A strategic fairy lights curtain instantly elevates standard patios into luxury evening retreats. Upgrading to commercial-grade strands and specific anchoring methods delivers a high-end designer aesthetic on a budget. These vertical sparkle blueprints completely eliminate the need for expensive hardscaping.
Design Snapshot Key Principles
- Vertical Flow: Install lights in cascading strands to create waterfall effects that draw eyes upward and define outdoor rooms
- Spacing Strategy: Position anchor points 6-10 inches apart along horizontal supports for optimal curtain density and even light distribution
- Layering Depth: Combine curtain lights with greenery, sheer fabric, or architectural elements to create dimensional outdoor backdrops
- Weather Protection: Select IP65-rated or higher fixtures for exposed installations, reserving covered areas for standard outdoor-rated strands
Pergola and Arbor Installations With Fairy Lights Hanging
Pergolas and arbors provide ideal frameworks for fairy lights hanging vertically, offering pre-existing anchor points and overhead structure. These installations enhance outdoor living spaces by defining boundaries and creating ceiling-like enclosures that extend comfortable gathering hours into twilight.
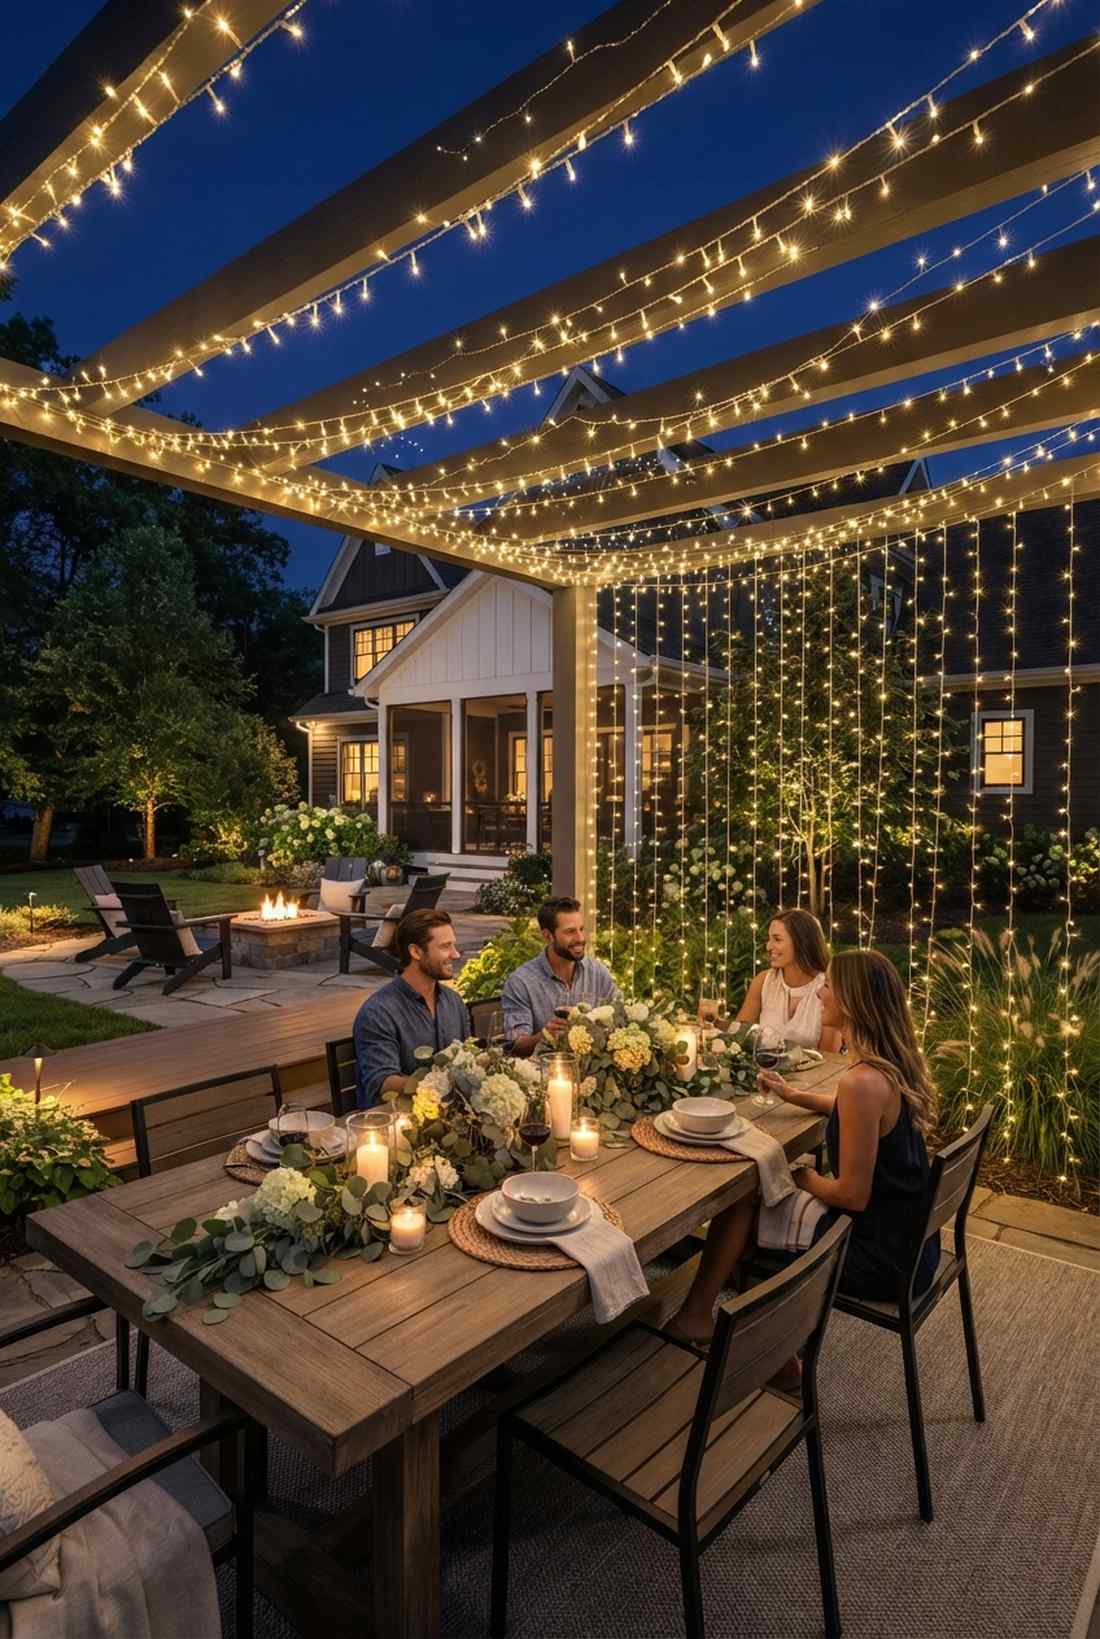
1. Full Perimeter Light Curtain
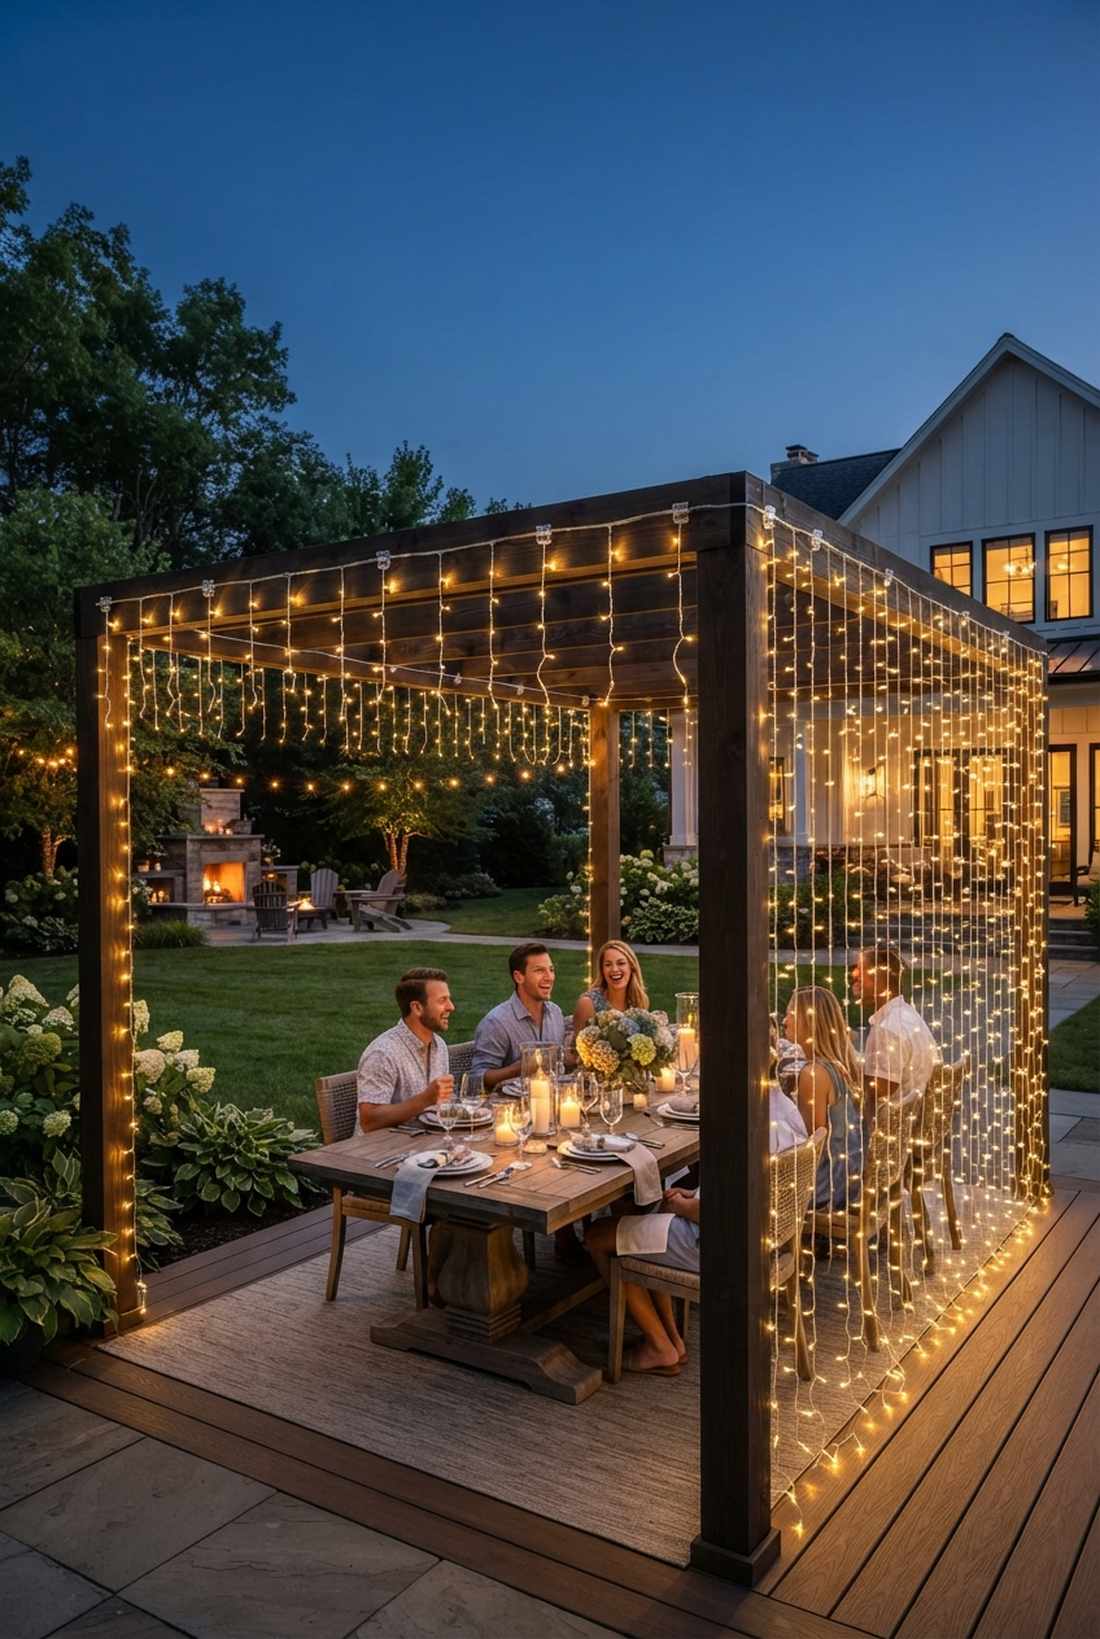
Feels like stepping into a private starlit pavilion hidden at a luxury resort. This outdoor dining perimeter lighting wraps your entire structure in a seamless glow, making it exceptionally perfect for framing open-air dinner parties.
Most backyard setups look messy because they use flimsy indoor strings, but securing heavy-duty fairy lights hanging from rigid upper beams guarantees a crisp, wind-proof drop. The trick is utilizing weatherproof connectors to maintain a continuous, unbothered line.
You can effortlessly execute this upgrade for roughly $45–$65 per side. Pin this to your DIY outdoor lighting board to replicate the exact perimeter layout.
- Key Materials: Waterproof connector cables, clear mounting clips
- Vibe / Style: Modern luxury pavilion
- Difficulty: Moderate afternoon project
- Budget Breakdown: Strands: $50 | Mounting hardware: $12
- Creator’s Tip: Space anchor points precisely 8 inches apart to prevent wind-tangled strands.
- Smart Sourcing: commercial-grade IP65 curtain strands (bulk pack) and heavy-duty clear zip ties (outdoor rated).
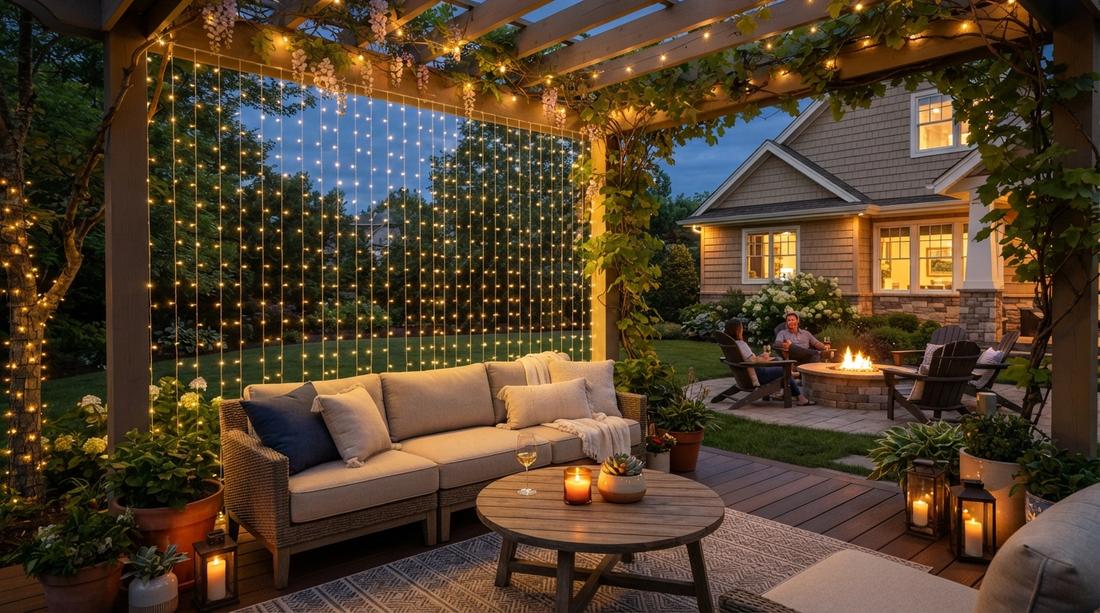
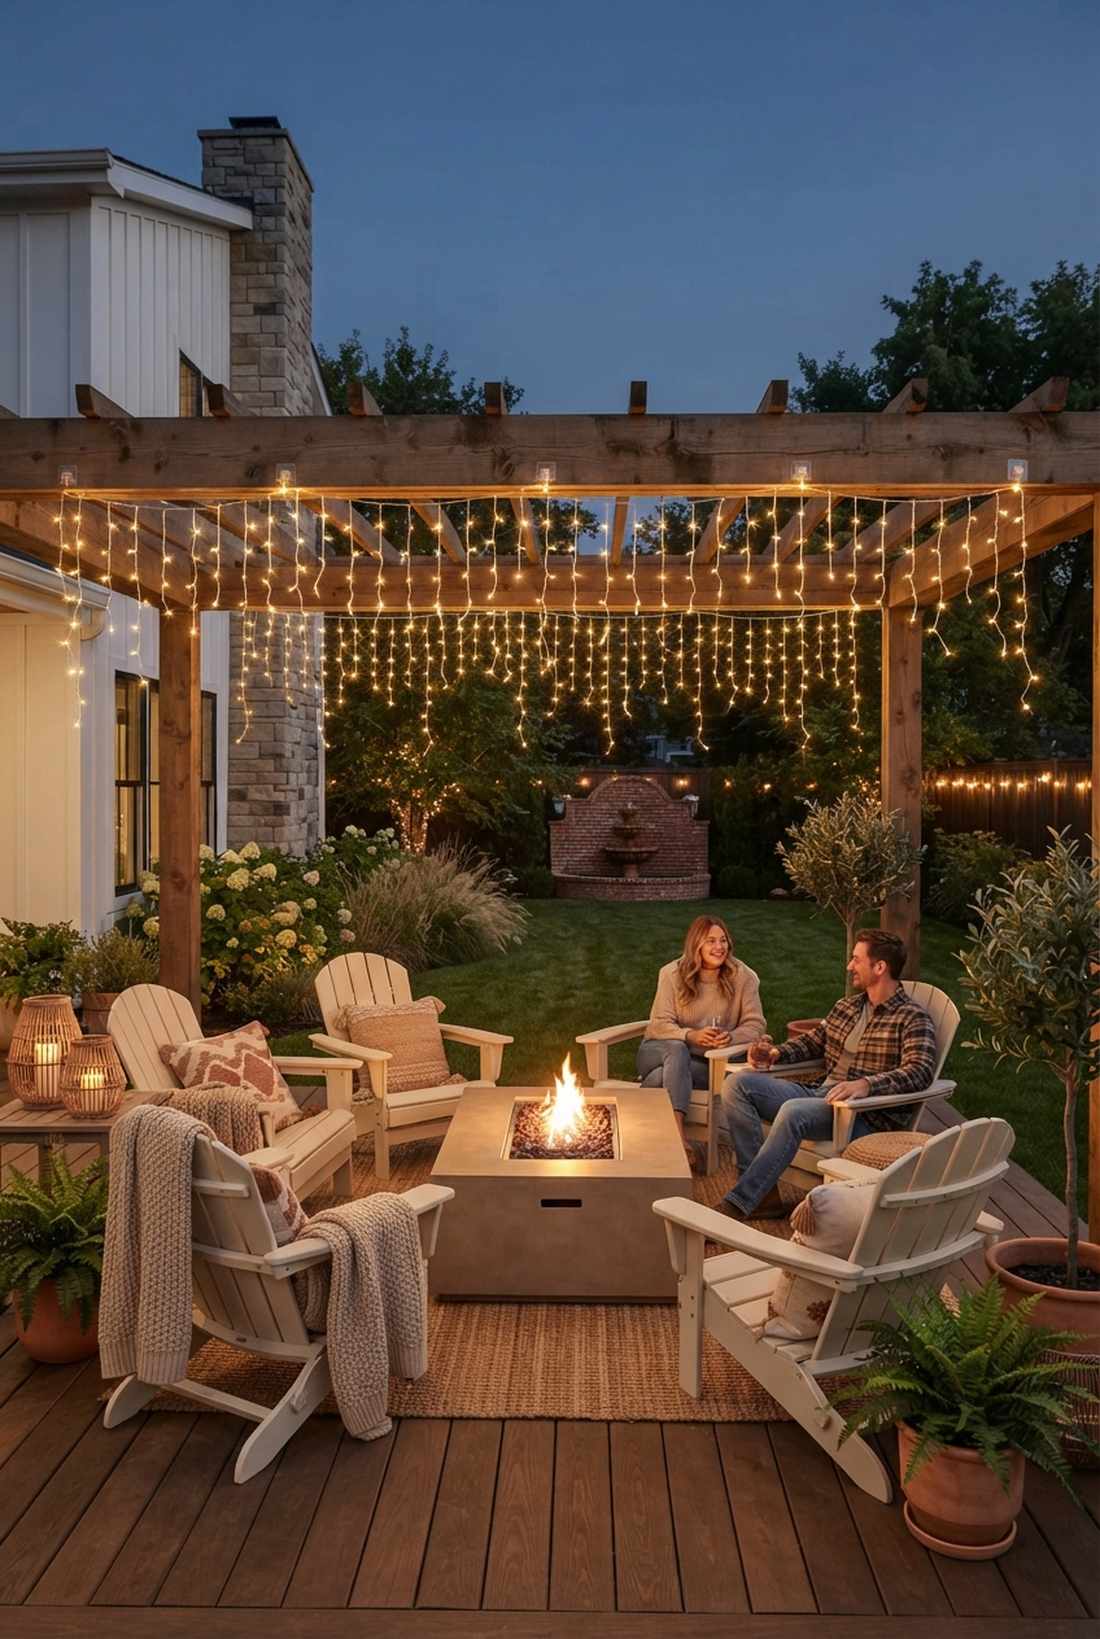
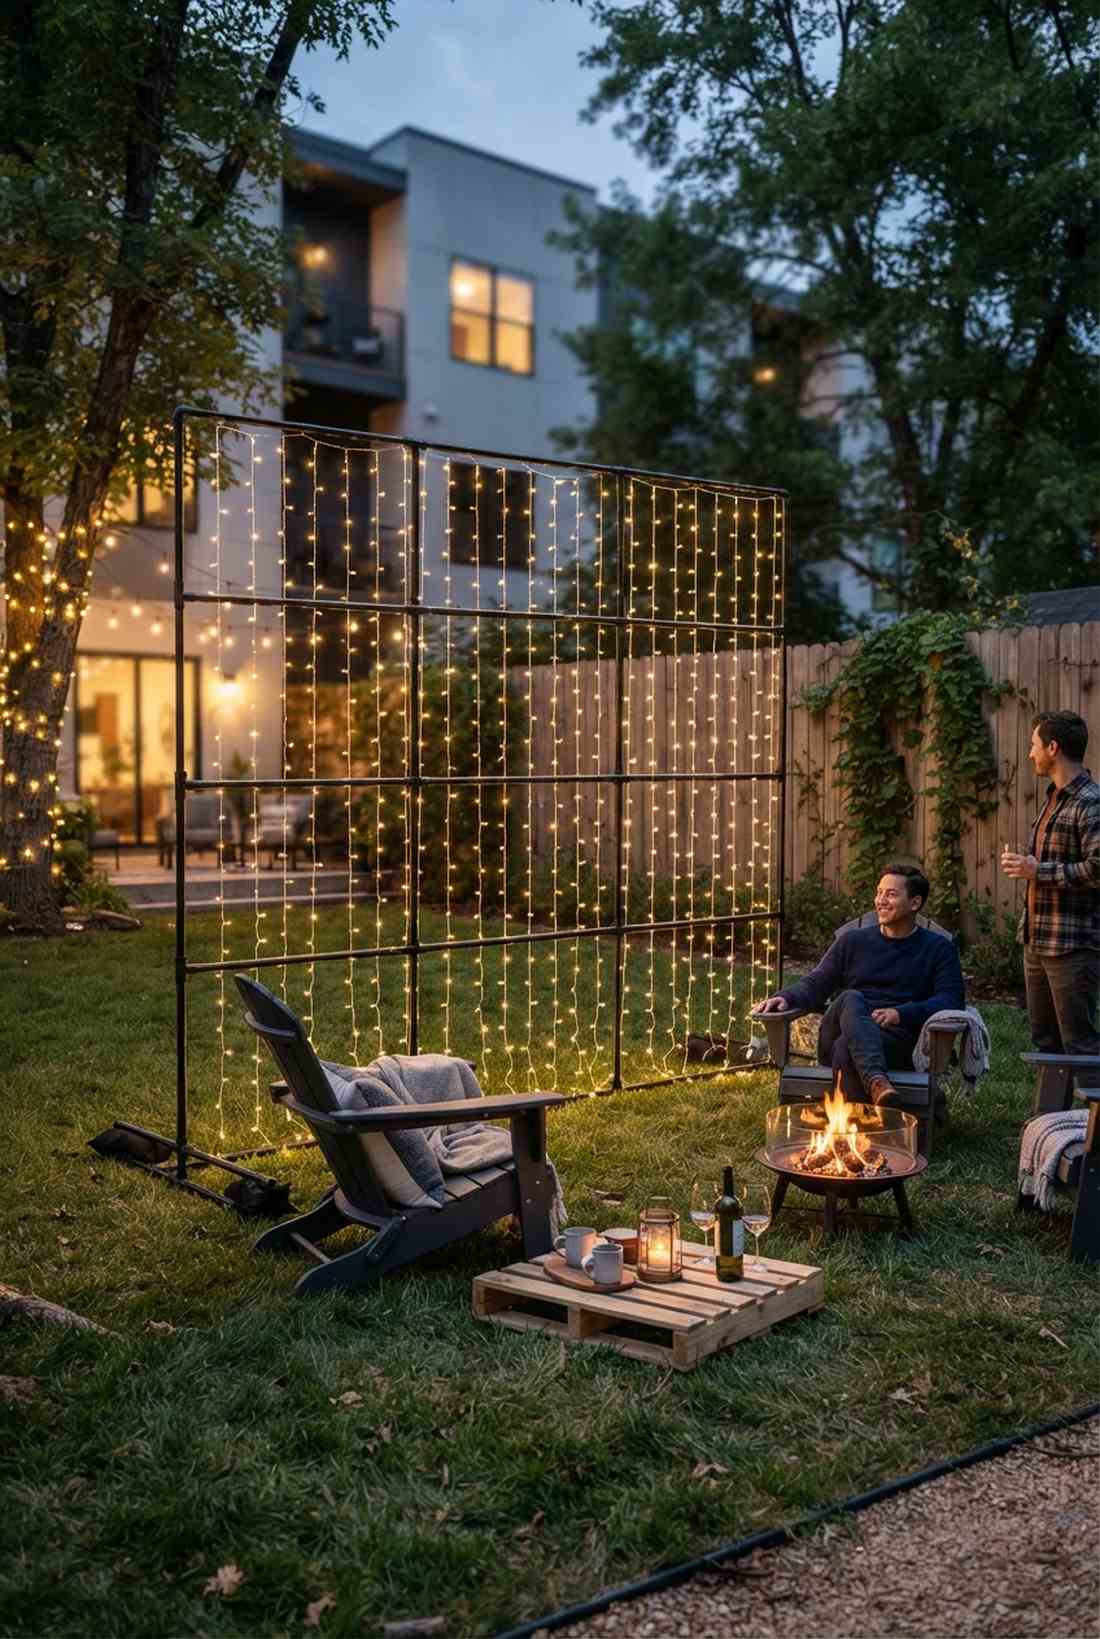
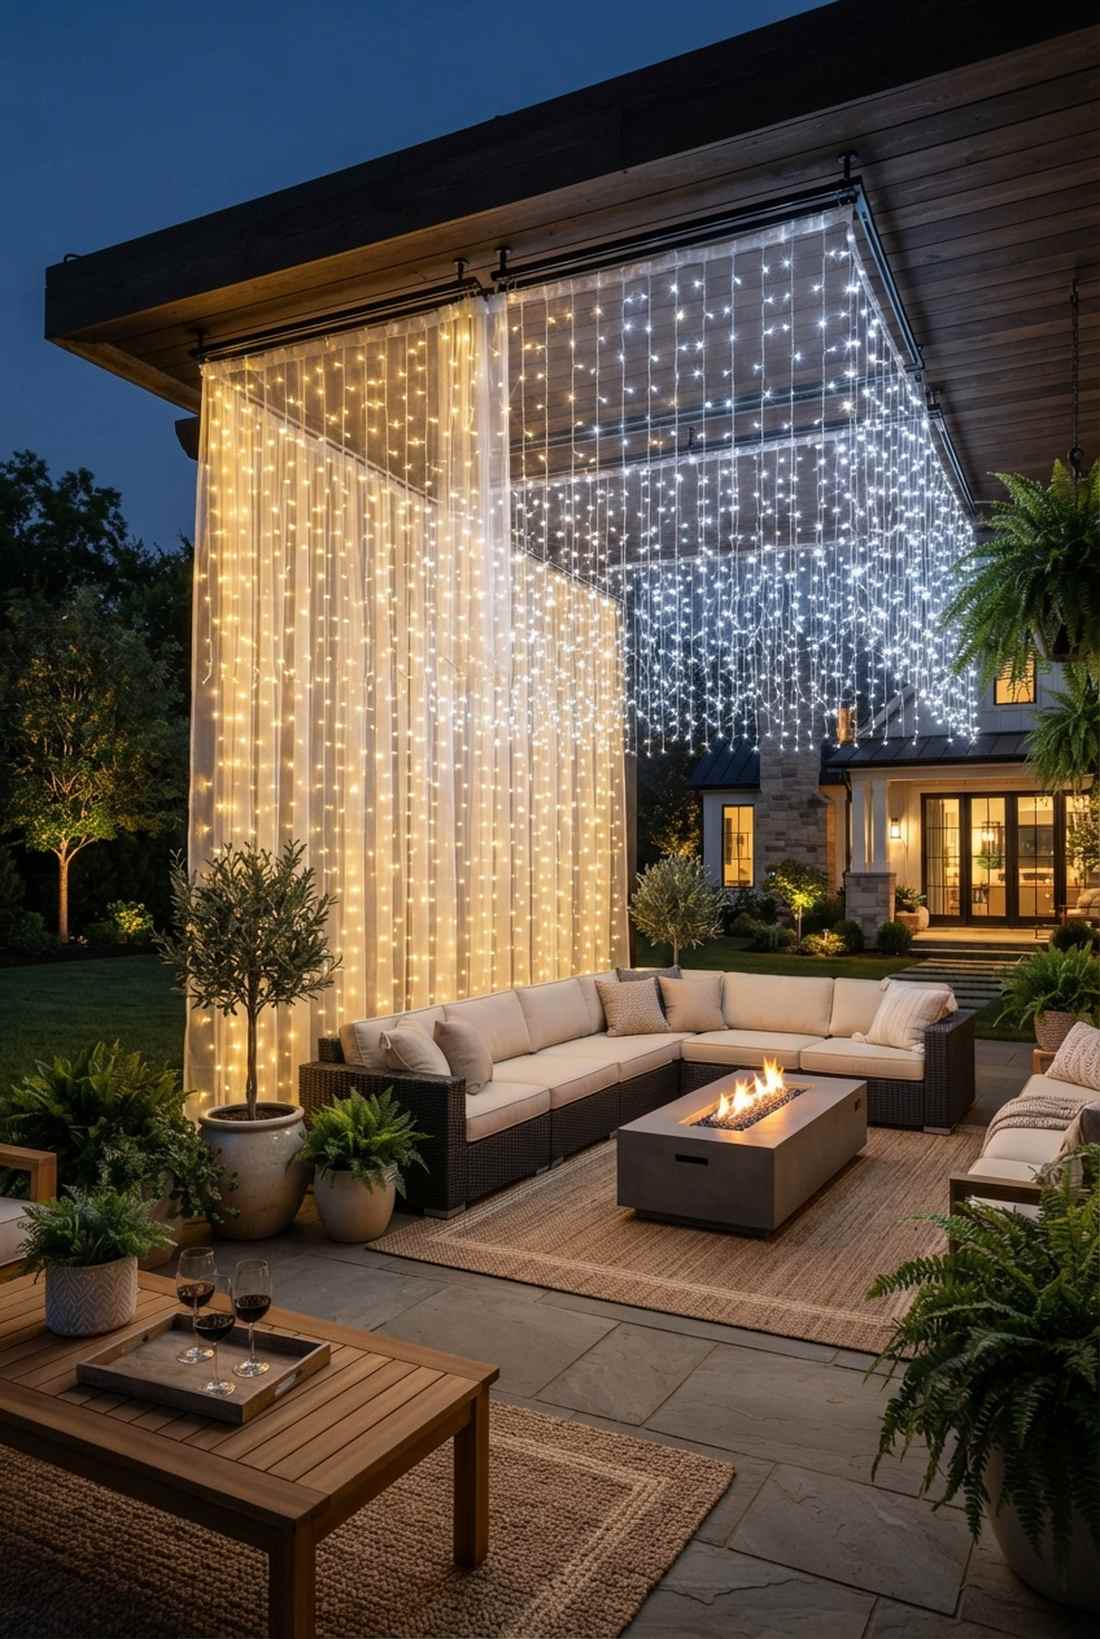
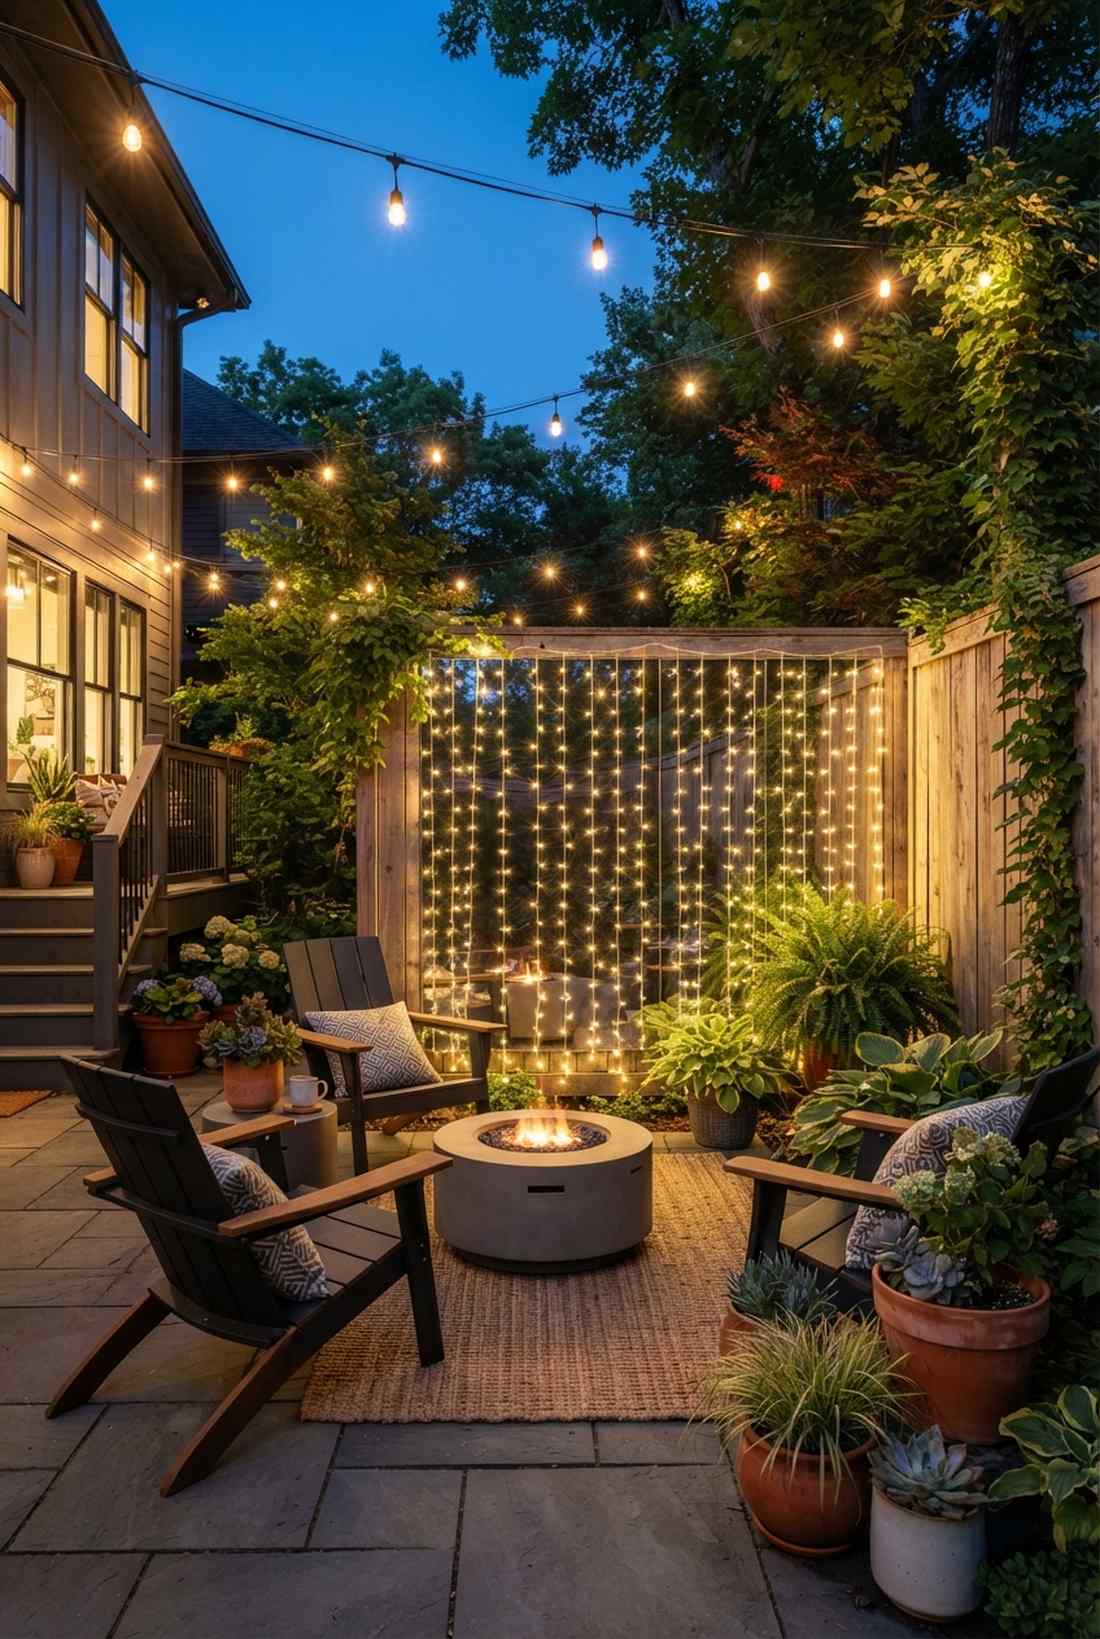
2. Single-Wall Backdrop Installation

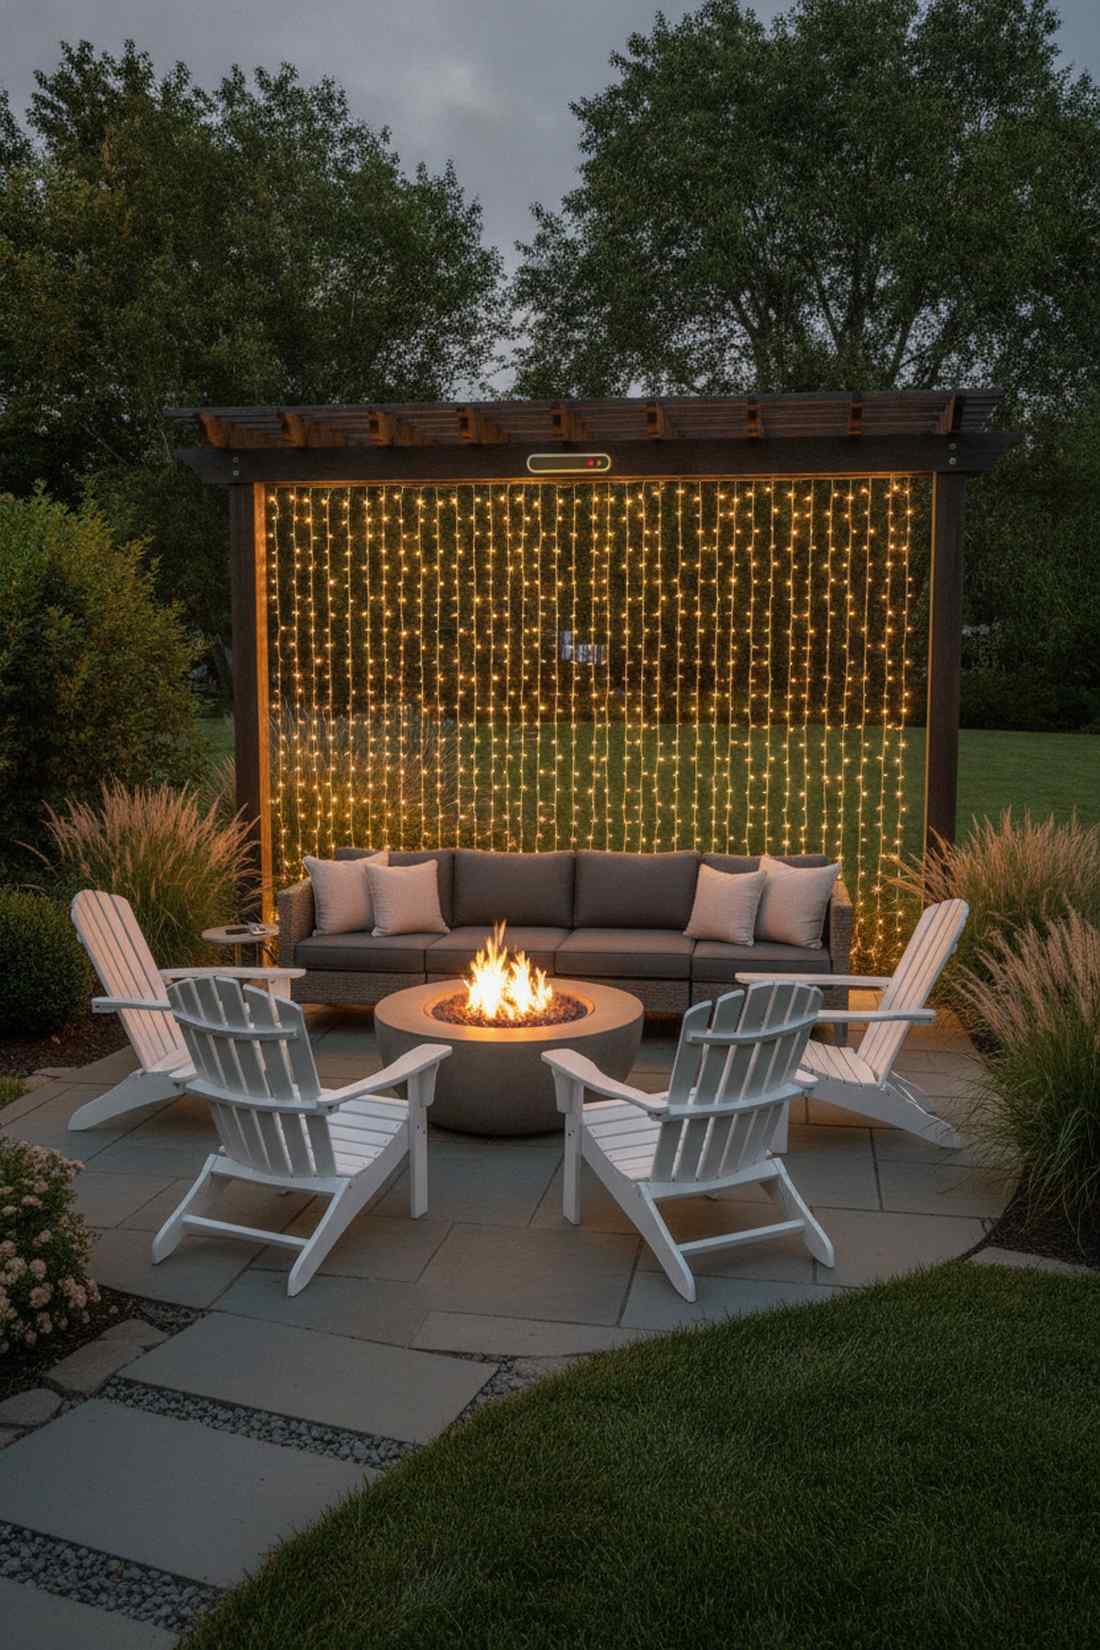
Straight out of a cozy boutique hotel patio. A concentrated luminous focal wall acts as a glowing canvas behind outdoor sectionals, serving as the ultimate functional backdrop for fire pit conversations.
It creates a surprisingly high-end designer finish by drawing the eye to one deliberate zone rather than overwhelming the space. Using a dimmer switch on your fairy lights curtain ensures the brightness perfectly matches the moody evening energy without causing glare.
Expect to spend about $30 to transform a single wall. It’s a fast upgrade that completely shifts the entire patio’s atmosphere.
- Key Materials: Single-curtain drop sets, inline outdoor dimmers
- Vibe / Style: Intimate lounge retreat
- Difficulty: Very easy beginner setup
- Budget Breakdown: Lights: $25 | Dimmer module: $15
- Creator’s Tip: Mount the main header wire behind the wooden pergola lip to hide the electronics completely.
- Smart Sourcing: pre-measured light drops (10-foot width) and plug-in outdoor dimmer remotes.
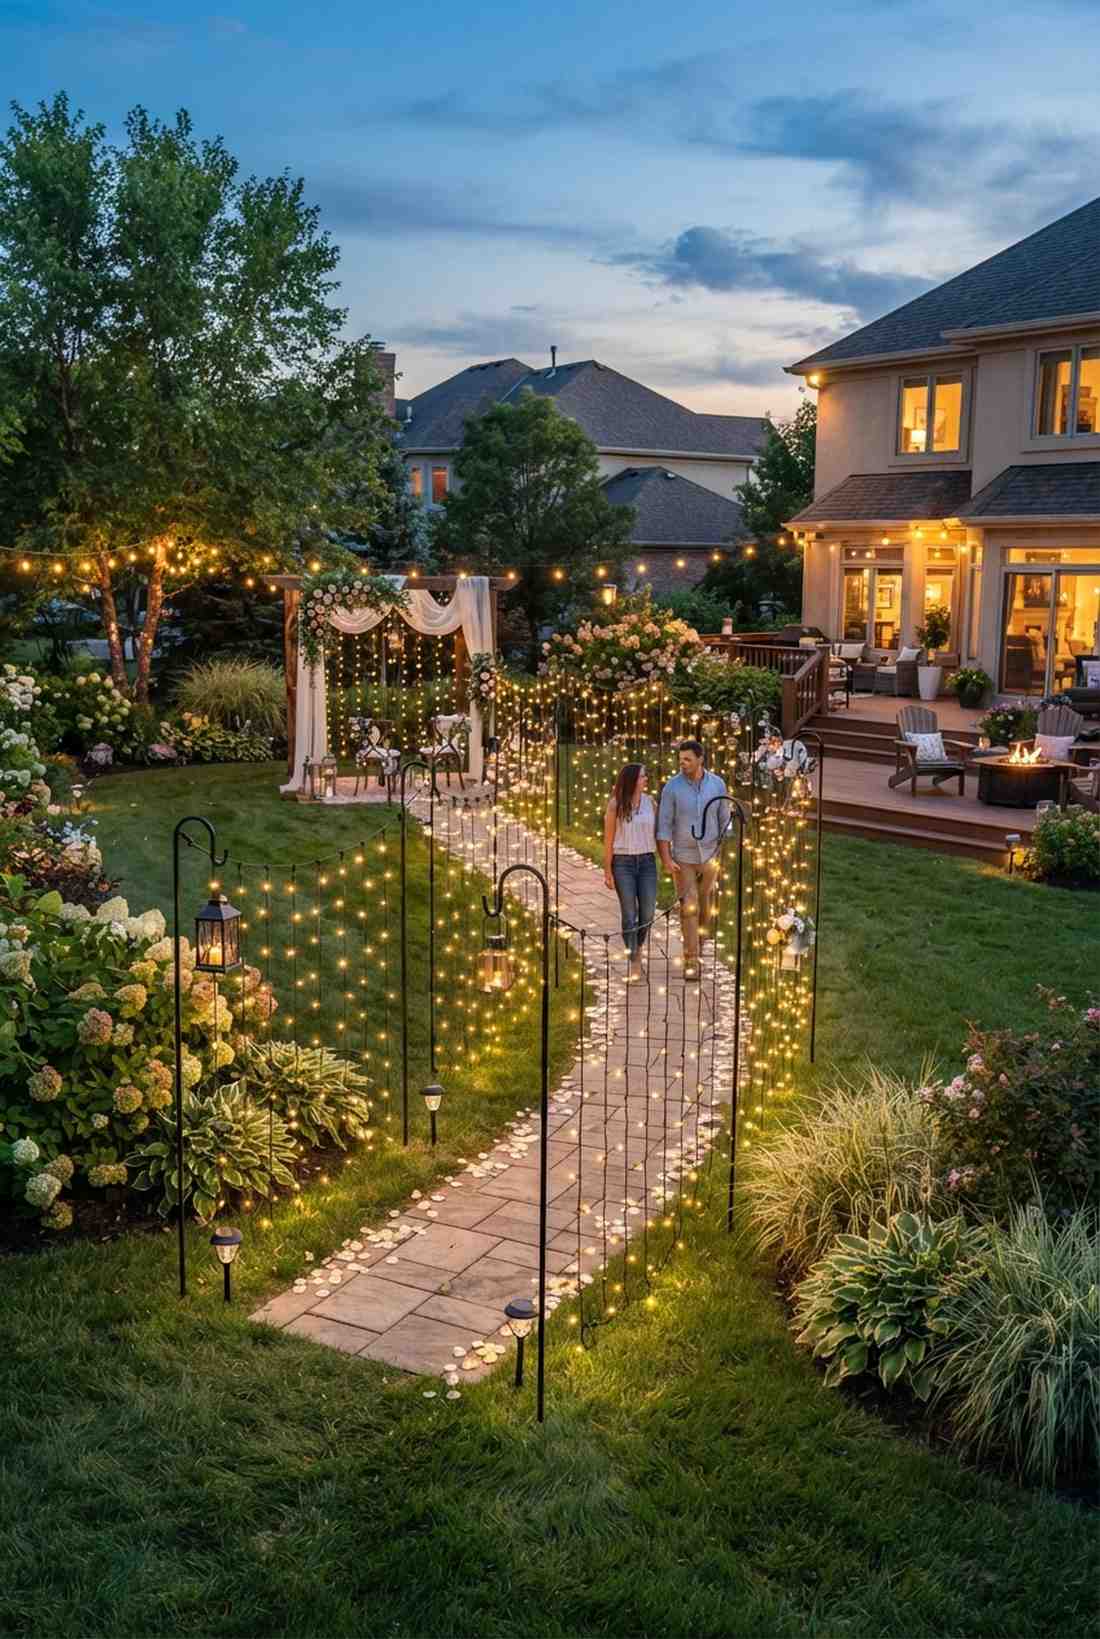
3. Arched Entryway Waterfall
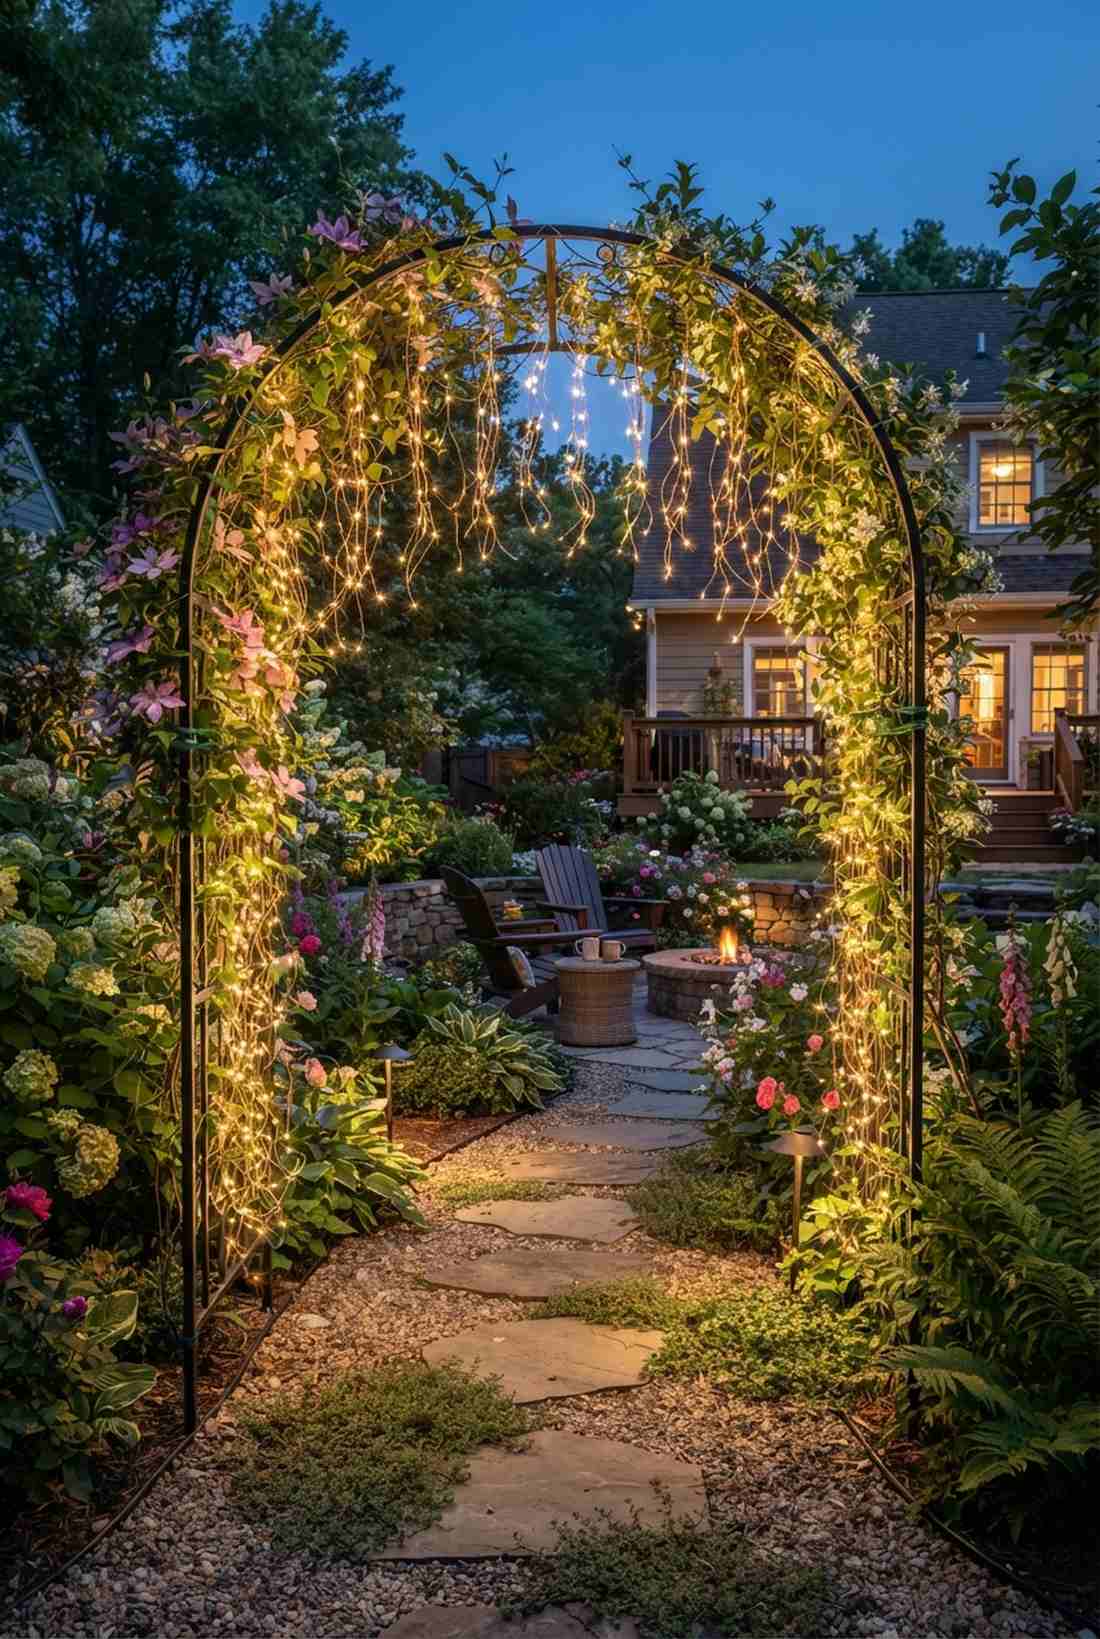
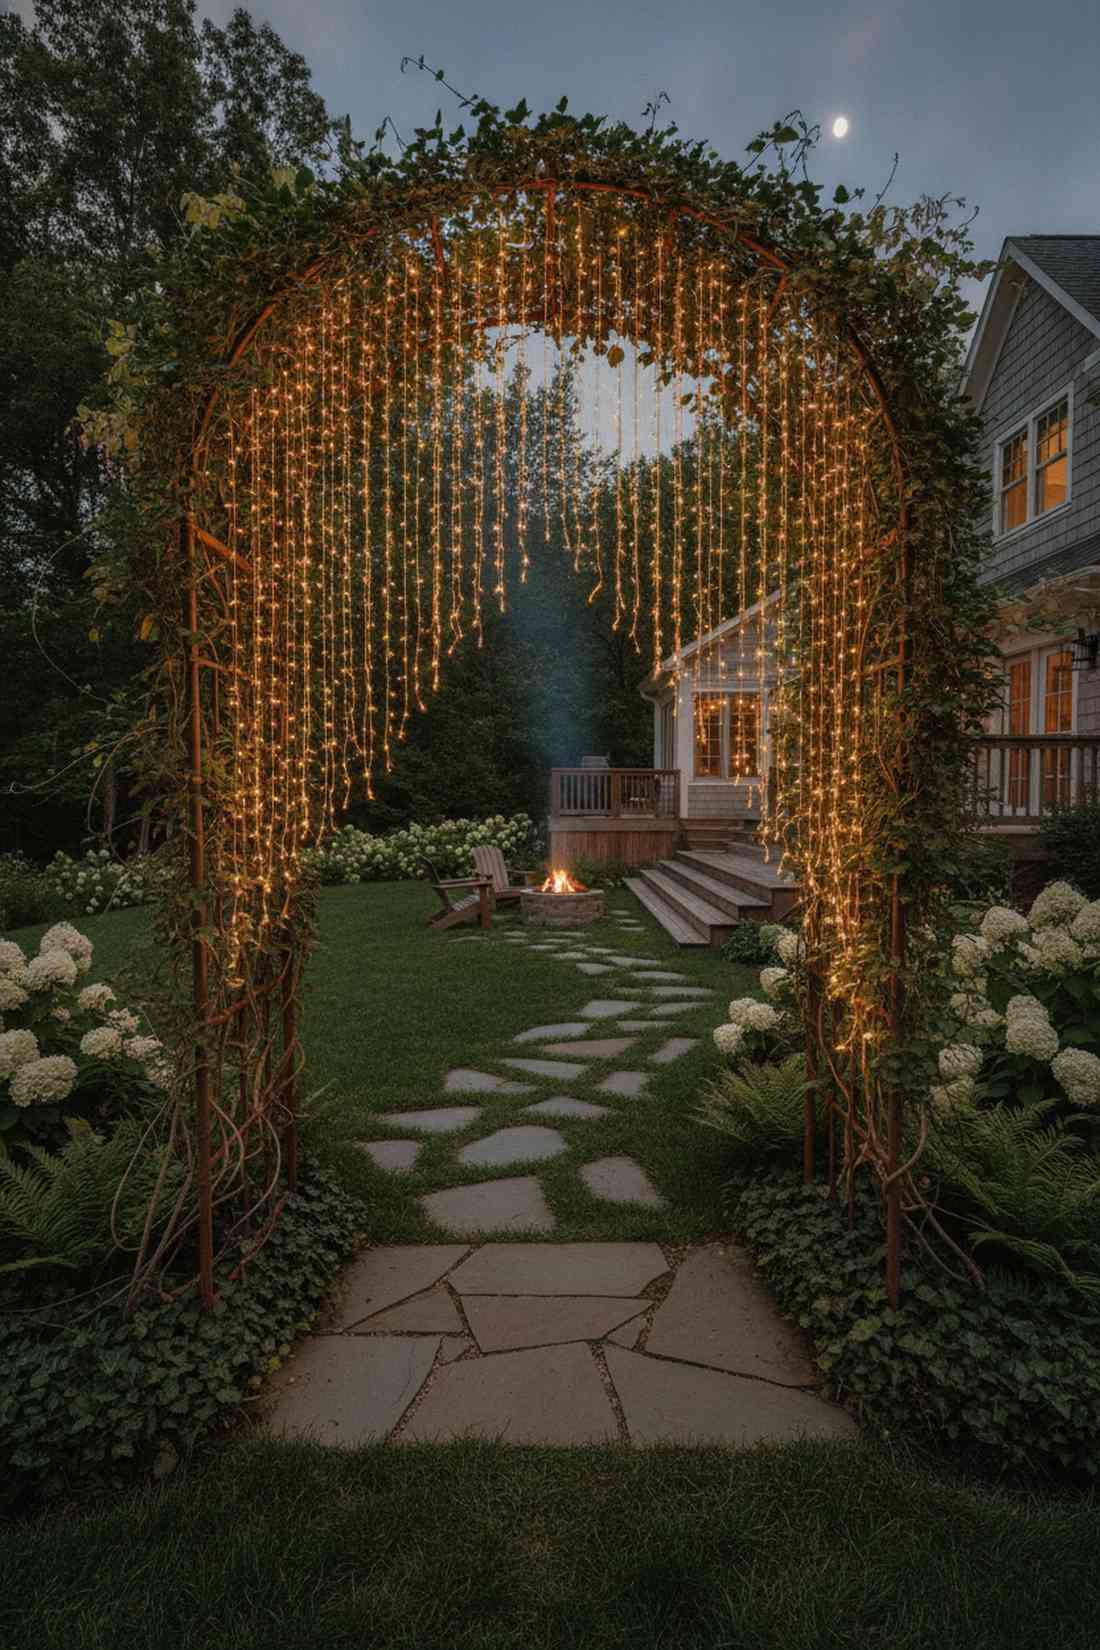
Gives off major secret garden energy the moment the sun goes down. A sparkling landscape arch guides guests through transitional spaces, making it a magical entryway for garden pathways or stepping stone routes.
Far too many people try to aggressively wrap the poles, but allowing the strands to cascade naturally delivers a surprisingly premium look. Letting the LED drops intermingle with existing climbing vines hides the wiring and makes the glow look organic.
This enchanting entryway costs around $20–$35 depending on the arch size. Save this idea if you are planning a romantic yard overhaul this spring.
- Key Materials: Flexible copper wire drops, vine clips
- Vibe / Style: Storybook cottagecore entrance
- Difficulty: Quick 30-minute fix
- Budget Breakdown: Copper lights: $20 | Camouflage clips: $8
- Creator’s Tip: Weave the top wire into faux ivy if your natural climbers haven’t fully covered the arch yet.
- Smart Sourcing: copper wire fairy light curtains (solar powered) and green garden twist ties (spool).
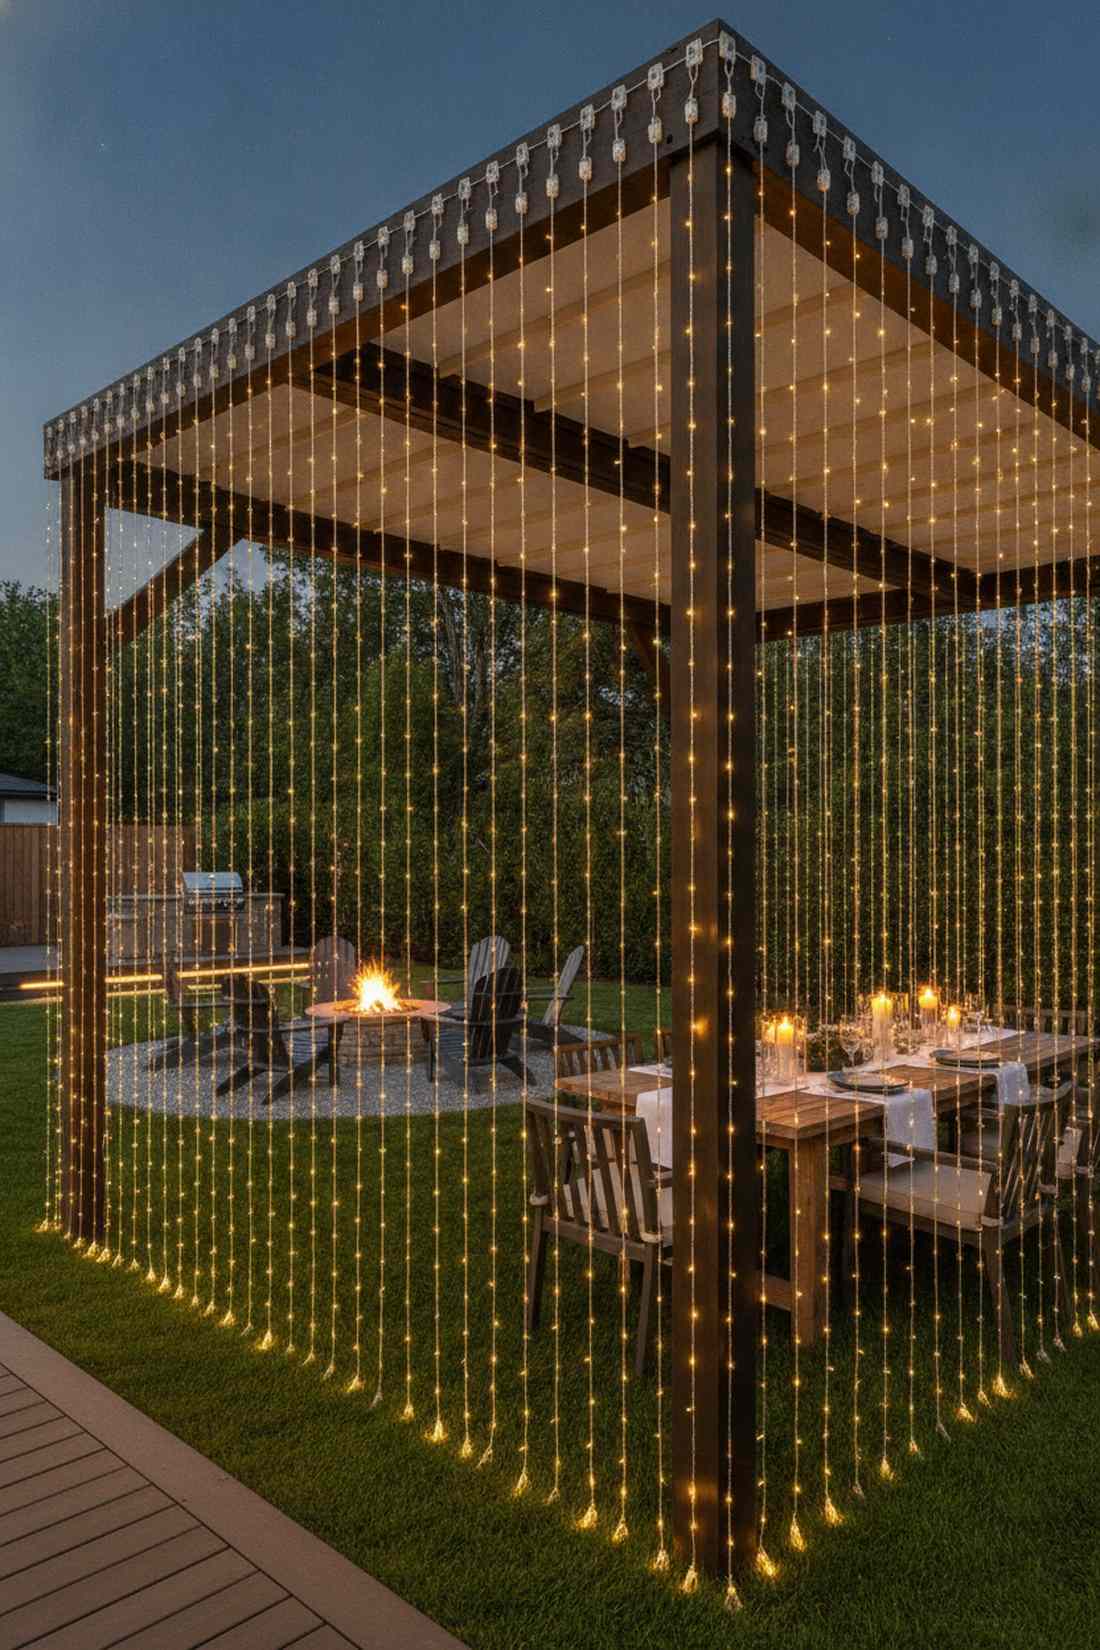
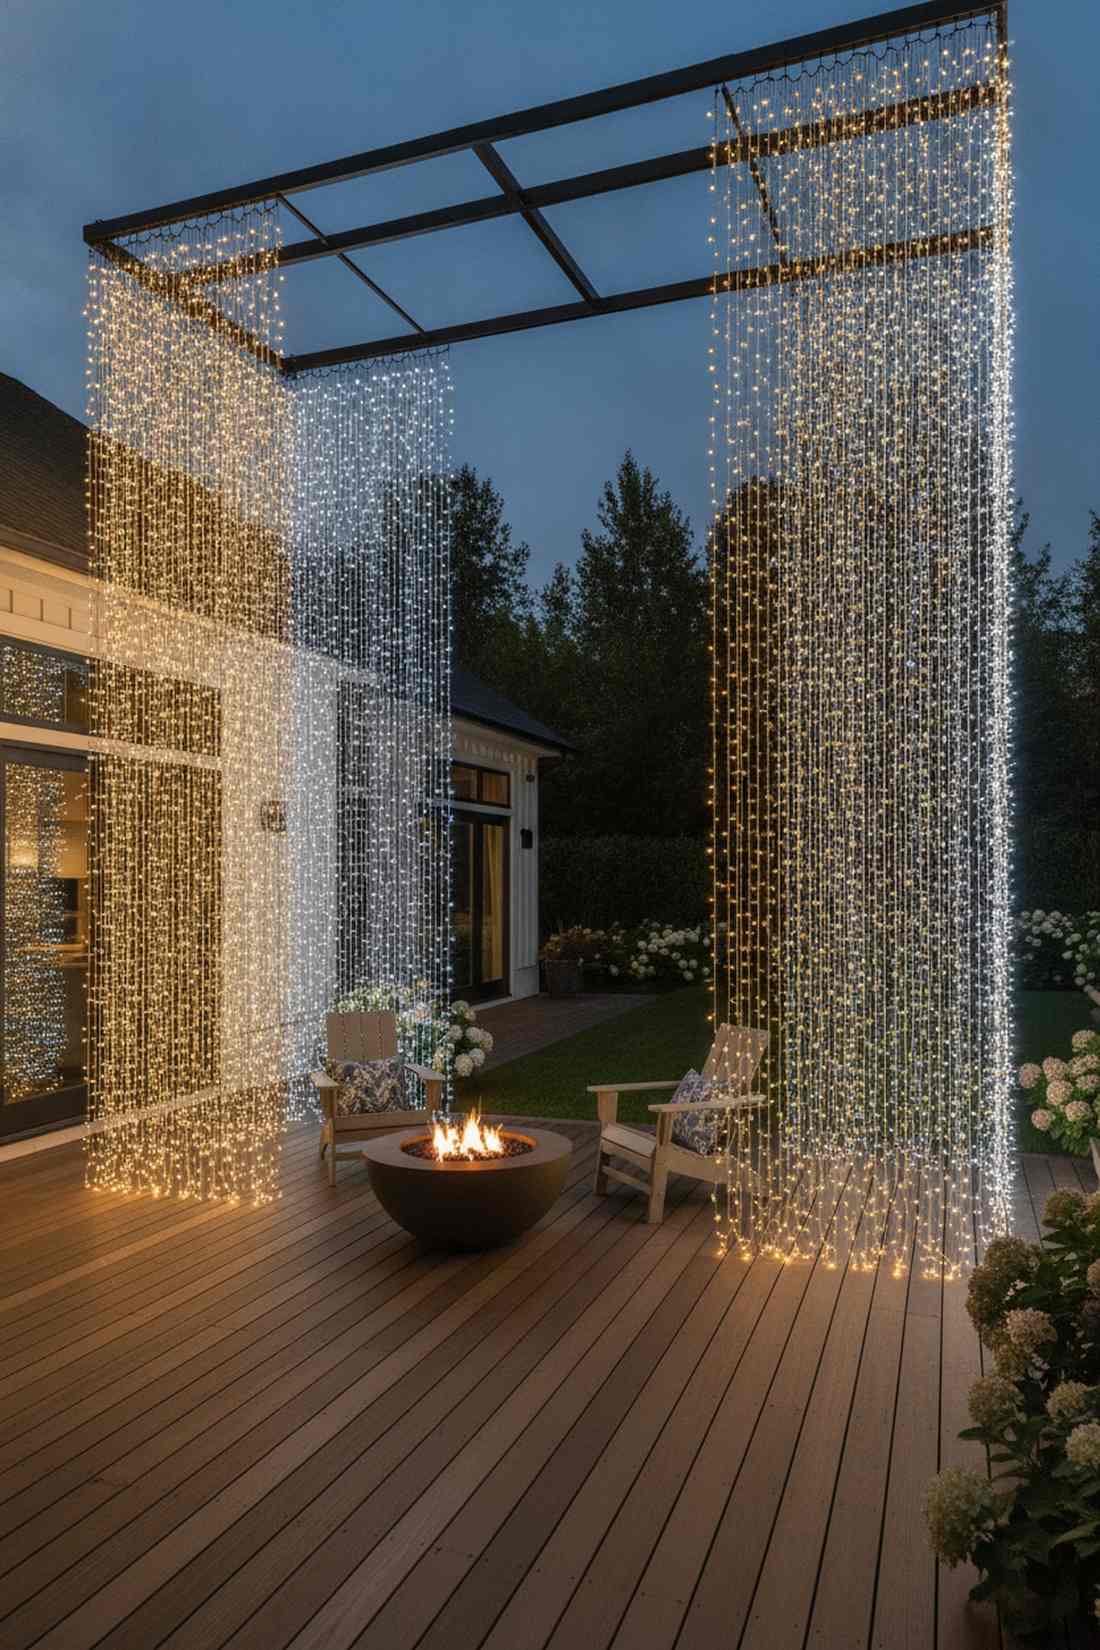
4. Corner Cascade Columns
Looks exactly like illuminated Roman pillars anchoring your patio space. Bundled vertical light columns highlight the structural corners of your pergola, defining the footprint brilliantly for large deck platforms.
The secret here is avoiding flat, single strands; instead, you layer multiple curtains to create dense, textured light pillars. Bundling fairy lights hanging tightly against the posts mimics high-end architectural up-lighting at a fraction of the cost.
A four-post installation typically runs about $60 in total. Pin this if you love a minimalist, structured outdoor aesthetic.
- Key Materials: Densely packed LED clusters, dark cable wraps
- Vibe / Style: Structured contemporary elegance
- Difficulty: Beginner-friendly
- Budget Breakdown: Corner light clusters: $15 per post
- Creator’s Tip: Wrap the bundles slightly in a spiral motion around the post to prevent them from looking like rigid prison bars.
- Smart Sourcing: high-density fairy light bundles (4-pack) and UV-resistant black cable sleeves.
This next setup is ridiculously cheap but looks like a $200 custom ceiling installation from an event planner…
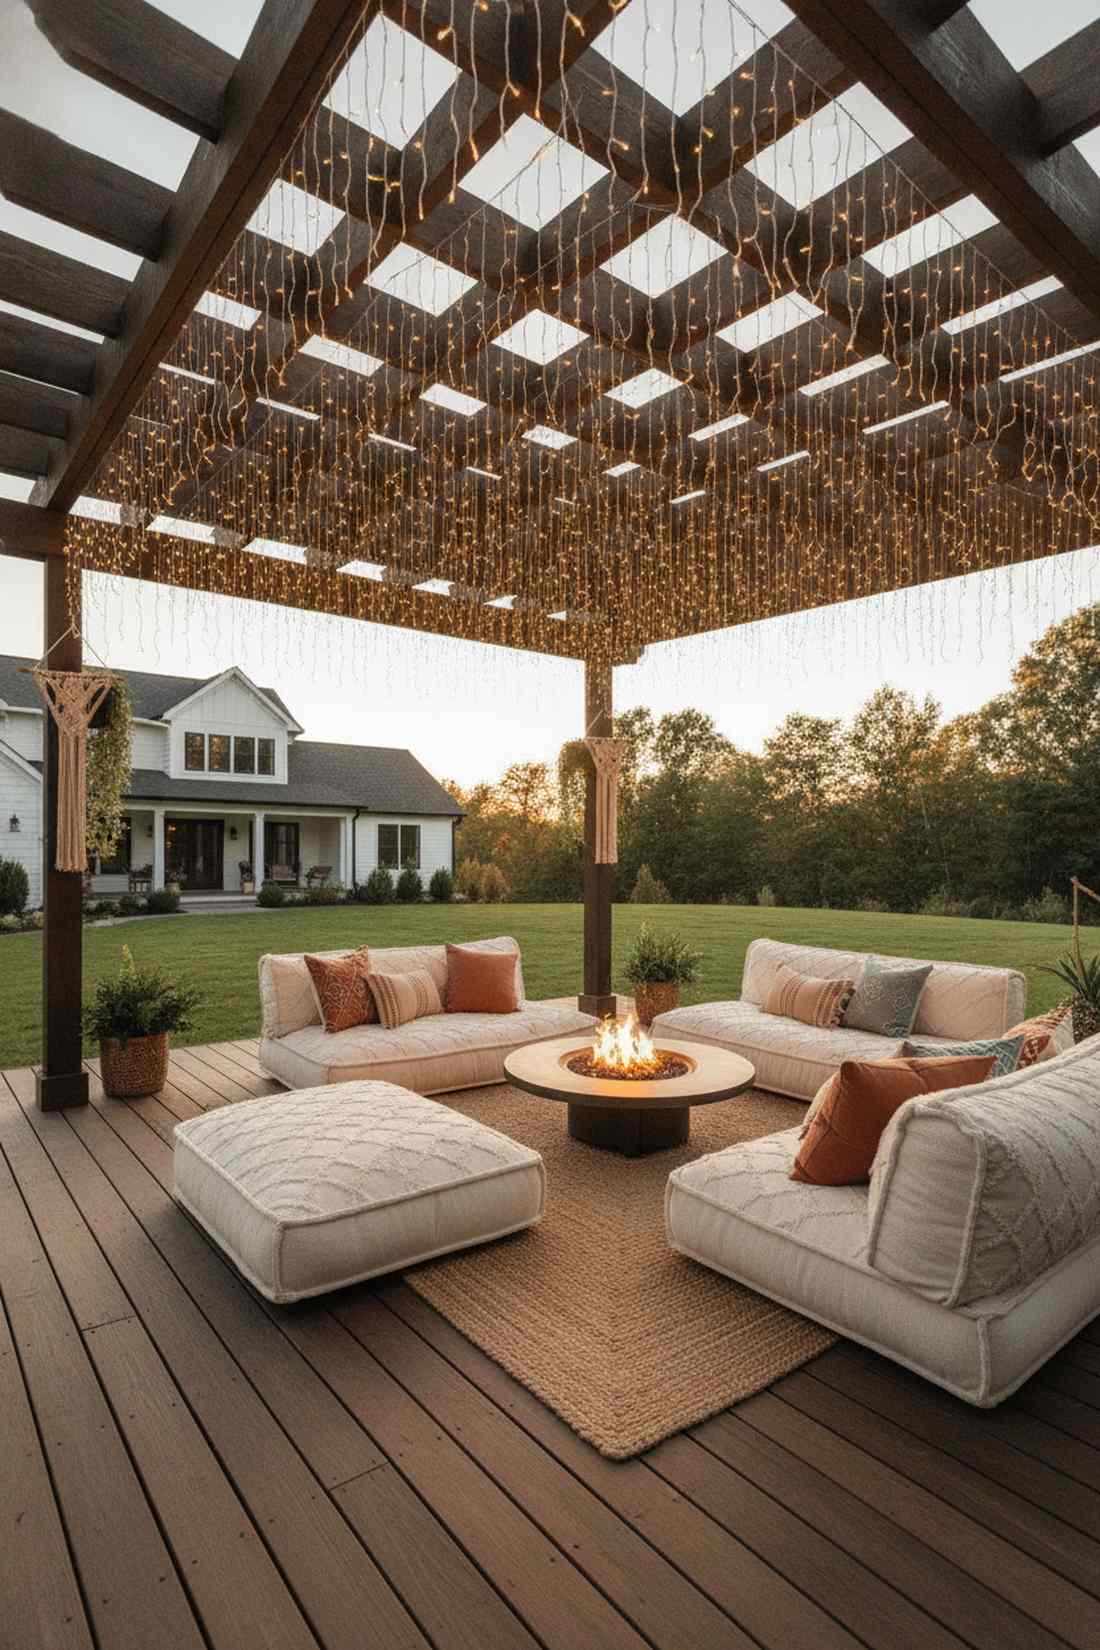
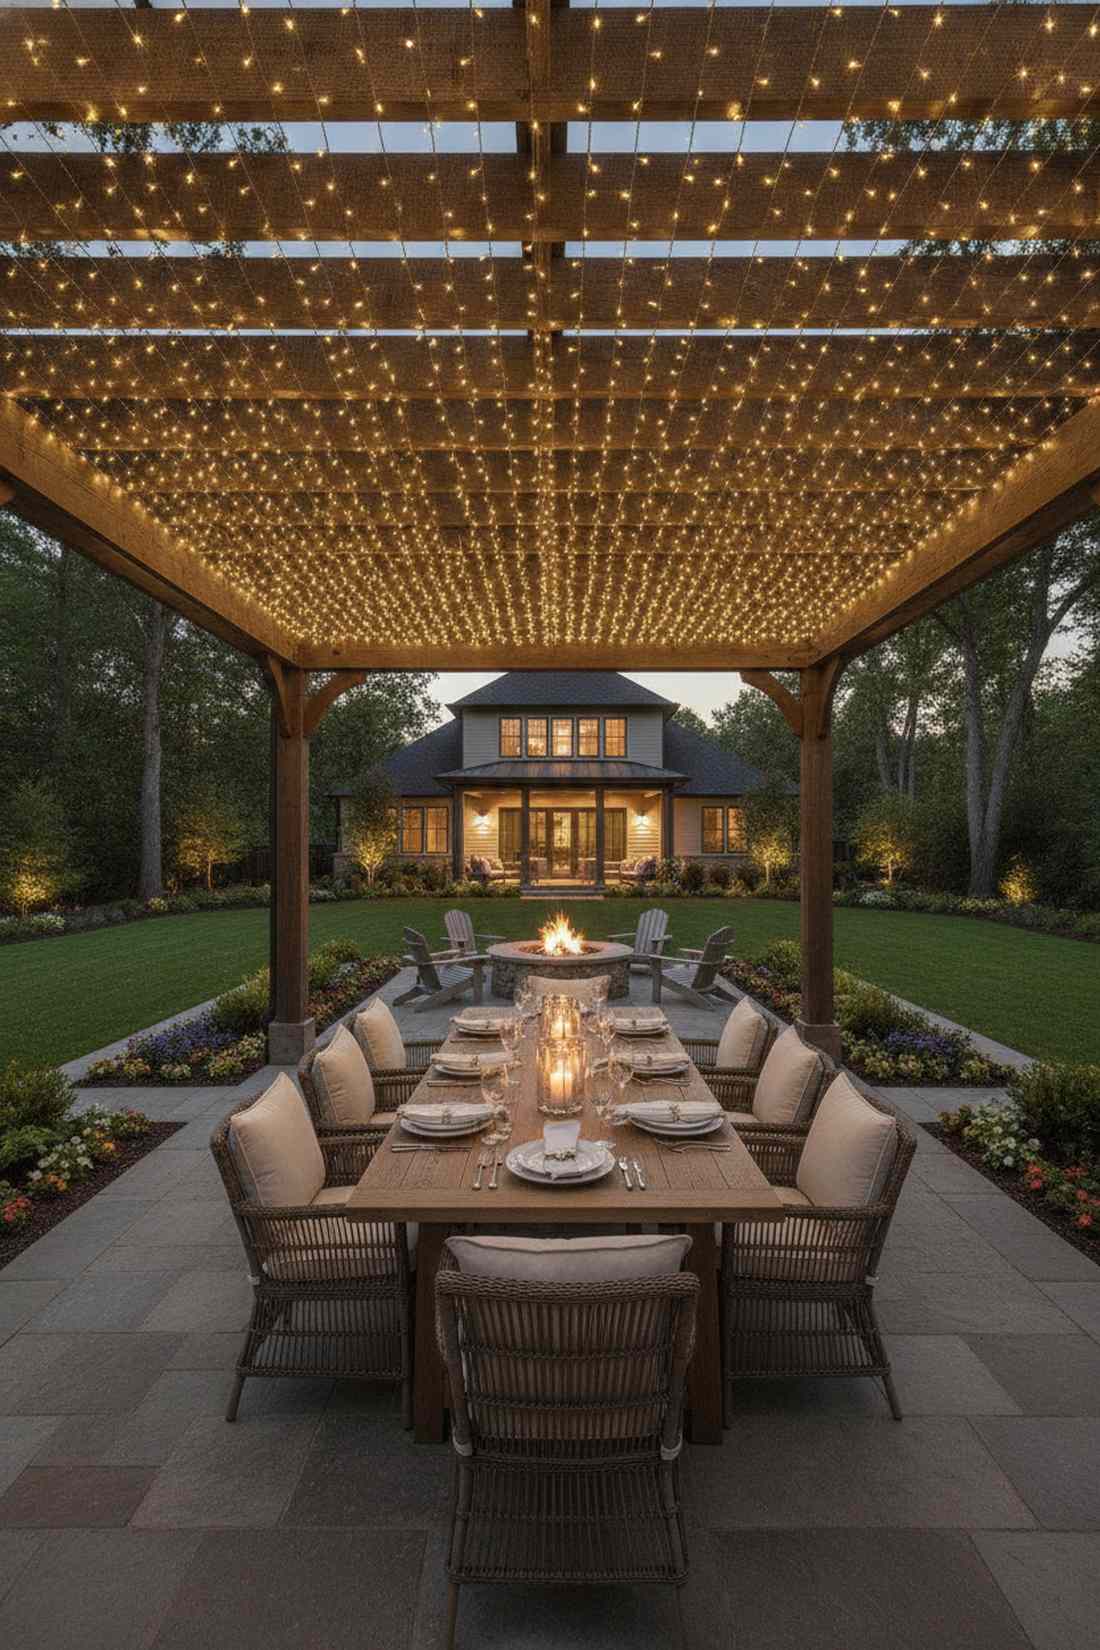
5. Overhead Canopy With Vertical Drips
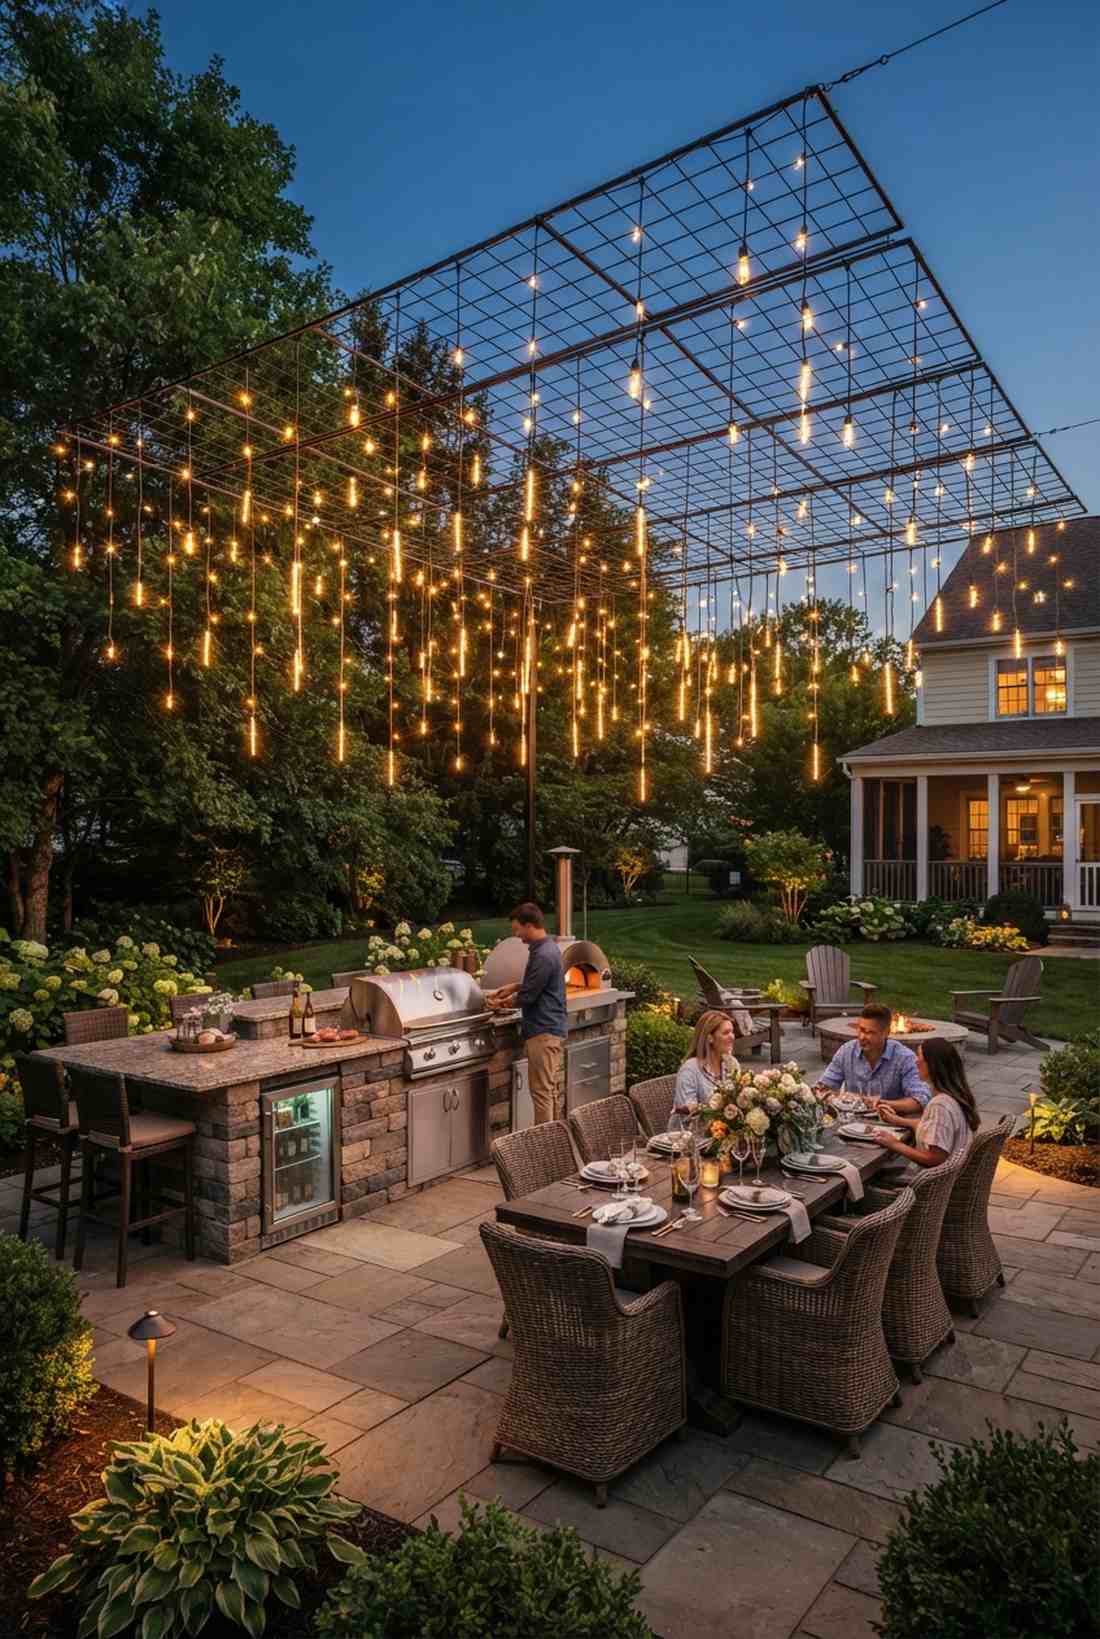

Feels like dining underneath a glowing, weeping willow tree. A dimensional lighting canopy mixes ceiling grids with delicate descending drops, providing flawless ambient coverage for sprawling outdoor kitchen islands.
Most basic string layouts fall flat, but dropping alternating vertical sections completely changes the spatial depth of the yard. This layered canopy trick fools the eye into thinking the ceiling is taller while bringing the warmth closer to the table.
You can build this layered masterpiece for $80–$100. It’s an absolute game-changer for people who host frequent summer dinners.
- Key Materials: String light bases, attachable drop extensions
- Vibe / Style: Immersive enchanted forest
- Difficulty: Intermediate weekend project
- Budget Breakdown: Ceiling grid: $50 | Vertical drops: $40
- Creator’s Tip: Stagger the drops at different lengths so it looks natural, not like a geometric barcode.
- Smart Sourcing: connectable canopy light starter kits and plug-in drop extensions (mixed lengths).
6. Graduated Height Curtains
Brings a beautifully dynamic rhythm that mimics flowing waves. A scalloped lighting fringe breaks up the hard wooden edges of your overhead structure, softening the look for a relaxed bohemian lounge area.
Instead of buying standard square cuts, manually staggering the drops looks far more expensive than it actually is. Utilizing an asymmetrical fairy lights curtain design pulls attention toward specific focal points, like a fire table or water feature.
This custom visual movement costs exactly the same as a standard drape—usually around $35. Save this to your patio inspiration board to remember the wavy trim idea.
- Key Materials: Trimmable fairy strands, clear measuring tape
- Vibe / Style: Relaxed boho-chic
- Difficulty: Easy but requires patience
- Budget Breakdown: Trimmable lights: $35
- Creator’s Tip: Only buy specific trimmable sets; cutting standard strands will break the electrical circuit and ruin the lights.
- Smart Sourcing: cut-to-length curtain fairy lights (safe trim) and transparent adhesive hooks (bulk pack).
7. Vine-Integrated Light Curtain
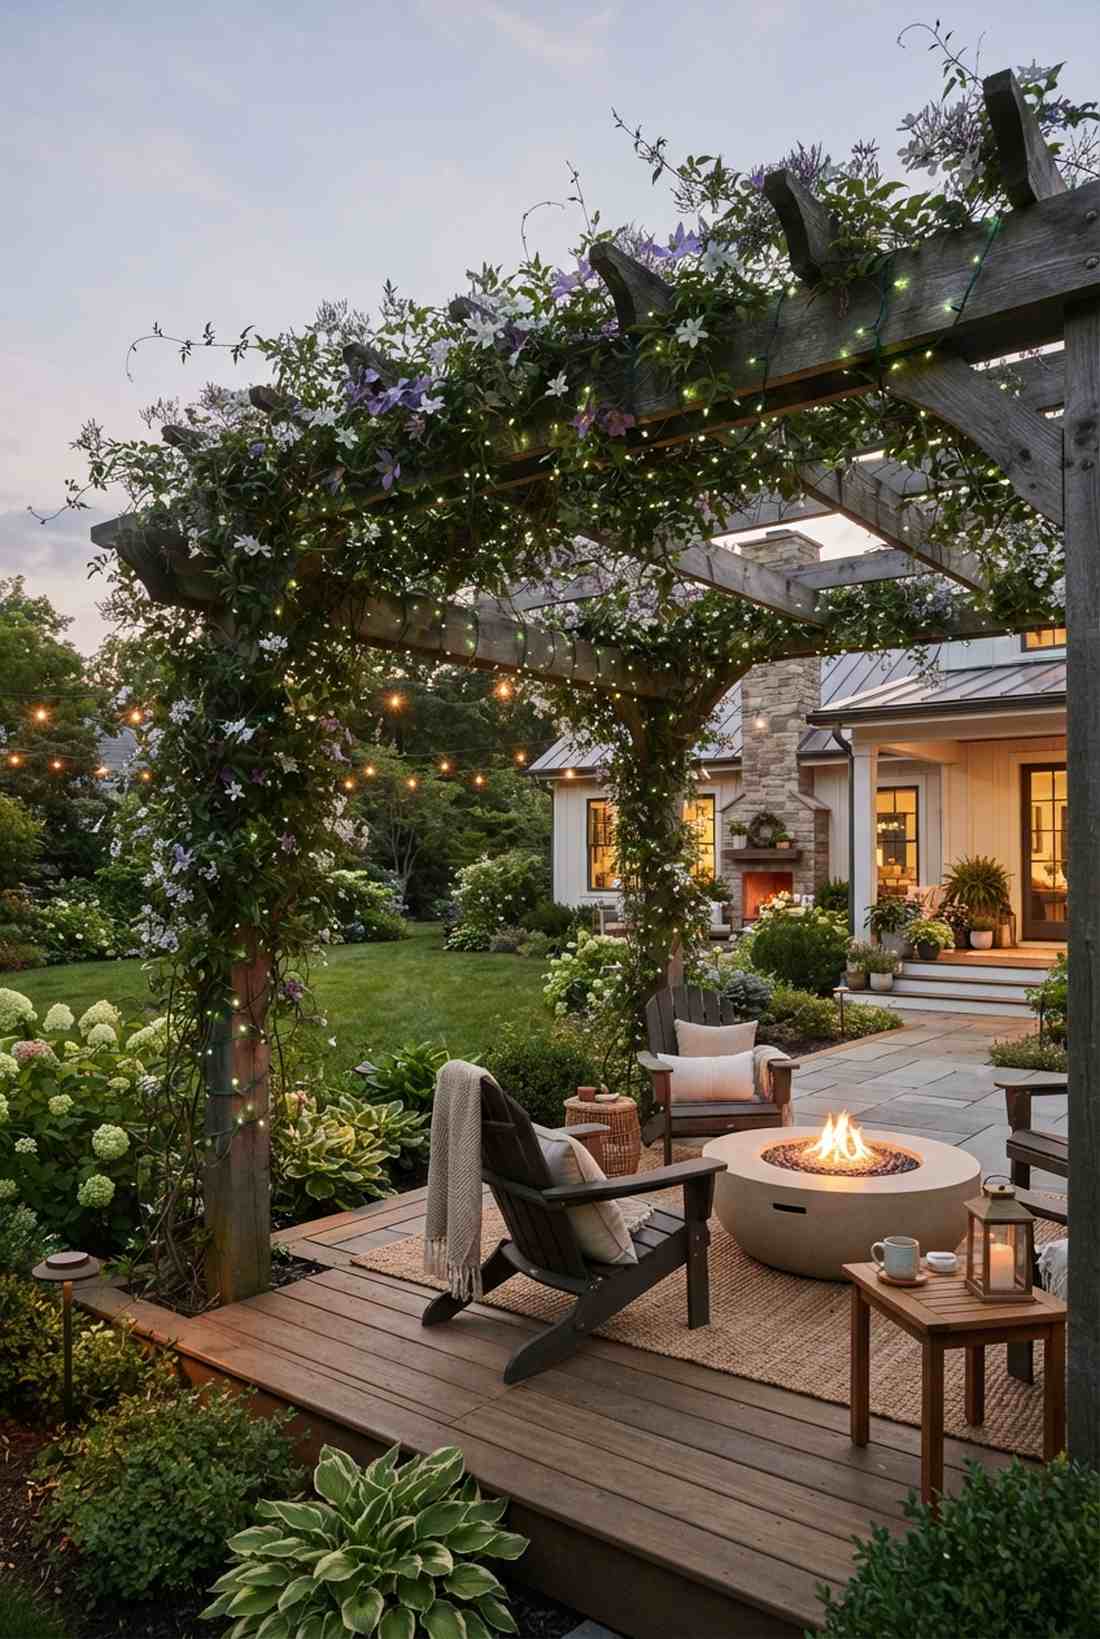

Looks like glowing morning dew suspended entirely by nature. A foliage-wrapped light display weaves magic right into your living plants, perfectly upgrading an established jasmine or clematis trellis.
If you just slap wires over leaves, it looks incredibly tacky—but training the vines *through* the strands gives a designer-level finish. Integrating outdoor fairy lights hanging directly onto the growing paths ensures the tech disappears completely during the daytime.
Achieving this organic blend costs roughly $25 in waterproof lighting. Highly recommended for a quick weekend win that gets better as the plants grow.
- Key Materials: Green-wire micro LEDs, soft plant ties
- Vibe / Style: Organic glowing garden
- Difficulty: Requires delicate handling
- Budget Breakdown: Green-wire strands: $20 | Plant ties: $5
- Creator’s Tip: Install the lights in early spring before the vines fully leaf out for the easiest weaving process.
- Smart Sourcing: green-cable fairy strands (outdoor rated) and velcro plant support ties (roll).
Fairy Lights On Wall Ideas For Vertical Impact
Fences and walls offer expansive vertical canvases for curtain light installations that transform property boundaries into luminous backdrops. These applications enhance privacy while adding depth and interest to previously overlooked garden perimeters.
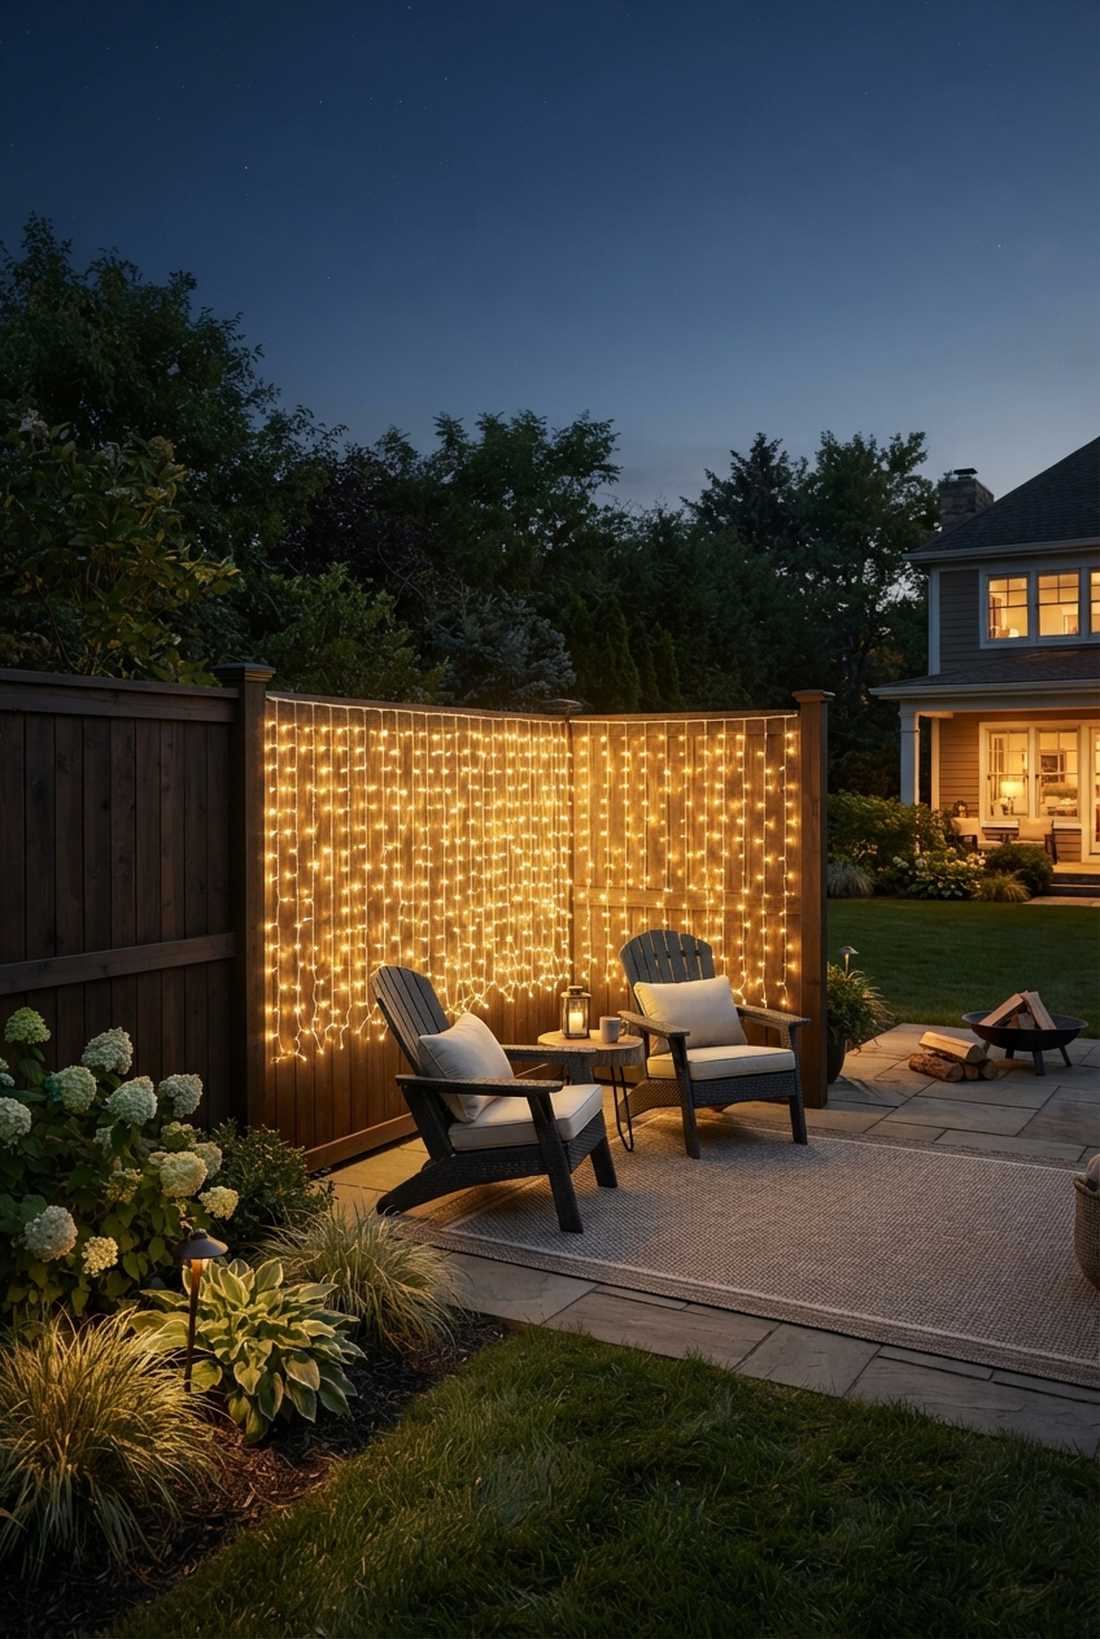
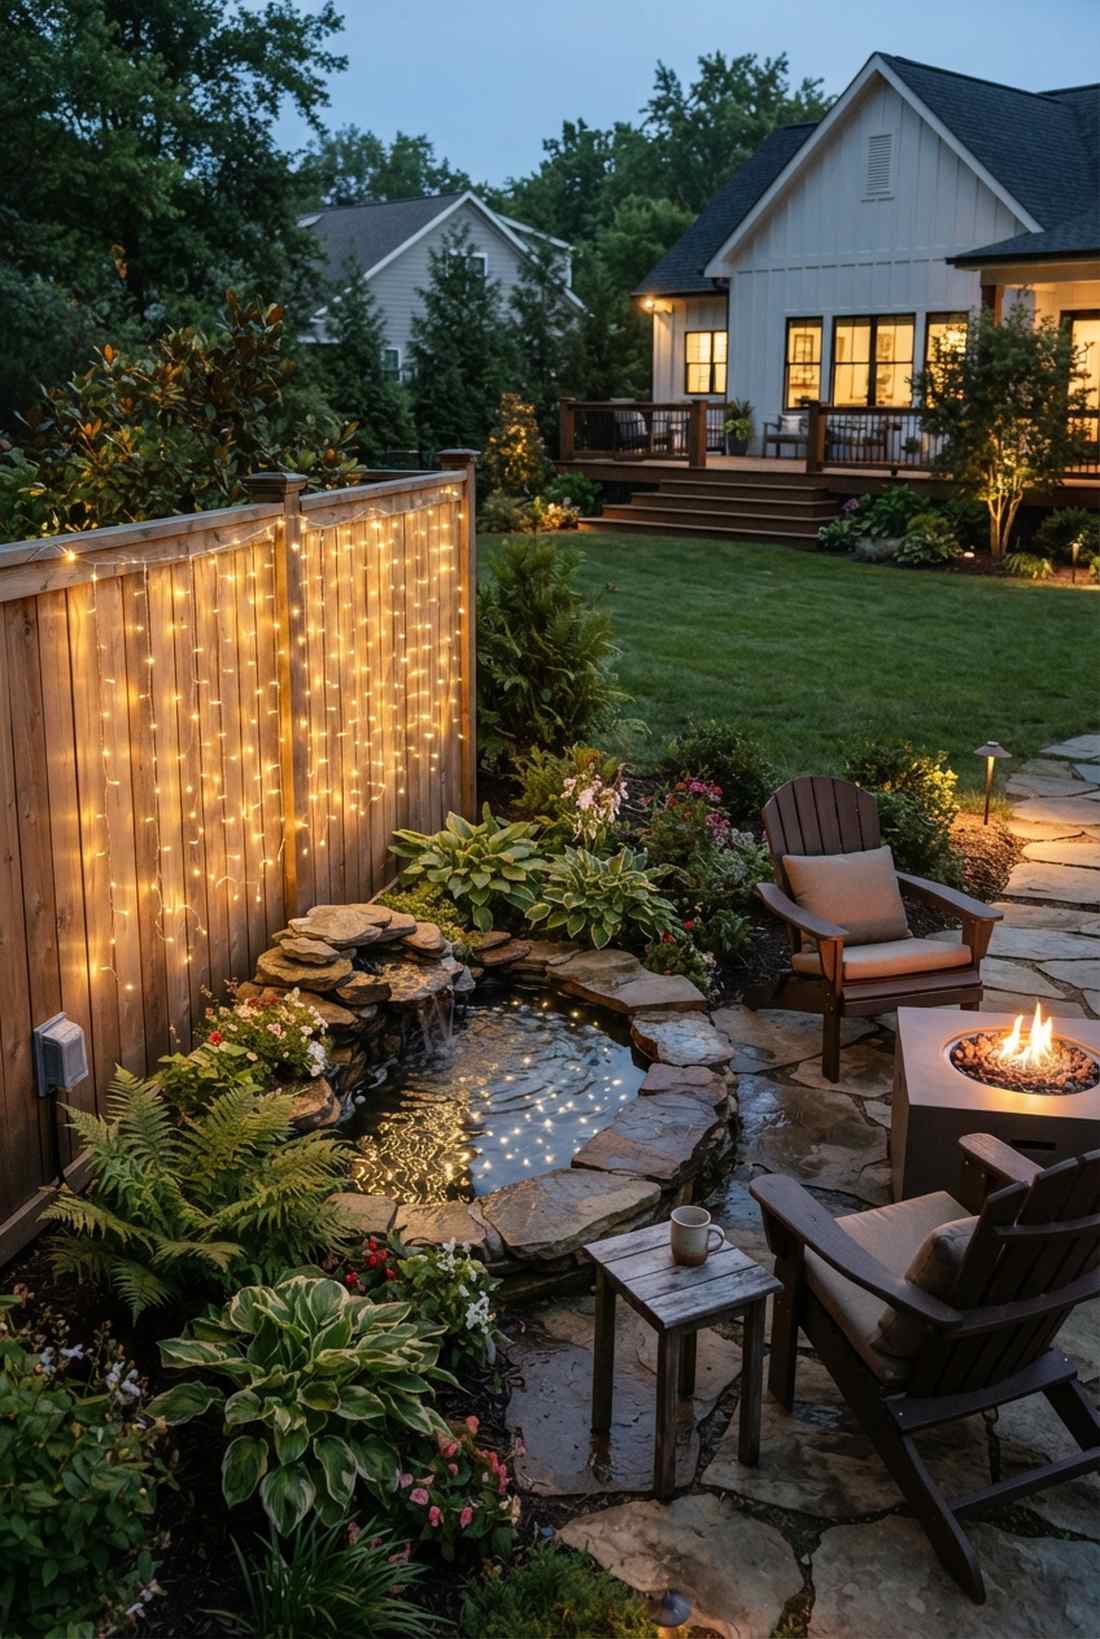
8. Full Fence Light Wall
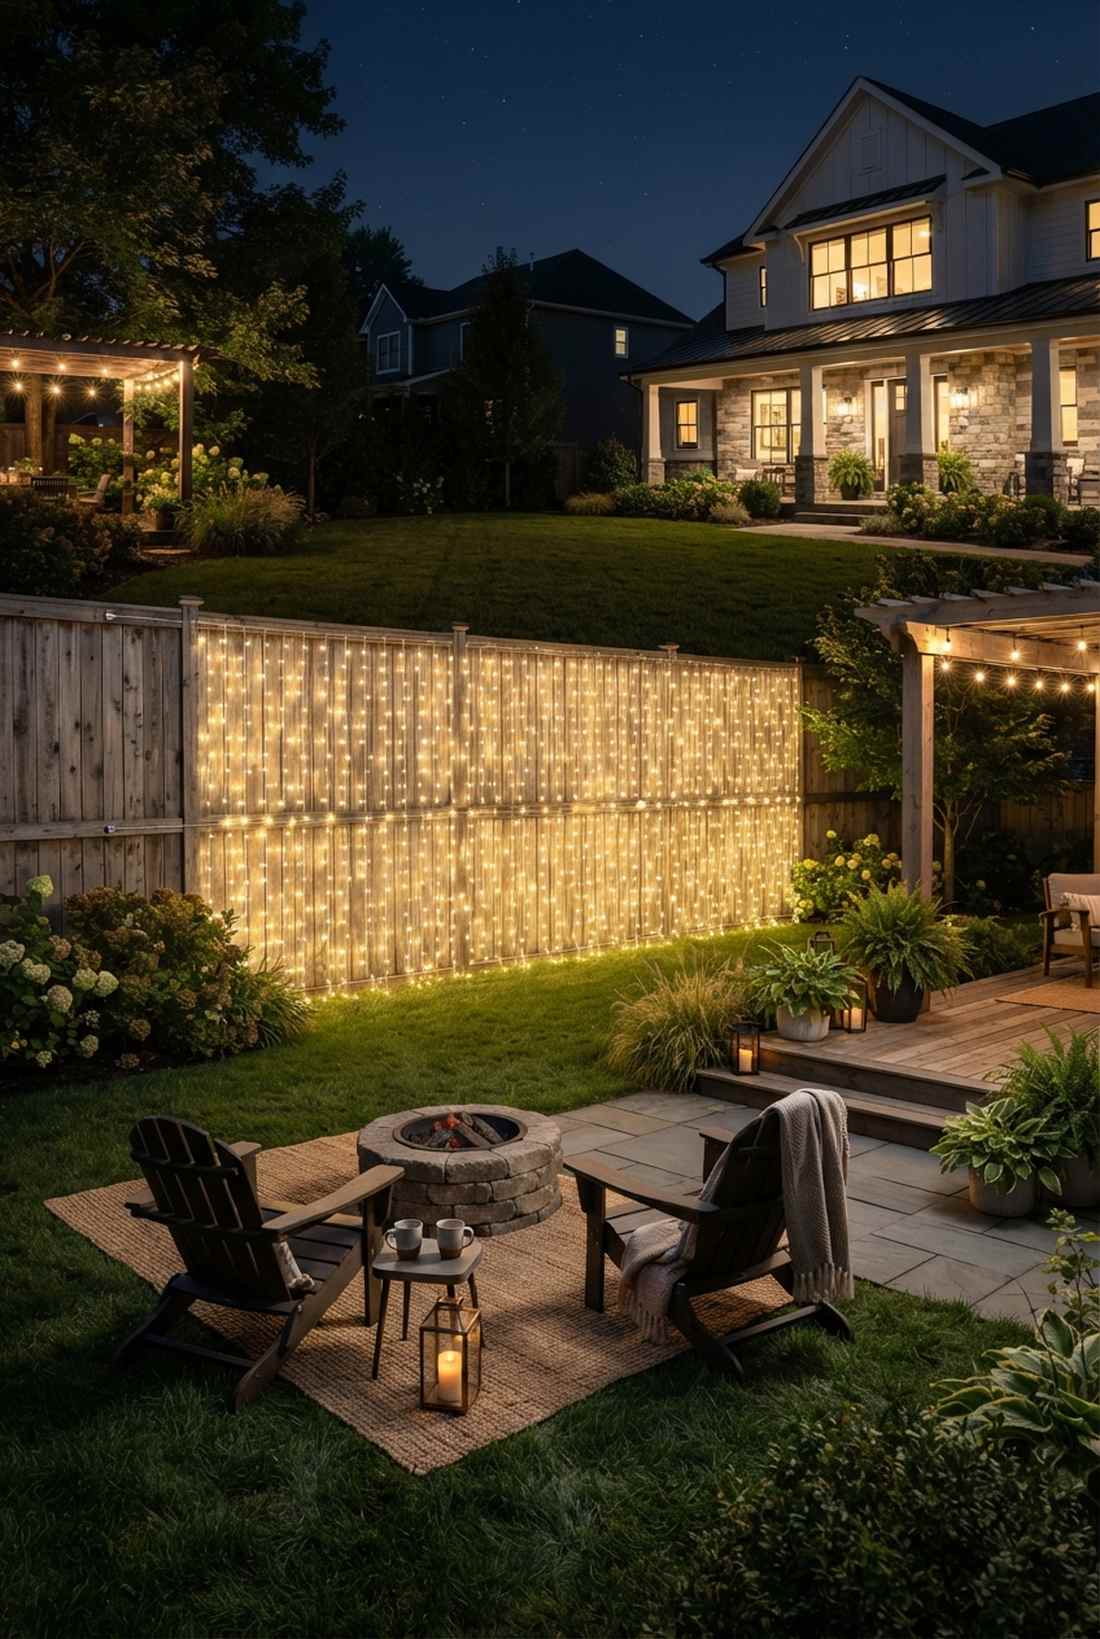
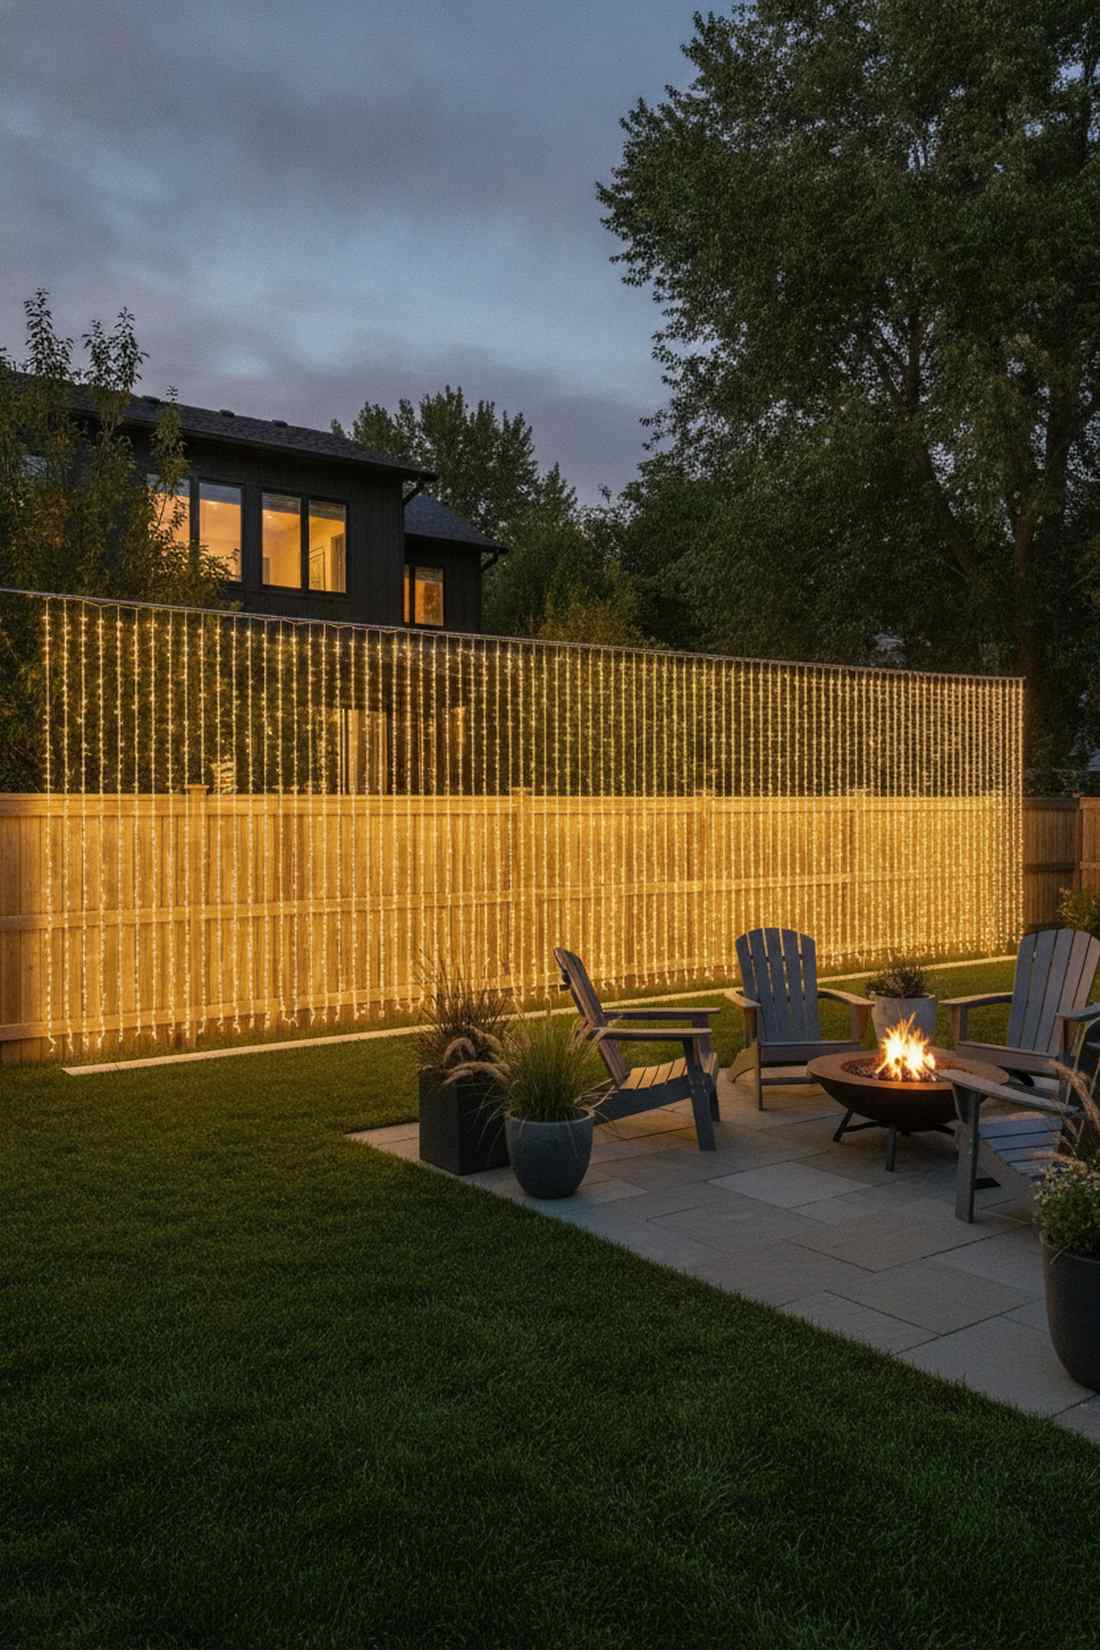
Turns a boring wooden boundary into an expansive, cinematic glowing canvas. A full-coverage perimeter glow completely erases the claustrophobic feel of a small yard, making it highly effective for tight urban privacy fences.
Don’t just staple strings randomly; executing proper fairy lights on wall ideas with tension wires guarantees straight, professional drops. Blanketing an ugly fence with sheer illumination acts as brilliant camouflage, distracting from peeling paint or weathered wood.
A 20-foot fence section requires about $70 in materials to look this good. Pin this if you need an immediate backyard facelift without buying new lumber.
- Key Materials: Long-drop curtain units, top tension wire
- Vibe / Style: Expansive modern glow
- Difficulty: Moderate (requires ladder work)
- Budget Breakdown: Lights: $55 | Tension wire kit: $15
- Creator’s Tip: Leave the bottom 2 inches floating so lawnmowers and weed whackers don’t destroy the tips.
- Smart Sourcing: 10x10ft outdoor curtain lights (connectable) and stainless steel tension wire kits.
9. Zigzag Wall Pattern
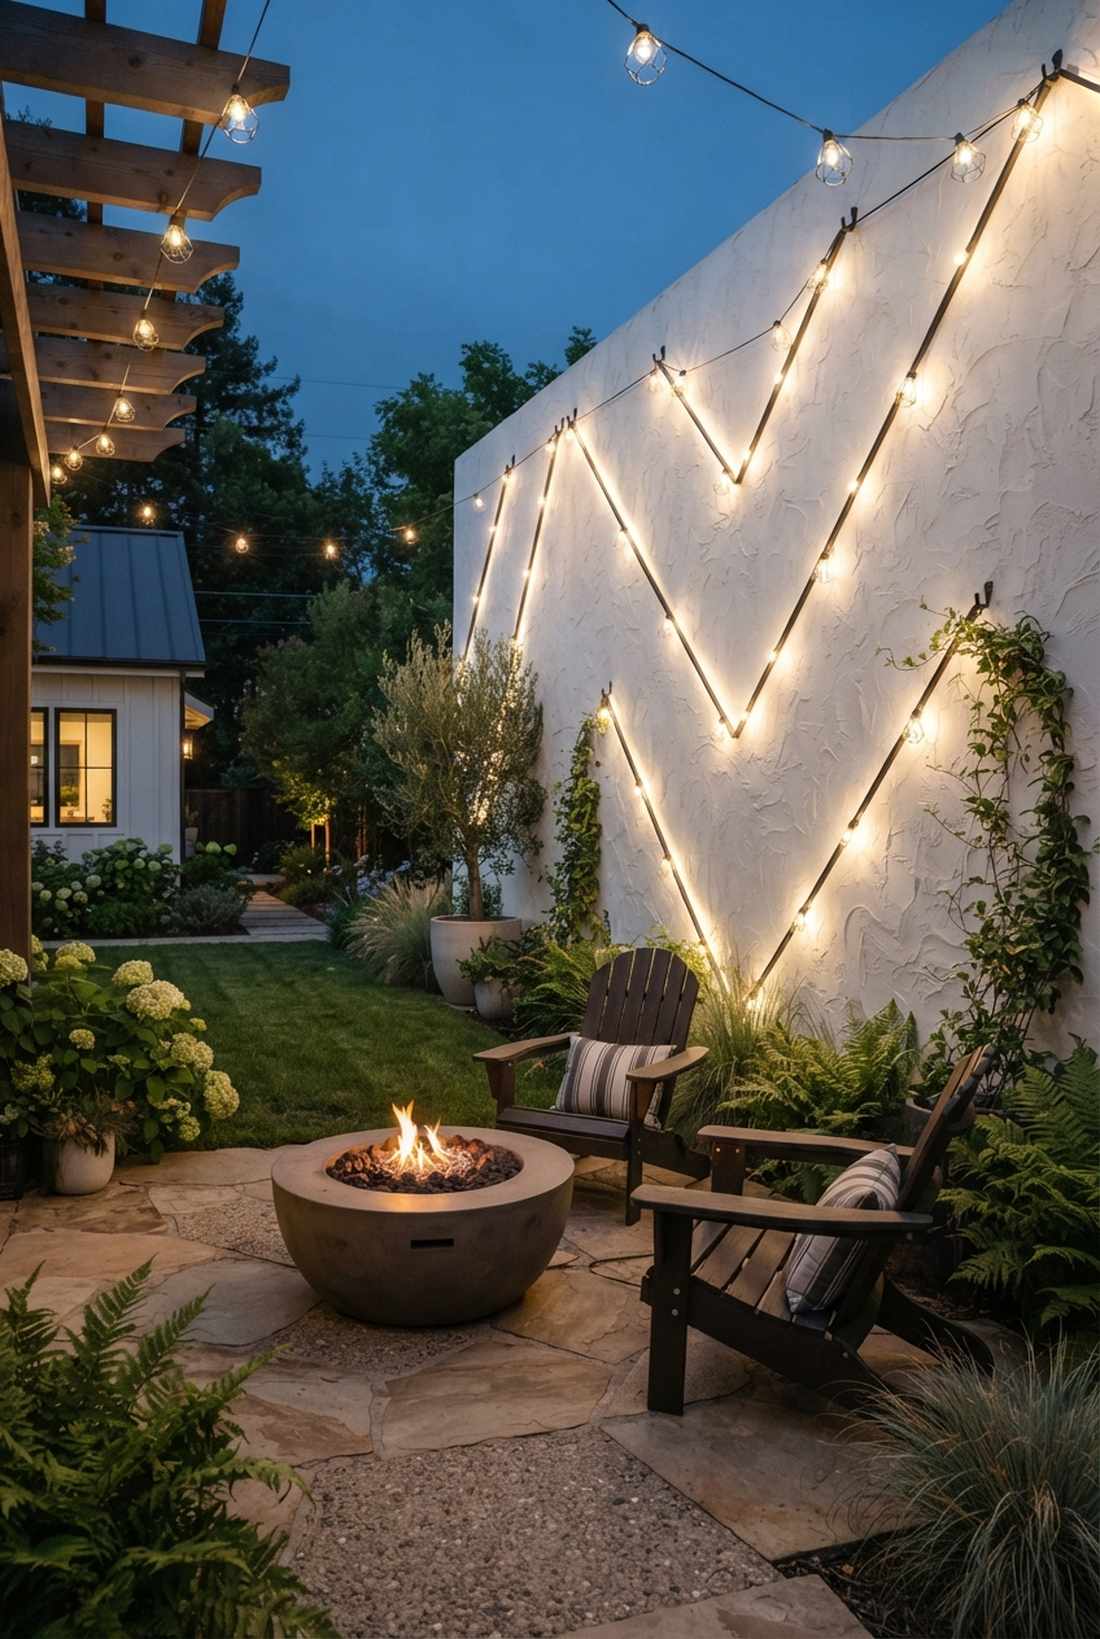
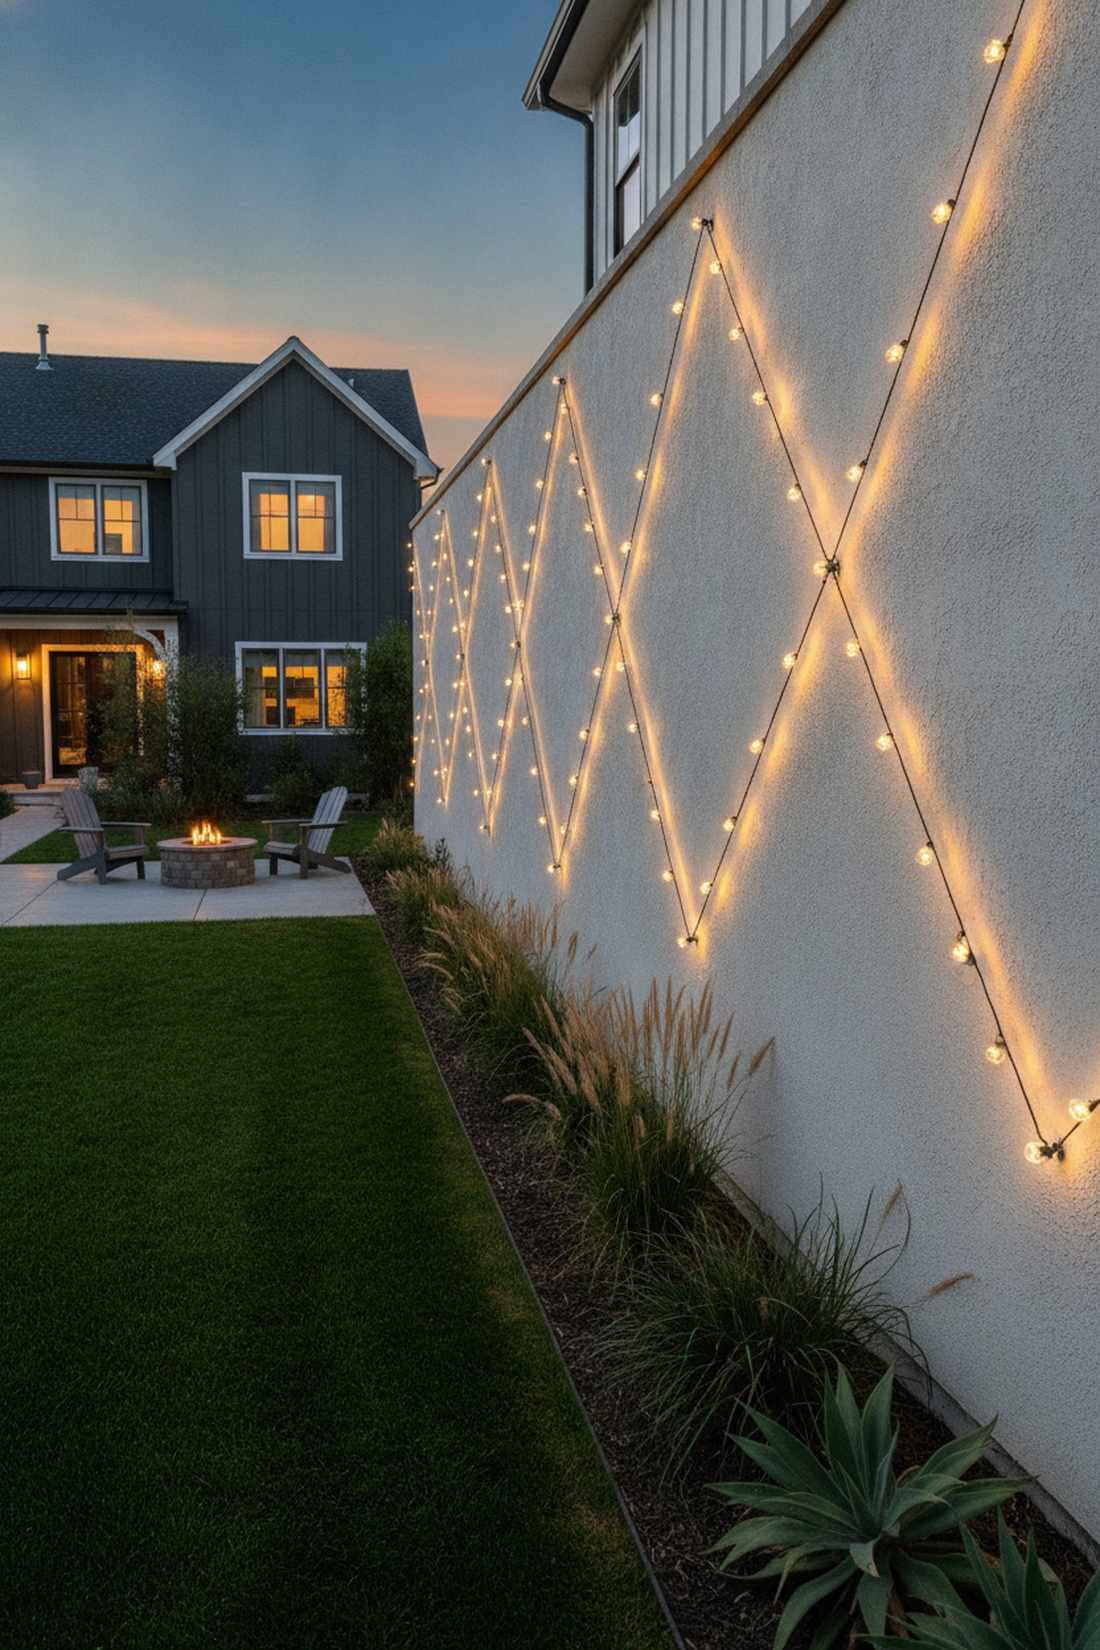
Gives off an edgy, geometric art-installation vibe. This diagonal ambient layout breaks up massive, monotonous solid surfaces, working wonderfully as an accent on blank stucco or tall side-yard walls.
Hanging lights straight down can sometimes feel too rigid, but introducing angled fairy lights on wall concepts creates dynamic visual movement. Angling the drops at 45 degrees reflects the light beautifully across varied textures, completely masking wall imperfections.
You can execute this modern pattern for under $30. It’s an incredibly cheap way to make a boring side-yard look architecturally planned.
- Key Materials: Heavy-duty outdoor hooks, modular string drops
- Vibe / Style: Geometric contemporary
- Difficulty: Easy mapping, simple hang
- Budget Breakdown: Lights: $20 | Hardware: $10
- Creator’s Tip: Use a chalk line to map out your zigzags before drilling or placing adhesive to ensure perfectly symmetrical angles.
- Smart Sourcing: shatterproof geometric fairy string kits and masonry wall anchor hooks (outdoor).
Most people get this completely wrong… until they try the exact framed focal trick coming up next to save 80% on lighting costs.
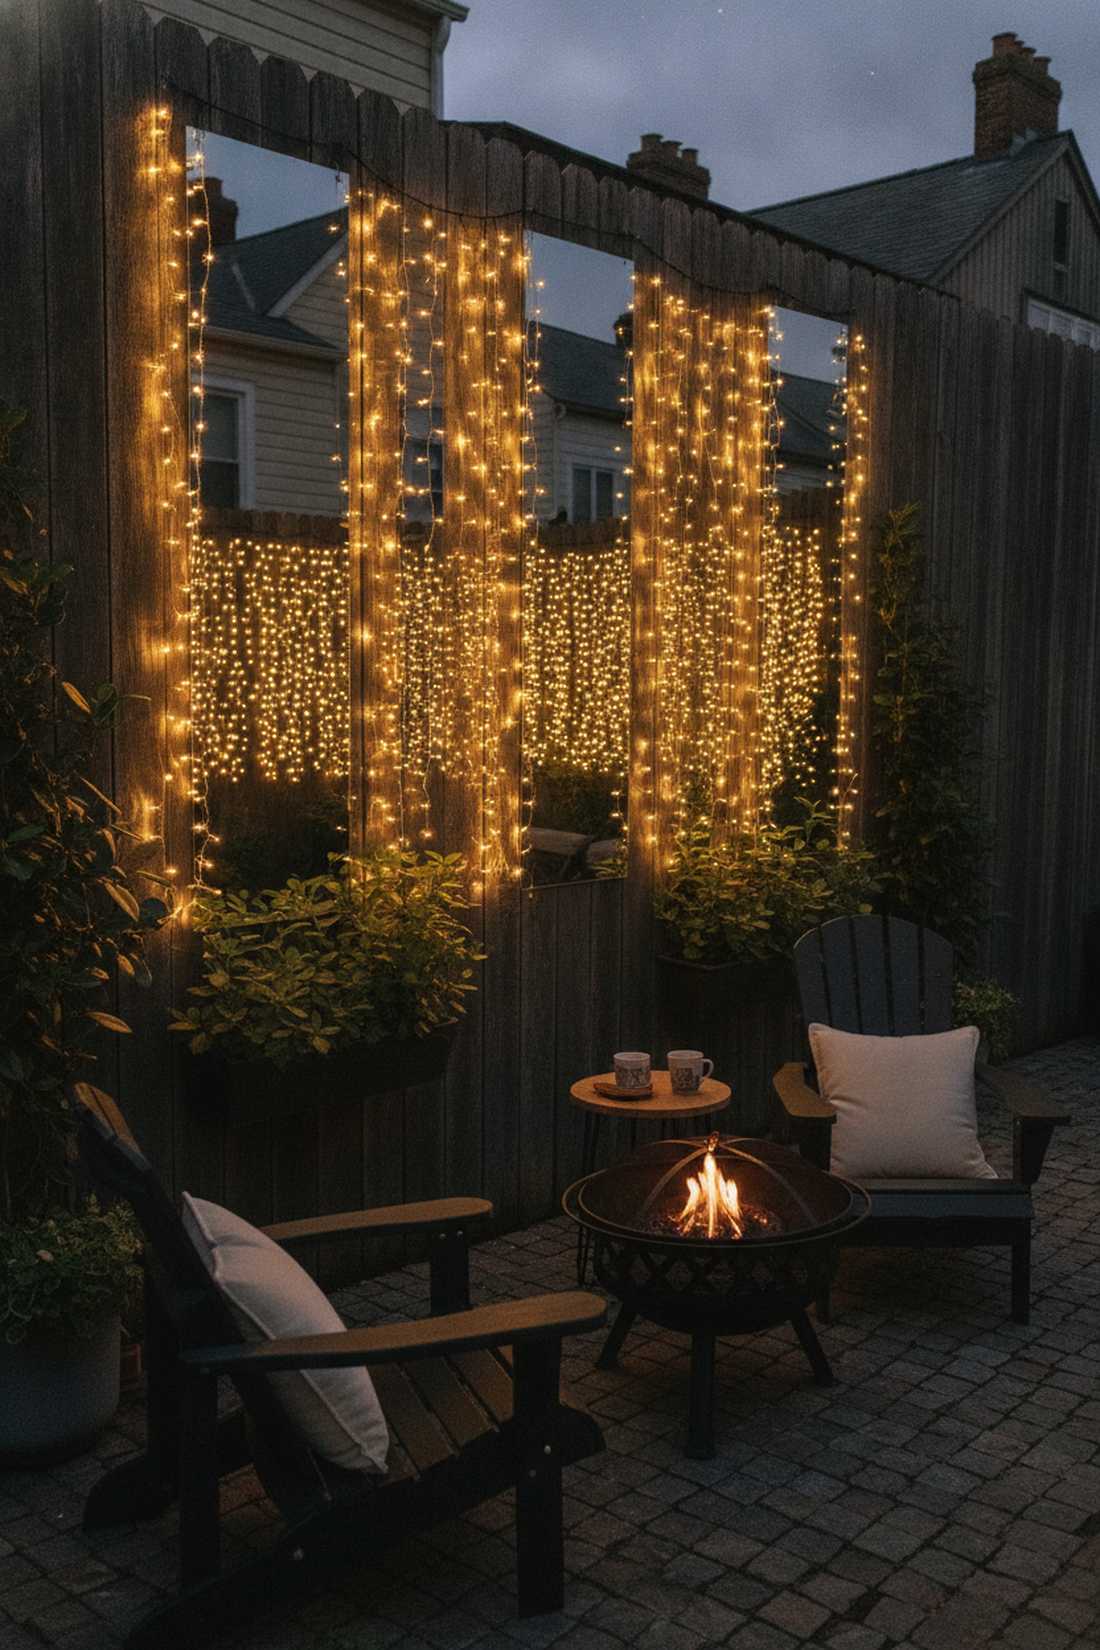
10. Framed Section Highlights
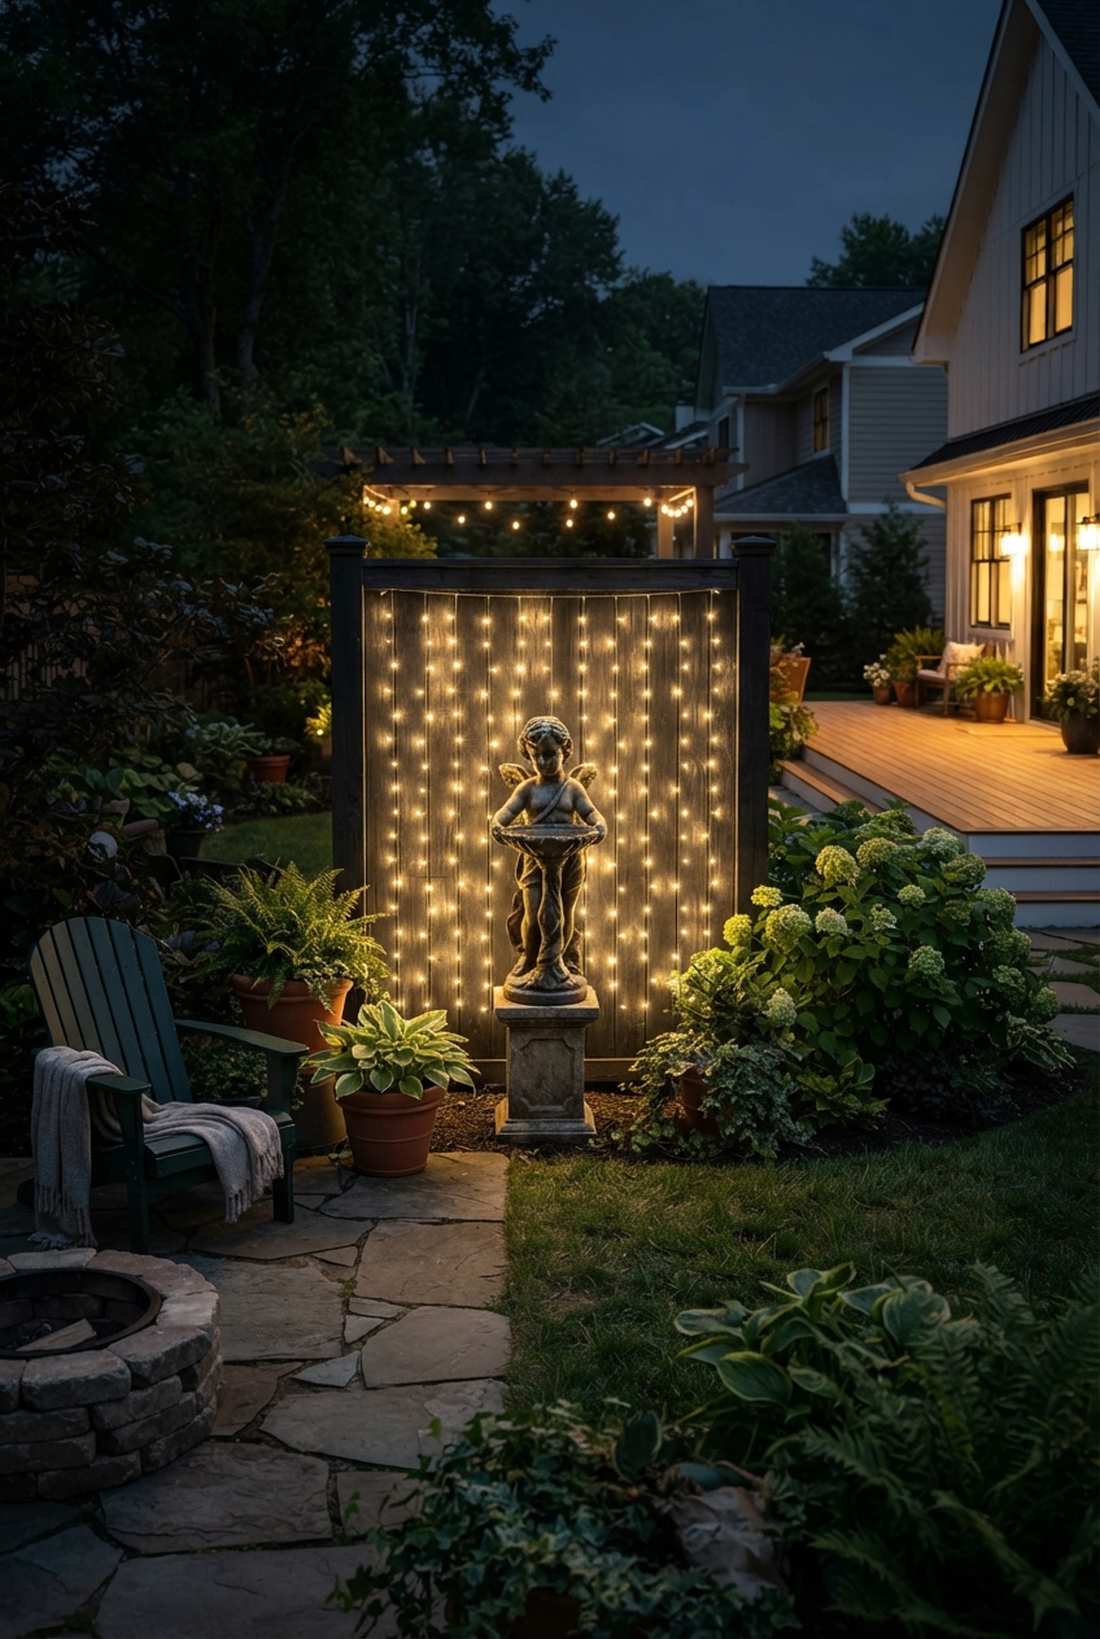
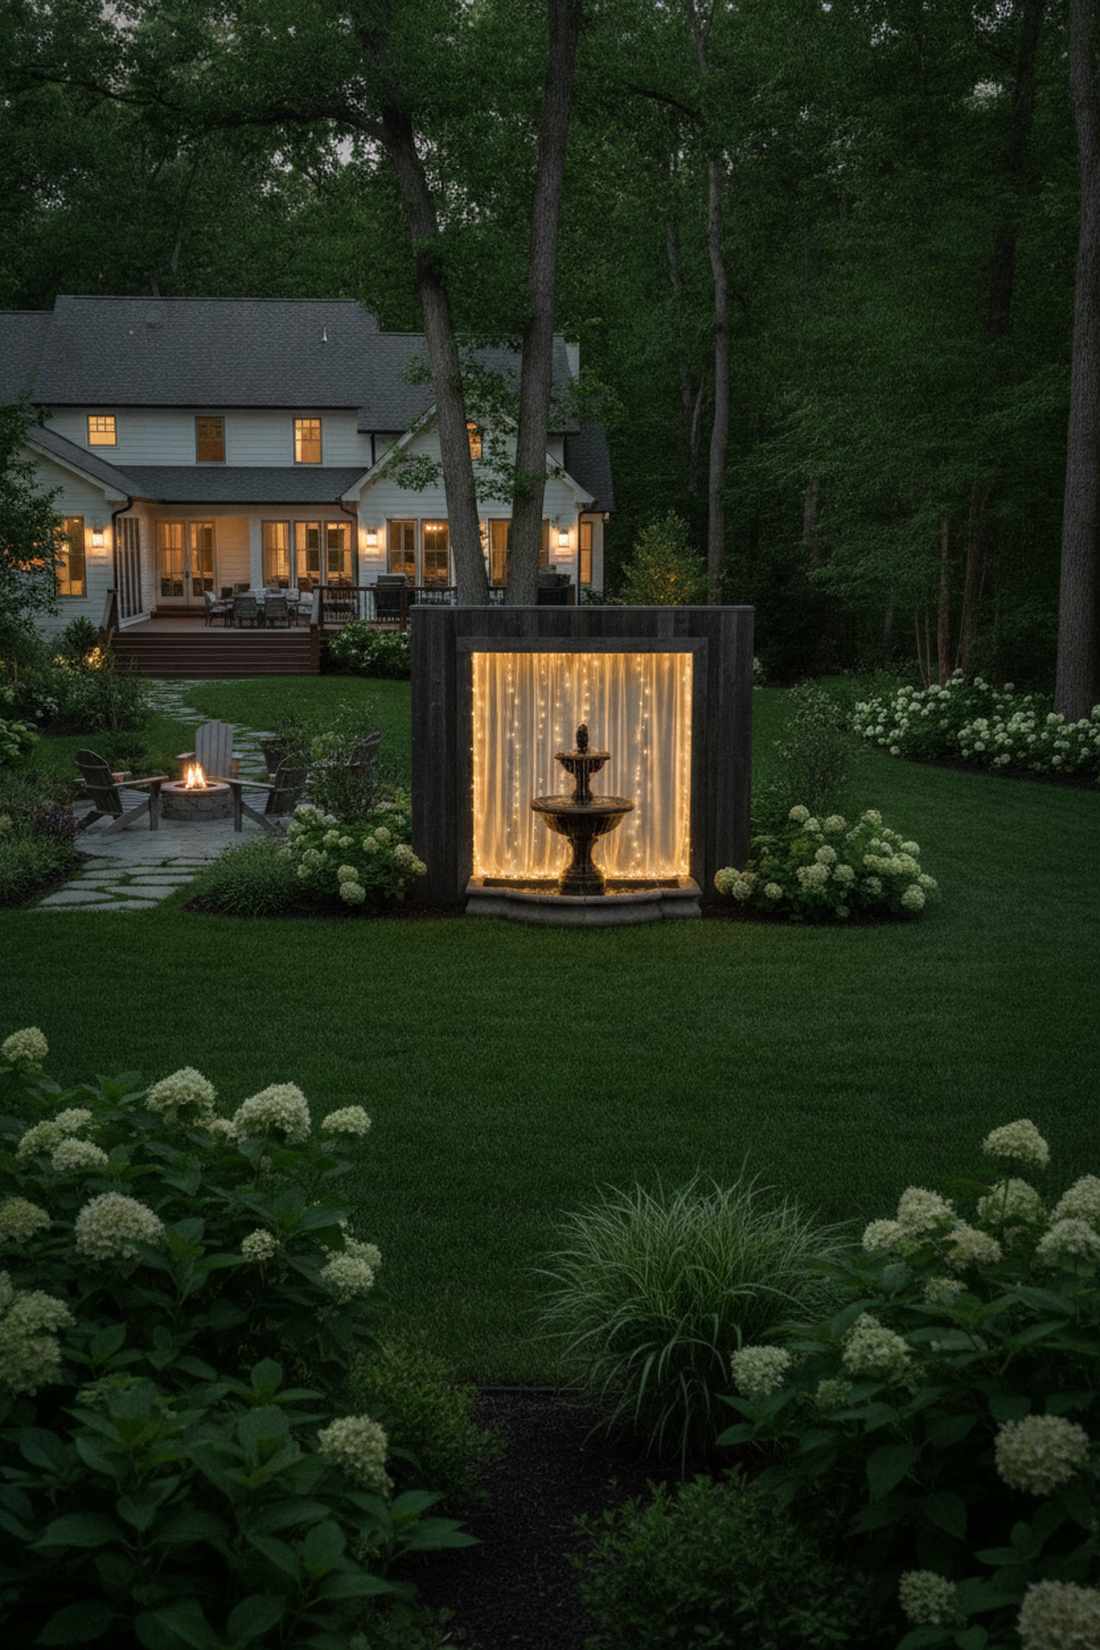
Feels like looking at a curated museum display in the middle of nature. A spotlight fence panel draws all eyes directly to your favorite garden statue, fountain, or prize-winning potted plant layout.
Instead of wasting money lighting the whole yard, applying tight fairy lights on wall ideas behind a singular object delivers a striking, high-contrast silhouette. This selective illumination creates a deeply dimensional background that makes foreground elements practically pop out of the dark.
By only lighting one panel, you slash your budget down to just $15. Save this to your garden design board for a genius, money-saving focal point.
- Key Materials: Short-width curtain panels, backdrop framing
- Vibe / Style: Curated luxury gallery
- Difficulty: Extremely easy
- Budget Breakdown: Single panel kit: $15
- Creator’s Tip: Use warm-white (2700K) to highlight stone or terracotta, and cool-white (4000K) to highlight modern metal sculptures.
- Smart Sourcing: miniature garden supplies (lighting panels) and remote-controlled 3×3 curtain drops.
💡 Must-Have Supplies for High-End Setups
To build these setups faster and ensure they last, skip the generic craft aisles and invest in the right foundational kits.
- Base & Support: UV-coated stainless steel tension cables
- Setup Tools: outdoor adhesive cable clip starter kits
- Weather/Durability Protection: clear silicone dielectric grease for plug connections
11. Window-Style Light Boxes
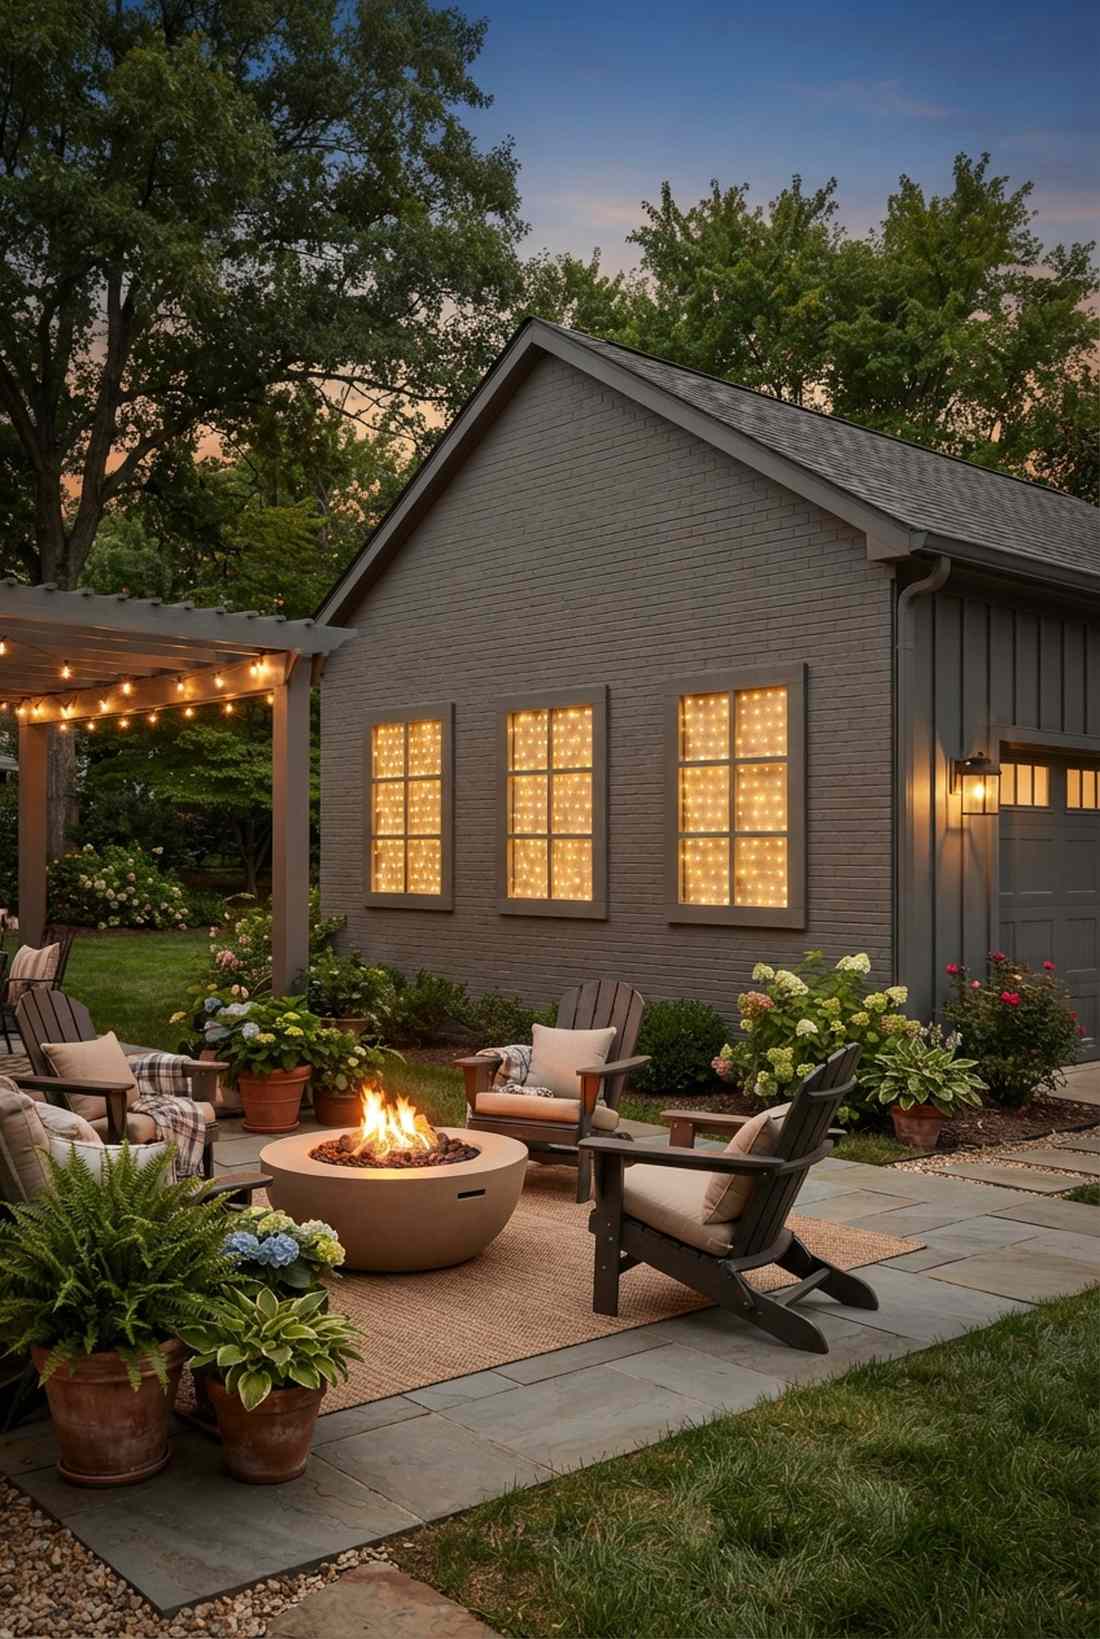
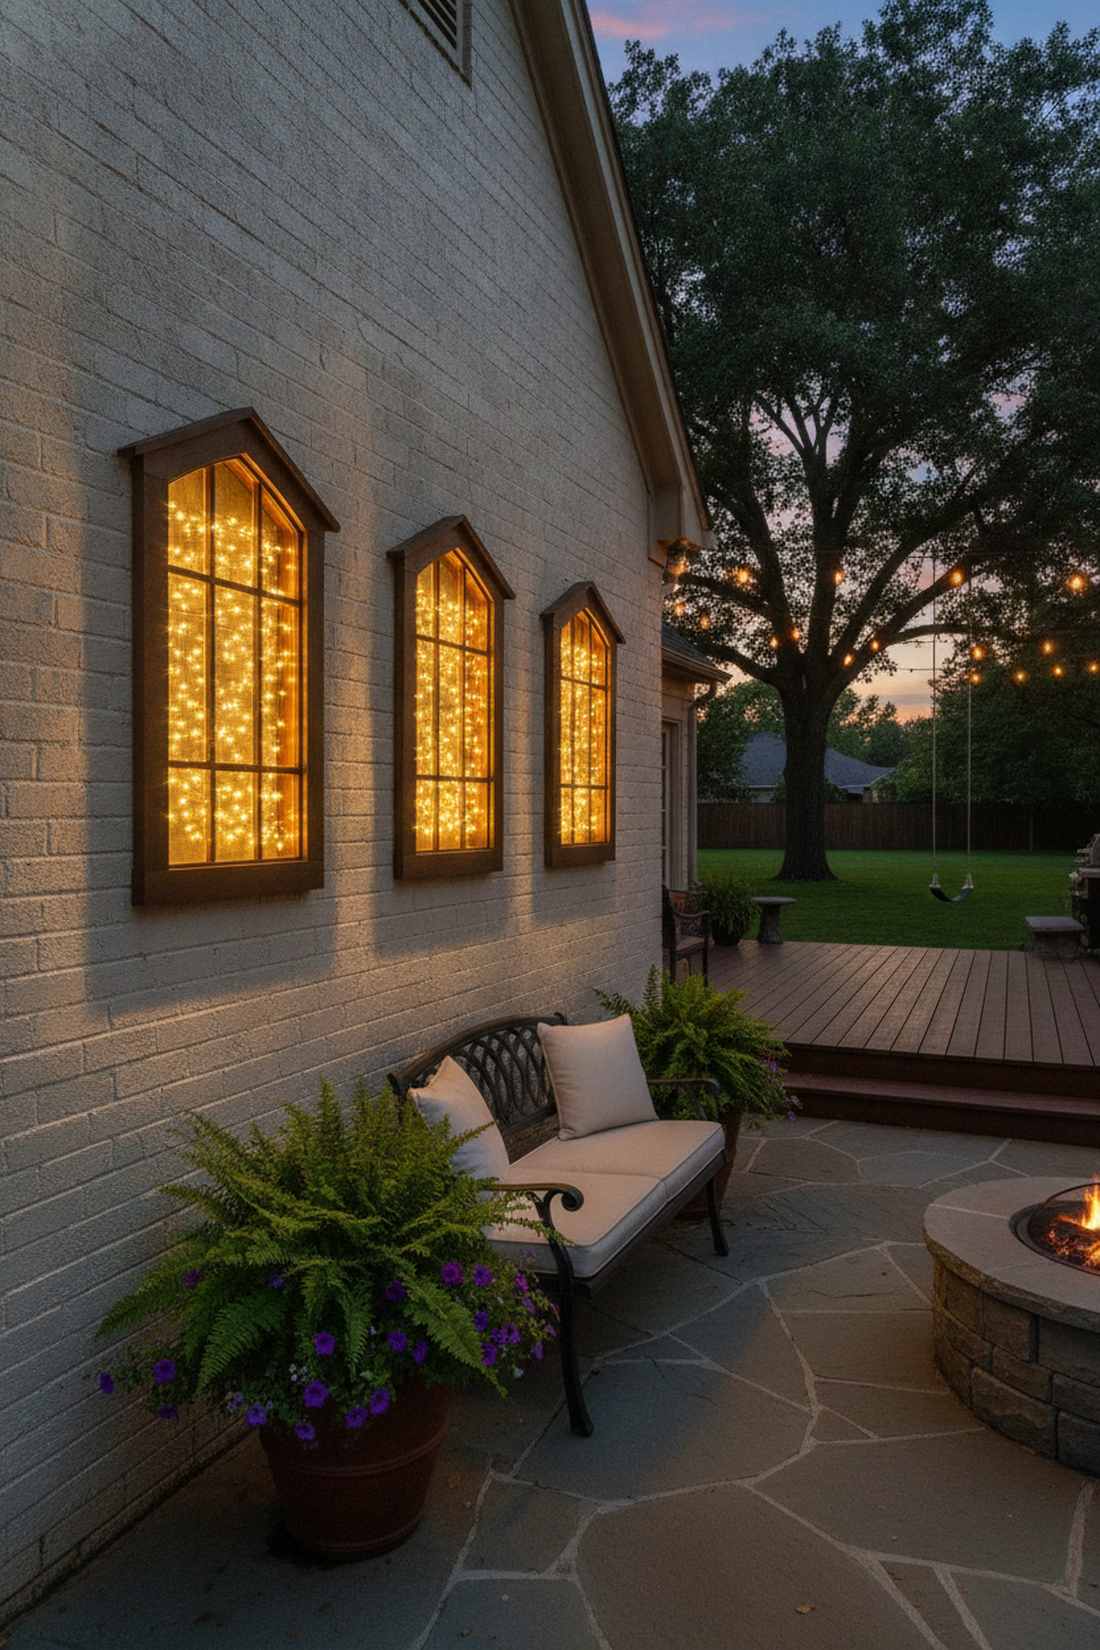
Creates the magical illusion of glowing cottage windows on a completely blank surface. These faux illuminated frames add profound architectural depth to windowless garage walls or solid brick boundaries.
You avoid the flat-wall trap completely because pushing the lights slightly away from the surface casts unbelievable shadow depths. Utilizing structured fairy lights on wall ideas within a literal wooden frame gives a designer-level finish that fools the eye every time.
Building the frames and adding lights will cost around $40 per “window”. It completely transforms dead zones into cozy, inviting features.
- Key Materials: 1×2 wooden trim, dense micro-LED squares
- Vibe / Style: Cozy faux-architecture
- Difficulty: Moderate DIY woodworking
- Budget Breakdown: Wood frames: $20 | Lights: $20
- Creator’s Tip: Paint the wooden frames to match the wall during the day so the lights seemingly float out of nowhere at night.
- Smart Sourcing: square-grid fairy light mats (pre-cut) and outdoor wood sealant sprays.
12. Graduated Border Lighting
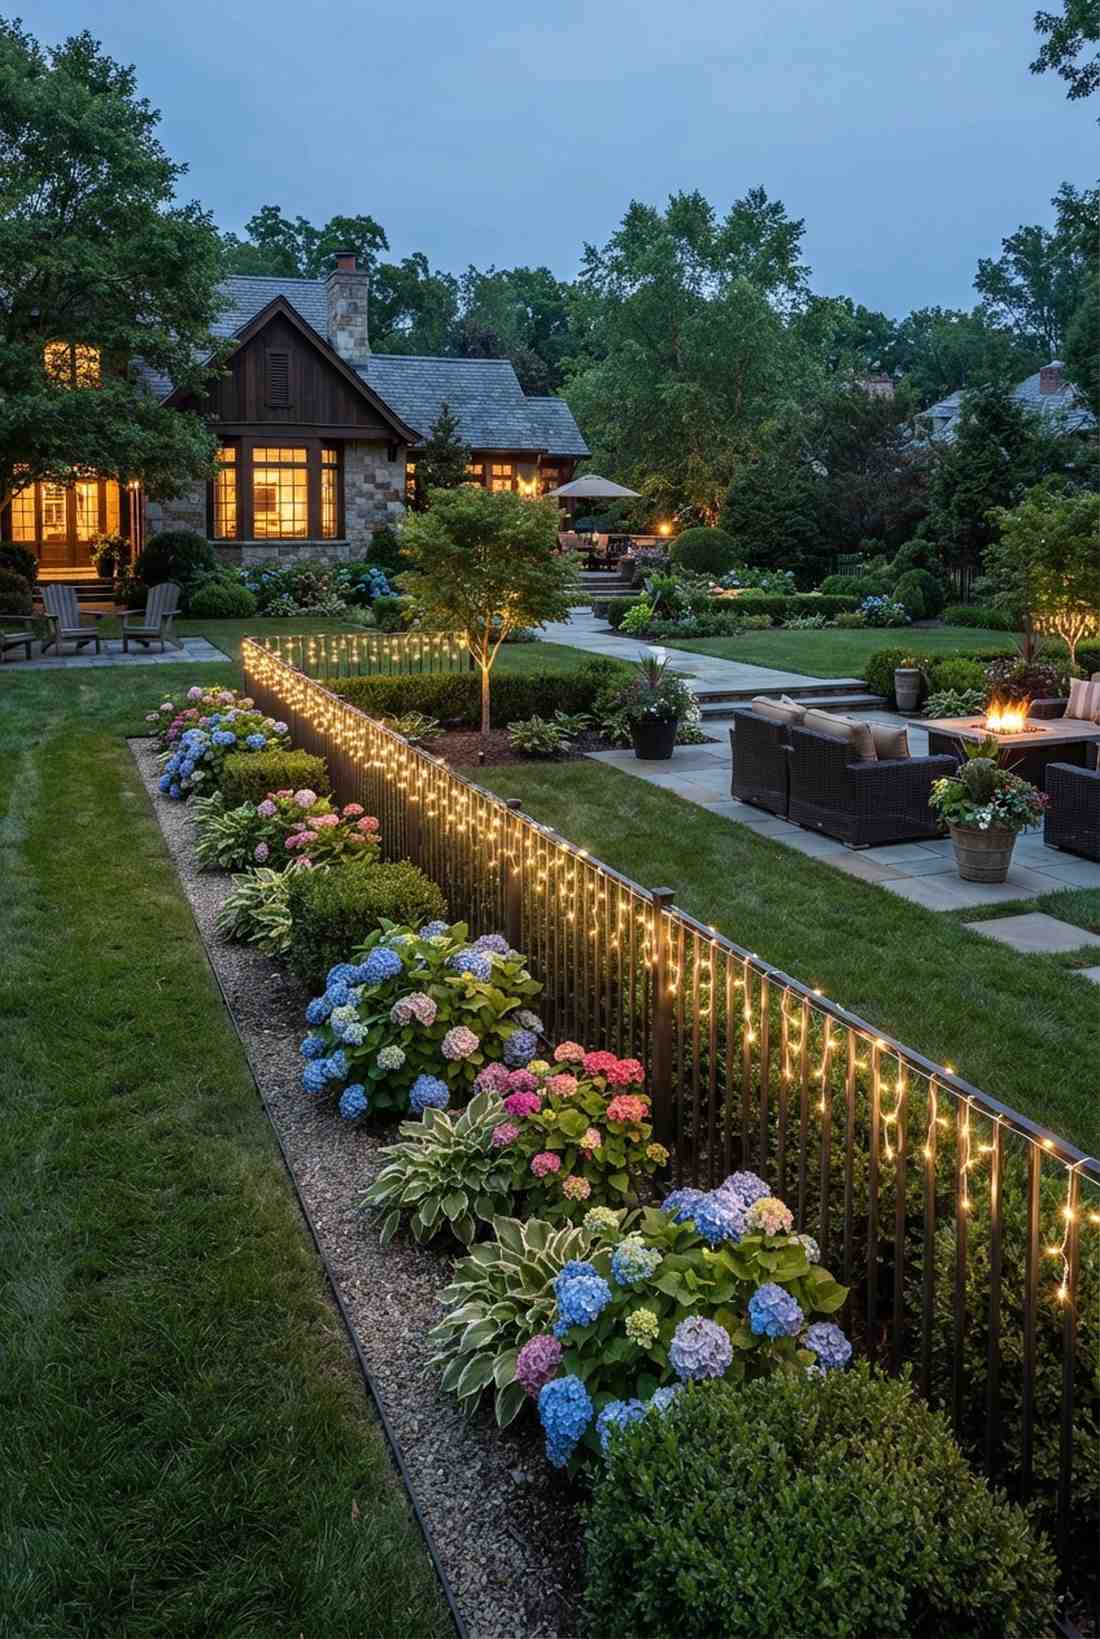
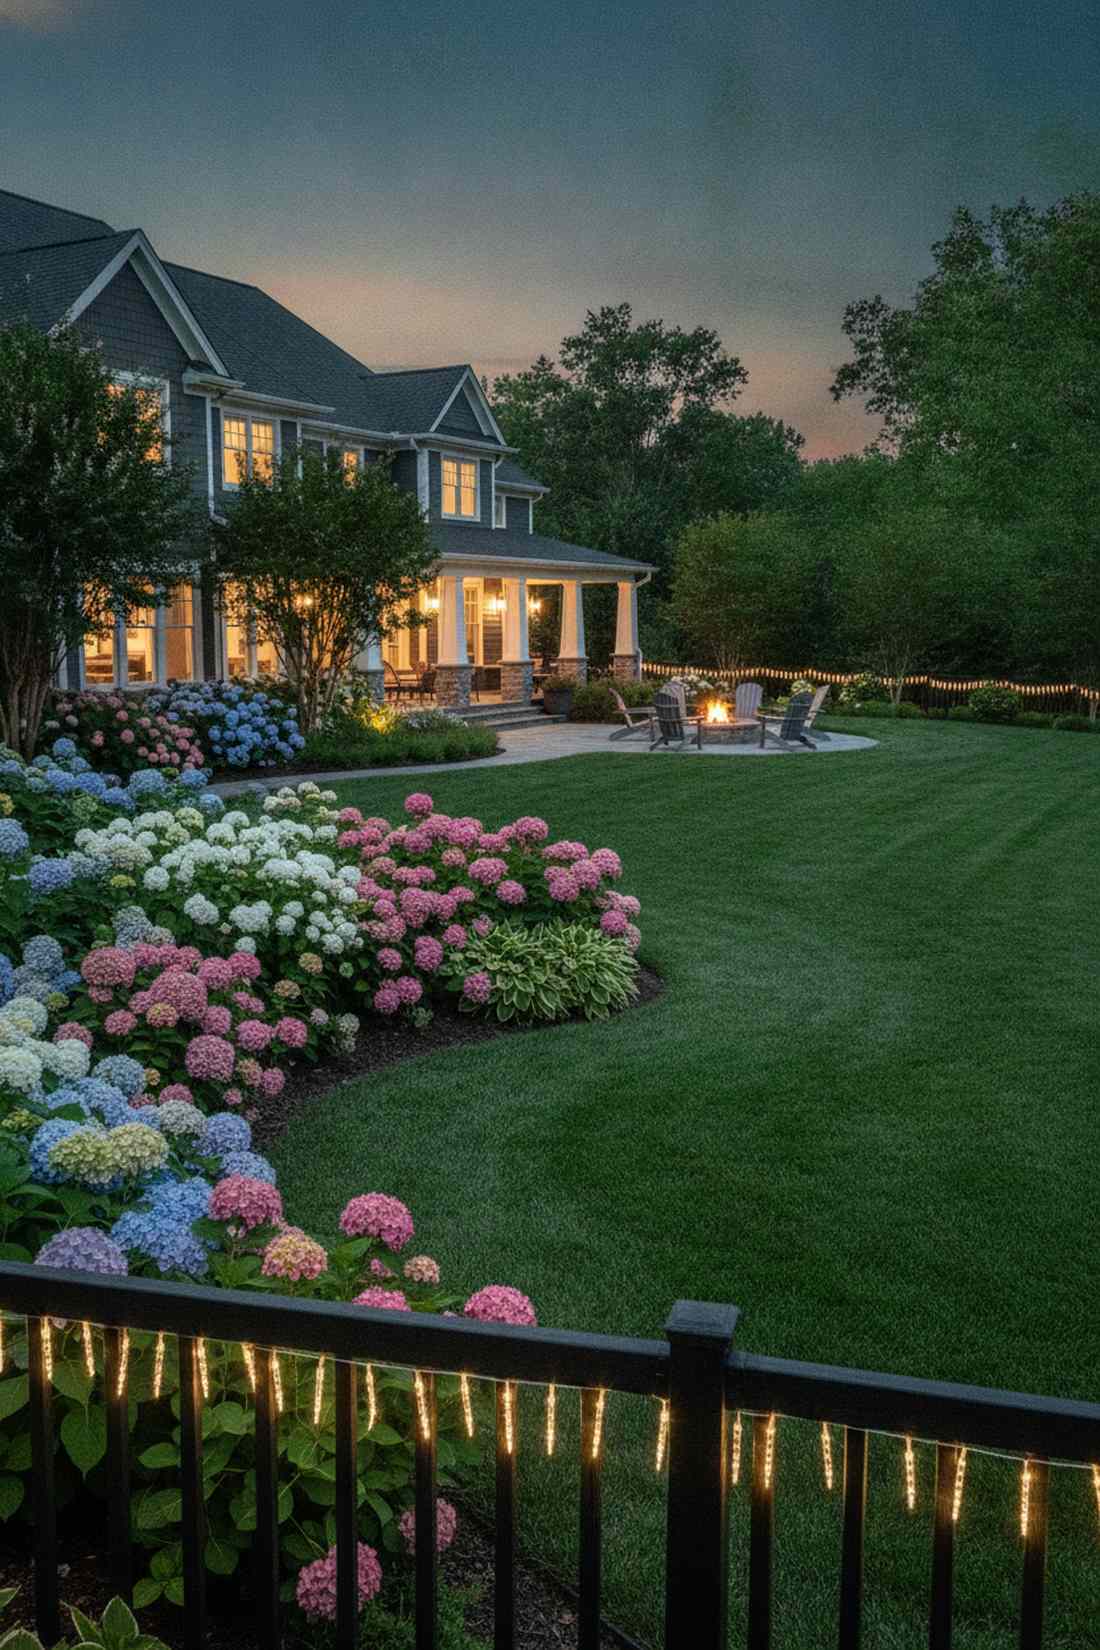
A sophisticated, dripping edge that feels impeccably classy and restrained. A short glowing fringe defines the very top of your boundary lines, ideal for bordering manicured flower beds or formal English gardens.
Dumping huge sheets of light can ruin delicate landscaping, but a subtle top-border setup looks incredibly expensive and tasteful. Trimming down the fairy lights curtain to just 12 inches keeps the ambient glow alive without overpowering your expensive hydrangeas below.
This refined minimalist trim is highly budget-friendly, costing around $20 per section. Pin this if you prefer subtle elegance over bright, flashy yard decor.
- Key Materials: Icicle-style short drops, top-rail clips
- Vibe / Style: Refined formal garden
- Difficulty: Quick setup
- Budget Breakdown: Short icicle drops: $20
- Creator’s Tip: Hide the main power cord on the backside of the fence so only the glowing drops face the yard.
- Smart Sourcing: warm-white icicle string lights (bulk pack) and invisible fence rail hooks.
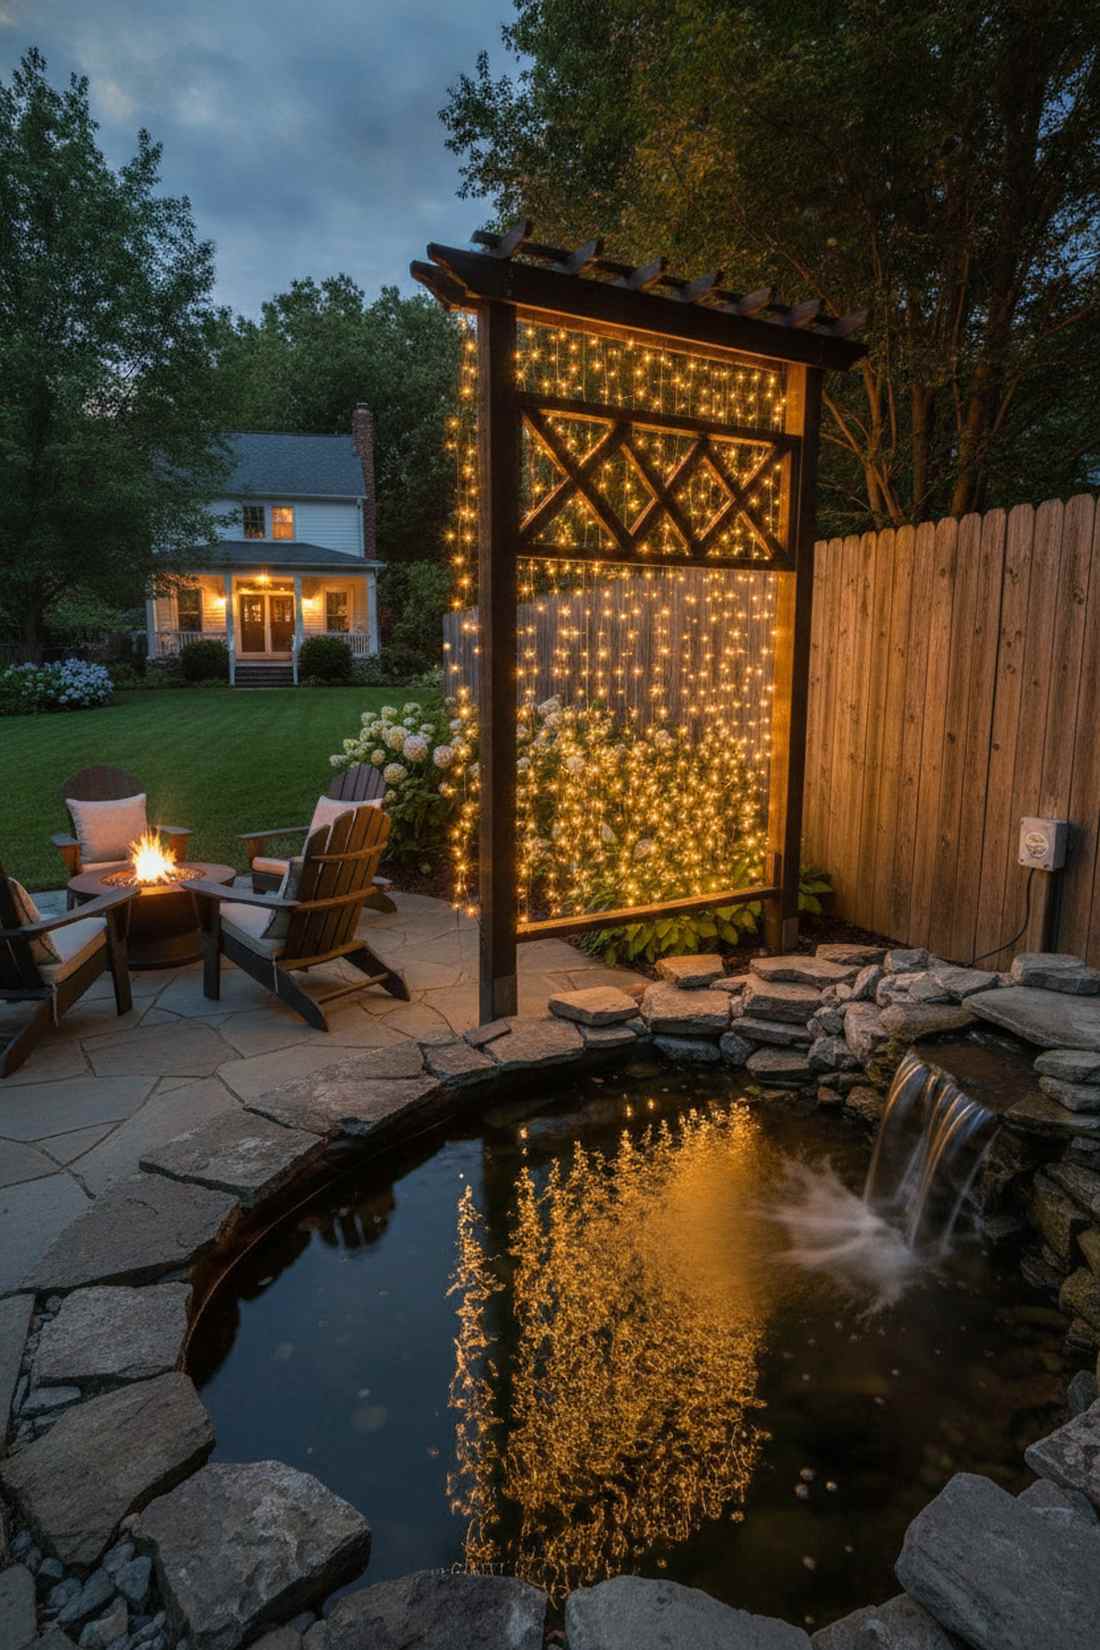
13. Privacy Screen Enhancement
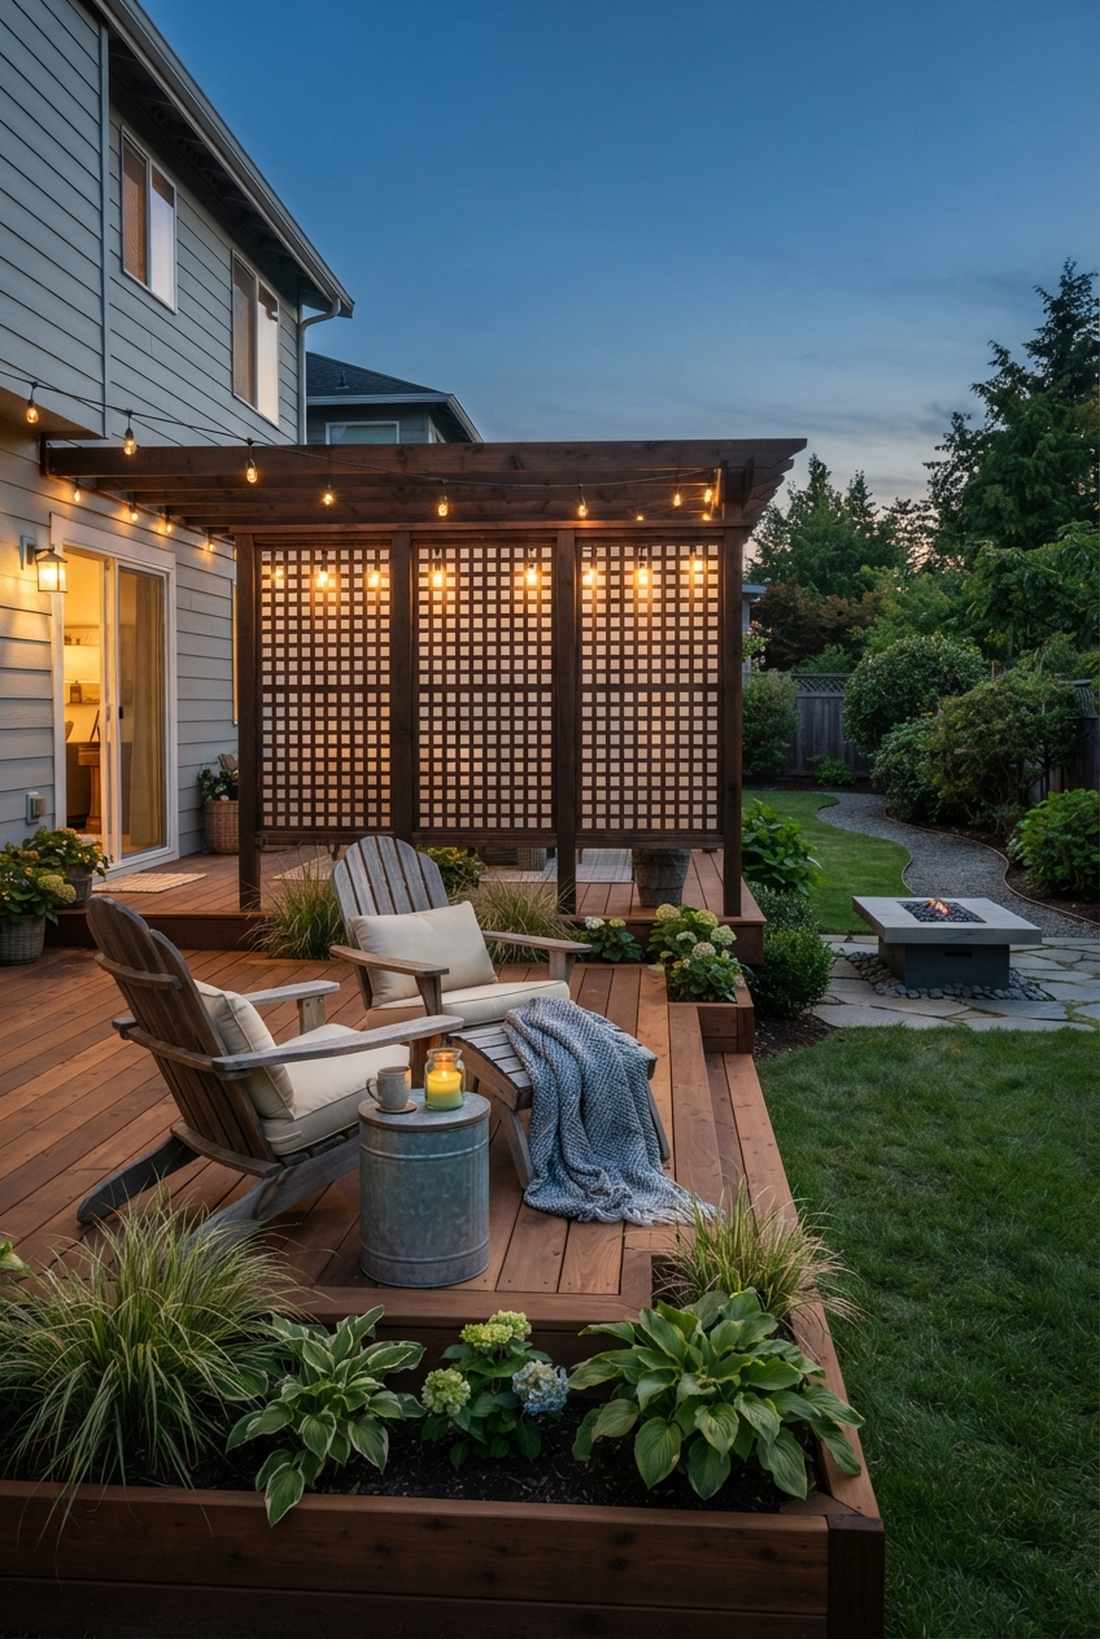
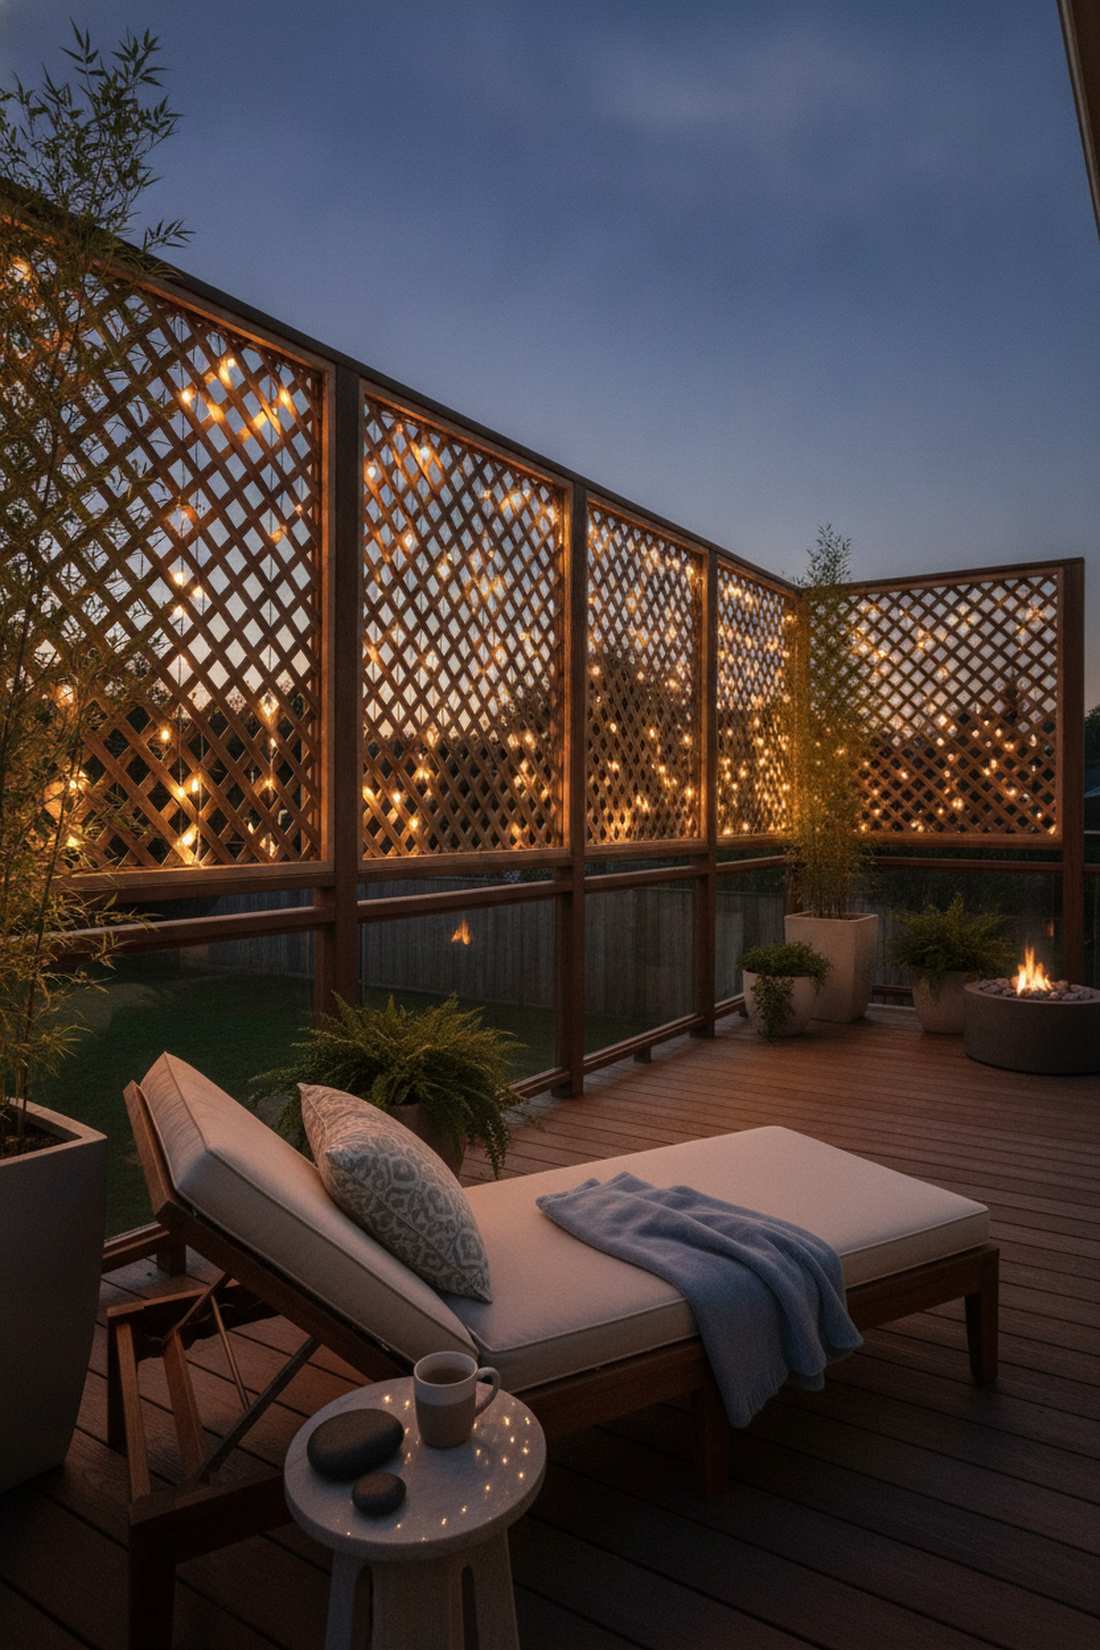
Radiates a soft, diffused glow that feels like a luxury spa sanctuary. A backlit lattice panel obscures nosy neighbors while flooding your deck with gentle, shadow-filtered illumination.
Direct bulbs can be blindingly harsh, but hiding the fairy lights hanging behind semi-transparent wooden slats delivers a surprisingly premium, diffused look. This standoff method prevents the plastic from melting while casting a deeply dimensional, moody silhouette.
Upgrading your privacy panels will run you about $35 per screen. Save this to your deck makeover board for an instant privacy upgrade.
- Key Materials: Flat-wire curtain lights, standoff brackets
- Vibe / Style: Zen spa retreat
- Difficulty: Easy weekend upgrade
- Budget Breakdown: Lights: $25 | Brackets: $10
- Creator’s Tip: Use frosted bulb covers if your screen slats are wide, softening the light even further.
- Smart Sourcing: flat-wire outdoor light curtains (low profile) and weatherproof lattice panels (pre-cut).
14. Corner Emphasis Installations
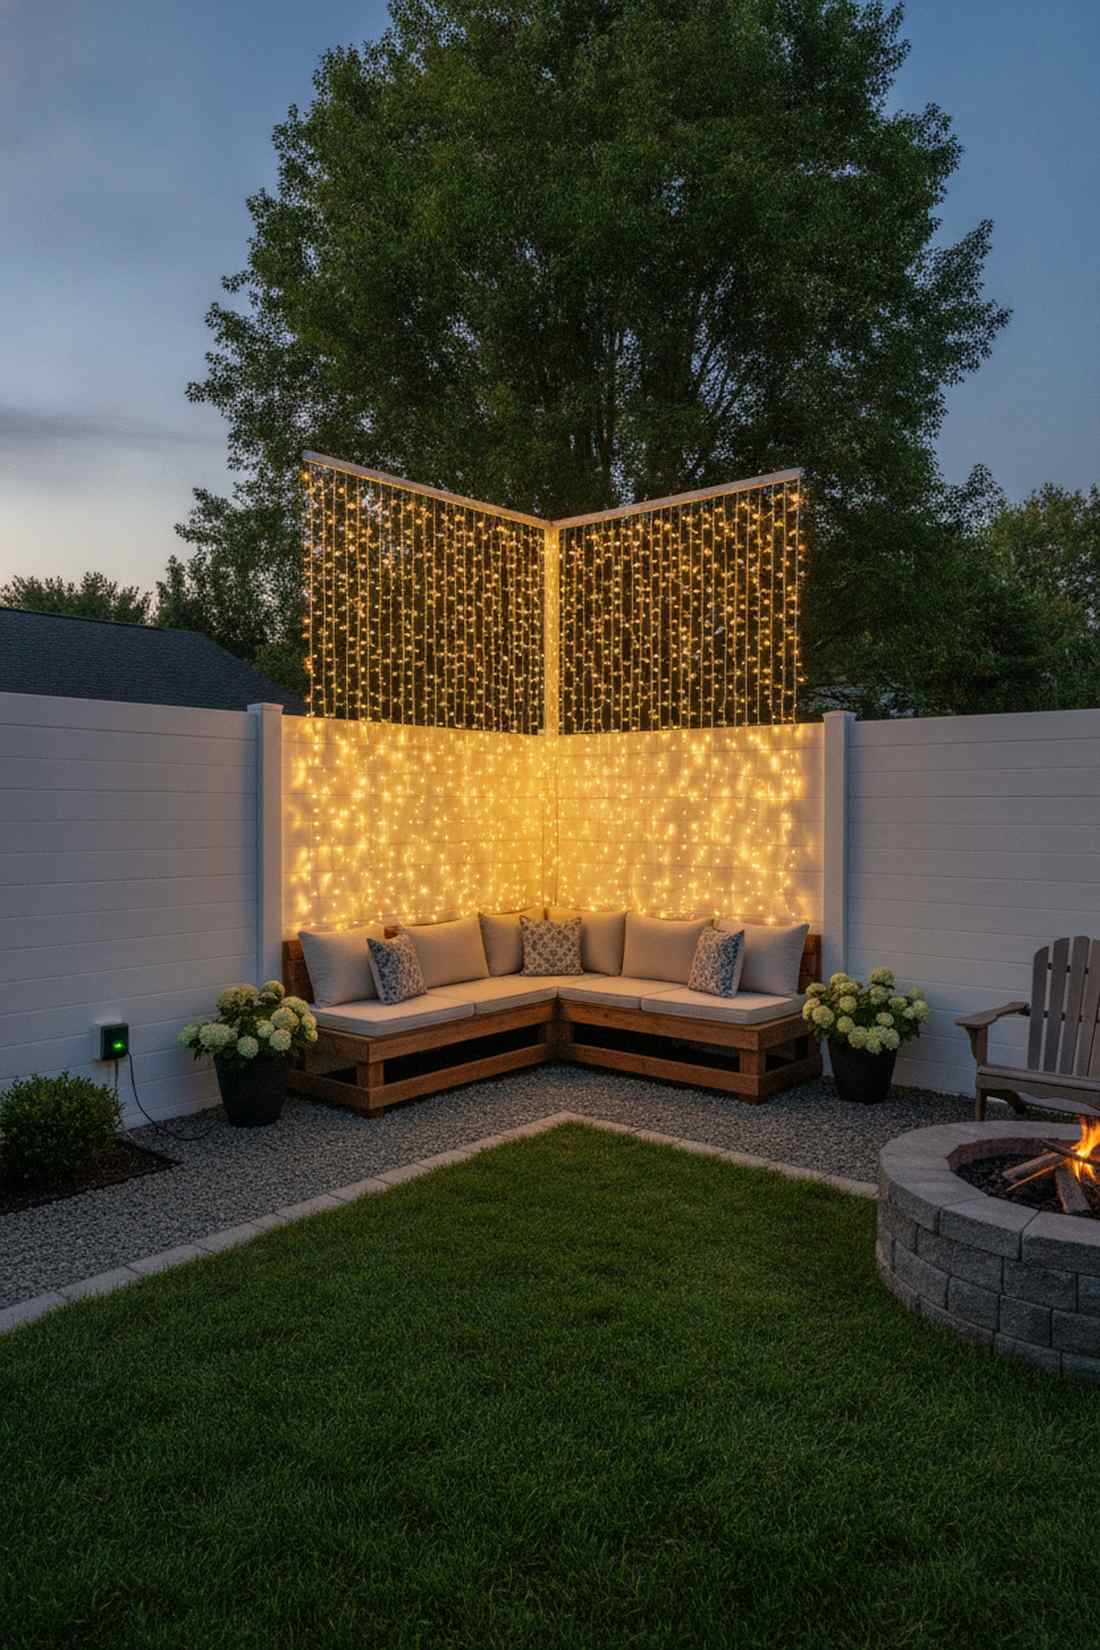
Acts like a glowing beacon drawing guests into the best parts of your yard. A dense corner column wrap eliminates creepy dark zones where fences meet, transforming them into highlighted seating nooks.
Most people leave corners blacked out, but wrapping the junction heavily with a fairy lights curtain visually expands the perceived size of the entire garden. Pushing brighter lumens into the sharp 90-degree angles anchors the space and makes night navigation effortlessly safe.
A brilliant corner anchor costs less than $25 to illuminate. It’s a rapid fix that fixes awkward, unlit property boundaries immediately.
- Key Materials: High-density light drops, corner mounting tape
- Vibe / Style: Expansive modern perimeter
- Difficulty: Very easy
- Budget Breakdown: High-density lights: $20 | Tape: $5
- Creator’s Tip: Use an outdoor smart plug to sync the corner beacons with your sunset automatically.
- Smart Sourcing: dense waterfall string lights (corner pack) and heavy-duty outdoor mounting tape (UV resistant).
This next PVC hack is the ultimate secret weapon for renters who want massive backdrops without drilling a single hole…
Free-Standing Fairy Lights Curtain Frameworks
Portable and free-standing structures allow fairy lights curtain installations in locations without permanent architecture, offering flexibility for seasonal displays and event-specific arrangements.
15. PVC Pipe Light Frames
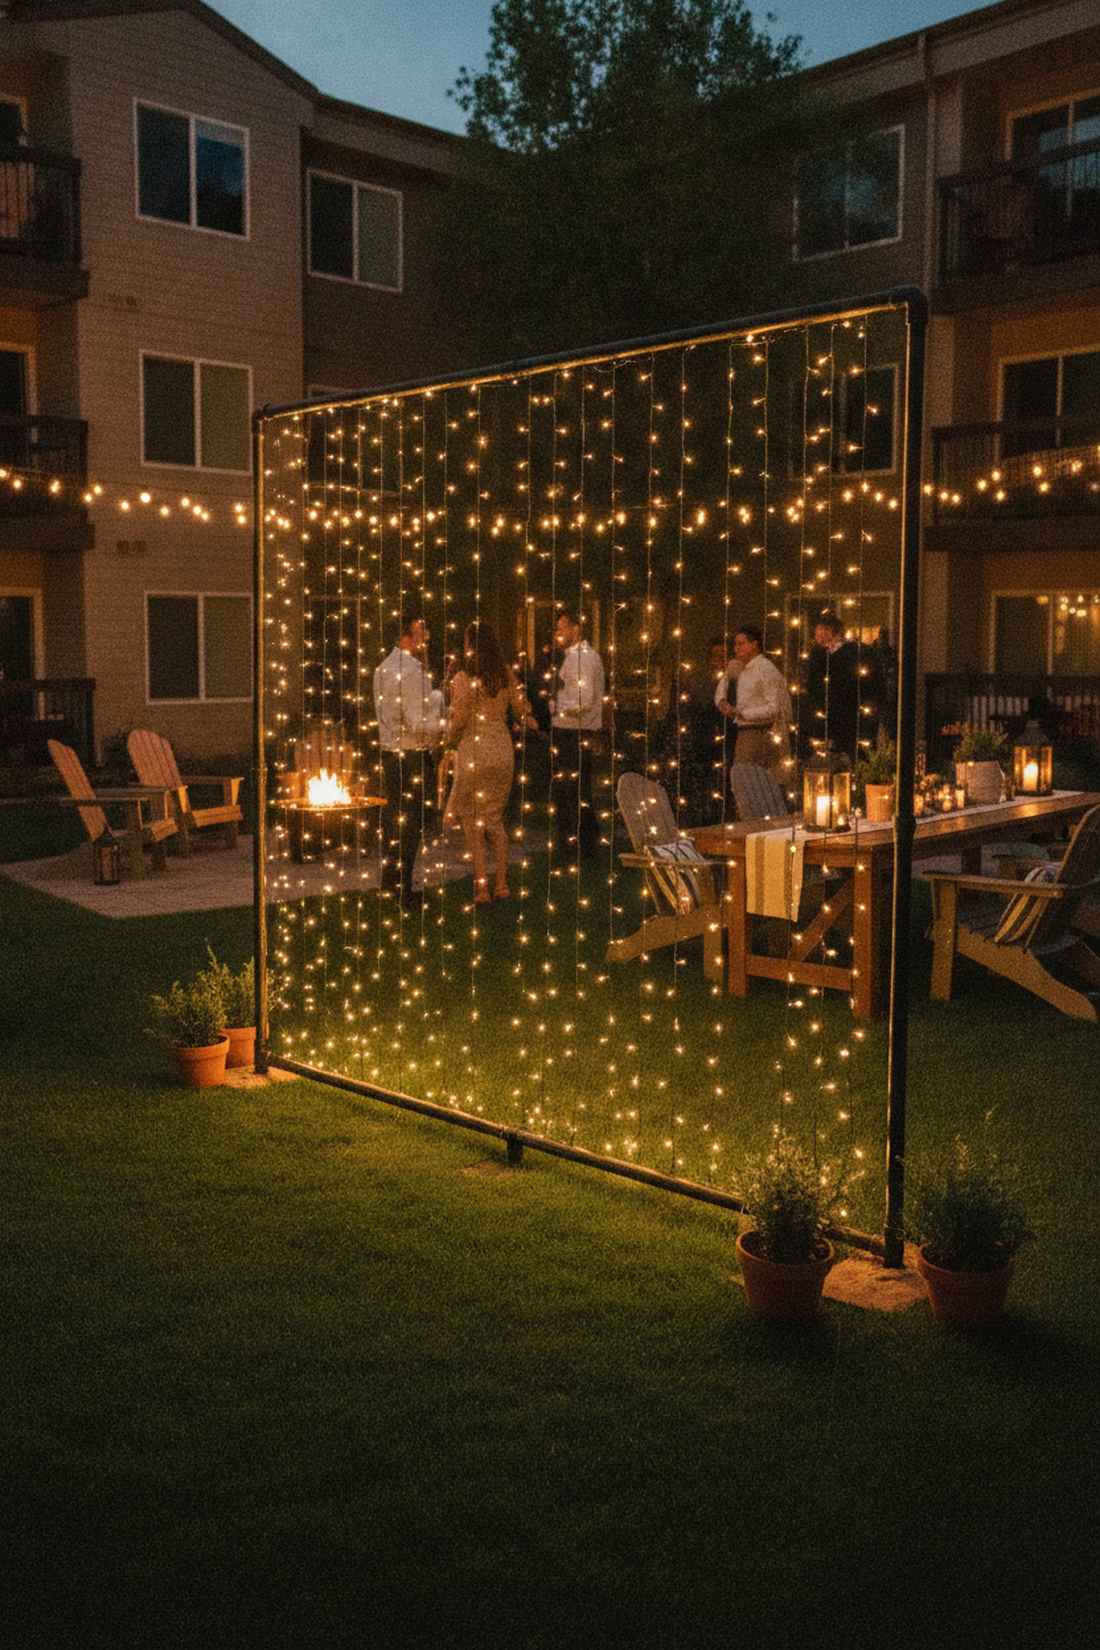
A genius, invisible skeletal system that makes walls of light float out of thin air. This freestanding modular backdrop is the absolute holy grail for renters throwing parties on bare apartment lawns.
Building heavy wooden frames is expensive and permanent, but painting cheap PVC black delivers a surprisingly premium look that vanishes in the dark. Securing fairy lights hanging from this lightweight rig lets you move the entire luminous wall wherever the party shifts.
You can build the frame and buy the lights for under $40 total. Pin this to your renter-friendly DIY hacks board immediately.
- Key Materials: 1-inch PVC pipes, black matte spray paint
- Vibe / Style: Floating modern magic
- Difficulty: Simple adult Lego building
- Budget Breakdown: PVC kit: $15 | Lights: $25
- Creator’s Tip: Fill the bottom PVC base pipes with play sand to weigh the entire structure down against strong winds.
- Smart Sourcing: pre-cut PVC backdrop stands (starter kits) and matte black outdoor spray enamel.
16. Bamboo Pole Curtain Stands
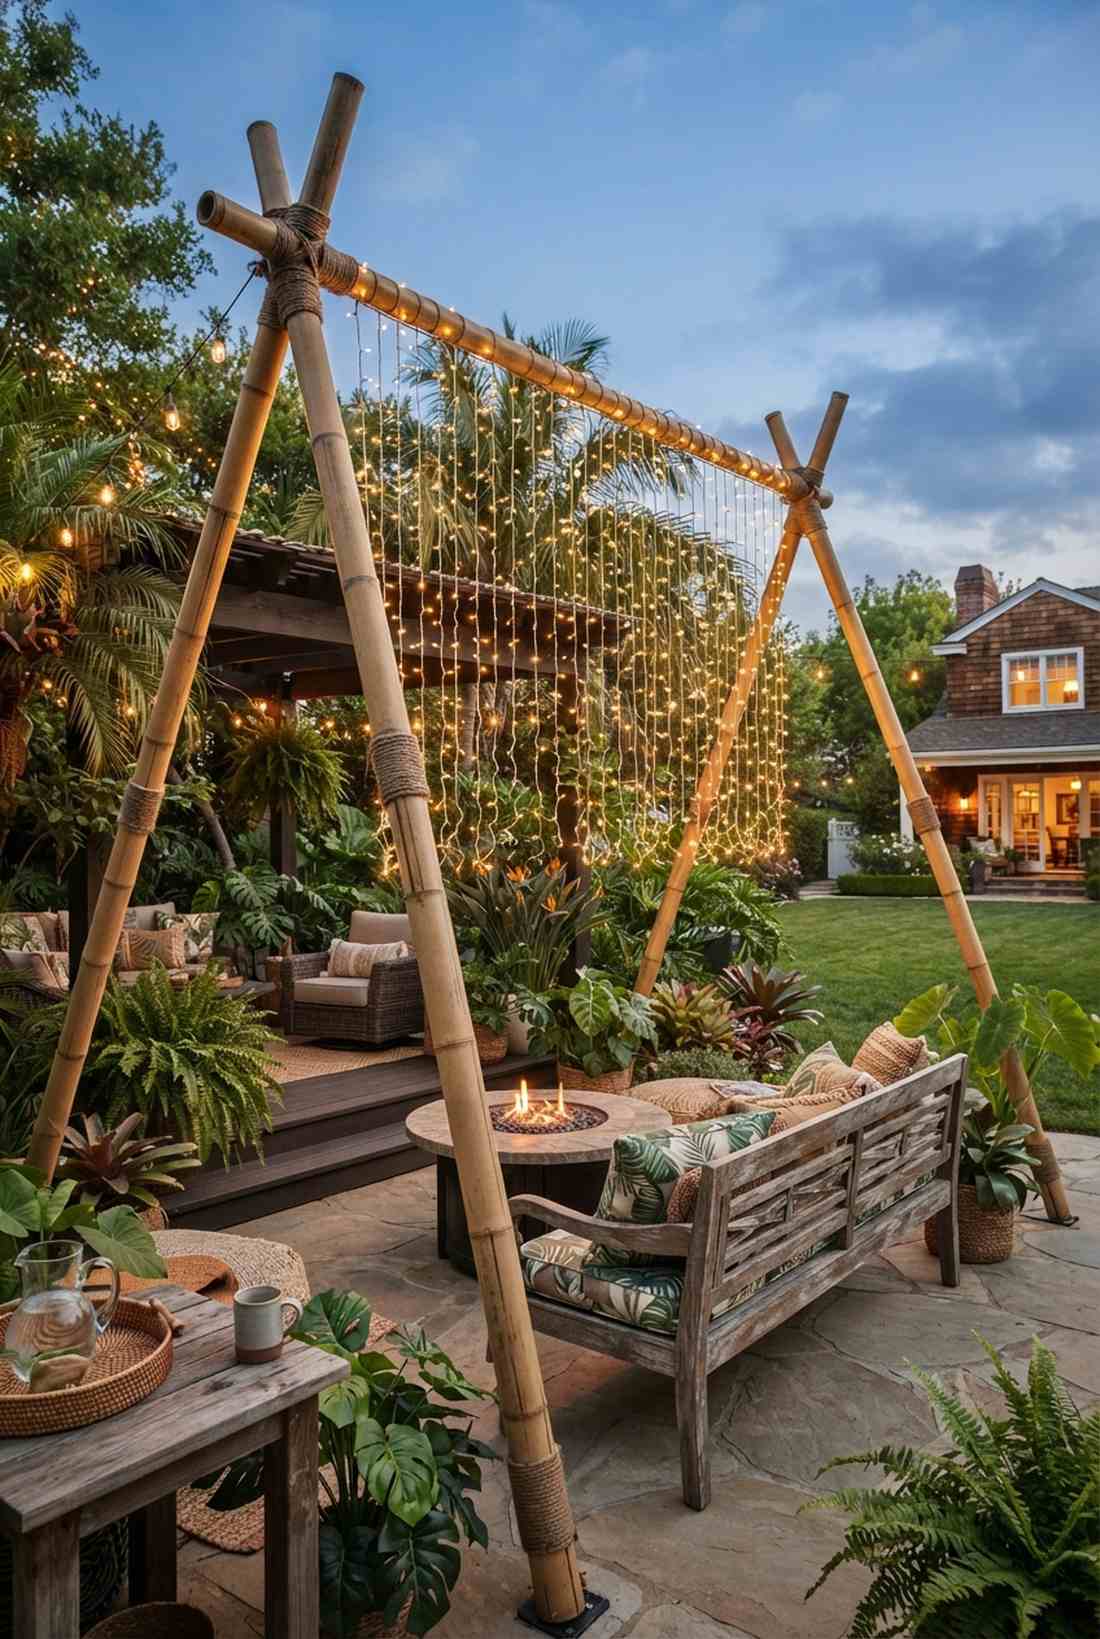
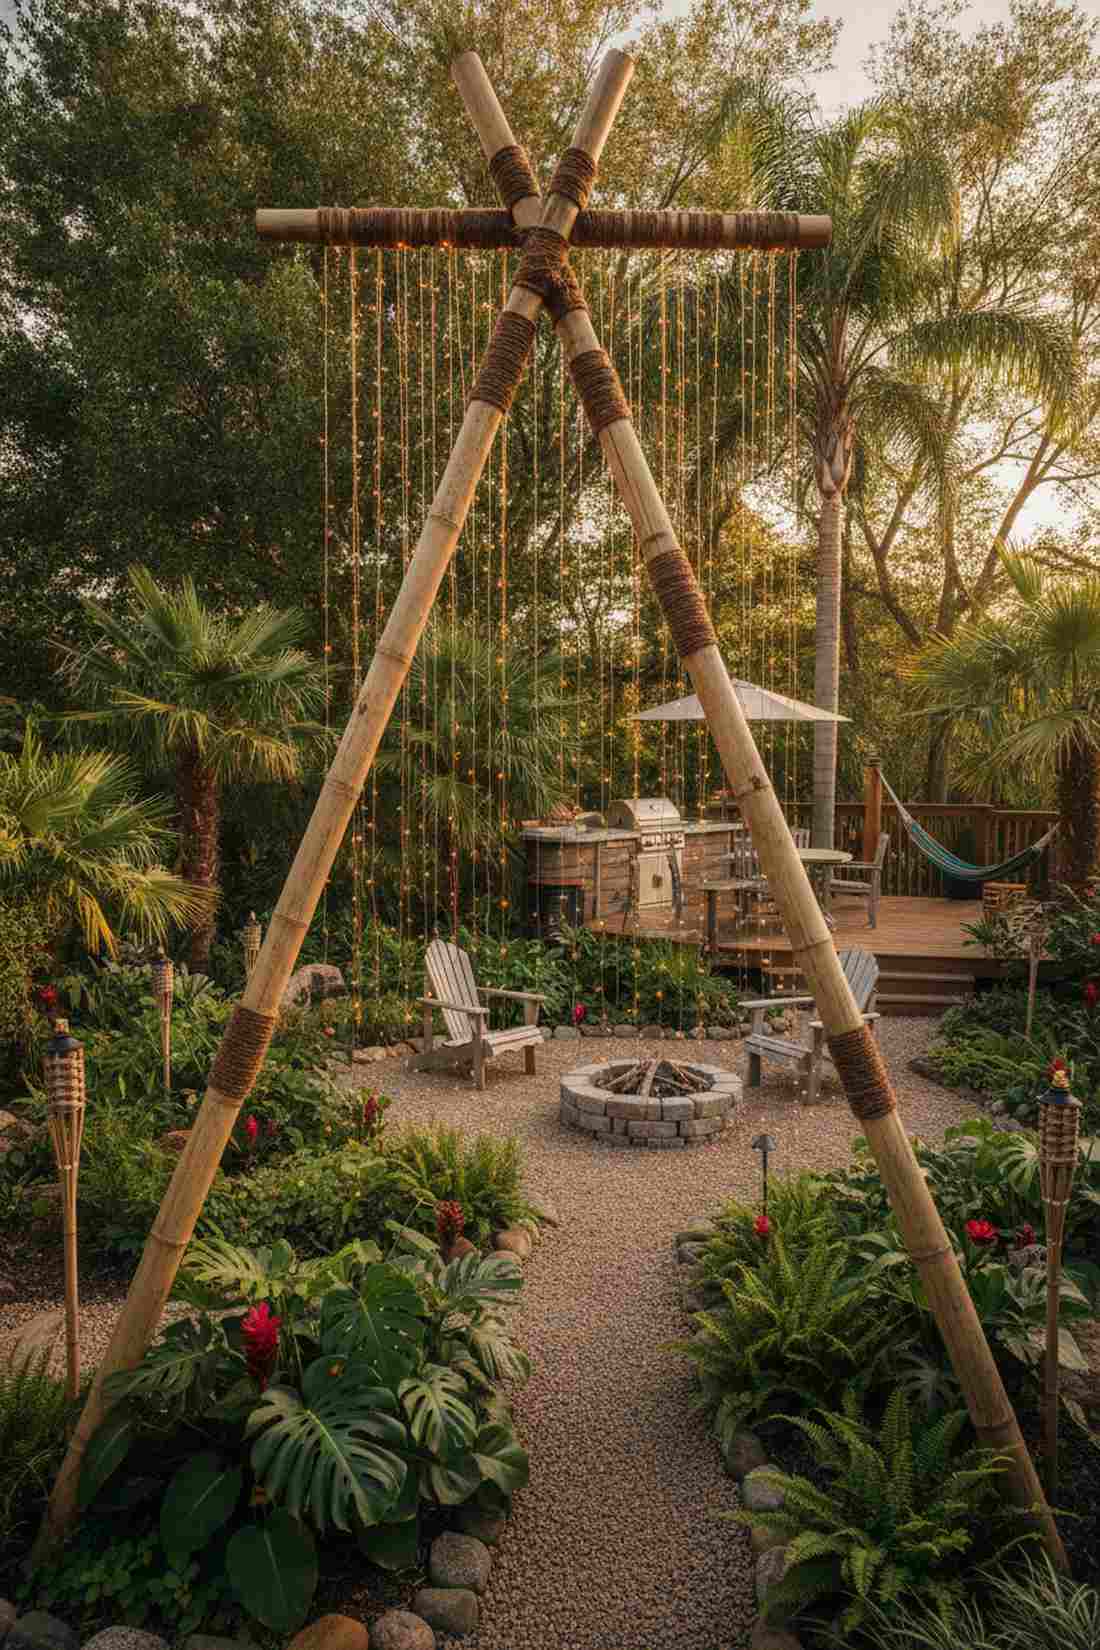
Looks perfectly at home in a lush, tropical tiki garden setting. A natural wood A-frame rig brings immense rustic charm while secretly supporting massive cascades of glowing LEDs.
Metallic poles often clash with organic garden beds, but integrating a fairy lights curtain onto thick bamboo poles gives a designer-level finish that looks intentional even during the day. Lashing the joints with dark jute twine adds an earthy, handcrafted texture.
Building a rugged bamboo support costs around $35. It’s highly recommended if your yard features heavy tropical or bohemian landscaping.
- Key Materials: Thick bamboo poles, weather-treated jute twine
- Vibe / Style: Rustic tropical getaway
- Difficulty: Moderate lashing skills needed
- Budget Breakdown: Bamboo: $15 | Twine/Lights: $20
- Creator’s Tip: Seal the bamboo tips with clear glue to prevent splitting and rot during heavy rain seasons.
- Smart Sourcing: stout garden bamboo poles (bulk pack) and UV-coated jute lashing twine.
17. Shepherd Hook Light Towers
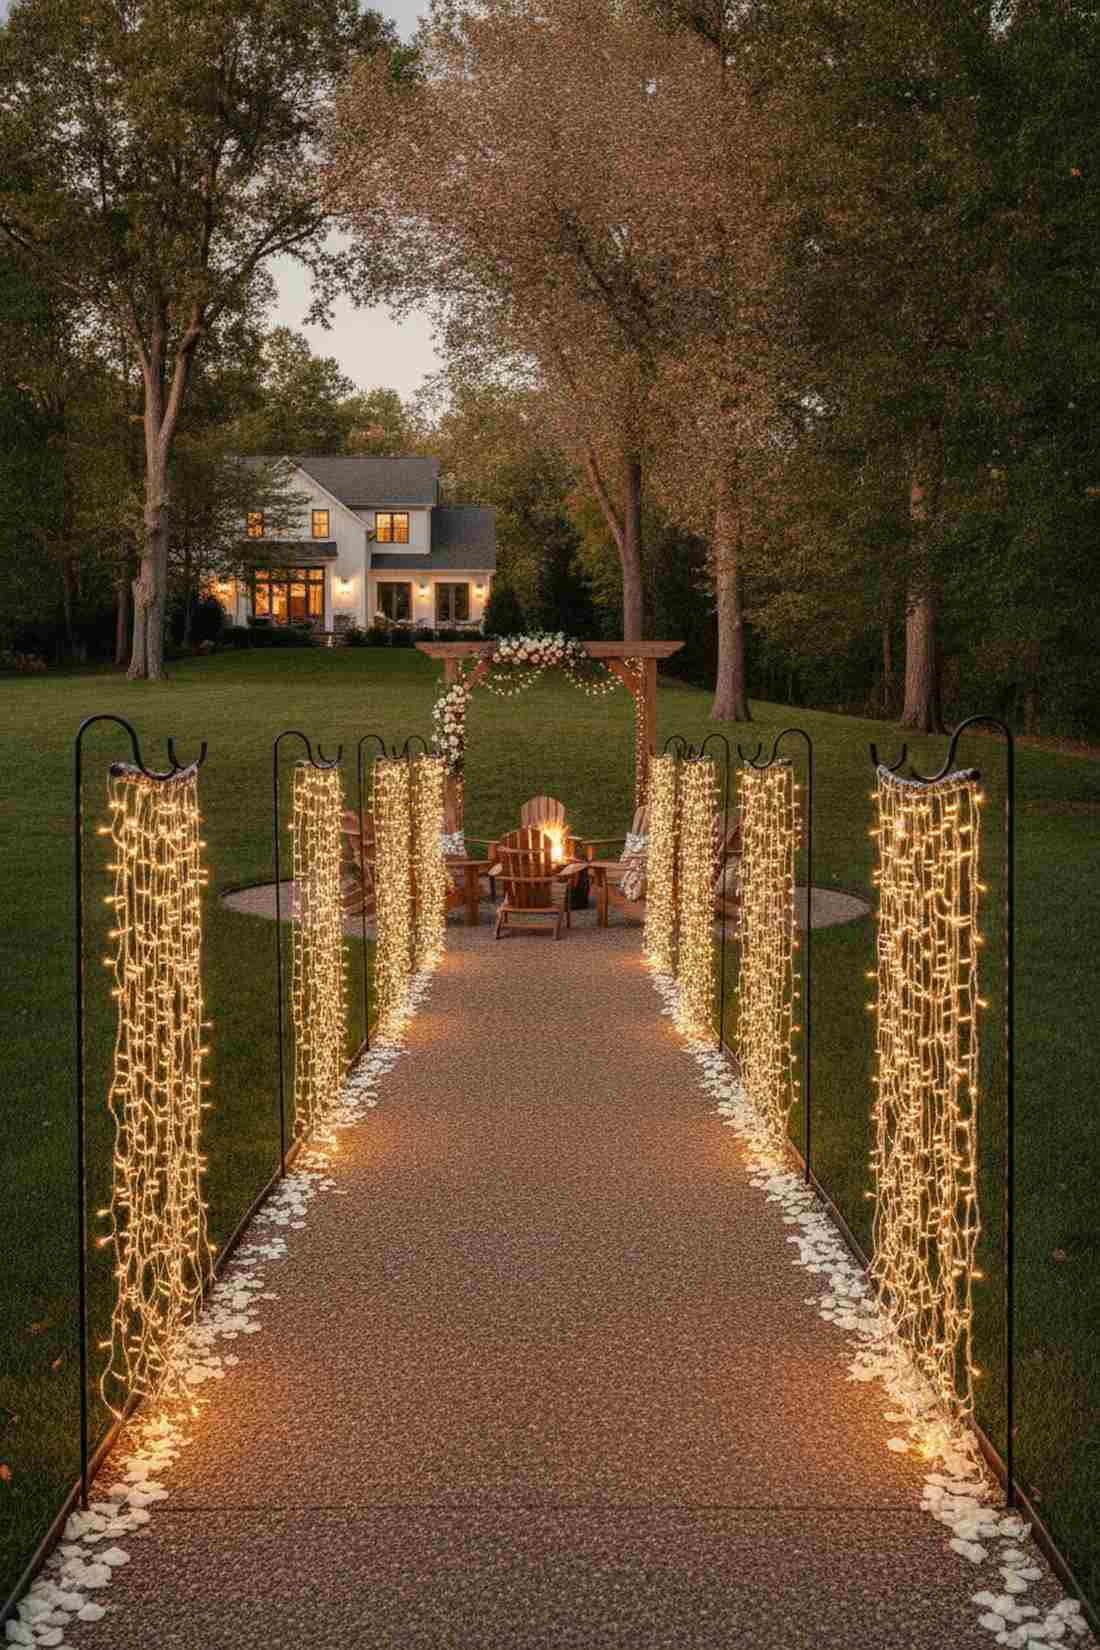
Feels like a vintage carnival pathway magically appeared on your lawn. This instant pathway suspension strings dazzling curtains alongside your walkways without requiring a single power tool.
Setting up permanent poles is a headache, but bridging heavy-duty hooks with paracord looks far more expensive than it is. Staking these hooks and clipping fairy lights hanging between them creates a rapid pop-up venue for last-minute backyard weddings.
A 15-foot suspended walkway sets you back about $50. Save this to your outdoor wedding or event planning board for rapid setup ideas.
- Key Materials: Tall shepherd hooks, black paracord, S-clips
- Vibe / Style: Whimsical event pathway
- Difficulty: Super fast assembly
- Budget Breakdown: Hooks: $30 | Cord & Lights: $20
- Creator’s Tip: Stagger the hooks in a slight zigzag pattern to give the curtain more depth and wind resistance.
- Smart Sourcing: heavy-duty shepherd hooks (4-pack) and black nylon suspension paracord.
18. Tension Rod Installations
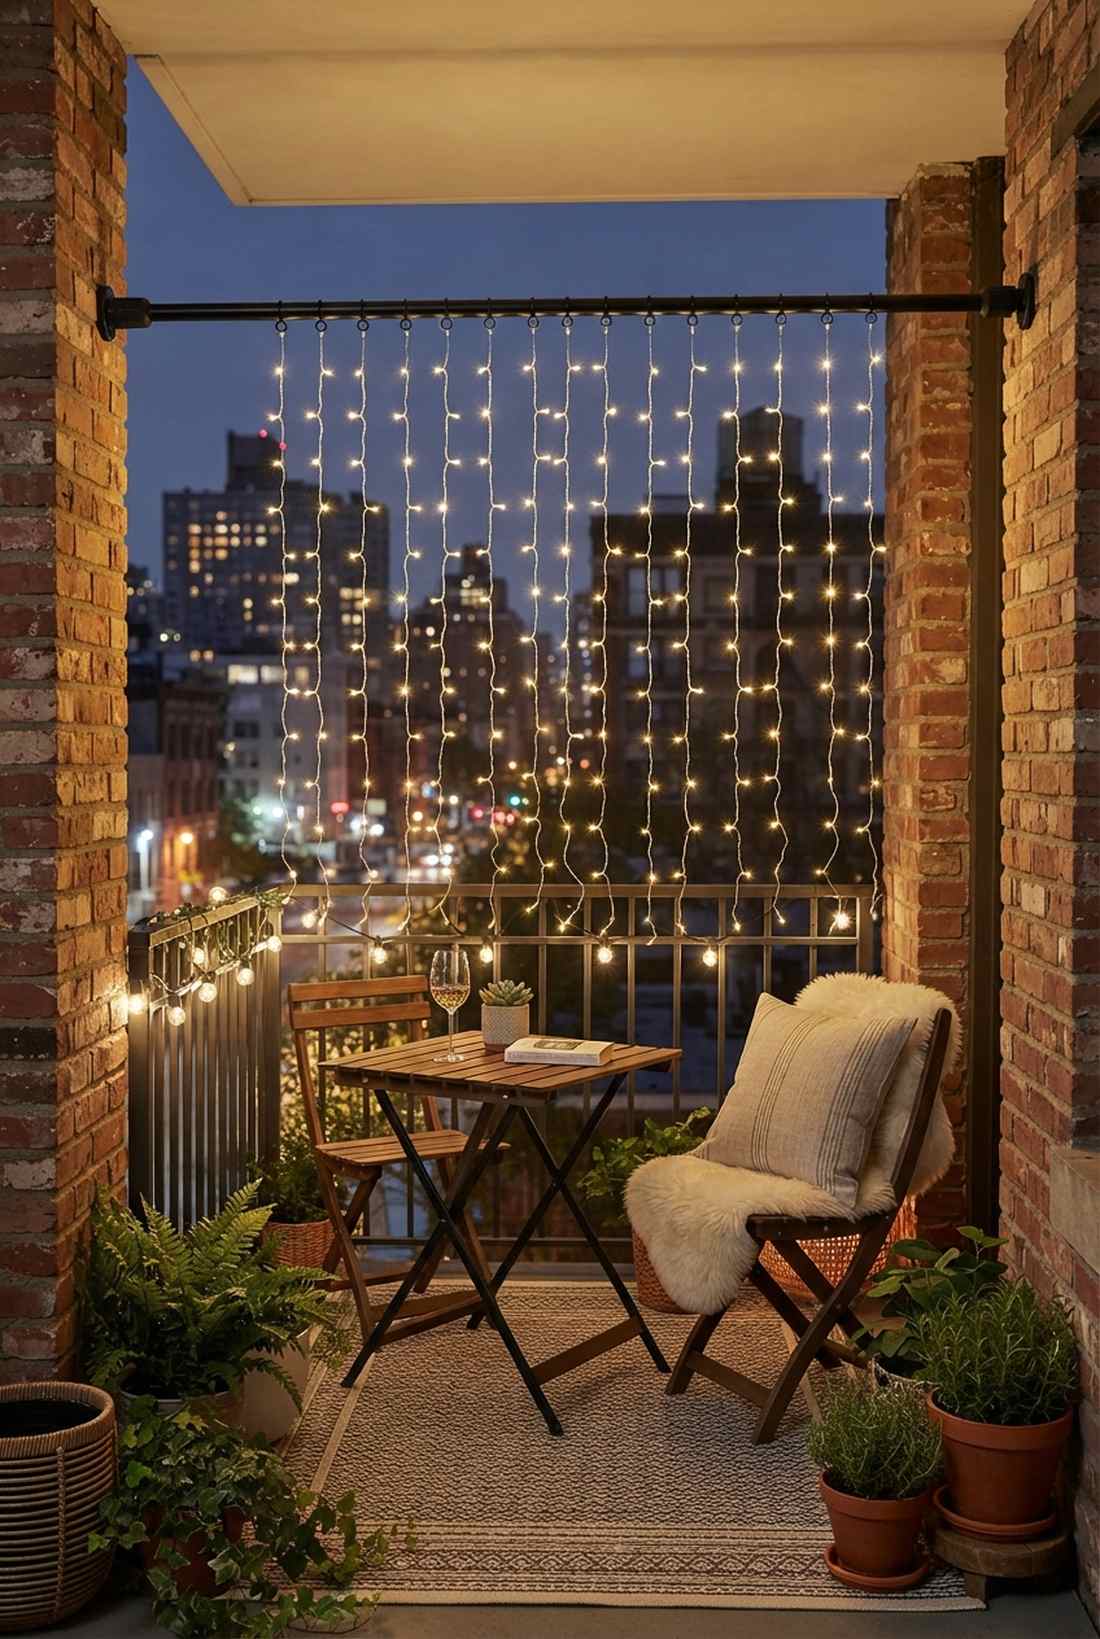
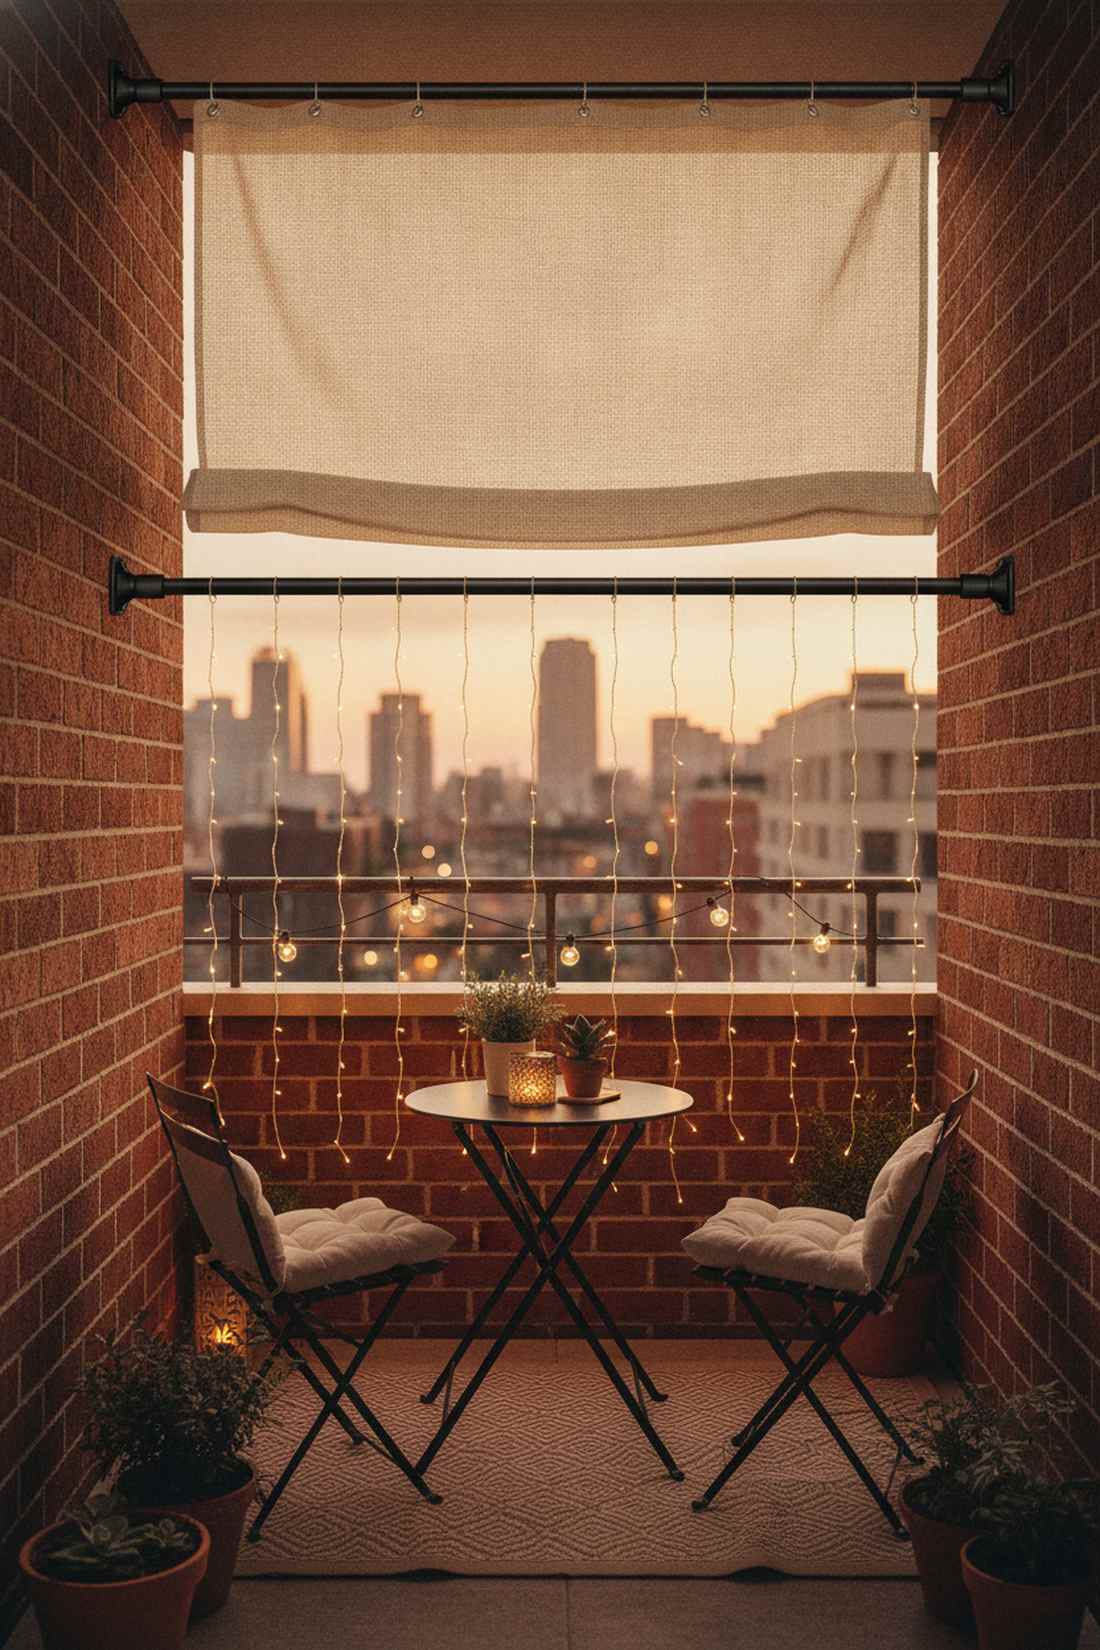
The ultimate zero-damage hack that transforms awkward balcony gaps. A temporary floating canopy snaps securely between brick columns, creating an instant privacy veil for tiny apartment patios.
Most renters give up on outdoor lighting because of strict lease rules, but securing a fairy lights curtain onto a heavy-duty shower rod delivers a flawless, drill-free aesthetic. The horizontal pressure safely wedges the lights overhead, turning dead space into a glowing oasis.
You can execute this genius balcony upgrade for just $25. Pin this if you are decorating a strict rental or dorm balcony.
- Key Materials: Outdoor tension rods, curtain ring clips
- Vibe / Style: Cozy urban balcony
- Difficulty: 5-minute setup
- Budget Breakdown: Tension rod: $15 | Light sheet: $10
- Creator’s Tip: Use rods with rubberized ends so they grip securely to stucco or brick without slipping in humidity.
- Smart Sourcing: rust-proof outdoor tension rods and usb-powered fairy curtain drops.
19. Tripod-Style Light Stands
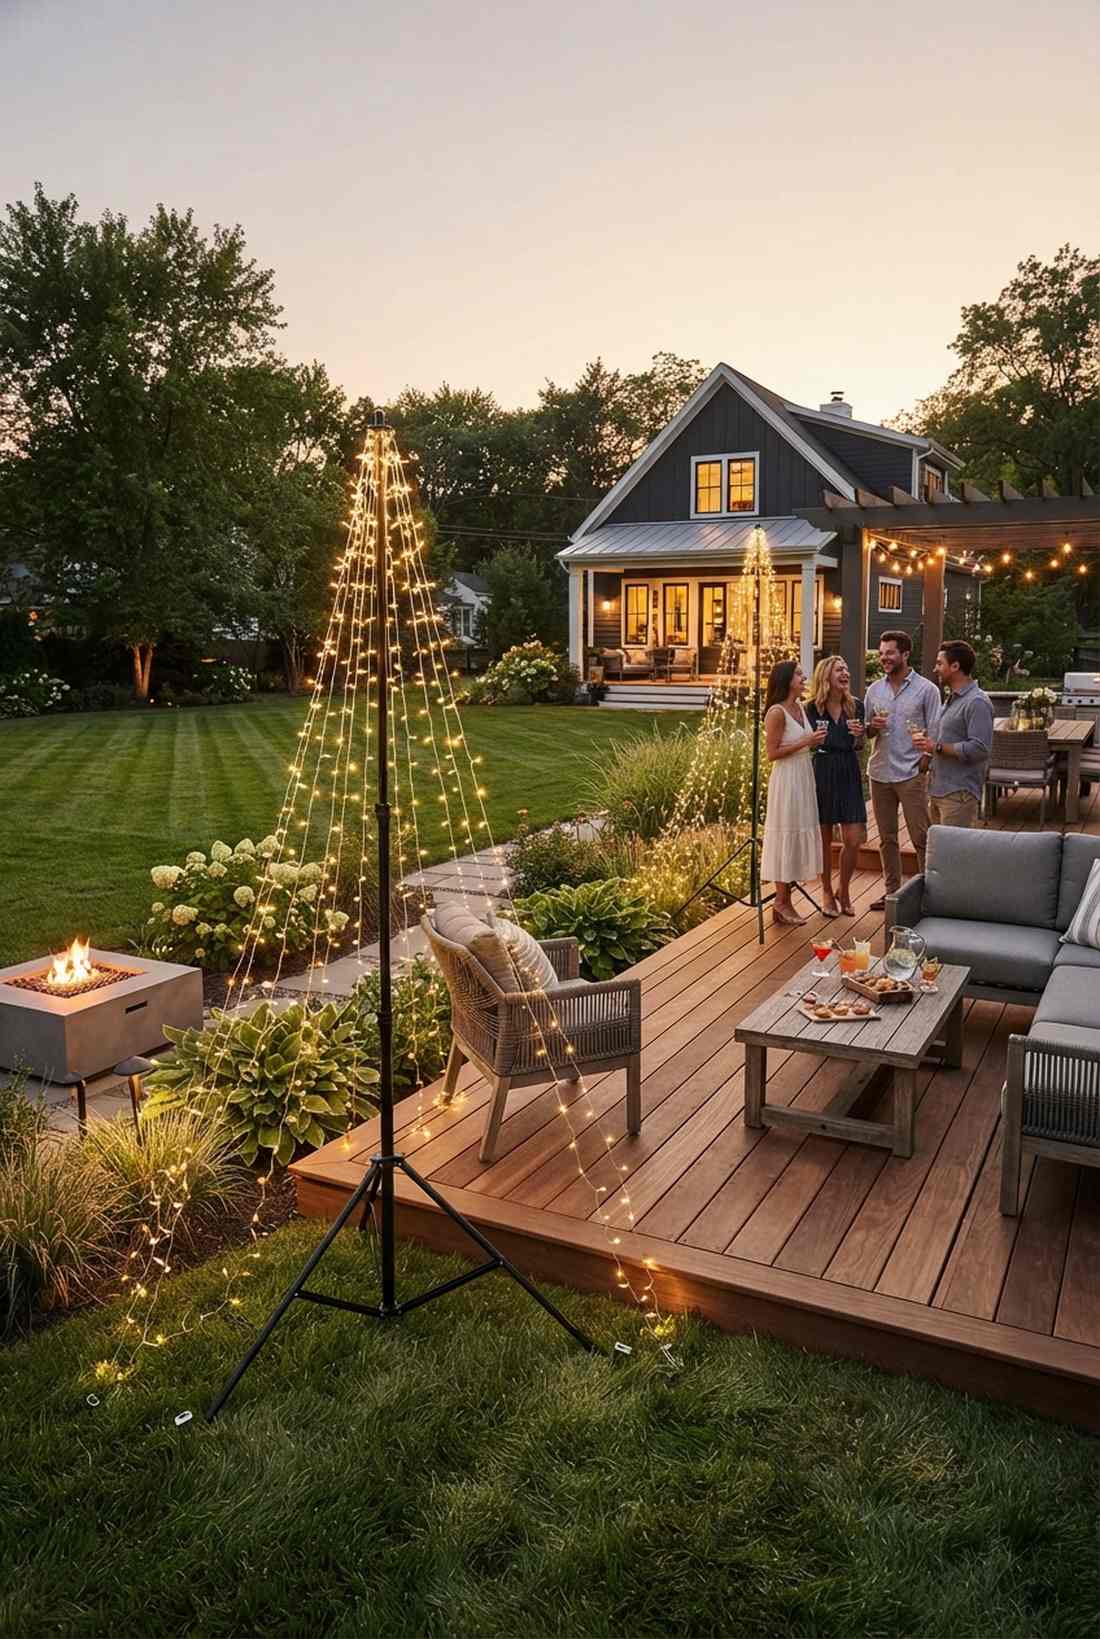
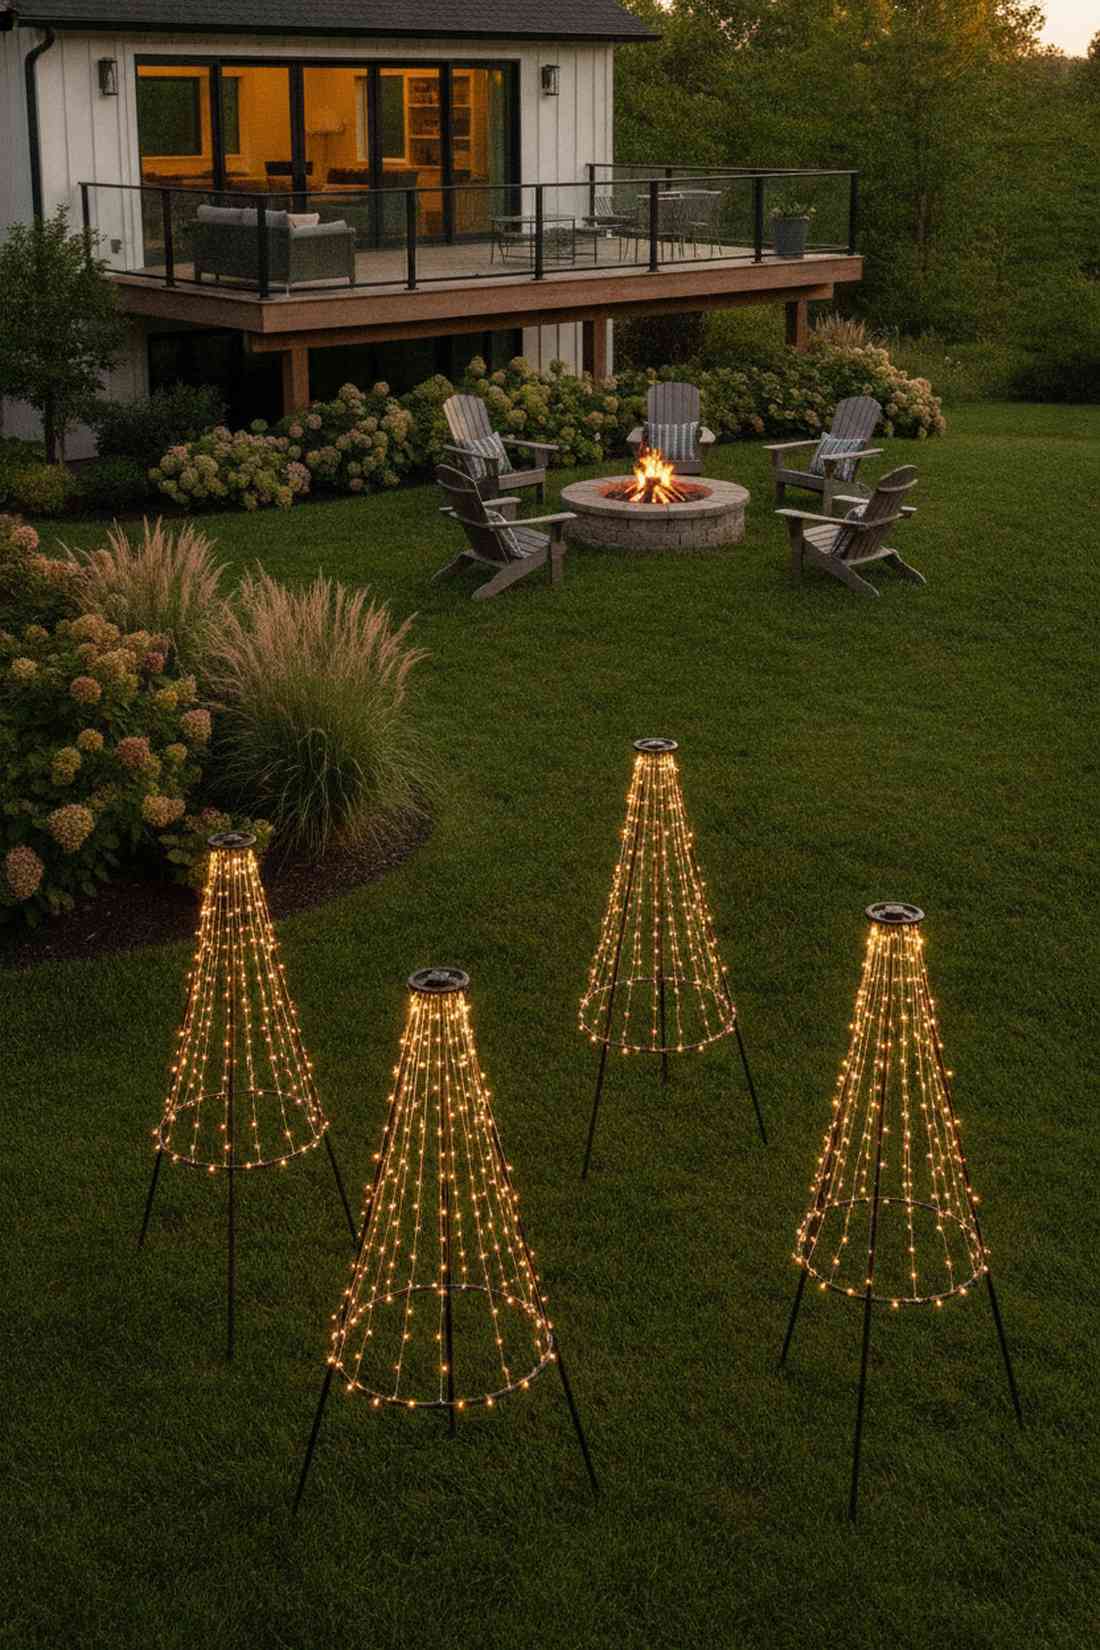
Instantly provides a sculptural, futuristic light column exactly where you need it. These three-legged movable light pillars act as glowing art installations, perfect for illuminating dark garden corners during cocktail hours.
Flimsy ground stakes easily topple over, but adapting photography stands for your fairy lights hanging setup gives a designer-level finish and unbreakable stability. Tenting the lights over the apex of the tripod creates a chic, glowing teepee effect.
Converting a basic stand costs around $35. It’s highly recommended for people who constantly rearrange their outdoor furniture.
- Key Materials: Metal tripods, umbrella light adapters
- Vibe / Style: Modern pop-up sculpture
- Difficulty: Extremely easy
- Budget Breakdown: Tripod base: $20 | Cascading lights: $15
- Creator’s Tip: Stake the tripod feet into the grass with tent pegs if you’re leaving them out during a breezy evening.
- Smart Sourcing: portable photography light stands (2-pack) and ring-top cascading fairy lights.
Before you drill into your house, look at this next commercial suspension trick—it’s how professional event planners cover massive yards without sag…
20. Cable Suspension Systems
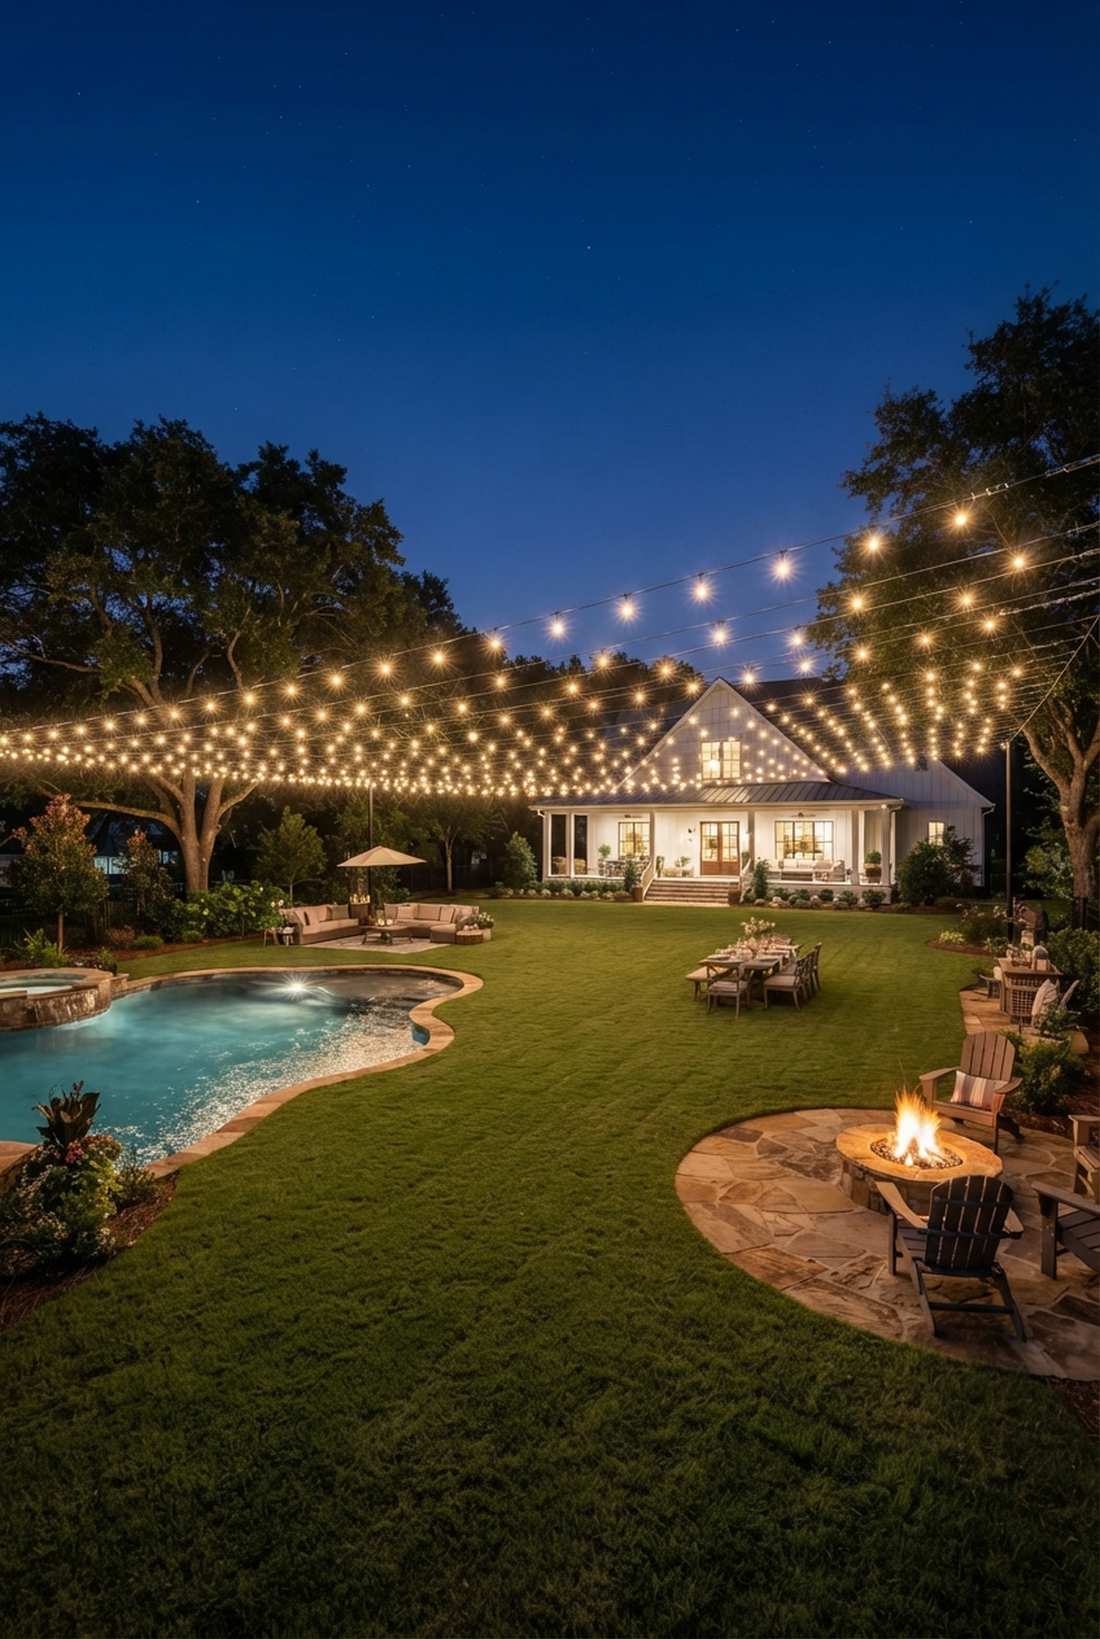
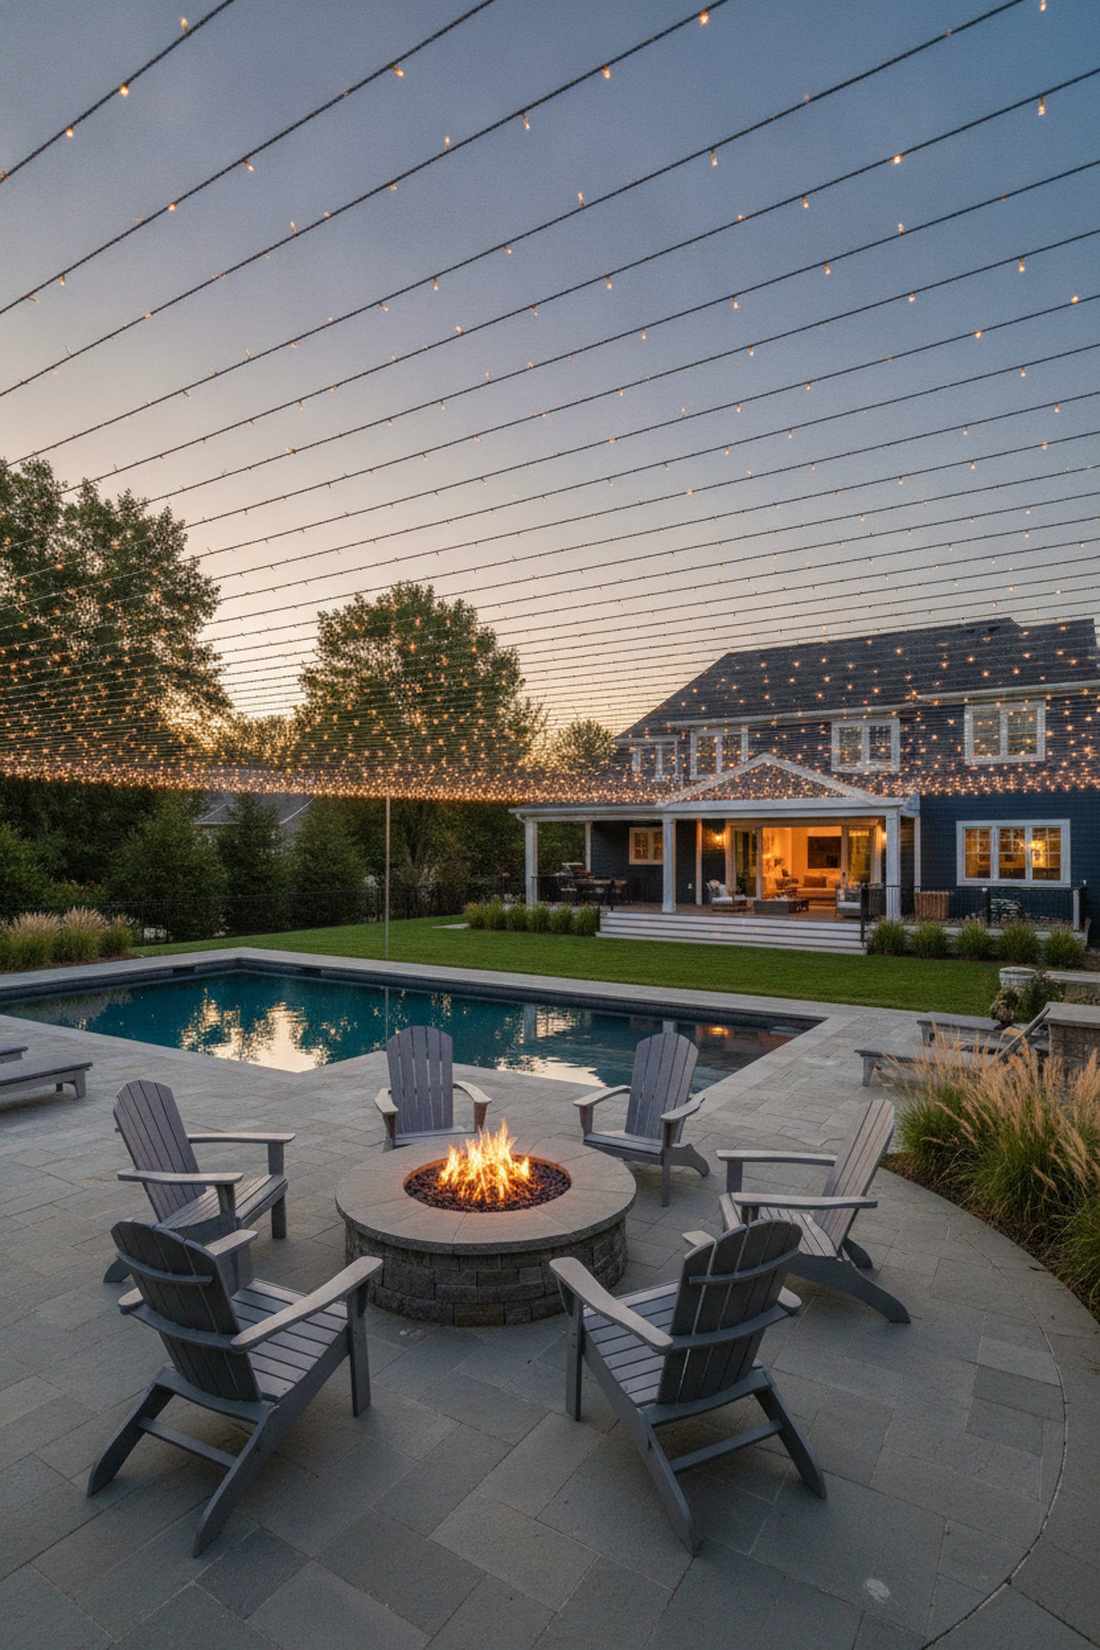
Creates a breathtaking, floating ceiling of light across massive open yards. A turnbuckle tension grid provides professional-grade support, allowing you to hang heavy curtains completely unsupported across the lawn.
Standard strings inevitably sag and look pathetic, but utilizing vinyl-coated steel cables delivers a remarkably premium finish that stays razor-straight year-round. This setup handles serious weight, letting you cross a massive fairy lights curtain directly over your pool or fire pit.
A professional tension system costs roughly $60 to assemble. Save this to your permanent backyard upgrade board.
- Key Materials: Steel cable, turnbuckles, carabiners
- Vibe / Style: Professional event venue
- Difficulty: Advanced DIY (requires tools)
- Budget Breakdown: Cable kit: $30 | Commercial lights: $30
- Creator’s Tip: Always use a turnbuckle in your line; it allows you to easily crank the wire tight again when temperatures fluctuate.
- Smart Sourcing: commercial steel cable suspension kits (outdoor) and stainless steel outdoor carabiners (bulk pack).
Tree and Natural Element Displays
Natural elements like trees, large shrubs, and existing landscape features provide organic frameworks for curtain light installations that integrate illumination seamlessly into garden ecosystems.
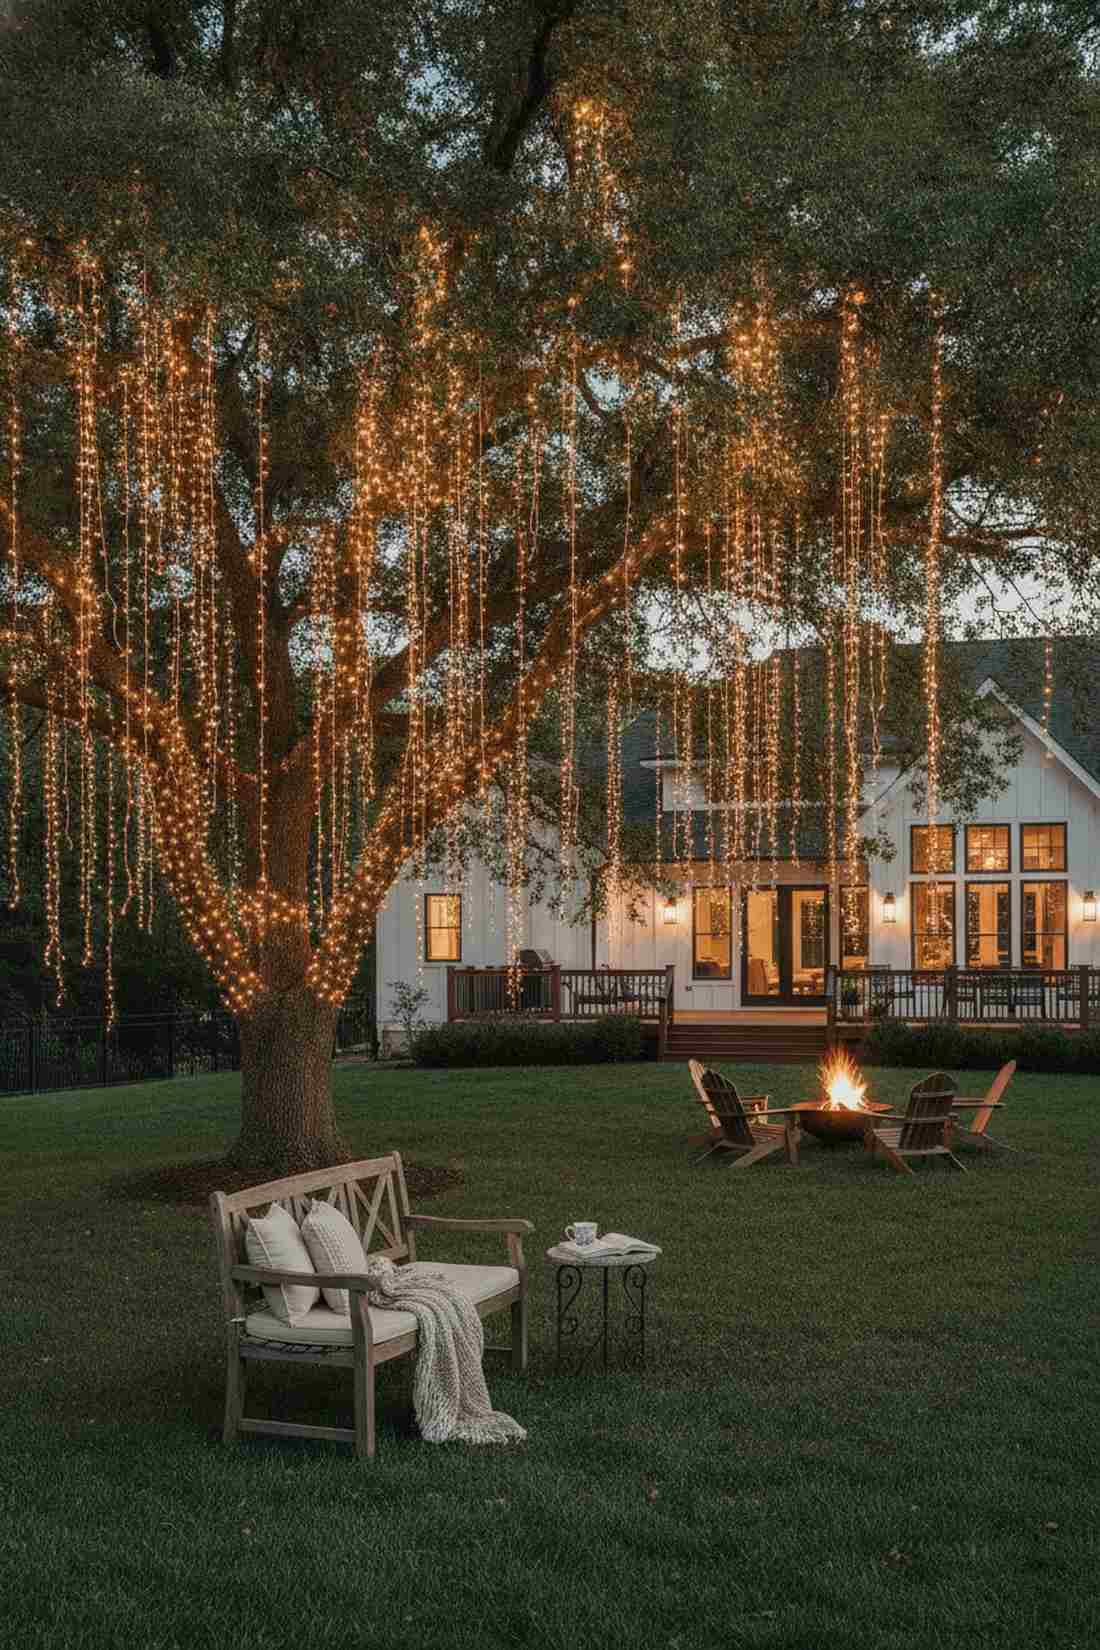
21. Trunk-to-Ground Curtains
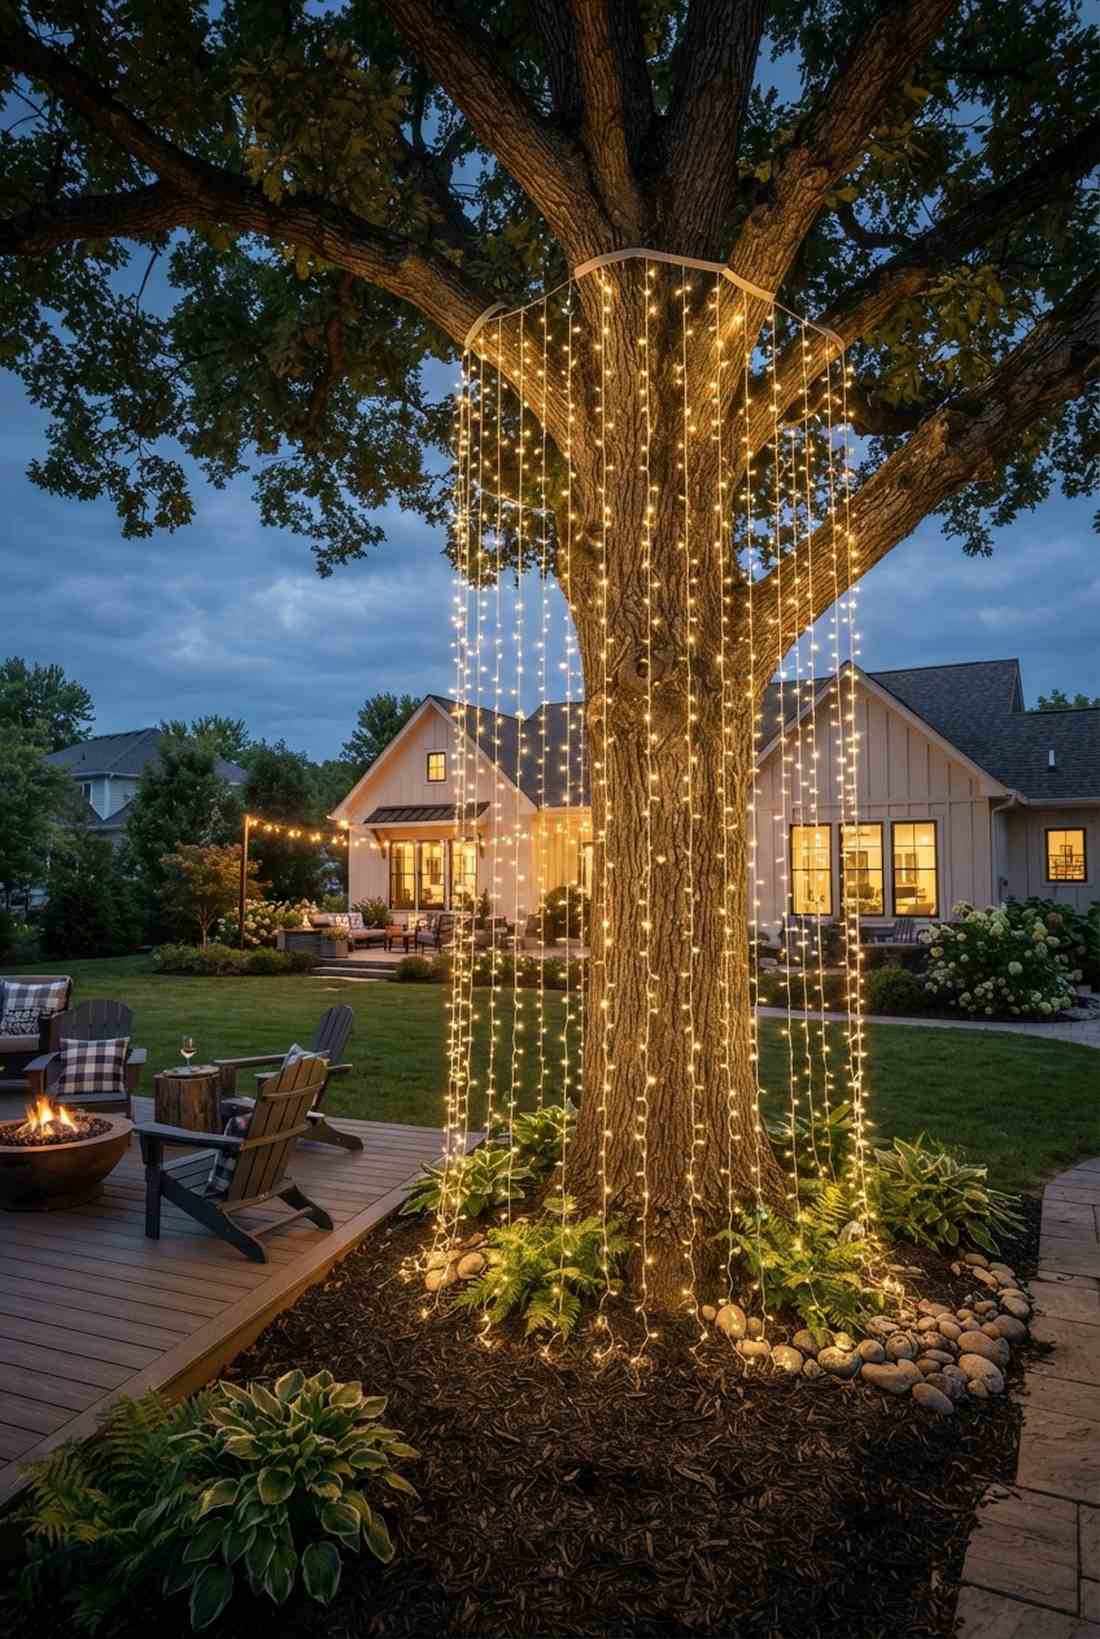
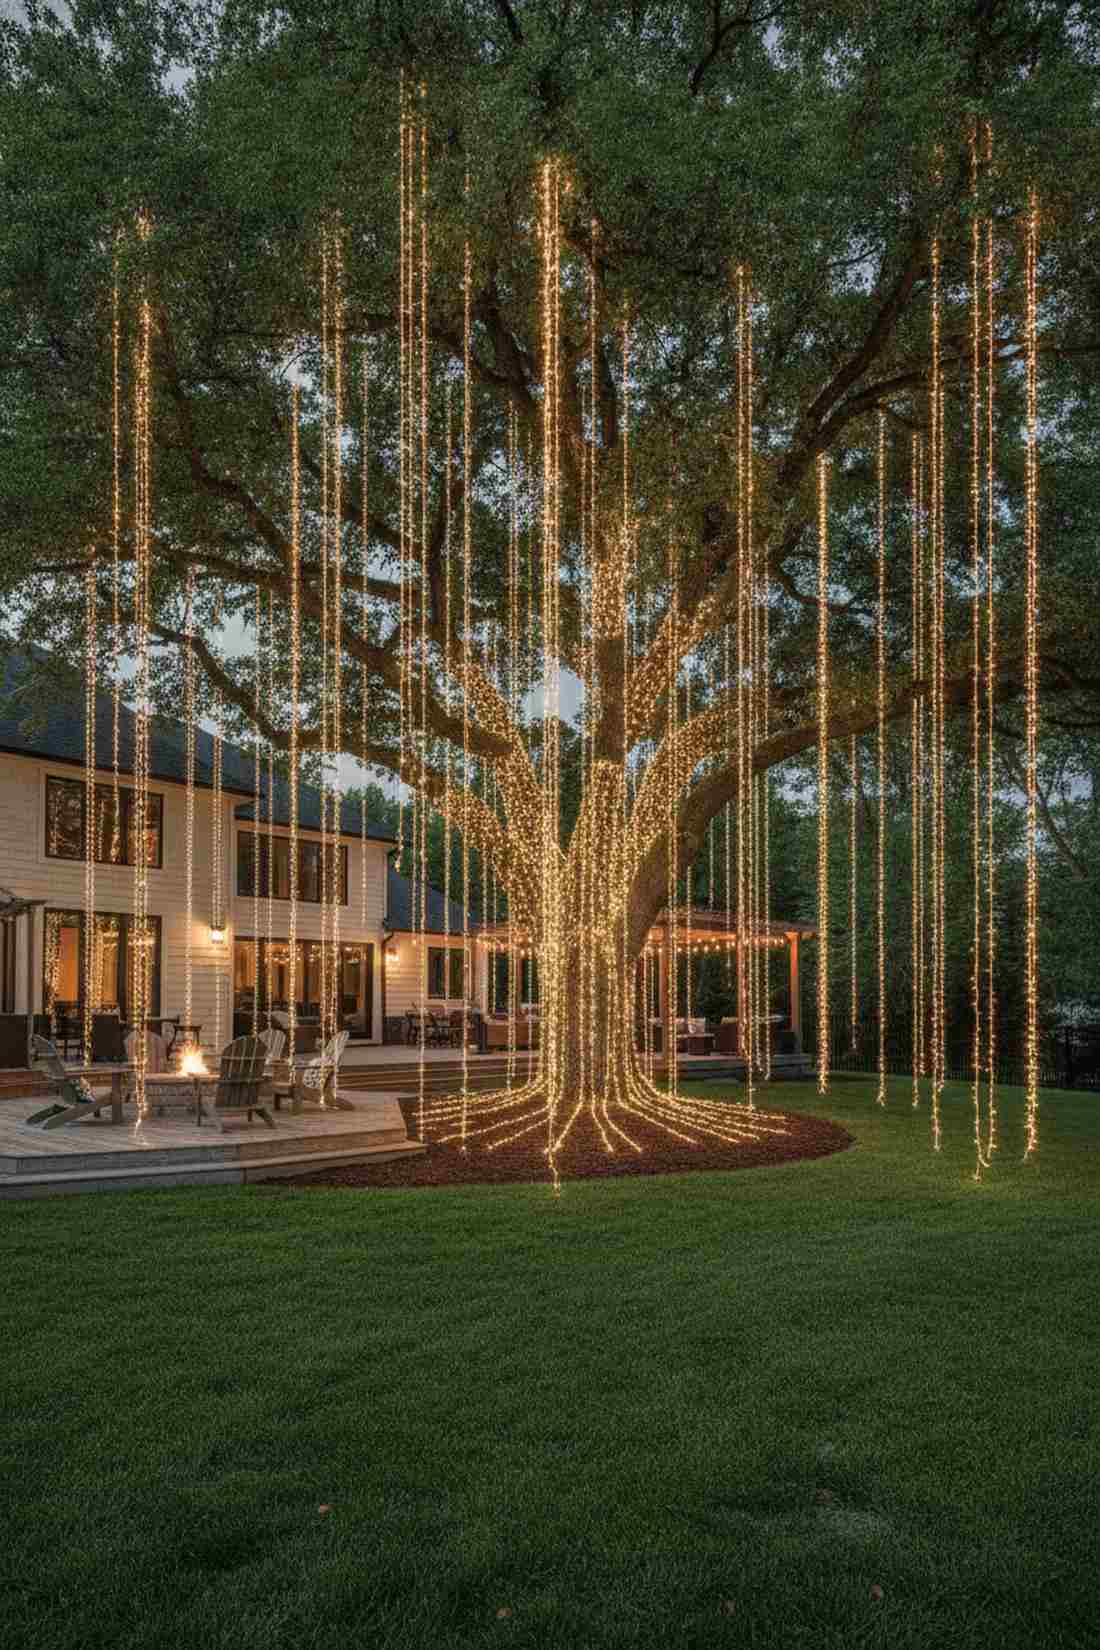
Feels exactly like a glowing weeping willow straight out of a fantasy novel. An illuminated canopy drop highlights massive oak or maple branches, raining light all the way down to the mulch bed.
Wrapping trunks in tight spirals is outdated and harms the bark, but letting a fairy lights curtain cascade freely down the trunk looks far more expensive than it is. Using tree-safe strapping preserves the health of the wood while creating a towering column of magic.
You can dress a large backyard tree for around $45. Pin this if you want to turn a boring backyard tree into a show-stopping evening centerpiece.
- Key Materials: Long-drop LED strings, tree-safe canvas straps
- Vibe / Style: Fantasy forest magic
- Difficulty: Moderate (requires a tall ladder)
- Budget Breakdown: Long drops: $35 | Tree straps: $10
- Creator’s Tip: Allow the bottom of the strings to pool slightly on the ground to amplify the magical waterfall illusion.
- Smart Sourcing: extra-long cascading fairy lights (20ft) and adjustable tree-safe hammock straps.
22. Multi-Tree Connection Curtains
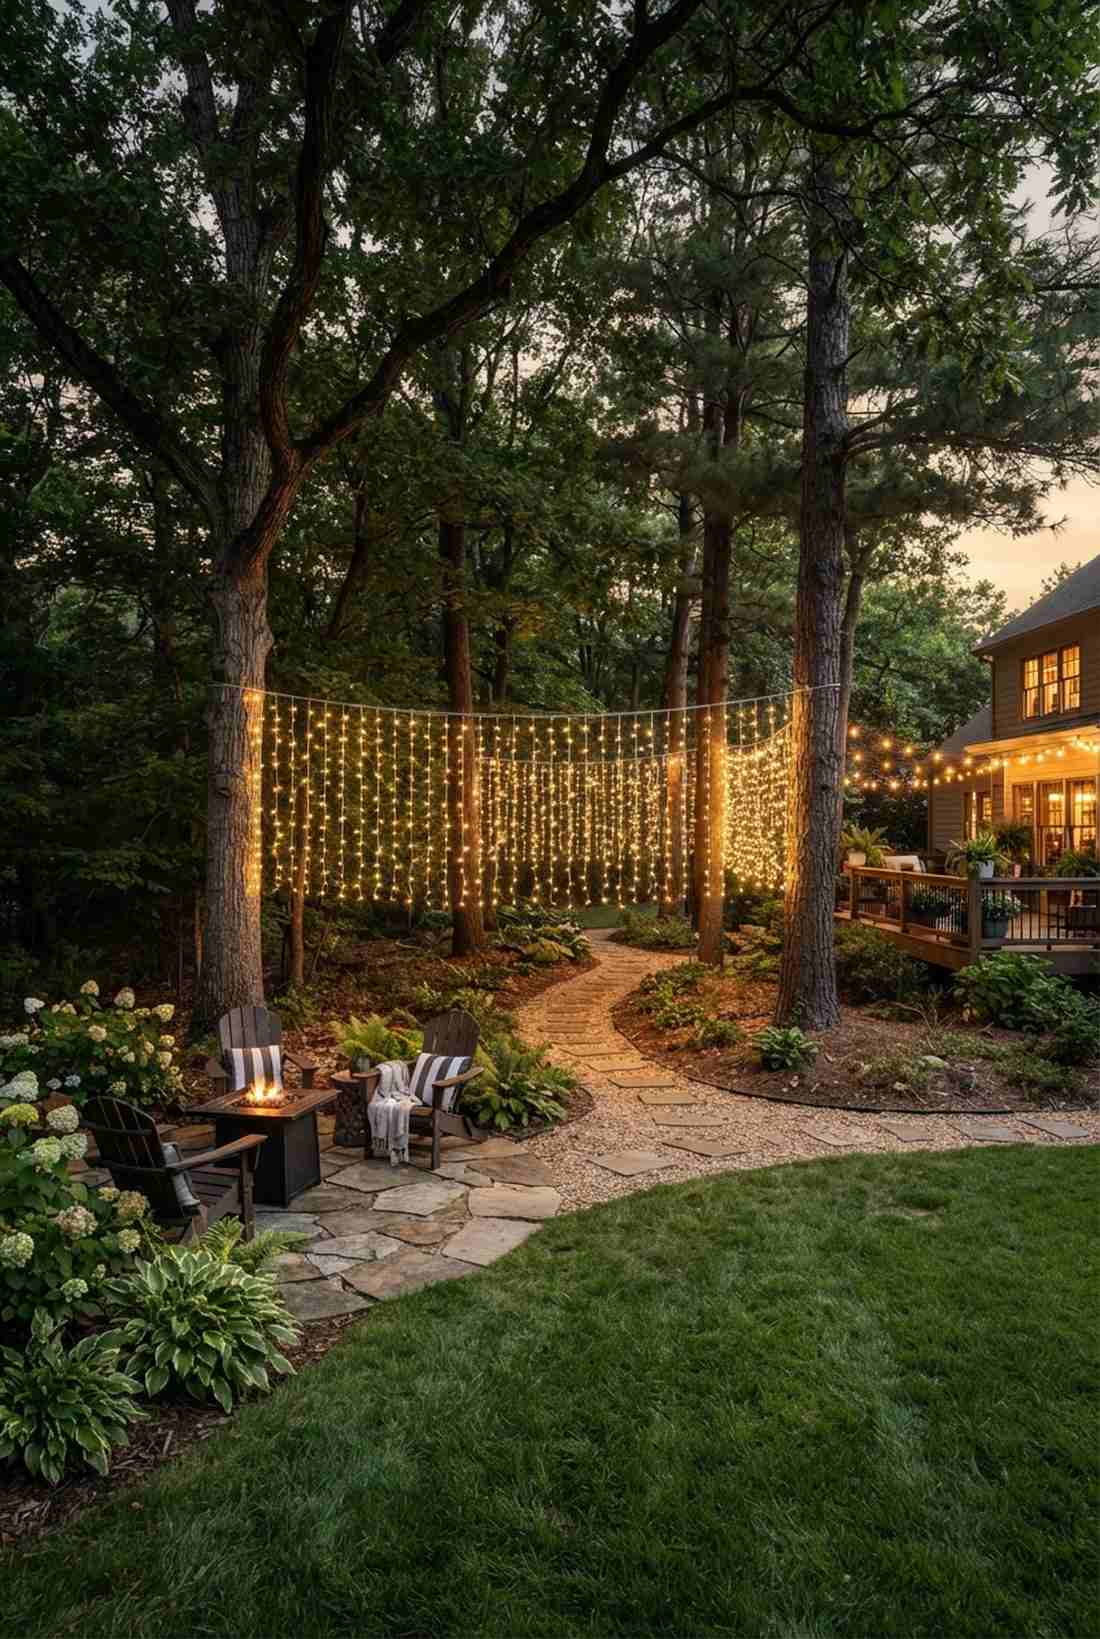
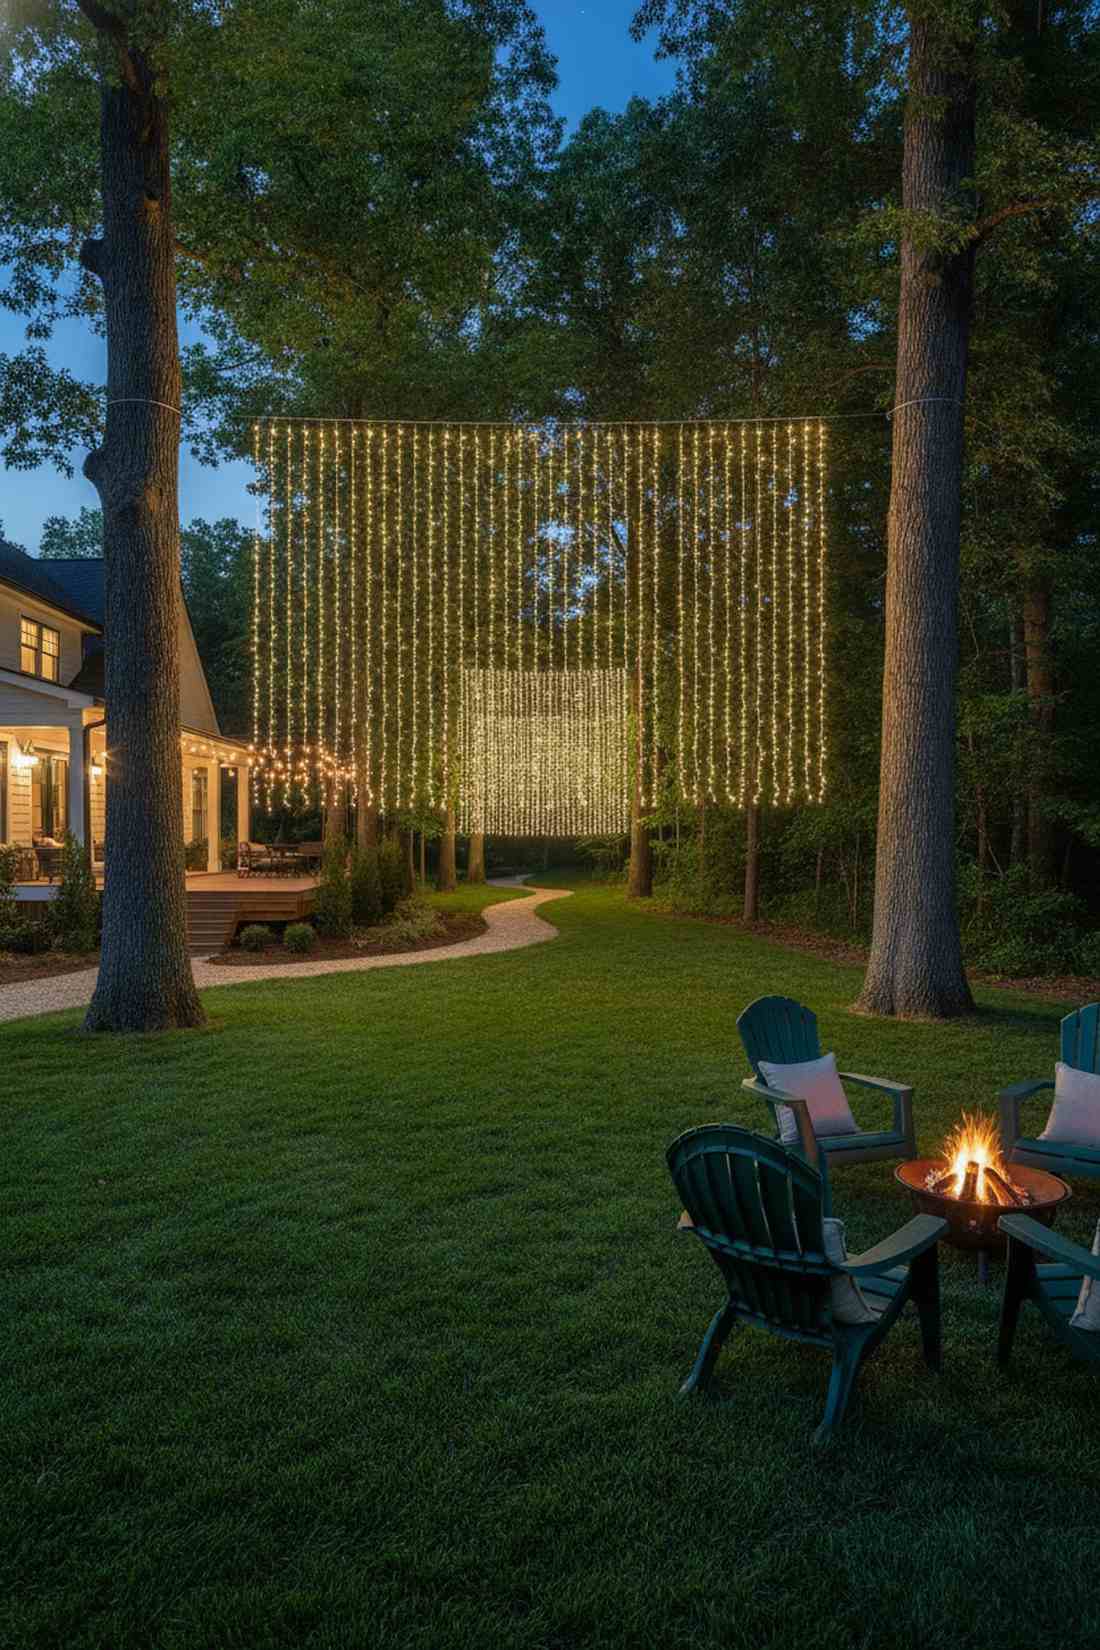
Transforms a dark, scary wooded patch into a safe, glowing outdoor room. A suspended forest wall links multiple trunks together, carving out a luminous pathway through deeply naturalized garden areas.
Randomly stringing lights between branches causes snap hazards during storms, but hanging fairy lights hanging from a dedicated high-tension guide wire gives a designer-level finish. This solid line acts as an architectural boundary, dividing wild nature from your manicured lawn.
Connecting two large trees securely runs about $55. It’s a fantastic solution for heavily wooded, shadow-heavy properties.
- Key Materials: Guide wire kits, connectable curtain sections
- Vibe / Style: Defined woodland retreat
- Difficulty: Moderate
- Budget Breakdown: Wire kit: $25 | Light sections: $30
- Creator’s Tip: Keep the hanging line at least 8 feet high so deer and tall guests can walk underneath without snagging.
- Smart Sourcing: heavy-duty guide wire kits (UV coated) and connectable outdoor string sections (bulk pack).
23. Shrub Backdrop Curtains
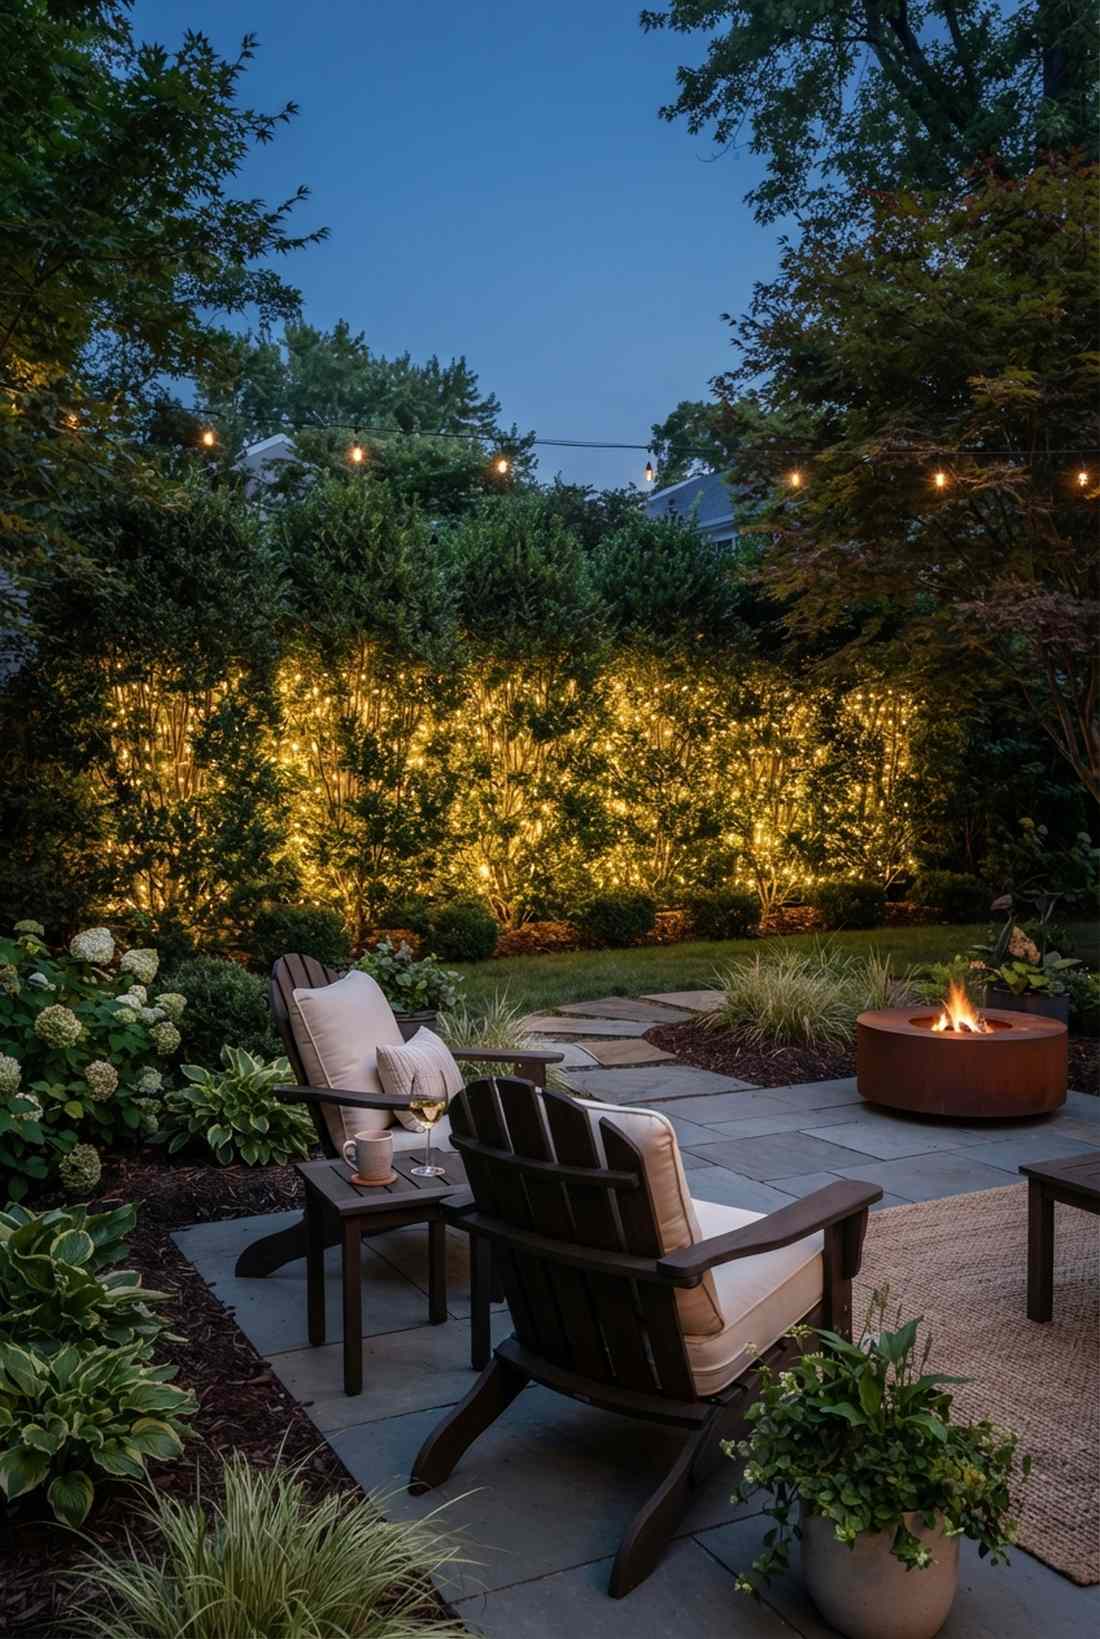
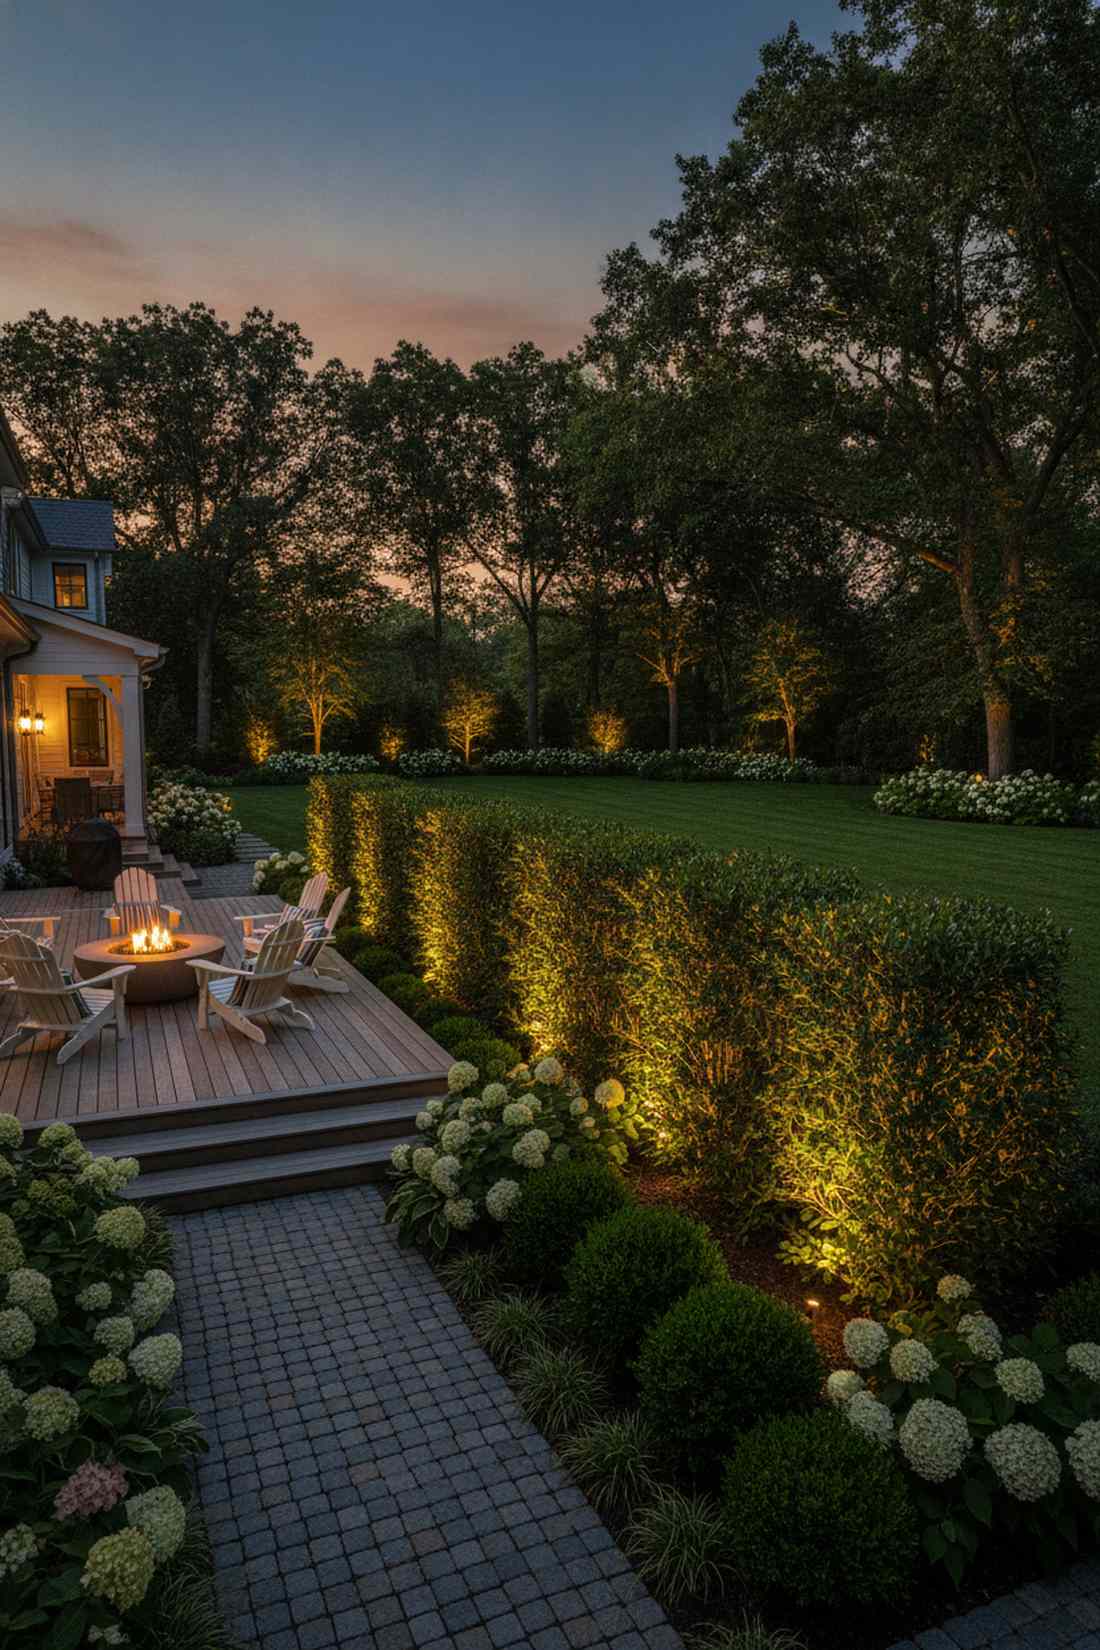
Casts a deep, moody silhouette that feels incredibly expensive and curated. A hidden foliage backlight pushes glowing warmth from directly behind dense boxwoods or hydrangeas, creating jaw-dropping depth.
Placing lights directly on top of shrubs looks cheap and chaotic, but hiding your fairy lights curtain behind the mass creates a remarkably premium backlit effect. The hidden LED source shines through the leaves, showing off the plant’s natural silhouette instead of the ugly wiring.
You can backlight a major garden bed for just $20. Save this to your landscape lighting board for a sneaky, high-impact trick.
- Key Materials: Ground stakes, warm-white LED grids
- Vibe / Style: High-end landscape architecture
- Difficulty: Very easy
- Budget Breakdown: Light grids: $15 | Stakes: $5
- Creator’s Tip: Position the lights about 6 inches behind the plant base; putting them too close will bleach out the leaf color.
- Smart Sourcing: waterproof fairy net lights (pre-cut grids) and metal landscape anchoring pins.
24. Branch Cascade Installations
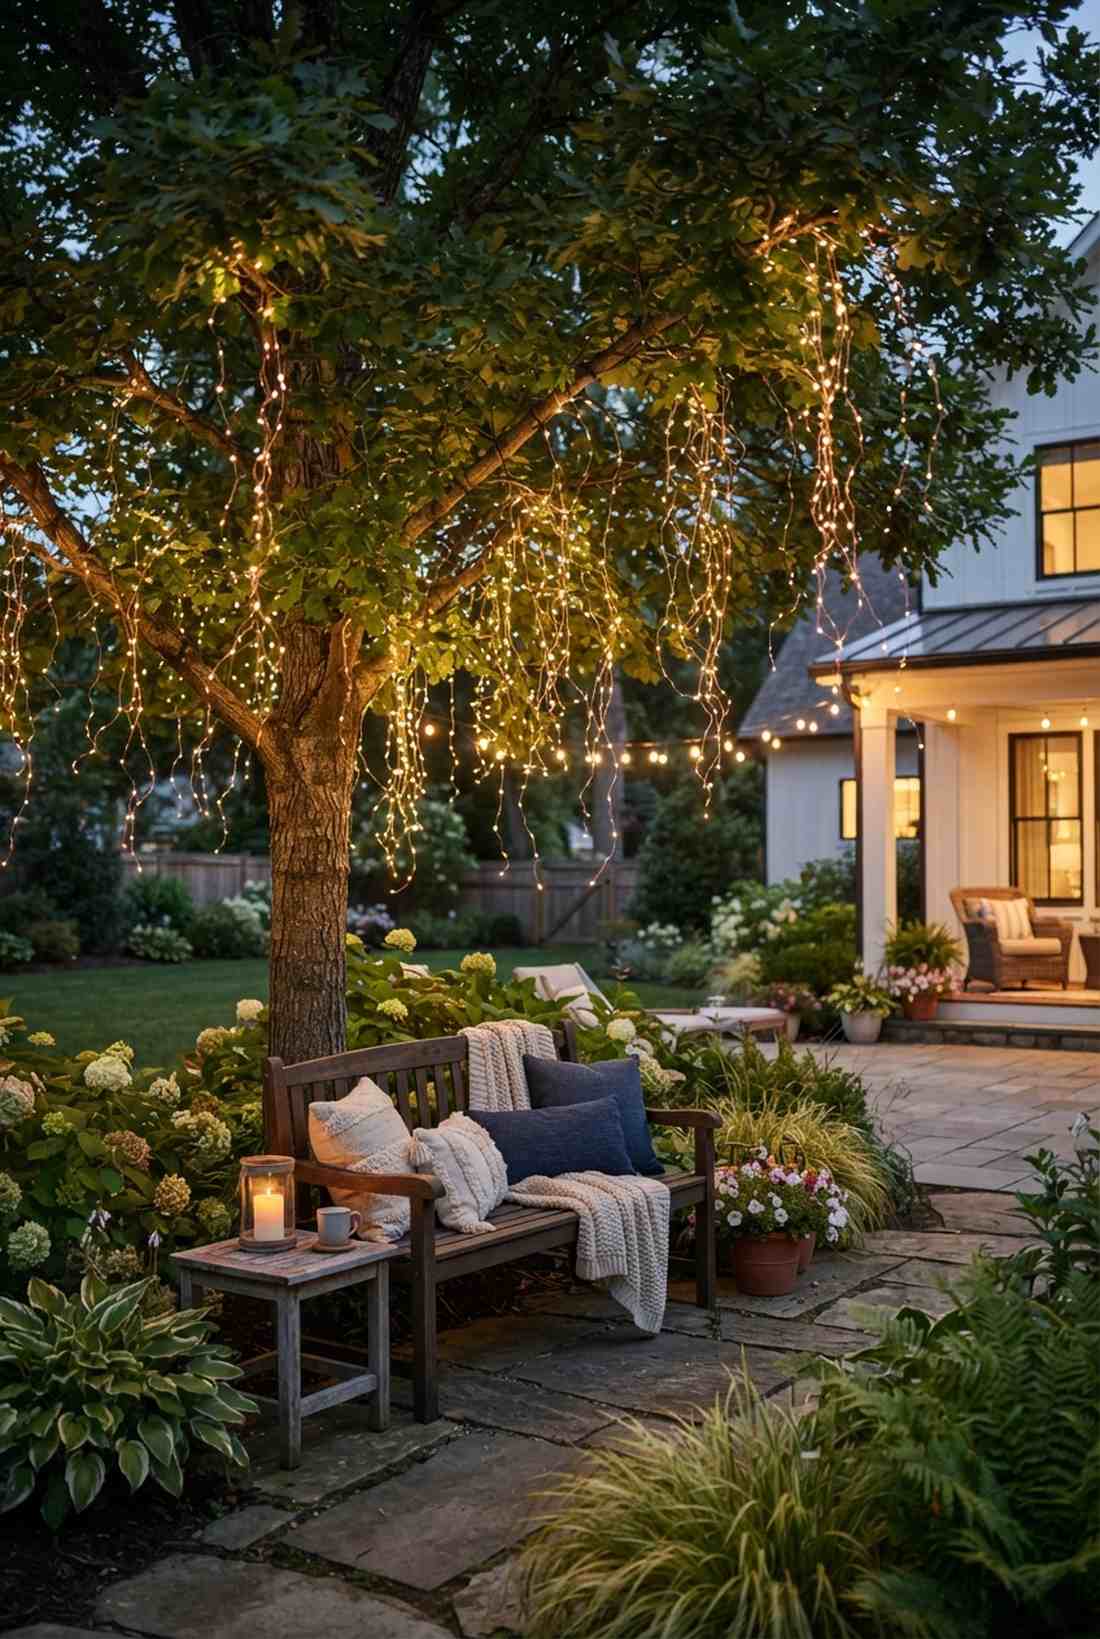
Looks like glowing water trickling effortlessly through the leaves. An organic branch drape follows the natural architecture of the tree, providing flawless ambiance over a garden bench or reading nook.
Rigid geometric lines ruin the vibe of natural trees, but draping fairy lights hanging loosely over random limbs delivers a surprisingly premium look. The irregular lengths and varied heights mimic the chaotic beauty of nature perfectly.
This organic weaving costs around $25 in flexible copper lights. Highly recommended for adding soft, romantic light to lower tree canopies.
- Key Materials: Flexible copper wire strands, dark zip ties
- Vibe / Style: Romantic weeping light
- Difficulty: Easy and creative
- Budget Breakdown: Copper lights: $20 | Zip ties: $5
- Creator’s Tip: Use brown or green copper wire instead of silver so the unlit strings become completely invisible during the day.
- Smart Sourcing: copper wire cascade lights (solar) and brown nylon cable ties (bulk pack).
Stop paying thousands for hardwired landscape lighting. This next grass-illumination trick achieves the exact same luxury look for under $20…
25. Decorative Grass Accent Lights
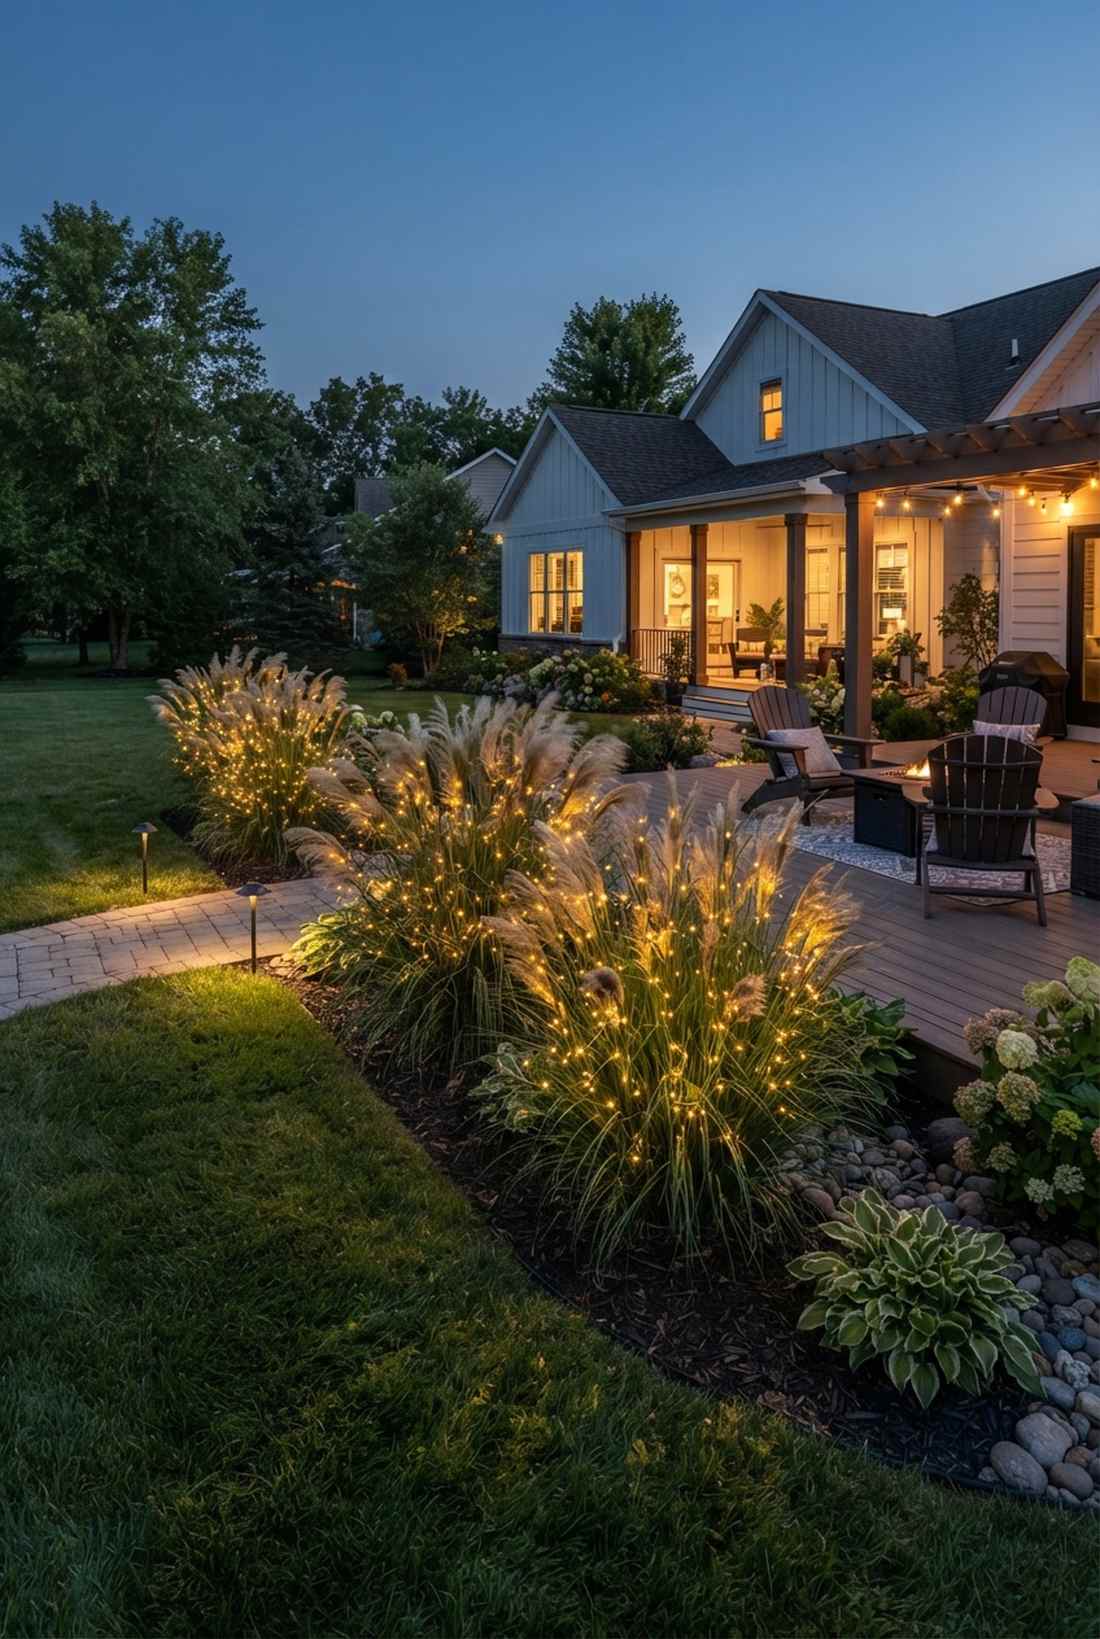
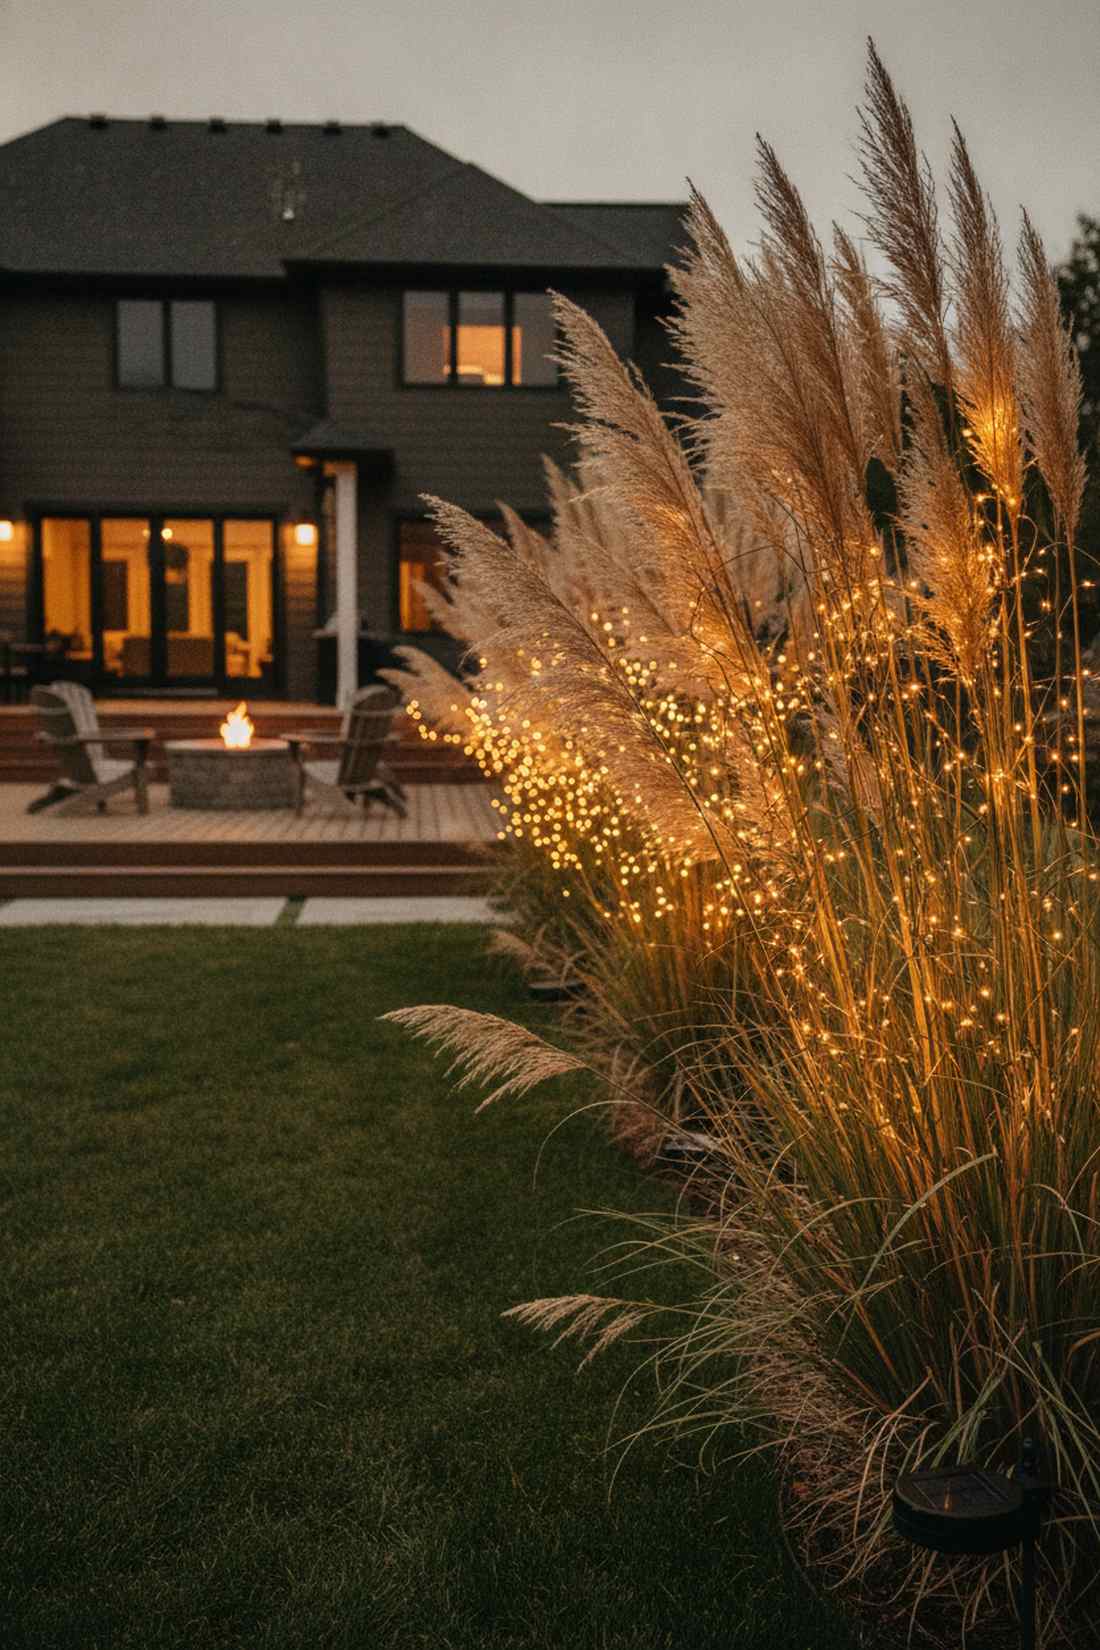
Catches the evening breeze to create a mesmerizing, glowing kinetic sculpture. A plume accent setup buries hidden light strands inside tall ornamental grasses like pampas or miscanthus for striking yard texture.
Most landscape lights just blast the front of the plant, but sneaking a tiny fairy lights curtain right into the center of the grass clump looks far more expensive than it is. As the wind blows, the glowing grass creates dynamic, shifting shadows across your lawn.
You can illuminate a row of ornamental grasses for about $15 per clump. Pin this if you want an animated, wind-driven light show in your yard.
- Key Materials: Battery/solar micro LEDs, green garden stakes
- Vibe / Style: Dynamic kinetic landscape
- Difficulty: Fast 10-minute install
- Budget Breakdown: Micro LEDs: $10 | Hidden stakes: $5
- Creator’s Tip: Opt for warm amber bulbs to make the dry autumn pampas grass look like glowing embers.
- Smart Sourcing: micro-LED fairy strands (solar starter kits) and green bamboo plant stakes.
26. Rock Feature Curtains
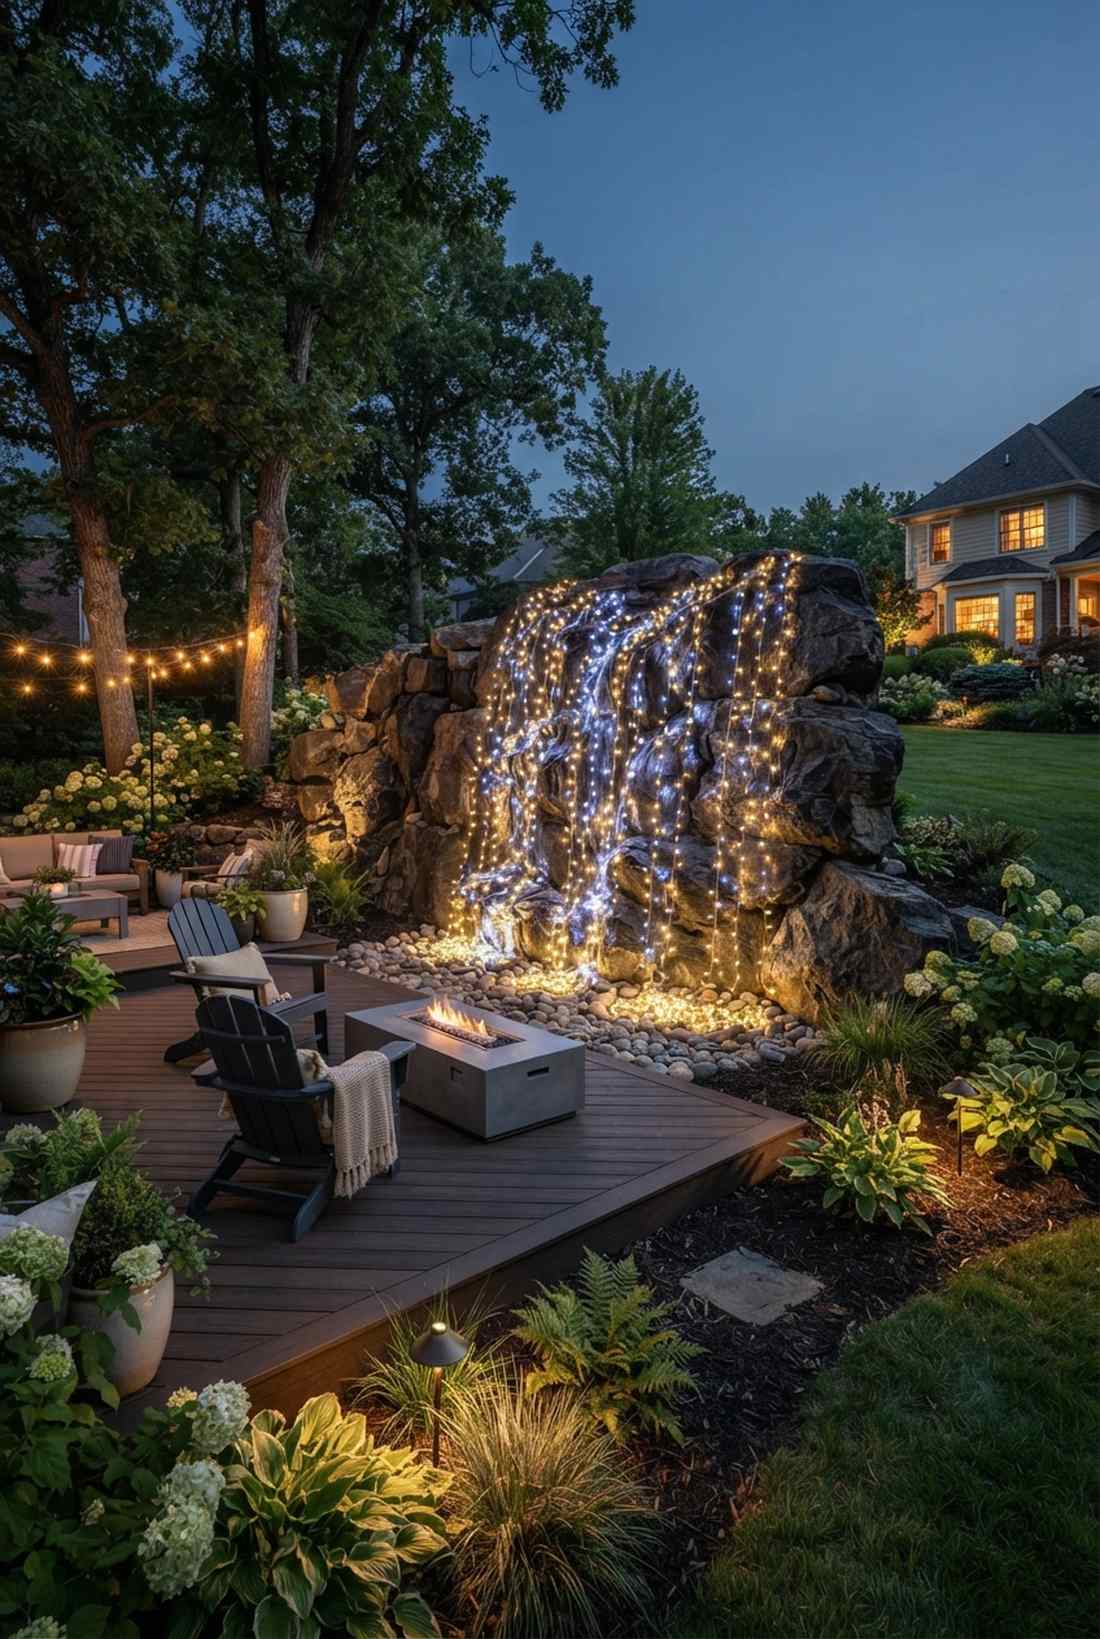
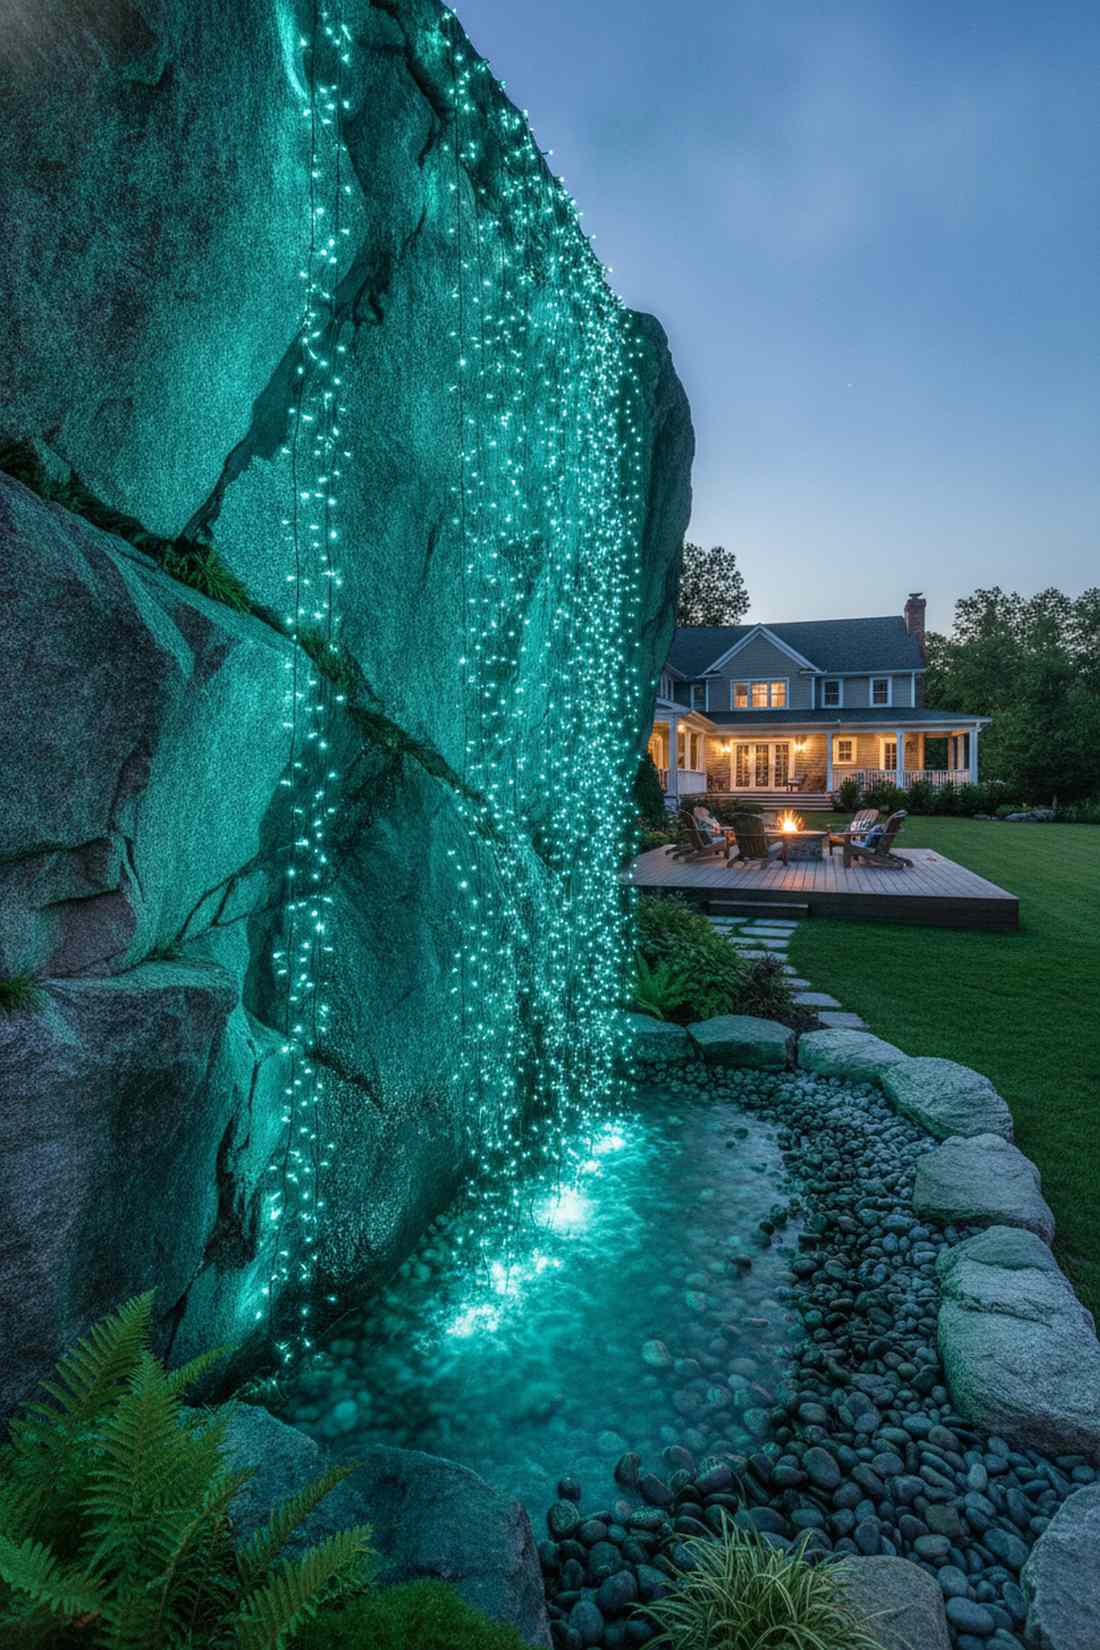
Mimics a flowing, bioluminescent waterfall cascading over heavy stone. A boulder illumination drape highlights the rigid textures of rock walls or garden outcroppings, adding serious drama to hardscaping.
Harsh floodlights wash out the beautiful crevices of stone, but pinning fairy lights hanging tightly against the rock face gives a designer-level finish. Allowing the lights to pool at the base mimics the exact visual weight of a luxury water feature without the plumbing costs.
Accenting a boulder wall sets you back roughly $30. It’s a genius way to soften massive, brutalist stone features in your yard.
- Key Materials: Heavy-duty waterproof strands, masonry anchors
- Vibe / Style: Bioluminescent natural spring
- Difficulty: Moderate (requires masonry drilling)
- Budget Breakdown: Lights: $20 | Masonry anchors: $10
- Creator’s Tip: Wedge the mounting hardware directly into natural rock crevices to avoid drilling into the stone itself.
- Smart Sourcing: IP65 waterfall fairy lights (heavy duty) and outdoor masonry cable clips.
Specialty Curtain Techniques For Creative Impact
Advanced installation techniques transform standard curtain lights into custom displays that address specific design challenges or create signature looks unique to your garden aesthetic.
27. Double-Layer Depth Curtains
Creates an absolutely mesmerizing 3D parallax effect as guests walk past. A dimensional double-drape sandwiches two distinct layers of light to build an impossibly deep, glowing wall for large outdoor venues.
Flat walls look incredibly basic, but combining a cool-white rear fairy lights curtain with a warm-white foreground layer delivers a remarkably premium finish. This staggering technique forces the eye to process depth, making small courtyards feel double their actual size.
Building a 3D light wall costs around $60 total. Save this to your advanced yard design board for the ultimate spatial hack.
- Key Materials: Contrasting temperature lights, dual-track framework
- Vibe / Style: High-end immersive art
- Difficulty: Intermediate alignment required
- Budget Breakdown: Warm lights: $30 | Cool lights: $30
- Creator’s Tip: Space the two layers exactly 18 inches apart for the most dramatic shifting parallax effect.
- Smart Sourcing: dual-color temperature curtain lights (starter kits) and double-hook ceiling brackets.
28. Fabric-Diffused Curtains
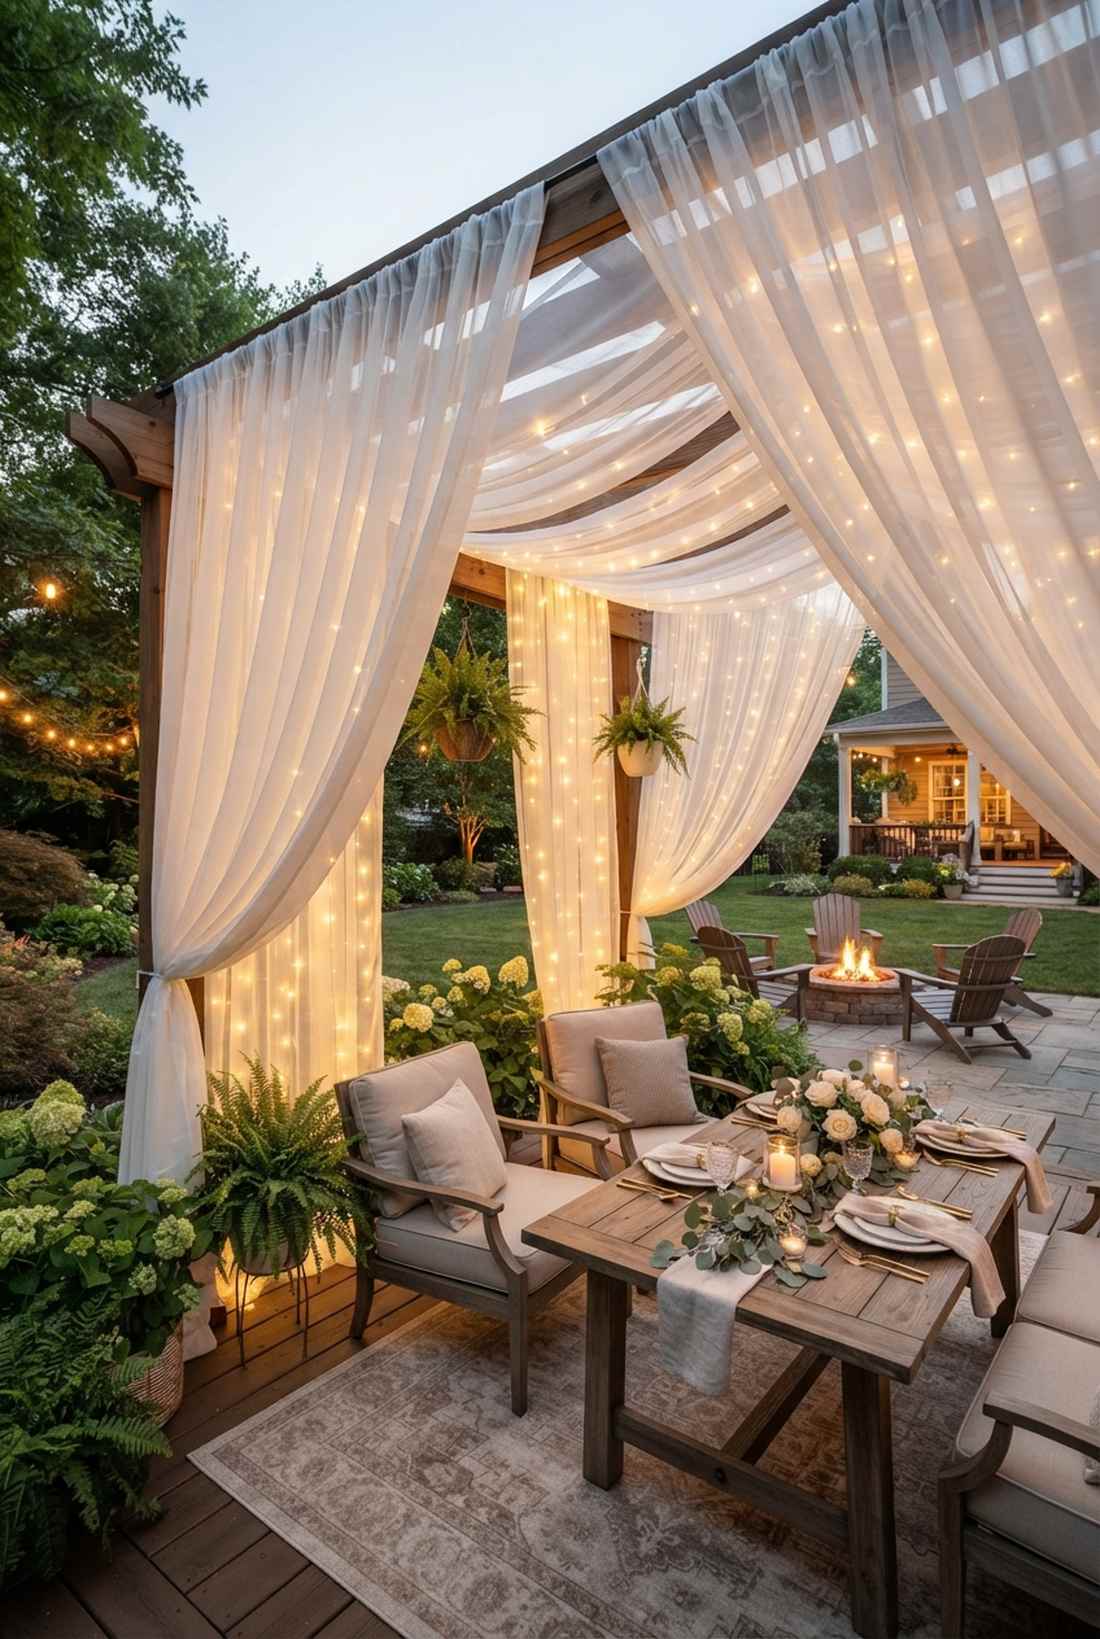
Gives off massive ethereal, romantic energy perfect for a dreamy summer night. A sheer fabric back-glow softens harsh bulbs into a continuous, cloudy radiance, ideal for intimate dining pavilions.
Bare bulbs can trigger migraines and kill the mood, but layering sheer curtains over fairy lights hanging delivers a surprisingly premium look. The chiffon material acts as a massive diffuser, blending the pinpoints of light into a smooth, luxurious glow.
You can create this cloudy, romantic diffusion for just $40. Pin this immediately if you are styling a DIY backyard wedding.
- Key Materials: Weather-resistant chiffon, warm-white curtains
- Vibe / Style: Dreamy romantic cabana
- Difficulty: Easy fabric draping
- Budget Breakdown: Chiffon fabric: $20 | Lights: $20
- Creator’s Tip: Always place the fabric directly *in front* of the lights to maximize the cloudy diffusion effect.
- Smart Sourcing: outdoor-rated sheer chiffon panels (bulk pack) and soft-glow fairy curtains.
29. Shaped Curtain Installations
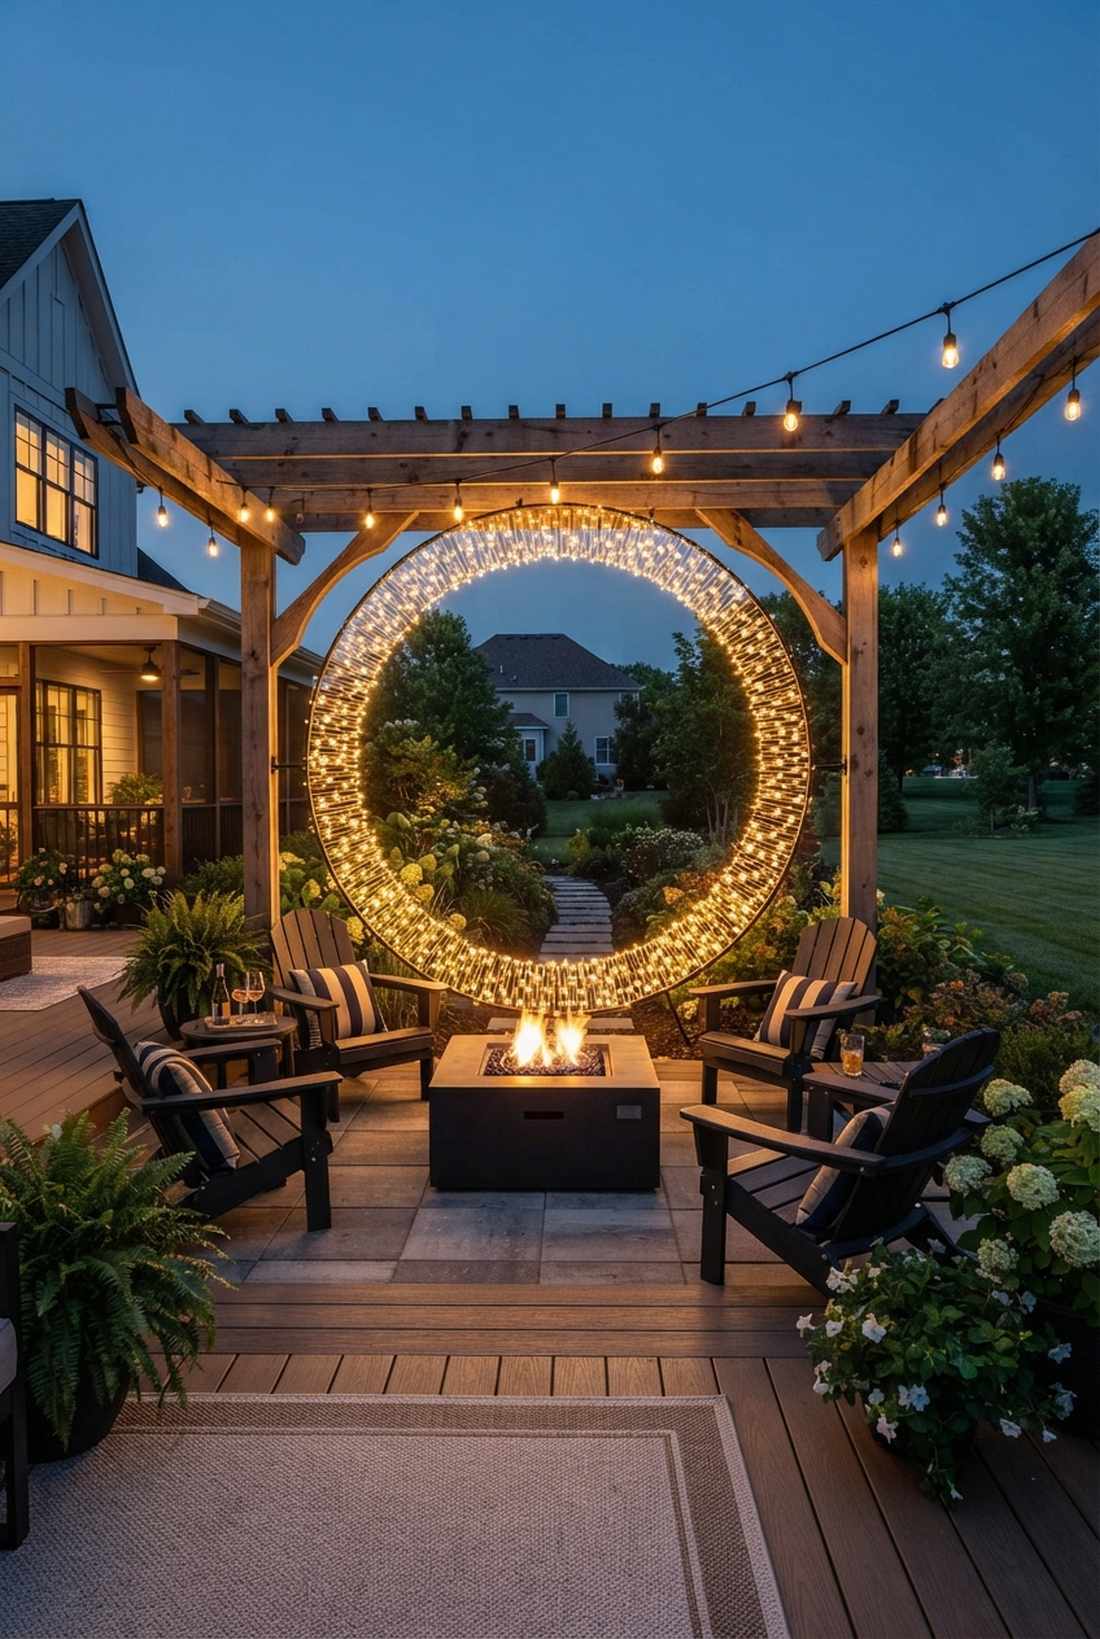
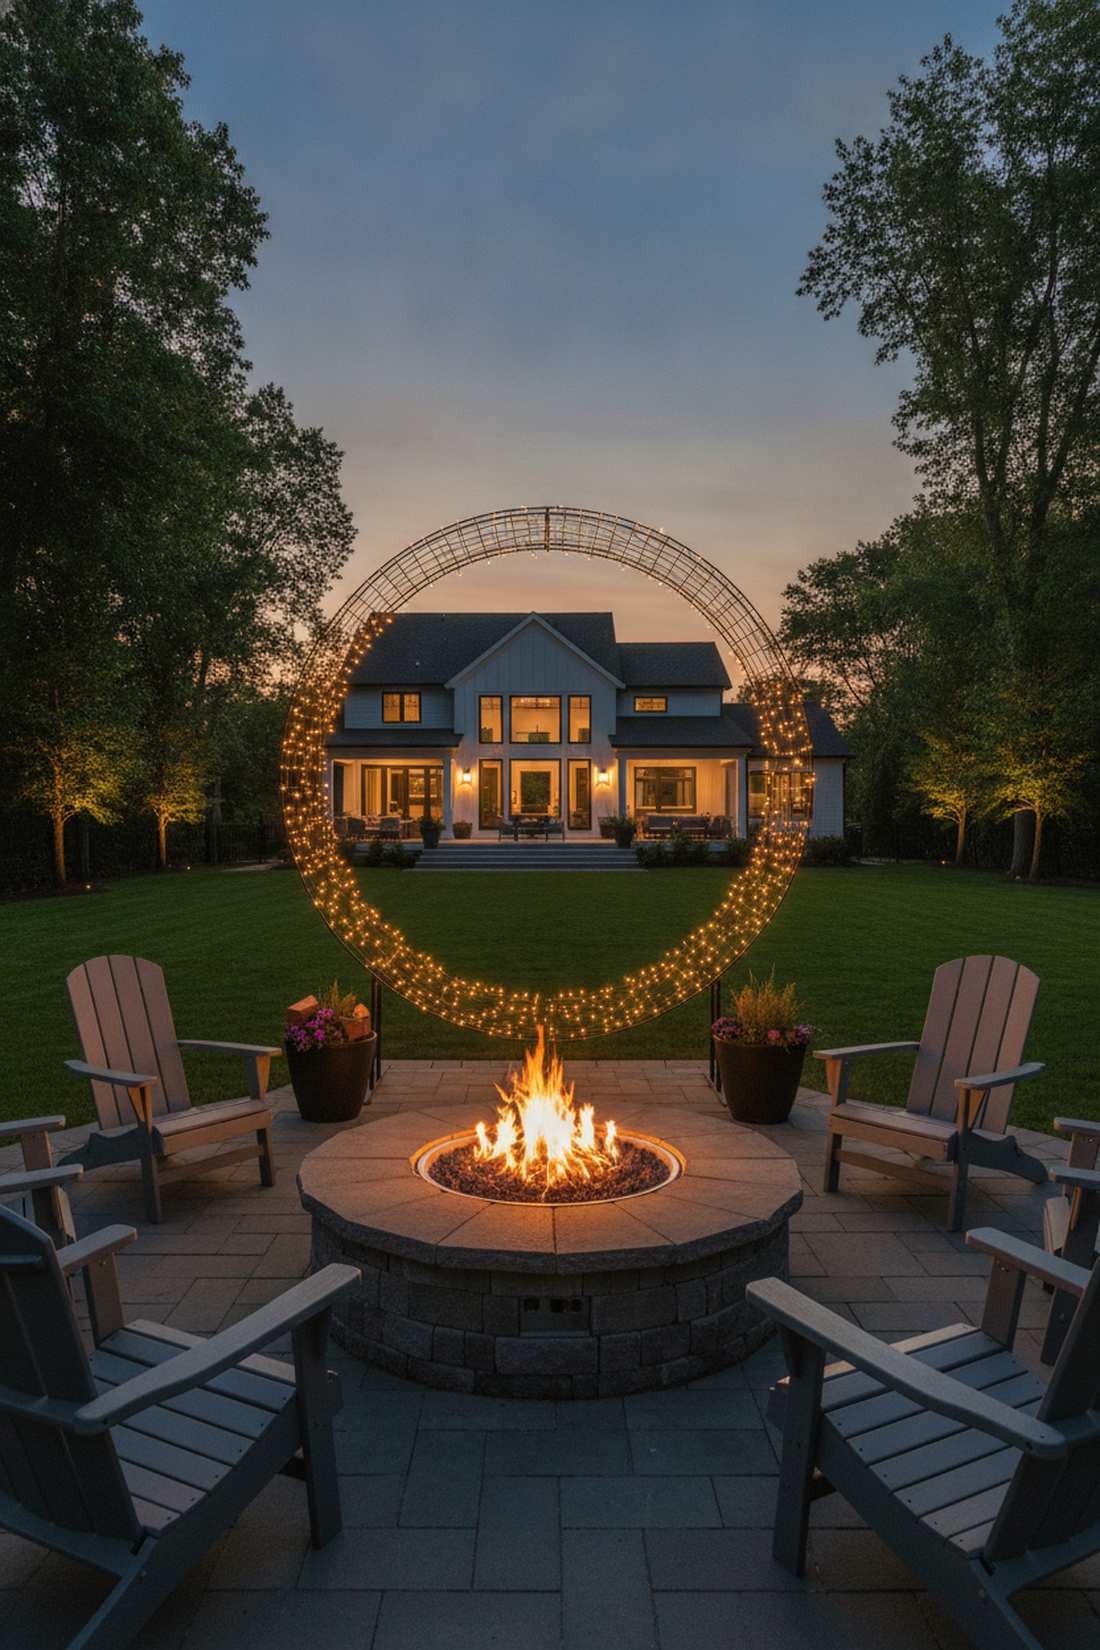
Transforms a cheap string of lights into literal glowing garden art. A custom silhouette frame bends standard lighting into perfect arches, circles, or hearts, creating a custom photo-op corner.
Instead of relying on whatever shape the box provides, bending heavy wire to frame your fairy lights curtain looks far more expensive than it is. Wrapping a rigid circular frame creates a flawless modern halo effect that looks stunning behind a fire pit.
Crafting a custom shape runs around $35. It’s highly recommended if you want your yard to stand out from every other basic string setup.
- Key Materials: Heavy gauge craft wire, bendable micro LEDs
- Vibe / Style: Sculptural modern art
- Difficulty: Moderate wire-bending
- Budget Breakdown: Heavy wire: $15 | Micro LEDs: $20
- Creator’s Tip: Use a large hula hoop painted black as a perfectly cheap, rigid base for circular halo designs.
- Smart Sourcing: bendable copper fairy strands (UV-coated) and thick gauge structural garden wire.
Material Guide: Cheap vs. Premium Aesthetic
Knowing exactly where to save and where to spend makes all the difference in achieving that “looks expensive but isn’t” vibe.
- Standard vs. UV-Resistant/Premium: Cheap indoor wires crack and yellow in the sun within months. Upgrading to UV-coated cables ensures your lines stay invisible and the wiring doesn’t short out during the first rainstorm.
- Pre-made Kits vs. Sourcing Locally: Scavenging hardware stores for random clips is exhausting. Grabbing dedicated starter kits with pre-measured drops and outdoor-rated adhesive prevents sag, saving you both hours of frustration and extra cash.
If you think white lights are boring, this next zoned color-blocking trick is about to completely change how you light your modern deck…
30. Color-Zoned Curtains
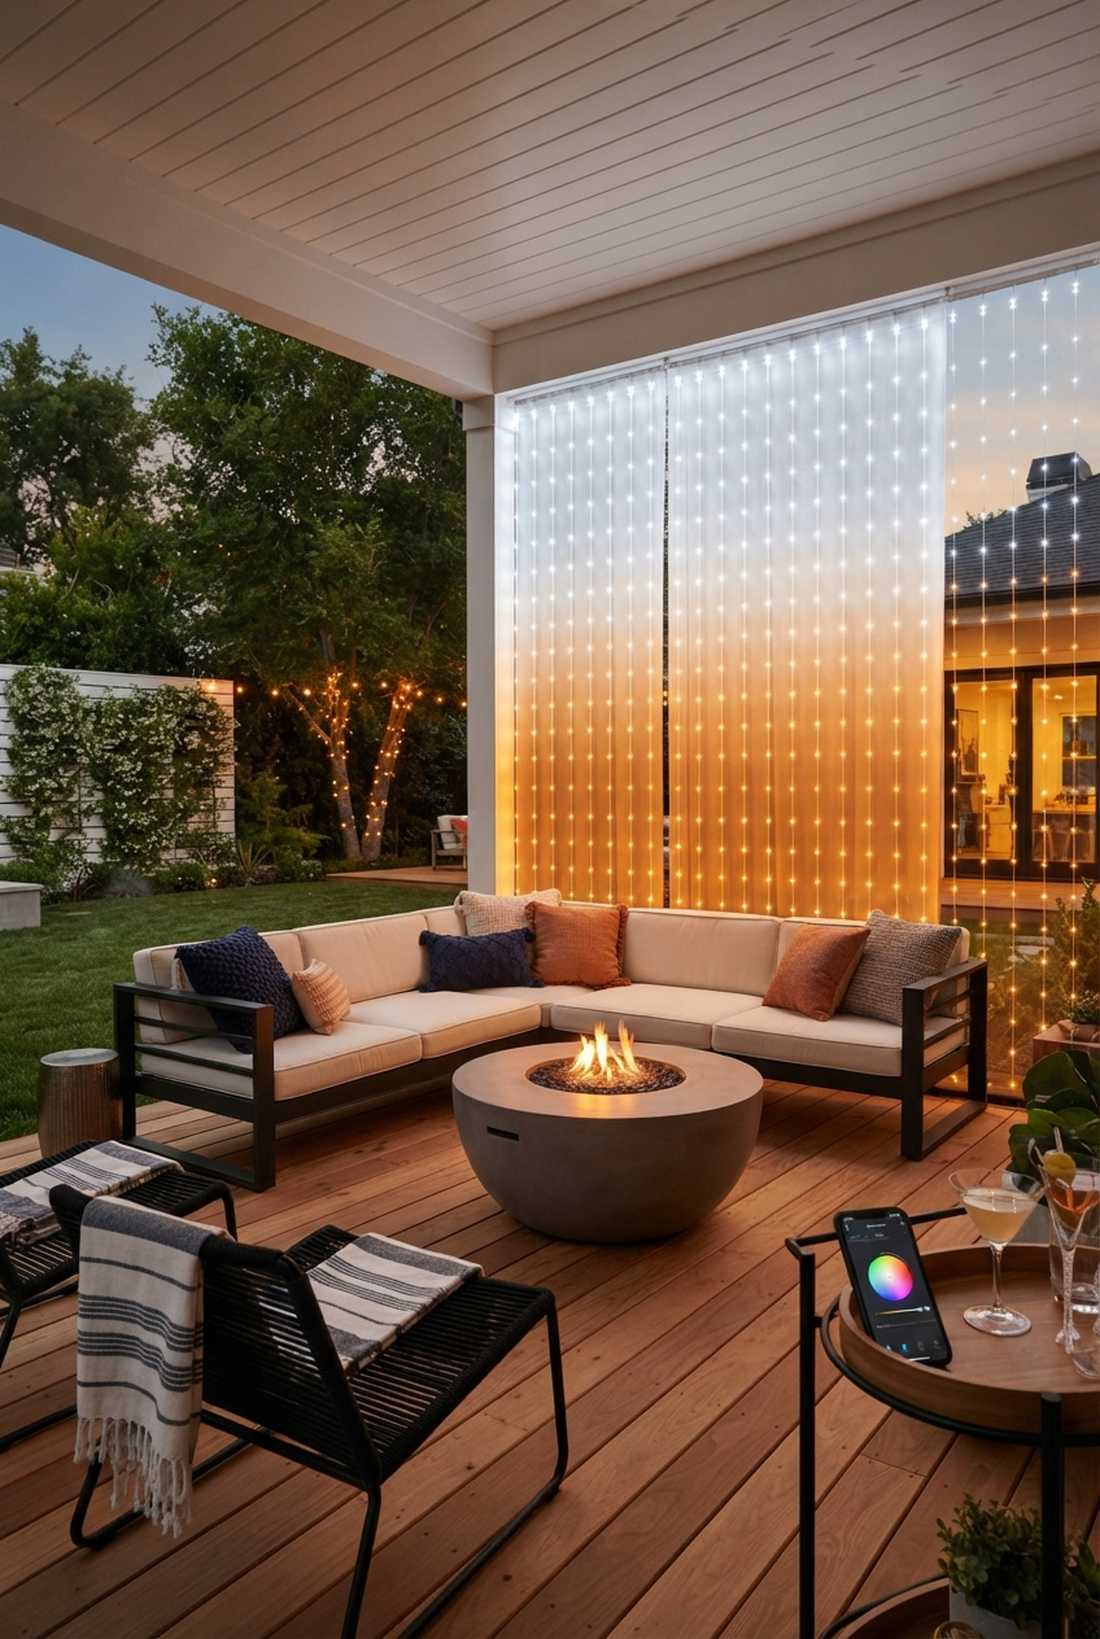
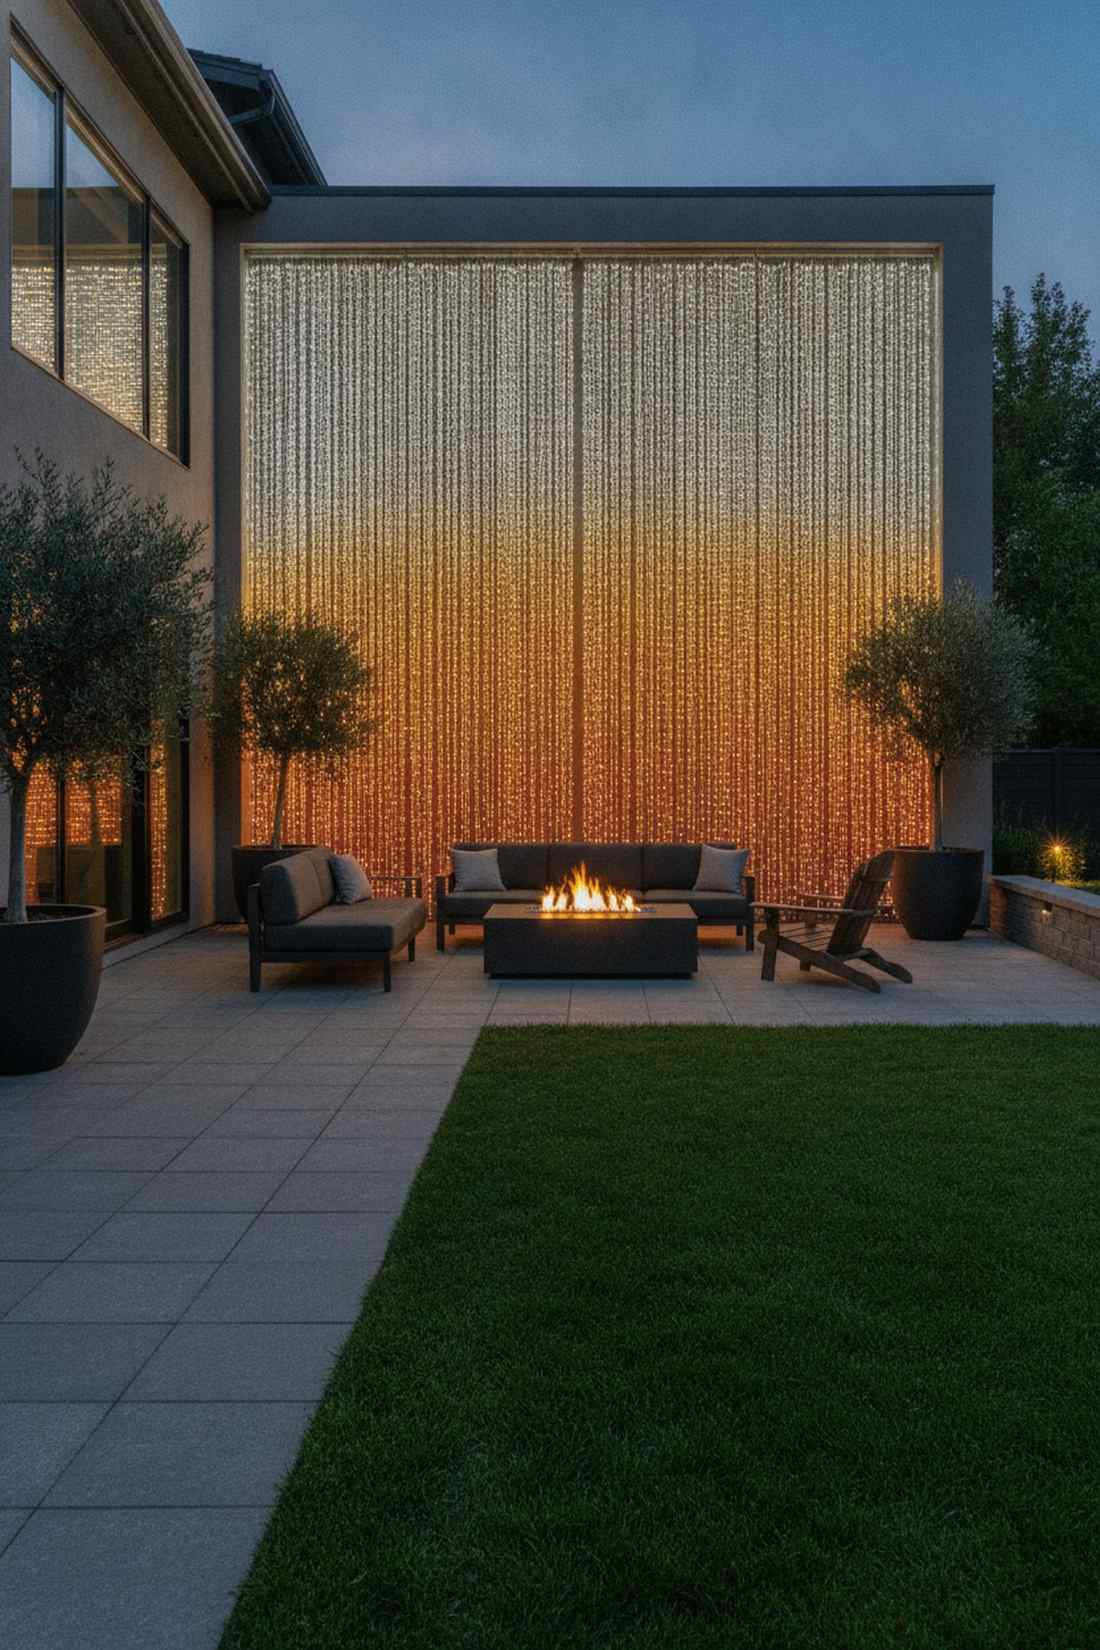
Delivers a bold, contemporary neon aesthetic that feels like a chic downtown lounge. A color-blocked light wall segments different hues into distinct zones, injecting vibrant energy into flat modern landscapes.
Mixing random colored bulbs looks like a tacky holiday display, but assigning strict color zones to your fairy lights hanging setup gives a designer-level finish. Fading from deep amber at the bottom to crisp white at the top creates a flawless sunset gradient effect.
A smart RGB curtain setup costs about $50. Save this to your smart-home garden board for the ultimate customizable party vibe.
- Key Materials: App-controlled RGB curtain units
- Vibe / Style: Modern chic lounge
- Difficulty: Easy plug-and-play
- Budget Breakdown: RGB smart curtain: $50
- Creator’s Tip: Use the companion app to lock in a dual-tone gradient (like blue and purple) rather than a chaotic rainbow mode.
- Smart Sourcing: smart RGB fairy light curtains (app controlled) and outdoor smart plug timers.
31. Twinkle and Steady Combinations
Provides a deeply hypnotic, breathing energy that makes the whole yard feel alive. A mixed-animation backdrop layers static warm glow with sporadic sparkling pops, ensuring the space never feels flat.
Leaving every single bulb on twinkle mode causes severe eye fatigue, but layering a 10% twinkle strand over a 90% steady fairy lights curtain creates a remarkably premium finish. The subtle movement draws the eye without turning your backyard into a frantic disco.
Mixing these distinct light rhythms sets you back about $35. It’s a mandatory upgrade for anyone trying to mimic high-end restaurant lighting.
- Key Materials: Static warm strands, subtle flash strands
- Vibe / Style: Hypnotic starlit dining
- Difficulty: Very easy
- Budget Breakdown: Steady base: $20 | Twinkle accent: $15
- Creator’s Tip: Ensure both sets of lights are the exact same color temperature (e.g., 2700K) so the twinkle blends seamlessly.
- Smart Sourcing: multi-function fairy lights (starter kits) and warm-white steady string drops.
32. Mirror-Backed Curtains
The ultimate illusion that legally cheats physics to double your yard’s brightness. A reflective light multiplier bounces every single bulb back into the yard, making small patios feel endlessly expansive.
Buying twice as many lights drains your wallet, but mounting a fairy lights curtain directly in front of cheap acrylic mirrors looks far more expensive than it is. The reflection completely eliminates dead space on your fence and multiplies your light output for free.
Creating this infinity-mirror illusion costs under $45. Pin this if you have a tiny courtyard and need an aggressive space-expanding hack.
- Key Materials: Outdoor acrylic mirrors, dense light strands
- Vibe / Style: Expansive infinity illusion
- Difficulty: Moderate panel mounting
- Budget Breakdown: Acrylic panels: $25 | Lights: $20
- Creator’s Tip: Use shatterproof acrylic instead of real glass mirrors outdoors to prevent dangerous breakage from flying yard debris.
- Smart Sourcing: shatterproof acrylic mirror sheets (pre-cut) and high-density fairy light curtains.
33. Photo Display Curtain Backdrop
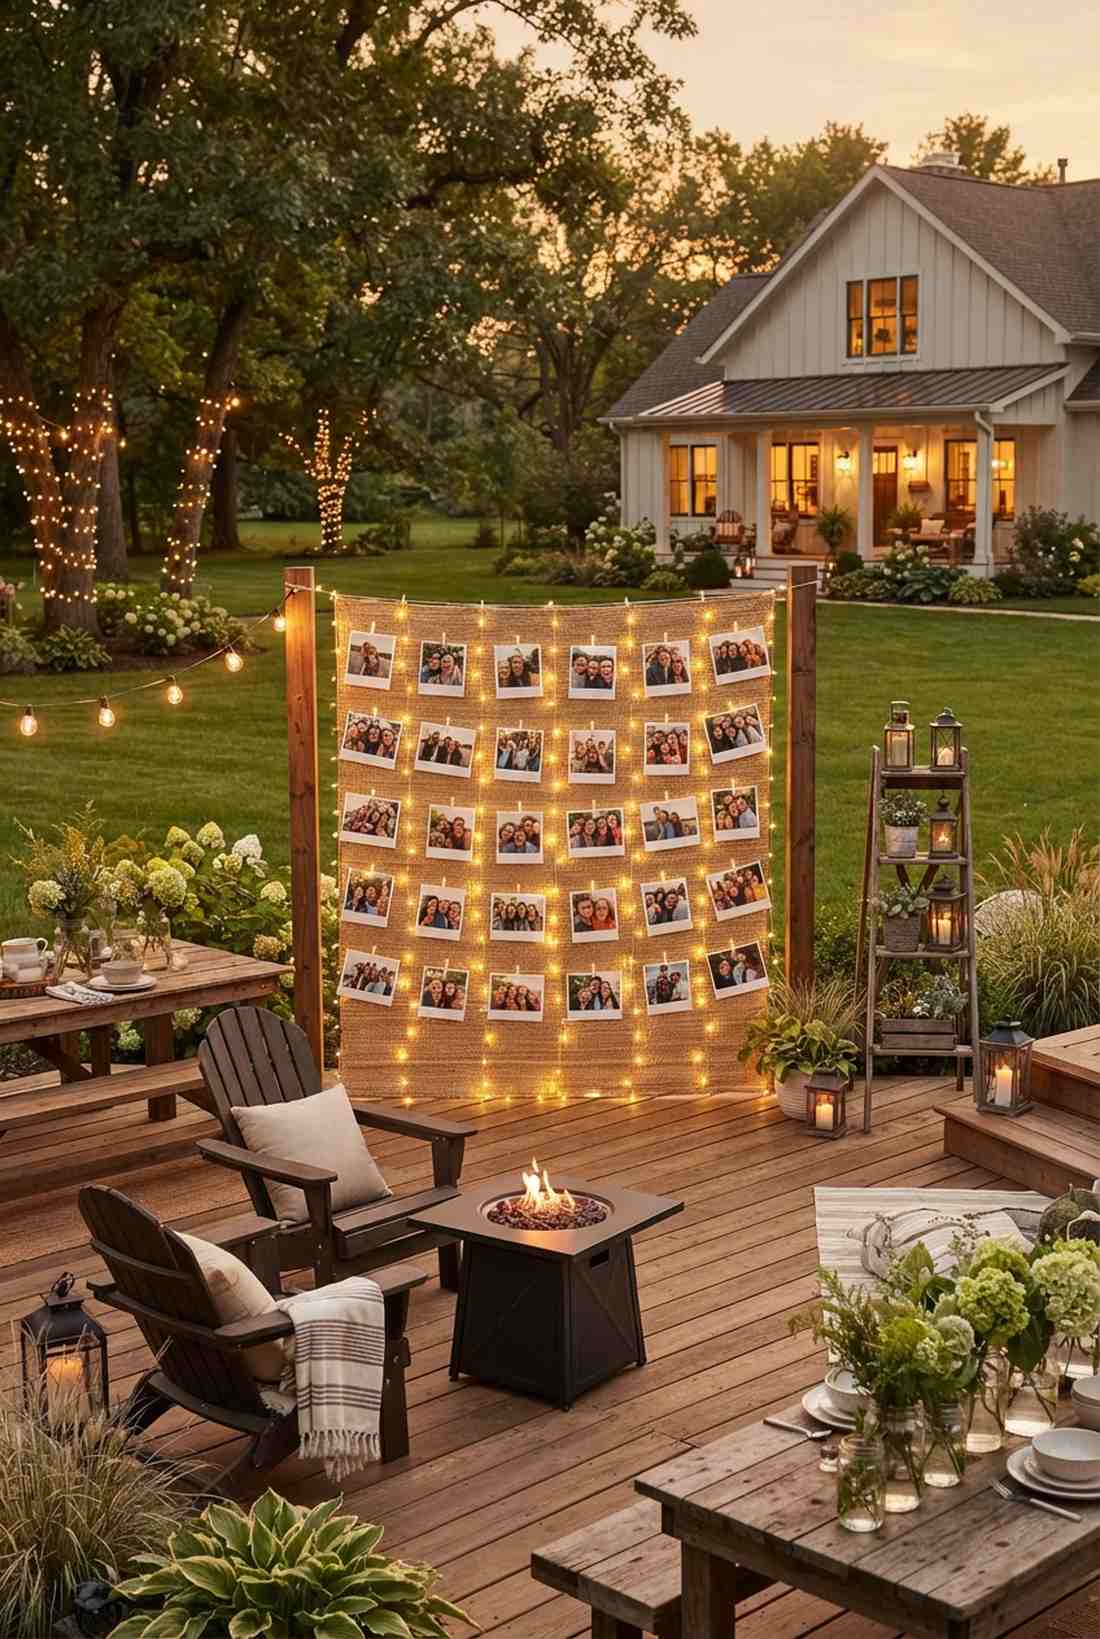
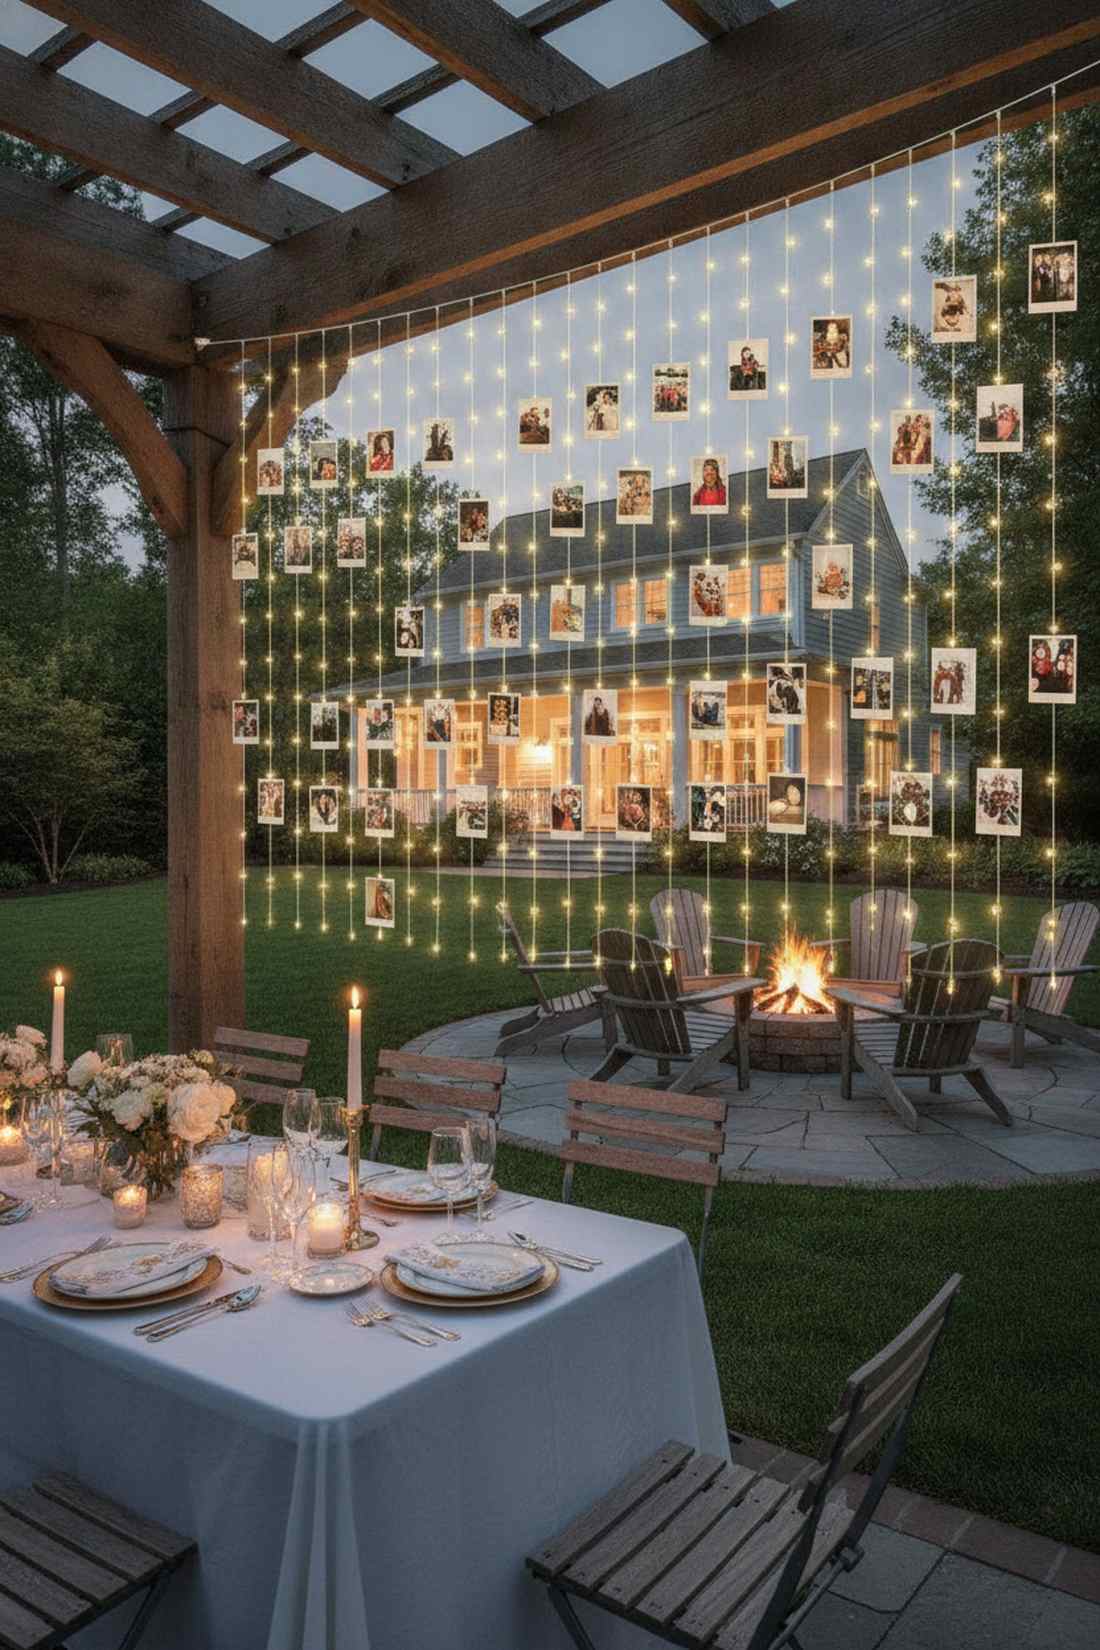
Feels like a deeply personal, glowing scrapbook brought to life. A luminous gallery wall combines glowing drops with suspended polaroids, creating the ultimate nostalgic focal point for graduation parties or anniversaries.
Taping photos to a wall looks messy and cheap, but clipping them to a structured fairy lights hanging grid delivers a surprisingly premium look. The warm bulbs naturally backlight the printed photos, turning memories into literal glowing art pieces.
You can build this glowing memory board for just $20. Save this to your party planning board for an unforgettable, personalized decor trick.
- Key Materials: LED photo clip strings, mini clothespins
- Vibe / Style: Nostalgic personalized gallery
- Difficulty: Fast 15-minute setup
- Budget Breakdown: Clip lights: $15 | Printed photos: $5
- Creator’s Tip: Use a service to print photos on plastic or waterproof paper so evening dew doesn’t ruin your memories.
- Smart Sourcing: fairy light photo clip strings (starter kits) and clear mini clothespins (bulk pack).
34. Water Feature Companion Lighting
Creates a mesmerizing, dancing light show as the bulbs reflect off moving water. A fountain companion glow amplifies the sound of trickling water with stunning visual movement, elevating basic backyard ponds.
Submerging cheap lights is a massive electrical hazard, but placing a fairy lights curtain on a structure *just beside* the water gives a designer-level finish safely. The rippling water catches the LED reflections, painting your fence with gorgeous, animated light patterns.
This dual-sparkle enhancement costs exactly $30. Highly recommended to maximize the impact of small water features at night.
- Key Materials: IP65 waterproof curtains, safe standoff mounts
- Vibe / Style: Tranquil animated oasis
- Difficulty: Easy but requires safe distancing
- Budget Breakdown: Safe distance lights: $30
- Creator’s Tip: Ensure the power source is plugged into a GFCI outlet to protect against accidental splashes.
- Smart Sourcing: IP65-rated waterproof fairy curtains and outdoor GFCI protective covers.
Most holiday decorators waste hours untangling old strings. This next temporary entrance trick sets up in 5 minutes and looks like a professional catalog shoot…
Seasonal and Event Applications
Temporary and seasonal curtain light installations allow homeowners to transform gardens for specific occasions or times of year without permanent commitment to fixed lighting layouts.
35. Holiday Entrance Curtains
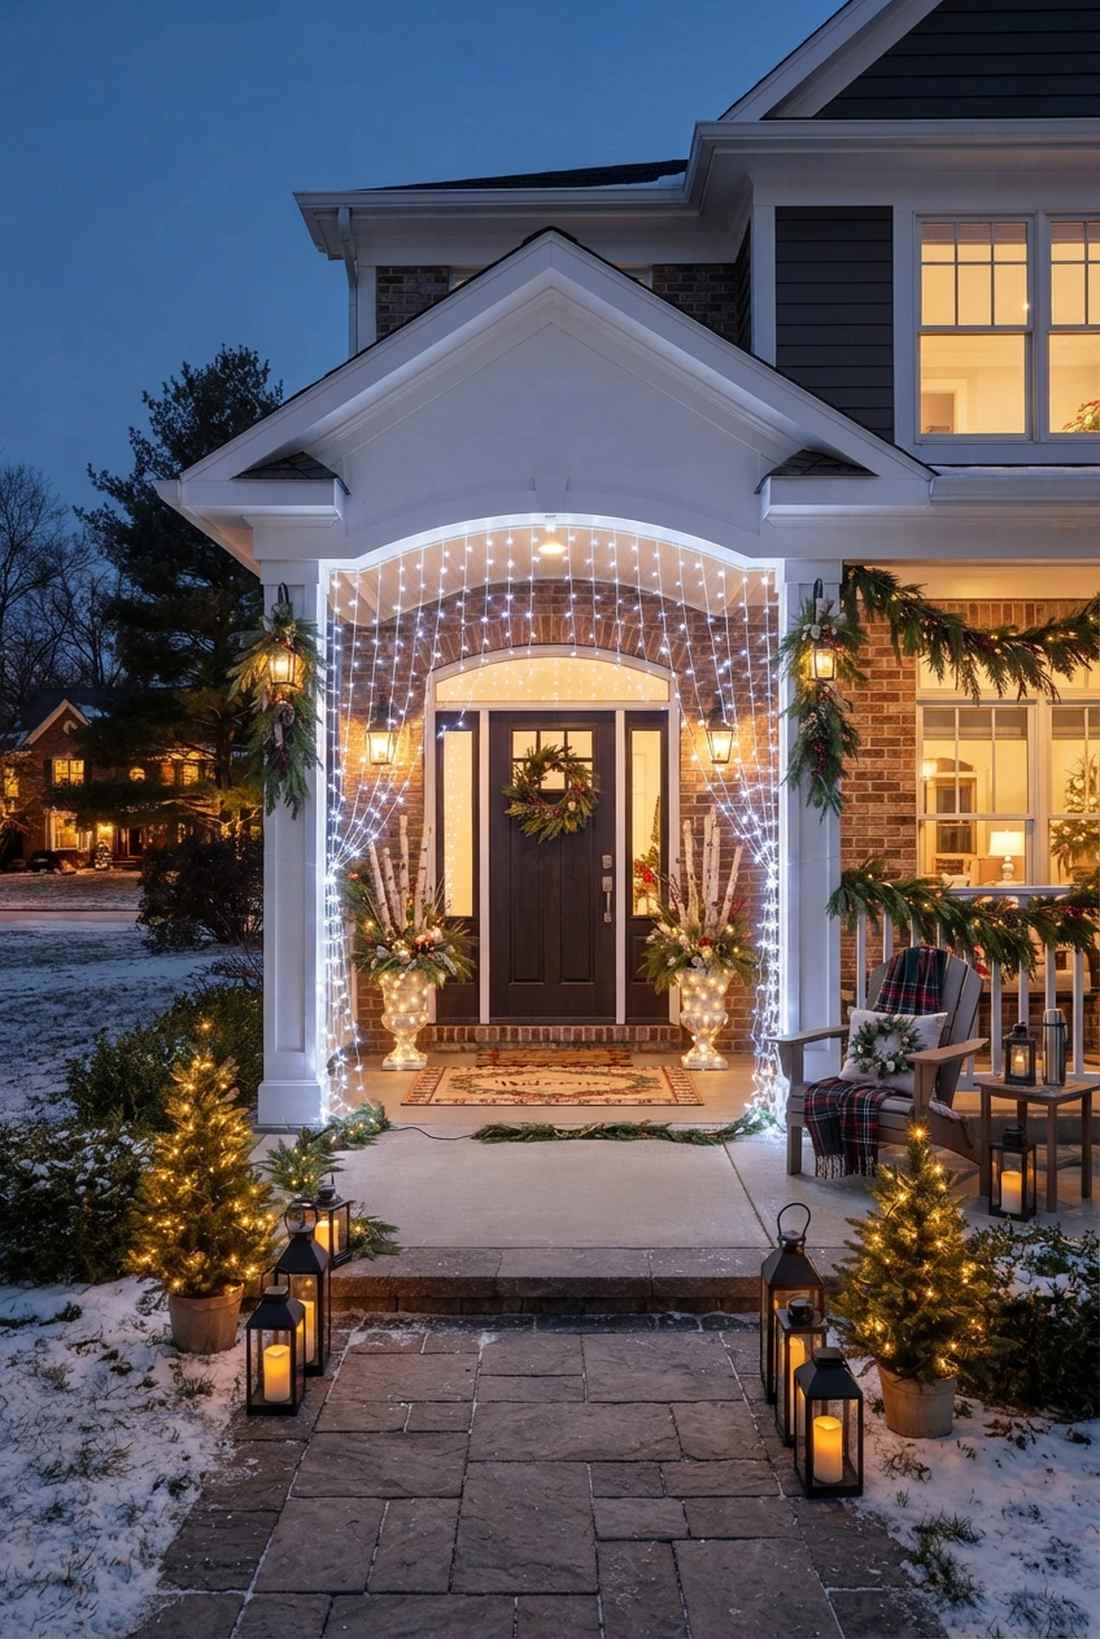
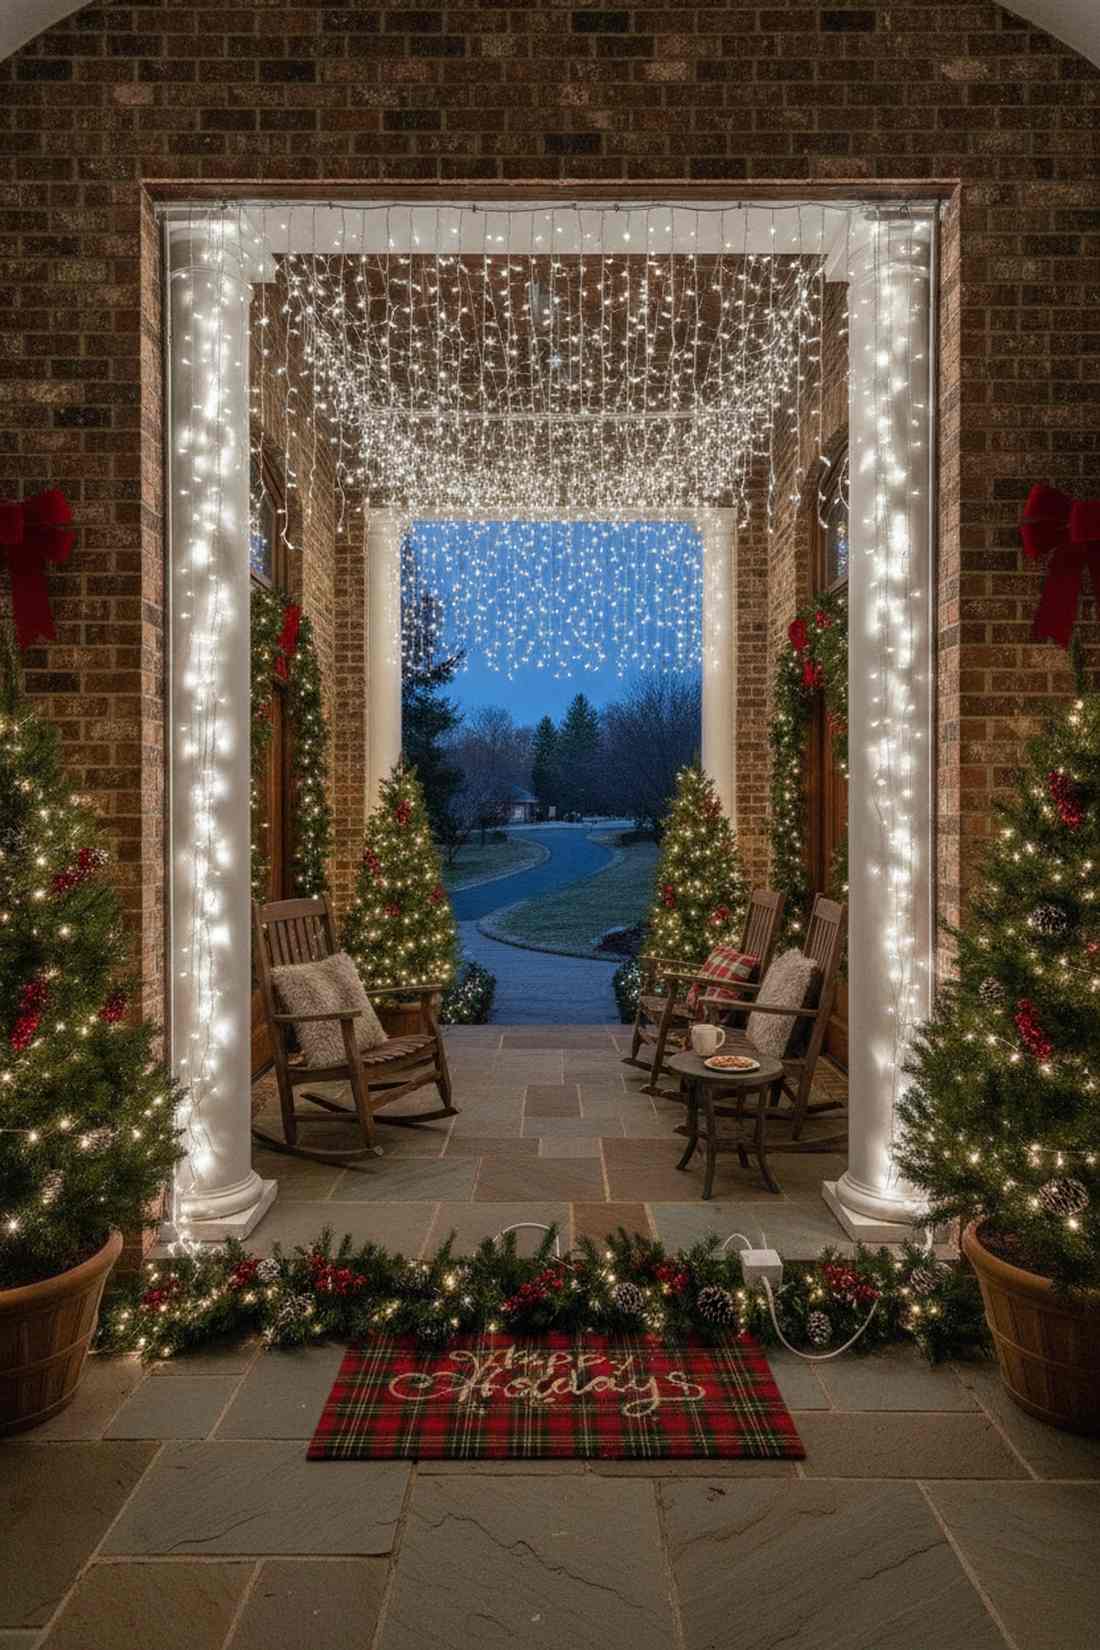
Instantly transforms a standard front porch into a welcoming, festive gateway. A glowing holiday portal frames your walkway or gate, wrapping your guests in seasonal cheer the moment they arrive.
Nailing strings into your expensive siding causes permanent rot, but utilizing a temporary fairy lights curtain with tension frames or brick clips looks far more expensive than it is. Using an automated timer ensures this massive glowing welcome mat turns on exactly at dusk without lifting a finger.
A grand holiday entrance runs about $40 to set up perfectly. Pin this to your winter decor board to dominate your neighborhood’s curb appeal.
- Key Materials: Bright-white light drops, brick-grip clips
- Vibe / Style: Majestic festive welcome
- Difficulty: Quick, damage-free install
- Budget Breakdown: Lights: $30 | Brick clips: $10
- Creator’s Tip: Tuck the excess cord under a seasonal welcome mat or wrap it in faux garland to hide the ugly power block.
- Smart Sourcing: cool-white holiday light curtains (bulk pack) and no-drill masonry brick clips.
36. Party Backdrop Walls
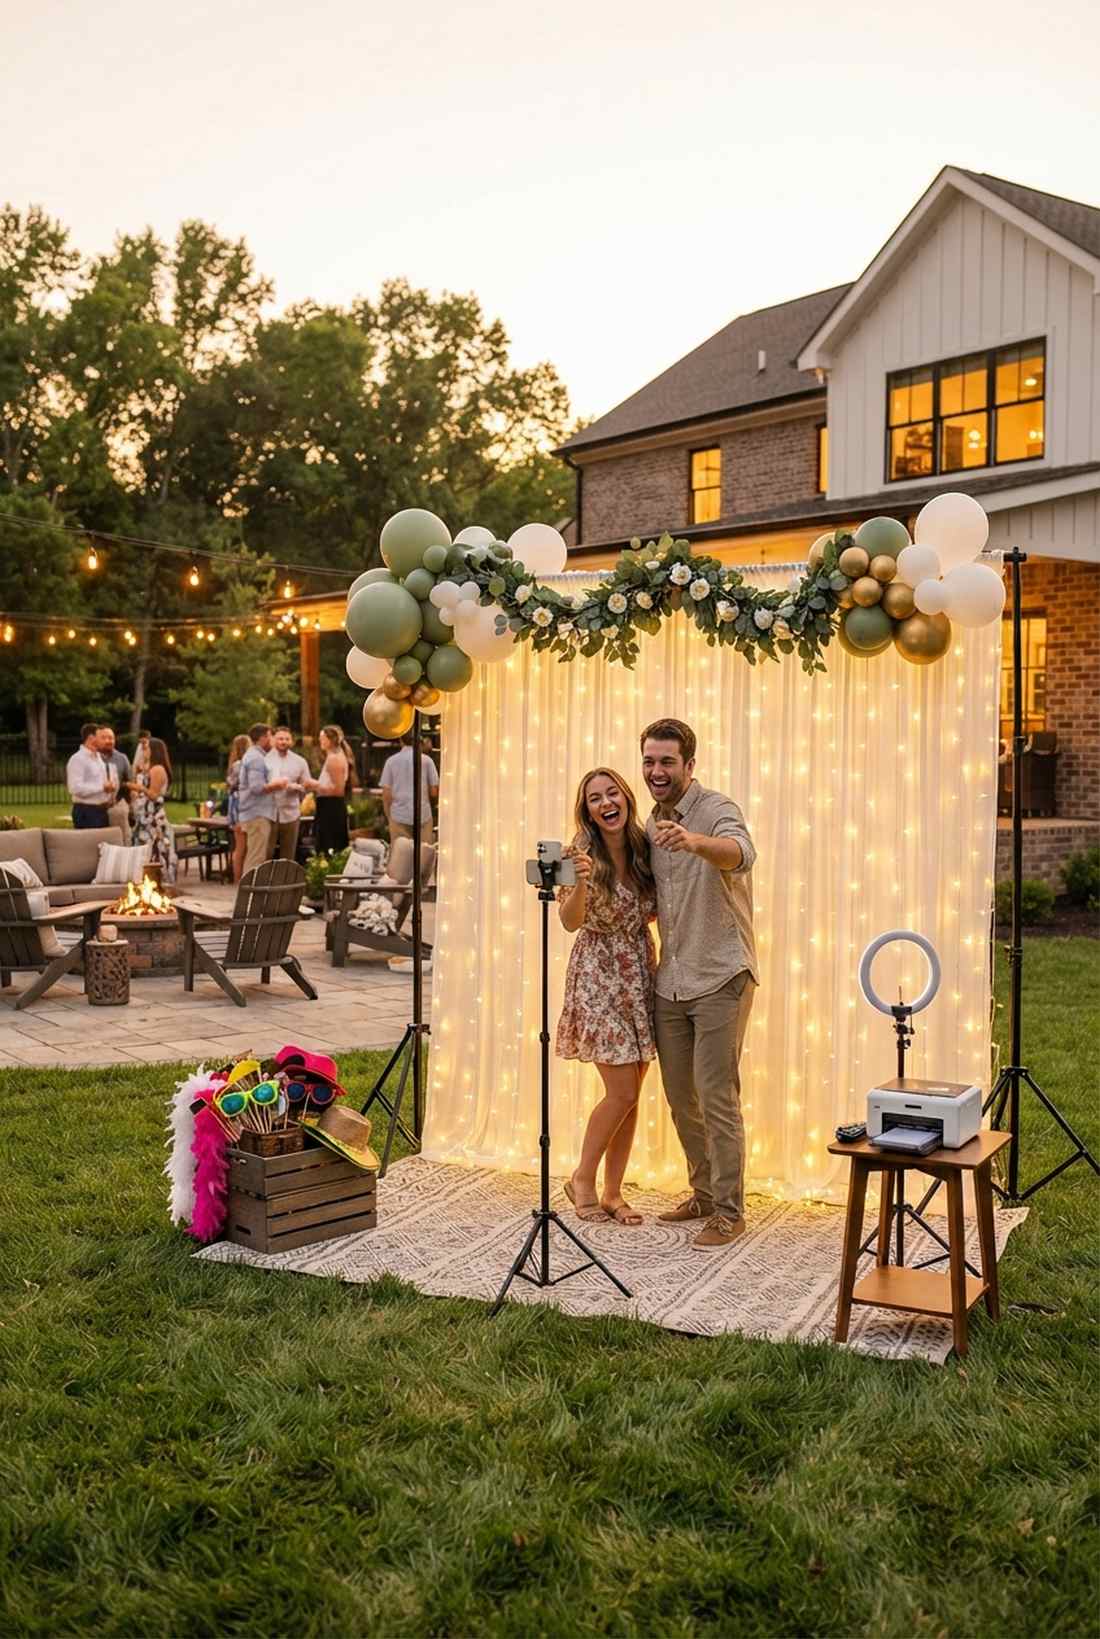
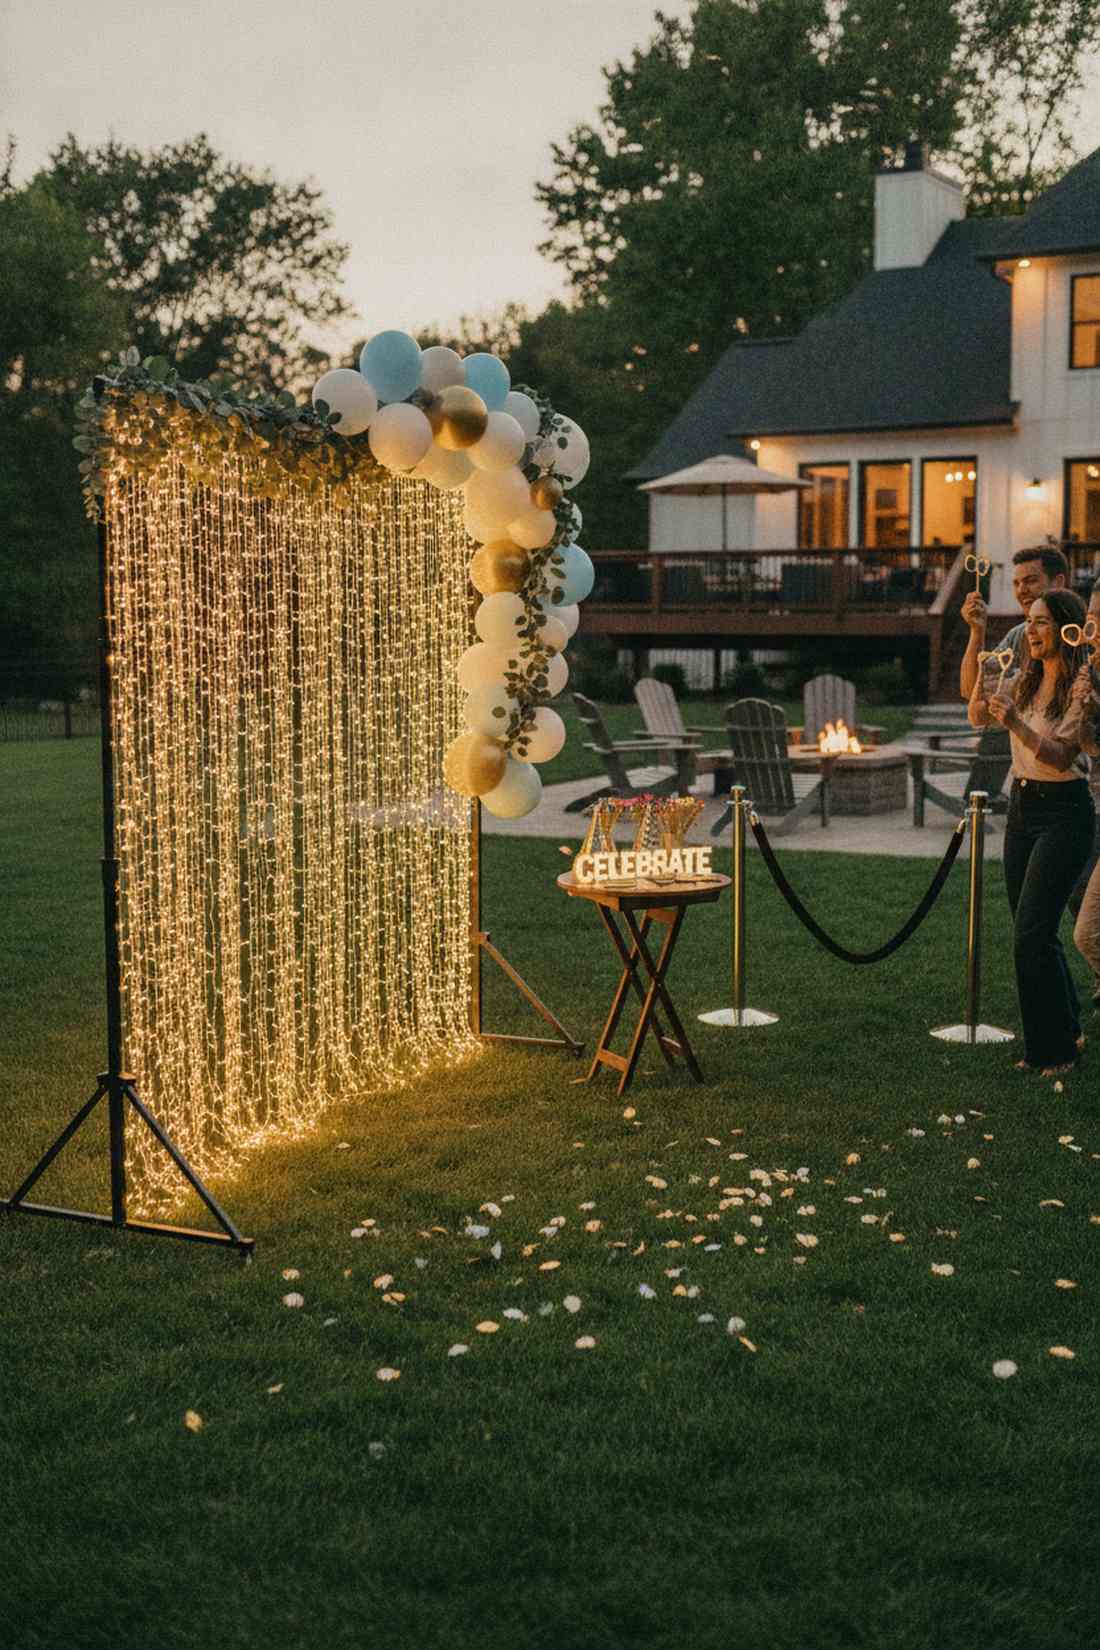
Creates a dedicated, highly photogenic zone that keeps party guests lingering outdoors. A pop-up glowing photobooth turns a boring patch of lawn into a structured, VIP event space in minutes.
Renting professional event backdrops costs hundreds, but draping fairy lights hanging over a collapsible garment rack or PVC square delivers a surprisingly premium look. Positioning this glowing wall perfectly hides ugly service areas or trash cans from your party photos.
You can build your own portable VIP backdrop for under $35. Save this genius hack for your next birthday or graduation party prep.
- Key Materials: Portable backdrop stand, dense LED sheets
- Vibe / Style: VIP event photobooth
- Difficulty: Fast snap-together assembly
- Budget Breakdown: Collapsible stand: $20 | LED sheet: $15
- Creator’s Tip: Add a balloon garland or faux eucalyptus across the top rail to hide the ugly mounting clips.
- Smart Sourcing: portable photo backdrop stands (starter kits) and dense warm-white curtain sheets.
37. Wedding Ceremony Curtains
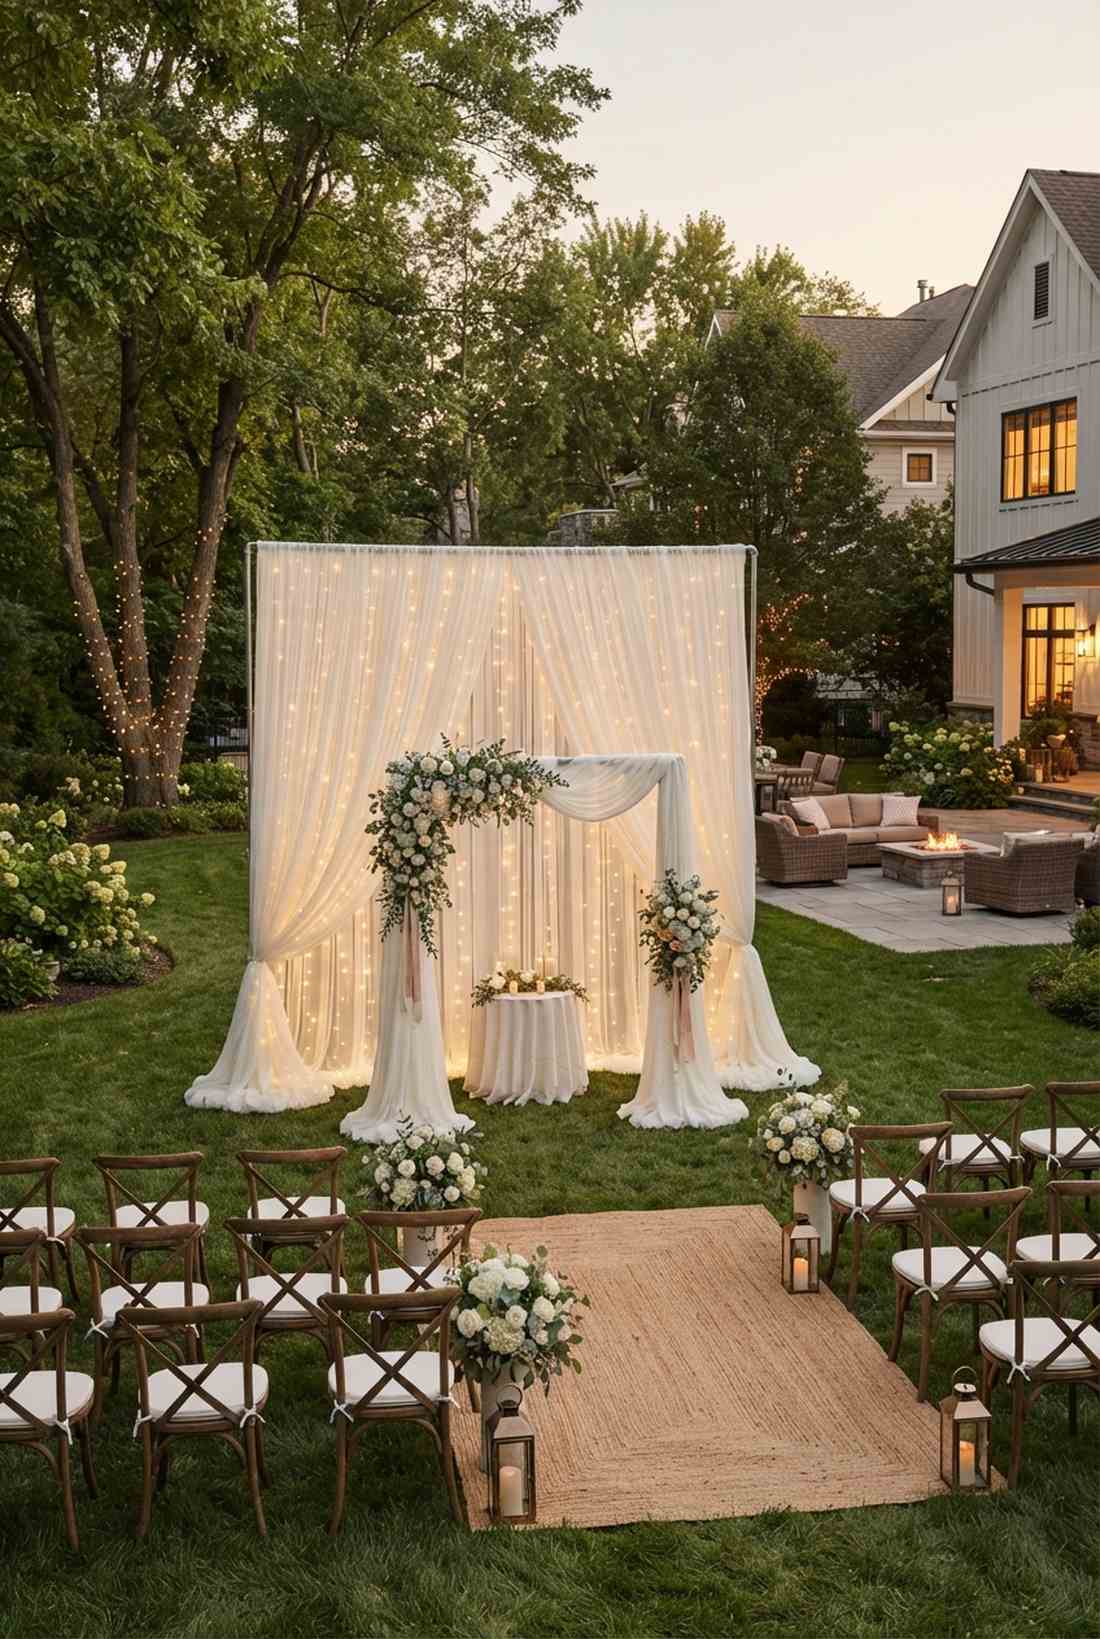
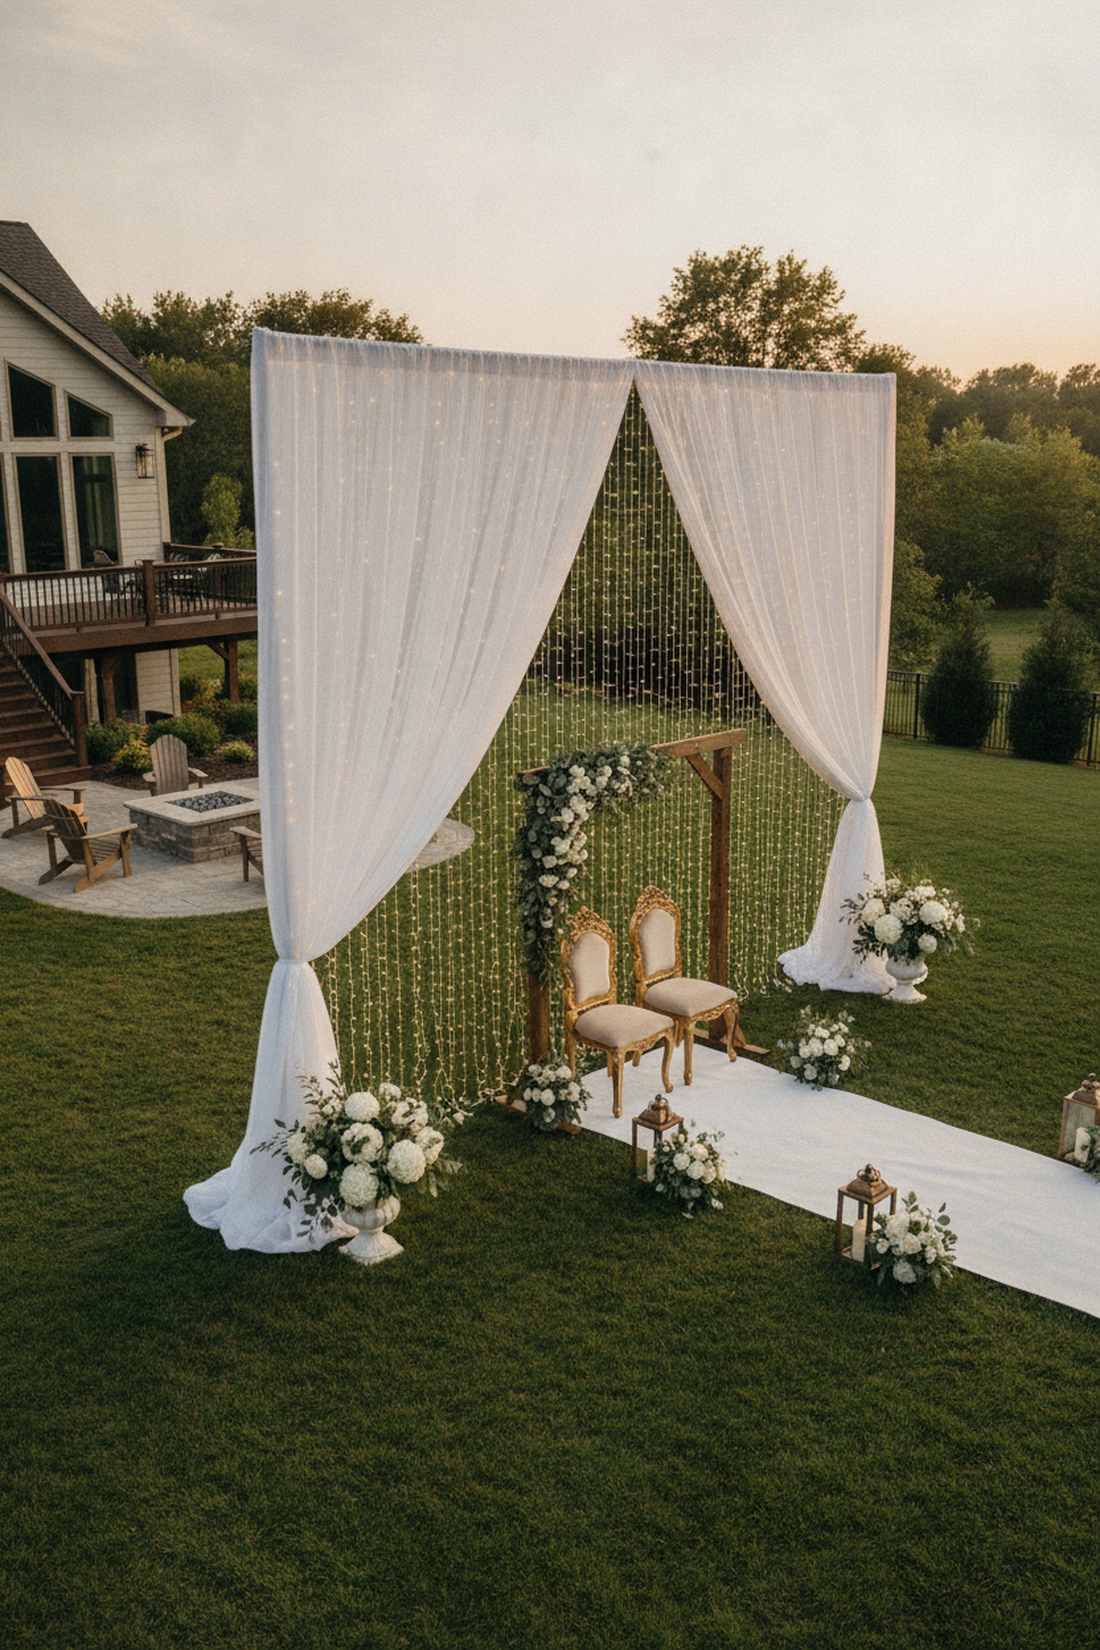
Radiates pure elegance and ensures every single photograph looks like a magazine cover. A romantic altar backdrop floods the ceremony site with soft, flattering vertical sparkle that professional photographers love.
Standard venue lighting is often harsh and unflattering, but combining a fairy lights curtain with heavy chiffon drapes gives a designer-level finish for pennies. Anchoring the structure heavily ensures an outdoor breeze doesn’t ruin your perfect “I do” moment.
Building a custom wedding altar glow costs roughly $70. Pin this to your DIY wedding board to save thousands on event rentals.
- Key Materials: Heavy-base pipe and drape, warm-white LEDs
- Vibe / Style: Elegant magazine-quality romance
- Difficulty: Moderate (requires heavy base anchoring)
- Budget Breakdown: Heavy base frame: $40 | Lights/Fabric: $30
- Creator’s Tip: Set the lights to a steady burn; twinkling lights behind an altar will ruin the photographer’s camera focus.
- Smart Sourcing: heavy-duty pipe and drape kits (outdoor) and premium warm-white wedding curtains.
38. Summer Outdoor Movie Screens
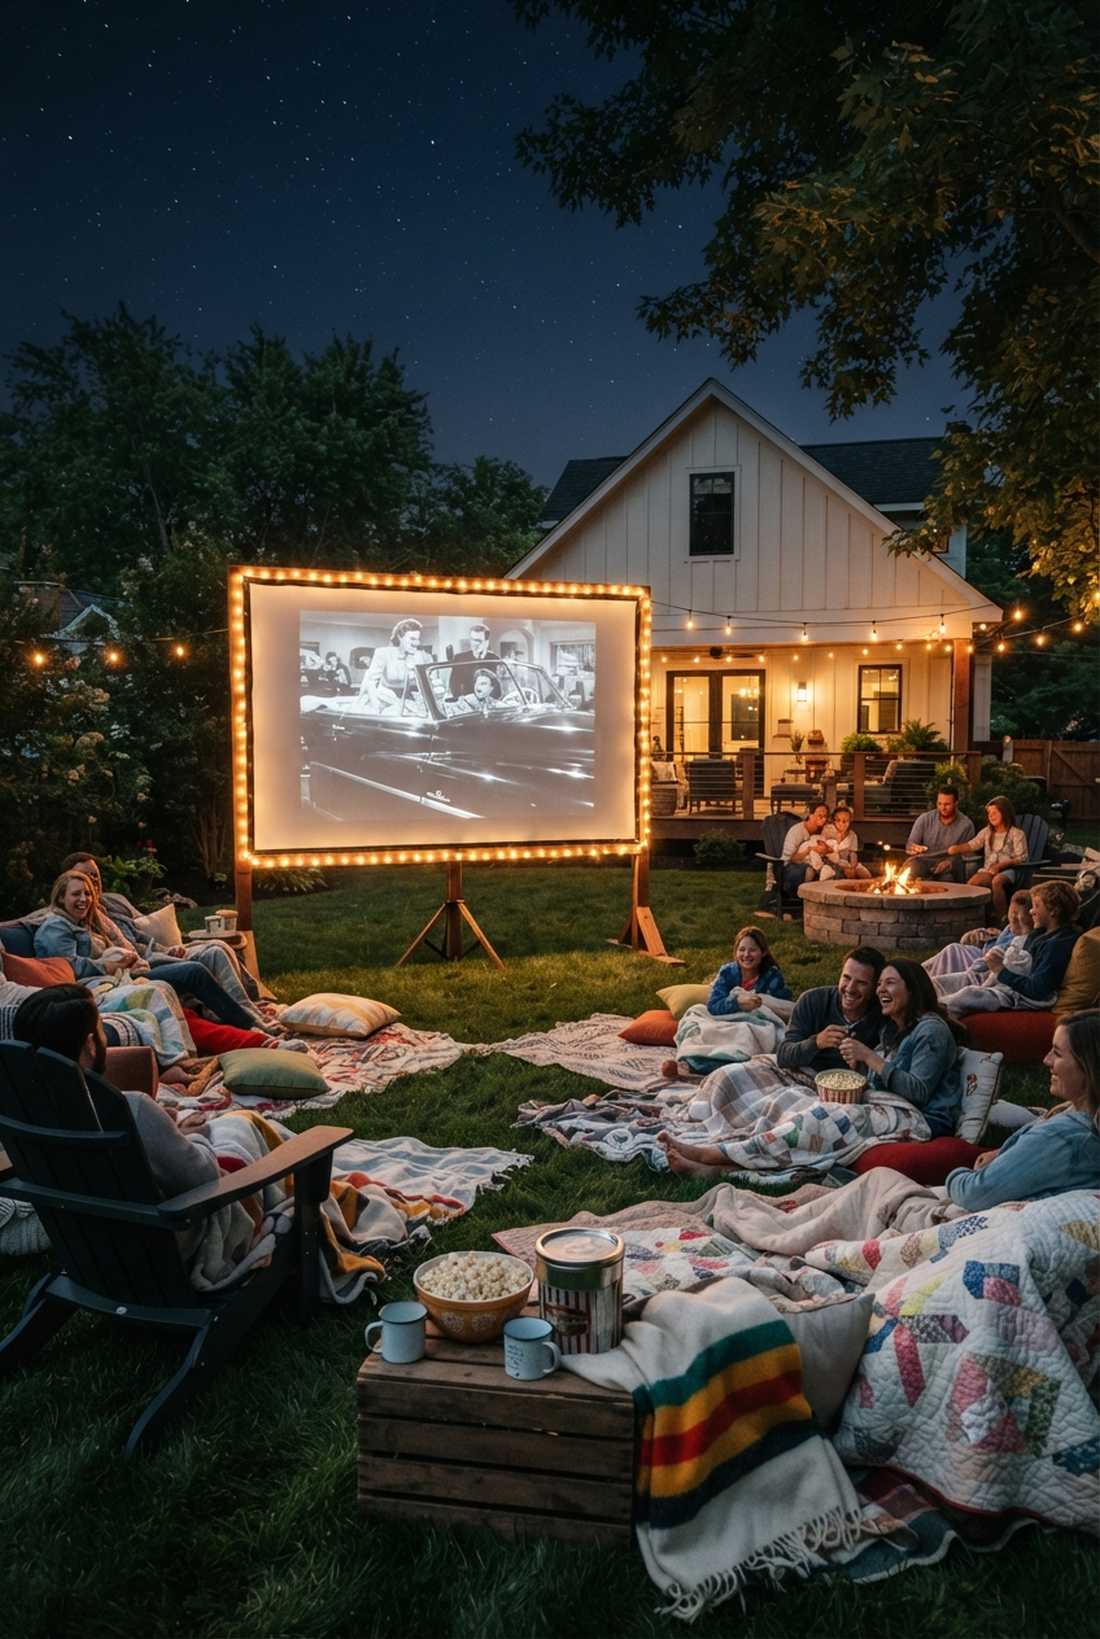
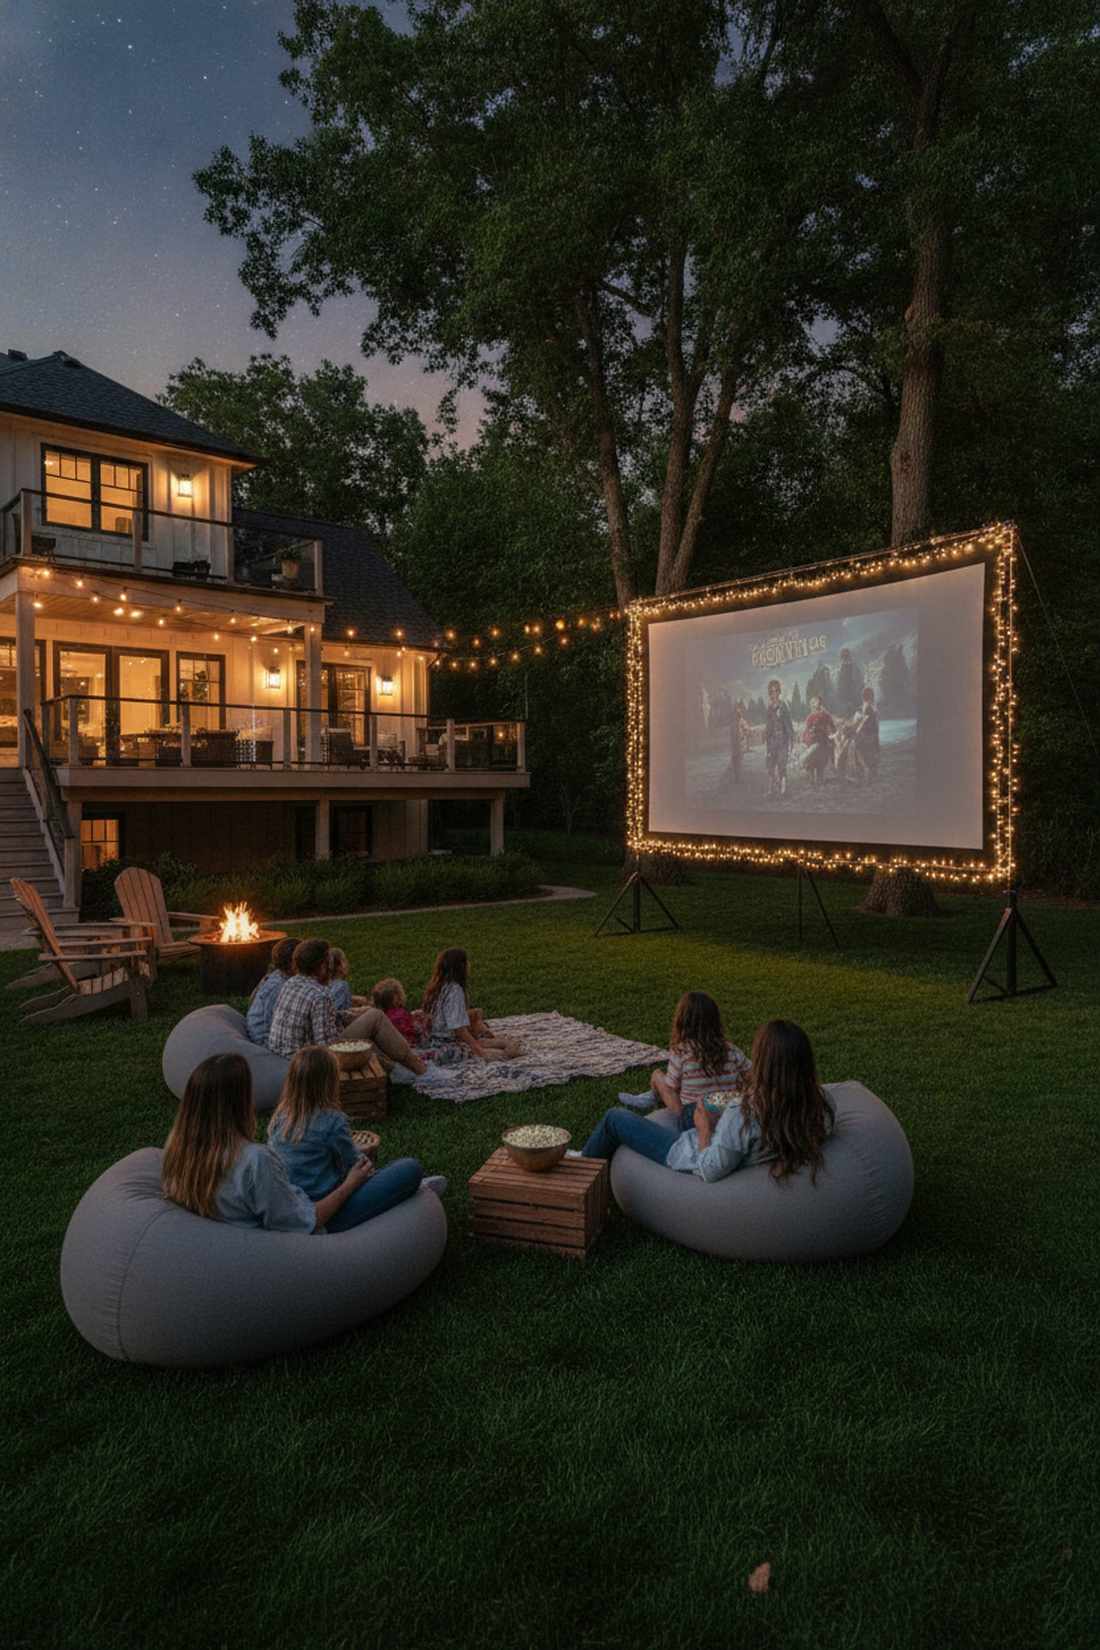
Makes your backyard feel like a nostalgic drive-in theater under the stars. A glowing cinema border softly defines the viewing area, providing crucial ambient light so guests can find their popcorn without ruining the projection.
Blasting patio lights completely washes out the movie projector, but framing the screen with a dimmable fairy lights hanging border looks far more expensive than it is. Reducing the intensity right as the movie starts gives that authentic, lights-going-down theater experience.
Adding this theater border costs just $20. It’s a mandatory upgrade for anyone hosting summer movie nights for the neighborhood.
- Key Materials: Border rope curtains, inline dimmer
- Vibe / Style: Nostalgic backyard cinema
- Difficulty: Very easy peel-and-stick
- Budget Breakdown: Border lights: $15 | Dimmer: $5
- Creator’s Tip: Only place the lights on the back or outer frame of the screen, never shining forward toward the viewer’s eyes.
- Smart Sourcing: dimmable fairy light borders (starter kits) and blackout outdoor projector screens.
39. Winter Greenhouse Curtains
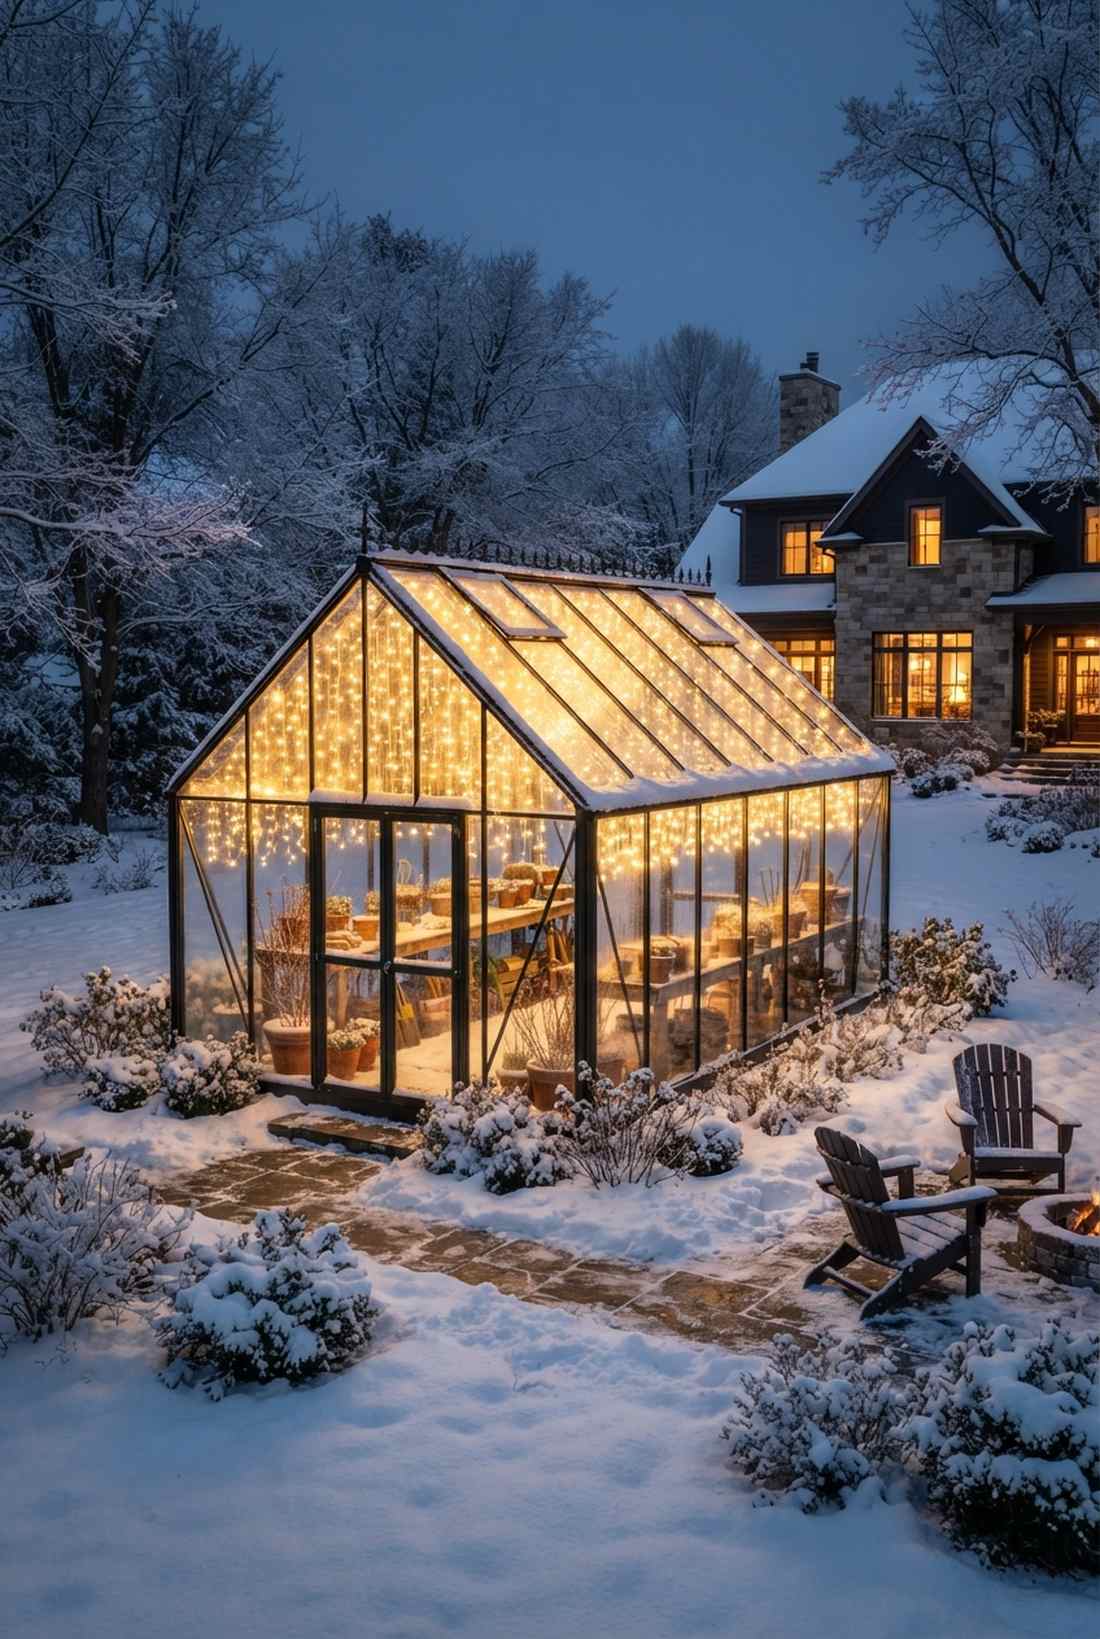
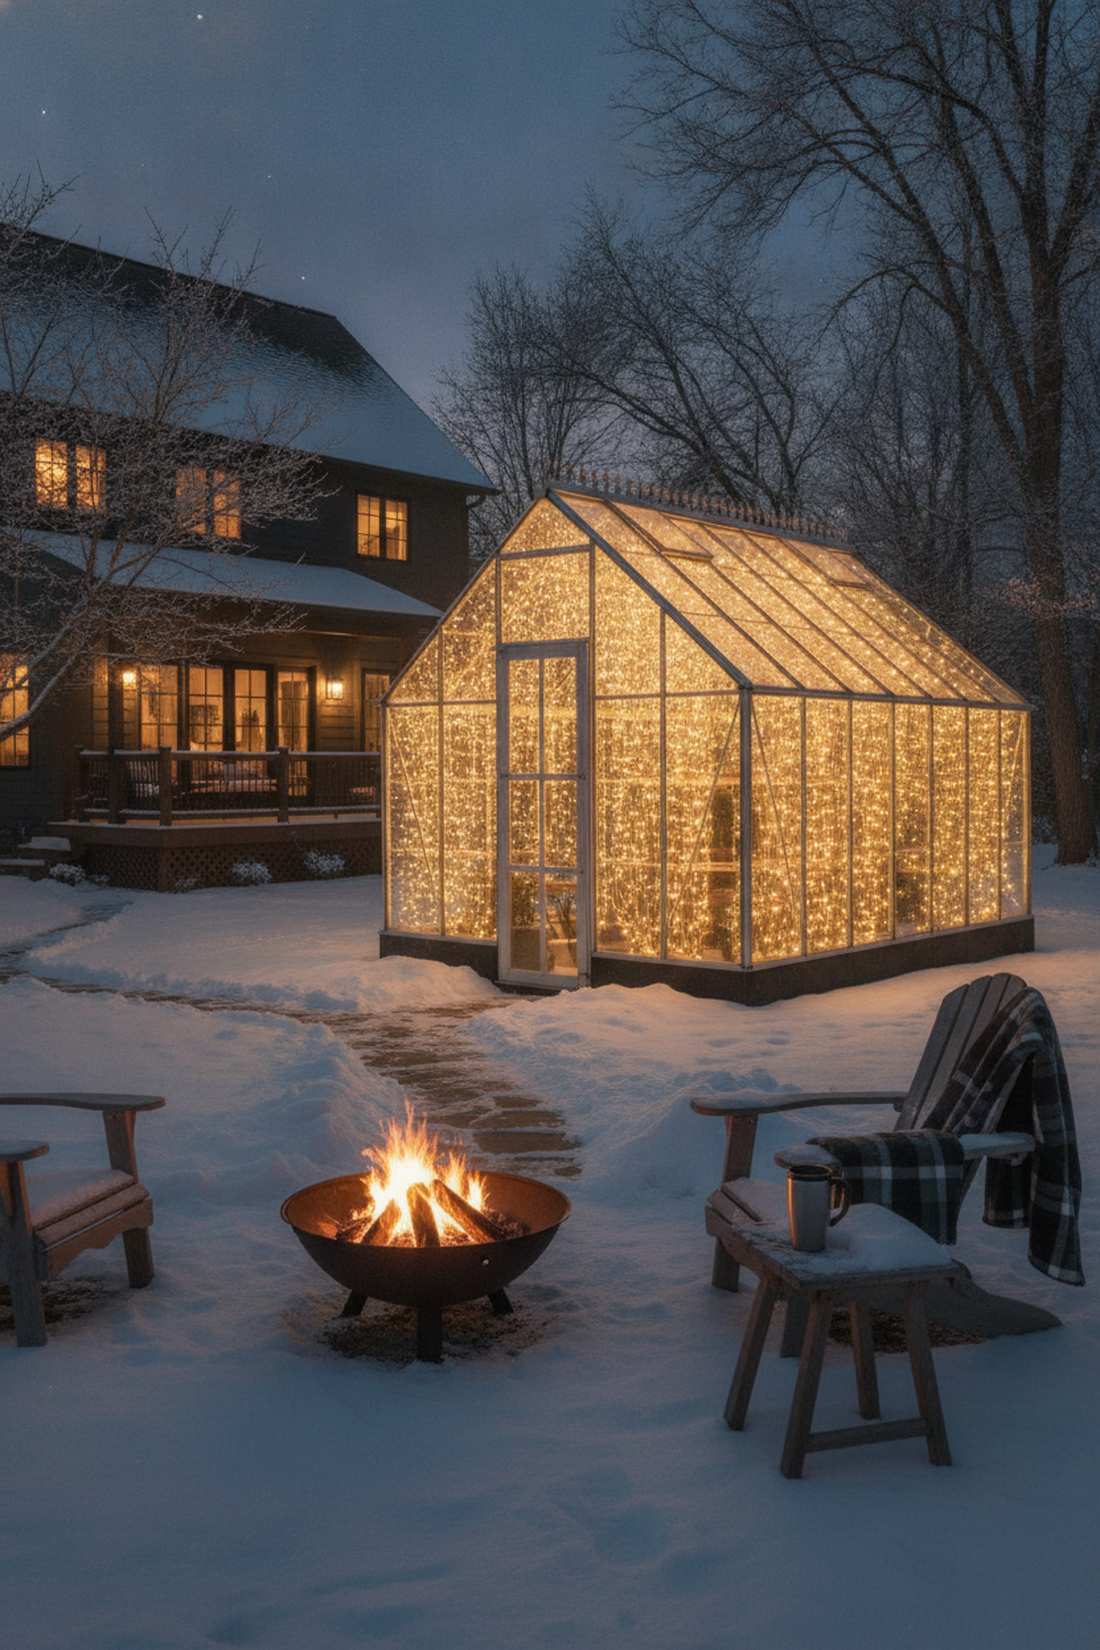
Turns a dormant, gloomy glass house into a brilliant, glowing winter jewel box. A glasshouse architecture highlight keeps the garden visually alive even when buried under three feet of snow.
Leaving greenhouses dark in winter wastes amazing structural beauty, but lining the ridge pole with a fairy lights curtain delivers a remarkably premium finish. The warm glow bouncing off the glass panes acts as a massive lantern visible from your warm living room.
Lighting up a backyard greenhouse costs about $35. Save this to your winter garden prep board to fight off seasonal yard depression.
- Key Materials: High-humidity rated LEDs, glass suction clips
- Vibe / Style: Glowing winter jewel box
- Difficulty: Fast interior hanging
- Budget Breakdown: Waterproof LEDs: $25 | Suction clips: $10
- Creator’s Tip: Ensure your light strings are rated for high humidity, as winter greenhouses trap massive amounts of condensation.
- Smart Sourcing: IP65 sealed fairy light curtains (high humidity) and heavy-duty window suction hooks (bulk pack).
Before you pack away your yard for the fall, try this insanely cheap harvest lighting trick to extend your patio season by two whole months…
40. Harvest Celebration Displays
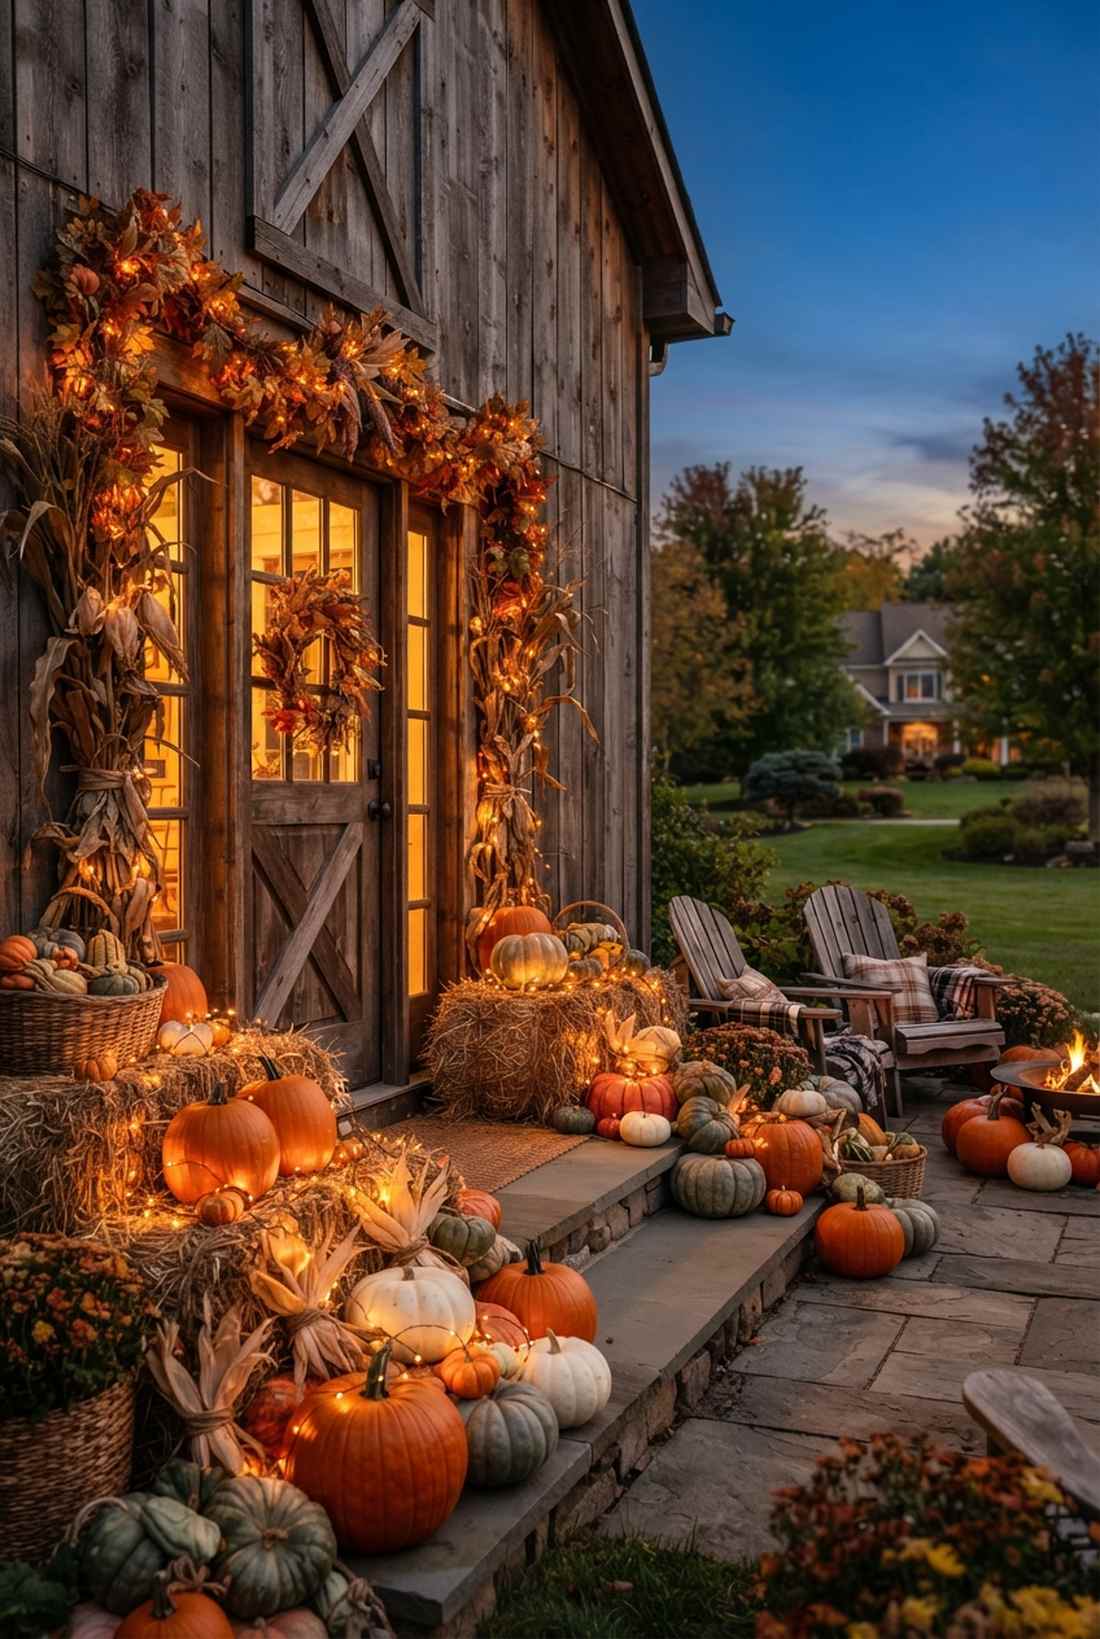
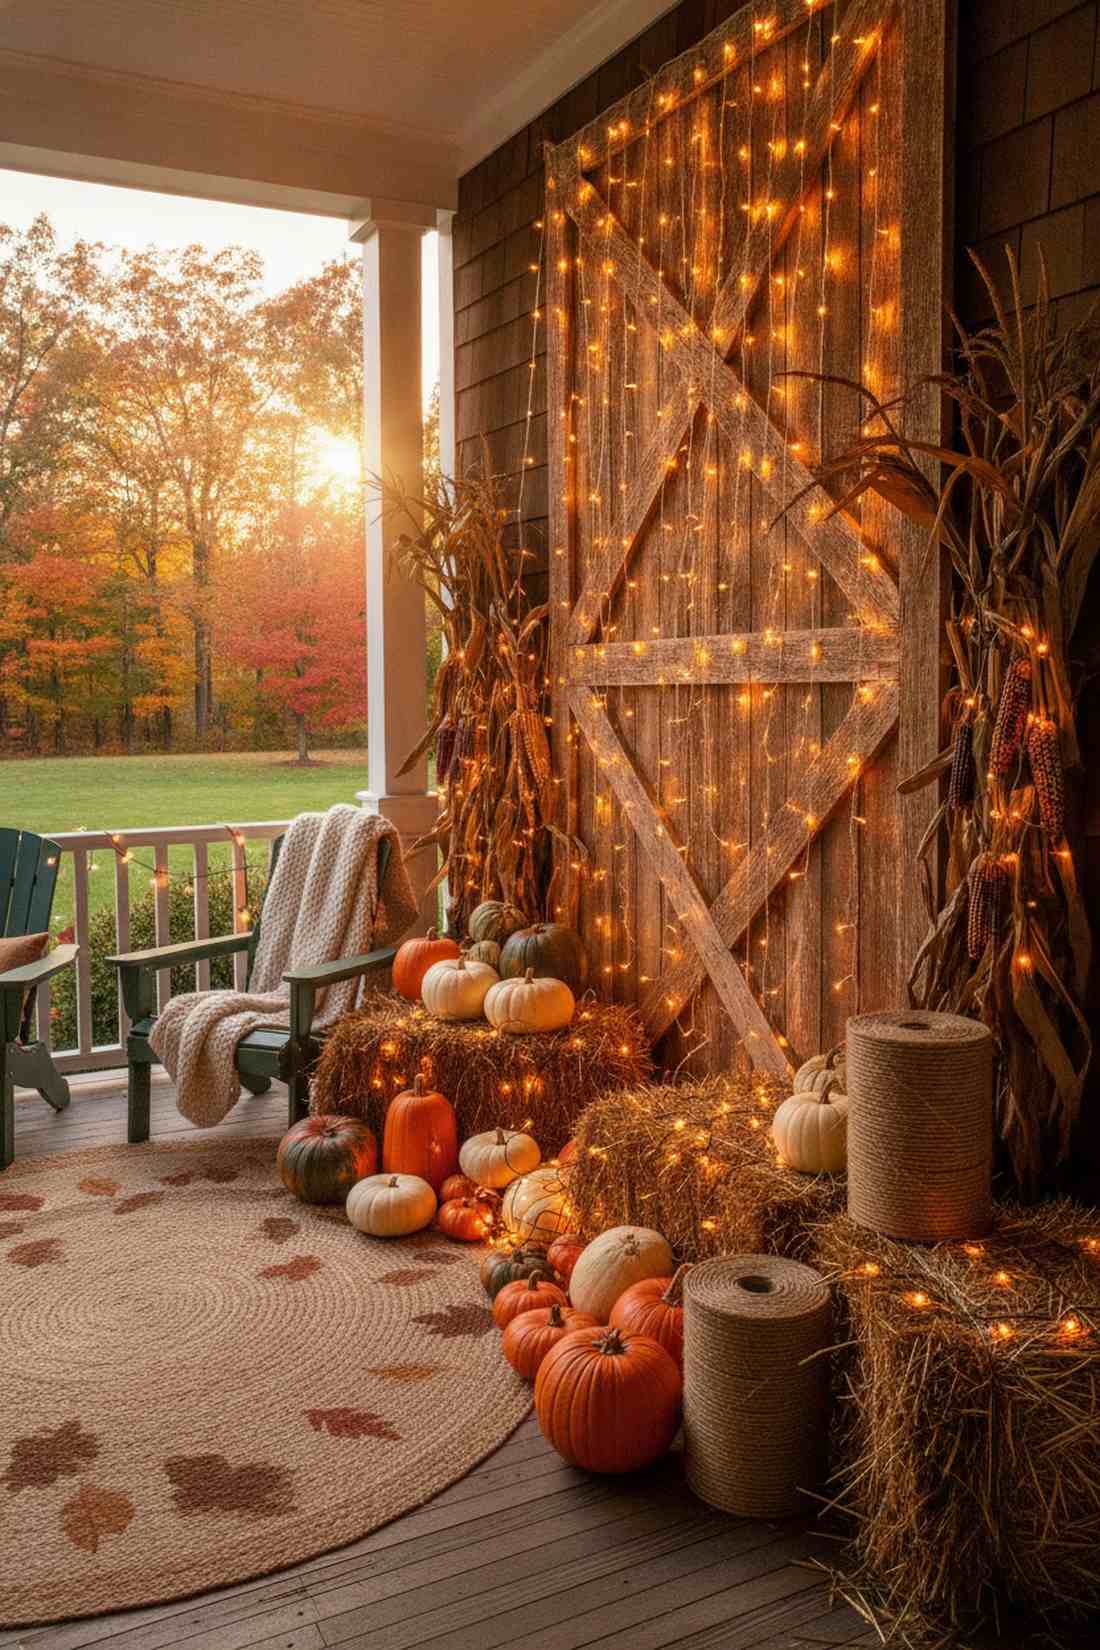
Brings a rich, glowing warmth to hay bales and autumn displays as the days get shorter. A rustic autumn backdrop perfectly frames pumpkins and corn stalks, extending your porch visibility well into the crisp evening.
Cold white lights totally ruin the cozy fall aesthetic, but utilizing amber-tinted fairy lights hanging behind a rustic barn door gives a designer-level finish. The orange-hued LEDs complement the harvest color palette beautifully without looking like premature Christmas decor.
This cozy autumn glow costs roughly $25 to achieve. Pin this to your fall porch inspiration board for an instant seasonal glow-up.
- Key Materials: Amber-tinted fairy drops, rustic twine
- Vibe / Style: Cozy autumn harvest
- Difficulty: Easy draping
- Budget Breakdown: Amber lights: $20 | Twine: $5
- Creator’s Tip: Bundle the strings slightly thicker near the base of pumpkins to make them look like they are glowing from below.
- Smart Sourcing: amber-glow copper string lights (premium) and weatherproof rustic garden twine.
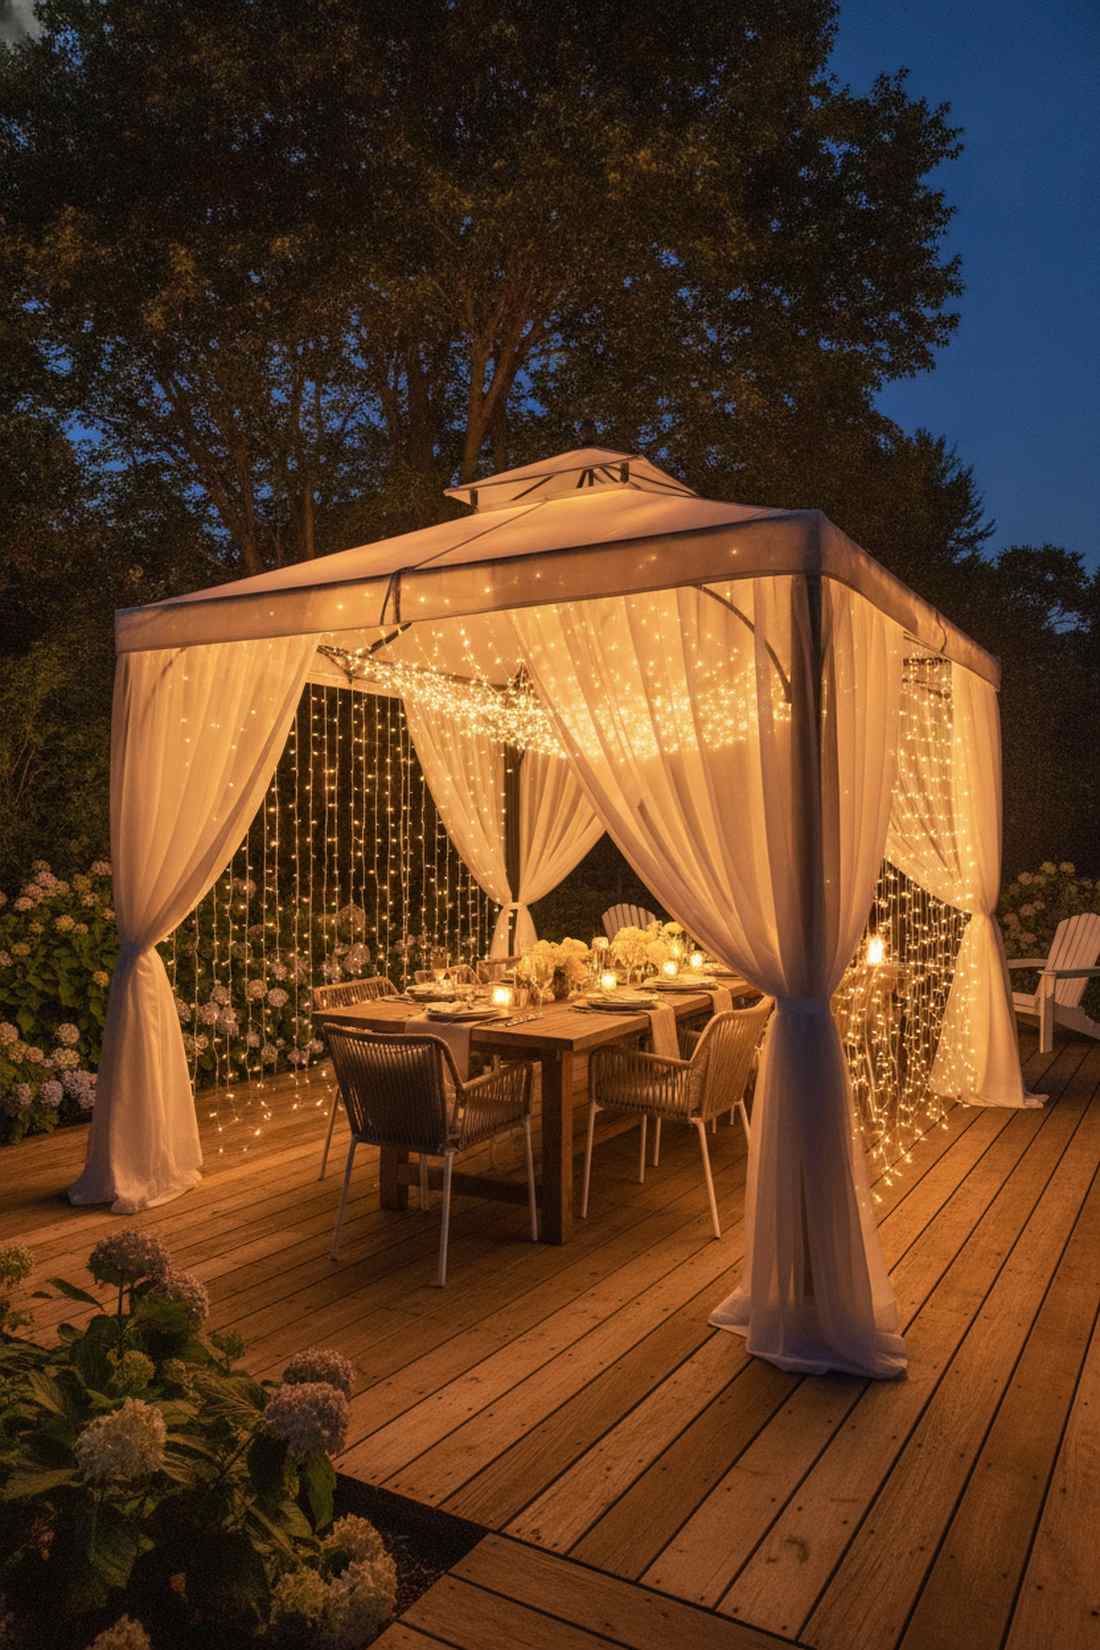
41. Spring Garden Party Canopies

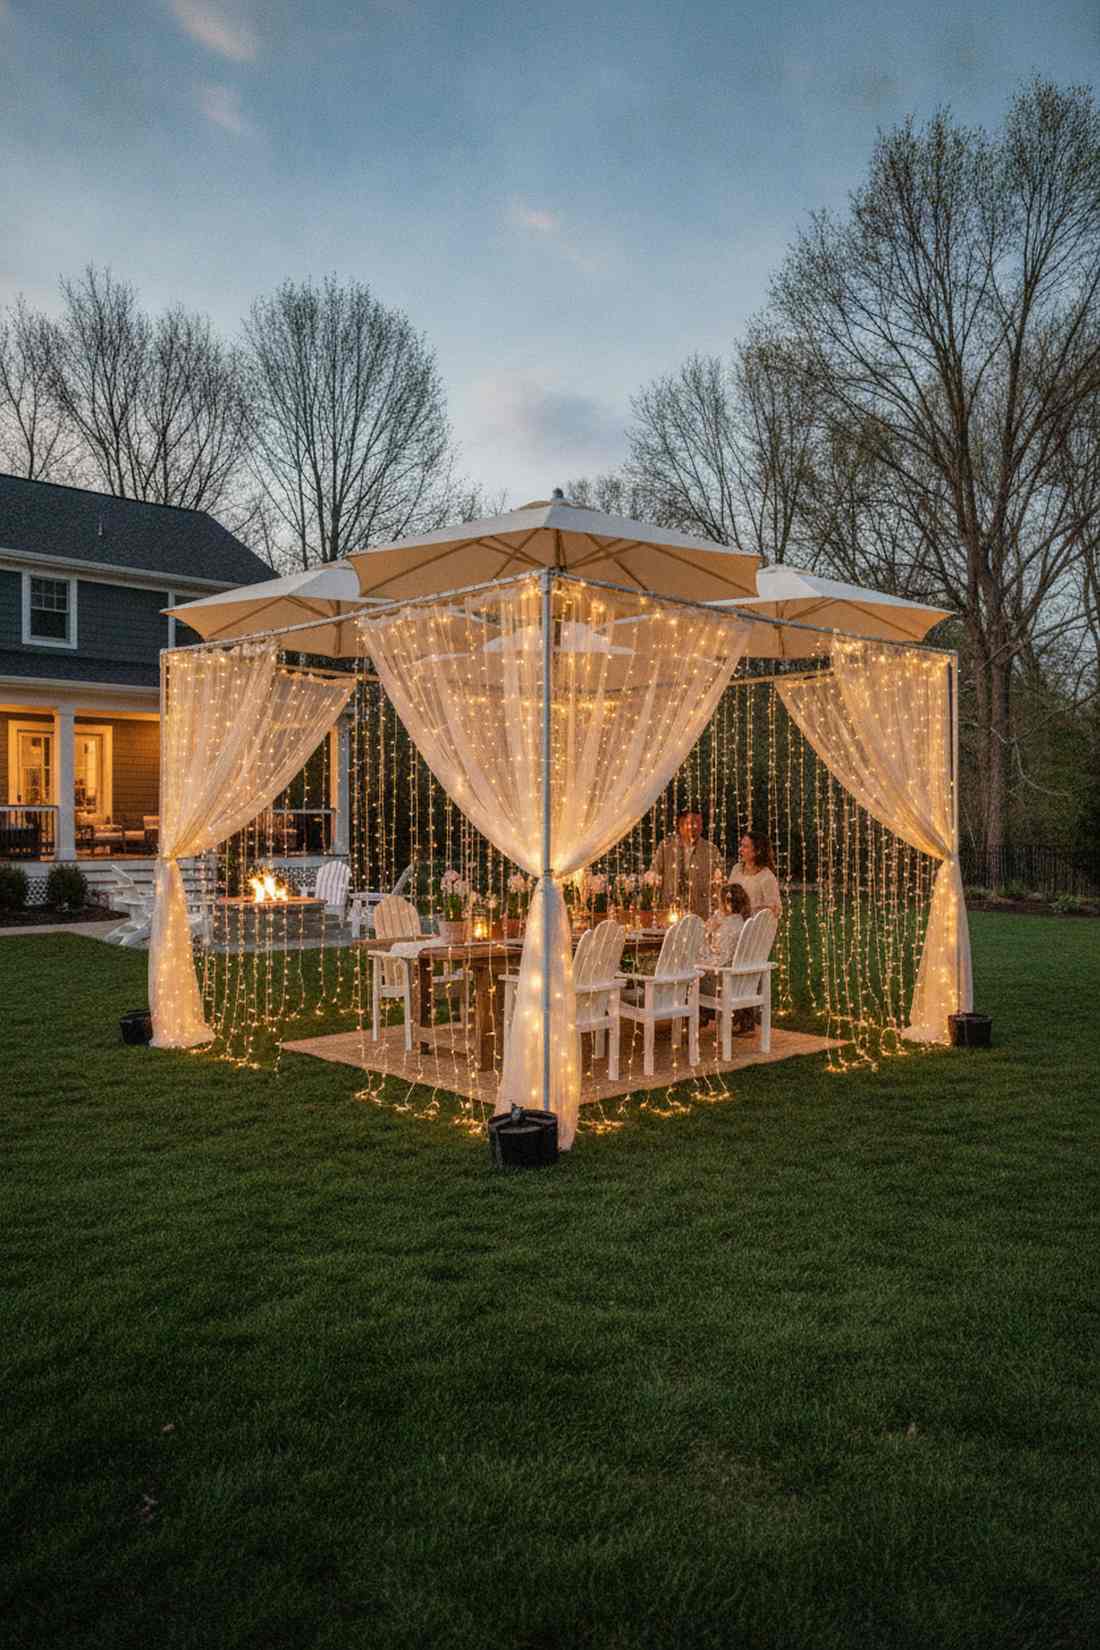
Compensates for early-season bare branches with a stunning, artificial blooming glow. A temporary floating pavilion builds an outdoor room over your lawn exactly when you want to celebrate the end of winter.
Hosting early spring parties is tough when the garden looks dead, but draping a fairy lights curtain from a pop-up canopy looks far more expensive than it is. Blending the lights with market umbrellas and sheer fabric completely distracts from the lack of spring flowers.
Creating this pop-up spring room runs around $45. Highly recommended for Easter gatherings or early May birthdays.
- Key Materials: Temporary canopy frame, cascading warm-whites
- Vibe / Style: Elegant pop-up garden room
- Difficulty: Moderate frame assembly
- Budget Breakdown: Canopy structure: $25 | Lights: $20
- Creator’s Tip: Stake the corners of the canopy heavily, as spring weather is notorious for unexpected wind gusts.
- Smart Sourcing: pop-up garden canopy frames (starter kits) and outdoor globe curtain drops.
42. Poolside Evening Ambiance
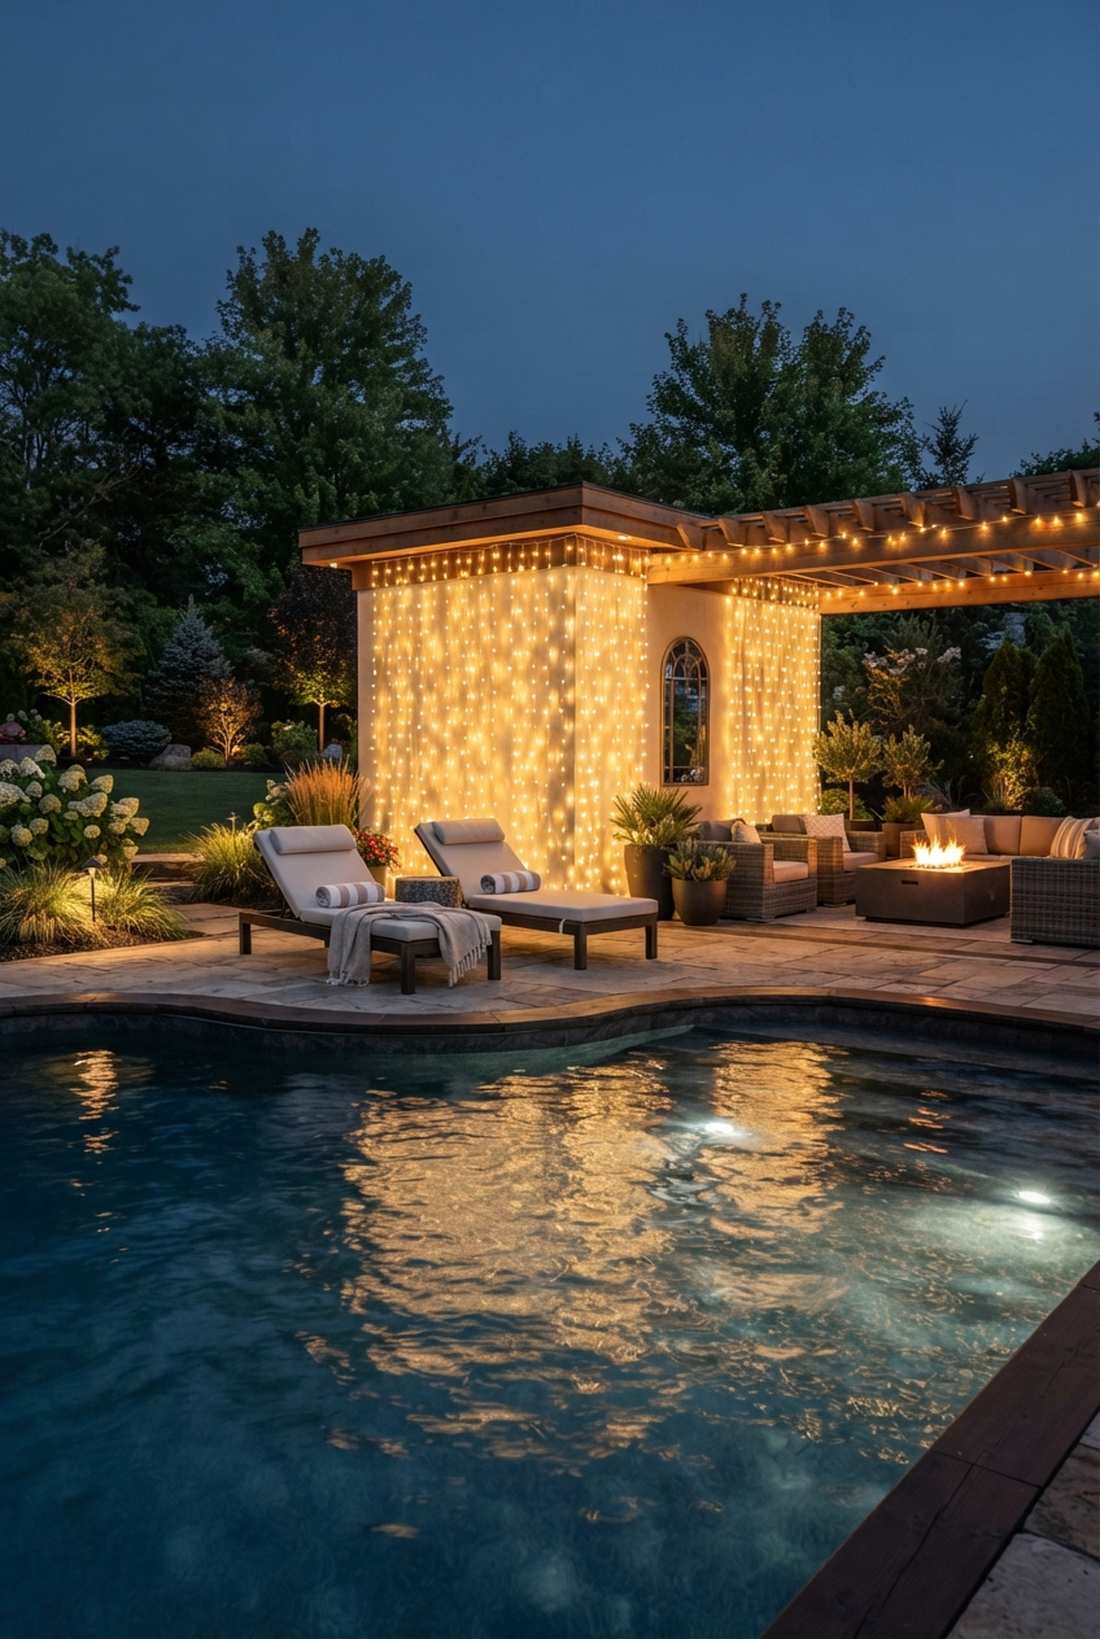

Casts breathtaking, resort-style reflections across the rippling water all night long. A cabana mirror-glow setup mounts safely on privacy fences near the pool, flooding the deck with luxurious, safe illumination.
Putting high-voltage lighting near water is dangerous and illegal, but mounting low-voltage fairy lights hanging strictly on the cabana walls delivers a remarkably premium finish safely. The vertical lines stretch the visual height of the pool house while keeping all electricity far from the splash zone.
Upgrading your poolside aesthetic costs exactly $50. Save this to your luxury backyard pool board for the ultimate night-swim vibe.
- Key Materials: Low-voltage IP65 LEDs, secure wall brackets
- Vibe / Style: Luxury nighttime resort
- Difficulty: Requires strict safety distancing
- Budget Breakdown: Low-voltage LEDs: $40 | Brackets: $10
- Creator’s Tip: Use a low-voltage transformer plugged safely indoors to completely eliminate electric shock risks near the water.
- Smart Sourcing: low-voltage outdoor fairy curtains (pool safe) and waterproof cable routing clips (bulk pack).
Bringing Vertical Sparkle to Your Garden
A high-end fairy lights curtain installation is the ultimate secret weapon for transforming basic vertical surfaces into expensive-looking evening focal points. By utilizing the 42 precise blueprints broken down in this guide, you can skip the generic craft-store look and build highly durable, commercial-grade vertical sparkle on a DIY budget. From tension-wire fence installations to premium double-layered dimensional canopies, the key to success lies in smart sourcing and proper weatherproofing. Invest in UV-coated cables, secure your anchor points perfectly, and start building your custom outdoor luxury space today.
Frequently Asked Questions
What is the difference between curtain lights and regular string lights?
Curtain lights feature a robust main horizontal cable designed to hold multiple vertical light strands that drop at regular intervals, delivering a dense waterfall aesthetic perfectly suited for backdrops. Regular string lights are just one continuous line, making them ideal for wrapping trees but terrible for covering flat spaces. If you want that premium, full-coverage look, you must invest in high-density curtain kits rather than wasting money taping regular strings back and forth.
How do I hang fairy lights curtain outdoors without damaging surfaces?
You don’t need to drill holes into your expensive siding or brick. Utilize heavy-duty outdoor adhesive hooks, rust-proof tension rods, or freestanding base frames to achieve a damage-free setup. Renters should specifically look for outdoor-rated Command hooks or UV-coated zip ties to wrap pergola beams securely. Grabbing a temporary suspension starter kit ensures you get a flawless, professional hang without losing your security deposit.
What waterproof rating should I look for in outdoor curtain lights?
Never buy standard indoor lights for outdoor setups—they will short out and rust. You must select sets with a minimum IP44 rating for covered patios, but for exposed fences and tree drops, upgrading to commercial-grade IP65 ratings is mandatory. IP65 ensures your miniature garden supplies and wiring can withstand direct heavy rain and sprinkler jets. Always seal your plug connections with dielectric grease for ultimate weatherproofing.
How far apart should I space curtain light attachment points?
For a flawless, sag-free look, space your mounting clips exactly 6-10 inches apart along your top support cable. If you are building a dense photo backdrop, compress that spacing to 4 inches to create an intense, expensive-looking light wall. Grabbing a bulk pack of outdoor cable clips ensures you never have to stretch the wire too far, which prevents wind from ripping your setup down during storms.
Can I connect multiple curtain light sets together?
Yes, but you must buy specific “connectable” starter kits designed for end-to-end linking. Most premium sets allow you to daisy-chain 3 to 5 units on a single power adapter. Attempting to splice cheap, non-connectable lines together is a massive fire hazard. Always check the manufacturer’s wattage limit, and opt for low-voltage LED bulk packs to safely cover massive fences or double-layered pergola installations.