Designing an outdoor seating fire pit instantly elevates backyard aesthetics. Uncover precise budget breakdowns and hidden commercial-grade material sources. Achieve a luxury resort finish without expensive contractor markups.
Design Snapshot Key Principles
- Clearance Standards: Maintain 18-24 inches between pit edge and knee position for safe ingress and egress
- Heat Distribution: Circular arrangements provide even thermal coverage; linear pits suit boundary applications
- Seating Capacity: Allocate 24 inches of seat frontage per person to prevent crowding in social configurations
- Walkway Access: Reserve 24-36 inches behind primary seating for circulation, especially in high-traffic zones
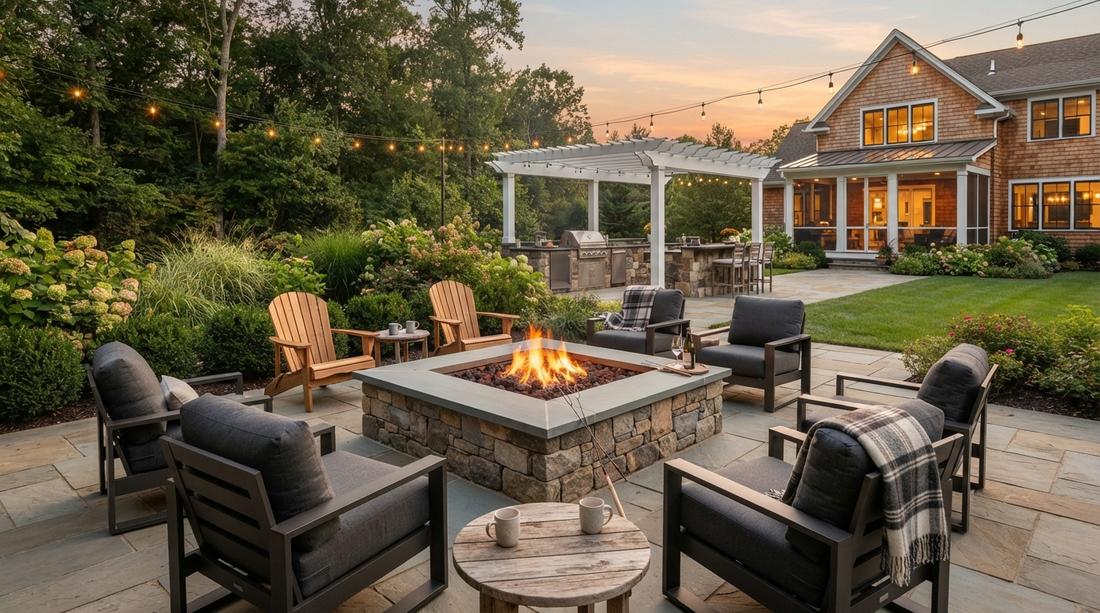
Circular & Intimate Configurations
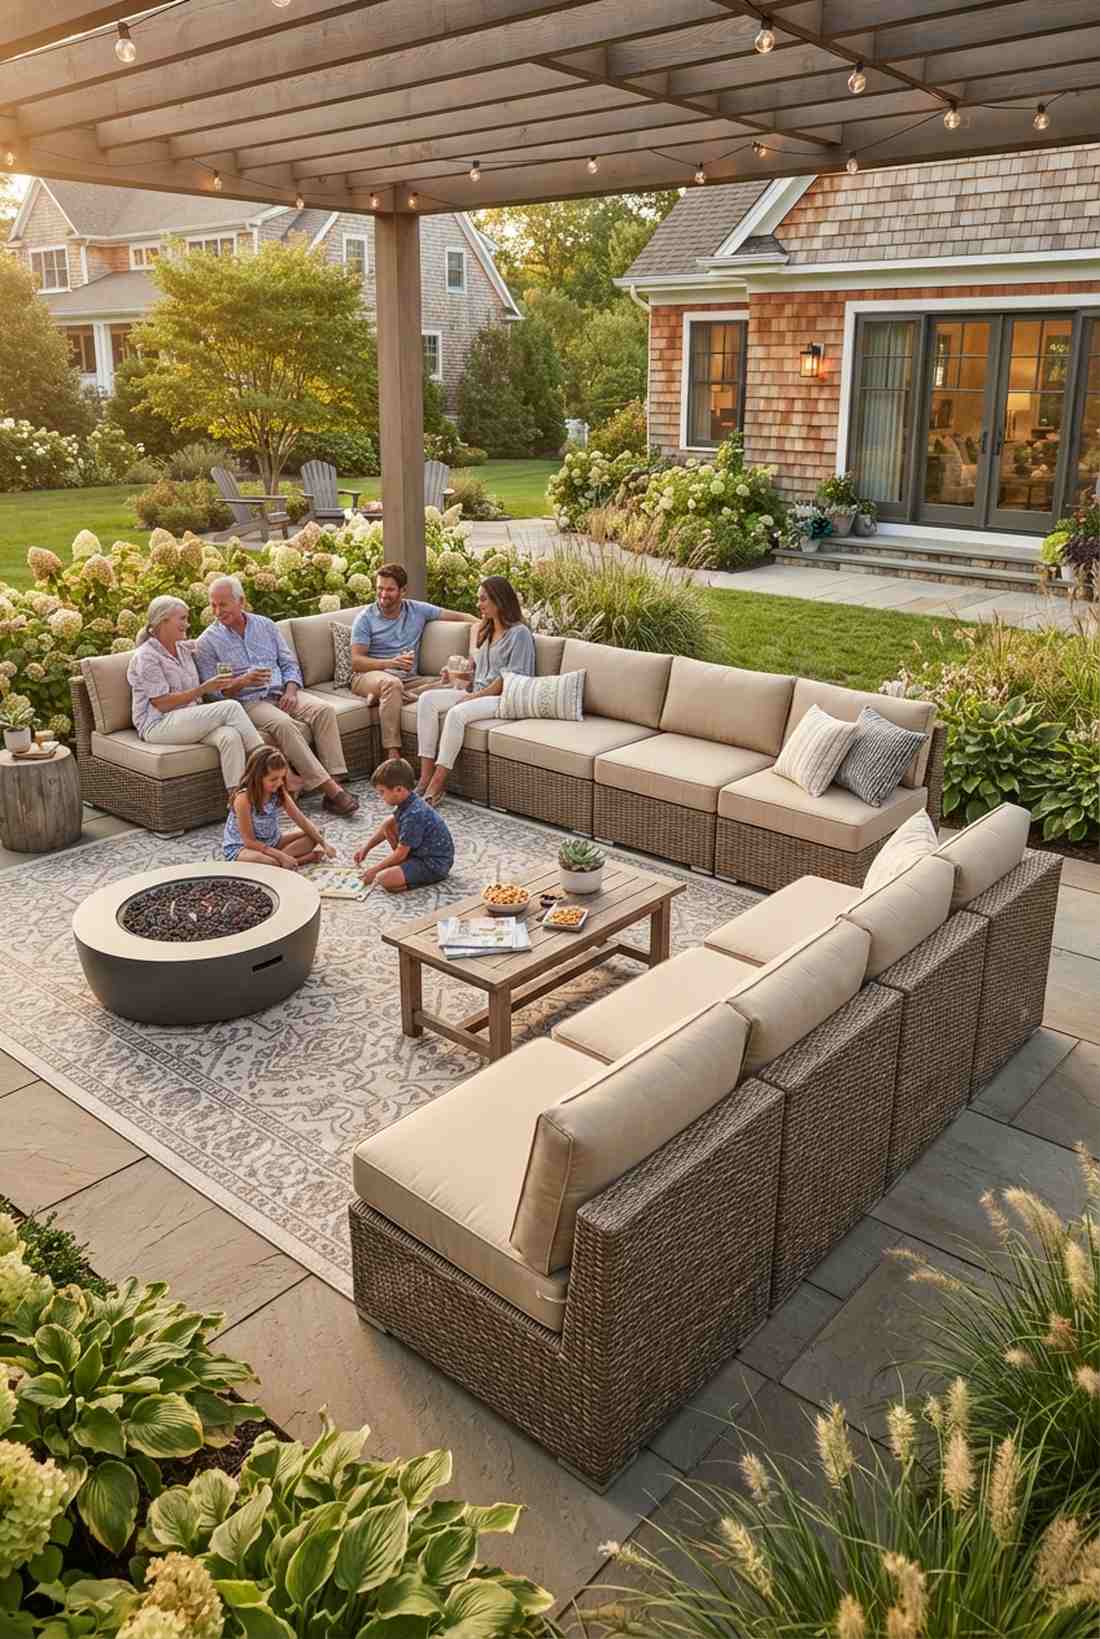
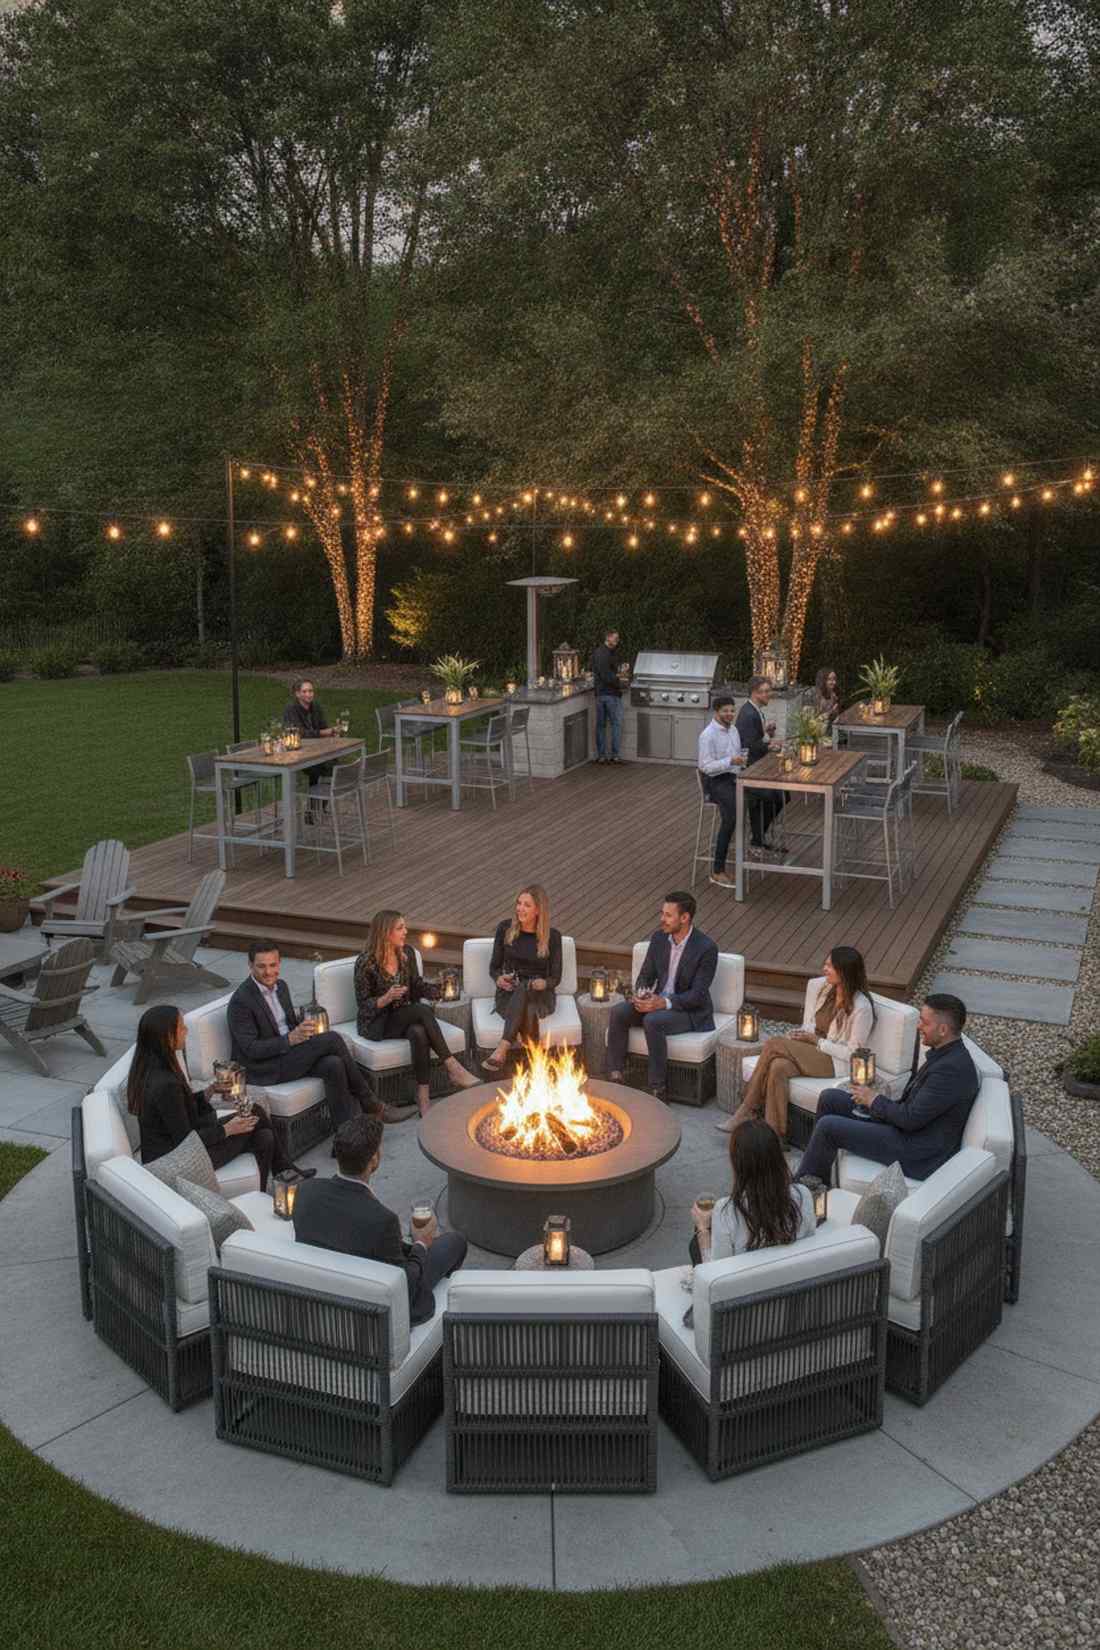
Circular fire pit arrangements optimize heat distribution by creating equidistant seating positions around a central flame source. This geometry produces uniform thermal zones that accommodate 6-12 people while maintaining conversational sight lines across the entire group.
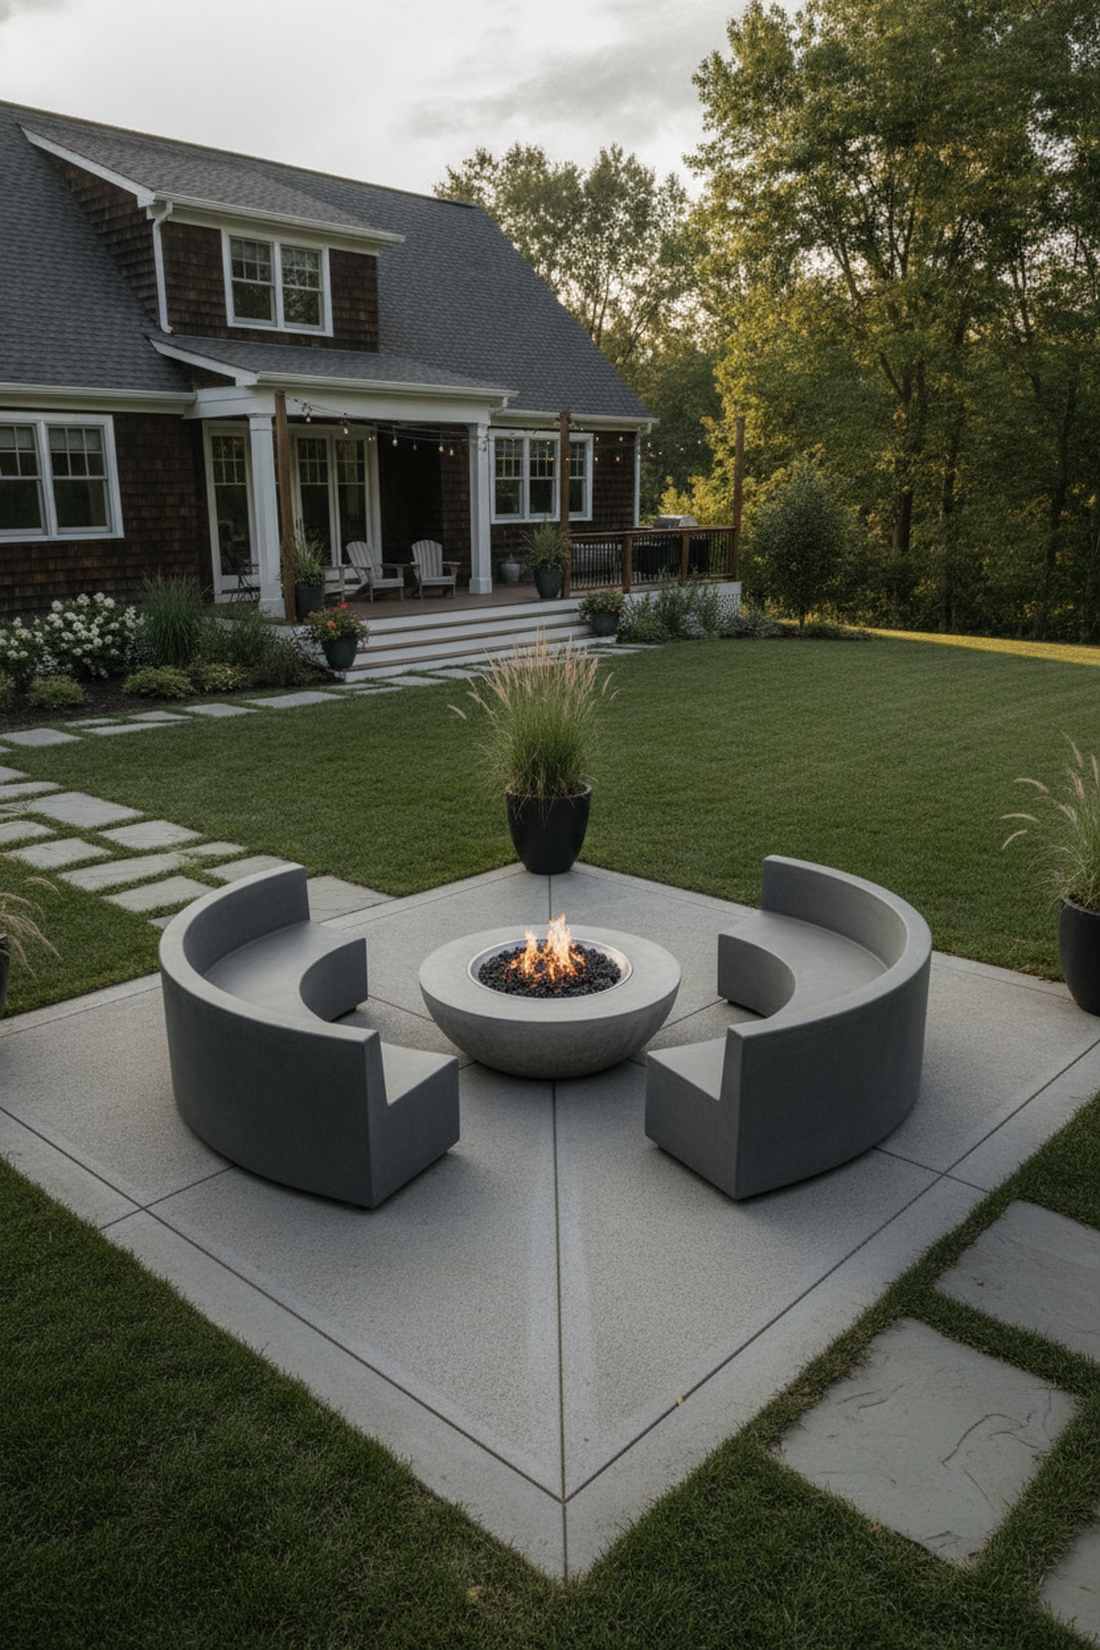
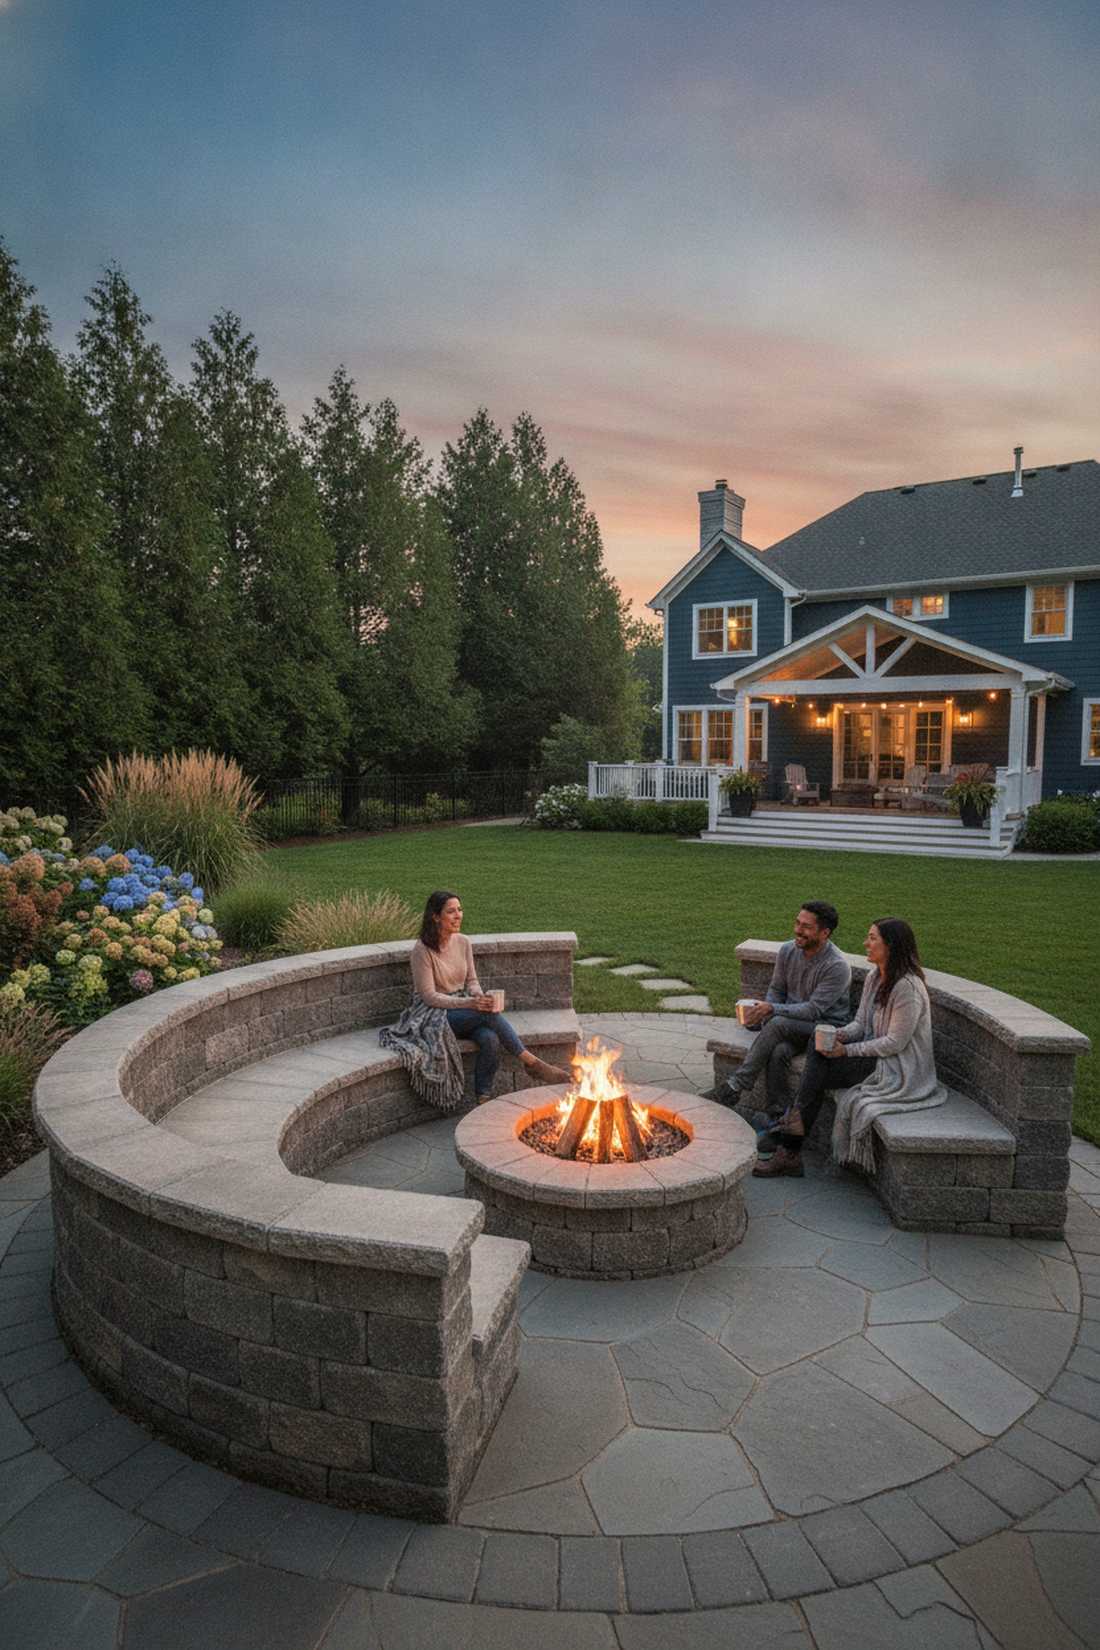
1. Full-Circle Freestanding Ring
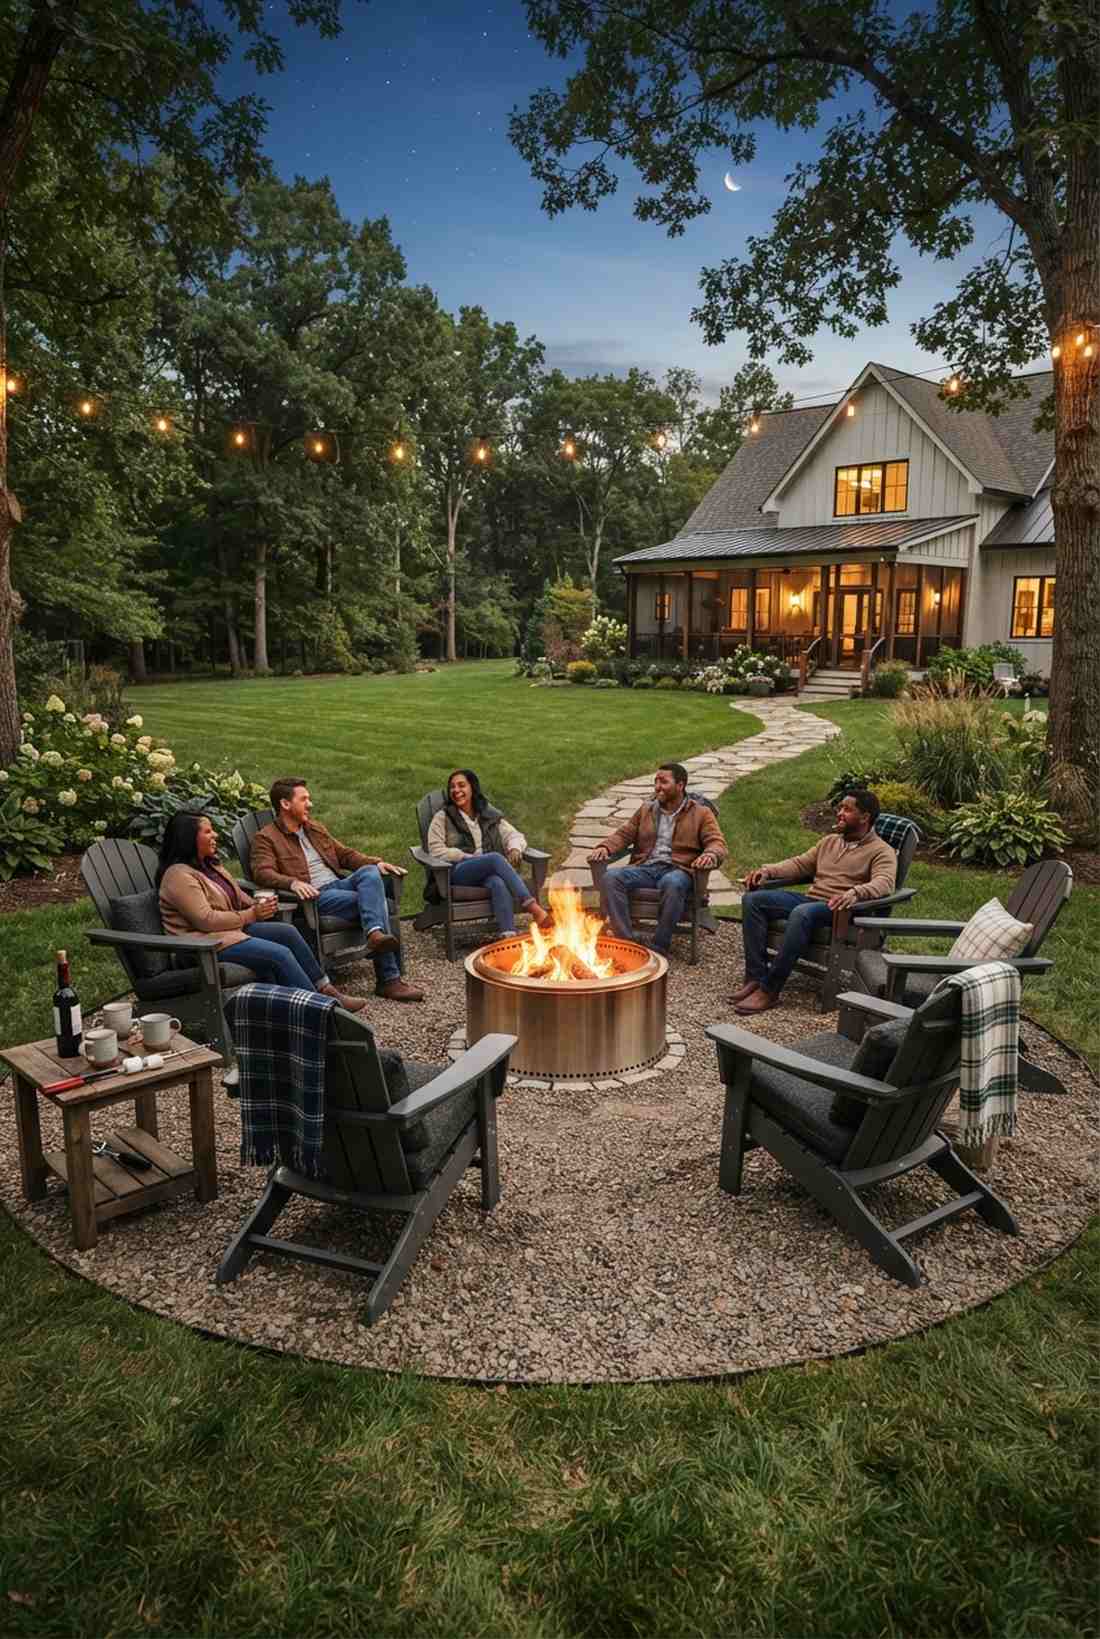
This layout feels like a secluded wilderness retreat dropped right into civilization. It centers around a classic 360-degree fire ring setup, working exceptionally well for an open lawn area devoid of structural boundaries.
Creating democratic thermal access delivers a surprisingly premium look when paired with uniform, high-quality seating. By investing in heavy-duty fire pit insert kits, you eliminate preferential hot spots and ensure radiant heat reaches every single occupant.
You can easily pull this off for around $150–$300 depending on chair choice. Pin this if you’re planning a massive open-air backyard upgrade!
- Key Materials: Weather-resistant poly-lumber chairs, stainless steel burner rings
- Vibe / Style: Rustic democratic gathering
- Difficulty: Easy weekend assembly
- Budget Breakdown: Chairs: $200 | Pit Base: $100.
- Creator’s Tip: Set a crushed gravel perimeter to prevent grass scorching and minimize mud during wet seasons.
- Smart Sourcing: rust-proof smokeless fire pit inserts (large capacity) or bulk pack UV-coated Adirondack chairs.
2. Three-Quarter Arc with Focal View
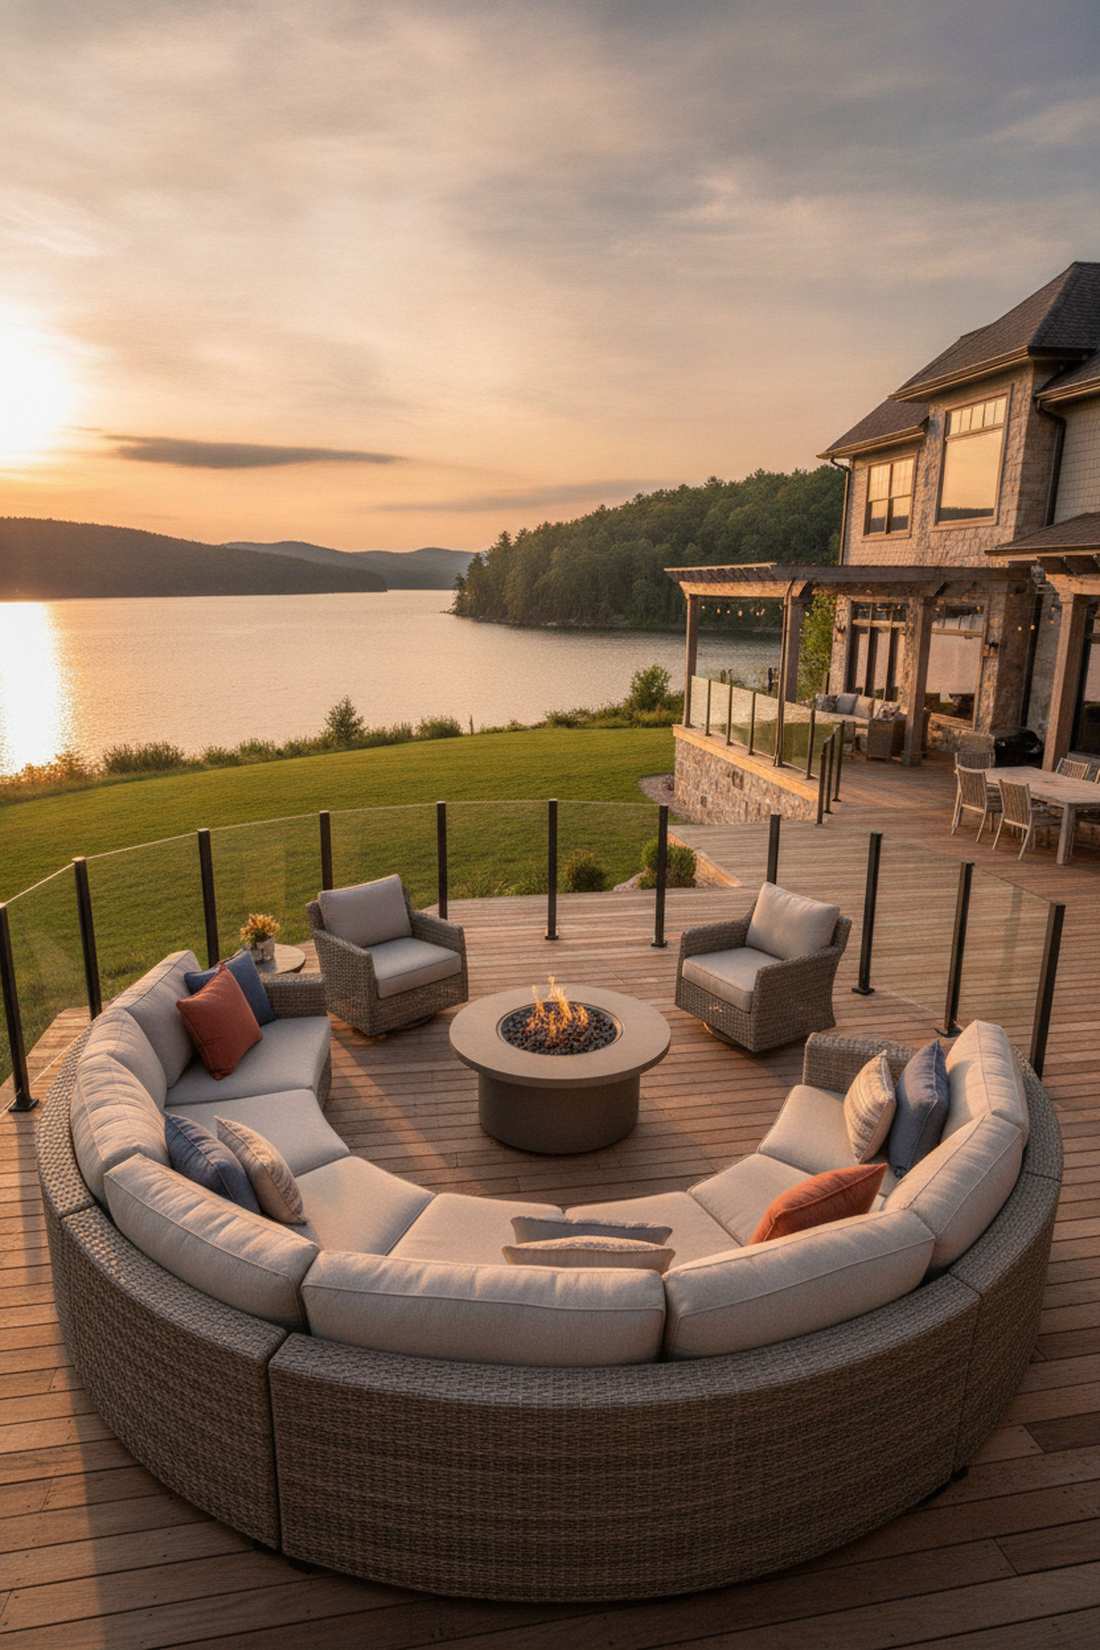
Nothing screams high-end resort quite like an arrangement that frames a stunning backdrop. Utilizing a crescent patio seating layout, this configuration works brilliantly for yards facing a lake, garden focal point, or dramatic valley view.
Leaving one quadrant open visually expands the space, looking far more expensive than a closed loop ever would. Positioning this gap strategically opposite prevailing winds guarantees guests enjoy the view without battling unexpected smoke drift.
Expect to spend roughly $250 for quality curved seating elements. It’s a fast upgrade that completely changes the vibe.
- Key Materials: Curved outdoor sofas, wind-deflecting glass guards
- Vibe / Style: Scenic luxury lounge
- Difficulty: Moderate spatial planning
- Budget Breakdown: Sectional: $200 | Glass Guard: $50.
- Creator’s Tip: Ensure the focal gap aligns perfectly with your home’s primary interior window view.
- Smart Sourcing: tempered glass wind guard kits or weatherproof modular curved sectionals.
3. Conversation Pit Sunken Seating
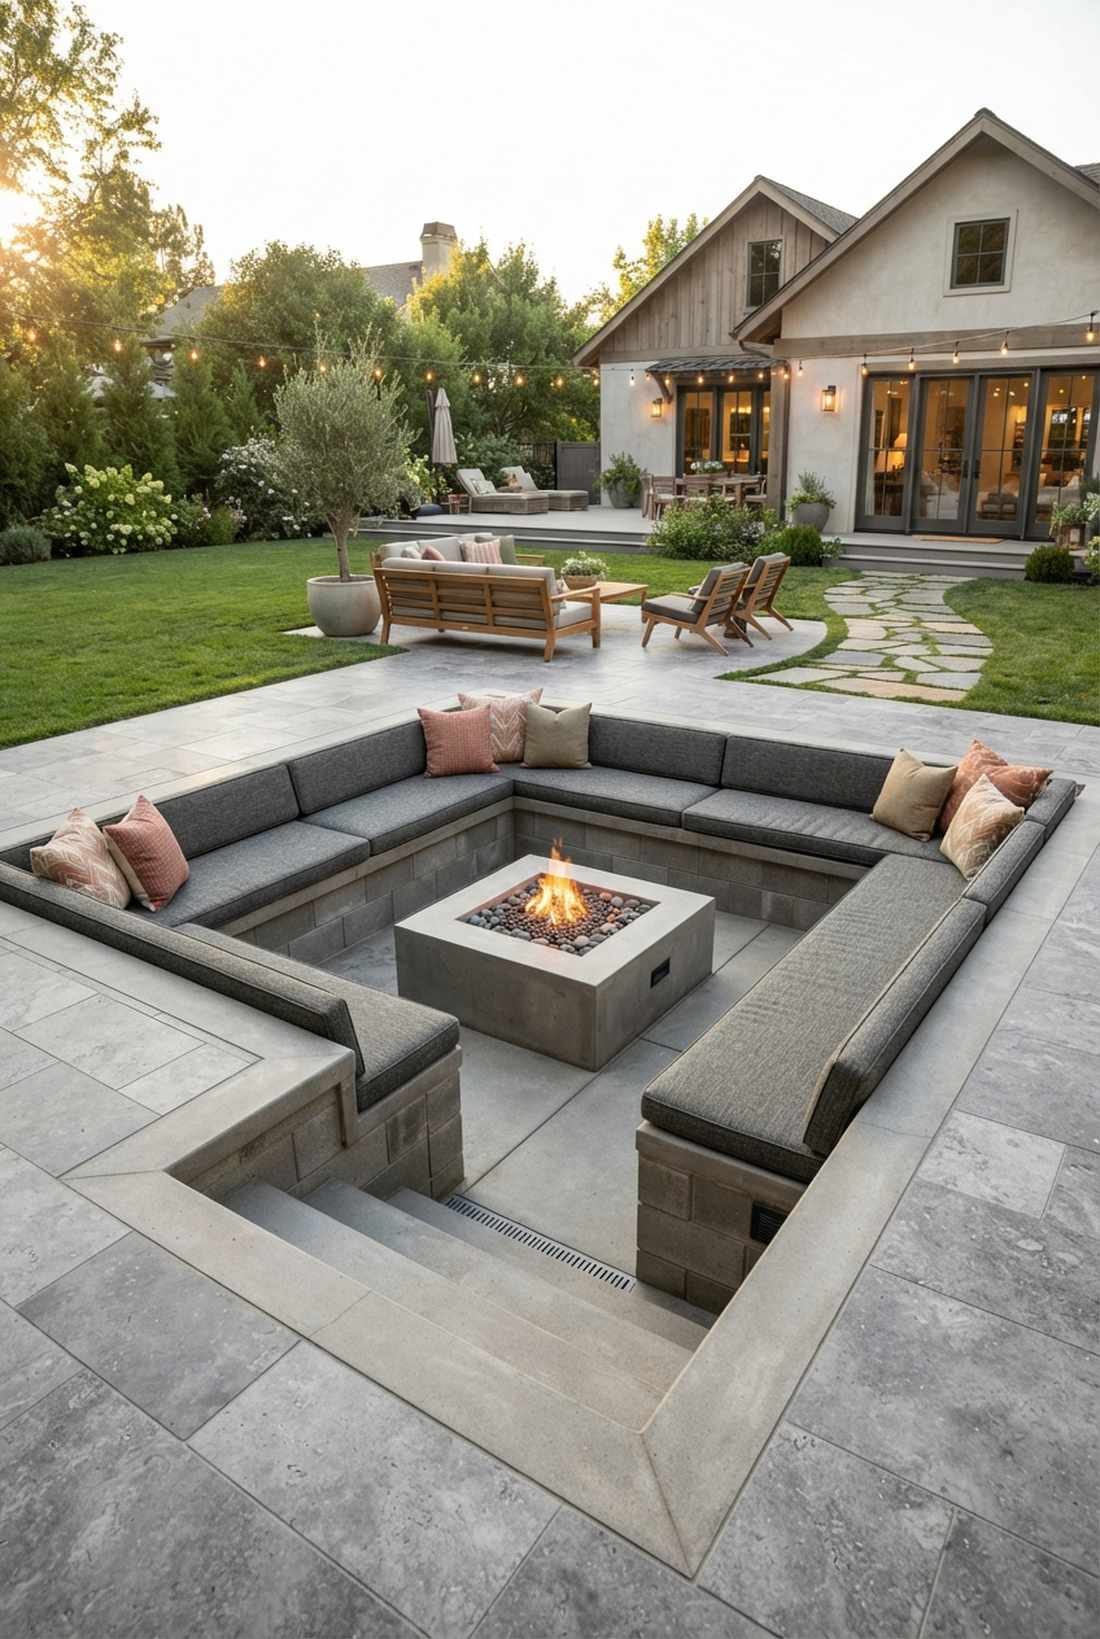
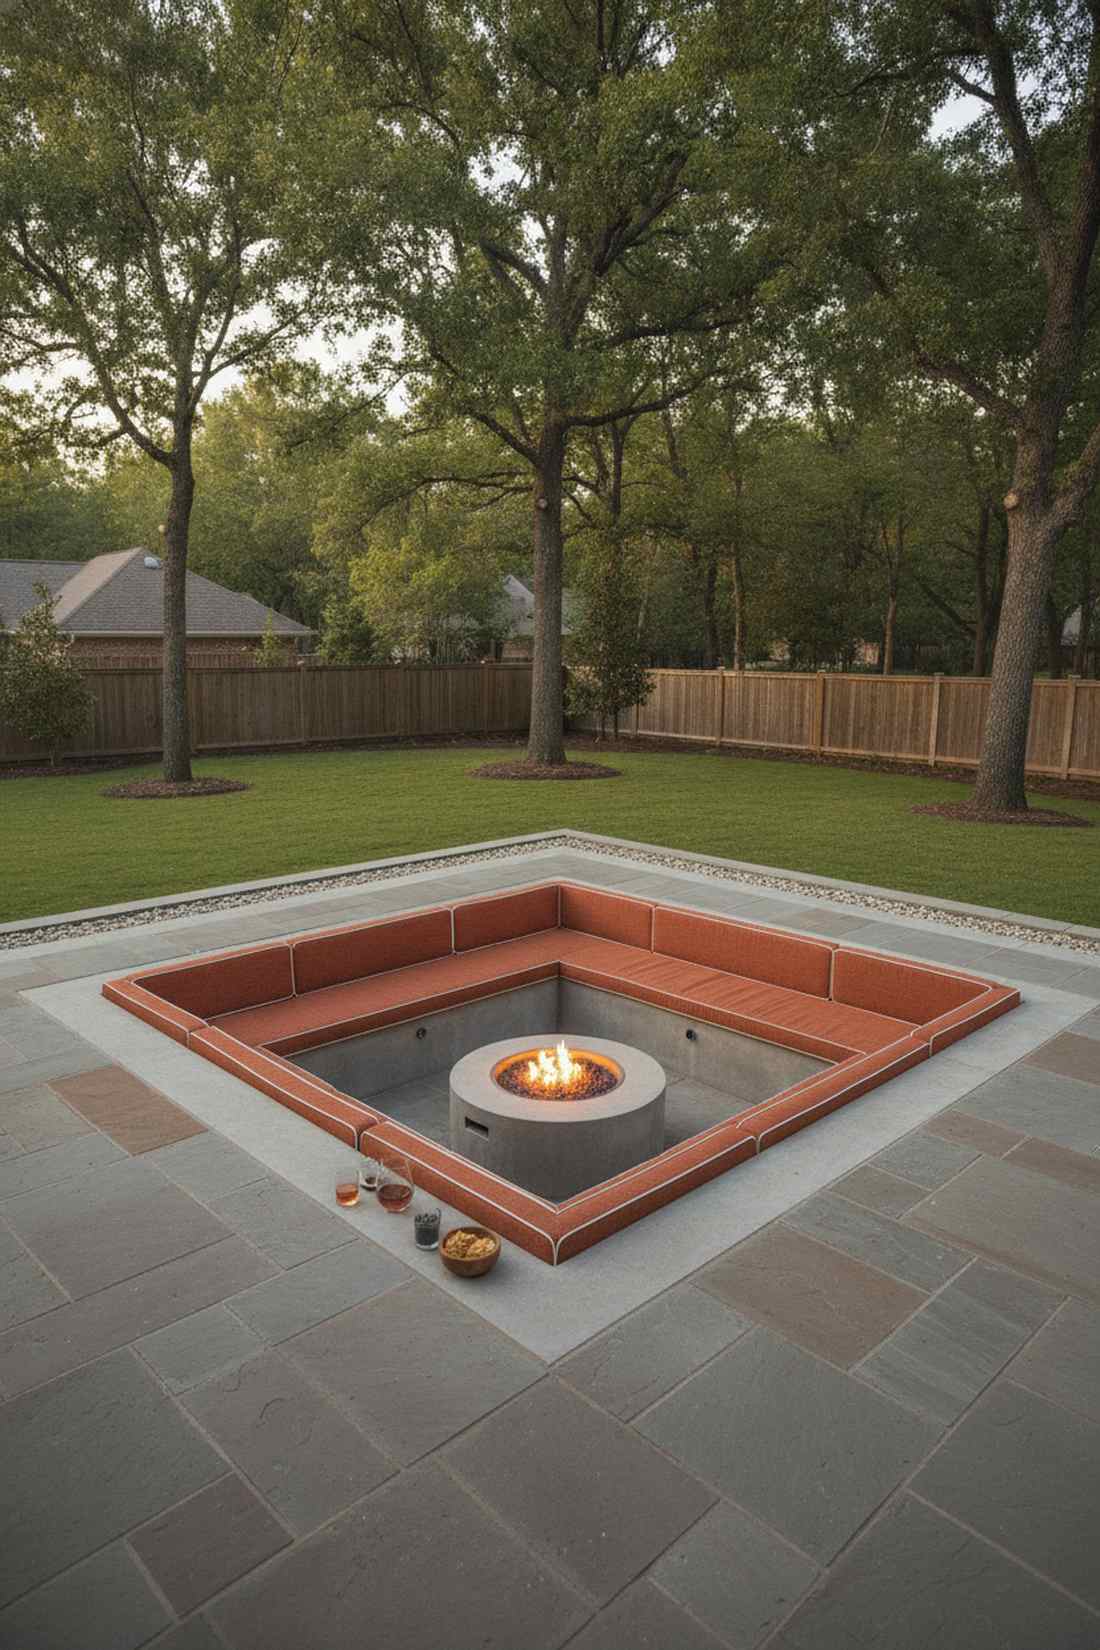
This feels like a hidden mid-century modern bunker you accidentally discovered in a designer magazine. The sunken concrete conversation pit excels as a dramatic centerpiece for expansive concrete or stone patios.
Excavating the floor level instantly gives a designer-level finish while naturally blocking harsh winds from stealing the warmth. High-end patio accessory suppliers often recommend this microclimate approach to maximize deep-season usability.
This is a heavier investment, usually starting around $800+ for proper drainage and masonry. Save this to your extreme DIY architecture board!
- Key Materials: Retaining wall blocks, French drain kits, custom cushions
- Vibe / Style: Retro architectural masterpiece
- Difficulty: Advanced hardscaping
- Budget Breakdown: Blocks: $400 | Drainage: $100 | Cushions: $300.
- Creator’s Tip: Never skip the sub-surface drainage layer, or your pit will become an accidental backyard pond.
- Smart Sourcing: commercial-grade French drain starter kits or marine-grade custom cut foam inserts.
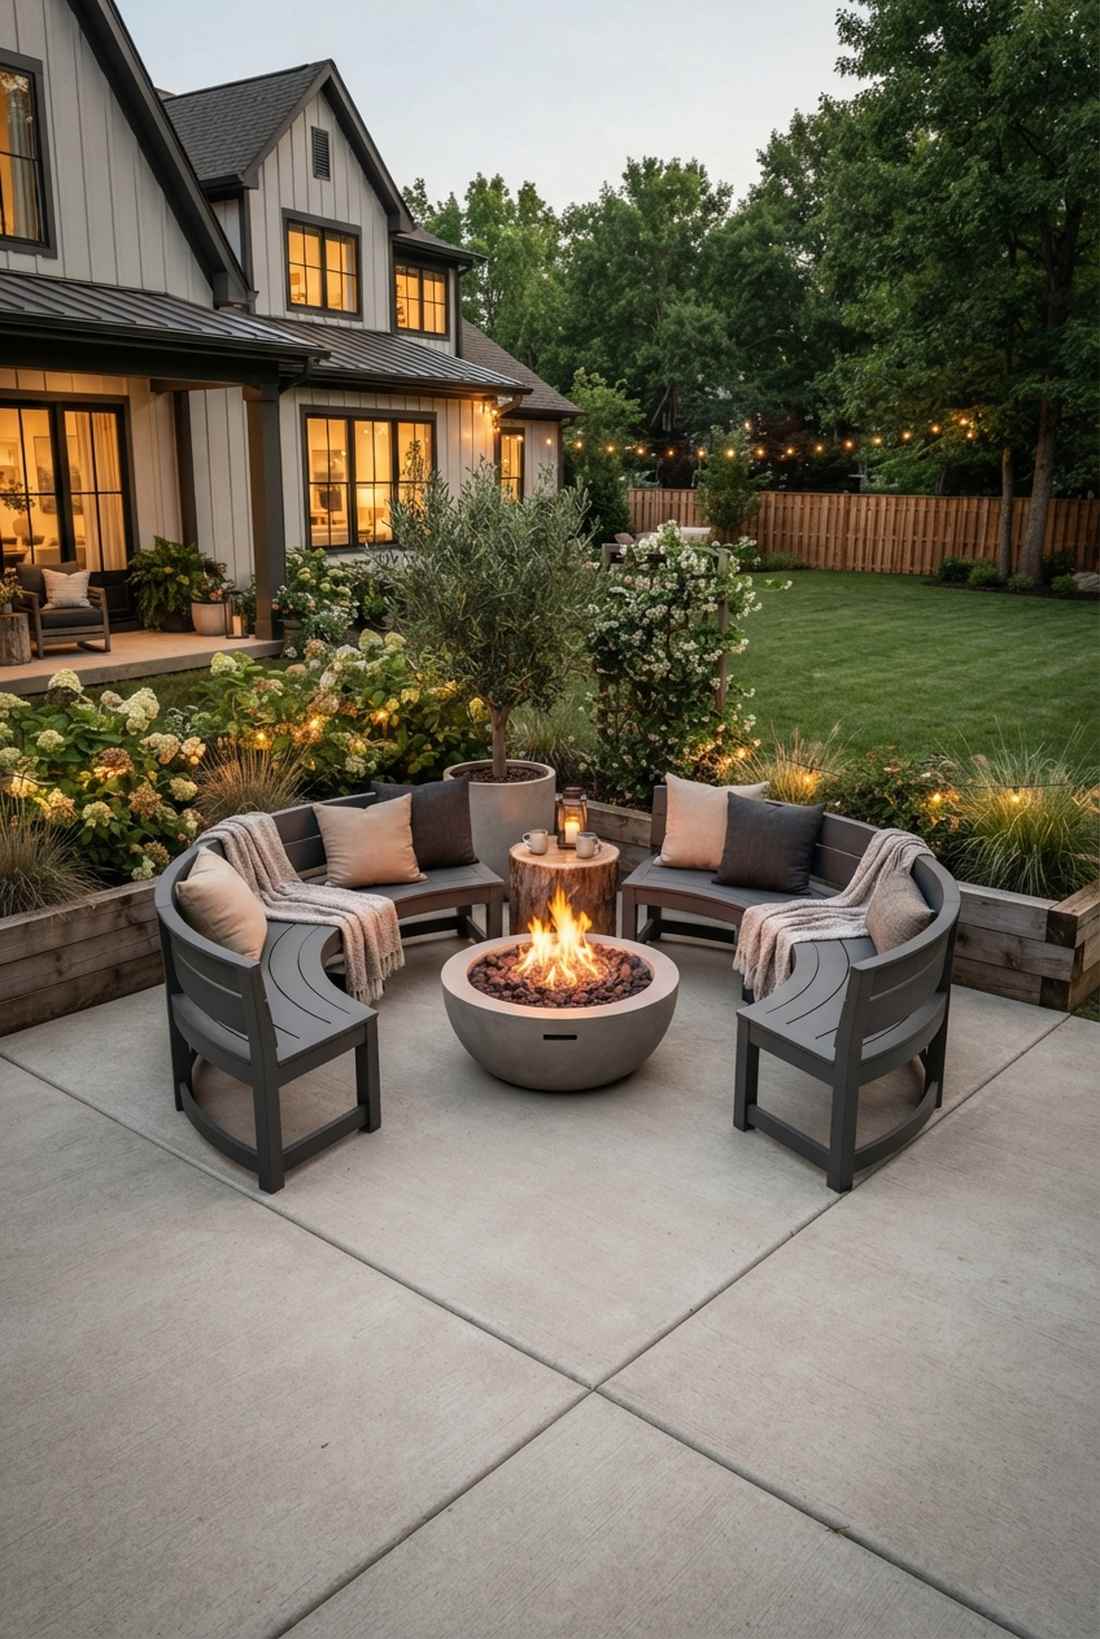
4. Intimate Four-Person Cluster
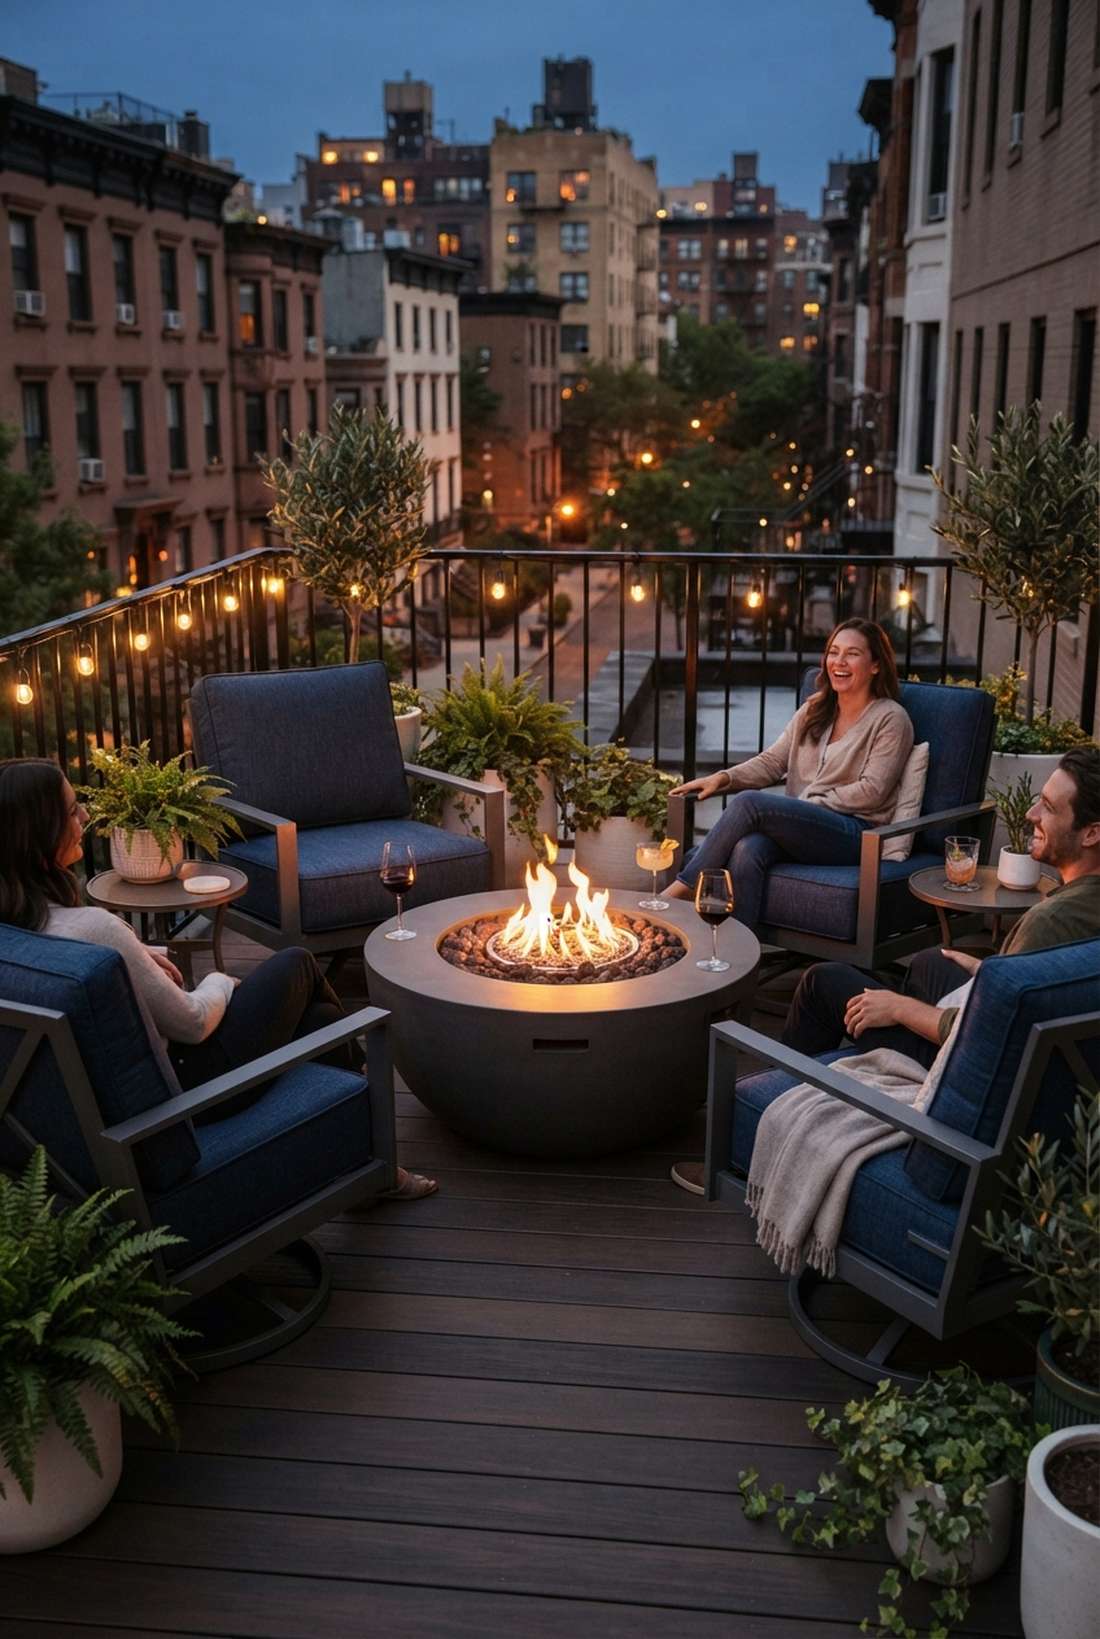
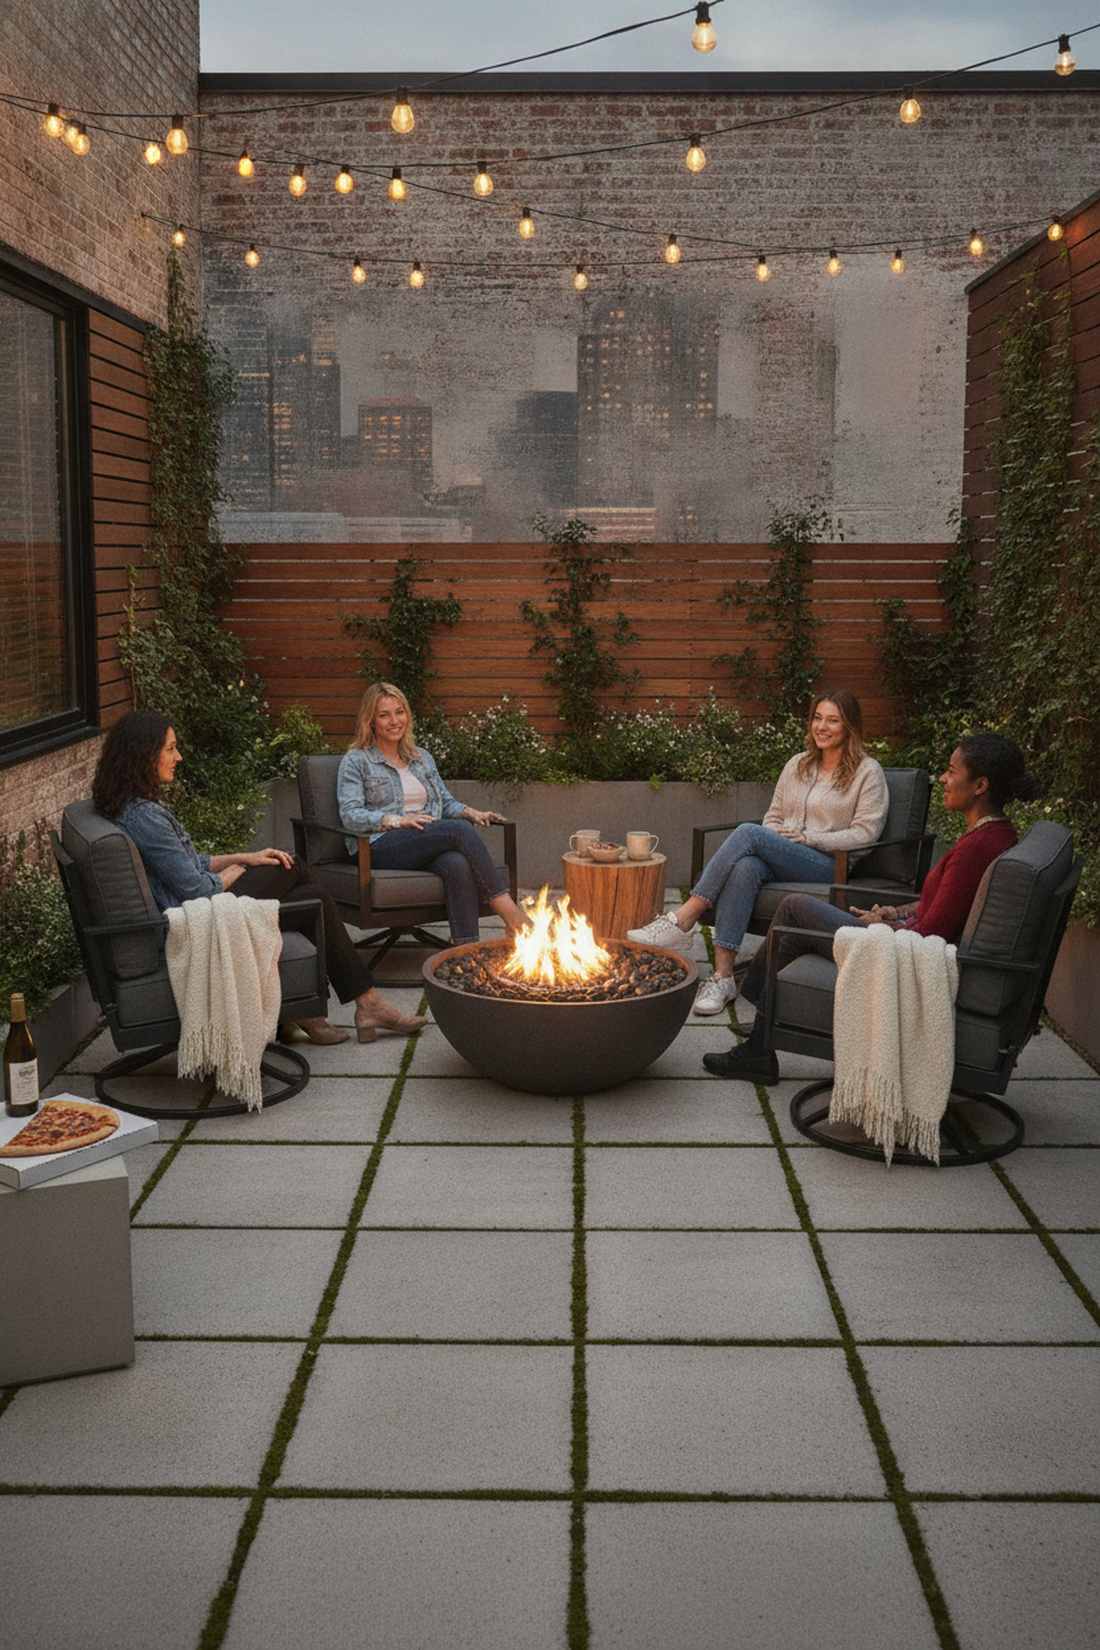
Radiating absolute coziness, this setup feels like a private VIP table at an exclusive outdoor bistro. Focusing on a compact urban fire bowl arrangement, it completely transforms a cramped 10×10 city terrace into a nightly retreat.
Keeping the seating tight around a smaller heat source proves that tiny footprints can still deliver aggressive luxury. Premium gas ignition systems are heavily favored here because they eliminate flying sparks in enclosed urban quarters.
You can execute this flawlessly for under $150 if you catch end-of-season sales. Highly recommended for a quick weekend win.
- Key Materials: 36-inch propane bowl, swivel rocker chairs
- Vibe / Style: Cozy urban escape
- Difficulty: Zero-tool setup
- Budget Breakdown: Gas Bowl: $90 | Chairs: $60.
- Creator’s Tip: Use swivel chairs to let guests easily rotate away if the radiant heat becomes too intense.
- Smart Sourcing: compact tabletop fire bowl kits or heavy-duty swivel base replacement kits.
This next setup completely defies traditional rules but looks like a $5,000 custom installation…
5. Semi-Circle Against Structure
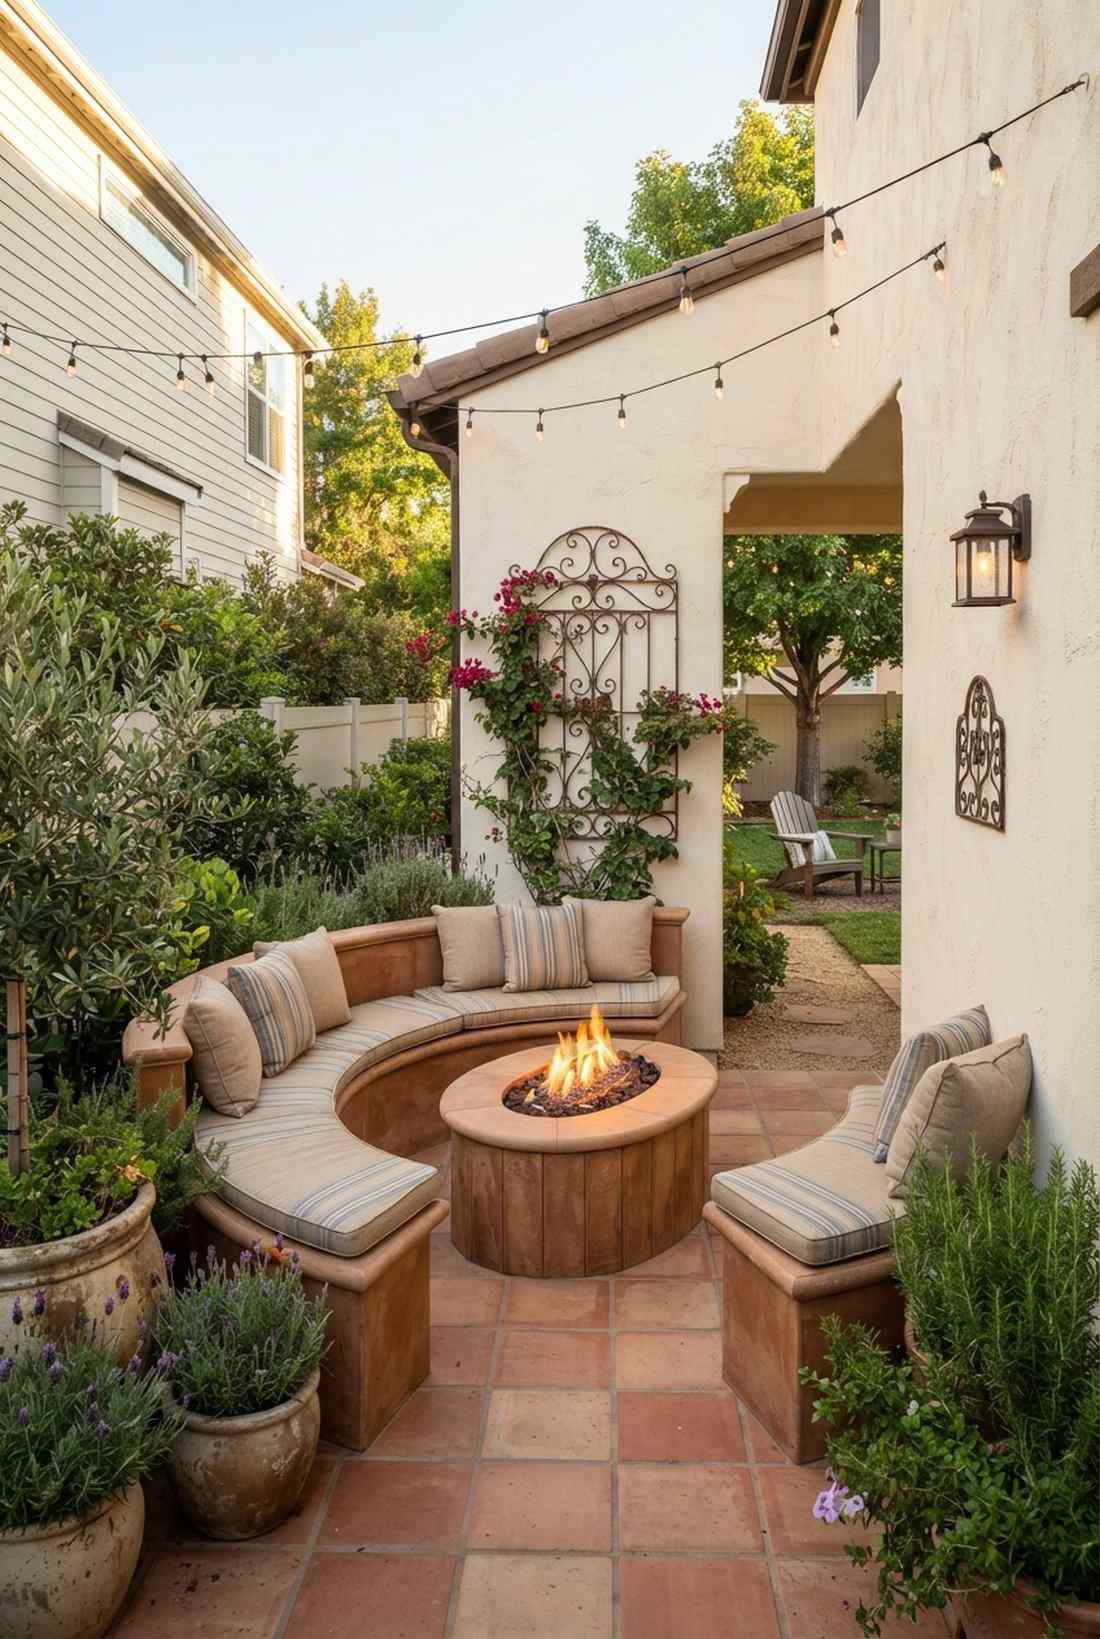
A brilliant optical illusion that feels like a European courtyard right outside your back door. By creating a wall-anchored half-circle fire zone, this layout is an absolute lifesaver for narrow side yards lacking depth.
Using the existing wall as a thermal reflector radically amplifies the heat output, essentially halving your fuel costs. Sourcing proper heat-deflecting masonry panels ensures your siding remains completely safe while absorbing that precious radiant energy.
Set aside roughly $200 for proper heat shields and seating. Pin this if you need brilliant small-space patio hacks!
- Key Materials: Stucco thermal panels, half-moon curved benches
- Vibe / Style: Mediterranean courtyard
- Difficulty: Easy placement
- Budget Breakdown: Reflector Panels: $80 | Benches: $120.
- Creator’s Tip: Always maintain a minimum 7-foot clearance from vinyl siding even with reflectors installed.
- Smart Sourcing: pre-cut thermal masonry backer boards or UV-resistant half-circle bench pads.
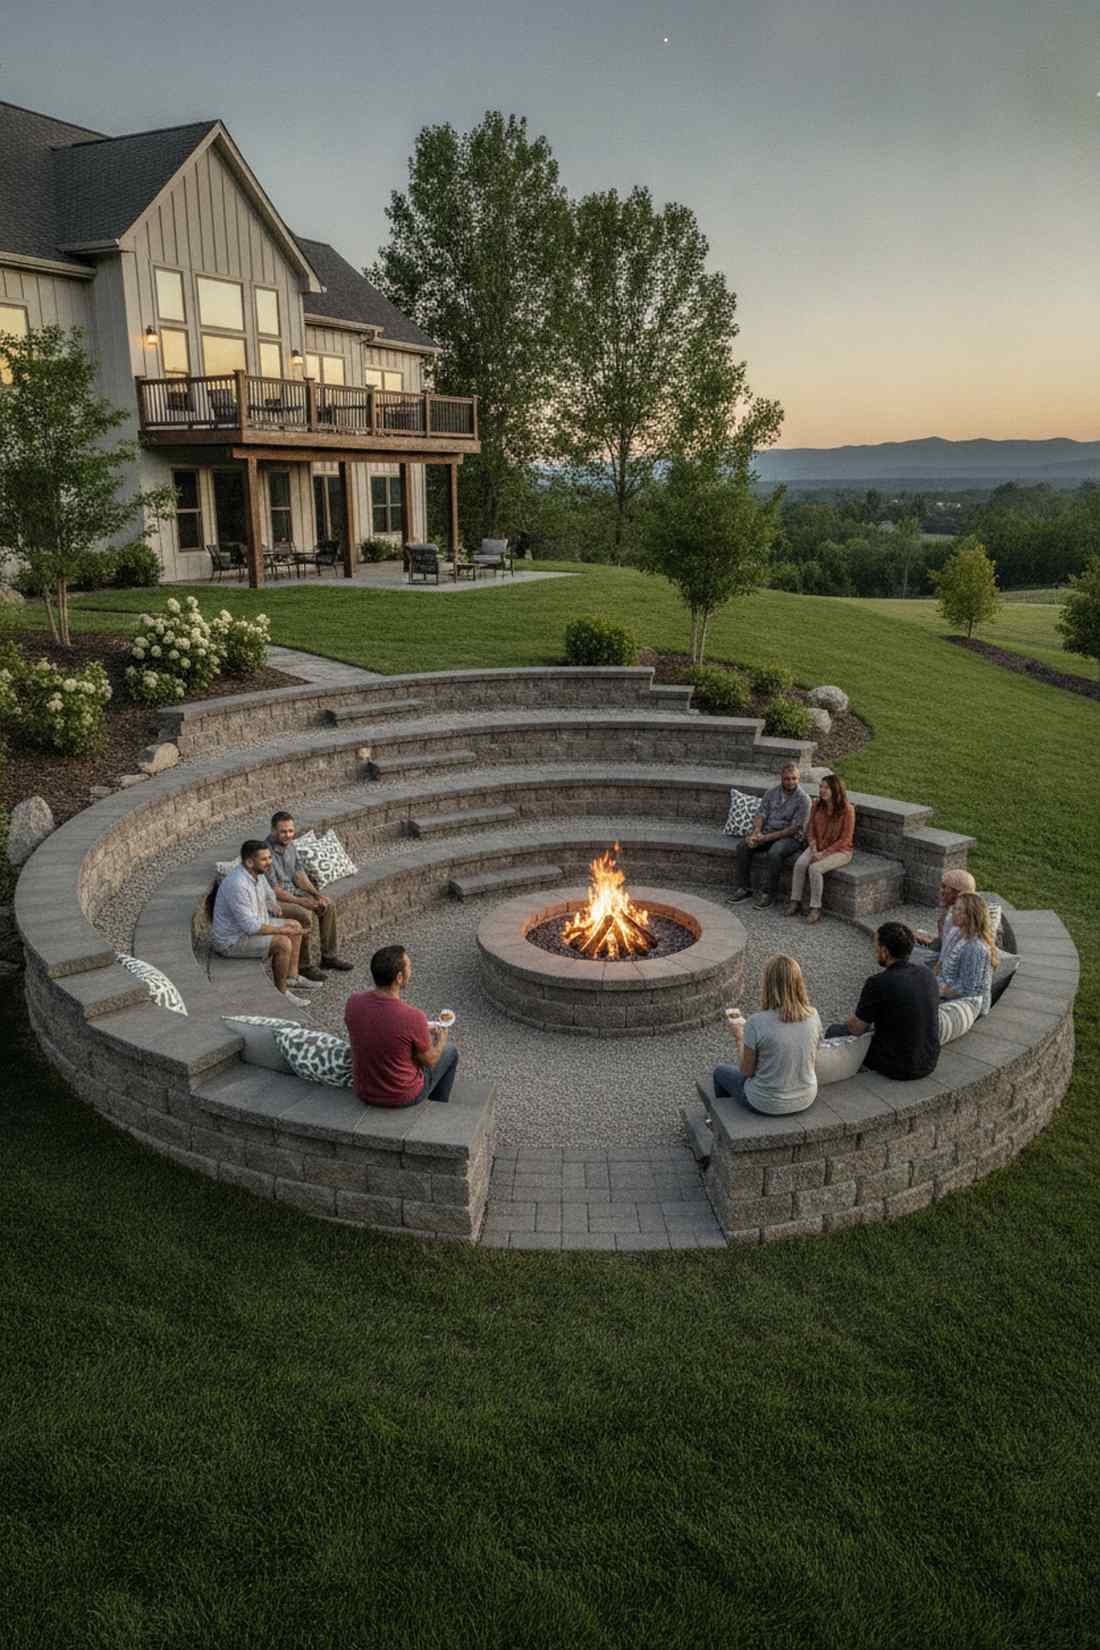
6. Double-Depth Concentric Circles

Evoking the grand scale of an ancient amphitheater, this arrangement comfortably handles massive neighborhood gatherings. The multi-tiered stadium seating pit is the ultimate flex for sprawling suburban backyards where single rings look awkward.
Staggering distances from the central flame creates an incredibly sophisticated thermal hierarchy that looks undeniably custom. Utilizing broad hardscape layout principles here allows heat-sensitive guests to retreat without ever leaving the conversation.
This tiered approach typically scales from $400 to $900 based on seating quality. It’s a game-changer for frequent entertainers.
- Key Materials: Low-profile poufs, standard-height lounge chairs
- Vibe / Style: Epic entertainer’s paradise
- Difficulty: Moderate spacing strategy
- Budget Breakdown: Inner Poufs: $150 | Outer Chairs: $350.
- Creator’s Tip: Keep the inner circle seating strictly low-profile so they don’t block the radiant heat from reaching the outer ring.
- Smart Sourcing: waterproof heavy-duty floor pouf kits or commercial-grade outdoor lounge chairs (bulk pack).
Linear & Contemporary Layouts
Rectangular fire features align with modern architectural vocabularies and fit efficiently along property boundaries, pool edges, or patio perimeters. Linear configurations suit narrow spaces where circular arrangements prove geometrically impossible.
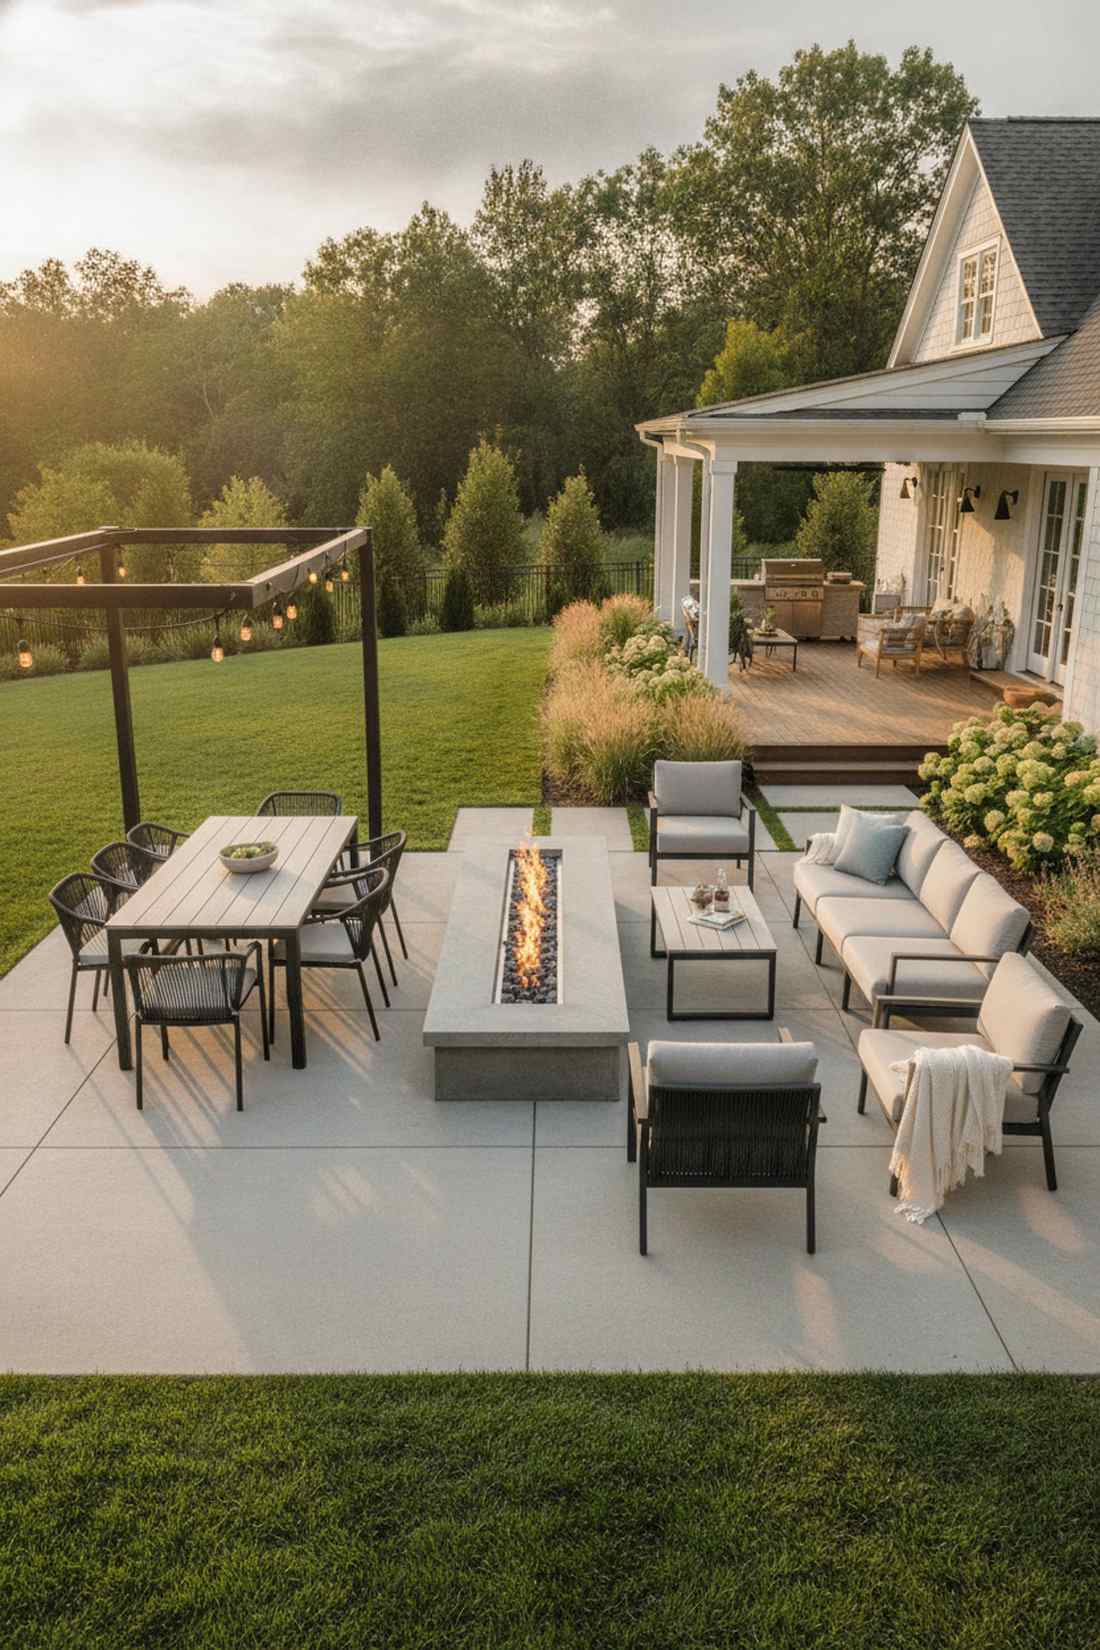
7. Parallel Long-Bench Configuration
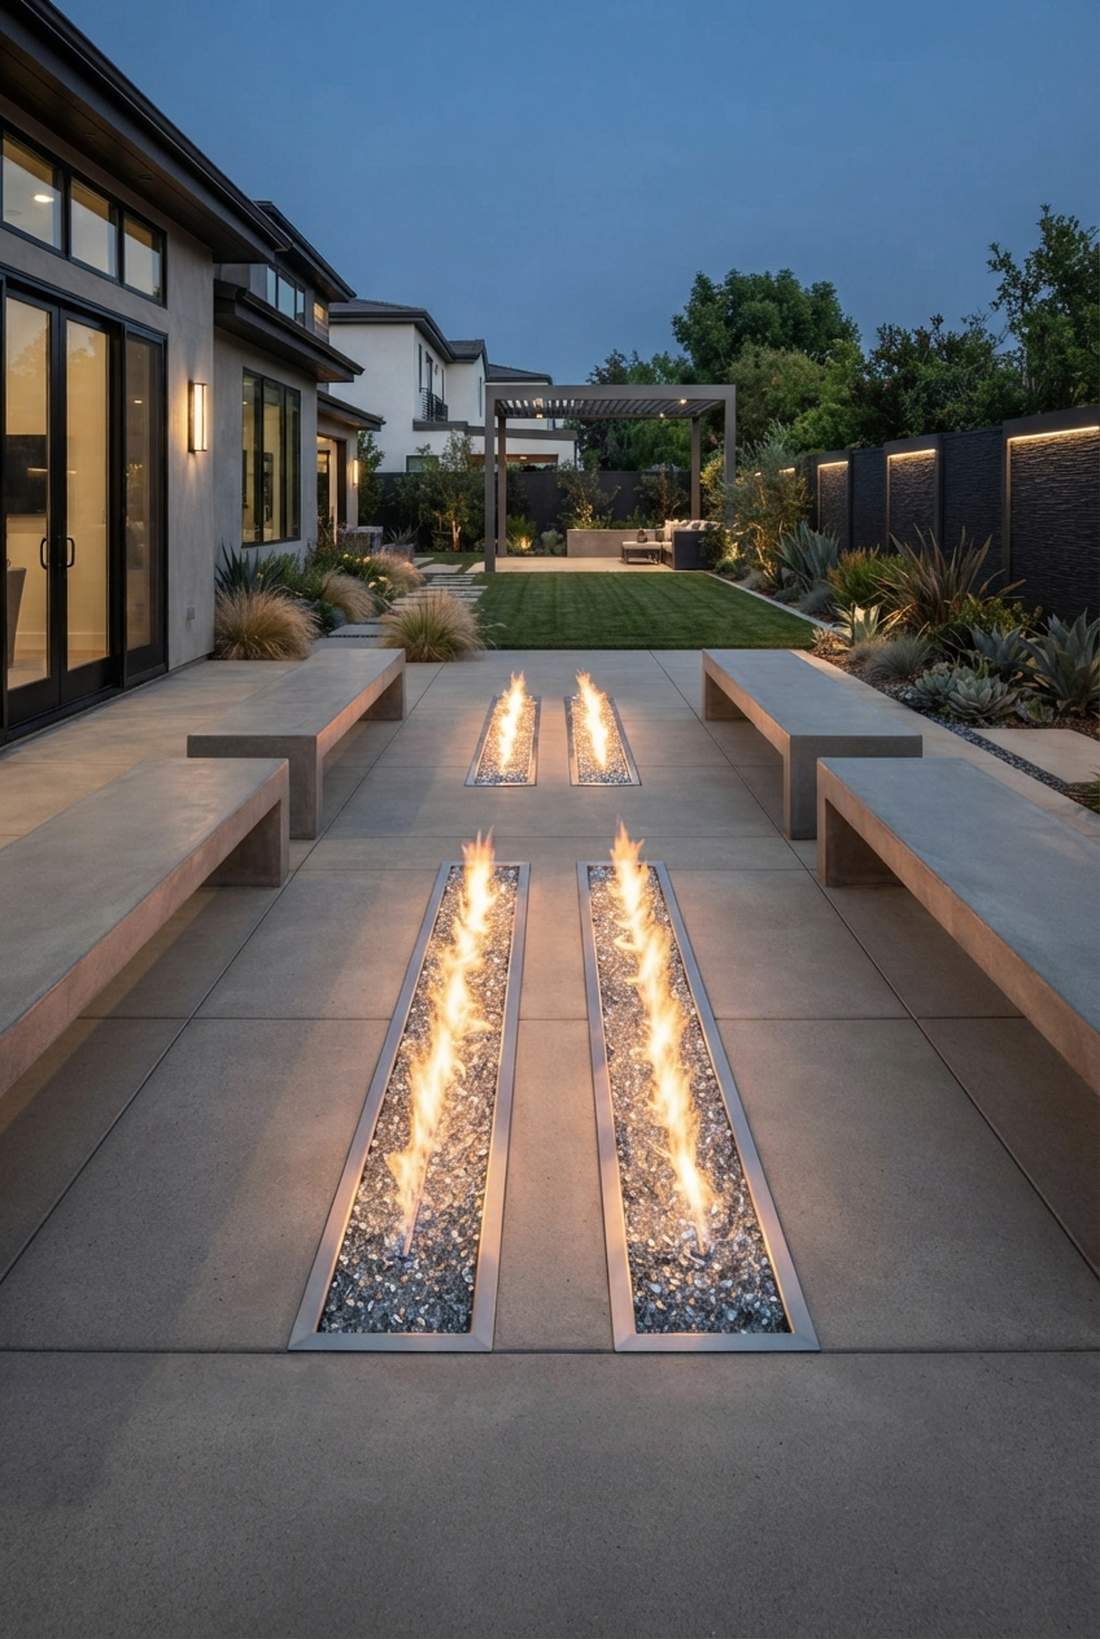
Strikingly minimalist, this configuration feels like stepping onto the terrace of an upscale modern art museum. The parallel linear fire trough layout is tailor-made for ultra-modern concrete patios craving a touch of geometric symmetry.
Forcing a structured, face-to-face interaction creates an atmosphere that feels incredibly deliberate and expensive. Securing long, continuous stainless burners avoids the cheap, spotty flame look that plagues lower-end installations.
Executing this crisp look usually demands about $300–$500. Save this to your contemporary backyard mood board!
- Key Materials: 60-inch linear drop-in pans, minimalist concrete benches
- Vibe / Style: Sleek modernist symmetry
- Difficulty: Intermediate gas plumbing
- Budget Breakdown: Linear Burner: $200 | Benches: $250.
- Creator’s Tip: Add crushed fire glass instead of lava rocks to enhance the contemporary reflective aesthetic.
- Smart Sourcing: stainless steel linear drop-in burner kits or bulk pack reflective tempered fire glass.
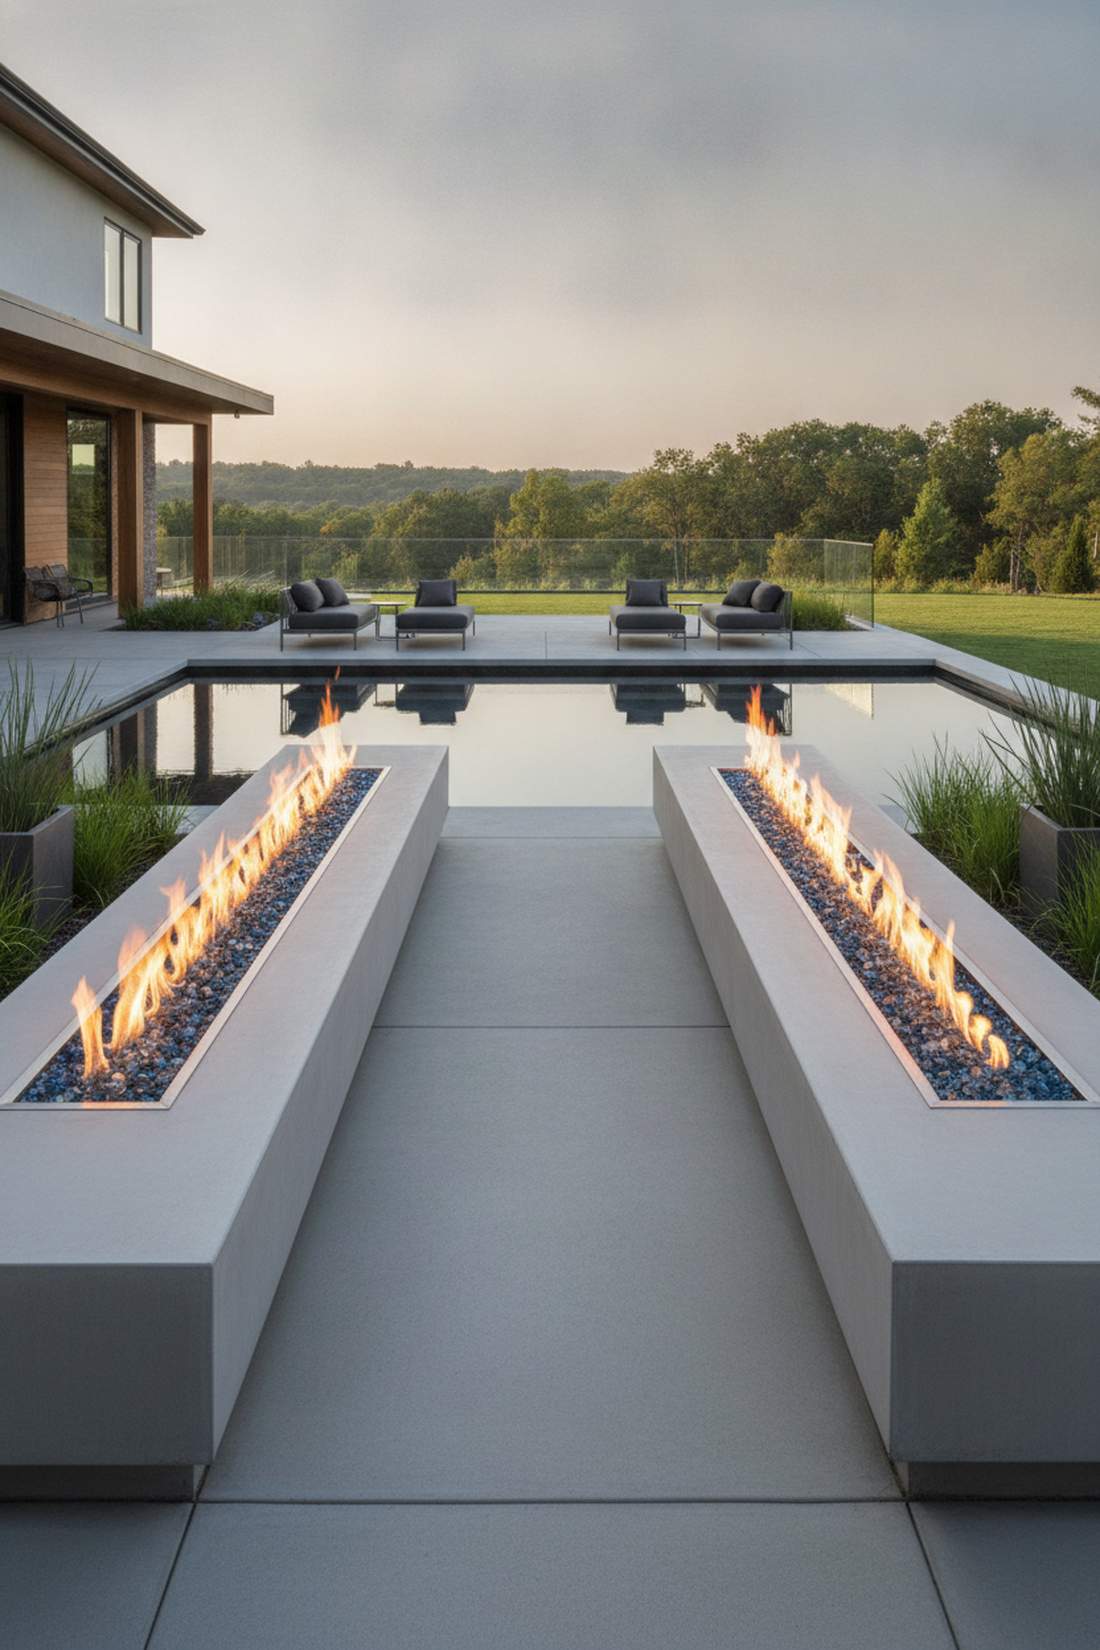
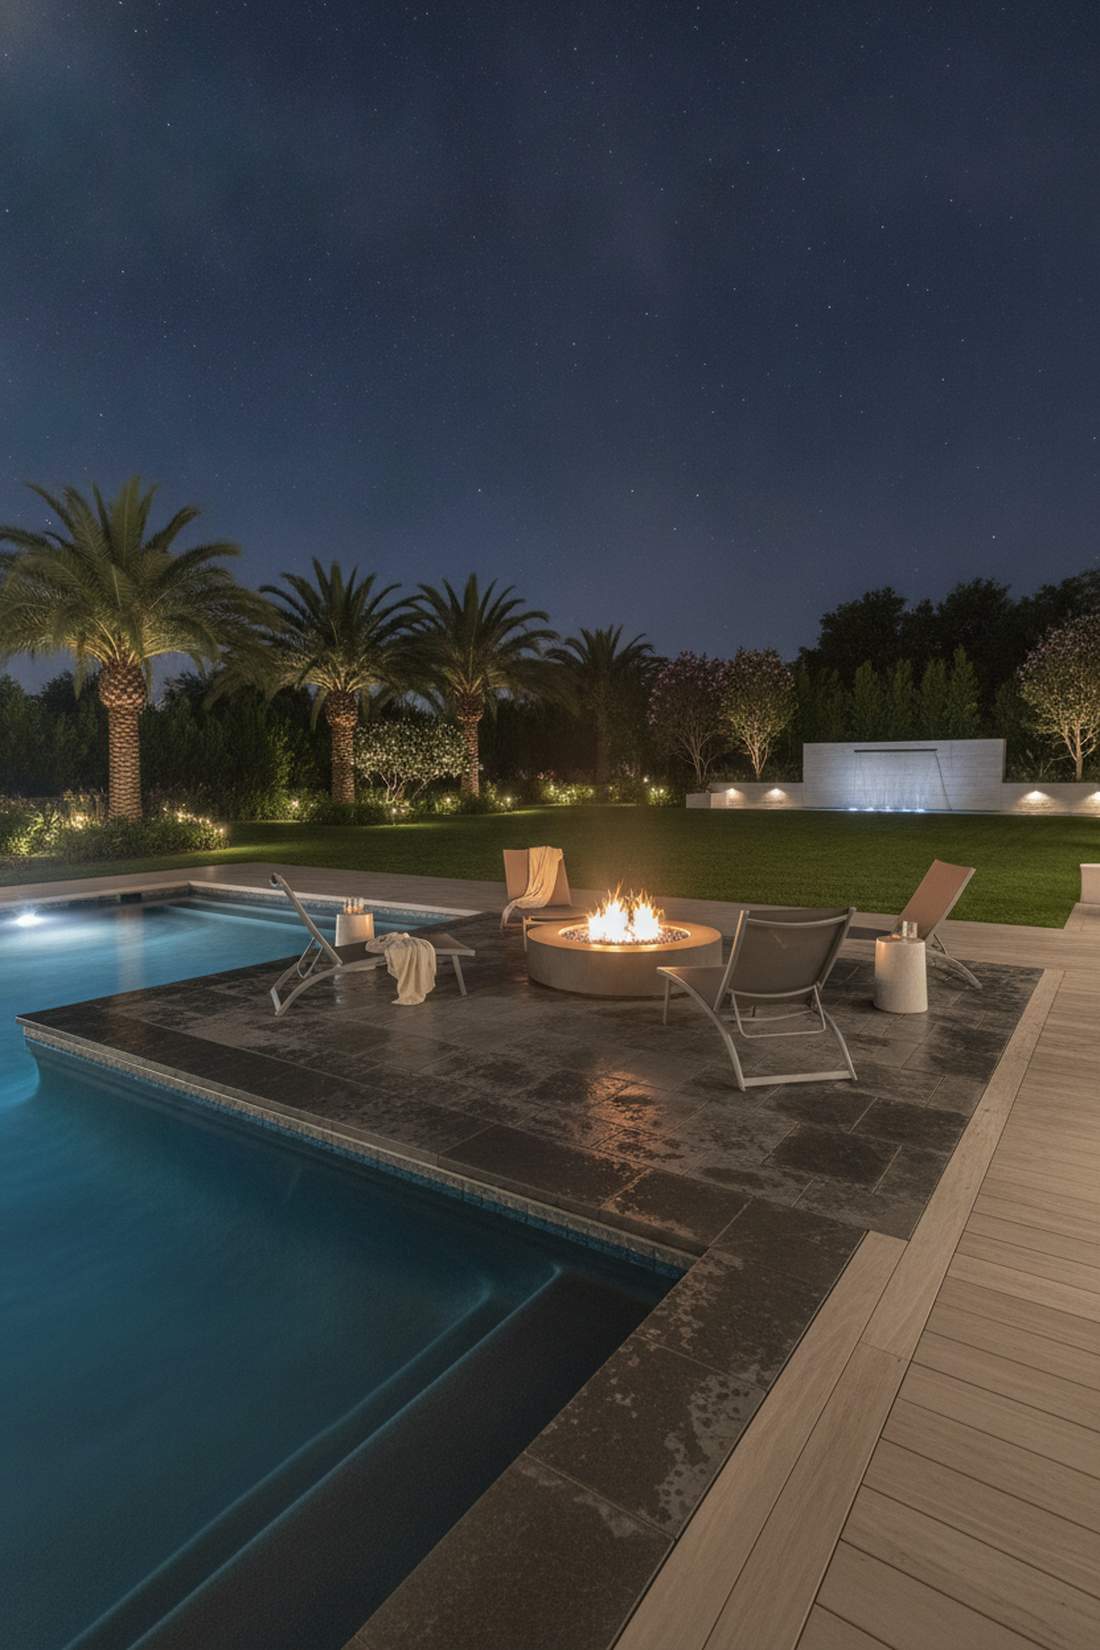
8. Single-Side Boundary Seating
This sleek divider feels less like a backyard pit and more like a glowing VIP room boundary line. Leveraging an asymmetrical pool edge fire barrier, this setup is perfect for defining property lines without building an actual fence.
Using fire as a spatial divider instantly commands a premium aesthetic that heavy shrubs or wooden rails just can’t touch. Investing in top-tier linear wind guards ensures the flame ribbon stays perfectly intact, even across breezy pool decks.
This layout runs about $400 when utilizing pre-fab linear troughs. It’s an elegant solution to awkward property boundaries.
- Key Materials: Narrow fire tables, single-sided sofa sectionals
- Vibe / Style: High-roller pool deck
- Difficulty: Easy furniture arranging
- Budget Breakdown: Narrow Table: $250 | Sofa: $150.
- Creator’s Tip: Angle the sofa a slight 5 degrees inward to naturally direct gazes toward the center of the flame.
- Smart Sourcing: pre-assembled narrow linear gas fire tables or UV-coated modular boundary sofas.
9. Staggered Offset Seating Groups
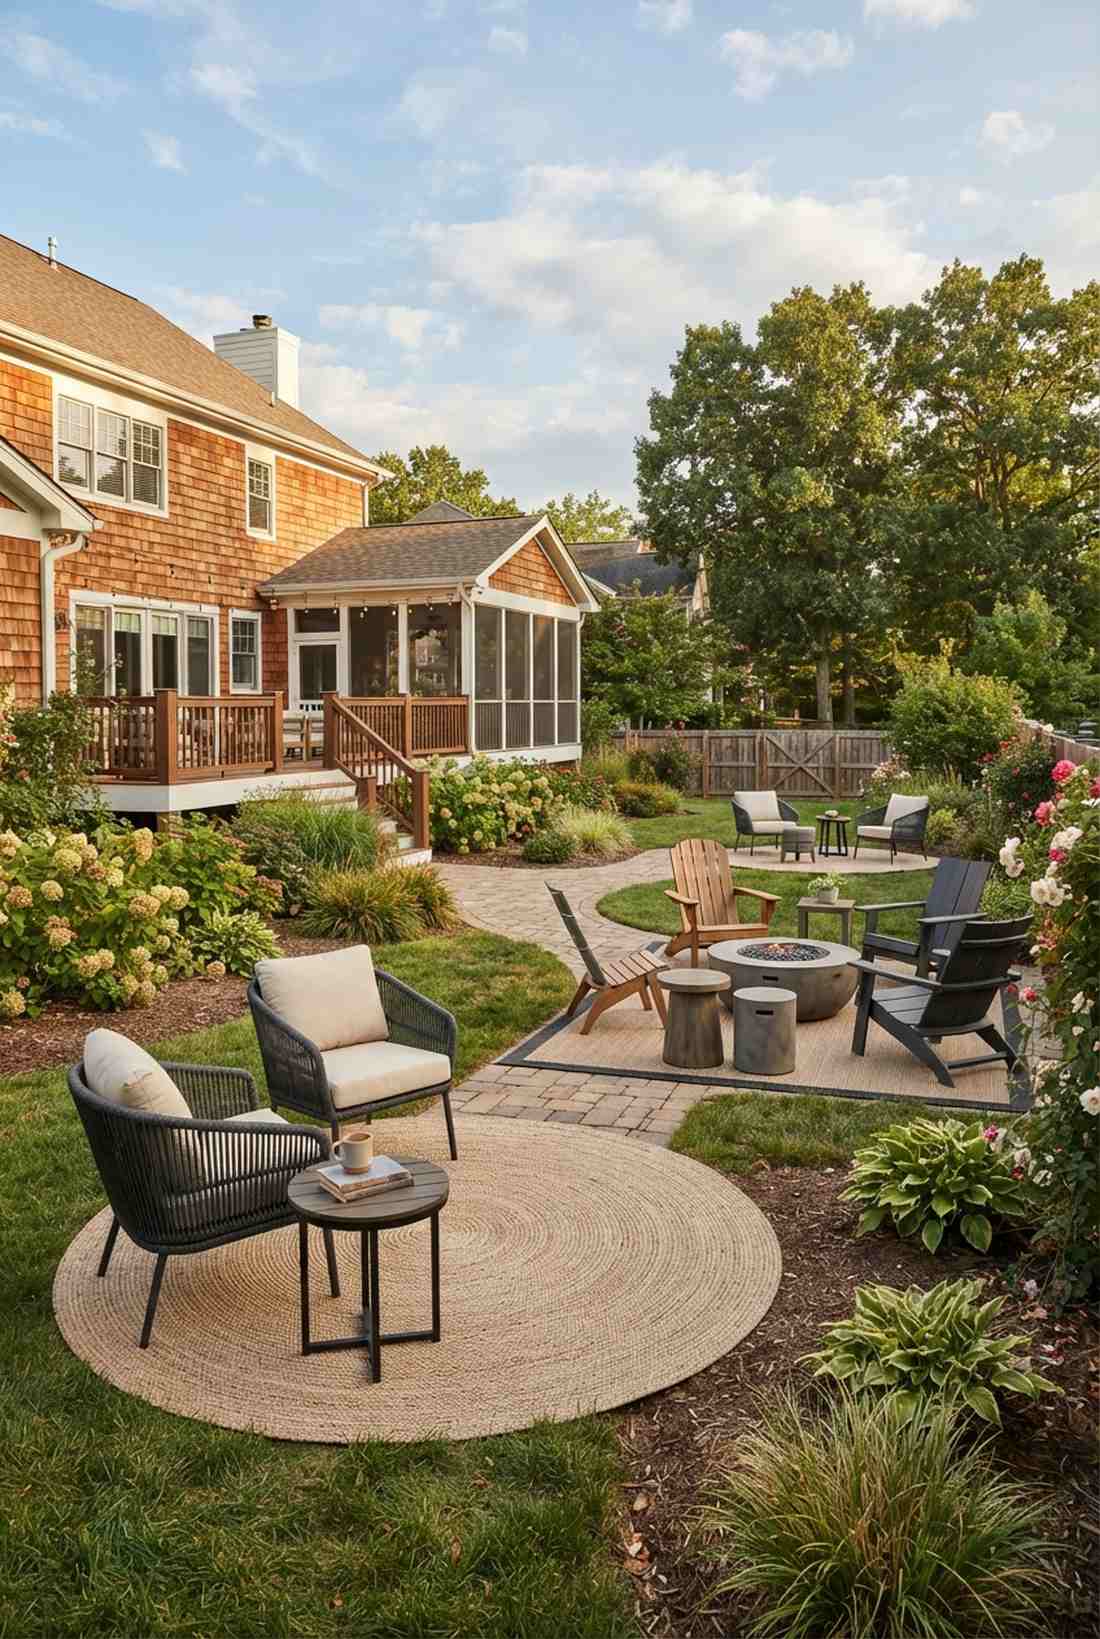
Dynamic and unpretentious, this arrangement feels like a high-end rooftop mixer where everyone naturally finds their tribe. Setting up an offset multi-cluster fire zone works magic on long, bowling-alley-style backyard spaces.
Ditching rigid symmetry for calculated chaos delivers a surprisingly premium look that encourages actual mingling. High-end landscape designers often use this trick alongside heavy-duty outdoor rugs to anchor the disparate zones visually.
You can piece this together gradually for around $350. Pin this if you hate stiff, formal backyard layouts!
- Key Materials: Multiple accent chairs, varied height side tables
- Vibe / Style: Effortless rooftop lounge
- Difficulty: Minimal effort required
- Budget Breakdown: Seating: $250 | Accent Tables: $100.
- Creator’s Tip: Use outdoor rugs of identical material but different shapes to tie the staggered look together seamlessly.
- Smart Sourcing: weatherproof synthetic sisal outdoor rugs or pre-treated nesting side table kits.
Wait until you see how this upcoming arrangement fixes the biggest heating mistake beginners make…
💡 Must-Have Supplies for High-End Setups
To build these setups faster and ensure they last, skip the generic craft aisles and invest in the right foundational kits.
- Base & Support: heavy-duty stainless drop-in burner pans
- Setup Tools: commercial-grade gas line connection kits
- Weather/Durability Protection: premium marine-grade canvas covers (bulk pack)
10. Integrated Seat Wall with Linear Pit
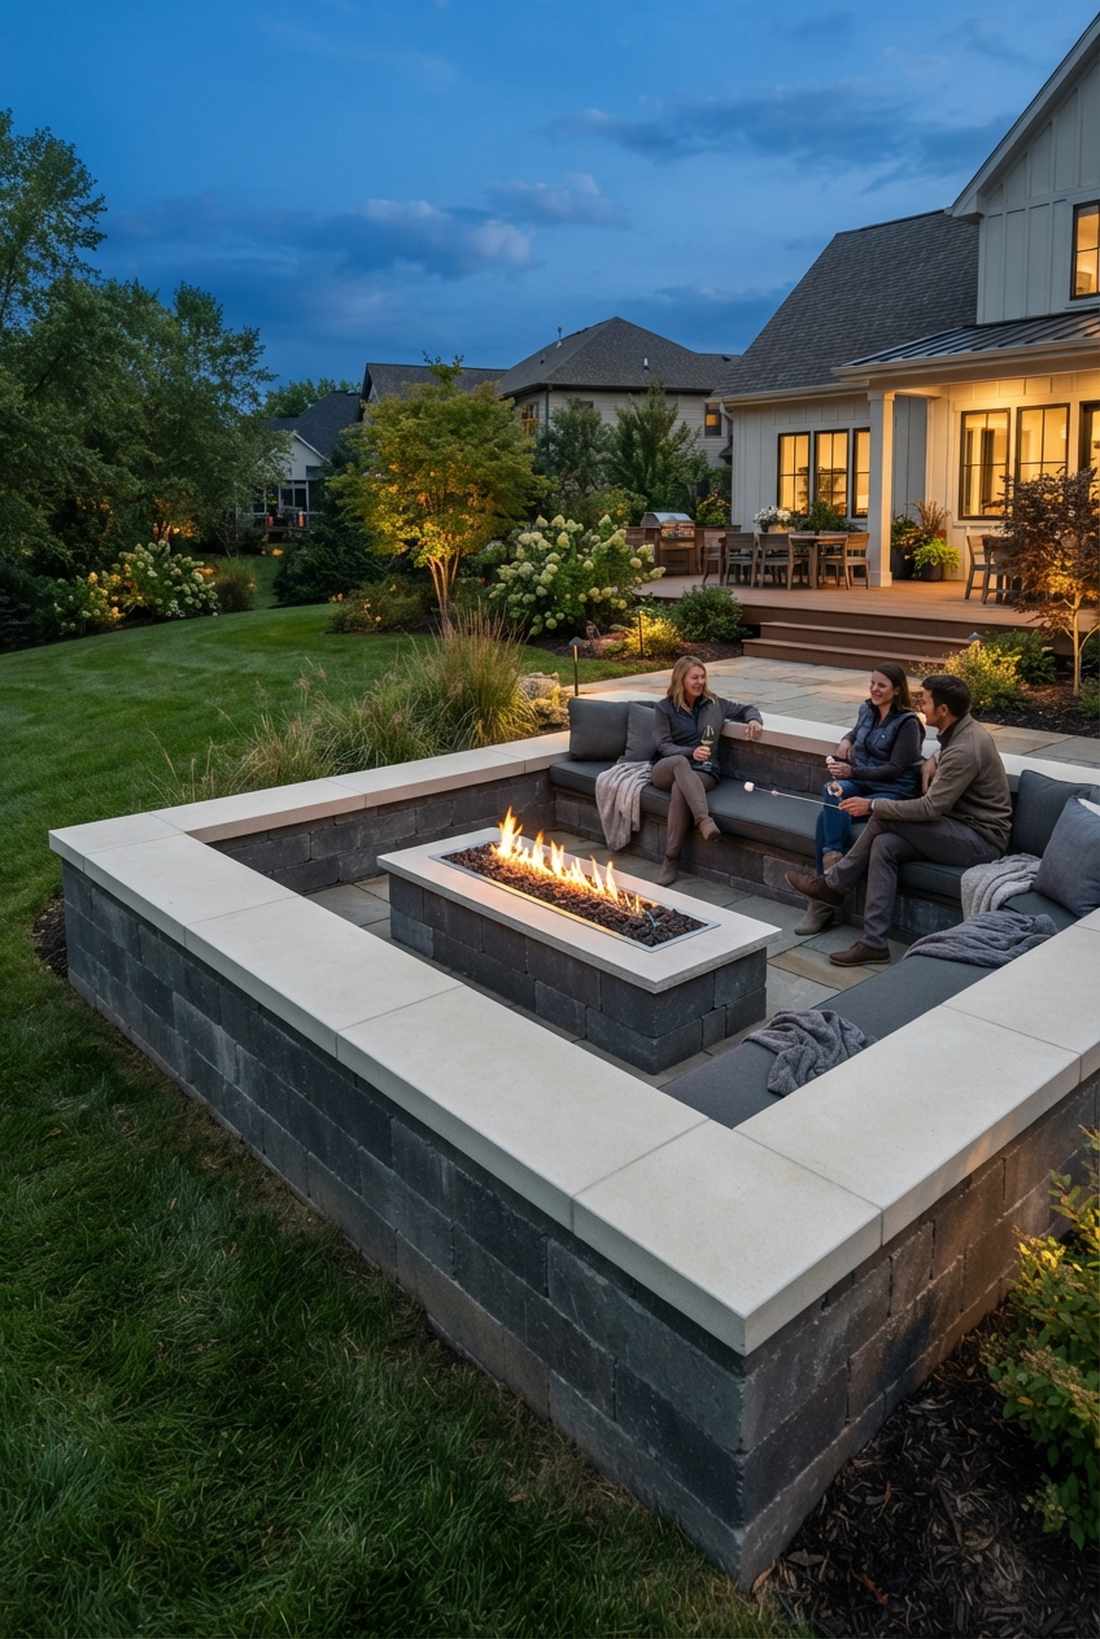
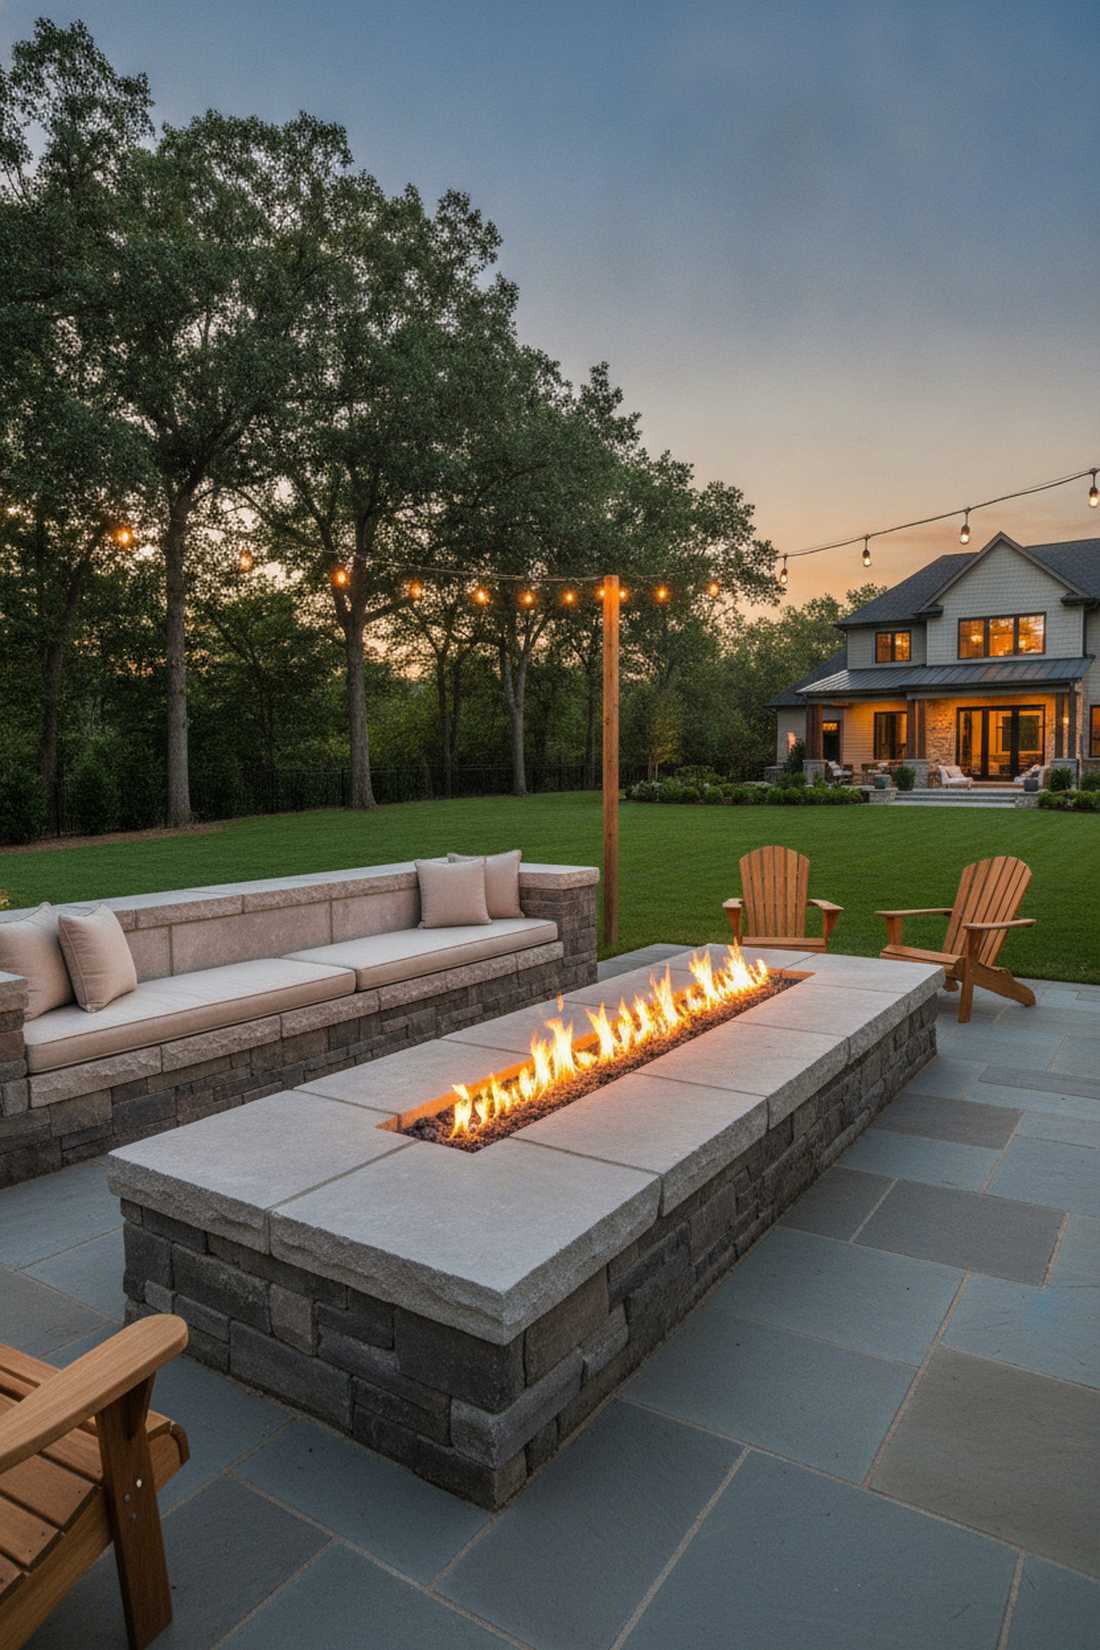
This layout looks like it was carved directly out of the earth by a master stonemason. Fusing seating and heat into an integrated hardscape fire trench, it perfectly anchors newly constructed retaining walls.
Merging the seat cap right into the fire surround creates a massive visual impact that screams luxury architecture. Utilizing high-heat mortar and precision-cut block ensures the structural integrity never wavers after years of heavy thermal cycling.
Expect a heavy DIY lift or a $600+ material cost. The seamless look completely justifies the effort.
- Key Materials: Hardscape capstones, high-heat refractory cement
- Vibe / Style: Brutalist luxury integrated
- Difficulty: Advanced masonry
- Budget Breakdown: Stone/Blocks: $450 | Cement/Pan: $150.
- Creator’s Tip: Sink the actual burner pan 4 inches below the wall cap to stop wind from blowing flames into guests’ laps.
- Smart Sourcing: pre-mixed refractory high-heat mortar tubs or bulk pack architectural capstones.
11. Perpendicular T-Shaped Arrangement
Solving the eternal problem of varying heat tolerance, this design feels like a clever architectural cheat code. The T-shaped multi-temperature lounge is a brilliant adaptation for deep patios hosting multi-generational families.
Adding a perpendicular arm breaks up the long line, giving a designer-level finish that looks meticulously planned rather than thrown together. Premium outdoor accessory catalogs frequently feature this exact layout to showcase how secondary seating acts as a cooler relief zone.
You can execute this add-on for roughly $150 in extra seating. Save this to your smart patio planning board!
- Key Materials: Long sectional base, matching armless accent chairs
- Vibe / Style: Multi-zone family resort
- Difficulty: Easy layout trick
- Budget Breakdown: Base Seating: $100 | Extension Chairs: $50.
- Creator’s Tip: Keep the perpendicular seats armless to allow smooth visual flow across the T-intersection.
- Smart Sourcing: armless modular outdoor seating sections or weather-resistant furniture clip kits.
Outdoor Seating with Fireplace Solutions
Vertical fireplaces and architectural fire features create focused thermal projection with distinct seating strategies compared to horizontal pit configurations. These installations suit covered patios, loggias, and outdoor rooms where overhead protection exists.
12. Theater-Style Fireplace Facing
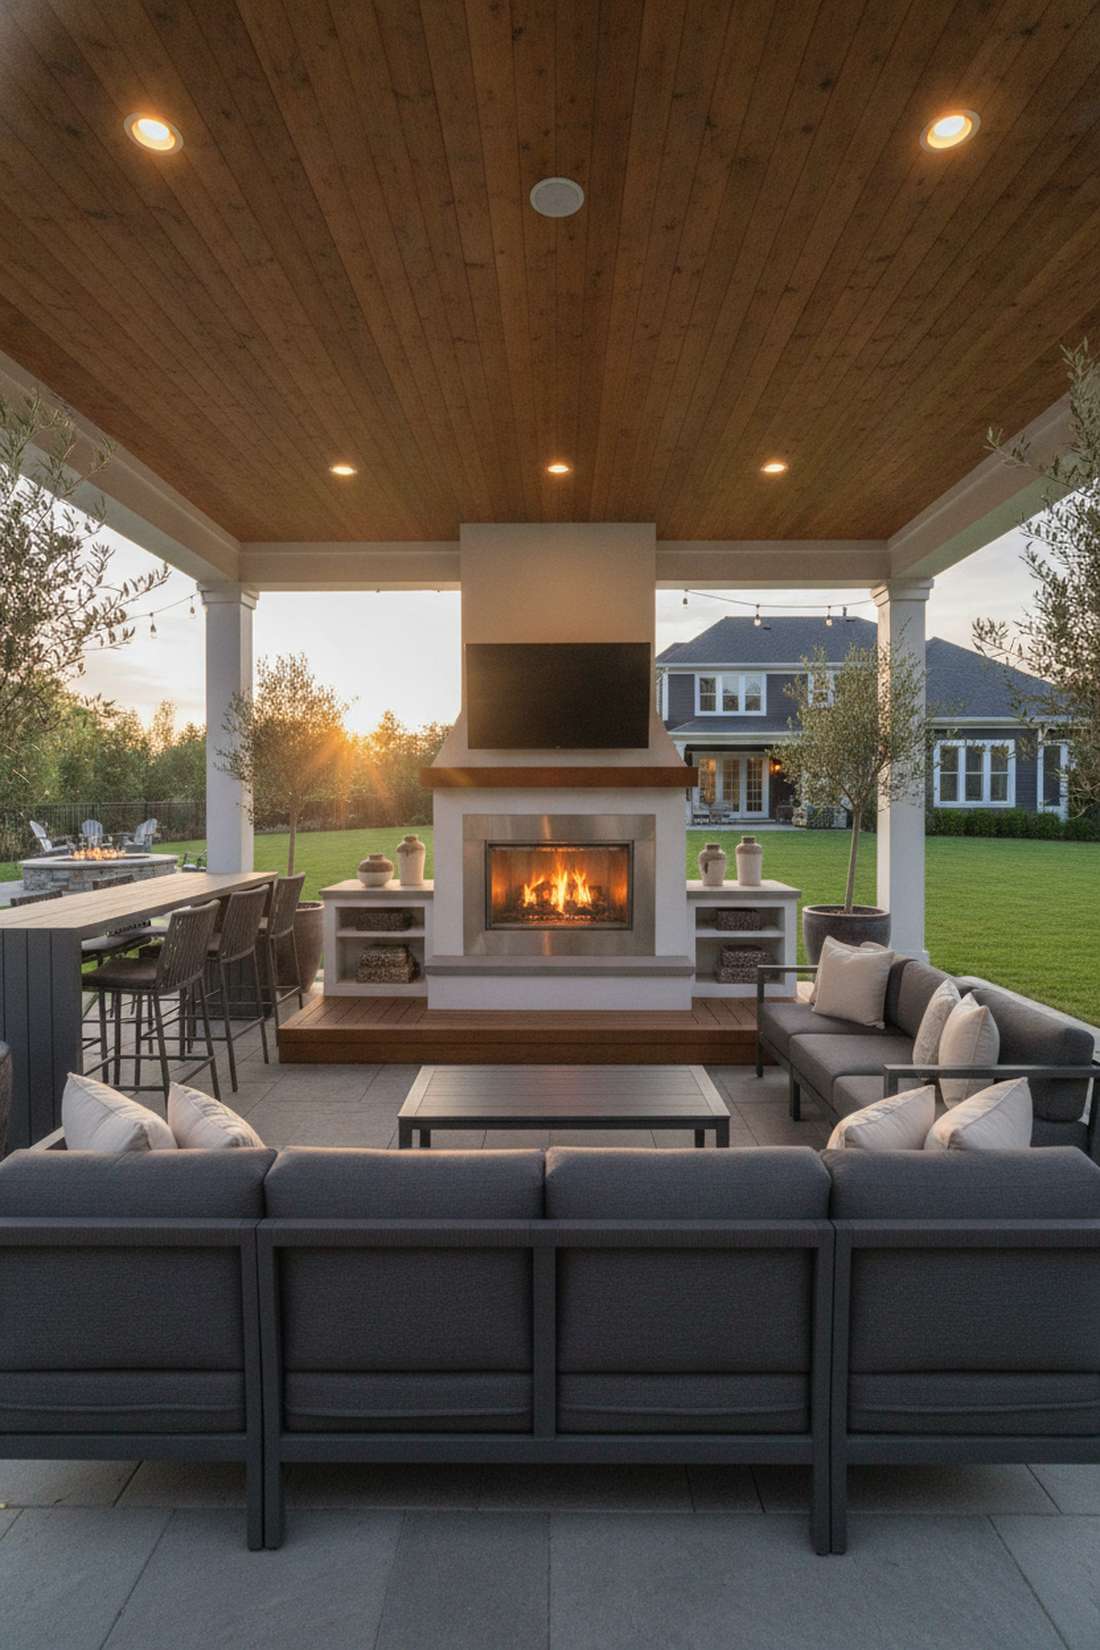
Radiating the dramatic energy of an outdoor cinema, this setup demands total attention. Building a tiered fireplace viewing lounge transforms a boring covered pavilion into a prime-time entertainment hub.
Stacking rows forces a directional focus that completely mimics the vibe of a high-end resort lobby. Relying on premium high-BTU inserts pushes serious radiant heat backward, ensuring even the cheap seats stay incredibly warm.
Creating this layered aesthetic will run about $300–$500 in tiered seating. Highly recommended for avid outdoor hosts.
- Key Materials: High-BTU gas insert, varying height sofa sets
- Vibe / Style: Outdoor luxury cinema
- Difficulty: Moderate spacing
- Budget Breakdown: Front Low-Seating: $200 | Rear Bar-Seating: $250.
- Creator’s Tip: Build a simple 6-inch wooden platform for the back row to guarantee unobstructed views of the flames.
- Smart Sourcing: high-BTU stainless fireplace insert kits or pre-cut deck riser platforms.
13. L-Shaped Sectional Corner Fireplace
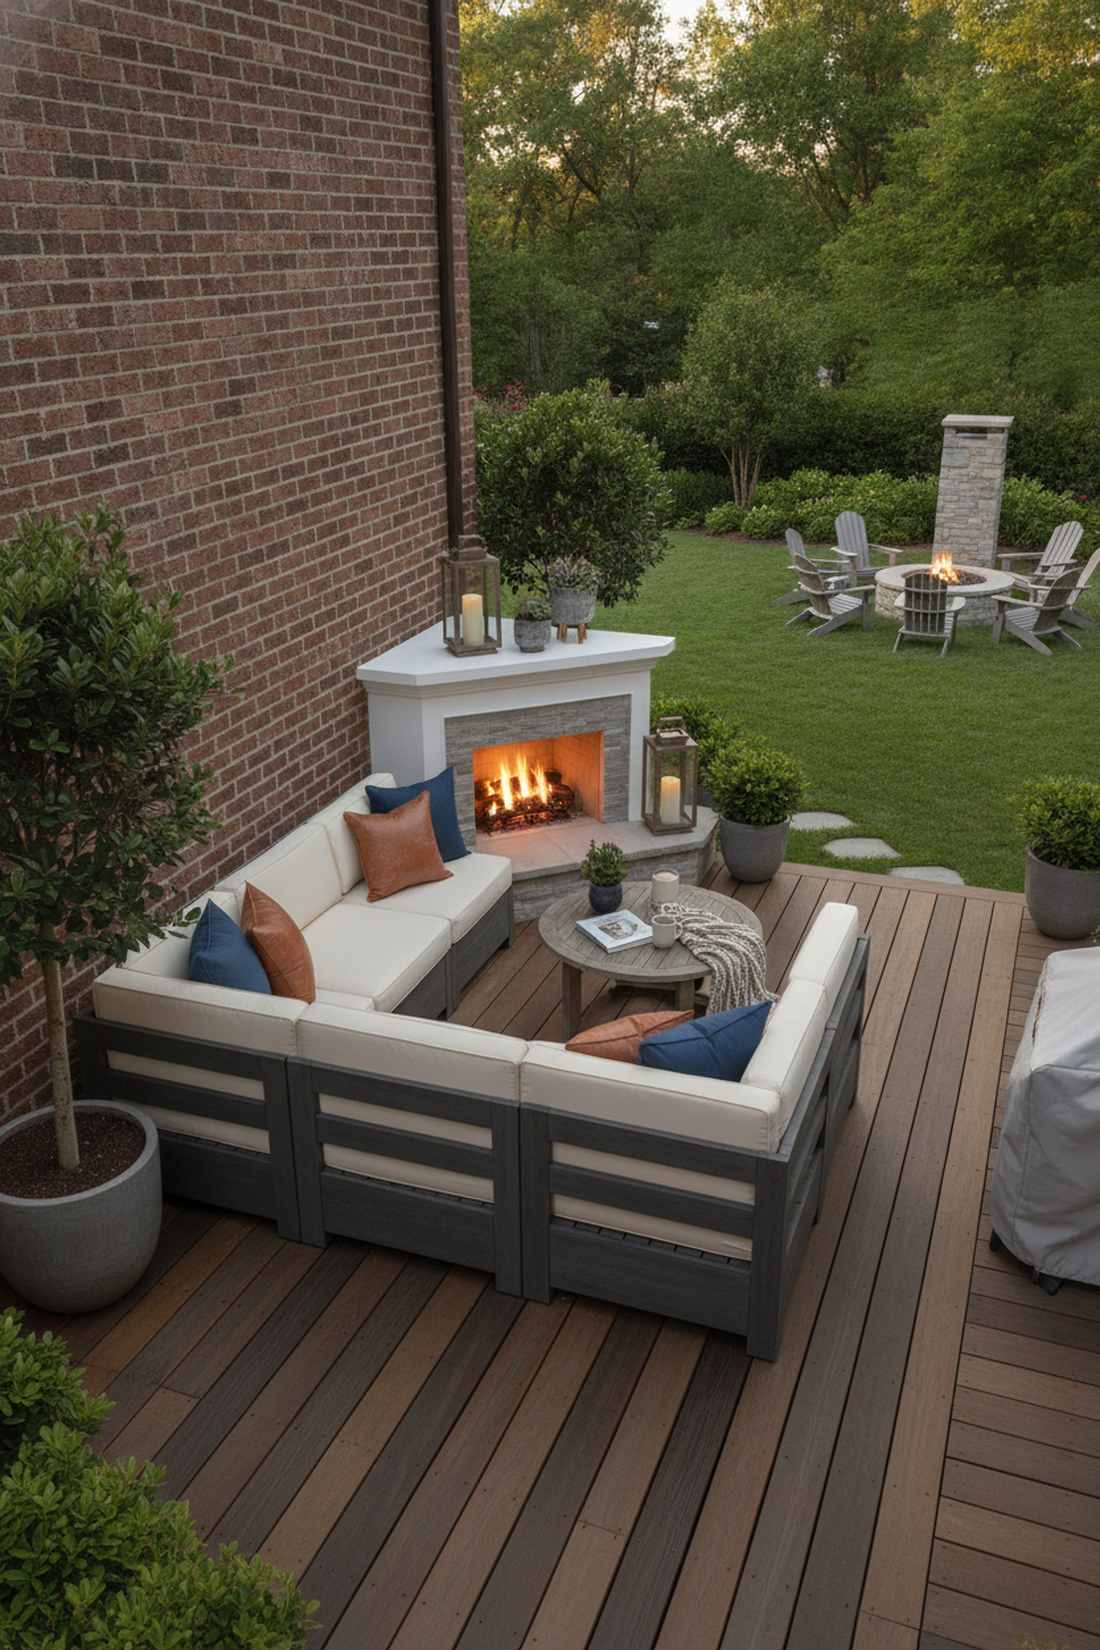
This layout tucks right in and feels like the ultimate cozy reading nook brought outside. The corner-wrapped sectional hearth layout is the absolute king of maximizing dead space on an L-shaped deck.
Hugging the corner walls with plush seating maximizes square footage while looking ridiculously deliberate and expensive. Incorporating heavy-duty waterproof modular frames guarantees the piece survives being pushed flush against exterior brickwork all season.
Expect to invest around $350 for a quality corner sectional block. Pin this if you’re trying to fix an awkward patio corner!
- Key Materials: L-shaped modular sectional, corner mantel kit
- Vibe / Style: Cozy space-saving nook
- Difficulty: Simple furniture drop
- Budget Breakdown: Corner Sectional: $280 | Cushions: $70.
- Creator’s Tip: Leave a 3-inch gap between the sofa back and the wall to prevent mold buildup and allow air circulation.
- Smart Sourcing: UV-coated modular L-shape outdoor sofas or breathable heavy-duty furniture covers.
14. Double-Sided See-Through Fireplace
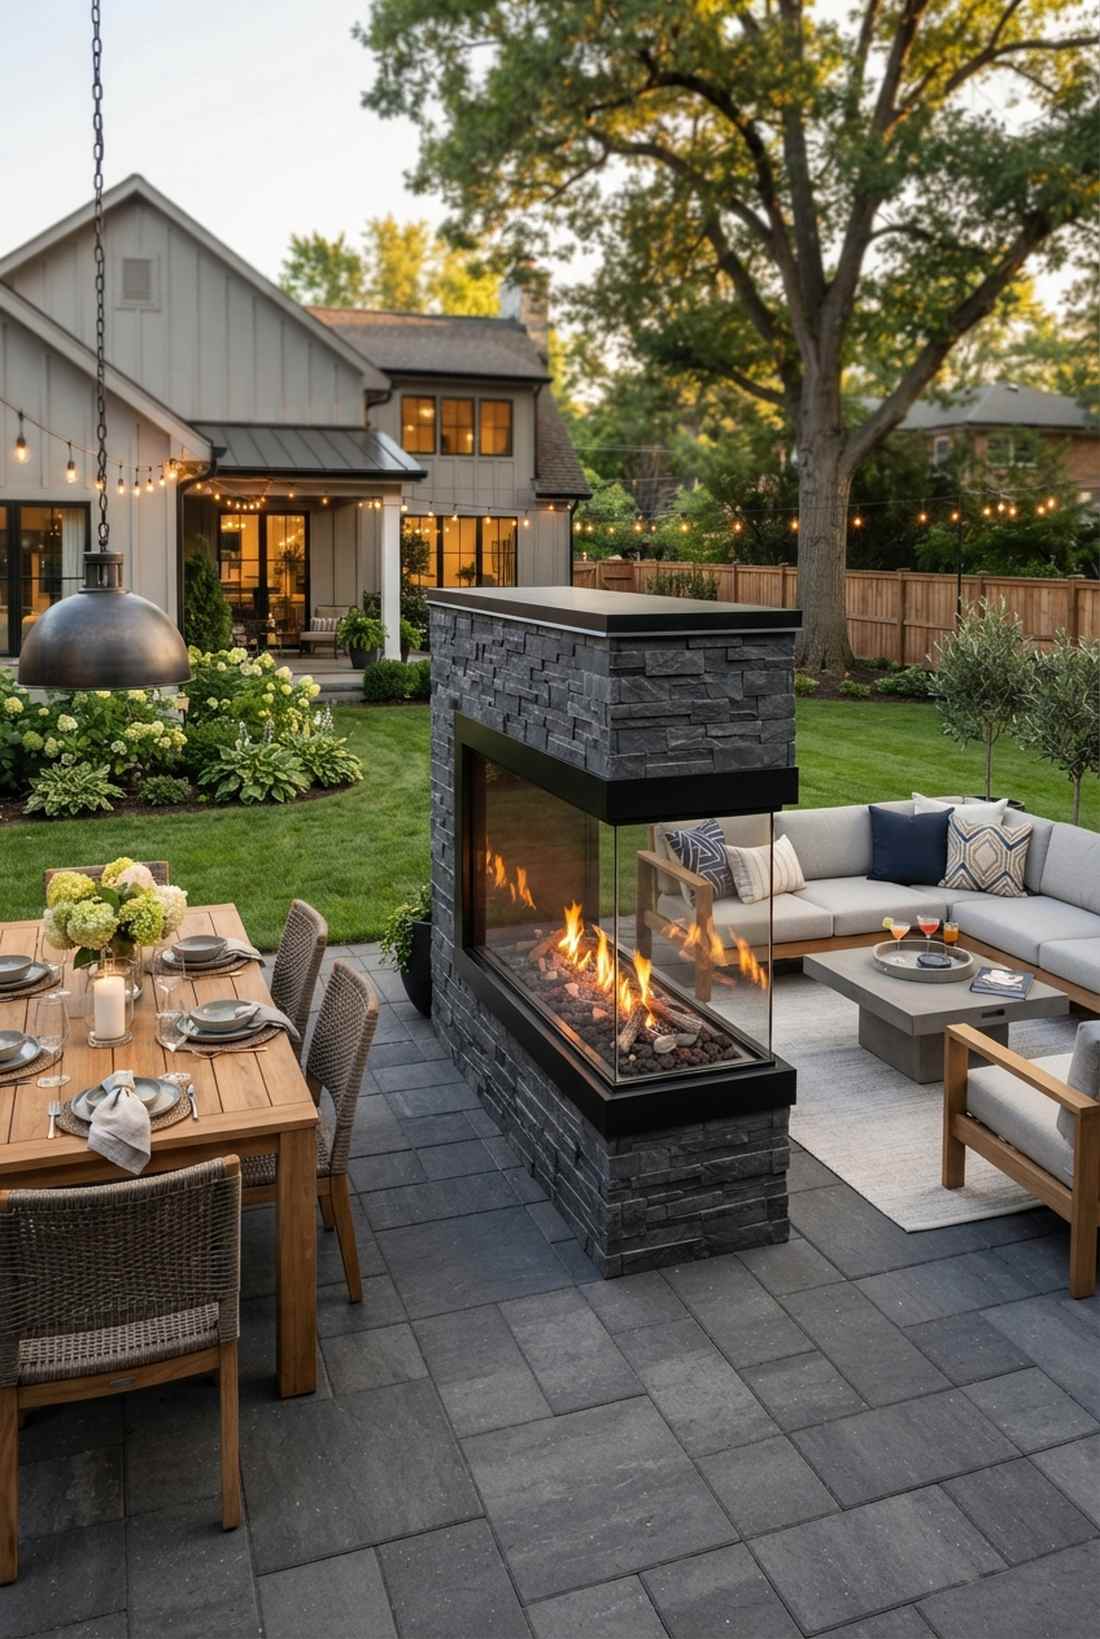
Acting as a glowing window between two worlds, this is the ultimate architectural flex. A dual-zone transparent fire wall is perfect for separating an outdoor dining room from a relaxed lounge area.
Creating two distinct spaces from a single heat source delivers a surprisingly premium look often reserved for multi-million dollar estates. High-end outdoor seating with fireplace setups heavily utilize double-sided glass to maintain visual flow without sacrificing wind protection.
This structural addition is pricey, starting around $1,200 for the unit alone. It completely redefines luxury outdoor living.
- Key Materials: Double-sided fireplace frame, tempered ceramic glass
- Vibe / Style: Five-star resort partition
- Difficulty: Professional installation recommended
- Budget Breakdown: Fireplace Unit: $900 | Framing: $300.
- Creator’s Tip: Use identical flooring on both sides of the fireplace to make the divided space feel cohesive and vast.
- Smart Sourcing: pre-built double-sided outdoor fireplace kits or high-heat ceramic replacement glass panels.
The genius layout dropping next is ridiculously affordable but instantly triggers massive backyard envy…
15. Fireplace with Built-In Bench Flanking
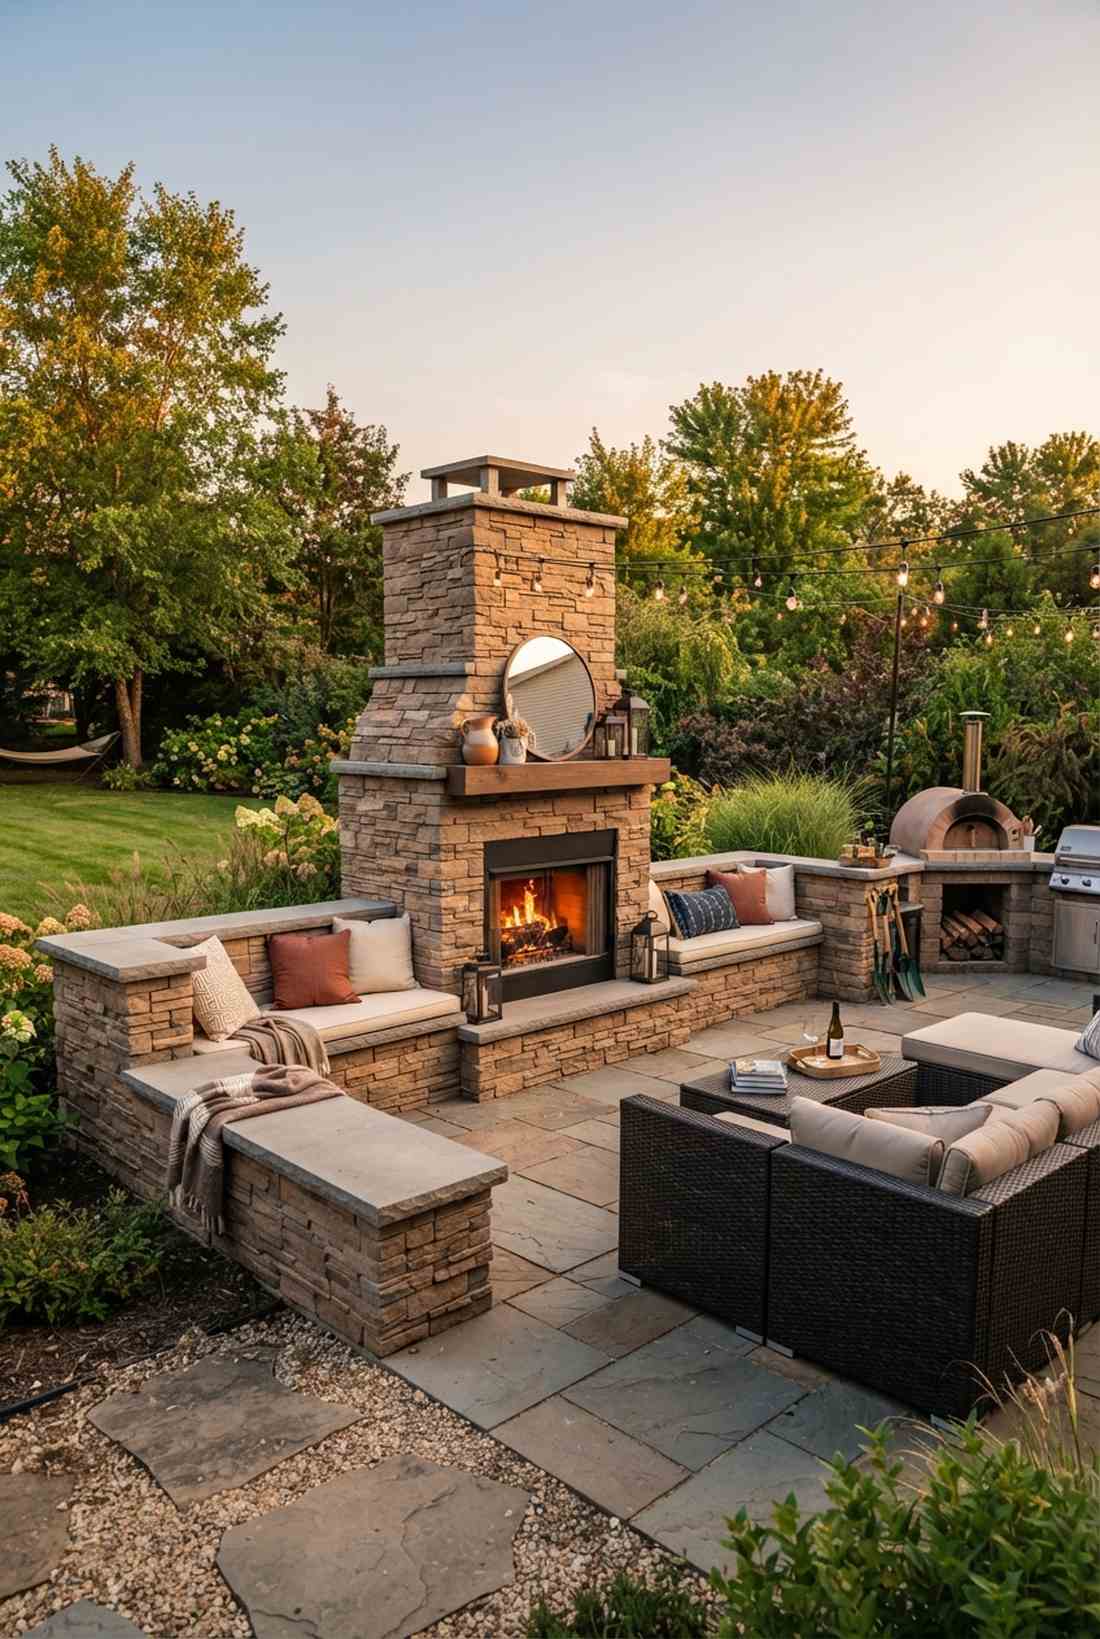

This setup feels like a grand medieval hearth modernized for today’s luxury standards. Constructing masonry wing-wall seating benches works phenomenally well to extend the footprint of a standalone chimney structure.
Extending hardscape wings directly from the firebox absorbs and radiates warmth long after the embers die down, offering incredible thermal efficiency. Utilizing dense stone or concrete blocks for these extensions mimics expensive custom architecture on a tight DIY budget.
You can block this out for about $250 in masonry materials. Save this to your heavy-duty DIY hardscape board!
- Key Materials: Cinder blocks, stone veneer panels, masonry adhesive
- Vibe / Style: Grand architectural hearth
- Difficulty: Intermediate block-laying
- Budget Breakdown: Blocks: $100 | Veneer: $150.
- Creator’s Tip: Core-fill the cinder blocks with concrete and rebar to ensure the benches don’t shift or crack over time.
- Smart Sourcing: pre-cut faux stone veneer panels (bulk pack) or commercial-grade masonry construction adhesive.
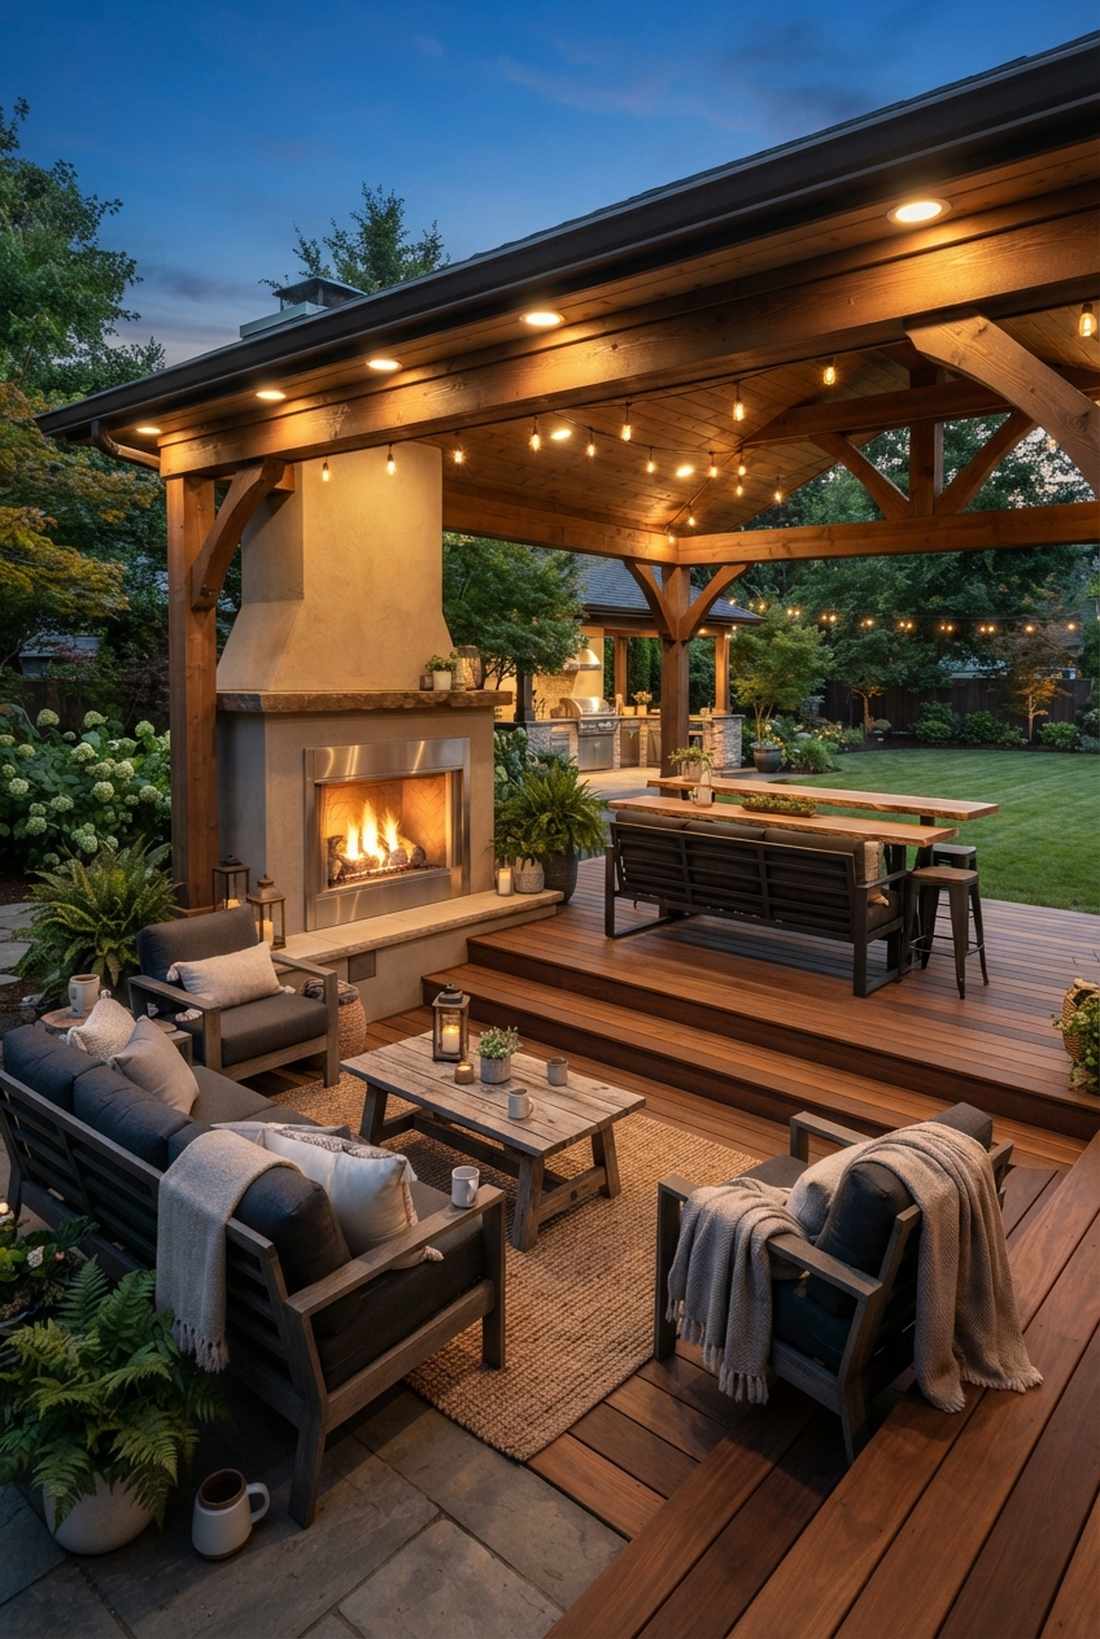
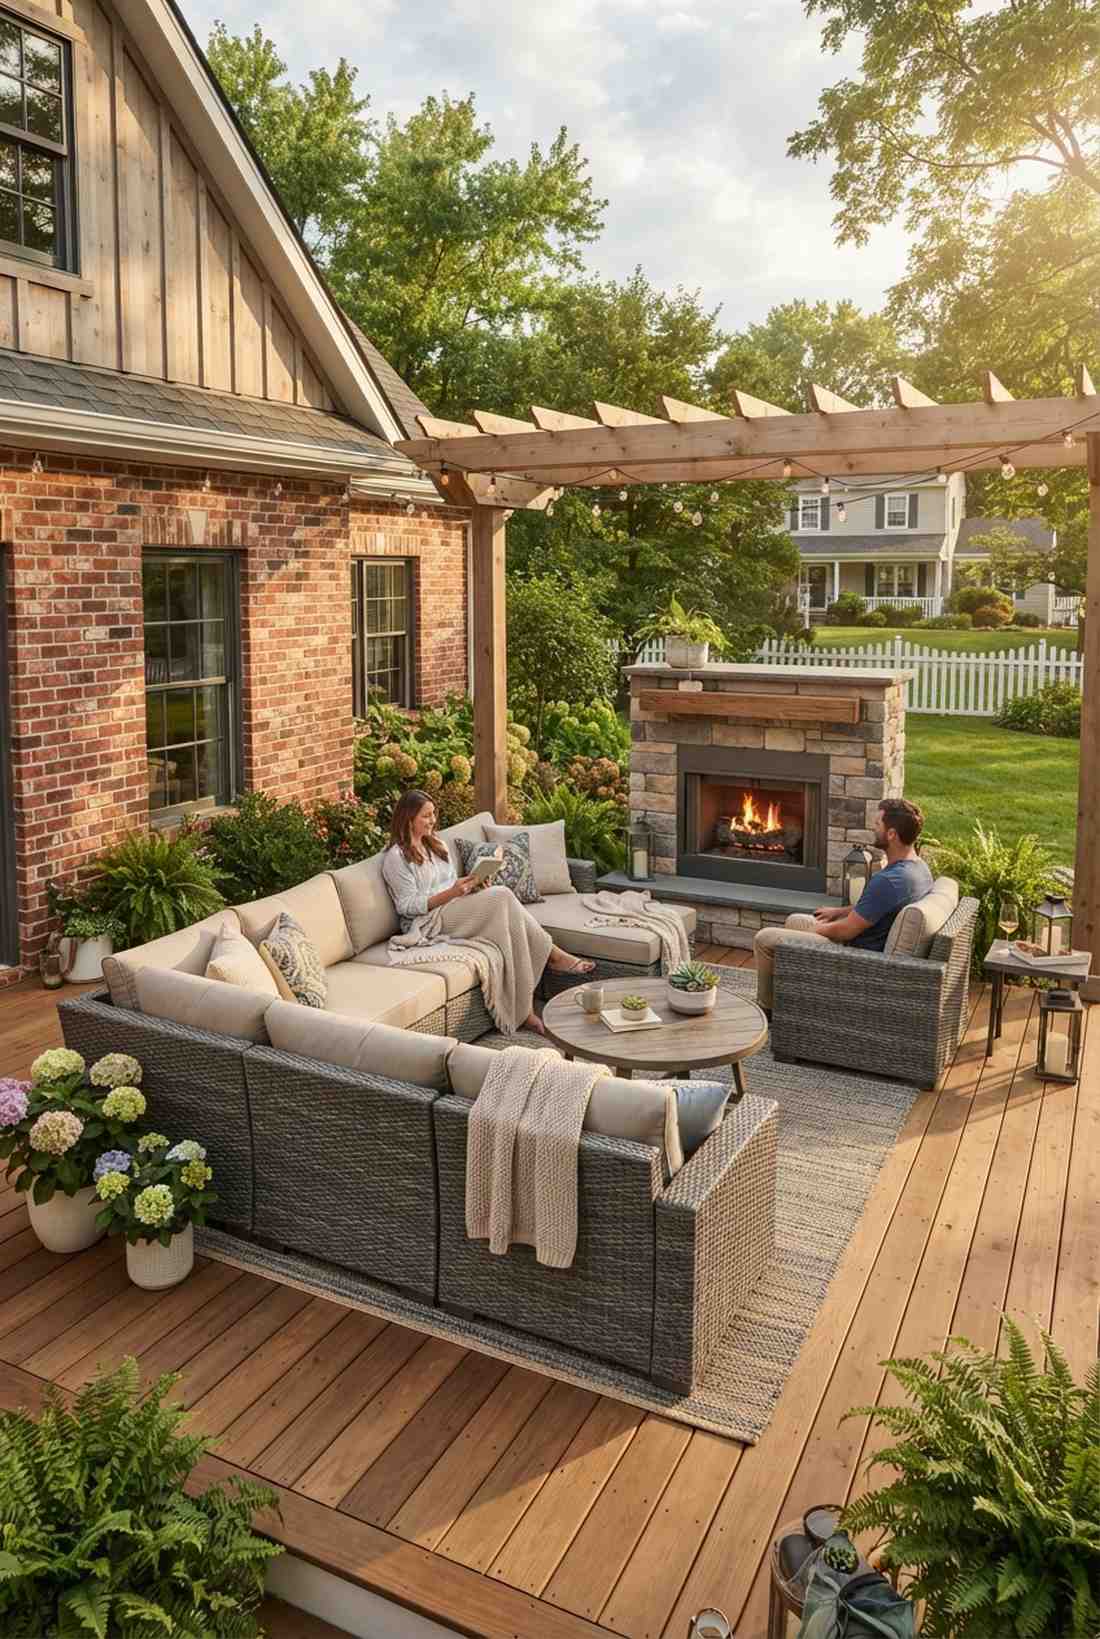
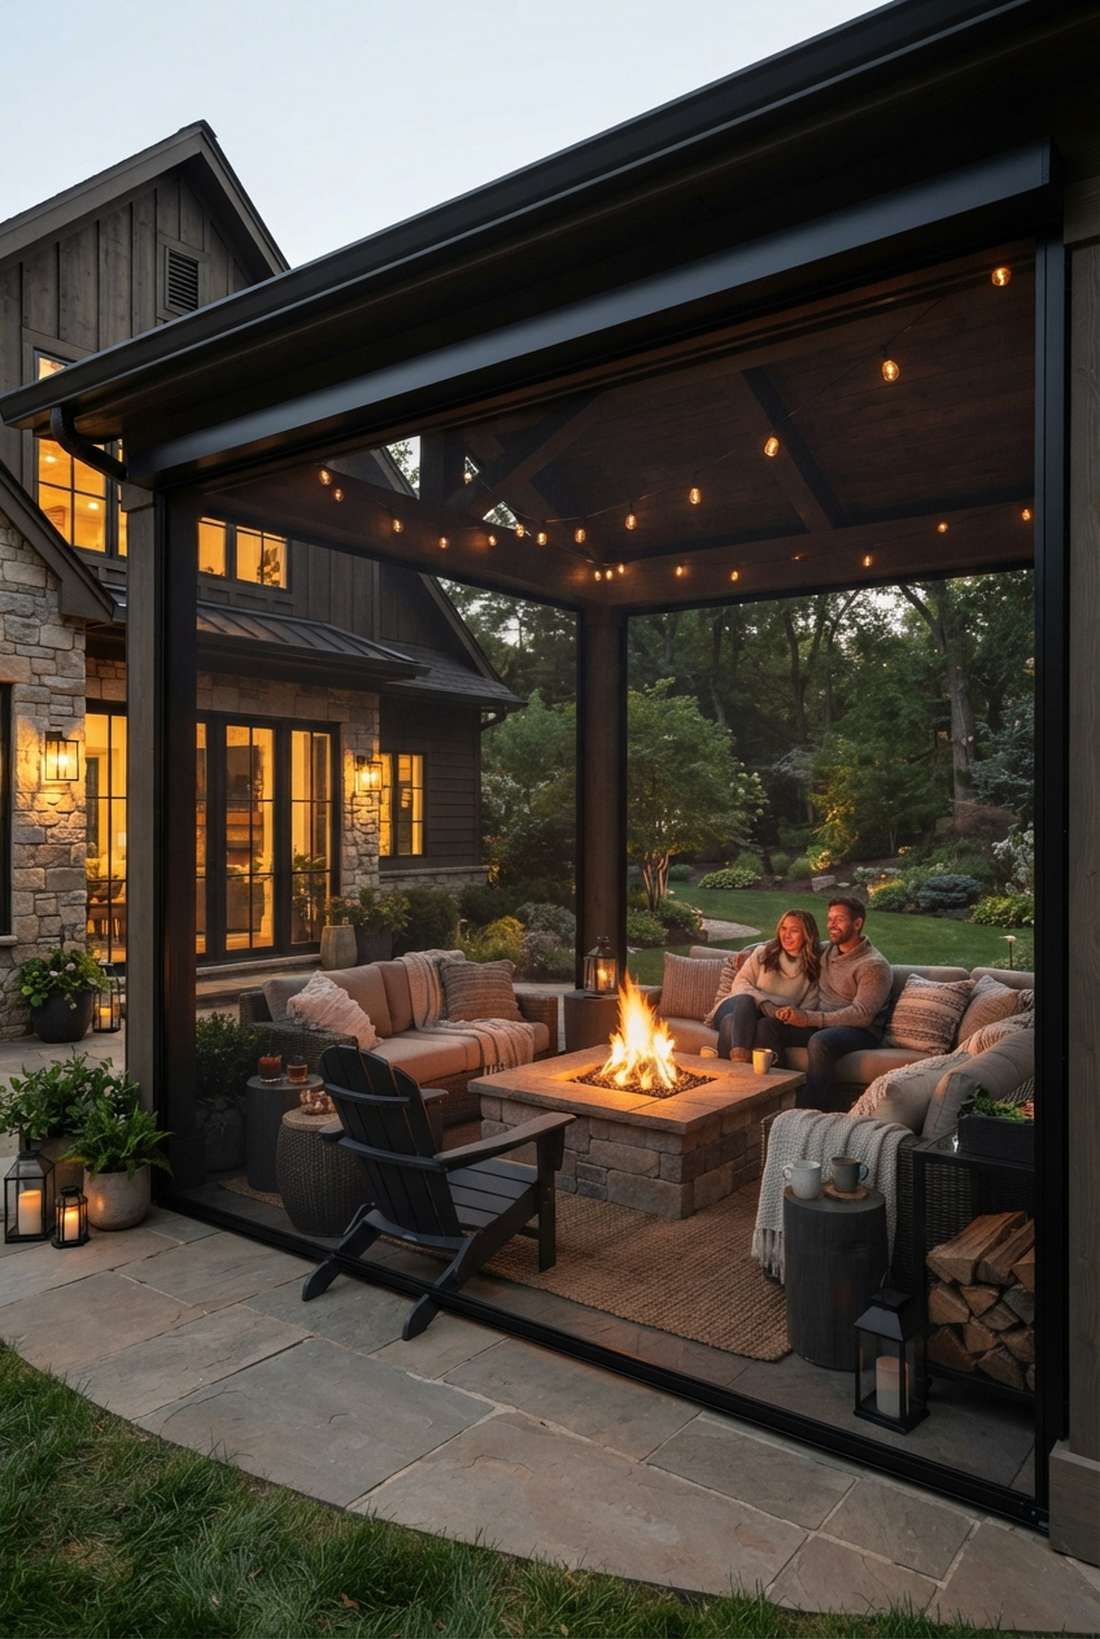
16. Covered Patio Fireplace Lounge
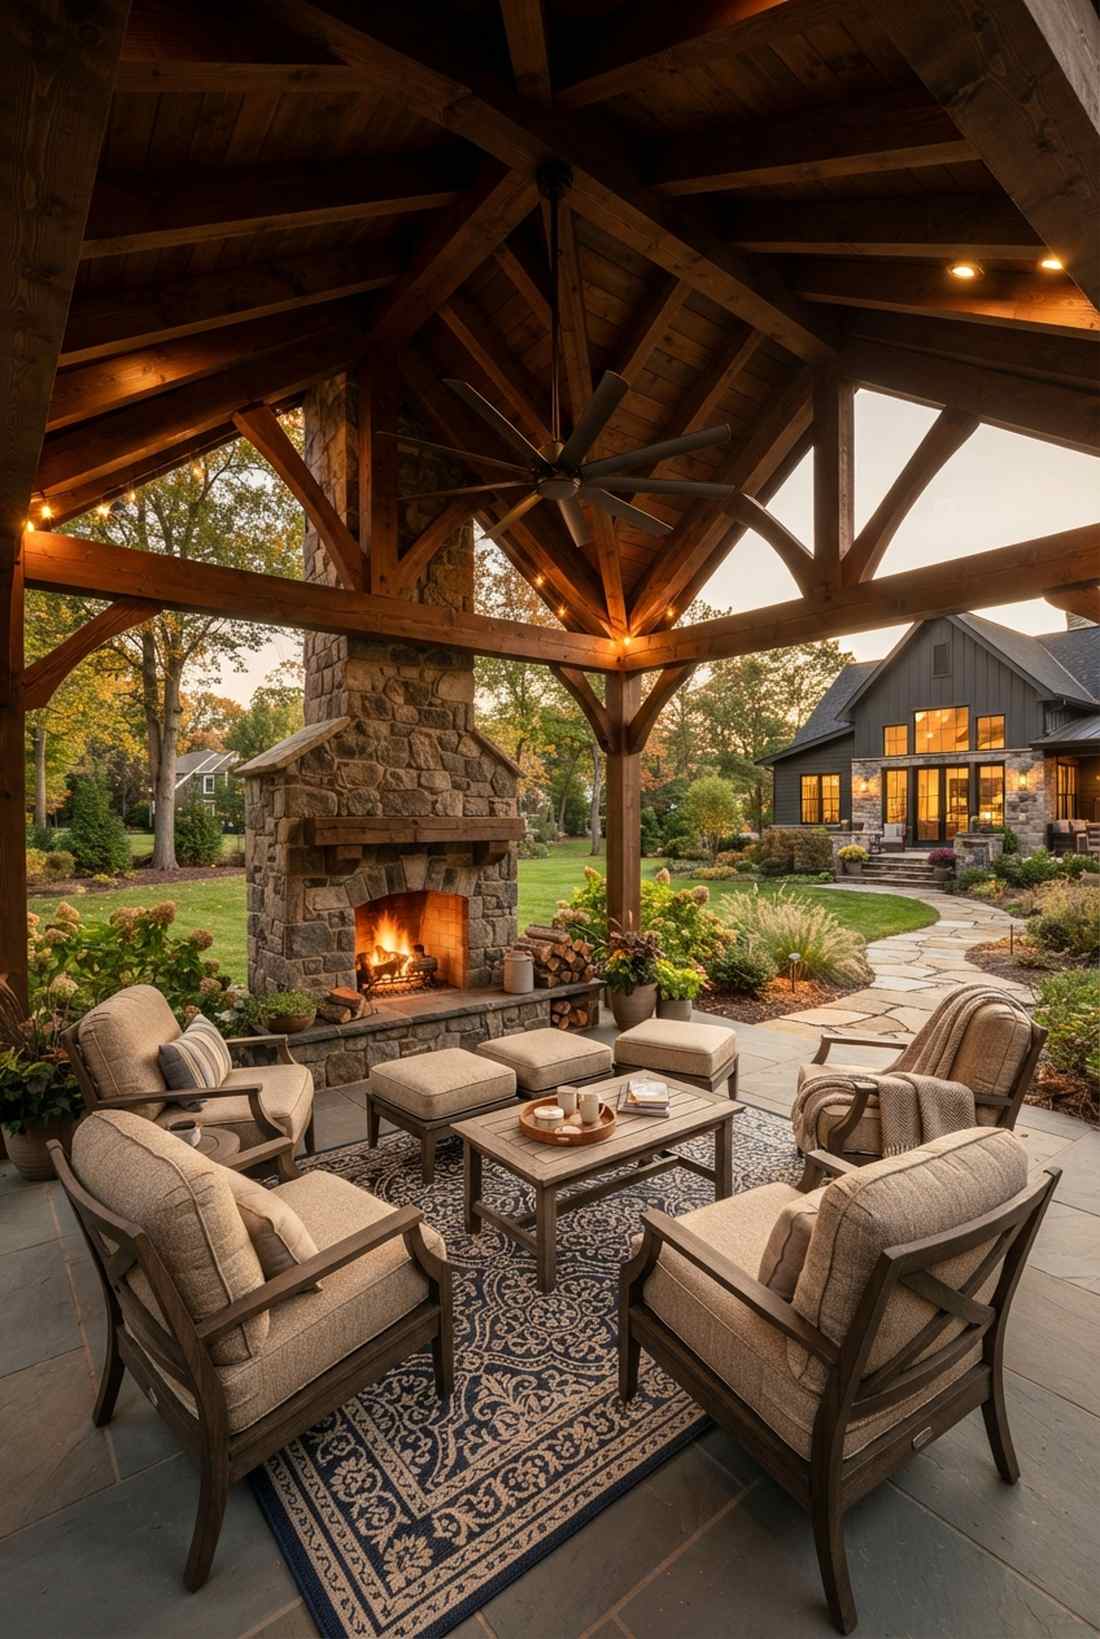
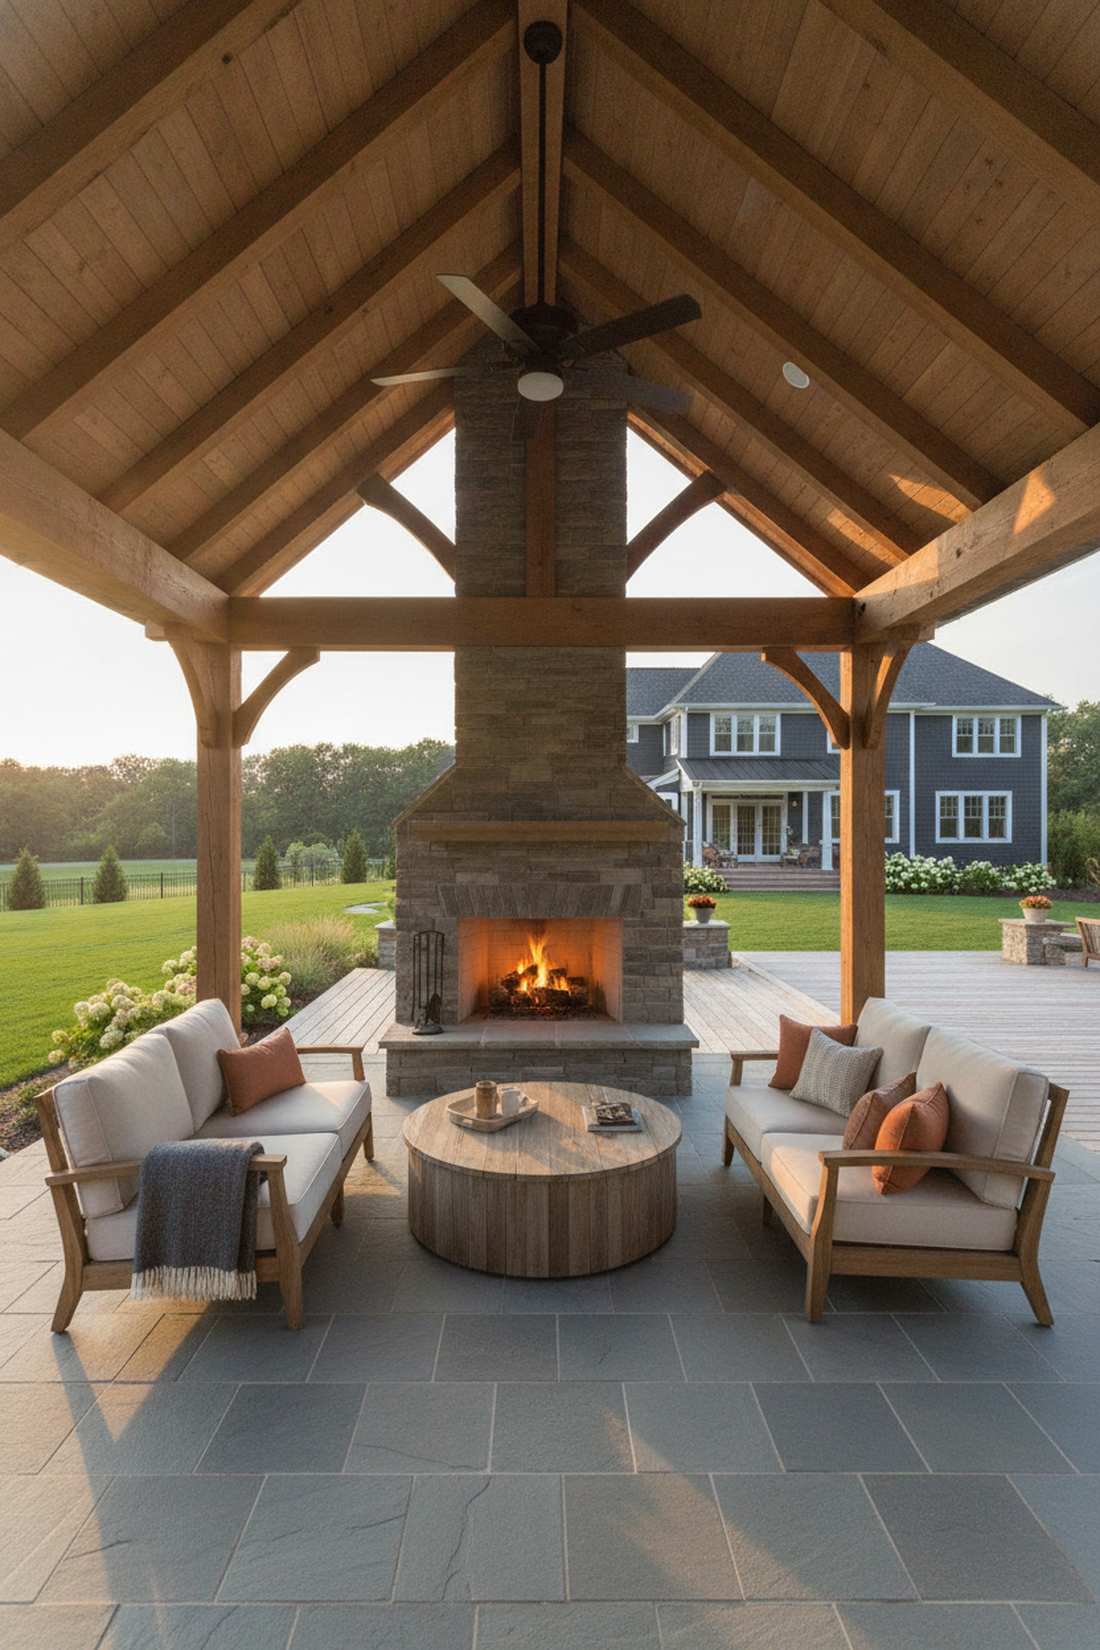
Providing the ultimate shelter, this configuration feels like a plush living room that just happens to be outdoors. A roofed pavilion fire lounge is the absolute gold standard for creating true four-season usability.
Trapping the heat under a structured canopy gives a designer-level finish and stops precious warmth from escaping into the night sky. Sourcing proper ventilation kits is mandatory here to prevent dangerous exhaust buildup while maintaining that cozy cabin aesthetic.
A basic pavilion setup starts around $600, scaling up with luxury finishes. Pin this if you want to use your patio through winter!
- Key Materials: Timber frame pergola, deep-seating club chairs
- Vibe / Style: All-weather living room
- Difficulty: Advanced carpentry/assembly
- Budget Breakdown: Canopy Kit: $400 | Seating: $200.
- Creator’s Tip: Add a ceiling fan above the seating to actively push the rising warm air back down toward your guests.
- Smart Sourcing: pre-cut timber pavilion starter kits or weatherproof outdoor ceiling fan units.
Multi-Zone & Hybrid Arrangements
Complex outdoor spaces benefit from multiple seating zones at varying distances from fire features, accommodating diverse activities and heat preferences. Hybrid configurations combine circular, linear, and architectural elements into unified designs.
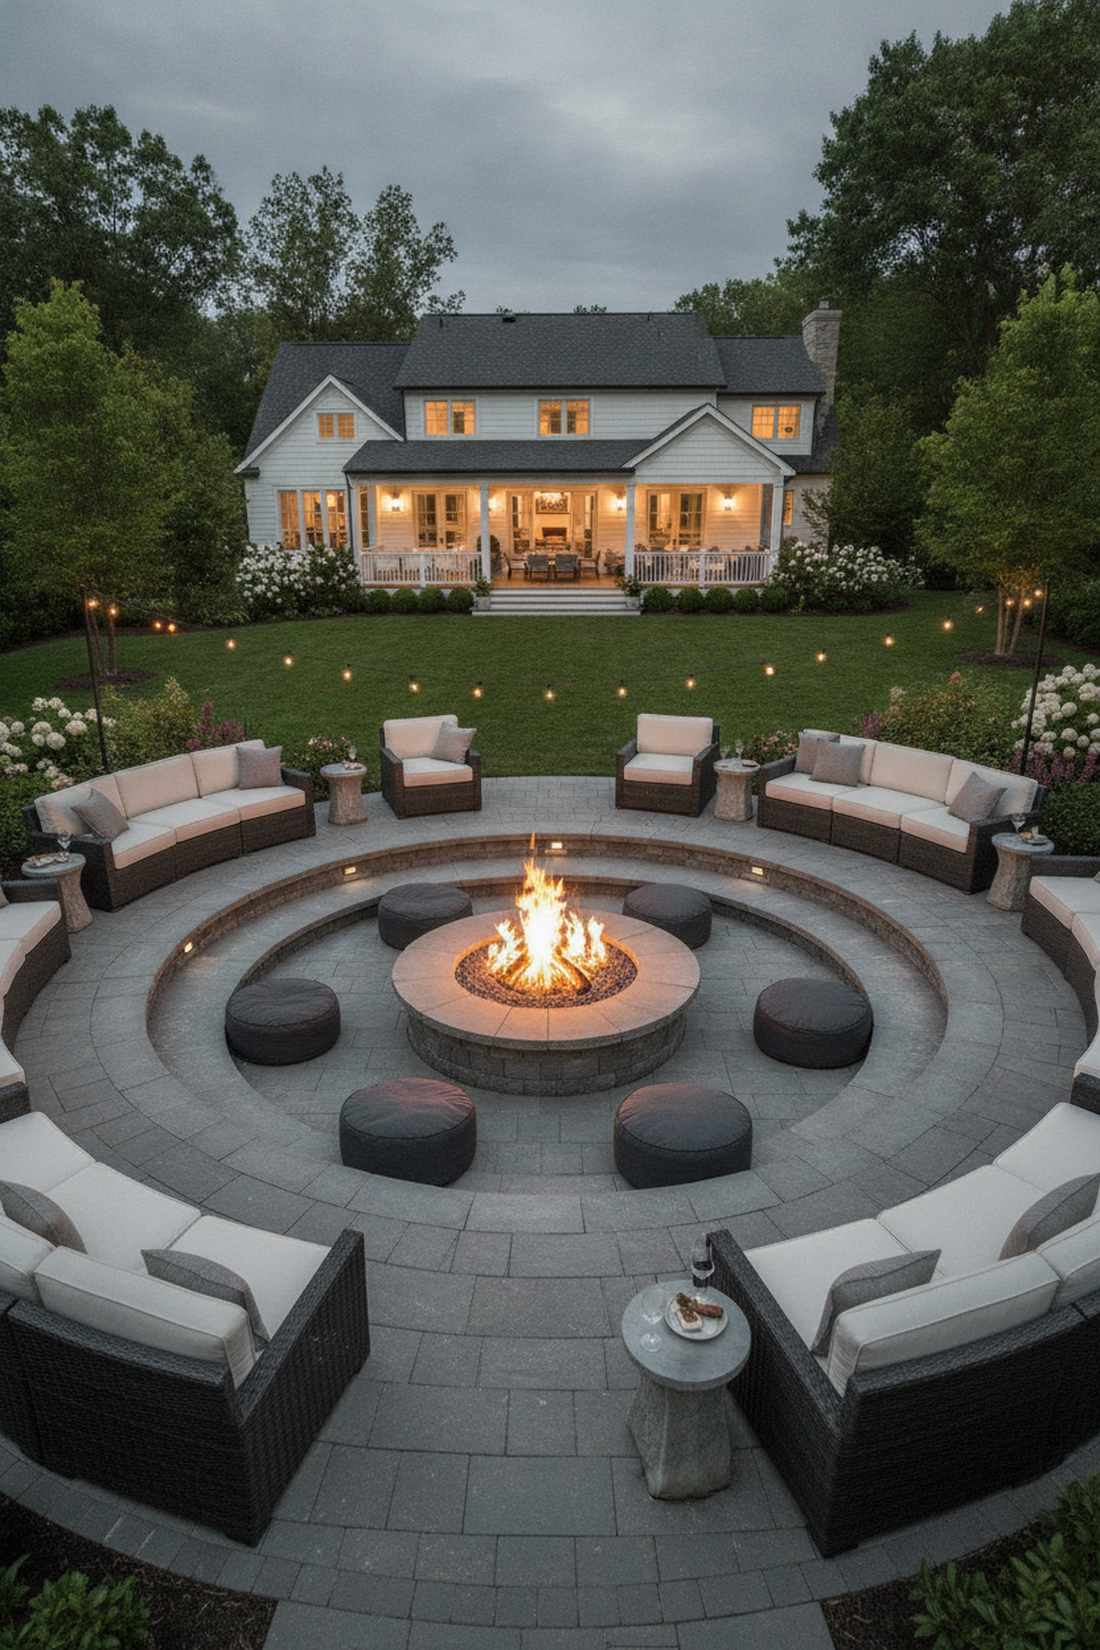
17. Primary and Secondary Seating Rings
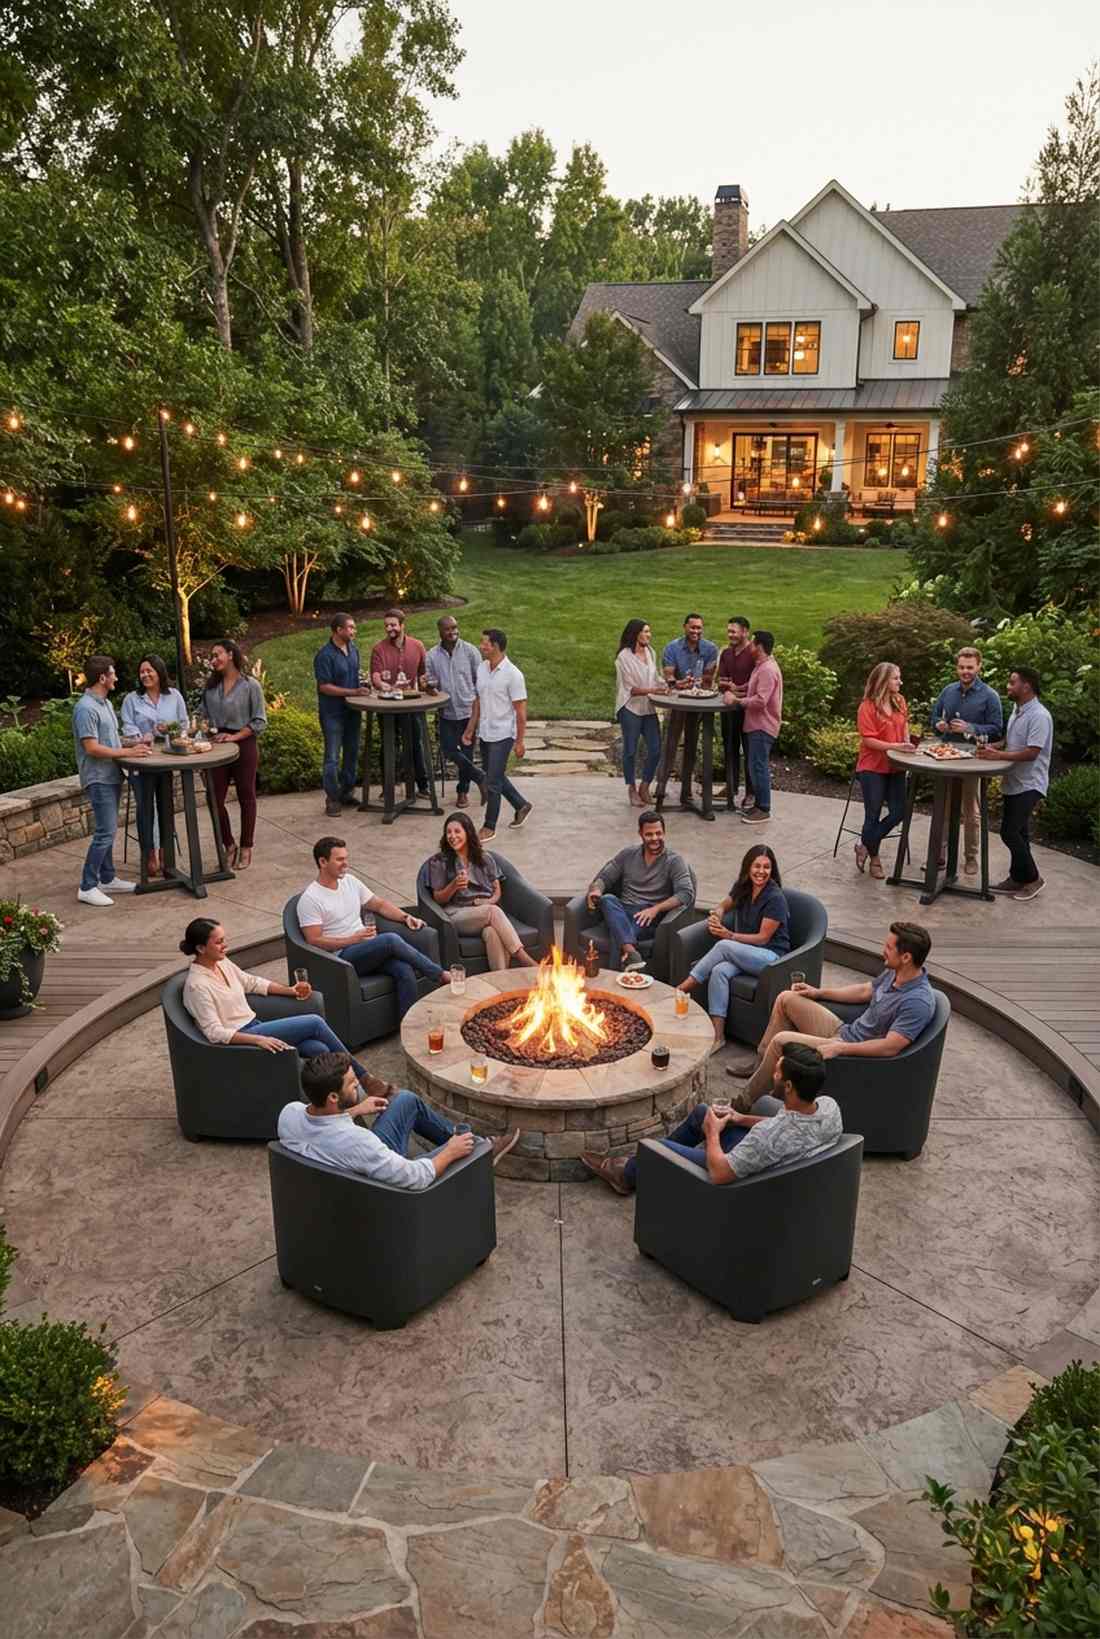
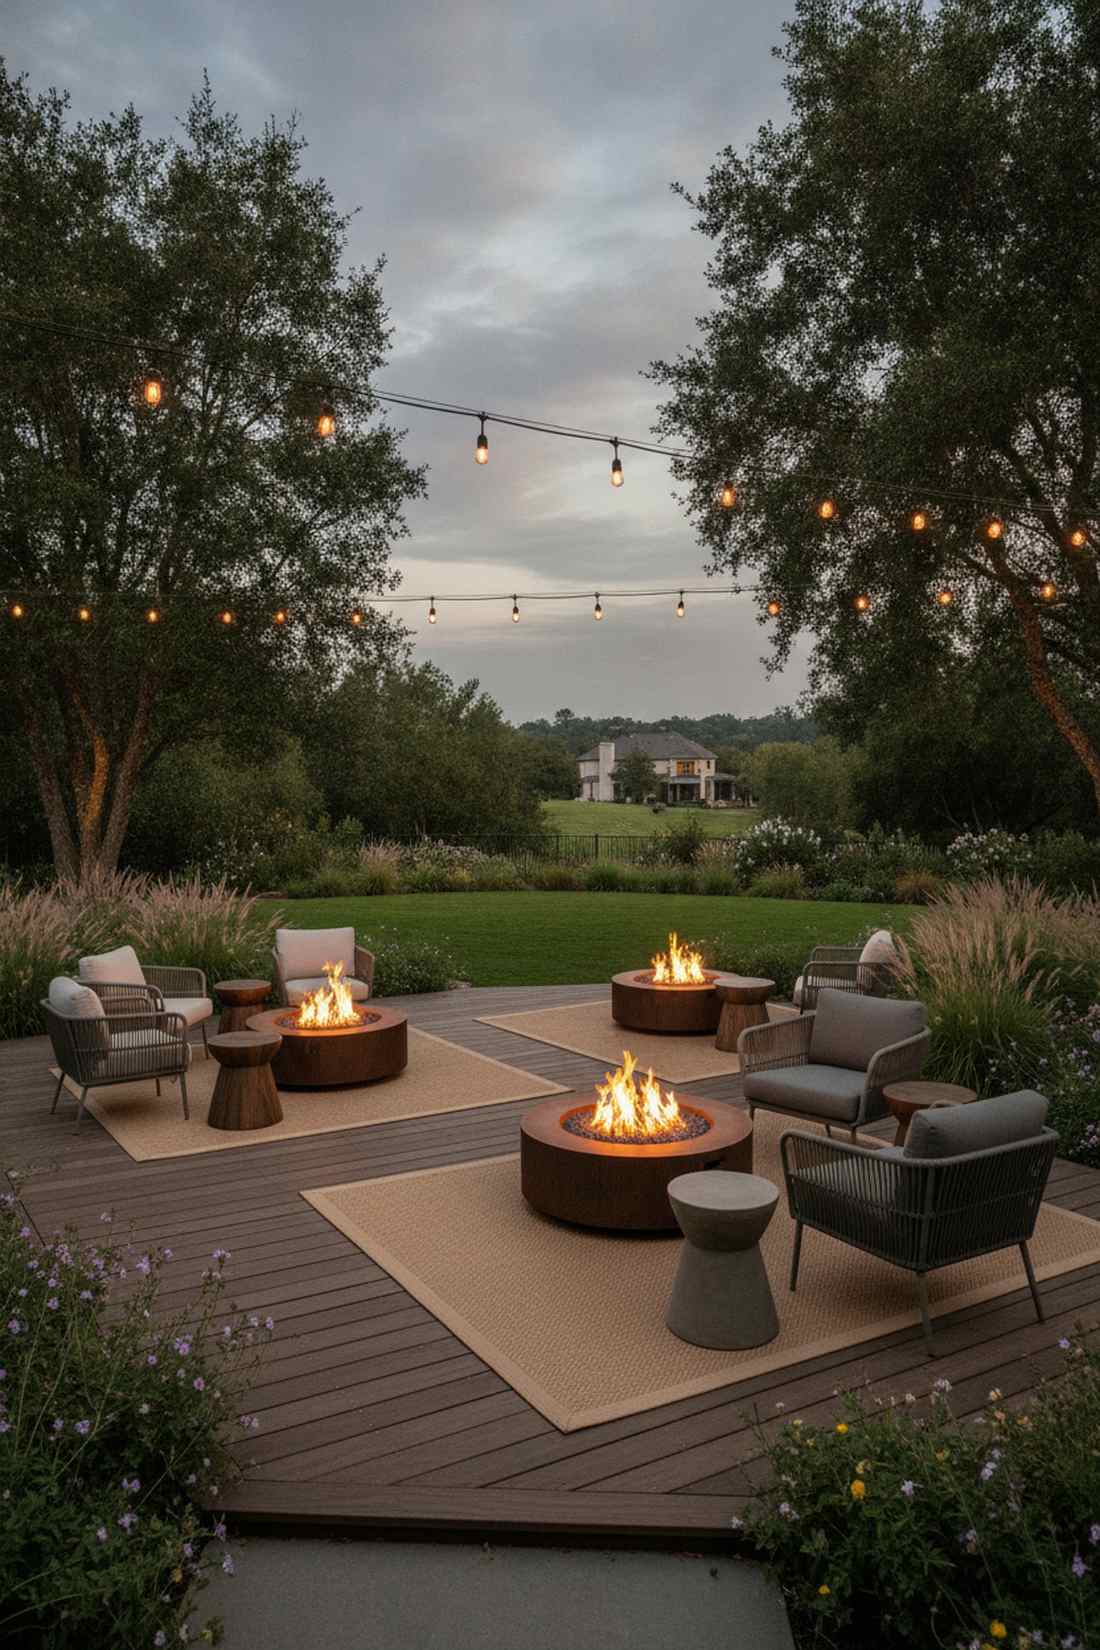
This layout mimics the bustling energy of a trendy outdoor bar with VIP sections. Deploying a dual-perimeter party zone arrangement is absolutely necessary when hosting groups larger than 15 people in a single open area.
Splitting the crowd into a close warm circle and an outer mingling ring looks far more expensive than scattering random chairs. Integrating heavy-duty bar height tables on the outer edge ensures standing guests feel actively included in the inner circle’s conversation.
You can execute this two-tier vibe for around $350. Great for anyone who hosts massive holiday bonfires.
- Key Materials: Low club chairs, standing bar-height tables
- Vibe / Style: Trendy backyard club
- Difficulty: Easy zone mapping
- Budget Breakdown: Inner Chairs: $200 | Outer High-Tops: $150.
- Creator’s Tip: Keep the outer ring exactly 8 to 10 feet back so guests can easily navigate between the two zones without tripping.
- Smart Sourcing: weatherproof outdoor high-top tables (bulk pack) or UV-coated low-profile club chairs.
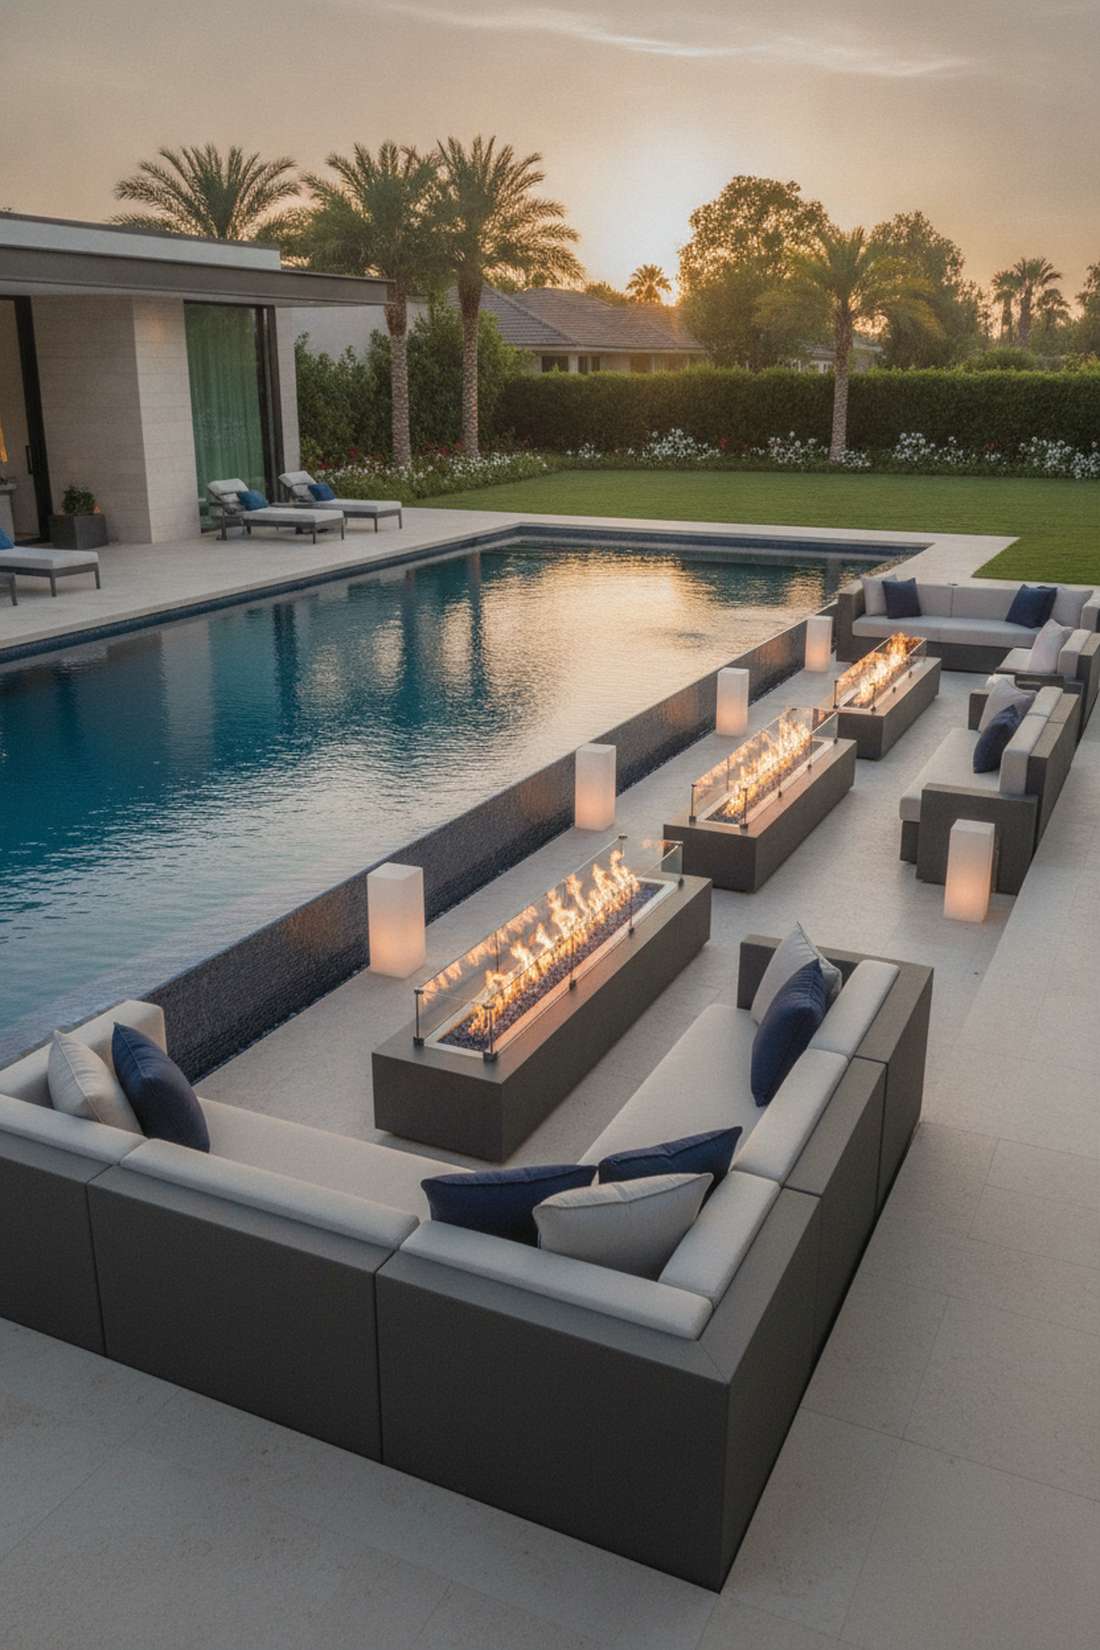
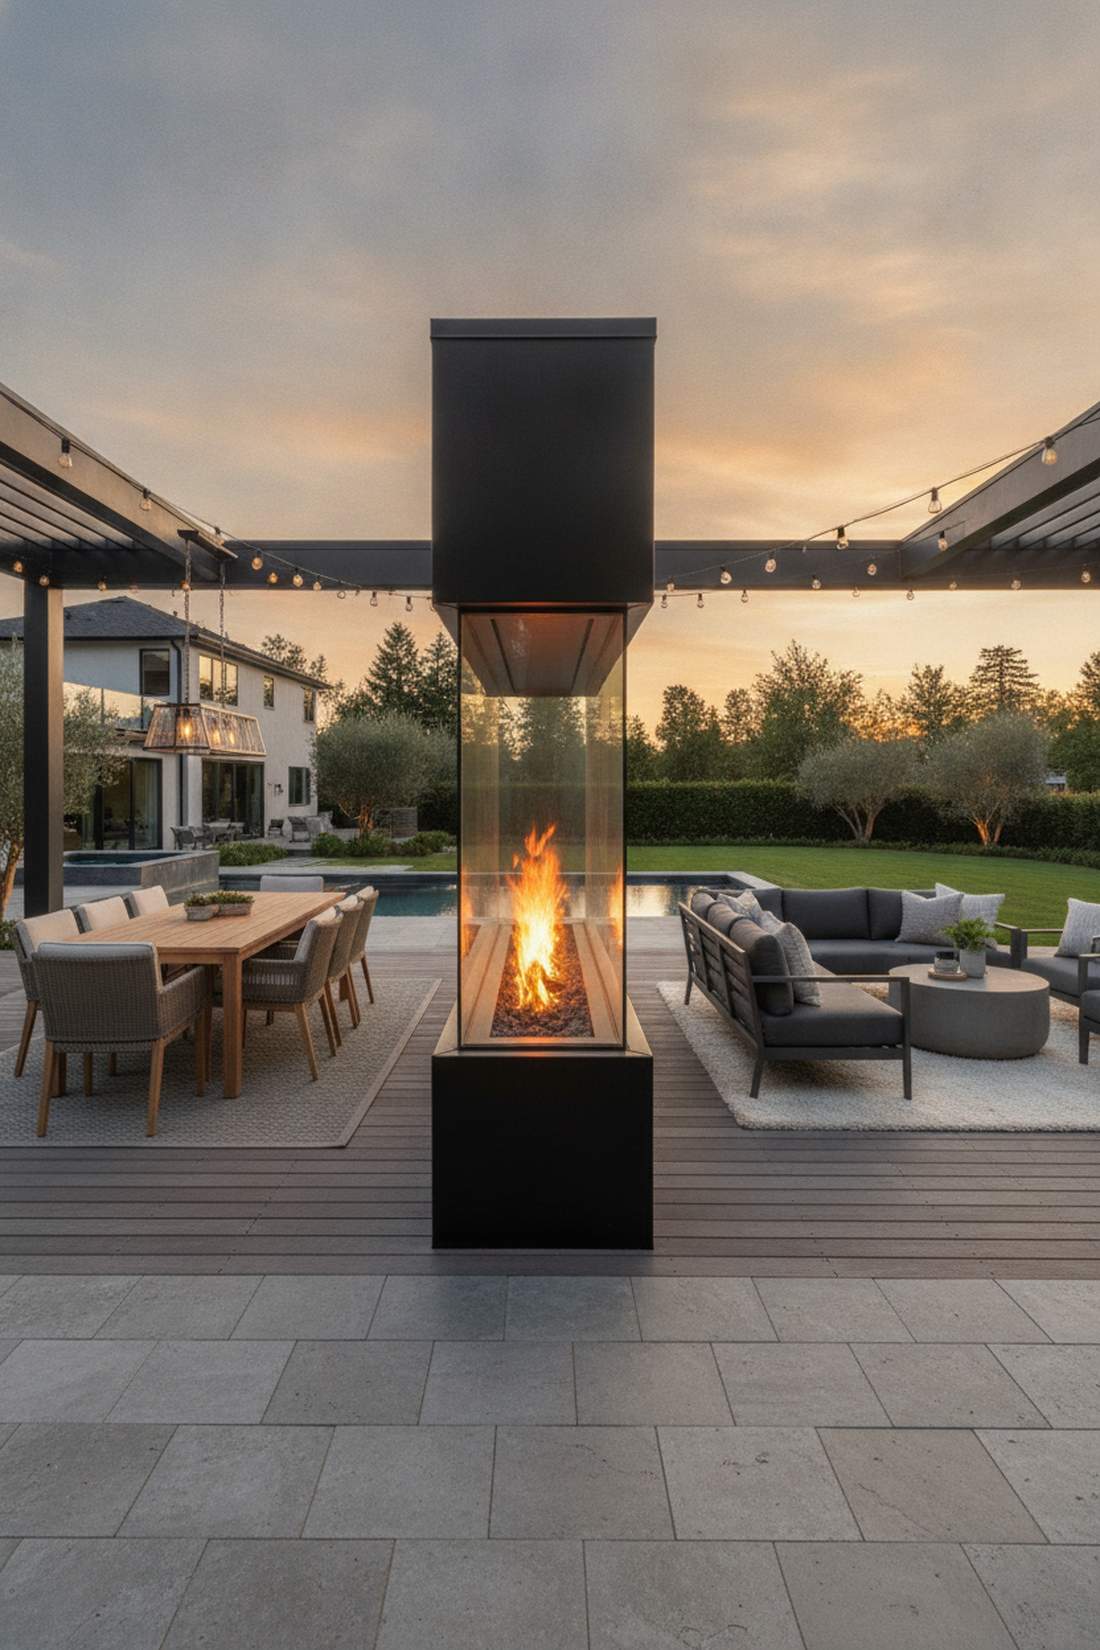
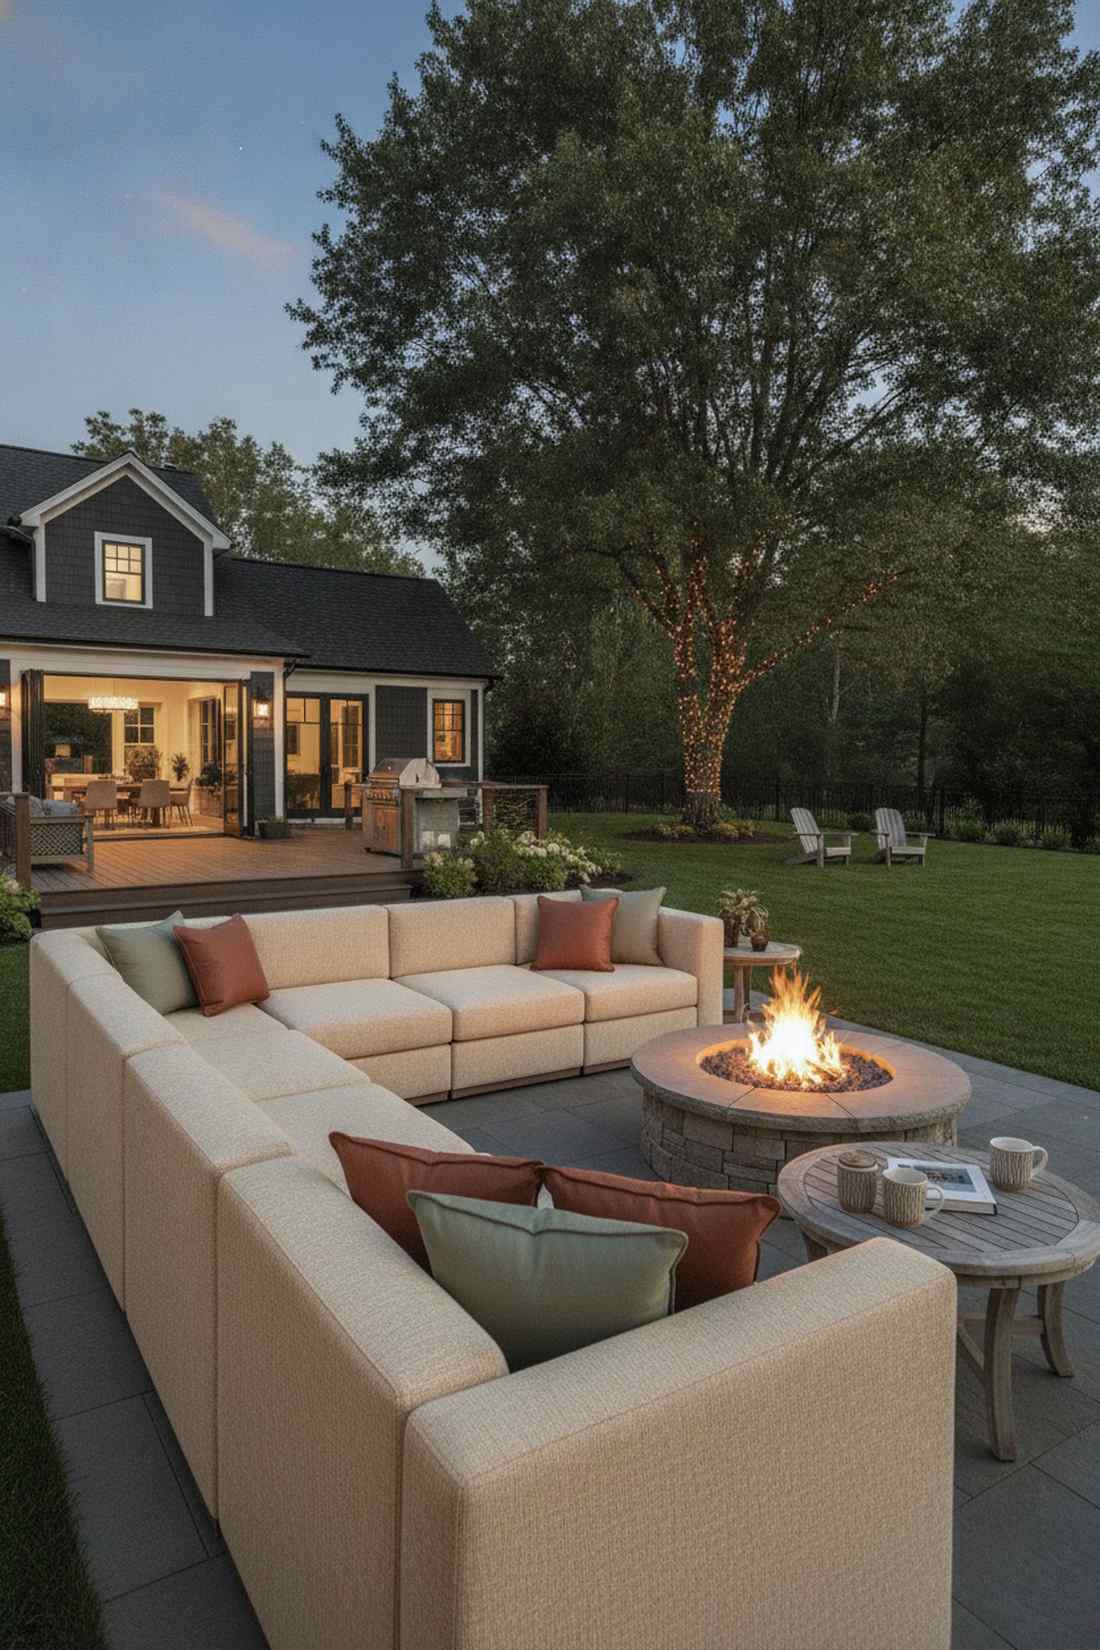
18. Fire Pit Plus Dining Hybrid
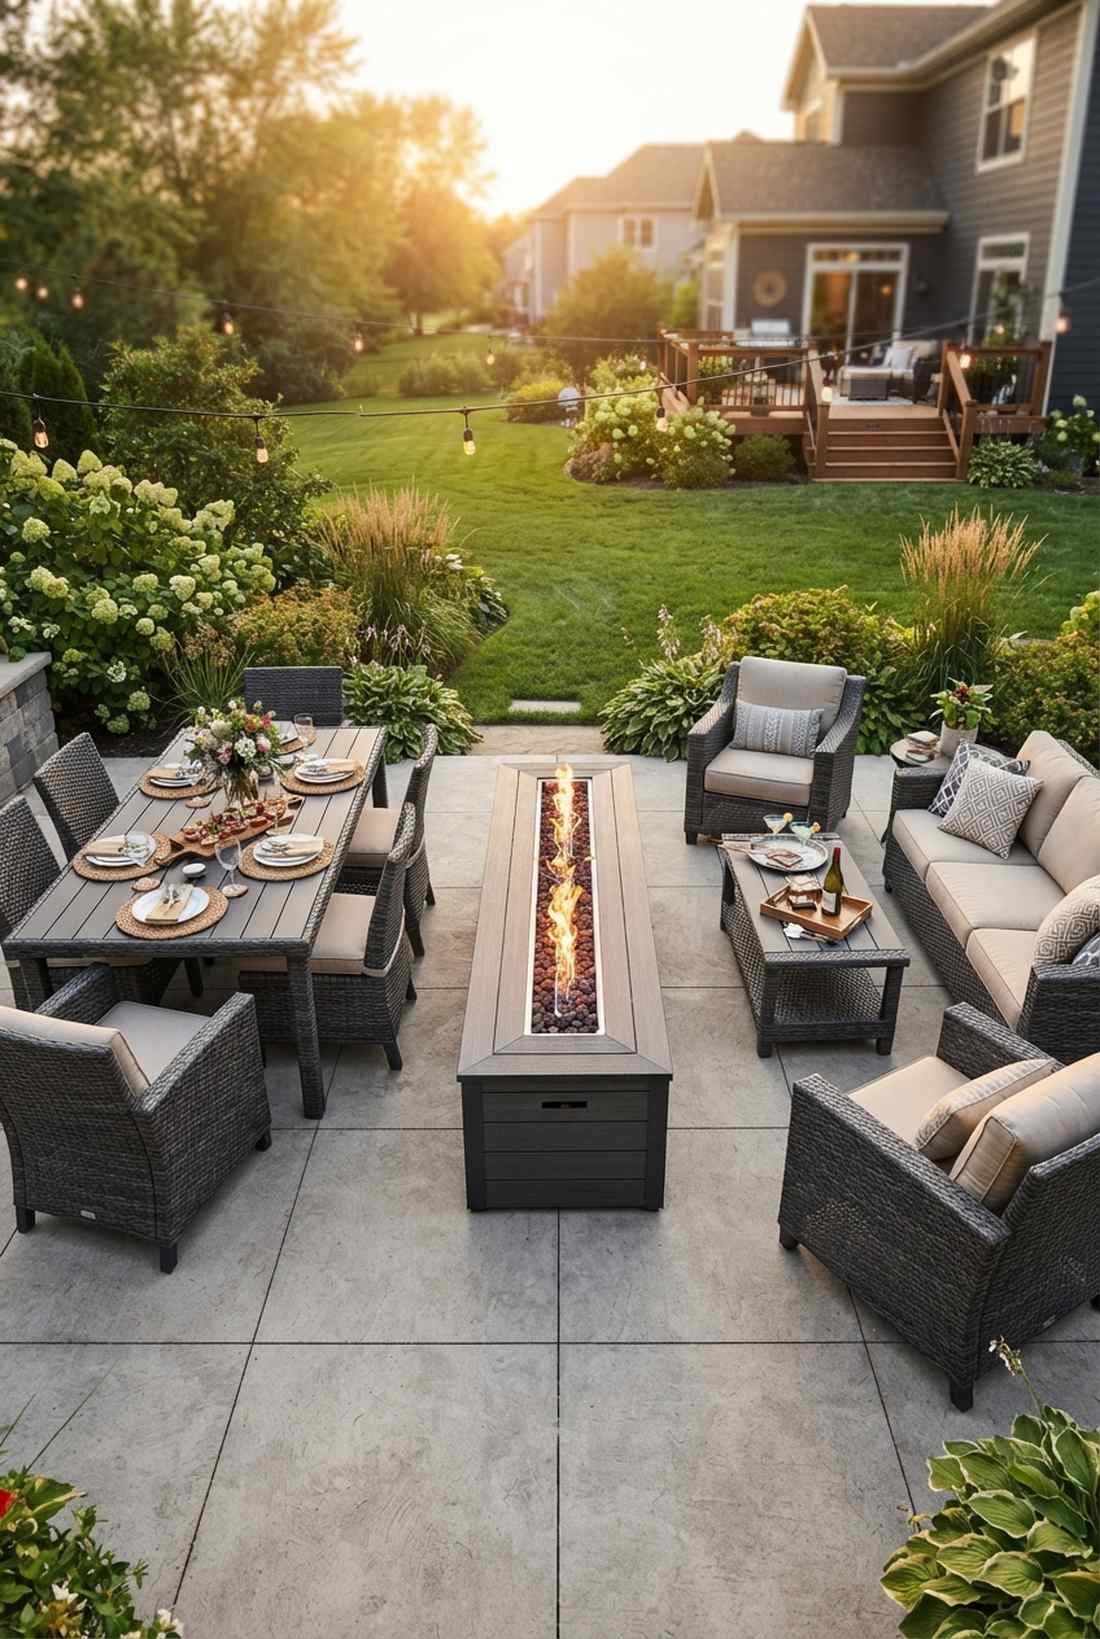
Seamlessly blending supper and s’mores, this layout feels incredibly intuitive and hospitable. A dinner-to-drinks transitional patio works perfectly for long, rectangular concrete slabs that need clear purpose.
Using a linear fire element as a glowing barricade between the eating and lounging zones delivers a surprisingly premium look. Savvy outdoor seating fire pit enthusiasts know this staging method keeps the party flowing naturally as the sun goes down.
Budget around $400 to establish two distinct but cohesive furniture zones. Pin this to your ultimate entertainer’s checklist!
- Key Materials: Al fresco dining set, matching transitional lounge seating
- Vibe / Style: Progressive dinner party
- Difficulty: Moderate furniture matching
- Budget Breakdown: Dining Set: $250 | Lounge Set: $150.
- Creator’s Tip: Buy dining and lounge sets from the exact same manufacturer collection to ensure the transition feels intentional and seamless.
- Smart Sourcing: matched outdoor dining and lounge bundles or weather-resistant table and chair cover kits.
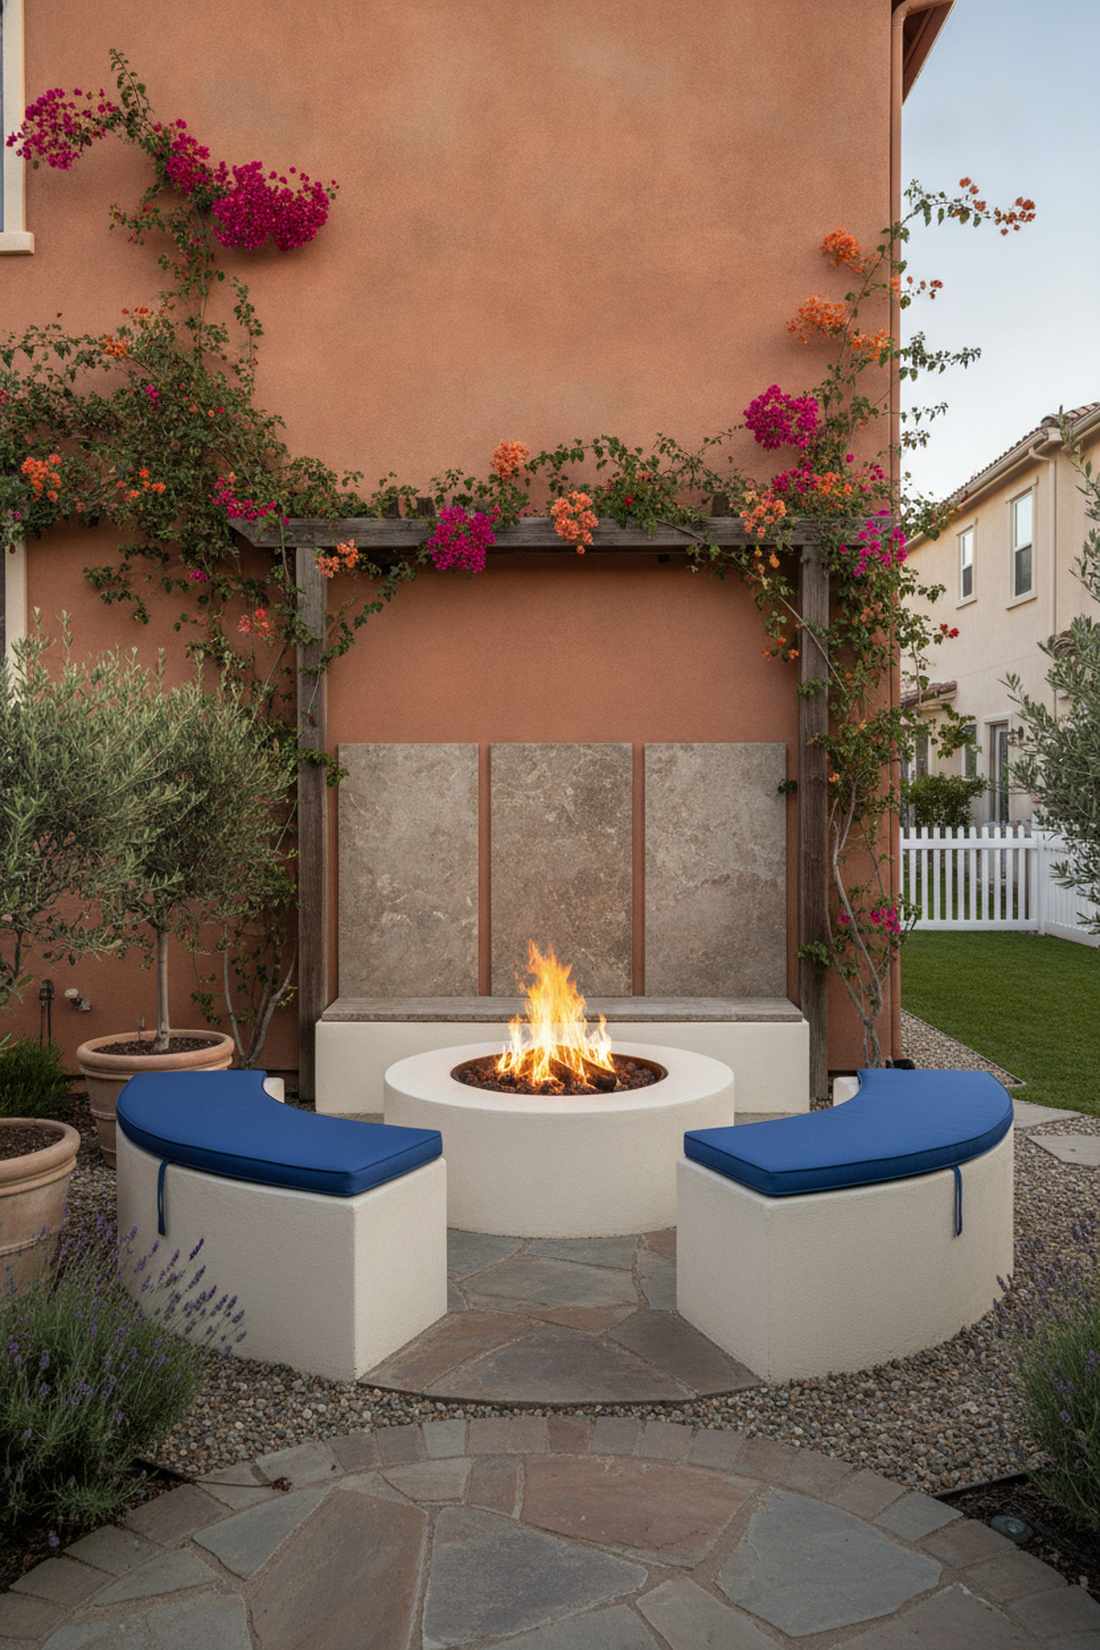
19. L-Shaped Patio Corner Fire Solution
This configuration acts as a clever hinge, turning a dead corner into the patio’s beating heart. The interior angle pivot fire setup rescues awkwardly shaped poured concrete patios from feeling disjointed.
Locking the heat source directly in the elbow of the “L” creates a natural traffic flow that makes the space feel twice as large. Opting for curved seating elements here violently softens the harsh 90-degree angles, creating a highly customized aesthetic.
You can pull off this geometric trick for about $200 with the right curved bench. Highly recommended for tricky yard layouts.
- Key Materials: Curved quarter-circle benches, round concrete fire bowl
- Vibe / Style: Geometric flow master
- Difficulty: Simple visual geometry
- Budget Breakdown: Round Bowl: $80 | Curved Benches: $120.
- Creator’s Tip: Ensure the fire feature is perfectly bisected by the corner angle to maintain symmetrical pathways on both sides.
- Smart Sourcing: pre-cast round concrete fire bowl kits or UV-coated curved modular benches.
Stop placing your chairs exactly the same way everyone else does until you check this out…
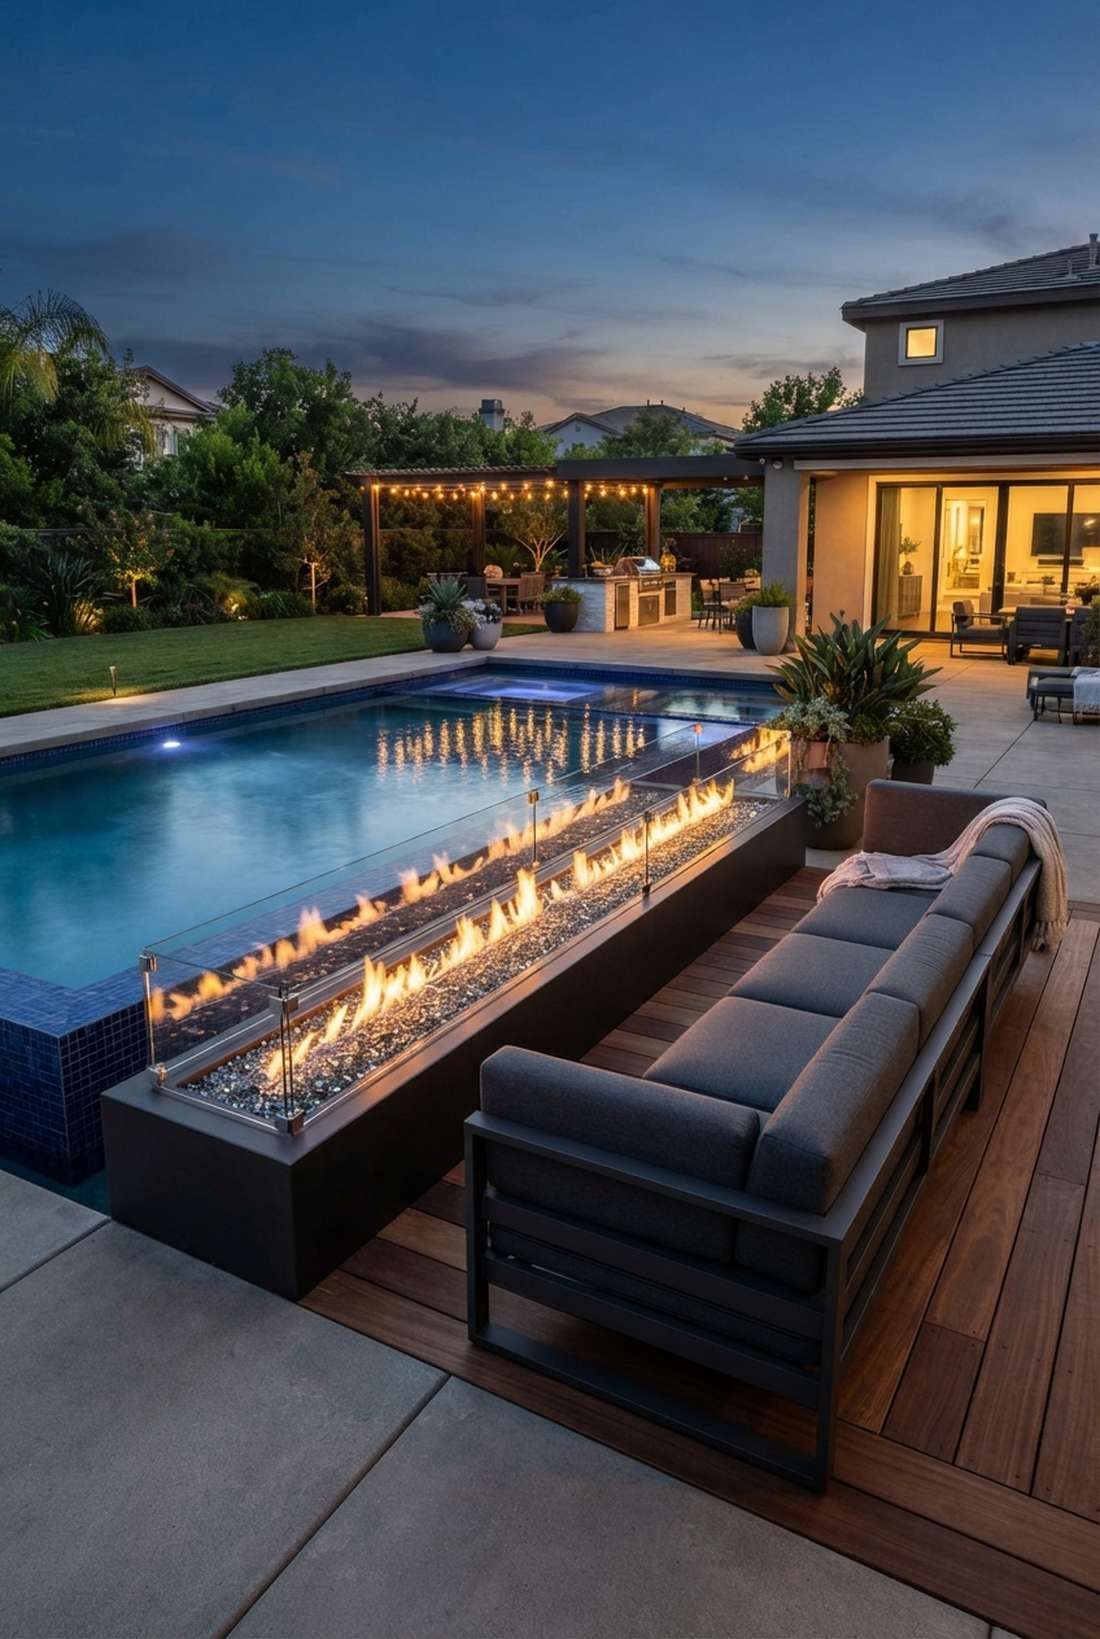
20. Pool Deck Fire Lounge Combination
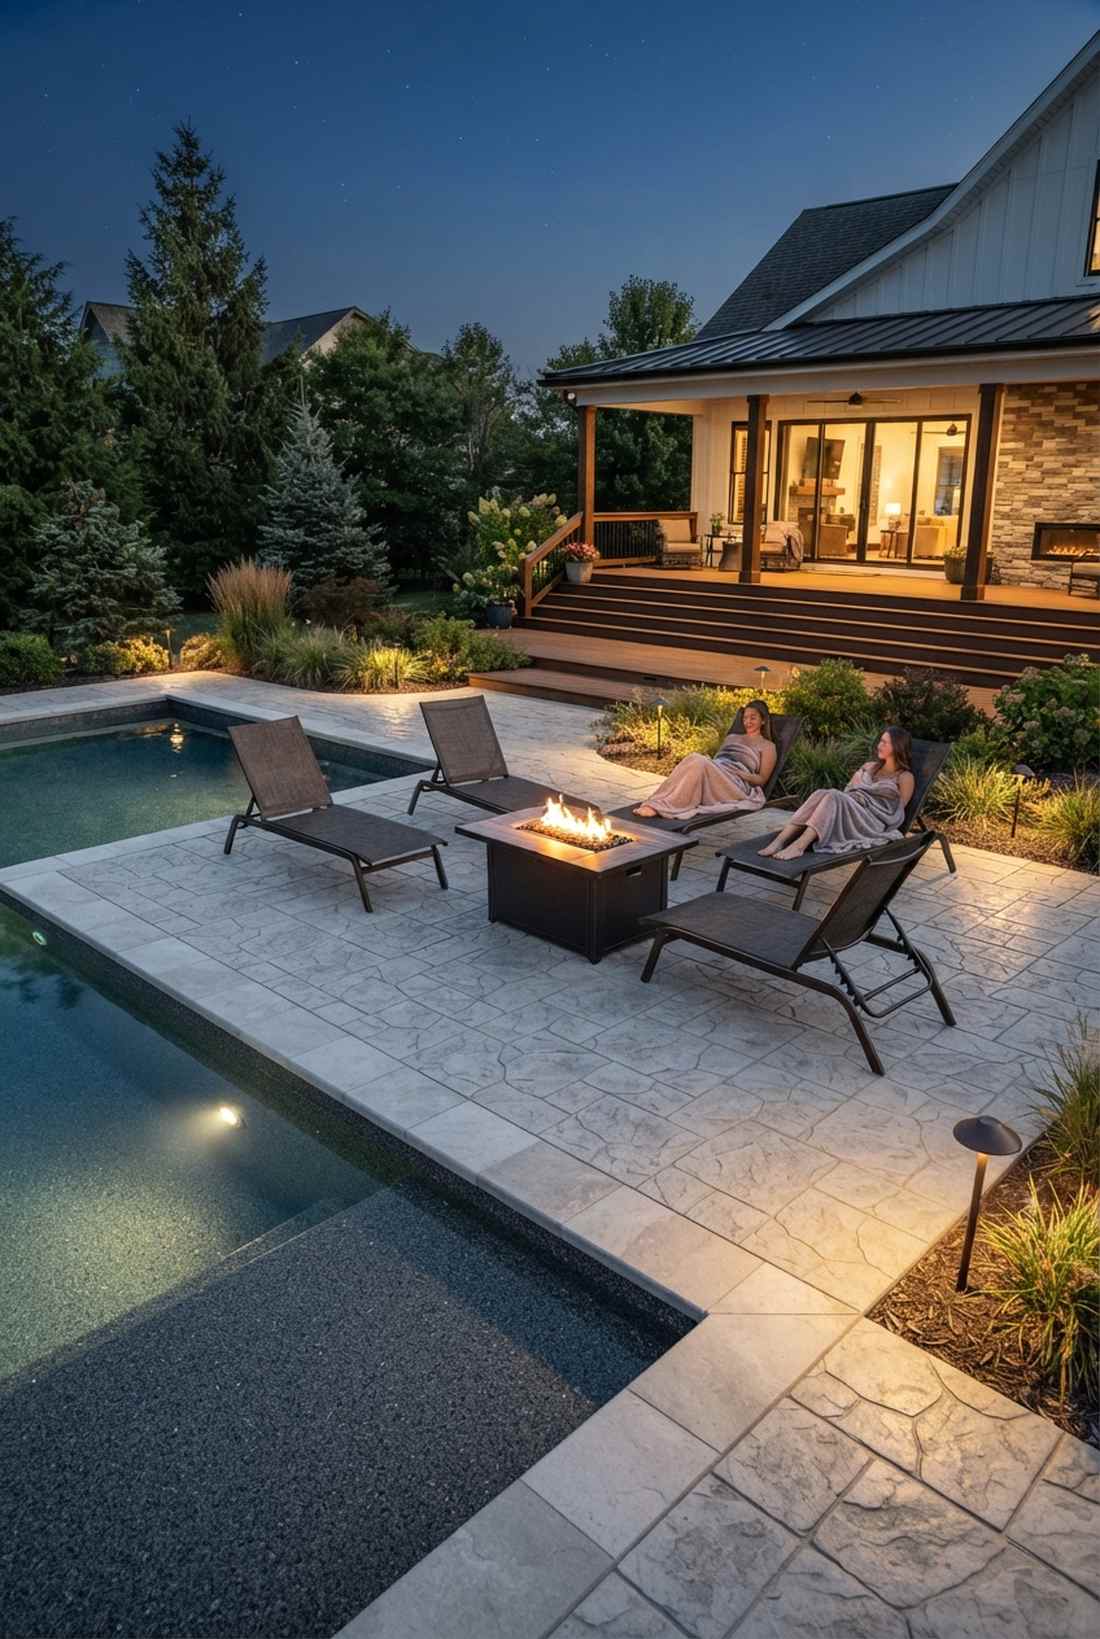
Feeling like a midnight swim at a luxury spa, this layout perfectly bridges fire and water. The poolside warm-up transition zone extends the swimming season well into the crisp autumn months by offering immediate thermal relief.
Positioning a heat source exactly 15 feet from the splash zone gives a designer-level finish while completely avoiding dangerous steam generation. Top-tier hardscapers insist on utilizing specialized non-slip paver kits in this exact zone to handle dripping wet foot traffic safely.
Expect to invest around $300 in waterproof loungers and slip-resistant bases. Save this to your luxury pool upgrade board!
- Key Materials: Mesh water-draining loungers, non-slip textured pavers
- Vibe / Style: Midnight resort spa
- Difficulty: Moderate safety planning
- Budget Breakdown: Mesh Loungers: $200 | Texture Pavers: $100.
- Creator’s Tip: Always map your prevailing wind directions before installation so the smoke never drifts directly across the pool water.
- Smart Sourcing: quick-dry textilene mesh lounge chairs (bulk pack) or commercial-grade non-slip paver sealant.
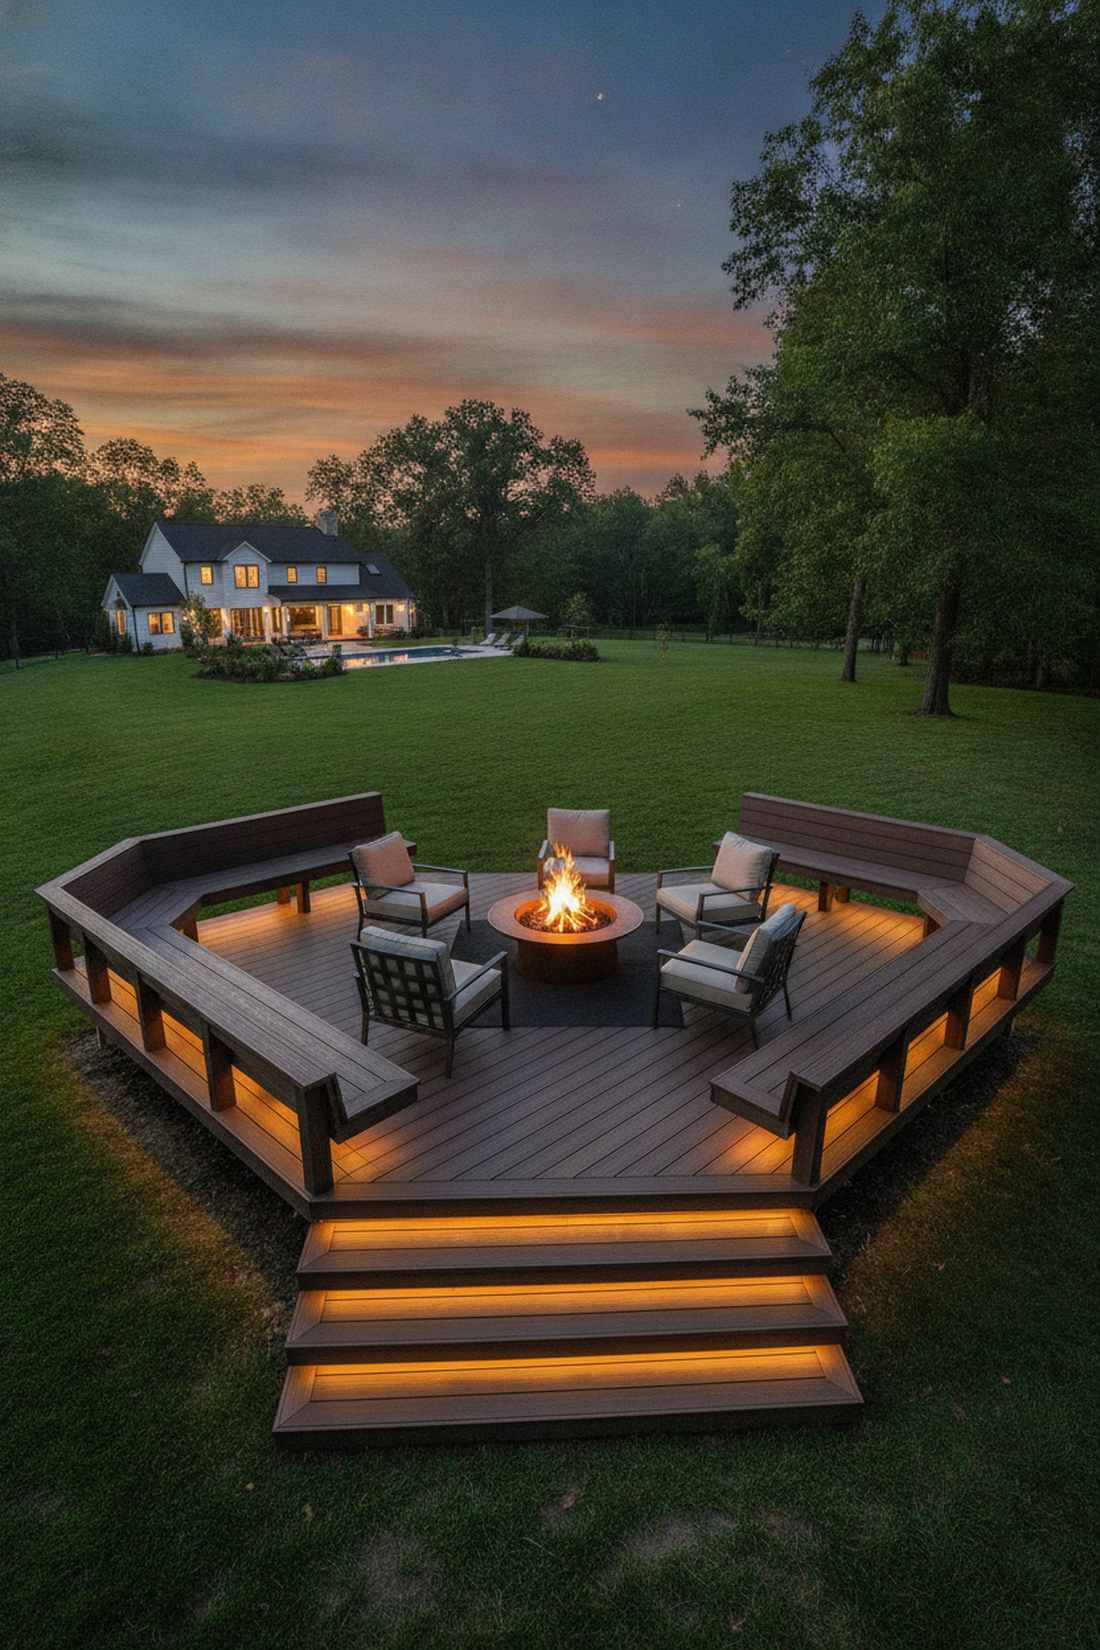
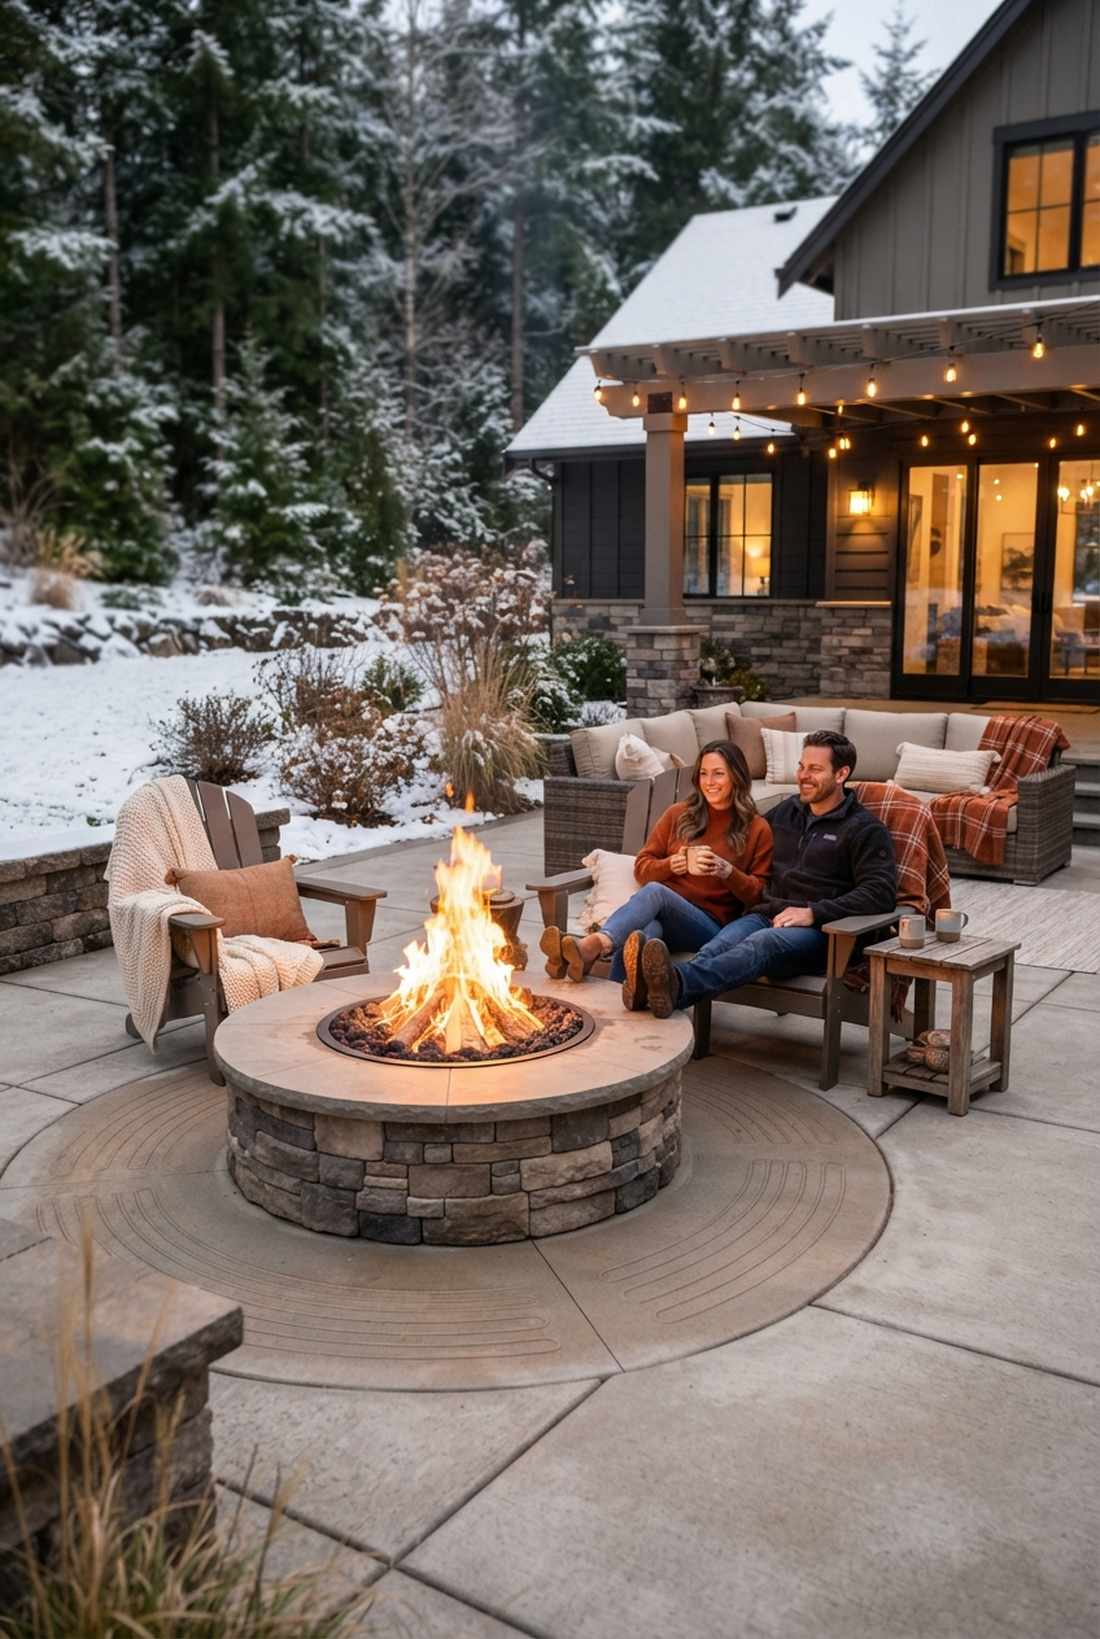
21. Tiered Elevation Fire Pit Seating
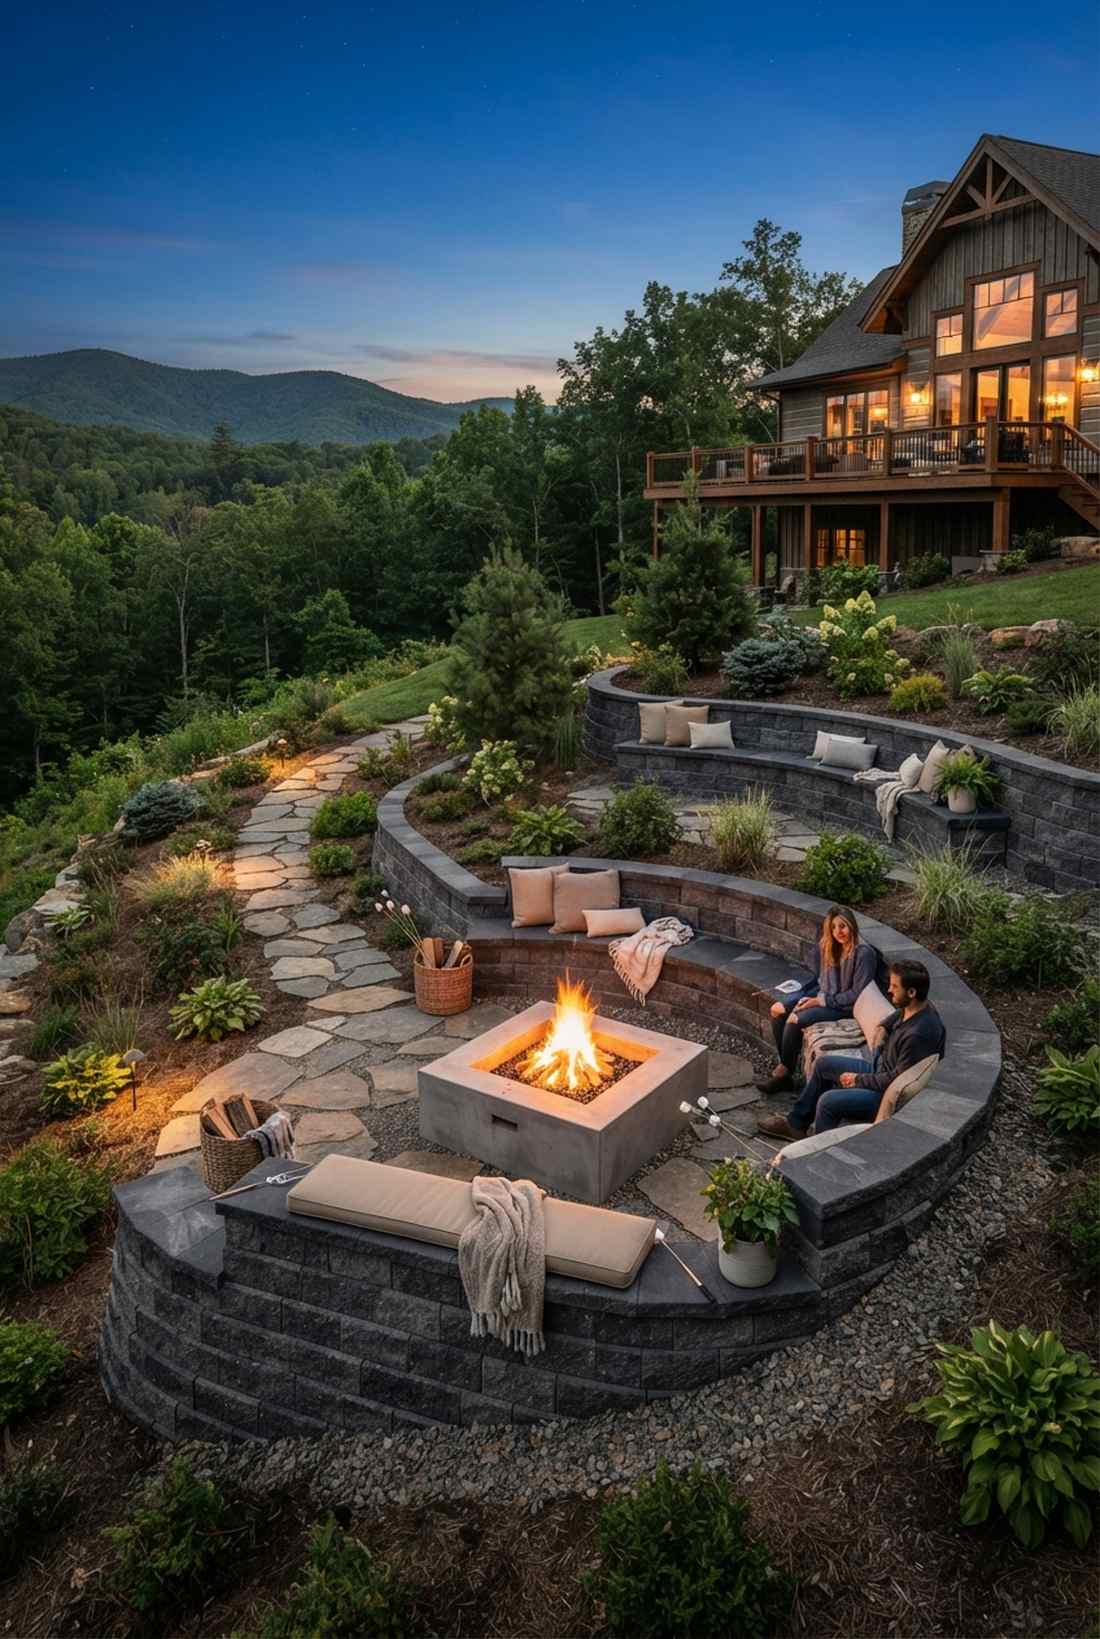
Taking full advantage of annoying yard slopes, this layout feels like your own private hillside amphitheater. A sloped terrain terraced fire pit turns a difficult, unlevel yard into a jaw-dropping architectural feature.
Carving seating ledges directly into the hillside looks far more expensive than it is, completely eliminating the need for bulky metal furniture. Using heavy retaining wall blocks not only holds back the earth but acts as a massive thermal battery that radiates heat all night.
This is a heavy dirt-moving project, running about $500 in stone alone. It completely revolutionizes unusable sloped backyards.
- Key Materials: Heavy-duty retaining blocks, crushed leveling gravel
- Vibe / Style: Mountain retreat theater
- Difficulty: Strenuous excavation/hardscaping
- Budget Breakdown: Wall Blocks: $400 | Gravel/Base: $100.
- Creator’s Tip: Tamp your gravel base meticulously; settling earth on a terraced slope will completely ruin the clean visual lines.
- Smart Sourcing: interlocking concrete retaining wall block kits or heavy-duty steel hand tampers.
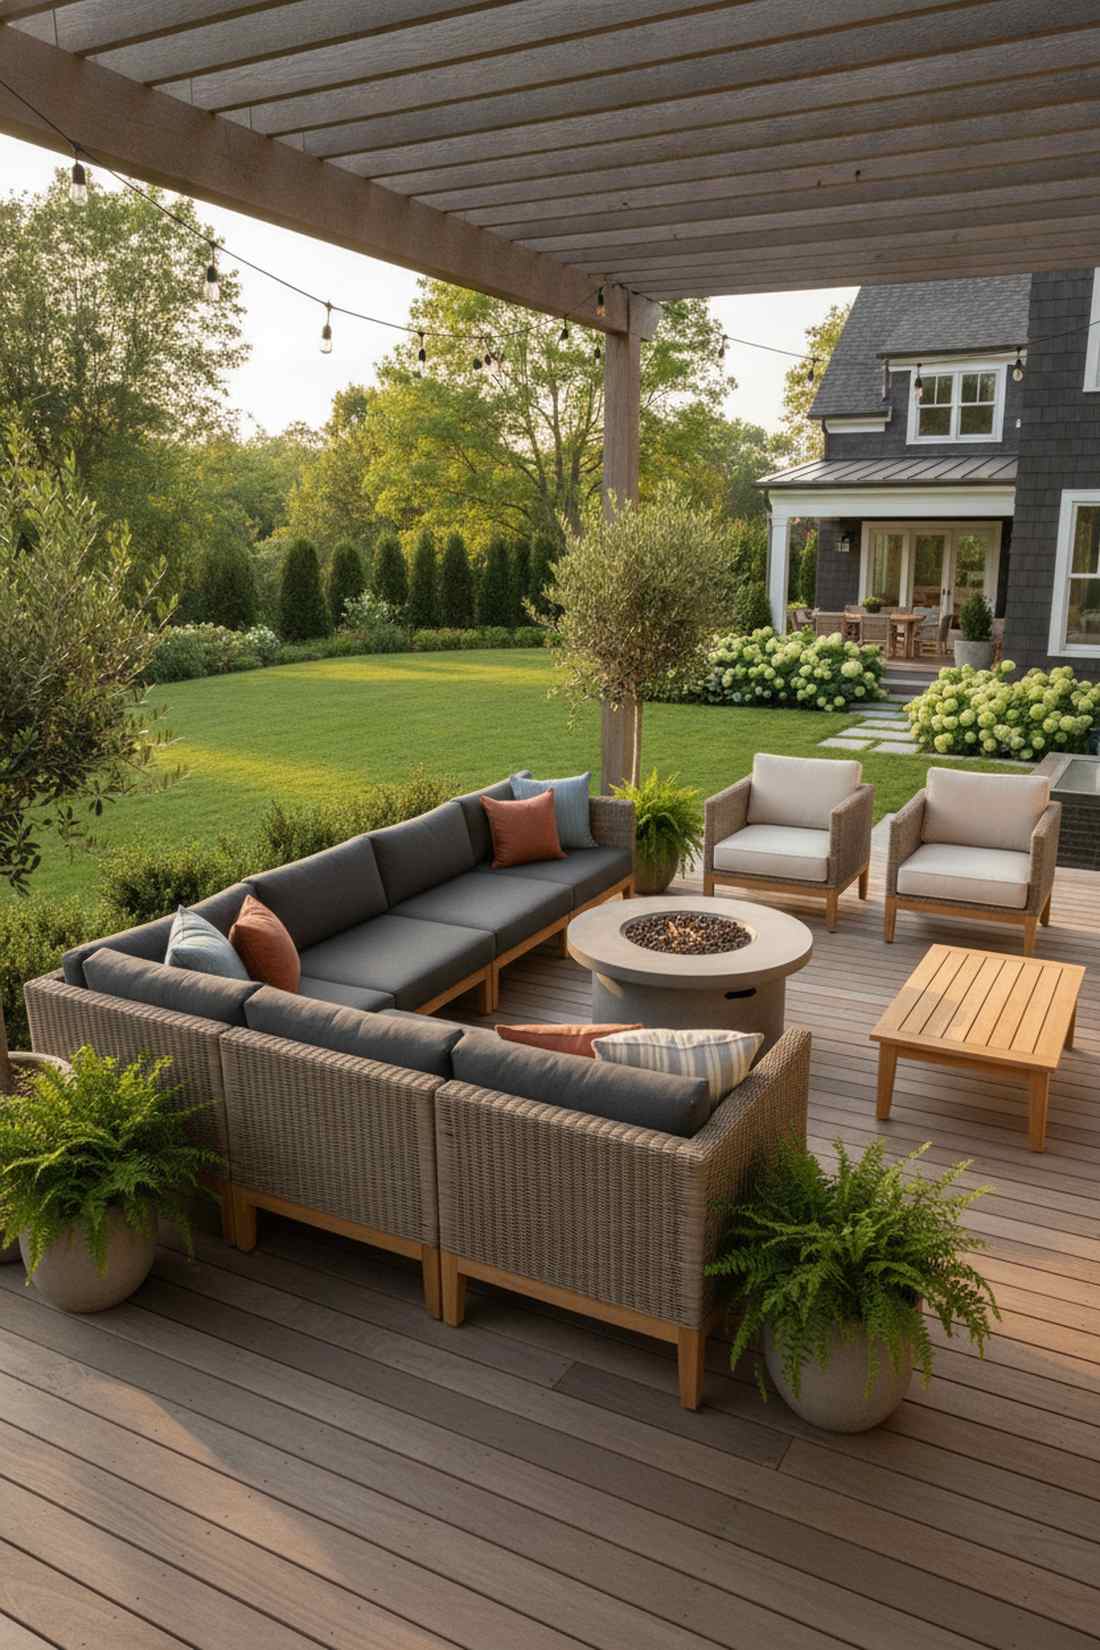
22. Wraparound Deck with Fire Focal Point
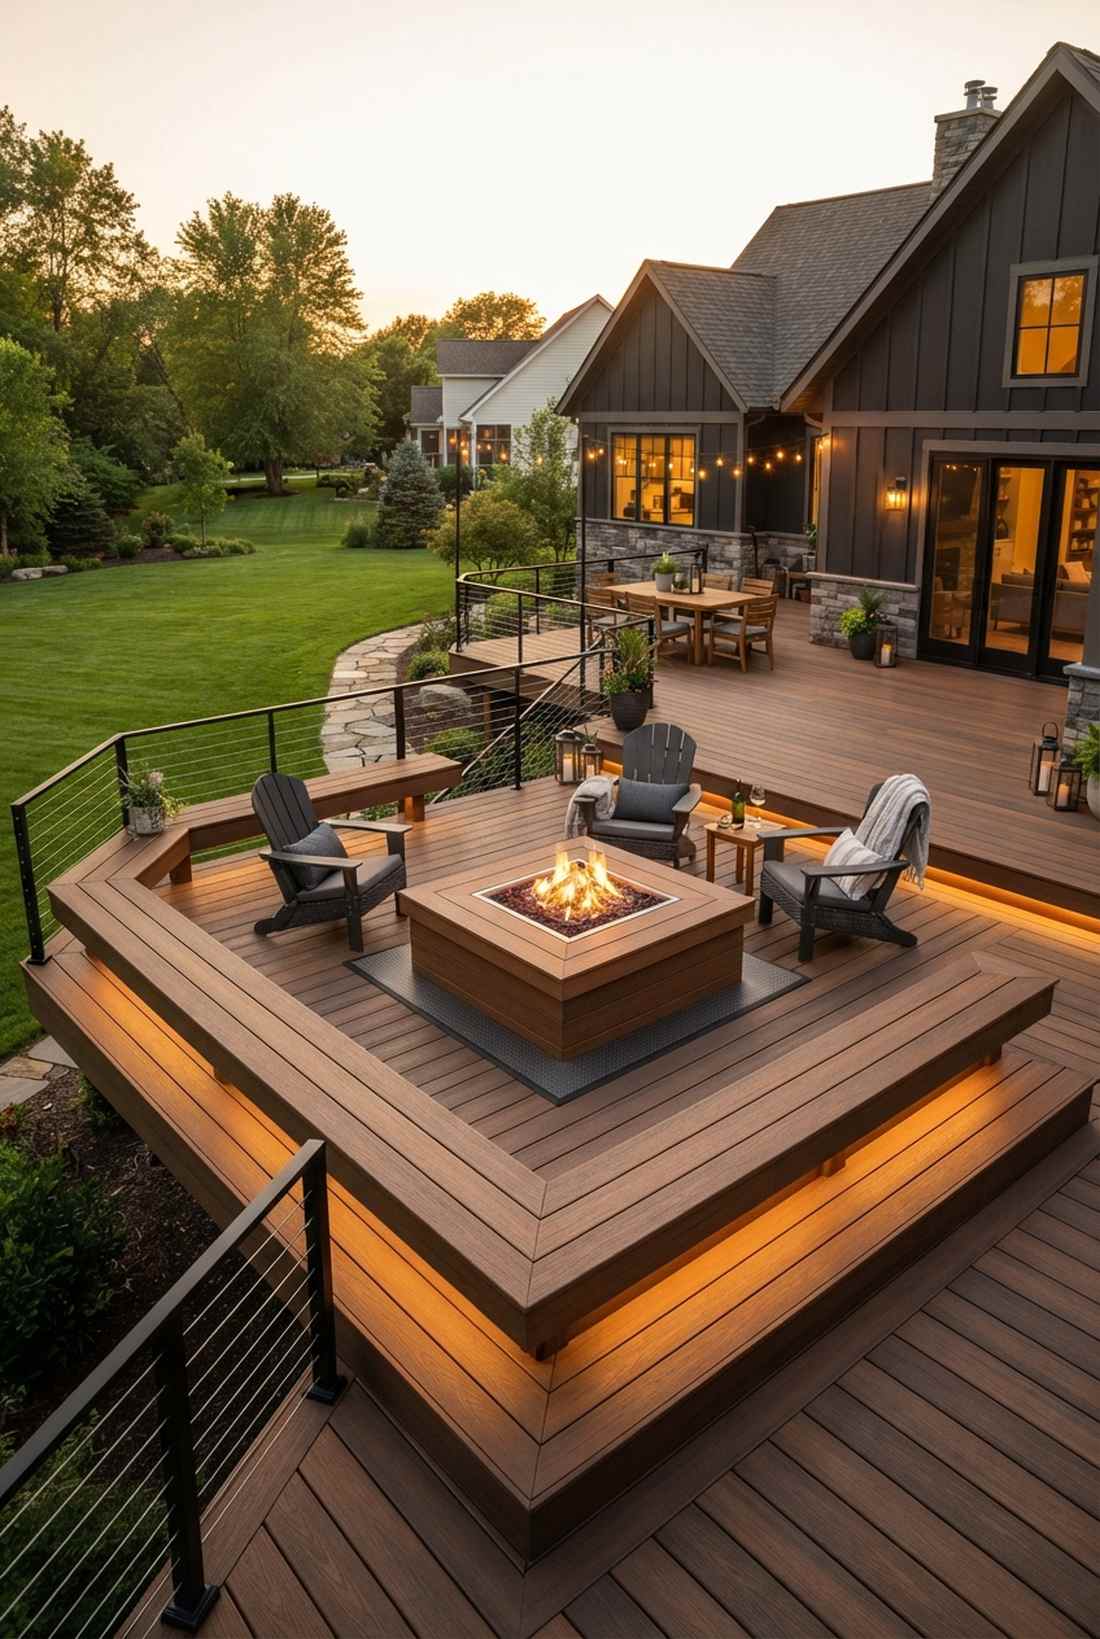
Hovering slightly above the yard, this setup gives you a commanding view of the property while soaking in the warmth. The elevated timber fire deck surround is ideal for properties where ground moisture or uneven dirt makes traditional patios impossible.
Sinking a fire element into a raised wooden platform creates an aggressively premium look that defines the yard’s focal point. Incorporating highly rated outdoor seating fire pit heat-shield kits is non-negotiable here to ensure your beautiful timber deck doesn’t accidentally ignite.
Budgeting $600 for the decking and specialized heat shields is typical. Pin this if you want to upgrade an old, boring deck!
- Key Materials: Composite decking boards, thermal deck insulation shields
- Vibe / Style: Elevated commanding lookout
- Difficulty: Advanced deck carpentry
- Budget Breakdown: Heat Shields: $150 | Composite Planks: $450.
- Creator’s Tip: Integrate LED strip lighting under the built-in deck benches to add incredible ambient safety lighting at night.
- Smart Sourcing: thermal protective fire pit deck mats or weatherproof LED deck lighting starter kits.
Built-In & Architectural Seating
Permanent masonry and concrete seating integrates structurally with fire pit surrounds, creating unified hardscape elements that anchor outdoor spaces. Built-in solutions maximize seating capacity within limited footprints.
23. Continuous Circular Seat Wall
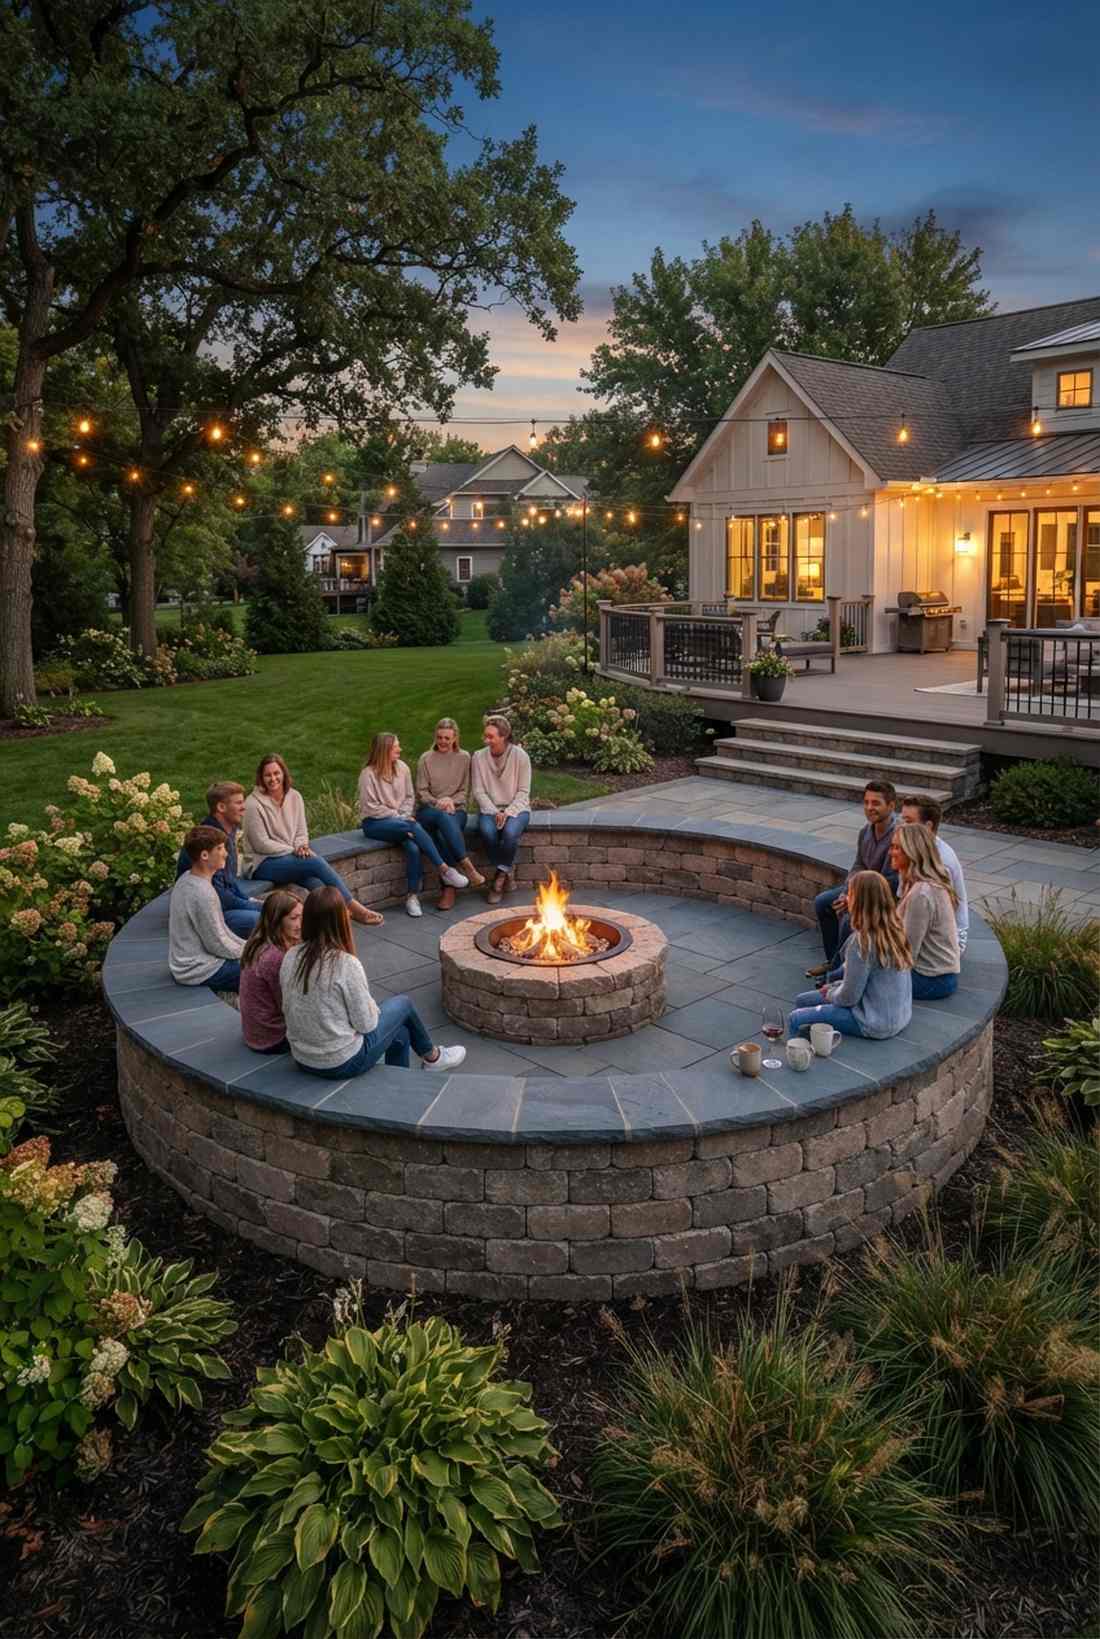
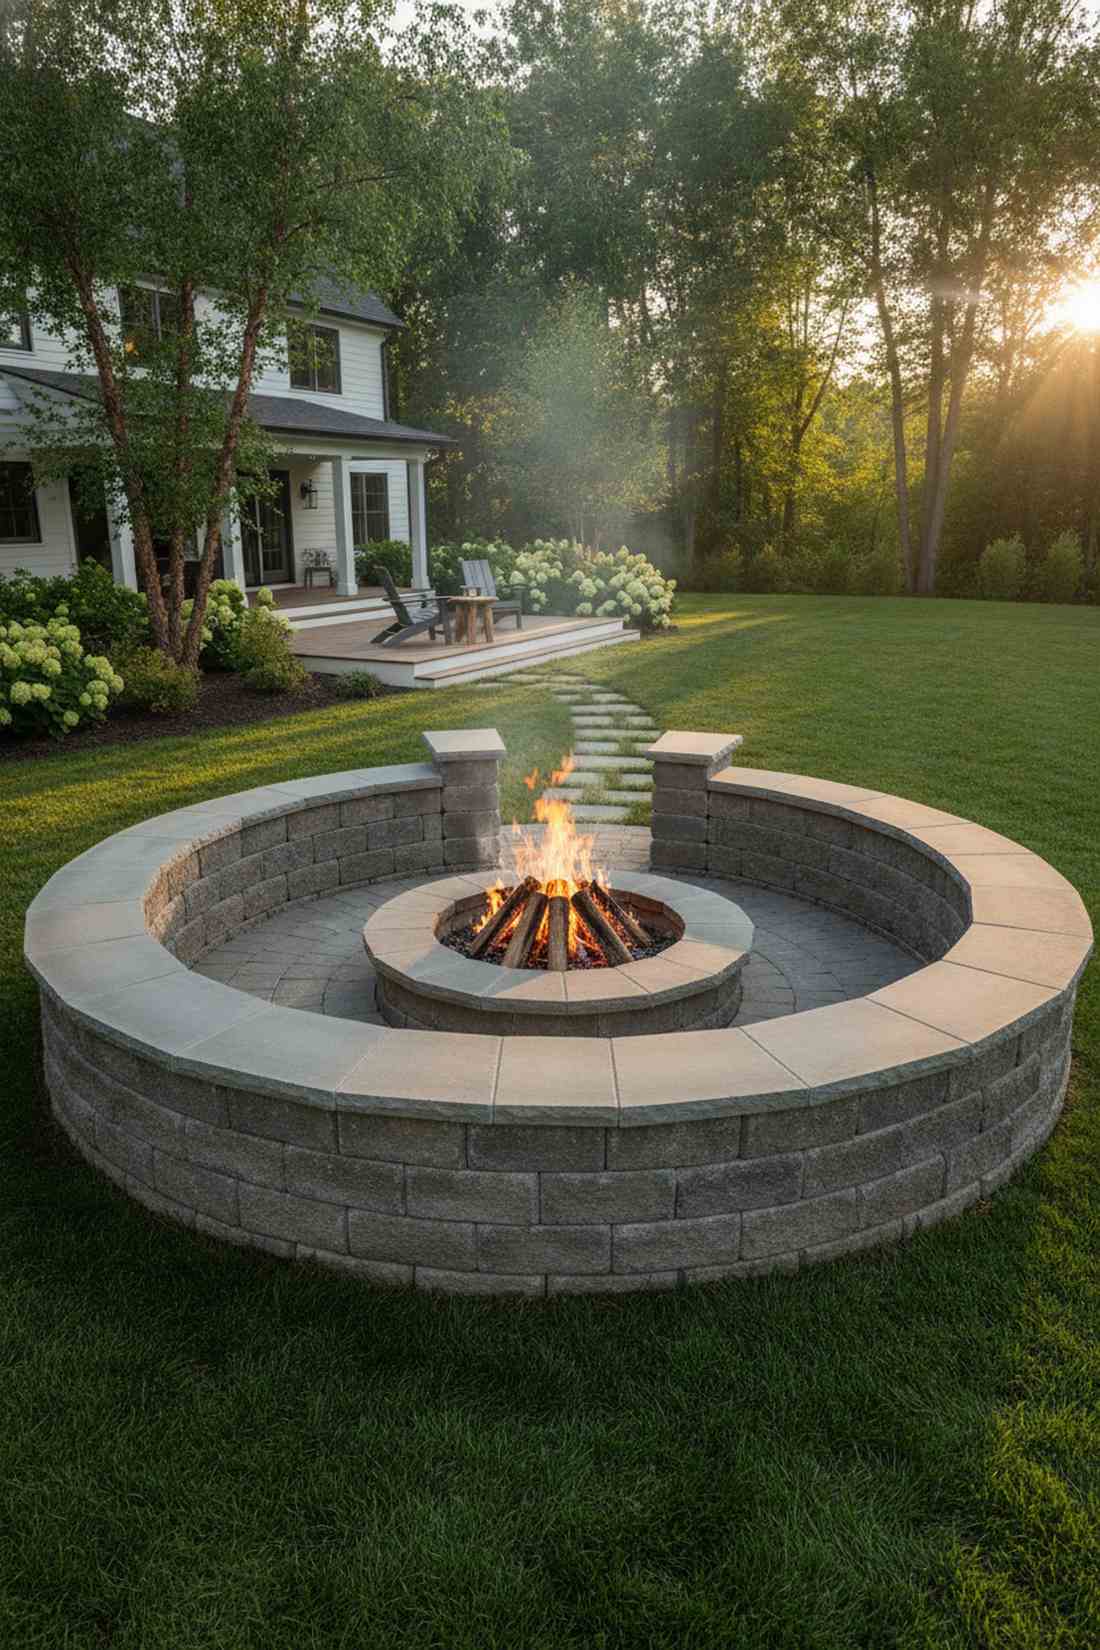
This heavy-duty setup feels like a fortress of warmth designed to outlast generations. A fully enclosed stone seating ring completely eliminates the chaotic clutter of blowing patio chairs on a windy property.
A continuous masonry build delivers a surprisingly premium look by providing a seamless, unbroken visual weight to the backyard. By utilizing high-end bluestone or thermal concrete caps, the wall literally sucks up the sun’s heat by day and releases it directly into your legs by night.
Expect to spend roughly $500 on quality stone caps and block. It’s a permanent upgrade that seriously boosts property value.
- Key Materials: Segmented curved wall blocks, bluestone cap treads
- Vibe / Style: Bulletproof hardscape fortress
- Difficulty: Heavy lifting/masonry
- Budget Breakdown: Wall Blocks: $300 | Stone Caps: $200.
- Creator’s Tip: Overhang the seat caps by 1.5 inches to provide a comfortable edge behind the knees.
- Smart Sourcing: pre-cut radius retaining wall blocks (bulk pack) or premium thermal bluestone capstone kits.
24. Segmented Seat Wall with Entry Gaps
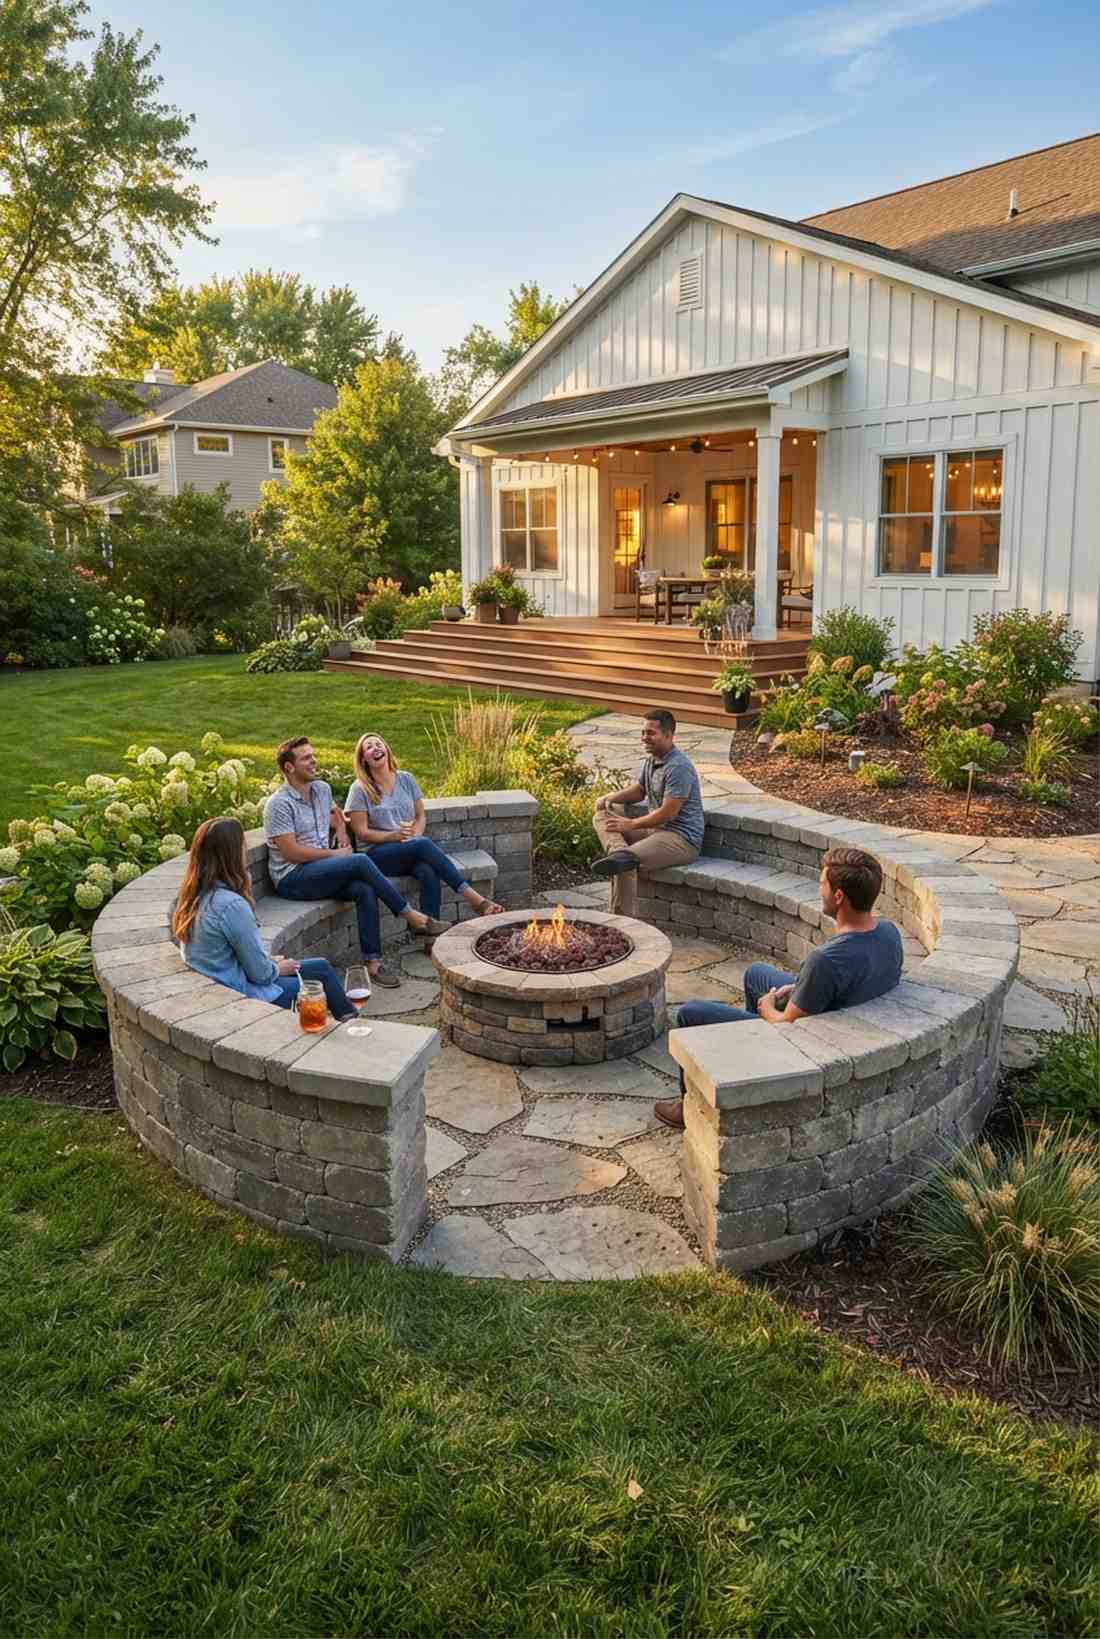
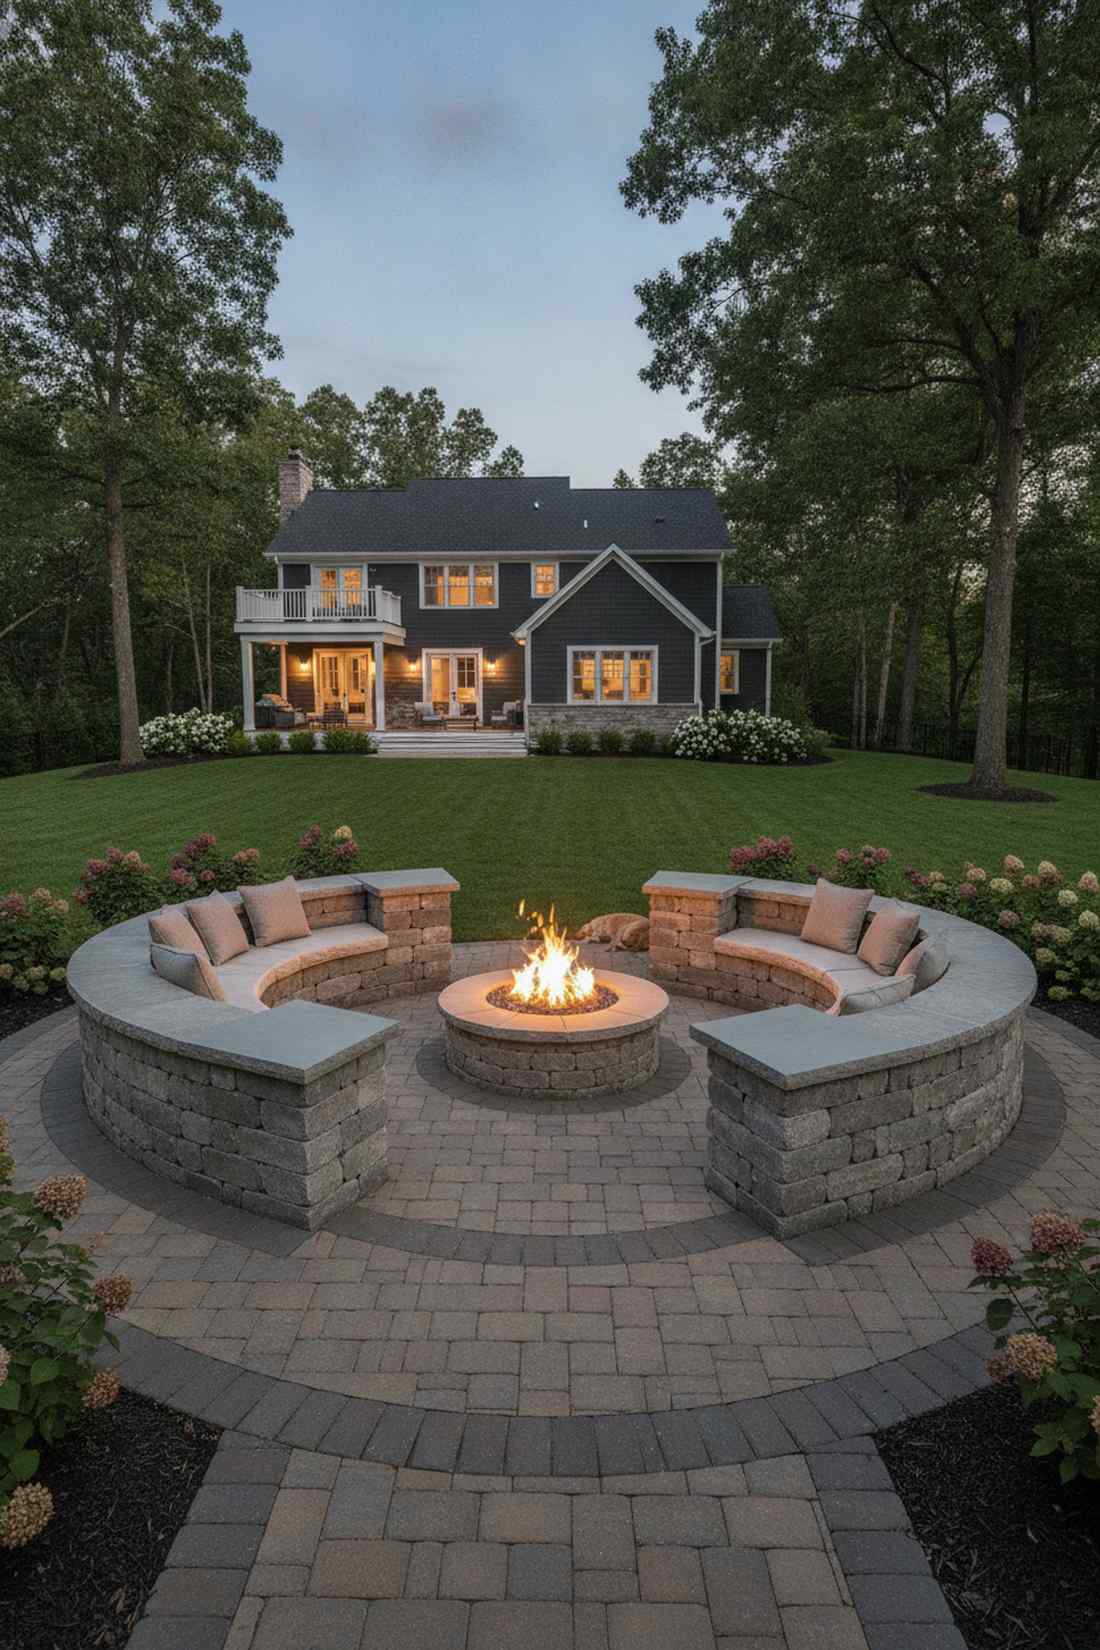
Offering the same architectural weight as a full circle but with breathing room, this layout is incredibly inviting. The broken-ring masonry seating layout solves the trapped feeling some guests get in fully enclosed hardscape setups.
Leaving deliberate 3-foot entry gaps looks far more expensive than a solid block because it requires precise termination cuts and planning. These natural breaks serve a brilliant dual purpose as built-in side table locations for drinks, eliminating the need for extra patio furniture.
You can achieve this highly functional look for about $400. Save this if you love heavy stone but hate feeling boxed in!
- Key Materials: Finished end-cap blocks, heavy-duty construction adhesive
- Vibe / Style: Accessible luxury hardscape
- Difficulty: Intermediate masonry cutting
- Budget Breakdown: Main Blocks: $250 | End Caps/Adhesive: $150.
- Creator’s Tip: Align the entry gaps precisely with the cardinal directions (North, South, East, West) for a highly satisfying symmetrical aesthetic.
- Smart Sourcing: pre-finished masonry end-cap blocks (bulk pack) or weatherproof commercial construction adhesive tubes.
This brilliant architectural hack is the closely guarded secret behind those viral Pinterest luxury patios…
25. Curved Bench with Back Support
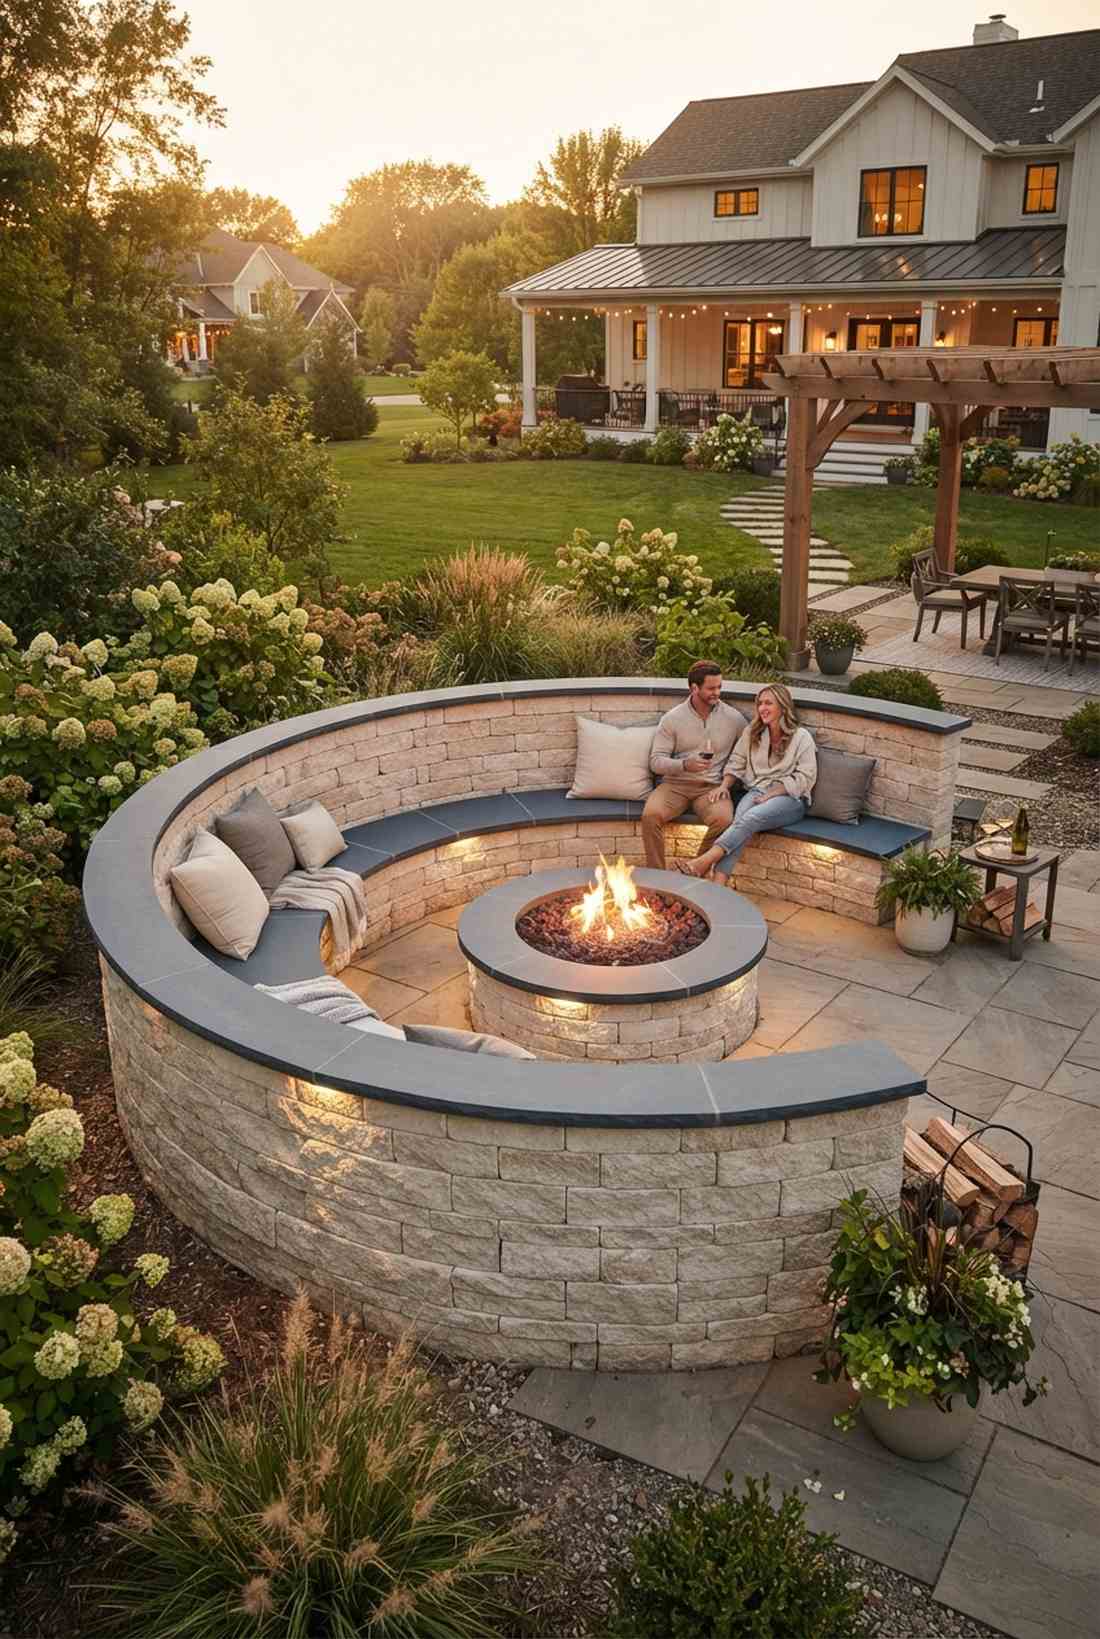
This setup feels like a custom-molded ergonomic lounge seat built directly into your landscape. Fusing a high-backed masonry seating curve completely changes the game for long, multi-hour bonfire sessions where standard flat walls destroy your posture.
Adding a vertical backrest instantly elevates the design, giving a designer-level finish that rivals high-end boutique hotel lounges. When you incorporate proper outdoor seating with fireplace setups, adding this solid back wall also acts as a phenomenal windbreak, keeping the heat perfectly trapped around the guests.
This requires extra materials, bringing the cost to about $550. It is unequivocally worth it for the added comfort.
- Key Materials: Vertical block supports, ergonomic contoured caps, mortar
- Vibe / Style: Ergonomic hardscape luxury
- Difficulty: Advanced block shaping
- Budget Breakdown: Base/Caps: $350 | Vertical Back Blocks: $200.
- Creator’s Tip: Slope the actual seat cap backwards at a tiny 5-degree angle so water runs off instead of pooling where you sit.
- Smart Sourcing: pre-angled ergonomic masonry seat caps or high-strength masonry mortar starter kits.
26. Stone Block Modular Seating
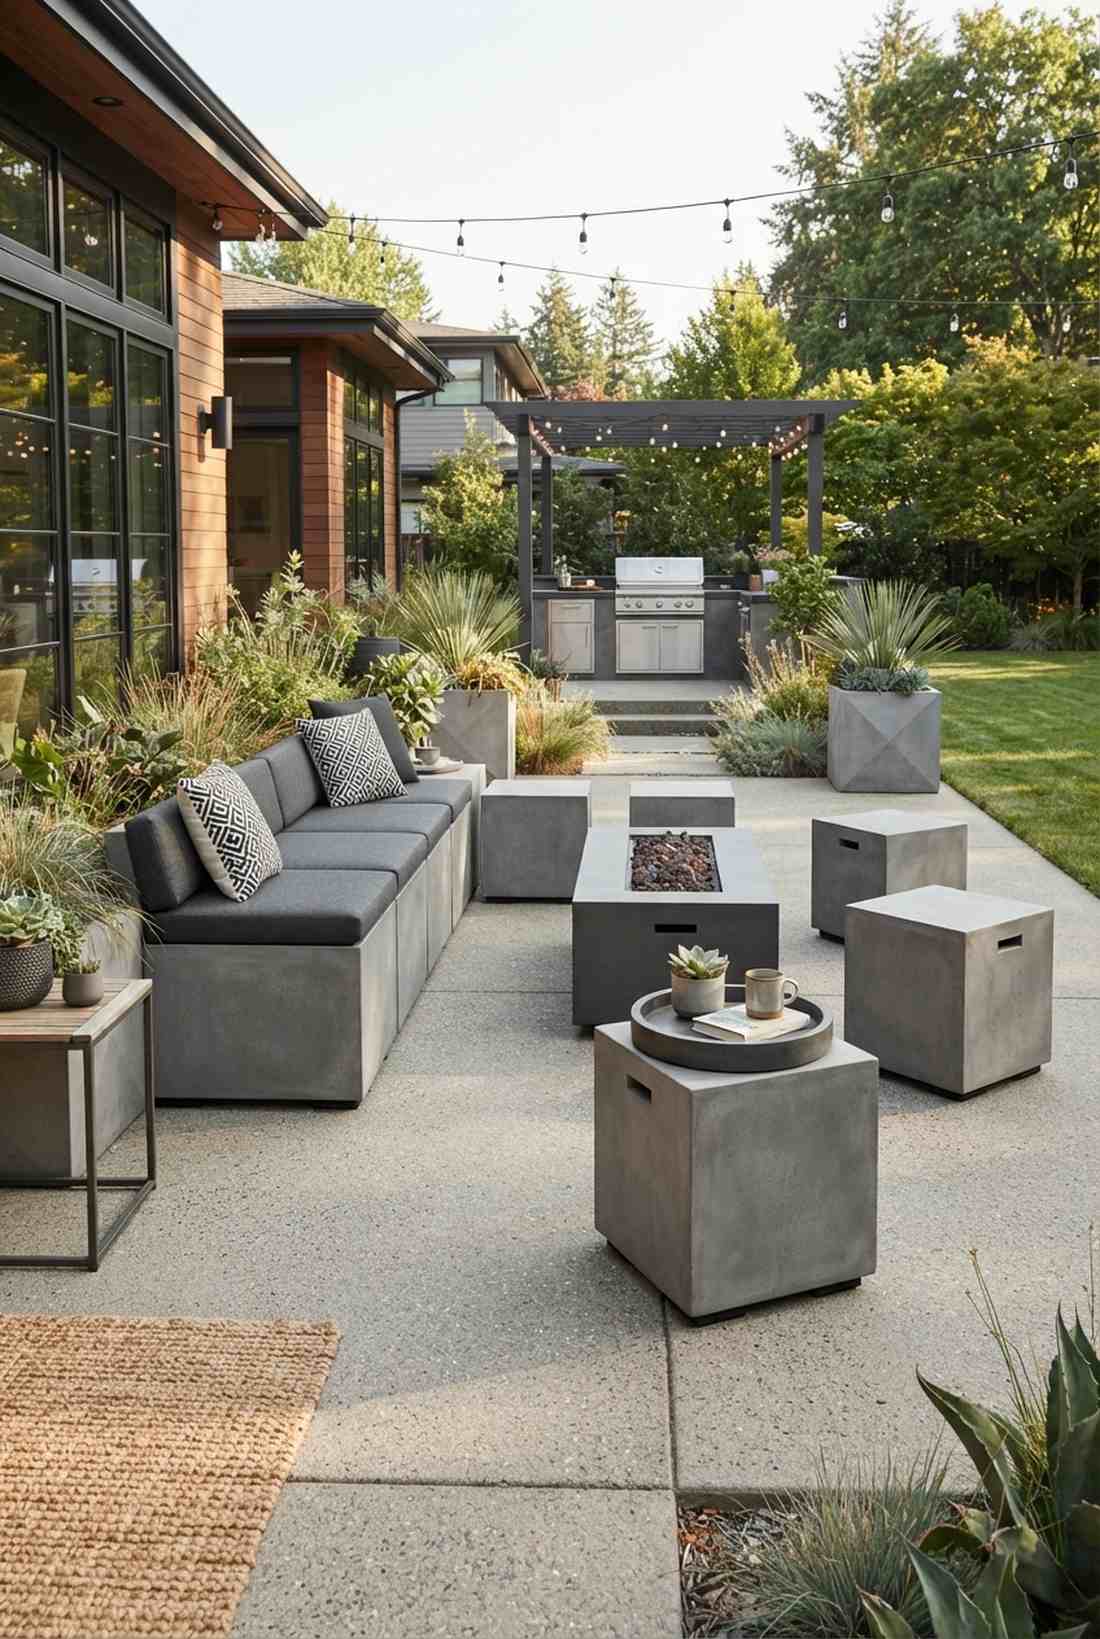
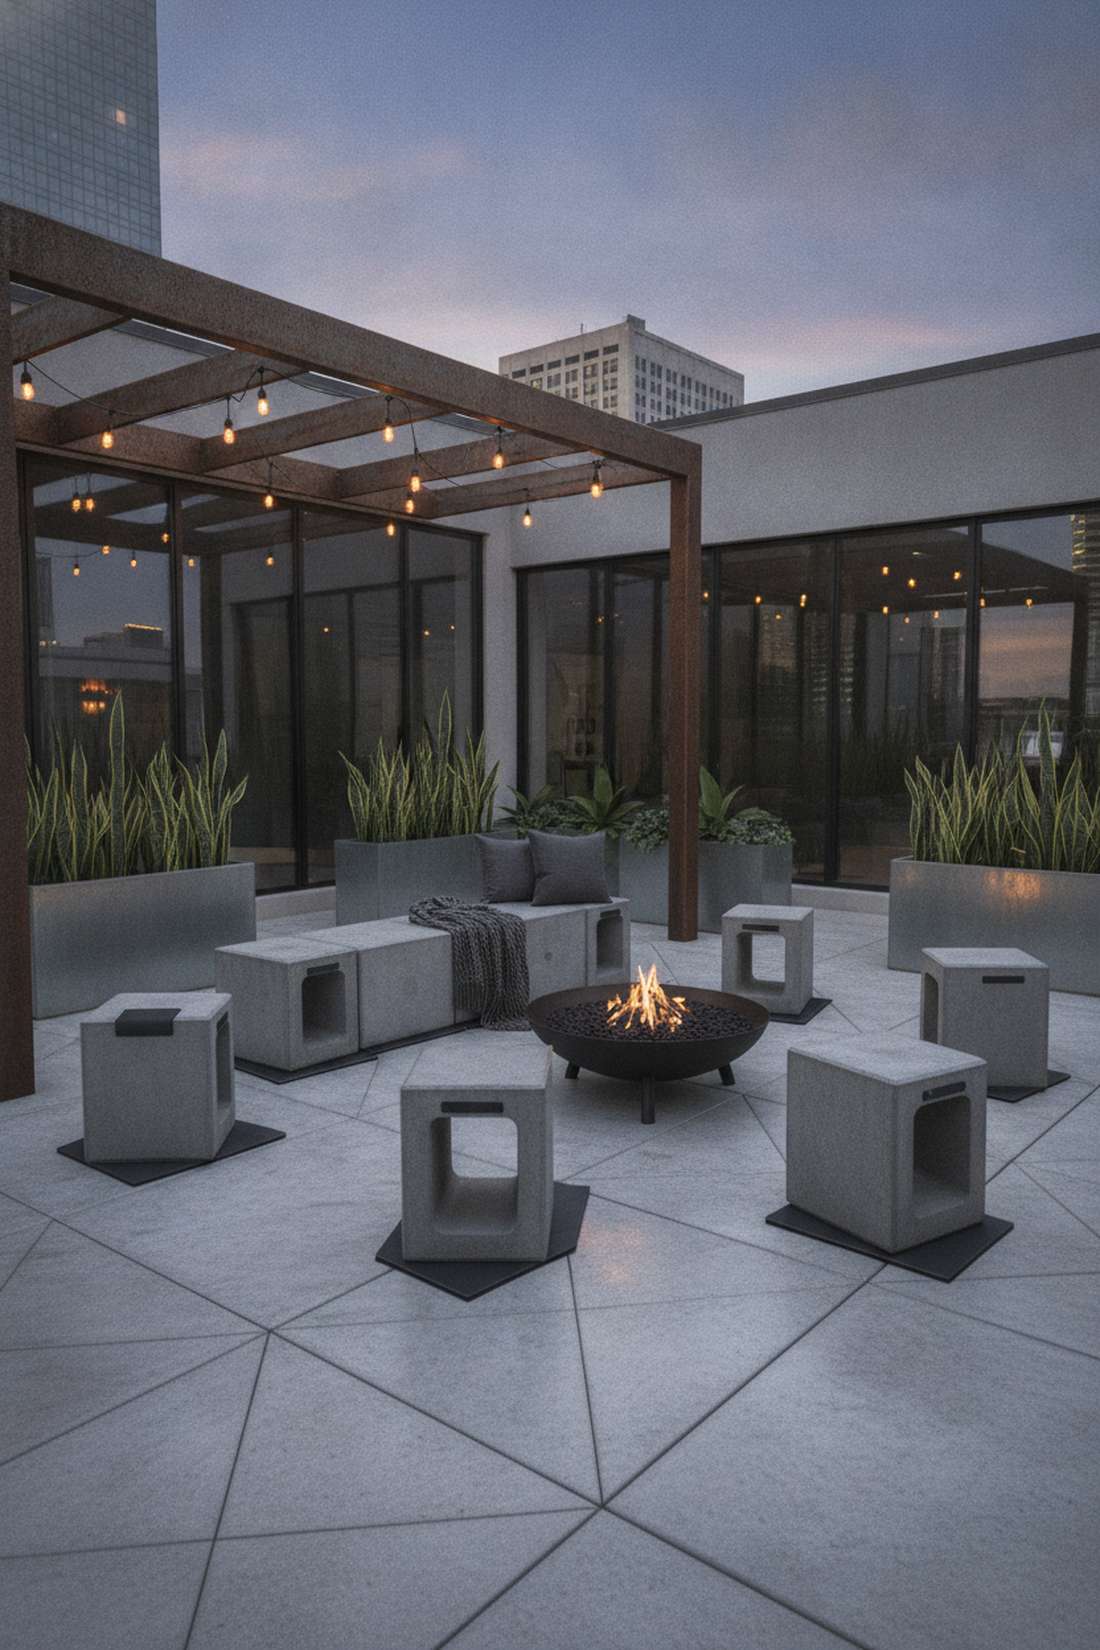
Offering the heavy look of concrete with the flexibility of Lego, this layout is aggressively modern. The scattered concrete block modular setup is the ultimate hack for industrial-chic patios that change functions frequently.
Using oversized 18×18 geometric cubes delivers a surprisingly premium look that feels curated by a high-end urban architect. These blocks can be shoved together to make a long bench or separated into individual stools, making them the most versatile, indestructible furniture you will ever own.
At around $40 a block, you can build an 8-piece setup for about $320. Pin this to your minimalist industrial aesthetic board!
- Key Materials: 18×18 hollow concrete display blocks, felt slider pads
- Vibe / Style: Urban industrial chic
- Difficulty: Heavy lifting but no tools
- Budget Breakdown: Blocks (x8): $320 | Sliders: $20.
- Creator’s Tip: Apply heavy-duty teflon sliders to the bottom of each block so you can actually push them across the patio without gouging the concrete.
- Smart Sourcing: large-format geometric concrete planter blocks or heavy-duty teflon furniture slider packs.
27. Built-In Storage Bench Seating
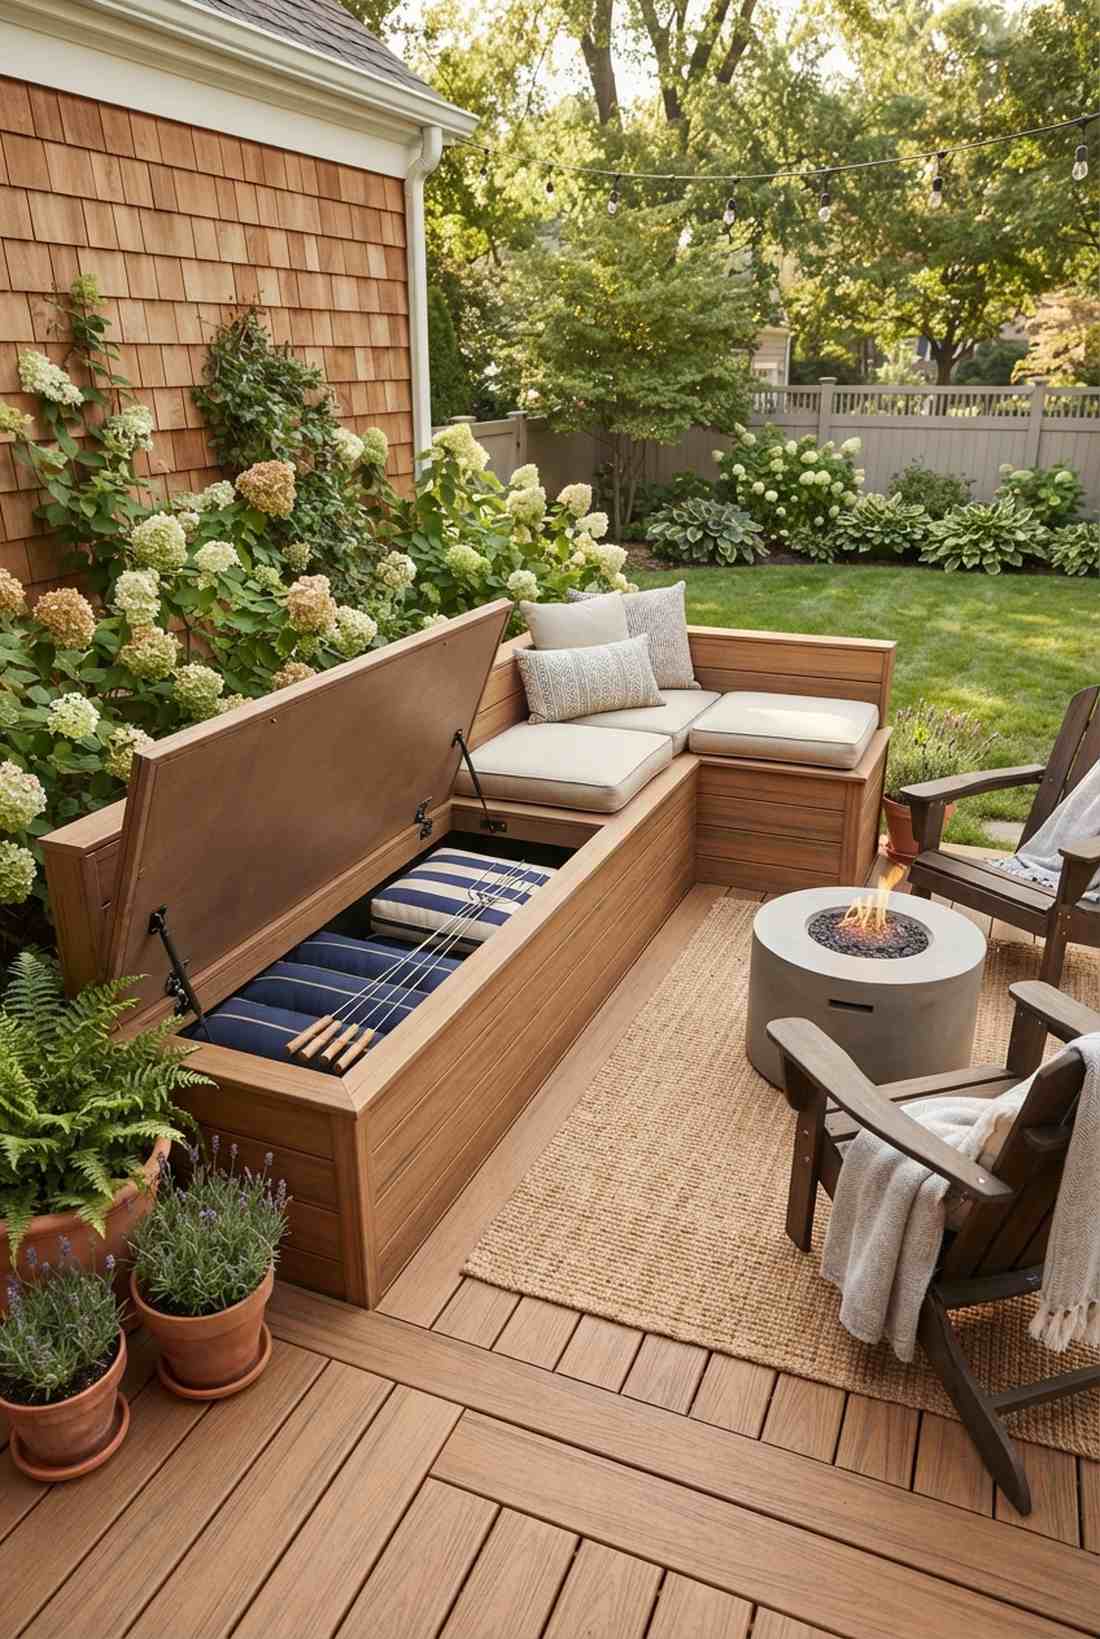
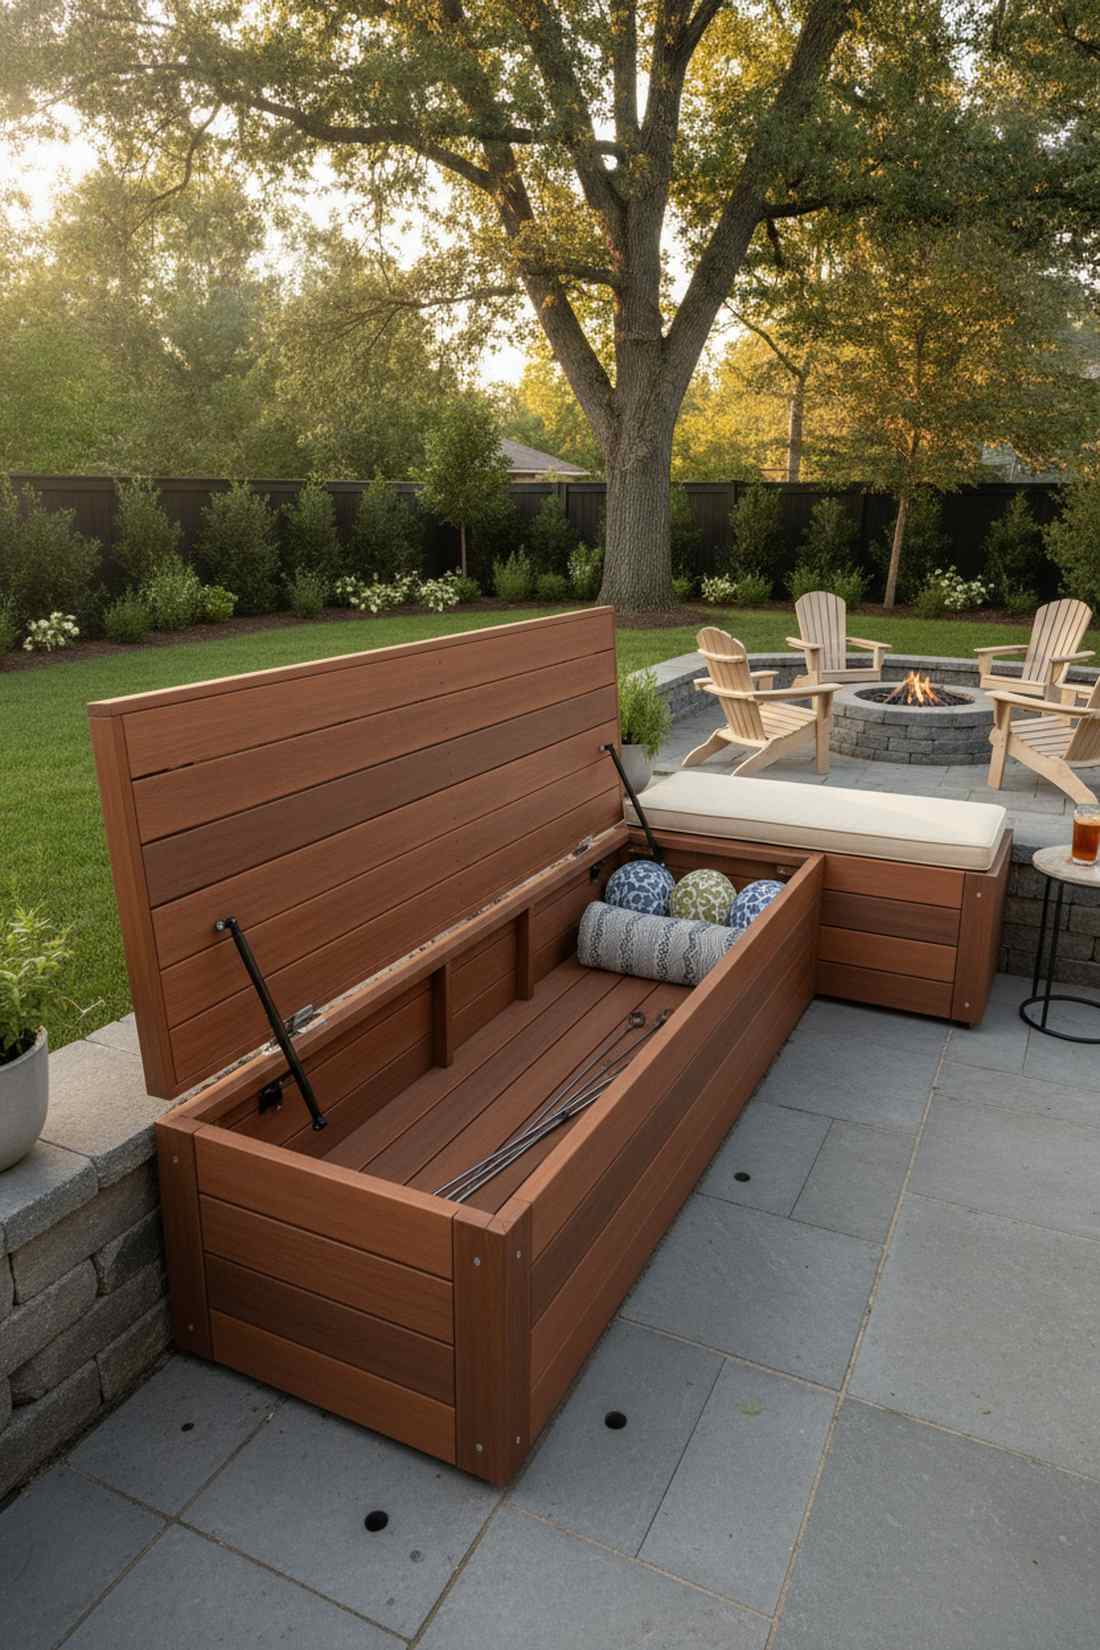
This layout acts as a gorgeous piece of furniture that hides an incredible secret. The hollow cavity storage bench layout is a brilliant space-saver for compact patios that constantly struggle with messy accessory clutter.
Hiding bulky cushions and roasting sticks inside the seat itself looks far more expensive than having a cheap plastic deck box sitting nearby. Utilizing premium gas-strut hinges is the secret to making the heavy lid open effortlessly without slamming on fingers.
You can frame and finish this dual-purpose bench for about $300. Highly recommended for neat freaks with small yards.
- Key Materials: Pressure-treated framing, composite siding, gas struts
- Vibe / Style: Clutter-free utility chic
- Difficulty: Intermediate carpentry
- Budget Breakdown: Wood/Siding: $220 | Hardware/Struts: $80.
- Creator’s Tip: Drill several small drainage holes in the absolute bottom corner of the bench floor so trapped moisture can escape without molding your cushions.
- Smart Sourcing: heavy-duty rust-proof gas strut hinge kits or waterproof composite deck board (bulk pack).
Material Guide: Cheap vs. Premium Aesthetic
Knowing exactly where to save and where to spend makes all the difference in achieving that “looks expensive but isn’t” vibe.
- Standard vs. UV-Resistant/Premium: Generic patio plastics chalk and crack within a year. Upgrading to UV-coated poly-lumber stops fading dead in its tracks, keeping the color deep and rich for a decade.
- Pre-made Kits vs. Sourcing Locally: While buying raw hardware store brick is cheaper, using pre-cut masonry starter kits saves dozens of hours of brutal labor and guarantees a perfectly level, professional finish.
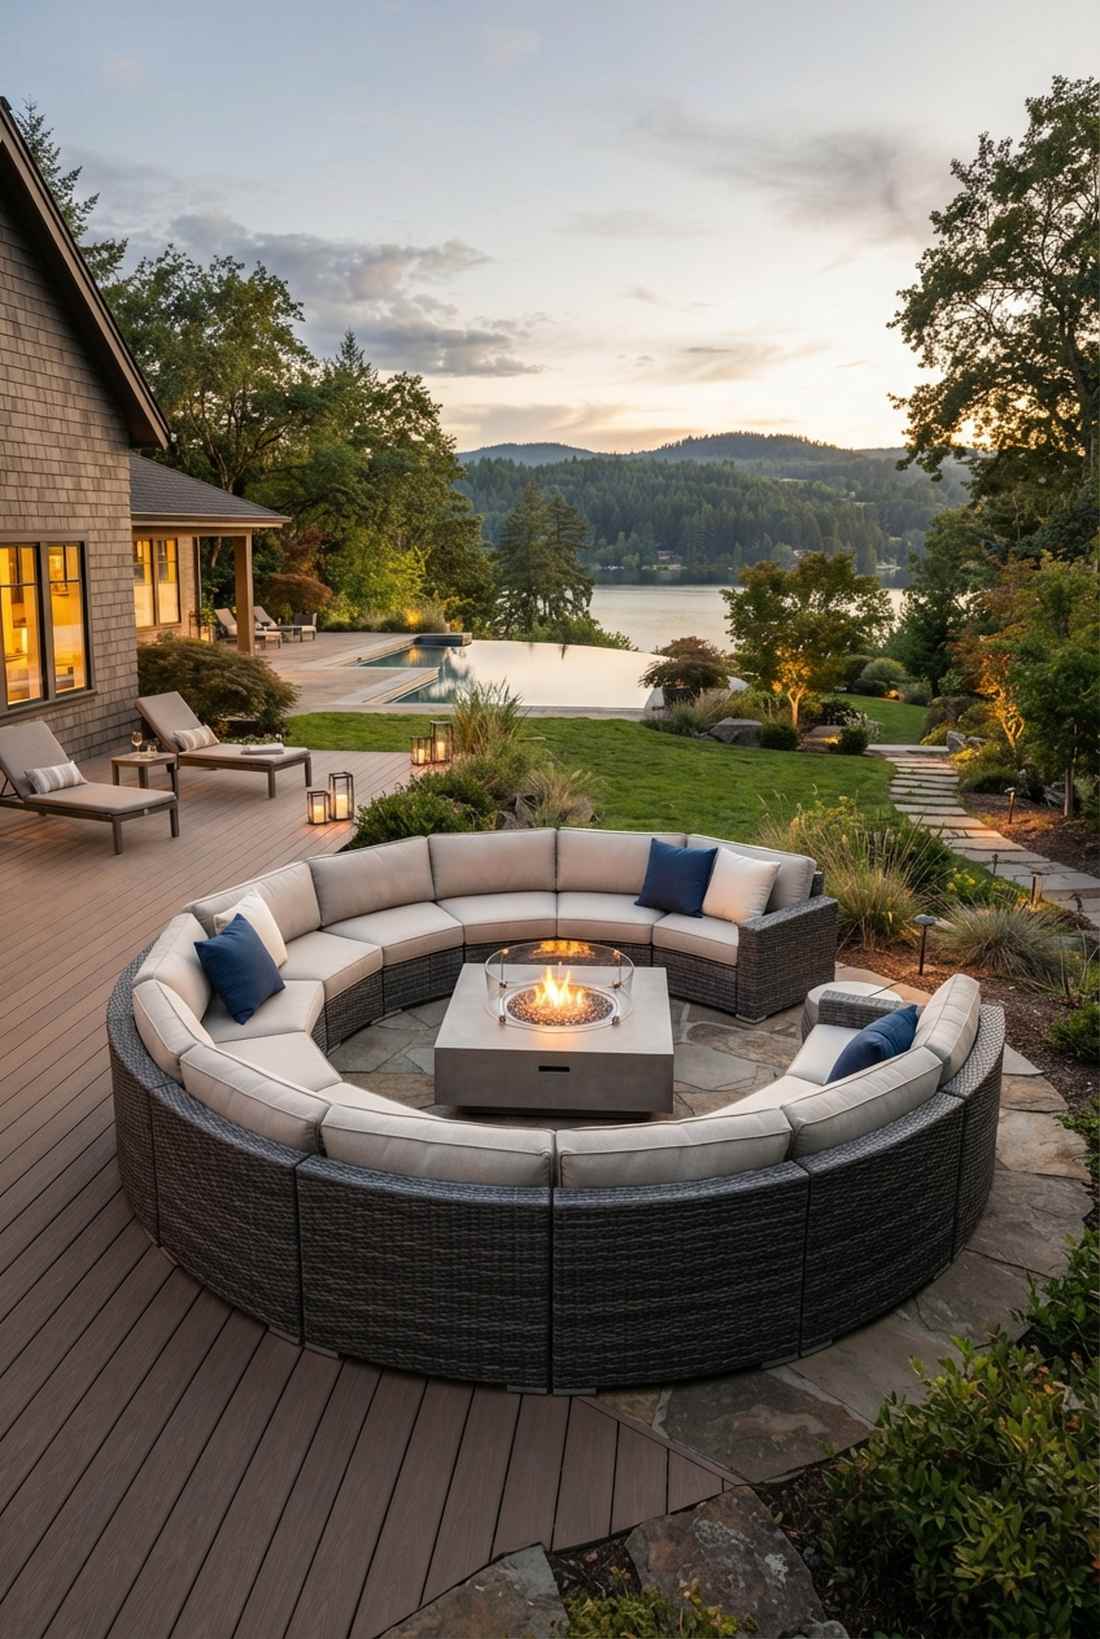
28. Sectional Sofa Configurations
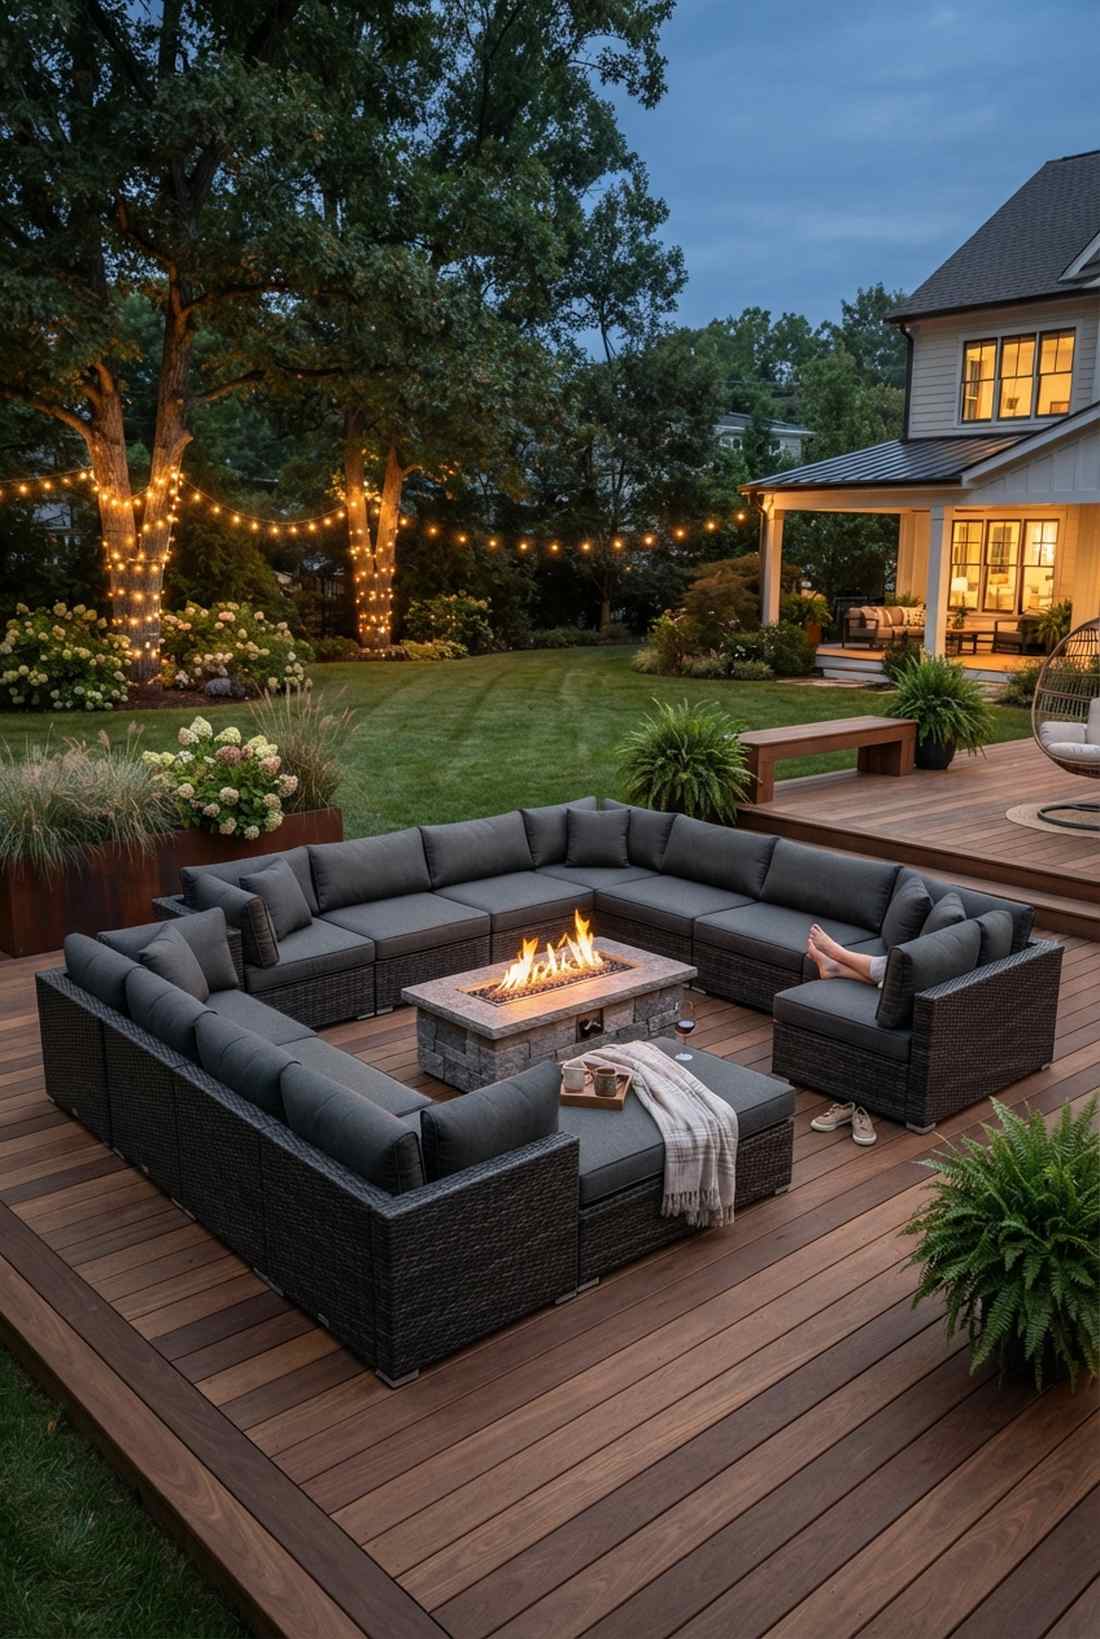
Feeling like a plush indoor living room teleported outside, this layout maximizes sprawling comfort. The U-shaped deep-cushion sectional setup is perfect for lounging horizontally while watching the flames dance.
Wrapping the fire entirely in matched modular fabric gives a designer-level finish that encourages guests to take their shoes off and stay for hours. Snagging top-tier weatherproof upholstery is critical because cheap fabrics will melt instantly from a single stray ember.
Expect to spend $400 to $800 depending on fabric quality. Save this if you prioritize absolute comfort over hard architectural lines!
- Key Materials: Modular outdoor sectional pieces, ember-resistant upholstery
- Vibe / Style: Plush horizontal lounging
- Difficulty: Simple furniture linking
- Budget Breakdown: Sectional Base: $300 | Premium Cushions: $200.
- Creator’s Tip: Use zip-ties hidden underneath to lock the modular pieces together so the sofa doesn’t split apart when someone lays across the seam.
- Smart Sourcing: UV-coated ember-resistant outdoor cushion covers or modular heavy-duty patio sofa kits.
If you think movable pieces look cheap, the following configuration will completely change your mind…
Flexible & Modular Systems
Portable and reconfigurable seating accommodates evolving needs, seasonal changes, and multi-purpose patio use. Modular approaches balance flexibility with the cohesive appearance of permanent installations.
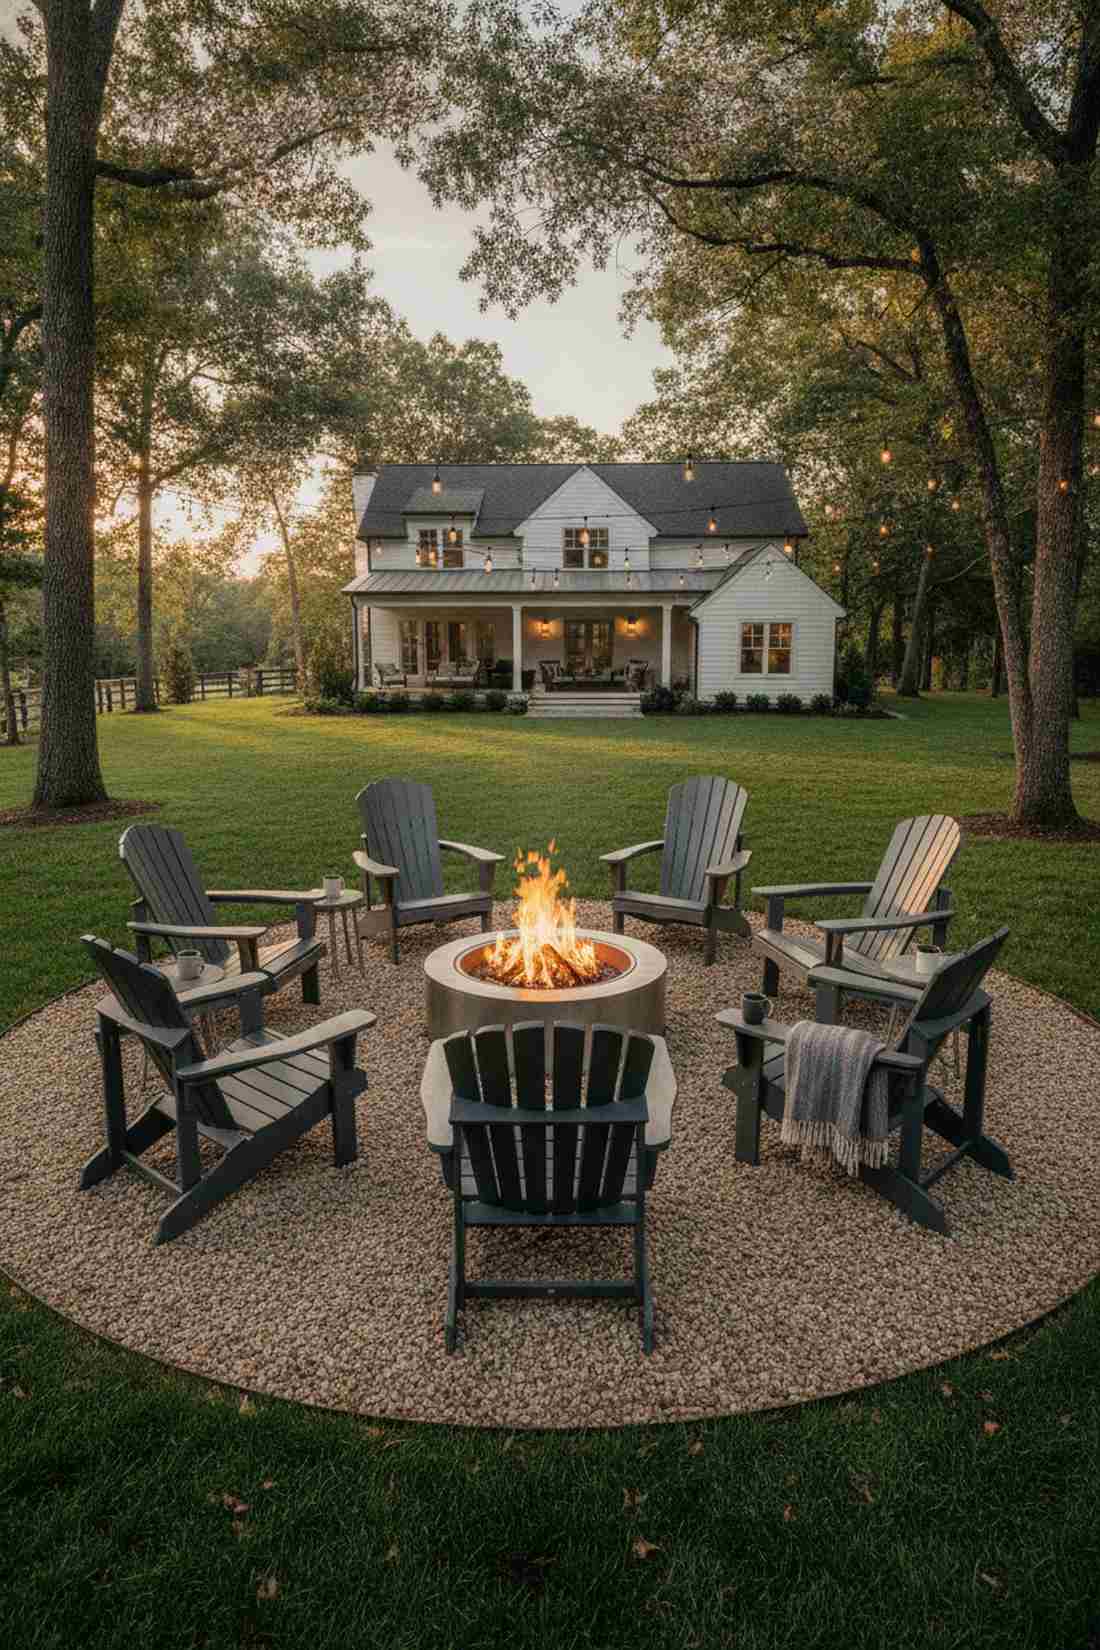
29. Movable Adirondack Circle
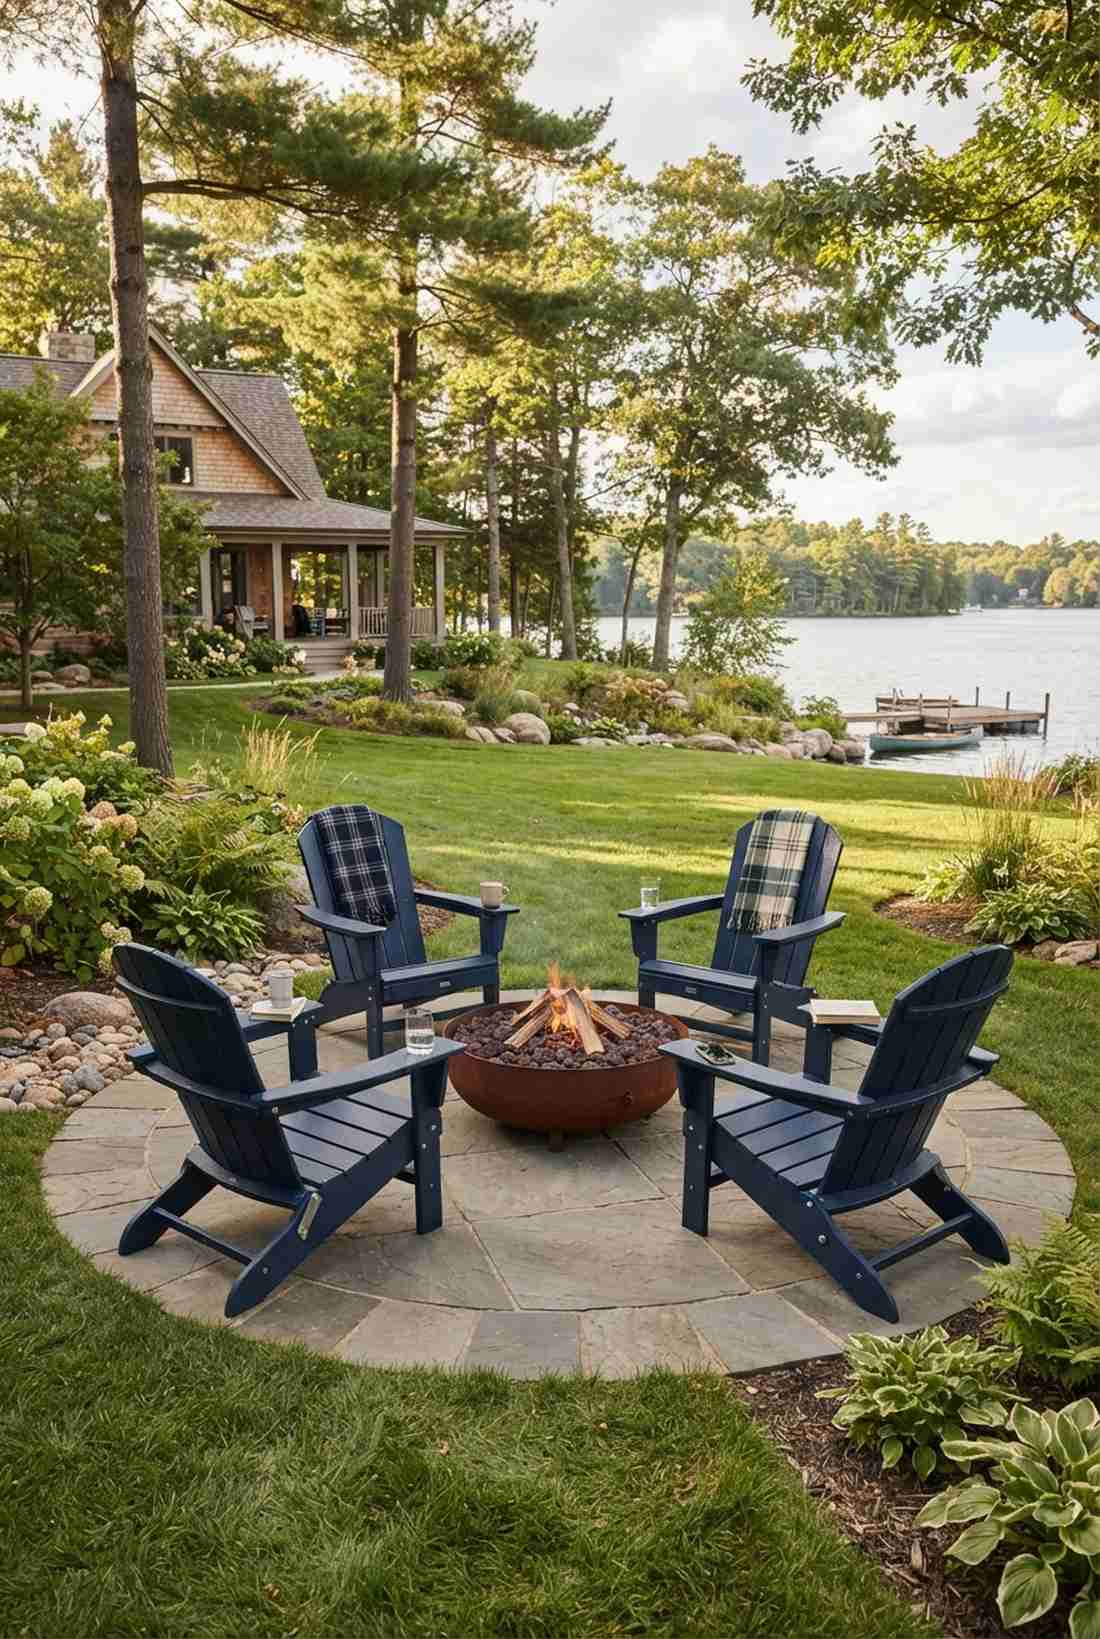

This layout channels the timeless energy of a luxury lakeside cabin getaway. The classic poly-lumber Adirondack arrangement is the undefeated champion of versatile, unpretentious backyard hosting.
Allowing guests to drag their own heavy chairs delivers a surprisingly premium look when all the chairs match perfectly in color and material. Choosing high-density poly-wood over cheap cedar ensures these chairs can survive blizzards and heatwaves without ever needing a fresh coat of paint.
A set of four premium chairs will cost around $400 to $600. It’s the most reliable, idiot-proof patio setup in existence.
- Key Materials: High-density poly-wood chairs, stainless hardware
- Vibe / Style: Timeless lakeside retreat
- Difficulty: Zero skills required
- Budget Breakdown: Poly-Chairs (x4): $450 | Hardware: $50.
- Creator’s Tip: Opt for chairs with ultra-wide flat armrests; they eliminate the need for side tables by securely holding drinks and phones.
- Smart Sourcing: bulk pack UV-resistant poly-lumber Adirondack chairs or marine-grade stainless assembly hardware kits.
30. Portable Bench and Stool System
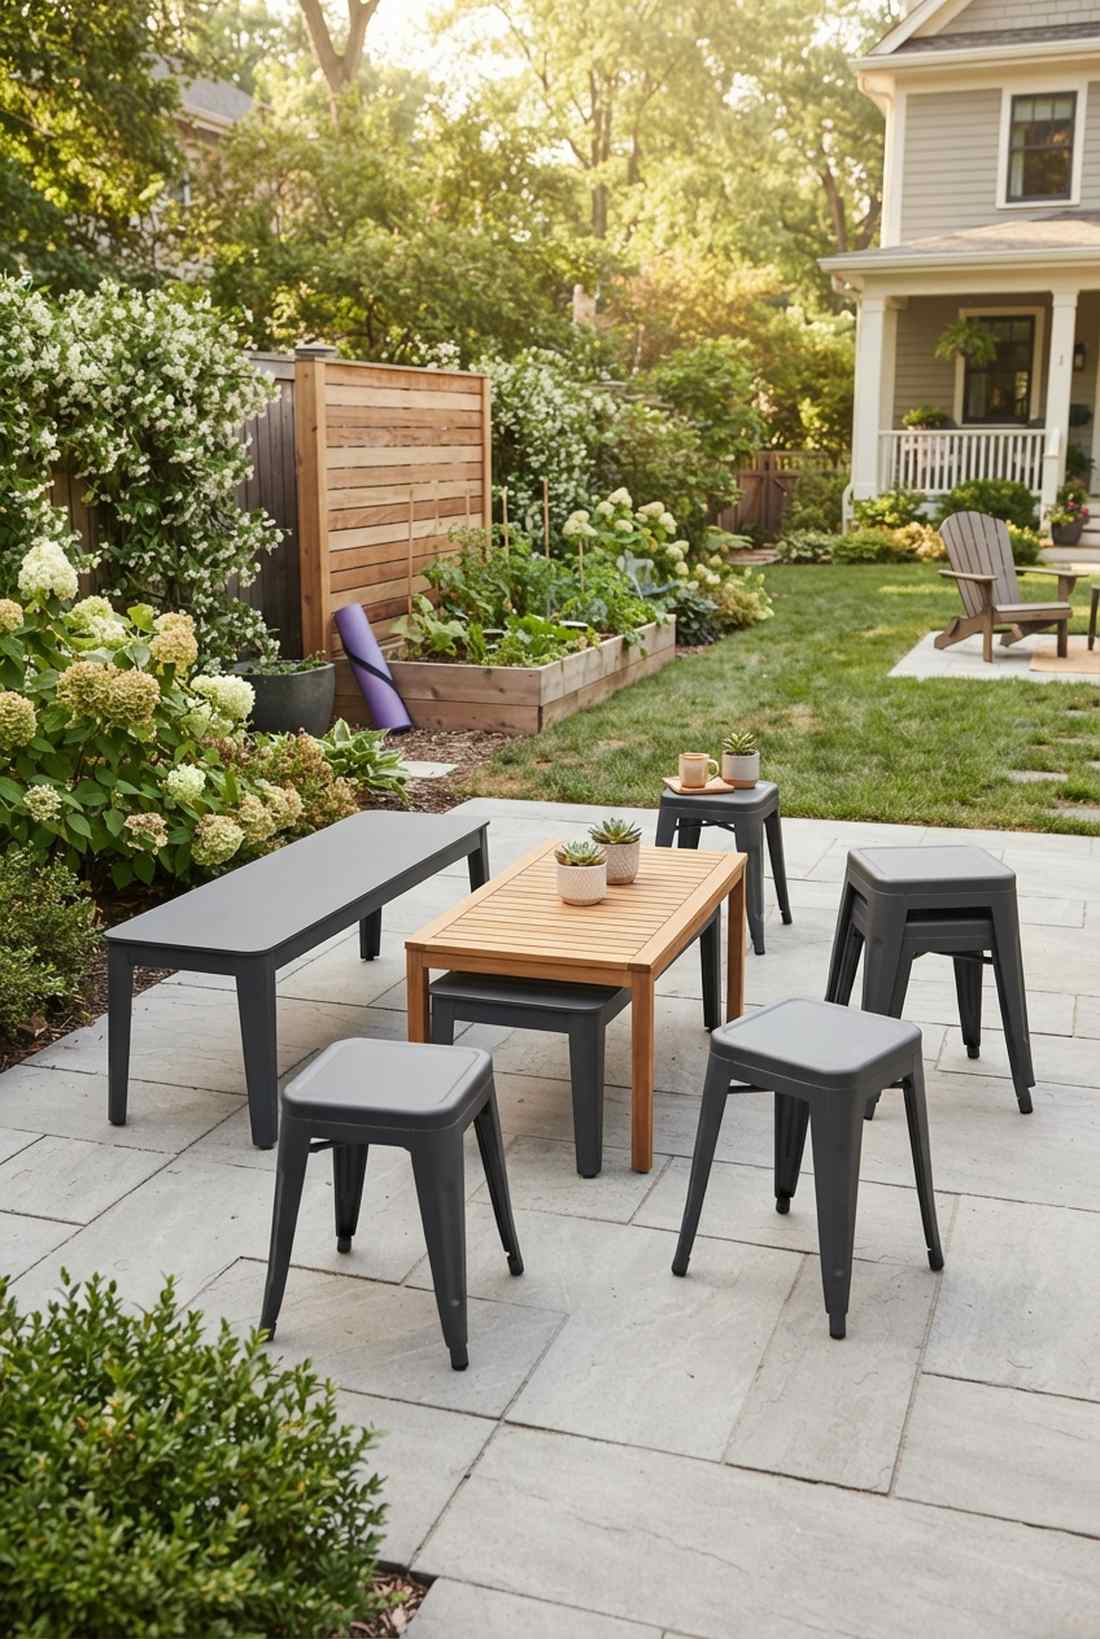
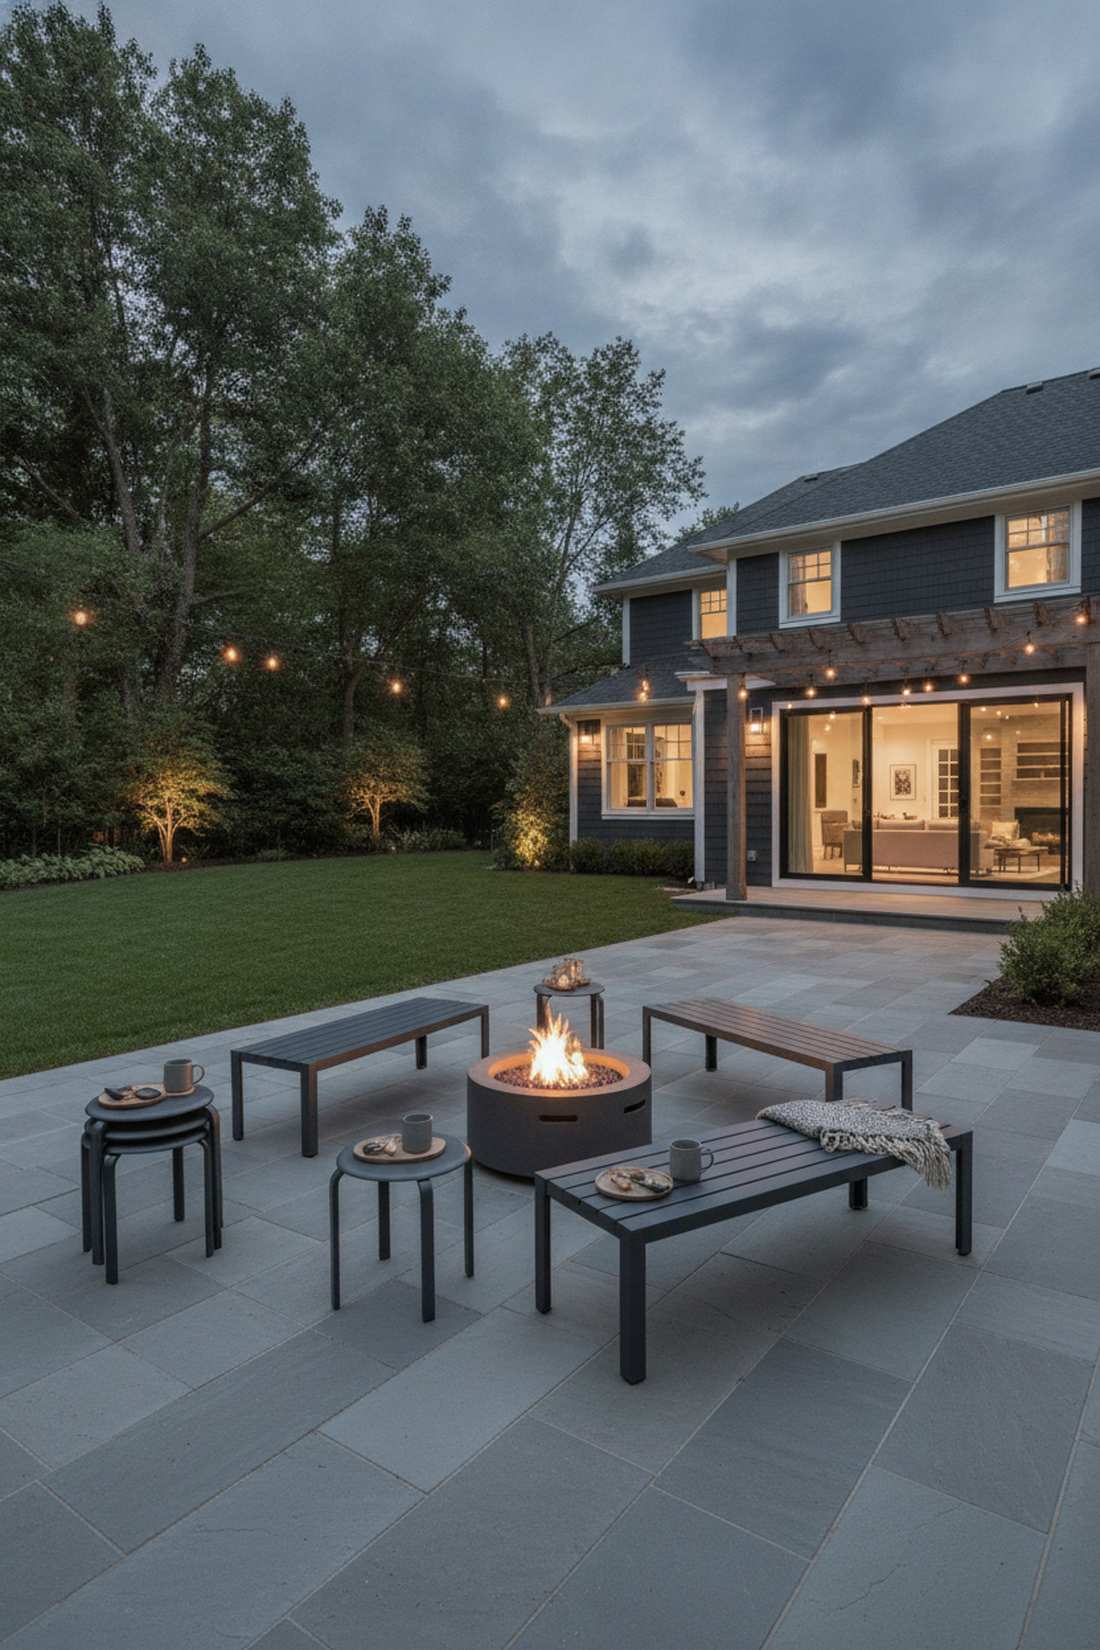
Looking like a hip pop-up cafe, this highly adaptable setup changes shapes on the fly. Implementing a lightweight stackable bench and stool mix works miracles on tiny patios that also need space for morning yoga or daytime play.
Using matching metallic or teak finishes makes this scattered approach look far more expensive than a random collection of folding chairs. When the fire goes out, these sleek backless pieces slide perfectly under dining tables or stack in the corner, reclaiming your precious square footage instantly.
You can acquire a solid stackable system for around $250. Pin this if your patio has to serve five different purposes!
- Key Materials: Powder-coated aluminum stools, nesting benches
- Vibe / Style: Hip adaptable pop-up
- Difficulty: Easy stacking/moving
- Budget Breakdown: Benches: $150 | Stools (x4): $100.
- Creator’s Tip: Buy stools that are precisely 18 inches high so they can double comfortably as impromptu side tables for the benches.
- Smart Sourcing: powder-coated aluminum nesting bench kits or weatherproof stackable outdoor stools (bulk pack).
31. Wheeled Lounge Chairs
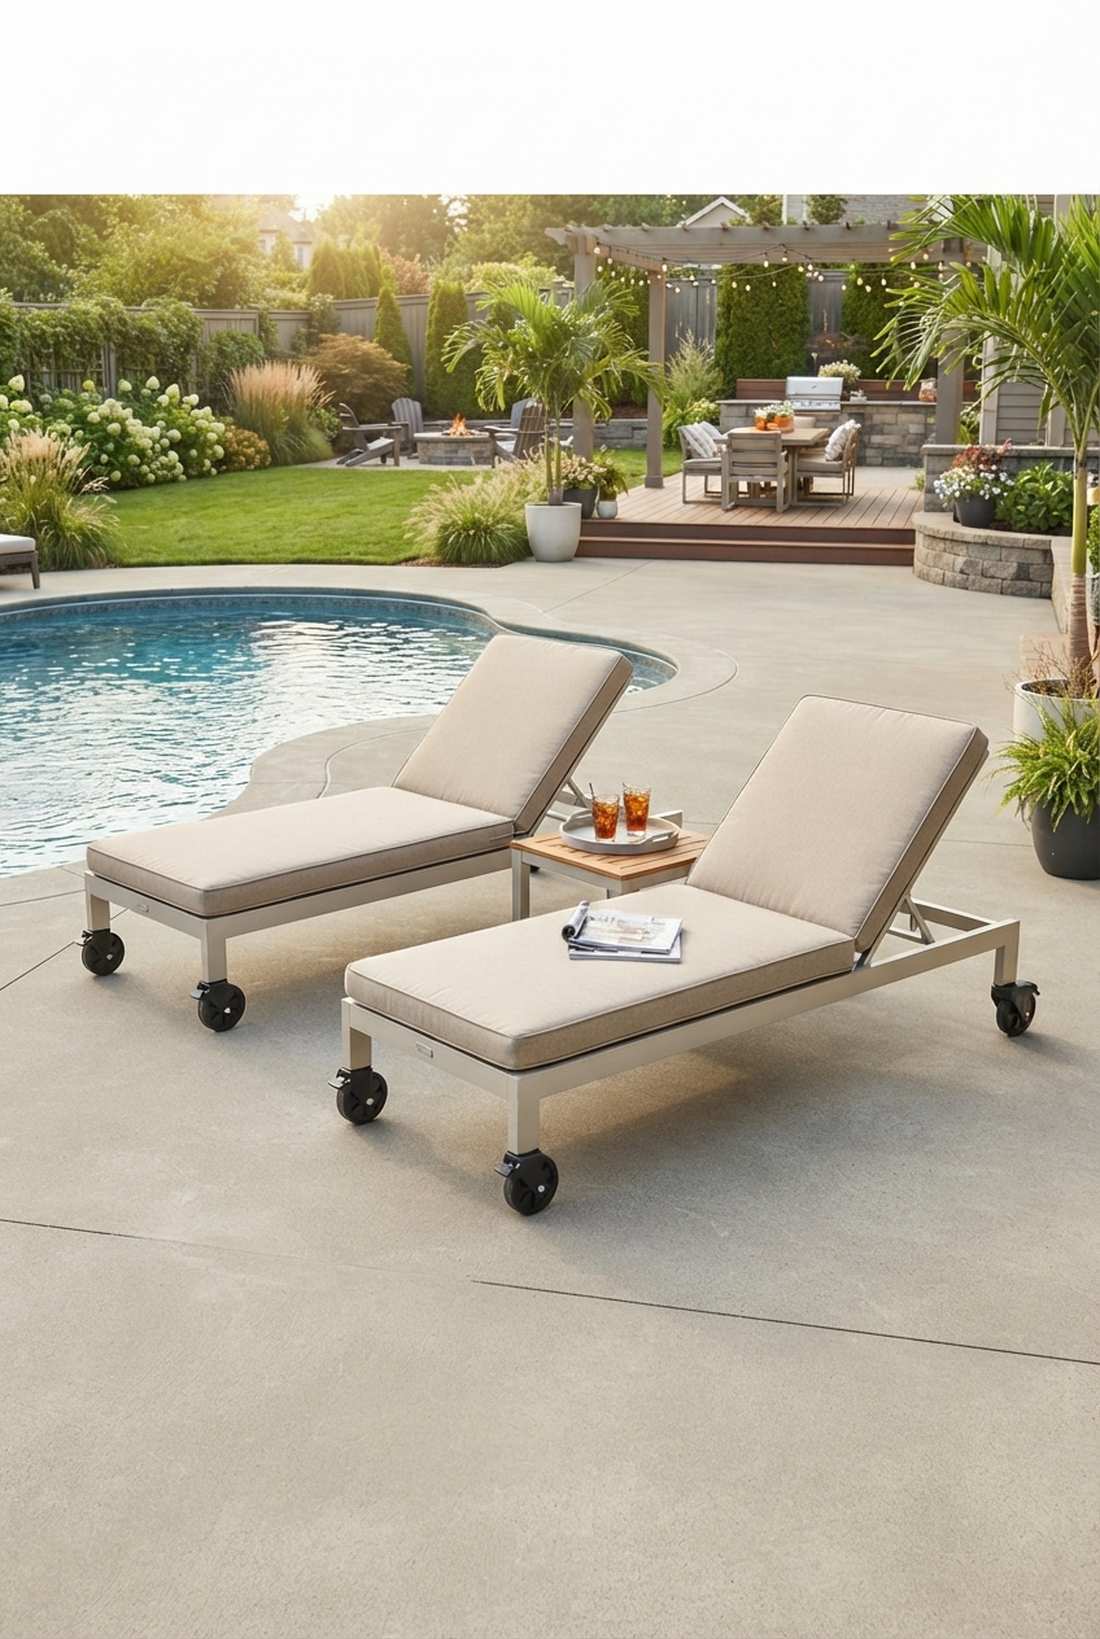
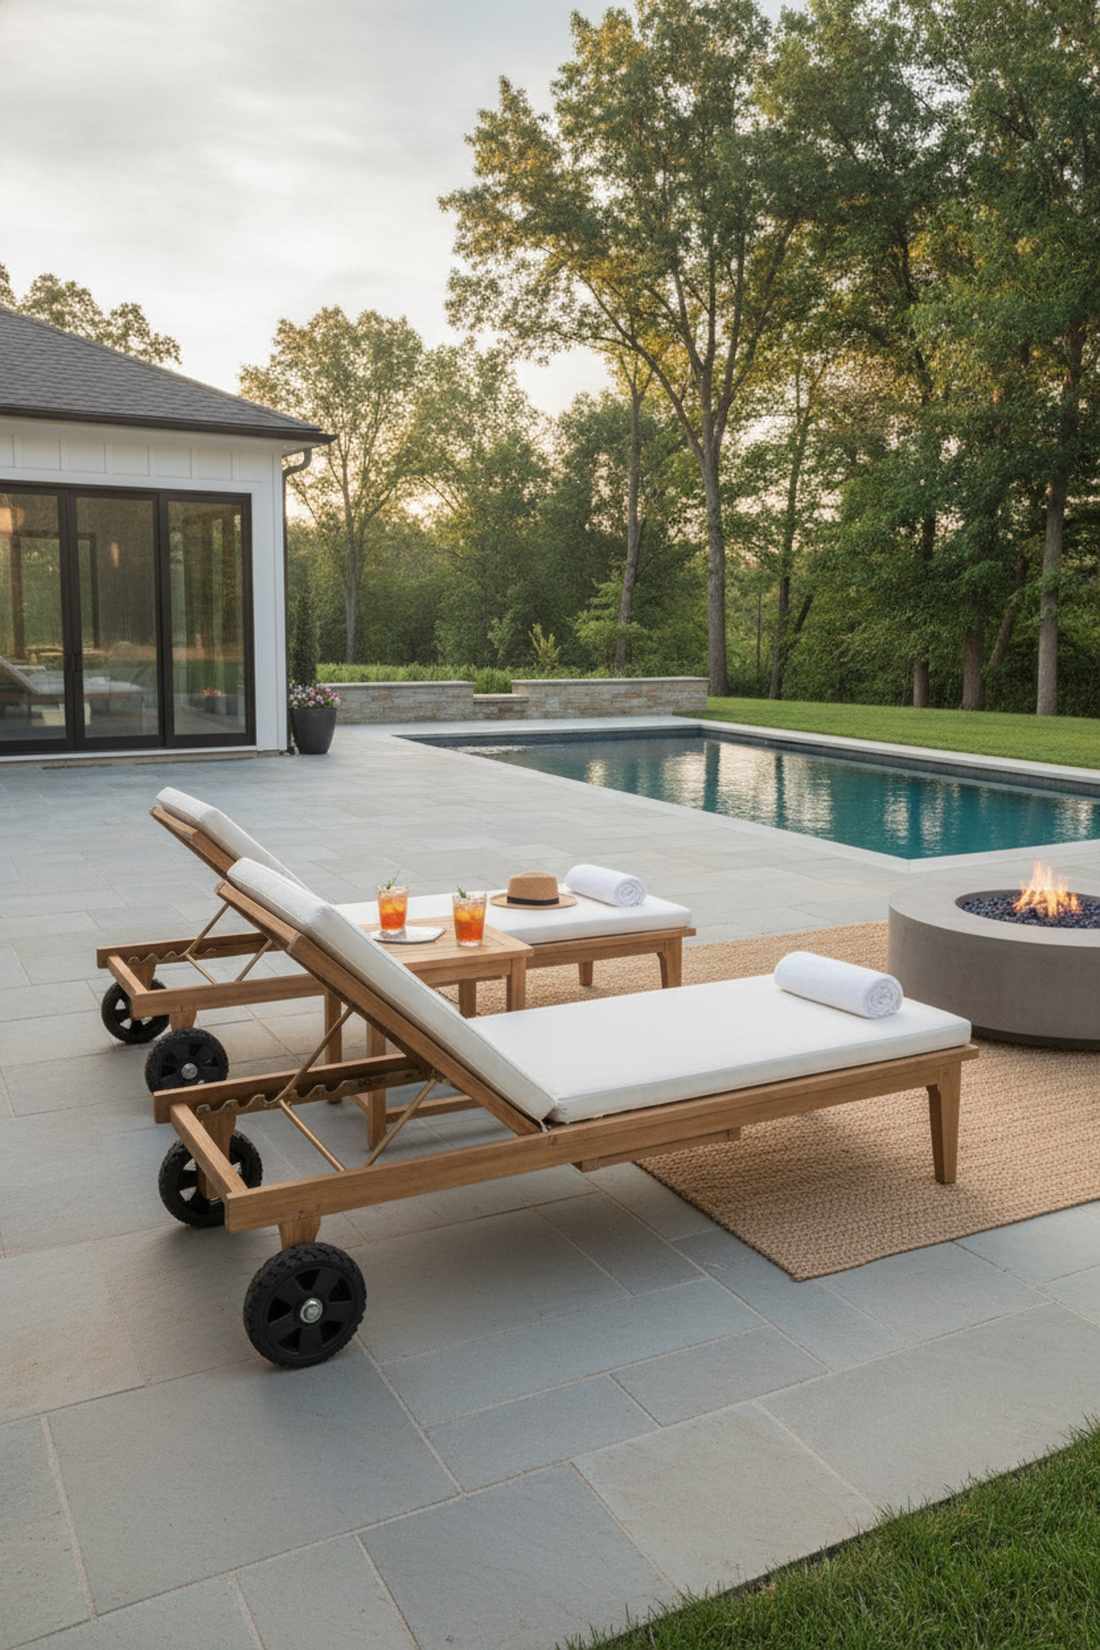
This dynamic layout feels like you’re adjusting your cabana position at a five-star resort pool. The locking caster-wheeled lounge setup is a brilliant hack for deep patios that suffer from unpredictable, swirling wind patterns.
Adding mobility to heavy, luxurious loungers gives a designer-level finish that allows guests to instantly dodge smoke without awkwardly dragging heavy frames. Upgrading basic chairs with heavy-duty outdoor locking casters completely modernizes the space and saves your concrete from nasty scrape marks.
A set of high-end casters and loungers runs about $300. Highly recommended for people who constantly rearrange their yard.
- Key Materials: Teak or aluminum loungers, locking rubber outdoor casters
- Vibe / Style: Dynamic resort mobility
- Difficulty: Easy drill-and-bolt assembly
- Budget Breakdown: Loungers: $250 | Caster Wheels: $50.
- Creator’s Tip: Always buy casters with double-locking mechanisms (locking both the wheel roll and the swivel) so the chairs don’t drift away on slight inclines.
- Smart Sourcing: heavy-duty outdoor locking caster wheel packs or pre-drilled wheeled aluminum lounge chairs.
32. Folding Director Chairs
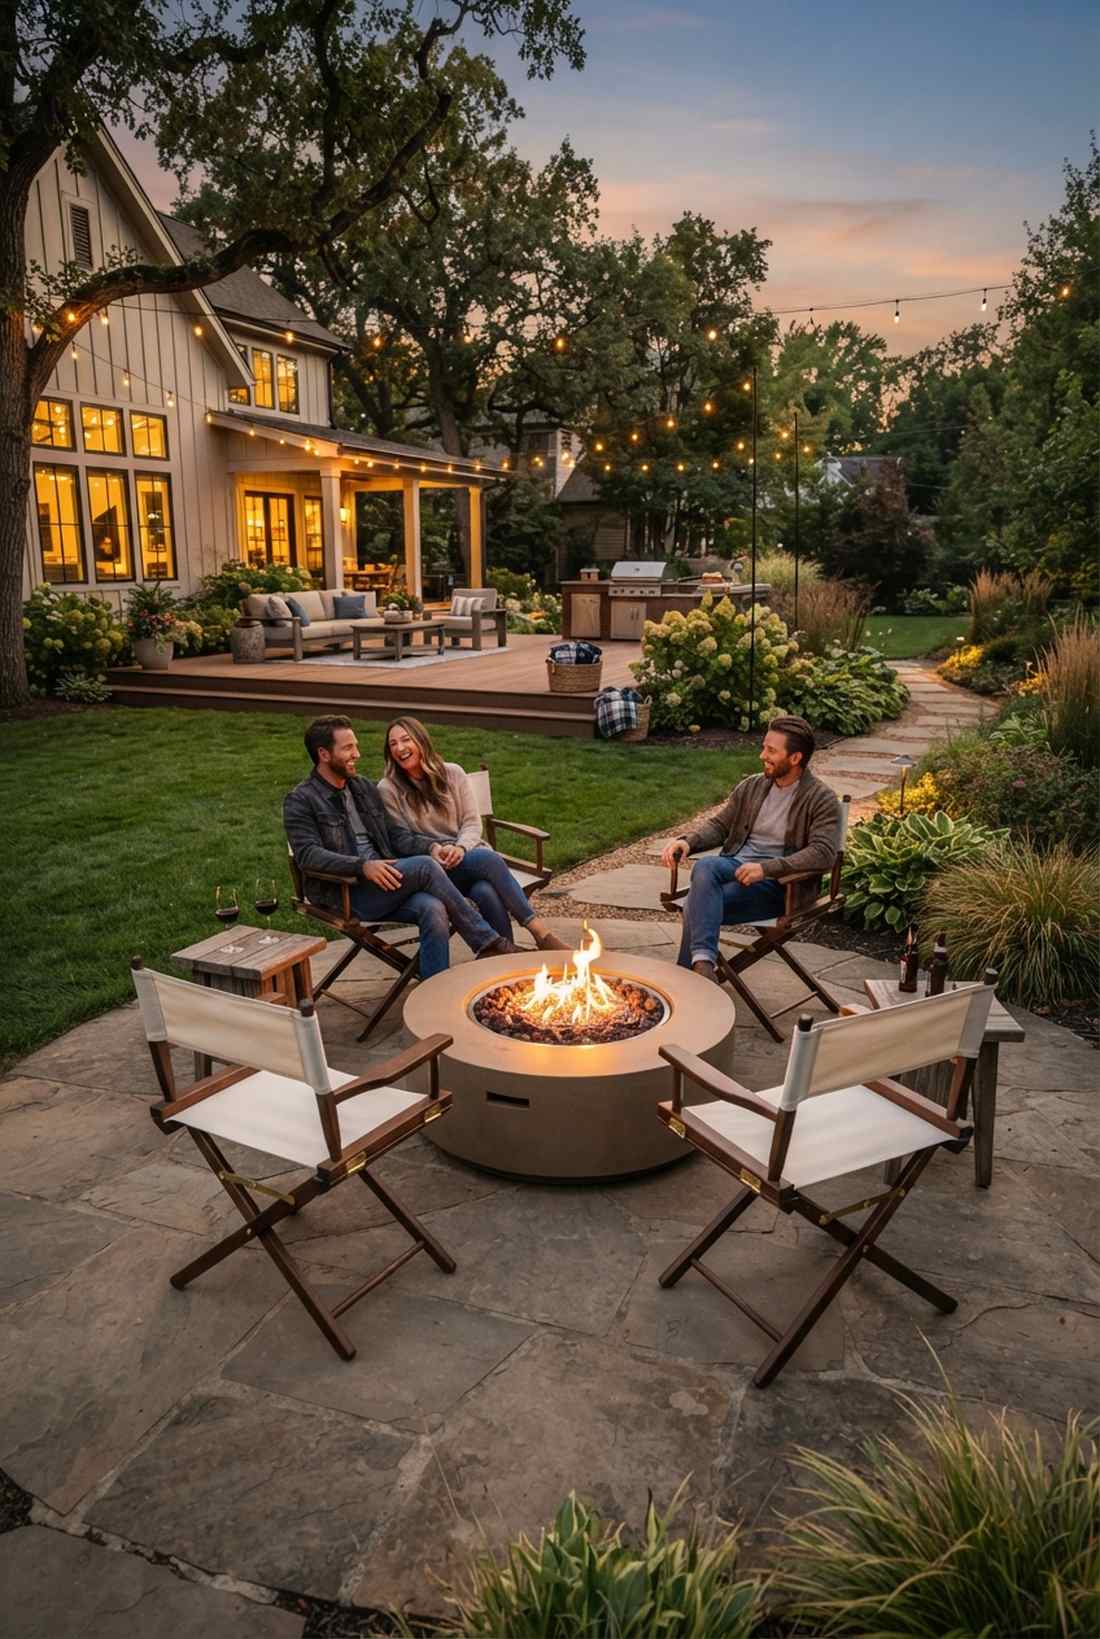
Emitting a cool, on-set Hollywood vibe, this arrangement is the ultimate quick-deploy solution. The canvas director folding chair circle is an absolute lifesaver for homeowners who only use their fire pit for three months out of the year.
Swapping cheap nylon camping chairs for structural canvas frames delivers a surprisingly premium look that folds completely flat in seconds. Focusing on marine-grade canvas prevents the dreaded spark-holes that instantly destroy synthetic camping materials during a lively bonfire.
You can grab a set of four high-quality folding directors for about $200. Save this to your ultra-efficient storage board!
- Key Materials: Hardwood folding frames, marine-grade canvas slings
- Vibe / Style: Crisp pop-up Hollywood
- Difficulty: No setup required
- Budget Breakdown: Frames: $120 | Canvas Slings: $80.
- Creator’s Tip: Treat the canvas seats with a hydrophobic outdoor fabric spray before your first fire to protect against spilled drinks and morning dew.
- Smart Sourcing: marine-grade canvas folding director chairs or heavy-duty outdoor fabric waterproofing spray kits.
33. Ottoman and Pouf Supplemental Seating
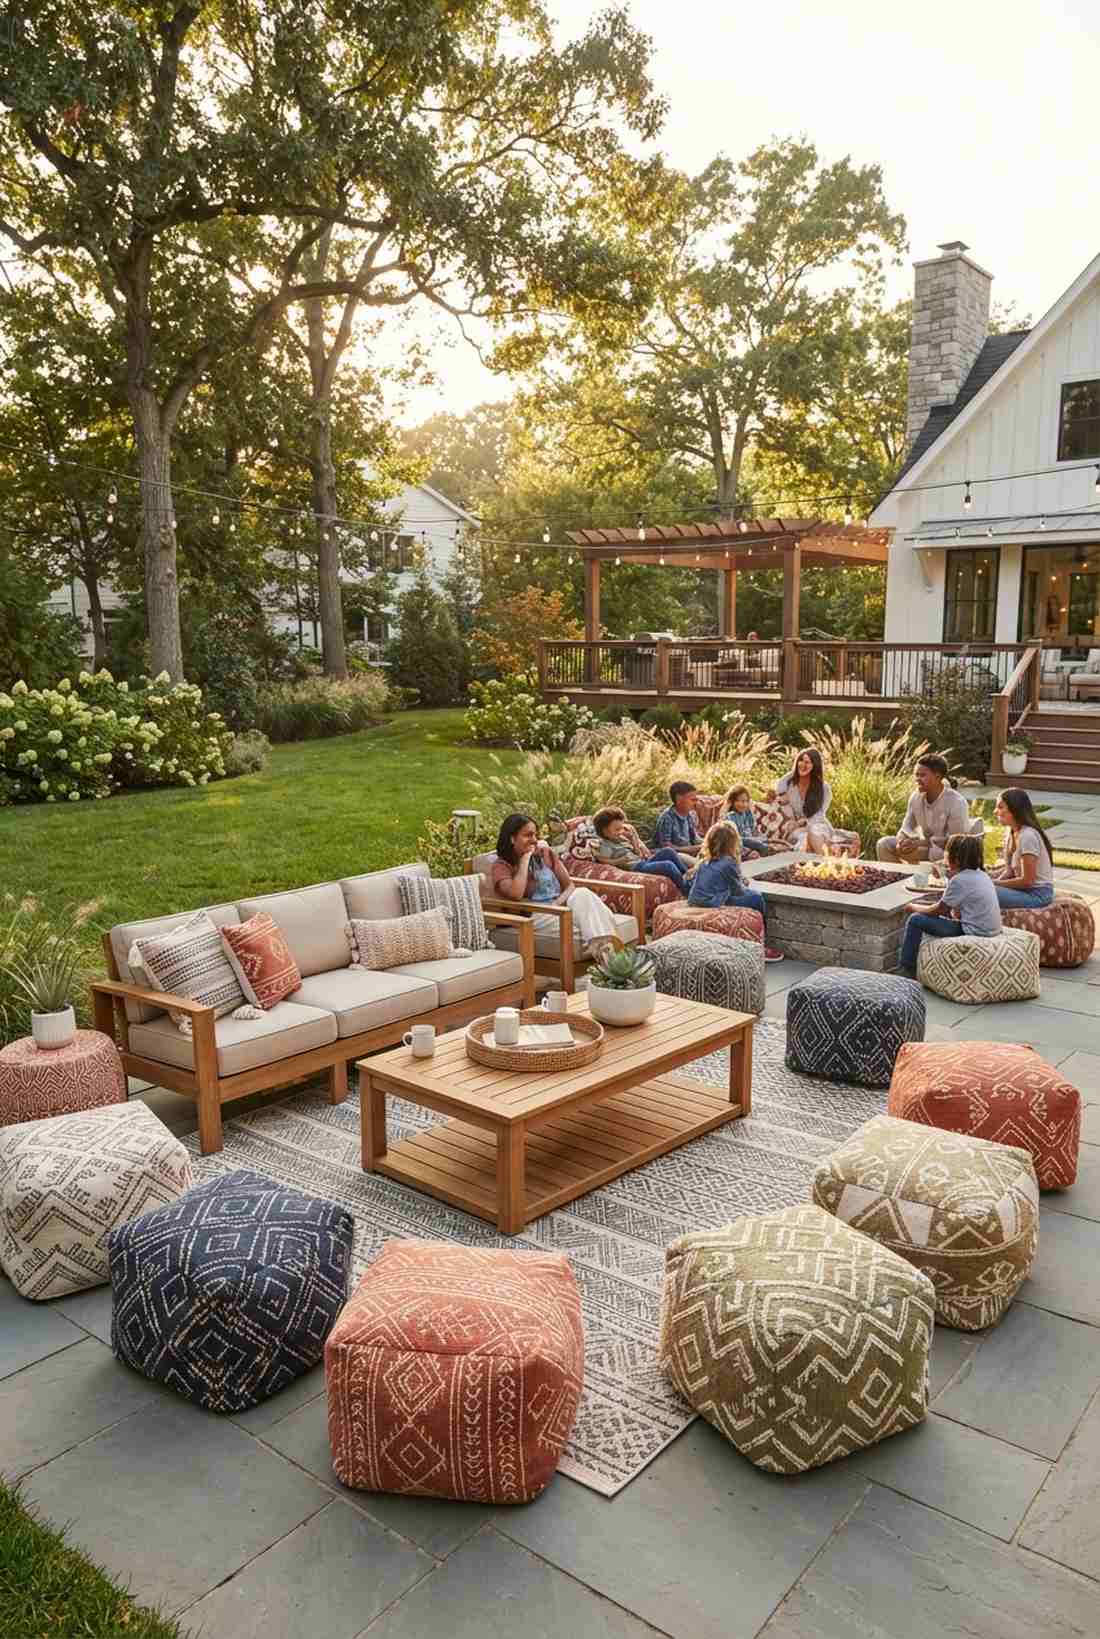
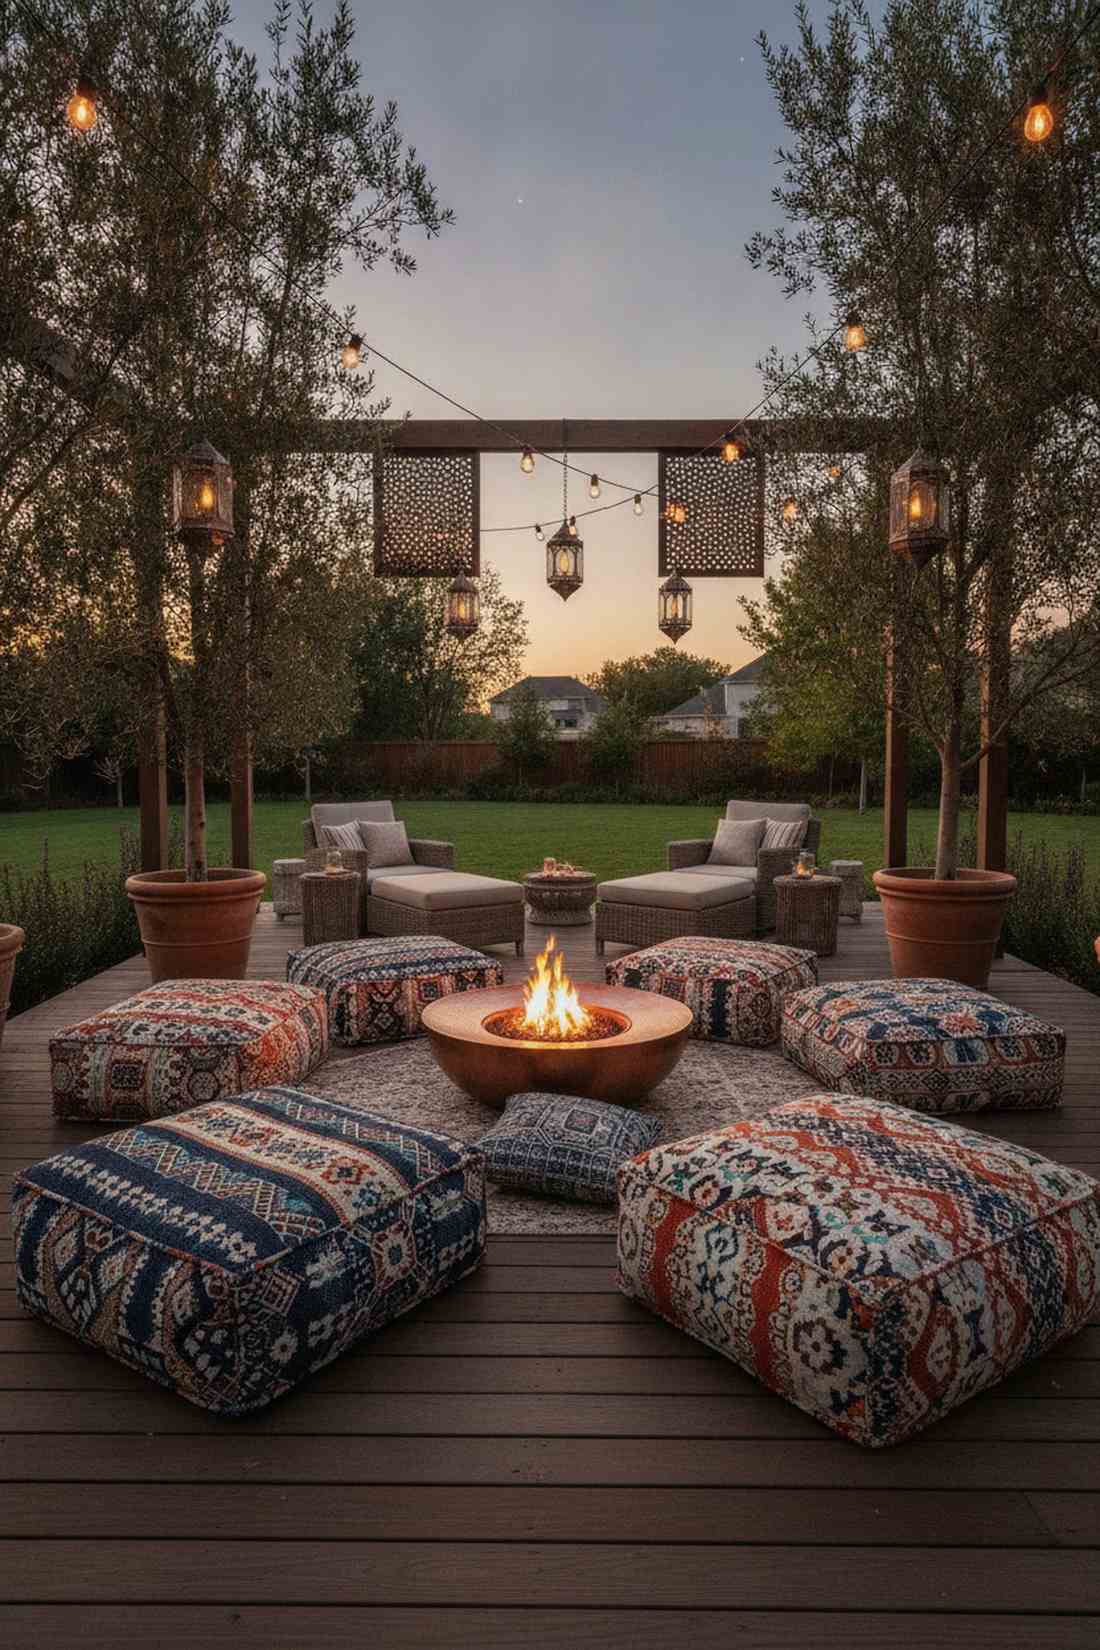
This layout feels incredibly relaxed, mimicking a Moroccan rooftop lounge filled with plush floor cushions. Dropping an outer ring of waterproof poufs and ottomans is the smartest way to absorb surprise overflow guests without ruining the patio’s aesthetic.
Scattering massive, soft seating elements looks far more expensive than dragging out plastic emergency folding chairs. These soft blocks naturally encourage younger guests to sit closer to the warmth while keeping the primary furniture ring looking pristine and uncluttered.
You can stuff a gorgeous set of outdoor poufs for around $150. Pin this to your casual boho-chic backyard mood board!
- Key Materials: Weather-resistant pouf covers, high-density polystyrene bead filler
- Vibe / Style: Boho-chic Moroccan lounge
- Difficulty: Easy stuffing
- Budget Breakdown: Pouf Covers: $100 | Bead Filler: $50.
- Creator’s Tip: Over-stuff the poufs by 10% initially because the internal beads will naturally compress and settle after the first few weeks of use.
- Smart Sourcing: UV-coated waterproof outdoor pouf covers (bulk pack) or high-density polystyrene refill bead kits.
The final few layouts integrate tech so flawlessly it feels like stepping into a 5-star mountain resort…
Elevated Thermal Comfort Features
Advanced configurations incorporate supplemental heating, wind protection, and climate control systems that extend comfortable outdoor use across broader temperature ranges. These strategies transform fire pits from seasonal amenities into year-round focal points.
34. Pergola-Integrated Heating System
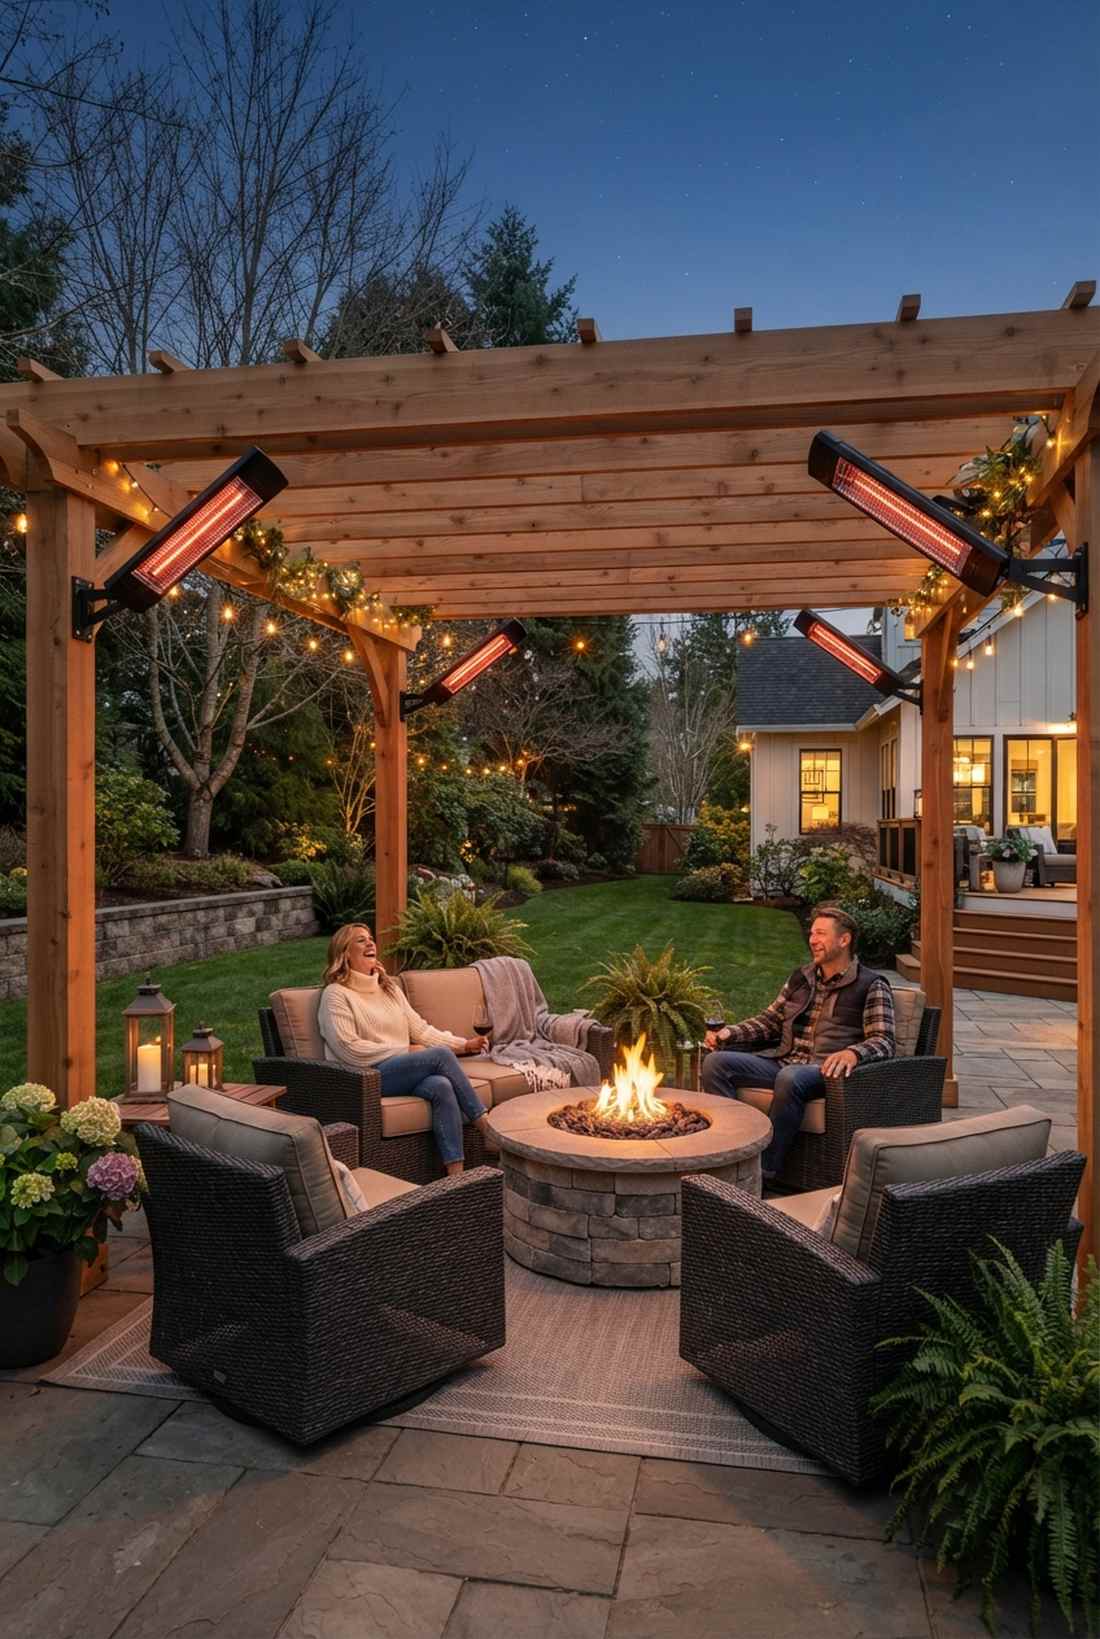
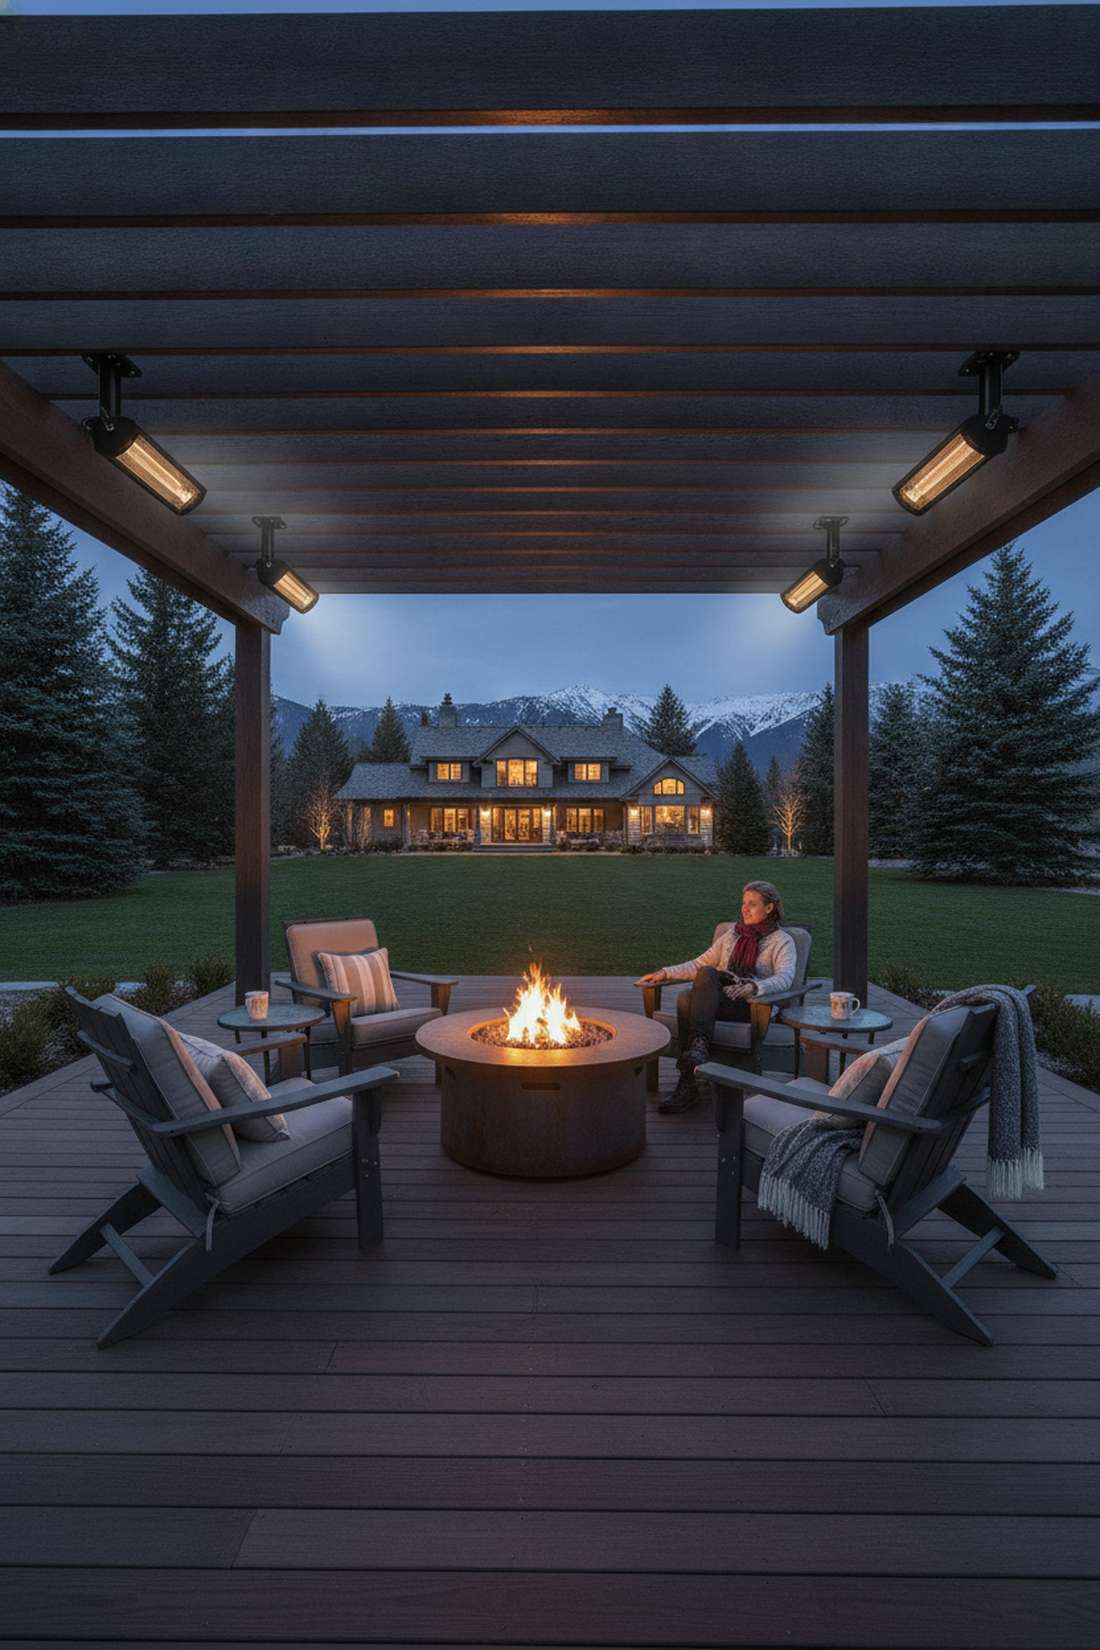
This dual-action setup feels like sitting inside a gently warmed oven, defying the freezing air around you. The overhead infrared pergola heat integration is the ultimate hack for people who refuse to go indoors when winter hits.
Pairing the glowing fire below with invisible radiant heat from above gives a designer-level finish that entirely eliminates cold drafts hitting your back. When reviewing elite outdoor seating fire pit blueprints, integrating directional electric heaters is the number one secret to achieving genuine four-season comfort.
Adding smart heaters runs about $400 to $800 depending on wattage. Highly recommended for extreme climate hosting.
- Key Materials: Electric infrared patio heaters, heavy-duty mounting brackets
- Vibe / Style: All-weather luxury resort
- Difficulty: Advanced electrical wiring
- Budget Breakdown: Heaters: $350 | Wiring/Brackets: $150.
- Creator’s Tip: Mount the heaters at a 45-degree angle directly behind the primary seating so the infrared waves hit guests squarely in the shoulders and back.
- Smart Sourcing: weatherproof electric infrared patio heater kits or commercial-grade adjustable mounting brackets.
35. Glass Windscreen Fire Pit Surround
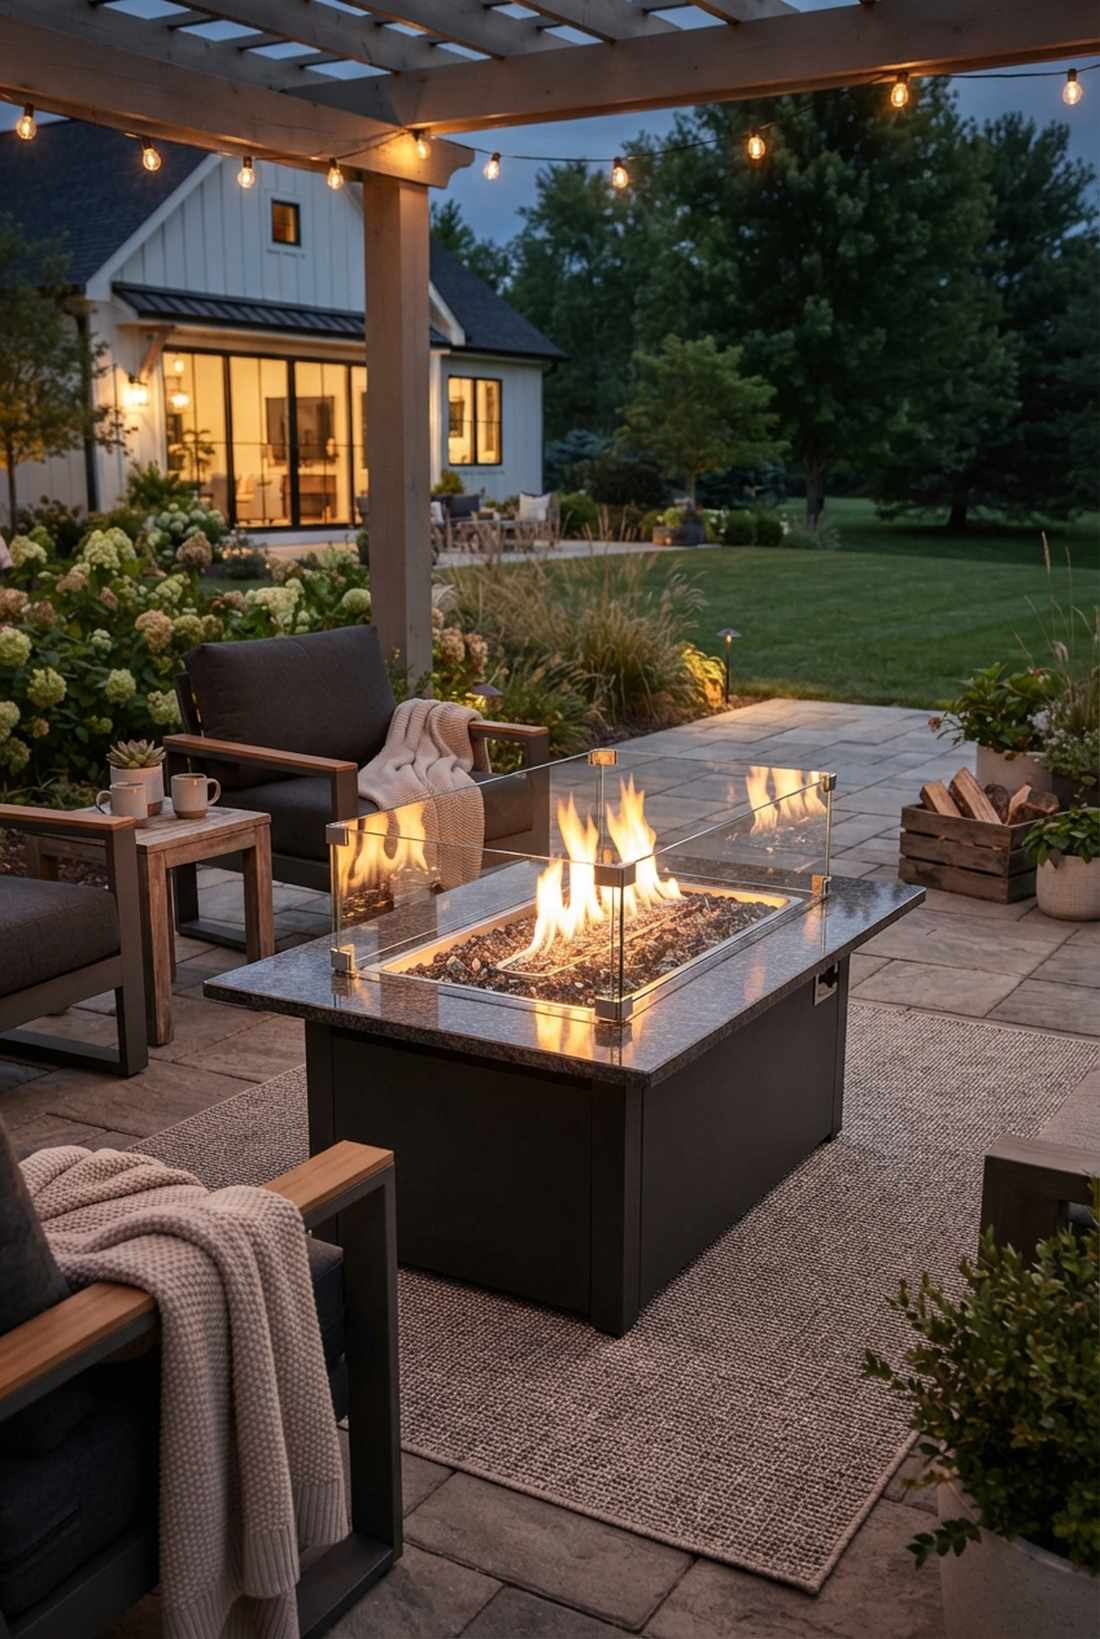
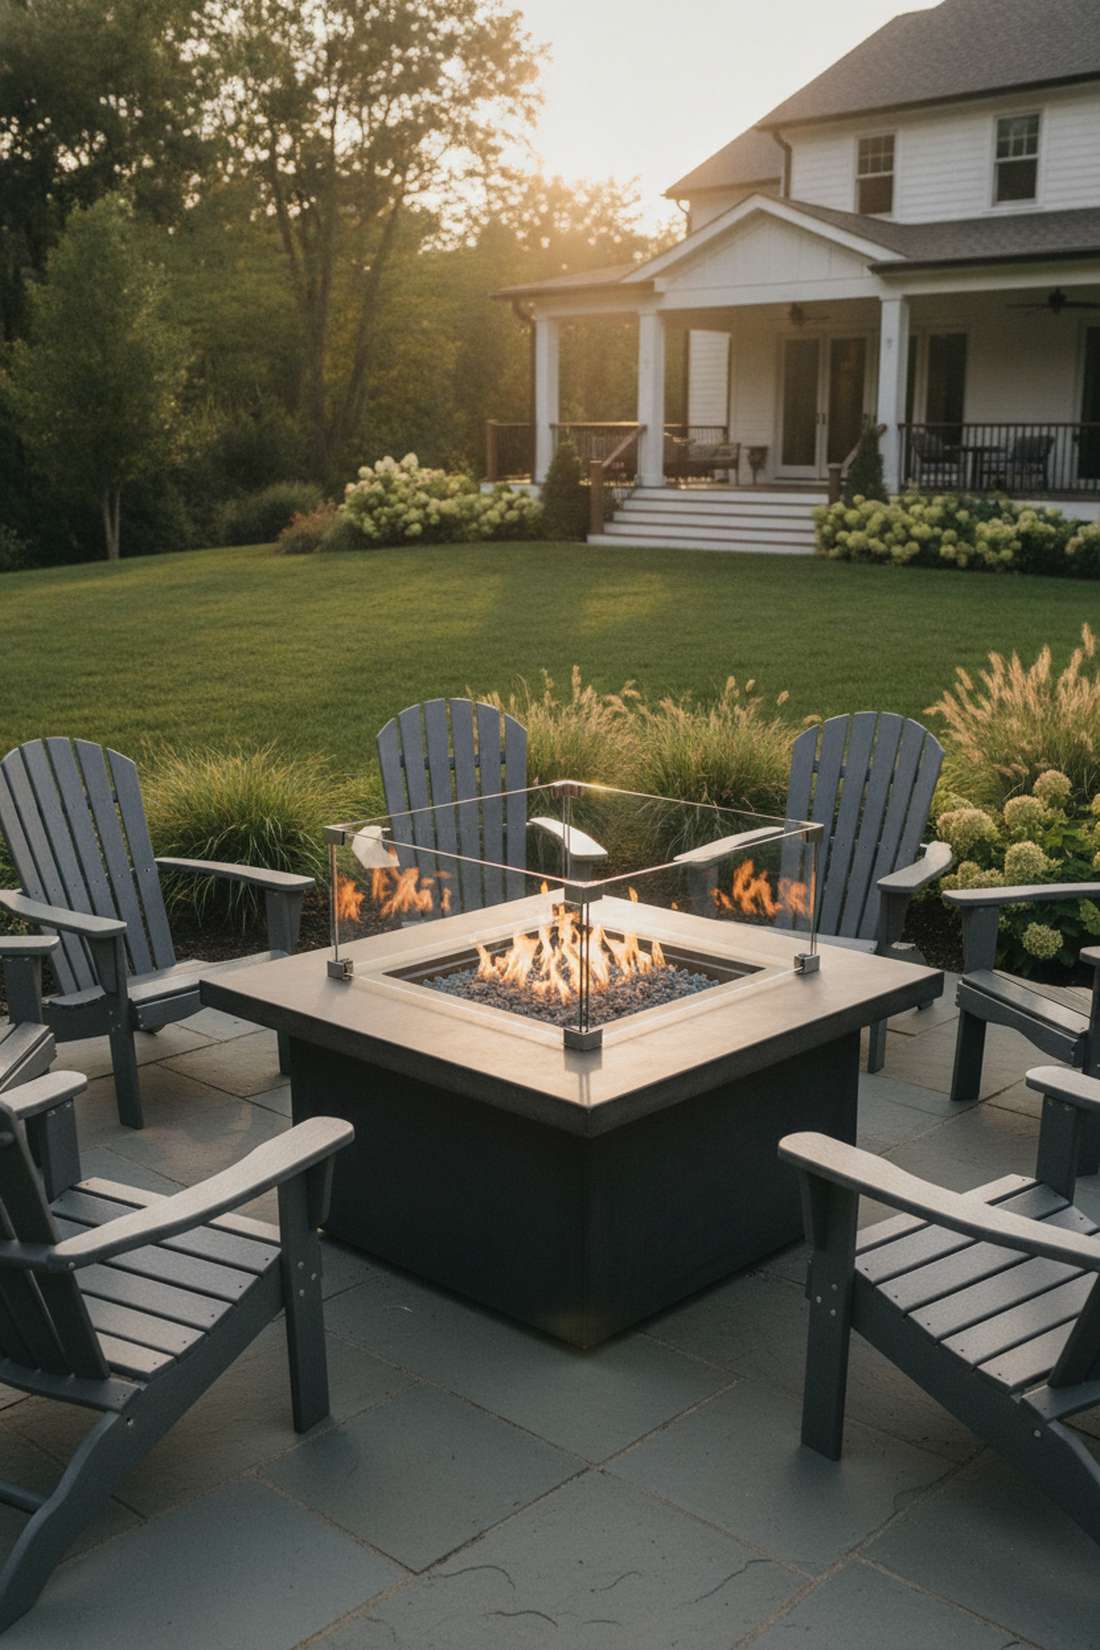
Sleek and invisible, this configuration looks like a modern museum display holding captive flames. Using a tempered glass flame barrier surround immediately fixes the most annoying problem of gas fire pits: wind blowouts.
Reflecting the glowing light while violently rejecting cross-breezes delivers a surprisingly premium look that makes cheap fire tables look highly expensive. Securing heavy, heat-rated glass panels with stainless steel corner brackets ensures the flame ribbon stays tall, warm, and perfectly centered all night long.
You can retrofit almost any square table with glass for about $100. Save this if you live in a notoriously breezy area!
- Key Materials: High-heat tempered glass panels, stainless corner clamps
- Vibe / Style: Crisp modern museum
- Difficulty: Simple bracket screwing
- Budget Breakdown: Glass Panels: $70 | Clamps: $30.
- Creator’s Tip: Leave a 1-inch gap between the bottom of the glass and the table surface to allow essential oxygen to feed the gas flame.
- Smart Sourcing: pre-cut tempered glass wind guard starter kits or marine-grade stainless corner clamp packs.
36. Retractable Screen Enclosure
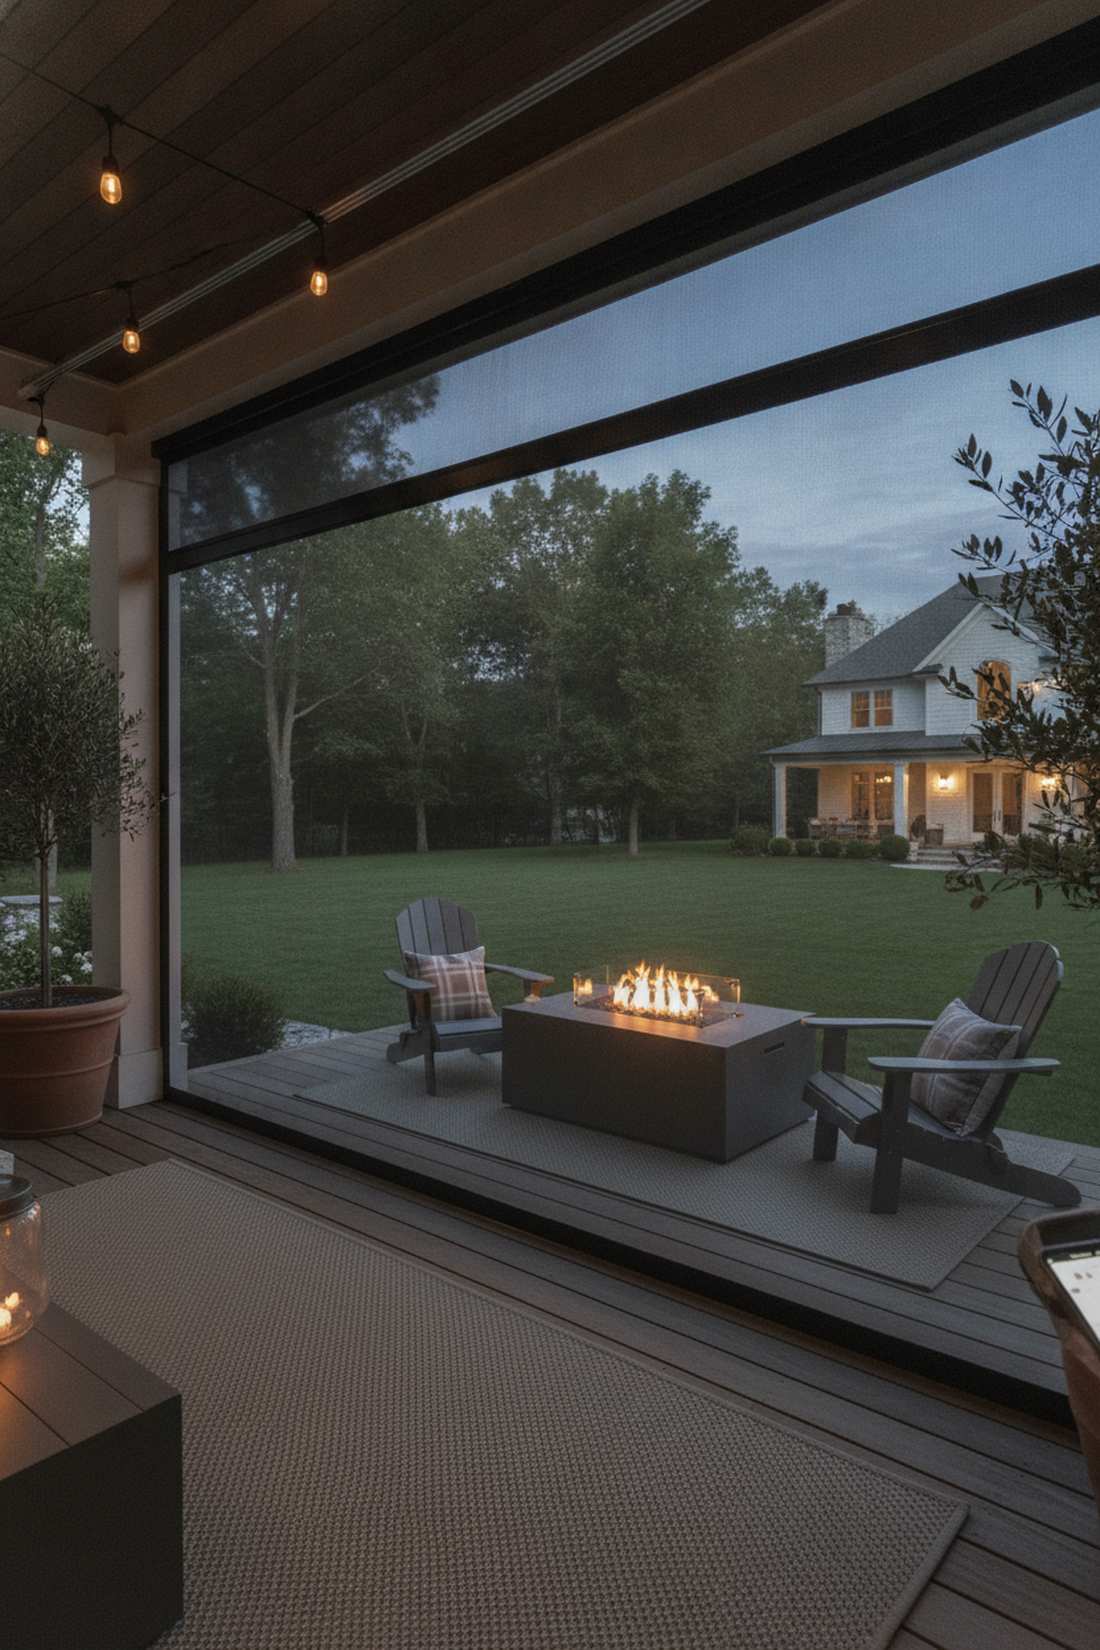
This layout operates like a magic trick, transforming a breezy patio into an enclosed sanctuary at the push of a button. The motorized drop-down thermal screen system is an absolute necessity for mosquito-heavy regions that also experience sharp temperature drops.
Dropping a tight mesh curtain to trap the fire’s radiant heat looks far more expensive than traditional rigid sunrooms. High-end patio contractors swear by dense solar-mesh fabrics that breathe enough to vent smoke safely while fiercely holding back the chill.
This is a premium upgrade, often starting at $800+ for motorized tracks. Pin this to your ultimate dream patio board!
- Key Materials: Motorized track system, heavy-duty solar/thermal mesh
- Vibe / Style: Transformative high-tech sanctuary
- Difficulty: Professional track installation
- Budget Breakdown: Motor/Tracks: $500 | Mesh Screens: $300.
- Creator’s Tip: Choose a 90% density black mesh rather than white; it traps more heat and is actually much easier to see through from the inside.
- Smart Sourcing: motorized outdoor retractable screen starter kits or bulk roll 90-density thermal patio mesh.
37. Heated Floor Radiant Warmth
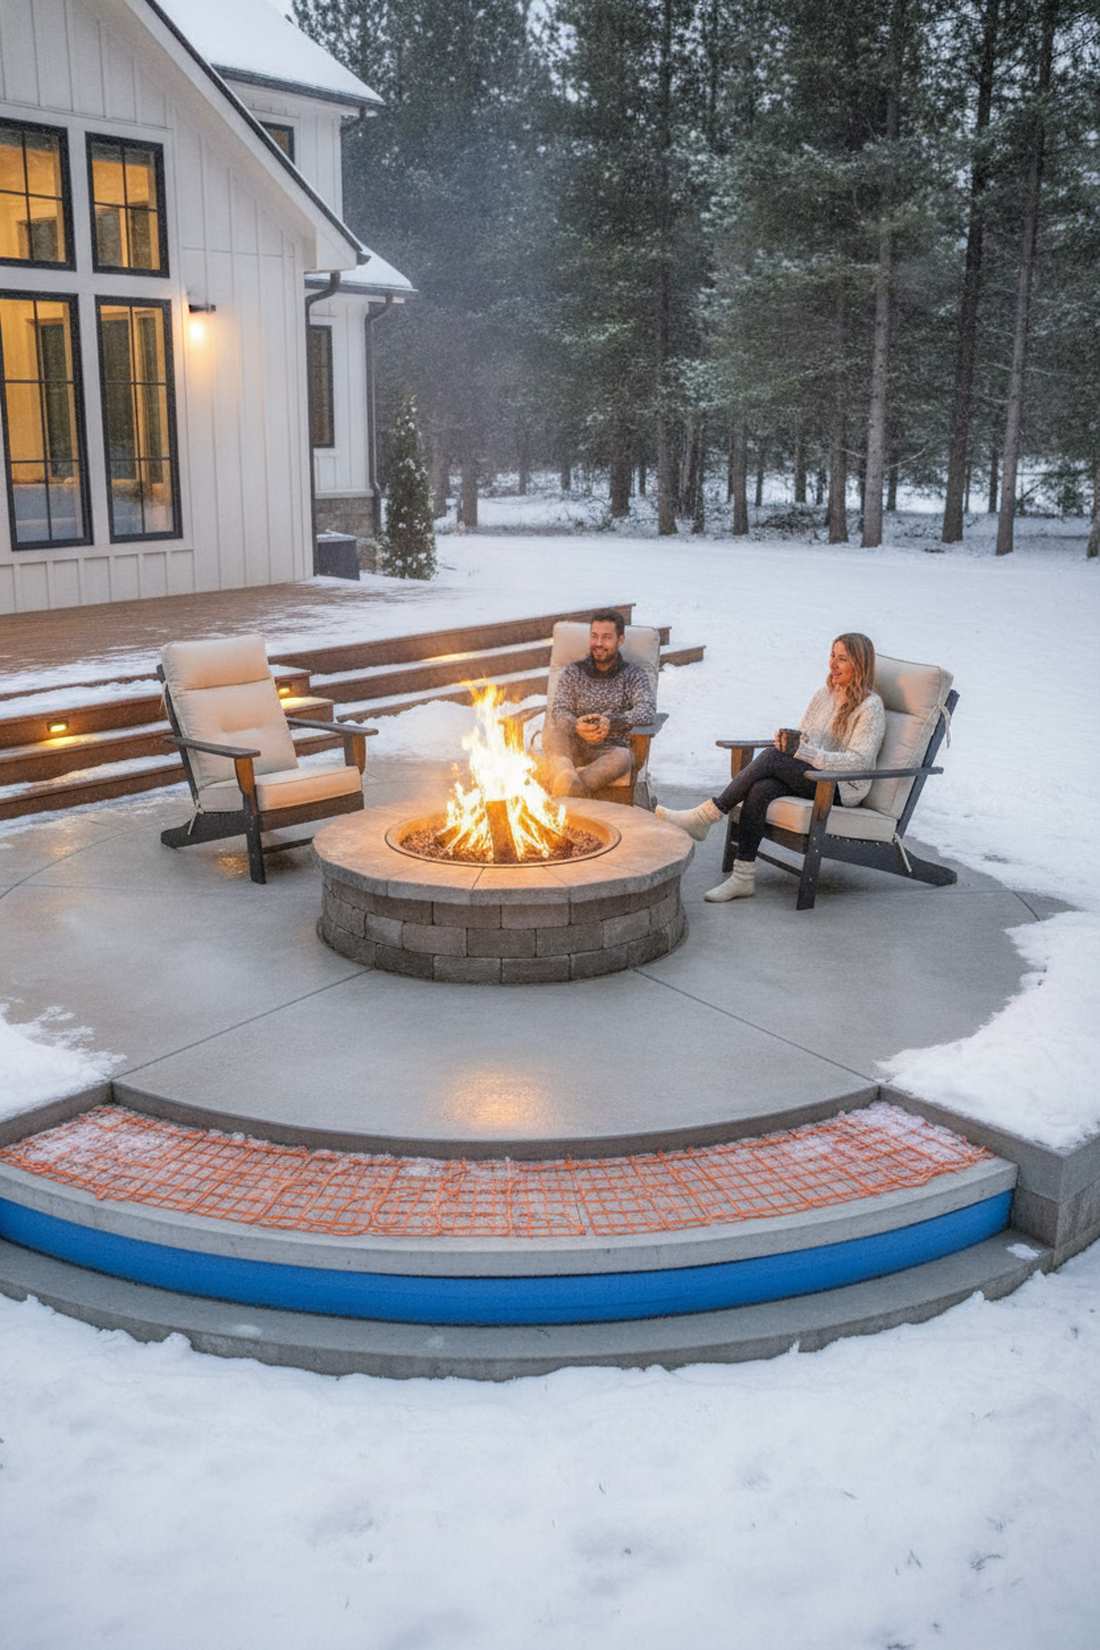
Experiencing this feels like stepping onto warm sand on a summer evening, even in the dead of winter. Installing sub-surface radiant patio heating coils beneath your fire pit zone is the absolute peak of invisible luxury.
Preheating the concrete directly under your feet gives a designer-level finish that permanently cures the problem of cold toes around a hot fire. By tackling the thermodynamics from both the ground up and the fire down, you create an impenetrable bubble of absolute thermal comfort.
Embedding these coils during a concrete pour adds roughly $600 to the job. It’s the ultimate weapon against winter.
- Key Materials: Electric radiant heat mats, concrete/paver base layer
- Vibe / Style: Invisible absolute luxury
- Difficulty: Advanced hardscape integration
- Budget Breakdown: Heat Mats: $400 | Wiring/Controls: $200.
- Creator’s Tip: Always install a heavy layer of rigid foam insulation strictly beneath the heating mats so the energy pushes up into the stone, not down into the dirt.
- Smart Sourcing: outdoor-rated electric radiant floor heating mats or waterproof smart thermostat controller kits.
38. Thermal Blanket Storage Integration
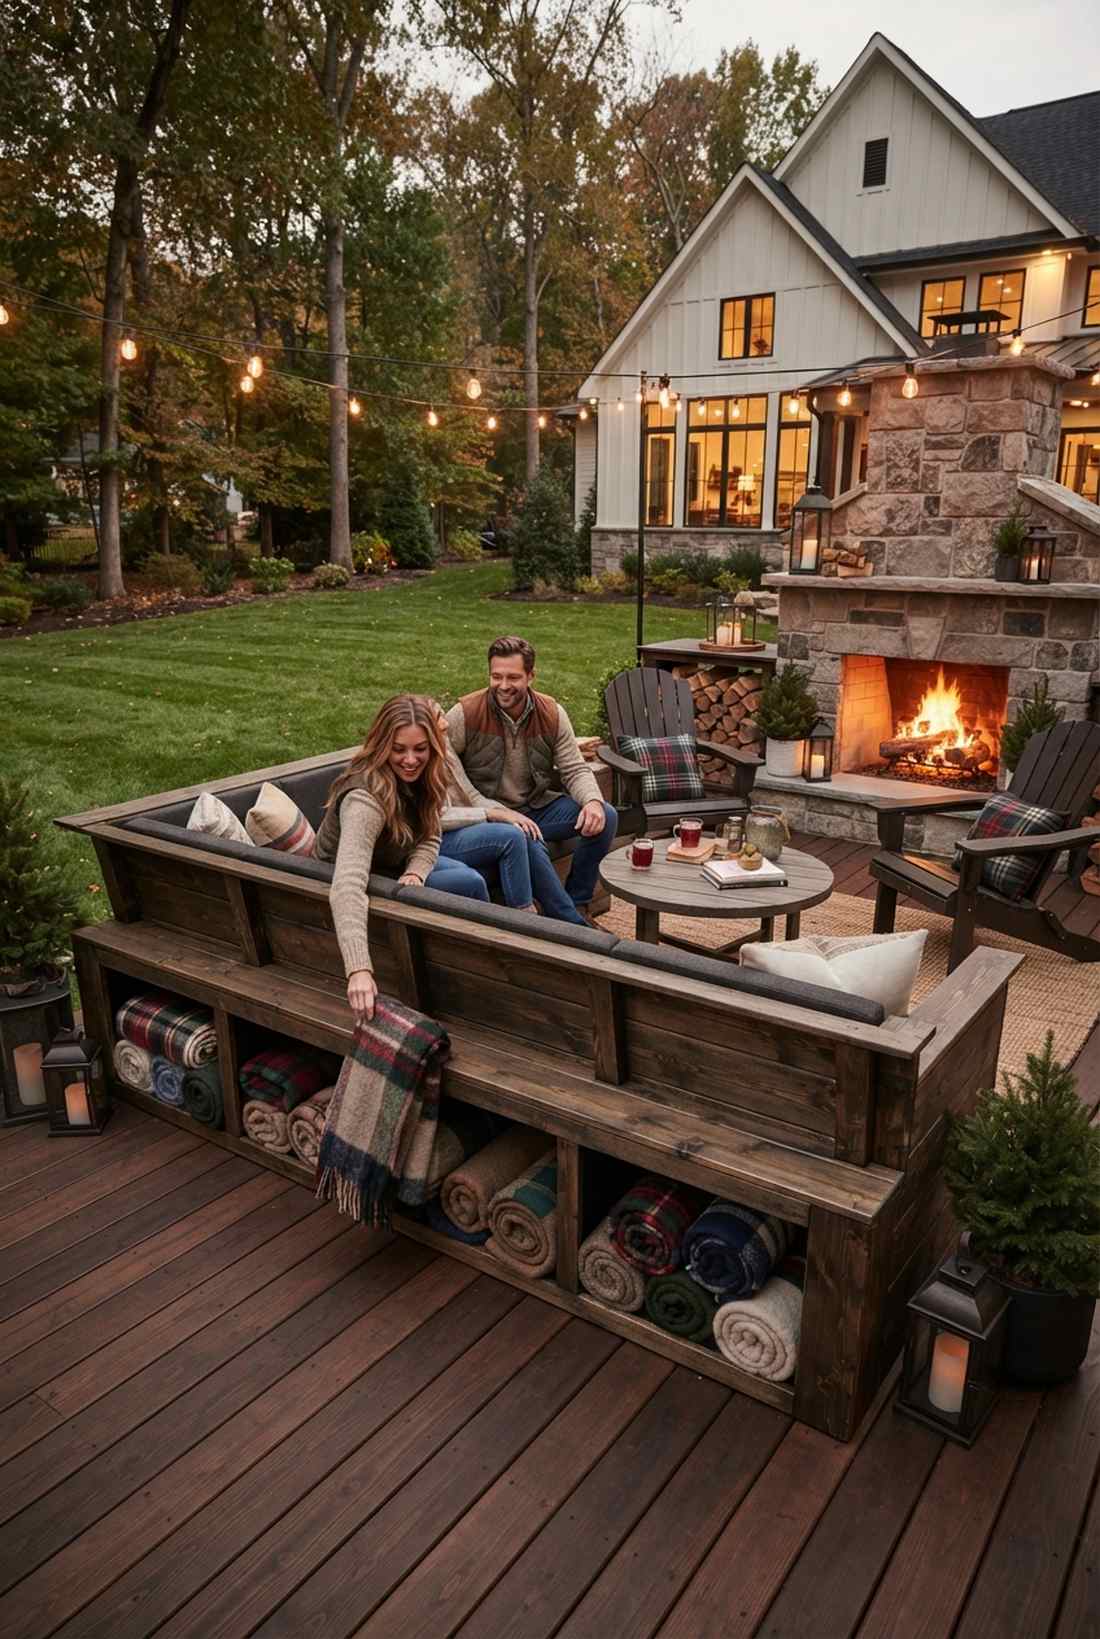
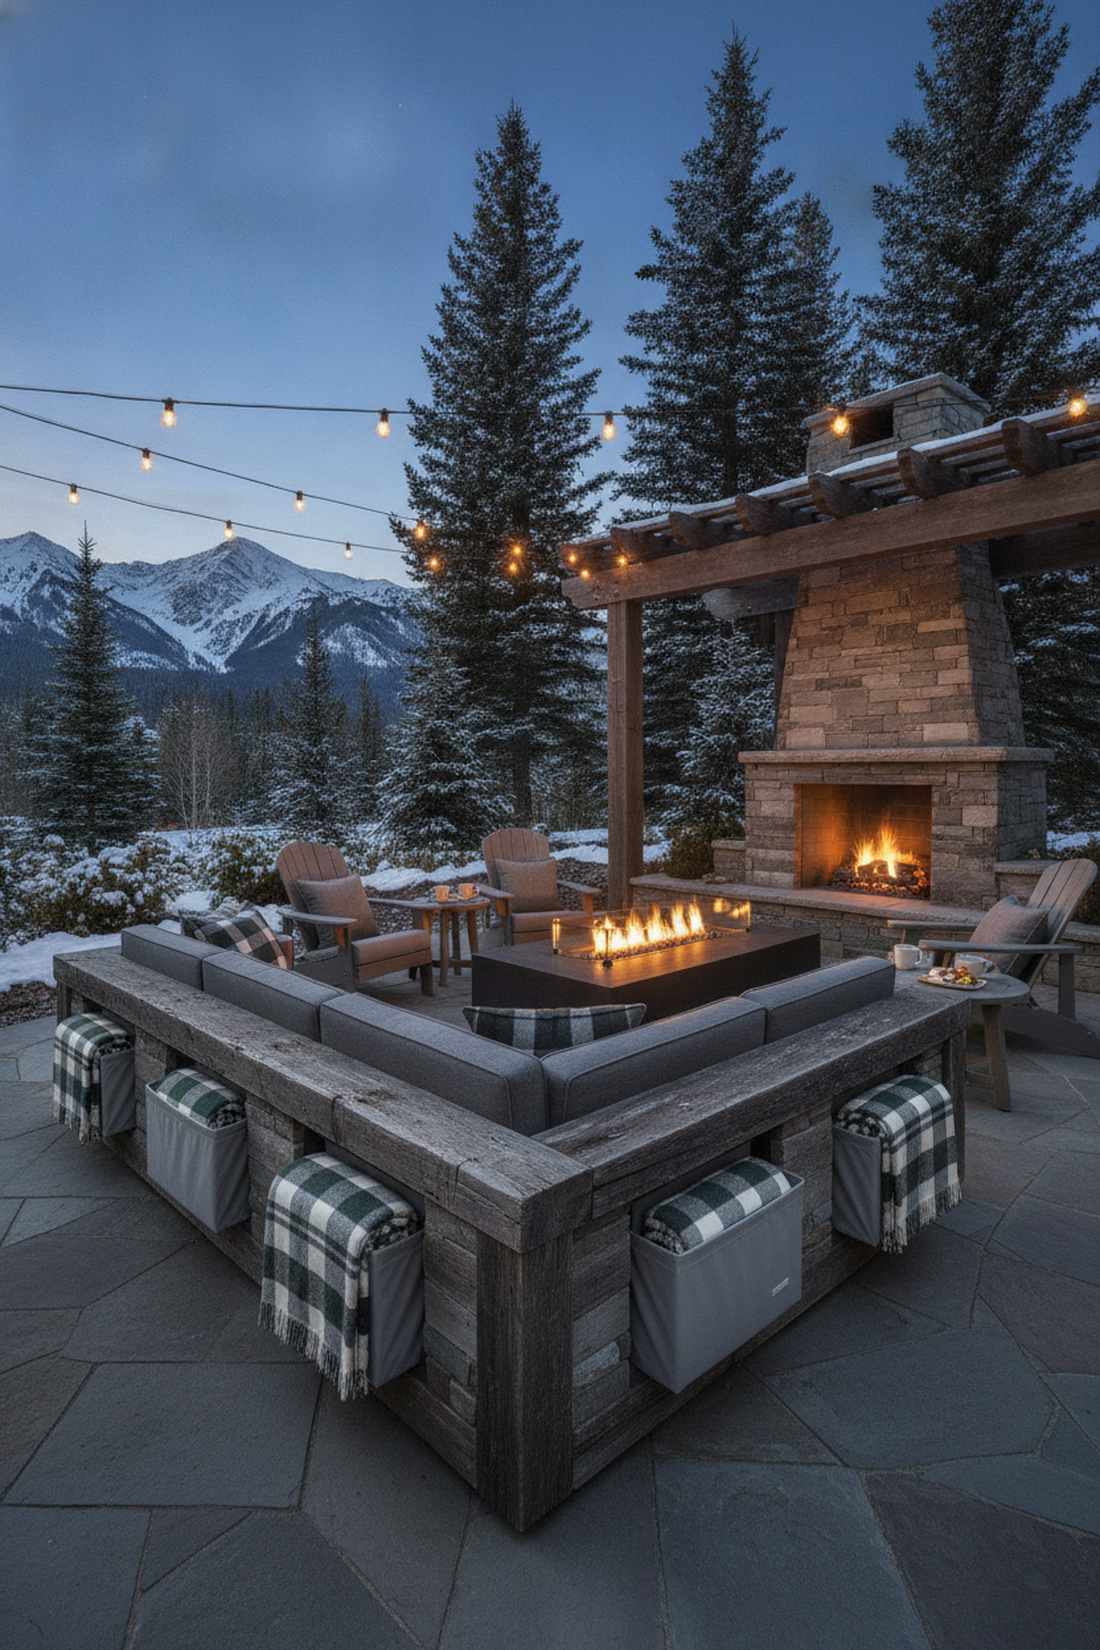
Radiating ultimate hospitality, this setup feels like a high-end ski lodge anticipating your every need. Building weatherproof blanket cubbies directly into the seating is the smartest, cheapest way to vastly extend your outdoor hosting hours.
Having dedicated, dry spots for thick wool throws delivers a surprisingly premium look by proving you planned the space for maximum comfort. Serious outdoor seating with fireplace setups always utilize hidden textile storage to give guests that extra layer of personalized warmth right when the temperature dips.
You can execute this genius touch for under $100. Save this to your essential hosting hacks board!
- Key Materials: Waterproof marine-grade cubby inserts, washable heavy wool throws
- Vibe / Style: Thoughtful ski lodge hospitality
- Difficulty: Easy insertion
- Budget Breakdown: Cubby Liners: $40 | Blankets (x4): $60.
- Creator’s Tip: Throw a few silica gel moisture absorber packets into the bottom of the cubby to completely prevent the blankets from smelling musty over the winter.
- Smart Sourcing: waterproof marine-grade storage cubby liners or bulk pack heavy-duty outdoor thermal blankets.
Conclusion
Strategic outdoor seating fire pit configurations balance thermal comfort, safety clearances, and social dynamics to create genuinely high-end gathering spaces. The 38 layouts detailed above prove that smart sourcing—like investing in premium UV-coated materials and commercial-grade starter kits—delivers a luxury aesthetic without the custom-built price tag. Successful implementations maintain strict clearances while utilizing hardscape and modular furniture to trap warmth efficiently. Whether executing a brutalist sunken pit or a sleek contemporary linear barrier, upgrading your layout transforms basic backyard fires into premium resort-level experiences. By following these budget breakdowns and utilizing high-CPC buyer strategies to source the right gear, your outdoor space will completely dominate the neighborhood.
Frequently Asked Questions
What is the optimal distance between outdoor seating and a fire pit for thermal comfort?
For a premium experience, position seating 2-3 feet from gas fire pits and 3+ feet from wood-burning pits to balance warmth with safety. The thermal comfort zone extends 4-6 feet, so utilizing modular outdoor sofa kits allows you to easily adjust distances based on the guest’s heat preference. Maintain 18-24 inches of knee clearance to ensure high-end aesthetic flow and safe ingress. Investing in high-BTU stainless burner inserts dramatically improves how far that thermal comfort actually reaches.
How many people can comfortably sit around a circular fire pit?
To achieve a custom-built look without crowding, allocate exactly 24 inches of seat frontage per person around the ring. A 48-inch pit surrounded by a 14-foot seating circle easily accommodates 8-10 people. If you buy bulk pack Adirondack chairs, space them evenly to maintain an expensive, symmetrical aesthetic. Always map out entry gaps using pre-cut masonry blocks so the circle feels inviting rather than like a trapped cage.
Do linear or circular fire pit configurations provide better heat distribution?
Circular fire pit layouts distribute radiant heat perfectly across 360 degrees, which is why top-rated smokeless fire pit kits almost exclusively use round designs for maximum efficiency. Conversely, linear setups concentrate heat along a specific boundary, making them the superior choice for narrow pool decks or tight property lines. While circular gives the most even heat, investing in premium linear drop-in burner pans ensures a straight layout still throws massive, consistent warmth.
Can outdoor fireplaces replace fire pits for seating area warmth?
Yes, but an outdoor seating with fireplace setup projects radiant heat directionally rather than in a 360-degree circle. This makes premium pre-built outdoor fireplace kits ideal for covered patios, pergolas, and theater-style seating where heat is reflected off a back wall. To get the best of both worlds, budget-friendly hardscape designs often build masonry bench wings off the sides of the fireplace to mimic the communal gathering vibe of a central fire pit.
What clearances are required behind fire pit seating for walkways?
To keep the space feeling like a luxury resort rather than a cramped campsite, reserve 24-36 inches of hardscape clearance strictly behind primary seating zones. High-traffic areas require a minimum 36-inch walkway so two people can pass without bumping expensive outdoor furniture. When using permanent retaining wall block kits for built-in benches, map your walkways first—guests cannot adjust heavy masonry if the layout is too tight.
How do wind conditions affect fire pit seating configurations?
Wind destroys thermal comfort by blowing heat away and pushing smoke into eyes. To counter this, position your heaviest UV-coated modular sectionals perpendicular to prevailing winds. The absolute best way to protect your aesthetic and warmth is by sourcing tempered glass wind guard starter kits; they stop wind instantly without blocking the visual glow. If building a permanent layout, utilizing sunken designs completely insulates the flames from harsh horizontal breezes.