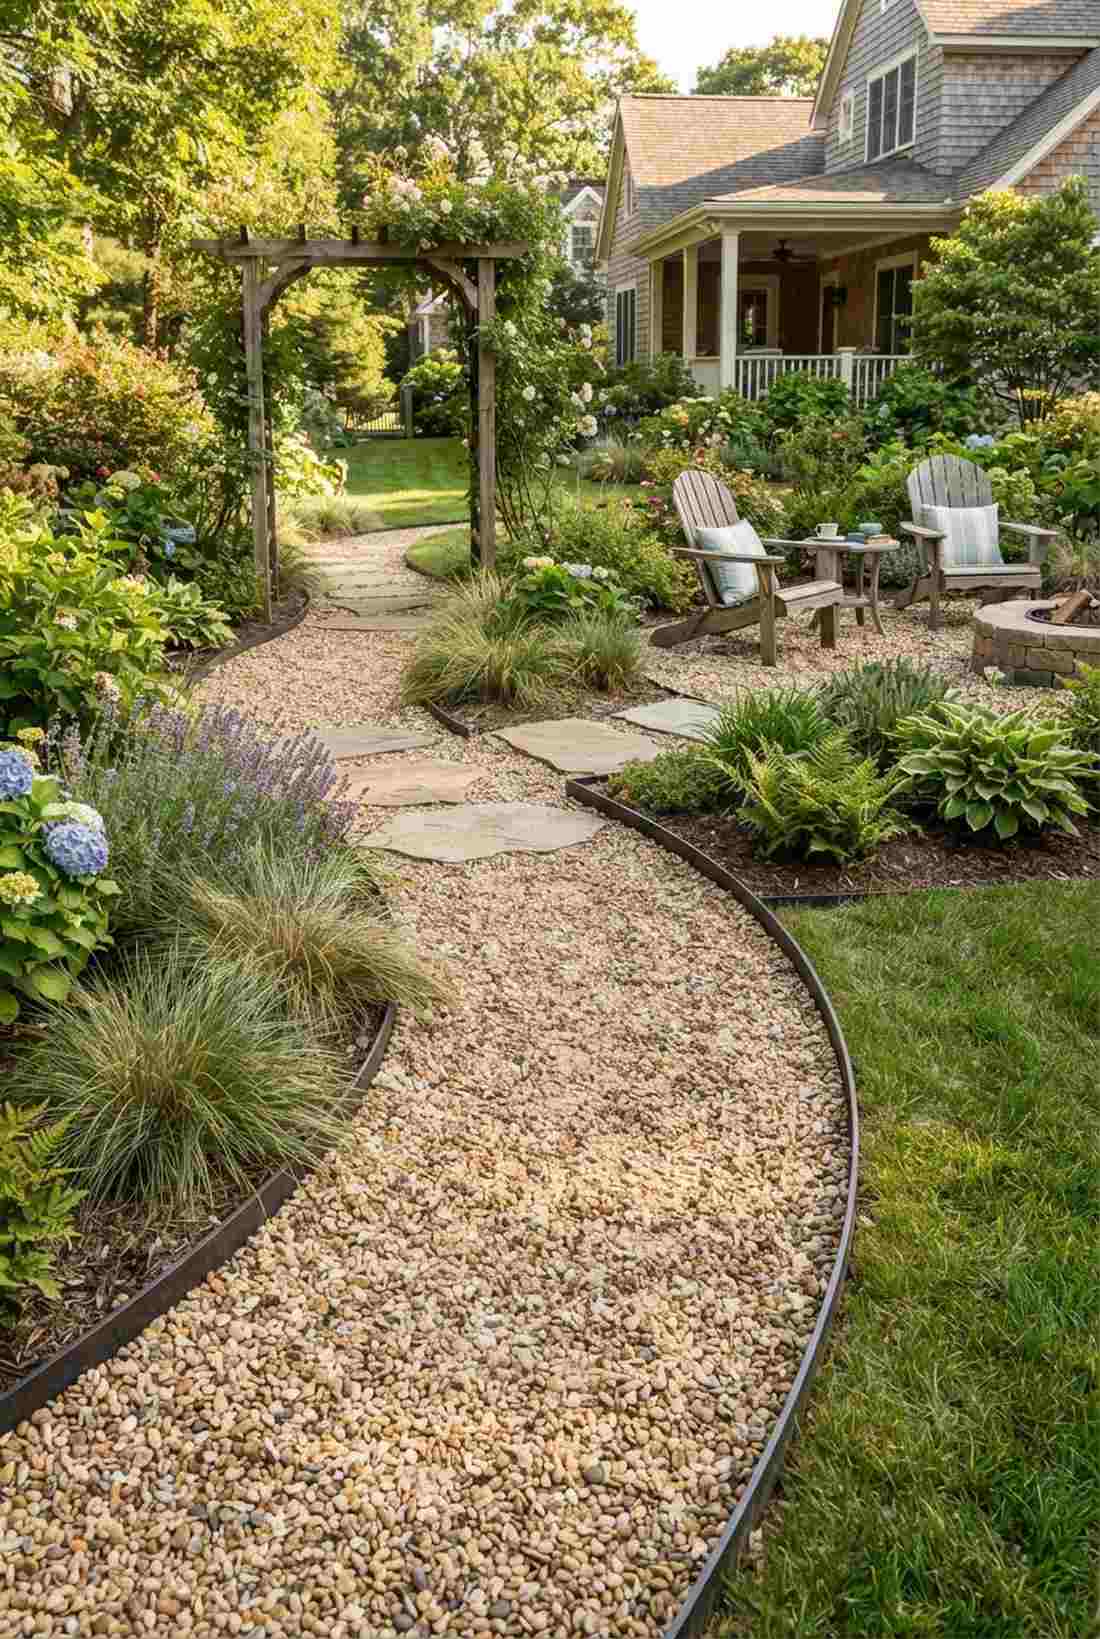
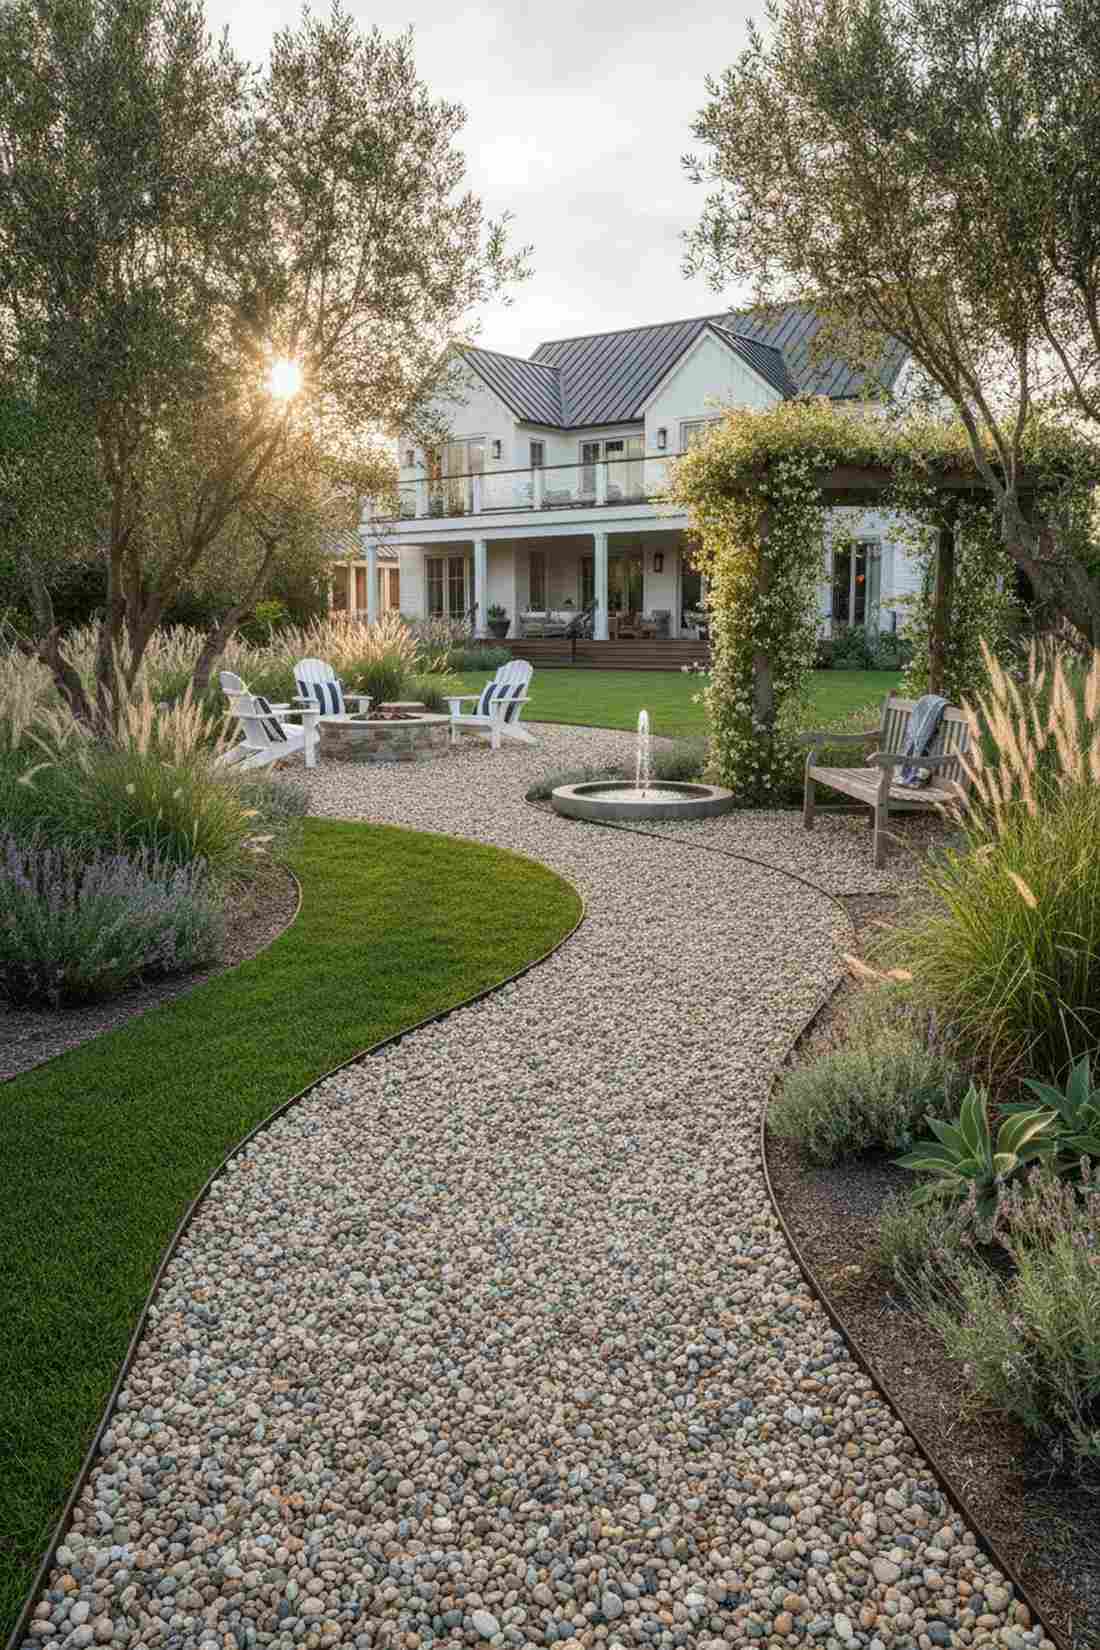
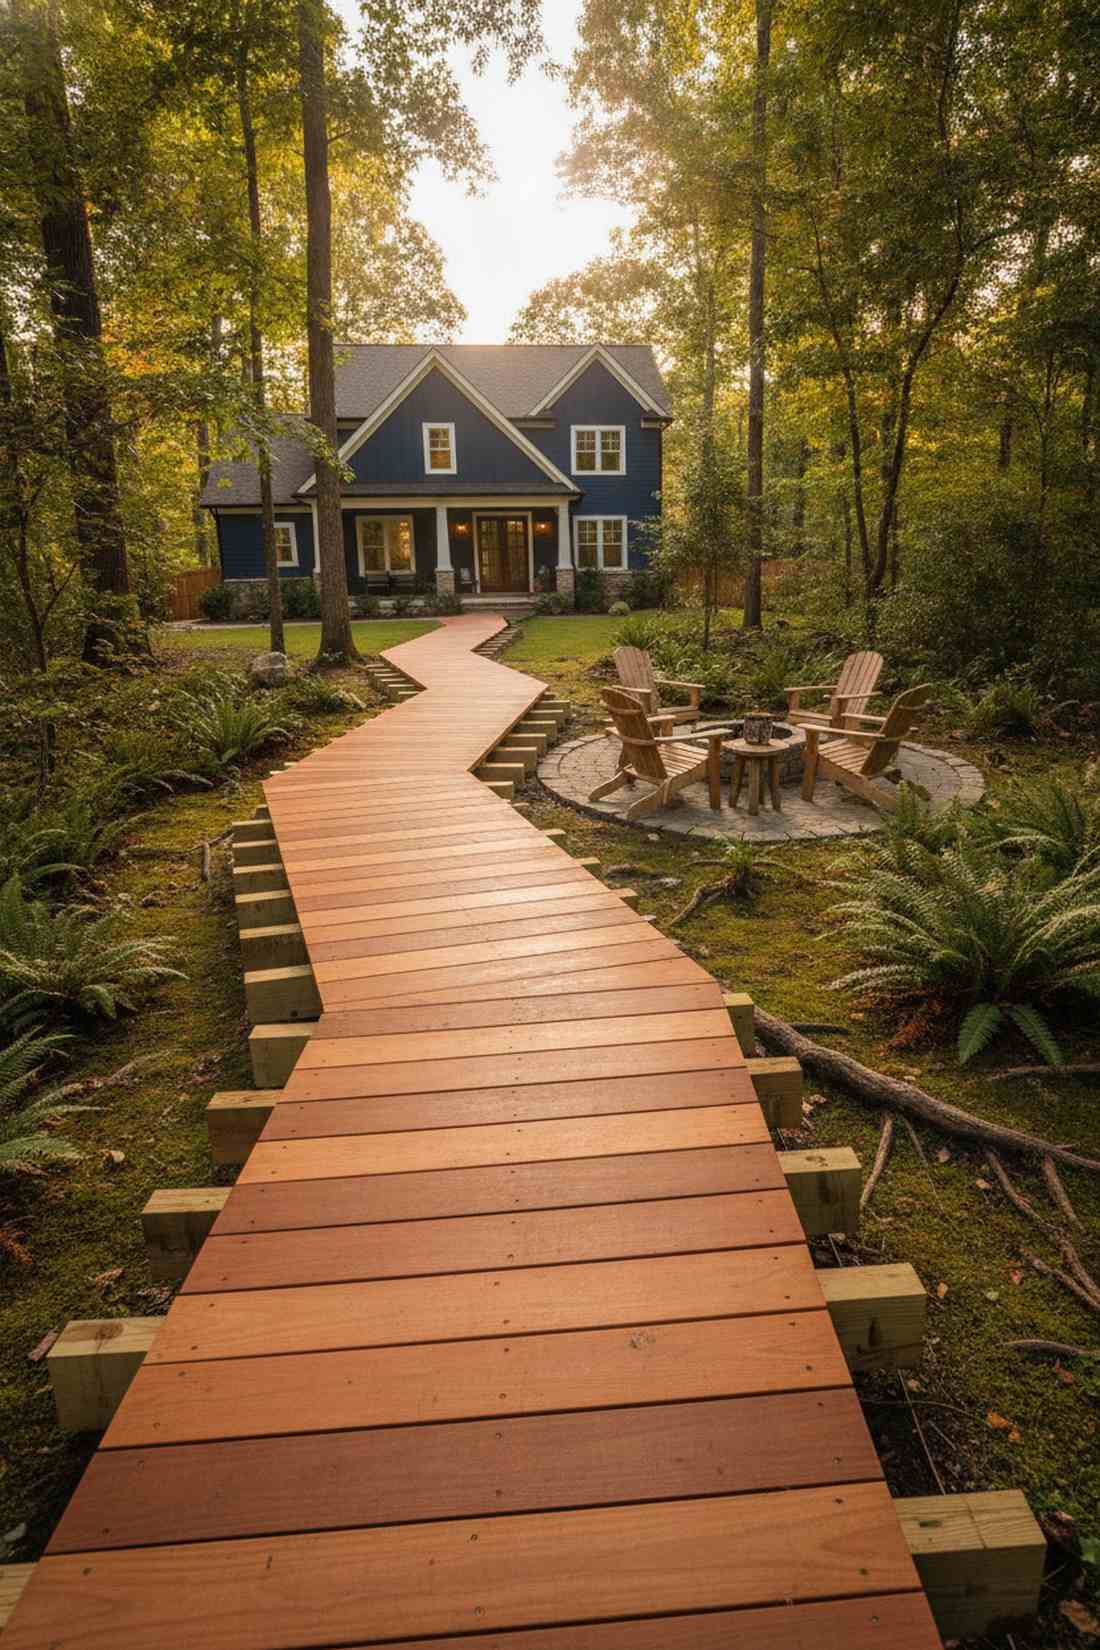
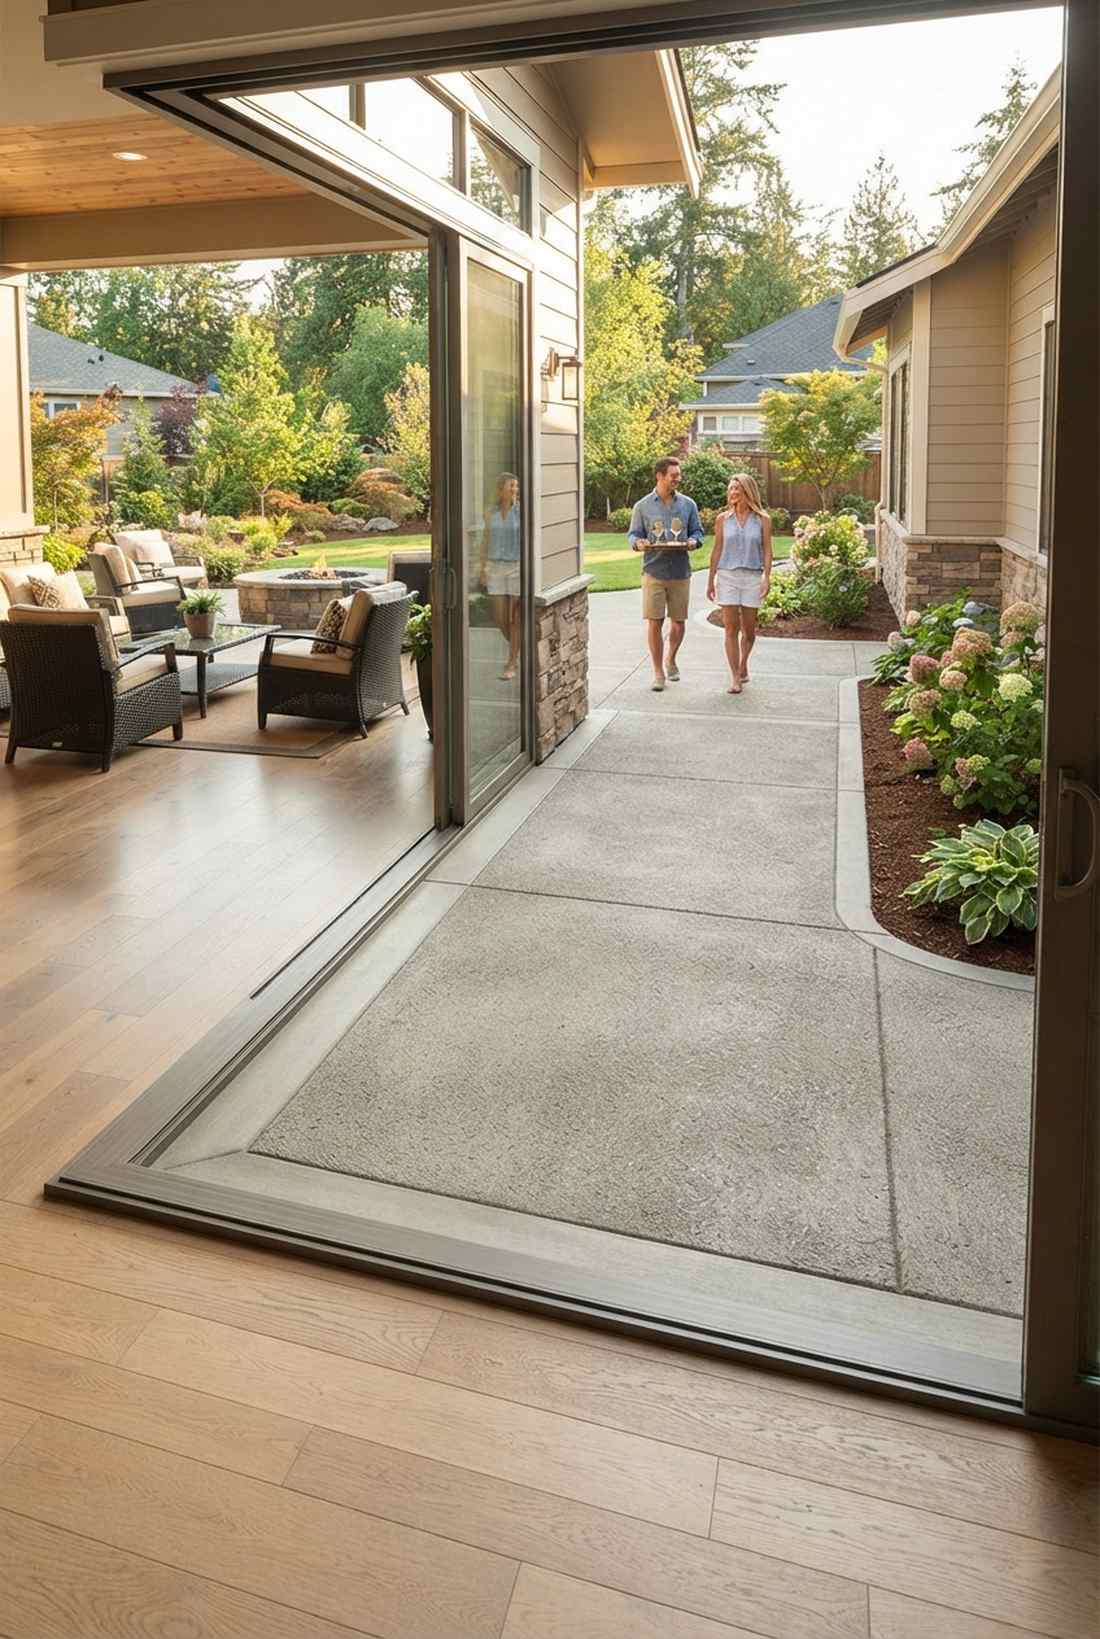
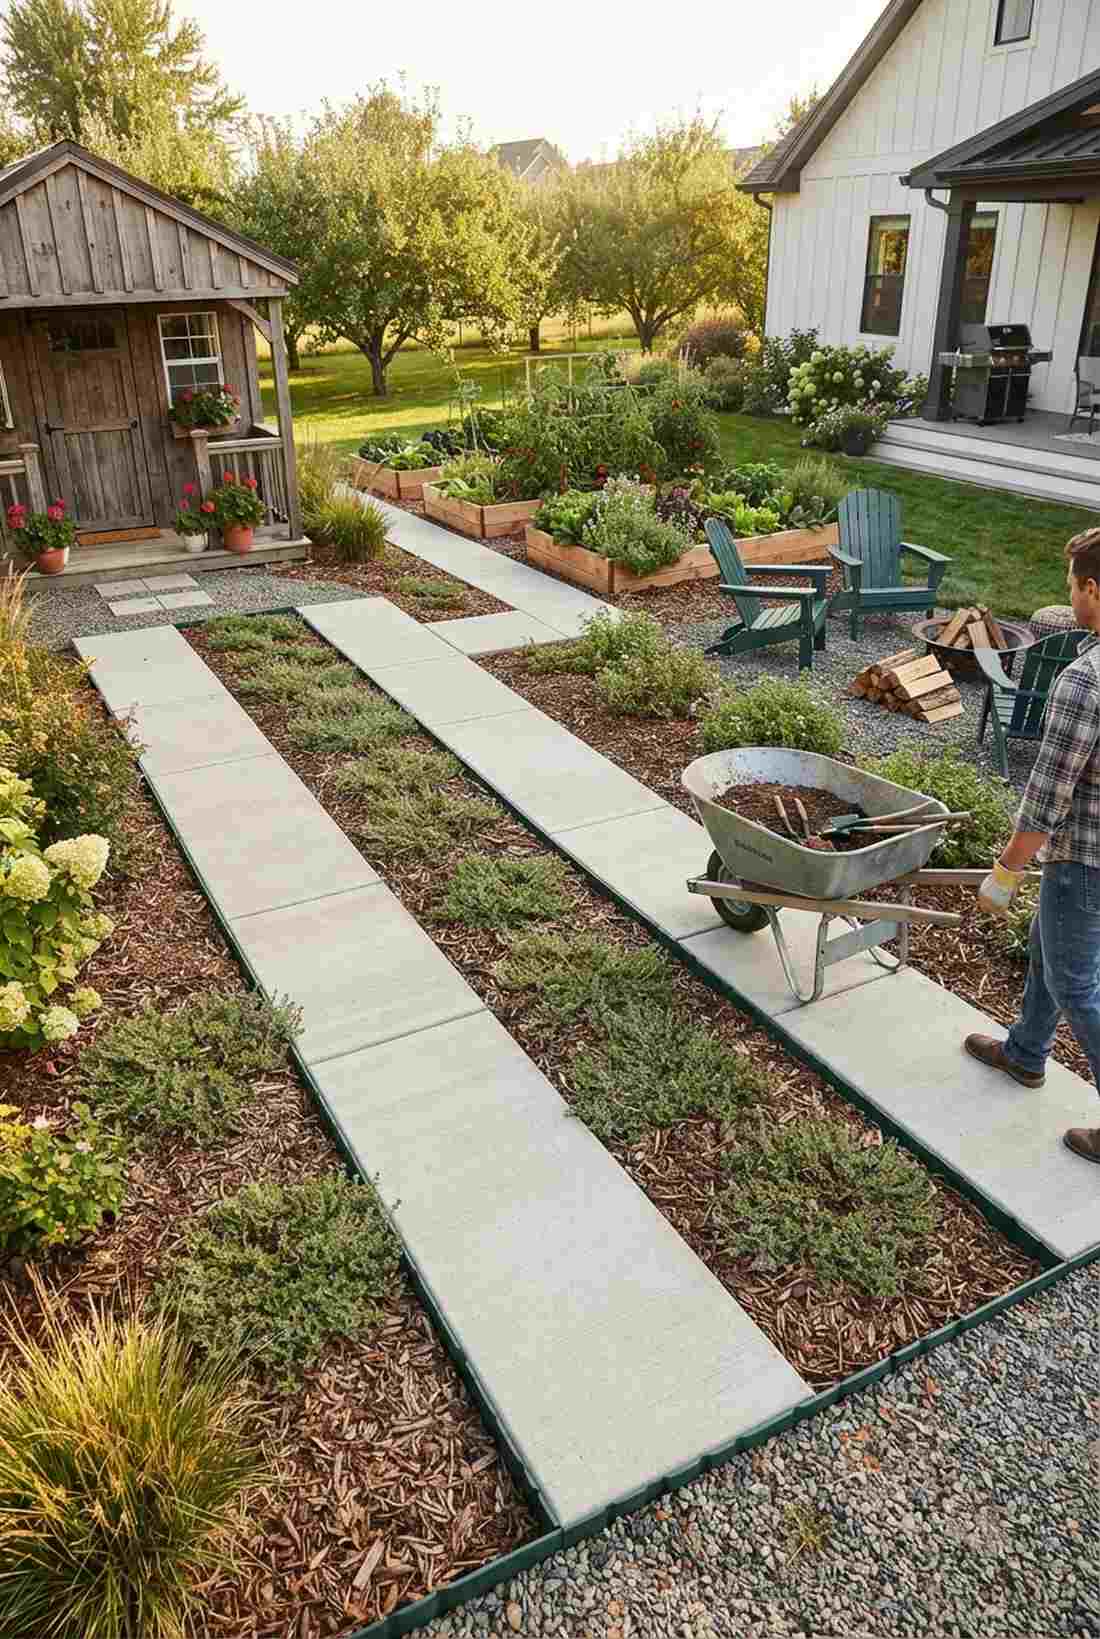
Expert-designed garden pathways instantly elevate a chaotic lawn into a structured sanctuary. Smart material choices prevent sinking and save thousands in professional hardscaping costs over time. Upgrade your exterior layout with these exact blueprints.
Design SnapshotKey Principles
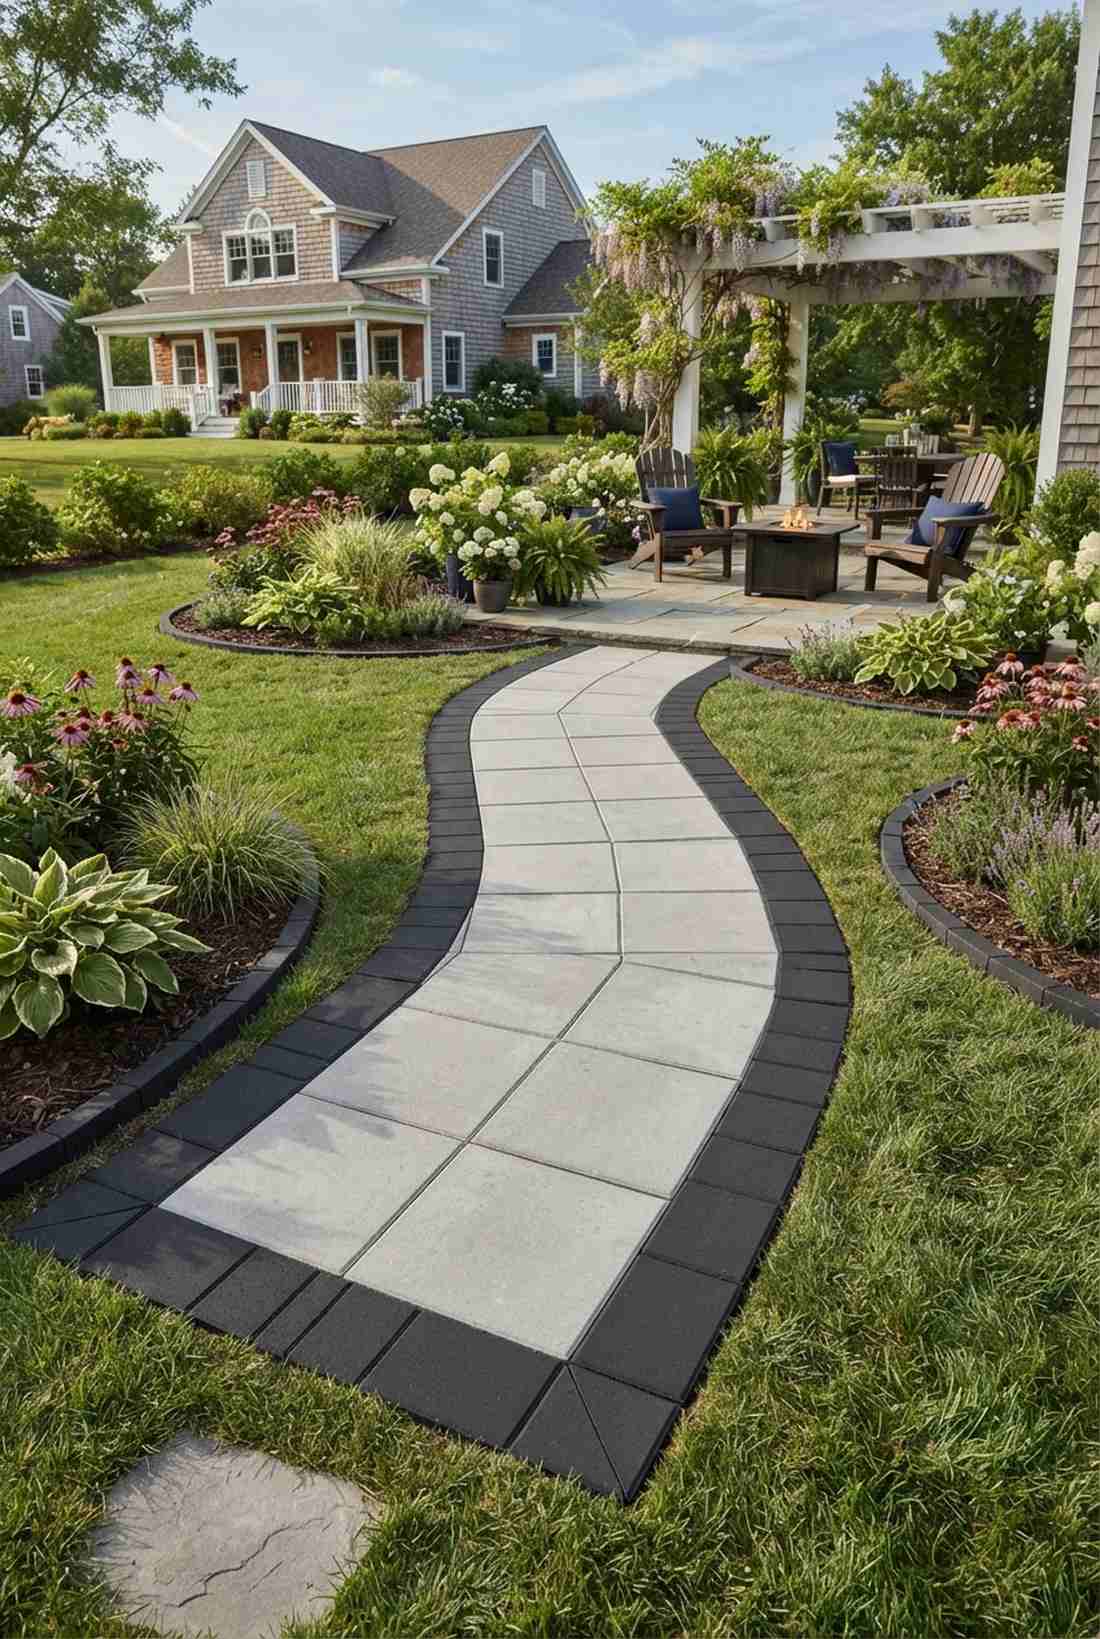
- Width Standards: Primary paths 48–60 inches; secondary paths 24–36 inches; utility access 18–24 inches minimum
- Base Preparation: Four to six inches of compacted aggregate base prevents settling and manages subsurface drainage
- Edging Integrity: Rigid aluminum, steel, or concrete restraints lock unit pavers and prevent lateral creep over time
- Slope Management: Maintain 1–2% cross-slope away from structures; avoid gradients steeper than 1:12 for accessibility
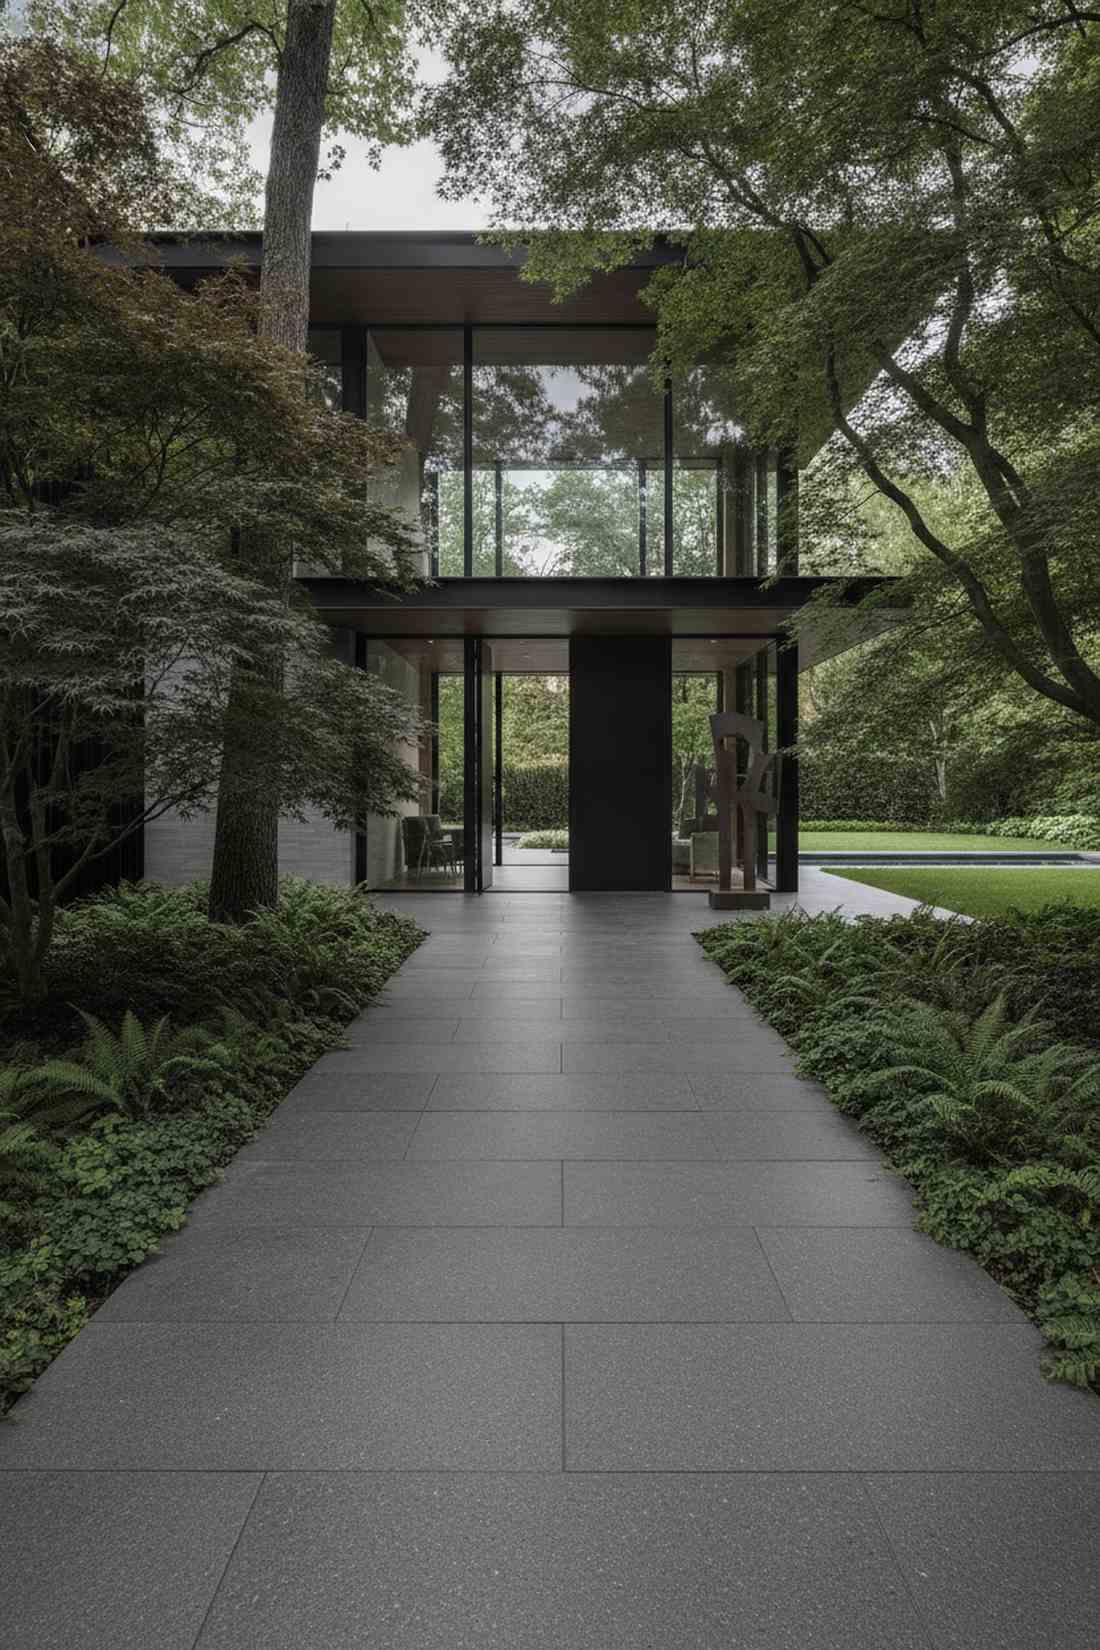
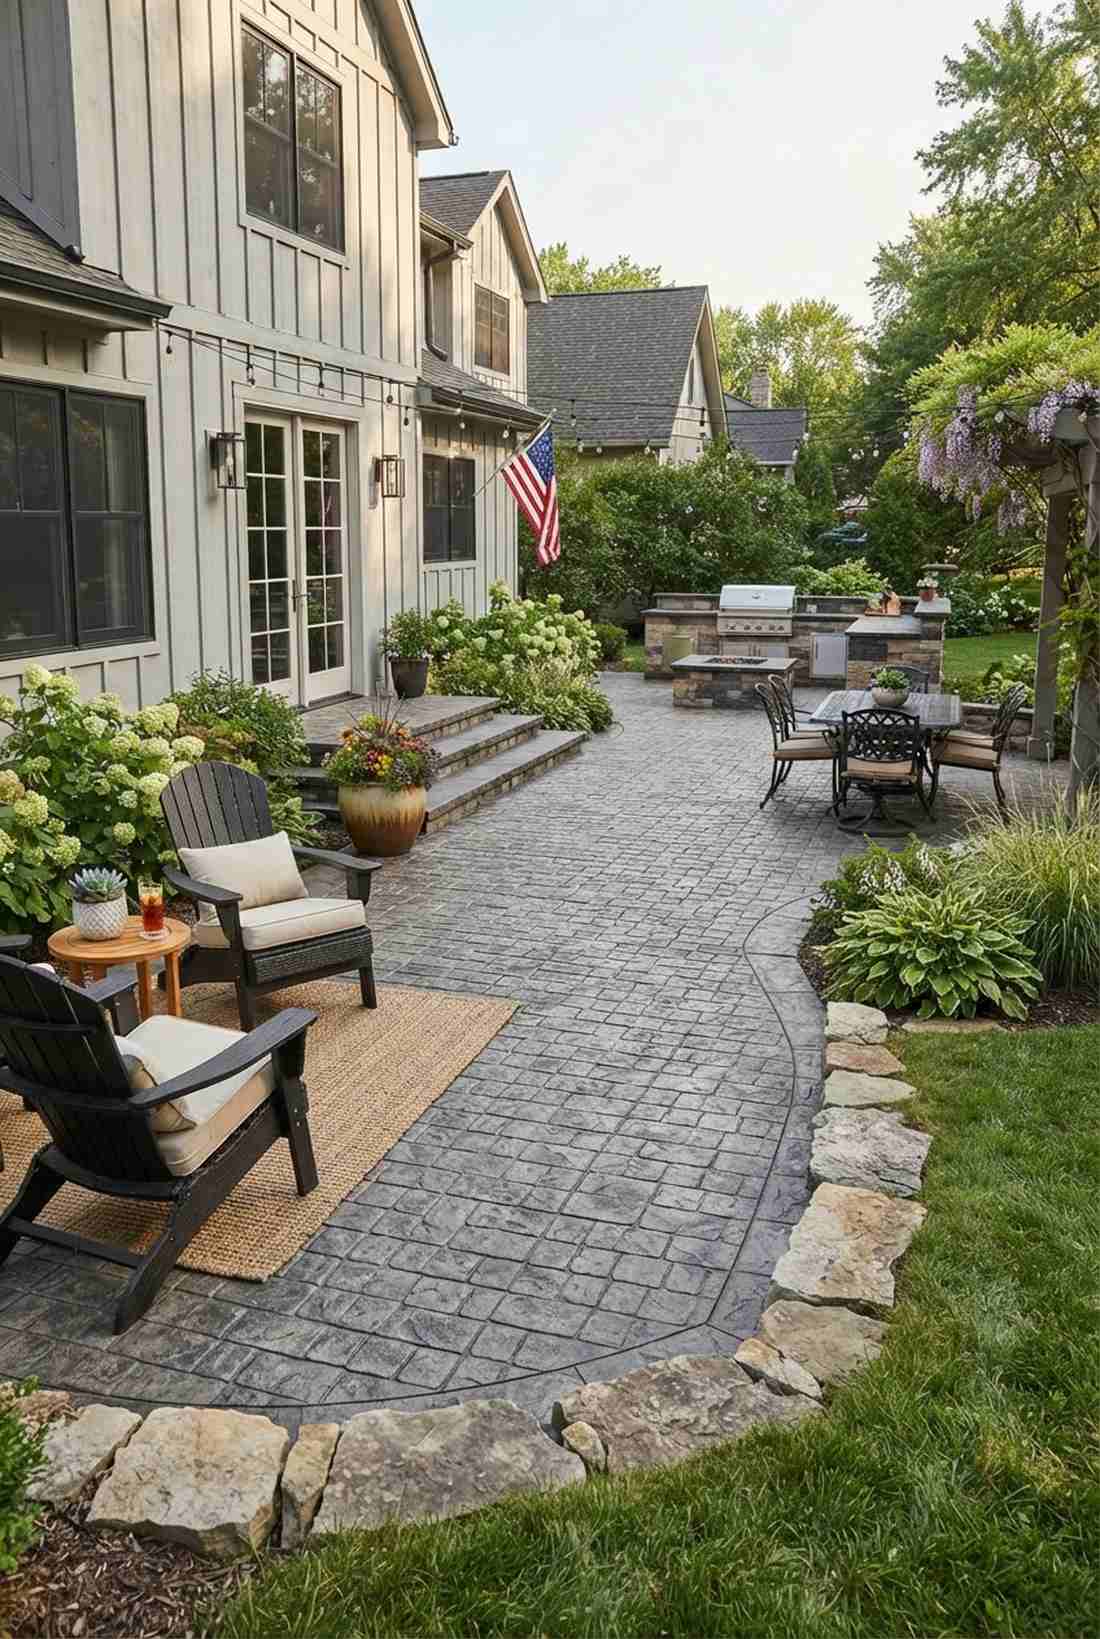
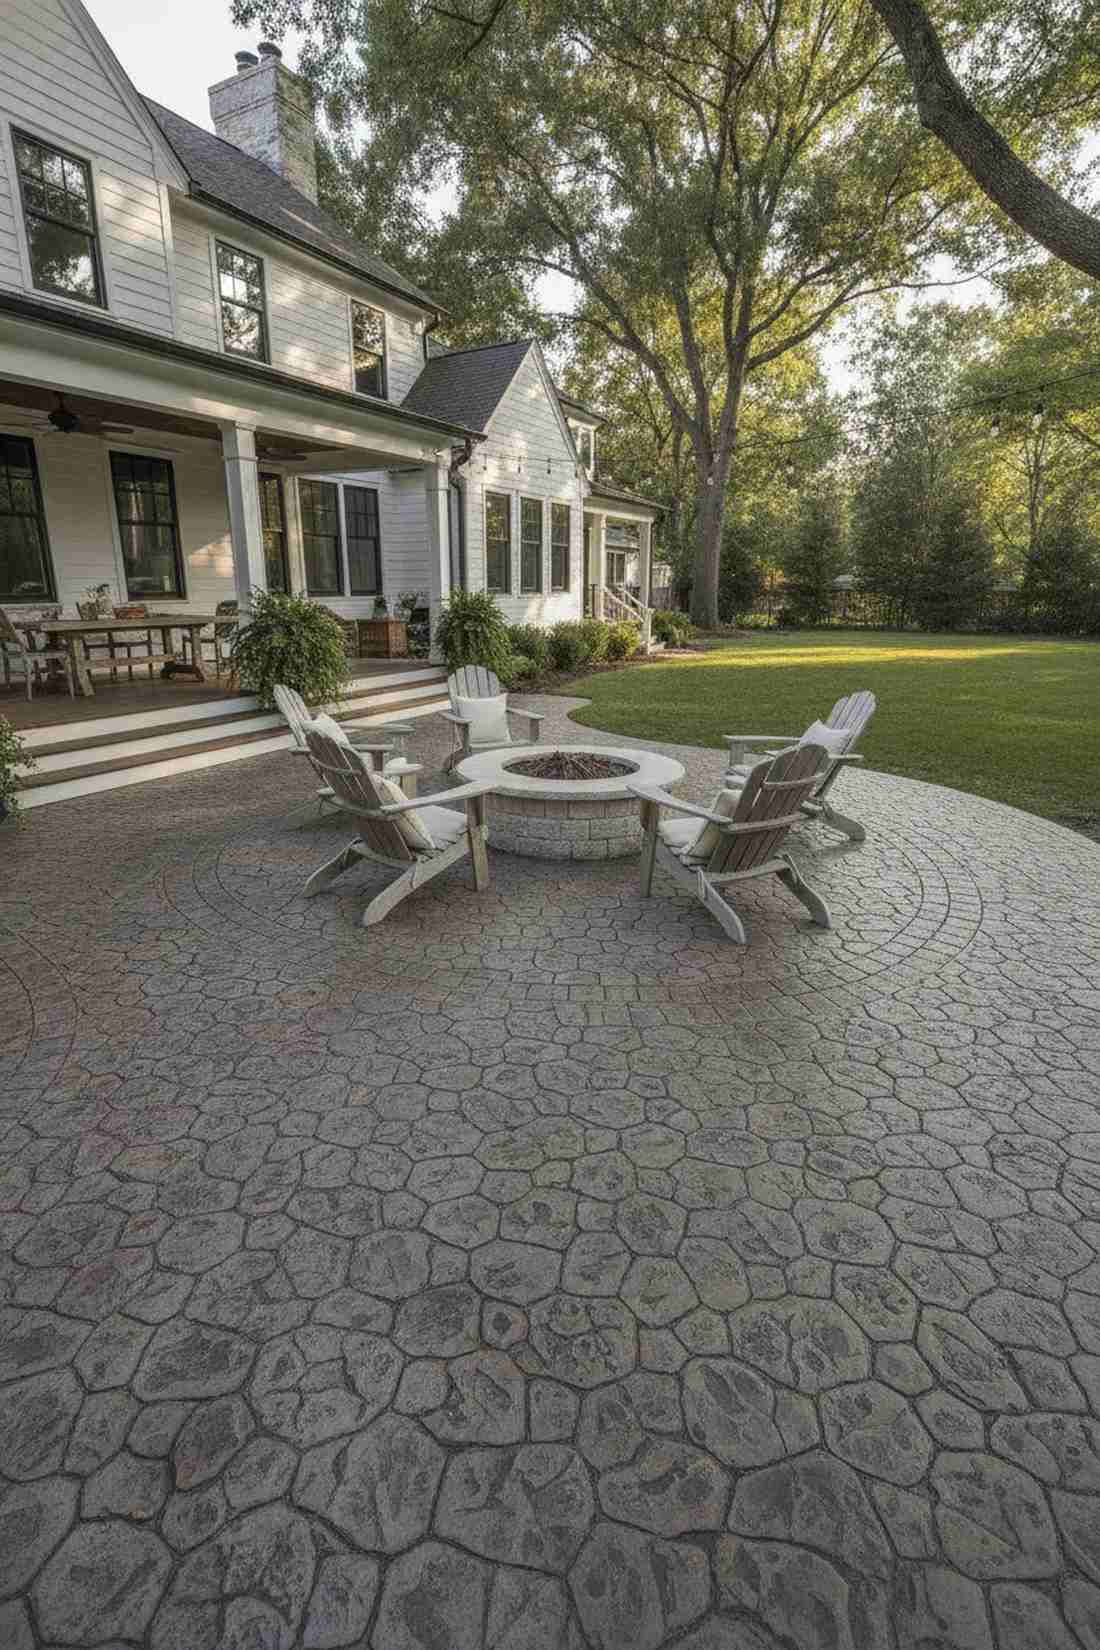
Traditional Paver Pathways
Concrete and clay unit pavers remain the workhorse of residential landscape design because they deliver predictable dimensions, consistent color, and modular flexibility. Designers specify them for high-traffic entries, pool decks, and driveway transitions where structural integrity and clean lines matter most.
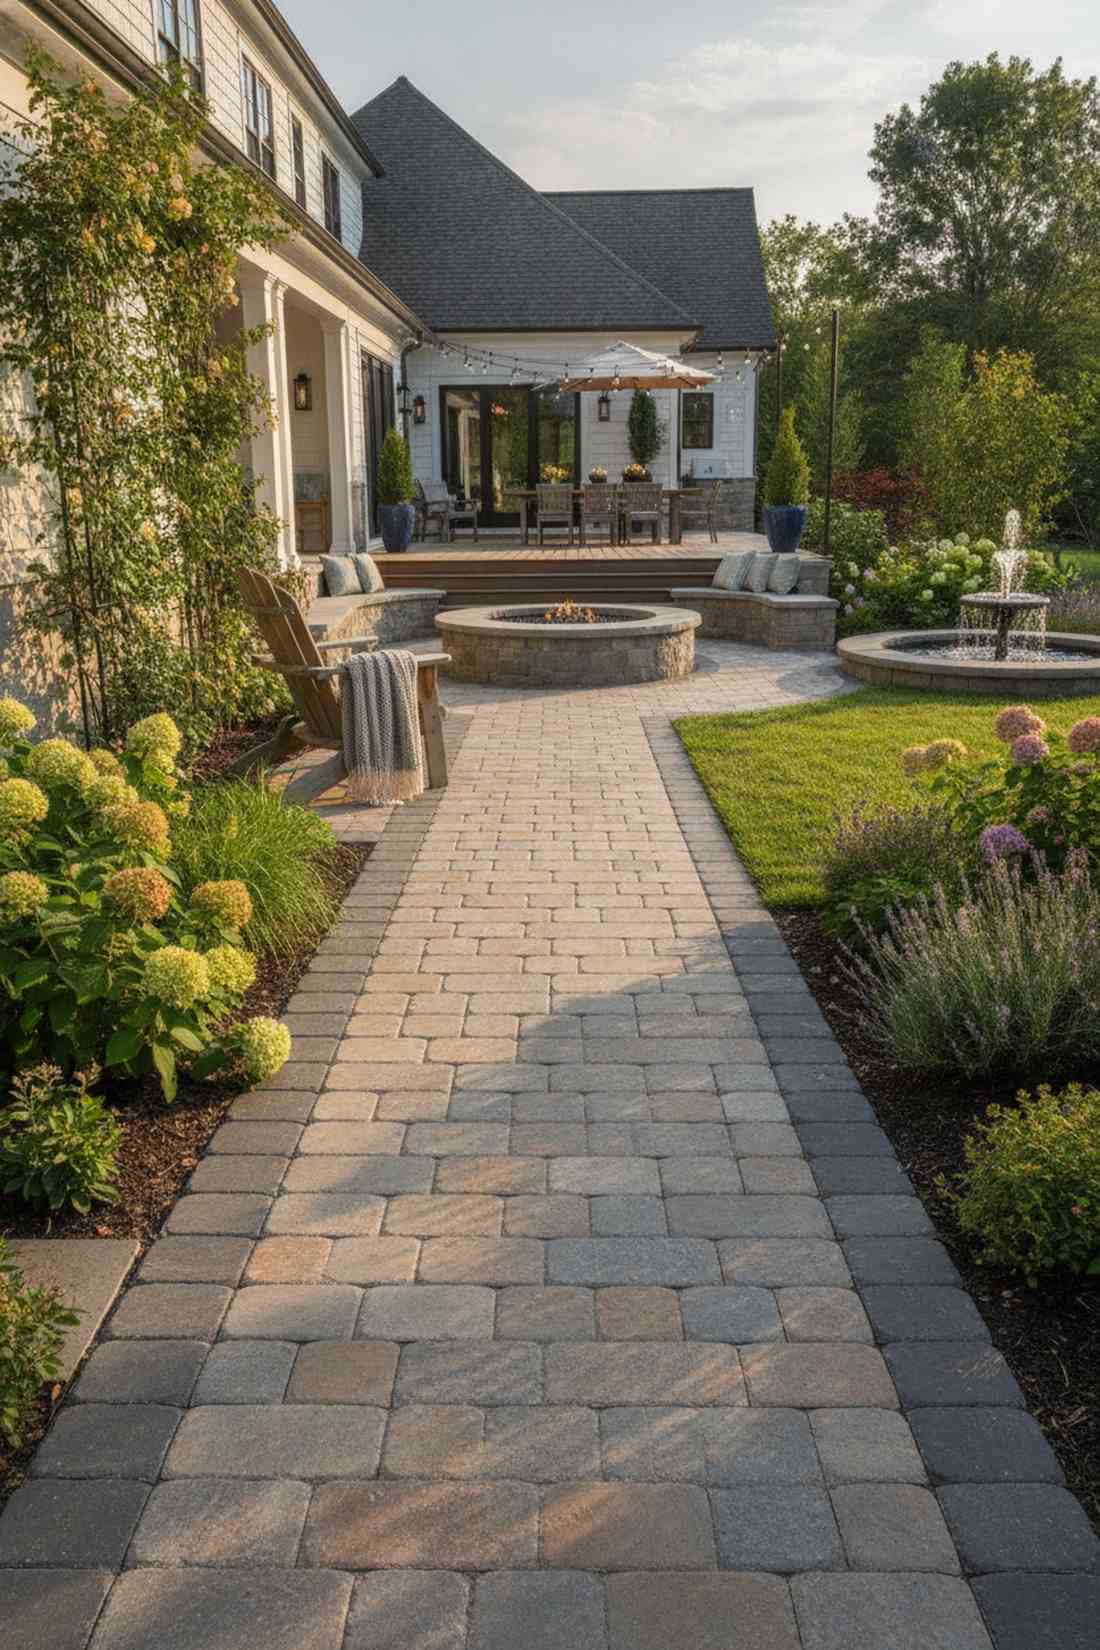
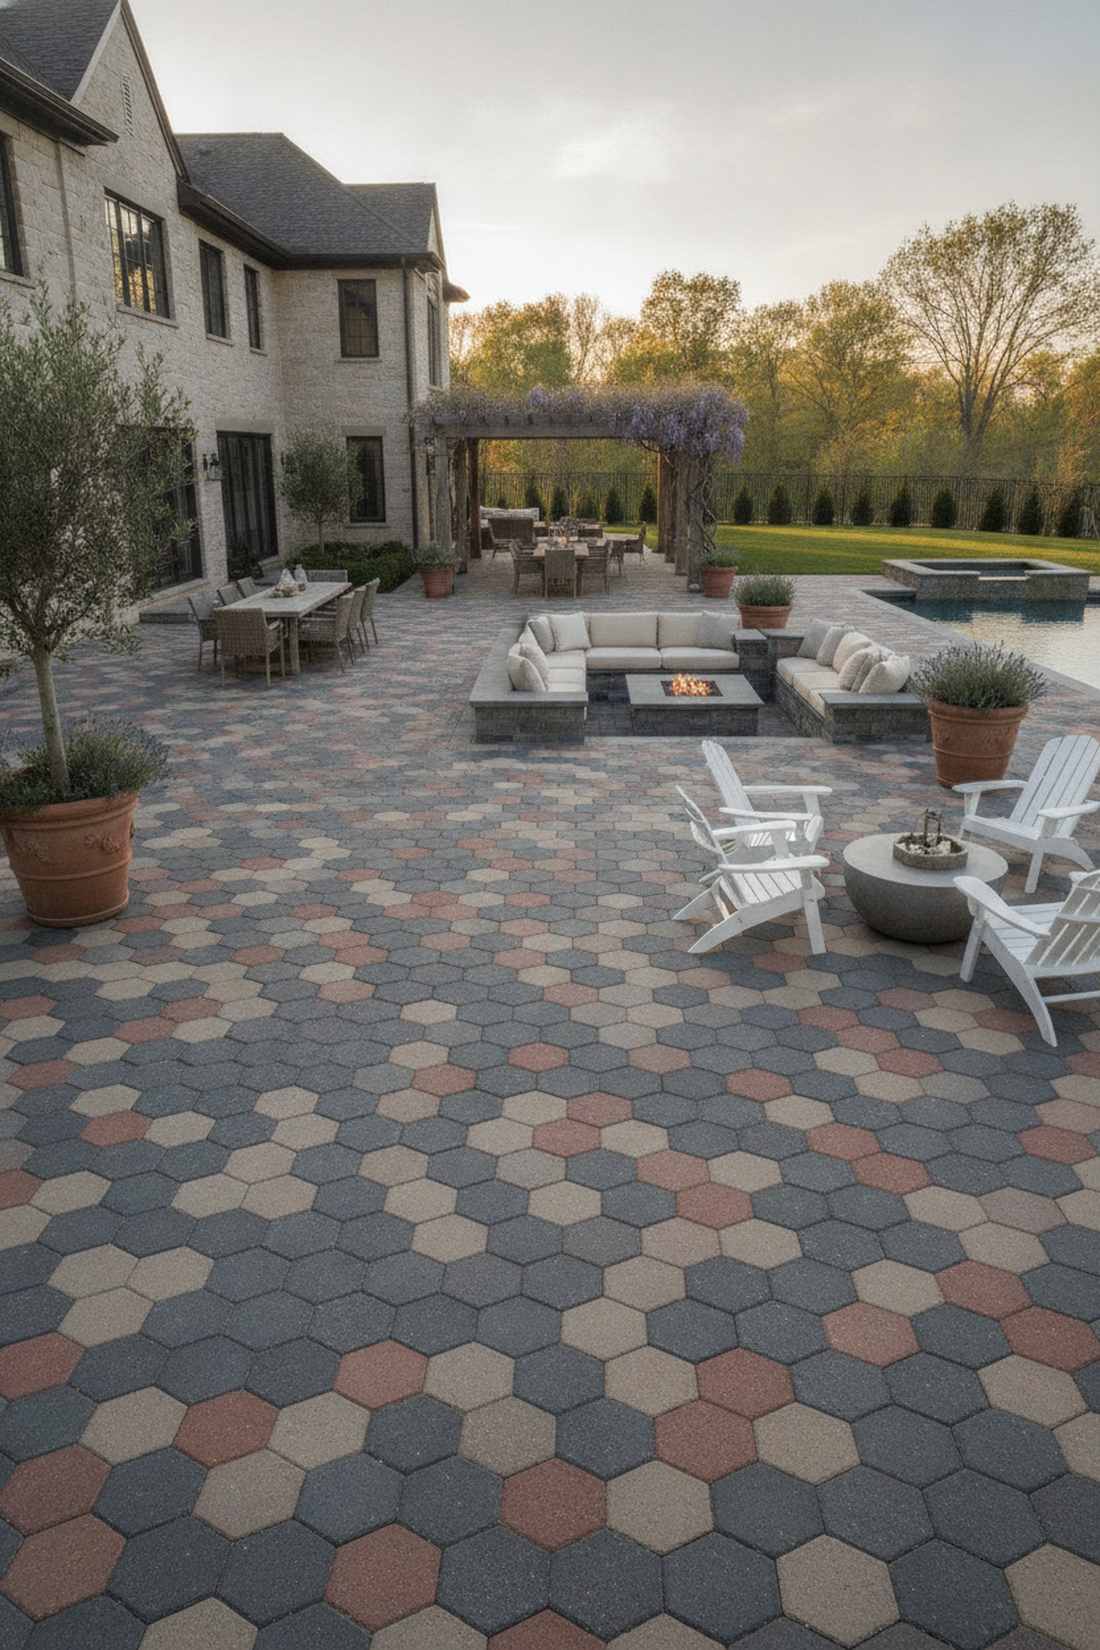
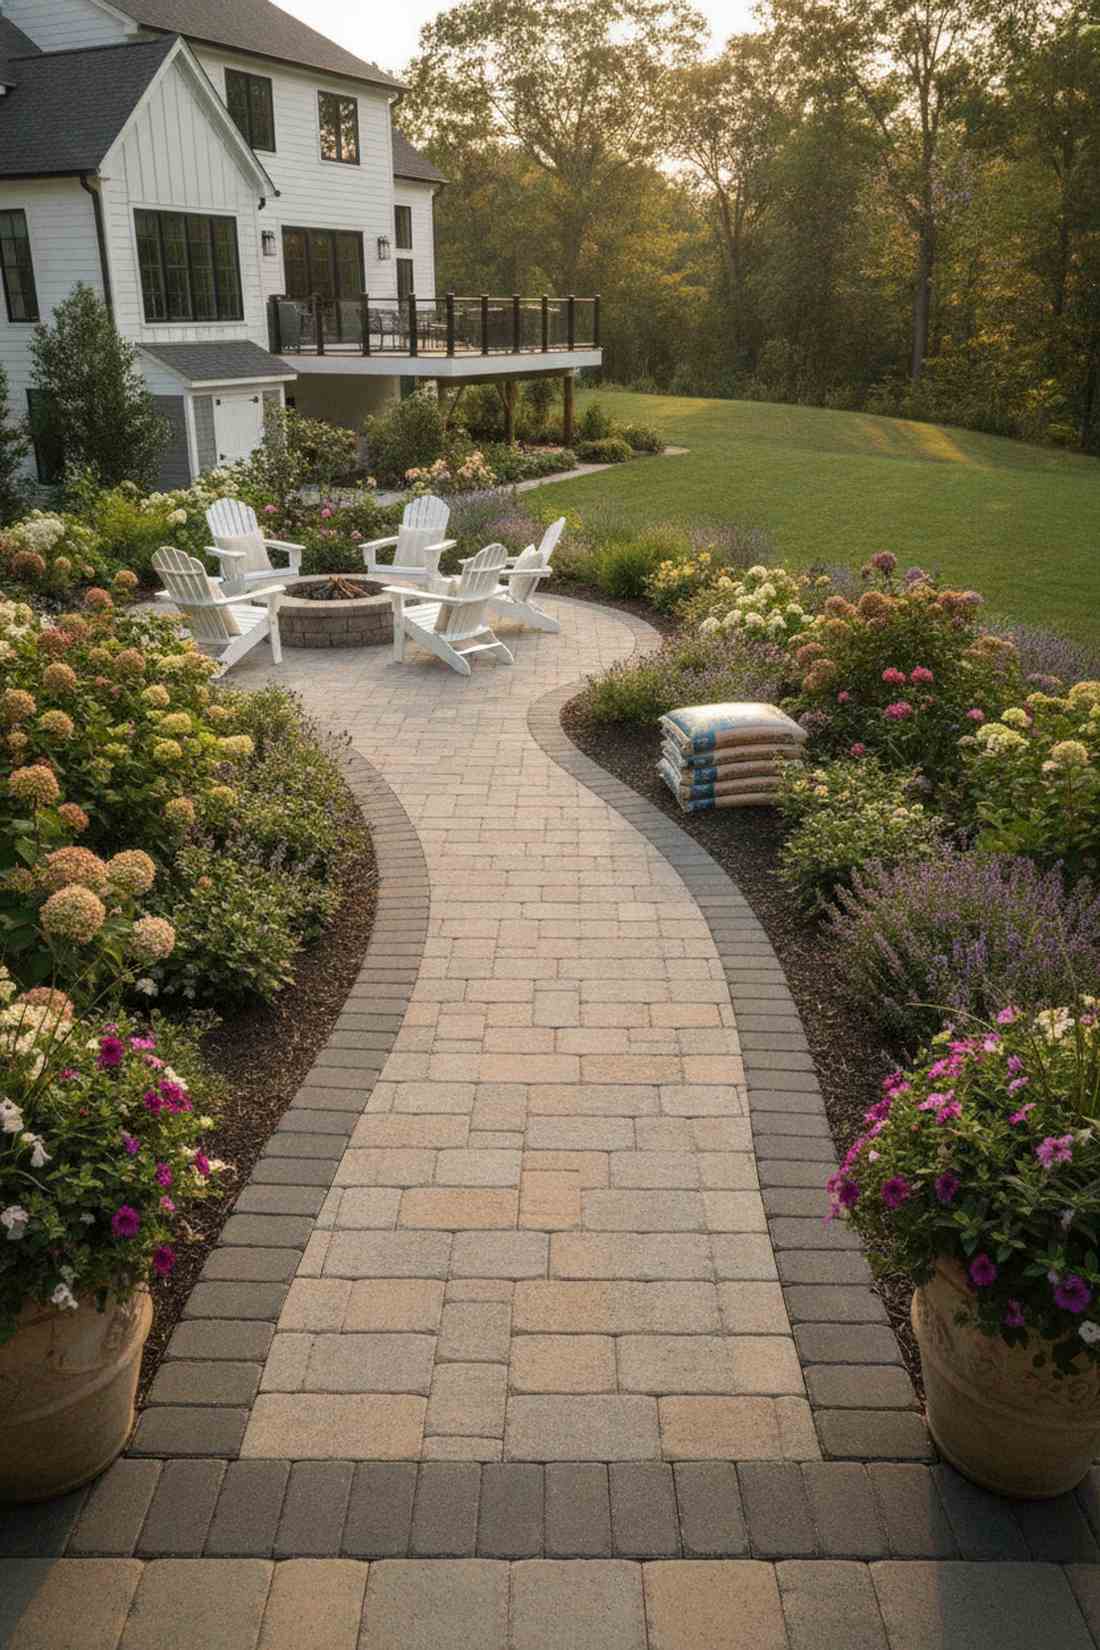
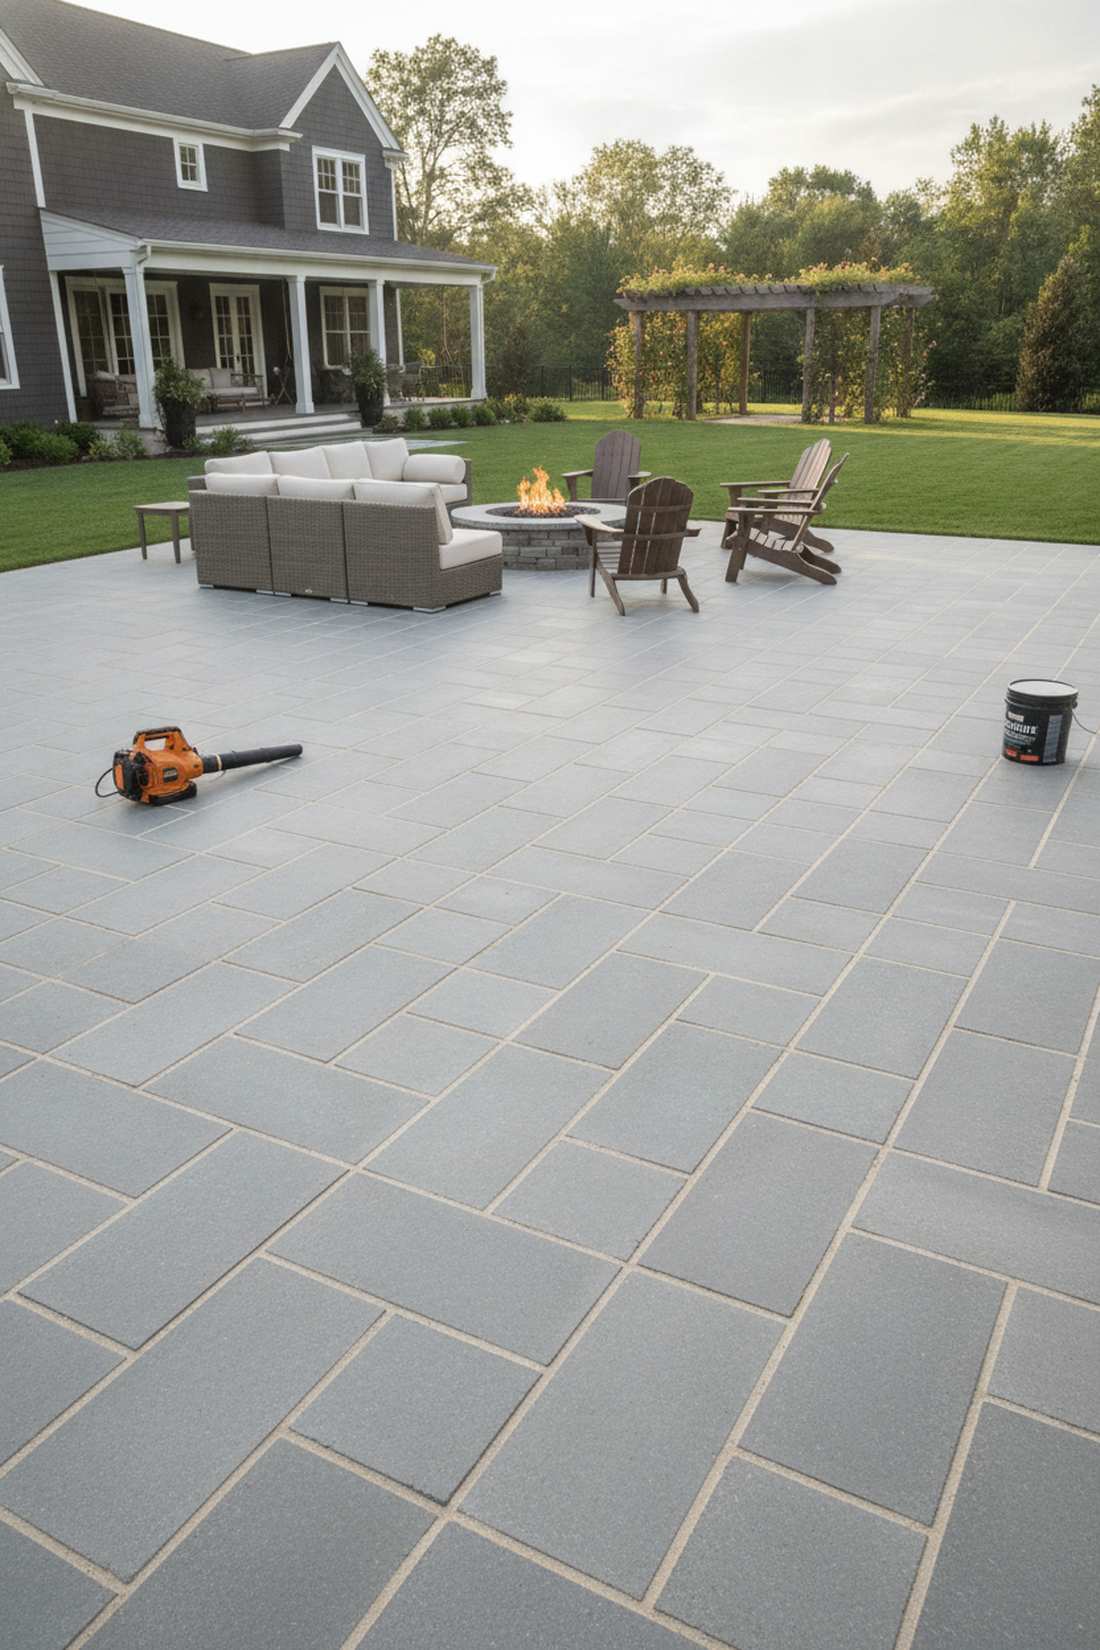
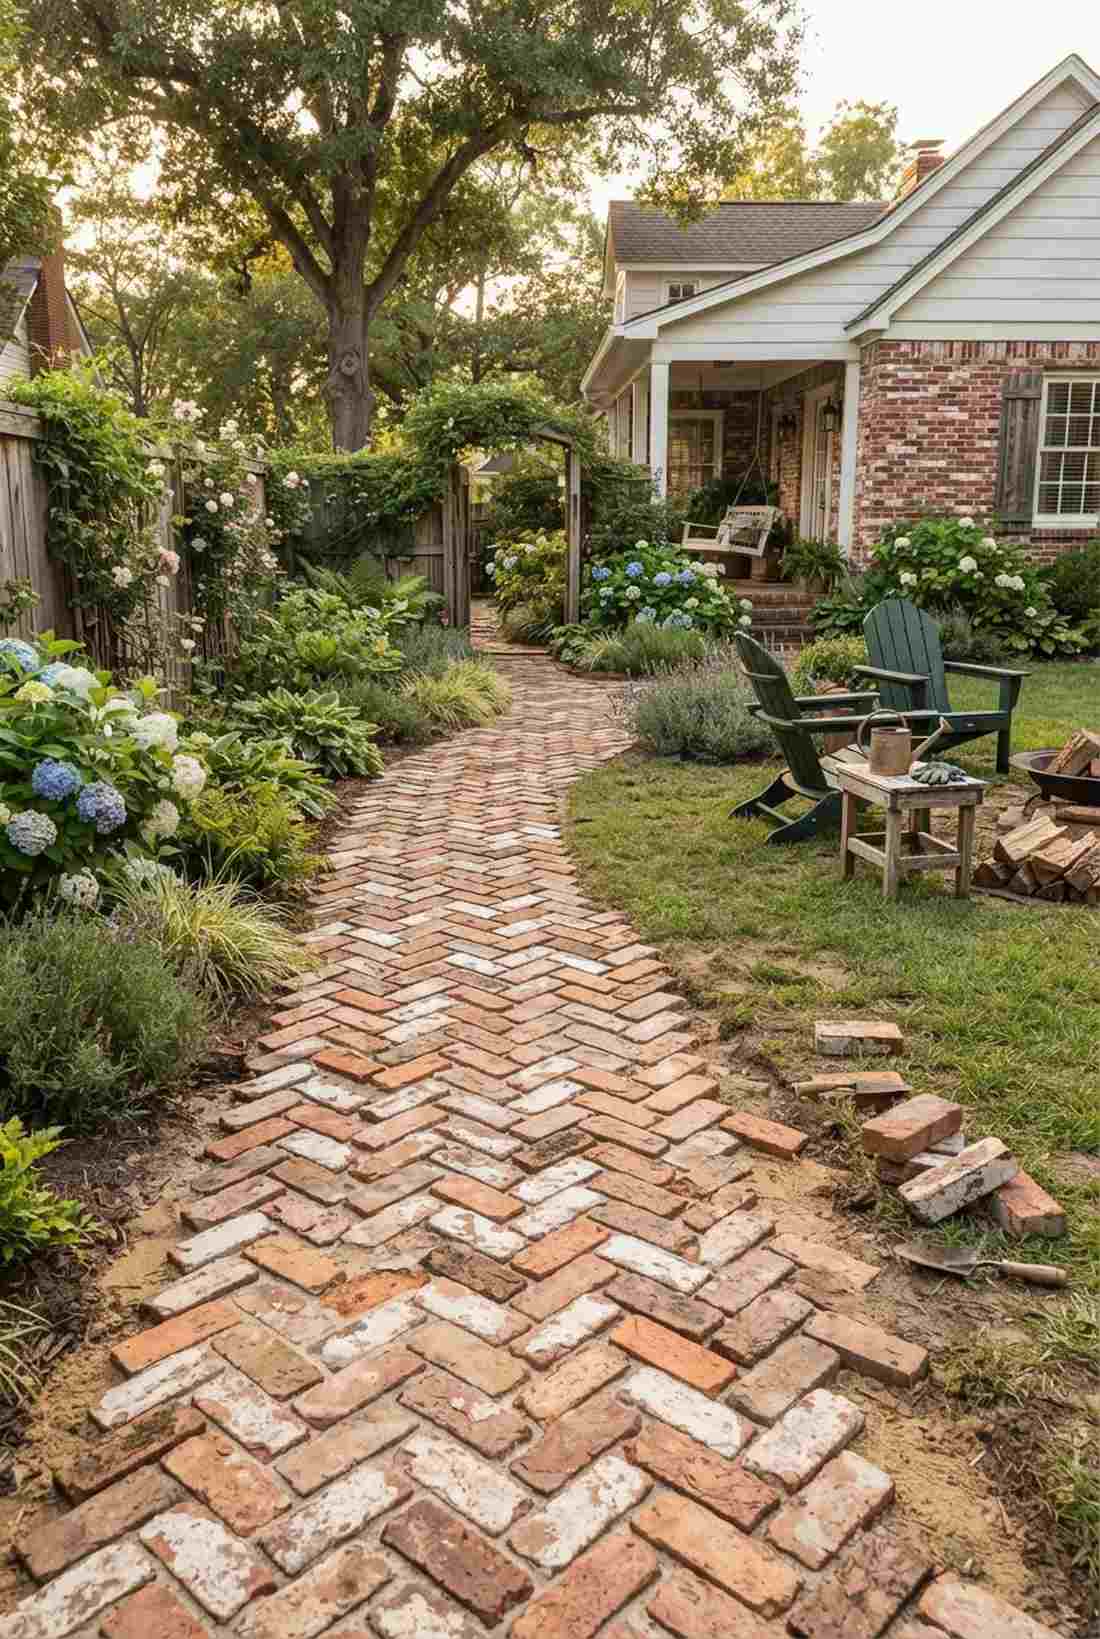
1. Herringbone Concrete Pavers
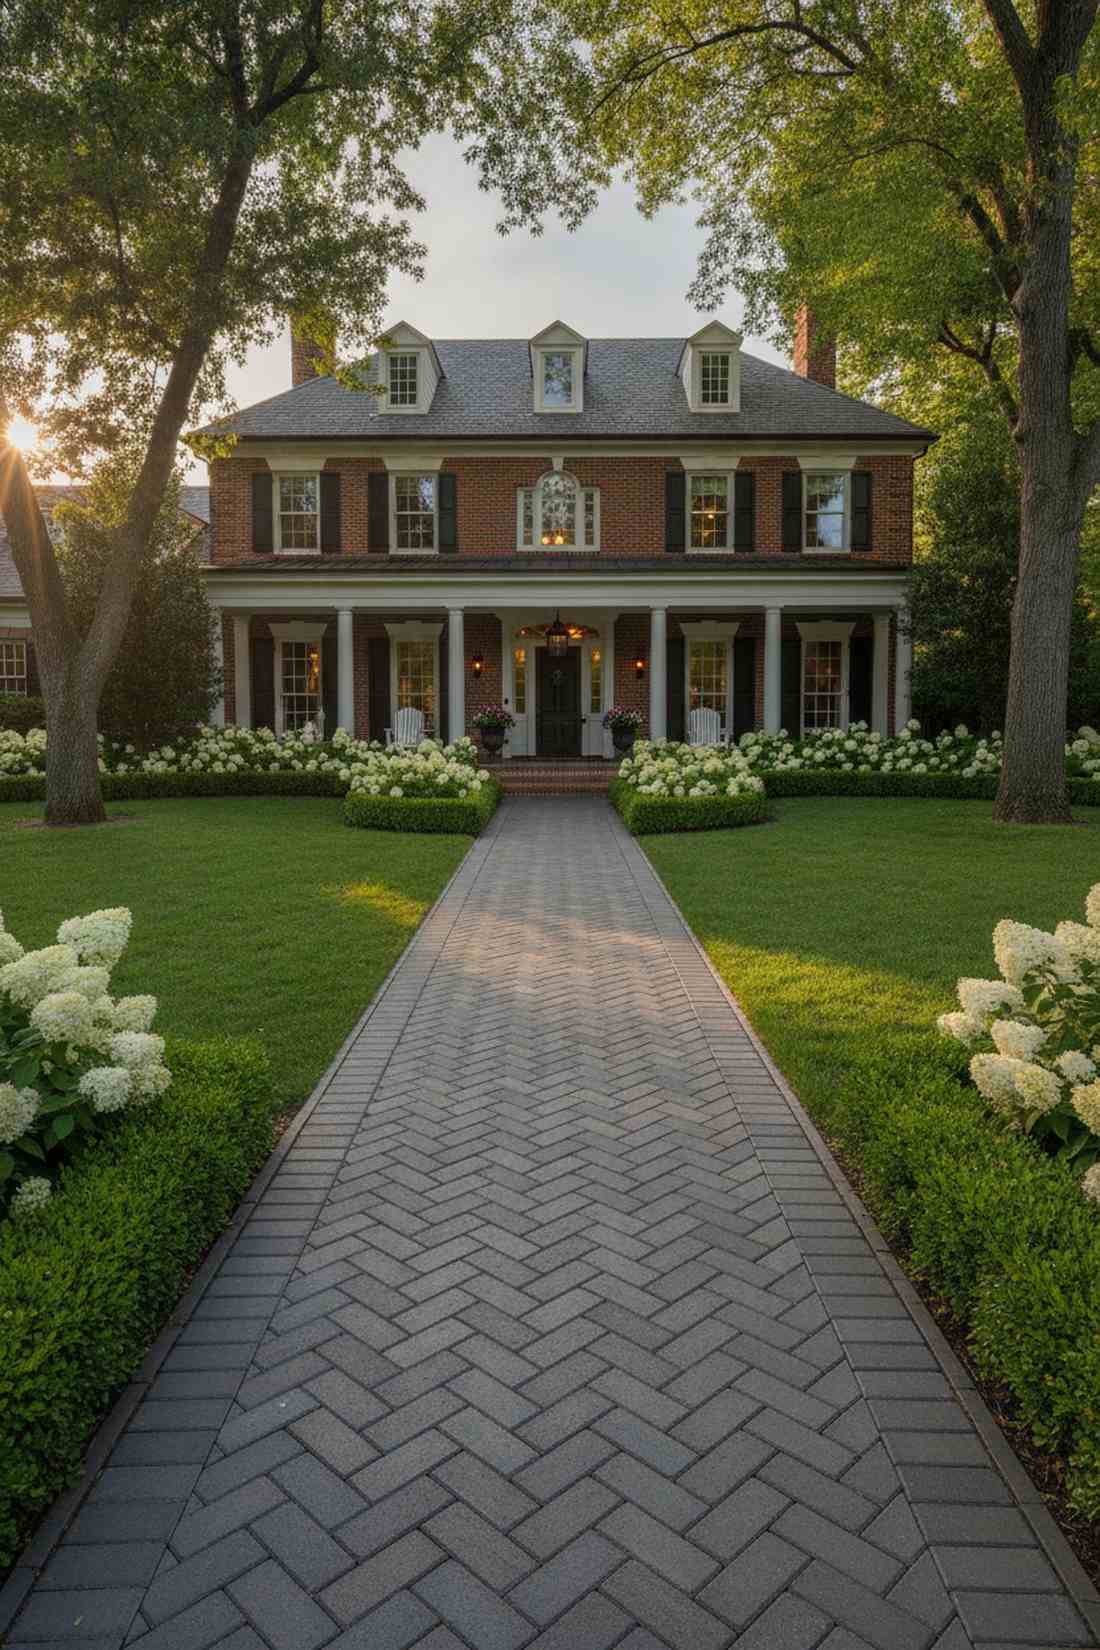
This classic estate walkway feels like a manicured royal garden, perfect for anchoring a high-traffic front door approach.
Laying blocks this way delivers a surprisingly premium look while structurally locking the surface against heavy frost heaves. Snag some UV-resistant interlocking blocks to ensure your garden pathways with pavers never lose their rich color under the brutal summer sun.
You can easily pull this off for around $6–$10 per square foot. Pin this if you’re planning a massive curb appeal upgrade!
- Key Materials: UV-resistant herringbone concrete blocks
- Vibe / Style: Formal English estate
- Difficulty: Intermediate DIY
- Budget Breakdown: Materials: $300 | Base: $85
- Creator’s Tip: Tamp the paver sand twice to prevent low spots after the first rain.
- Smart Sourcing: pre-cut polymeric sand bags (bulk pack), heavy-duty aluminum edge restraints
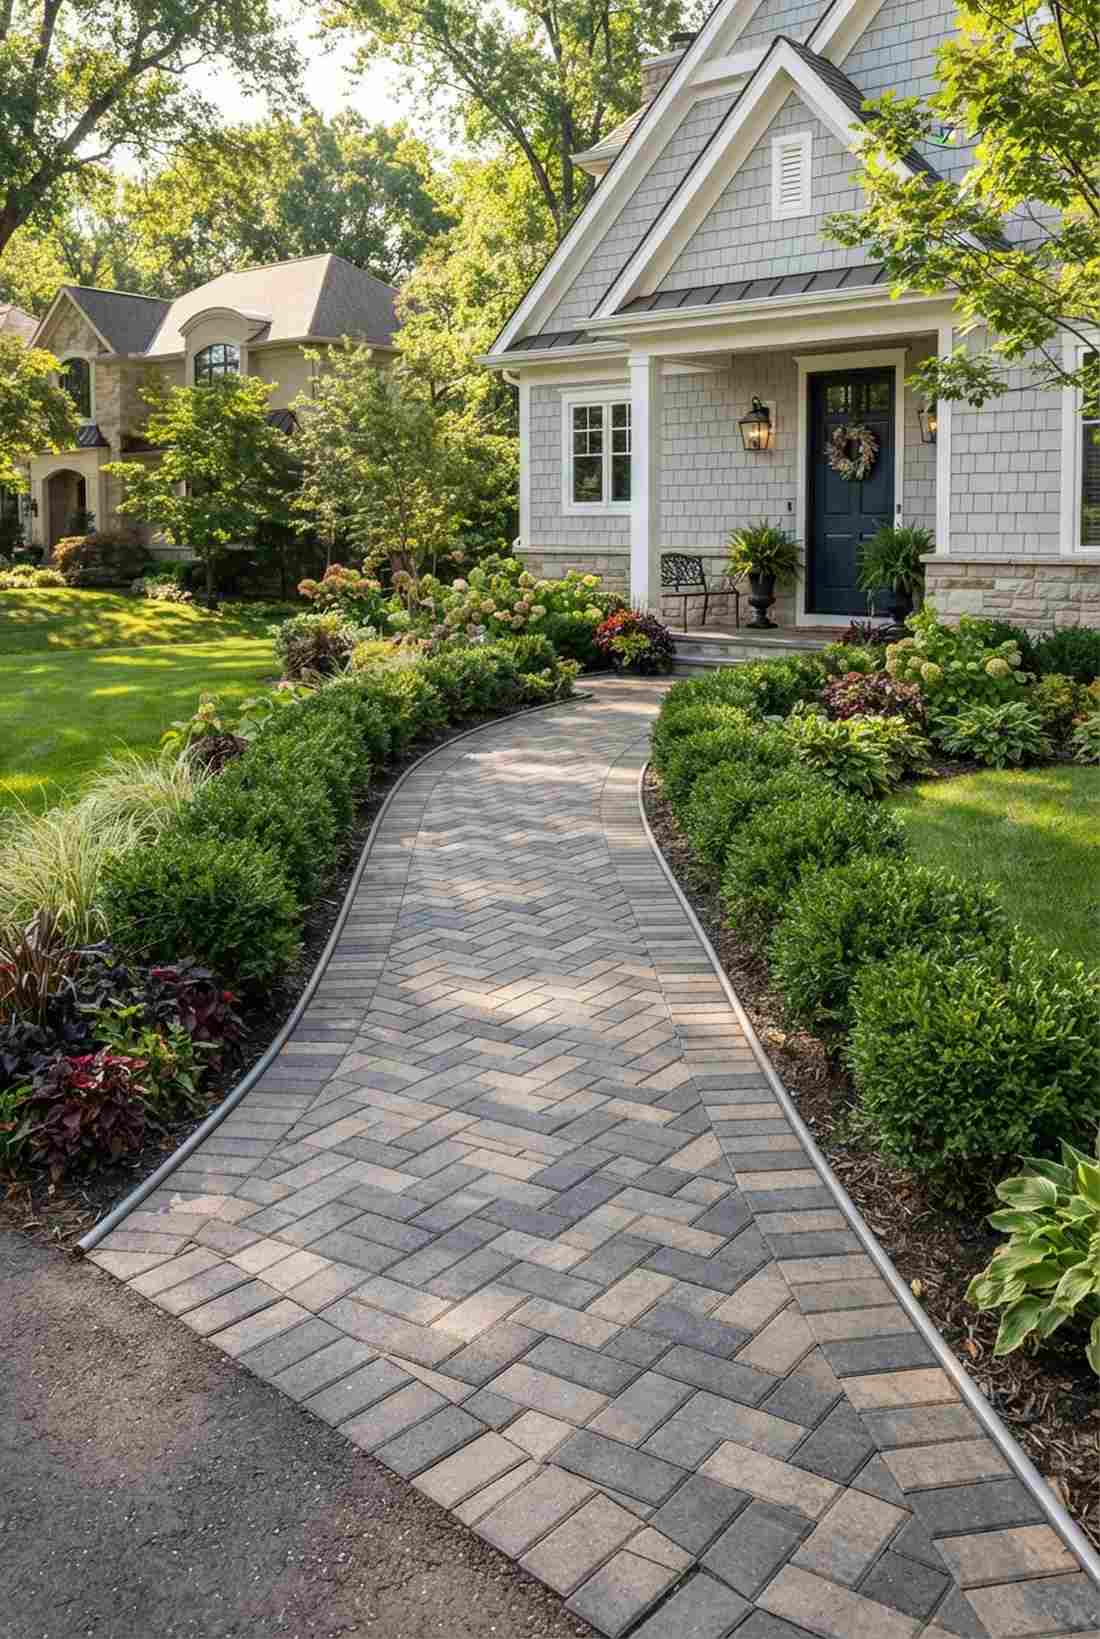
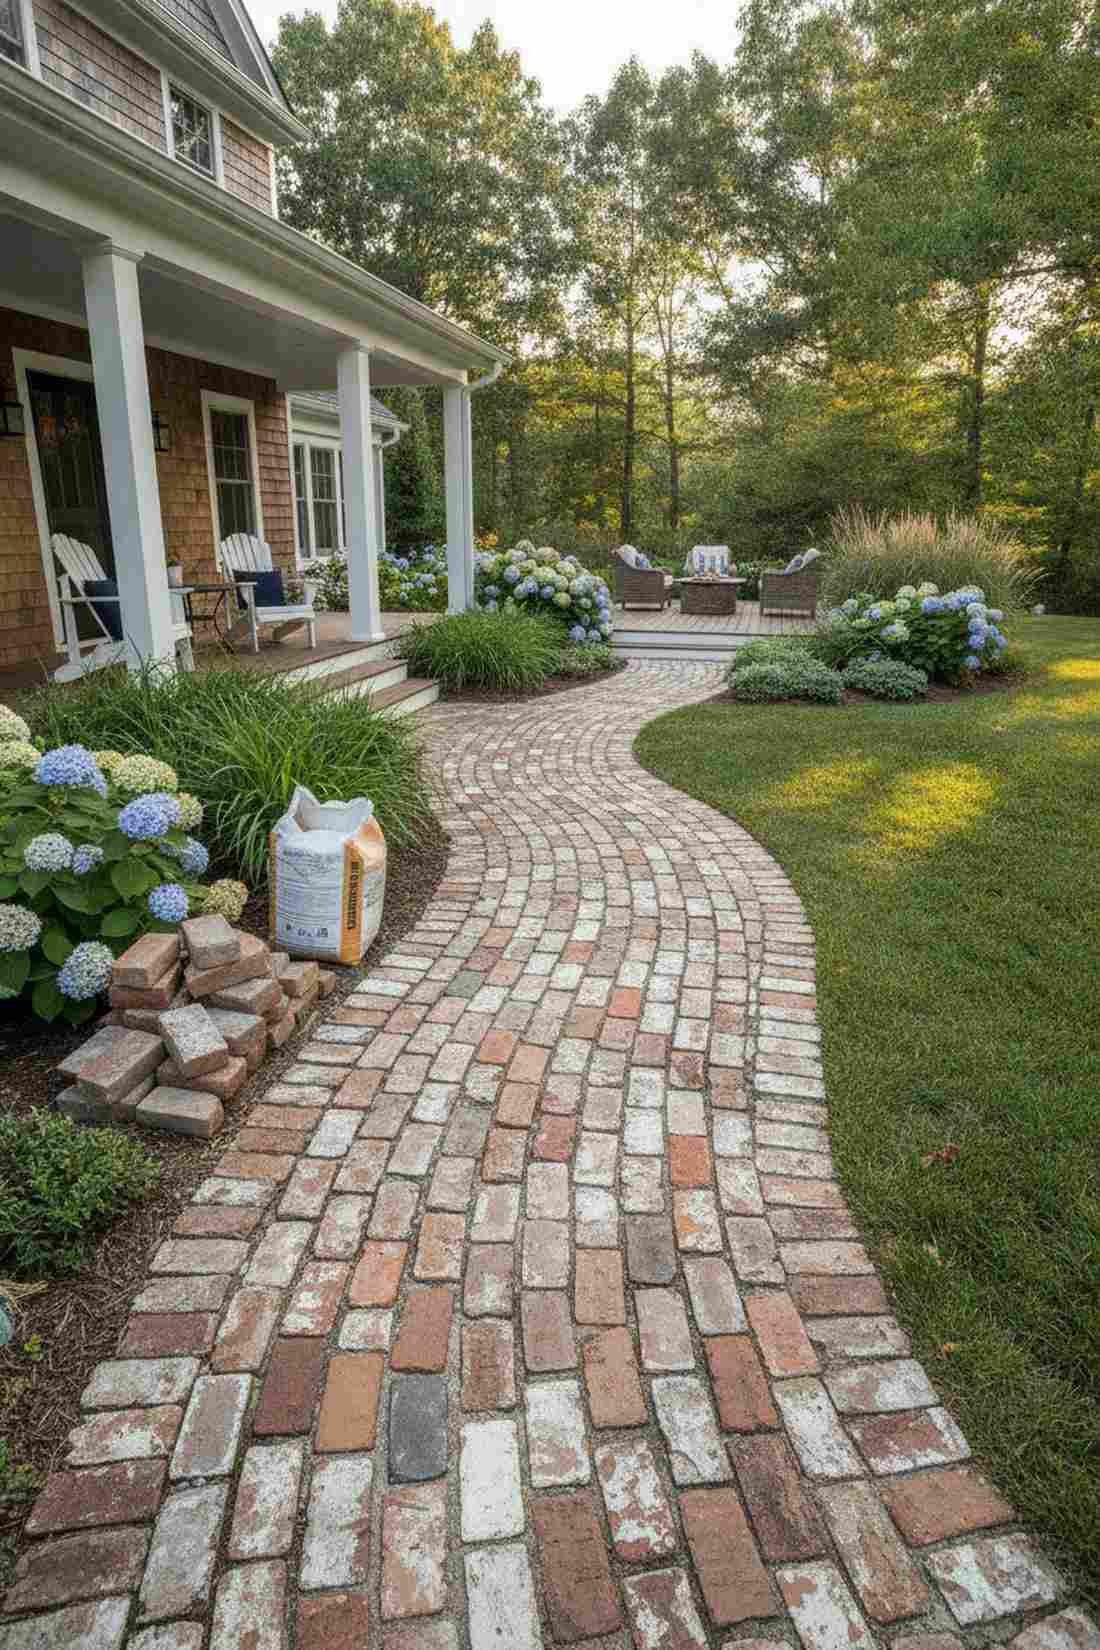
2. Running Bond Clay Brick
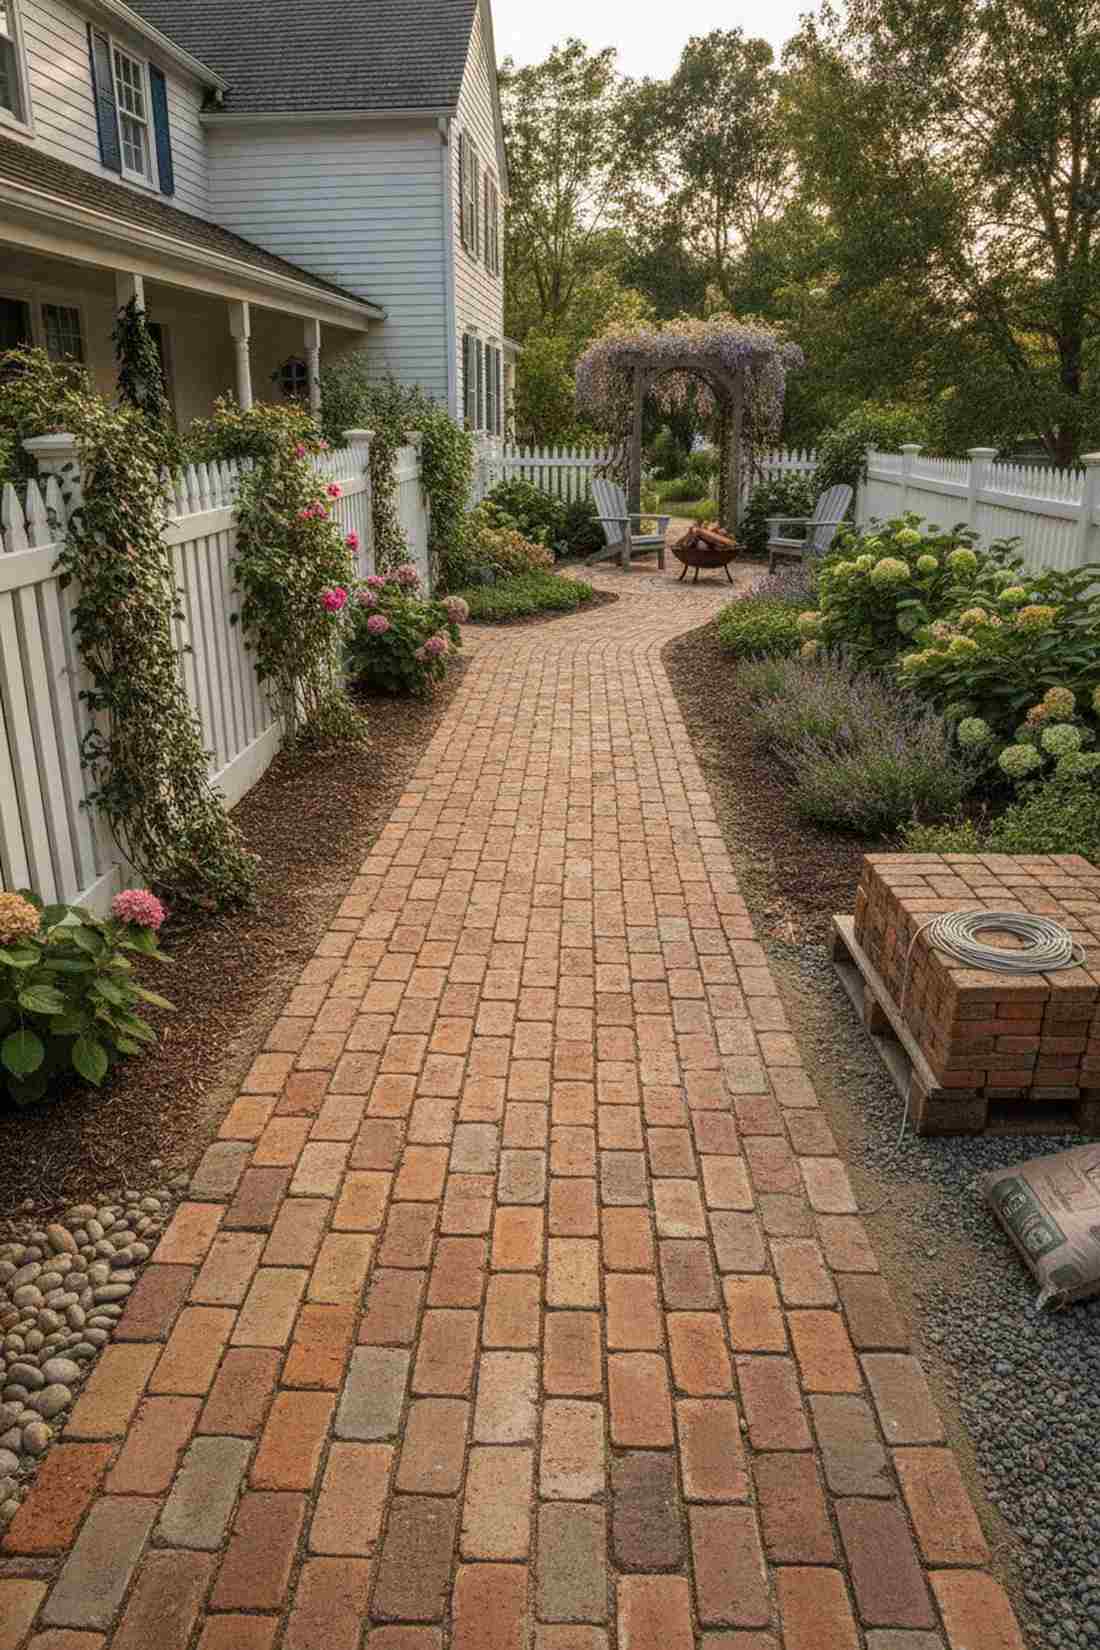
Creating a timeless colonial path feels like stepping back into a historic neighborhood, ideal for long, narrow side yards.
Most homeowners assume brick is outdated, but this layout actually elongates tight spaces to look far more expensive than it is. Invest in freeze-thaw rated clay bricks so your hard work survives harsh northern winters without cracking.
Expect to spend around $5–$8 per square foot for a solid base.
- Key Materials: Freeze-thaw rated clay pavers
- Vibe / Style: Historic cottage core
- Difficulty: Beginner-friendly masonry
- Budget Breakdown: Materials: $250 | Base: $60
- Creator’s Tip: String a mason line to keep every course perfectly straight over long distances.
- Smart Sourcing: weather-resistant clay brick pallets, commercial-grade leveling sand kits
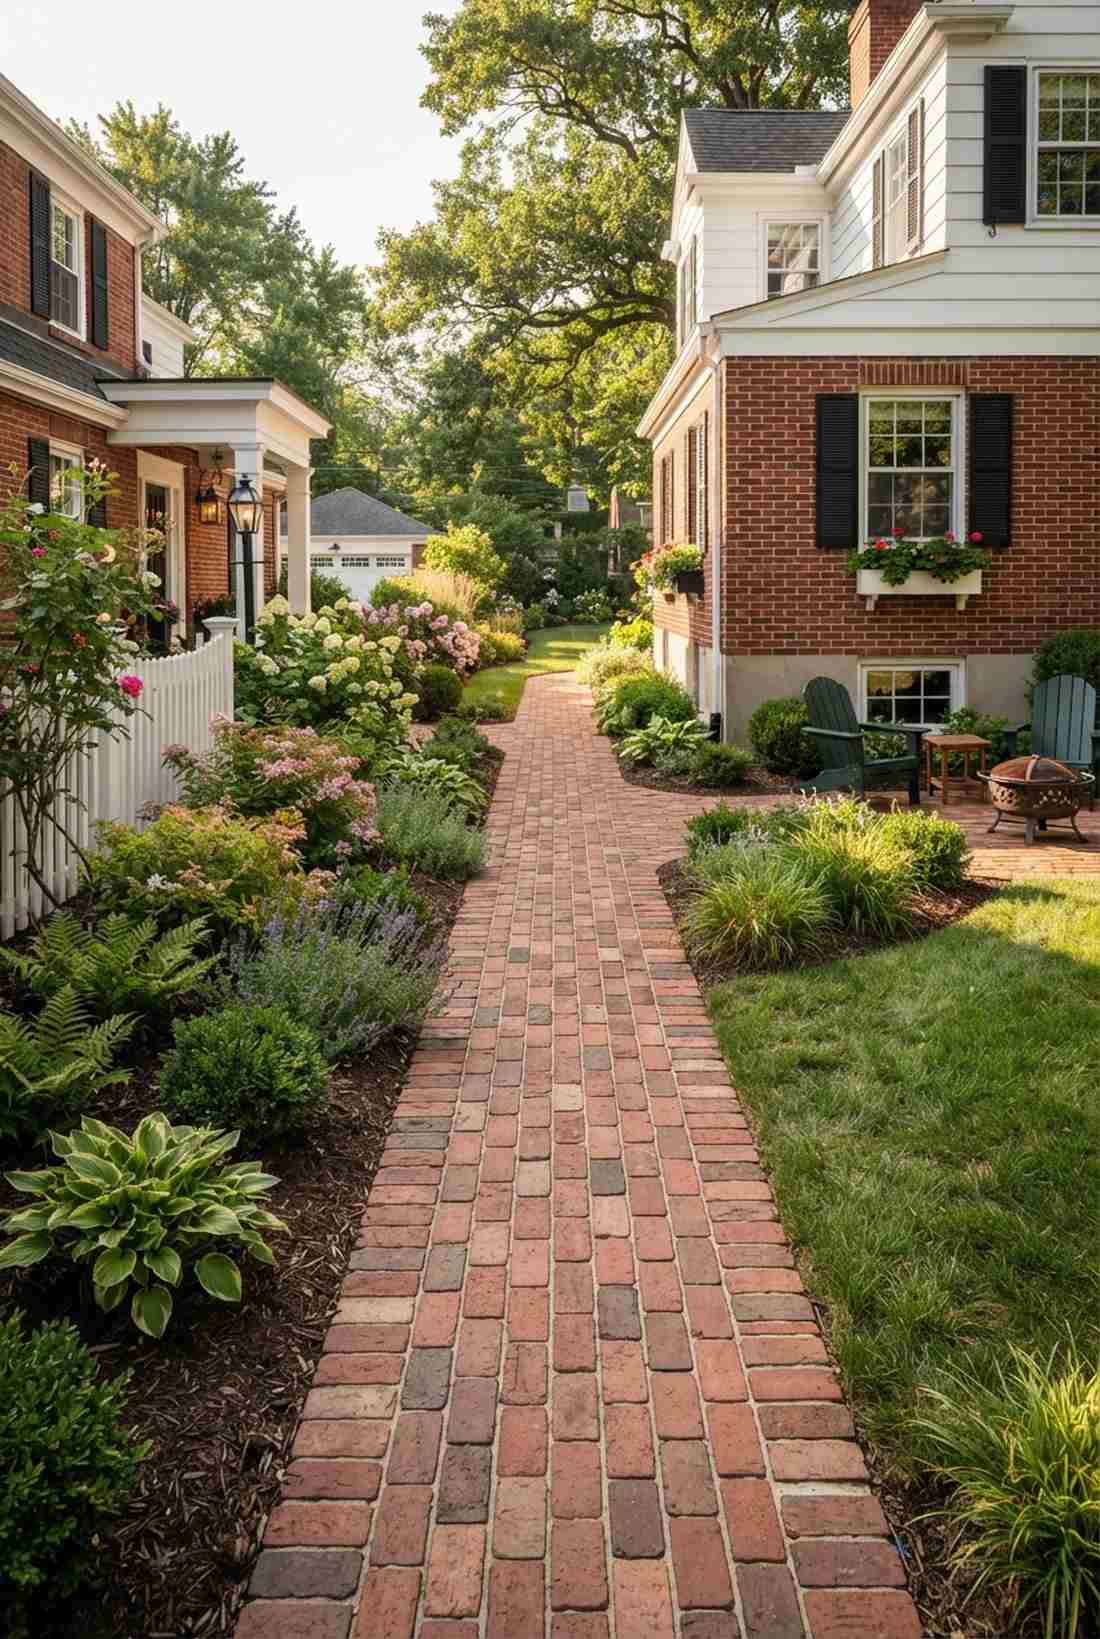
3. Basketweave Reclaimed Brick
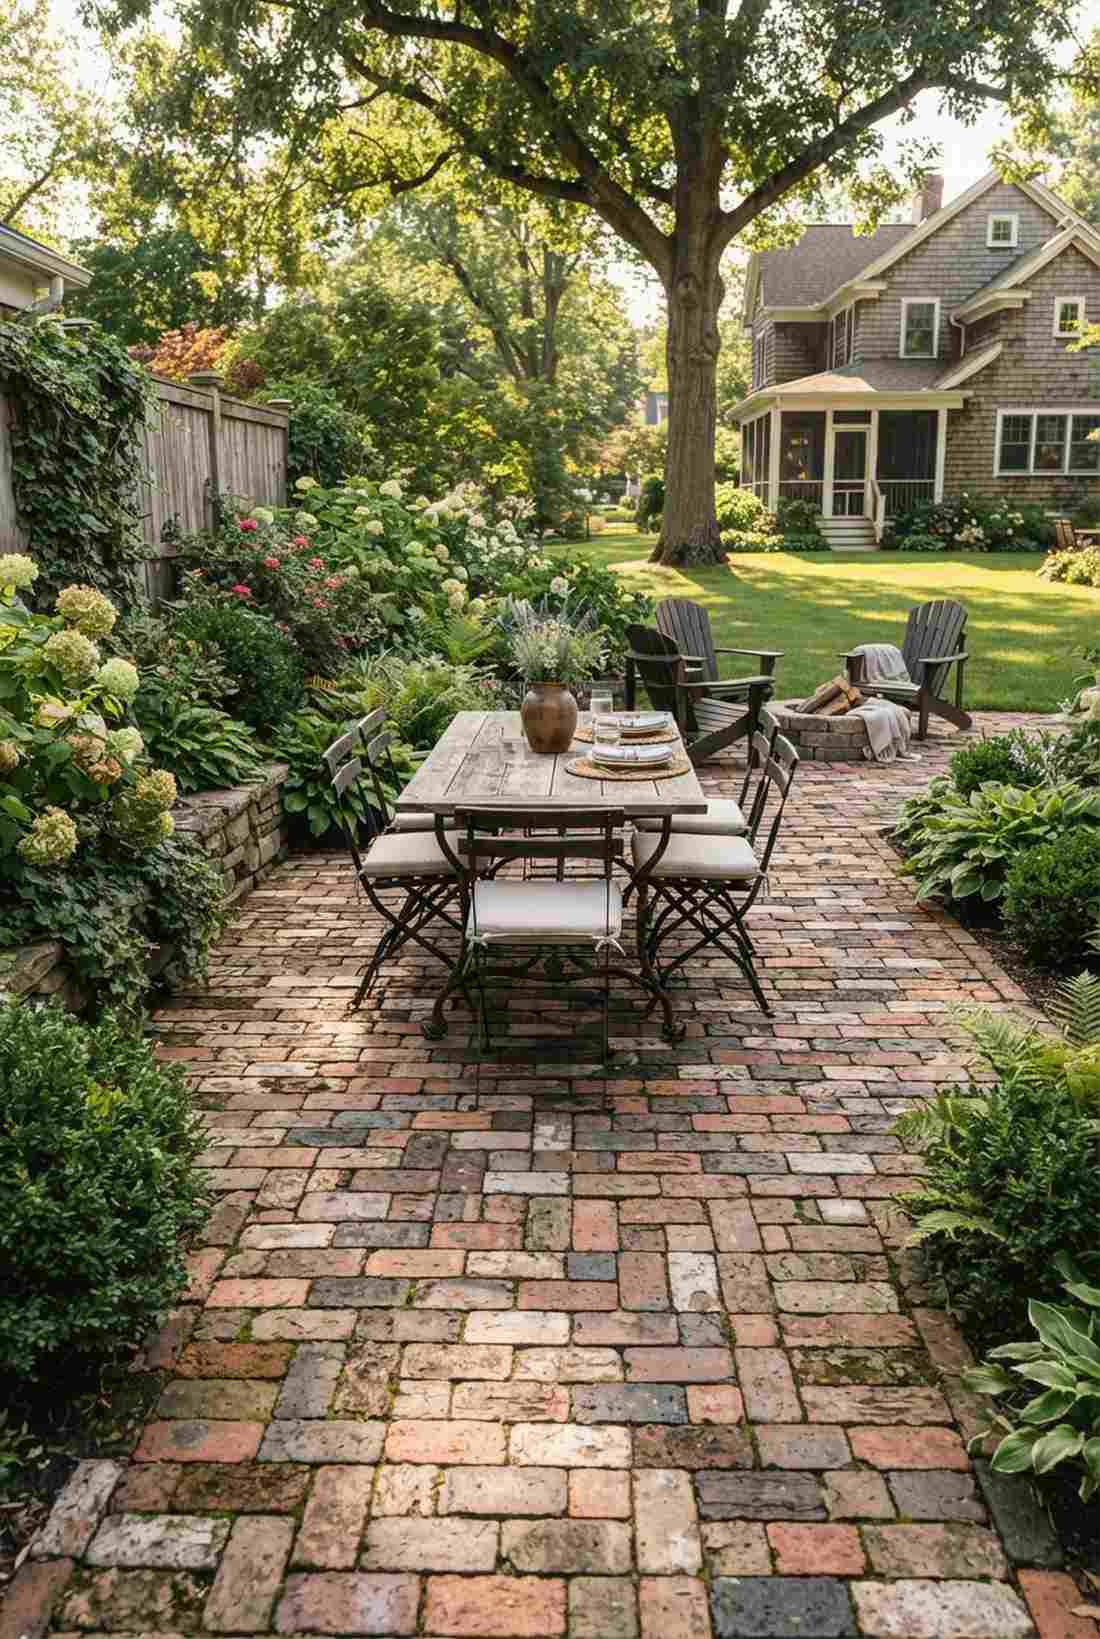
This vintage woven hardscape feels like a cozy European courtyard, working exceptionally well for patio dining areas.
Mixing old materials creates a custom aesthetic that mass-produced stones simply cannot replicate. Use architectural salvage bricks to instantly add burnt umber and charcoal tones into your garden ideas pathways.
This setup usually runs $8–$12 per square foot depending on local salvage rates. Save this to your DIY weekend garden board!
- Key Materials: Reclaimed architectural salvage bricks
- Vibe / Style: Rustic European
- Difficulty: Moderate alignment required
- Budget Breakdown: Materials: $350 | Base: $75
- Creator’s Tip: Embrace minor size differences; the imperfection is what makes the basketweave pop.
- Smart Sourcing: heavy-duty masonry mallet kits, premium jointing sand (bulk bag)
4. Soldier Course Edging
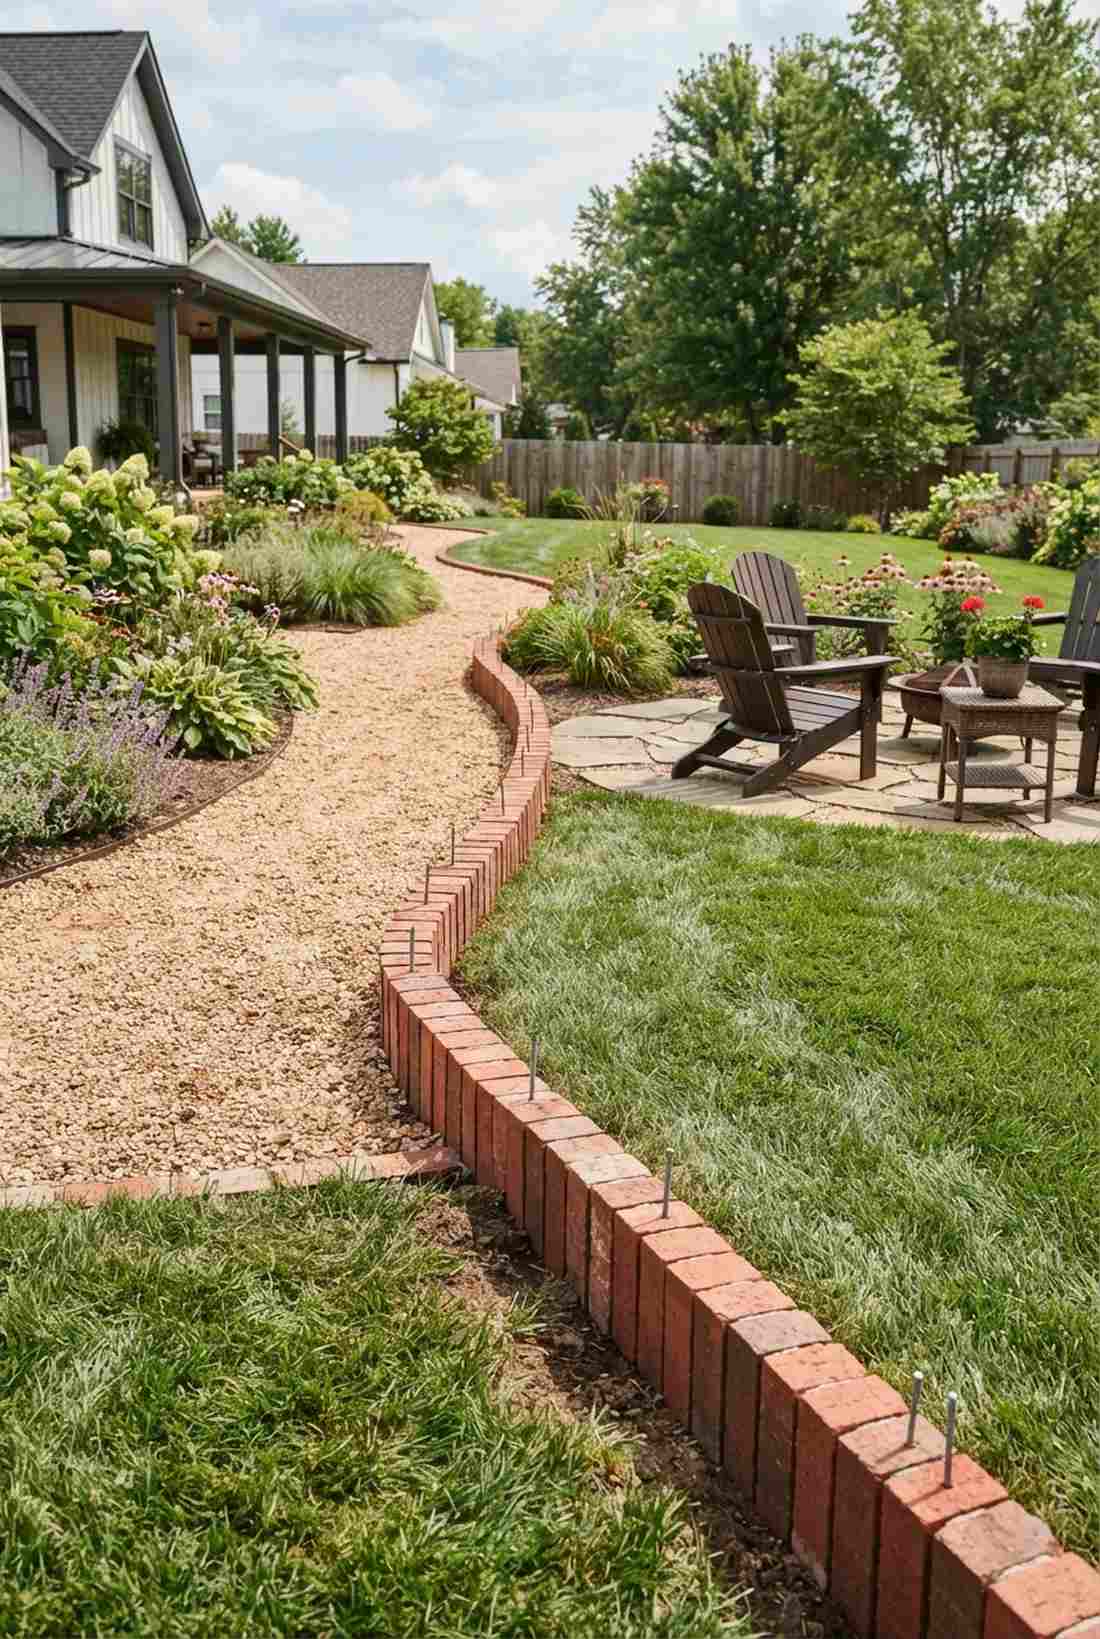
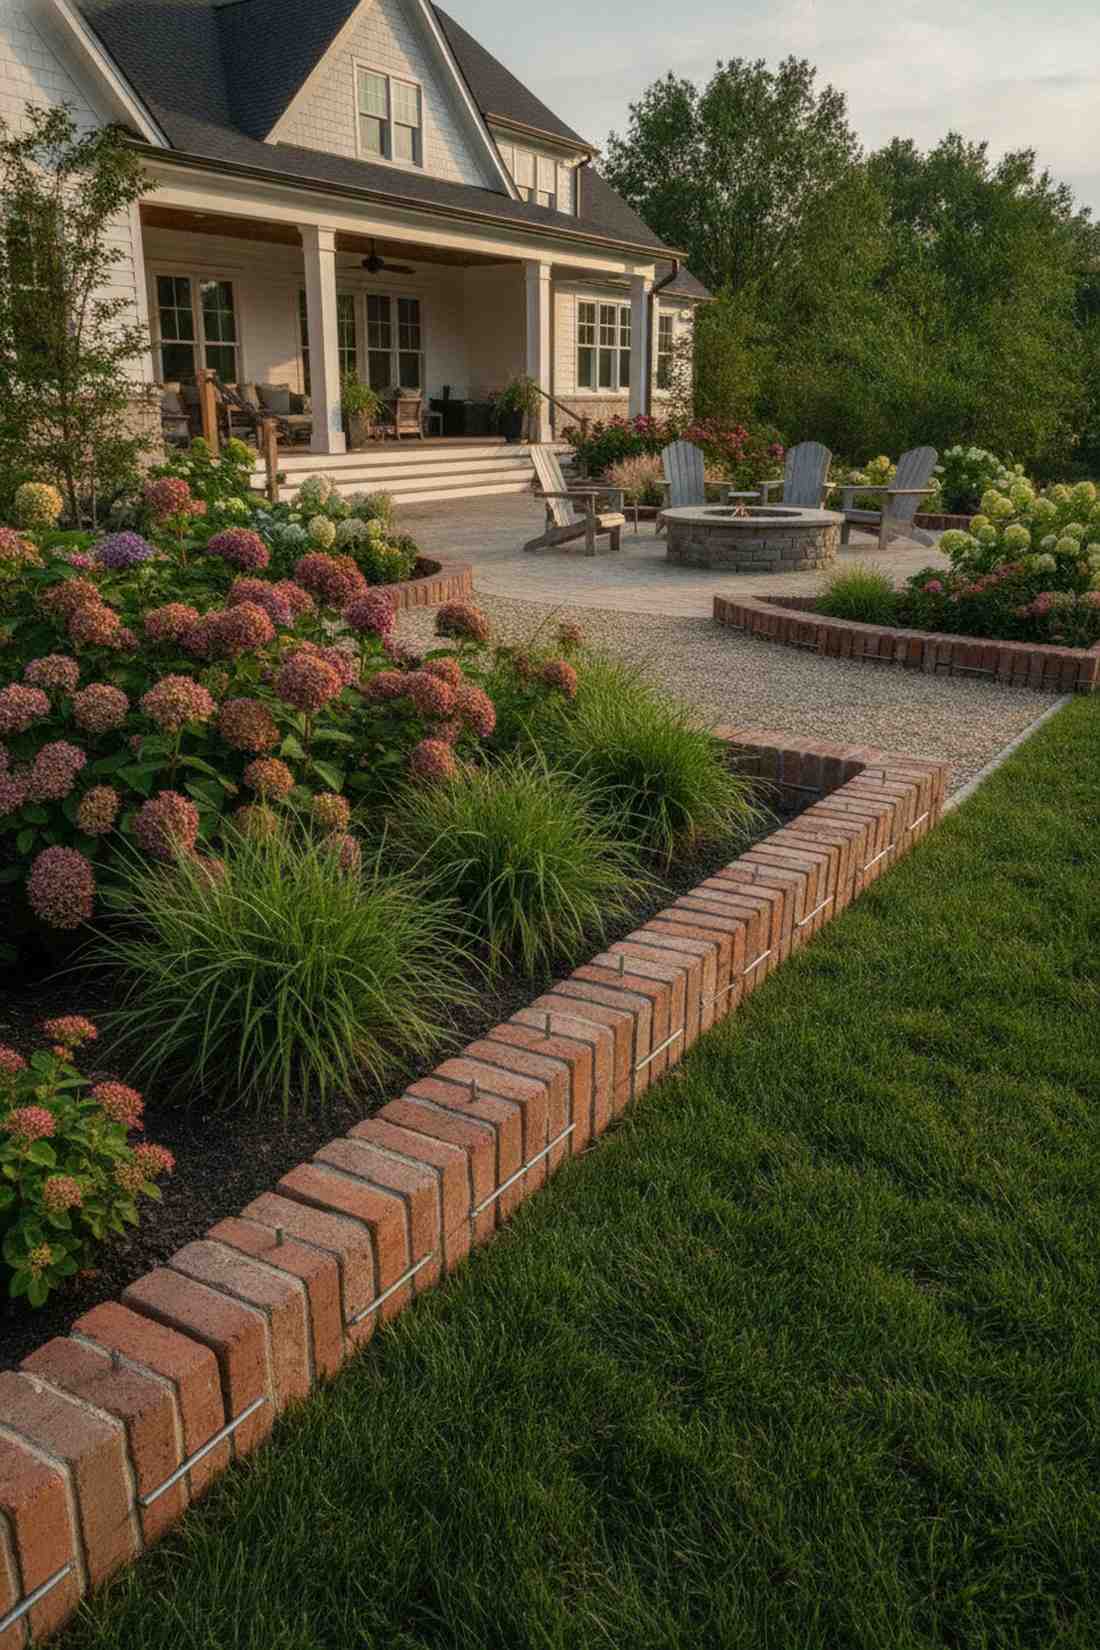
A framed border setup feels like putting a custom frame on a masterpiece, designed to hold back aggressive turf.
Failing to lock your edges is why most cheap paths fall apart, but this vertical installation completely solves lateral drift. Upgrading to pre-drilled soldier bricks allows you to pin them directly into the earth for permanent stability.
It’s a fast upgrade that completely changes the vibe for under $100.
- Key Materials: Vertical edging bricks and rebar pins
- Vibe / Style: Crisp and structured
- Difficulty: Easy weekend project
- Budget Breakdown: Edging: $90 | Hardware: $20
- Creator’s Tip: Set the soldiers one inch above the lawn to create an effortless mowing strip.
- Smart Sourcing: galvanized rebar stakes (100-pack), pre-cut edging border kits
5. Circular Paver Medallion
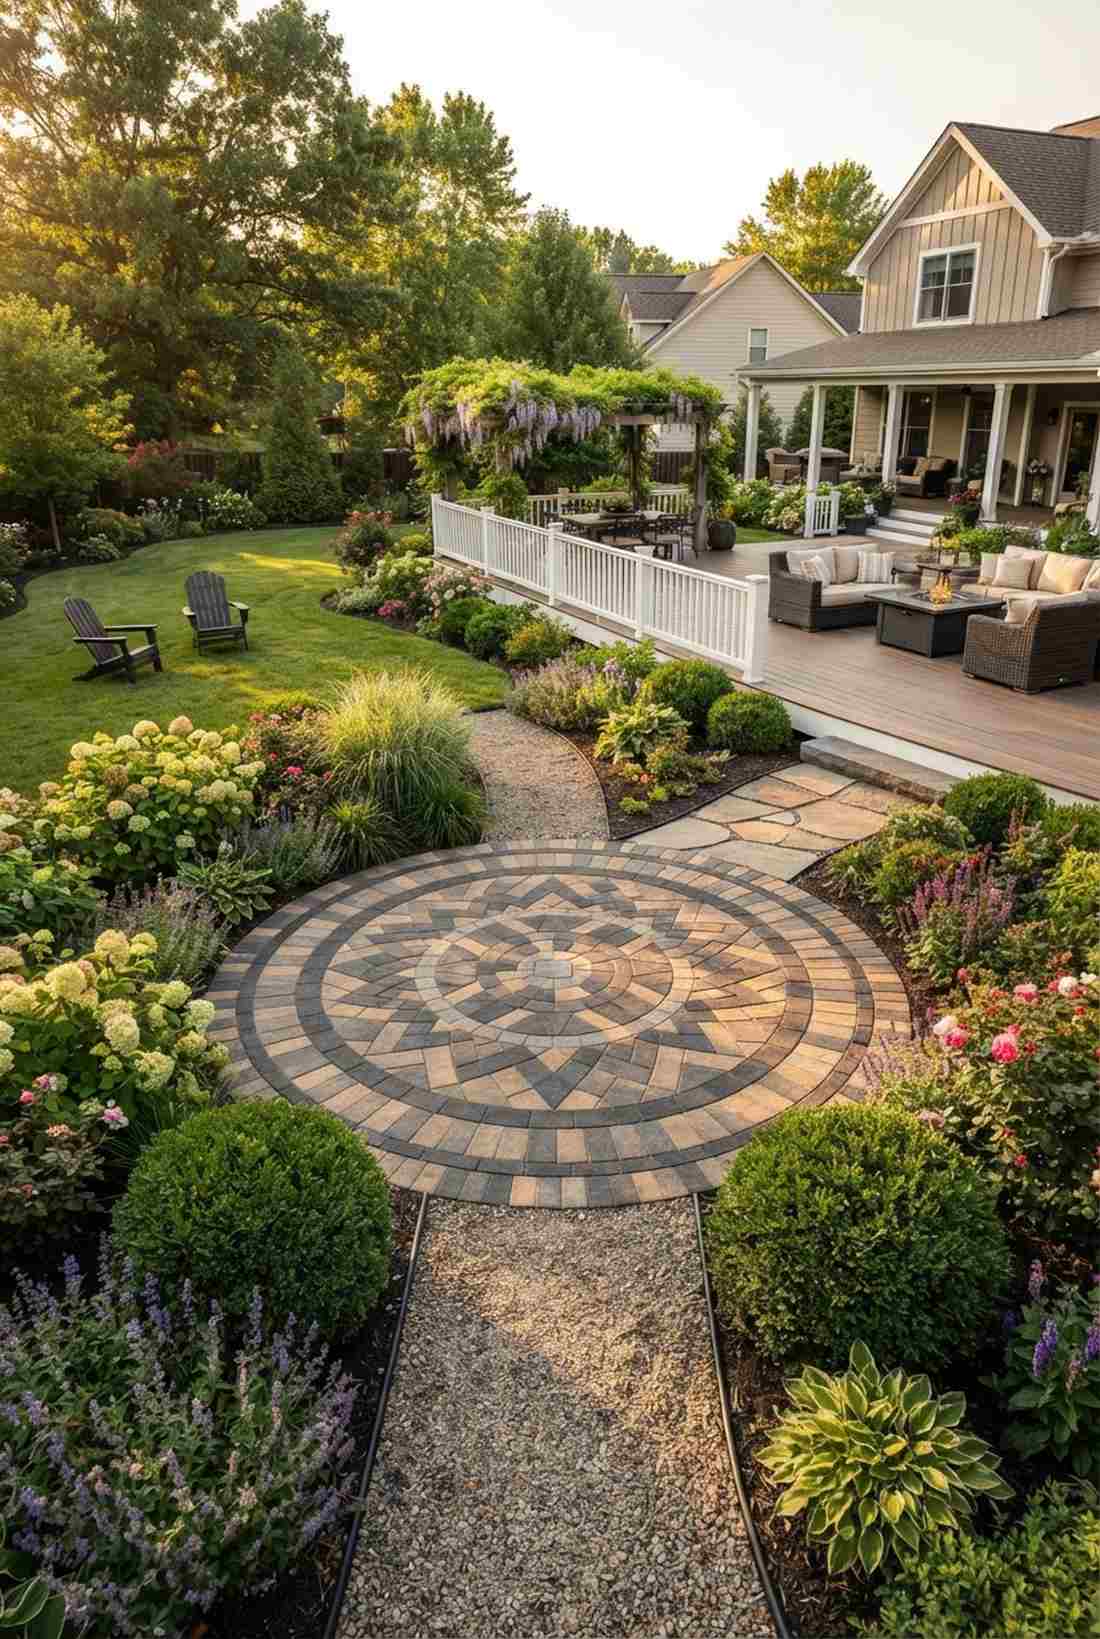
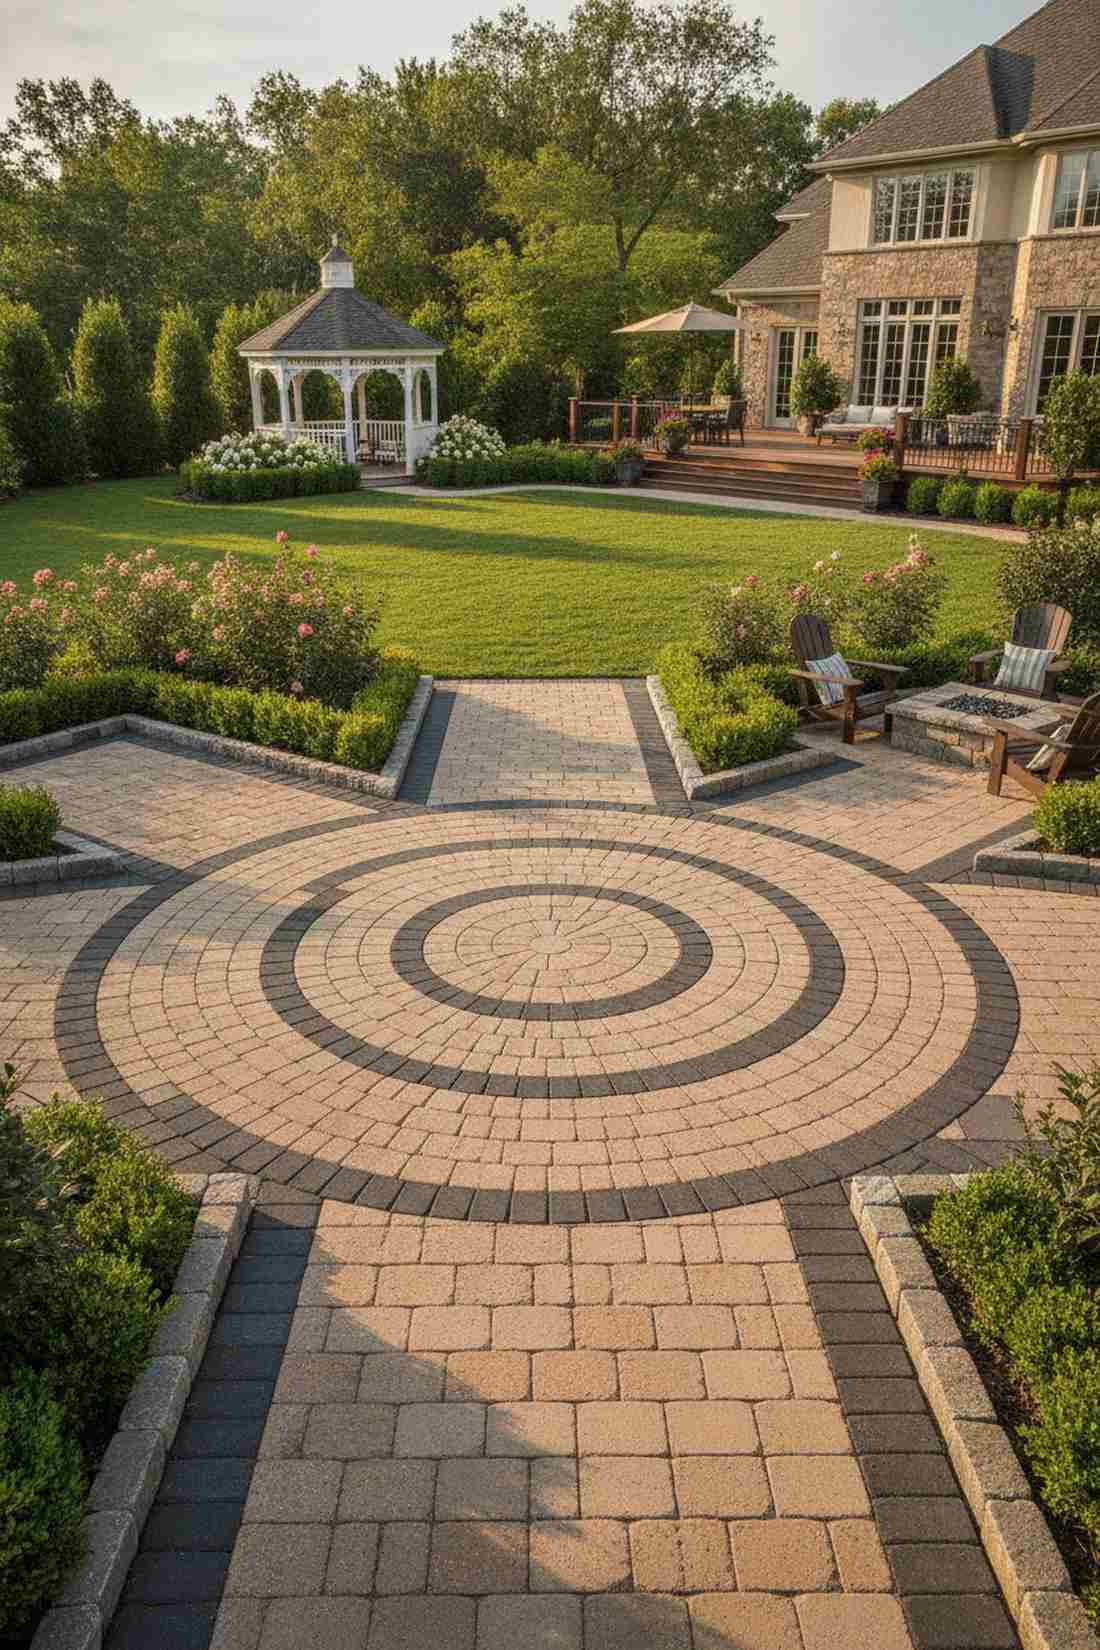
This focal point plaza feels like a luxury hotel entrance, acting as the perfect pause point at a garden intersection.
Cutting sweeping curves takes patience, but it gives a designer-level finish that blows standard straight lines away. Skip the wet saw rental and buy pre-cut radial kits to assemble perfect circles in under an hour.
These centerpieces cost around $150–$300 as a standalone feature.
- Key Materials: Pre-cut radial paver kits
- Vibe / Style: High-end luxury
- Difficulty: Advanced if cutting manually
- Budget Breakdown: Kit: $200 | Base: $40
- Creator’s Tip: Always start from the center stone and work your way outward for perfect geometry.
- Smart Sourcing: pre-cut circular patio kits, professional diamond blade attachments
Most beginners completely ignore this next layout, but it hides dirt better than anything else…
6. Tumbled Paver Blend
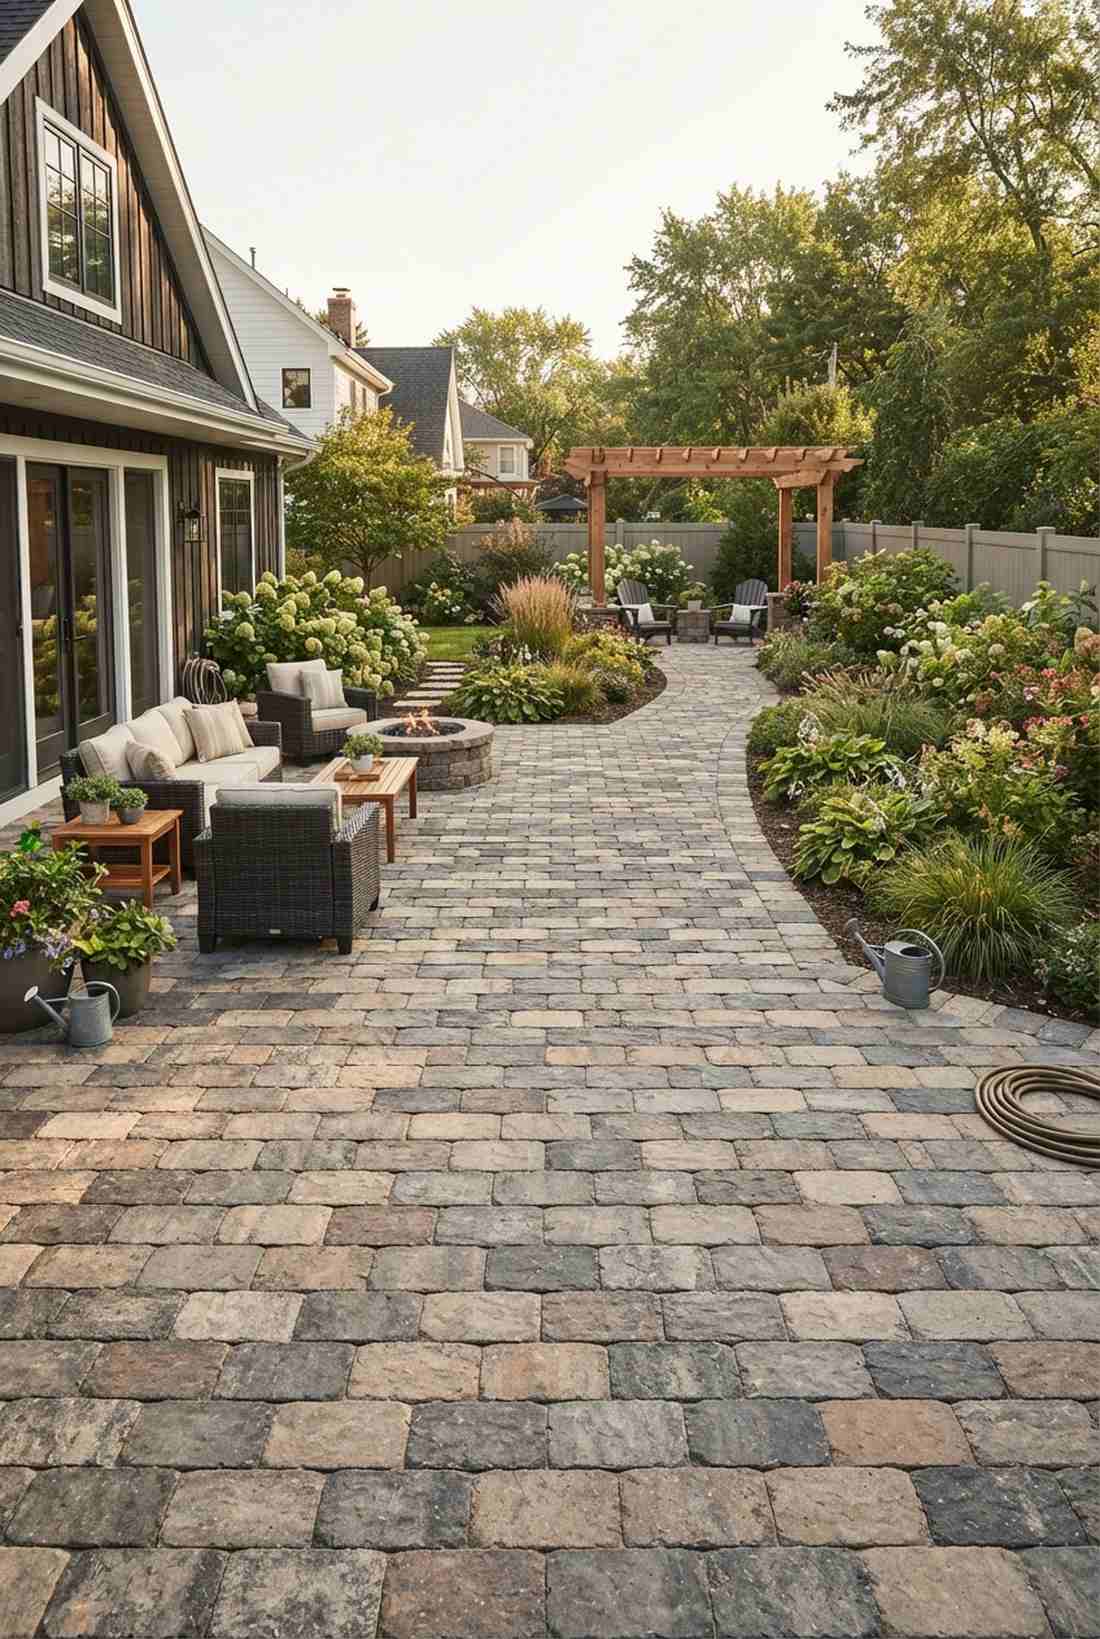
The distressed stone aesthetic feels like a century-old carriage trail, ideal for softening modern, rigid architecture.
Blending multiple color pallets tricks the eye and avoids awkward banding, making it look incredibly high-end. Sourcing a tri-color tumbled pack guarantees that muddy footprints and dust practically disappear into the texture.
You can easily pull this off for around $7–$11 per square foot. Pin this if you want low-maintenance luxury!
- Key Materials: Tri-color tumbled concrete blocks
- Vibe / Style: Weathered traditional
- Difficulty: Easy installation
- Budget Breakdown: Materials: $280 | Base: $60
- Creator’s Tip: Pull stones from three different pallets simultaneously to randomize the color naturally.
- Smart Sourcing: tumbled paver multi-packs, heavy-duty plate compactor rentals
7. Permeable Paver Grid
An eco-smart drainage route feels like a secret botanical garden floor, perfect for driveways that constantly flood.
Pouring solid concrete causes a drainage nightmare, whereas these open-cell grids suck rainwater straight into the earth. Fill the voids with low-growing sedums or micro-clover to merge your garden pathways with pavers directly into the lawn.
This eco-friendly hack usually costs around $9–$14 per square foot.
- Key Materials: Open-cell concrete grid blocks
- Vibe / Style: Green and sustainable
- Difficulty: Intermediate base prep
- Budget Breakdown: Grids: $300 | Fill: $50
- Creator’s Tip: Use angular clean stone instead of fine sand underneath to maximize water drainage.
- Smart Sourcing: permeable grid system base (bulk pack), creeping thyme seed starter kits
8. Multi-Size Modular System
The European plaza layout feels like a bustling Italian piazza, stunningly effective for massive patio expansions.
Using three different block sizes destroys visual monotony, delivering a surprisingly premium look across huge spaces. Grab a pre-engineered modular set so you never have to make a single cut while laying the pattern.
Expect to invest $10–$15 per square foot for a flawless finish. Save this to your backyard makeover board!
- Key Materials: Pre-engineered coordinated paver sets
- Vibe / Style: Expansive modern classic
- Difficulty: Requires strict pattern following
- Budget Breakdown: Materials: $400 | Base: $100
- Creator’s Tip: Keep the manufacturer’s layout diagram on your phone; one wrong block ruins the sequence.
- Smart Sourcing: multi-size paver template guides, professional edge restraint spikes
💡 Must-Have Supplies for High-End Setups
To build these setups faster and ensure they last, skip the generic craft aisles and invest in the right foundational kits.
- Base & Support: commercial-grade geotextile fabric rolls
- Setup Tools: heavy-duty paver starter kits
- Weather/Durability Protection: UV-resistant waterproof stone sealants
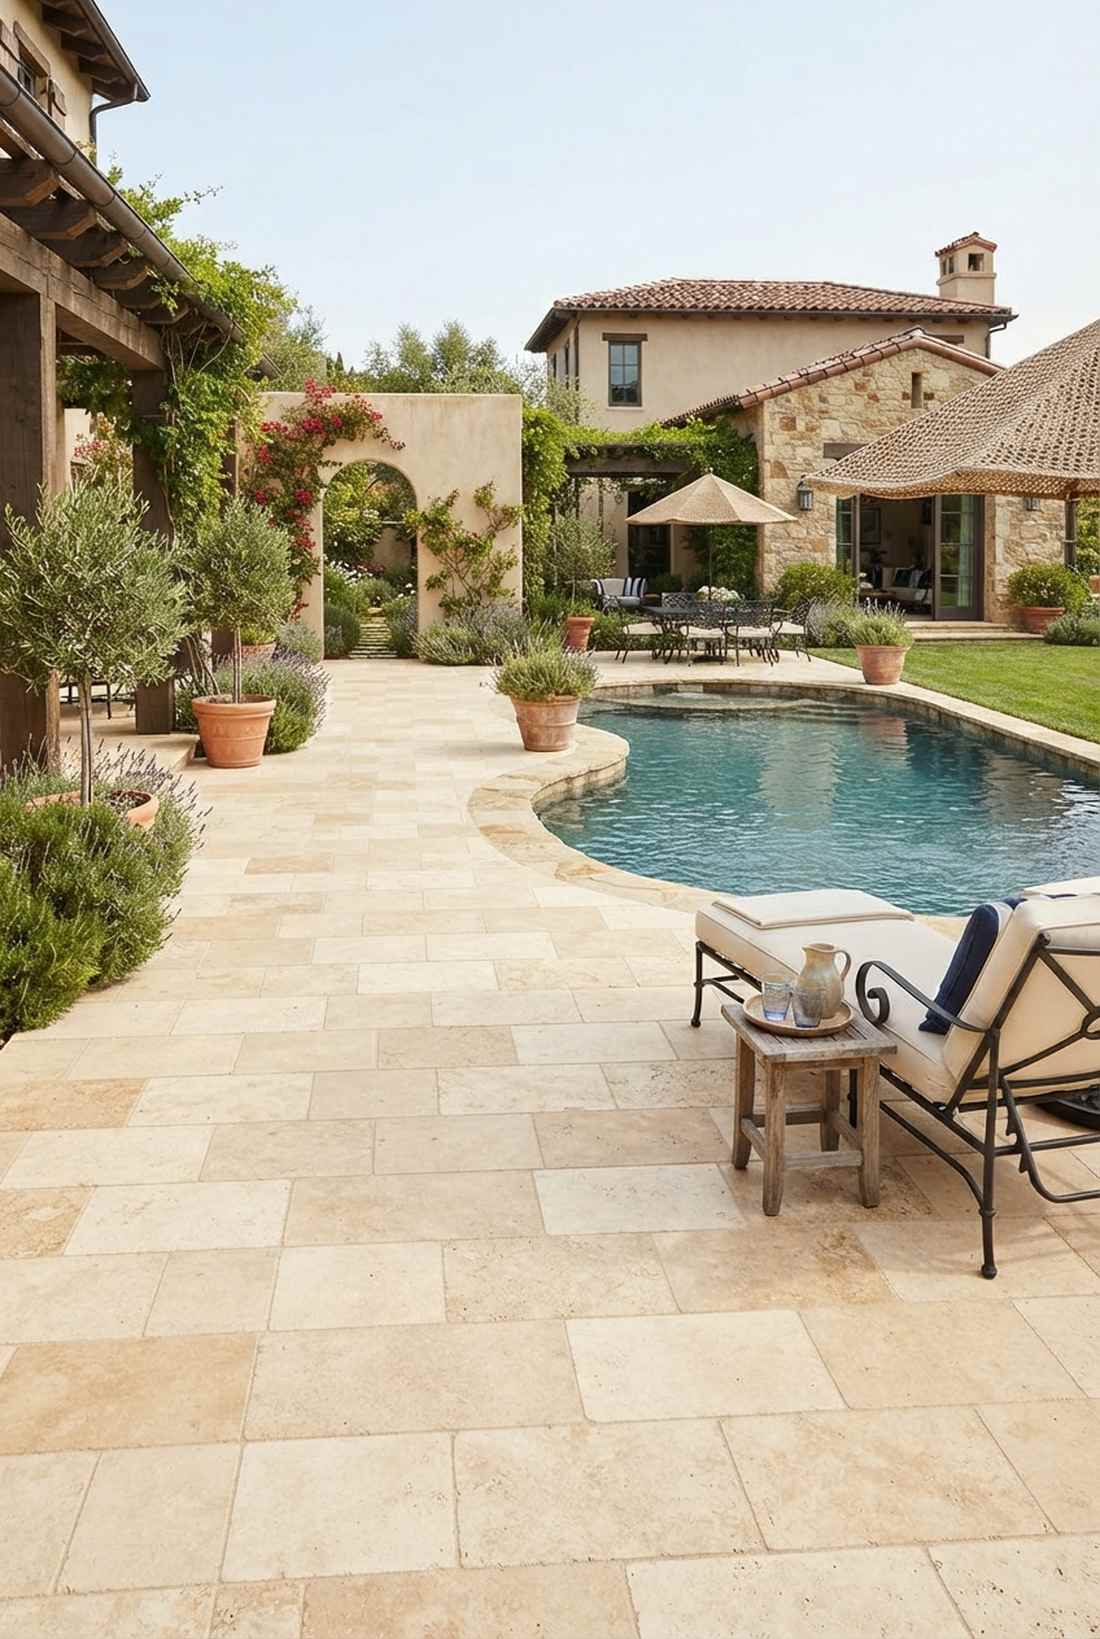
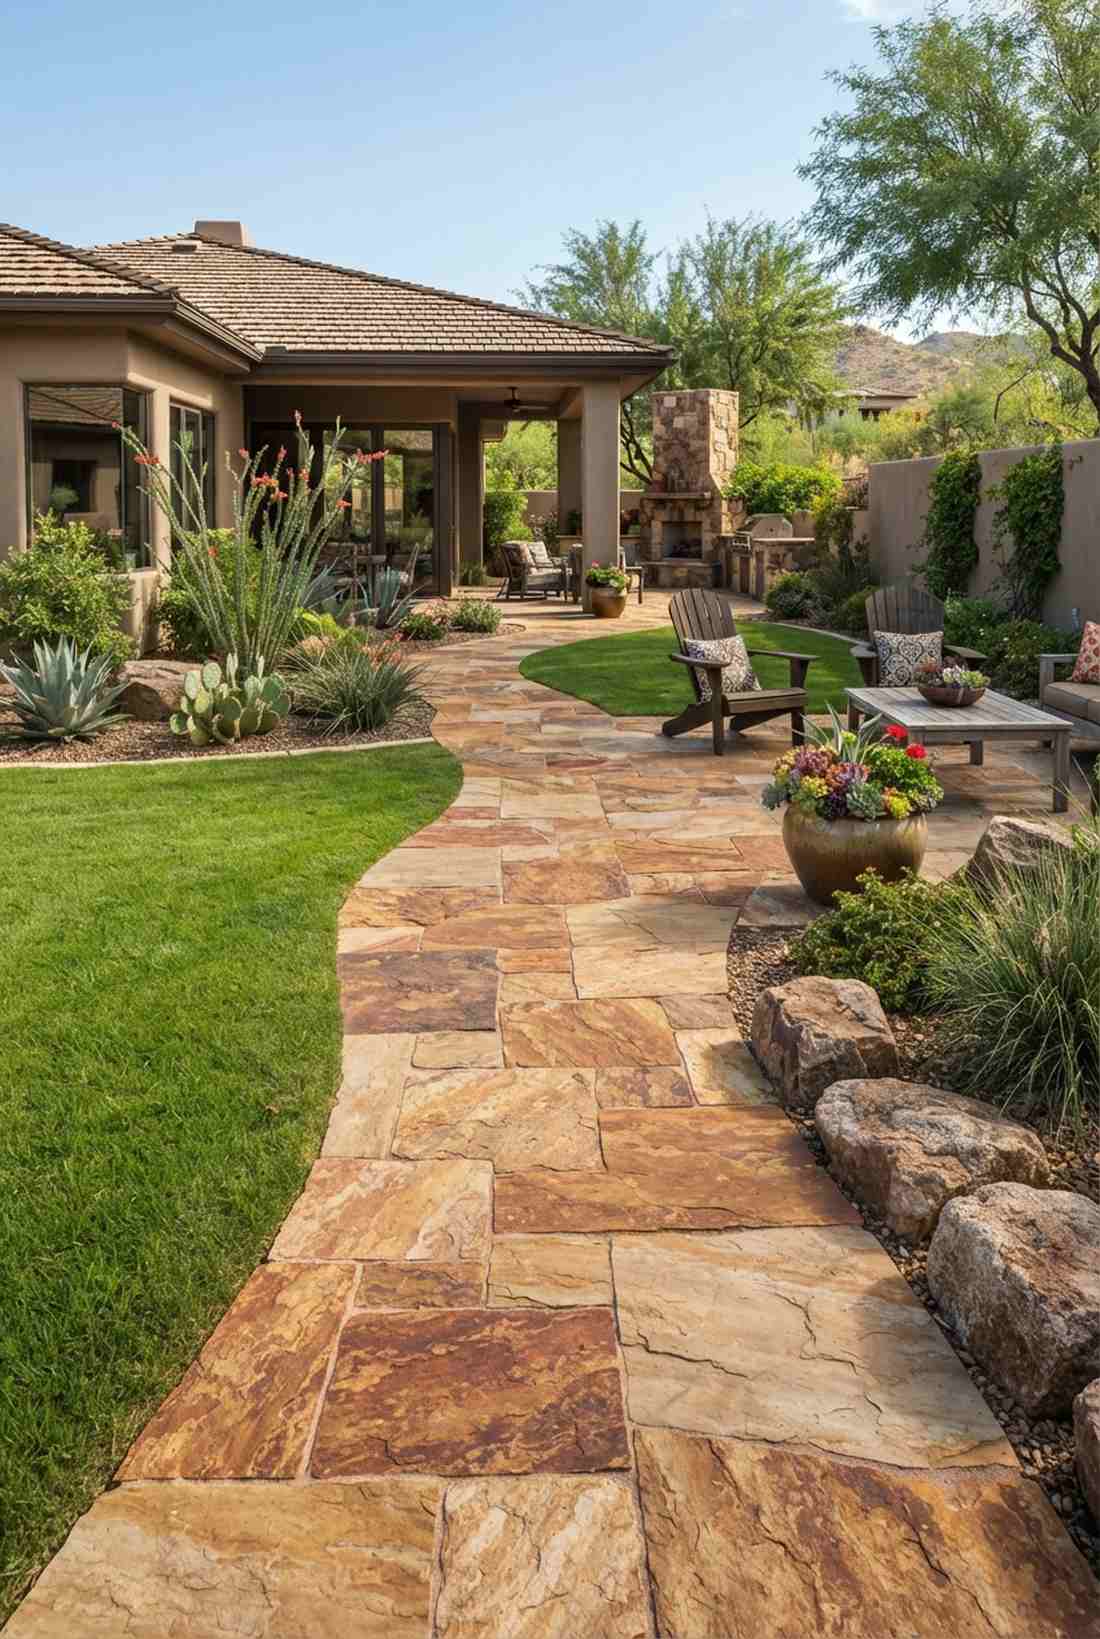
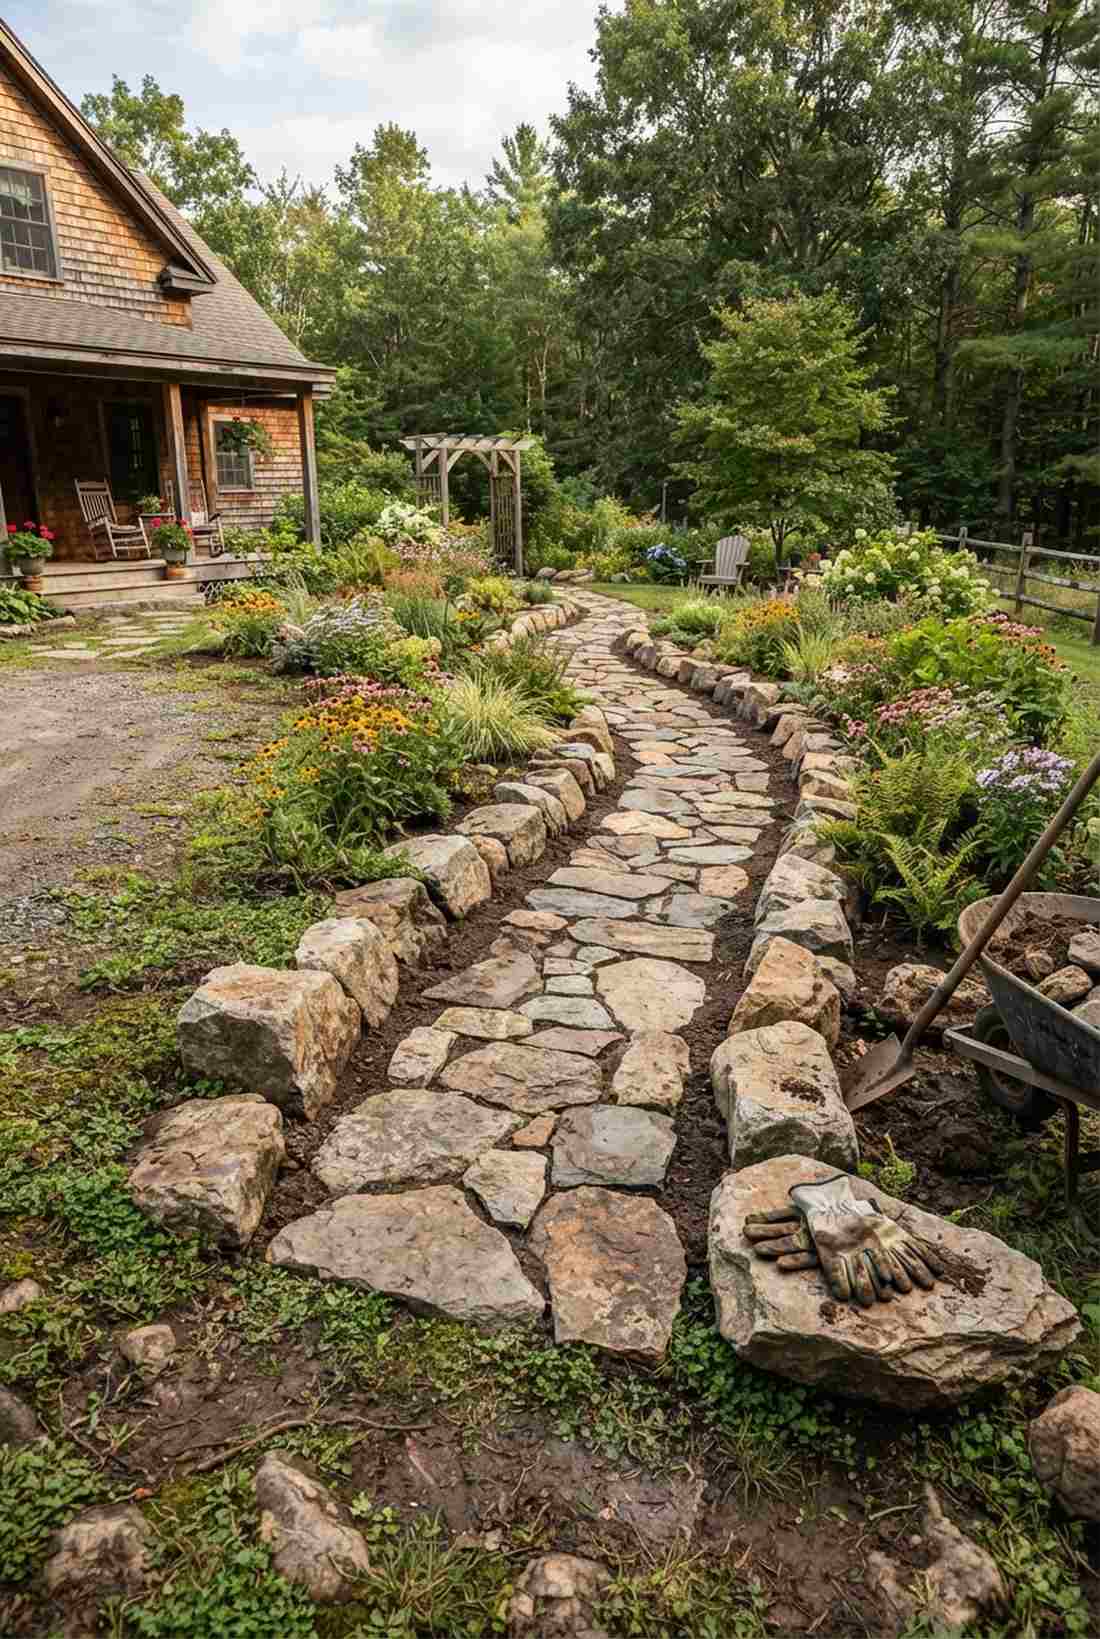
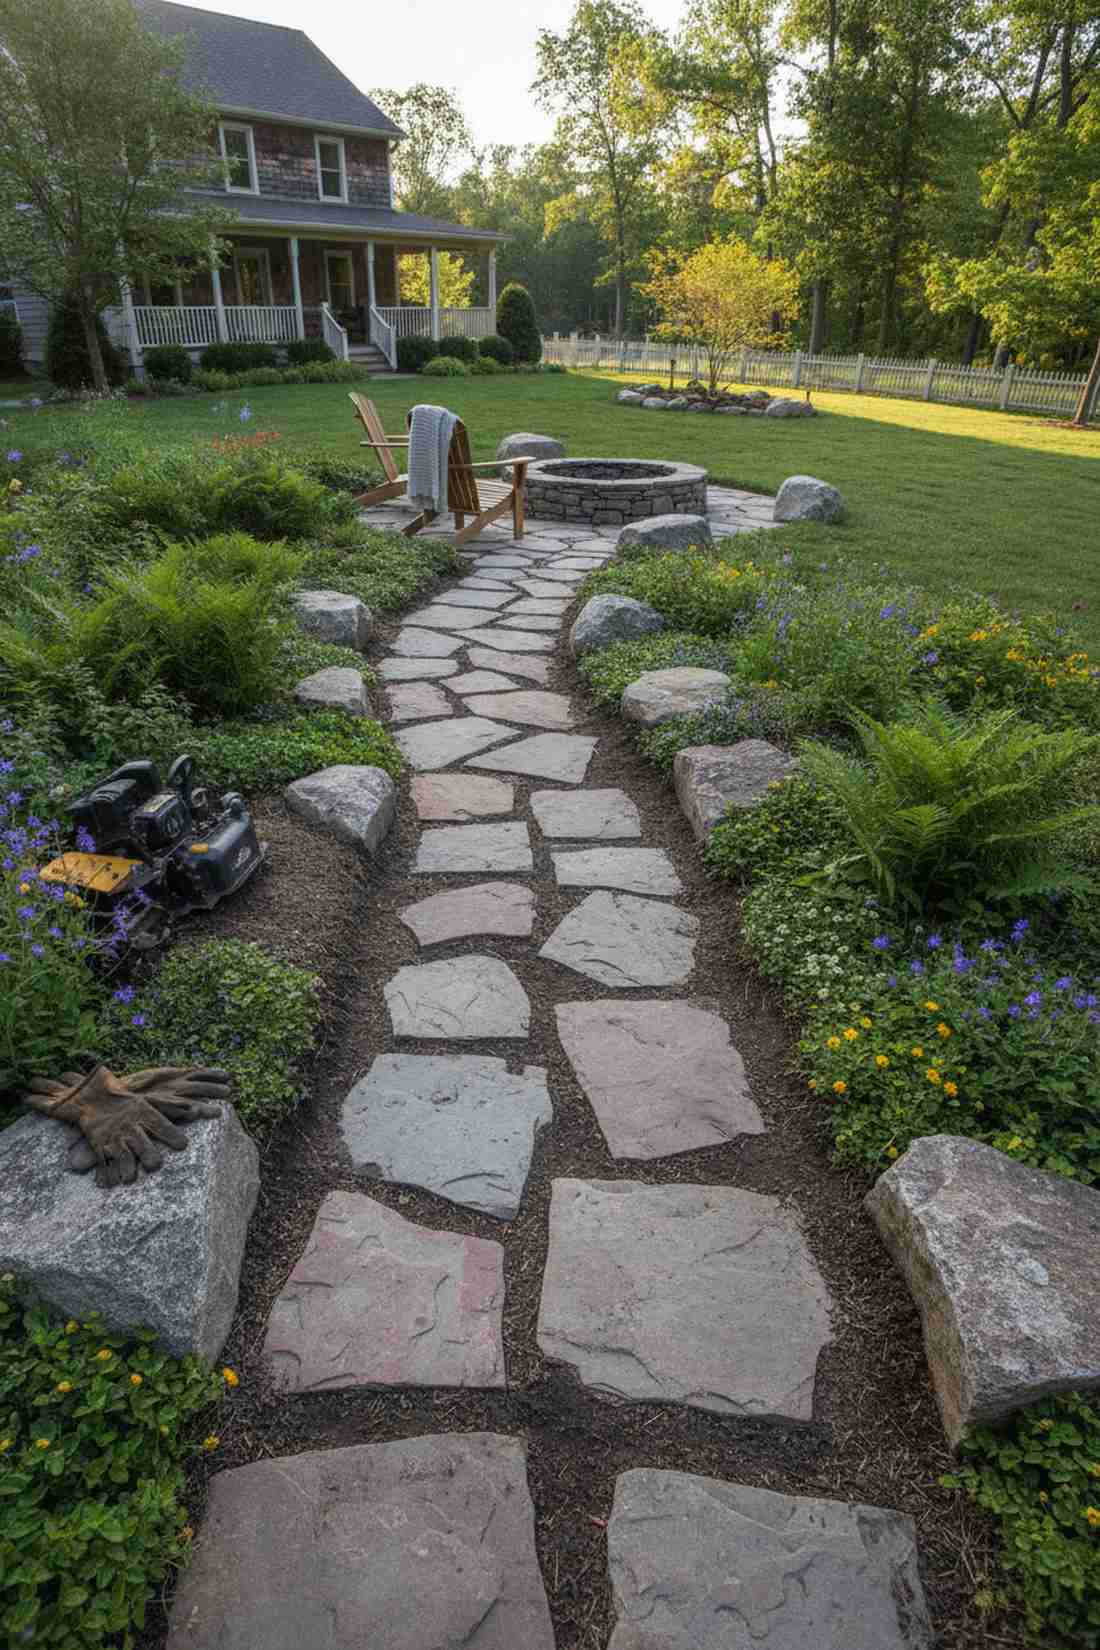
Natural Stone Garden Ideas Pathways
Quarried stone brings geological authenticity and regional character that manufactured products struggle to match. Flagstone, bluestone, and limestone slabs integrate seamlessly with native plantings and naturalistic garden styles favored in woodland or meadow settings.
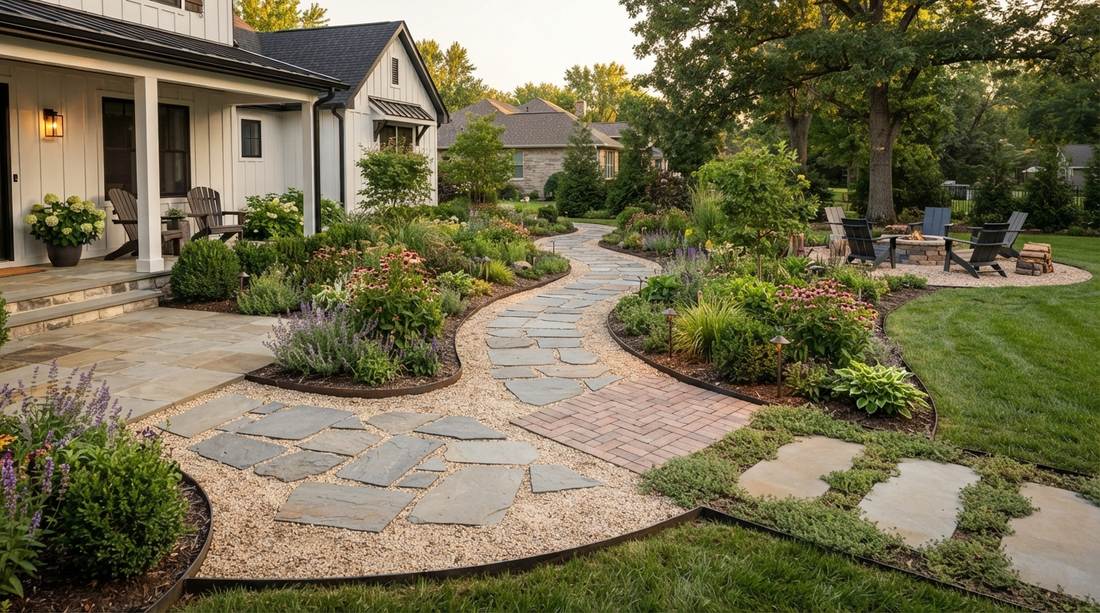
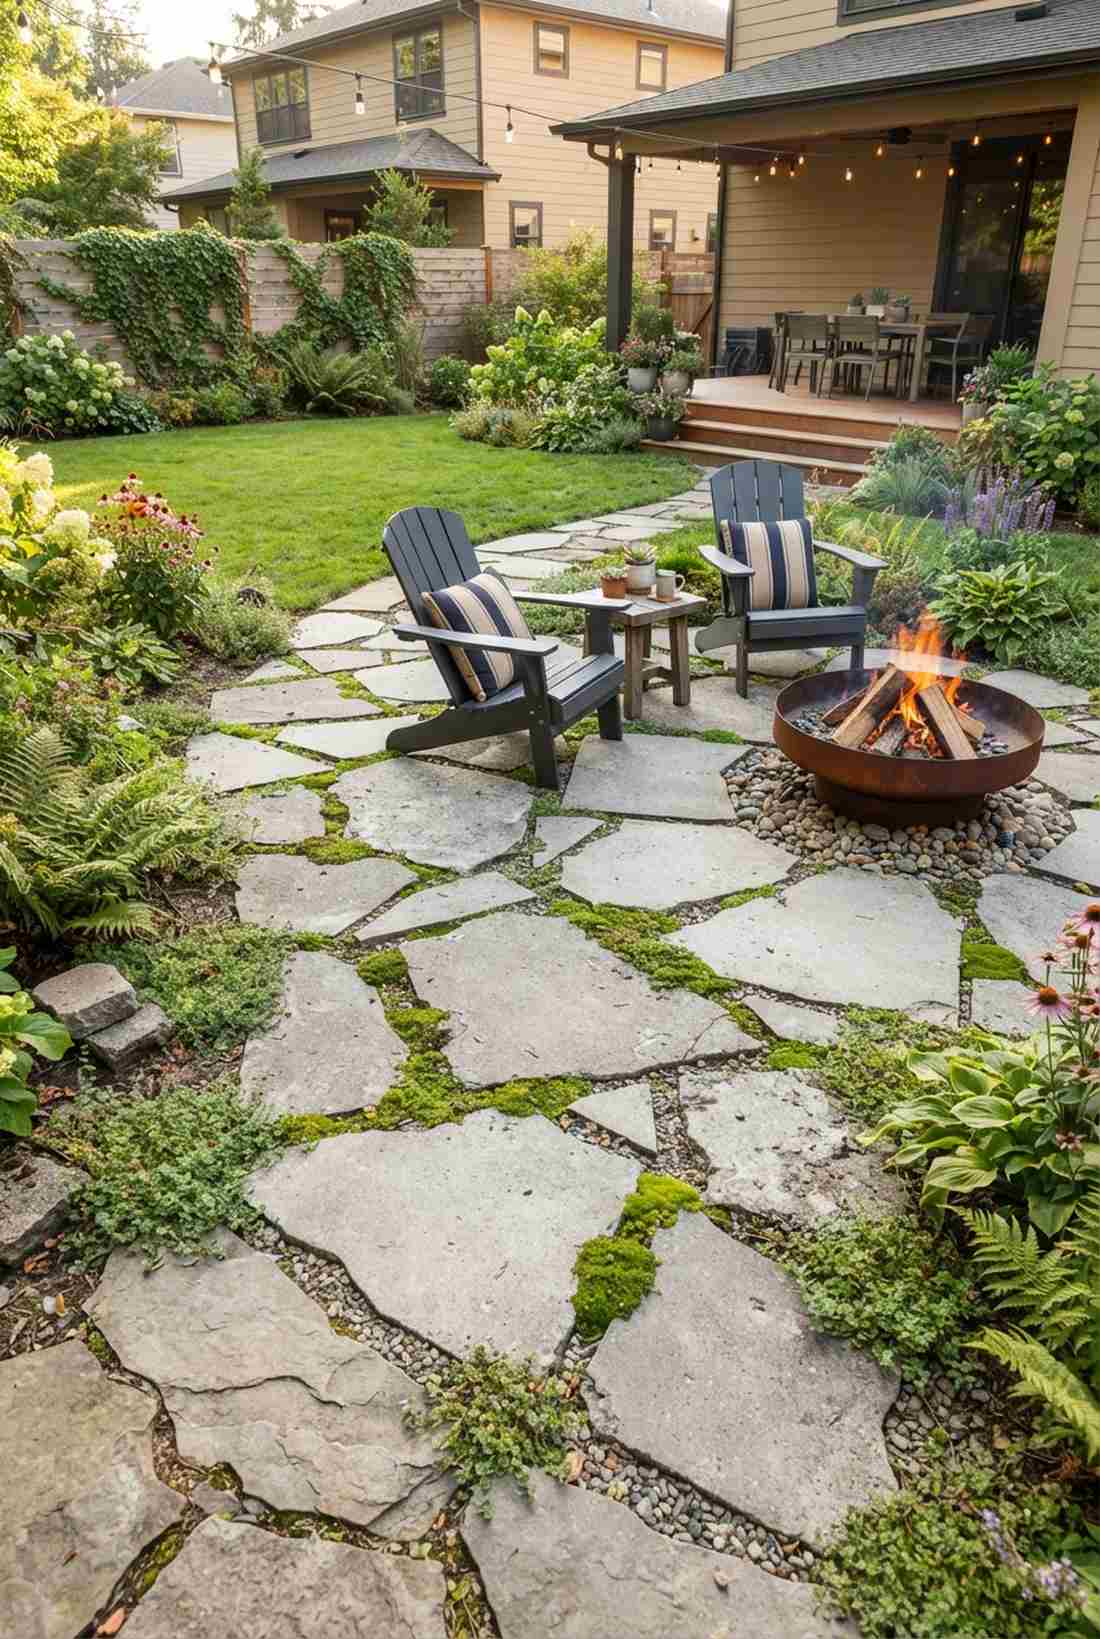
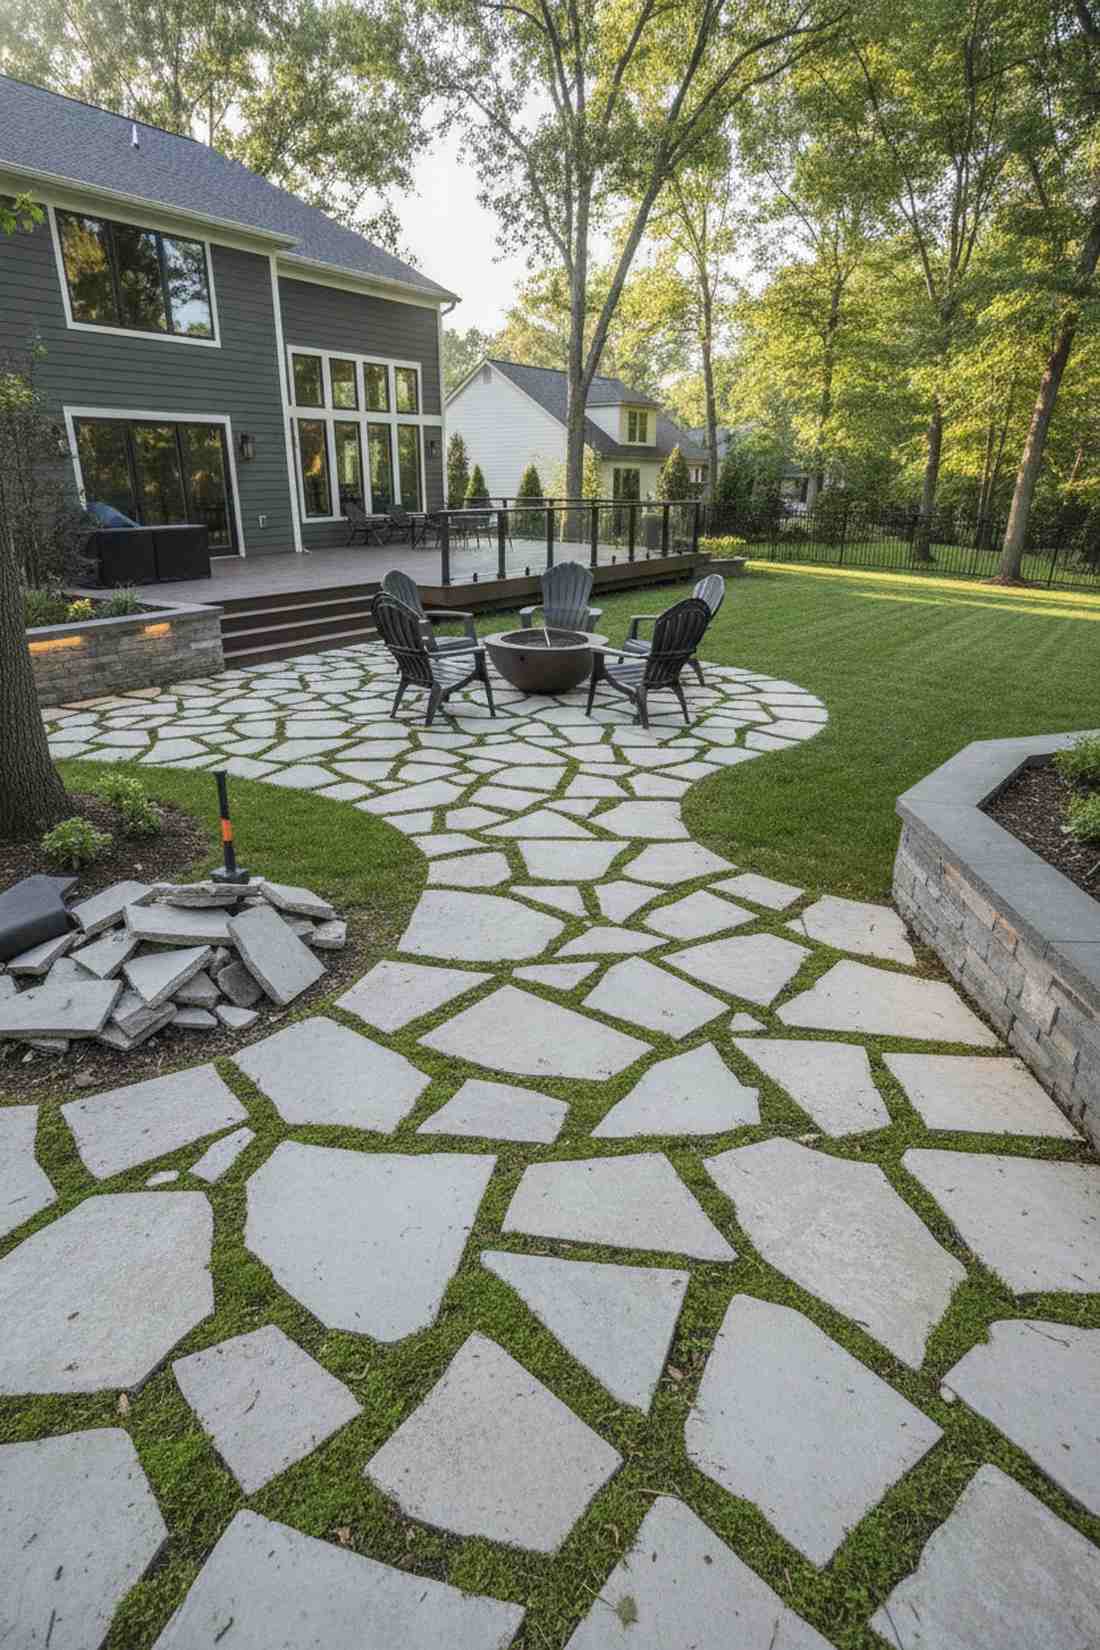
9. Irregular Flagstone Mosaic
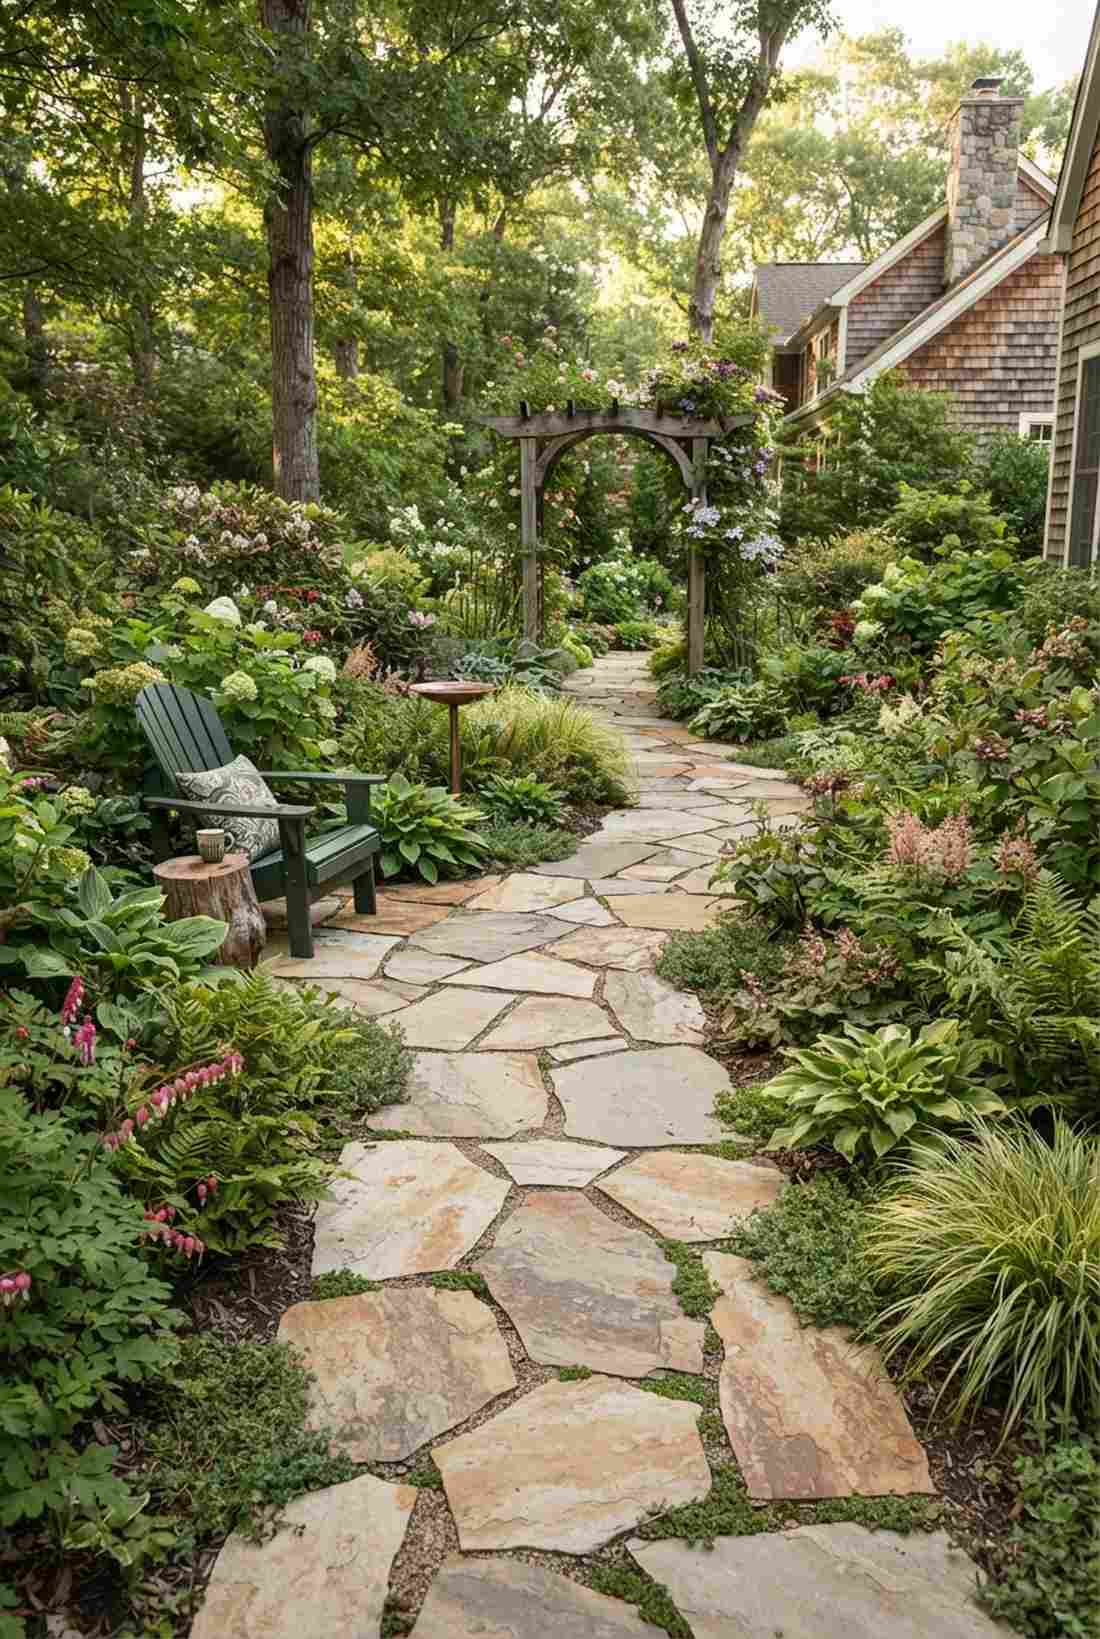
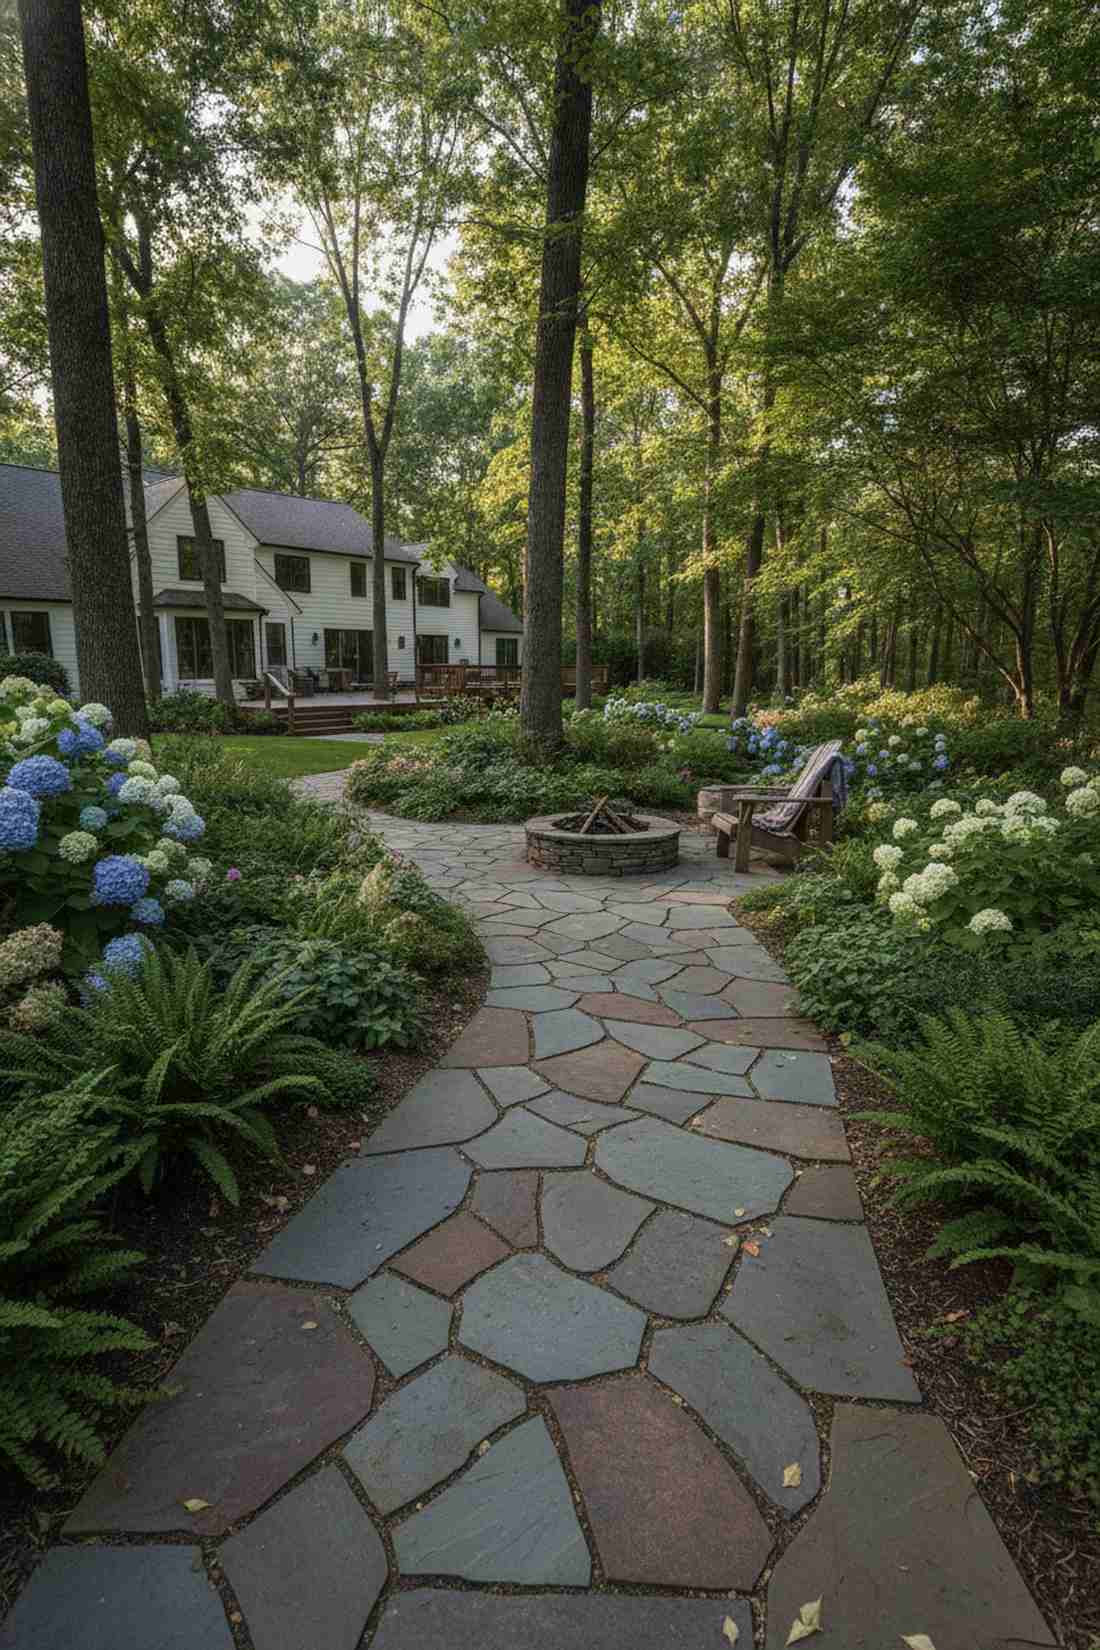
This organic stone puzzle feels like a magical woodland walk, completely at home meandering through deep perennial borders.
Rigid squares look terrible in a lush forest setting, but these natural polygons give a designer-level finish straight from nature. If you want high-CPC landscape results without the cost, dry-lay these stones over compacted dust instead of pouring wet mortar.
You can piece this together for about $12–$18 per square foot.
- Key Materials: Irregular sedimentary flagstones
- Vibe / Style: Naturalistic woodland
- Difficulty: Like a heavy jigsaw puzzle
- Budget Breakdown: Stone: $350 | Base dust: $60
- Creator’s Tip: Keep your joint gaps strictly under two inches to prevent tripping hazards.
- Smart Sourcing: pre-cut flagstone pallets, high-yield stone dust bags
10. Bluestone Thermal Finish
A matte charcoal walkway feels like a sleek modern museum, brilliantly suited for shaded north-facing entryways.
Slick stones are a lawsuit waiting to happen, but this heat-treated granular texture provides extreme grip even in heavy rain. Combine this thermal finish with steel architecture to make your garden pathways ideas look incredibly expensive.
This premium upgrade runs around $18–$25 per square foot. Pin this if you prioritize safety and style!
- Key Materials: Heat-treated thermal bluestone
- Vibe / Style: Modern architectural
- Difficulty: Requires heavy lifting equipment
- Budget Breakdown: Stone: $500 | Base: $100
- Creator’s Tip: Seal bluestone immediately to prevent oily leaf stains during autumn.
- Smart Sourcing: premium thermal bluestone slabs, UV-resistant clear stone sealers
This next setup is ridiculously cheap but looks like a $1,000 custom masonry job…
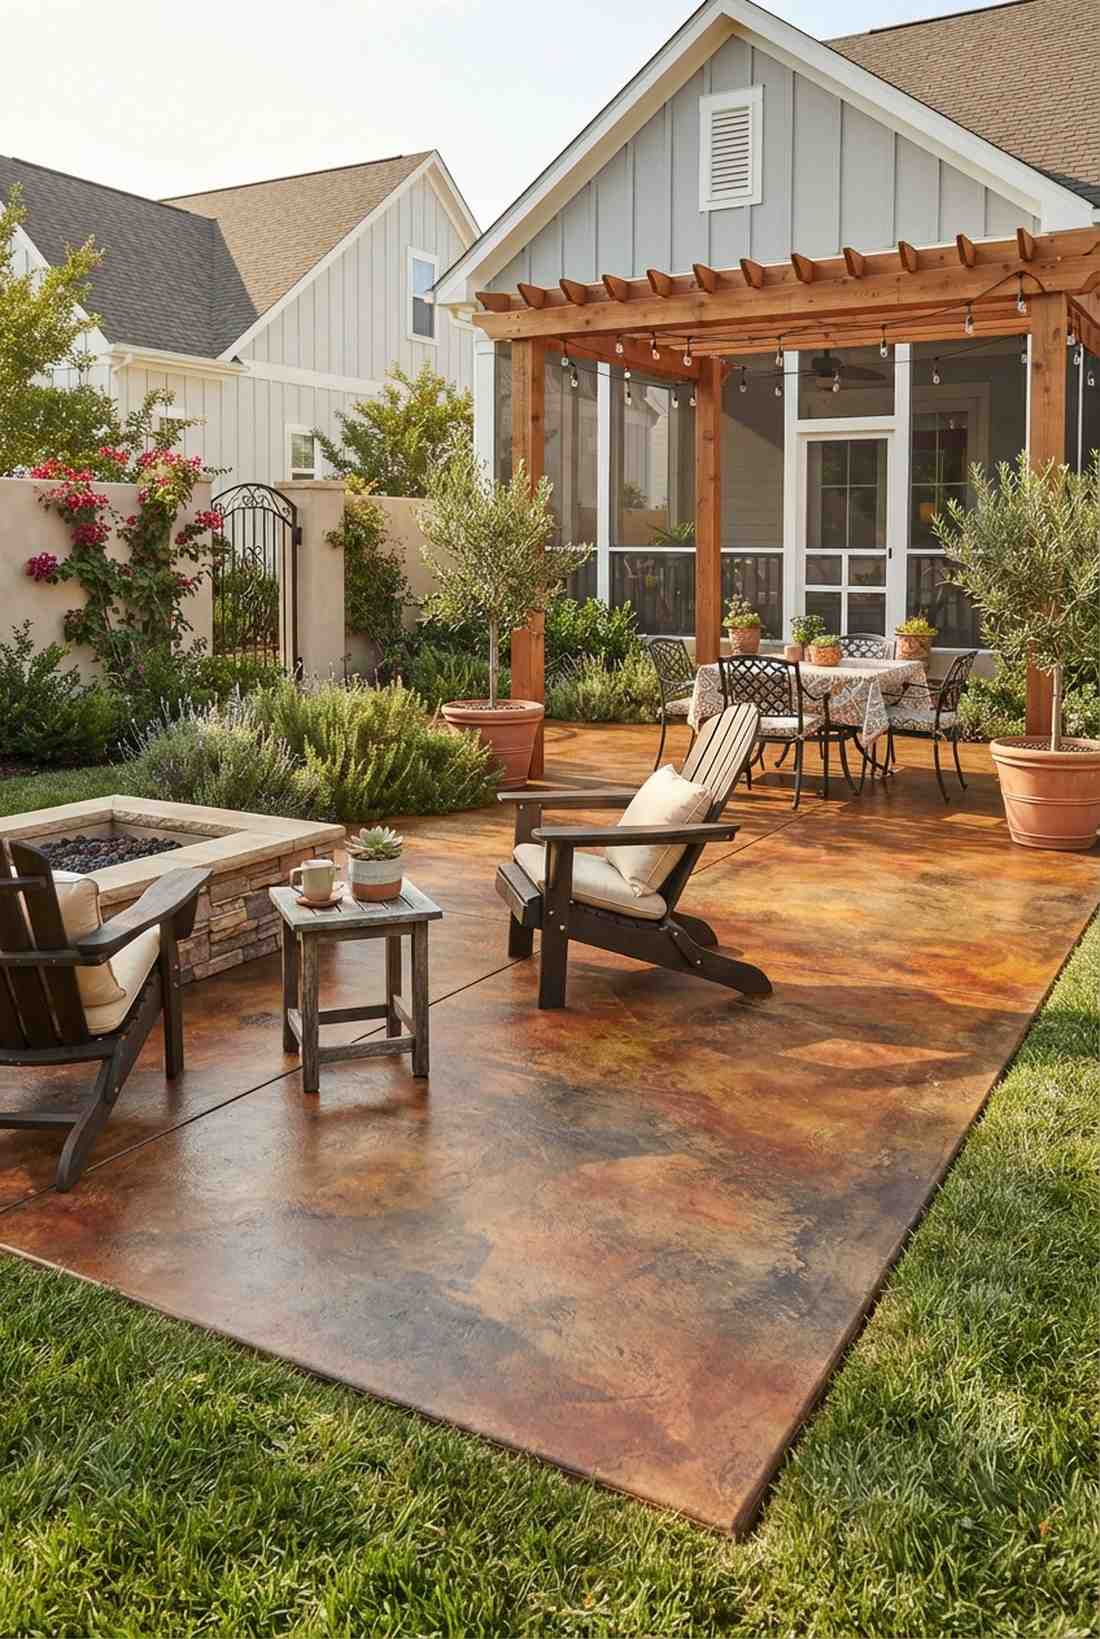
11. Cut Limestone Ashlar
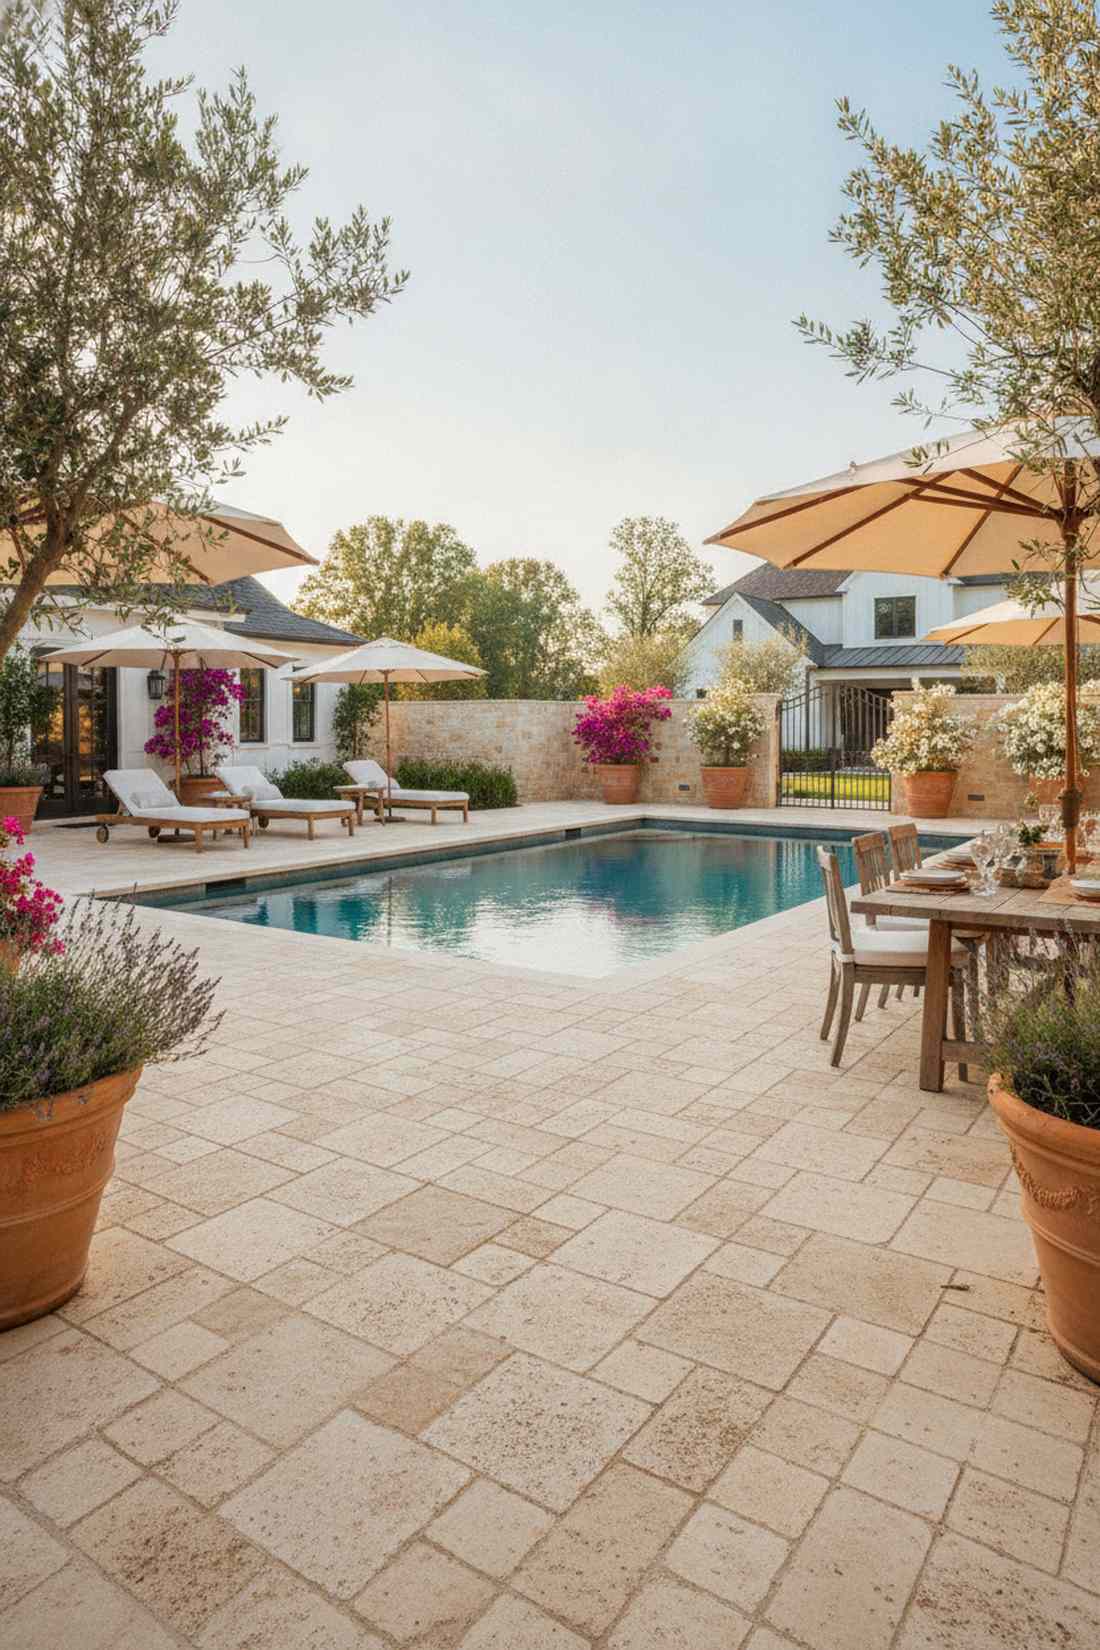
This Tuscan courtyard vibe feels like a sun-drenched Mediterranean villa, perfect for wrapping around a backyard pool.
Limestone naturally weathers into a buttery cream color that looks far more expensive than standard concrete flatwork. Shield the porous surface with a tannin blocker so nearby trees don’t permanently stain your stunning new layout.
Expect to budget $15–$22 per square foot for authentic limestone.
- Key Materials: Rectangular cut limestone blocks
- Vibe / Style: Mediterranean elegance
- Difficulty: Intermediate
- Budget Breakdown: Stone: $450 | Sealer: $45
- Creator’s Tip: Lay the blocks in coursed rows to stretch the visual length of your patio.
- Smart Sourcing: porous stone sealant kits, pre-cut limestone block pallets
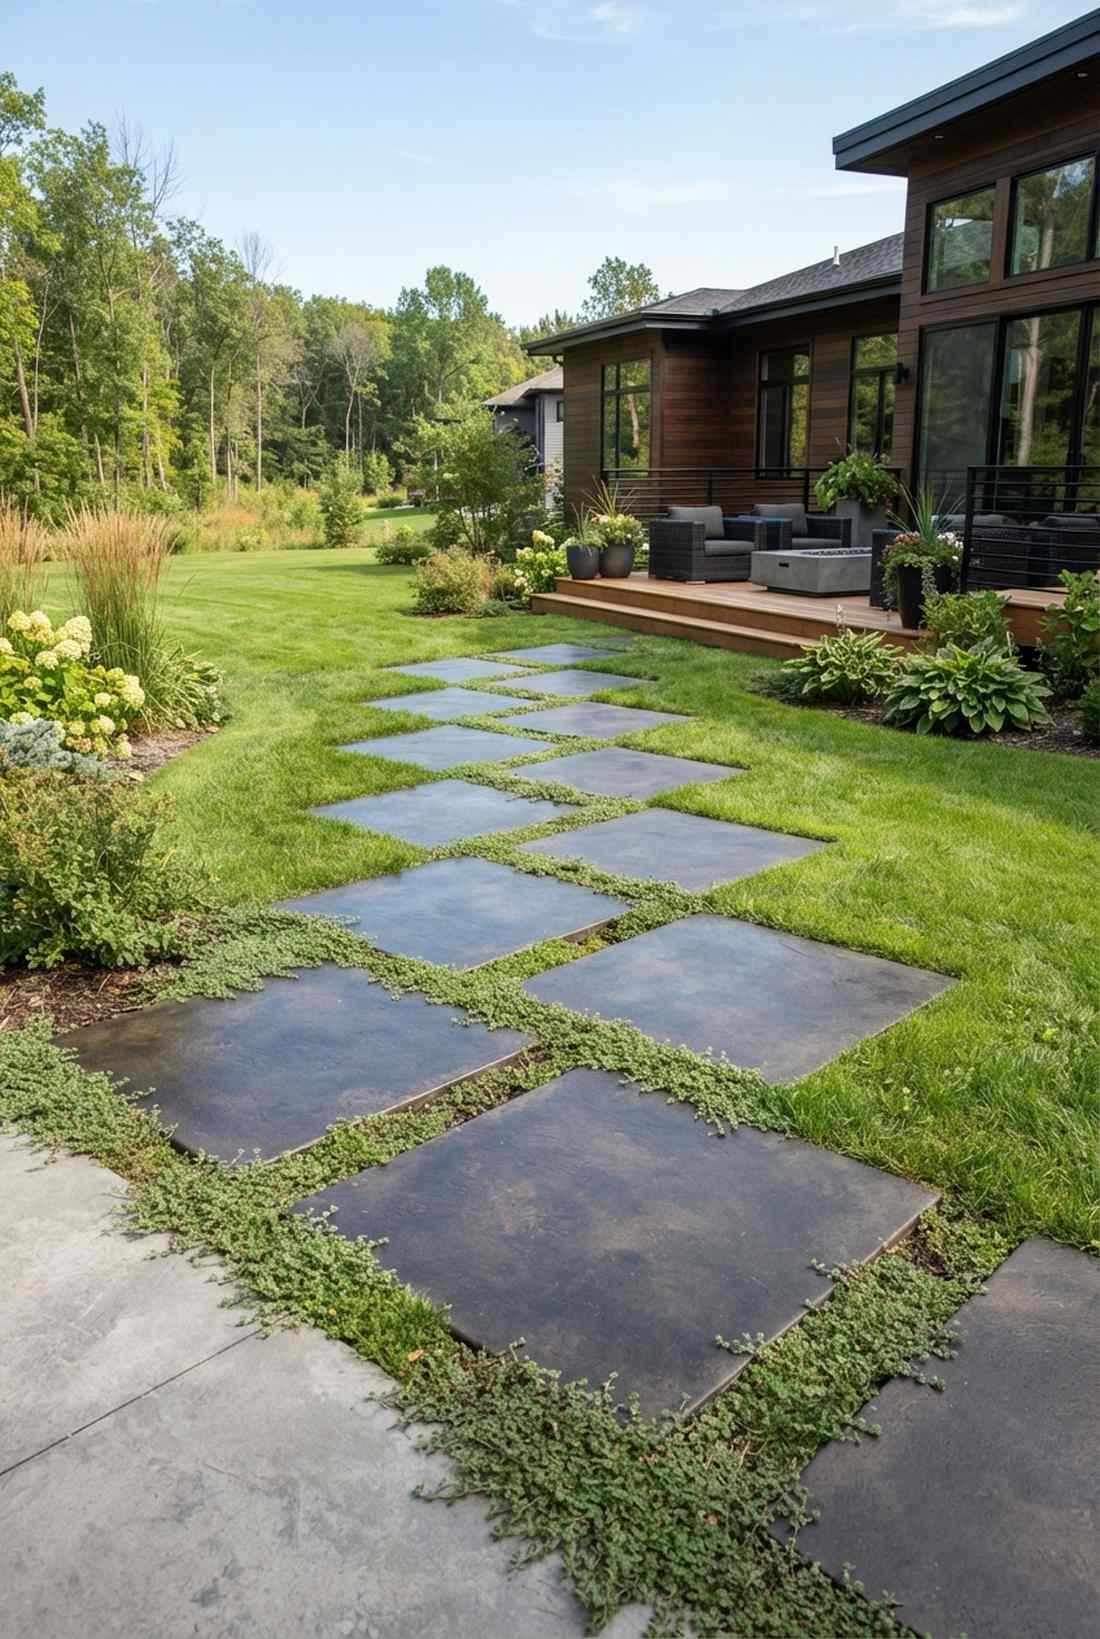
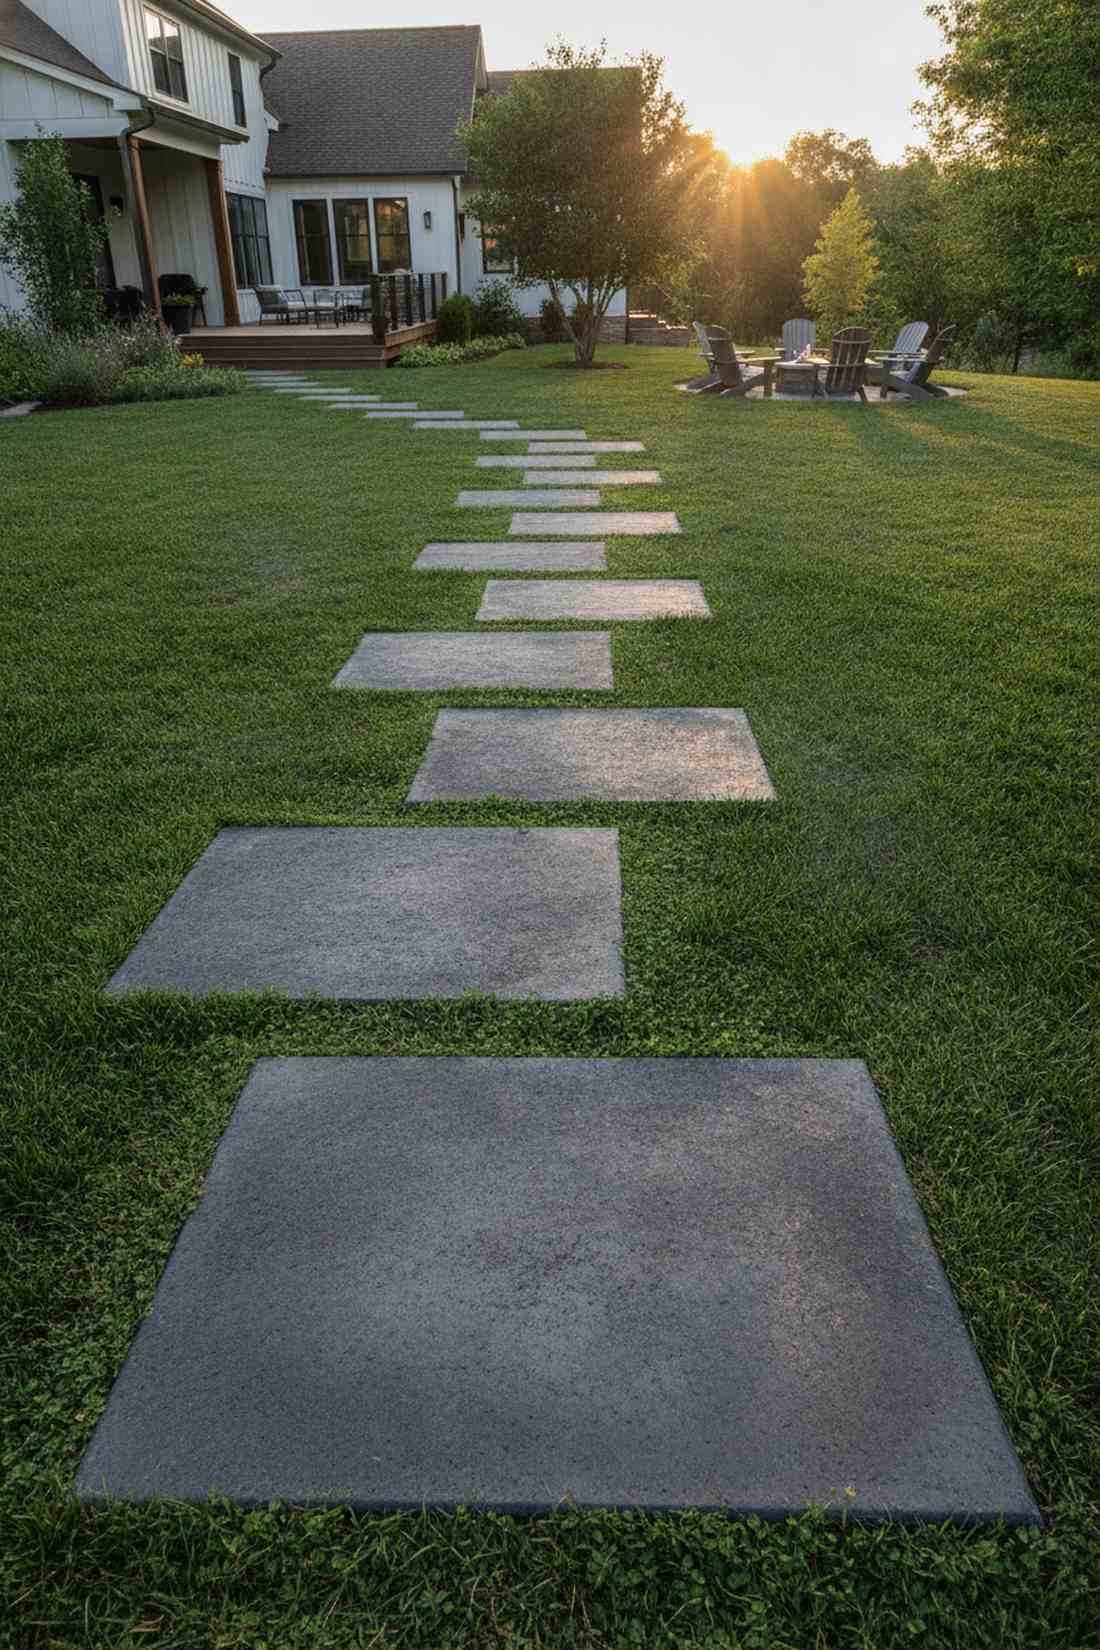
12. Stepping Stone Archipelago
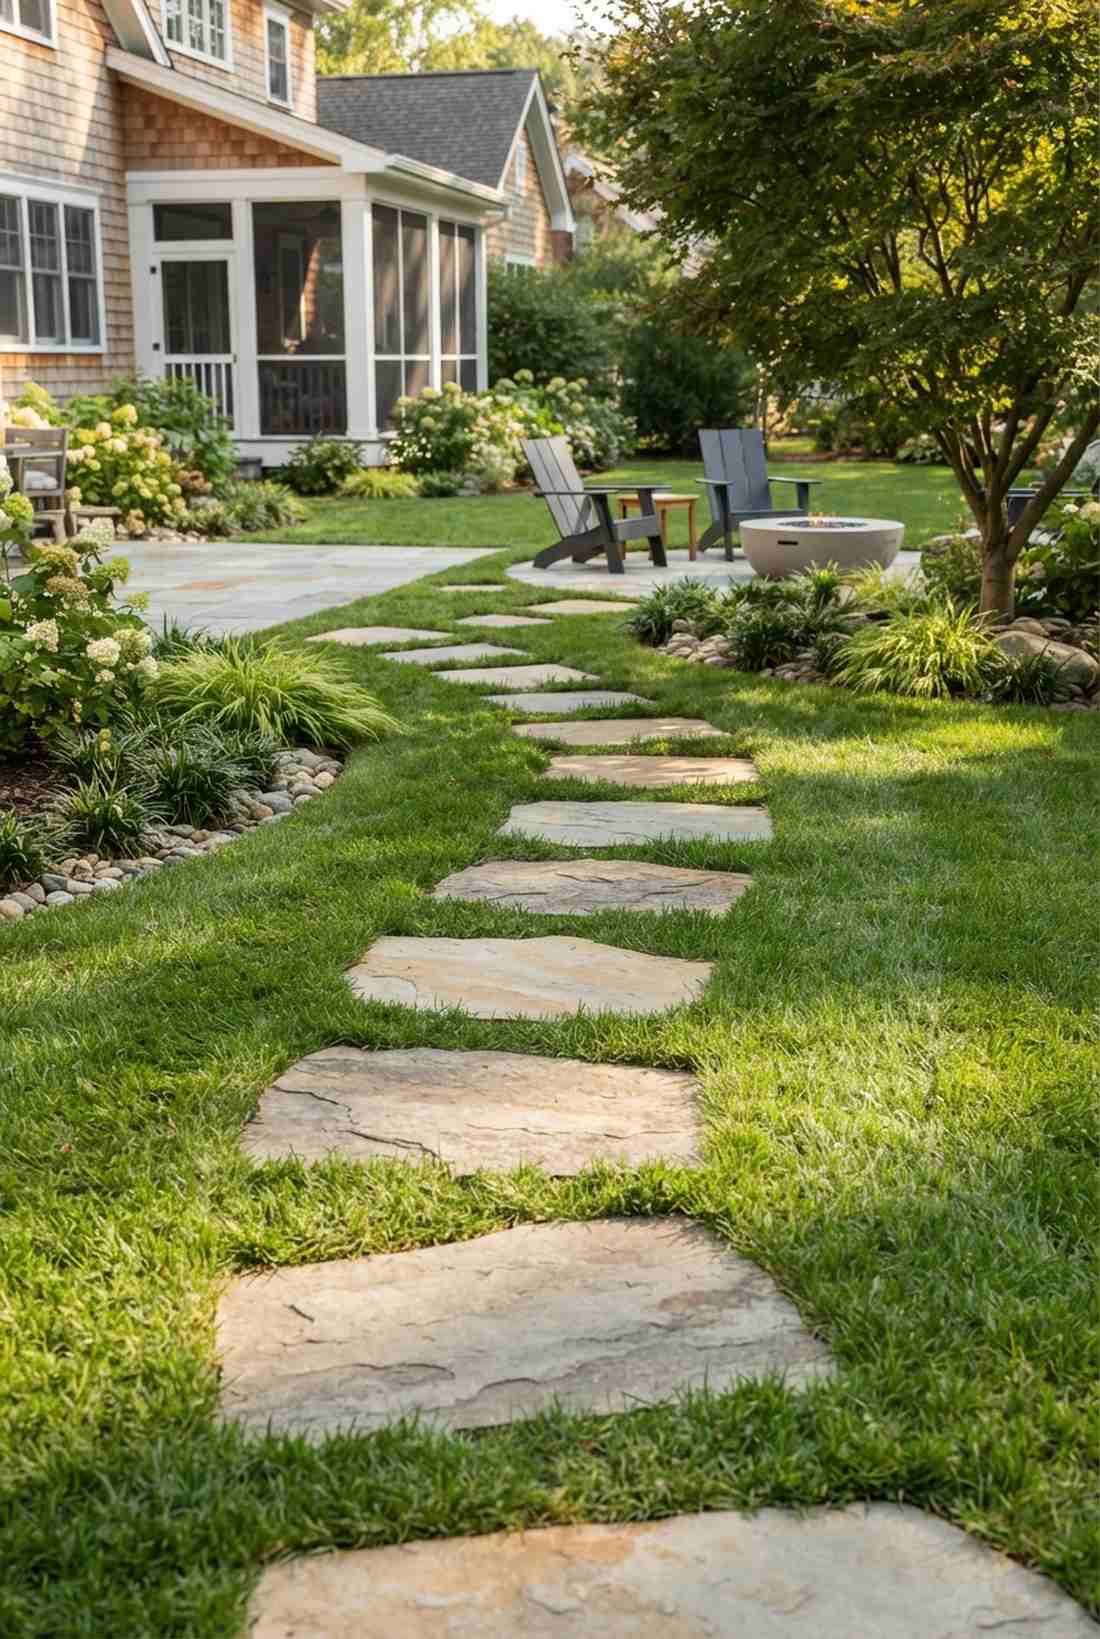
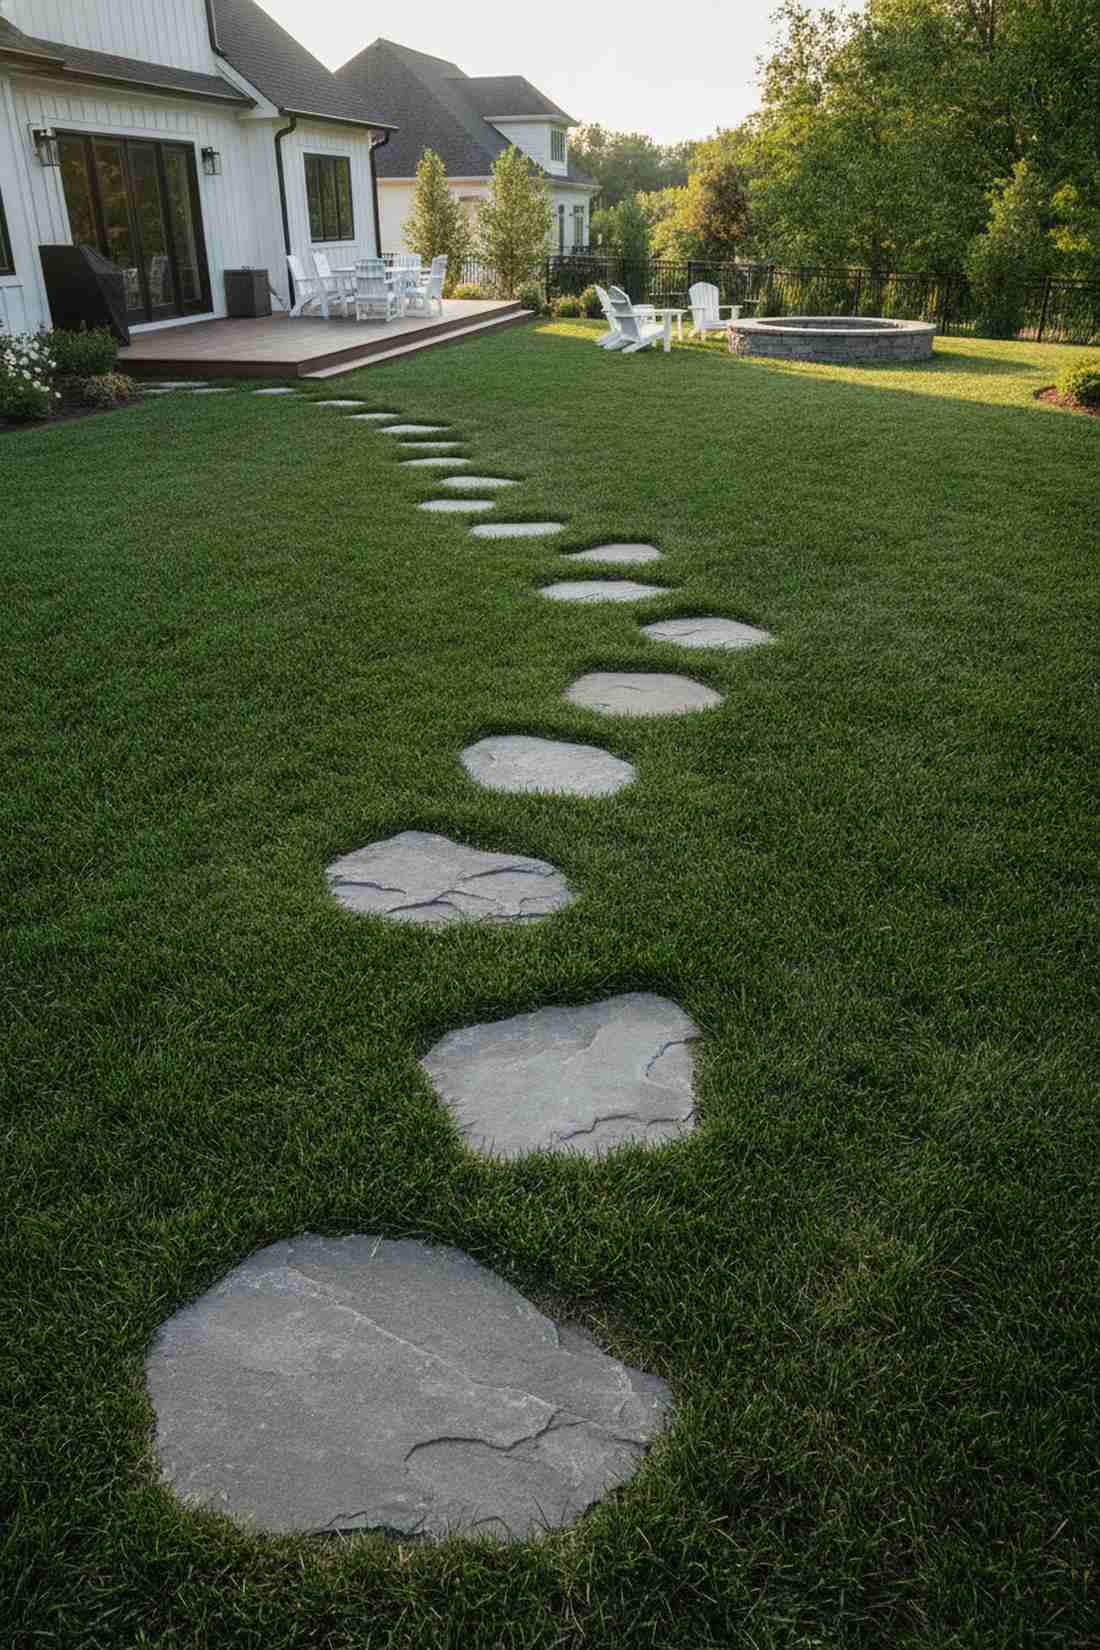
A floating stone sequence feels like a whimsical zen garden, ideal for creating desire lines across a plush lawn.
Pouring a solid path destroys grass, but sinking individual stones protects the turf while looking effortlessly chic. Recess the stones completely flush with the dirt so your mower glides right over them without striking the blade.
You can easily pull this off for just $50–$100 total. Save this for a rapid Saturday afternoon upgrade!
- Key Materials: Flat natural stepping stones
- Vibe / Style: Minimalist Zen
- Difficulty: Extremely easy
- Budget Breakdown: Stones: $60 | Base sand: $15
- Creator’s Tip: Space the center of each stone exactly 24 inches apart to match a natural human stride.
- Smart Sourcing: heavy-duty stepping stone molds, bulk natural flat stones
13. Granite Cobblestone Edging
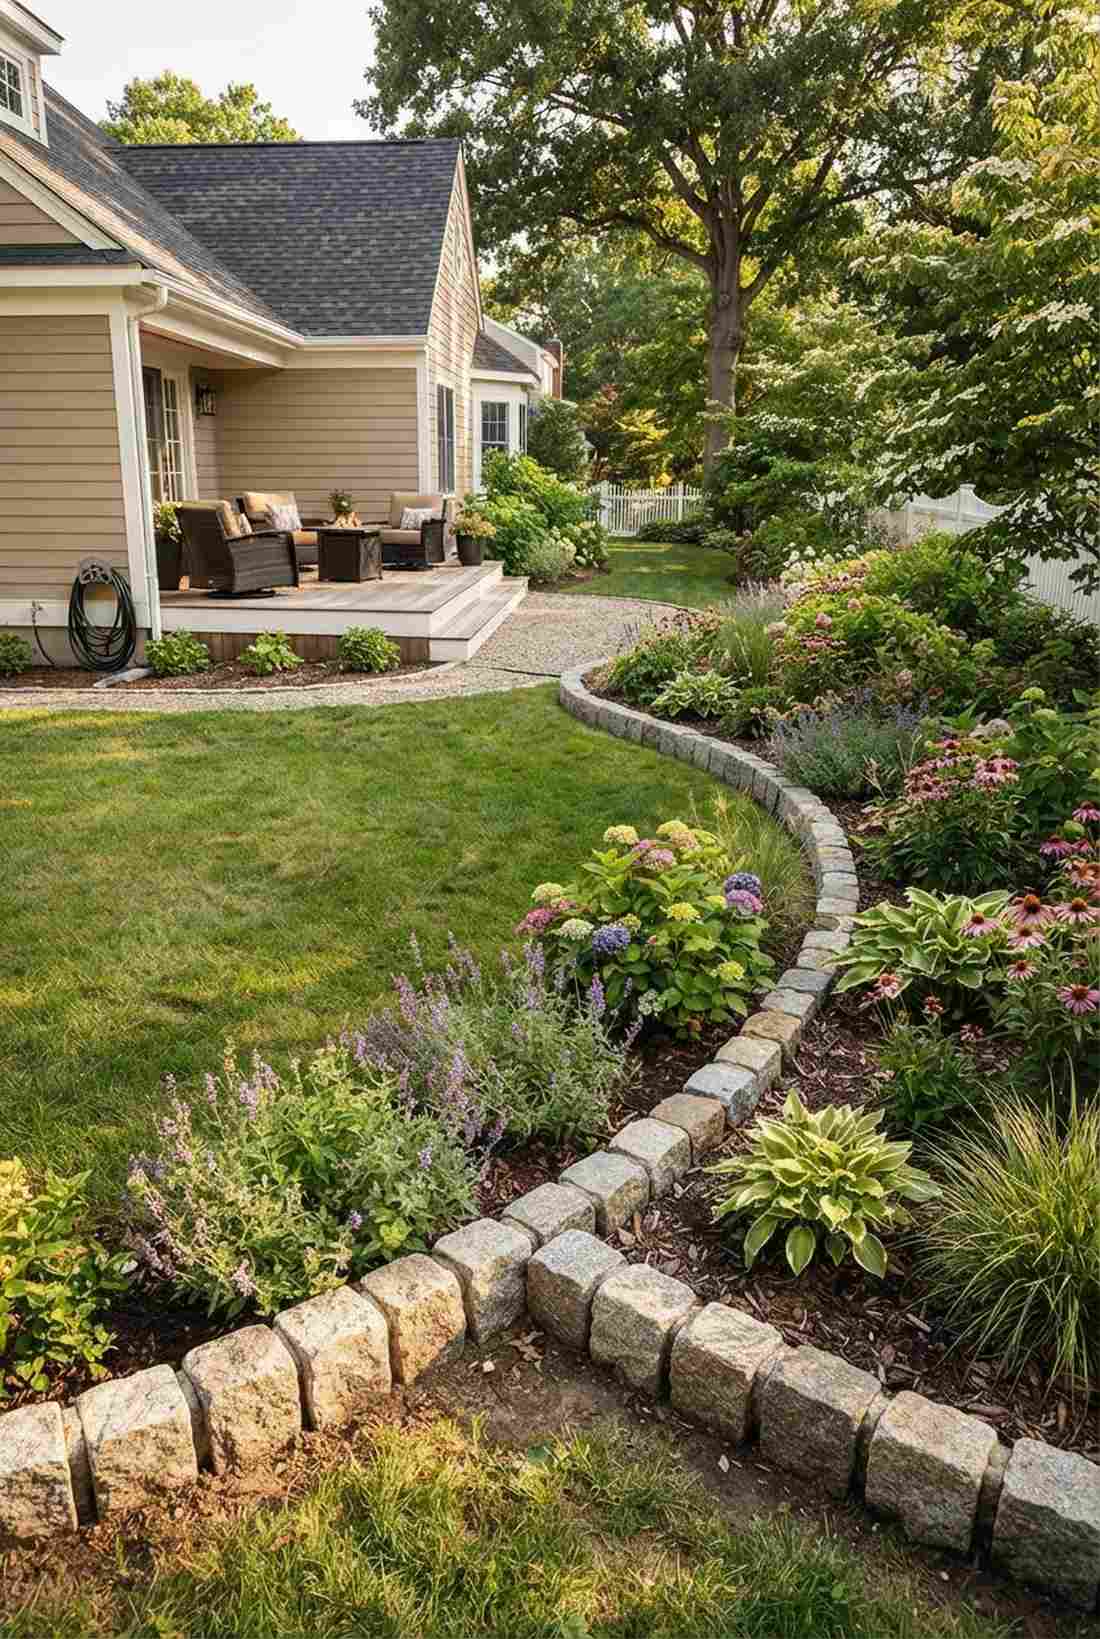
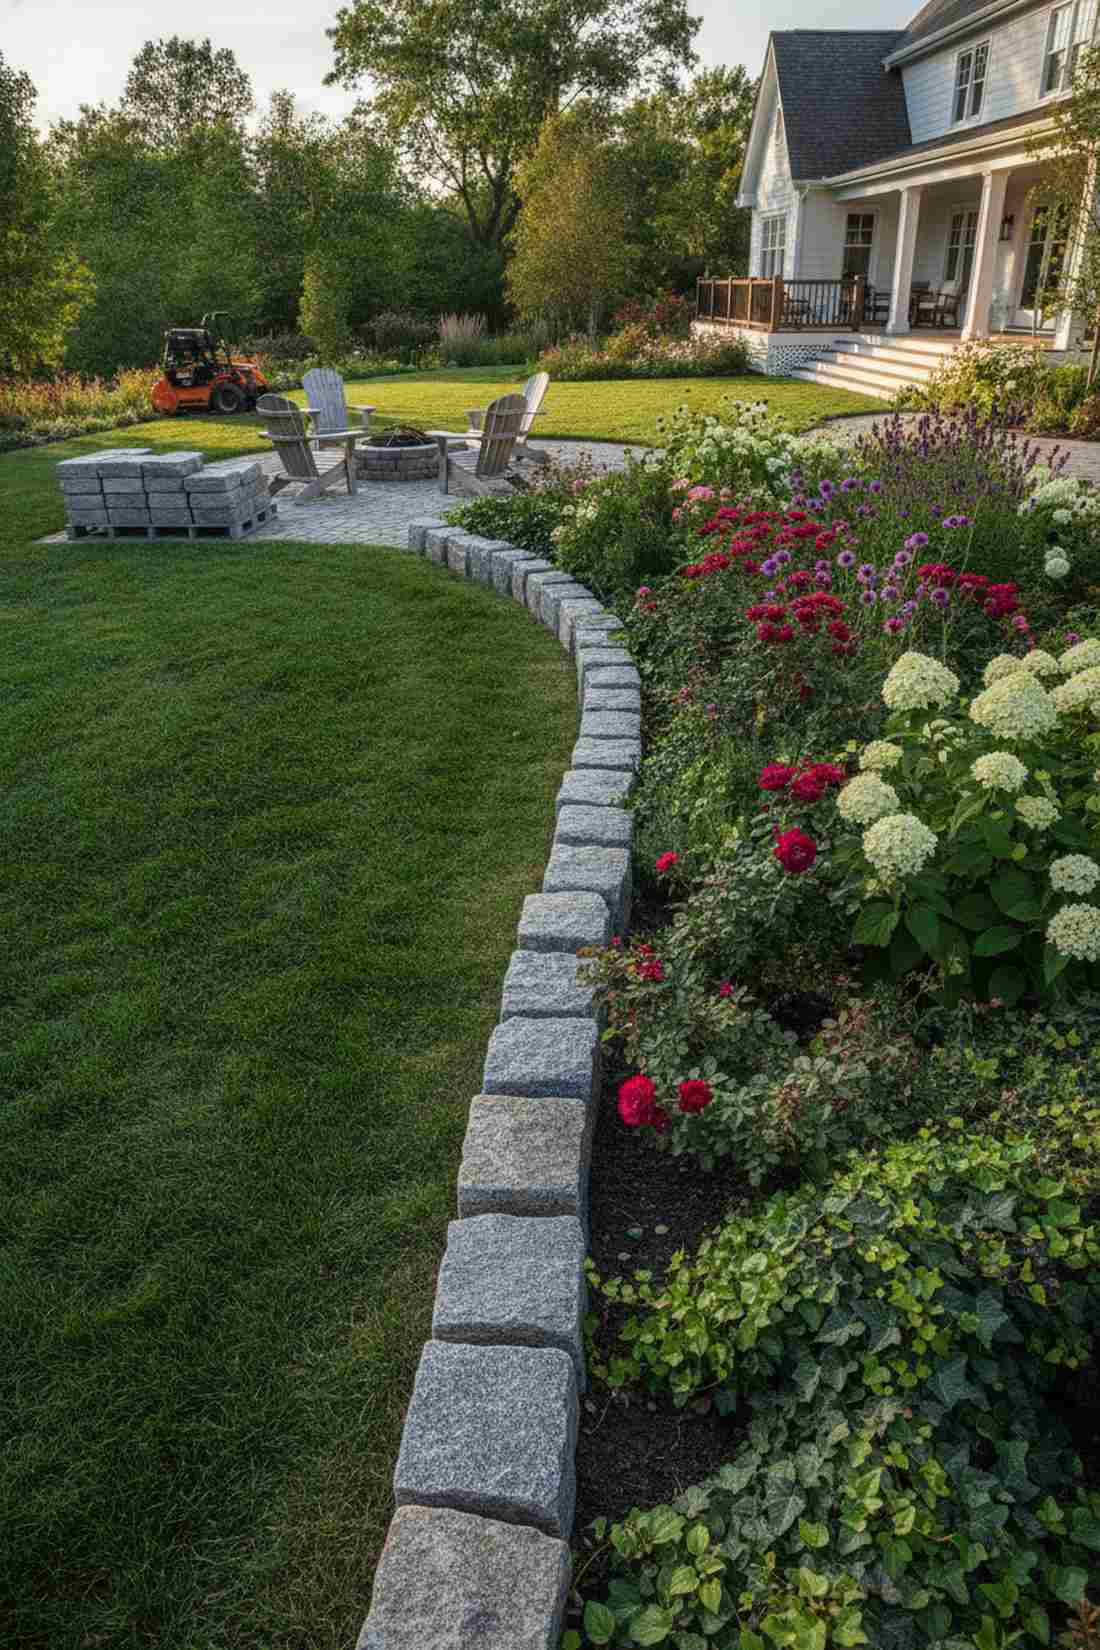
This historic street border feels like a 19th-century carriage lane, brilliant for framing messy garden beds.
Using plastic edging looks terribly cheap, but genuine rough-hewn cobbles give a designer-level finish that lasts lifetimes. Dig a shallow trench and set these reclaimed blocks vertically to stop grass runners from invading your flowers.
This permanent border costs around $8–$12 per linear foot.
- Key Materials: Reclaimed granite cobbles
- Vibe / Style: Historic urban
- Difficulty: Labor intensive but simple
- Budget Breakdown: Cobbles: $150 | Trench sand: $20
- Creator’s Tip: Don’t try to perfectly align them; the jagged, irregular tops are what create the charm.
- Smart Sourcing: reclaimed granite cobblestone pallets, commercial-grade landscaping trenchers
14. Split Face Sandstone

The textured desert walkway feels like exploring an arid canyon resort, striking against lush green turf.
Machine-cut rock looks sterile, whereas this natural cleft surface reveals gorgeous rust and gold striations. Because thicknesses vary, you’ll need to shim the bottoms with crushed stone to keep the walking surface perfectly level.
Expect to spend $14–$20 per square foot for high-quality sandstone. Pin this if you love earthy textures!
- Key Materials: Natural cleft split-face sandstone
- Vibe / Style: Rugged earth tones
- Difficulty: Requires meticulous leveling
- Budget Breakdown: Stone: $380 | Shims: $30
- Creator’s Tip: Always install the thickest stones first, then build the base up for the thinner pieces.
- Smart Sourcing: premium split-face stone kits, crushed leveling aggregate (bulk bags)
Stop scrolling if you want an eco-friendly look that requires literally zero weekend maintenance.
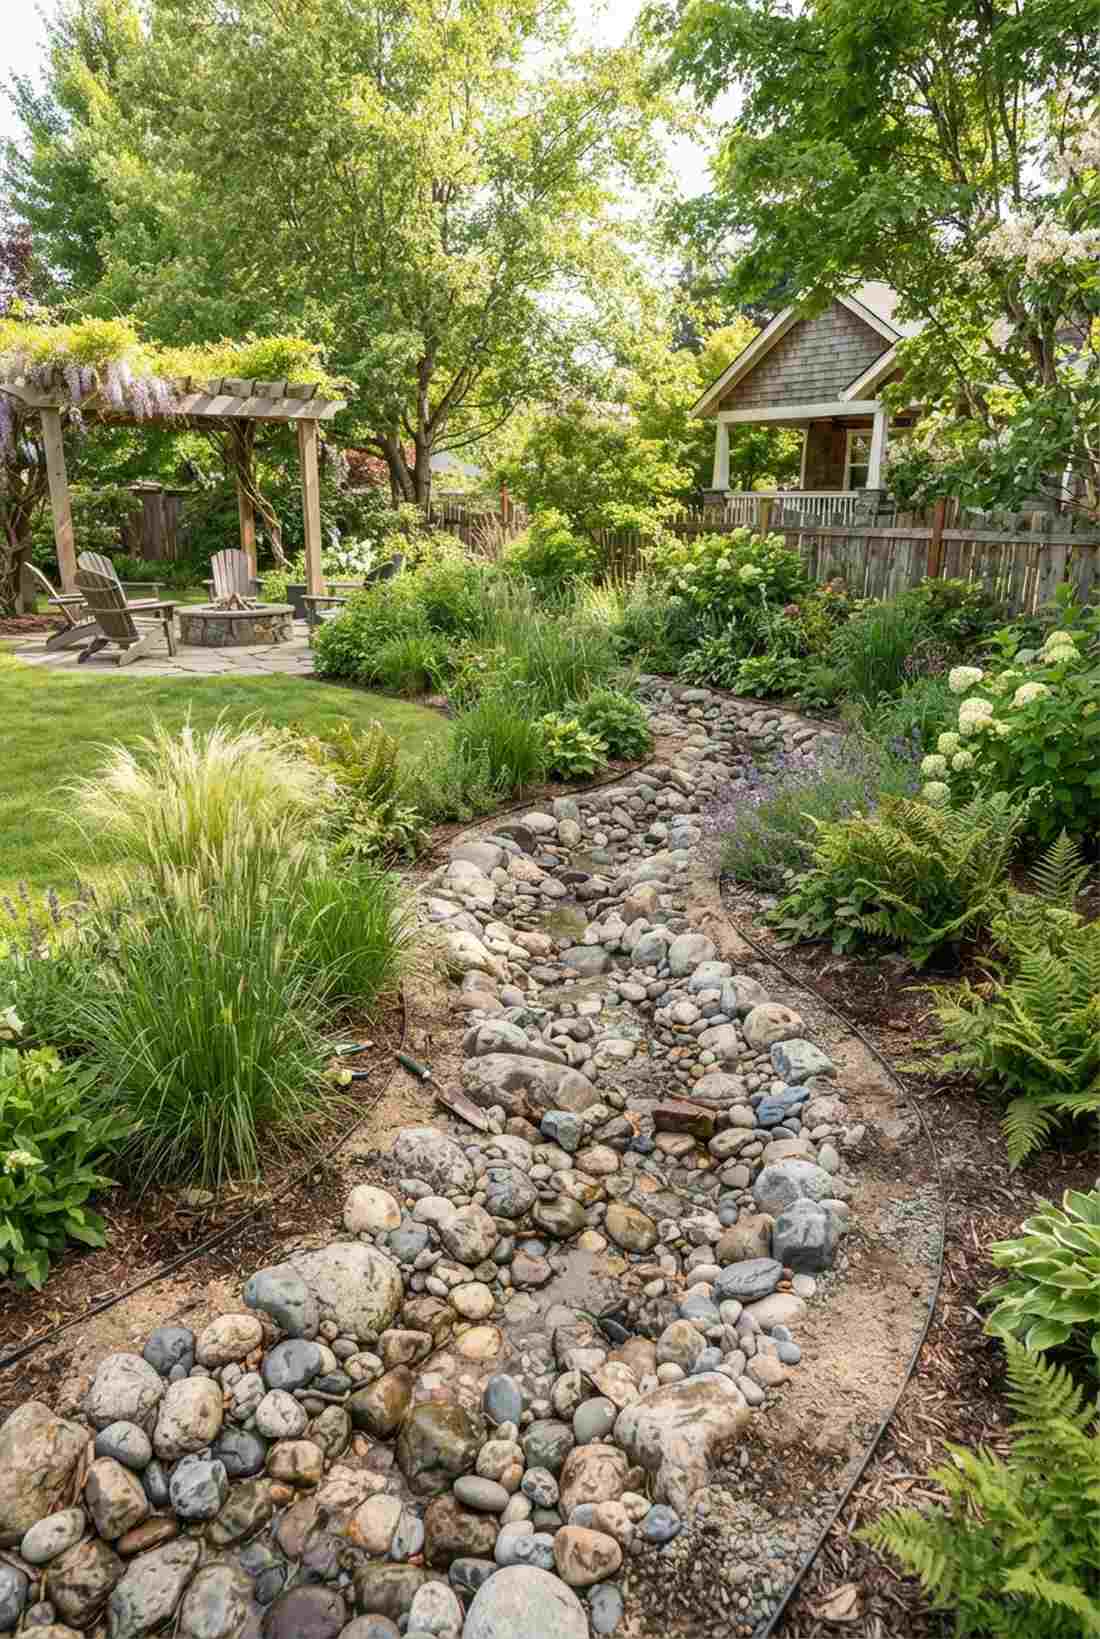
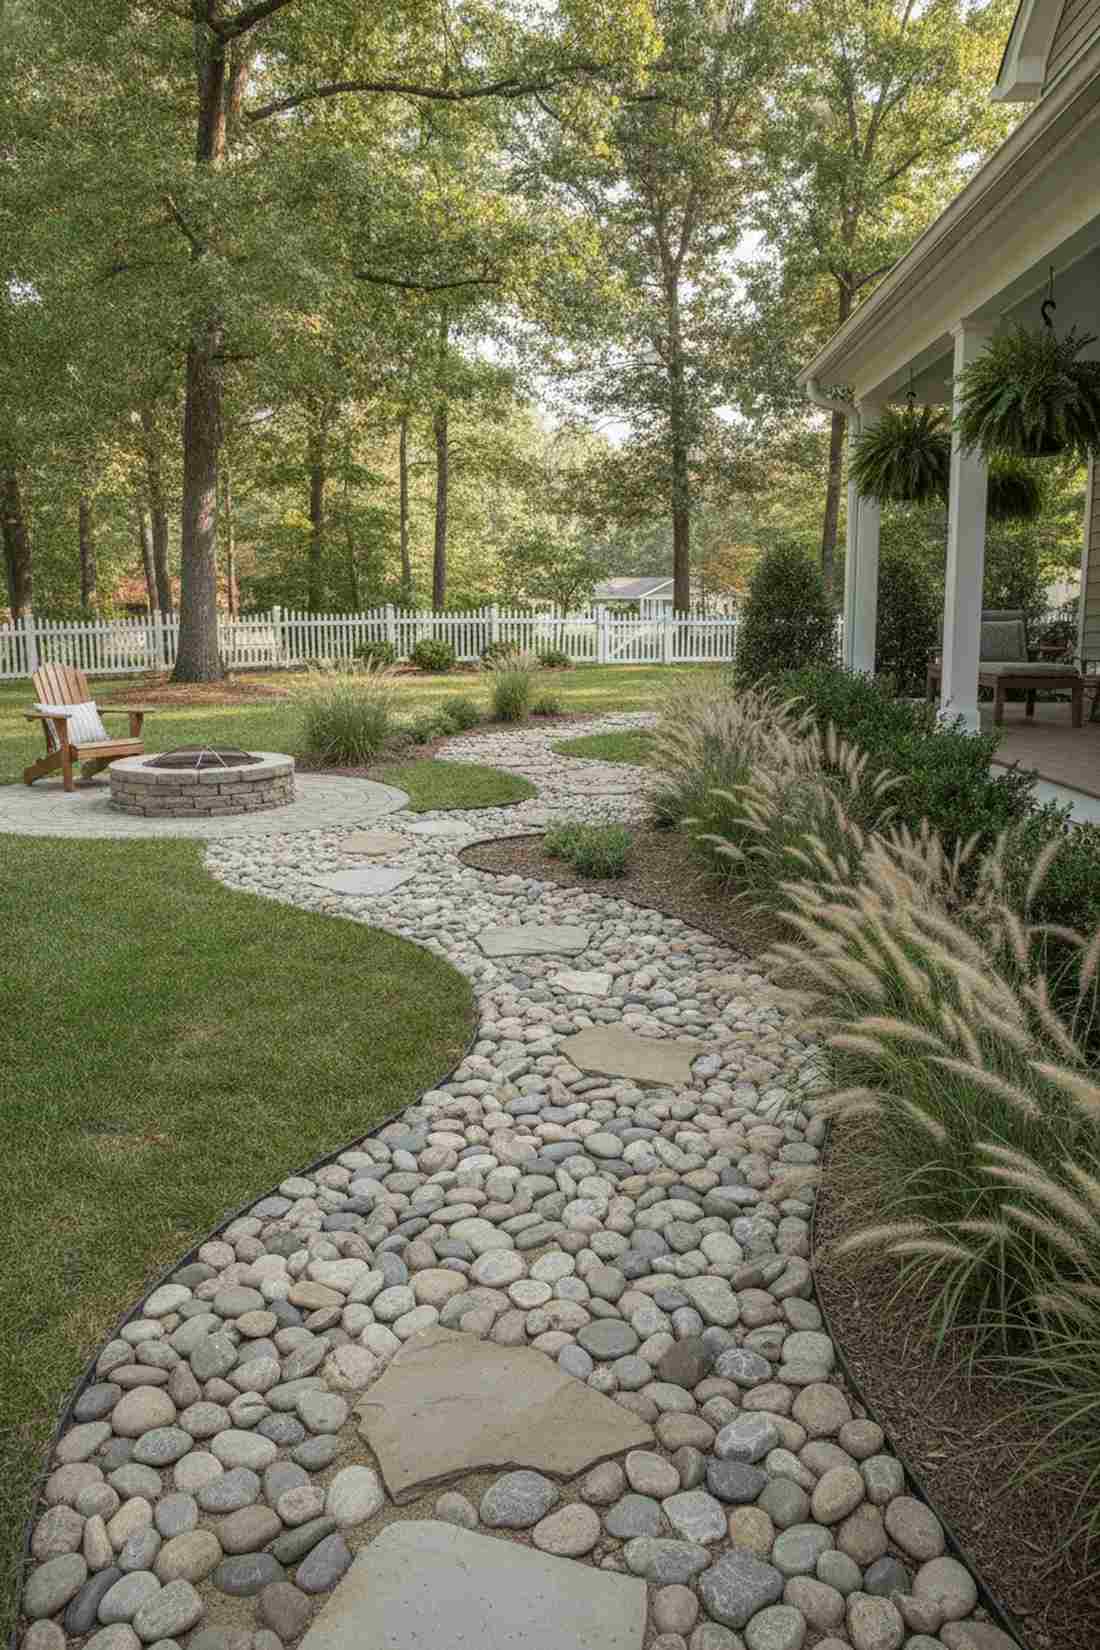
15. River Rock Border Accent
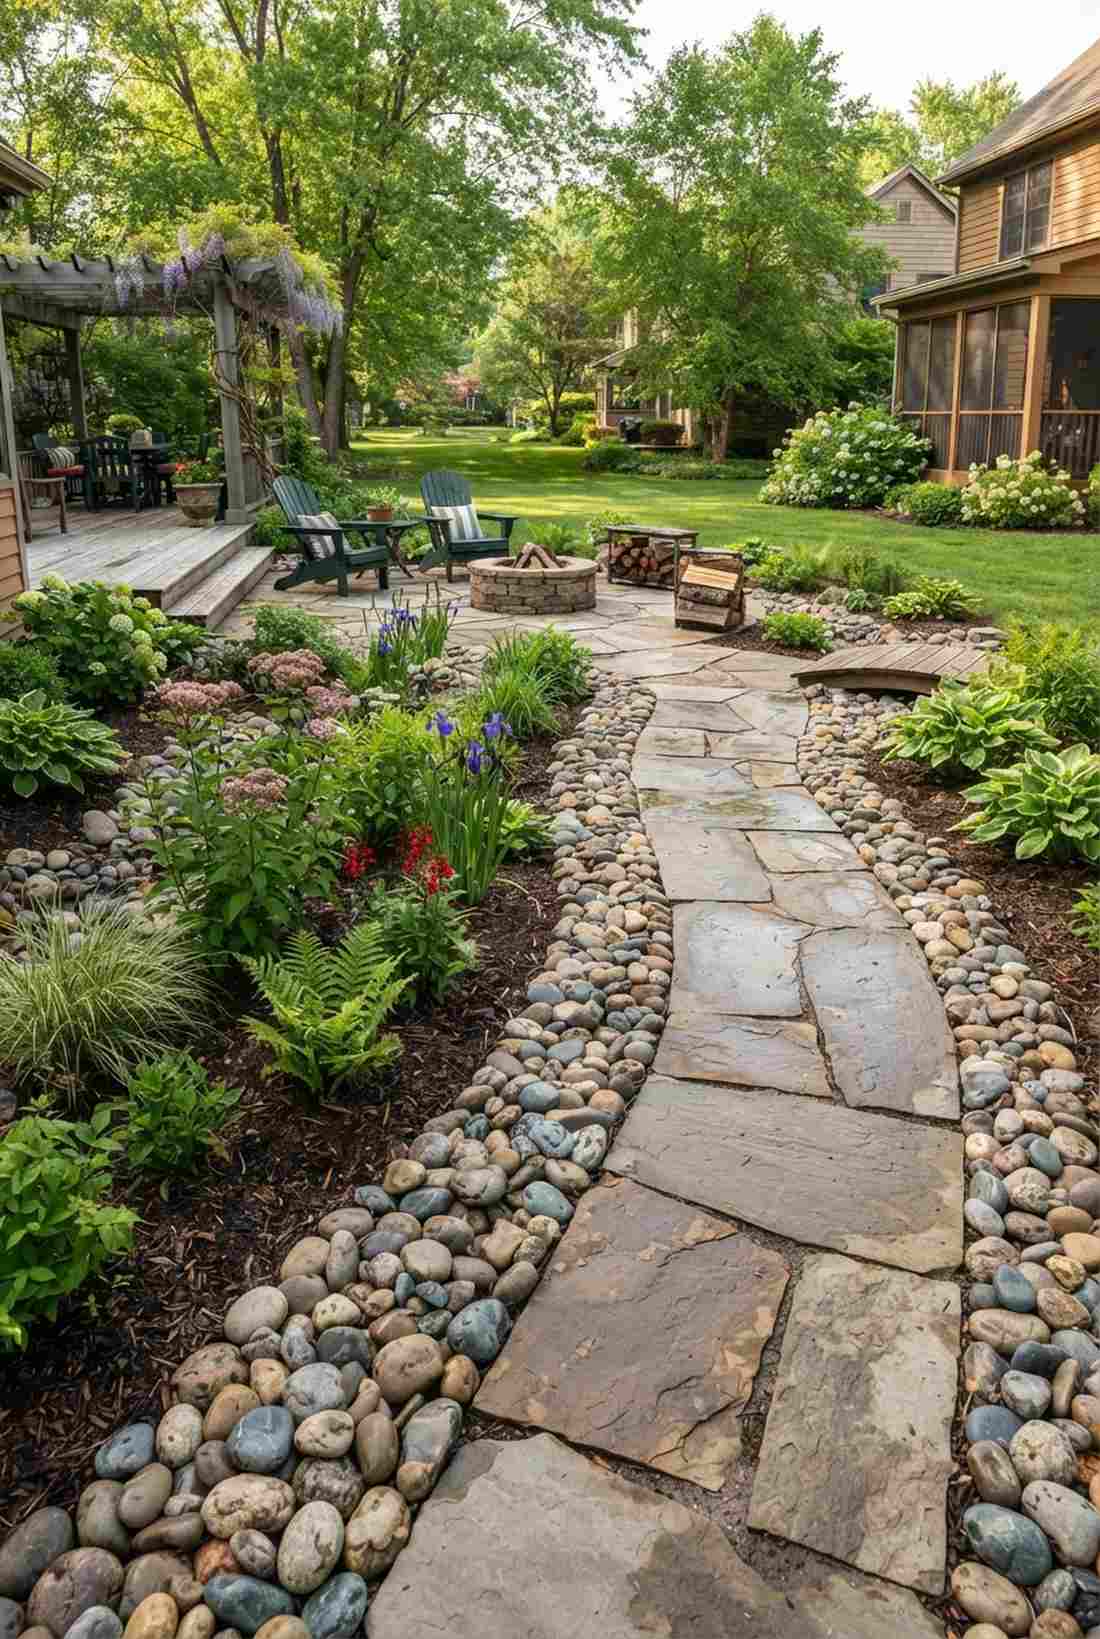
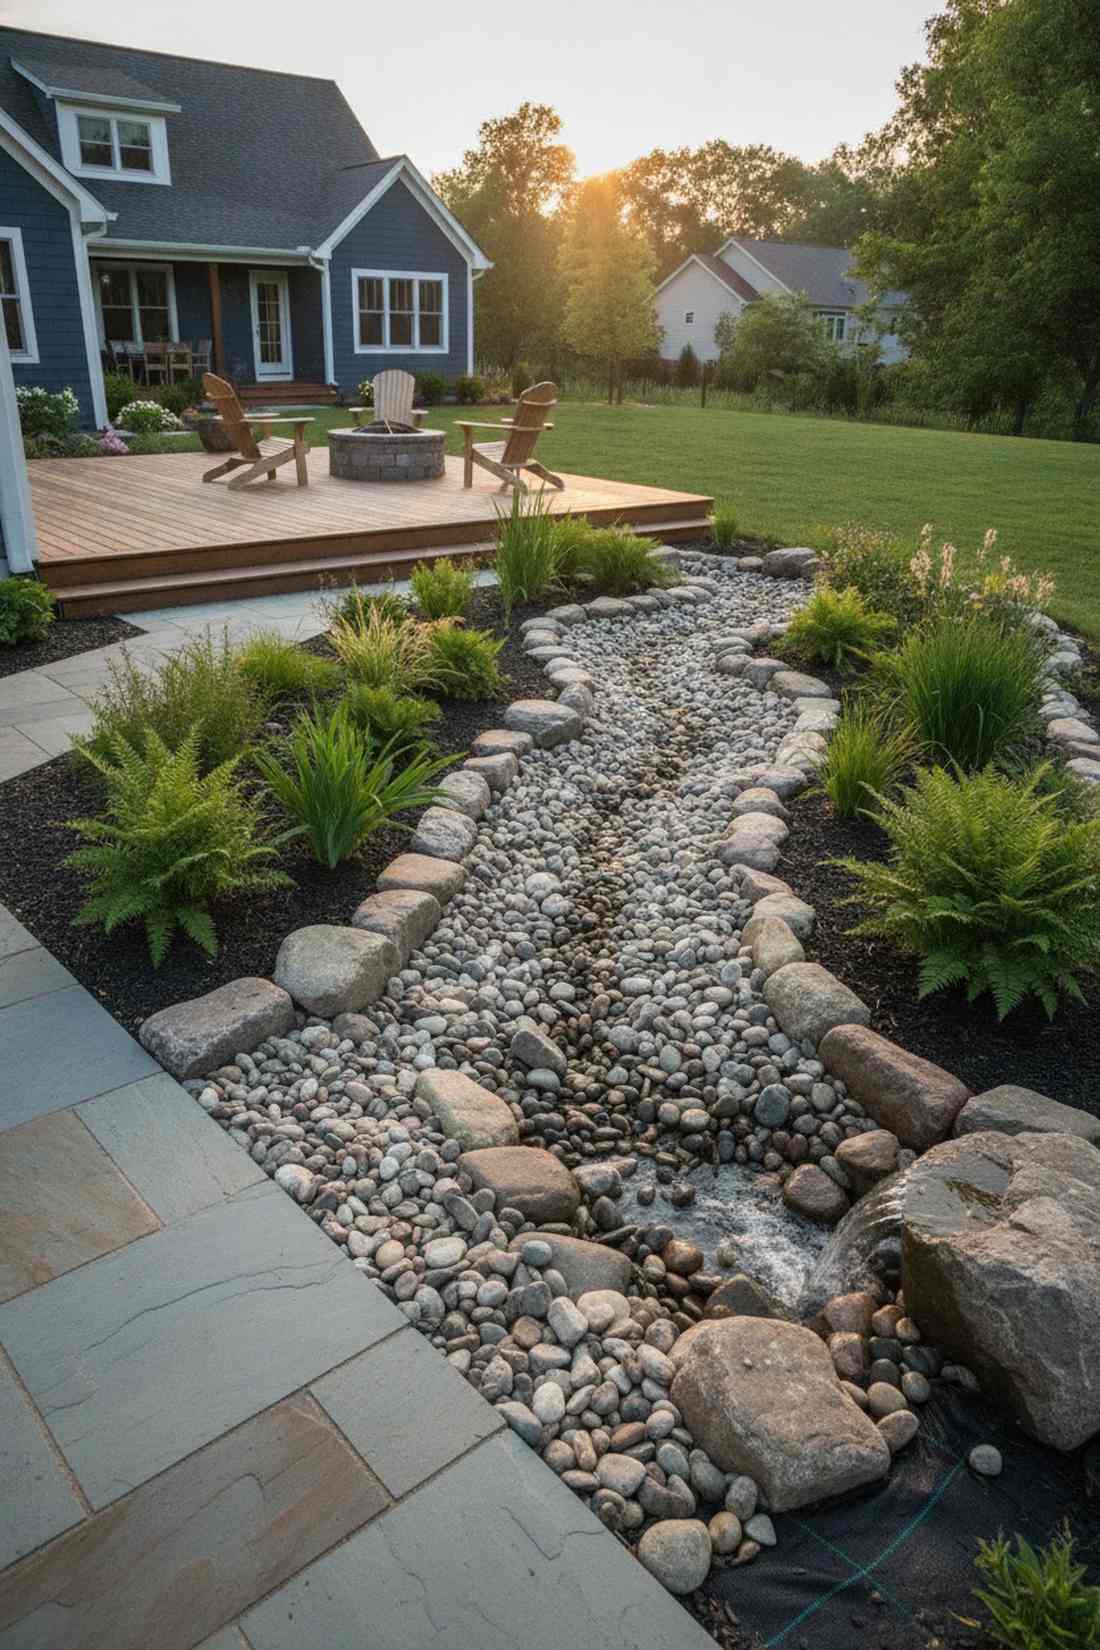
This smooth aquatic frame feels like a natural stream bed, the ultimate accent for rain gardens and pond edges.
Solid concrete traps water, but placing mortarless river rocks lets heavy storms drain directly into the water table. The rounded, organic shapes beautifully soften rigid, angular flagstone paths to create a balanced landscape.
You can bag enough rocks for this look for under $80 total.
- Key Materials: Smooth rounded river rocks
- Vibe / Style: Aquatic organic
- Difficulty: Beginner friendly
- Budget Breakdown: Rocks: $60 | Weed barrier: $20
- Creator’s Tip: Dig the border trench two inches deep so the rocks don’t scatter into the yard.
- Smart Sourcing: polished river rock pebbles (bulk pack), heavy-duty weed barrier fabric rolls
16. Slate Ribbon Inlay
A dark geometric track feels like a modern art installation, highly effective at drawing the eye down a long property line.
Injecting thin strips of dark slate breaks up boring expanses of light stone and looks far more expensive than it is. Purchase pre-cut masonry strips so you don’t have to risk shattering fragile slate tiles with a wet saw.
This striking optical illusion adds about $5 per linear foot to your build. Save this to your modern landscape board!
- Key Materials: Pre-cut dark slate ribbons
- Vibe / Style: Sleek geometric
- Difficulty: High precision required
- Budget Breakdown: Slate strips: $100 | Adhesive: $30
- Creator’s Tip: Run the ribbons horizontally across the path to make a narrow walkway feel incredibly wide.
- Smart Sourcing: pre-cut slate border strips, commercial-grade masonry adhesive
Eco-Friendly Permeable Routes
Low-impact pathways prioritize rainwater infiltration, reduce heat island effect, and accommodate native plant establishment within walking surfaces. These solutions align with municipal stormwater credits and LEED-certified landscape goals.
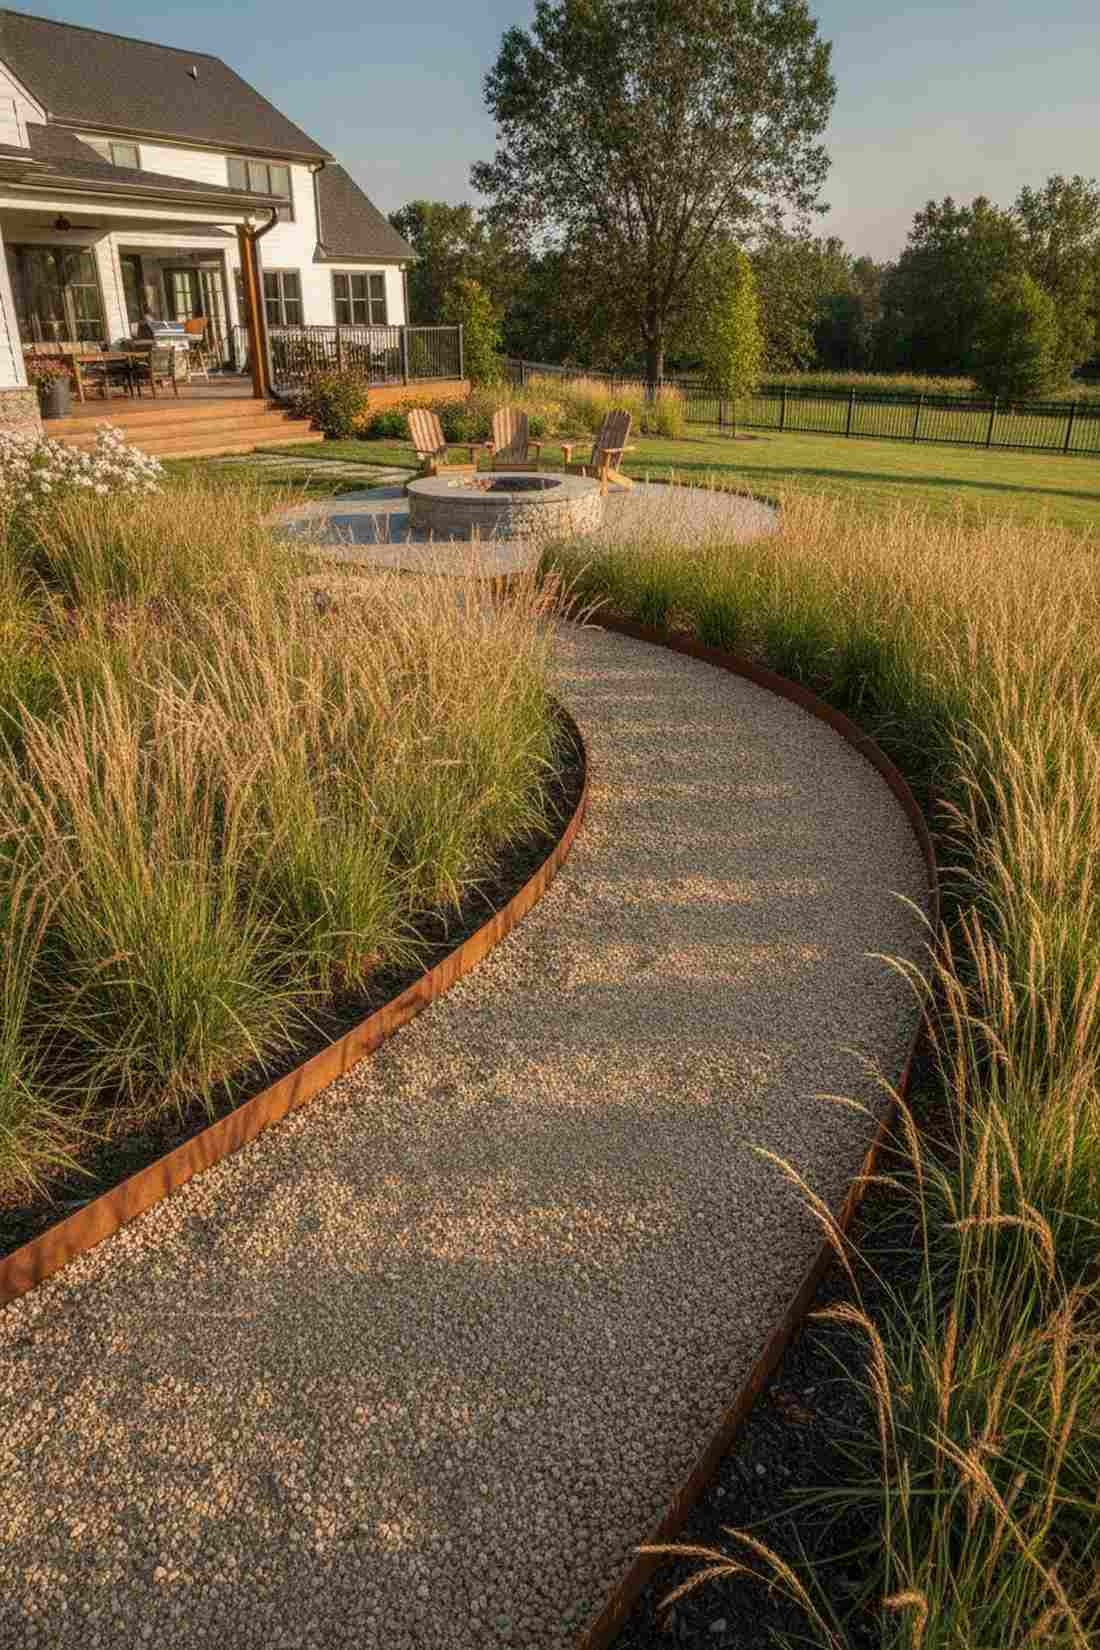
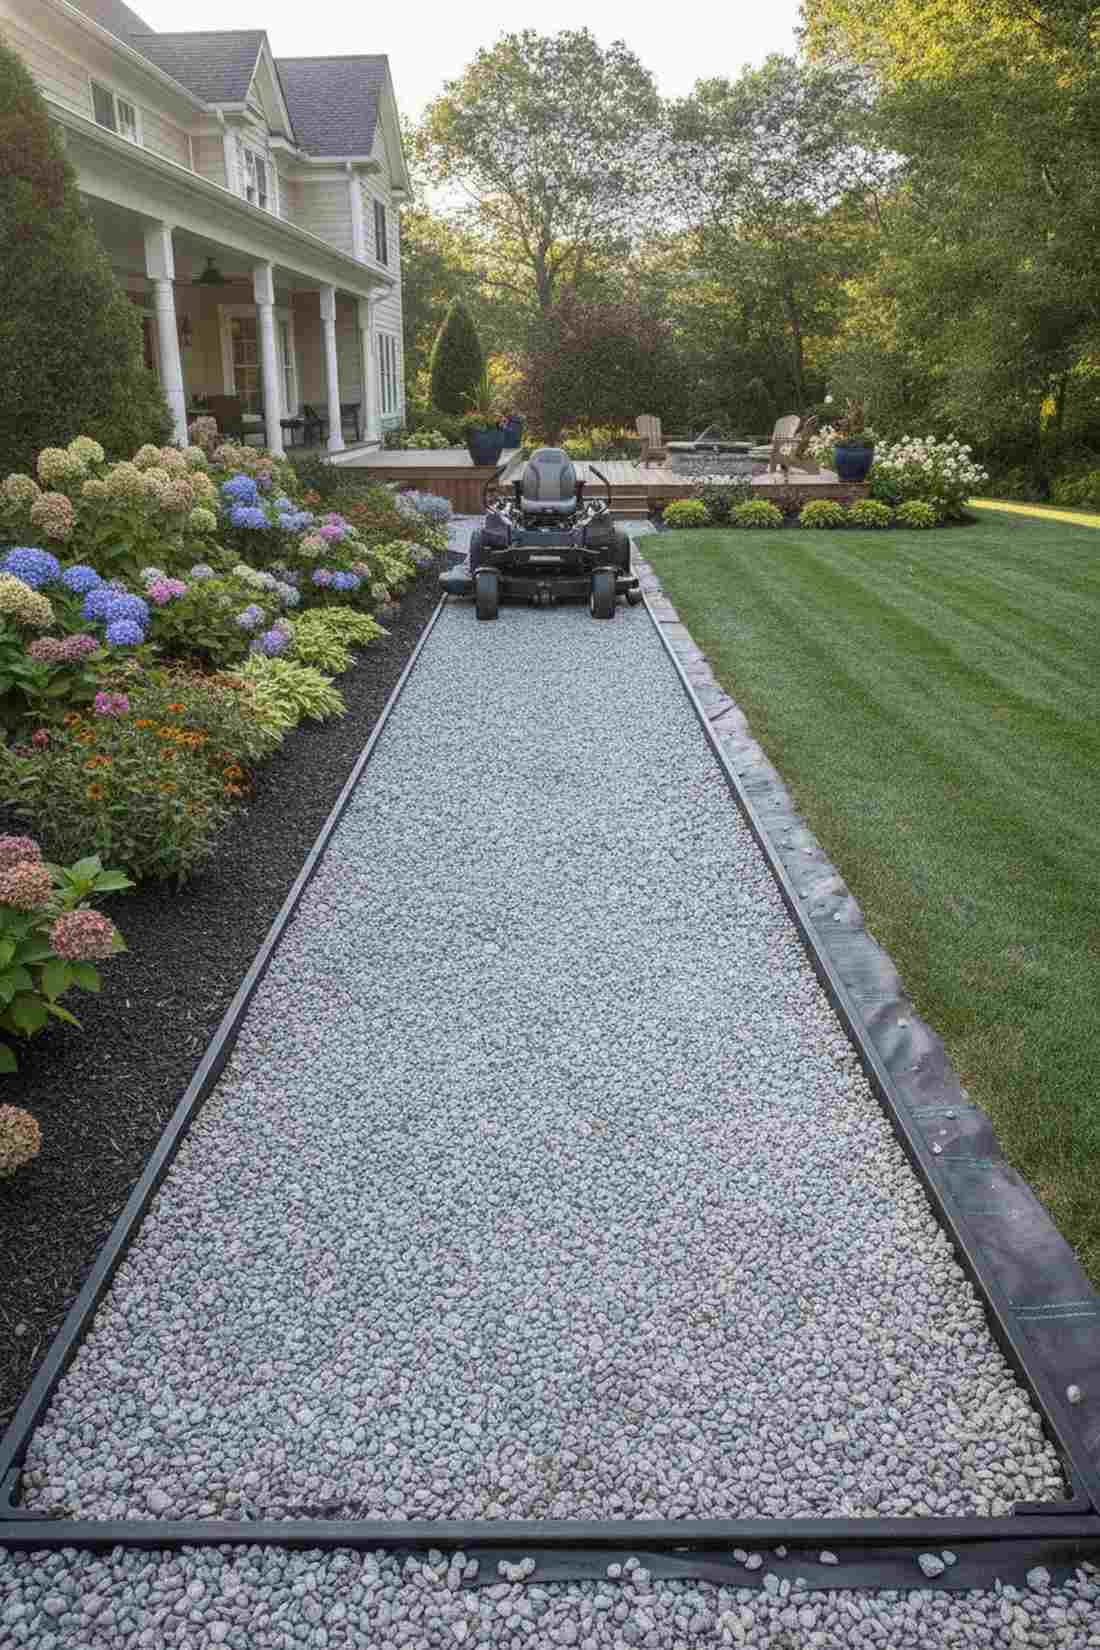
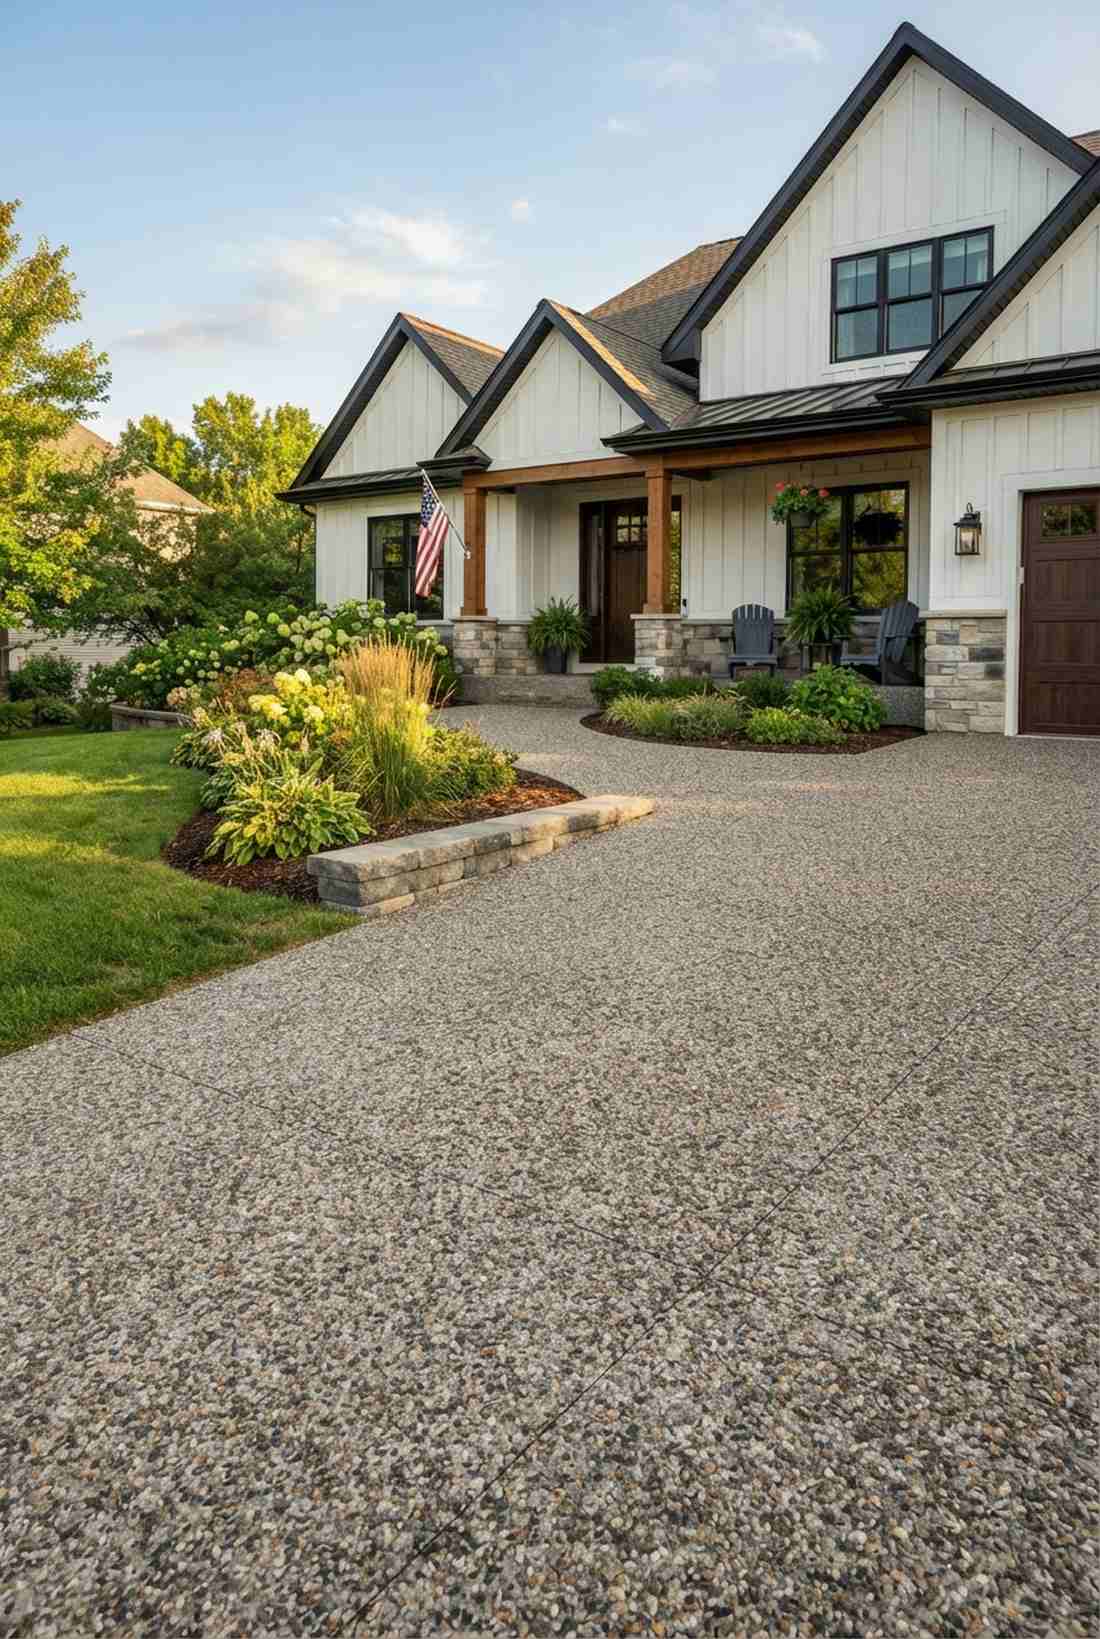
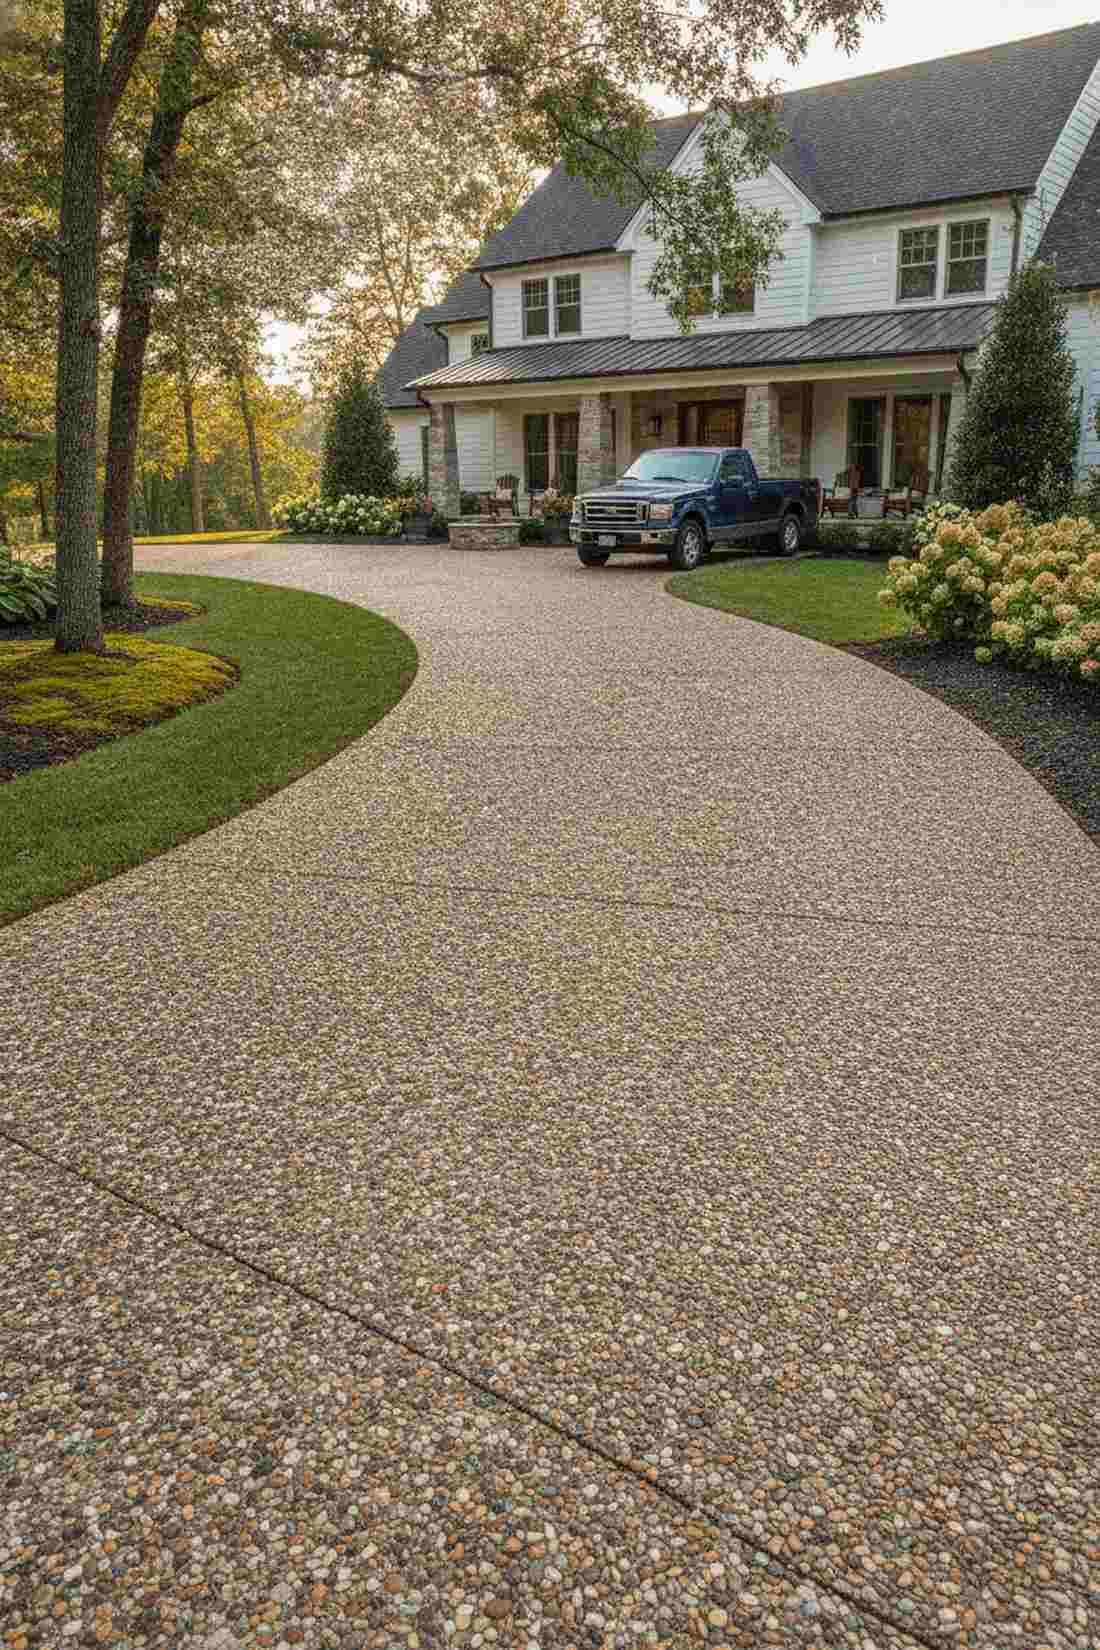
17. Crushed Gravel Compacted Base
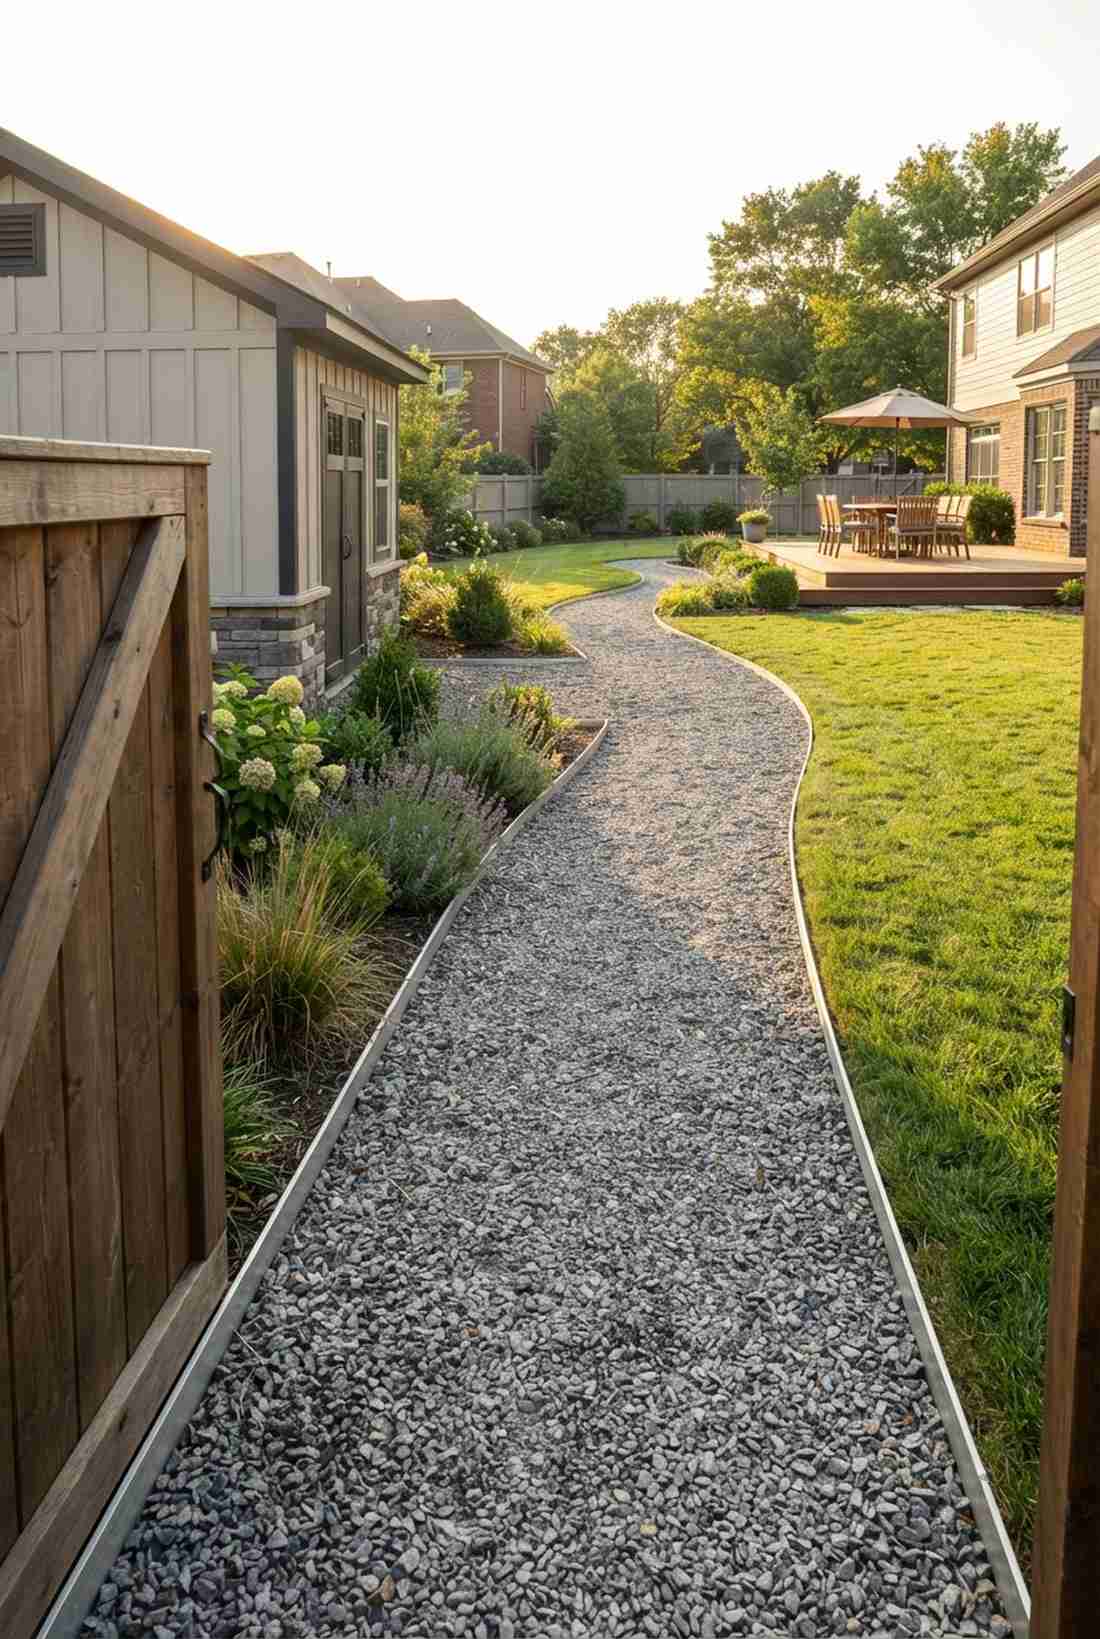
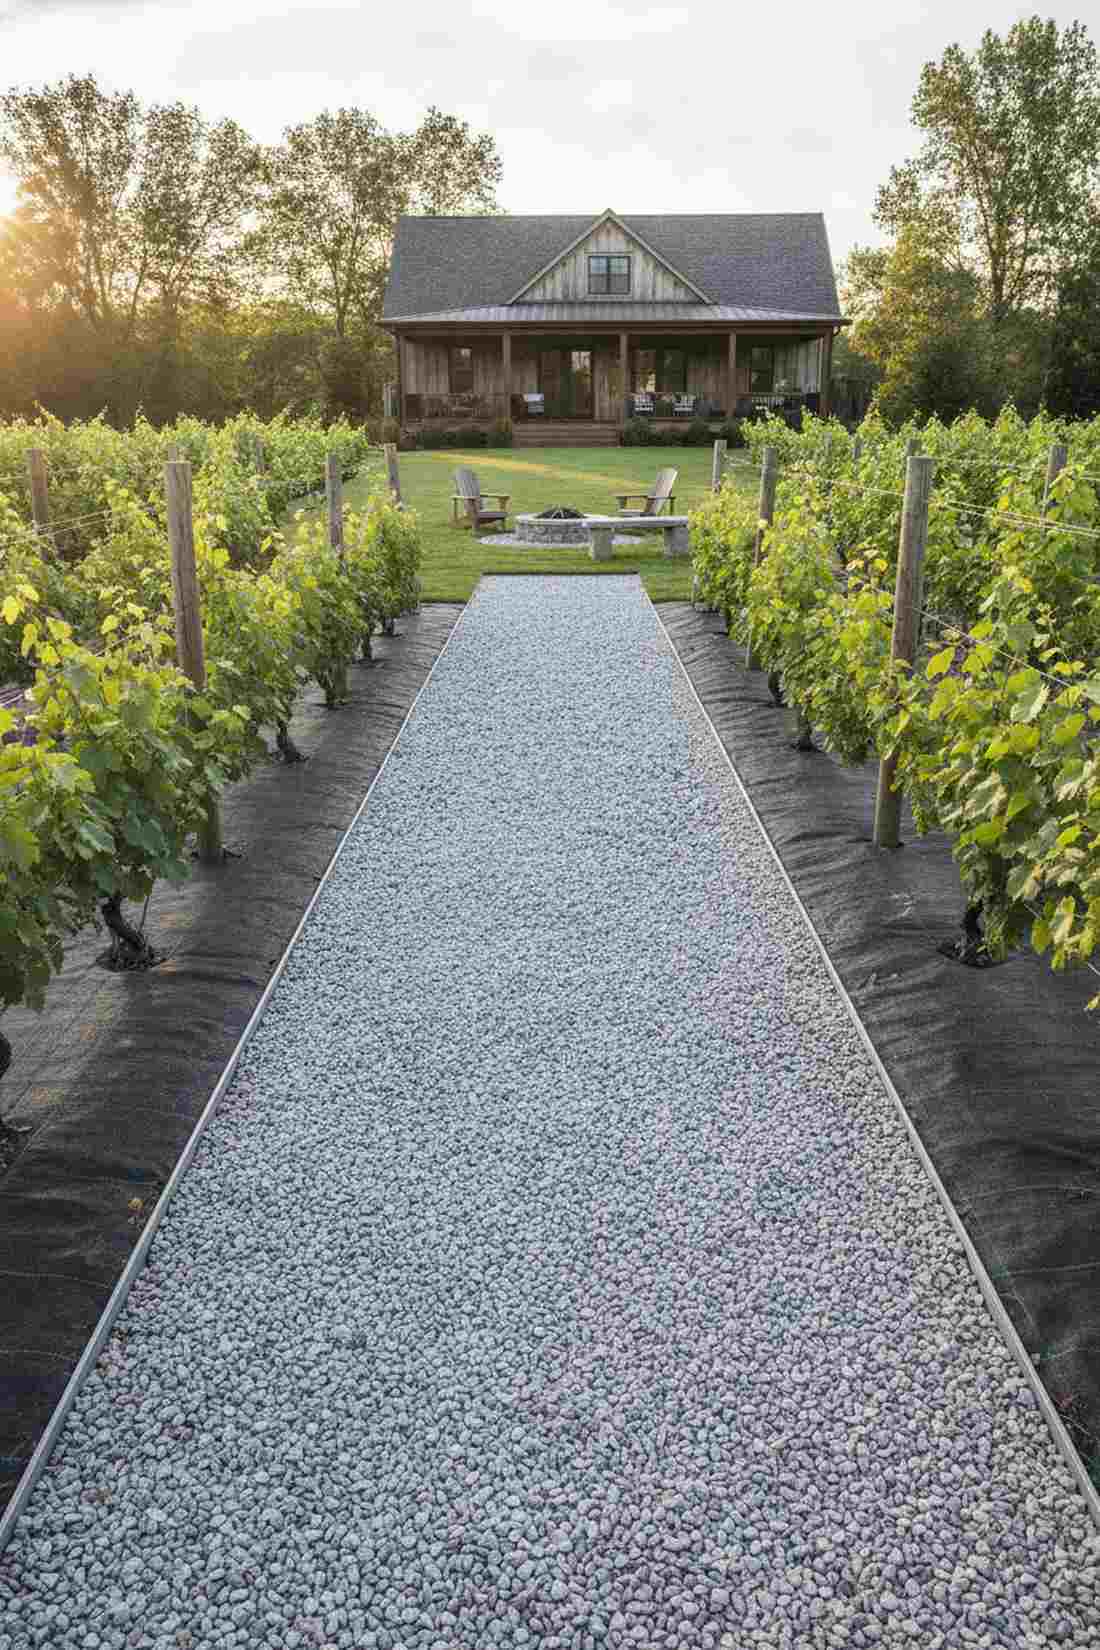
This crisp minimalist trail feels like a high-end vineyard path, heavily utilized for expansive utility access routes.
Most gravel paths turn into mushy swamps, but laying angular quarter-minus stone locks the pieces together like concrete. Pair this with commercial grade landscape fabric to completely block weeds while still allowing massive rainfall to drain.
You can easily pull this off for just $2–$4 per square foot.
- Key Materials: Quarter-minus angular crushed gravel
- Vibe / Style: Clean utility
- Difficulty: Physically demanding but simple
- Budget Breakdown: Gravel: $80 | Fabric: $35
- Creator’s Tip: You absolutely must use a rented plate compactor; hand tamping will not lock the stones.
- Smart Sourcing: commercial grade landscape fabric, rigid aluminum gravel edging
18. Decomposed Granite Stabilized
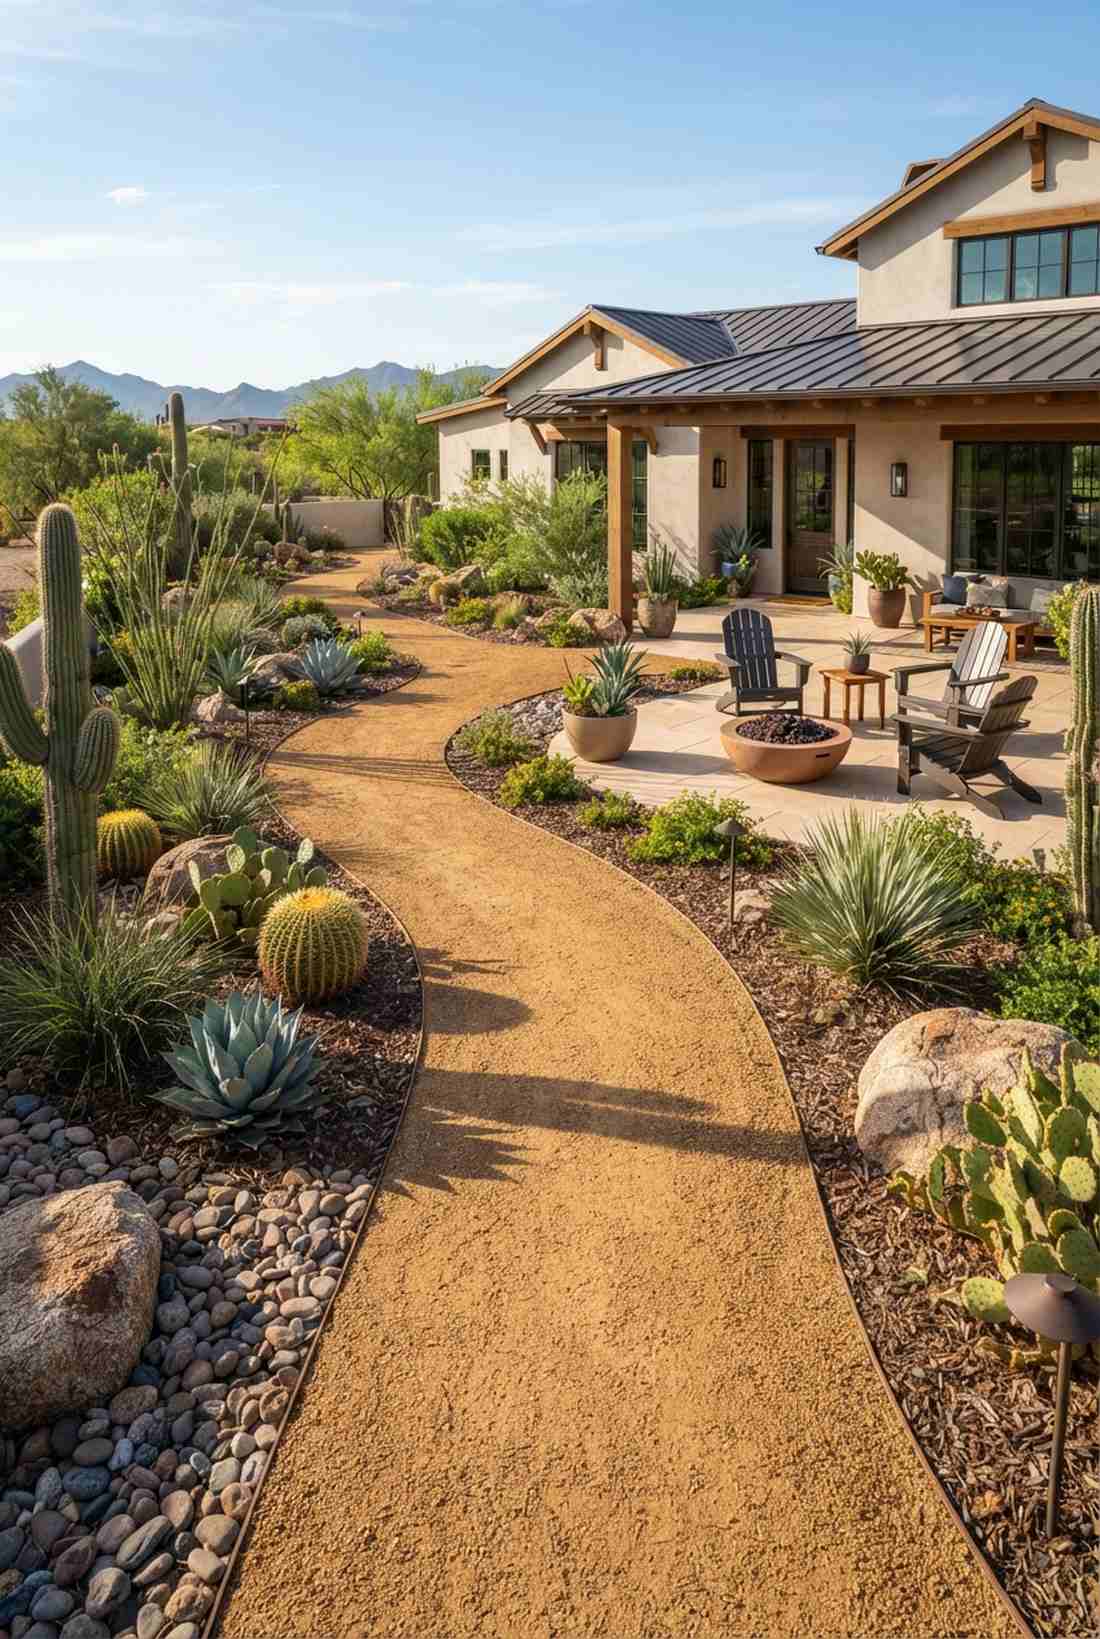
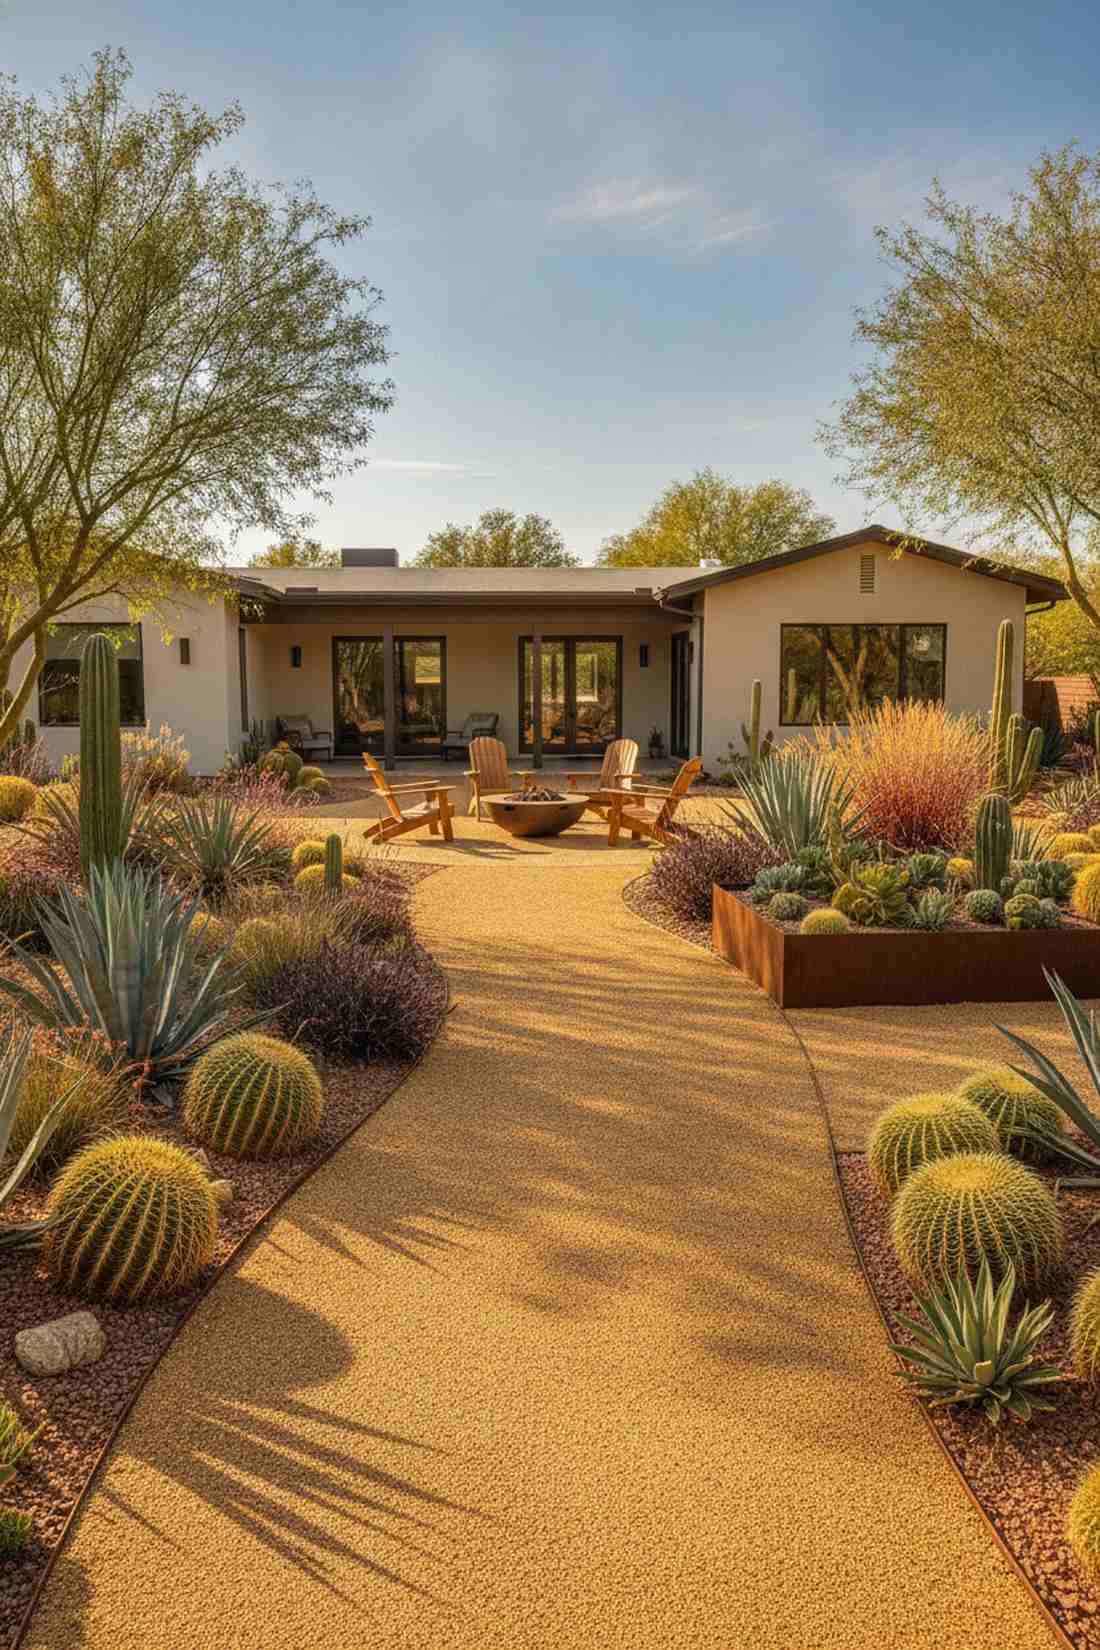
A golden desert walkway feels like exploring a high-end botanical xeriscape, flawless for hot, arid climates.
Loose dirt tracks mud everywhere, but mixing crushed granite with a polymer binder hardens it into a weatherproof, semi-rigid floor. This rusty-gold aesthetic delivers a surprisingly premium look that complements drought-tolerant agave and cactus beds.
This premium dirt alternative costs roughly $4–$7 per square foot. Pin this for a zero-water landscape!
- Key Materials: Decomposed granite and polymer binder
- Vibe / Style: Arid southwest luxury
- Difficulty: Fast working time required
- Budget Breakdown: Granite: $120 | Binder: $60
- Creator’s Tip: Reapply a spray-on stabilizer every three years as brutal UV rays break down the surface glue.
- Smart Sourcing: heavy-duty polymer soil stabilizers, decomposed granite bulk bags
19. Pea Gravel Walking Surface
The crunchy resort pathway feels like a breezy coastal getaway, designed for slow-paced meditation gardens.
Unlike angular stone, these rounded pebbles shift underfoot to create an incredibly satisfying auditory crunch as you walk. Because it doesn’t compact, you must install steep metal edging to stop the tiny stones from migrating into your grass.
Bagging this look is incredibly cheap, around $3 per square foot.
- Key Materials: Rounded pea gravel pebbles
- Vibe / Style: Casual coastal
- Difficulty: Beginner DIY
- Budget Breakdown: Gravel: $75 | Edging: $40
- Creator’s Tip: Never pour pea gravel deeper than two inches, or it will feel like walking in deep beach sand.
- Smart Sourcing: bulk pea gravel kits, L-profile steel edging kits
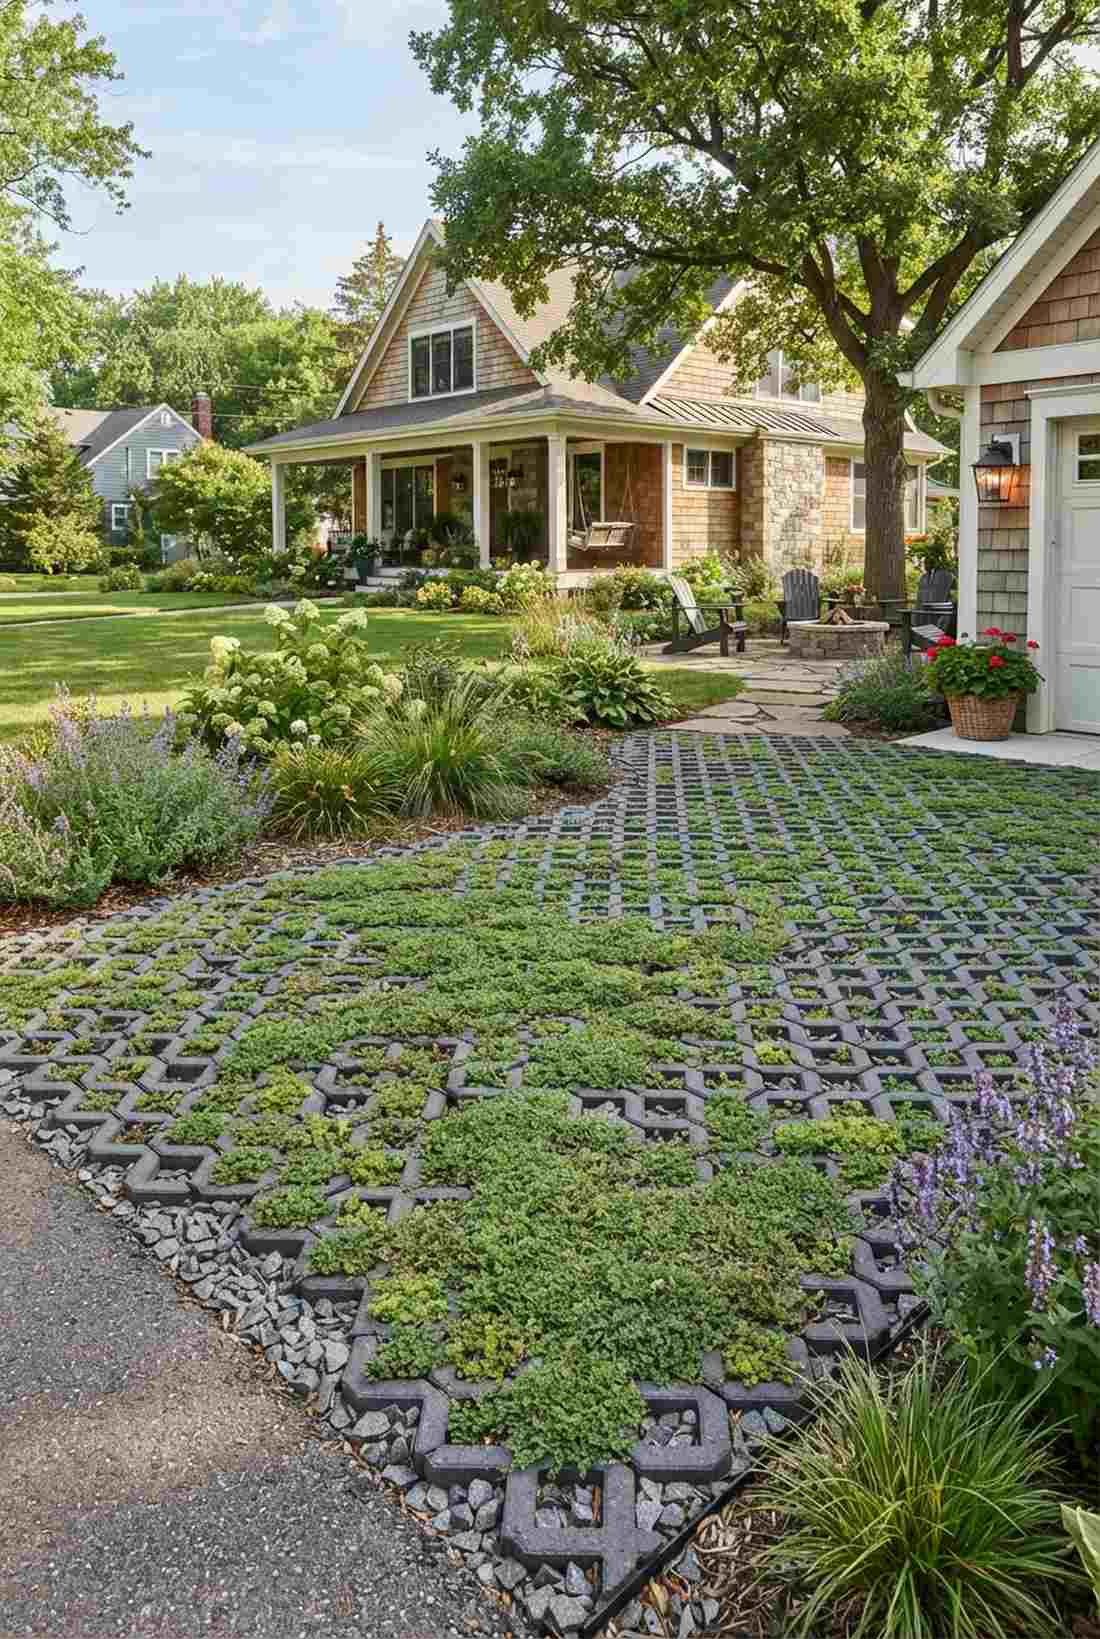
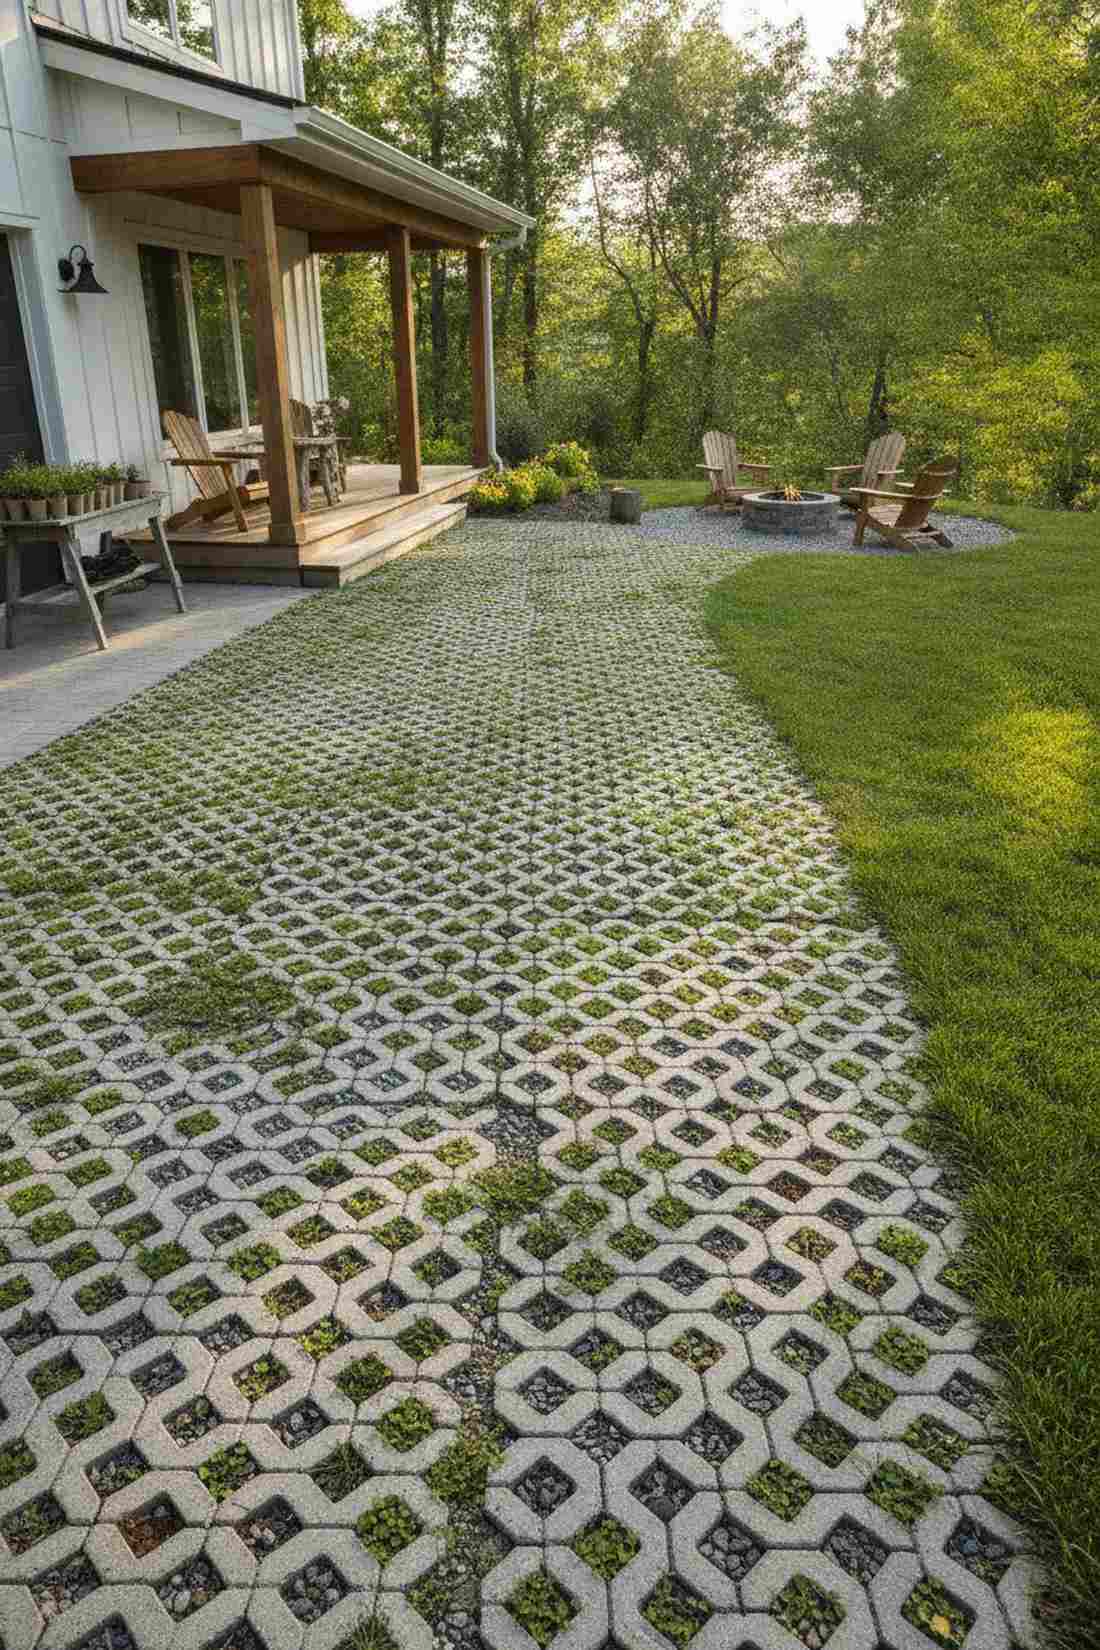
20. Grass Pavers Reinforced Turf

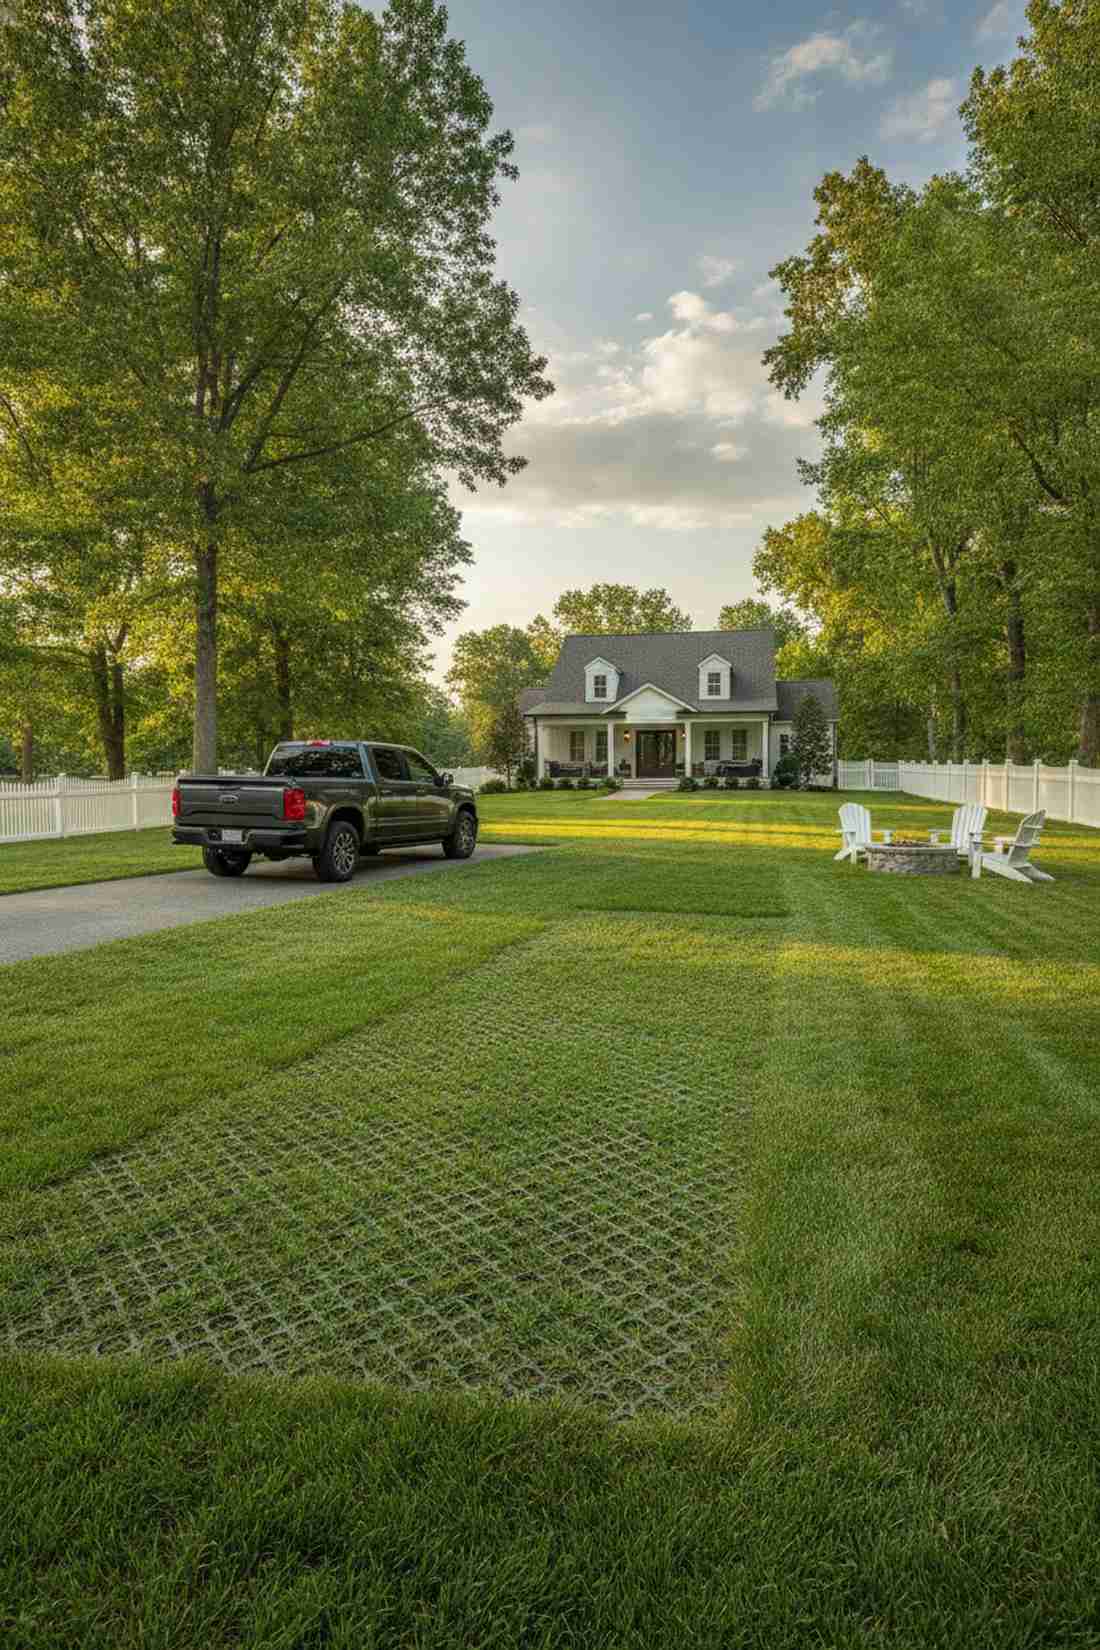
This hidden structural lawn feels like a secret driveway, perfectly concealing high-traffic parking zones.
Parking on raw grass turns a yard into a muddy rut trap, but high-density polyethylene grids carry heavy truck weight effortlessly. Seed the open cells with durable fescue, and your garden pathways with pavers vanish entirely into the green landscape.
Expect to spend $8–$12 per square foot for the hidden grid system. Save this to your smart home design board!
- Key Materials: High-density polyethylene turf grids
- Vibe / Style: Invisible utility
- Difficulty: Intermediate excavation
- Budget Breakdown: Grids: $250 | Seed/Soil: $40
- Creator’s Tip: Mow this area half an inch higher than the rest of the yard to completely hide the plastic edges.
- Smart Sourcing: heavy-duty grass driveway grids, durable tall fescue seed blends
The layout coming up is the absolute secret weapon for microscopic side yards…
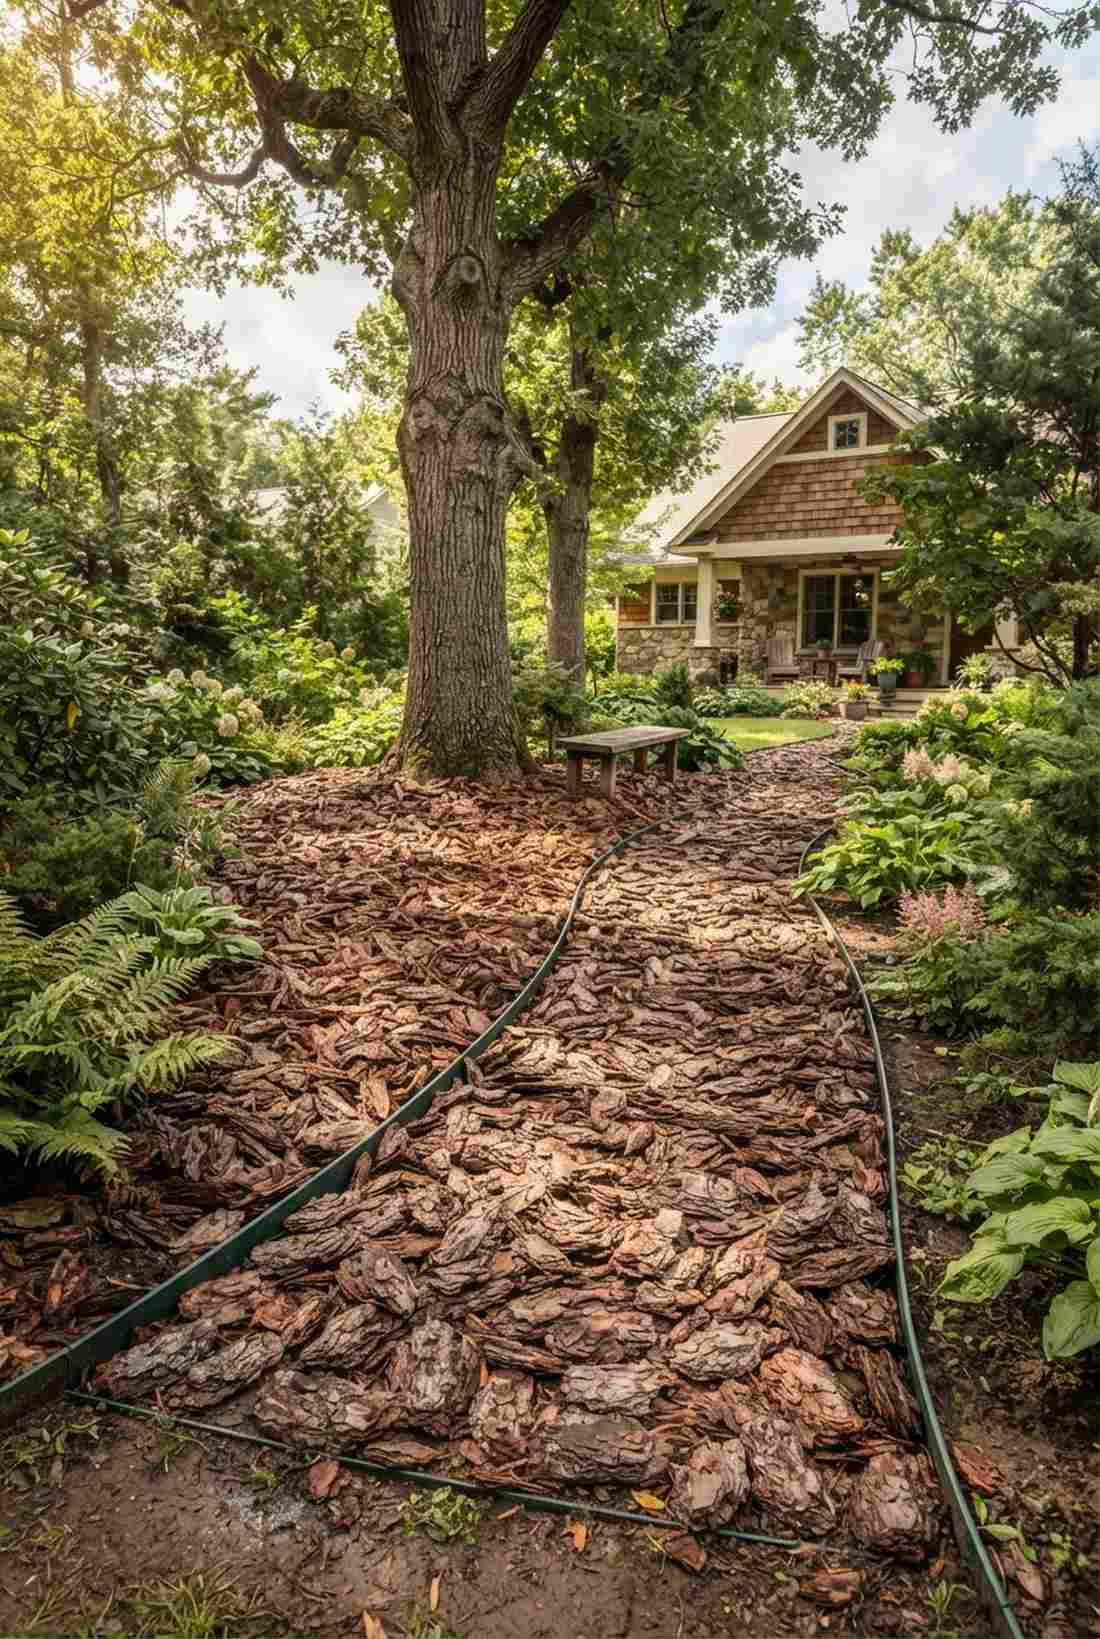
21. Shredded Hardwood Mulch
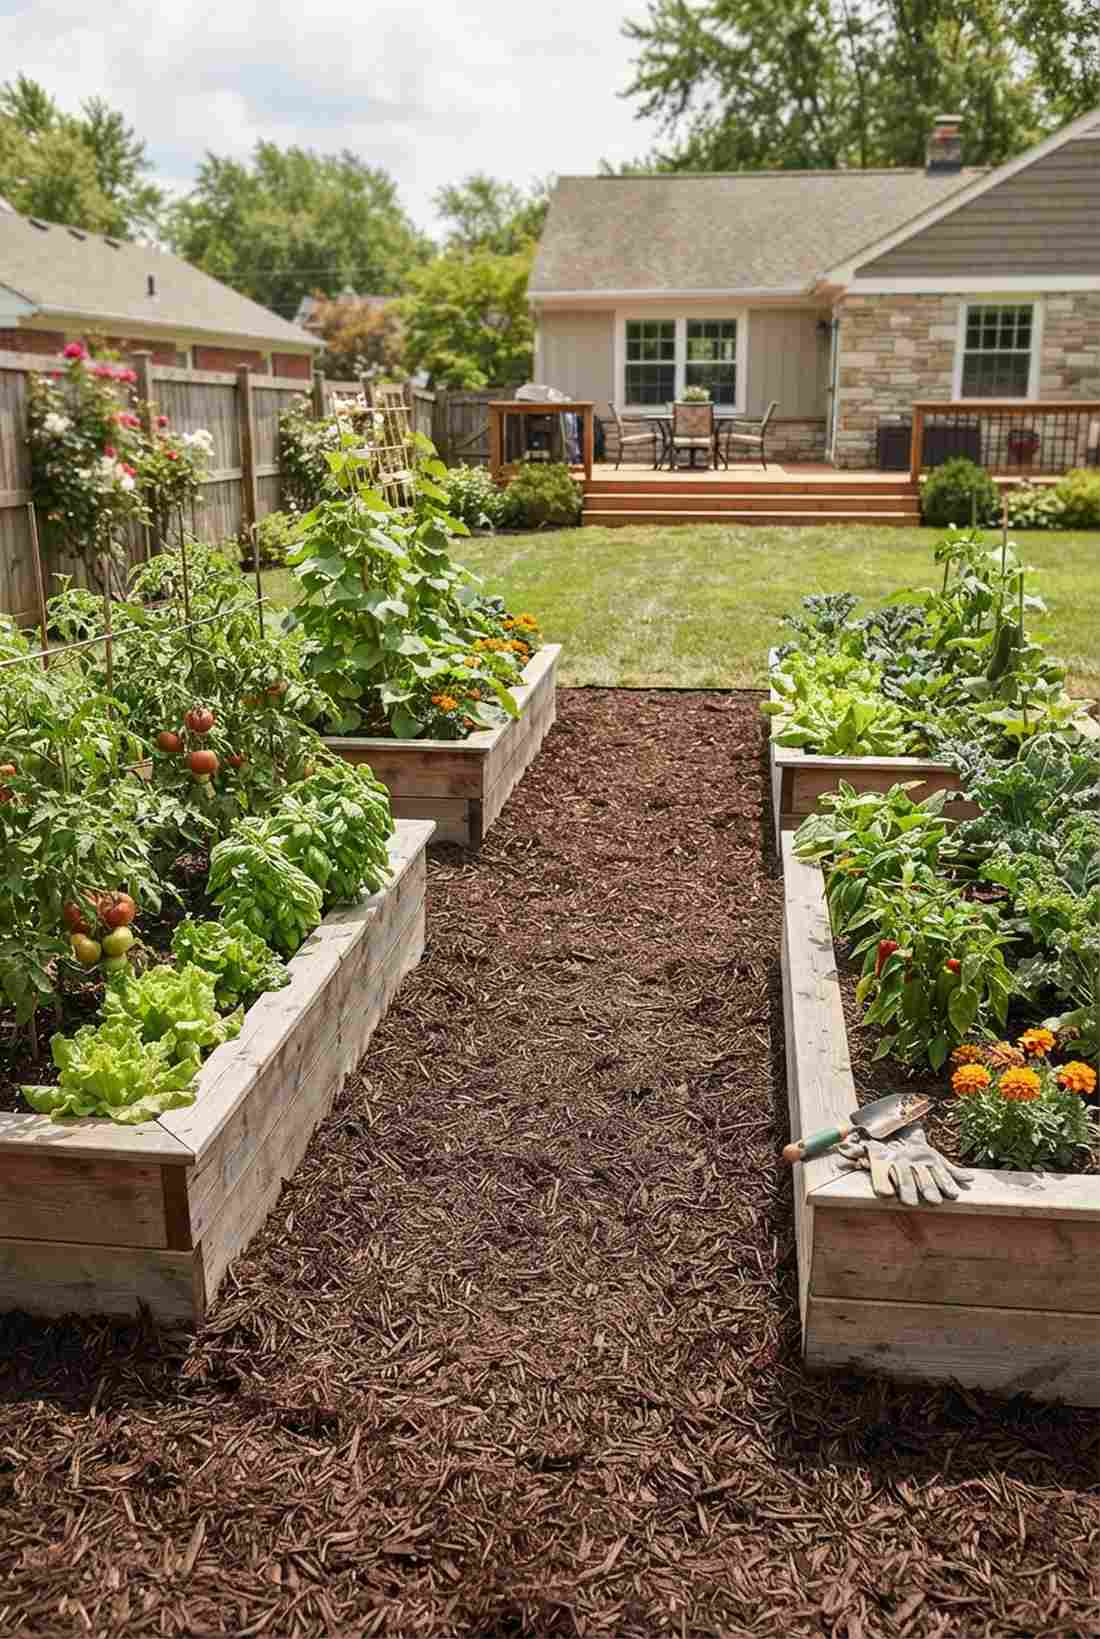
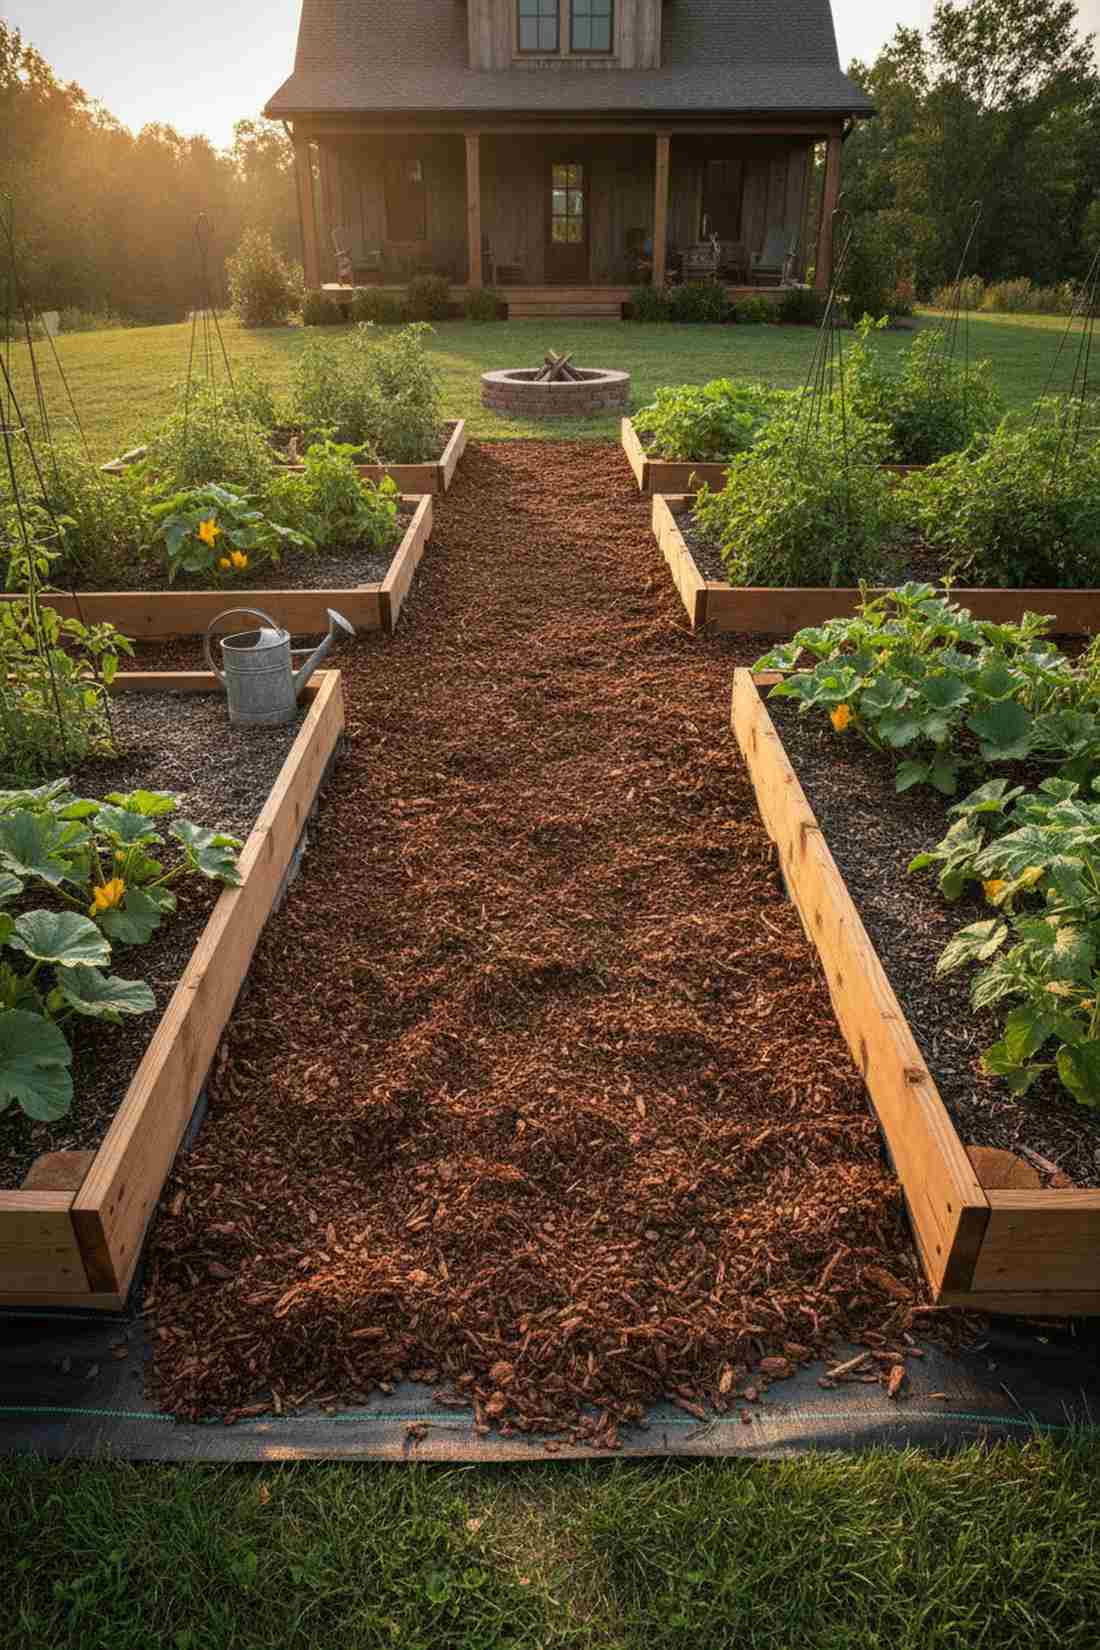
An aromatic woodland trail feels like a hike through a deep forest, a godsend for muddy vegetable garden aisles.
Pouring concrete between raised beds is overkill, but double-shredded hardwood creates a spongy, weed-free floor for pennies. The dark brown tones unify chaotic garden elements while naturally decomposing to feed your surrounding plants.
You can easily pull this off for just $1–$2 per square foot.
- Key Materials: Double-shredded hardwood mulch
- Vibe / Style: Earthy and functional
- Difficulty: Extremely simple
- Budget Breakdown: Mulch: $40 | Fabric: $25
- Creator’s Tip: Lay the mulch four inches deep initially, as it will compress to two inches after the first heavy rain.
- Smart Sourcing: premium hardwood mulch blocks, commercial-grade weed block fabric
22. Pine Bark Nuggets
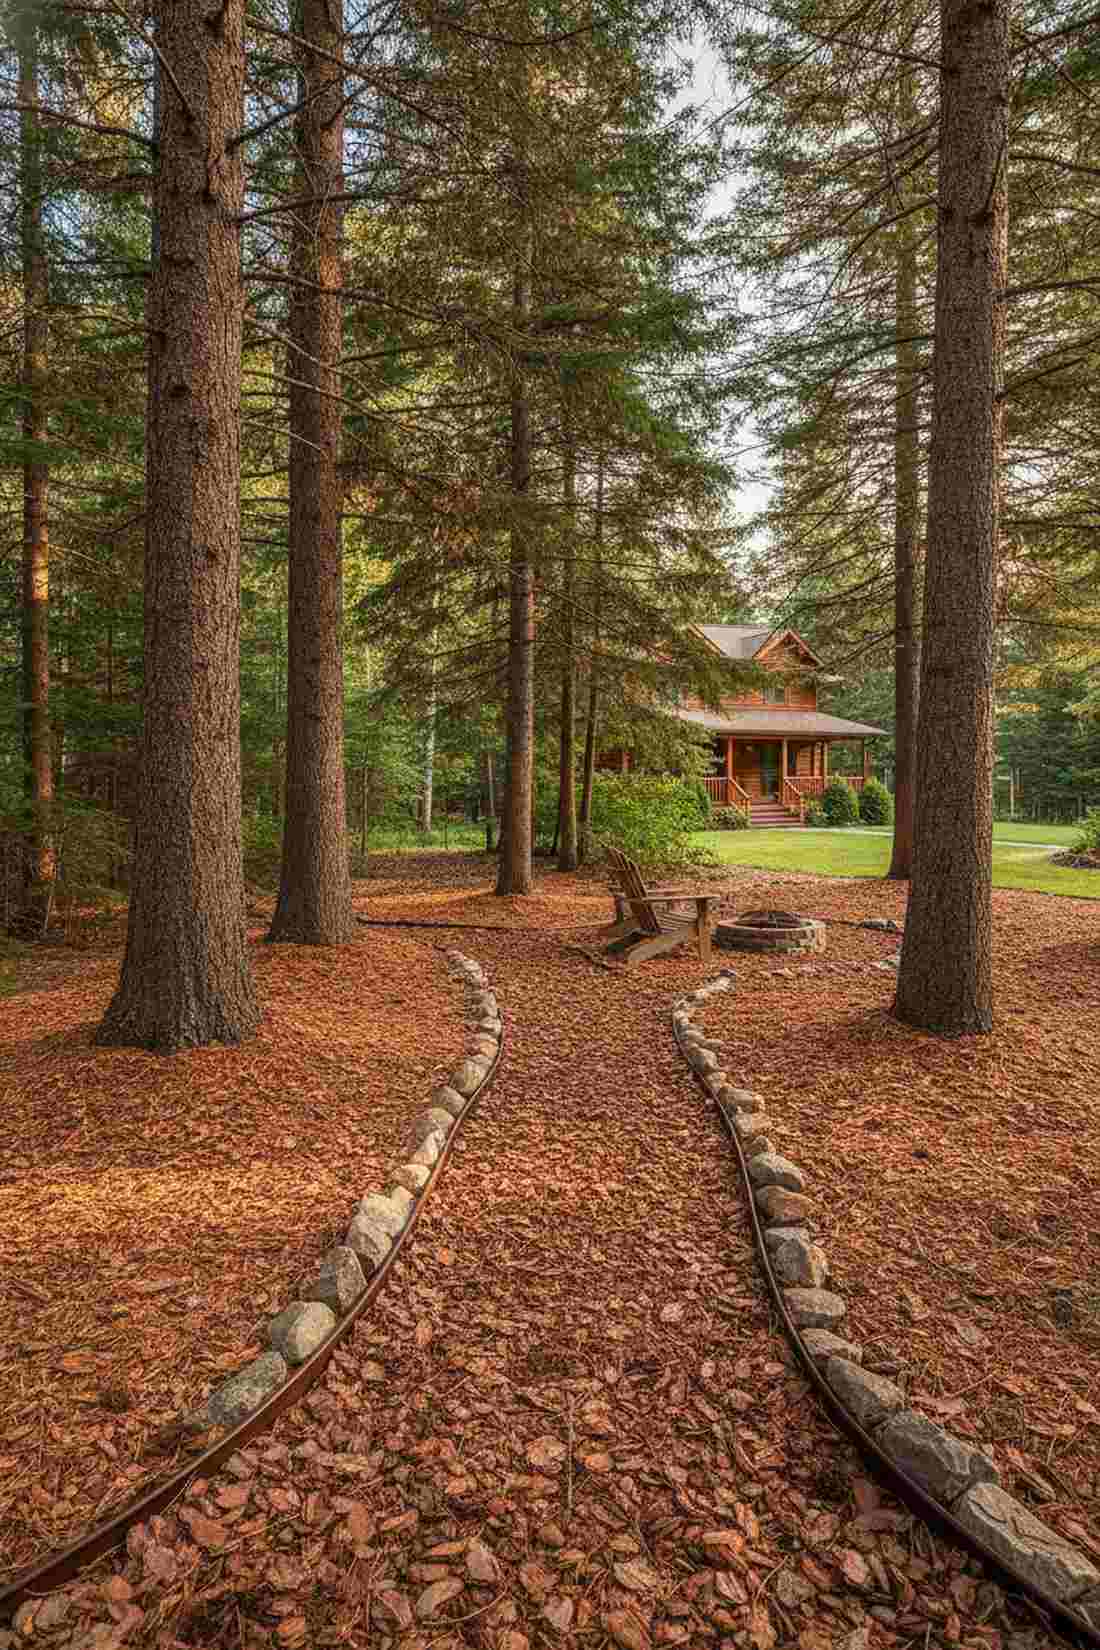
This chunky rustic path feels like a mountain cabin approach, superb for cutting through dense conifer beds.
Fine mulch blows away in heavy wind, but these heavy 3-inch nuggets lock together and survive brutal storms. Utilizing nuggets is a genius budget hack that gives a designer-level finish around massive shade trees where grass refuses to grow.
This ultra-cheap solution costs around $2 per square foot. Pin this if you need an instant weekend fix!
- Key Materials: Large pine bark nuggets
- Vibe / Style: Rugged woodland
- Difficulty: Easiest possible install
- Budget Breakdown: Nuggets: $45 | Edging: $15
- Creator’s Tip: Avoid using nuggets on steep slopes, as heavy flood waters can float and wash them down the hill.
- Smart Sourcing: bulk pine bark nugget bags, flexible plastic border edging
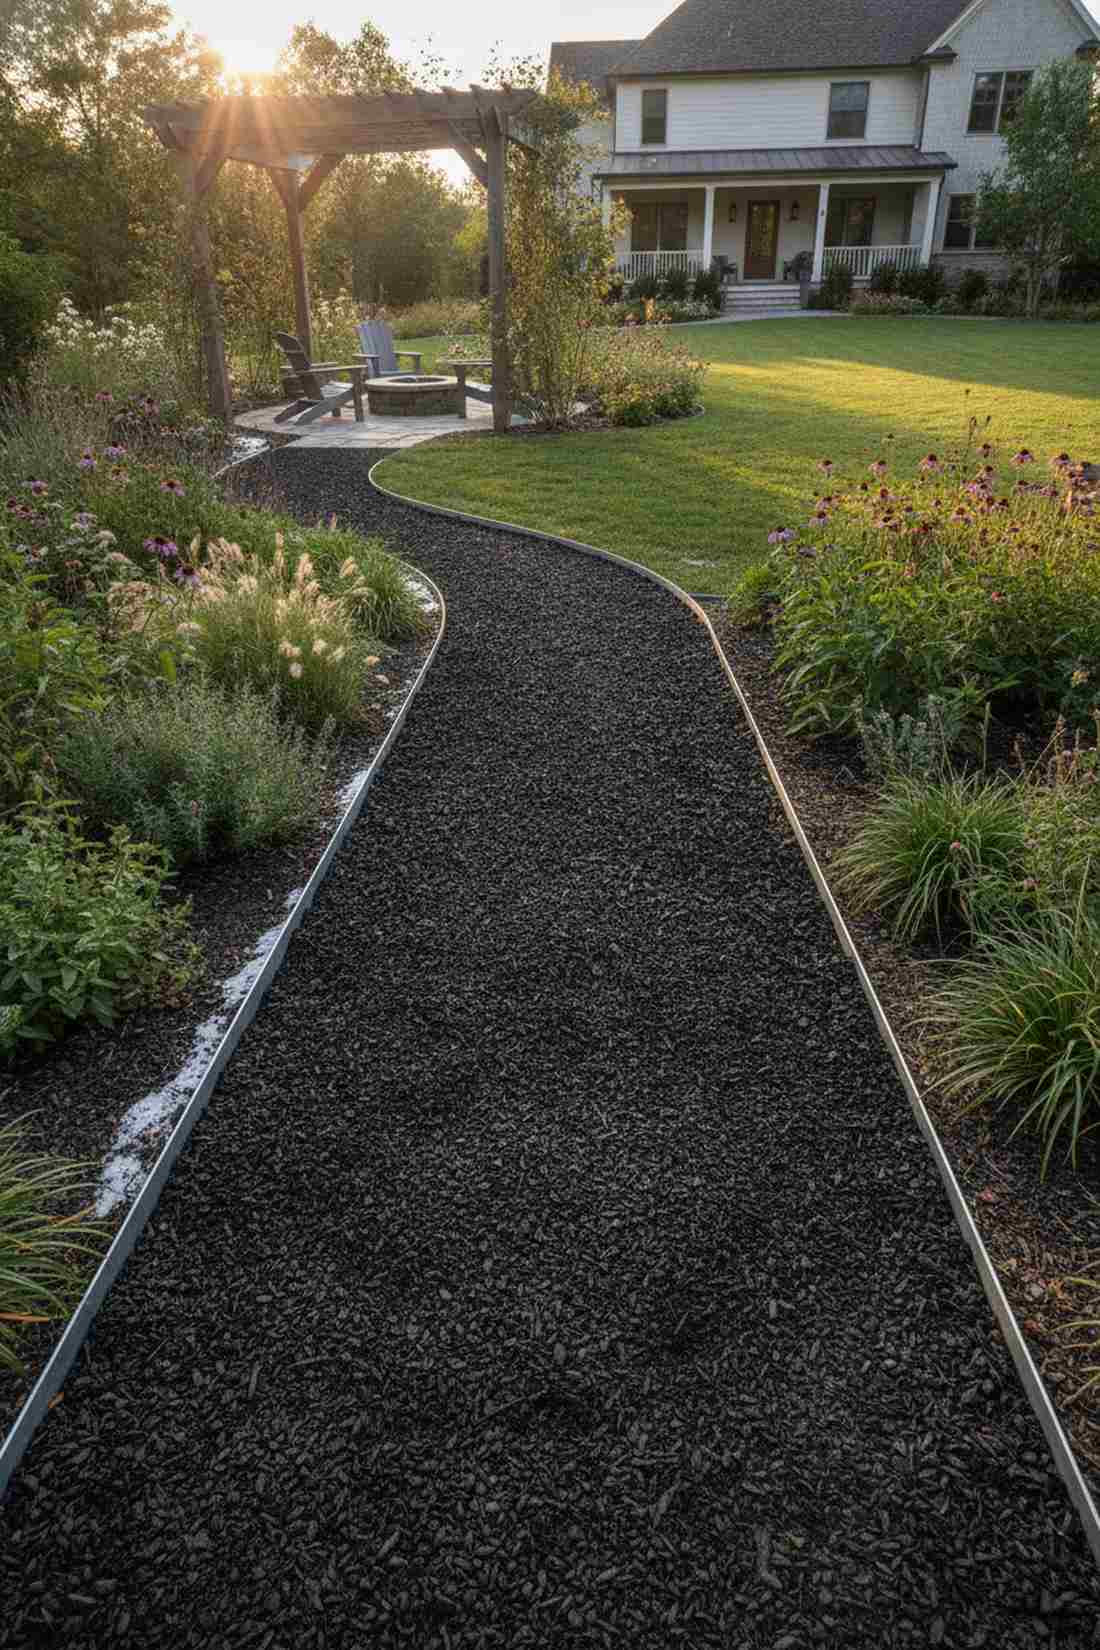
23. Recycled Rubber Mulch
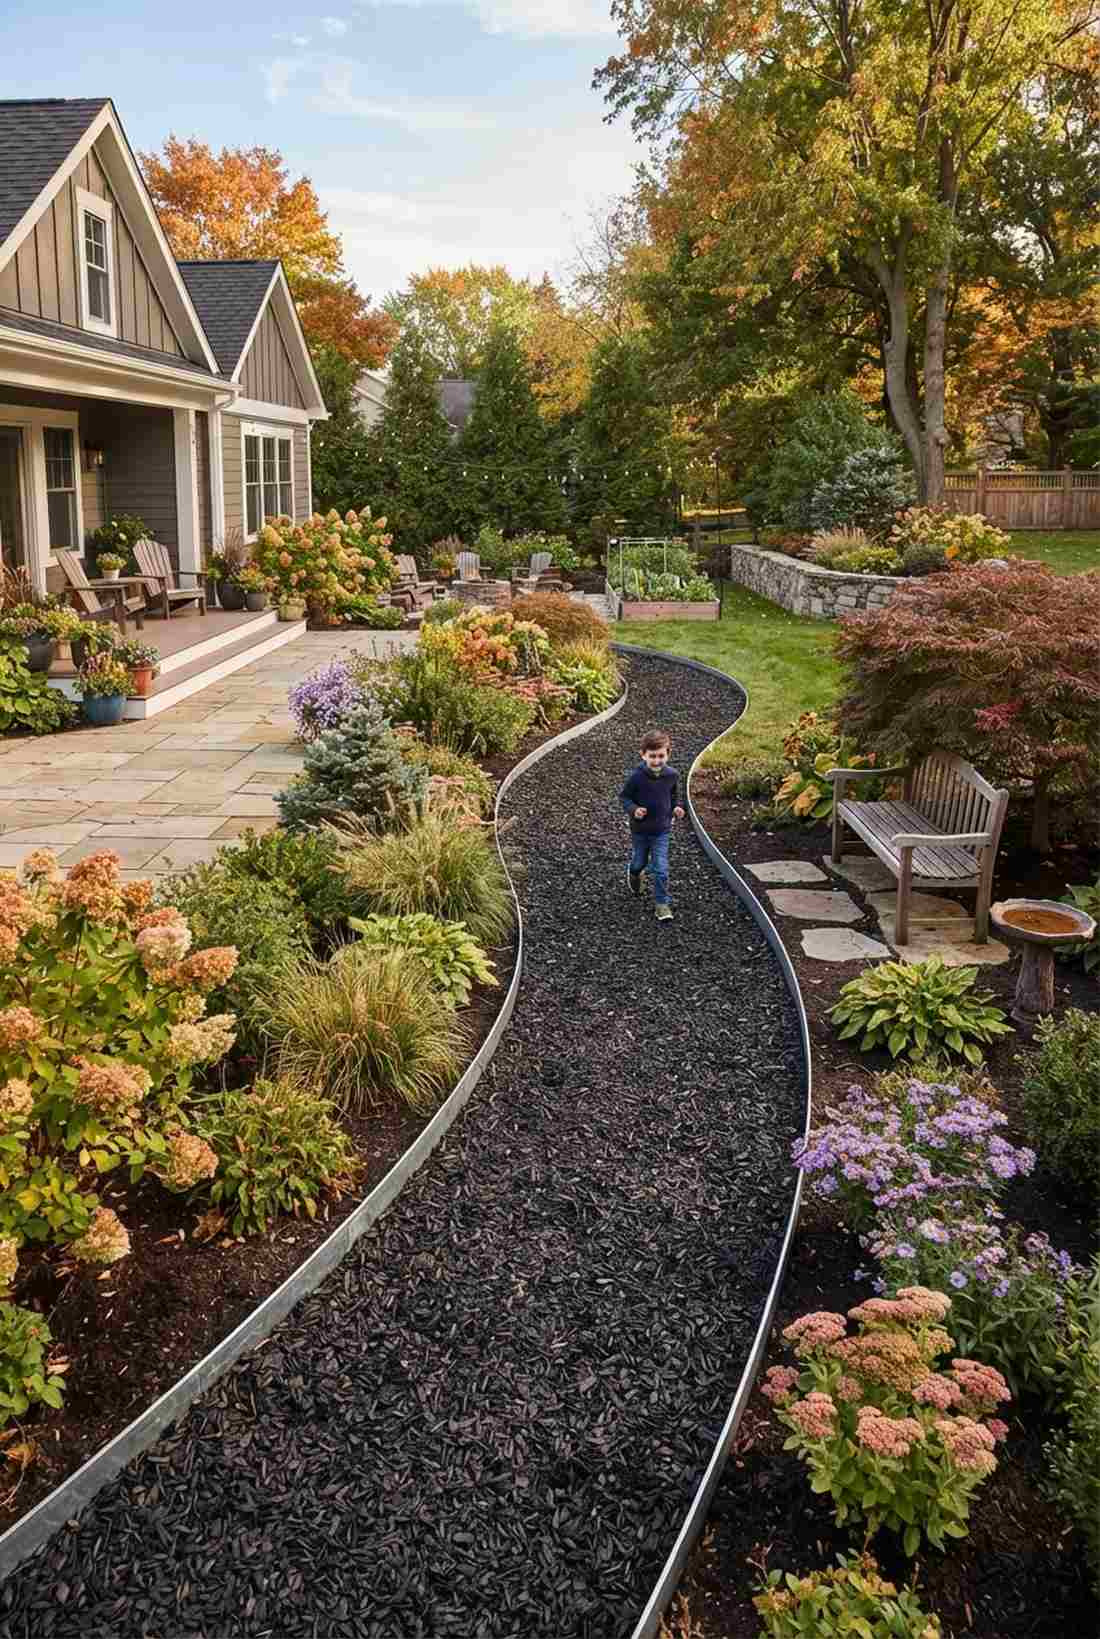
A shock-absorbing walkway feels like a professional running track, a brilliant safety upgrade for therapeutic landscapes.
Organic wood rots and breeds nasty fungi, whereas shredded tires provide a permanent, bouncy surface that never degrades. Sourcing black rubber absorbs intense solar heat to melt winter snow faster on your garden pathways ideas.
Expect to spend $4–$6 per square foot for permanent fill.
- Key Materials: Shredded recycled rubber chunks
- Vibe / Style: Modern playground
- Difficulty: Very easy
- Budget Breakdown: Rubber mulch: $120 | Fabric: $30
- Creator’s Tip: Use metal edging; plastic borders will warp under the intense heat generated by the dark rubber.
- Smart Sourcing: non-toxic recycled rubber mulch, galvanized steel landscape edging
24. Crushed Shell Coastal Aggregate
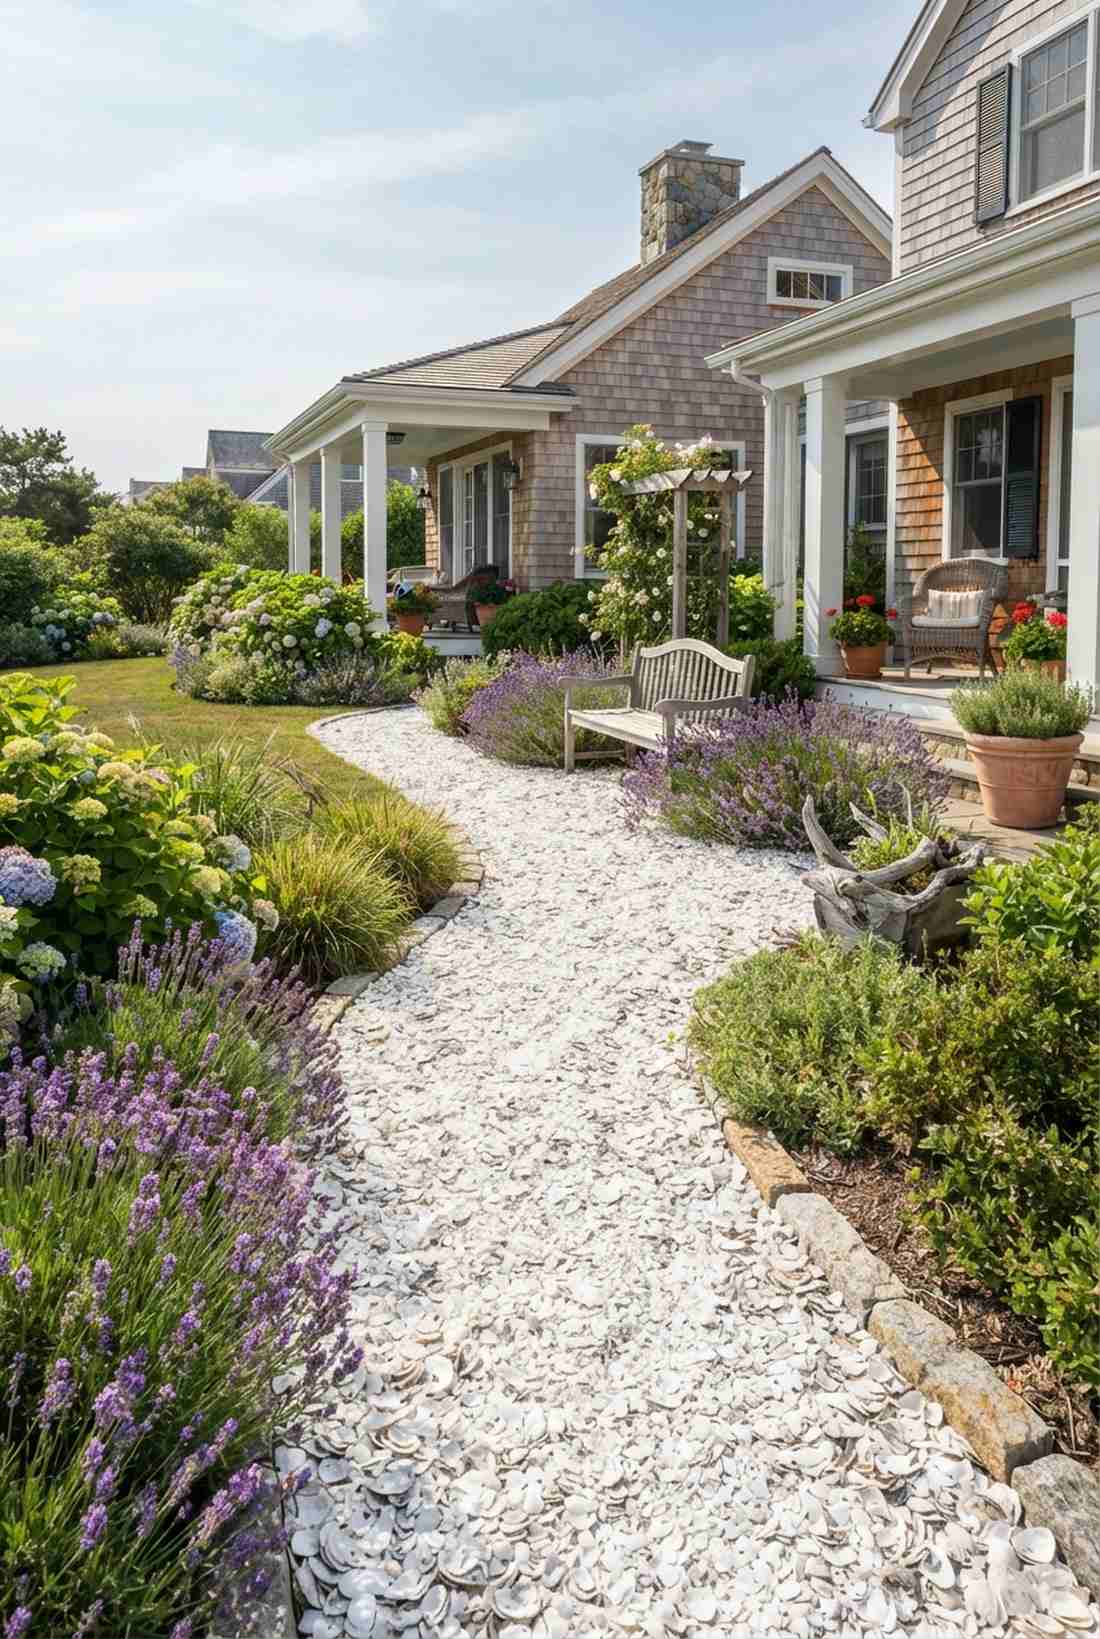
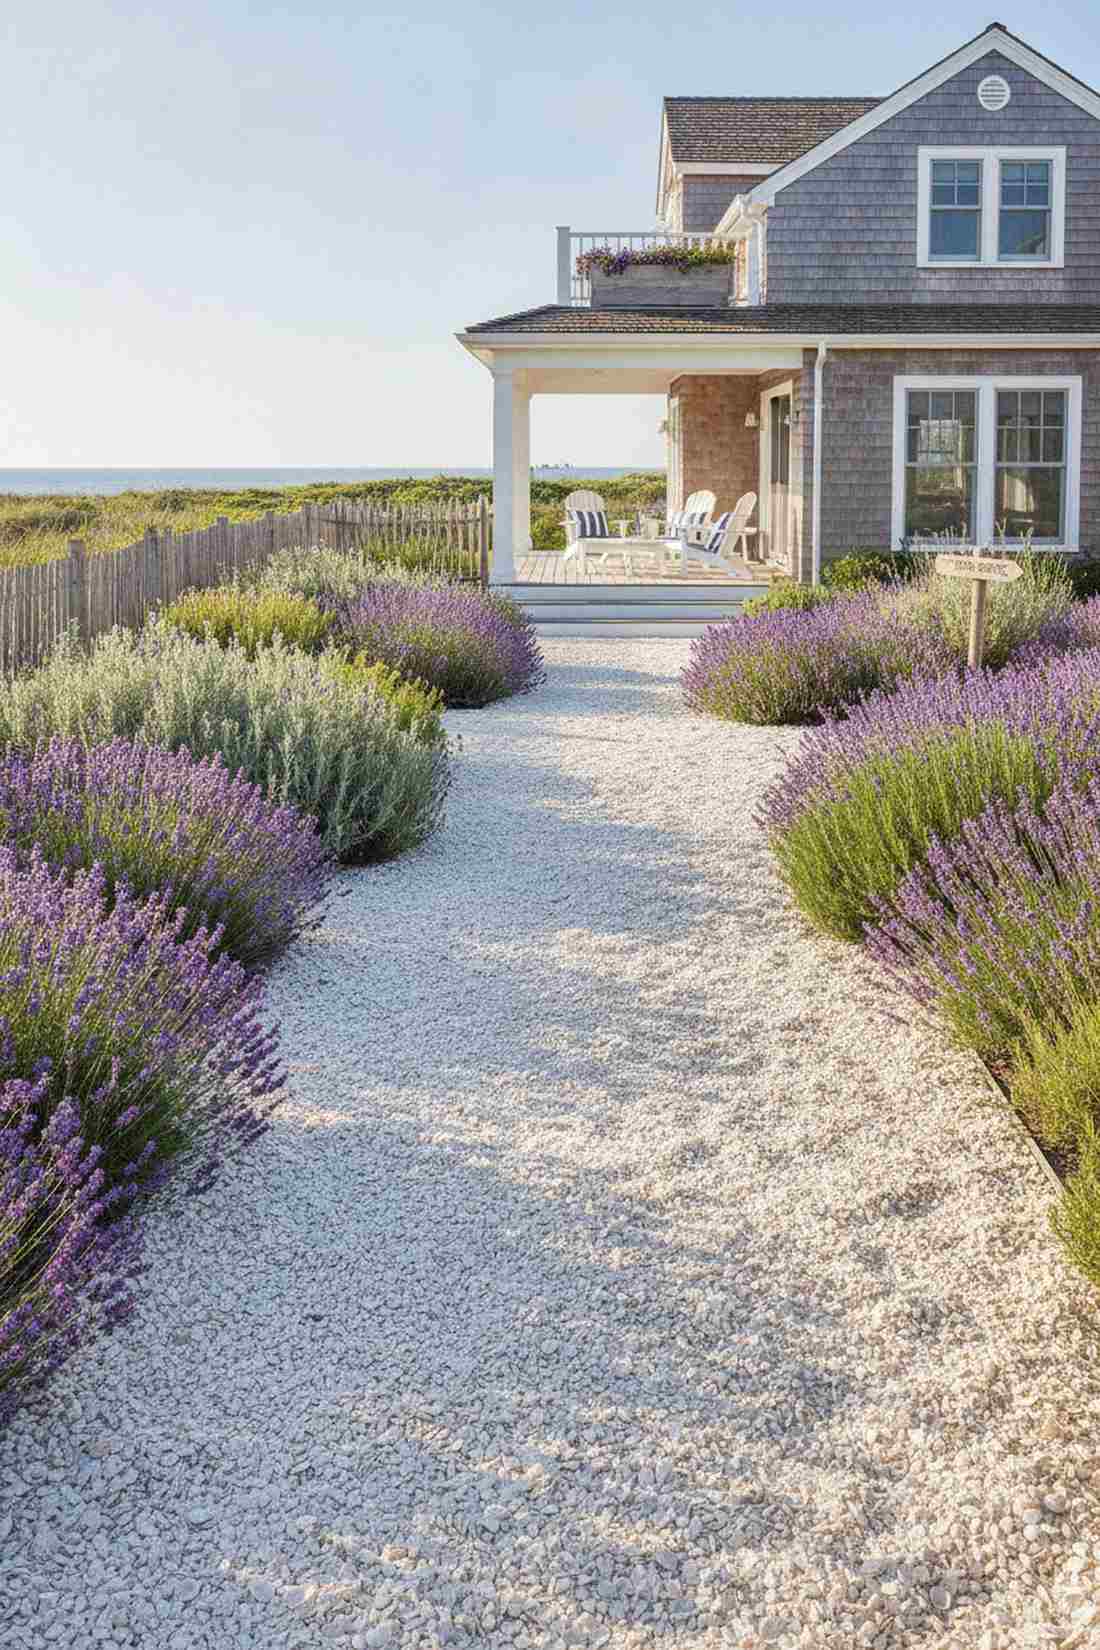
This bright white shell path feels like a breezy Hamptons estate, unmatched for reflecting heat away from delicate plants.
Most gravel looks dull, but crushed oyster shells literally gleam in the sun and look far more expensive than they are. The calcium slowly bleeds into the earth, sweetening the soil beautifully for alkaline-loving plants like lavender.
You can create this coastal vibe for roughly $3–$5 per square foot. Save this to your beach house design board!
- Key Materials: Crushed oyster or clam shells
- Vibe / Style: Bright coastal
- Difficulty: Beginner DIY
- Budget Breakdown: Shells: $95 | Base: $25
- Creator’s Tip: Do not use near acid-loving plants like azaleas, as the leaching calcium will yellow their leaves.
- Smart Sourcing: crushed oyster shell bulk bags, heavy-duty tamper tools
Garden Pathways with PaversContemporary Patterns
Modern design language favors bold geometry, monochromatic palettes, and contrasting materials that emphasize clean horizontal planes. These paver strategies suit minimalist courtyards, rooftop terraces, and urban townhouse gardens where architectural discipline prevails.
I almost skipped this next concept, but the modern aesthetic is completely taking over Pinterest…
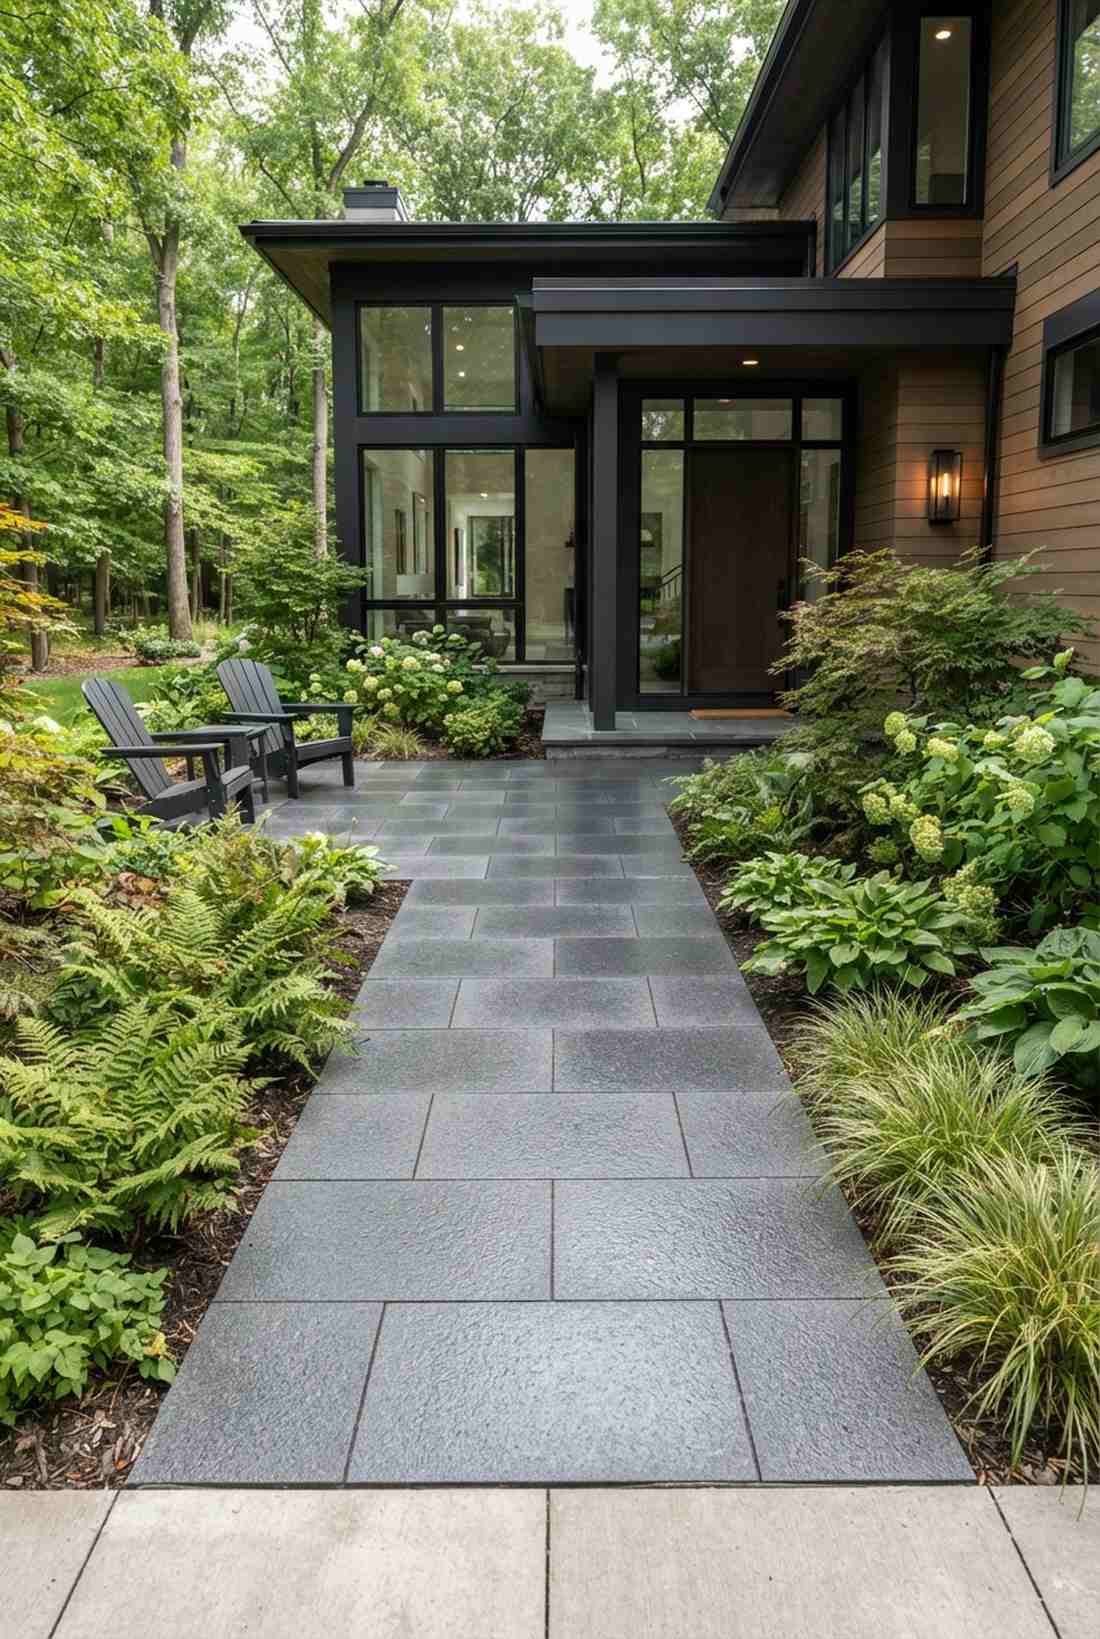
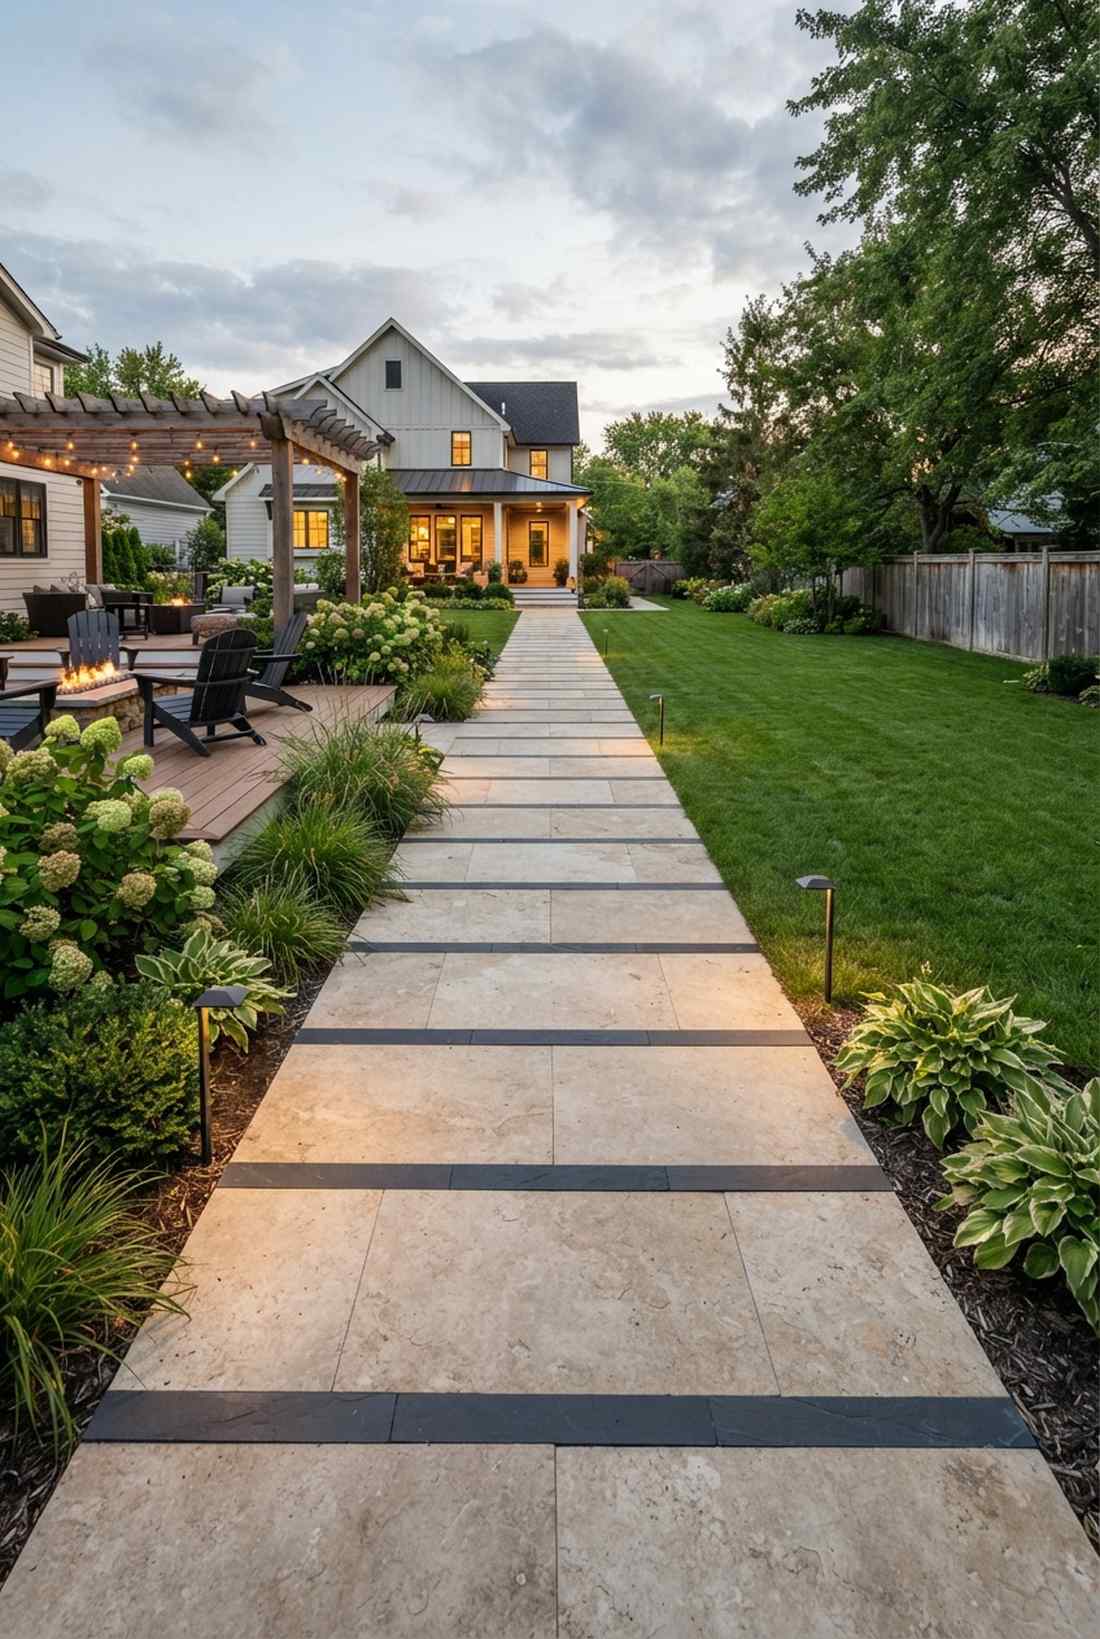
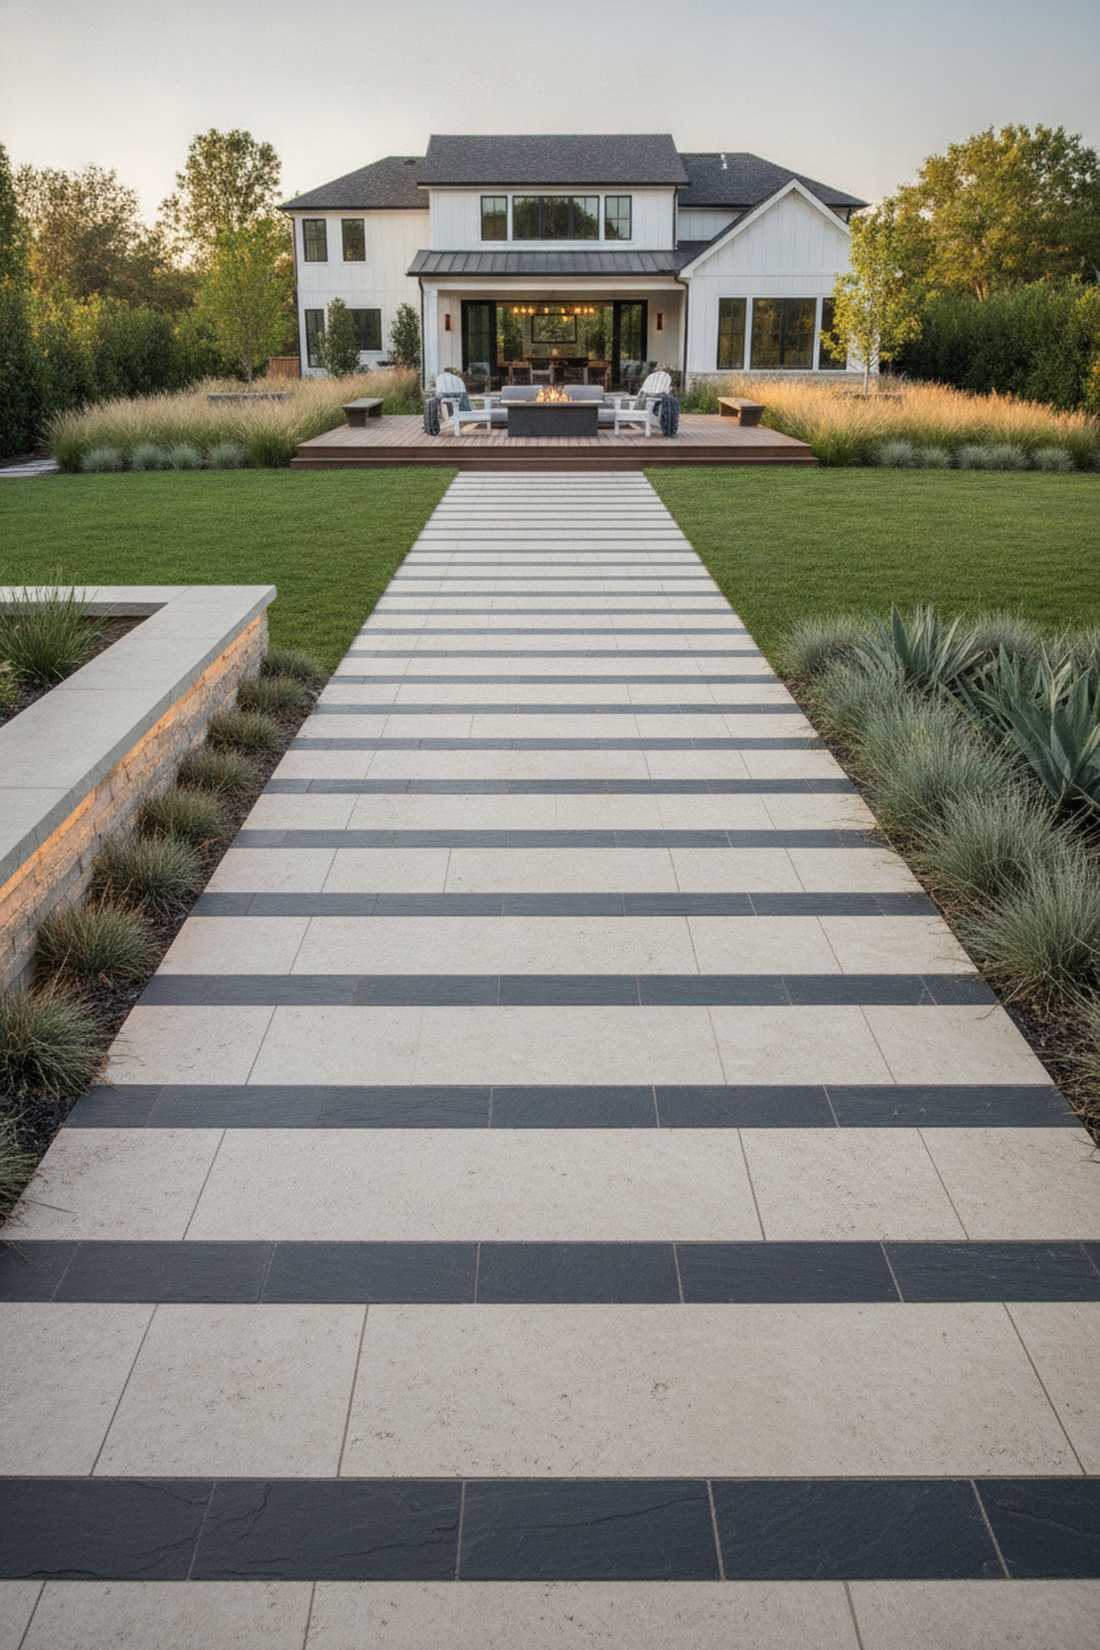
25. Linear Plank Pavers

This sleek striped walkway feels like a high-end architectural digest cover, forcing short courtyards to look massive.
Chunky squares feel dated, but laying 24-inch narrow planks end-to-end stretches optical perspective to the absolute limit. Using smooth charcoal tones gives a designer-level finish that pairs flawlessly with minimalist concrete walls.
This modern illusion costs around $12–$18 per square foot.
- Key Materials: 6×24 inch linear concrete planks
- Vibe / Style: Ultra-modern minimalist
- Difficulty: High precision leveling needed
- Budget Breakdown: Planks: $350 | Polymeric sand: $45
- Creator’s Tip: Align the stripes perpendicular to your main window to maximize the optical lengthening effect.
- Smart Sourcing: linear concrete paver planks, precision paver leveling tools
26. Oversized Porcelain Slabs
The seamless large-format floor feels like an indoor living room placed outside, engineered specifically for luxury rooftop terraces.
Natural stone cracks easily on suspended decks, but UV-coated porcelain slabs offer indestructible, stain-proof perfection. Mount them on adjustable pedestal systems to completely hide ugly drainage pipes while maintaining a perfectly flat walking surface.
Premium porcelain runs about $20–$30 per square foot. Pin this if you are upgrading a luxury urban balcony!
- Key Materials: 24×24 inch porcelain exterior slabs
- Vibe / Style: Seamless contemporary
- Difficulty: Advanced pedestal installation
- Budget Breakdown: Slabs: $600 | Pedestals: $150
- Creator’s Tip: Ensure your underlying roof membrane is pristine; fixing leaks after slabs are locked is a nightmare.
- Smart Sourcing: UV-coated porcelain patio slabs, adjustable deck pedestal systems
27. Contrasting Border Frame
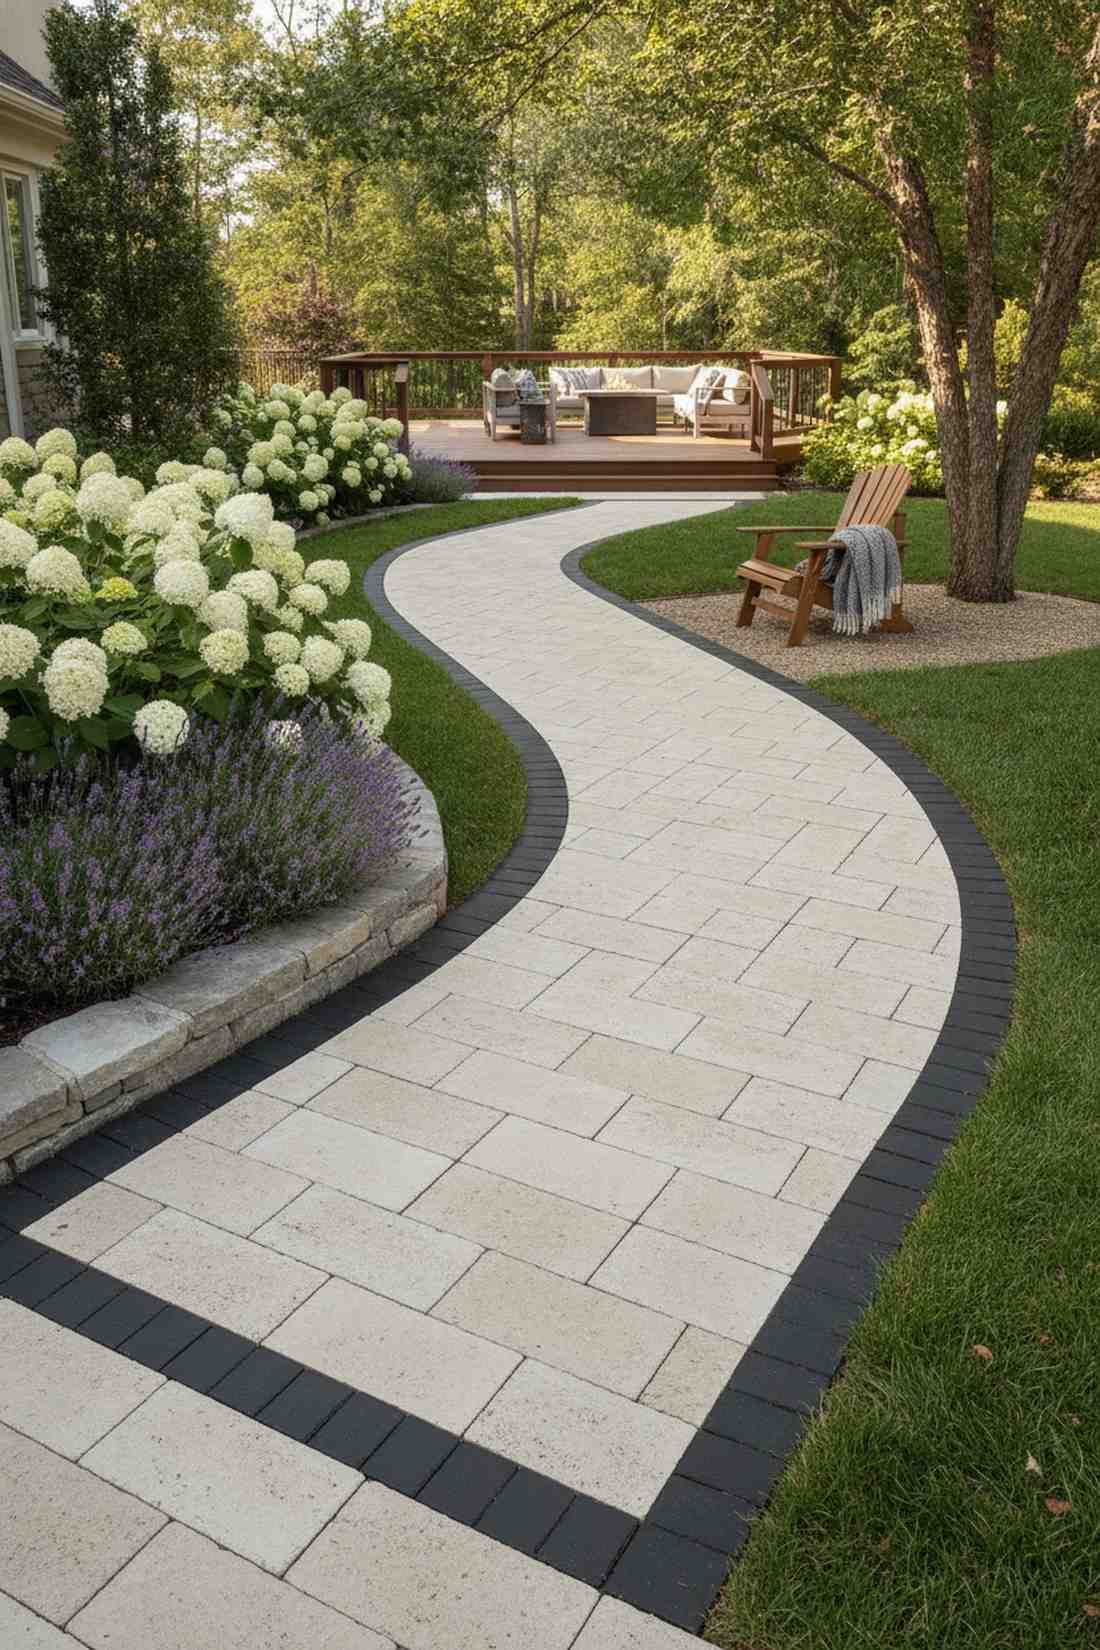
A sharp dual-tone border feels like a tailored tuxedo for your yard, dramatically sharpening the edges of any path.
Using a single color looks lazy, but framing light field pavers with stark black borders delivers a surprisingly premium look. This framing technique anchors your garden pathways with pavers so powerfully that nearby weeds practically disappear from view.
Adding a contrast frame only increases costs by $2 per square foot.
- Key Materials: Dark charcoal border pavers
- Vibe / Style: Tailored and crisp
- Difficulty: Moderate cutting required
- Budget Breakdown: Border stones: $80 | Base: $20
- Creator’s Tip: Use a wet saw to cut corner angles at exactly 45 degrees for a flawless picture-frame joint.
- Smart Sourcing: black charcoal edging blocks, heavy-duty wet saw blades
28. Ashlar Pattern Variation

This staggered geometry layout feels like a custom artisan masonry job, brilliant for breaking up long, boring walkways.
Straight lines visually fracture a narrow path, but interlocking three different block sizes creates an endless, flowing puzzle. Snag a pre-measured ashlar starter kit to ensure your joints never accidentally line up and ruin the illusion.
This intricate design costs around $10–$14 per square foot. Save this to your high-end landscape board!
- Key Materials: Three-piece paver sets
- Vibe / Style: Artisan craftsmanship
- Difficulty: Requires meticulous pattern tracking
- Budget Breakdown: Stones: $320 | Base: $80
- Creator’s Tip: Never let four corners meet at a single point; it destroys the random ashlar aesthetic instantly.
- Smart Sourcing: pre-cut ashlar paver kits, polymeric jointing sand (bulk bags)
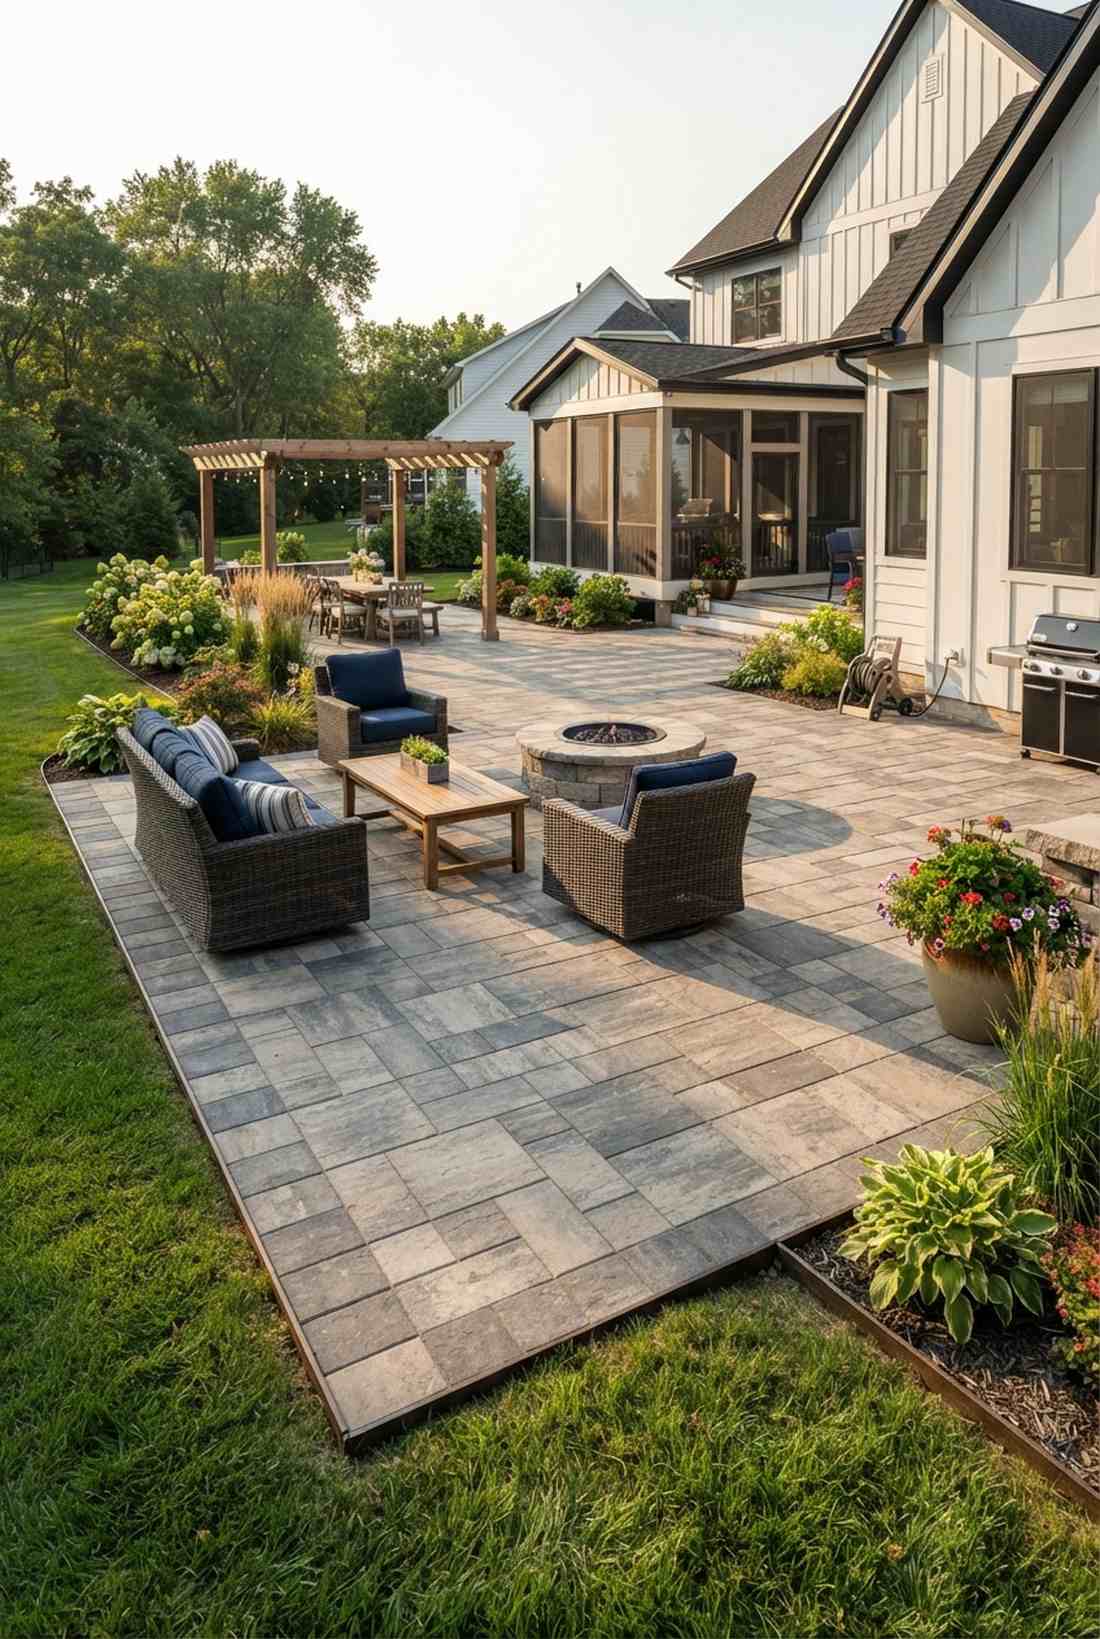
29. Monochrome Gray Gradient
A fading tonal pathway feels like an edgy urban gallery, engineered to let bright floral beds command all the attention.
Loud stone colors clash with blooming gardens, whereas blending light, medium, and dark grays looks far more expensive than it is. Intentionally transitioning from dark to light down the path tricks the brain into thinking the yard is incredibly deep.
You can easily pull this off for around $8–$12 per square foot.
- Key Materials: Gradient gray concrete units
- Vibe / Style: Edgy modern minimalism
- Difficulty: Color planning required
- Budget Breakdown: Stones: $250 | Base: $60
- Creator’s Tip: Lay the pieces out dry on your lawn first to ensure the color fade looks natural before setting them.
- Smart Sourcing: monochrome paver starter packs, commercial base prep kits
You won’t believe how easy the next approach is—even if you’ve never laid a single brick before.
30. Precision-Cut Joints
This ultra-tight layout feels like a continuous slab of high-end stone, practically mandatory for luxury residential work.
Wide, messy gaps scream DIY, but reducing joints to one-eighth of an inch gives a designer-level finish that stops ant colonies dead. Pack those microscopic gaps with water-activated polymeric sand to lock the surface so tight it feels like poured concrete.
Upgrading your joints costs roughly $15 extra in materials. Pin this if you hate pulling weeds!
- Key Materials: Factory-edge wet-cut blocks
- Vibe / Style: Flawless luxury
- Difficulty: Advanced precision leveling
- Budget Breakdown: Polymeric sand: $40 | Stones: $400
- Creator’s Tip: You must blow every spec of dust off the top before watering the sand, or it will permanently stain the brick.
- Smart Sourcing: premium polymeric sand buckets, high-powered leaf blowers
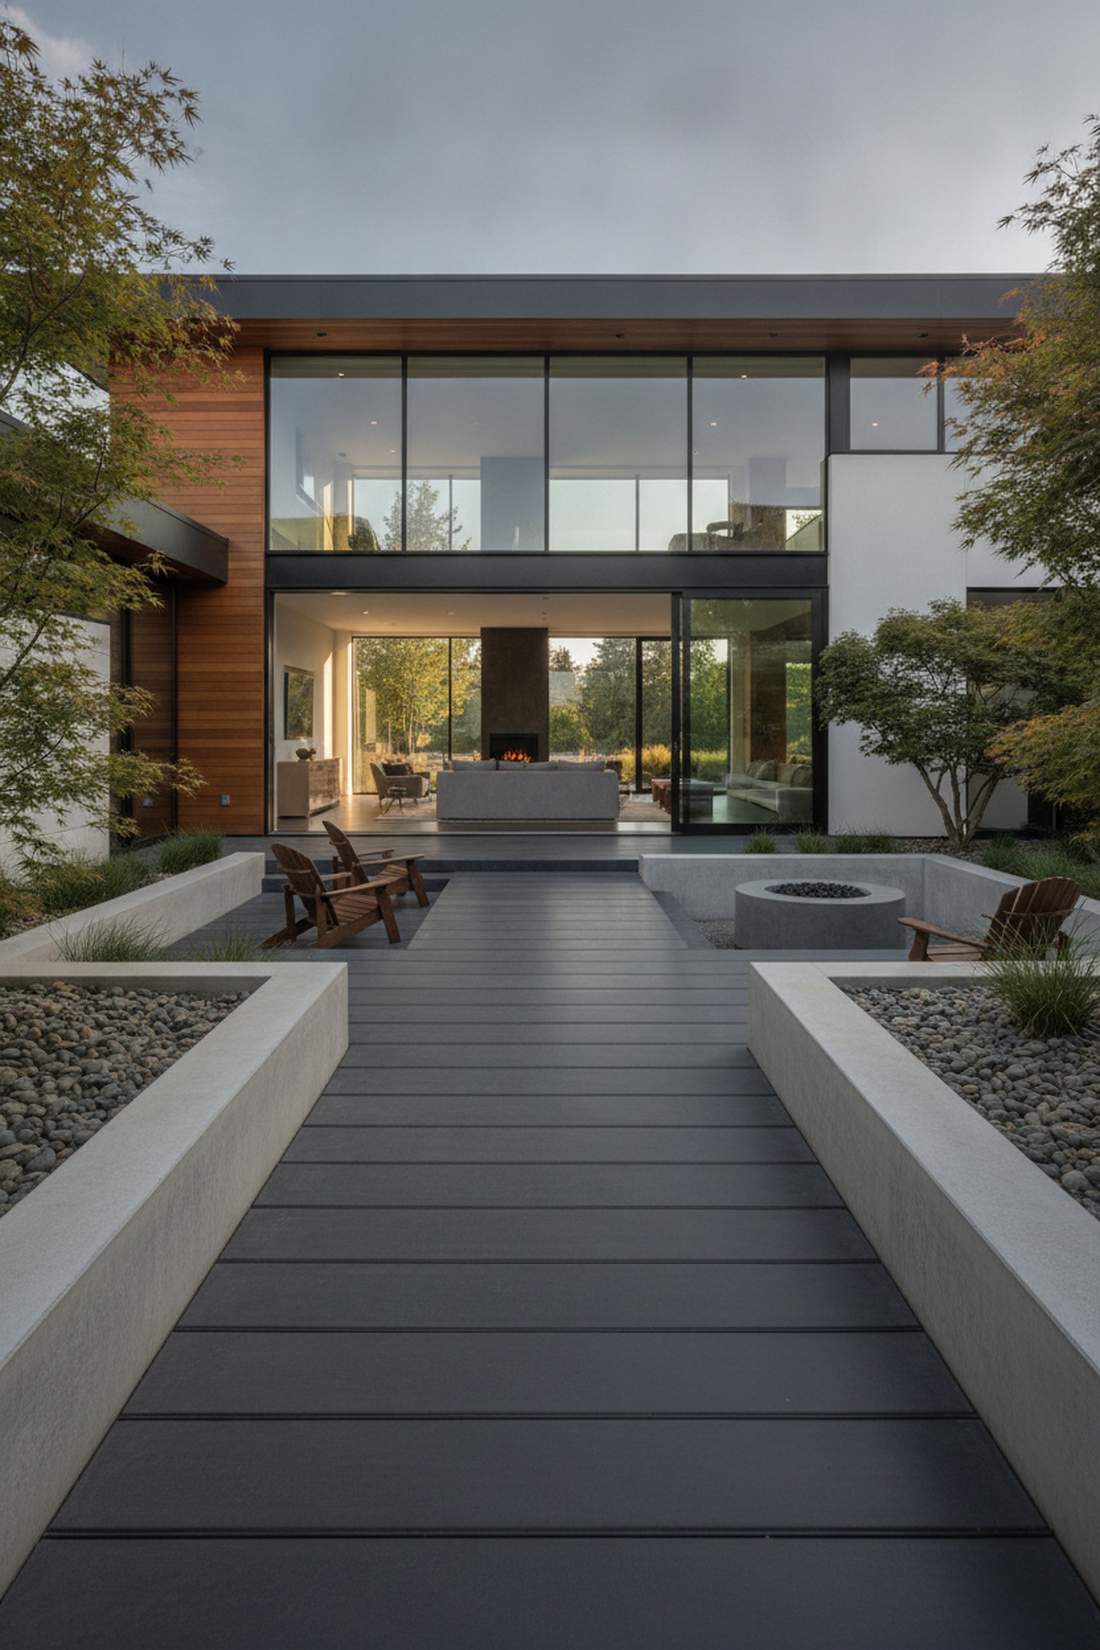
31. Floating Concrete Pads
The oversized rhythmic steppers feel like a geometric architectural dream, violently dynamic when placed across wide, open lawns.
Standard tiny steppers look cheap, but casting massive 30-inch pads creates serious visual gravity that modernizes dull grass. Leaving generous gaps between these huge units allows creeping thyme to weave through, perfectly softening the brutal industrial aesthetic.
Casting these yourself costs only $40–$60 in total materials.
- Key Materials: Oversized concrete cast pads
- Vibe / Style: Industrial modern
- Difficulty: Heavy concrete mixing
- Budget Breakdown: Concrete: $45 | Molds/Wood: $20
- Creator’s Tip: Add a dark acid stain to the cured concrete to eliminate the boring, generic gray finish.
- Smart Sourcing: heavy-duty concrete stepping molds, dark concrete acid stain kits
32. Steel Edging Detail
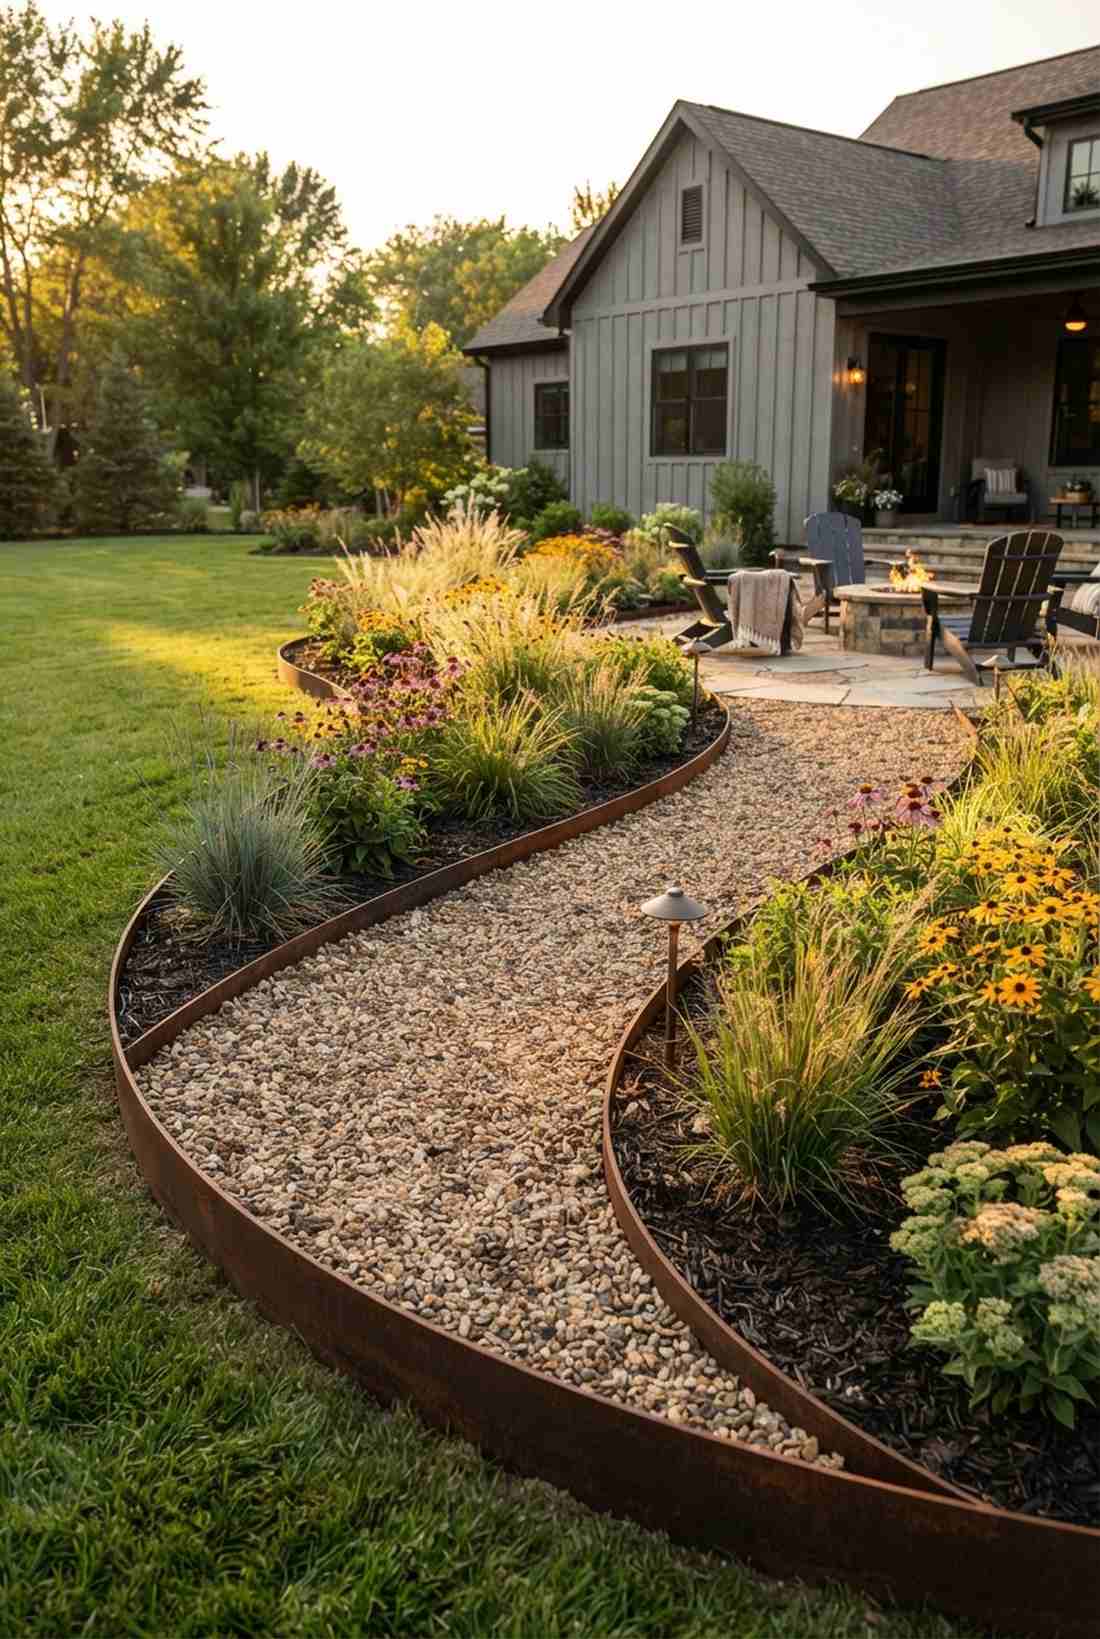
A rusty metal border feels like a chic urban park, providing maintenance-free containment for loose path fill.
Flimsy plastic borders heave and snap, but quarter-inch steel plates hold aggressive curves with crisp, flawless precision. The natural rust patina looks incredibly expensive and blends perfectly with native prairie grasses.
Heavy steel edging runs about $5–$8 per linear foot. Save this to your permanent landscape board!
- Key Materials: Quarter-inch corten steel strips
- Vibe / Style: Urban industrial
- Difficulty: Requires heavy mallet work
- Budget Breakdown: Steel: $150 | Rebar pins: $25
- Creator’s Tip: Pin the steel every 24 inches on the outside edge so the stakes remain entirely invisible under the dirt.
- Smart Sourcing: flexible corten steel edging kits, heavy-duty steel anchor pins
Material Guide: Cheap vs. Premium Aesthetic
Knowing exactly where to save and where to spend makes all the difference in achieving that “looks expensive but isn’t” vibe.
- Standard vs. UV-Resistant/Premium: Standard dyes fade to chalky gray in two summers. Upgrading to UV-coated stones or applying a heavy-duty sealant stops fading and prevents hairline fractures.
- Pre-made Kits vs. Sourcing Locally: Sourcing individual rocks is tedious. Buying commercial-grade starter kits often saves both time and money by including exact ratios of sand, block, and edge restraints.
Rustic Organic Walkways
Naturalistic pathways embrace imperfection, weathering, and integration with surrounding plantings. These designs prioritize ecological function and sensory richness over geometric precision.
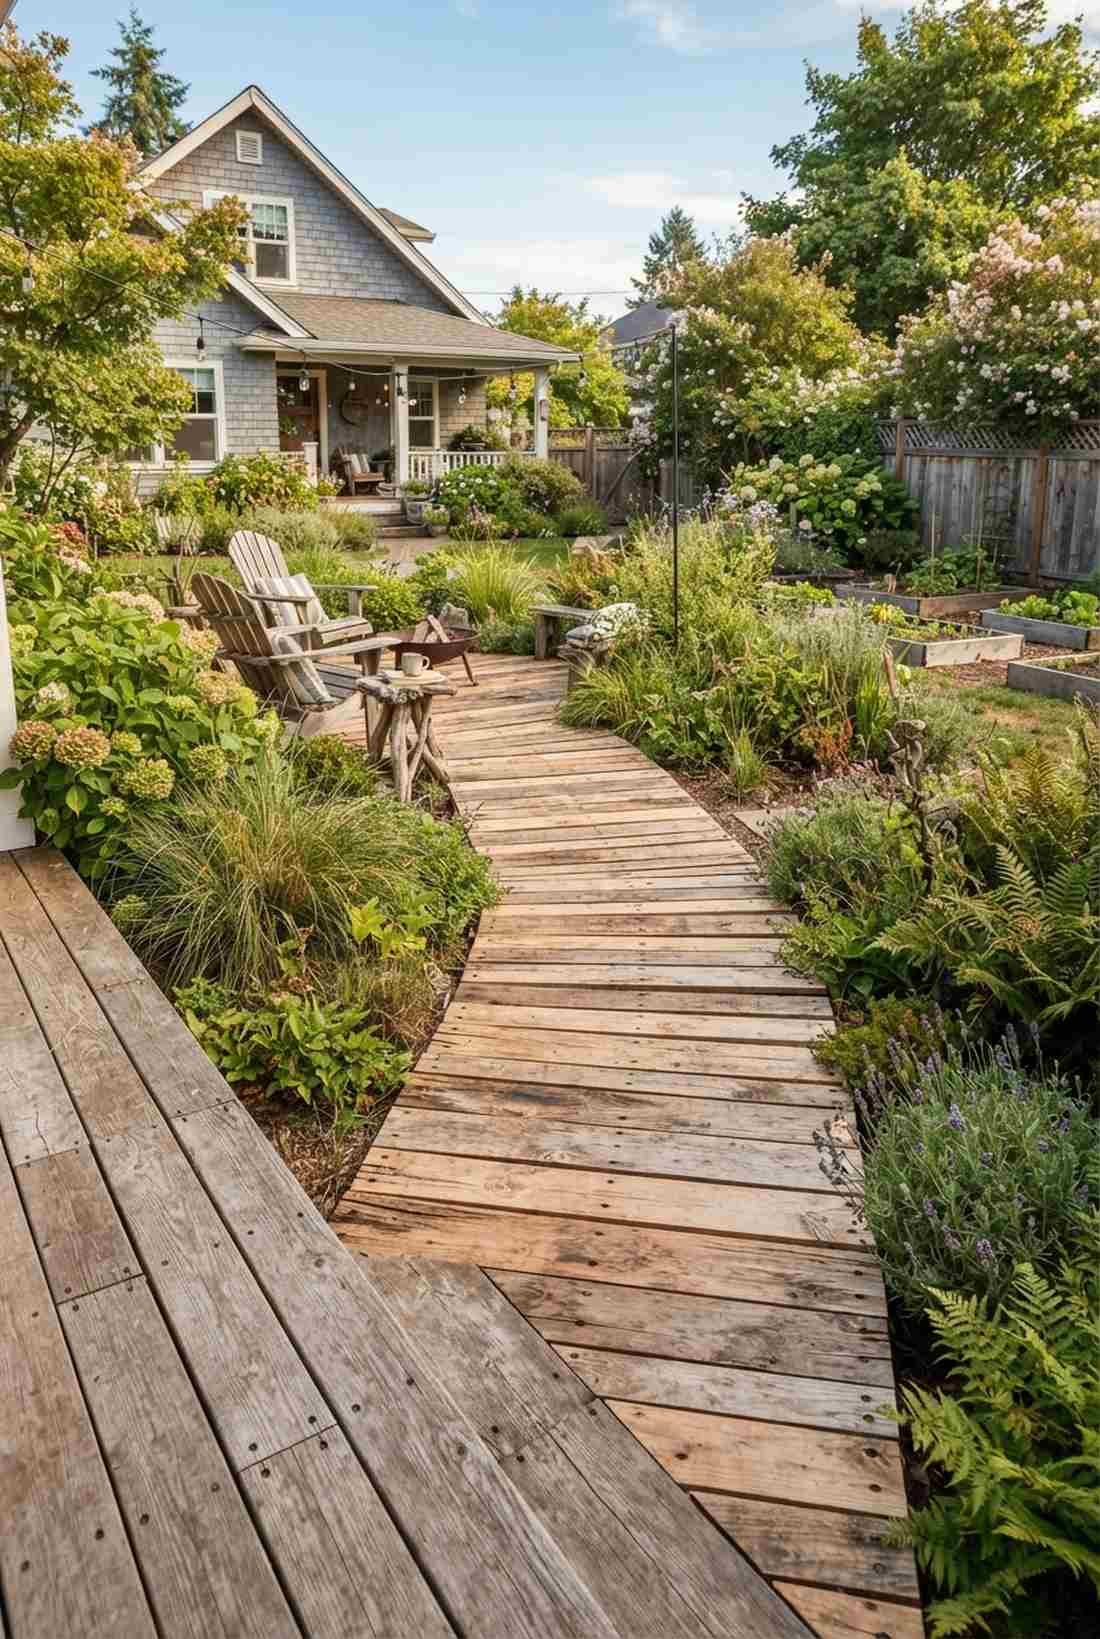
33. Wood Chip Forest Trail
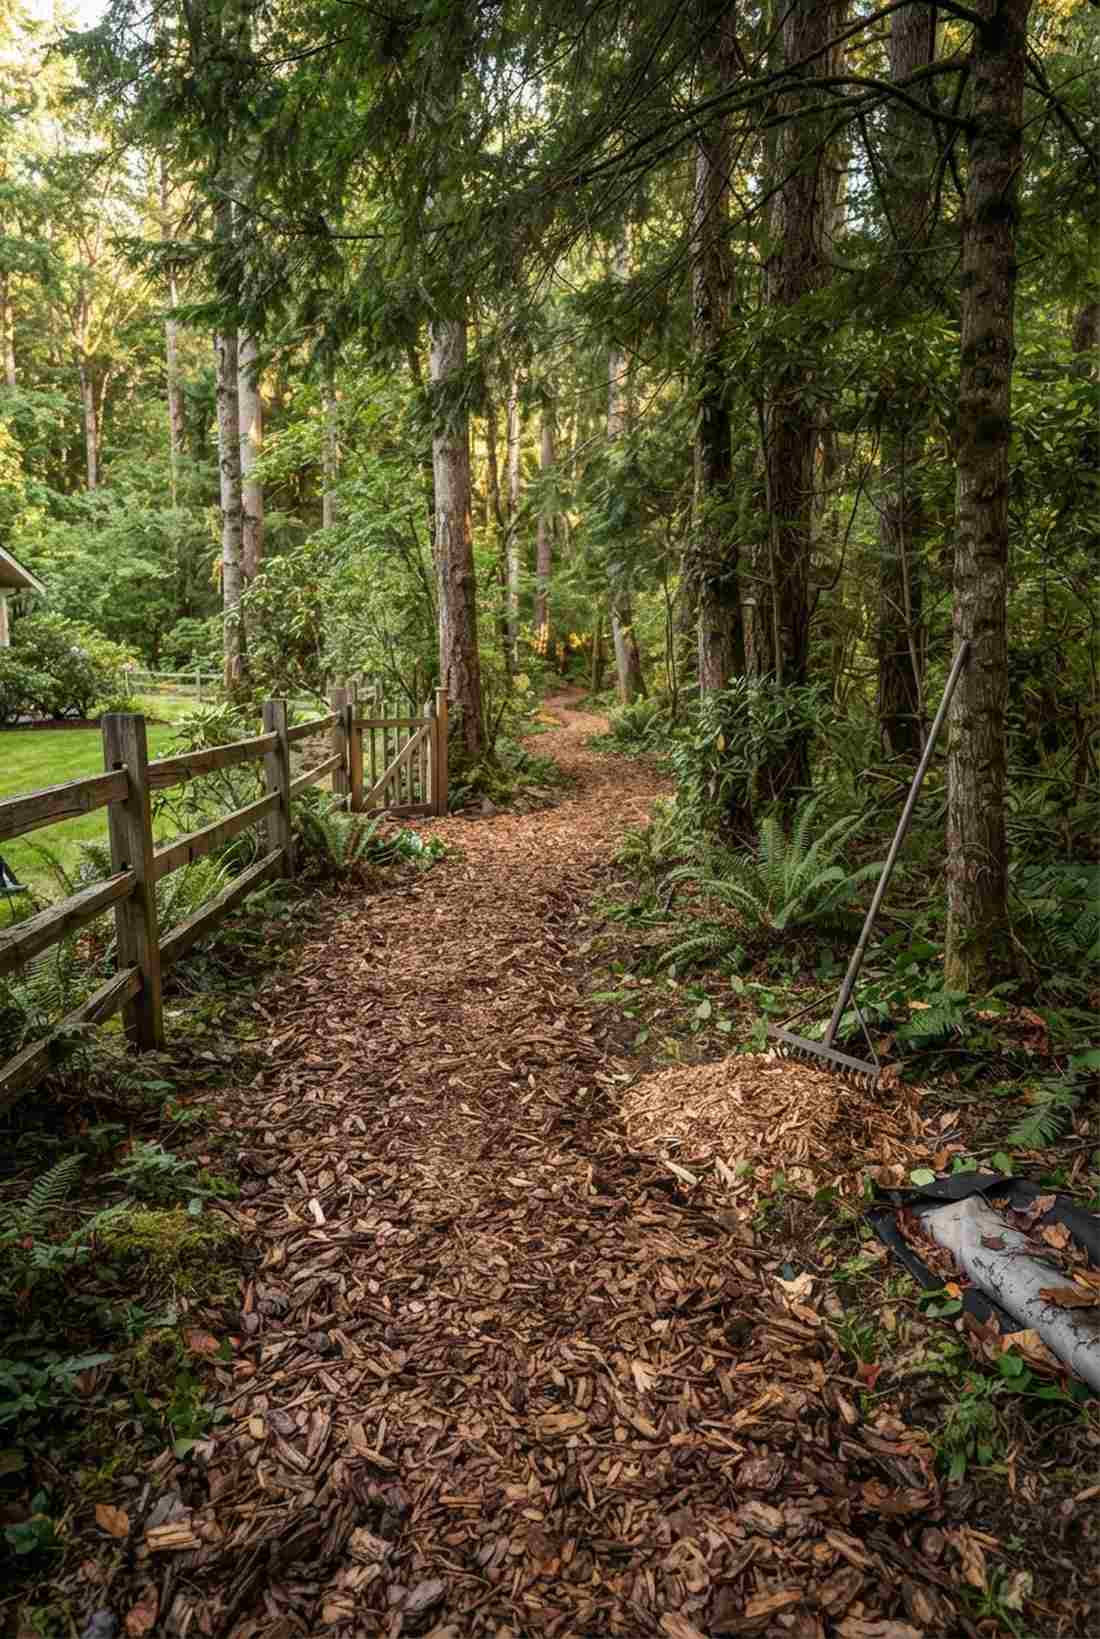
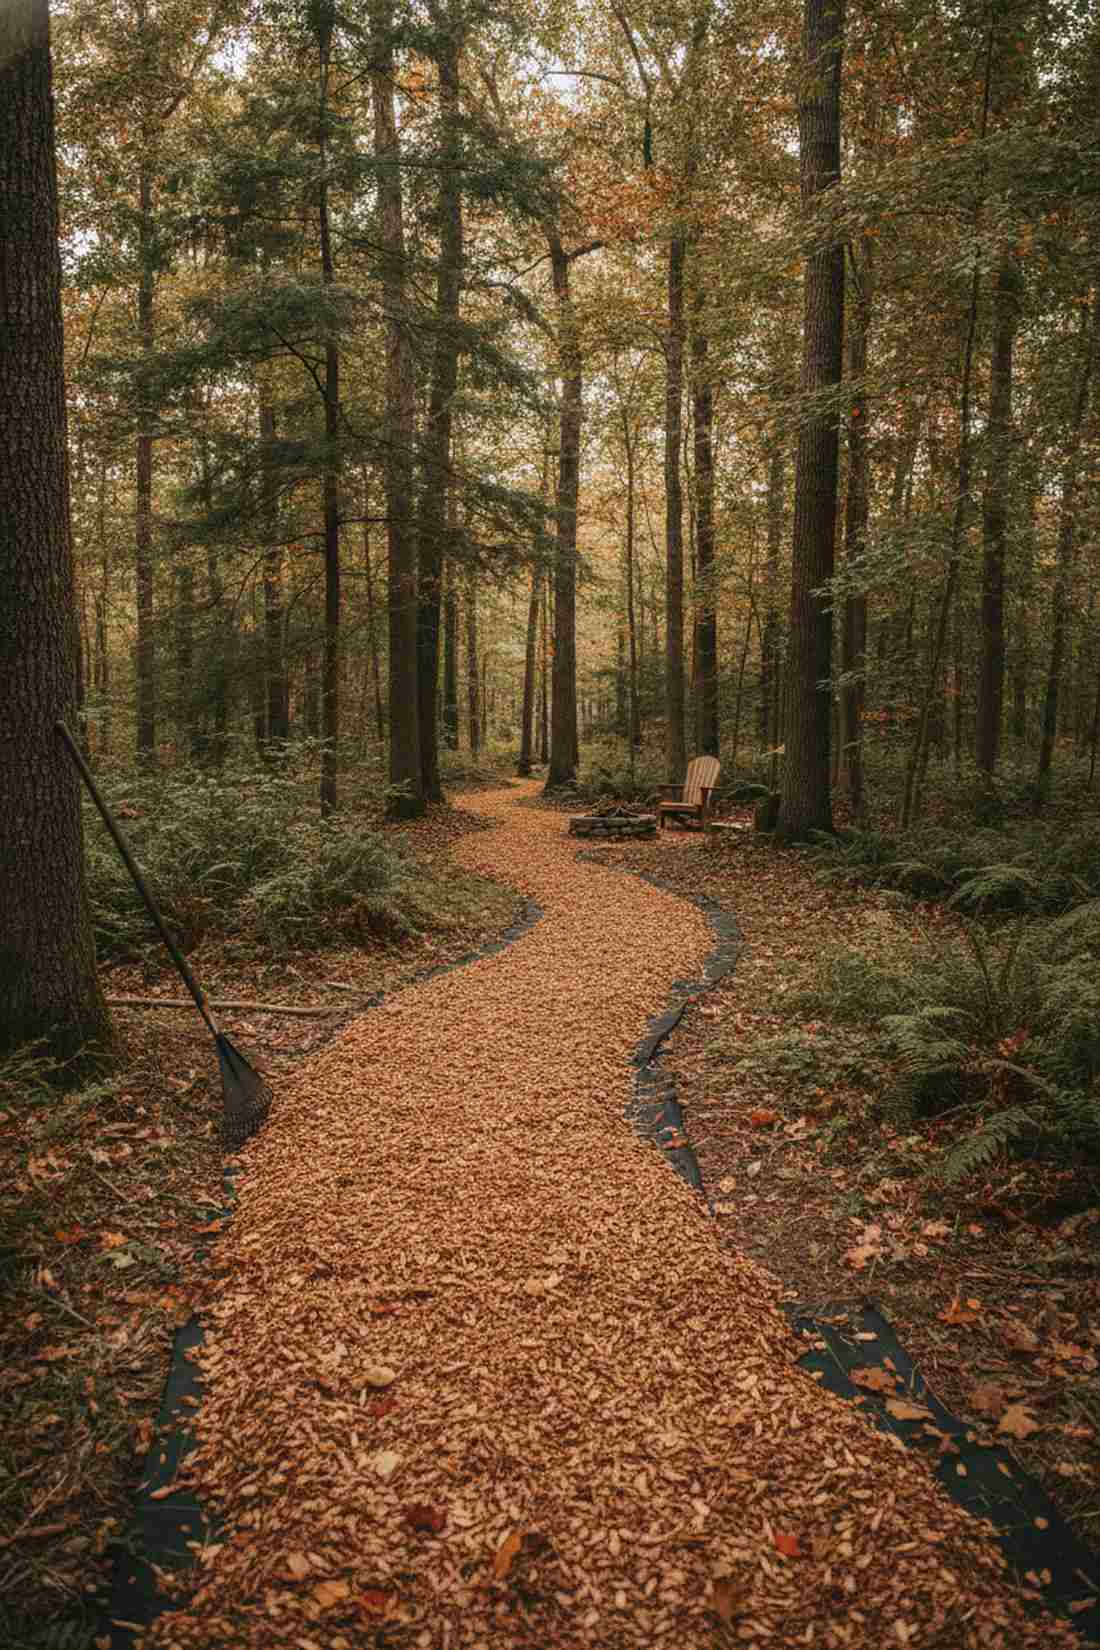
This spongy organic trail feels like an authentic national park hike, perfect for carving through deeply wooded backyards.
Pouring gravel under thick tree canopies is a nightmare to clean, but coarse arborist chips deliver a surprisingly premium look that swallows fallen leaves. The chips suppress brutal weed germination and slowly rot to create rich, dark humus for the surrounding soil.
You can easily pull this off for just $20–$40 total.
- Key Materials: Coarse arborist wood chips
- Vibe / Style: Deep forest natural
- Difficulty: Easiest project on the list
- Budget Breakdown: Chips: $30 | Rake: $10
- Creator’s Tip: Dump the chips a full six inches deep; they will compress to three inches in just one month.
- Smart Sourcing: commercial-grade landscape fabric, heavy-duty bow rakes
34. Log Round Stepping Stones
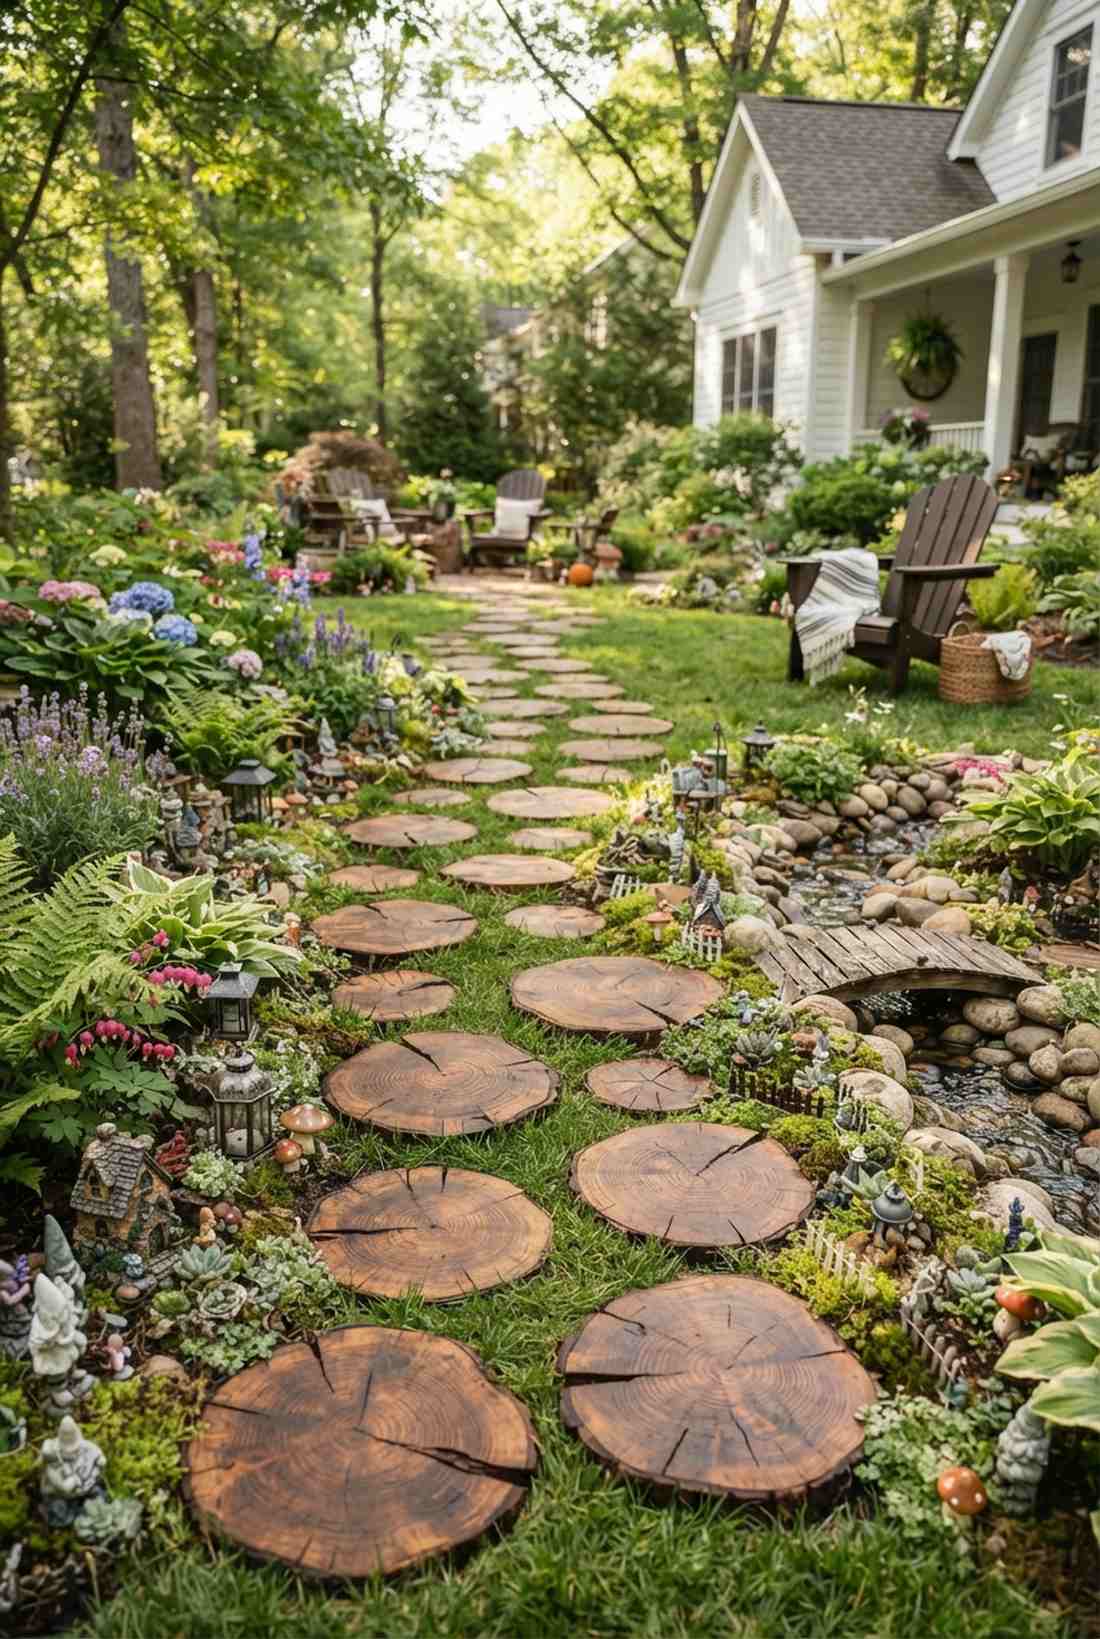
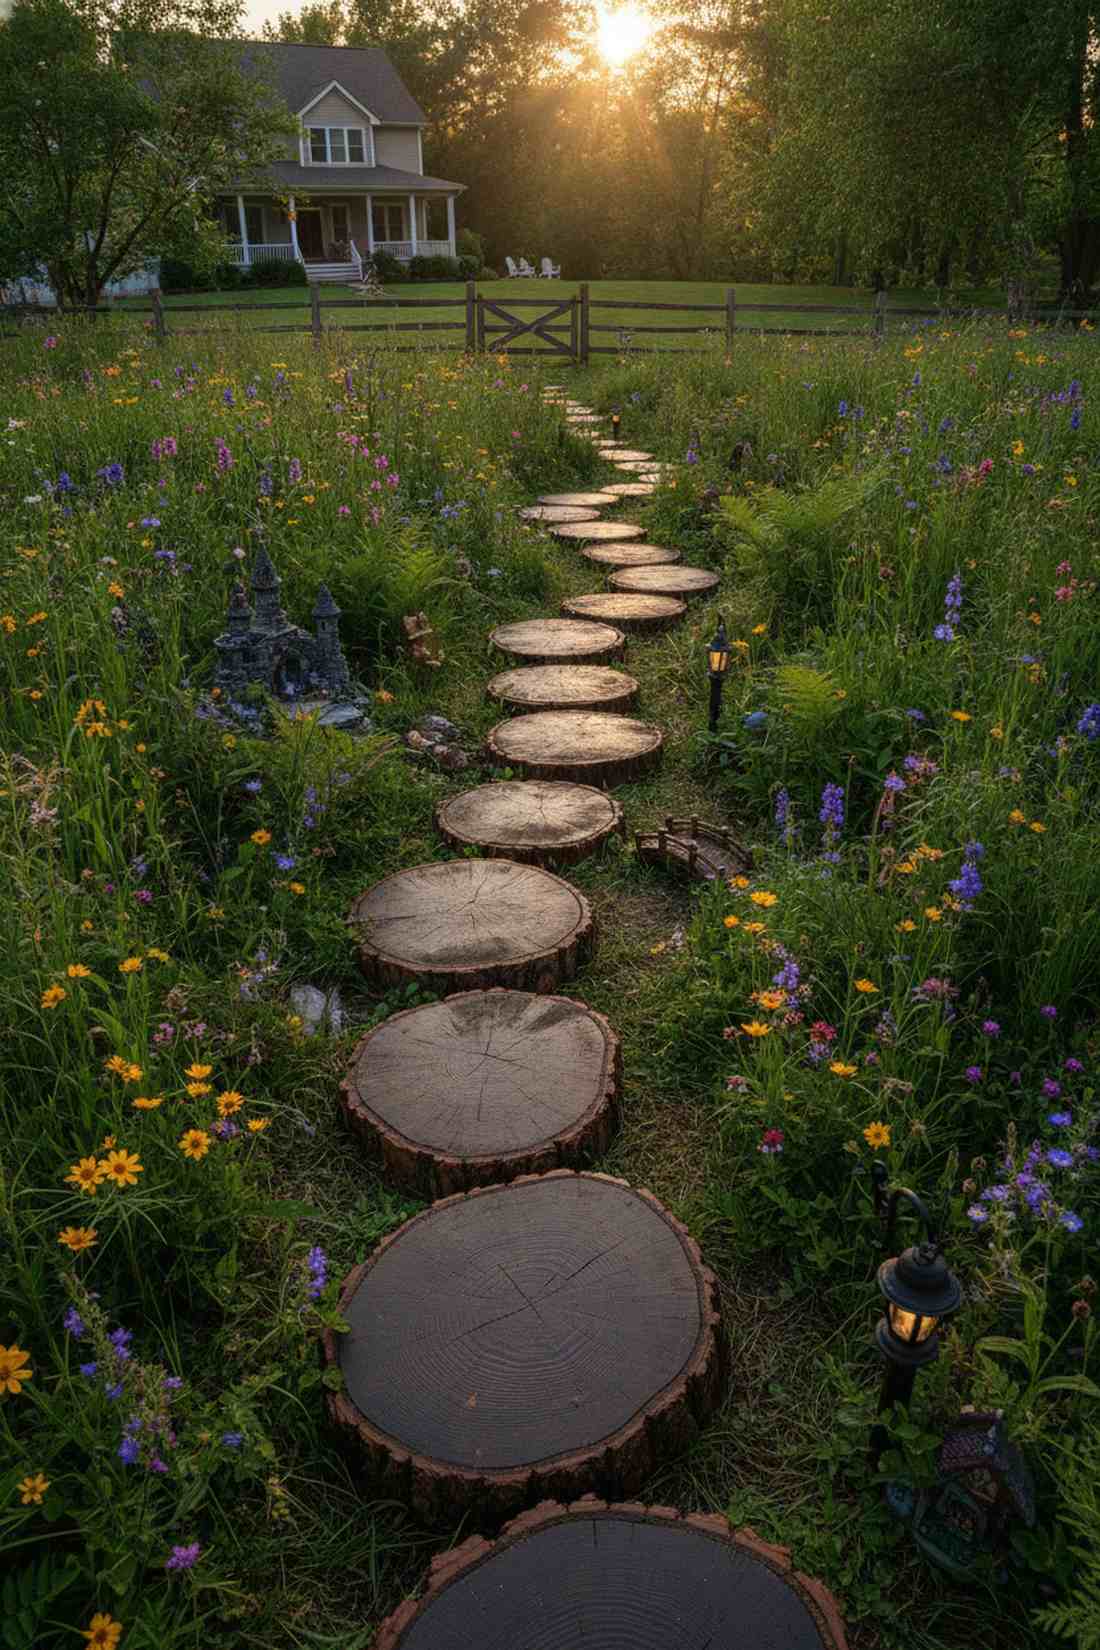
A fairy tale slice pathway feels like a whimsical storybook adventure, practically demanding to be paired with miniature garden supplies.
Standard paver blocks look harsh in a lush meadow, but utilizing hardwood cross-sections creates an intensely organic aesthetic. Treat the bottoms heavily with linseed oil, or rot will destroy your gorgeous fairy garden kits within two wet seasons.
This charming look costs nearly nothing if you have a chainsaw. Pin this for a magical garden upgrade!
- Key Materials: 18-inch hardwood trunk slices
- Vibe / Style: Whimsical fairy core
- Difficulty: Easy DIY
- Budget Breakdown: Logs: Free | Oil sealer: $25
- Creator’s Tip: Randomize the diameter of the slices to keep the organic, unplanned forest look authentic.
- Smart Sourcing: premium wood preservative oils, miniature garden supplies
Get ready to screenshot this next idea; it feels like walking through a private mountain retreat…
35. Railroad Tie Borders
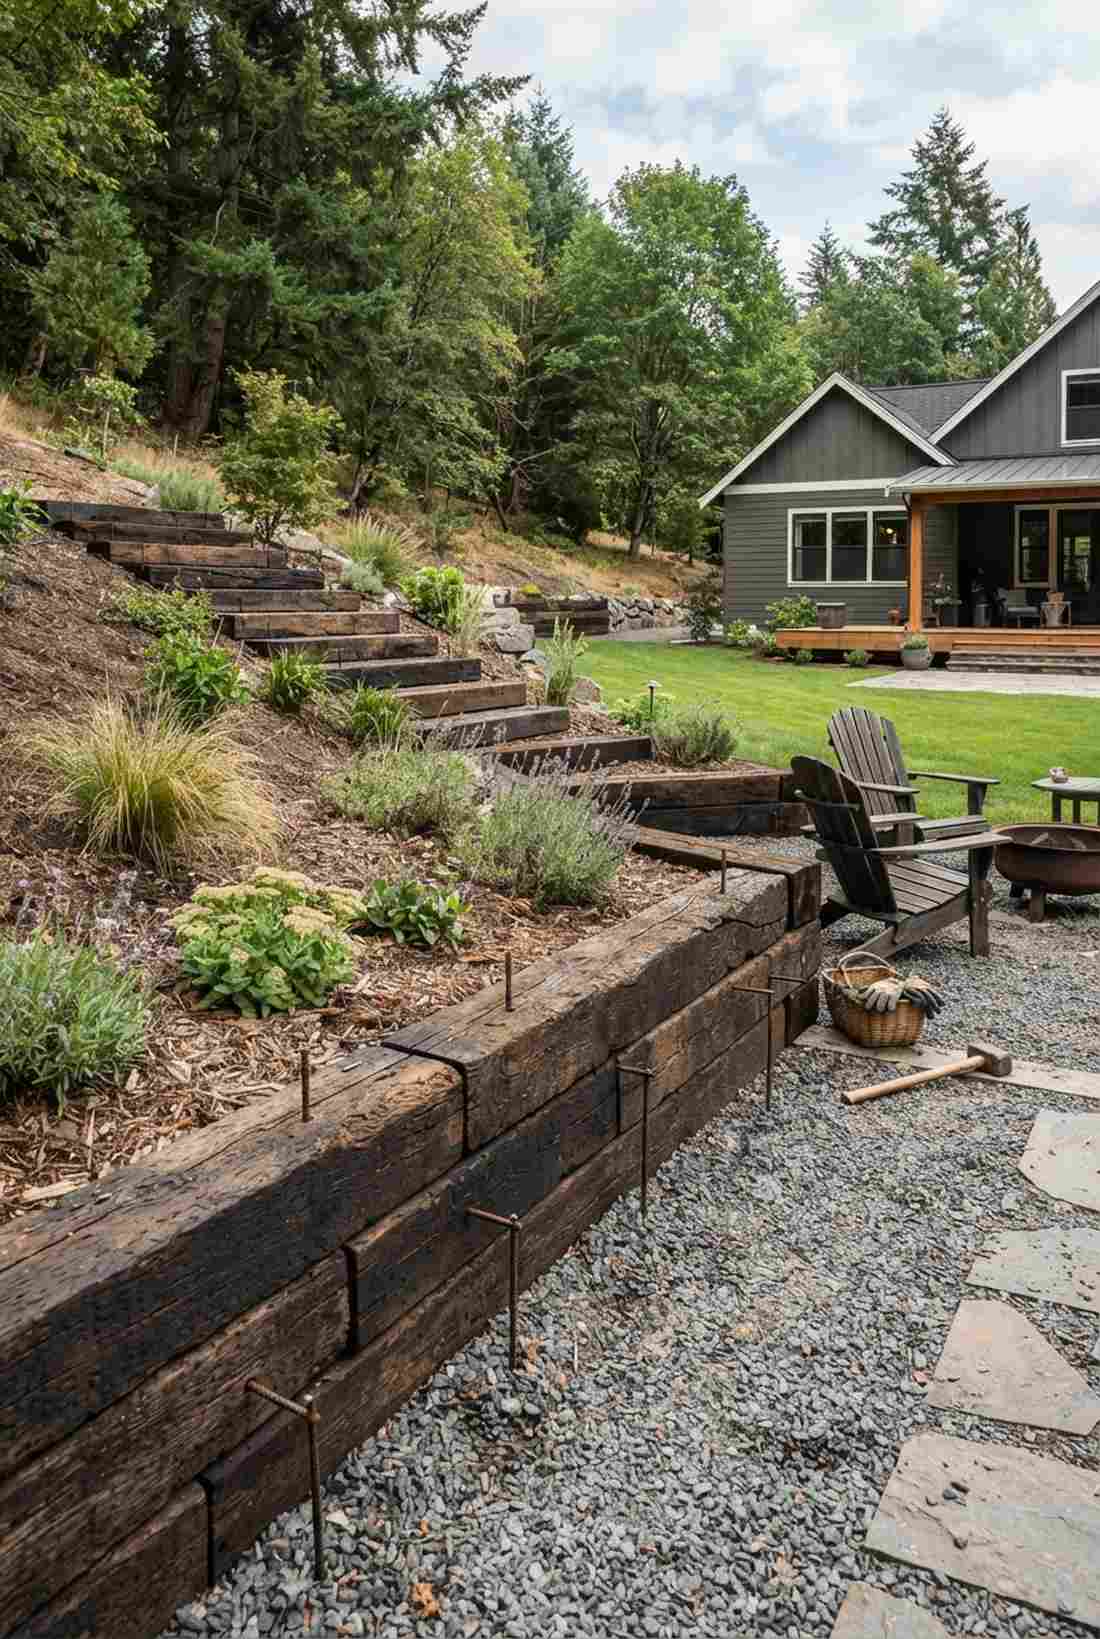
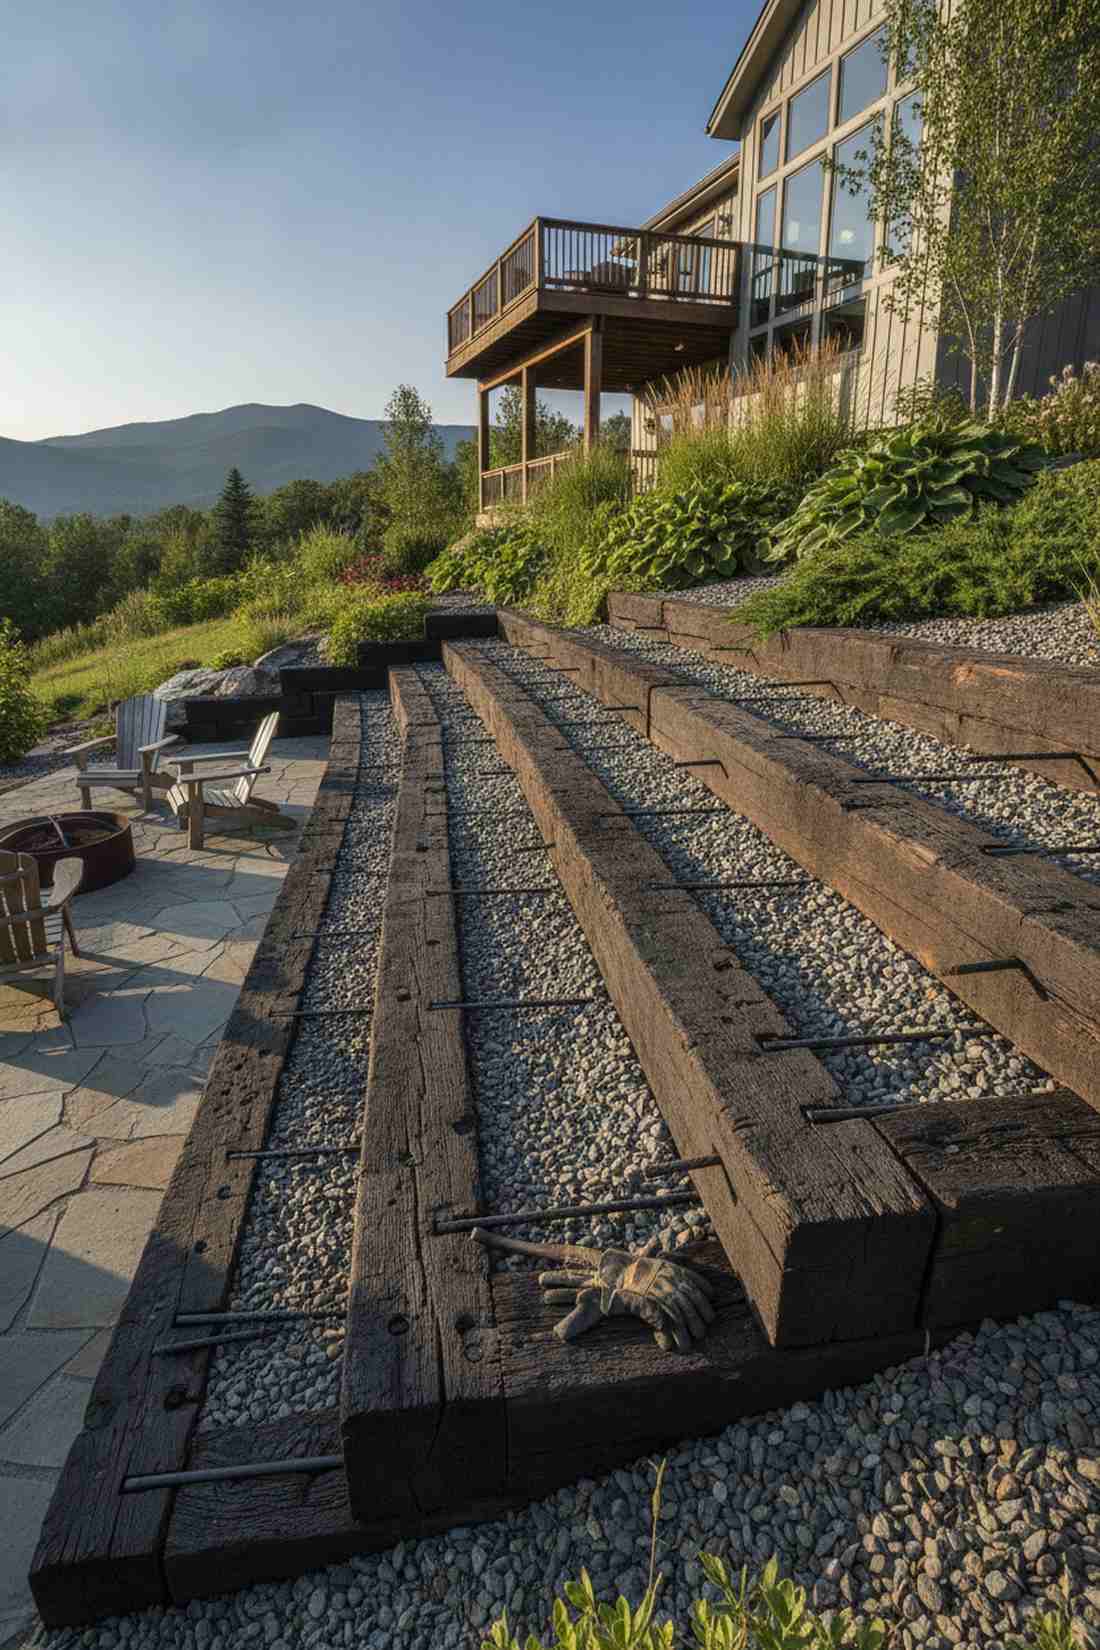
This heavy timber terrace feels like an industrial mountain pass, capable of holding back massive tons of sloped gravel.
Flimsy plastic edging explodes on steep hills, whereas reclaimed creosote ties give a designer-level finish that absolutely refuses to budge. Stack these massive black timbers two-high and pin them with rebar for an indestructible retaining border.
Expect to spend $15–$25 per salvaged tie.
- Key Materials: Reclaimed heavy railroad ties
- Vibe / Style: Rugged industrial
- Difficulty: Extremely heavy lifting required
- Budget Breakdown: Ties: $150 | Rebar: $30
- Creator’s Tip: Wear heavy gloves and old clothes; the creosote tar will permanently ruin anything it touches.
- Smart Sourcing: heavy-duty sledgehammers, thick landscaping timber spikes
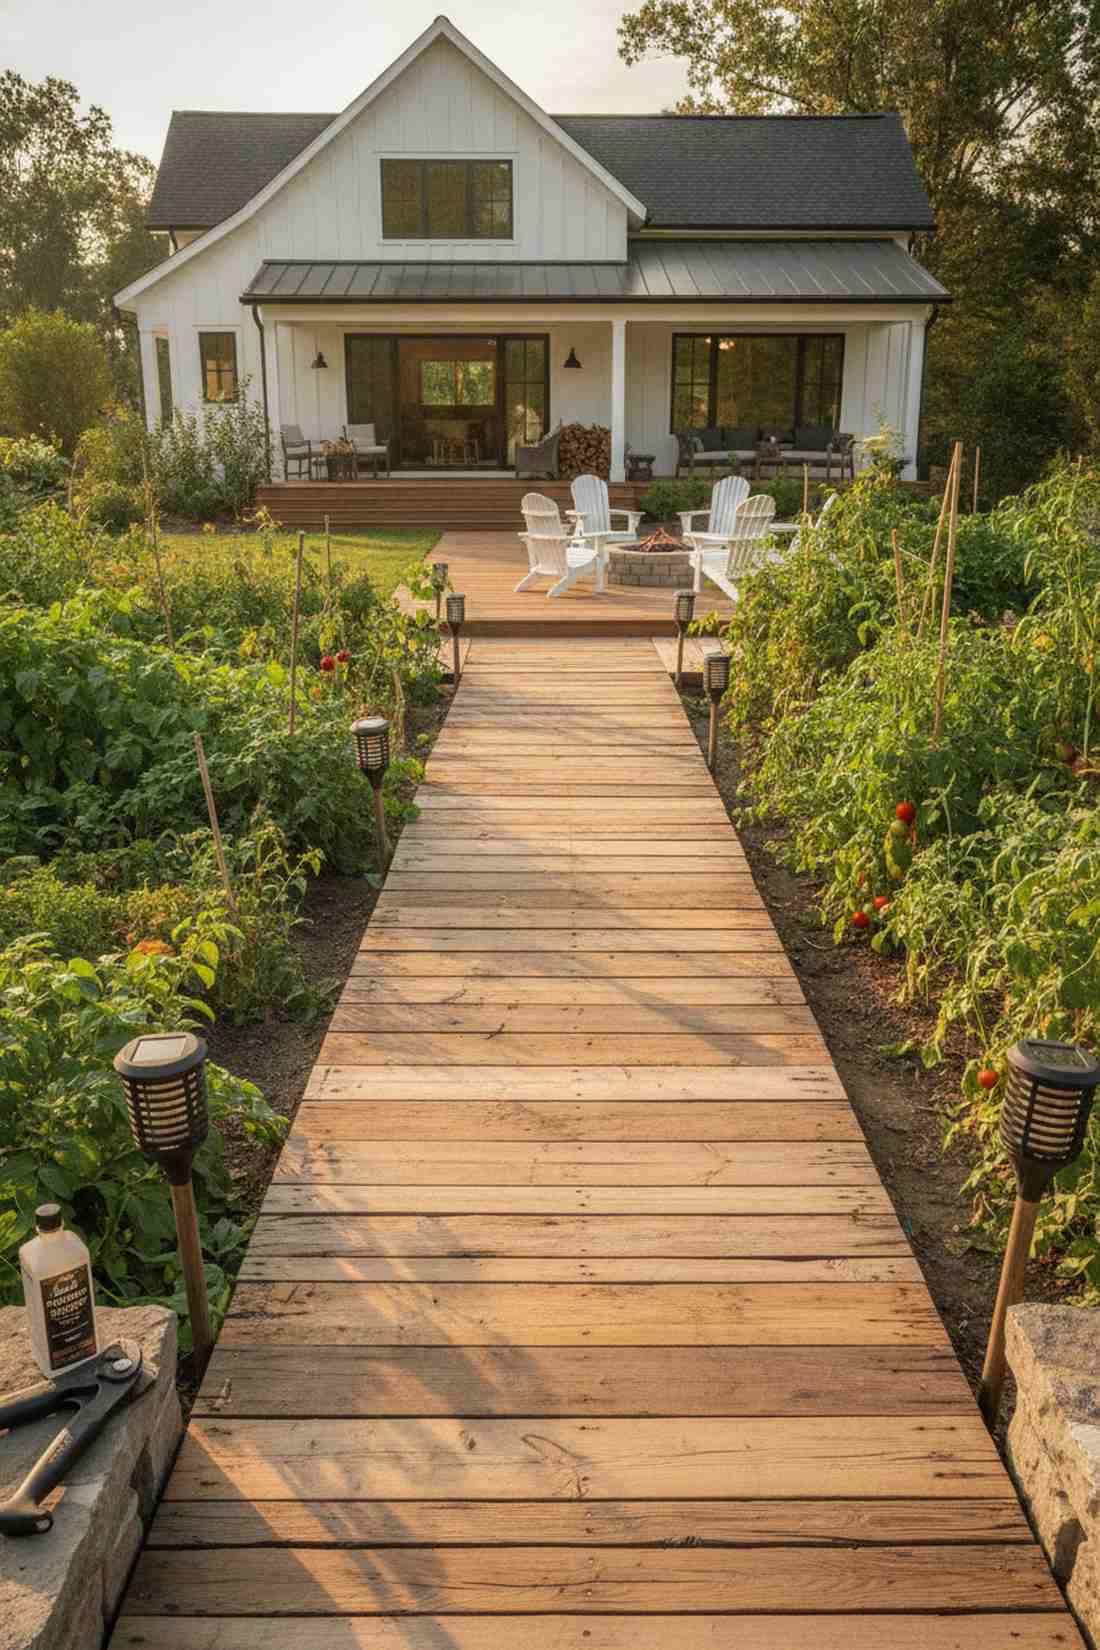
36. Cedar Boardwalk Elevated
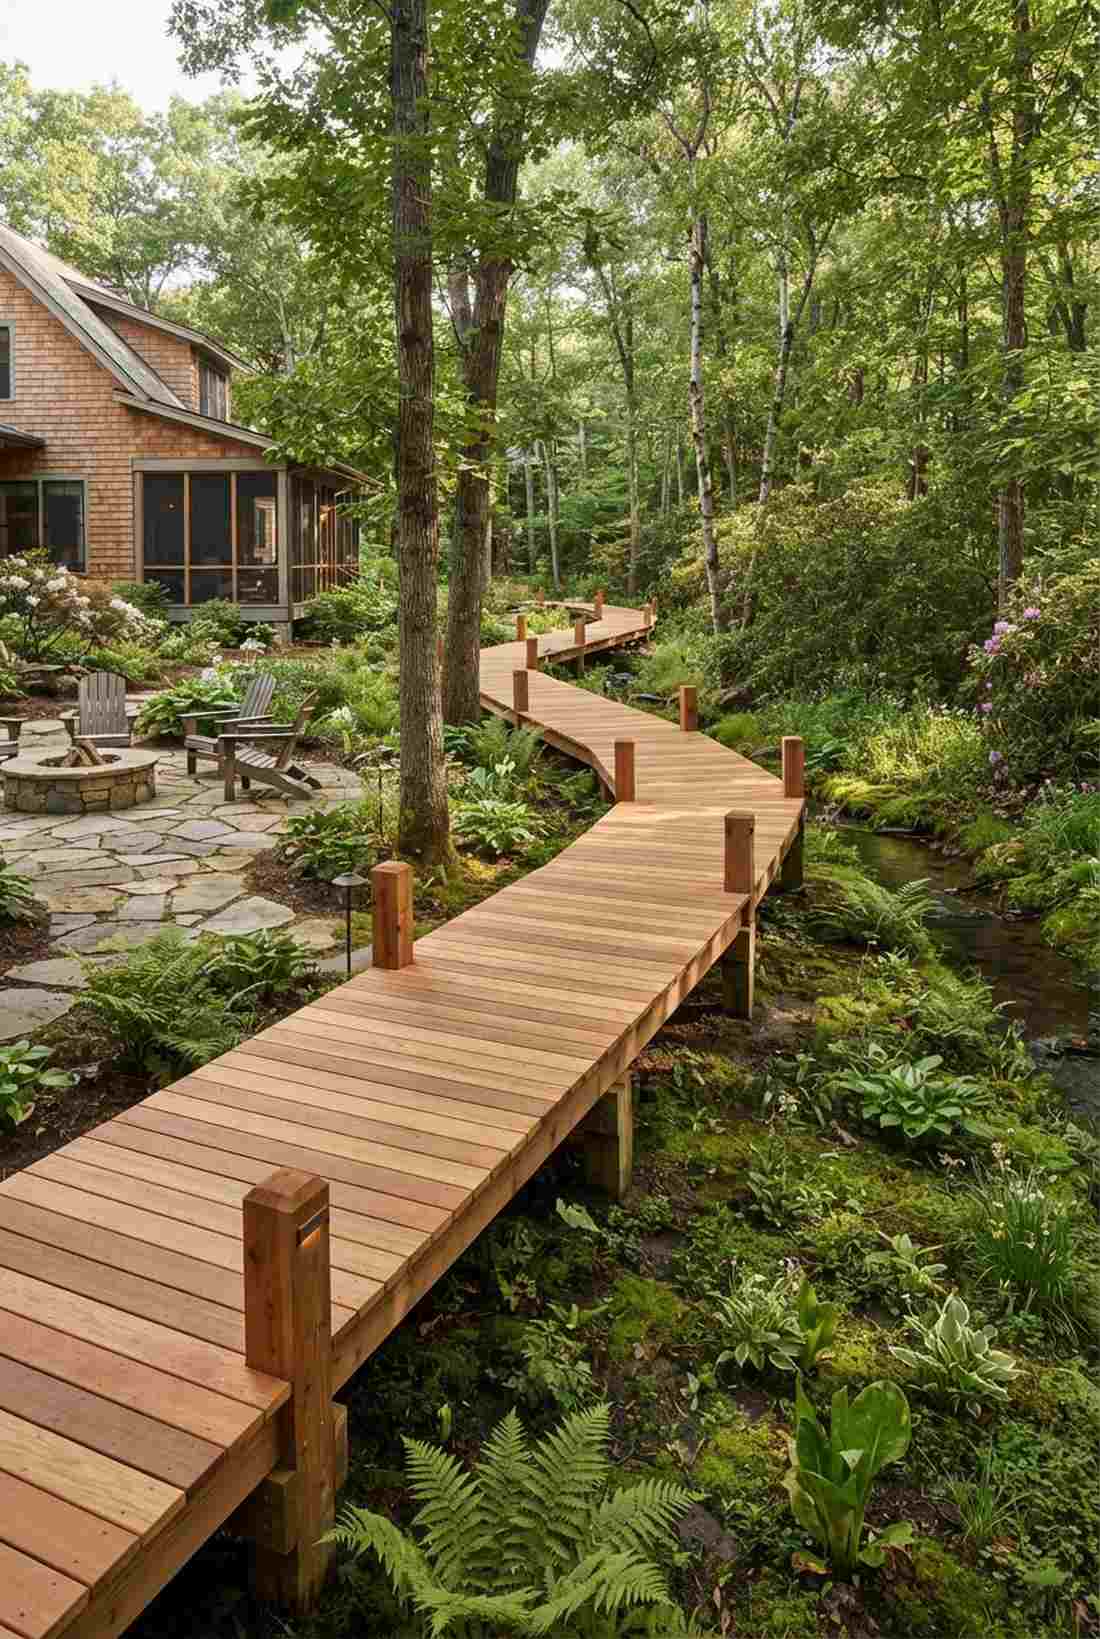
An elevated wetland bridge feels like a luxury eco-lodge pathway, the ultimate solution for perpetually boggy backyards.
Trying to pave over deep mud is a guaranteed failure, but spanning pressure-treated joists floats your walkway above the mess. Snag some cedar boardwalk starter kits to build a rot-resistant path that preserves delicate tree roots completely untouched.
This premium wood feature runs about $20–$35 per linear foot. Save this to your problem-solving board!
- Key Materials: Rot-resistant cedar decking boards
- Vibe / Style: Eco-lodge luxury
- Difficulty: Intermediate carpentry
- Budget Breakdown: Wood: $300 | Screws: $45
- Creator’s Tip: Space every deck board exactly one-quarter inch apart to prevent standing water from rotting the top.
- Smart Sourcing: cedar boardwalk starter kits, premium exterior deck screws (bulk bucket)
37. Moss-Grown Flagstone

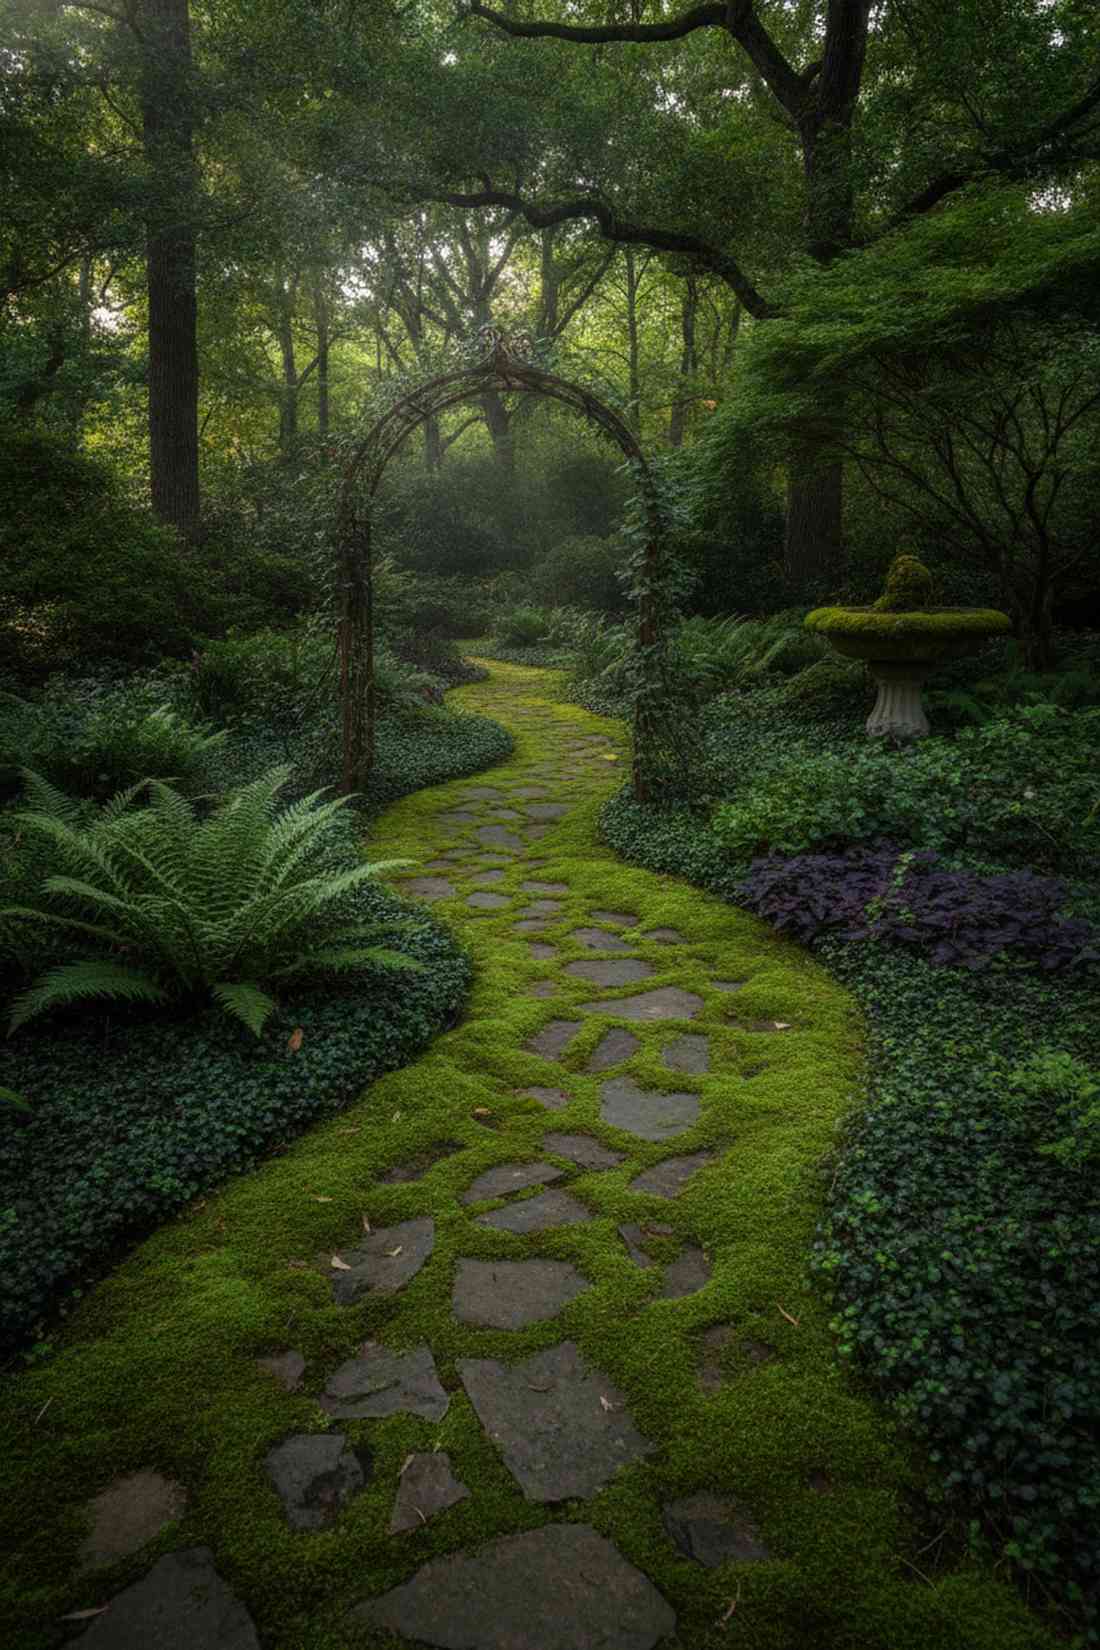
This velvet green antique path feels like a forgotten castle ruin, absolutely stunning in deep, damp shade.
Scrubbing rocks clean is exhausting, so leaning into the moss gives a surprisingly premium look that practically maintains itself. Fast-track this historic aesthetic by misting the gaps with buttermilk, turning boring garden ideas pathways into a living masterpiece.
You can encourage this growth for under $10.
- Key Materials: Aged flagstone and moss spores
- Vibe / Style: Ancient ruins
- Difficulty: Patience required
- Budget Breakdown: Stone: $200 | Buttermilk: $5
- Creator’s Tip: Never use a power washer near this path, or you will blast away years of gorgeous, expensive-looking growth.
- Smart Sourcing: live moss starter spores, fine-mist garden sprayers
38. Twig Bundle Edging
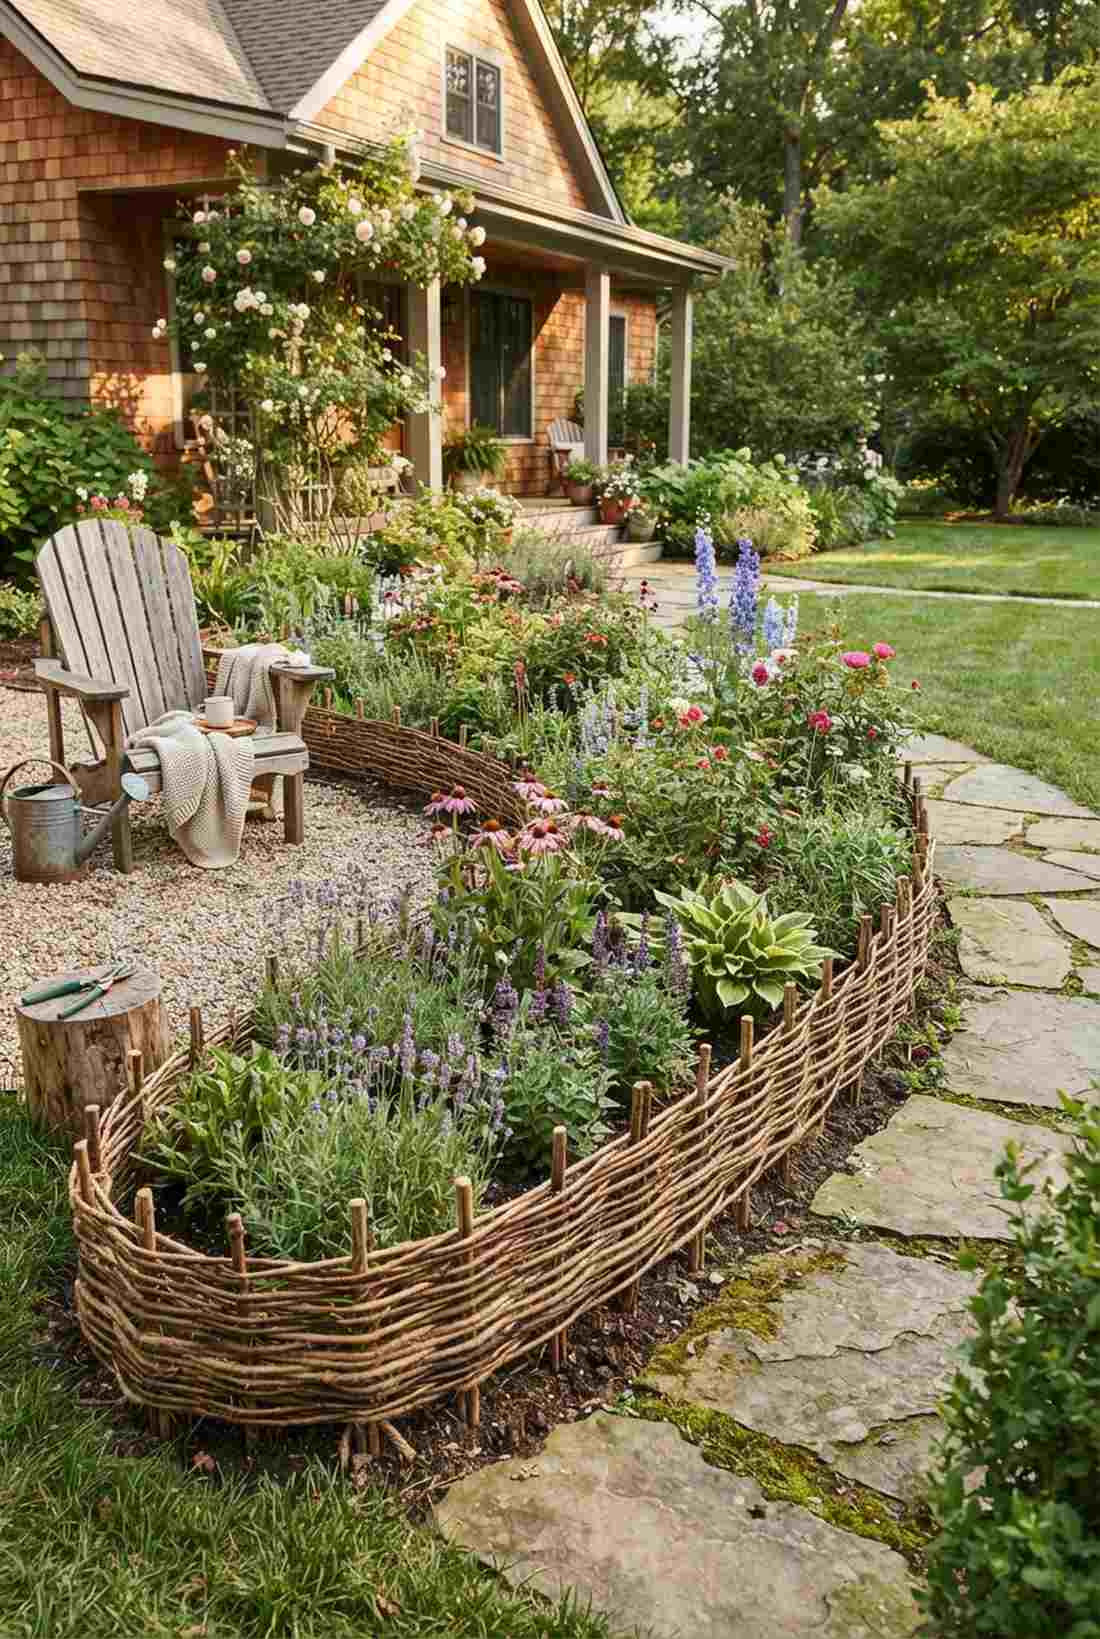
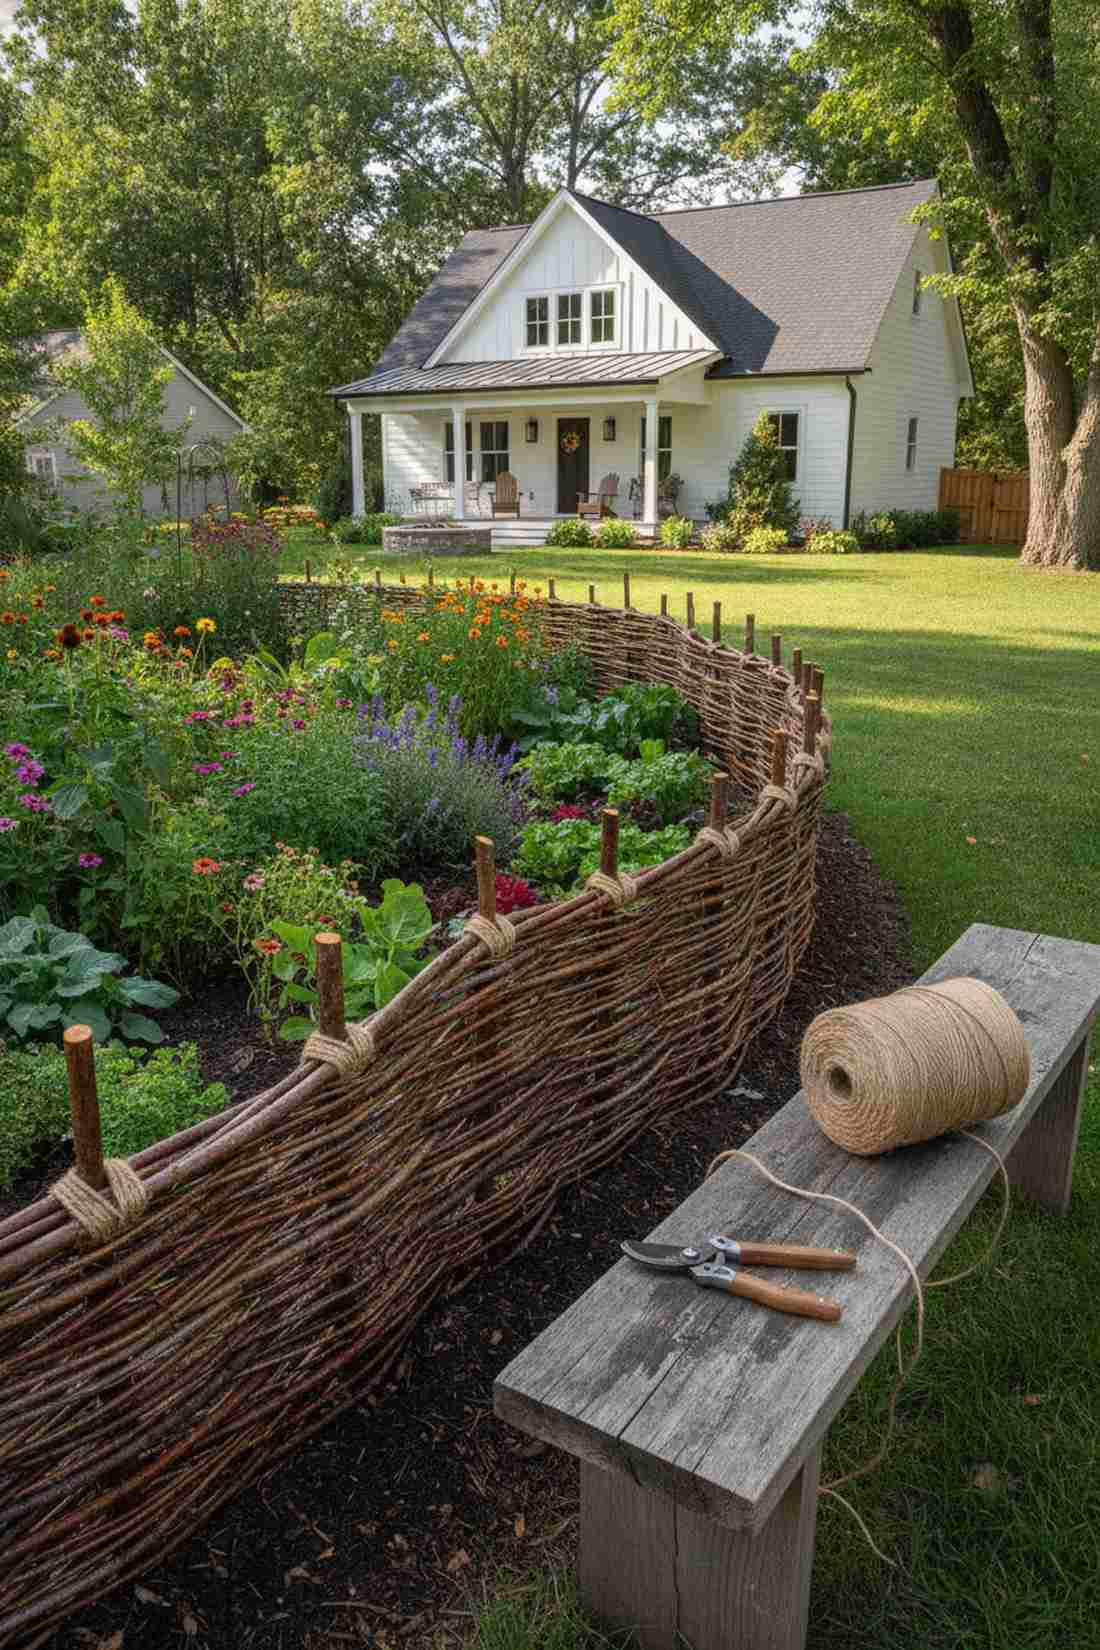
A woven living border feels like a traditional English cottage garden, a zero-waste dream for permaculture designs.
Buying plastic edging feels toxic, whereas staking bundles of dogwood shoots looks far more expensive than it is and might actually root. This coppice technique binds chaos into structure and costs literally nothing if you forage the sticks yourself.
This zero-cost hack relies entirely on sweat equity. Pin this for a sustainable weekend project!
- Key Materials: Foraged willow or dogwood shoots
- Vibe / Style: Rustic permaculture
- Difficulty: Fun and crafty
- Budget Breakdown: Twine: $10 | Twigs: Free
- Creator’s Tip: Soak the shoots in water for 24 hours before bending them so they don’t snap under tension.
- Smart Sourcing: heavy-duty jute twine (bulk roll), professional bypass pruners
39. Meandering Creek Stone
The flowing river layout feels like a dried mountain watercourse, a brilliant trick for making small yards feel huge.
Harsh 90-degree turns ruin organic flow, but laying sweeping arcs of irregular stone pulls visitors on a journey of discovery. Obscure the sightlines with tall grasses, and this fluid garden pathways layout instantly doubles your perceived property size.
You can easily pull this off for around $12–$16 per square foot.
- Key Materials: Mixed size irregular creek stones
- Vibe / Style: Natural mountain stream
- Difficulty: Creative placement needed
- Budget Breakdown: Stones: $350 | Base: $50
- Creator’s Tip: Ensure your curves have a minimum radius of eight feet to avoid awkward, sharp bends.
- Smart Sourcing: irregular creek stone pallets, commercial-grade leveling sand kits
40. Living Thyme Joints
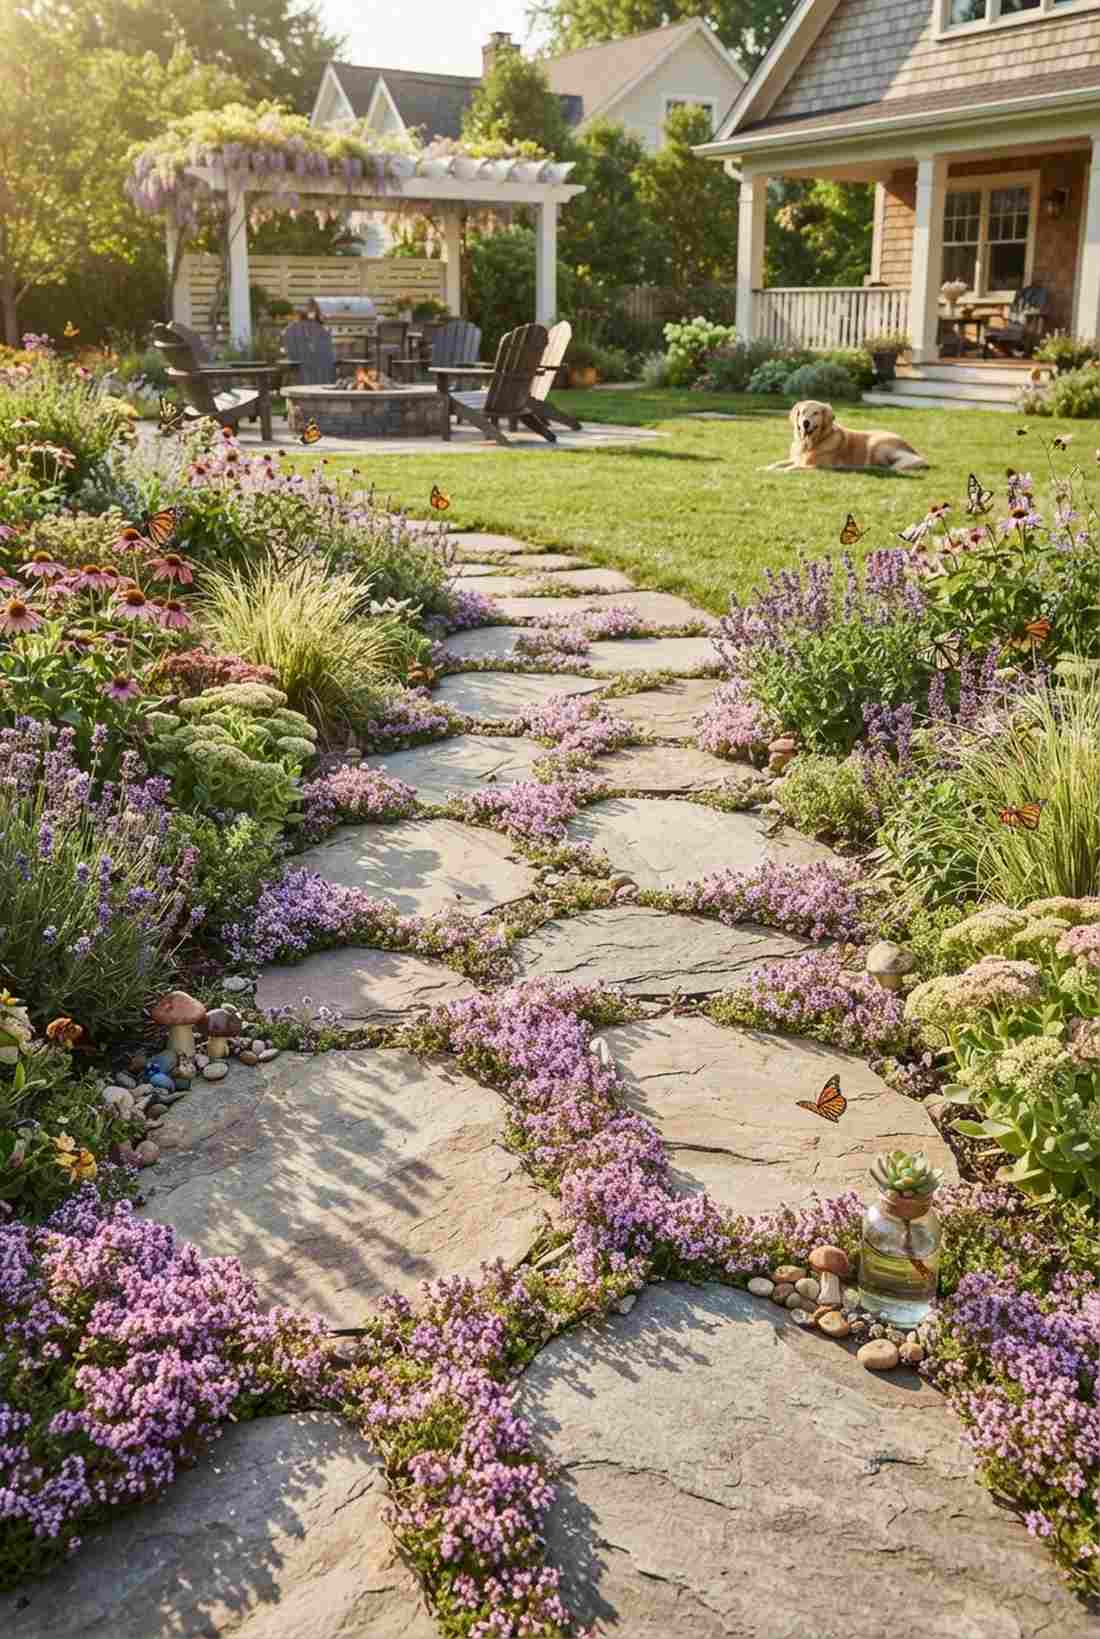
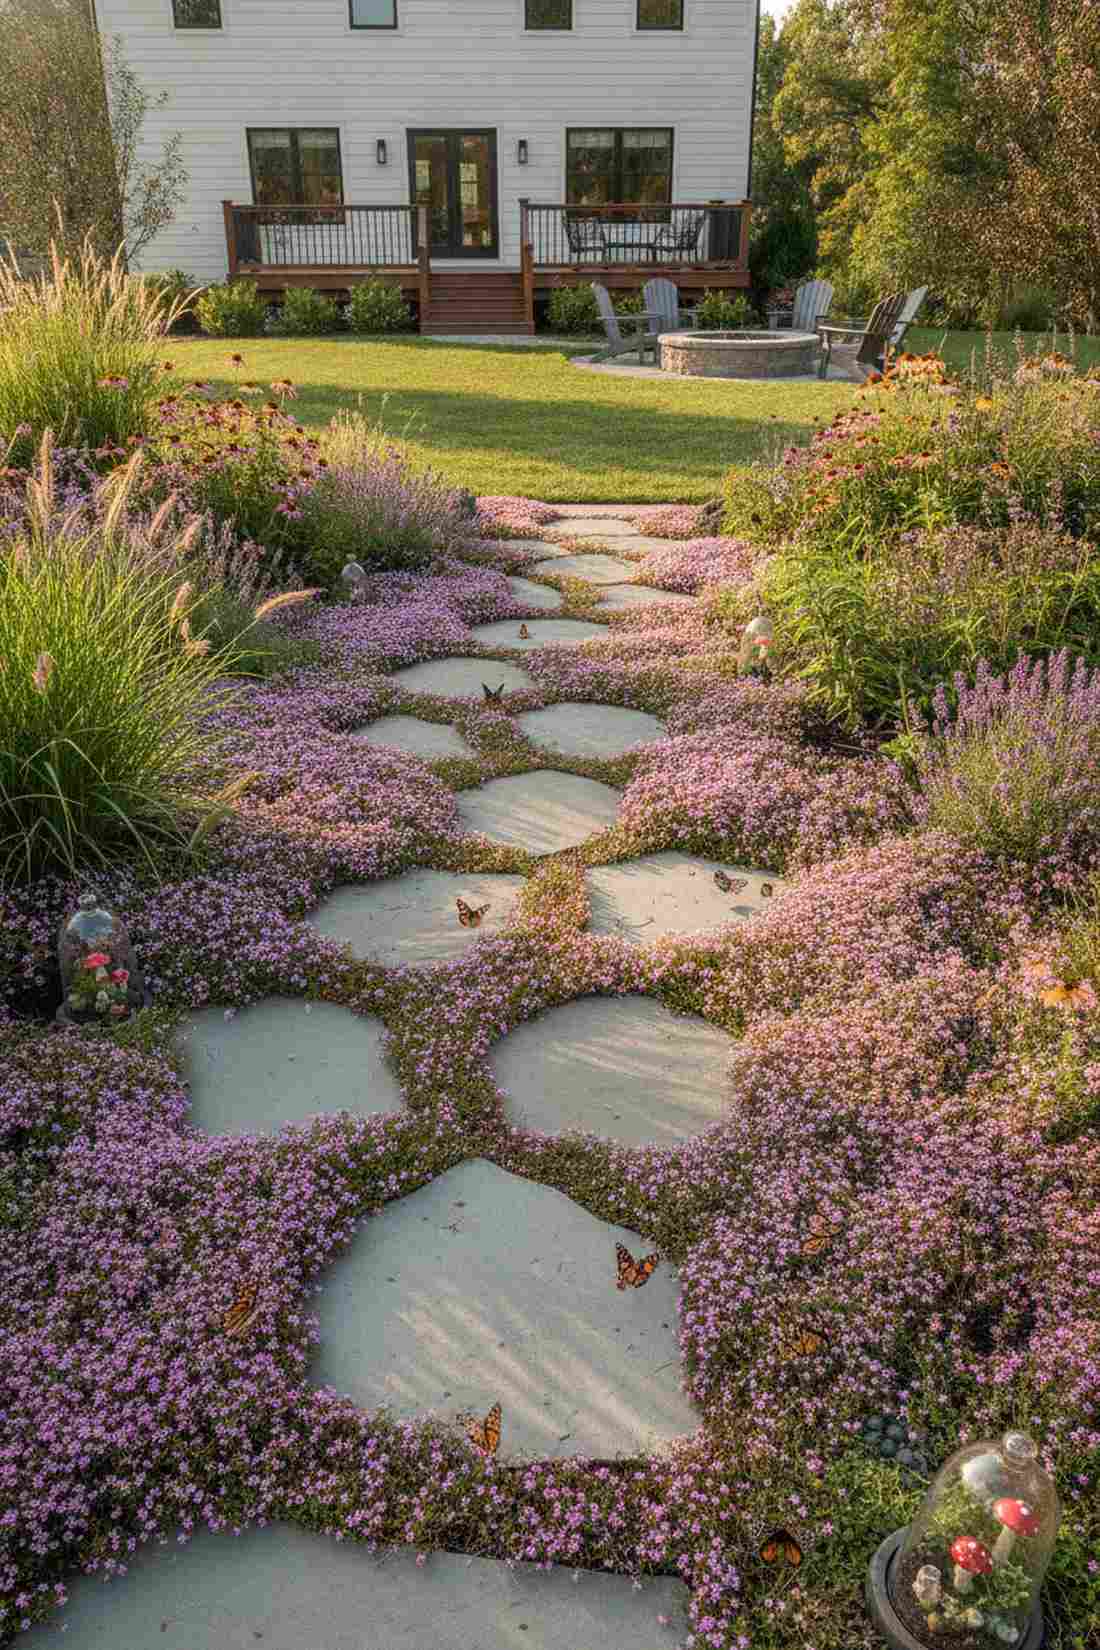
This fragrant blooming walkway feels like a sensory healing garden, bursting with purple-pink flowers all summer long.
Cementing joints reflects brutal heat, but planting creeping thyme between stones delivers a surprisingly premium look that actively attracts butterflies. Use terrarium accessories to turn these tiny gaps into miniature, highly-detailed plant ecosystems.
Adding live joints costs roughly $30–$50 for the starter plugs. Save this to your pollinator garden board!
- Key Materials: Creeping thyme plugs and wide flagstone
- Vibe / Style: Sensory and vibrant
- Difficulty: Requires diligent early watering
- Budget Breakdown: Plants: $45 | Soil: $15
- Creator’s Tip: Choose the ‘Elfin’ cultivar; it stays microscopic and easily survives heavy foot traffic without dying.
- Smart Sourcing: creeping thyme live starter plugs, terrarium accessories
Contractors hate when you discover this next DIY method because it cuts their margins to zero…
Utility & Accessible Designs
Functional pathways prioritize clearance, slope compliance, surface firmness, and equipment compatibility. These routes serve maintenance vehicles, wheelchairs, and utility access without sacrificing durability or safety.
41. ADA-Compliant Concrete
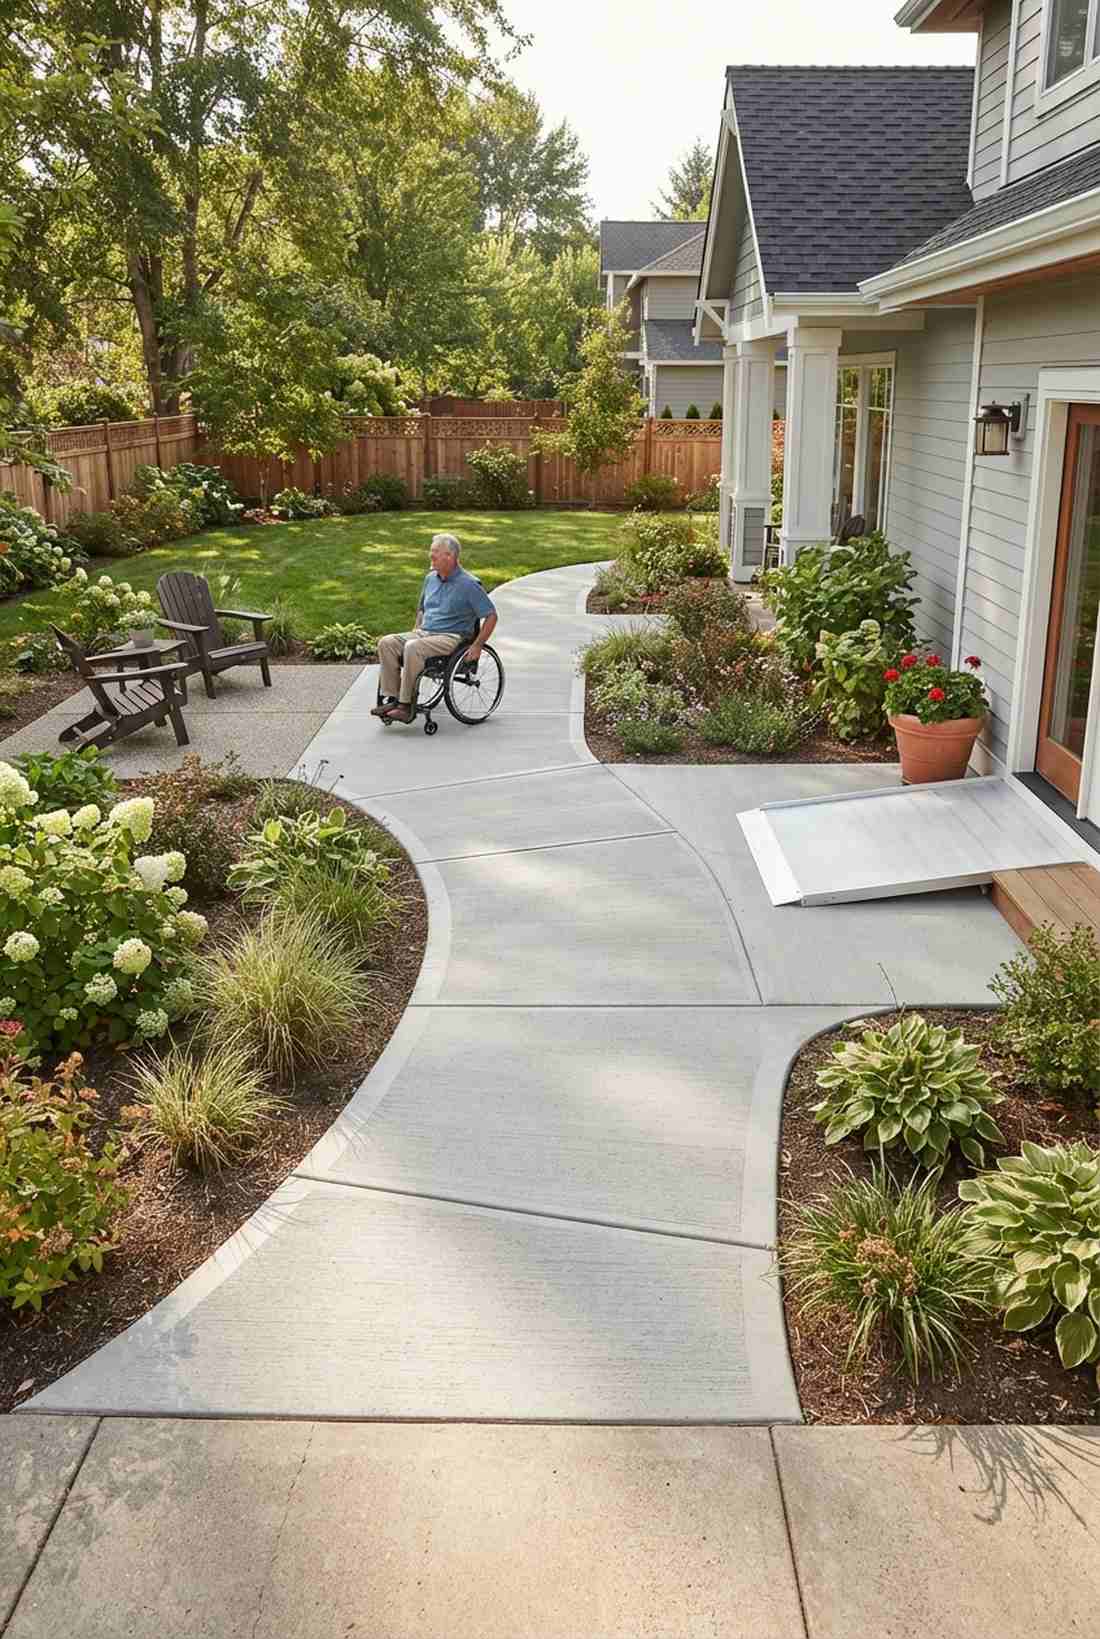
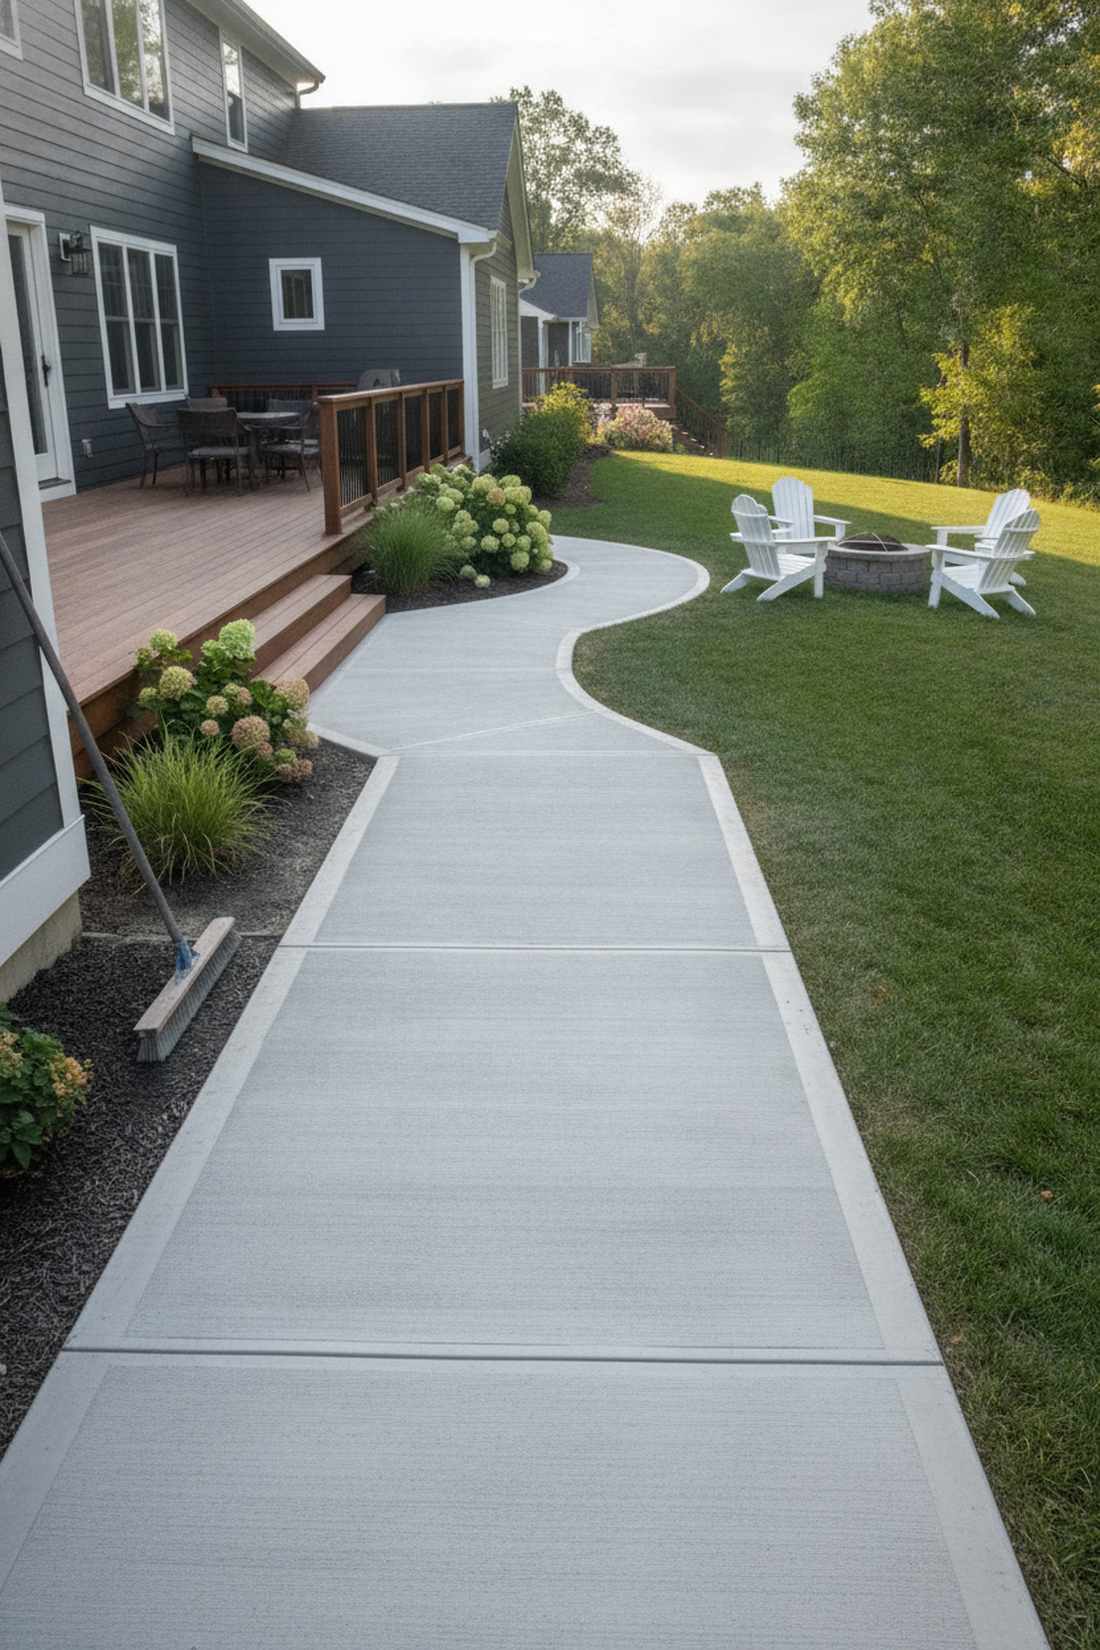
A firm broom-finished slab feels like a seamless architectural transition, critical for prioritizing safe, stable mobility.
Loose gravel traps wheelchairs, but perfectly graded concrete gives a designer-level finish that meets strict accessibility codes. Incorporate level landing pads every thirty feet so users can rest safely on longer inclines without drifting backward.
Professional concrete pours cost around $8–$12 per square foot.
- Key Materials: Poured concrete with broom texture
- Vibe / Style: Clean and accessible
- Difficulty: Professional skills recommended
- Budget Breakdown: Concrete: $600 | Forms: $100
- Creator’s Tip: Cut control joints every ten feet to guarantee the slab cracks invisibly instead of randomly across the surface.
- Smart Sourcing: ADA-compliant threshold ramps, heavy-duty concrete finishing brooms
42. Wide Service Access
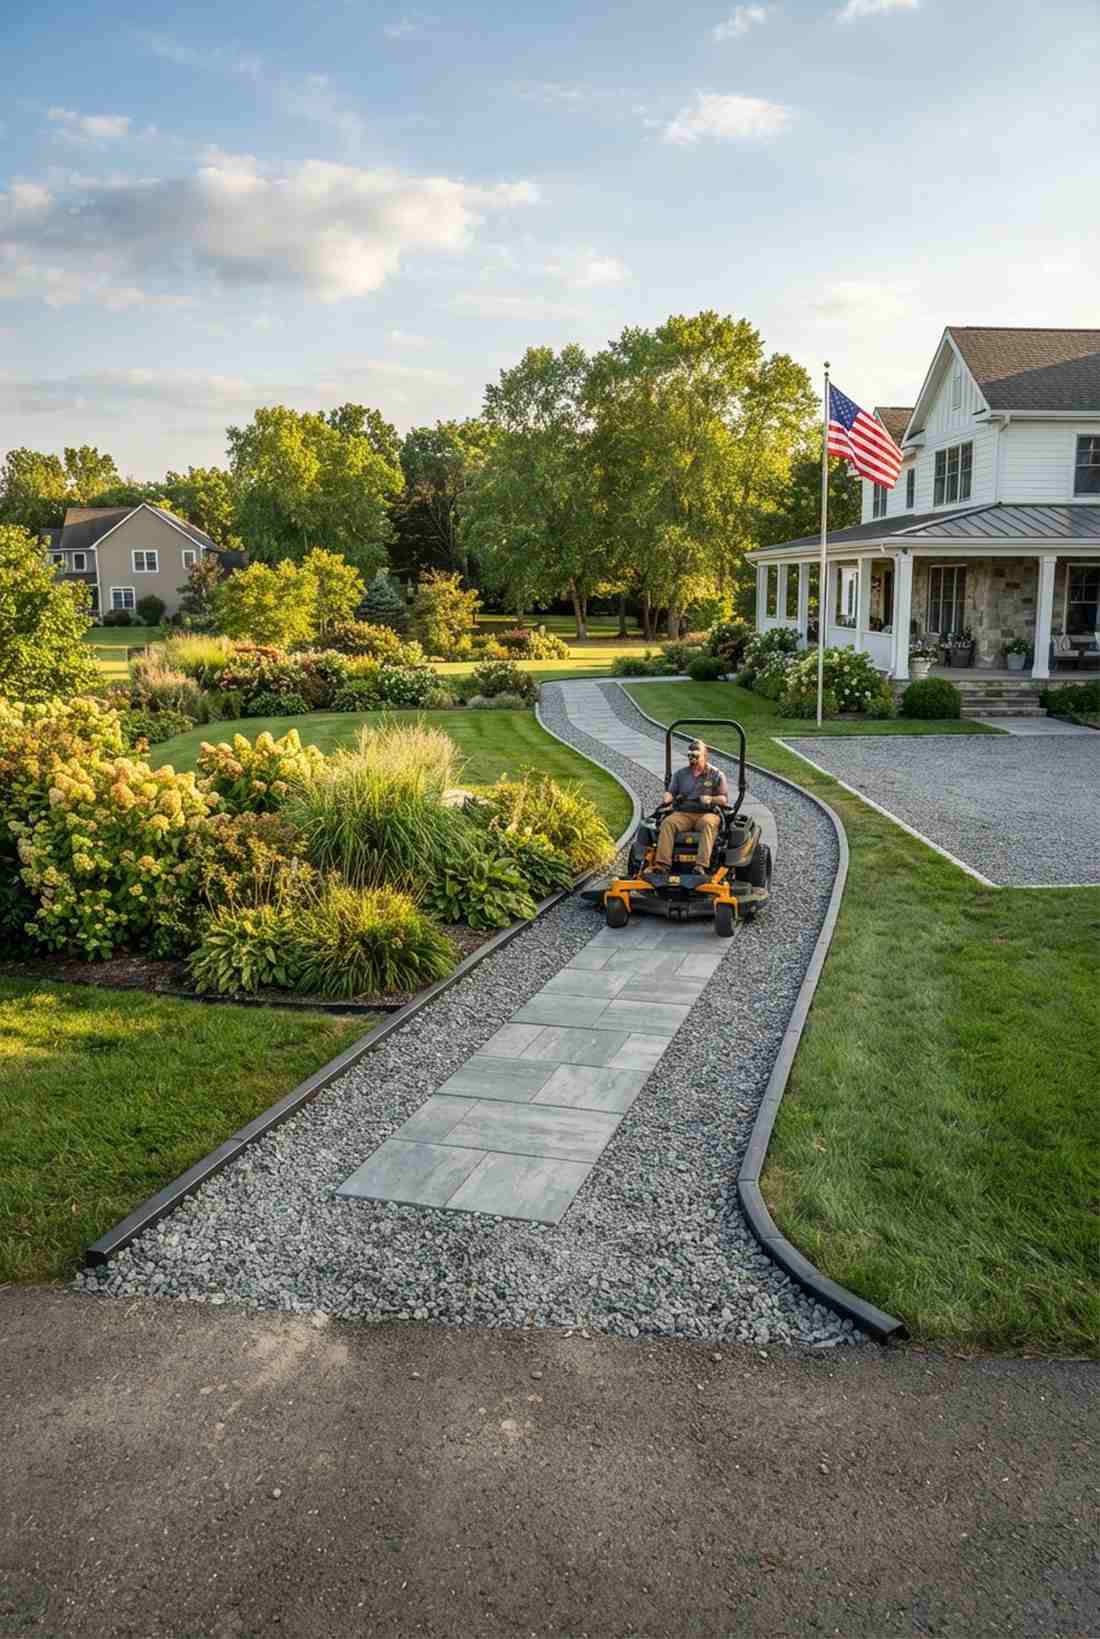
This oversized utility highway feels like a professional estate management lane, essential for giant riding mowers.
Skimping on width destroys adjacent flower beds, but opening a 60-inch lane looks far more expensive than it is while protecting your grass. You absolutely must compact a full six inches of base rock so the heavy machinery doesn’t carve massive ruts.
You can easily pull this off for roughly $4–$7 per square foot. Pin this if you own heavy garden equipment!
- Key Materials: Extra-wide compacted gravel or pavers
- Vibe / Style: Heavy-duty utility
- Difficulty: Massive material hauling
- Budget Breakdown: Base rock: $200 | Surface: $300
- Creator’s Tip: Over-engineer your edge restraints; zero-turn mowers exert massive lateral force that destroys cheap plastic.
- Smart Sourcing: heavy-duty aluminum edge restraints, commercial grade landscape fabric
43. Level Threshold Transitions
A flush zero-step entry feels like a luxury resort patio, completely eliminating dangerous tripping hazards.
Bumpy transitions ruin wheeled access, whereas beveling the concrete edge delivers a surprisingly premium look that flows seamlessly into the house. Grade the surrounding mulch downward so heavy rain doesn’t wash muddy sediment onto your clean garden pathways ideas.
Modifying a threshold usually costs less than $100 in materials.
- Key Materials: Beveled concrete transition strips
- Vibe / Style: Seamless indoor-outdoor
- Difficulty: Moderate concrete finishing
- Budget Breakdown: Cement: $30 | Trowels: $20
- Creator’s Tip: Use a specialized edging trowel to create a smooth, rounded lip that prevents chipping under heavy foot traffic.
- Smart Sourcing: premium concrete edging trowels, high-strength concrete mix kits
44. Textured Warning Strips
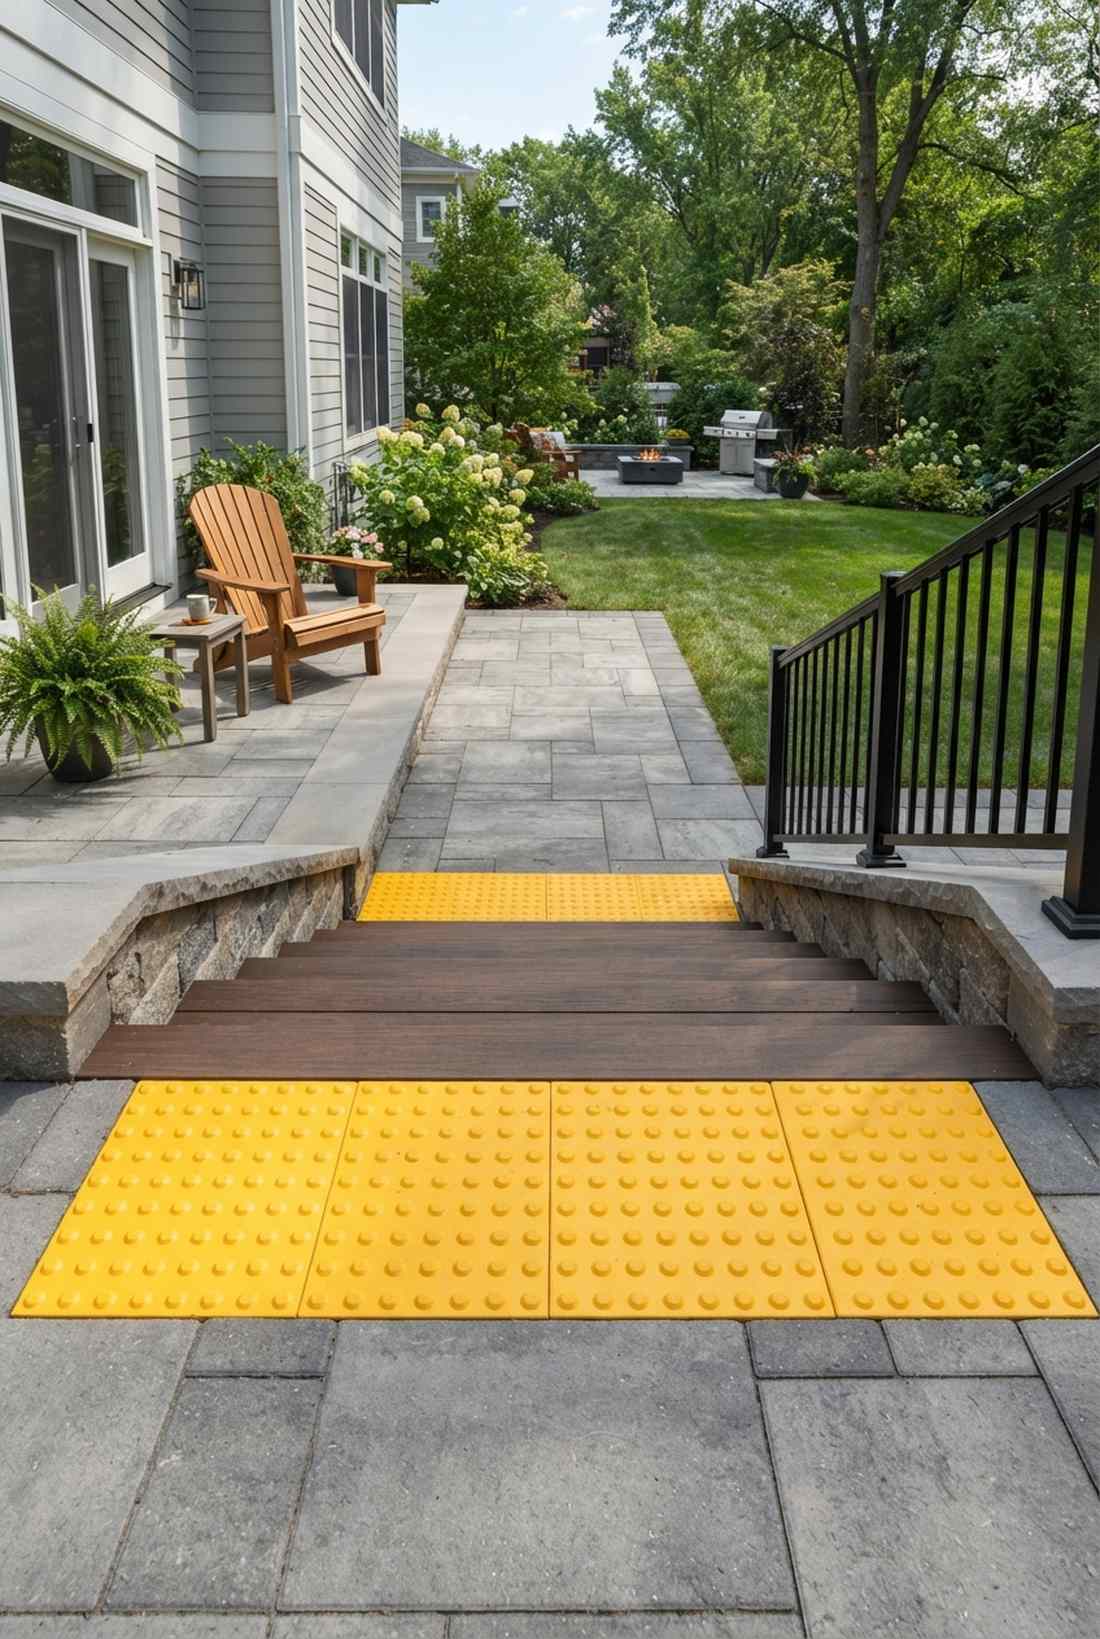
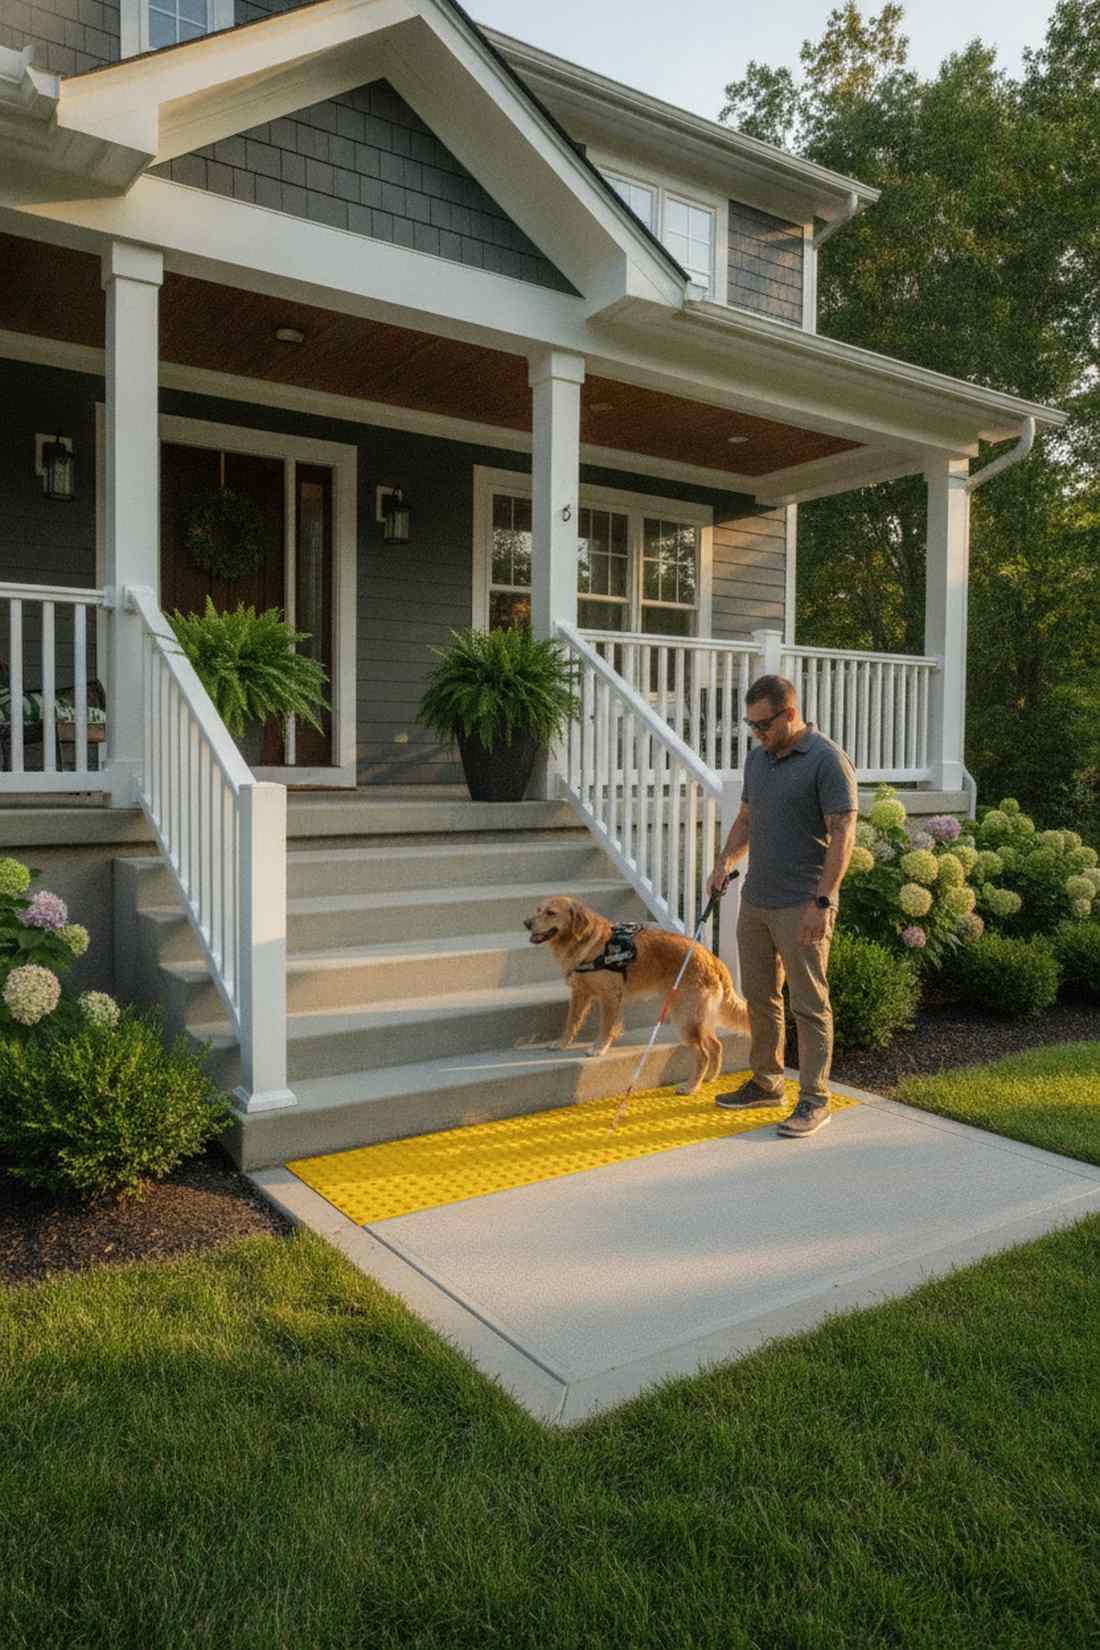
The tactile alert boundary feels like an urban transit station upgrade, providing crucial safety cues for the visually impaired.
Unexpected stairs are incredibly dangerous, but installing high-contrast raised domes gives a designer-level finish that alerts users to hazards instantly. These bright yellow or red panels drop seamlessly into any paver or concrete layout to meet ADA codes.
Safety strips cost around $40–$80 per panel. Save this to your inclusive design board!
- Key Materials: Tactile warning paver panels
- Vibe / Style: High-visibility safety
- Difficulty: Easy drop-in install
- Budget Breakdown: Panels: $150 | Adhesive: $25
- Creator’s Tip: Place the strips exactly 24 inches before the top of the stair drop-off to give ample warning time.
- Smart Sourcing: ADA-compliant tactile warning tiles, commercial-grade masonry adhesive
The lighting trick in this upcoming section turns a basic path into a luxury resort walkway instantly.
45. Non-Slip Aggregate Finish
This exposed pebble surface feels like a high-end country club driveway, offering legendary traction in the rain.
Smooth concrete turns into an ice rink, but washing the top layer off to expose pea gravel looks far more expensive than it is. This mechanical interlocking surface completely resists polishing over time and defeats slippery moss in deep shade.
Expect to add $2–$4 per square foot over standard concrete costs.
- Key Materials: Concrete mix and pea gravel topping
- Vibe / Style: Textured luxury
- Difficulty: Time-sensitive washing process
- Budget Breakdown: Concrete: $300 | Retarder: $45
- Creator’s Tip: You must spray a chemical retarder on the wet pour; it slows the top cure so you can wash the cream away easily.
- Smart Sourcing: concrete surface retarder sprays, bulk pea gravel topping
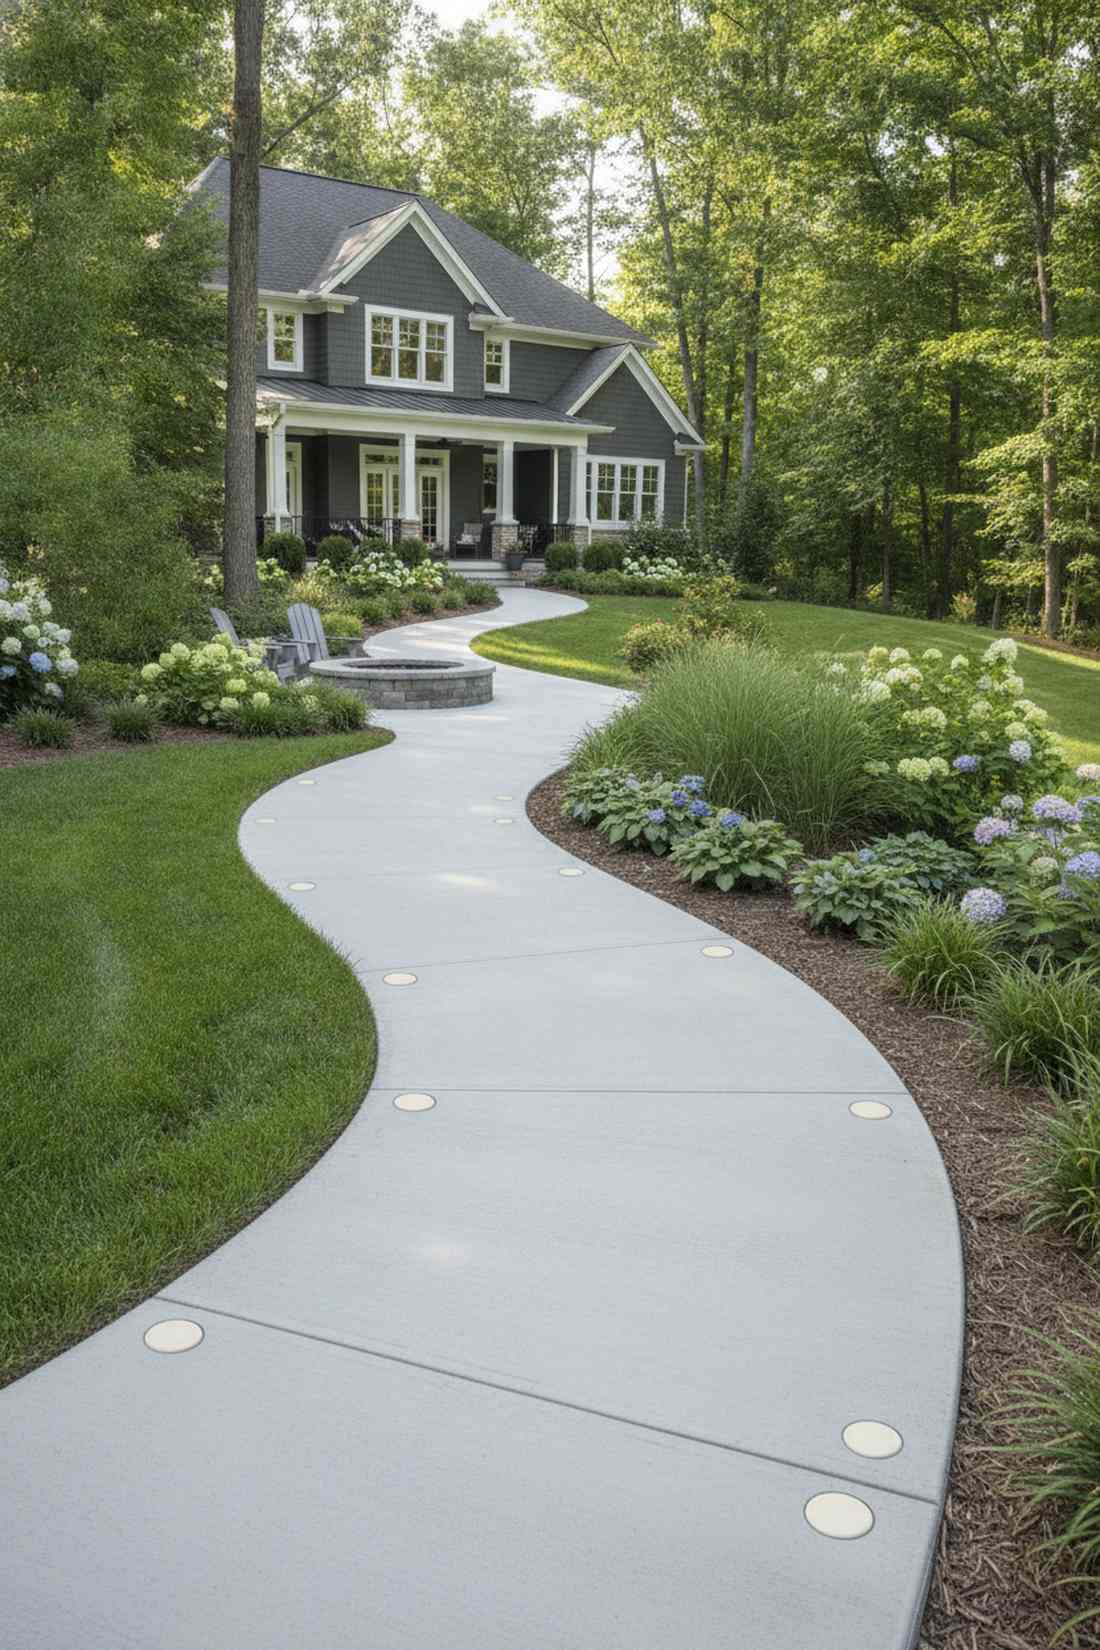
46. Reflective Edge Markers
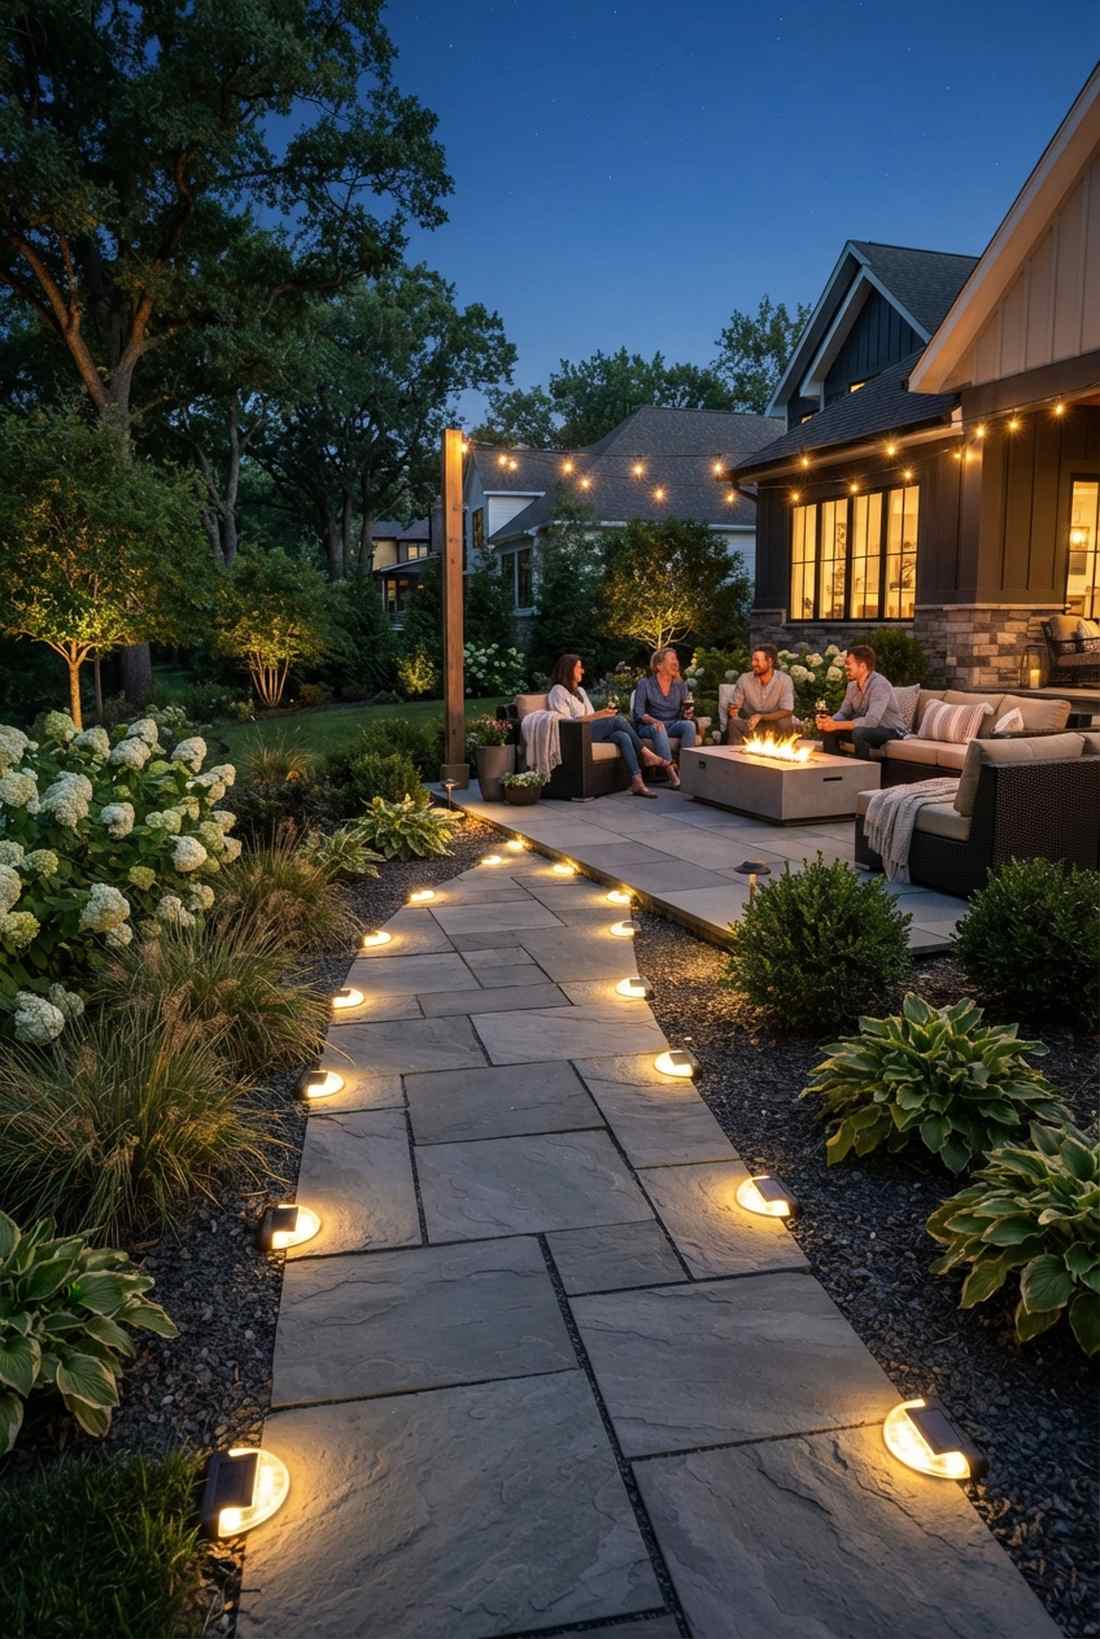
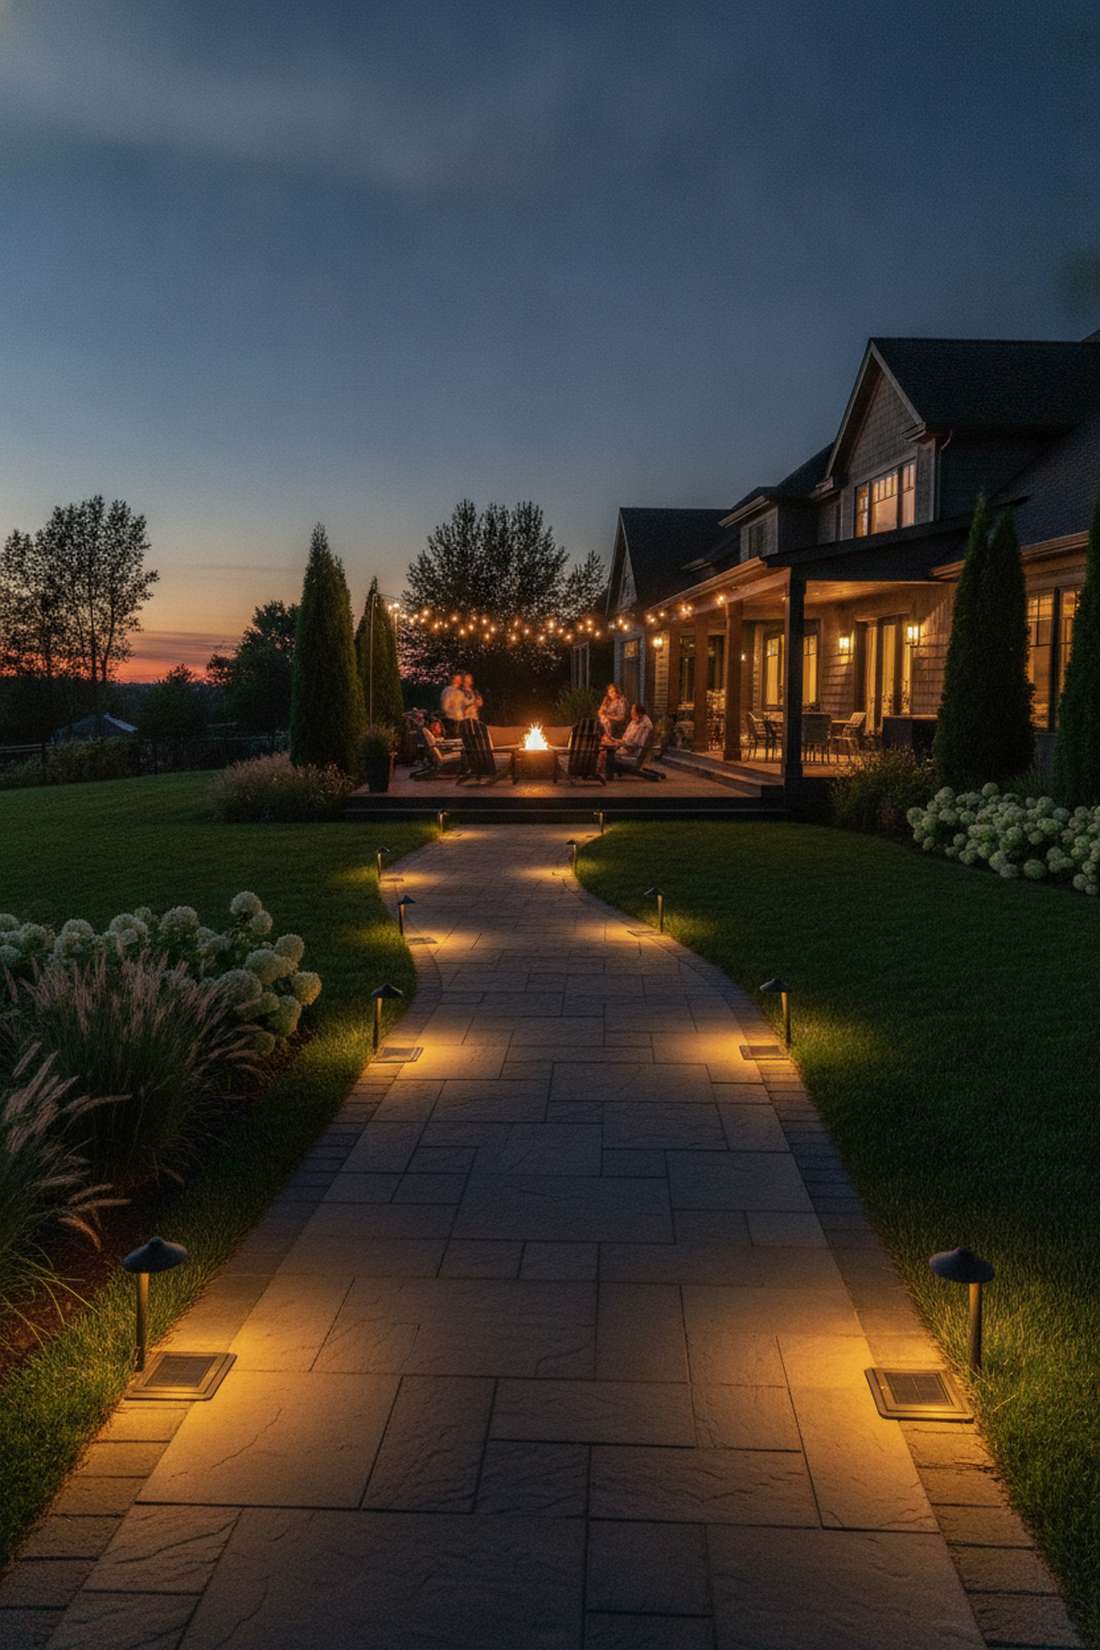
A glowing nighttime trail feels like an exclusive VIP lounge entrance, transforming pitch-black yards into safe entertainment zones.
Stumbling in the dark ruins parties, but embedding heavy-duty solar path lights delivers a surprisingly premium look without running a single electrical wire. Stick to warm 2700K temperatures to keep the vibe incredibly inviting instead of looking like a sterile hospital.
You can easily pull this off for around $60–$120 total. Pin this if you love hosting evening parties!
- Key Materials: Flush-mount solar LED markers
- Vibe / Style: Modern evening luxury
- Difficulty: Beginner-friendly
- Budget Breakdown: Lights: $90 | Drill bit: $15
- Creator’s Tip: Space the lights slightly staggered on opposite sides to widen the perceived boundaries of the walkway.
- Smart Sourcing: heavy-duty solar path lights (multi-pack), warm-white LED strip kits
47. Reinforced Cart Tracks

This dual-ribbon utility lane feels like a vintage farm driveway, perfectly engineered to stop wheelbarrows from sinking into the mud.
Paving an entire 60-inch utility path is insanely expensive, but pouring two narrow concrete tracks looks far more expensive than it is while saving massive cash. The open space between the tracks drains water perfectly and can be filled with cheap mulch or creeping thyme.
This clever hybrid system costs about $3–$5 per linear foot.
- Key Materials: Dual poured concrete ribbons
- Vibe / Style: Smart agricultural
- Difficulty: Intermediate form building
- Budget Breakdown: Concrete: $150 | Wood forms: $40
- Creator’s Tip: Measure your specific garden cart wheel gauge before pouring; standard wheelbarrows differ from riding mowers!
- Smart Sourcing: high-strength concrete mix kits, flexible plastic border edging
48. Handrail Integration Points

The future-proof support system feels like brilliant architectural foresight, easily accommodating aging-in-place modifications on steep hills.
Smashing up finished concrete later to add rails is a nightmare, but embedding sleeve footings now gives a designer-level finish for pennies. Cap the sleeves with flush plugs so the path remains pristine until mobility needs inevitably change.
Pre-planning this feature adds less than $50 to your total build. Save this to your smart home design board!
- Key Materials: Embedded PVC sleeves and flush caps
- Vibe / Style: Seamless foresight
- Difficulty: Easy during initial pour
- Budget Breakdown: Sleeves: $20 | Caps: $10
- Creator’s Tip: Position the sleeves exactly 36 inches apart on center to perfectly match standard commercial handrail brackets.
- Smart Sourcing: ADA-compliant handrail brackets, heavy-duty PVC mounting sleeves
This final stretch of ideas proves you don’t need a massive budget to get magazine-worthy outdoor spaces…
Creative Budget Solutions
Innovative material sourcing and simplified construction techniques make attractive pathways accessible to modest budgets. These strategies trade labor intensity or material cost for creativity and resourcefulness.
49. Broken Concrete Urbanite
This shattered urban mosaic feels like a trendy eco-chic patio, the ultimate hack for diverting heavy demolition waste from landfills.
Buying premium flagstone destroys a budget, but scavenging old driveway chunks looks far more expensive than it is once laid creatively. Flip the concrete chunks upside down so the smooth, un-broomed bottom serves as a sleek walking plane.
You can easily pull this off for $0 in materials. Pin this for a zero-dollar yard makeover!
- Key Materials: Salvaged broken concrete chunks
- Vibe / Style: Industrial eco-chic
- Difficulty: Heavy manual labor
- Budget Breakdown: Concrete: Free | Base sand: $30
- Creator’s Tip: Leave three-inch gaps and plant moss; the green completely hides the ugly, jagged gray edges of the concrete.
- Smart Sourcing: heavy-duty sledgehammers, commercial grade landscape fabric
50. Repurposed Pallet Planks
A rustic wooden boardwalk feels like a beachside tiki path, providing instant, free lumber for fast seasonal walkways.
New deck boards are insanely priced, but breaking down heat-treated pallets gives a designer-level finish for literally pennies. Avoid any pallets stamped with “MB” (methyl bromide) to ensure you aren’t bringing toxic chemicals into your organic vegetable garden.
This fast fix costs under $20 for nails and sealer.
- Key Materials: Heat-treated (HT) reclaimed pallet wood
- Vibe / Style: Upcycled beachy
- Difficulty: Tear-down intensive
- Budget Breakdown: Wood: Free | Sealer: $25
- Creator’s Tip: Don’t try to pry the nails out; use a reciprocating saw to cut straight through the rusty nails to save hours.
- Smart Sourcing: premium wood preservative oils, heavy-duty pallet buster tools
51. DIY Concrete Stepping Stones
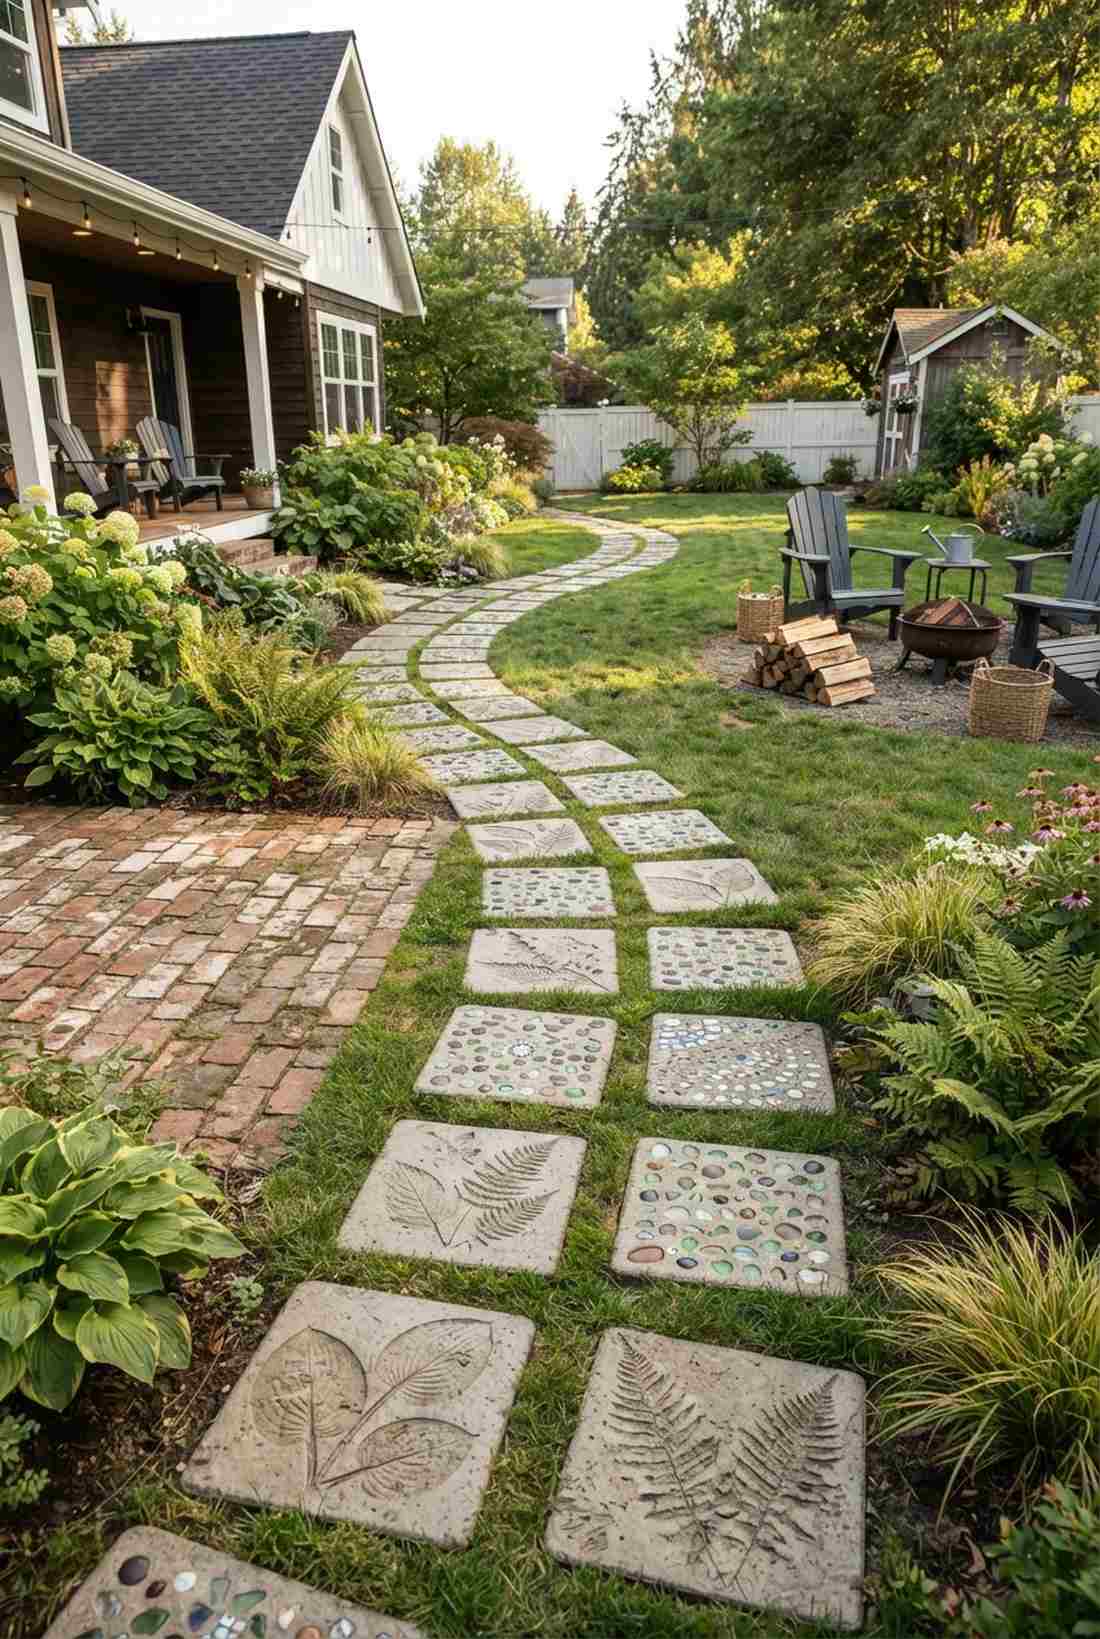
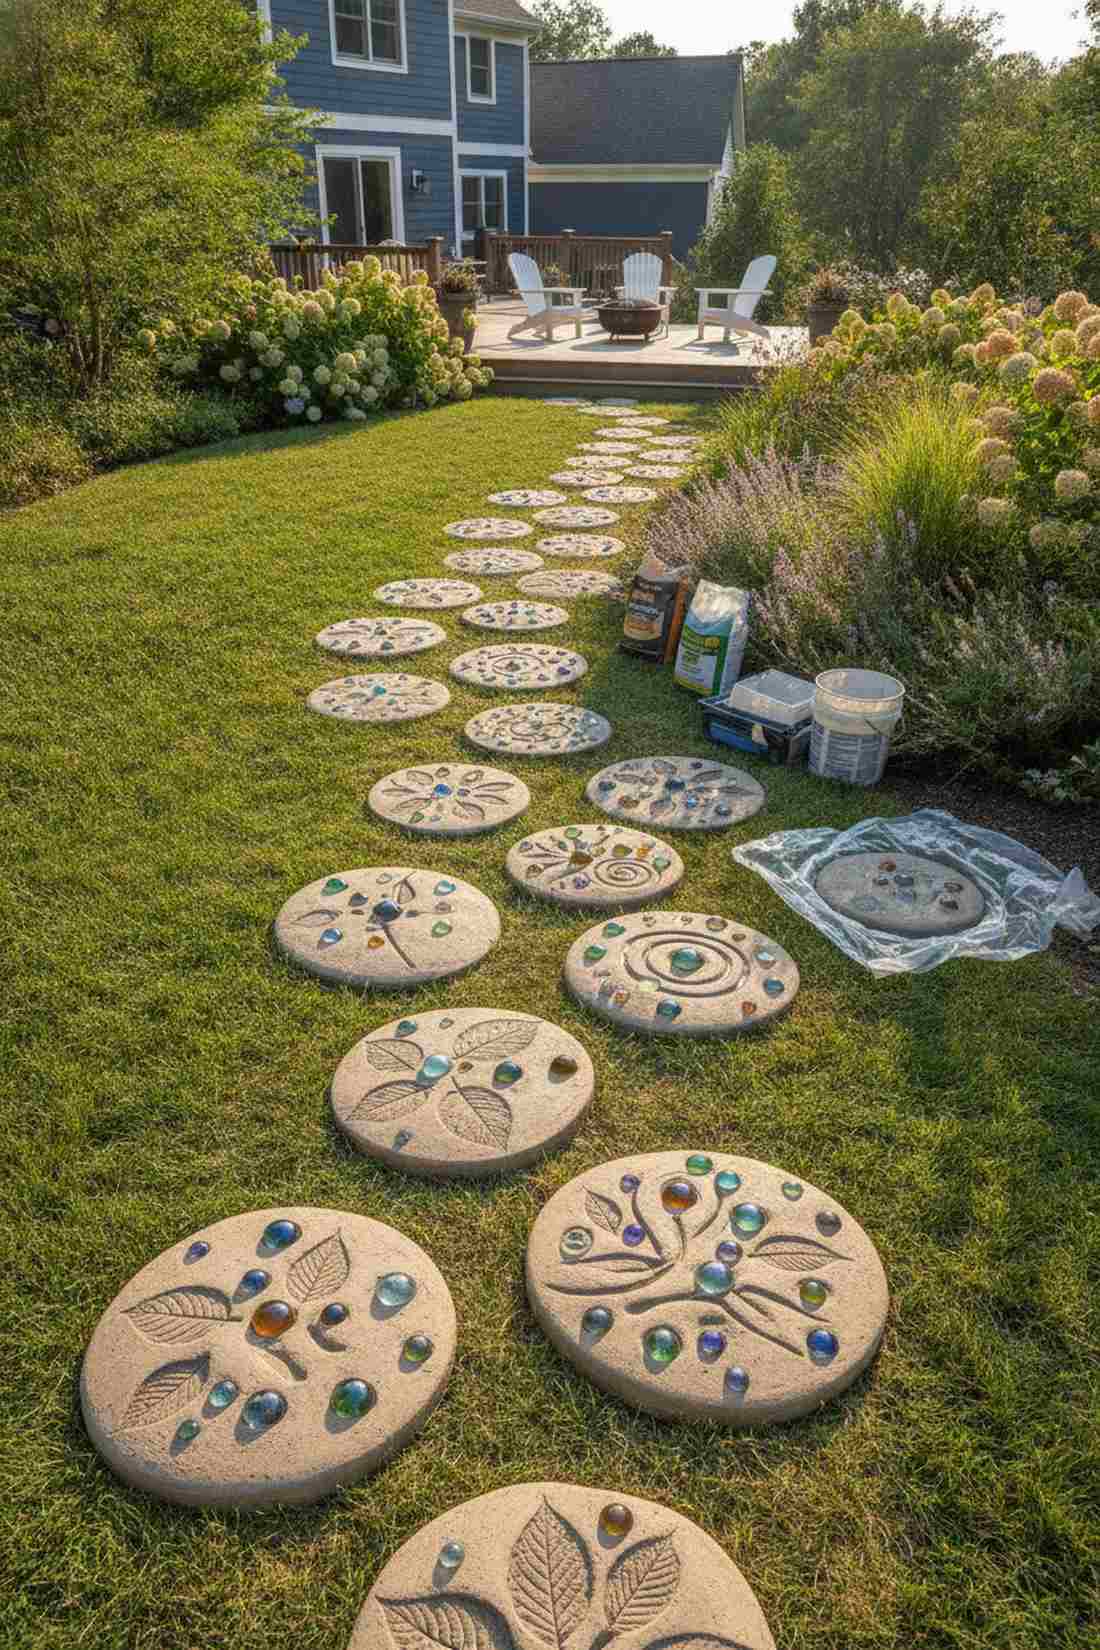
This custom molded path feels like a highly personalized art installation, allowing you to embed glass or leaf prints easily.
Buying pre-cast stones limits your creativity, but pouring concrete stepping stone molds delivers a surprisingly premium look at a fraction of the cost. Mix fiber-reinforced concrete so your custom creations never snap under heavy winter snow loads.
You can cast dozens of stones for about $30. Save this to your weekend craft board!
- Key Materials: Fiber-reinforced concrete and reusable molds
- Vibe / Style: Personalized artisan
- Difficulty: Fun and messy
- Budget Breakdown: Concrete: $20 | Molds: $15
- Creator’s Tip: Cure the stones under a plastic sheet for seven days; drying too fast causes them to turn brittle and crack.
- Smart Sourcing: concrete stepping stone molds, fiber-reinforced concrete mix kits
52. Reclaimed Brick Salvage
The weathered architectural walkway feels like a centuries-old courtyard, injecting instant, unmatched heritage into any new build.
Brand new bricks look fake and sterile, whereas hunting down demolition salvage looks far more expensive than it is. The residual white mortar and chipped edges add a dramatic patina that turns basic garden pathways with pavers into a masterpiece.
Salvage brick usually runs 50% cheaper than new materials.
- Key Materials: Demolition site salvaged bricks
- Vibe / Style: Instant antique
- Difficulty: Sorting required
- Budget Breakdown: Brick: $150 | Base: $50
- Creator’s Tip: Always buy 15% more than you need, as salvaged pallets contain many broken or unusable half-bricks.
- Smart Sourcing: premium jointing sand (bulk bag), commercial-grade leveling sand kits
53. Colored Concrete Stain
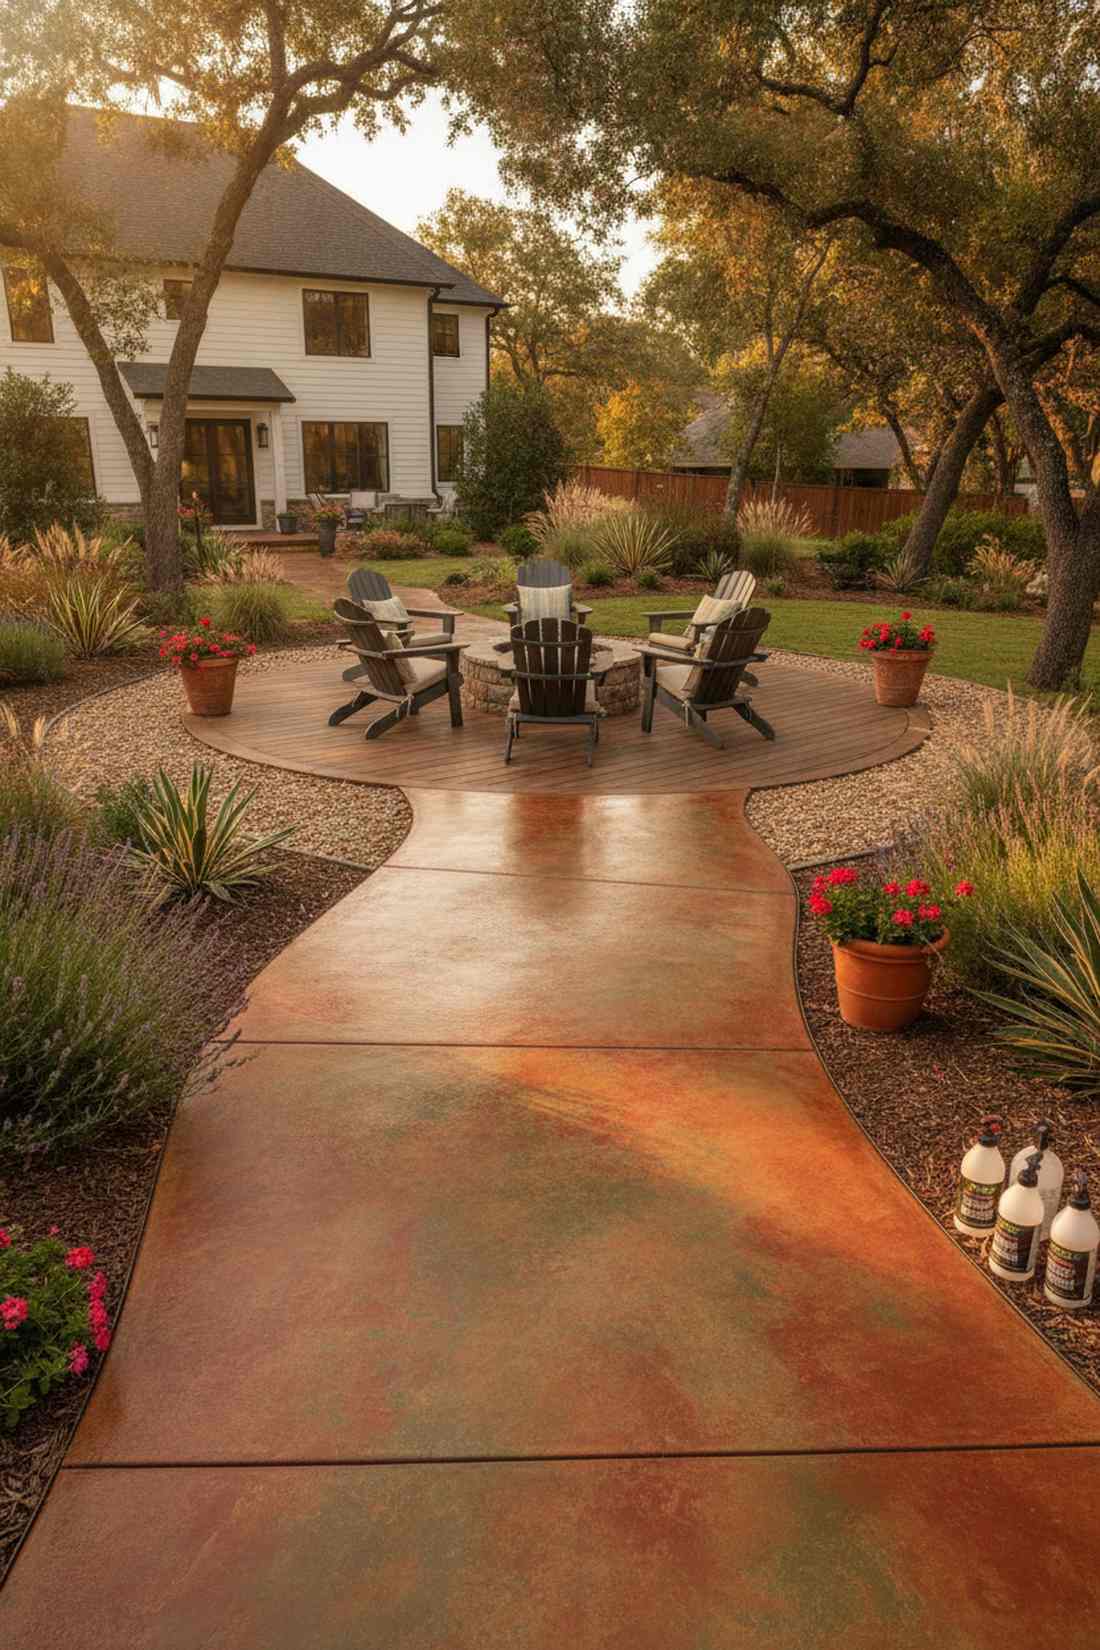
A variegated earth-tone slab feels like an expensive terra cotta installation, completely hiding boring, generic gray cement.
Ripping out ugly concrete is terribly expensive, but grabbing acid stain starter kits gives a designer-level finish right over the existing path. The chemical reaction penetrates the surface to create deep, marbled colors that never peel like cheap paint.
You can easily pull this off for just $50–$80 total. Pin this if you have an ugly sidewalk!
- Key Materials: Acid or water-based concrete stains
- Vibe / Style: Rich Mediterranean
- Difficulty: Chemical handling required
- Budget Breakdown: Stain: $60 | Sealer: $30
- Creator’s Tip: Apply multiple incredibly thin coats using a plastic sprayer to build complex color depth without pooling.
- Smart Sourcing: dark concrete acid stain kits, UV-resistant clear stone sealers
54. Stamped Pattern Overlay
This faux cobblestone texture feels like a high-end masonry marvel, completely fooling the eye without the massive stone budget.
Laying thousands of tiny blocks takes weeks, but pressing rubber mats into wet concrete looks far more expensive than it is and finishes in hours. Dust the wet surface with a dry-shake color hardener to make the “stones” look stunningly authentic.
Stamping adds about $3–$5 per square foot to a concrete pour.
- Key Materials: Flexible rubber stamp mats and release powder
- Vibe / Style: High-end faux stone
- Difficulty: Fast-paced precision
- Budget Breakdown: Mats rental: $100 | Color: $50
- Creator’s Tip: You must stamp immediately after screeding; if bleed water rises to the top, the texture will turn out mushy.
- Smart Sourcing: polyurethane concrete stamp mats, dry-shake color hardener kits
55. Local Stone Fieldstone
The native gathered rock path feels like a rugged homesteader trail, ensuring 100% regional geological authenticity.
Buying imported stone looks out of place, but scavenging rocks directly from your property gives a designer-level finish that blends perfectly with the local environment. Use the flattest pieces for walking and reserve the chunky boulders to frame the edges.
This sweat-equity masterpiece costs absolutely nothing in materials. Save this to your homesteading board!
- Key Materials: Foraged native fieldstones
- Vibe / Style: Authentic pioneer
- Difficulty: Heavy physical labor
- Budget Breakdown: Stones: Free | Gloves: $15
- Creator’s Tip: Dig the stones directly into the dirt so they sit flush; setting them on top creates a massive tripping hazard.
- Smart Sourcing: heavy-duty landscaping gloves, commercial-grade landscaping trenchers
Finishing the Route
Executing these 55 garden pathways blueprints successfully balances raw material performance, budget discipline, and sheer aesthetic impact. Whether you’re dropping a premium UV-coated porcelain slab for a rooftop terrace or laying bulk wood chips across a massive woodland trail, high-end hardscaping comes down to smart sourcing. Skip the cheap retail plastics and invest in commercial-grade weed barriers, heavy-duty paver starter kits, and proper edge restraints. By locking your base properly and choosing materials that fight your specific climate challenges, your upgraded outdoor layout will deliver a magazine-worthy, high-RPM visual impact that lasts for decades without sinking.
Frequently Asked Questions
What is the minimum width for a functional garden pathway?
To avoid a cramped, cheap look, you need at least 36 inches for basic solo passage and ADA compliance. If you’re building high-traffic garden pathways with pavers, upgrading to 48 inches allows two people to walk side by side comfortably, creating a much more luxurious feel. Utility paths can drop to 24 inches, but make sure you measure your wheelbarrows first!
How deep should the base layer be under paver pathways?
Never skip the base! Dig down and compact four to six inches of crushed angular gravel beneath your stones. If you have terrible clay soil or want to park heavy vehicles, excavate up to ten inches and use commercial-grade leveling sand kits. A deep base is the ultimate secret to why professional paver jobs never sink or heave during winter.
What materials work best for shaded, moss-prone areas?
Ditch smooth tiles instantly; they turn into ice rinks in damp shade. Opt for heavy-duty textured thermal bluestone, broom-finished concrete, or exposed aggregate kits for maximum grip. Alternatively, grab some live moss starter spores and let the green velvet take over an irregular flagstone path for an incredibly expensive-looking ancient ruin aesthetic.
How can I prevent weeds in pathway joints?
For loose gravel or mulch, always lay down commercial grade landscape fabric before dumping your material. For stone gaps, abandon regular sand and upgrade to premium polymeric sand buckets; it activates with water to form an impenetrable, rock-hard glue that stops seeds and ants dead in their tracks while maintaining a flawless designer finish.
What slope is safe for accessible pathway design?
The ADA mandates a maximum 1:12 slope (one inch rise per twelve inches run) to prevent wheelchairs from rolling backward. If you have the space, a 1:20 slope feels significantly more comfortable and premium. Don’t forget to use ADA-compliant threshold ramps and keep the cross-slope under 1:48 so wheeled garden carts and chairs don’t violently pull to the side.
How do I choose between permeable and solid paving?
If your yard constantly floods, permeable grid systems or bulk pea gravel kits are mandatory because they suck rainwater straight into the earth. Solid setups, like precision-cut garden ideas pathways, are better for high heels, heavy rolling equipment, and zero-maintenance luxury. The smartest money mixes both: solid blocks for the main entry, and eco-friendly gravel for side yard routes.