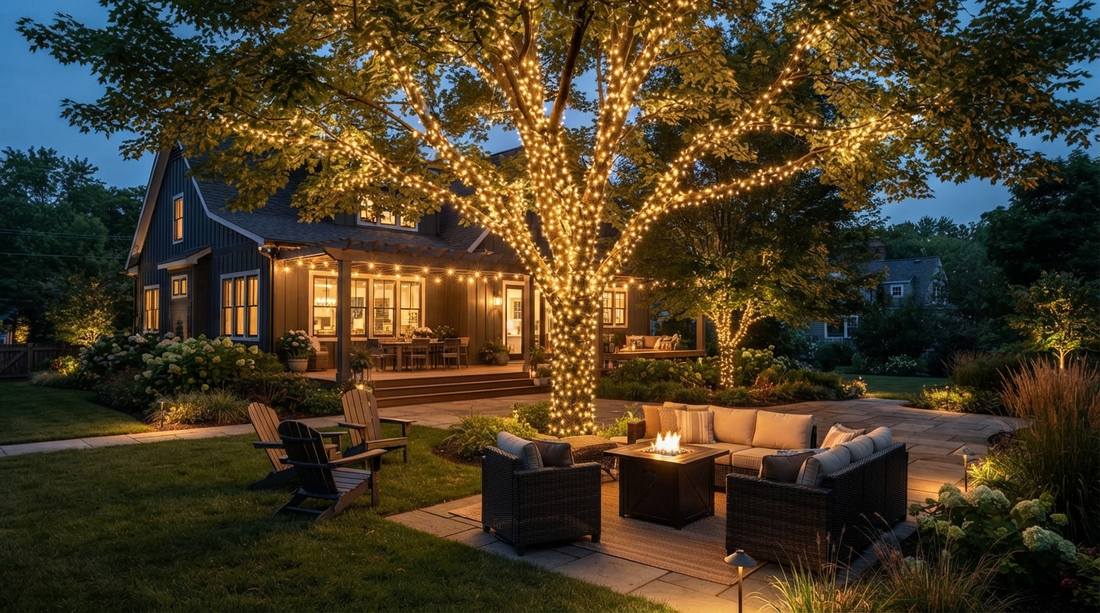
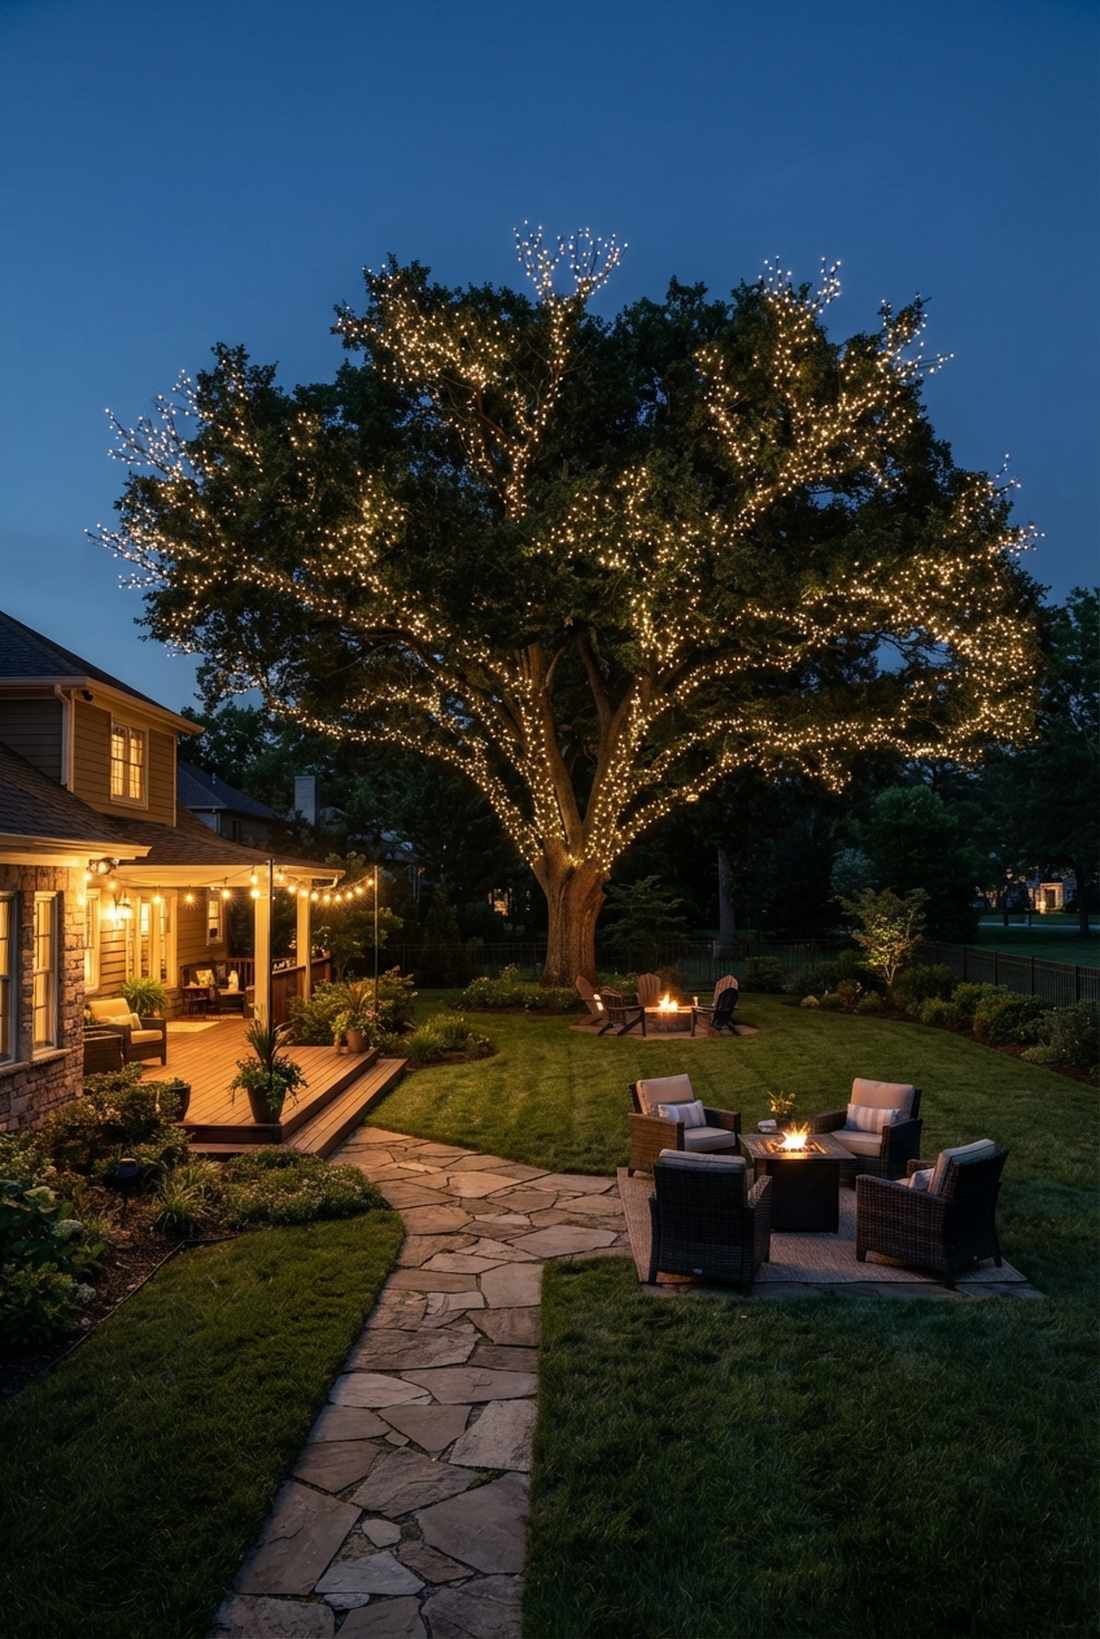
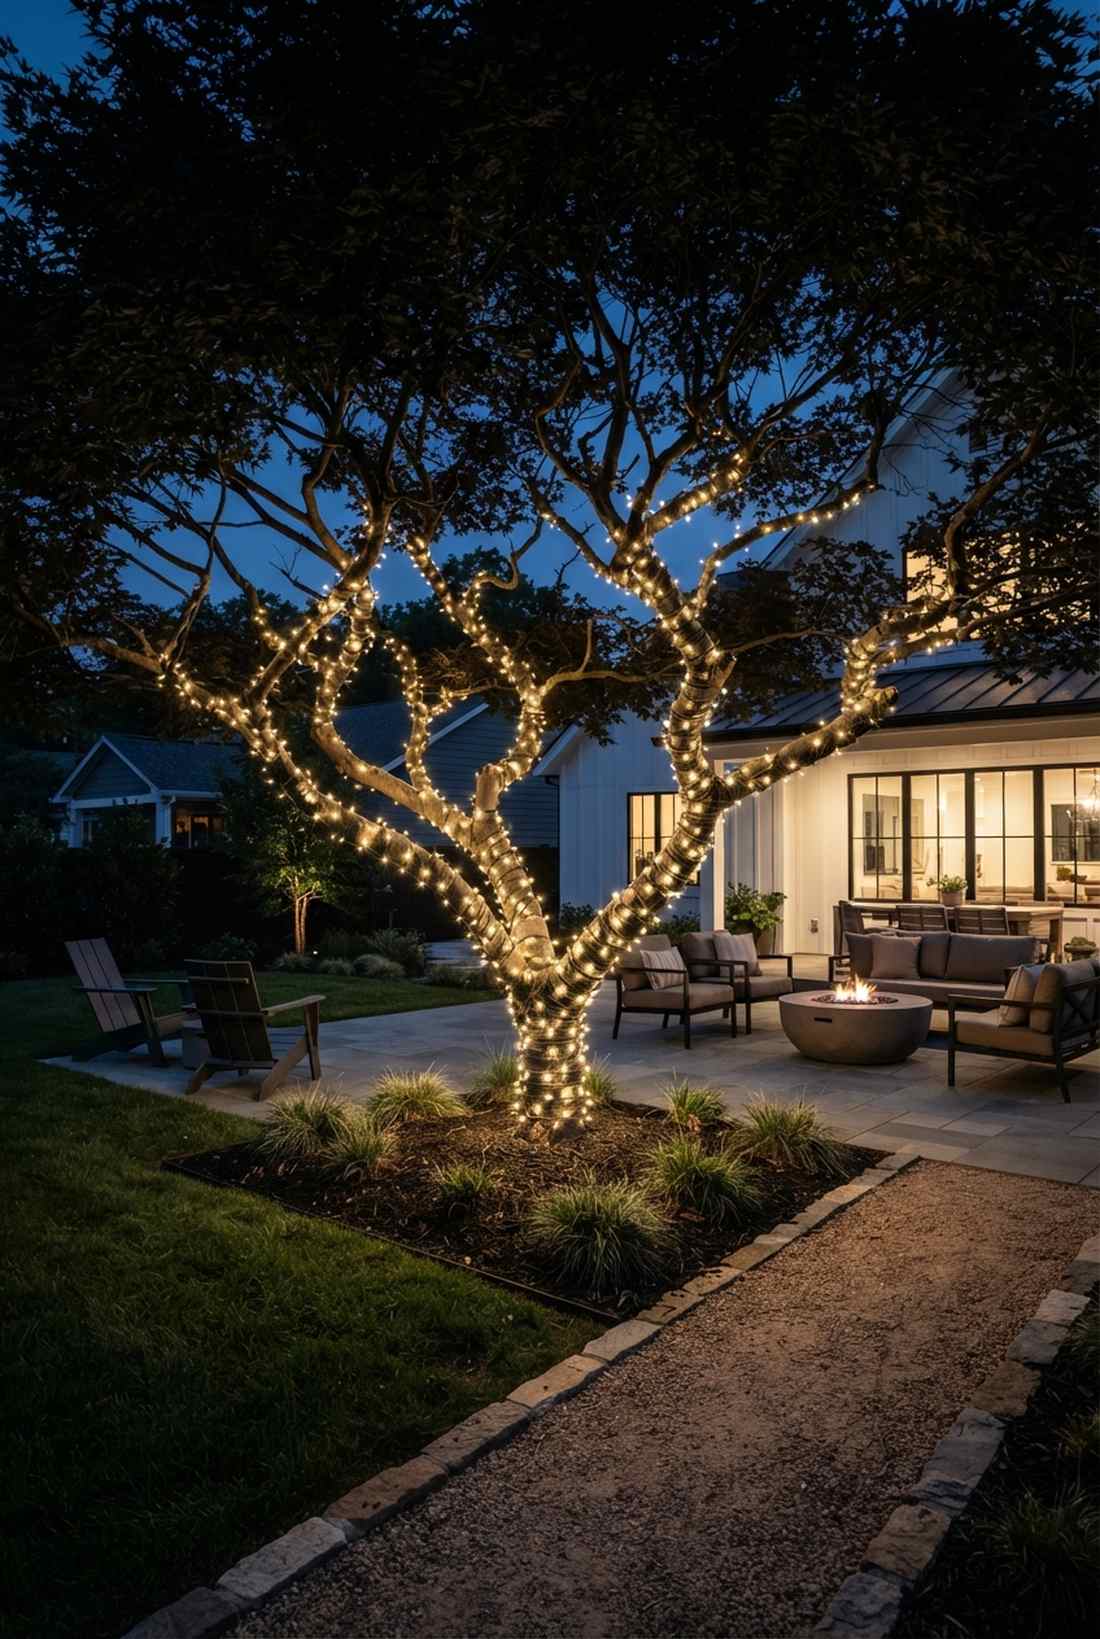
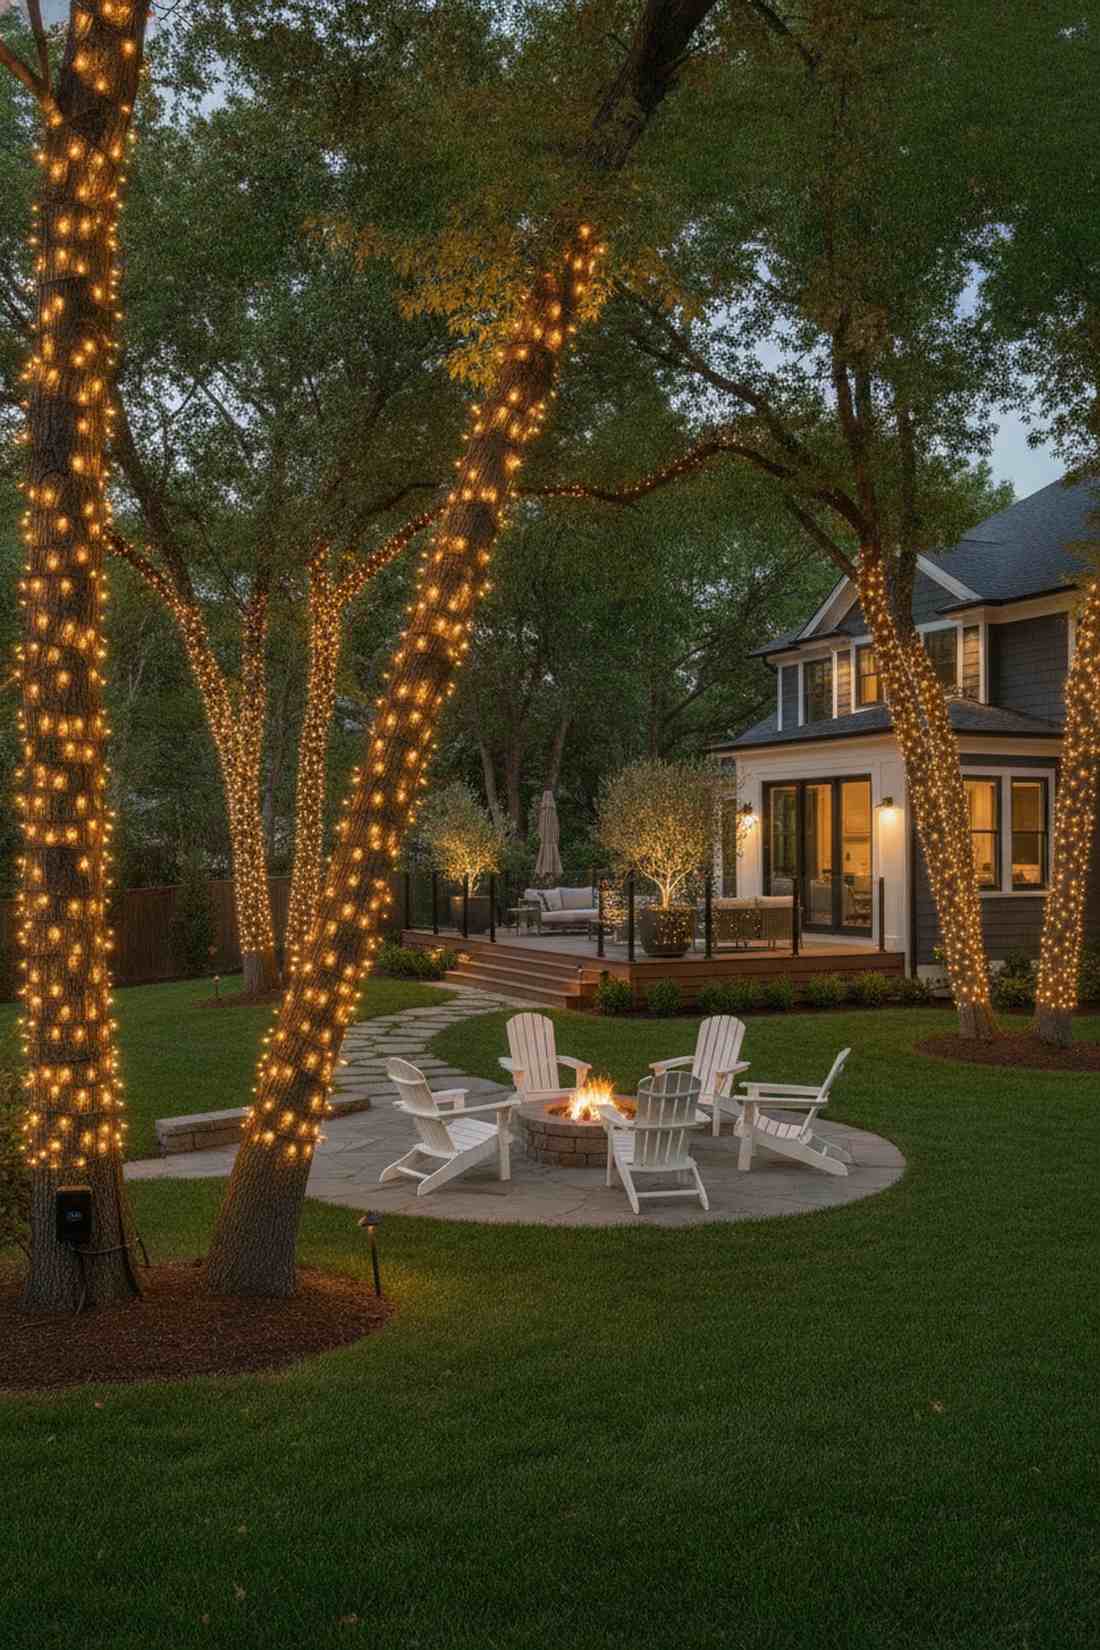
Transforming your backyard with fairy lights in trees instantly elevates a dull landscape into a high-end entertaining space. By mastering these commercial-grade wrapping blueprints, you bypass expensive contractor fees using smart material sourcing. The result is a weatherproof, premium outdoor glow that lasts for years.
Design Snapshot Key Principles
- Spacing Control: Maintain 6-8 inches between wraps for balanced coverage without overwhelming the tree’s natural structure
- Bottom-Up Approach: Starting at the base and working upward allows gravity to assist installation and prevents light strand slippage
- Tension Balance: Secure lights firmly enough to prevent sagging but loose enough to allow natural branch movement and tree growth
- Power Planning: Position electrical connections at trunk base level rather than ground level to protect from moisture and lawn equipment
Trunk Wrapping Fundamentals
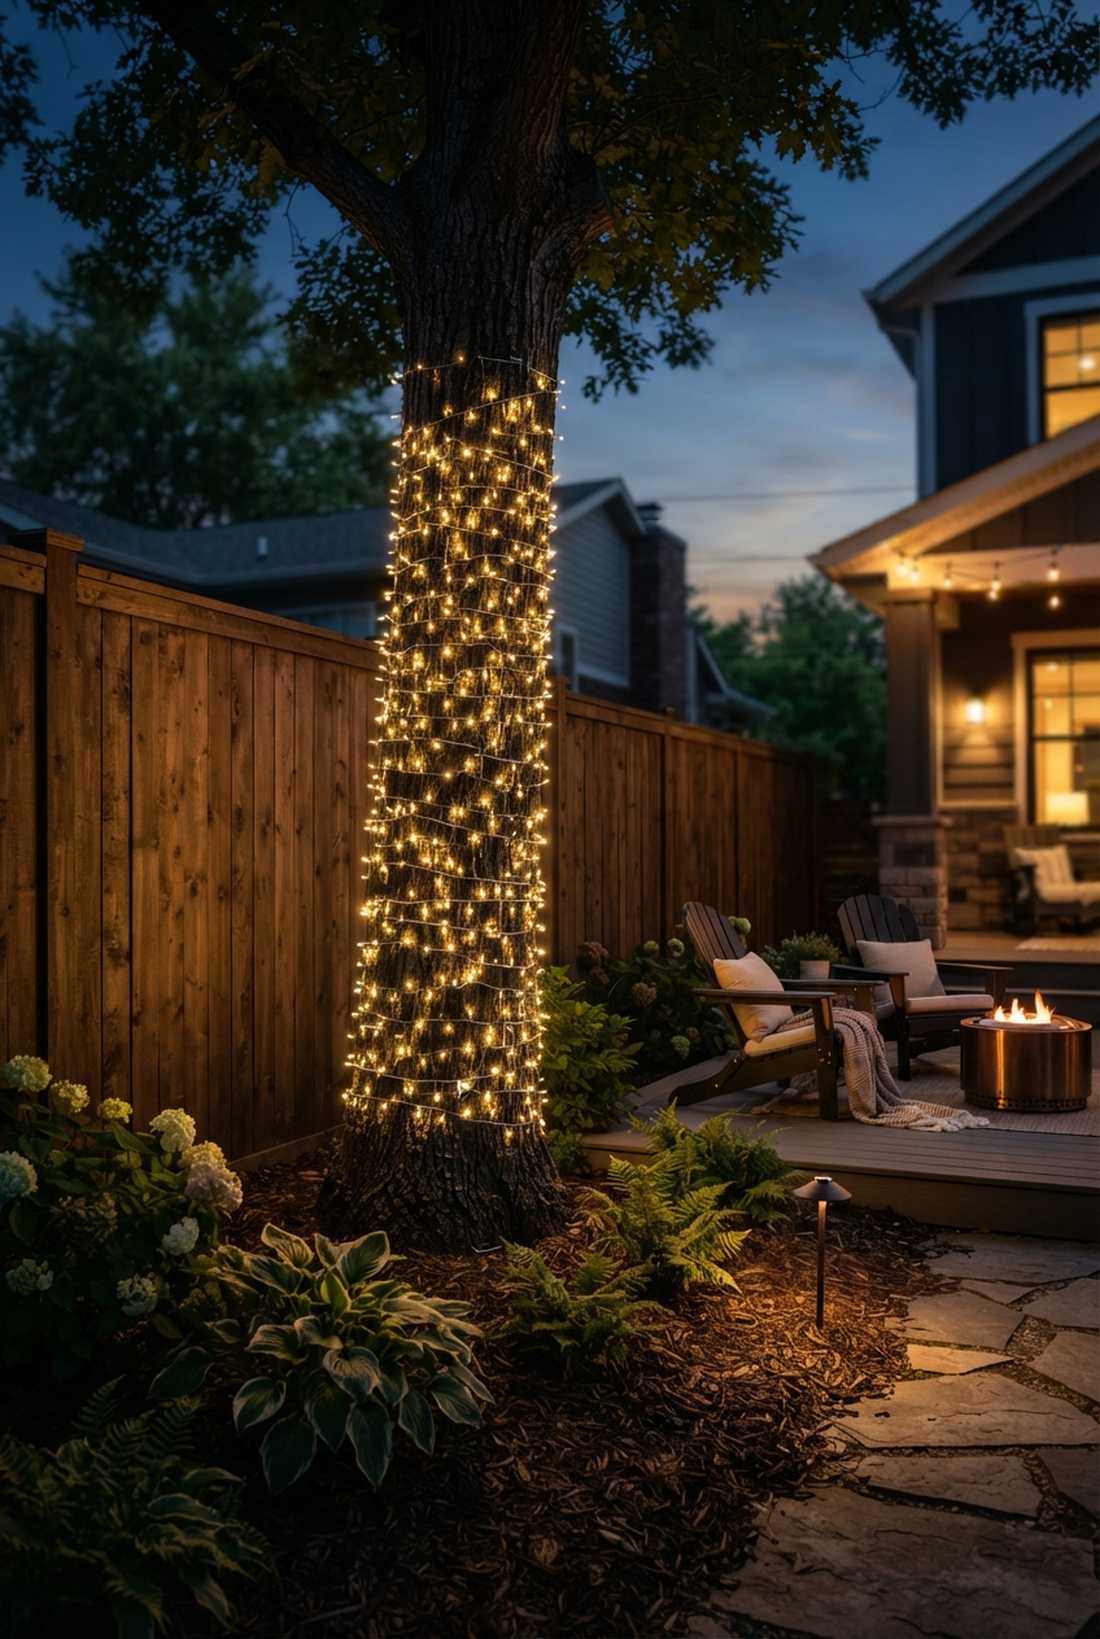
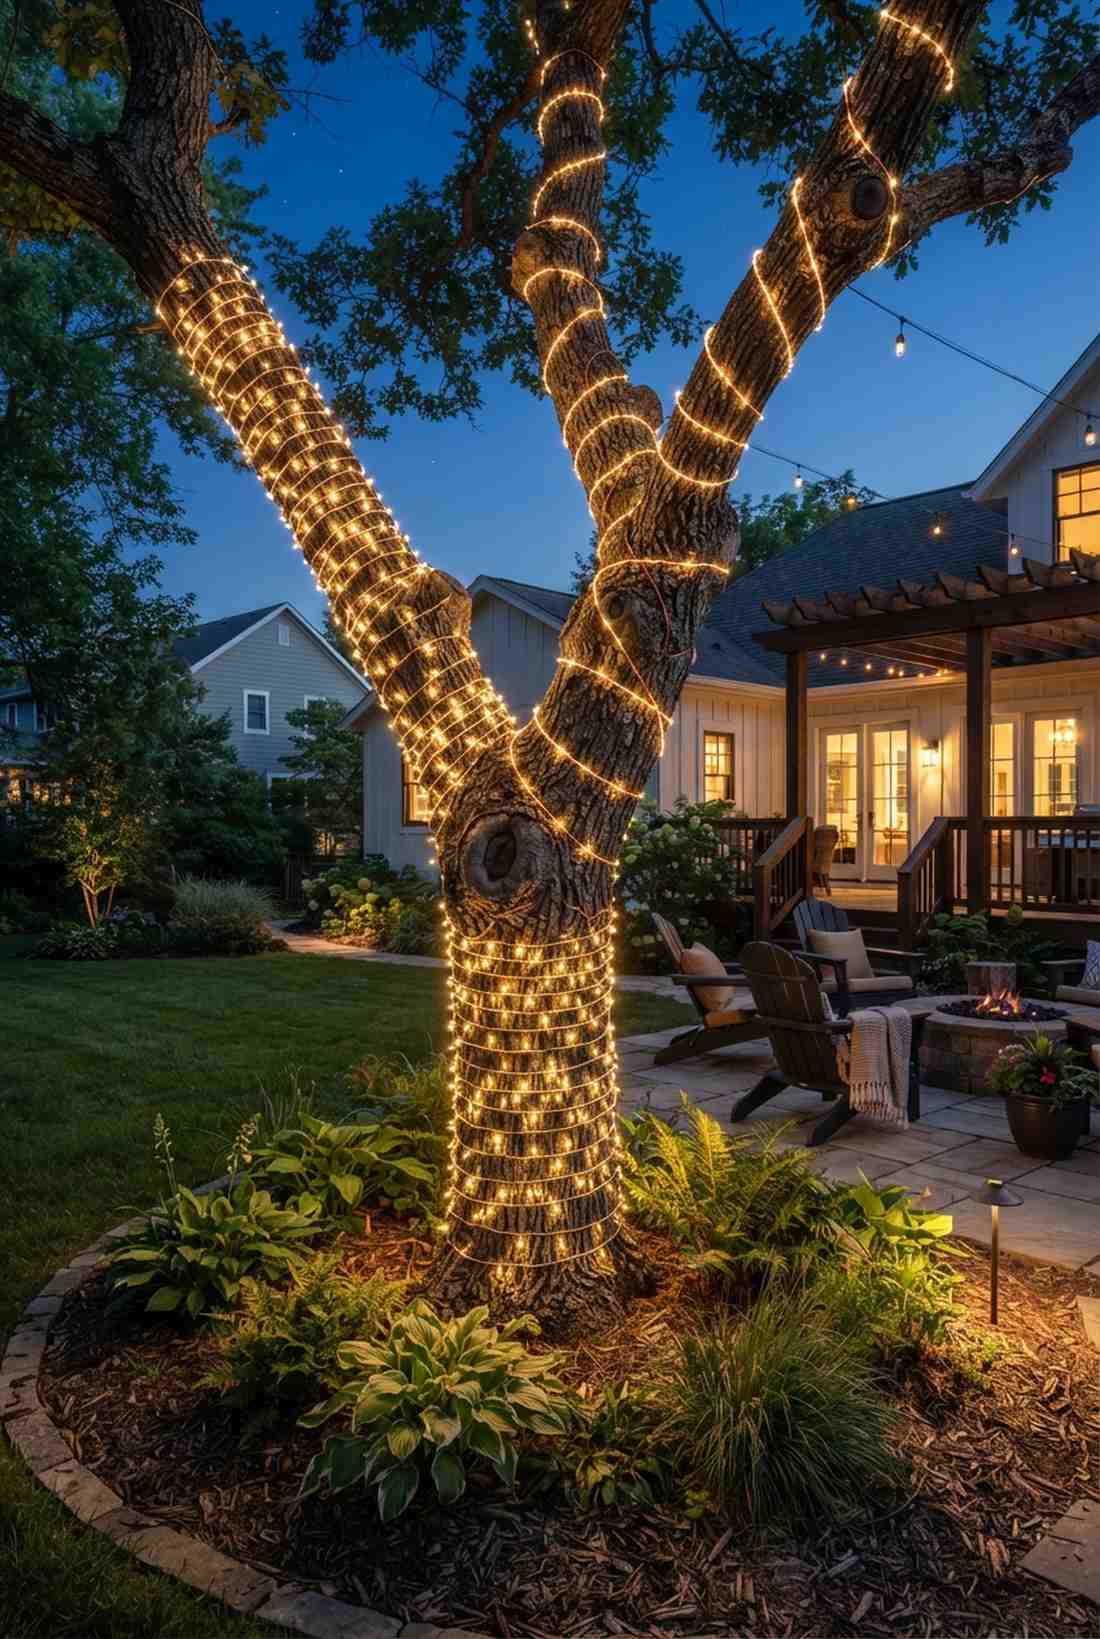
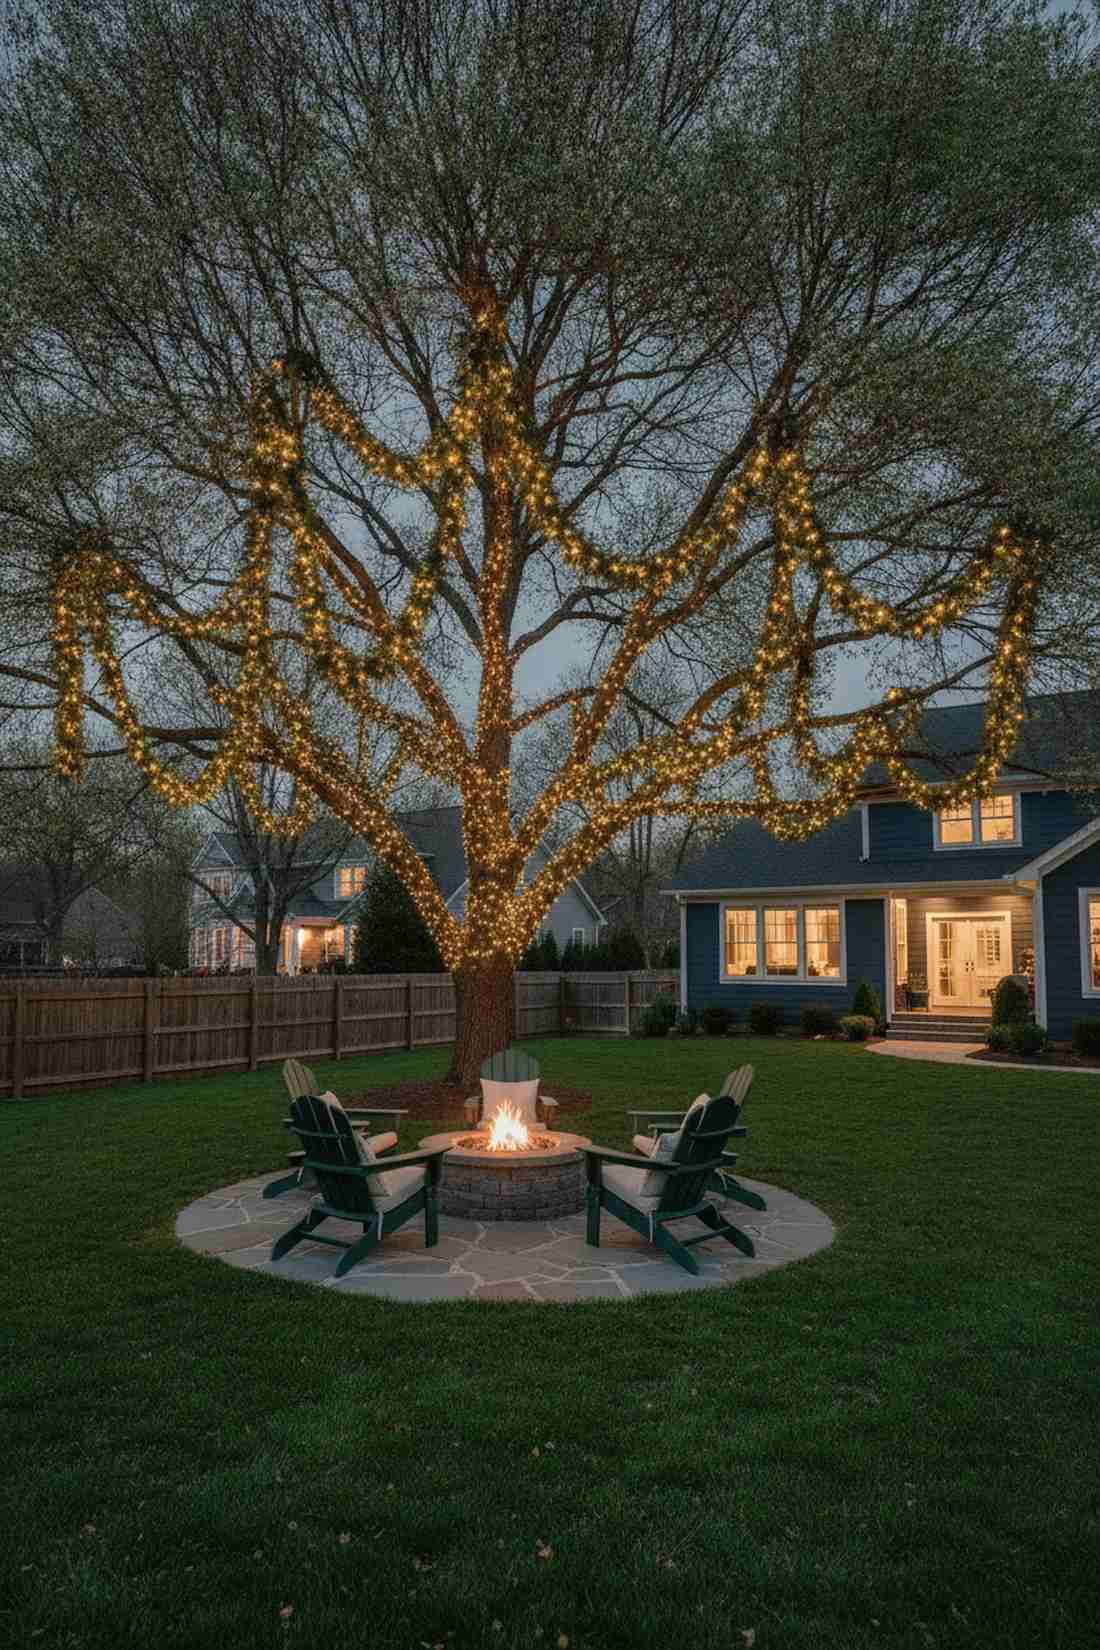
1. Classic Spiral Wrap
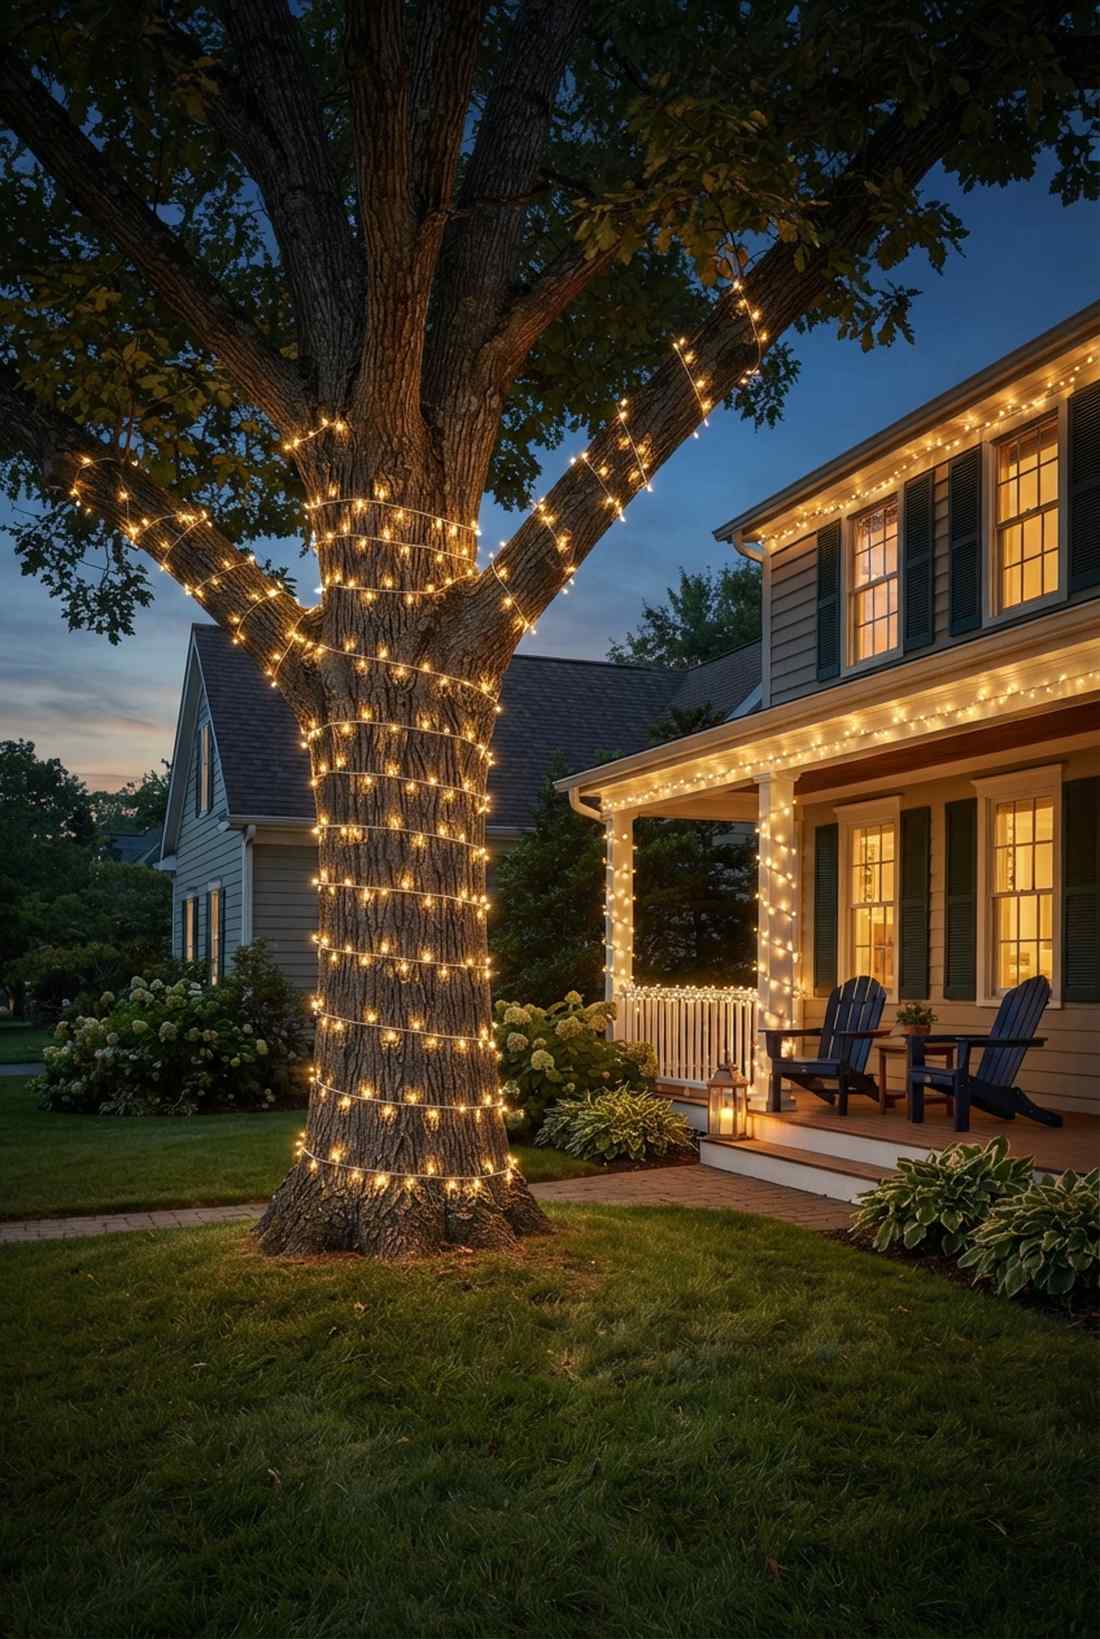
Feels like a timeless enchanted forest straight out of a storybook. This classic outdoor lighting layout works exceptionally well for framing front porch entrances or illuminating mature oak tree bases.
Most beginners wrap too tightly, but spacing out your strands delivers a surprisingly premium look. Using an even four-finger gap as you ascend creates a professional visual rhythm while utilizing heavy-duty outdoor lighting kits effectively.
You can easily pull this off for around $25–$45 depending on trunk width. Pin this if you’re planning a weekend curb appeal upgrade.
- Key Materials: Warm white LED spools
- Vibe / Style: Traditional elegance
- Difficulty: Easy beginner setup
- Budget Breakdown: Materials: $35 | Fasteners: $5.
- Creator’s Tip: Use a zip tie at the very bottom to anchor the strand before you start spinning upward.
- Smart Sourcing: commercial-grade LED wire spools (bulk pack) and UV-resistant heavy-duty zip ties.
2. Wide Gap Minimalist Wrap
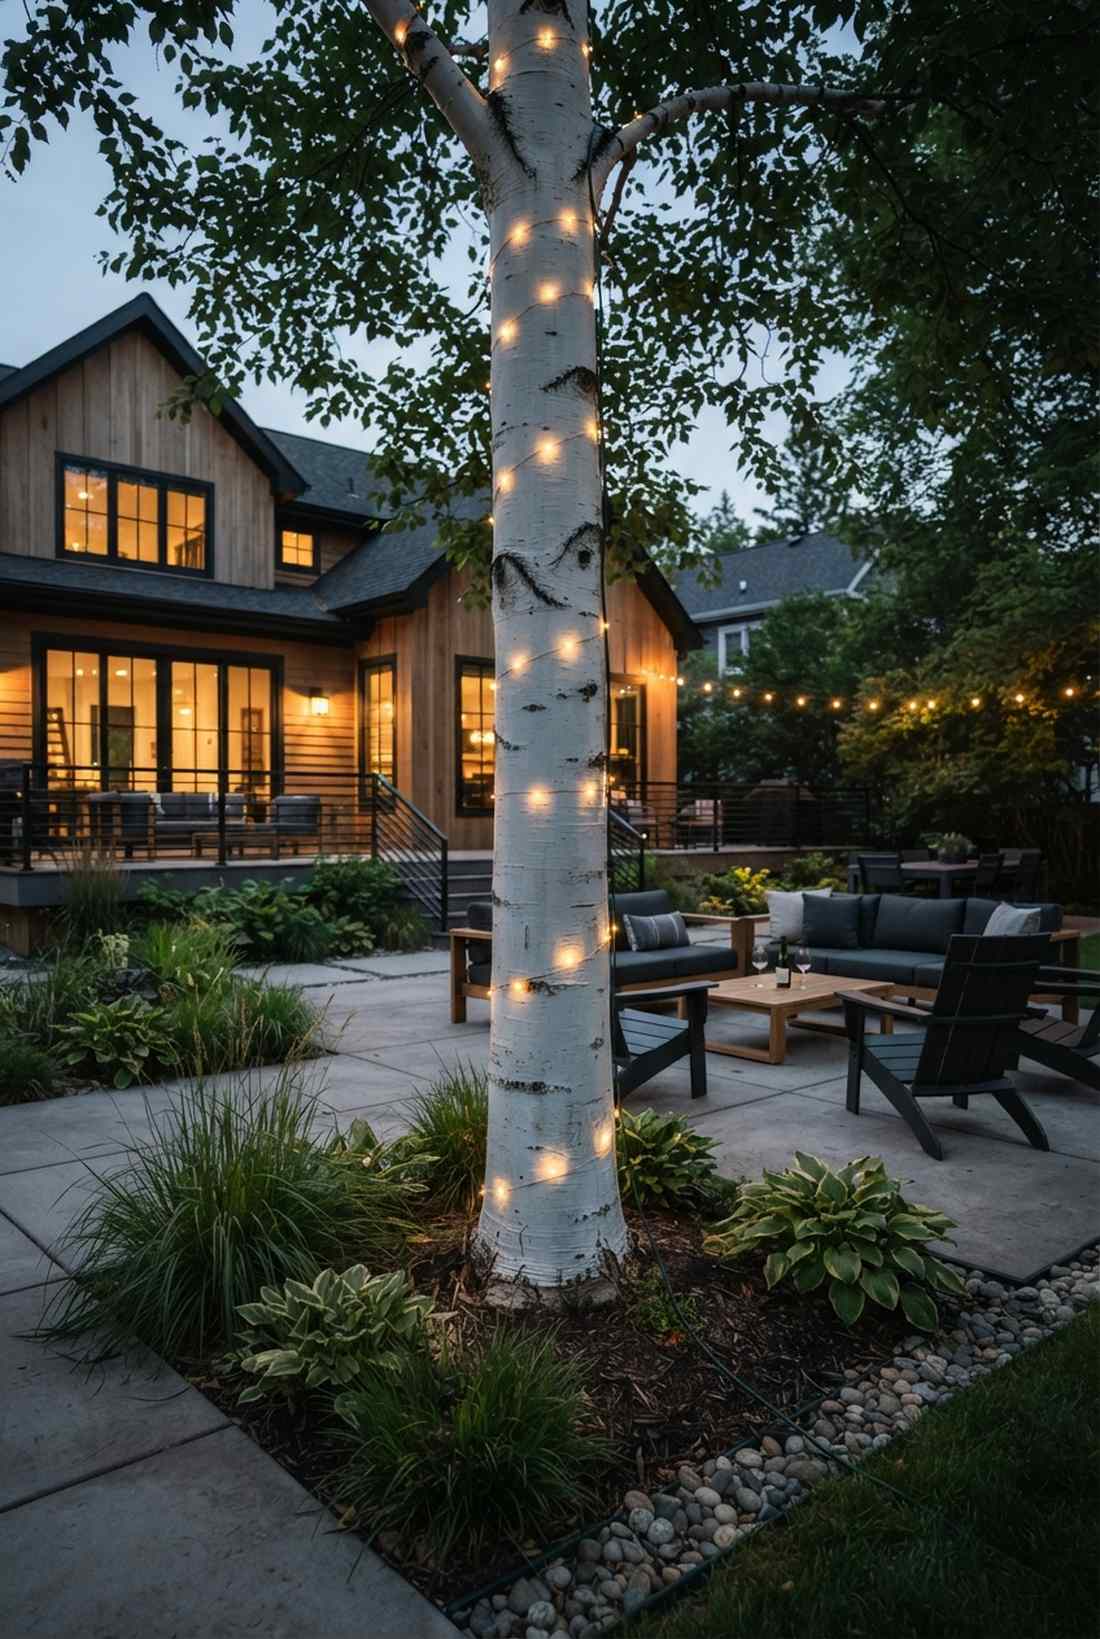
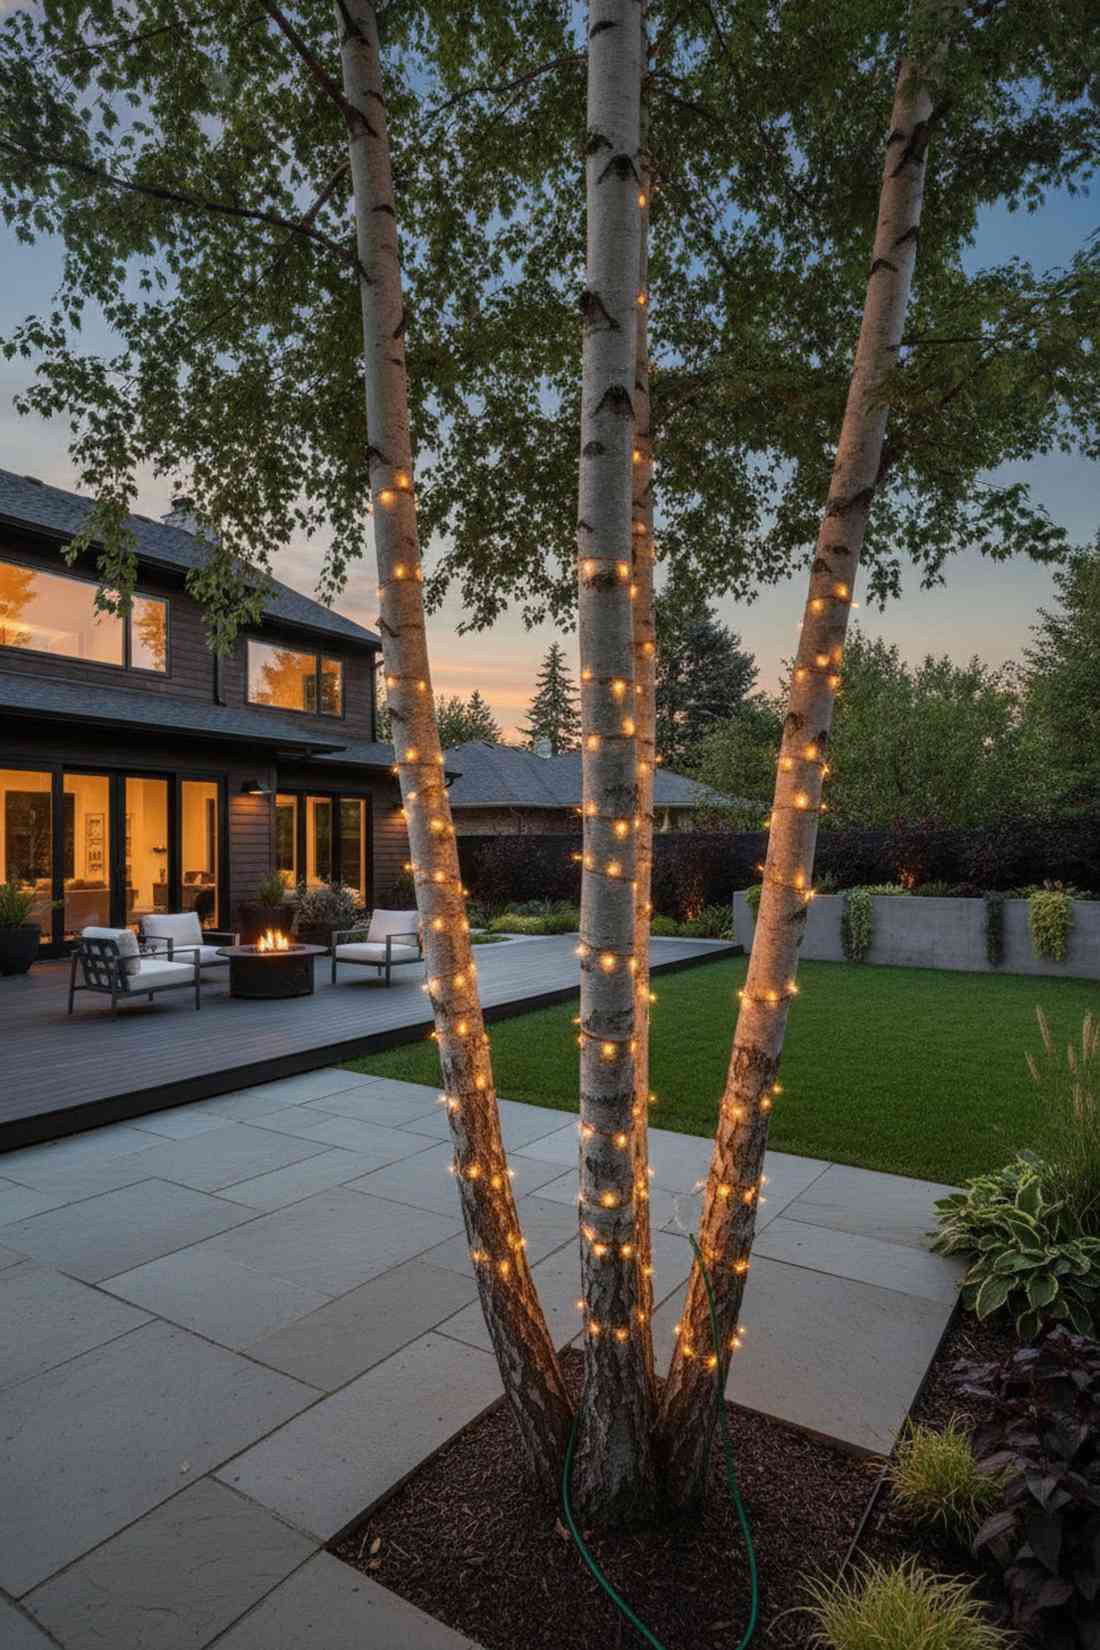
Brings a sleek, moody ambiance that feels like an upscale boutique hotel patio. This modern minimalist tree decor is perfect for contemporary backyards with smooth-barked trees like birch or maple.
Over-lighting can look tacky, yet this spaced-out layout looks far more expensive than it is. By stretching the gaps to 12-18 inches, you highlight the natural bark texture while saving massive amounts on landscape lighting supplies.
Expect to spend a mere $15–$25 for this subtle glow. It’s a fast upgrade that completely changes the evening vibe.
- Key Materials: Micro-LED copper wire lights
- Vibe / Style: Modern and understated
- Difficulty: Very easy
- Budget Breakdown: Materials: $20 | Extension cords: $10.
- Creator’s Tip: Press the wire firmly into natural bark crevices to hold the wide tension naturally.
- Smart Sourcing: extra-long micro LED strands (plug-in) and green exterior extension cables.
3. Double Helix Trunk Wrap
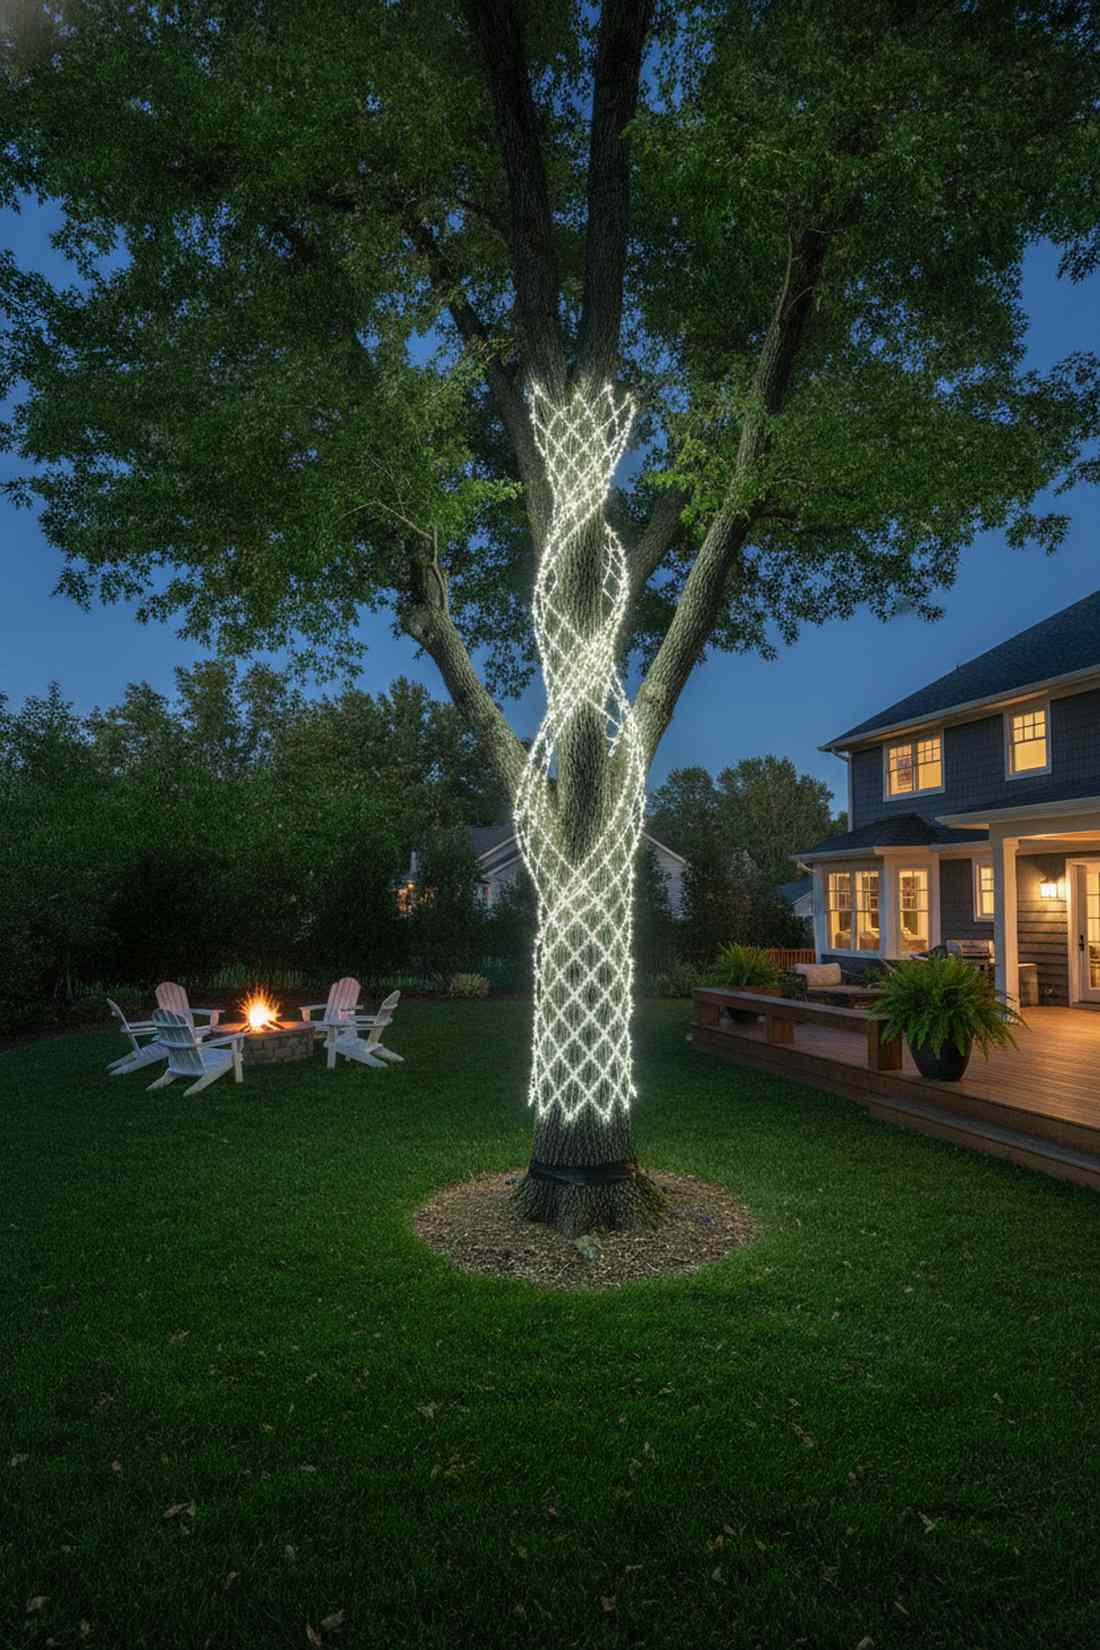
Delivers a mesmerizing woven texture that feels like a glowing architectural sculpture. This geometric yard lighting design shines brightest when used on standalone focal point trees in the center of a lawn.
While crossing wires sounds chaotic, this intentional crisscross gives a designer-level finish. Wrapping two separate strands in opposing directions naturally locks them in place, making it perfect for high-wind areas.
This layout runs about $40–$60 since it requires dual strands. Save this to your DIY weekend garden board for your next big project.
- Key Materials: High-density light strands
- Vibe / Style: Architectural and complex
- Difficulty: Intermediate
- Budget Breakdown: Materials: $50 | Base: $0.
- Creator’s Tip: Angle one clockwise and one counterclockwise at the exact same pitch for a flawless diamond effect.
- Smart Sourcing: twin-pack waterproof LED strings and outdoor electrical tape rolls.
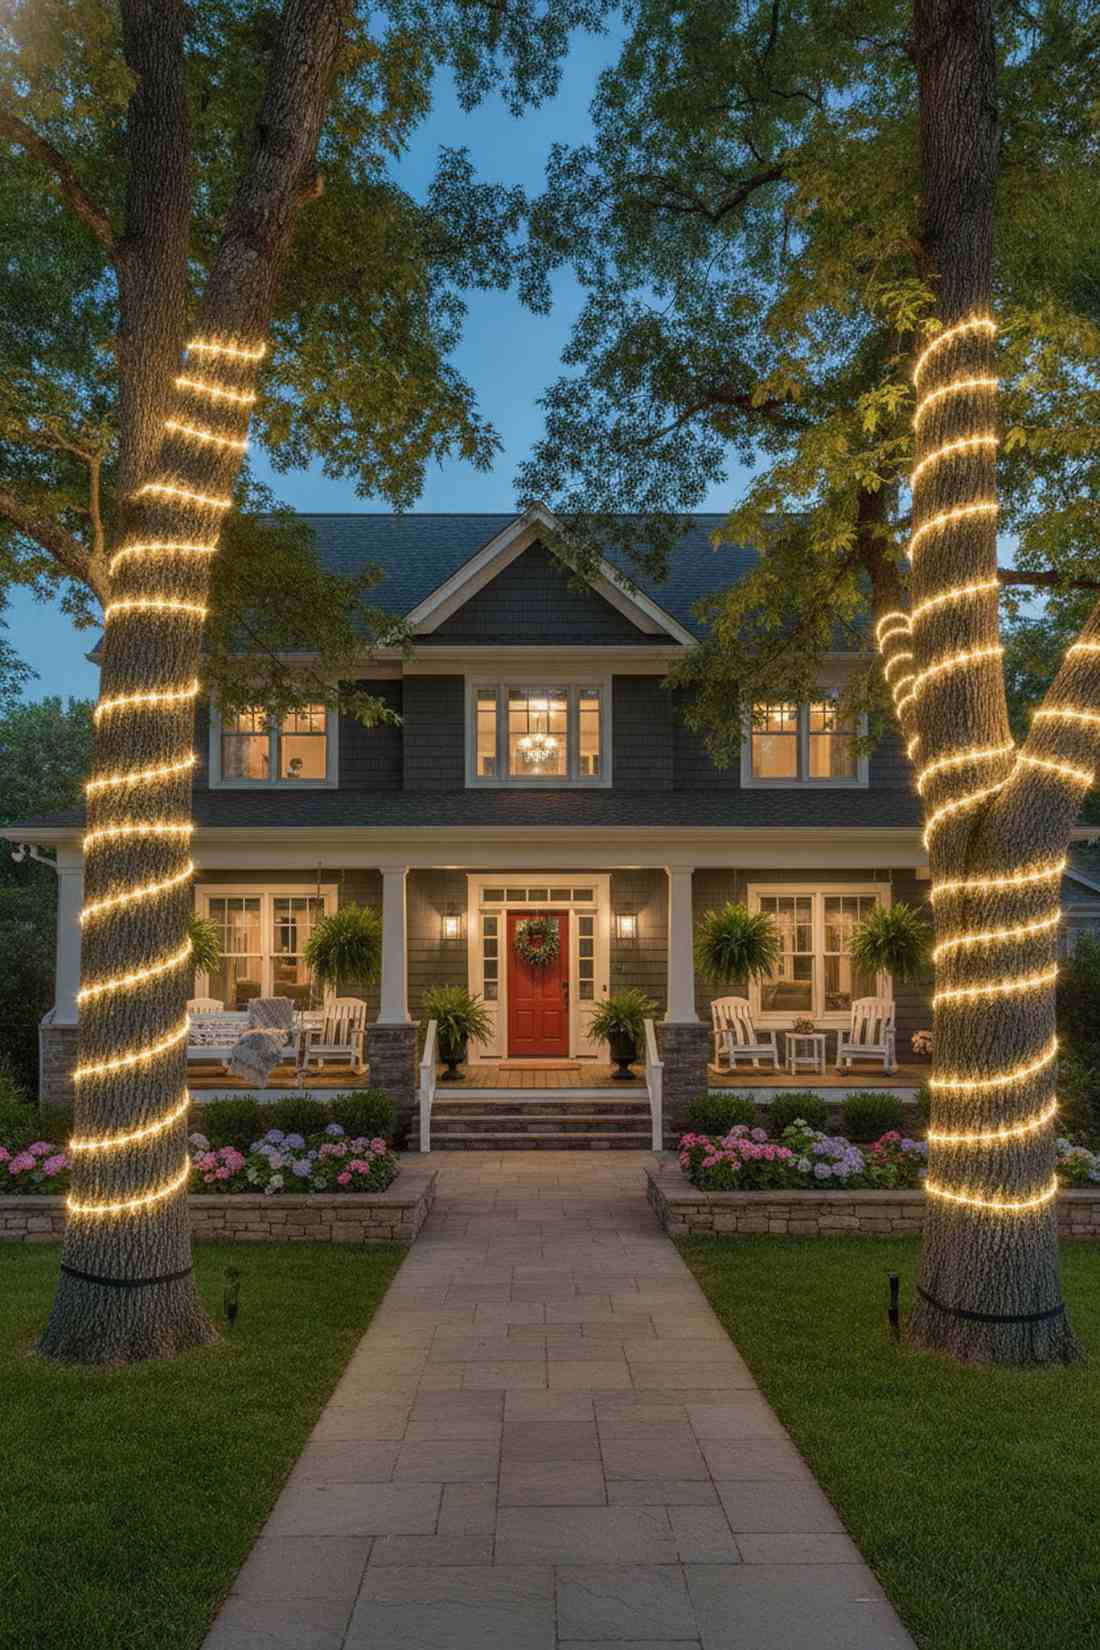
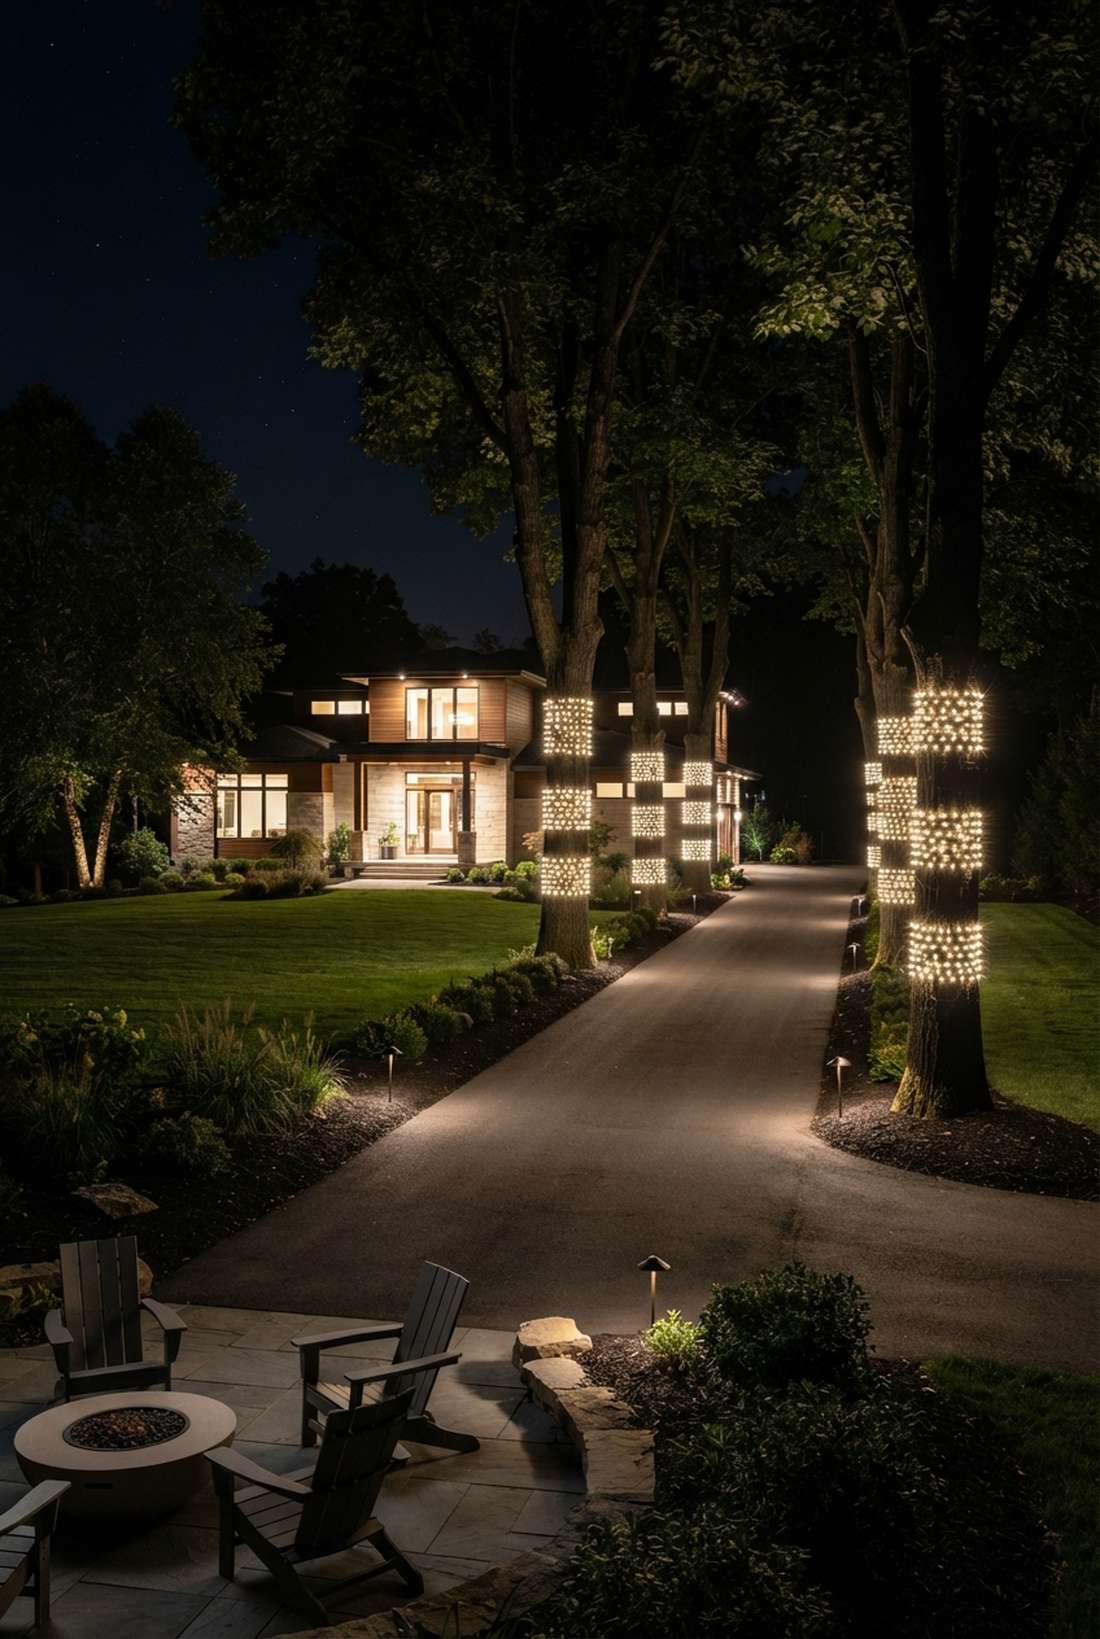
4. Vertical Stripe Wrapping
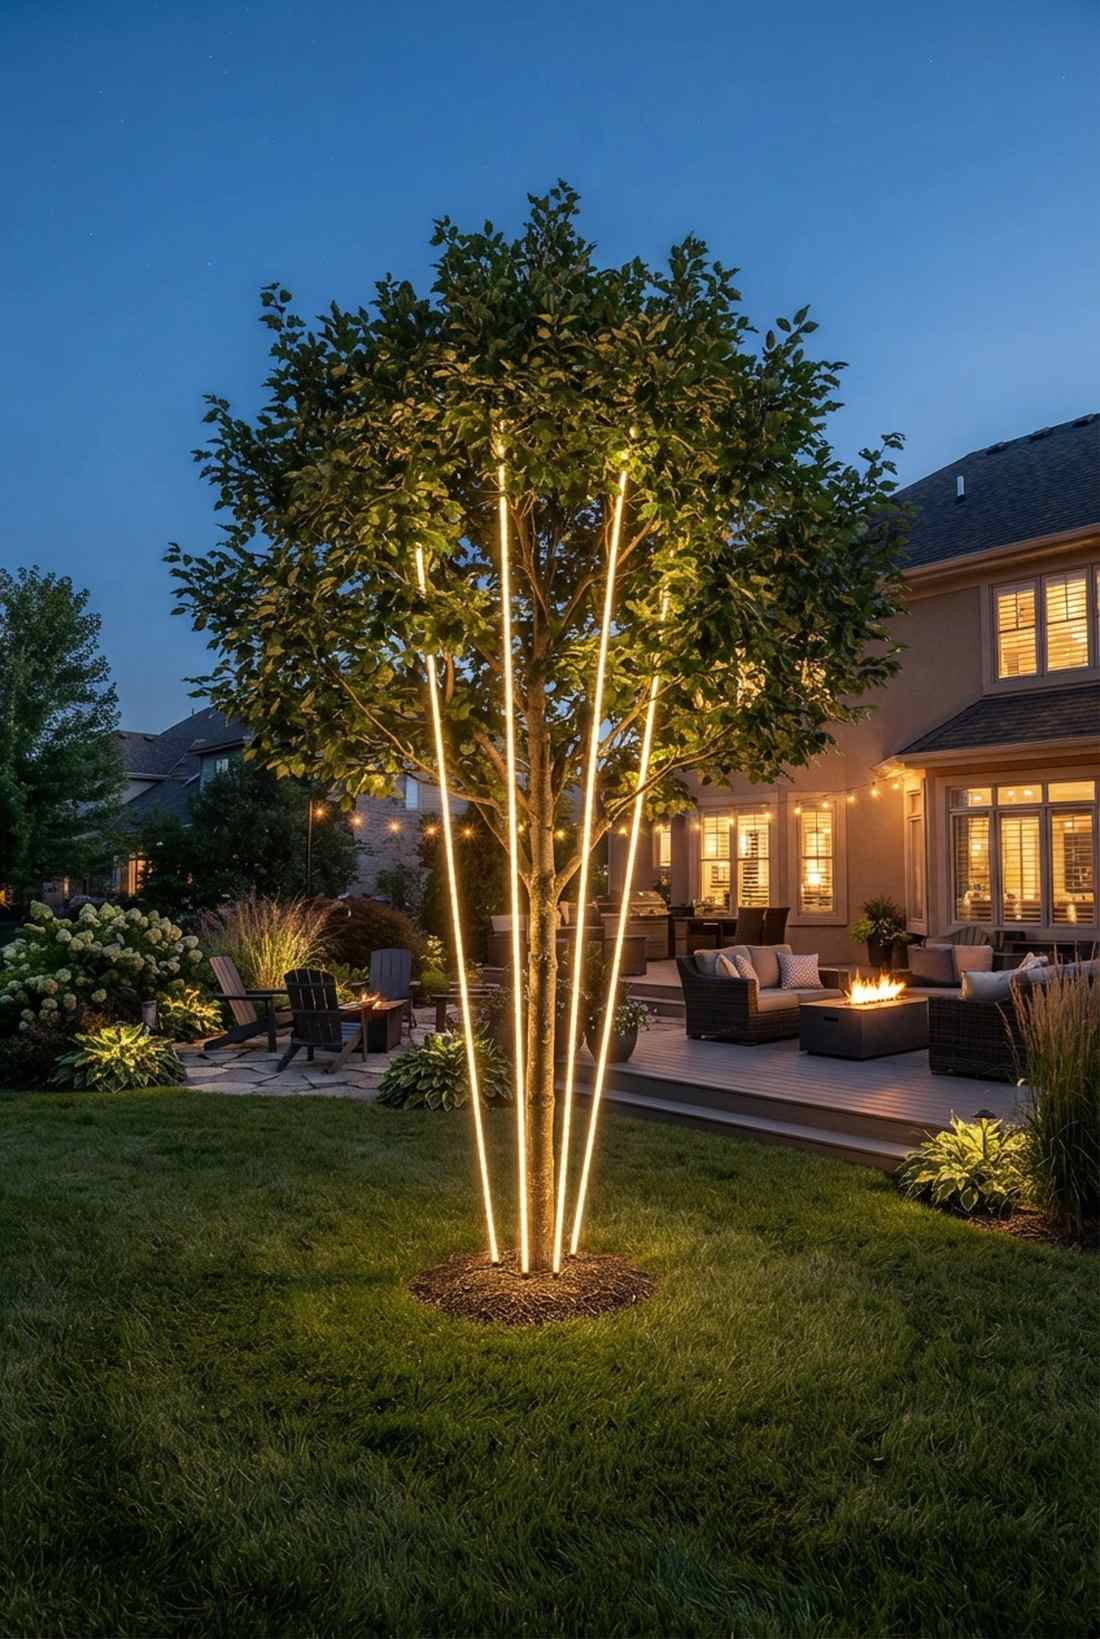
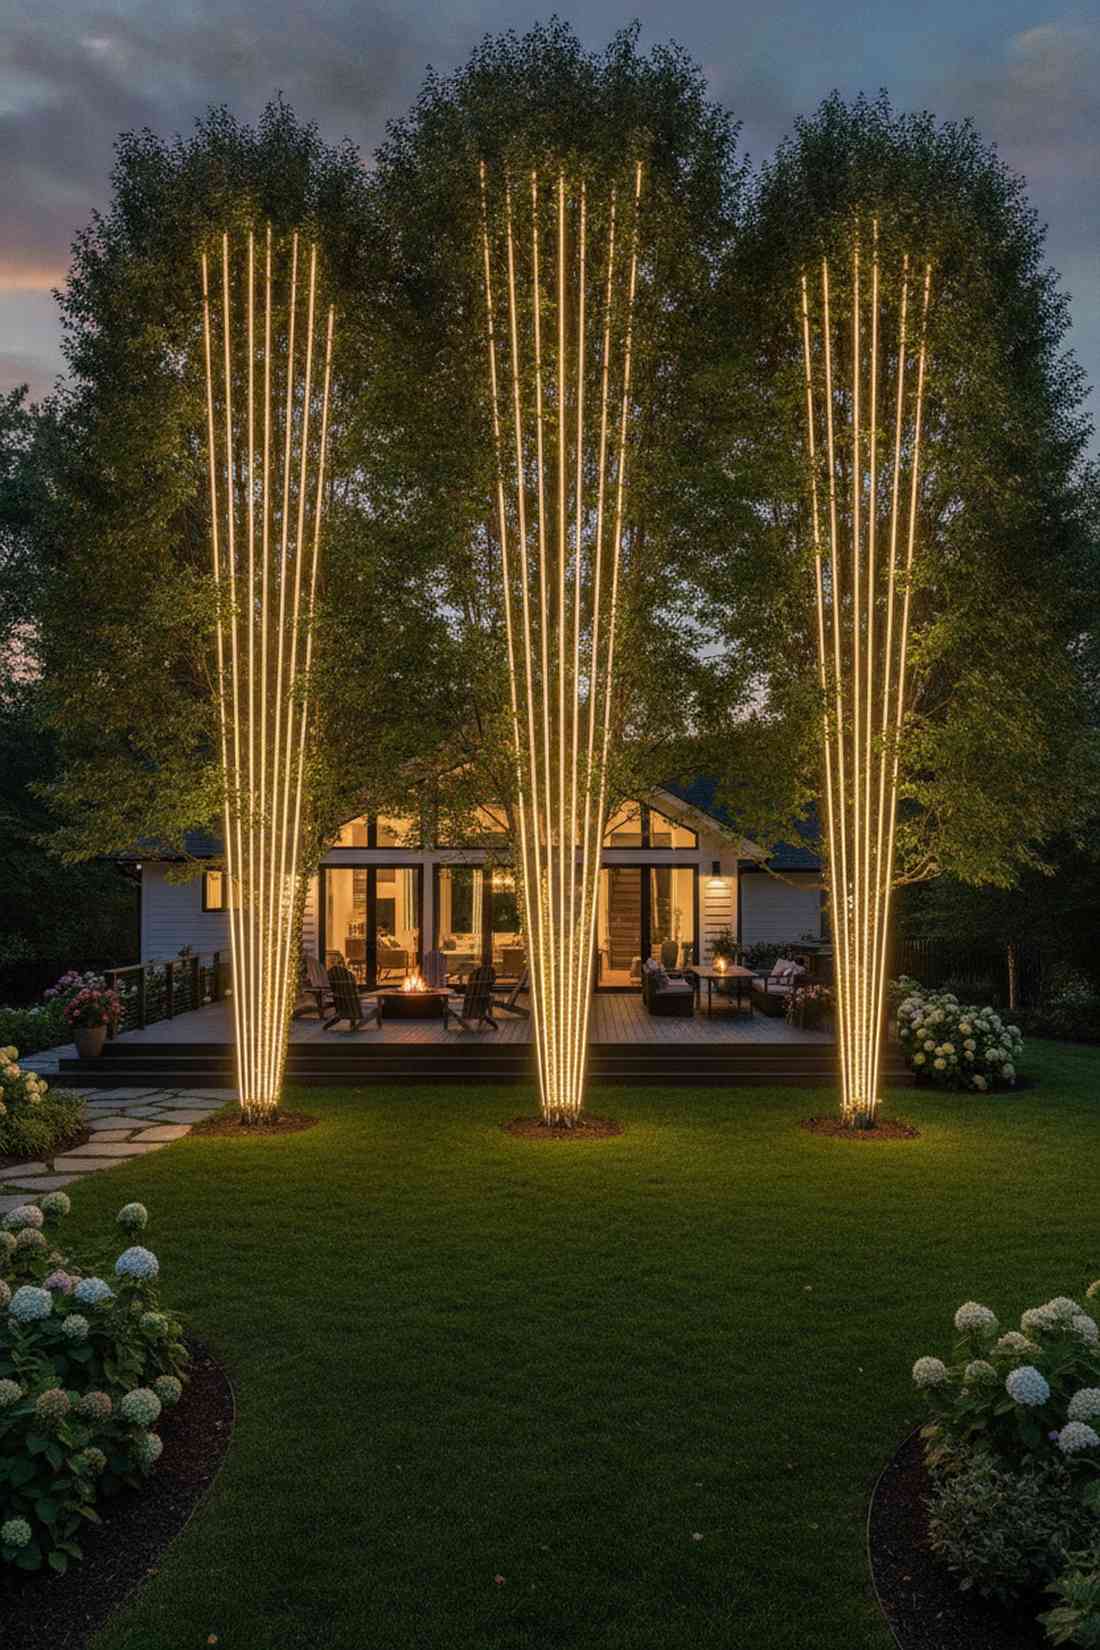
Creates an optical illusion of immense height, feeling like majestic columns of pure light. This vertical tree illumination technique works magic on shorter, stumpier trees by drawing the eye straight up.
Standard horizontal wraps are expected, but running lights vertically creates a controversial, dramatic profile. Space out three to five lines from canopy to root, instantly upgrading basic backyard supplies into a high-end installation.
You can achieve this striking look for $20–$35. Highly recommended if you want to make small trees look massive.
- Key Materials: Rope lights or structured LEDs
- Vibe / Style: Tall and majestic
- Difficulty: Easy
- Budget Breakdown: Materials: $25 | Anchors: $5.
- Creator’s Tip: Secure tightly at the top branch crotch before pulling the tension down to the ground.
- Smart Sourcing: shatterproof outdoor rope lights and silicone mounting clips.
Most people get this completely wrong… until they try the exact layout coming up next.
5. Trunk Base Ring Foundation
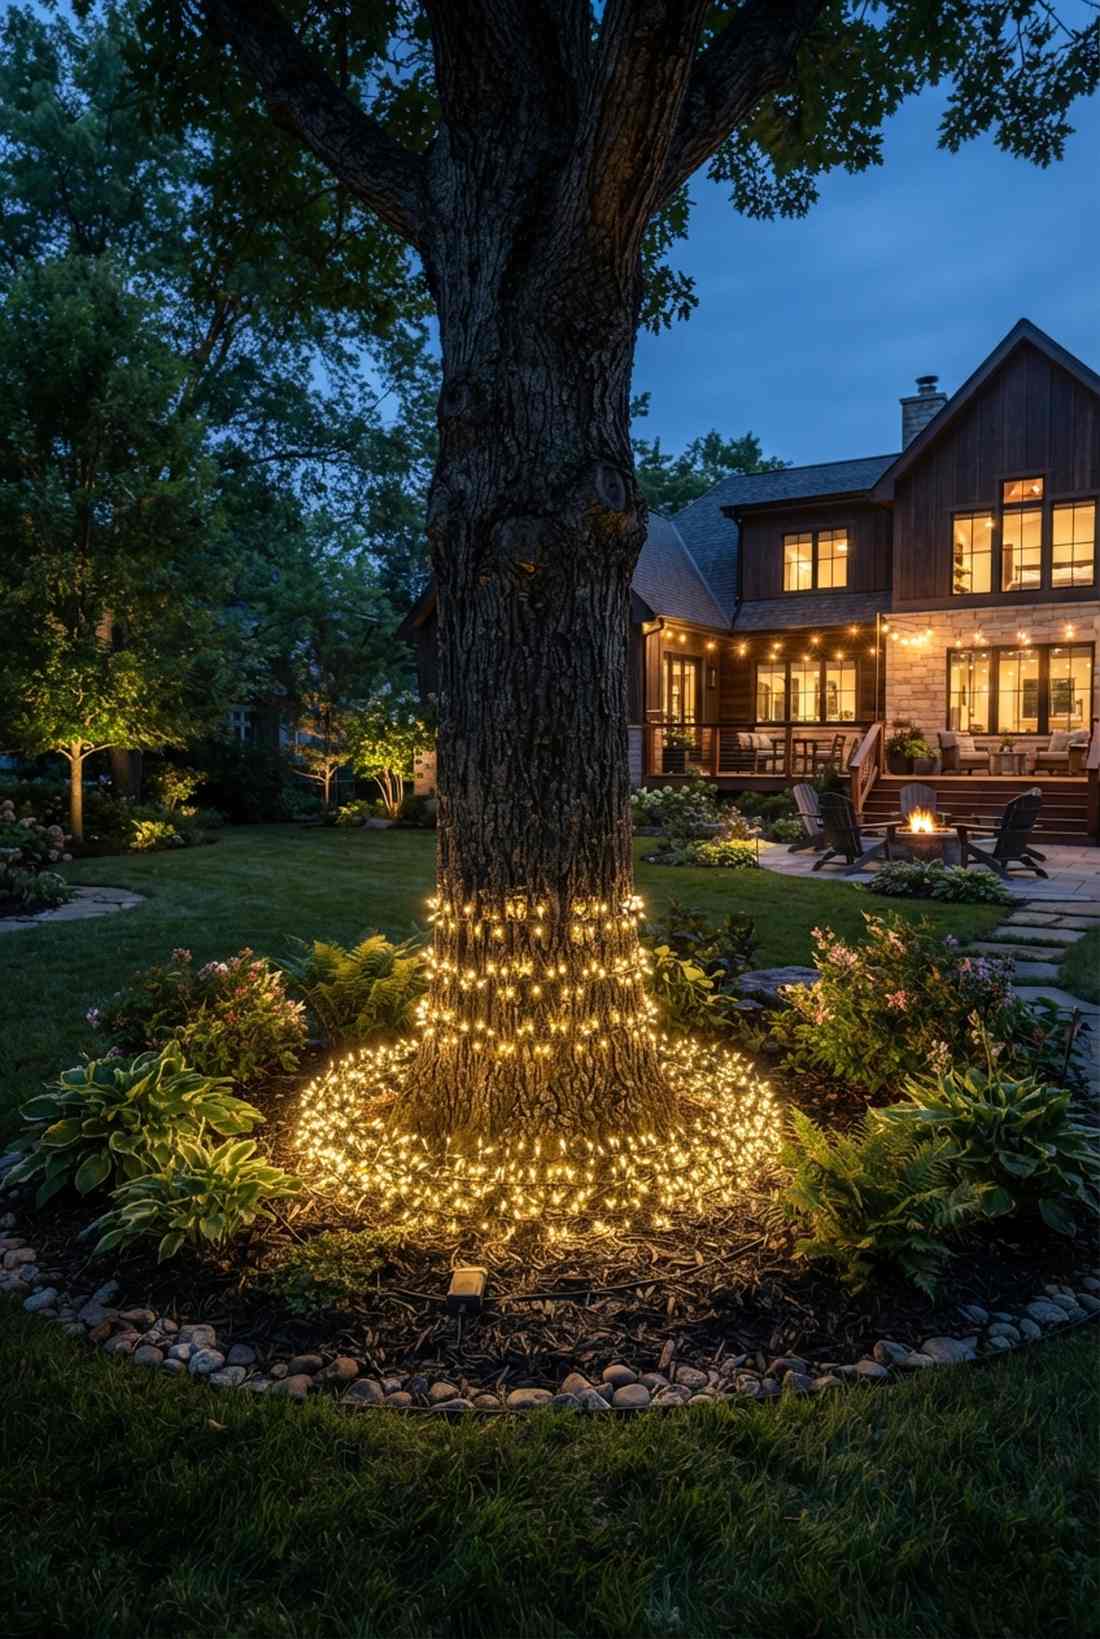
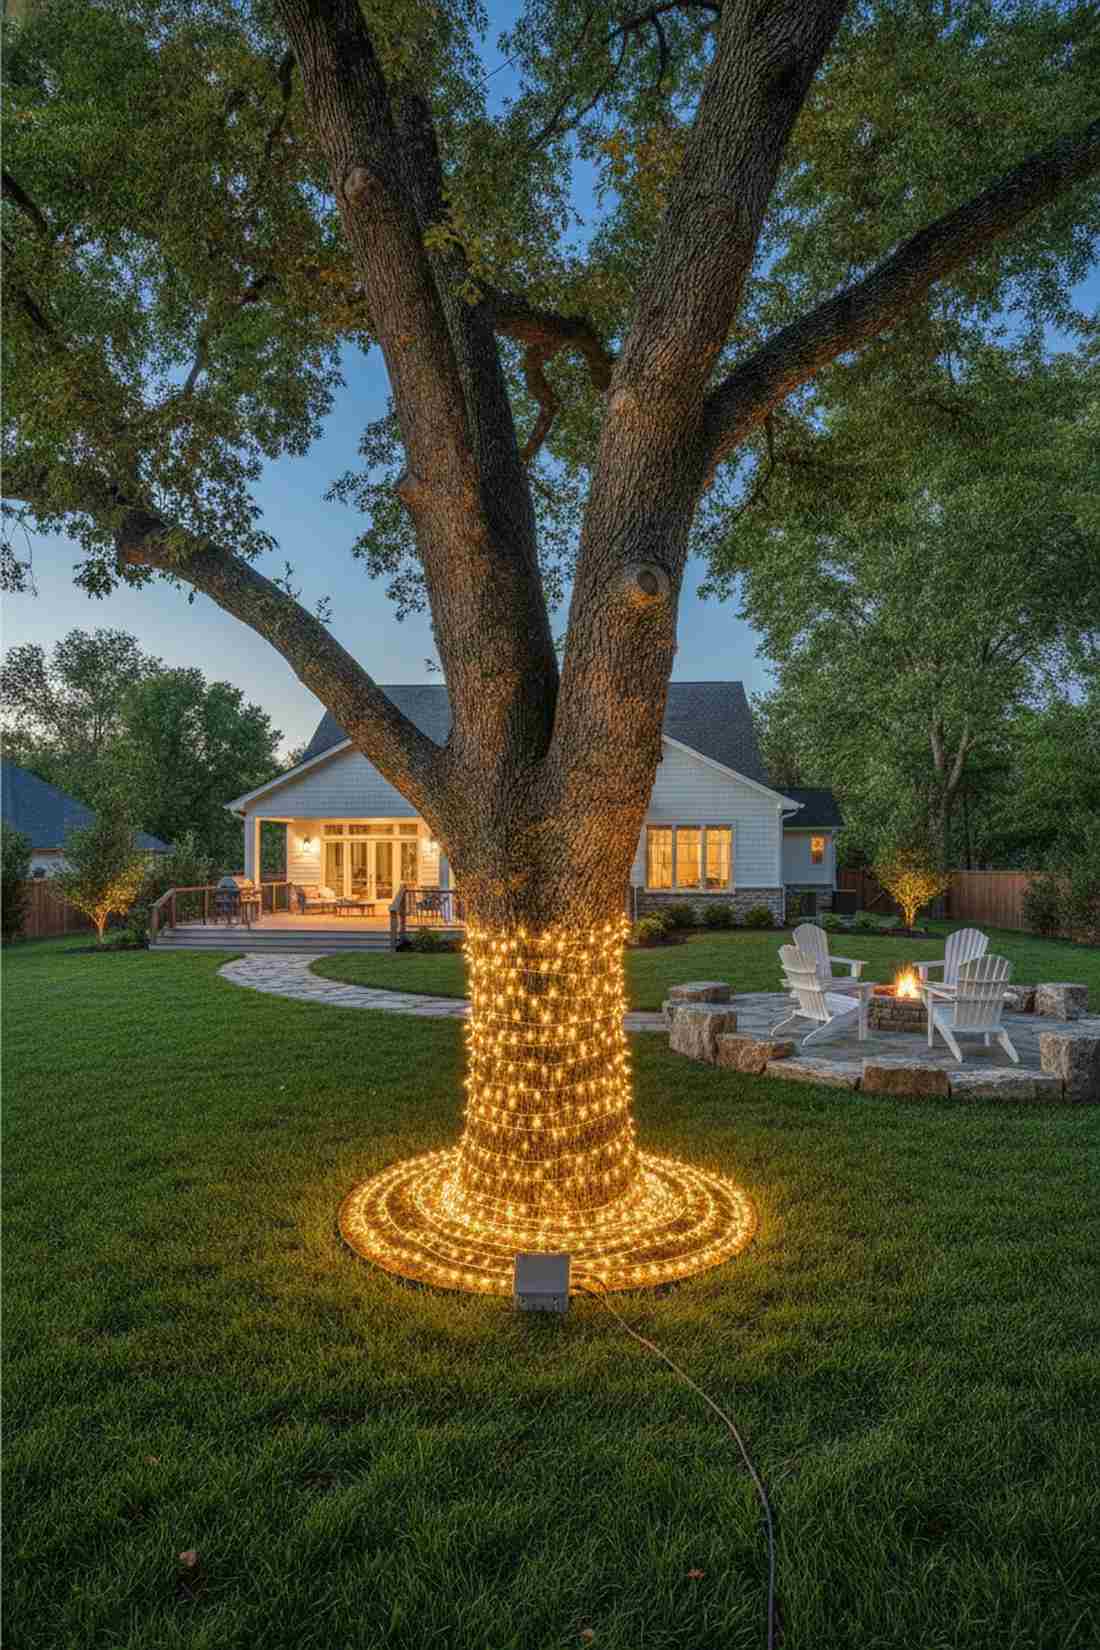
Casts a magical under-glow that feels like the tree is hovering above the grass. This concentrated base lighting setup is brilliant for hiding messy extension cords and power stakes in garden beds.
Ignoring the tree’s base is a common amateur mistake, but pooling light at the bottom instantly grounds your design. Three to five tight rings create a glowing pedestal, utilizing affordable outdoor garden lights for trees effectively.
This localized trick costs barely $10–$15 to execute. Pin this if you hate seeing ugly outdoor plugs in your landscaping.
- Key Materials: Short, dense light clusters
- Vibe / Style: Grounded and luminous
- Difficulty: Beginner
- Budget Breakdown: Materials: $12 | Connectors: $8.
- Creator’s Tip: Wrap directly over your weatherproof power box to camouflage it entirely.
- Smart Sourcing: cluster LED string lights and waterproof outdoor plug covers.
6. Bark Texture Highlighting
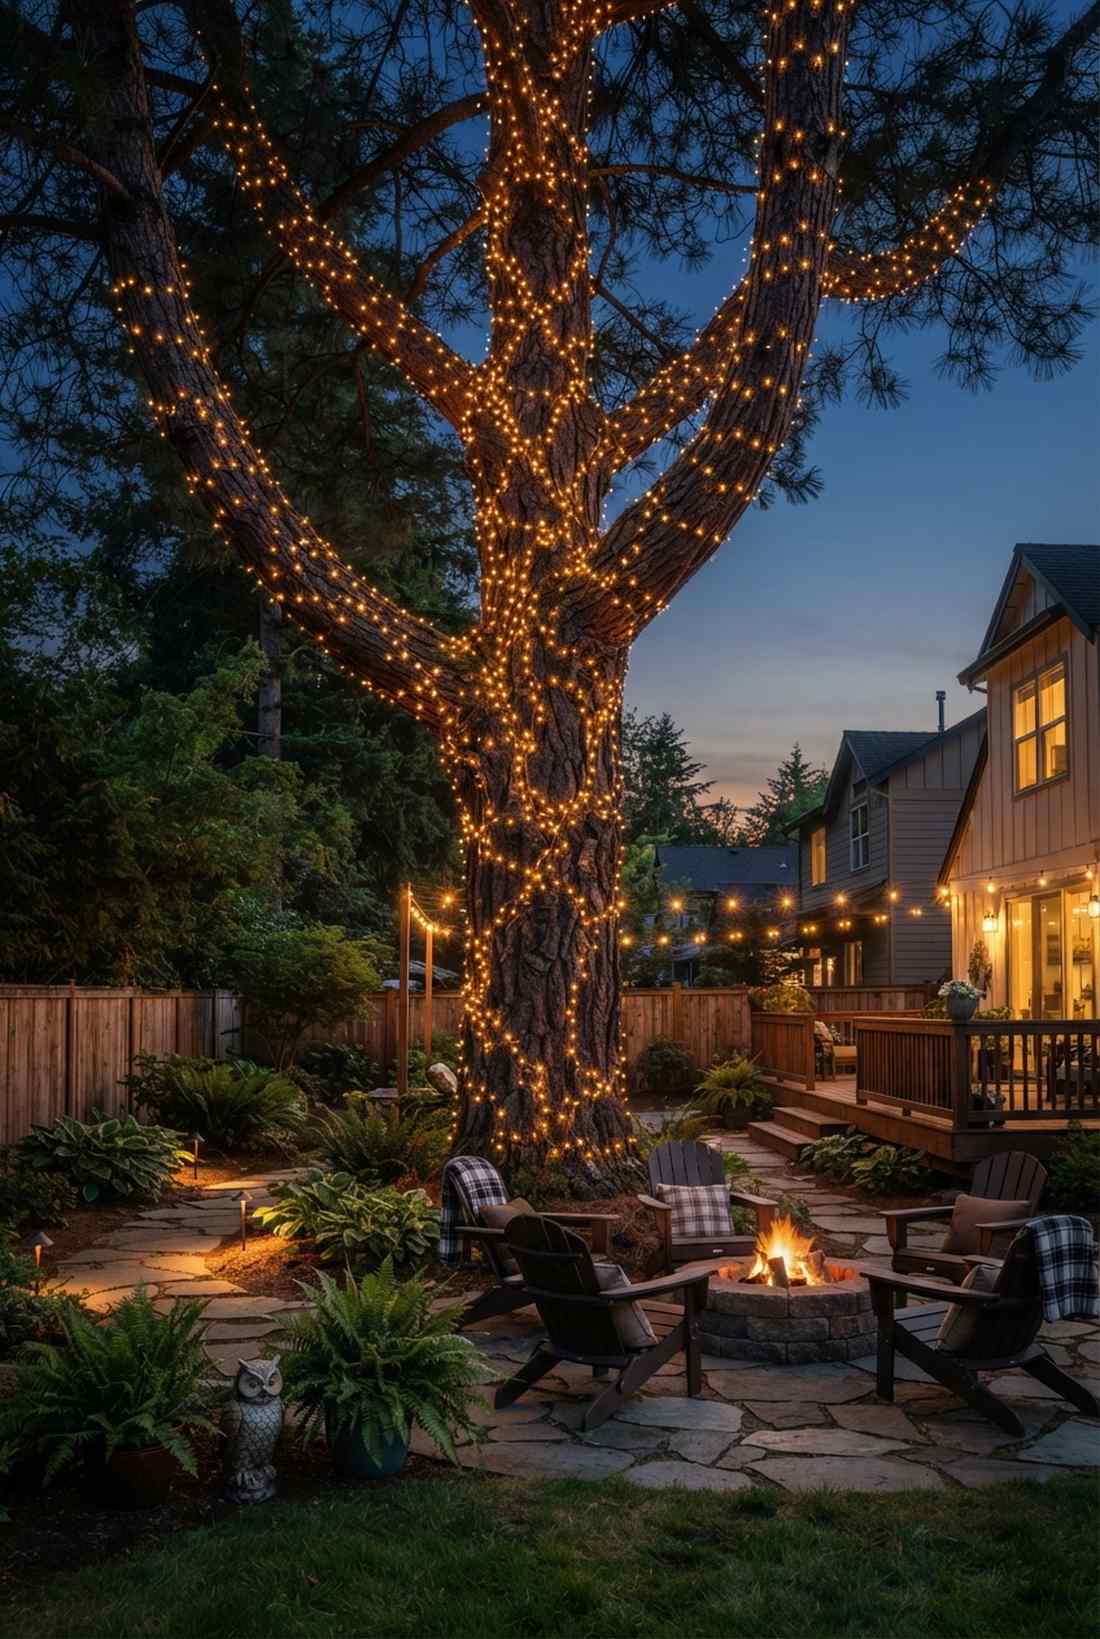

Evokes an organic, wild aesthetic that feels like glowing veins running up the timber. This naturalistic fairy light layout is an absolute must for deeply grooved trees like old pines or cottonwoods.
Symmetrical wraps can look too rigid, but following the bark’s natural topography provides a custom, bespoke aesthetic. Pressing the wires directly into the natural fissures requires zero fasteners and creates stunning shadow play.
A highly budget-friendly option averaging $15–$25. It’s a fast upgrade that completely changes the evening vibe.
- Key Materials: Brown or black-wire fairy lights
- Vibe / Style: Organic and wild
- Difficulty: Moderate patience needed
- Budget Breakdown: Materials: $20 | Base: $0.
- Creator’s Tip: Always match the wire color to the bark—brown wire is essential here for the daytime look.
- Smart Sourcing: copper wire fairy lights (brown coating) and landscape staple pins.
Branch Illumination Methods
7. Out-and-Back Branch Wrapping
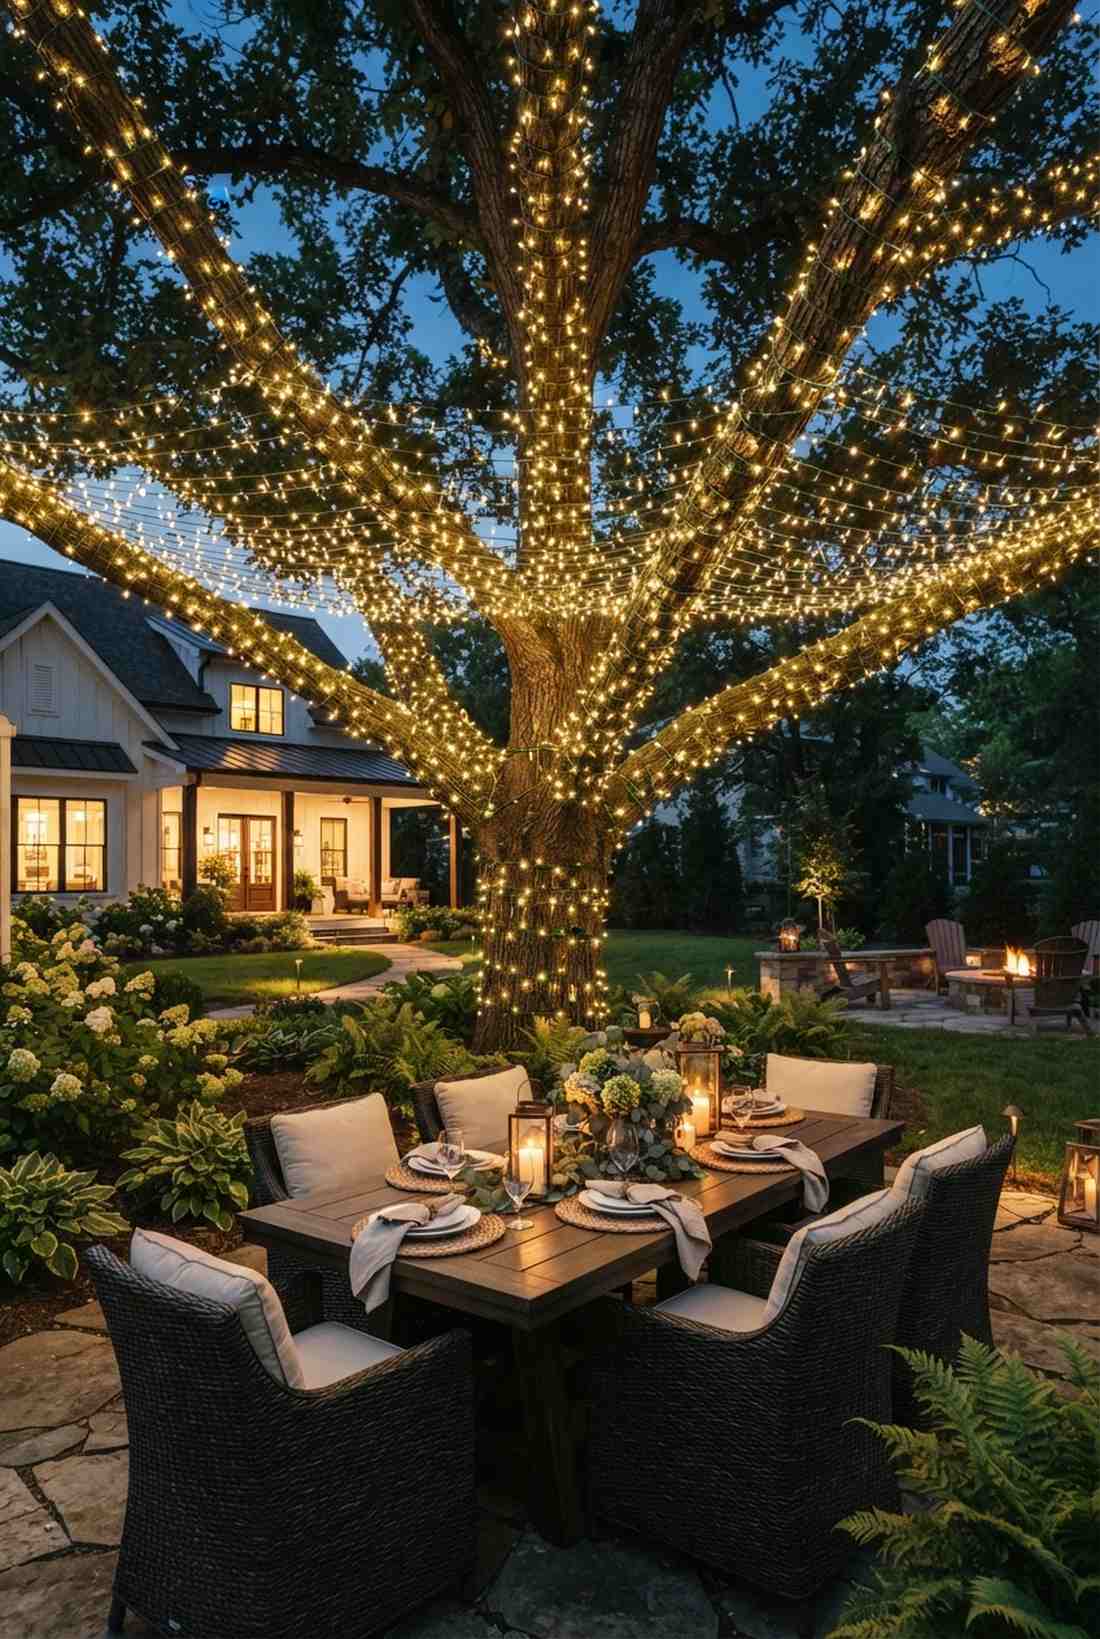
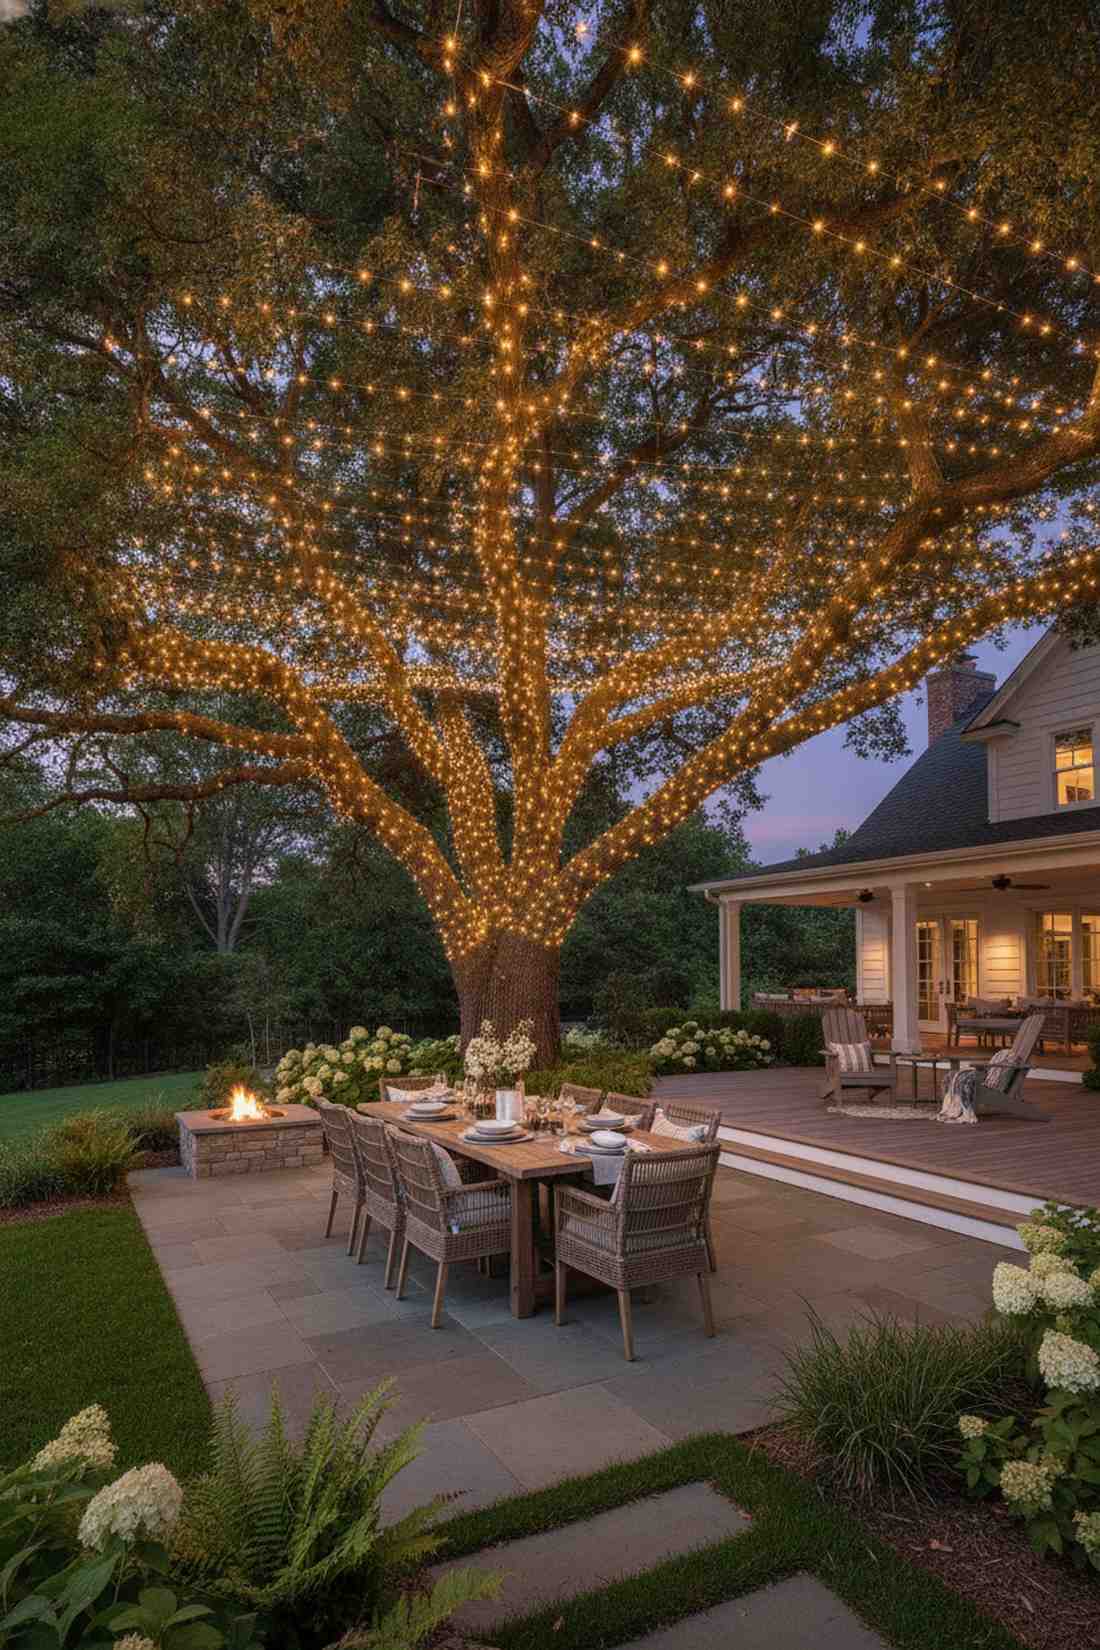
Creates a sprawling canopy of stars that feels like an enchanted ceiling over your patio. This horizontal branch lighting method is unmatched for creating a glowing dining area under mature shade trees.
Lighting every single twig is a waste of money, but targeting just three to five main branches delivers maximum impact. Running the strand out to the tip and doubling back creates immense visual weight using standard patio light kits.
Expect a materials cost of $35–$60 for a medium canopy. Save this to your outdoor dining inspiration board.
- Key Materials: Long-run LED spools
- Vibe / Style: Immersive canopy
- Difficulty: Intermediate (ladder required)
- Budget Breakdown: Materials: $45 | Hardware: $10.
- Creator’s Tip: Leave a little slack at the turnaround point at the branch tip to allow for wind swaying.
- Smart Sourcing: 330ft commercial LED spools and soft-tie plant wire (green).
8. Weaving Branch Technique
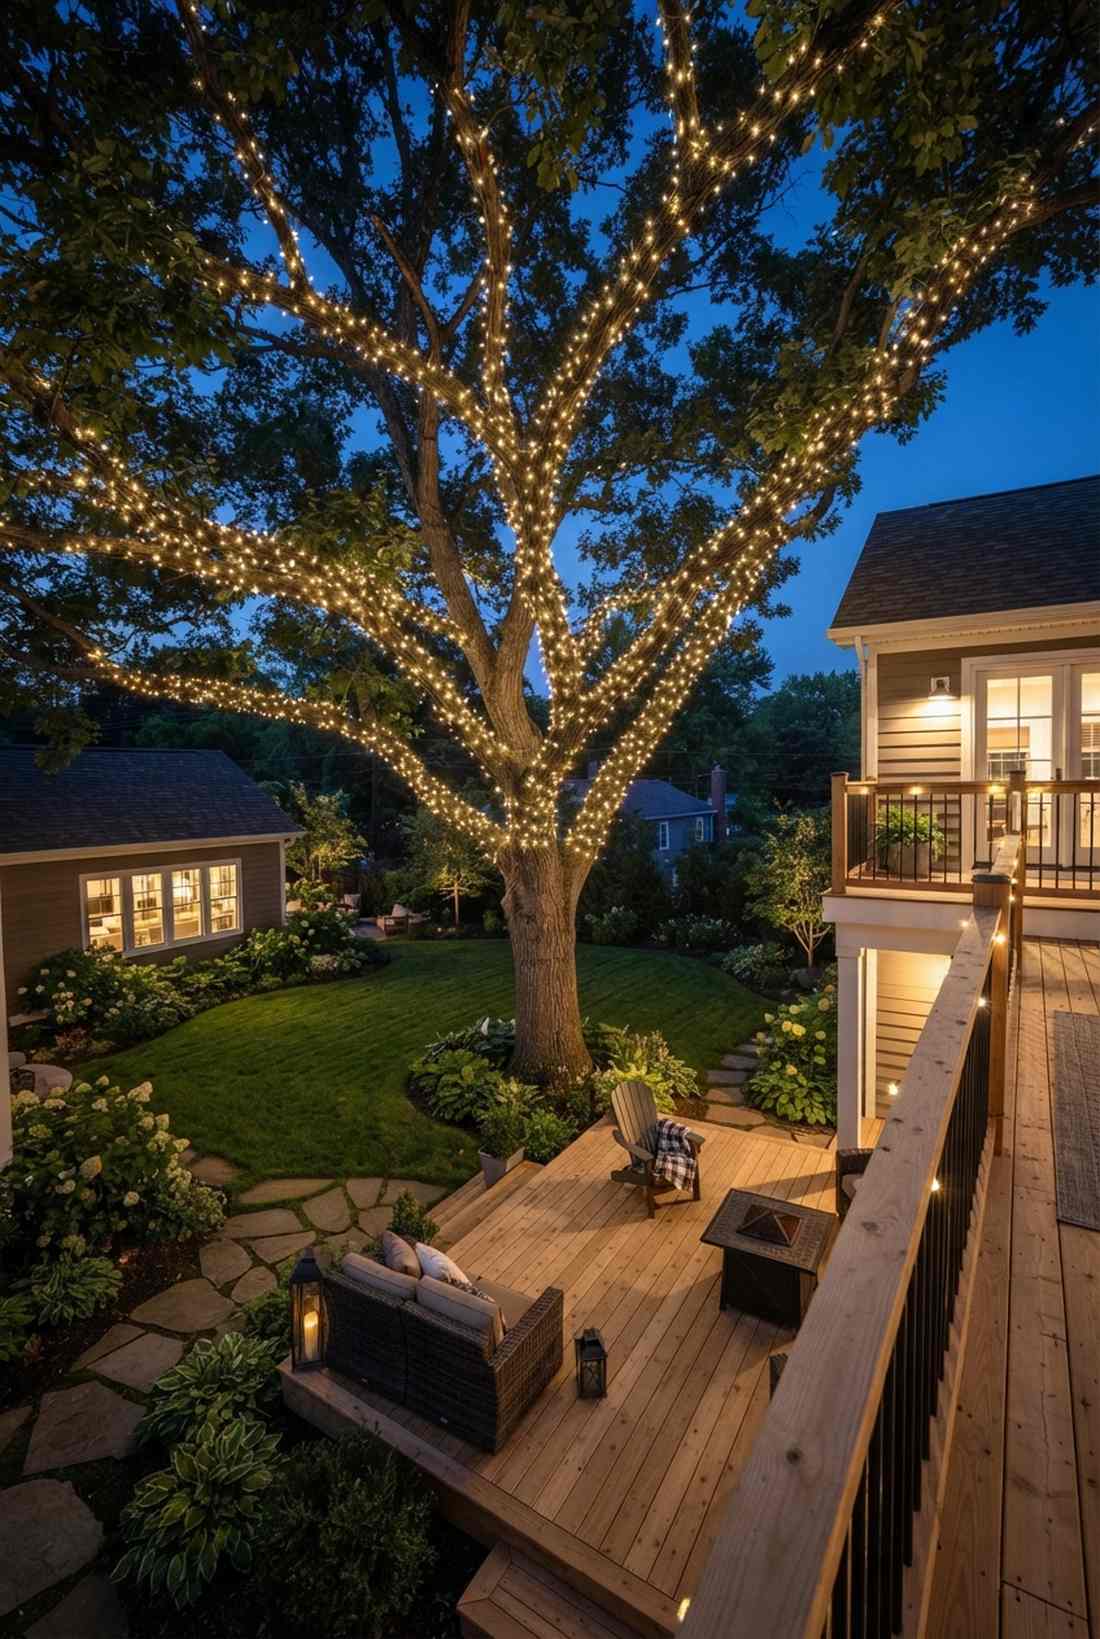
Produces a delicate, floating illumination that feels like fireflies resting on the timber. This subtle top-lit branch design is perfect for trees viewed primarily from a second-story balcony or raised deck.
Circling the branch wastes light underneath, while snaking the wire only across the top surface looks incredibly chic. This method cuts your string length requirements in half, offering a high-end look on a strict budget.
You can achieve this elegant top-glow for about $20–$40. A brilliant hack for maximizing your outdoor lighting supplies.
- Key Materials: Thin wire string lights
- Vibe / Style: Delicate and airy
- Difficulty: Easy
- Budget Breakdown: Materials: $25 | Base: $0.
- Creator’s Tip: Only weave through branches that are thick enough to hide the wire from ground viewers.
- Smart Sourcing: ultra-thin outdoor fairy lights and removable adhesive branch clips.
This next setup is ridiculously cheap but looks like a $500 custom display…
9. Branch Tip Accent Lighting
Looks like a floating constellation of stars hovering magically in the night sky. This exterior tip-lighting trick works wonders on wide-spreading trees at the far edges of a property line.
Most homeowners wrap the trunk and stop, but leaving the interior dark and only wrapping the ends creates dramatic depth. Bundling lights at the very tips uses minimal footage but makes the tree look twice as wide.
This striking illusion will only set you back $15–$30. Pin this if you want maximum curb appeal with minimum effort.
- Key Materials: Battery or solar-powered clusters
- Vibe / Style: Magical and expansive
- Difficulty: Moderate (reaching tips)
- Budget Breakdown: Materials: $20 | Solar Panels: $15.
- Creator’s Tip: Use solar strings for the tips so you don’t have to run black extension cords along bare branches.
- Smart Sourcing: solar-powered outdoor fairy lights (2-pack) and velcro cable wraps.
💡 Must-Have Supplies for High-End Setups
To build these setups faster and ensure they last, skip the generic craft aisles and invest in the right foundational kits.
- Base & Support: UV-coated commercial LED string spools
- Setup Tools: weatherproof outdoor timer hubs
- Weather/Durability Protection: silicone sealant tape for electrical joints
10. Zigzag Branch Method
Offers a bold, 3D textured glow that feels incredibly robust and festive. This crisscross canopy lighting layout is the ultimate crowd-pleaser for holiday front yard displays or winter wonderland parties.
Simple loops can look flat, but actively crossing from the top to the bottom of the branch delivers a surprisingly premium look. This ensures the lights don’t migrate to the underside, maximizing visibility from the street using your favorite garden lights for trees.
Plan for a $30–$55 budget for this dense coverage. Highly recommended for a show-stopping winter yard.
- Key Materials: Heavy-duty outdoor stringers
- Vibe / Style: Dense and festive
- Difficulty: Intermediate
- Budget Breakdown: Materials: $45 | Base: $5.
- Creator’s Tip: Pull the wire tight across the top, but leave slight slack on the bottom to prevent bark damage.
- Smart Sourcing: heavy-duty LED outdoor strings and reusable zip ties (UV-rated).
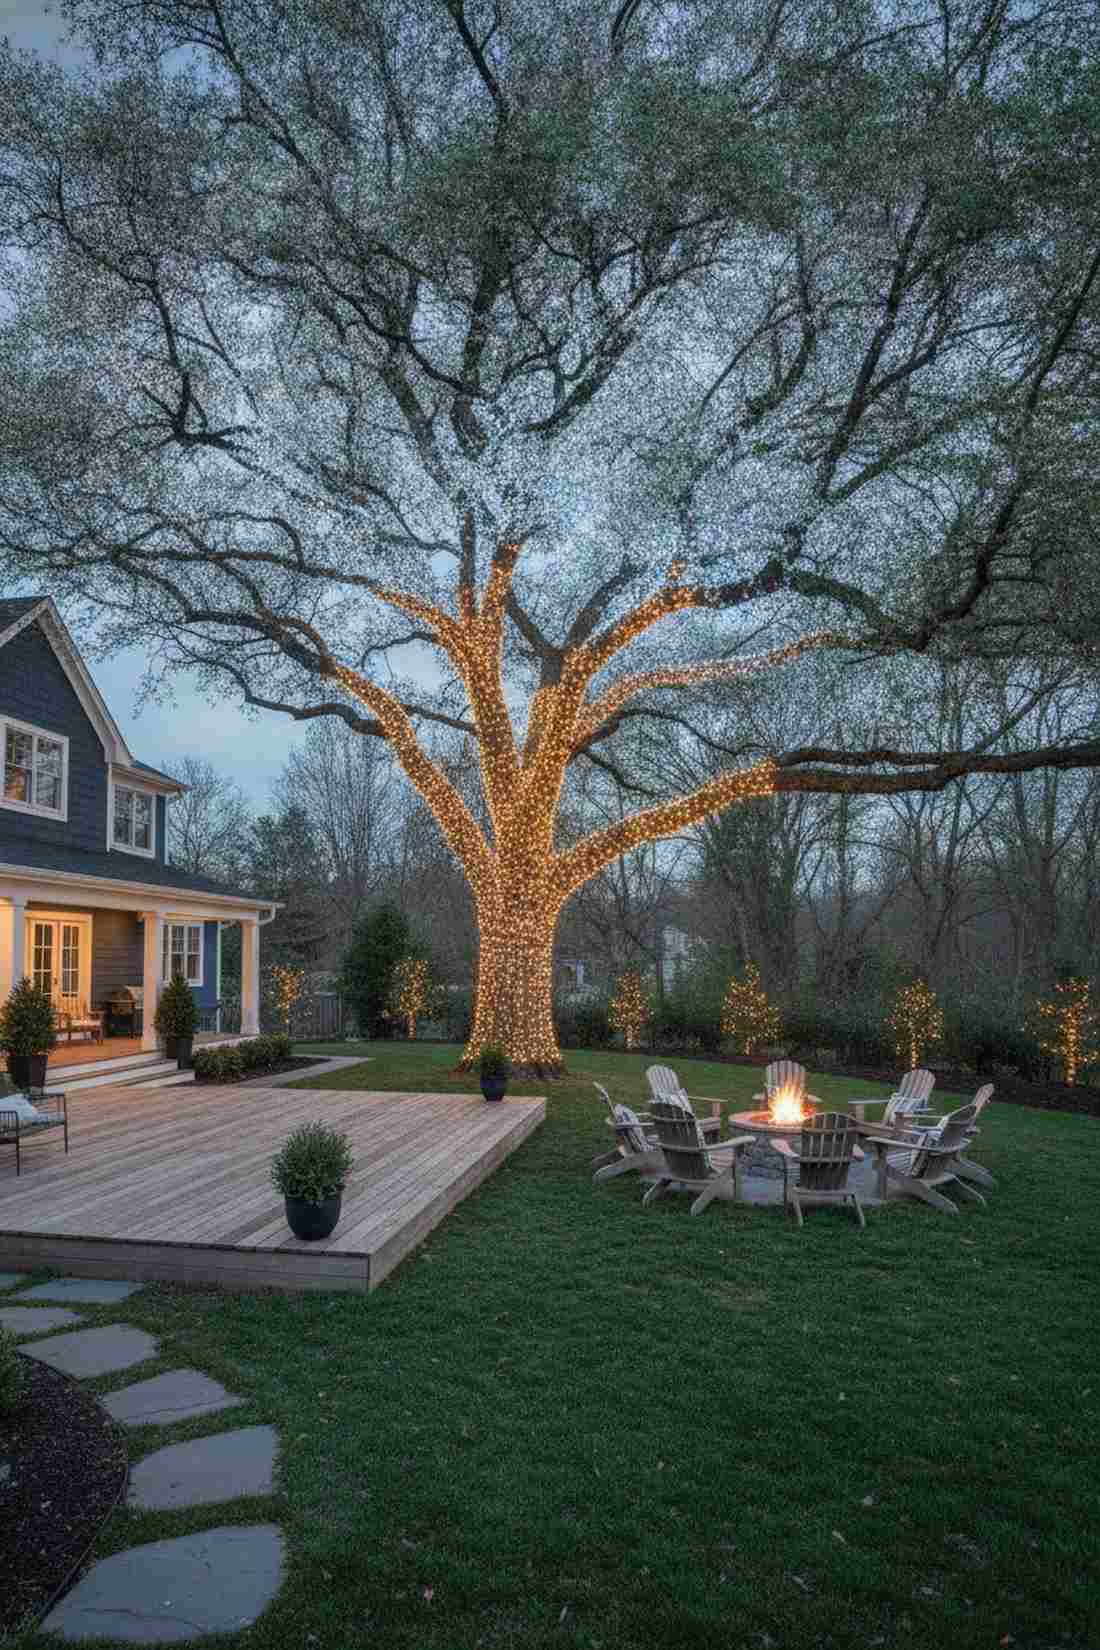
11. Major Branch Only Lighting
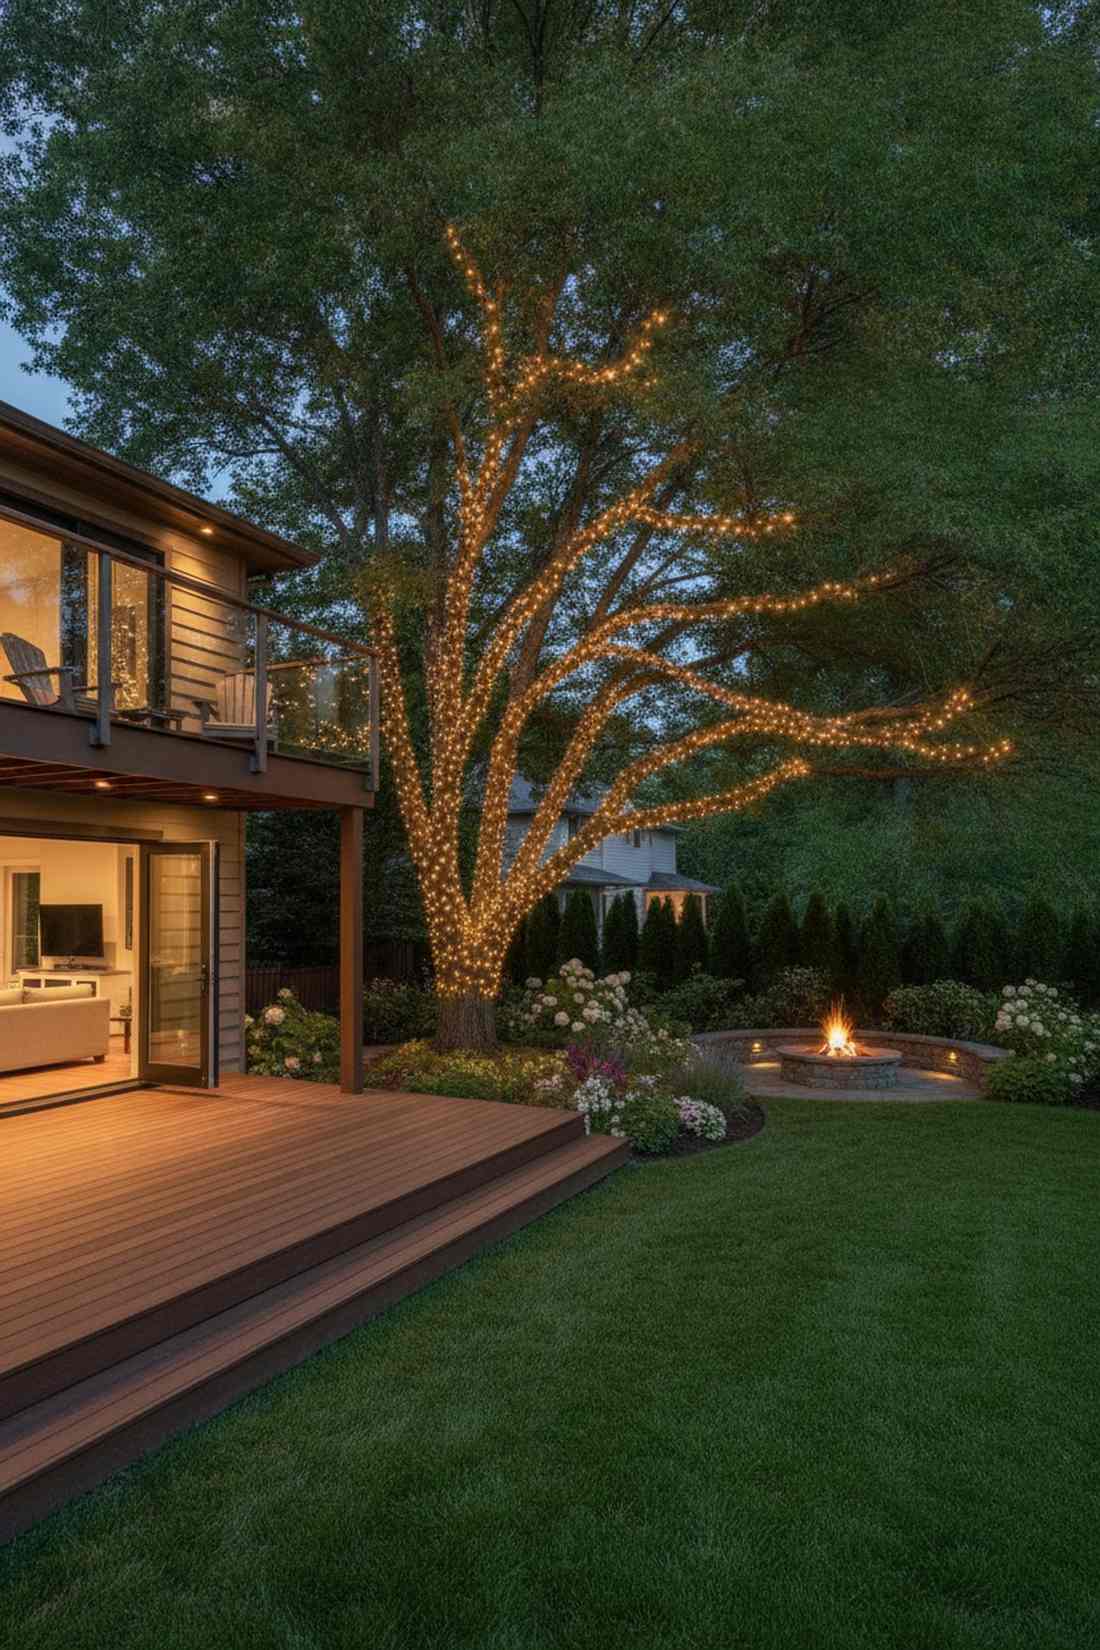
Strikes a commanding, architectural tone that feels like a modern art museum’s courtyard. This structural landscape lighting design is flawless for illuminating the thick, dramatic scaffolding of old crepe myrtles or Japanese maples.
Amateurs try to light every twig, but highlighting only the primary limbs gives a designer-level finish. Leaving the secondary growth completely dark creates intense, moody shadows that look professionally curated.
This sophisticated look is incredibly cheap, costing just $20–$40. Save this to your minimalist landscaping board.
- Key Materials: Warm white C3 or mini LEDs
- Vibe / Style: Structural and bold
- Difficulty: Easy
- Budget Breakdown: Materials: $30 | Timers: $15.
- Creator’s Tip: Stop wrapping exactly where the branch forks into smaller twigs to keep the clean architectural line.
- Smart Sourcing: commercial mini LED lights (warm white) and dusk-to-dawn outdoor timers.
12. Branch Cluster Wrapping
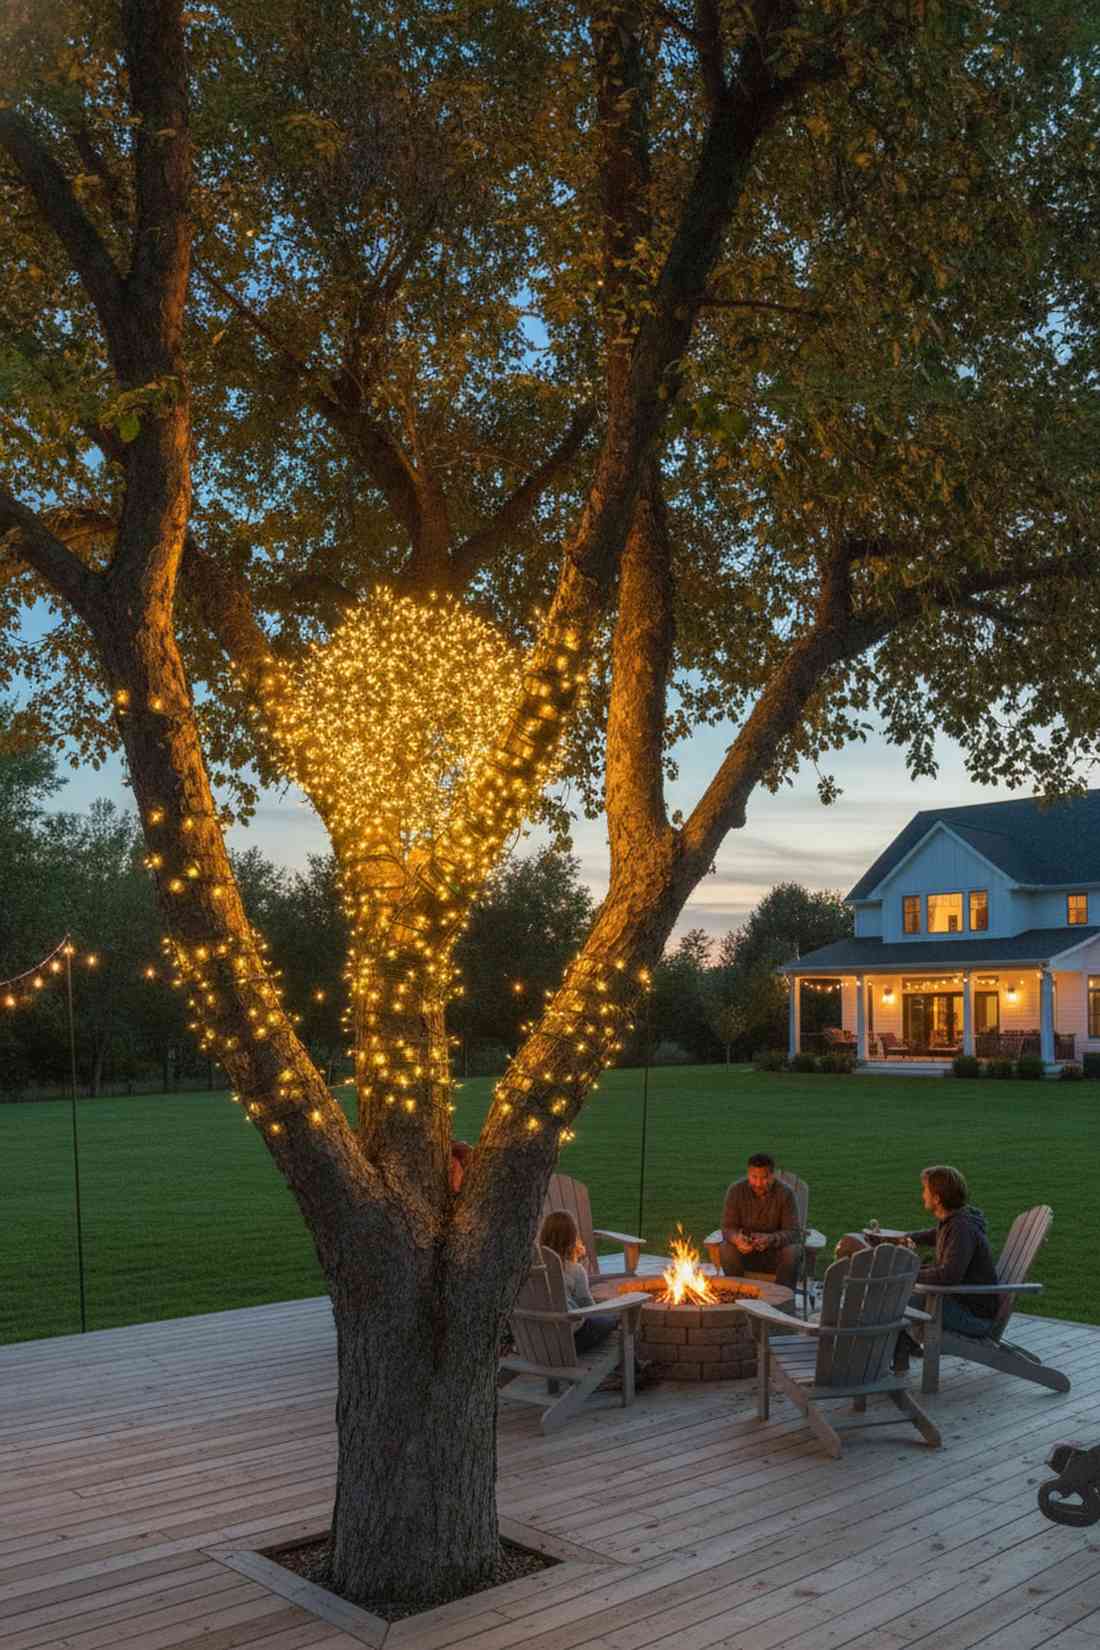
Generates a blazing core of light that feels like a glowing hearth in the middle of your yard. This concentrated branch junction wrap is ideal for trees with deep, multi-pronged forks like fruit trees.
Spreading lights too thin ruins the impact, while aggressively bundling them at the crotch of the tree looks far more expensive than it is. The density of the bulbs creates a brilliant focal point before trailing off into the darkness.
You can execute this high-impact knot for around $15–$25. It’s a fast upgrade that completely changes the evening vibe.
- Key Materials: High-density cluster lights
- Vibe / Style: Focused and radiant
- Difficulty: Beginner
- Budget Breakdown: Materials: $20 | Base: $0.
- Creator’s Tip: Use “firecracker” or cluster style lights here to get 300+ bulbs in a very short, intense space.
- Smart Sourcing: LED firecracker string lights and flexible garden ties.
Cascading and Draping Techniques
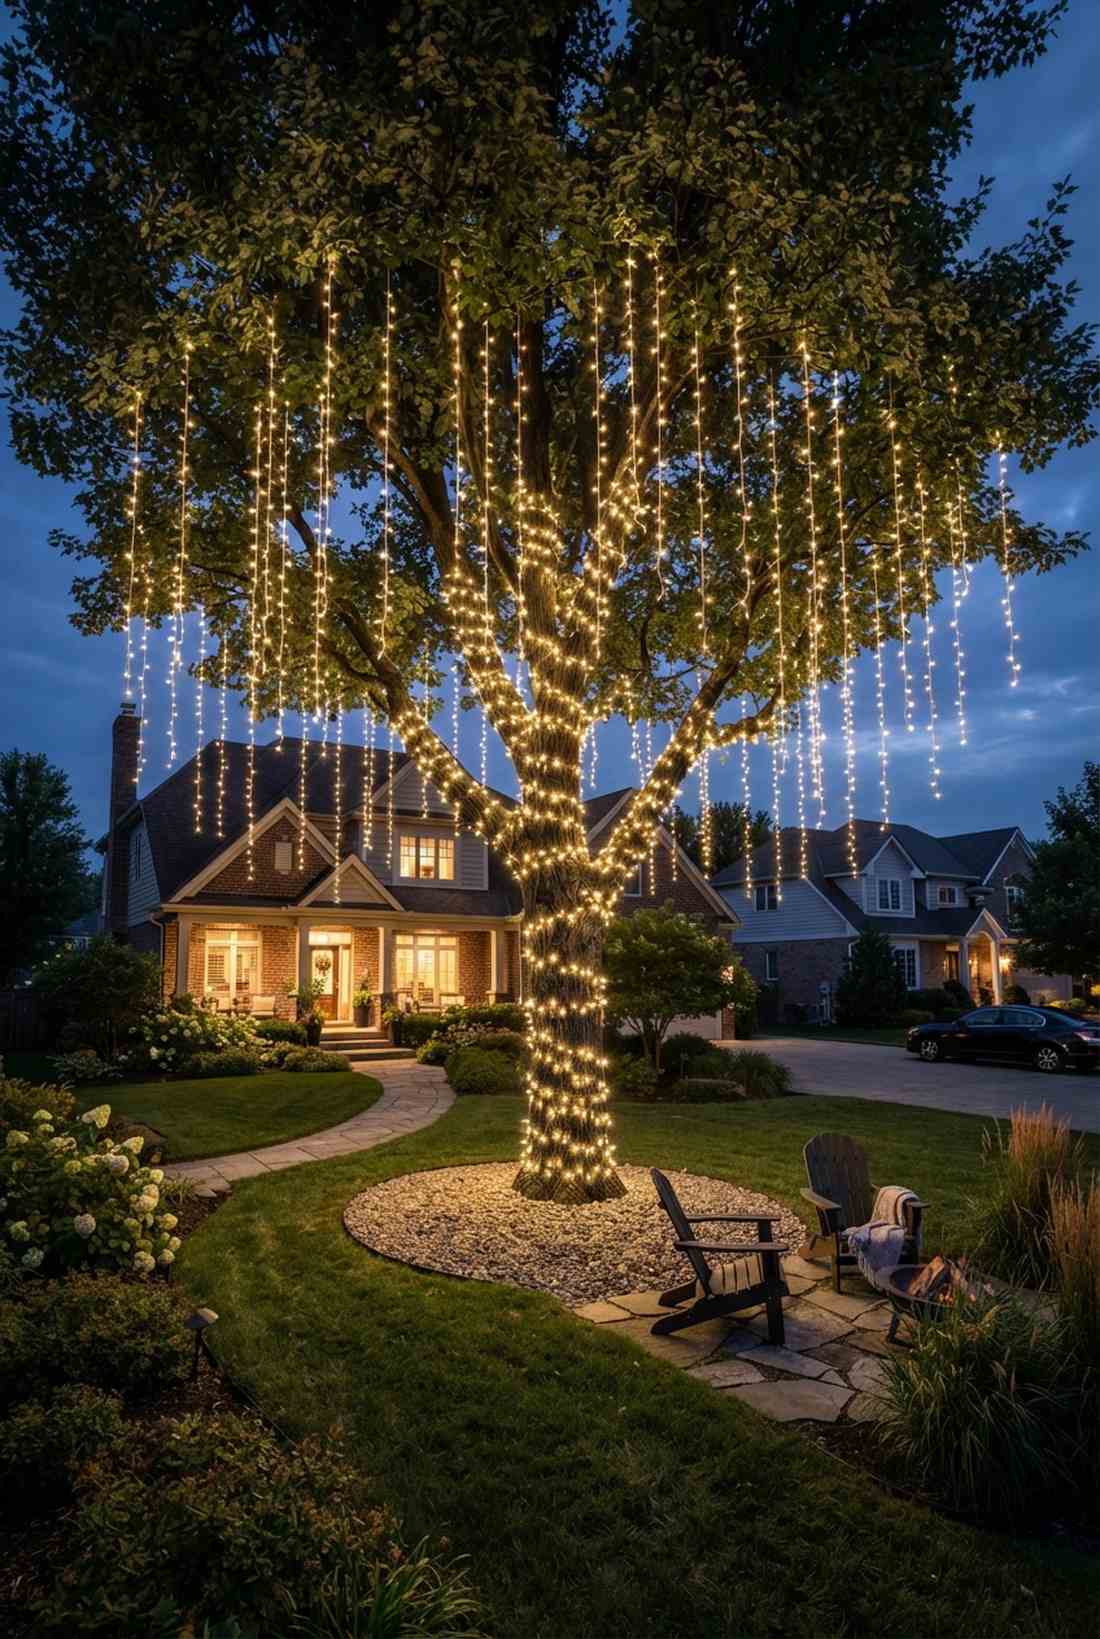
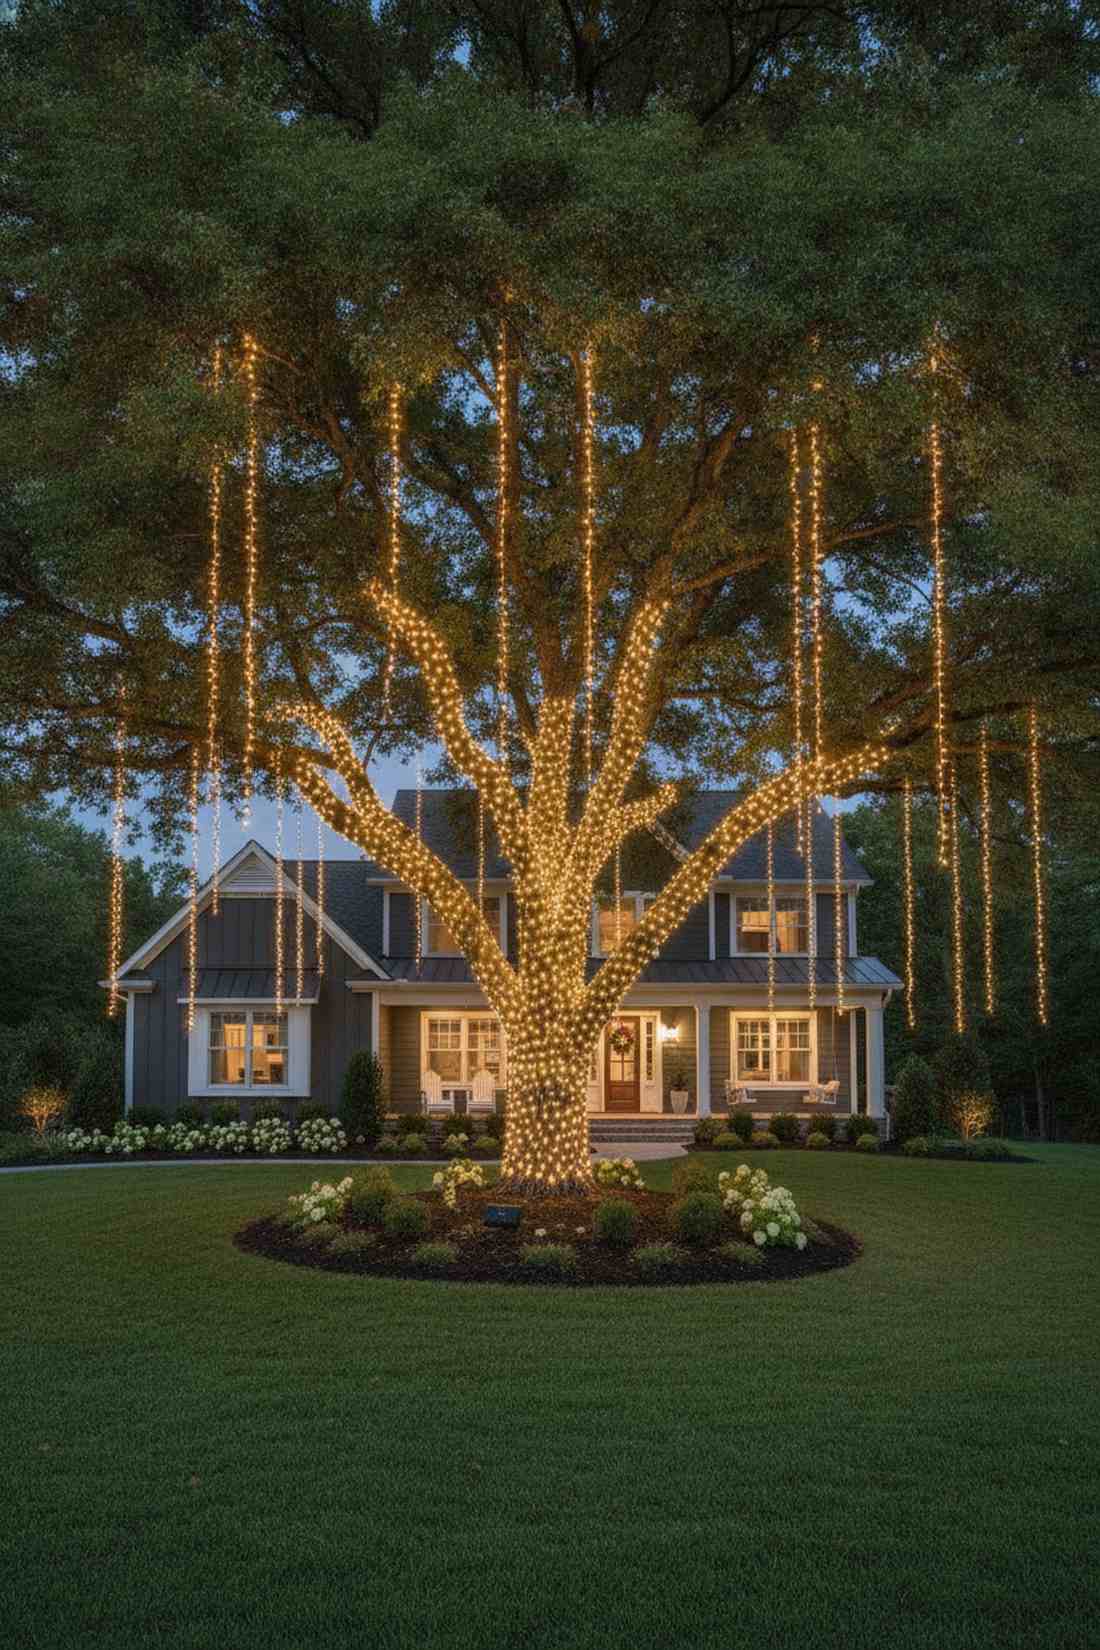
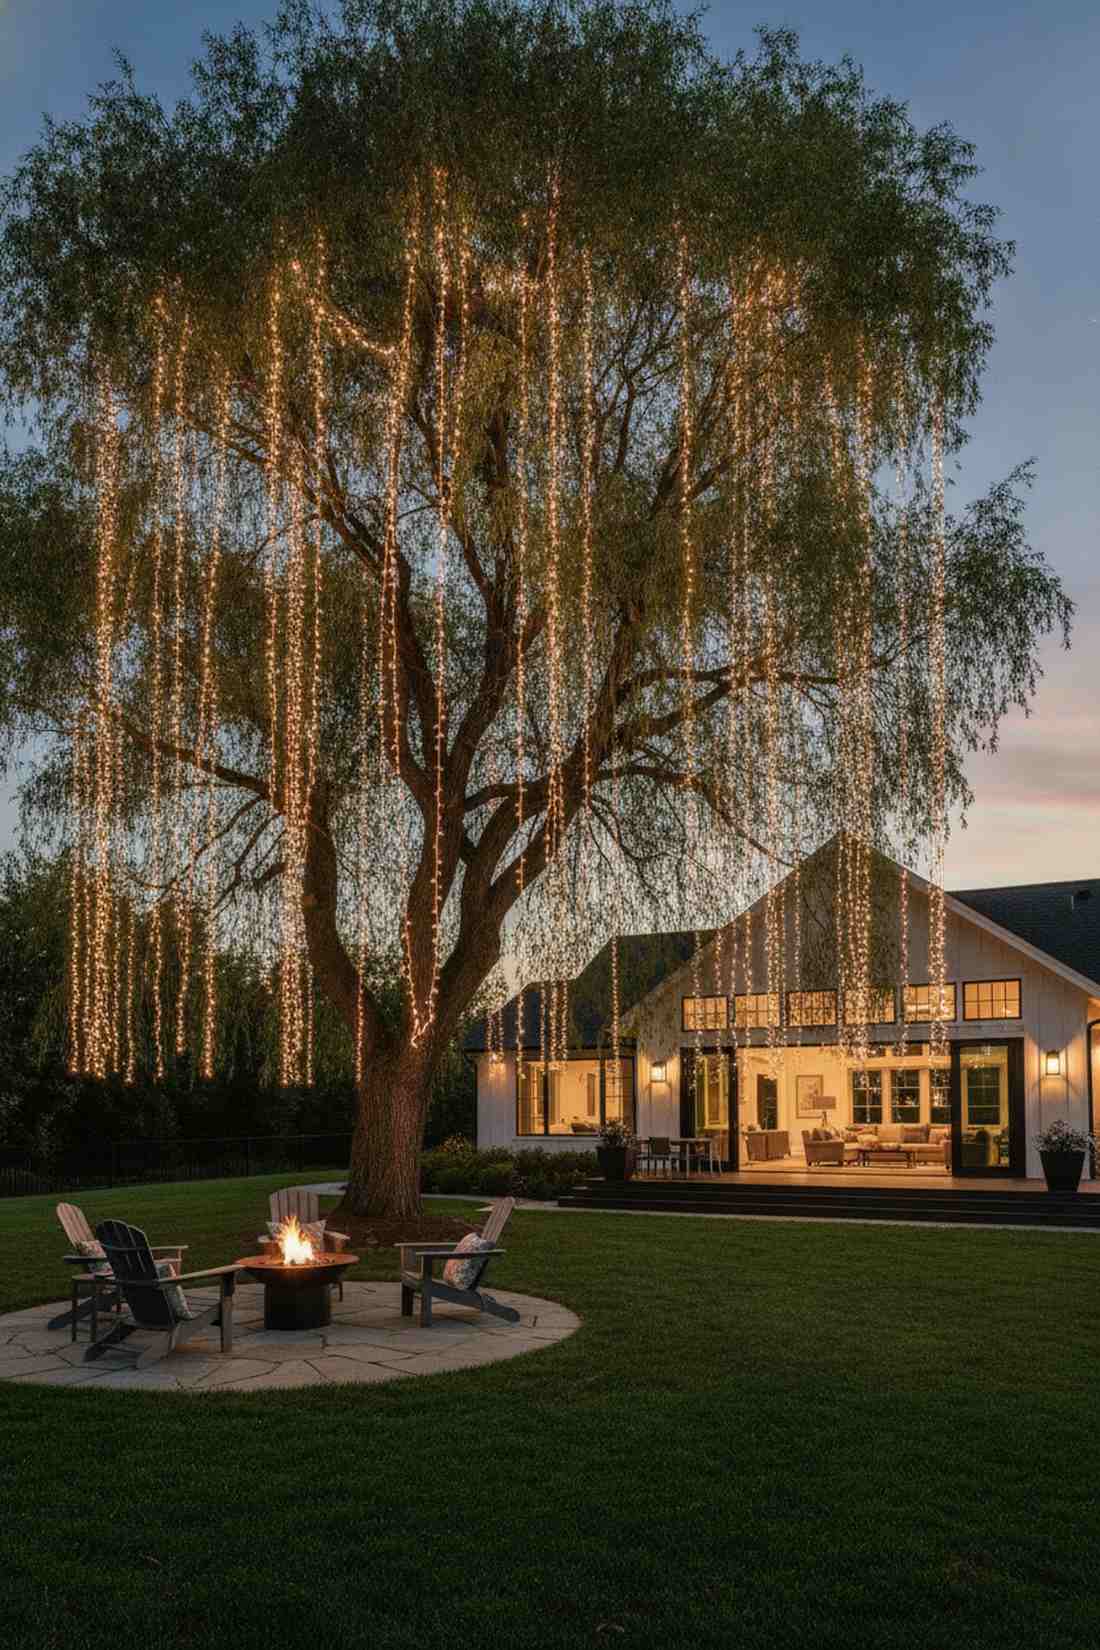
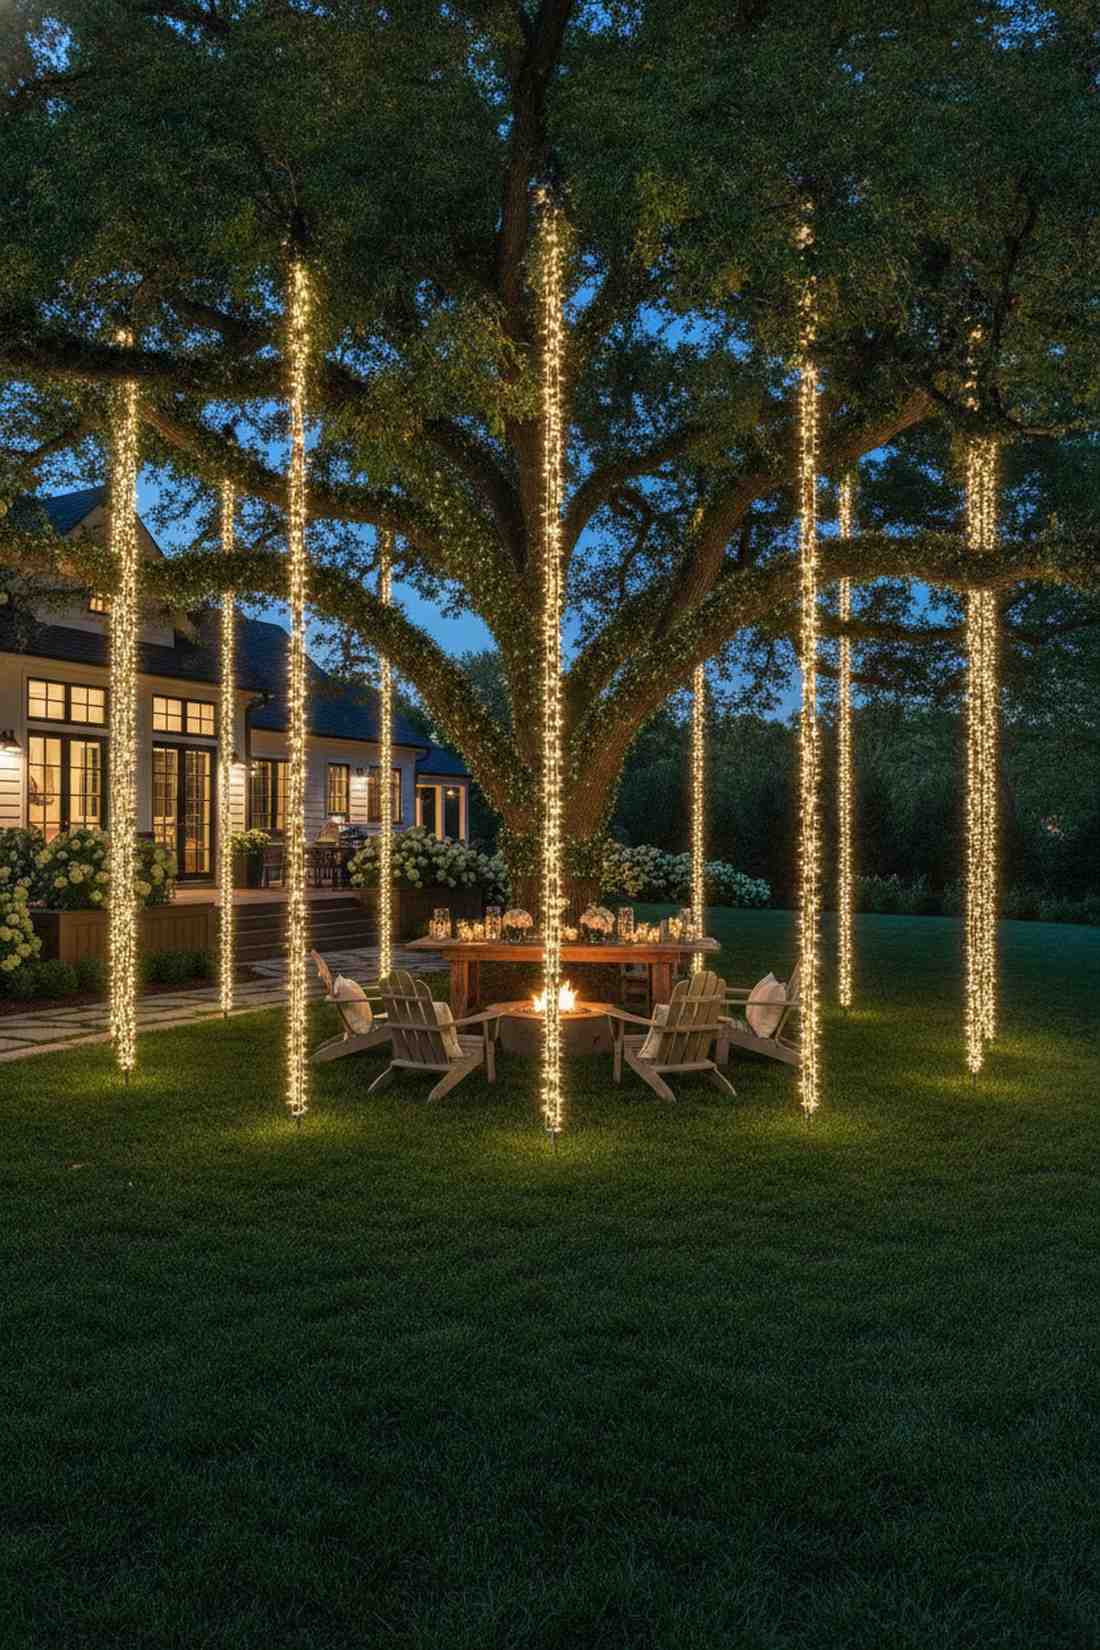
13. Waterfall Cascade from Canopy
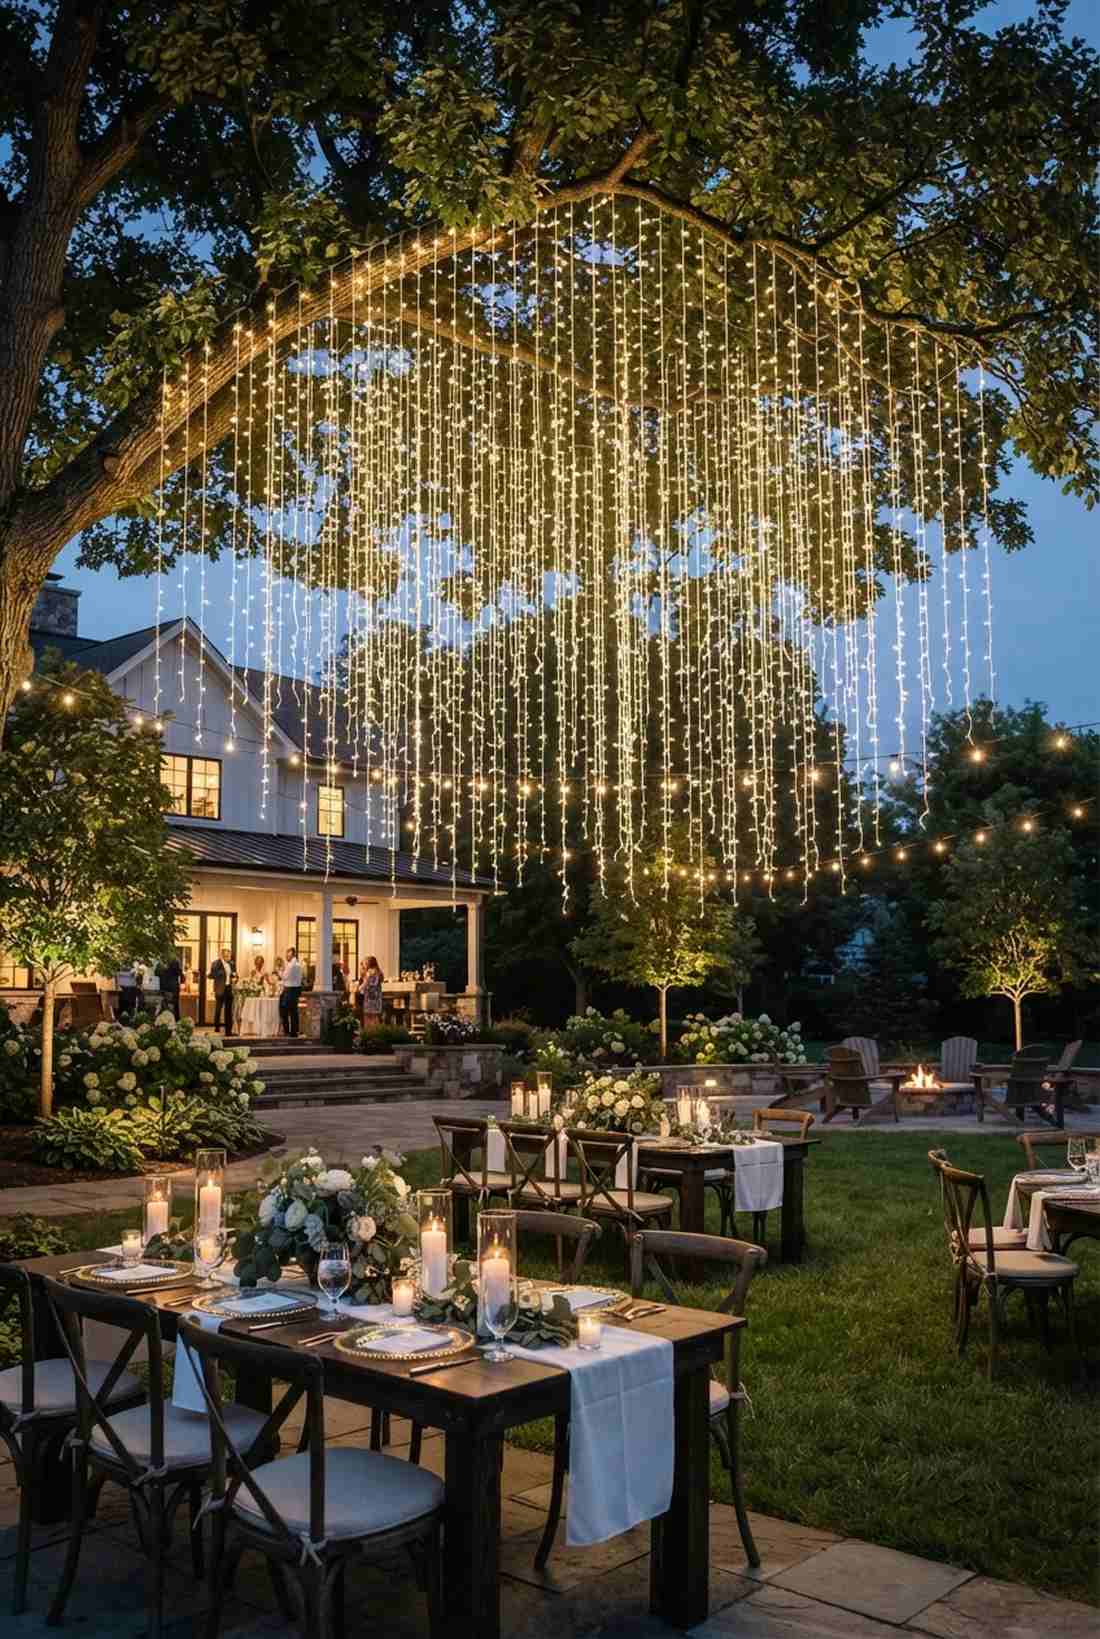
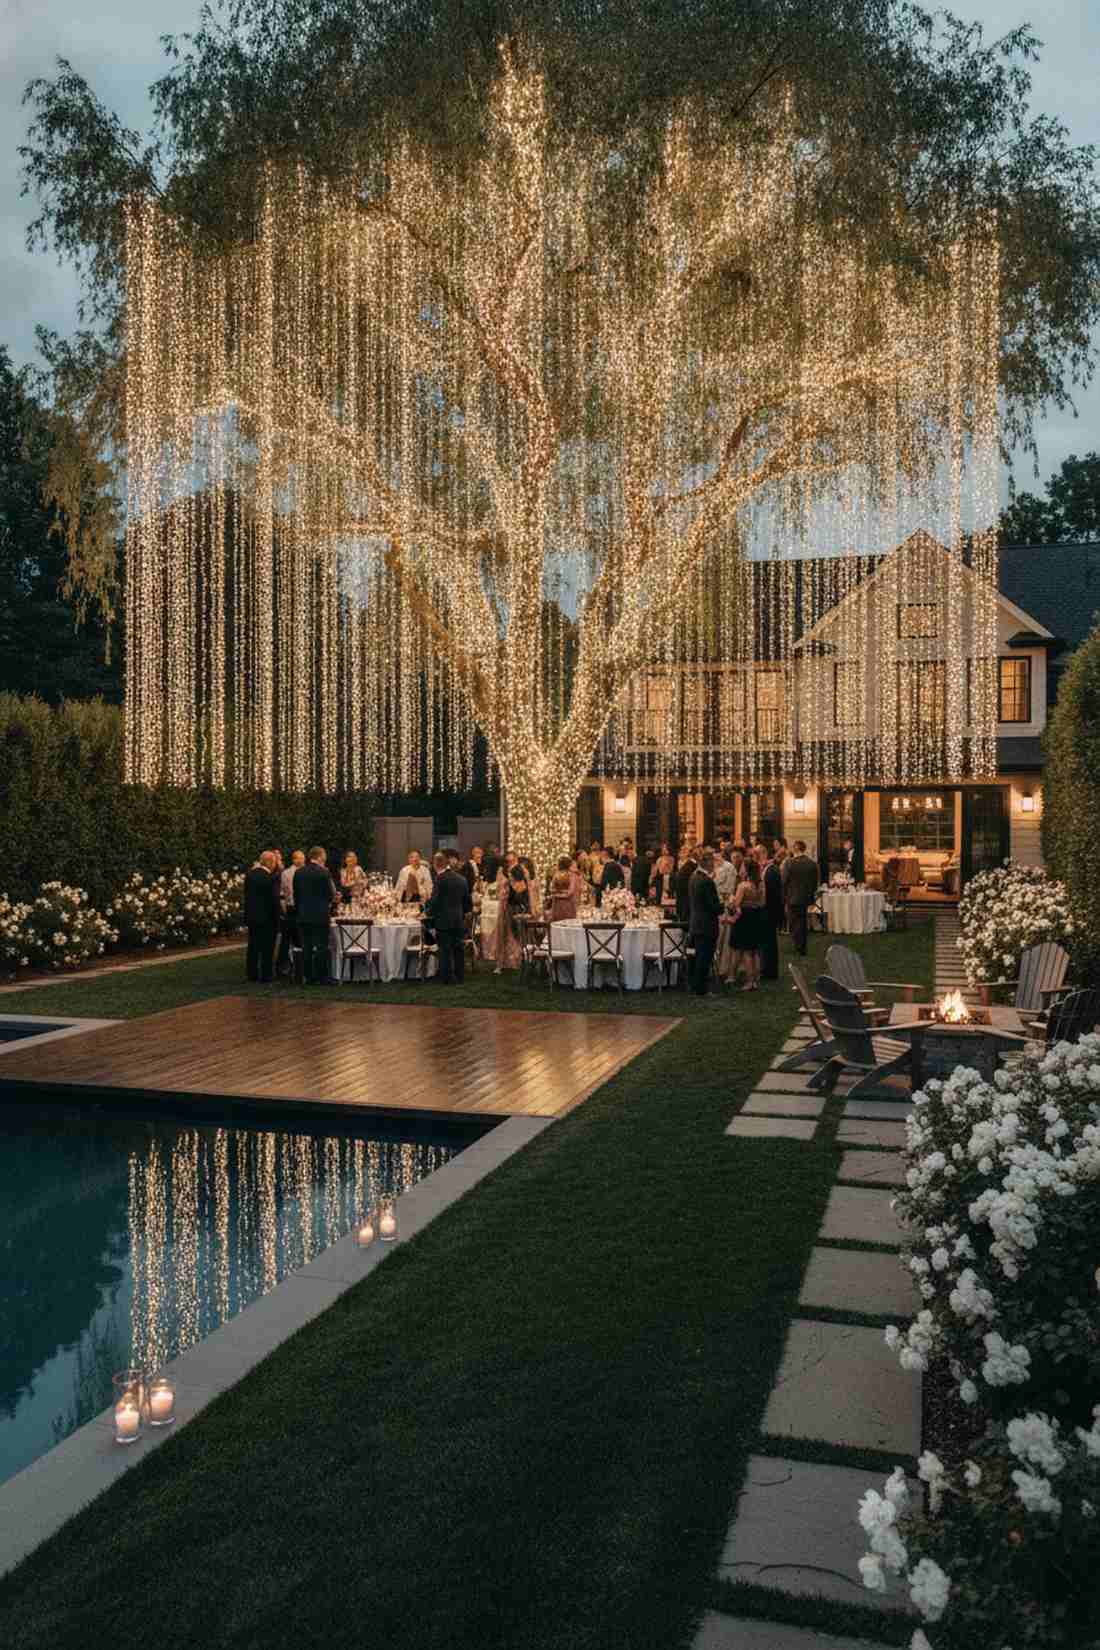
Feels like a weeping willow made entirely of starlight. This vertical dripping light display is the ultimate romantic upgrade for backyard wedding receptions or elegant garden parties.
Tight wrapping is standard, but letting the wires hang straight down delivers a surprisingly premium look. By securing the tops and letting gravity do the work, you create a dynamic curtain of light that sways beautifully in the wind.
This lush setup runs around $40–$75 depending on drop length. Pin this if you are hosting a high-end outdoor event.
- Key Materials: Curtain lights or icicle drops
- Vibe / Style: Romantic and flowing
- Difficulty: Intermediate
- Budget Breakdown: Materials: $60 | Base: $0.
- Creator’s Tip: Ensure the bottom of the strands sit at least 12 inches above the soil to avoid lawnmower disasters.
- Smart Sourcing: outdoor LED curtain lights (waterproof) and heavy-duty branch hooks.
Contractors absolutely hate when homeowners discover this next lighting hack.
14. Branch-to-Branch Draping
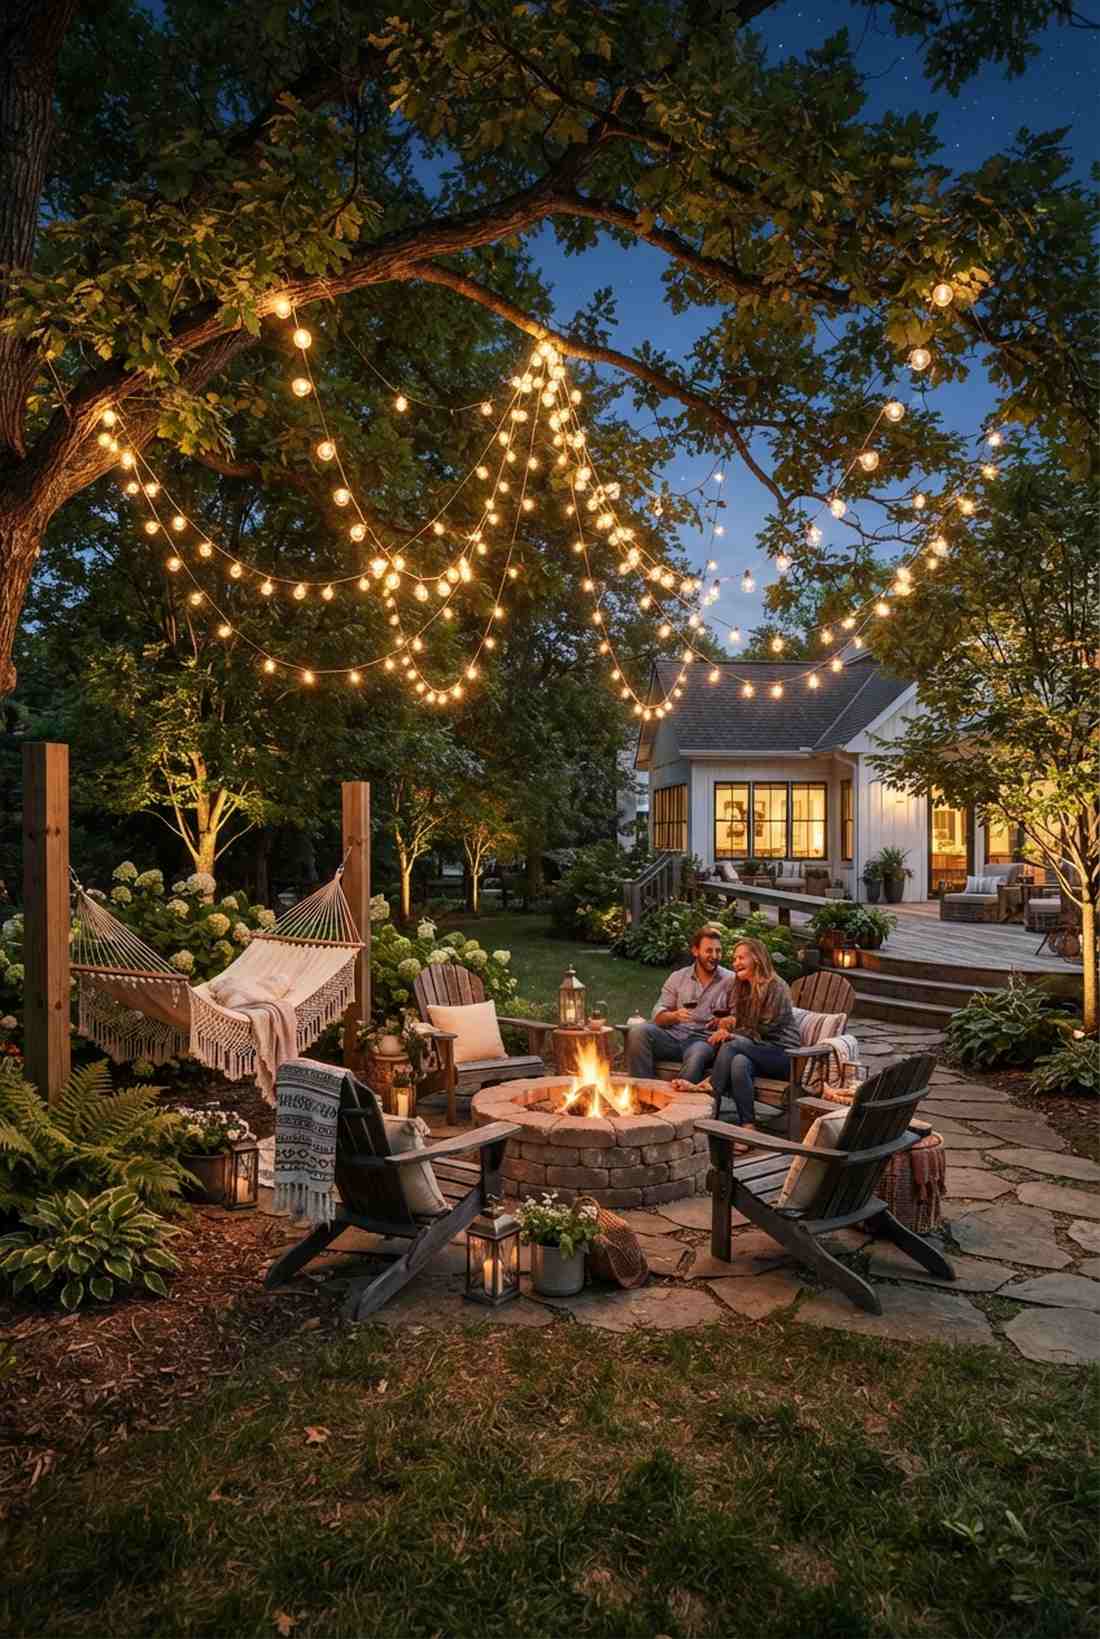
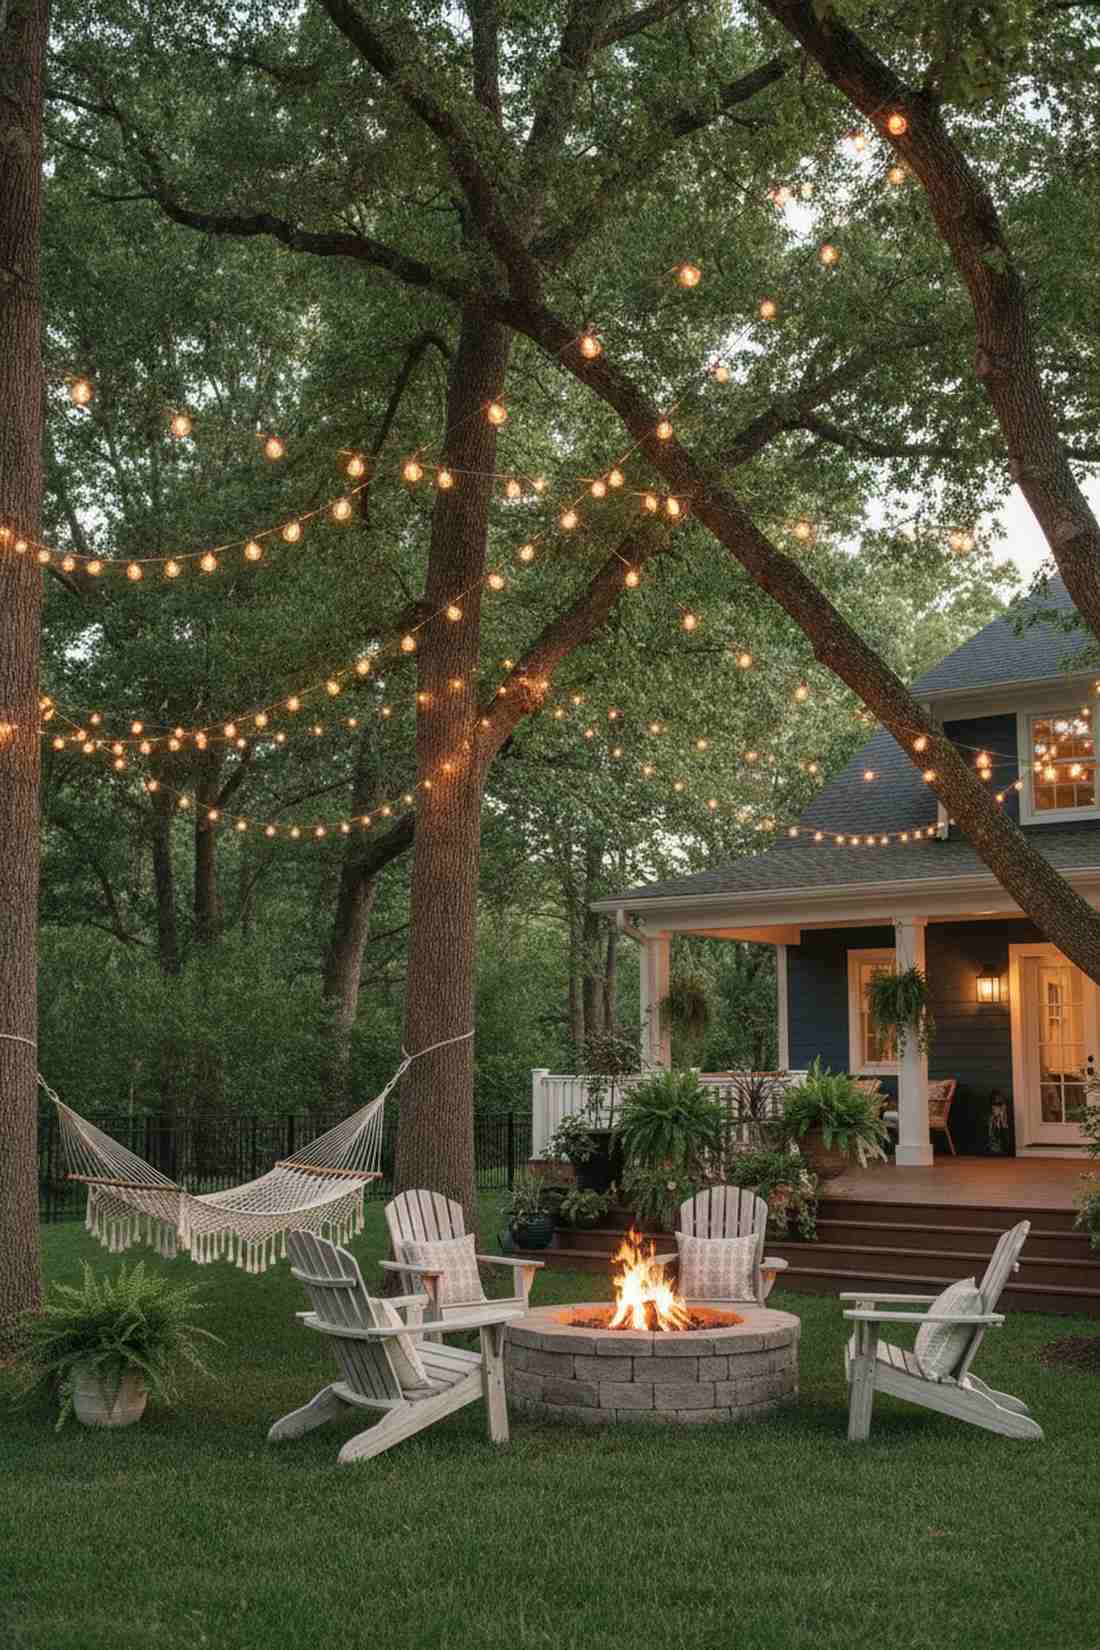
Brings a soft, bohemian energy that feels like a festival in a hidden meadow. This swooping canopy light arrangement is perfect for hanging above a cozy fire pit or an outdoor hammock zone.
Rigid lines can feel corporate, whereas letting the wires gracefully sag looks far more expensive than it is. Connecting the loops across the negative space of the branches completely changes the perceived volume of the tree.
You can create this boho canopy for roughly $25–$45. Highly recommended for a relaxed, inviting backyard atmosphere.
- Key Materials: Globe lights or large bulbs
- Vibe / Style: Bohemian and relaxed
- Difficulty: Moderate
- Budget Breakdown: Materials: $35 | Fasteners: $5.
- Creator’s Tip: Use G40 or Edison-style bulbs for draping to give it that trendy, vintage café aesthetic.
- Smart Sourcing: shatterproof G40 globe string lights and screw-in cup hooks (rust-proof).
15. Weighted Pendant Drops
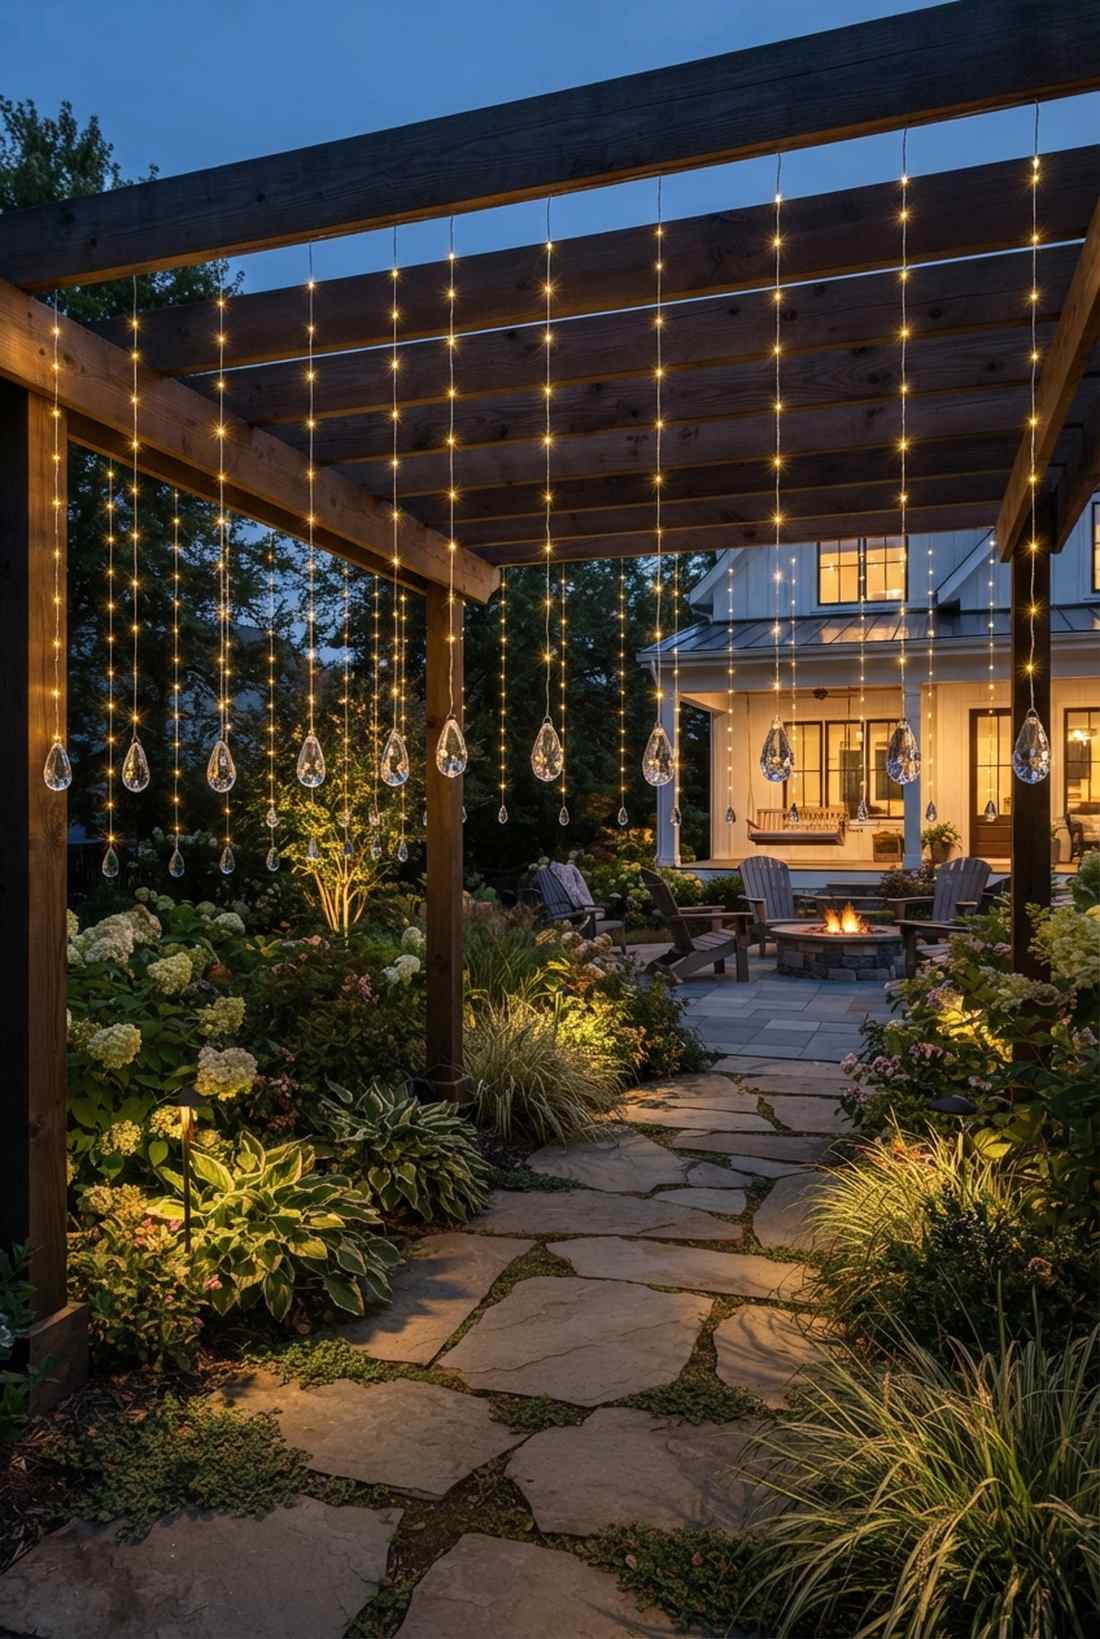
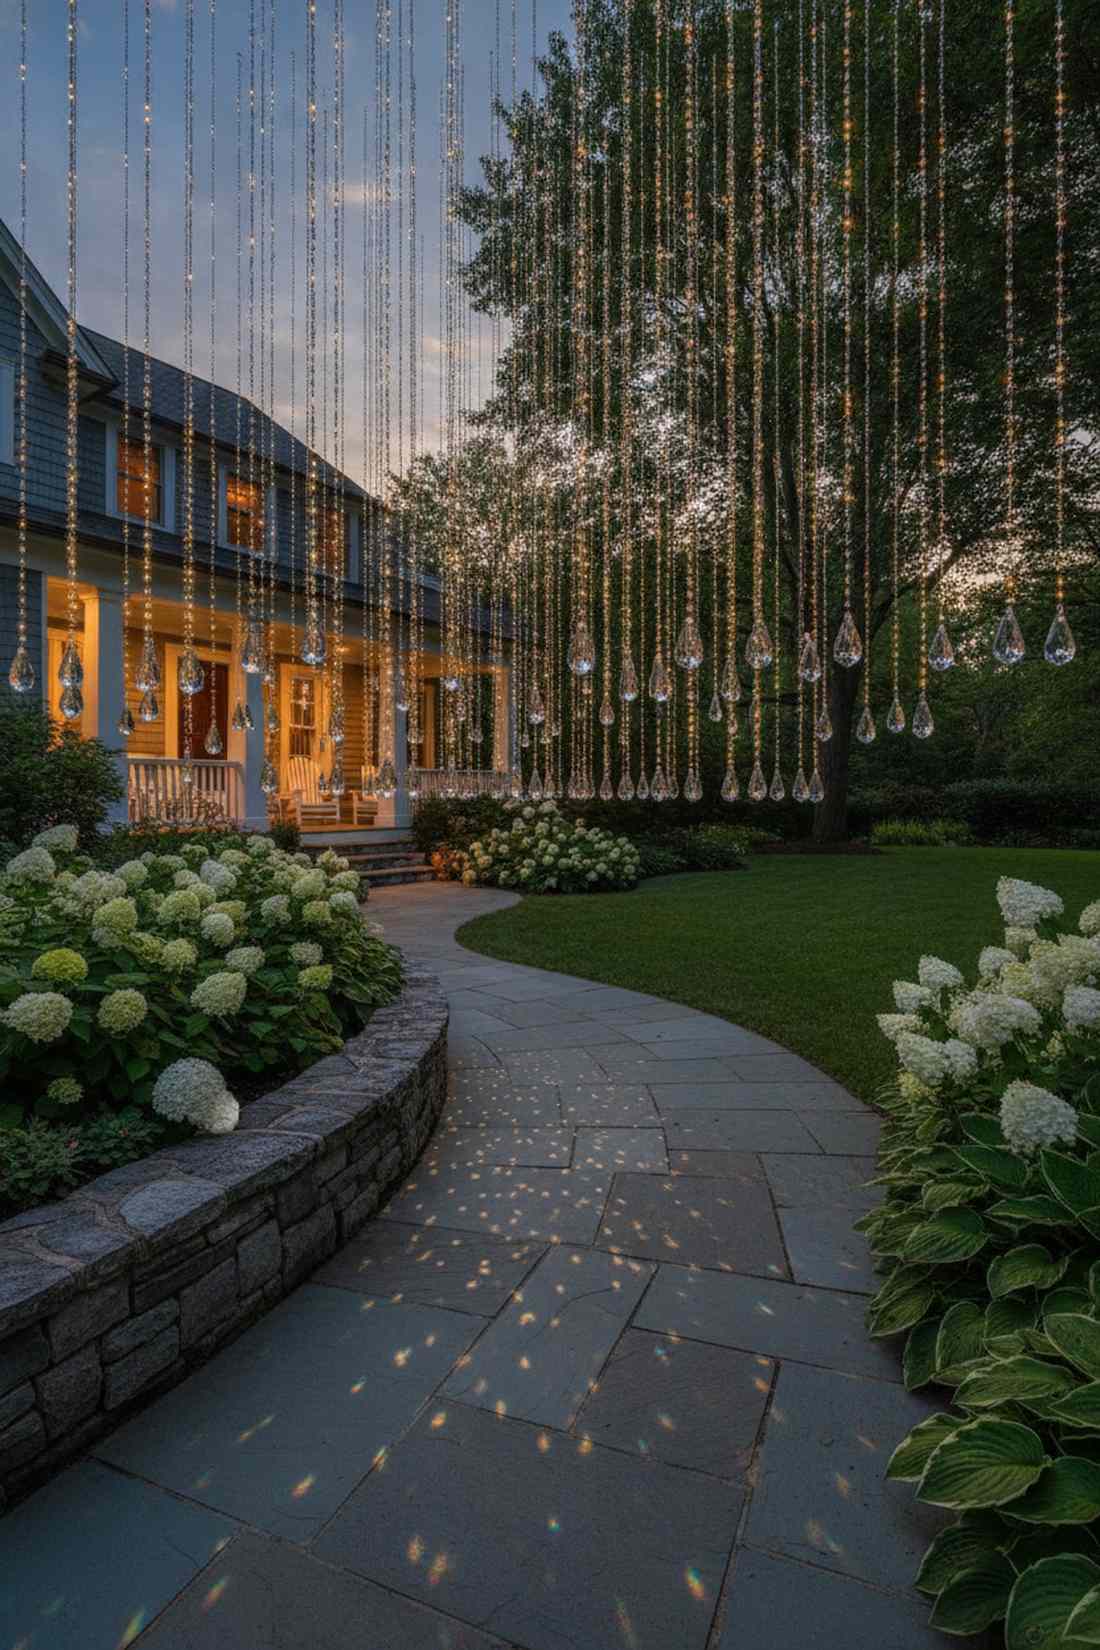
Creates an upscale, curated aesthetic that feels like floating crystal chandeliers in nature. This weighted decorative light setup looks absolutely stunning over garden pathways or front walkways.
Loose wires tangle easily, but adding a physical anchor to the ends gives a designer-level finish. Tying crystals or small rustic weights to the bottom of vertical strands keeps them perfectly straight and adds daytime visual interest.
This custom aesthetic costs about $30–$50 to assemble. Save this to your DIY outdoor decor board.
- Key Materials: Single vertical strands + weights
- Vibe / Style: Elegant and structured
- Difficulty: Intermediate
- Budget Breakdown: Materials: $25 | Pendants: $20.
- Creator’s Tip: Use heavy glass teardrop ornaments at the bottom of the wire for a beautiful daytime suncatcher effect.
- Smart Sourcing: warm white micro-dot LEDs and glass teardrop chandelier prisms (bulk pack).
16. Spiral Cascade Combination
Delivers the ultimate dual-texture aesthetic, feeling both structured and wildly organic. This hybrid tree lighting blueprint is fantastic for front-yard focal trees that demand attention from the street.
Choosing between wrapping or dripping is tough, so combining both creates a controversial, show-stopping profile. The tight trunk spirals pull the eye up, while the loose drips create a waterfall effect, utilizing your premium garden lights for trees perfectly.
Expect to spend $50–$85 for this maximalist look. It’s a fast upgrade that completely changes the evening vibe.
- Key Materials: Mixed light strands
- Vibe / Style: Dynamic and lush
- Difficulty: Advanced (time-consuming)
- Budget Breakdown: Materials: $70 | Connectors: $10.
- Creator’s Tip: Use a multi-plug splitter hidden in the lower branches to separate the trunk wrap from the canopy drips.
- Smart Sourcing: 3-way outdoor splitter cords and commercial-grade LED wire spools (bulk pack).
17. Canopy Net Draping
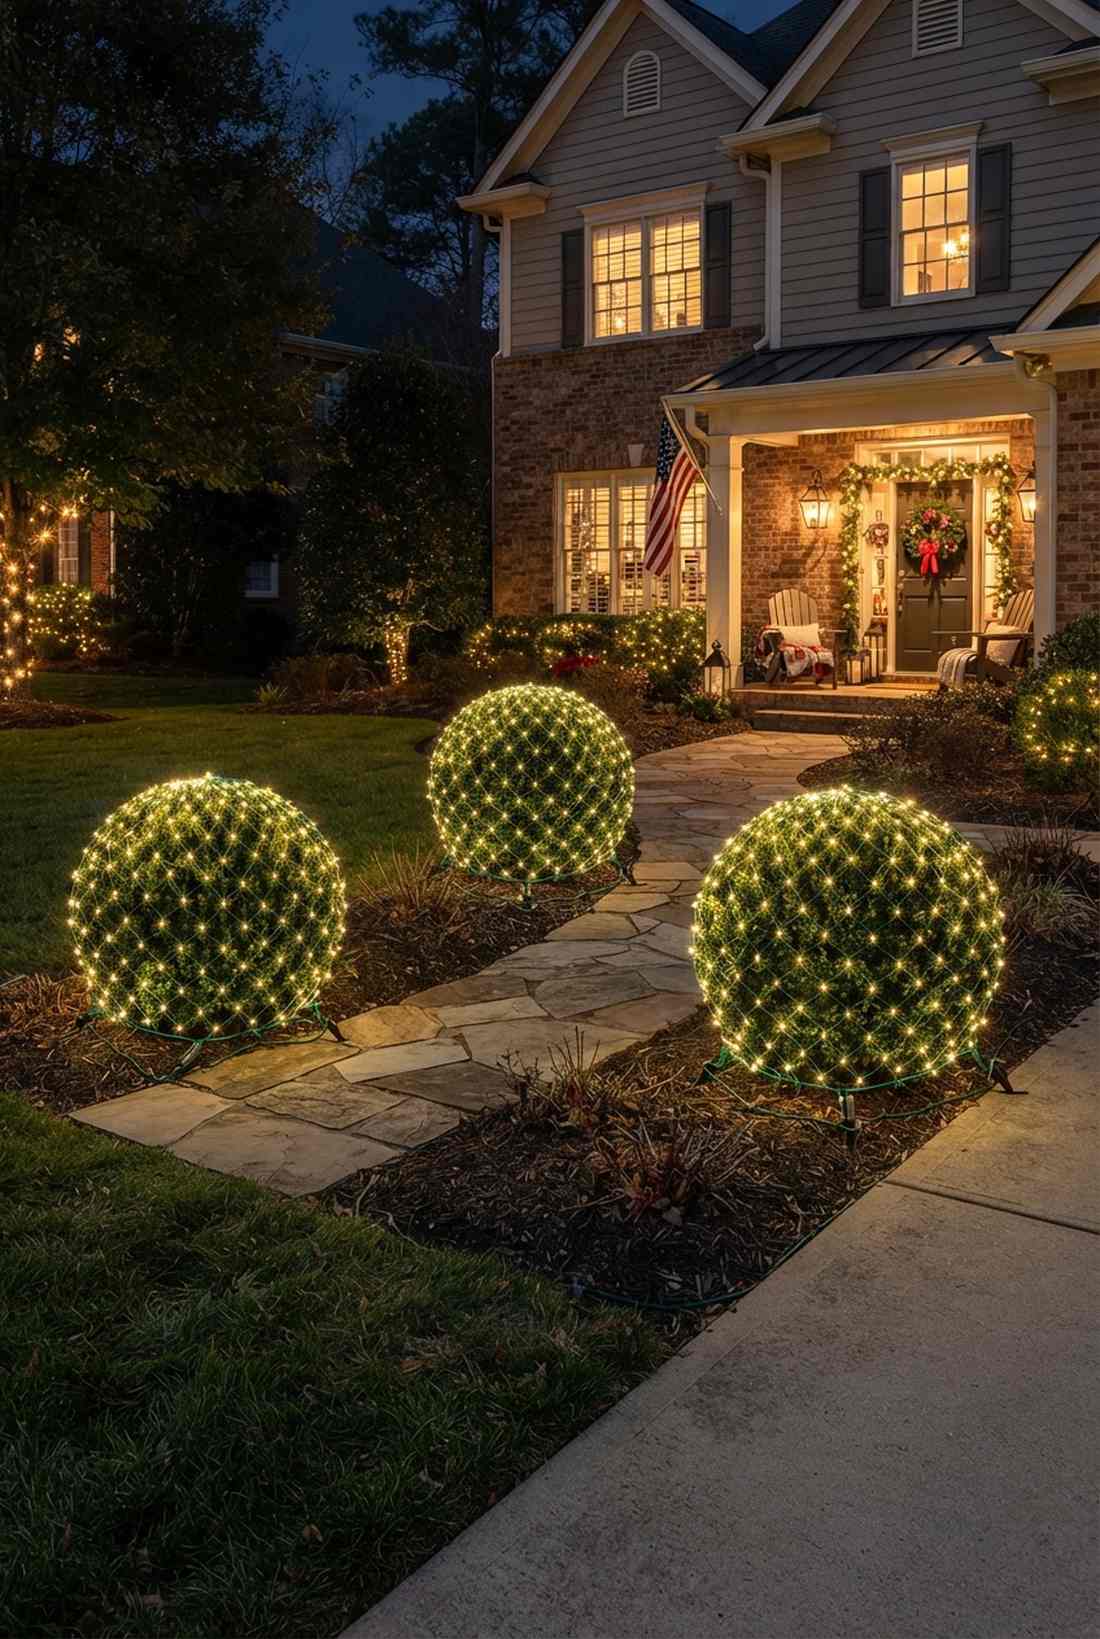
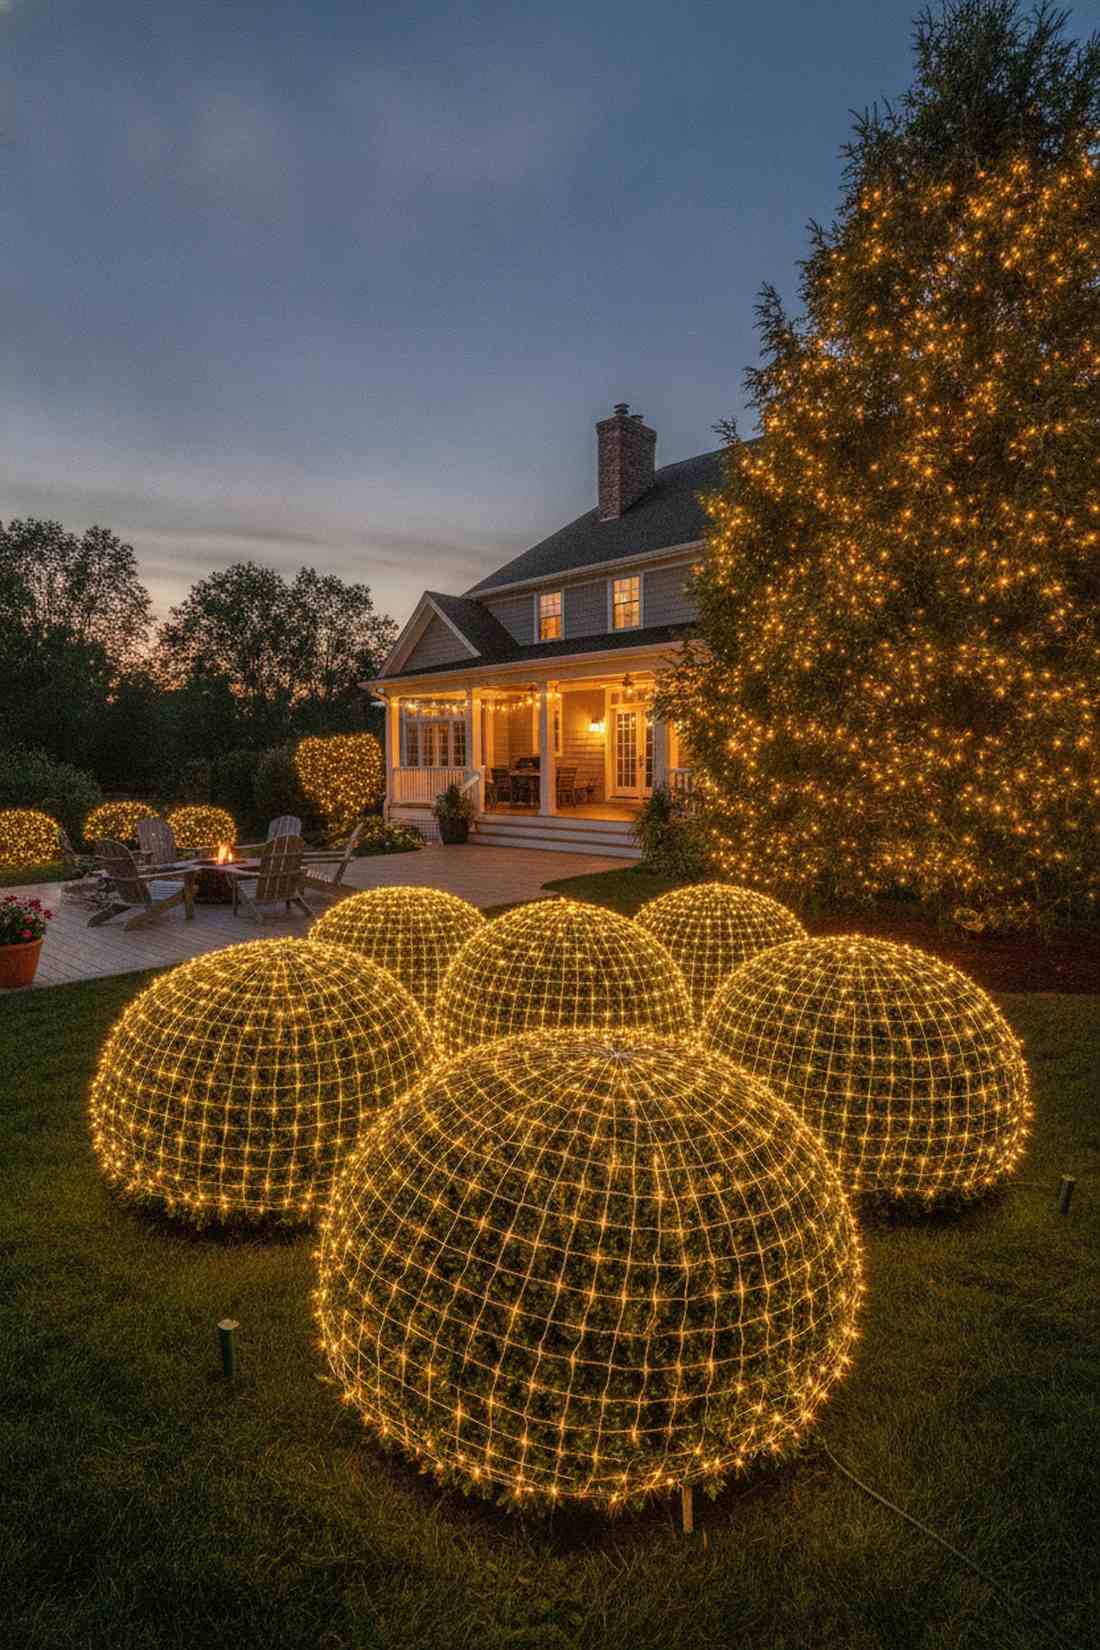
Instantly blankets the tree in a perfect geometric grid, feeling like a high-end commercial holiday installation. This pre-woven net lighting technique is an absolute lifesaver for dense evergreen shrubs or perfectly spherical boxwoods.
Hand-wrapping dense bushes takes hours, but tossing a grid over the top looks far more expensive than it is. The uniform spacing compresses the outer leaves slightly, creating a solid, glowing dome of light in mere minutes.
These nets cost around $20–$40 per bush. Pin this if you want a professional look but have zero time.
- Key Materials: Pre-made net lights
- Vibe / Style: Uniform and manicured
- Difficulty: Extremely easy
- Budget Breakdown: Materials: $30 | Base: $0.
- Creator’s Tip: Buy nets with green wiring so the grid completely vanishes into the foliage during the day.
- Smart Sourcing: heavy-duty outdoor net lights (green wire) and landscape ground stakes.
Pattern-Based Wrapping Styles
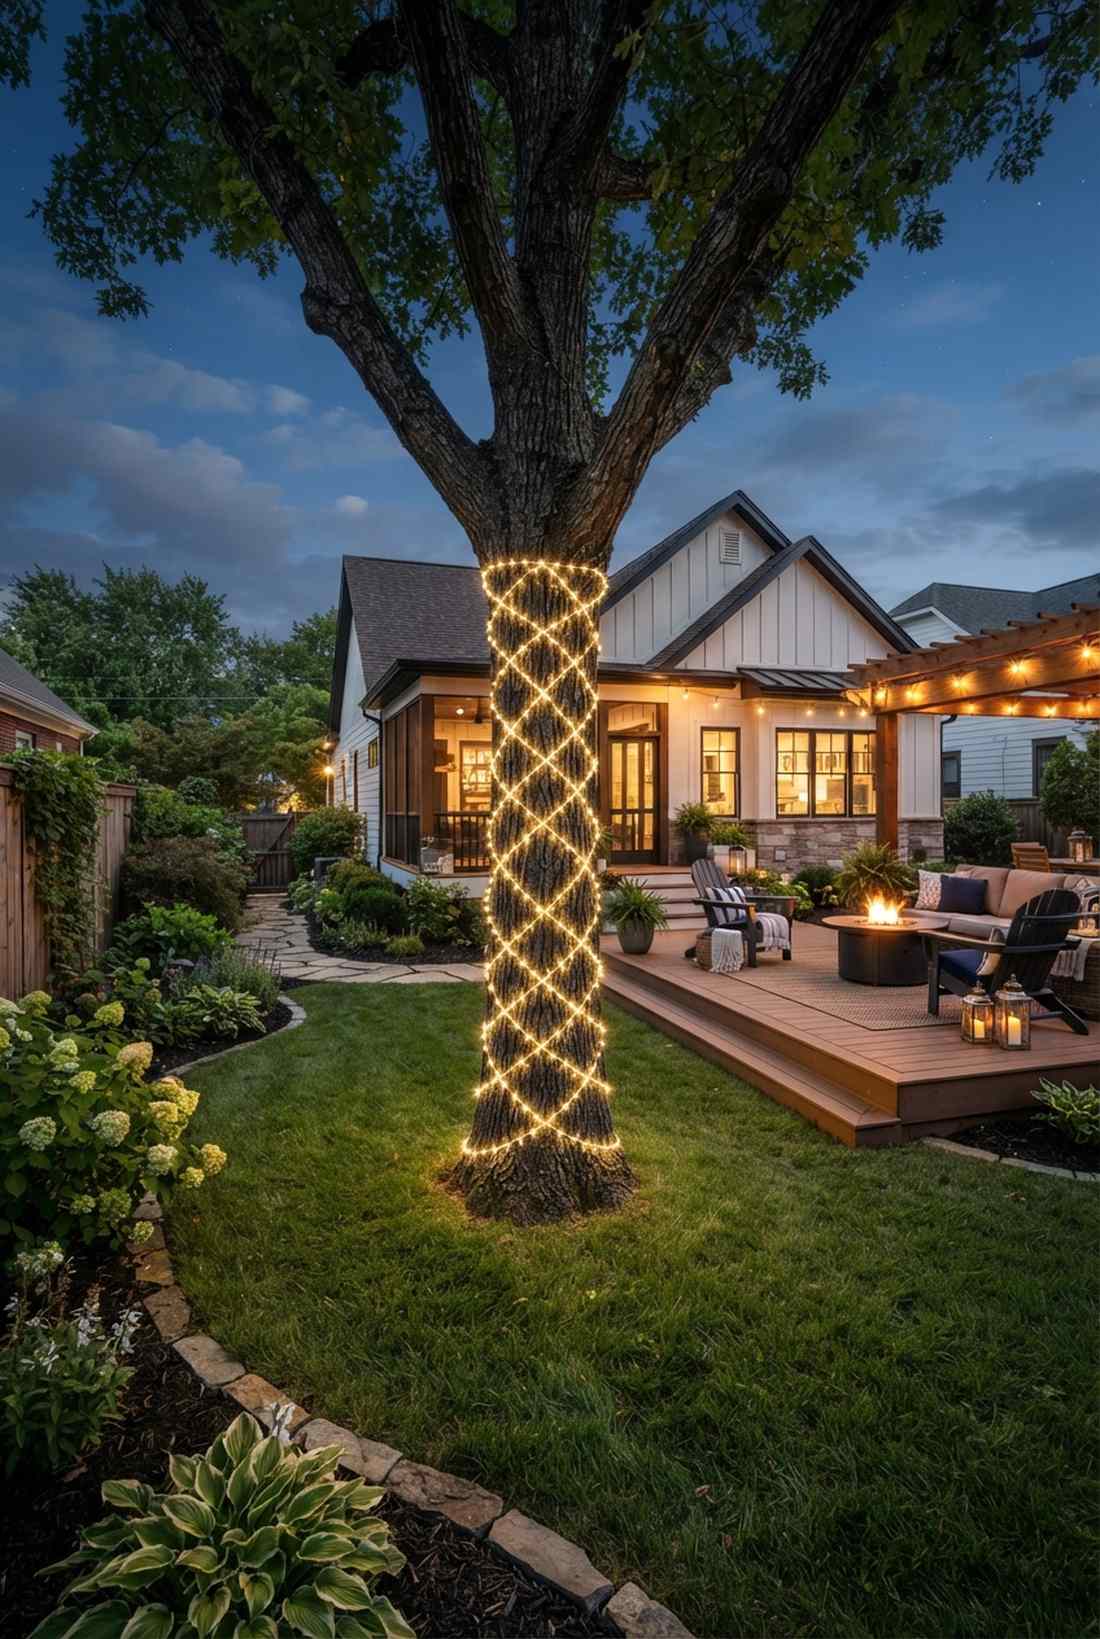
18. Diamond Lattice Pattern
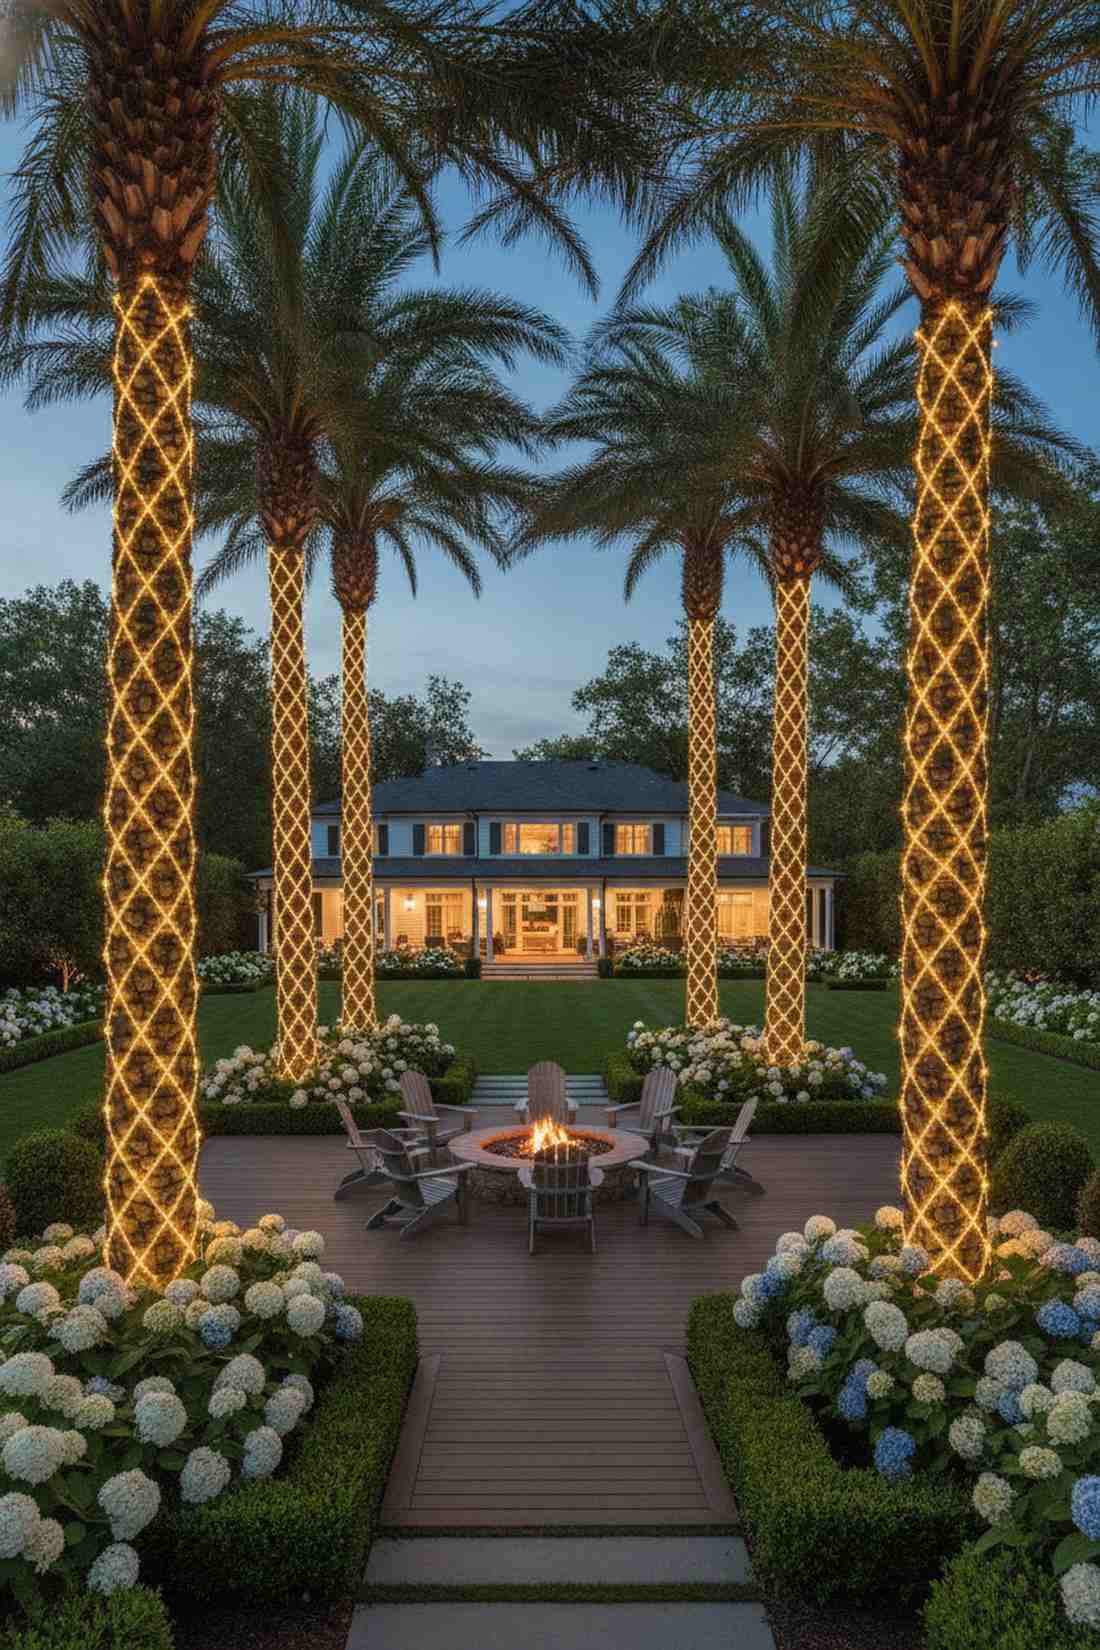
Evokes a regal, manicured estate vibe that feels like stepping into a royal botanical garden. This crisscross trunk lighting design is visually stunning on thick, straight trunks like palm trees or mature maples.
Standard spirals are everywhere, but laying out a geometric lattice delivers a surprisingly premium look. Using two contrasting wire colors or simply securing intersections precisely transforms basic lighting supplies into custom outdoor art.
This precise layout runs about $35–$60. Save this to your high-end landscaping inspiration board.
- Key Materials: Standard LED strings
- Vibe / Style: Regal and geometric
- Difficulty: Intermediate (requires measuring)
- Budget Breakdown: Materials: $45 | Fasteners: $5.
- Creator’s Tip: Use small dots of clear silicone at the intersections to keep the diamonds perfectly uniform through high winds.
- Smart Sourcing: warm white LED spools and clear waterproof silicone sealant.
If you only have 30 minutes this weekend, skip straight to this next layout.
19. Horizontal Band Stacking
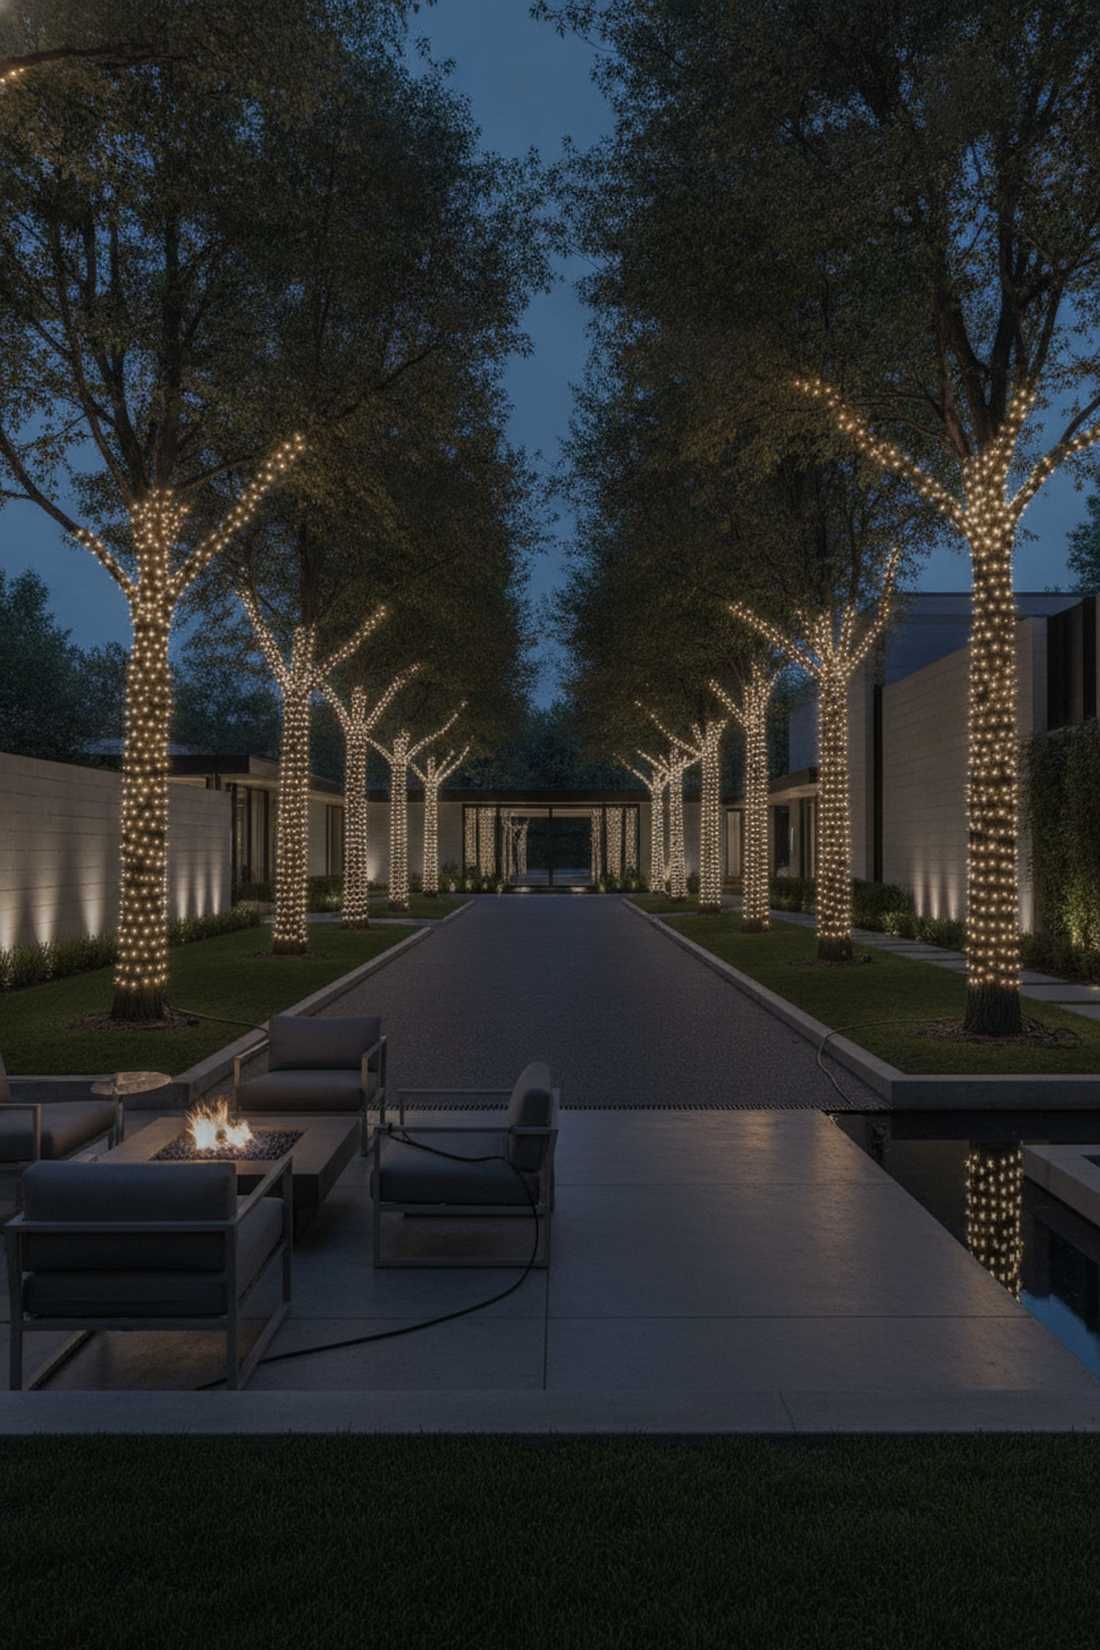
Creates a futuristic, segmented look that feels like glowing bracelets stacked up the timber. This banded tree lighting method is incredibly unique and perfect for lining a long driveway or illuminating a sleek, modern courtyard.
Continuous wraps are traditional, but leaving dark voids between tight rings gives a designer-level finish. Grouping strands tightly together in distinct zones makes the light output pop violently against the night sky.
You can execute this segmented style for $25–$45. Highly recommended for a quick weekend win.
- Key Materials: High-density mini lights
- Vibe / Style: Modern and segmented
- Difficulty: Easy
- Budget Breakdown: Materials: $35 | Hardware: $0.
- Creator’s Tip: Use black extension wires to jump between the glowing rings so the negative space stays completely dark.
- Smart Sourcing: black-wire outdoor extension cords and high-density cluster LED strings.
20. Asymmetrical Artistic Wrap
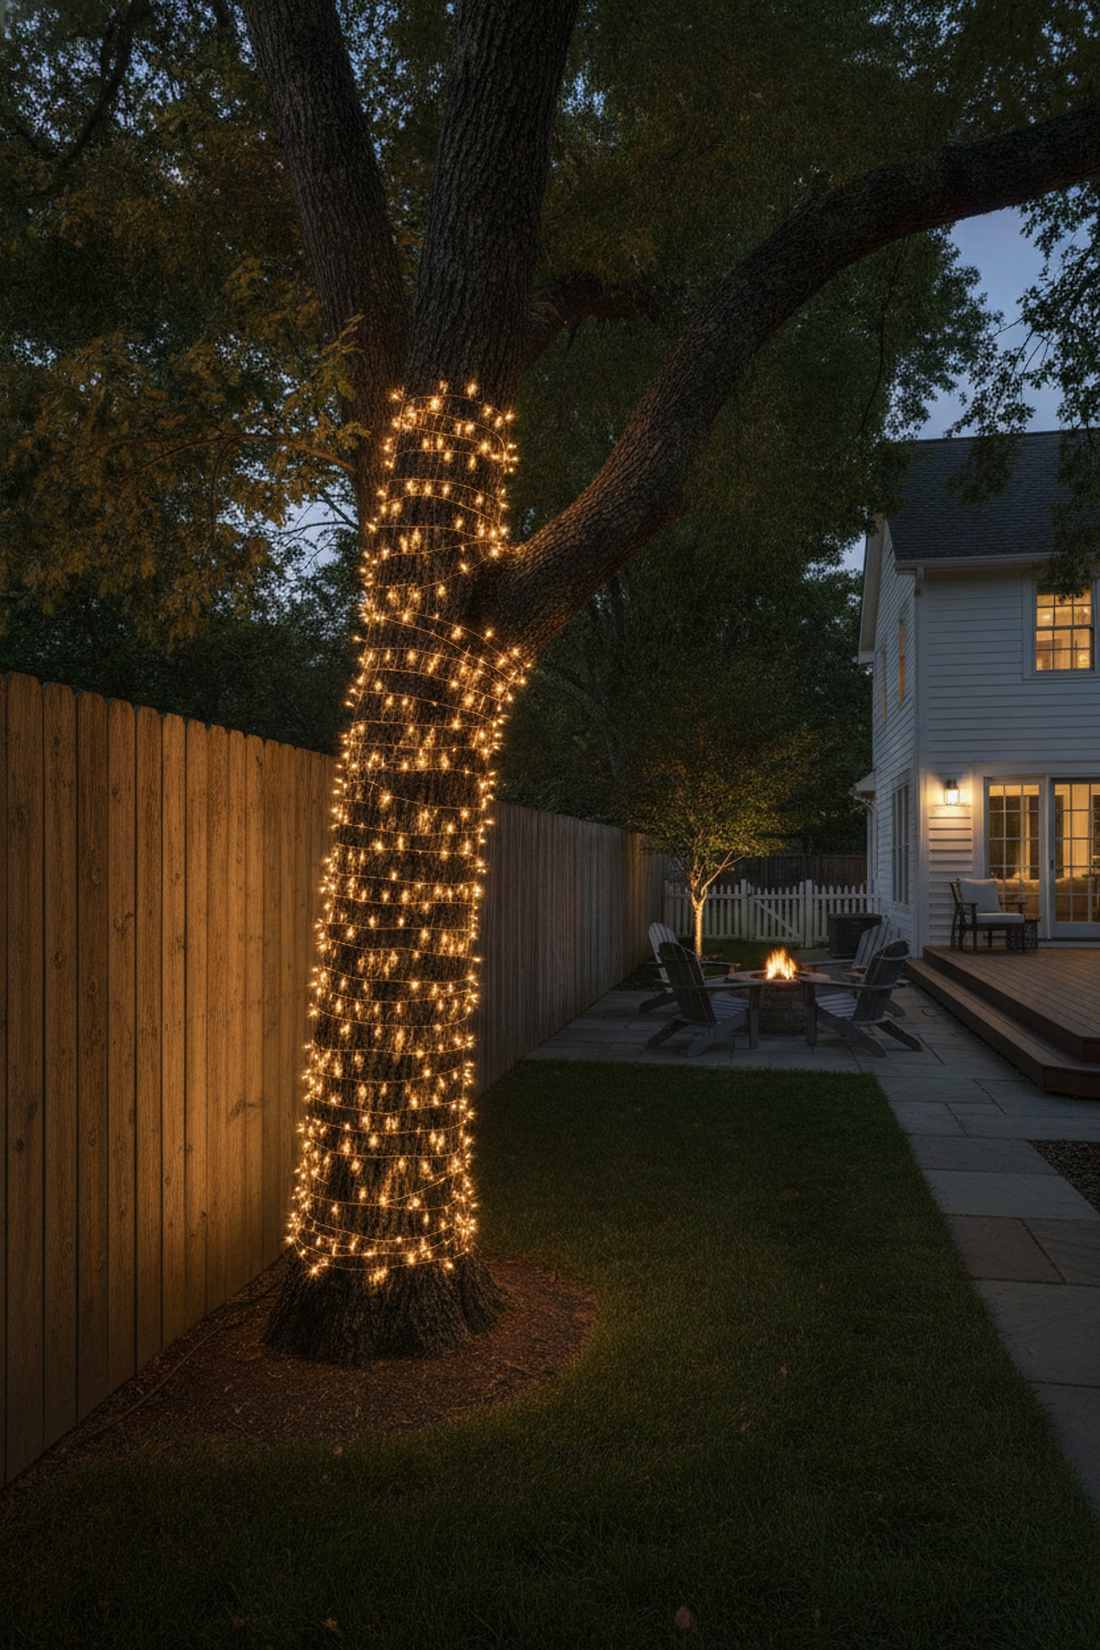
Brings a dramatic, theatrical flair that feels like a professional stage lighting setup. This one-sided directional lighting layout is the smartest choice for trees pushed up against fences or exterior home walls.
Wrapping the backside of a wall-facing tree is pointless, and heavy front-loading looks far more expensive than it is. By concentrating all your lumens on the viewer-facing side, you double the visual impact while halving your material costs.
This sneaky money-saving trick costs just $15–$30. Pin this if you’re lighting a tight side-yard.
- Key Materials: Any standard outdoor lights
- Vibe / Style: Theatrical and bold
- Difficulty: Easy
- Budget Breakdown: Materials: $20 | Base: $0.
- Creator’s Tip: Zig-zag the wire back and forth purely on the front face of the trunk using U-nails to hold the turns.
- Smart Sourcing: copper wire fairy lights (bulk pack) and galvanized U-shaped fencing staples.
21. Alternating Density Wrapping
Produces a pulsing, rhythmic glow that feels like the tree has a glowing heartbeat. This variable tension wrap technique adds immense character to unusually shaped or knobby tree trunks.
Uniformity can be boring, while intentionally scrambling your spacing delivers a surprisingly premium look. Shifting from intense, tight bundles to wide, sparse gaps forces the eye to travel up and down the landscape installation.
A fun, free-form project that costs roughly $20–$40. It’s a fast upgrade that completely changes the evening vibe.
- Key Materials: Flexible wire lights
- Vibe / Style: Artistic and rhythmic
- Difficulty: Beginner (no rules)
- Budget Breakdown: Materials: $25 | Base: $0.
- Creator’s Tip: Place the dense, tight wraps right over ugly knots or scars on the trunk to turn flaws into glowing features.
- Smart Sourcing: flexible copper wire LEDs (UV-coated) and heavy-duty zip ties.
22. Color Blocking Technique
Creates a striking, dimensional gradient that feels like a professionally curated holiday exhibit. This multi-zone color lighting setup is an absolute show-stopper for December displays or festive summer parties.
Using one color is safe, but stacking contrasting colors gives a designer-level finish. Utilizing warm white on the thick trunk and icy cool white on the fragile branches creates a forced perspective that makes the tree look massive.
Plan for a $40–$70 budget to get the dual tones. Save this to your ultimate holiday decor board.
- Key Materials: Distinct colored strands
- Vibe / Style: Festive and dimensional
- Difficulty: Moderate
- Budget Breakdown: Materials: $55 | Adapters: $10.
- Creator’s Tip: Never mix wire colors in the same zone; keep a strict horizontal boundary where the color shifts.
- Smart Sourcing: cool white outdoor LED spools and warm white commercial string kits.
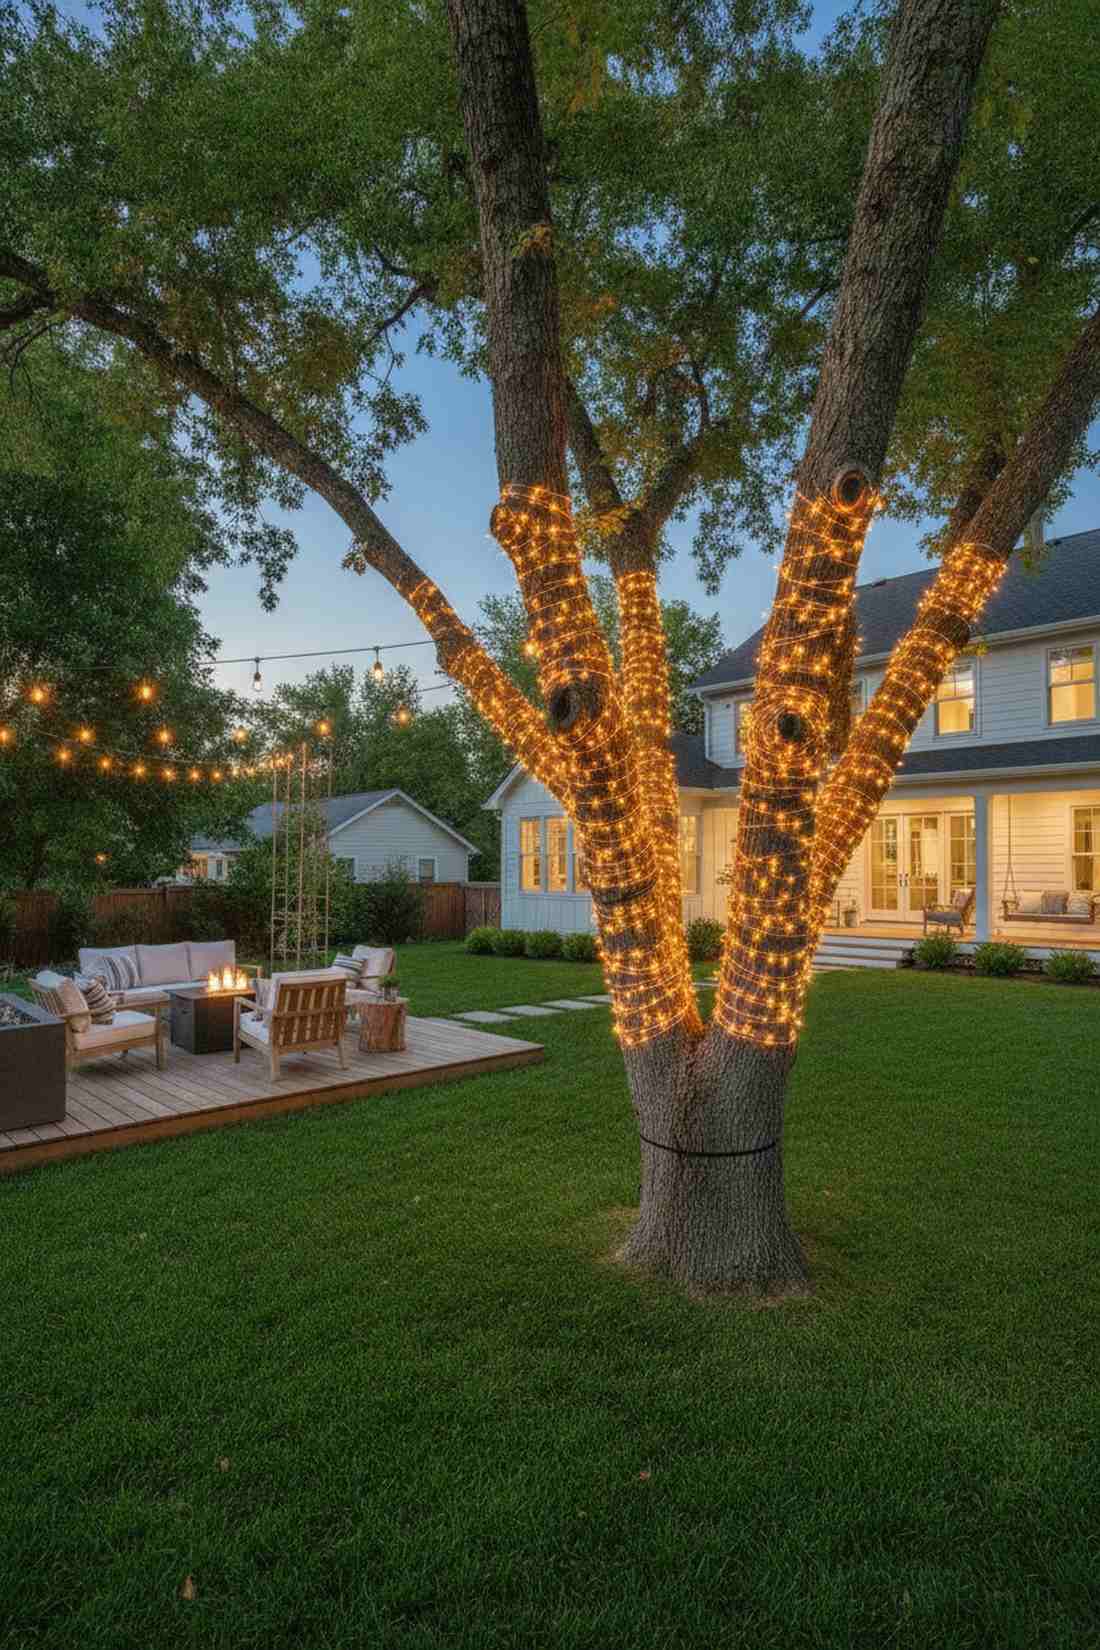
23. Multi-Trunk Coordination
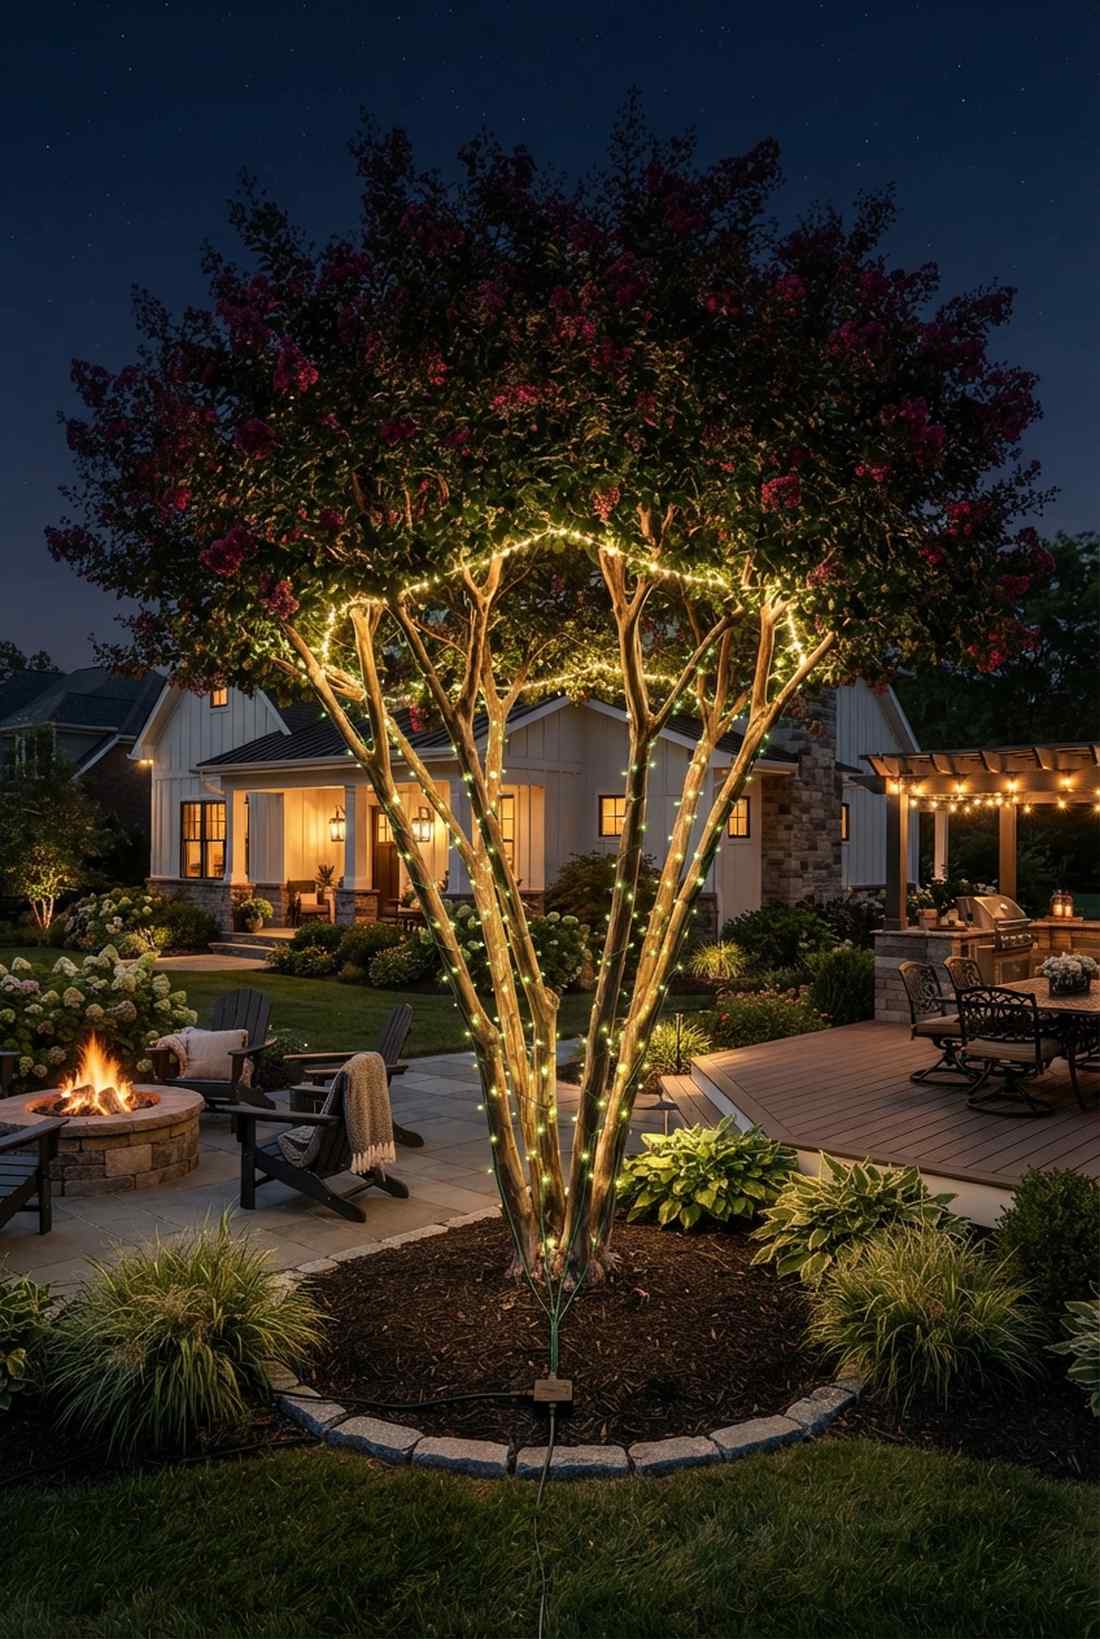
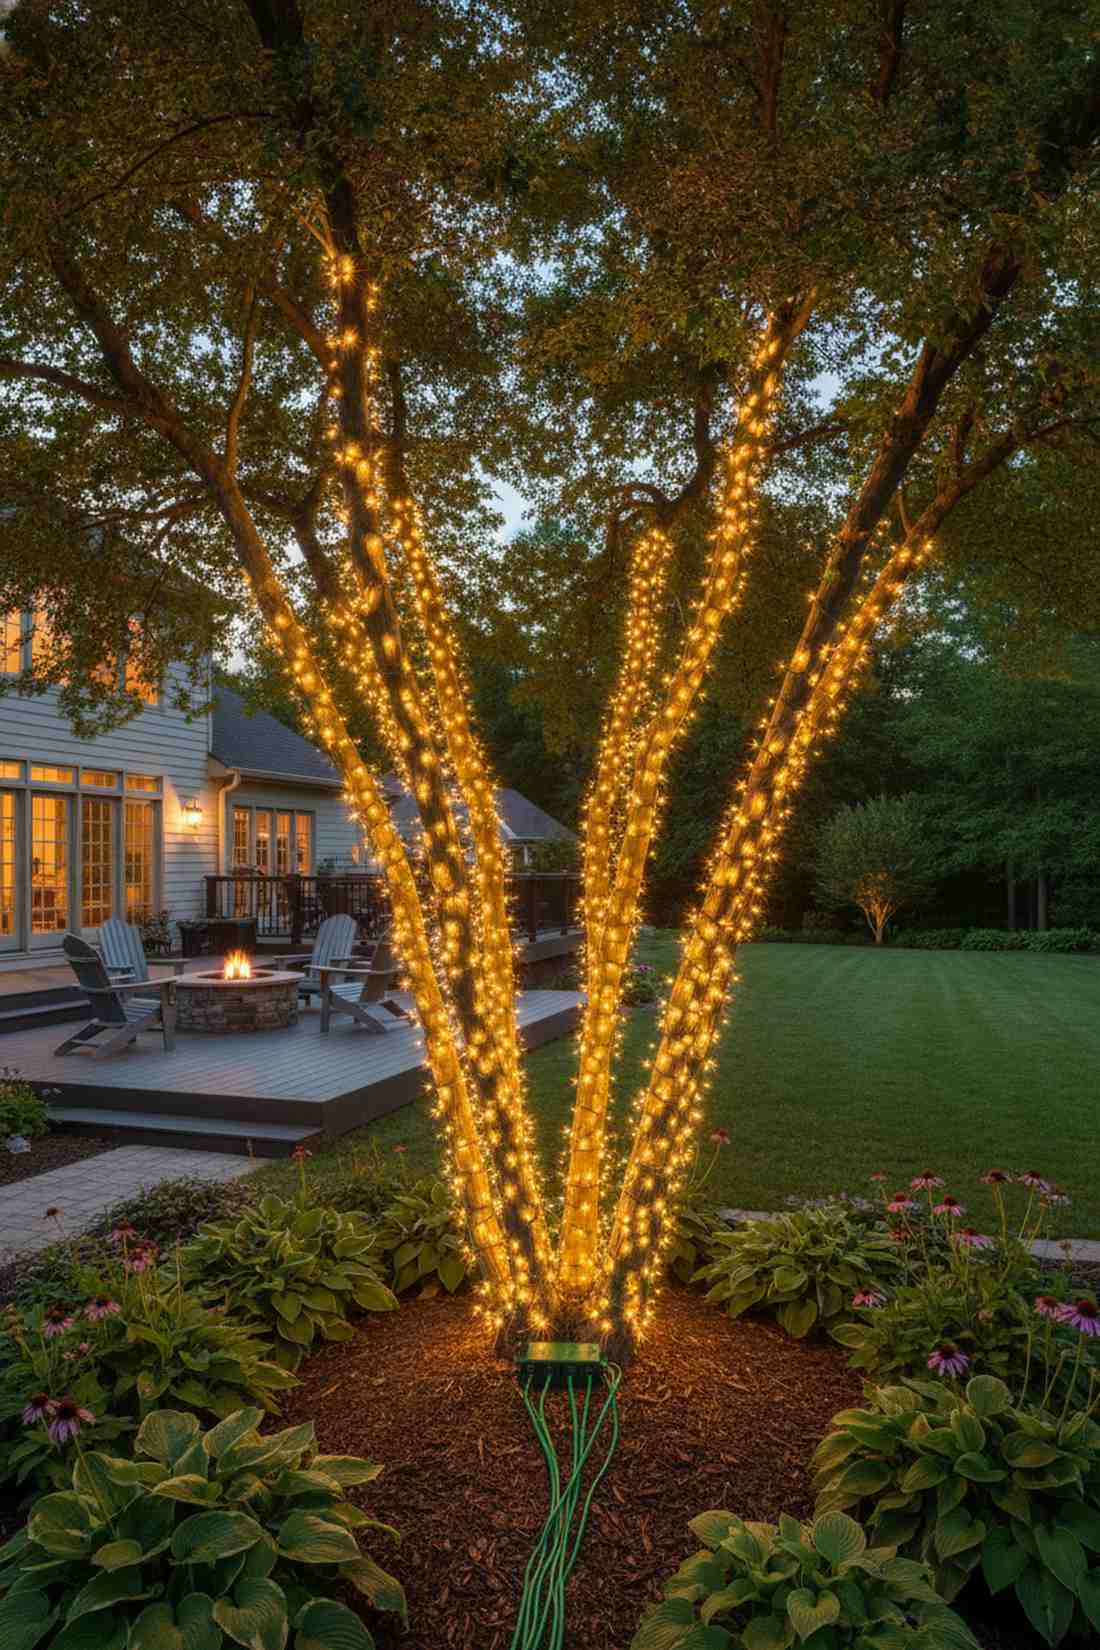
Projects a massive, unified glow that feels like a grand glowing archway. This split-base lighting method is mandatory for illuminating crape myrtles, birch clumps, or any multi-stemmed specimen.
Lighting just one stem looks lopsided, but individually wrapping all stems before joining them at the canopy looks far more expensive than it is. It highlights the unique V-shape architecture of the plant while maximizing your outdoor garden supplies.
This comprehensive wrap will cost around $45–$80. Highly recommended to show off expensive landscaping plants.
- Key Materials: Multiple mid-length strands
- Vibe / Style: Grand and architectural
- Difficulty: Intermediate
- Budget Breakdown: Materials: $65 | Splitters: $10.
- Creator’s Tip: Run a heavy-duty outdoor splitter flat on the dirt beneath the mulch, sending one wire up each trunk base.
- Smart Sourcing: 4-way outdoor power splitter block and green-wire mini LED sets (4-pack).
Warning: The upcoming design is so atmospheric, your neighbors will ask for your landscaper’s number.
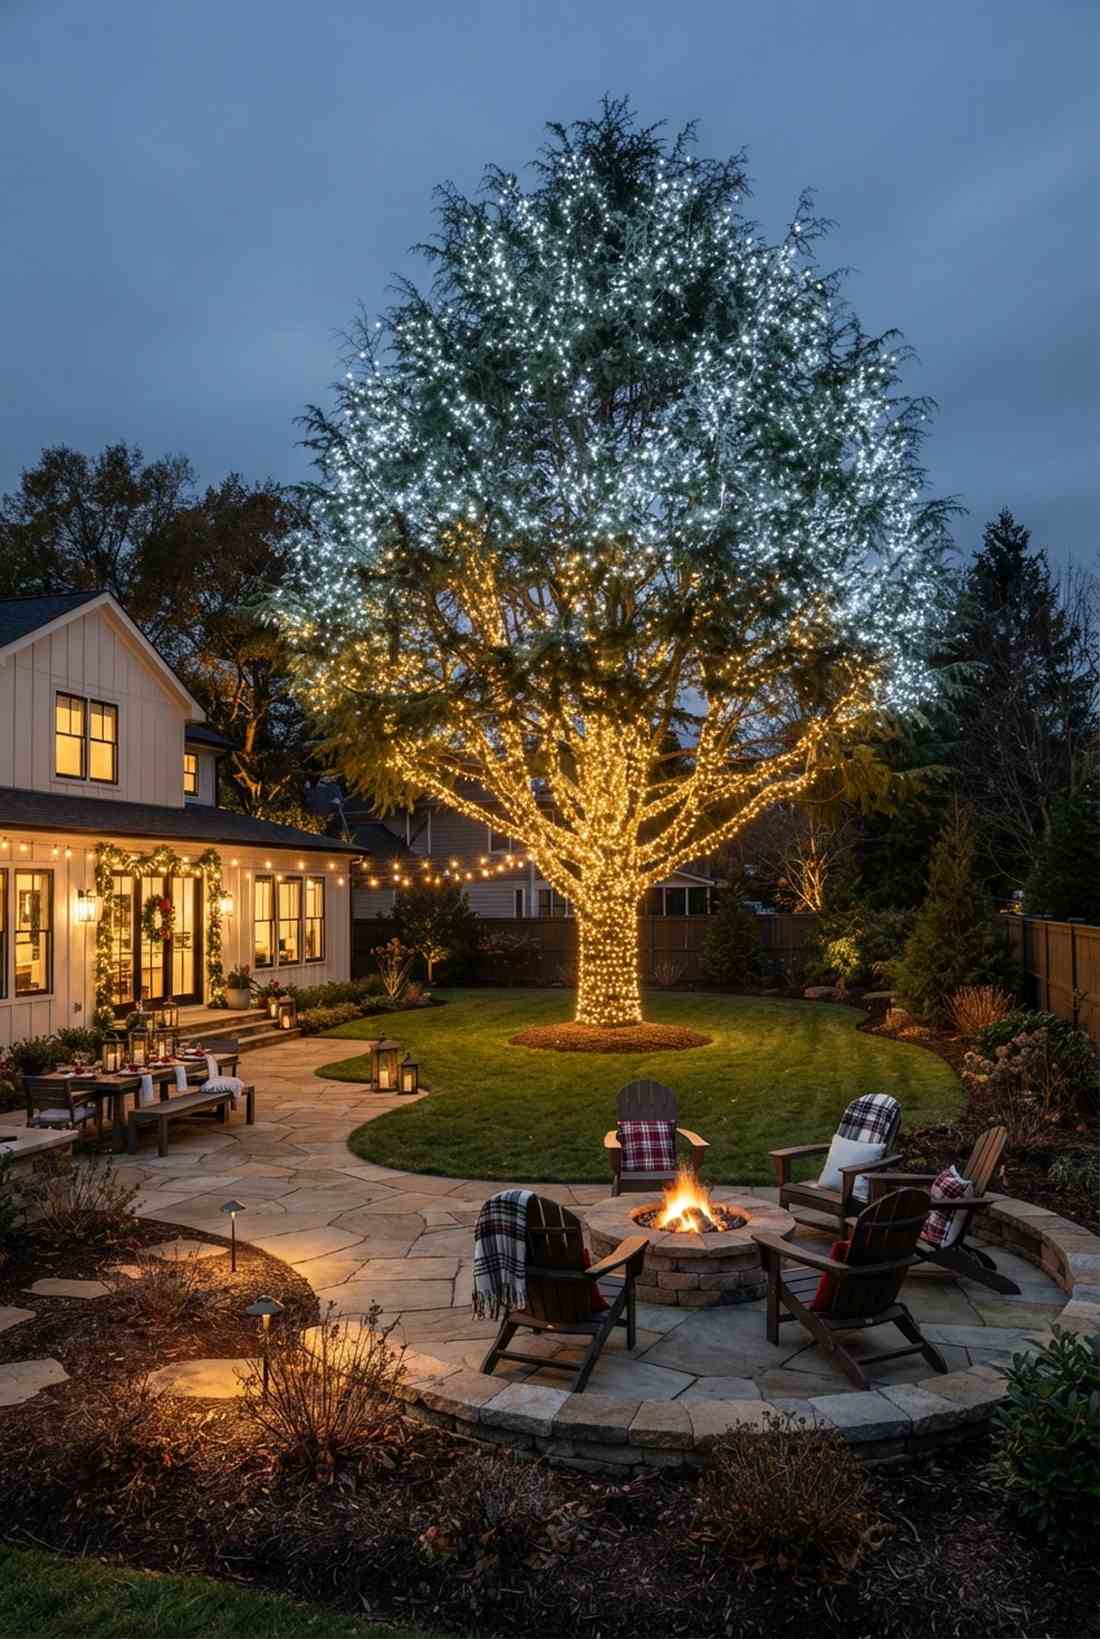
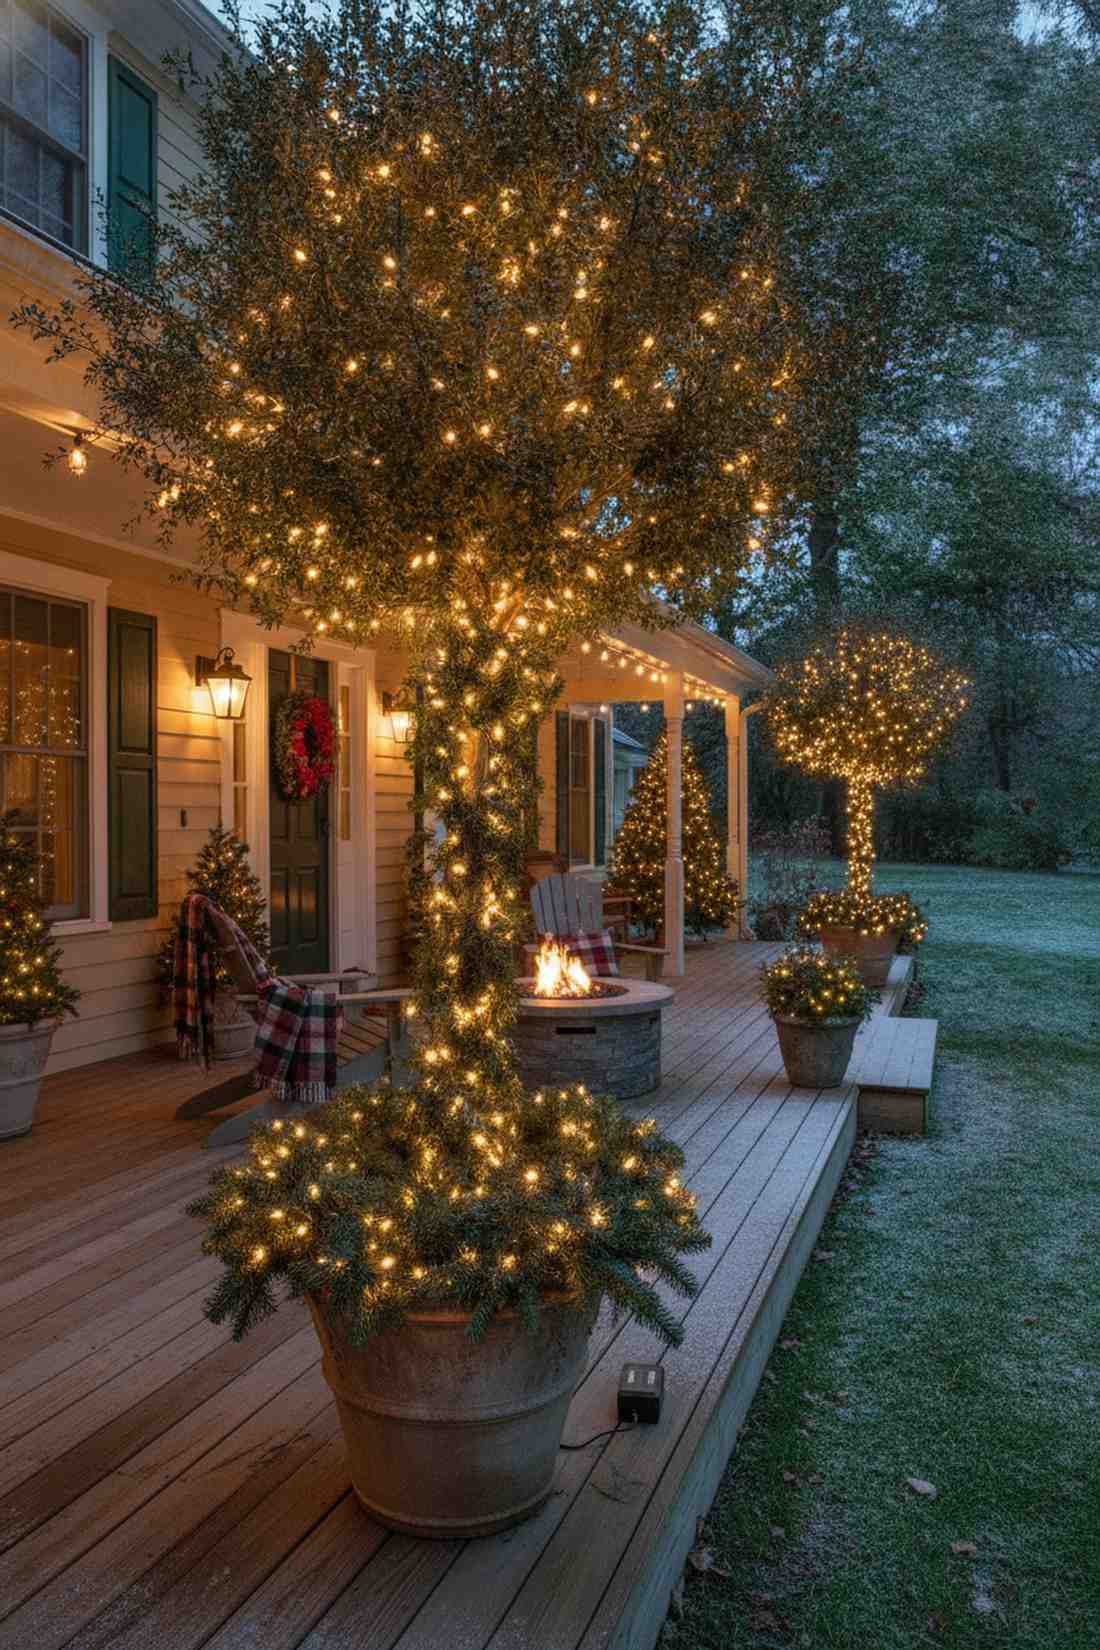
24. Evergreen Interior Lighting
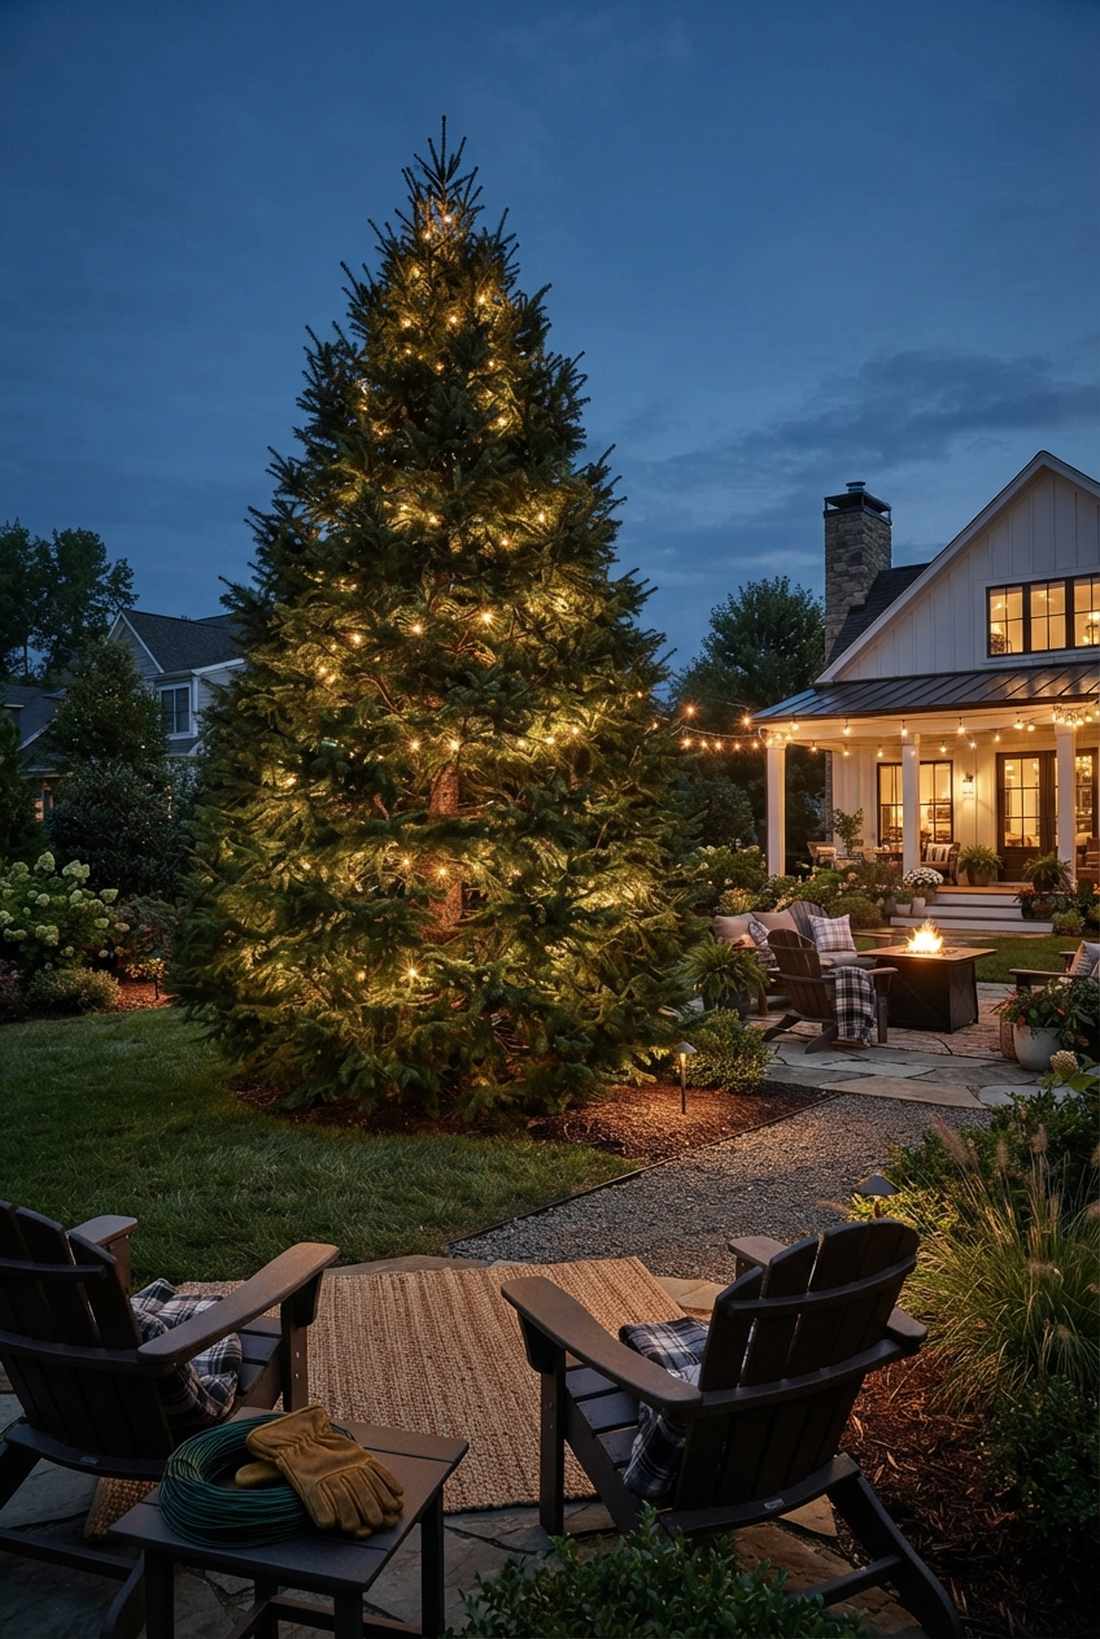
Radiates a deep, mysterious ambiance that feels like the pine tree is glowing from the inside out. This internal foliage illumination trick is the absolute best way to light dense spruce, fir, or cedar trees year-round.
Wrapping the outside of a pine tree looks tacky, but burying the bulbs deep against the trunk delivers a surprisingly premium look. The thick outer needles act as a natural diffuser, turning harsh LED points into a soft, ambient radioactive glow.
Achieve this hidden magic for roughly $30–$50. Pin this if you want subtle, high-end evergreen lighting.
- Key Materials: Large-bulb C7 or C9 strings
- Vibe / Style: Mysterious and ambient
- Difficulty: Moderate (scratched arms!)
- Budget Breakdown: Materials: $40 | Safety: $5.
- Creator’s Tip: Wear long sleeves and use thick gardening gloves; push the wire all the way back until it touches the main center trunk.
- Smart Sourcing: commercial C9 LED light strings and heavy-duty leather gardening gloves.
Material Guide: Cheap vs. Premium Aesthetic
Knowing exactly where to save and where to spend makes all the difference in achieving that “looks expensive but isn’t” vibe.
- Standard vs. UV-Resistant/Premium: Cheap retail wires crack and fade in the sun within months. Upgrading to UV-coated, commercial-grade spools ensures your setup survives summer heat and winter ice.
- Pre-made Kits vs. Sourcing Locally: Buying bulk commercial spools online is significantly cheaper per foot than buying tiny boxes from the local hardware store, and results in fewer ugly connection plugs.
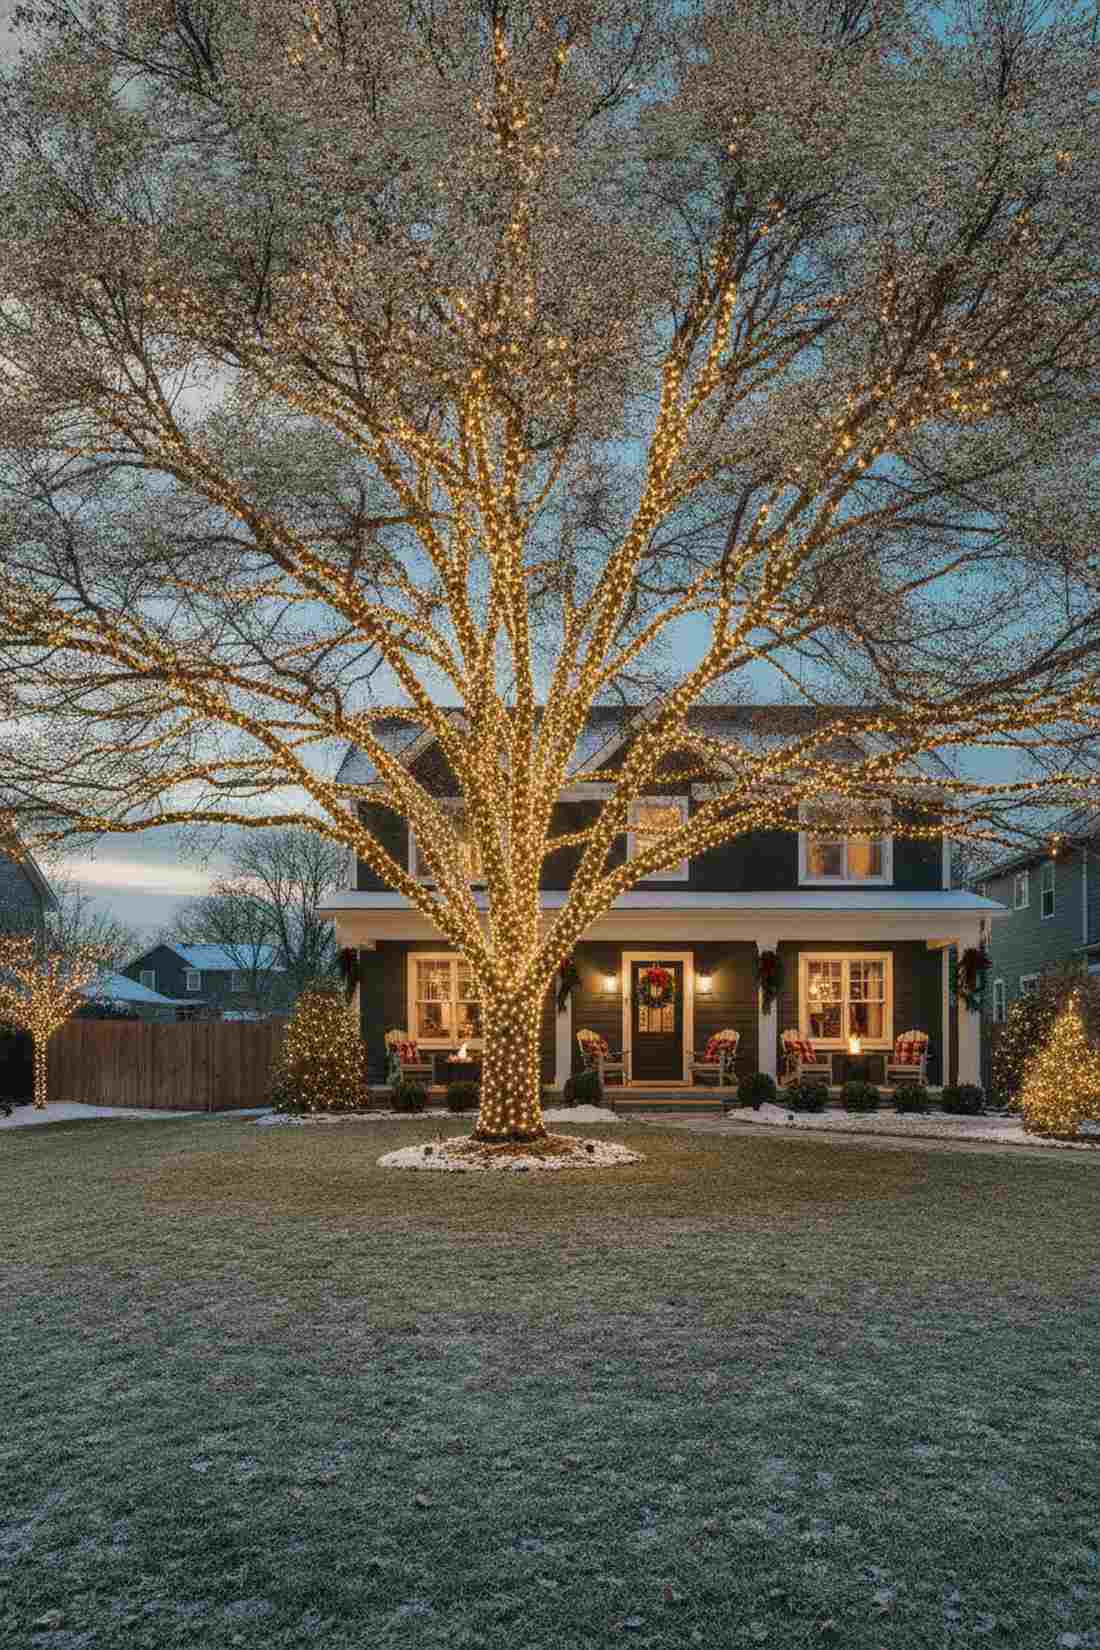
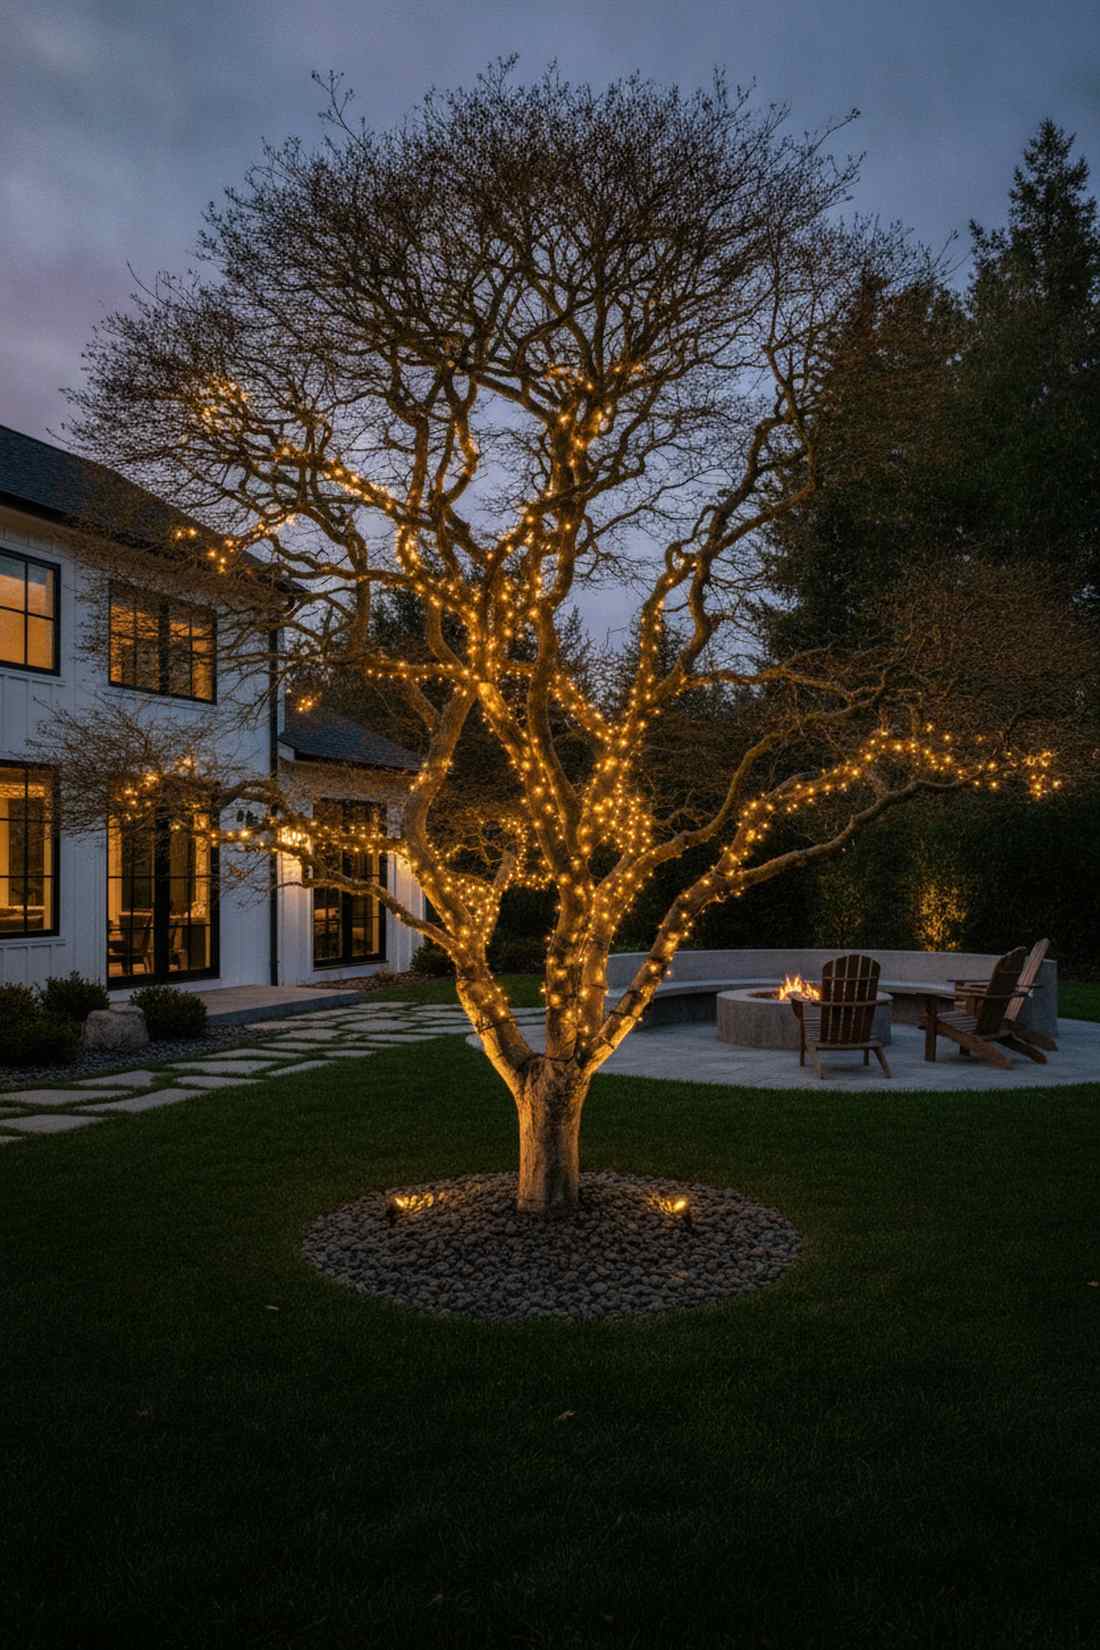
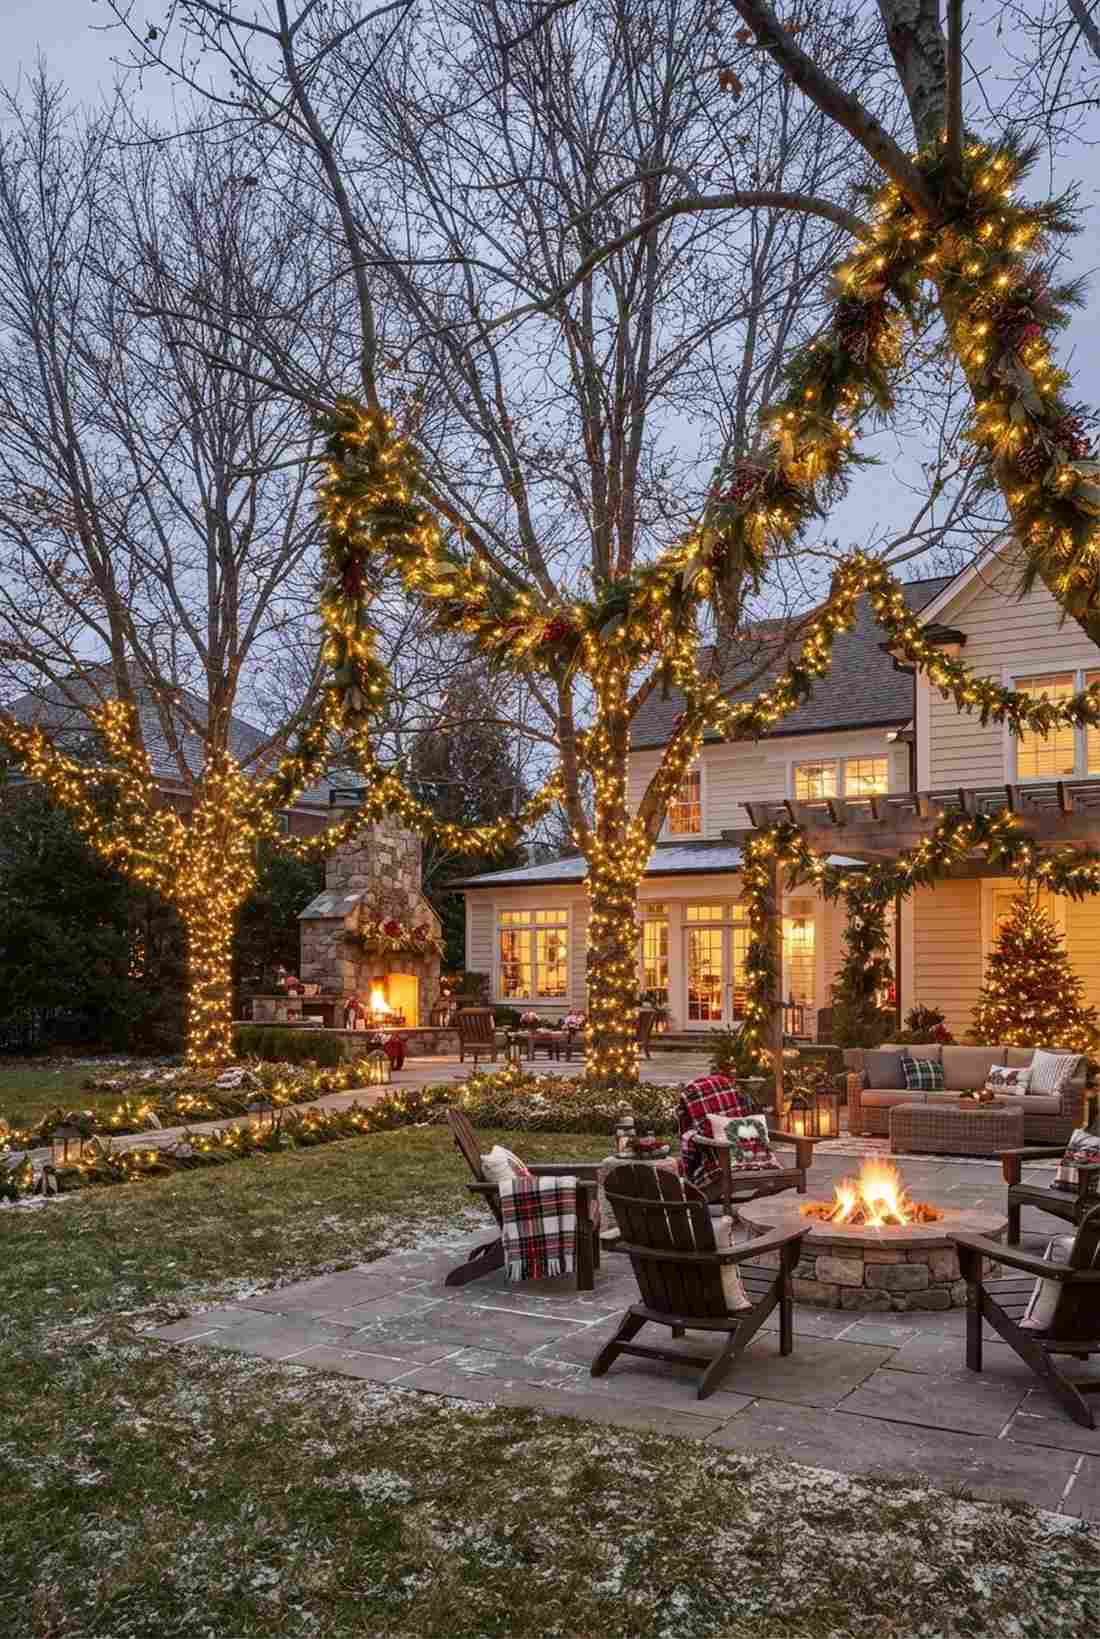
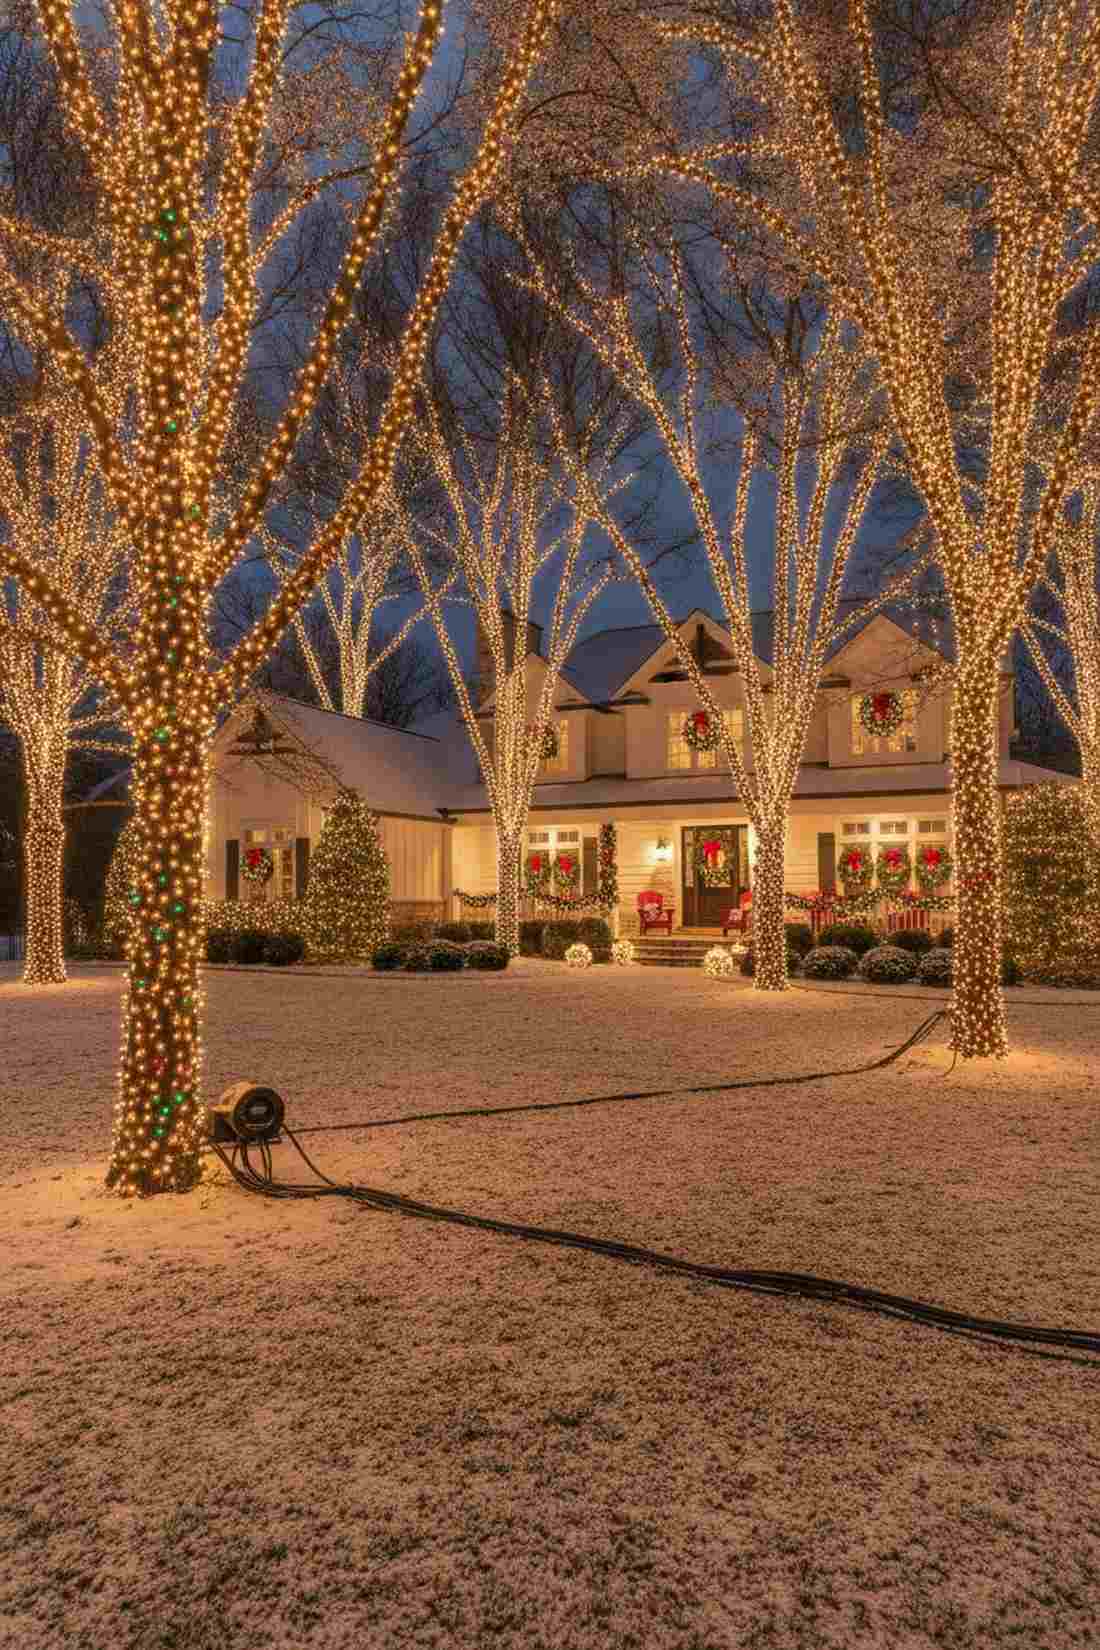
25. Bare Winter Branch Technique
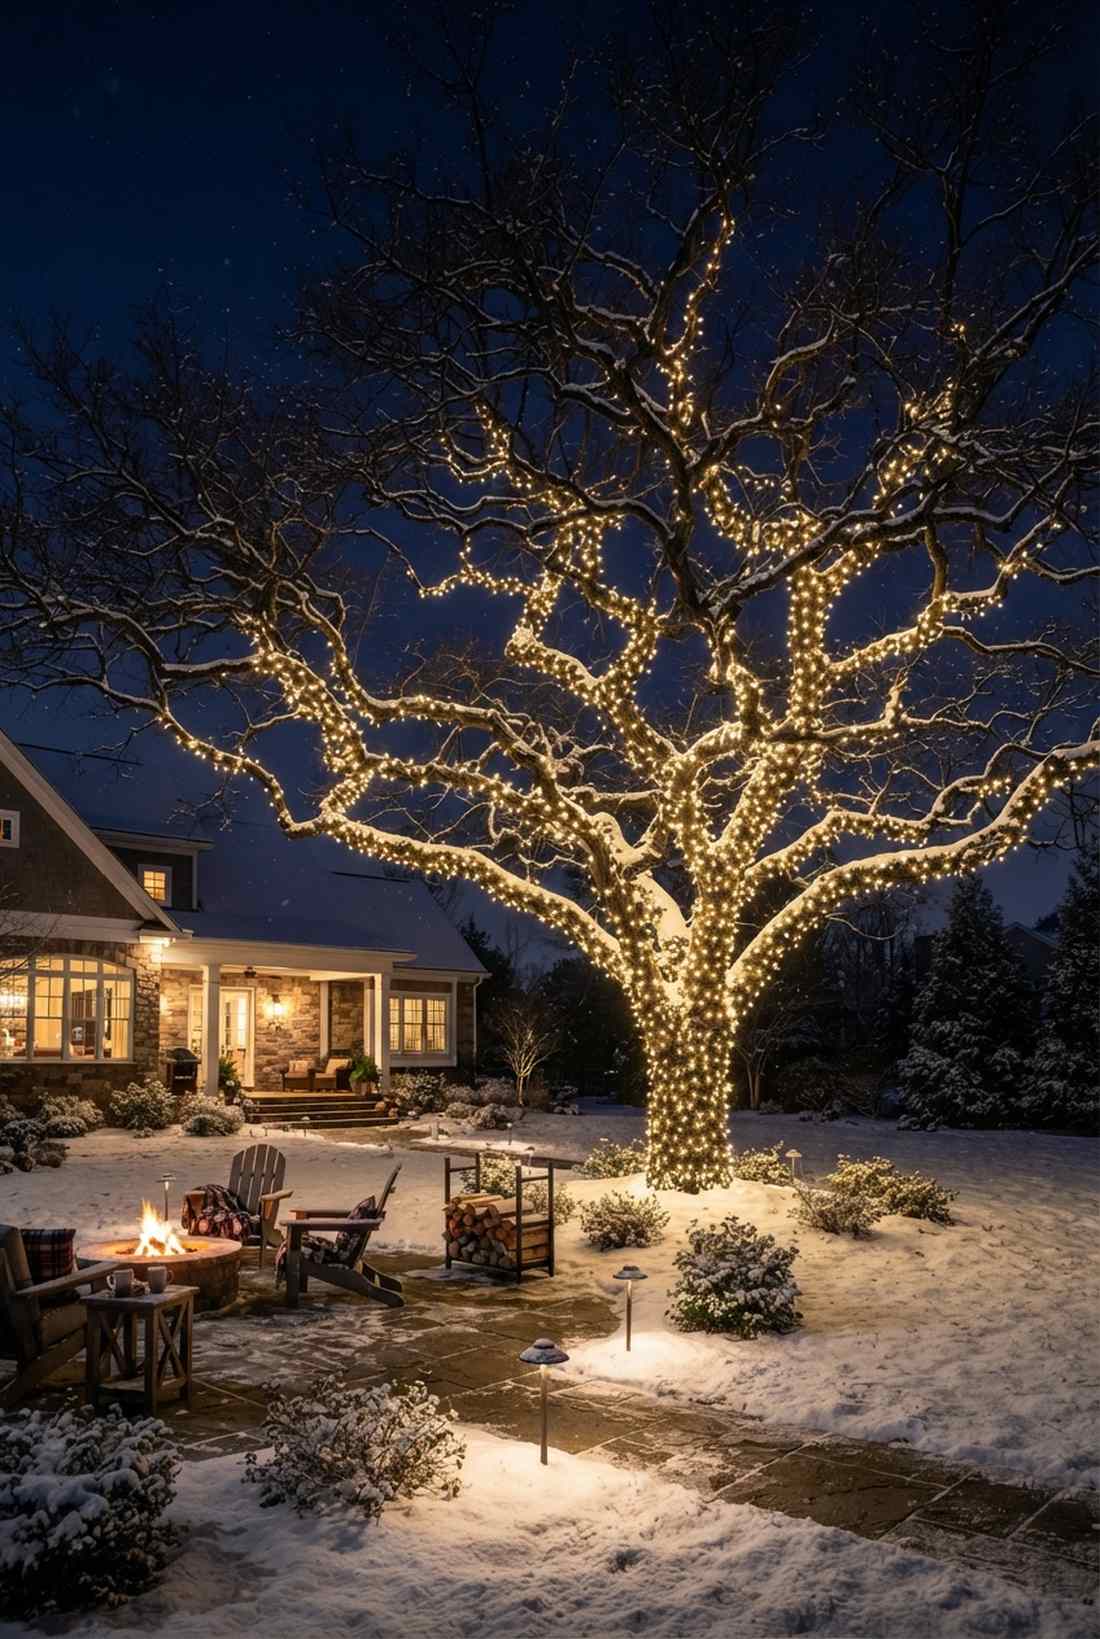
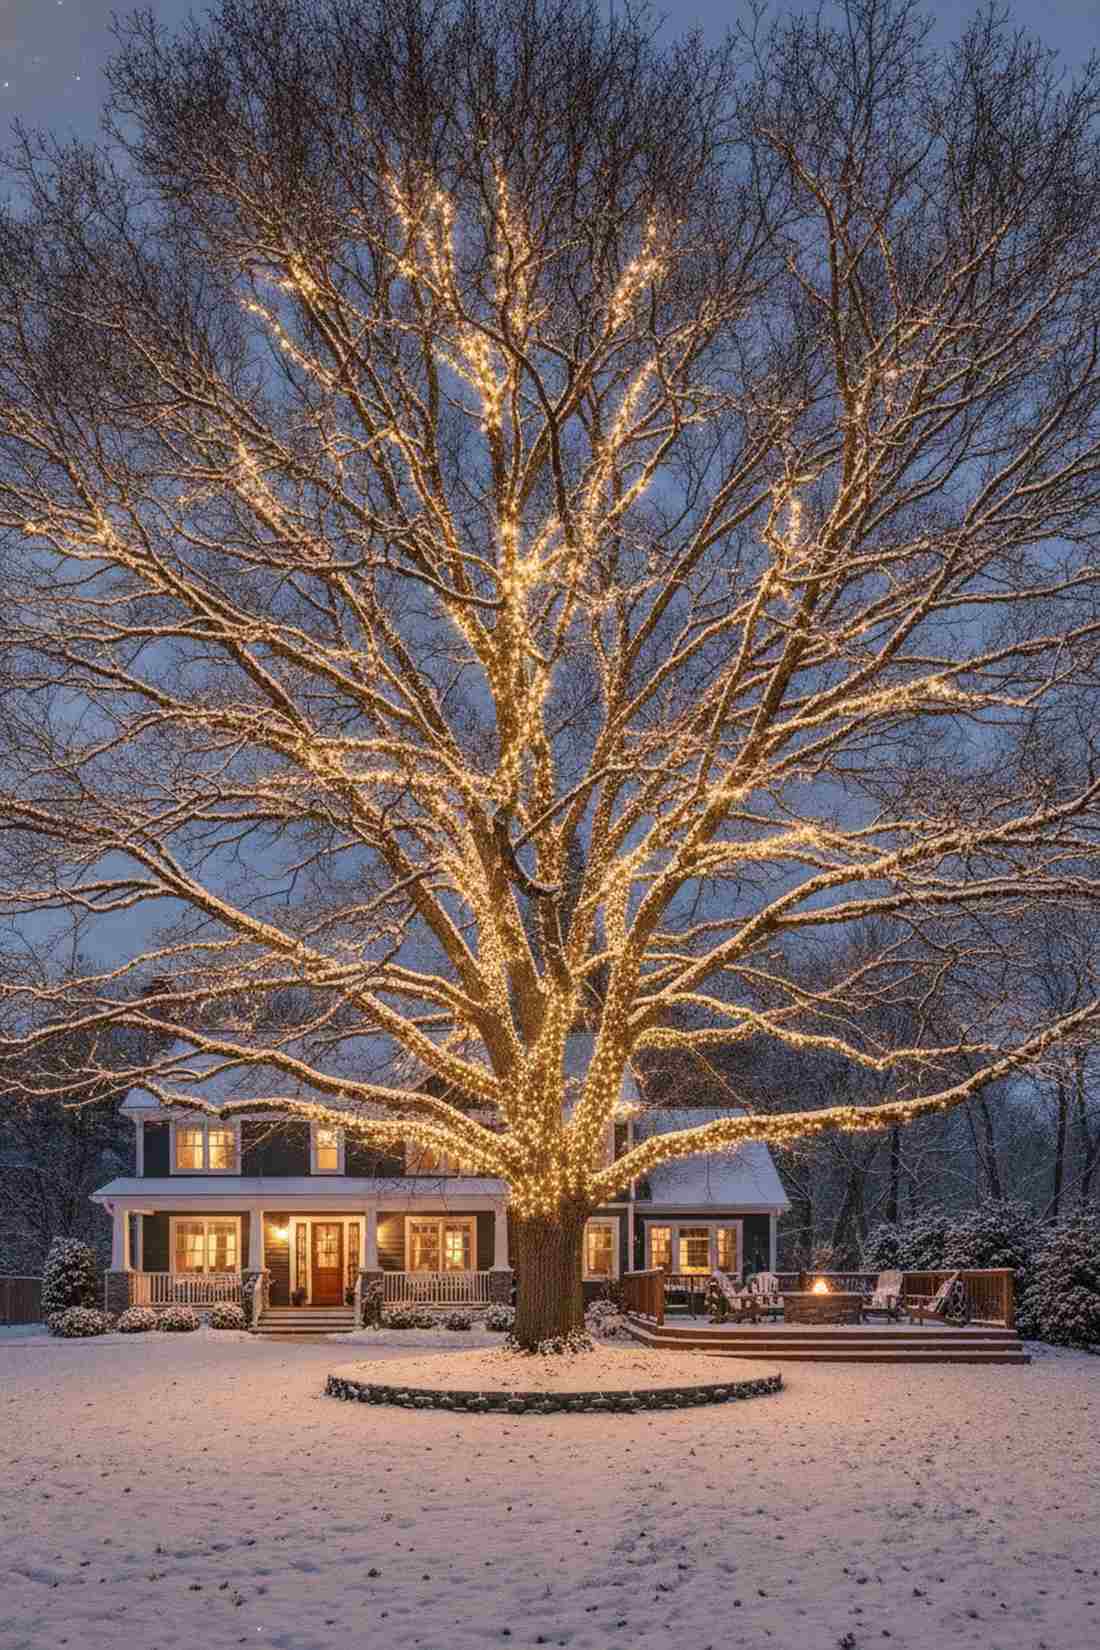
Transforms a dead landscape into a stark, sculptural masterpiece that feels like a modern art installation. This dormant tree wrapping blueprint turns leafless winter oaks into the focal point of your snowy yard.
Most people pack their lights away, but wrapping skeletal branches tightly gives a designer-level finish. The intense contrast of bright warm lights against the dark winter sky highlights every jagged twist and turn of the bare wood.
A striking winter project costing around $40–$70. Save this to your winter curb appeal board.
- Key Materials: High-durability outdoor LEDs
- Vibe / Style: Stark and sculptural
- Difficulty: Intermediate
- Budget Breakdown: Materials: $60 | Base: $0.
- Creator’s Tip: Wait until all leaves have completely fallen before installing, otherwise trapped dead leaves will look terrible illuminated.
- Smart Sourcing: weatherproof commercial LED spools and silicone sealant tape for electrical joints.
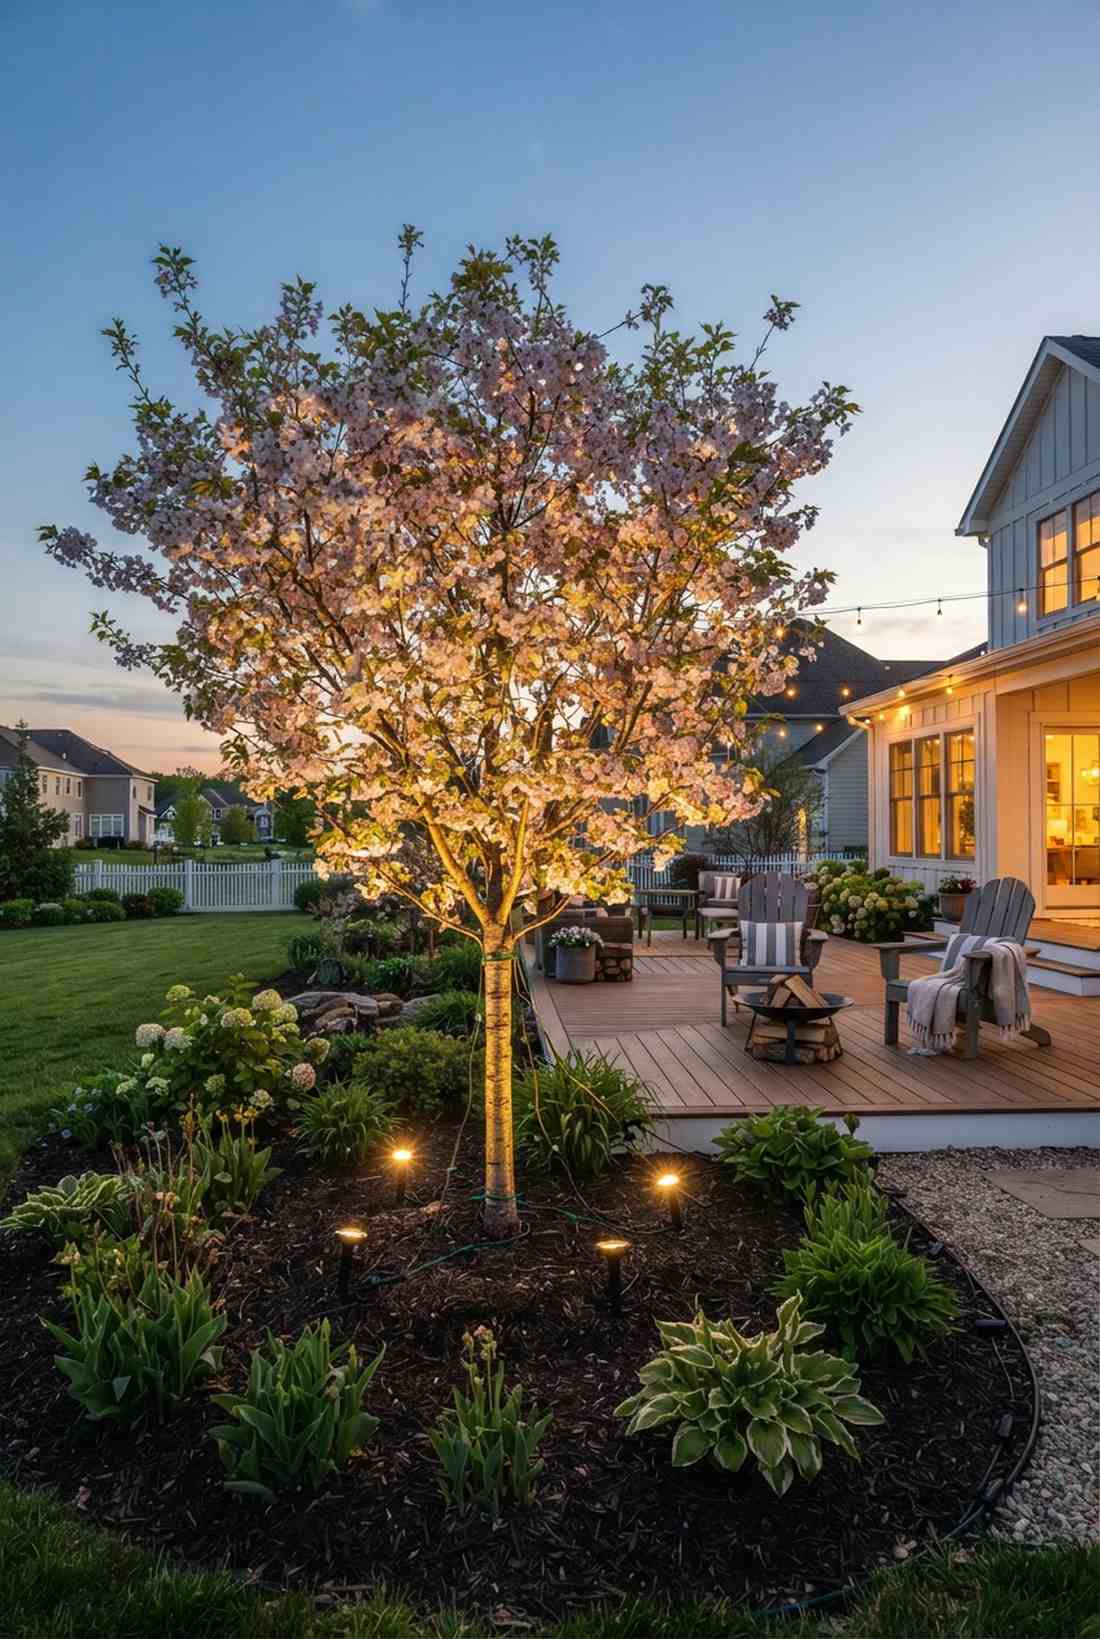
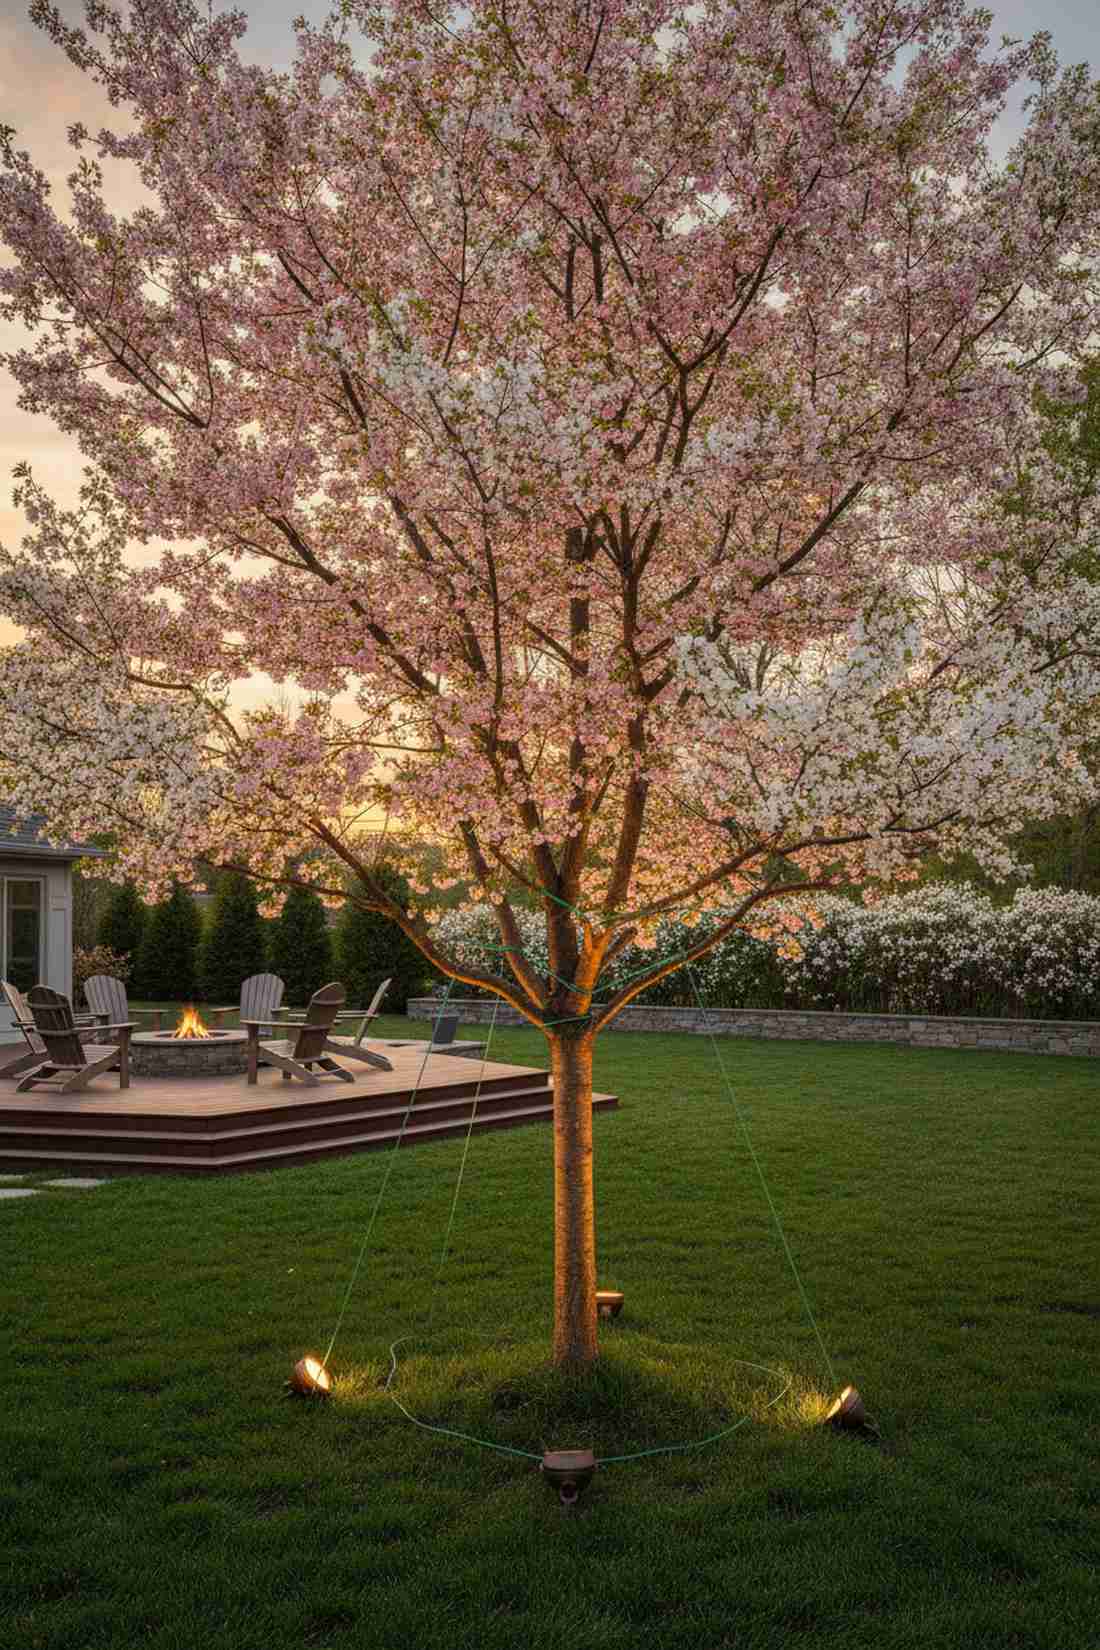
26. Flowering Tree Accent Lighting
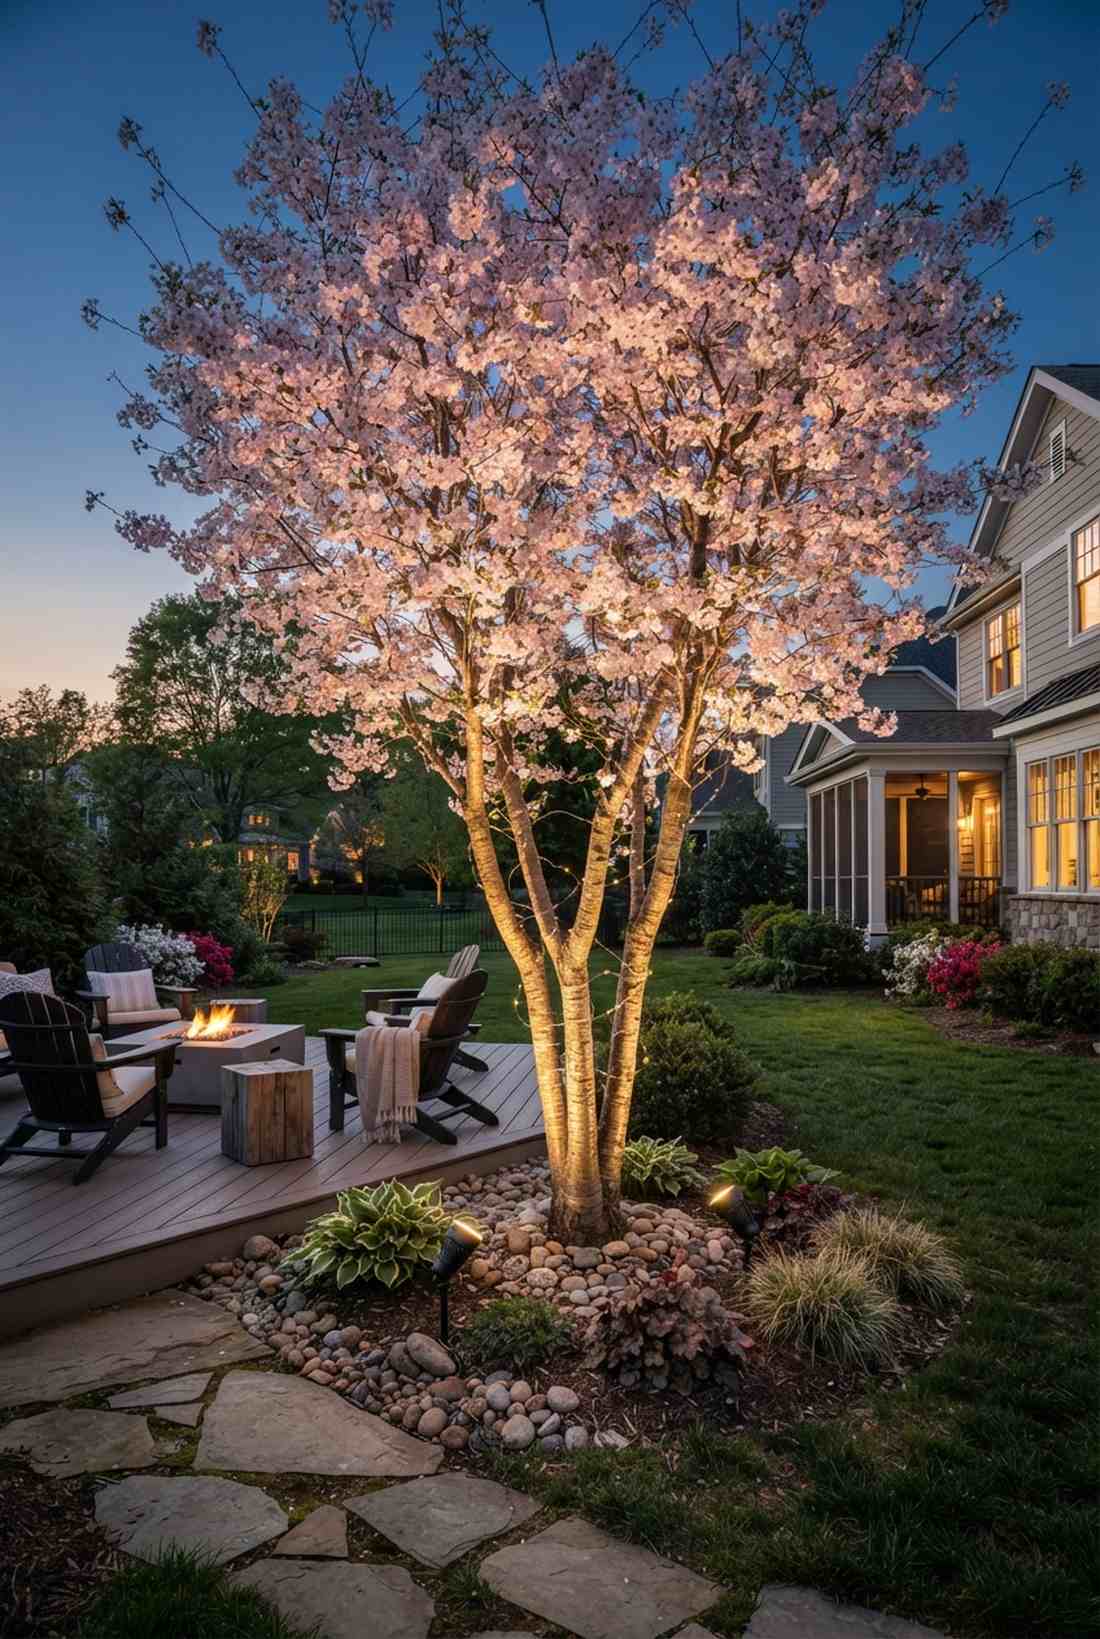
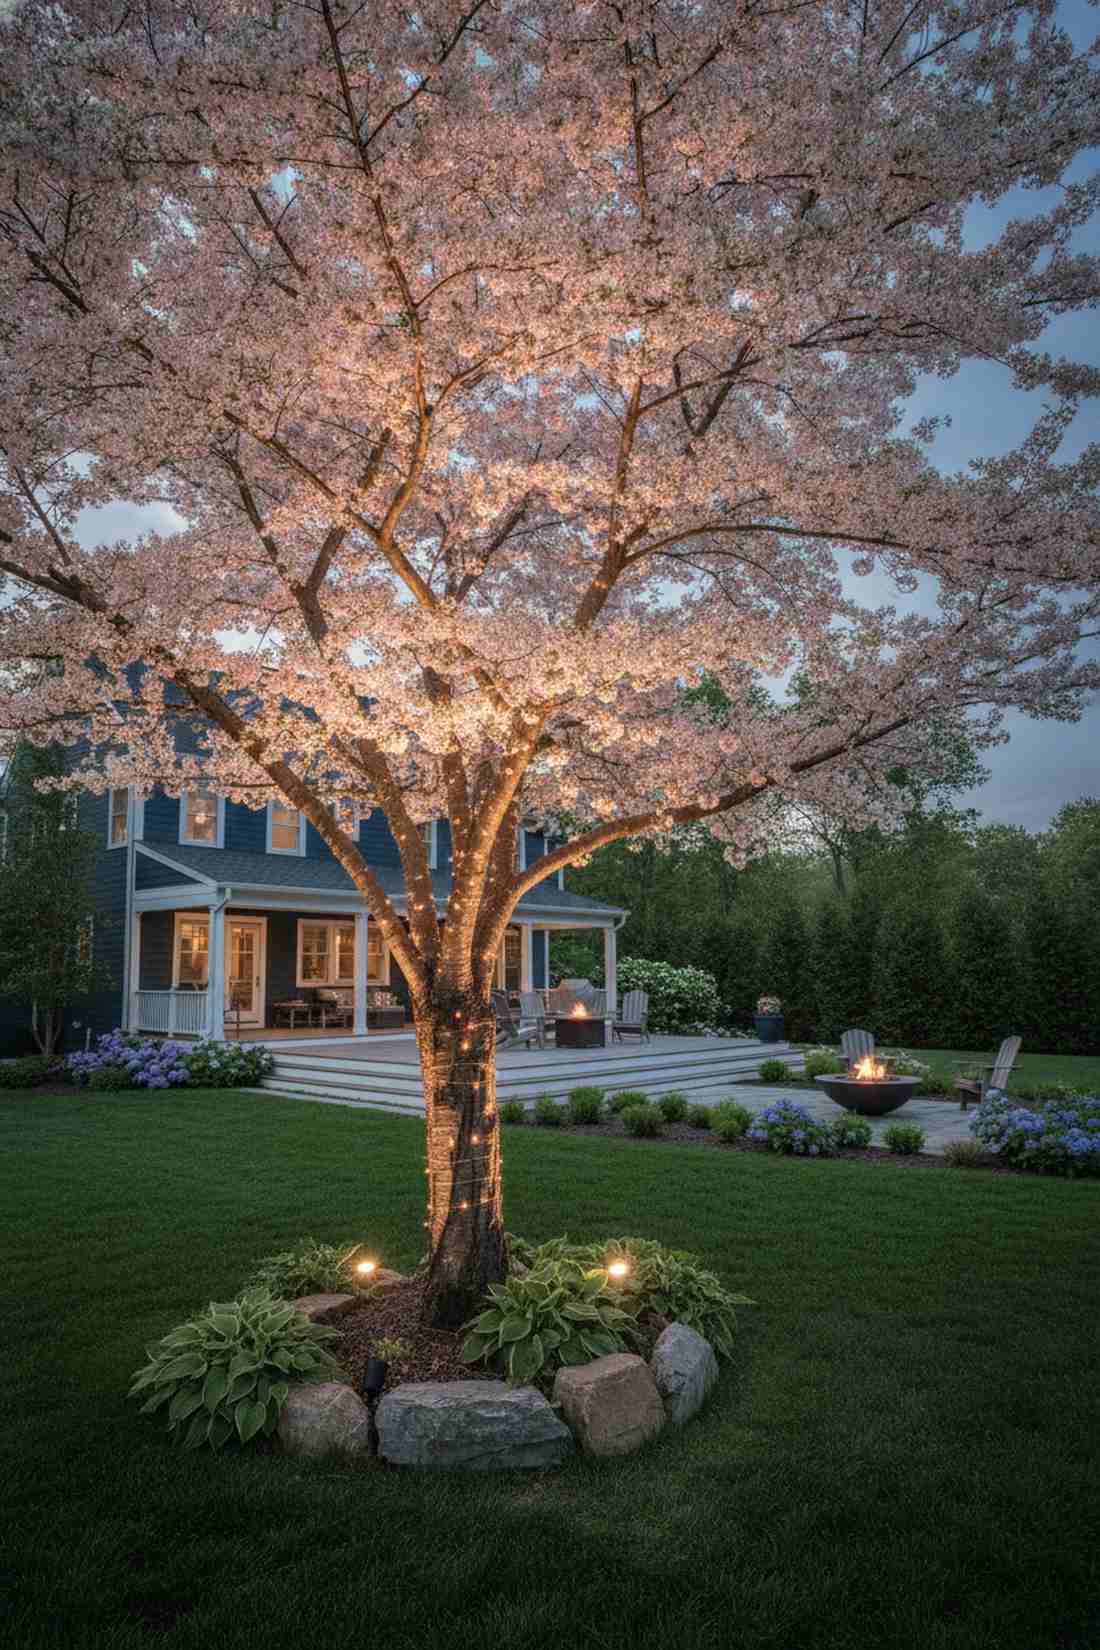
Enhances spring blossoms with a soft under-glow, feeling like a glowing pink or white cloud in your yard. This base-uplighting technique is essential for delicate cherry blossoms, dogwoods, or magnolias in full bloom.
Strangling fragile blooming branches with wires destroys the petals, but combining a trunk wrap with base-level uplights looks far more expensive than it is. The directional ground lights catch the underbelly of the flowers without damaging a single bud.
This gentle illumination costs roughly $35–$60. It’s a fast upgrade that completely changes the evening vibe.
- Key Materials: Base spotlights + thin wire wraps
- Vibe / Style: Soft and ethereal
- Difficulty: Easy
- Budget Breakdown: Materials: $20 | Spotlights: $30.
- Creator’s Tip: Angle a low-voltage solar spotlight straight up from the dirt, hidden behind a rock, to hit the canopy perfectly.
- Smart Sourcing: solar-powered LED uplights (2-pack) and copper wire fairy lights (bulk pack).
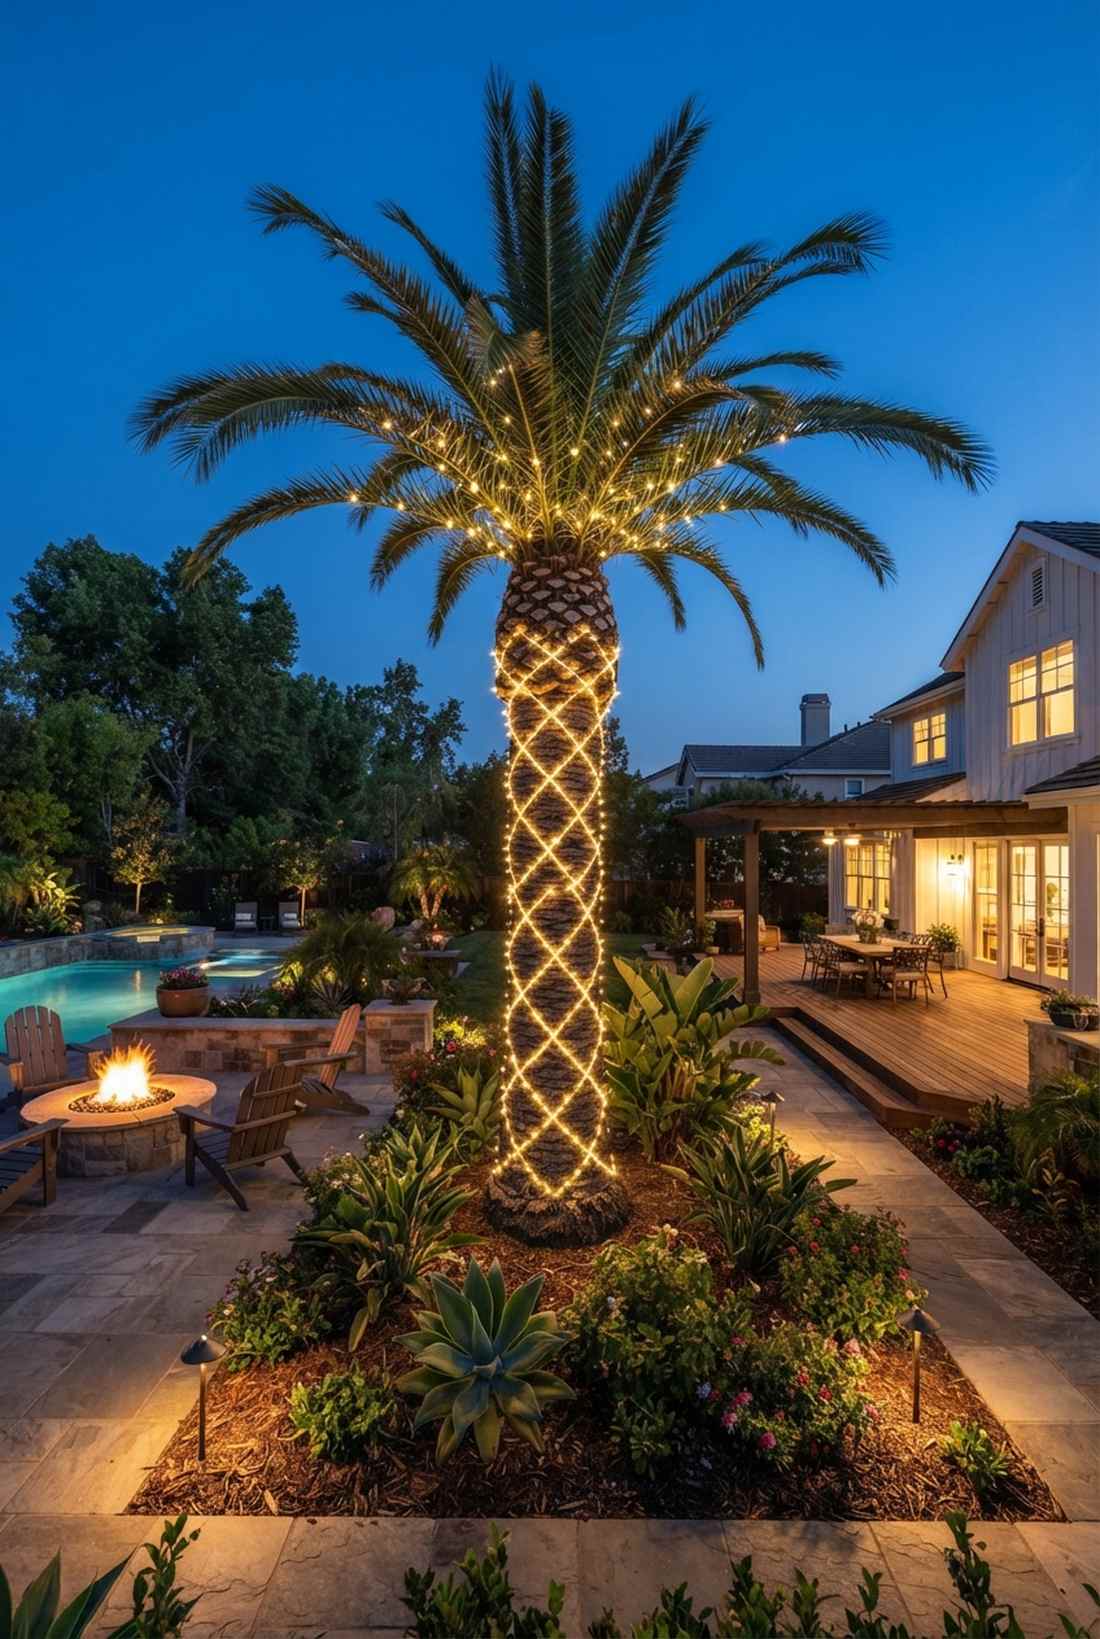
27. Palm Tree Adaptation

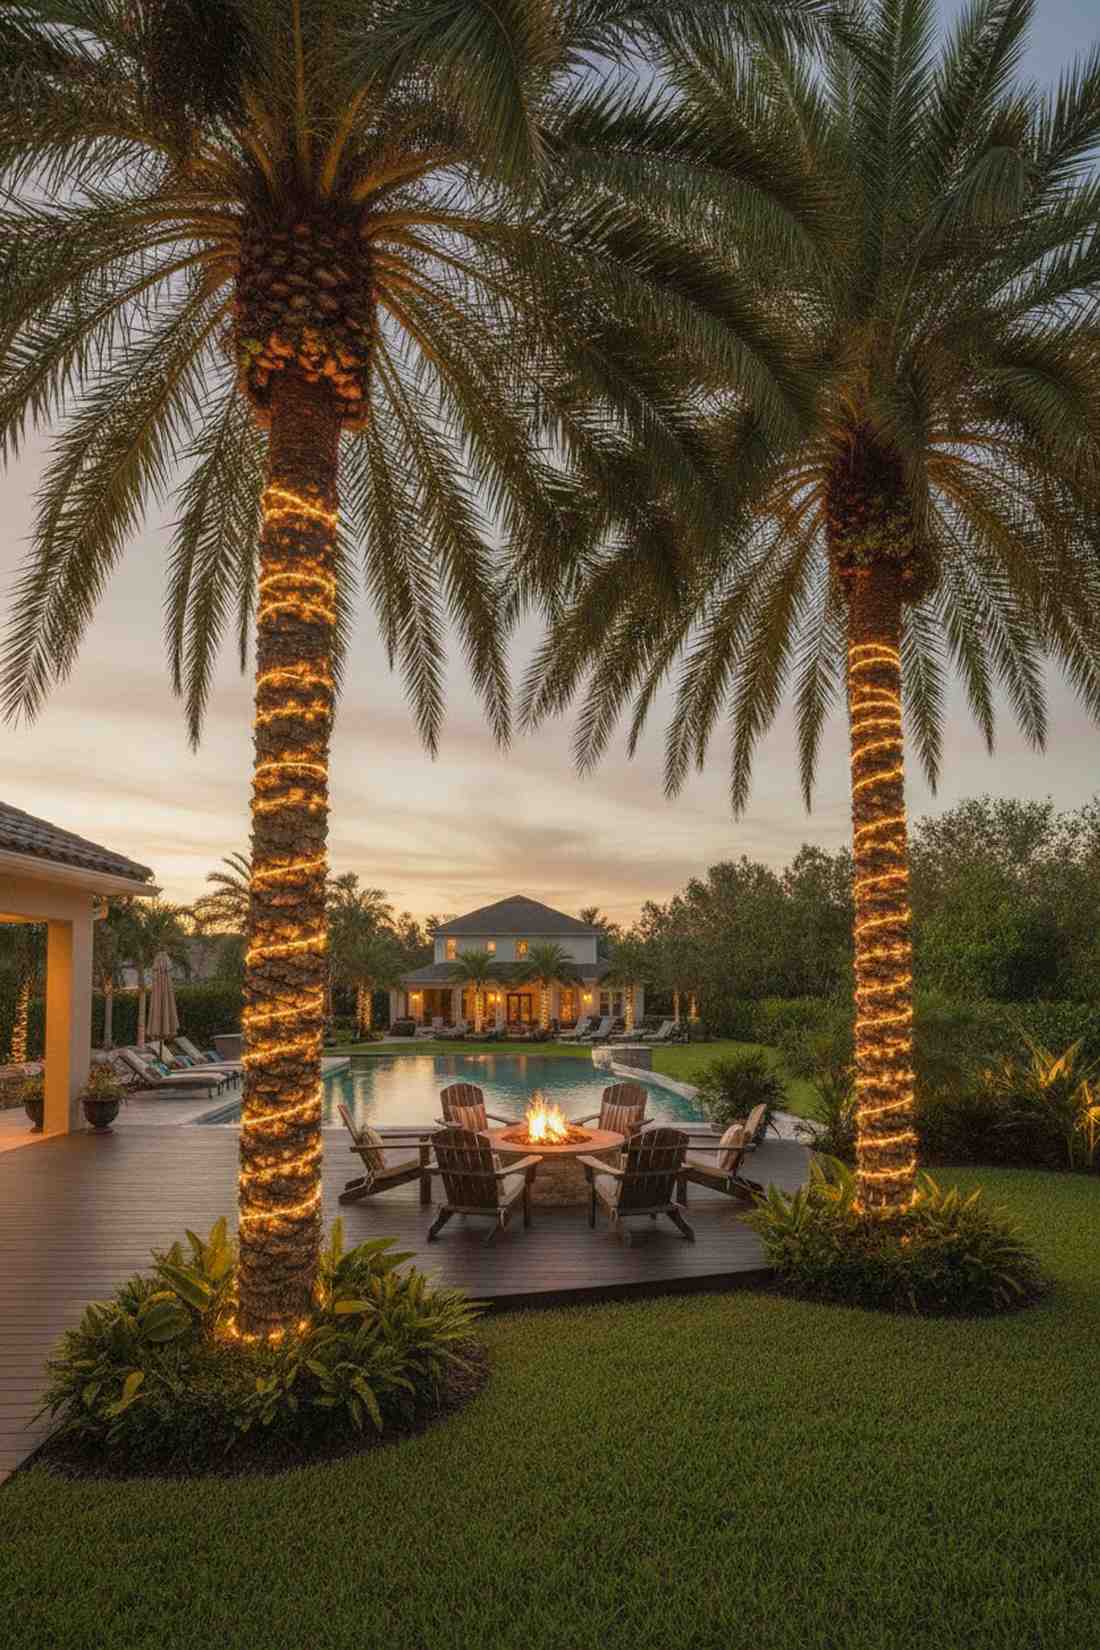
Brings a vibrant, tropical resort energy that feels like a luxury beachfront cabana. This coastal trunk lighting method is uniquely tailored to grip the rough, crosshatched bark of mature palm trees.
Smooth spirals slip right off a palm, but weaving lights directly up the natural vertical bark grooves delivers a surprisingly premium look. Running a distinct line up the trunk and shooting out under the fronds creates an iconic tropical silhouette.
You can achieve this resort look for $25–$50. Pin this if you live in a coastal or southern climate.
- Key Materials: Rope lights or thick-wire LEDs
- Vibe / Style: Tropical and vibrant
- Difficulty: Intermediate (ladder needed)
- Budget Breakdown: Materials: $40 | Zip ties: $5.
- Creator’s Tip: Never wrap lights tight around the green fronds, only the dead bark, to allow the tree to breathe and sway.
- Smart Sourcing: warm white outdoor rope lights and UV-resistant heavy-duty zip ties.
28. Weeping Tree Enhancement
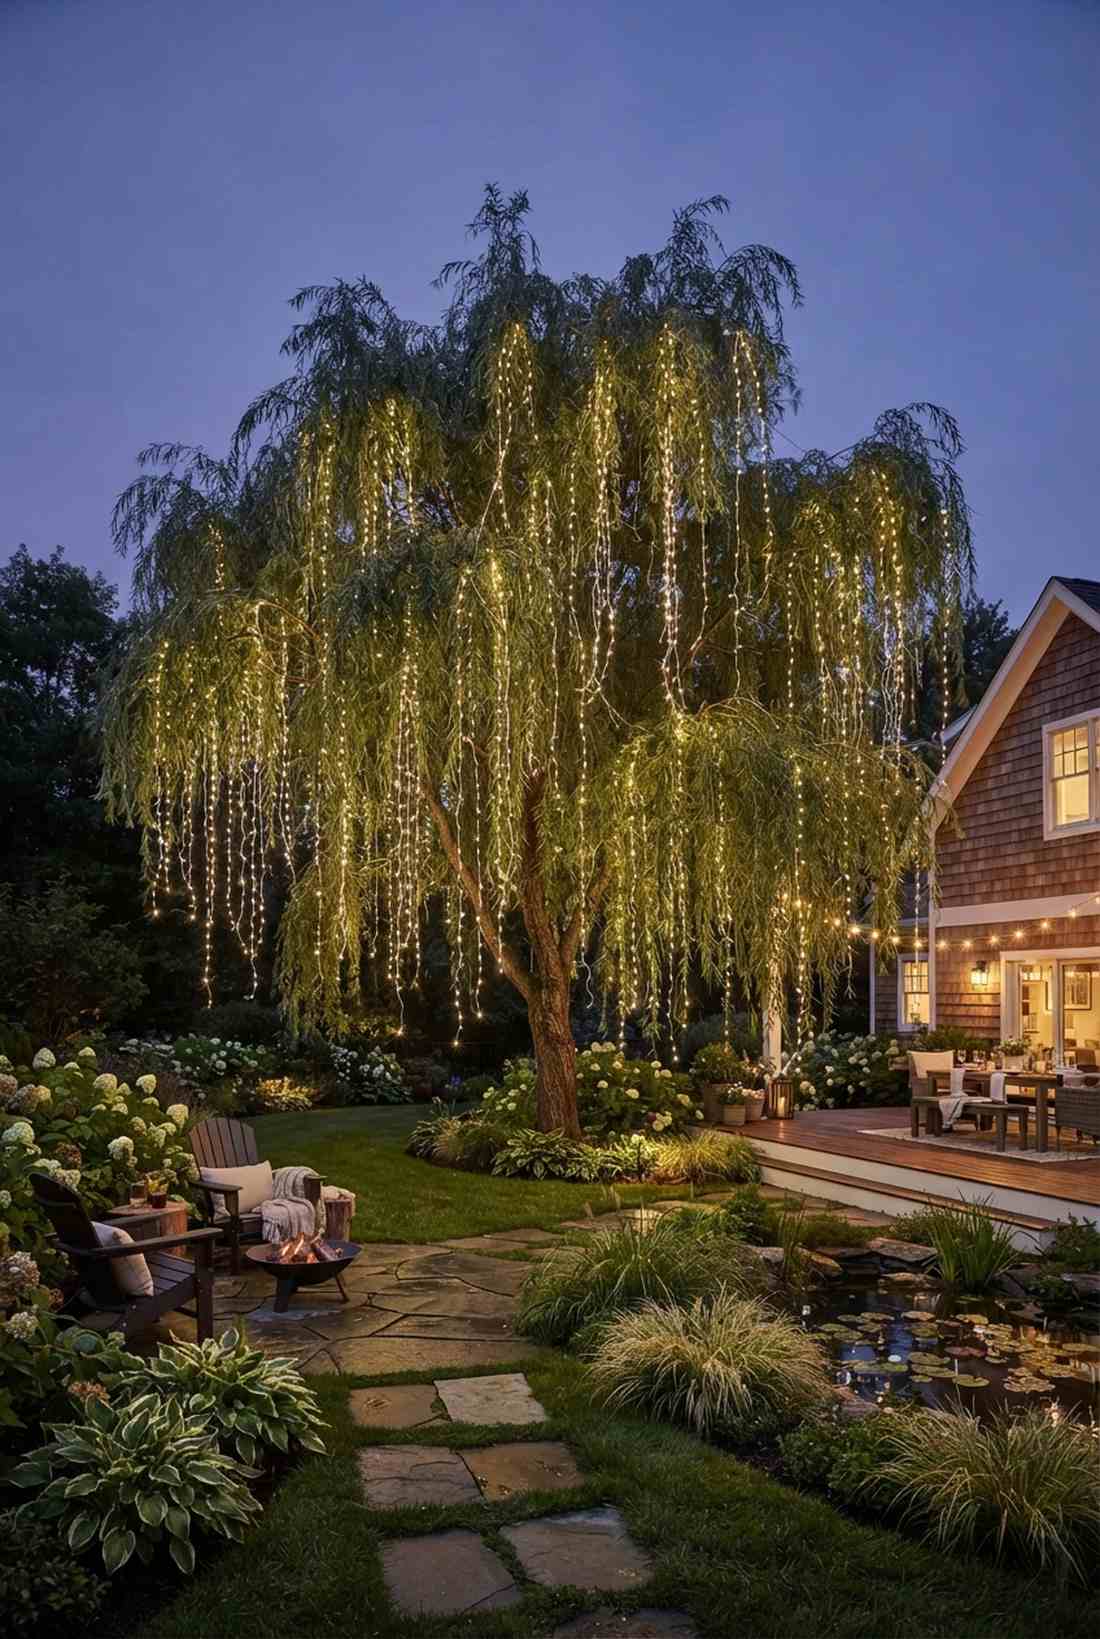
Mimics a cascade of glowing rainwater that feels incredibly serene and melancholic. This draping illumination strategy is custom-made for the long, sweeping branches of weeping willows or weeping cherry trees.
Wrapping weeping branches rigidly ruins their flow, while letting thin micro-wires hang loosely gives a designer-level finish. Anchoring the light only at the top canopy allows the LED strands to sway beautifully in the breeze alongside the leaves.
This fluid, moving display runs about $30–$55. Highly recommended to maximize the drama of weeping flora.
- Key Materials: Lightweight fairy wire
- Vibe / Style: Fluid and serene
- Difficulty: Easy
- Budget Breakdown: Materials: $40 | Base: $0.
- Creator’s Tip: Use the thinnest silver or copper wire lights you can find so the wind can easily move them.
- Smart Sourcing: ultra-thin outdoor fairy lights and reusable zip ties (UV-rated).
Don’t buy a single spool of wire until you see how effective this next minimal trick is.
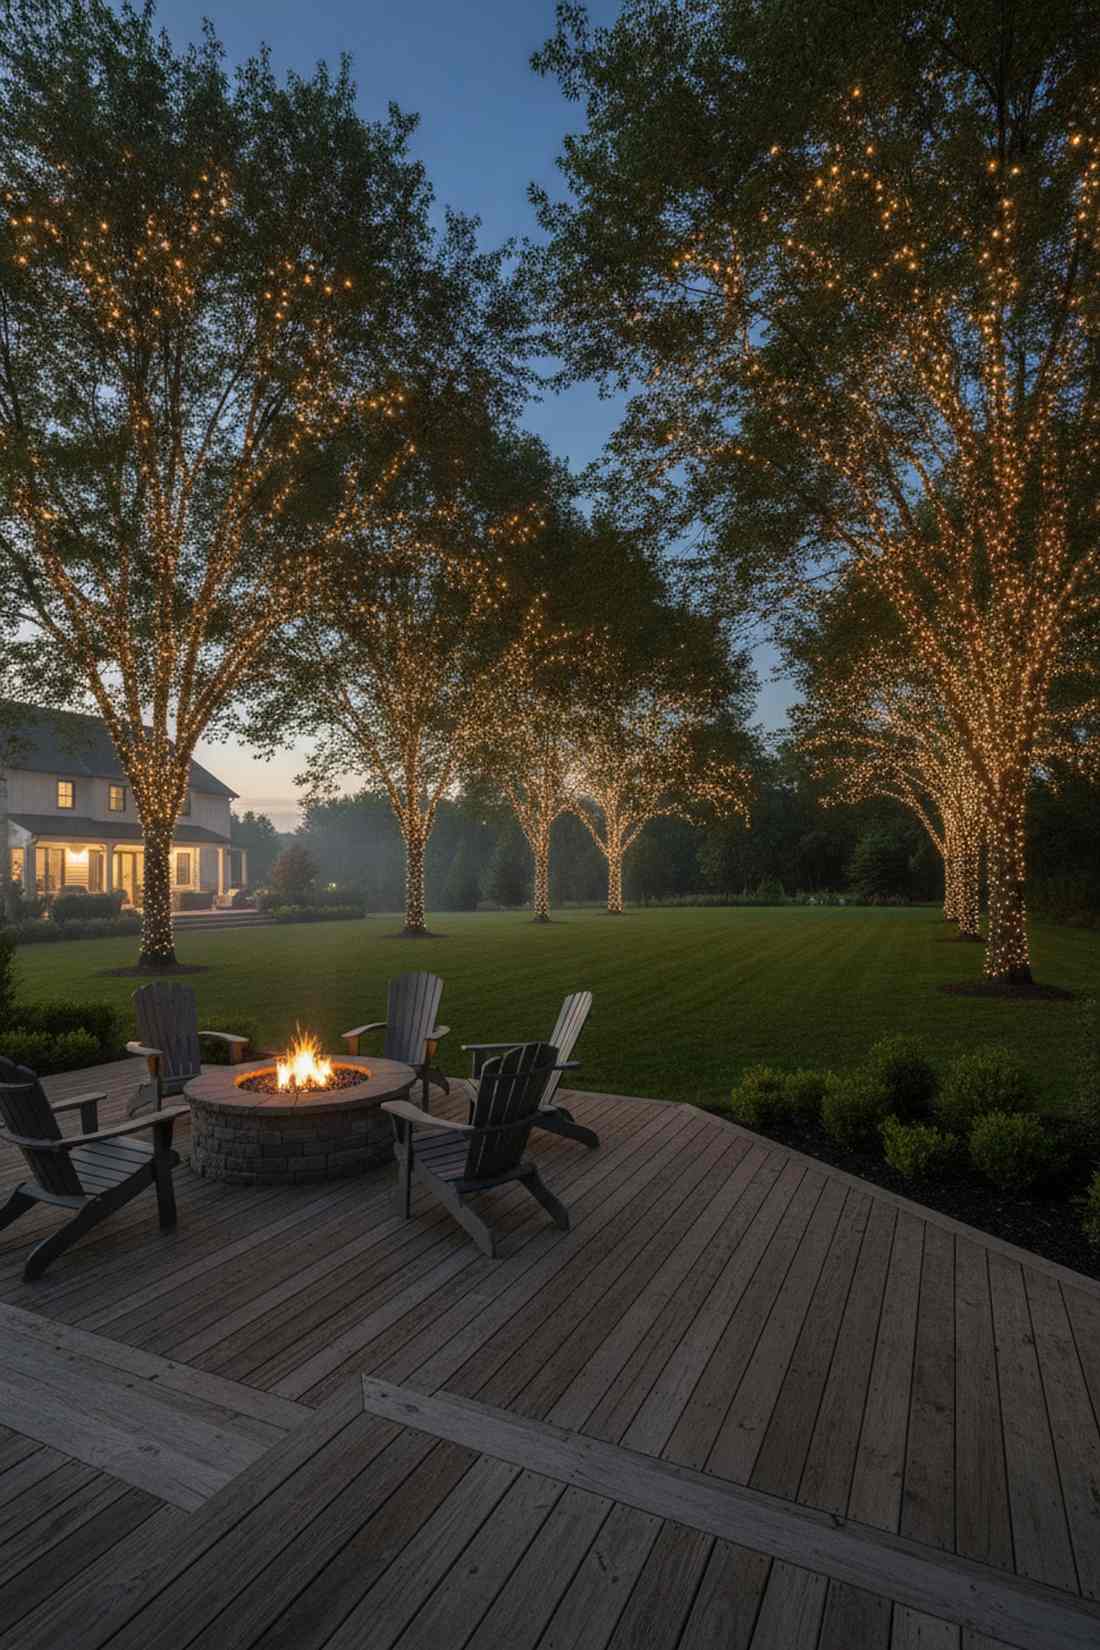
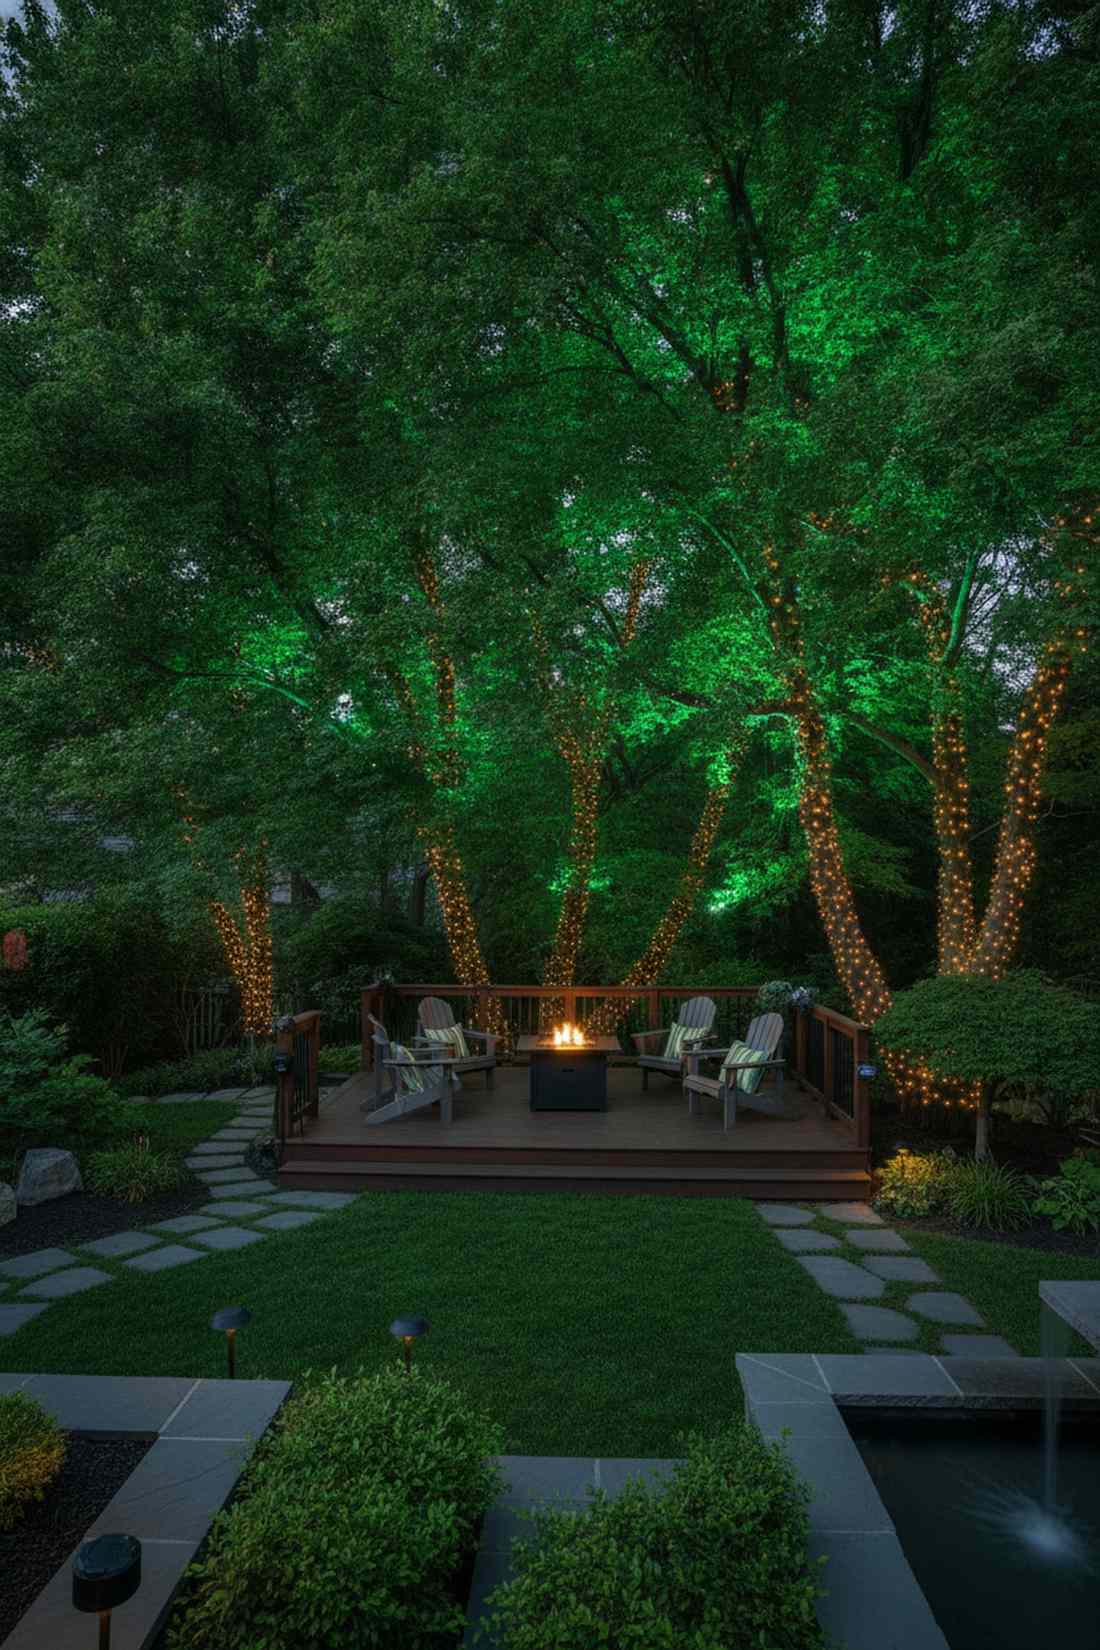
29. Grove or Cluster Lighting
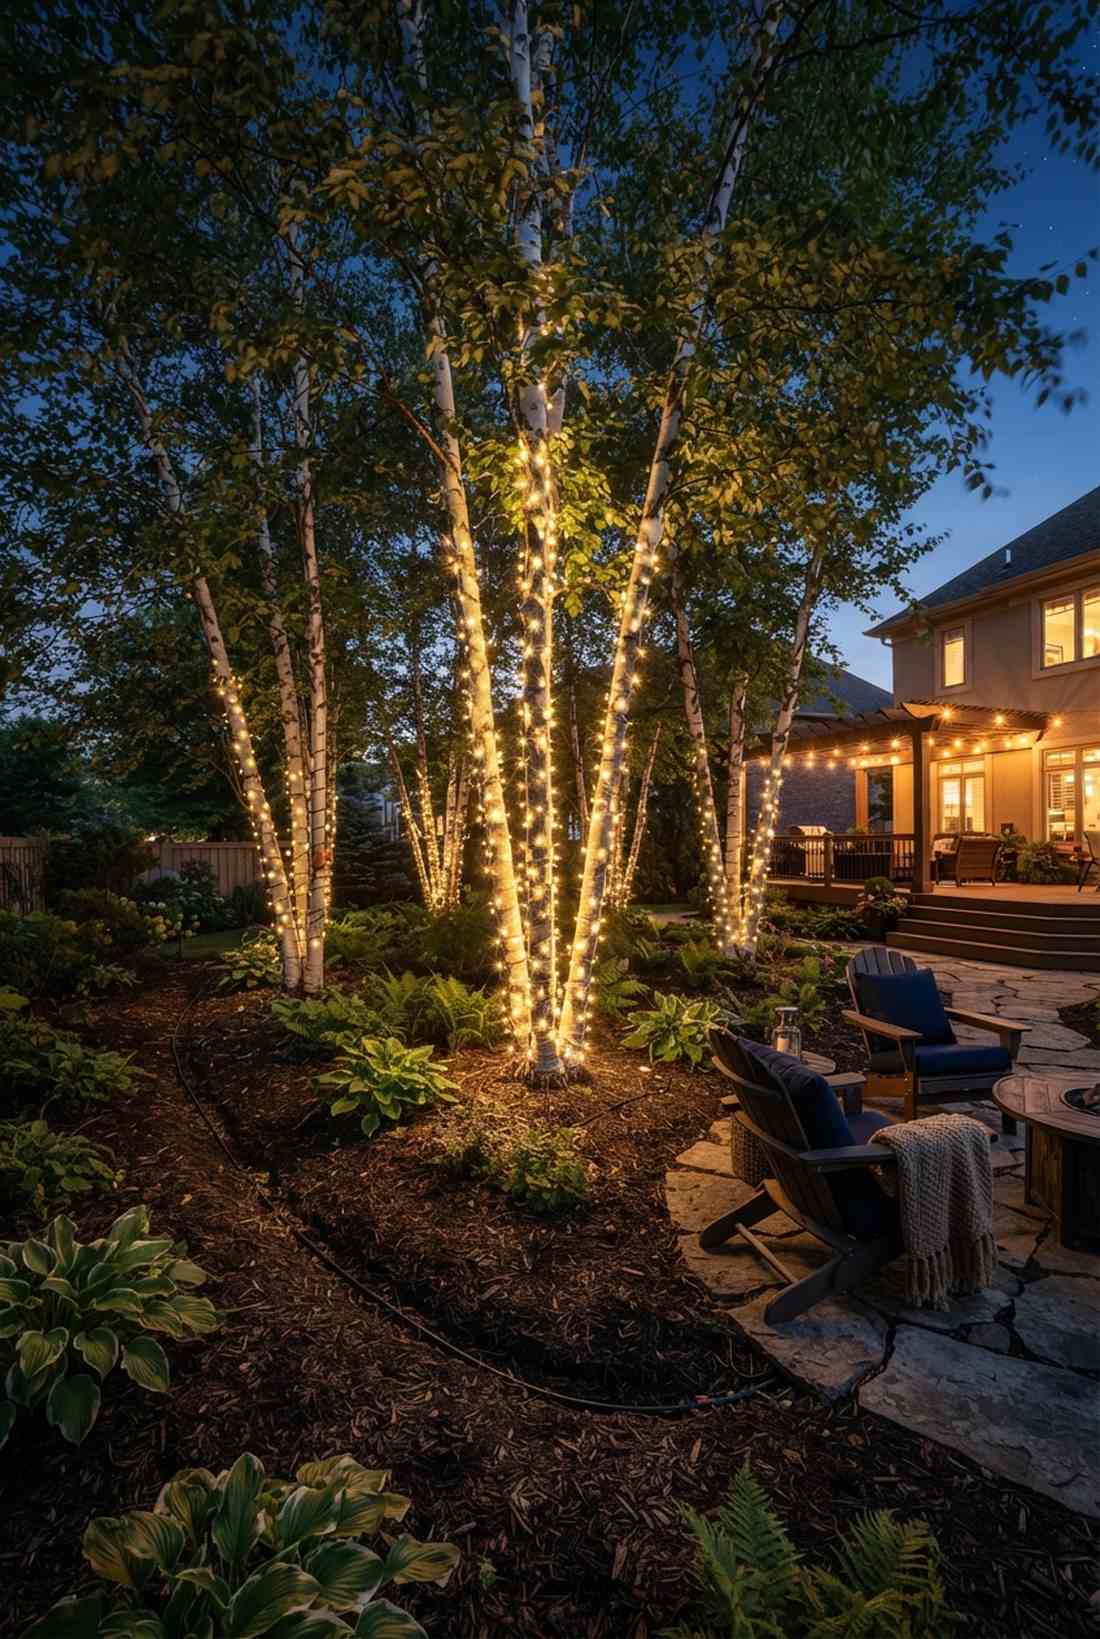
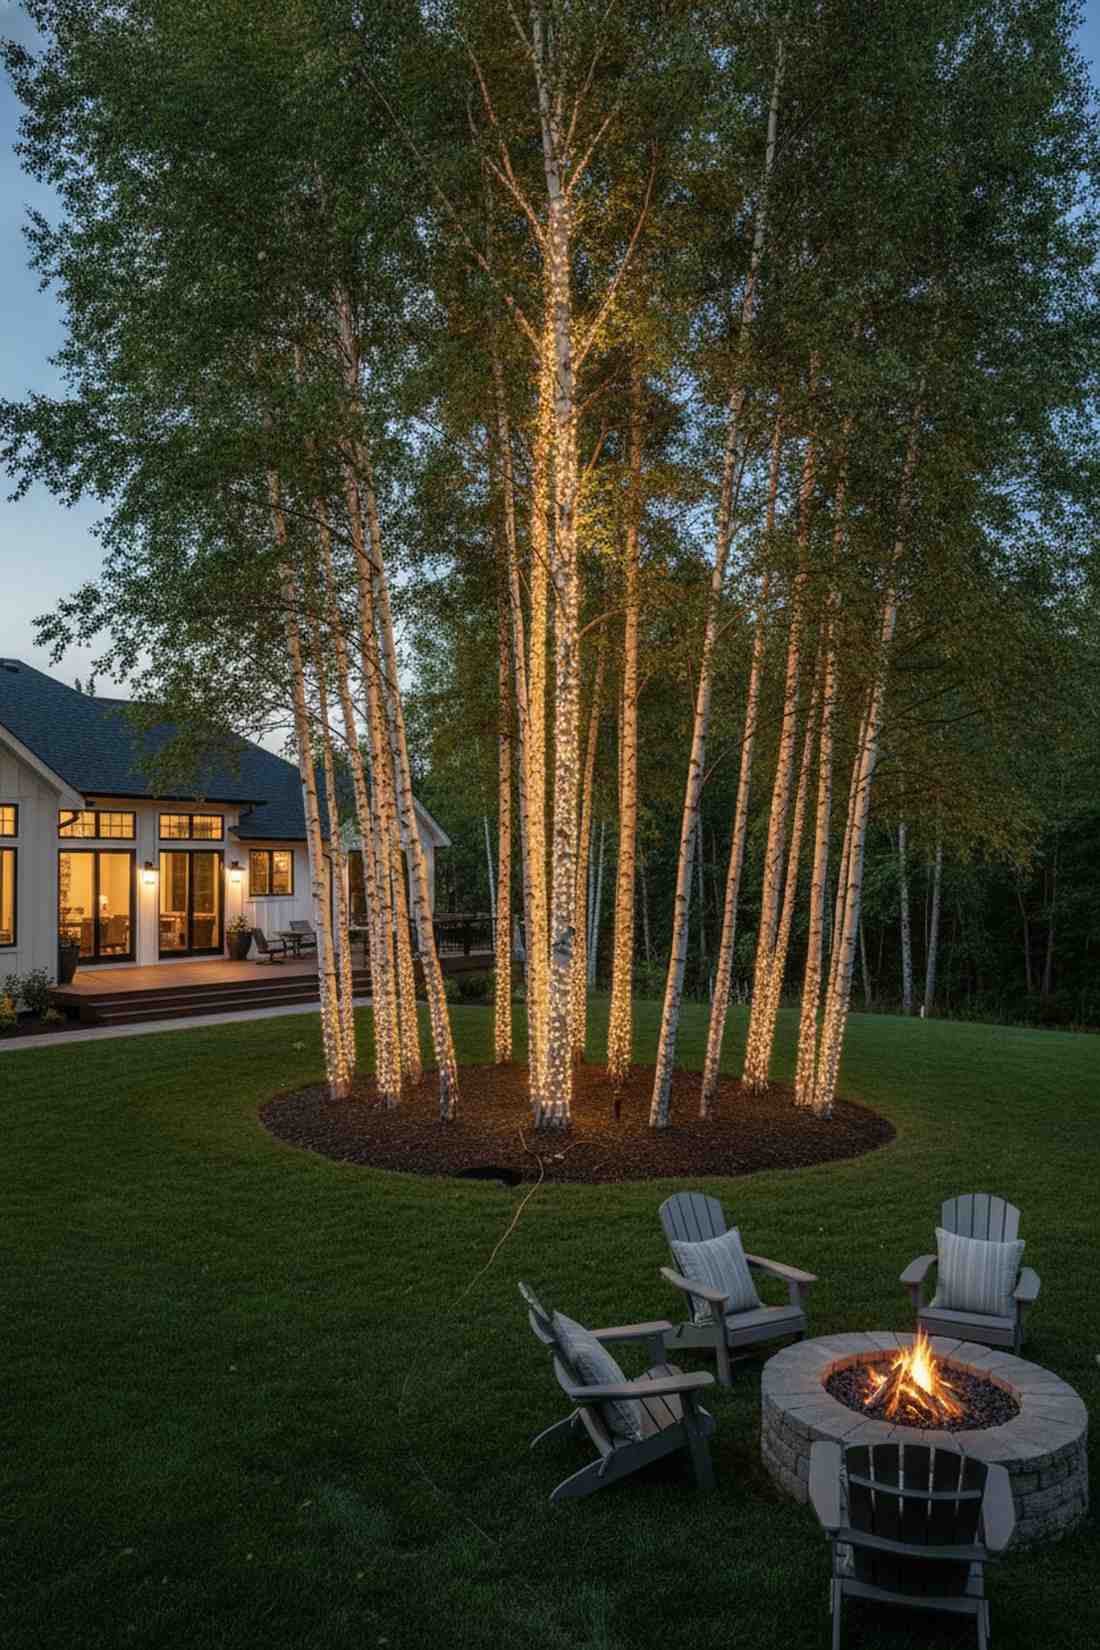
Creates an immersive, glowing woodland that feels like you’ve stepped into an enchanted private park. This unified multi-tree layout is the ultimate flex for properties with tight clusters of skinny birch or aspen trees.
Lighting every tree identically looks artificial, but varying the brightness across a grove looks far more expensive than it is. Make one central tree the intense focal point, while loosely wrapping the surrounding trunks to create depth and shadows.
A full grove setup will cost $60–$120 depending on scale. Save this to your large-scale landscaping board.
- Key Materials: Bulk commercial spools
- Vibe / Style: Immersive and unified
- Difficulty: Advanced (managing cords)
- Budget Breakdown: Materials: $90 | Cords: $20.
- Creator’s Tip: Dig a shallow two-inch trench in the mulch to completely hide the extension cords connecting the trees.
- Smart Sourcing: commercial-grade LED wire spools (bulk pack) and underground-rated extension cables.
30. Garland-Wrapped Trunk Base
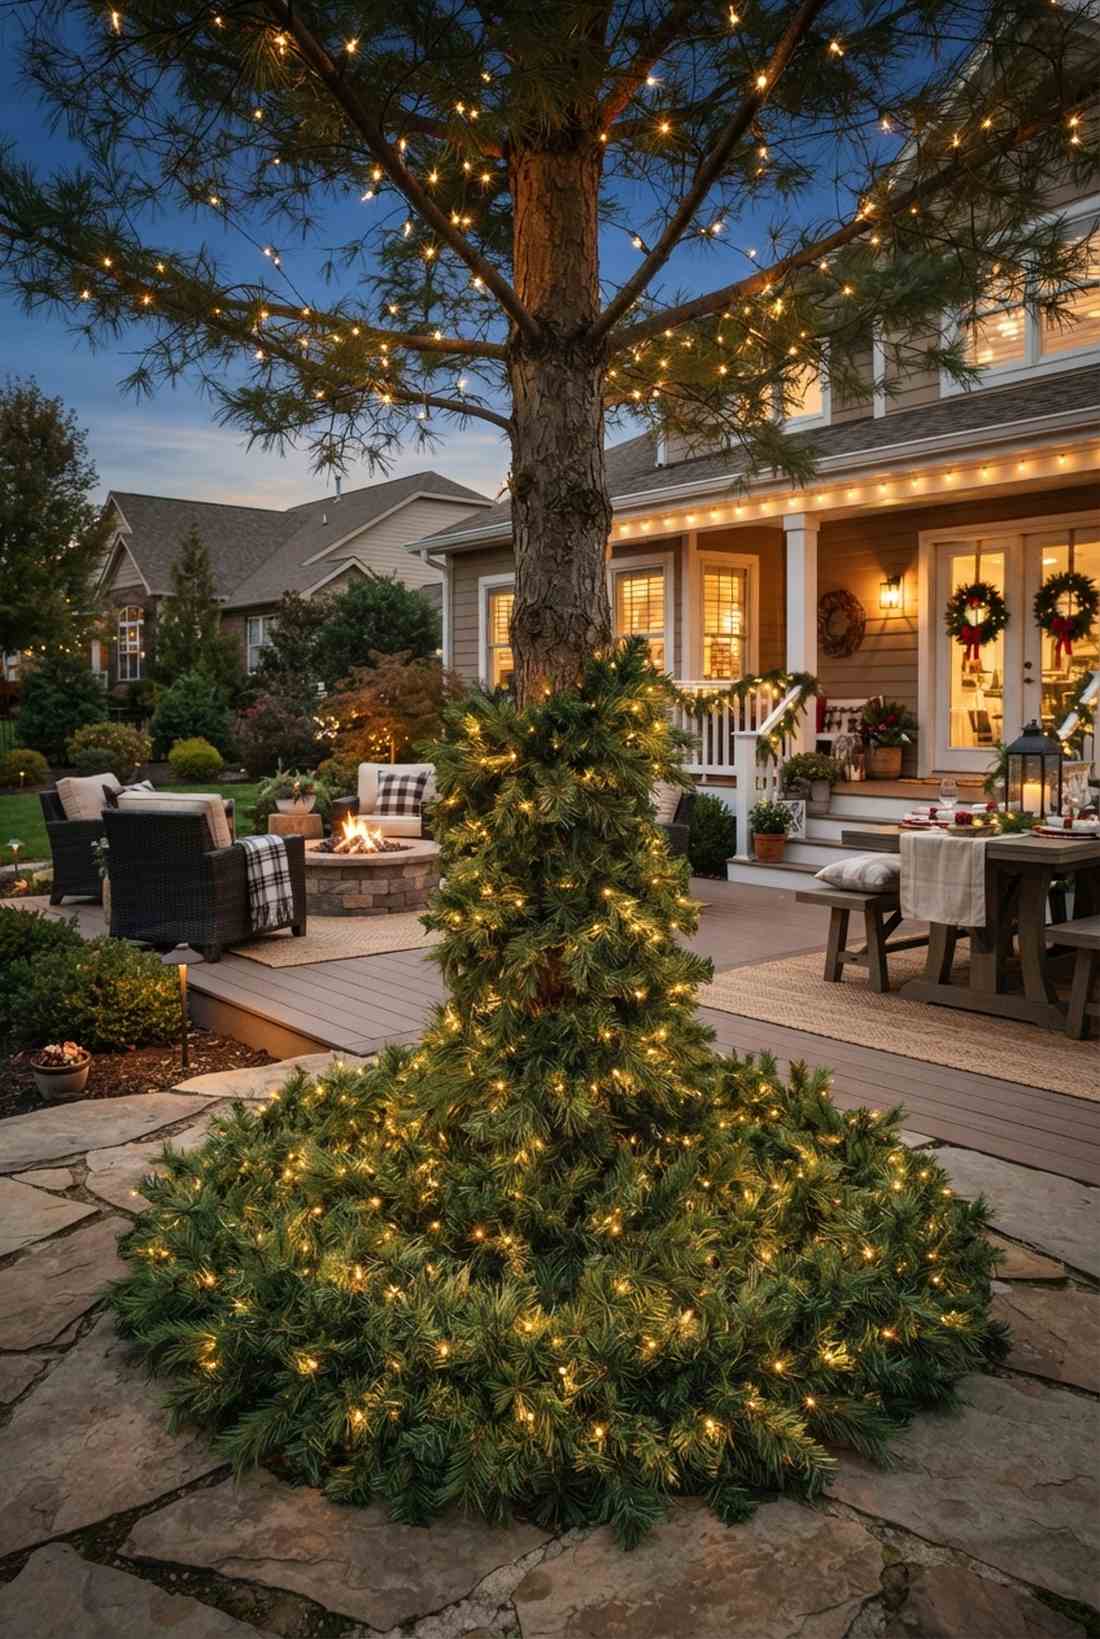
Provides a thick, lush texture that feels like a premium holiday installation at a luxury mall. Integrating a fairy lights garland at the base is brilliant for hiding ugly exposed roots or protecting young saplings.
Naked wires at the base can look messy, but weaving them through faux greenery delivers a surprisingly premium look. The artificial pine needles add massive daytime volume, hiding battery packs flawlessly while glowing beautifully at night.
You can execute this thick base wrap for $30–$50. It’s a fast upgrade that completely changes the evening vibe.
- Key Materials: Pre-lit or unlit faux garland
- Vibe / Style: Lush and festive
- Difficulty: Very easy
- Budget Breakdown: Materials: $20 | Garland: $25.
- Creator’s Tip: Wrap the garland first to establish the bulk, then spiral the fairy wire over the top to lock it down.
- Smart Sourcing: thick artificial pine garland (outdoor rated) and battery-operated fairy lights (waterproof).
31. Branch Garland Swags
Hangs with a heavy, classic elegance that feels like a Victorian Christmas postcard. This draped fairy lights garland technique adds incredible fullness to sparse trees that lost their leaves too early.
Stringing plain wire across branches is invisible by day, but hanging thick, lit garland gives a designer-level finish 24/7. The swooping curves add a sense of celebration and structure to the negative space of your canopy.
Expect to spend $40–$75 for high-quality faux greenery. Pin this if you want your yard to look beautiful during the day, too.
- Key Materials: Heavy-duty lit garland
- Vibe / Style: Classic and heavy
- Difficulty: Intermediate
- Budget Breakdown: Materials: $55 | Fasteners: $10.
- Creator’s Tip: Use heavy-duty zip ties at the branch connections; wet garland is incredibly heavy and will snap weak wire.
- Smart Sourcing: pre-lit outdoor evergreen garland (commercial) and UV-resistant heavy-duty zip ties.
32. Vertical Garland Columns
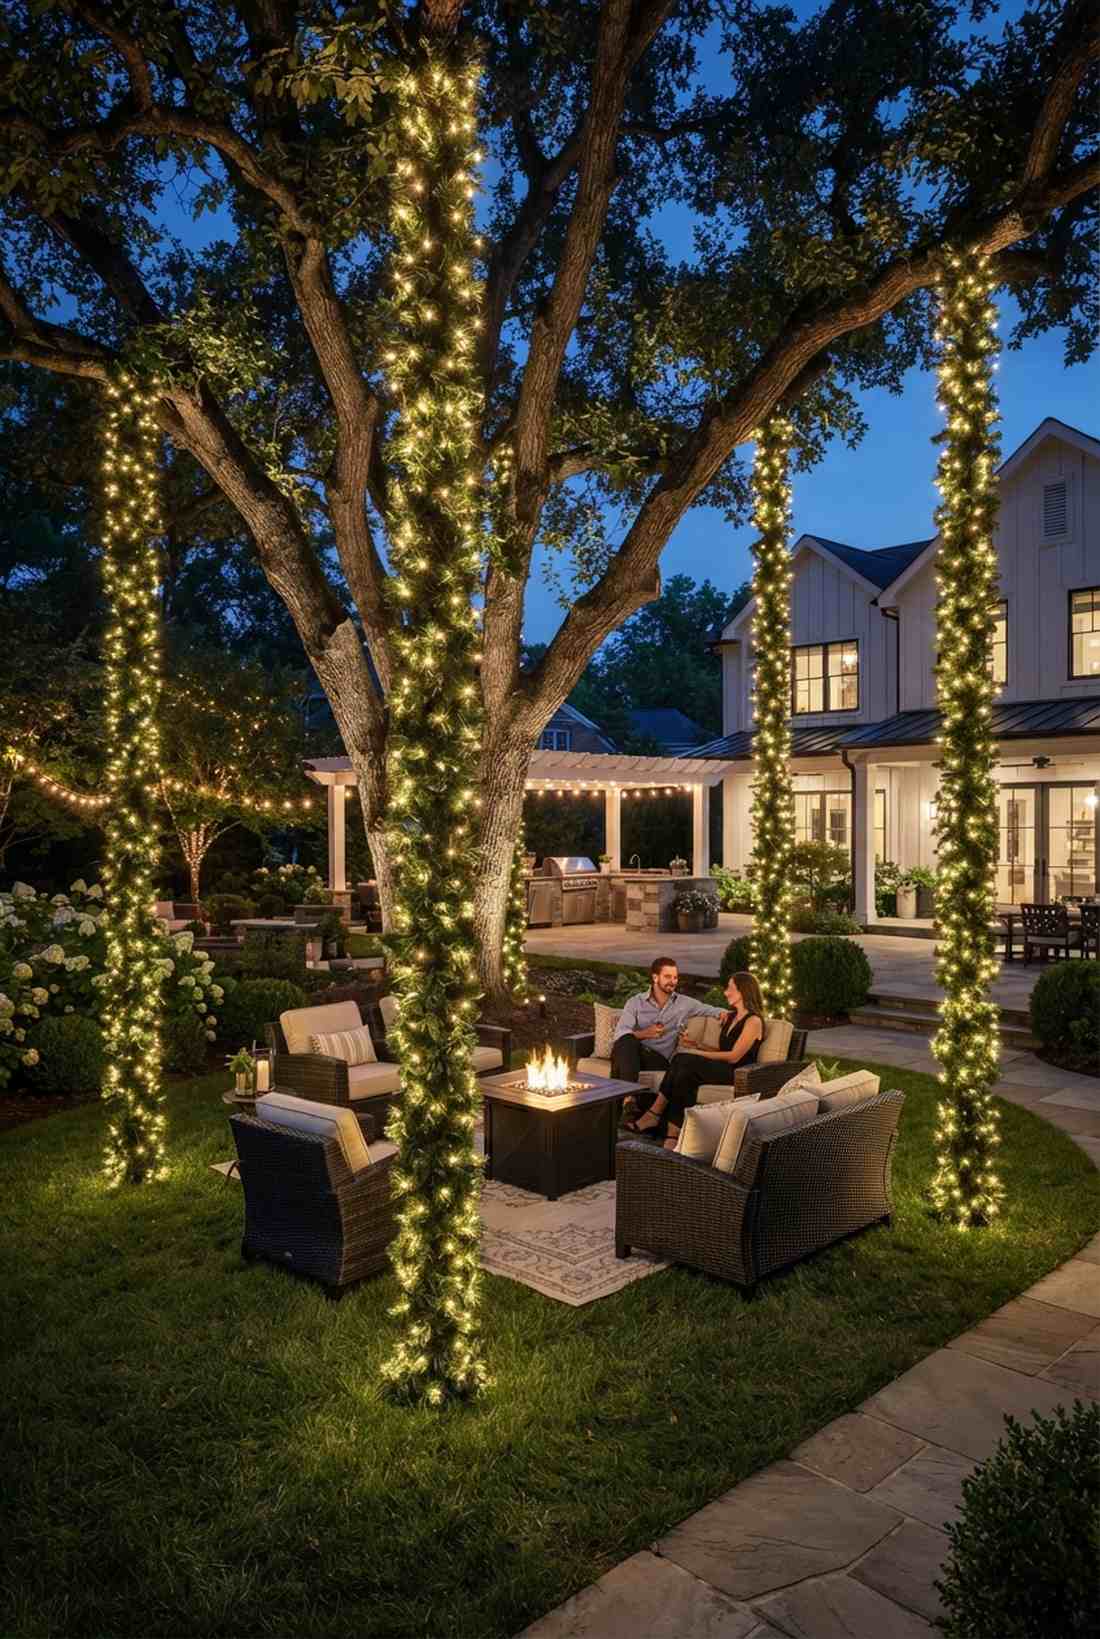
Constructs majestic glowing pillars that feel like the entrance to a grand outdoor ballroom. This hanging fairy lights garland design frames the perimeter of a large tree, creating an intimate room underneath.
Wrapping branches is standard, but dropping thick lit columns straight down to the grass looks far more expensive than it is. It creates a striking architectural boundary that elevates standard backyard parties into high-end events.
This custom pillar aesthetic costs roughly $50–$90. Highly recommended to create a VIP lounge feel in your yard.
- Key Materials: Long garland + wrap lights
- Vibe / Style: Grand and structured
- Difficulty: Intermediate
- Budget Breakdown: Materials: $70 | Anchors: $10.
- Creator’s Tip: Stake the bottom of the garland firmly into the soil so the pillars don’t swing wildly and damage property in a storm.
- Smart Sourcing: extra-long unlit outdoor garland and warm white LED spools.
33. Spring Bloom Coordination
Highlights seasonal pink and white petals, feeling like a vibrant celebration of the thaw. Adjusting your garden lights for trees during spring ensures your wiring doesn’t choke out fresh, delicate buds.
Leaving heavy winter wraps on during spring restricts growth, but loosening the tension and switching to base lighting delivers a surprisingly premium look. Warm white LEDs perfectly enhance the natural saturation of spring flowers without washing them out.
Adapting your existing setup costs almost nothing. Save this to your spring gardening checklist board.
- Key Materials: Existing lights + slack adjustment
- Vibe / Style: Fresh and vibrant
- Difficulty: Easy maintenance
- Budget Breakdown: Labor: $0 | Extras: $0.
- Creator’s Tip: Cut every third zip tie in March to give the branches room to swell with water and sap.
- Smart Sourcing: soft-tie plant wire (green) and solar-powered LED uplights (2-pack).
This specific setup is currently going viral on Pinterest for completely transforming tiny backyards.
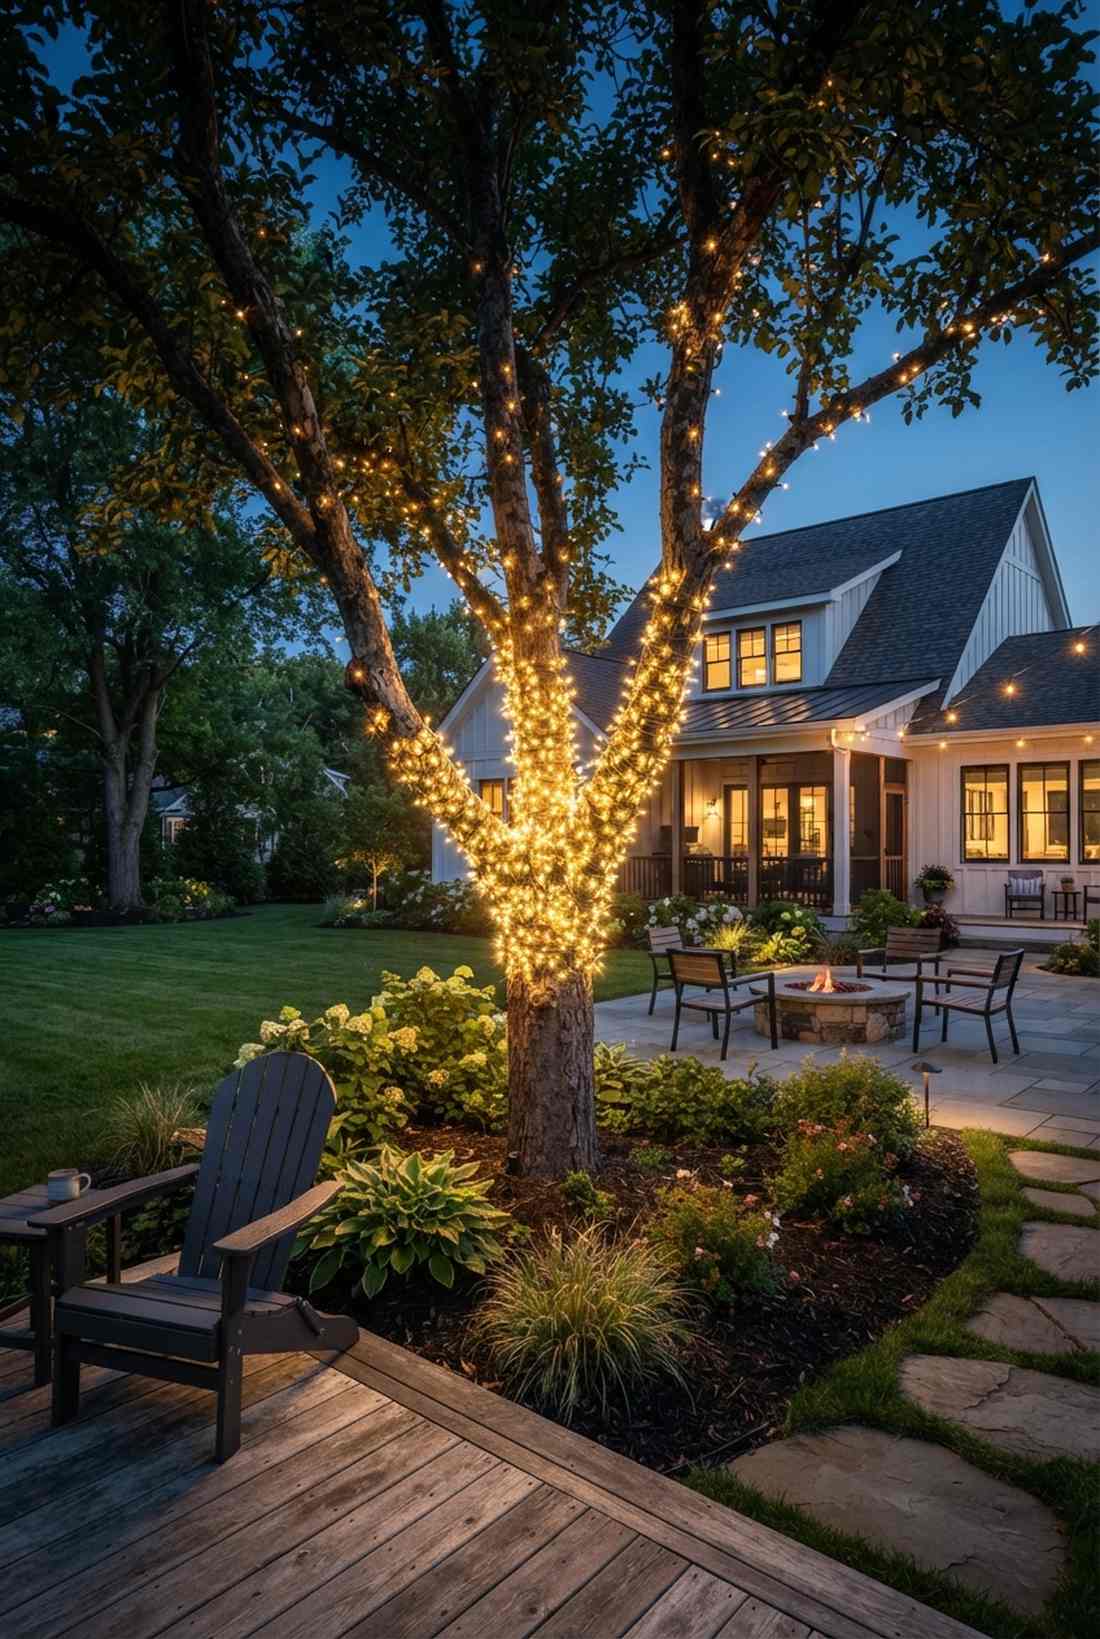
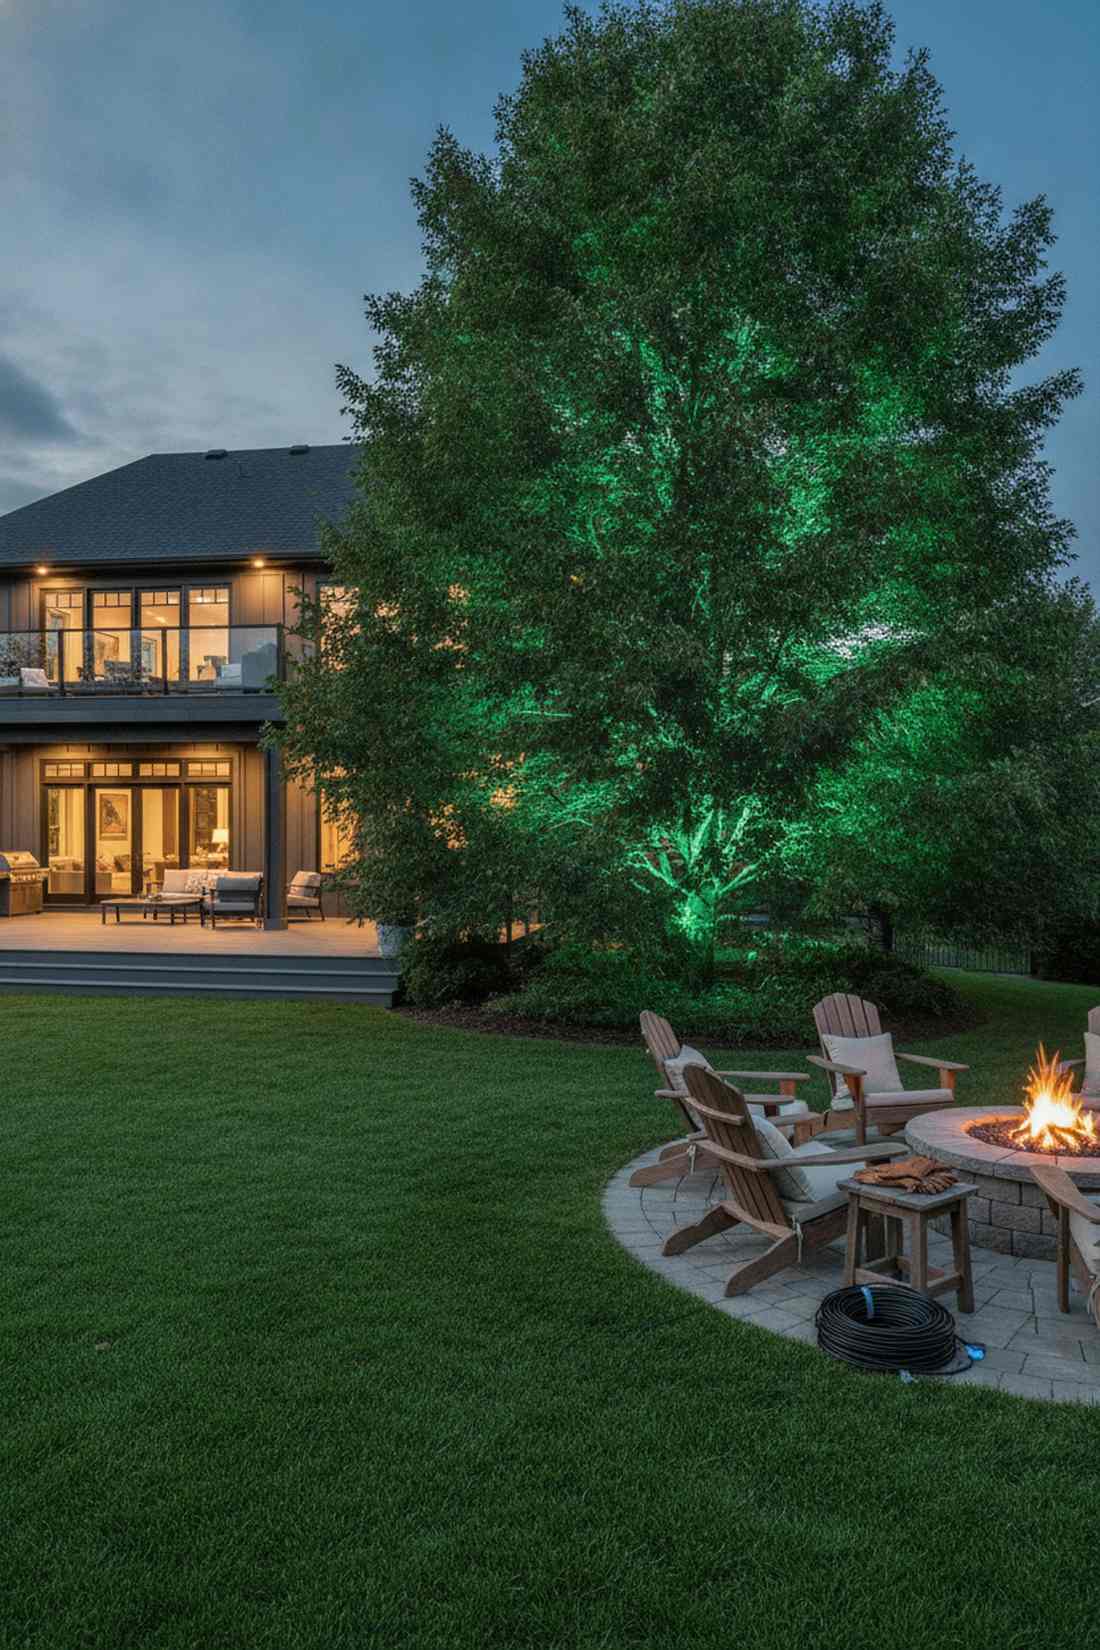
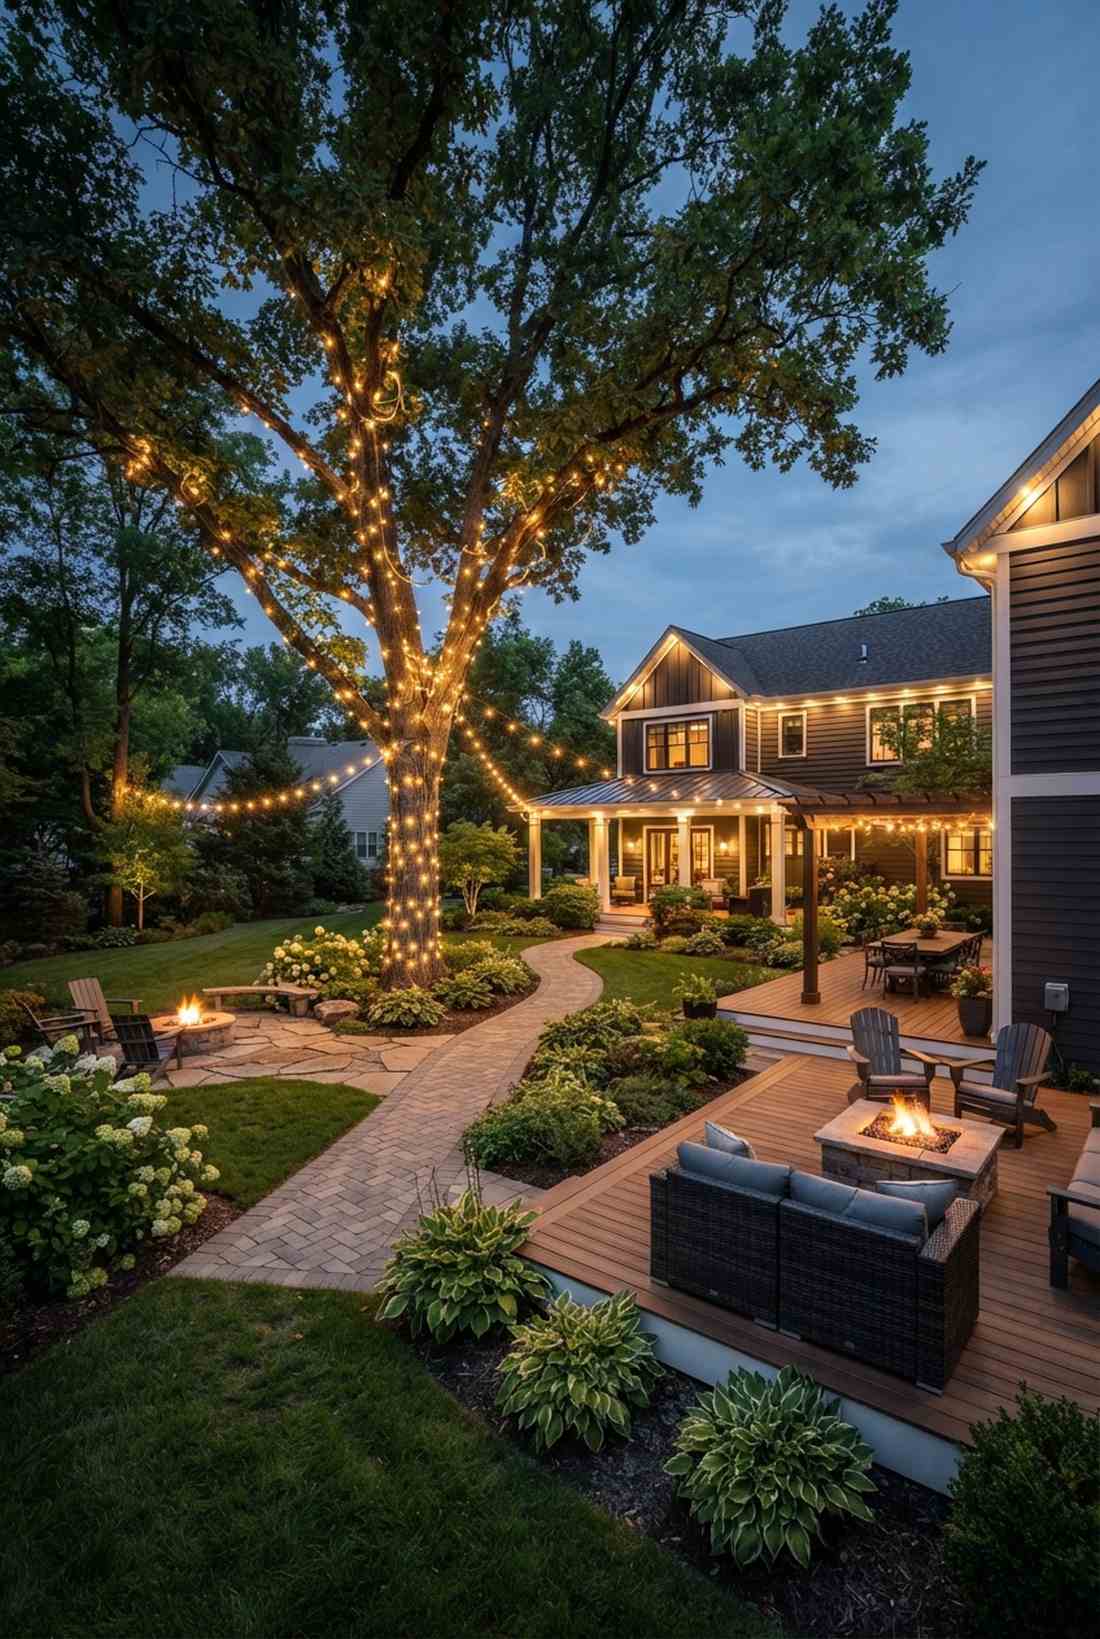
34. Summer Foliage Diffusion
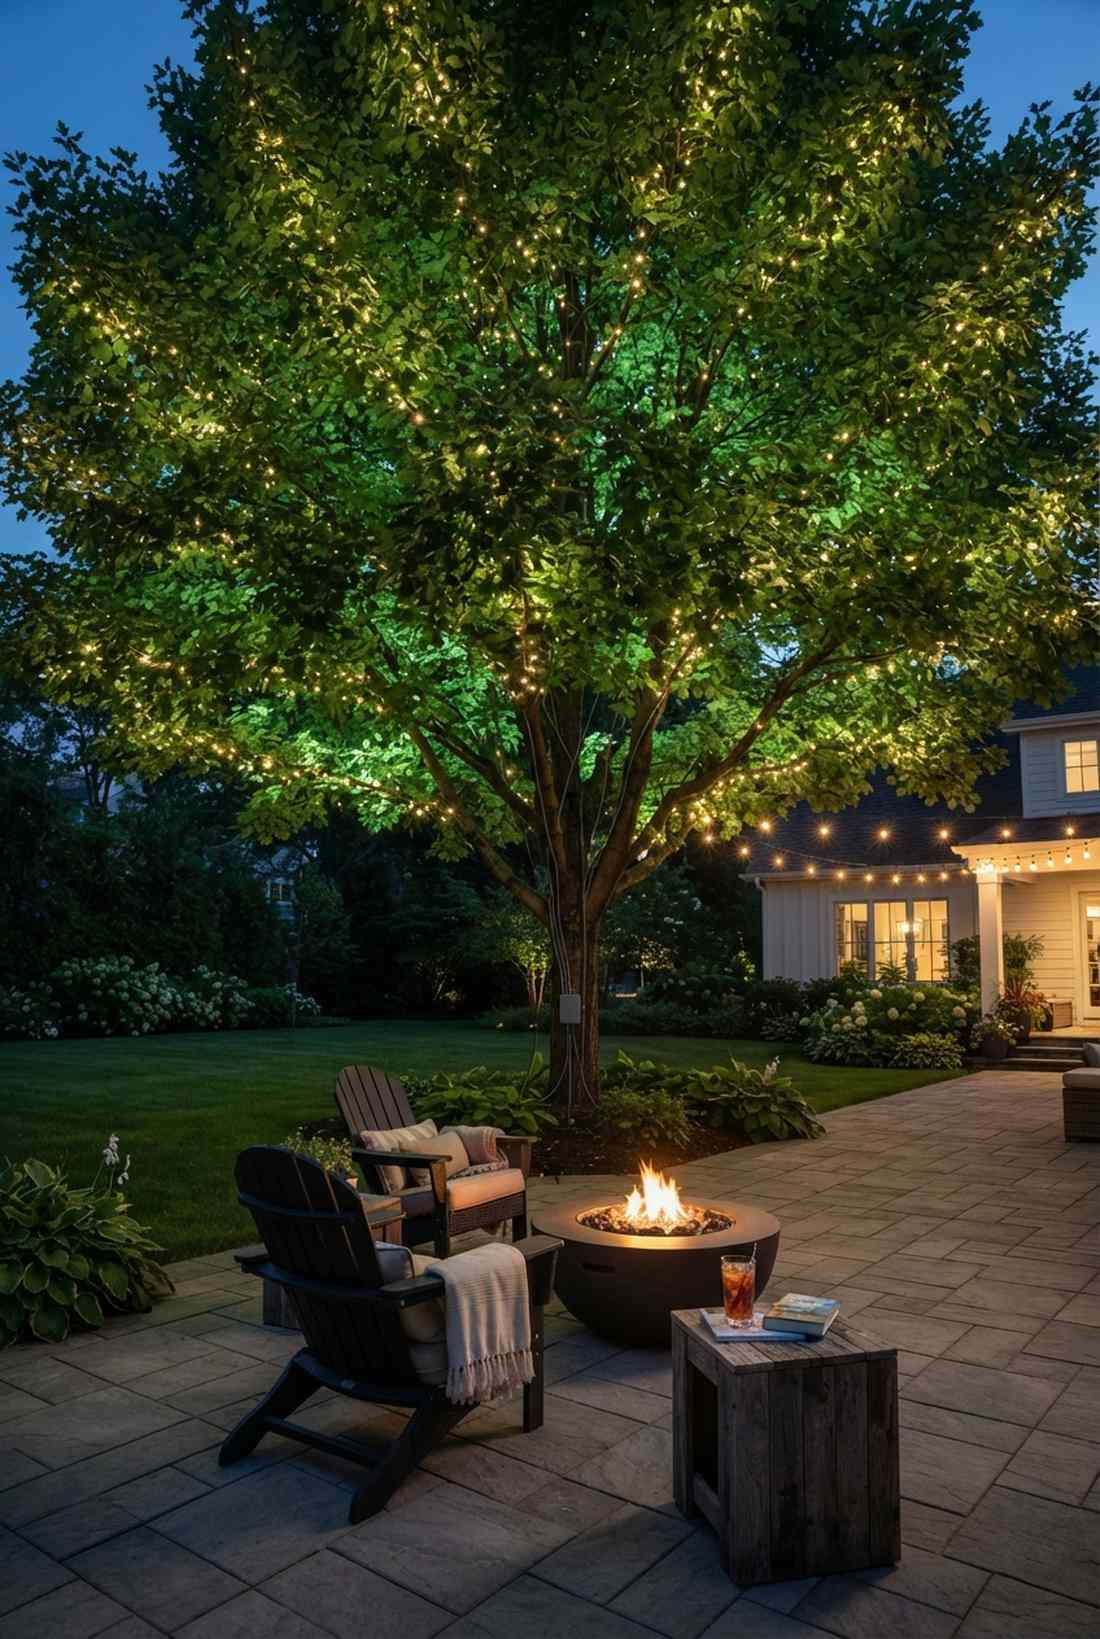
Creates a lush, moody green glow that feels like a hidden jungle oasis. Maximizing your garden lights for trees when leaves are at their thickest requires shifting the bulbs toward the outer edges of the canopy.
Deep trunk wraps disappear behind July leaves, but weaving lights through the outer foliage gives a designer-level finish. The broad green leaves act as a natural lampshade, turning harsh points of light into a massive, ambient green lantern.
Adjusting the strands for summer takes an hour and costs $0. It’s a fast upgrade that completely changes the evening vibe.
- Key Materials: Outer canopy wire lights
- Vibe / Style: Lush and ambient
- Difficulty: Moderate (repositioning)
- Budget Breakdown: Materials: $0 | Base: $0.
- Creator’s Tip: Pull the strands from the inner trunk out to the leafy tips so the light isn’t swallowed by the dense shadows.
- Smart Sourcing: weatherproof outdoor timer hubs and removable adhesive branch clips.
35. Autumn Transition Lighting
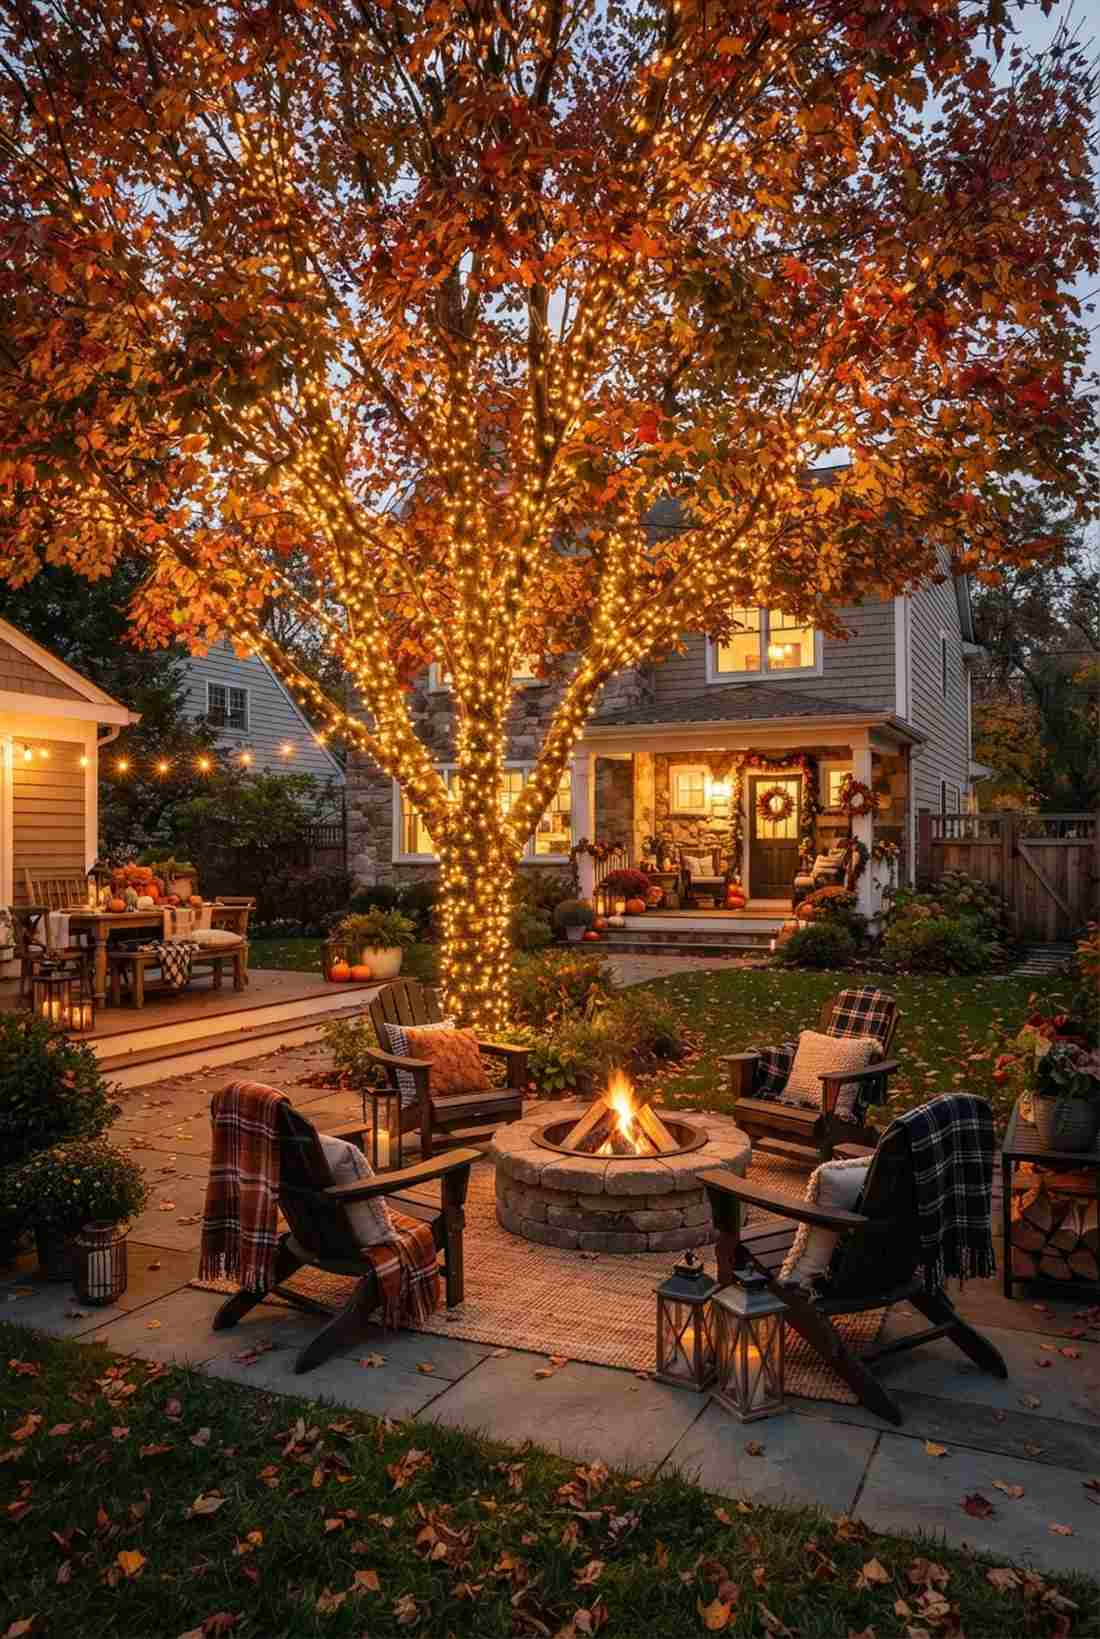
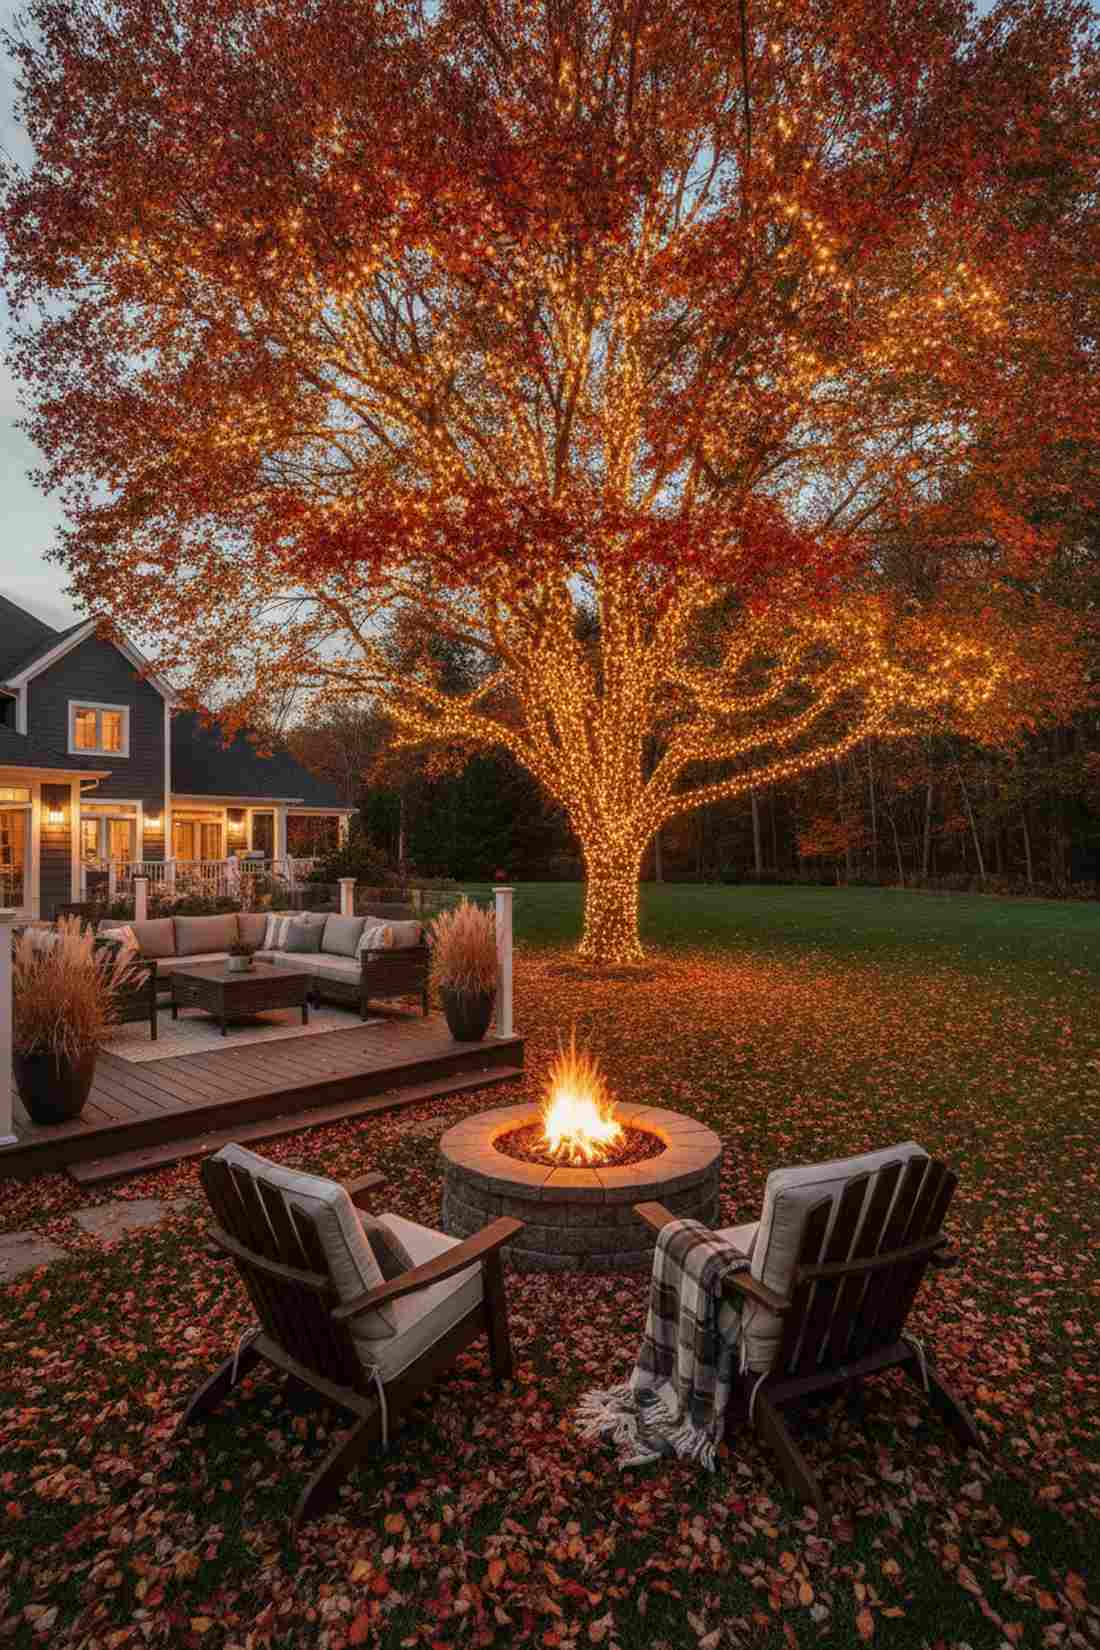
Amplifies the fiery reds and oranges, feeling like a glowing campfire suspended in the air. Utilizing warm garden lights for trees during fall perfectly complements crisp evenings on the patio.
As leaves drop, the tree looks bald, but actively adding more lights to fill the negative space looks far more expensive than it is. The extra illumination catches the remaining autumn foliage, extending the cozy outdoor entertaining season.
Supplemental fall strands run about $20–$40. Pin this if you love hosting autumn firepit nights.
- Key Materials: Extra warm white/amber LEDs
- Vibe / Style: Cozy and fiery
- Difficulty: Easy
- Budget Breakdown: Materials: $30 | Timers: $10.
- Creator’s Tip: Swap out stark cool-white bulbs for amber or extra-warm white to make the orange leaves pop visually.
- Smart Sourcing: amber-toned micro LED strands and dusk-to-dawn outdoor timers.
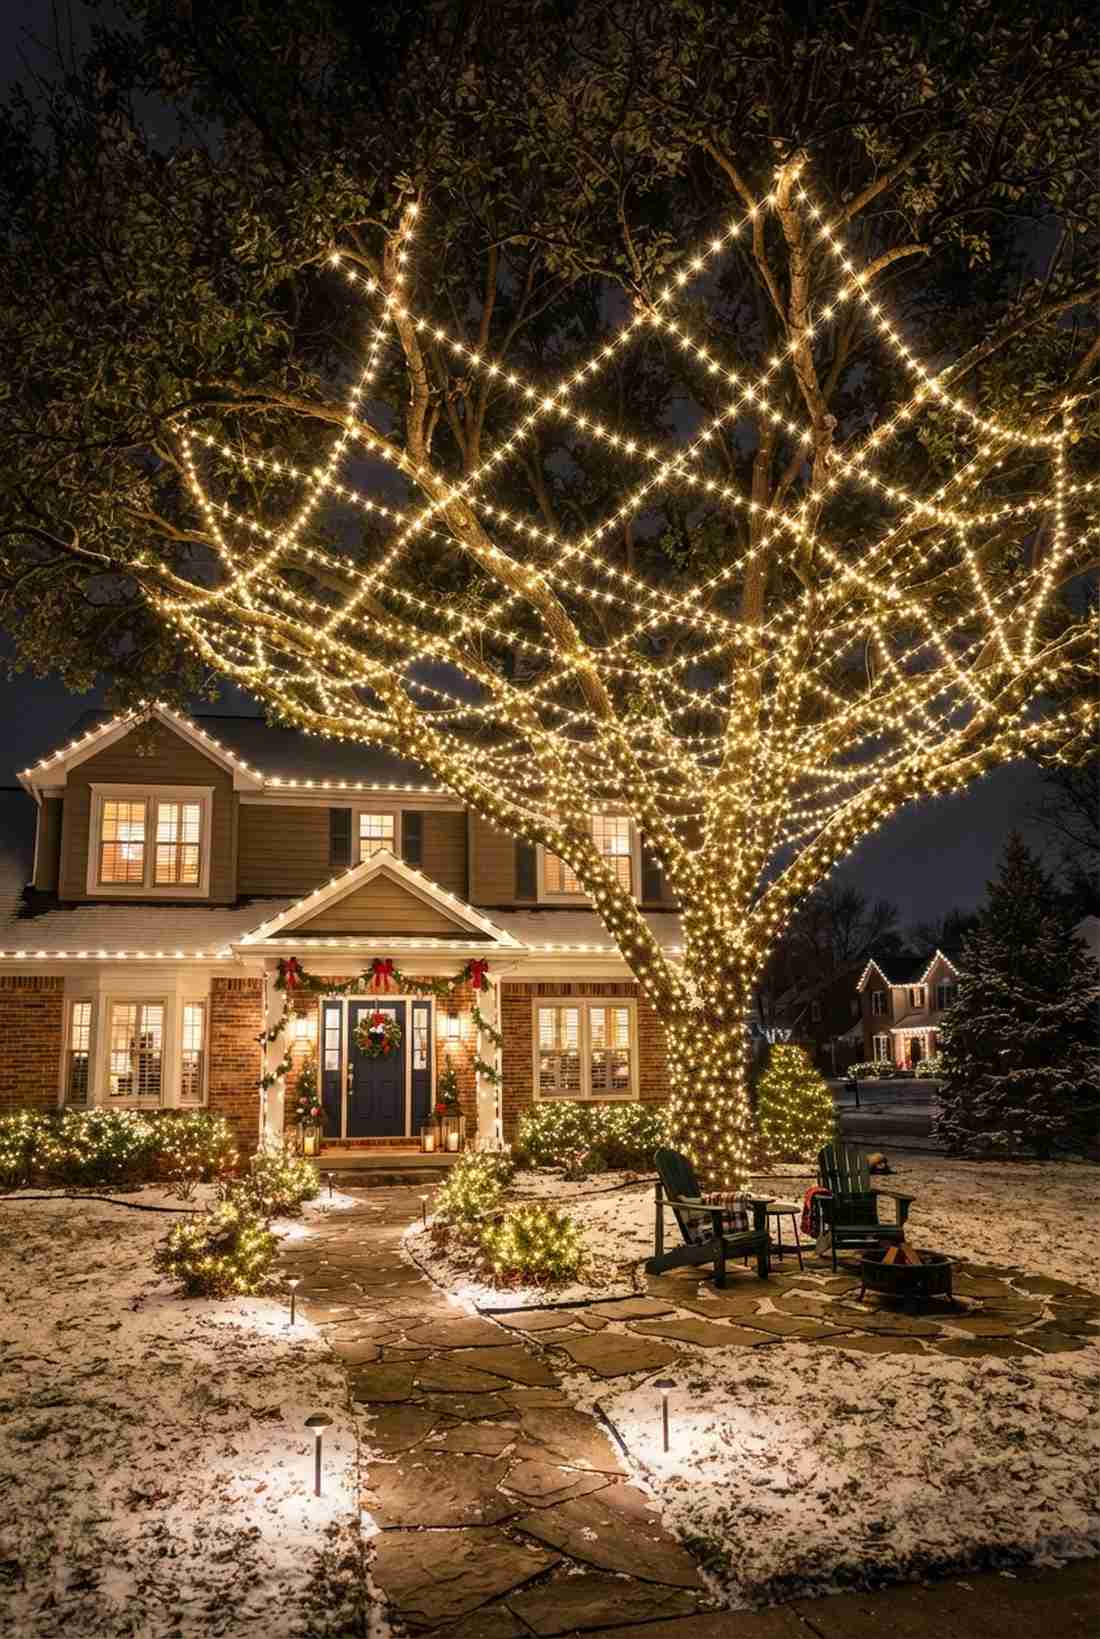
36. Winter Maximalist Approach
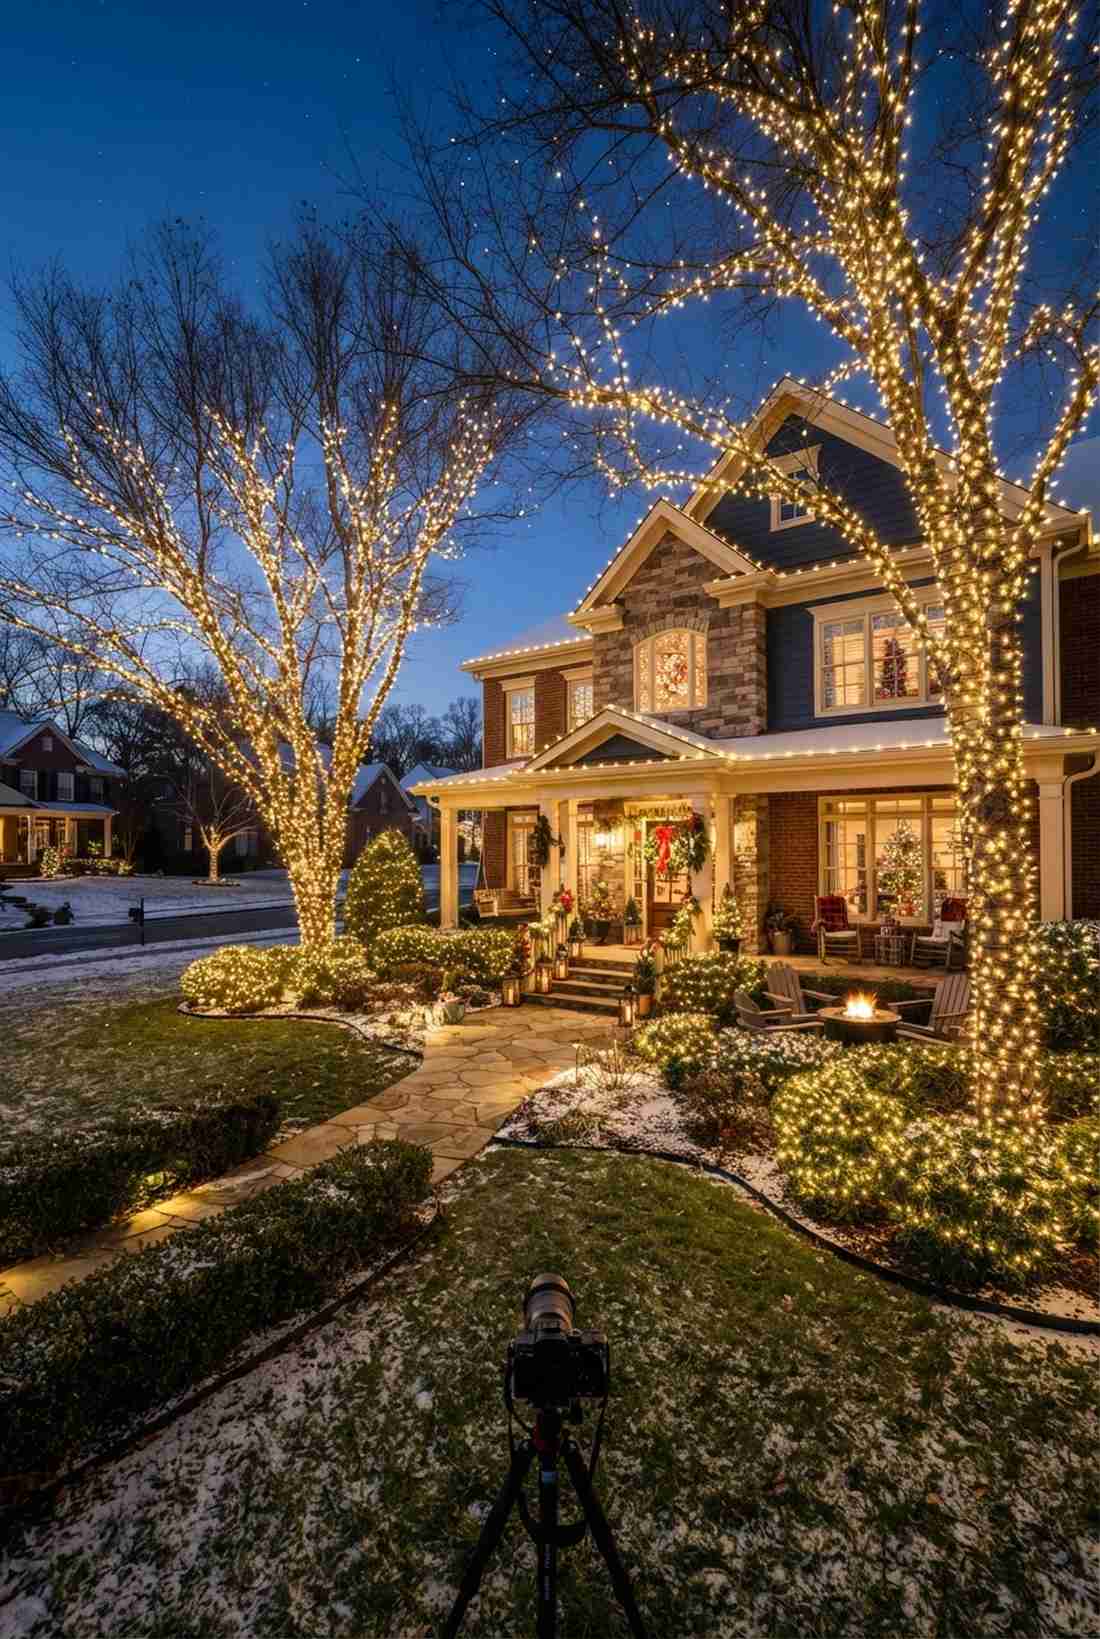
Blazes through the longest nights of the year, feeling like a hyper-festive holiday wonderland. This high-density winter wrap takes advantage of bare branches to handle massive amounts of commercial outdoor lighting.
Minimalism is boring in December; aggressively packing every branch with tight loops delivers a surprisingly premium look. Without leaves in the way, you can achieve perfect, unobstructed spirals that scream luxury curb appeal.
This bold statement requires a budget of $75–$150+ for heavy materials. Highly recommended for the ultimate holiday yard.
- Key Materials: Bulk spools of C3/mini lights
- Vibe / Style: Blazing and maximalist
- Difficulty: Advanced (high volume)
- Budget Breakdown: Materials: $100 | Hardware: $20.
- Creator’s Tip: Wrap the lights while they are turned ON. It’s much easier to see gaps and uneven spacing in the winter twilight.
- Smart Sourcing: 330ft commercial LED spools and weatherproof outdoor timer hubs.
37. Year-Round Permanent Installation
Offers a flawless, set-it-and-forget-it glow that feels like you hired a luxury landscaping firm permanently. This commercial-grade permanent lighting setup is the holy grail for homeowners who hate climbing ladders.
Putting up and taking down lights annually is exhausting, but investing in UV-coated wires meant to stay up gives a designer-level finish. With loose, growth-accommodating wraps and smart timers, your yard automatically looks incredible 365 days a year.
An upfront investment of $100–$200 saves hours of future labor. Save this to your smart home outdoor board.
- Key Materials: IP65 waterproof commercial LEDs
- Vibe / Style: Permanent luxury
- Difficulty: Intermediate (one-time setup)
- Budget Breakdown: Materials: $120 | Tech: $40.
- Creator’s Tip: Leave a 10% slack loop at the base of every branch so the tree can grow for 3-5 years without snapping the wire.
- Smart Sourcing: IP65 rated permanent outdoor LEDs and smart plug outdoor Wi-Fi timers.
Conclusion
Mastering these 37 techniques for fairy lights in trees instantly transforms an ordinary backyard into a premium, commercial-grade outdoor lounge. By skipping cheap retail options and investing in smart, productized materials like UV-resistant spools and weatherproof hubs, you can achieve a high-end designer aesthetic on a DIY budget. Whether you’re executing a minimal wide-gap wrap for a subtle summer evening or building a maximalist winter canopy, the right foundational kits ensure your installation outlasts the elements. Pin your favorite layouts, order your bulk supplies, and spend this weekend giving your landscape the ultimate luminescent upgrade.
Frequently Asked Questions
How many lights do I need to wrap a tree trunk?
For a premium, dense look without the contractor markup, plan for 20-30 bulbs per wrap. A standard 12-inch diameter trunk wrapped up to 6 feet requires roughly 150-200 lights. Instead of buying dozens of tiny retail boxes, always invest in commercial-grade LED wire spools (bulk pack) to save money and reduce the number of ugly plug connections in your yard. Grab 20% more footage than you think you need to account for knots and thick bark.
What is the best way to secure fairy lights to tree branches?
Never use metal staples or nails, as they invite disease and rot into the wood. The secret to a durable, high-end installation is using soft-tie plant wire (green) or UV-resistant heavy-duty zip ties. Lock the base with a firm zip tie, then rely on moderate wire tension to grip the natural bark texture. For delicate weeping branches, removable adhesive branch clips ensure the wire stays put without choking the timber.
Should I start at the top or bottom of the tree when installing lights?
Always start at the base. Anchoring your weatherproof outdoor timer hubs and plugs at the bottom allows gravity to work with you, keeping the tension incredibly tight as you wrap upward. Pulling from the top down guarantees your strands will slip and sag after the first rainstorm. Run your primary cord up the trunk, then snake outward to the branch tips and double back.
How can I prevent lights from damaging my trees?
Girdling (strangling the tree as it grows) is the number one mistake DIYers make. If you are using heavy-duty outdoor stringers, you must leave 1-2 inches of slack in the wire, especially before the spring growth spurt. Using adjustable velcro cable wraps instead of fixed zip ties allows you to easily loosen the tension twice a year without dismantling the entire lighting display.
What spacing between light wraps looks best on tree trunks?
For a balanced, professional landscape aesthetic, a strict 6-8 inch gap is standard. However, if you’re using high-density cluster LED strings for a focal point, compressing the wraps to 2-3 inches delivers a blazing, premium look. Conversely, expanding to 12 inches creates a modern, minimalist vibe while drastically cutting down your material costs. The key is absolute consistency—use your hand as a spacer to ensure the pattern looks mathematically perfect.
Can fairy lights stay on trees year-round?
Yes, but only if you buy the right gear. Cheap retail lights will shatter and fade by July. If you want a permanent setup, you must purchase IP65 rated permanent outdoor LEDs with UV-coated wiring. Pair them with silicone sealant tape for electrical joints to waterproof the connections. Check the anchor points every 6 months to ensure the tree hasn’t outgrown the wire tension.