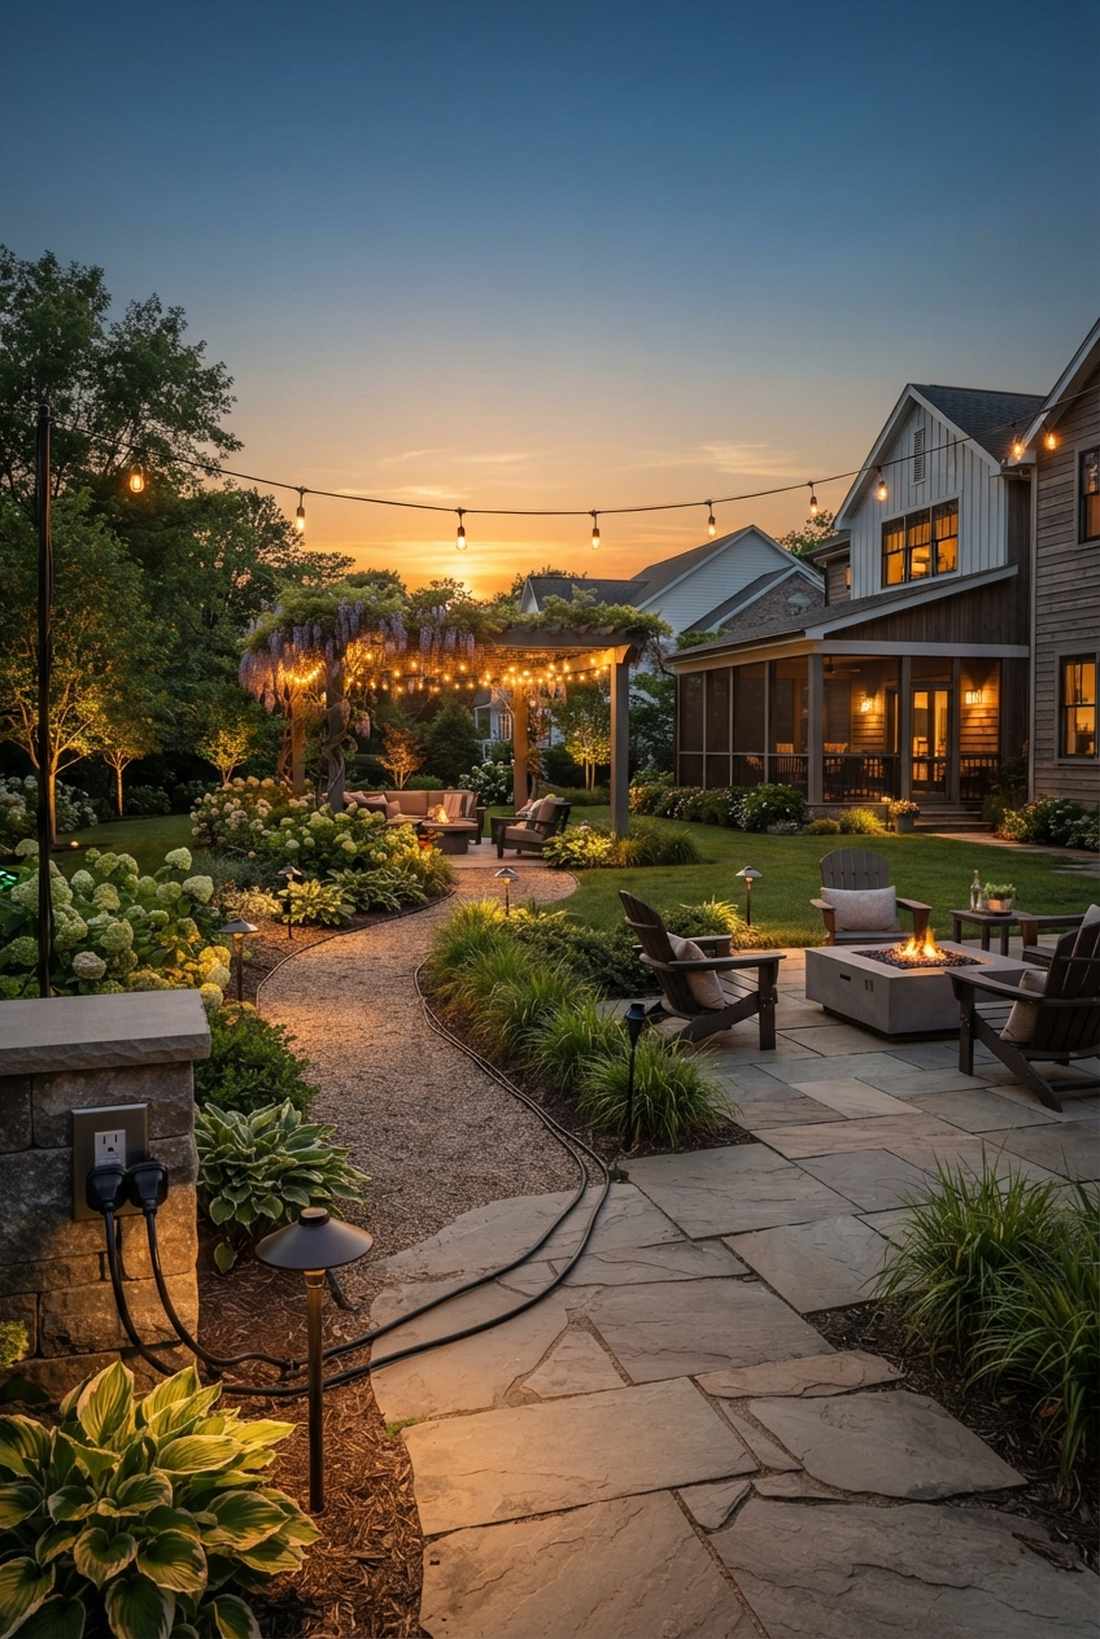
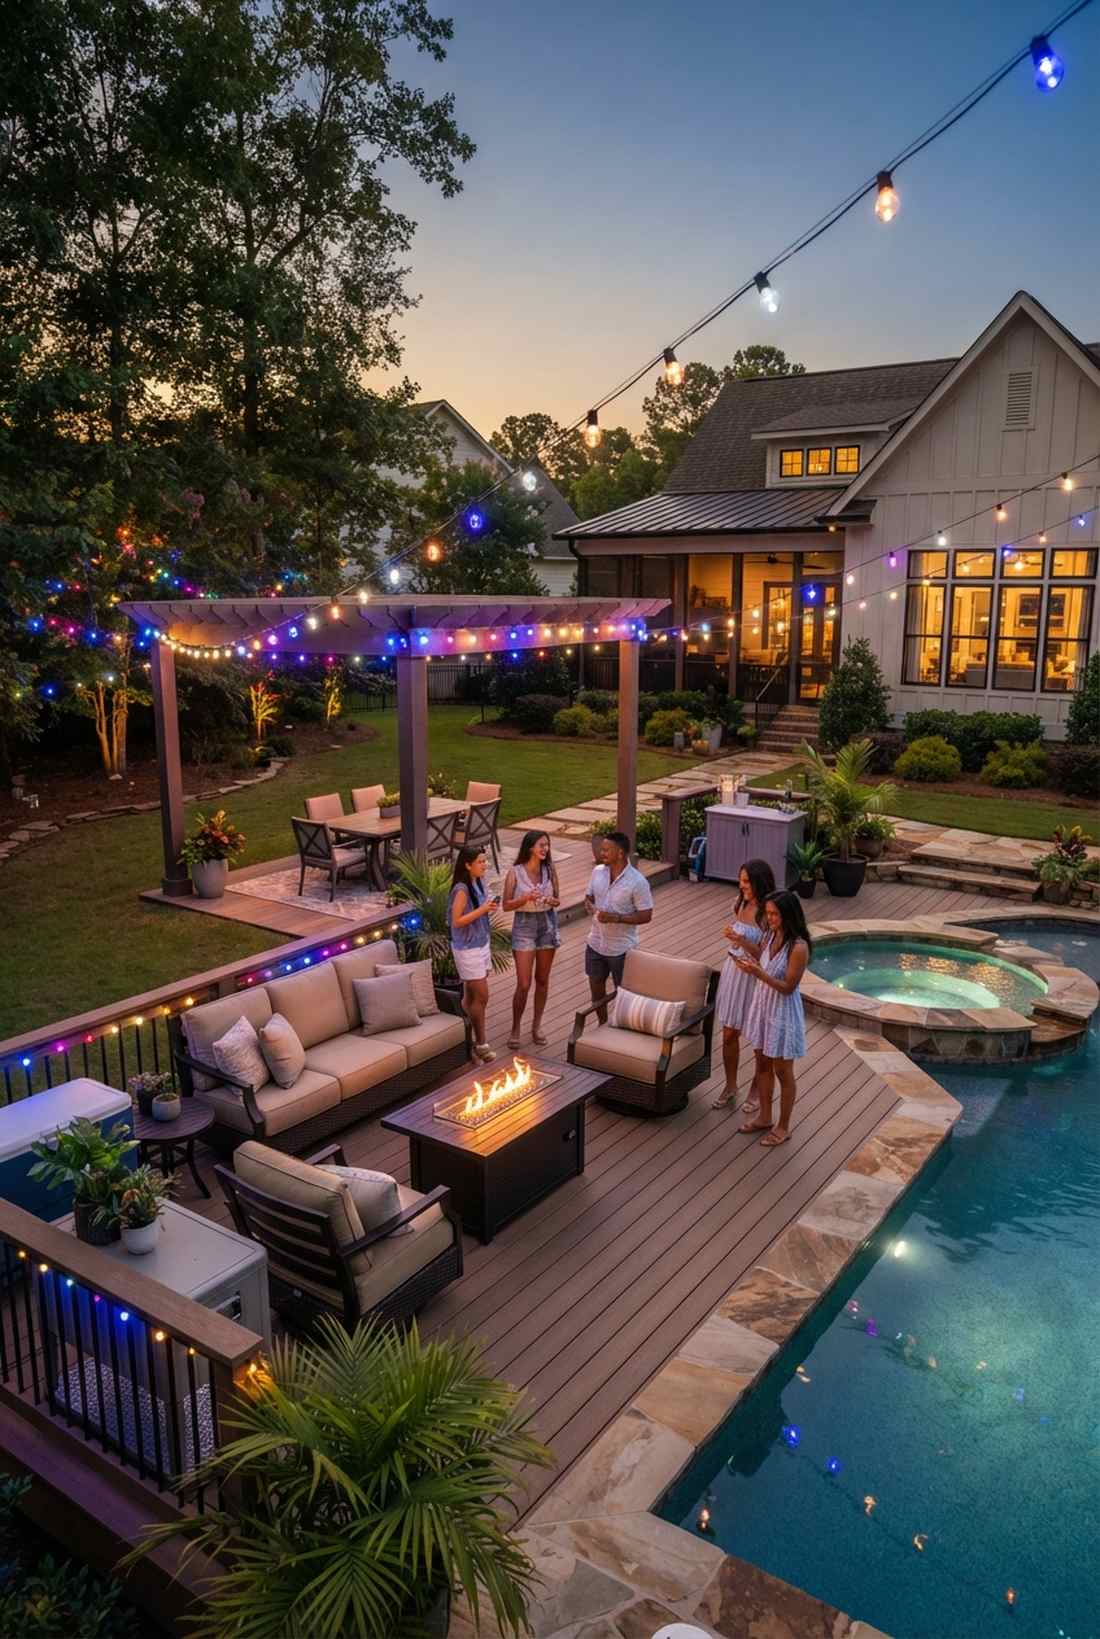
Upgrading your outdoor space with premium fairy lights instantly shifts the evening vibe. Uncover exact materials and budget secrets for designer-level illumination. Achieve that expensive, custom glow without hiring a professional.
Design Snapshot Key Principles
- Layered Illumination: Combine overhead, mid-level, and ground lighting for dimensional depth
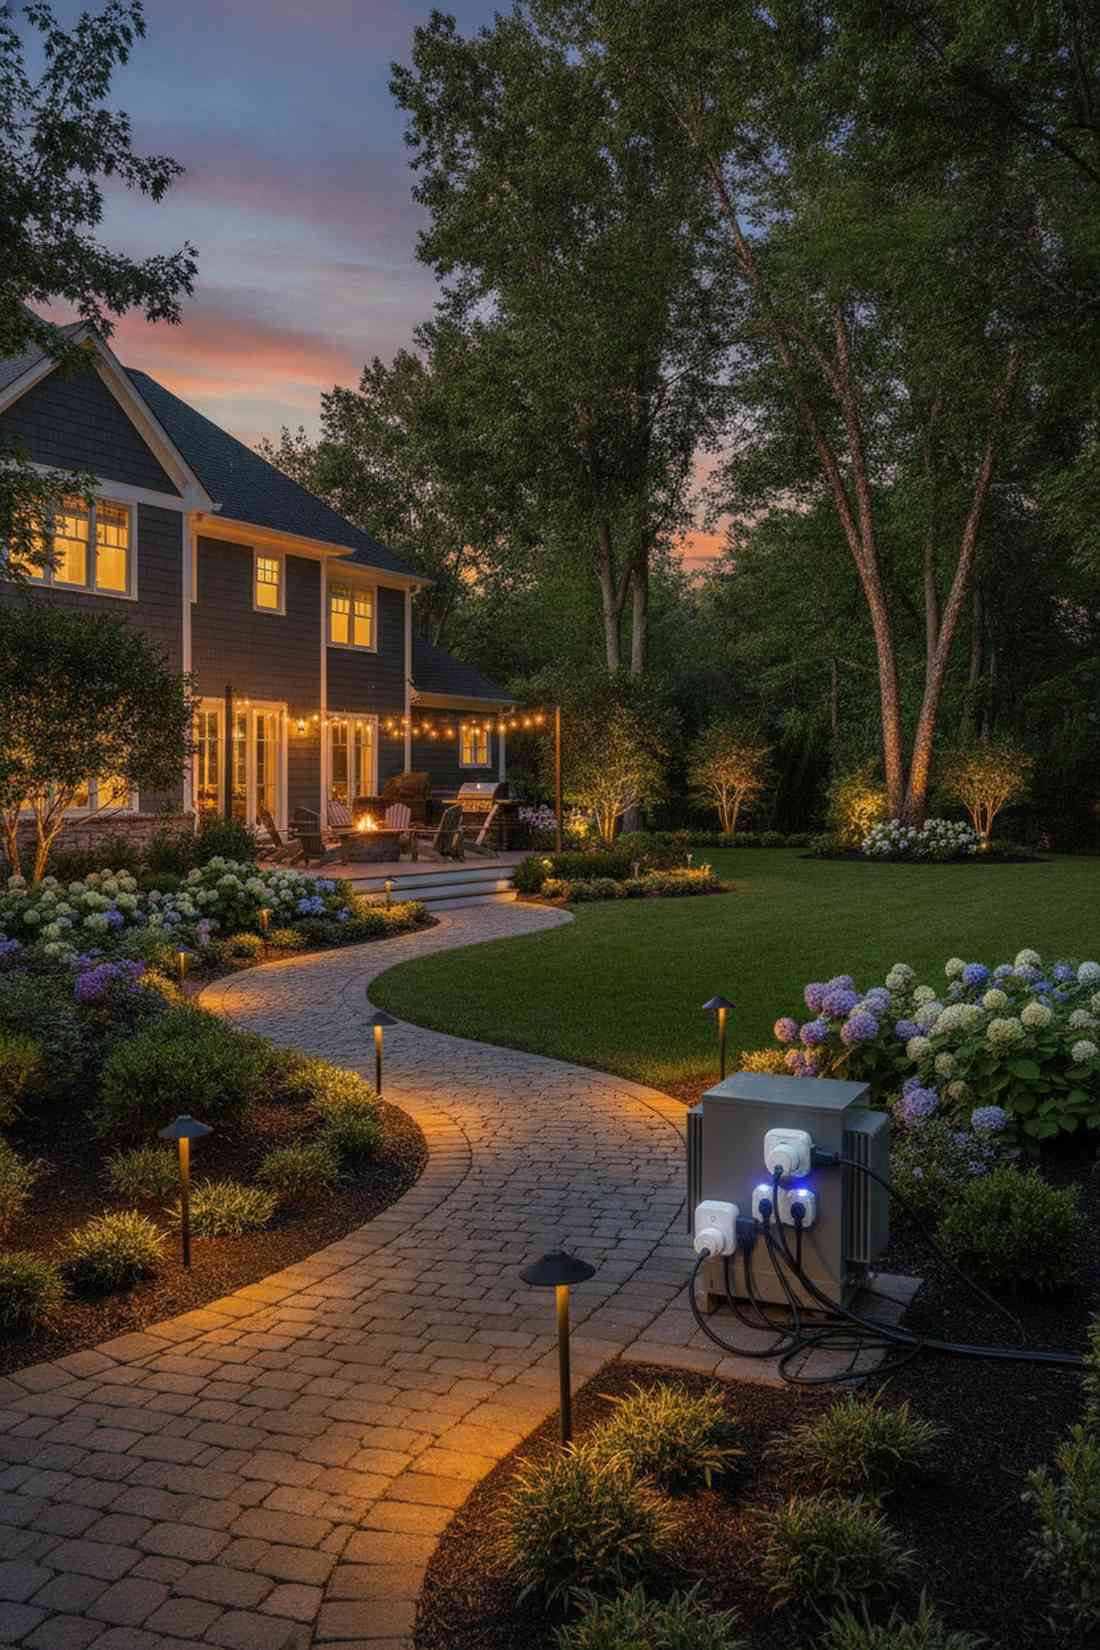
- Power Strategy: Select solar, battery, or plug-in systems based on installation permanence and location accessibility
- Color Temperature: Warm white (2700K-3000K) creates residential comfort; colored LEDs set thematic moods
- Installation Integrity: Use tension wire systems, grommets, and weather-rated fixtures for professional results
Overhead Canopy Installations
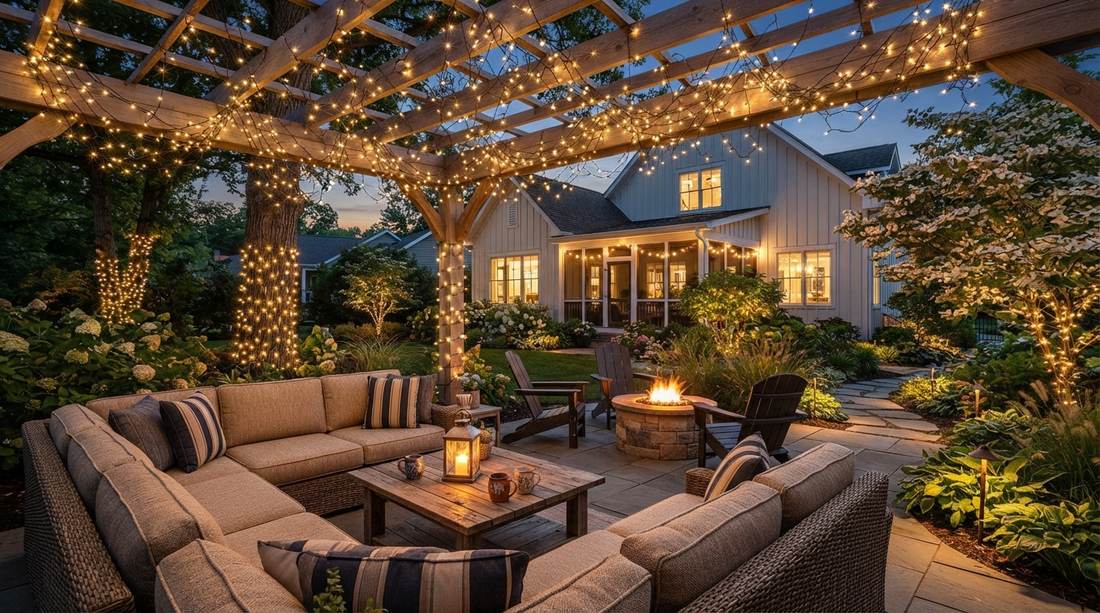
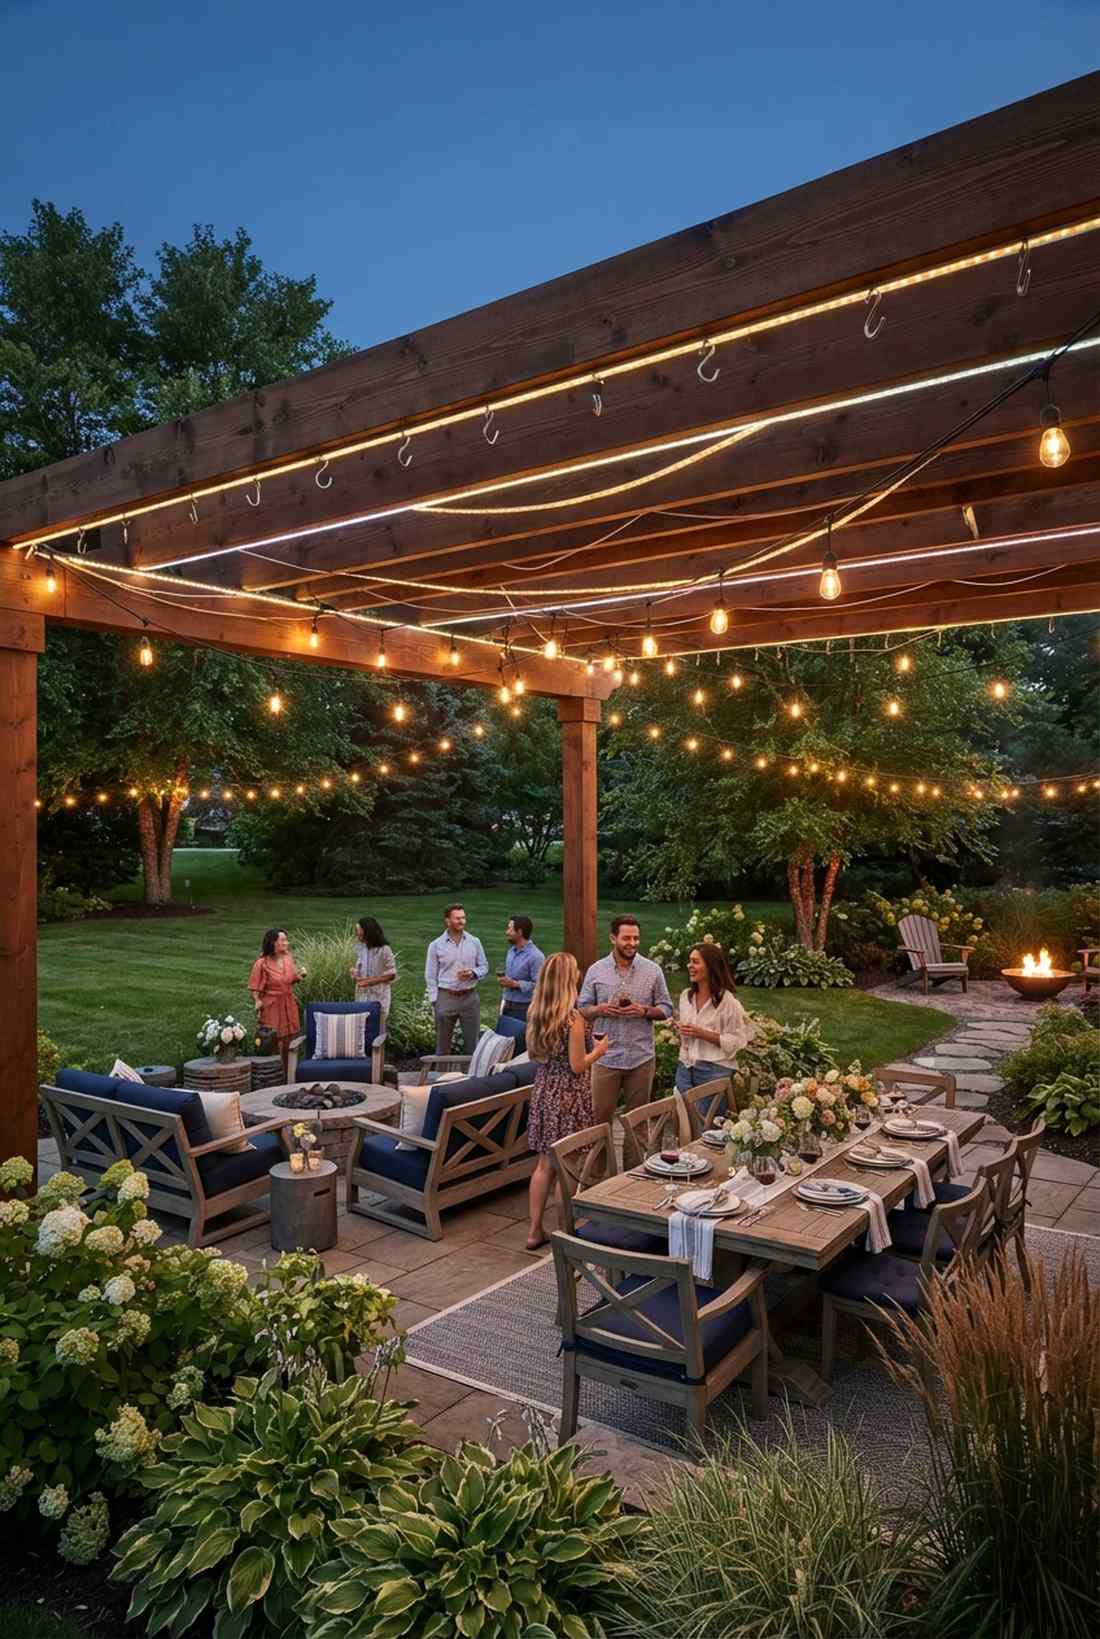
1. Classic Zigzag Pergola Pattern

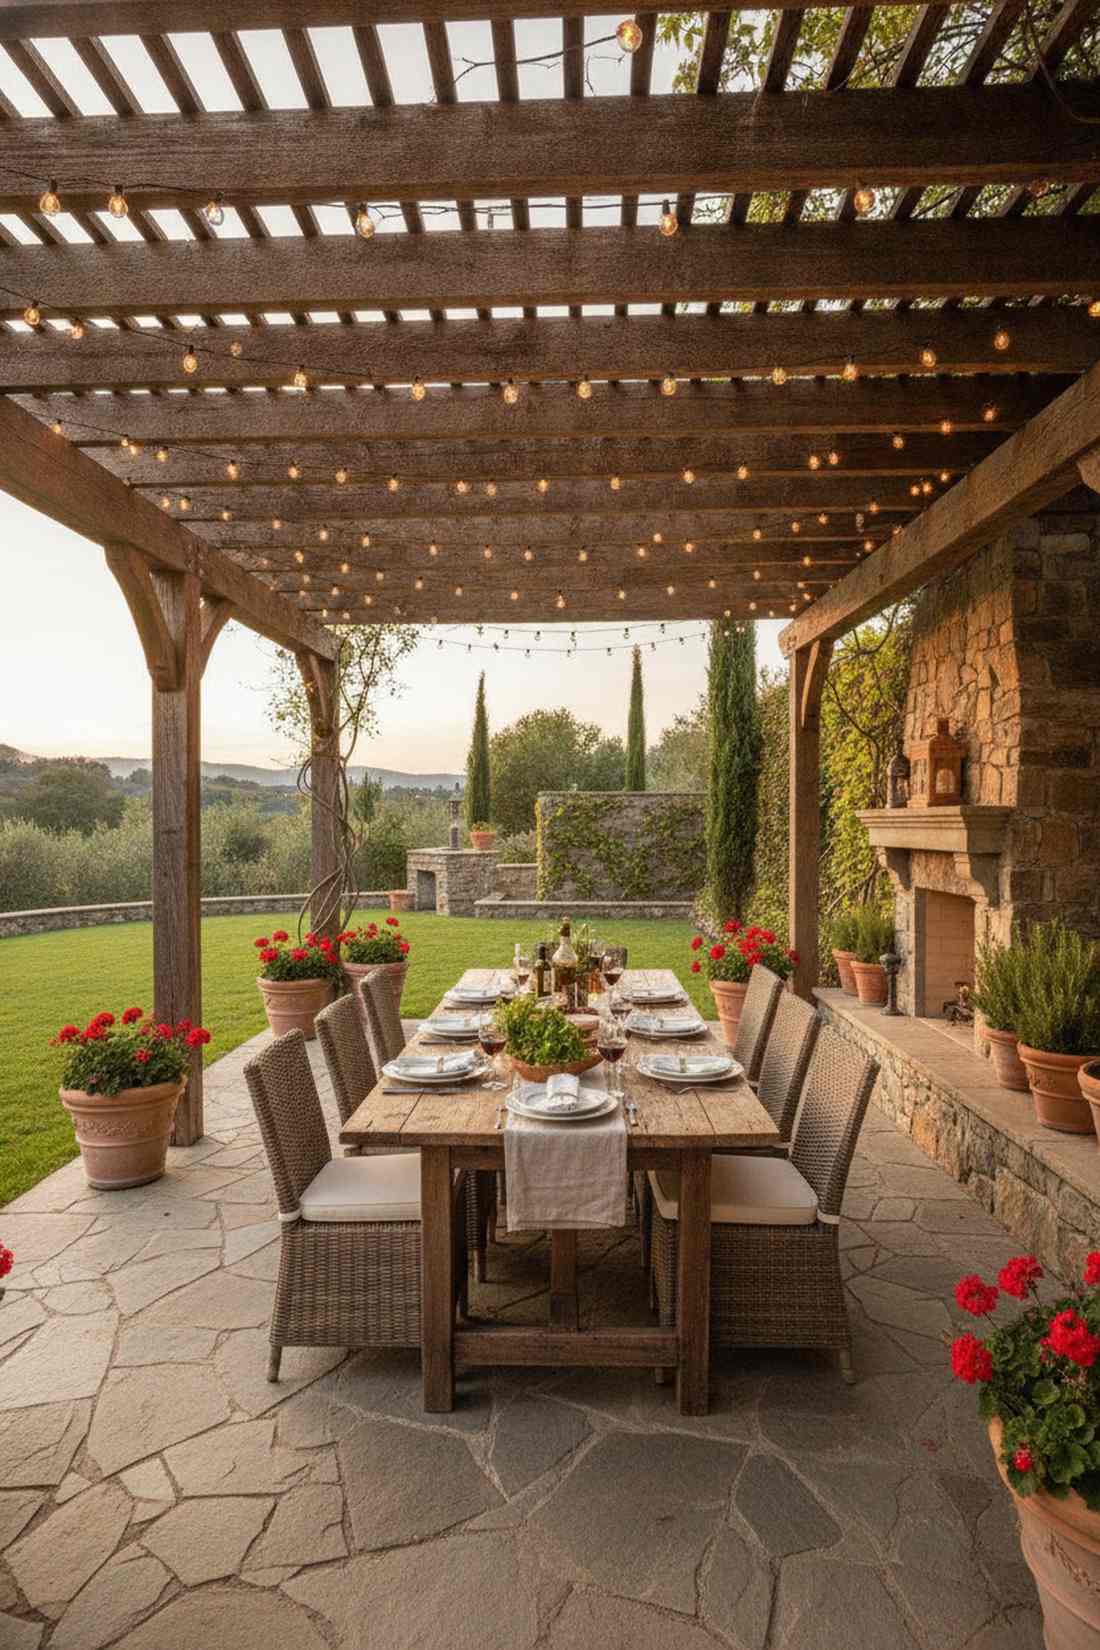
Feels like a hidden Tuscan villa right in your backyard. Outdoor fairy lights decor shines best when zigzagged above a warm, inviting patio. Works phenomenally well for a shaded wooden pergola.
Most designers won’t tell you that using commercial-grade tension cables underneath the wires prevents inevitable sagging. It instantly delivers a surprisingly premium look that defies basic DIY efforts.
You can easily pull this off for around $40–$75. Save this to your DIY weekend garden board!
- Key Materials: UV-coated outdoor stringers
- Vibe / Style: Rustic Italian dinner
- Difficulty: Moderate weekend project
- Budget Breakdown: Materials: $45 | Hardware: $15
- Creator’s Tip: Use screw-in cup hooks to maintain the perfect diamond geometry.
- Smart Sourcing: shatterproof outdoor fairy lights (bulk pack) and a stainless steel tension wire kit.
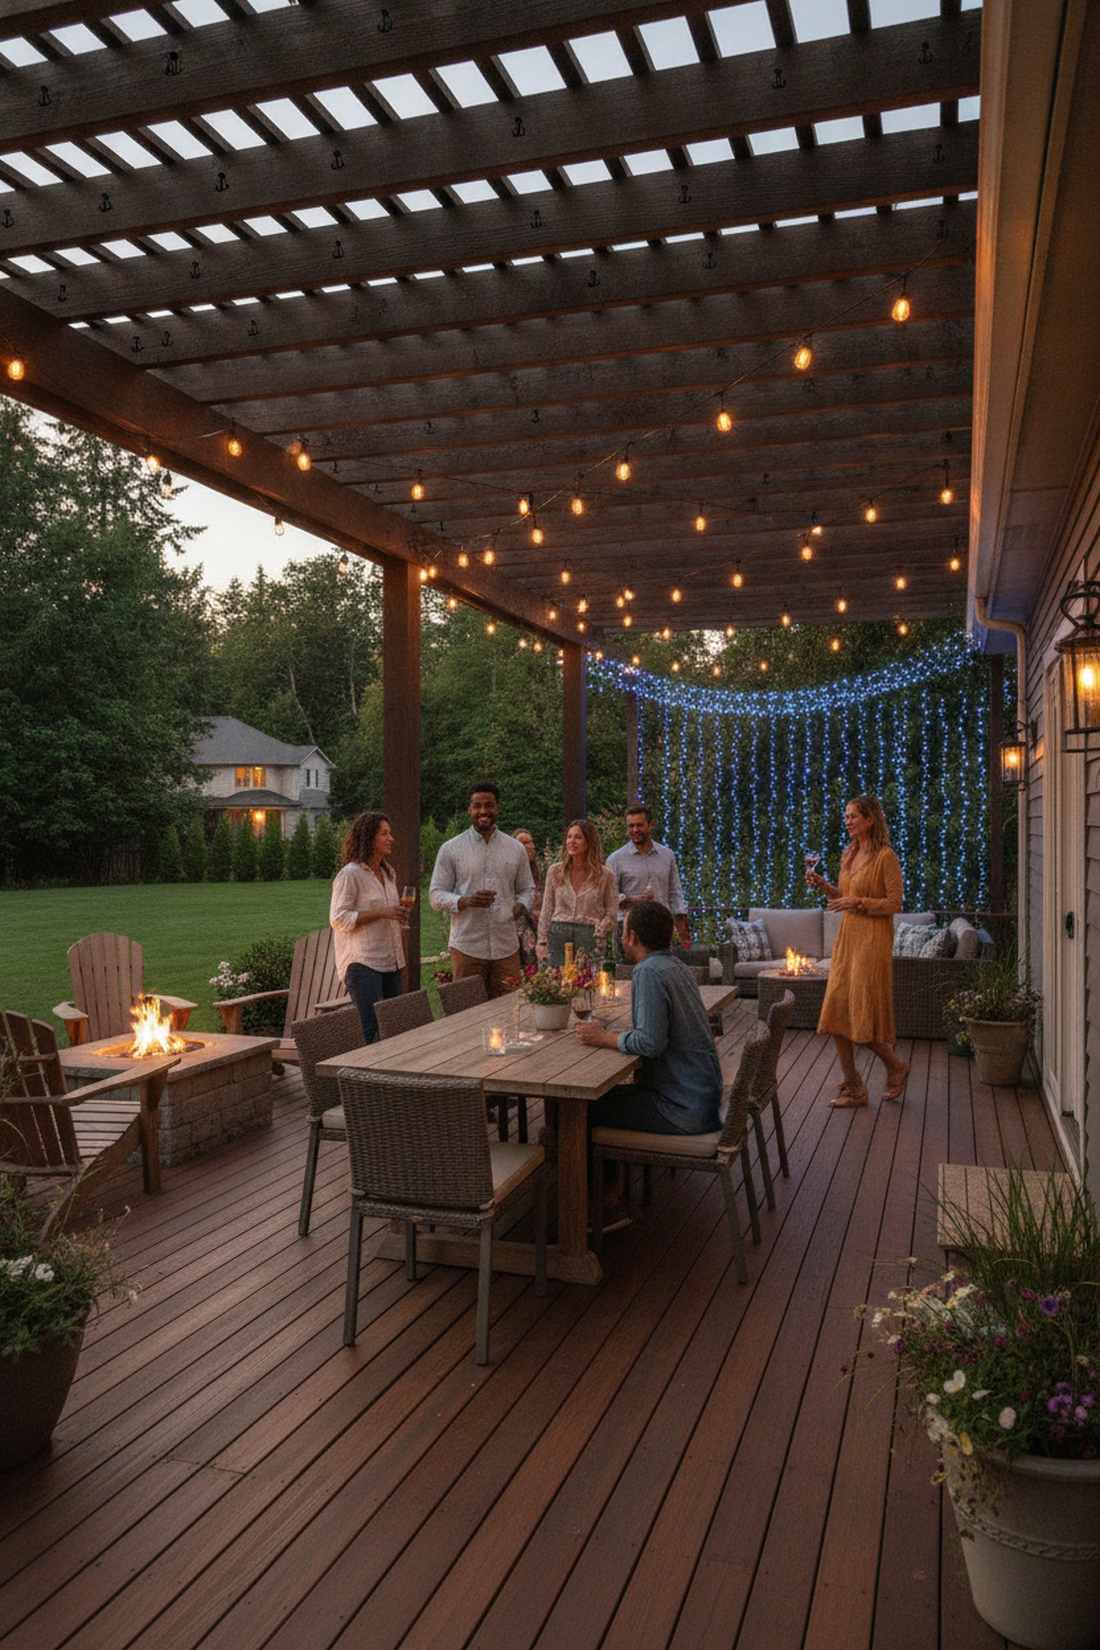
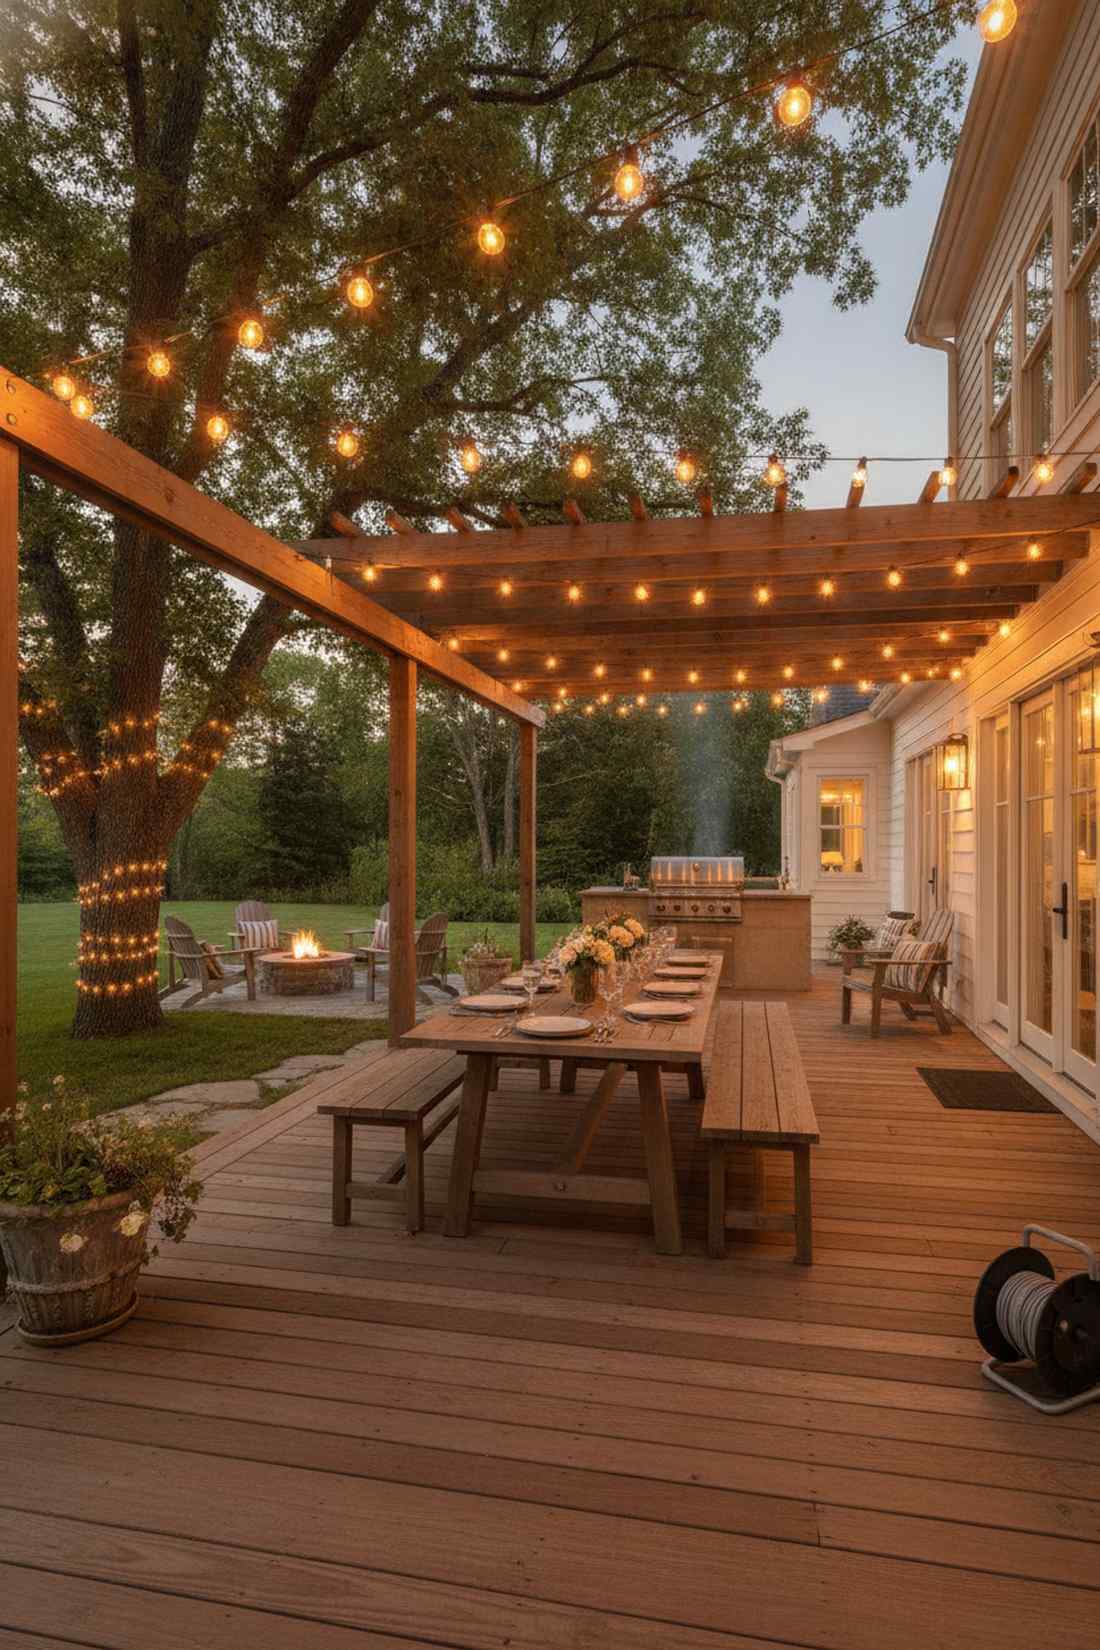
2. Parallel Strand Dining Canopy
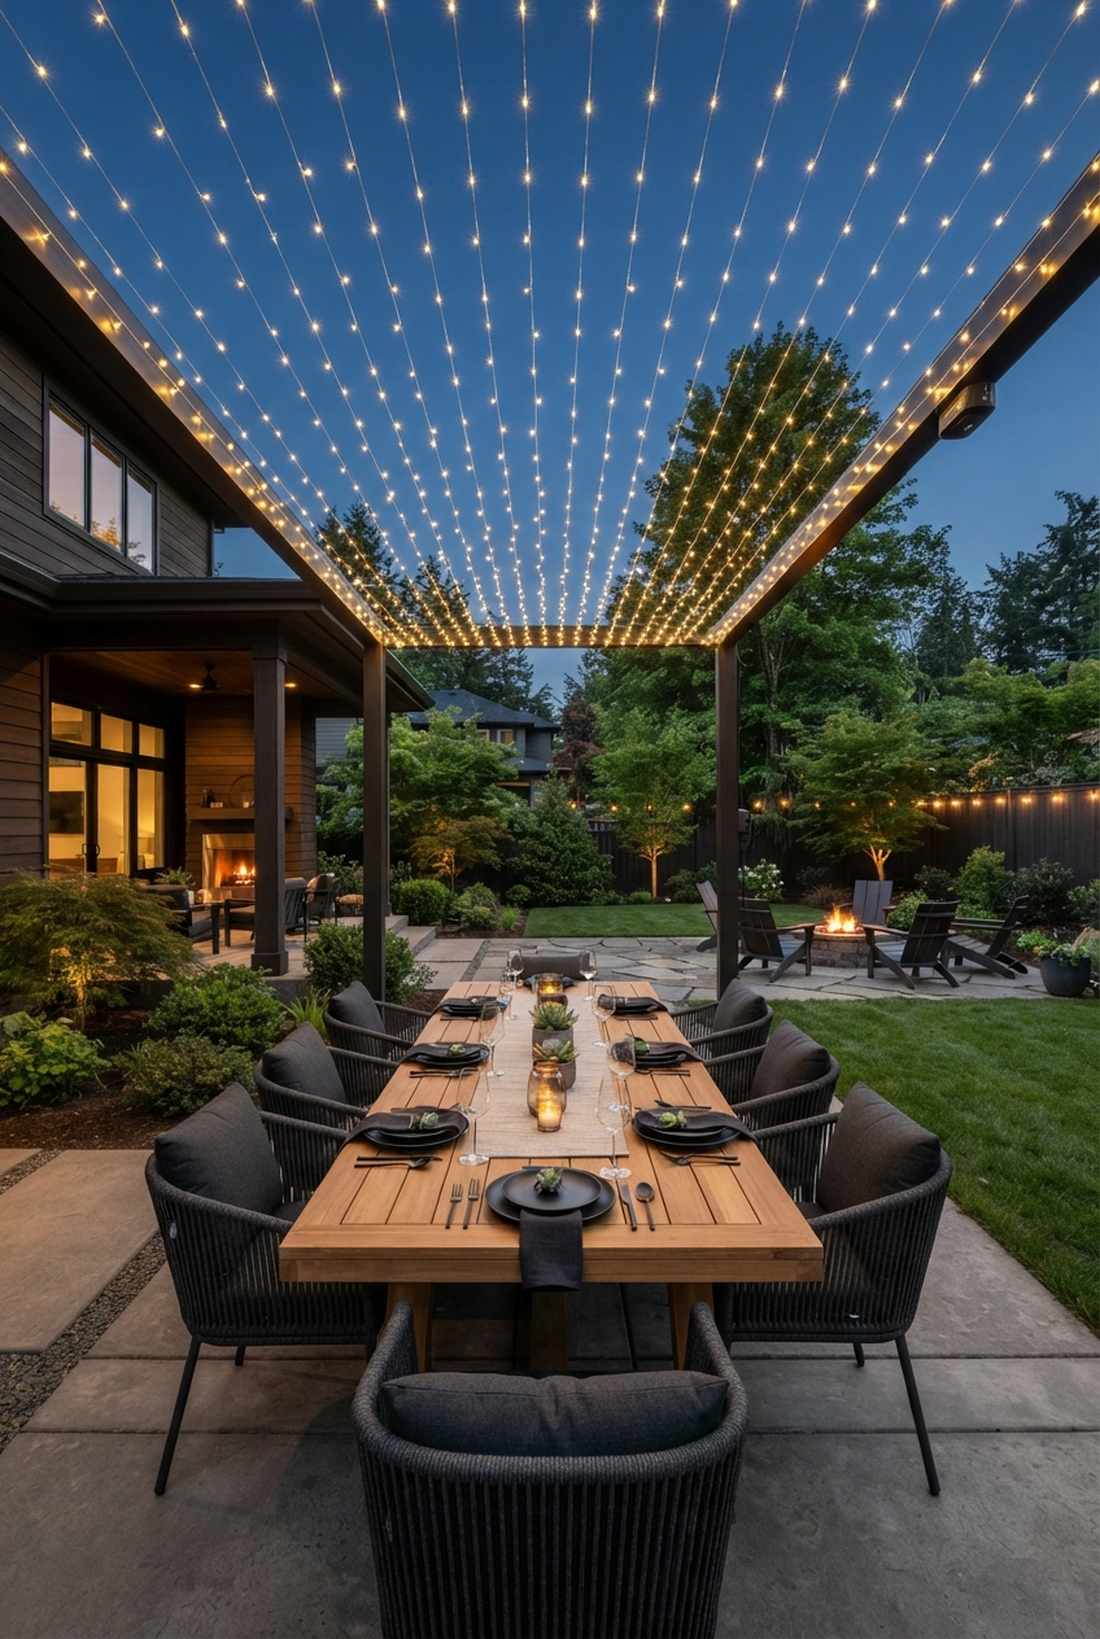
Straight out of a luxury boutique hotel dining experience. A linear fairy lights string canopy over a long outdoor table creates an intimate faux-ceiling. Perfect for framing rectangular dining zones.
Rather than loosely draping them, pulling the strands razor-straight completely flips the aesthetic from messy to modern minimalist. Introducing dimmable smart plugs elevates the entire setup.
Set this up for a crisp $50–$80. It’s a fast upgrade that completely changes the vibe.
- Key Materials: Dimmable micro-LEDs
- Vibe / Style: Modern minimalist dining
- Difficulty: Easy beginner setup
- Budget Breakdown: Strings: $35 | Dimmer: $20
- Creator’s Tip: Space strands exactly 14 inches apart for perfect light diffusion.
- Smart Sourcing: dimmable warm-white LED strands and weatherproof smart outdoor plugs.
3. Radial Pole Starburst
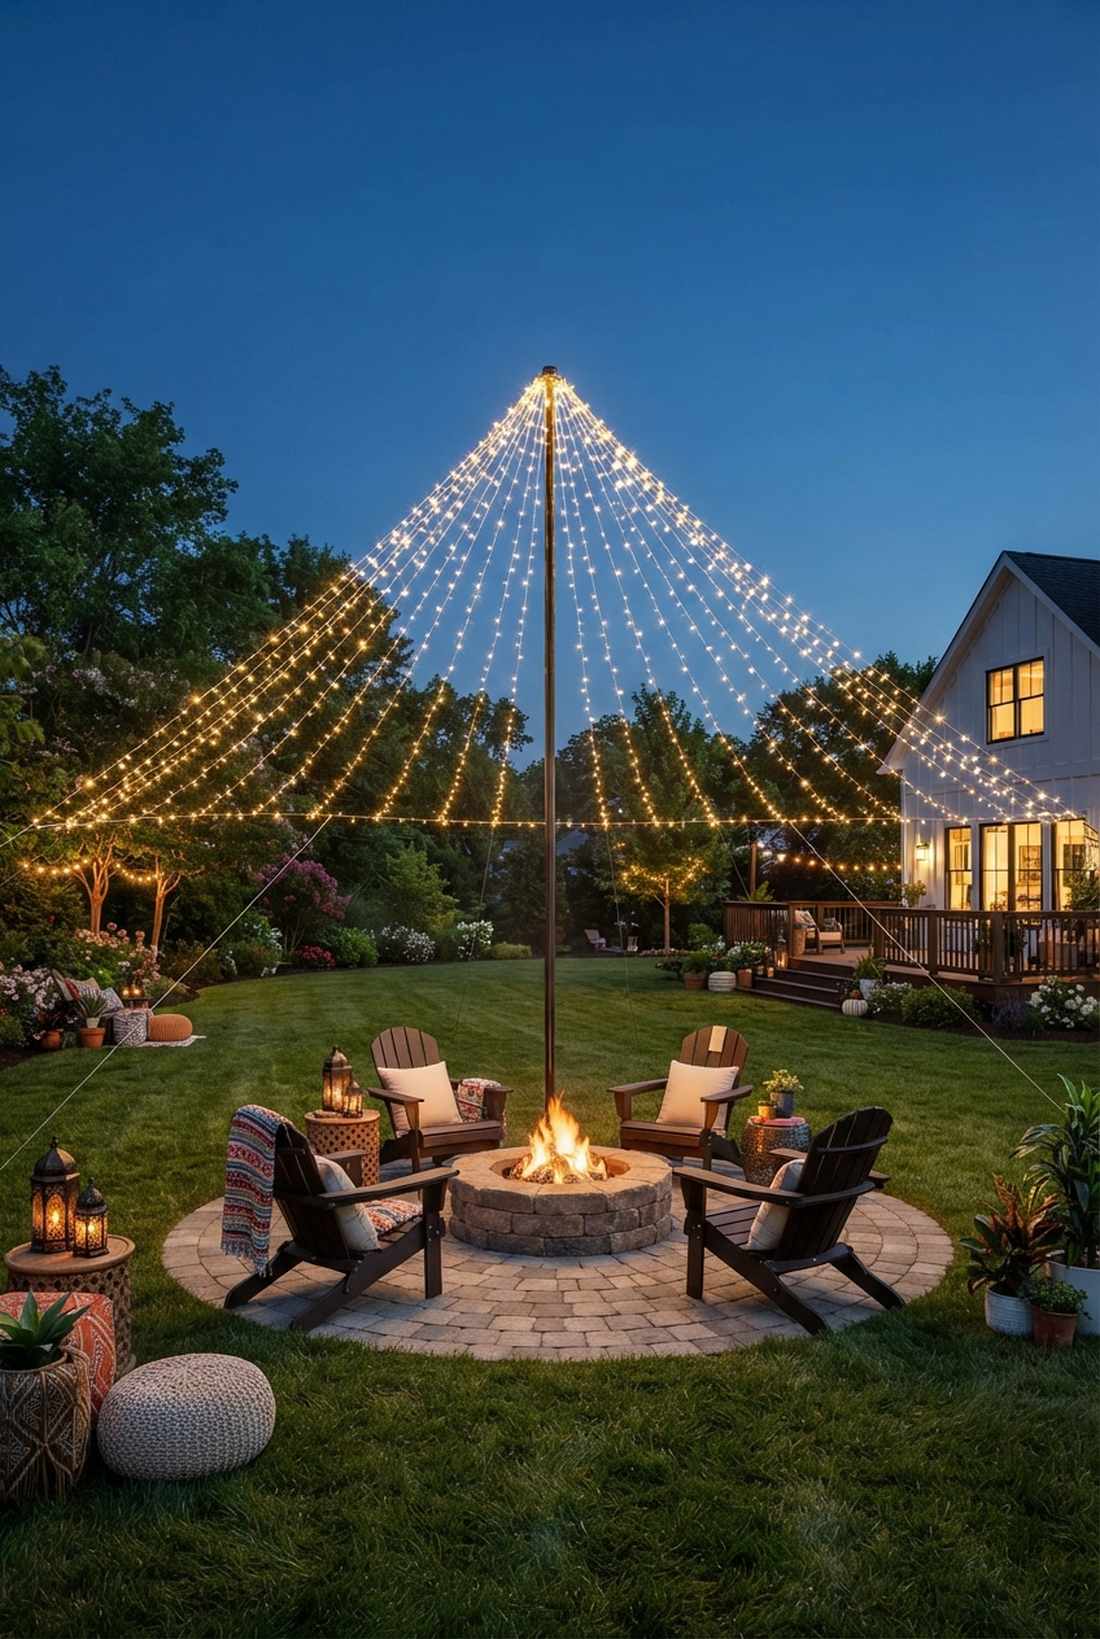
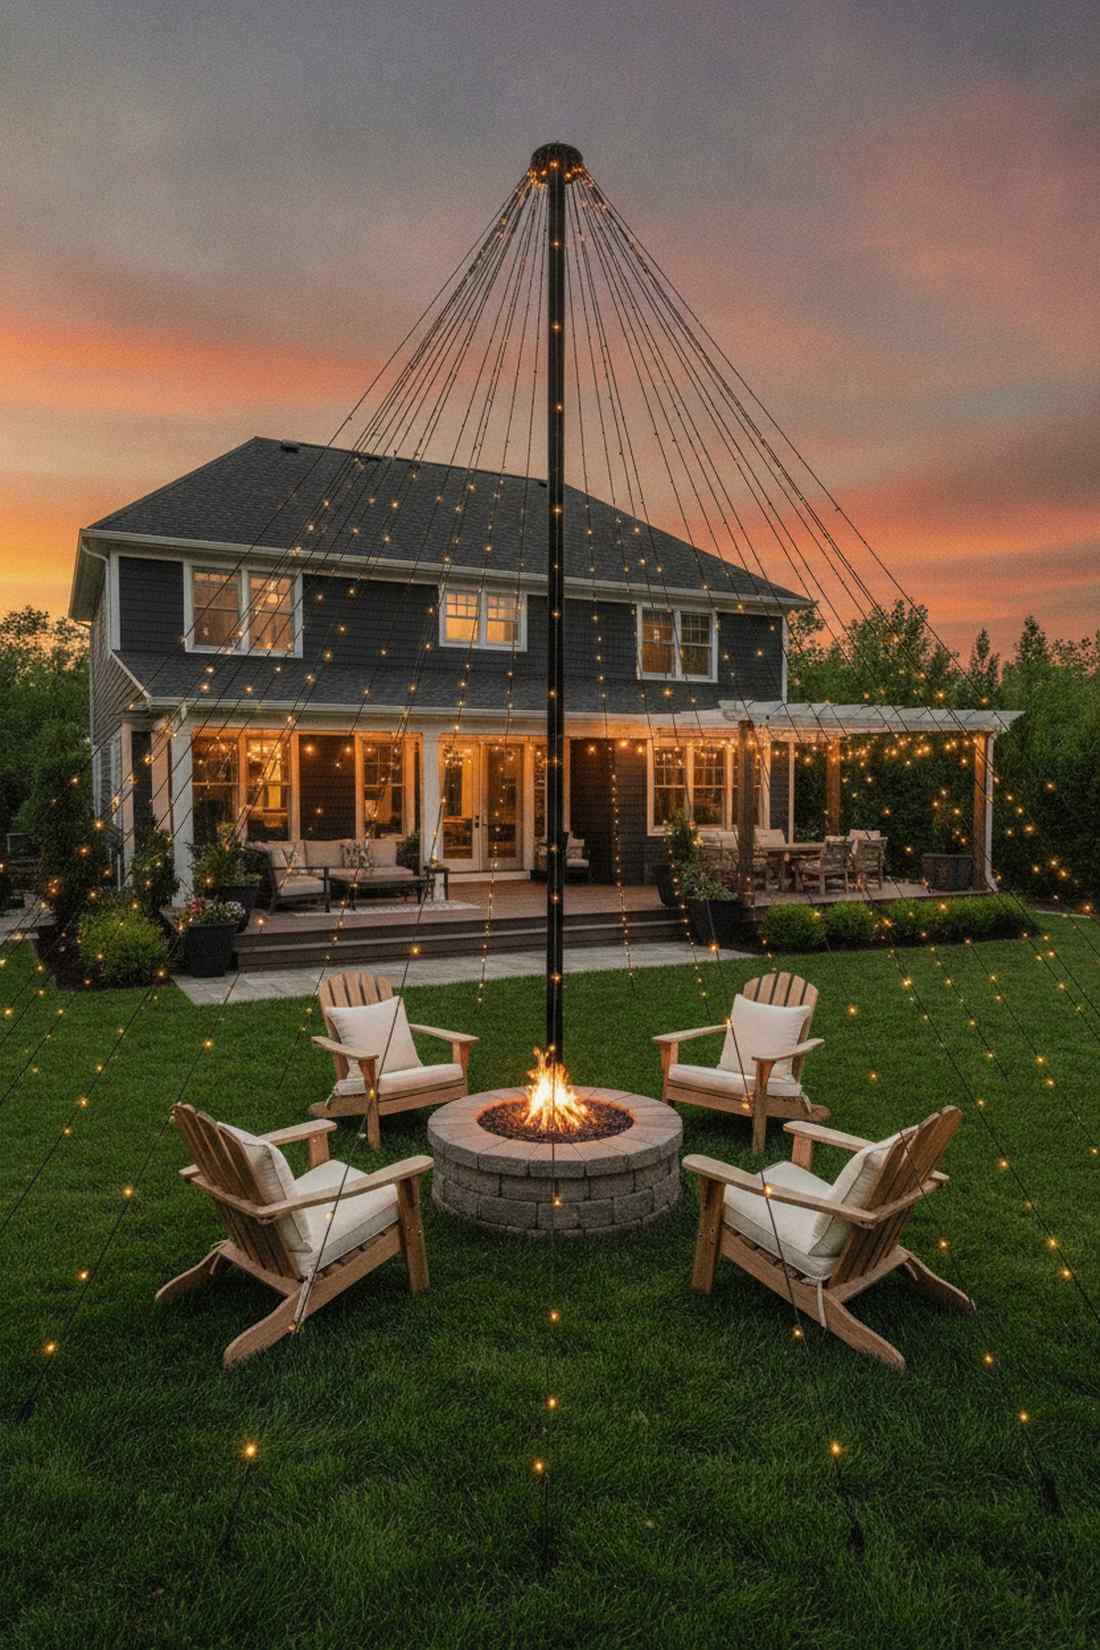
Brings the energy of a vibrant midnight festival directly to your lawn. Center-pole outdoor lighting casts a majestic umbrella glow. Flawless execution for circular fire pits or wide-open grass areas.
The controversial secret here is anchoring the spokes to invisible ground stakes rather than heavy posts. This creates a floating circus-tent illusion that looks far more expensive than it is.
Budget roughly $60–$90 for this entire majestic array. Pin this if you’re planning a massive backyard glow-up!
- Key Materials: Heavy-duty center pole, solar micro-lights
- Vibe / Style: Bohemian festival glow
- Difficulty: Advanced leveling required
- Budget Breakdown: Pole: $30 | Lighting Kits: $50
- Creator’s Tip: Use black paracord for the outer supports to make them disappear at night.
- Smart Sourcing: extendable outdoor string light poles and high-capacity solar string packs.
4. Tree-to-Structure Spans
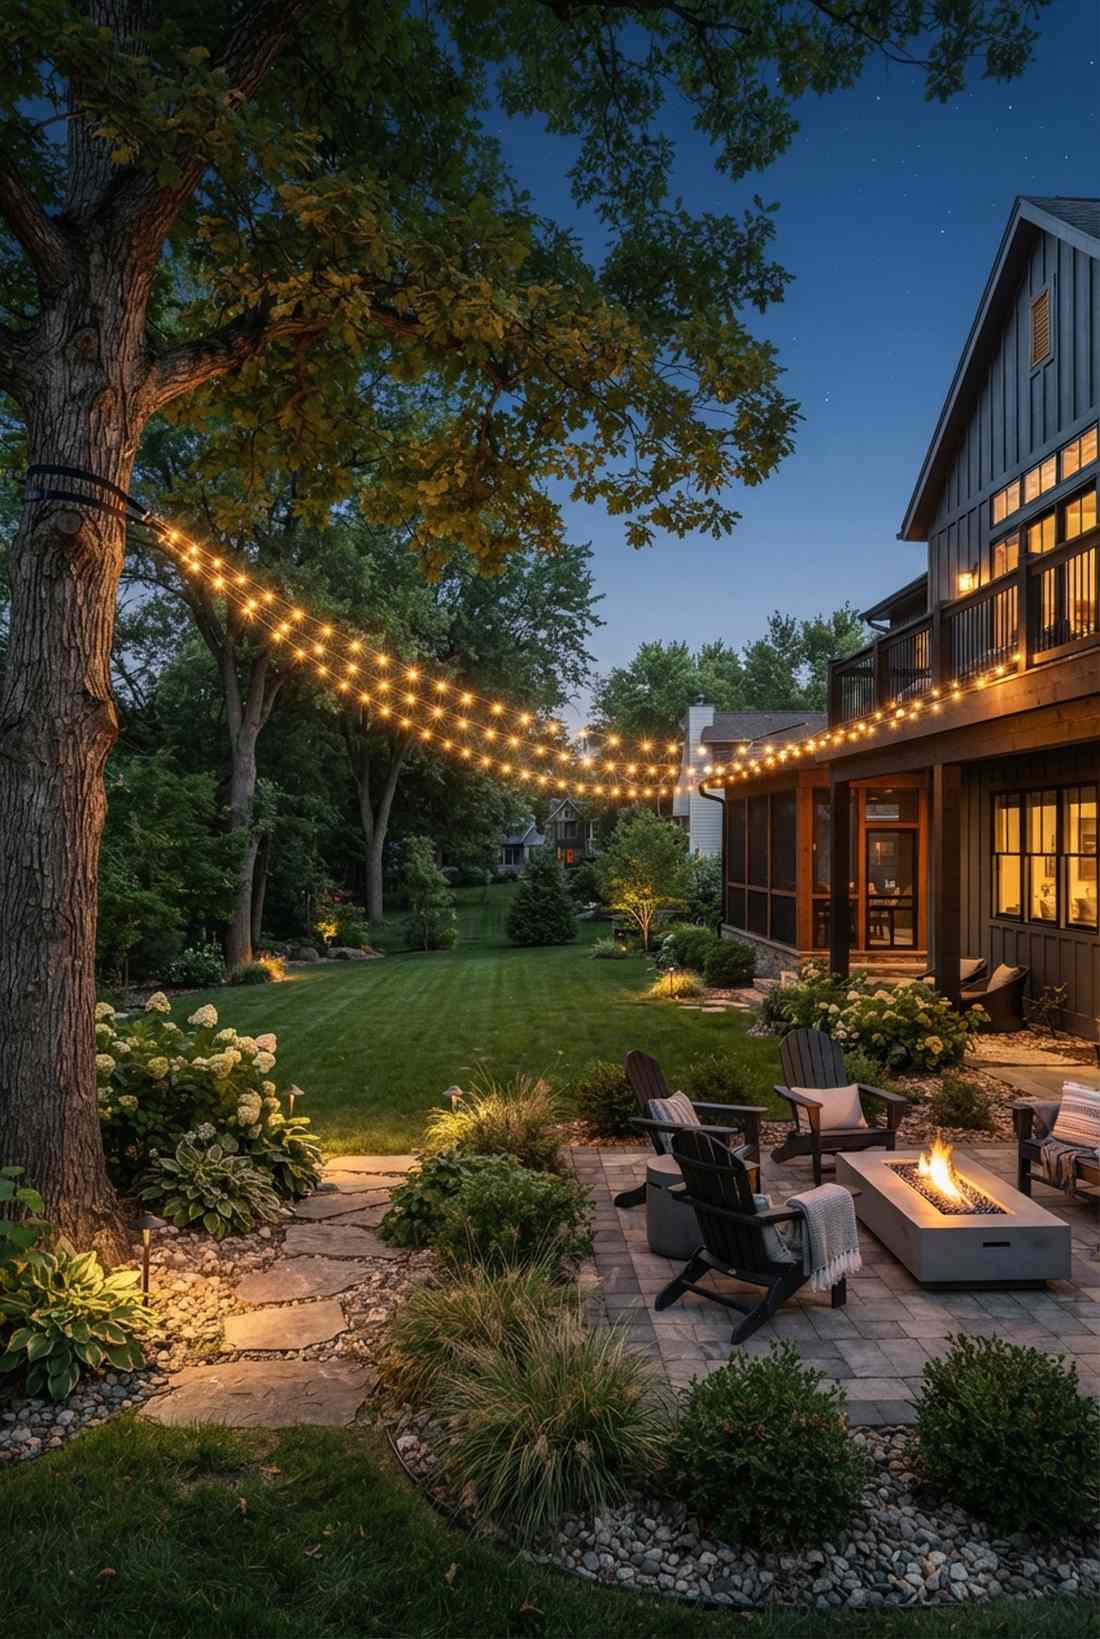
Feels like nature naturally grew its own glowing vines. Suspended garden lighting linking mature trees to your house creates stunning architectural depth. Works exceptionally well to bridge isolated patio islands.
Skip the cheap extension cords and use landscape-rated connection wire to bridge the gap seamlessly. Weaving in high-end fairy lights ideas like this ensures the backyard feels cohesive, not disjointed.
Expect to spend about $40–$100 depending on the span length.
- Key Materials: Tree-safe strap anchors
- Vibe / Style: Enchanted forest crossing
- Difficulty: Moderate climbing involved
- Budget Breakdown: Cables: $60 | Straps: $20
- Creator’s Tip: Leave a slight dip in the middle to account for trees swaying in heavy wind.
- Smart Sourcing: tree-safe mounting straps (2-pack) and heavy-gauge suspension cables.
Most people stop right here… until they see the cascading layout coming up next.
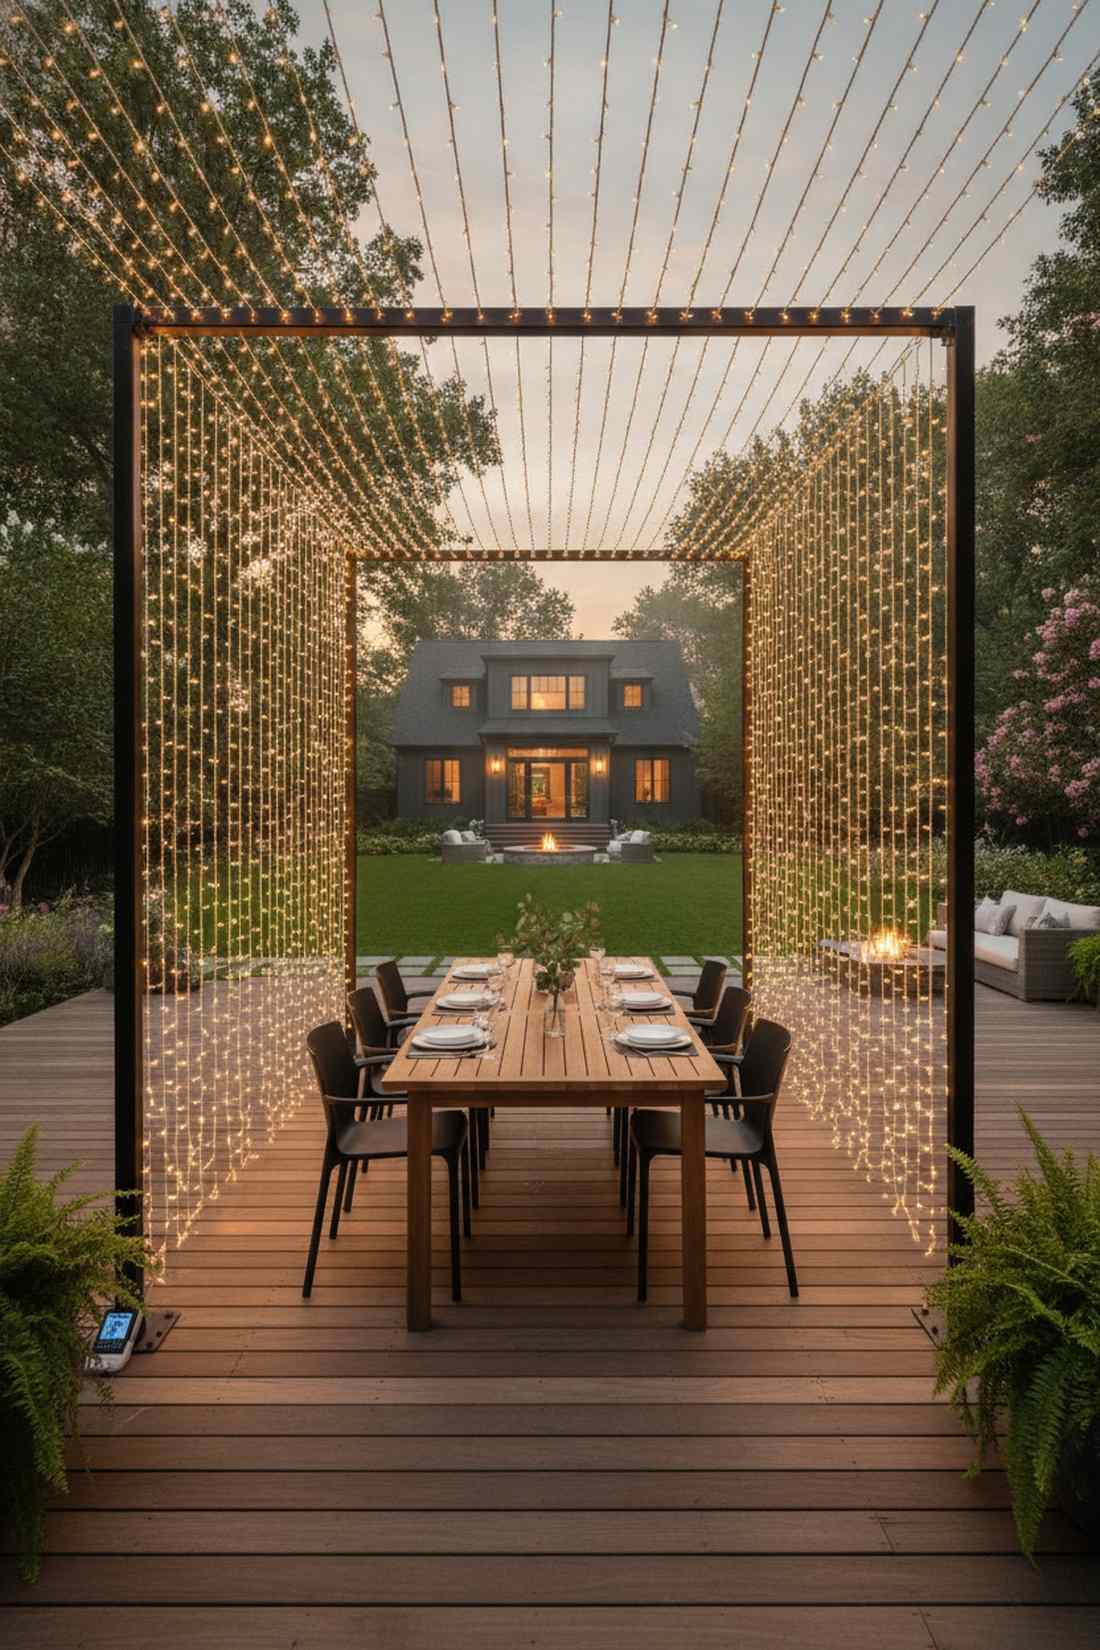
5. Cascading Waterfall Drape
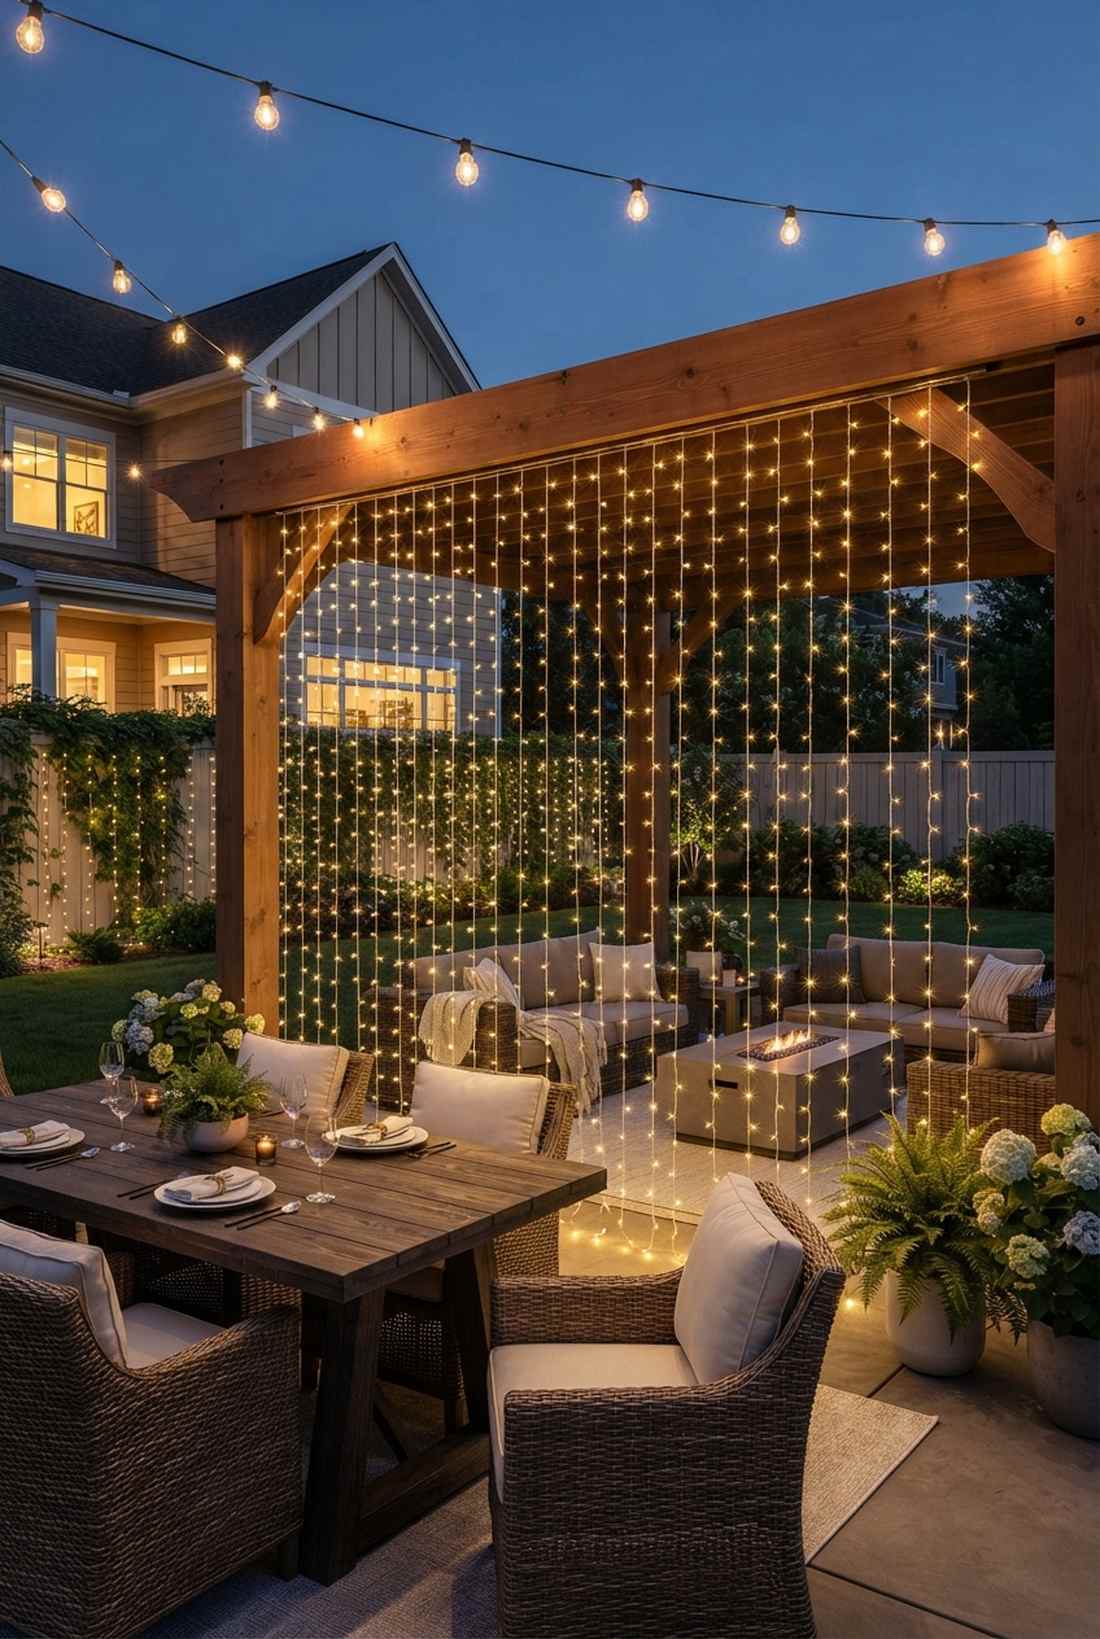
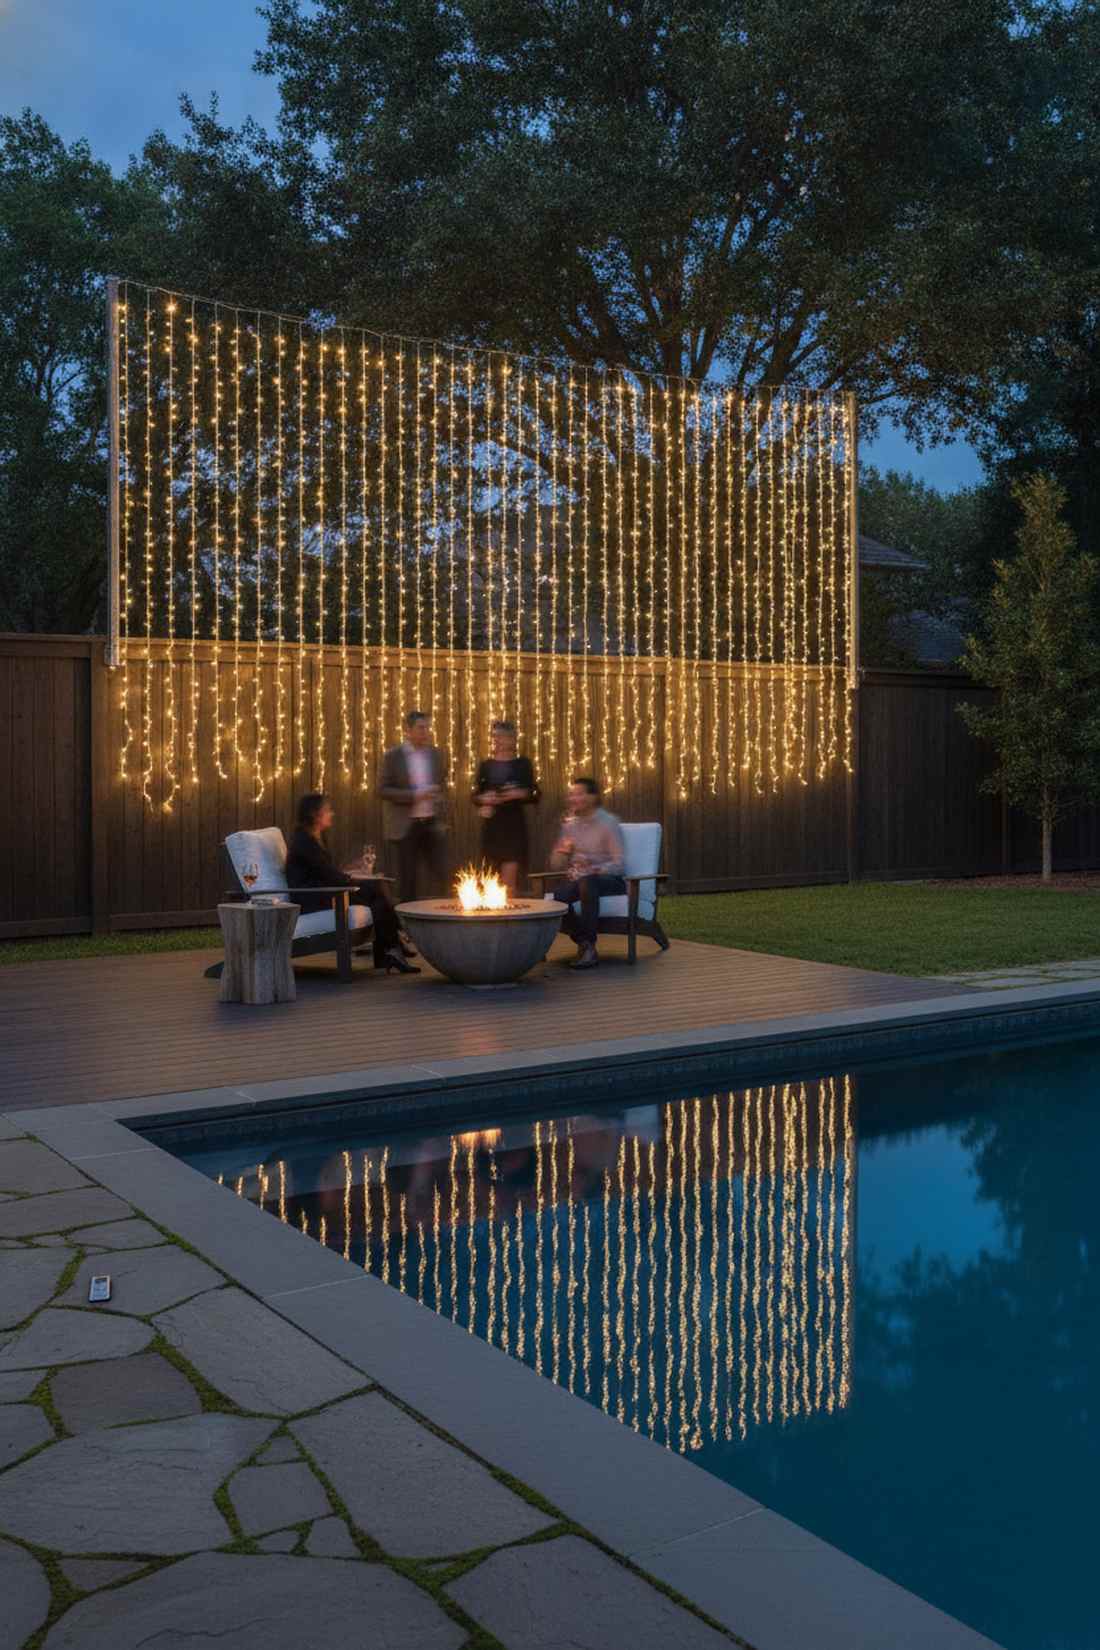
Imagine a mesmerizing curtain of falling stars separating your outdoor rooms. A vertical fairy lights ideas installation completely transforms boring blank walls or privacy fences. Exceptional for creating a dramatic photo backdrop.
The industry trick is utilizing pre-spaced curtain icicle strings rather than hanging individual lines yourself. This guarantees a designer-level finish and prevents horrific wind tangles.
You can buy pre-made rigs for around $25–$45. Save this idea for your next evening patio party!
- Key Materials: Pre-strung curtain lights
- Vibe / Style: Dramatic elegant backdrop
- Difficulty: Quick plug-and-play
- Budget Breakdown: Curtains: $30 | Hooks: $5
- Creator’s Tip: Stagger the bottom lengths so it looks like organic rainfall.
- Smart Sourcing: waterproof LED curtain lights (remote controlled) and outdoor adhesive cable clips.
6. Multi-Level Tiered Canopy
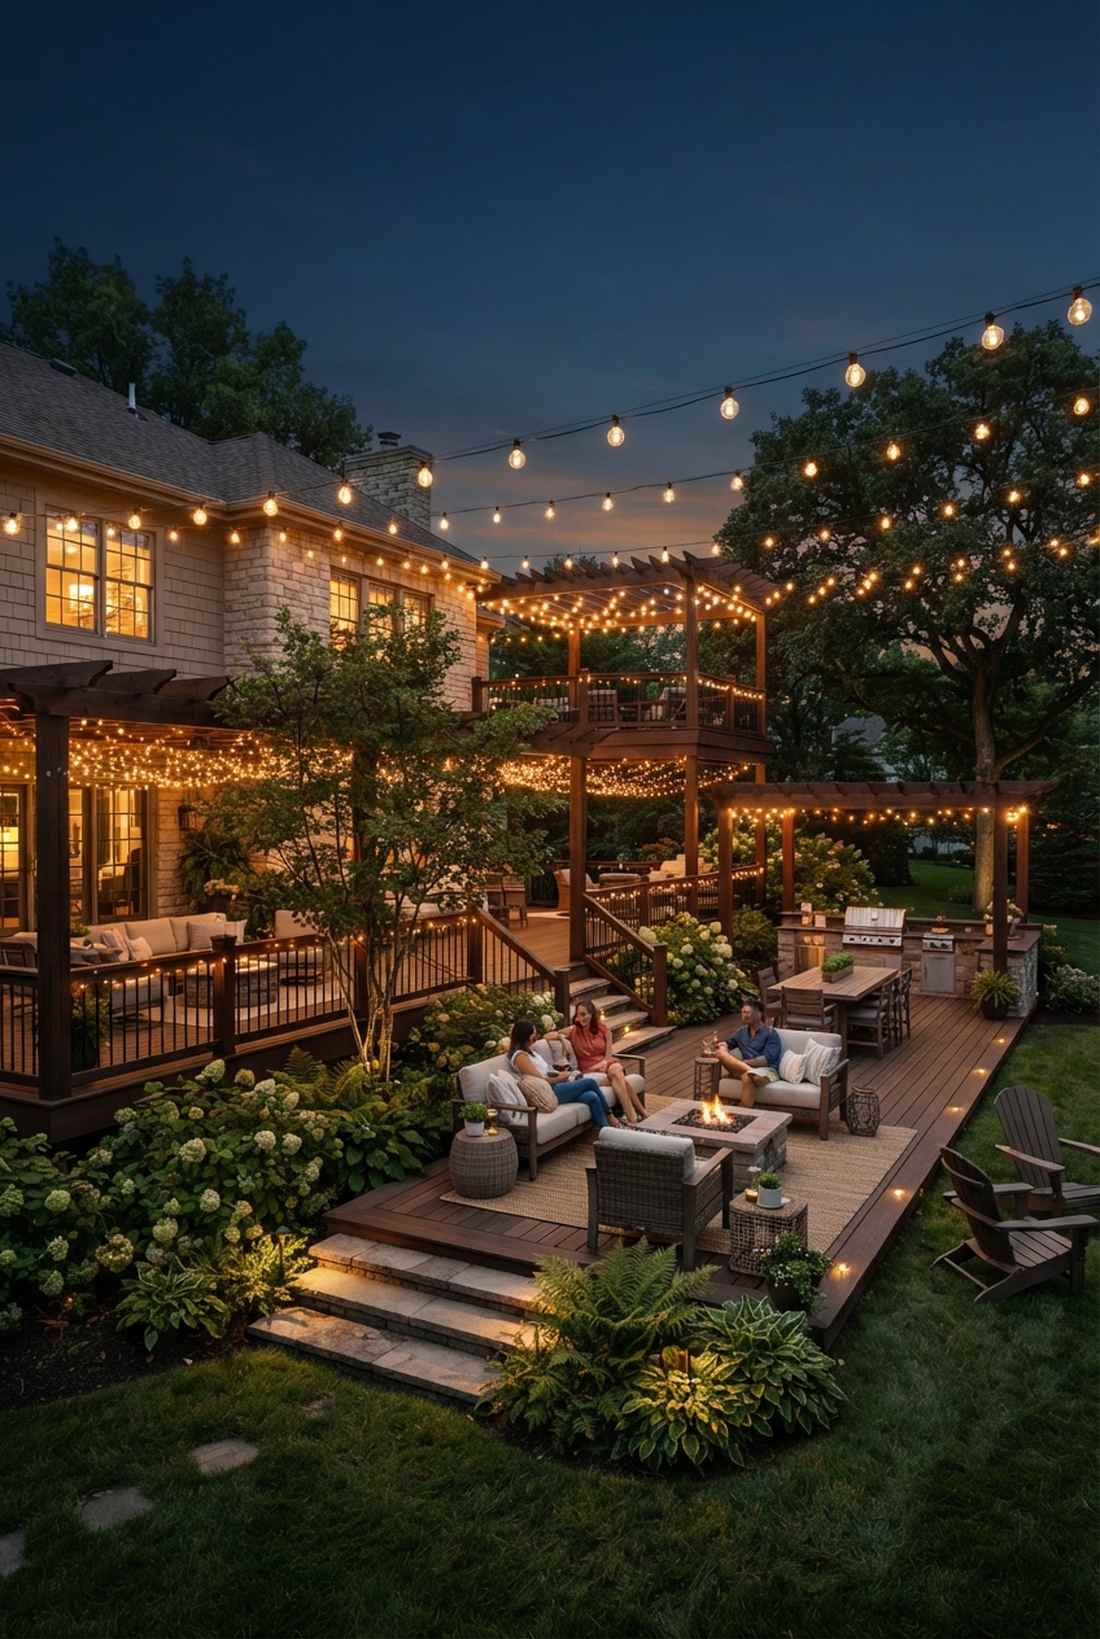

Feels like stepping onto a multi-million dollar event set. Layered outdoor illumination utilizes low, mid, and high overhead lines. Designed exclusively for deep, three-dimensional patio spaces.
Applying theater-lighting techniques by using different bulb densities completely eliminates flat, boring shadows. Grabbing premium fairy garden supplies makes the layered tiers visually pop against the dark sky.
A layered approach typically runs $80–$120. Highly recommended for a massive aesthetic win.
- Key Materials: Mixed-density LED strands
- Vibe / Style: Professional event lighting
- Difficulty: Advanced spatial planning
- Budget Breakdown: High lights: $40 | Mid lights: $40
- Creator’s Tip: Use larger globe bulbs up high and tiny micro-LEDs down low to force perspective.
- Smart Sourcing: commercial-grade globe strings and copper micro-LED spools.
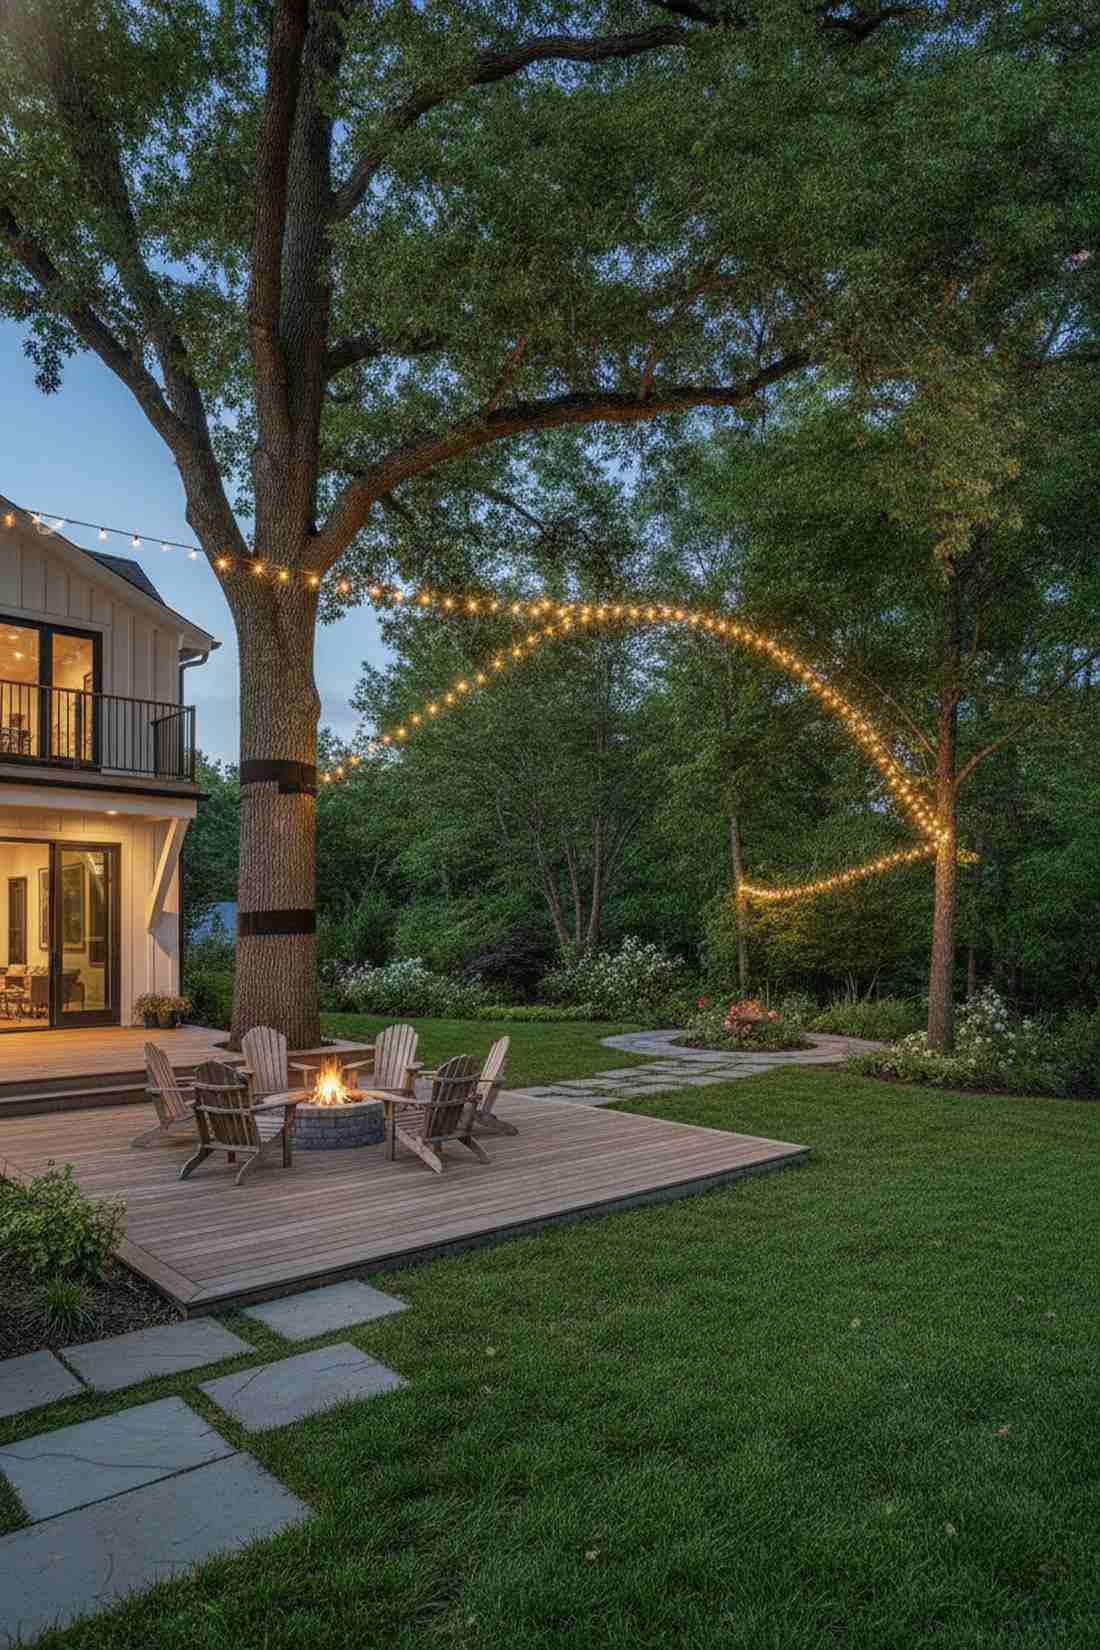
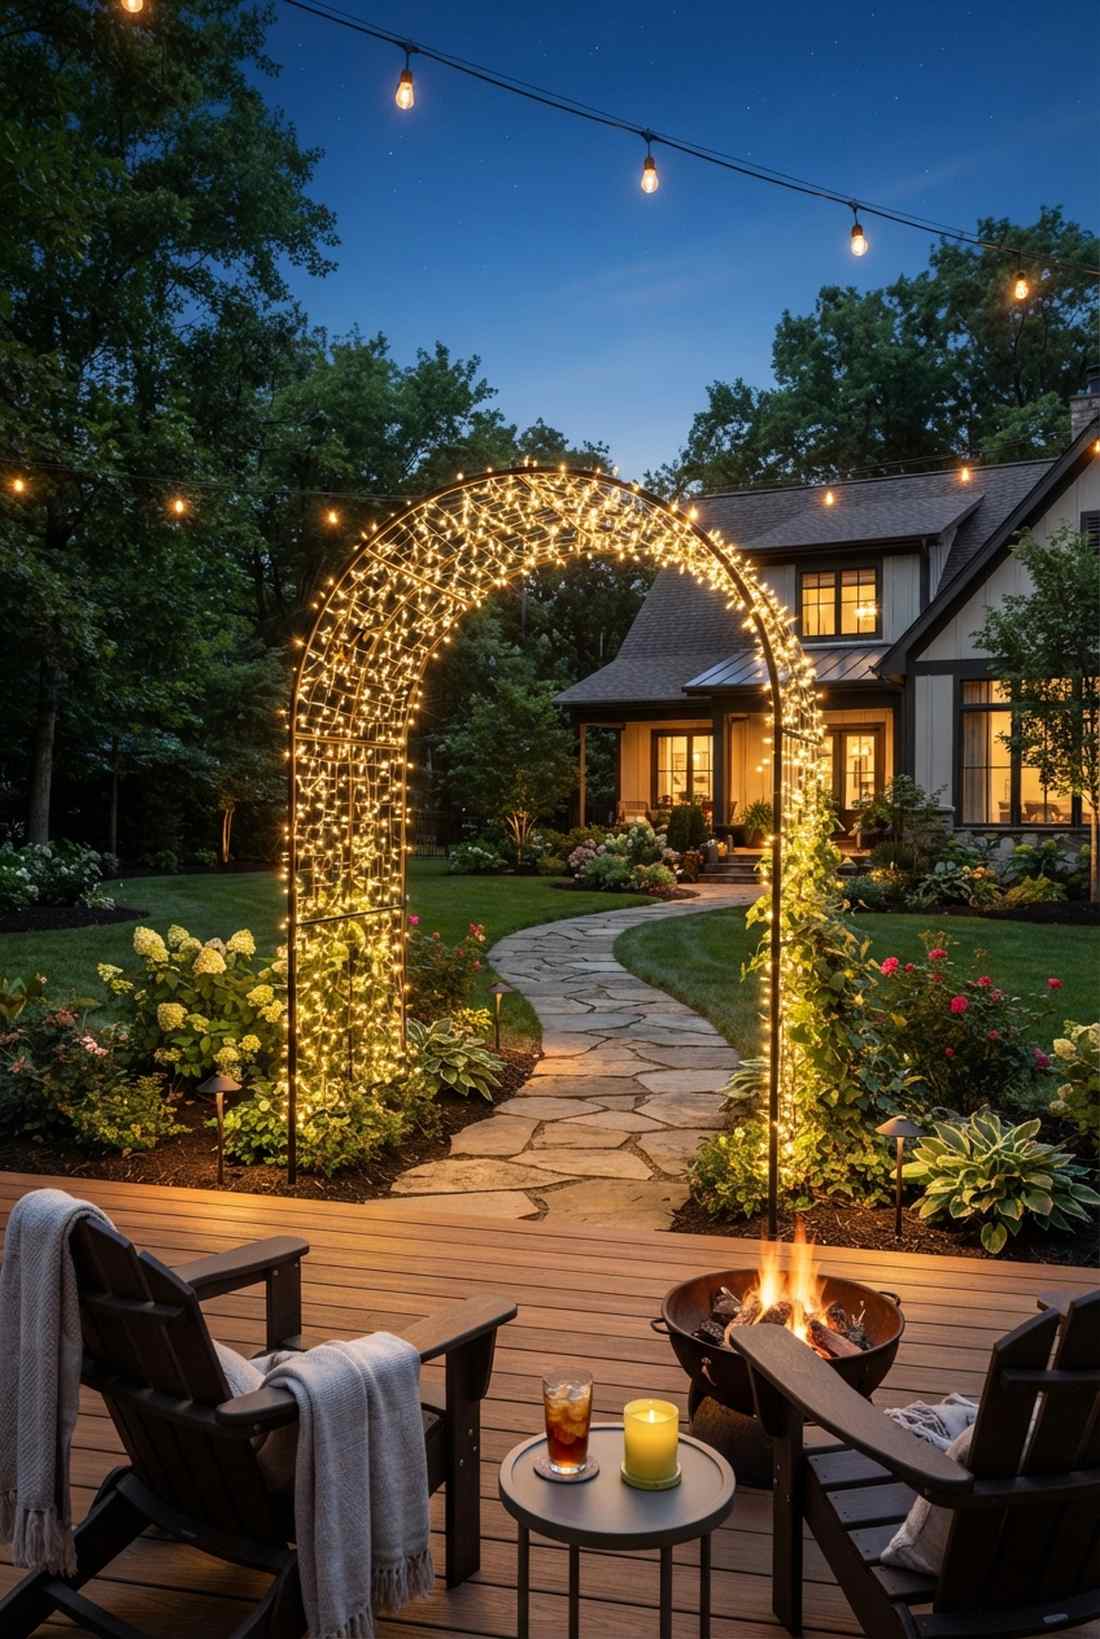
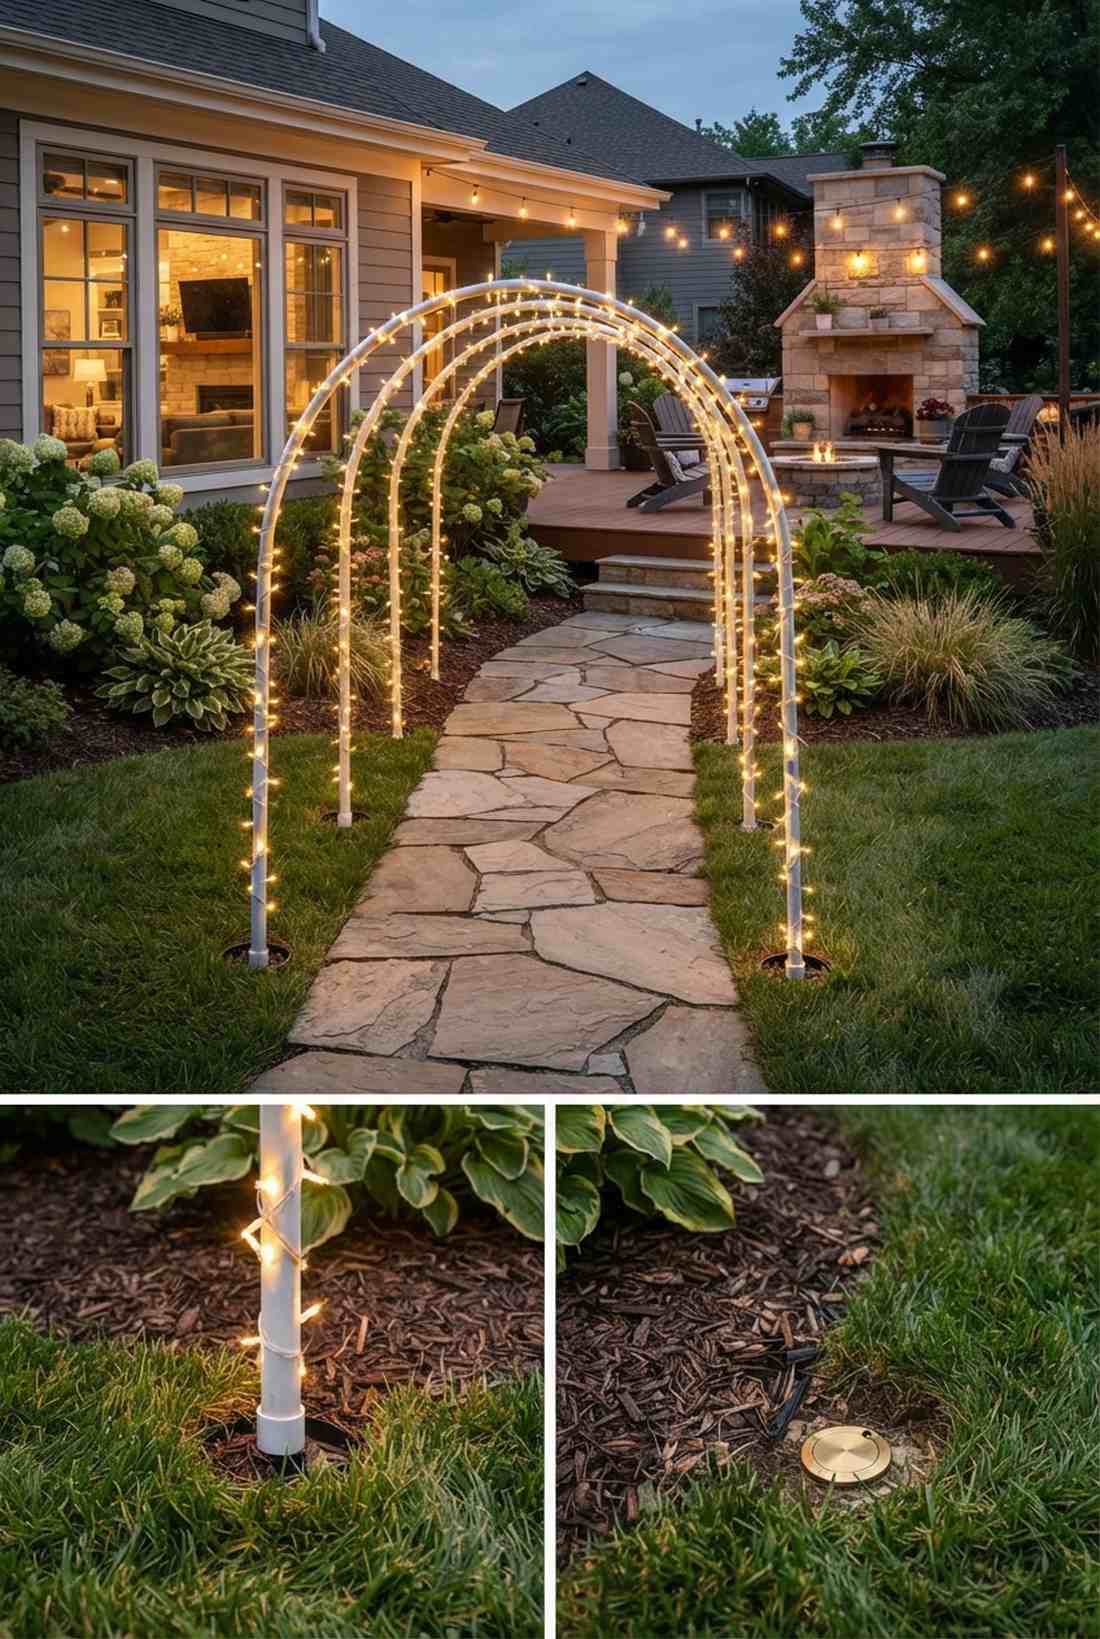
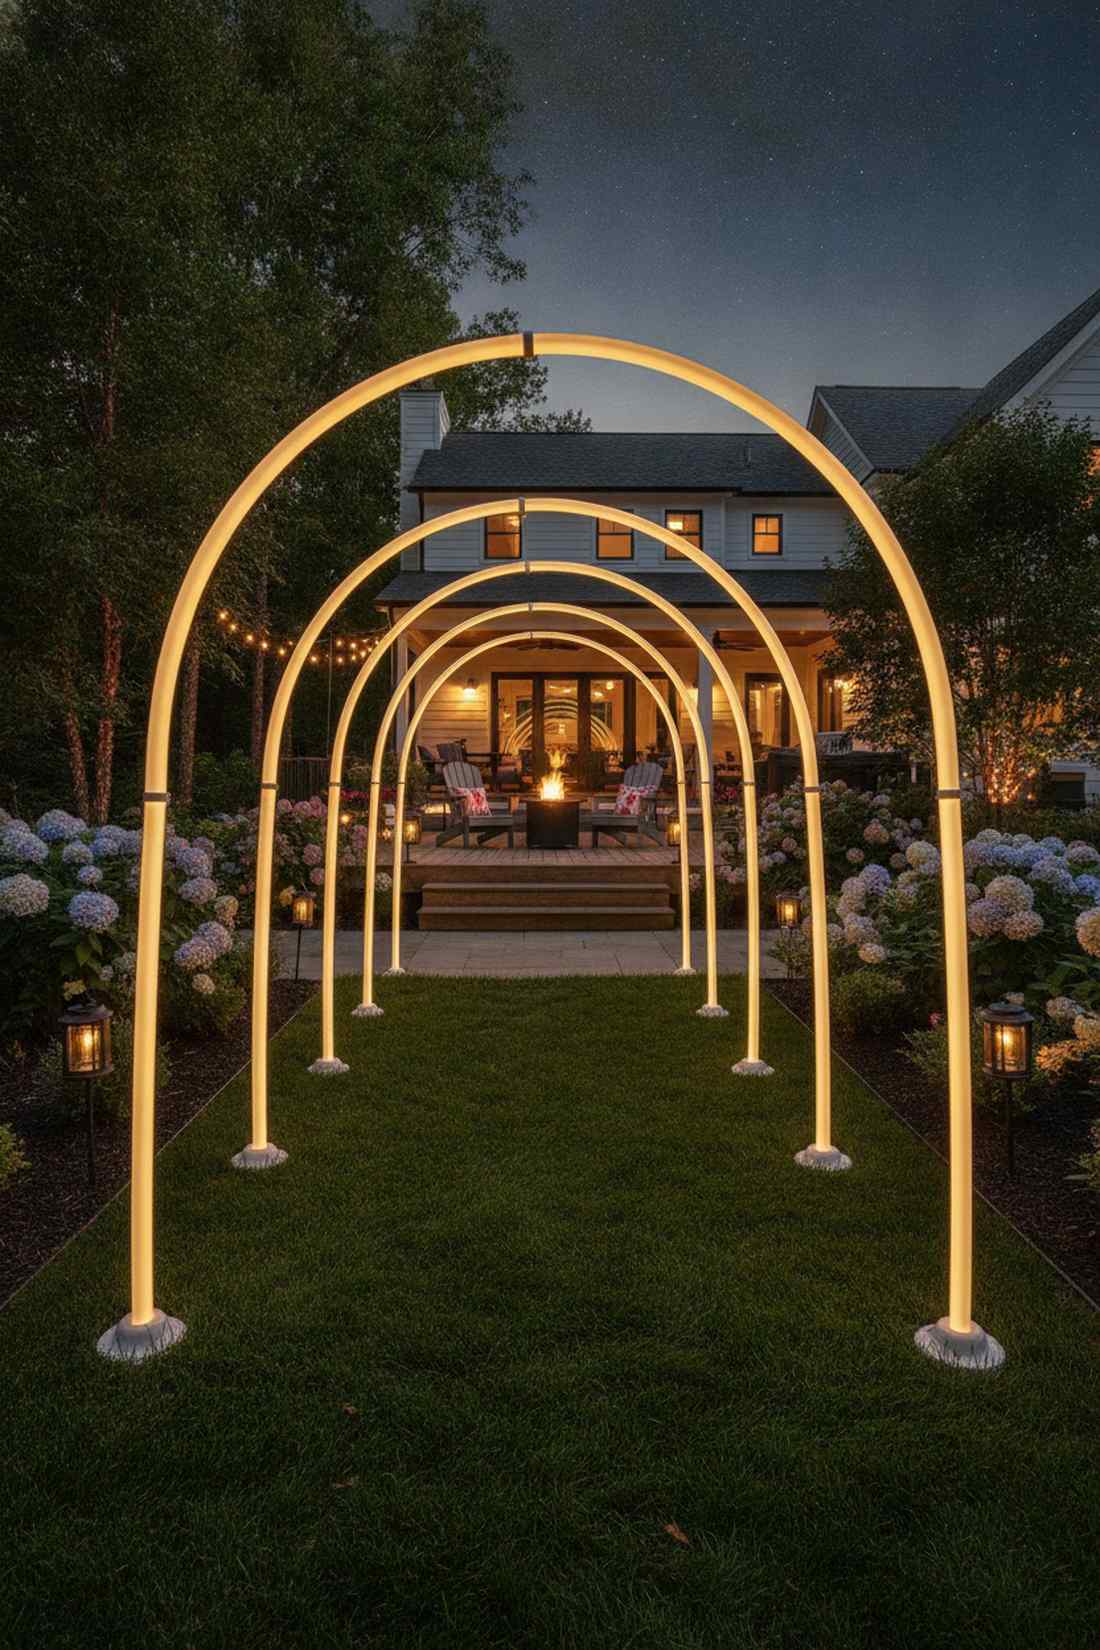
7. Curved Arc Installation
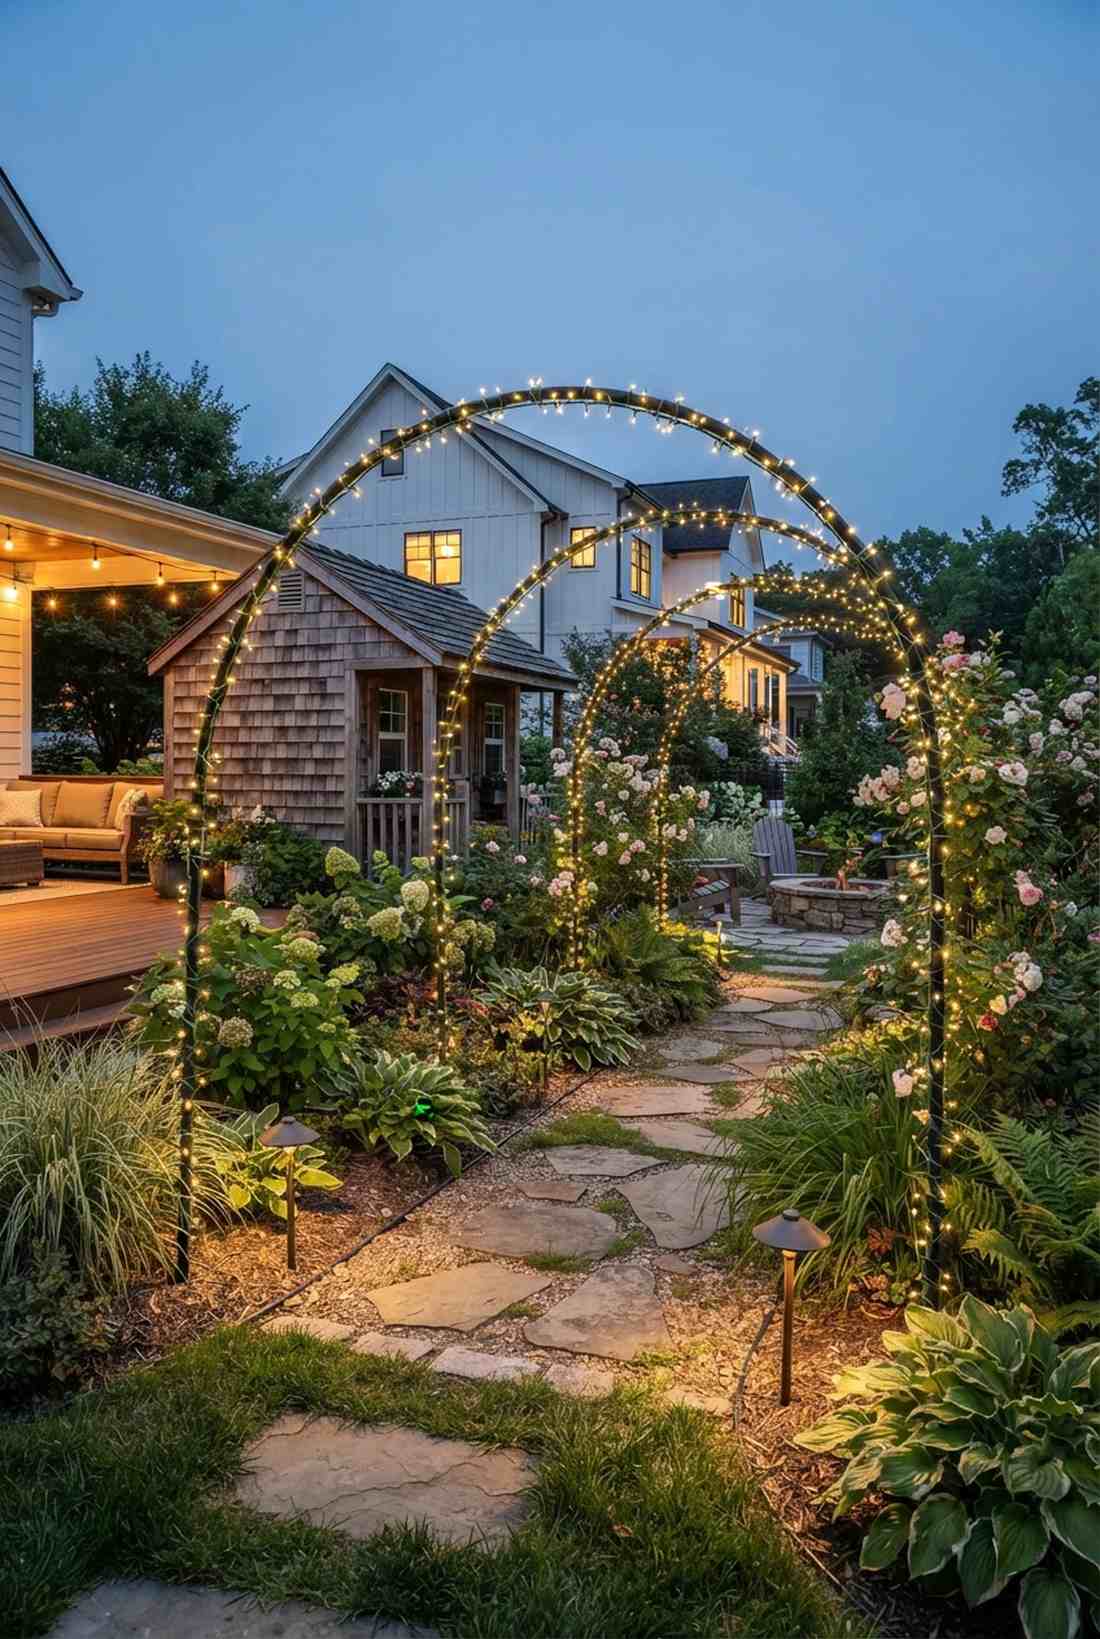
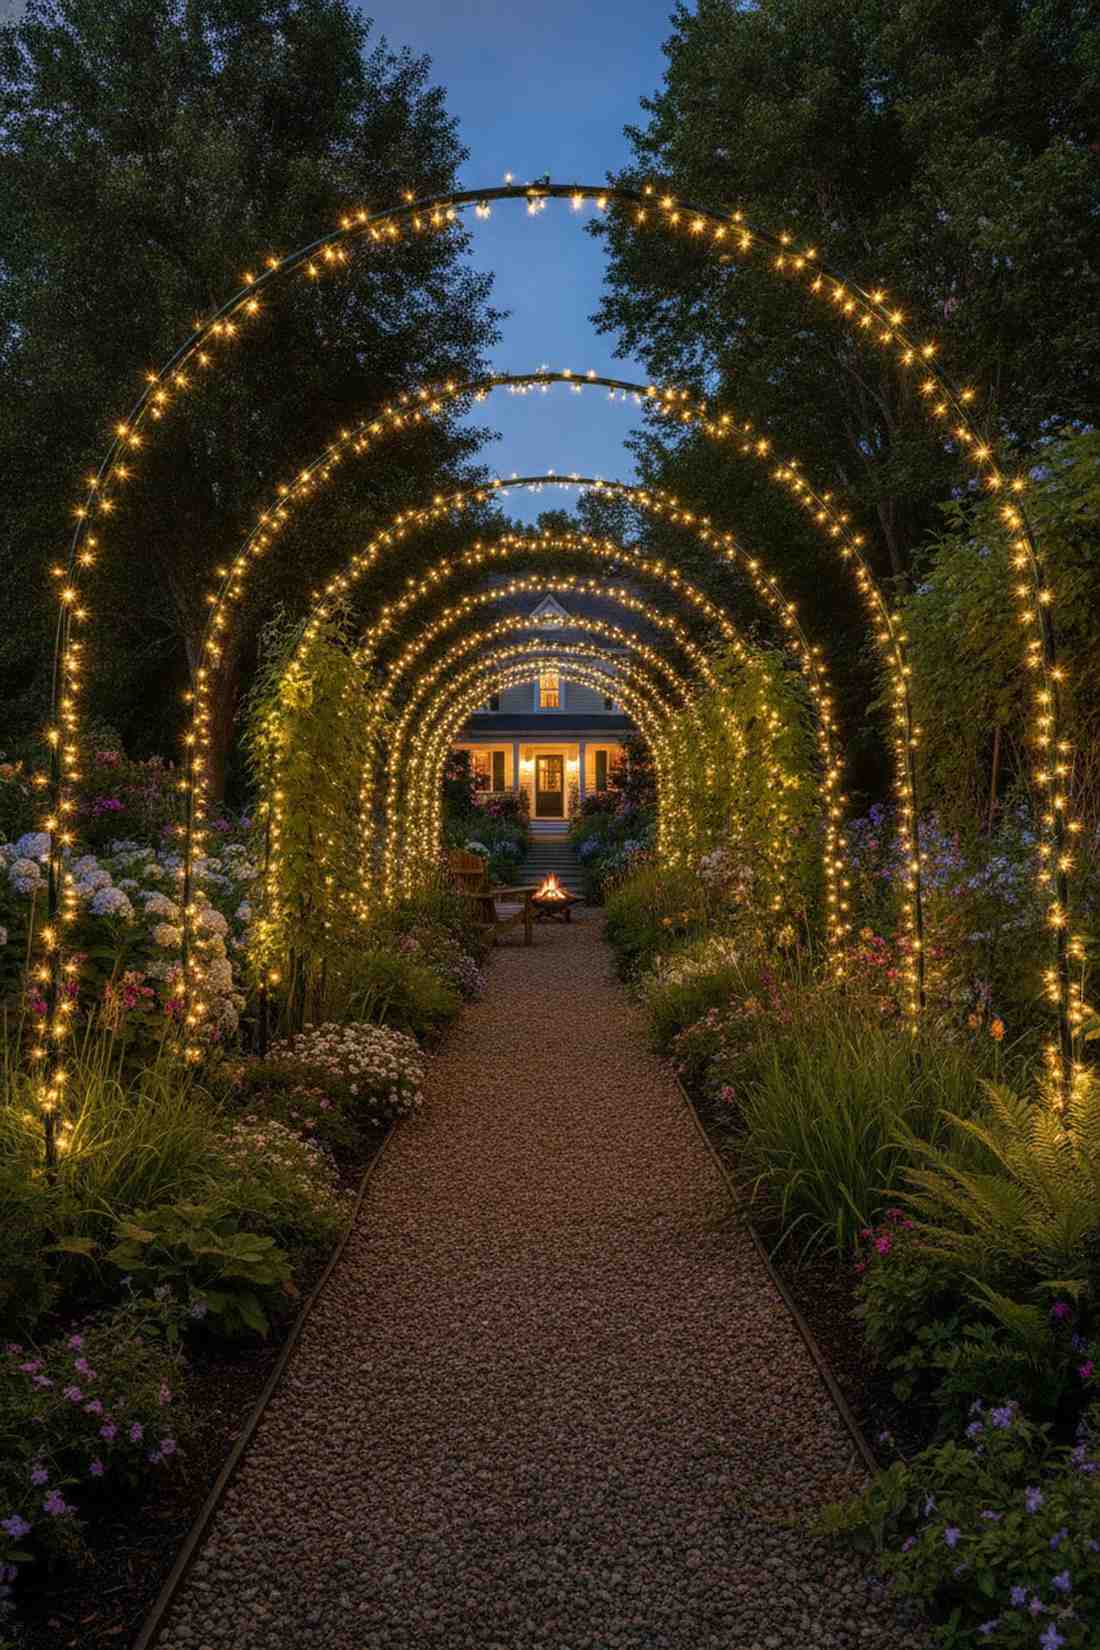
Creates a whimsical gateway into an enchanted botanical garden. Arched fairy light frames give structure to empty walkways. Incredibly effective for highlighting standard garden paths.
Bending flexible conduit instead of buying pre-made arches is a controversial money-saver that looks aggressively high-end. Wrapping it tightly with micro-lights delivers a seamless glowing tunnel.
Build these yourself for about $15 per arch. Pin this for an ultra-cheap landscaping hack!
- Key Materials: Flexible PVC conduit
- Vibe / Style: Whimsical garden portal
- Difficulty: Fun weekend build
- Budget Breakdown: Conduit: $10 | Lights: $5 per arch
- Creator’s Tip: Paint the conduit matte black before wrapping so it disappears in the dark.
- Smart Sourcing: bendable PVC conduit pipes and green-wire solar fairy lights.
Architectural Wrapping Techniques
8. Spiral Column Wrap
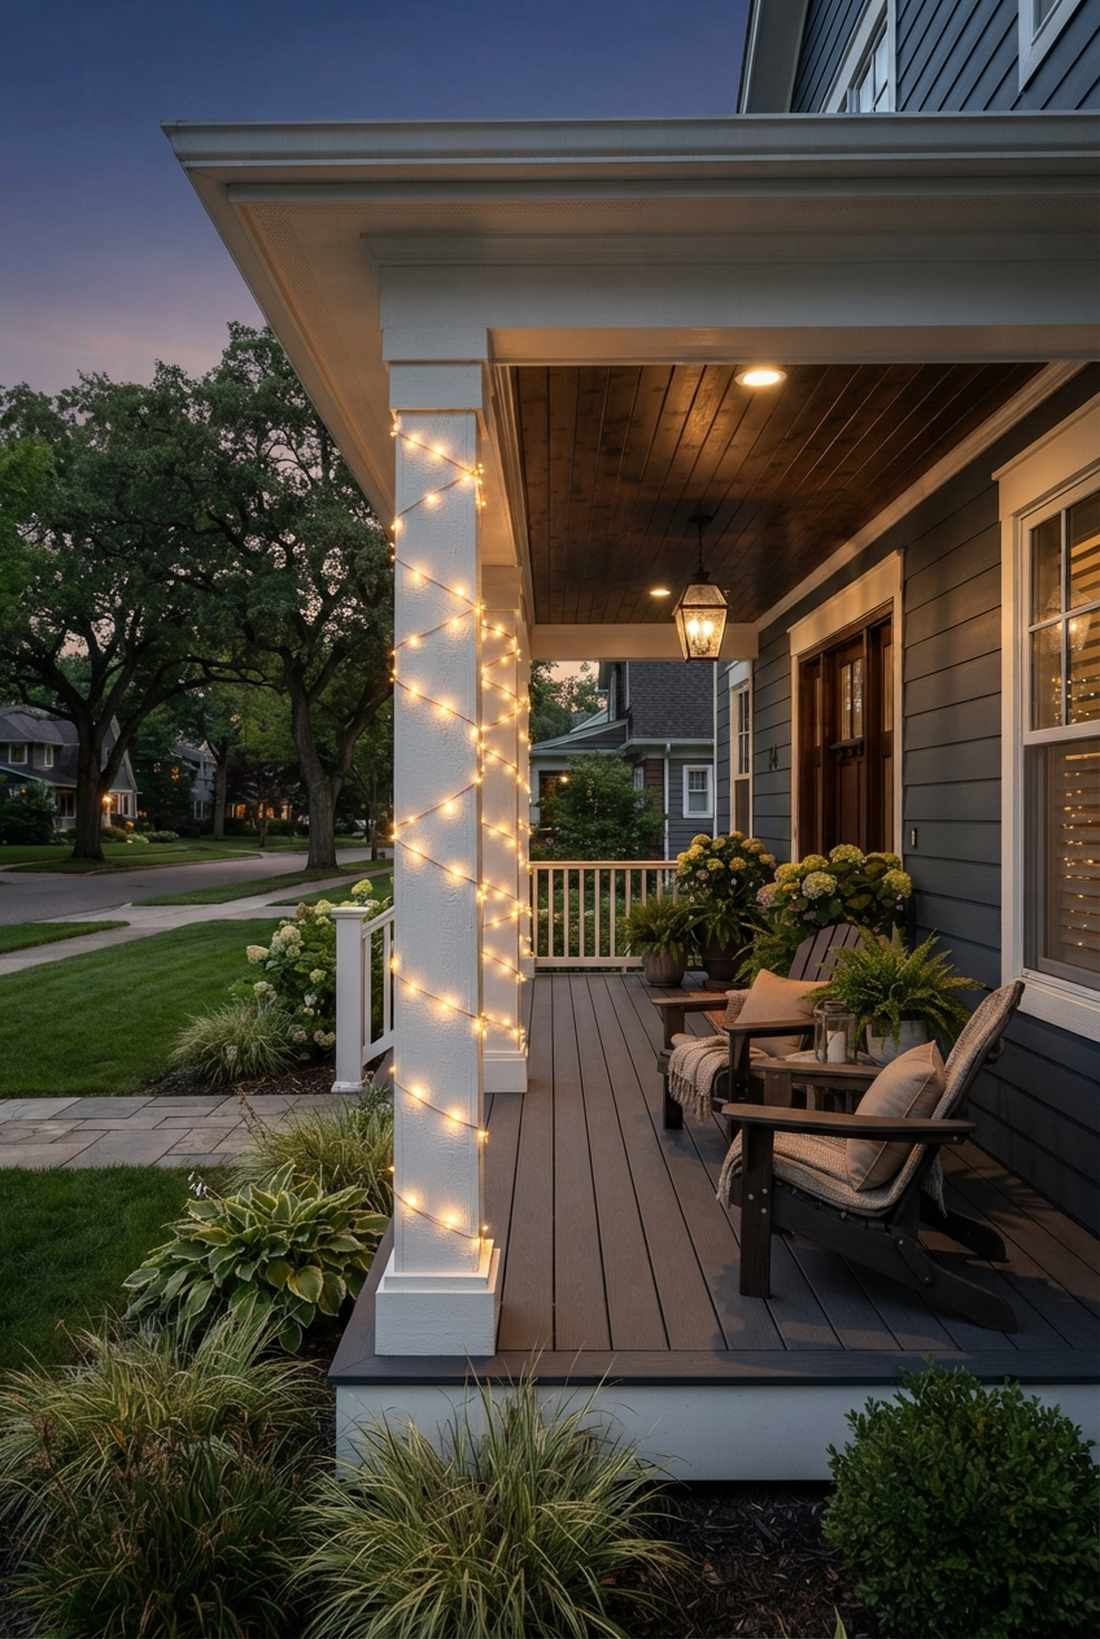
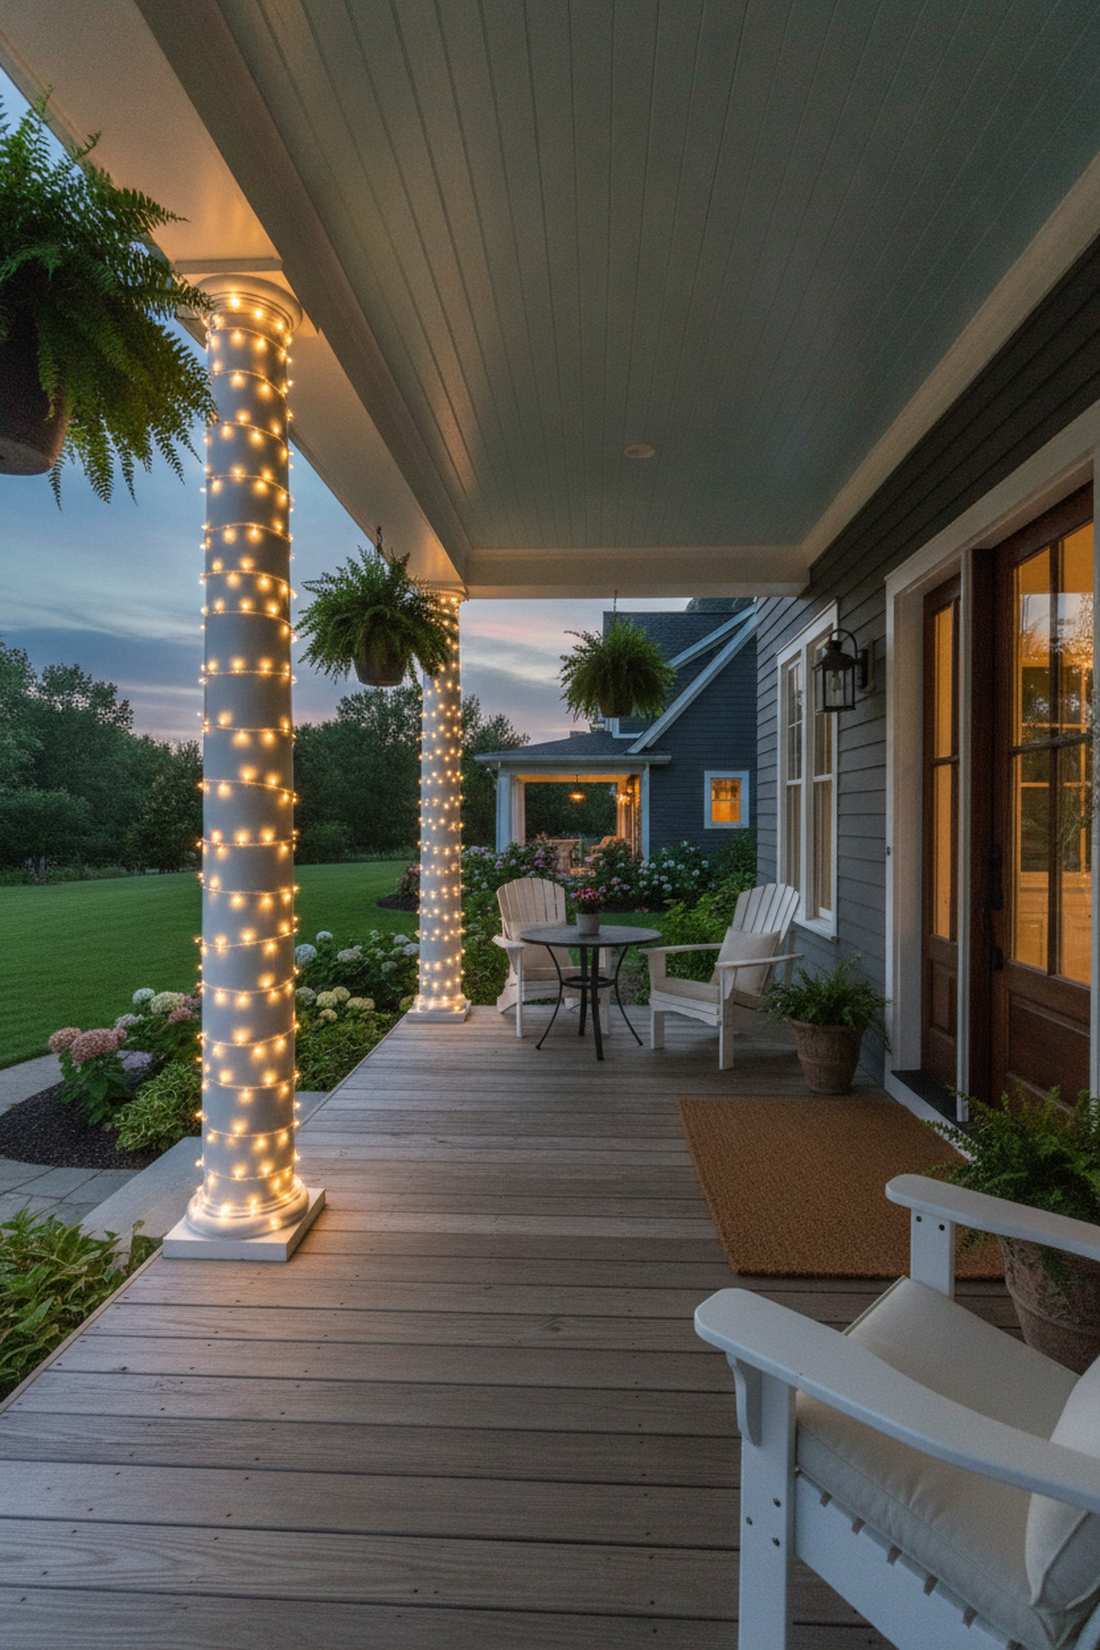
Turns basic porch pillars into glowing Grecian columns. This fairy lights decor ideas technique draws the eye upward, making ceilings feel infinitely taller. Perfect for front porch or pergola vertical supports.
Most beginners wrap way too loosely; the secret is using friction tape on the back of the wire to lock the spirals tight. This provides a clean, premium aesthetic that survives rough weather.
Expect to spend $15–$25 per column. A brilliantly cheap way to flex your curb appeal.
- Key Materials: Flexible copper wire LEDs
- Vibe / Style: Classic glowing architecture
- Difficulty: Easy but repetitive
- Budget Breakdown: Lights: $15 | Friction Tape: $5
- Creator’s Tip: Calculate the column circumference and multiply by height, then add 30% to buy enough length.
- Smart Sourcing: extra-long copper wire LED spools and clear outdoor friction tape.
9. Beam Outline Tracing
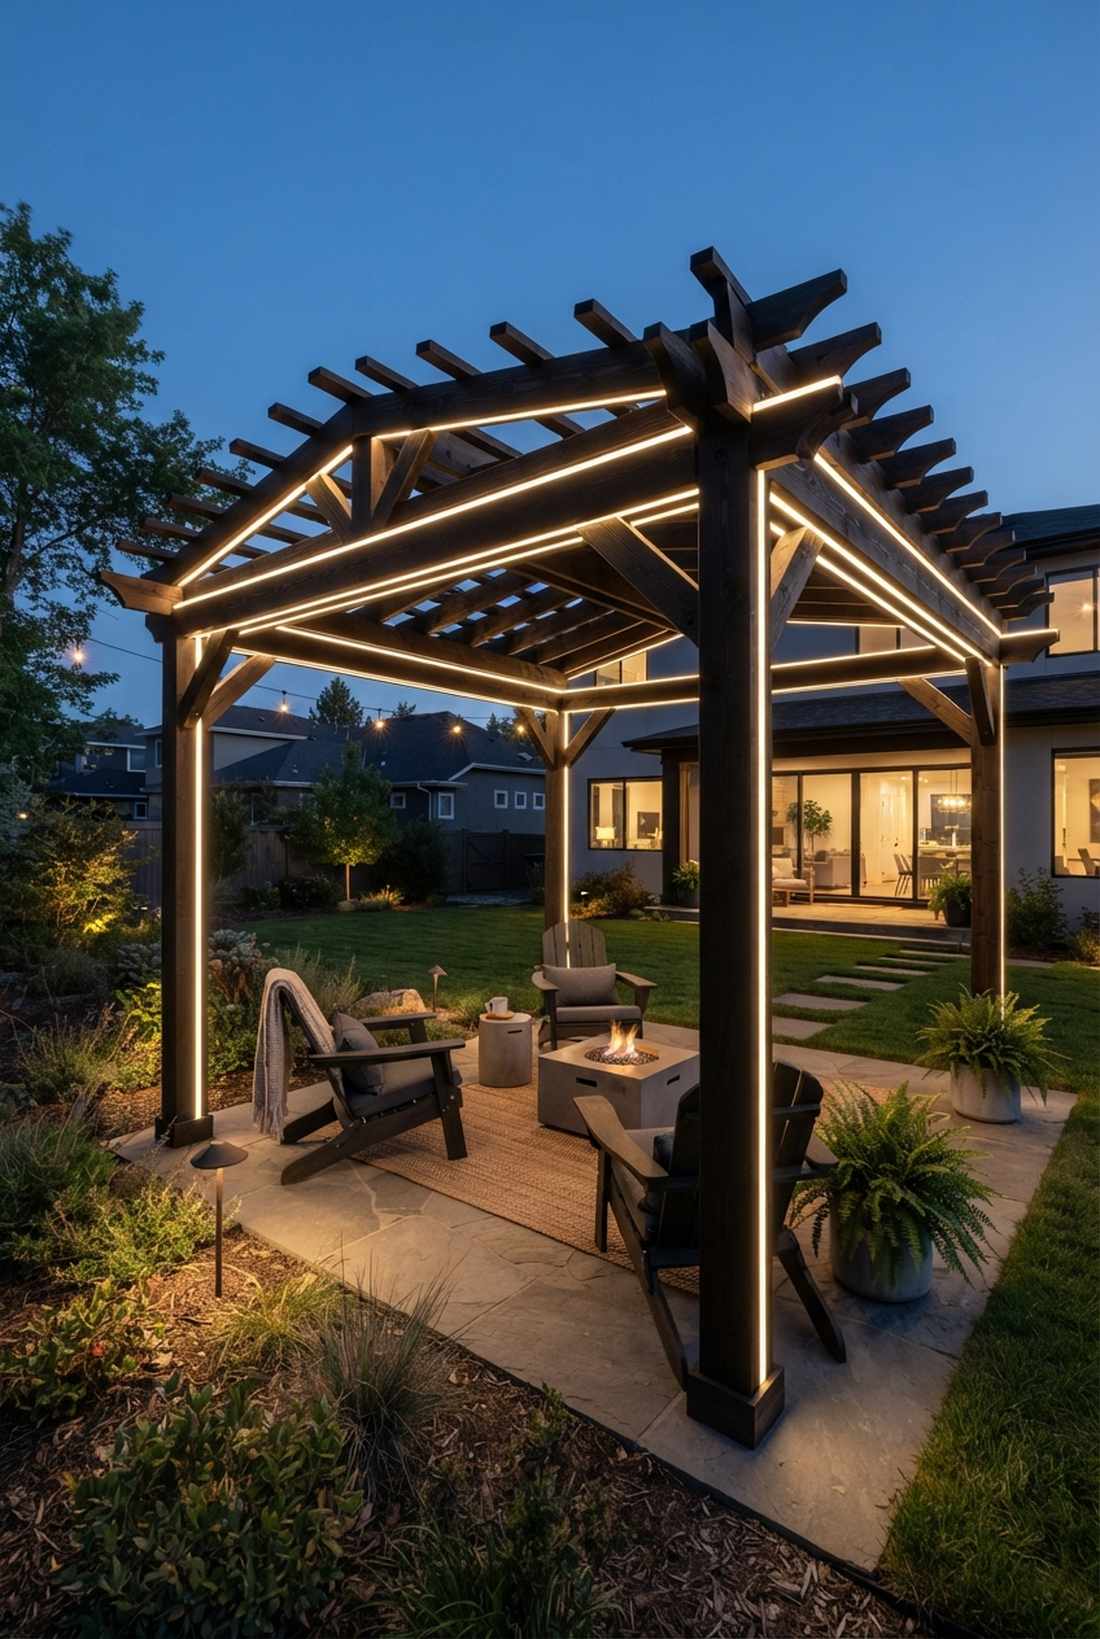
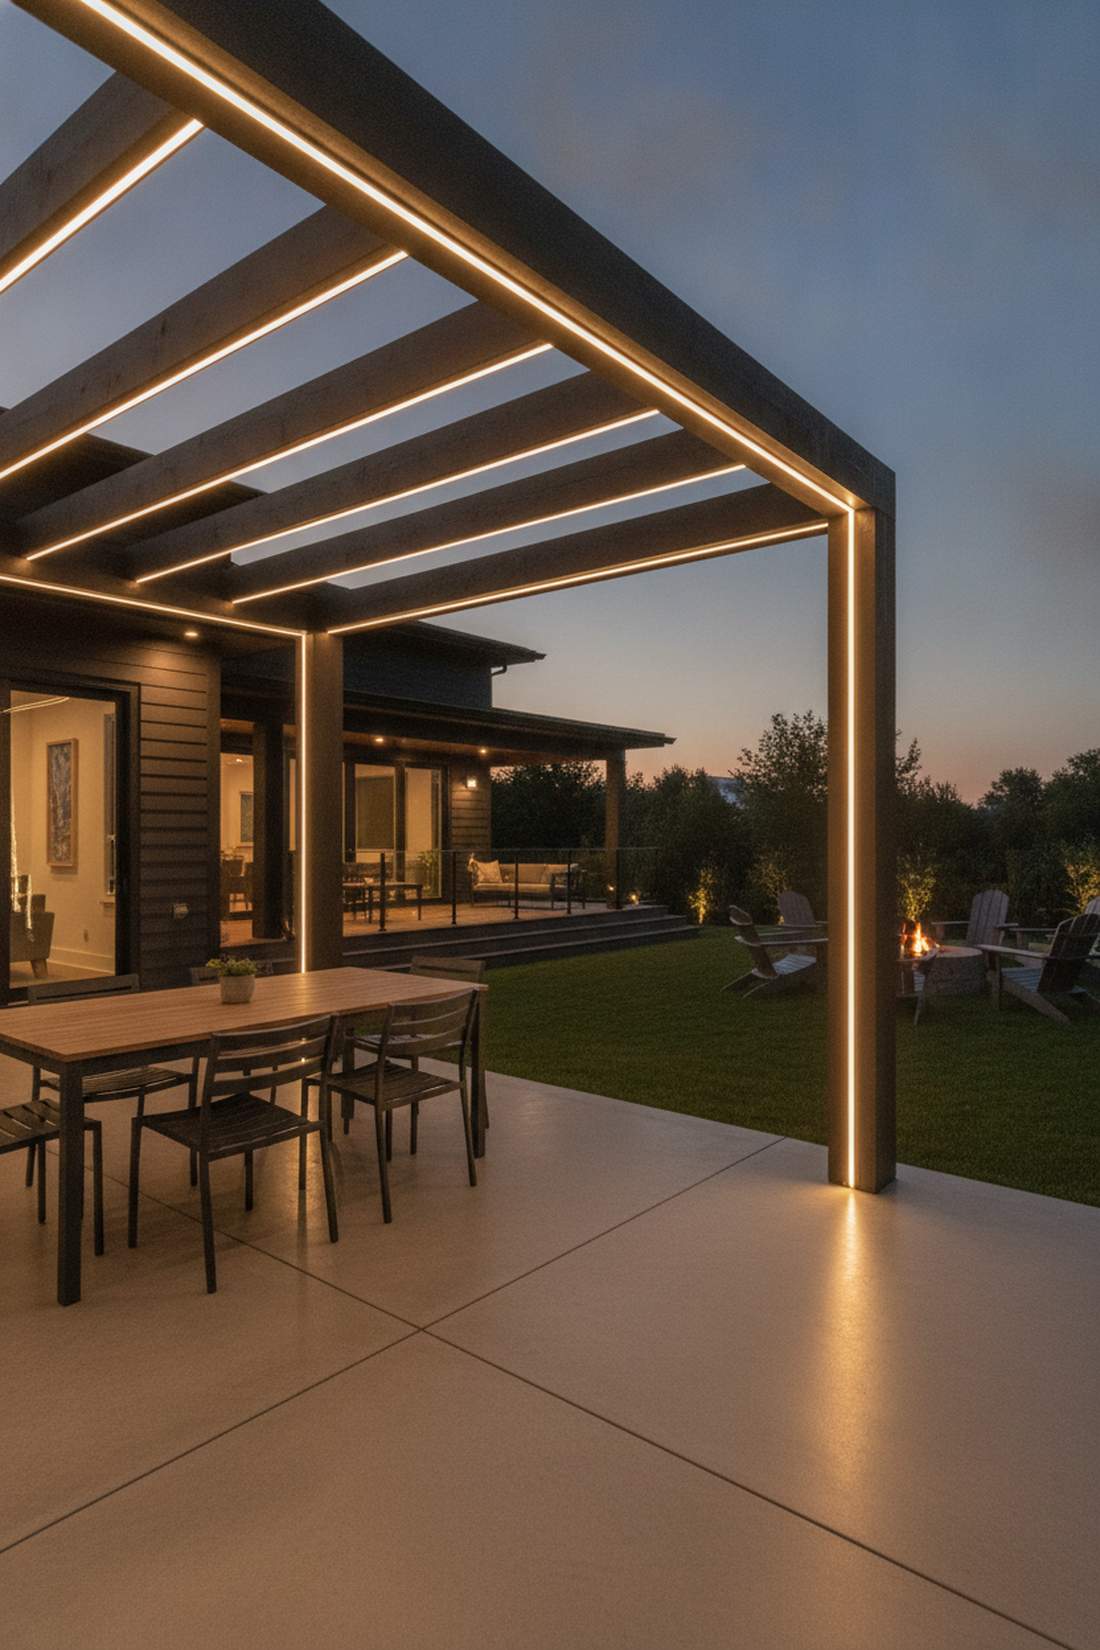
Feels like your outdoor architecture is glowing from within. Structural fairy lights decor creates a razor-sharp, illuminated skeleton. Brilliant for modern homes with clean, dark wood pergolas.
Forget using staples that invite rot and water damage; utilizing UV-rated adhesive clips is the smart buyer’s secret. It preserves your expensive woodwork while looking flawlessly straight.
Outline your structure for around $40–$70. Save this to your modern architecture board!
- Key Materials: Rigid LED ropes or tight stringers
- Vibe / Style: Sleek geometric glow
- Difficulty: Requires a steady ladder
- Budget Breakdown: Lights: $45 | Clips: $15
- Creator’s Tip: Run the lights strictly on the bottom inner edges to hide the wiring from daytime view.
- Smart Sourcing: flat-rope LED outdoor strips and UV-resistant adhesive light clips.
💡 Must-Have Supplies for High-End Setups
To build these setups faster and ensure they last, skip the generic craft aisles and invest in the right foundational kits.
- Base & Support: commercial-grade vinyl-coated tension cables
- Setup Tools: outdoor lighting staple-free starter kits
- Weather/Durability Protection: dielectric grease and UV-clear sealants
10. Lattice Weave Pattern
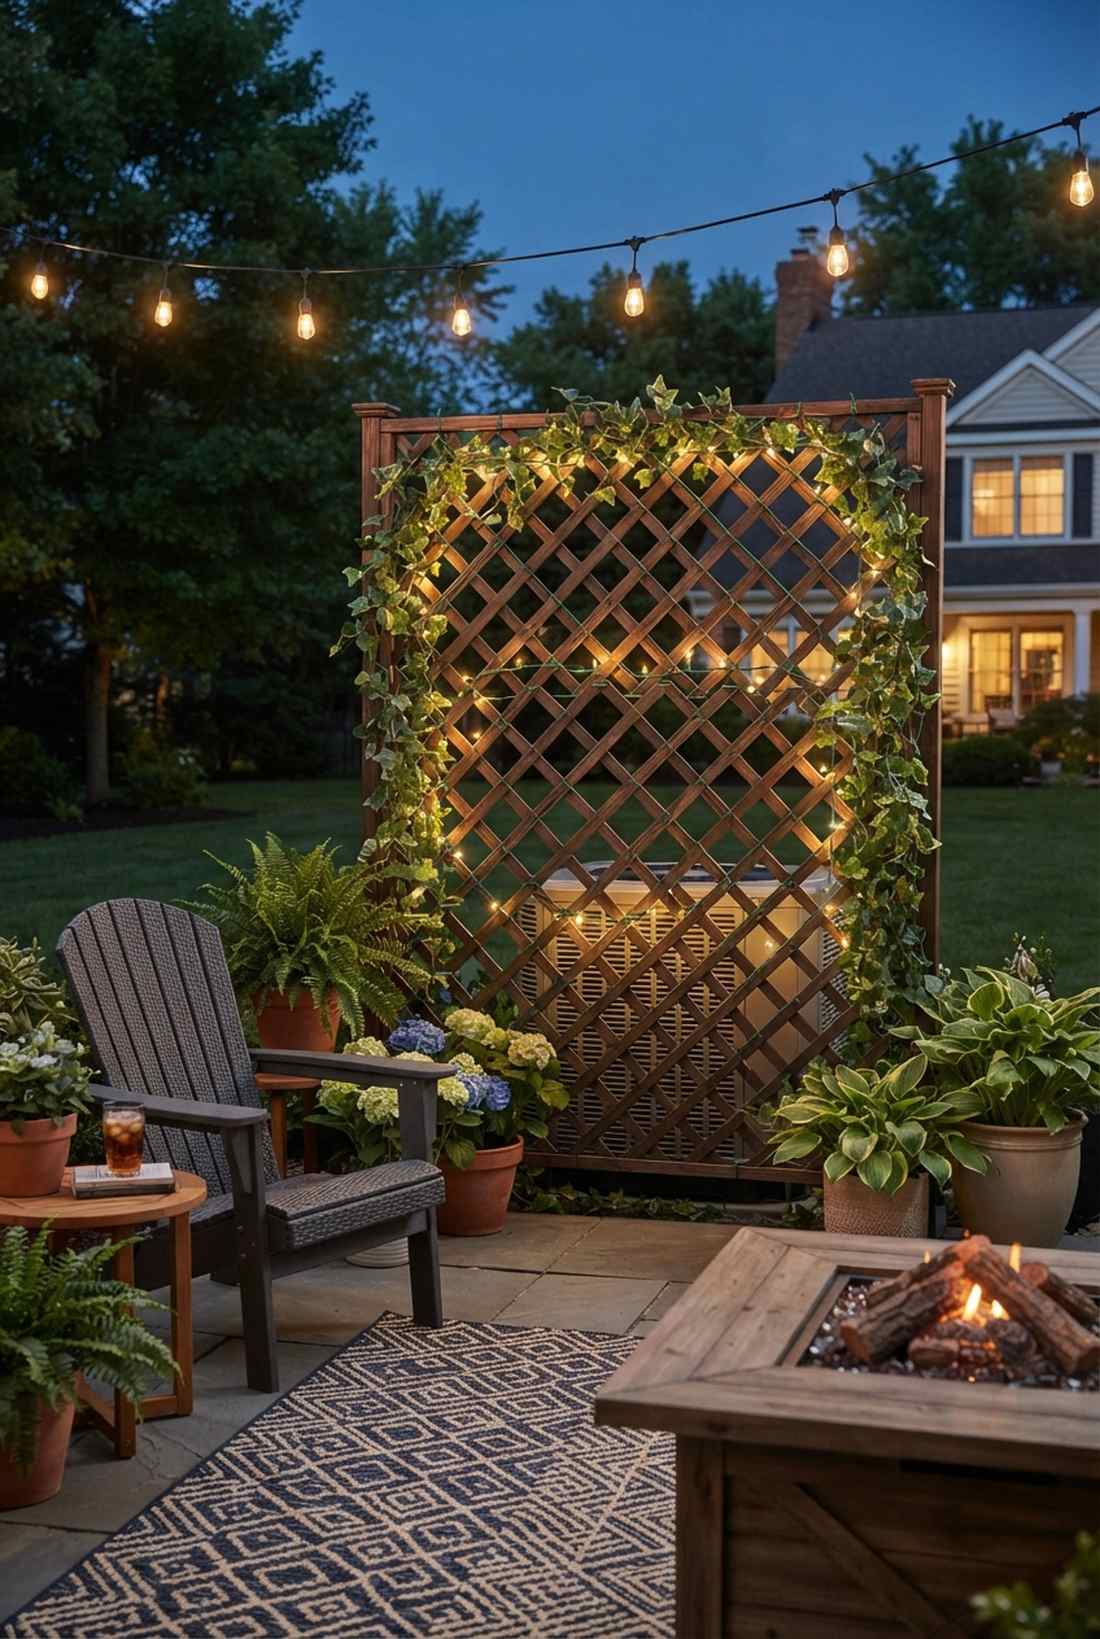
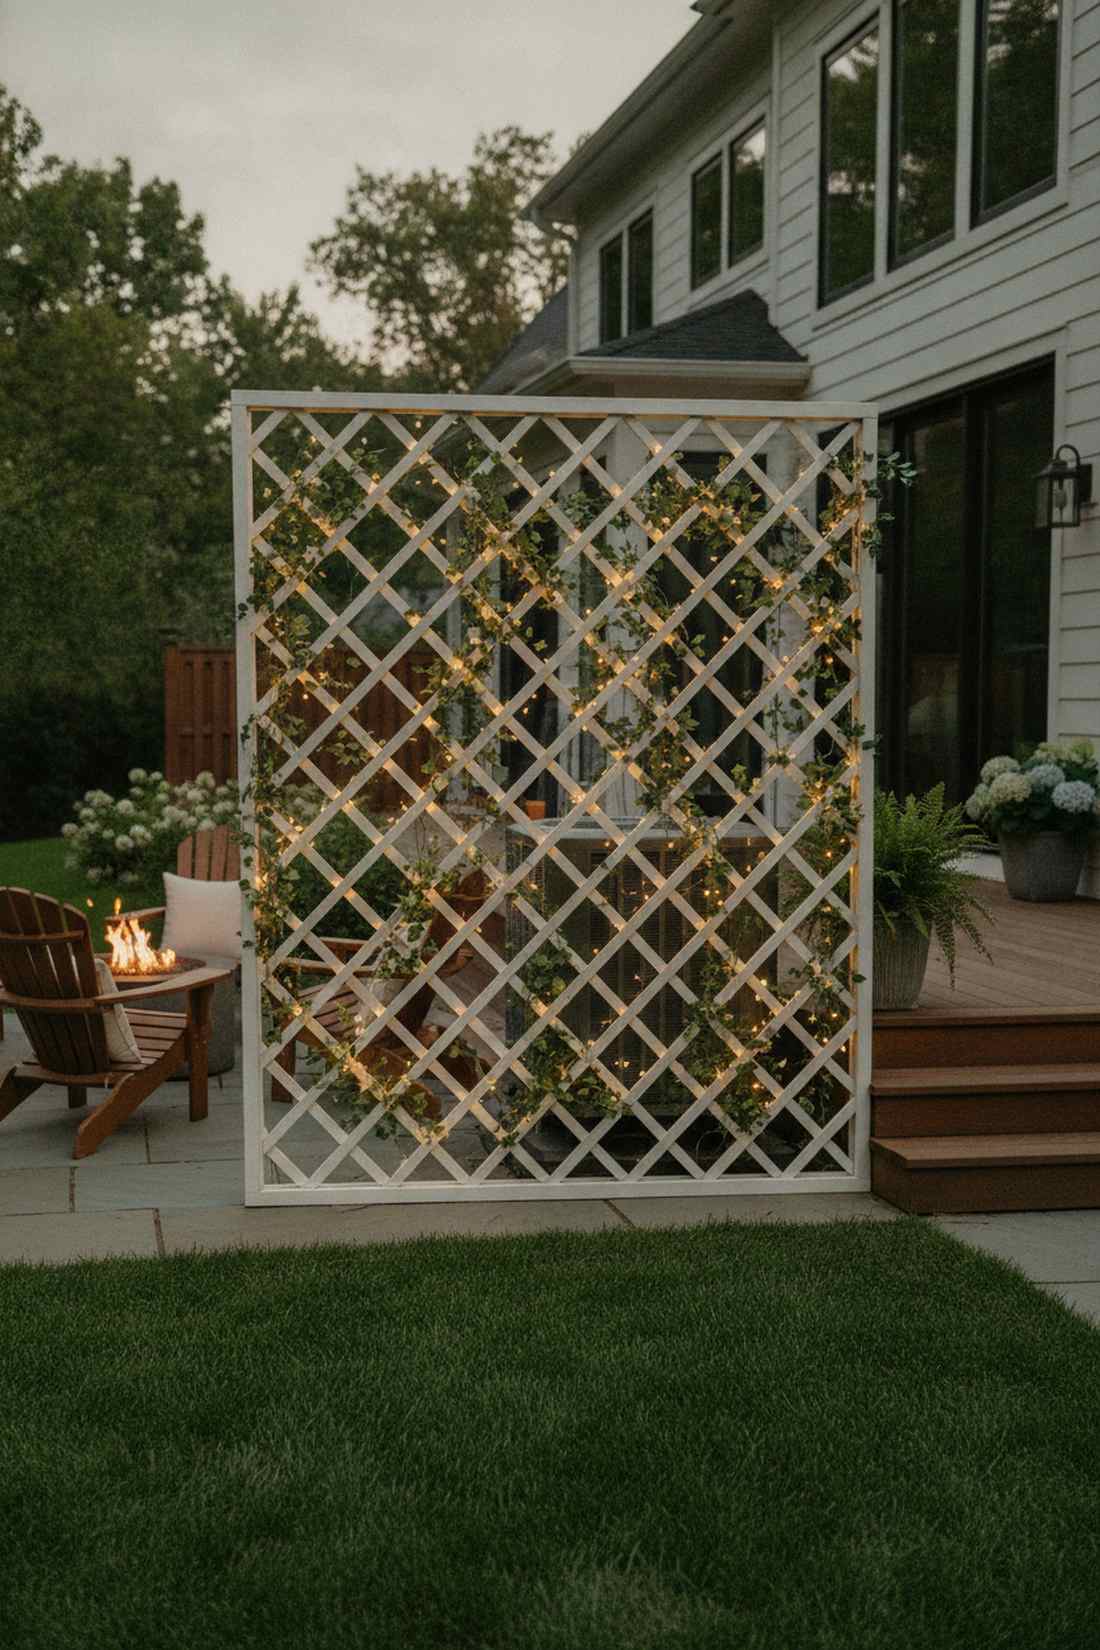
Brings a boring privacy screen to life like a sparkling checkerboard. Threading a fairy lights string directly through wooden lattice builds immense depth. Incredible for hiding ugly AC units or neighbor views.
Weaving the wire over and under rather than just draping it creates a 3D matrix effect that looks far more expensive than it is. Sneaking in artificial climbing vines alongside the lights elevates it heavily.
Upgrading a single lattice panel costs just $20. It’s a ridiculously high ROI for your patio.
- Key Materials: Green-wire LEDs
- Vibe / Style: Secret garden privacy
- Difficulty: Relaxing and simple
- Budget Breakdown: Lights: $15 | Zip ties: $5
- Creator’s Tip: Weave on a diagonal path to make the structure look wider.
- Smart Sourcing: green-cable solar string kits and miniature zip ties (bulk pack).
11. Fence Top Rail Runner
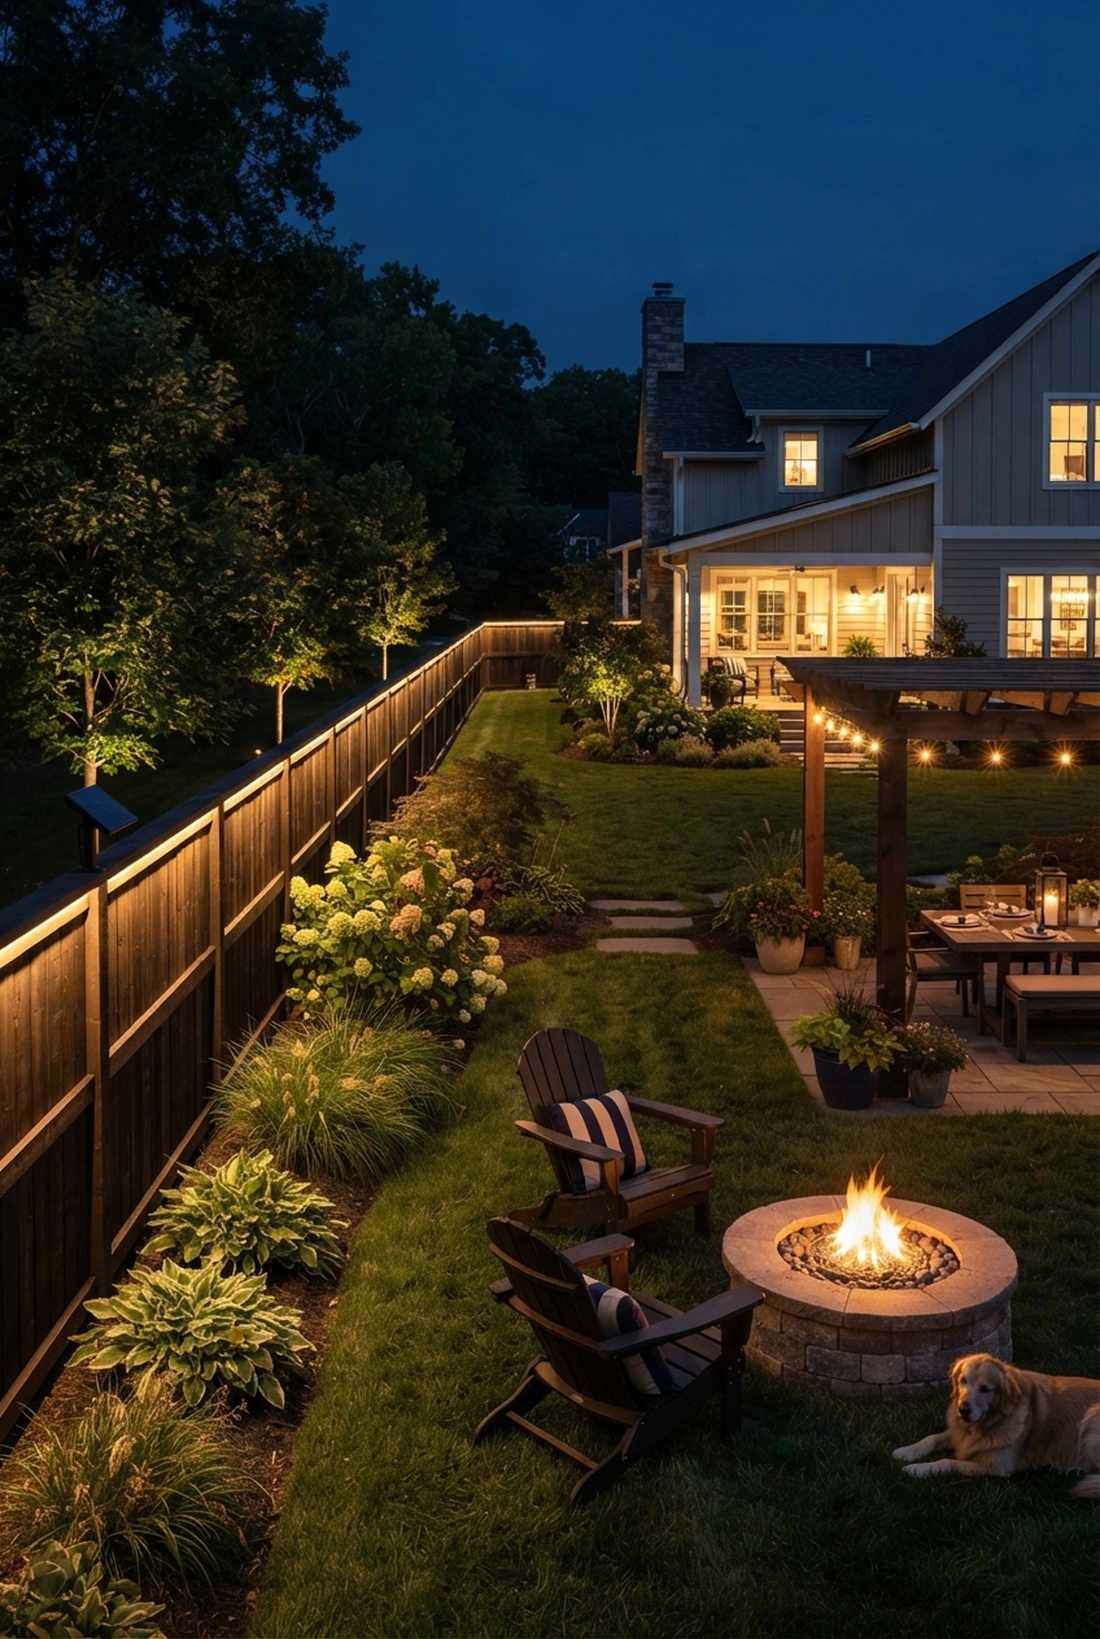
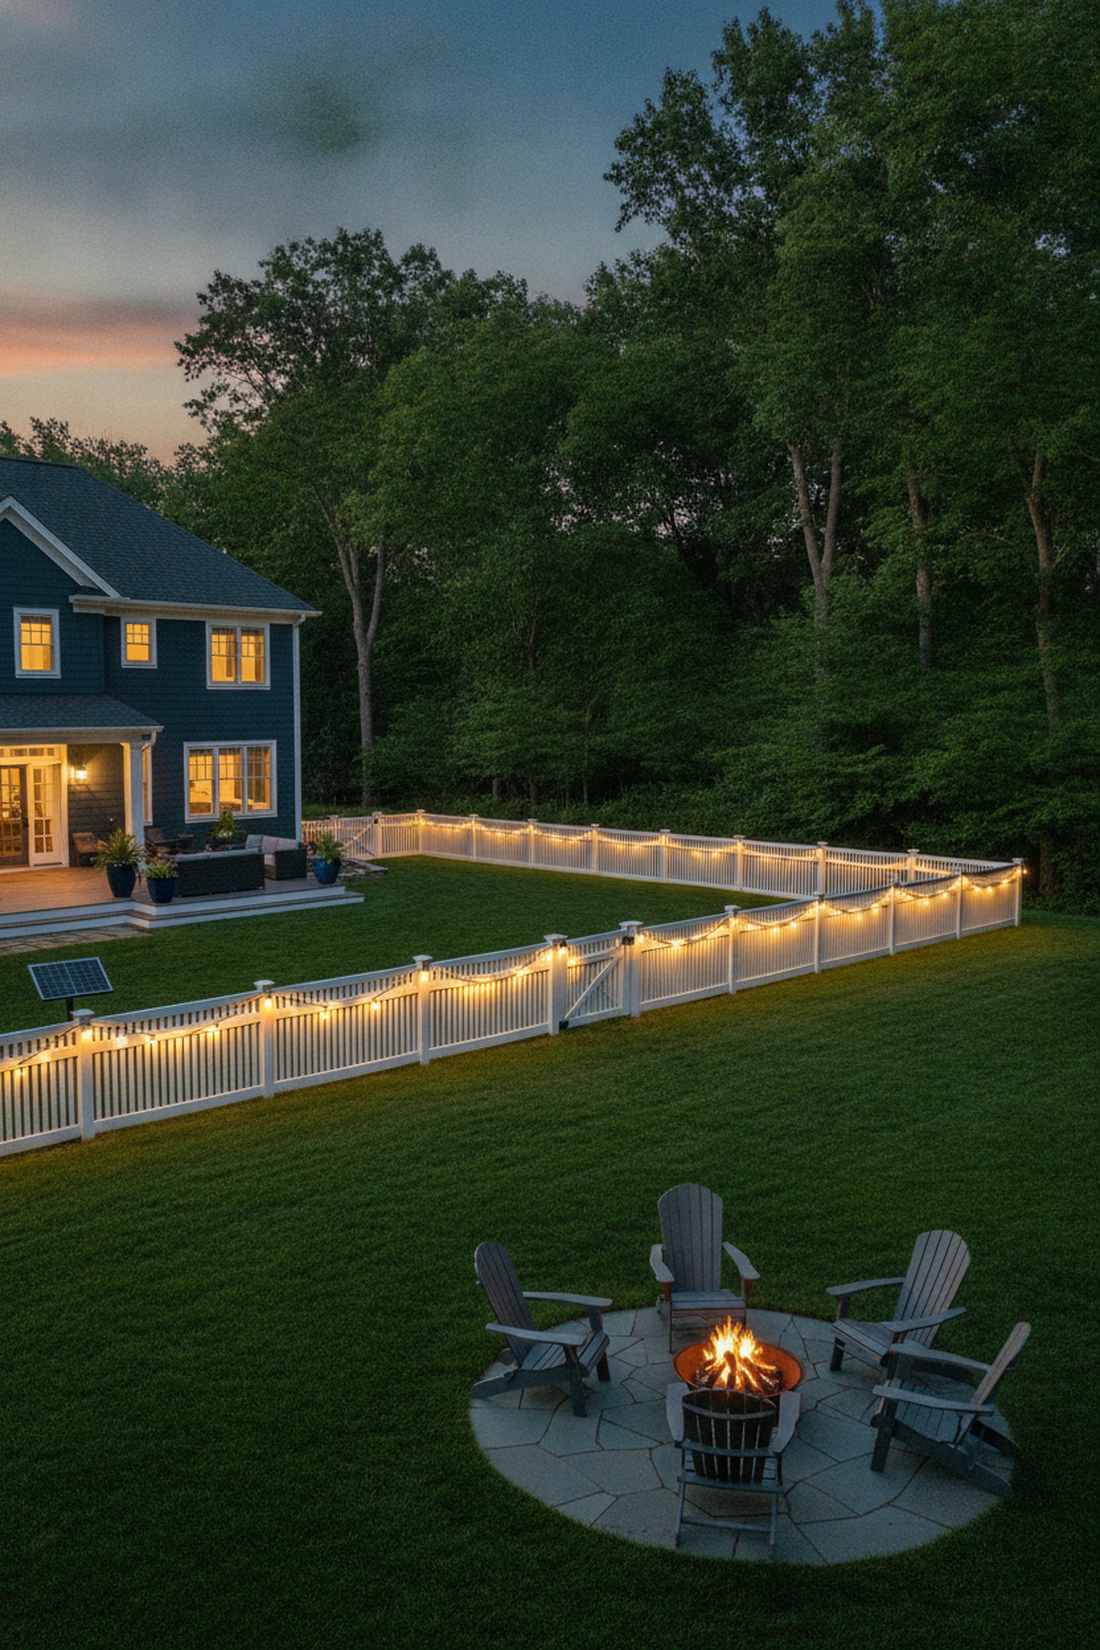
Acts like an illuminated boundary marking your magical territory. Elevated perimeter lighting throws a soft wash of light down your fence line. Perfect for deep, dark suburban backyards.
The controversial hack here is mounting the wire slightly behind the top rail so you only see the glow, never the bulb. This trick immediately separates cheap setups from high-end landscaping.
Run a 50-foot fence line for $30–$50. Pin this if you need elegant security lighting!
- Key Materials: Solar-powered continuous strands
- Vibe / Style: Resort-style perimeter
- Difficulty: Fast linear installation
- Budget Breakdown: Solar Strings: $35 | Mounts: $10
- Creator’s Tip: Use high-efficiency solar panels since fence lines often get shaded by trees.
- Smart Sourcing: high-efficiency solar string lights (100ft) and outdoor screw-in wire guides.
12. Archway Frame Accent
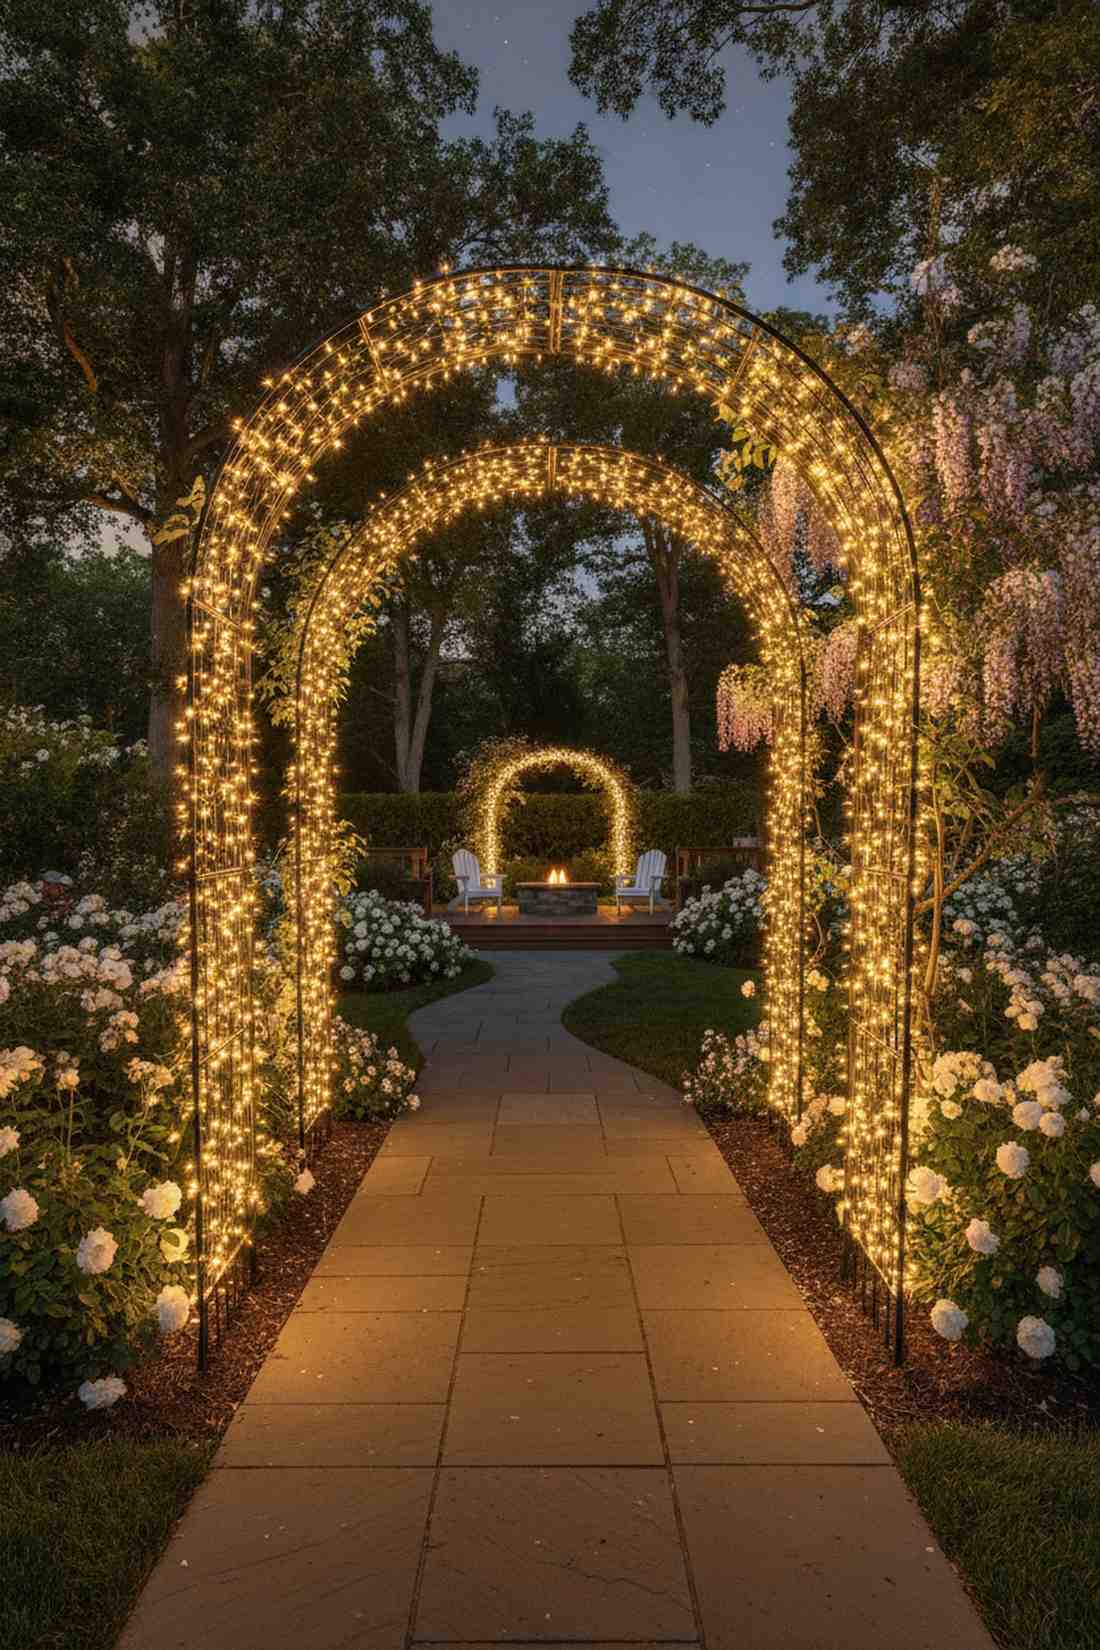
Looks exactly like a glowing portal into another dimension. Luminous archway accents produce some of the best fairy lights pictures on Pinterest. Ideal for framing a garden entrance or wedding aisle.
Double-wrapping the metal frame eliminates all the awkward dark gaps that ruin nighttime photos. Grabbing premium miniature garden supplies ensures the wire doesn’t rust and snap during winter.
Wrap a standard archway for around $25–$40.
- Key Materials: Insulated warm-white LEDs
- Vibe / Style: Romantic wedding portal
- Difficulty: Medium effort wrapping
- Budget Breakdown: Wire lights: $25 | Protective tape: $8
- Creator’s Tip: Use insulated wire if you live in a freezing climate to stop the cold metal from snapping bulbs.
- Smart Sourcing: insulated copper fairy strings and heavy-duty metal garden arches.
13. Railing Balustrade Lacing
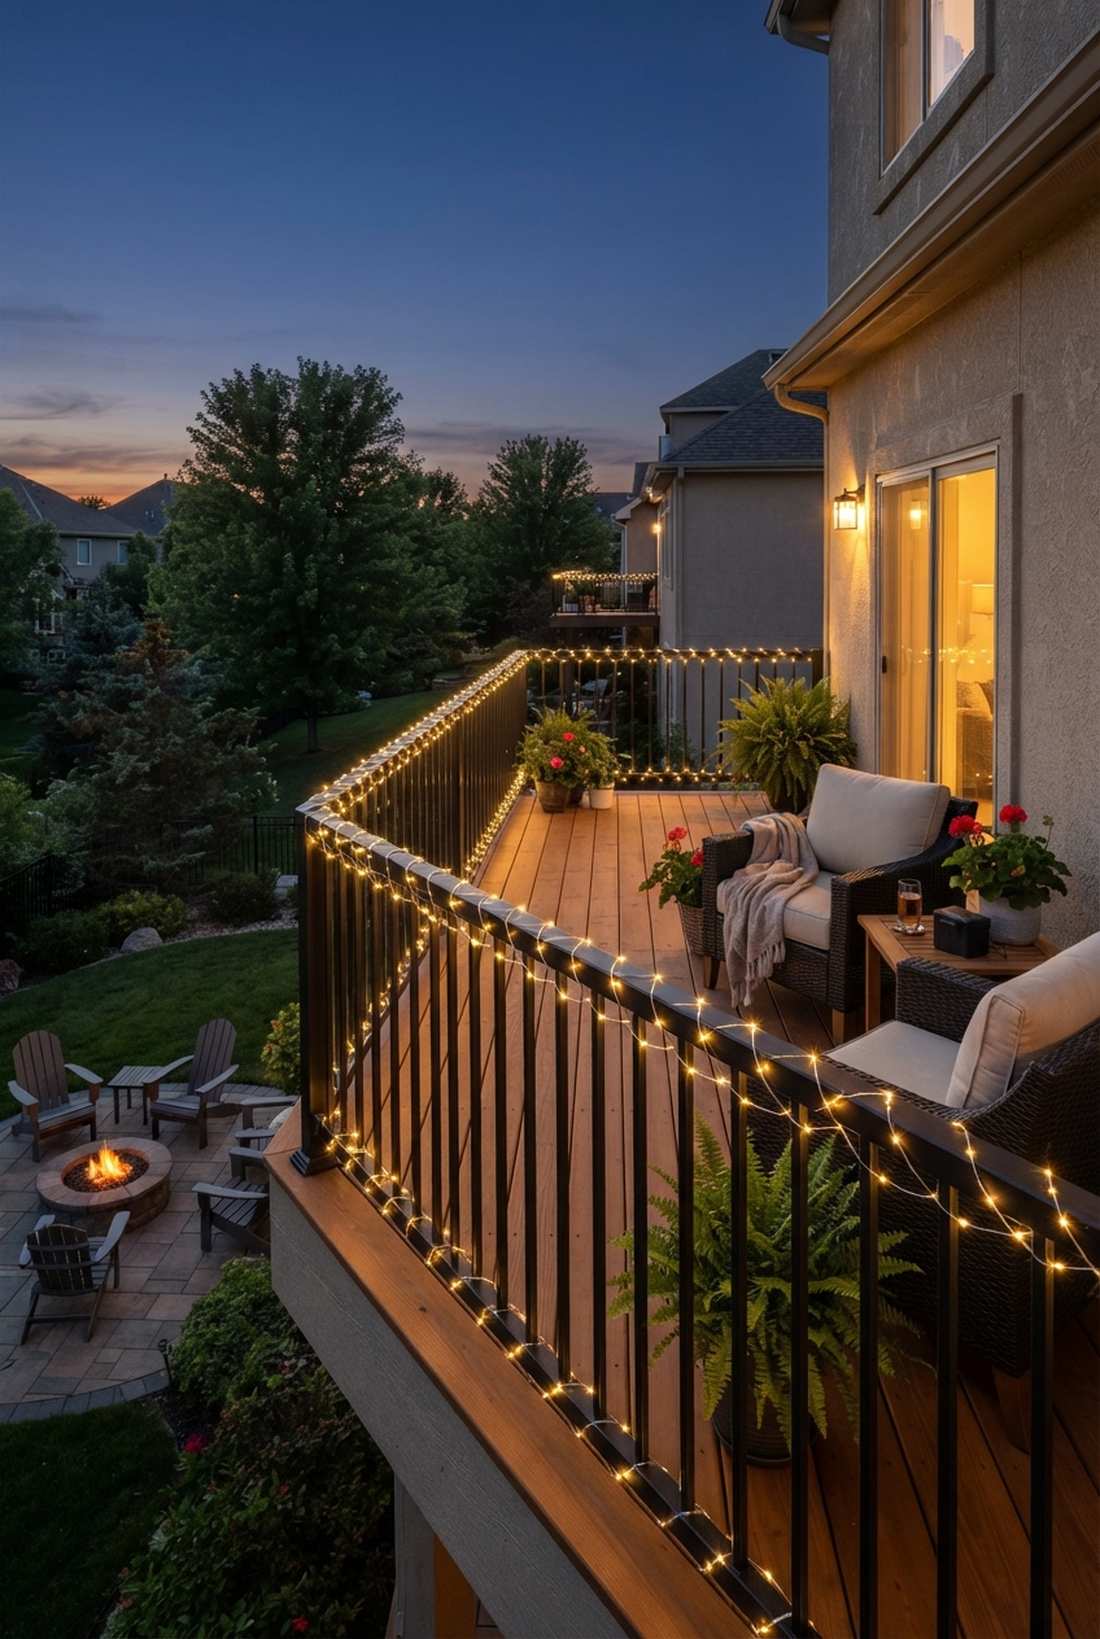
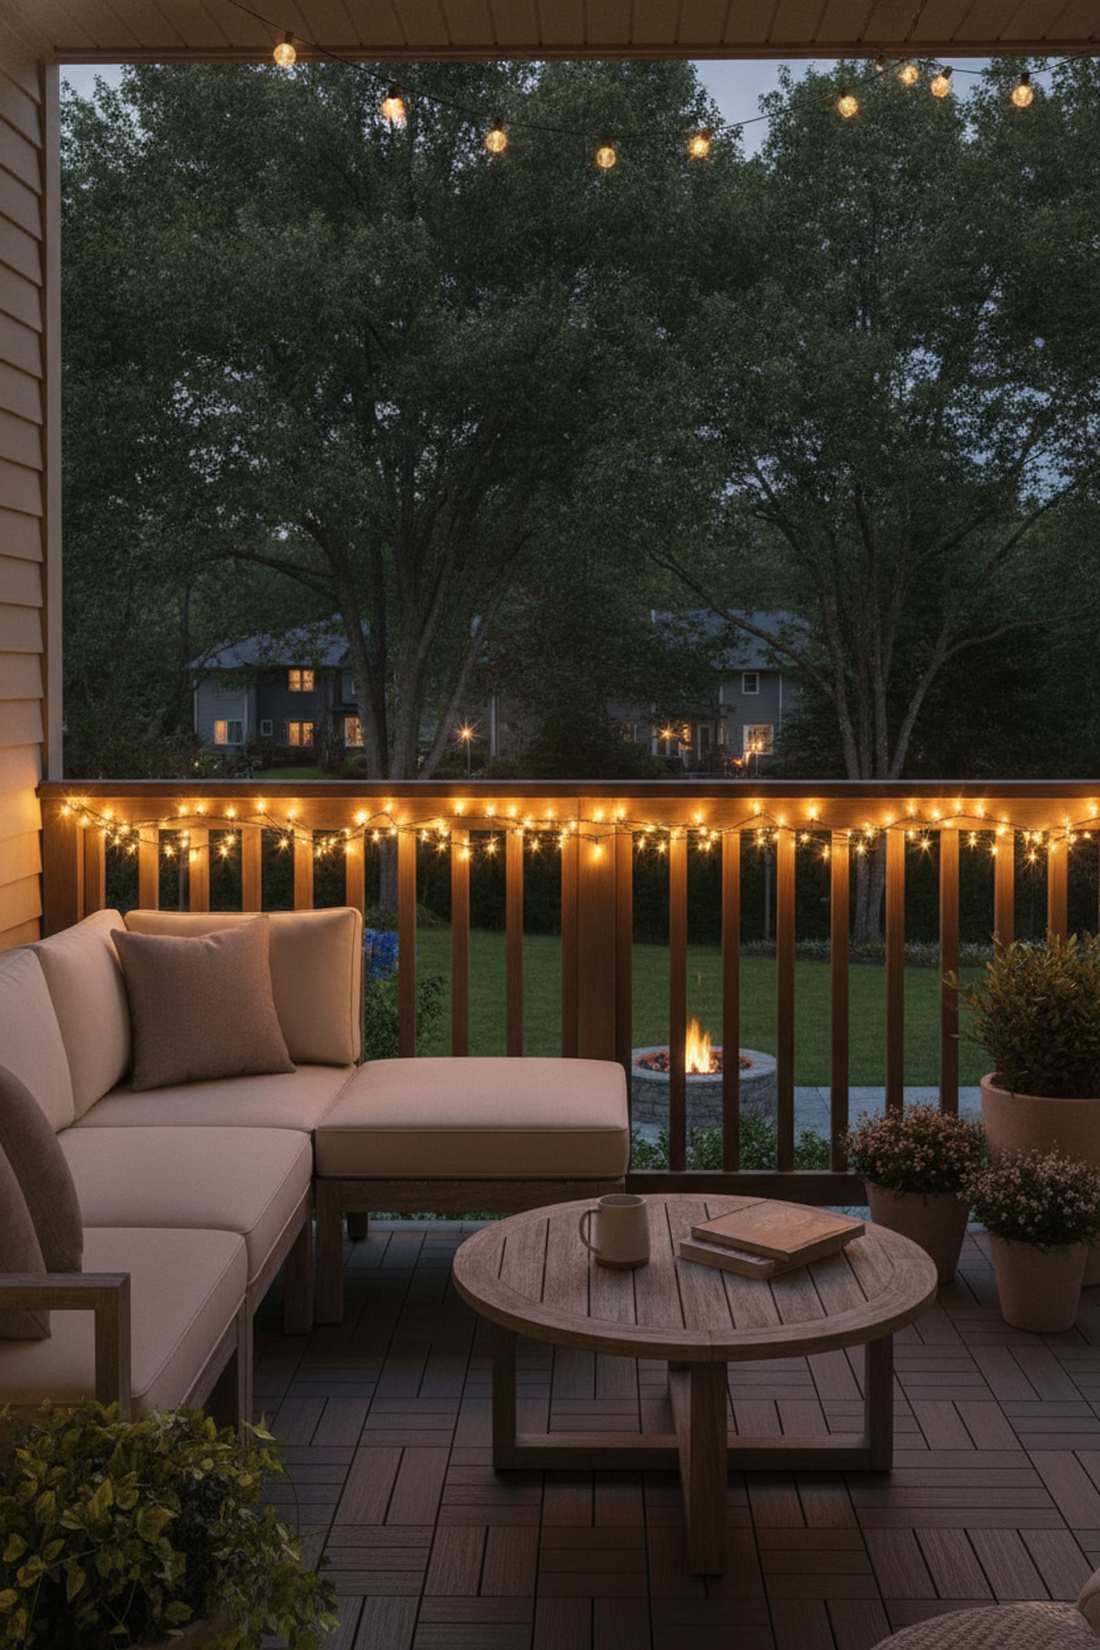
Feels like your deck is floating on a bed of fireflies. Balcony railing illumination laces safety lighting seamlessly into your existing architecture. Fantastic for second-story apartment balconies.
An over-under weaving method completely bypasses the need for ugly plastic zip ties. It instantly gives a designer-level finish while preventing the wind from rattling the wires.
Upgrade your deck railing for roughly $20. Save this for a fast balcony makeover!
- Key Materials: Battery or plug-in micro-strands
- Vibe / Style: Cozy elevated lounge
- Difficulty: Extremely simple
- Budget Breakdown: Lights: $20 | Tools: $0
- Creator’s Tip: Keep the tension tight on the top rail and let the bottom rail sag slightly for contrast.
- Smart Sourcing: shatterproof micro-LED spools and weatherproof battery boxes.
14. Gazebo Cupola Crown
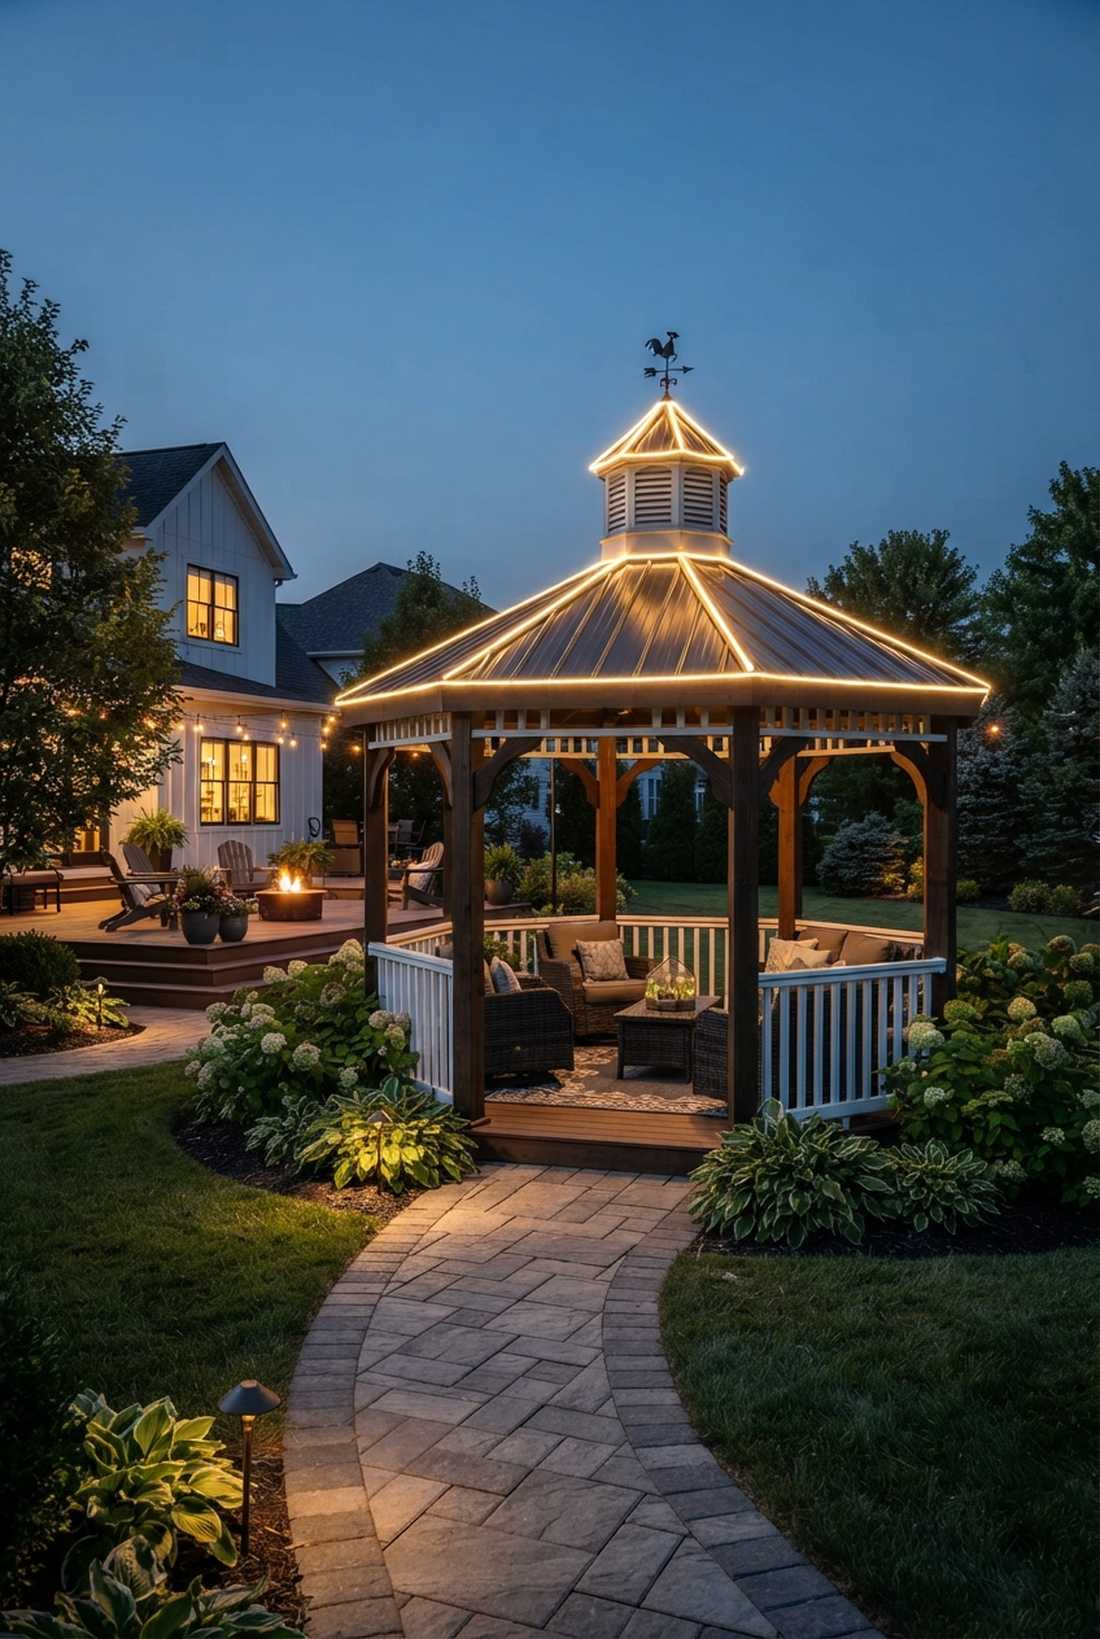
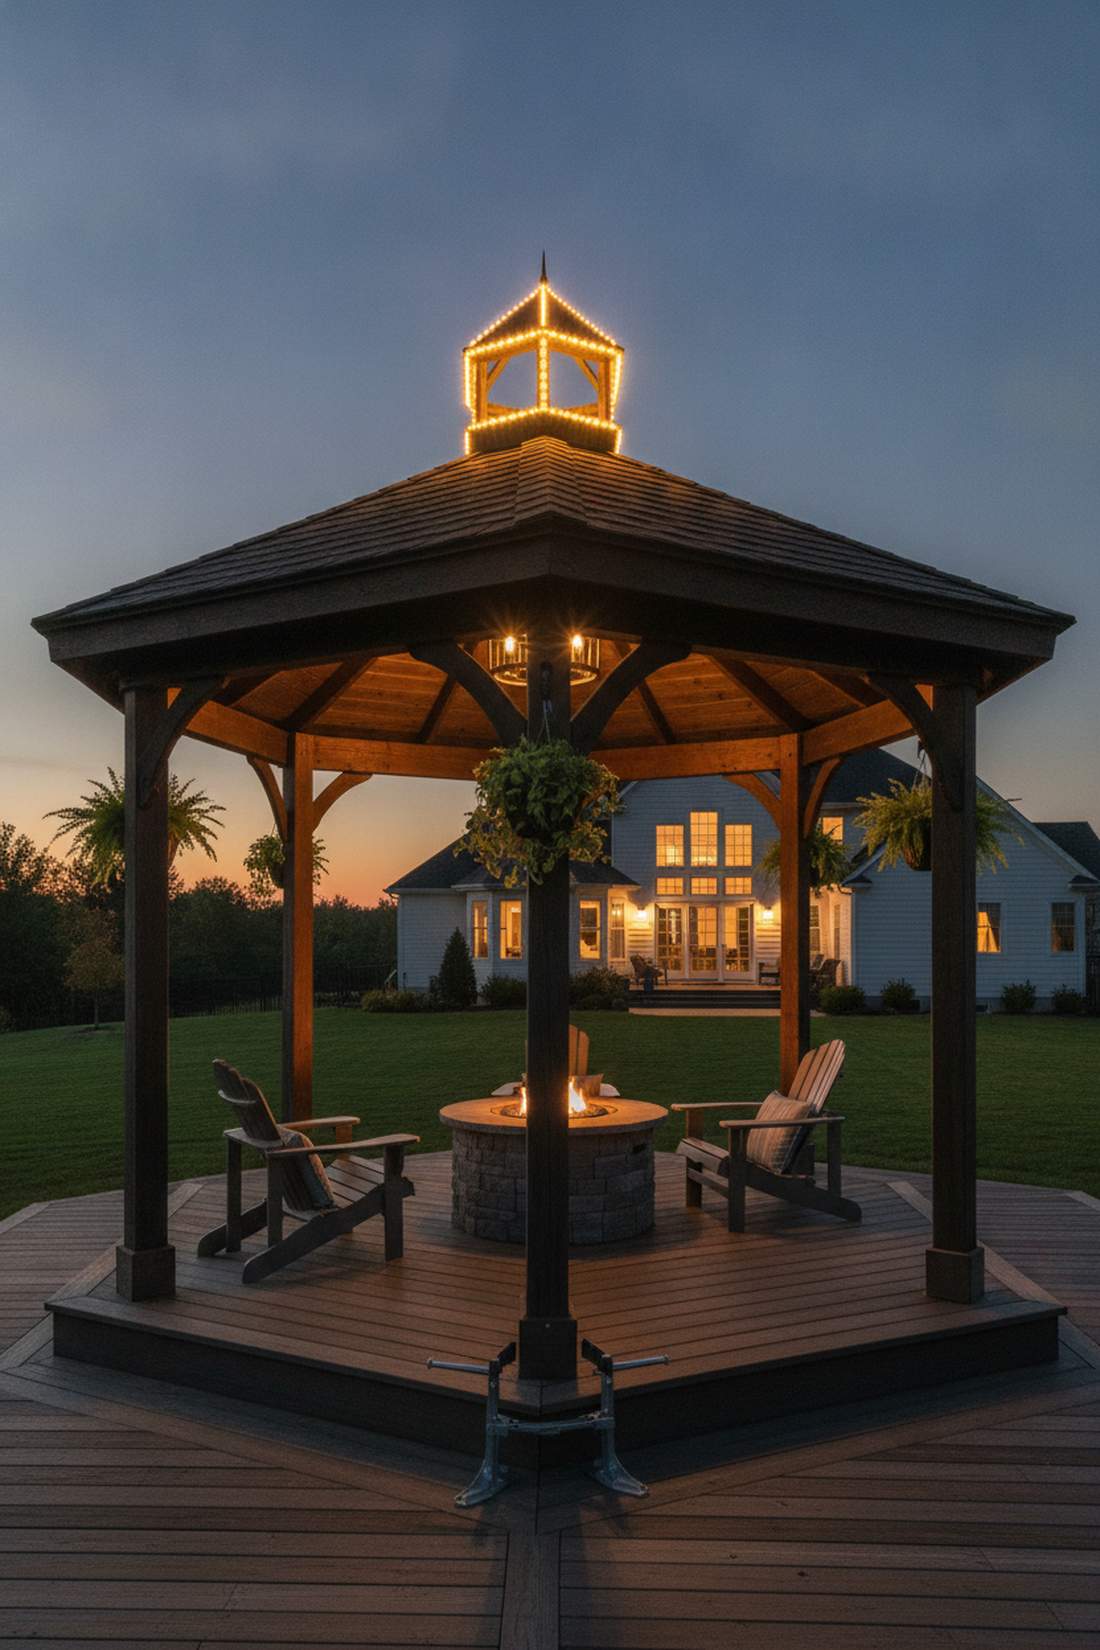
Like putting a glowing diamond crown on your backyard pavilion. Elevated peak lighting creates a stunning focal point visible from inside the house. Built specifically for high-roofed gazebos.
Hardwiring this section permanently is a smart move that saves you from climbing a scary ladder every season. Integrating commercial-grade terrarium accessories nearby brings the whole structure to life.
Expect a one-time cost of $40–$60. Pin this for ultimate backyard luxury!
- Key Materials: Permanent outdoor rope lights
- Vibe / Style: Majestic backyard beacon
- Difficulty: Requires ladder safety
- Budget Breakdown: Rope Light: $40 | Hardware: $15
- Creator’s Tip: Connect it to a smart-switch so it turns on automatically at dusk.
- Smart Sourcing: flexible outdoor LED rope lighting and heavy-duty ladder standoff brackets.
This next ground-level setup is ridiculously affordable but looks like a $500 custom landscaping job…
Fairy Lights String Pathways & Ground-Level Concepts
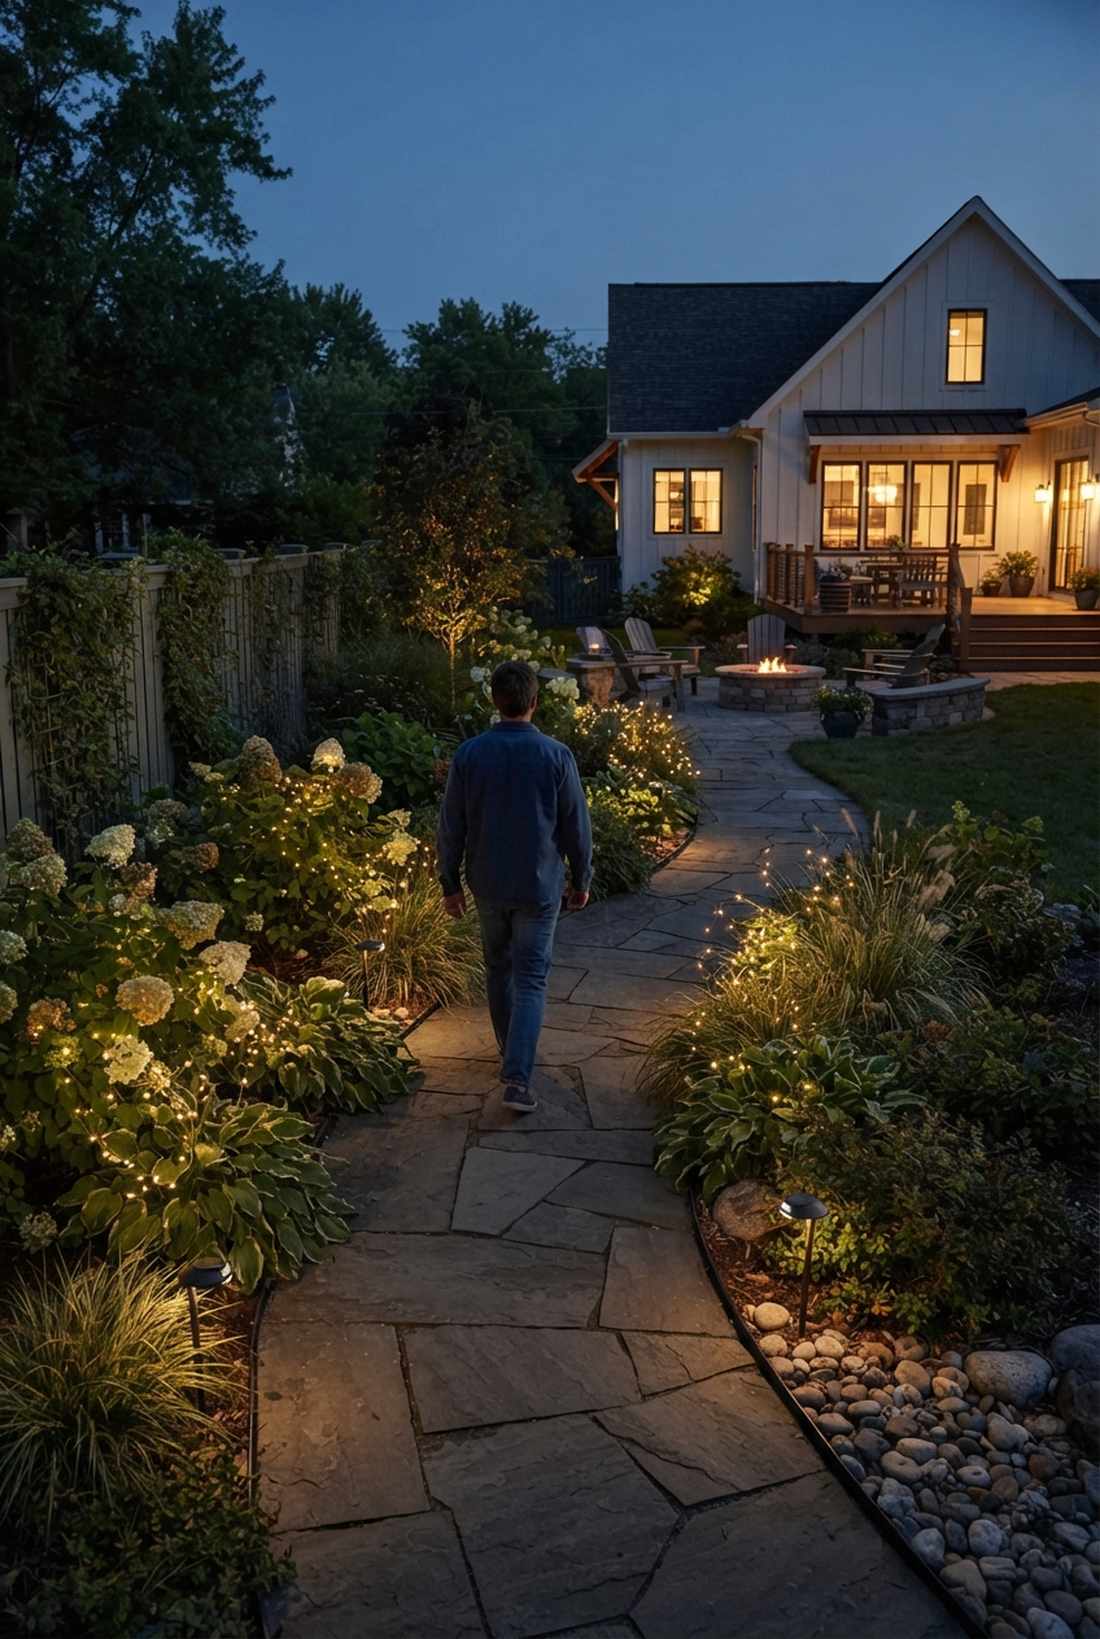
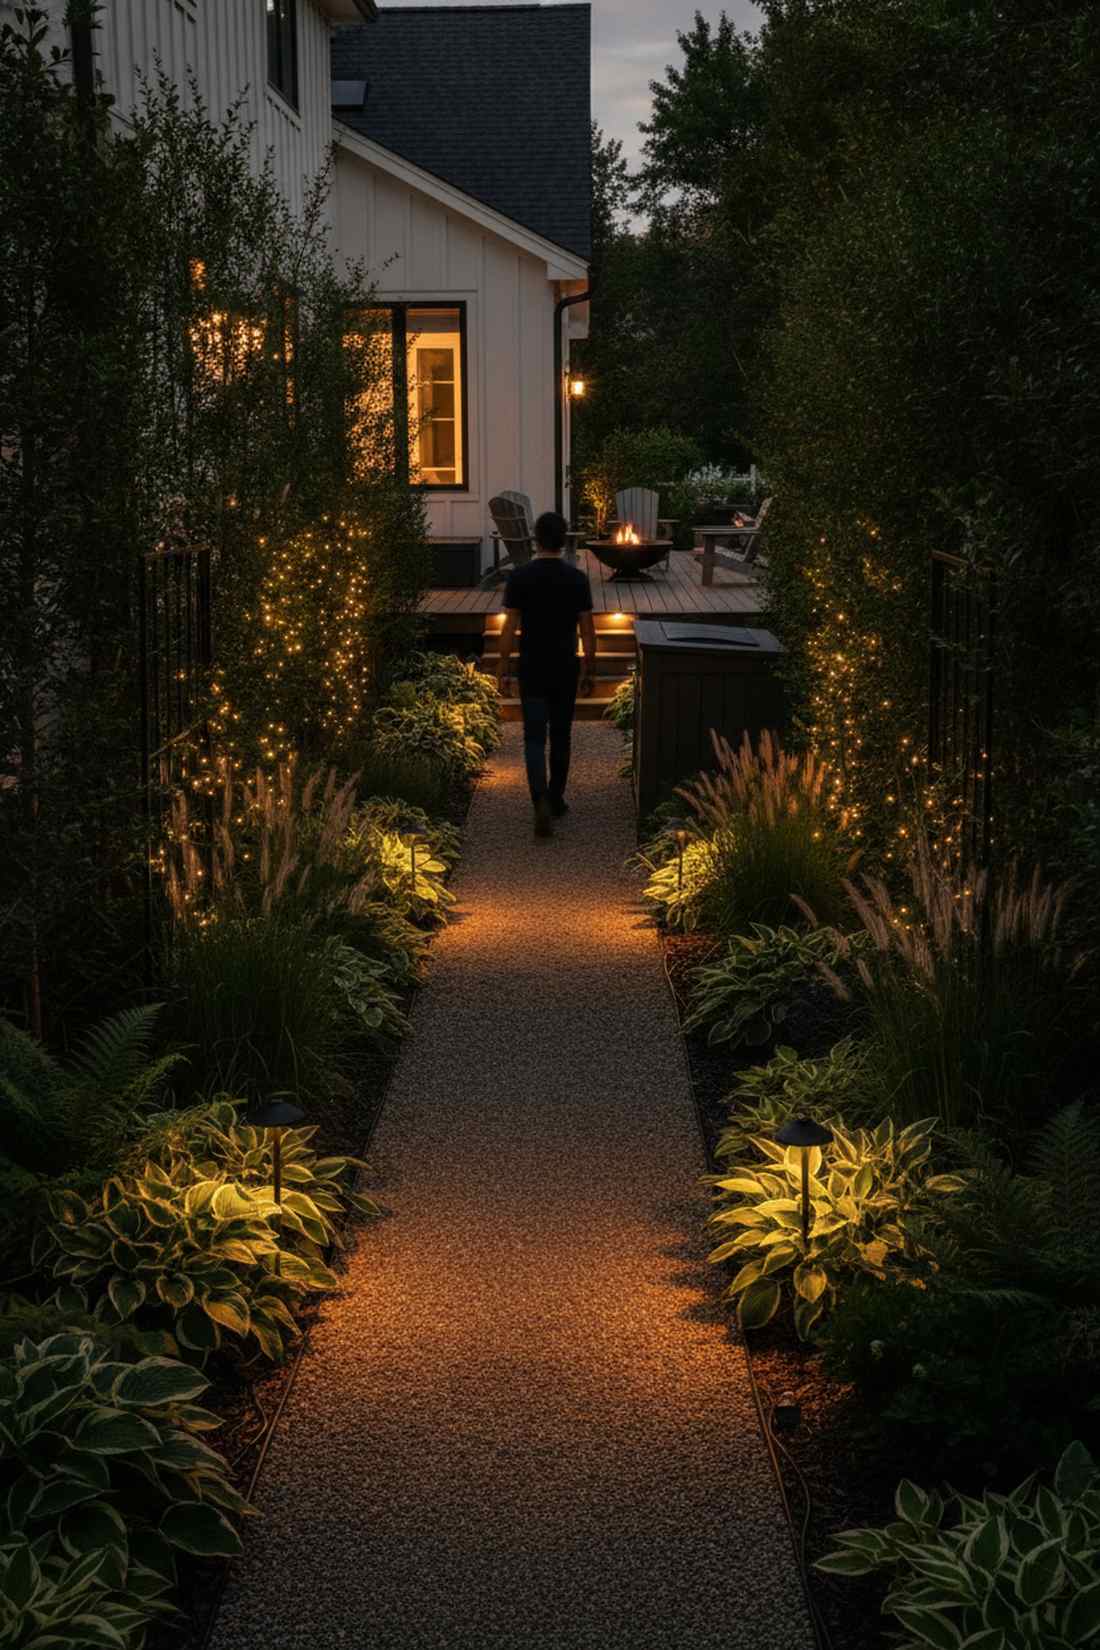
15. Pathway Edge Runners
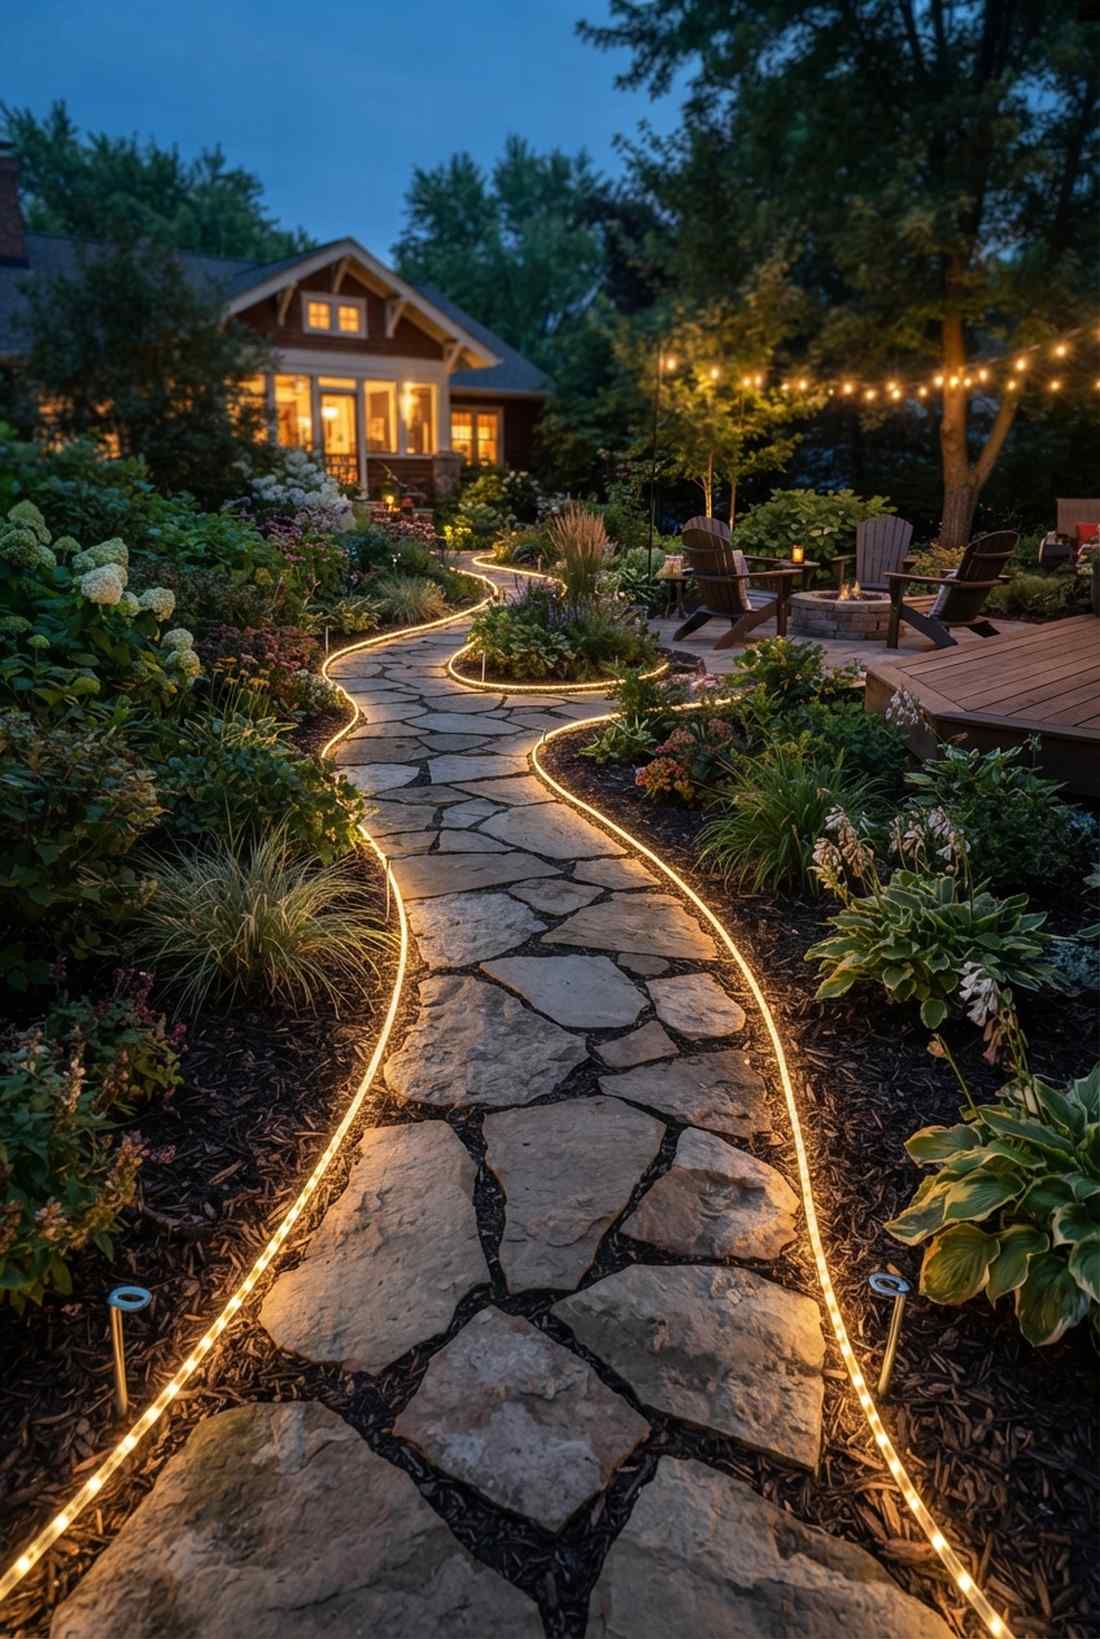
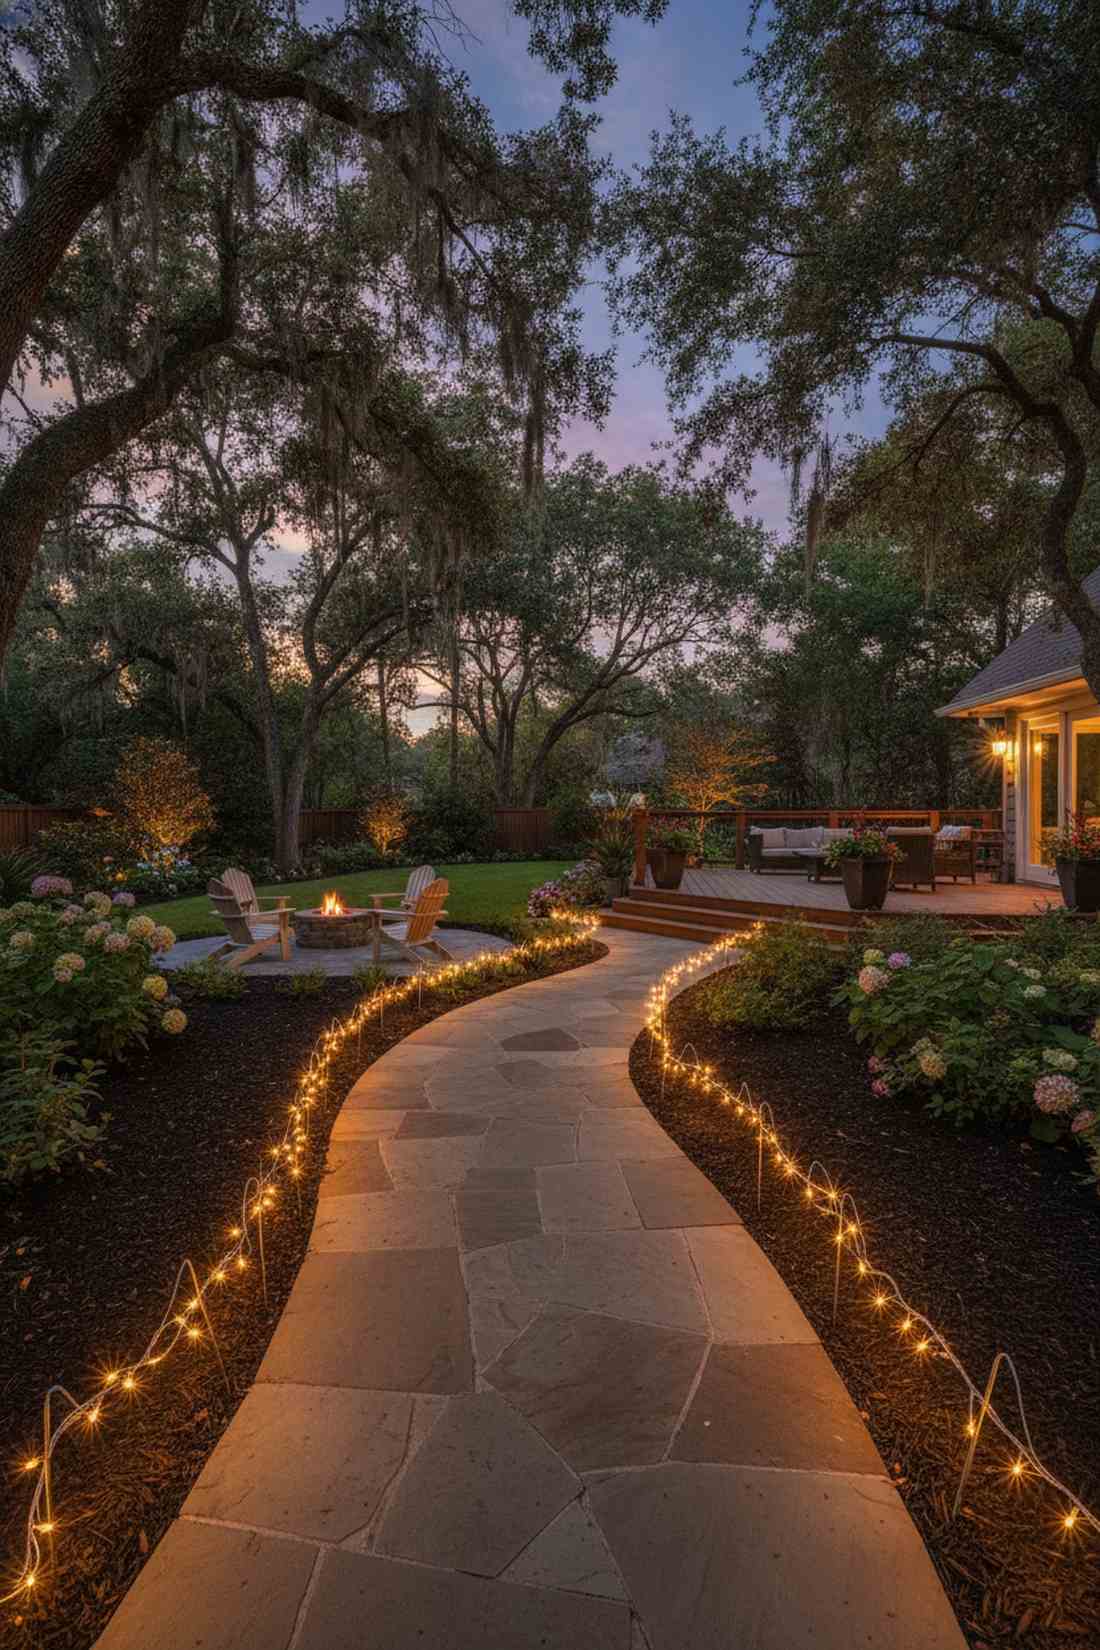
Feels like an enchanted runway guiding you through the dark. Low-level fairy lights ideas clearly define walkway borders without aggressive floodlights. Works exceptionally well for winding flagstone paths.
Staking flexible strands precisely 4 inches above the mulch prevents soil moisture from shorting out the system. This cheap hack looks far more expensive than standard bulky solar lamps.
You can line a 20-foot path for around $30–$45.
- Key Materials: Low-voltage rope or thick wire LEDs
- Vibe / Style: Enchanted garden runway
- Difficulty: Quick ground staking
- Budget Breakdown: Light ropes: $30 | Staples: $10
- Creator’s Tip: Use U-shaped landscape staples to pin the lights tightly to the earth.
- Smart Sourcing: waterproof fairy rope lights and galvanized landscape staples (bulk pack).
16. Step Tread Underlighting
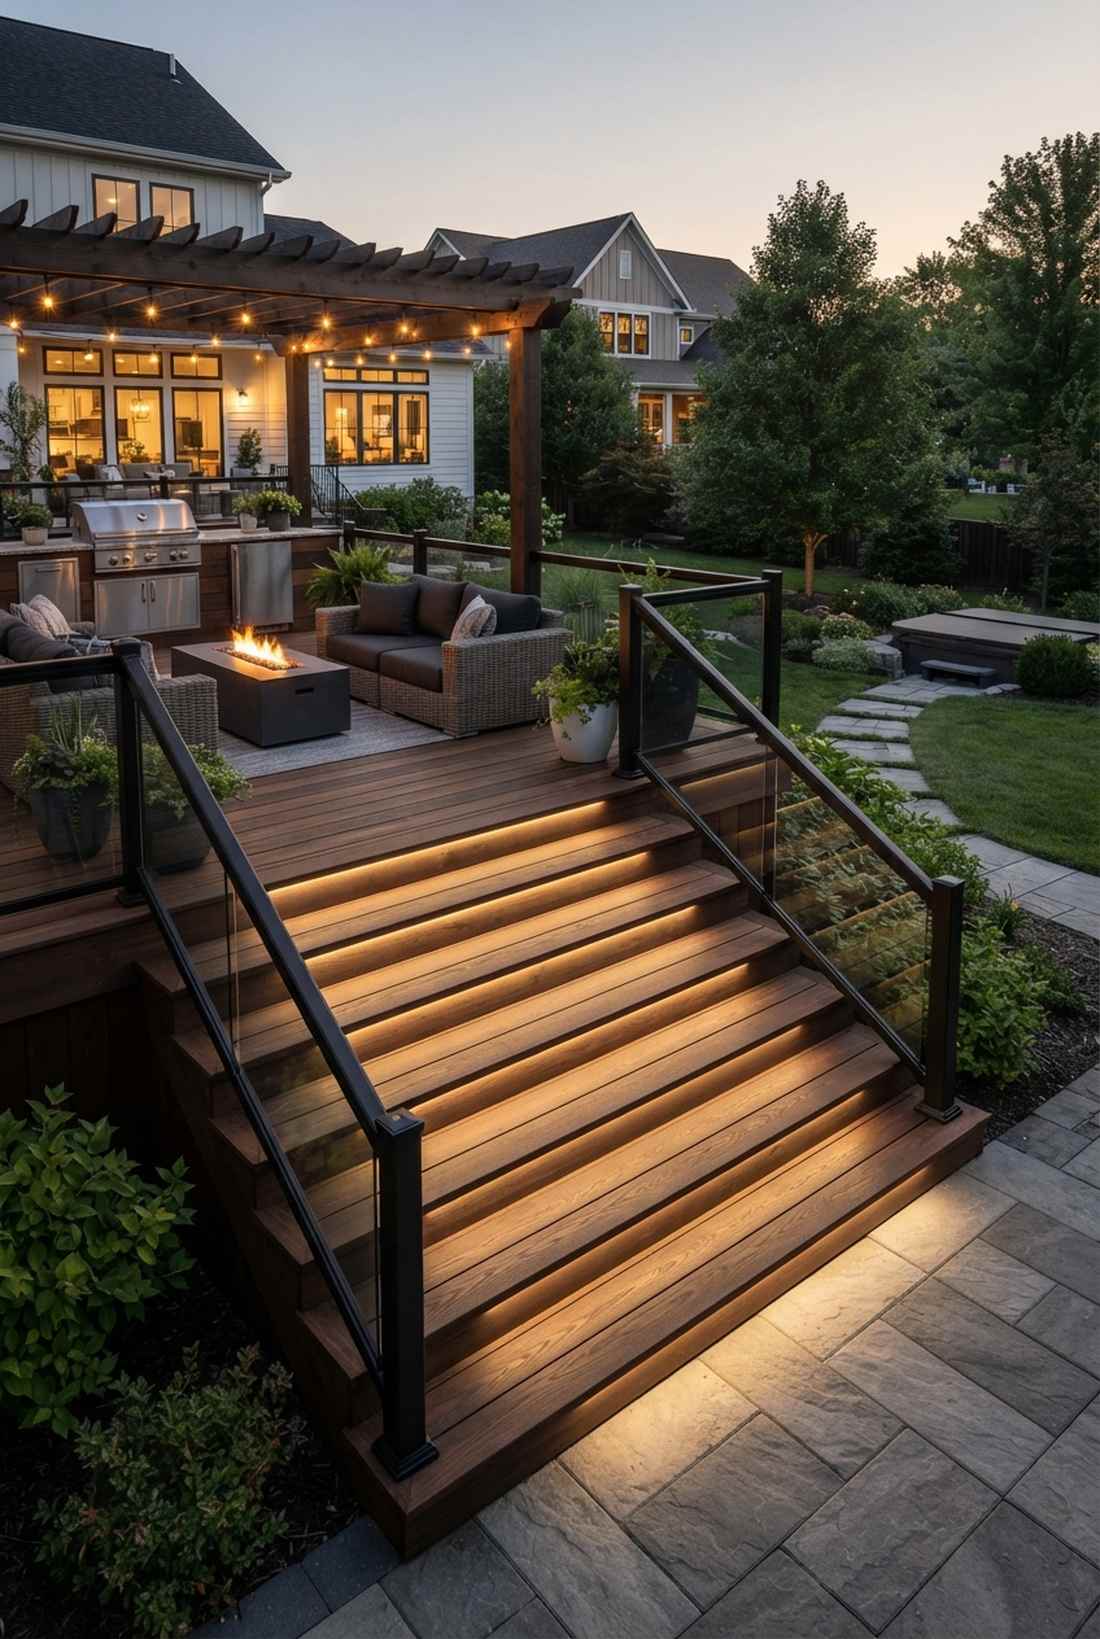
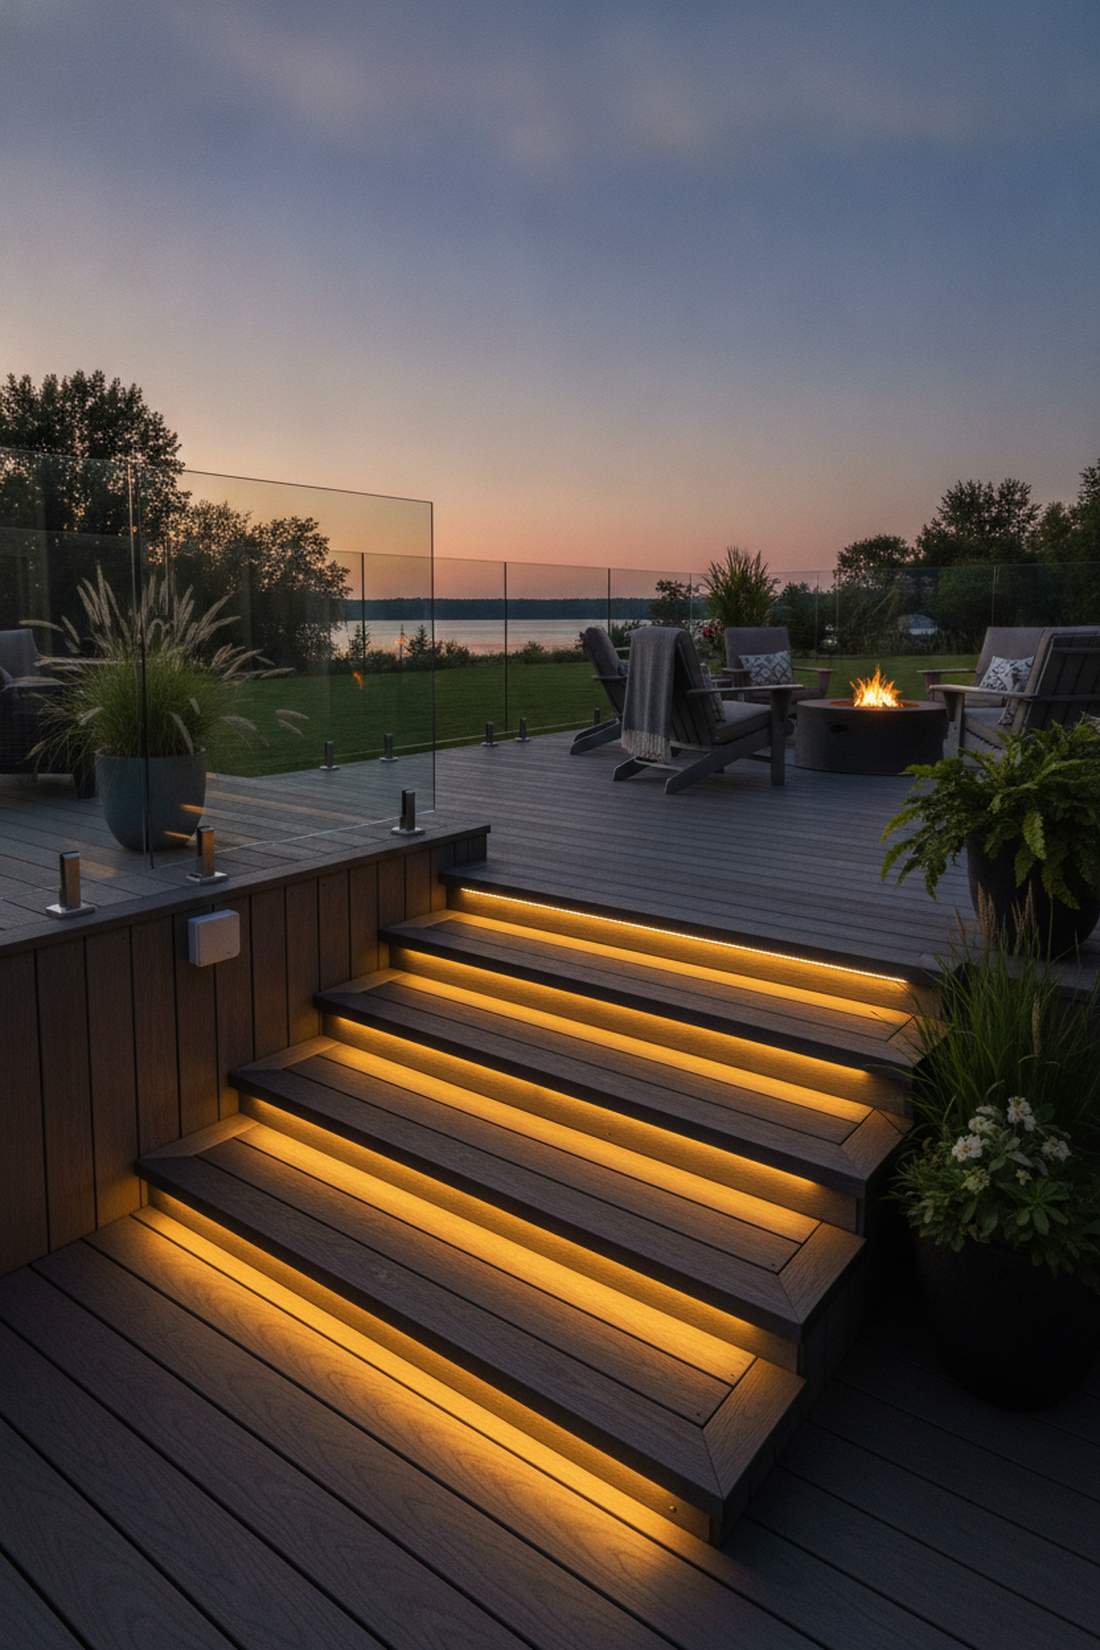
Straight out of a high-end luxury resort magazine. Hidden stair tread lighting casts a gorgeous downward glow while preventing nighttime trips. Perfect for sharp wooden deck stairs or concrete steps.
Using flat adhesive light strips hidden directly under the lip completely conceals the hardware from daytime view. It delivers a surprisingly premium look that makes the steps appear as if they are floating.
Outfit a standard staircase for $40–$70. Save this to your deck safety board!
- Key Materials: Waterproof adhesive LED strips
- Vibe / Style: Floating modern steps
- Difficulty: Clean peel-and-stick
- Budget Breakdown: Strips: $40 | Connectors: $15
- Creator’s Tip: Wipe the underside of the stairs with rubbing alcohol before sticking the lights to ensure they never peel off.
- Smart Sourcing: IP65 waterproof LED strip kits and motion-sensor outdoor controllers.
17. Flower Bed Border Glow
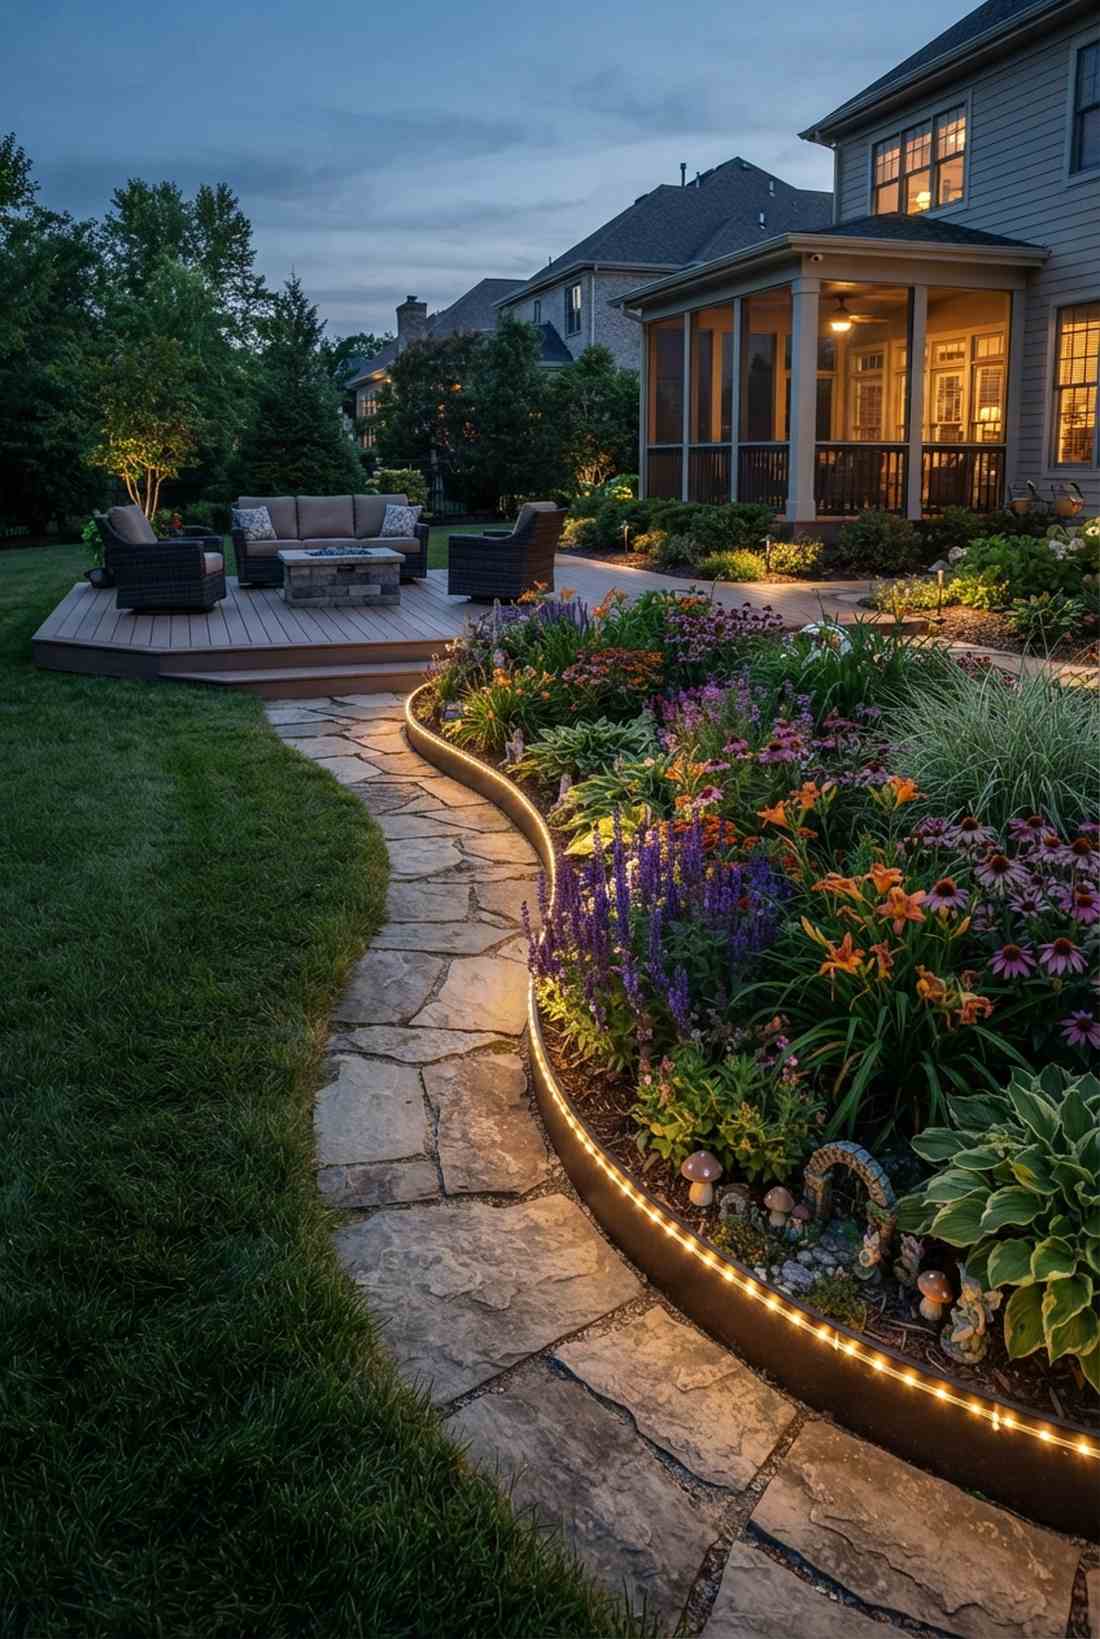

Creates a crisp, glowing boundary between your wild plants and manicured lawn. Illuminated landscape edging stops visitors from stepping on your prize flowers. Flawless for framing vibrant seasonal blooms.
Attaching the lights directly to metal or stone edging rather than laying them in the dirt saves the electronics from water rot. Sneaking fairy garden kits into the illuminated soil bed creates a magical focal point.
Border a large flower bed for just $25–$40.
- Key Materials: Solar wire lights, hard edging
- Vibe / Style: Crisp botanical showcase
- Difficulty: Easy border tracing
- Budget Breakdown: Lights: $25 | Mounting putties: $10
- Creator’s Tip: Stick to warm white to make the green foliage pop; cool white makes plants look dead.
- Smart Sourcing: copper wire solar strands and weatherproof mounting putty.
18. Stepping Stone Accents
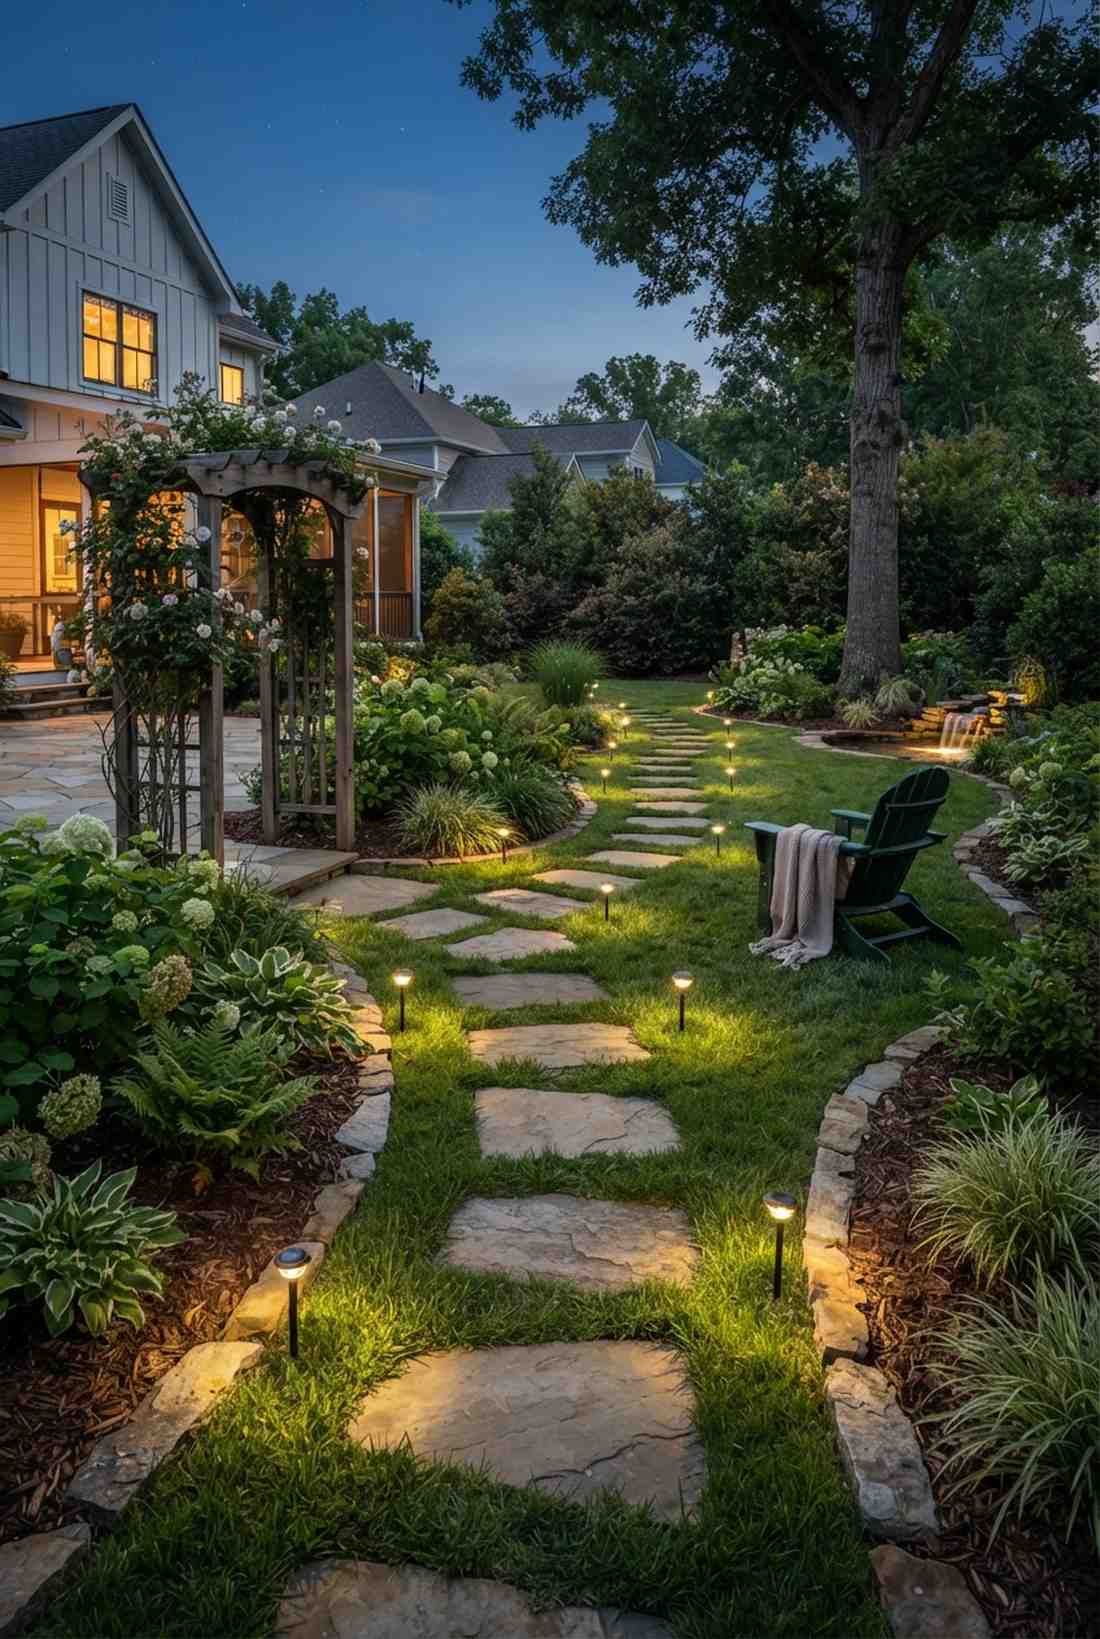
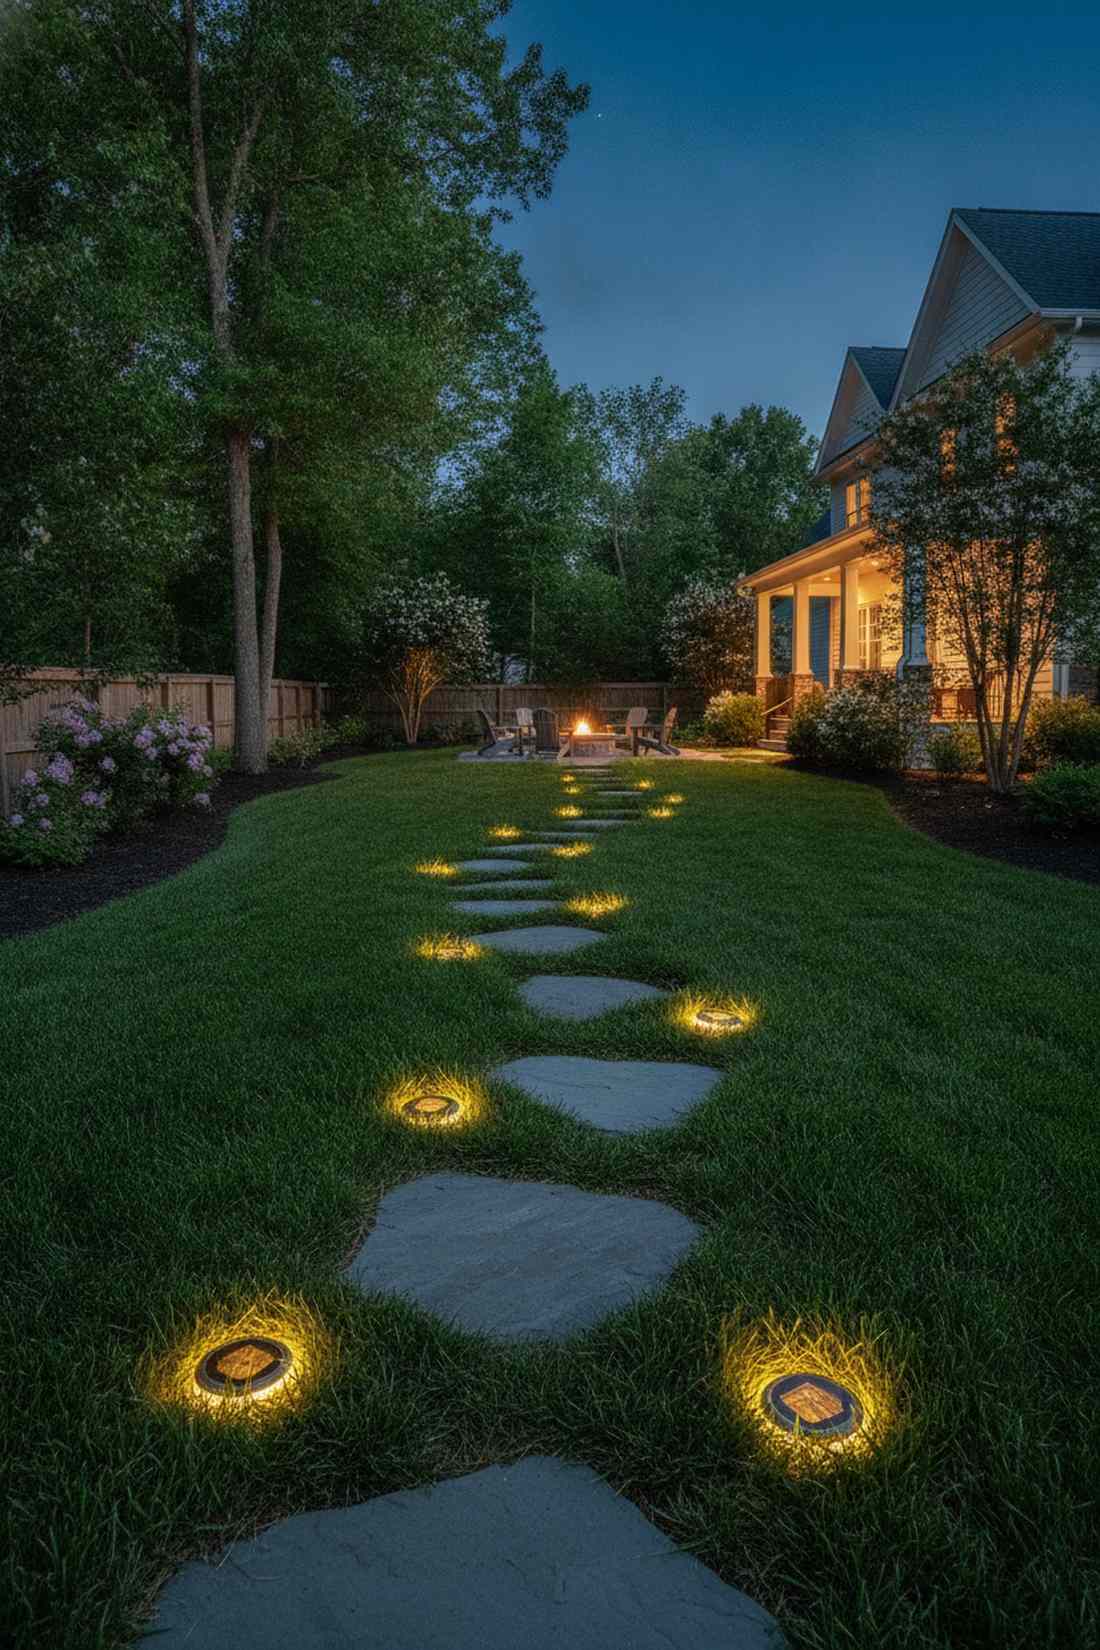
Feels like you’re hopping across glowing lily pads. Tiny fairy lights string nodes placed adjacent to individual stones creates a magical rhythm. Incredible for informal, grassy side-yards.
Spacing the lights at every *other* stone instead of continuously creates a mysterious, naturalistic vibe. This strategic spacing gives a designer-level finish while cutting your material costs exactly in half.
Achieve this whimsical path for around $20–$35. Pin this for your fairy garden layout!
- Key Materials: Single-node solar spikes
- Vibe / Style: Whimsical secret trail
- Difficulty: Push and play
- Budget Breakdown: Solar spikes: $25 | Extra batteries: $0
- Creator’s Tip: Bury the wire slack deep under the sod so the lawnmower doesn’t shred your installation.
- Smart Sourcing: flat-disk solar pathway lights (8-pack) and subsurface wire burying tools.
19. Ground Wire Pathway Matrix
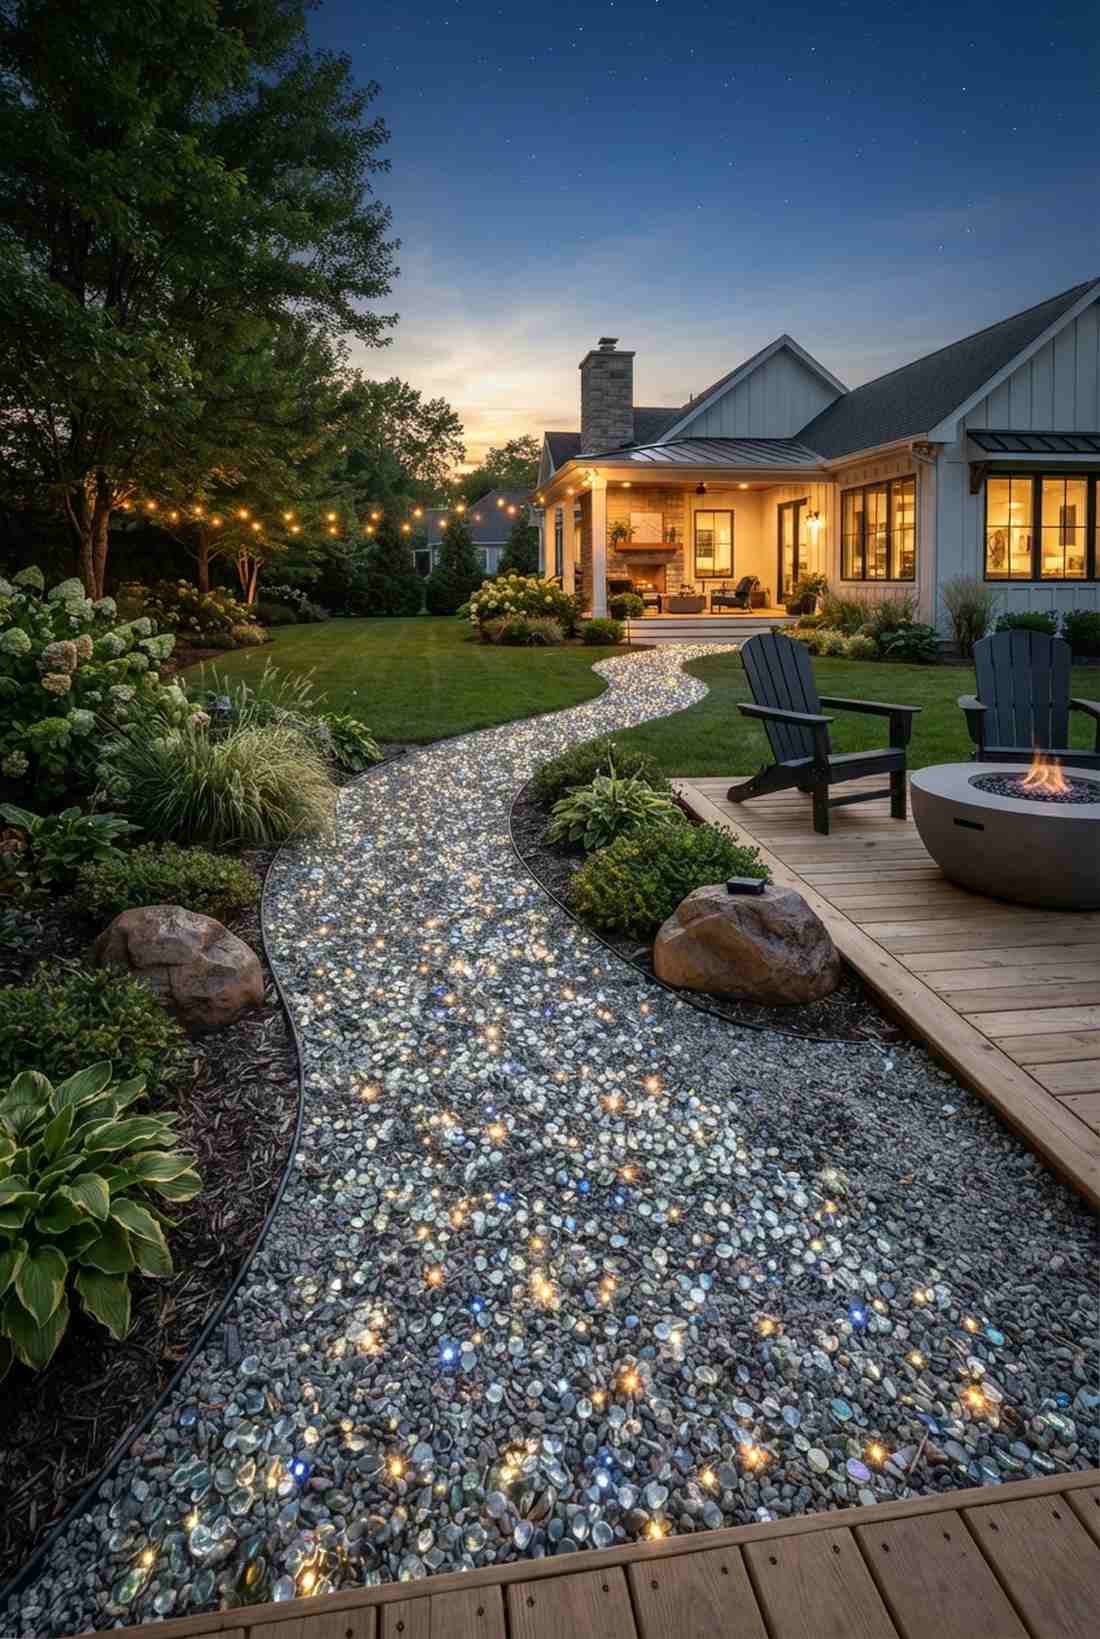
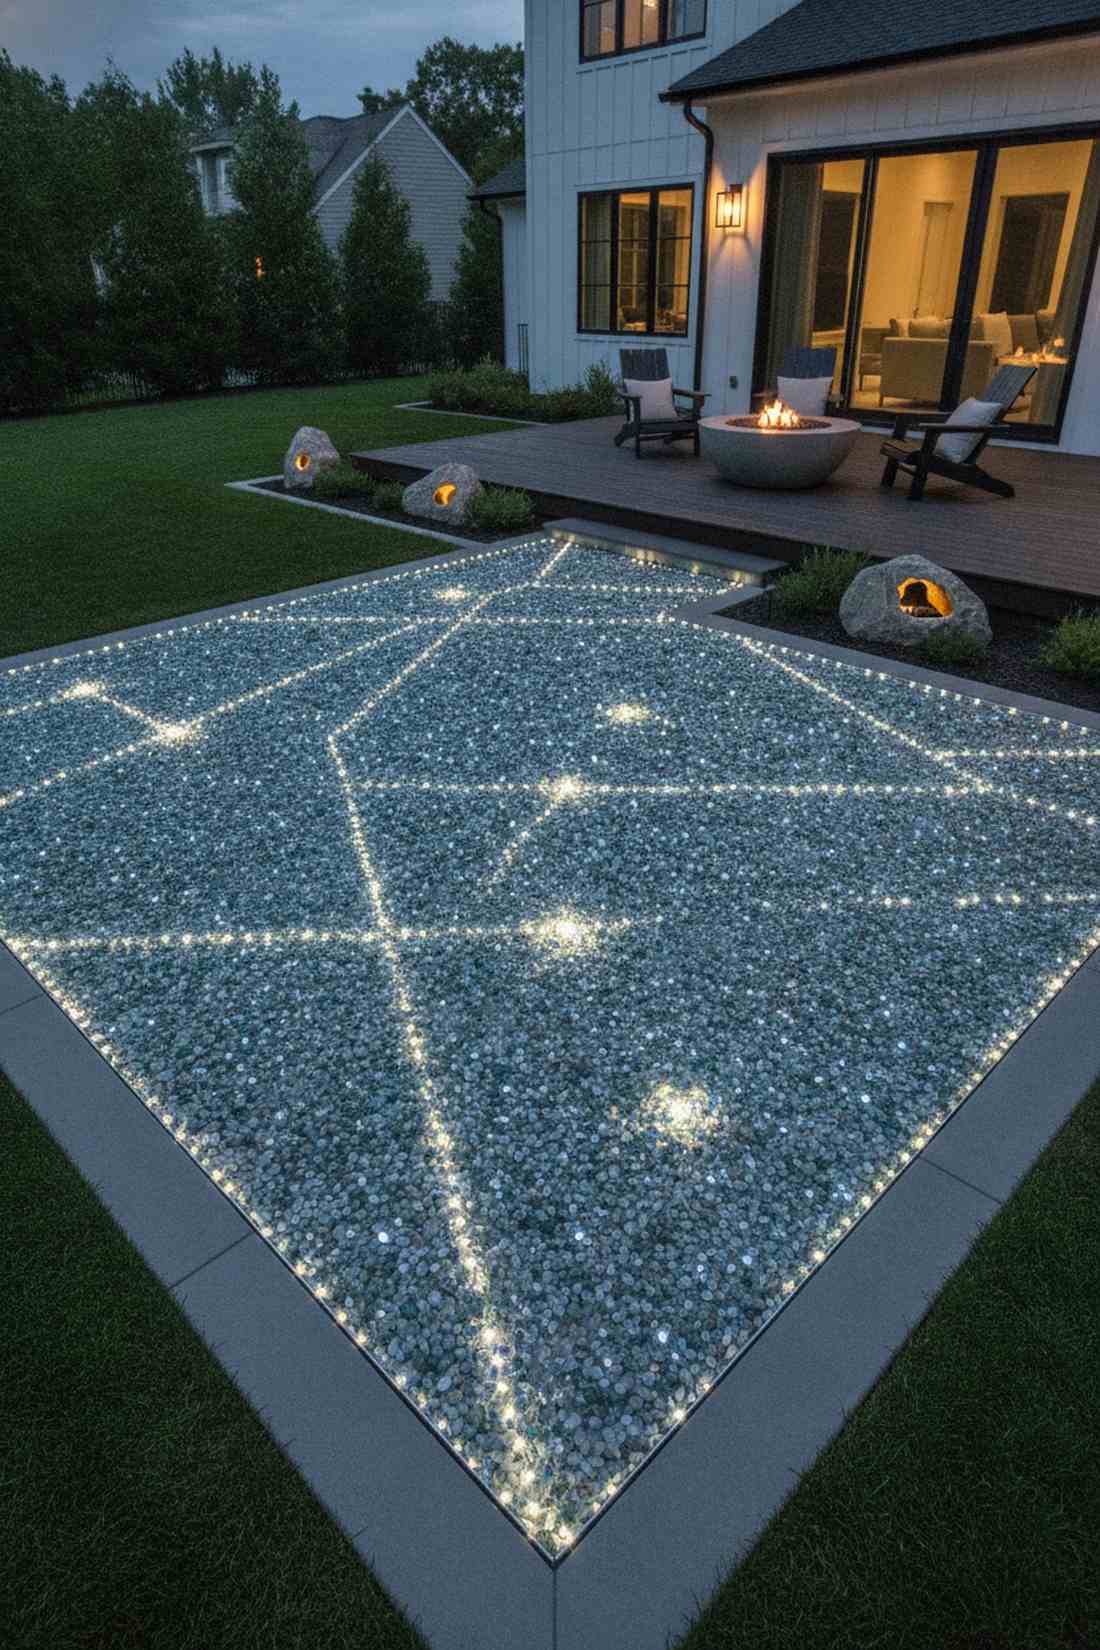
Transforms your gravel driveway into a sparkling galaxy. Embedded micro-lighting weaves glowing diodes directly into permeable paving. A hyper-modern look for minimalist crushed-stone patios.
Burying battery-operated micro-lights just beneath transparent glass pebbles creates an insane optical illusion. This controversial trick looks far more expensive than it is and requires zero electrical trenching.
Create a glowing patio matrix for $45–$80.
- Key Materials: Battery-powered micro LEDs
- Vibe / Style: Contemporary starry ground
- Difficulty: Tedious wire burying
- Budget Breakdown: Matrix lights: $40 | Glass pebbles: $20
- Creator’s Tip: Map your battery box locations under fake decorative rocks so you can easily swap batteries.
- Smart Sourcing: submersible battery micro-LEDs and hollow decorative landscape rocks.
20. Driveway Edge Delineation
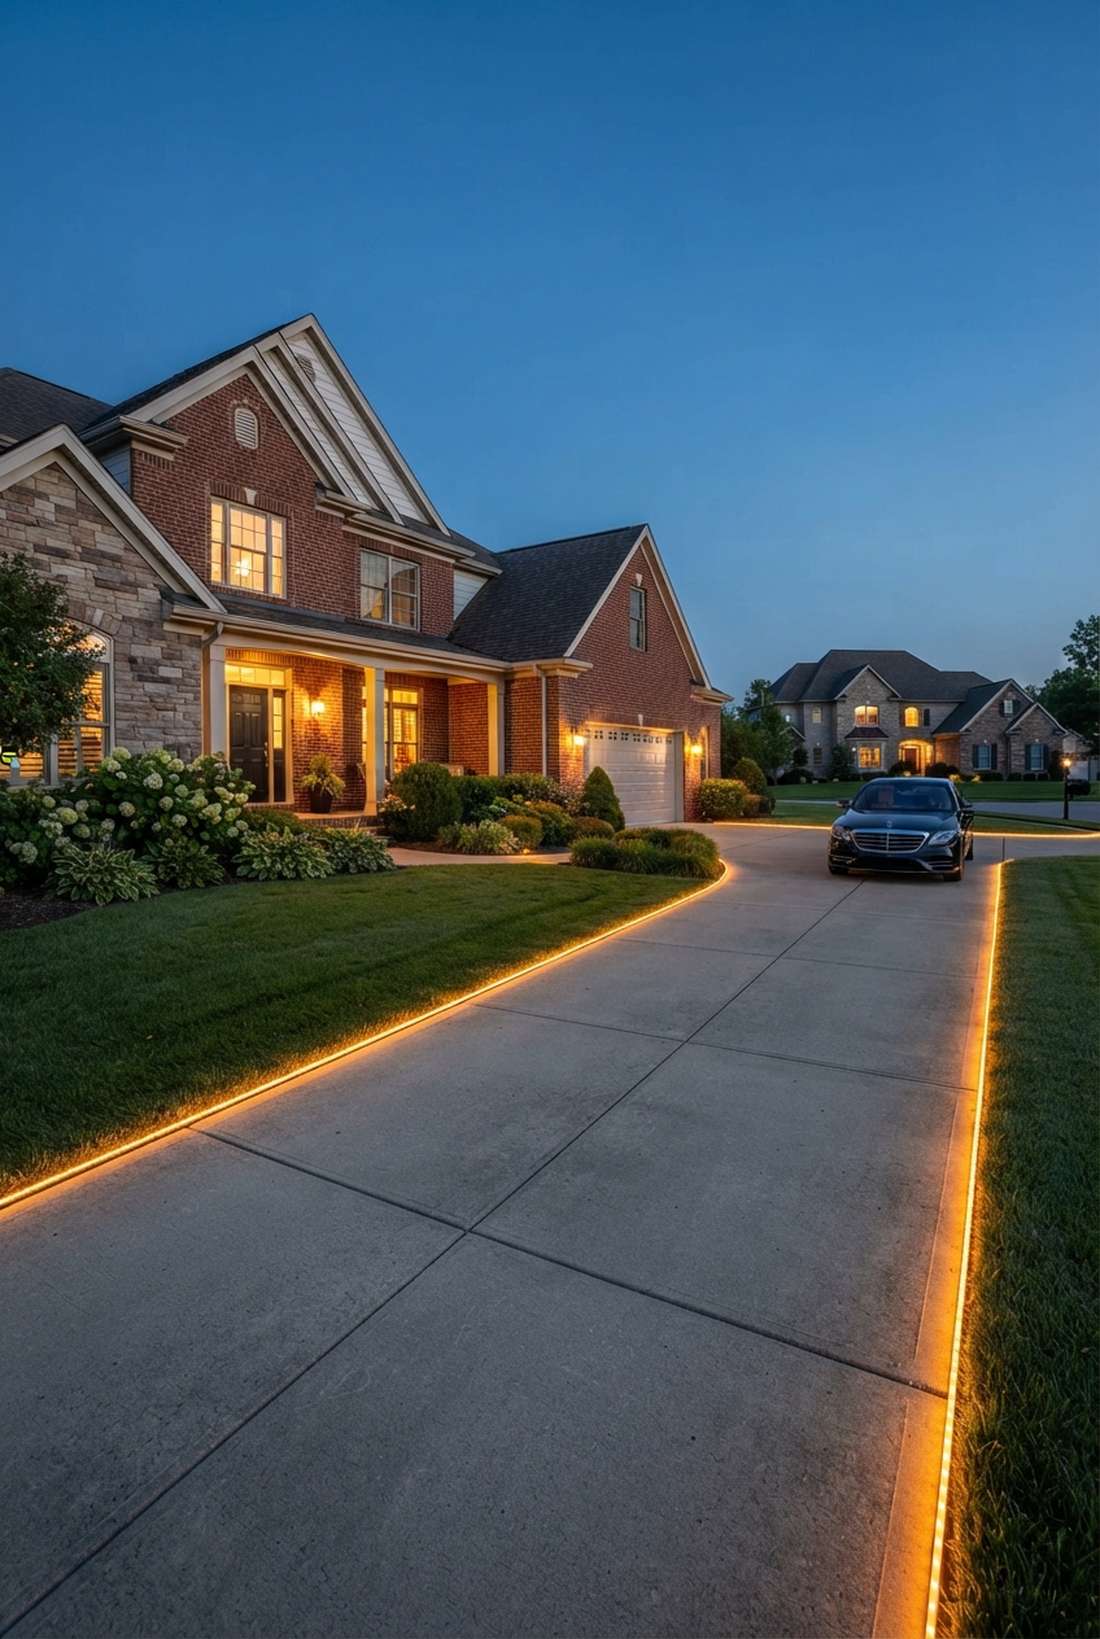
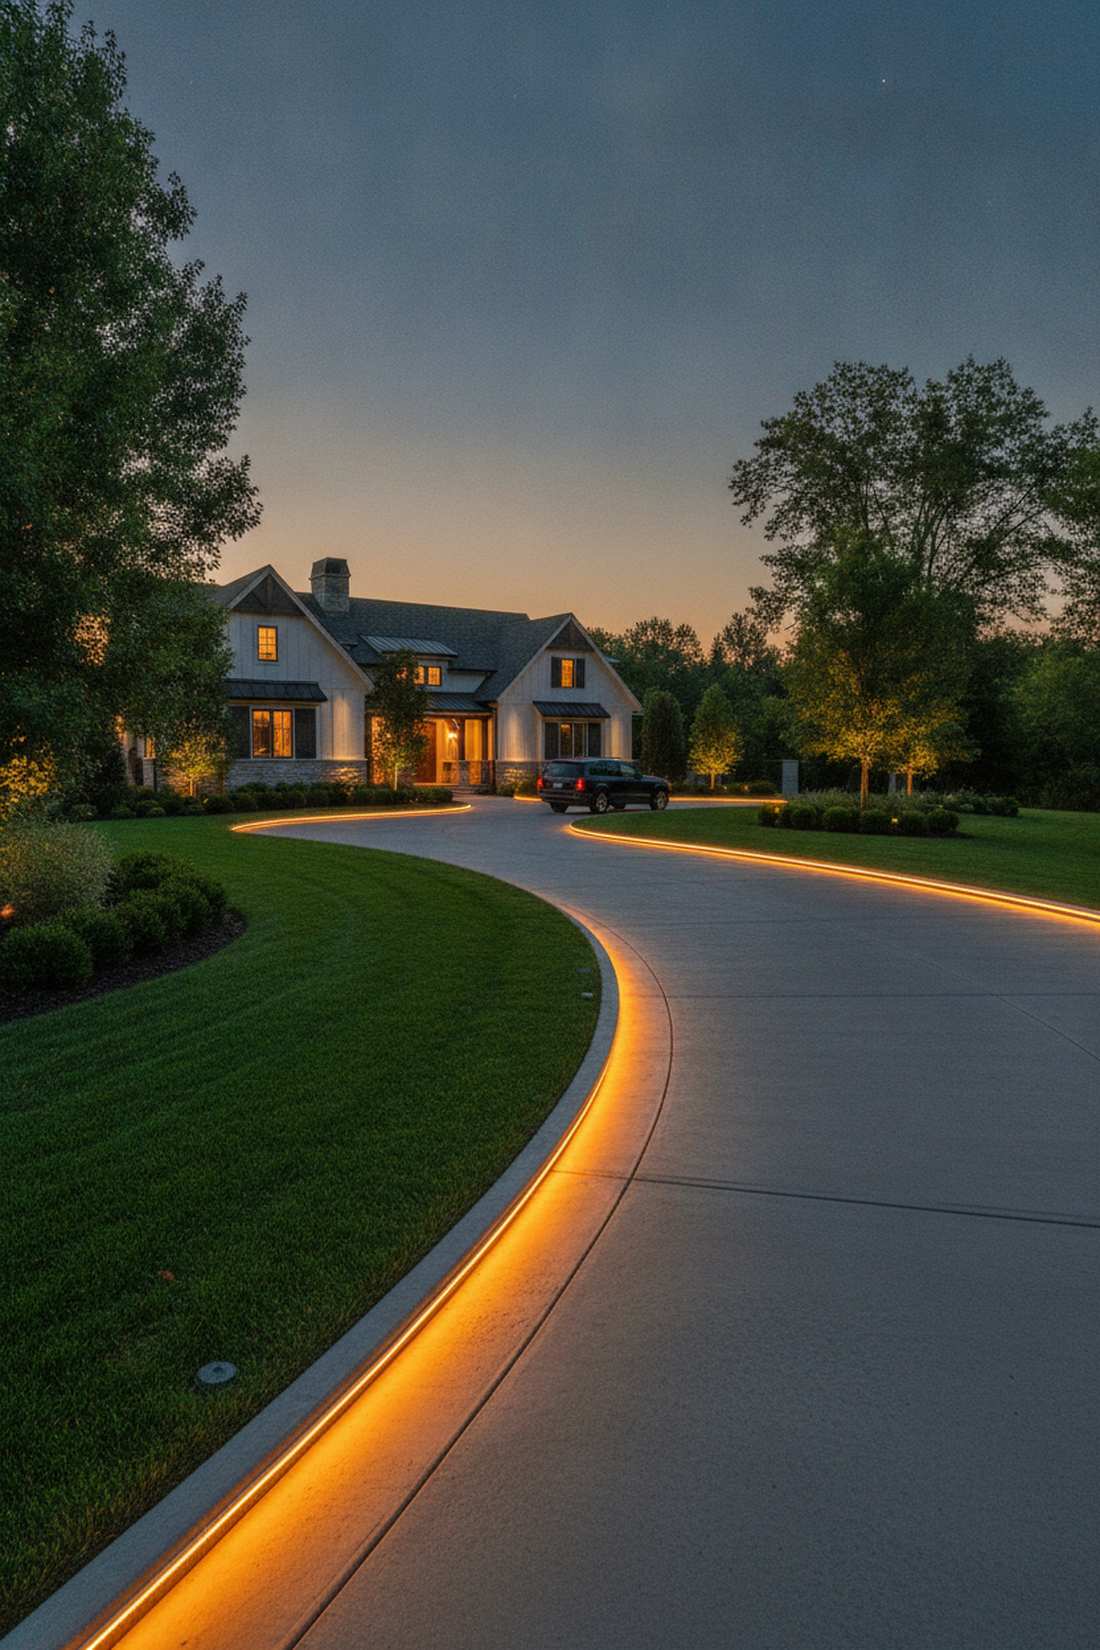
Saves your fresh lawn from terrible nighttime parking jobs. Durable driveway outlining casts a harsh but elegant line down the concrete edge. Built strictly for practical vehicle navigation.
Ditching weak solar stakes for heavy-duty, drive-over rated commercial strips stops you from replacing broken lights every month. This heavy-duty approach instantly gives a designer-level finish to your curb.
Protect your lawn and light your drive for $60–$100. Save this brilliant landscape hack!
- Key Materials: Impact-resistant commercial lighting ropes
- Vibe / Style: High-end estate entrance
- Difficulty: Moderate trenching
- Budget Breakdown: Heavy ropes: $70 | Ground clips: $15
- Creator’s Tip: Use amber tones instead of bright white to avoid annoying your neighbors across the street.
- Smart Sourcing: drive-over rated LED ropes and heavy-duty concrete anchors.
Wait until you see how simple container displays completely flip the script on outdoor lighting…
Container Display Concepts
21. Mason Jar Cluster Arrangements
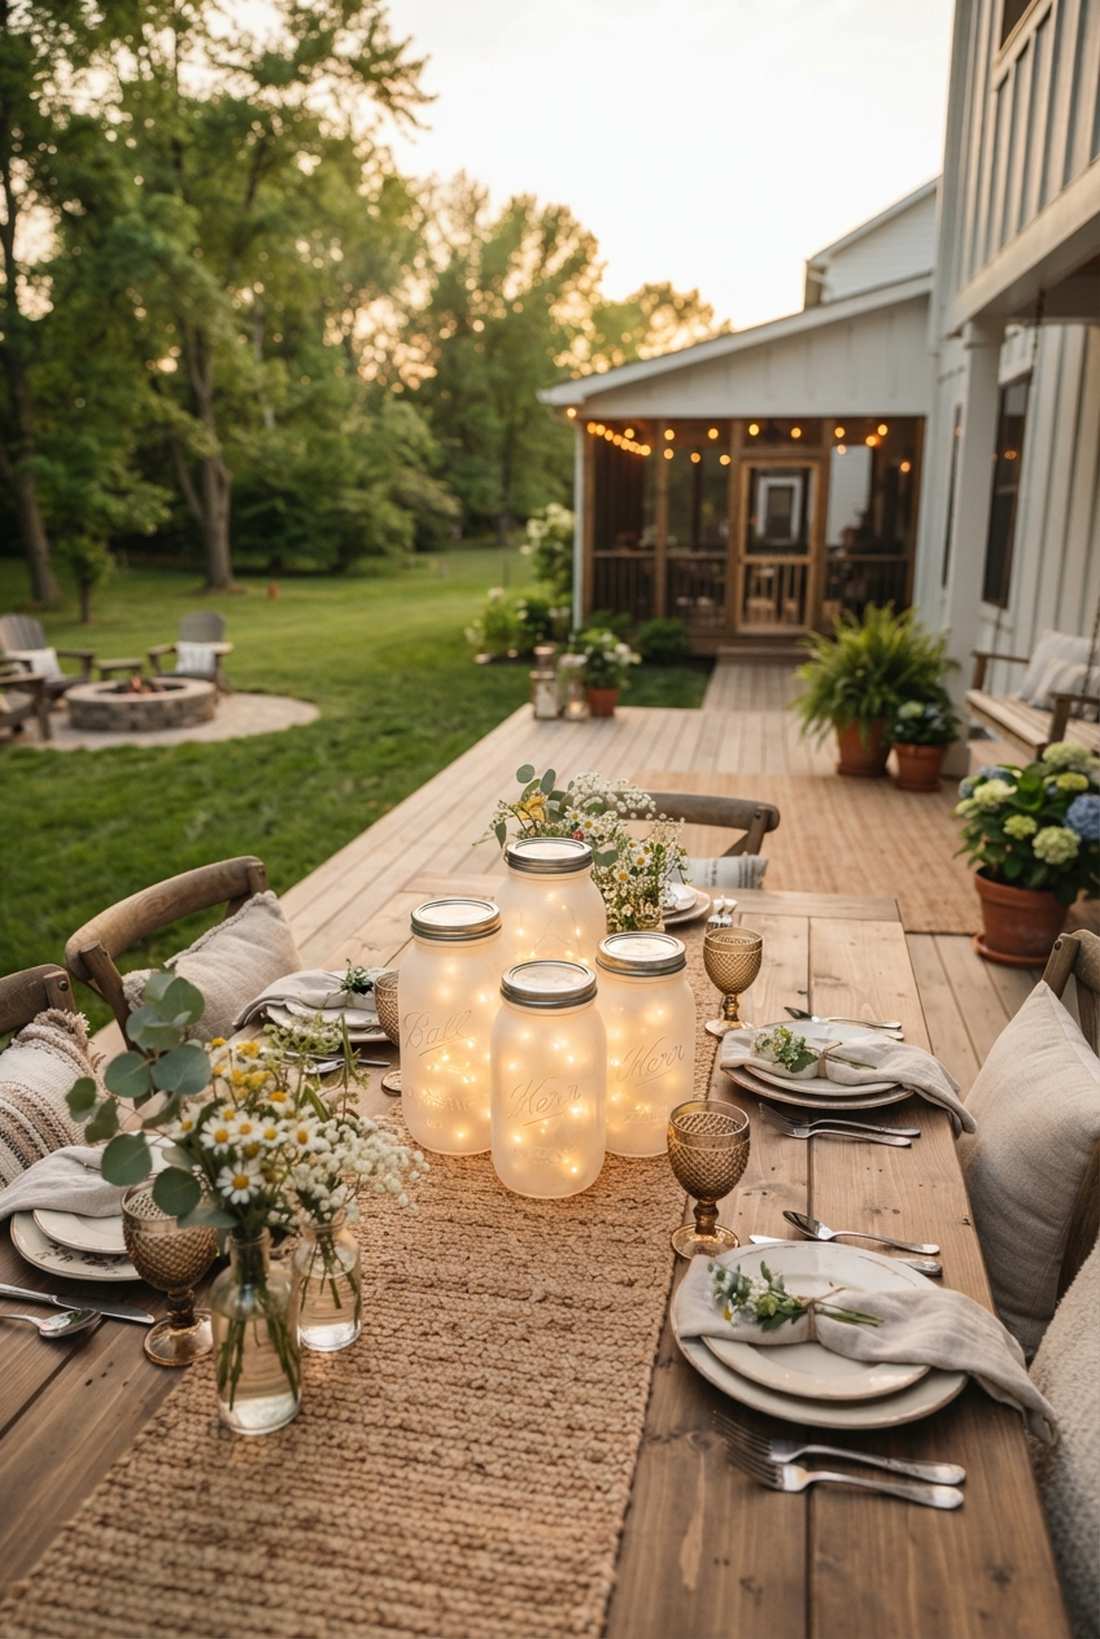

Feels like you captured a swarm of fireflies in a bottle. Fairy lights decor trapped in vintage glassware makes the perfect tabletop centerpiece. Works exceptionally well for rustic wedding tables or outdoor picnics.
Using frosted glass spray on the inside of the jar diffuses the harsh LED glare into a soft, velvety glow. It instantly gives a designer-level finish using items from your recycling bin.
You can easily pull this off for around $10–$15. Pin this for your next dinner party!
- Key Materials: Mason jars, battery cork-lights
- Vibe / Style: Vintage rustic charm
- Difficulty: 5-minute craft
- Budget Breakdown: Cork-lights: $10 | Jars: $5
- Creator’s Tip: Always group them in odd numbers (3, 5, or 7) to make the cluster visually balanced.
- Smart Sourcing: wine bottle cork fairy lights (bulk pack) and frosted glass spray paint.
22. Wire Basket Light Spheres
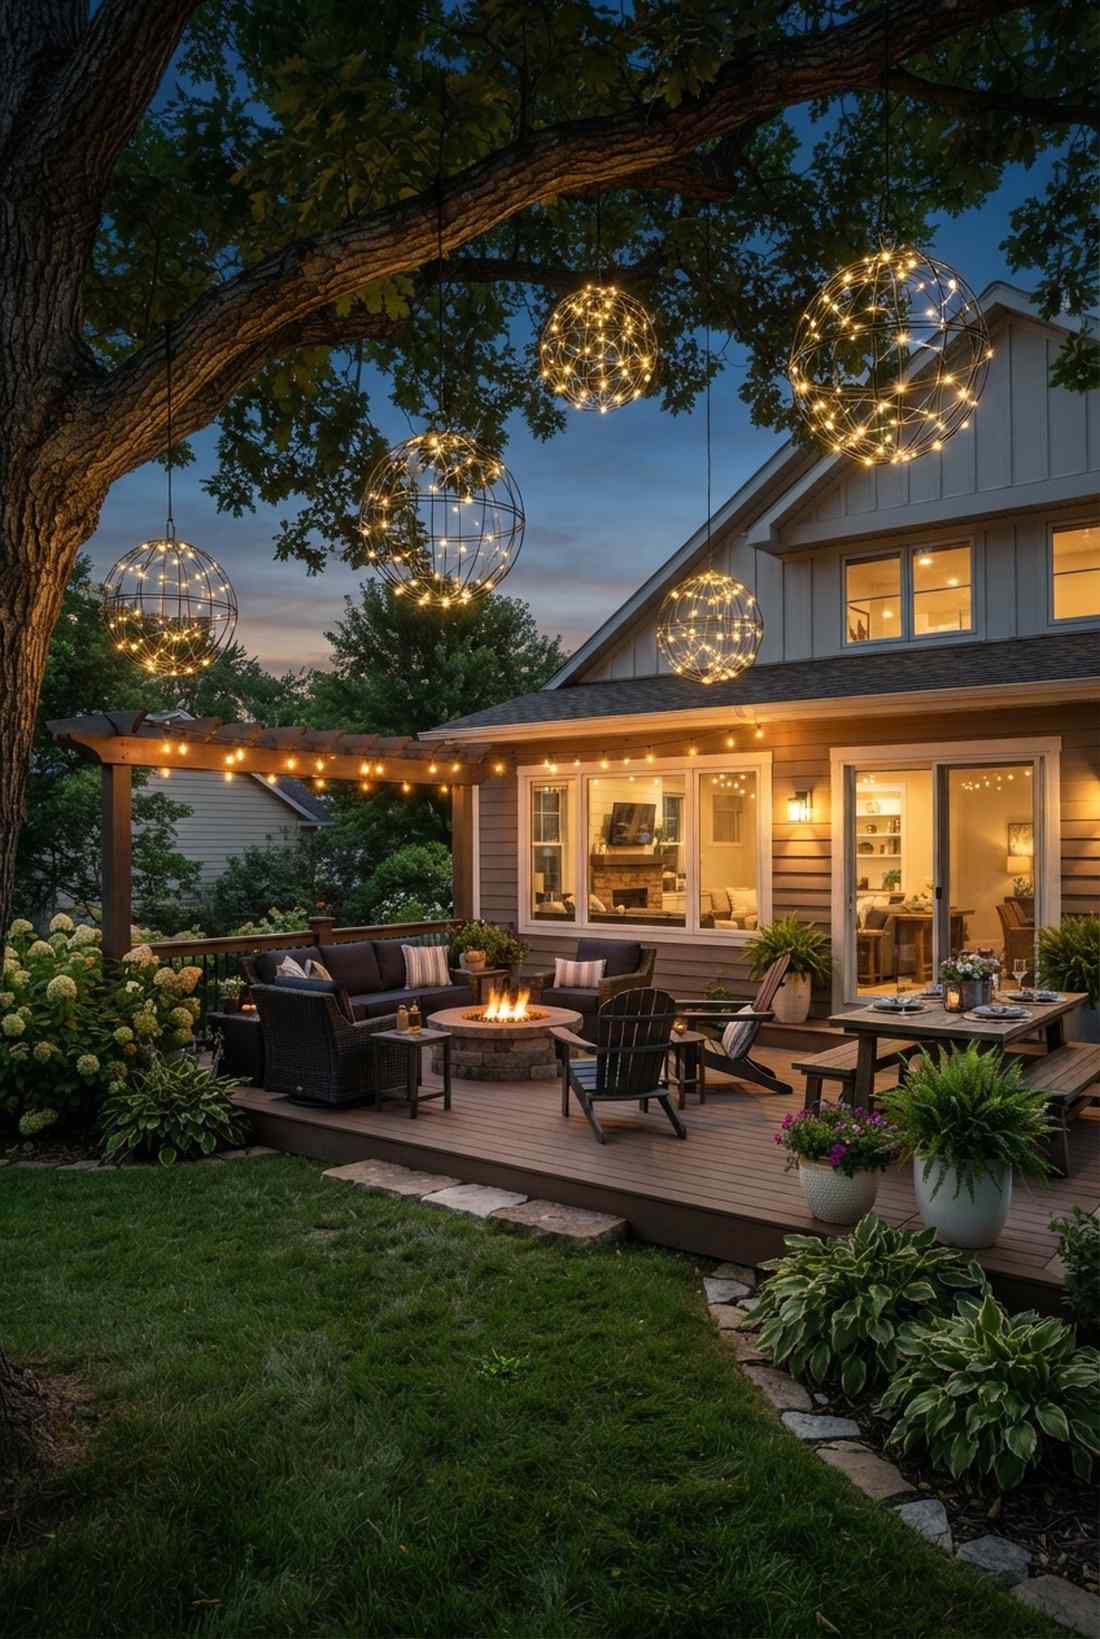
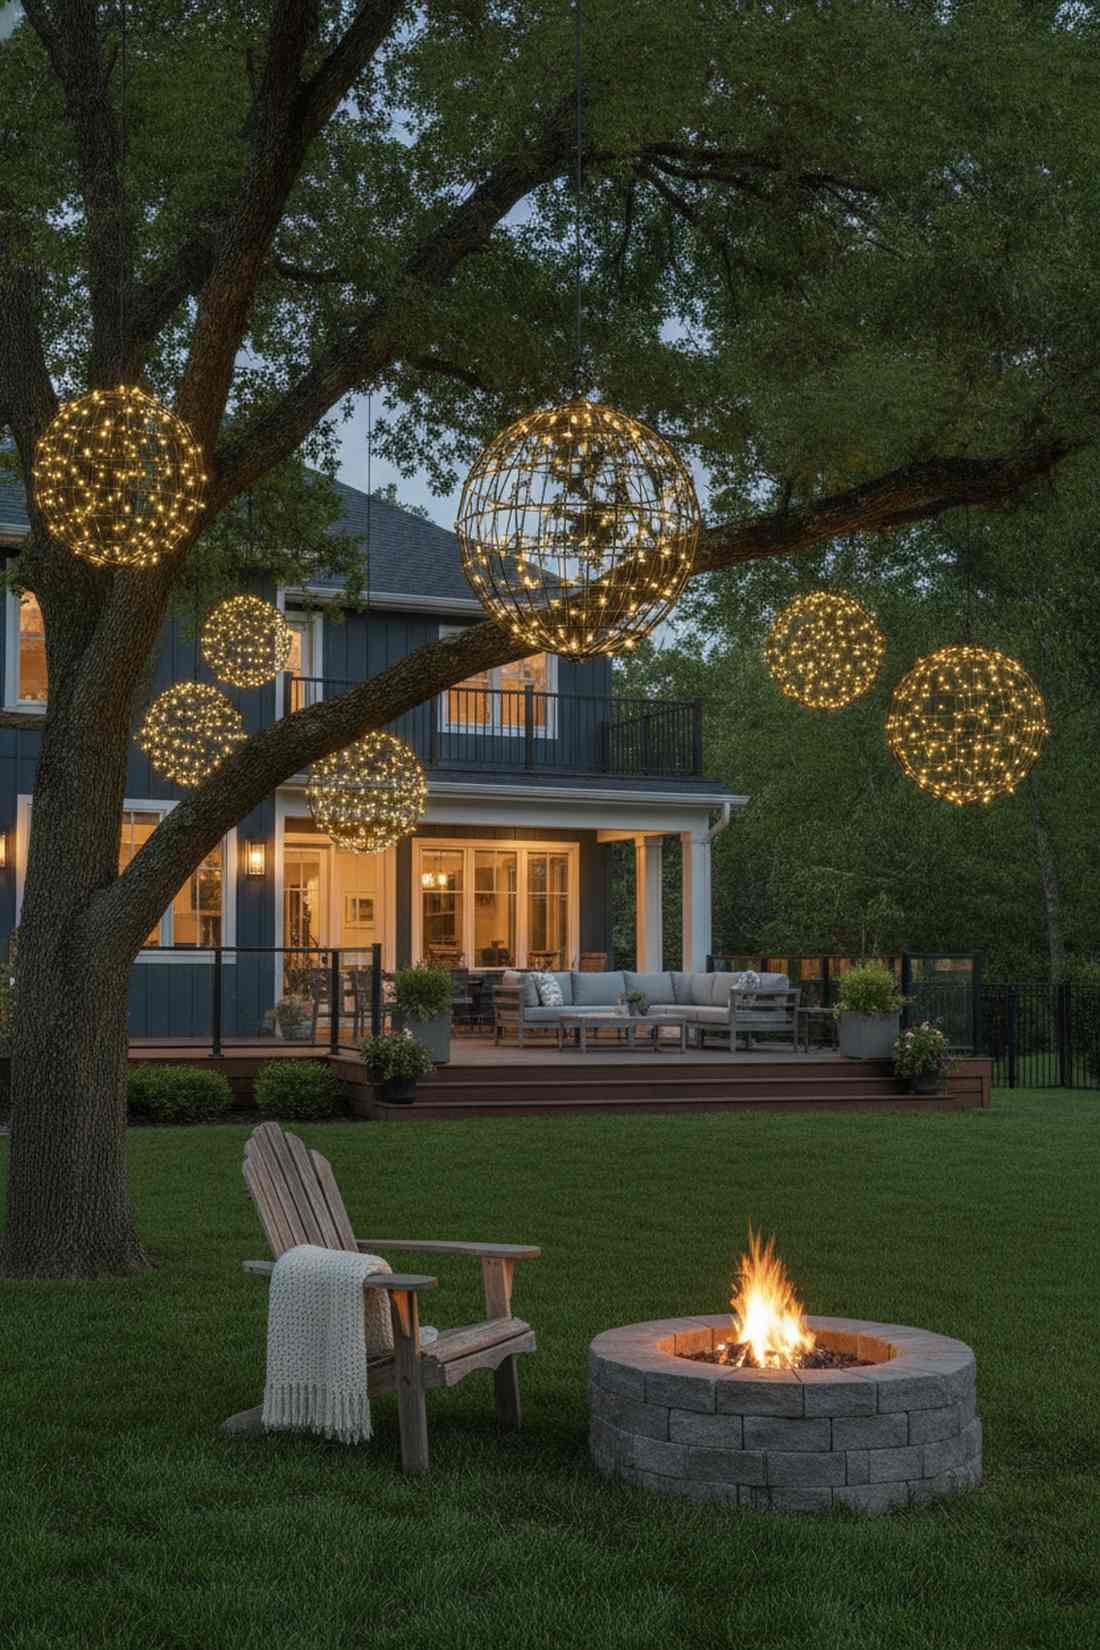
Looks like floating orbs of pure energy suspended in mid-air. These fairy lights decor ideas utilize standard wire garden baskets clapped together. Flawless for hanging from low tree branches.
Zipping two cheap dollar-store wire baskets together to form a sphere is a legendary budget hack. This simple setup looks far more expensive than it is when viewed from a distance.
Create massive glowing orbs for just $12 each.
- Key Materials: Wire planter baskets, battery strands
- Vibe / Style: Floating modern orbs
- Difficulty: Quick zip-tying
- Budget Breakdown: Baskets: $4 | Lights: $8
- Creator’s Tip: Spray paint the wire baskets flat black so the structure disappears at night.
- Smart Sourcing: wire hanging planter baskets (2-pack) and outdoor battery operated stringers.
23. Lantern Internal Illumination
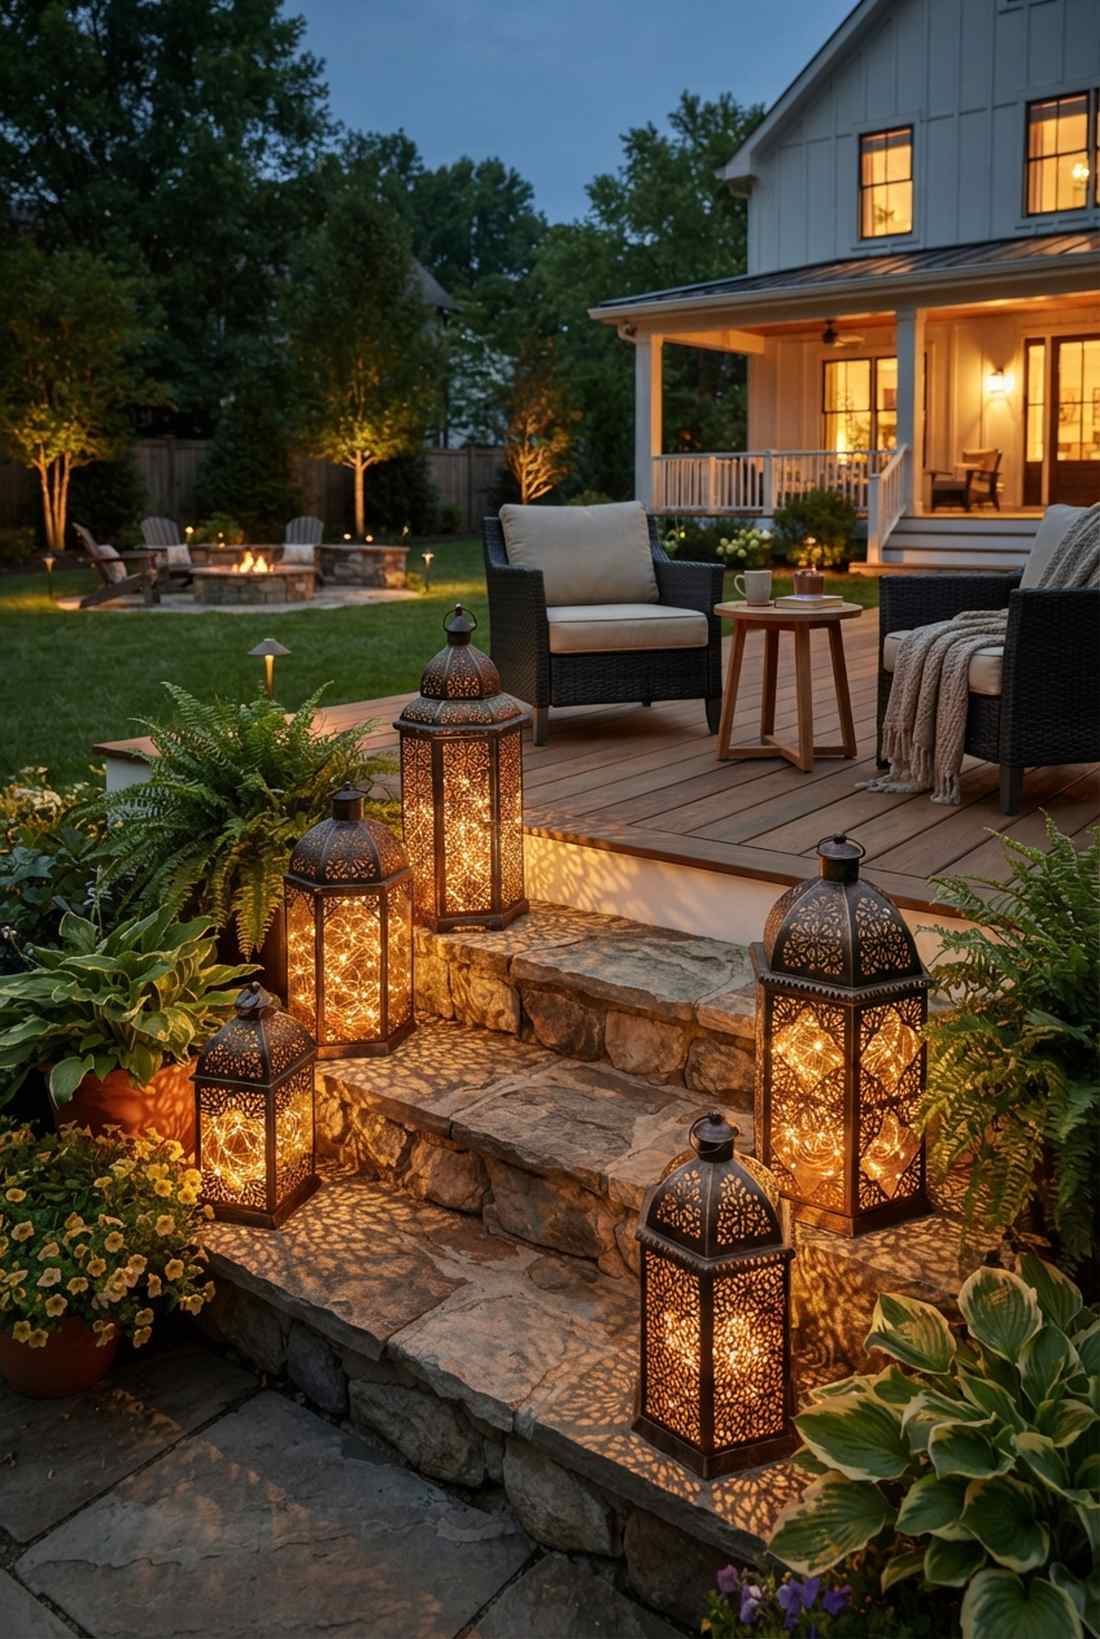
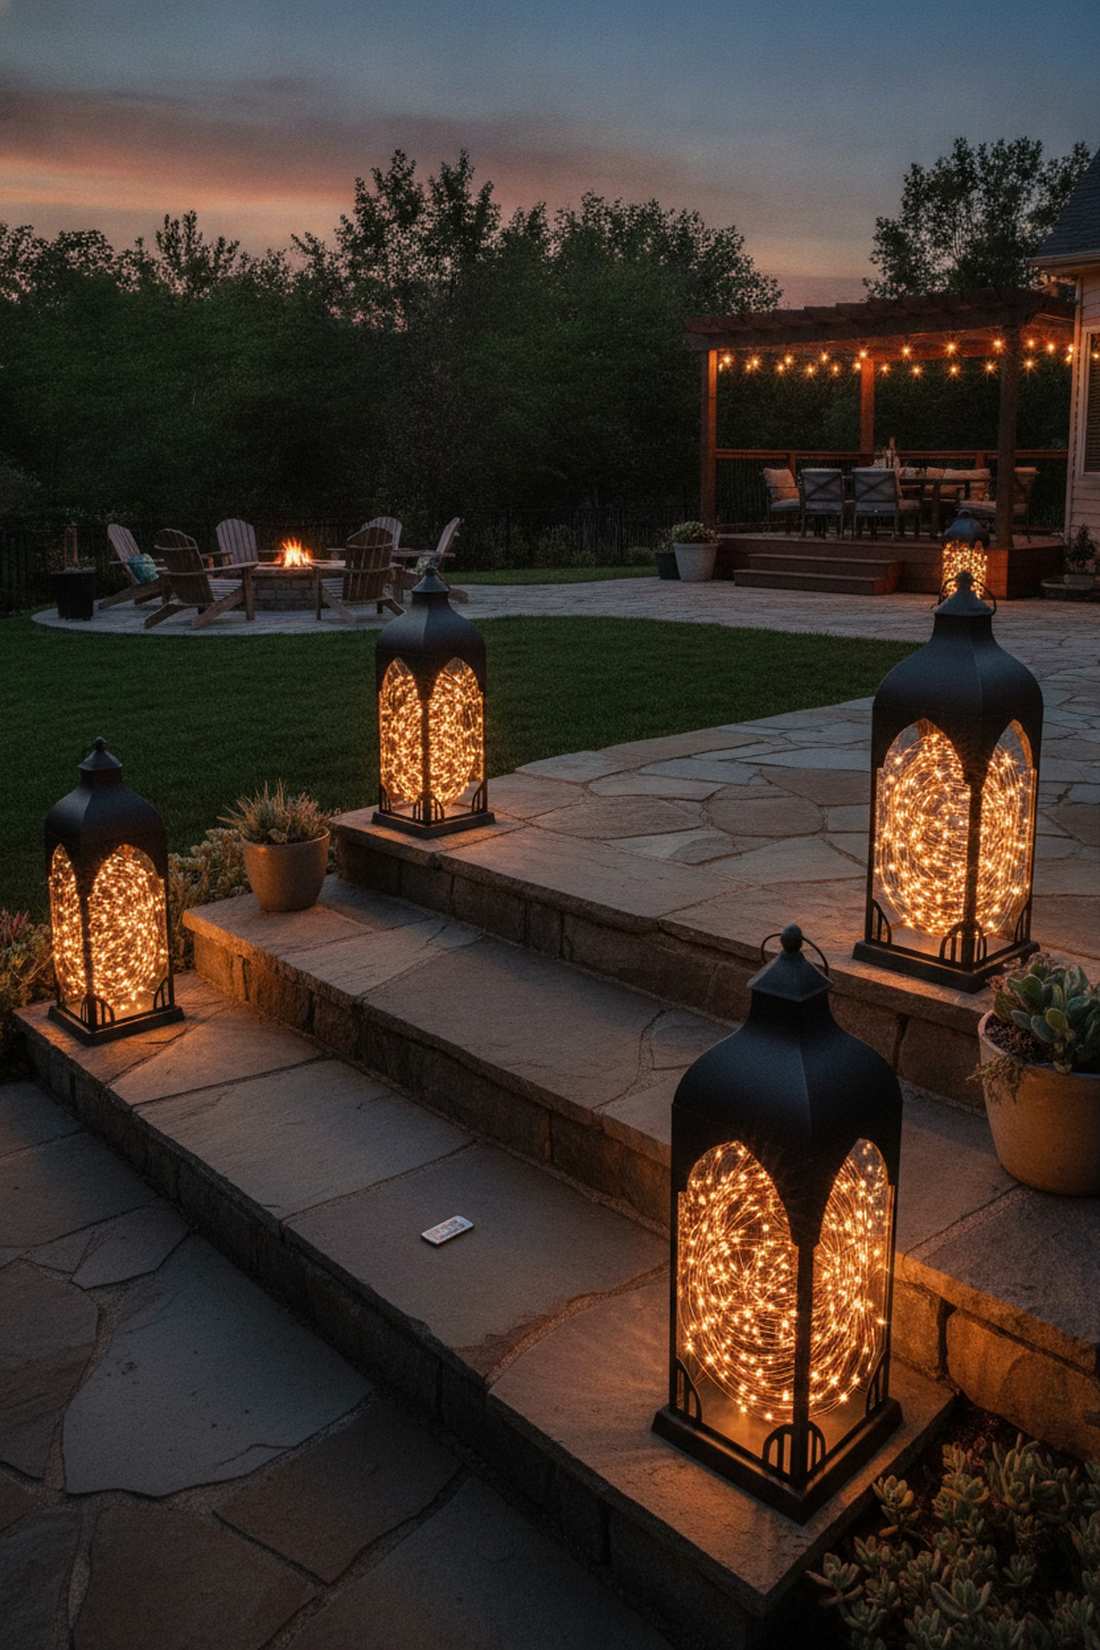
Brings a heavy, gothic Moroccan vibe to your patio steps. Enclosed lantern lighting protects delicate wires while casting intricate shadows. Perfect for marking dark staircase corners.
Stuffing a mass of micro-wires into a large floor lantern instead of a single fake candle creates a brilliant, blinding supernova effect. It delivers a surprisingly premium look that demands attention.
Repurpose old lanterns for roughly $15–$25. Save this to your cozy outdoor decor board!
- Key Materials: Metal lanterns, thick wire LEDs
- Vibe / Style: Exotic Moroccan nights
- Difficulty: Effortless stuffing
- Budget Breakdown: Lanterns: Thrifted | Light packs: $15
- Creator’s Tip: Use copper-wire lights instead of silver—the copper reflects beautifully against rustic lantern metal.
- Smart Sourcing: copper-wire fairy lights (remote controlled) and oversized outdoor patio lanterns.
24. Terrarium Miniature Gardens
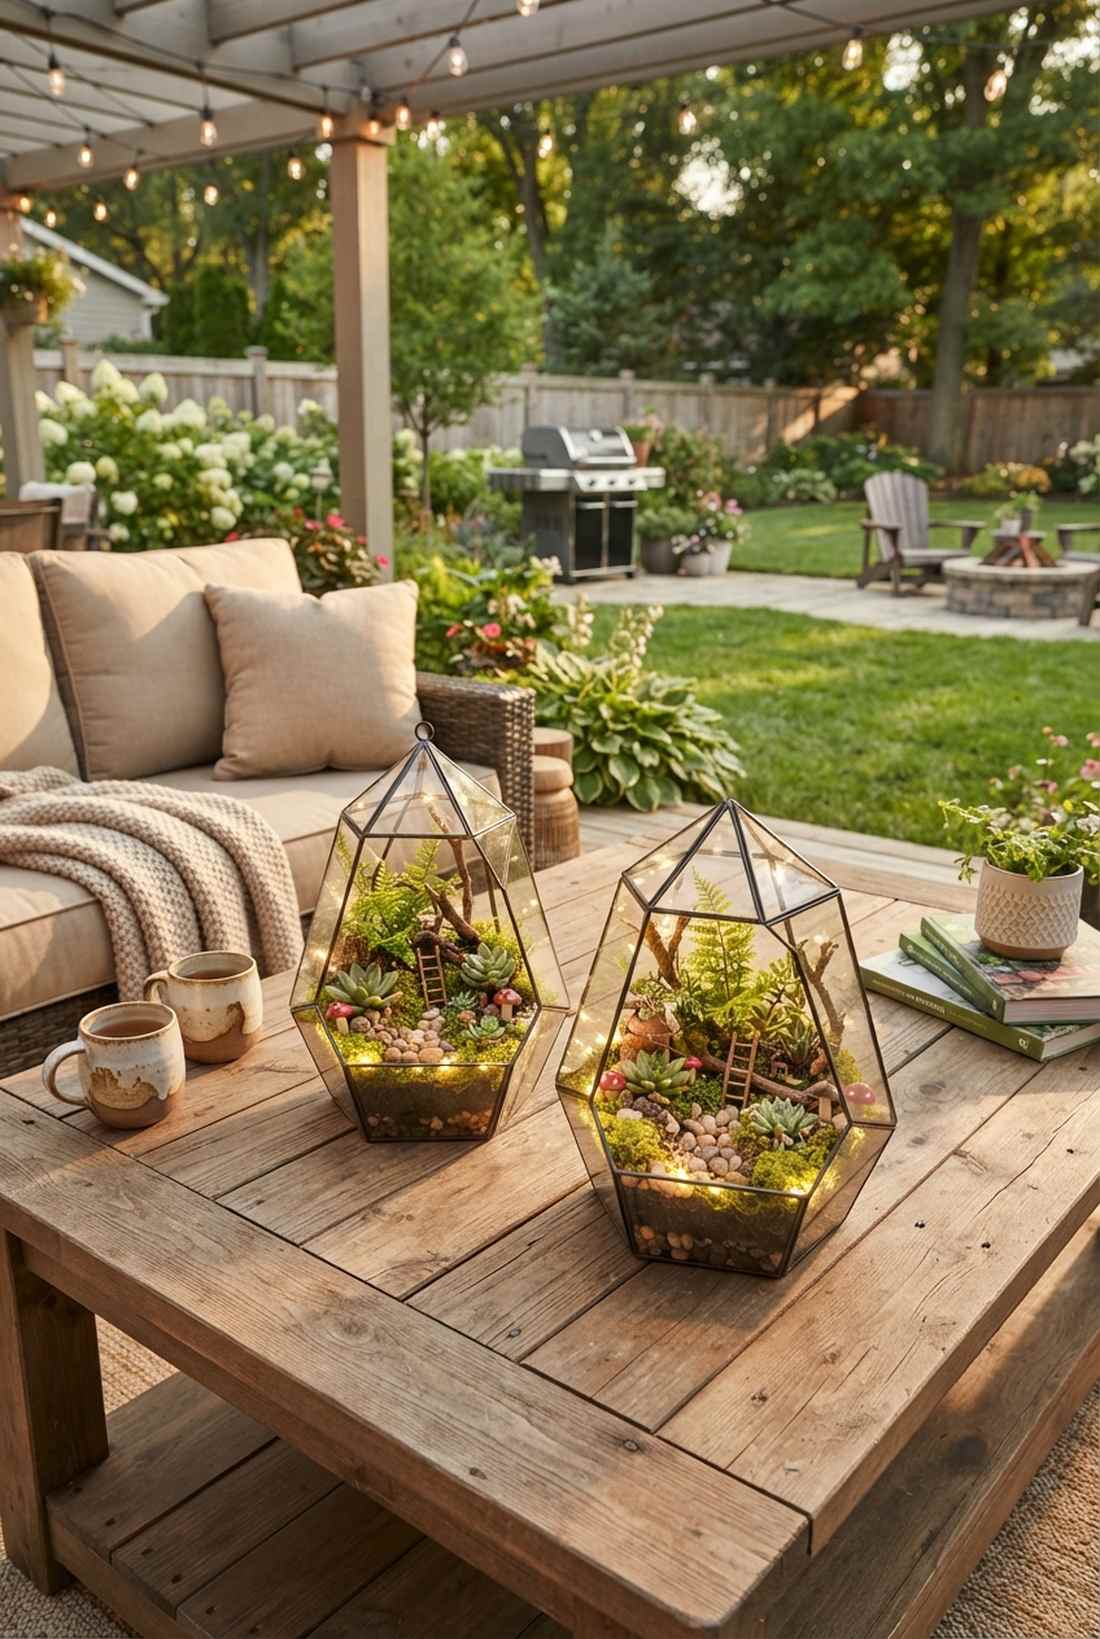
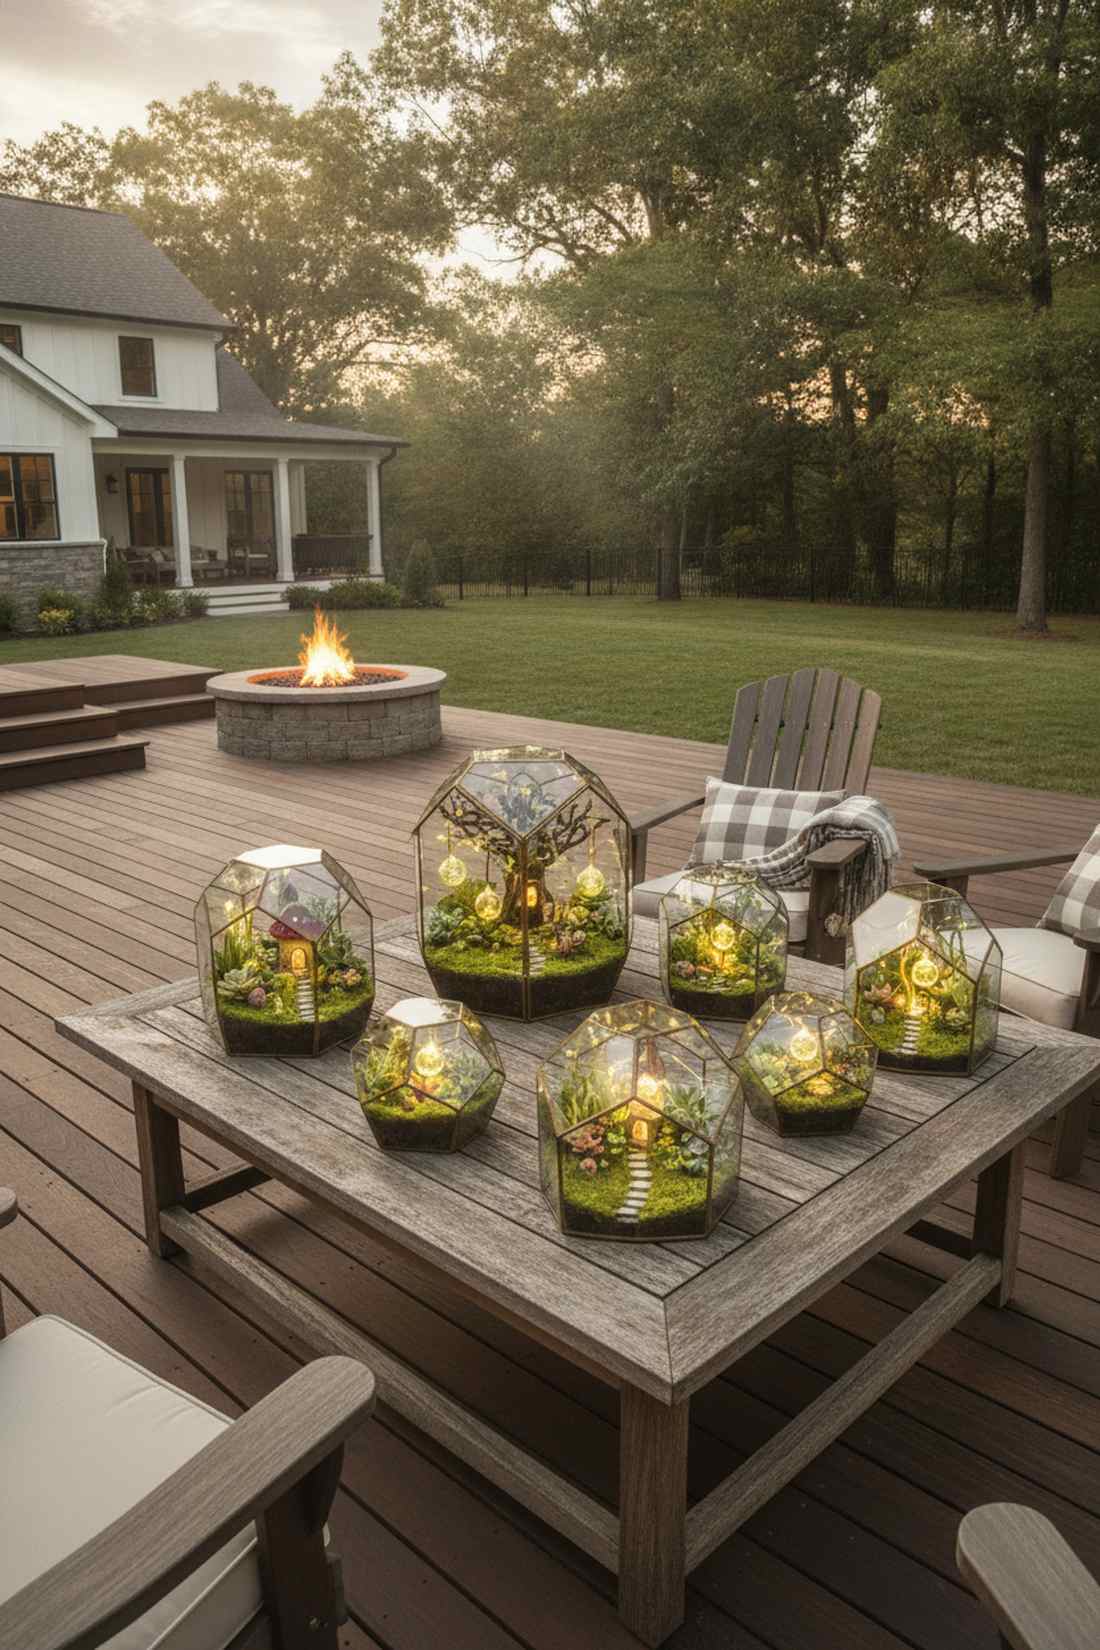
Feels like peering into a glowing, magical alien ecosystem. Illuminated glass cloches magnify the tiny details of your favorite succulents. Incredible as a conversation piece on an outdoor coffee table.
Hiding the battery pack underneath the false bottom of the terrarium is the ultimate pro-move. Adding premium terrarium accessories alongside the tiny bulbs creates an ultra-realistic fairy landscape.
Build a stunning mini-world for $25–$45.
- Key Materials: Glass terrarium, micro-lights, moss
- Vibe / Style: Enchanted desktop biome
- Difficulty: Delicate tweezer work
- Budget Breakdown: Glassware: $20 | Decor/Lights: $20
- Creator’s Tip: Keep live plants away from the battery pack to avoid moisture corrosion.
- Smart Sourcing: geometric glass terrarium containers and pre-cut preserved moss sheets (bulk pack).
If you think standard lanterns are cool, this next miniature trick will blow your mind…
25. Decorative Bottle Luminaries
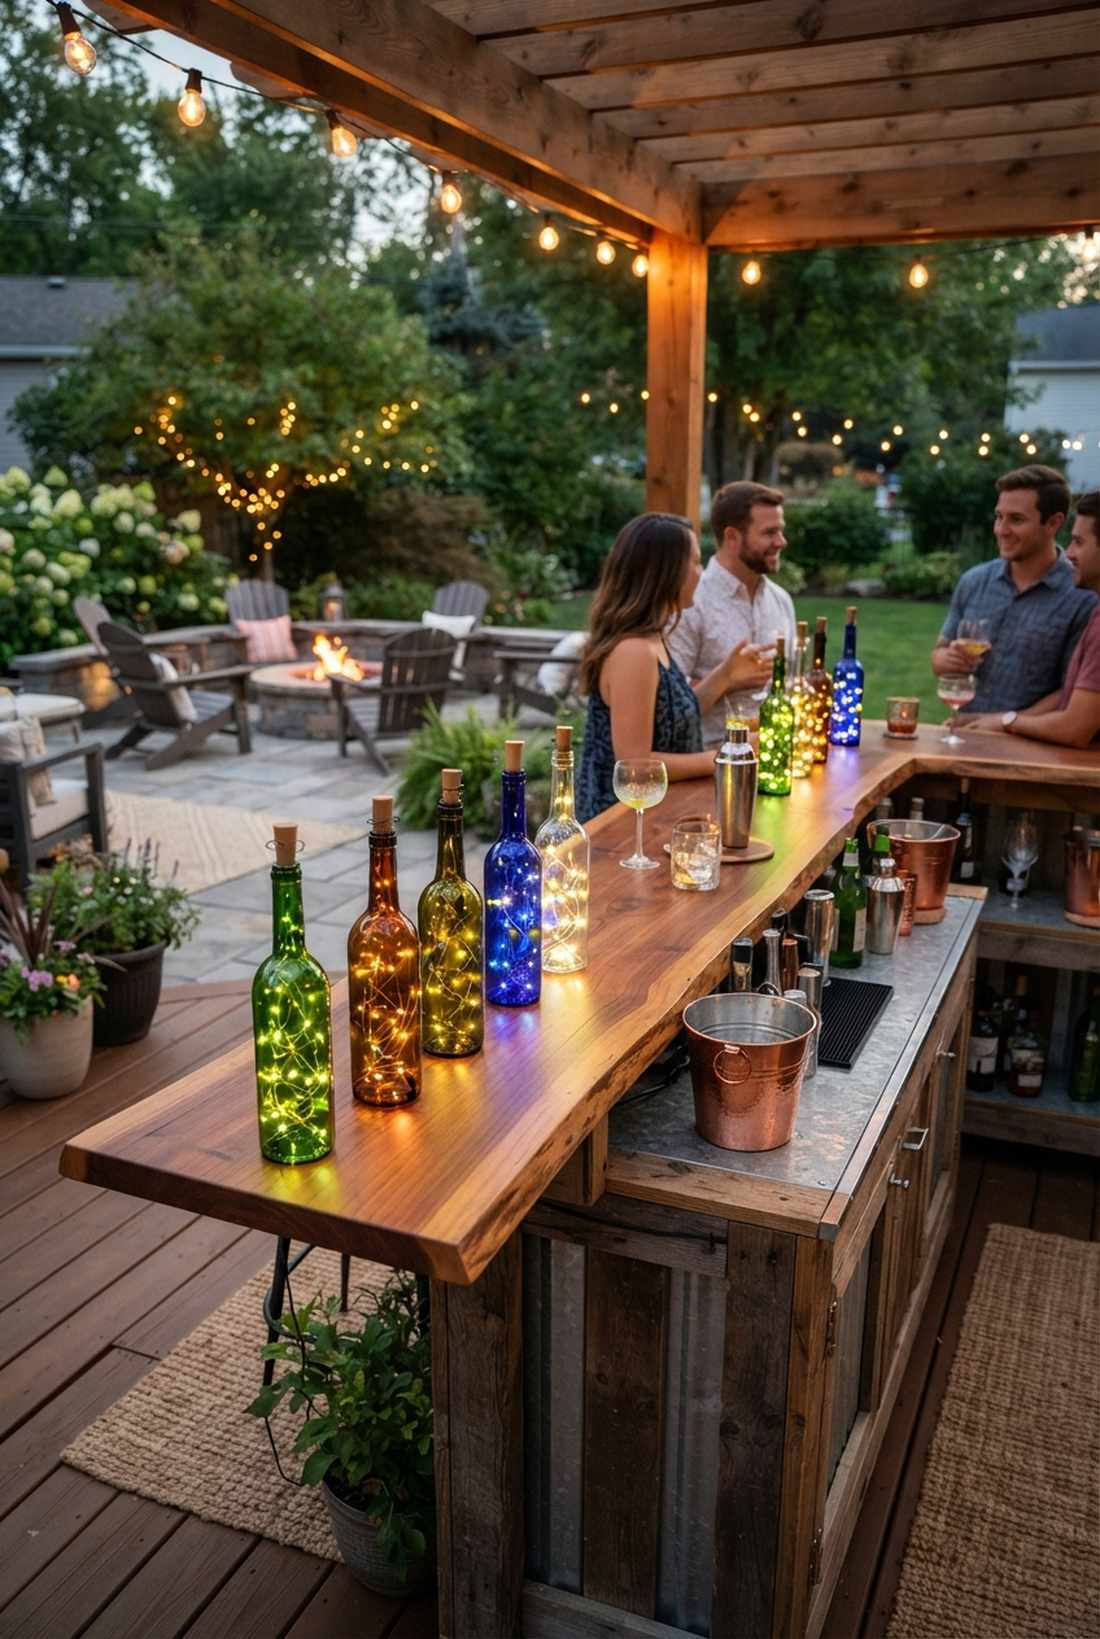
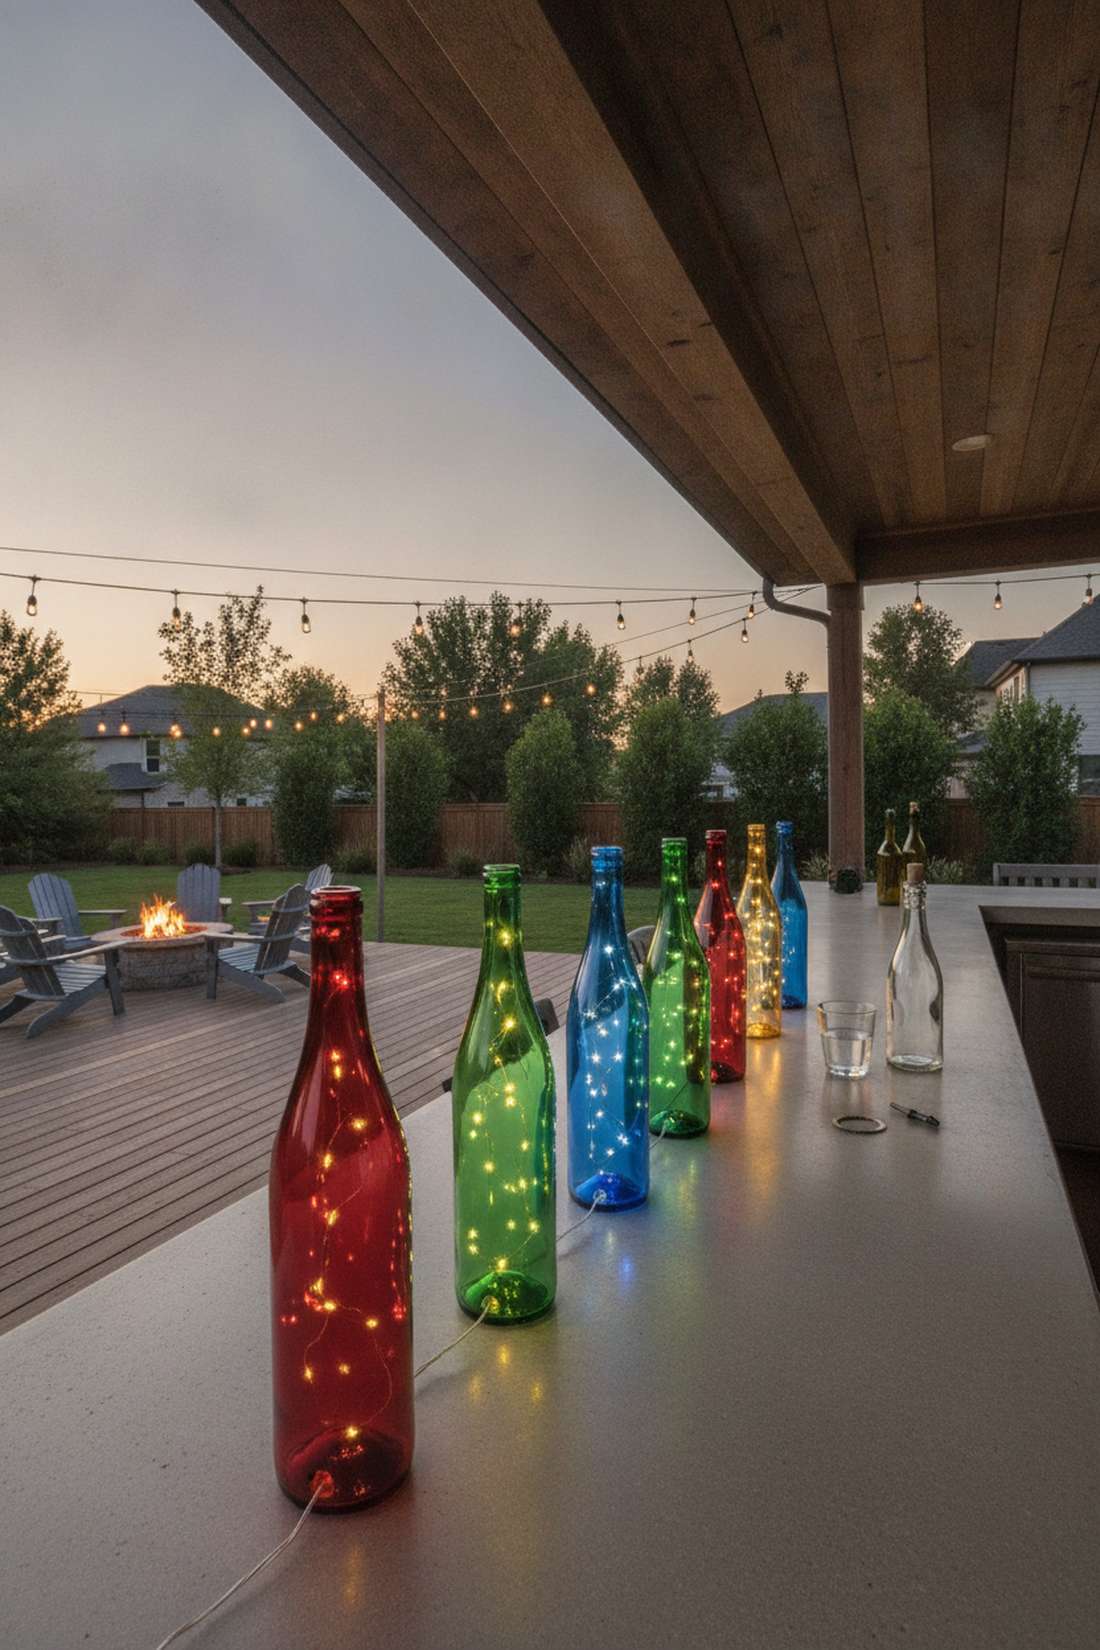
Transforms your empty wine bottles into elegant stained-glass lamps. Tinted bottle fairy lights ideas shoot concentrated color upward into the night. Ideal for lining outdoor bar countertops.
Drilling a tiny hole in the bottom of the bottle to run the wire out completely hides the ugly plastic battery corks. This simple drill trick instantly gives a designer-level finish to literal trash.
Upcycle your glass for less than $10 a bottle. Pin this zero-waste DIY project!
- Key Materials: Colored glass bottles, diamond drill bit
- Vibe / Style: Upcycled bar decor
- Difficulty: Requires glass drilling
- Budget Breakdown: Lights: $8 | Glass bit: $10
- Creator’s Tip: Use a diamond hole-saw bit and keep the glass wet while drilling to prevent shattering.
- Smart Sourcing: diamond glass drill bits (starter kit) and plug-in bottle string lights.
26. Wire Cloche Plant Covers
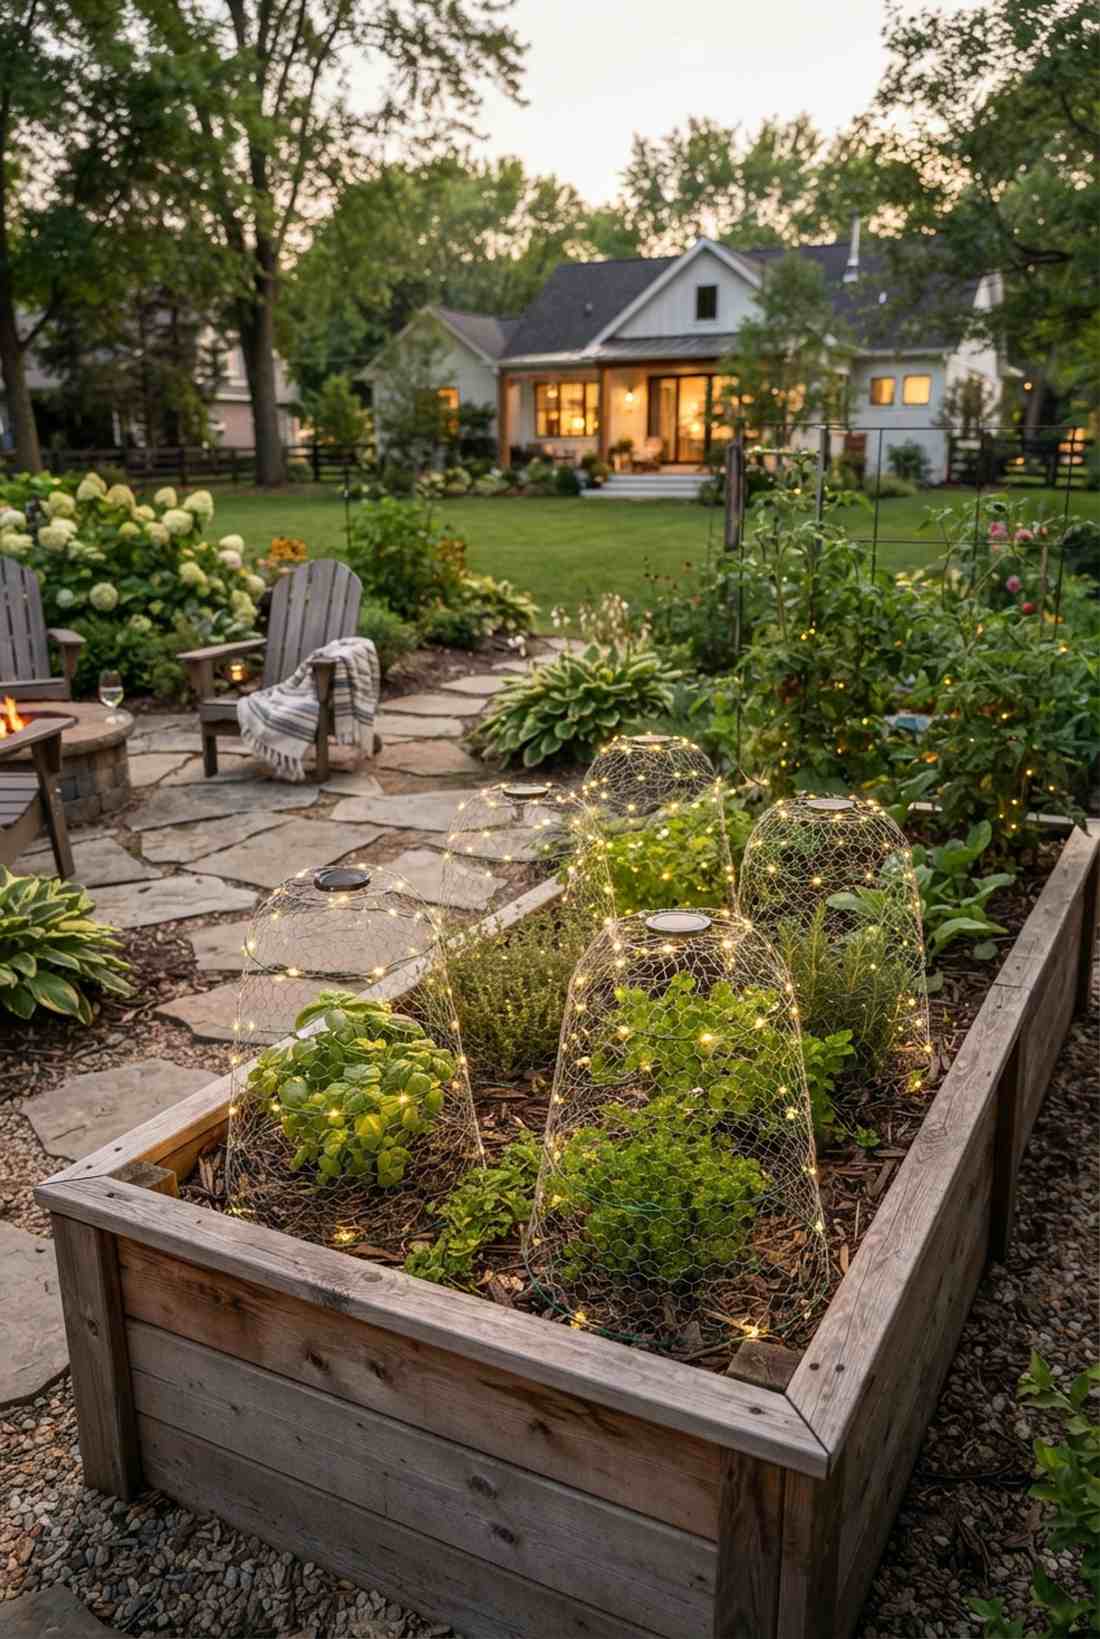
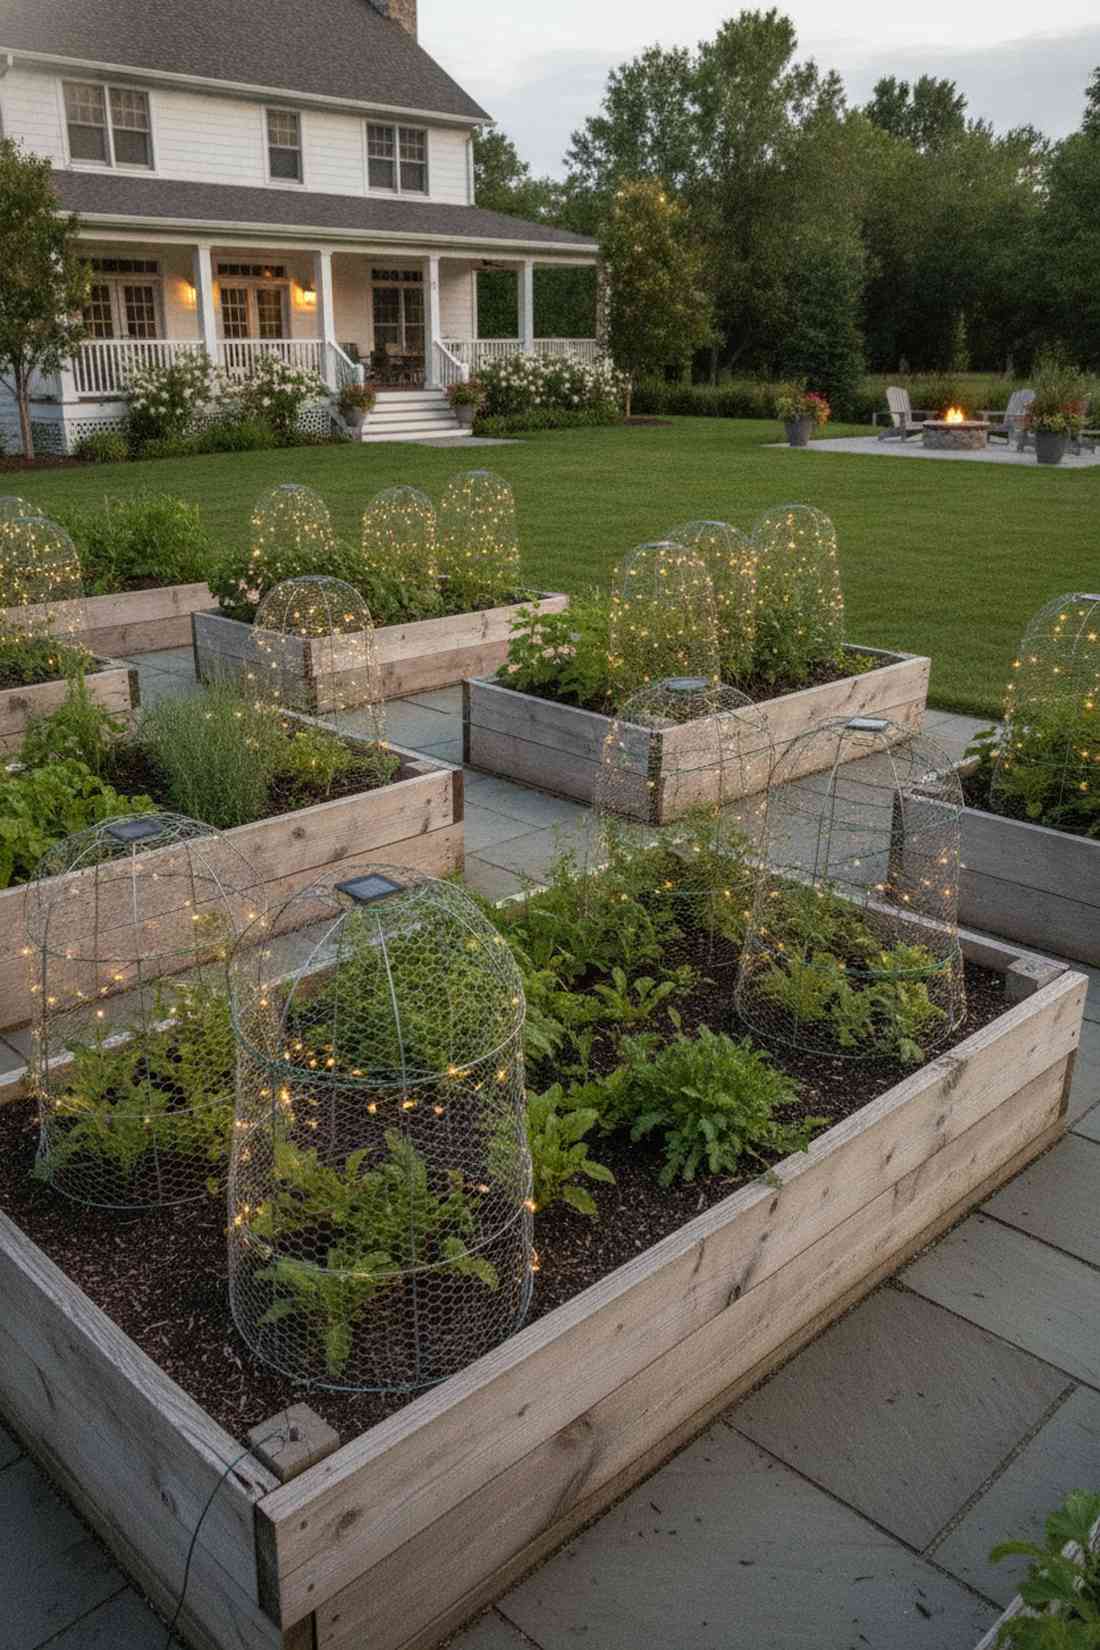
Protects your expensive herbs while making them look like museum exhibits. Illuminated plant cages guard against night critters while providing a soft glow. Brilliant for elevated vegetable garden beds.
Wrapping the wire strictly on the outside of the cloche cage prevents the heat from burning delicate seedlings. This dual-purpose utility looks far more expensive than it is while saving your plants.
Protect and illuminate for $15–$25 per cage.
- Key Materials: Chicken-wire cloche, solar strings
- Vibe / Style: Practical glowing farm
- Difficulty: Fast exterior wrapping
- Budget Breakdown: Cloche cages: $15 | Lights: $10
- Creator’s Tip: Use green floral wire to attach the lights so the ties blend perfectly with your garden.
- Smart Sourcing: wire garden plant cloches (bulk pack) and green-coated floral wire spools.
27. Hanging Glass Globes
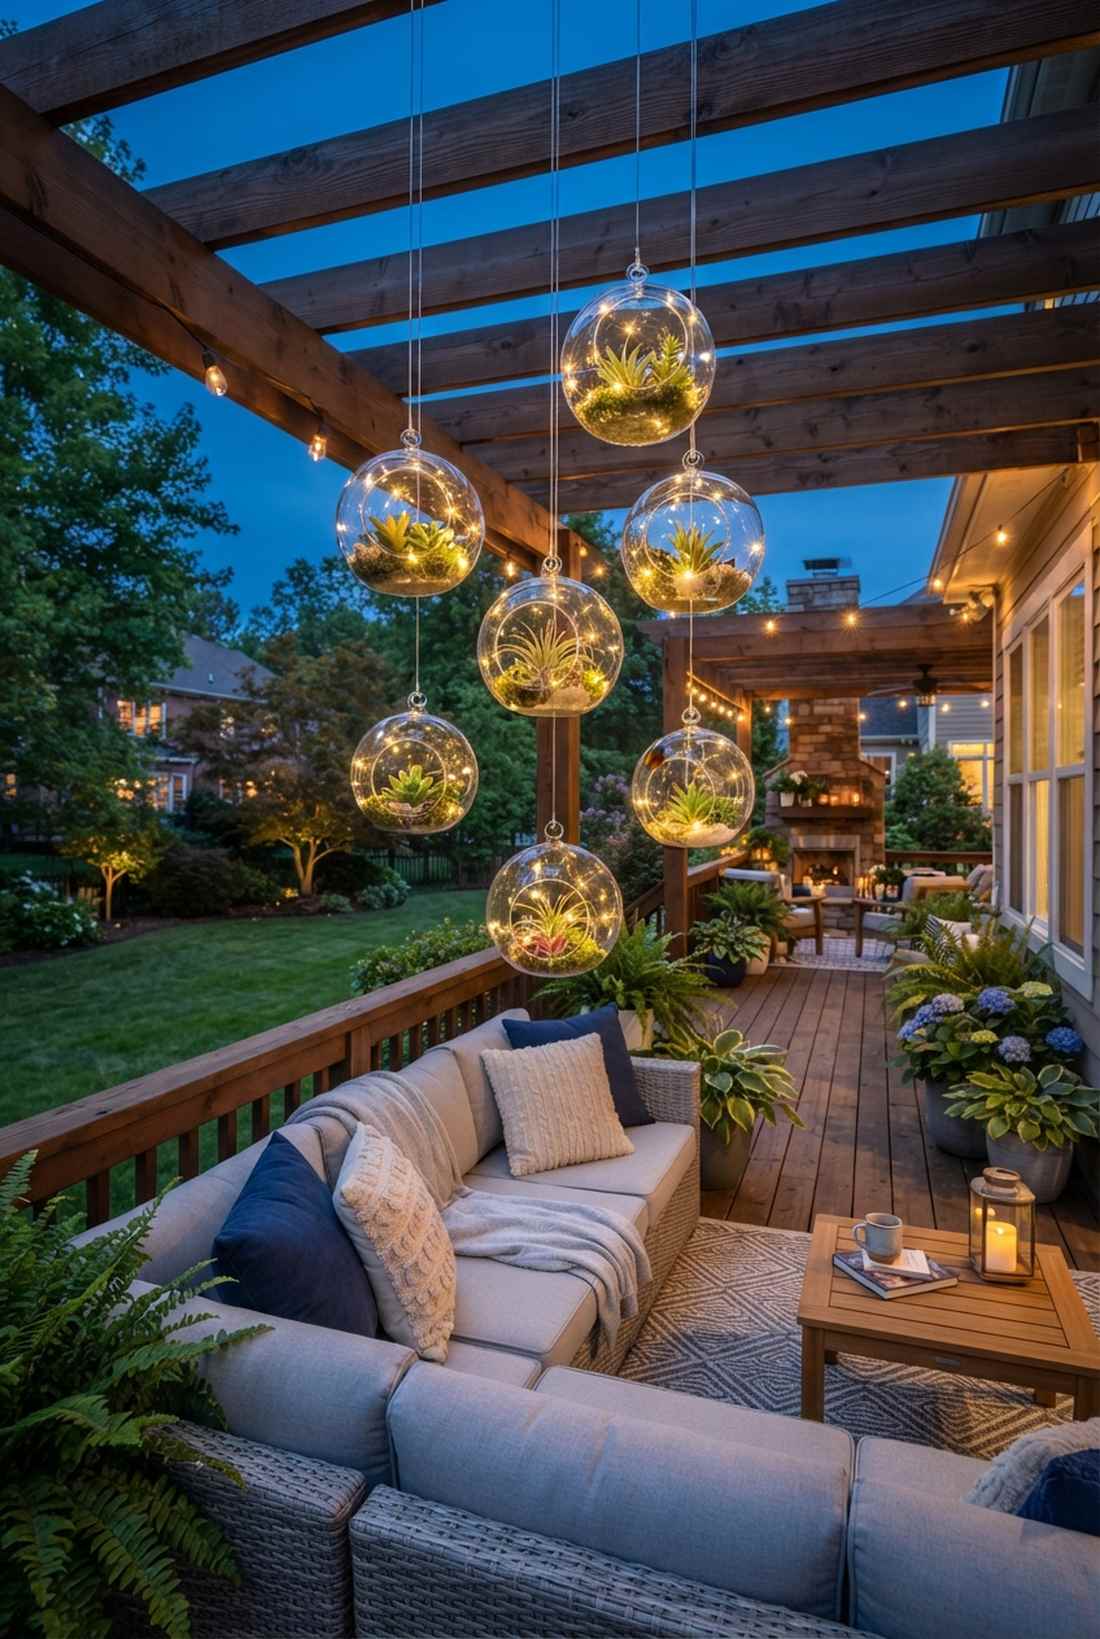
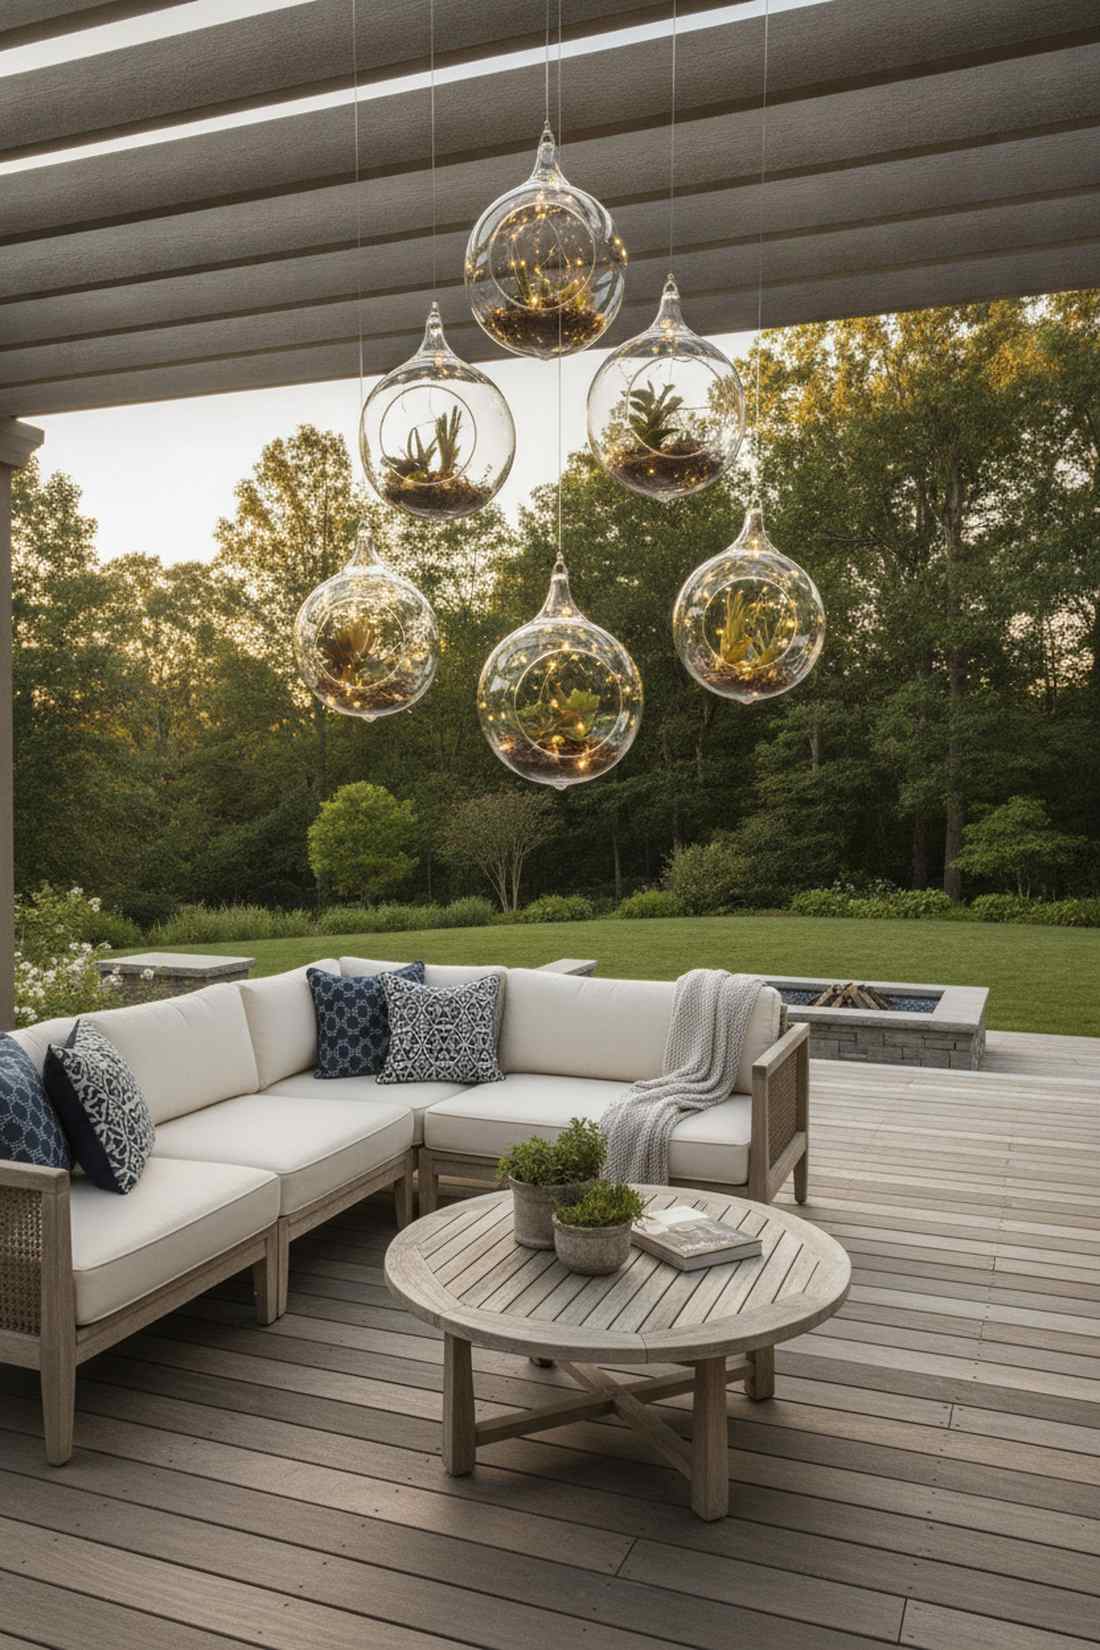
Looks exactly like glowing dewdrops caught in the canopy. Suspended transparent spheres scatter elegant pinpoints of light. Works exceptionally well dangling above an outdoor lounging couch.
Using open-faced glass orbs instead of closed ones stops condensation from fogging up your beautiful display. Bringing in miniature garden supplies like tiny faux-succulents inside the globes takes the aesthetic to the next level.
Hang a cluster of six for $35–$50. Save this for your aesthetic balcony makeover!
- Key Materials: Open glass terrarium orbs
- Vibe / Style: Modern floating dewdrops
- Difficulty: Fragile hanging required
- Budget Breakdown: Globes: $25 | Micro-lights: $15
- Creator’s Tip: Hang them using invisible fishing line to maximize the floating illusion.
- Smart Sourcing: hanging glass orb terrariums (6-pack) and heavy-duty invisible fluorocarbon line.
Fairy Lights Decor Ideas For Living Elements
28. Tree Canopy Draping
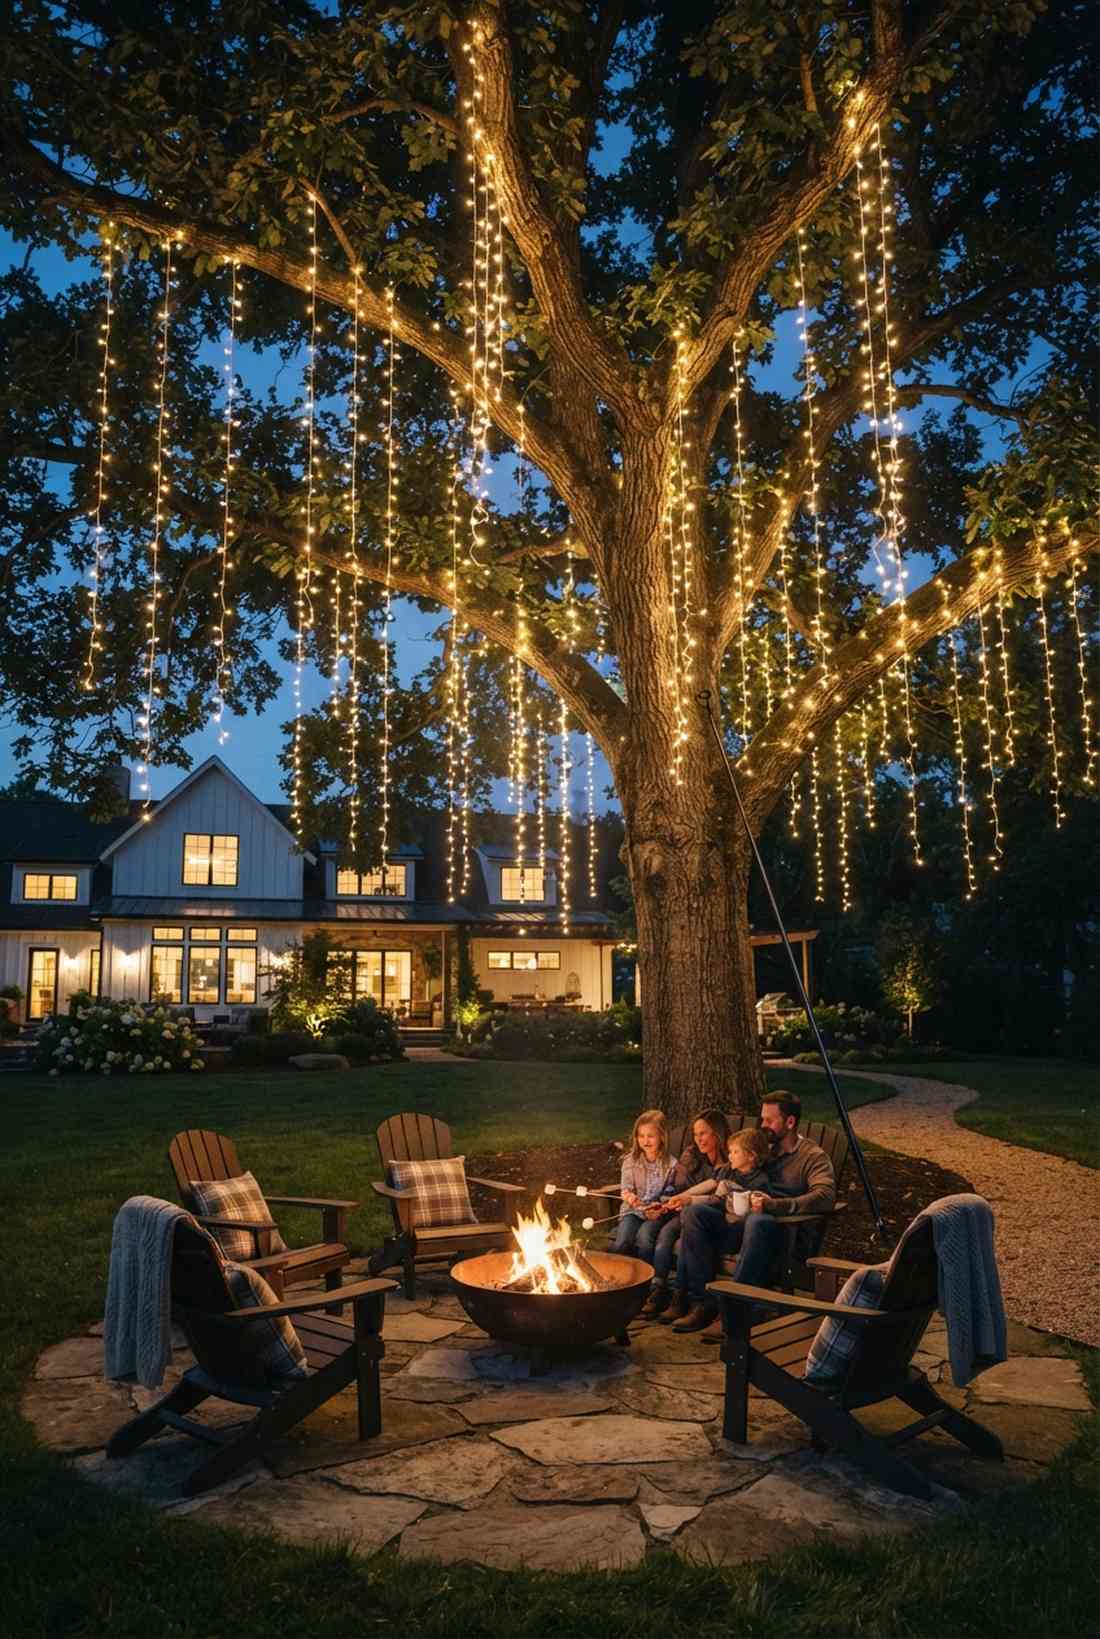
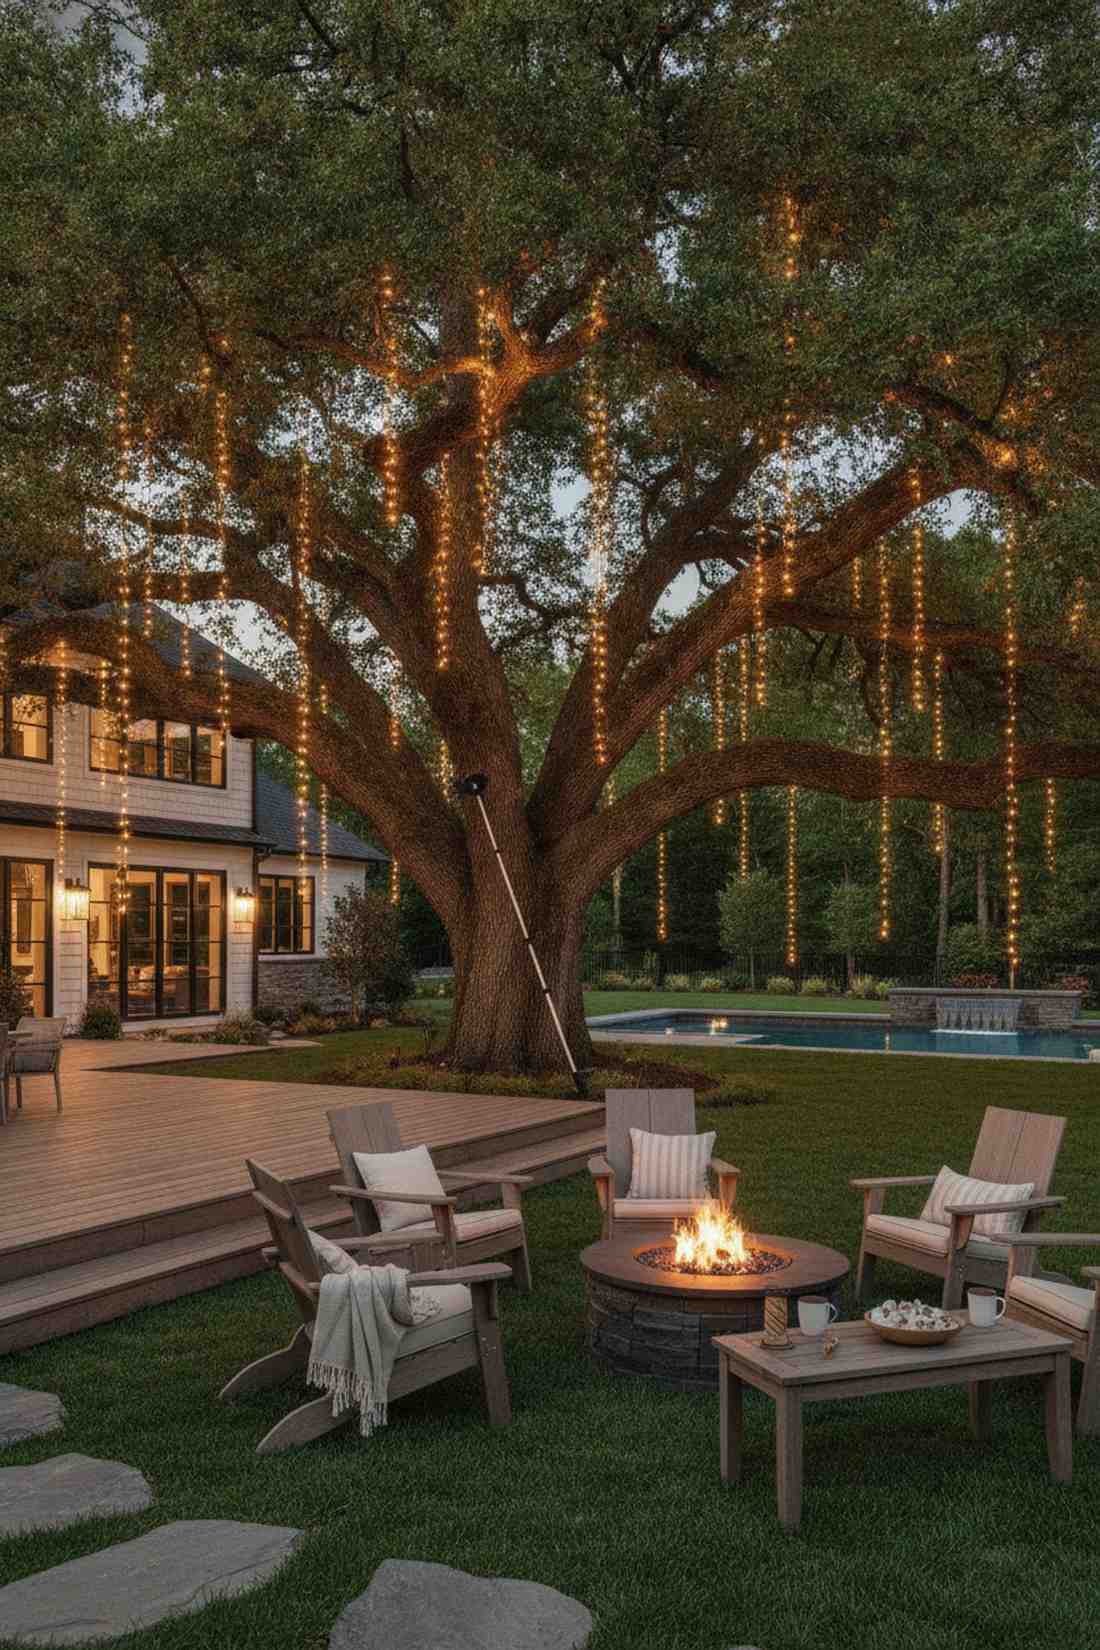
Feels like the Tree of Souls right in your backyard. Throwing fairy lights pictures-worthy drapes over heavy oak branches diffuses the light through the leaves. Best utilized on massive, mature shade trees.
Using an extendable painter’s pole with a hook attachment prevents you from risking your life on a 20-foot ladder. It instantly gives a designer-level finish while saving you from a hospital bill.
Drape a huge canopy for $60–$100. Pin this to your massive backyard transformation board!
- Key Materials: Heavy-duty outdoor stringers
- Vibe / Style: Avatar-style ancient tree
- Difficulty: High-reach pole work
- Budget Breakdown: Lights: $60 | Pole: $25
- Creator’s Tip: Distribute the strands loosely—tight wires will snap when the branches sway in the wind.
- Smart Sourcing: extendable telescopic hanging poles and commercial-grade warm LED strings.
29. Trunk Spiral Ascent
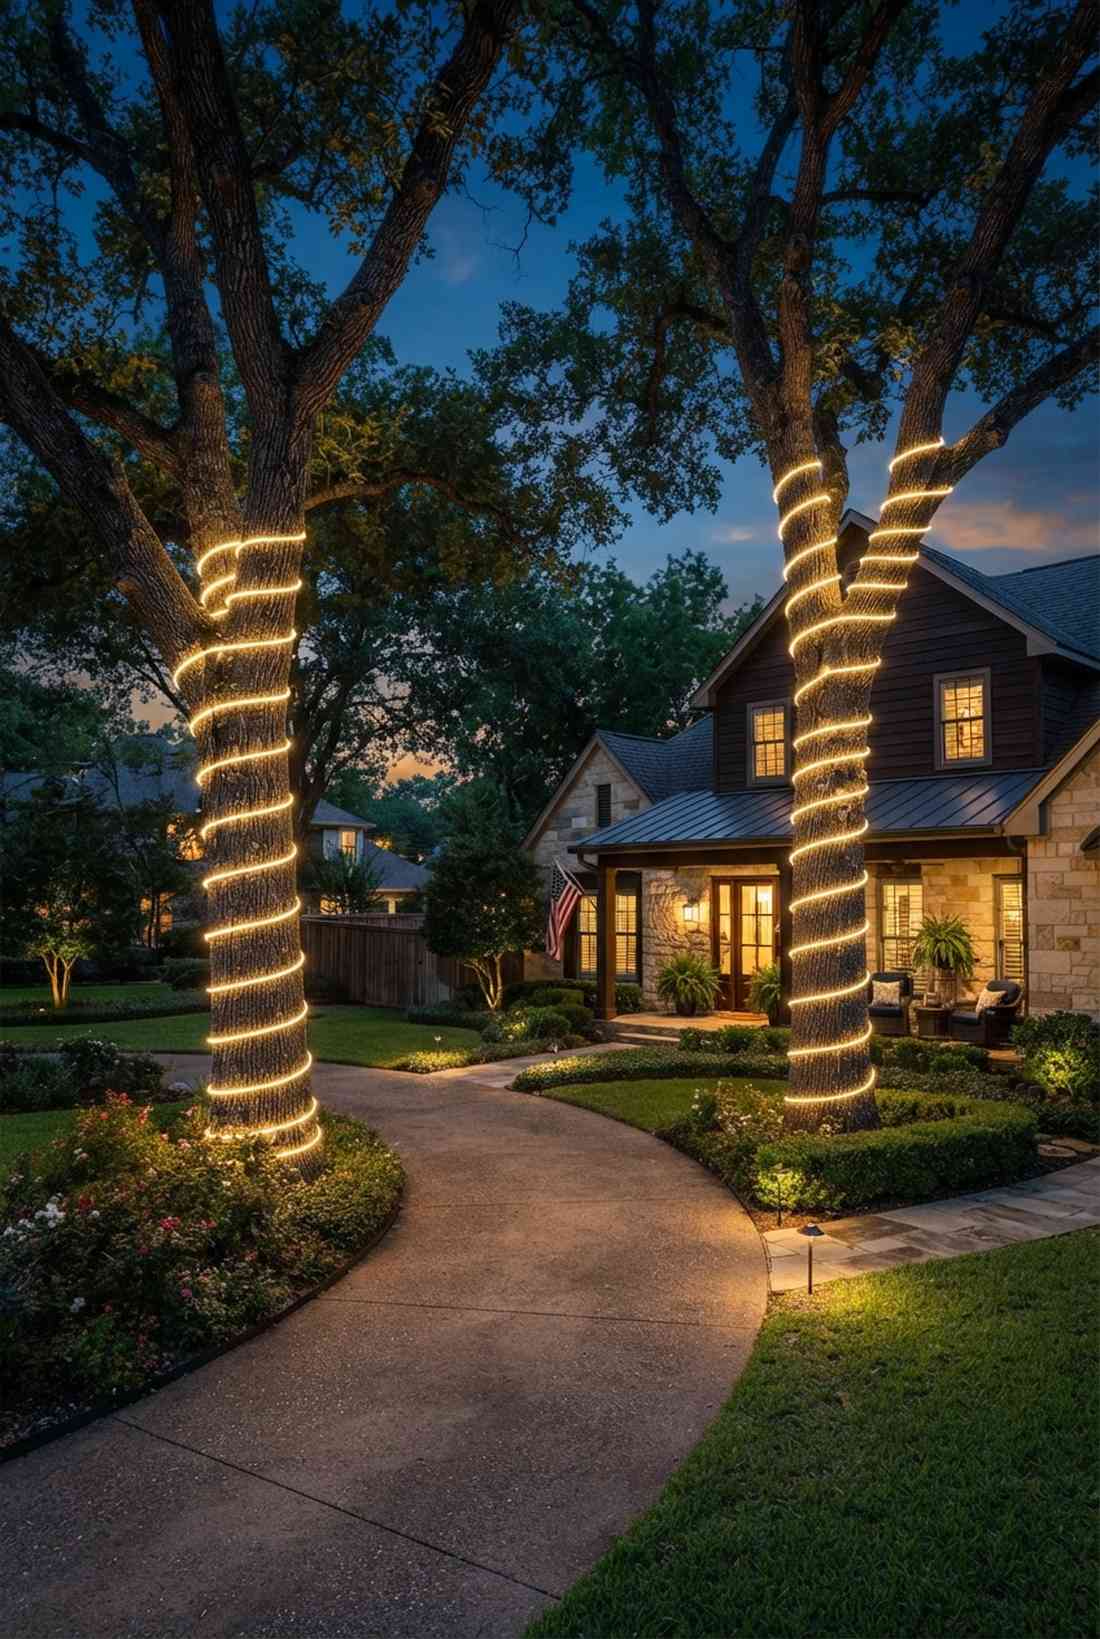
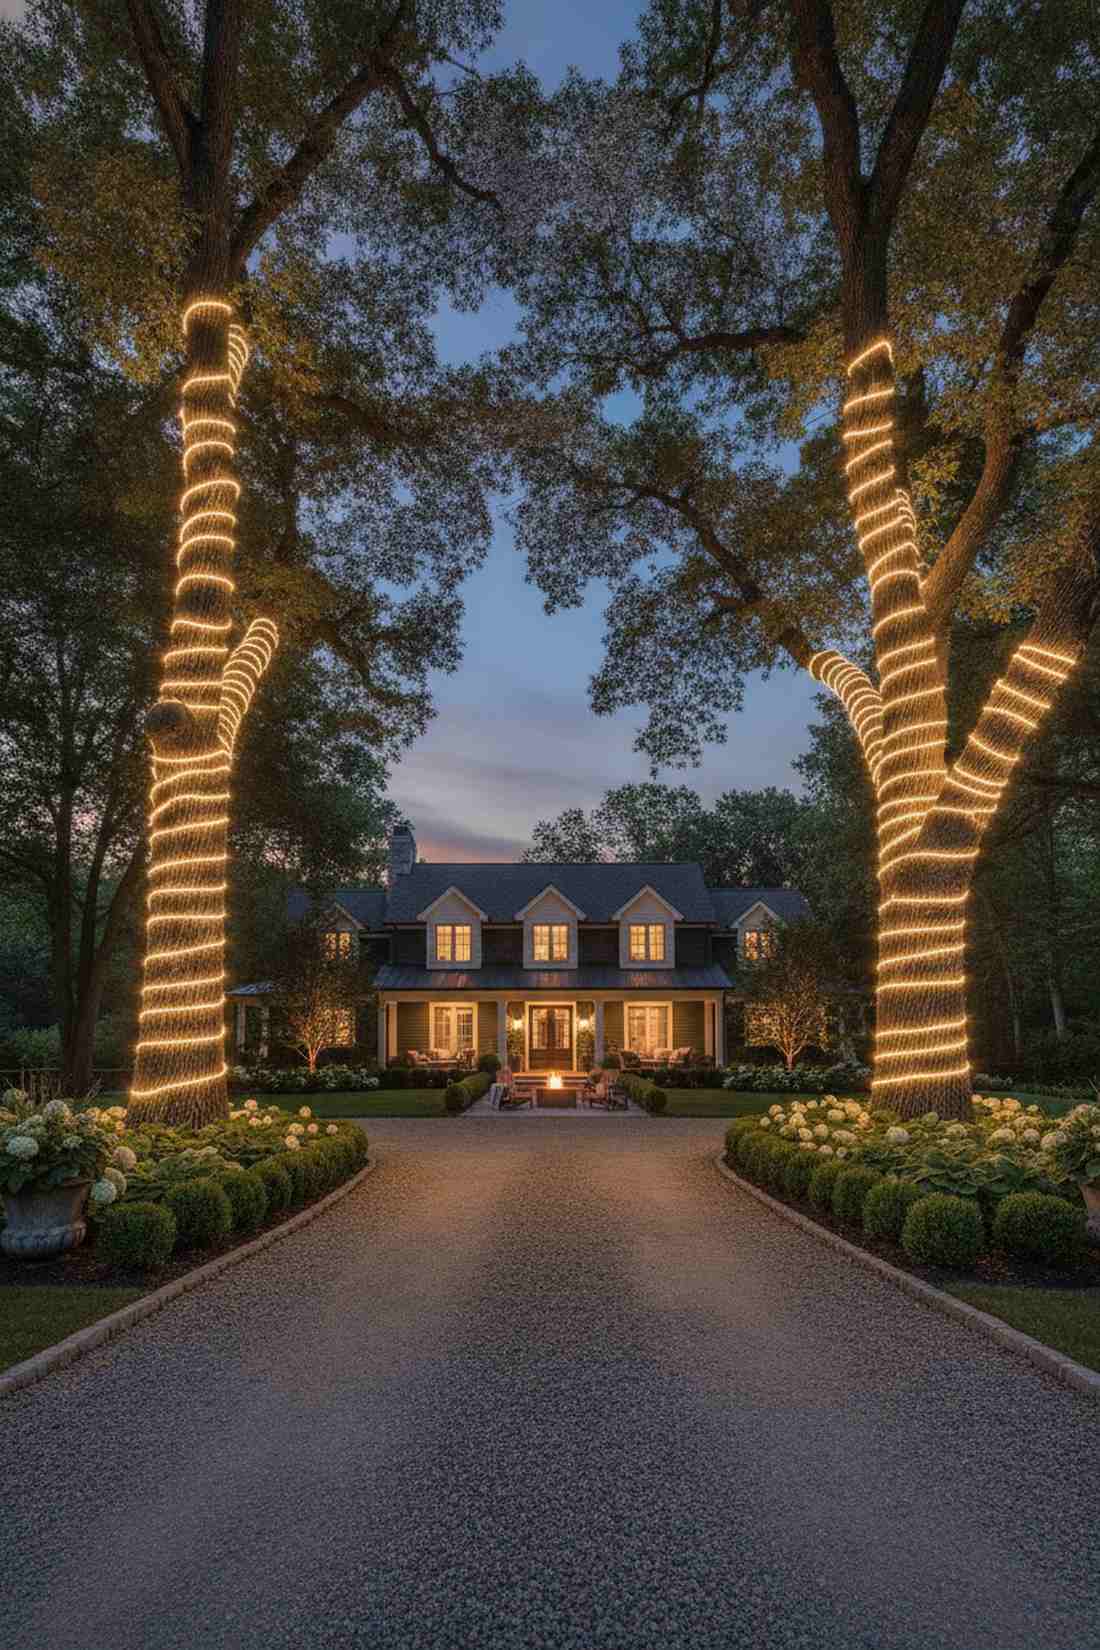
Turns massive boring tree trunks into glowing structural pillars. Ascending trunk wraps emphasize rough bark texture and sheer tree size. Incredible for framing the entrance of a driveway.
Most people choke their trees to death; using flexible bungee standoffs allows the tree to grow without snapping the wires. This arbor-safe method looks far more expensive than it is and saves your old-growth trees.
Wrap a massive trunk safely for $30–$60.
- Key Materials: Flexible rope lights, tree-safe ties
- Vibe / Style: Majestic glowing pillars
- Difficulty: Repetitive trunk circling
- Budget Breakdown: Ropes: $45 | Bungee ties: $10
- Creator’s Tip: Stop wrapping at the first major fork in the branches to keep the look clean and intentional.
- Smart Sourcing: tree-safe expandable light straps and extra-thick outdoor rope lighting.
Warning: Once you try this interior foliage trick, you’ll want to backlight your entire garden…
30. Shrub Interior Glow
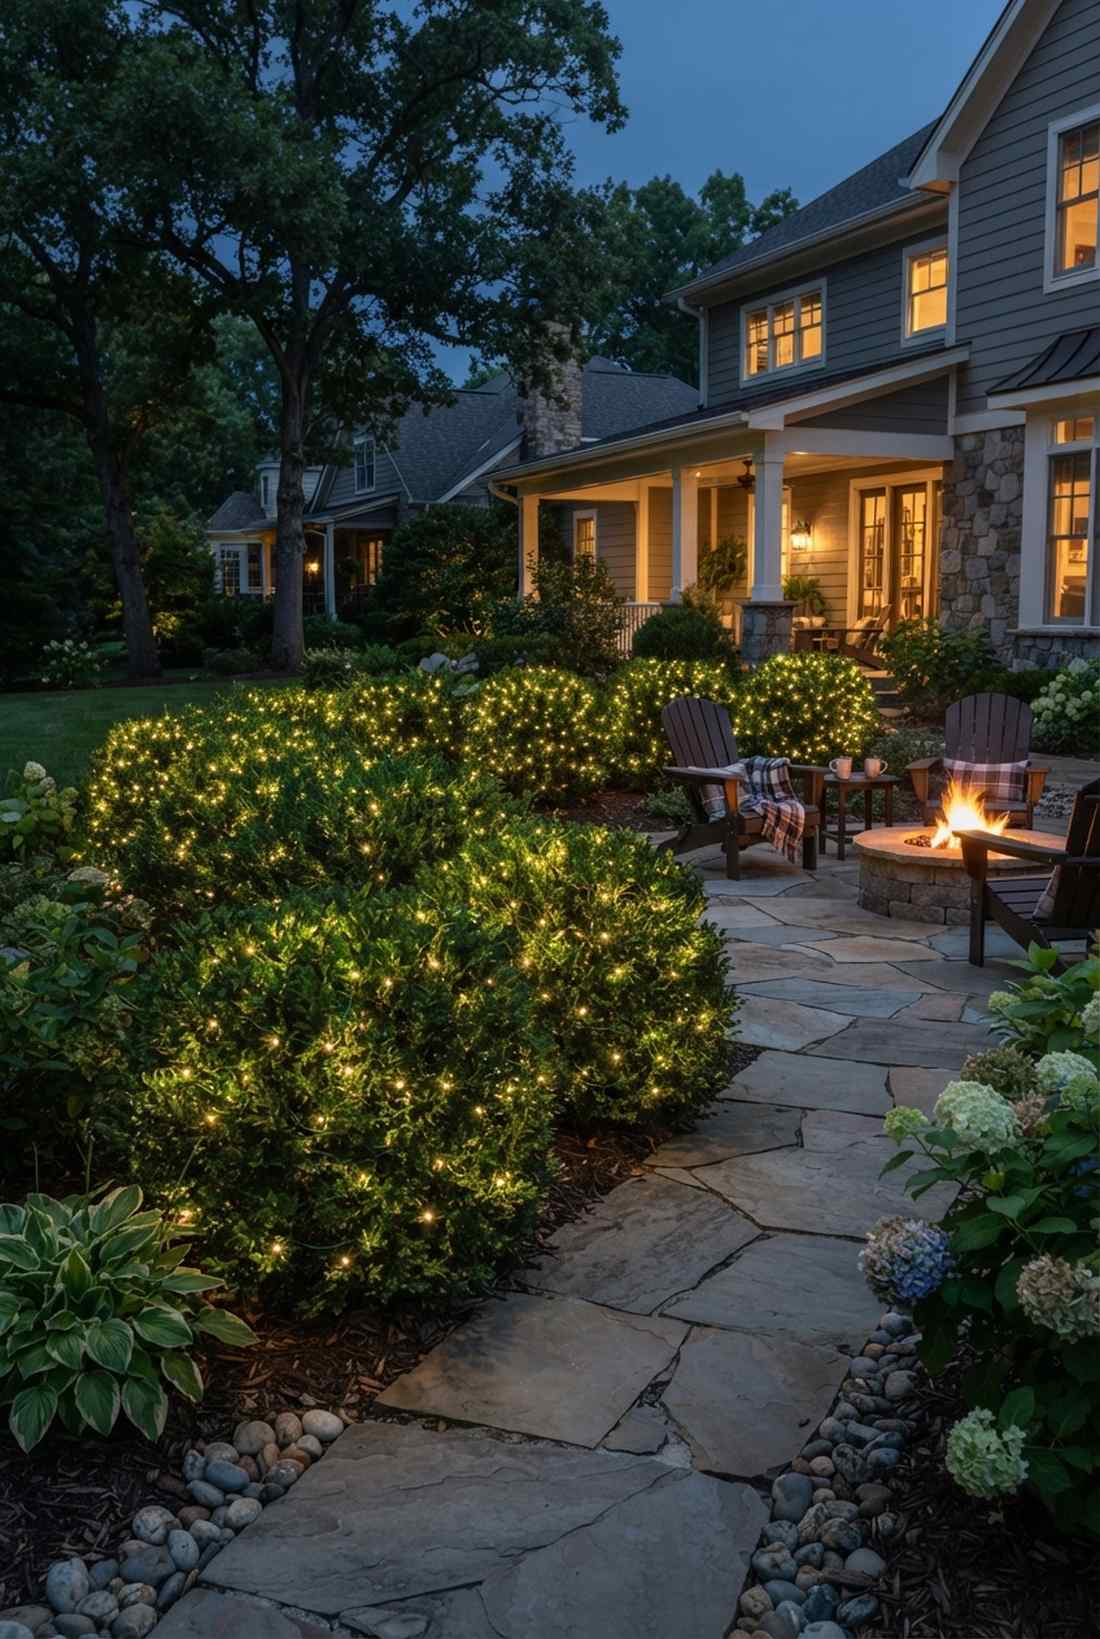
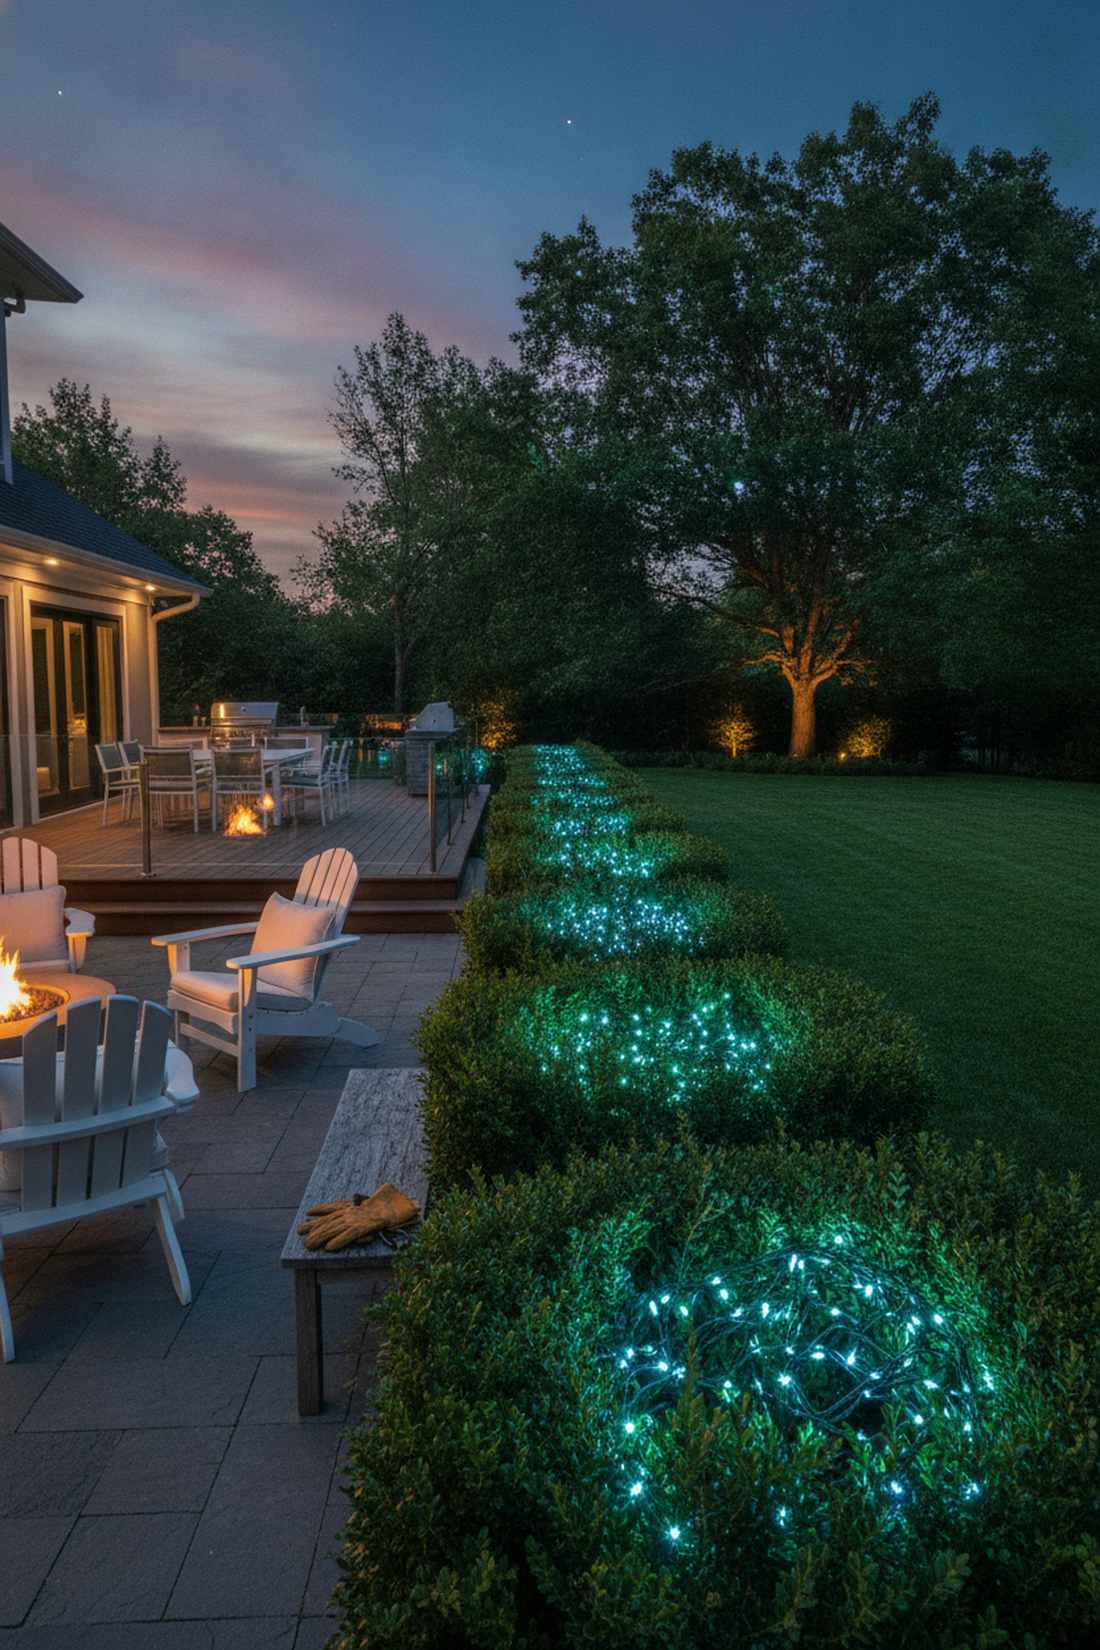
Creates a mysterious, radioactive glow from deep within the bushes. Stuffing a fairy lights string deep inside dense evergreens produces an otherworldly effect. Perfect for boxwoods and yew shrubs.
Shoving the lights strictly into the interior rather than laying them on top completely hides the ugly wires during the day. It delivers a surprisingly premium look that makes the bush itself look like it’s emitting light.
Light up a row of shrubs for $40–$75. Save this sneaky landscaping hack!
- Key Materials: Green-wire solar or plug-in LEDs
- Vibe / Style: Mysterious deep-woods glow
- Difficulty: Scratchy arm work
- Budget Breakdown: Lights: $40 | Gloves: $10
- Creator’s Tip: Do this in late fall before the branches harden for winter, making it easier to reach the center.
- Smart Sourcing: green-wire outdoor fairy strands and heavy-duty pruning gloves.
31. Climbing Vine Integration
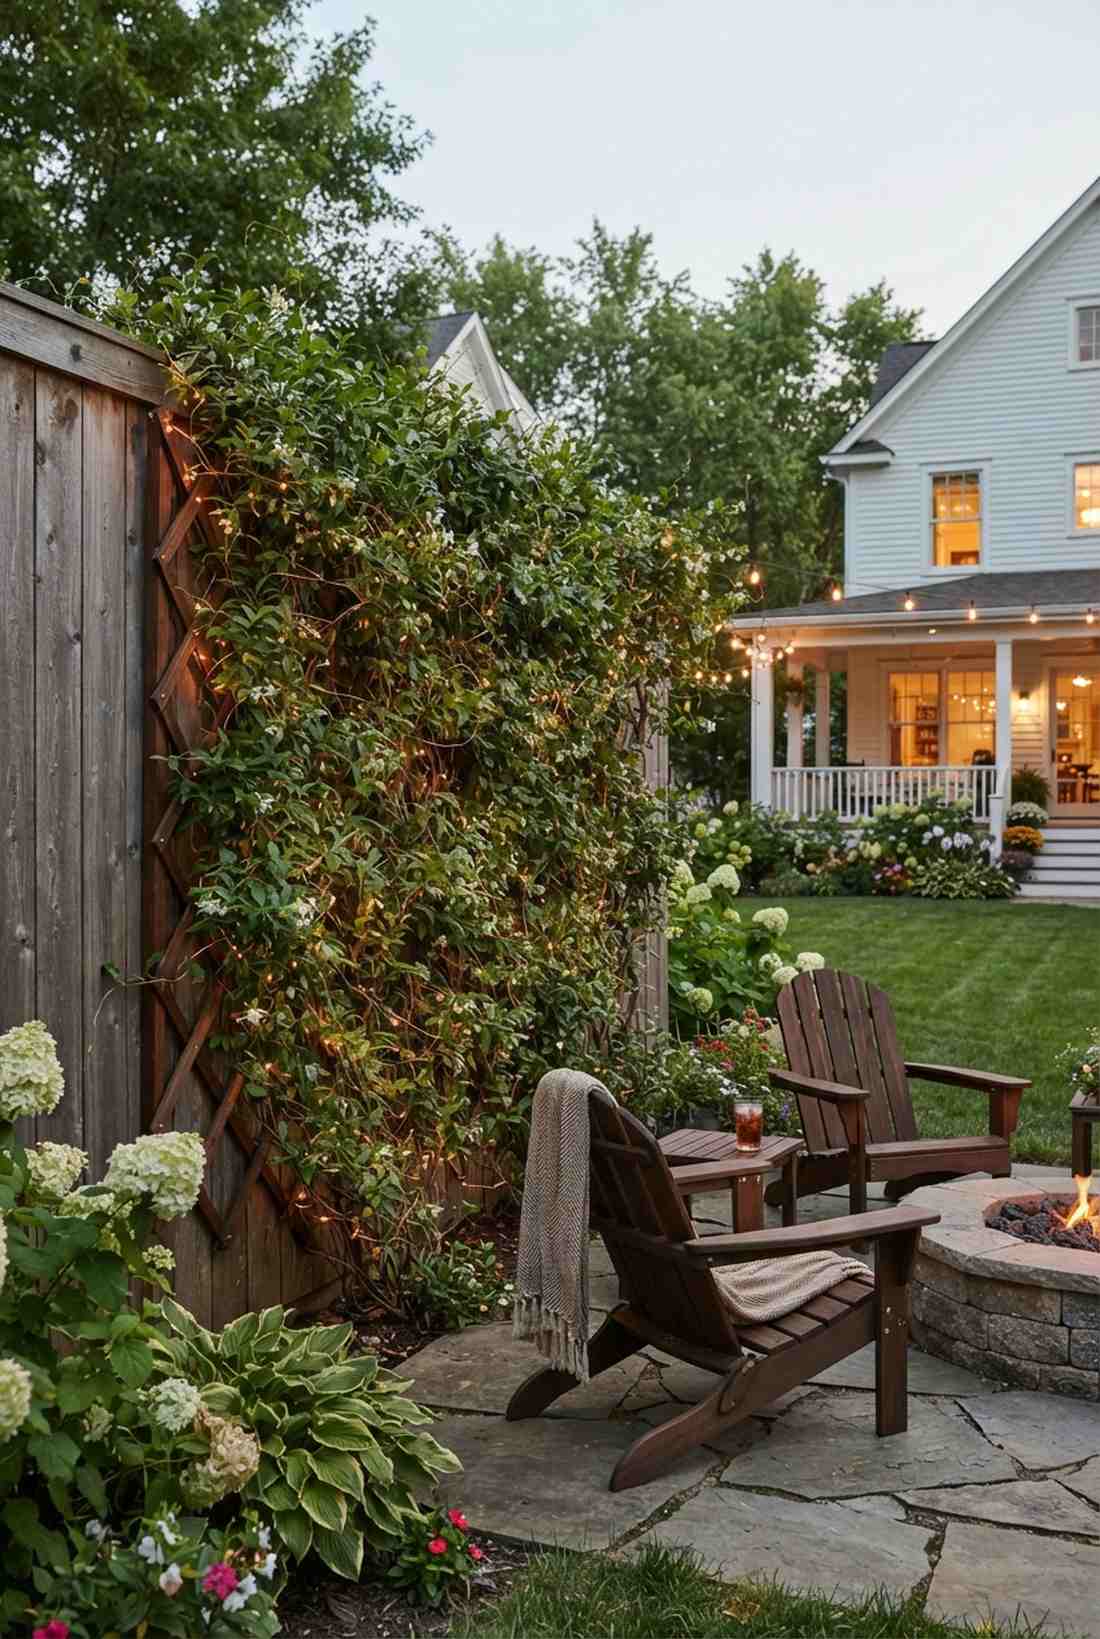

Looks like glowing veins naturally grew into your trellis. Interwoven vine lighting lets climbing plants naturally absorb the wire over a few seasons. Beautiful for jasmine, ivy, or clematis walls.
Installing the waterproof outdoor fairy lights kit *before* the vine grows completely hides the hardware in the mature foliage. This long-game strategy instantly gives a designer-level finish that cannot be faked later.
Setup the skeleton for around $30–$50.
- Key Materials: Copper wire lights, trellis
- Vibe / Style: Organic glowing ivy
- Difficulty: Requires immense patience
- Budget Breakdown: Lights: $25 | Trellis: $30
- Creator’s Tip: Use copper wire instead of plastic-coated green wire; the copper looks like natural twigs as the plant grows.
- Smart Sourcing: bare copper outdoor micro-LEDs and expandable wooden garden trellis.
32. Topiary Form Outlining
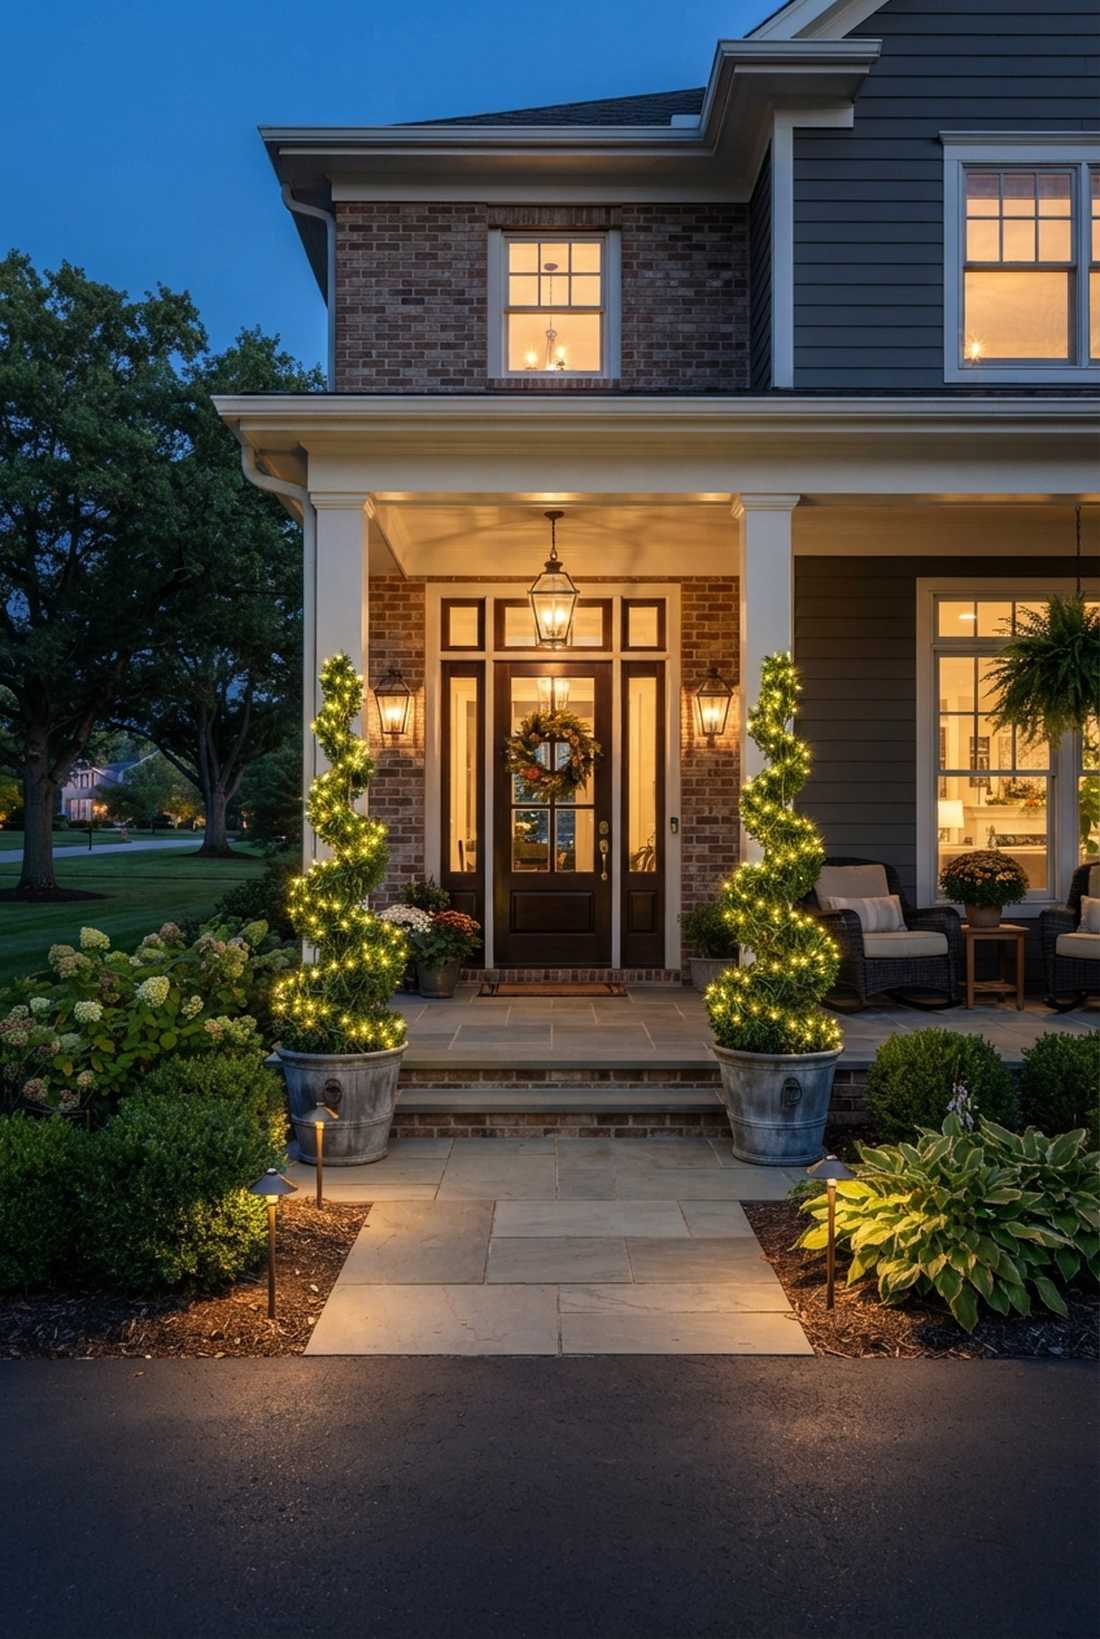
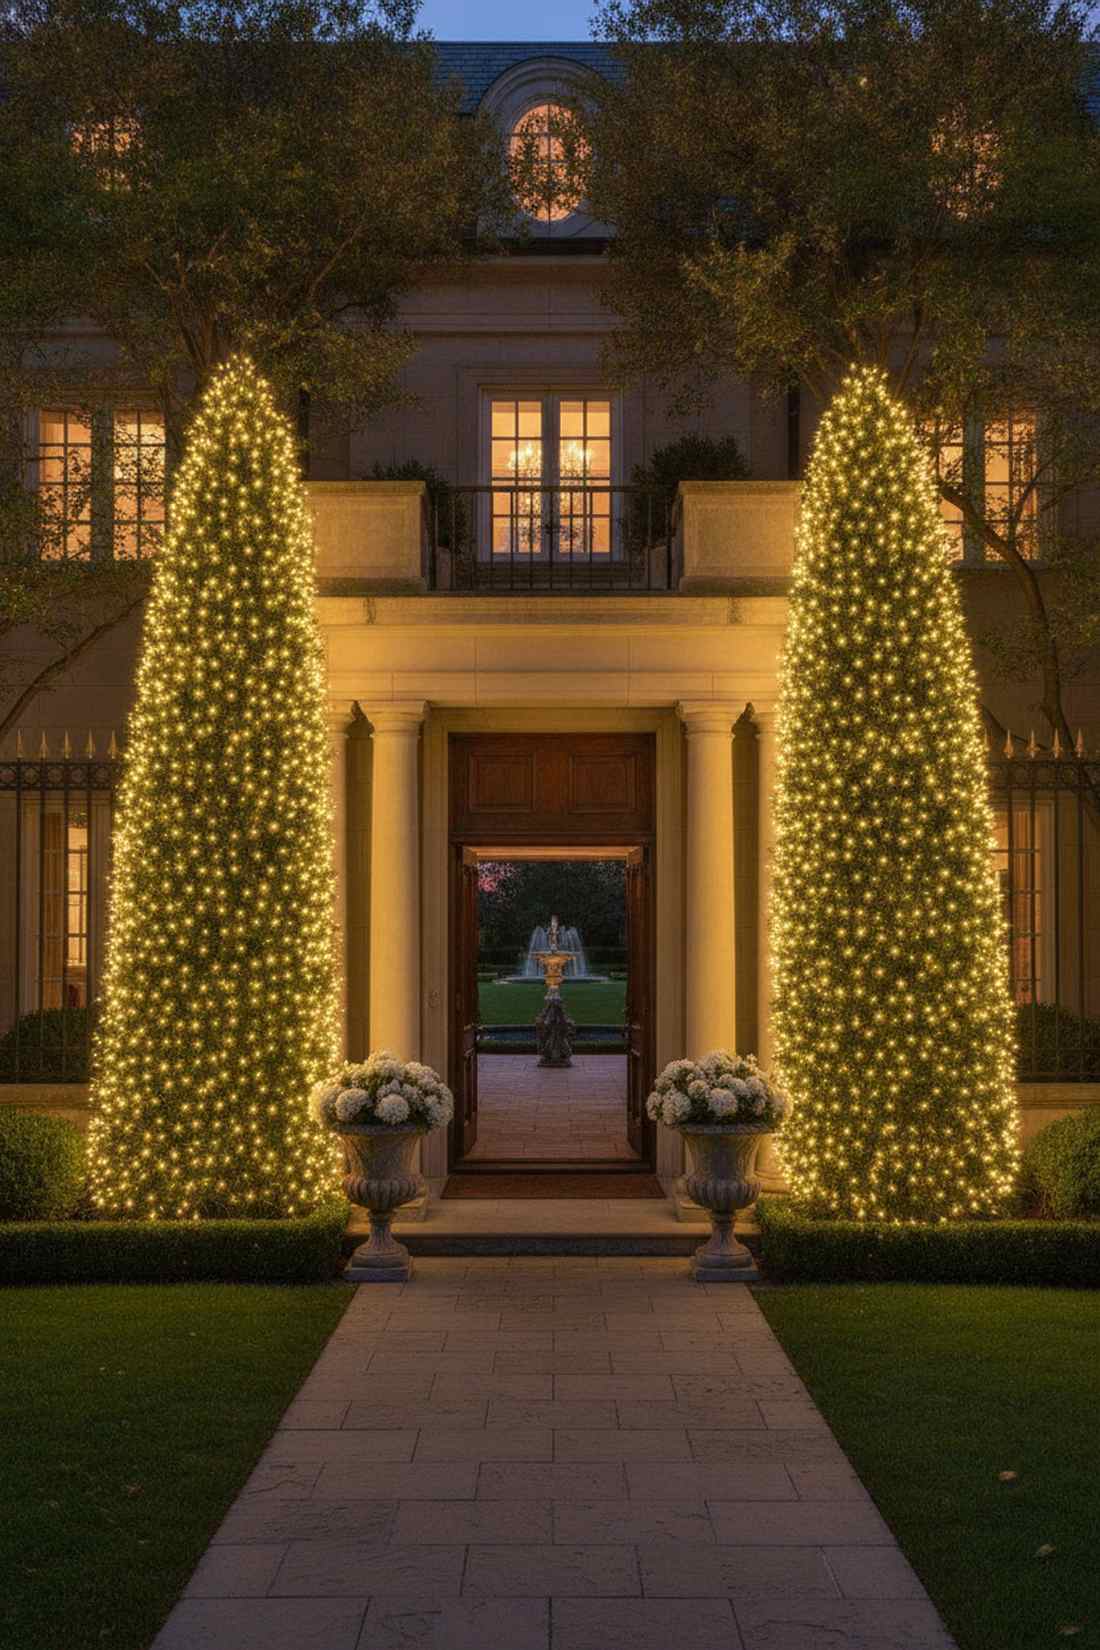
Feels like an illuminated sculpture straight from a royal palace. Geometric topiary highlighting traces perfectly manicured bushes with sharp precision. Excellent for front-door spiral or cone evergreens.
Pinning the lights down with floral wire rather than letting them sag keeps the geometry razor-sharp. This strict outlining looks far more expensive than it is and commands crazy curb appeal.
Outline two front door topiary trees for $25–$40. Pin this to your luxury entrance board!
- Key Materials: High-density micro LEDs
- Vibe / Style: Royal estate entrance
- Difficulty: Requires meticulous pinning
- Budget Breakdown: Lights: $20 | Pins: $8
- Creator’s Tip: Always trim the bush perfectly *before* you apply the lights, otherwise, you’ll cut your own wires later.
- Smart Sourcing: high-density fairy light clusters and green floral u-pins (bulk pack).
33. Ornamental Grass Uplighting
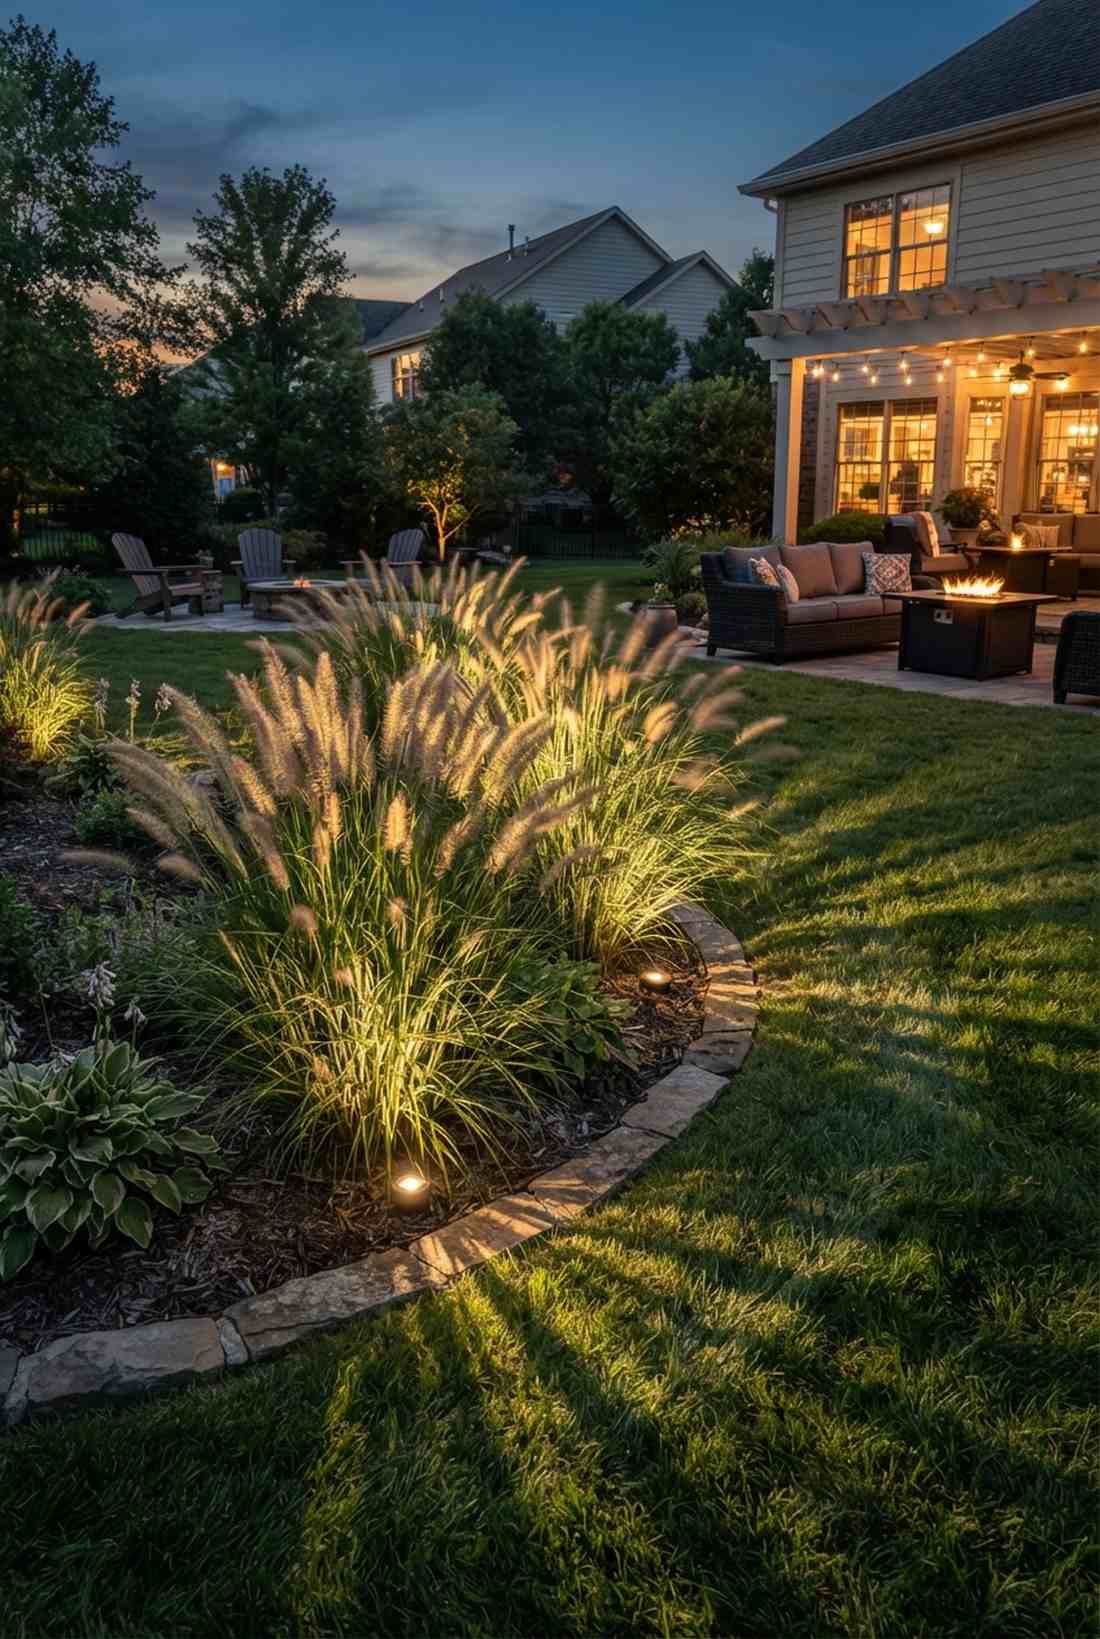
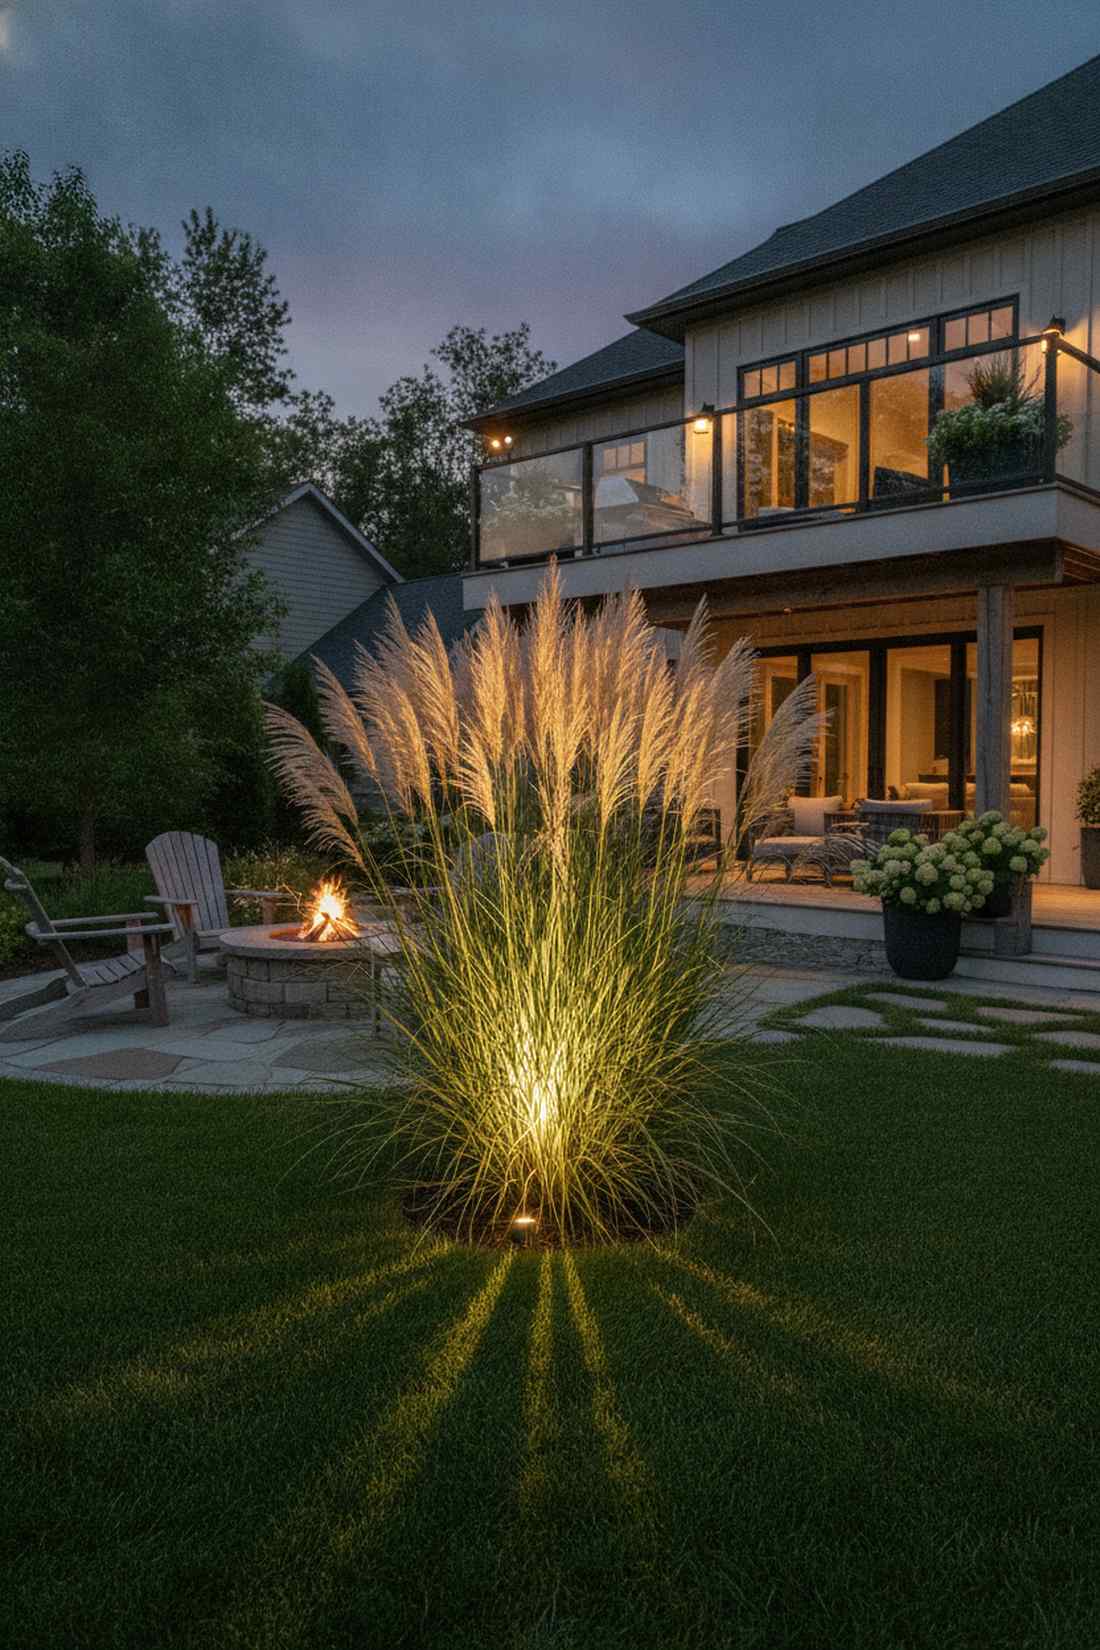
Casts wildly dancing shadows across your lawn every time the wind blows. Base-level grass illumination shoots light straight up through tall grass blades. Flawless for fountain grasses or tall pampas.
Ditching standard floodlights for hidden waterproof fairy rings inside the grass clump creates a much softer, ambient texture. It delivers a surprisingly premium look that makes the grass glow from the root.
Uplight your ornamental grasses for just $15 a clump.
- Key Materials: Waterproof LED pucks or rings
- Vibe / Style: Dynamic dancing shadows
- Difficulty: Instant drop-in
- Budget Breakdown: Puck lights: $15 | Batteries: $5
- Creator’s Tip: Keep the lights fully covered by the lowest blades so the light source remains completely invisible.
- Smart Sourcing: submersible outdoor LED puck lights (4-pack) and lithium outdoor batteries.
34. Hedge Top Linear Runs
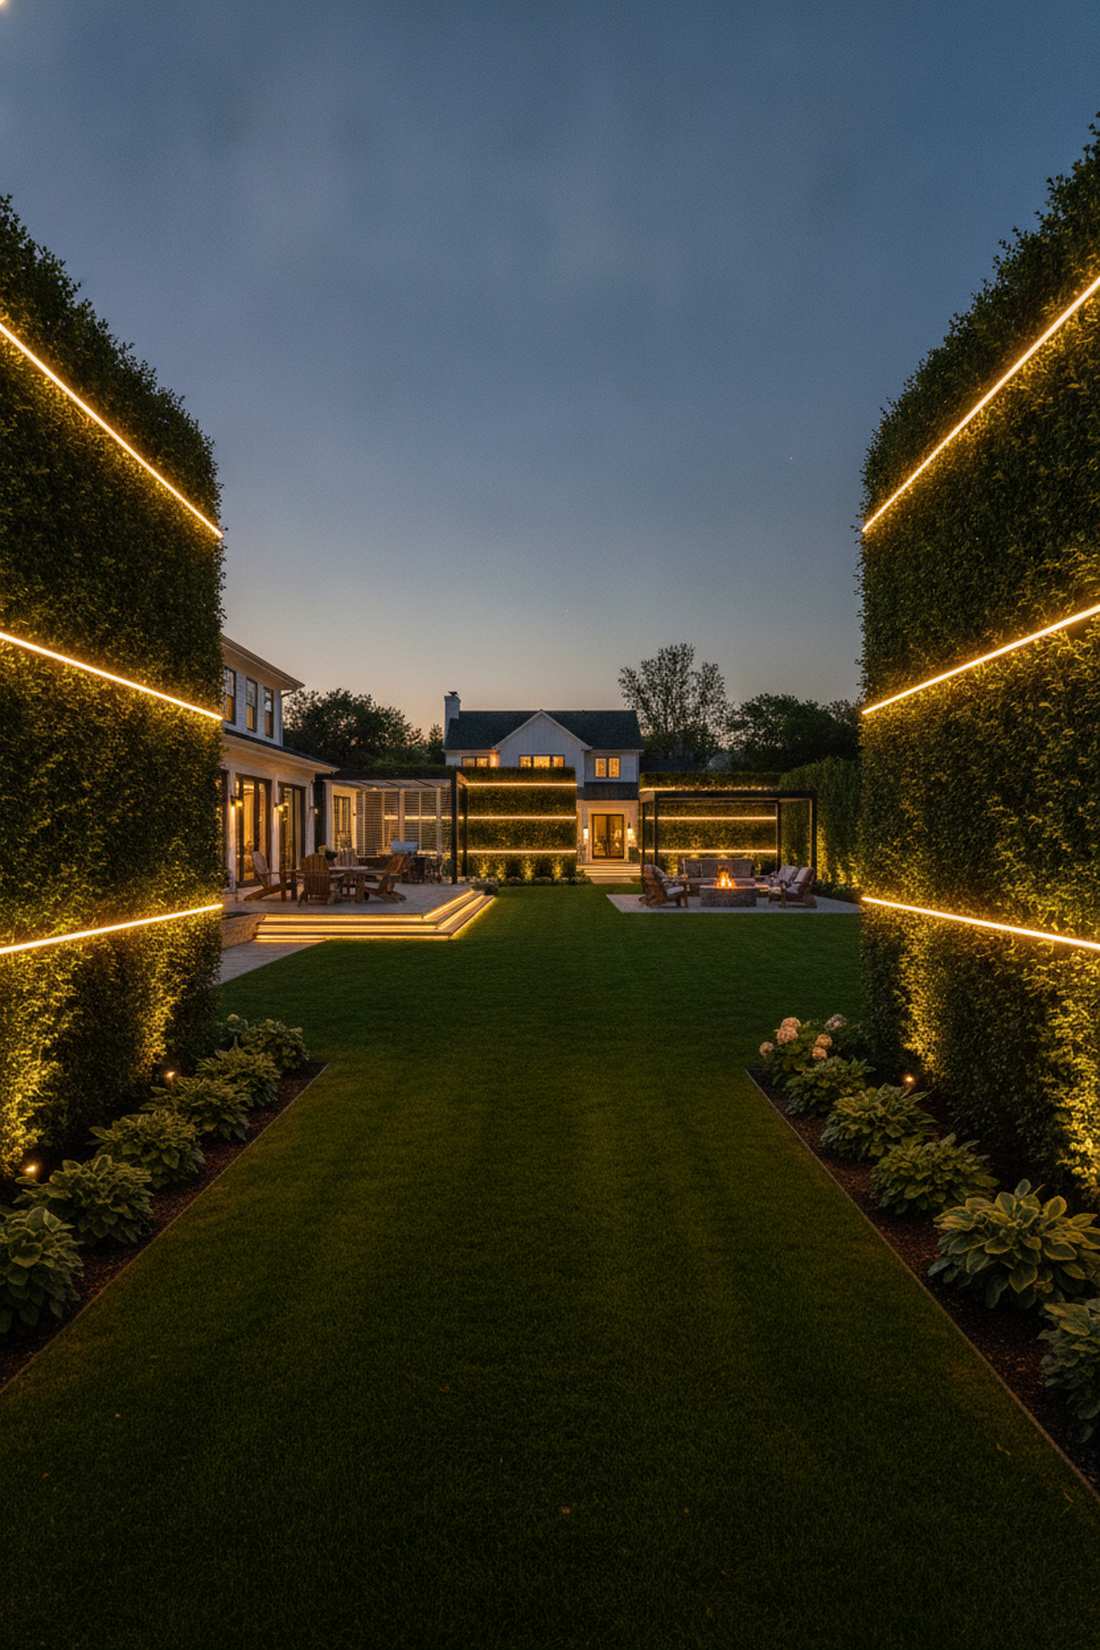
Acts like a glowing crown molding for your garden walls. Linear top-hedge lighting defines strict property boundaries in pitch-black yards. Perfect for formal, flat-topped privacy hedges.
Tensioning the line tight across invisible stakes driven into the hedge completely stops the wire from dropping into the leaves. This trick instantly gives a designer-level finish usually reserved for high-end country clubs.
Crown your hedges for roughly $40–$60. Save this for a sharp, modern yard aesthetic!
- Key Materials: Rigid flat LED ropes
- Vibe / Style: Country club formal
- Difficulty: Requires ladder and leveling
- Budget Breakdown: Ropes: $50 | Hedge stakes: $15
- Creator’s Tip: Only attempt this if your hedge is cut perfectly level; wavy hedges will make the lights look sloppy.
- Smart Sourcing: flat silicone LED outdoor ropes and long wooden landscape stakes.
35. Branch Silhouette Highlighting
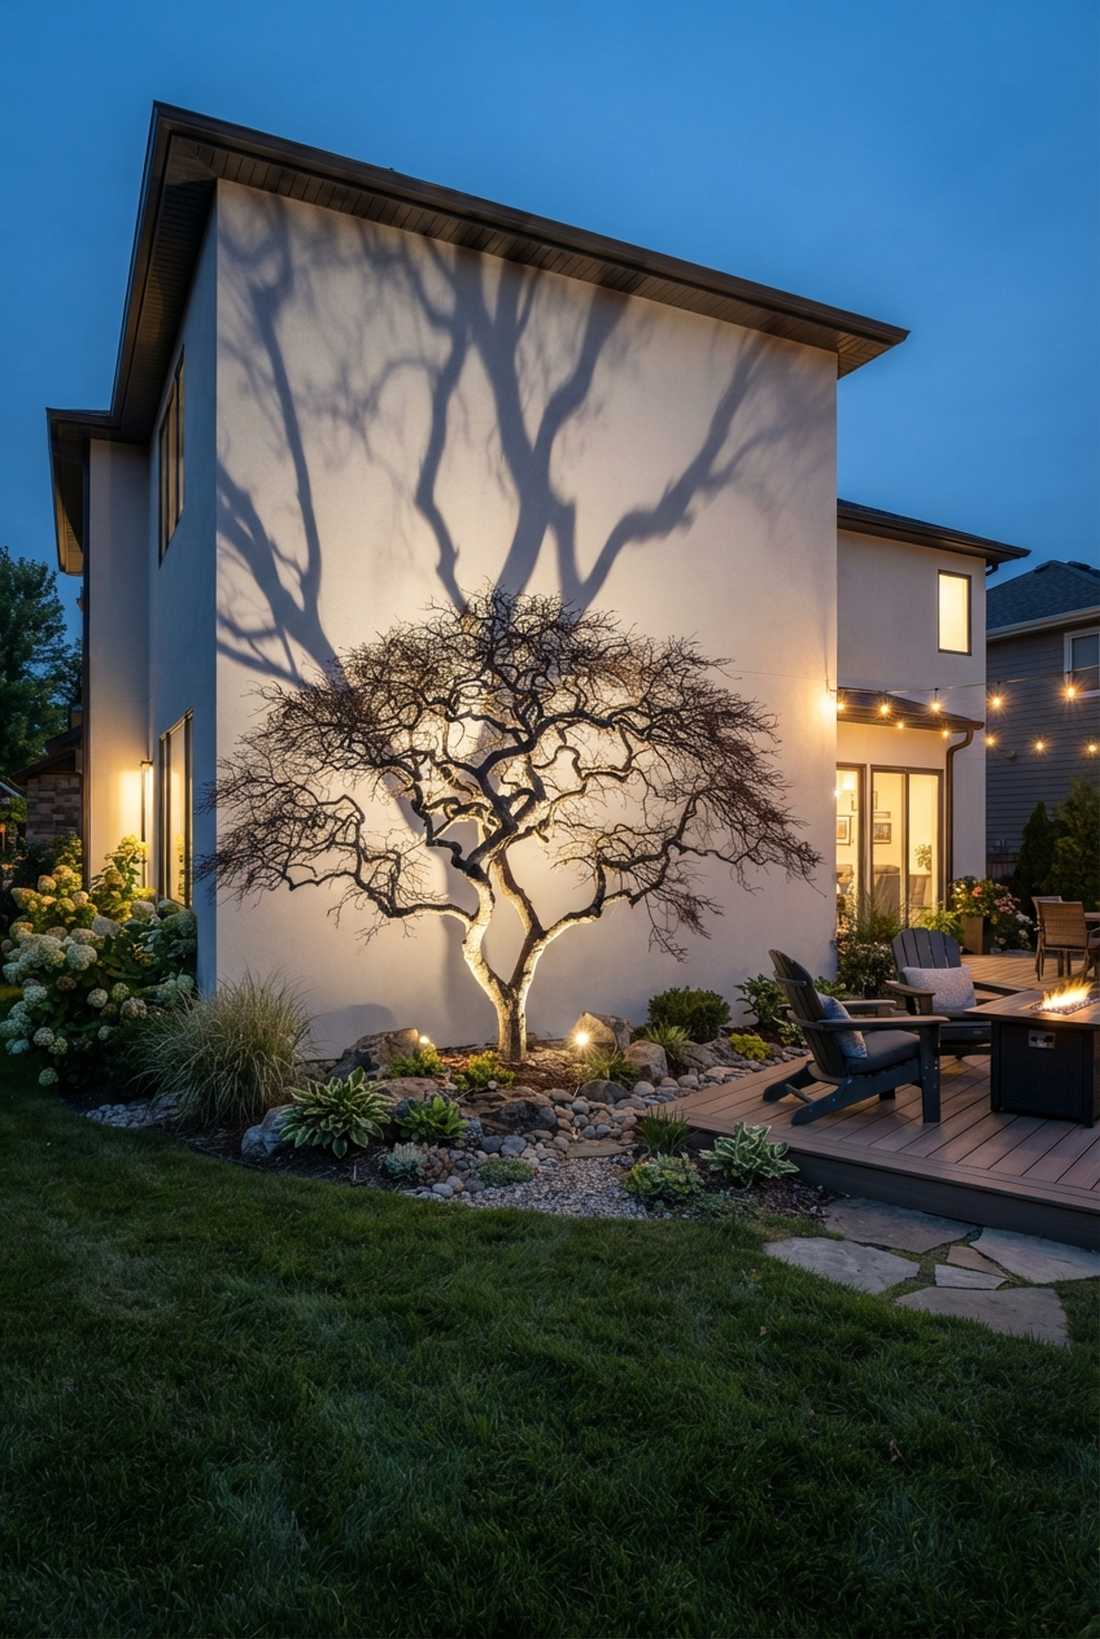
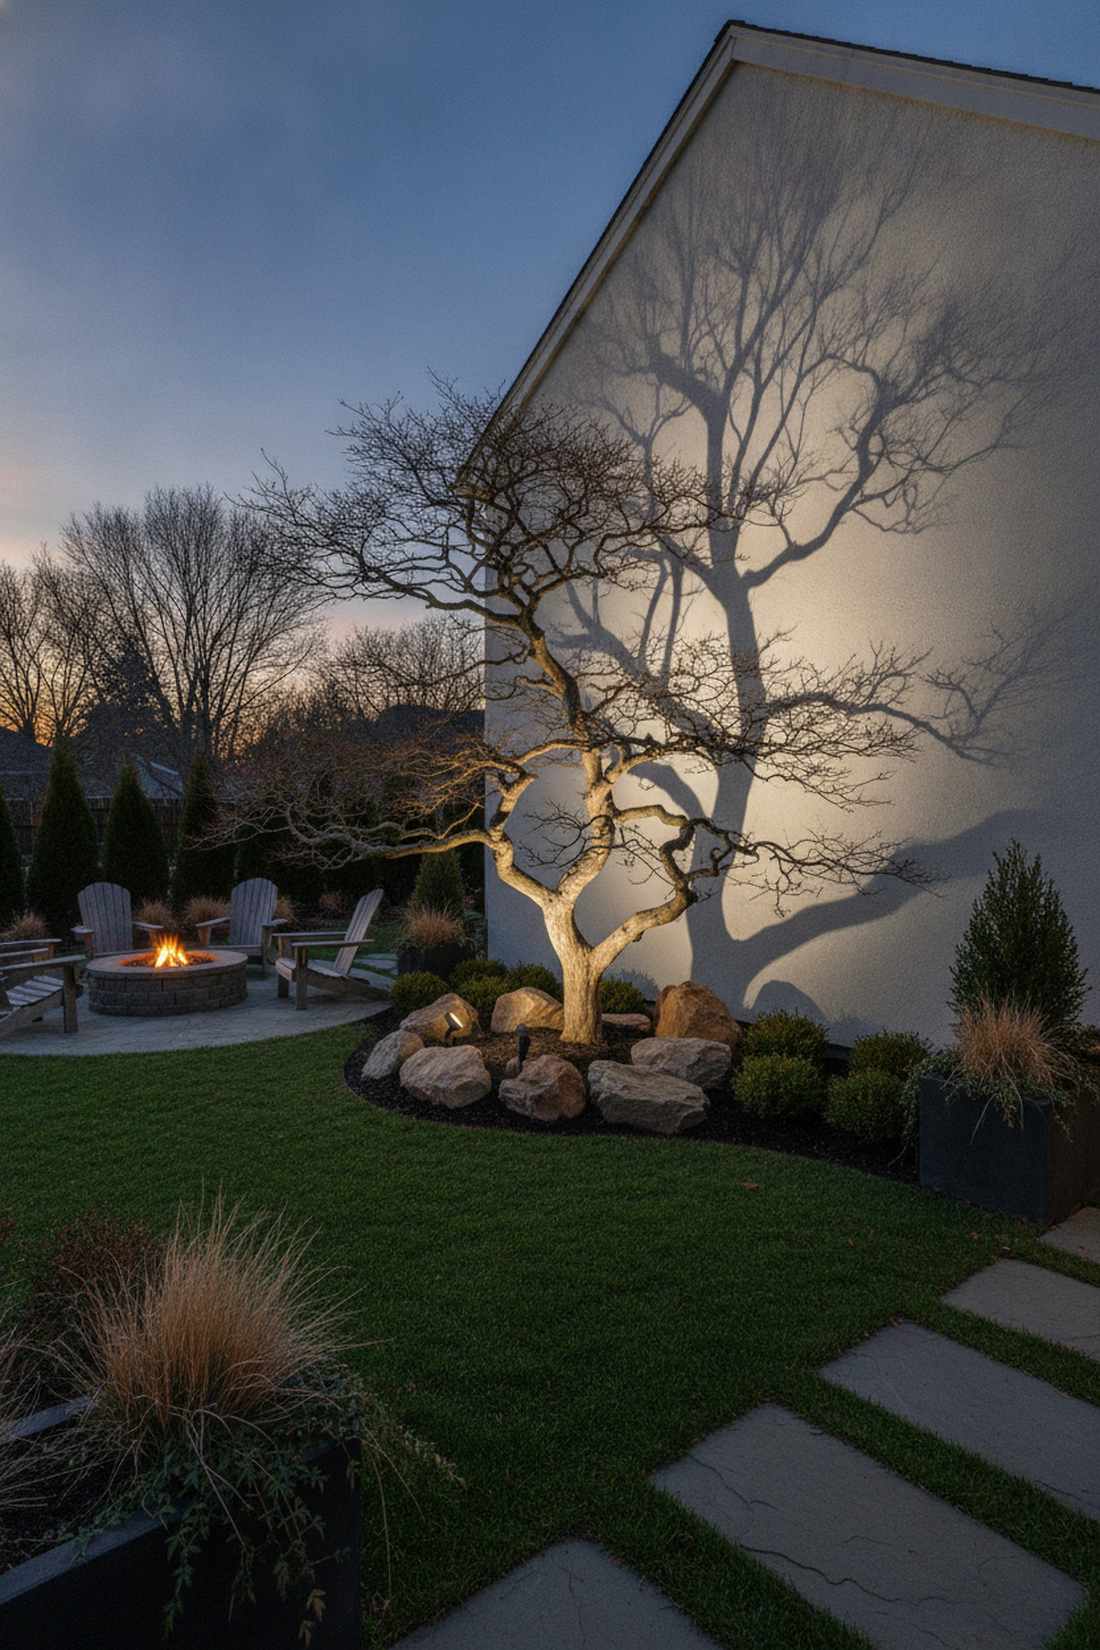
Turns a dead, twisted tree into a dramatic piece of modern art. Backlit branch fairy lights decor throws harsh, beautiful shadows against a blank wall. Incredible for Japanese maples in the winter.
Placing the lights *behind* the tree rather than wrapping it forces a massive, creepy silhouette against your house. Utilizing miniature garden supplies around the base hides the light source perfectly.
Create a giant shadow puppet for $25–$45.
- Key Materials: High-output LED mini-floods or tight fairy clusters
- Vibe / Style: Dramatic architectural shadow
- Difficulty: Easy placement, hard angling
- Budget Breakdown: Backlights: $30 | Concealing rocks: $15
- Creator’s Tip: The closer you move the lights to the trunk, the larger the shadow will appear on the wall behind it.
- Smart Sourcing: high-lumen outdoor LED mini-spotlights and faux landscape concealing rocks.
Material Guide: Cheap vs. Premium Aesthetic
Knowing exactly where to save and where to spend makes all the difference in achieving that “looks expensive but isn’t” vibe.
- Standard vs. UV-Resistant/Premium: Standard indoor wires turn yellow, brittle, and snap in the sun after one month. UV-coated commercial strings last over 5 years.
- Pre-made Kits vs. Sourcing Locally: Scavenging hardware stores piece-by-piece costs triple. Starter kits pack the exact tension wires, hooks, and dimmers you need for half the price.
Water Feature Illumination
36. Pond Perimeter Ring
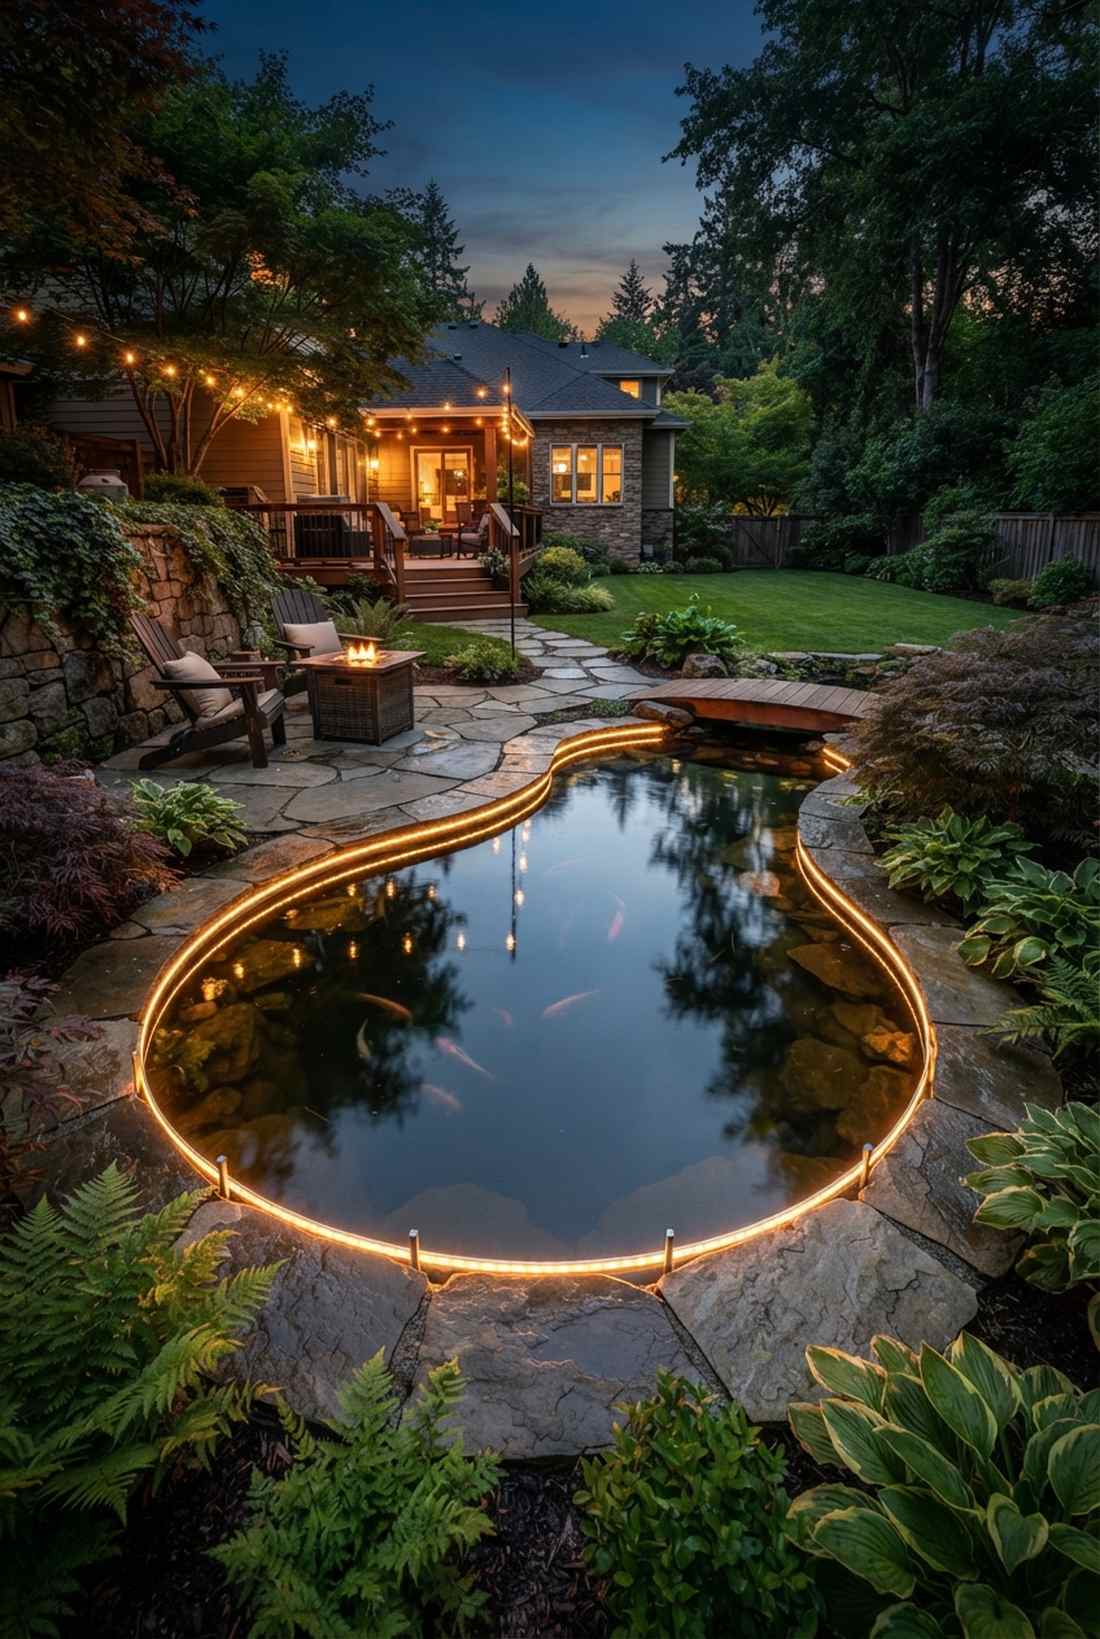
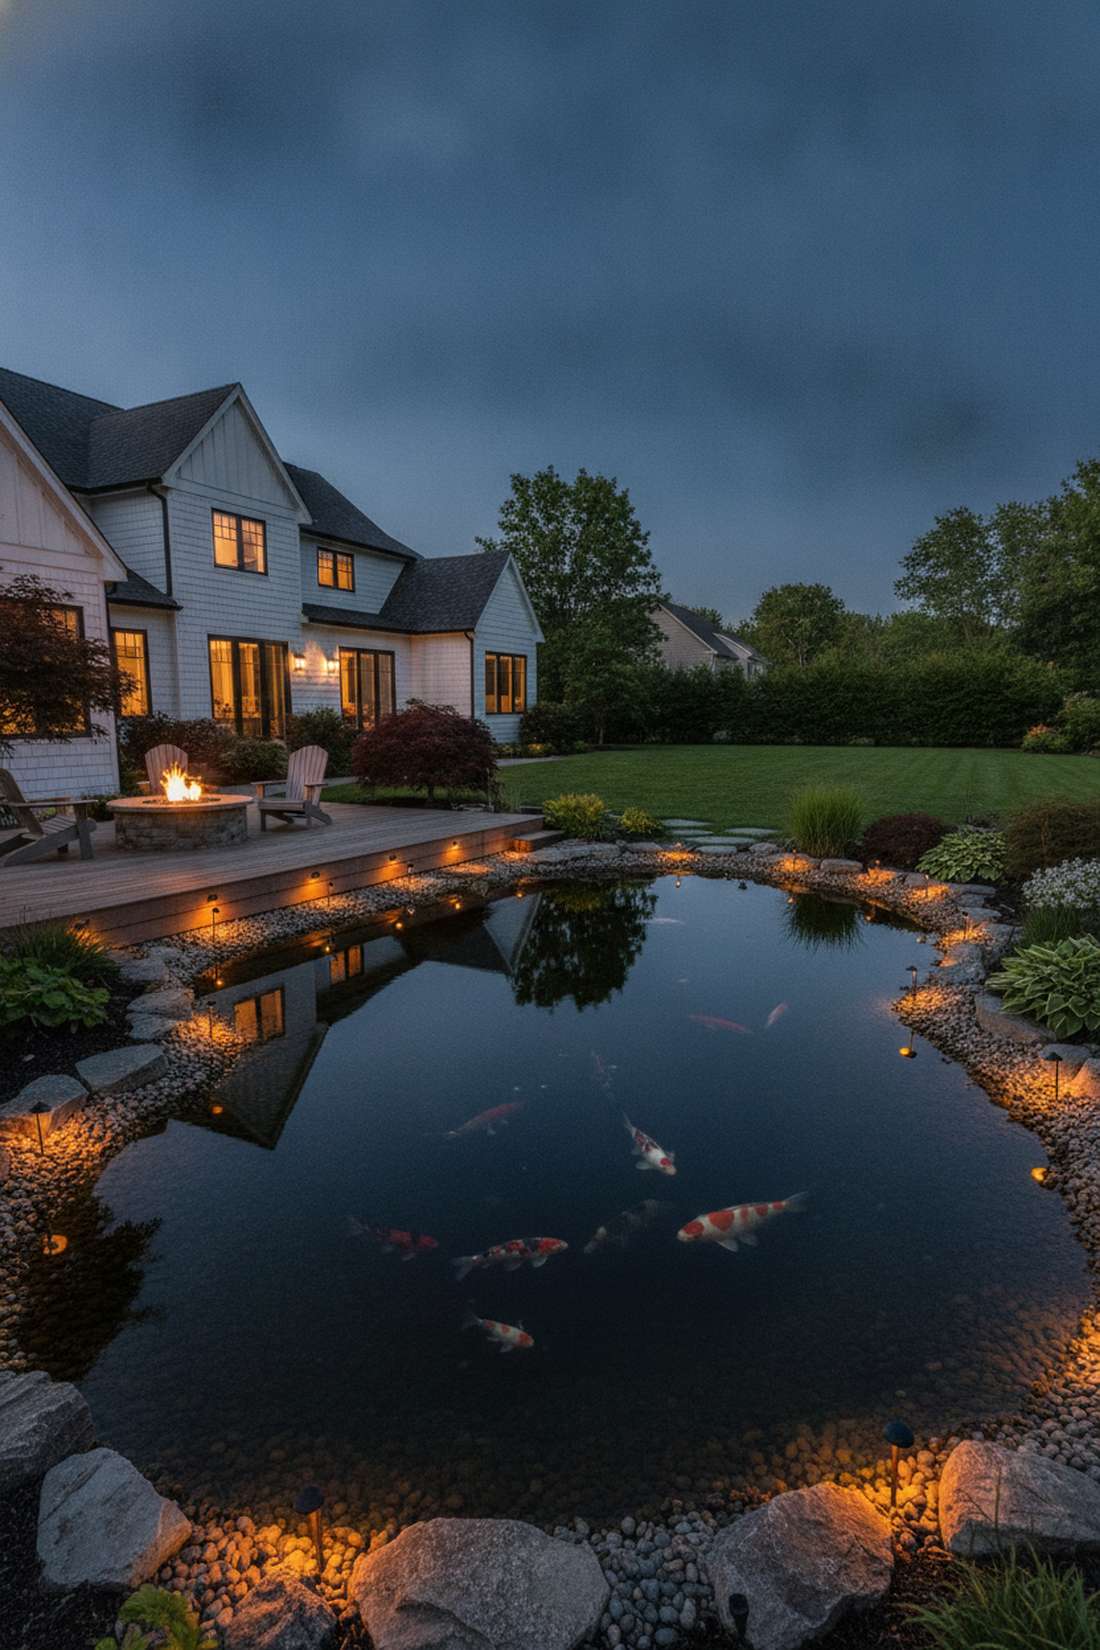
Feels like a glowing portal to the underworld reflecting in the water. Illuminated water edges double their impact by creating a perfect mirror reflection. Essential for backyard koi ponds or reflection pools.
Staking the wire exactly 6 inches back from the waterline prevents a massive short-circuit during heavy rain. This safety measure looks far more expensive than it is while keeping your fish alive.
Ring a standard pond for $35–$60. Pin this to your water garden inspiration board!
- Key Materials: IP68 fully waterproof LEDs
- Vibe / Style: Mystical mirror pond
- Difficulty: Careful measuring required
- Budget Breakdown: IP68 lights: $40 | Stakes: $10
- Creator’s Tip: Use warm amber tones instead of bright white to complement the water and avoid scaring the fish.
- Smart Sourcing: IP68 fully submersible LED stringers and rust-proof galvanized stakes.
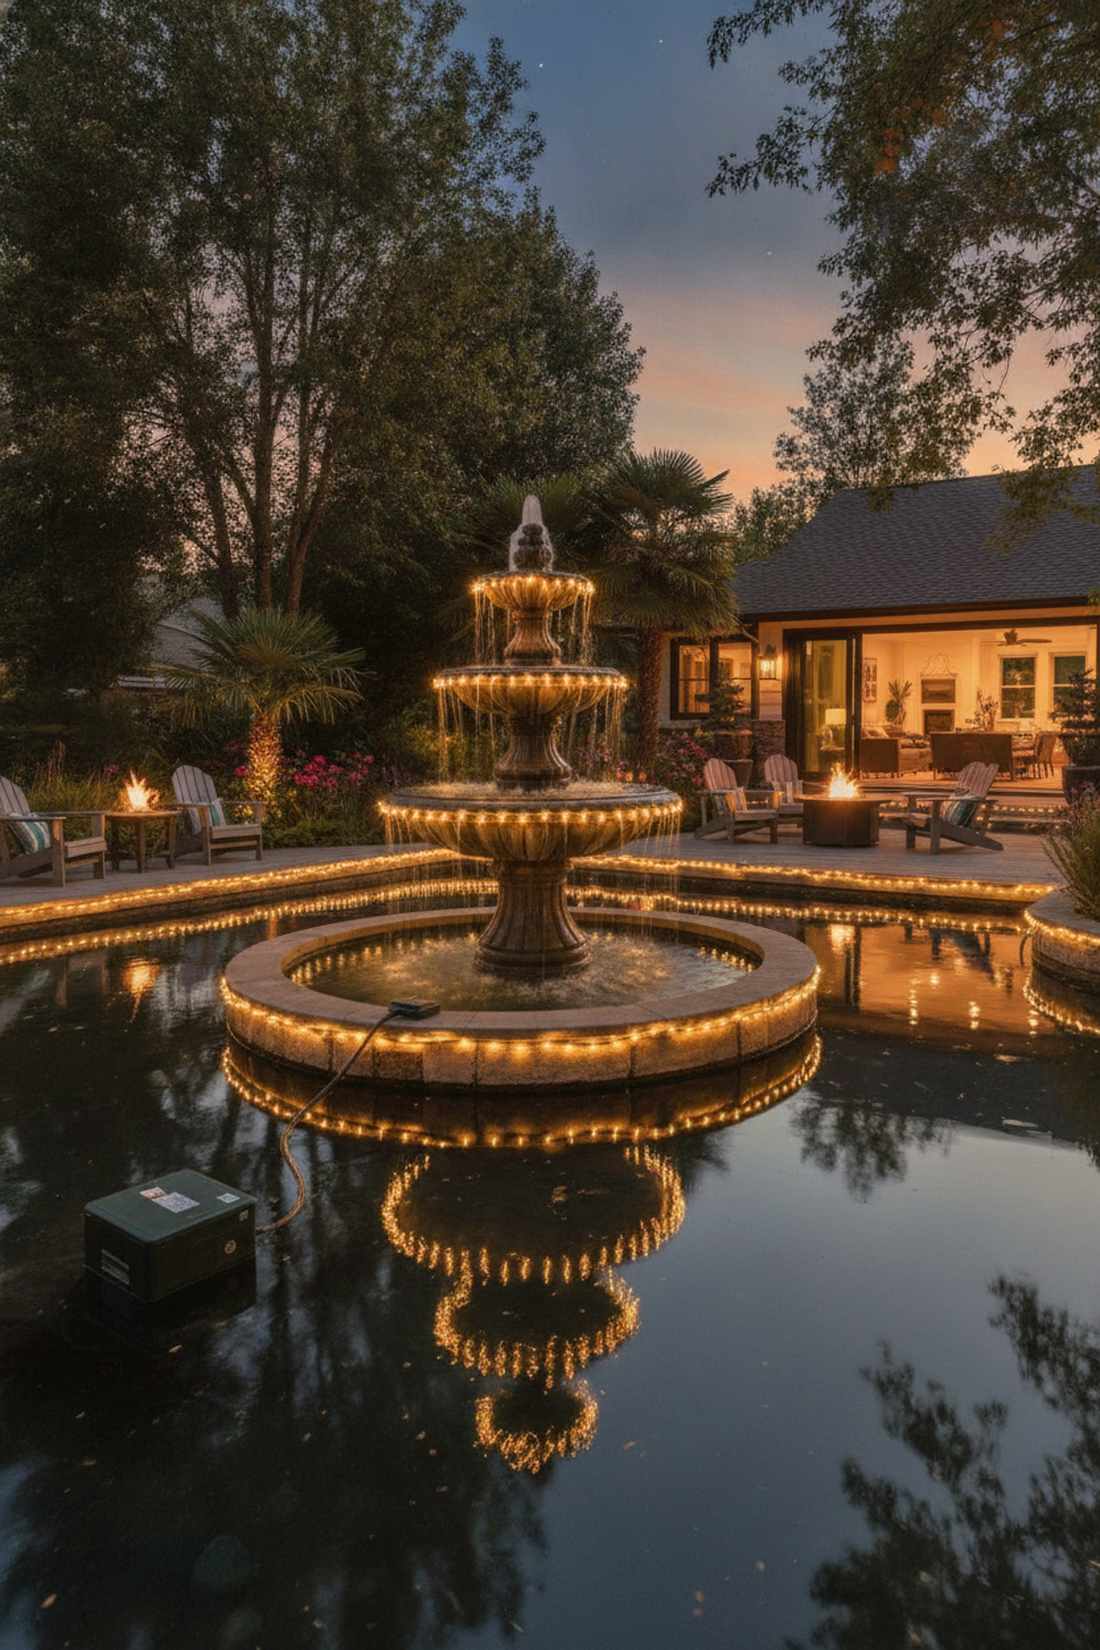
37. Fountain Base Illumination

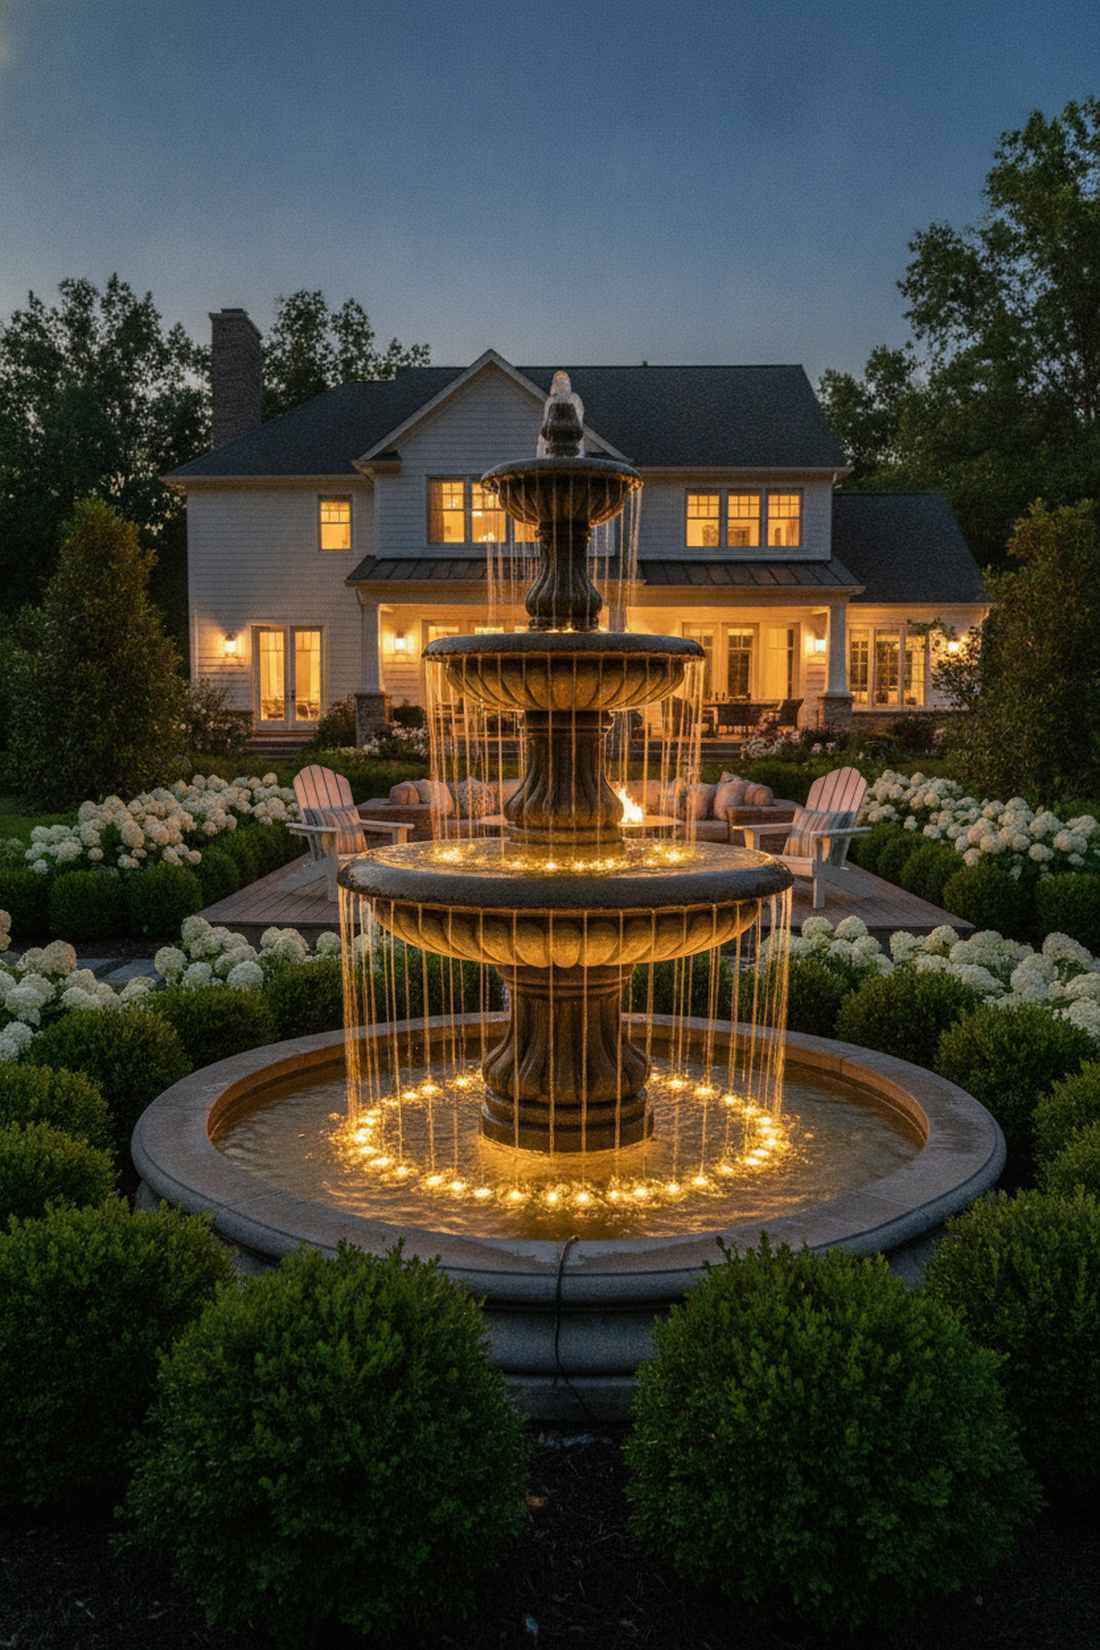
Makes ordinary falling water look like liquid gold pouring into a basin. Uplit fountain rings catch the moving ripples and scatter the light. Perfect for classic concrete birdbaths or tiered fountains.
Dropping heavy submersible pucks directly into the lower basin avoids all the tacky exterior wiring. It instantly gives a designer-level finish that makes a cheap fiberglass fountain look like carved stone.
Uplight your fountain for roughly $25–$40.
- Key Materials: Weighted submersible LED rings
- Vibe / Style: Luxury hotel courtyard
- Difficulty: Instant drop-in
- Budget Breakdown: Submersible ring: $30 | Cable hider: $10
- Creator’s Tip: Tape the power cord to the back of the fountain pedestal using waterproof tape so it remains invisible.
- Smart Sourcing: weighted submersible fountain LED rings and clear waterproof gorilla tape.
38. Stream Course Marking
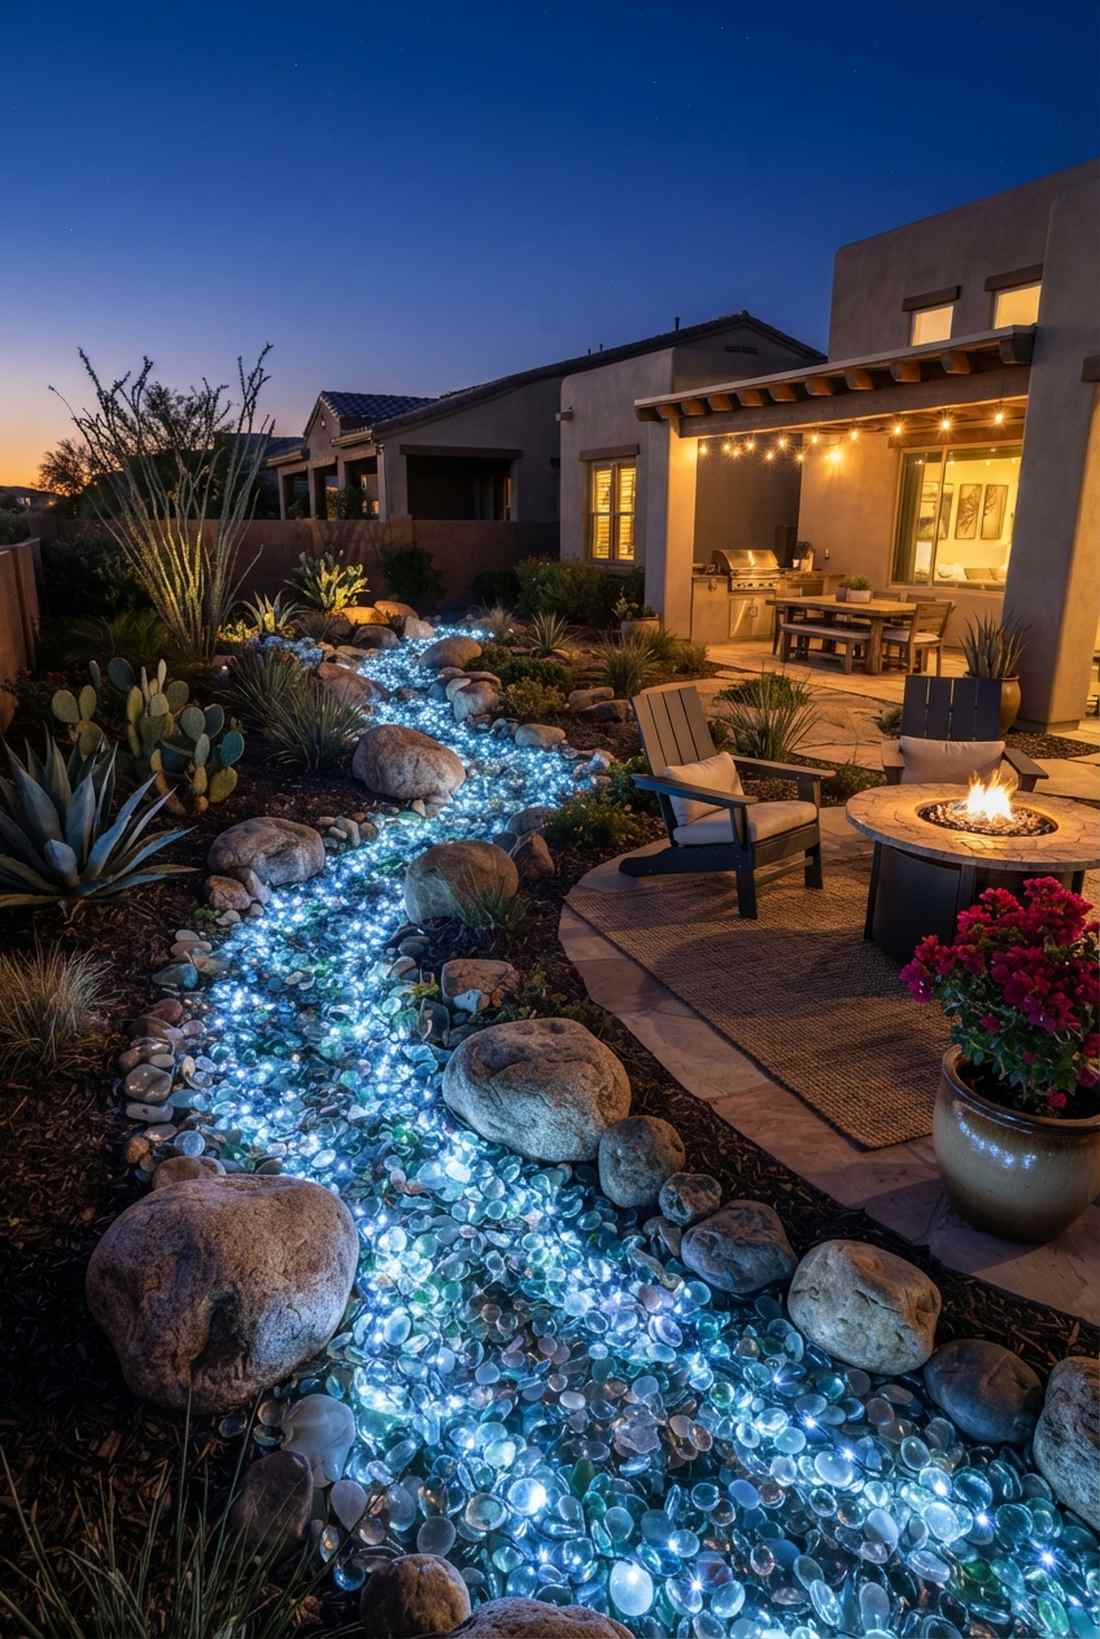
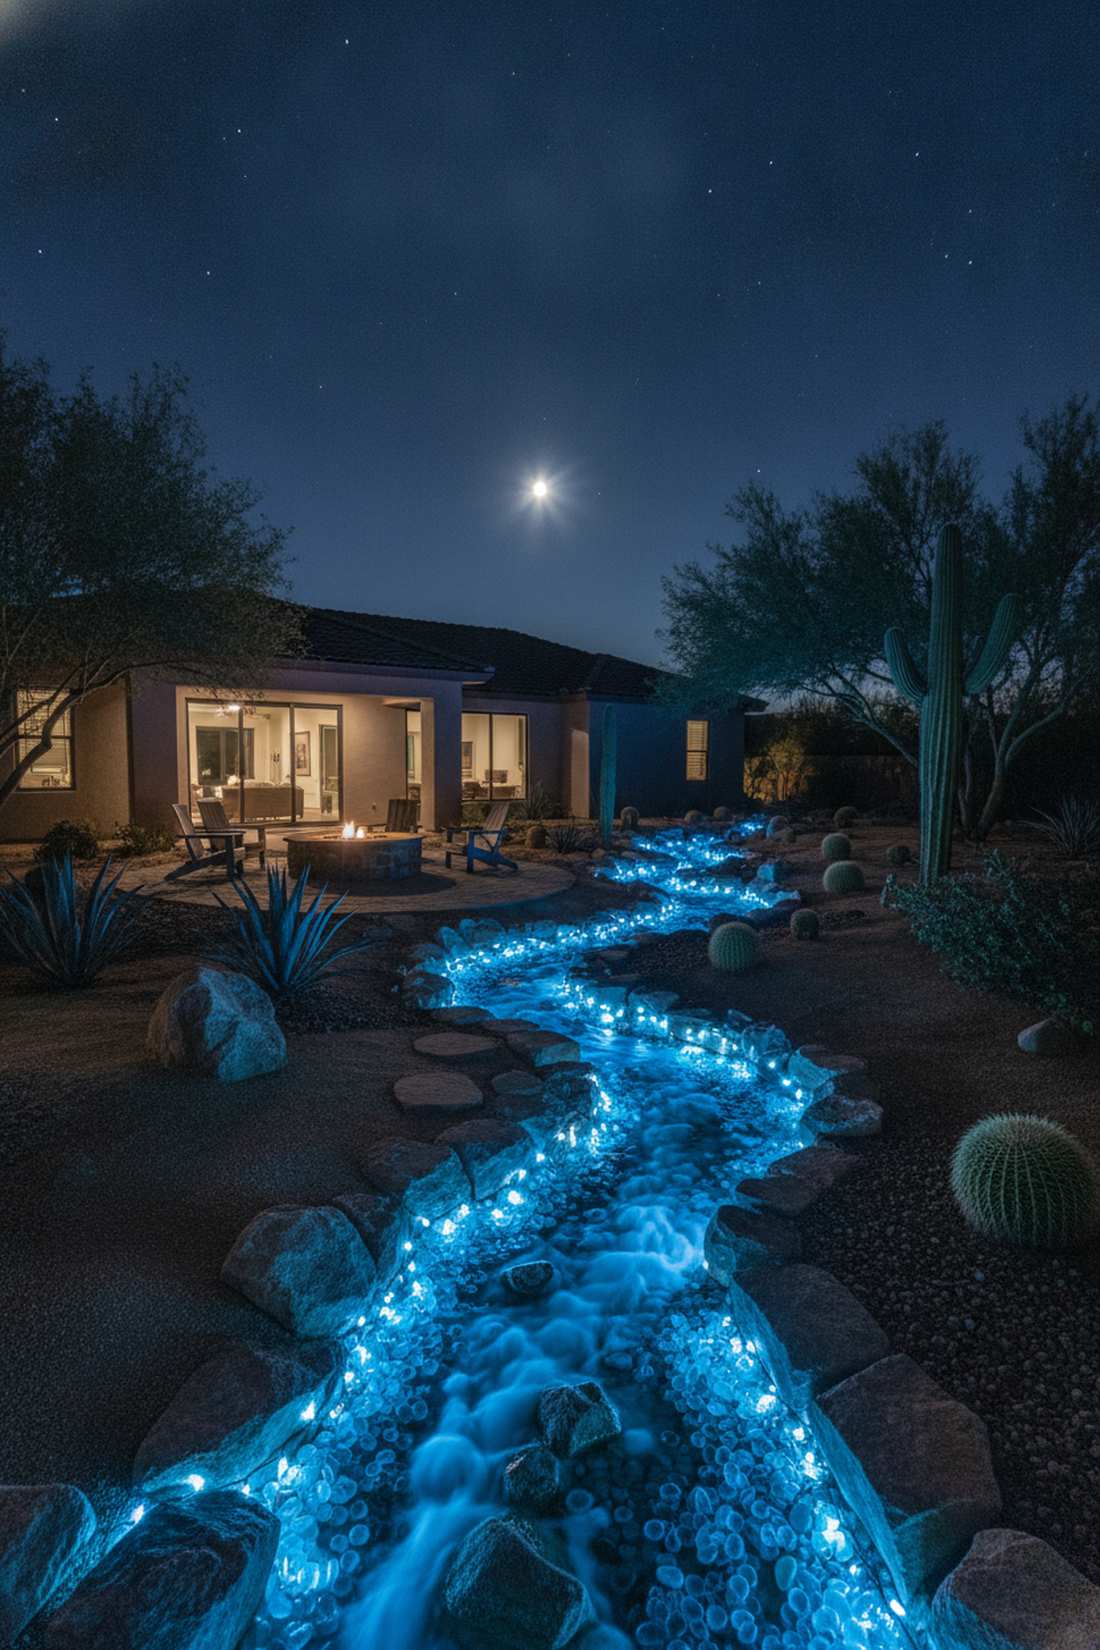
Brings a dead, dry creek bed back to life at midnight. These fairy lights decor ideas trace the natural curves of the rocks to simulate glowing water. Incredible for xeriscaped desert yards.
Running blue-tinted micro-leds beneath transparent river glass creates a stunning illusion of running water. This massive aesthetic upgrade looks incredibly expensive but uses basic craft materials.
Build a glowing fake river for $40–$75. Save this for your drought-friendly yard!
- Key Materials: Blue-tinted LEDs, transparent river rocks
- Vibe / Style: Glowing desert oasis
- Difficulty: Fun creative scattering
- Budget Breakdown: Blue lights: $25 | Glass rocks: $35
- Creator’s Tip: Weave the lights tightly around the larger boulders to simulate water crashing against the rocks.
- Smart Sourcing: blue-tinted outdoor fairy lights and translucent glass river stones (bulk pack).
39. Waterfall Backdrop Glow
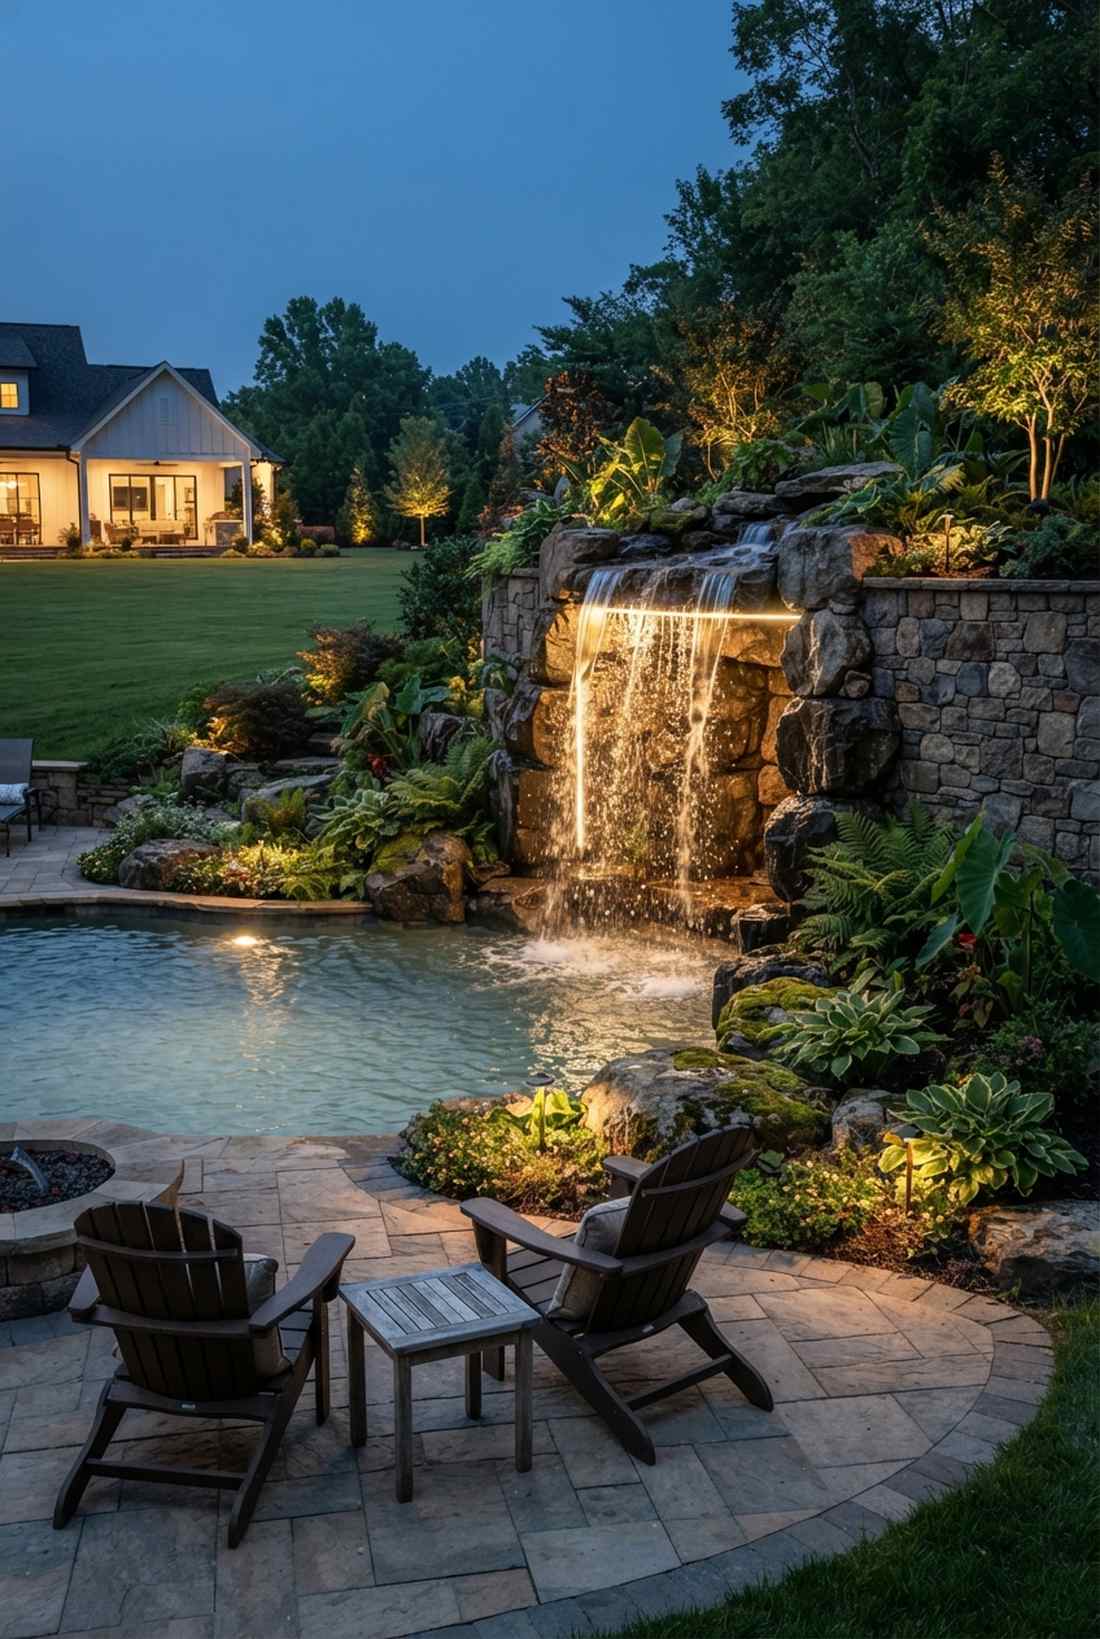
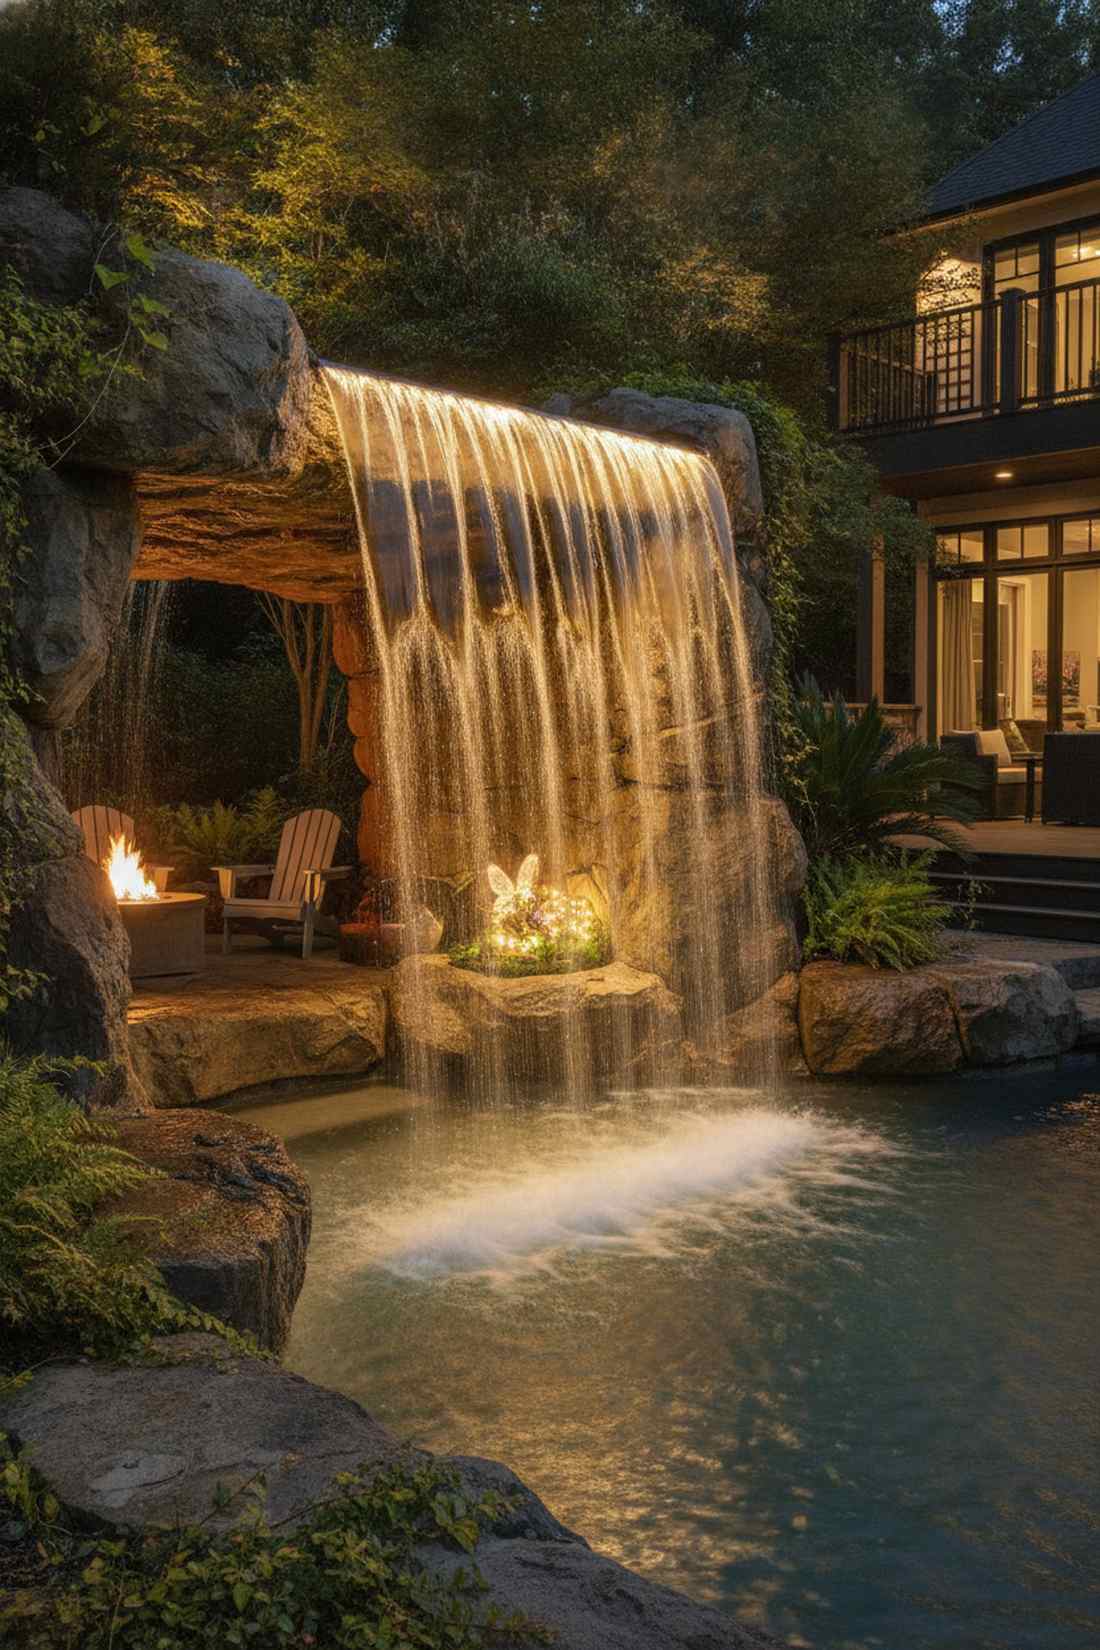
Looks like a secret glowing cave hidden behind a cascade. Backlit falling water turns the splashing drops into thousands of tiny prisms. Perfect for heavy rock-fall pool features.
Sealing every single electrical connection with dielectric grease is the hardcore trick professionals use to prevent constant water-spray failure. This ensures the magical fairy garden kits you place nearby stay lit forever.
Backlight a heavy cascade for $50–$90.
- Key Materials: High-lumen waterproof strips, dielectric grease
- Vibe / Style: Hidden grotto resort
- Difficulty: Requires intense waterproofing
- Budget Breakdown: Waterproof strips: $60 | Grease: $10
- Creator’s Tip: Never use colored lights here unless it’s a party—stick to warm white to avoid a cheap amusement-park look.
- Smart Sourcing: silicone-sealed outdoor LED strips and marine-grade dielectric grease.
Almost nobody thinks to use lighting underneath their landscaping architecture, but look at this next result…
40. Bridge Underside Reflection
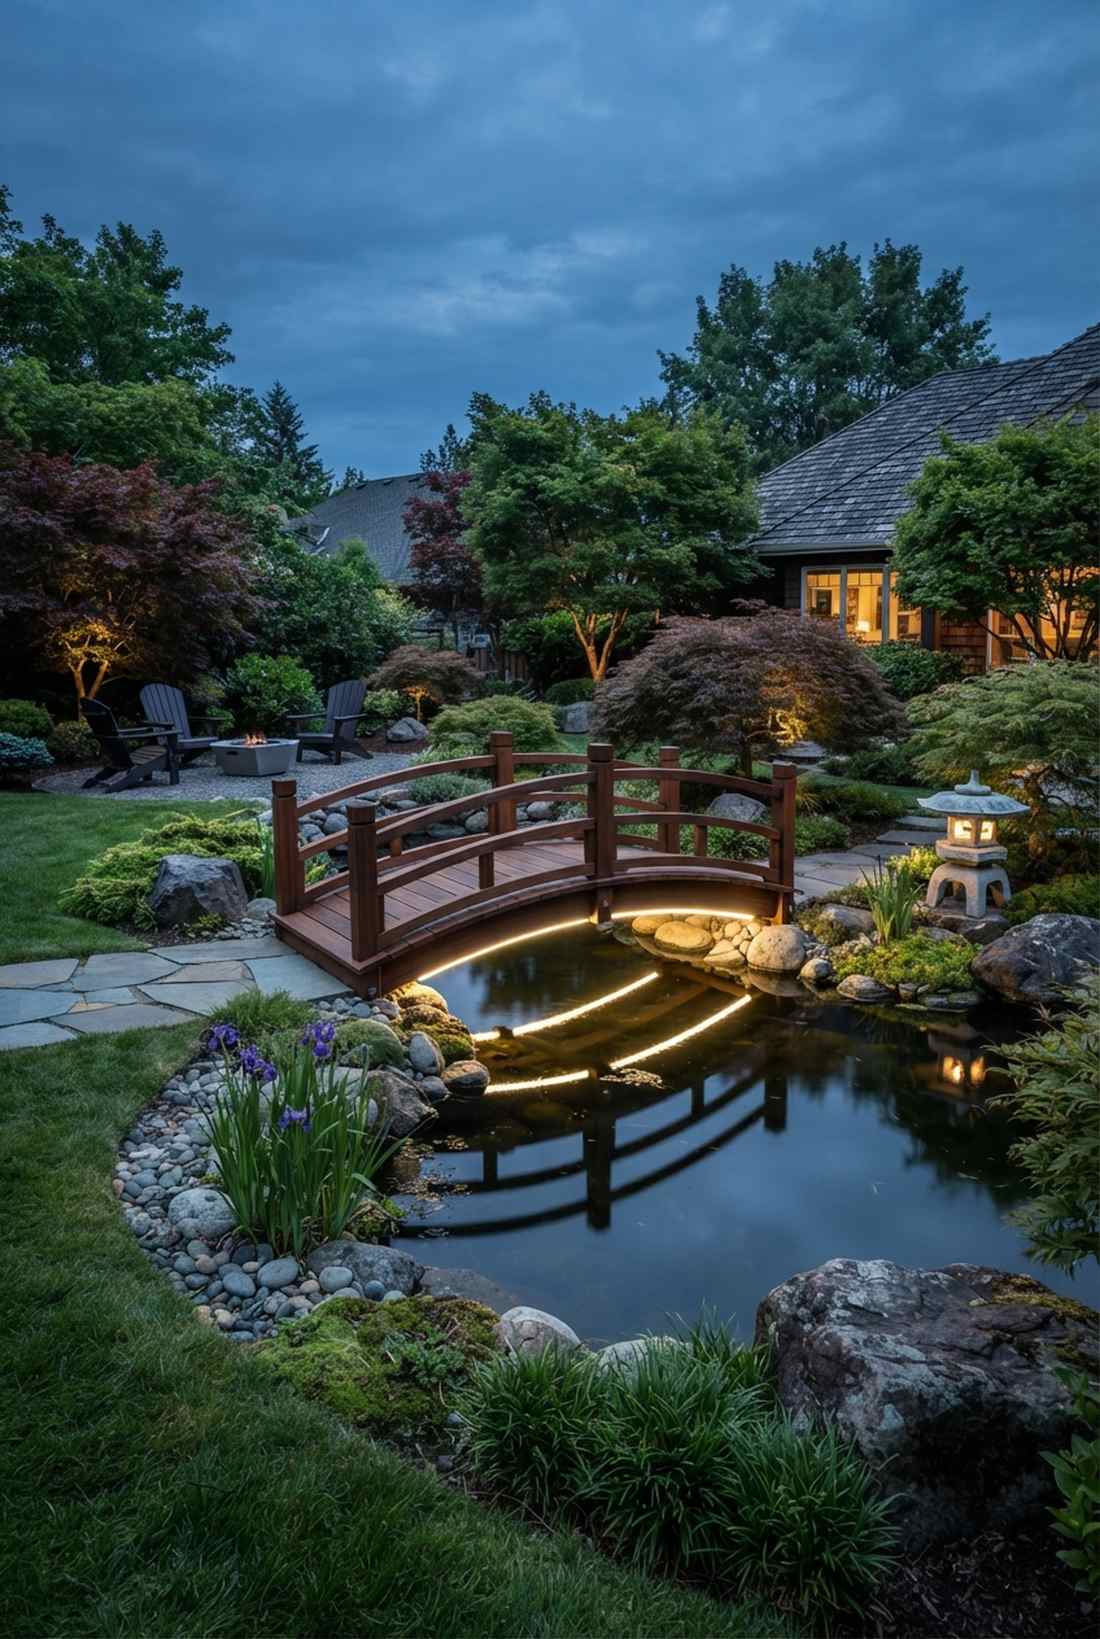
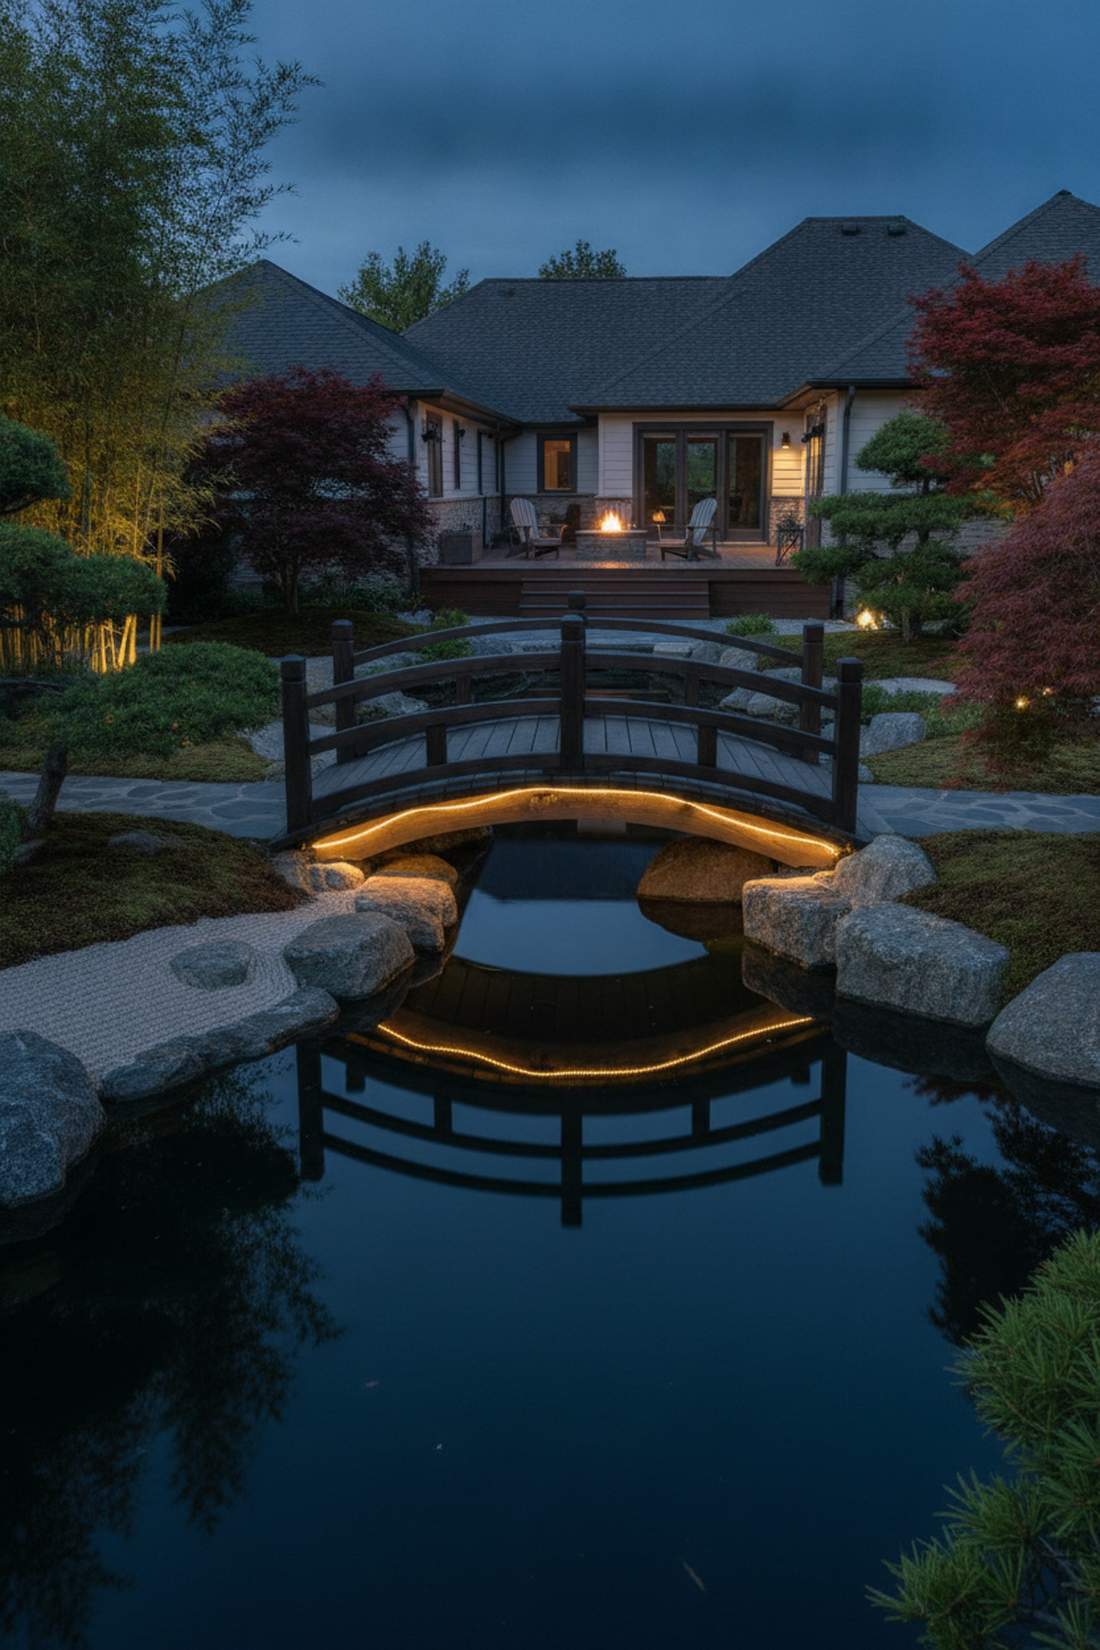
Feels like a troll’s magical glowing bridge crossing a black abyss. Stunning fairy lights pictures come from hiding strips directly under the floorboards of garden bridges. Exceptional for Japanese-style wooden crossings.
Facing the LEDs straight down into the water rather than outward completely blinds the source bulb from the viewer. It delivers a surprisingly premium look that makes the bridge look like it’s hovering.
Hover your bridge for about $30–$50. Pin this for your Zen garden project!
- Key Materials: Adhesive outdoor light strips
- Vibe / Style: Hovering Zen crossing
- Difficulty: Easy under-mounting
- Budget Breakdown: Strips: $30 | Staples: $10
- Creator’s Tip: Add a dab of superglue to the ends of the adhesive strips—the bridge humidity will peel the factory glue fast.
- Smart Sourcing: waterproof LED strip kits (under-glow) and outdoor heavy-duty super glue.
41. Floating Sphere Clusters
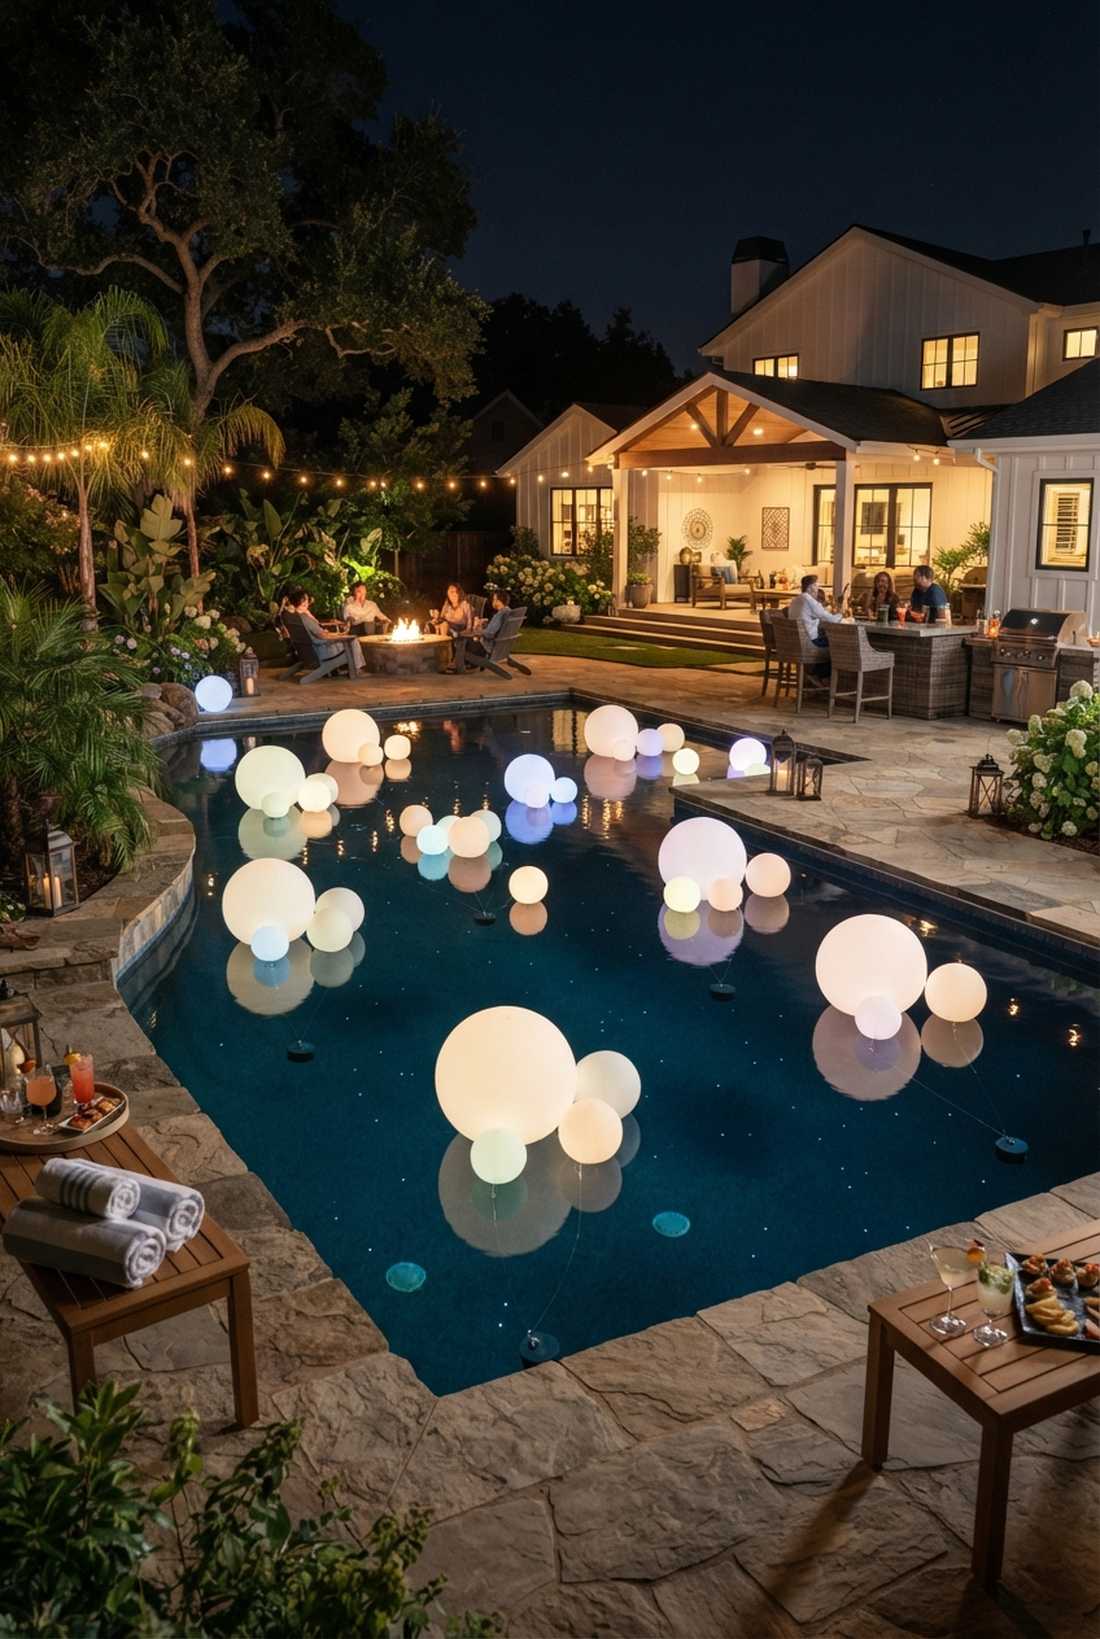
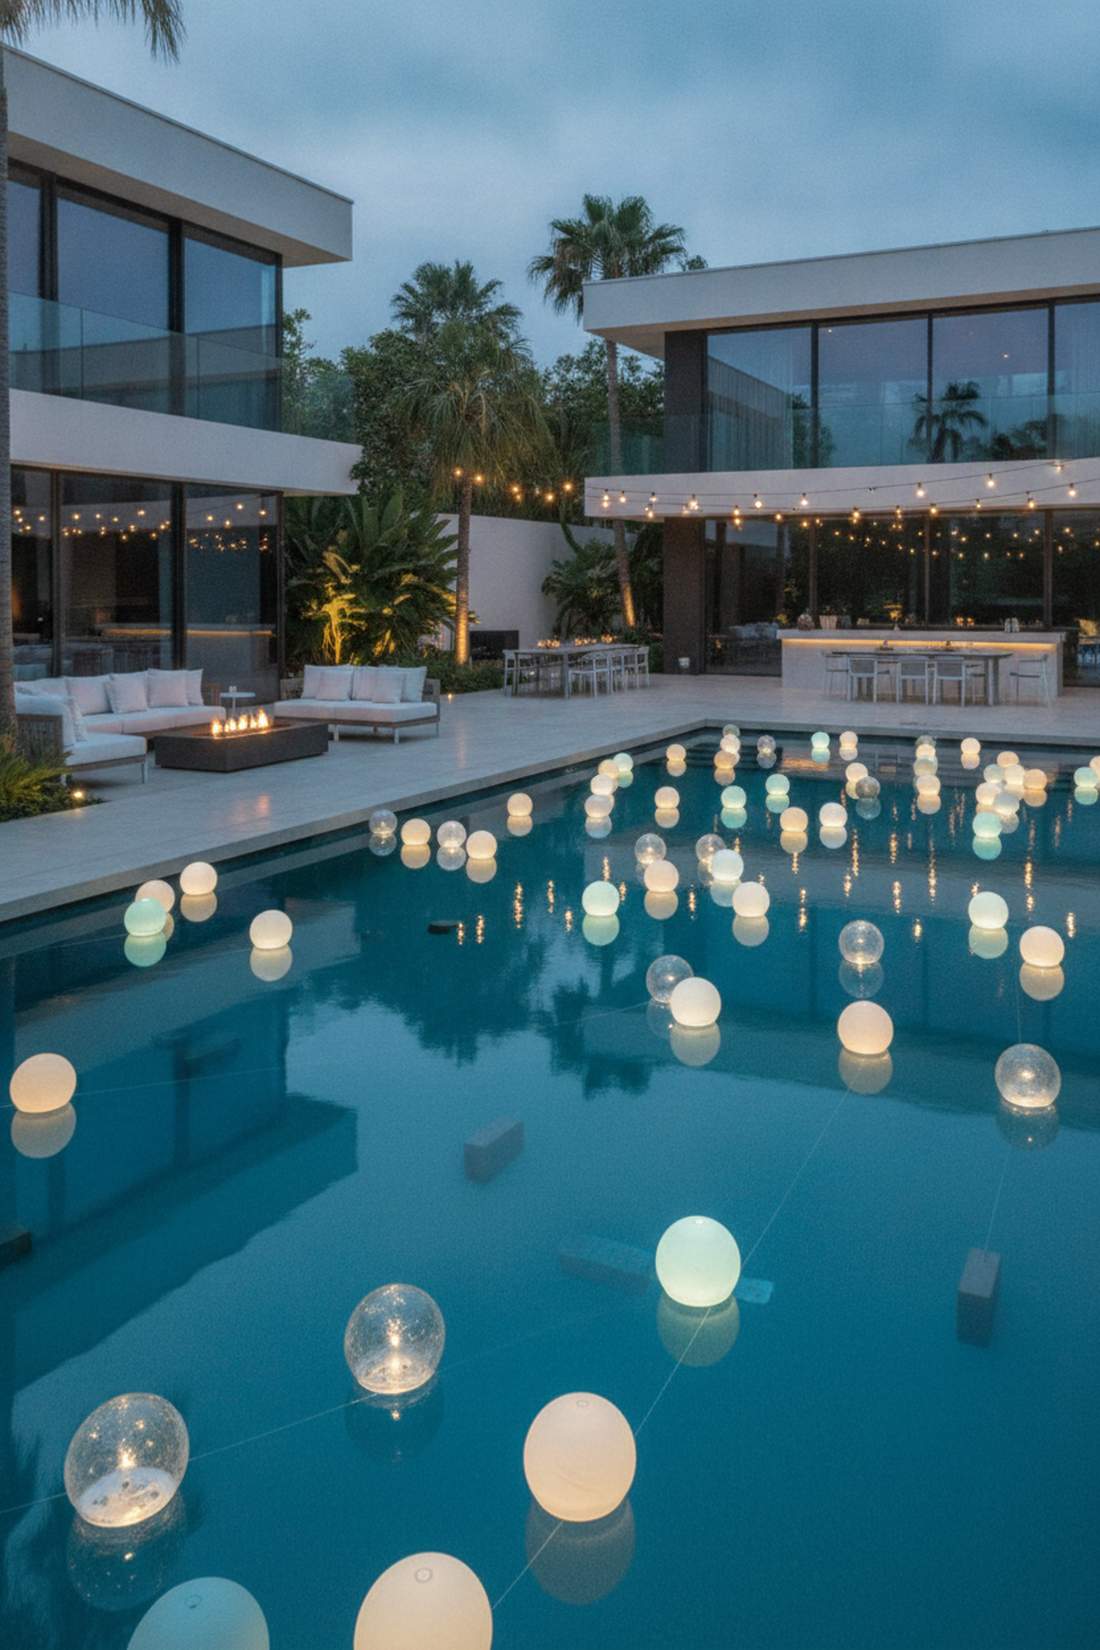
Like glowing crystal balls drifting across the water’s surface. Battery-operated floating orbs bounce gently with the wind. A flawless, temporary hack for an evening pool party.
Tethering the spheres to a sunken brick using clear fishing line stops them from clustering into one sad corner of the pool. This trick instantly gives a designer-level finish that looks meticulously planned.
Float a galaxy for $40–$80 depending on orb count.
- Key Materials: Waterproof floating pool orbs
- Vibe / Style: Luxury Ibiza pool party
- Difficulty: Easy drop and tie
- Budget Breakdown: Orbs: $40 | Fishing line: $5
- Creator’s Tip: Buy rechargeable orbs instead of battery-operated ones to save massive amounts of money over the summer.
- Smart Sourcing: rechargeable floating LED pool spheres (4-pack) and invisible fluorocarbon fishing line.
42. Rain Chain Accompaniment
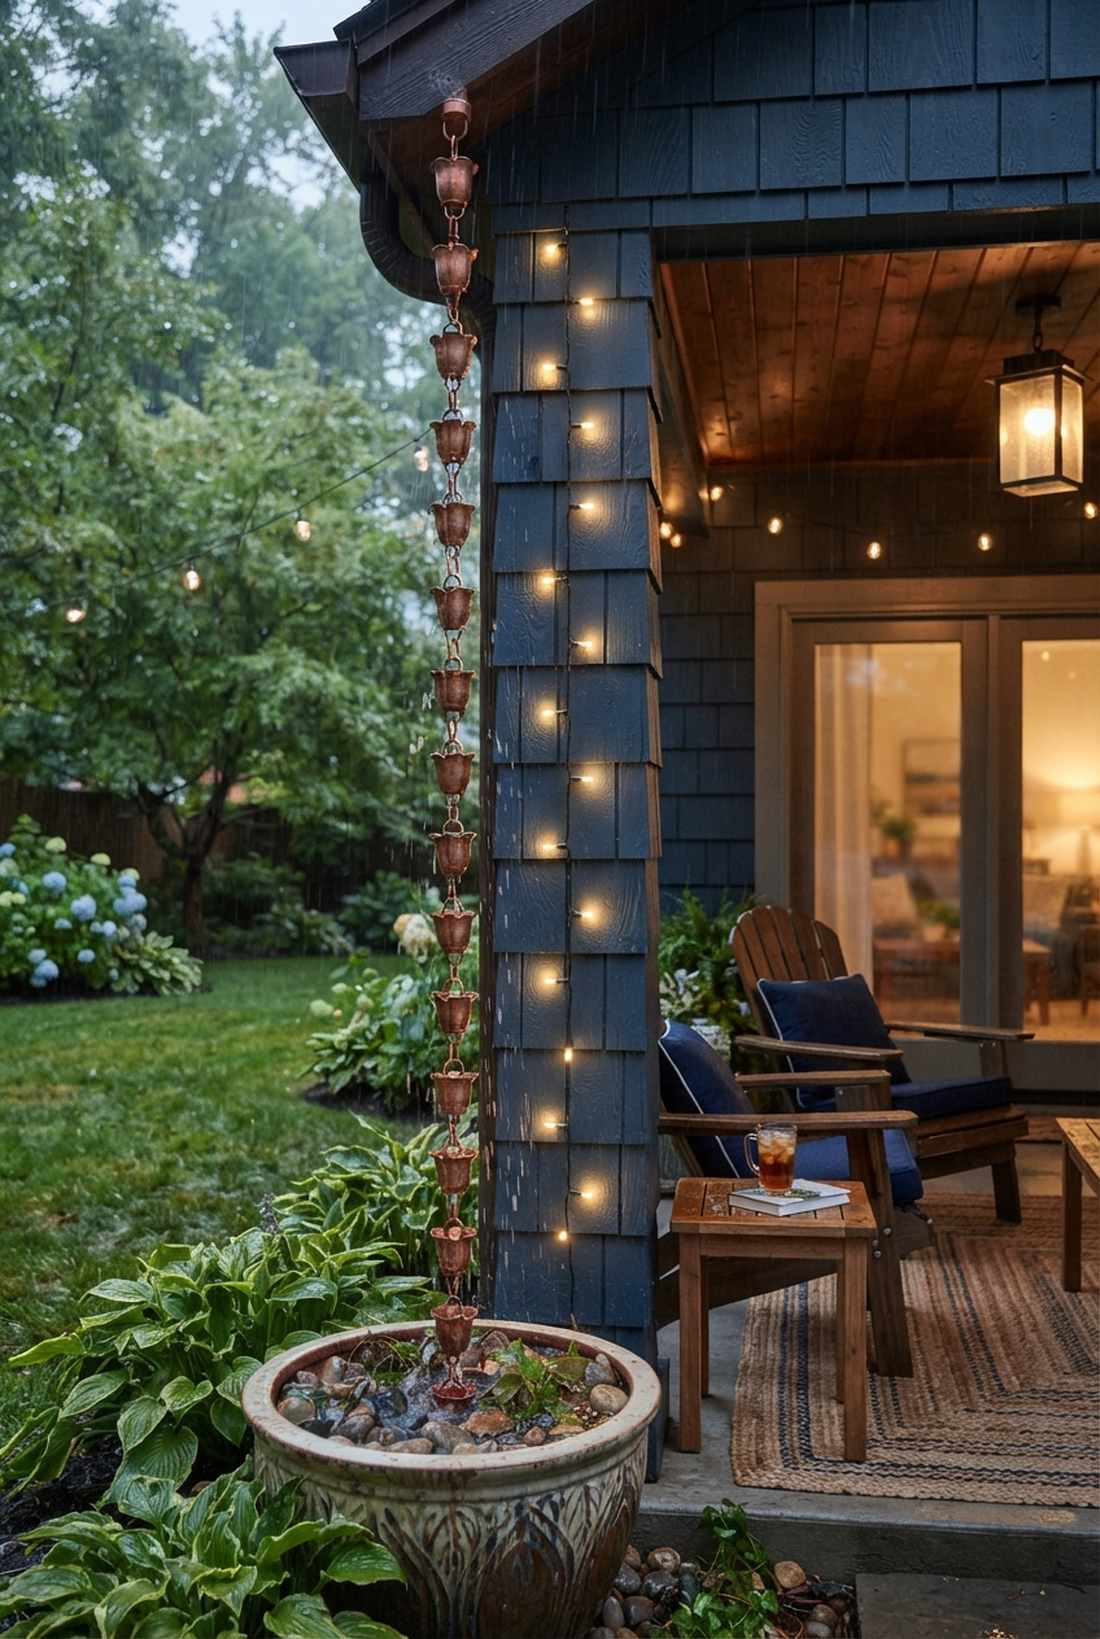
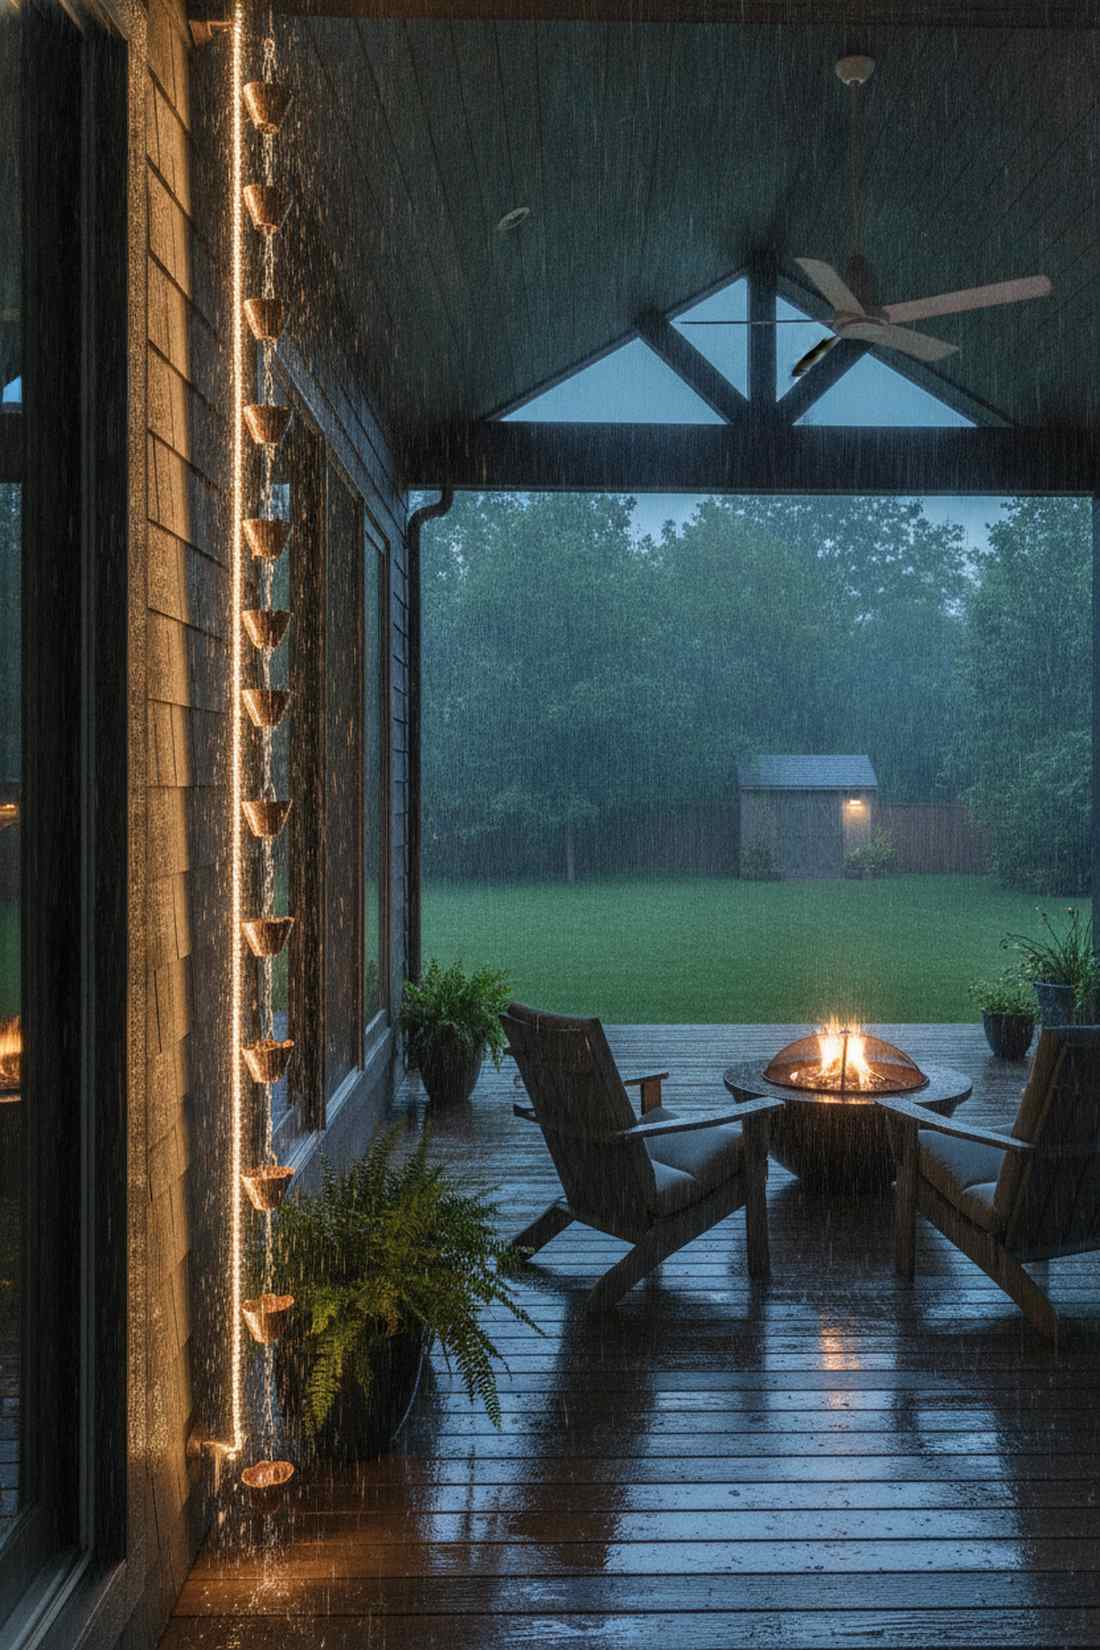
Turns a boring rainstorm into a spectacular glowing water feature. A vertical fairy lights string mounted parallel to a copper rain chain catches the splashing drops. Incredible for patio roof overhangs.
Mounting the lights to the wall *behind* the chain instead of wrapping the chain itself prevents massive tangles and rust. This looks far more expensive than it is and preserves the expensive copper chain.
Illuminate your storms for $20–$35. Save this genius architectural hack!
- Key Materials: Rigid outdoor string, copper chain
- Vibe / Style: Cozy stormy aesthetic
- Difficulty: Quick wall mounting
- Budget Breakdown: Lights: $20 | Wall clips: $10
- Creator’s Tip: Align the lights perfectly behind the chain so the silhouette pops when you view it from the yard.
- Smart Sourcing: rigid outdoor LED strings and pure copper garden rain chains.
Seasonal Adaptive Designs
43. Modular Hook System
Feels like owning a professional stage rigging in your own yard. Permanent hook grids allow you to swap lighting styles in literally five minutes. Essential for people who host constant patio events.
Pre-installing stainless steel cup hooks every 3 feet creates a massive, invisible matrix that handles any design you throw at it. Integrating starter kits makes switching from summer warm-white to winter colors an absolute breeze.
Install the grid once for $15–$30.
- Key Materials: Stainless steel cup hooks
- Vibe / Style: Versatile event host
- Difficulty: Tedious one-time installation
- Budget Breakdown: Hooks: $15 | Measuring tape: $0
- Creator’s Tip: Spray paint the hooks the exact color of your pergola wood before screwing them in so they vanish during the day.
- Smart Sourcing: stainless steel cup hooks (bulk pack) and matte camouflage spray paint.
44. Removable Arch Frames
Creates a pop-up glowing tunnel that disappears when the party ends. Temporary PVC arches slide seamlessly into hidden ground pipes. Perfect for narrow walkways during holiday seasons.
Burying PVC sleeves flush with the grass allows you to pull the arches out and mow right over the holes. This landscape hack instantly gives a designer-level finish while preserving your lawn maintenance routine.
Build a pop-up tunnel for $40–$70. Pin this crazy DIY magic trick!
- Key Materials: Thick PVC pipes, ground sleeves
- Vibe / Style: Magical pop-up tunnel
- Difficulty: Moderate pipe cutting
- Budget Breakdown: PVC pipes: $25 | Lights: $30
- Creator’s Tip: Cap the ground sleeves when the arches are put away so dirt and bugs don’t fill the holes.
- Smart Sourcing: bendable PVC landscape pipes and flush-mount ground pipe caps.
Don’t skip the upcoming winter strategy—it actually saves money compared to standard holiday stringers…
45. Winter Evergreen Focus
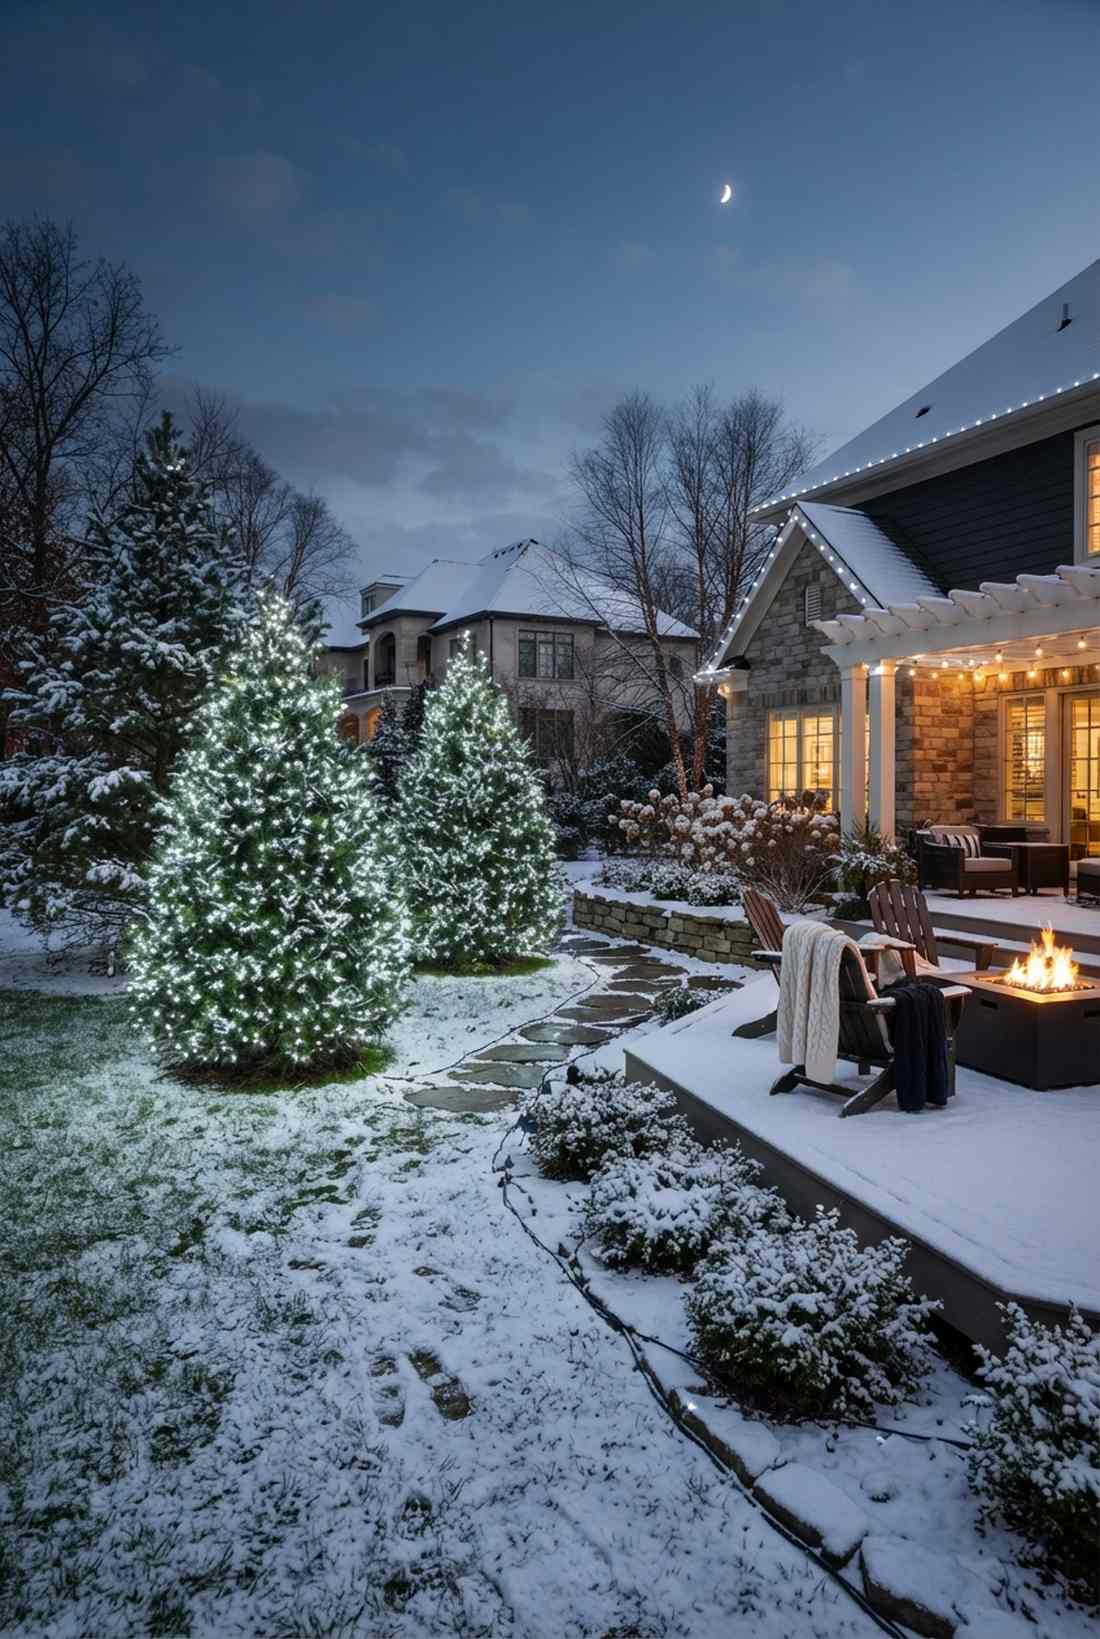
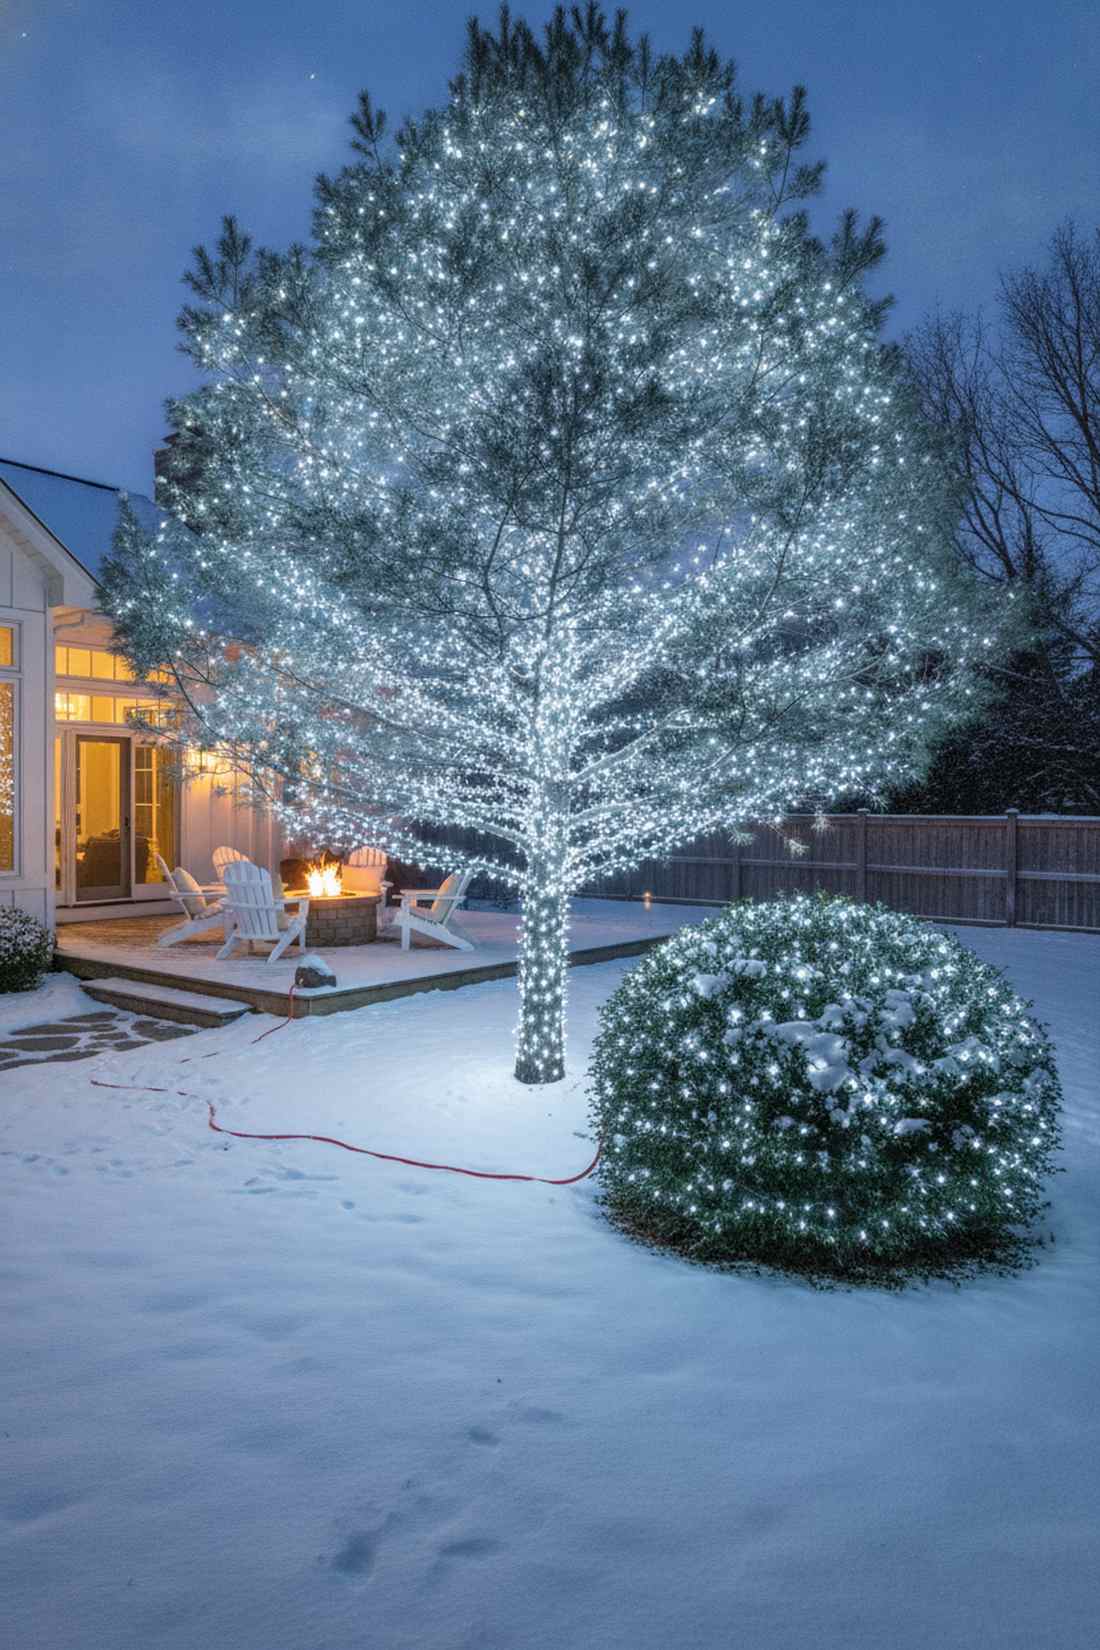
Turns your dead winter yard into a spectacular focal point. Targeted evergreen fairy lights ideas completely ignore bare trees to highlight year-round structure. Beautiful for snowy pine trees or thick yews.
Ditching standard fat holiday bulbs for tiny, high-density micro-leds makes the bush look frosted rather than decorated. It delivers a surprisingly premium look that bridges the gap between Christmas and Spring.
Highlight winter bones for $30–$50.
- Key Materials: Cool-white micro LEDs
- Vibe / Style: Elegant frosted winter
- Difficulty: Cold weather wrapping
- Budget Breakdown: Micro-LEDs: $40 | Timers: $15
- Creator’s Tip: Use cool-white (4000K+) lights in winter to make the snow look crisp; warm white makes snow look yellow.
- Smart Sourcing: cool-white outdoor fairy clusters and heavy-duty winter extension cords.
46. Spring Blossom Enhancement
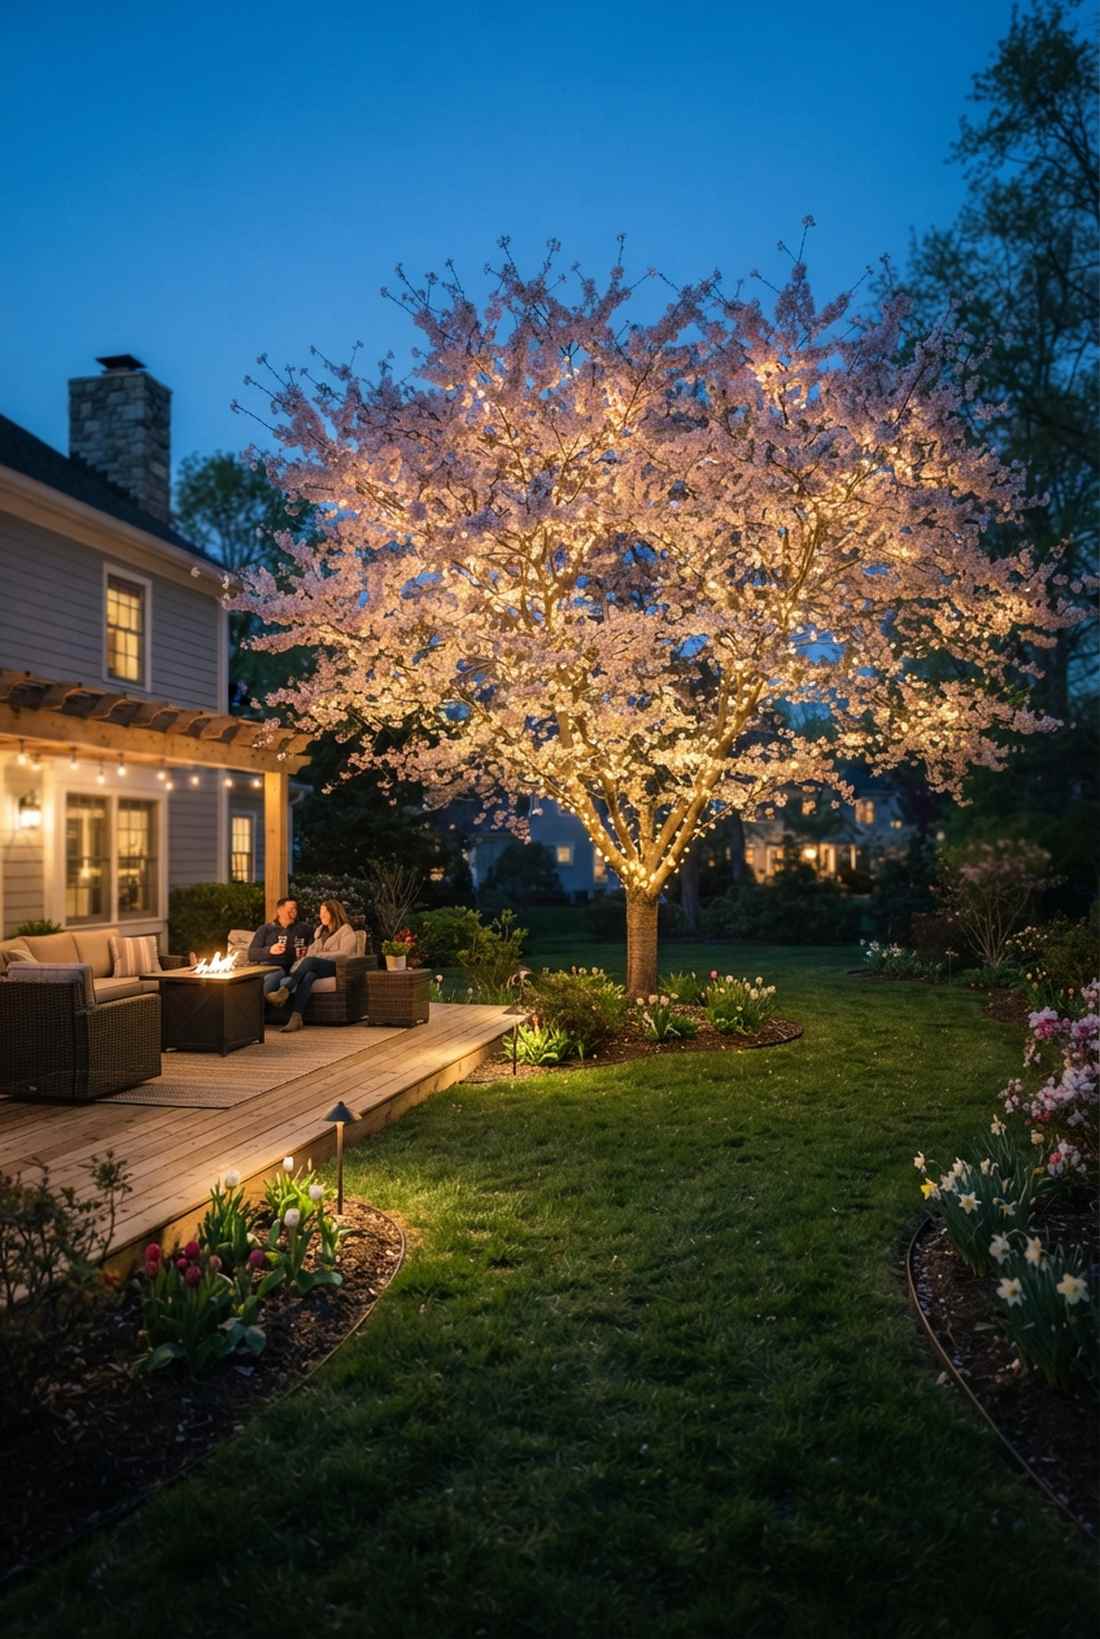
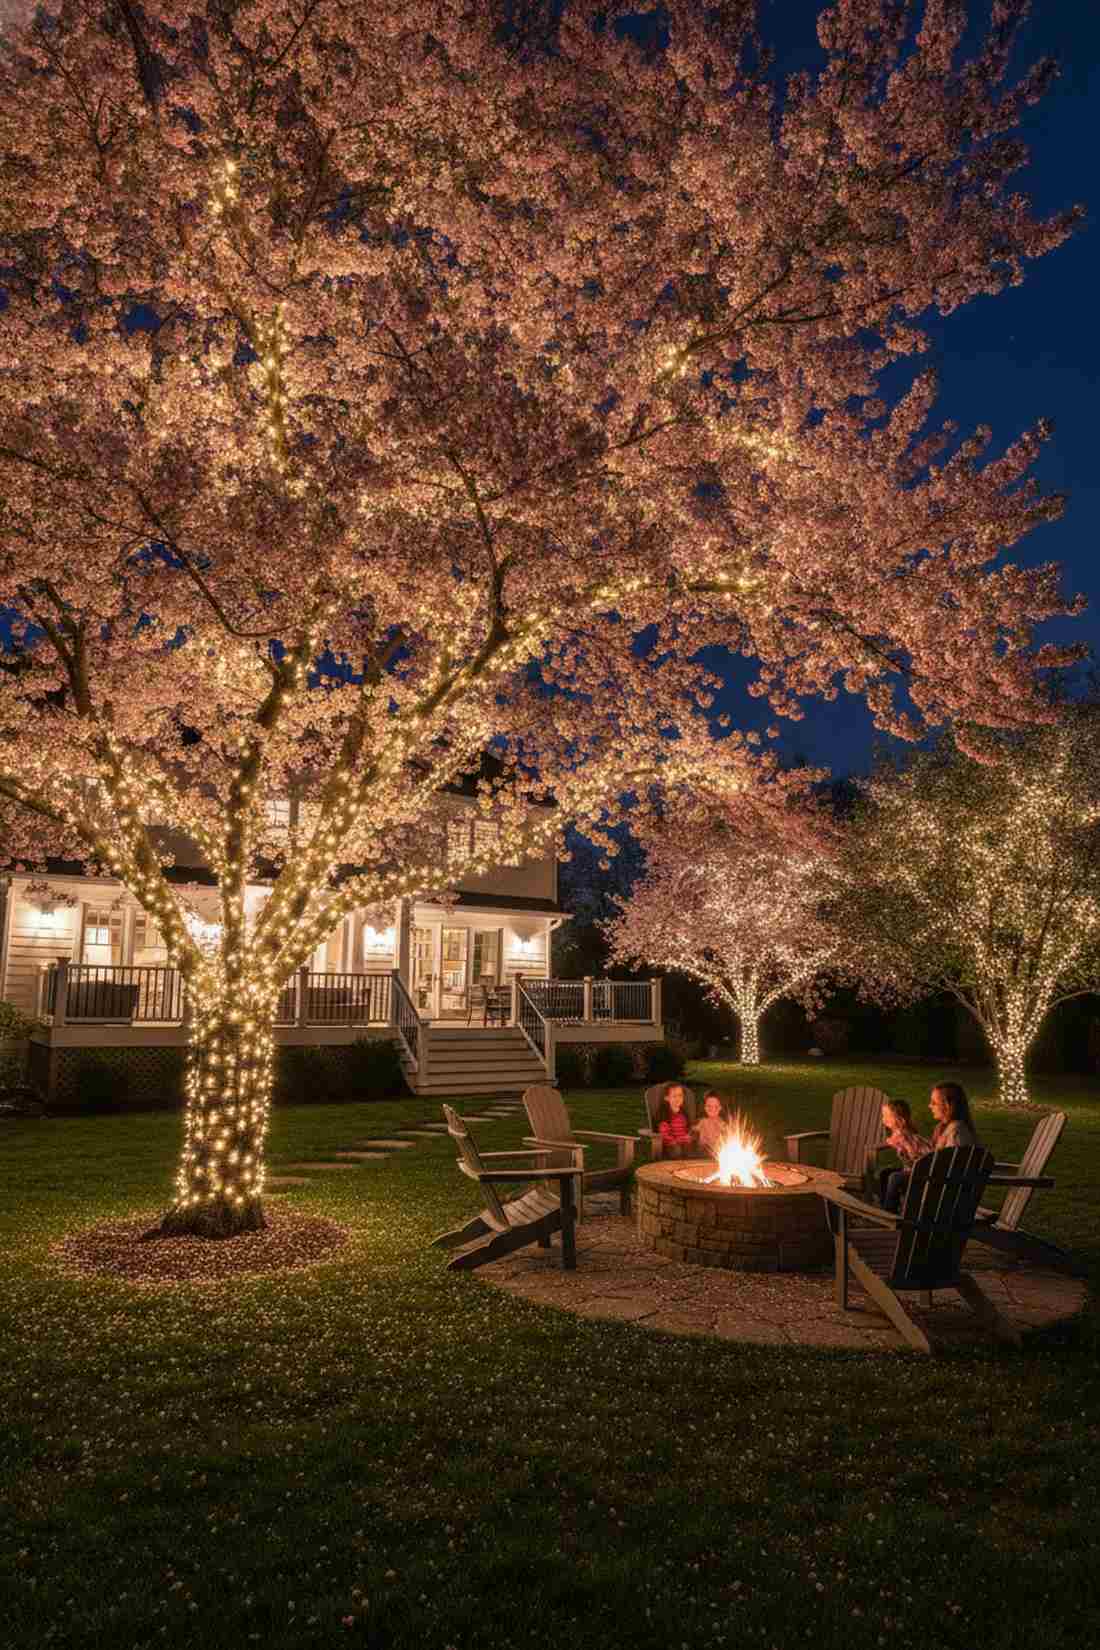
Makes cherry blossoms look like glowing pink cotton candy. Temporary bloom illumination extends the painfully short viewing window of spring flowering trees. Unbelievable for magnolias and crabapples.
Running battery-powered strands just for the two weeks of bloom bypasses all electrical trenching. This short-term flex looks far more expensive than it is and creates jealousy across the entire neighborhood.
Light up a blooming tree for just $20–$35. Save this for early Spring!
- Key Materials: Battery-powered warm-white strands
- Vibe / Style: Ethereal midnight garden
- Difficulty: Fast, temporary drape
- Budget Breakdown: Battery lights: $25 | Rechargeable batteries: $15
- Creator’s Tip: Remove them the second the petals drop so you don’t damage the new green leaf growth.
- Smart Sourcing: long-length battery fairy strings and high-capacity rechargeable AA batteries.
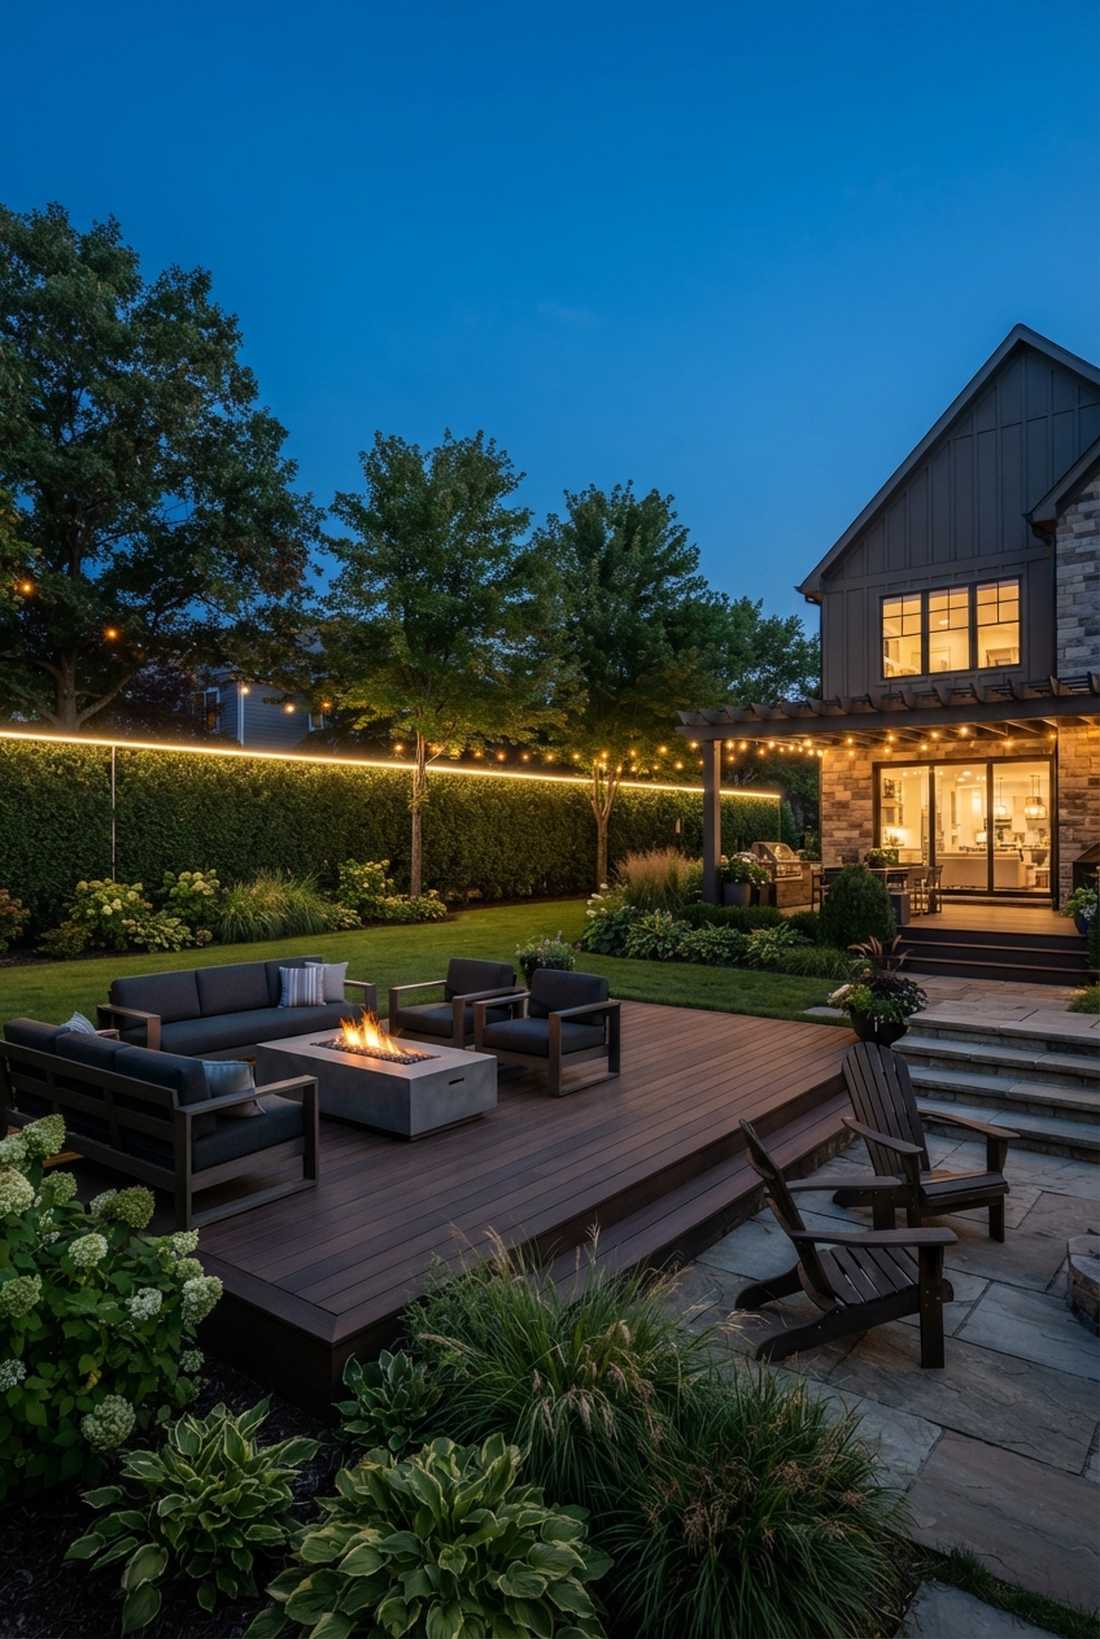
47. Summer Dining Zone Expansion
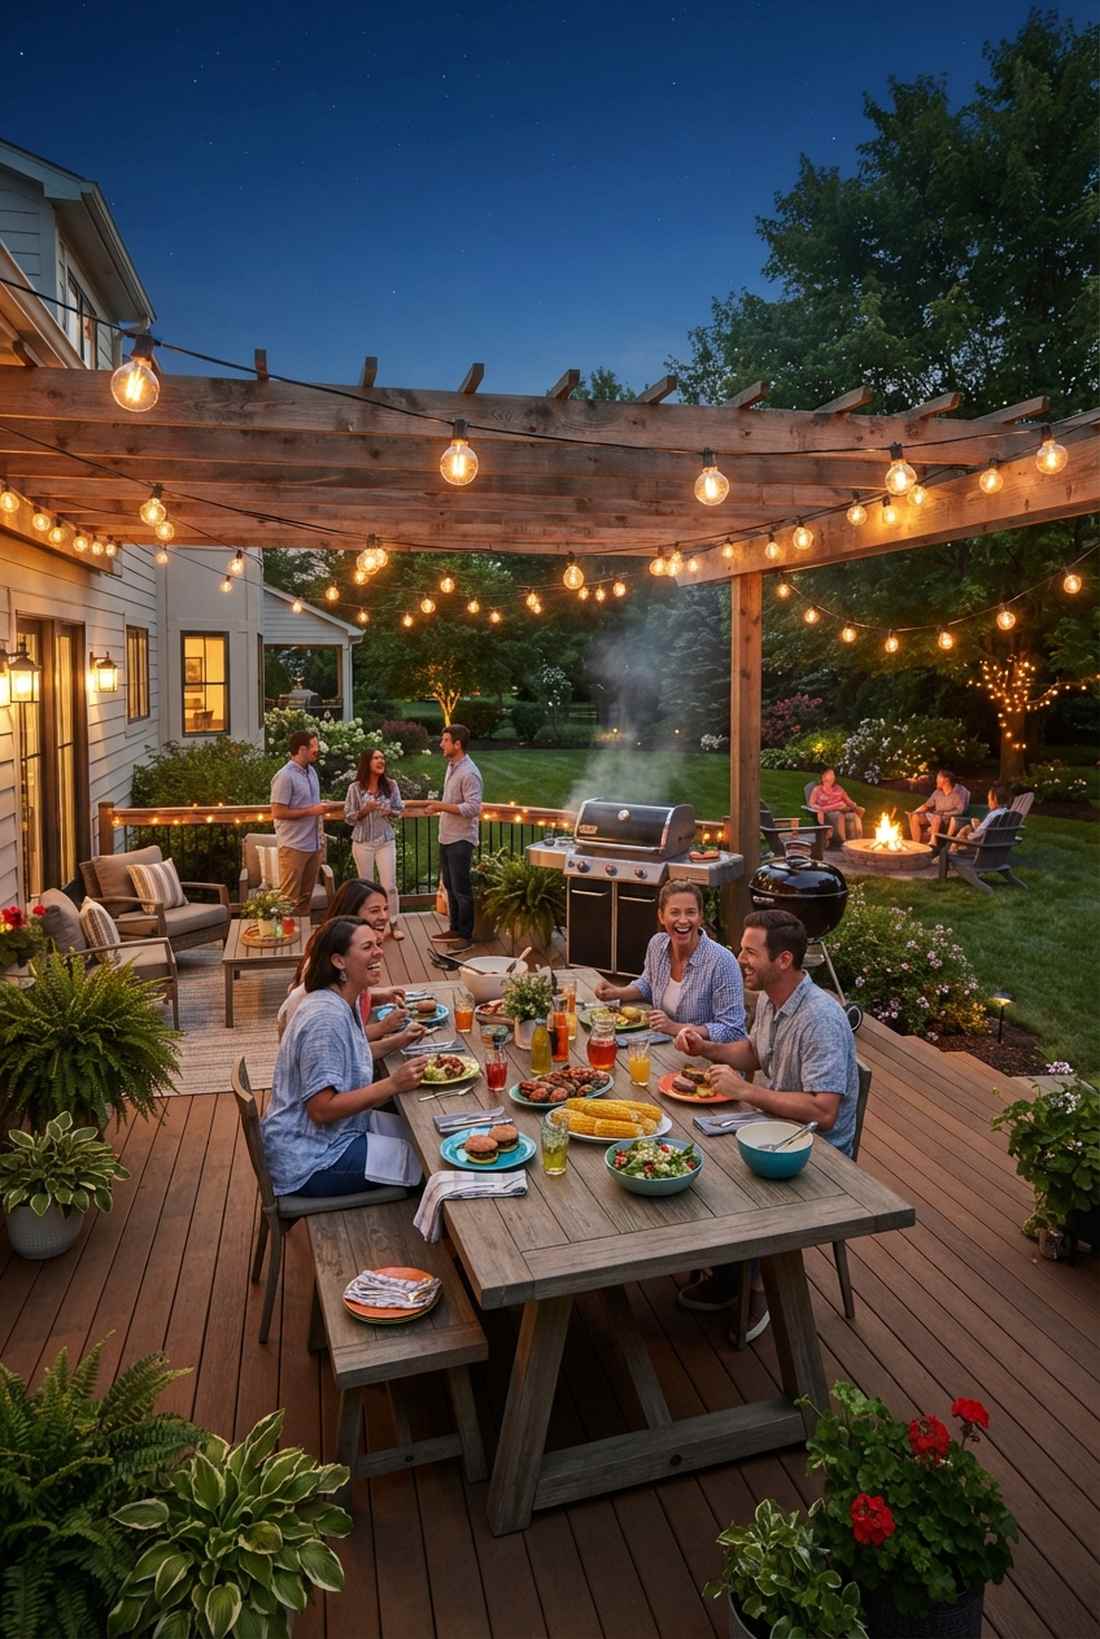
Feels like adding an entirely new room to your house for the summer. Supplemental overhead fairy lights decor ideas flood your dining area with massive usable light. Flawless for late-night BBQ hosting.
Taking the strands down in September preserves the expensive UV coating and triples the lifespan of the lights. Storing premium terrarium accessories alongside them keeps your gear perfectly organized for next year.
Expand your patio usage for $50–$90.
- Key Materials: High-lumen globe strings
- Vibe / Style: Lively summer BBQ
- Difficulty: Quick seasonal hang
- Budget Breakdown: Globe lights: $60 | Storage reel: $15
- Creator’s Tip: Wrap the lights around a cheap hose reel when storing them so they never tangle in the garage.
- Smart Sourcing: shatterproof outdoor globe stringers and plastic cable storage reels (bulk pack).
48. Autumn Harvest Displays

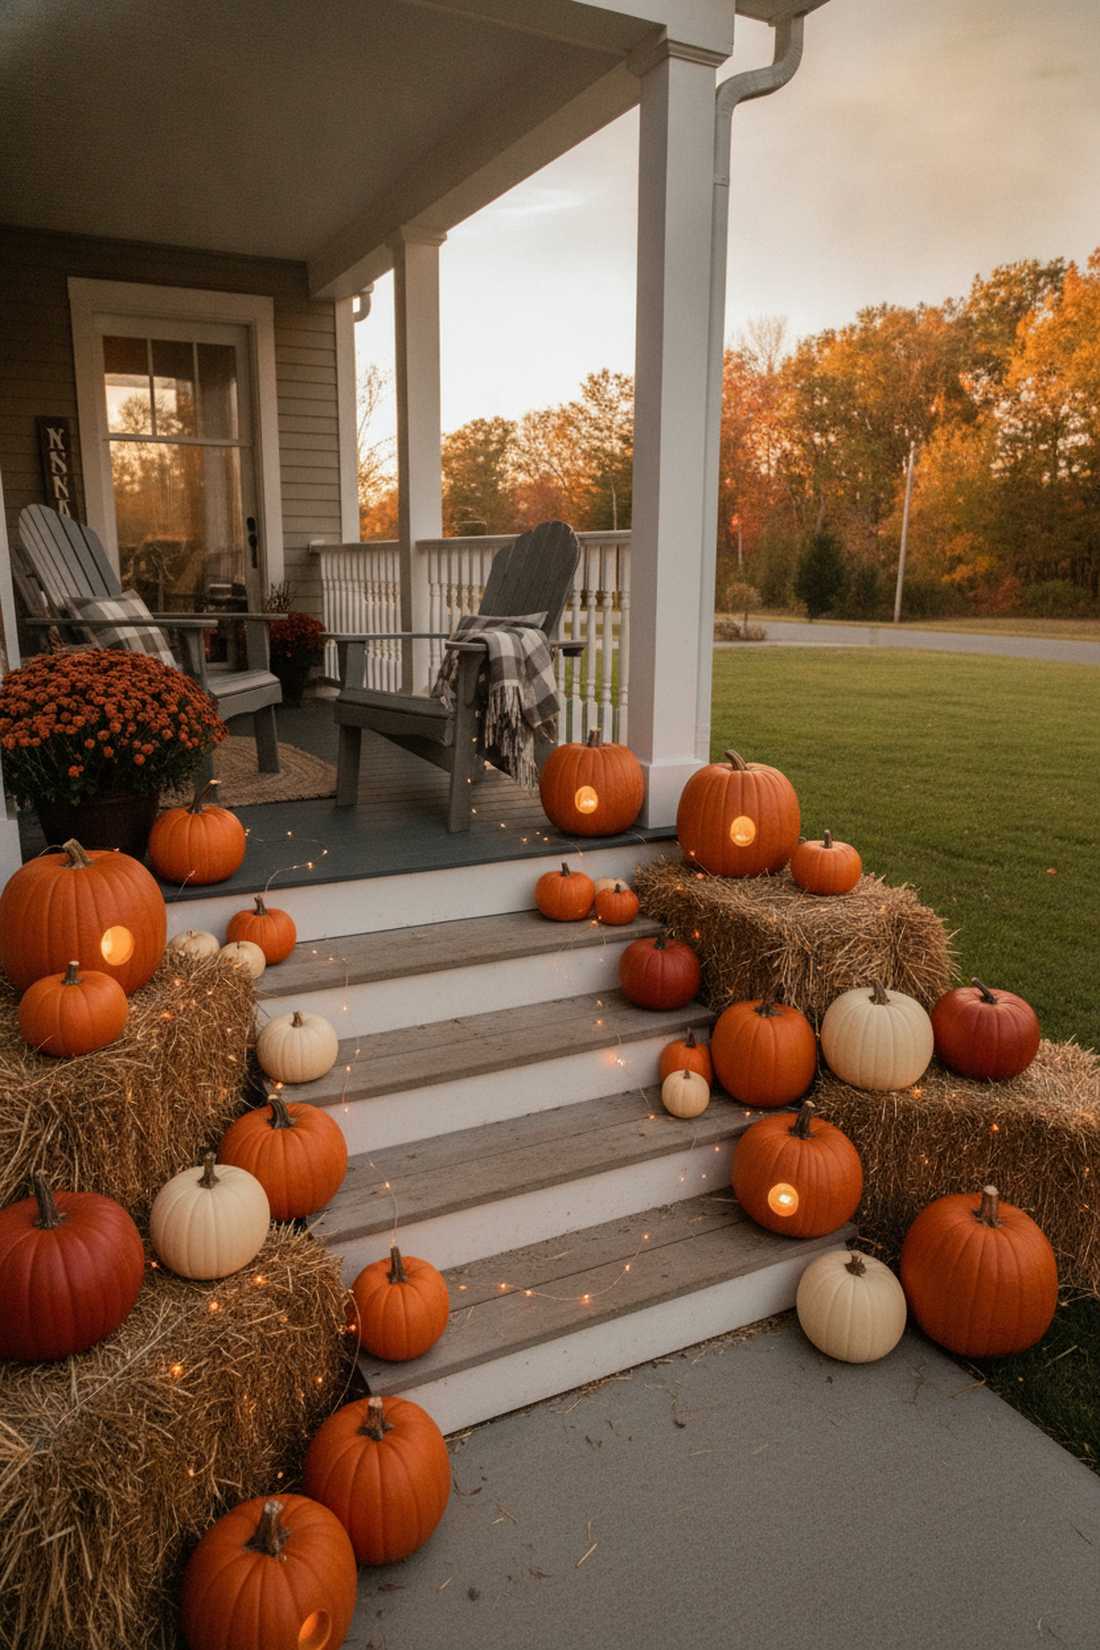
Creates a ridiculously cozy fall porch without looking cheesy. Illuminated harvest fairy lights decor weaves subtle warmth into hay bales and pumpkins. Perfect for Halloween or Thanksgiving porch steps.
Stuffing waterproof battery packs deep inside hollowed-out faux pumpkins completely hides the messy electronics. This simple concealment trick instantly gives a designer-level finish to generic craft store supplies.
Upgrade your fall porch for $20–$40. Pin this to your autumn aesthetic board!
- Key Materials: Amber-tinted micro LEDs, faux pumpkins
- Vibe / Style: Cozy glowing harvest
- Difficulty: Fun and crafty
- Budget Breakdown: Amber lights: $15 | Fake pumpkins: $20
- Creator’s Tip: Use amber or orange-tinted lights to massively enhance the rich fall colors of your display.
- Smart Sourcing: amber-tinted copper wire strings and carvable foam craft pumpkins.
The ultimate secret to premium ambiance? The automation trick hiding in the next section…
49. Event-Responsive Configurations
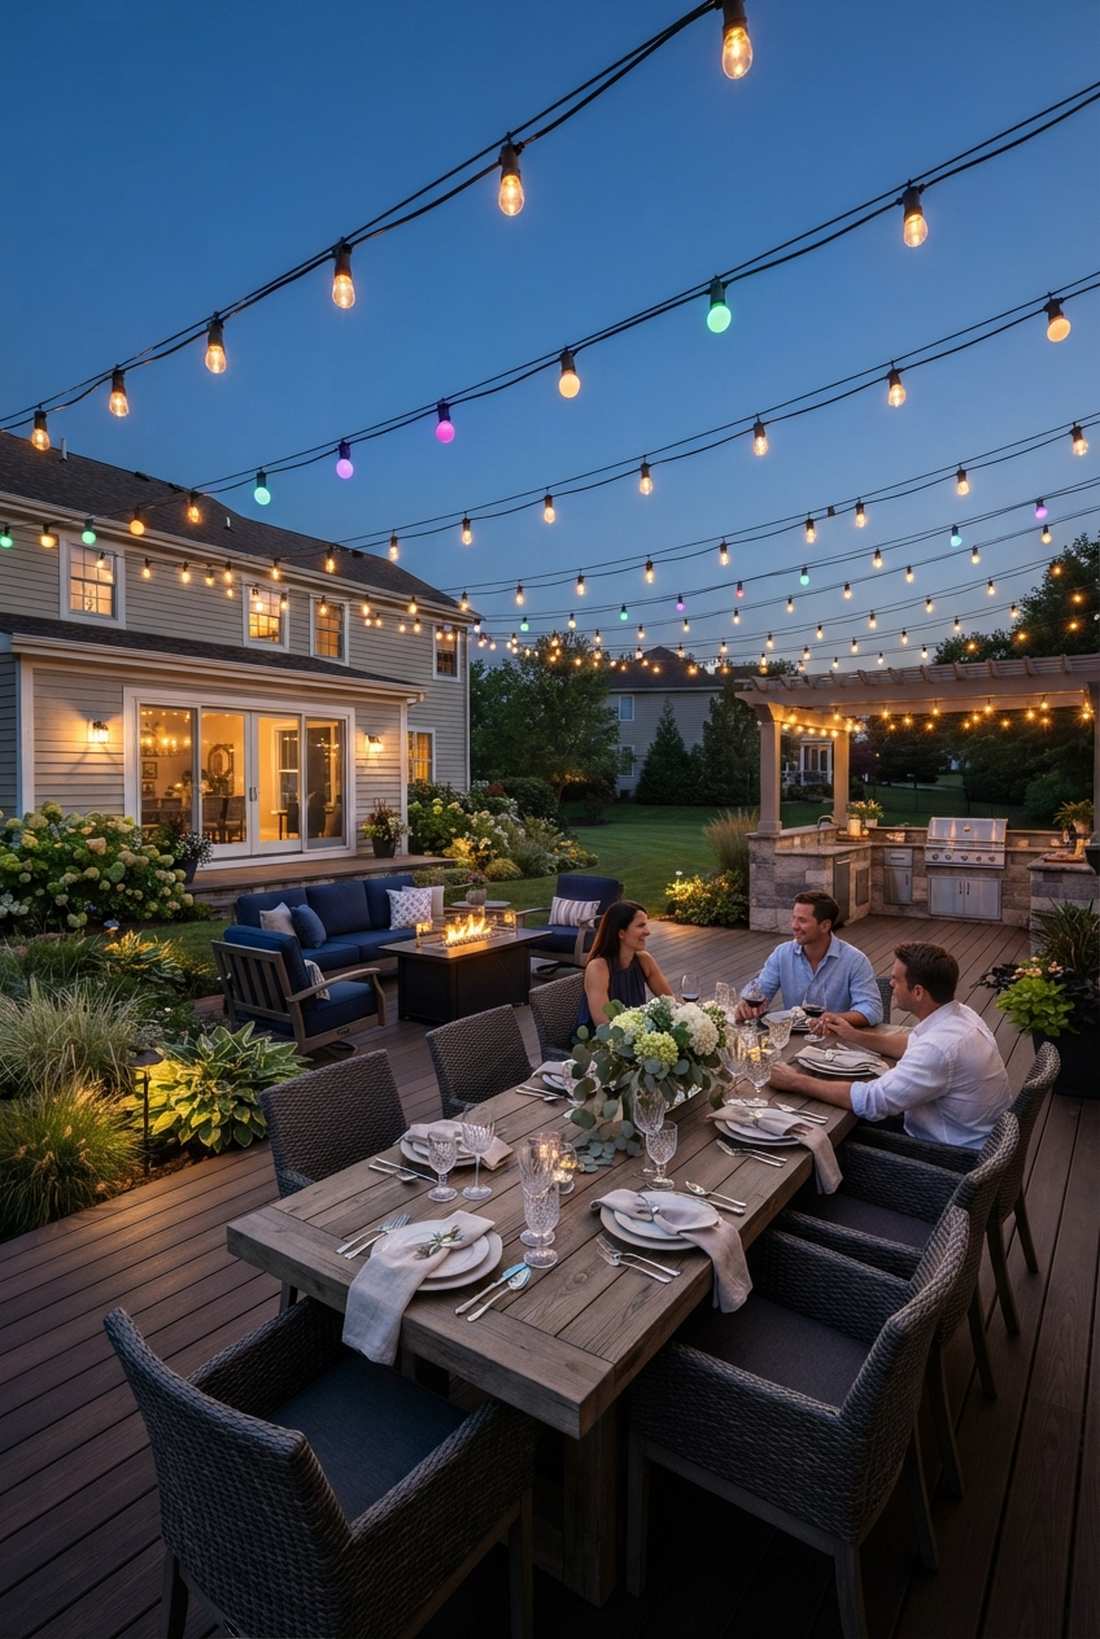

Swaps your yard’s entire personality with the push of a button. Multi-occasion lighting grids utilize dual strands for different moods. Built specifically for people who host both formal dinners and wild parties.
Running a warm-white strand and an RGB color strand parallel on the same cable wire lets you flip vibes without rehanging anything. It delivers a surprisingly premium look that makes your yard wildly versatile.
Dual-wire your patio for $70–$120.
- Key Materials: Parallel warm-white and RGB strands
- Vibe / Style: Chameleon party space
- Difficulty: Double stringing required
- Budget Breakdown: White lights: $40 | RGB lights: $50
- Creator’s Tip: Zip-tie both strands together on the ground before hanging them up to save hours on the ladder.
- Smart Sourcing: app-controlled RGB fairy strings and heavy-duty black zip ties (bulk pack).
50. Timer-Controlled Transitions
Feels like having a microscopic butler controlling your yard. Astronomical lighting timers adjust themselves perfectly to the shifting sunset every day. Essential for massive, complex landscape setups.
Ditching cheap mechanical dials for smart-plugs connected to local weather apps ensures your lights never turn on while the sun is still out. This tech upgrade looks far more expensive than it is and slashes your electric bill.
Automate your entire yard for $25–$40. Save this genius energy hack!
- Key Materials: WiFi-enabled outdoor smart plugs
- Vibe / Style: High-tech effortless luxury
- Difficulty: App setup required
- Budget Breakdown: Smart plugs: $30 | App: Free
- Creator’s Tip: Group your pathway lights and canopy lights on separate plugs so the canopy turns off at midnight while pathways stay lit.
- Smart Sourcing: weatherproof outdoor smart plugs (2-pack) and heavy-duty outdoor splitters.
51. Motion-Activated Accent Zones
Creates a magical yard that literally wakes up as you walk through it. Sensor-driven fairy lights ideas save power while giving off a massive wow-factor. Perfect for long, dark side-yards or trash-can paths.
Using soft-fade controllers instead of jarring security-light sensors makes the lights gently bloom rather than aggressively flashing. This nuanced upgrade instantly gives a designer-level finish to a basic security feature.
Install motion triggers for roughly $35–$60.
- Key Materials: Outdoor PIR motion sensors
- Vibe / Style: Responsive magical pathway
- Difficulty: Simple wiring/plugging
- Budget Breakdown: Sensors: $25 | Lights: $30
- Creator’s Tip: Point the sensor low to the ground to avoid stray neighborhood cats triggering your lights all night.
- Smart Sourcing: soft-fade outdoor motion sensors and low-voltage landscape transformers.
52. Smart Color-Changing Systems
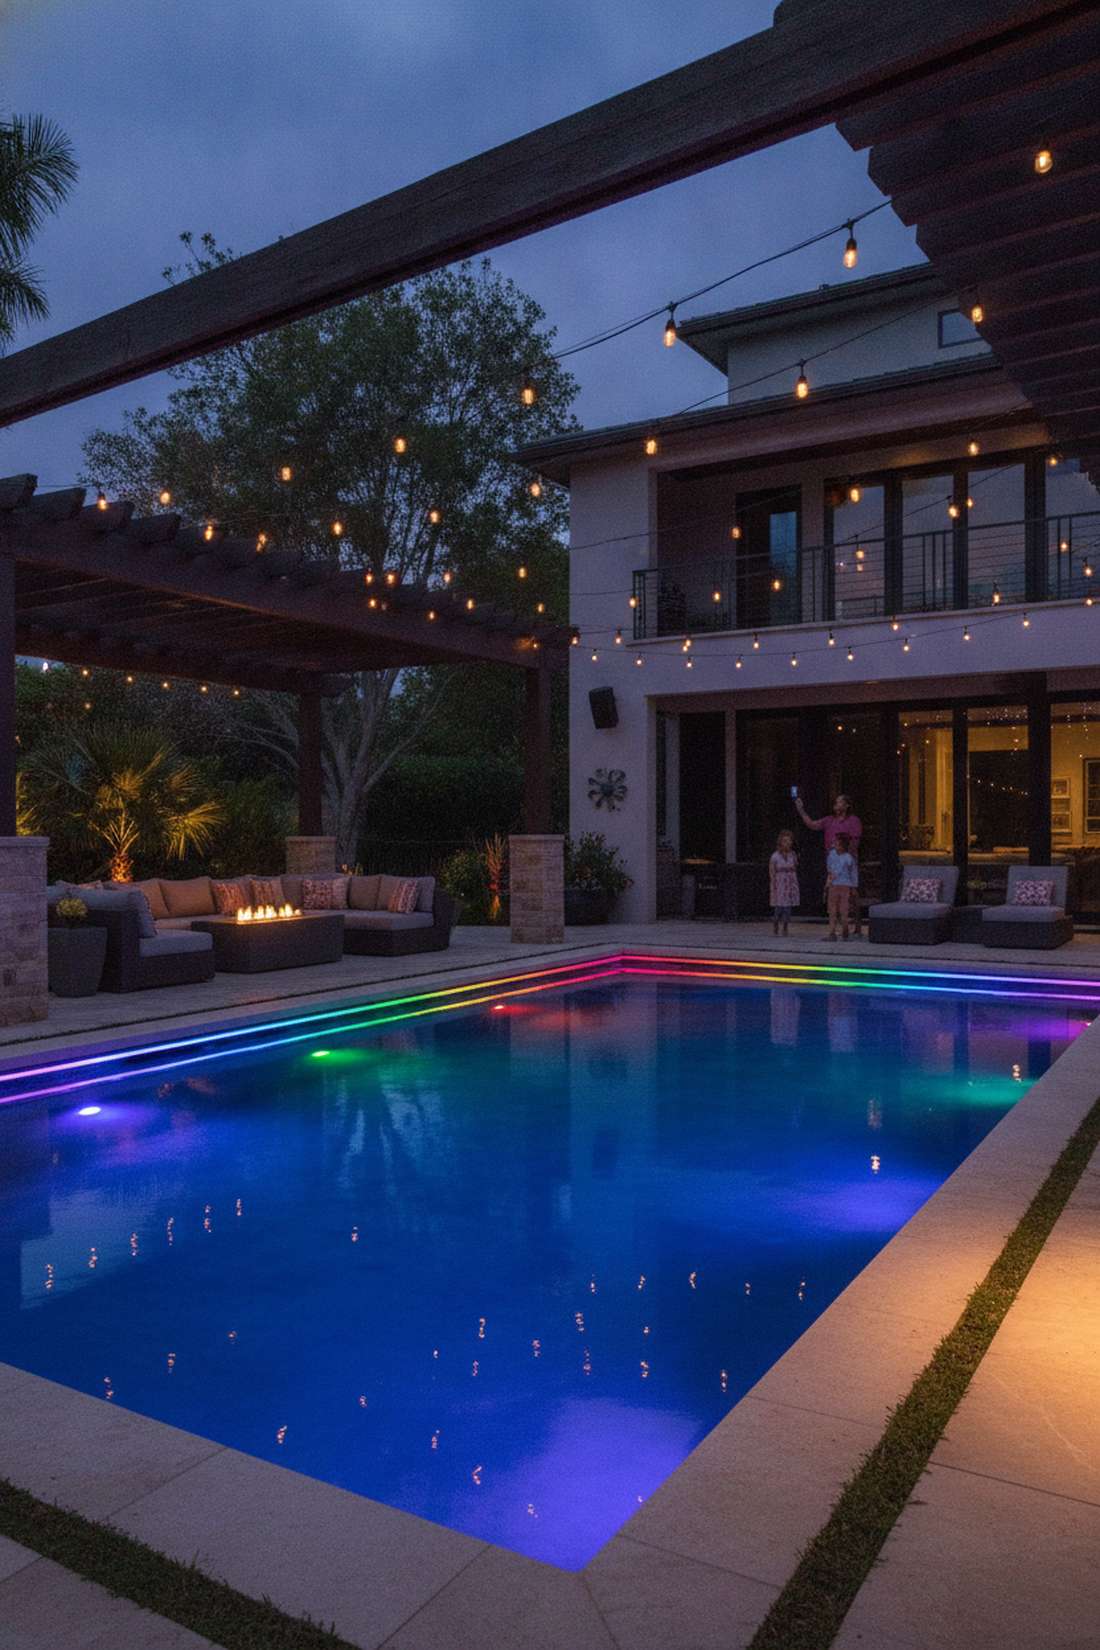
Looks like a multi-million dollar Vegas pool club whenever you want. App-controlled RGB LED setups give you infinite color palettes for zero extra physical work. Incredible for highly-active family backyards.
Sinking the extra cash into true RGBW systems (which have a dedicated white bulb) prevents the awful blue-tinted fake white that cheap systems produce. Utilizing these smart fairy garden kits future-proofs your entire property.
Upgrade to a smart system for $80–$150. Pin this to your ultimate dream yard board!
- Key Materials: RGBW smart light strings, WiFi mesh
- Vibe / Style: Premium infinite colors
- Difficulty: Easy physical, moderate digital
- Budget Breakdown: Smart strings: $100 | Connectors: $20
- Creator’s Tip: Ensure your home WiFi reaches the backyard before buying; you may need an outdoor WiFi extender.
- Smart Sourcing: premium RGBW smart outdoor stringers (starter kit) and outdoor WiFi range extenders.
Bringing Your Garden to Life After Dark
Executing these exactly 52 strategic fairy lights concepts shifts your outdoor space from a basic, dark yard into an expensive-looking, year-round retreat. True designer-level aesthetic isn’t about buying the most expensive custom fixtures; it’s about smart sourcing—leveraging bulk packs, starter kits, and UV-resistant materials. By blending robust commercial-grade support lines with cheap but beautiful micro-LEDs, you master the high-low budget trick. Start with a foundational overhead canopy and pathway safety layer, then experiment with high-CPC buyer upgrades like smart RGBW controls and automated timers to finalize that premium, maintenance-free magical atmosphere.
Frequently Asked Questions
What is the best type of fairy lights for outdoor garden use?
The smartest investment is skipping the cheap craft-store aisle and buying commercial-grade IP65 or IP68 waterproof outdoor fairy lights kits. If you want that high-end aesthetic without trenching wires, high-capacity solar-powered fairy lights string setups are incredibly cost-effective. For the ultimate “looks expensive” vibe, always opt for warm white (2700K-3000K) or invest in a premium smart RGBW starter kit to control the exact color temperature from your phone.
How do I protect fairy lights from weather damage?
Don’t let a $50 investment rot in the rain—buy heavy-duty weatherproof outdoor battery boxes and seal every single plug connection with marine-grade dielectric grease. If you’re building a permanent canopy, sourcing UV-coated patio fairy lights is non-negotiable to stop the plastic from shattering in the sun. Always pack your miniature garden supplies and extra stringers into sealed plastic storage reels before winter ice storms hit.
How many strands of fairy lights do I need for a typical pergola?
To avoid the dreaded “cheap, sparse” look, a 10×10 foot pergola using a zigzag pattern requires a bulk pack of 80-100 feet. For a premium, dense faux-ceiling, you need 150-200 feet of commercial stringers. Save massive amounts of money by buying connectable extra-long copper wire LED spools rather than linking ten expensive tiny strands together. Always order 20% more length than your raw measurements require.
Can fairy lights damage trees or plants?
Standard hard-wiring will absolutely strangle and kill your trees as they grow. To keep your landscaping safe, use tree-safe expandable light straps and flexible bungee ties that stretch. Modern LED micro-lights generate zero heat, meaning you can safely weave them directly into expensive bushes and fairy garden decor without burning the foliage. Always use green-coated floral wire to attach them securely without damaging bark.
What are the most energy-efficient outdoor fairy light options?
High-efficiency solar string kits completely eliminate your electric bill, paying for themselves in one season. If you prefer the absolute brightest output, plug-in LEDs attached to WiFi-enabled outdoor smart plugs give you automated control, ensuring you only burn electricity when you are actually outside. Buying a starter kit with built-in dimmers allows you to drop the brightness by 50%, stretching the bulb lifespan for years.