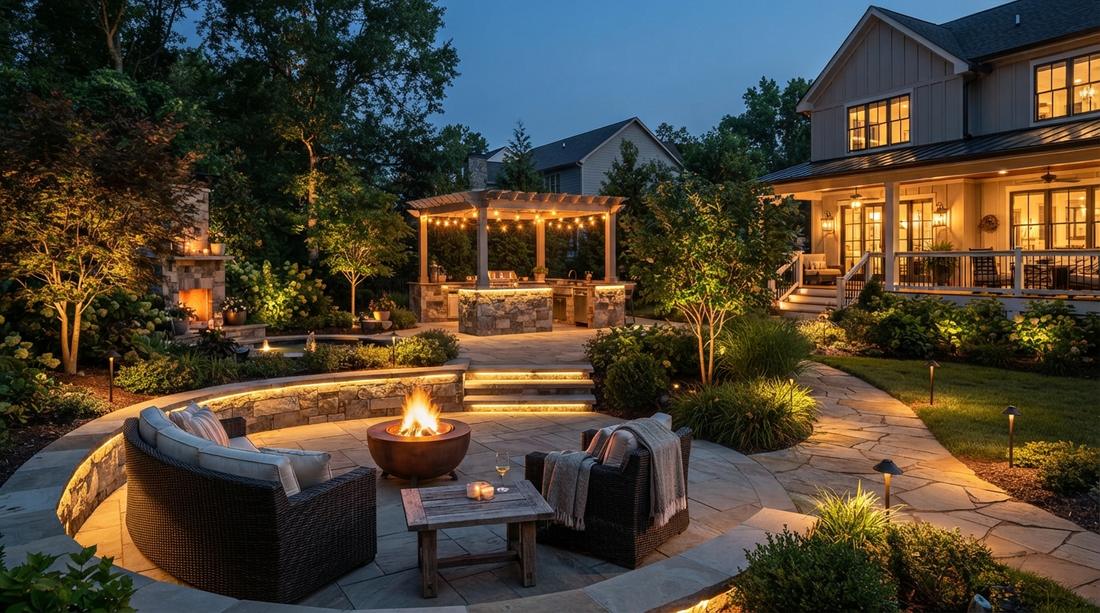
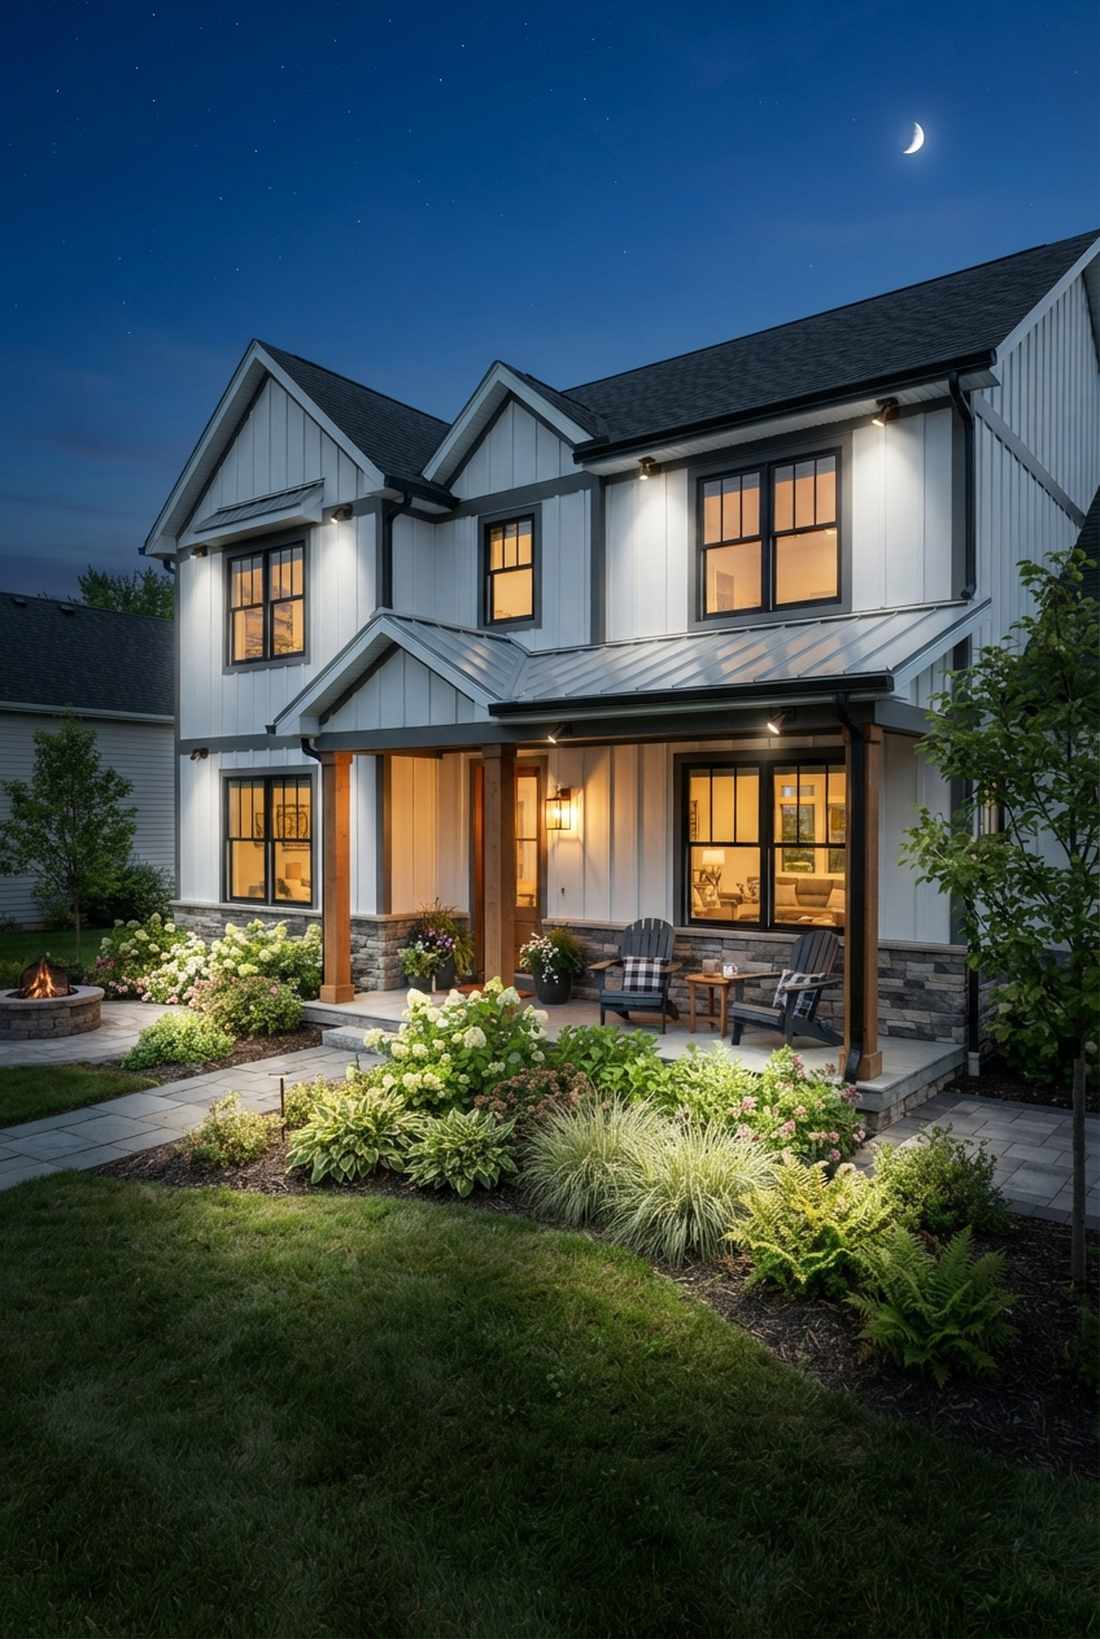
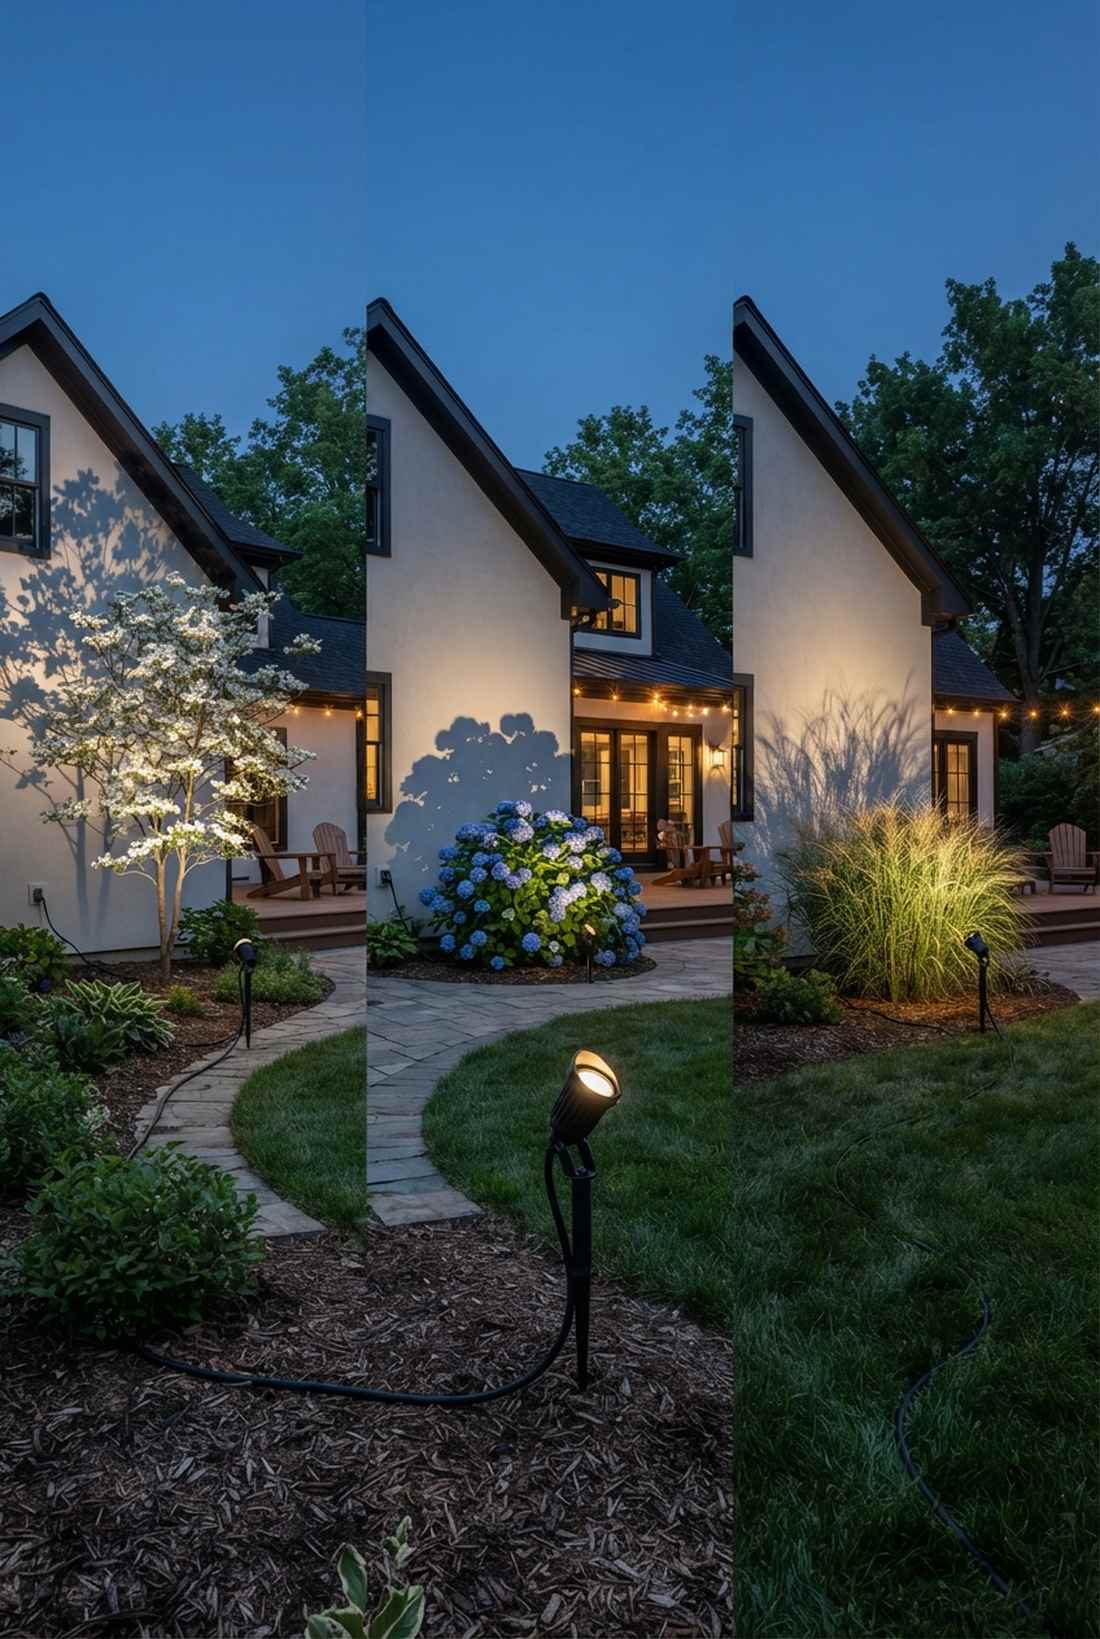
Mastering outdoor lighting landscape layouts instantly elevates a dull yard into a premium evening sanctuary. Skip cheap solar spikes and leverage high-lumen, UV-coated fixtures for lasting impact. These exact visual blueprints deliver designer-level ambiance on an everyday budget.
Design SnapshotKey Principles
- Layered Illumination: Combine uplighting, downlighting, and path lighting to create depth and dimensional interest throughout the landscape
- Strategic Beam Angles: Match beam width to plant size—narrow beams for tall trees, wide wash beams for shrub masses and flower beds
- Color Temperature Selection: Use warm 2700-3000K tones for inviting spaces, neutral 3500K for botanical accuracy, cool 4000K for modern aesthetics
- Fixture Concealment: Hide hardware behind plantings, stones, or architectural elements to maintain clean sightlines during daylight hours
Foundation Uplighting Strategies
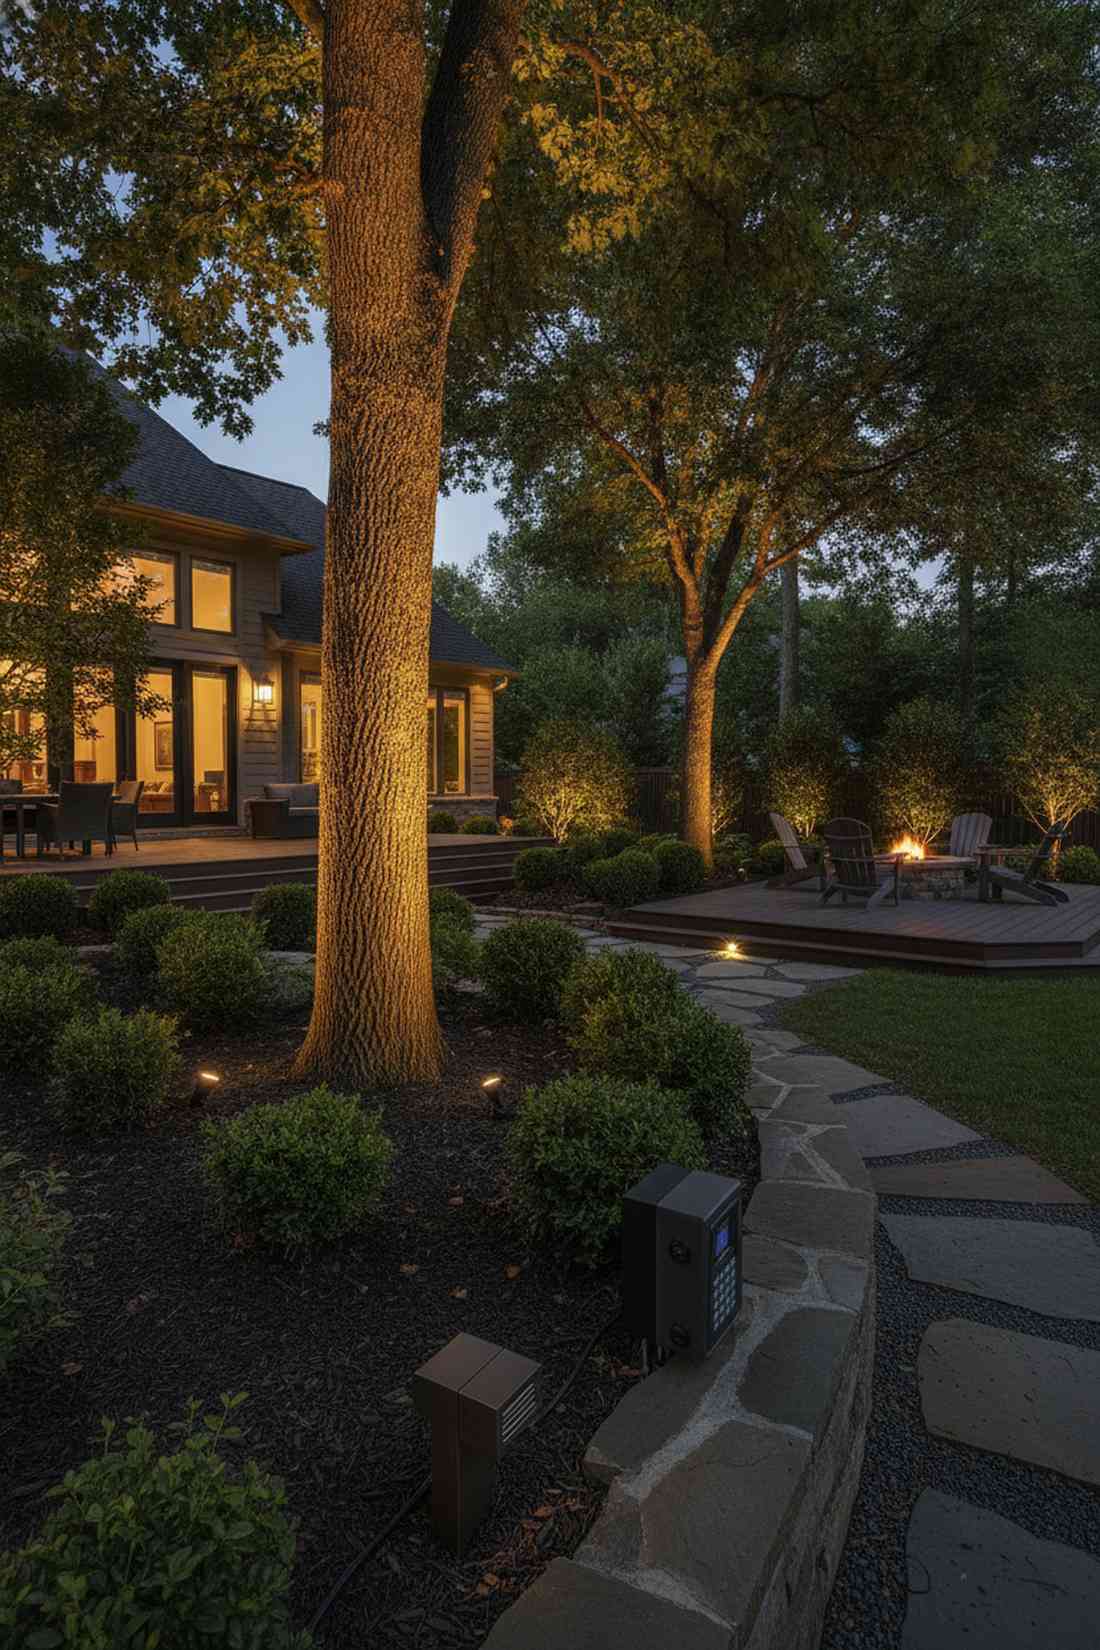
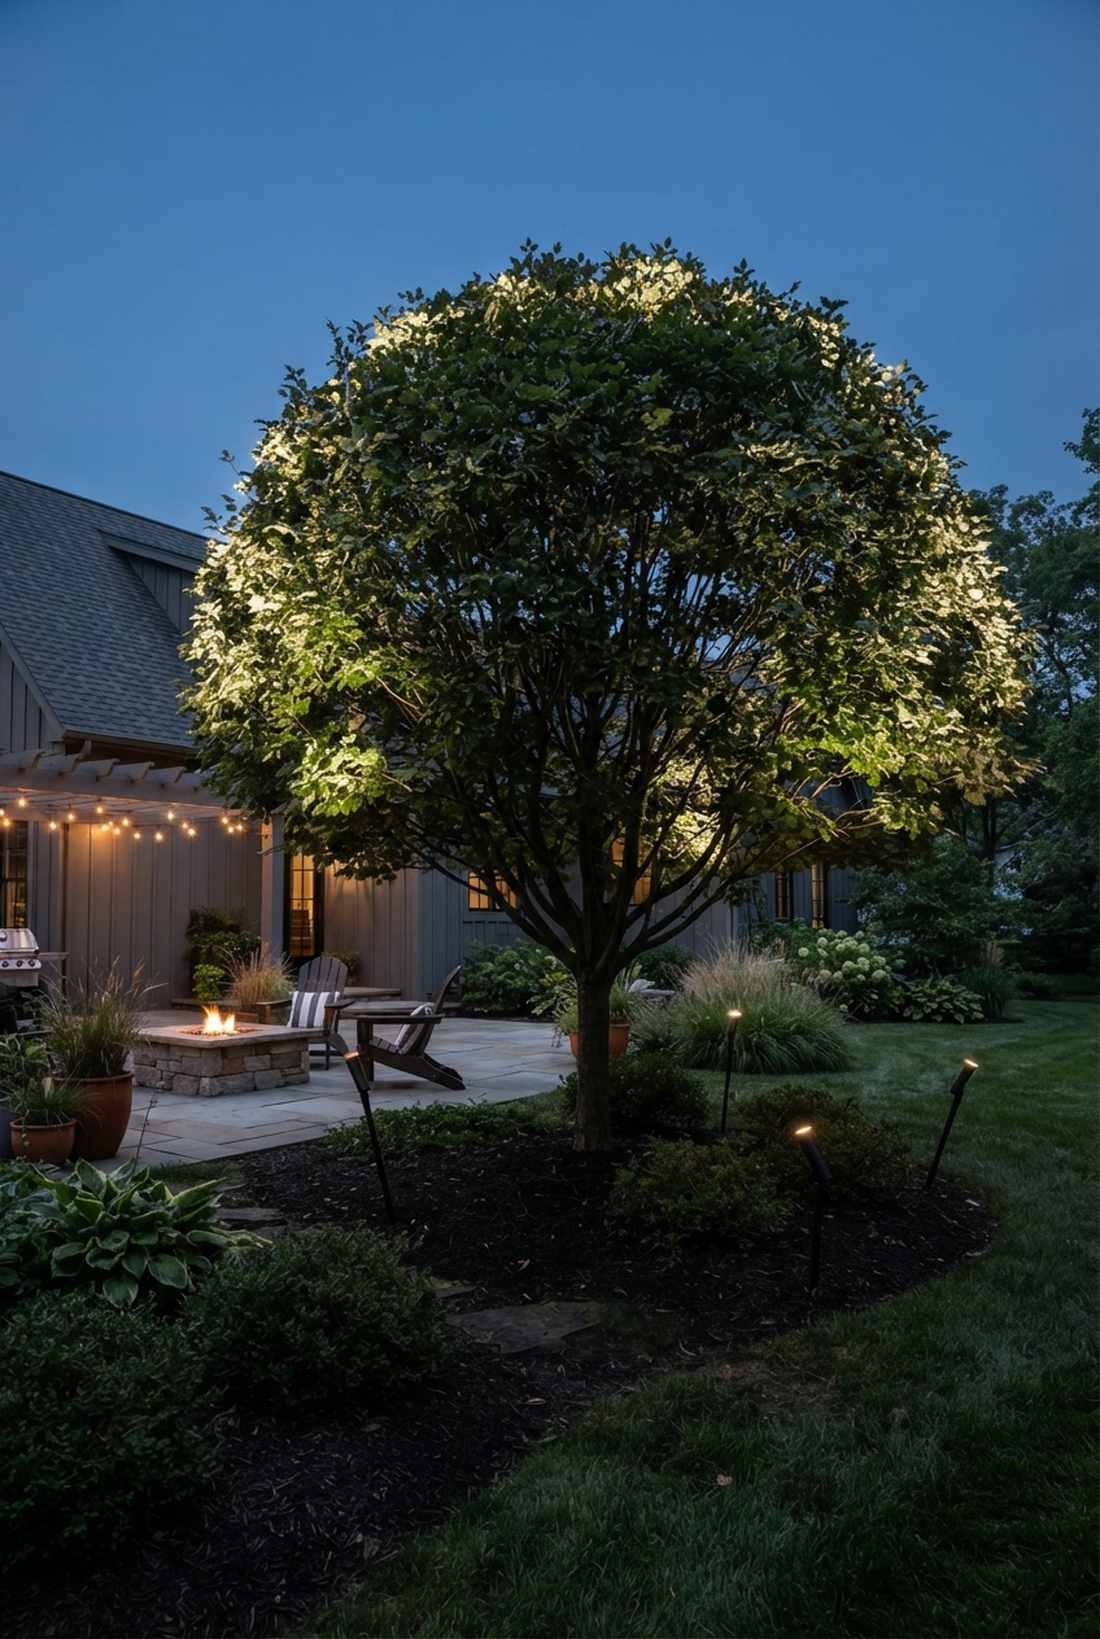
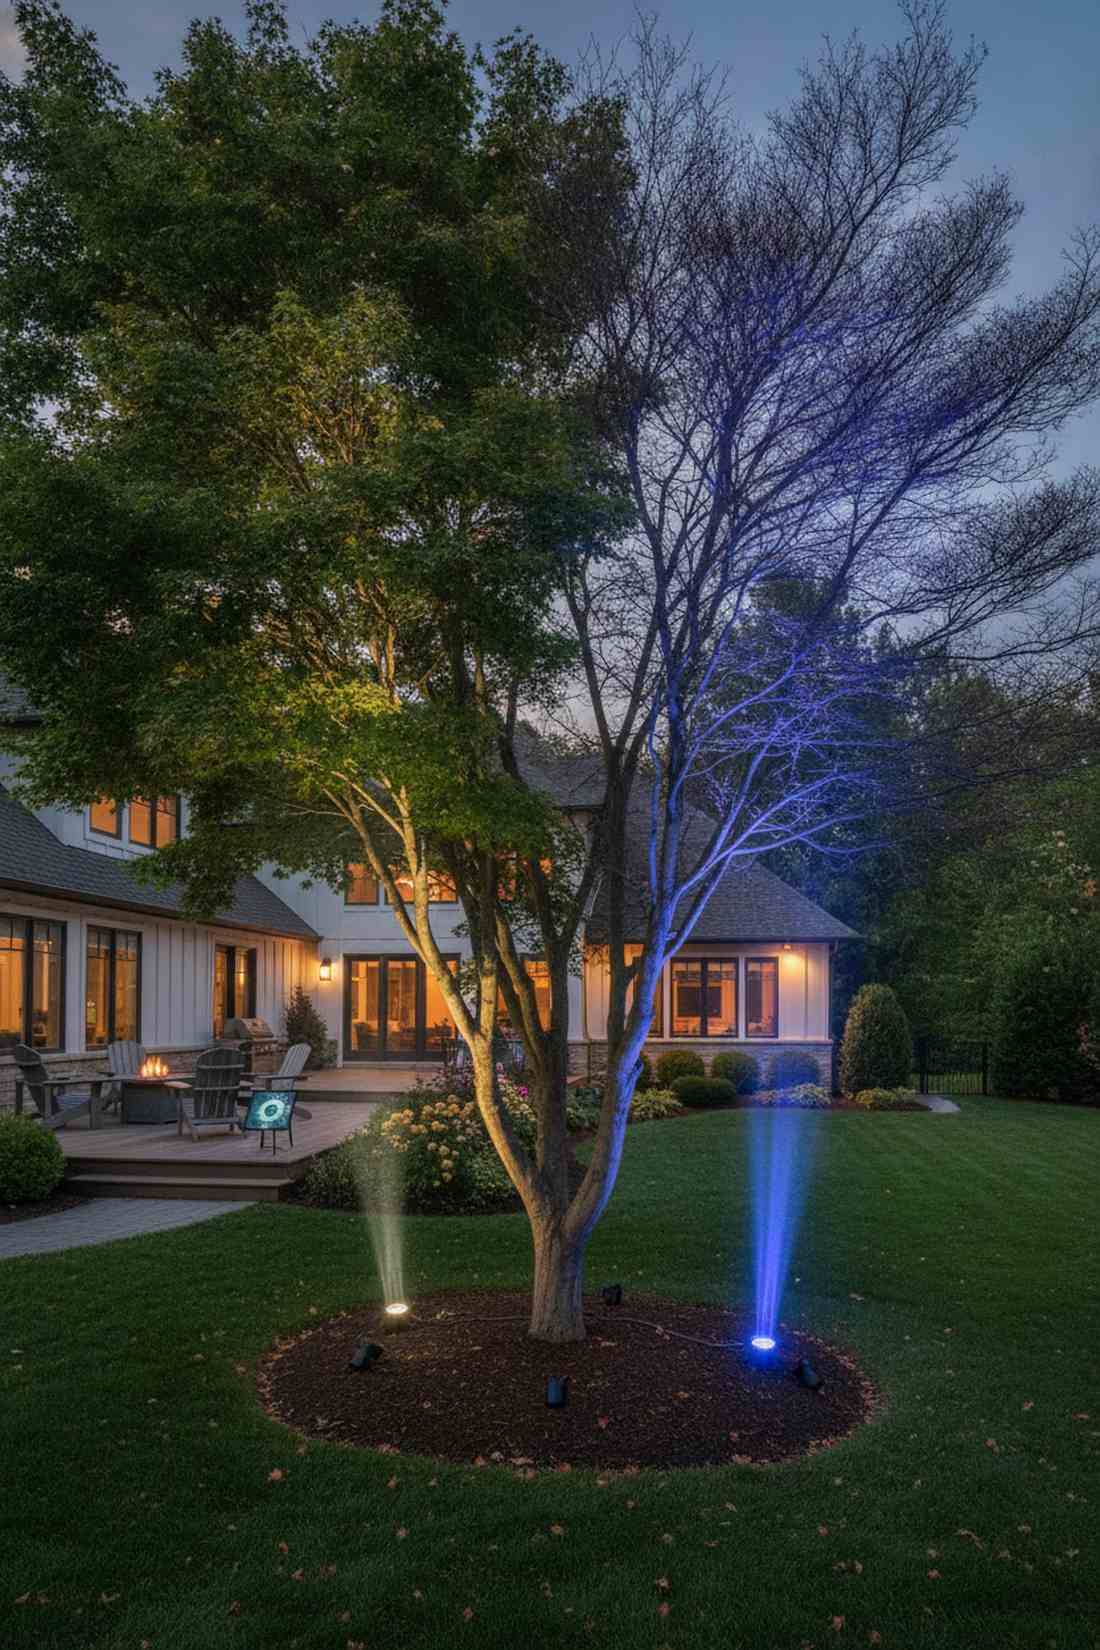
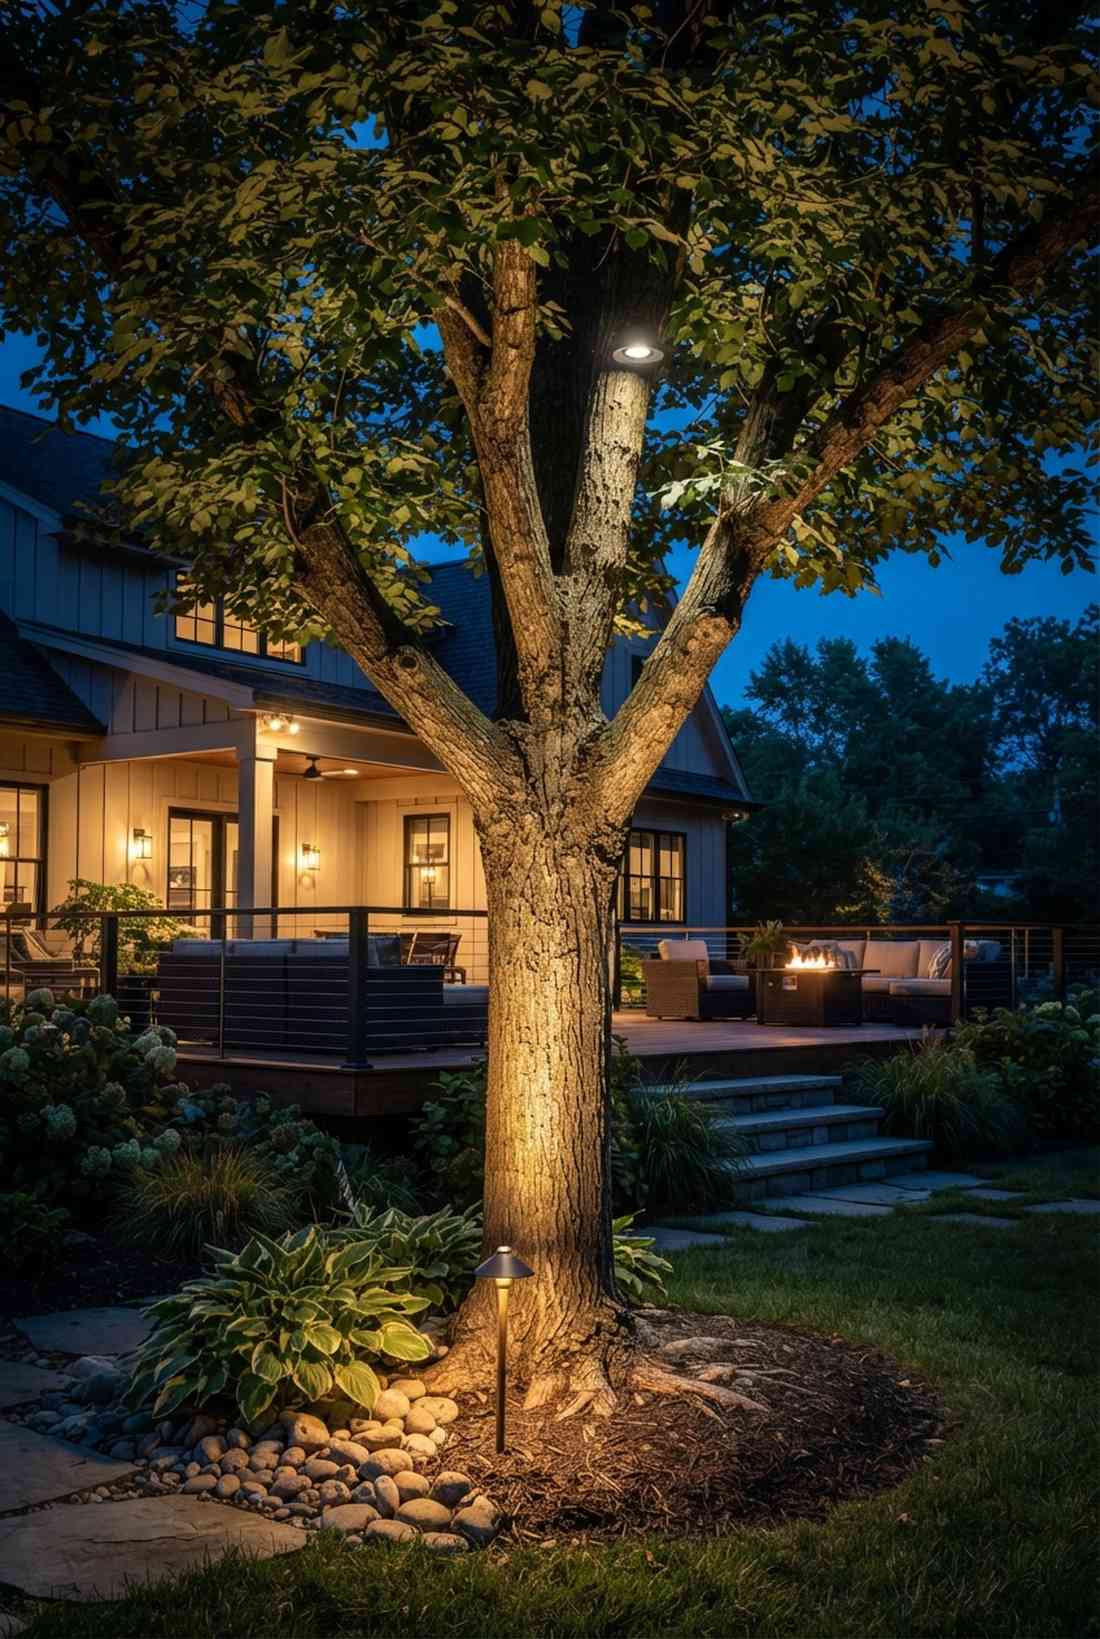
1. Single-Source Uplighting for Specimen Trees
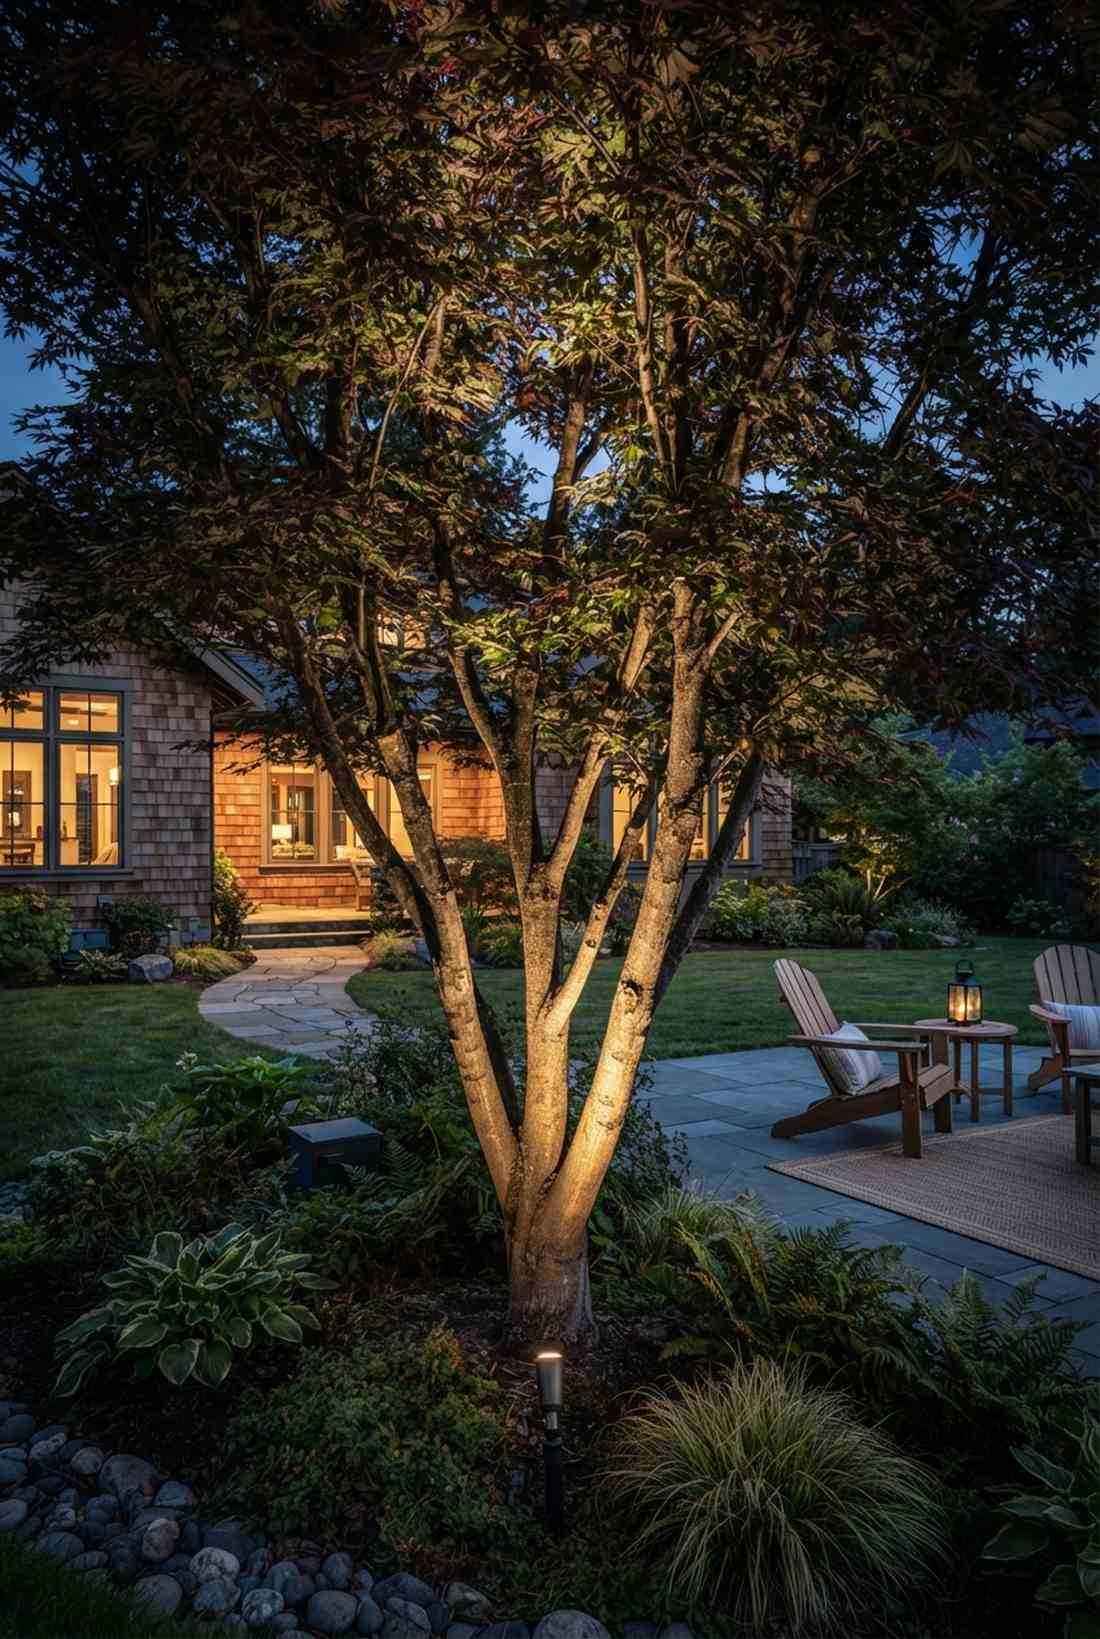

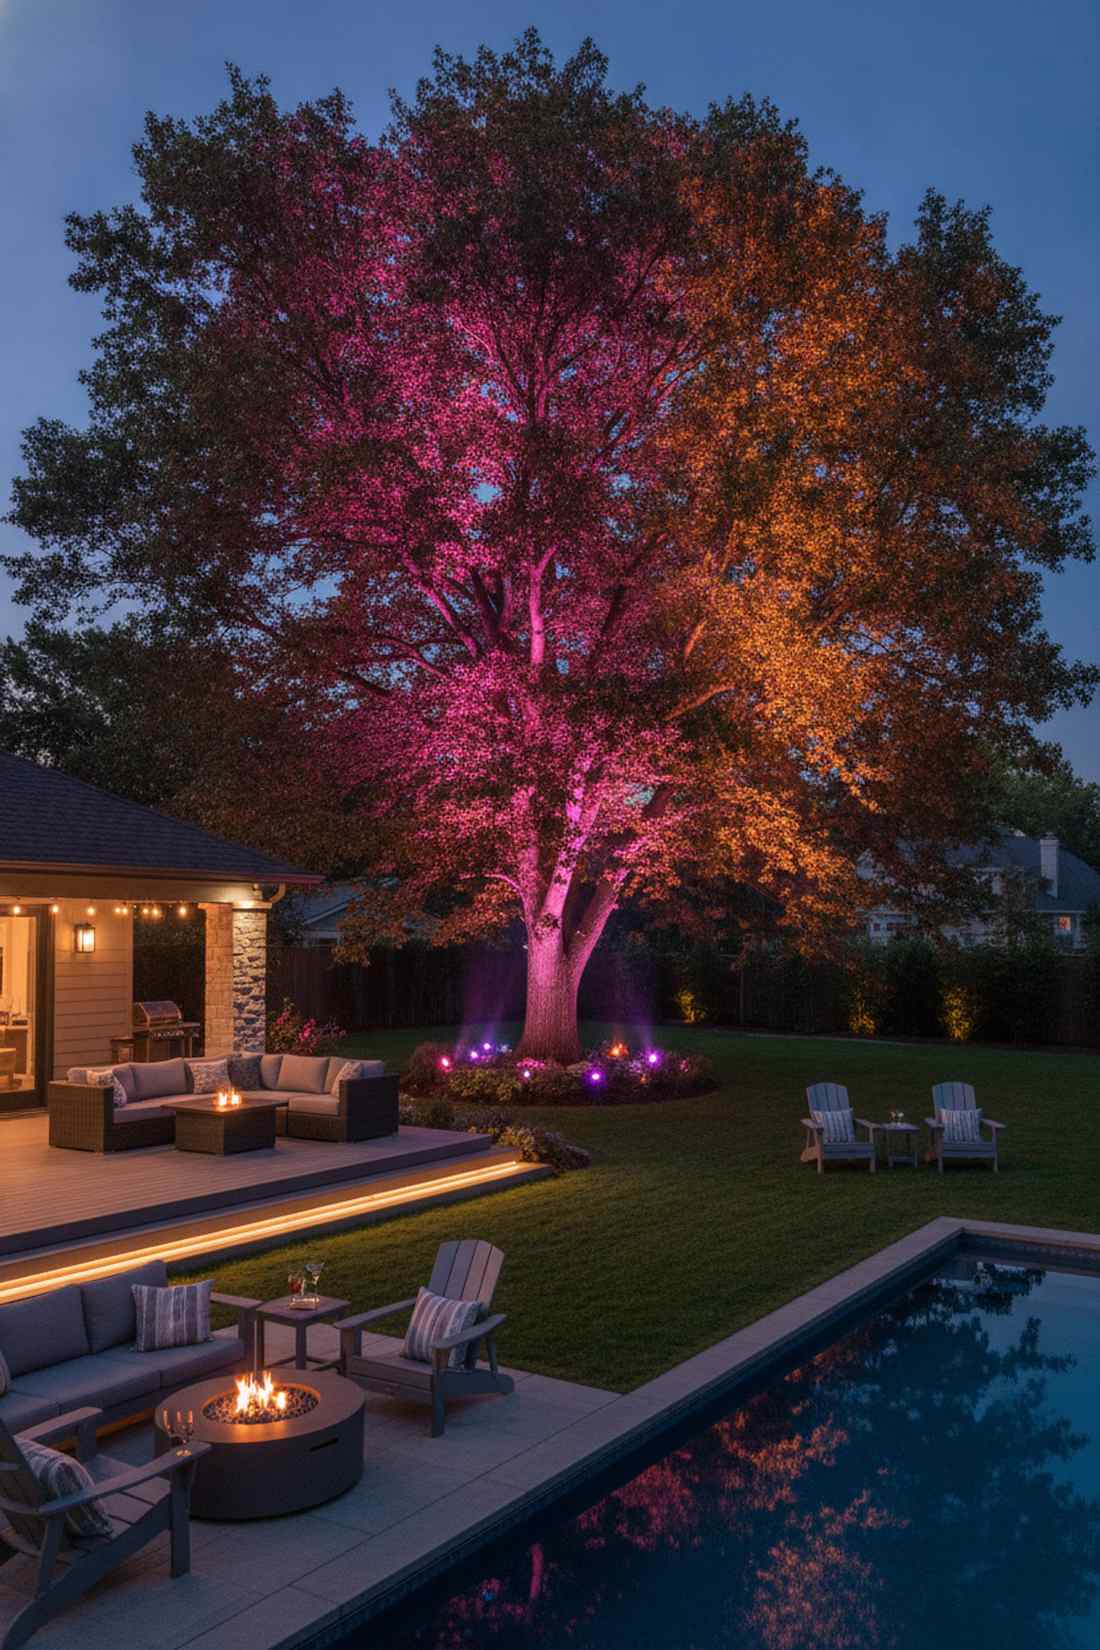
A bold specimen tree lighting layout feels like a private botanical resort right in your backyard. Works exceptionally well for showcasing ornamental Japanese maples or striking birch trunks near front entries.
Forget scattering cheap lights everywhere; a solitary heavy-duty beam delivers a surprisingly premium look by forcing dramatic shadows into the canopy. By using a narrow 10-degree LED fixture aimed directly at the central trunk, the bark texture pops instantly. It is the perfect excuse to finally upgrade your landscape fixture kits.
You can easily pull this off for around $45–$80 per tree. Save this to your DIY weekend garden board!
- Key Materials: Narrow-beam LED spotlight
- Vibe / Style: Architectural drama
- Difficulty: Easy beginner setup
- Budget Breakdown: Spotlight: $50 | Wiring: $20.
- Creator’s Tip: Angle the beam specifically at the first major branch fork for maximum shadow play.
- Smart Sourcing: cast-brass narrow beam spotlights and heavy-duty low voltage transformers.
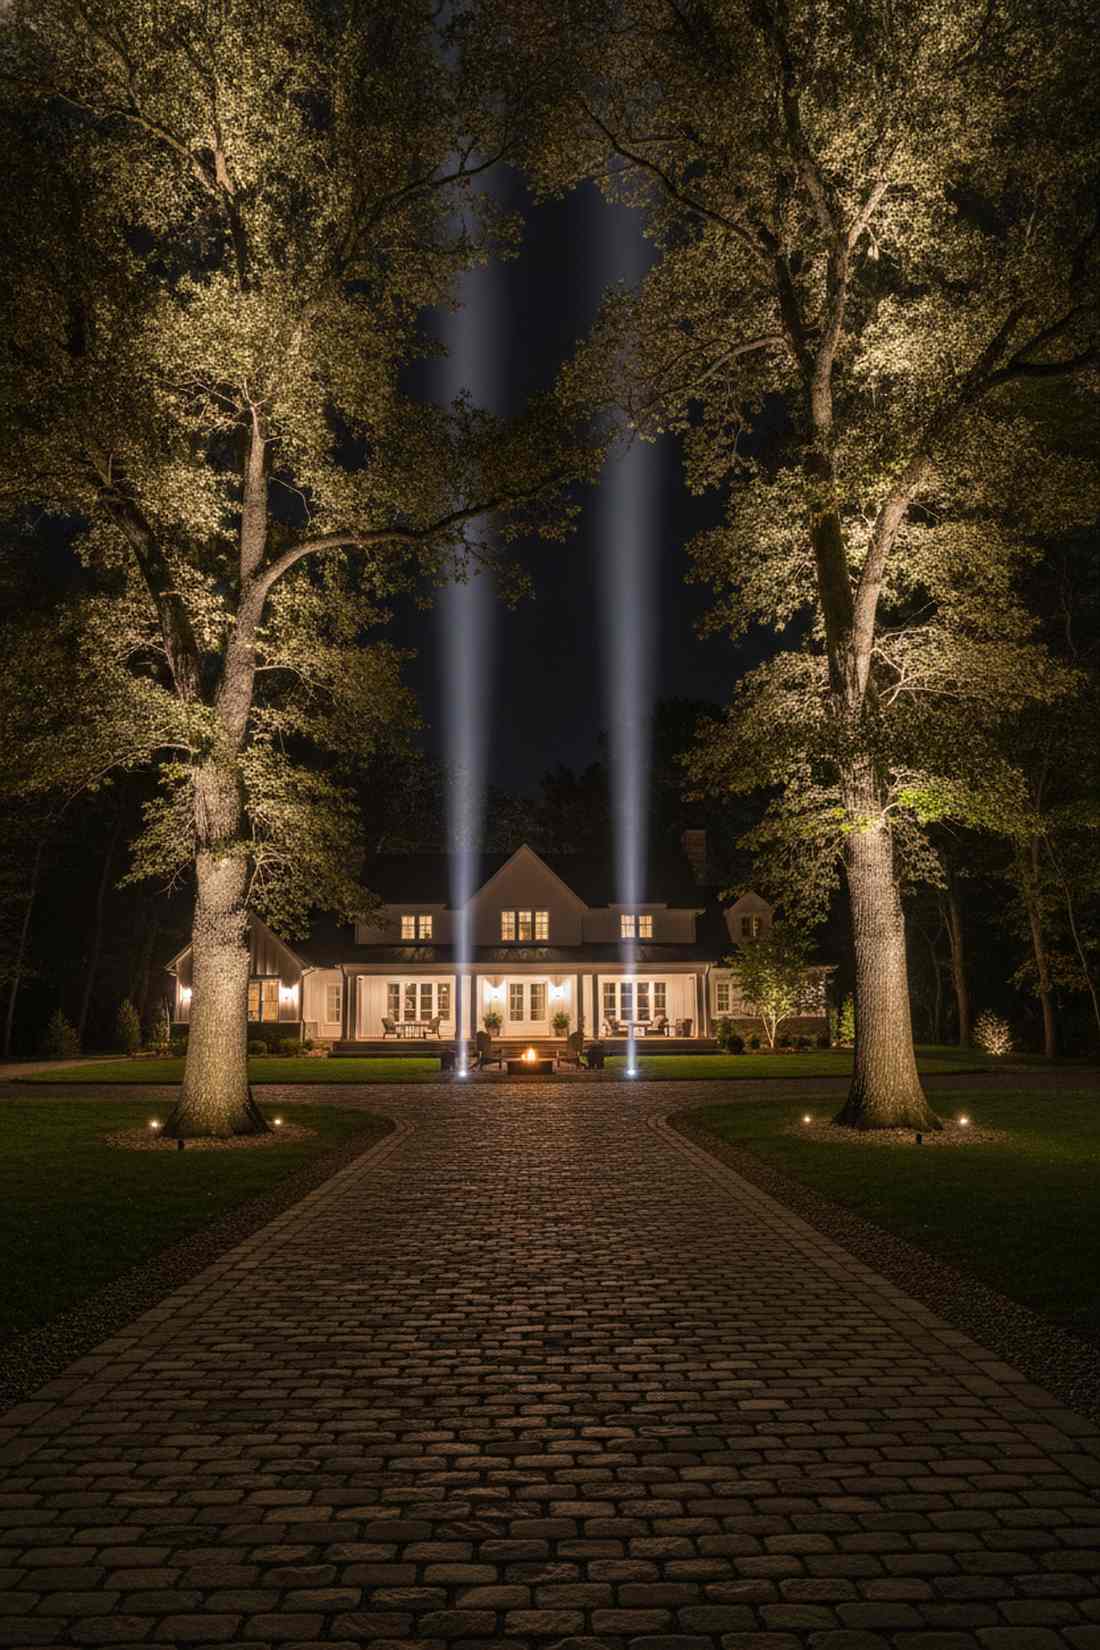
2. Dual-Uplight Cross Positioning
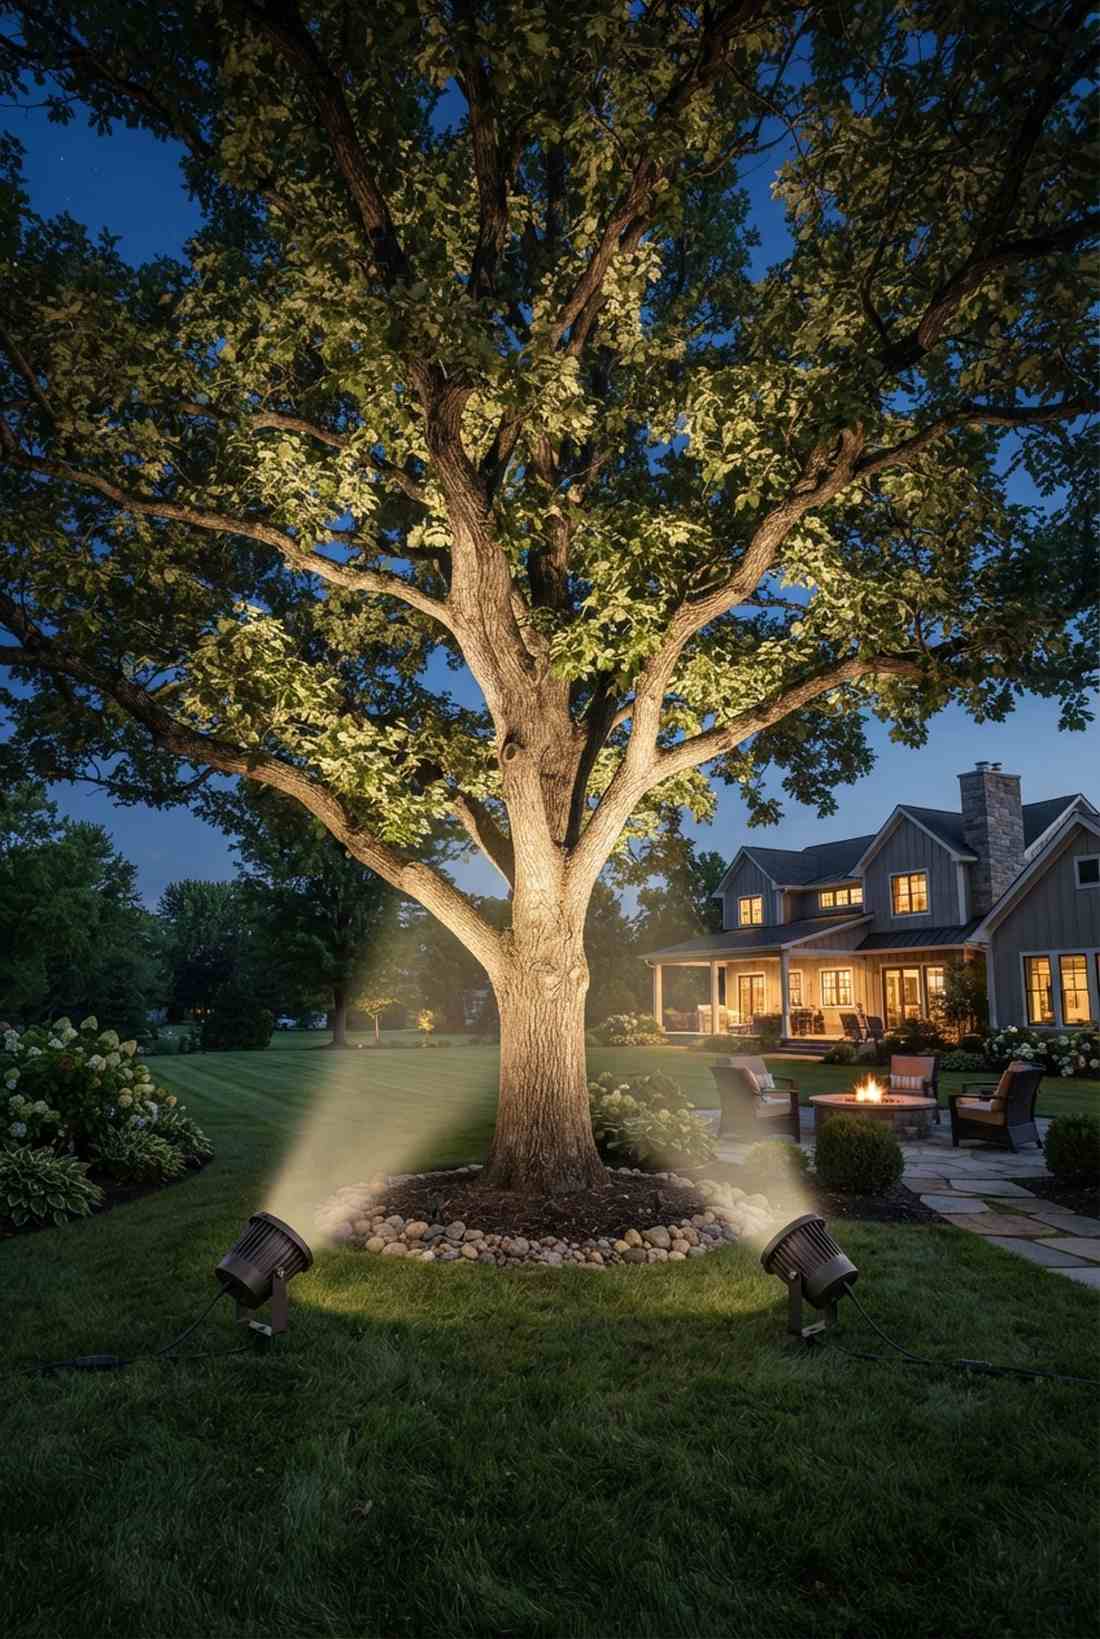
This broad canopy tree glow feels straight out of a storybook twilight scene. It is the ultimate solution for massive oak or elm trees that dominate a large backyard space.
Relying on a single light for a massive tree is a massive mistake that creates flat, ugly blind spots. Using two intersecting beams at 45-degree angles eliminates harsh shadows and provides full dimensional volume. Investing in quality hardscape lighting accessories here ensures the dual beams don’t wash each other out.
Expect to spend roughly $120 total for the pair of lights. It’s a fast upgrade that completely changes the vibe.
- Key Materials: Twin matching LED wash fixtures
- Vibe / Style: Majestic estate
- Difficulty: Intermediate wiring
- Budget Breakdown: 2x Fixtures: $90 | Connectors: $30.
- Creator’s Tip: Ensure identical wattage on both sides to keep the shadow distribution symmetrical.
- Smart Sourcing: pre-wired LED floodlights (2-pack) and waterproof wire connector starter kits.
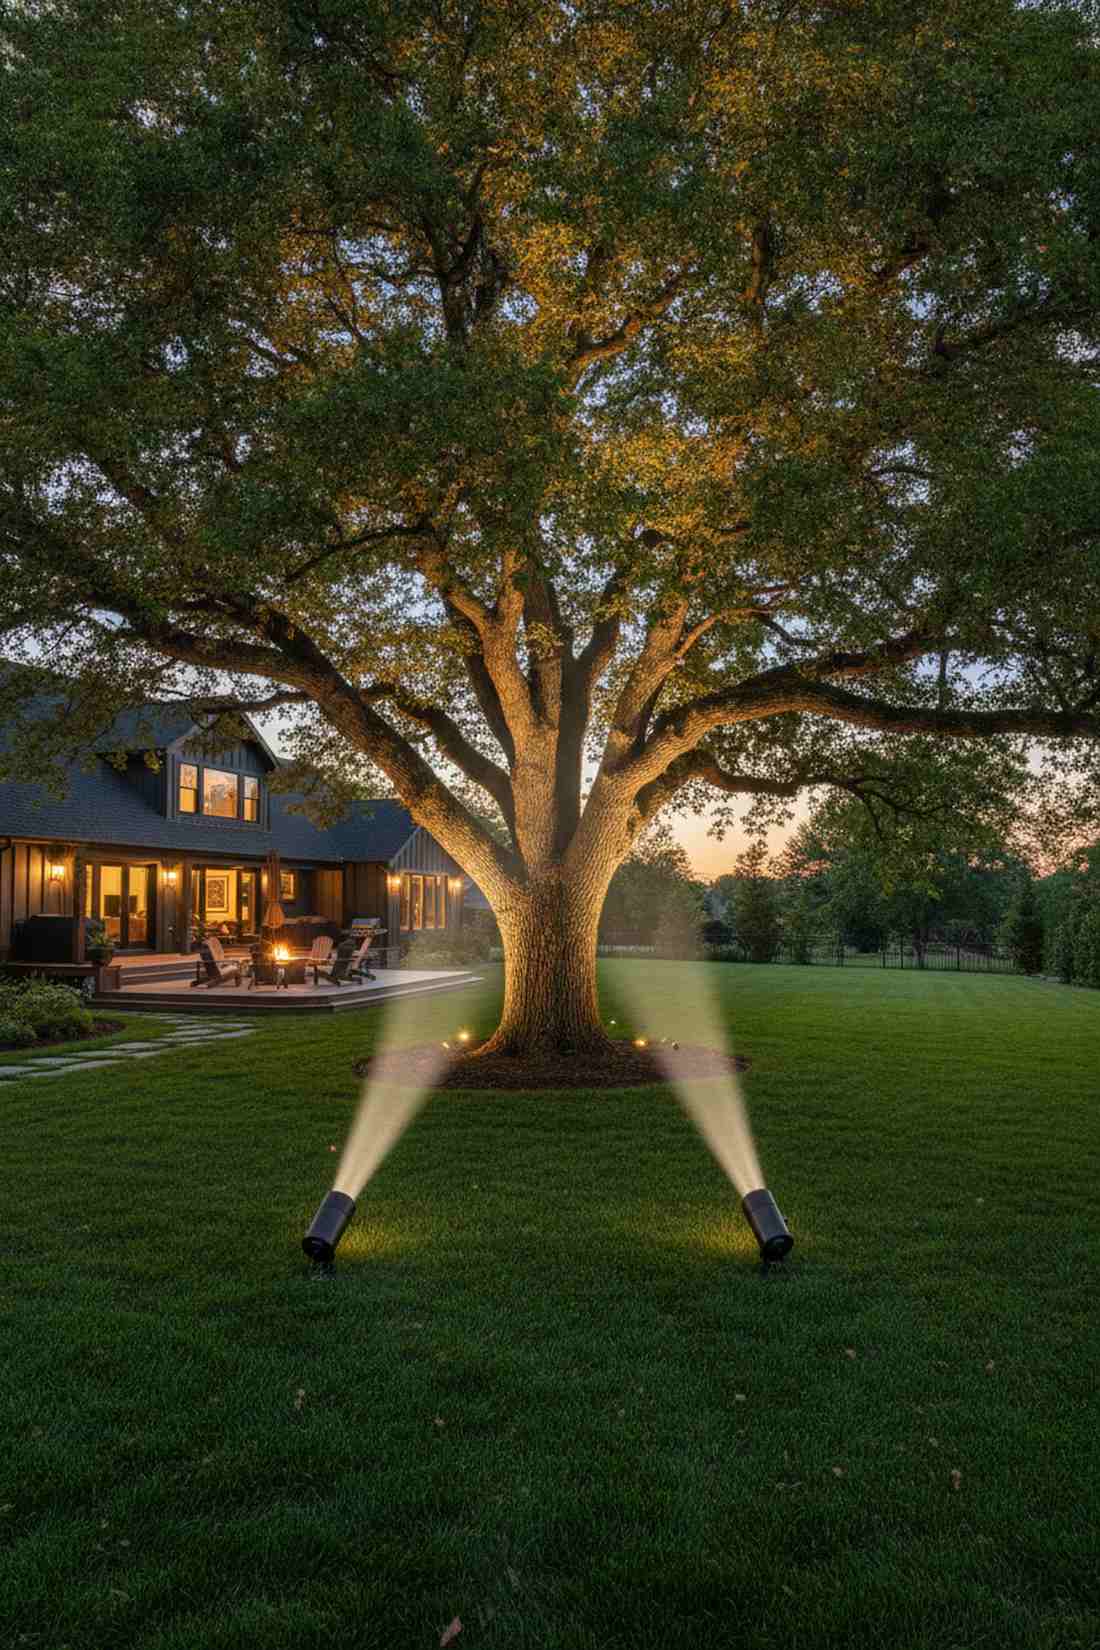
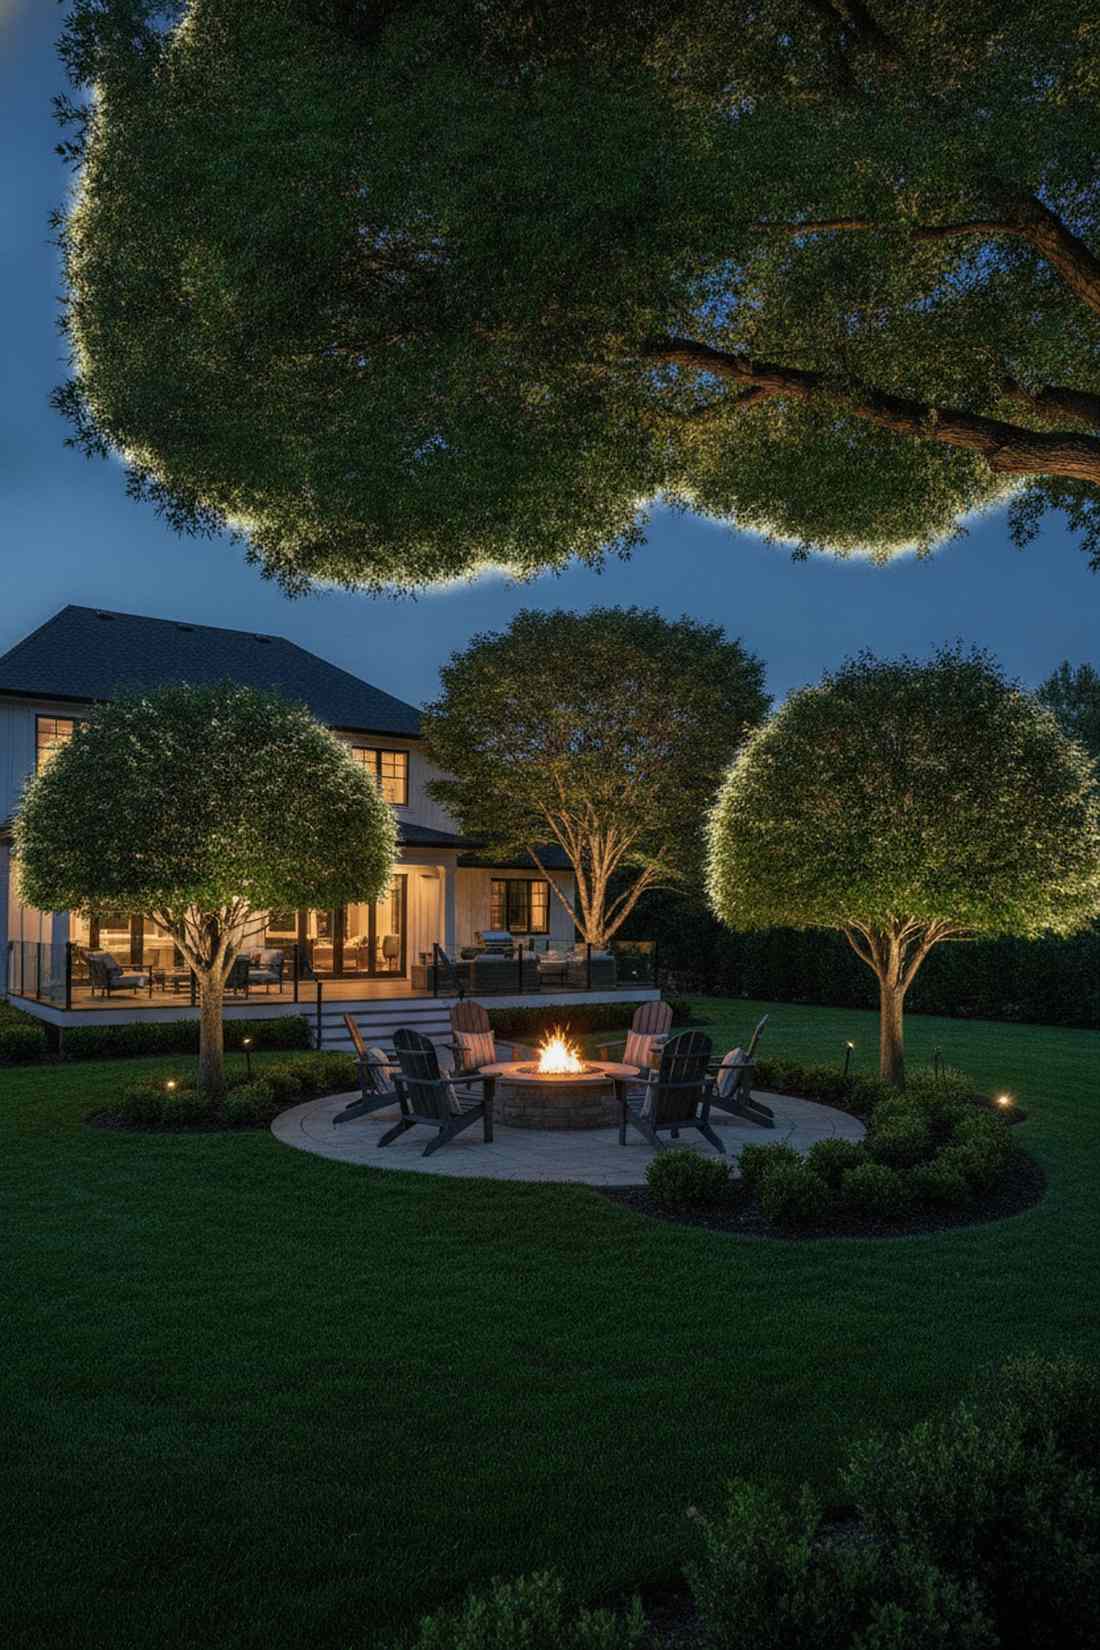
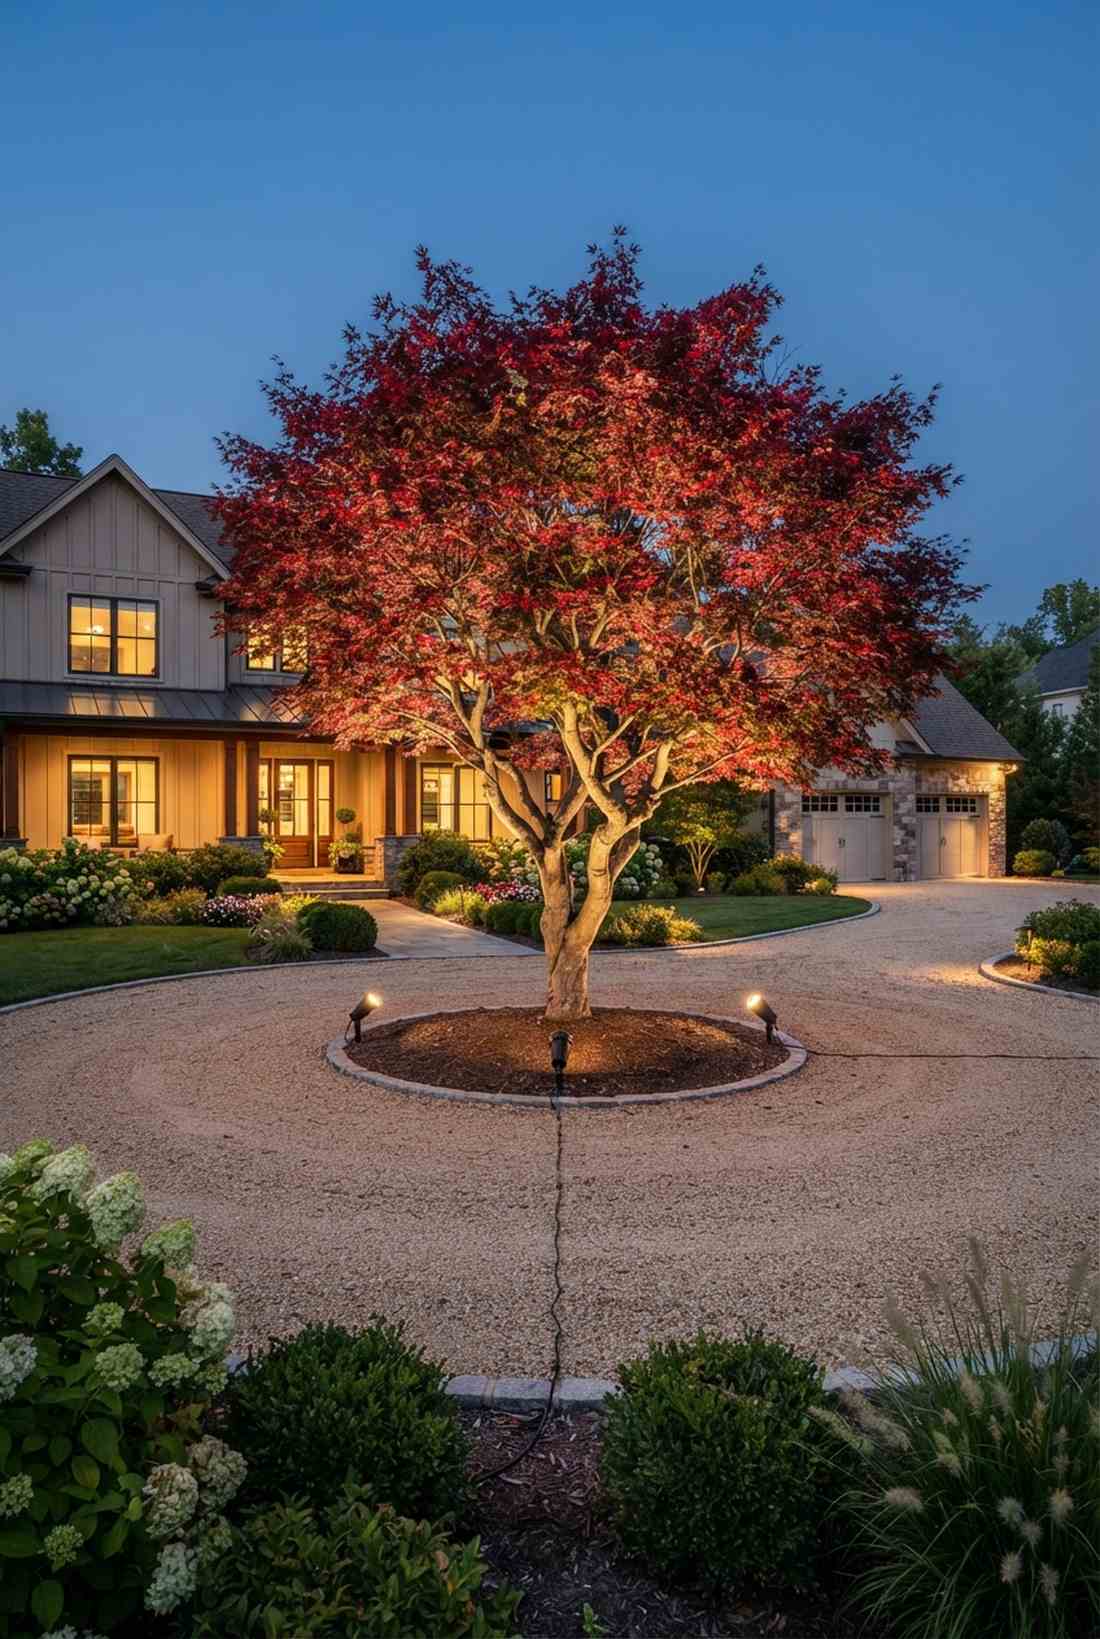
3. Triple-Point Surround Lighting
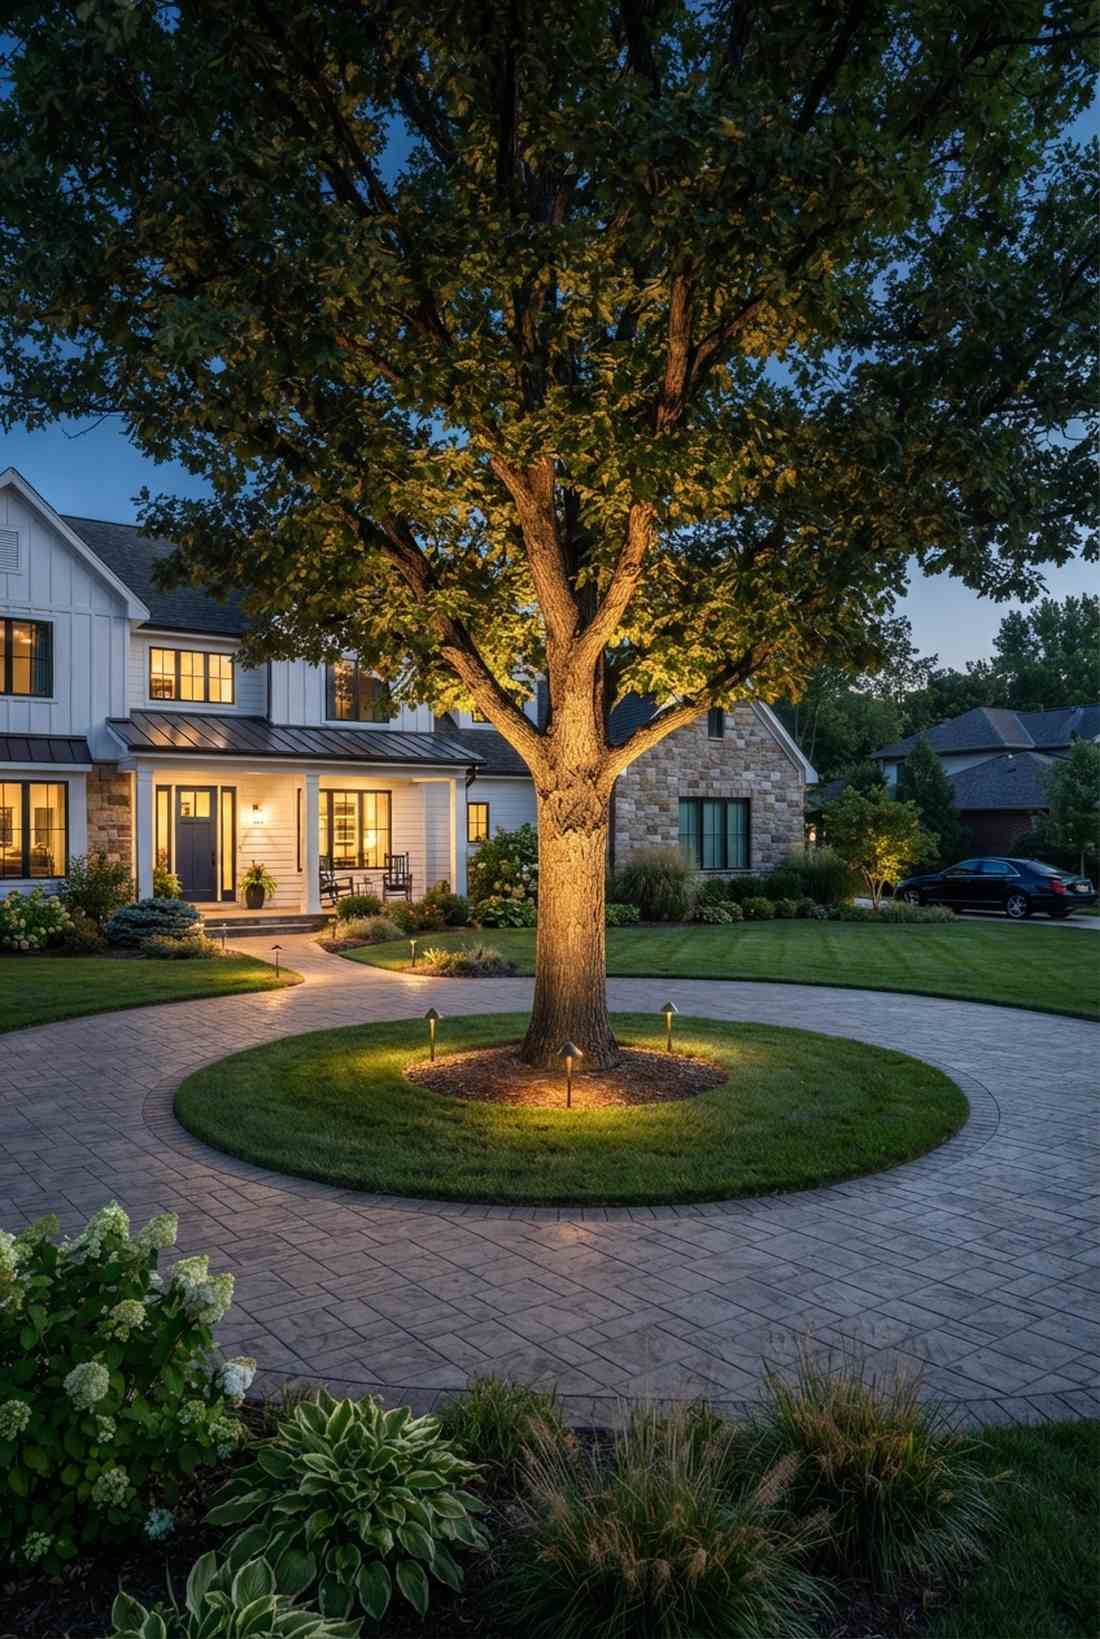
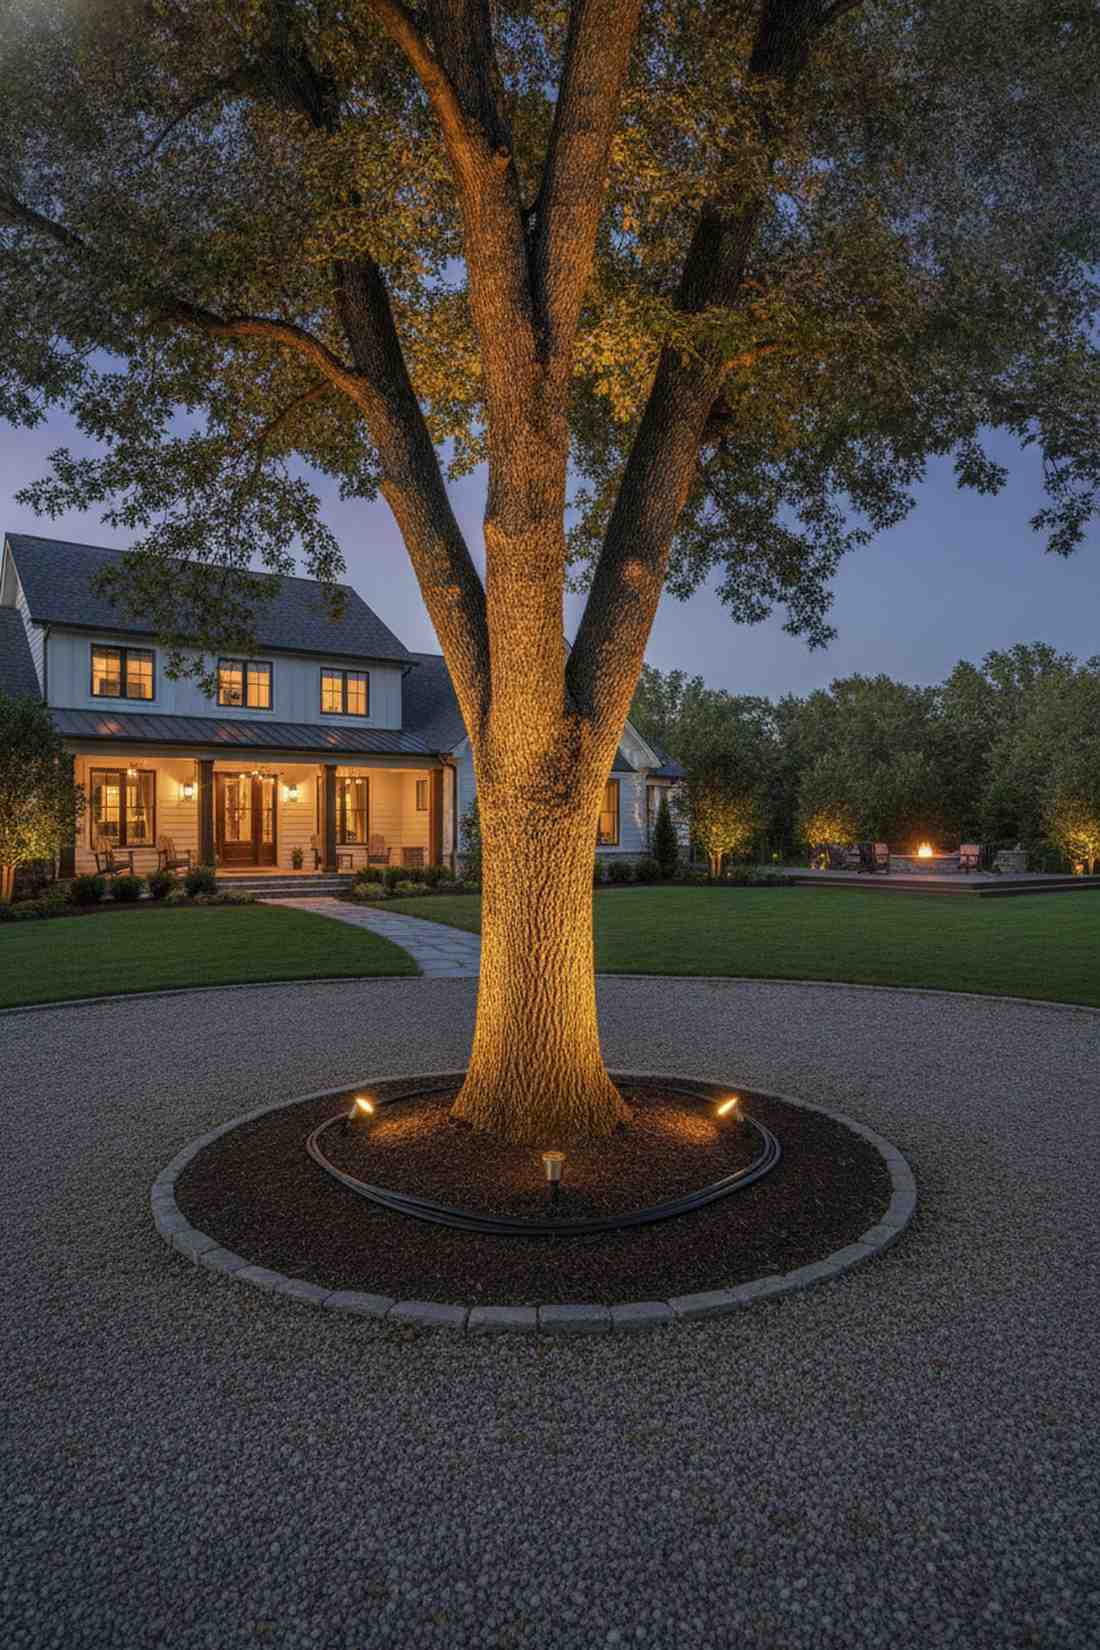
A seamless 360-degree tree illumination setup feels like a glowing centerpiece in a luxury park. Place this in the absolute center of a circular driveway or a primary lawn focal point.
Most homeowners only light the front of the tree, ignoring the gorgeous depth visible from the sides. Placing three identical uplights in a strict triangular formation wraps the trunk in light, completely banishing dark zones. Throwing in professional-grade waterproof wiring ensures it survives the rainy season.
This robust layout runs about $150–$200 for materials. Pin this if you’re planning a massive yard renovation.
- Key Materials: Three mid-wattage uplights, waterproof splices
- Vibe / Style: 360-degree luxury
- Difficulty: Intermediate
- Budget Breakdown: 3x Uplights: $140 | Supplies: $40.
- Creator’s Tip: Measure exact equal distances from the trunk so the light intensity perfectly matches all around.
- Smart Sourcing: commercial-grade brass uplights and direct burial landscape wire spools.
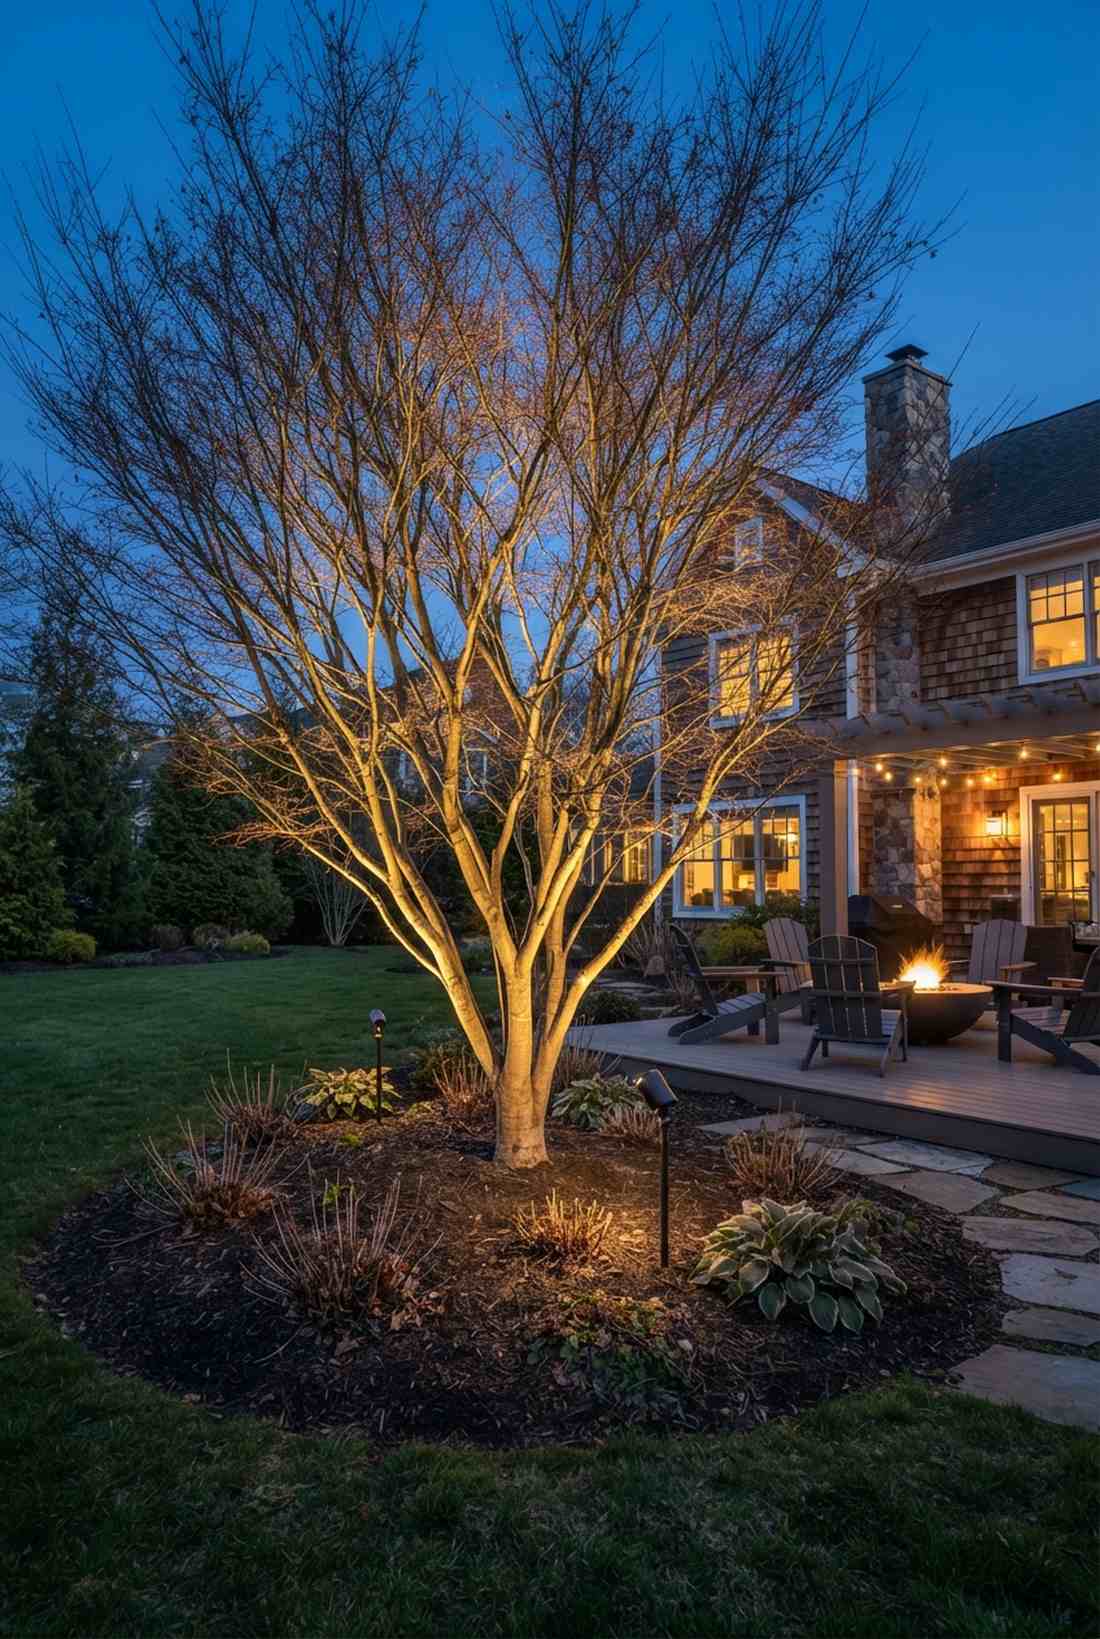
4. Offset Asymmetric Uplighting
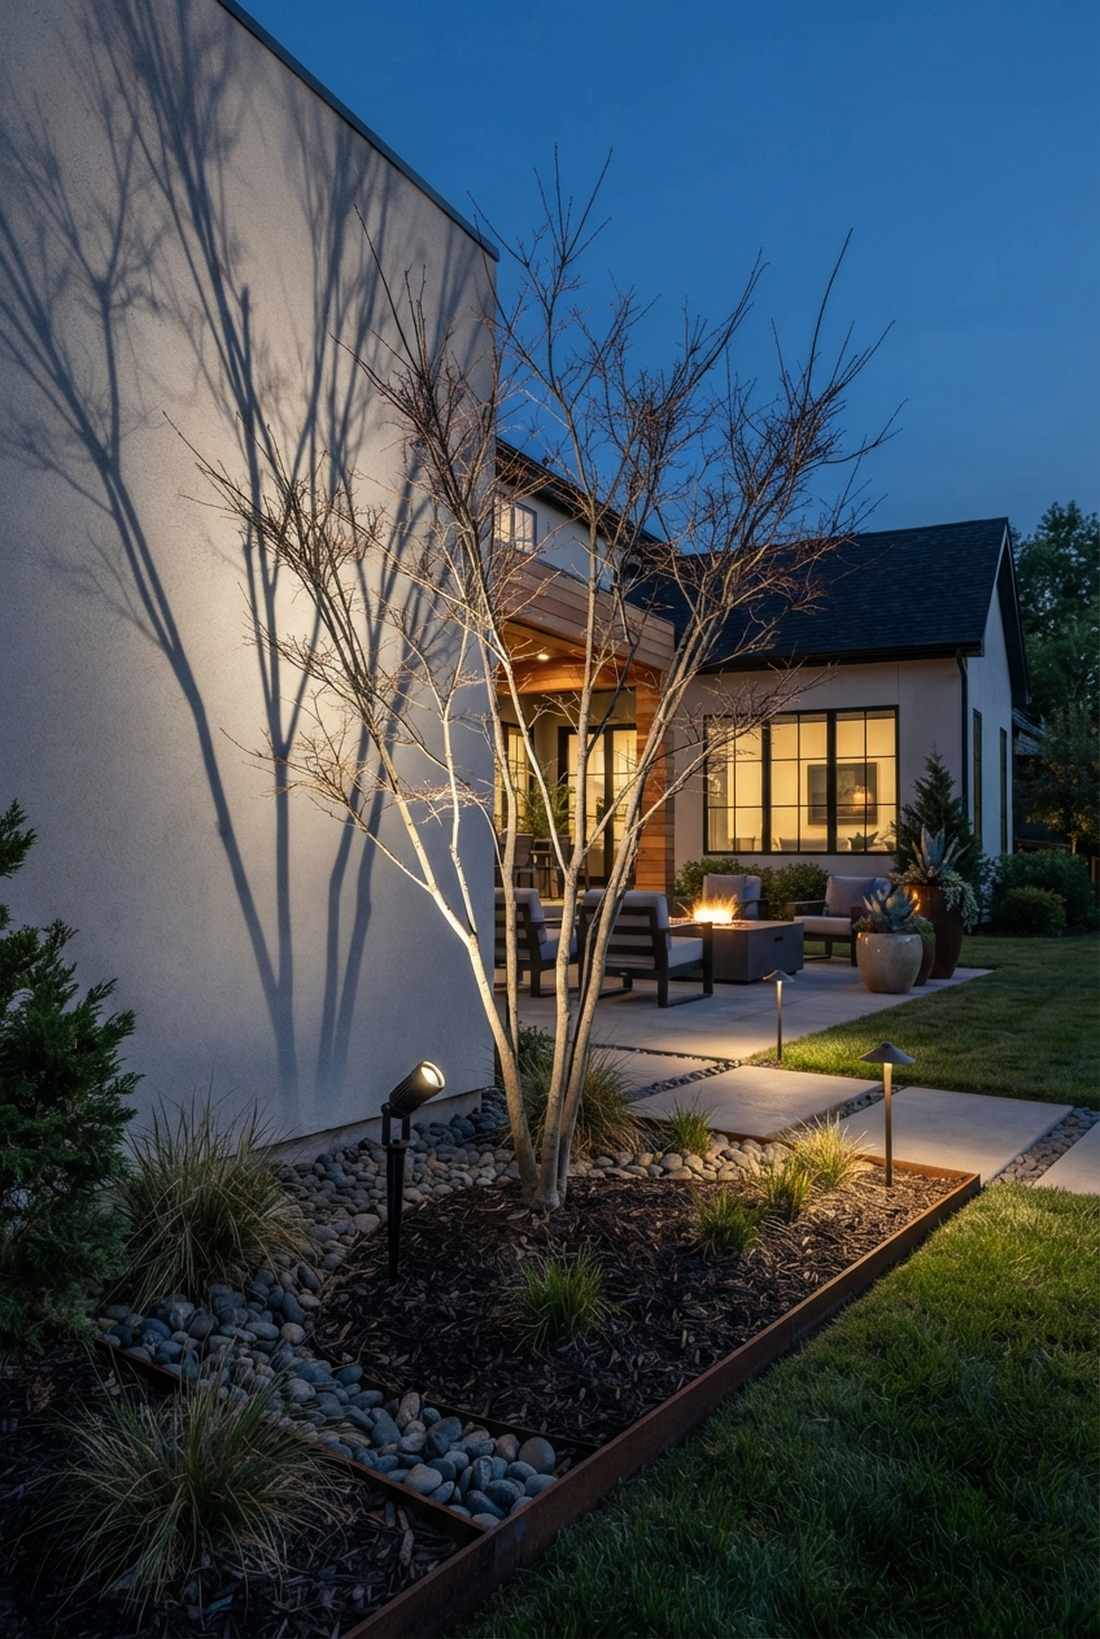
Embracing an asymmetrical garden shadow design feels like stepping into a modern art museum at midnight. Excellent for contemporary, minimalist gardens featuring sculptural, barren tree forms.
Symmetry is safe, but deliberately shifting the light source two feet off-center gives a designer-level finish filled with visual tension. Steeping the angle to 70 degrees elongates the shadows, turning ordinary branches into striking silhouettes. It completely reinvents standard patio garden decor approaches.
Pulling off this modern aesthetic costs a mere $50. Highly recommended for a quick weekend win.
- Key Materials: High-angle spotlight, spike mount
- Vibe / Style: Modern art tension
- Difficulty: Easy
- Budget Breakdown: Fixture: $40 | Stake/Base: $10.
- Creator’s Tip: Move the fixture side-to-side at night before burying the wire to find the most artistic shadow.
- Smart Sourcing: adjustable beam landscape spotlights and heavy-duty mounting stakes (bulk pack).
5. Low-Wattage Shrub Uplighting

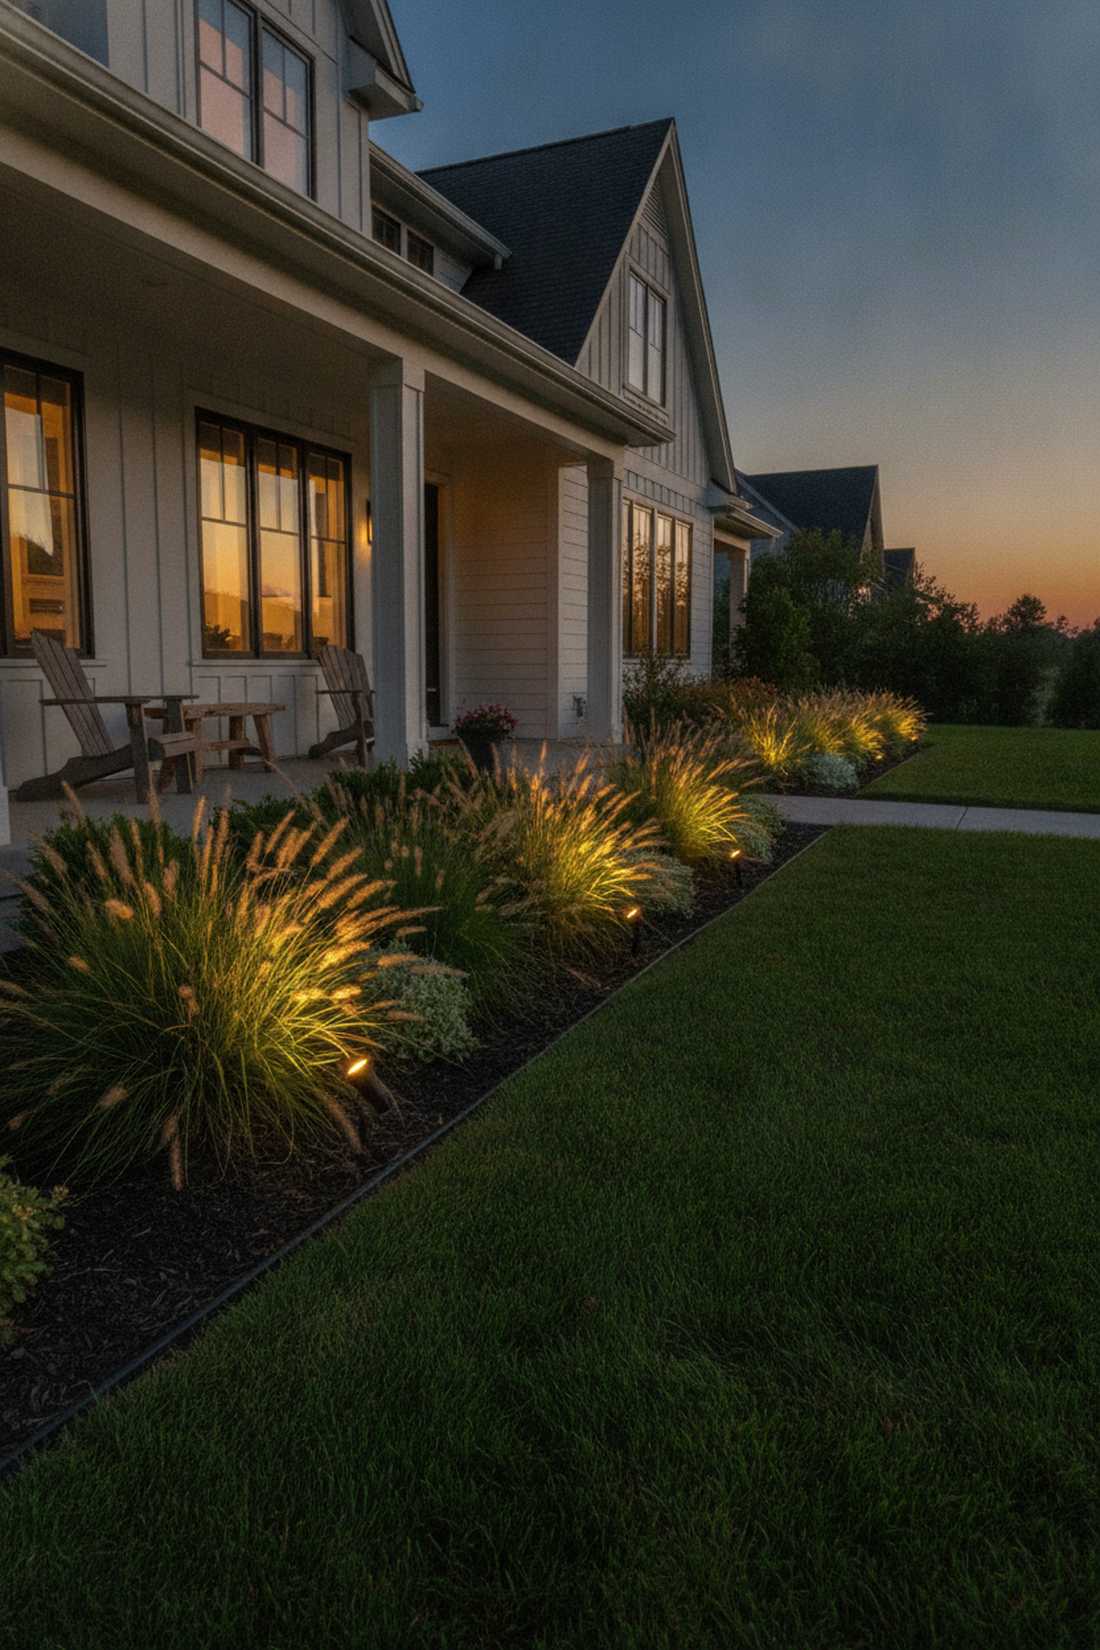
Gentle ornamental grass lighting feels like a soft, magical glowing border straight out of a fairy tale. Highly effective when woven into sprawling front foundation plantings.
Blasting small shrubs with high-wattage bulbs completely ruins their texture and bleaches the leaves. A subtle 1-2 watt fixture with a wide 60-degree spread catches the very tips of the branches without causing an obnoxious hot spot. It requires delicate outdoor lighting accessories rather than heavy industrial floods.
A grouping of these will cost roughly $25 per bush. Pin this for your upcoming spring planting refresh!
- Key Materials: 2-watt wide-beam mini floods
- Vibe / Style: Soft garden glow
- Difficulty: Easy
- Budget Breakdown: Mini light: $20 | Connector: $5.
- Creator’s Tip: Back the light away by at least a foot so the beam widens enough to cover the whole shrub.
- Smart Sourcing: low-lumen LED mini wash lights and UV-coated protective wire sleeves.
This next setup is ridiculously cheap but looks like a $1,000 custom display…
6. Graduated Intensity Uplighting
A layered depth lighting arrangement feels like a carefully painted theater stage right in your yard. Perfect for deep garden beds where tall trees and small shrubs mix together.
Treating every plant with the exact same brightness is why most yards look so flat at night. Purposefully staggering wattages—7 watts on the main tree, 3 watts in the background—guides the eye and looks far more expensive than it is. Opting for premium multi-tap transformers makes dialing in these exact intensities a breeze.
Setting up a layered zone usually runs around $200. Save this trick to instantly upgrade your curb appeal.
- Key Materials: Mixed wattage LED drop-ins
- Vibe / Style: Theatrical depth
- Difficulty: Advanced planning
- Budget Breakdown: Mixed fixtures: $150 | Transformer: $50.
- Creator’s Tip: Always light the absolute furthest background element very dimly to establish the yard’s boundaries.
- Smart Sourcing: multi-wattage adjustable LED kits and smart landscape lighting controllers.
Outdoor Lighting Uplighting for Canopy Trees
7. High-Wattage Deep-Throw Uplighting
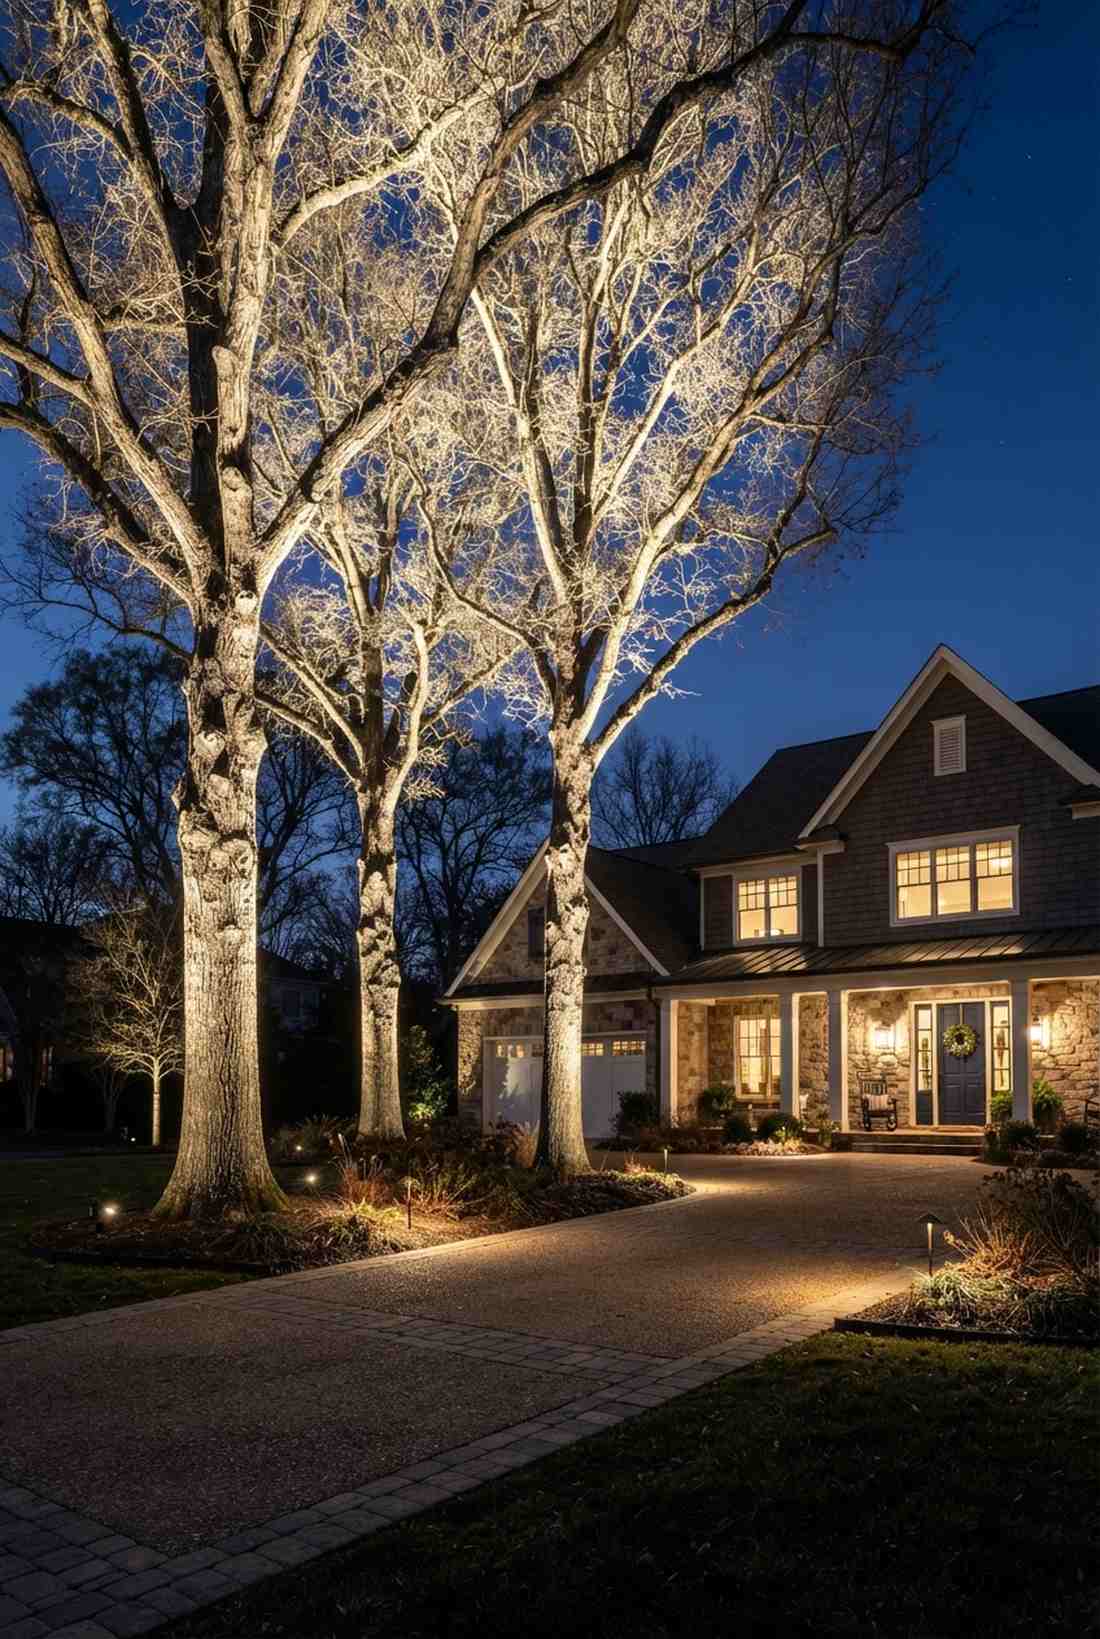
An intense deep canopy illumination feels like an ancient, towering pillar of light piercing the night sky. Essential when dealing with towering 30-foot oaks or sycamores near a large driveway.
Standard retail lights will barely reach the lowest branches, leaving the crown of the tree completely invisible. Aggressive **outdoor lighting uplighting** using 15-watt concentrated beams positioned at the drip line pushes light deep into the winter branch architecture. You need professional-grade sealed housings to handle this thermal output.
Heavy-duty throwers cost around $80–$120 each. A crucial investment for mature, massive trees.
- Key Materials: 15W high-output LED spotlights
- Vibe / Style: Towering majesty
- Difficulty: Intermediate
- Budget Breakdown: High-output light: $100 | Heavy wiring: $20.
- Creator’s Tip: Aim for the drip line rather than the trunk base; it lets the light travel up through the leaves.
- Smart Sourcing: high-lumen commercial tree uplights and sealed brass fixture housings.
8. Canopy-Edge Uplighting
The perimeter tree glow method feels like a mysterious, glowing halo hovering over your backyard. Works flawlessly for dense, umbrella-shaped trees where inner branches block light.
Blasting the center of a dense tree just creates an ugly bright blob on the trunk. Skimming the extreme outer foliage edges at a sharp 60-degree angle leaves the core dark, creating incredible depth perception. It is a highly coveted trick among high-end landscape lighting designers.
You can achieve this floating effect for about $70. Pin this to your moody outdoor aesthetic board!
- Key Materials: Narrow beam uplights, long stakes
- Vibe / Style: Mysterious halo
- Difficulty: Easy positioning
- Budget Breakdown: Edge spots: $60 | Pegs: $10.
- Creator’s Tip: Mount the lights a good 4 feet OUTSIDE the physical canopy to get the perfect skimming angle.
- Smart Sourcing: extra-long landscape fixture spikes and narrow-beam directional LEDs.
9. Seasonal Deciduous Uplighting
A smart adjustable seasonal lighting layout feels like a living, breathing garden that changes its mood. The absolute best choice for maples or cherry trees that shed completely in winter.
Leaving the same beam angle year-round guarantees your yard will look awkward when the leaves drop. Utilizing app-controlled smart fixtures allows you to widen the beam for lush summer foliage and narrow it into a razor-sharp spotlight for bare winter branches. This dynamic approach ensures you never need manual miniature garden supplies to tweak the yard.
Smart fixtures range from $90 to $150. A brilliant set-and-forget seasonal hack.
- Key Materials: Smart color/beam adjustable LEDs
- Vibe / Style: Dynamic year-round
- Difficulty: App integration
- Budget Breakdown: Smart fixture: $120 | Wi-Fi Bridge: $30.
- Creator’s Tip: Program an automatic schedule that shifts the beam angle right around the first frost.
- Smart Sourcing: app-controlled smart landscape lights and outdoor Wi-Fi range extenders.
💡 Must-Have Supplies for High-End Setups
To build these setups faster and ensure they last, skip the generic craft aisles and invest in the right foundational kits.
- Base & Support: heavy-duty cast brass ground stakes
- Setup Tools: waterproof gel-filled wire connector kits
- Weather/Durability Protection: UV-resistant clear silicone sealant packs
10. Multi-Trunk Individual Uplighting
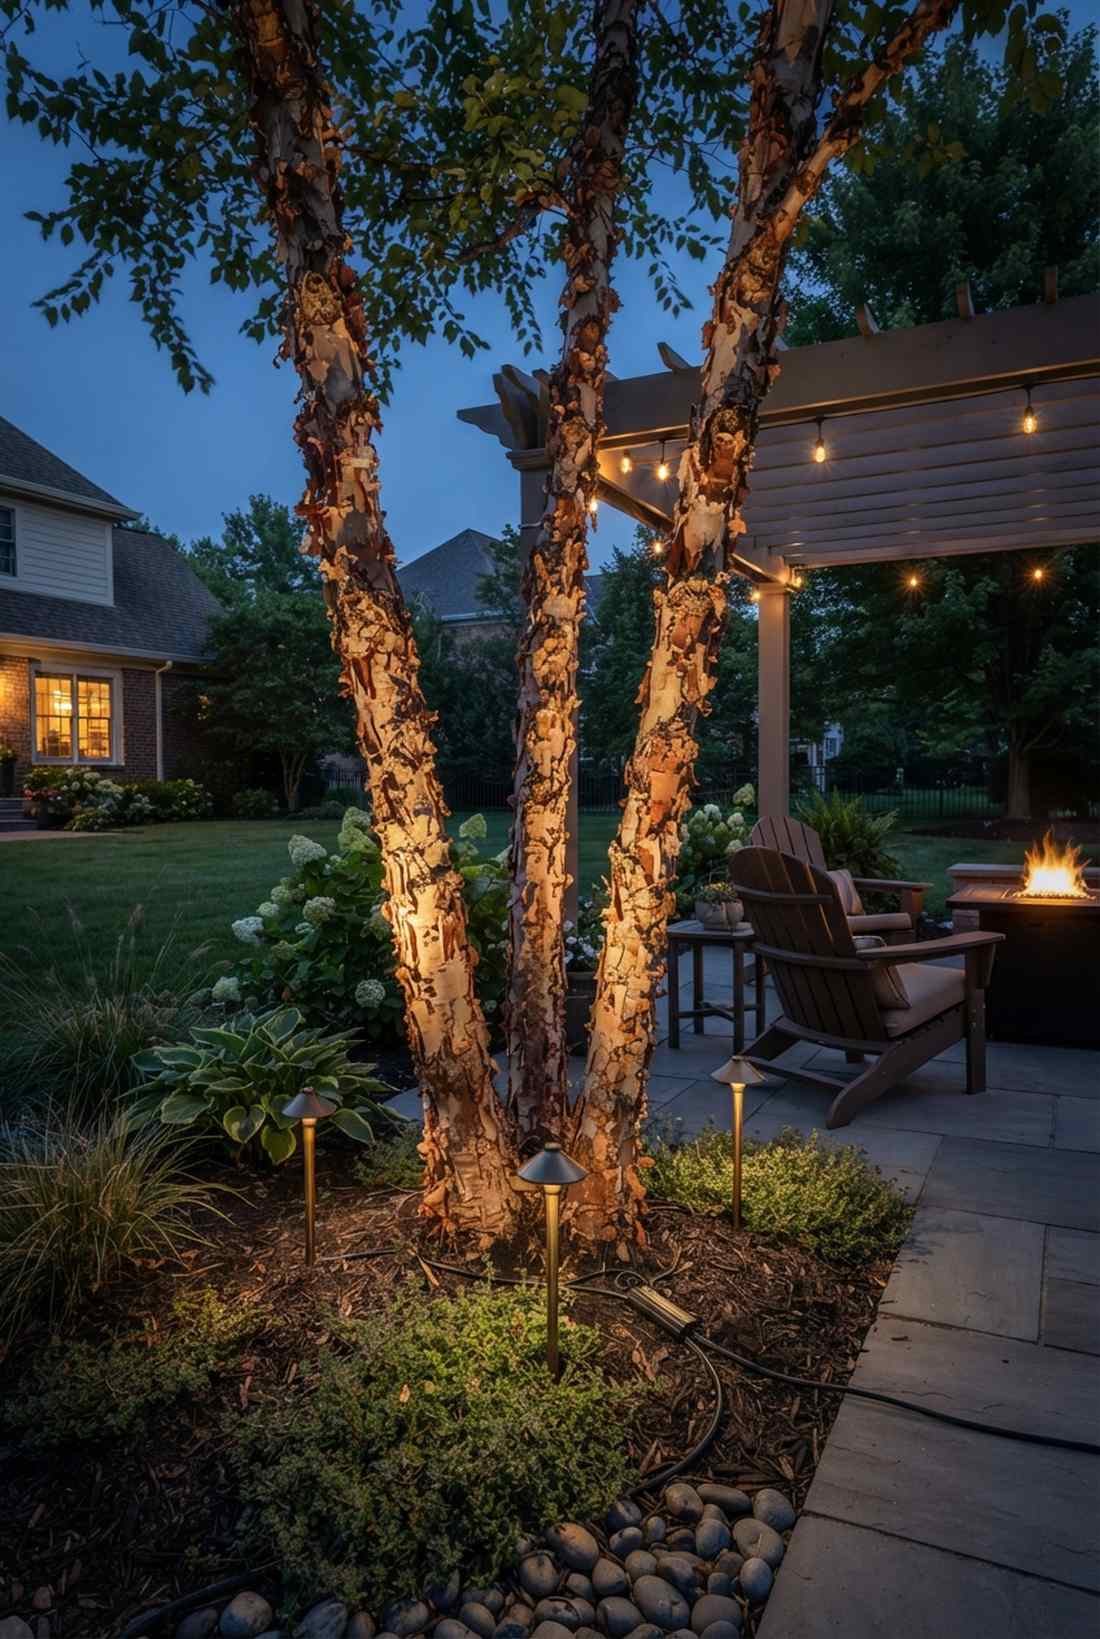
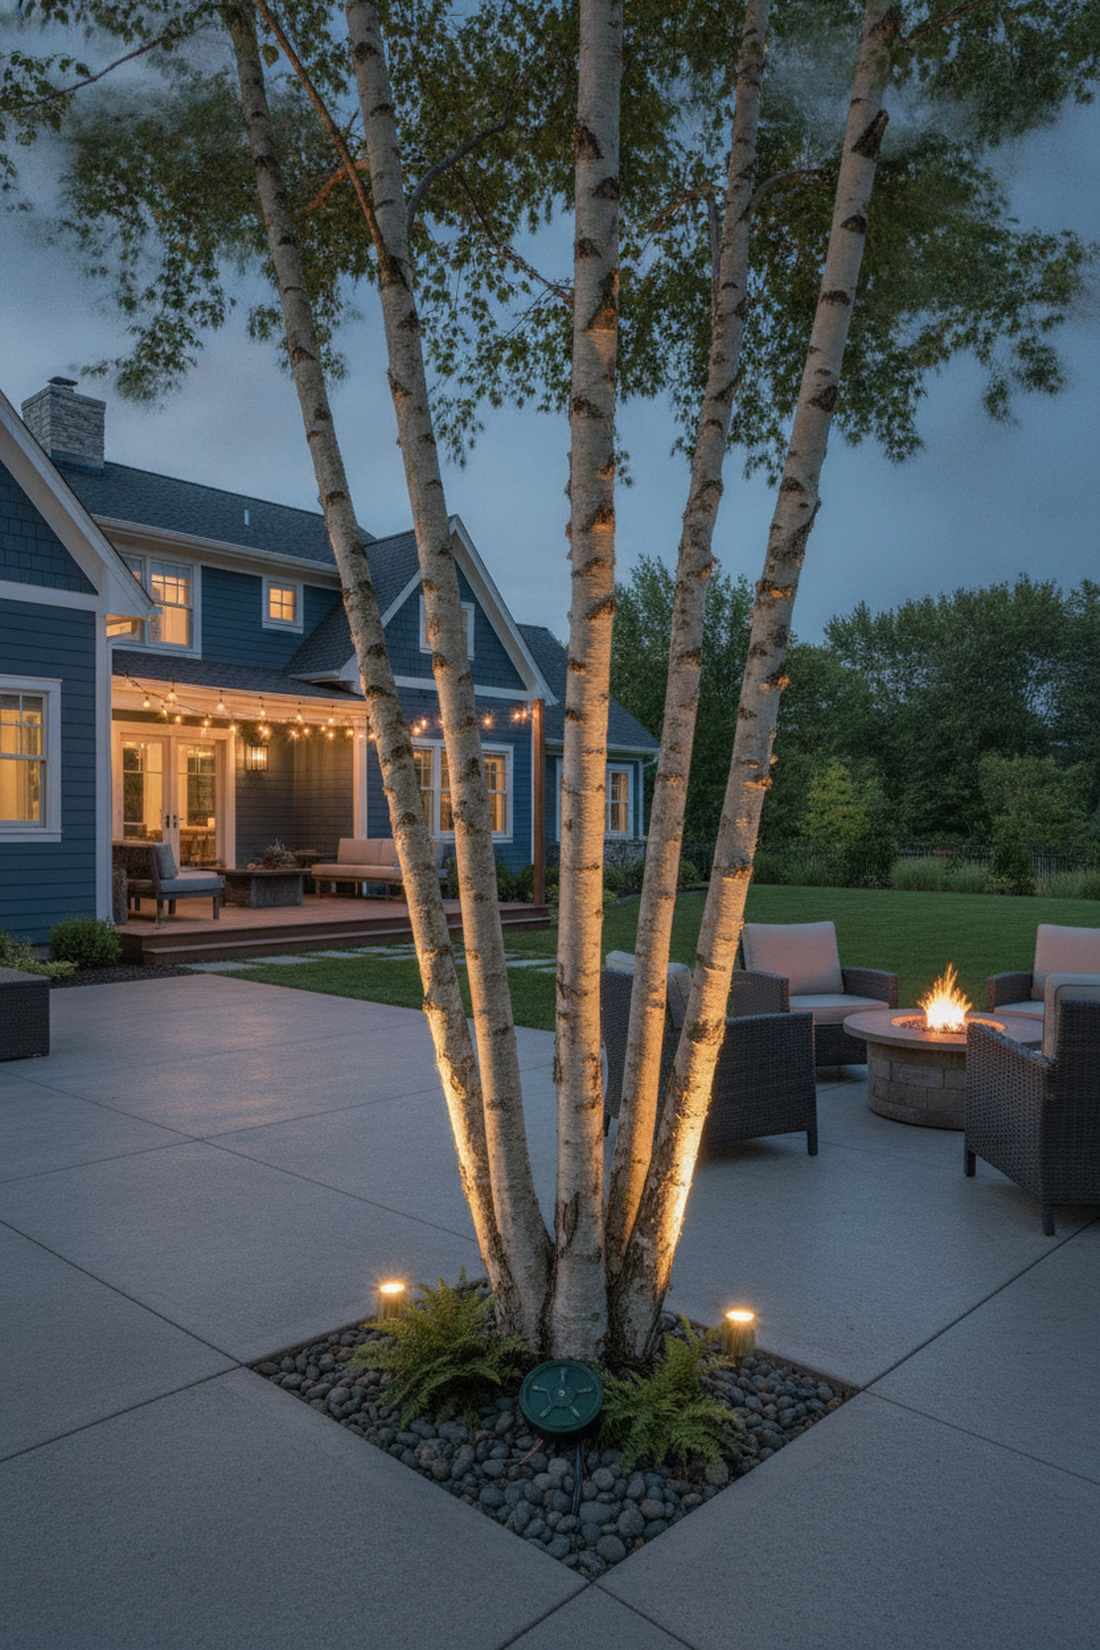
This crape myrtle spotlighting trick feels like an intricate, sculptural masterpiece illuminated in a museum. Place this directly under river birches or multi-stemmed focal trees in a patio corner.
Trying to light a sprawling multi-trunk tree with one big light completely washes out the elegant bark separation. Assigning one tiny, dedicated 3-watt beam to every single trunk independently delivers a surprisingly premium look that demands attention. You will need a reliable multi-port wire splitter to keep things neat.
Rigging three trunks costs around $100. Pin this if you have beautiful peeling bark trees!
- Key Materials: 3x mini narrow uplights
- Vibe / Style: Sculptural elegance
- Difficulty: Wiring intensive
- Budget Breakdown: Mini spots: $80 | Splitters: $20.
- Creator’s Tip: Angle each beam slightly outward so the lights don’t cross paths and create muddy bright spots.
- Smart Sourcing: miniature brass spot kits and multi-port landscape wire hubs.
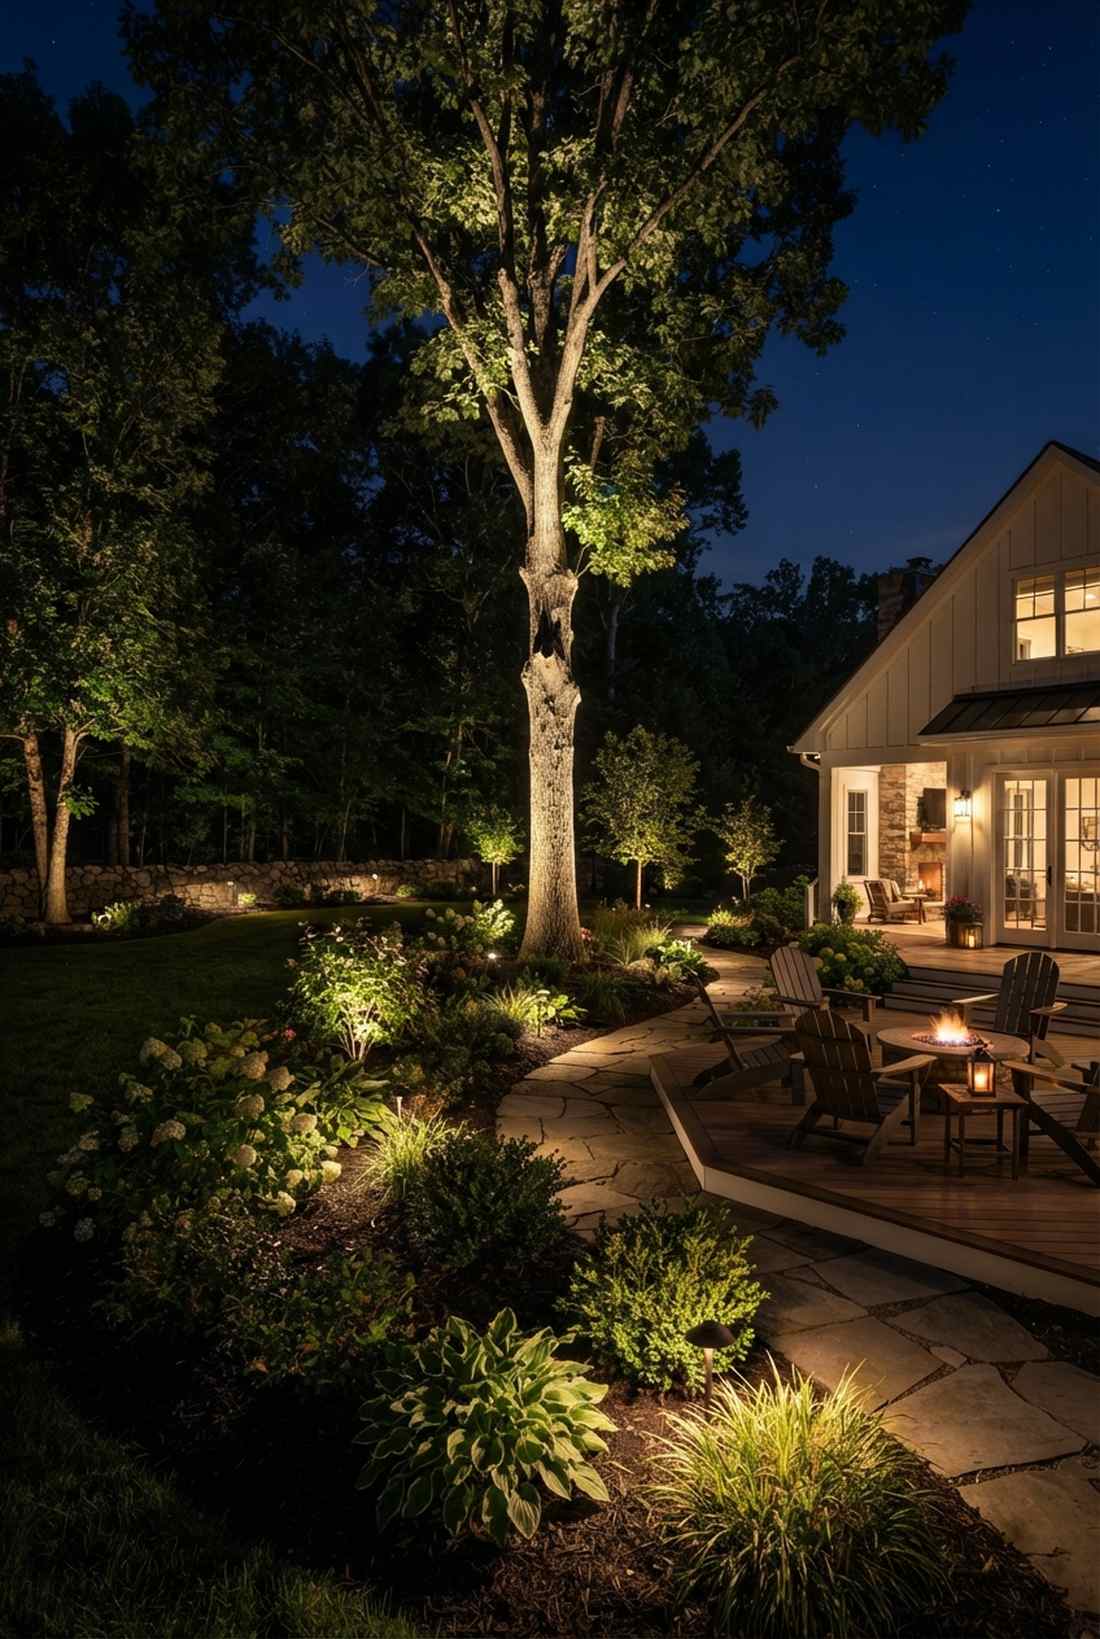
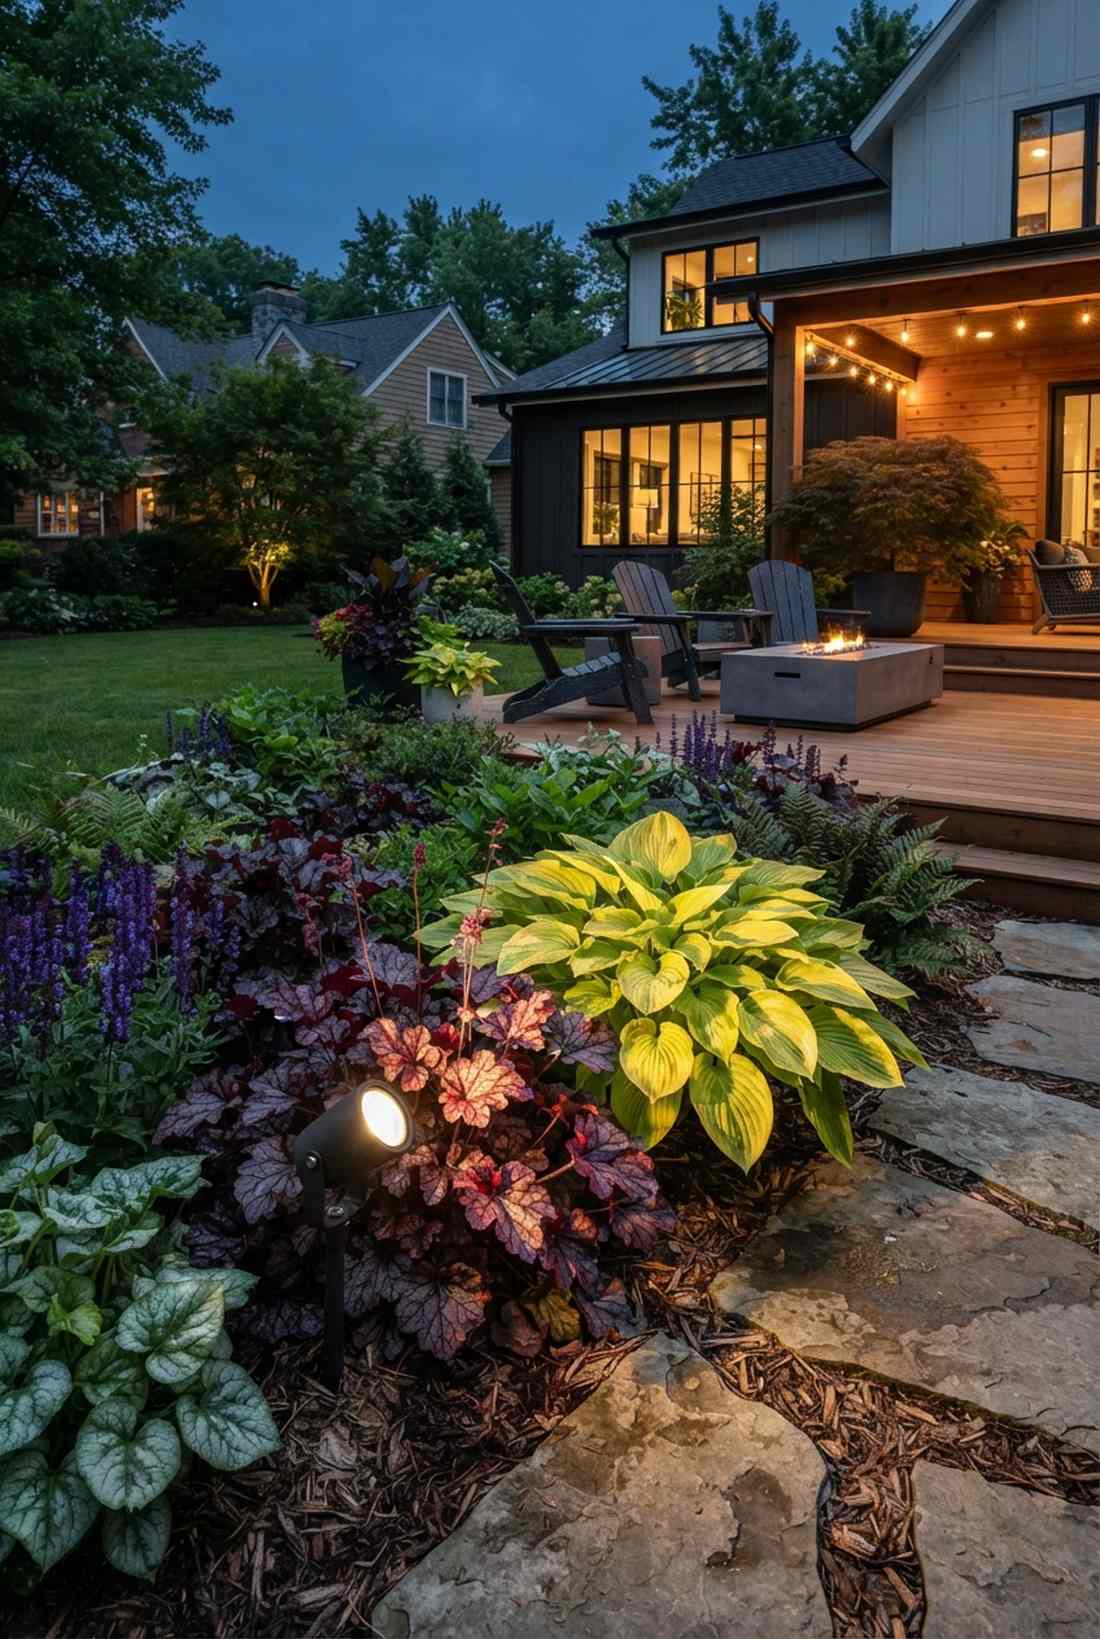
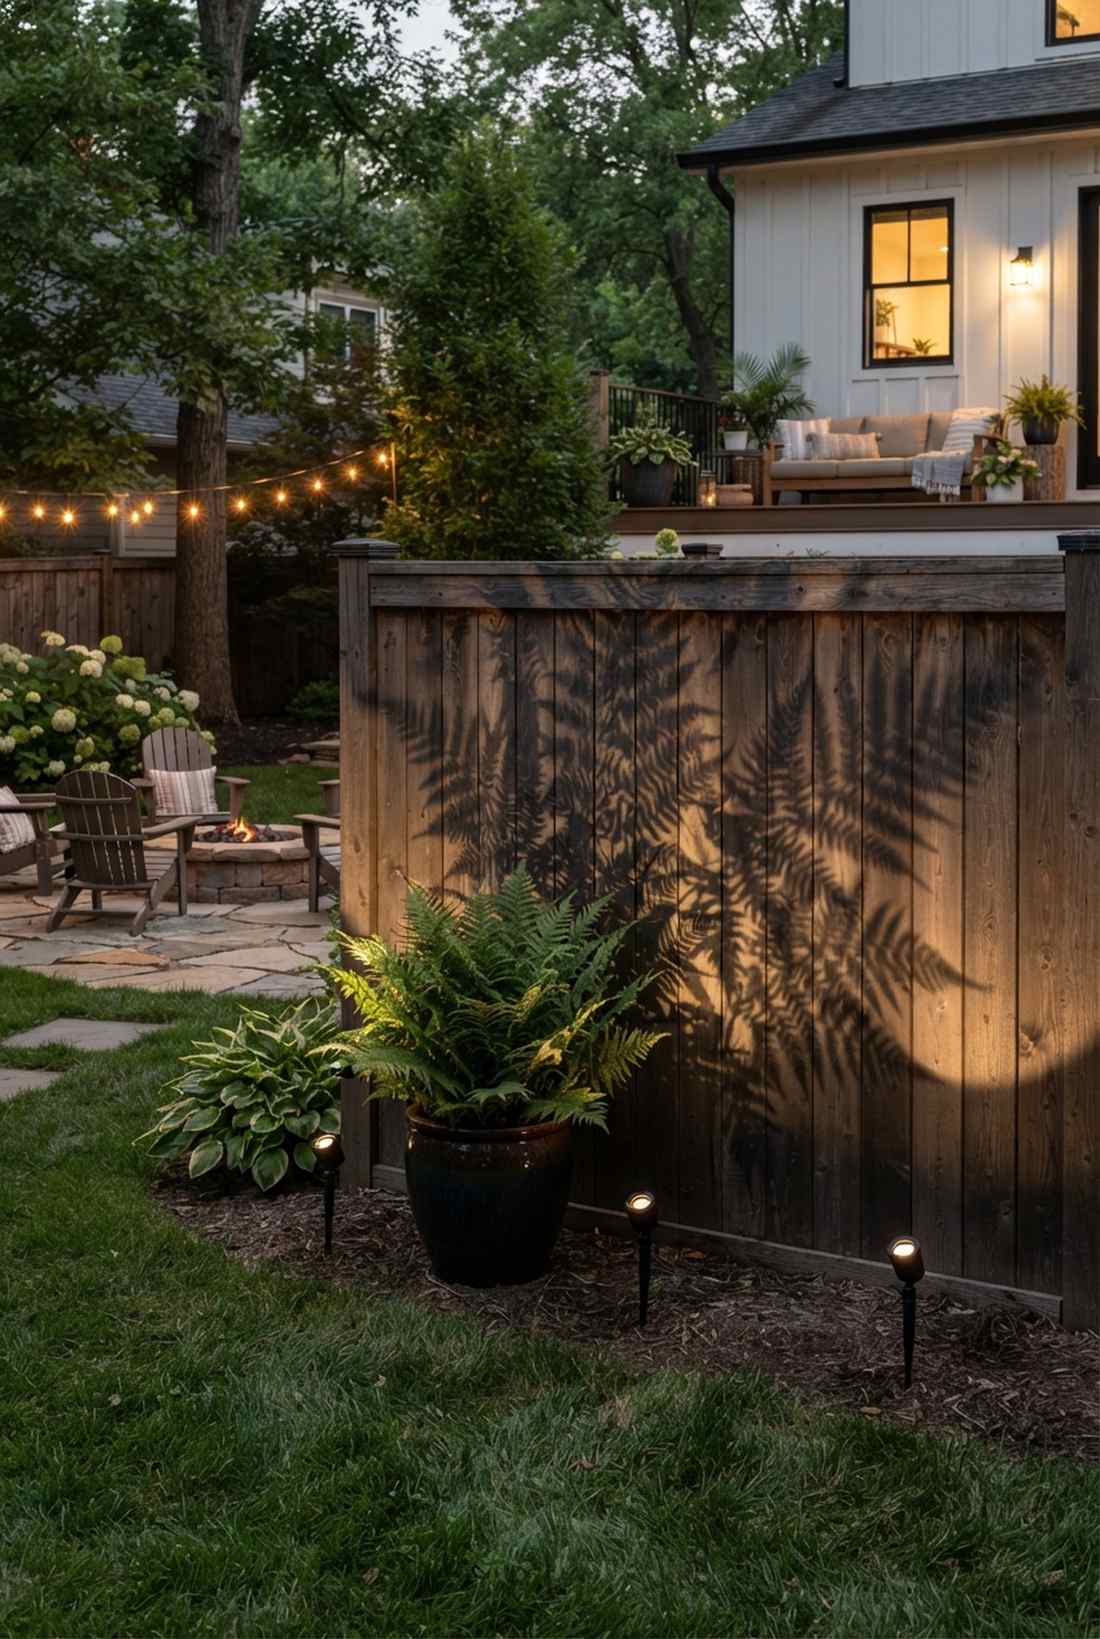
11. Understory Layer Uplighting
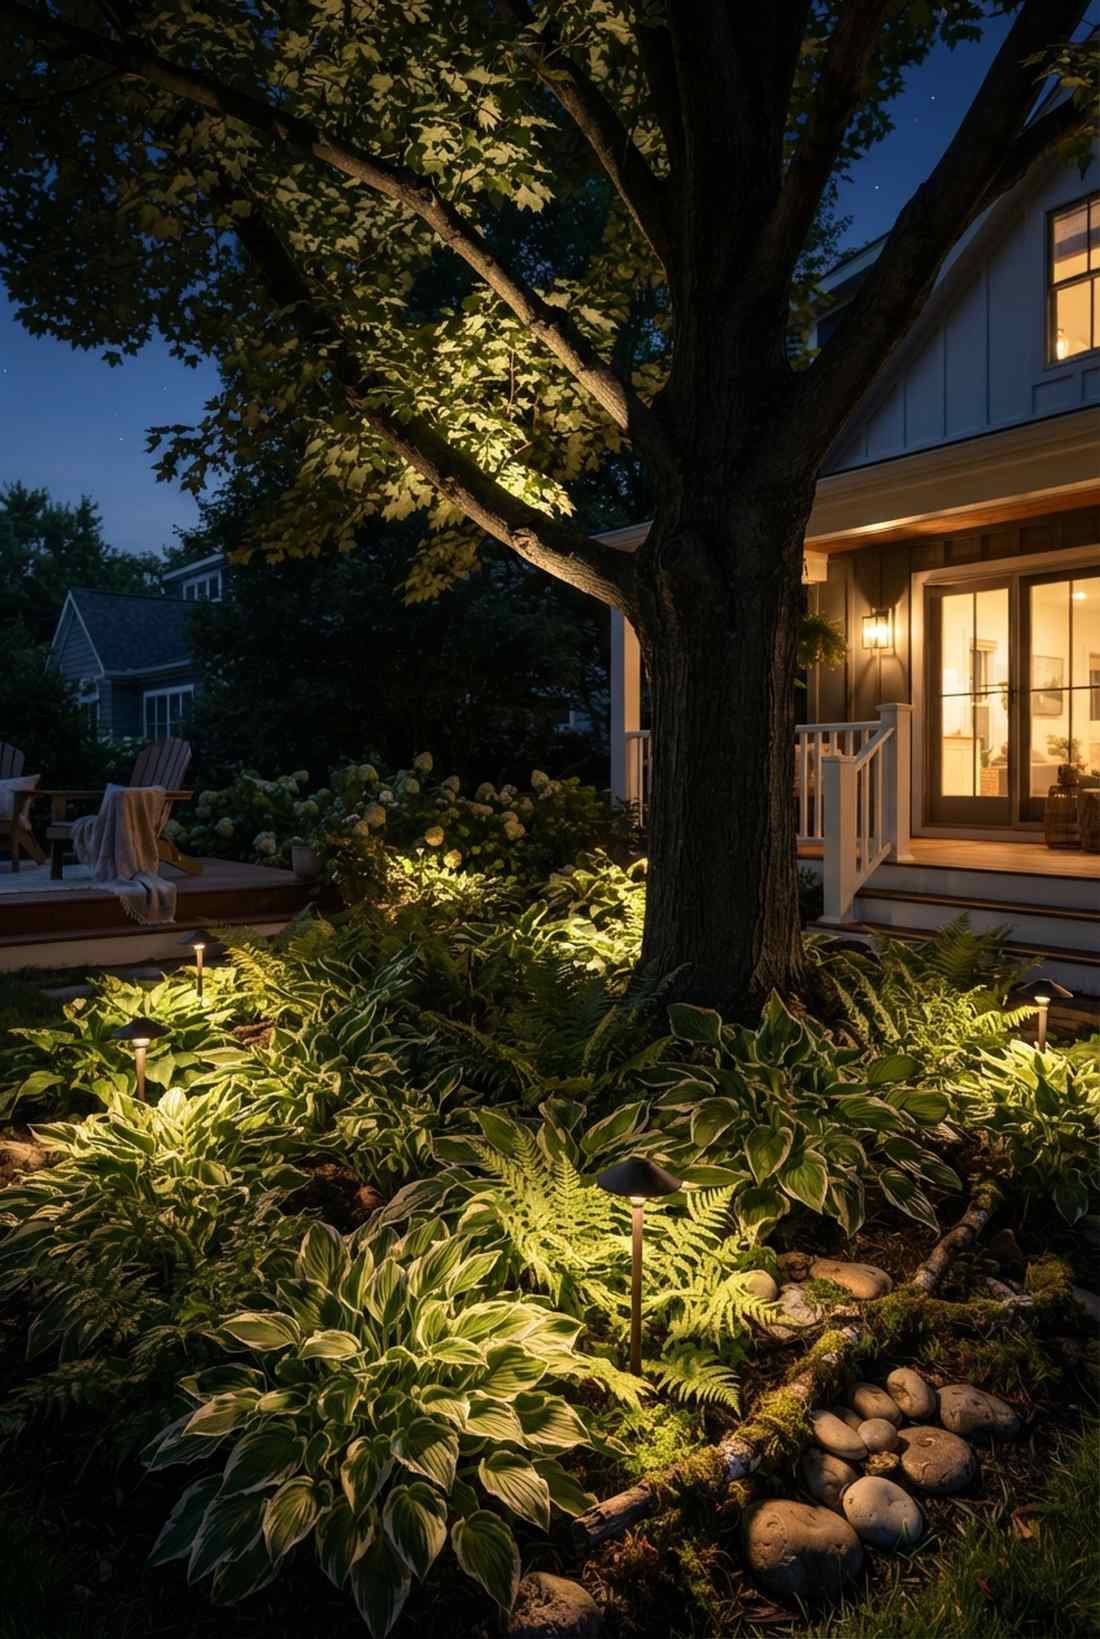
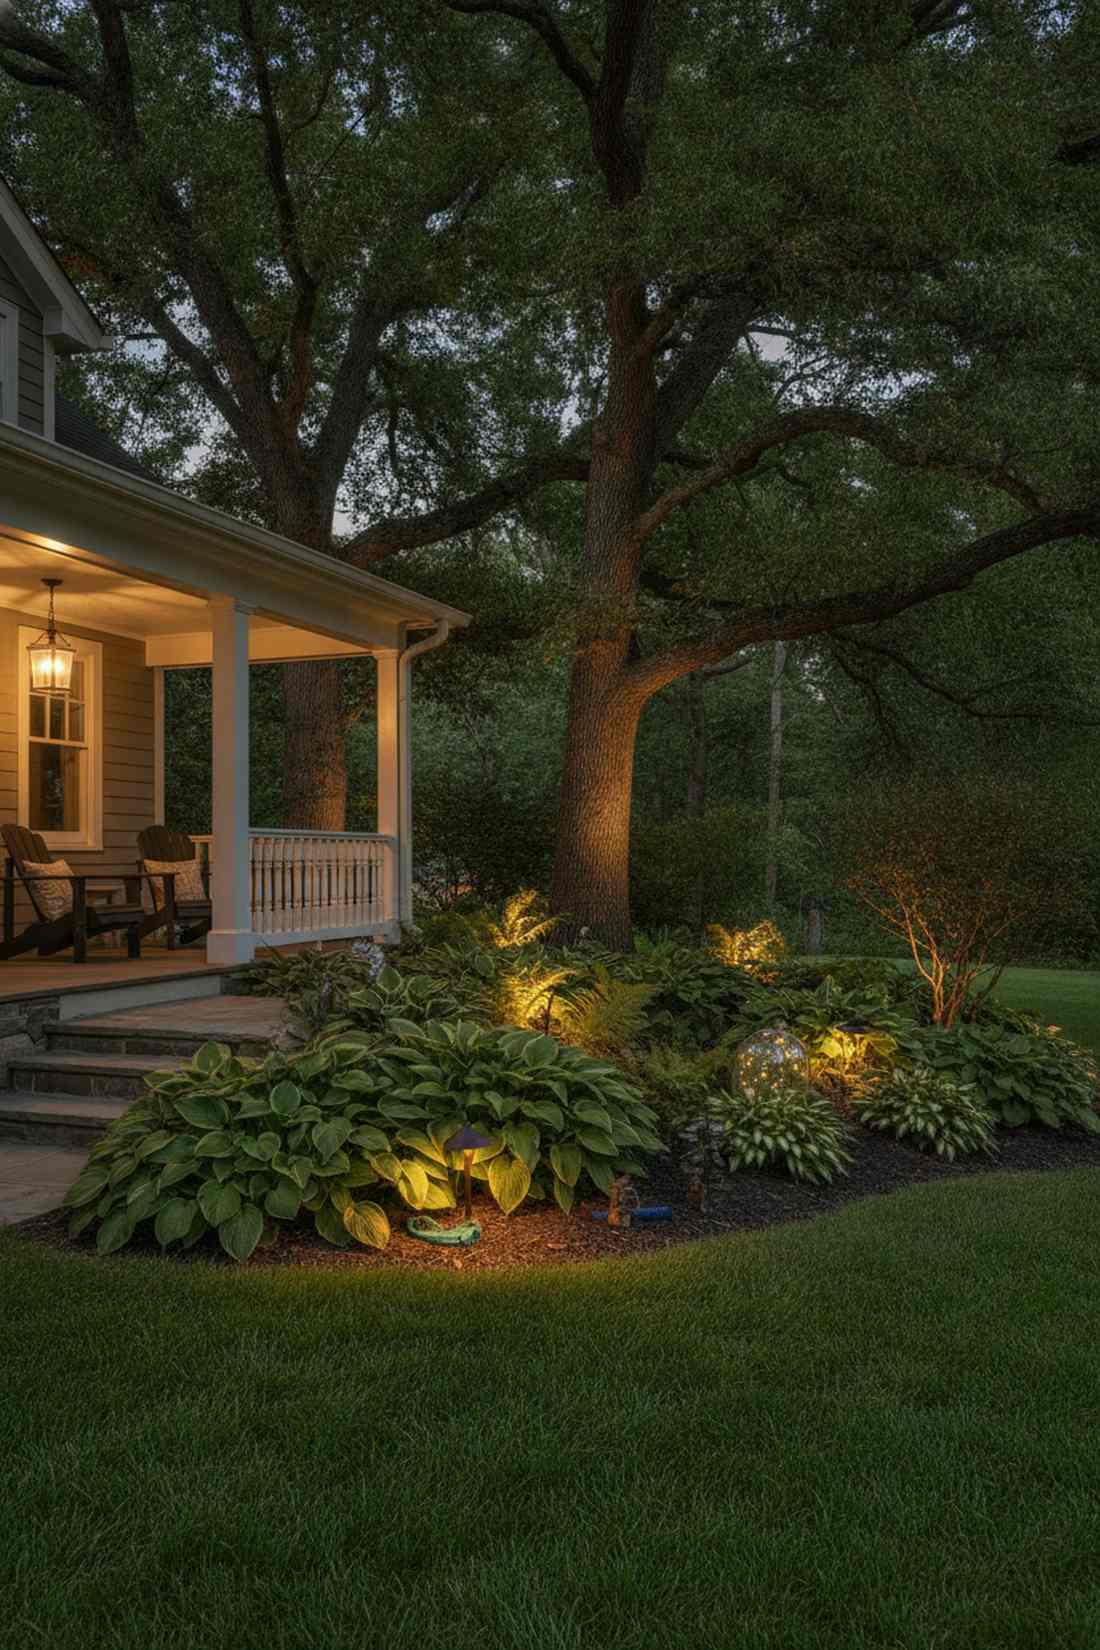
A lush hosta and fern glow feels like a secret enchanted forest floor right by your porch. Essential for filling in the massive black void beneath massive, mature shade trees.
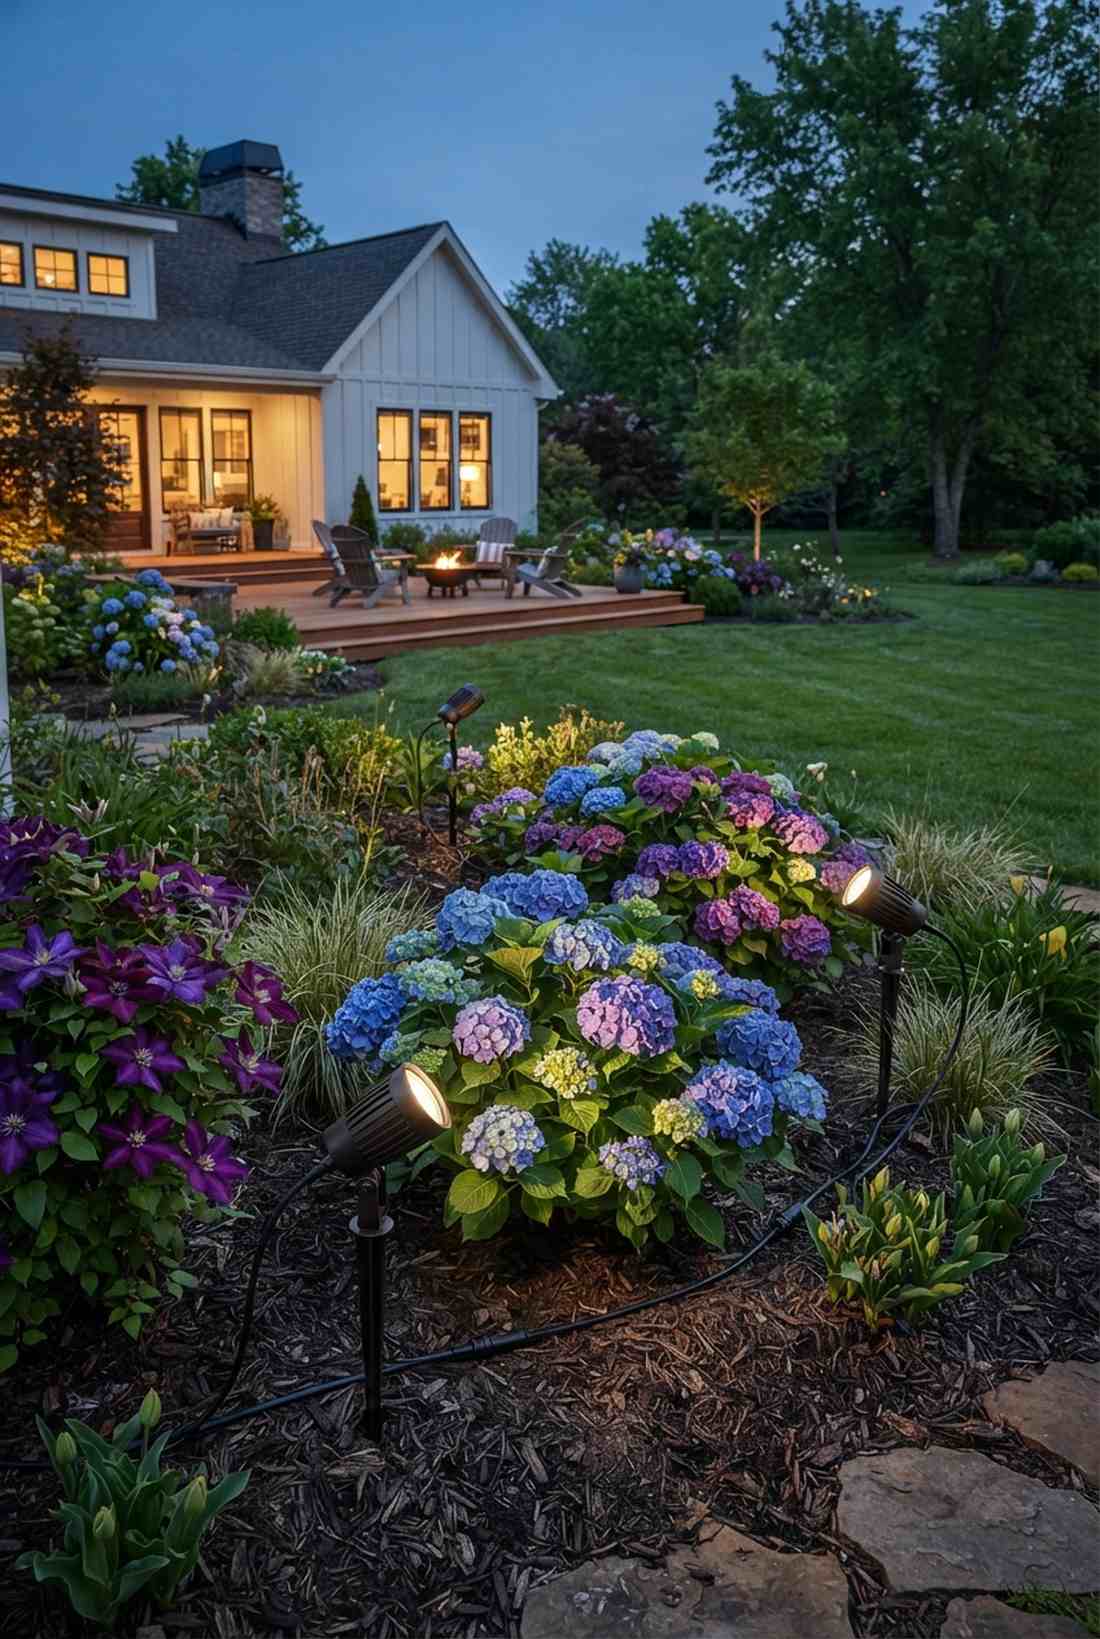
Most people stare at a beautifully lit canopy but leave the gorgeous hydrangeas underneath in total darkness. Sinking ultra-wide 2-watt beams horizontally through the understory catches the delicate leaves and visually connects the ground to the tree above. Integrating reliable terrarium accessories or low-level accents completes the lush floor.
Lighting the understory adds about $40 per zone. Save this to fix those dark garden corners.
- Key Materials: Wide-beam mini floods, flush mounts
- Vibe / Style: Enchanted woodland
- Difficulty: Easy
- Budget Breakdown: Mini floods: $30 | Wire: $10.
- Creator’s Tip: Shoot the light horizontally across the leaves, not straight up, to avoid blinding people walking by.
- Smart Sourcing: horizontal wash micro-lights and pre-cut waterproof shrink tubing.
12. Evergreen Winter-Interest Uplighting
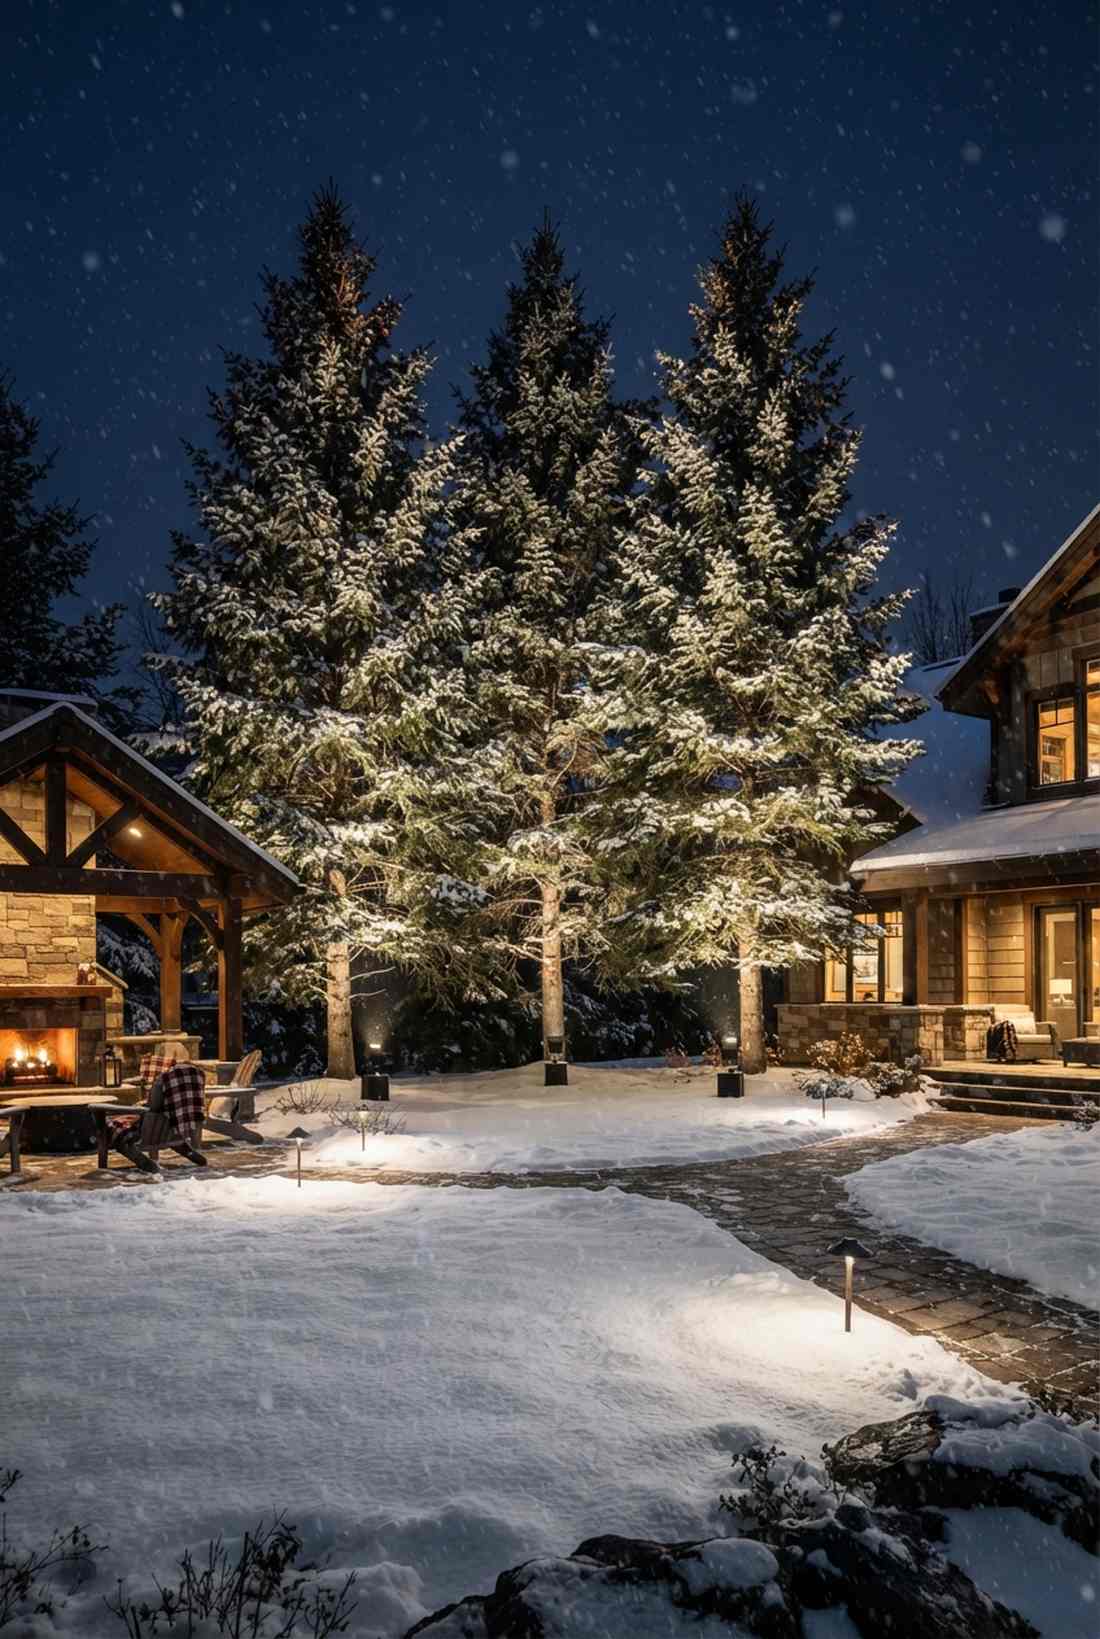
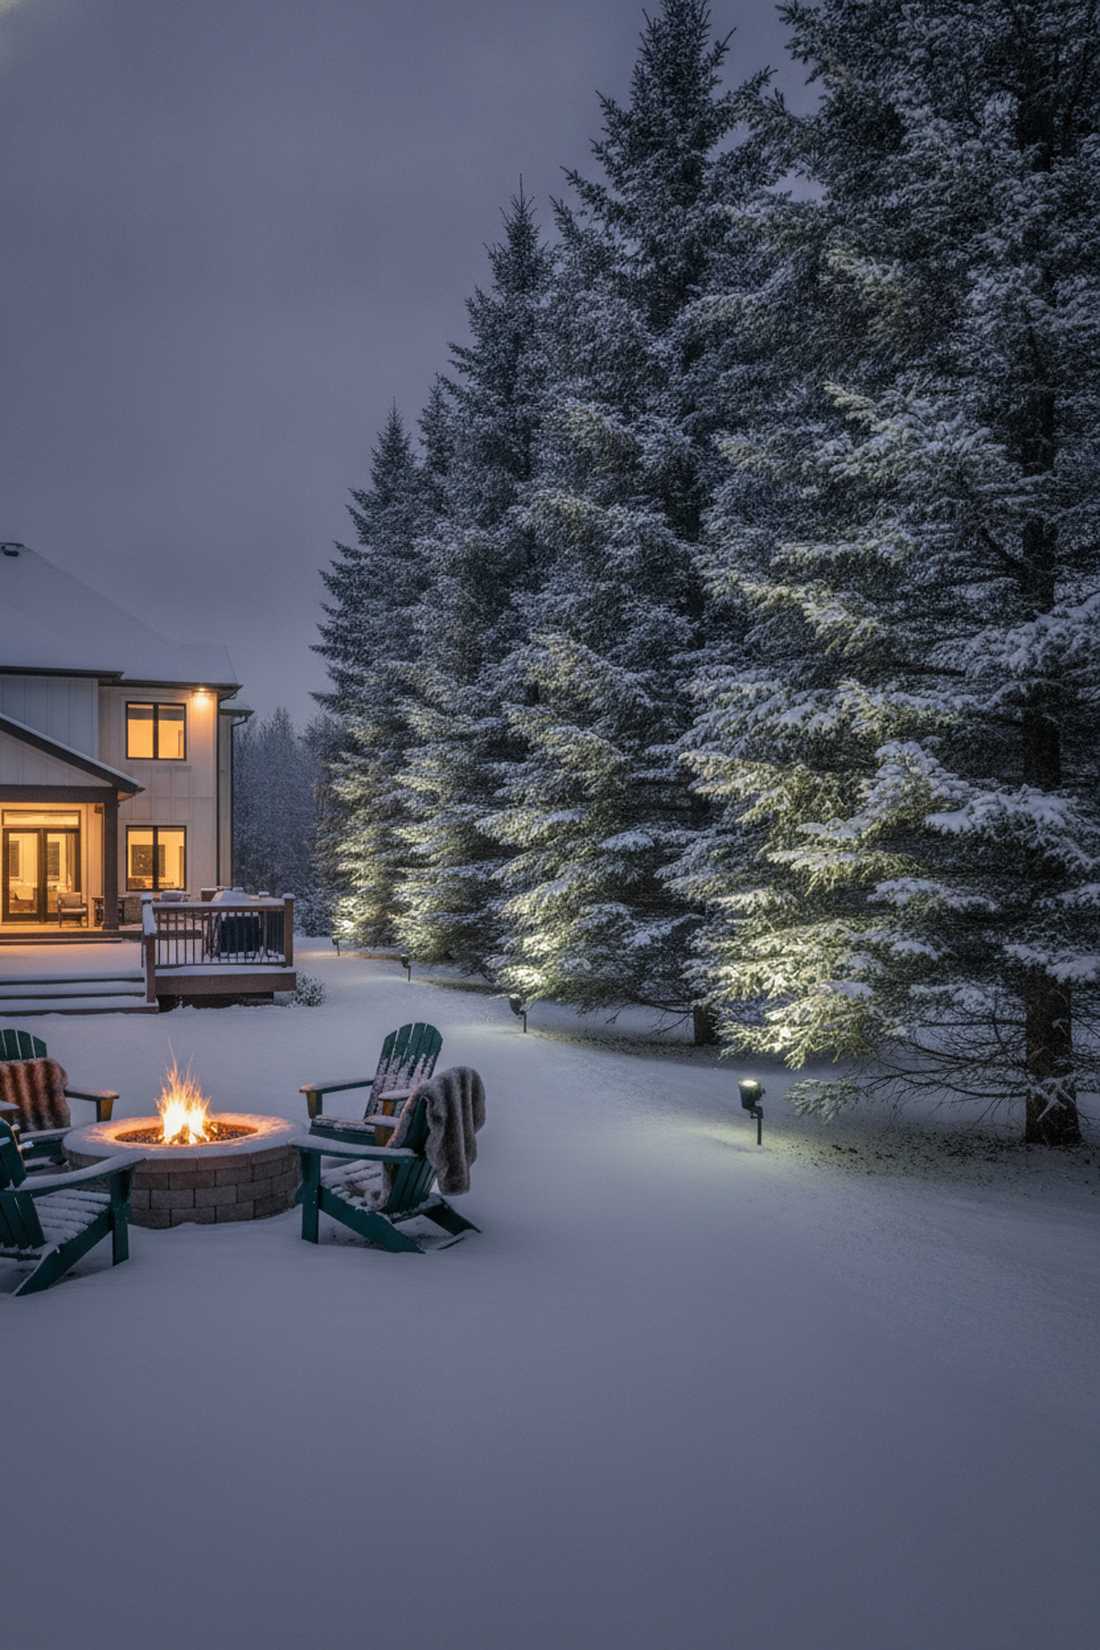
A frosty pine tree illumination feels like a luxurious, permanent holiday display in the dead of winter. Perfect for establishing towering property borders using spruces or cedars.
Shooting light straight up a dense pine tree results in a flat, unreadable wall of green. Stepping back and hitting the tree from opposing 45-degree angles reveals the deep needle density and overlapping branch layers that look incredible when snow falls. Using premium weather-sealed fixtures guarantees they won’t fail when frozen.
This dual-angle setup costs roughly $110 per evergreen. Highly recommended for brutal winter climates.
- Key Materials: Dual sealed LED floods
- Vibe / Style: Winter lodge premium
- Difficulty: Intermediate
- Budget Breakdown: Floods: $90 | Mounts: $20.
- Creator’s Tip: Keep fixtures elevated on 6-inch risers so they don’t get buried under the first snowfall.
- Smart Sourcing: snow-proof fixture riser extensions and sealed cold-weather LED bulbs.
Outdoor Lighting Ground Level Installations
13. Recessed Well Lights for Groundcovers
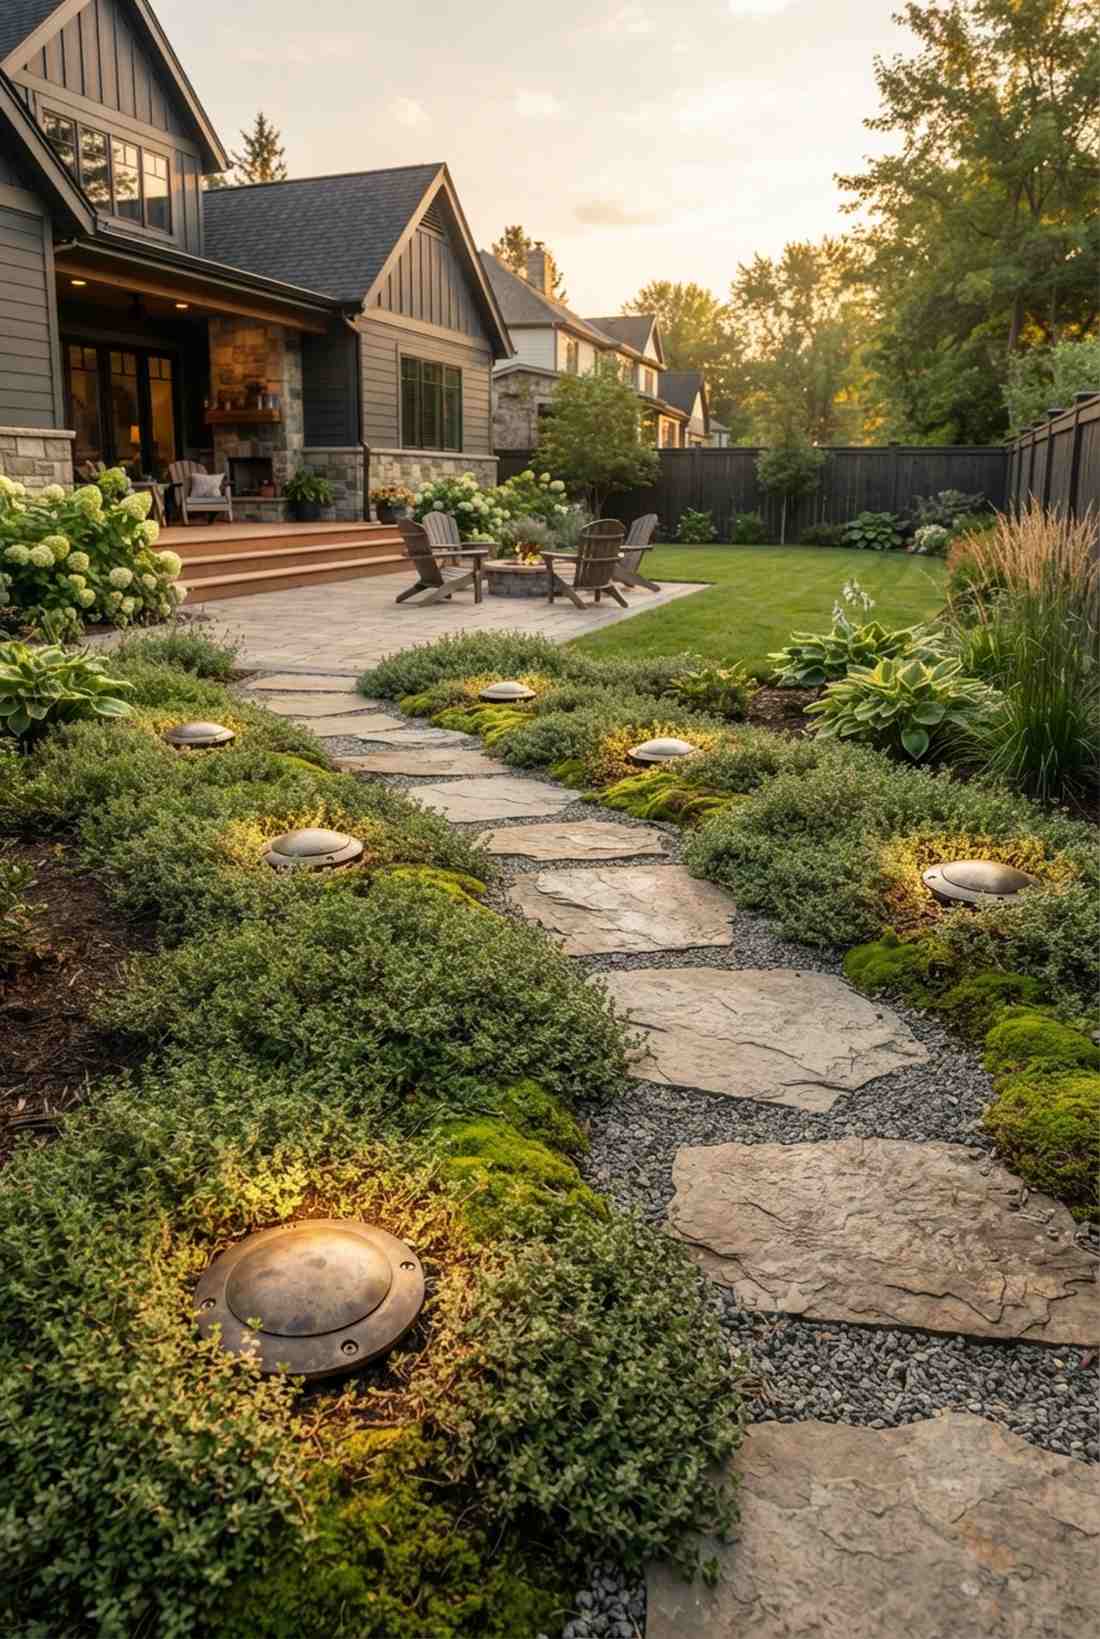
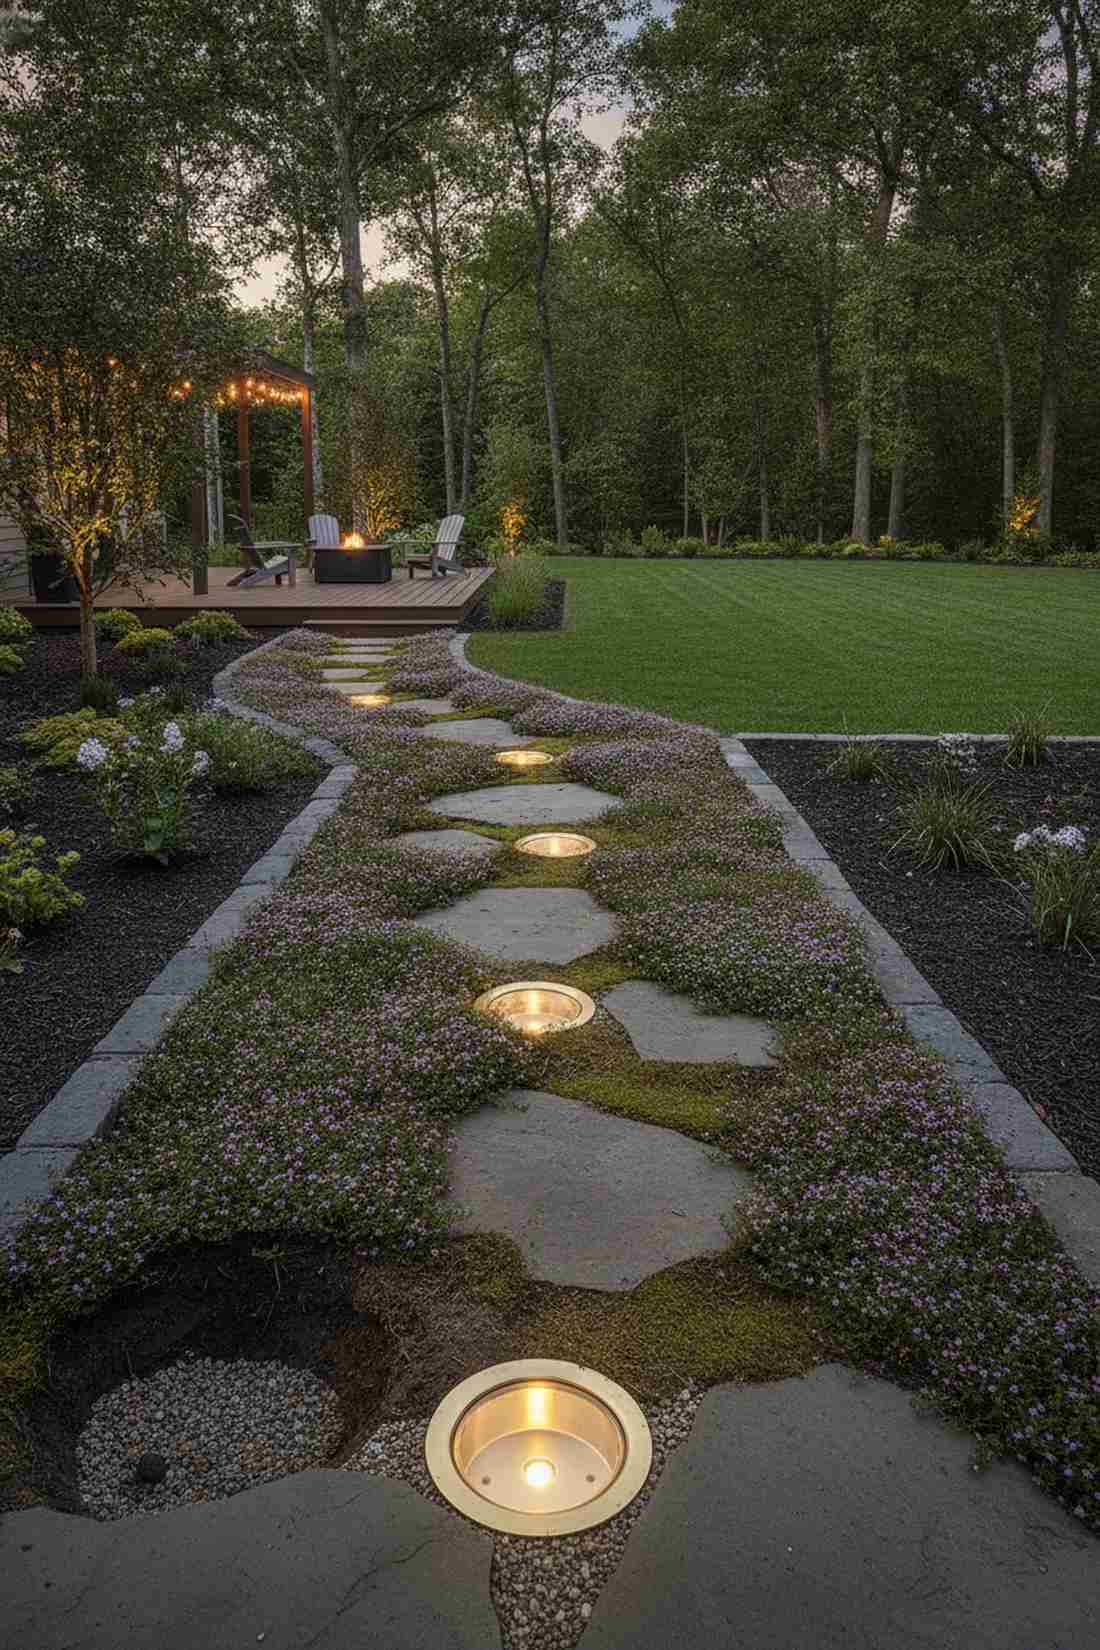
A seamless flush groundcover glow feels like the earth itself is radiating a warm, magical aura. Ideal for pathways lined with creeping thyme or dense mossy borders.
Sticking cheap plastic spikes into a lawn looks messy and invites disaster from the lawnmower. Installing rugged, **outdoor lighting ground** well lights perfectly flush with the dirt allows the plants to literally crawl over the light, which looks far more expensive than it is. It creates a stunning, integrated hardscape vibe.
Heavy-duty well lights cost around $60 each. Pin this if you want a hazard-free, clean yard look!
- Key Materials: PVC well housings, flush brass covers
- Vibe / Style: Modern seamless
- Difficulty: Digging required
- Budget Breakdown: Well light: $50 | Gravel base: $10.
- Creator’s Tip: Always dig the hole deeper than needed and add an inch of gravel at the bottom for drainage.
- Smart Sourcing: brass flush-mount well light kits and drainage gravel (bulk bag).
14. Spike-Mounted Garden Bed Lighting
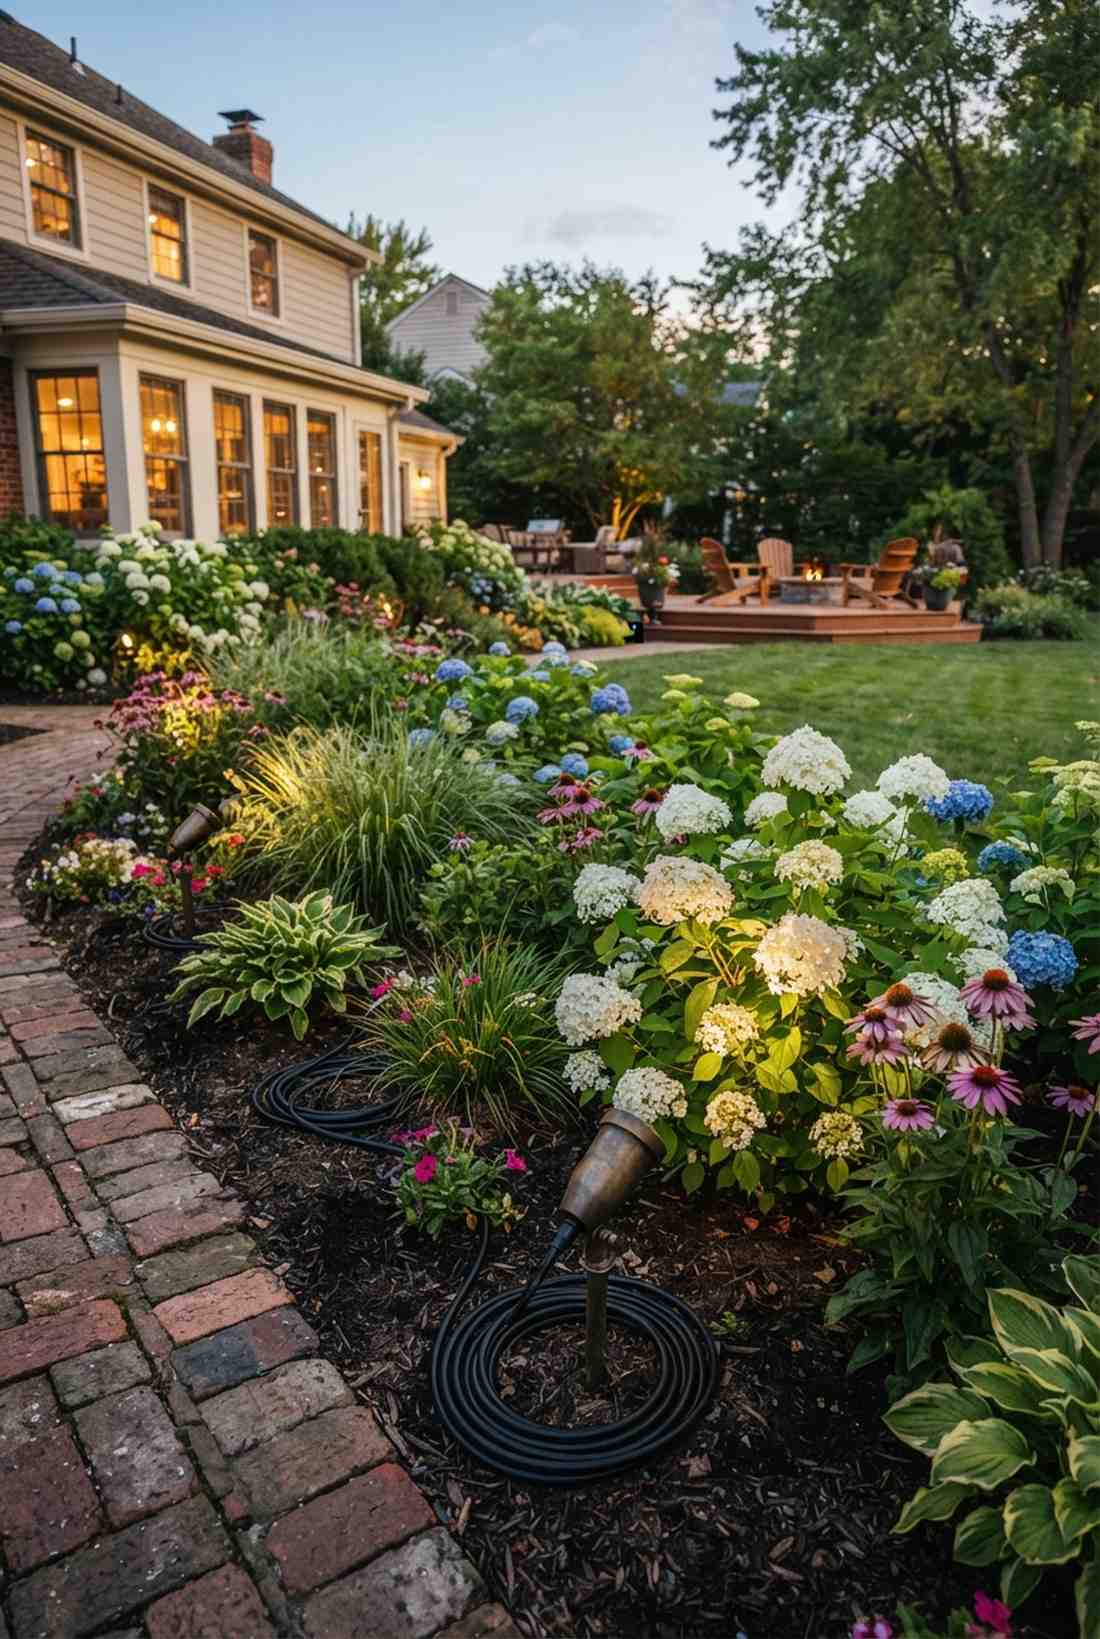
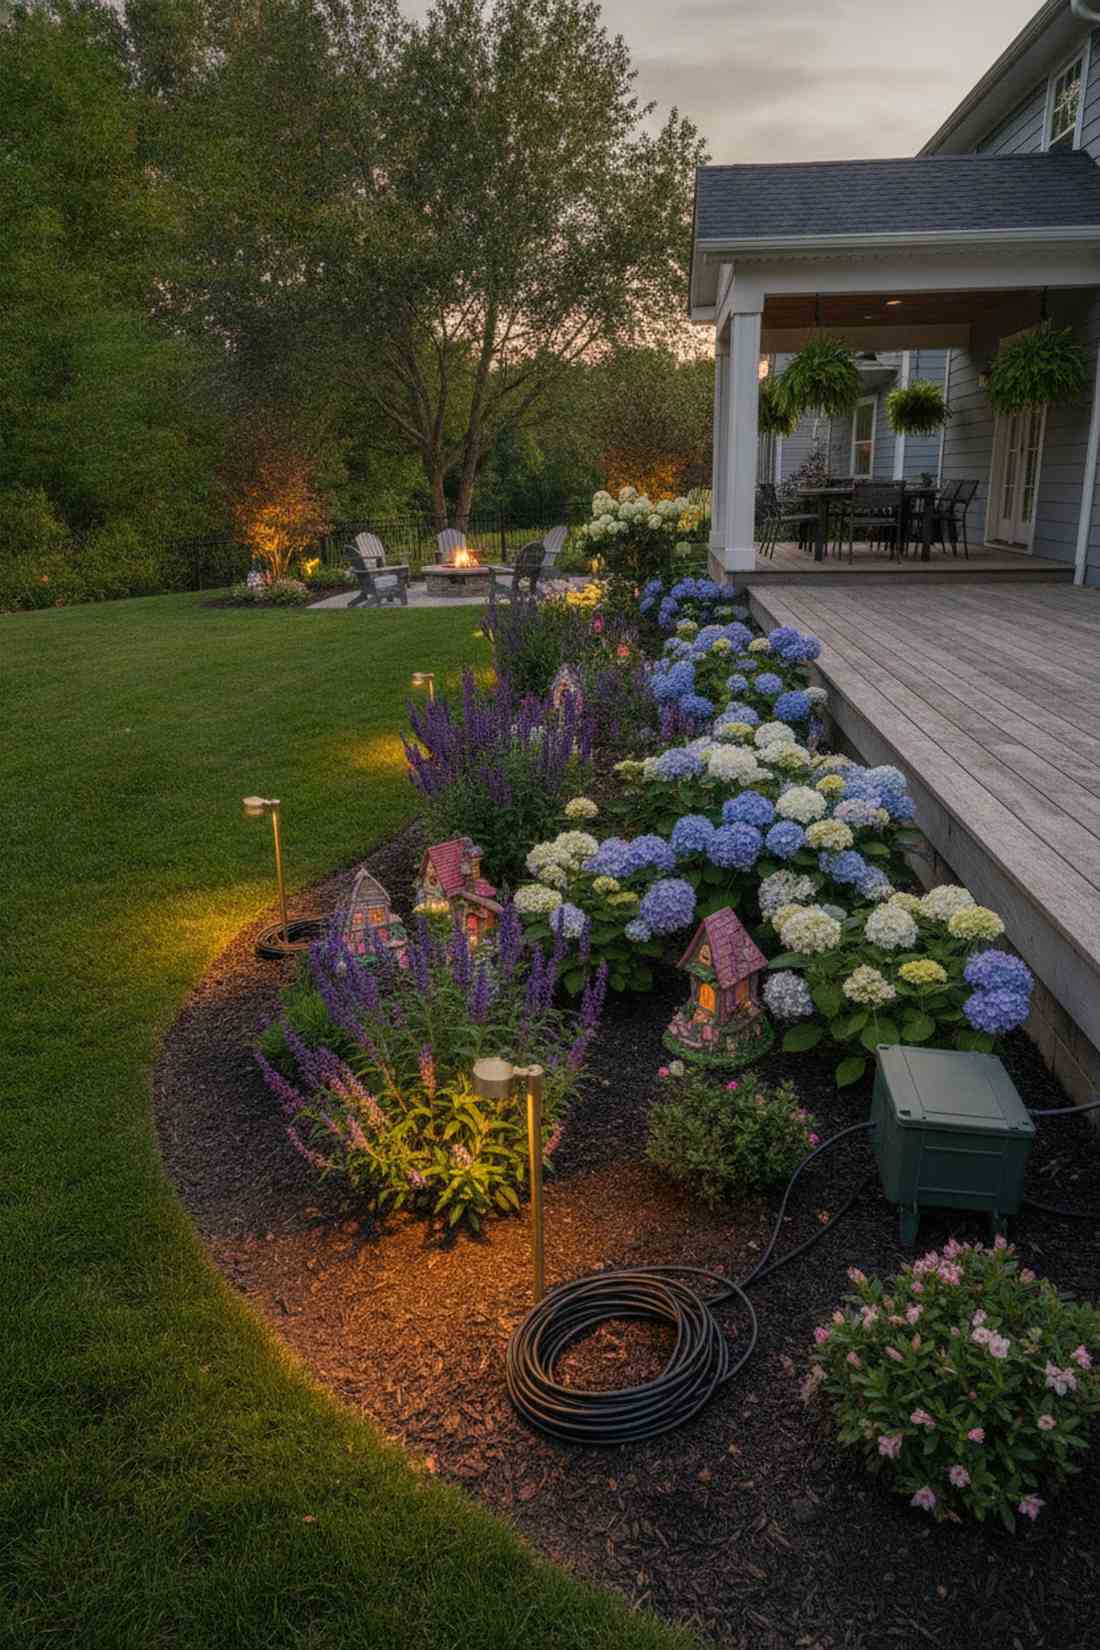
This movable perennial highlighting trick feels like an evolving gallery of your best blooming flowers. The ultimate versatile setup for seasonal flower beds that drastically change size by August.
Hardwiring fixtures permanently into a flower bed means your lights will eventually be swallowed by overgrown leaves. Using 12-inch portable spikes lets you physically move the beams back as the hydrangeas explode in size, ensuring perfect illumination all season. It is a foolproof way to manage your fairy garden kits and seasonal blooms.
A set of high-quality spikes runs about $45. An absolute must-have for active gardeners.
- Key Materials: Adjustable spike spots, extra wire slack
- Vibe / Style: Evolving gallery
- Difficulty: Very Easy
- Budget Breakdown: Spikes: $35 | Wire slack: $10.
- Creator’s Tip: Bury an extra two feet of wire coiled under the dirt so you have plenty of slack to move the light later.
- Smart Sourcing: portable solid brass spikes and UV-resistant flexible wire conduit.
Most homeowners completely ignore this next lighting angle, but it changes everything.
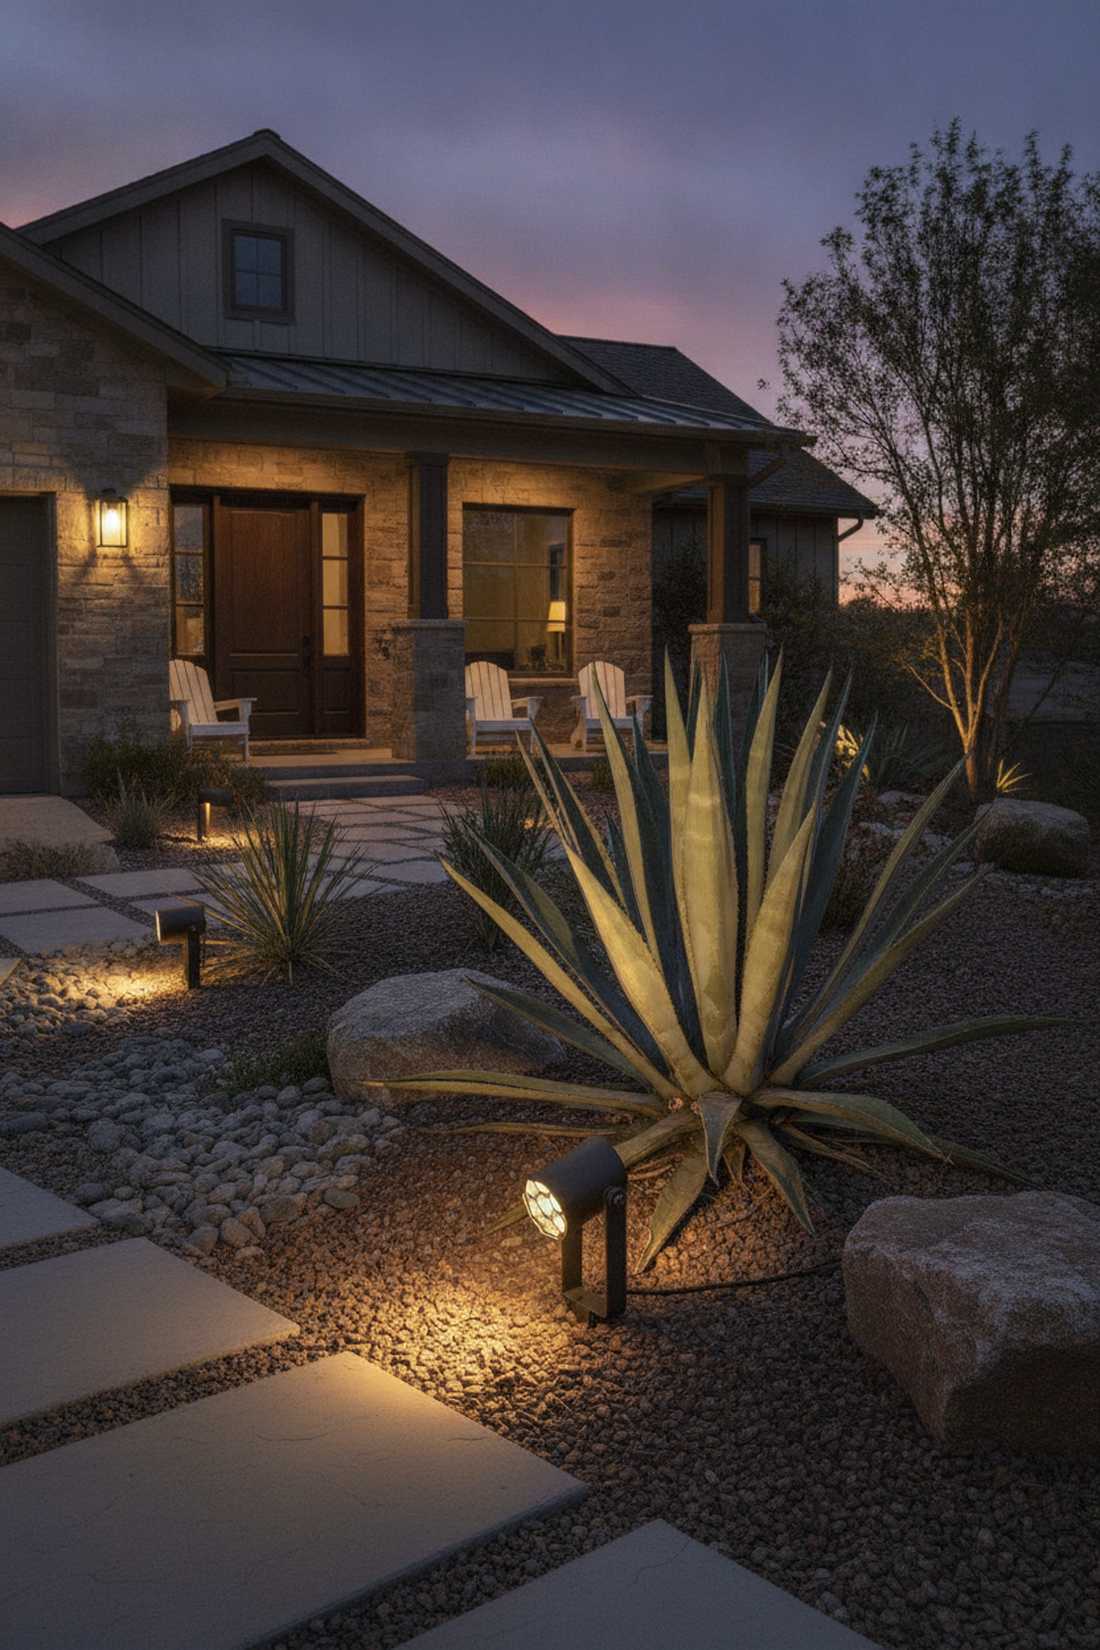
15. Gravel-Bed Bollard Lighting
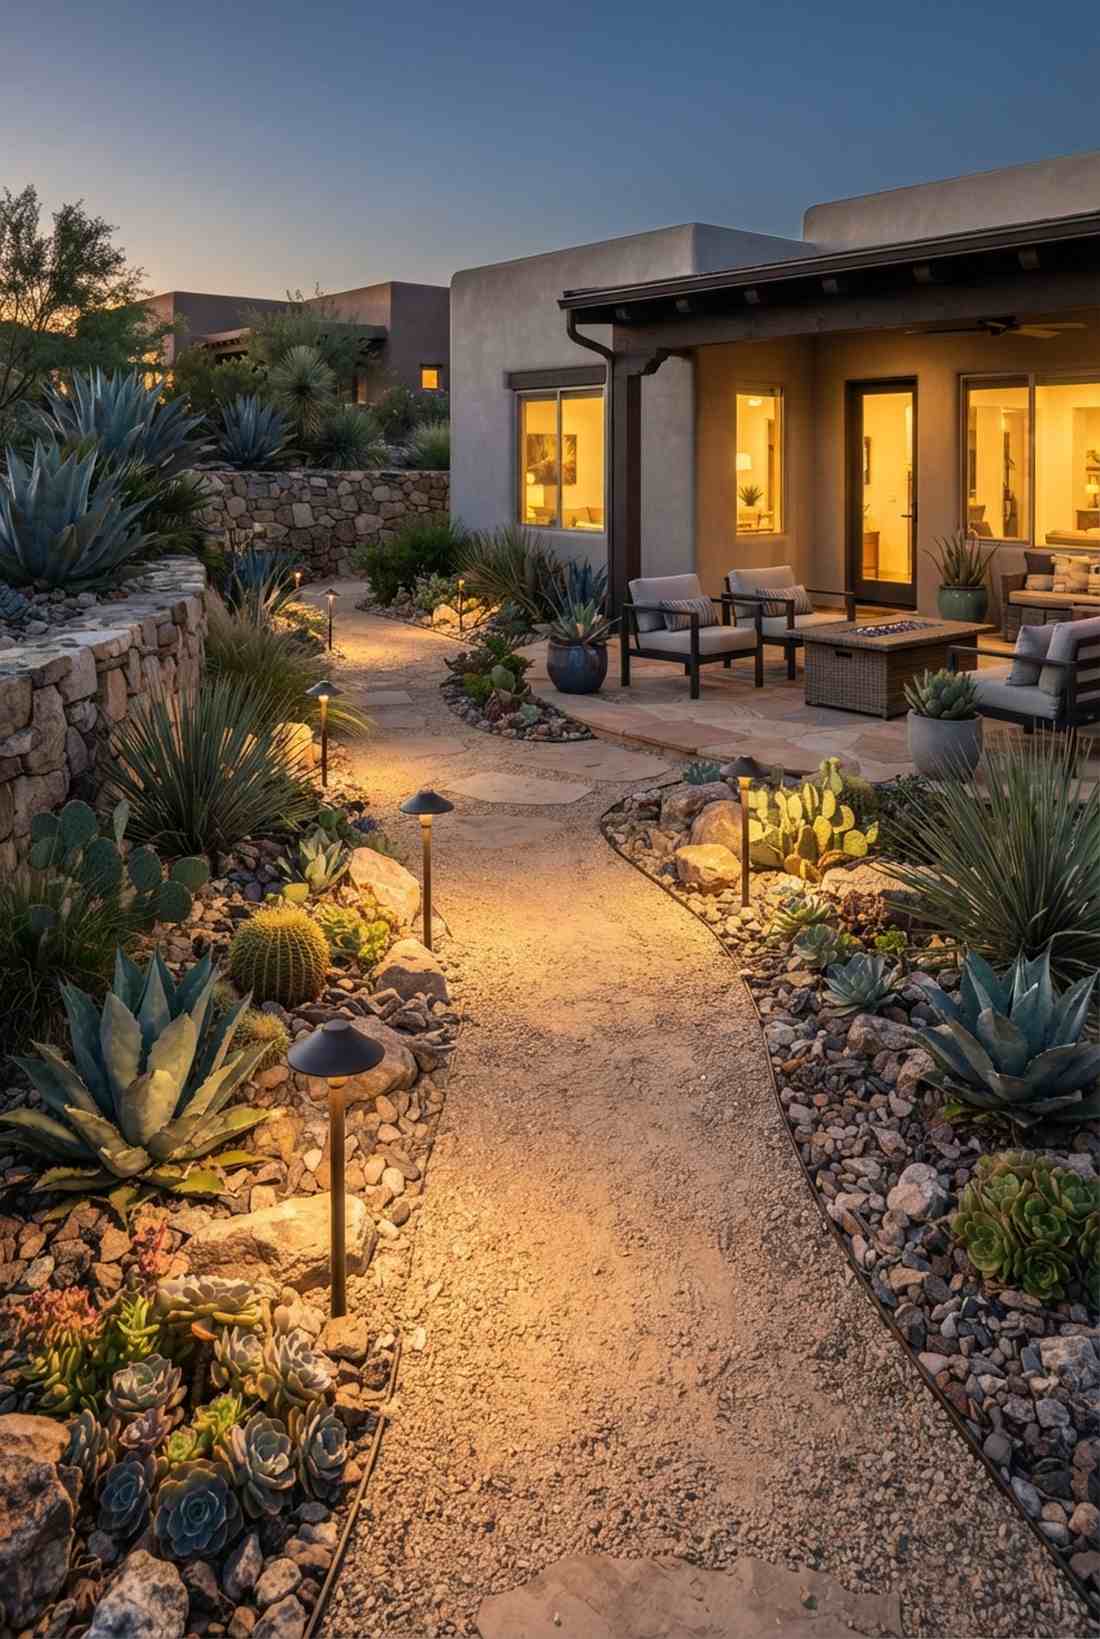
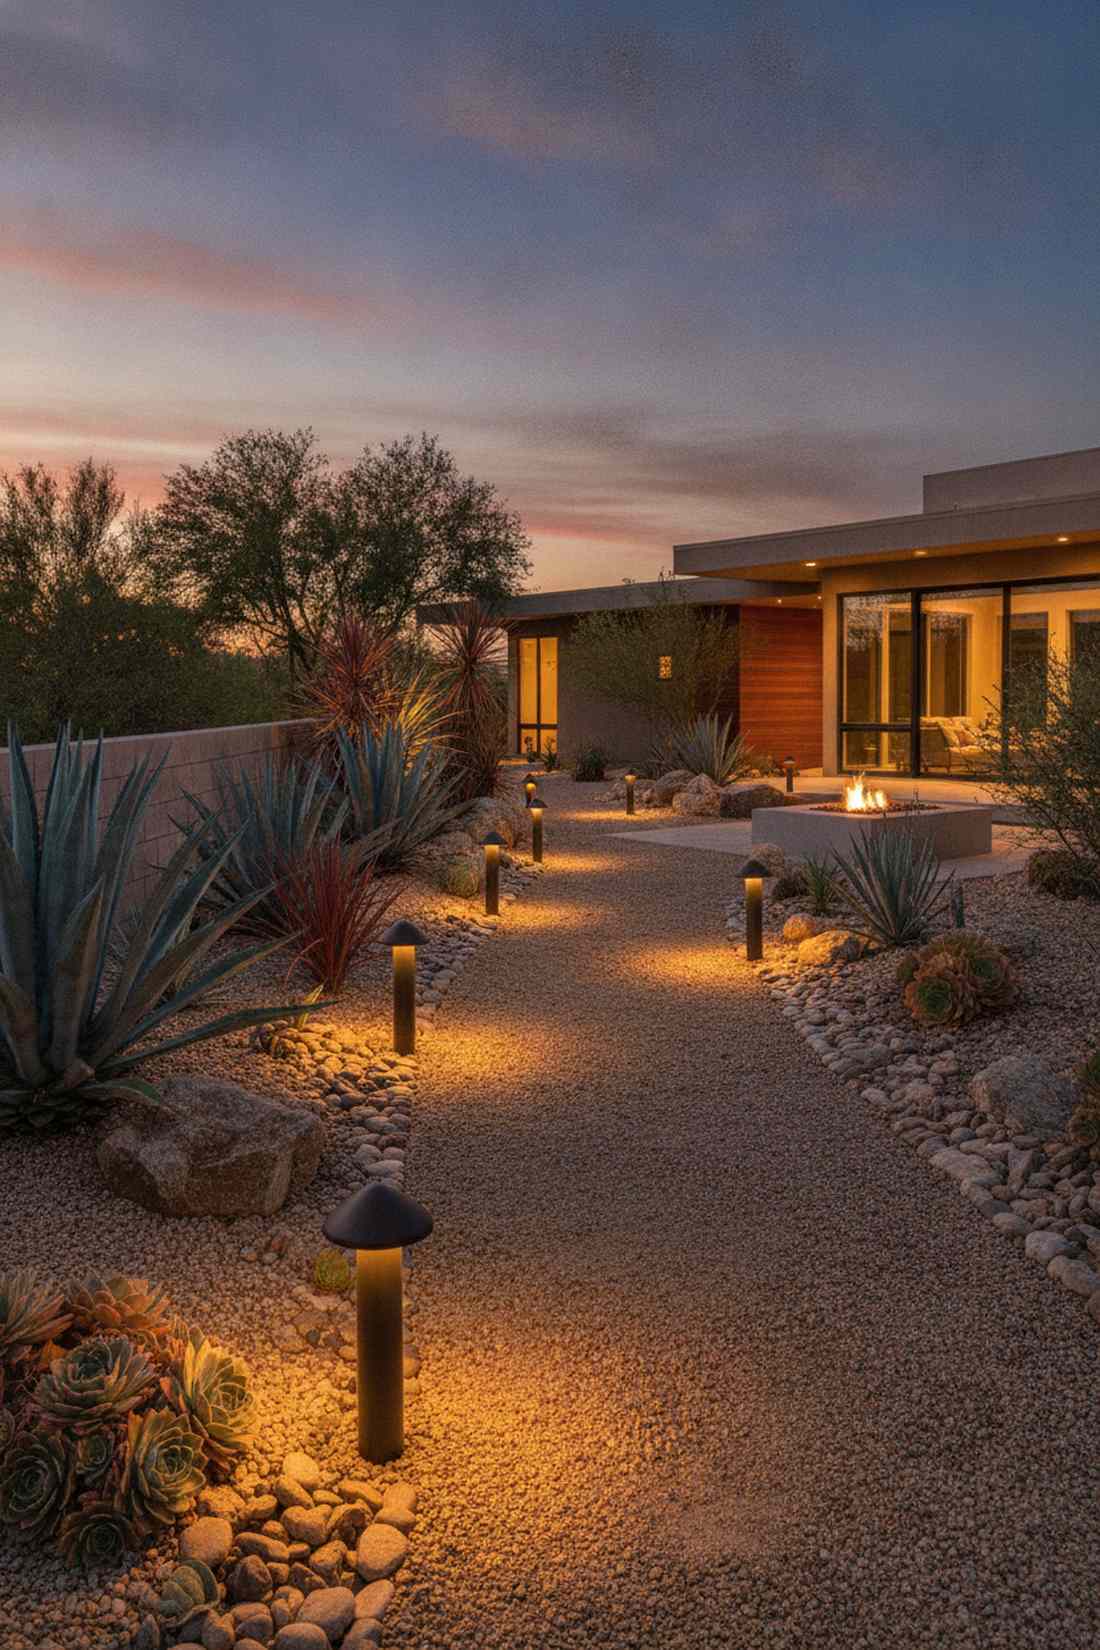
Low-profile xeriscape bollard lighting feels like a chic, high-end desert resort pathway. Flawless for illuminating agave, succulents, and decorative rock gardens without blinding guests.
Tall, glaring path lights completely ruin the minimalist aesthetic of a low rock garden. Sinking short 8-inch shielded bollards casts a gentle, downward ambient pool over the gravel, giving a designer-level finish that strictly controls light pollution. It’s the only way to properly showcase expensive architectural succulents.
Designer bollards usually cost $80–$120 each. Save this to your modern landscape inspiration board.
- Key Materials: 8-12 inch shielded metal bollards
- Vibe / Style: Desert resort chic
- Difficulty: Moderate digging
- Budget Breakdown: Bollard: $90 | Base plate: $10.
- Creator’s Tip: Stagger the bollards in a zig-zag pattern instead of a straight runway line for a more organic feel.
- Smart Sourcing: cast aluminum mini bollards and pre-cut heavy-duty mounting plates.
16. Step-Integrated Ground Lighting
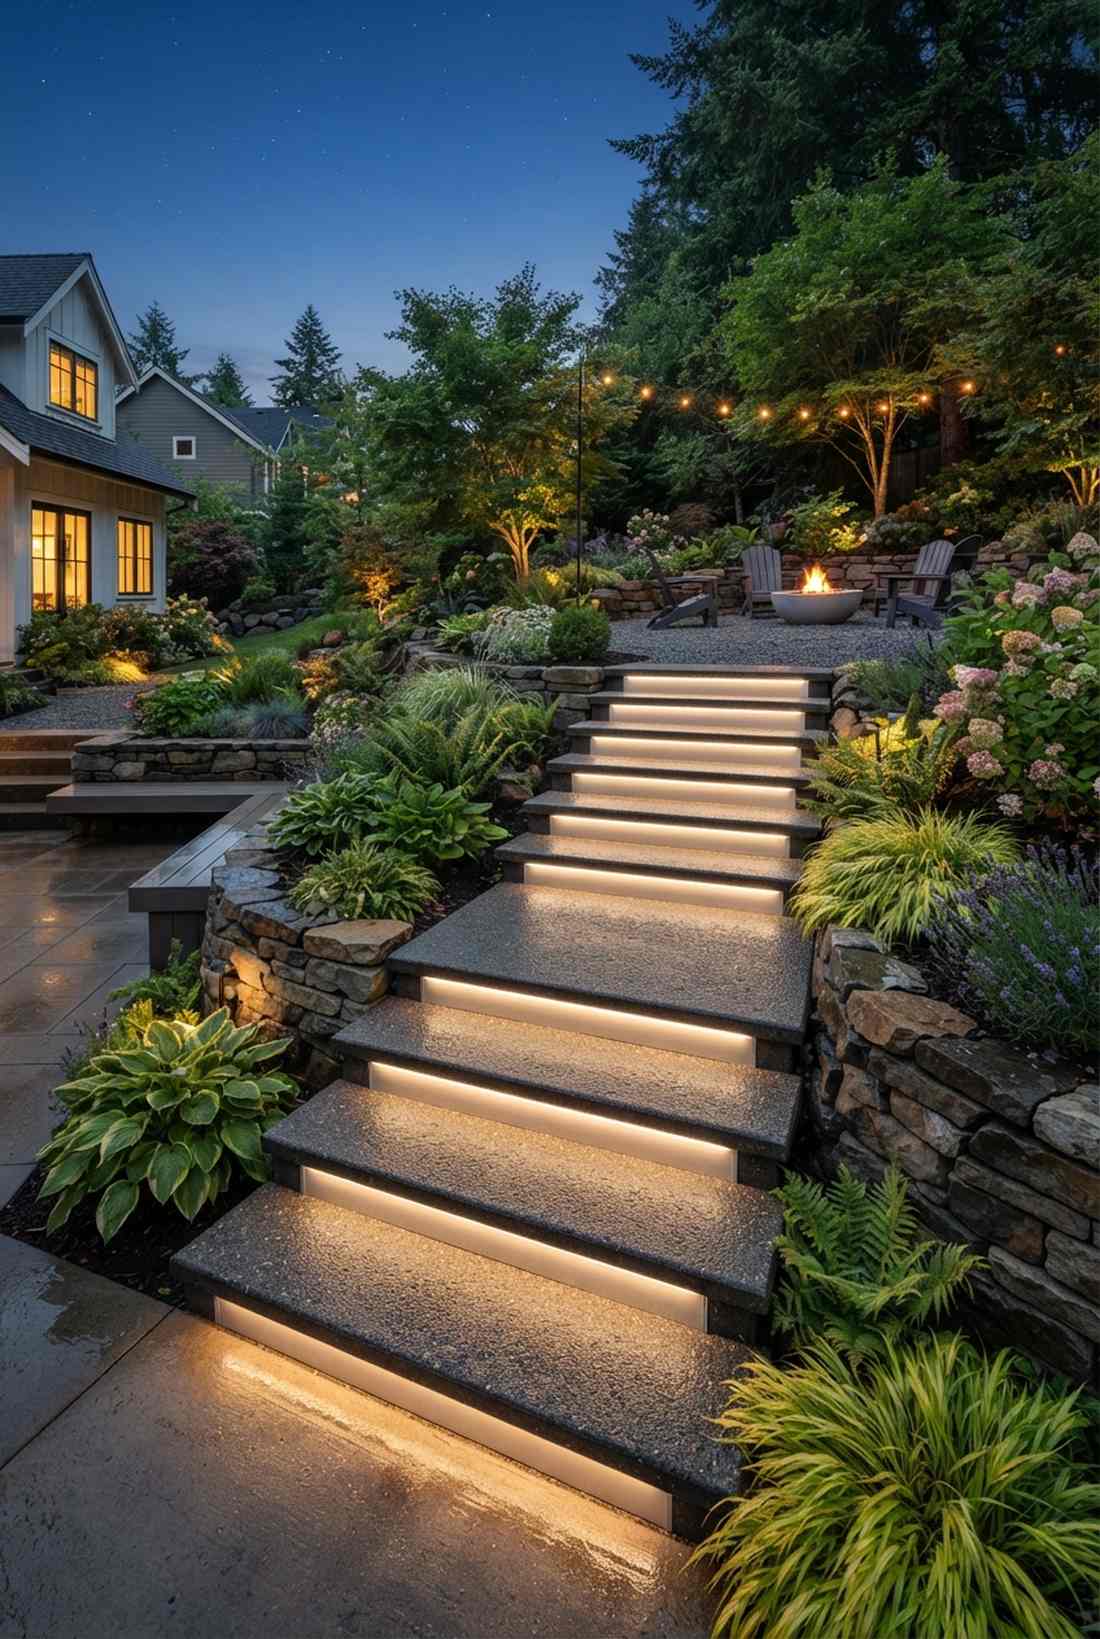
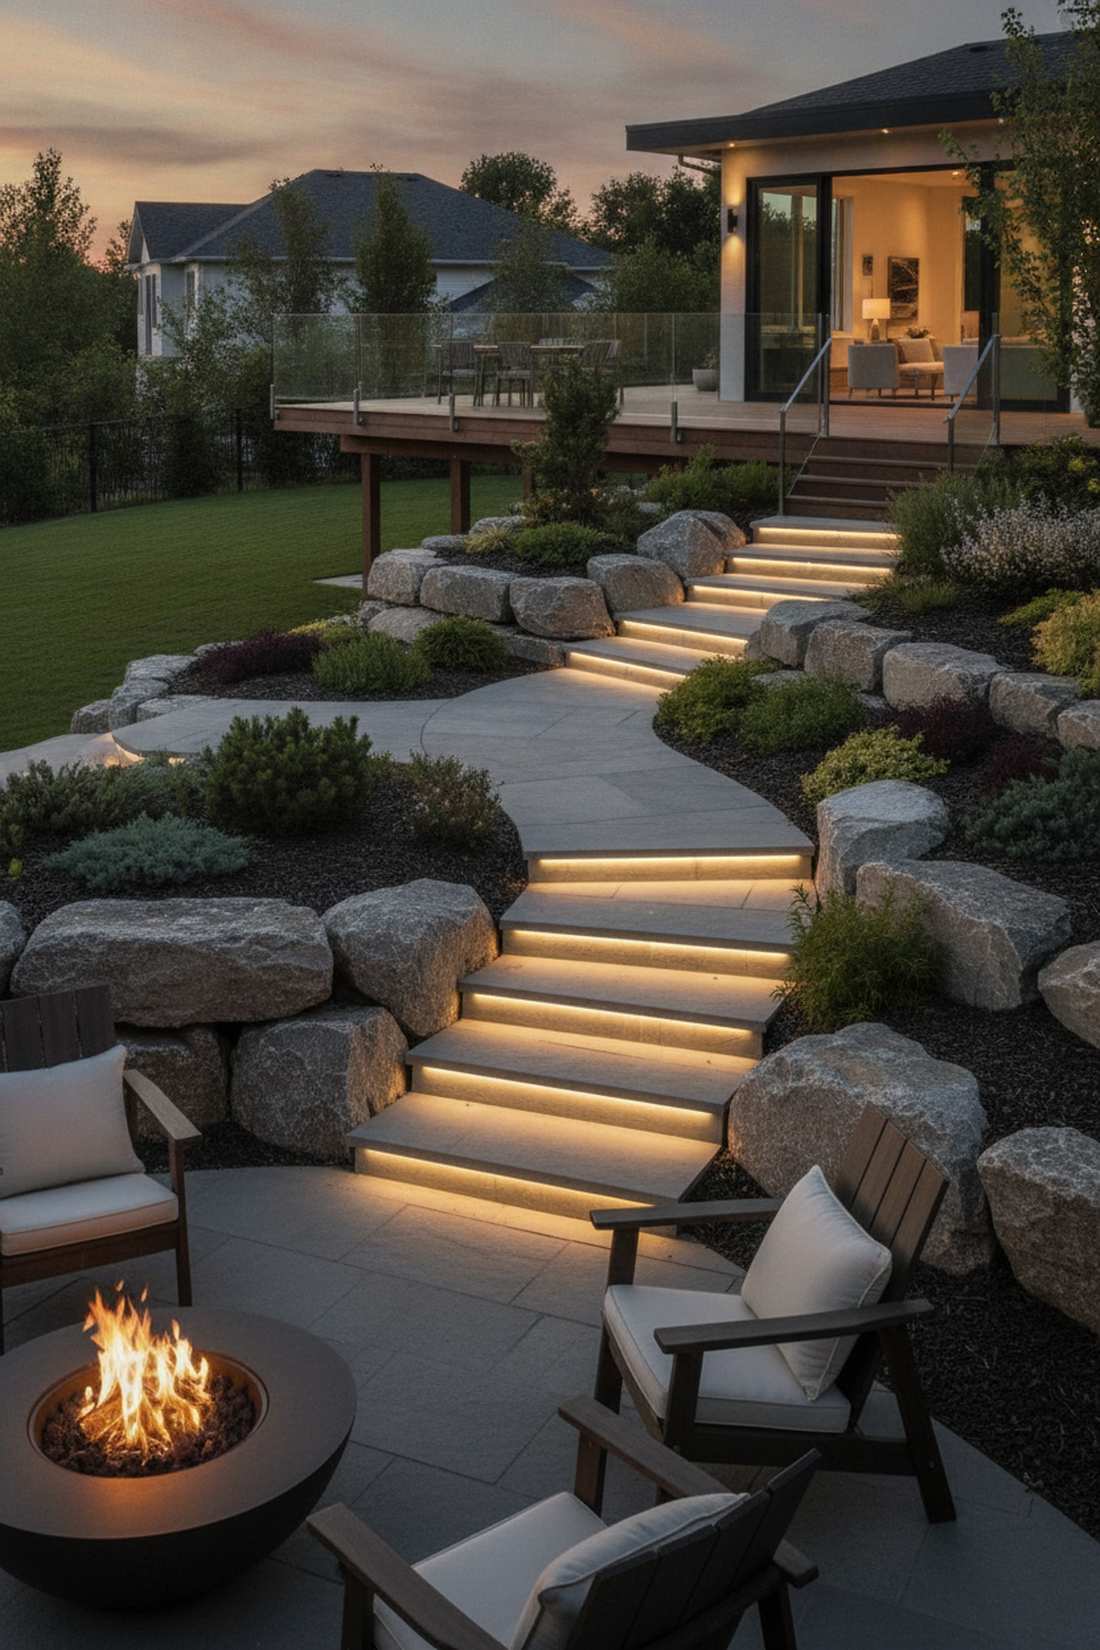
Subtle illuminated step risers feel like a luxurious VIP entrance to a secret garden terrace. Mandatory for terraced rock gardens or steep alpine walkway transitions.
Stabbing path lights next to stairs is a tripping hazard and casts ugly, confusing shadows on the steps. Routing LED strip lights directly into the bottom lip of the stair tread washes the riser below, which delivers a surprisingly premium look and absolute nighttime safety. This technique instantly modernizes older, tired hardscapes.
You can retrofit a whole staircase for under $150. A brilliant, safety-first aesthetic upgrade.
- Key Materials: IP68 LED strips, aluminum channels
- Vibe / Style: VIP modern terrace
- Difficulty: Advanced (Routing)
- Budget Breakdown: LED strip: $80 | Extrusions: $50.
- Creator’s Tip: Always mount the strips inside an aluminum channel with a frosted diffuser so you don’t see individual LED dots.
- Smart Sourcing: waterproof IP68 neon LED strips and recessed aluminum track profiles (bulk pack).
17. Border-Edge Linear Lighting
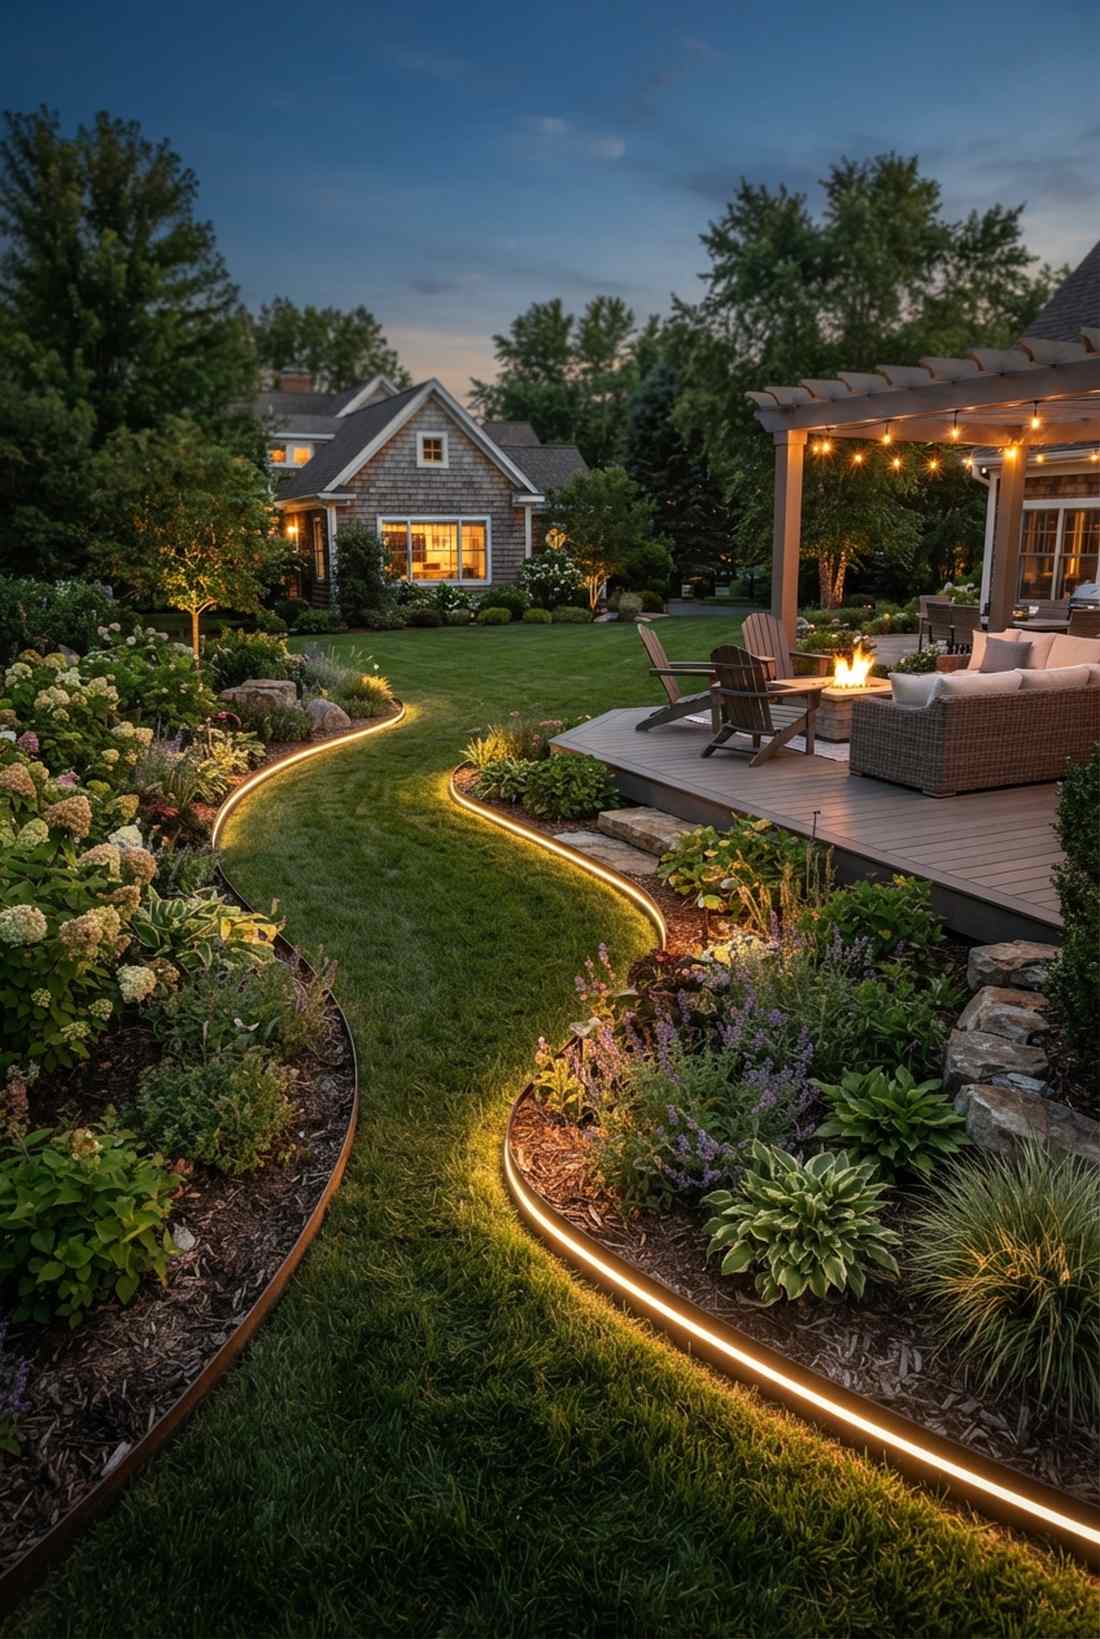
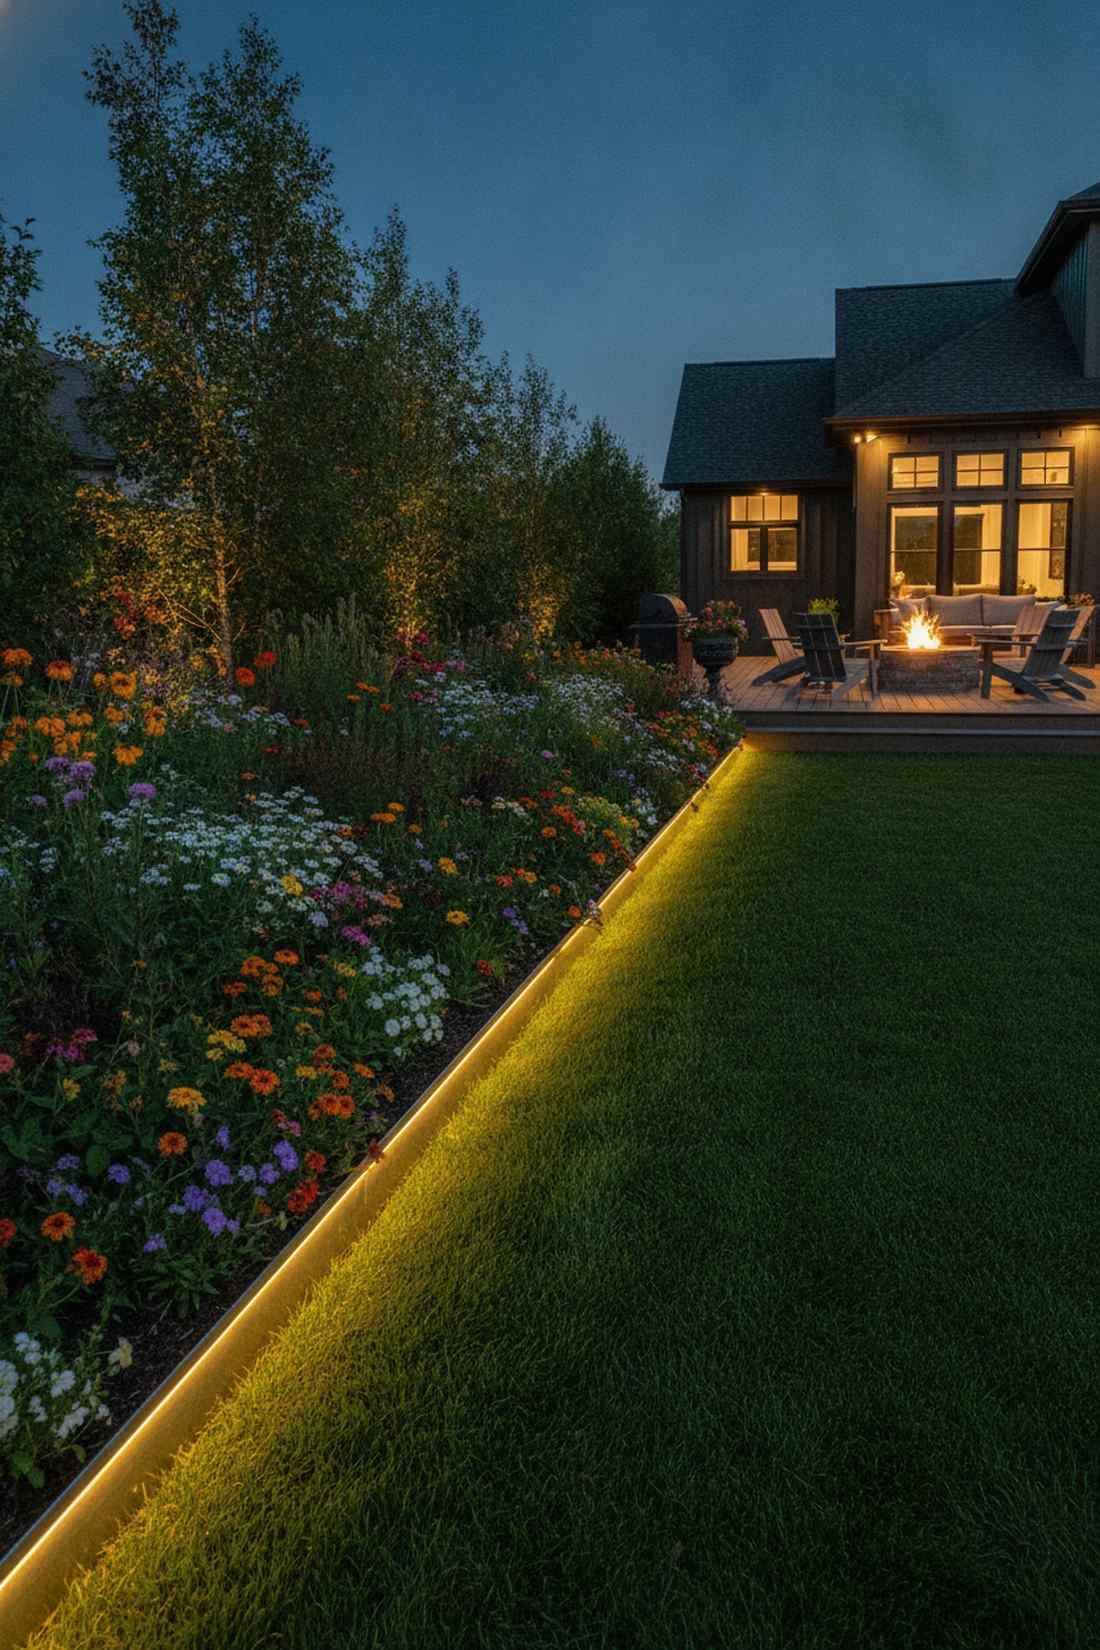
Continuous glowing lawn borders feel like a crisp, futuristic boundary framing your wildest plants. Ideal for dividing a pristine manicured lawn from an exploding, messy annual flower bed.
Relying on scattered spotlights leaves dark, muddy gaps between your front-row perennials. Securing a continuous, warm 2700K LED strip to the inner lip of your metal edging washes a solid wall of light across the roots, completely modernizing standard landscape designs. It is the ultimate boundary definition hack.
A 20-foot border run will cost roughly $100. Pin this if you crave perfectly clean yard lines!
- Key Materials: Flexible warm LED tape, metal edging clips
- Vibe / Style: Crisp futuristic edge
- Difficulty: Easy
- Budget Breakdown: Light roll: $60 | Clips/Edging: $40.
- Creator’s Tip: Face the strip inward toward the plants so the light highlights the flowers, not the grass.
- Smart Sourcing: outdoor-rated flexible LED ropes and steel landscape edging border starter kits.
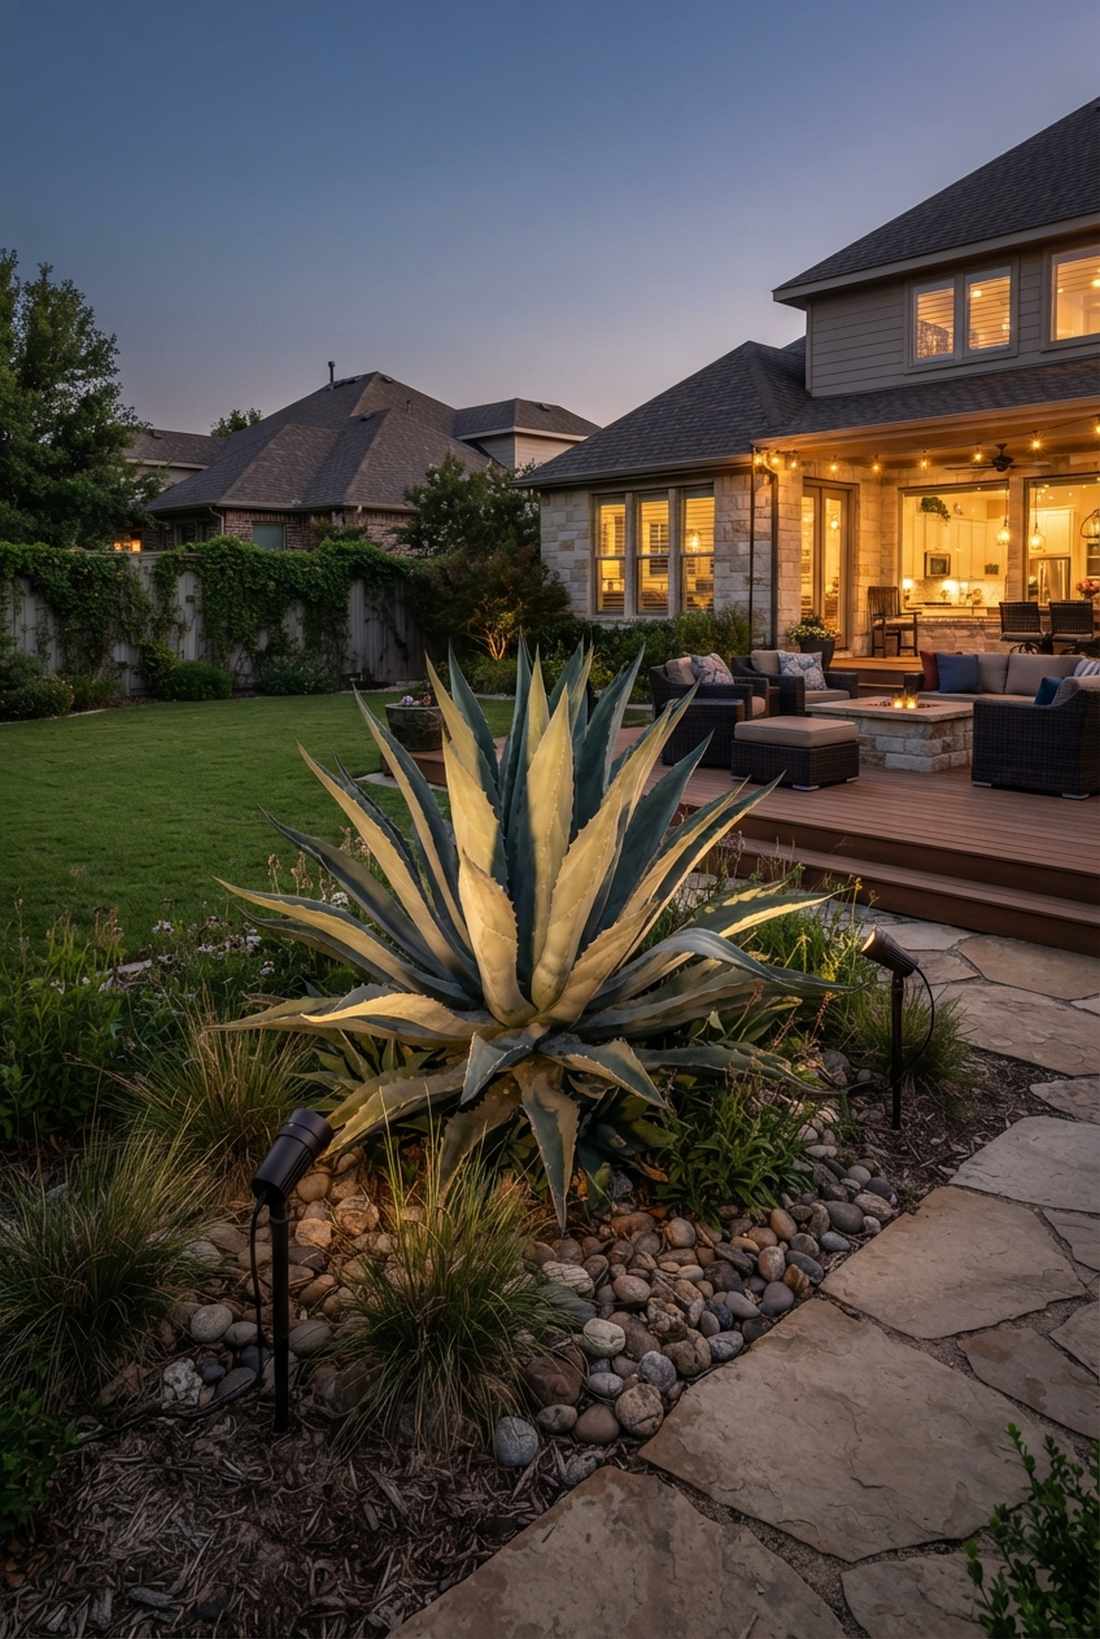
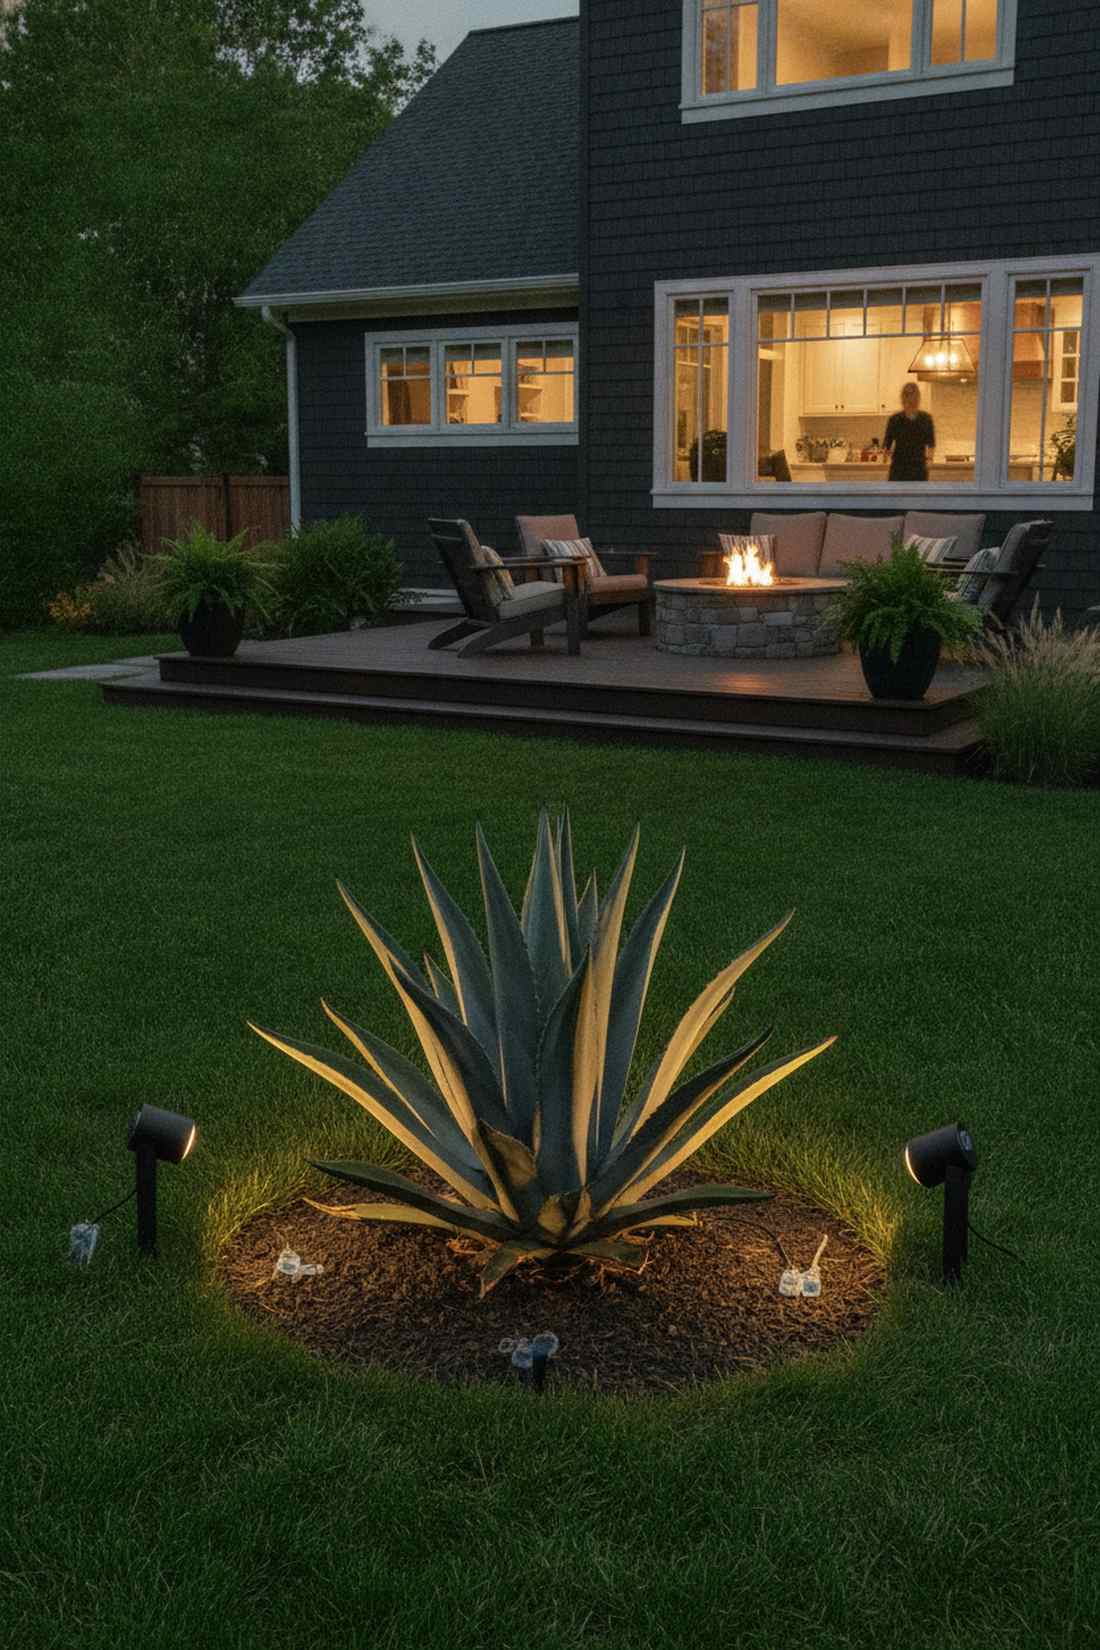
18. Directional Ground Spots
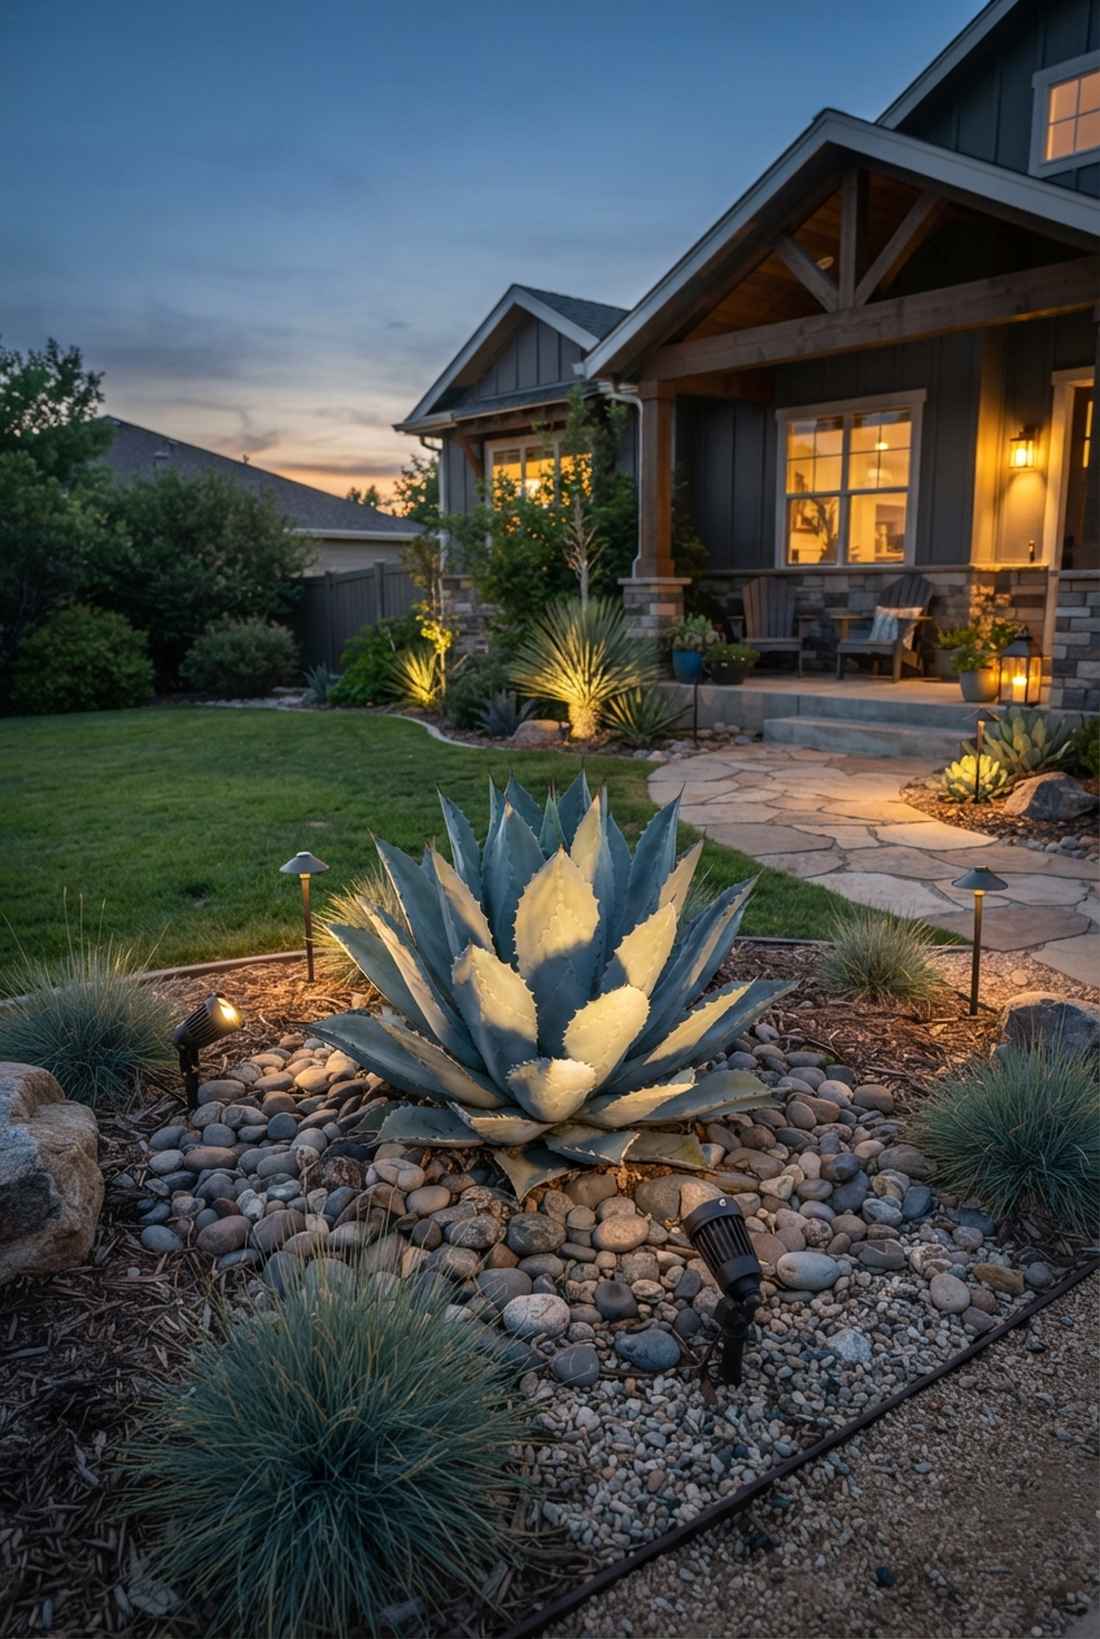
Precision architectural plant targeting feels like a VIP red carpet for your absolute best yard specimens. Perfectly suited for isolating a dramatic yucca or striking blue agave plant.
Washing a whole bed with floodlights dilutes the impact of an expensive, structural plant. Bringing a swiveling ground spot within 3 feet of the target and dialing in a tight 10-degree beam isolates the texture, which looks far more expensive than it is. It’s like putting a museum spotlight on a living sculpture.
These highly adjustable units run about $60. Highly recommended for xeriscaped front yards.
- Key Materials: Adjustable gimbal ground spots
- Vibe / Style: Living sculpture
- Difficulty: Easy positioning
- Budget Breakdown: Swivel spot: $50 | Connections: $10.
- Creator’s Tip: Keep the beam extremely narrow (10 degrees) to prevent the light from spilling onto the boring dirt around the plant.
- Smart Sourcing: variable-beam directional ground lights and glare-guard hex louvers.
Outdoor Lighting Up and Down Combined Effects
19. Integrated Bidirectional Wall Sconces
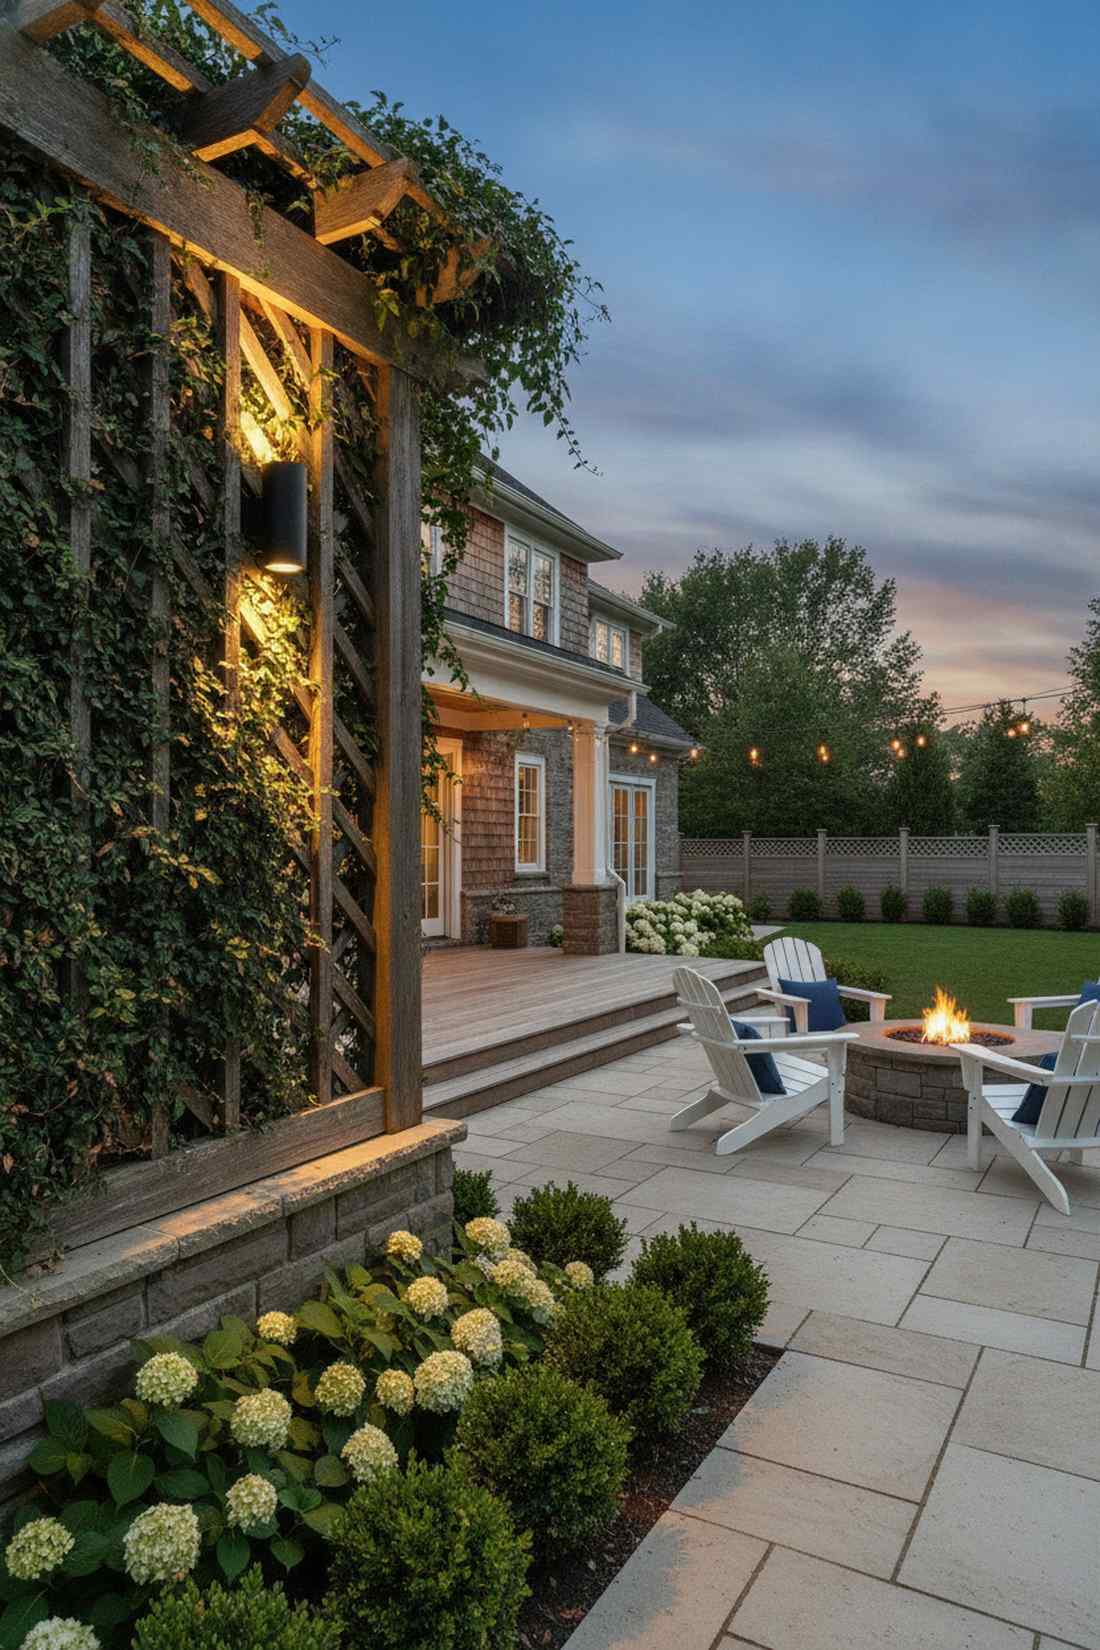
A sleek dual-beam patio sconce feels like a luxury hotel facade perfectly highlighting crawling ivy. The absolute best choice for illuminating a wooden arbor while simultaneously lighting the foundation shrubs below.
Using separate lights for the ground and the roofline clutters your walls with ugly hardware and wires. Installing a single **outdoor lighting up and down** sconce cuts your wiring in half while projecting dramatic hourglass shadow columns. It is a massive shortcut that gives a designer-level finish to blank exterior walls.
A premium bidirectional sconce costs about $80. Save this to your patio renovation board!
- Key Materials: Cylinder up/down wall sconce
- Vibe / Style: Luxury hotel facade
- Difficulty: Intermediate (Wall mounting)
- Budget Breakdown: Sconce: $70 | Anchors: $10.
- Creator’s Tip: Mount the sconce exactly at 6.5 feet high so the light perfectly balances between the ground and the eaves.
- Smart Sourcing: matte black up/down exterior sconces and weatherproof siding mounting blocks.
If you think your yard is too small for premium lighting, the next idea will prove you wrong.
20. Post-Mounted Up-Down Fixtures
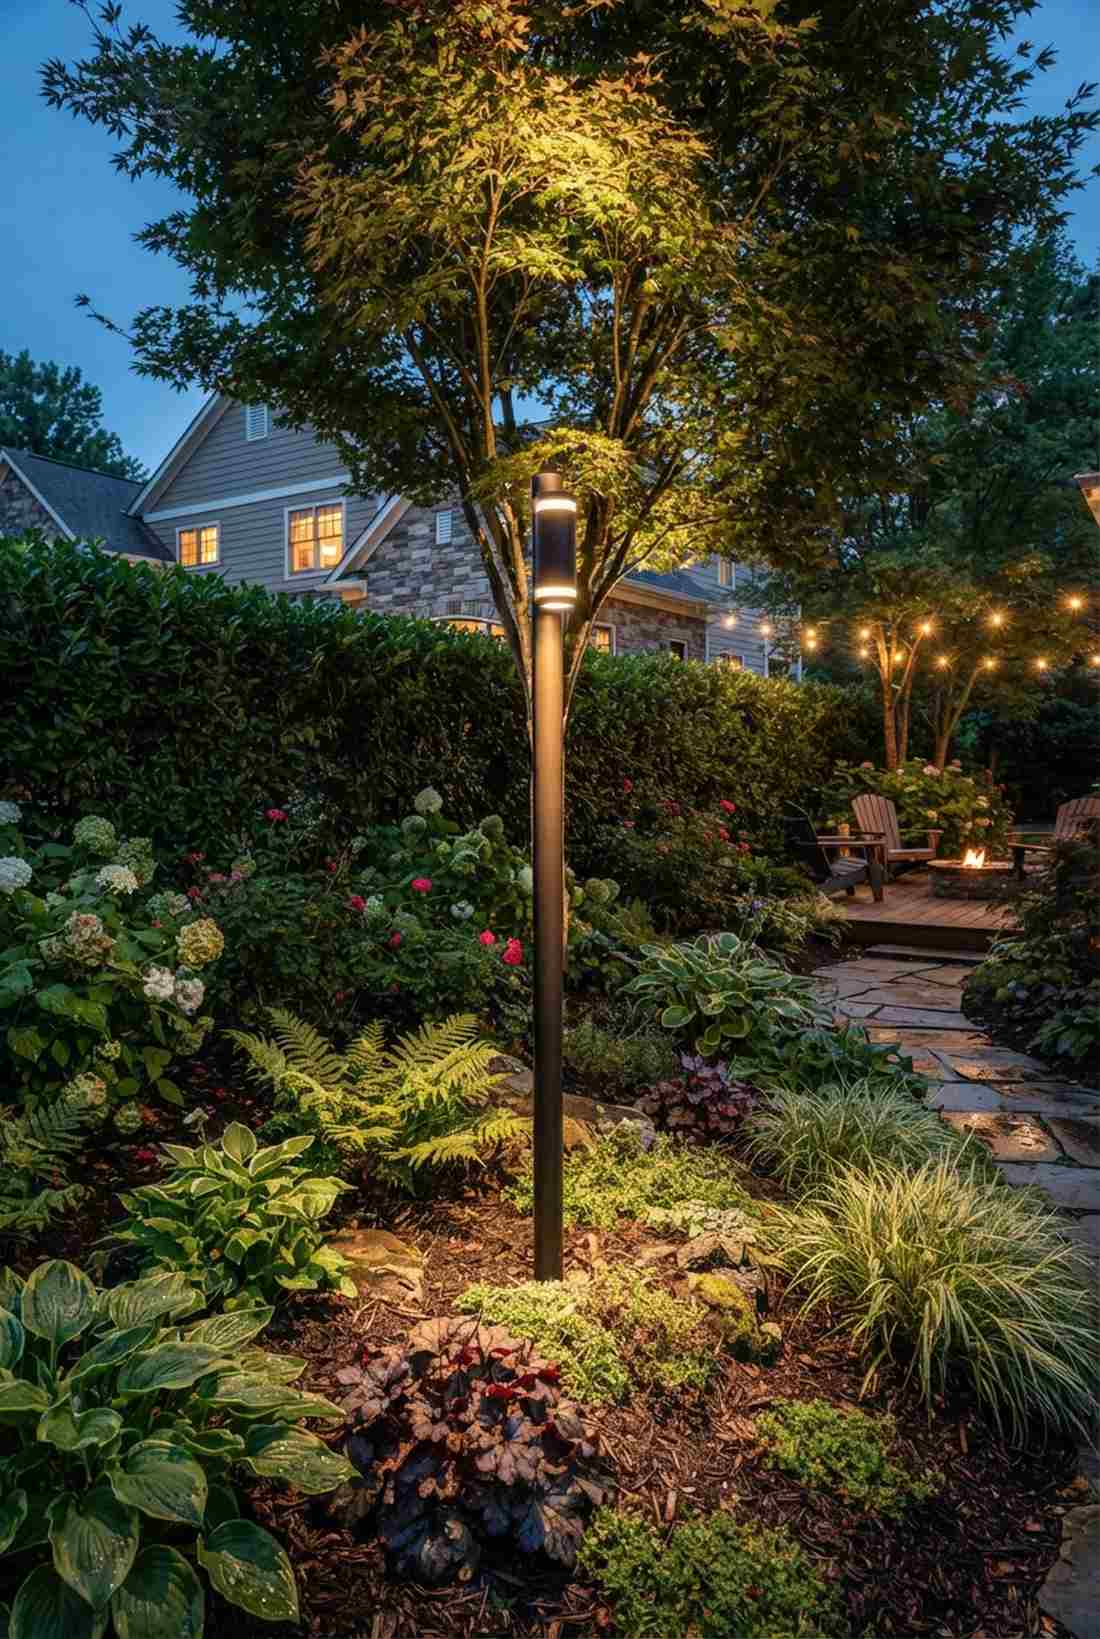
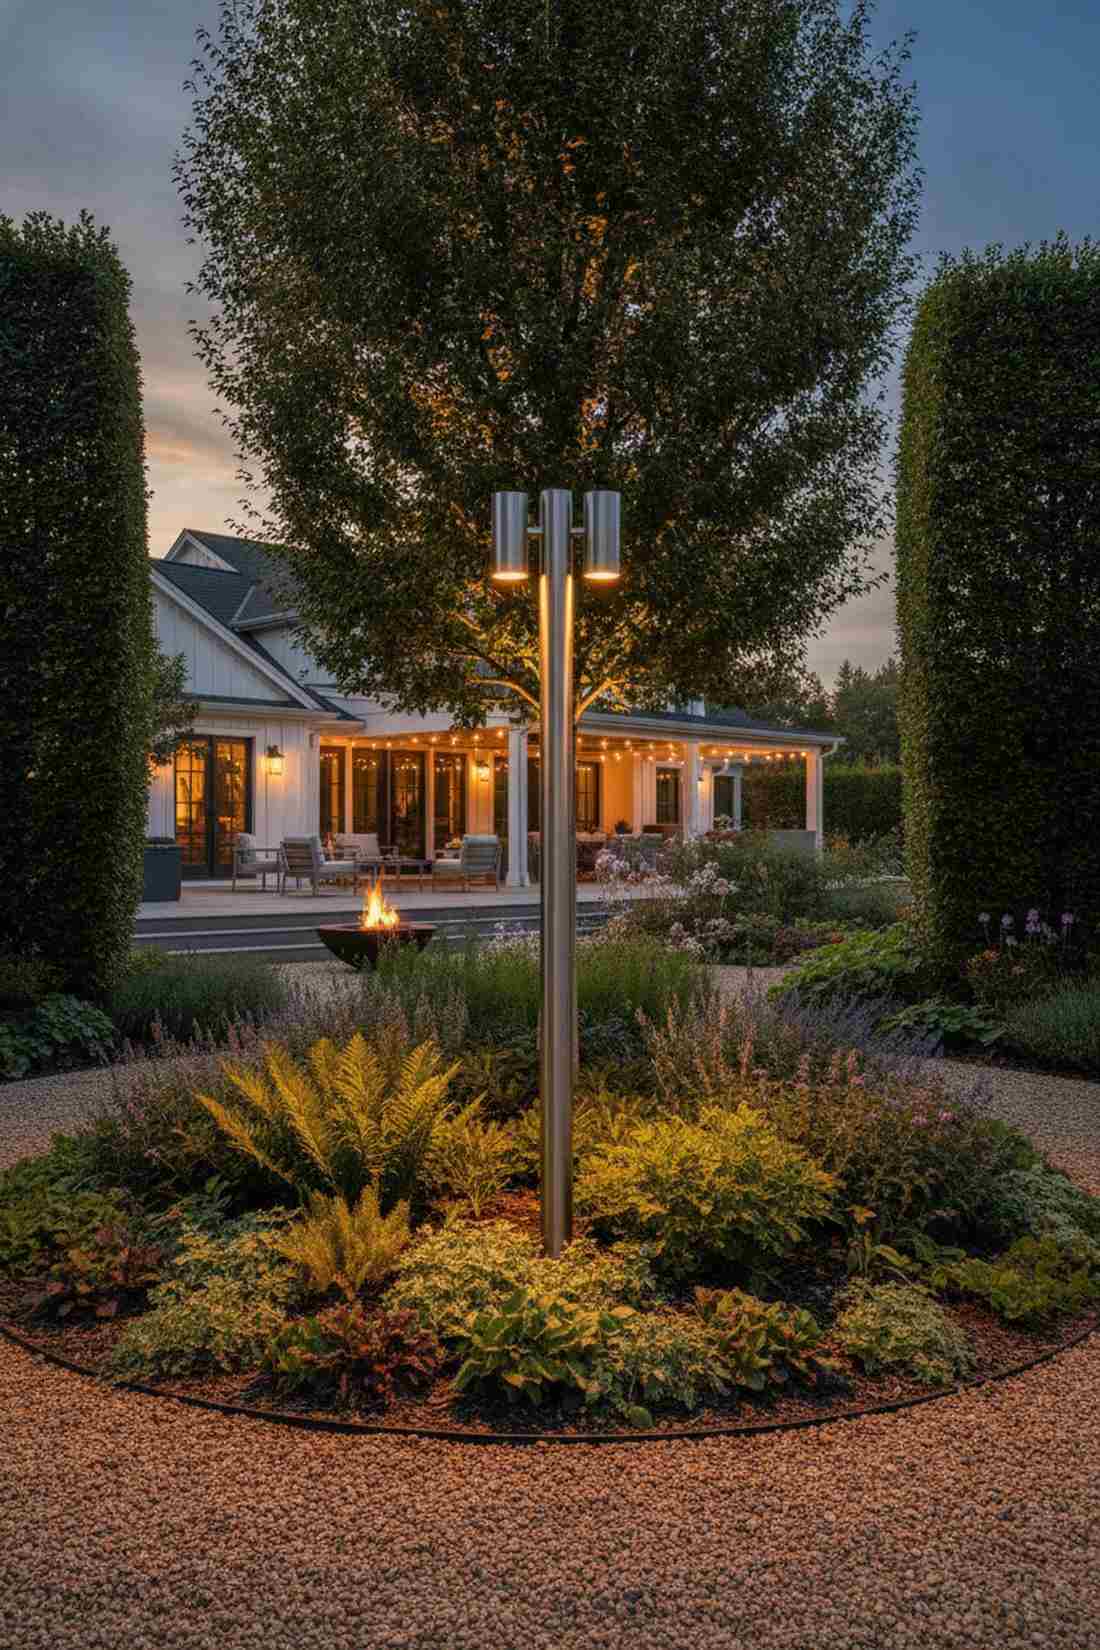
This glowing mid-bed pillar feels like a modern lighthouse guiding you through a dense botanical garden. Incredibly effective when planted smack in the middle of a transition zone between tall hedges and short groundcovers.
Relying purely on ground lights in a massive garden bed means the taller shrubs stay completely dark. Sinking a 5-foot decorative post equipped with **outdoor lighting up down** cylinders creates a floating focal point that washes both the canopy above and the dirt below. It acts as a stunning piece of modern art during the day.
Building a custom lighting pillar runs around $130. A fantastic trick for deep, chaotic gardens.
- Key Materials: 5ft metal post, cylinder fixture
- Vibe / Style: Modern botanical
- Difficulty: Posthole digging
- Budget Breakdown: Post: $40 | Fixture: $80.
- Creator’s Tip: Bury the bottom of the post in quick-set concrete so the tall fixture doesn’t lean after heavy rain.
- Smart Sourcing: aluminum garden light posts and post-mount bidirectional cylinders.
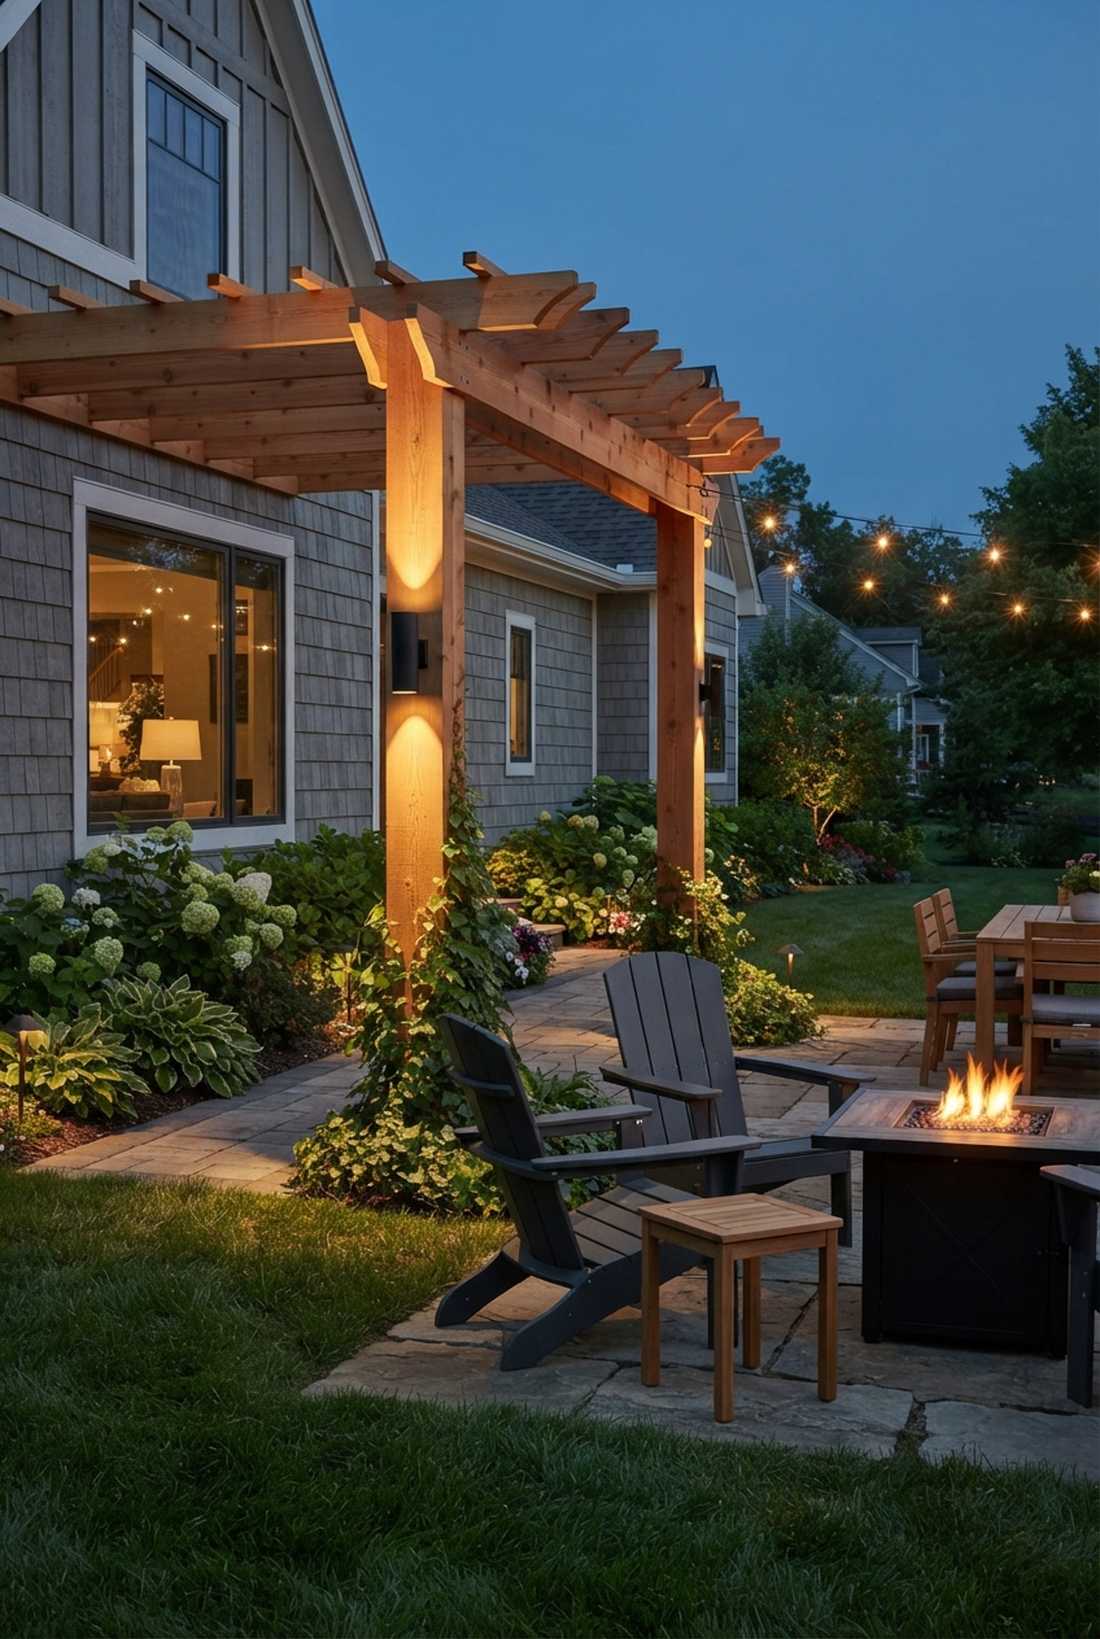
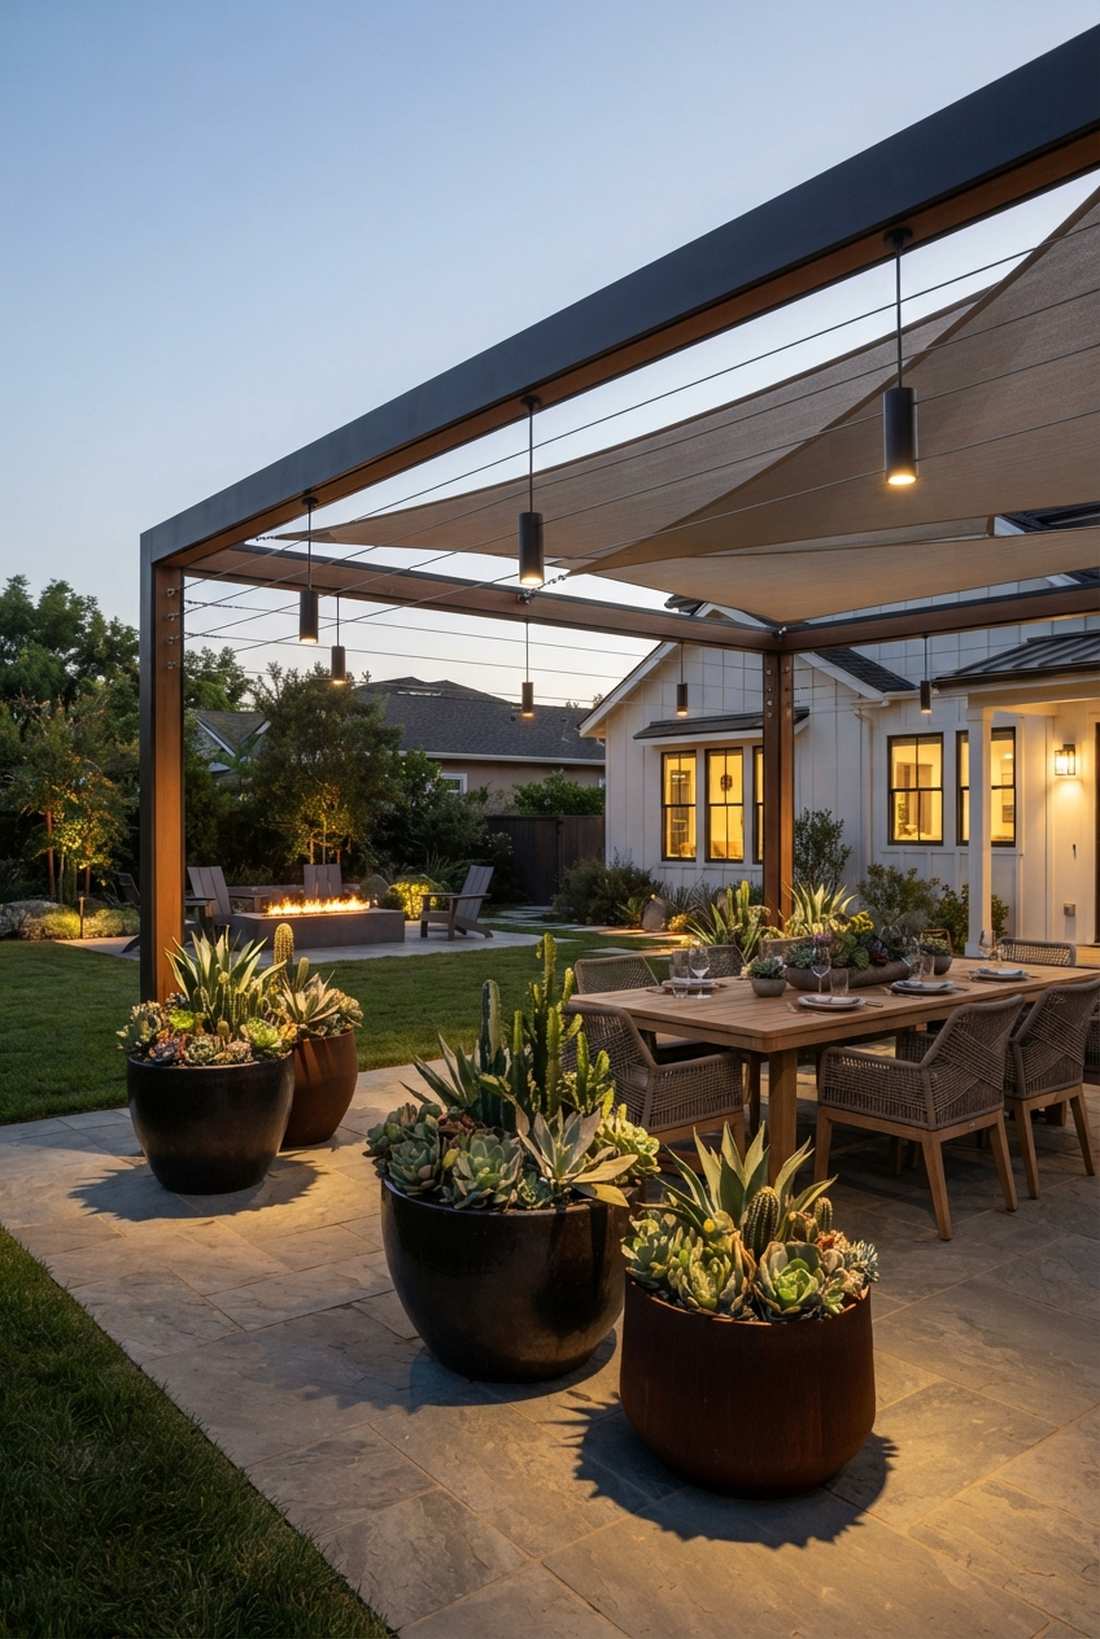
21. Pergola Beam Dual-Direction Lighting
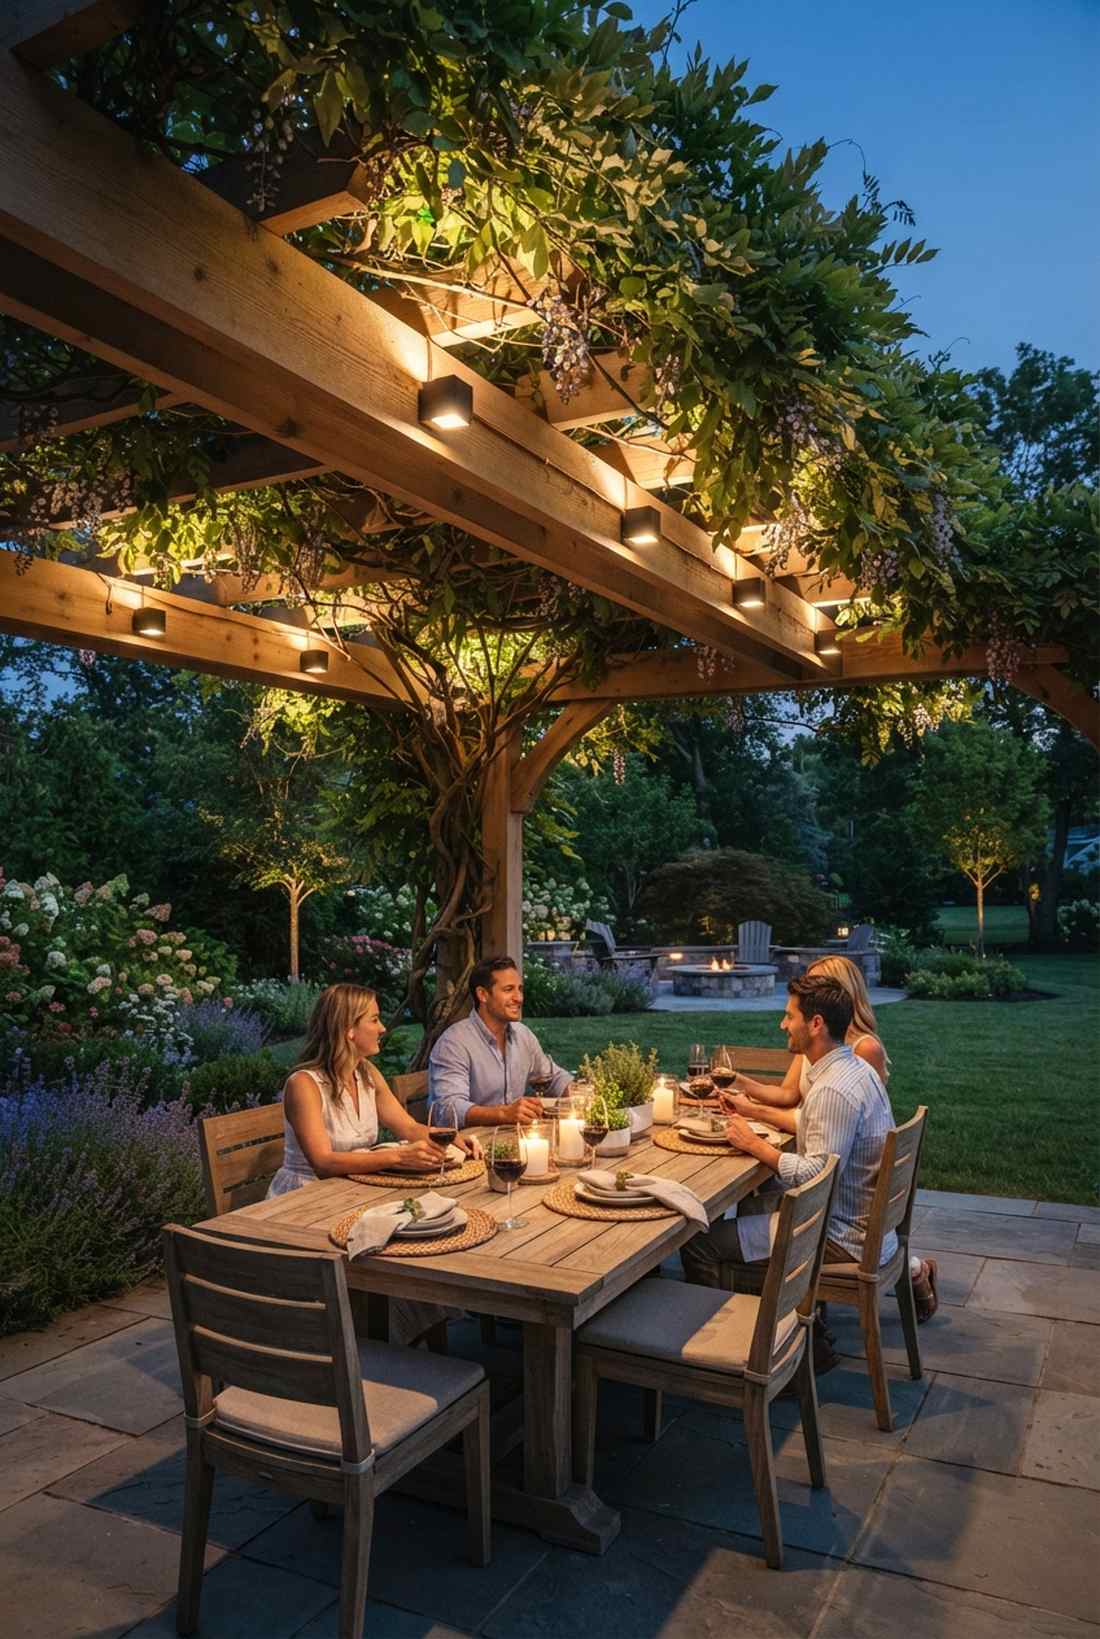
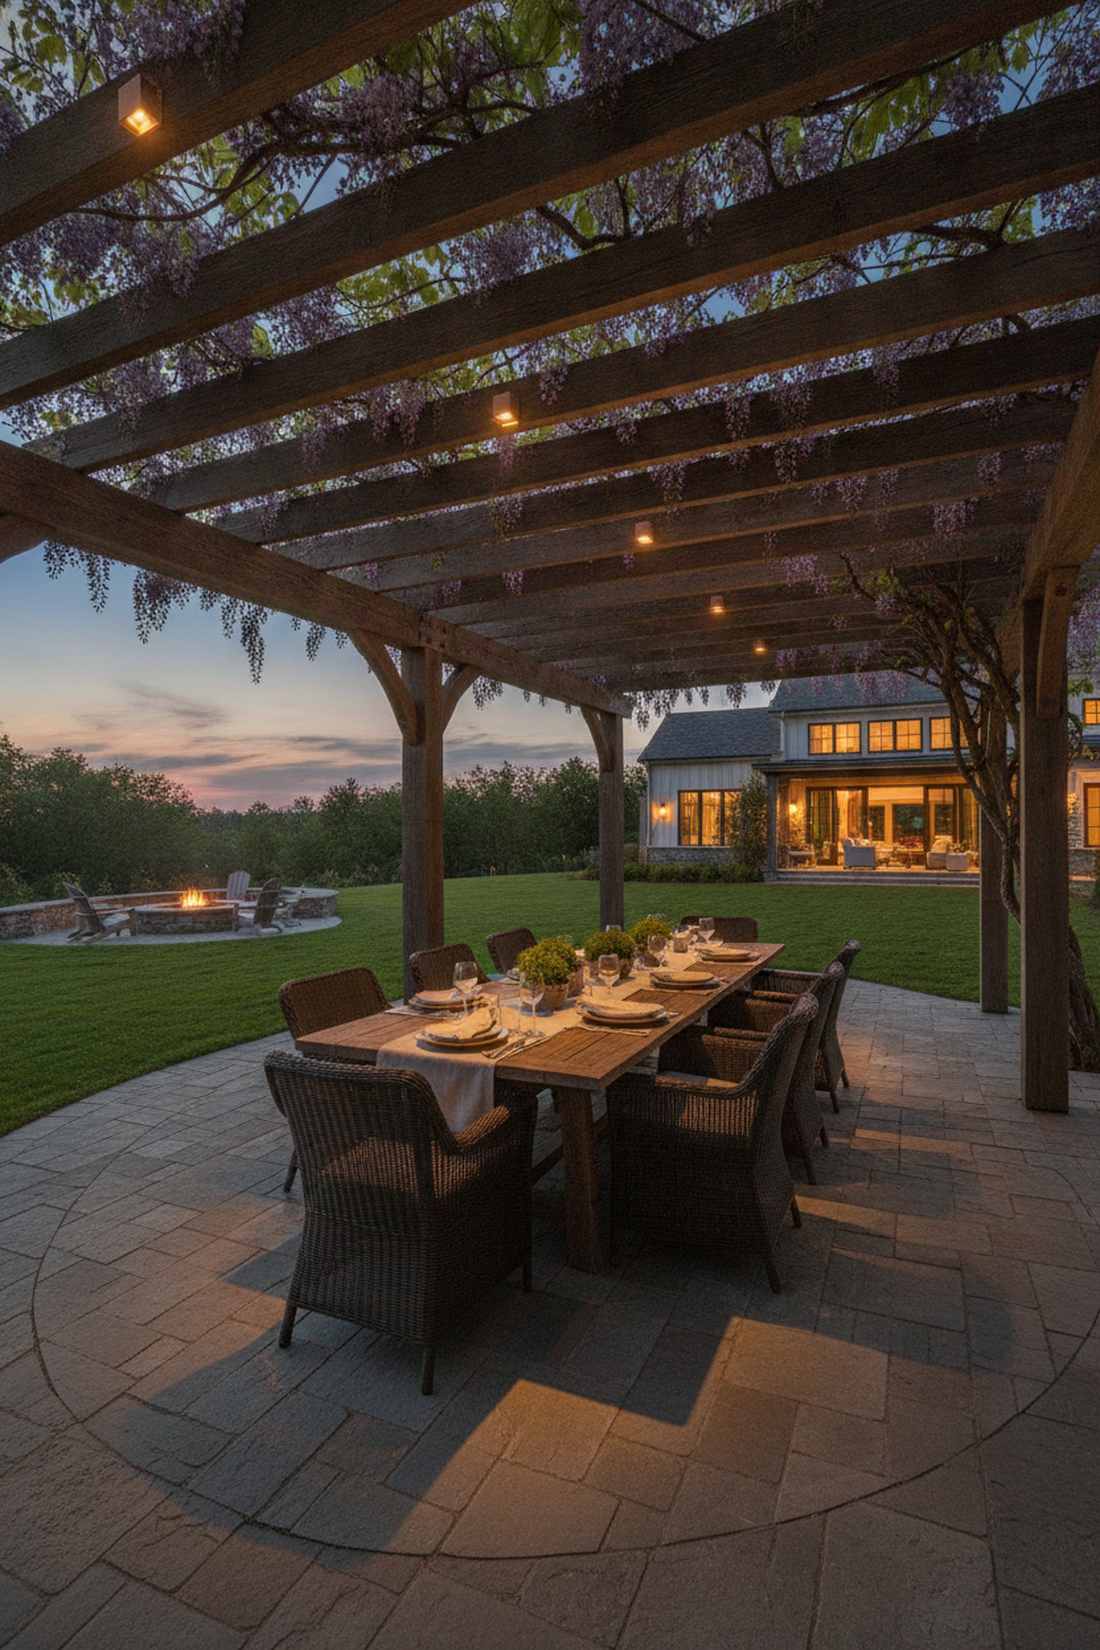
A glowing vine-draped pergola roof feels like dining under a magical canopy in an Italian vineyard. The ultimate solution for highlighting overhead wisteria while lighting your patio dining table simultaneously.
Slapping ugly spotlights on a beautiful wooden structure ruins the custom carpentry you paid for. Mounting tiny, dual-direction cubes directly to the cross-beams shoots light up into the grapevines and softly down onto the pavers, which delivers a surprisingly premium look without the glare. You only have to run one wire line for double the effect.
A set of these mounts costs about $160 for a standard pergola. Pin this for your summer outdoor dining setup!
- Key Materials: Mini dual-beam surface mounts
- Vibe / Style: Italian vineyard dining
- Difficulty: Wood routing/wiring
- Budget Breakdown: 4x Mounts: $140 | Wood staples: $20.
- Creator’s Tip: Alternate the orientation of the cubes slightly to create a randomized, organic moonlight effect below.
- Smart Sourcing: surface-mount micro up/down lights and copper wire routing staples (bulk pack).
22. Tree Trunk Mid-Height Bidirectional
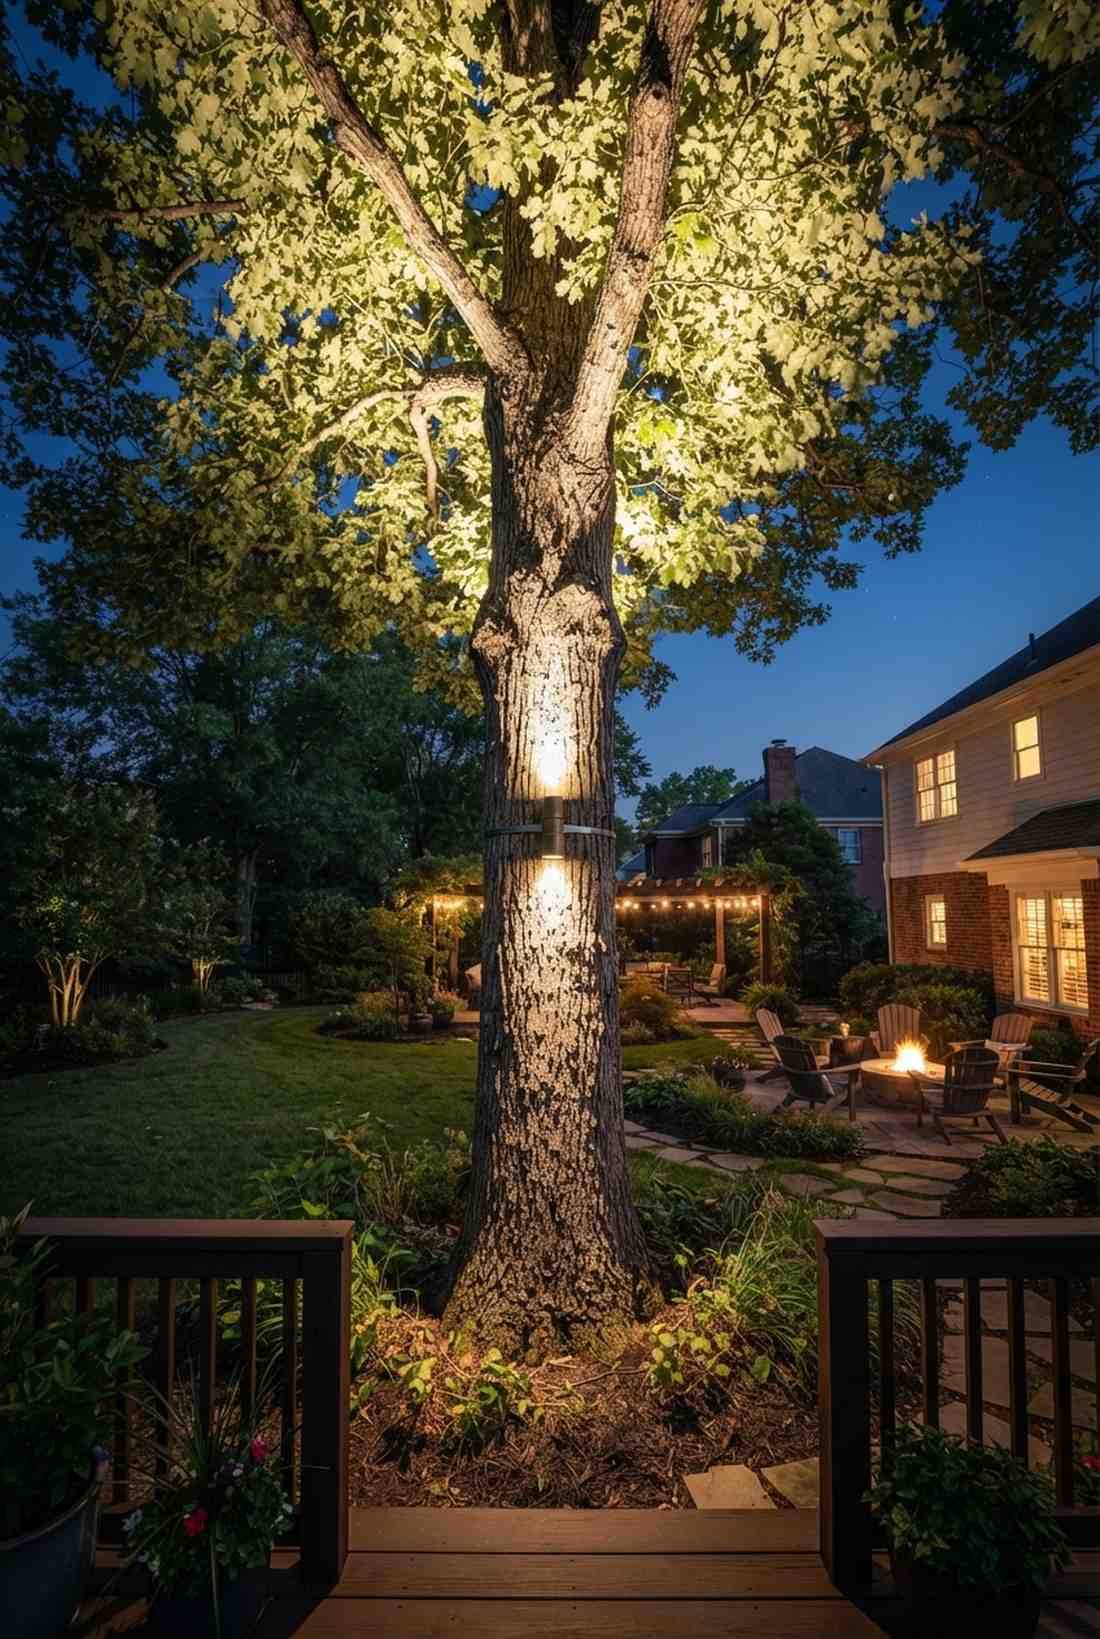
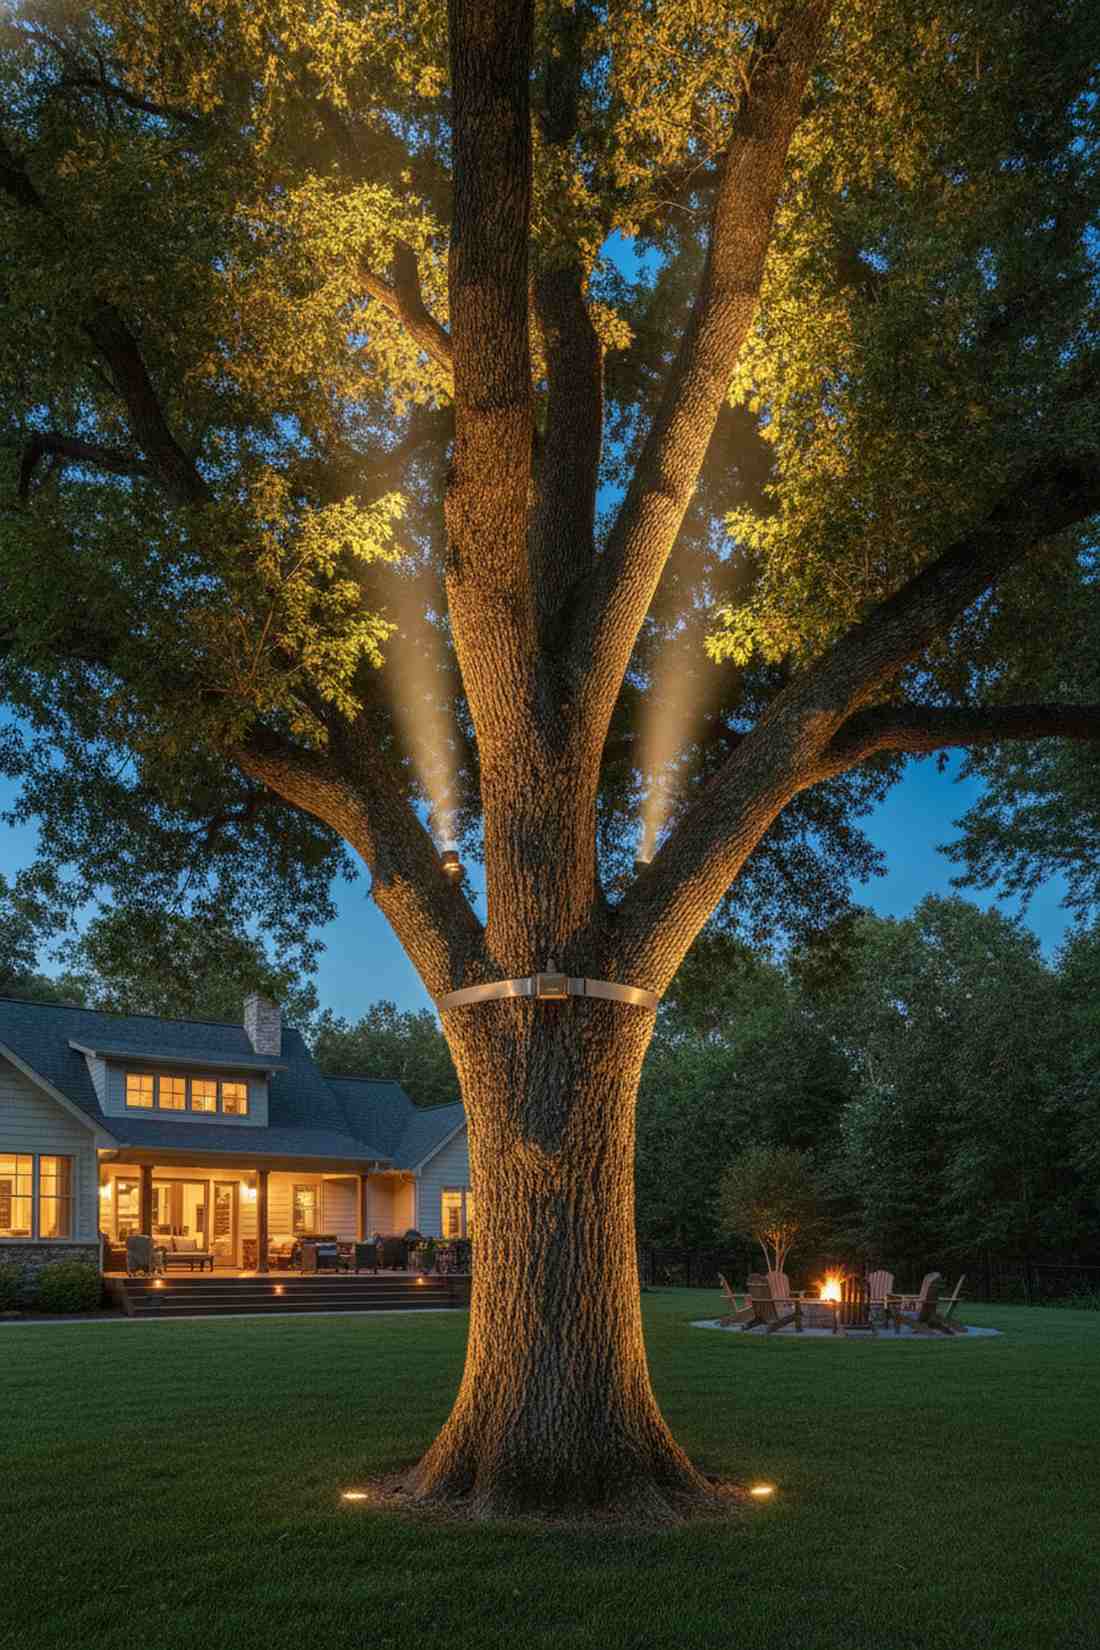
An illuminated floating oak canopy feels like a surreal, gravity-defying forest right in your yard. Perfect for massive, ancient trees where ground uplights would be completely blocked by thick lower branches.
Trying to push light through 15 feet of dense lower leaves from the dirt is an exercise in futility. Strapping a compact bidirectional light at the 10-foot trunk mark blasts the upper canopy while washing down the rough bark, avoiding ground interference completely. Securing this without damaging the tree requires specialized, expanding straps.
This mid-trunk setup costs roughly $85. A genius fix for overgrown, mature tree lighting.
- Key Materials: Trunk-mount dual fixture, expanding strap
- Vibe / Style: Surreal floating forest
- Difficulty: Ladder work required
- Budget Breakdown: Fixture: $60 | Tree strap: $25.
- Creator’s Tip: Never use screws or nails; always use a stainless steel expanding strap that grows with the tree.
- Smart Sourcing: tree-friendly expanding mounting straps and compact brass trunk lights.
23. Raised Bed Rim Up-Down Installations
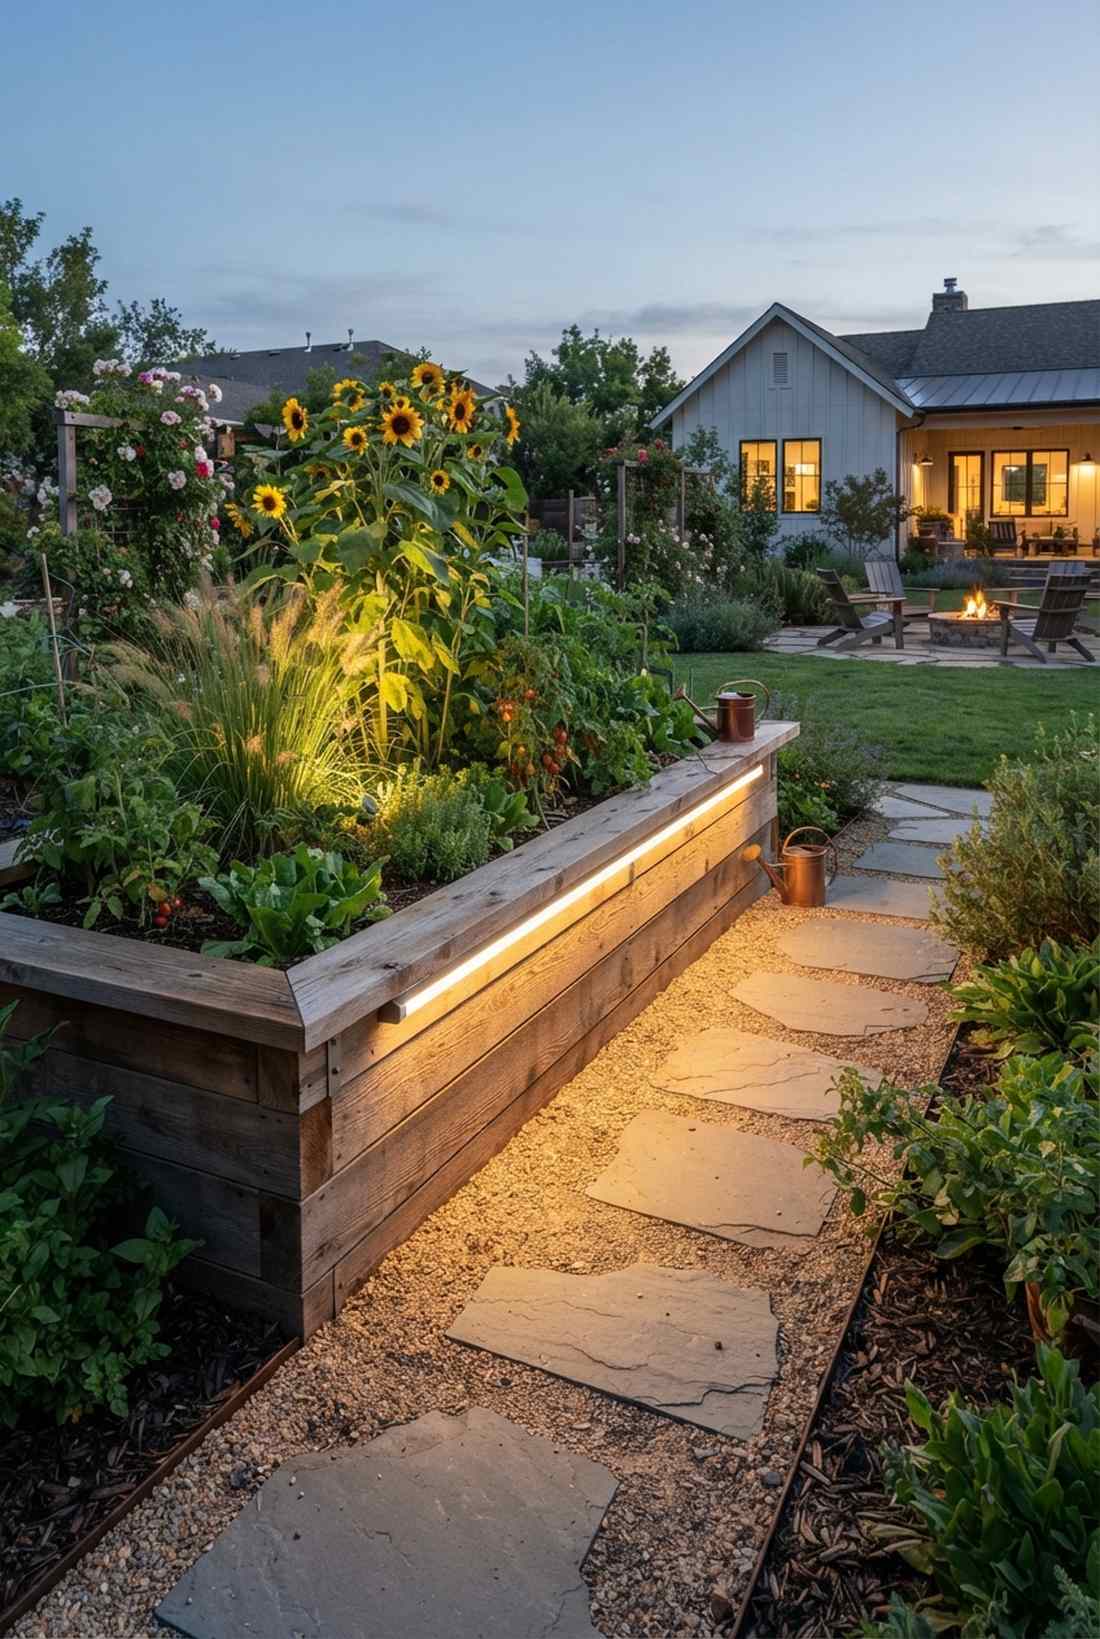
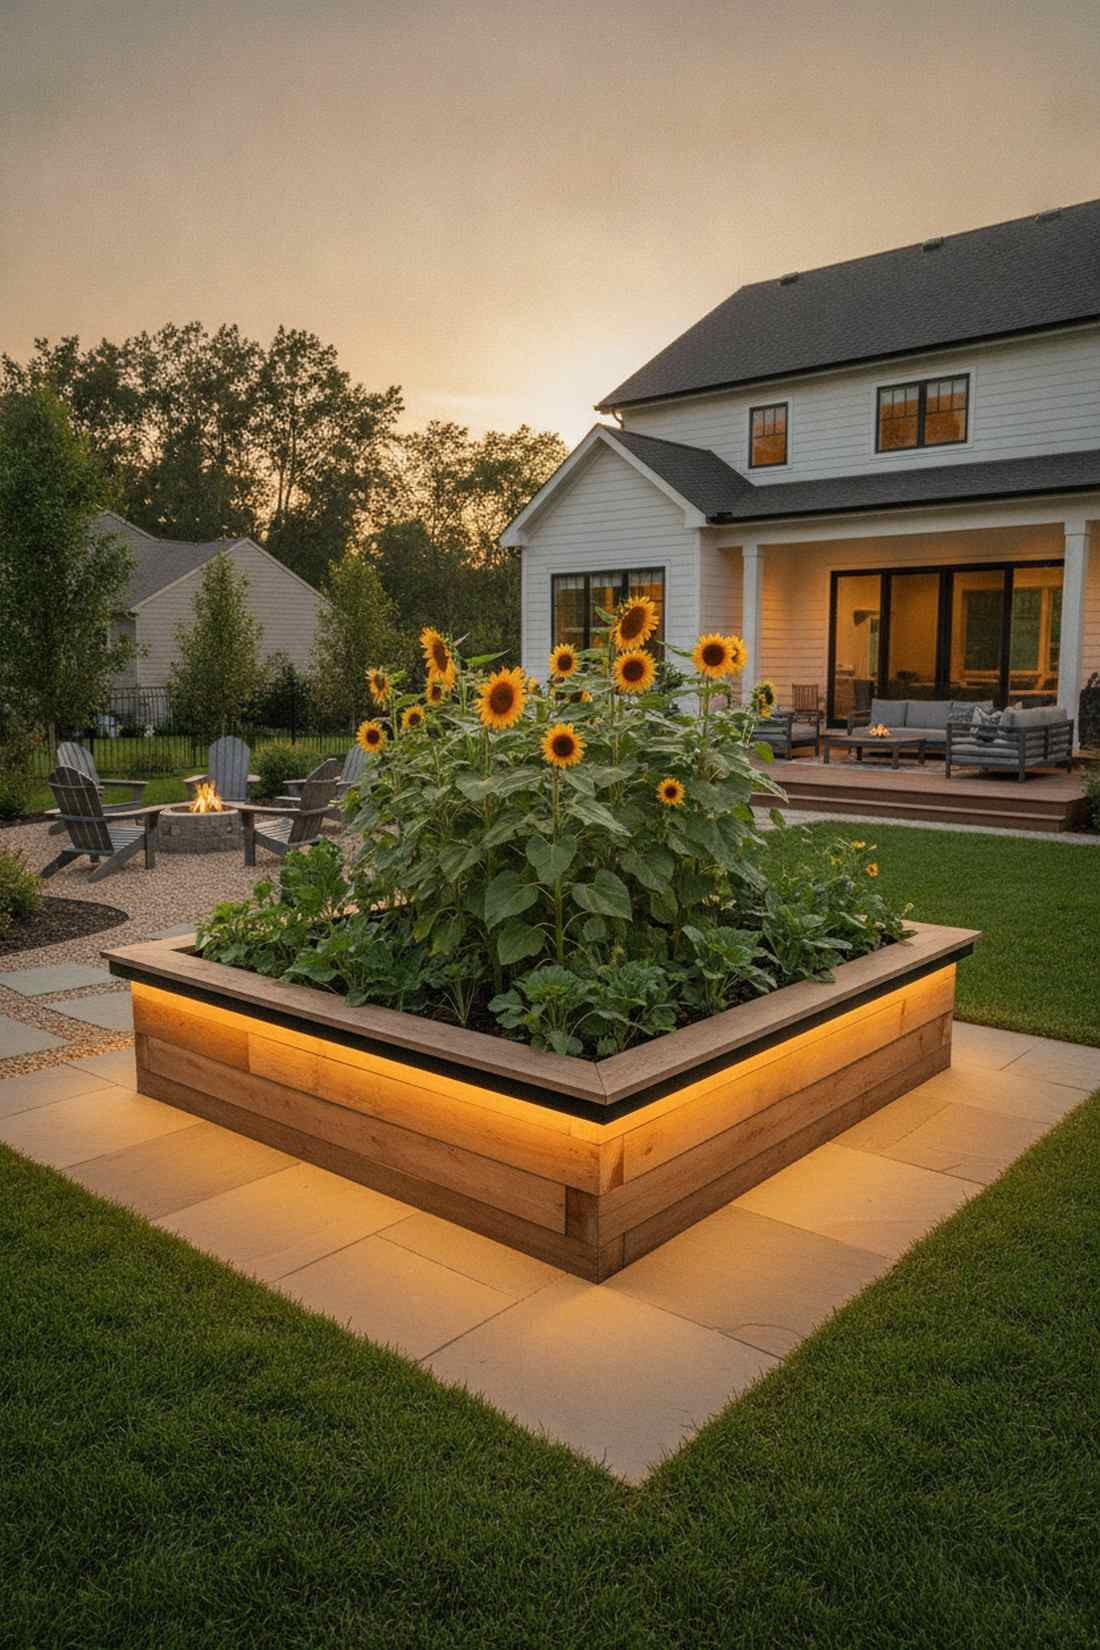
This glowing planter box edge feels like a sleek, modern architectural feature anchoring your vegetable garden. Ideal for illuminating tall sunflowers upwards while lighting the walking path safely below.
Sticking fragile path lights next to a raised wooden bed guarantees they will be kicked or tripped over. Attaching a sleek linear up/down fixture directly under the wooden lip eliminates trip hazards and looks far more expensive than it is. It’s a heavy-duty, commercial-grade aesthetic that survives harsh gardening tools.
Retrofitting a planter box runs about $40 per side. Save this trick for your spring garden build!
- Key Materials: Linear up/down led bars, rim brackets
- Vibe / Style: Modern architectural garden
- Difficulty: Easy
- Budget Breakdown: LED Bar: $30 | Screws/Wiring: $10.
- Creator’s Tip: Adjust the upper beam to be significantly brighter to penetrate the dense foliage of tall summer plants.
- Smart Sourcing: under-lip hardscape LED bars and corrosion-resistant mounting brackets.
24. Fence-Post Cap Bidirectional Lighting

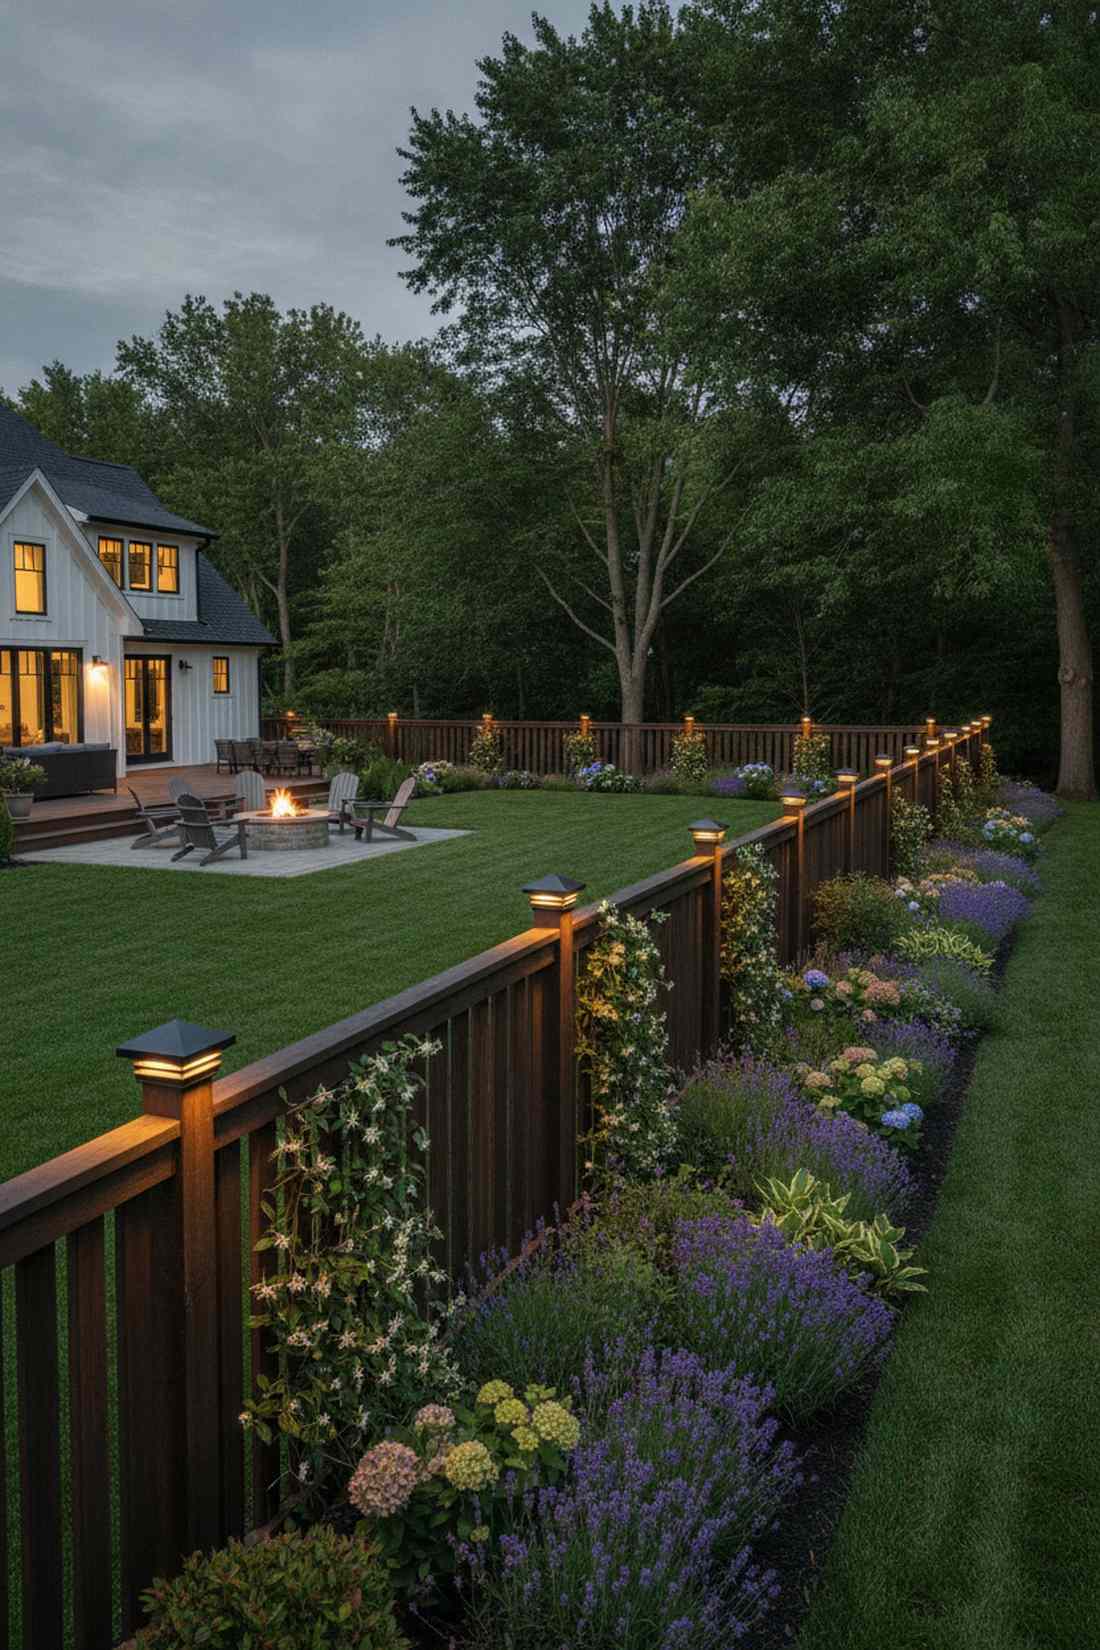
A continuous illuminated fence line feels like an ultra-secure, premium perimeter bordering your estate. The smartest way to wash light down onto perennial borders while highlighting climbing jasmine vines above.
Standard solar fence caps barely output a useless, dim blue dot of light. Swapping them for hardwired bidirectional post caps projects powerful cones of warm light across your wooden panels, giving a designer-level finish that defines the entire property boundary. Matching the fixture material exactly to the fence color hides them perfectly during the day.
High-end post caps cost roughly $60 each. An incredible way to expand the visual size of your yard.
- Key Materials: Hardwired up/down post caps
- Vibe / Style: Premium estate perimeter
- Difficulty: Intermediate wire hiding
- Budget Breakdown: Post cap: $50 | Core wiring: $10.
- Creator’s Tip: Skip every other post to maintain a rhythmic shadow pattern rather than blinding the entire fence line.
- Smart Sourcing: hardwired dual-beam post caps and color-matched exterior cable hiders.
The upcoming foliage trick is a closely guarded secret among high-end landscapers.
Moonlighting Downward Techniques
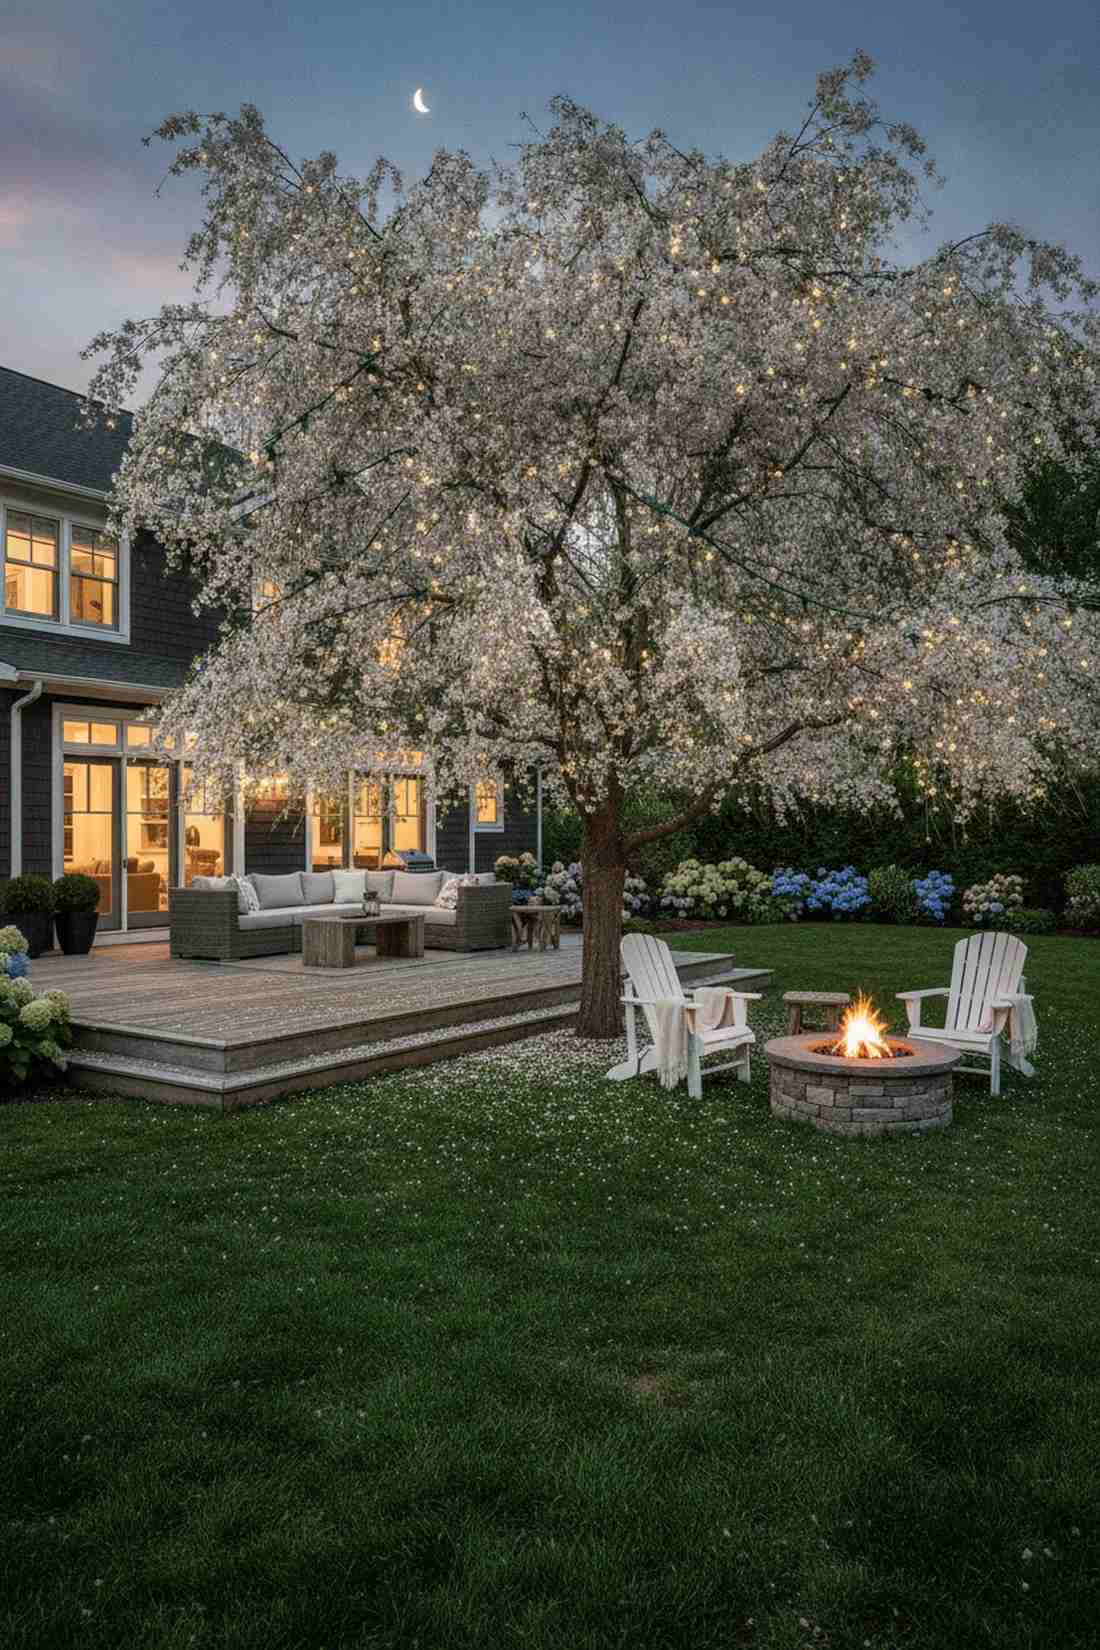
25. High-Branch Downlight Placement
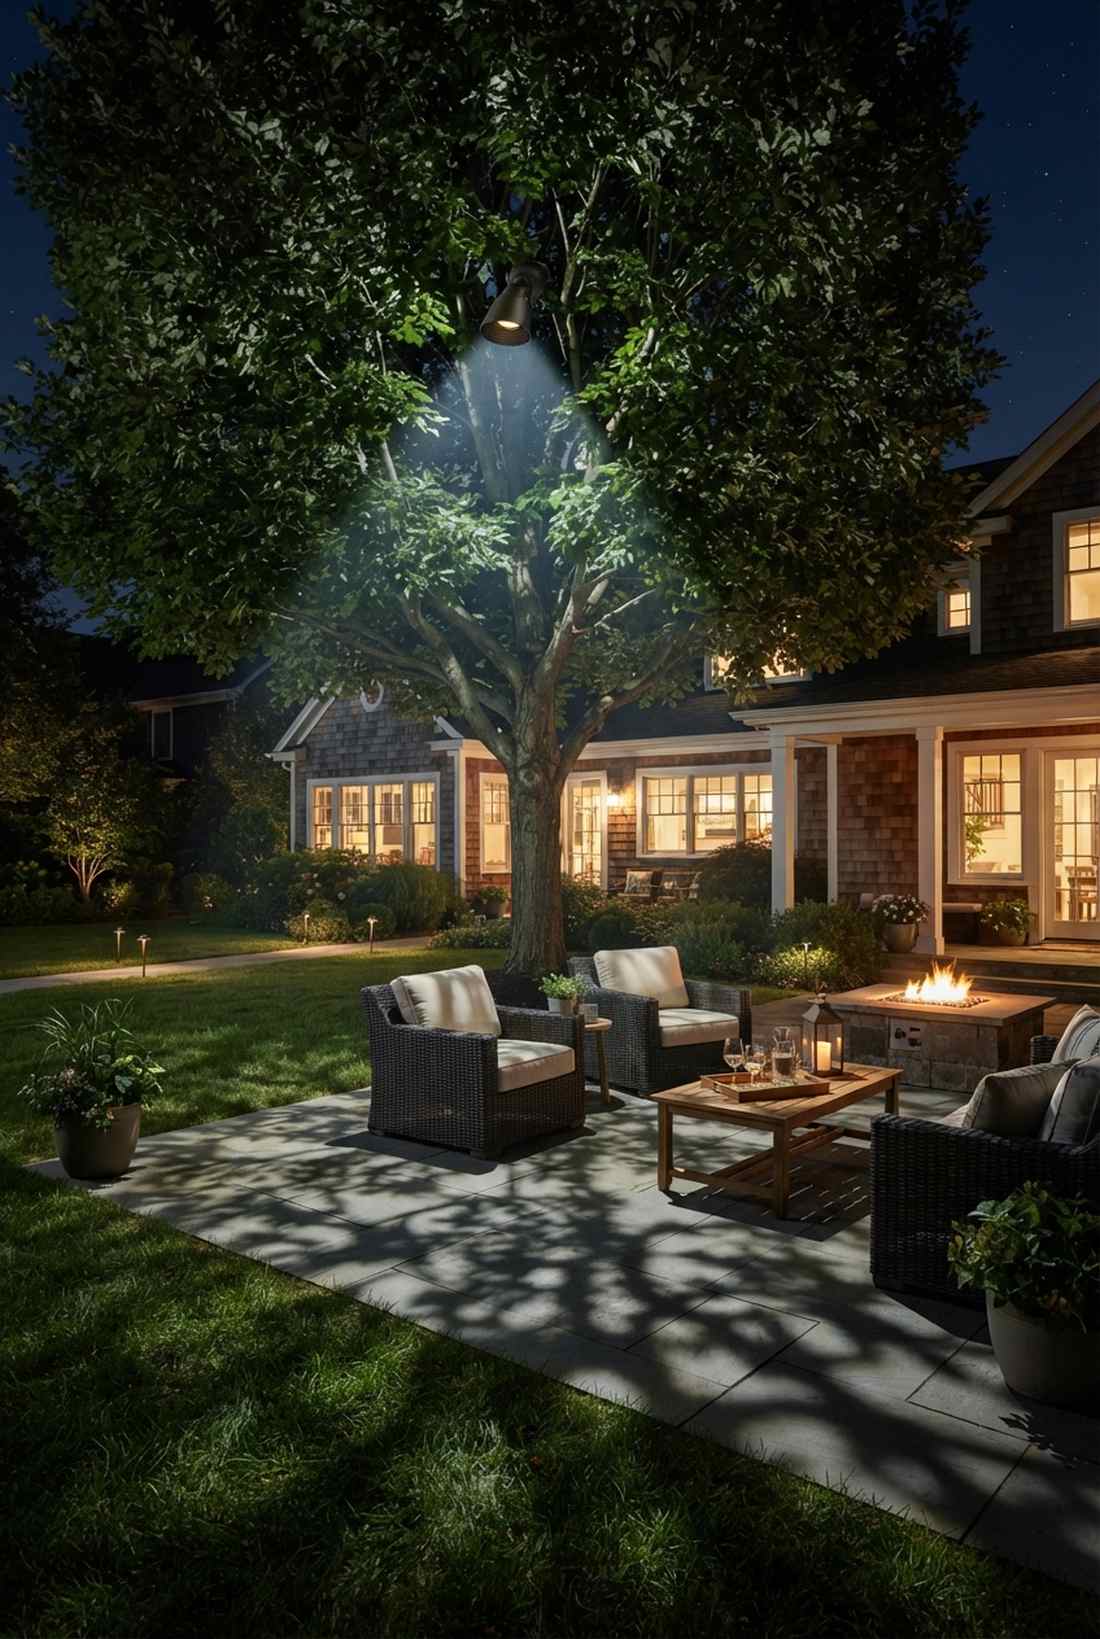
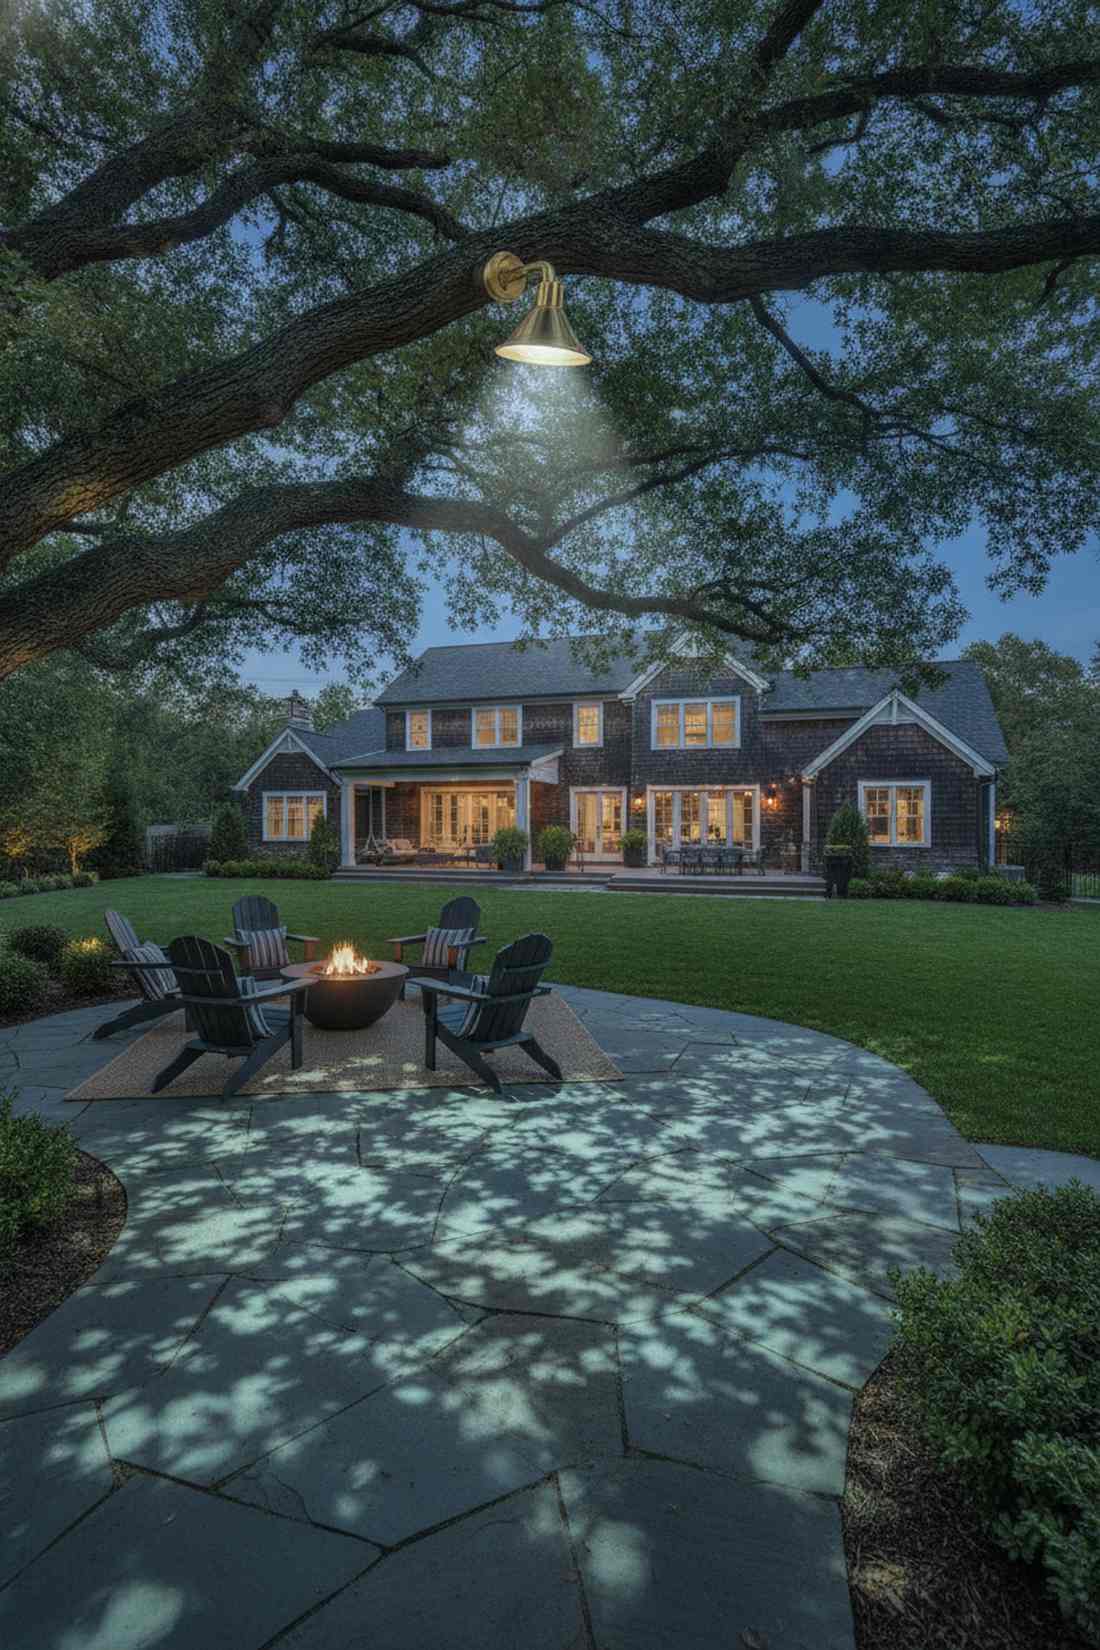
An authentic dappled canopy moonlight feels like a permanently serene full moon filtering through your favorite oak tree. The absolute gold standard for creating natural ambiance over an open lawn or patio.
Amateur setups blast glaring lights straight into people’s eyes from the ground. Climbing 20 feet up and angling a shielded fixture downward at 60 degrees projects stunning, organic leaf shadows across the grass, which delivers a surprisingly premium look that mimics nature flawlessly. You must use full glare guards so the bulb remains invisible from below.
This elevated setup costs around $130, minus the ladder. Pin this to your luxury landscape mood board!
- Key Materials: Tree-mount downlight, long hex louver
- Vibe / Style: Natural moonlight
- Difficulty: Dangerous ladder work
- Budget Breakdown: Downlight: $90 | Hex Louver: $20 | Tree hardware: $20.
- Creator’s Tip: Aim the beam straight through the thickest part of the lower branches to maximize the dappled shadow effect on the ground.
- Smart Sourcing: extended-cowl brass downlights and honeycomb glare louvers (bulk pack).
26. Pergola-Top Moonlighting
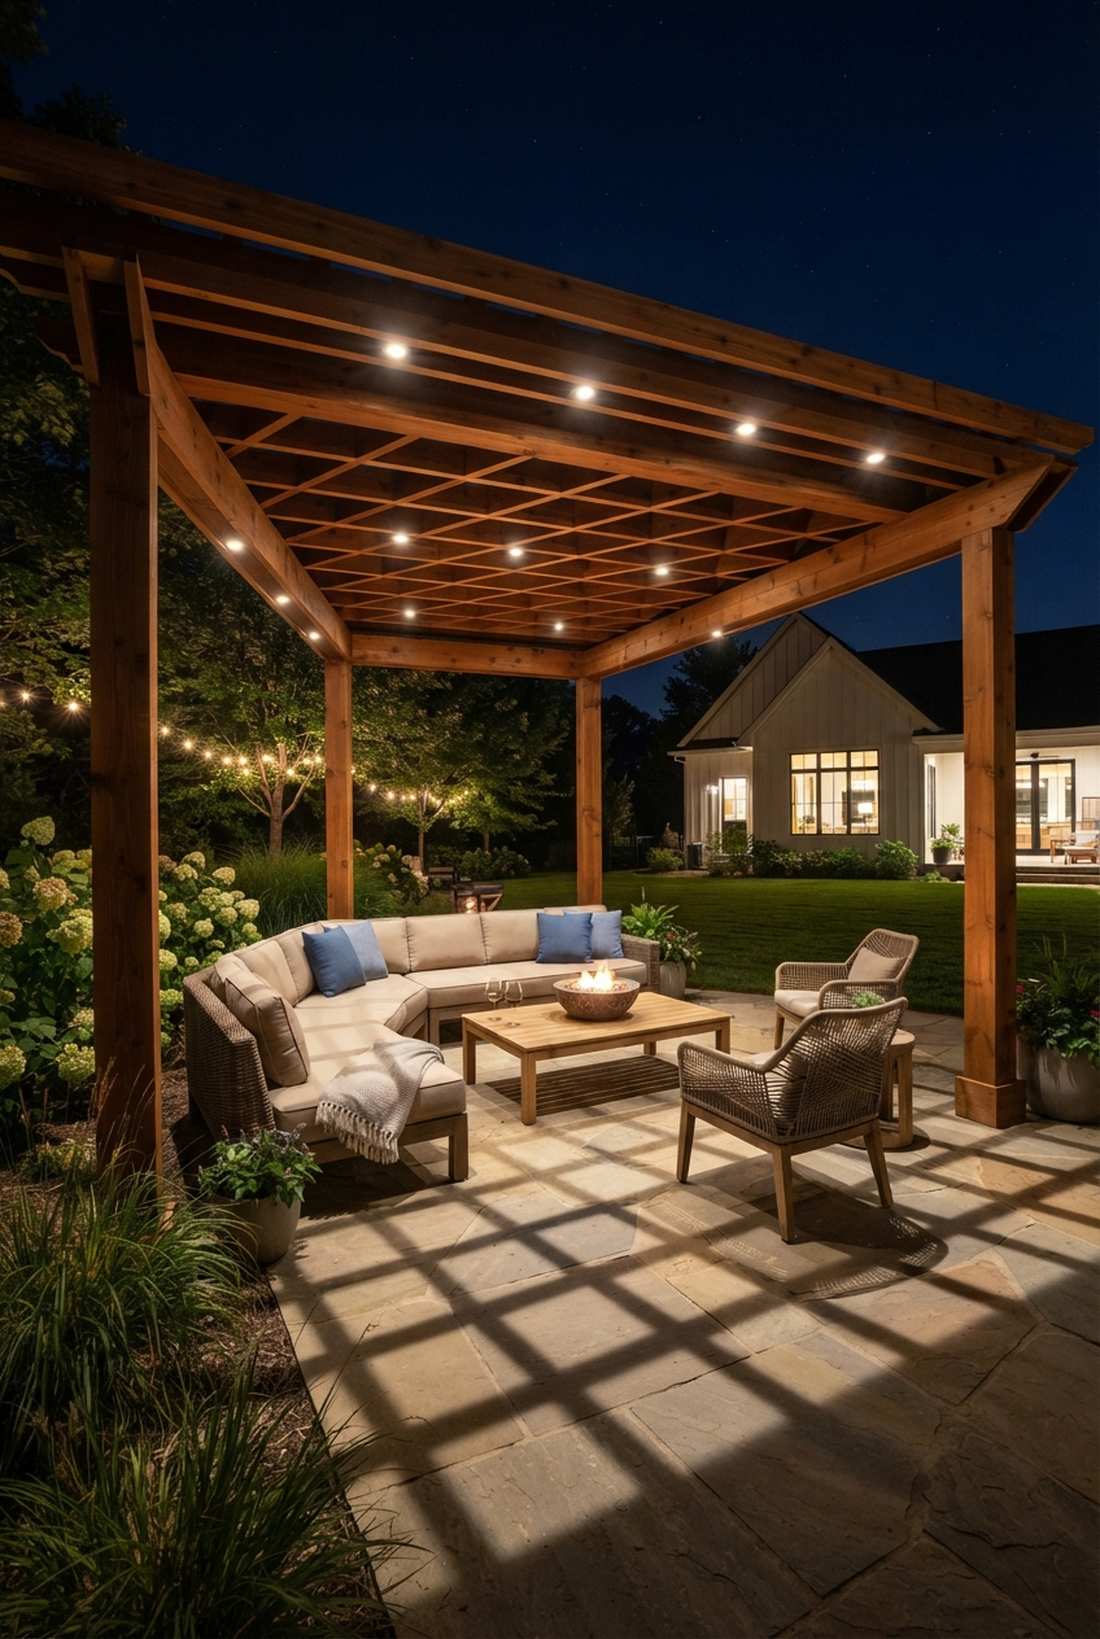
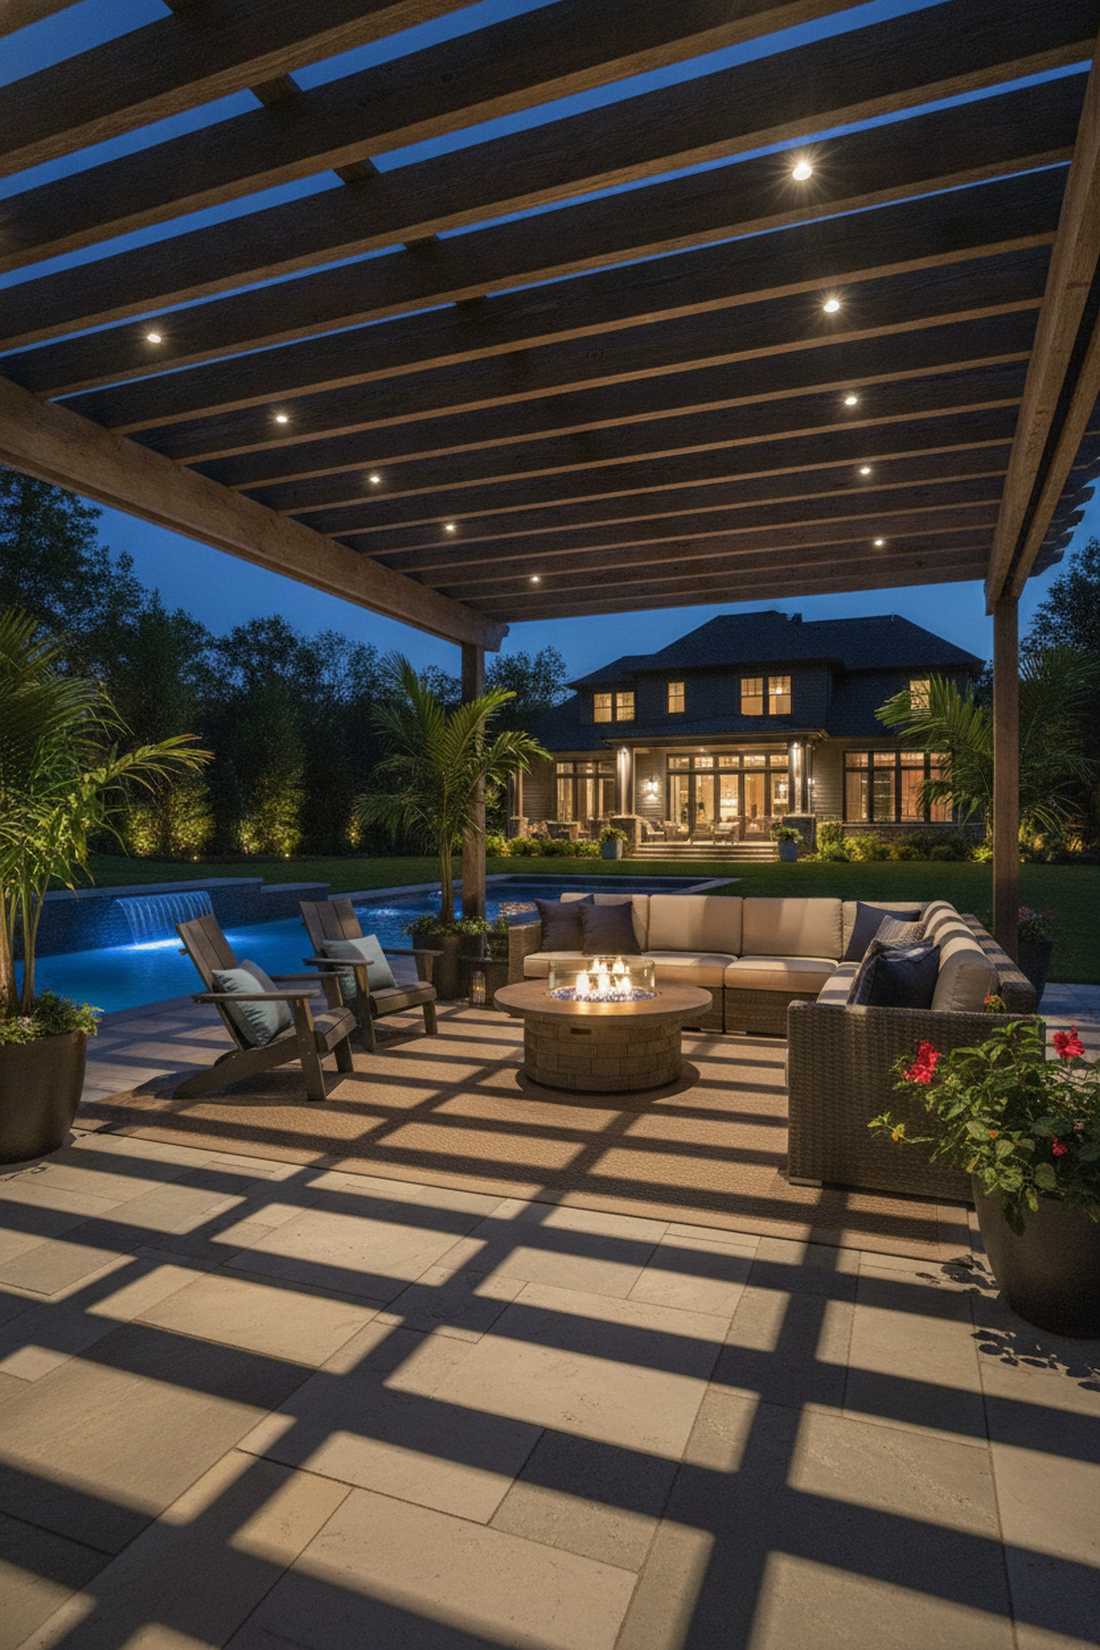
A structured overhead lattice glow feels like a chic, relaxing VIP cabana lounge at a tropical resort. Flawless for casting geometric shadows down through a wooden pergola onto an outdoor seating area.
Hanging clunky string lights often looks cheap and temporary. Recessing powerful downlights entirely into the top of the pergola beams creates a hidden light source that looks far more expensive than it is. The resulting grid-like shadows on the floor provide a highly structured, architectural nighttime vibe.
Sinking recessed pods costs roughly $150 for a full grid. Highly recommended for permanent outdoor structures.
- Key Materials: Micro recessed LED downlights, hole saw
- Vibe / Style: VIP cabana lounge
- Difficulty: Advanced carpentry
- Budget Breakdown: LED pods: $120 | Forstner bit: $30.
- Creator’s Tip: Use a perfectly sized hole saw so the fixture sits completely flush and invisible from the ground level.
- Smart Sourcing: IP-rated mini recessed LED pods and wood-boring drill bit kits.
27. Arbor Arch Downlighting
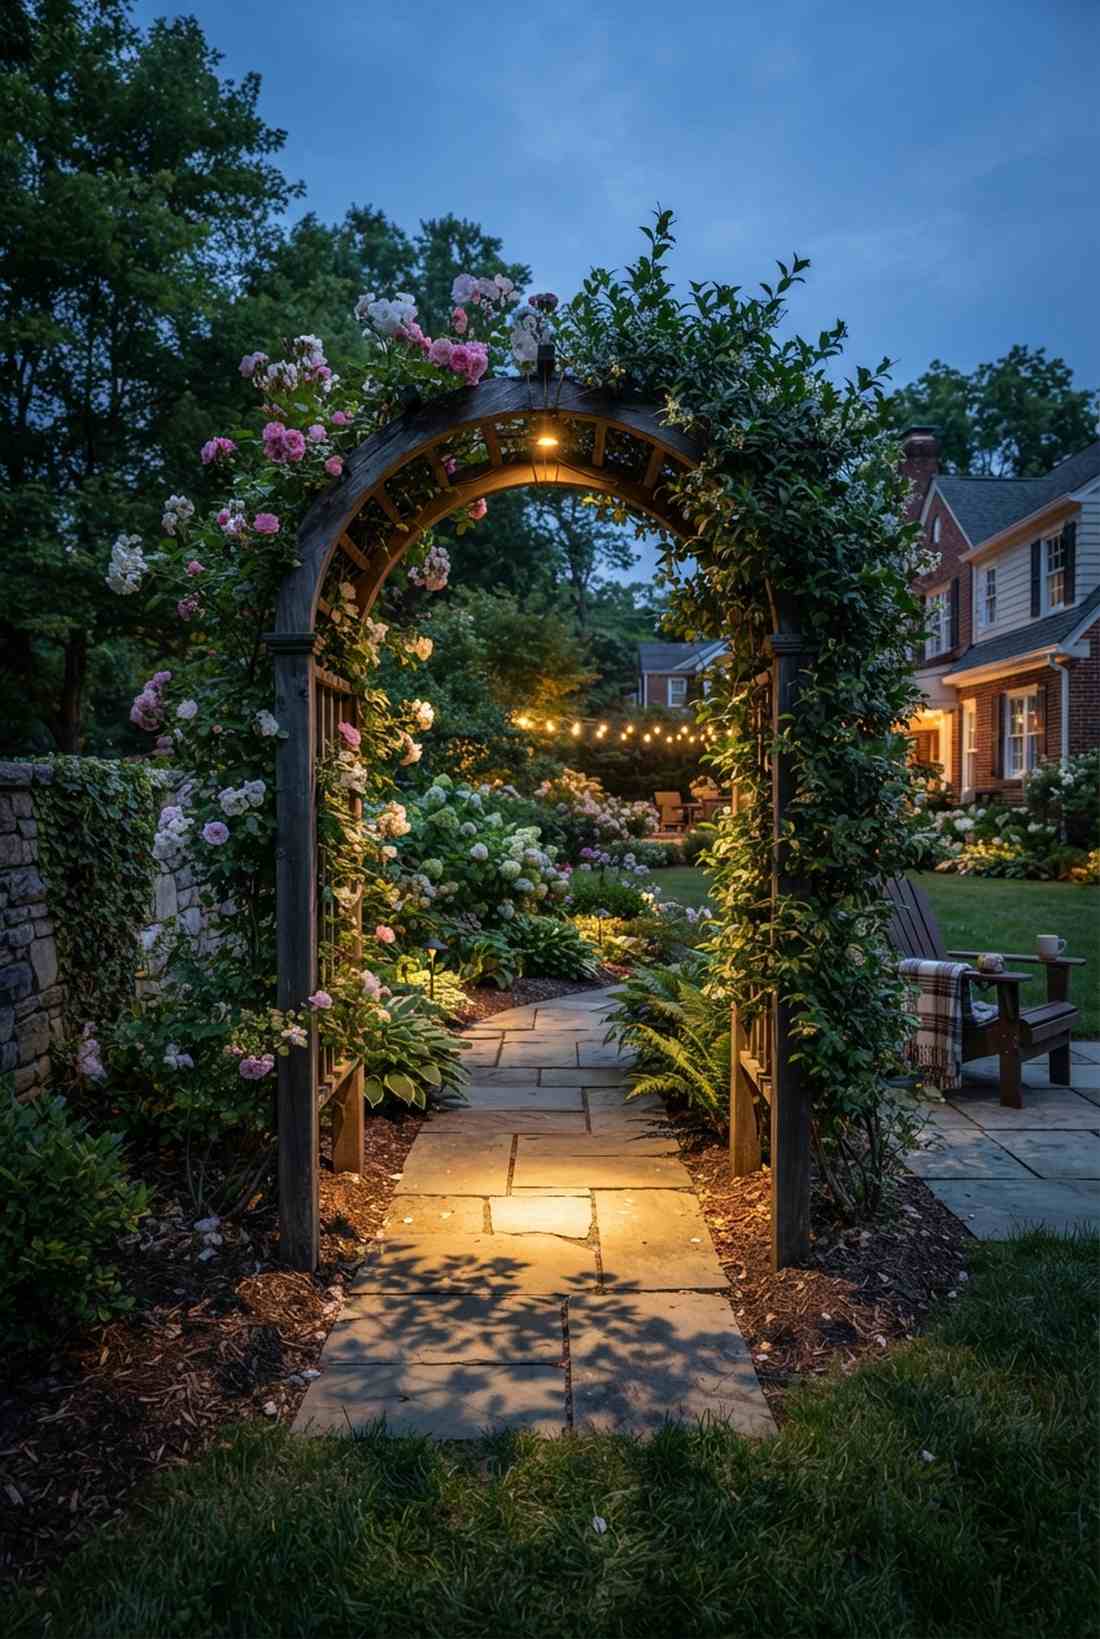
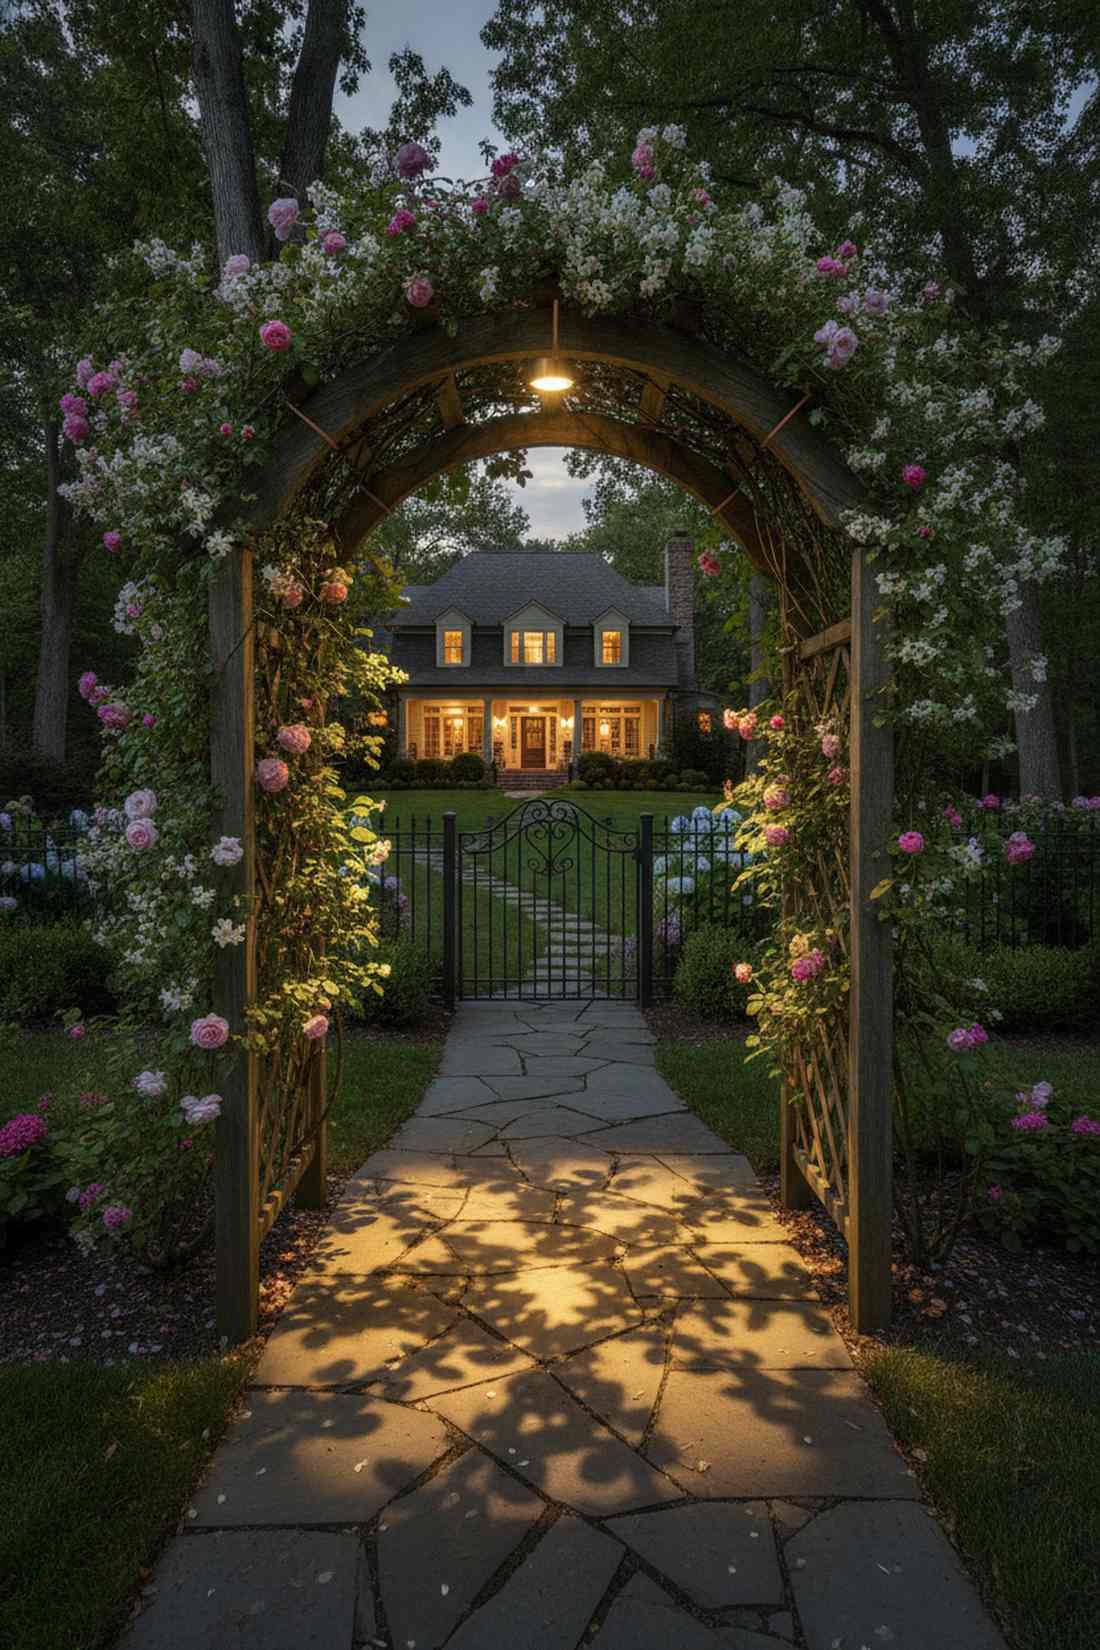
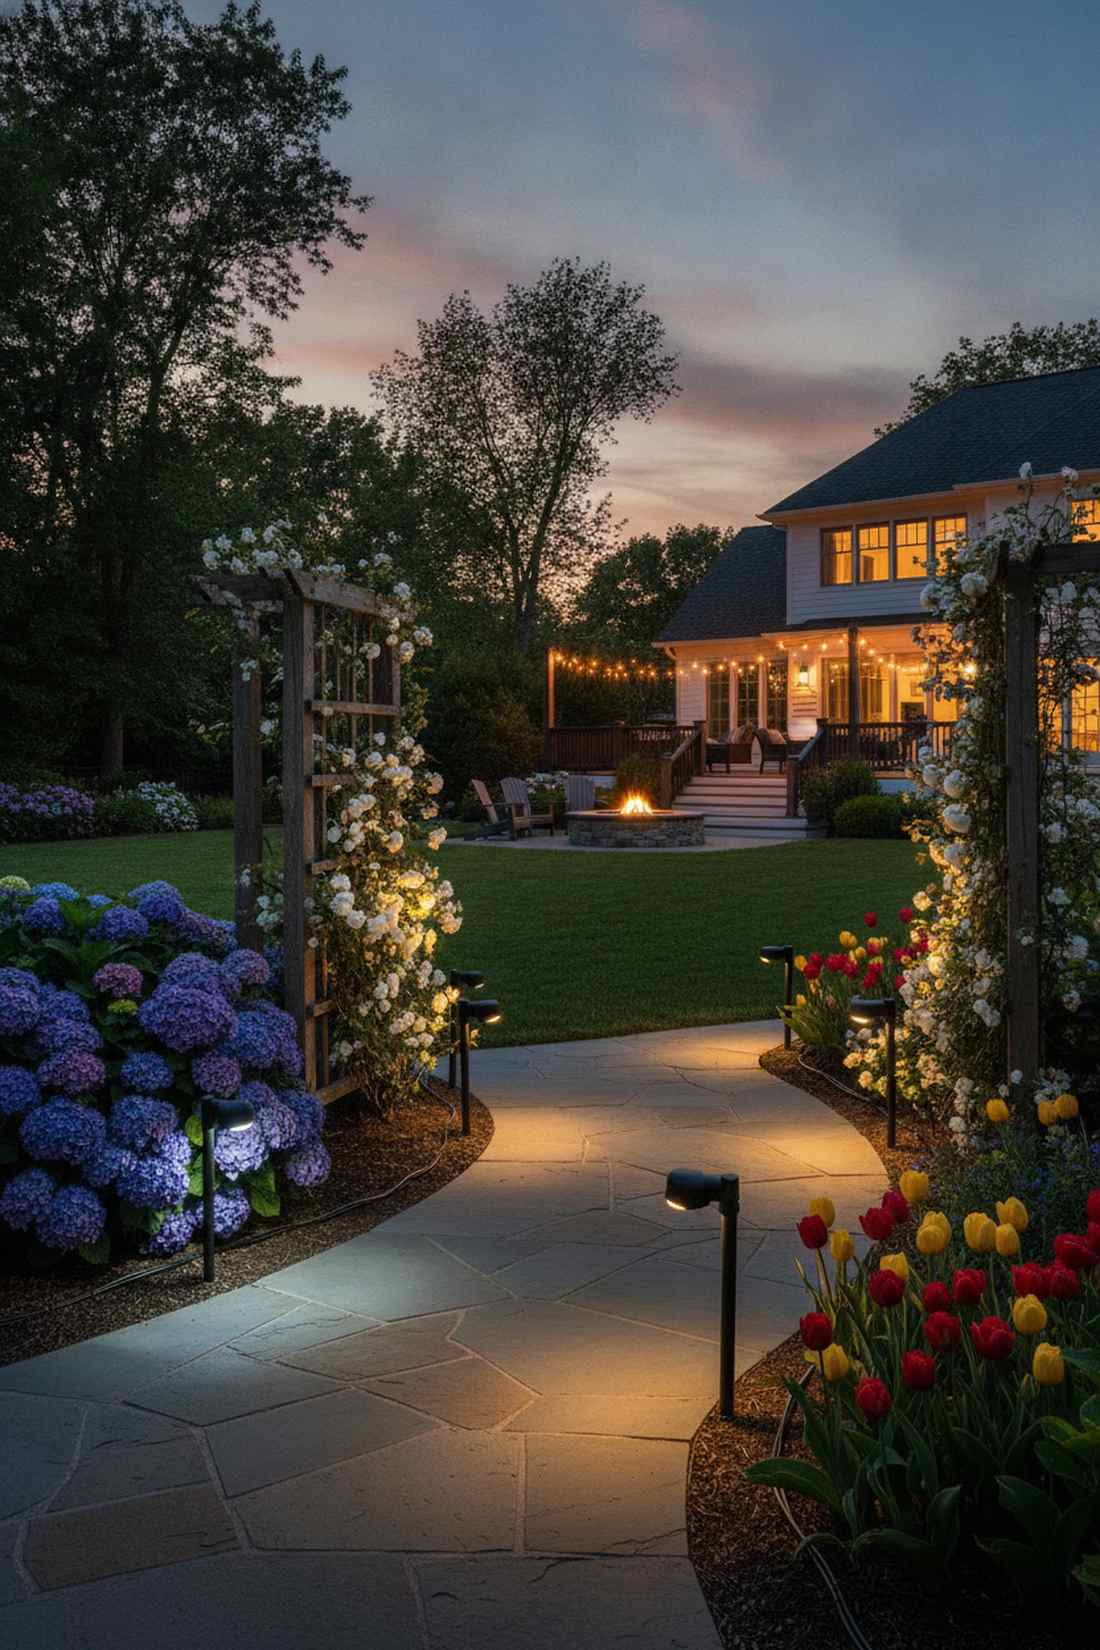
A soft glowing passage entryway feels like stepping through an enchanted portal into a secret garden. Ideal for illuminating a narrow stone walkway passing directly underneath a rose-covered arch.
Leaving garden gates dark is a massive missed opportunity for nighttime curb appeal. Tucking a single, tiny 3-watt downlight at the absolute apex of the arch projects the shadows of climbing jasmine perfectly onto the floor, completely reinventing standard pathway lighting setups. It turns a simple walkway into an immersive experience.
Adding this micro-light costs under $35. Save this idea for your front gate or garden entrance!
- Key Materials: 3W micro downlight, brown wire
- Vibe / Style: Enchanted garden portal
- Difficulty: Easy
- Budget Breakdown: Micro light: $25 | Zip ties: $10.
- Creator’s Tip: Use dark brown or green wiring to perfectly camouflage the electrical lines against the wooden arbor.
- Smart Sourcing: micro-brass hardscape downlights and UV-resistant brown zip ties (bulk pack).
28. Eave-Mounted Tree-Alternative Moonlighting
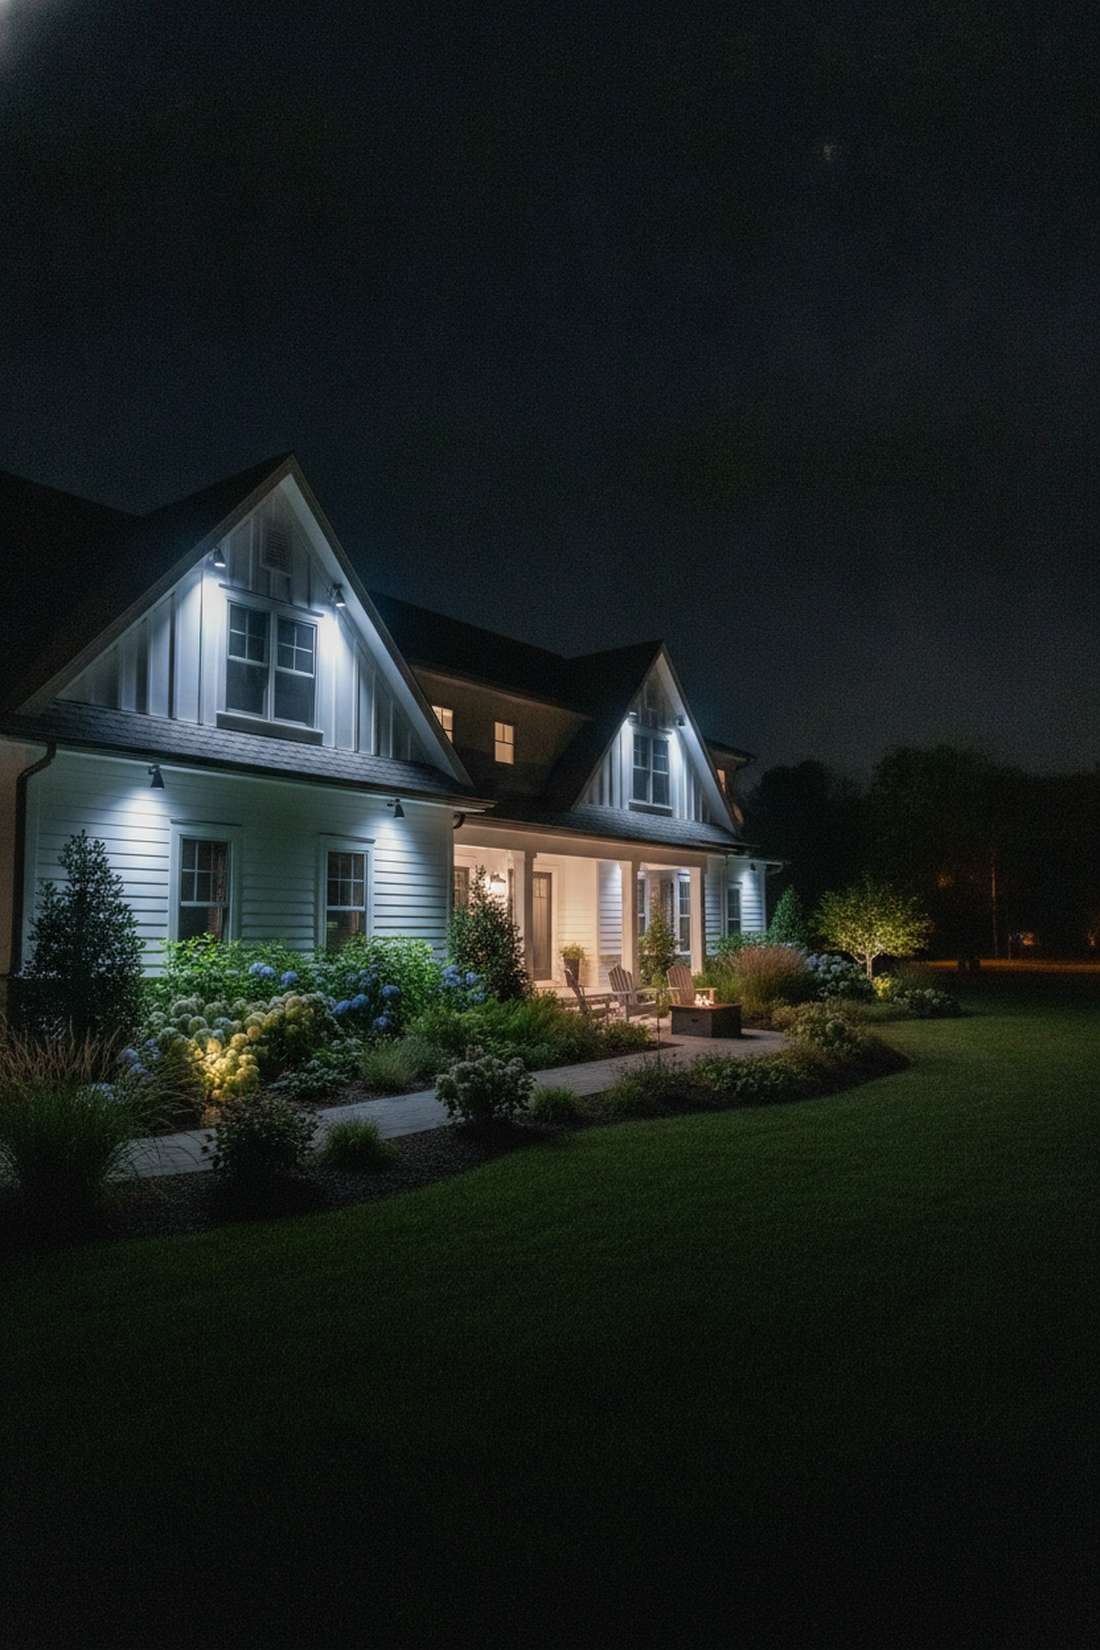
A sweeping simulated roofline moonlight feels like a brilliant cinematic wash over your entire foundation garden. The best alternative if your yard is totally flat and lacks tall, mature trees for mounting.
Complaining about having no trees won’t fix your dark yard. Tucking angled downlights directly under the soffits of your roof pushes light outward over the garden beds, which delivers a surprisingly premium look that fakes the moonlit effect perfectly. Matching the fixture color to the house trim makes them disappear entirely by day.
Wiring the eaves usually runs about $200 for the front facade. Pin this if you have a newly built, treeless yard.
- Key Materials: Eave-mount directional spots, color-matched paint
- Vibe / Style: Cinematic wash
- Difficulty: Advanced (House wiring)
- Budget Breakdown: Spotlights: $150 | Junction boxes: $50.
- Creator’s Tip: Aim the fixtures slightly outward at a 45-degree angle so you illuminate the plants, not just the side of your house.
- Smart Sourcing: eave-mount directional LEDs and exterior electrical junction boxes.
29. Shade-Structure Integrated Downlighting
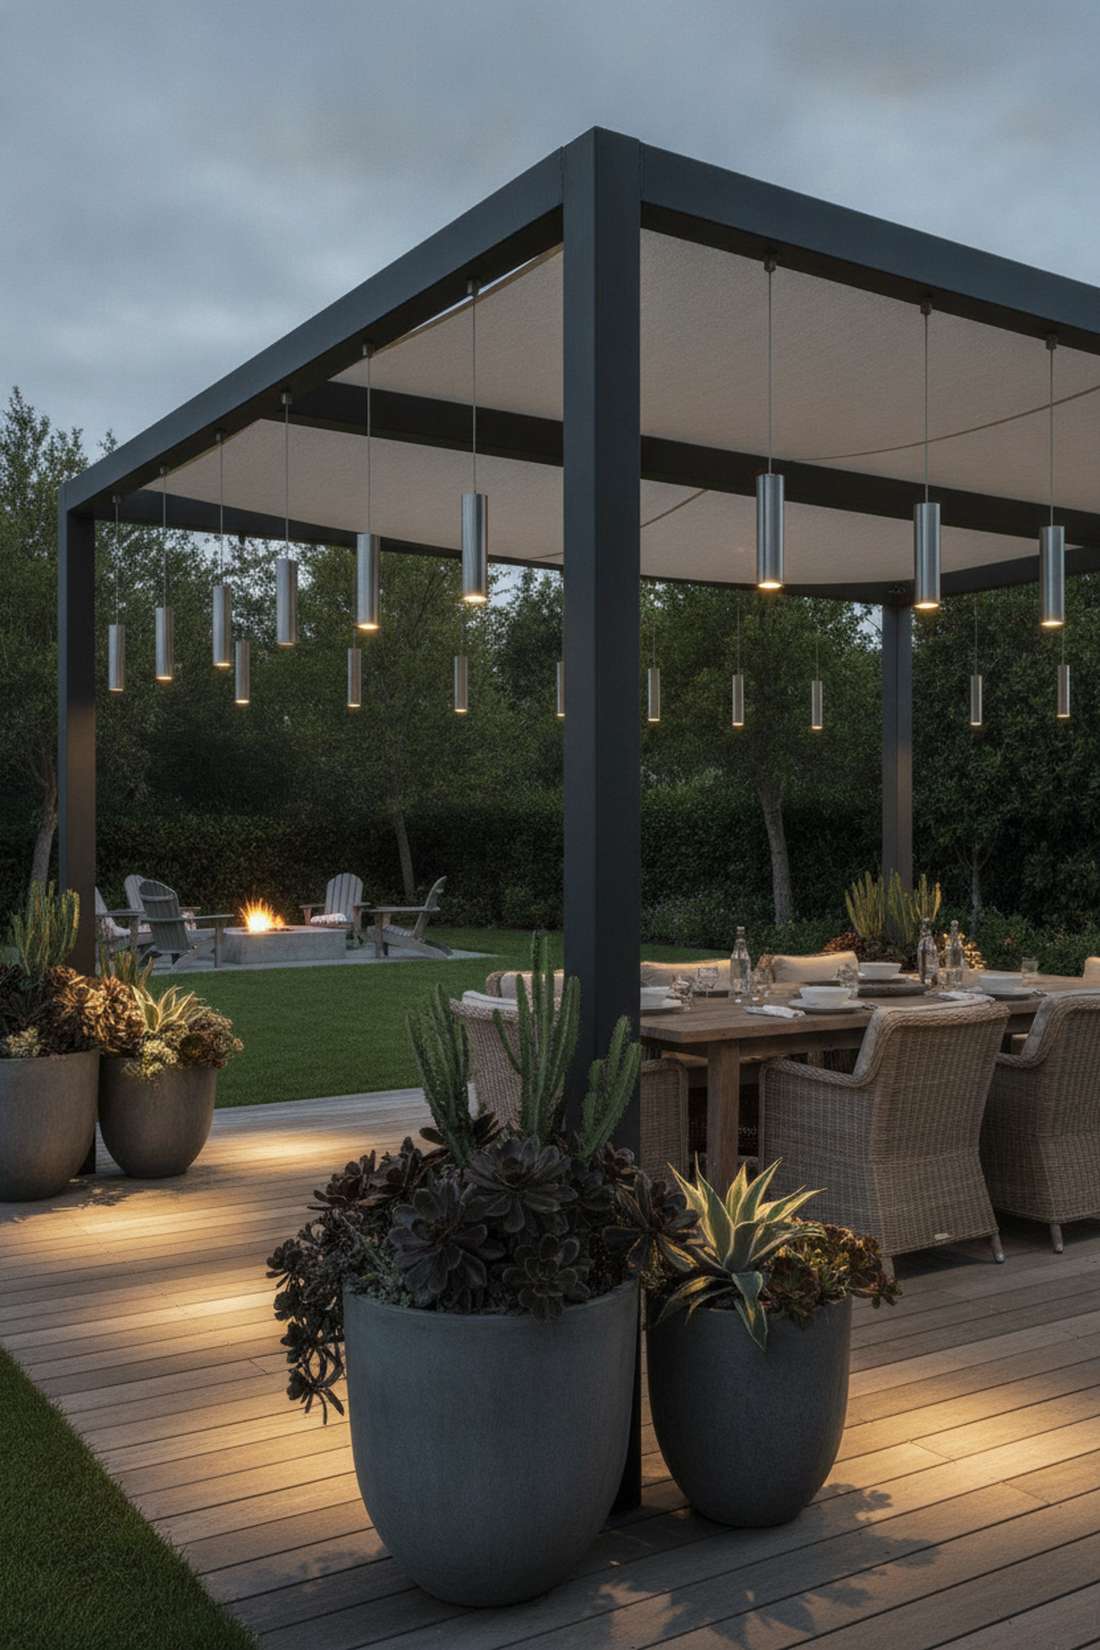
A floating pavilion perimeter glow feels like an exclusive resort dining space suspended in the dark. Mandatory for large gazebos or fabric shade sails positioned over heavy potted planters.
Sticking clumsy floor lamps under a pavilion ruins the outdoor vibe and eats up precious floor space. Suspending micro-downlights from the structure’s support cables washes the potted succulents below with crisp, clean light, giving a designer-level finish that maximizes usable area. It requires specialized waterproof connectors to survive under the open sides.
Rigging a pavilion runs about $180. A stunning upgrade for heavy outdoor entertainers.
- Key Materials: Hanging cylinder downlights, stainless cables
- Vibe / Style: Exclusive resort dining
- Difficulty: Intermediate
- Budget Breakdown: Cylinders: $140 | Cable ties: $40.
- Creator’s Tip: Hang the cylinders exactly centered over your potted plants to create perfectly symmetrical shadows on the floor.
- Smart Sourcing: suspended cylinder outdoor lights and marine-grade stainless steel cable kits.
Stop scrolling and look at this next layout—it’s the ultimate weekend glow-up.
30. Branch-Tip Delicate Moonlighting
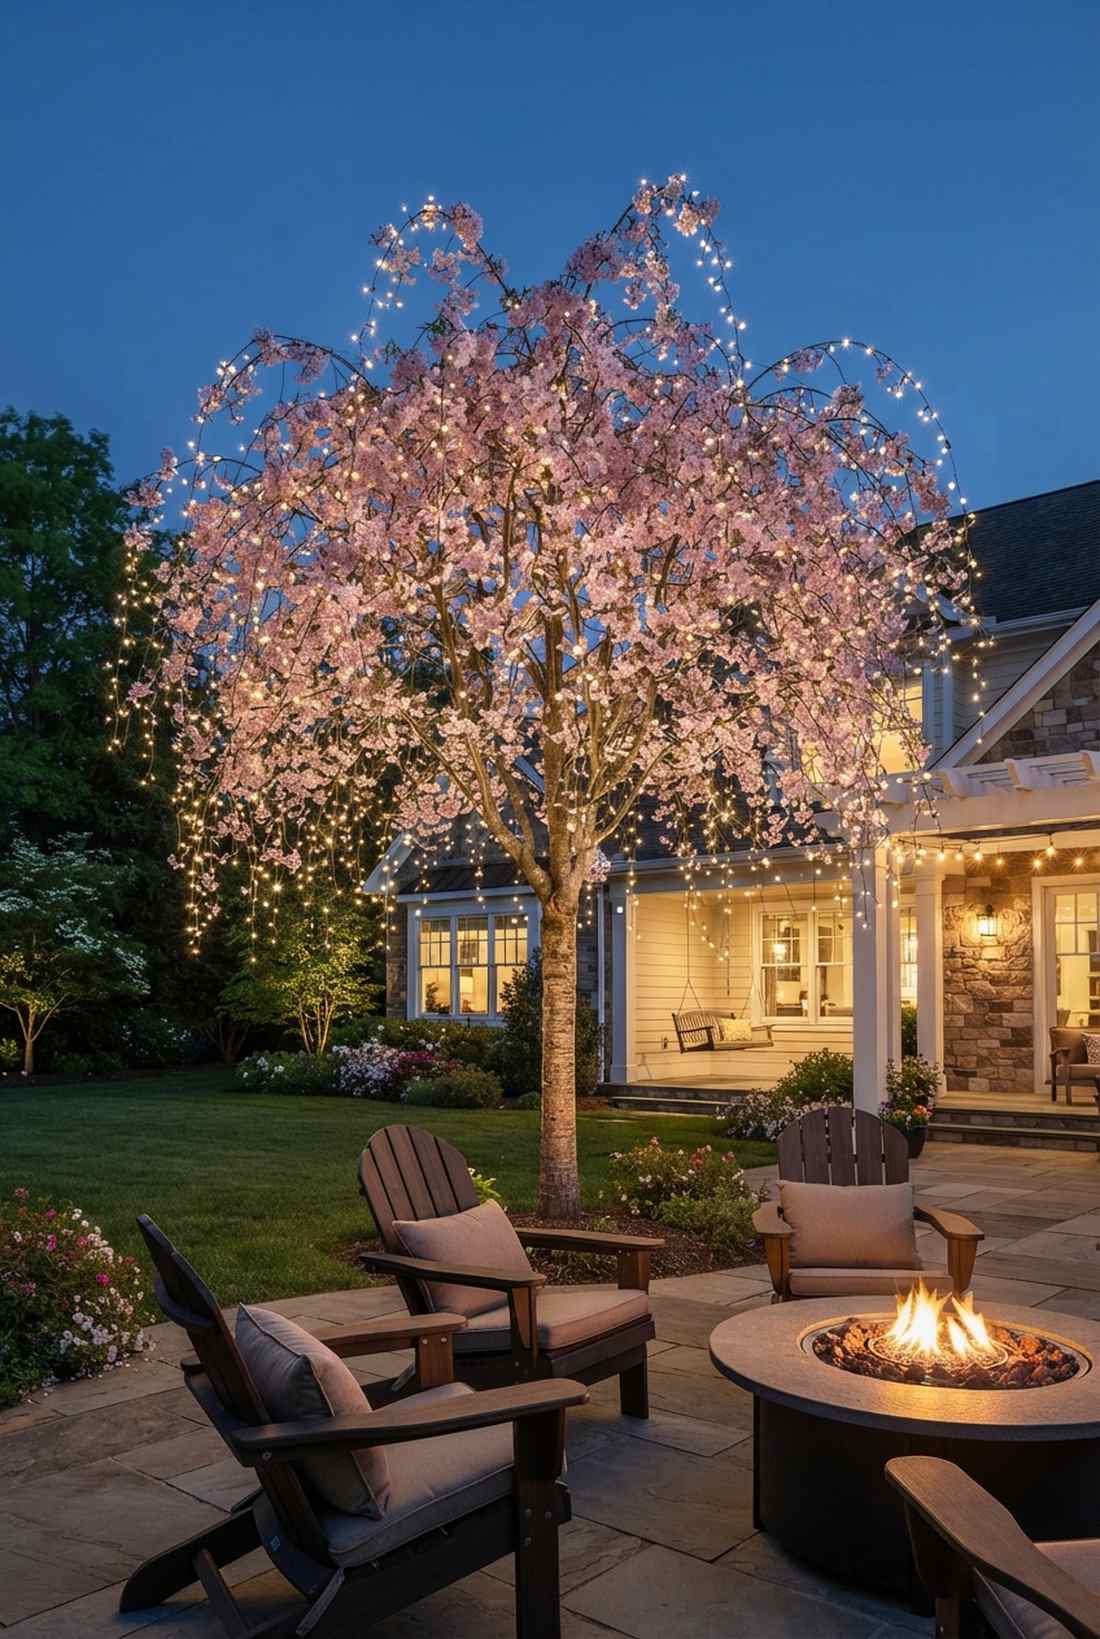
A twinkling flowering tree canopy feels like a delicate swarm of fairy lights permanently hovering in your yard. The most breathtaking way to showcase a weeping cherry or blooming dogwood tree in spring.
Tying heavy standard lights to the delicate ends of branches will literally snap the tree in half. Clipping ultra-lightweight 1-watt micro pods to the extreme outer tips casts a magical, cascading glow that looks far more expensive than it is. Using protective, bark-safe clips is absolutely mandatory here.
A cluster of micro-lights costs around $80. Save this for your absolute favorite ornamental tree!
- Key Materials: 1W micro pods, bark-safe adjustable clips
- Vibe / Style: Fairy-tale cascade
- Difficulty: Patience required
- Budget Breakdown: Micro pods: $60 | Soft clips: $20.
- Creator’s Tip: Run the ultra-thin wires strictly along the top side of the branches so they are invisible to anyone looking up.
- Smart Sourcing: 1-watt micro landscape pods and rubber-coated plant training clips (bulk pack).
Spotlight Focal Applications
31. Narrow-Beam Specimen Spotlighting
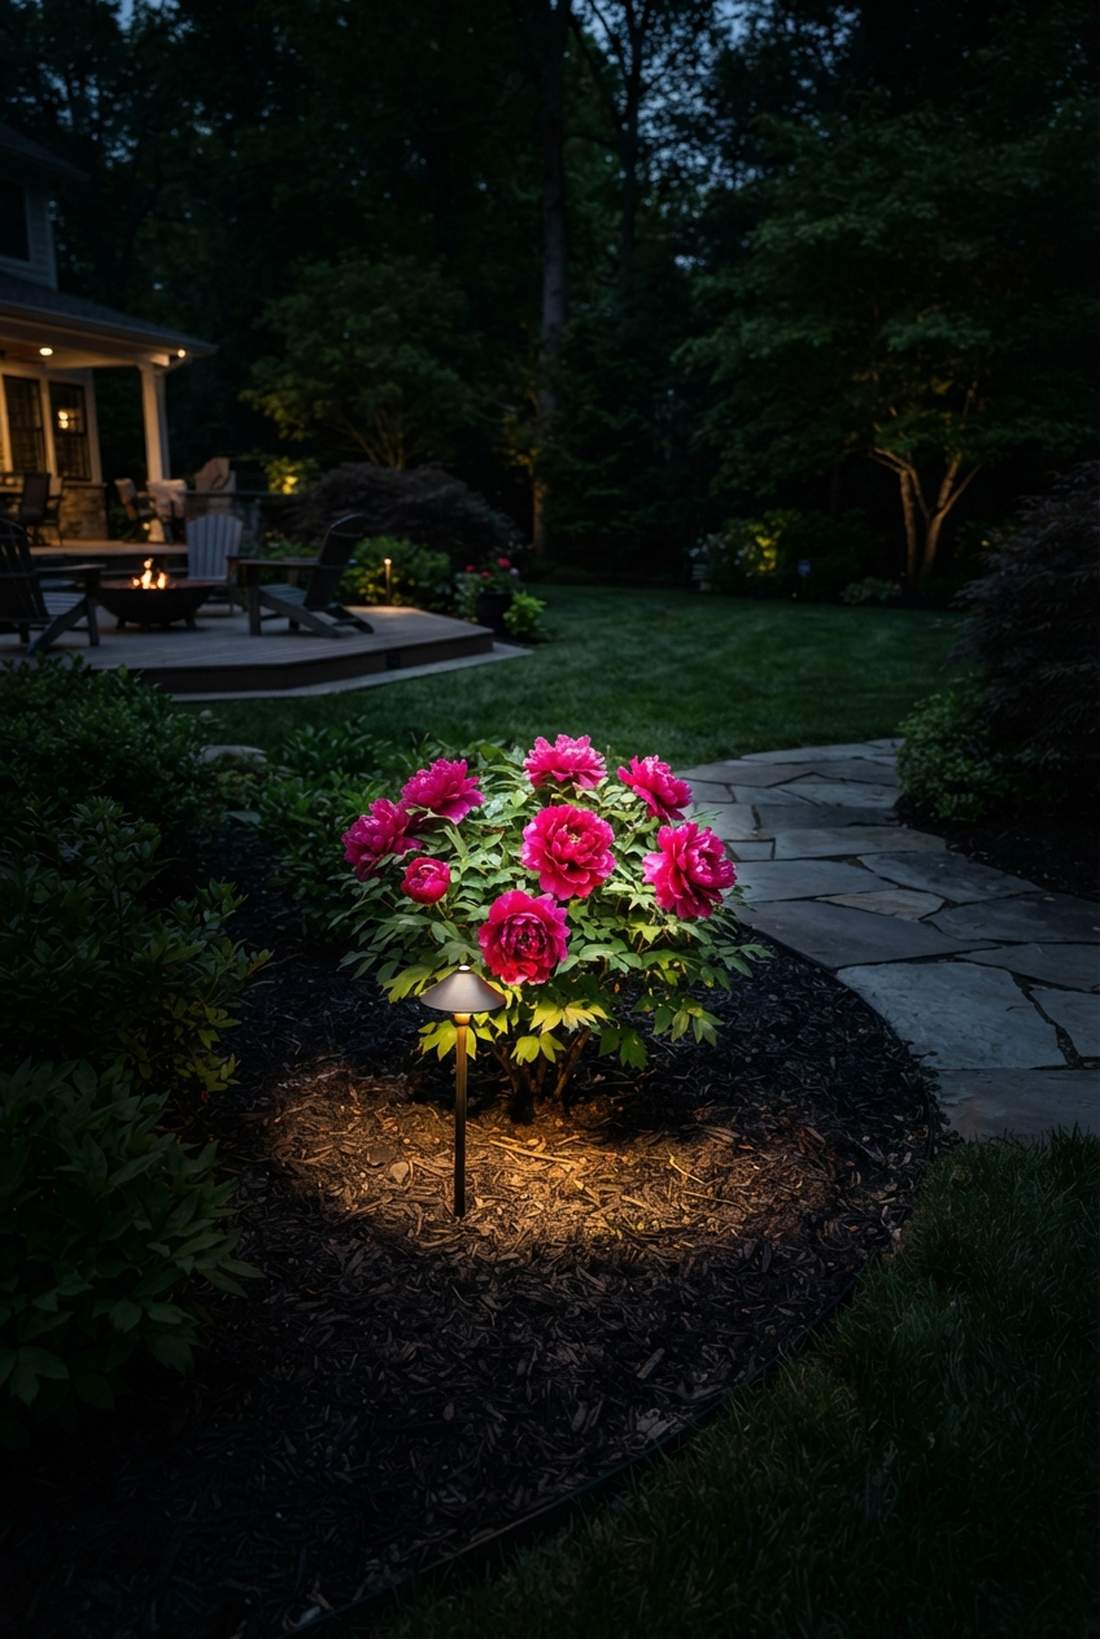
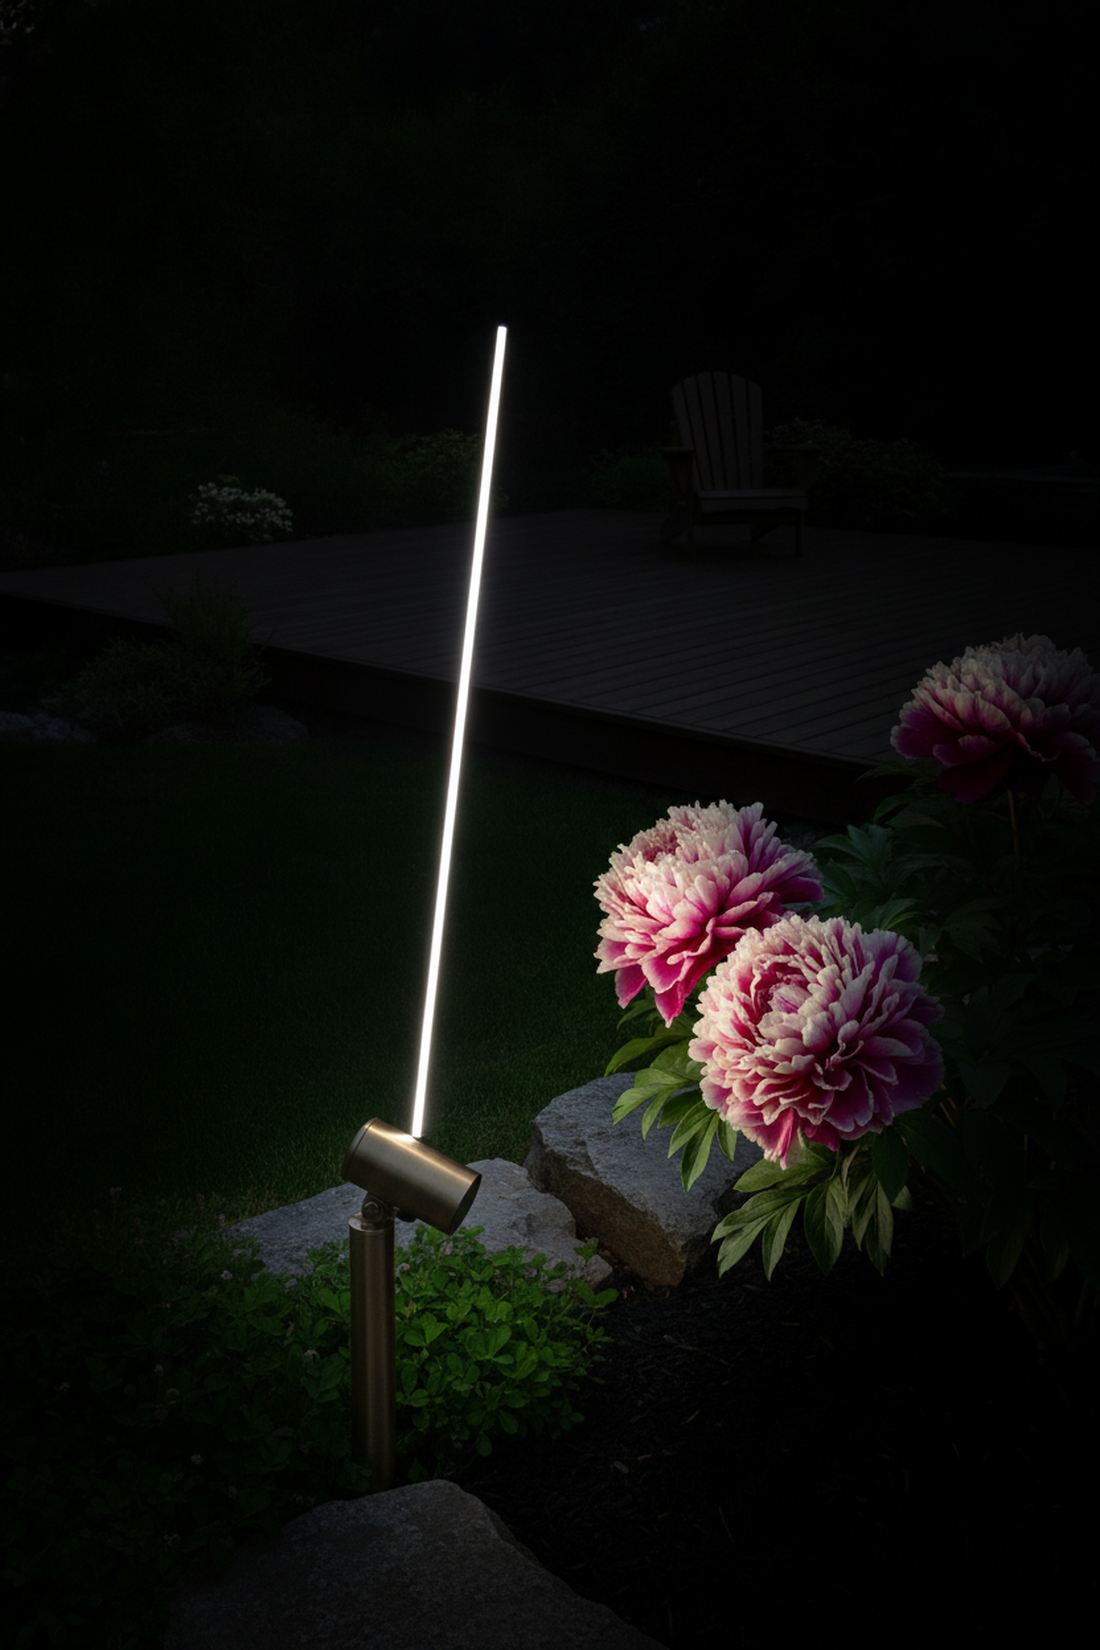
An intense isolated focal point feels like an expensive museum exhibit glowing fiercely against a pitch-black background. Required for showcasing a rare tree peony or a flawless, prize-winning rose bush.
Using a wide floodlight on a single rose bush ruins the drama by lighting up the ugly dirt and mulch around it. Utilizing a razor-thin 8-degree spotlight violently isolates the blooming colors, completely reinventing standard garden viewing into a theatrical event. It commands attention and establishes a strict visual hierarchy in the yard.
A premium tight-beam spot runs about $75. Pin this to ensure your best plants get the attention they deserve.
- Key Materials: 8-degree narrow spotlight, glare shield
- Vibe / Style: Museum exhibit drama
- Difficulty: Easy
- Budget Breakdown: Spot: $60 | Shield: $15.
- Creator’s Tip: Place the light at least 10 feet back; the distance allows the tight beam to perfectly frame the plant without blinding the leaves.
- Smart Sourcing: ultra-narrow 8-degree LED spots and slip-on brass glare shields.
32. Seasonal Bloom Spotlighting
A rotating peak bloom sequence feels like an interactive, constantly changing botanical gallery. The smartest approach for gardeners whose focal points shift rapidly from spring bulbs to fall asters.
Burying fixtures in concrete means you are stuck lighting a dead bush in the winter. Deploying tool-free adjustable stakes allows you to physically walk the lights over to whichever flower is peaking that week, which delivers a surprisingly premium look all year round. It completely justifies investing in premium miniature garden supplies.
A set of easily movable spots costs about $90. A brilliant, fluid approach to landscape design.
- Key Materials: Tool-free adjustable spots, quick-connect wires
- Vibe / Style: Dynamic floral gallery
- Difficulty: Very Easy
- Budget Breakdown: Spots: $70 | Connectors: $20.
- Creator’s Tip: Swap in a cool 4000K bulb when lighting blue or purple hydrangeas to make the colors explode.
- Smart Sourcing: tool-less adjustable landscape stakes and quick-release wire splices (bulk pack).
33. Water-Feature Botanical Spotlighting
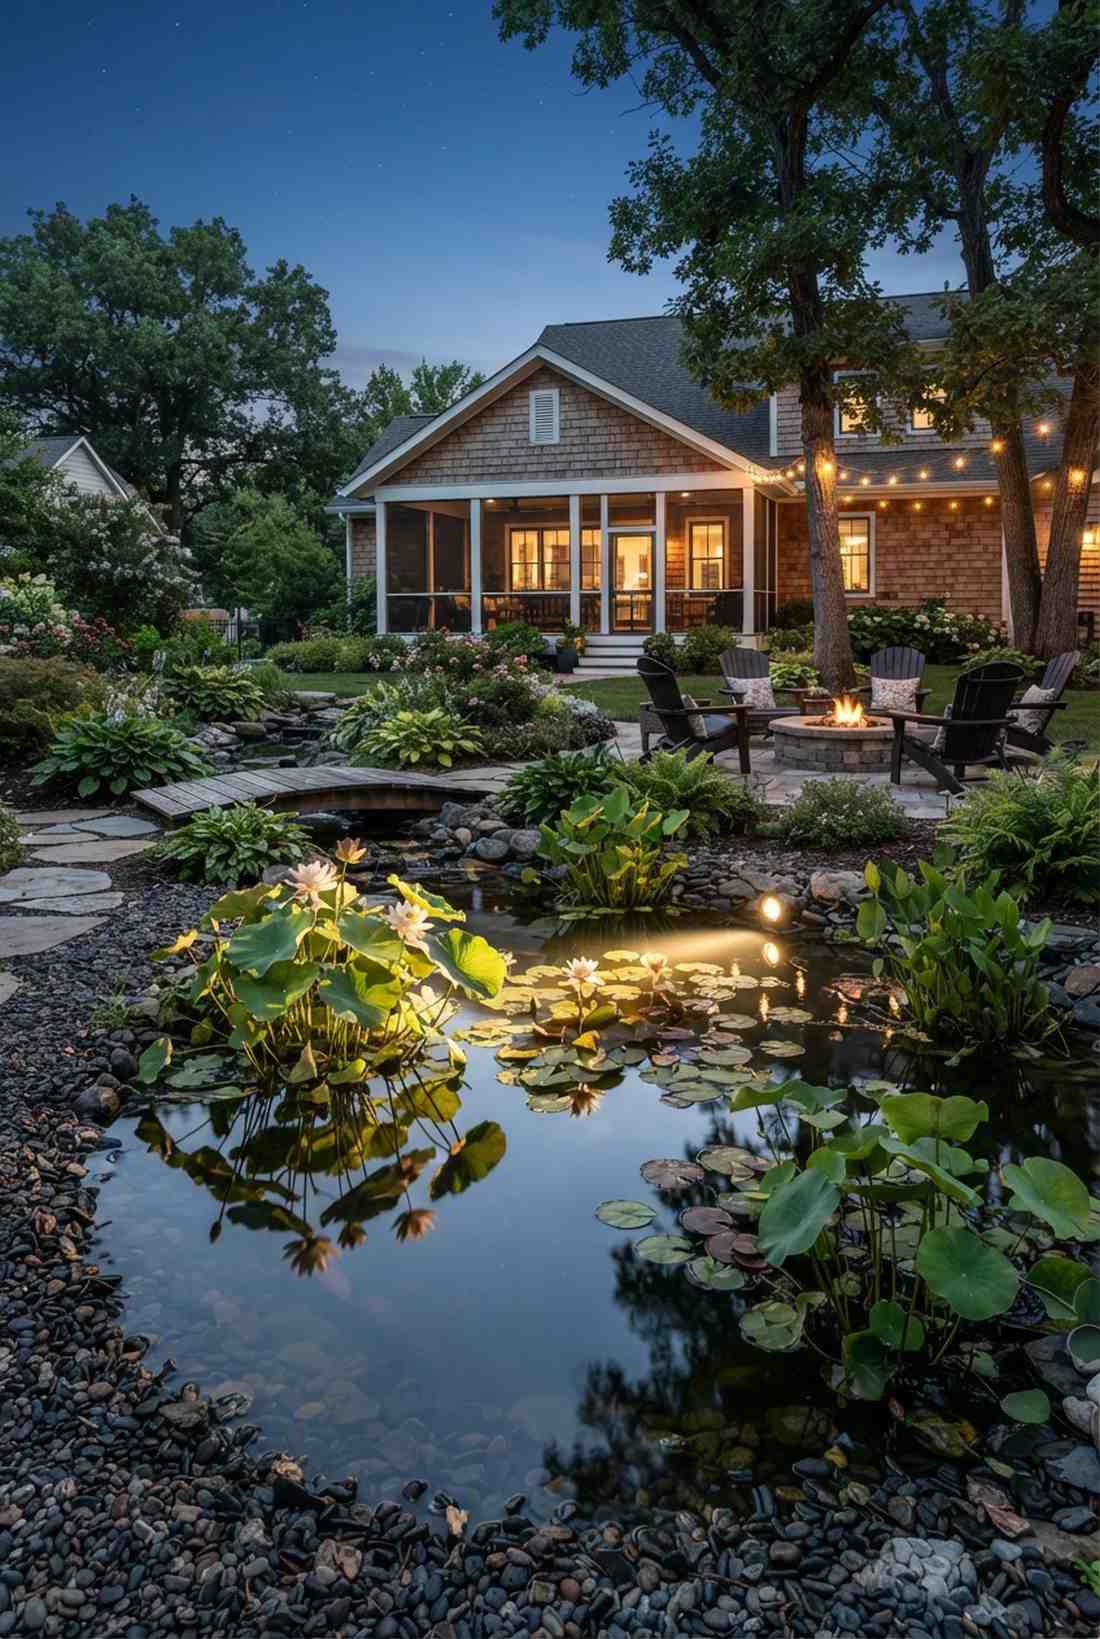
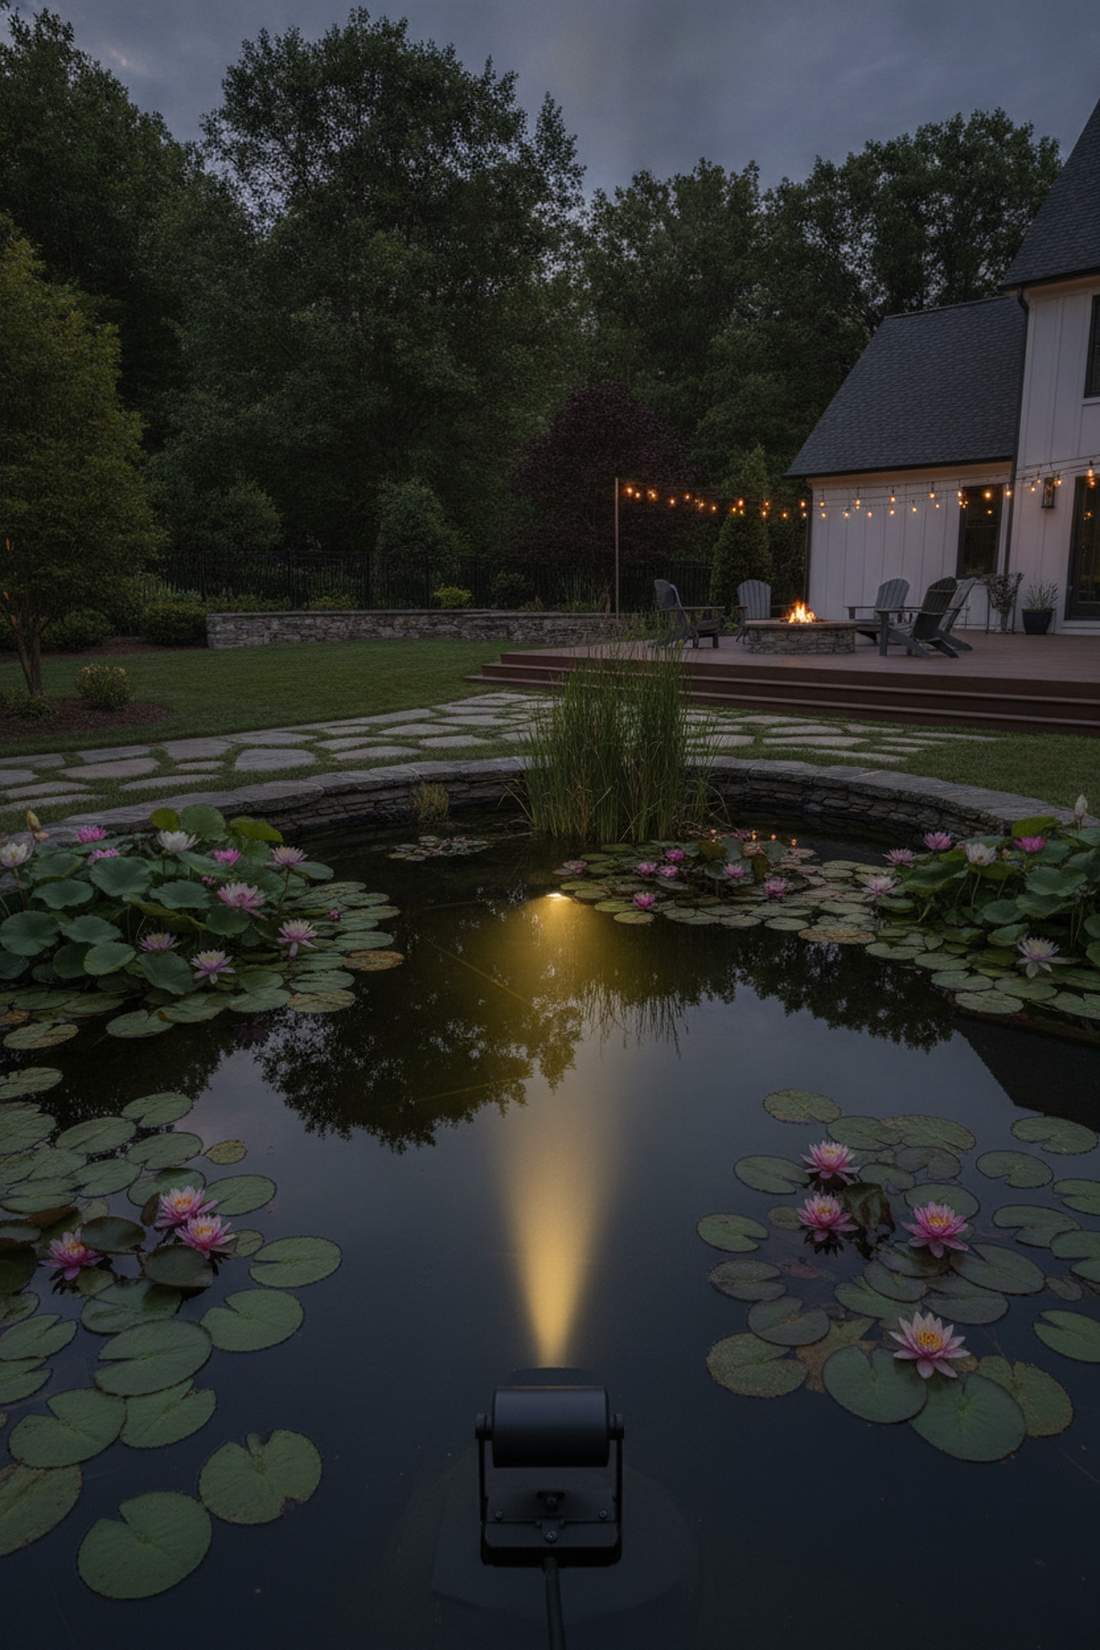
A mirrored aquatic reflection glow feels like a mesmerizing, deep oasis echoing under the stars. Perfect for amplifying the beauty of lotus flowers or water lilies planted along a koi pond edge.
Lighting a pond from the front completely destroys the reflection by hitting the water surface directly. Positioning the spot on the exact opposite bank and skimming the beam low over the water doubles the visual impact, giving a designer-level finish that mirrors the blooms flawlessly. It turns a simple puddle into a striking visual anchor.
This cross-pond setup runs about $65. Save this if you are planning a backyard water feature!
- Key Materials: Low-angle spot, heavy base
- Vibe / Style: Mesmerizing oasis
- Difficulty: Intermediate positioning
- Budget Breakdown: Spotlight: $50 | Heavy mount: $15.
- Creator’s Tip: Keep the angle beneath 25 degrees; any higher and you destroy the glassy reflection on the water’s surface.
- Smart Sourcing: low-profile surface mount spots and weighted cast-iron fixture bases.
34. Topiary Form Spotlighting
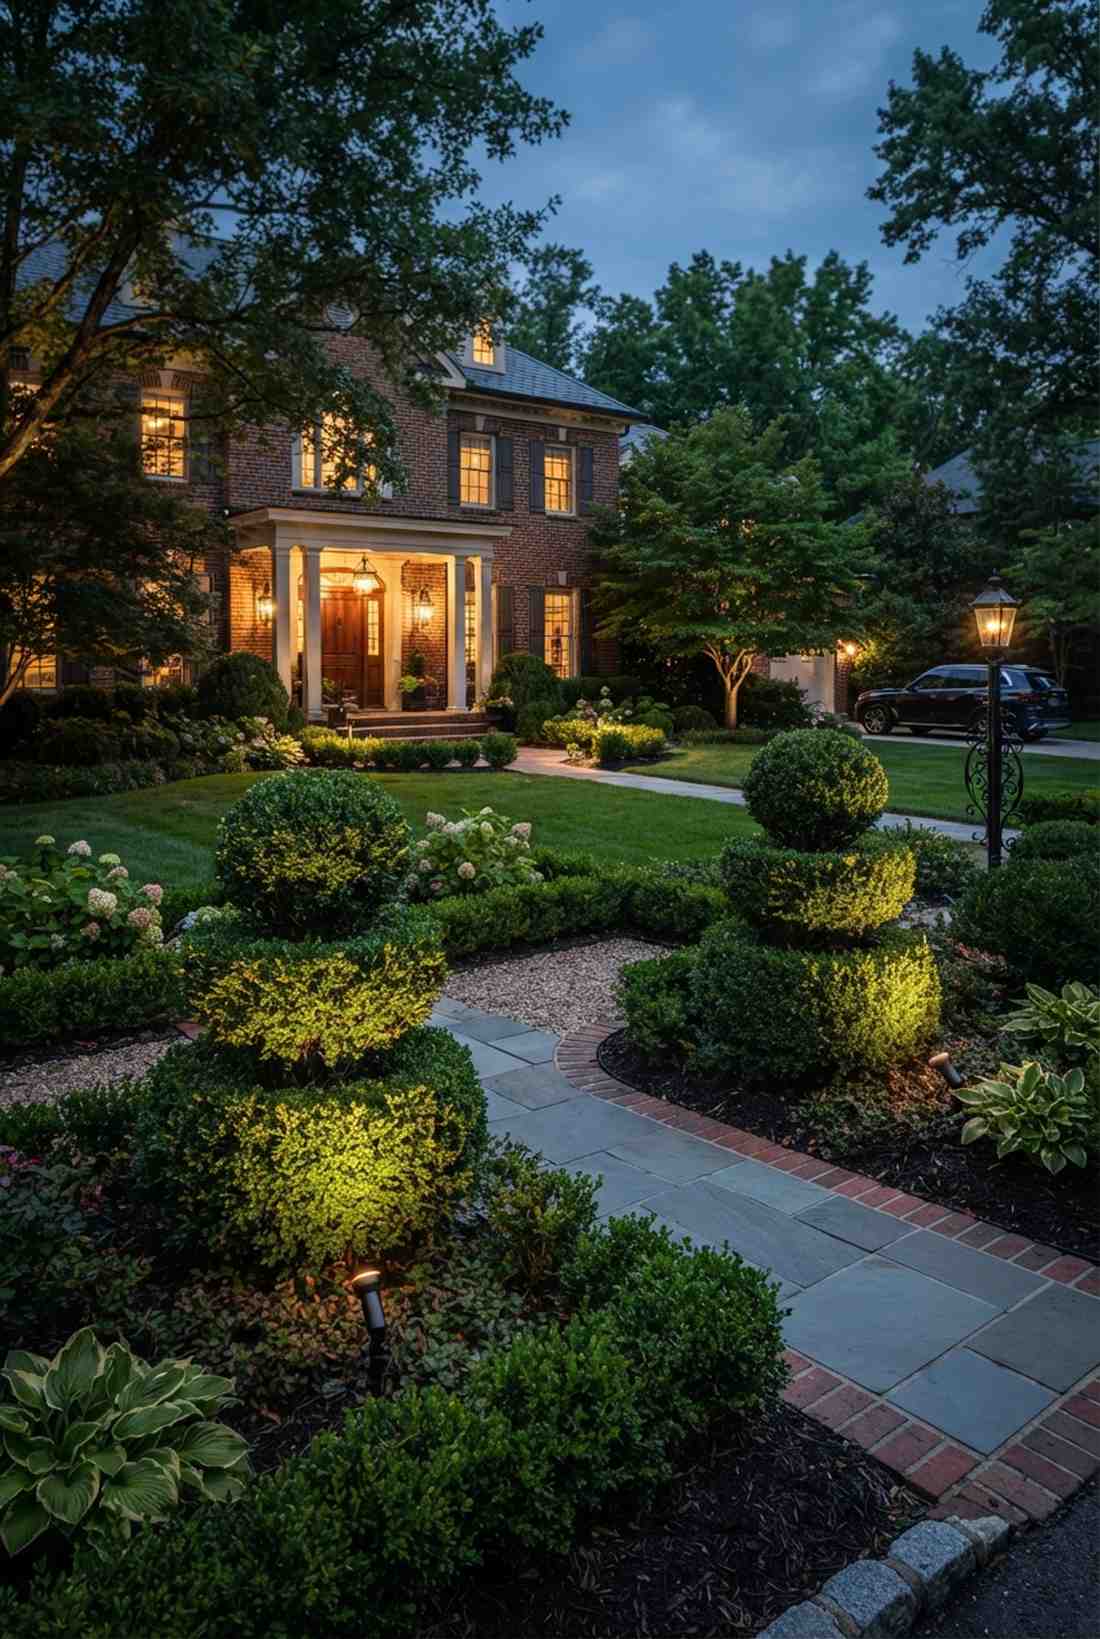
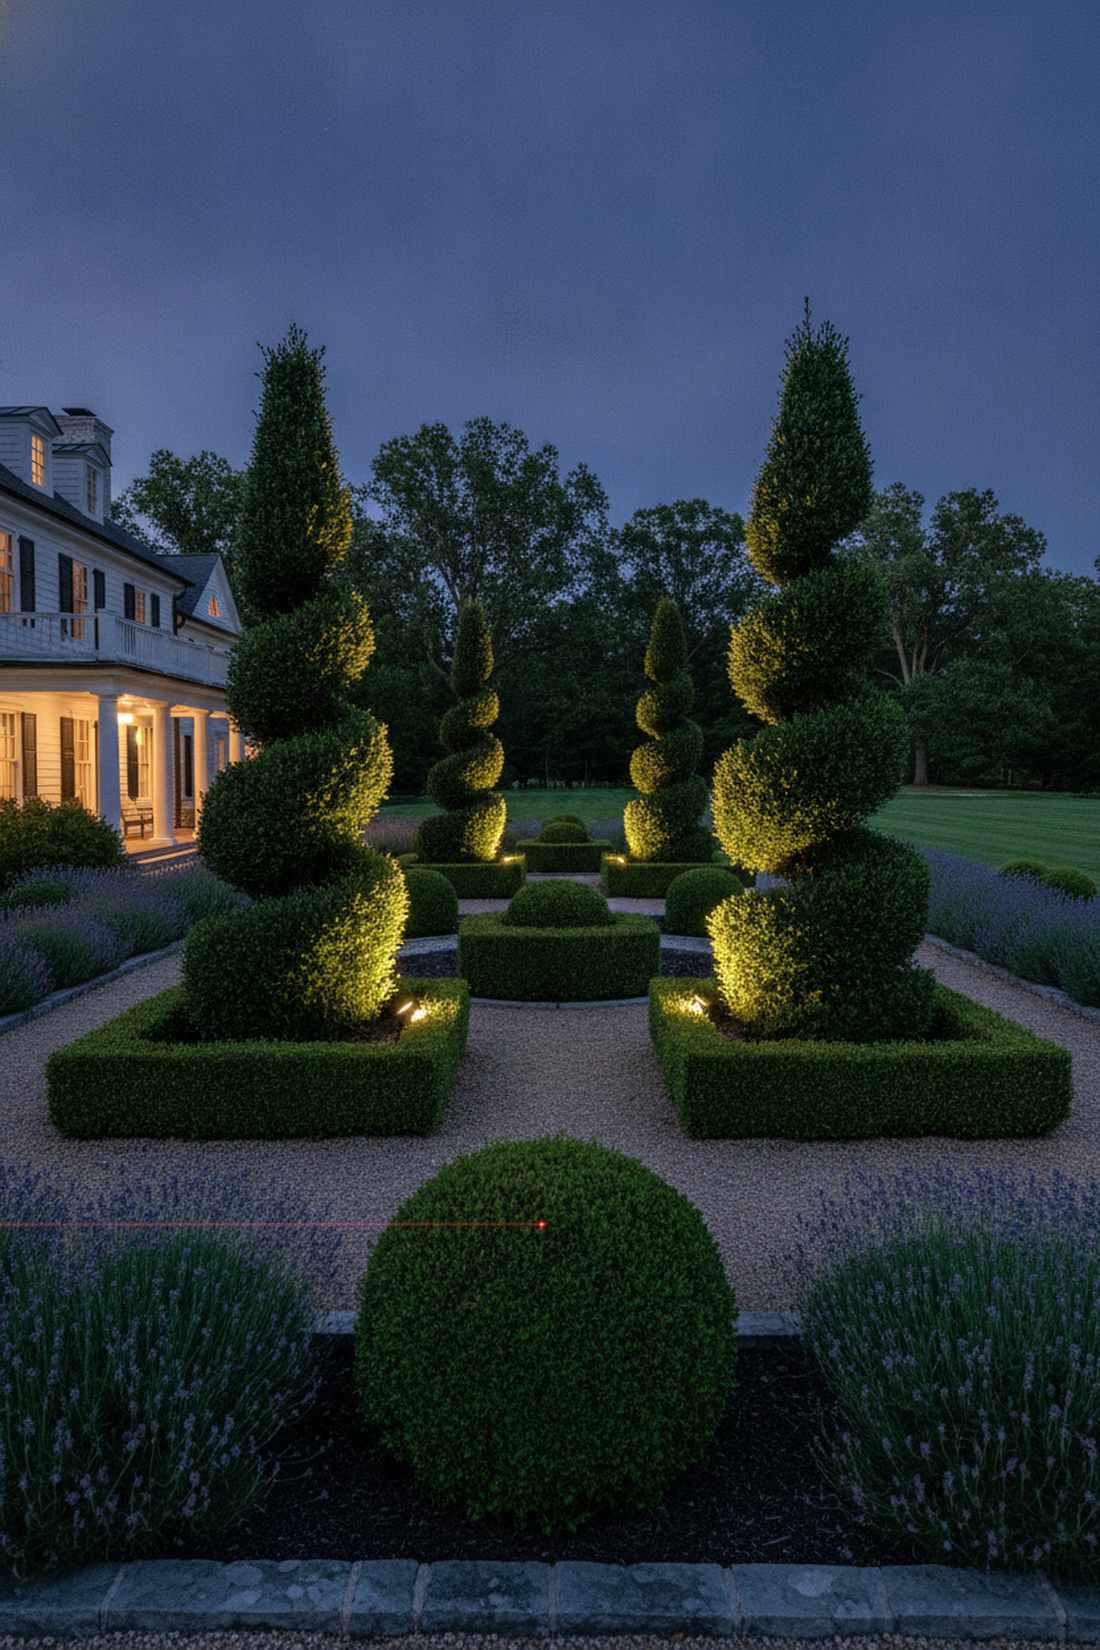
A sharply defined sculpted geometric glow feels like walking through a flawless, aristocratic European estate. Absolute necessity for perfectly trimmed boxwoods or spiral-cut yew topiaries.
Hitting a perfectly round topiary with a single flat light instantly destroys all the 3D shape you spent hours pruning. Utilizing a dual 90-degree cross-lighting setup creates rich, curving shadows that emphasize the exact geometric precision, looking far more expensive than it is. It honors the intense labor of formal gardening.
Rigging two spots per topiary costs around $110. Highly recommended for formal, manicured front yards.
- Key Materials: Two identical LED spots
- Vibe / Style: Aristocratic estate
- Difficulty: Precise alignment
- Budget Breakdown: 2x Spots: $90 | Wires: $20.
- Creator’s Tip: Never use a frontal light. The two side lights naturally carve out the dark shadows needed to see the shape.
- Smart Sourcing: matched-pair LED spot kits and precision alignment lasers.
You won’t believe how much expensive drama this next simple light placement adds.
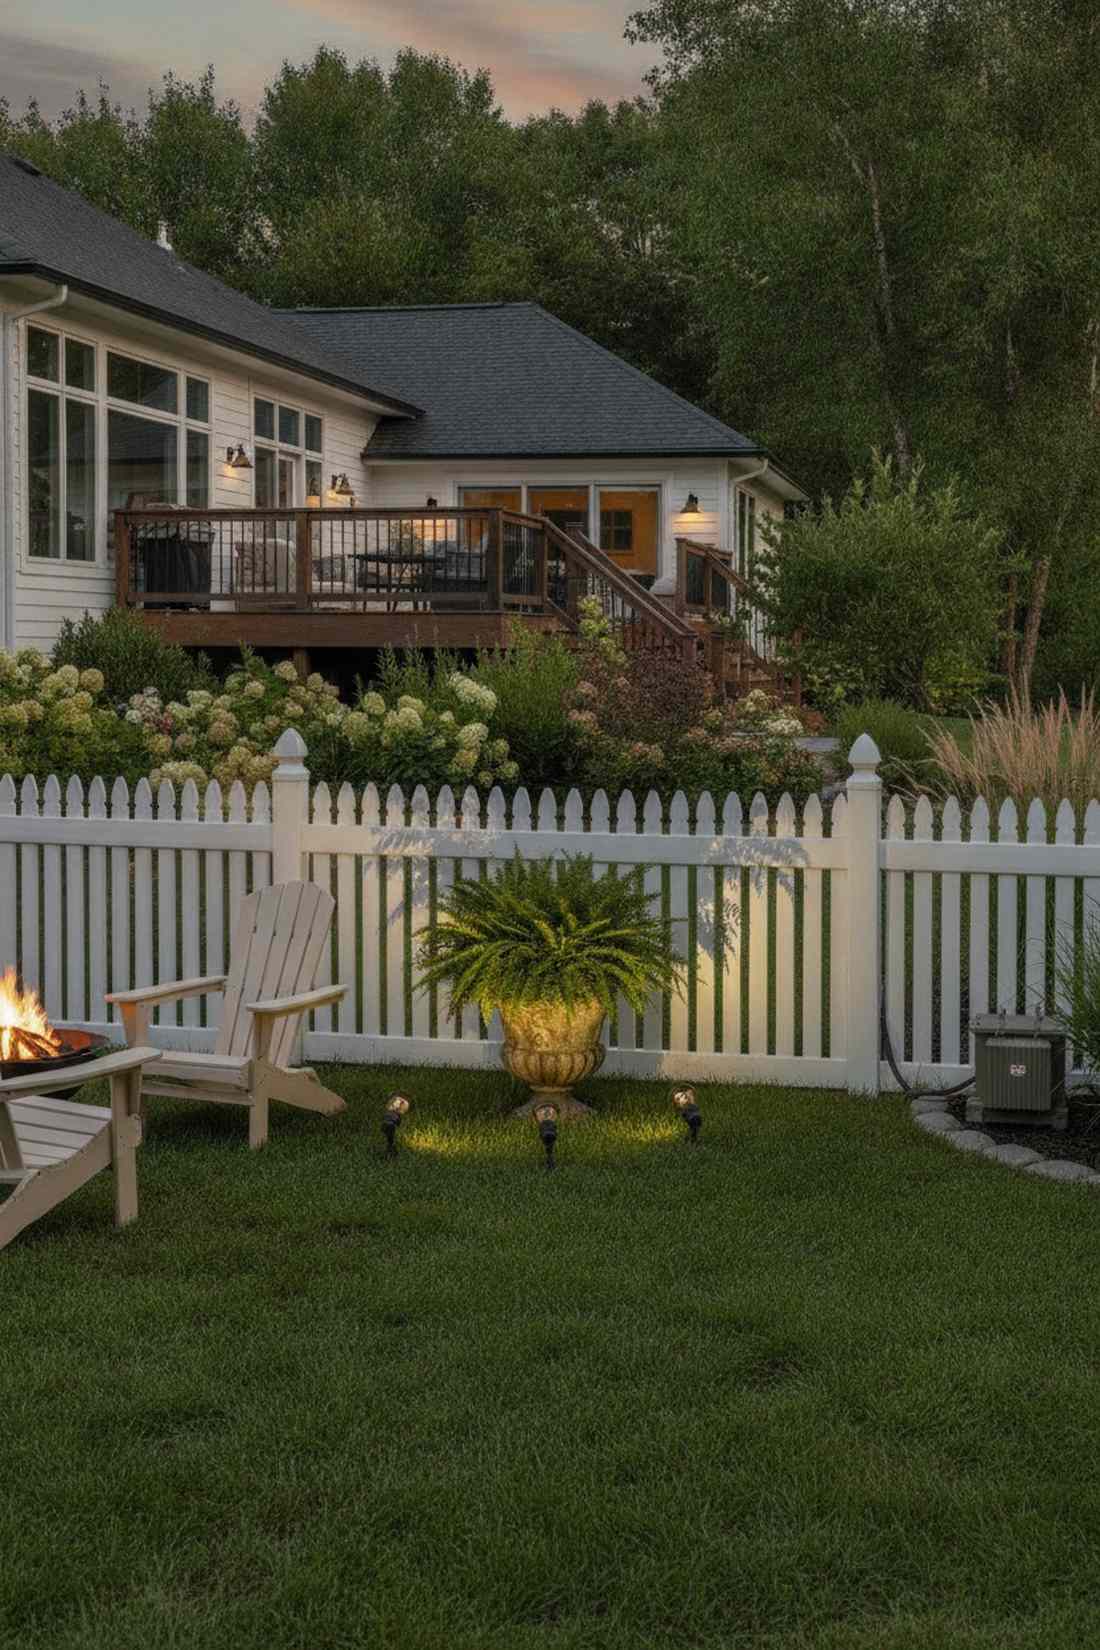
35. Container Arrangement Spot Lighting
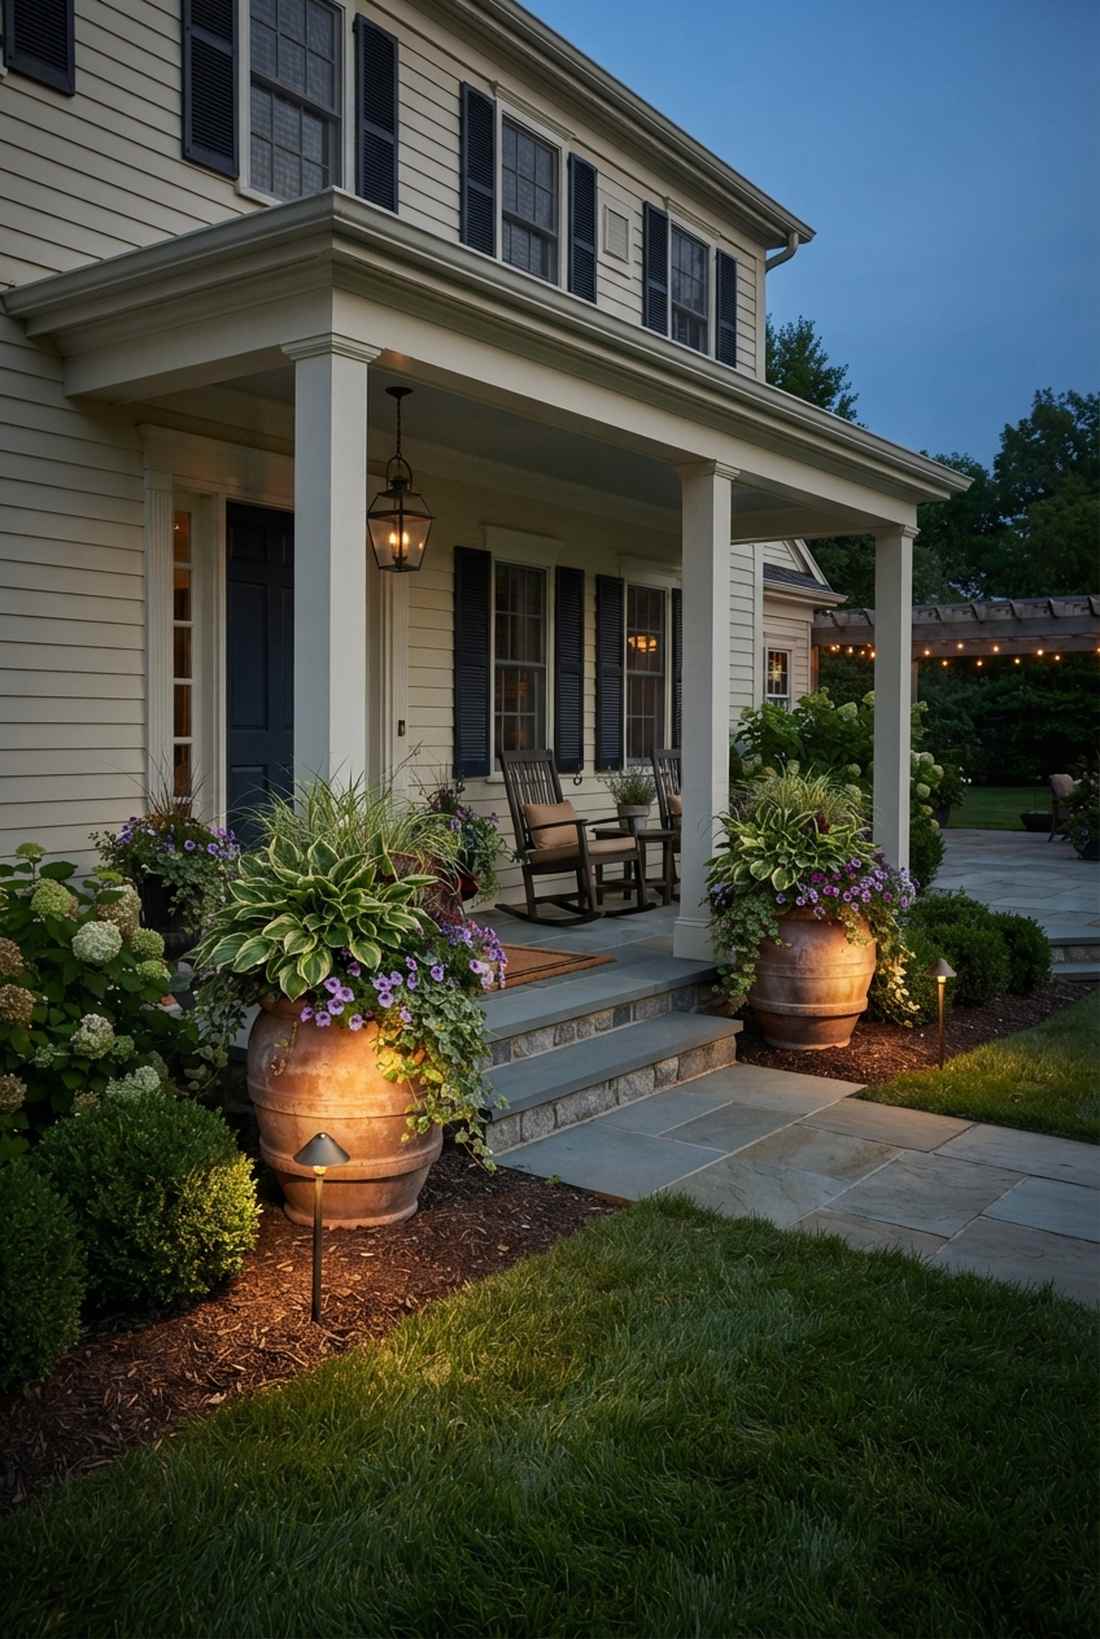
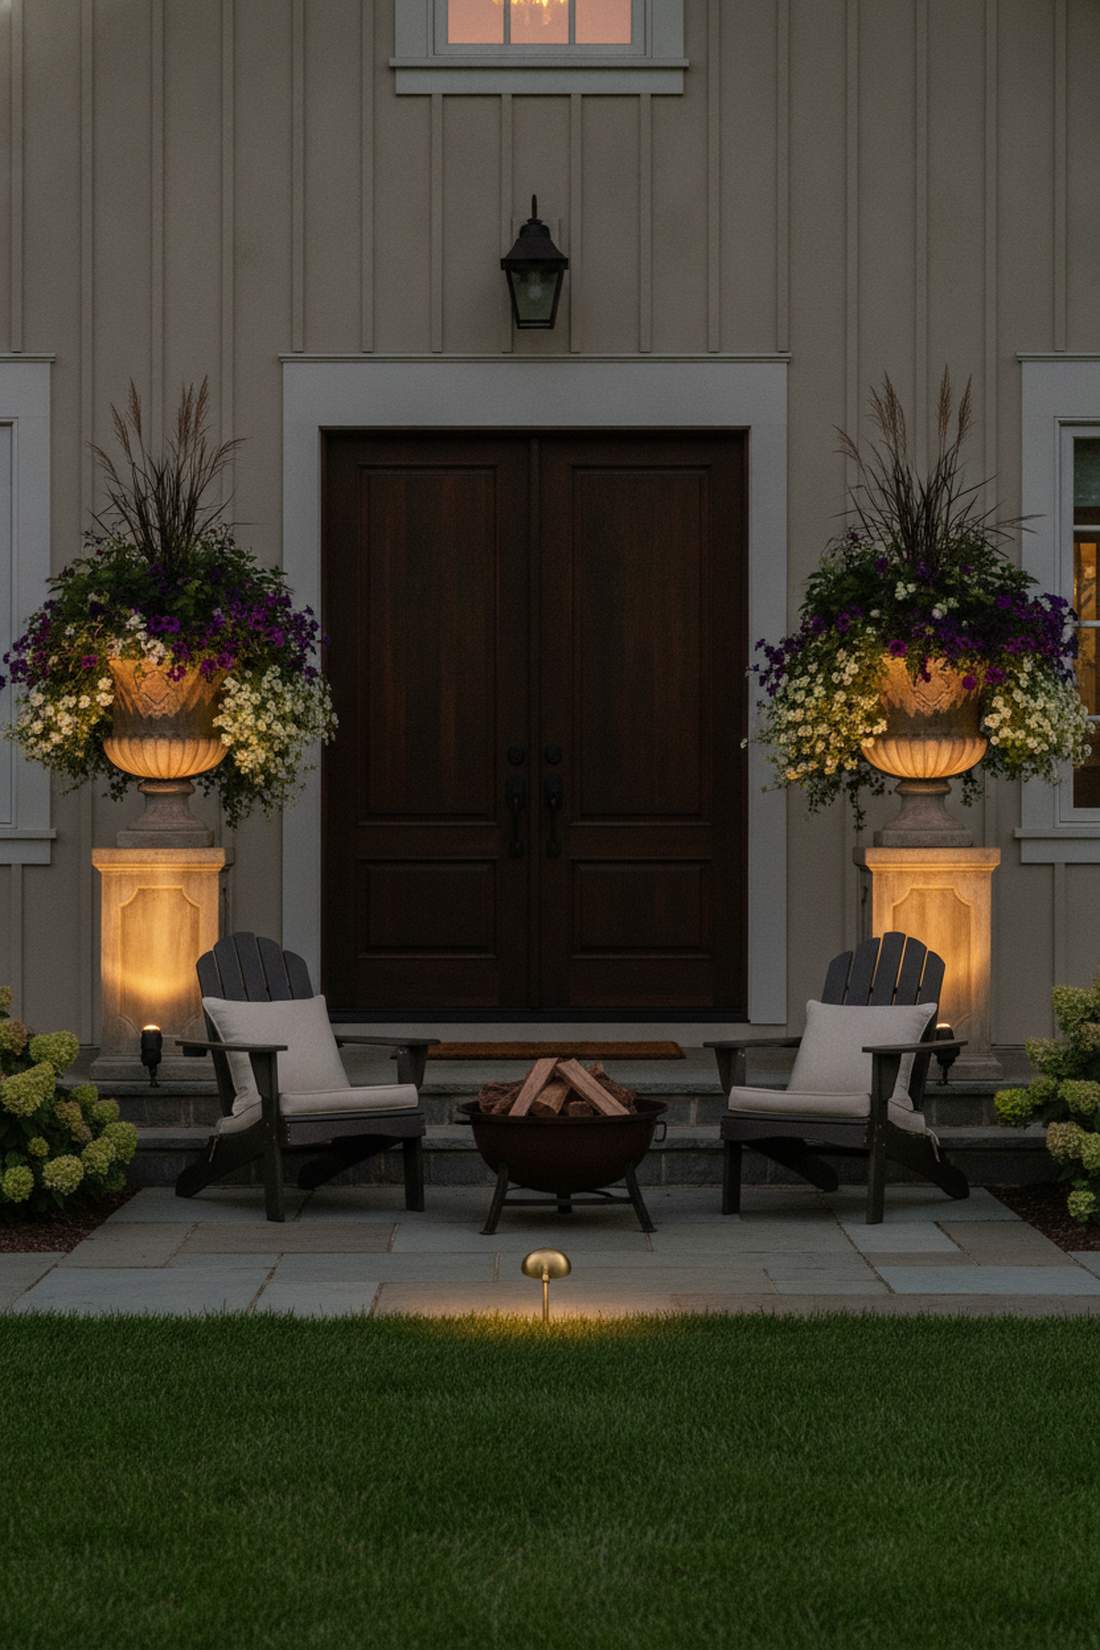
An illuminated patio urn display feels like an exclusive, curated exhibition of your finest container gardening. Excellent for large, dramatic terra-cotta pots flanking a front doorway or patio steps.
Ignoring your expensive potted plants while lighting the rest of the yard is a huge design flaw. Dialing in a tight 15-degree spot directly onto a massive urn completely elevates the container, which delivers a surprisingly premium look that welcomes guests perfectly. Customizing the beam width to the exact pot size is the secret here.
Adding dedicated spots for your pots costs about $50 each. Pin this to upgrade your front porch styling!
- Key Materials: Variable beam spot, short stakes
- Vibe / Style: Curated exhibition
- Difficulty: Easy
- Budget Breakdown: Spot: $40 | Stake: $10.
- Creator’s Tip: Match the beam width exactly to the rim of the pot so the light doesn’t spill awkwardly onto the house siding.
- Smart Sourcing: variable-focus landscape spots and low-profile brass stakes.
36. Color-Foliage Spotlight Enhancement
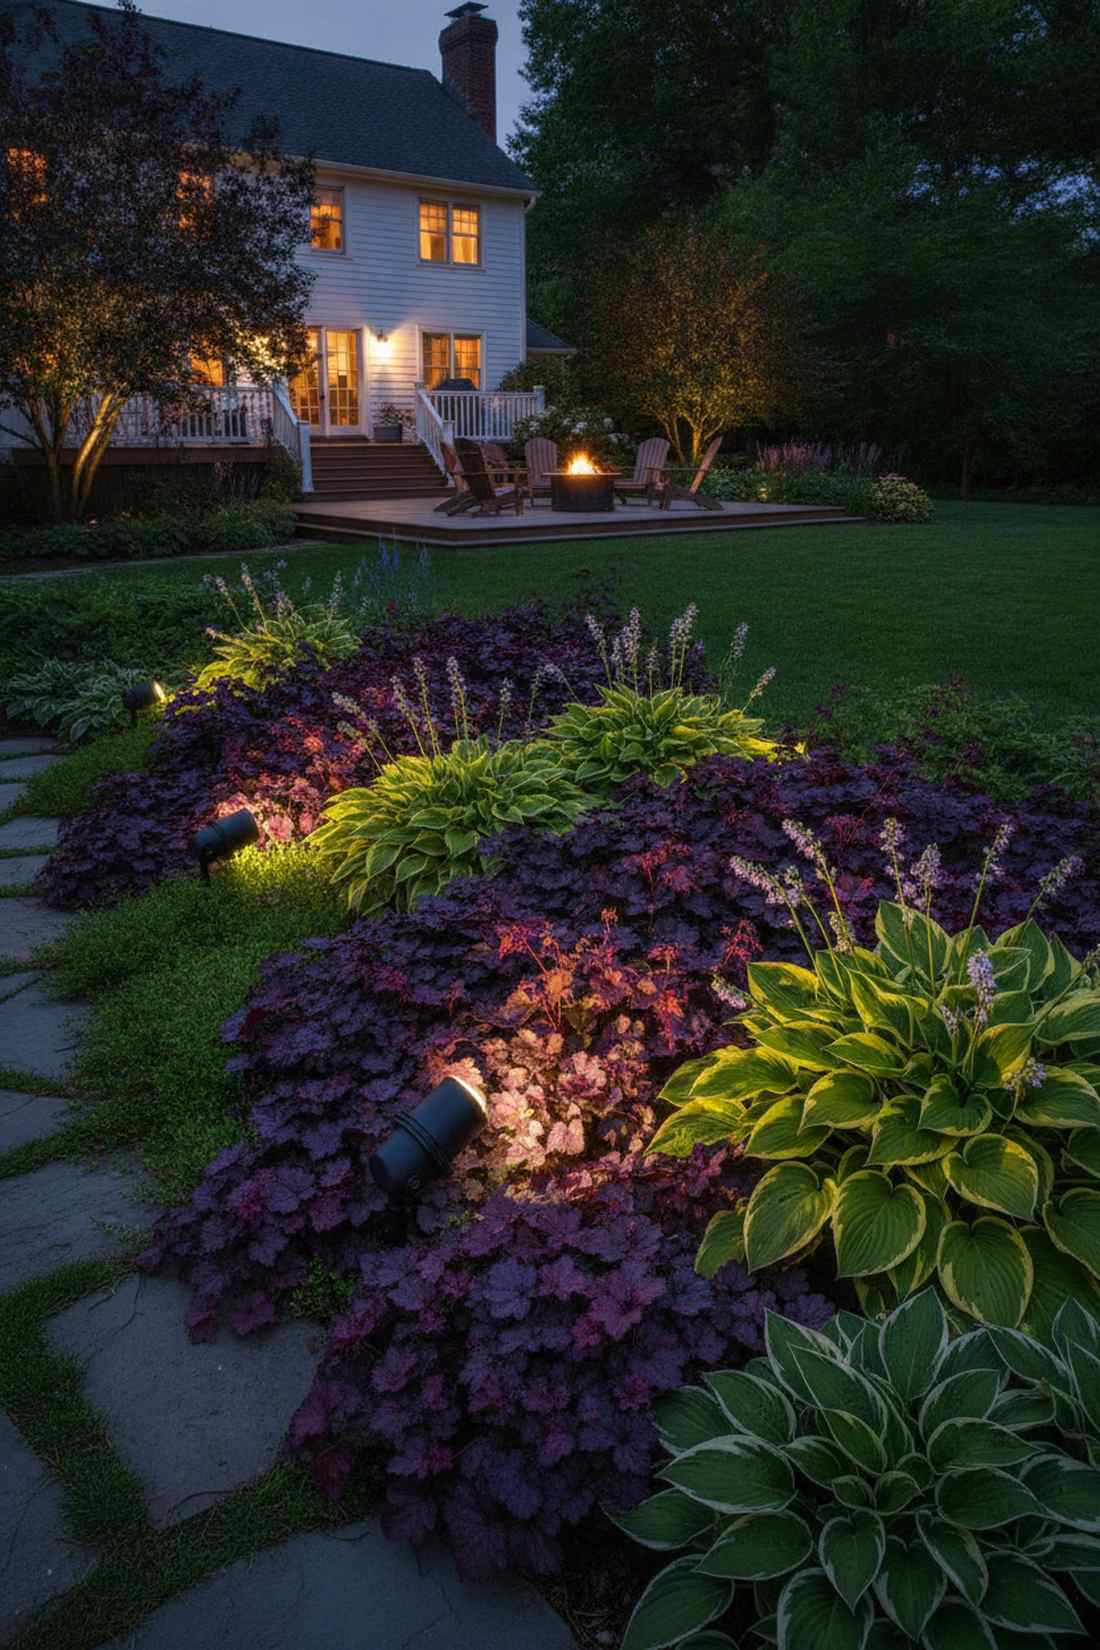
A vibrant chromatic leaf pop feels like a surreal, hyper-saturated painting brought to life in the dark. The ultimate trick for making burgundy coral bells or chartreuse hostas explode with color at night.
Using standard warm 2700K bulbs completely muddies the color of silver or purple plants, turning them a sickly brown. Swapping to a crisp, neutral 3500K color temperature renders the rare foliage colors flawlessly, giving a designer-level finish that looks meticulously planned. Side-lighting them adds the final punch of texture.
Dialing in the correct color temp costs around $45. Save this rule if you buy expensive, colorful perennials!
- Key Materials: 3500K neutral LED spot
- Vibe / Style: Hyper-saturated art
- Difficulty: Easy Bulb Swapping
- Budget Breakdown: 3500K Fixture: $40 | Wiring: $5.
- Creator’s Tip: Always hit colorful leaves from a side angle; straight-on light washes out the deep vein textures that make them interesting.
- Smart Sourcing: 3500K neutral white MR16 bulbs (bulk pack) and swappable-lens spot housings.
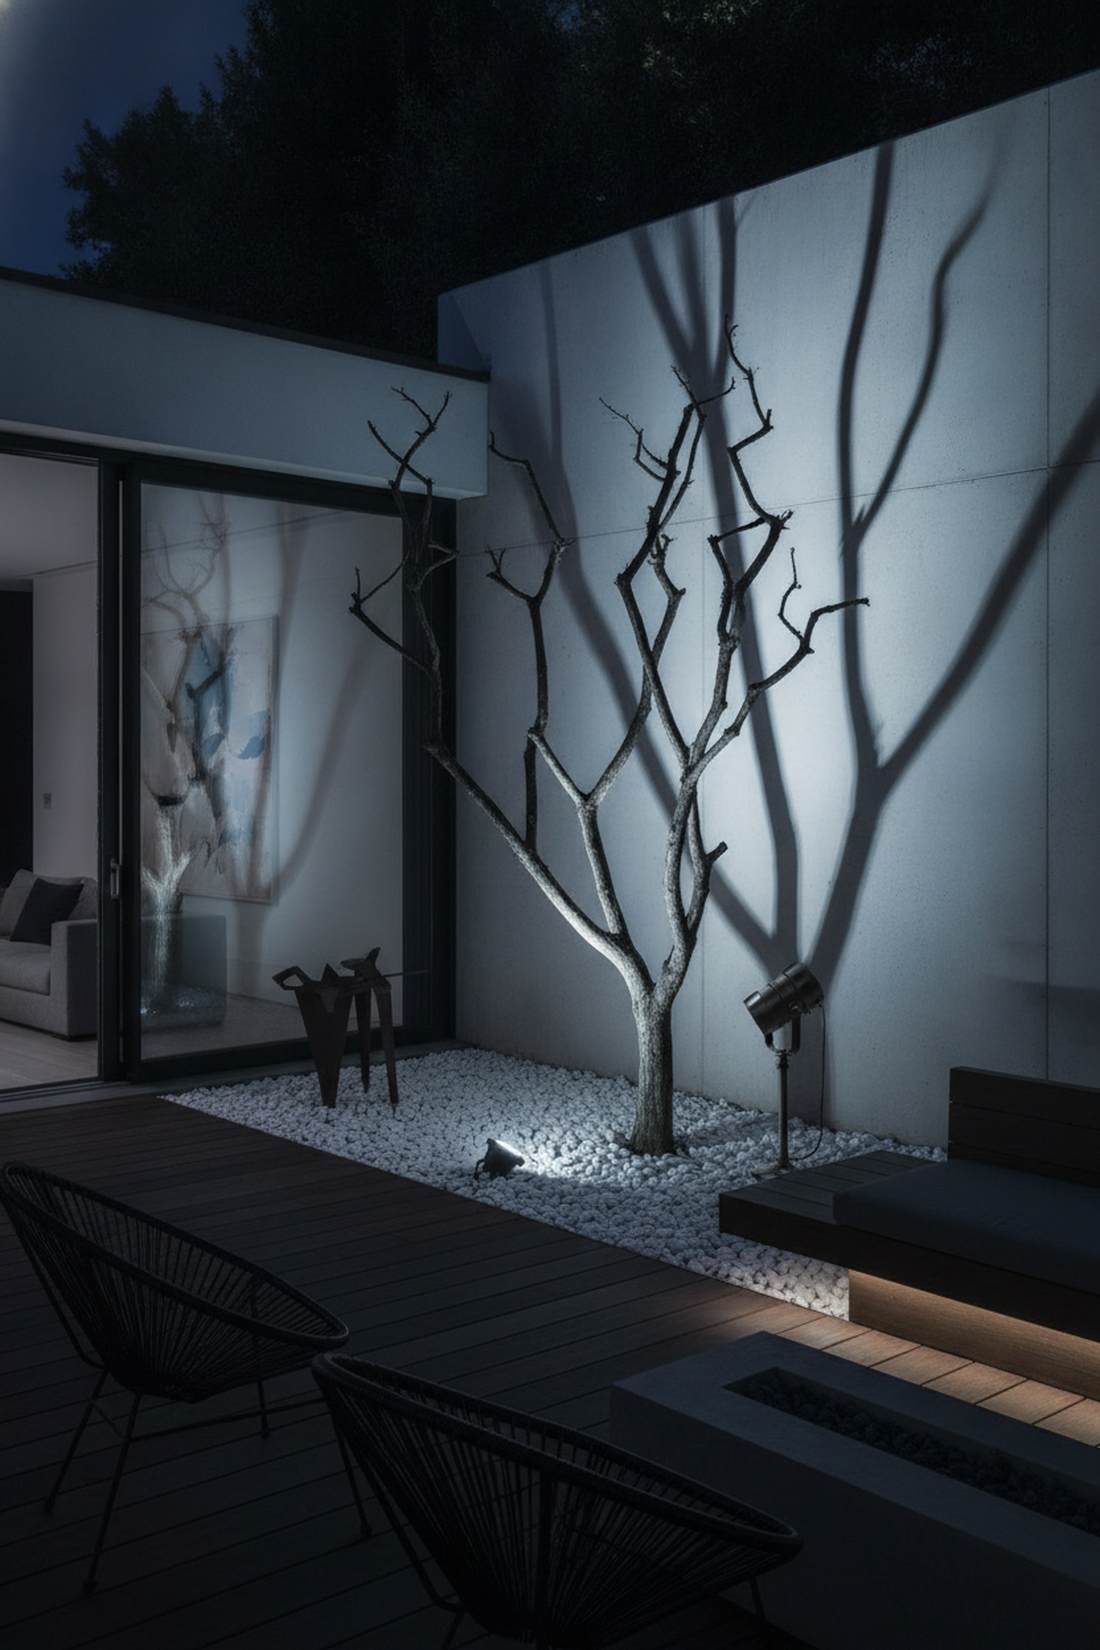
Silhouetting and Shadowing Methods
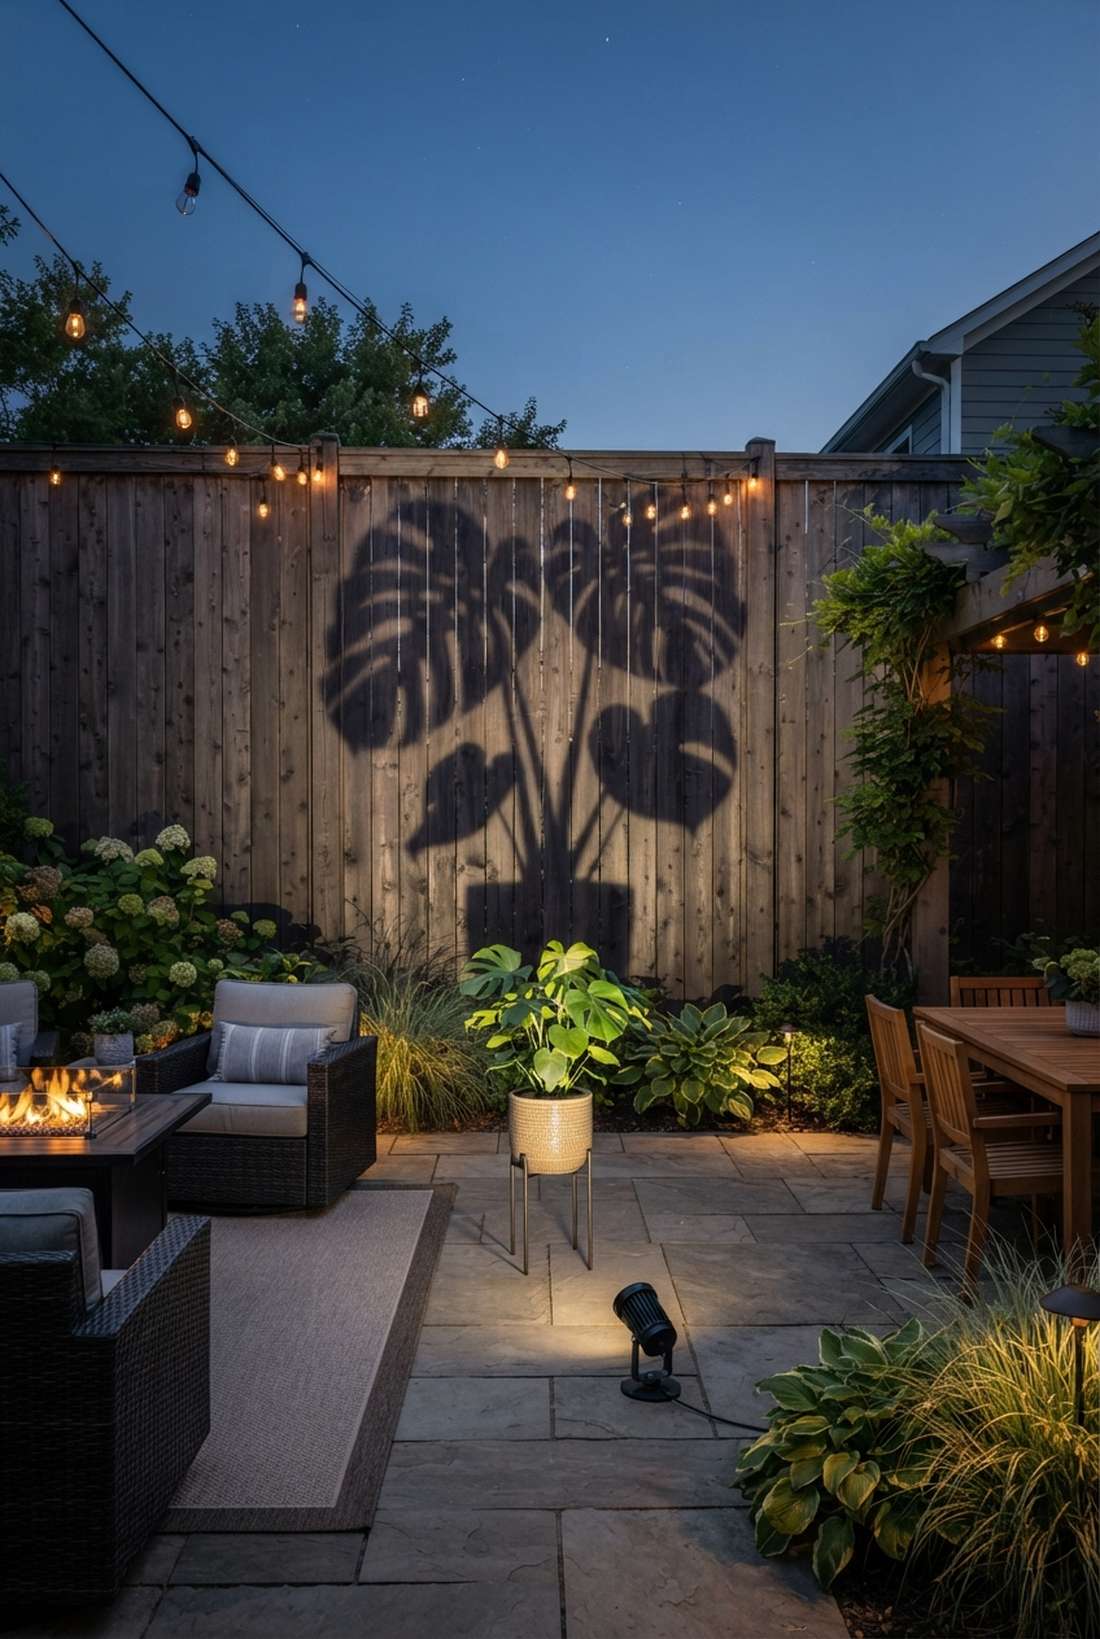
37. Wall Silhouette Lighting
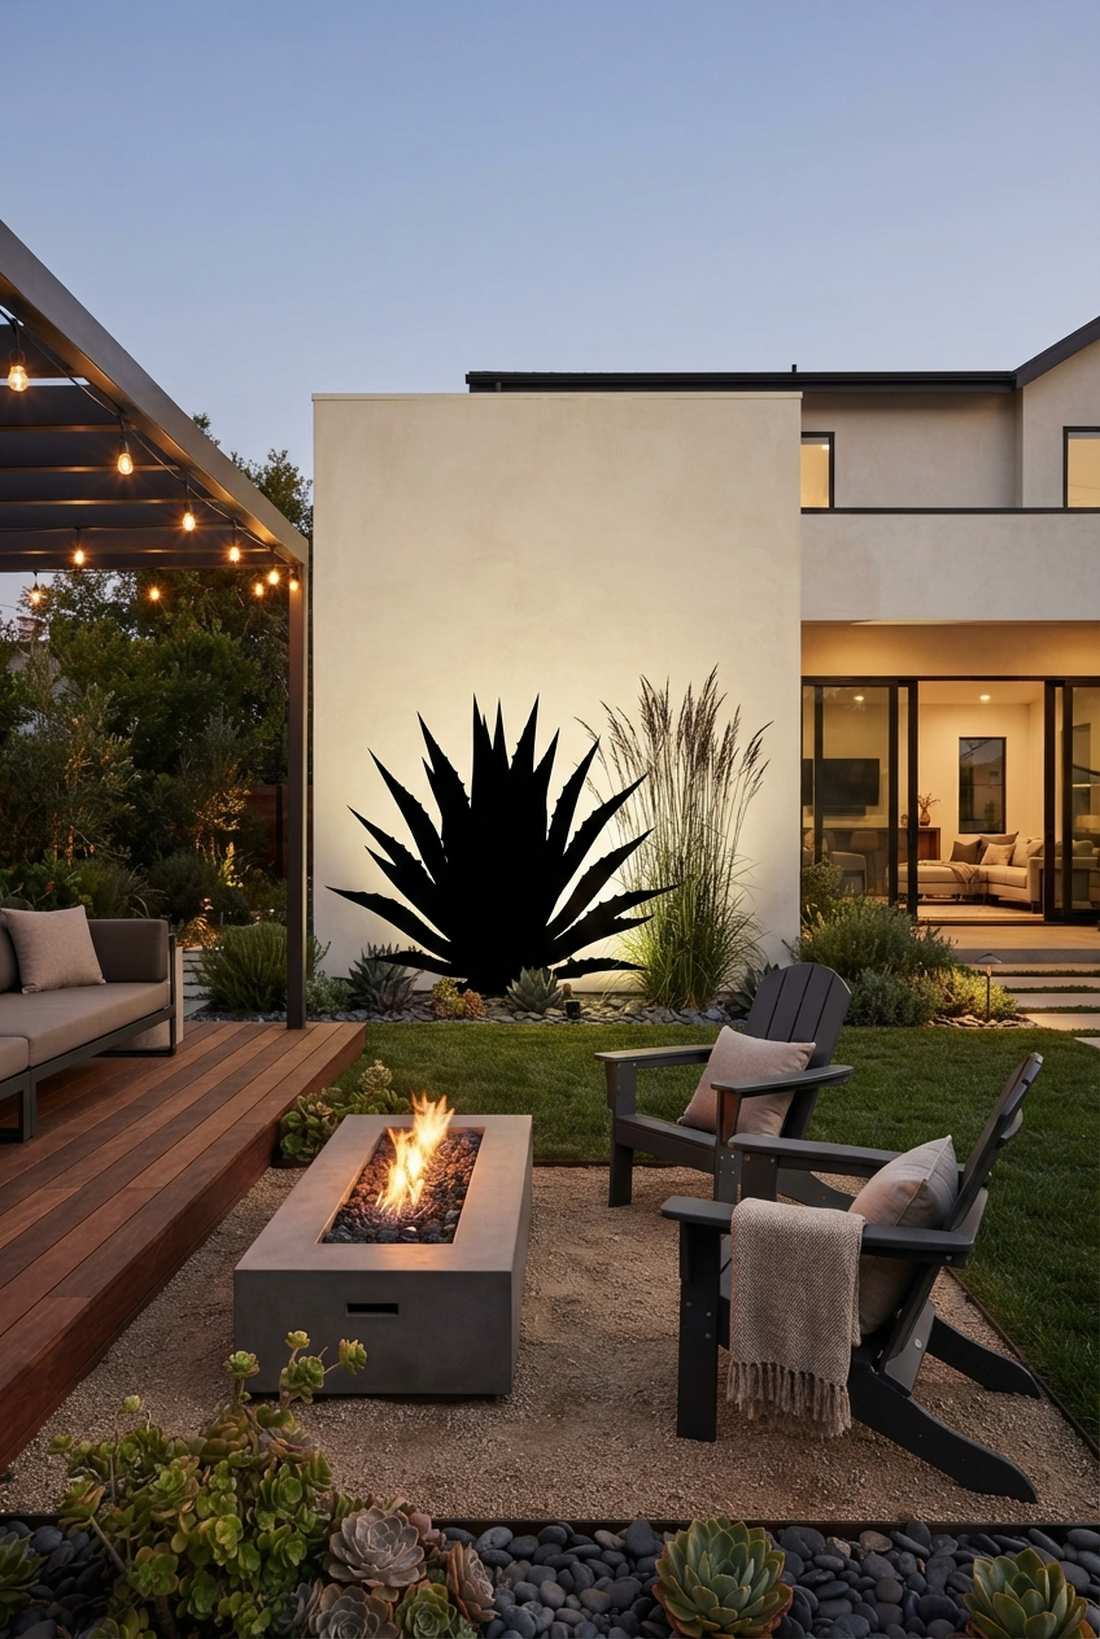
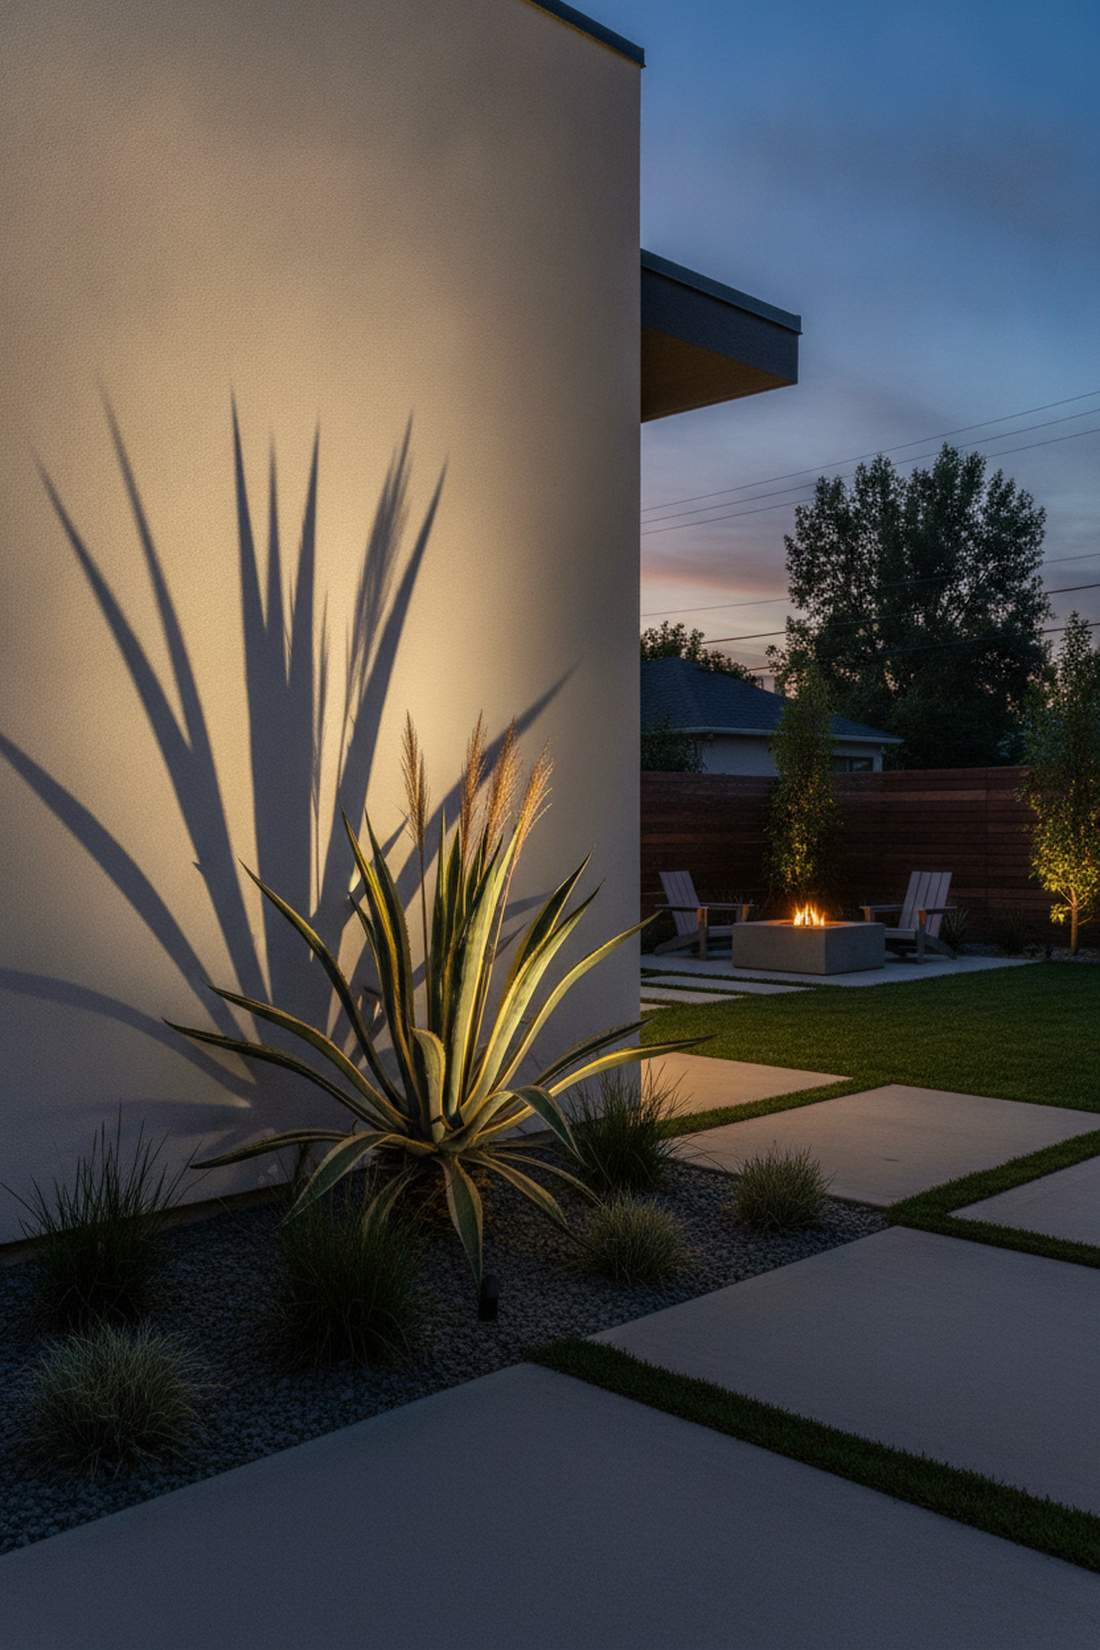
A stark backlit botanical profile feels like a modern, high-contrast art installation projected right onto your house. Perfectly executed with sharp, architectural plants like agave or tall ornamental grasses planted a few feet from a blank wall.
Lighting a spiky plant from the front usually flattens it against the wall into a boring green blob. Jamming a wide-beam uplight behind the plant forces a massive, striking black silhouette against the illuminated wall, which looks far more expensive than it is. It is the ultimate way to utilize empty, boring stucco walls.
Creating this massive shadow art costs around $60. Highly recommended for minimalist, contemporary yards.
- Key Materials: 10W wide wash light, flat wall backdrop
- Vibe / Style: High-contrast modern art
- Difficulty: Easy positioning
- Budget Breakdown: Wash light: $50 | Connections: $10.
- Creator’s Tip: Ensure the plant is at least 2 feet away from the wall; if it’s too close, the shadow won’t be large or sharp enough.
- Smart Sourcing: 120-degree wide wash LED fixtures and high-output 10W landscape bulbs.
38. Forward Shadow Casting
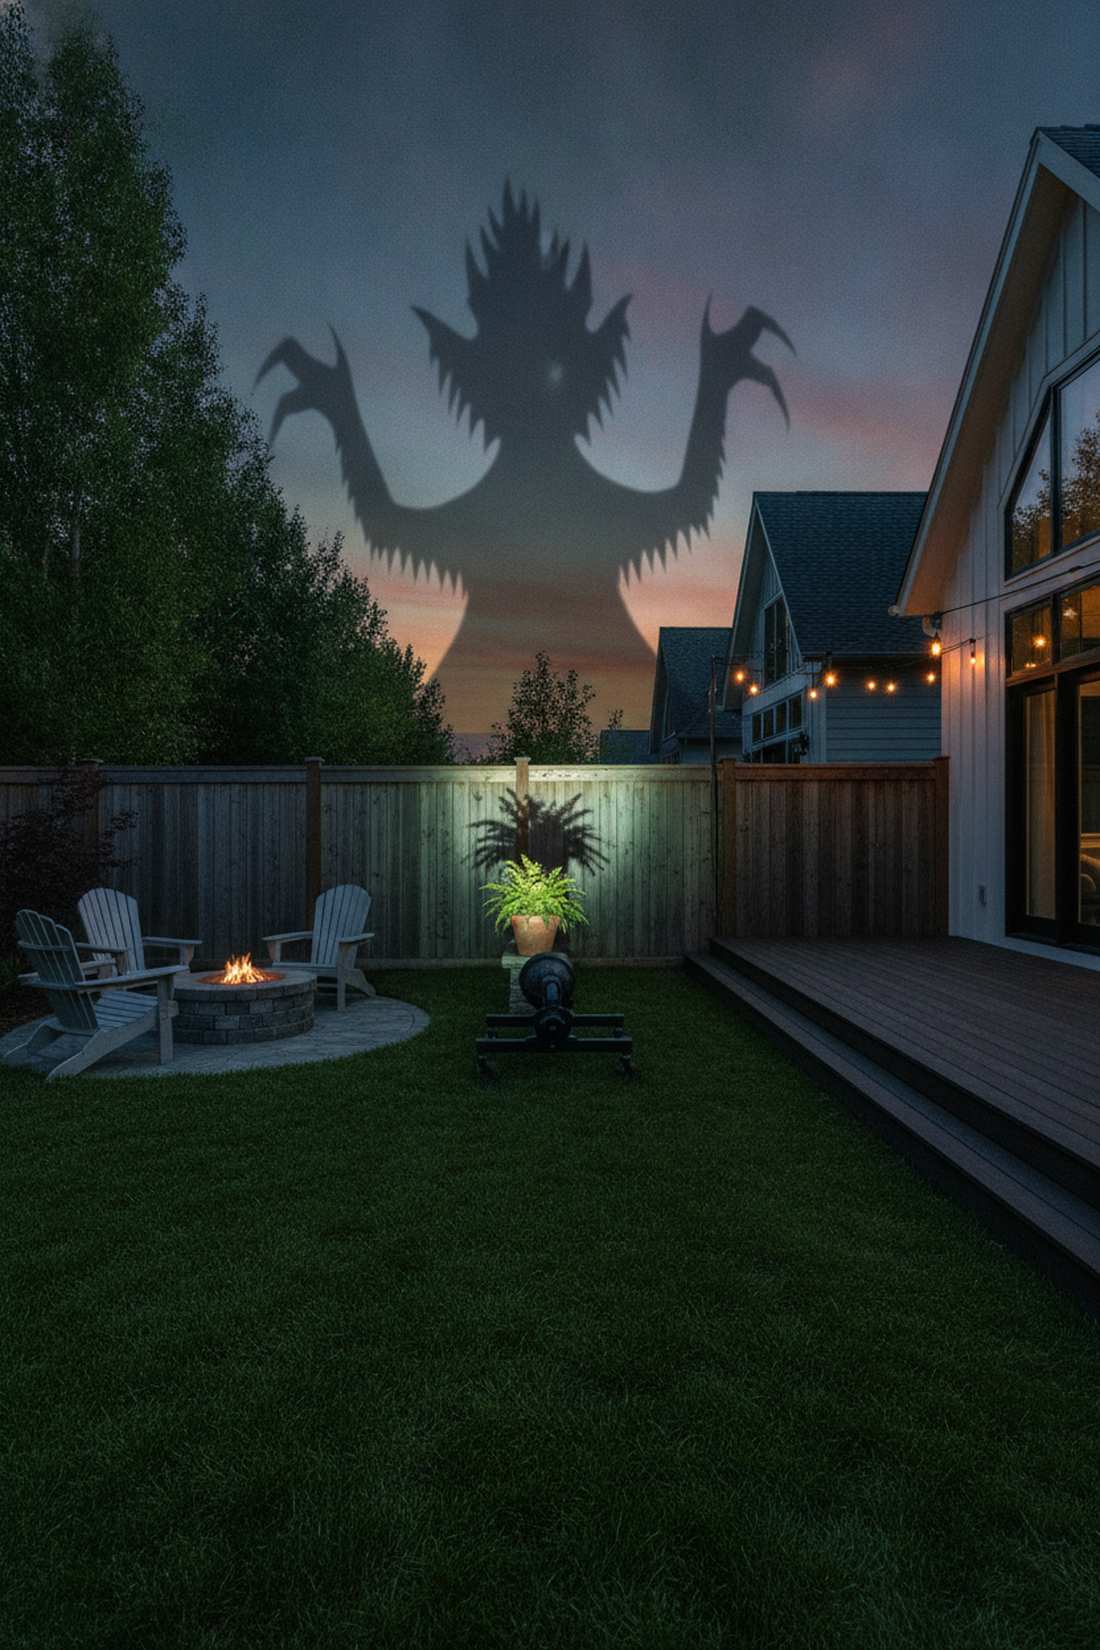
A massive projected monster shadow feels like a dramatic, theatrical set piece towering over the garden. Ideal for taking a small, interesting fern and projecting it 10 feet tall onto a tall privacy fence.
Most homeowners only care about seeing the actual plant, completely ignoring the massive canvas behind it. Placing the light several feet in front of the plant and aiming upward creates an artificially enlarged, ghostly shadow that completely reinvents standard patio setups. The shadow becomes the true focal point, not the plant.
Projecting these shadows costs roughly $45. Pin this to add serious drama to your backyard gatherings!
- Key Materials: Adjustable spotlight, clear backdrop
- Vibe / Style: Theatrical drama
- Difficulty: Trial and error
- Budget Breakdown: Spotlight: $40 | Base: $5.
- Creator’s Tip: Move the light backward inch by inch; the further back the light, the sharper and larger the projected shadow becomes.
- Smart Sourcing: high-intensity clear-lens spotlights and heavy-duty sliding ground mounts.
39. Tree Branch Shadow Patterns
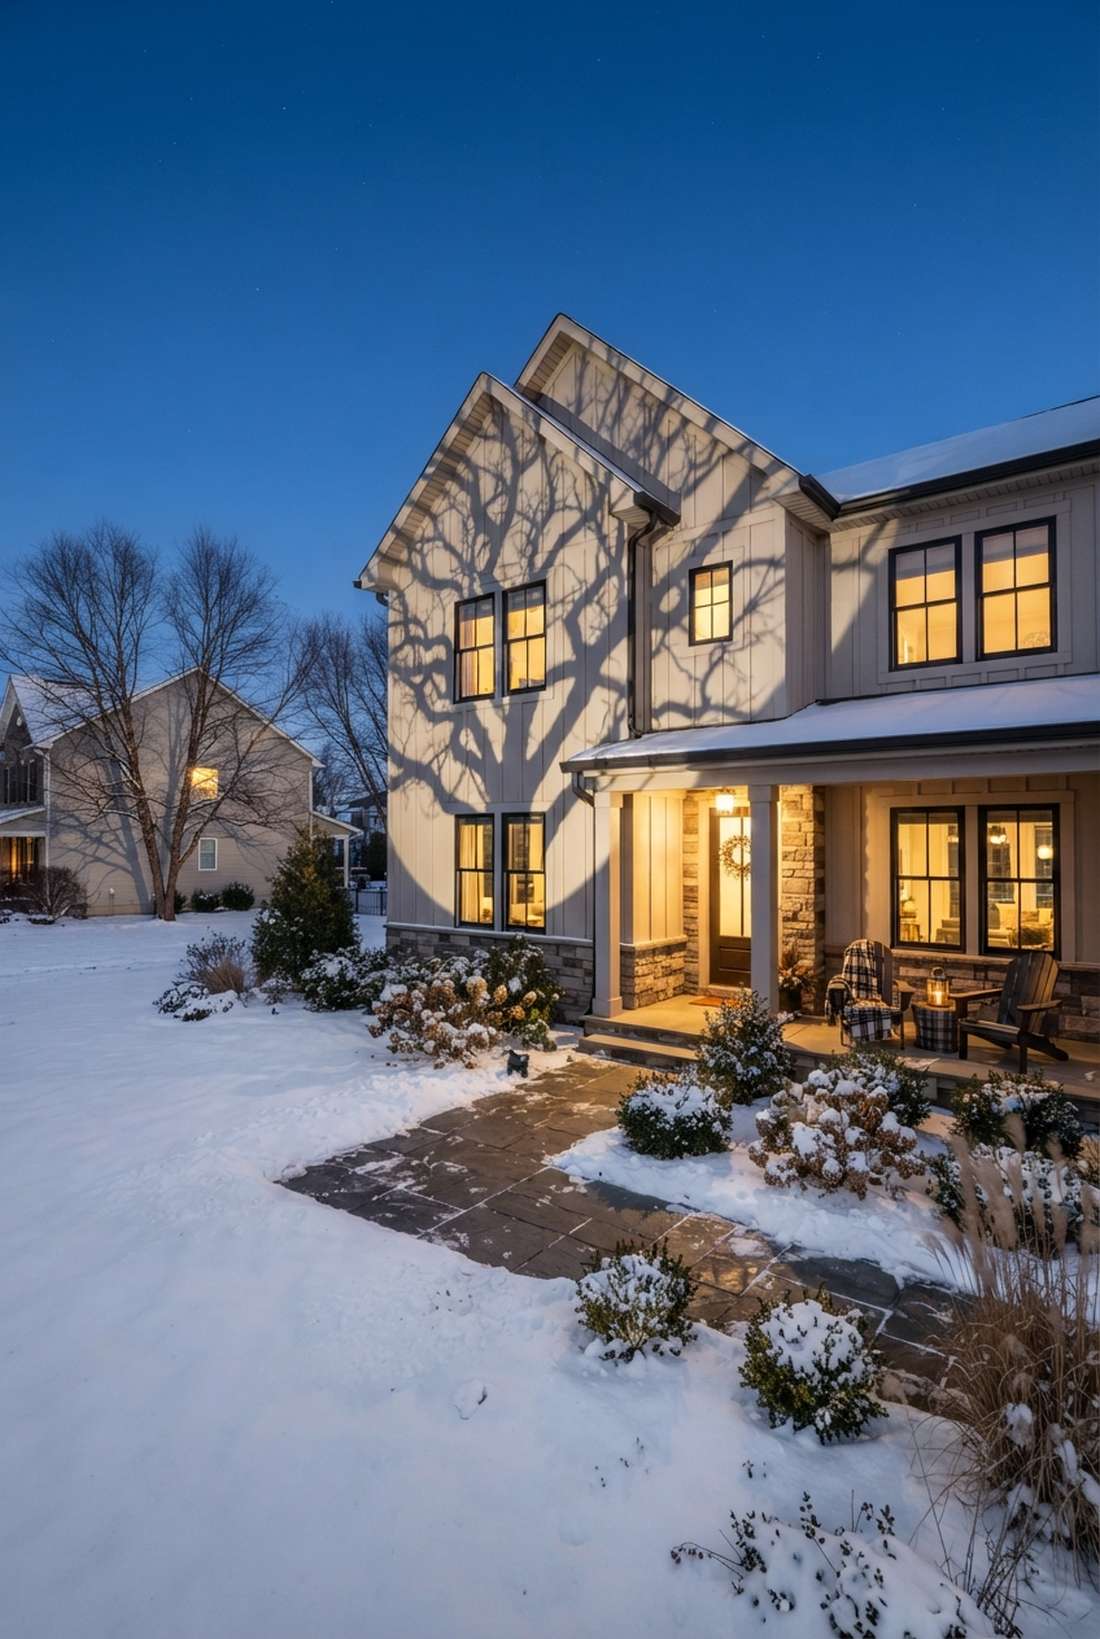
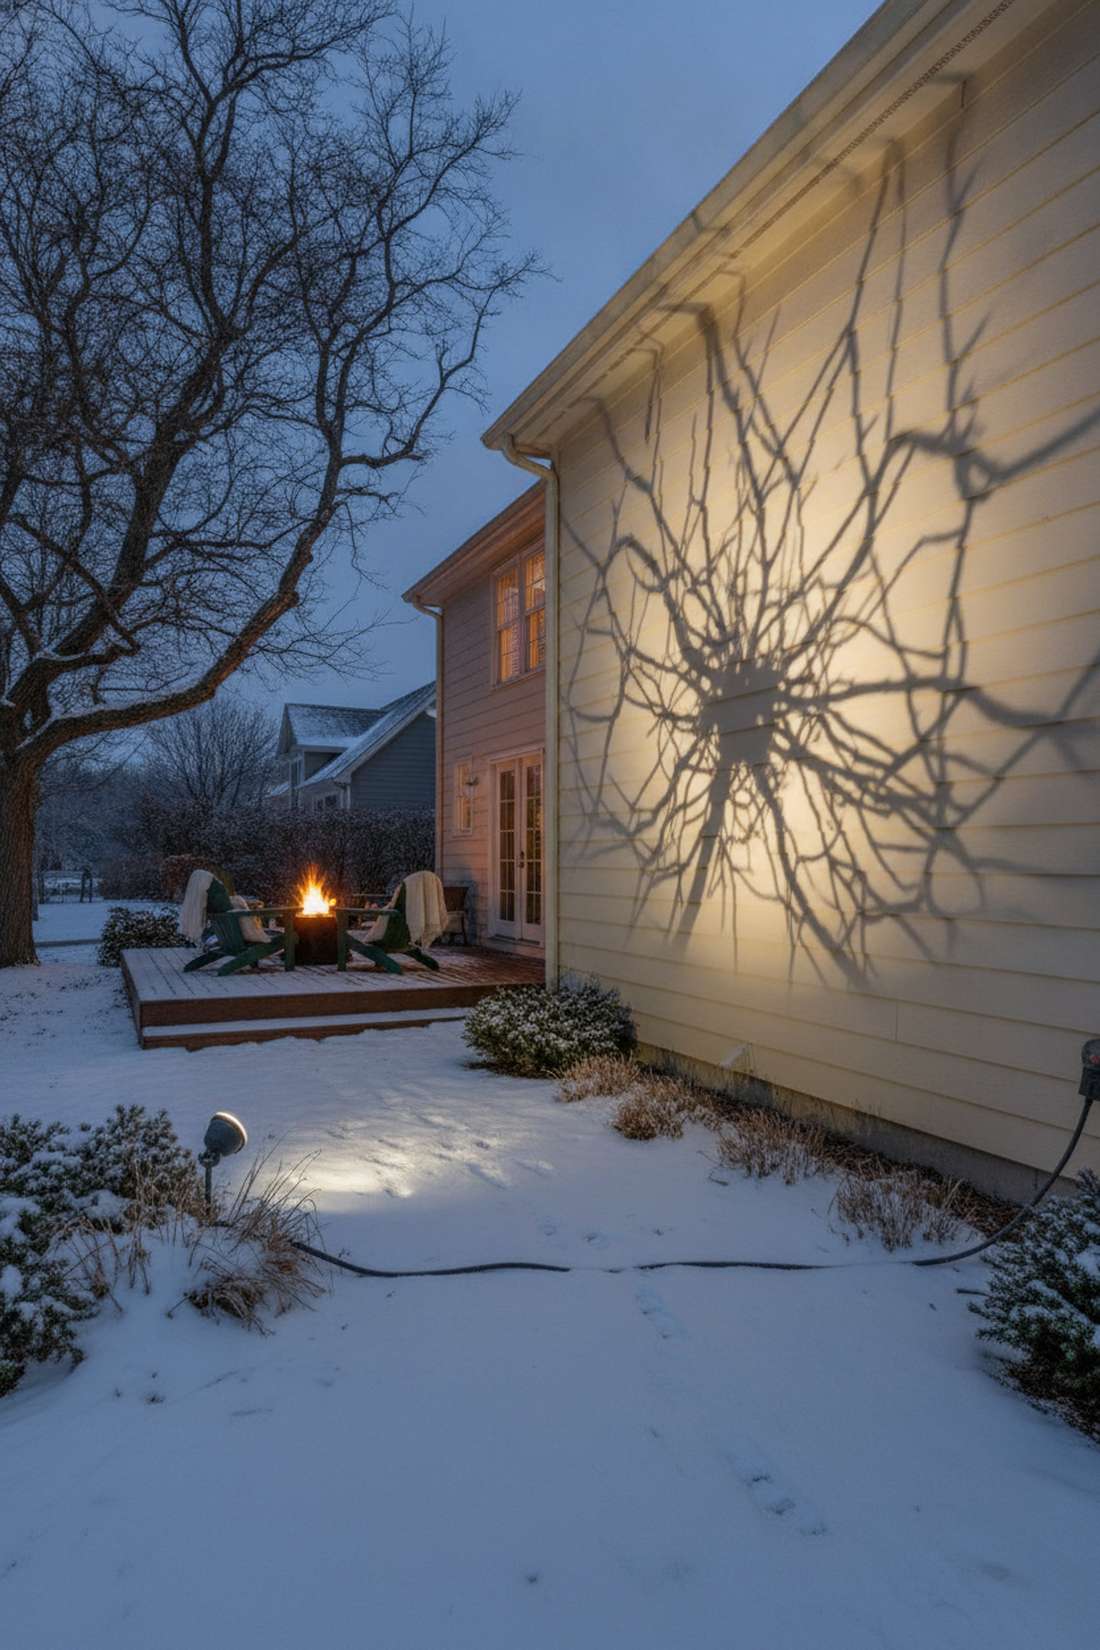
An intricate winter branch projection feels like a sprawling, chaotic spiderweb of light painted across your siding. The absolute best way to make a barren deciduous tree look breathtaking in January.
People assume bare trees are ugly and turn off their yard lights entirely in the winter. Purposely targeting the most twisted, complex branch clusters and blasting them against the side of your house delivers a surprisingly premium look that celebrates the skeletal structure. It turns a dead-looking tree into winter magic.
This seasonal shadow trick runs about $55. Save this for when the autumn leaves finally drop.
- Key Materials: Powerful tight-beam spot
- Vibe / Style: Winter magic web
- Difficulty: Easy
- Budget Breakdown: Spotlight: $50 | Wire: $5.
- Creator’s Tip: Walk around the tree before mounting; find the angle where the branches cross each other the most for the best shadow texture.
- Smart Sourcing: concentrated beam winter spotlights and frost-proof quick connectors.
This upcoming shadow technique forces neighbors to literally stop and stare.
40. Seasonal Silhouette Rotation

A shifting seasonal focal shadow feels like an exclusive, ever-changing gallery exhibit right in your driveway. The smartest way to guarantee your yard looks perfectly styled in spring, summer, and fall.
Locking your lights into concrete means you’re stuck highlighting a bush that only looks good for two weeks in May. Using heavy, portable spike bases lets you rotate the silhouette treatment to a blooming dogwood, then to hydrangeas, and finally to autumn grasses, giving a designer-level finish year-round. It is the ultimate flexible aesthetic hack.
A portable high-end kit costs roughly $80. Pin this to keep your yard looking fresh every month!
- Key Materials: Portable heavy spike, extra cord
- Vibe / Style: Ever-changing gallery
- Difficulty: Very Easy
- Budget Breakdown: Spike light: $60 | Conduit: $20.
- Creator’s Tip: Never leave a light aimed at a dormant, ugly plant; physically pick it up and move it to whatever is currently peaking.
- Smart Sourcing: commercial portable lighting spikes and flexible UV-resistant wire loom.
Material Guide: Cheap vs. Premium Aesthetic
Knowing exactly where to save and where to spend makes all the difference in achieving that “looks expensive but isn’t” vibe.
- Standard vs. UV-Resistant/Premium: Cheap plastic housings bake in the sun, turn grey, and crack within a year. Cast brass or thick aluminum fixtures weather into a beautiful patina.
- Pre-made Kits vs. Sourcing Locally: Buying a fully matched transformer/wire/light starter kit often saves 30% compared to buying random parts at a big box store, ensuring voltage drops don’t dim your furthest lights.
41. Multiple Shadow Layering
A chaotic multi-layered 3D shadow feels like a mesmerizing optical illusion playing on your fence. Flawless for taking a single, boring fern and turning it into a massive, complex art piece.
Lighting a plant with one bulb casts a basic, predictable shadow. Placing three separate uplights at staggered distances from the exact same plant projects three overlapping shadows of different sizes, completely reinventing the concept of terrarium accessories and outdoor lighting setups. It creates an insanely complex, abstract visual.
Rigging three lights runs about $140. A brilliant, advanced trick to impress design-savvy guests.
- Key Materials: 3x identical mini spots
- Vibe / Style: Optical illusion art
- Difficulty: Advanced alignment
- Budget Breakdown: 3x Spots: $110 | Wiring: $30.
- Creator’s Tip: Space the lights exactly at 2, 4, and 6 feet away from the plant to guarantee the shadows scale properly without turning into mush.
- Smart Sourcing: matching mini spot 3-packs and multi-tap landscape transformers.
42. Fence-Panel Silhouetting
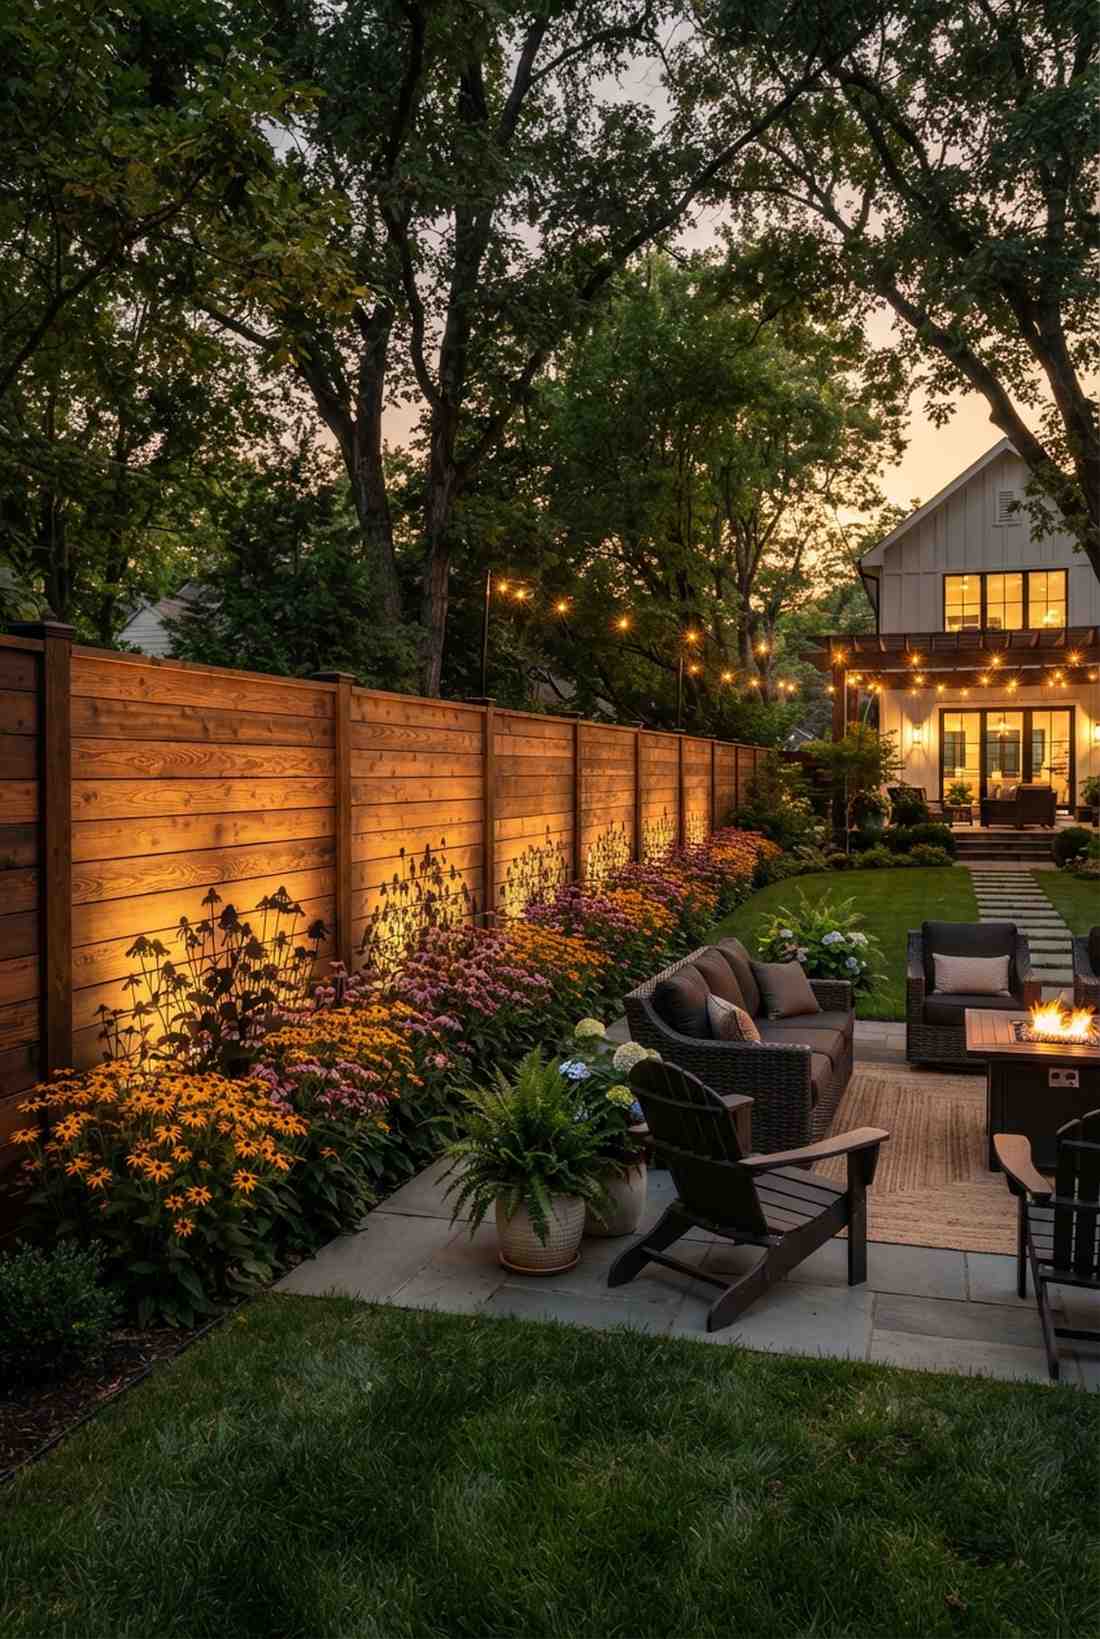

A crisp illuminated fence backdrop feels like a cozy, high-end border wrapping your entire patio. Ideal for emphasizing the sharp shapes of black-eyed Susans or coneflowers growing tightly against a wooden fence.
Blasting flowers from the front often washes out their delicate petals against a dark fence. Tucking tiny 2-watt lights flush against the bottom of the fence board behind the flowers throws the wood into brilliant light and turns the flowers into stunning black silhouettes, which looks far more expensive than it is. The low wattage ensures you don’t burn the petals.
Backlighting a flower row costs around $35 per cluster. Pin this if your garden borders a privacy fence!
- Key Materials: 2W micro wash lights, flat mounts
- Vibe / Style: High-end border
- Difficulty: Easy
- Budget Breakdown: Micro wash: $25 | Base mount: $10.
- Creator’s Tip: Keep the beam as wide as possible so you light the entire fence panel behind the flower, not just a tiny strip.
- Smart Sourcing: ultra-wide 2W micro wash lights and flush-mount fence brackets.
Outdoor Lighting Landscape DesignGrazing and Wash
43. Hedge Wall Grazing
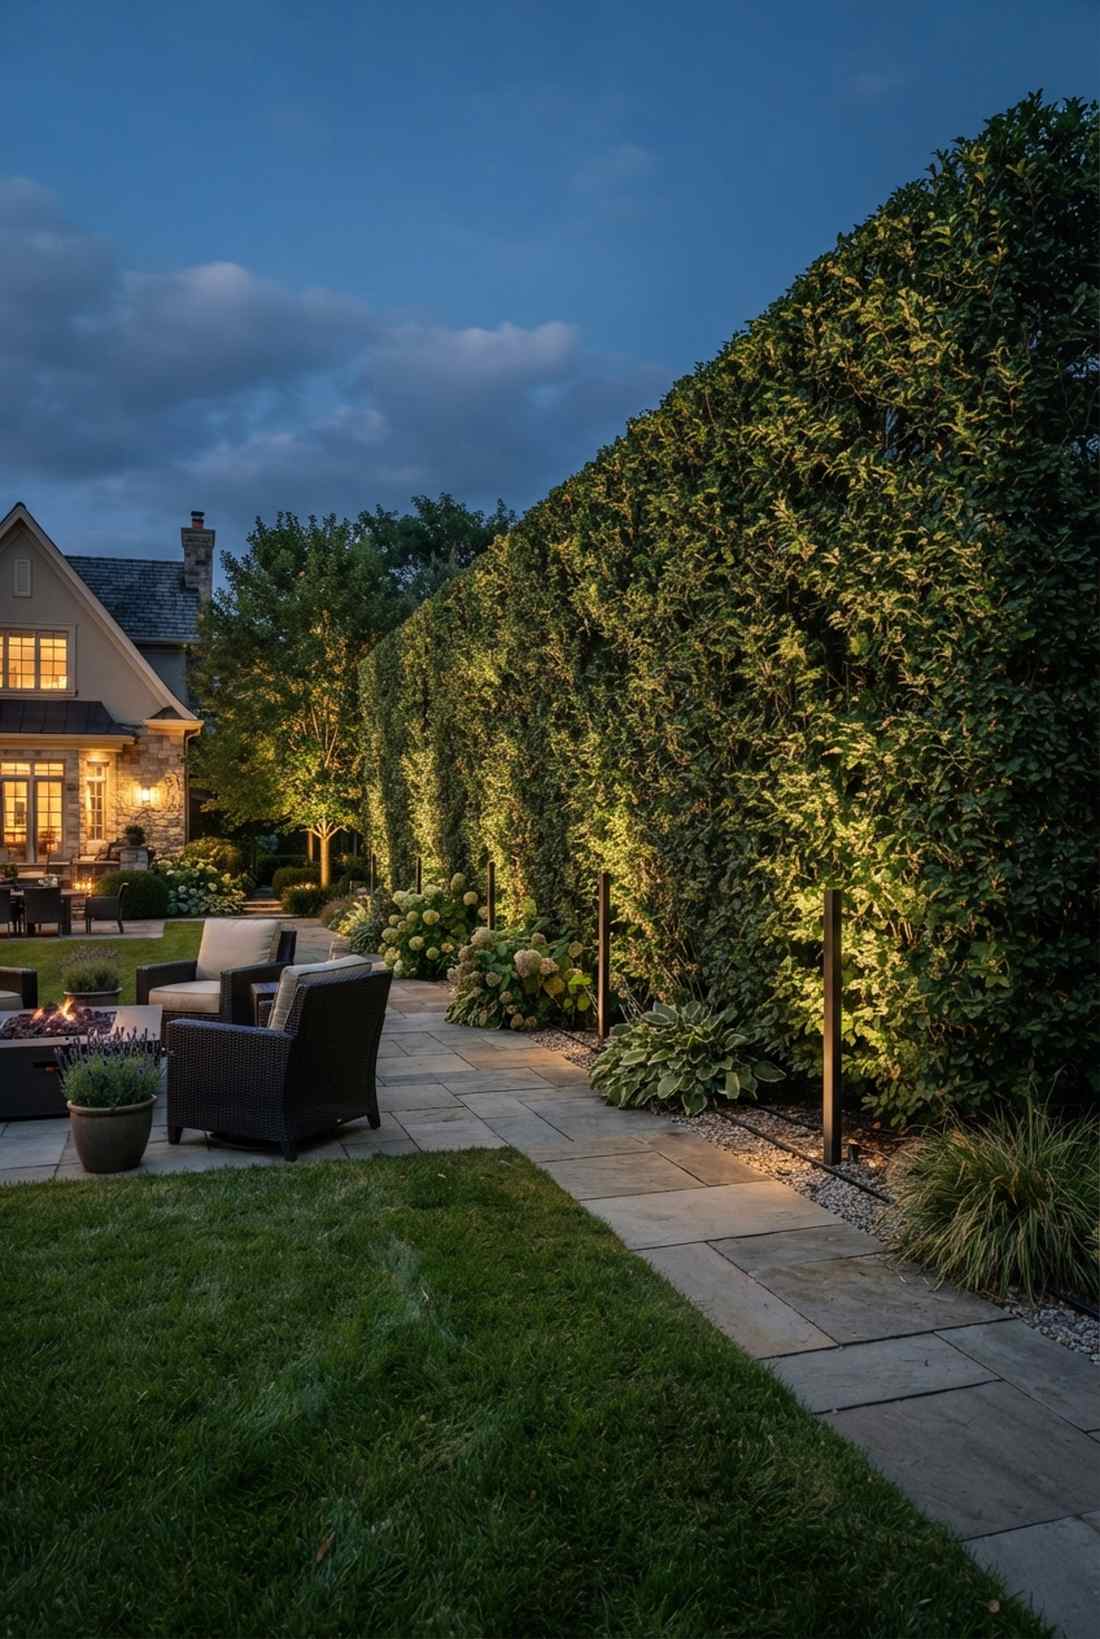
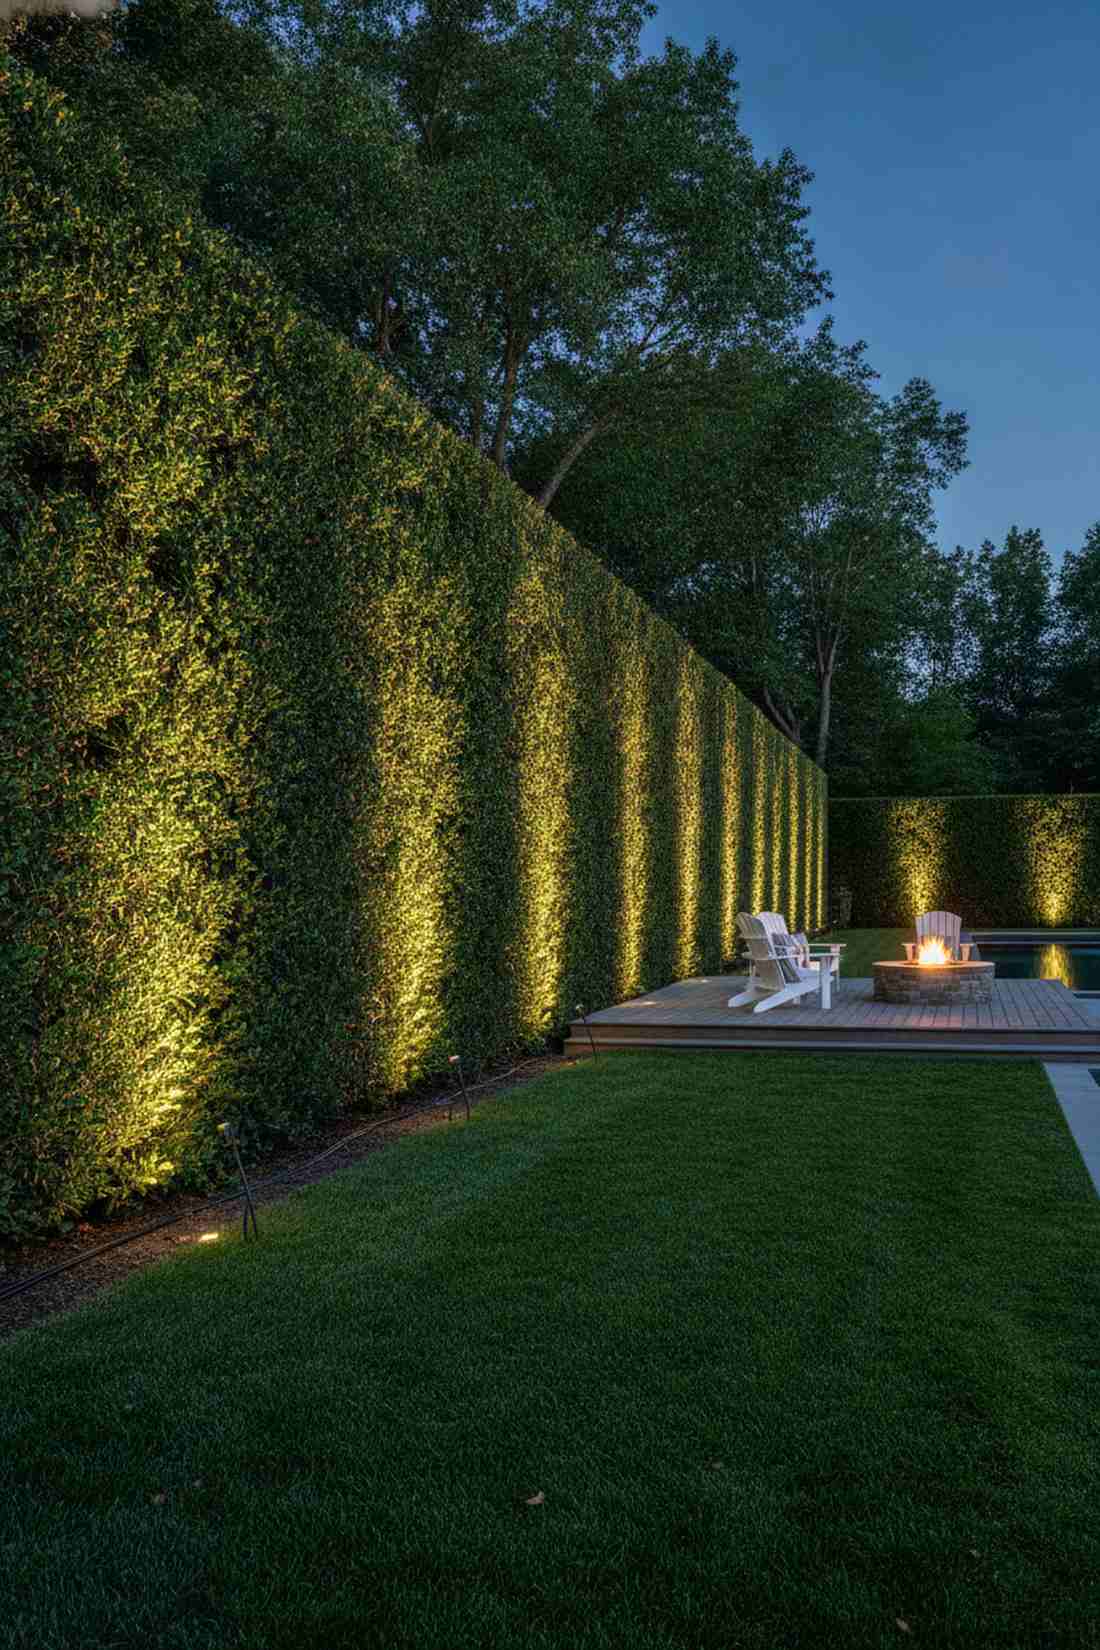
A razor-sharp textured hedge wash feels like a lush, living green wall imported straight from a French chateau. The only correct way to properly illuminate massive, formal boxwood or privet hedges.
Backing the light far away from a hedge flattens the leaves into a boring green wall. Jamming the fixtures just 6 inches away and shooting light aggressively straight up the face catches every single leaf and branch undulation, completely modernizing standard **outdoor lighting landscape design**. This severe “grazing” technique maximizes texture.
Lining a formal hedge costs about $60 per fixture. Save this to elevate your manicured property lines.
- Key Materials: Narrow vertical wash bars
- Vibe / Style: French chateau luxury
- Difficulty: Intermediate spacing
- Budget Breakdown: Wash bar: $50 | Wire hooks: $10.
- Creator’s Tip: Space the lights precisely every 8 feet; any wider and you will get ugly, dark scalloped gaps between the beams.
- Smart Sourcing: vertical linear wash lights and heavy-duty landscape wire staples.
44. Mass Planting Wash Lighting
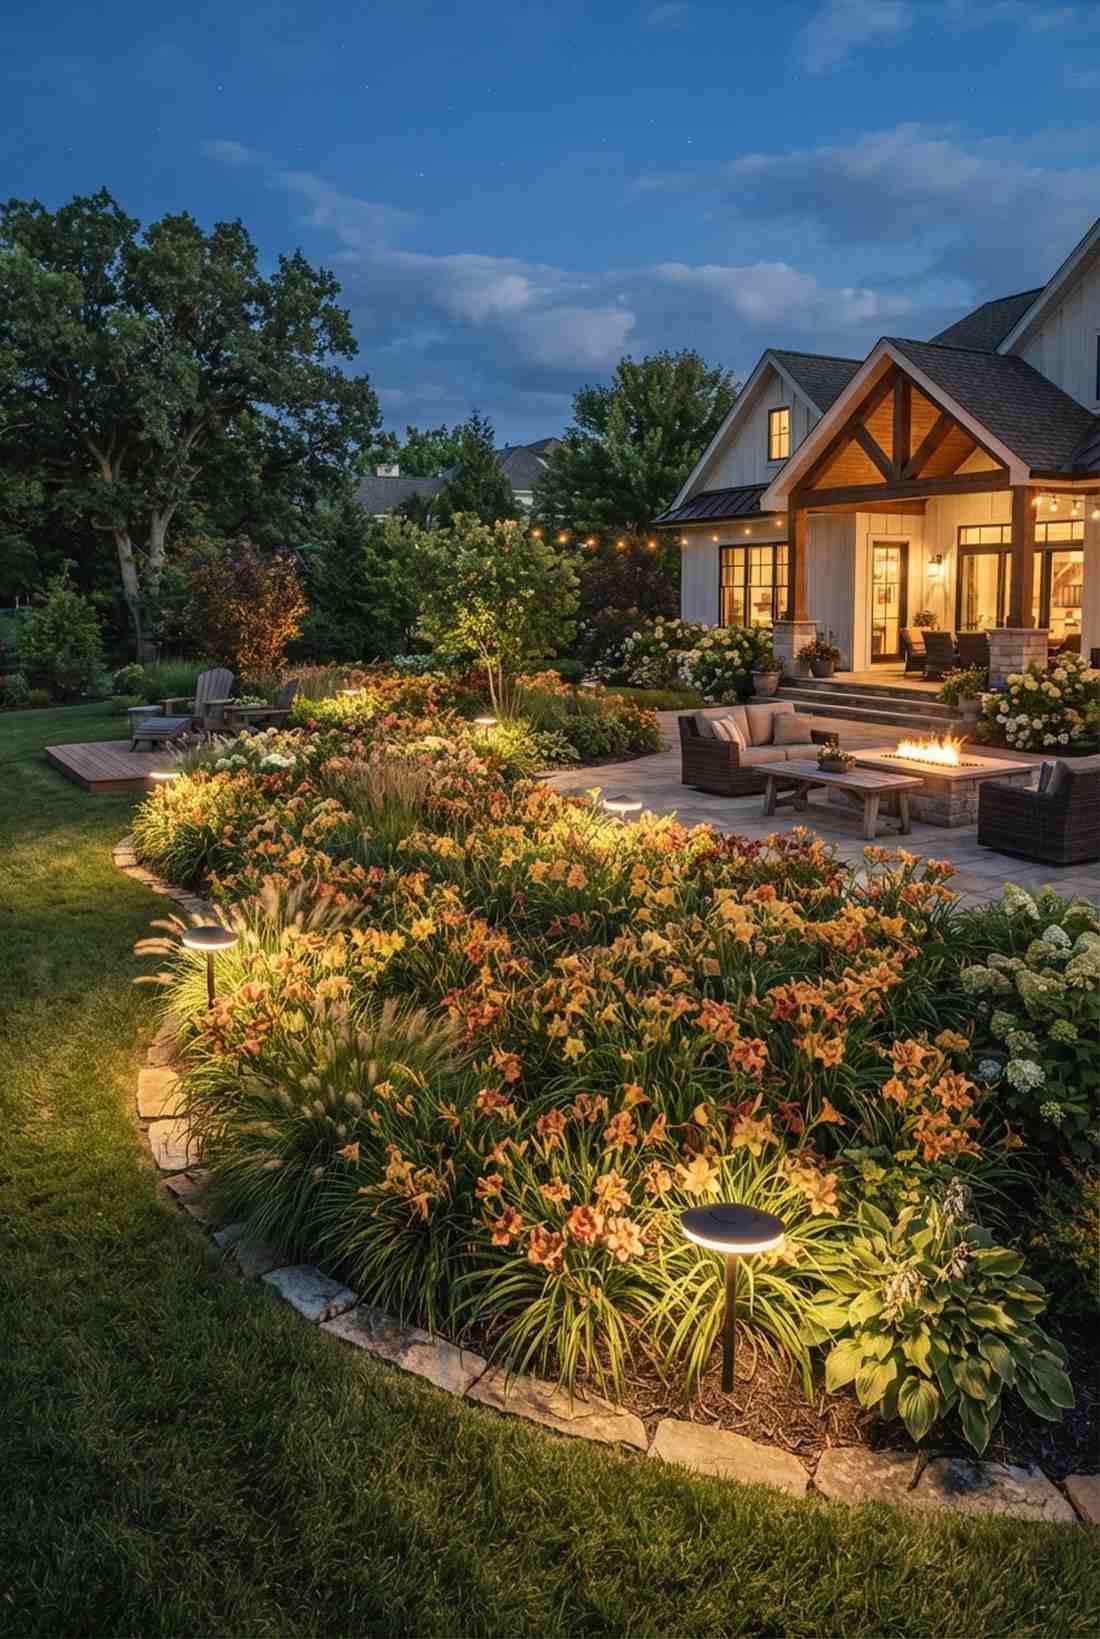
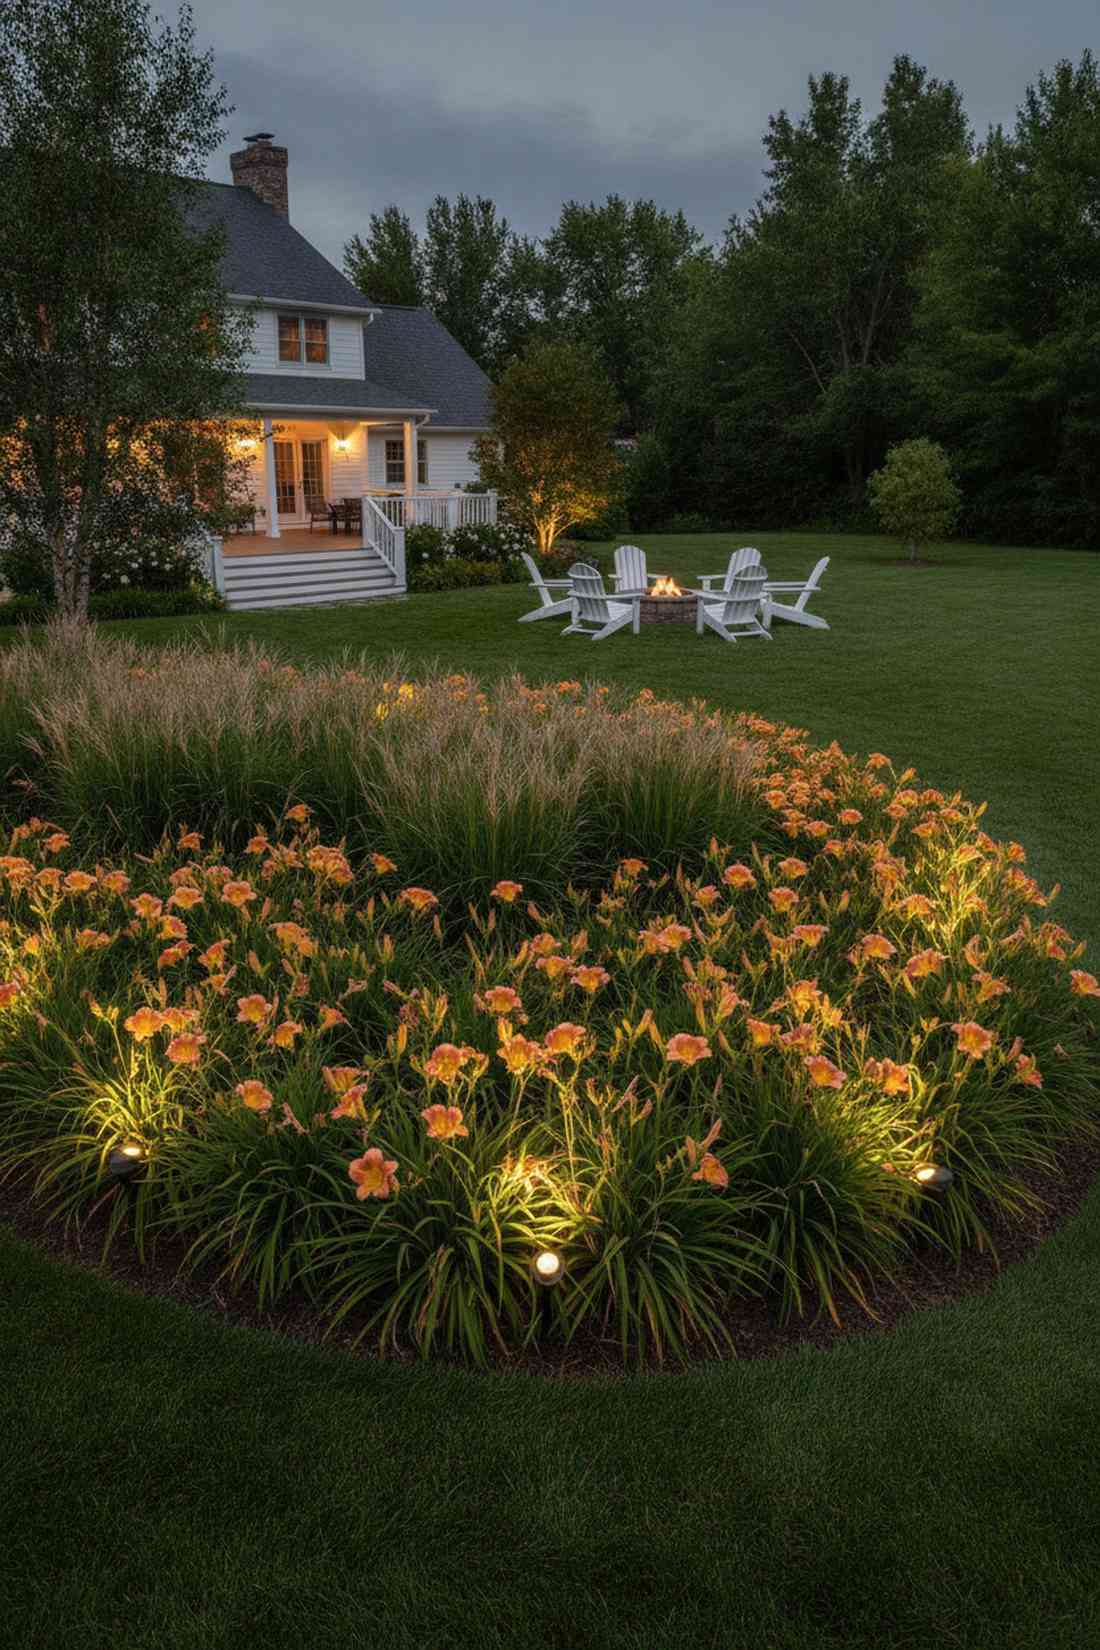
A soft sweeping floral flood feels like a gentle, glowing blanket resting over your best flower beds. Essential for huge clusters of daylilies or thick beds of ornamental grasses that lack a single focal point.
Trying to spotlight every single flower in a massive bed looks chaotic and cluttered. Pulling back and using a massive 90-degree wash light floods the entire zone with incredibly even, soft light, giving a designer-level finish that unifies the whole garden. It is the ultimate, low-effort way to light huge spaces.
A premium wide wash runs about $80. Pin this if you have massive, sprawling flower beds!
- Key Materials: 90-degree wide floodlight
- Vibe / Style: Glowing floral blanket
- Difficulty: Very Easy
- Budget Breakdown: Floodlight: $70 | Mount: $10.
- Creator’s Tip: Deliberately overlap the light beams by at least 30% to completely eliminate any dark, shadowy gaps in the flower bed.
- Smart Sourcing: ultra-wide 90-degree wash fixtures and glare-reducing frosted lenses.
Do not skip the next setup if you have boring blank walls in your yard.
45. Green Wall Vertical Garden Lighting
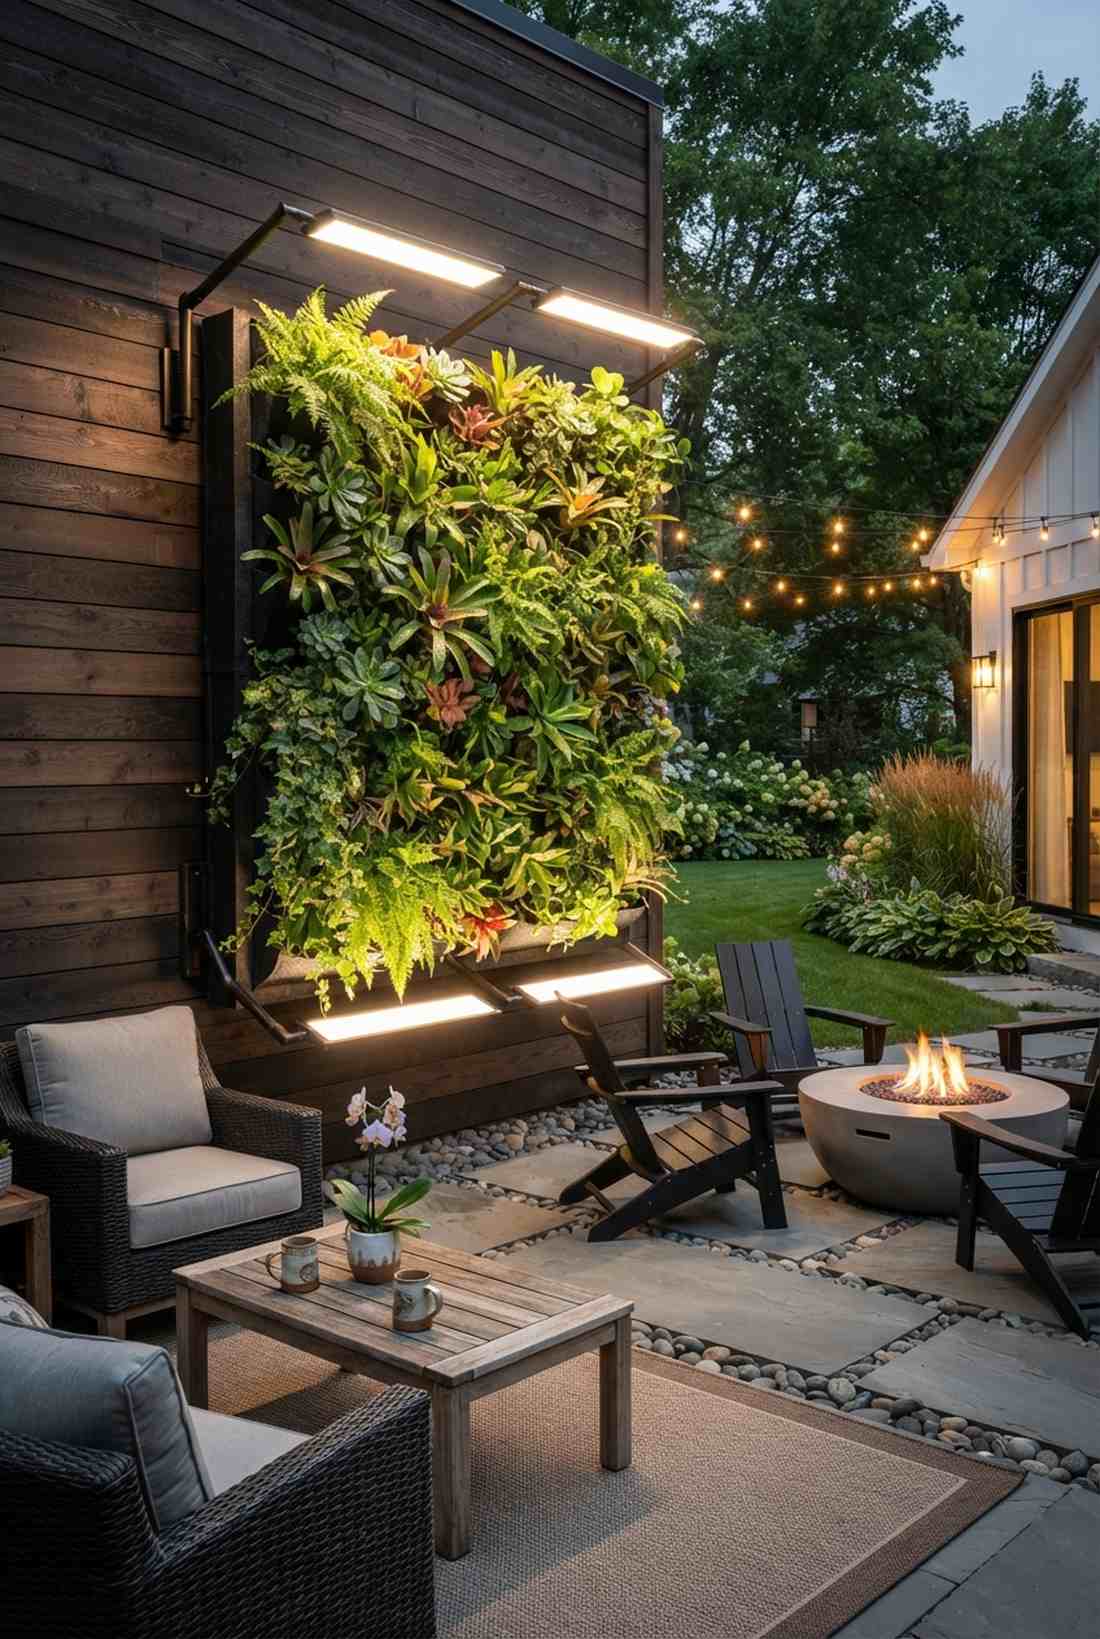
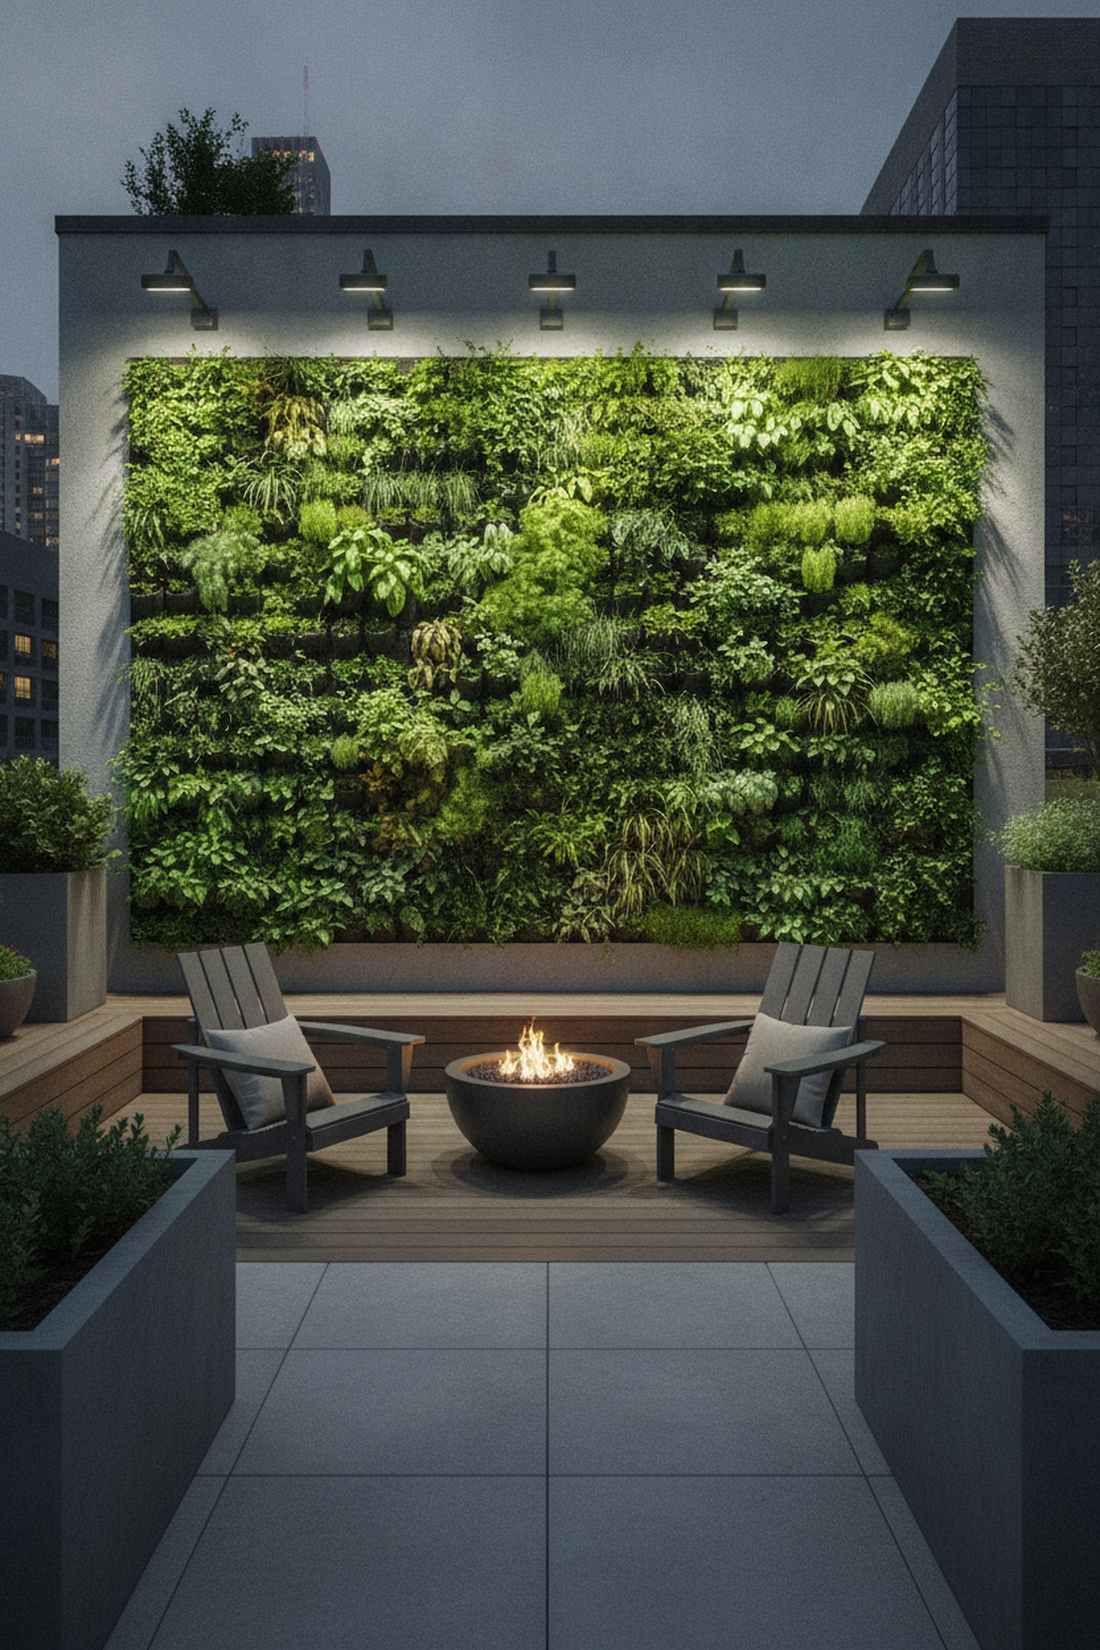
A brilliant illuminated living wall feels like a cutting-edge eco-resort installation breathing life into your patio. Mandatory for highlighting intricate vertical planters or felt-pocket herb walls without burning them.
Using hot, cheap halogens on a living wall will literally cook the plants in a matter of days. Installing top-and-bottom low-heat LED floods perfectly washes the vertical foliage, which looks far more expensive than it is while keeping the delicate roots completely safe. It creates an awe-inspiring wall of glowing life.
Properly lighting a vertical wall costs roughly $150. A brilliant solution for tight urban patios.
- Key Materials: Low-heat LED floods, top/bottom mounts
- Vibe / Style: Eco-resort installation
- Difficulty: Advanced (Wall mounting)
- Budget Breakdown: 2x Floods: $120 | Brackets: $30.
- Creator’s Tip: Mount one light aiming down and one aiming up so they perfectly meet in the middle, eliminating all shadows.
- Smart Sourcing: cool-running LED wash panels and adjustable wall-mount lighting arms.
46. Succulent Wall Grazing
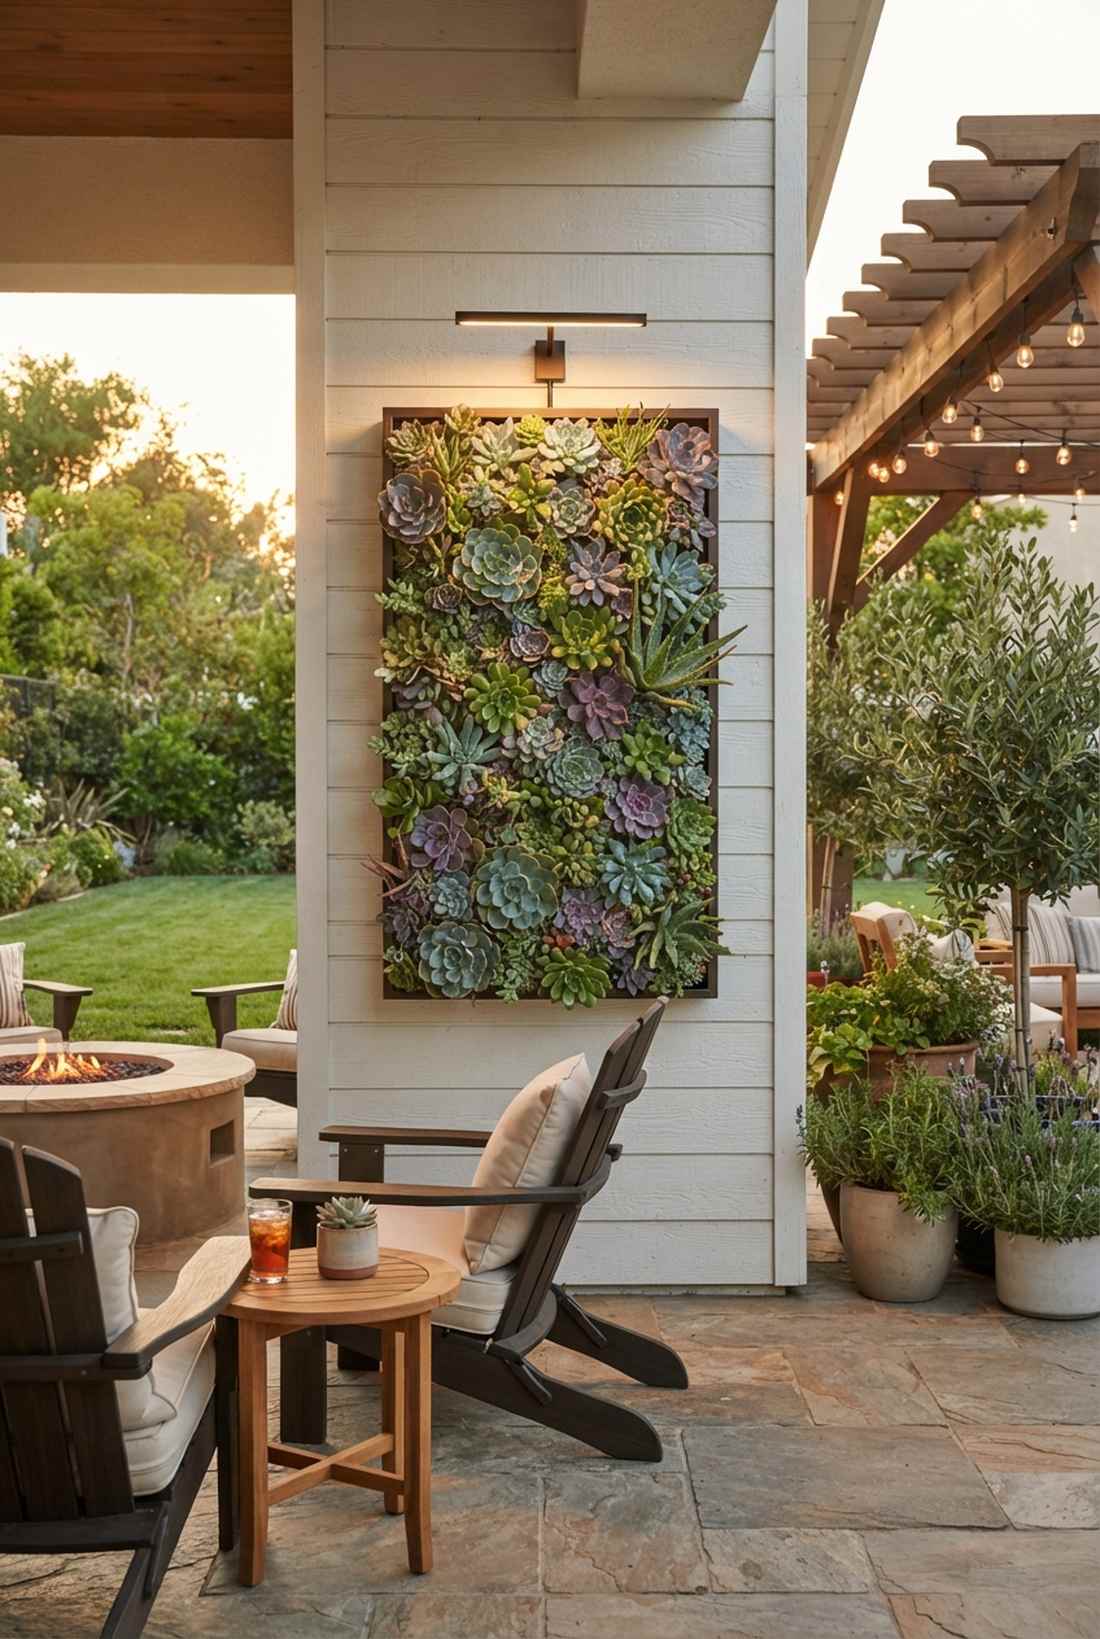
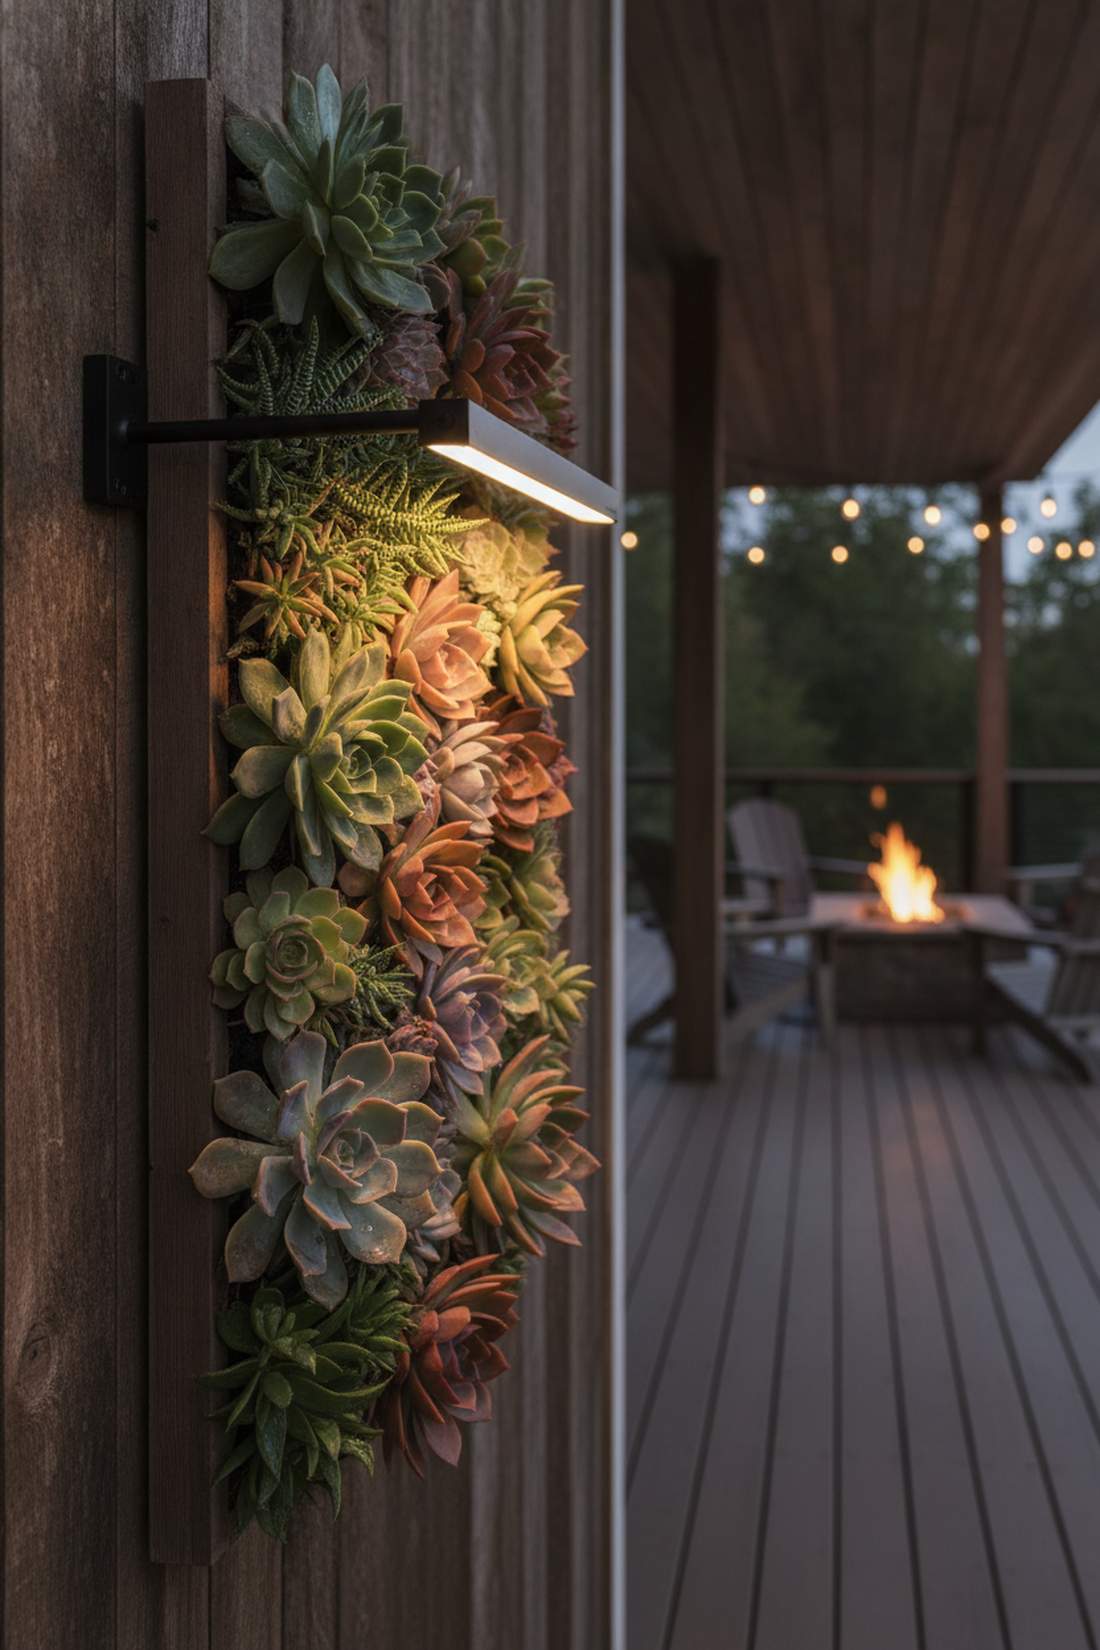
A tight macro succulent glow feels like an incredibly detailed, high-definition natural tapestry. The absolute best way to emphasize the thick, fleshy rosettes of a vertical succulent frame.
Lighting a succulent frame from too far away washes out the gorgeous 3D plumpness of the leaves. Shoving a tiny 2-watt light within 4 inches of the wall and grazing it violently across the surface delivers a surprisingly premium look that makes every tiny ridge pop. It takes specialized fairy garden kits or micro-lights to get this close.
This extreme close-up setup costs about $40. Save this for your patio wall art!
- Key Materials: 2W micro wash, close-range arm
- Vibe / Style: High-definition tapestry
- Difficulty: Delicate positioning
- Budget Breakdown: Micro wash: $30 | Arm: $10.
- Creator’s Tip: Use the lowest possible wattage (1-2W); because the light is only inches away, anything brighter will completely blind the viewer.
- Smart Sourcing: 12V micro linear wash bars and short-extension mounting brackets.
47. Flowering Shrub Mass Washing
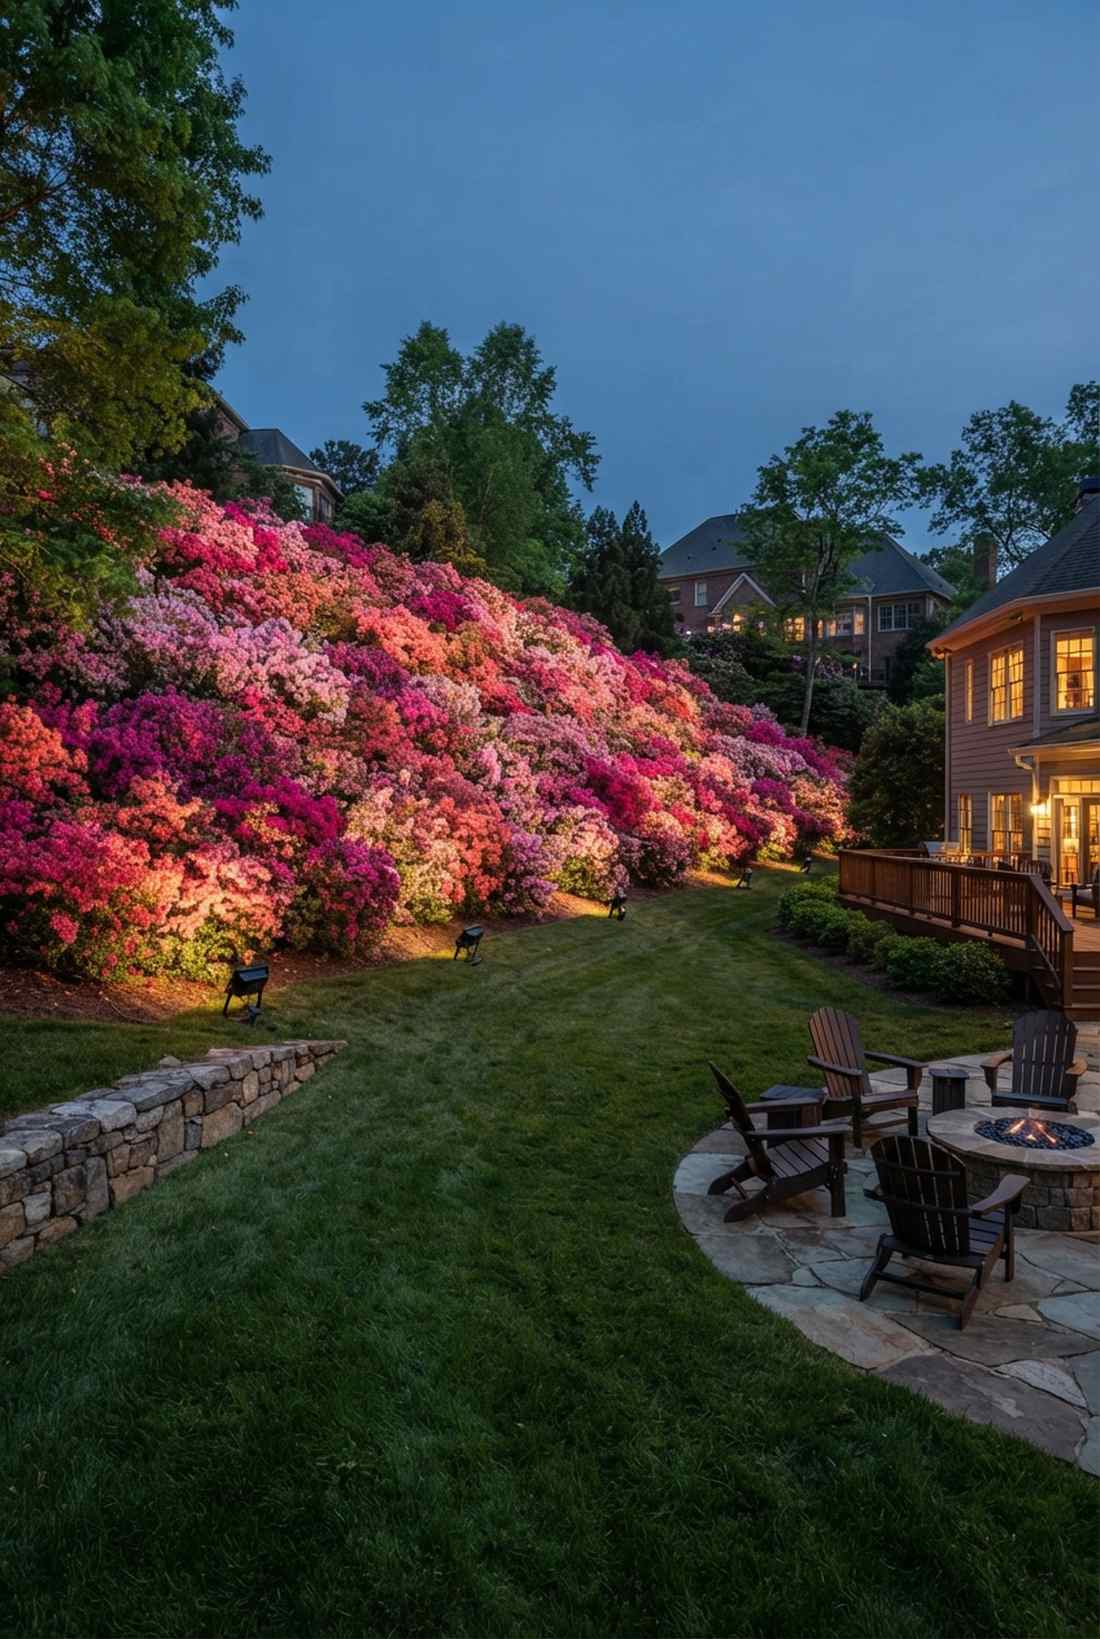
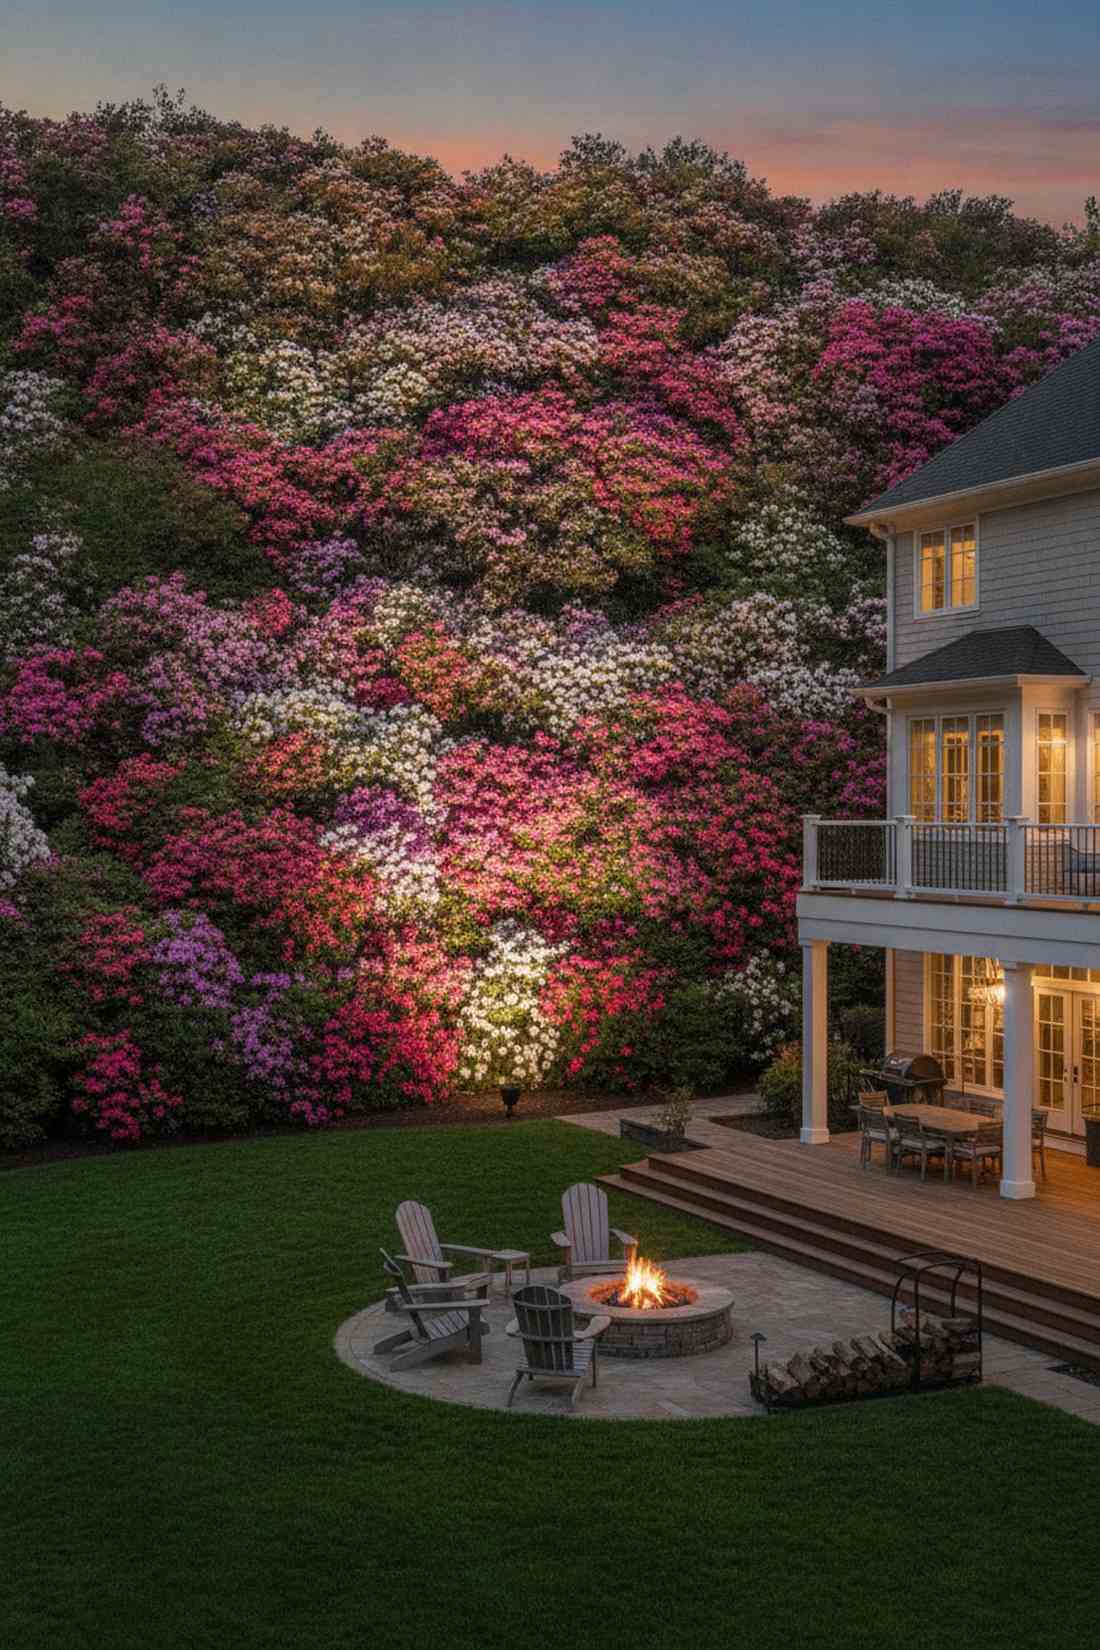
A colossal hillside floral burst feels like a rolling wave of illuminated color crashing through your yard. Perfect for massive slopes completely covered in blooming azaleas or massive rhododendrons.
Trying to pick out individual bushes on a densely planted hillside looks messy and disjointed. Backing up 12 feet and deploying a massive 15-watt wash light treats the entire hill as a single canvas, completely reinventing standard hillside lighting. It emphasizes the sheer scale and collective impact of the bloom.
Washing a huge slope runs around $110. Pin this to conquer those tough, steep yard grades!
- Key Materials: 15W high-output wash light
- Vibe / Style: Rolling color wave
- Difficulty: Easy
- Budget Breakdown: High-output wash: $90 | Heavy stake: $20.
- Creator’s Tip: Keep the light as low to the ground as possible and angle it up at 30 degrees to perfectly match the slope of the hill.
- Smart Sourcing: high-lumen wide floodlights and heavy-duty hillside anchor stakes.
Cross Lighting Multidirectional Setups
48. Perpendicular-Angle Cross Lighting
A perfectly balanced sculptural multi-angle glow feels like an expensive center-stage spotlighting rig for your best yard feature. Essential for complex, 3D plants like century plants or giant globe artichokes.
Hitting a spiky, 3D plant with one light completely hides half of its gorgeous structure in pure darkness. Dropping two fixtures exactly 90 degrees apart wraps the plant in light, giving a designer-level finish that ensures it looks perfect from the patio and from the kitchen window. It completely eliminates the dreaded one-sided shadow.
A dual perpendicular setup costs about $110. Save this trick for your main yard focal point.
- Key Materials: Two identical LED spots
- Vibe / Style: Center-stage rig
- Difficulty: Intermediate alignment
- Budget Breakdown: 2x Spots: $90 | Splice kits: $20.
- Creator’s Tip: Set one light physically 6 inches higher than the other; this subtle height difference adds incredible 3D realism to the shadows.
- Smart Sourcing: matched landscape spotlight pairs and gel-filled waterproof splices (bulk pack).
49. Three-Point Triangular Cross Lighting
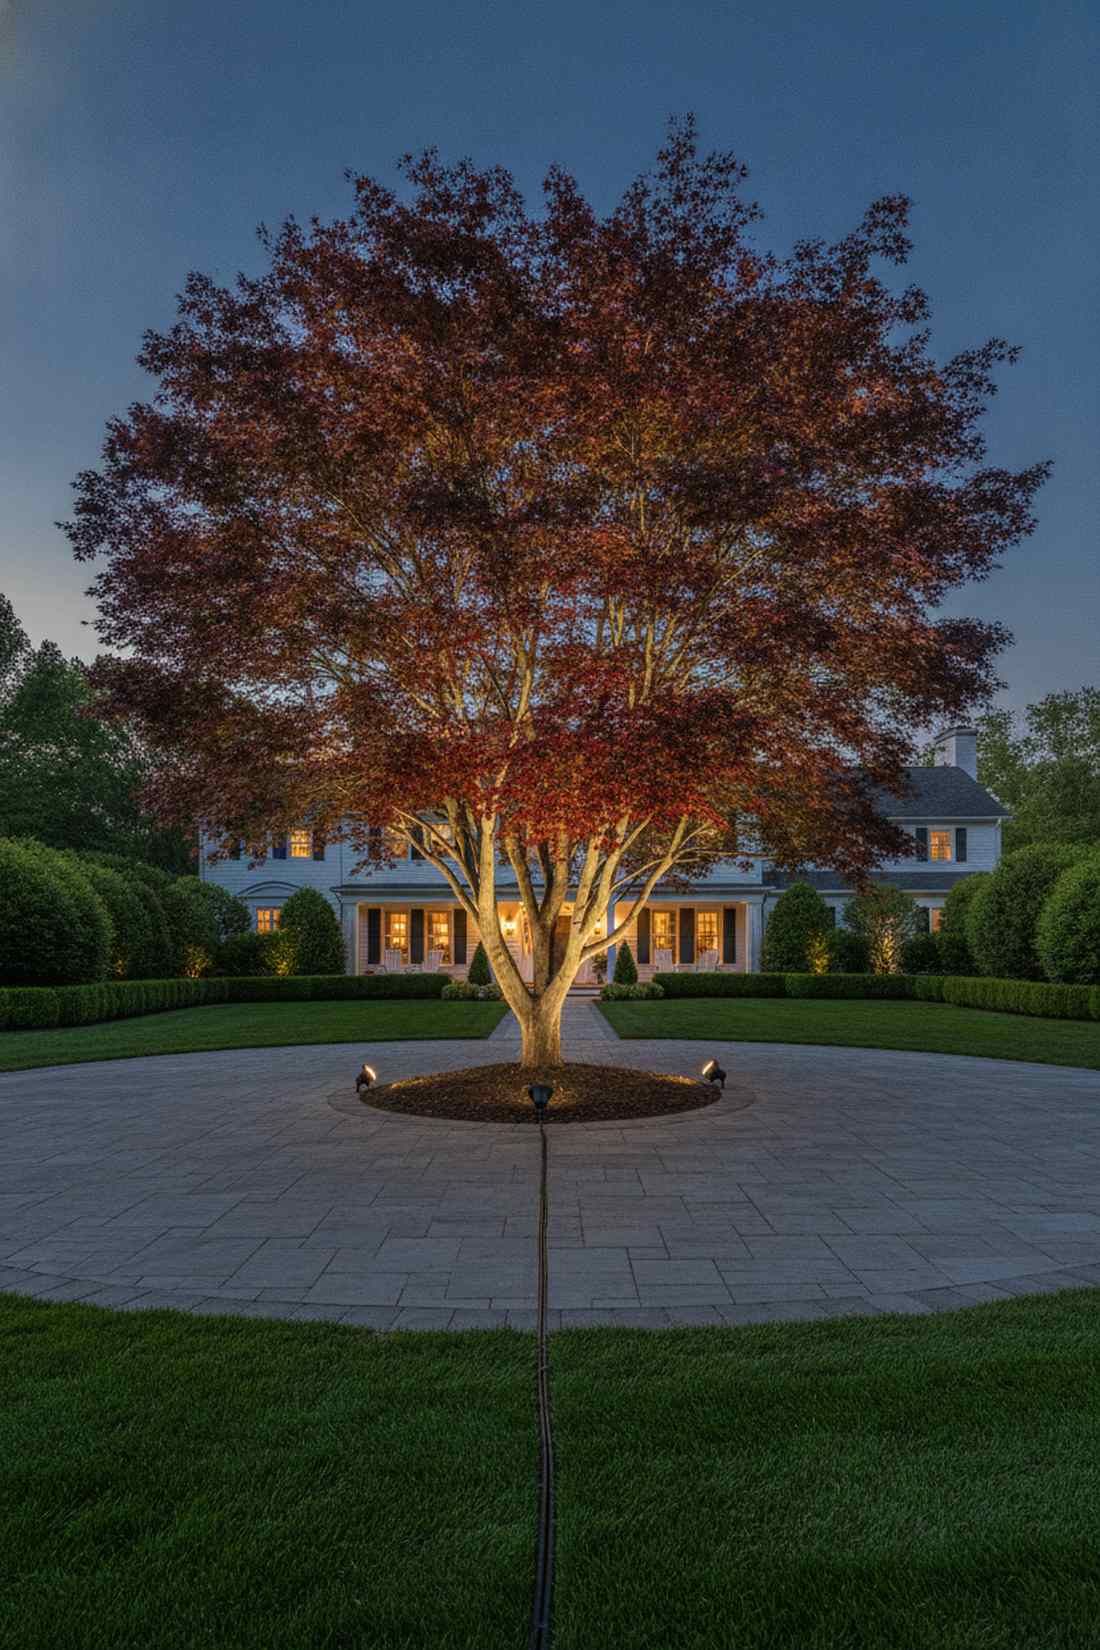
A flawless shadowless 360 glow feels like a pristine, floating botanical specimen suspended in mid-air. The ultimate luxury layout for a prize-winning tree sitting dead center in a circular driveway.
Most driveway trees have ugly dark spots because they are only lit from the house side. Surrounding the specimen with three perfectly spaced lights in a triangle eliminates every single shadow line, which looks far more expensive than it is. It creates a completely uniform, professional-grade visual.
Rigging a true three-point setup runs around $160. Pin this if you want absolute perfection.
- Key Materials: Three 40-degree wide spots
- Vibe / Style: Pristine floating specimen
- Difficulty: Advanced measuring
- Budget Breakdown: 3x Spots: $135 | Wires: $25.
- Creator’s Tip: Use a tape measure to ensure all three lights are the exact same distance from the trunk to avoid lopsided brightness.
- Smart Sourcing: 40-degree beam spread spots and direct burial wire measuring reels.
The multidirectional approach coming up creates a genuinely cinematic nighttime vibe.
50. Opposing Spotlight Cross Lighting
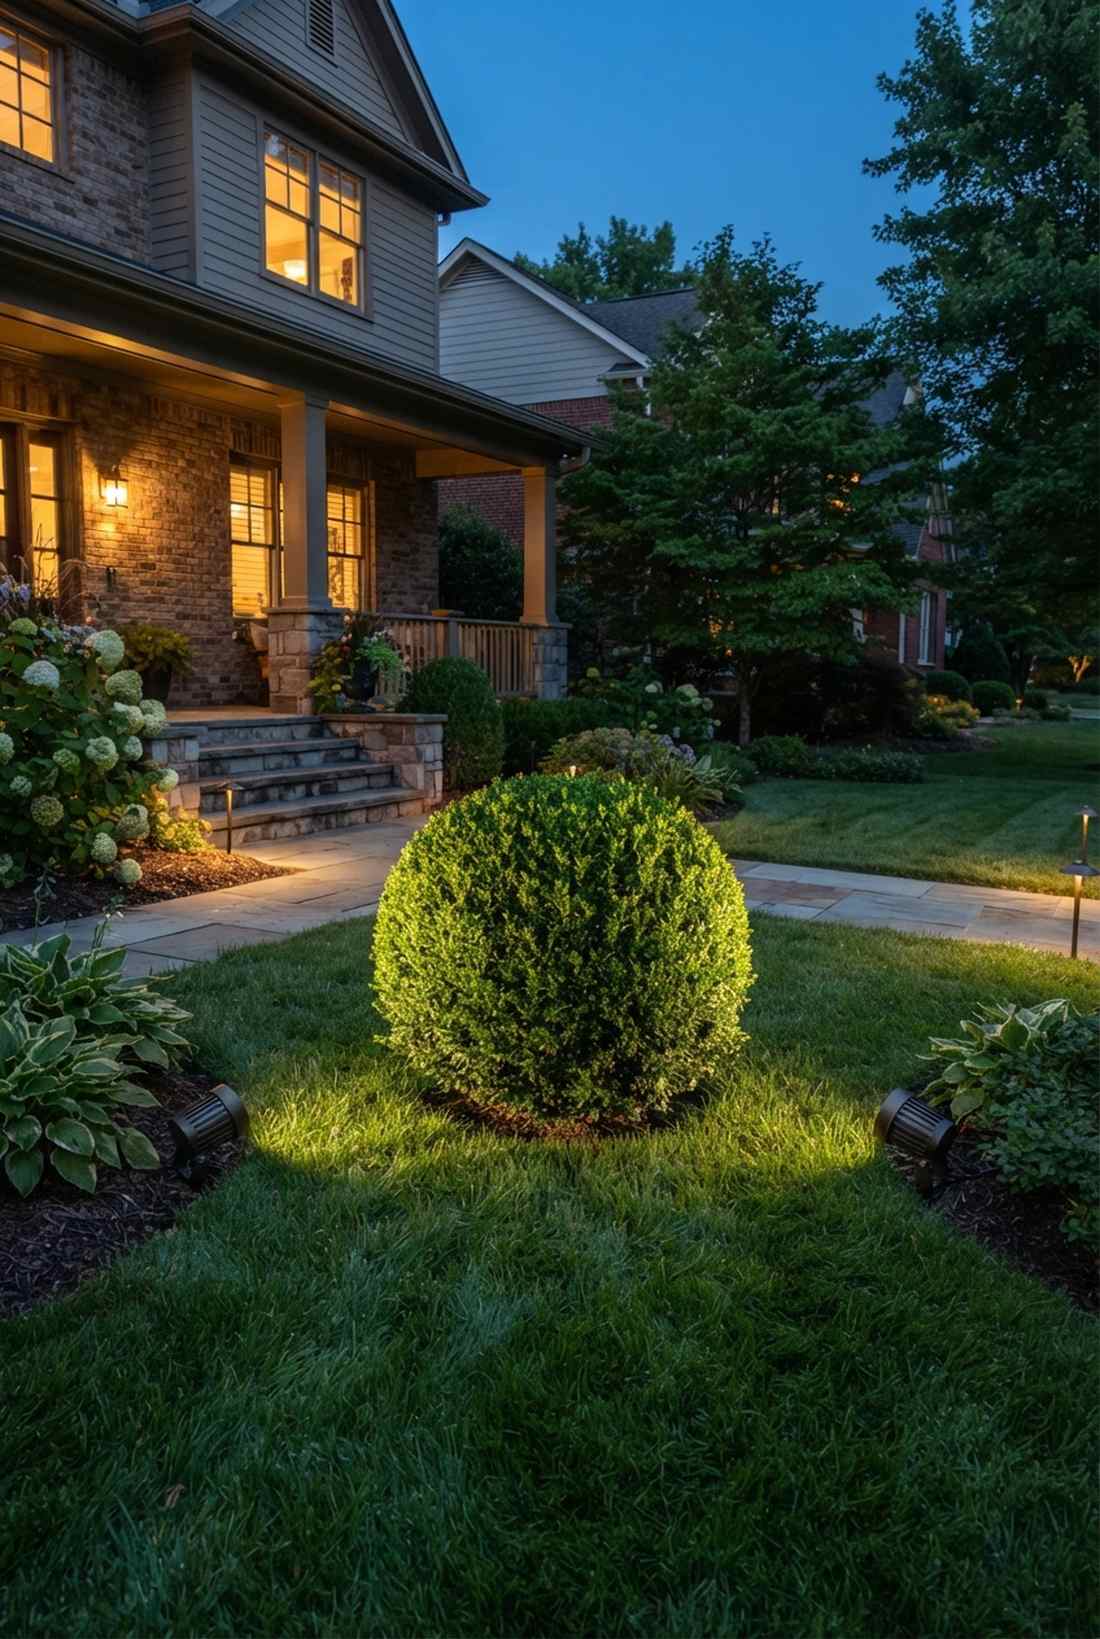
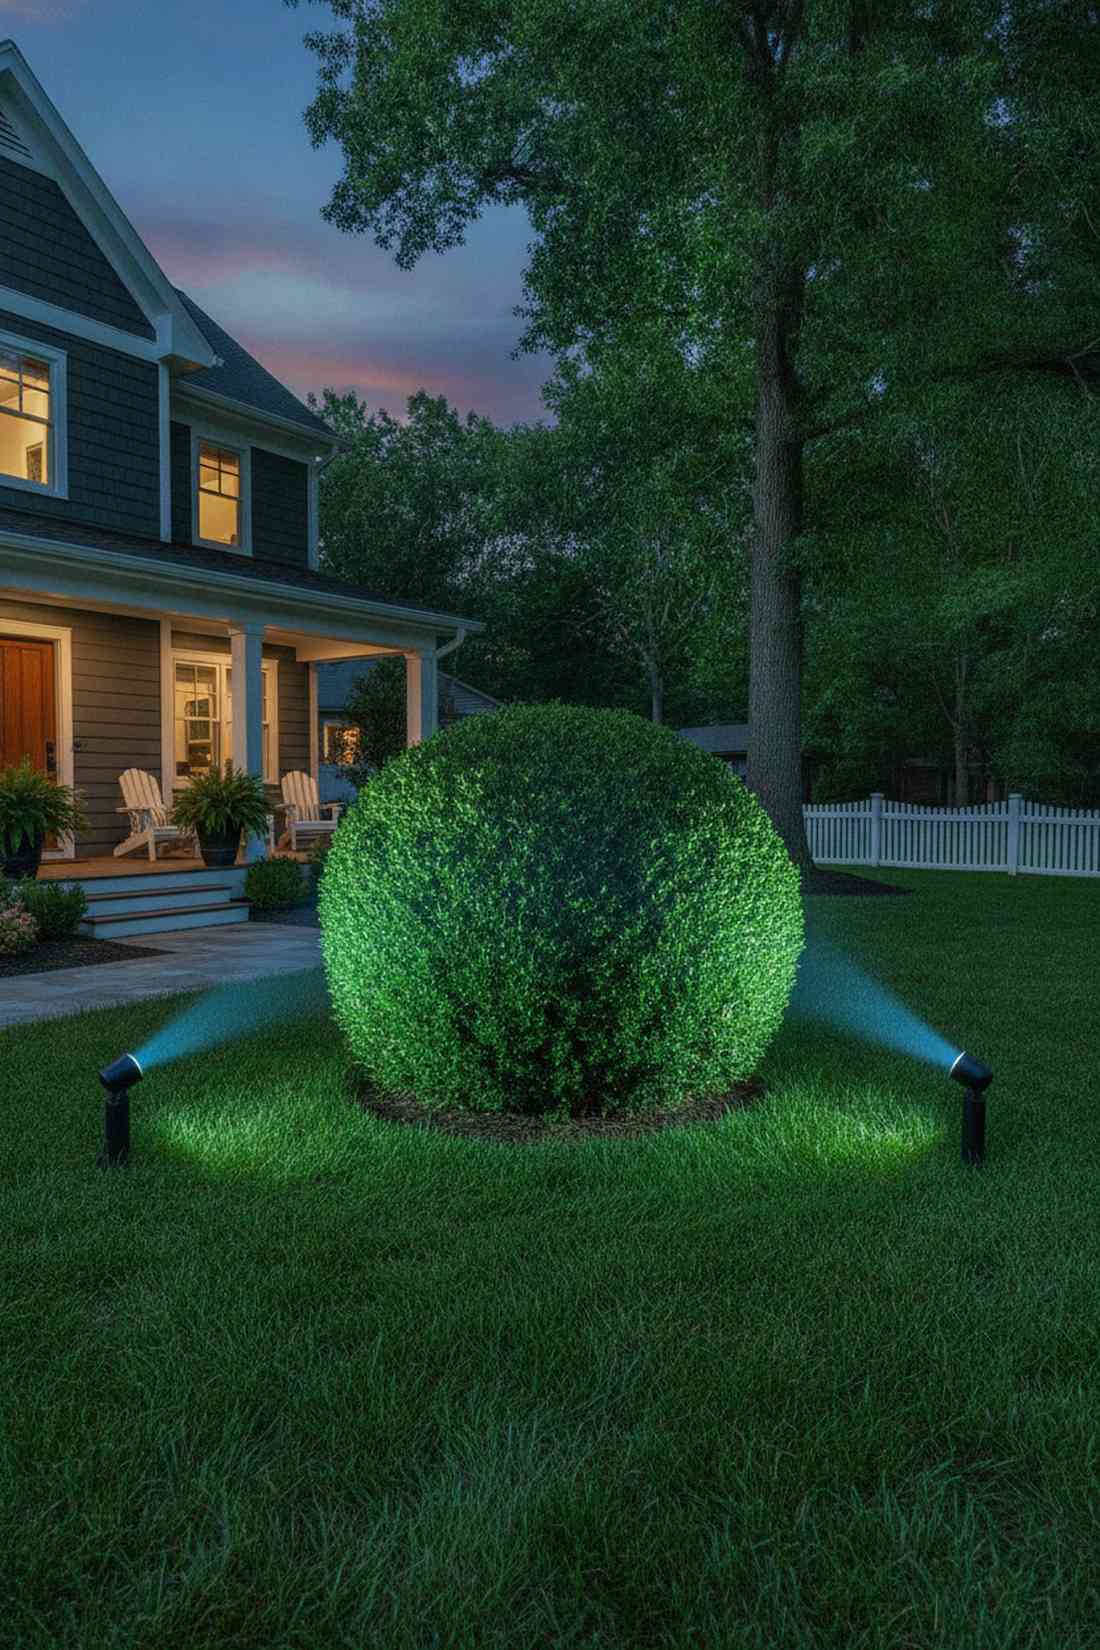
An intense floating centerpiece effect feels like an eerie, magical illusion hovering just above the grass. Works exceptionally well for dense, perfectly round shrubs sitting alone in a lawn.
Lighting a round bush from the front makes it look like a flat, boring green plate. Placing two perfectly matched lights on exactly opposite sides of the bush violently cancels out the shadows, completely reinventing standard lighting into a floating, glowing orb. Even the slightest imbalance ruins the trick, so precision is key.
This exact opposing layout costs about $90. Save this for your perfectly manicured front lawn!
- Key Materials: Two identical narrow spots
- Vibe / Style: Magical glowing orb
- Difficulty: High precision
- Budget Breakdown: 2x Spots: $80 | Splitter: $10.
- Creator’s Tip: You must use the exact same wattage bulb in both fixtures, or the stronger light will push the shadow out the other side.
- Smart Sourcing: precision-matched LED spot kits and symmetrical wire splitter hubs.
51. Vertical-Horizontal Cross Lighting

A cinematic full-volume yard fill feels like walking onto a perfectly lit Hollywood movie set. The absolute gold standard for filling out the top canopy and the bottom roots of a massive tree simultaneously.
Uplights leave the top of the leaves dark, while downlights leave the roots hidden in shadows. Combining a powerful ground uplight with a sneaky overhead downlight fills both shadow zones, giving a designer-level finish that provides total 3D illumination. You can bias the wattages to change the mood completely.
Combining up and down fixtures runs about $180 per tree. Pin this for ultimate landscape mastery.
- Key Materials: High-output uplight, shielded downlight
- Vibe / Style: Hollywood cinematic
- Difficulty: Advanced wiring
- Budget Breakdown: Uplight: $80 | Downlight: $80 | Wire: $20.
- Creator’s Tip: Make the uplight slightly brighter (e.g., 7W) and the downlight softer (3W) to create a natural, moonlit hierarchy.
- Smart Sourcing: high-output brass uplights and tree-safe mounting downlights.
Specialty Botanical Techniques
52. Submersible Aquatic Plant Lighting
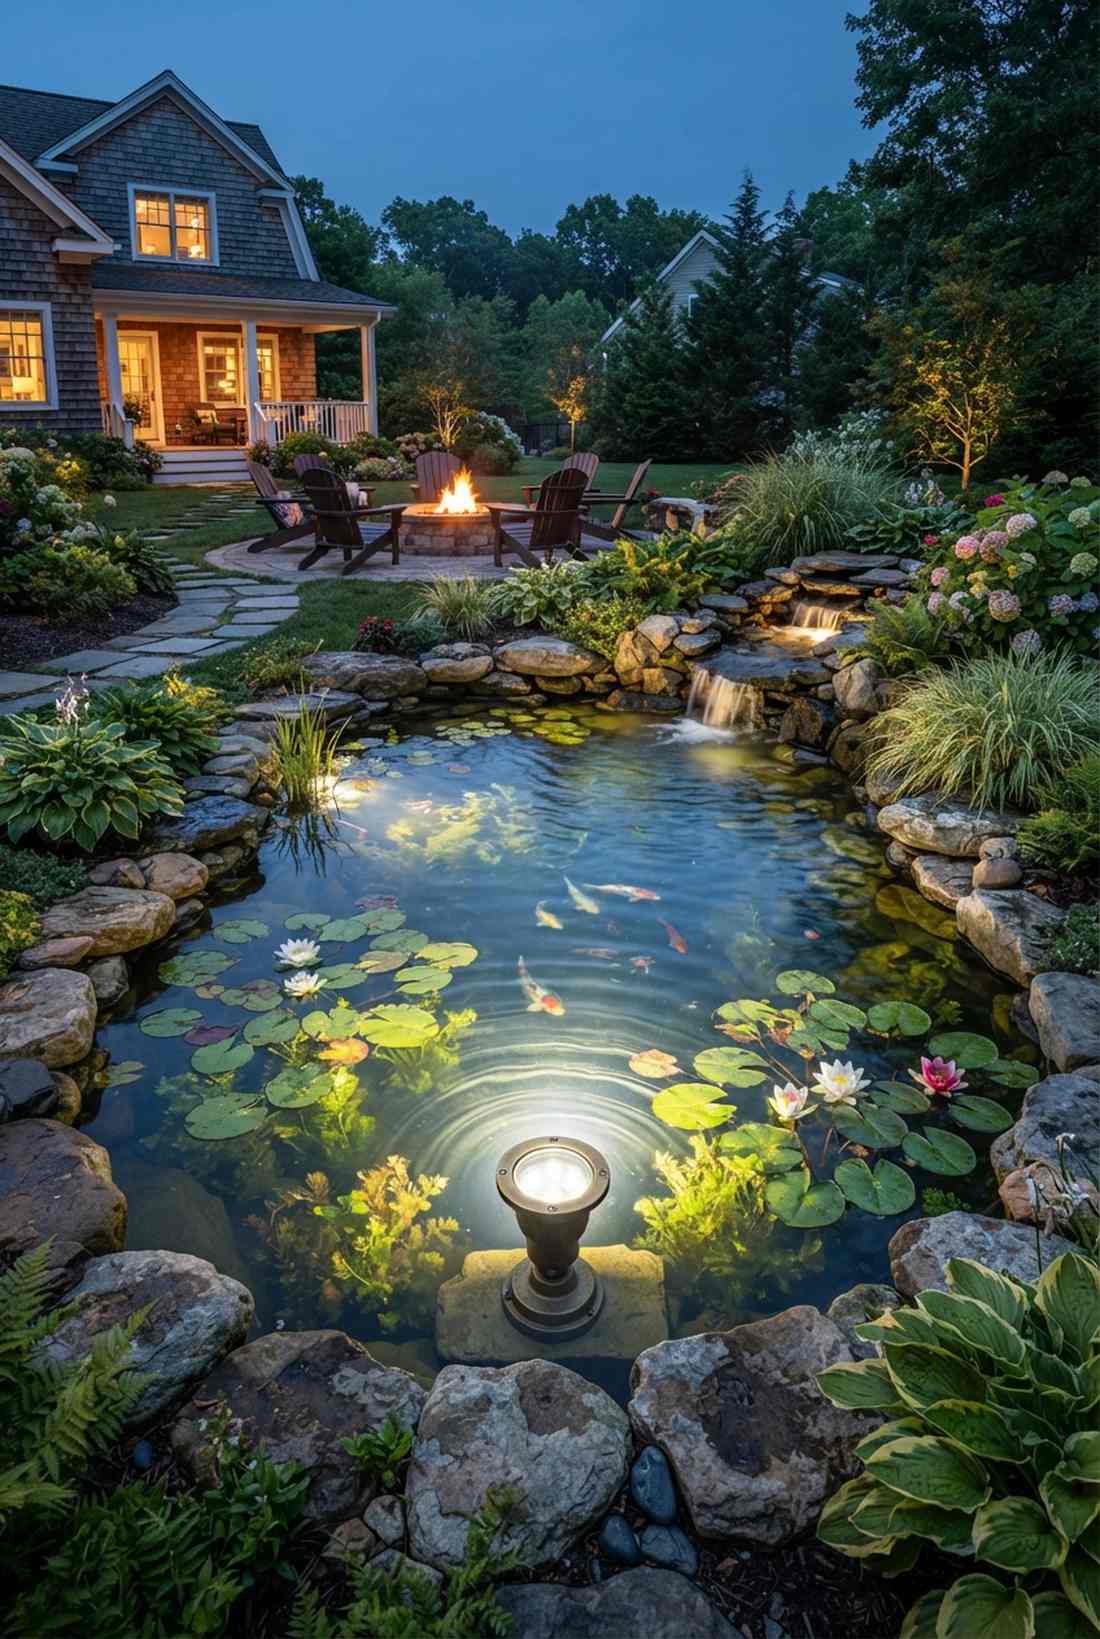
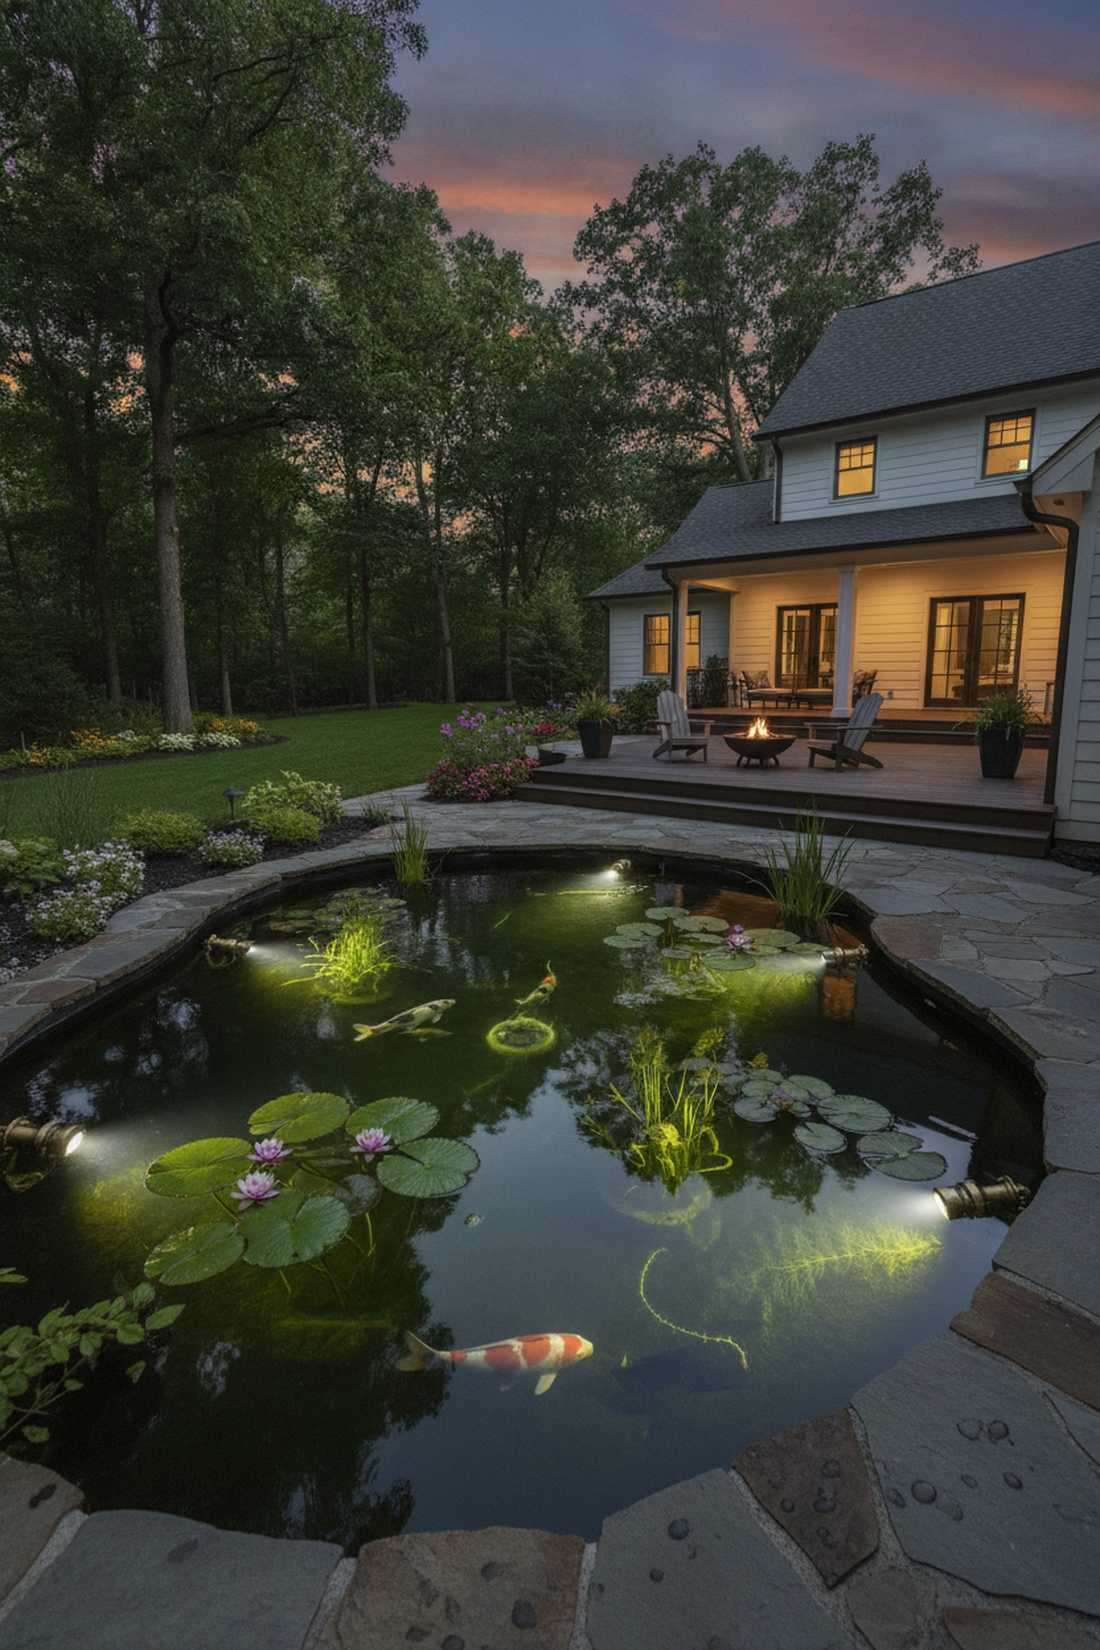
A magical glowing underwater oasis feels like discovering a hidden, radiant lagoon in your own backyard. Mandatory for illuminating koi ponds filled with floating lilies and submerged oxygenating plants.
Shining a light down onto water just creates a blinding, ugly glare that bounces back at you. Sinking a fully sealed IP68 fixture directly under the lilies shoots the light up through the water, which looks far more expensive than it is and creates mesmerizing ripples. You must use crisp 4000K light to penetrate the murky water effectively.
A heavy-duty submersible light costs about $75. Pin this if you are building a backyard pond!
- Key Materials: IP68 submersible brass light, heavy base
- Vibe / Style: Hidden glowing lagoon
- Difficulty: Wet installation
- Budget Breakdown: Sub light: $60 | Weighted base: $15.
- Creator’s Tip: Keep the fixture 12 to 18 inches below the surface; any deeper and the light won’t pierce through the surface tension.
- Smart Sourcing: IP68 rated fully submersible pond lights and 4000K cool white aquatic bulbs.
53. Color-Changing Seasonal Accent Lighting
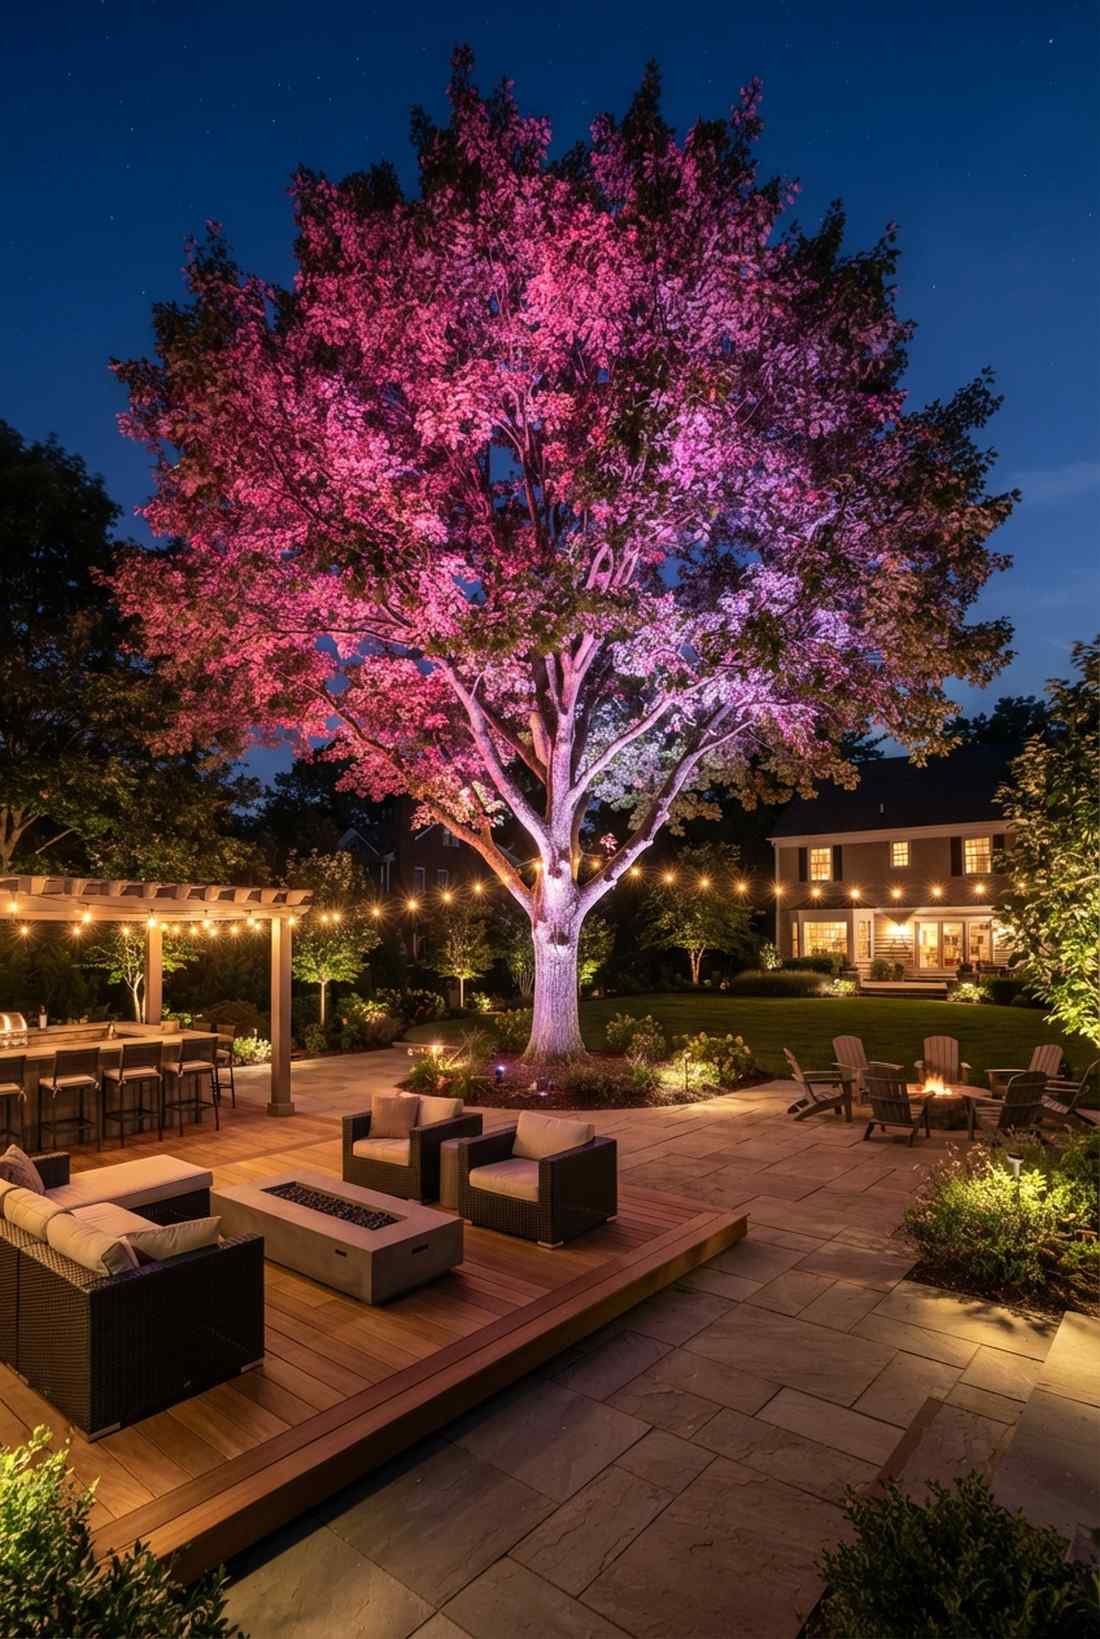
A vibrant dynamic mood canopy feels like a high-end, exclusive outdoor nightclub lounge. The most fun way to match your yard’s lighting to the exact color of the blooming seasons or holiday parties.
Being stuck with plain white light every single night is boring and dated. Swapping in smart RGB fixtures allows you to blast icy blue for winter, fiery orange for fall, and deep pink for spring, completely reinventing your yard with the tap of an app. It is the ultimate party trick for your main focal trees.
Smart RGB fixtures run roughly $120 each. Save this for your ultimate backyard entertaining space!
- Key Materials: Smart RGB LED spot, Wi-Fi hub
- Vibe / Style: Exclusive outdoor lounge
- Difficulty: App setup
- Budget Breakdown: RGB spot: $90 | Smart Hub: $30.
- Creator’s Tip: Use colors sparingly; lighting the main tree in color while keeping the rest of the yard in warm white creates the best contrast.
- Smart Sourcing: Bluetooth RGB landscape spotlights and weatherproof smart home lighting hubs.
54. Espalier Trained Fruit Tree Lighting
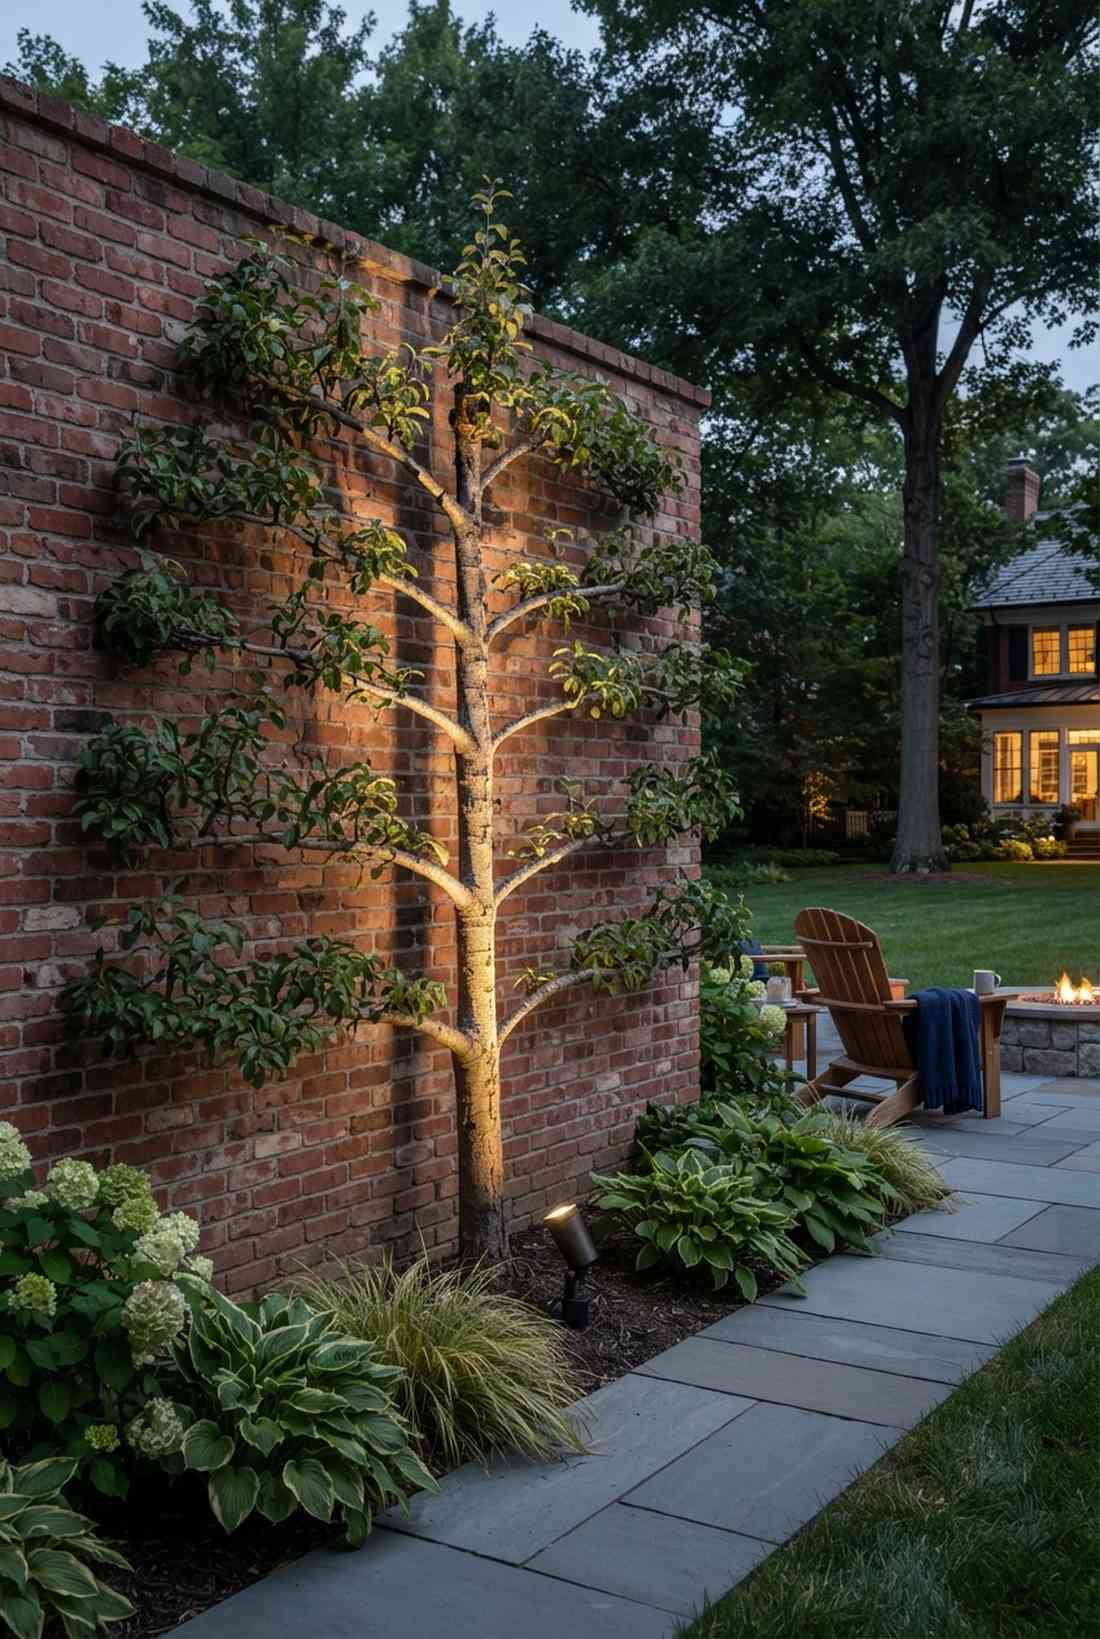

A highly structured geometric branch wash feels like a pristine, manicured orchard against a brick wall. Essential for highlighting flat-trained apple or pear trees growing precisely against a fence.
Hitting a flat espalier tree with a massive floodlight blasts the wall behind it, totally ruining the delicate branch structure. Deploying a razor-thin 15-degree vertical beam right at the base of the trunk shoots light strictly up the branches, giving a designer-level finish without causing obnoxious wall glare. Adding a tiny side light reveals the bark texture perfectly.
Rigging a flat tree costs about $80. Pin this if you love complex, structured gardening!
- Key Materials: 15-degree narrow uplight
- Vibe / Style: Manicured geometric orchard
- Difficulty: Precise aiming
- Budget Breakdown: Narrow uplight: $65 | Wire: $15.
- Creator’s Tip: Place the fixture absolute dead-center under the trunk so the beam climbs the main vertical stem flawlessly.
- Smart Sourcing: tight-beam 15-degree spotlights and flat-wall glare guards.
We saved the most visually striking micro-technique for the very end.
55. Moss Garden Micro-Lighting

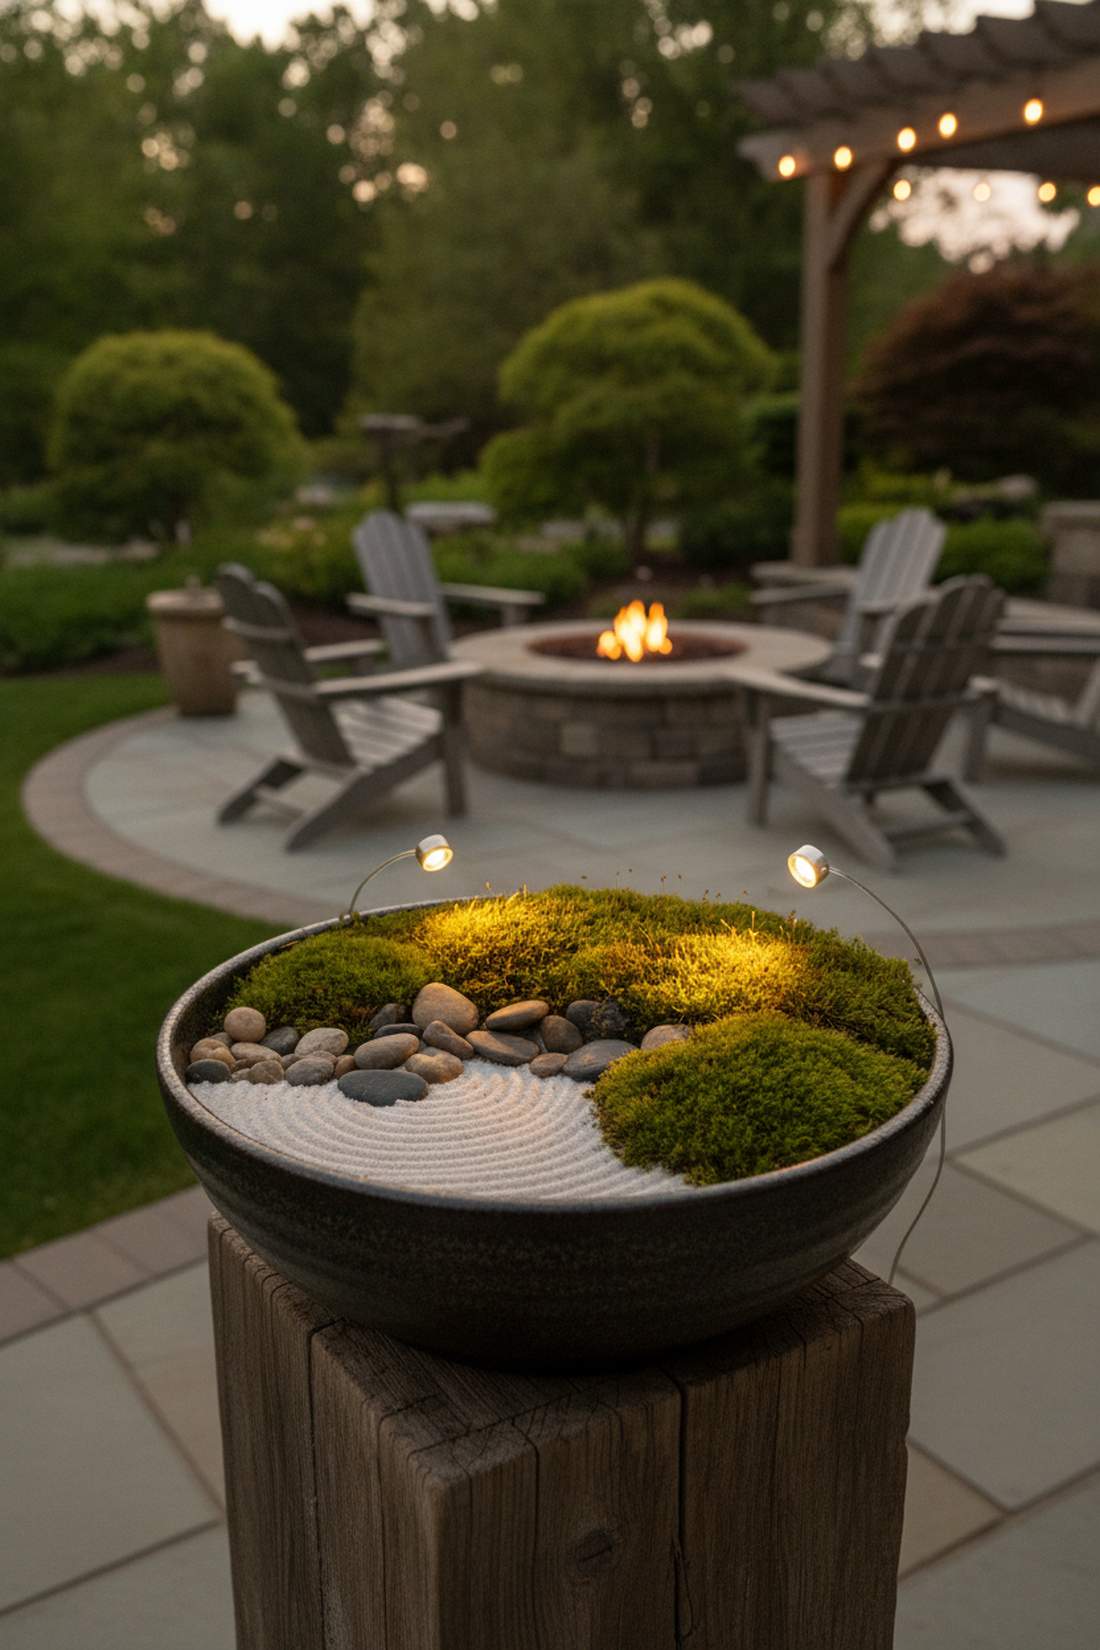
An ultra-close glowing velvet floor feels like a deeply meditative, ancient Japanese zen garden. The absolute best way to illuminate tiny, fragile moss compositions without drying them out to death.
Using standard yard lights on delicate moss will literally bake and kill the plants within a week. Getting extremely close with a tiny 1-watt LED puck allows you to graze the velvety texture safely, which looks far more expensive than it is and preserves the moisture. The extreme proximity compensates perfectly for the insanely low power.
A micro-lighting kit runs around $45. Save this for your miniature terrariums or rock garden bowls.
- Key Materials: 1W LED puck, micro wiring
- Vibe / Style: Ancient zen velvet
- Difficulty: Extremely delicate
- Budget Breakdown: Puck light: $30 | Splice: $15.
- Creator’s Tip: Angle the puck at a shockingly shallow 10 degrees; this rakes the light across the moss, making every tiny bump cast a shadow.
- Smart Sourcing: 1-watt micro LED pucks (bulk pack) and low-voltage miniature wiring kits.
56. Bamboo Grove Internal Lighting
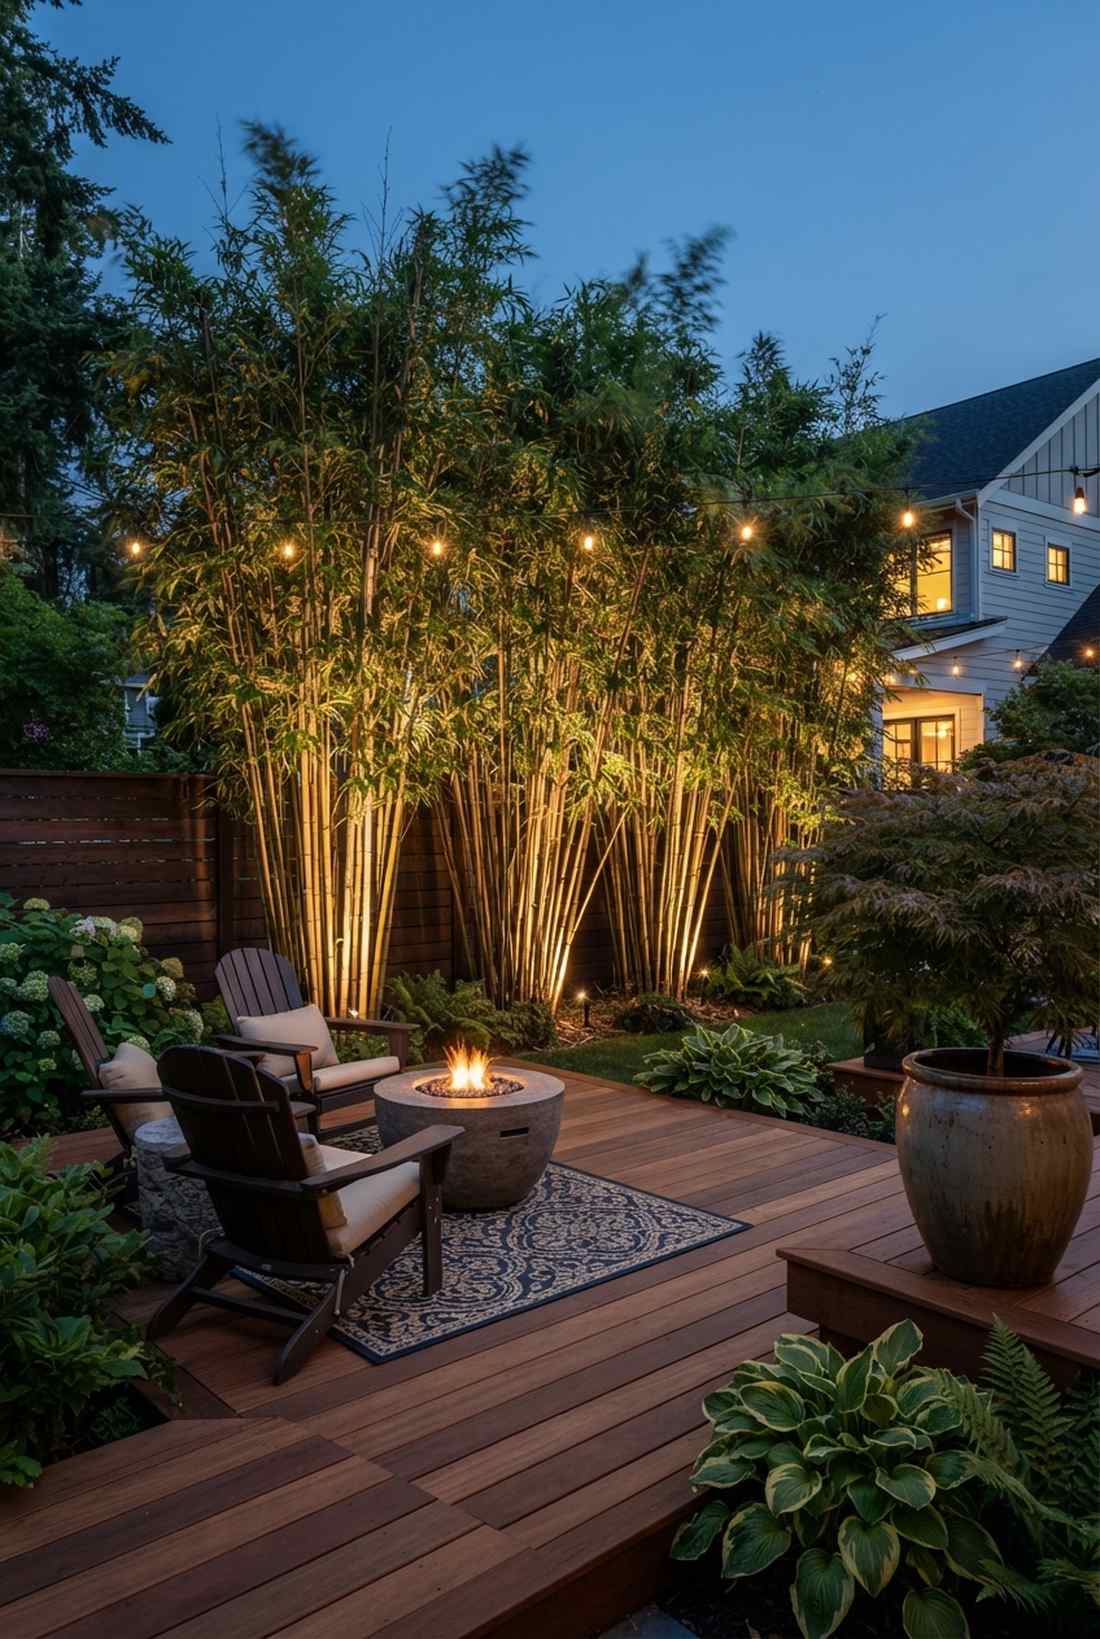
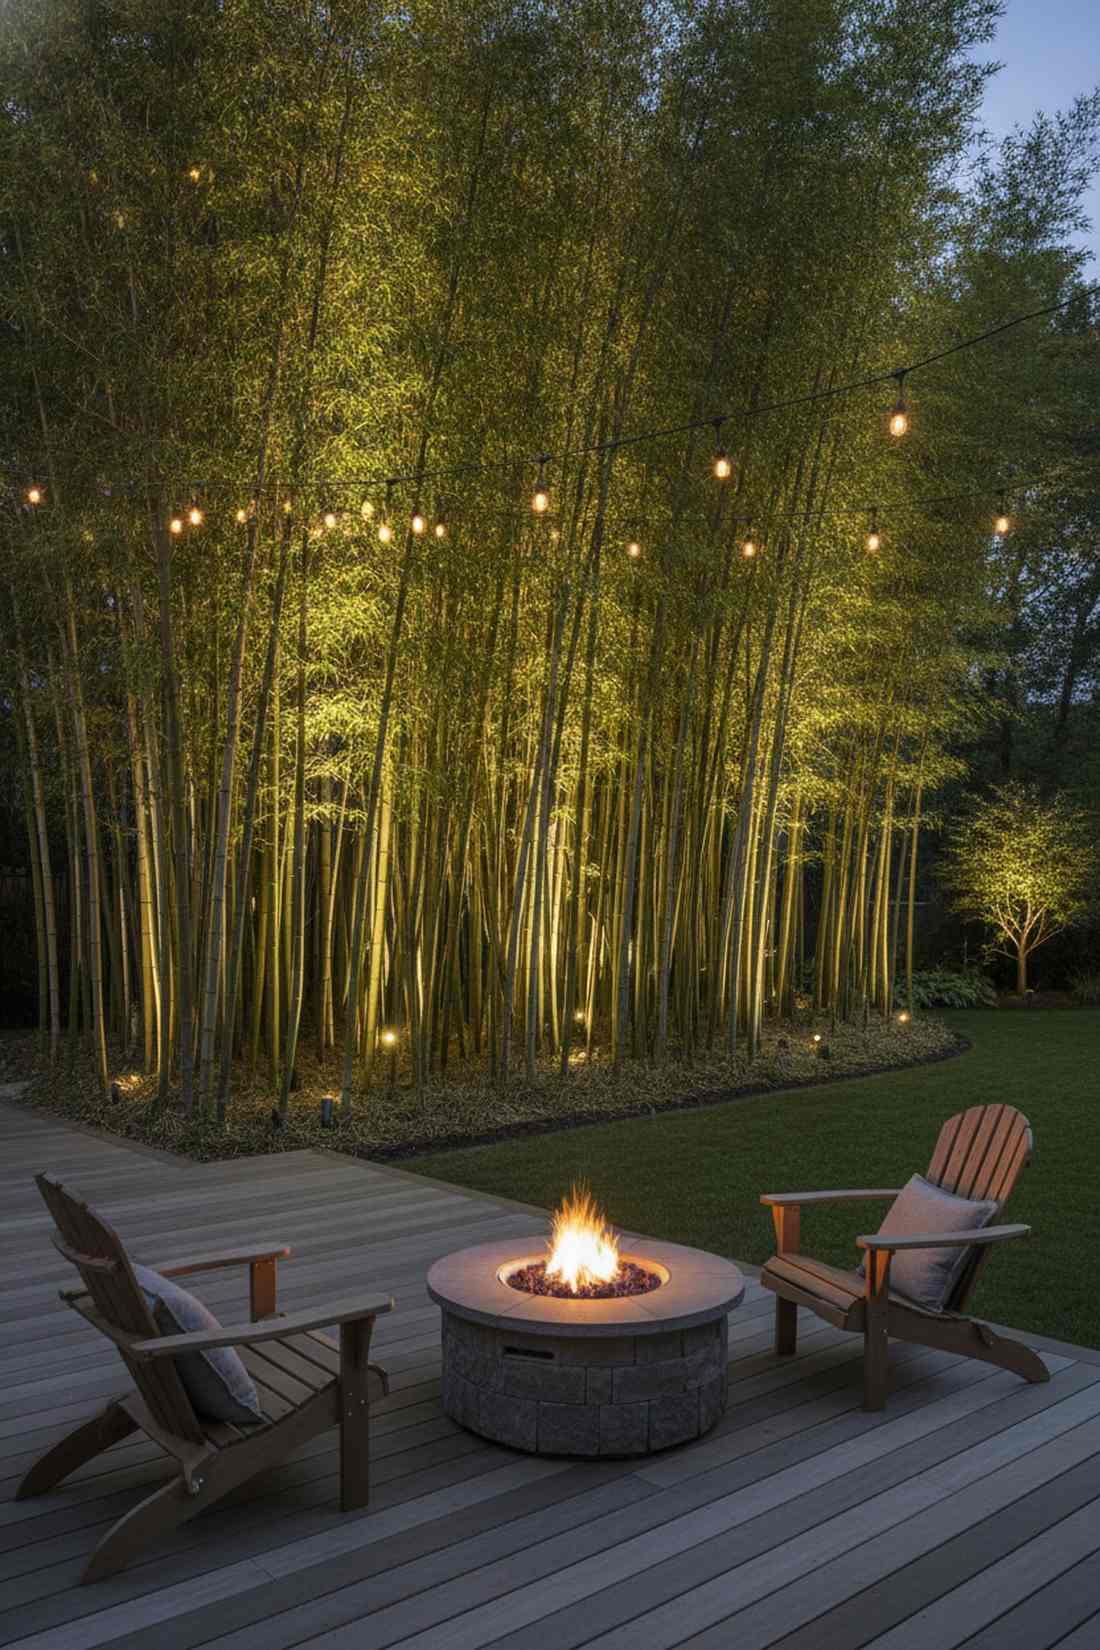
A deep hollow forest glow feels like an immersive, endless jungle right behind your fence. Mandatory for lighting dense bamboo screens or thick reed barriers without making them look flat.
Lighting a thick bamboo wall from the front turns it into a solid, impenetrable green wall. Stashing the uplights deep inside the center of the grove shoots light through the hollow culms, completely reinventing standard screen lighting by creating insane 3D depth. Varying the angles slightly stops it from looking like a boring barcode.
Hiding lights in a grove costs about $60 per zone. Pin this if you use bamboo for property privacy!
- Key Materials: Compact uplights, protective cages
- Vibe / Style: Endless glowing jungle
- Difficulty: Hard to access
- Budget Breakdown: Compact spot: $50 | Wire armor: $10.
- Creator’s Tip: Aim the fixtures at slightly different angles (some vertical, some 45 degrees) to mimic the natural chaotic growth of the grove.
- Smart Sourcing: compact bullet landscape uplights and rodent-proof wire armoring kits.
57. Autumn Foliage Enhancement Lighting

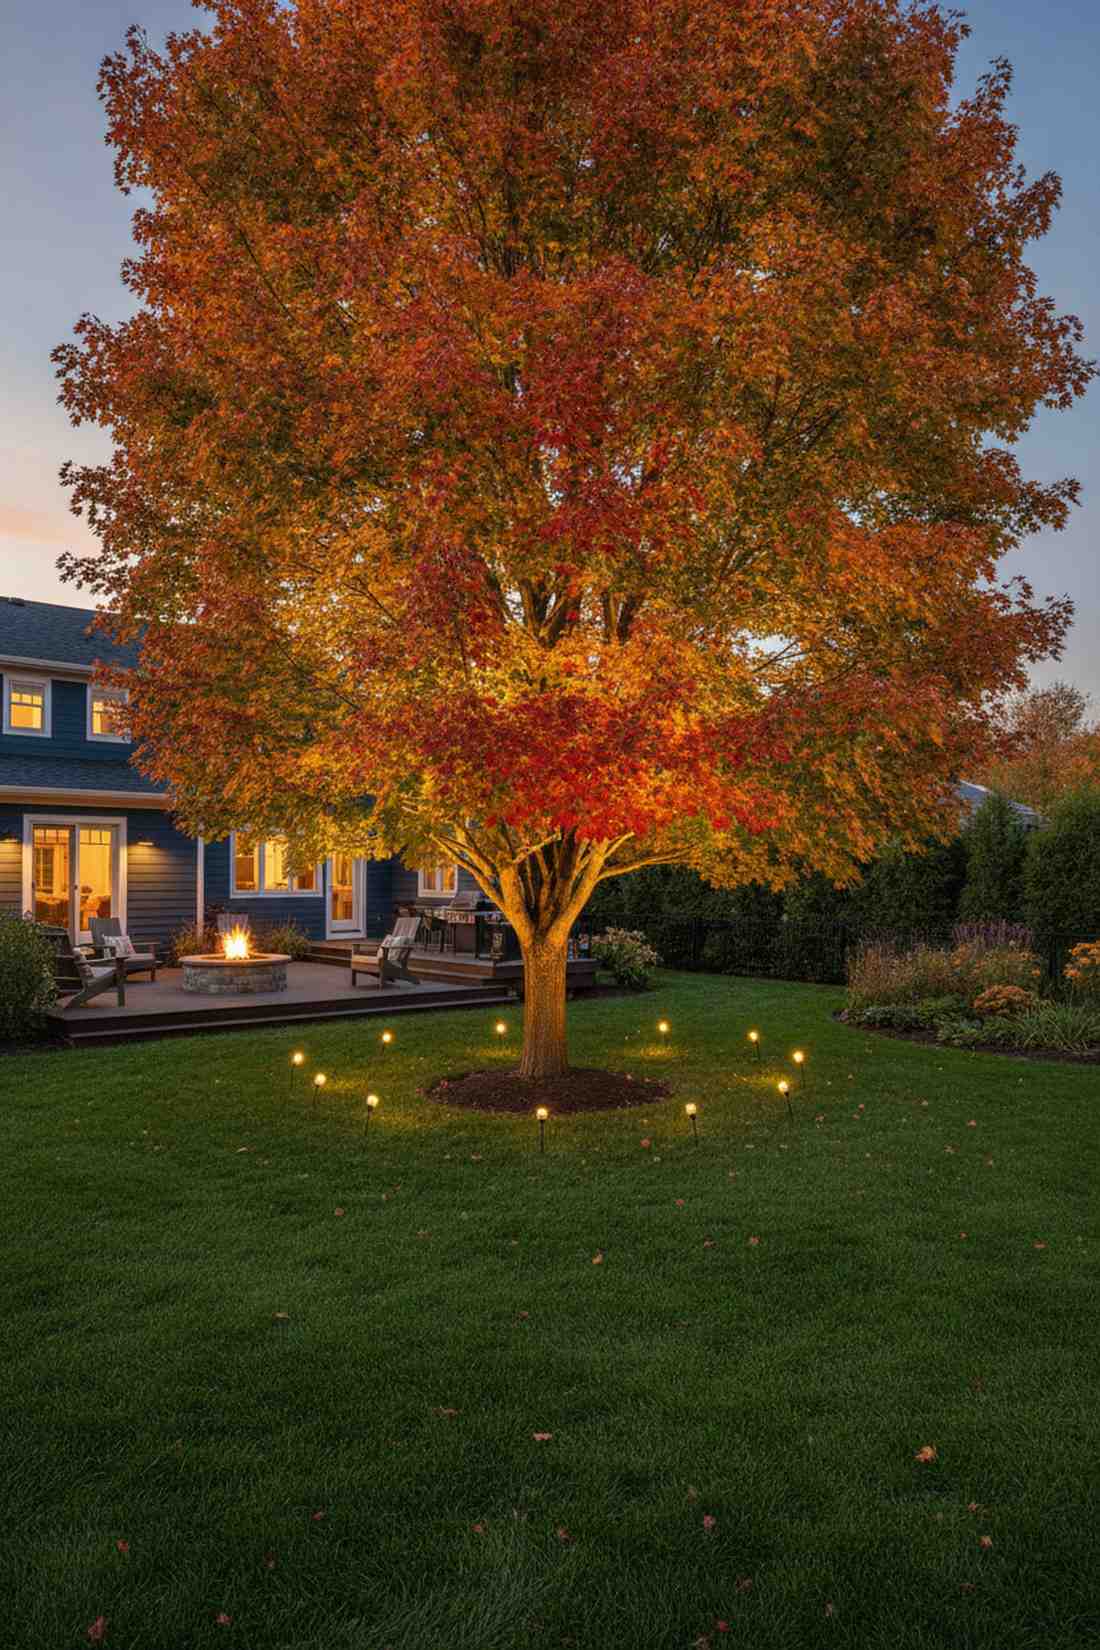
A fiery seasonal color explosion feels like a brilliant, blazing bonfire of leaves sitting right on your lawn. The ultimate temporary setup to squeeze the absolute maximum drama out of peak fall colors.
Leaving cold, blue lights on an orange maple tree completely neutralizes the beautiful autumn colors. Deploying temporary stakes armed with ultra-warm 2700K bulbs violently amplifies the reds and oranges for those three crucial weeks, giving a designer-level finish just for the season. Once the leaves drop, simply pull the stakes and pack them away.
A set of temporary fall stakes costs around $70. Save this trick for your October yard prep!
- Key Materials: Portable stakes, 2700K warm bulbs
- Vibe / Style: Blazing autumn bonfire
- Difficulty: Temporary setup
- Budget Breakdown: Spikes: $50 | 2700K Bulbs: $20.
- Creator’s Tip: Use an incredibly warm 2700K (or even a specialized amber bulb) to artificially boost the intensity of the dying leaves.
- Smart Sourcing: portable landscape lighting spikes and ultra-warm 2700K LED replacement bulbs (bulk pack).
Conclusion
Mastering **outdoor lighting landscape** layouts transforms a basic yard into a premium, multidimensional nighttime experience. By layering these exactly 57 visual blueprints—from foundational UV-coated uplighting to immersive smart RGB setups—you can achieve a designer-level aesthetic on a DIY budget. Always map out your heavy-duty cable runs and experiment with portable spikes before committing to deep burial. Sourcing bulk packs, commercial-grade fixtures, and waterproof kits ensures your investment survives the seasons. Quality LED components guarantee your massive aesthetic upgrade remains flawless and low-maintenance as your botanical landscape matures into a true sanctuary.
Frequently Asked Questions
What wattage LED fixtures work best for outdoor lighting landscape uplighting on trees?
Tree height directly dictates your power needs. Skip the weak solar toys and use hardwired 3-5 watt fixtures for small bushes, 5-7 watts for mid-sized maples, and high-output 10-15 watt LEDs for massive oaks. If you want a premium look without the guesswork, grab a multi-wattage landscape lighting starter kit that lets you dial in the exact brightness. Always bump up the wattage by 30% if you are trying to push light through thick evergreen needles.
How do I choose between warm and cool color temperatures for botanical highlighting?
Color temperature makes or breaks your expensive yard. Ultra-warm 2700-3000K bulbs are mandatory for making red, orange, and yellow foliage look rich and inviting. If you have a highly modern yard or are lighting a water feature, cool 4000K bulbs penetrate water best and highlight silver plants flawlessly. To save money, buy neutral 3500K bulbs in bulk packs—they render almost all garden colors perfectly without looking too orange or too blue.
What is the difference between outdoor lighting up and down and standard uplighting?
Standard uplighting wastes energy by shooting all the light strictly into the canopy, leaving the roots in the dark. **Outdoor lighting up and down** utilizes specialized bidirectional cylinders mounted on posts or tree trunks to simultaneously blast the canopy above and wash the flowers below. Investing in premium up/down sconce kits literally cuts your wire trenching in half while delivering double the visual impact, instantly modernizing the yard.
How far from plants should outdoor lighting ground fixtures be positioned?
Spacing determines whether your plant looks like a flat blob or a 3D masterpiece. For large trees, pull narrow-beam stakes back 8-12 feet to capture the whole canopy. For low perennials, sink UV-coated flush well lights just 6-12 inches away to violently graze the textures. Purchasing an adjustable beam-spread fixture kit lets you physically tweak the light cone to match your exact distance, preventing ugly hot spots.
Can I use the same outdoor lighting landscape design throughout all seasons?
Leaving the same setup year-round is a massive mistake for deciduous trees. When the leaves drop in winter, wide floods look sloppy; you need to tighten the beams to highlight the bare branches. The smartest, high-RPM upgrade you can make is investing in app-controlled smart landscape lights. These allow you to instantly widen beams in the summer and narrow them in the winter straight from your phone, completely eliminating the need to dig up or move fixtures.