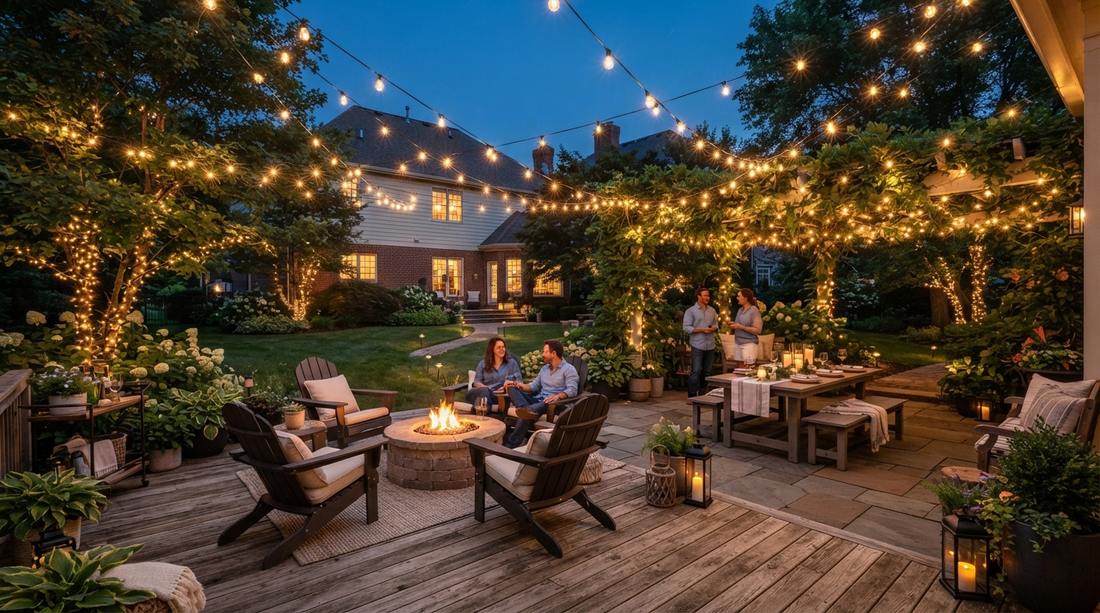
Upgrading your patio with a garden lights string setup instantly shifts a basic yard into a luxury retreat. Smart placement and commercial-grade waterproof cables deliver a premium designer finish. These high-end blueprints maximize your weekend budget effortlessly.
Design Snapshot Key Principles
- Layering Heights: Combine overhead canopies with mid-level and ground installations to create depth and visual hierarchy throughout your garden space.
- Warm vs. Cool Tones: Select bulb temperatures between 2200K-2700K for intimate settings or 3000K-4000K for functional task lighting along pathways and work areas.
- Power Planning: Calculate total wattage before installation and position outlets strategically to minimize visible extension cords while maintaining electrical safety.
- Weatherproofing: Choose IP65-rated fixtures minimum for exposed areas and secure connections with silicone-sealed enclosures to prevent moisture damage.
Overhead Canopy Designs
1. Parallel Line Canopy
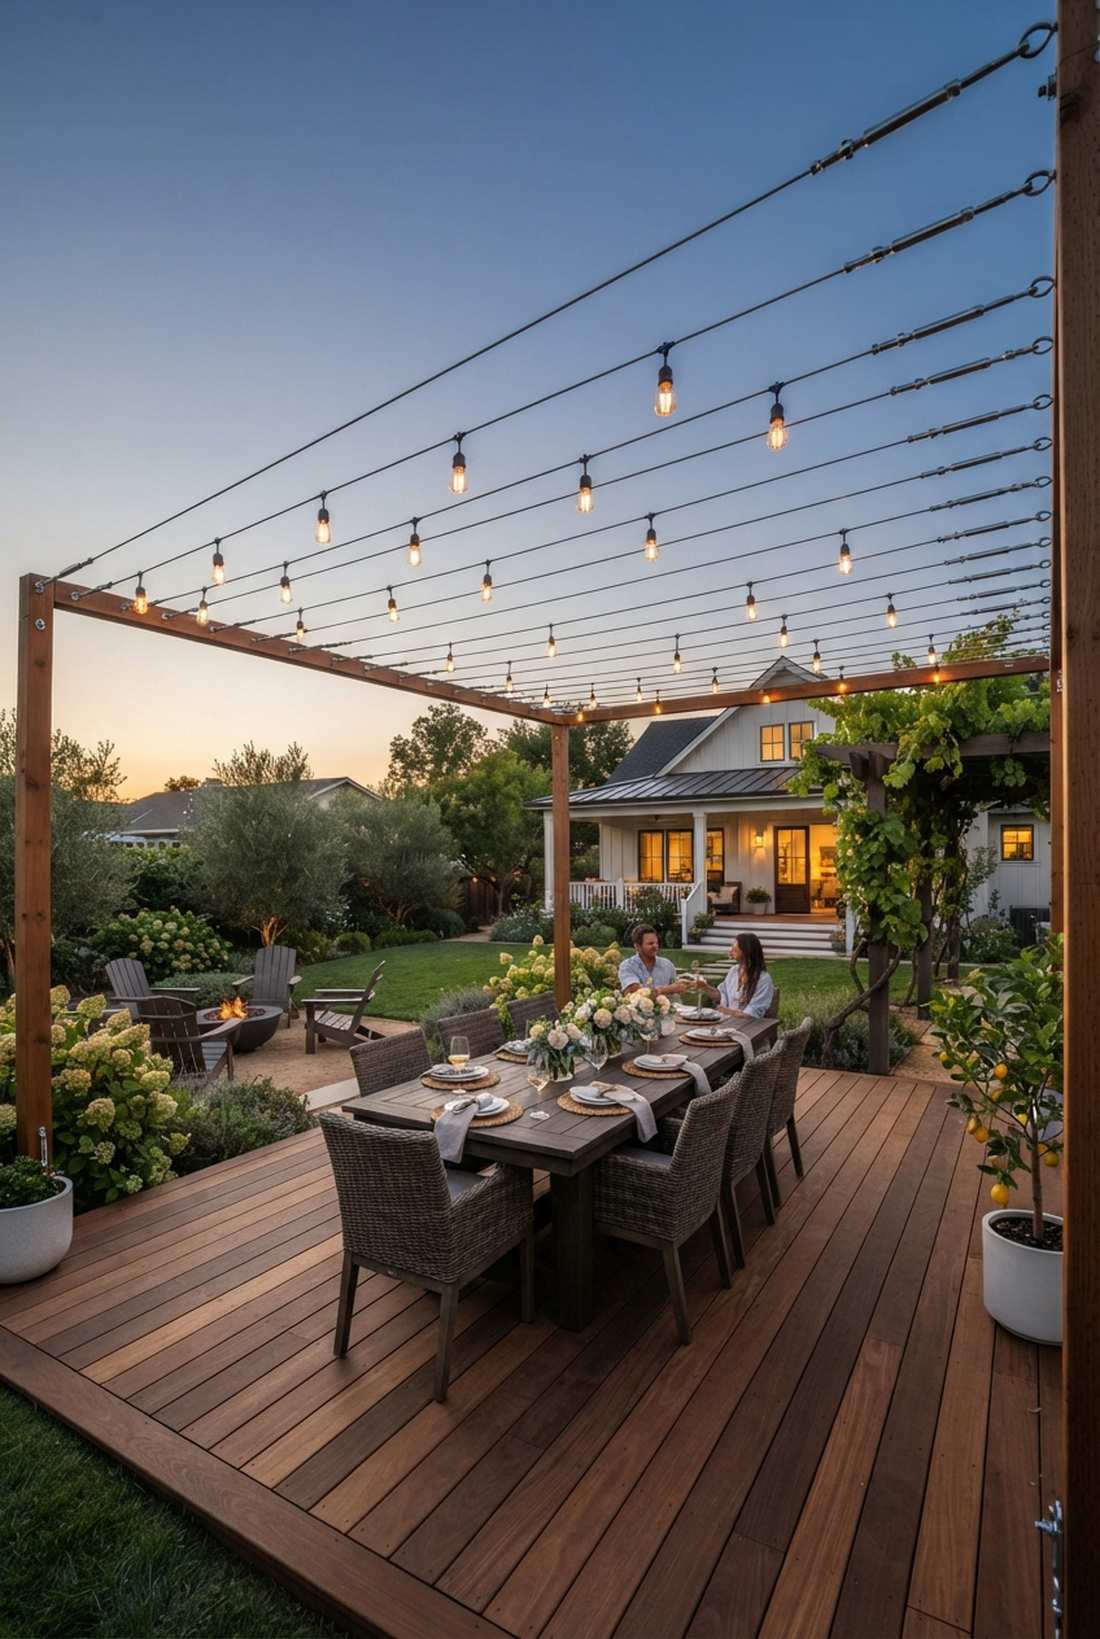
Creates a geometric outdoor dining canopy that feels like sitting in an upscale Mediterranean vineyard. This straight-line installation is perfect for defining wide, open-air wooden decks.
Most beginners try to zig-zag indiscriminately, but a clean parallel approach actually delivers a surprisingly premium look. Run your UV-coated, shatterproof cafe bulbs across tension wires to avoid that cheap, sagging patio aesthetic entirely.
You can effortlessly pull this off for around $40–$70 depending on your yard’s footprint. Pin this if you’re planning a sophisticated weekend patio upgrade.
- Key Materials: Heavy-duty outdoor string lights, turnbuckles
- Vibe / Style: Modern industrial vineyard
- Difficulty: Intermediate weekend project
- Budget Breakdown: Cables: $25 | LED Bulbs: $35.
- Creator’s Tip: Use turnbuckles on every line so you can tighten them instantly when the seasonal temperature shifts.
- Smart Sourcing: Grab a shatterproof LED Edison string kit (bulk pack) and a stainless steel outdoor suspension wire kit.
2. Radial Spoke Pattern
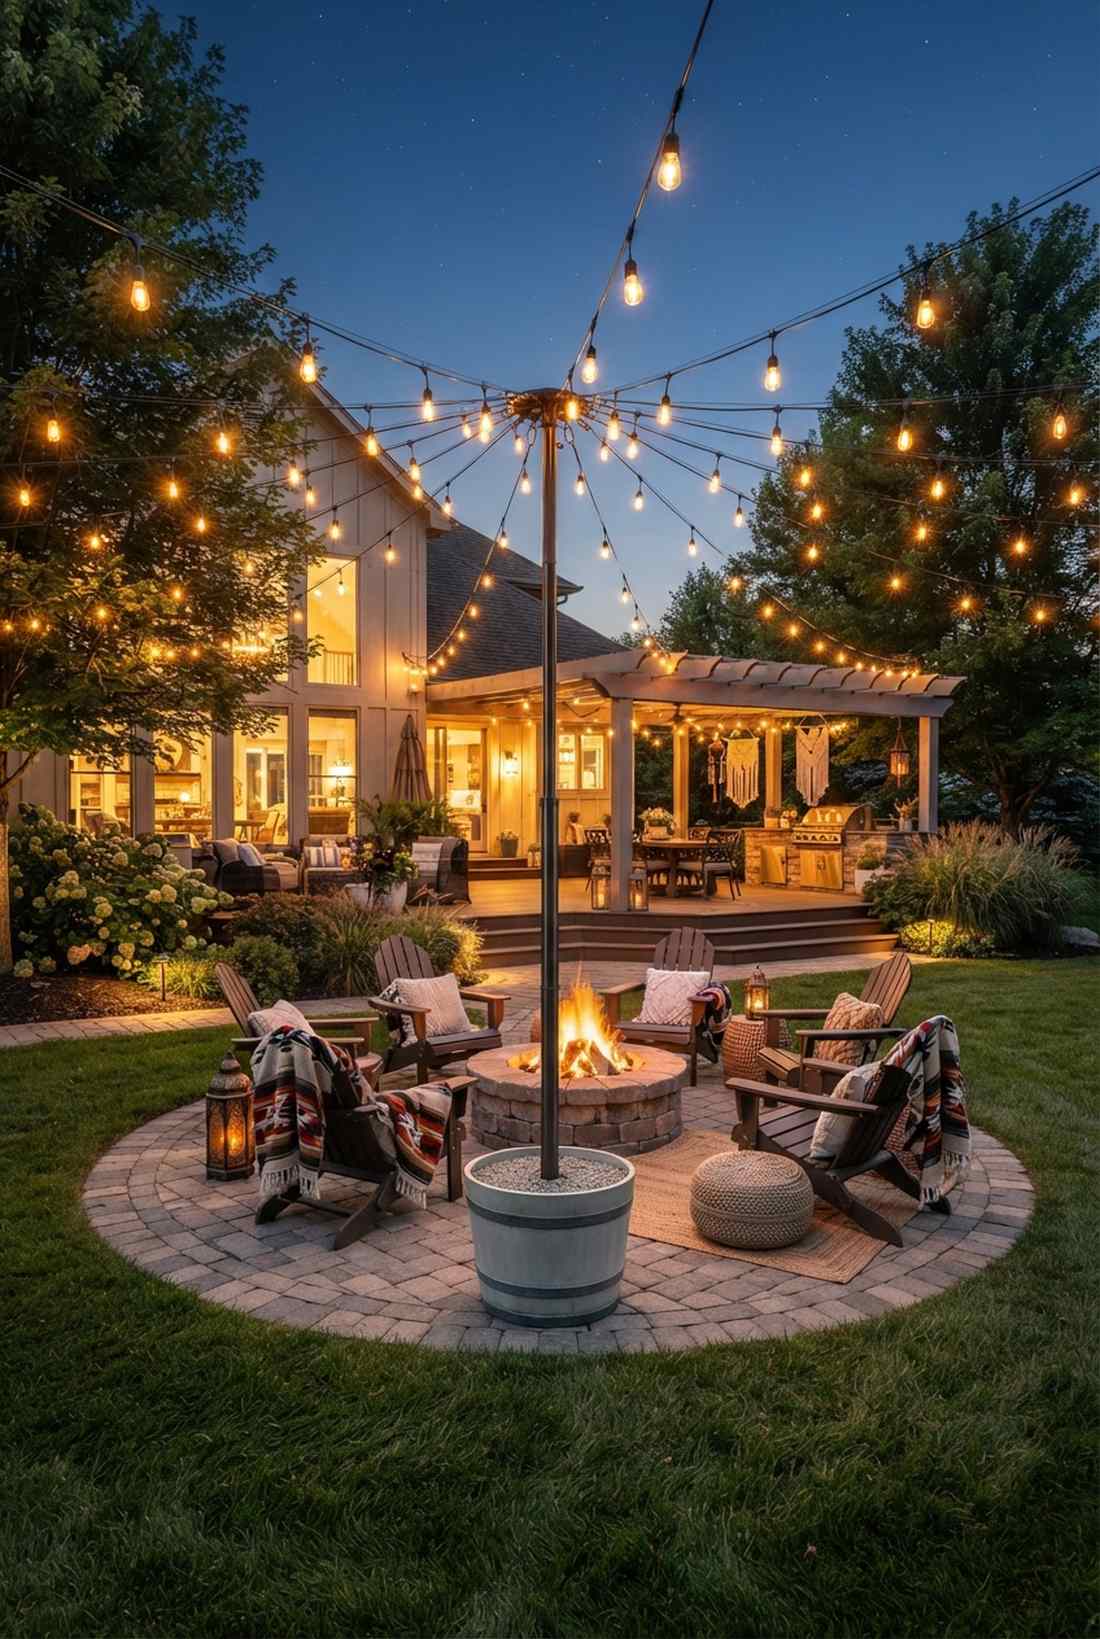
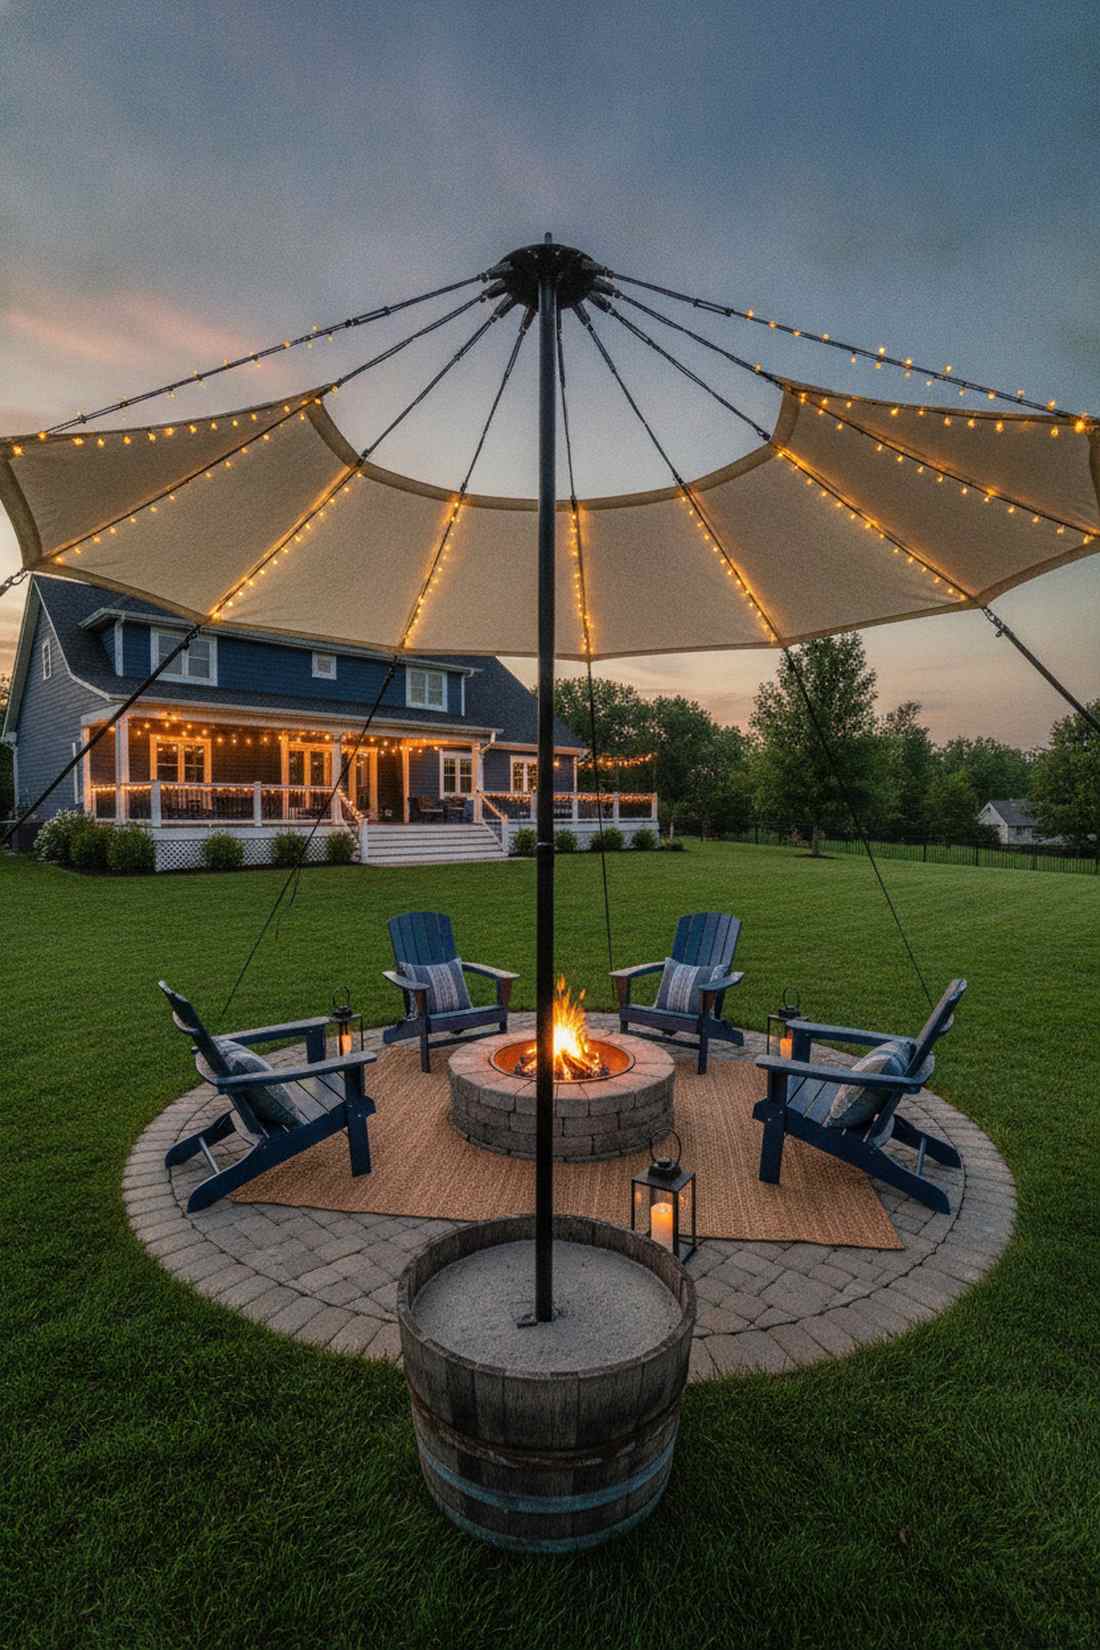
Forms a glowing outdoor tent structure that feels incredibly cozy and intimate. Works exceptionally well for centering a rustic fire pit or a circular paver courtyard.
Fanning lines outward from a central pole bypasses that basic DIY aesthetic, giving a designer-level finish instead. Use commercial-grade carabiners at the center hub so you can unclip the whole waterproof canopy during heavy winter storms.
Expect to spend roughly $50–$90 for a wide-spanning setup. It’s a fast layout that completely changes the evening atmosphere of a boring lawn.
- Key Materials: Telescoping center pole, multi-strand splitters
- Vibe / Style: Bohemian festival grounds
- Difficulty: Moderate balancing act
- Budget Breakdown: Hub Hardware: $20 | Strings: $50.
- Creator’s Tip: Sink the center pole into a cement-filled planter barrel for zero-dig stability.
- Smart Sourcing: Start with a heavy-duty 10ft outdoor light pole and pre-cut steel mounting brackets.
3. Zigzag Wave Formation
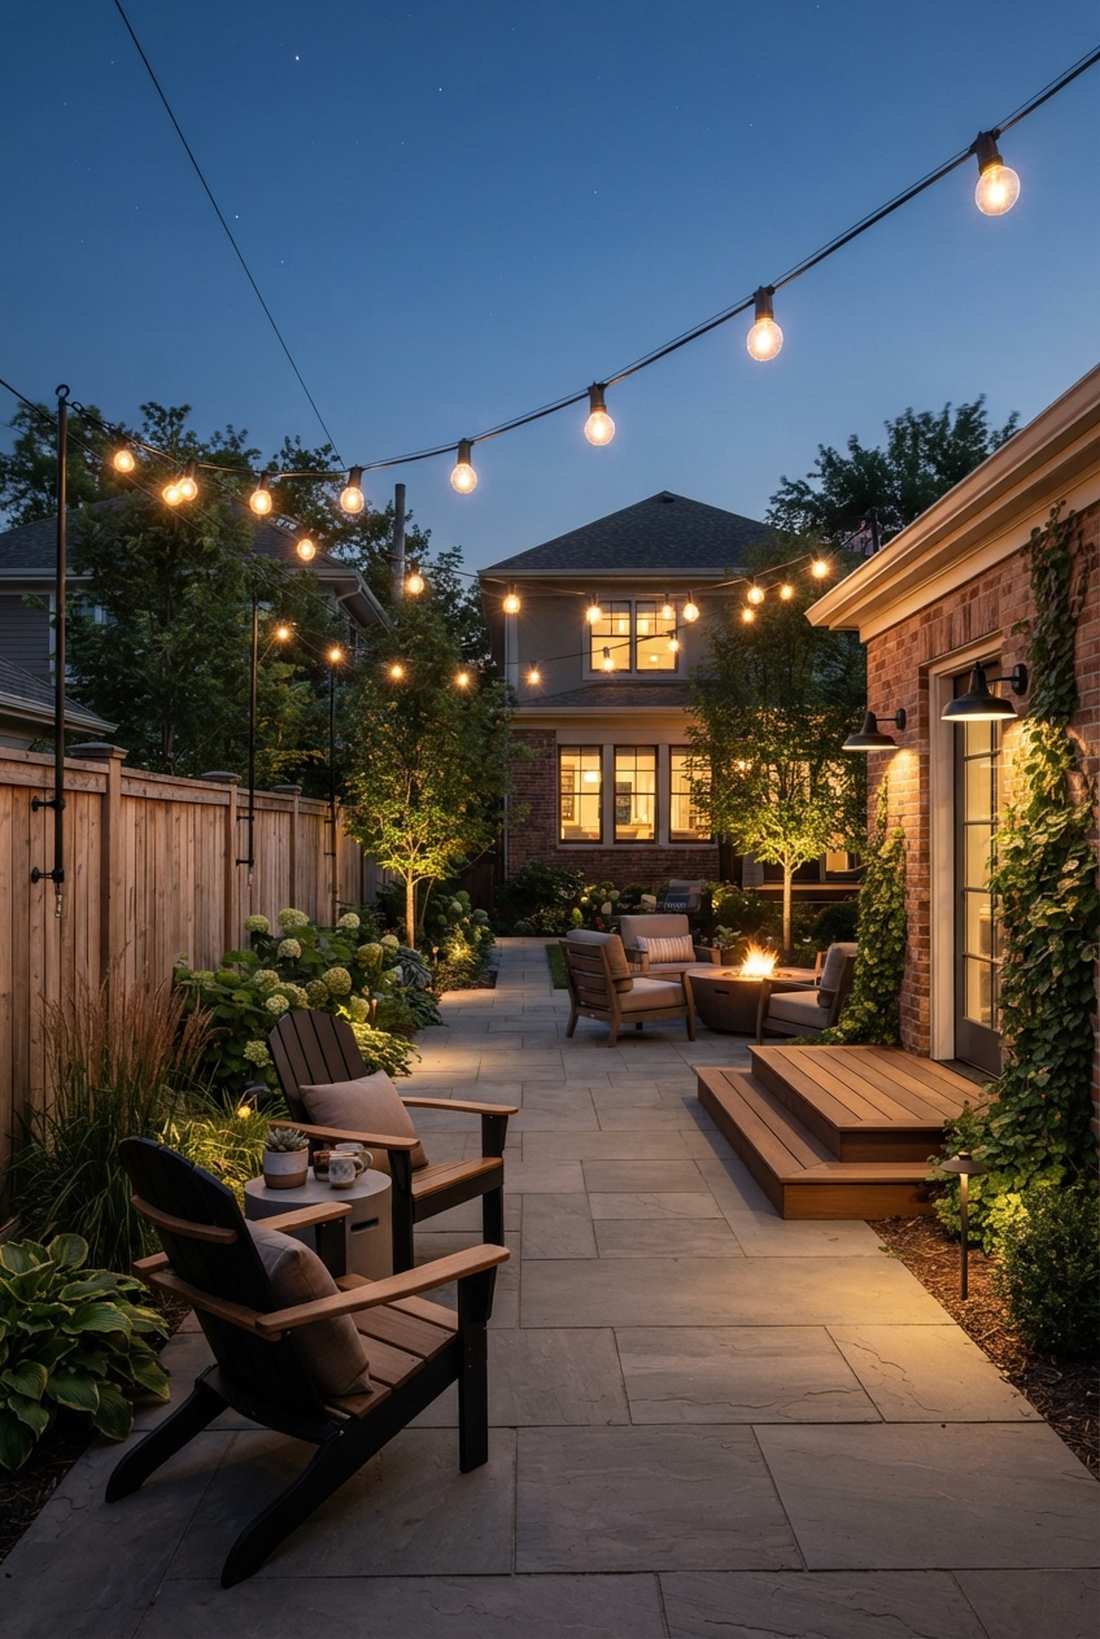
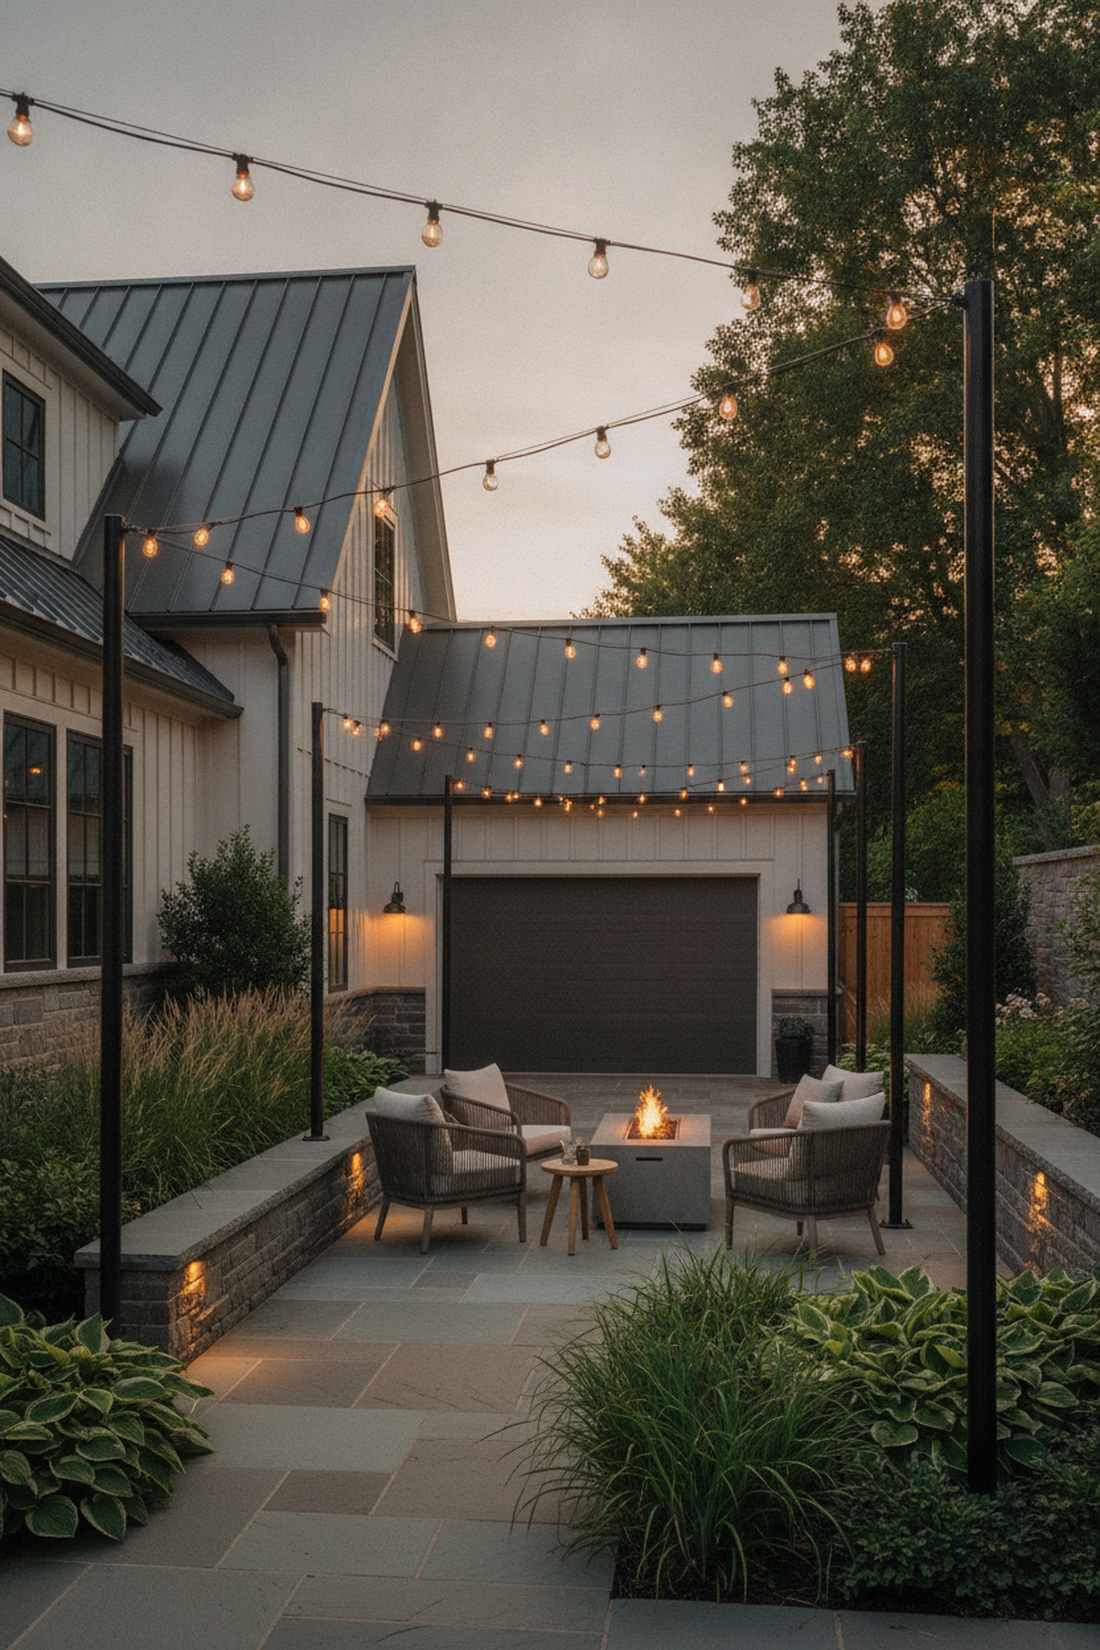
Builds an undulating patio light wave that feels like a chic rooftop lounge in the city. Excellent for connecting an uneven house roofline to a detached garage.
Alternating heights purposefully creates visual rhythm, which looks far more expensive than it is. Integrate broad landscape lighting supplies and adjustable cable tensioners to pull the cords taut, proving it’s an intentional architectural choice.
This layout clocks in at approximately $35–$60 for standard spacing. Save this to your DIY garden board if you need to light a narrow side yard.
- Key Materials: Acrylic globe lights, varied height posts
- Vibe / Style: Urban rooftop bar
- Difficulty: Easy beginner setup
- Budget Breakdown: Anchor points: $15 | Lights: $30.
- Creator’s Tip: Keep the low points at least 8 feet off the ground to avoid clotheslining taller guests.
- Smart Sourcing: Pick up a UV-resistant acrylic globe string (commercial grade) and heavy-duty screw-in eye hooks.
4. Crisscross Lattice Grid
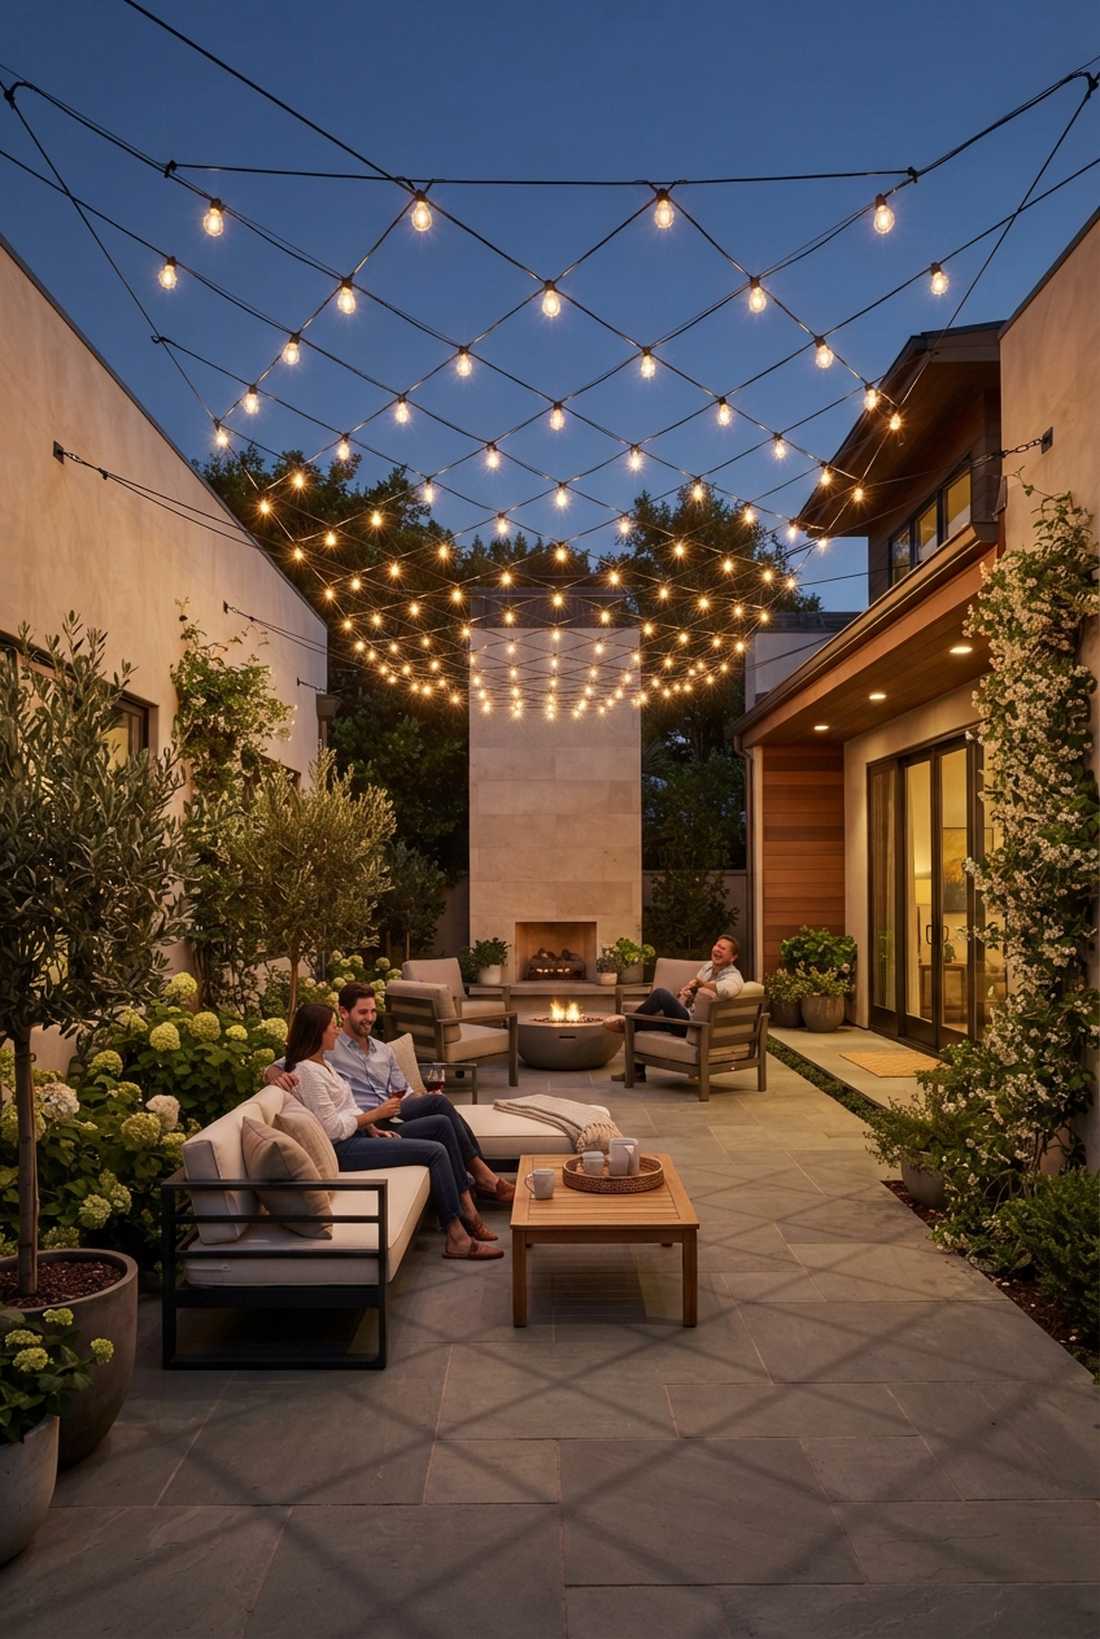
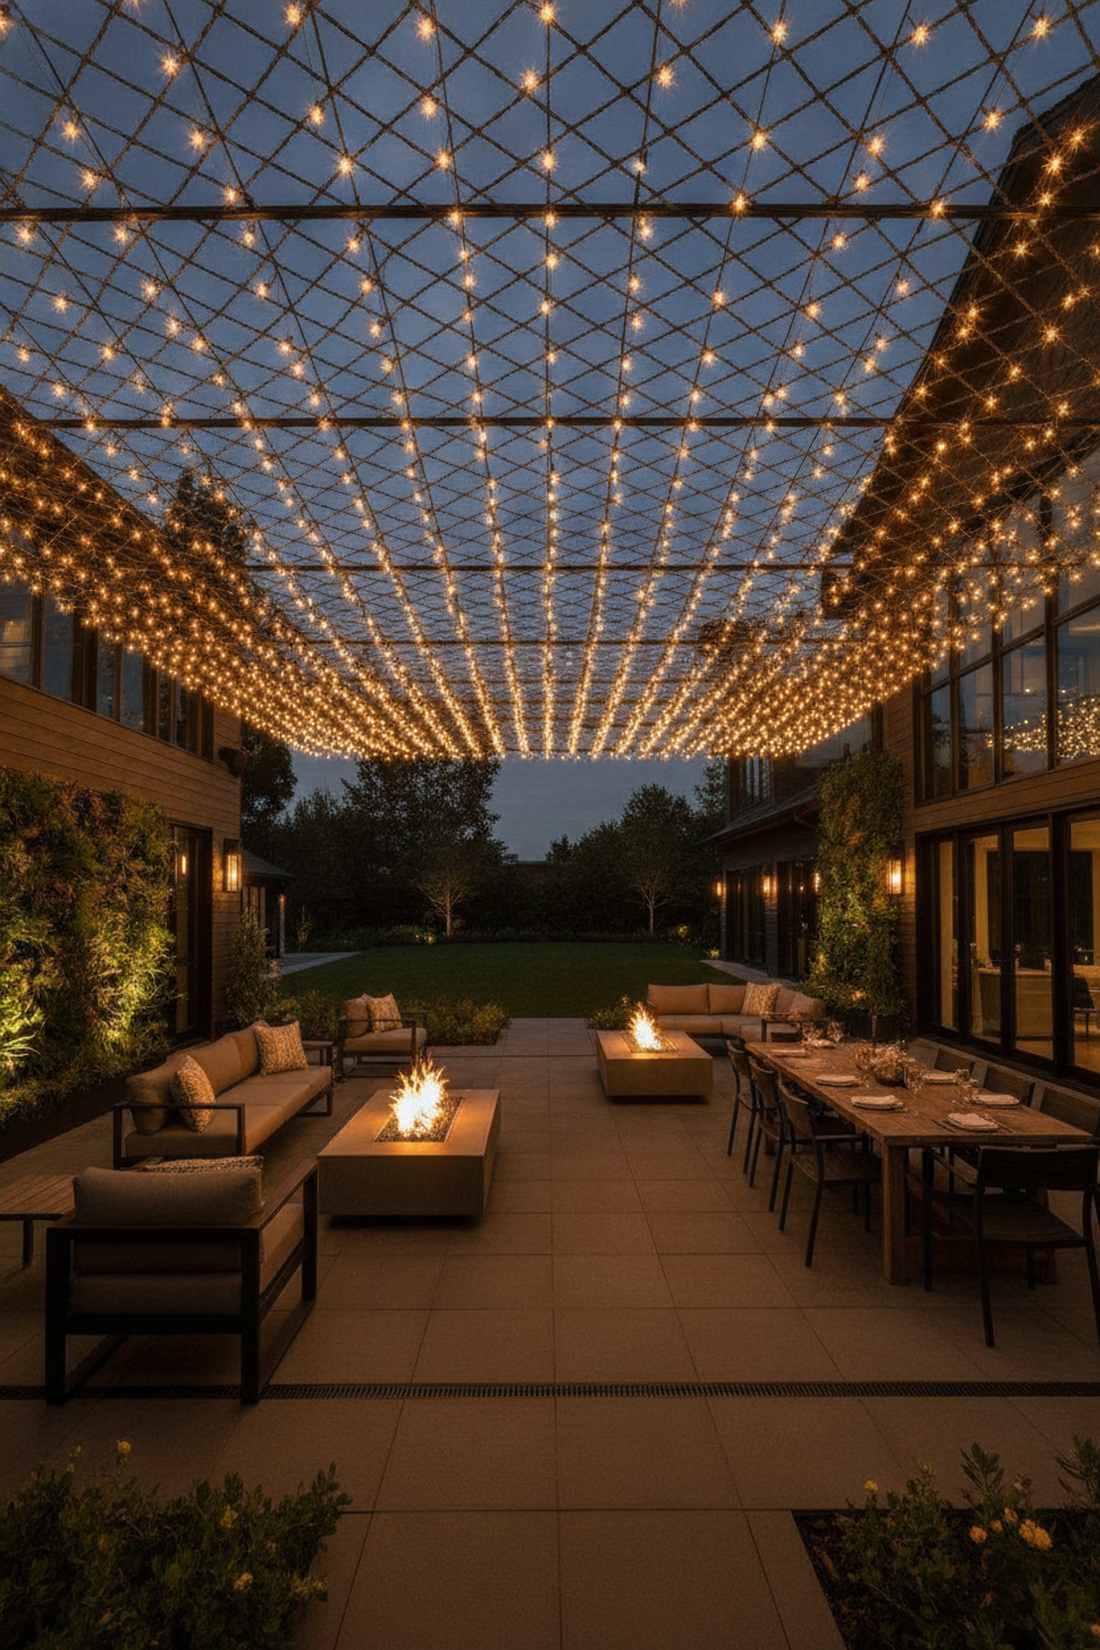
Generates an illuminated overhead grid pattern that feels like a magical floating ceiling. Ideally suited to strictly square or rectangular modern courtyards.
Instead of just draping cords, interlacing them produces a highly concentrated glow that creates an instant high-end restaurant feel. Layer in durable backyard lighting accessories and cross-clip the intersections so the wind doesn’t tangle the grid.
A dense grid requires more length, putting this around $80–$120 to execute properly. Highly recommended for a high-impact weekend win.
- Key Materials: Zip-ties, high-density mini Edison bulbs
- Vibe / Style: Upscale modern courtyard
- Difficulty: Requires precise measuring
- Budget Breakdown: Zip-ties: $5 | Bulk lights: $90.
- Creator’s Tip: String all the horizontal lines first, then weave the perpendicular lines over and under.
- Smart Sourcing: Invest in weatherproof Edison light bundles (2-pack) and UV-rated outdoor zip ties.
This next setup is ridiculously cheap but looks like a $150 custom landscape display…
5. Perimeter Inward Spiral
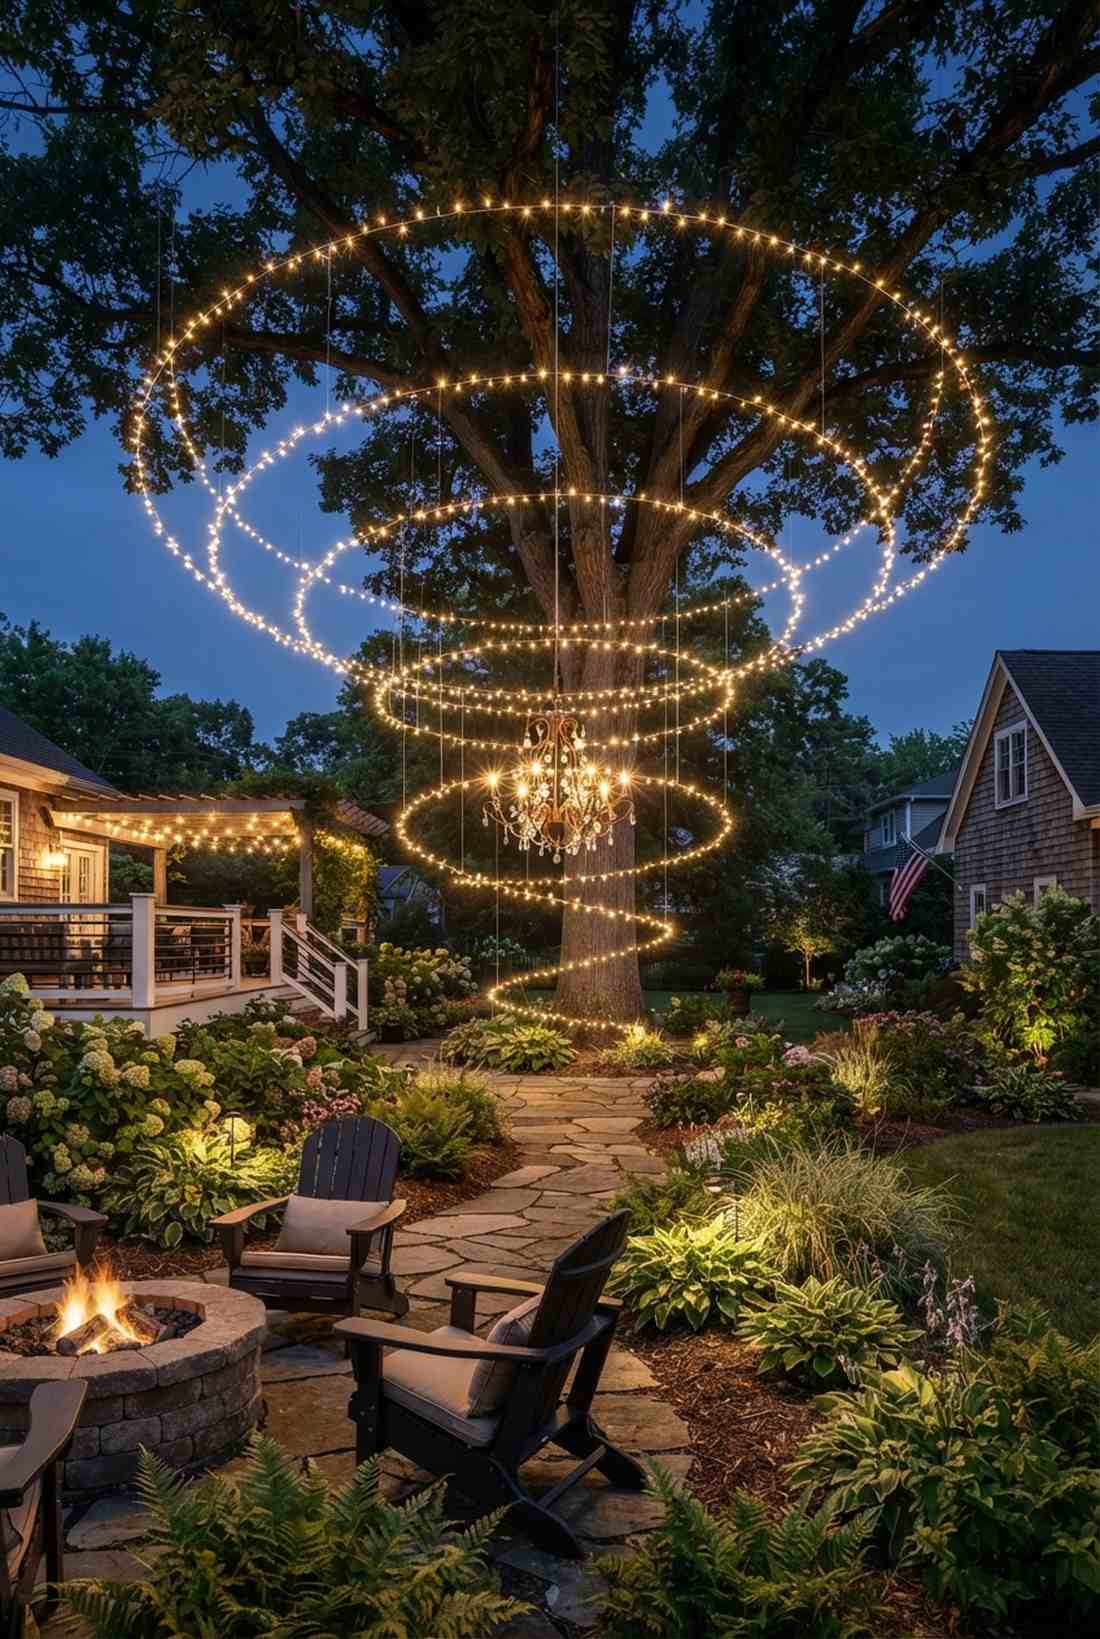
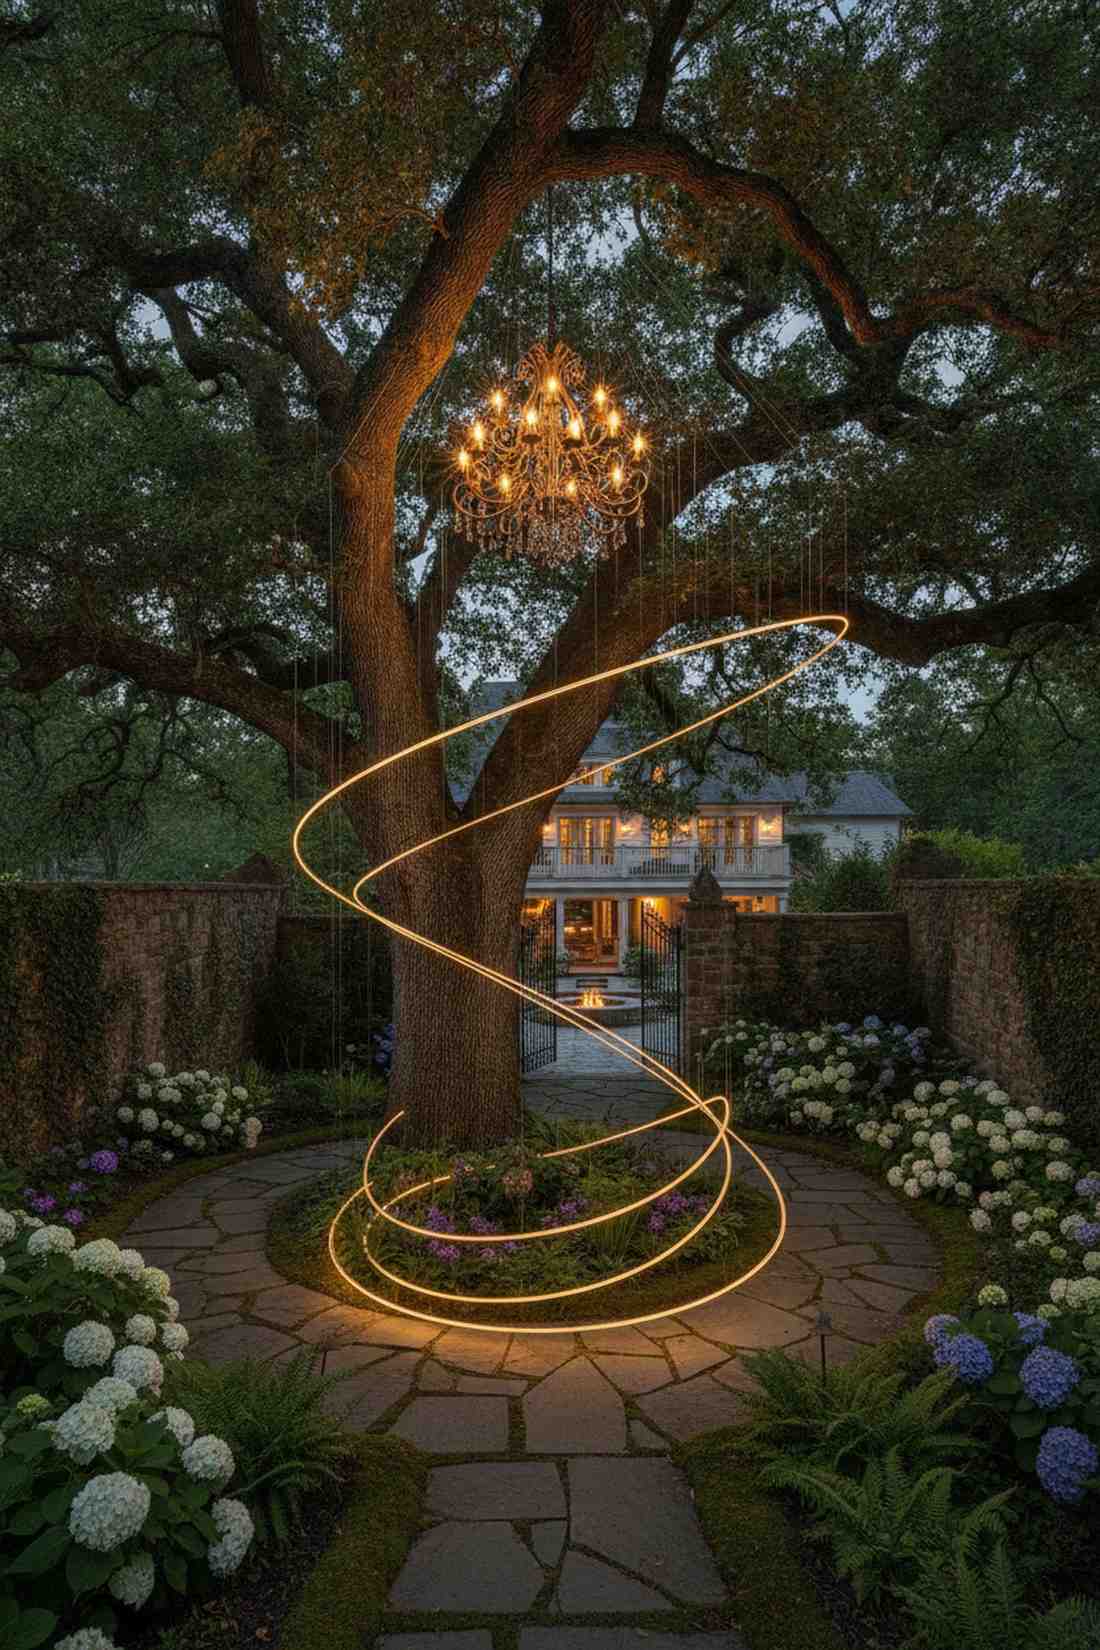
Designs a concentric garden vortex that feels delightfully whimsical and immersive. This concentric arrangement is a brilliant match for a central fountain or a solitary giant oak tree.
Spiraling inwards completely elevates a boring space into a luxury focal point with very little hardware. Lean into premium miniature garden supplies, suspending the inner loops with clear, high-test fishing line so the lights appear to levitate.
You can assemble this hypnotic display for merely $30–$55. Pin this layout to recreate a magical secret garden aesthetic.
- Key Materials: Clear suspension wire, soft-glow LED ropes
- Vibe / Style: Enchanted woodland spiral
- Difficulty: Time-consuming but simple
- Budget Breakdown: Clear wire: $10 | Lights: $35.
- Creator’s Tip: Use a central chandelier at the very middle of the spiral to ground the whole design.
- Smart Sourcing: Use a heavy-duty fluorocarbon line (bulk spool) and a pre-wired LED fairy string kit.
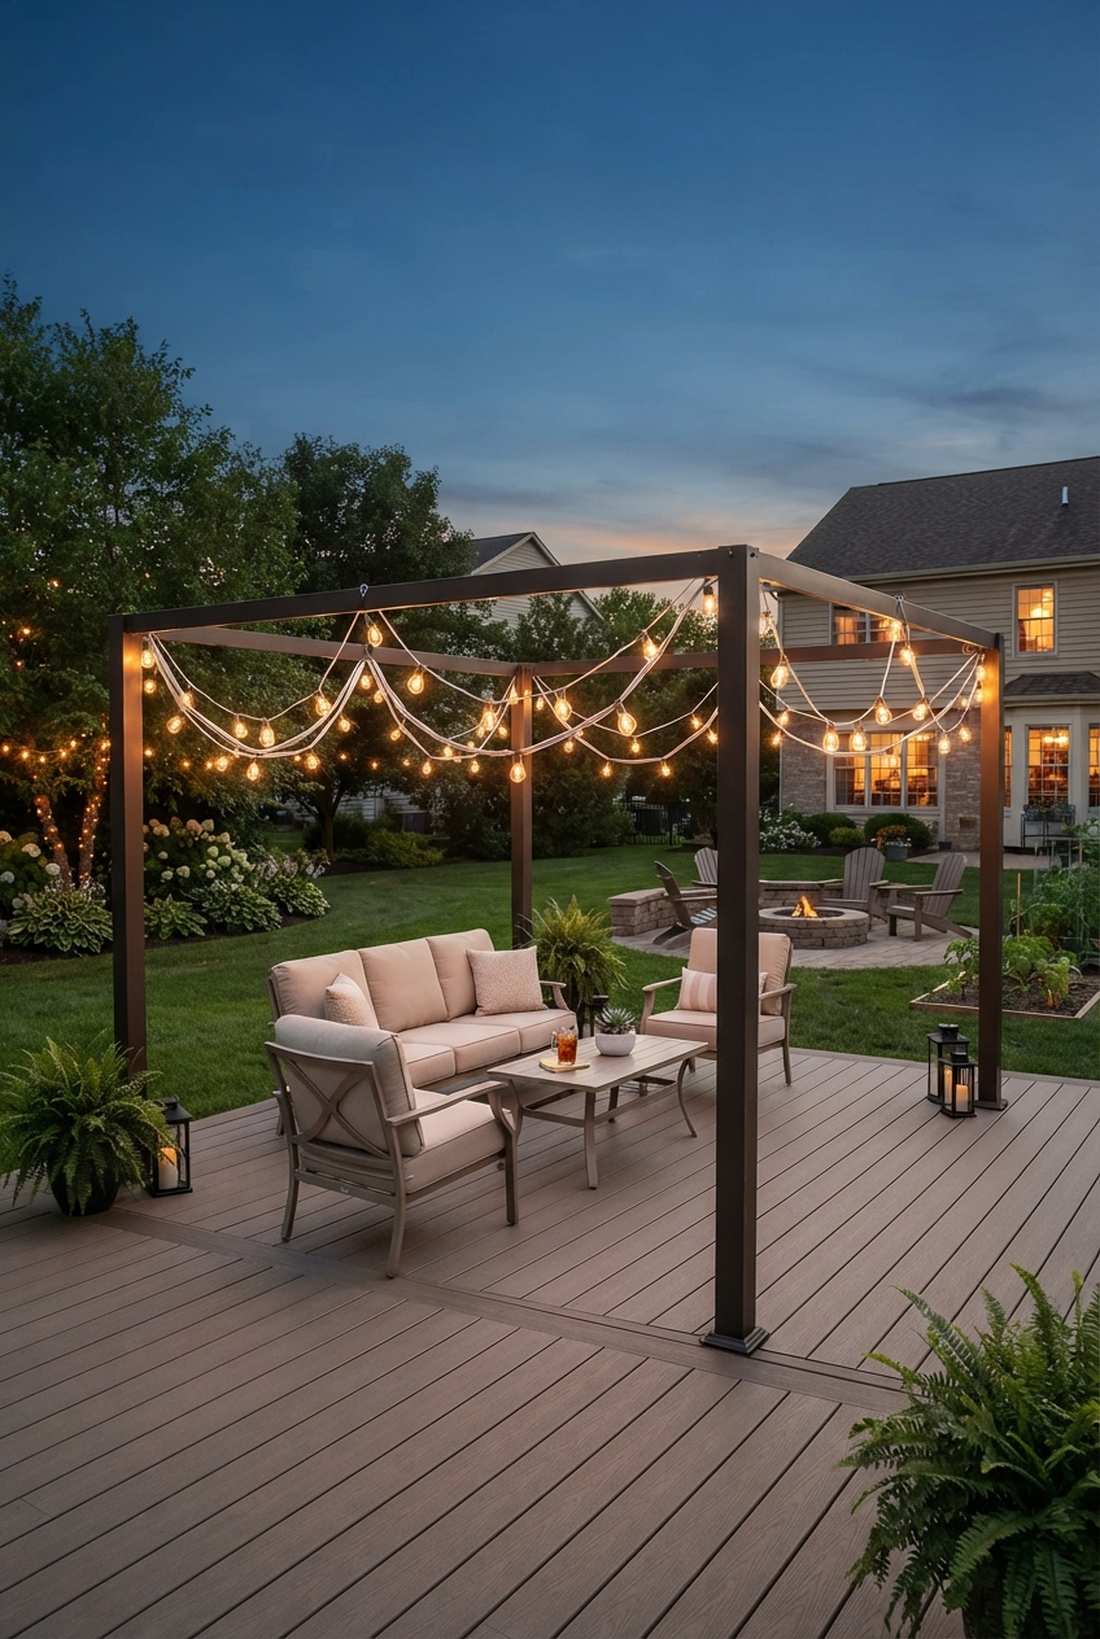
6. Draped Swag Catenary
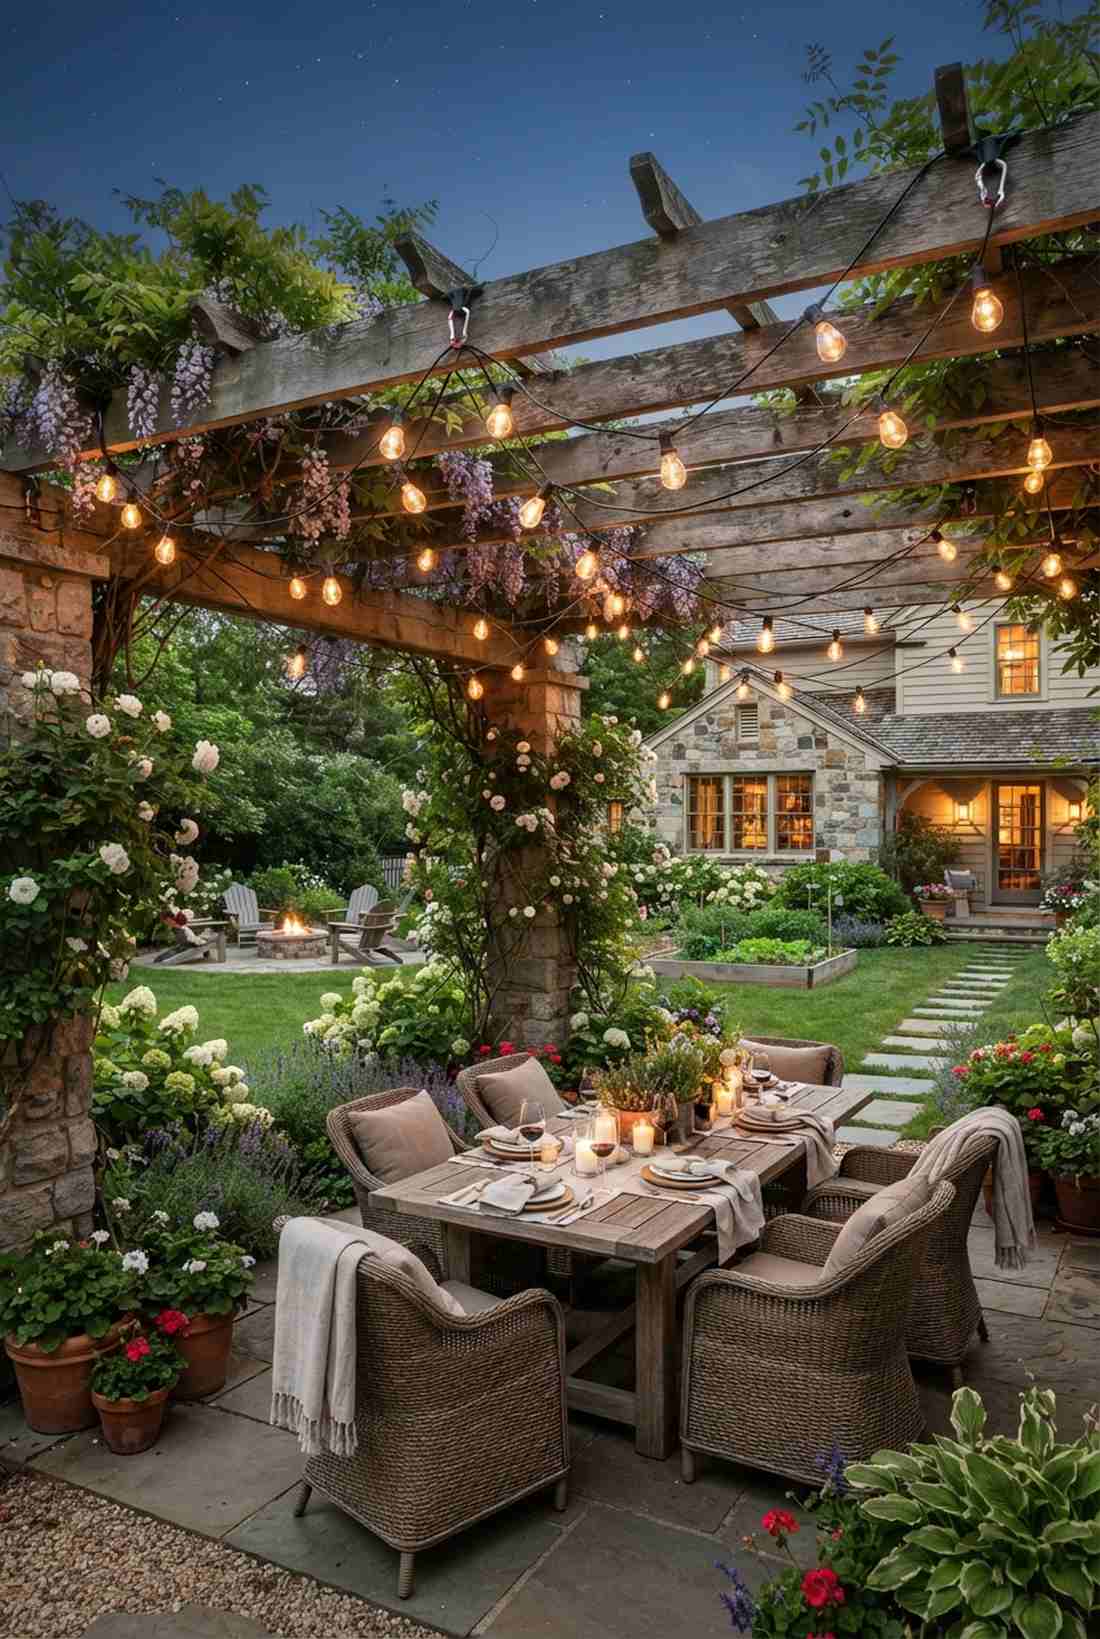
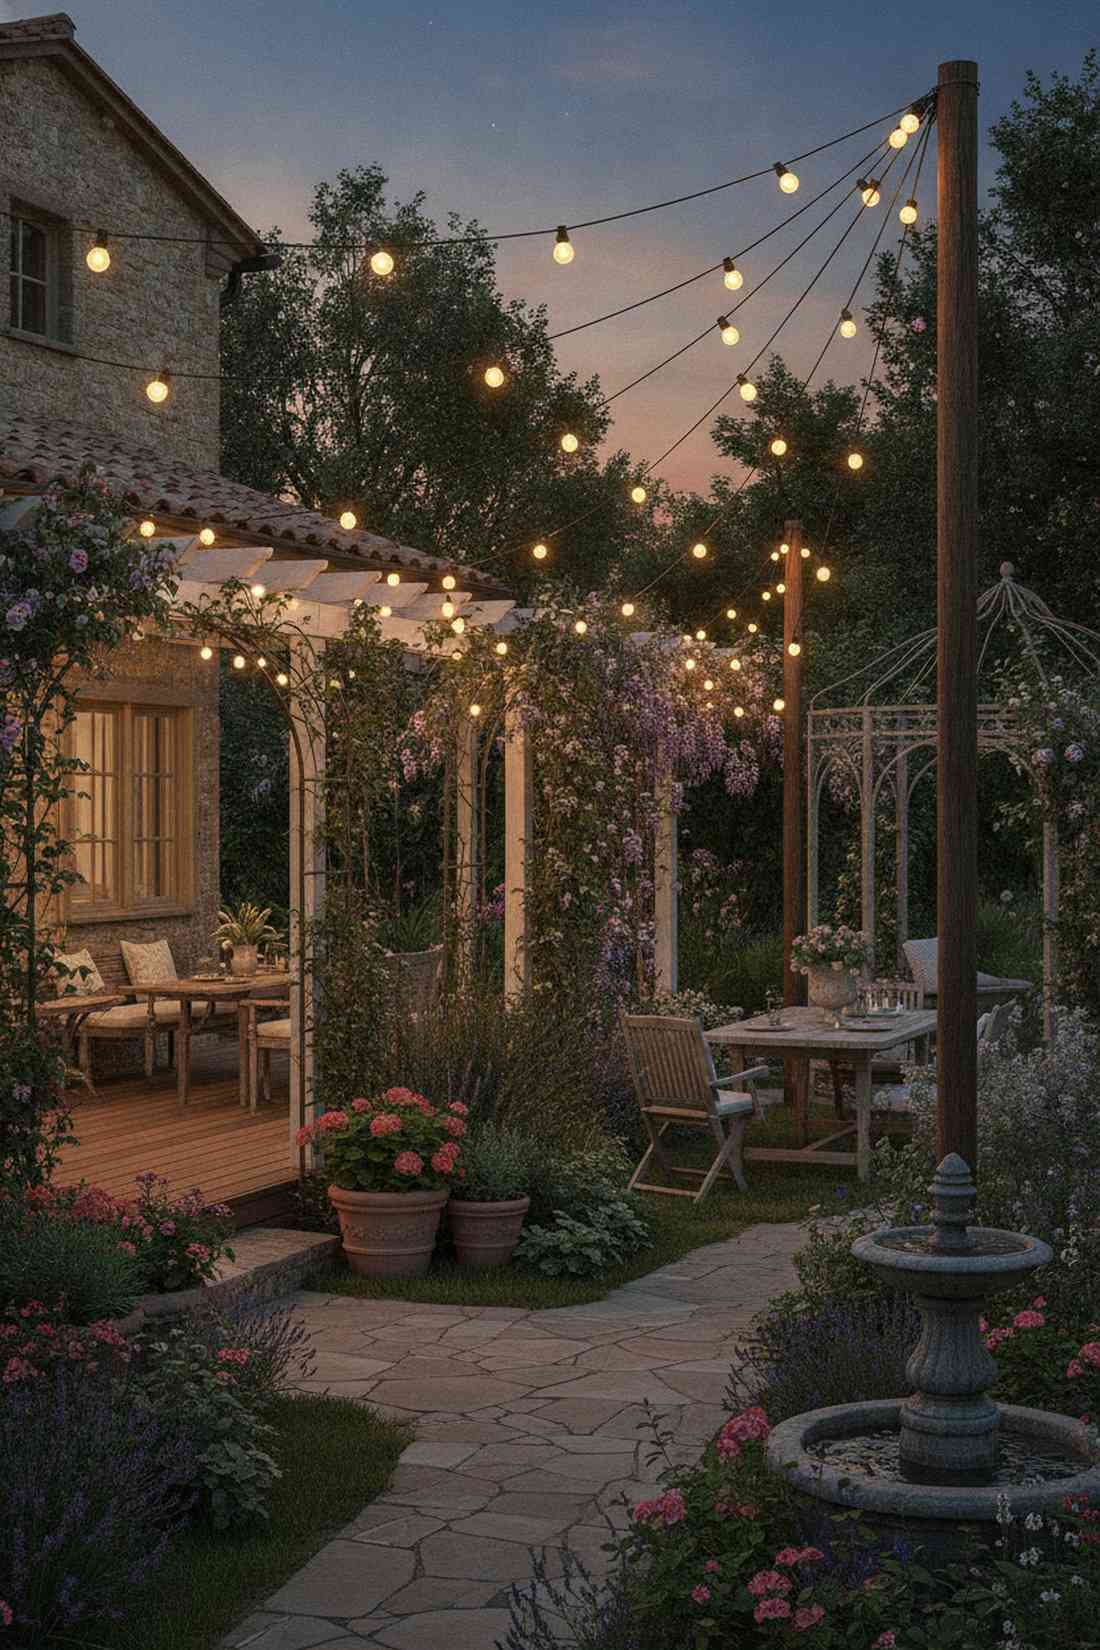
Constructs an elegant swooping canopy that feels right out of an old-world Tuscan romance. It is incredibly flattering for cottage gardens and soft, blooming pergolas.
Allowing the wires to naturally slump avoids rigid, sterile lines and is the ultimate secret to expensive-looking outdoor architecture. Pair these organic curves with weatherproof rubberized sockets so the slacked lines don’t invite water pooling.
A simple two-point swag only costs about $20–$40 to complete. It’s a gorgeous aesthetic tweak that requires zero heavy tools.
- Key Materials: C7 or C9 vintage bulbs, heavy mounting rings
- Vibe / Style: Relaxed Italian cottage
- Difficulty: Extremely beginner-friendly
- Budget Breakdown: Ring mounts: $10 | Vintage bulbs: $25.
- Creator’s Tip: Allow exactly 15% extra length in your measurements to achieve the perfect, relaxed drop.
- Smart Sourcing: Buy glass shatter-resistant C9 string bulbs and rust-proof outdoor mounting carabiners.
Pathway & Border Illumination
7. Ground Line Pathway Borders
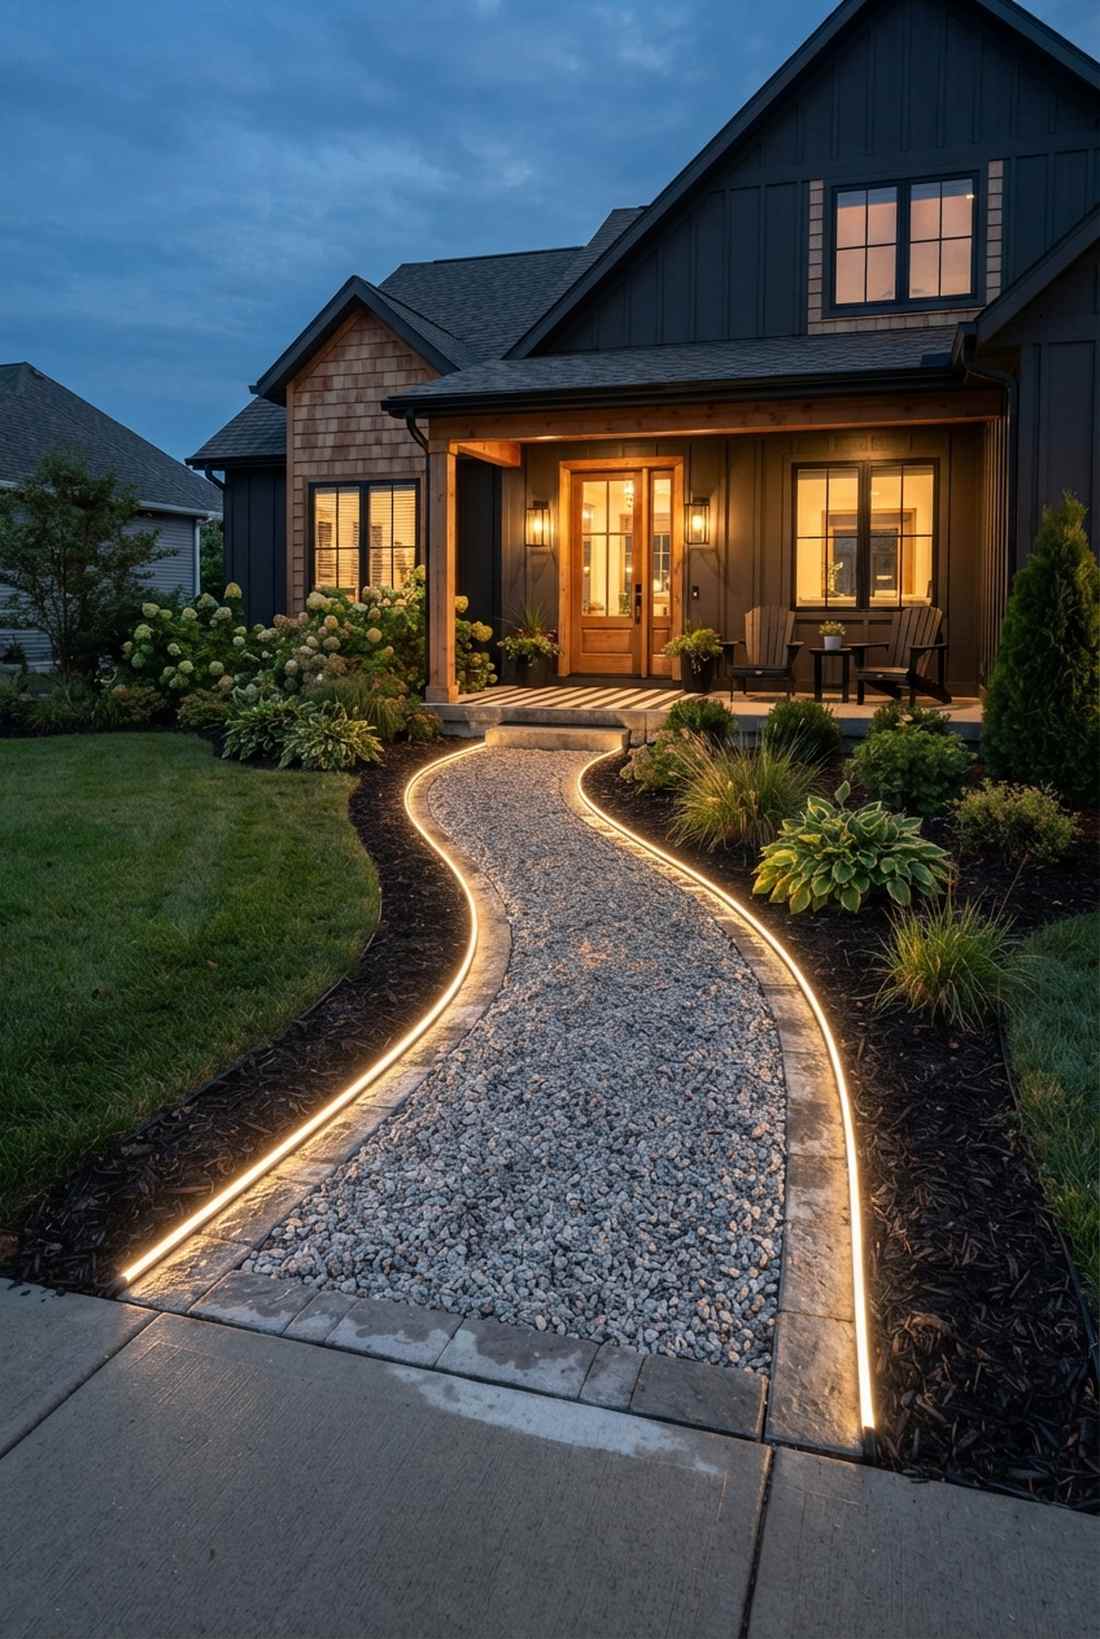
Lays out a glowing walkway perimeter that feels like a secure, inviting runway to your front door. Perfectly tailored for illuminating dense gravel paths or poured concrete sidewalks.
Keeping the cord tight to the earth entirely bypasses that cheap plastic solar-stake look. Utilize commercial low-voltage landscape wires anchored with galvanized landscape staples to ensure lawnmowers and foot traffic don’t destroy the setup.
This path upgrade generally costs $40–$60 depending on your walkway length. Save this idea if you hate traditional clunky path lights.
- Key Materials: Rope lights or ground-rated strands, metal staples
- Vibe / Style: Sleek minimalist runway
- Difficulty: Very quick ground installation
- Budget Breakdown: Staples: $15 | Rope light: $35.
- Creator’s Tip: Keep the line exactly 2 inches deep into the mulch line to hide the ugly rubber casing entirely.
- Smart Sourcing: Opt for a waterproof LED rope light (50ft spool) and heavy-duty galvanized landscape staples (bulk pack).
8. Elevated Post Corridor
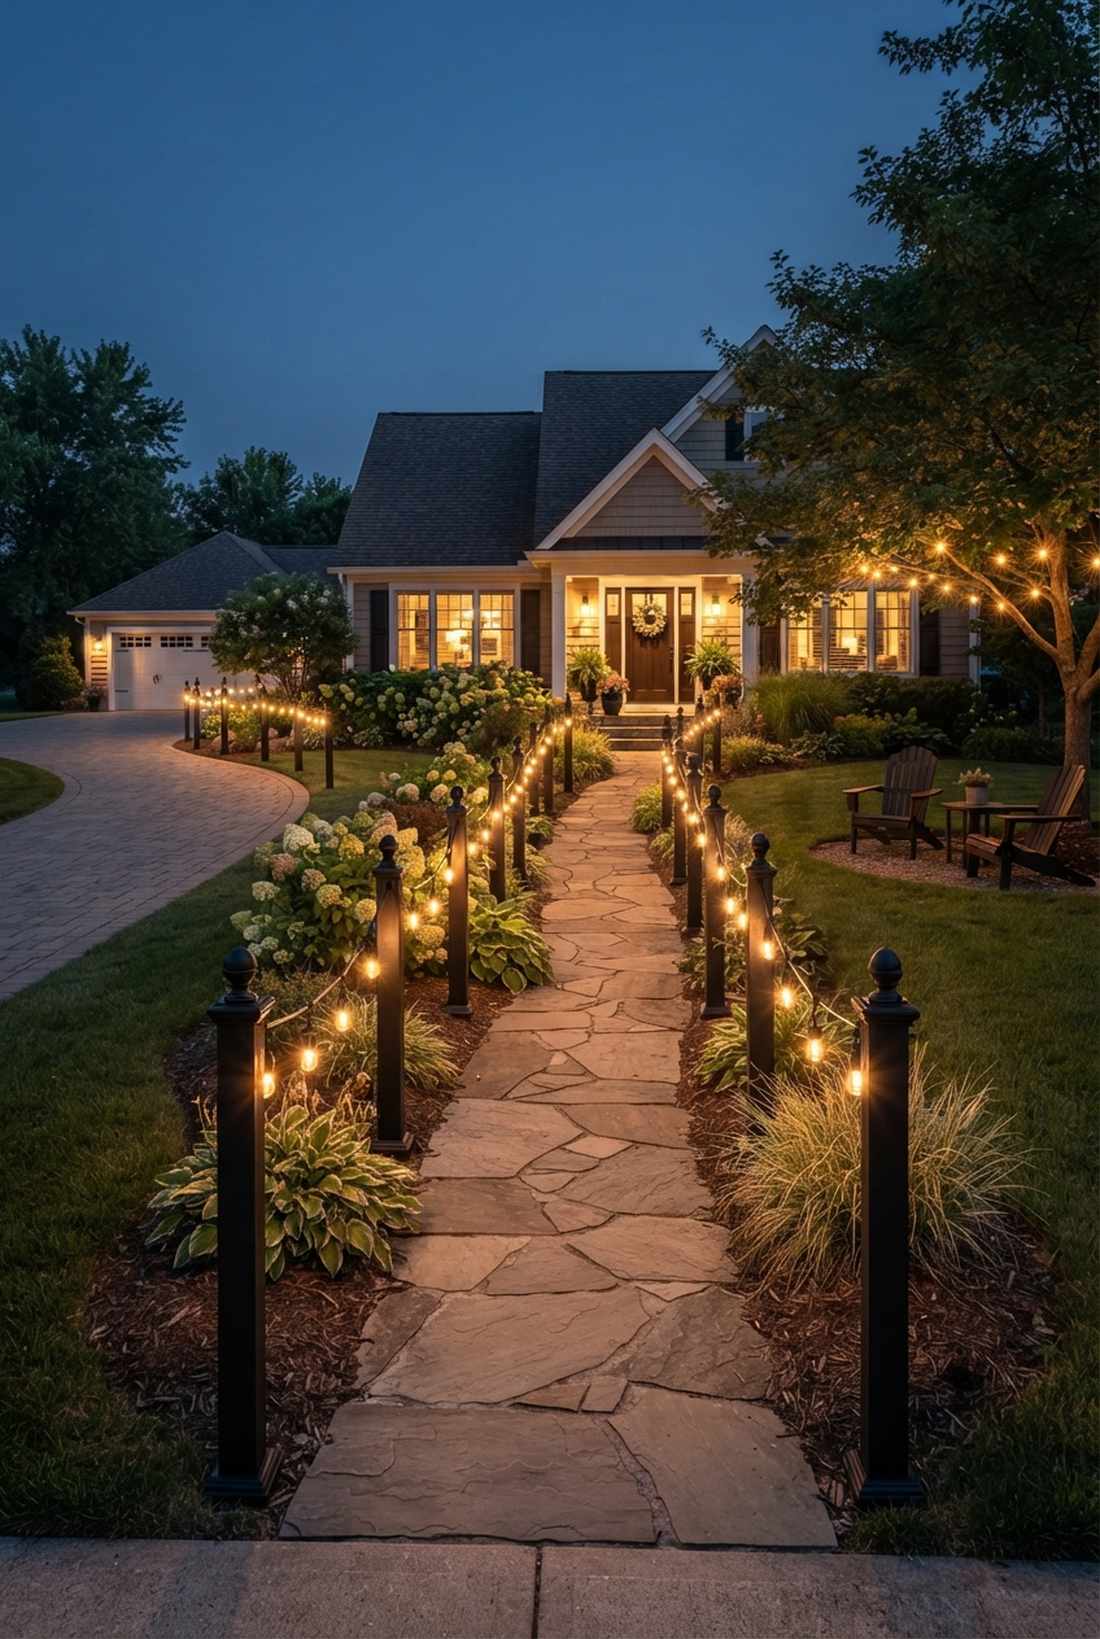
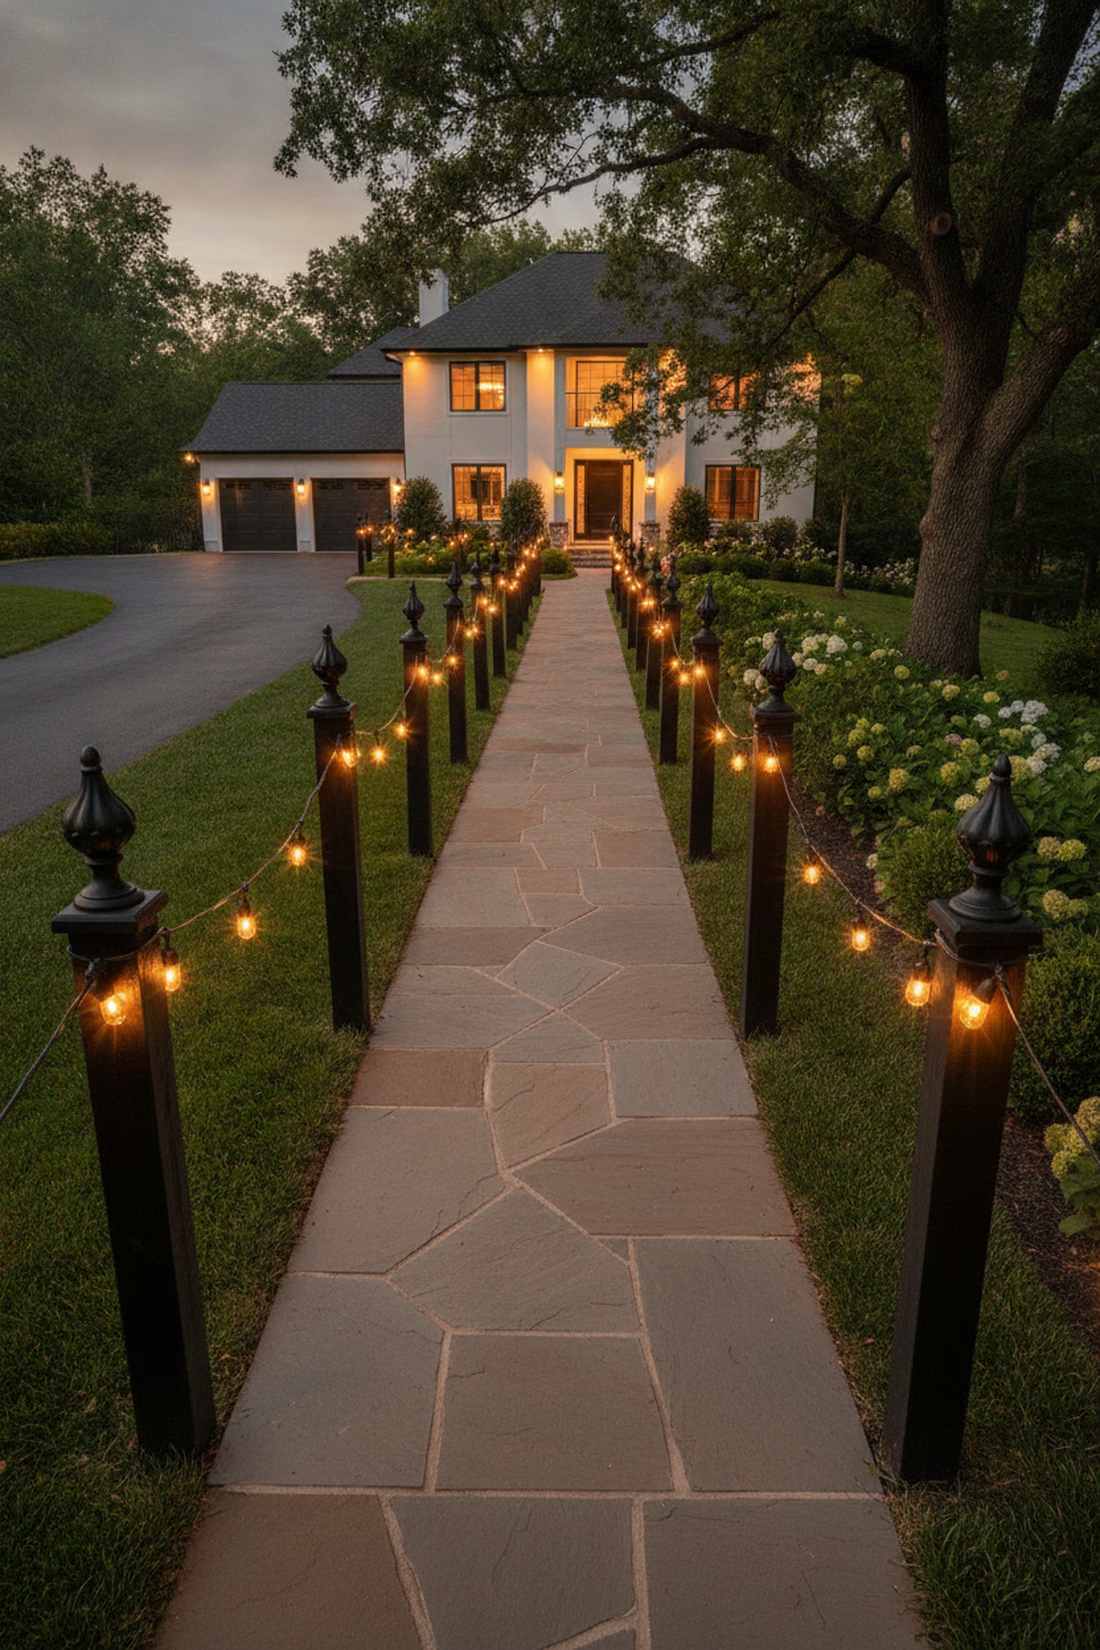
Frames an illuminated stanchion walkway that feels like a VIP entrance at a luxury resort. Ideal for lighting up sloped front yards or wide, sweeping driveways.
Stringing cords across knee-high posts instantly gives a designer-level finish while protecting the bulbs from muddy splashes. Paint some basic wooden dowels black and cap them with decorative finials to fake a highly expensive wrought-iron look.
Putting this together usually runs about $60–$90 for the lumber and lights combined. It drastically boosts nighttime curb appeal.
- Key Materials: 3ft wooden posts, black exterior paint
- Vibe / Style: Premium resort entrance
- Difficulty: Basic woodworking required
- Budget Breakdown: Wood & Paint: $40 | Lights: $35.
- Creator’s Tip: Add a drop of wood glue into the pre-drilled holes before inserting your hook screws so they never wobble out.
- Smart Sourcing: Search for pre-cut garden border posts and a low-voltage outdoor string light starter kit.
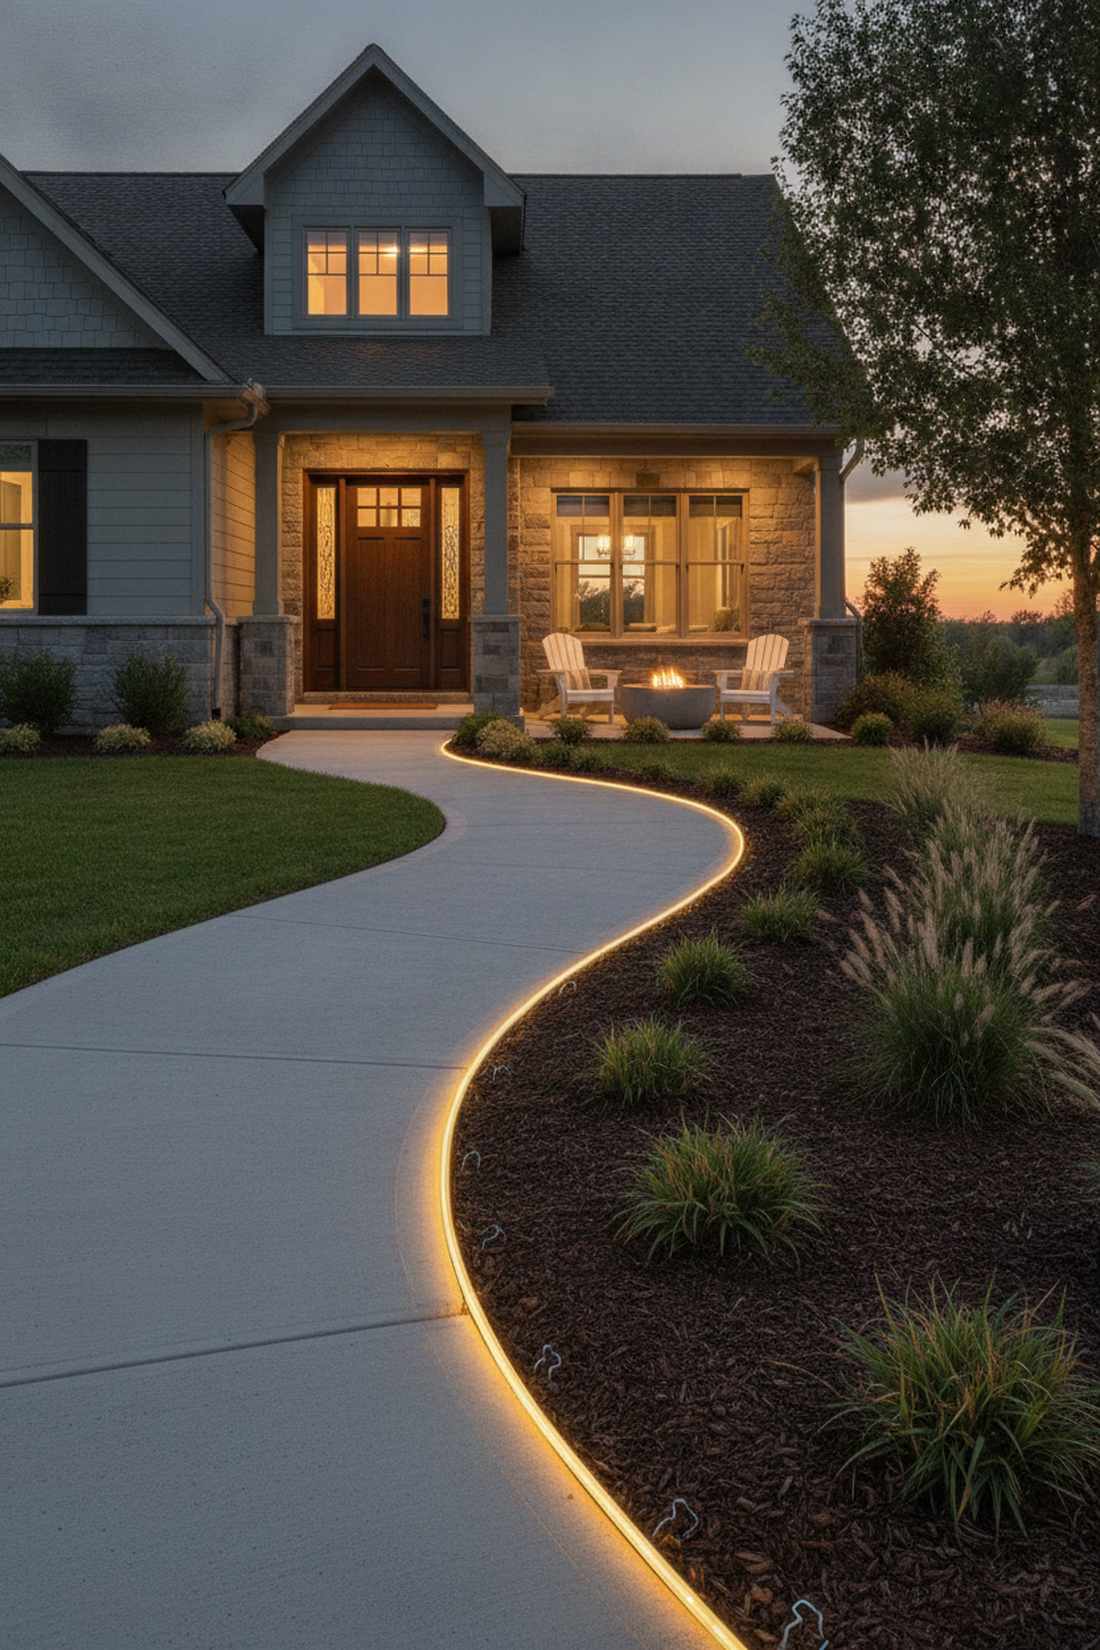
9. Garden Bed Outline Definition
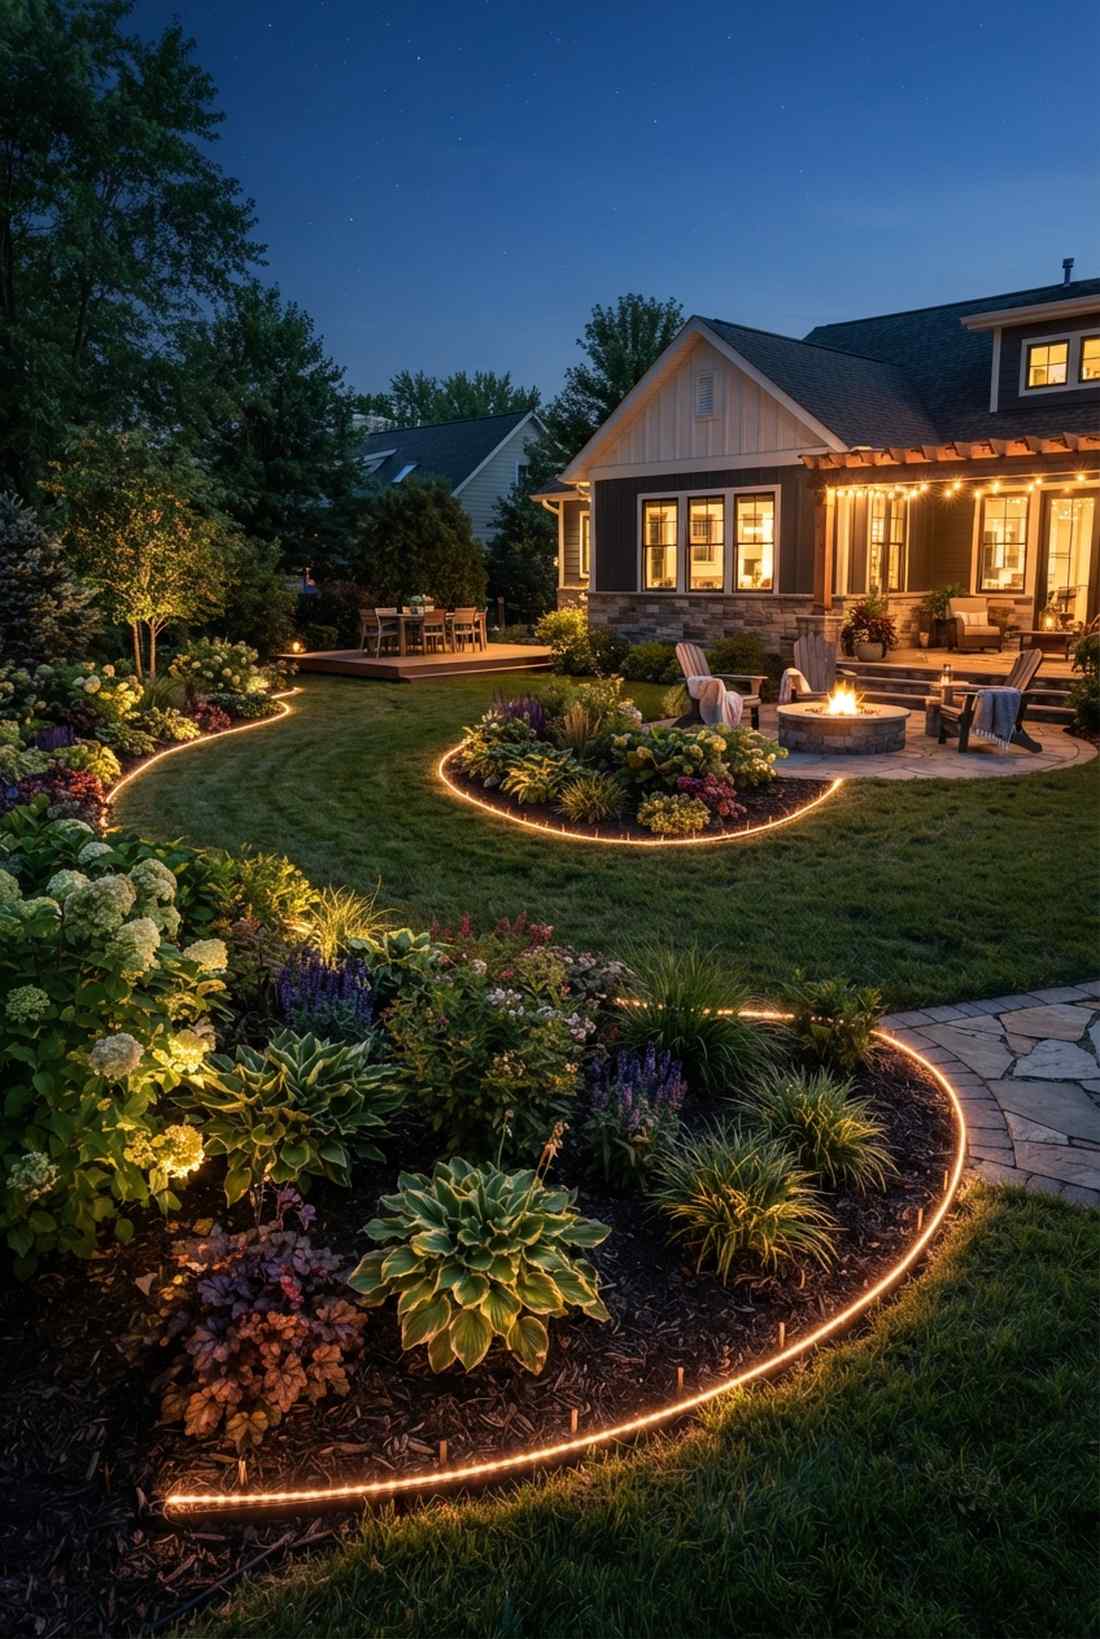
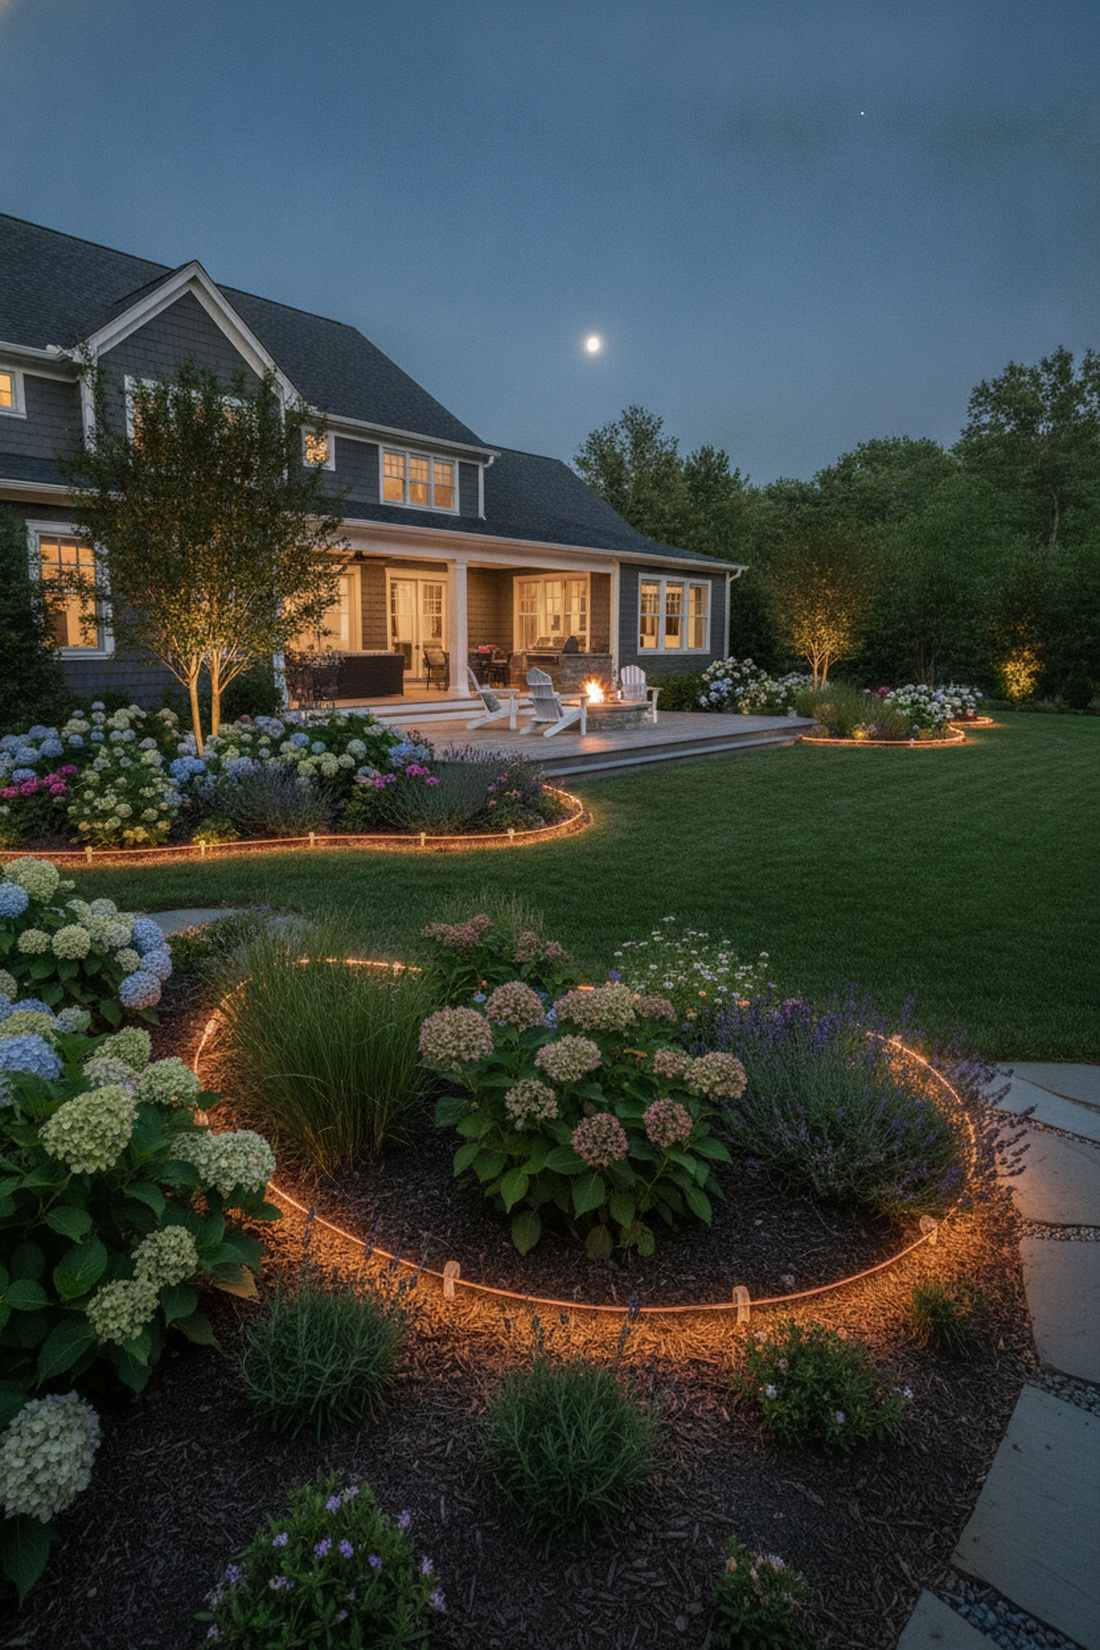
Highlights a flowing garden silhouette that feels like your plants are naturally emitting a warm glow. Extremely effective for showing off sweeping, curved flower beds.
Tracing the edge of your soil transforms basic landscaping into a magazine cover at night. Sneak the wire directly under the foliage canopy using flexible outdoor landscaping accessories, ensuring the leaves are beautifully underlit while the cables stay hidden.
This subtle perimeter hack only sets you back $25–$45. Pin this to your spring gardening board for an instant curb appeal lift.
- Key Materials: Flexible copper wire LEDs, short plastic stakes
- Vibe / Style: Hidden ethereal garden
- Difficulty: Fun and easy mapping
- Budget Breakdown: Stakes: $10 | Copper LEDs: $20.
- Creator’s Tip: Water the soil an hour before pushing the stakes in—it prevents the cheap plastic clips from snapping.
- Smart Sourcing: Order UV-coated copper wire lights and invisible garden wire clips (bulk pack).
Most people get this completely wrong… until they try the exact backyard layout coming up next.
💡 Must-Have Supplies for High-End Setups
To build these setups faster and ensure they last, skip the generic craft aisles and invest in the right foundational kits.
- Base & Support: Pre-cut stainless tension wire kits
- Setup Tools: Heavy-duty staple guns with galvanized outdoor staples
- Weather/Durability Protection: Clear silicone electrical sealant spray
10. Stairway Handrail Integration
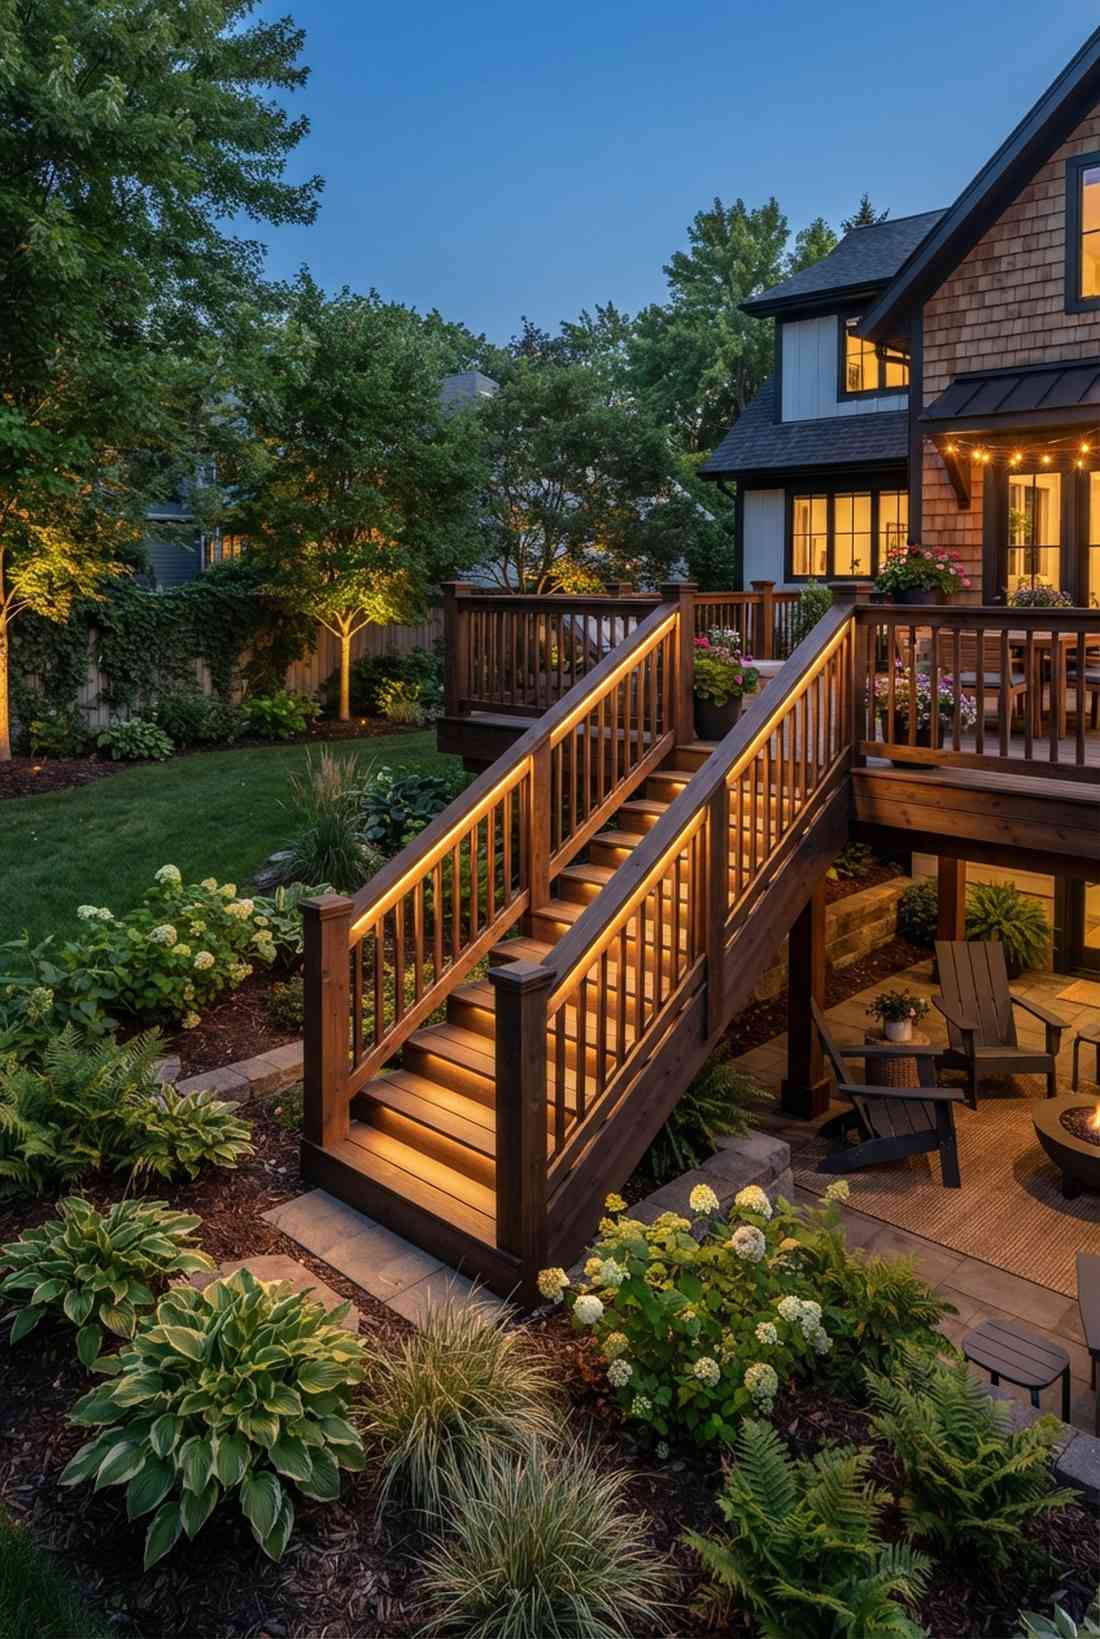
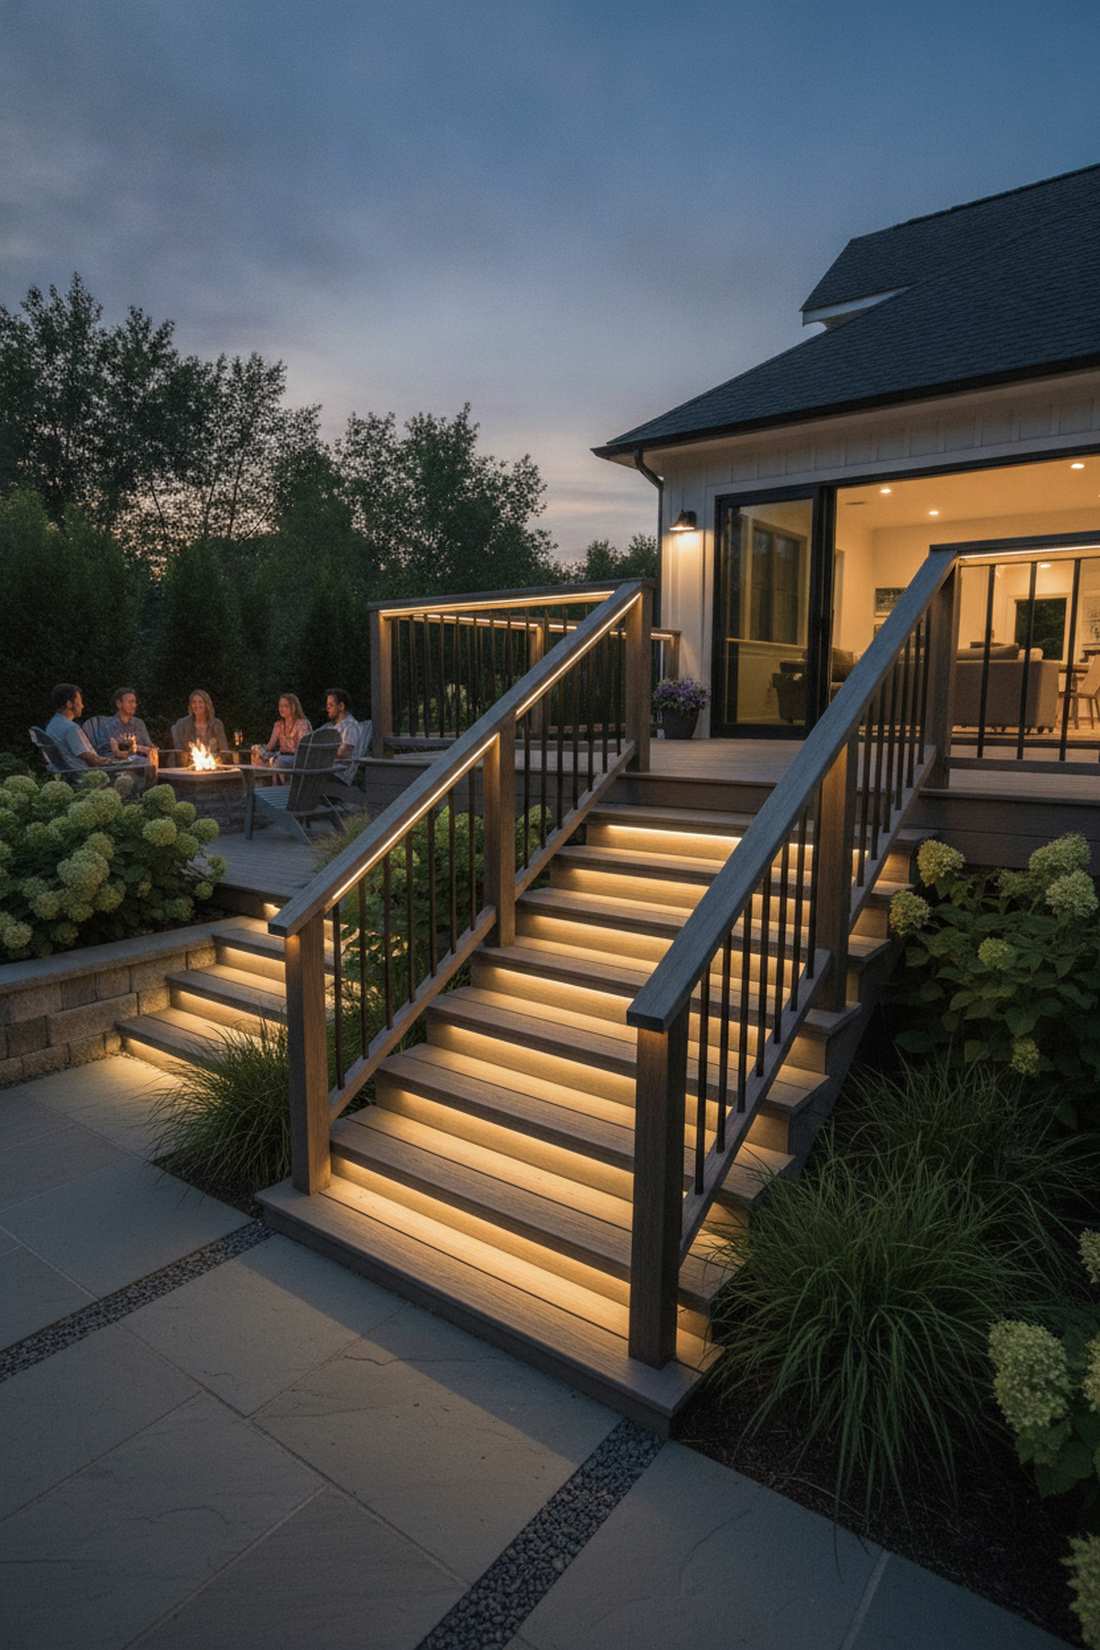
Builds a glowing stair safety rail that feels like modern architectural task lighting. It’s a brilliant way to handle steep deck steps or multi-level terraced garden transitions.
Tucking the bulbs tightly beneath the handrail avoids the dreaded cluttered backyard syndrome while keeping guests safe from tripping. Utilize a slim line of UV-resistant micro-LEDs zip-tied out of direct sight, mimicking the look of custom $500 hardwired step lights.
This functional upgrade usually costs a mere $15–$30. It’s a highly practical safety tweak with a luxury visual payoff.
- Key Materials: Flat-backed LED strip or micro string, micro zip-ties
- Vibe / Style: Modern integrated architecture
- Difficulty: Fast under-mounting
- Budget Breakdown: Micro-ties: $5 | Flat LED: $20.
- Creator’s Tip: Always face the bulbs inward toward the steps to eliminate blinding glare when walking up.
- Smart Sourcing: Use an outdoor waterproof LED strip kit and black UV-rated micro cable ties.
11. Retaining Wall Cap Lighting
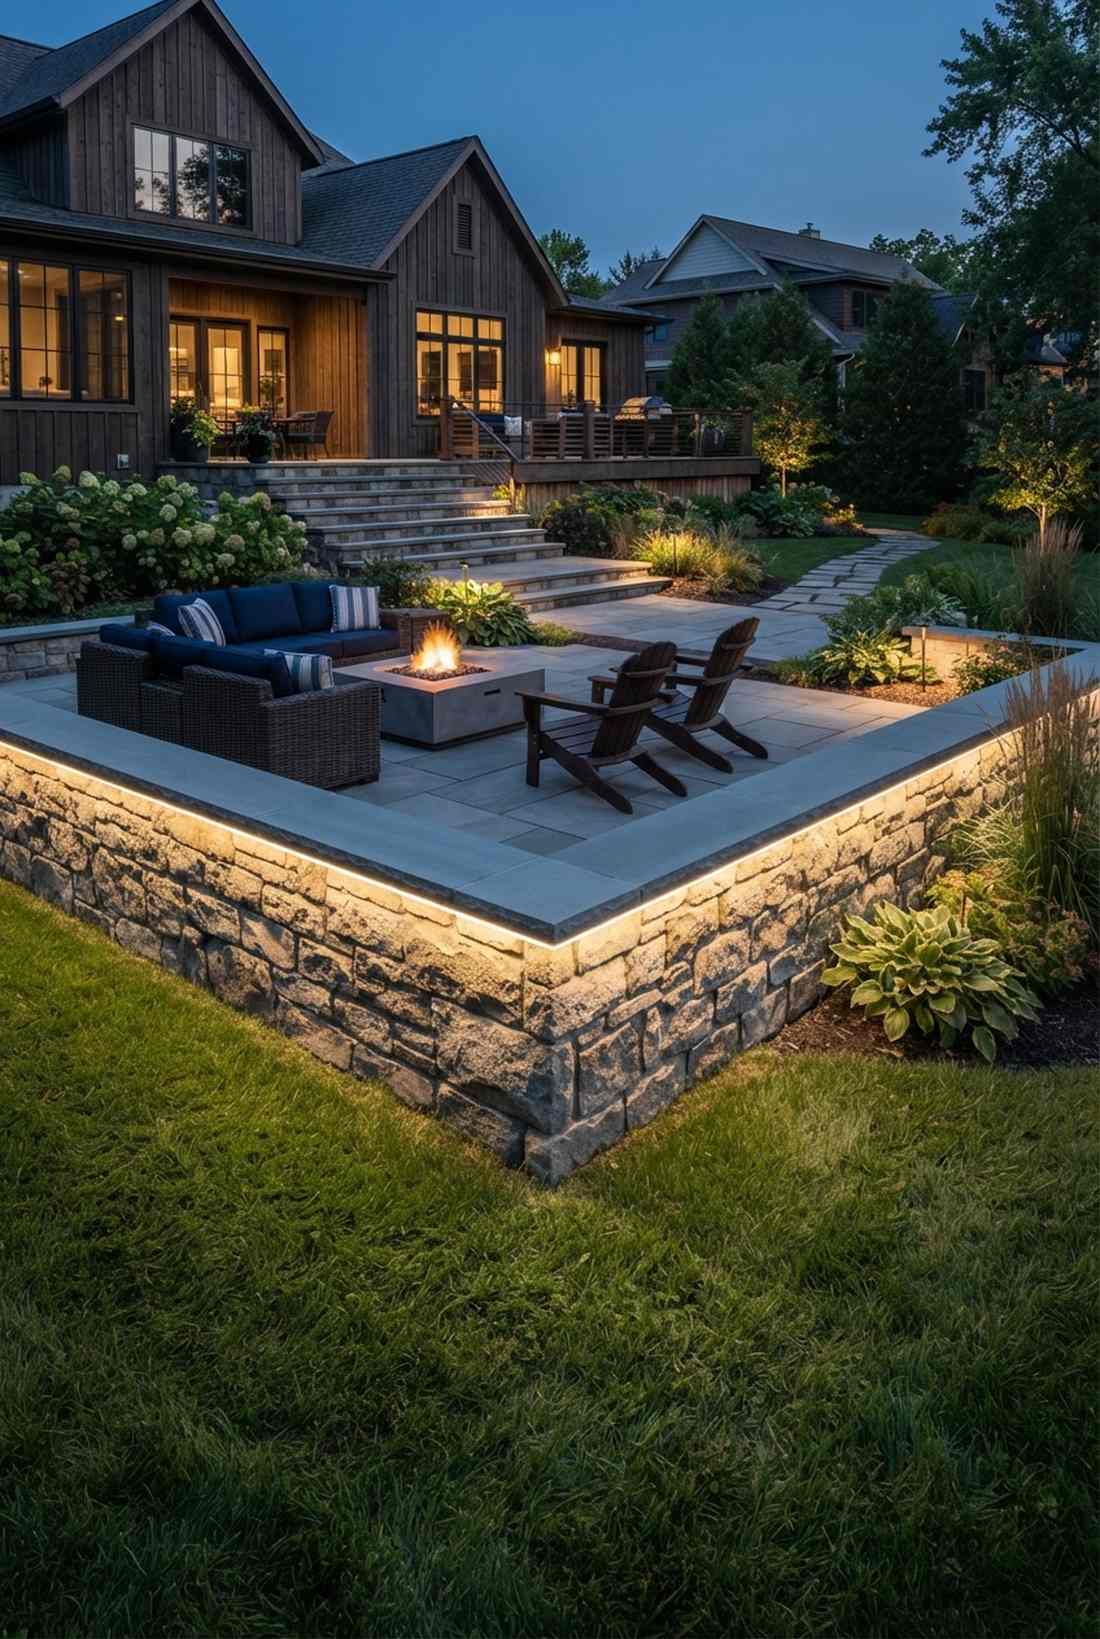

Creates a floating stone ledge effect that feels incredibly structured and robust. Perfect for washing light down a textured brick or concrete block retaining wall.
Mounting the strand right below the lip delivers a surprisingly premium look by dramatically casting shadows across the stonework. Skip drilling into the masonry; instead, use industrial-grade exterior adhesive clips that easily survive seasonal freeze-thaw cycles.
You can execute this faux hardscape lighting for about $35–$55. Save this to your exterior hardscaping board for an easy weekend project.
- Key Materials: Heavy-duty exterior adhesive tape, outdoor light rope
- Vibe / Style: High-end luxury estate
- Difficulty: Simple peel-and-stick
- Budget Breakdown: Tape: $15 | Rope lights: $30.
- Creator’s Tip: Scrub the underside of the wall cap with a wire brush and rubbing alcohol before applying the adhesive clips.
- Smart Sourcing: Get a flat outdoor LED rope light spool and extreme-weather double-sided mounting tape.
Tree & Vertical Installations
12. Trunk Wrapped Spiral Ascent
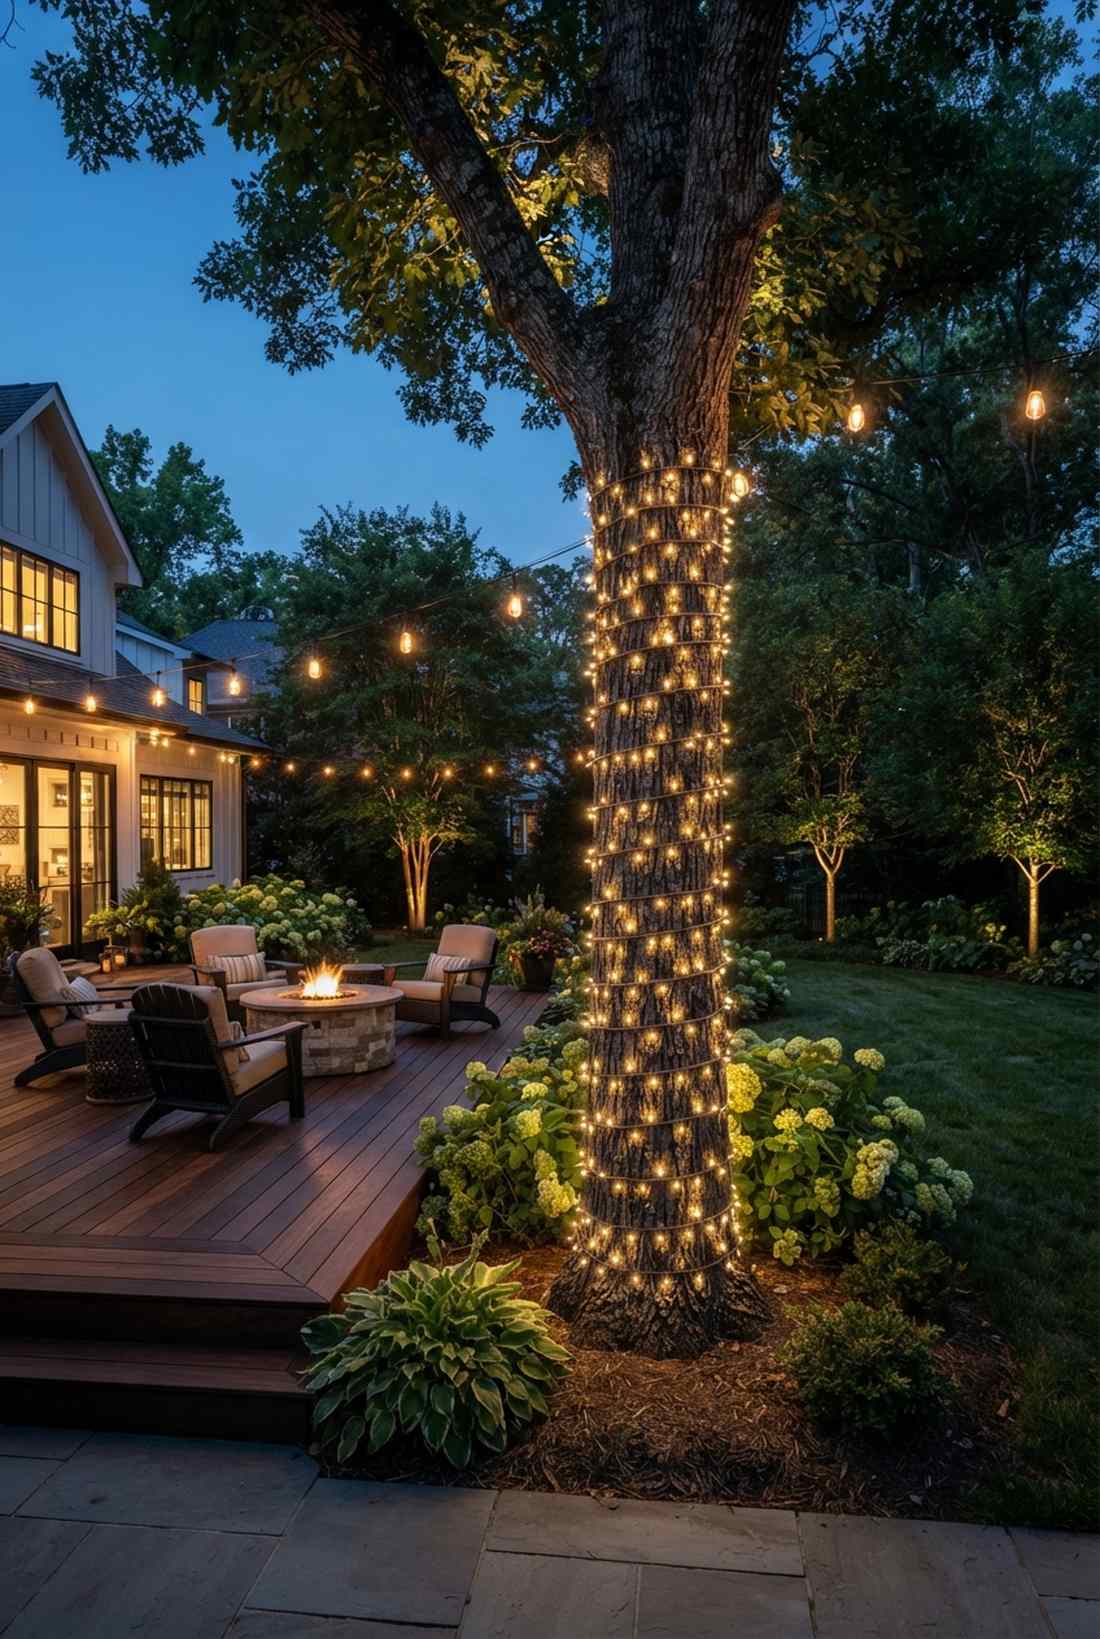

Wraps a luminous living column that feels right out of a high-end botanical garden event. This technique brilliantly anchors the deep corners of your yard using mature, thick-barked trees.
Using a tight, uniform coil completely elevates a boring backyard into a luxury retreat. Don’t choke the tree with cheap wire; utilize premium commercial stretch-cords that naturally expand as the tree trunk breathes and grows over the summer.
Wrapping a large trunk properly takes about $40–$70 in supplies. It completely reshapes the vertical depth of your property at night.
- Key Materials: Stretchable outdoor string lights, tree-safe padding
- Vibe / Style: Magical botanical garden
- Difficulty: Physically demanding but straightforward
- Budget Breakdown: Padding: $10 | Commercial string: $45.
- Creator’s Tip: Keep a strict 6-inch spacing between each wrap layer; inconsistency instantly ruins the professional look.
- Smart Sourcing: Buy an expandable commercial tree wrap light kit and brown tree-safe mounting bands.
13. Branch Draping Canopy Glow
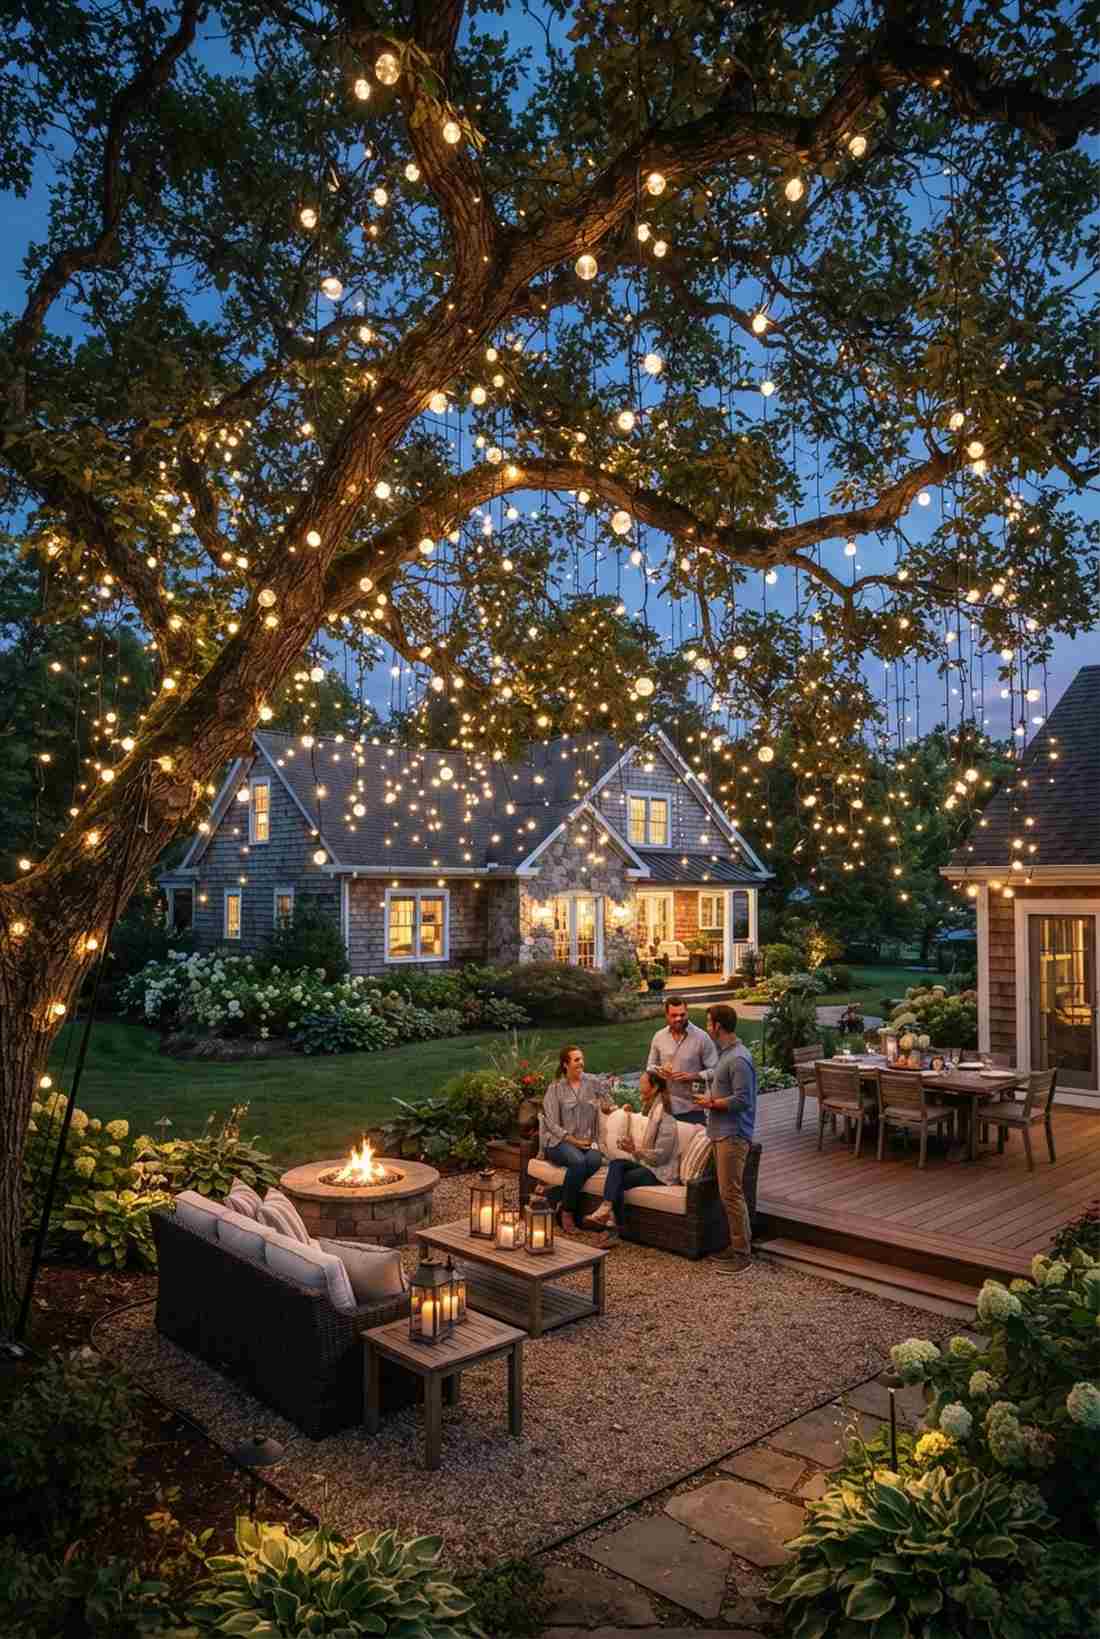
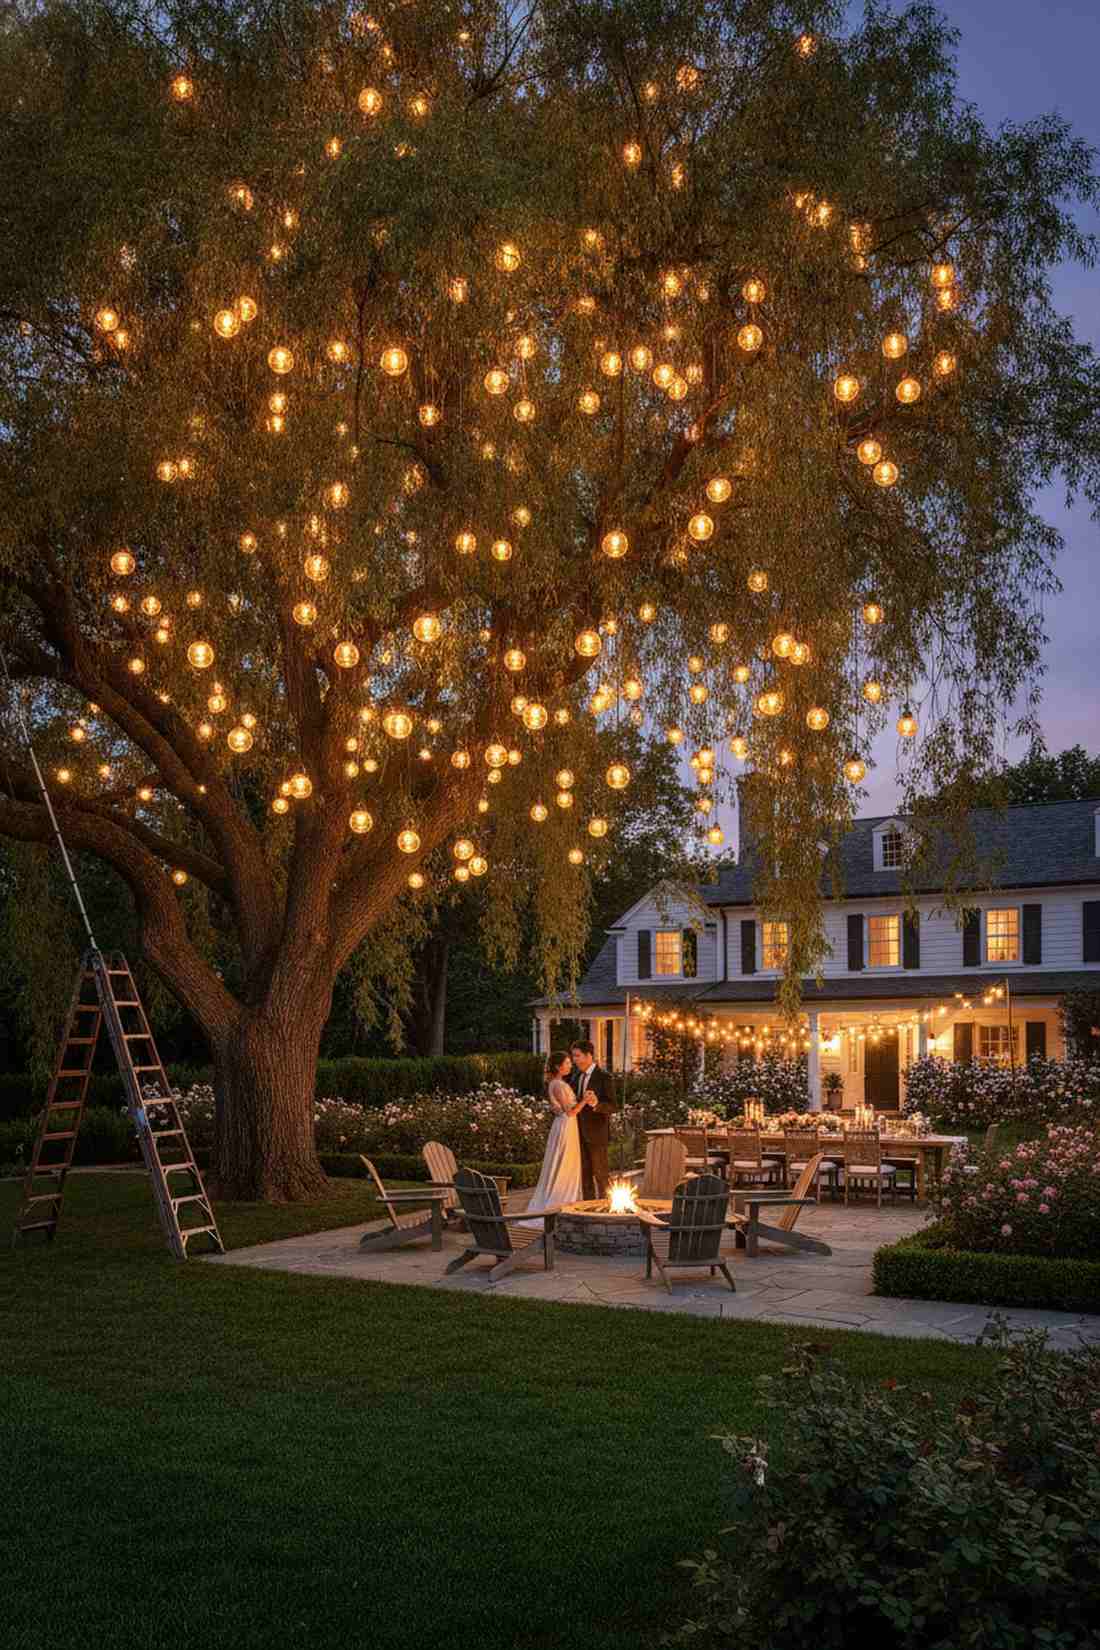
Produces a glowing weeping willow effect that feels incredibly romantic and majestic. Works phenomenally well with wide-spreading maples or twisting oak branches.
Draping lights loosely over the limbs avoids that rigid, choked aesthetic and looks far more expensive than it is. Integrate dark-wire strands so the cables completely disappear against the bark during the daytime, leaving only suspended orbs of light.
Expect to spend $50–$80 to properly fill out a large canopy. Save this to your outdoor wedding or summer party planning board.
- Key Materials: Brown-wire globe lights, extension poles
- Vibe / Style: Romantic estate grounds
- Difficulty: Requires a tall ladder or pole
- Budget Breakdown: Pole hook: $20 | Brown-wire lights: $40.
- Creator’s Tip: Start from the trunk and push the plugs outward toward the branch tips so you don’t end up with cords dangling mid-air.
- Smart Sourcing: Pick up a brown-wire outdoor cafe light strand and a telescoping hanger pole (starter kit).
14. Vertical Drop Curtain
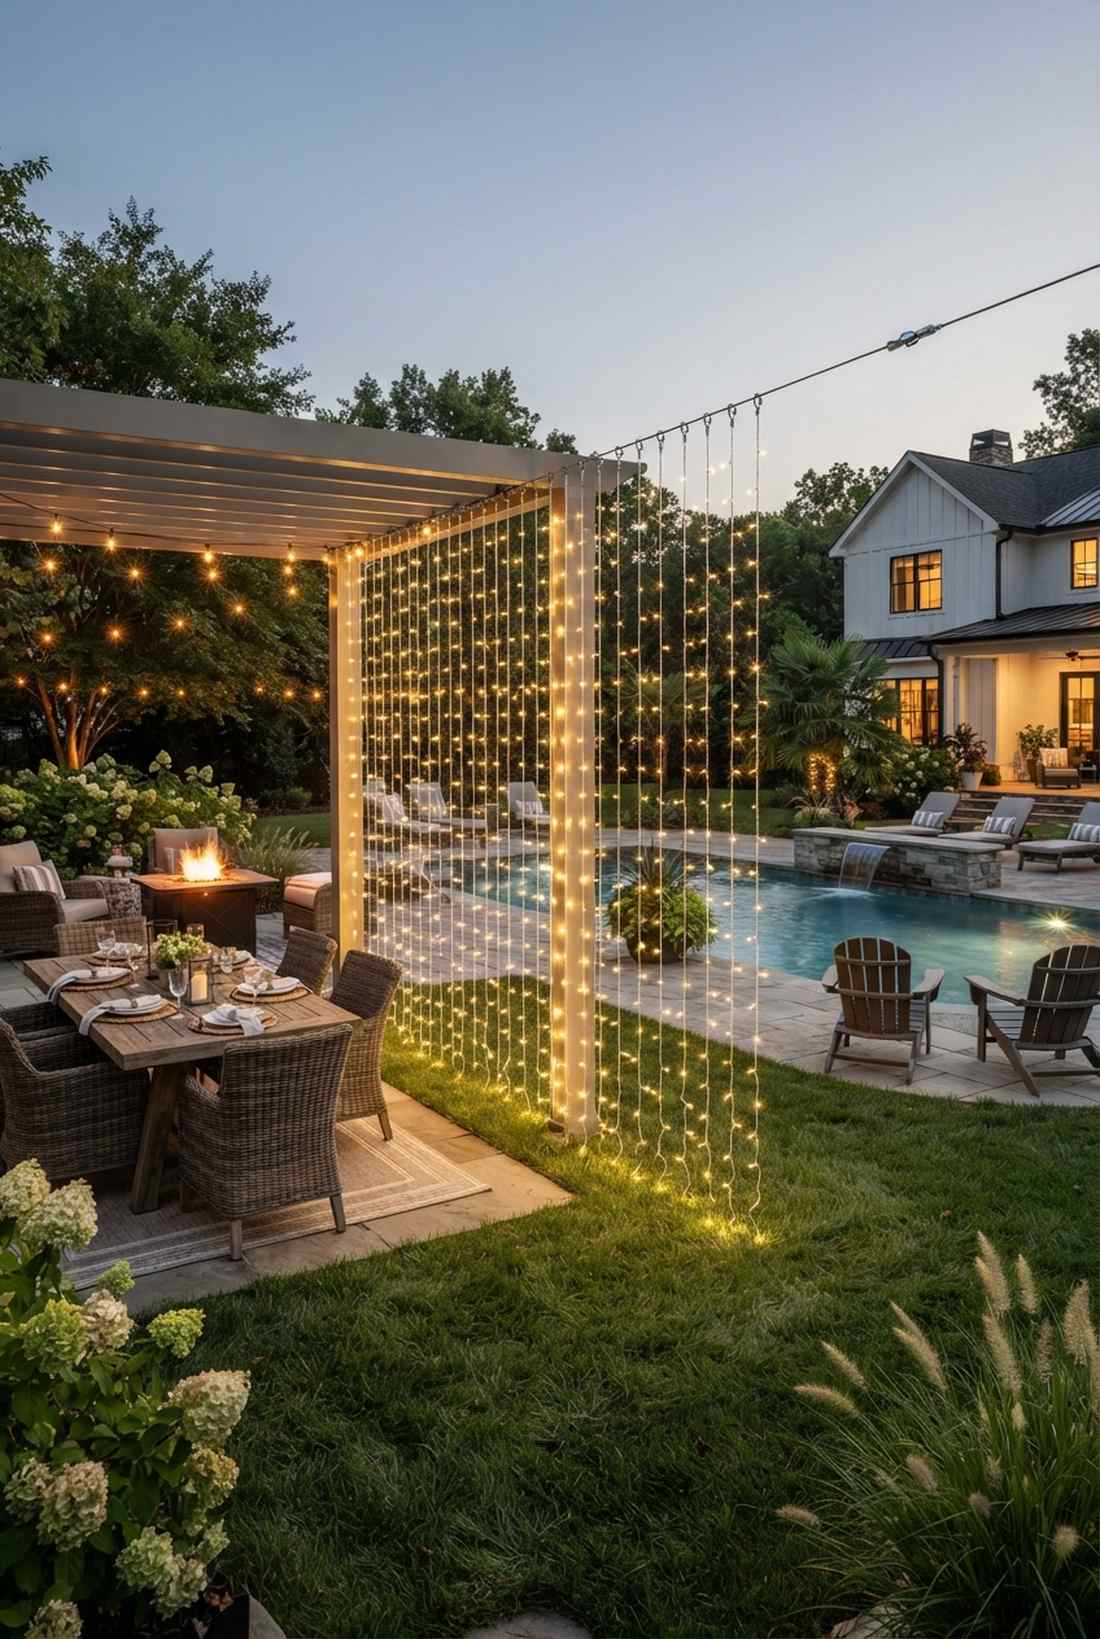
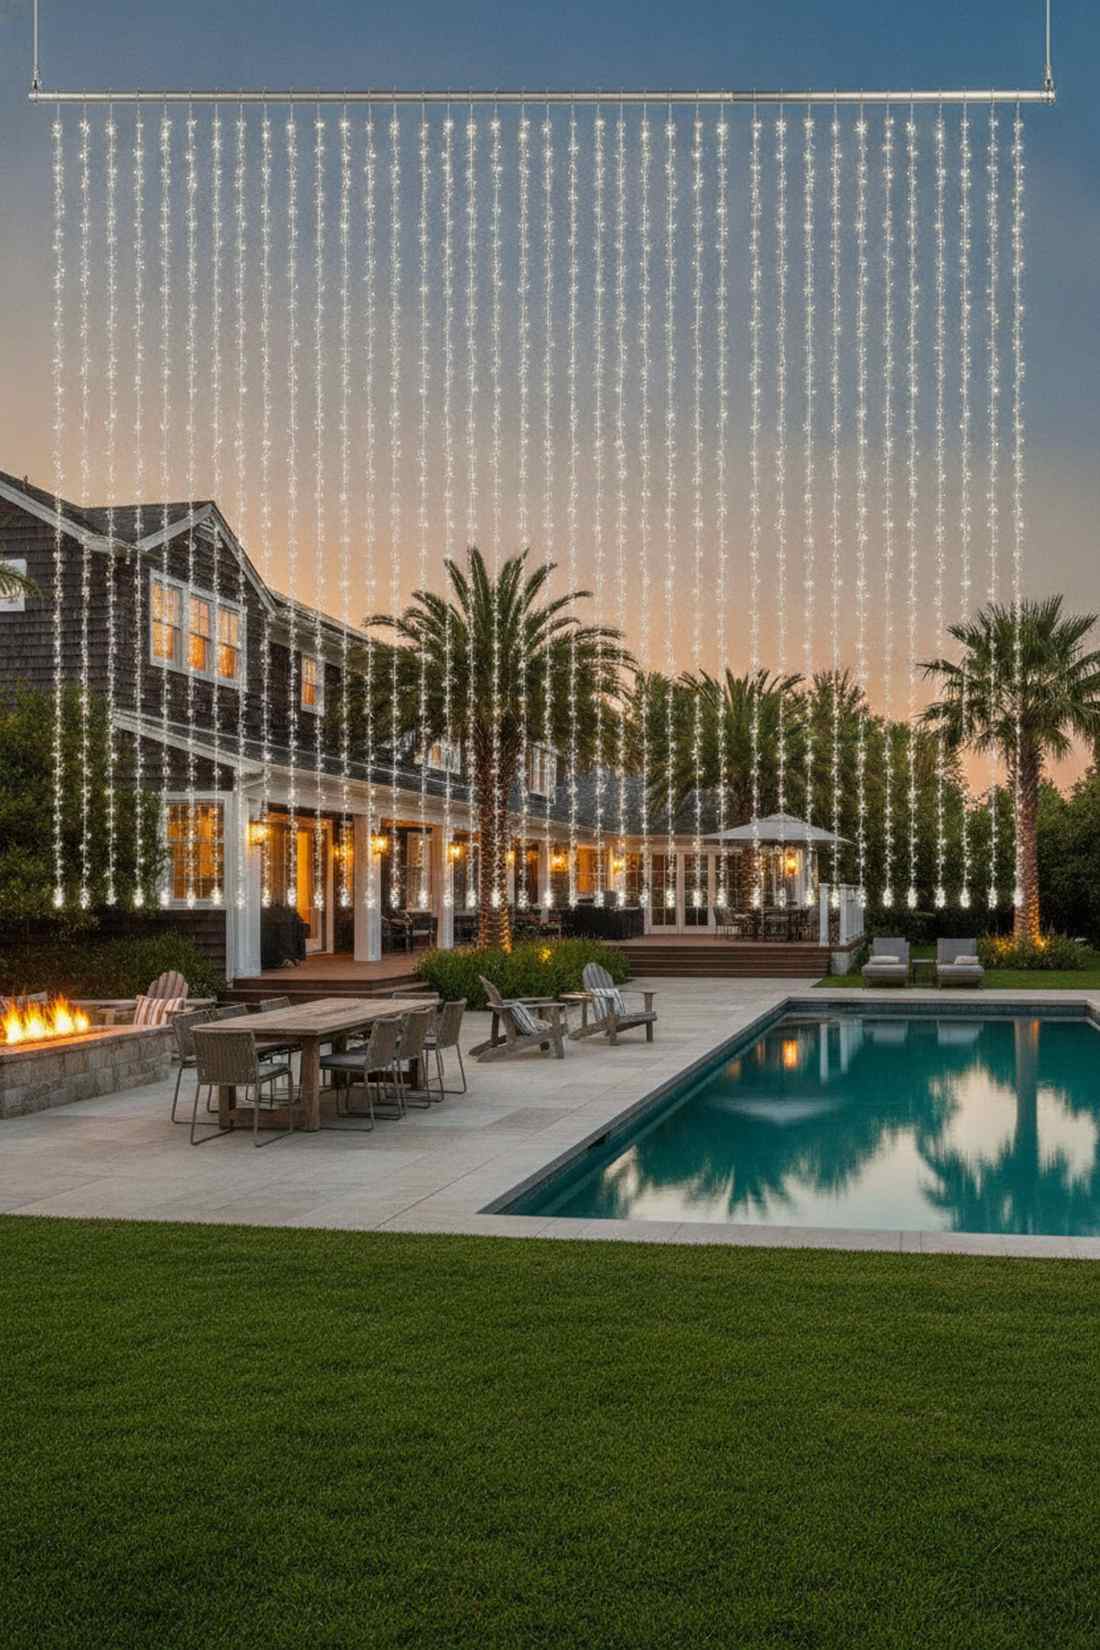
Fashions an illuminated room divider that feels like an exclusive VIP cabana. It is the absolute best way to separate a dining patio from a pool area.
Dropping dense vertical lines gives a designer-level finish that instantly creates privacy while radiating ambient warmth. Mount a high-tension steel cable up top and hang pre-measured icicle drops to fake the look of a $1000 custom light wall.
A solid 10-foot curtain wall runs roughly $45–$75. Pin this if you need a chic way to segment your large backyard.
- Key Materials: Waterfall curtain lights, tension top-wire
- Vibe / Style: Luxury poolside cabana
- Difficulty: Fast clip-on installation
- Budget Breakdown: Top wire: $15 | Curtain lights: $40.
- Creator’s Tip: Let the bottom bulbs hover exactly one inch above the grass to keep them out of wet soil and mower paths.
- Smart Sourcing: Grab an outdoor LED waterfall curtain string (pre-cut drops) and a stainless suspension cable kit.
Wait until you see the genius trick in number 18—it literally costs zero extra dollars but doubles the aesthetic.
15. Multi-Tree Connection Web
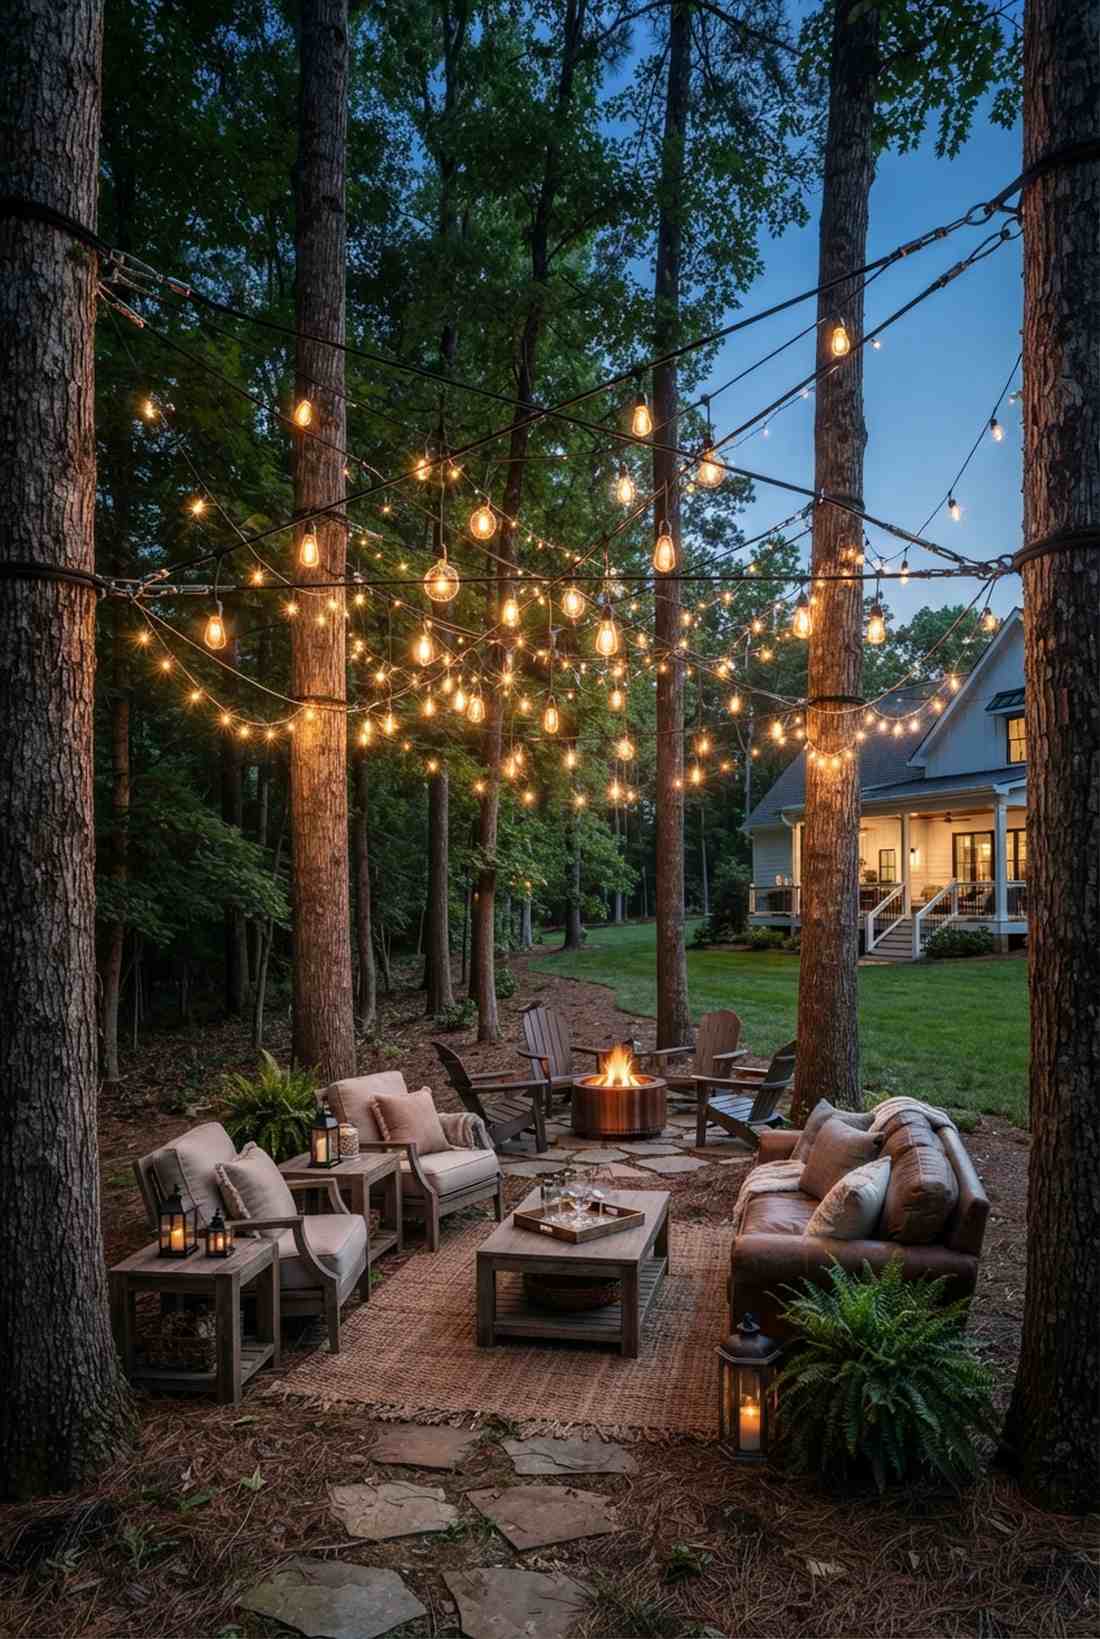
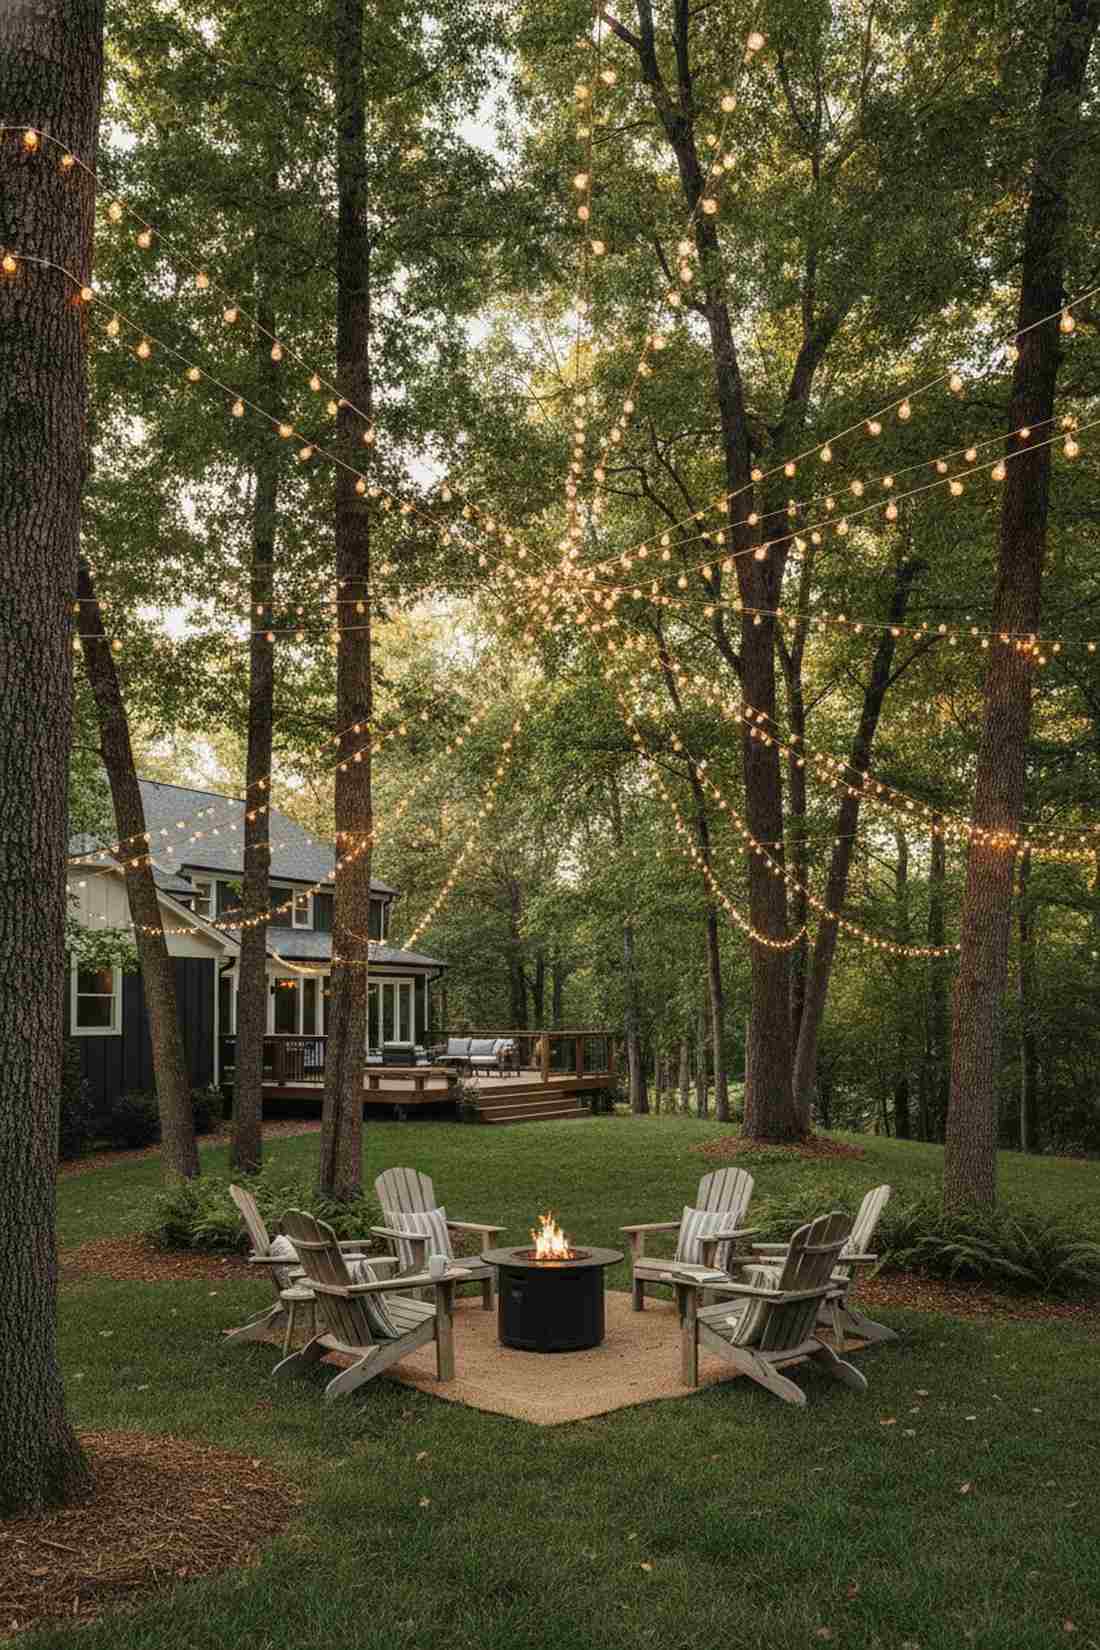
Weaves a floating star canopy that feels like a cozy, enclosed outdoor room without any walls. Perfect for creating a dedicated lounge zone right in the middle of a wooded grove.
Crisscrossing between natural tree trunks bypasses that cheap DIY aesthetic entirely, looking incredibly organic and intentional. Utilize heavy-duty outdoor lighting hardware to string the main structural lines, letting the secondary fairy lights drape lazily between them.
Covering a large gap between multiple trees costs around $80–$120. It’s a dramatic landscape transformation that requires zero digging or concrete.
- Key Materials: Heavy anchor bolts, mixed-size bulbs
- Vibe / Style: Enchanted forest gathering
- Difficulty: Requires careful balancing and climbing
- Budget Breakdown: Hardware: $30 | Strands: $70.
- Creator’s Tip: Install stainless steel eye-lags directly into the trees; wrapping wire around the trunk will eventually kill the bark.
- Smart Sourcing: Order heavy-duty stainless steel tree lags (bulk pack) and a shatterproof multi-bulb patio string kit.
16. Trellis Vertical Framework
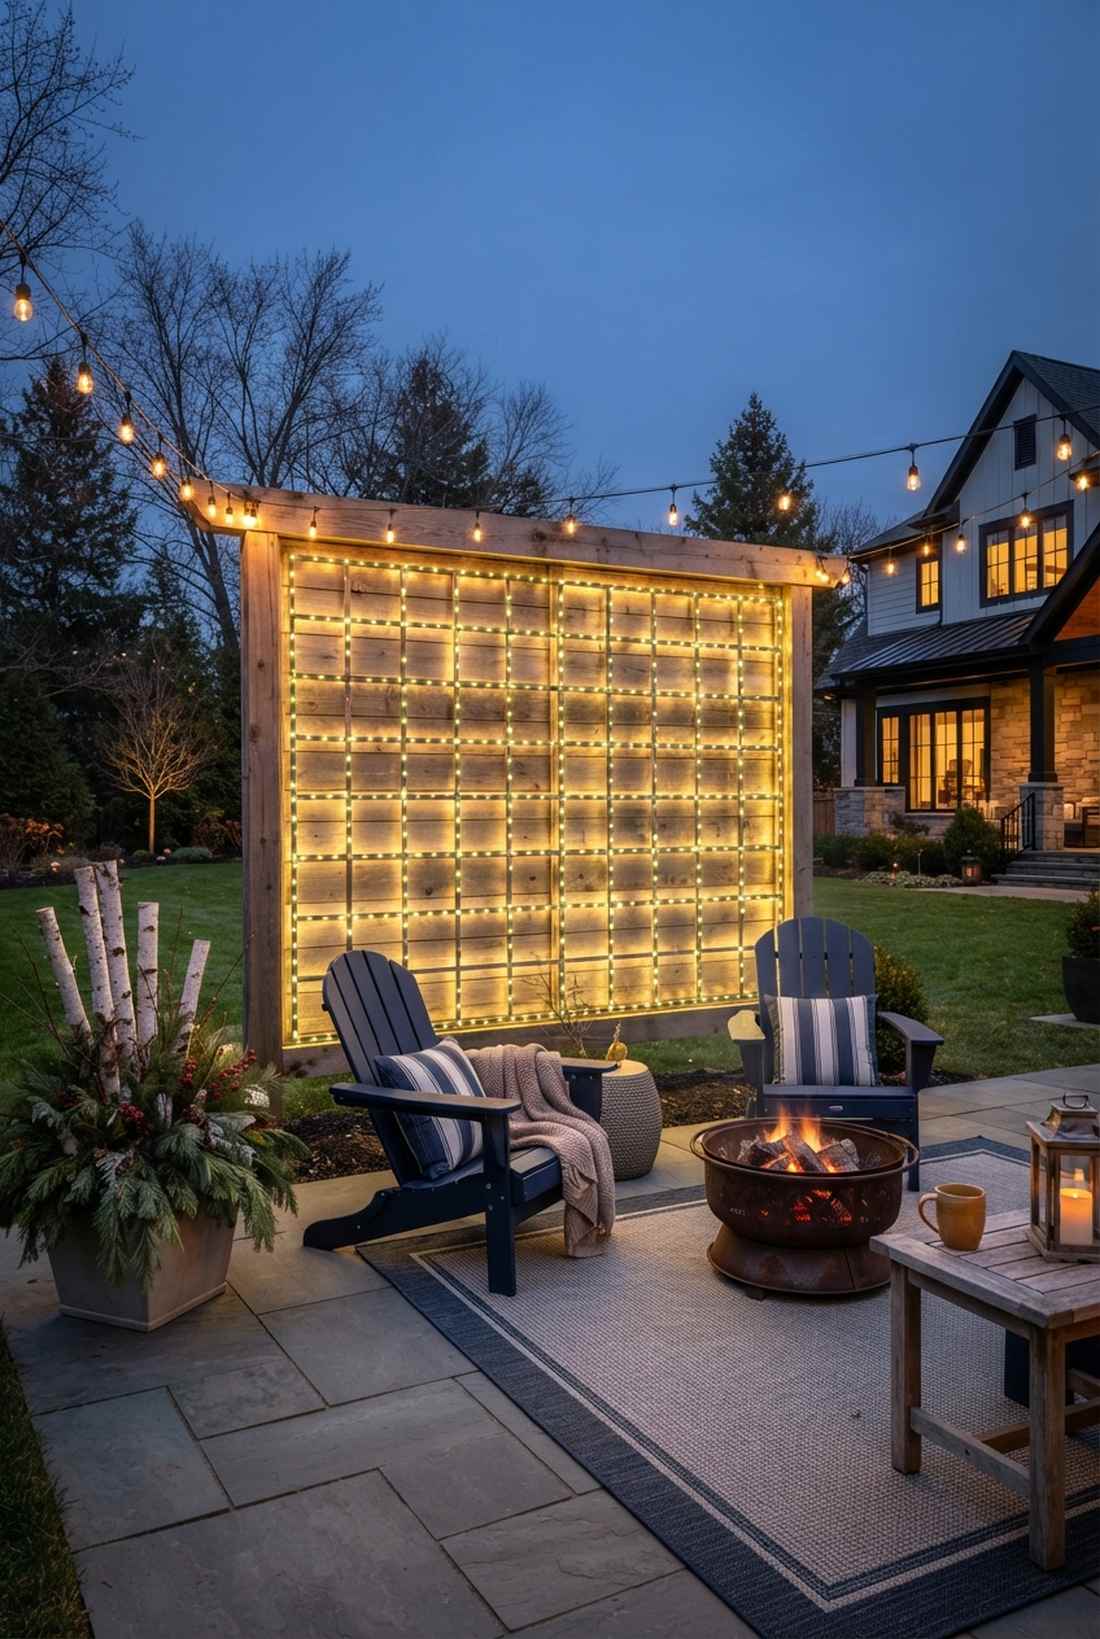
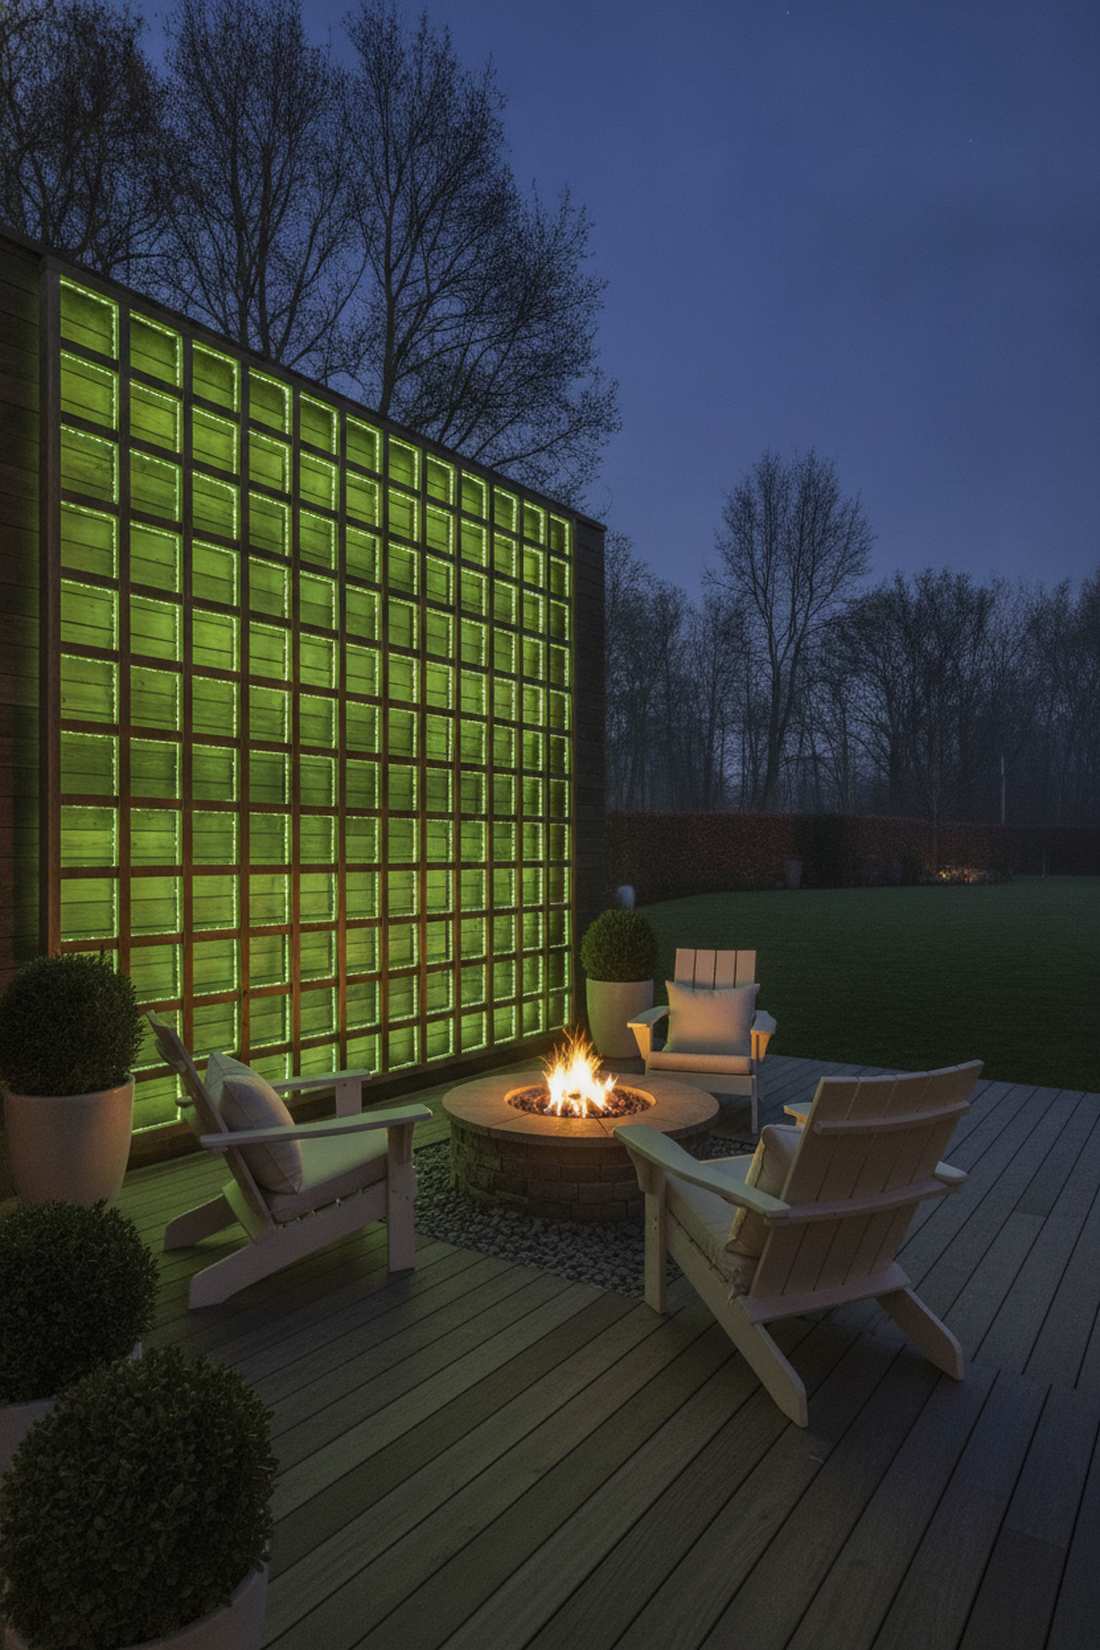
Outlines a glowing geometric garden wall that feels like a brilliant modern art piece. Ideal for bare wooden privacy screens or winter gardens where the climbing vines have died back.
Tracing the strict square lattice delivers a surprisingly premium look by turning basic carpentry into a massive outdoor lamp. Use mini outdoor staples to lock the wire tight against the wood so the grid geometry remains perfectly sharp.
This structural upgrade is incredibly cheap, usually around $20–$35. Save this to your winter patio board to keep your yard looking alive year-round.
- Key Materials: Green-wire mini LEDs, staple gun
- Vibe / Style: Modern architectural garden
- Difficulty: Very easy tracing
- Budget Breakdown: Staples: $5 | Green wire LEDs: $20.
- Creator’s Tip: Always run the wire on the inside corners of the trellis grid to hide the ugly cord completely.
- Smart Sourcing: Get a green-wire outdoor mini LED spool and a heavy-duty staple gun starter kit.
17. Arbor Archway Framing
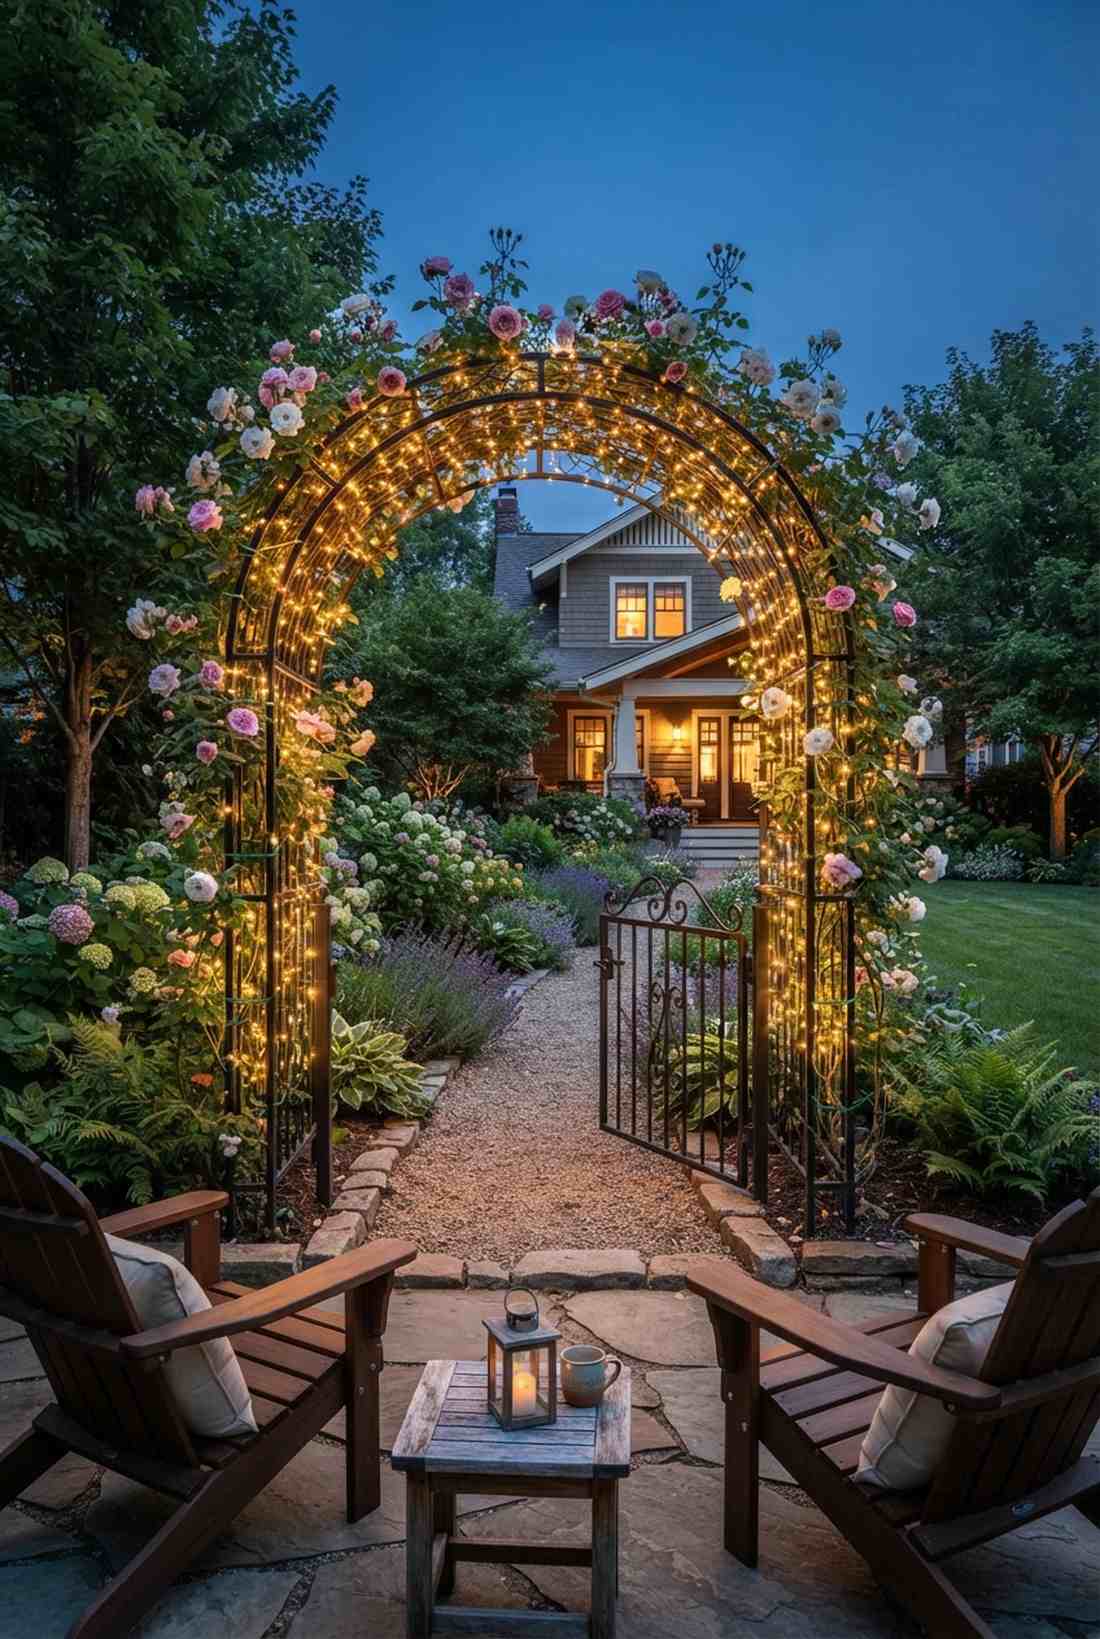

Creates a luminous portal entrance that feels straight out of an evening fairy tale. The ultimate addition for an entryway gate or a blooming rose arch leading into a side yard.
Accentuating the dramatic curve completely elevates a boring arch into a luxury wedding-style entrance. Blend miniature garden supplies and micro-wire into the existing vines so the bulbs look like glowing berries during the day.
You can execute this romantic threshold for about $15–$30. It’s a gorgeous weekend tweak that makes walking into your yard a total experience.
- Key Materials: Copper wire string lights, floral ties
- Vibe / Style: Storybook garden gate
- Difficulty: Fast weaving project
- Budget Breakdown: Floral wire: $5 | Copper strings: $15.
- Creator’s Tip: Twist the wire around the metal or wood frame, not the plants, so you don’t ruin the lights when pruning later.
- Smart Sourcing: Purchase a solar-powered copper wire light kit and green garden tying wire (bulk roll).
Garden Lights Fairy Enchantment
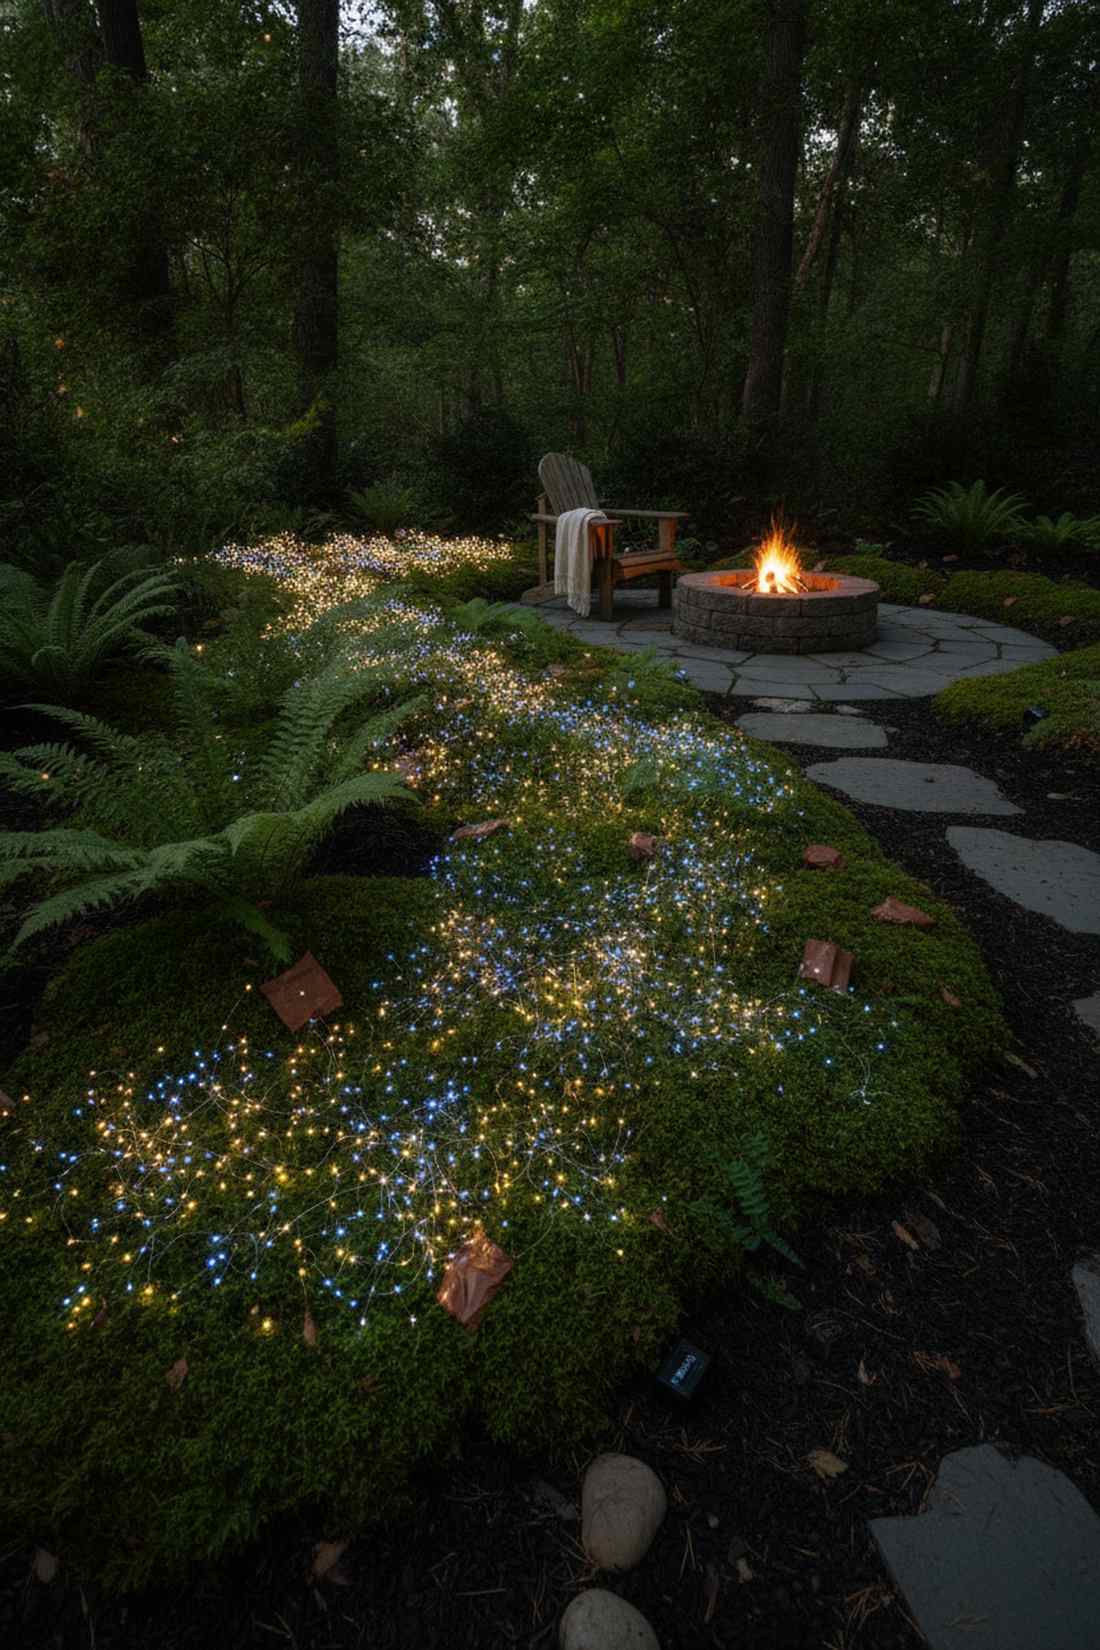
18. Shrub Nesting Sparkle
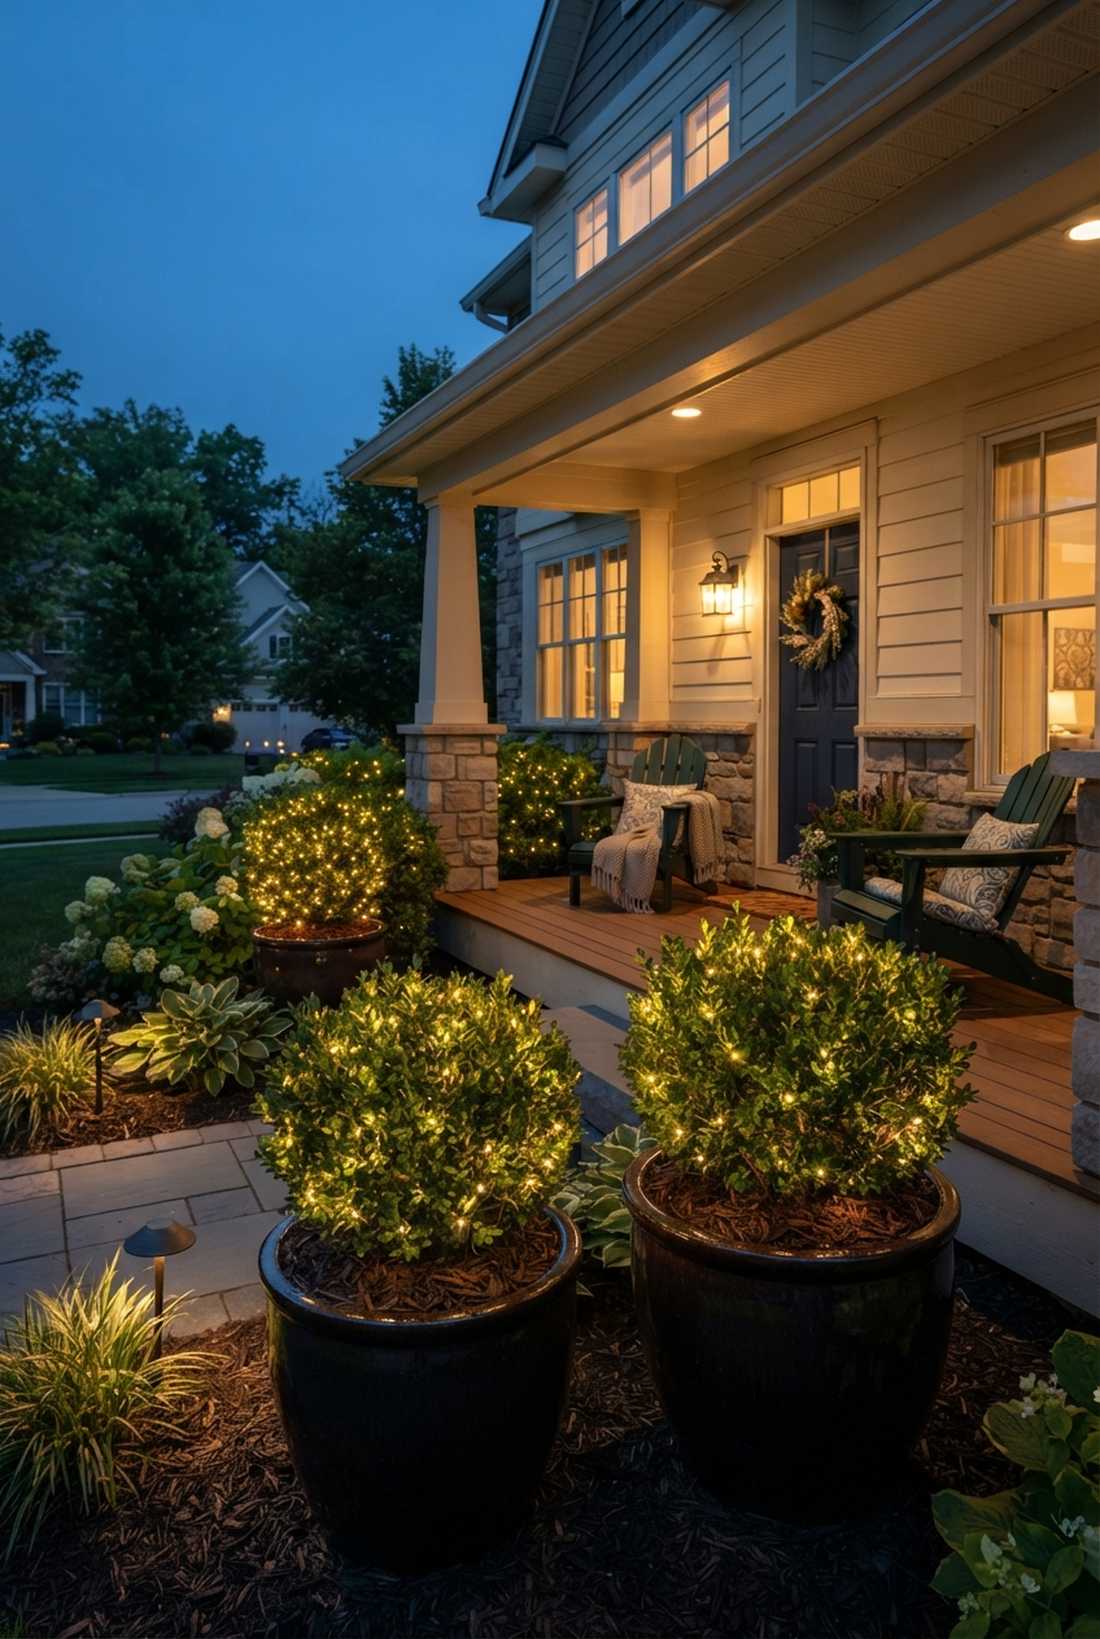
Embeds a deeply hidden ambient glow that feels like a tiny hidden forest you accidentally discovered. This technique is an absolute lifesaver for making boring, dense boxwoods or holly bushes pop at night.
Shoving the garden lights fairy strands deep into the core of the bush gives a designer-level finish, radiating light outward through the leaves. Bypass standard thick cables; you must use ultra-thin fairy garden kits with battery packs hidden in the mulch.
This magical little trick costs less than $15 per bush. Pin this if you want to add a layer of mystery to your front porch planters.
- Key Materials: Battery-operated fairy wires, dark mulch
- Vibe / Style: Hidden fairy thicket
- Difficulty: Takes 5 minutes per bush
- Budget Breakdown: Batteries: $5 | Fairy wire: $8.
- Creator’s Tip: Never lay the wire on the top leaves; always weave it into the thick branches near the trunk to hide the mechanism.
- Smart Sourcing: Grab a waterproof fairy light battery kit (bulk pack) and outdoor-rated AA batteries.
19. Flower Bed Constellation
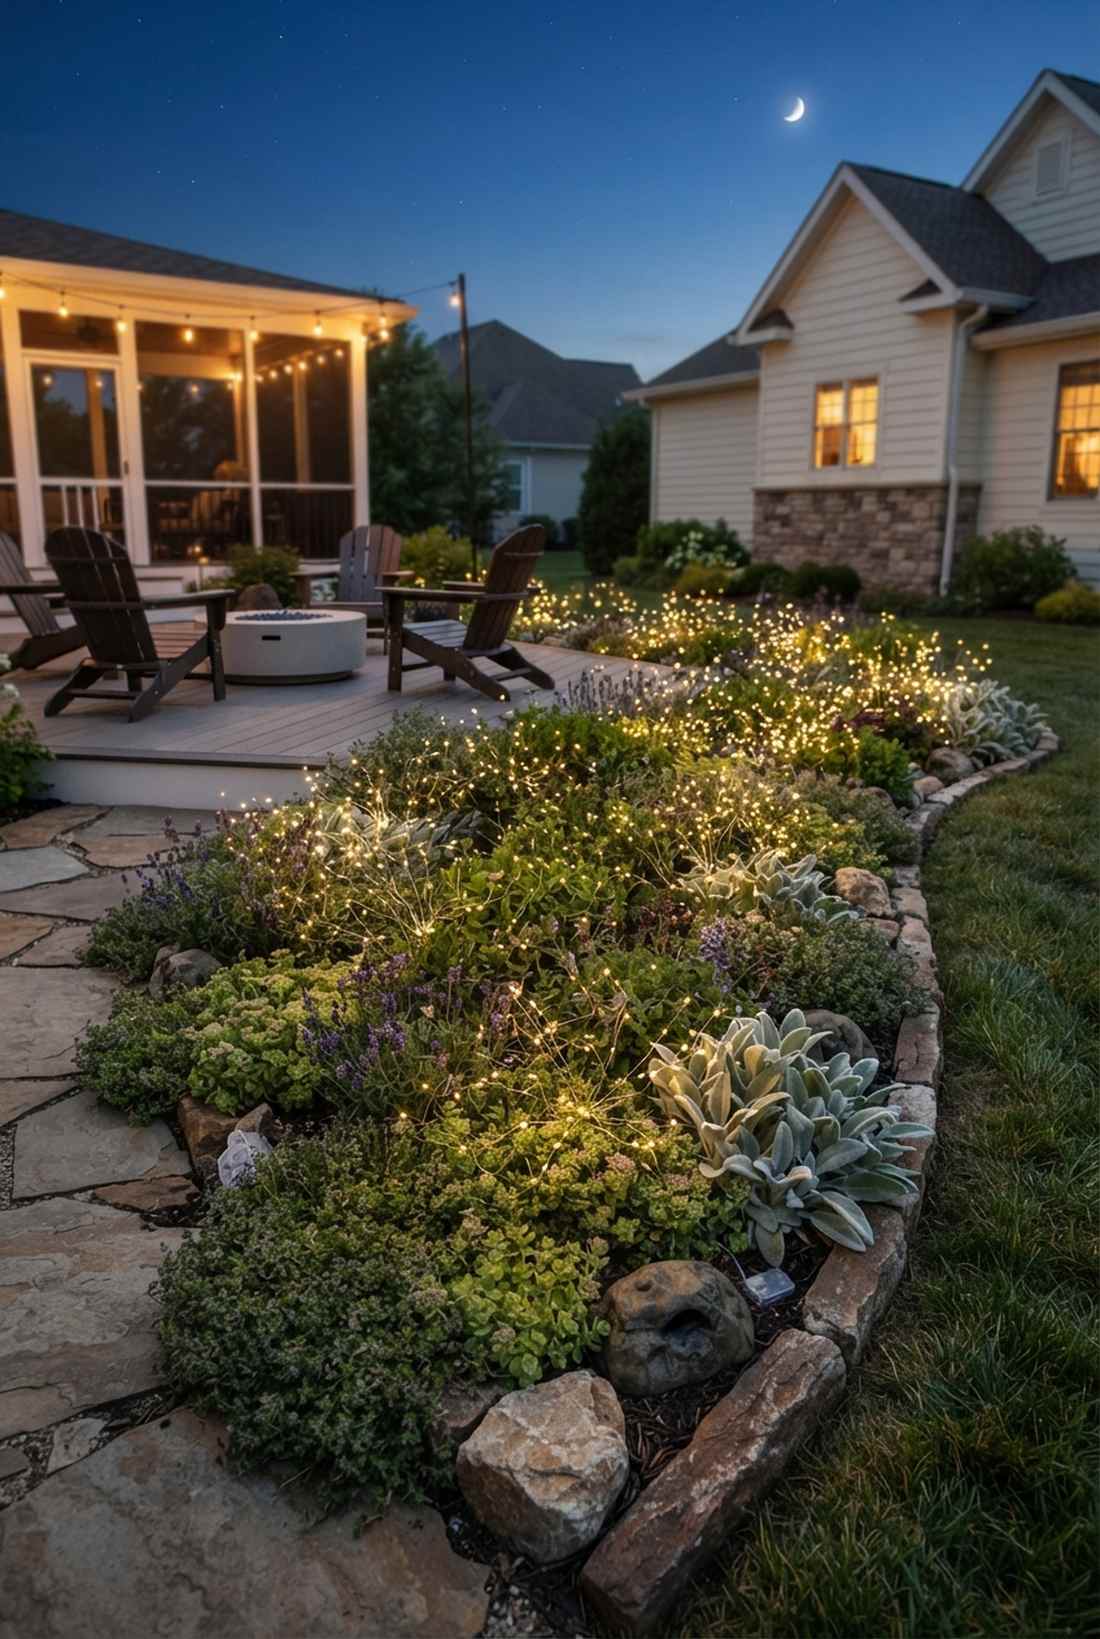

Scatters a randomized sparkling starfield that feels incredibly organic and effortless. Perfect for weaving through wild, low-growing perennial borders or creeping thyme groundcover.
Tossing loose garden lights fairy bundles haphazardly avoids the dreaded cluttered backyard syndrome of rigid plastic path lights. Incorporate premium terrarium accessories to mask the battery boxes beneath decorative stones or fake hollow logs.
You can light up an entire flower bed section for around $20–$40. It completely changes the vibe of your garden edge without requiring a single shovel.
- Key Materials: Micro LED drops, faux rock covers
- Vibe / Style: Whimsical firefly meadow
- Difficulty: Instant placement
- Budget Breakdown: Rock covers: $15 | Micro LEDs: $15.
- Creator’s Tip: Use warm-white bulbs only; pure white LEDs will make your flower bed look like a sterile laboratory.
- Smart Sourcing: Invest in a micro LED dewdrop string bundle and a hollow resin rock key hider (2-pack).
Don’t buy any expensive patio furniture until you’ve seen this next lighting hack…
20. Glass Jar Lantern Clusters
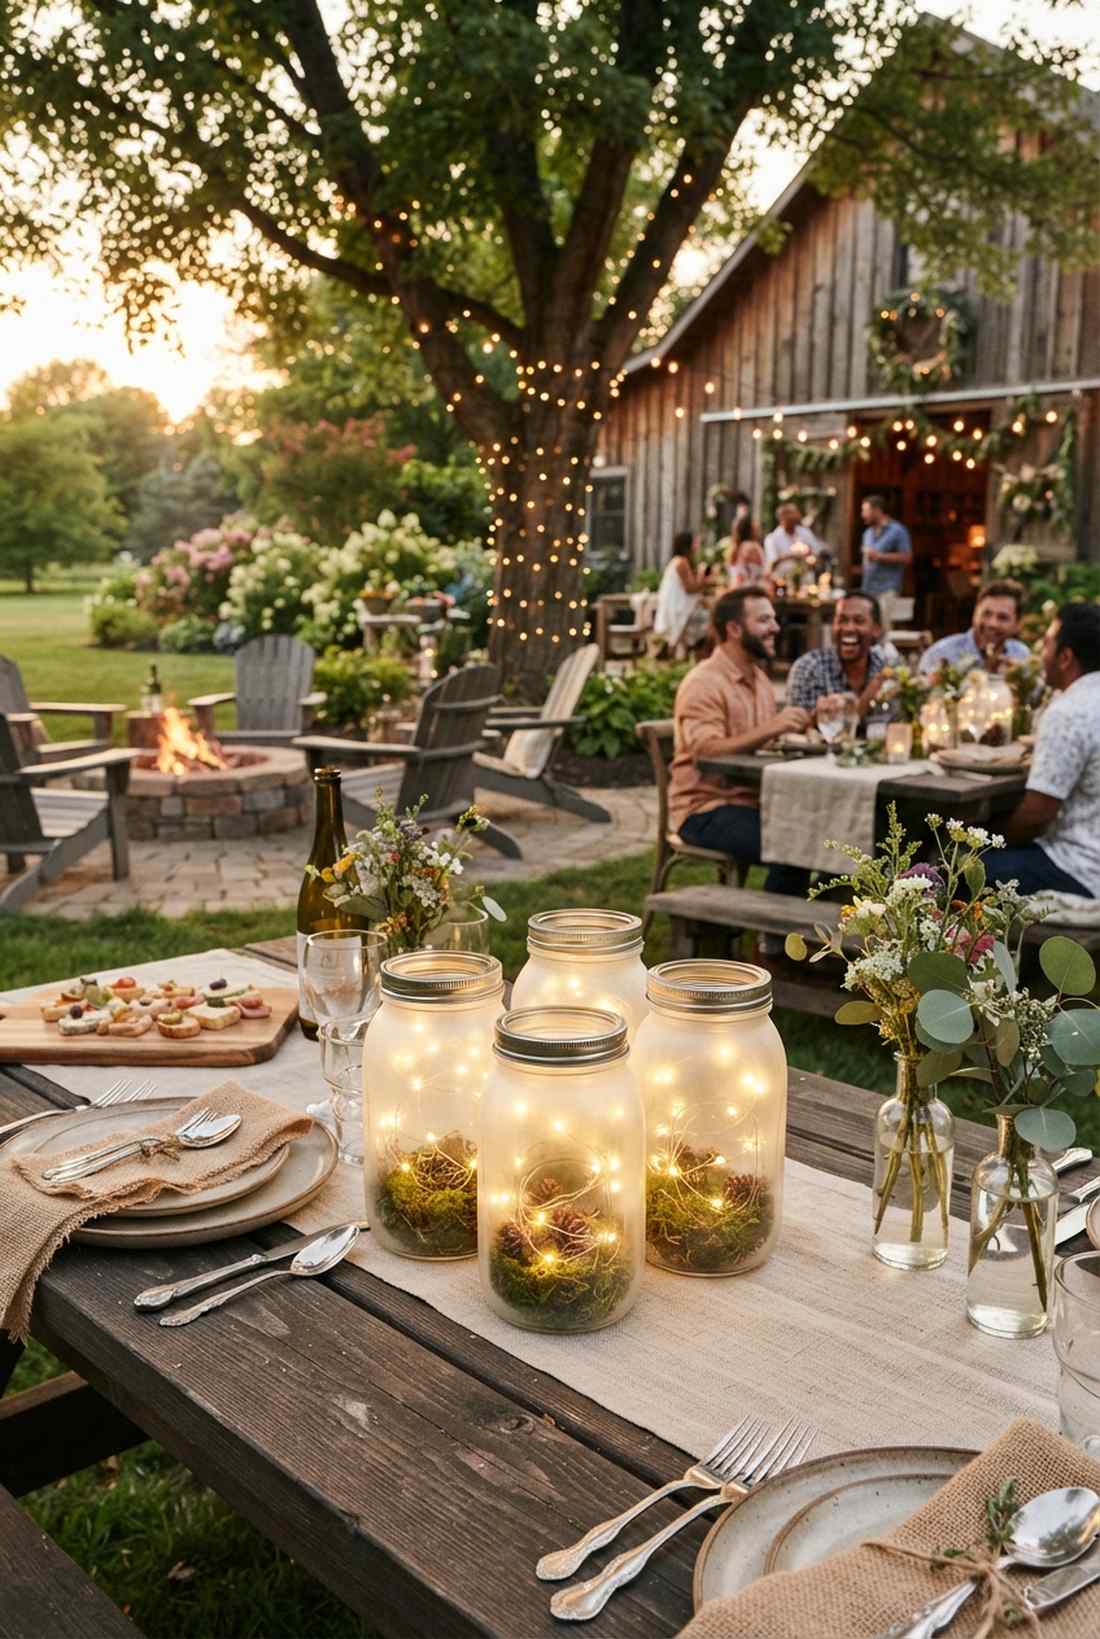
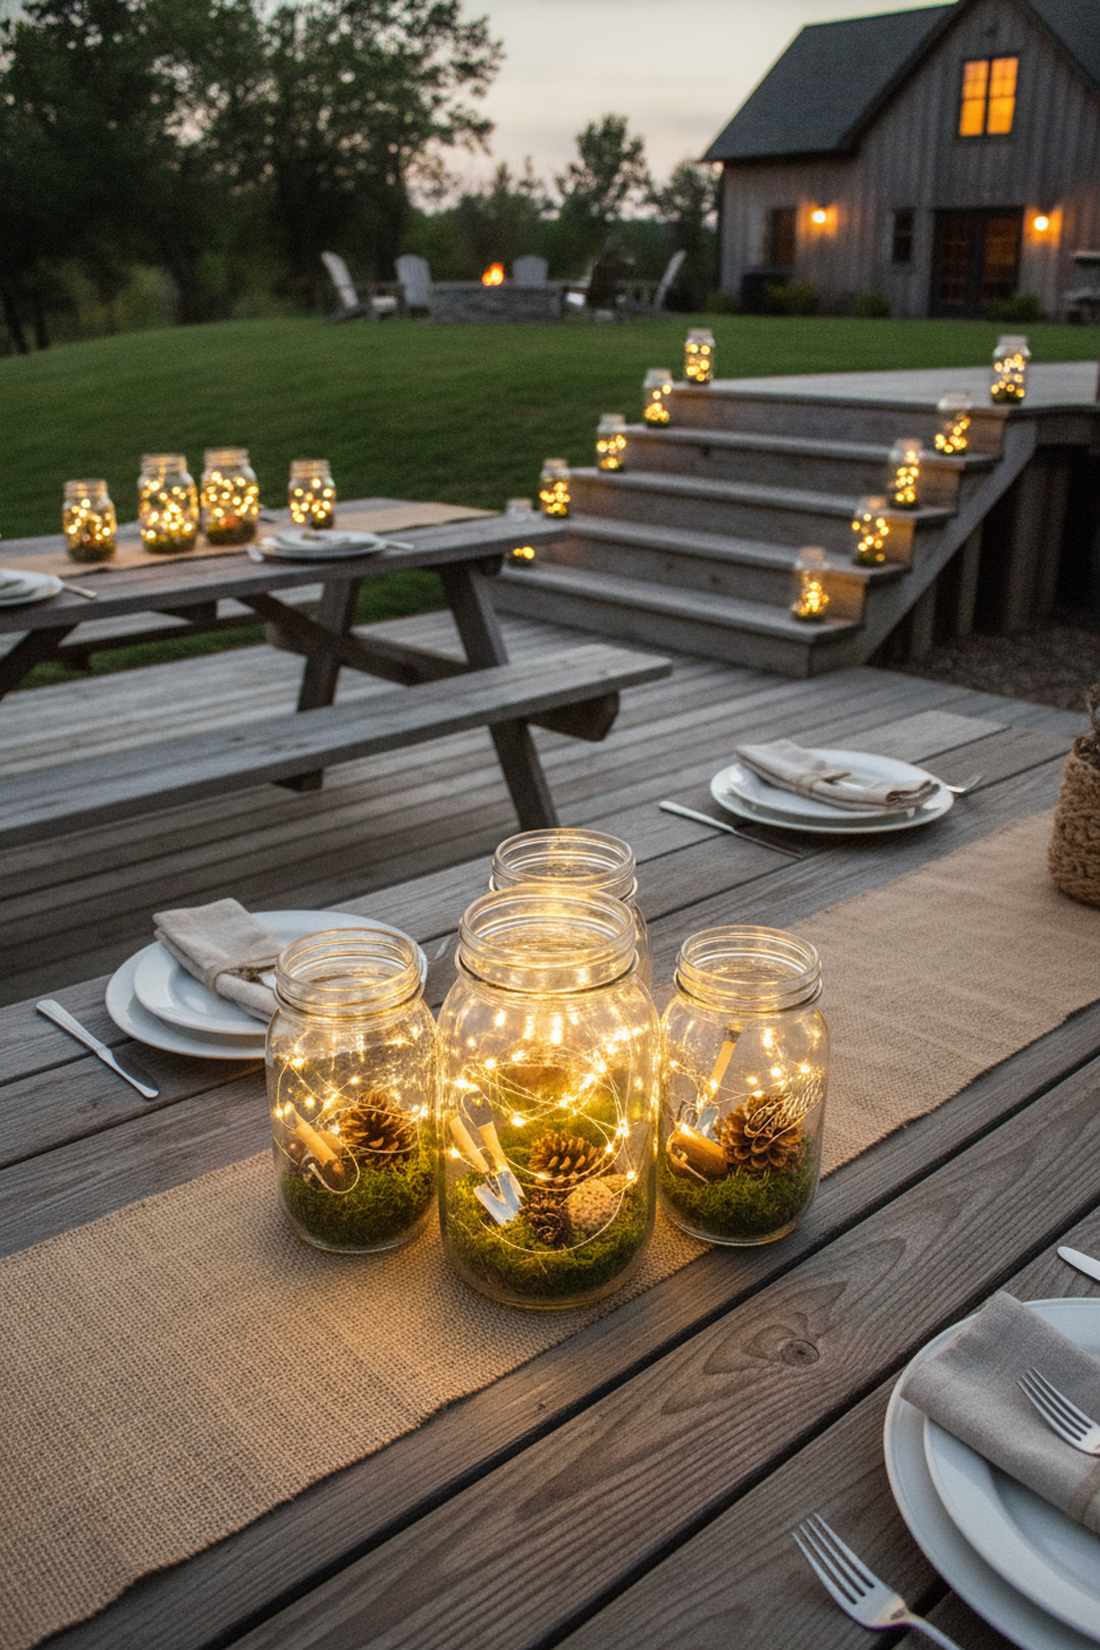
Crafts an upcycled tabletop luminary that feels like a cozy, rustic cabin dinner setting. These portable glowing jars are excellent for dotting across picnic tables or lining wide wooden staircases.
Stuffing a vibrant garden lights fairy strand into a vintage mason jar delivers a surprisingly premium look for almost zero money. Add miniature garden supplies like preserved moss or tiny pinecones to the bottom of the jar to hide the battery pack and add texture.
A cluster of three jars usually costs under $15 to build. Save this to your DIY outdoor wedding or budget party decor board.
- Key Materials: Mason jars, coin-cell fairy wires, moss
- Vibe / Style: Rustic barn wedding
- Difficulty: Perfect craft for kids
- Budget Breakdown: Jars: $5 | Lights: $5 | Moss: $5.
- Creator’s Tip: Lightly spray the inside of the jar with frosted glass paint to diffuse the harsh LED dots into a soft, hazy glow.
- Smart Sourcing: Buy pre-cut preserved moss sheets (bulk pack) and a coin-battery fairy light multi-pack.
21. Fence Weave Backdrop
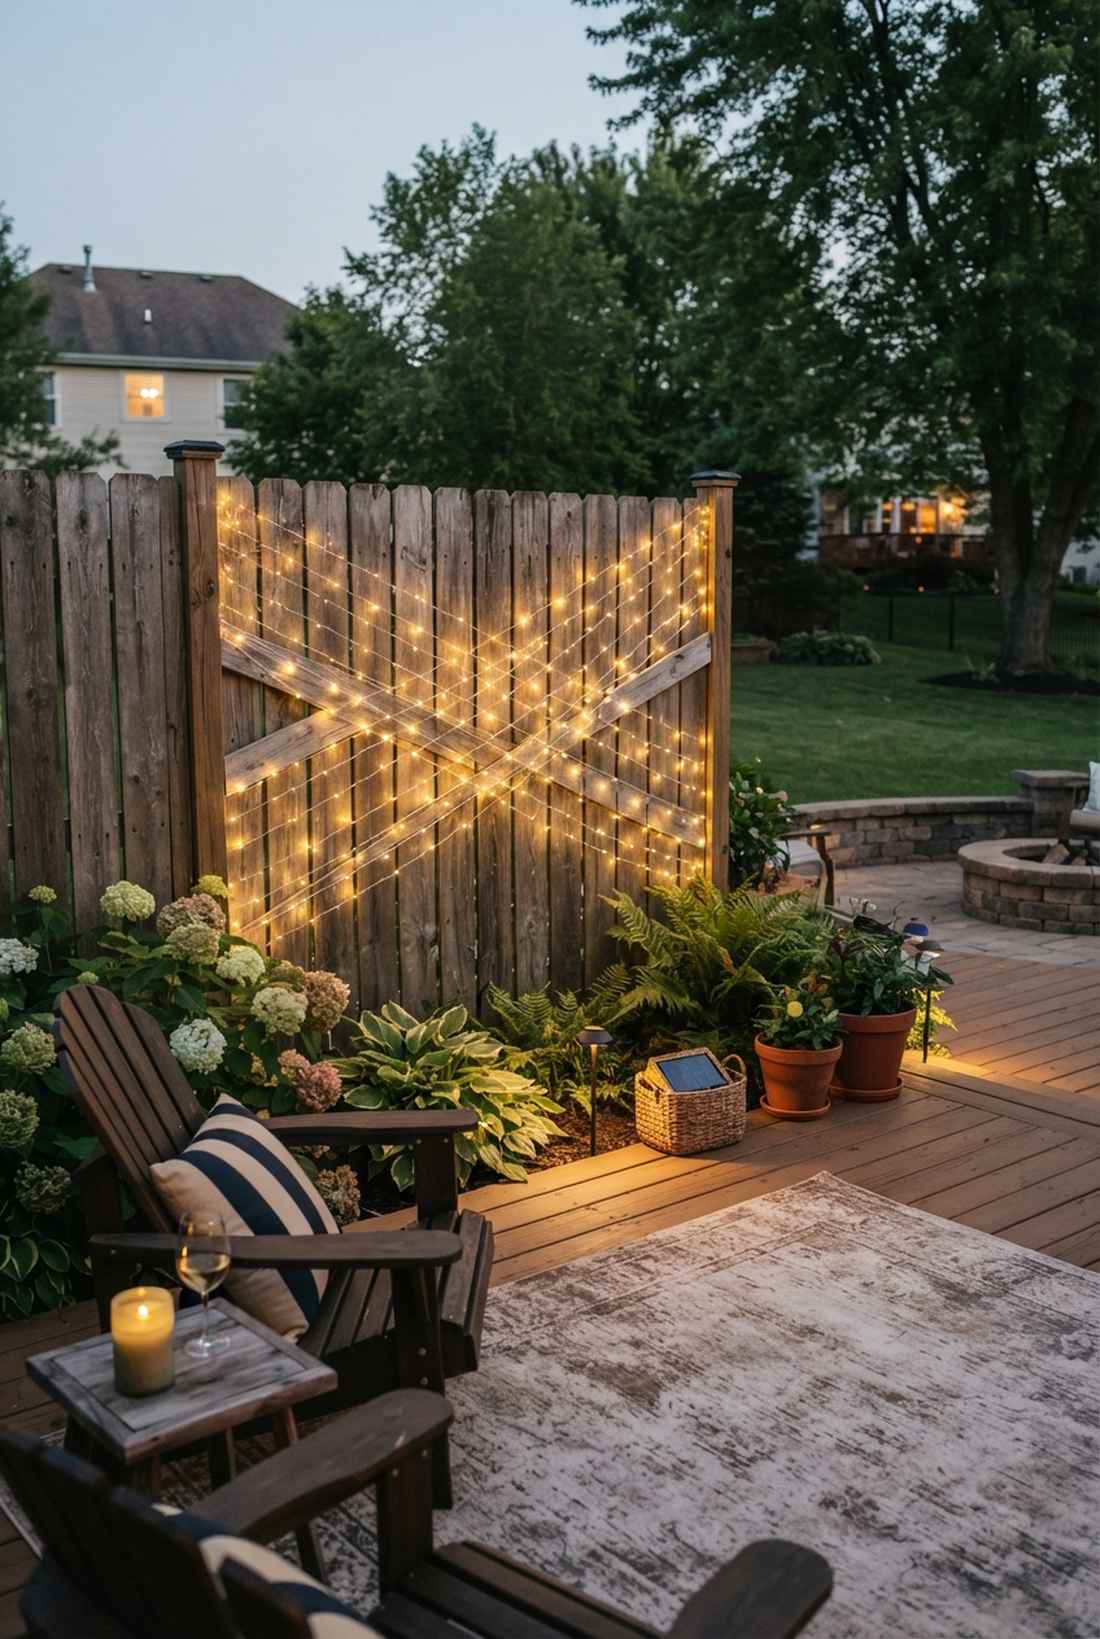
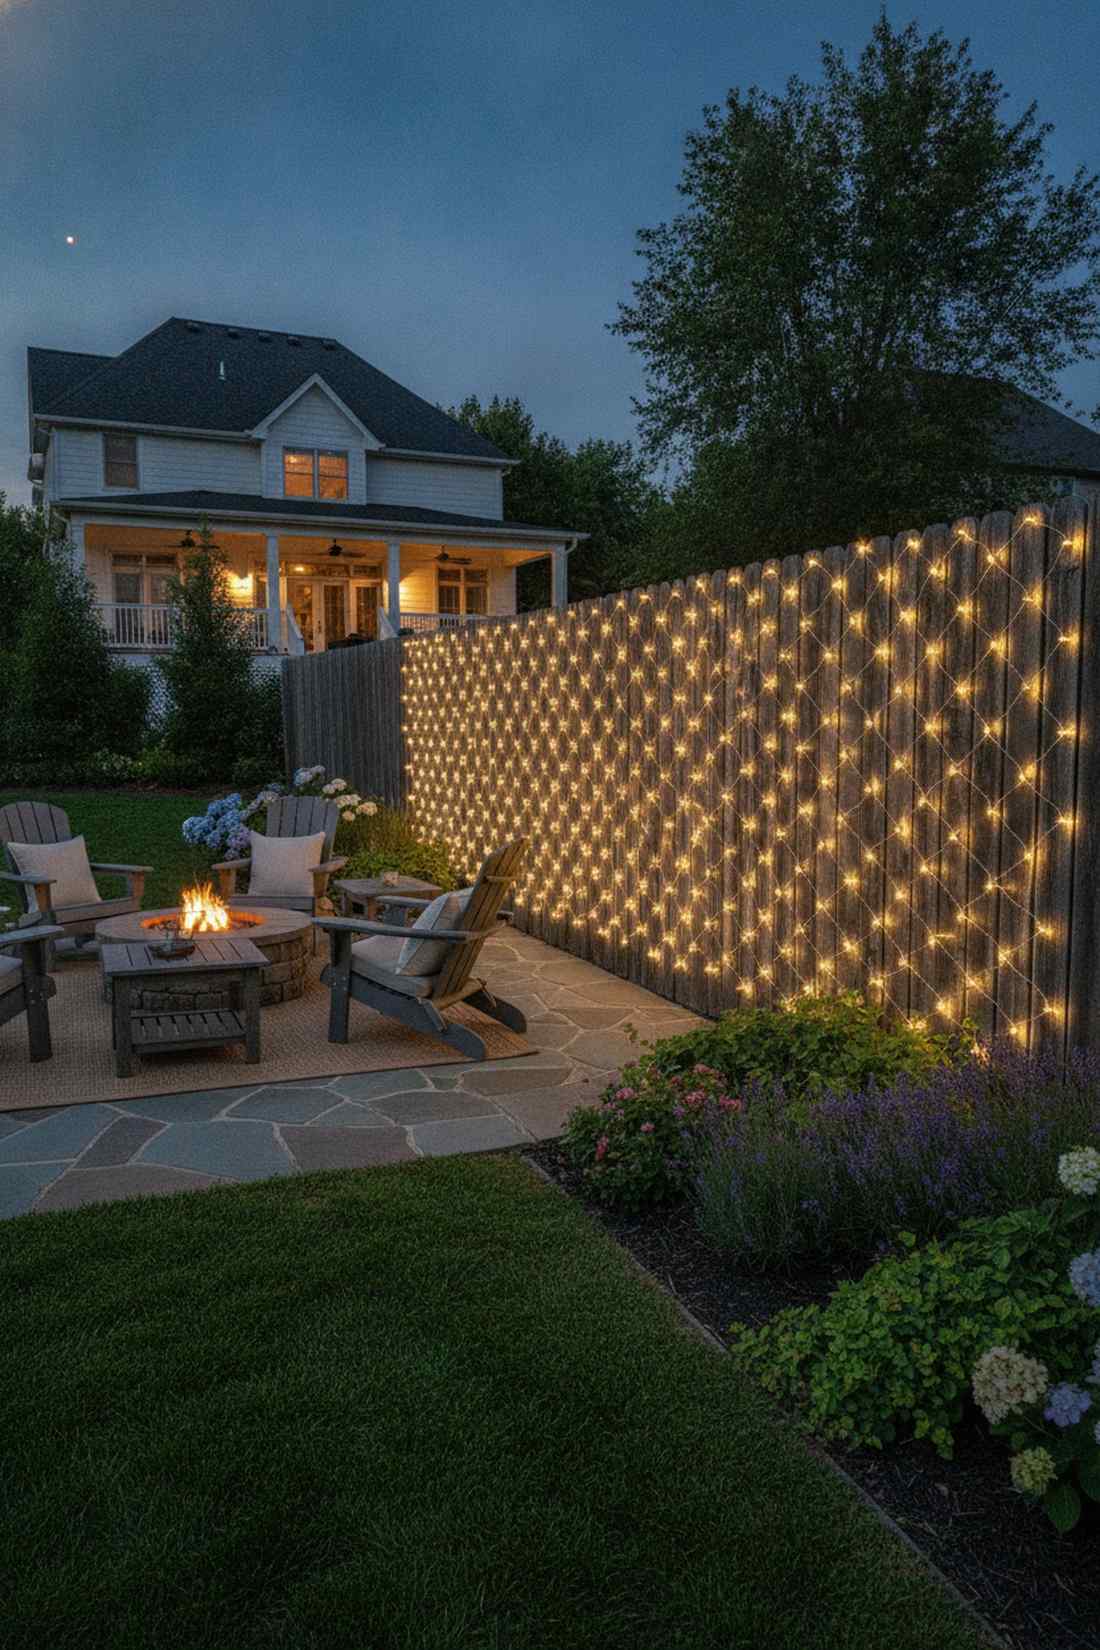
Spins a twinkling wooden canvas that feels like a dazzling theatrical backdrop for your patio. This is the ultimate fix for an ugly, faded wooden privacy fence.
Threading a delicate garden lights fairy wire through the tiny gaps in a fence looks far more expensive than it is. Using solar-powered kits entirely eliminates the need for ugly orange extension cords stretching across your lawn.
Covering a 10-foot fence panel runs about $25–$40. It’s an instant backyard facelift that hides imperfections brilliantly.
- Key Materials: Solar fairy strings, small U-nails
- Vibe / Style: Sparkling courtyard wall
- Difficulty: Tedious weaving required
- Budget Breakdown: Nails: $5 | Solar strings: $30.
- Creator’s Tip: Zig-zag the wire diagonally across the panels rather than straight across to create a much more organic, starry texture.
- Smart Sourcing: Choose an ultra-long solar fairy string light kit and a small U-nail hammer tacker.
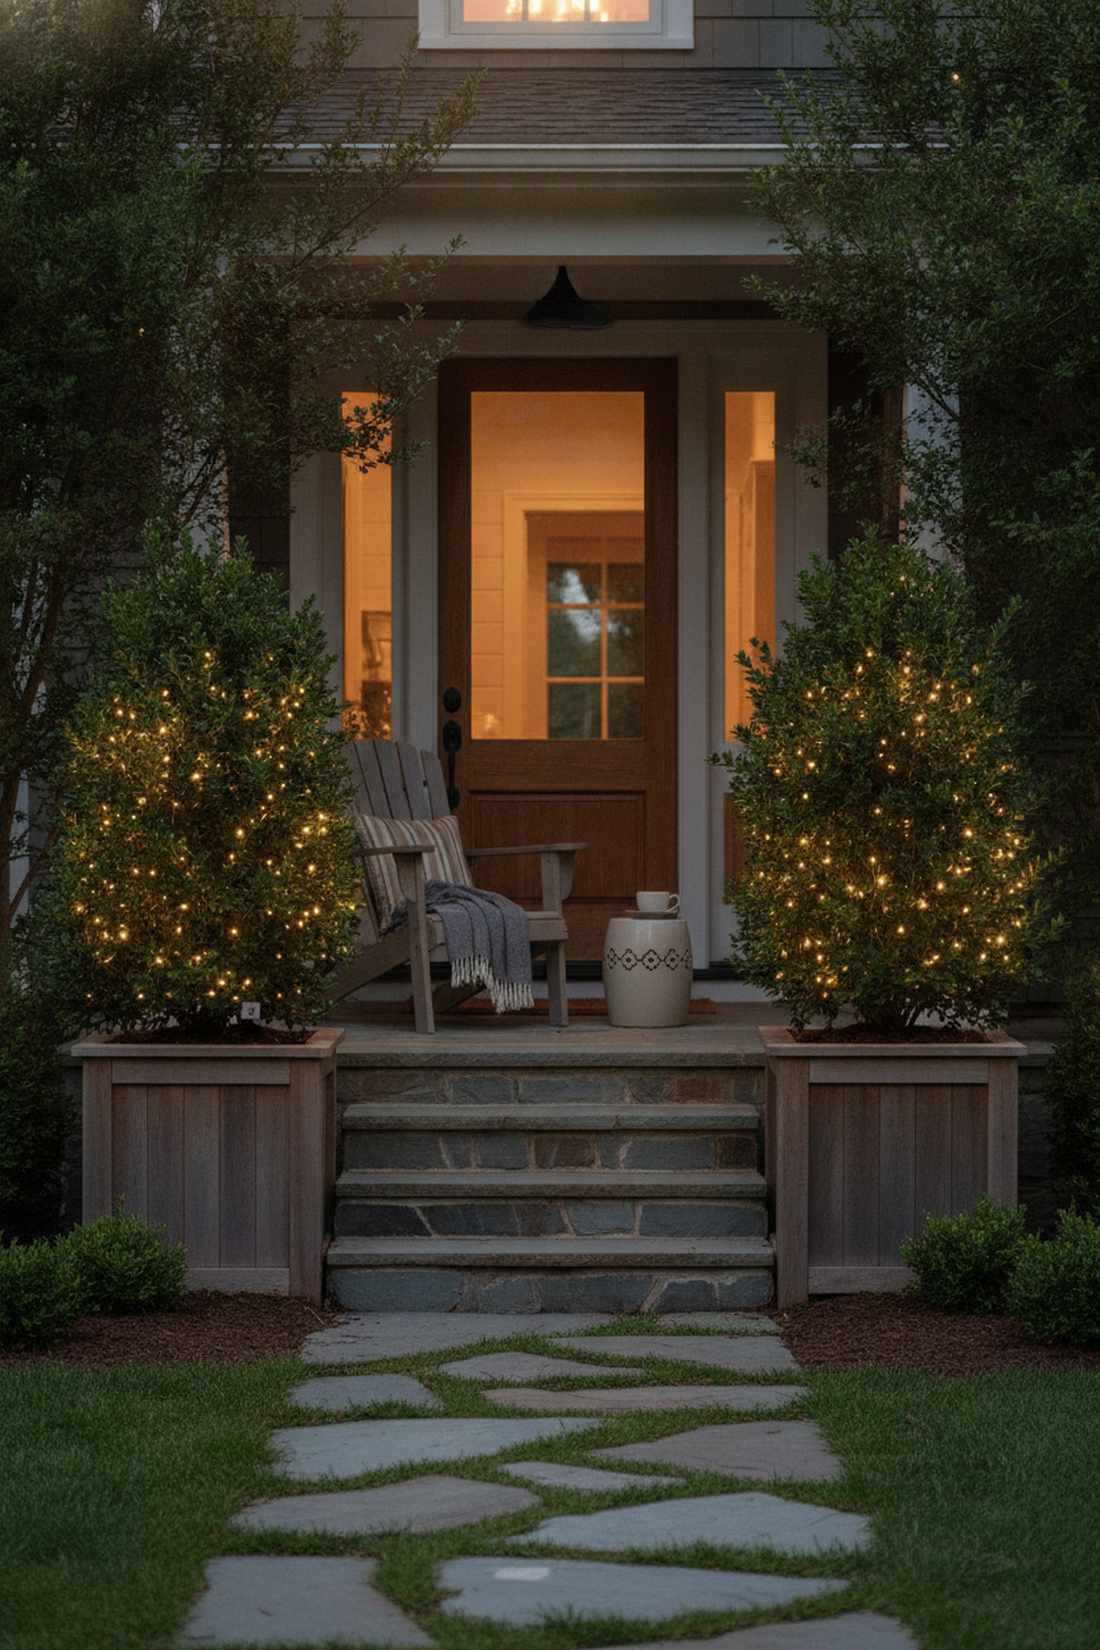
22. Potted Plant Accent Glow

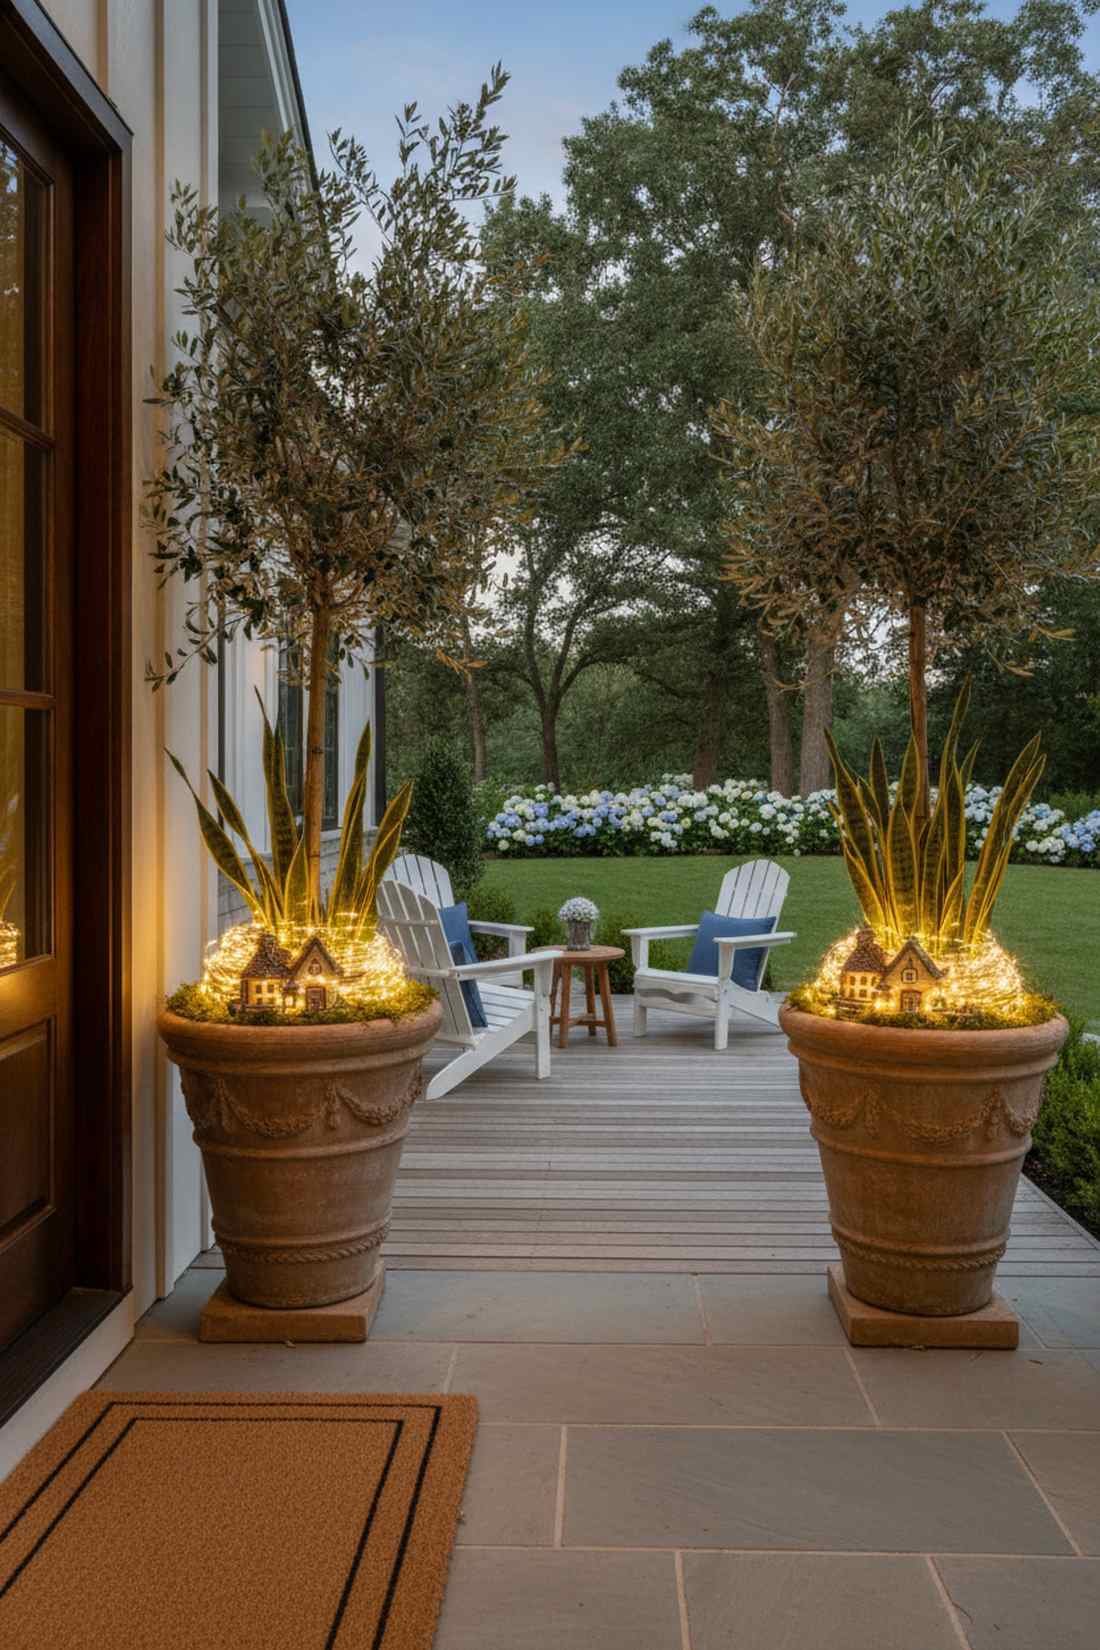
Fashions a dramatic container focal point that feels like a high-end hotel lobby display. This is the absolute best trick for illuminating large terracotta olive trees or tall porch snake plants.
Wrapping a tight garden lights fairy coil around the base soil transforms basic landscaping into a magazine cover. Sink small waterproof battery packs under the potting soil and use UV-coated resin fairy cottage kits alongside them to build a premium miniature terrarium vibe.
Lighting up a pair of front door planters costs about $20. Pin this trick to instantly upgrade your front porch curb appeal.
- Key Materials: Waterproof battery LEDs, clear plastic baggies
- Vibe / Style: Luxury boutique planter
- Difficulty: 2-minute upgrade
- Budget Breakdown: Bag for battery box: $1 | Lights: $10.
- Creator’s Tip: Always wrap the battery box in a ziplock bag before burying it in the potting soil to prevent water damage when you water the plant.
- Smart Sourcing: Grab a submersible micro LED fairy kit and UV-coated resin fairy cottage kits.
23. Hanging Basket Halo
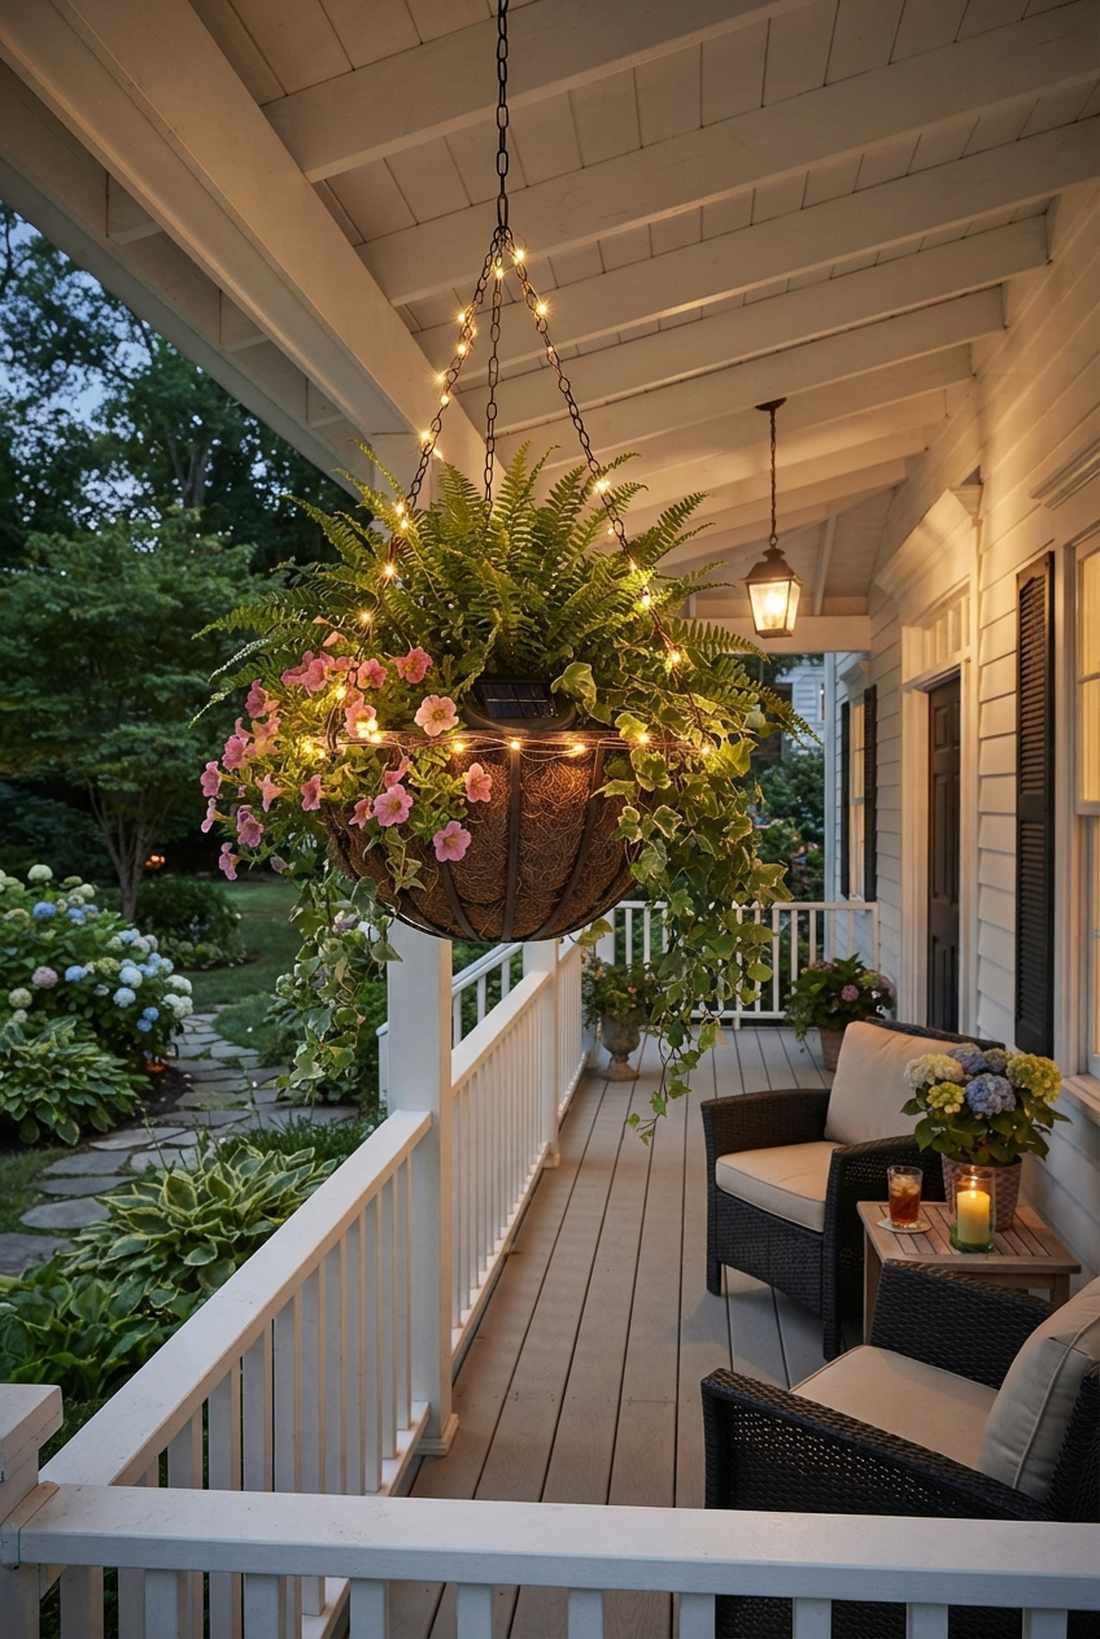
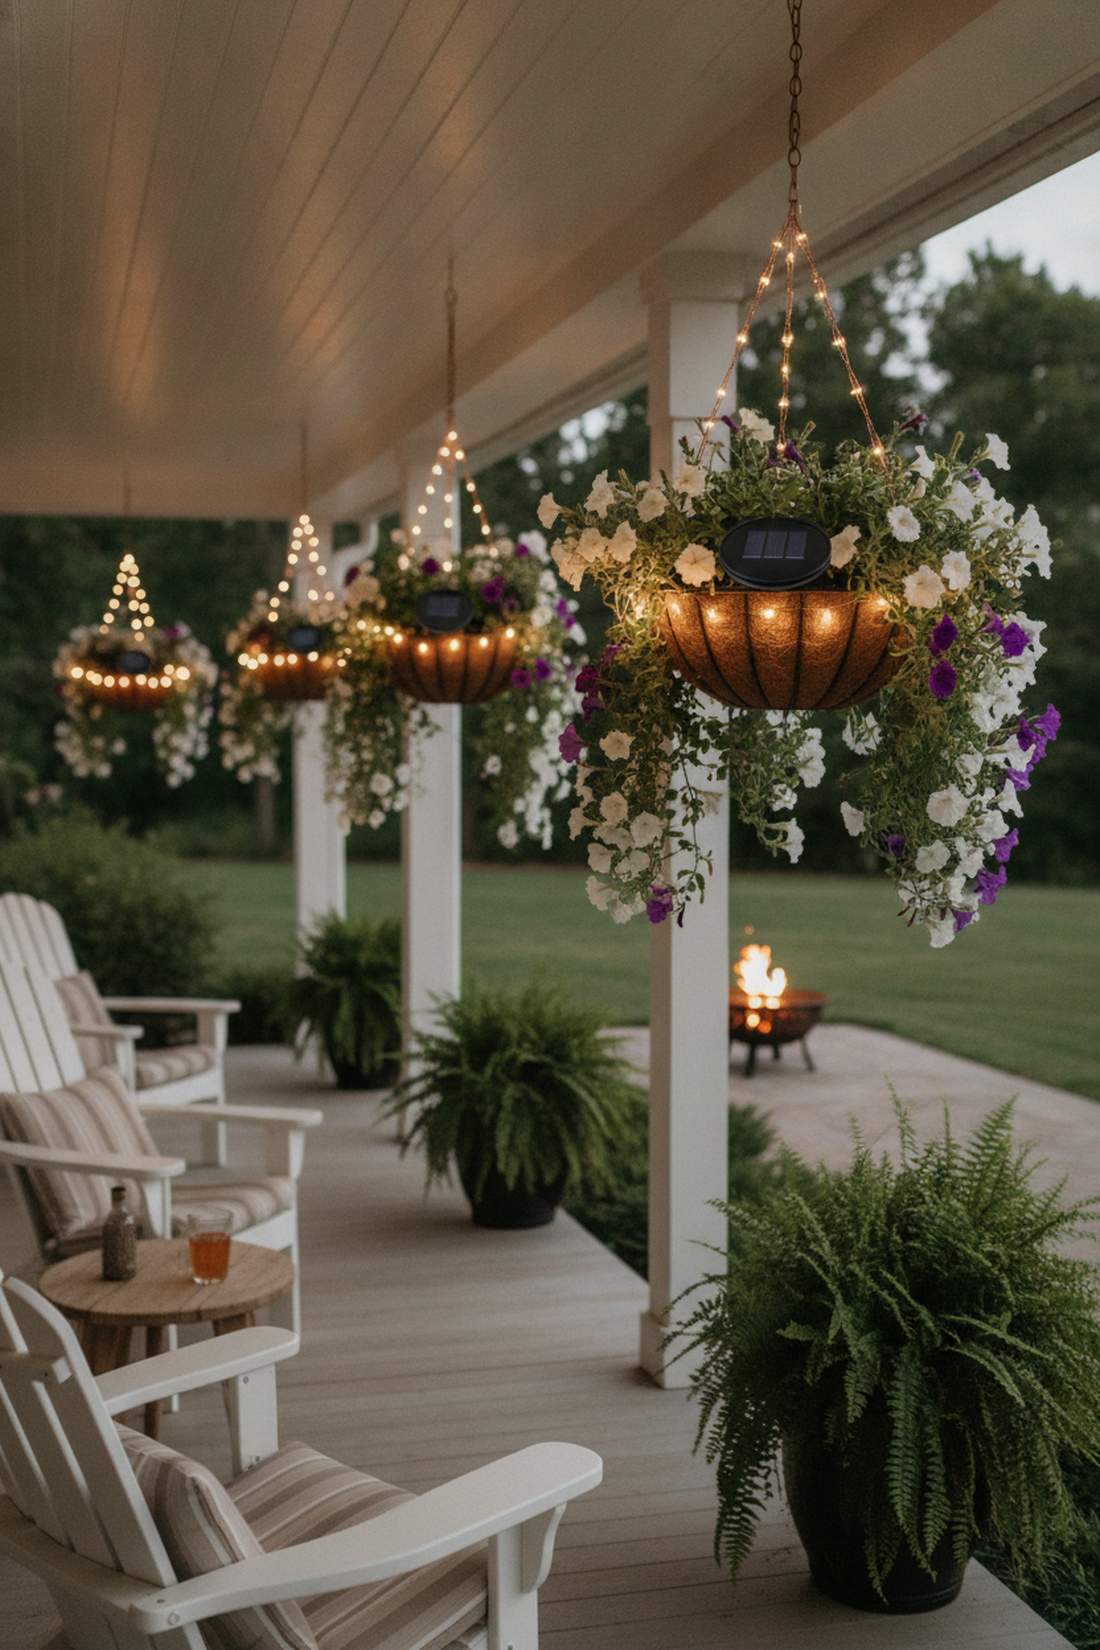
Ignites a floating floral chandelier that feels whimsical and weightless. An incredible addition to a wraparound farmhouse porch lined with ferns or petunias.
Circling the rim with a garden lights fairy string avoids that cheap DIY aesthetic entirely, drawing the eye upwards at night. Secure the slim copper wire directly to the basket’s chain using brown floral tape so the electrical path is 100% invisible.
Outfitting a hanging basket only sets you back $10–$15. It completely changes the evening atmosphere of your seating area.
- Key Materials: Copper wire LEDs, brown floral tape
- Vibe / Style: Southern wraparound porch
- Difficulty: Fast taping job
- Budget Breakdown: Tape: $5 | Copper wire: $8.
- Creator’s Tip: Tuck the small solar panel flat against the top soil of the basket so it gets full sun without hanging off the side clumsily.
- Smart Sourcing: Find a miniature solar fairy string (2-pack) and a waterproof brown floral tape roll.
Water Feature Reflections
This next one is the absolute favorite for luxury outdoor wedding venues, and you can build it for under $40.
24. Pond Perimeter Outline
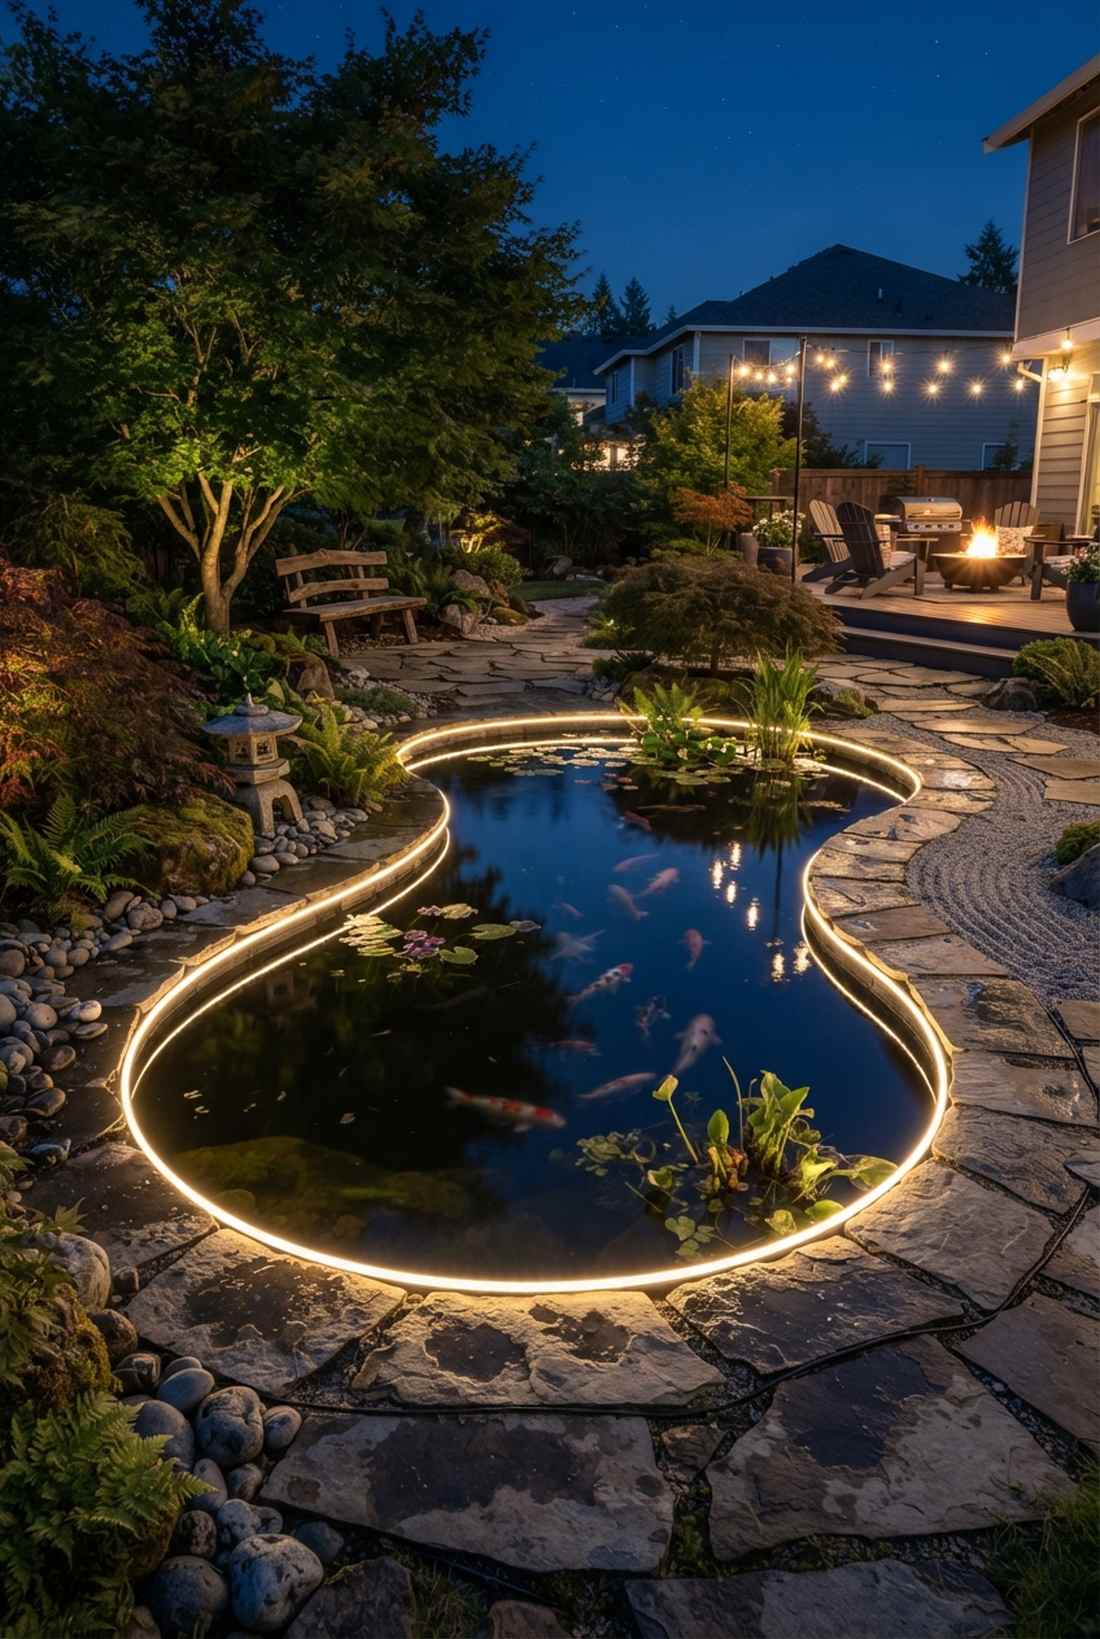
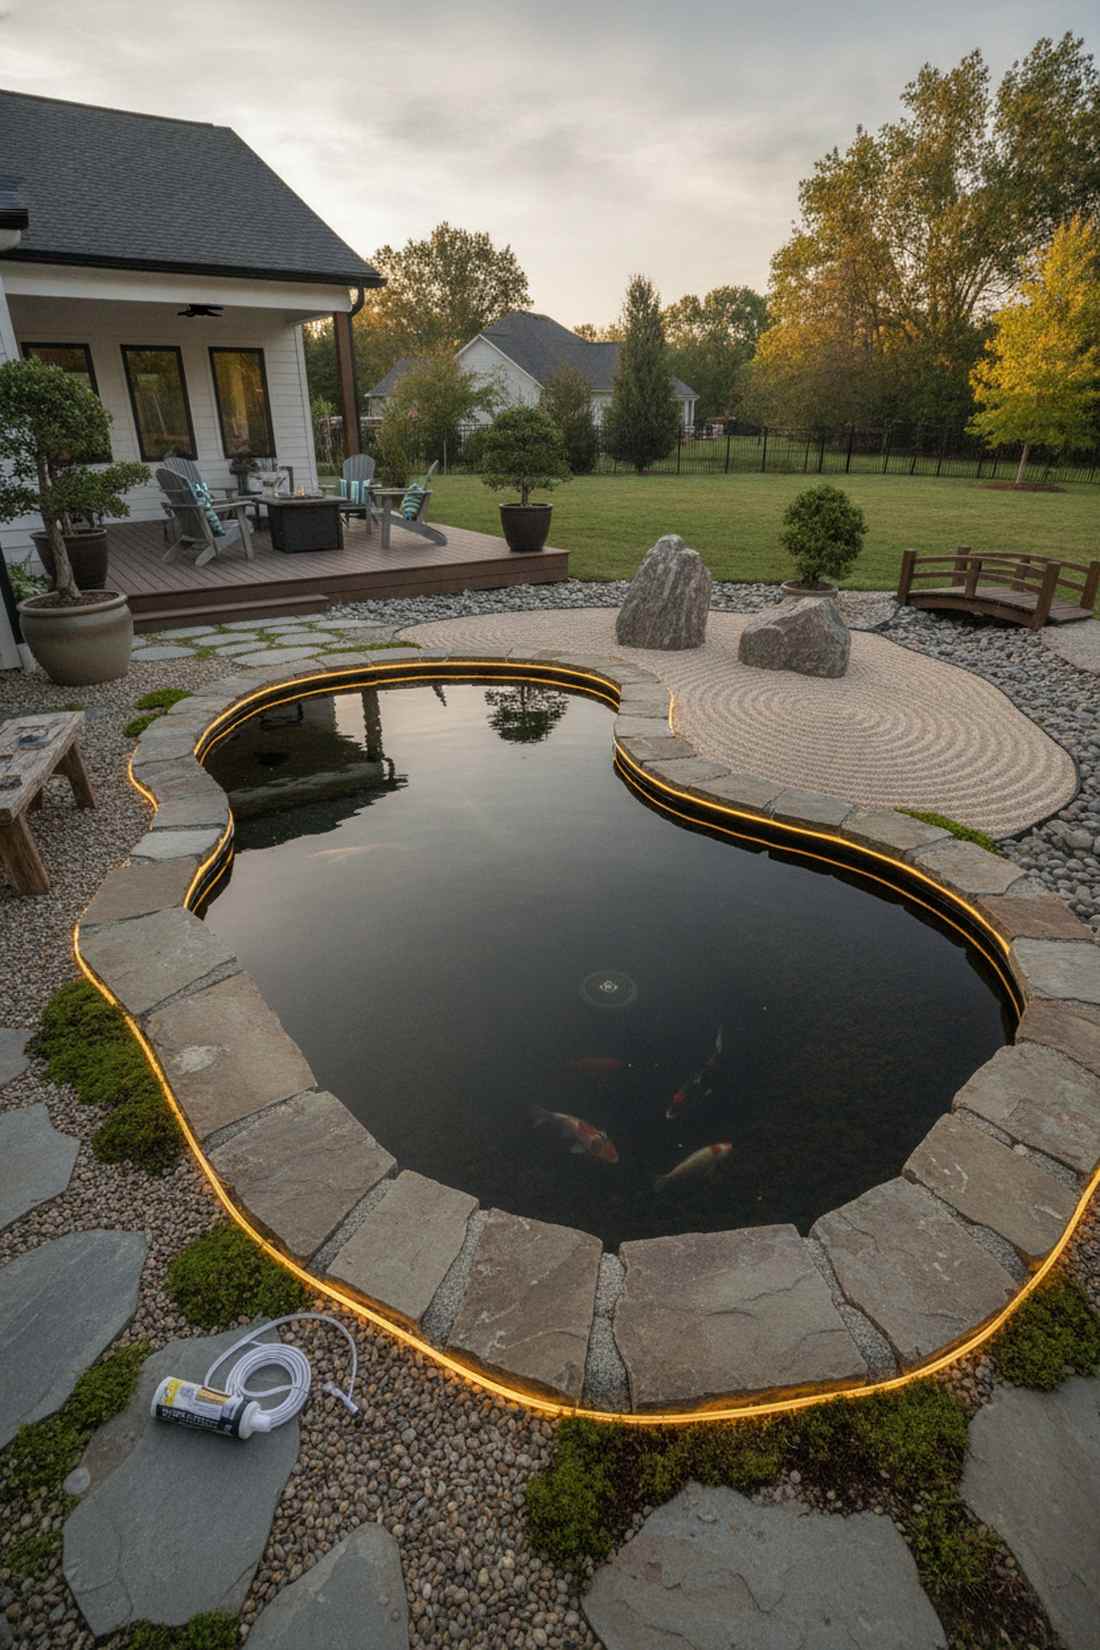
Traces a reflective water boundary that feels incredibly serene and expansive. Perfect for defining a backyard koi pond or a shallow stone reflecting pool.
Lining the extreme edge with IP68-rated waterproof bulbs delivers a surprisingly premium look, as the water naturally doubles the light output via reflection. Hide the heavy-duty cables beneath overlapping flagstones to ensure the hardware never distracts from the natural water aesthetic.
A safe, waterproof perimeter line costs about $45–$75. Save this to your landscape hardscaping board to prevent accidental nighttime pond slips.
- Key Materials: IP68 submersible rope lights, flat border stones
- Vibe / Style: Zen meditation garden
- Difficulty: Easy placement, requires careful waterproofing
- Budget Breakdown: IP68 lights: $45 | Waterproof sealant: $10.
- Creator’s Tip: Keep the lights exactly 2 inches above the normal waterline so small splashes hit them but they never fully submerge.
- Smart Sourcing: Use a fully submersible IP68 LED rope kit and a marine-grade silicone sealant tube.
25. Bridge Underside Reflection
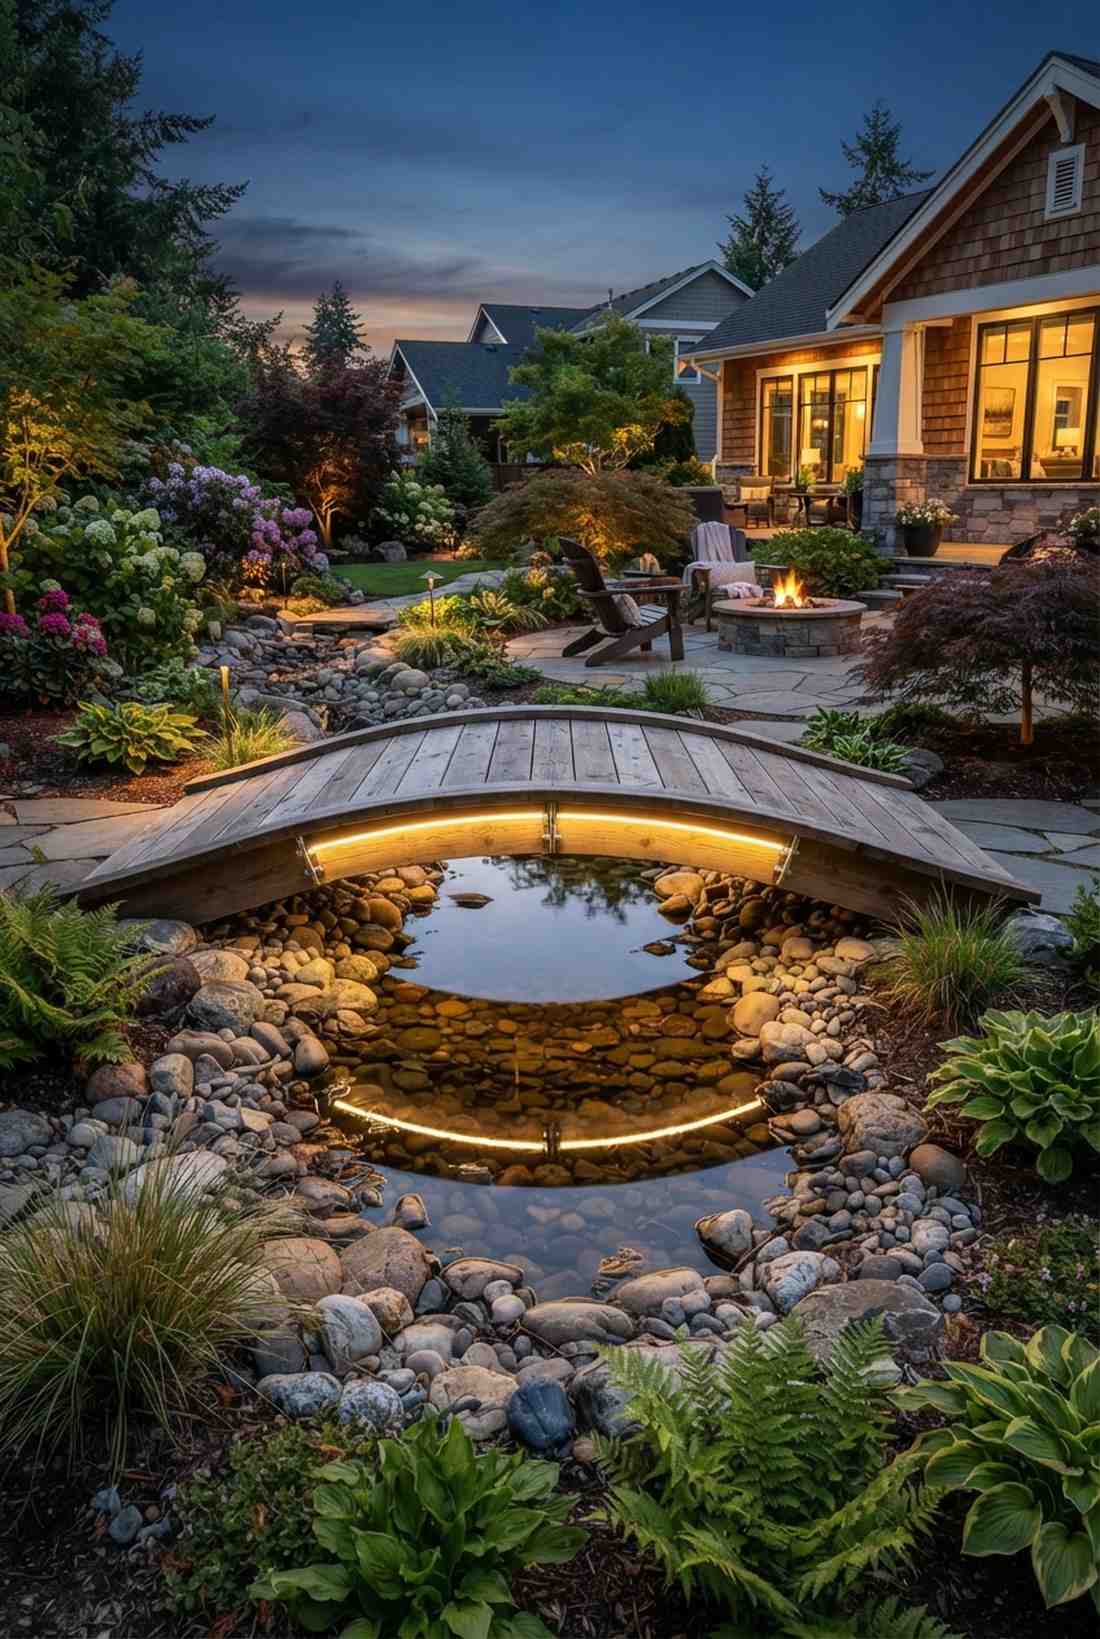
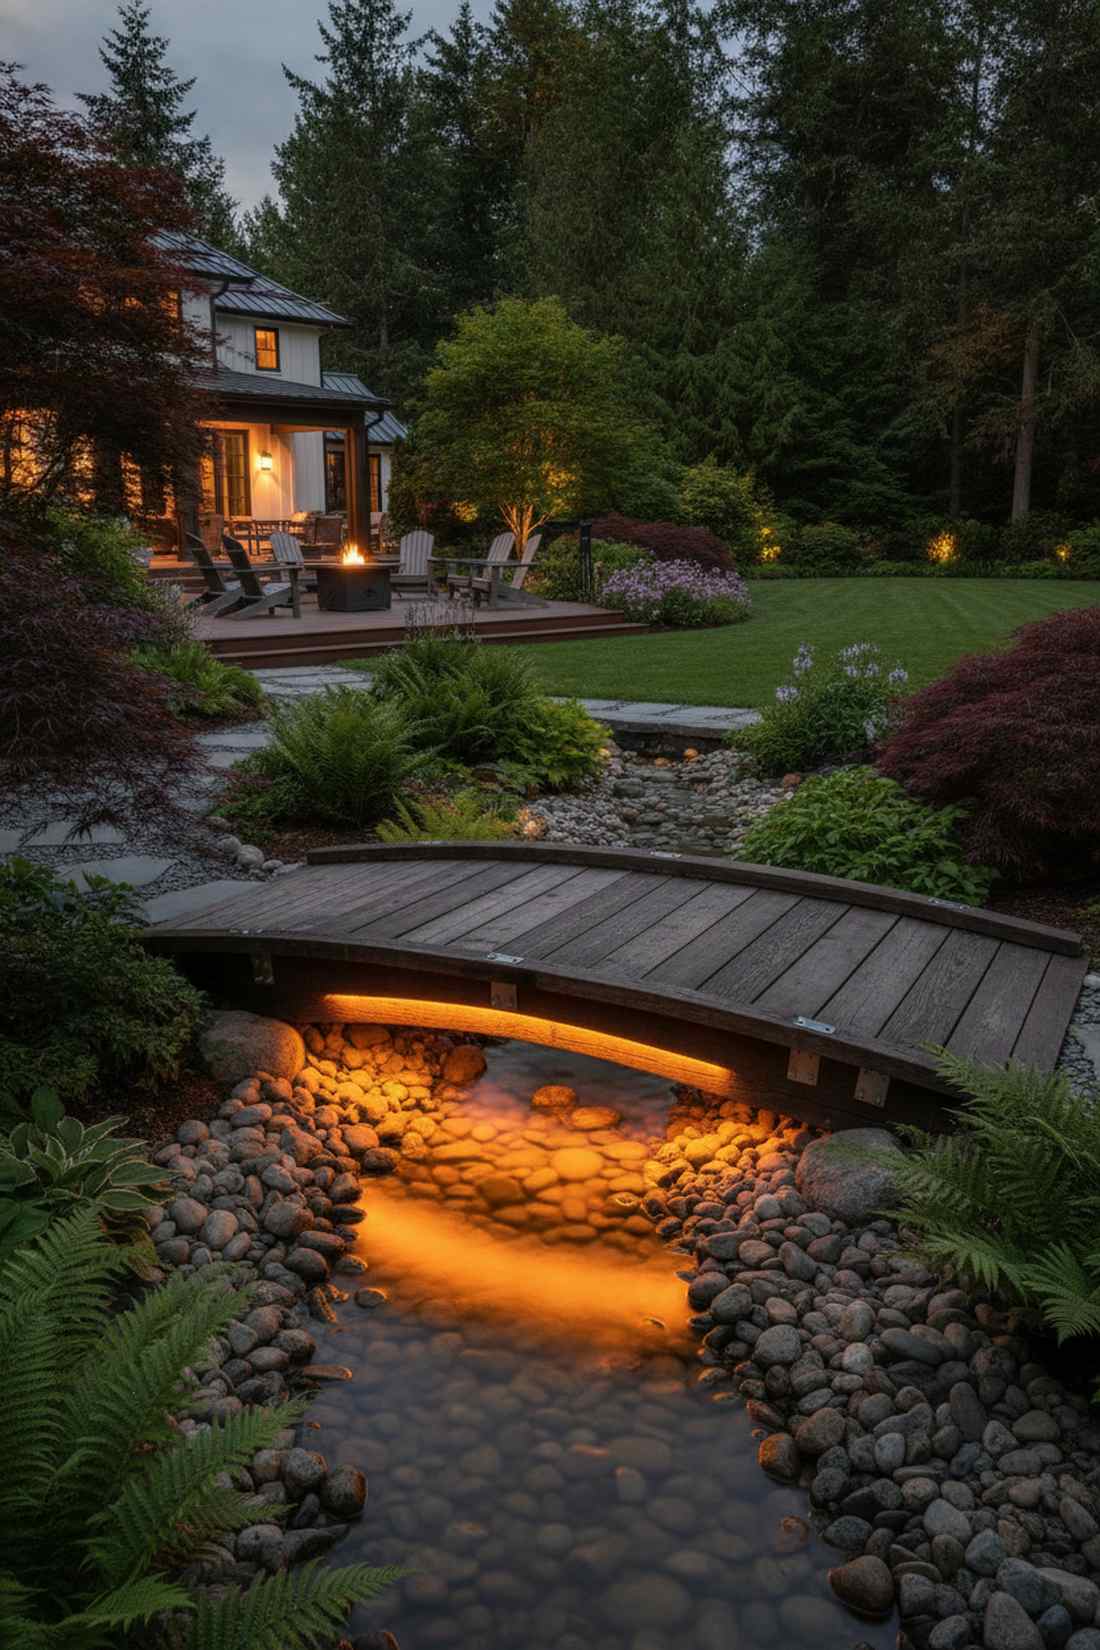
Casts a glowing sub-surface arch that feels highly engineered and magical. This is the perfect accent for small wooden footbridges crossing a dry creek bed or stream.
Mounting the strands entirely out of sight under the planks gives a designer-level finish that highlights the structural architecture beautifully. Fasten the cables using stainless steel cable clamps so humidity and rushing water never loosen the adhesive.
This hidden lighting trick runs a meager $20–$35 to complete. It elevates a boring garden bridge into a luxury estate feature.
- Key Materials: Flat LED outdoor strips, stainless screw clamps
- Vibe / Style: High-end botanical crossing
- Difficulty: Awkward under-mounting
- Budget Breakdown: Clamps: $8 | LED strip: $20.
- Creator’s Tip: Angle the LED strip exactly 45 degrees toward the water to maximize the mirrored reflection effect.
- Smart Sourcing: Buy a waterproof flat LED tape light and stainless steel screw-in cable clamps (bulk pack).
26. Fountain Surround Ring
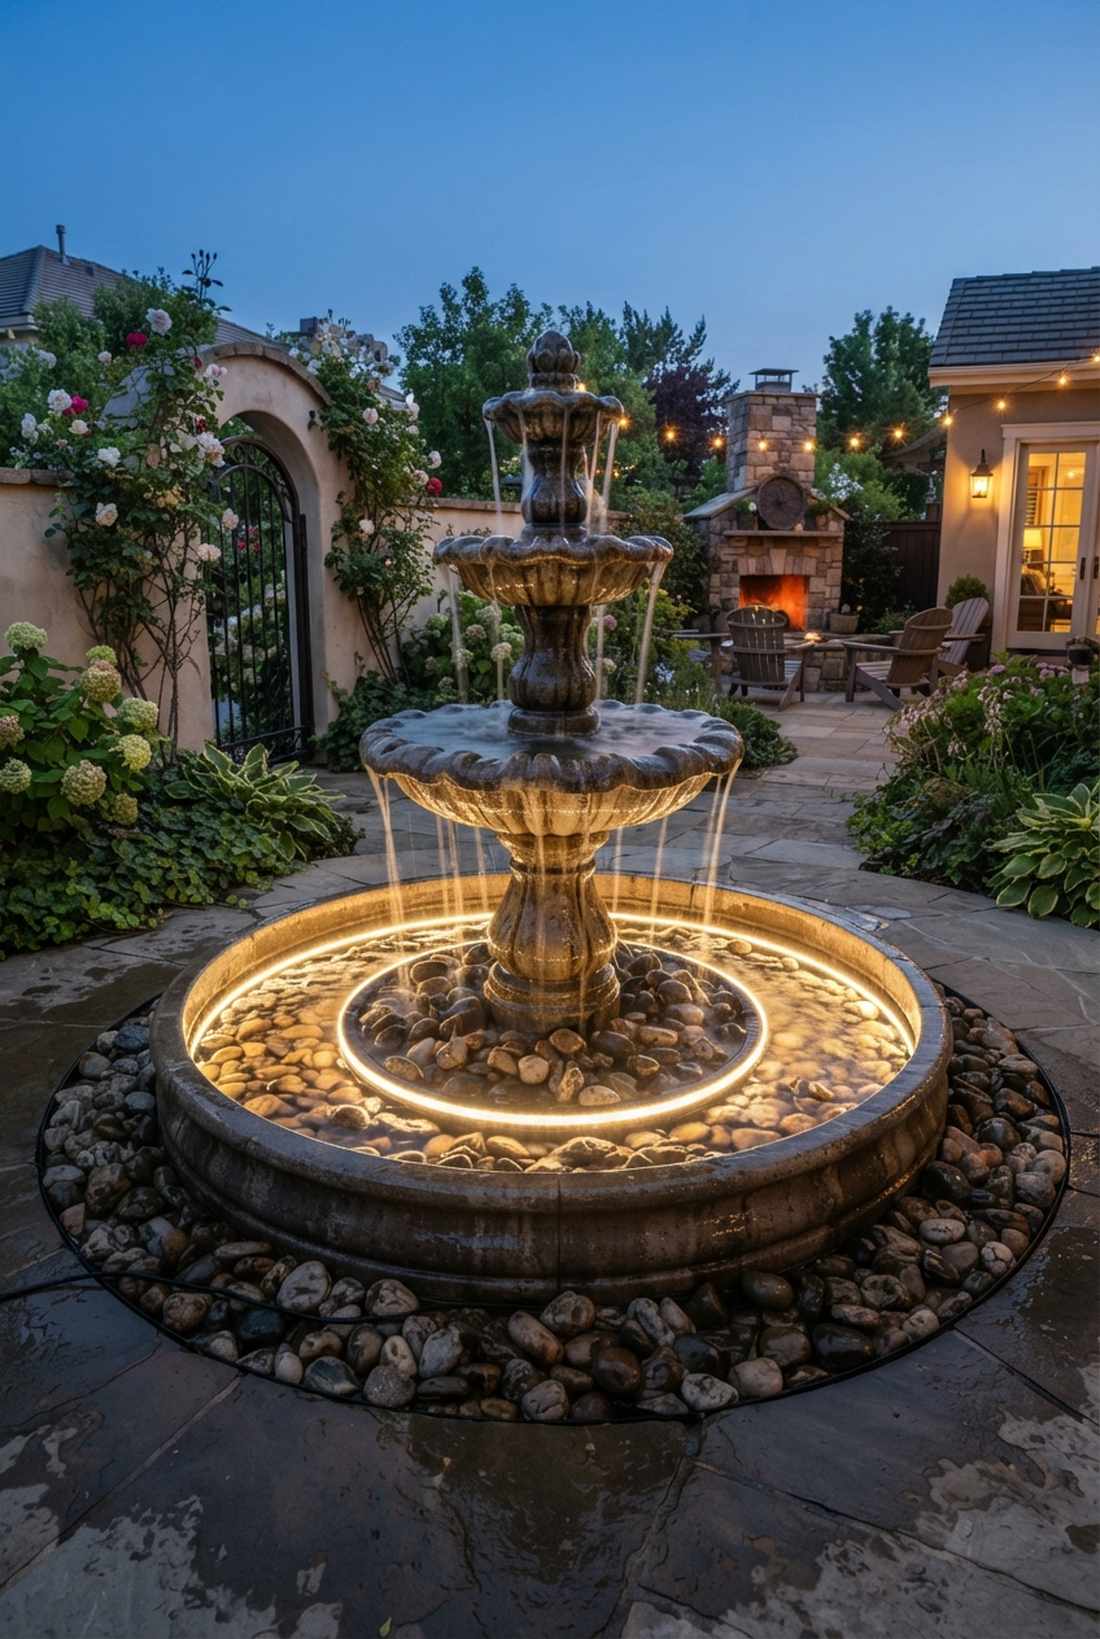
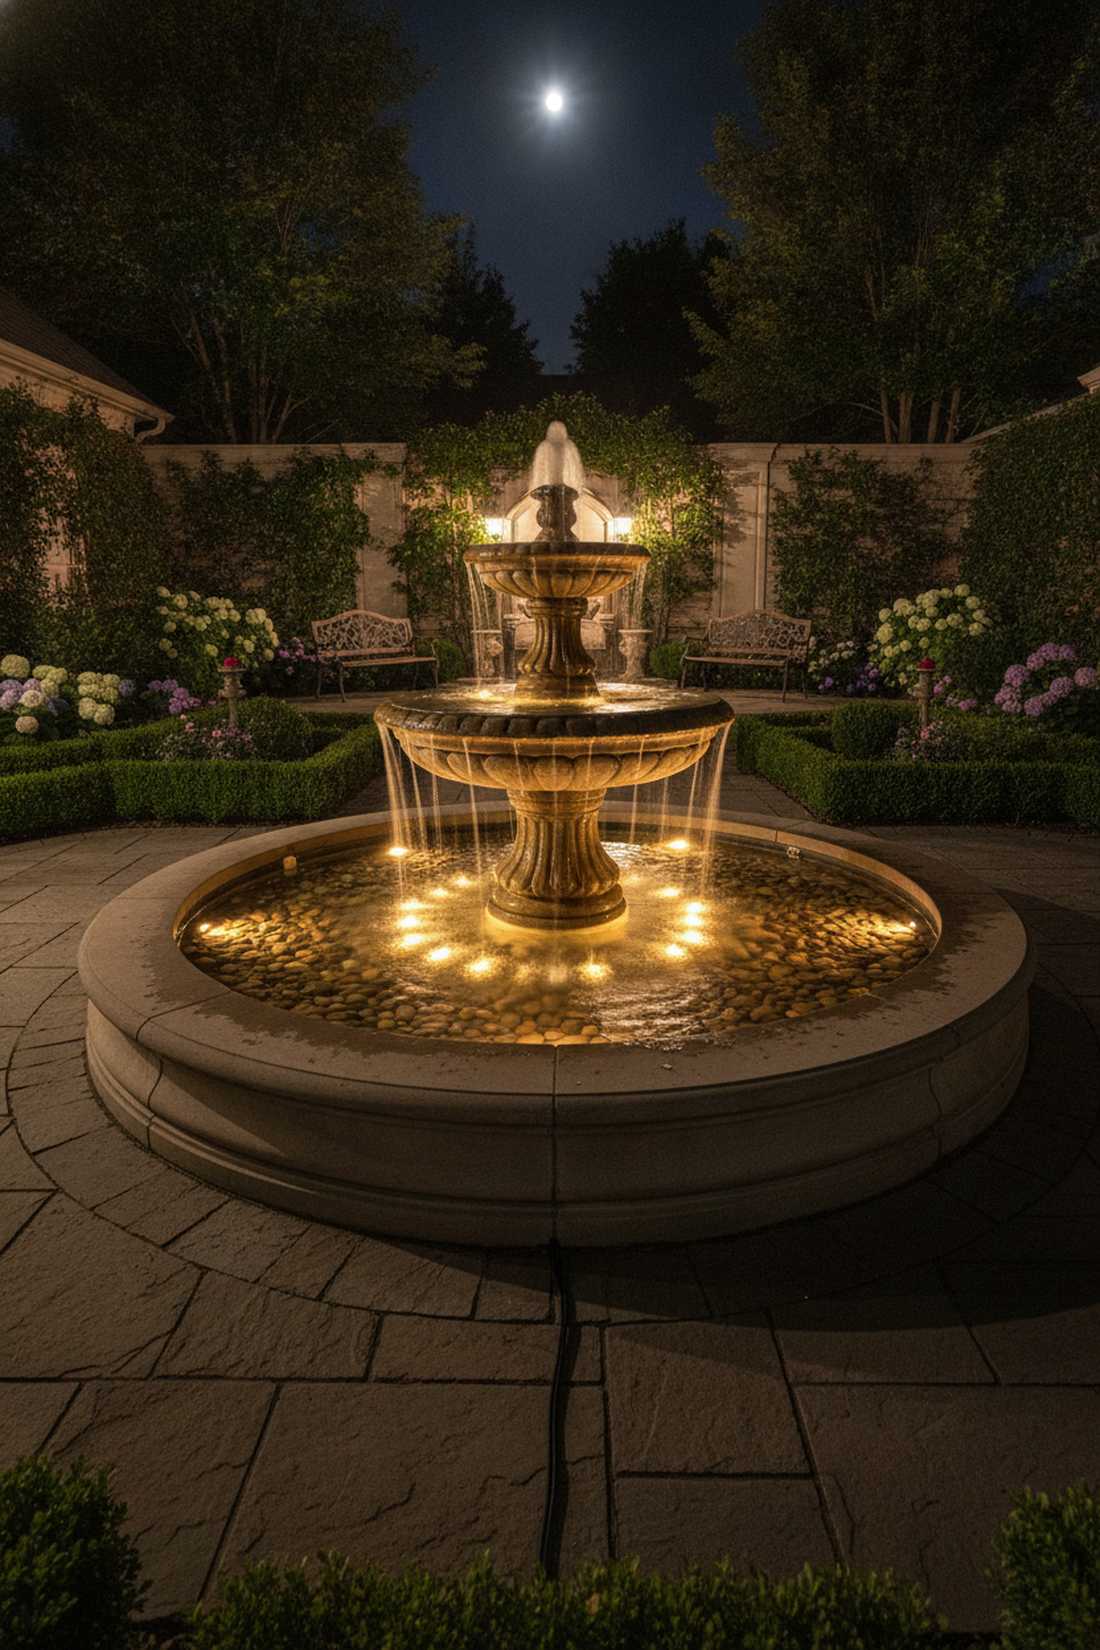
Frames an illuminated water basin that feels like a grand European plaza at midnight. Essential for making a tiered concrete fountain pop in a dark courtyard.
Circling the splash-zone completely elevates a boring water feature into a luxury focal point. You must strictly use heavy-duty submersible landscaping lights, anchoring them securely into the basin pebbles so the water’s vibration doesn’t move them.
A reliable waterproof ring will cost $30–$60. Pin this if your garden fountain completely disappears after sunset.
- Key Materials: Ring light submersible, decorative river rock
- Vibe / Style: Classic European courtyard
- Difficulty: Fast drop-in installation
- Budget Breakdown: Submersible ring: $35 | Rocks: $10.
- Creator’s Tip: Bury the power cable completely beneath the river rocks so it looks like the fountain is glowing from within the stone.
- Smart Sourcing: Order an IP68 submersible fountain ring kit and a heavy-duty outdoor GFCI extension cord.
27. Stream Bed Following
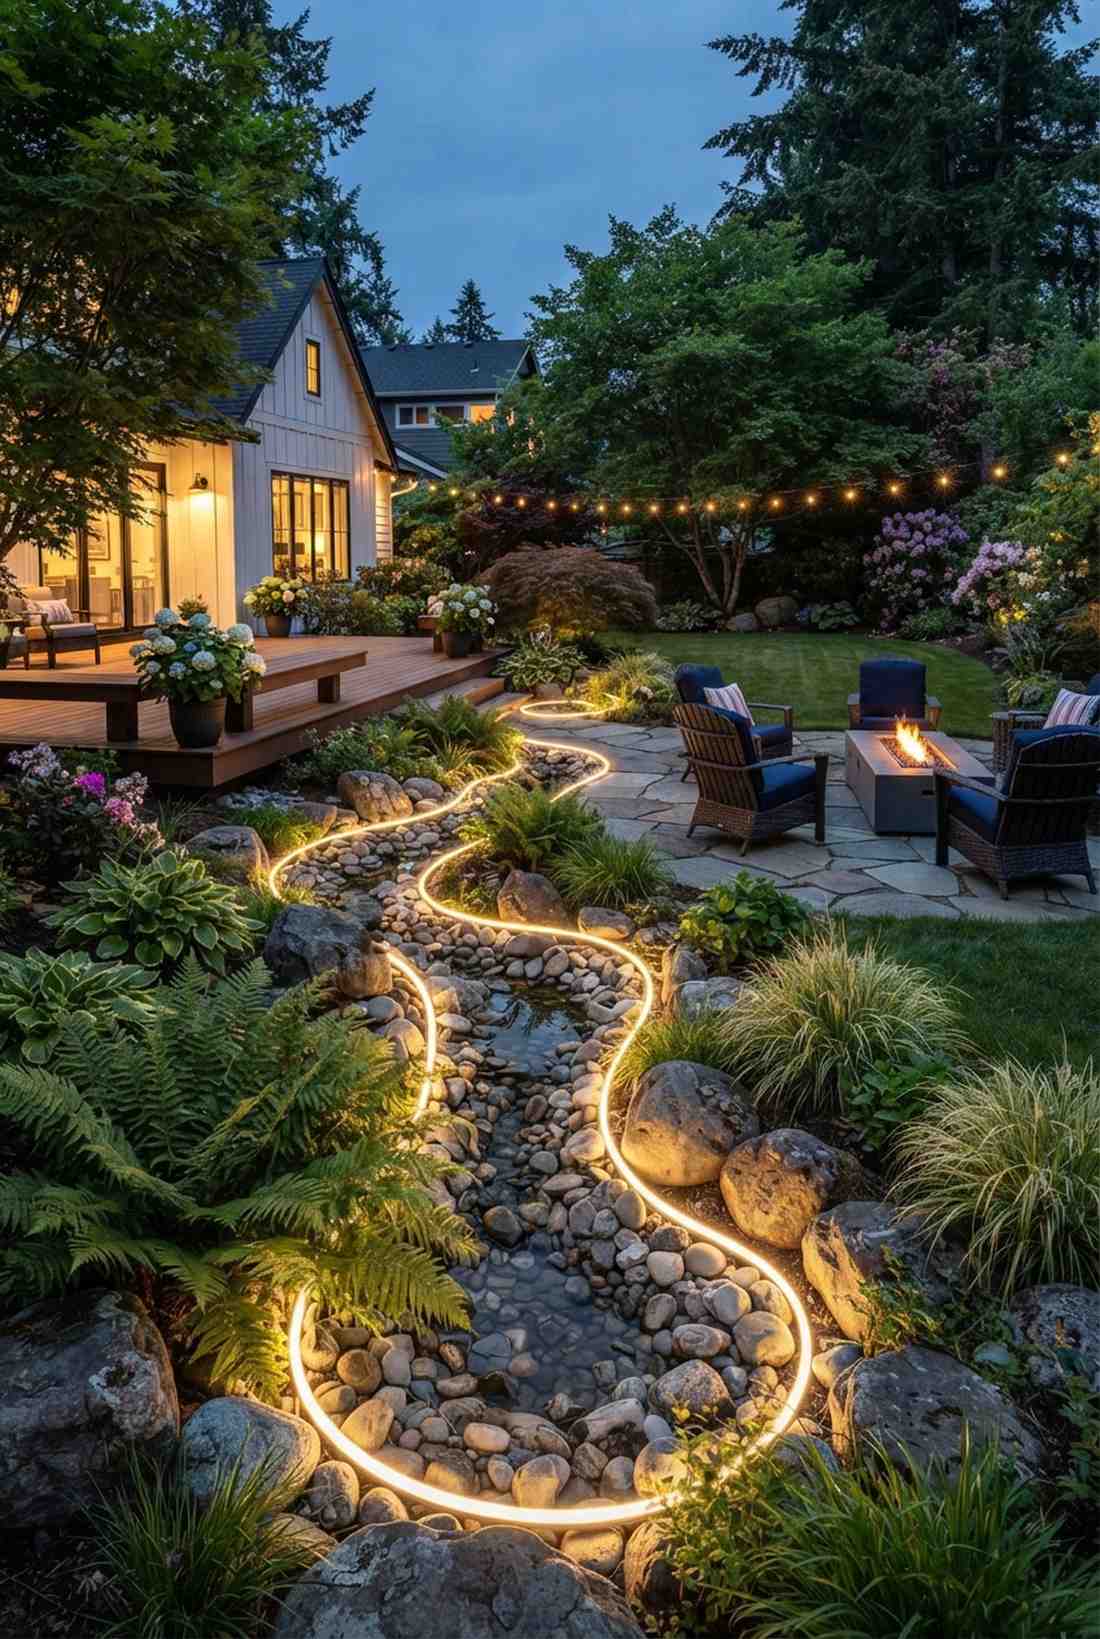
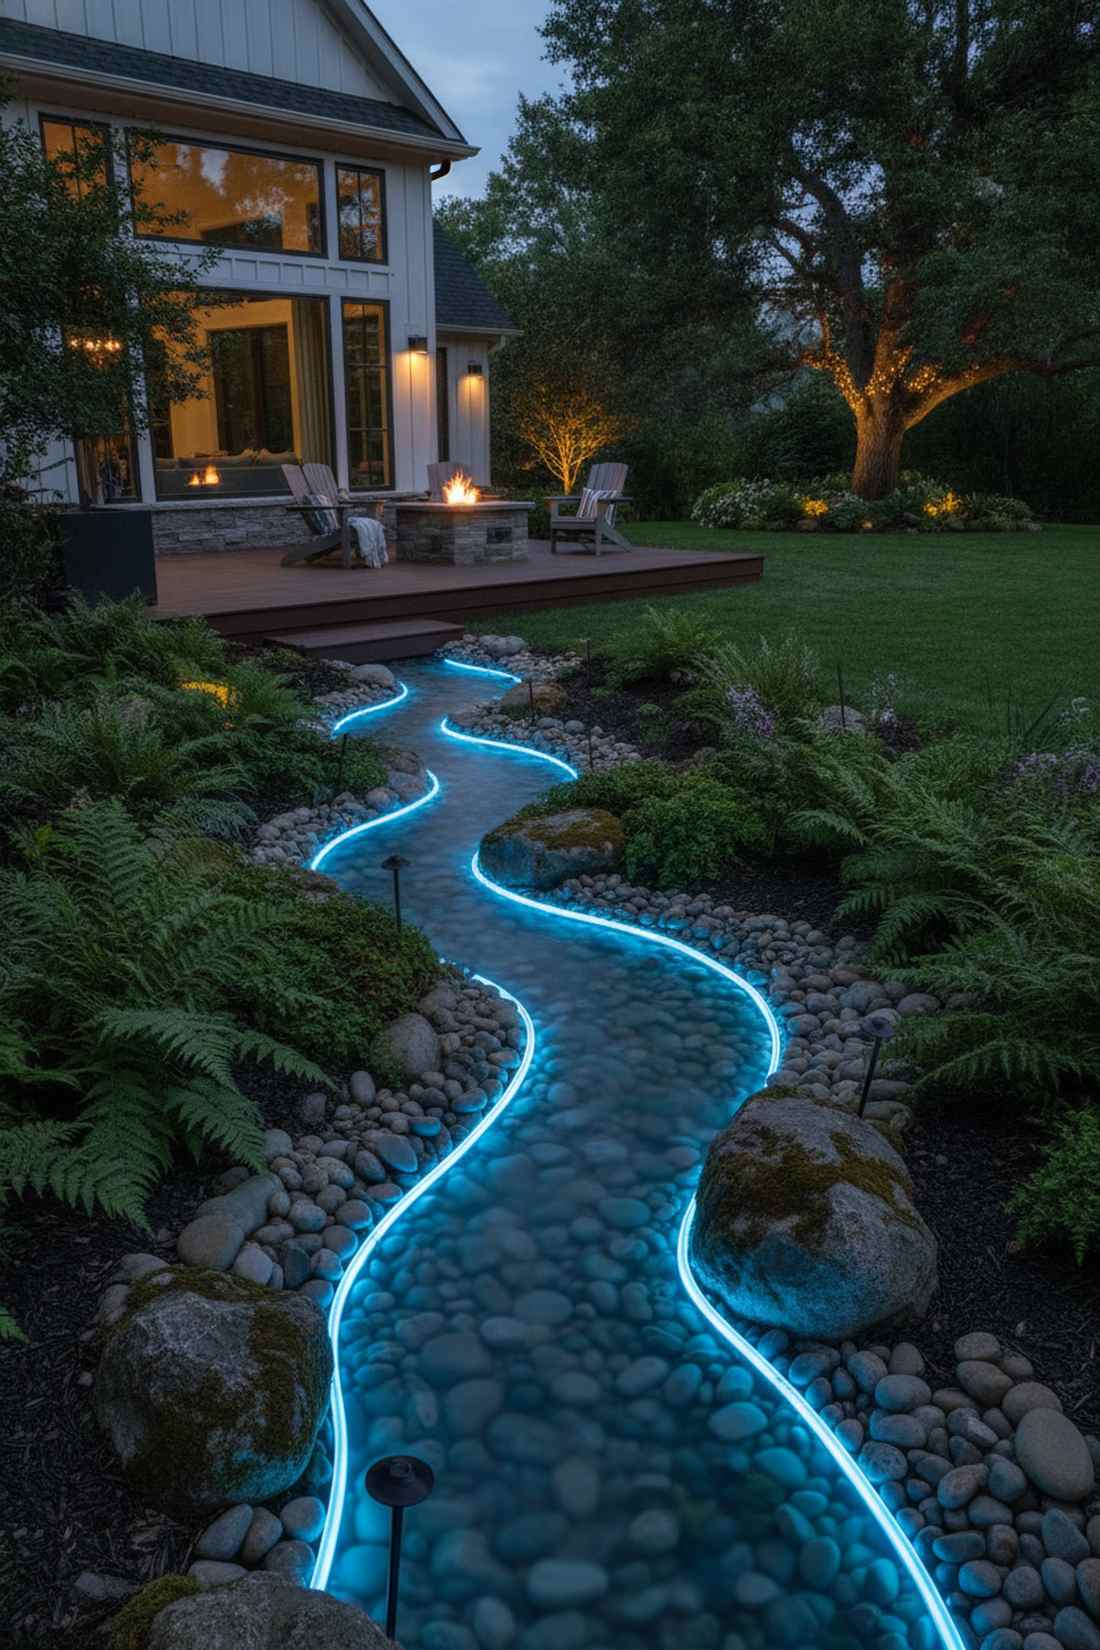
Paints a glowing winding river that feels dynamic and alive. It is beautifully suited to line a meandering garden stream or a synthetic rock dry-wash.
Following the organic curves of the water bypasses that cheap DIY aesthetic entirely, guiding the eye perfectly through the landscape. Tuck flexible outdoor silicone neon ropes beneath the overhanging bank ferns to create an unbroken, fluid ribbon of light.
Running a 20-foot stream border usually totals $50–$80. It completely changes the vibe of your backyard ecosystem at night.
- Key Materials: Silicone LED neon rope, ground stakes
- Vibe / Style: Flowing modern oasis
- Difficulty: Easy shaping and staking
- Budget Breakdown: Stakes: $10 | Neon rope: $50.
- Creator’s Tip: Never pull the rope tight; let it curve lazily around large stones to mimic the actual flow of water.
- Smart Sourcing: Get an outdoor flexible LED neon rope light and rust-proof metal ground stakes.
28. Waterfall Backdrop Cascade
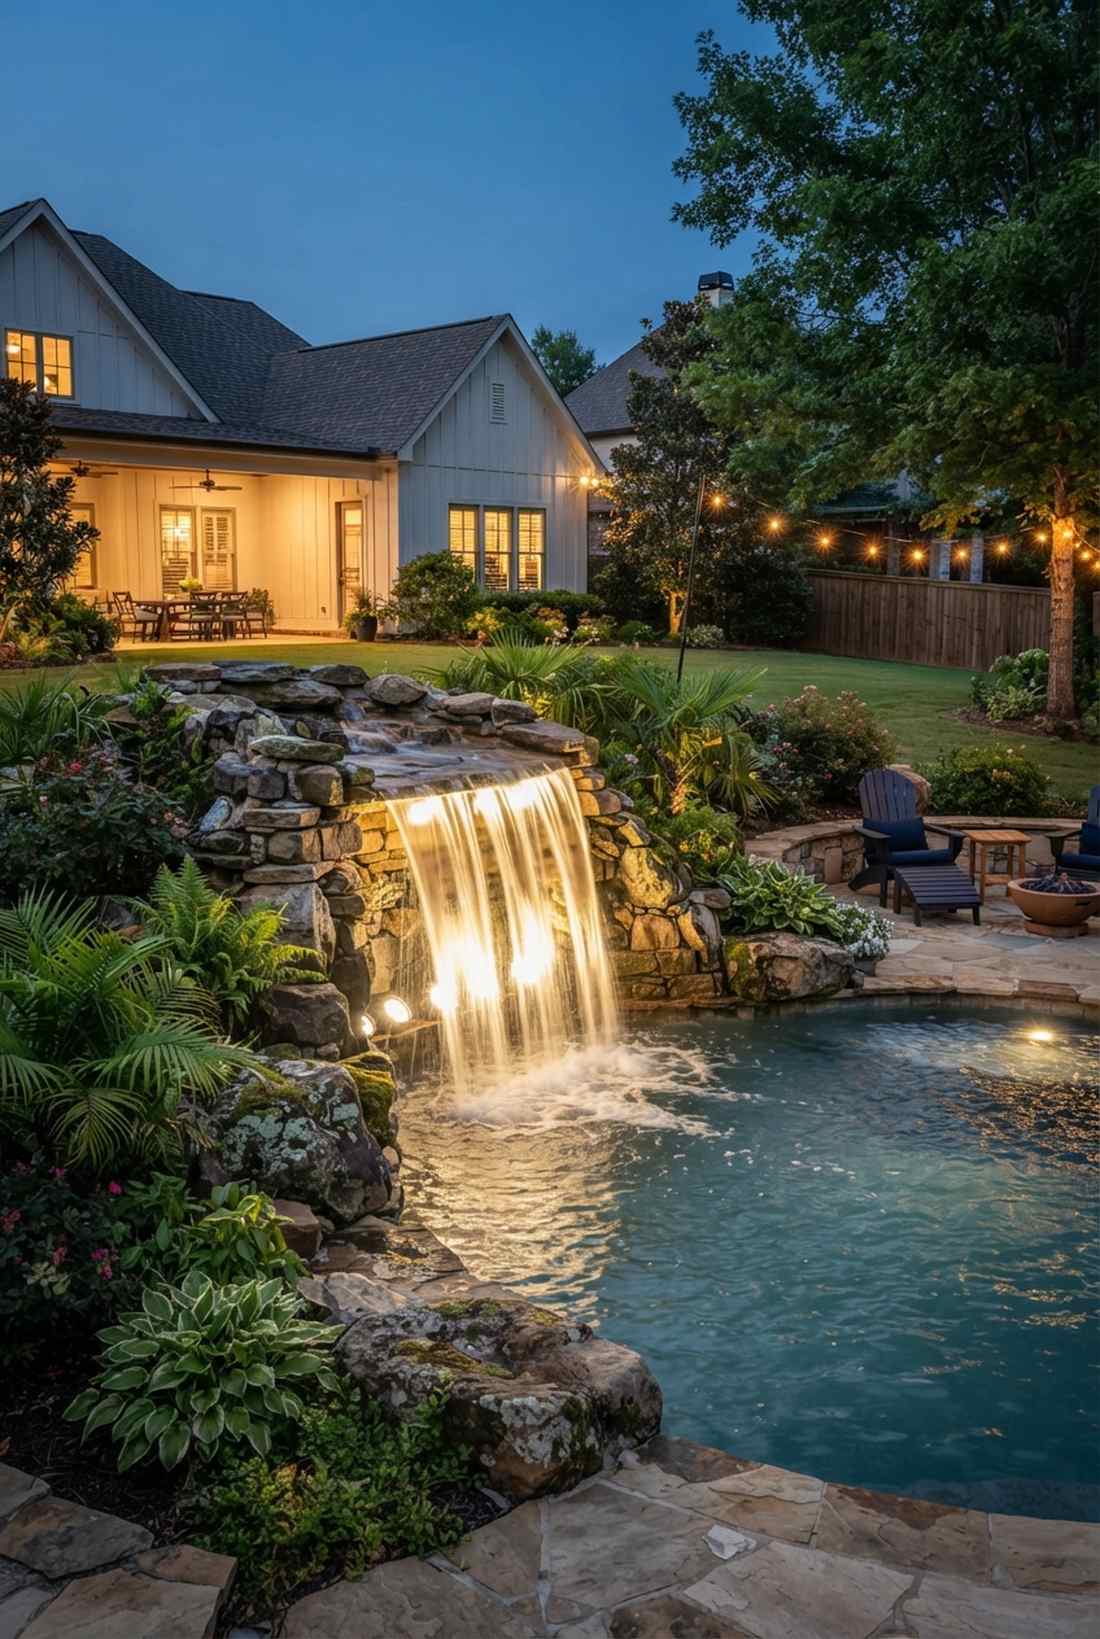
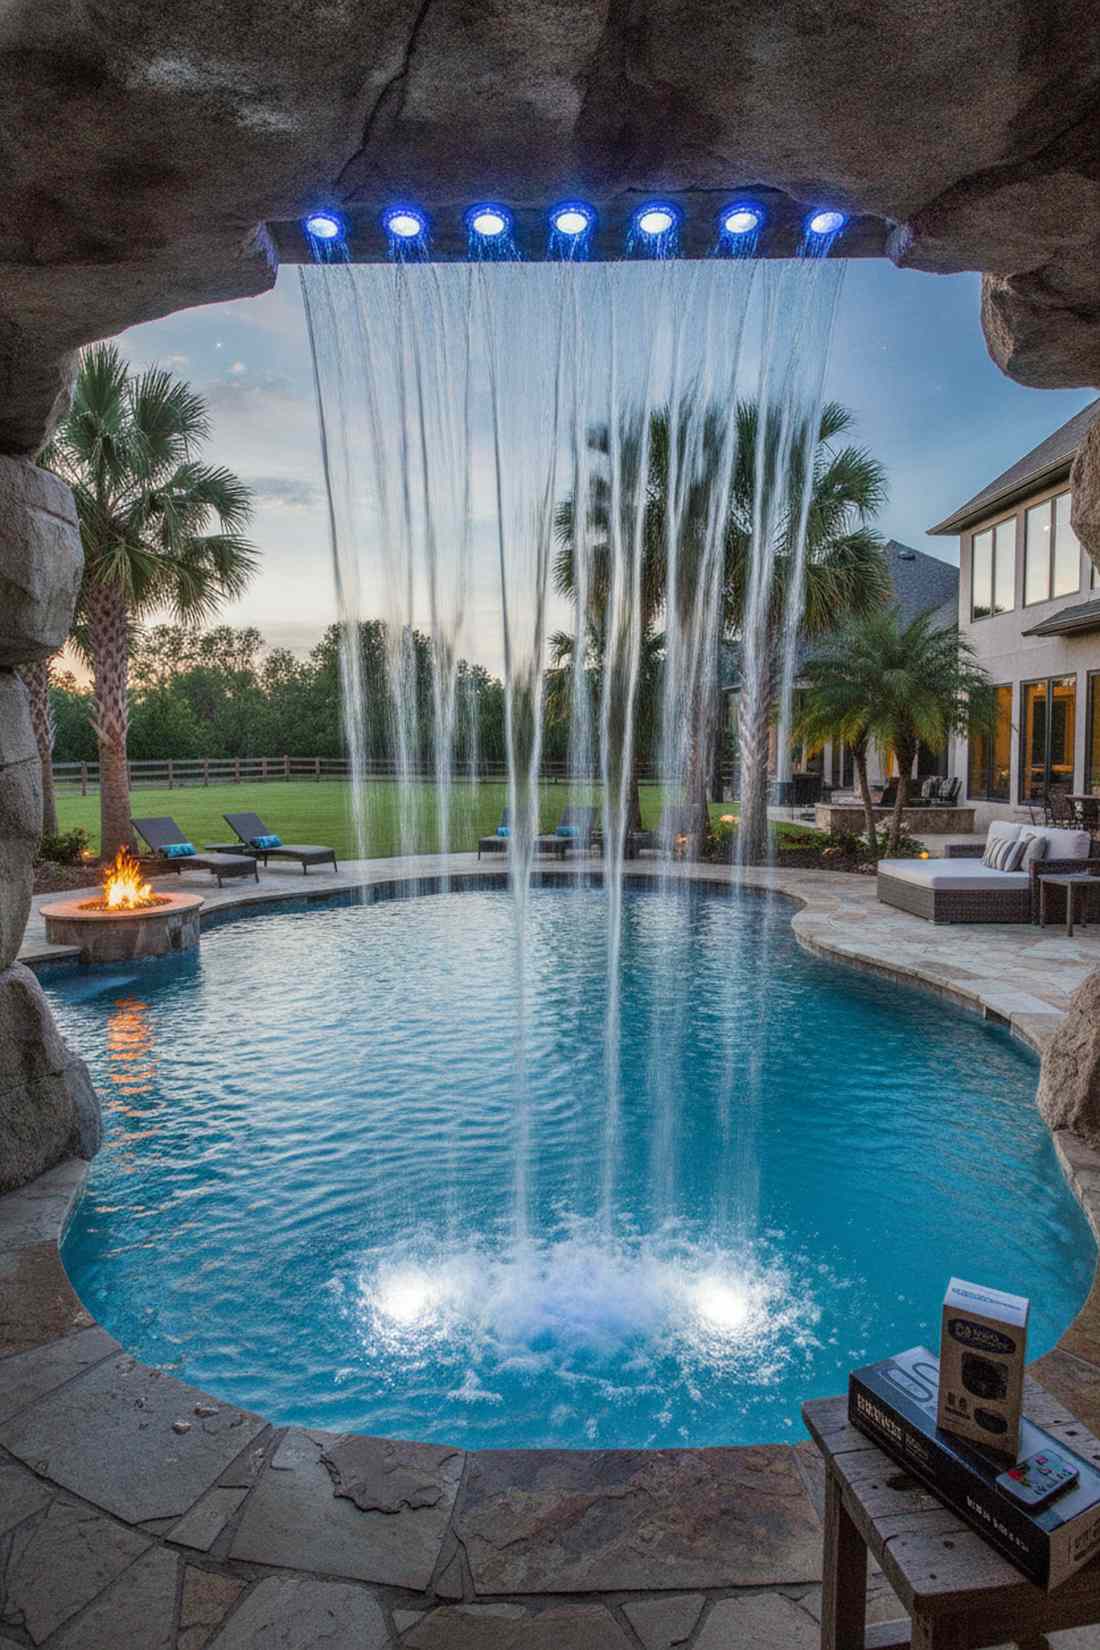
Builds a backlit cascading curtain that feels incredibly dramatic and cinematic. This is the ultimate trick for highlighting a sheer-descent waterfall dropping into a pool.
Placing waterproof bulbs directly behind the falling water looks far more expensive than it is, turning the water itself into a glowing glass sheet. You must use extreme-rated IP68 fixtures and coat every plug connection in dielectric grease to prevent instant short-circuits.
This high-end water effect requires about $40–$70 in specialized materials. Save this if you want to make your pool waterfall the centerpiece of the yard.
- Key Materials: Spot LED submersibles, dielectric grease
- Vibe / Style: Luxury resort grotto
- Difficulty: Advanced waterproofing required
- Budget Breakdown: Grease: $8 | Submersibles: $40.
- Creator’s Tip: Angle the lights slightly upwards so the light catches the bubbles as the water crashes down into the lower basin.
- Smart Sourcing: Grab a submersible LED spot kit (remote controlled) and a dielectric waterproof grease tube.
If you have a small, boring backyard, the layout coming up will instantly make it look twice as big…
Material Guide: Cheap vs. Premium Aesthetic
Knowing exactly where to save and where to spend makes all the difference in achieving that “looks expensive but isn’t” vibe.
- Standard vs. UV-Resistant/Premium: Standard indoor/outdoor cables crack and fade white under the sun in one season. Upgrading to UV-coated commercial wires stops fading and prevents water-shorting entirely.
- Pre-made Kits vs. Sourcing Locally: Scavenging separate hardware store bins is wildly expensive. Buying pre-cut tension kits and starter bundles saves both time and ensures all fittings actually match.
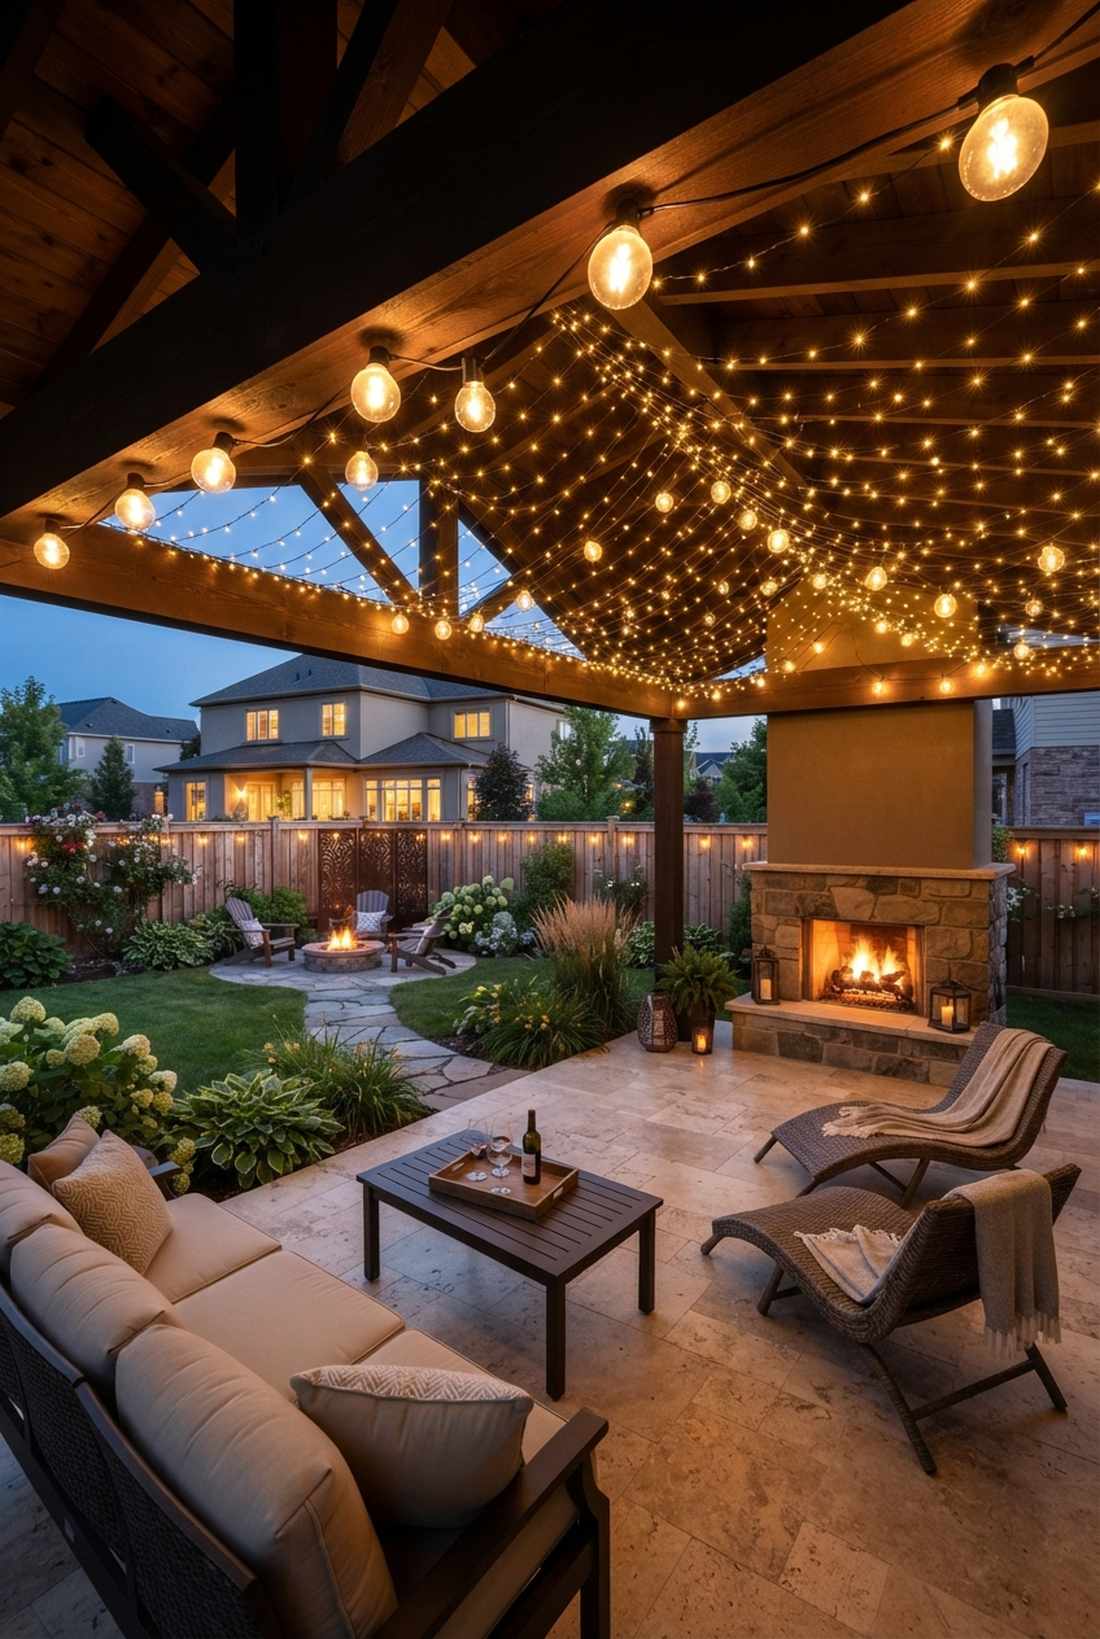
Pergola & Structure Lighting
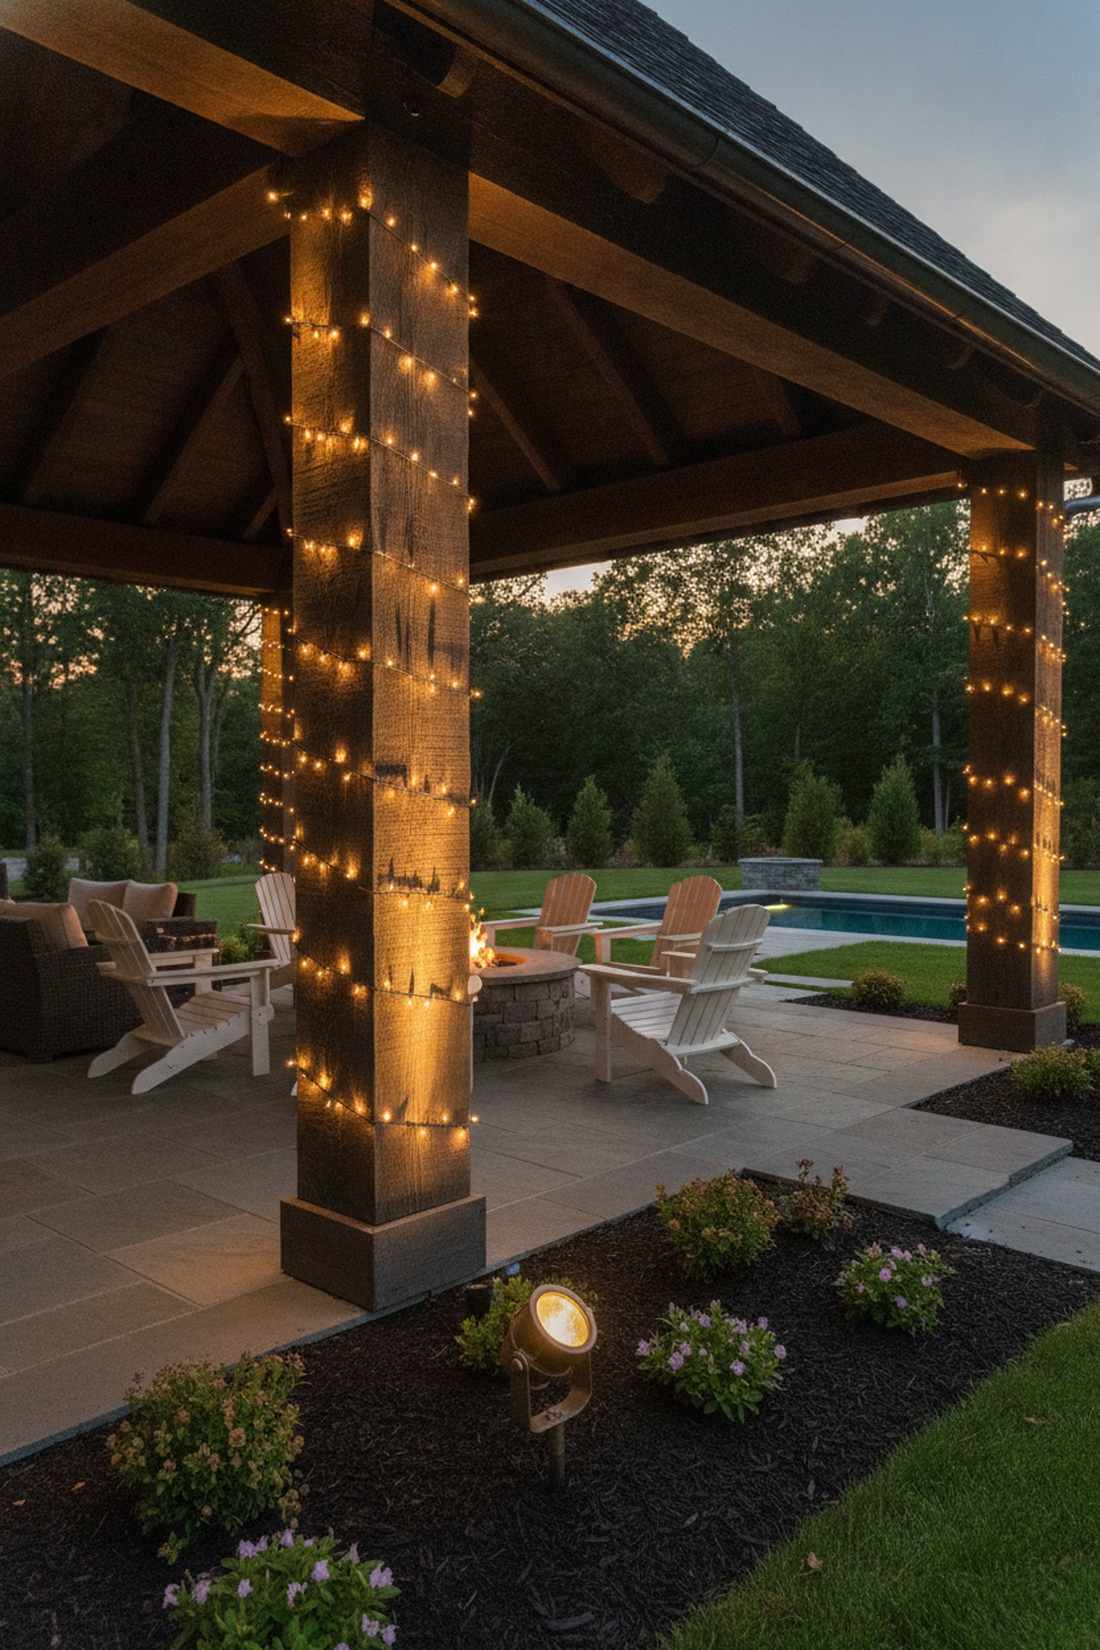
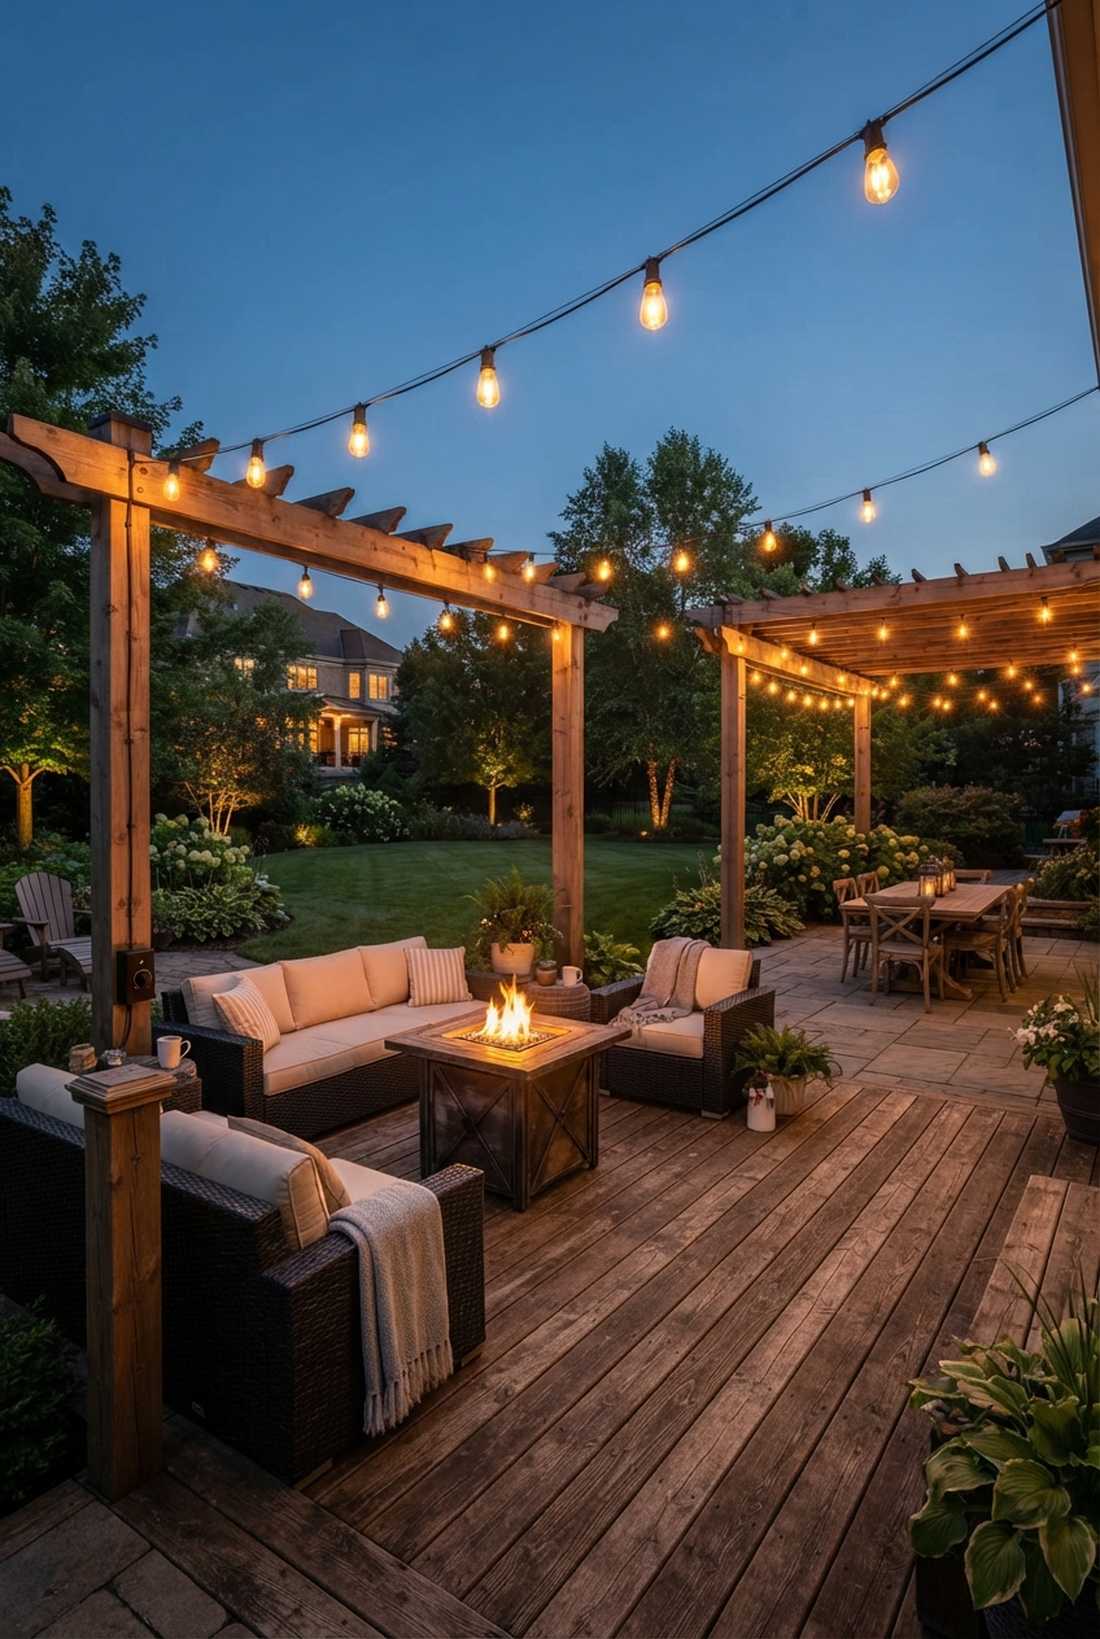
29. Beam Wrapped Emphasis
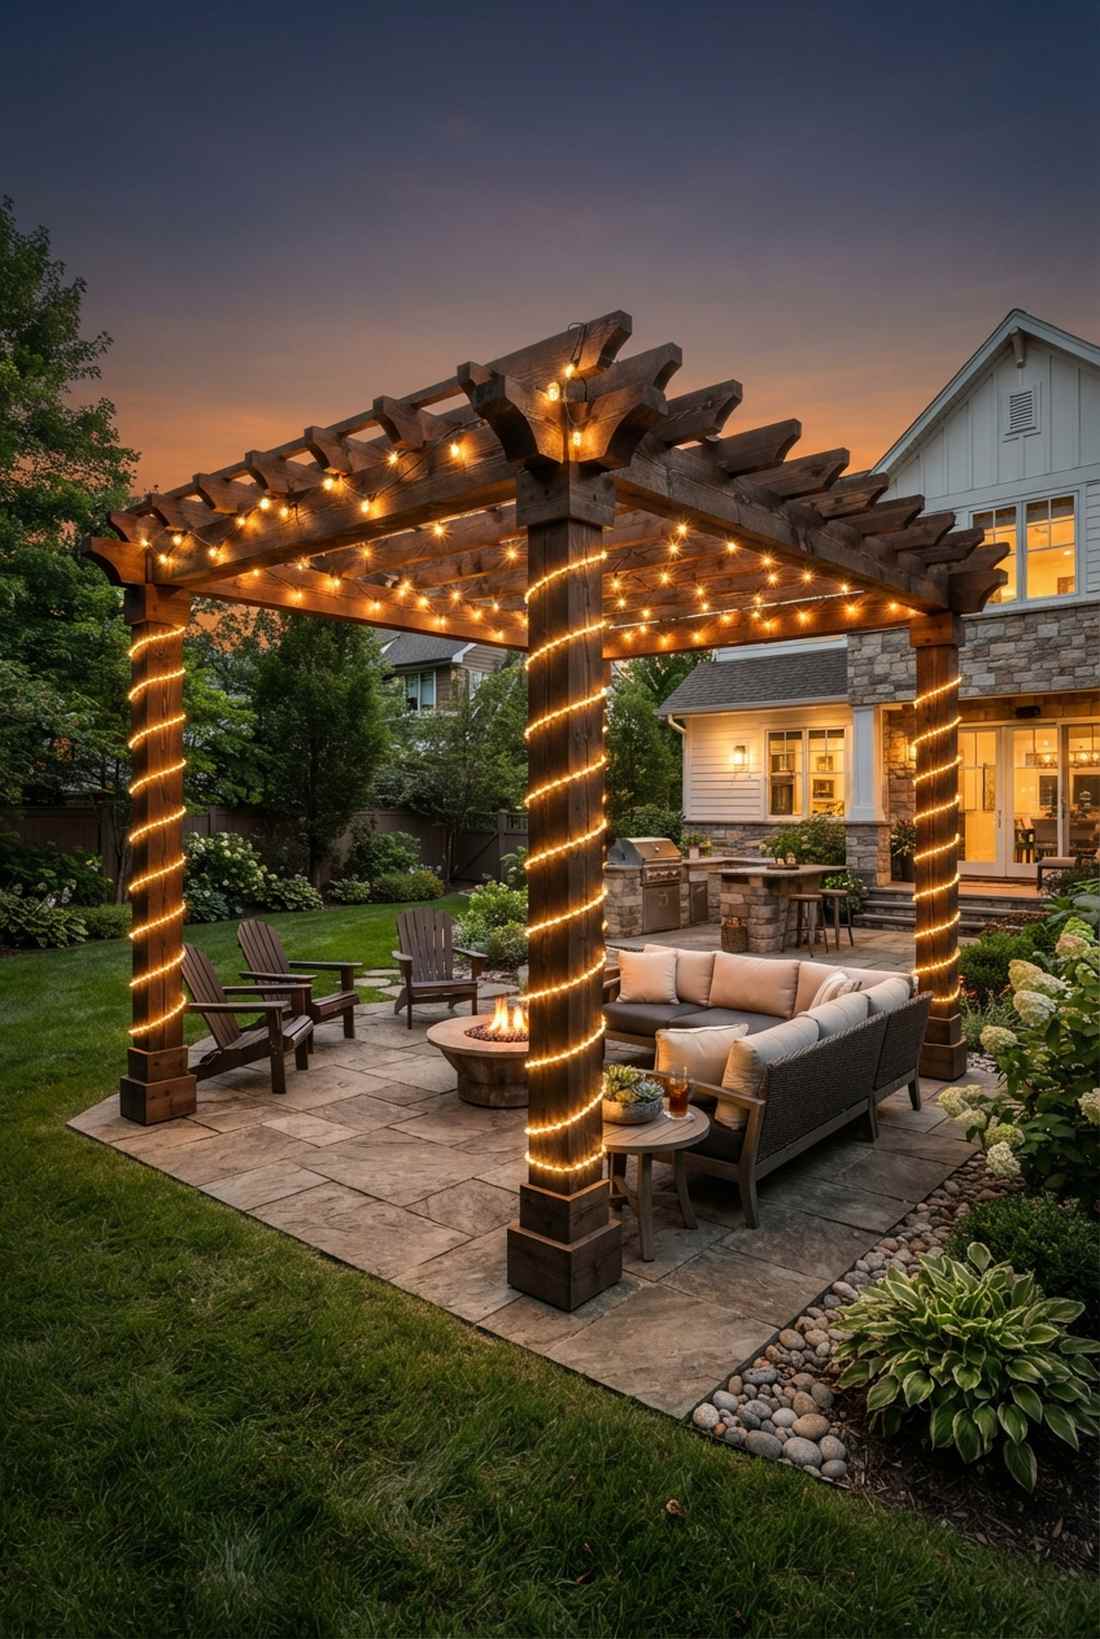
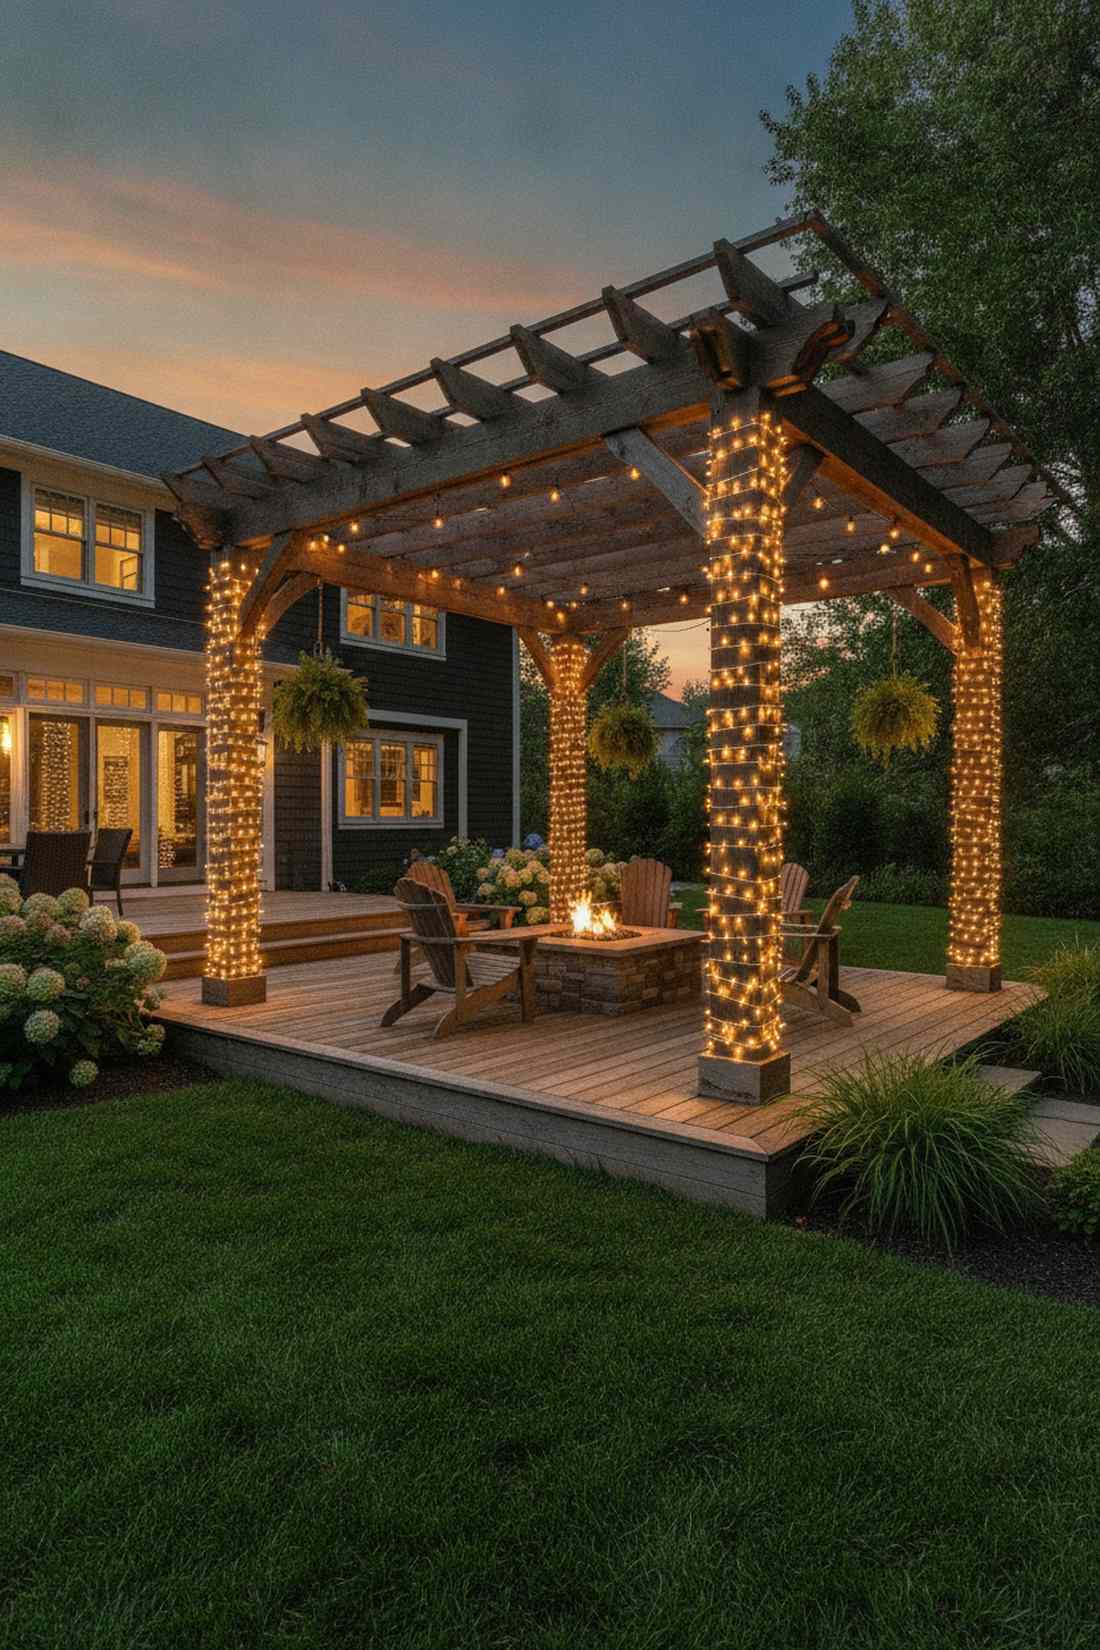
Wraps a sturdy glowing framework that feels like cozy, exposed architectural timber. Perfect for emphasizing the thick wooden columns of a standalone backyard pergola.
Coiling the string tightly around the support posts gives a designer-level finish, drawing the eye upward to the canopy. Skip the bulky staples and secure the wire tightly using a heavy-duty staple gun on the back-facing side of the wood so the hardware remains invisible.
Wrapping four massive columns will cost roughly $50–$80. Pin this to your patio remodel board for an instant structural highlight.
- Key Materials: Long commercial string lights, staple gun
- Vibe / Style: Rustic timber pavilion
- Difficulty: Physically tiring wrapping
- Budget Breakdown: Hardware: $10 | Strings: $50.
- Creator’s Tip: Keep the wire spacing exactly 4 inches apart on every single post to maintain a pristine, symmetrical aesthetic.
- Smart Sourcing: Use a heavy-duty 100ft outdoor string light and an electric staple gun kit.
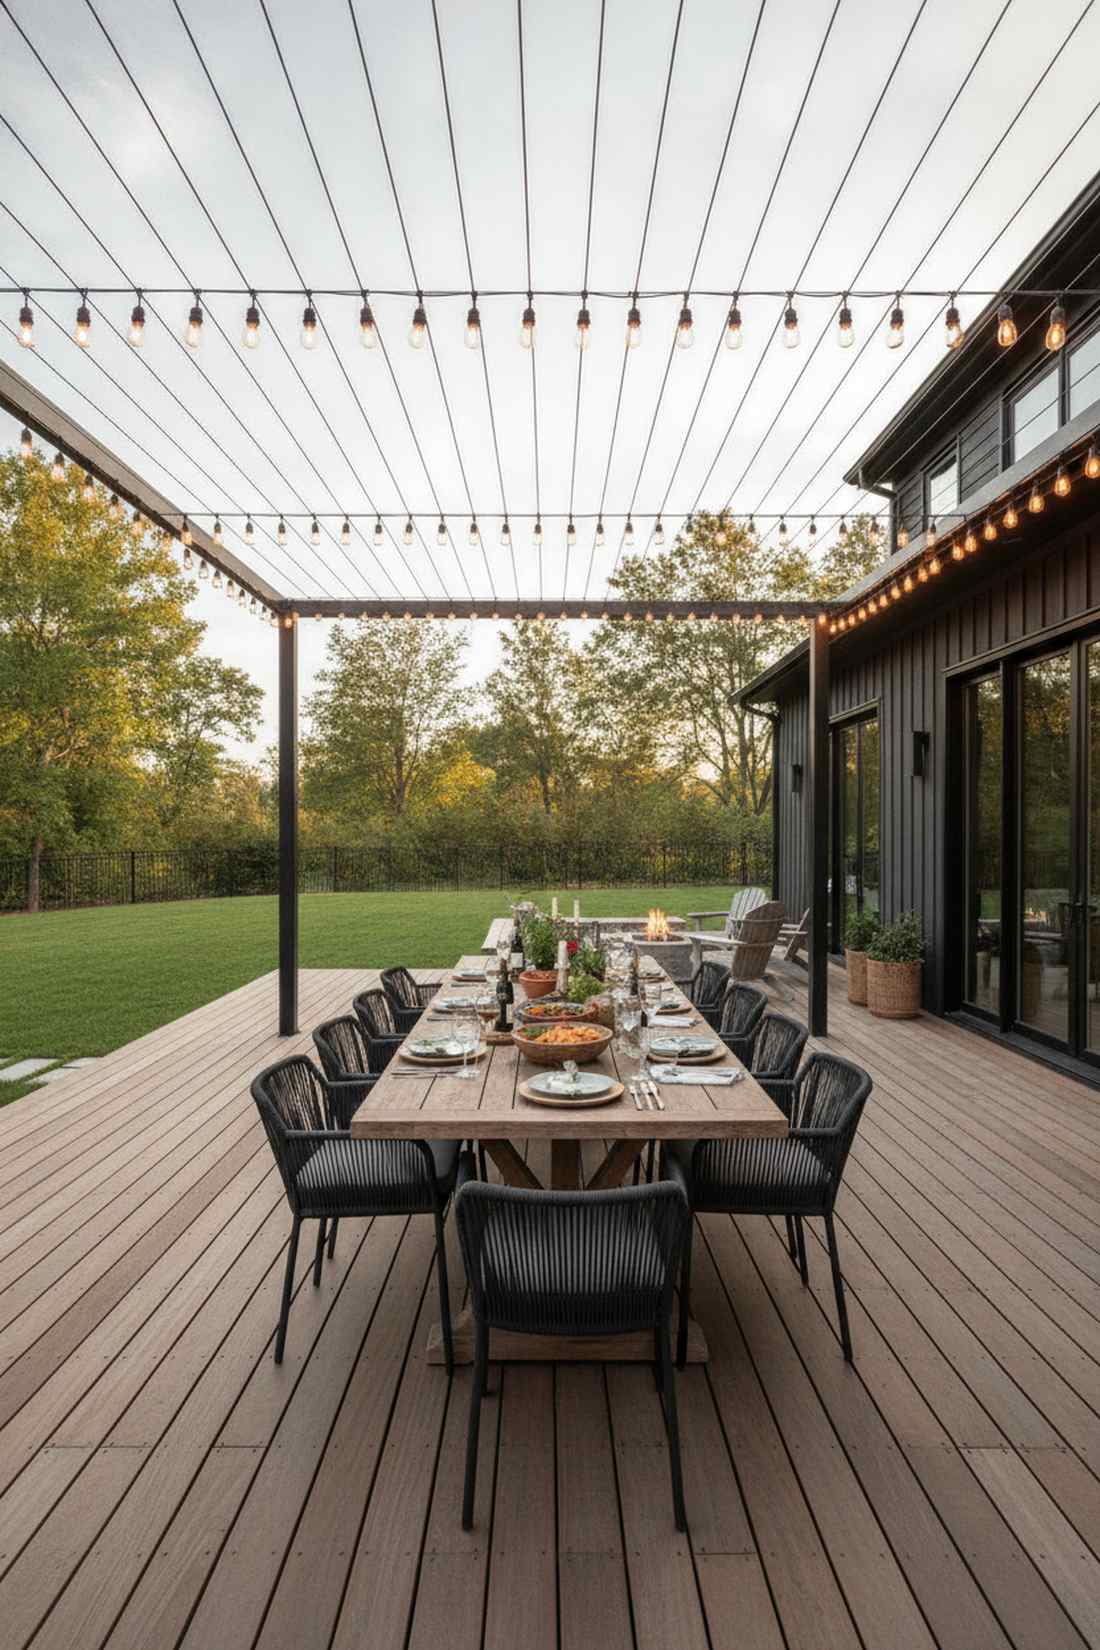
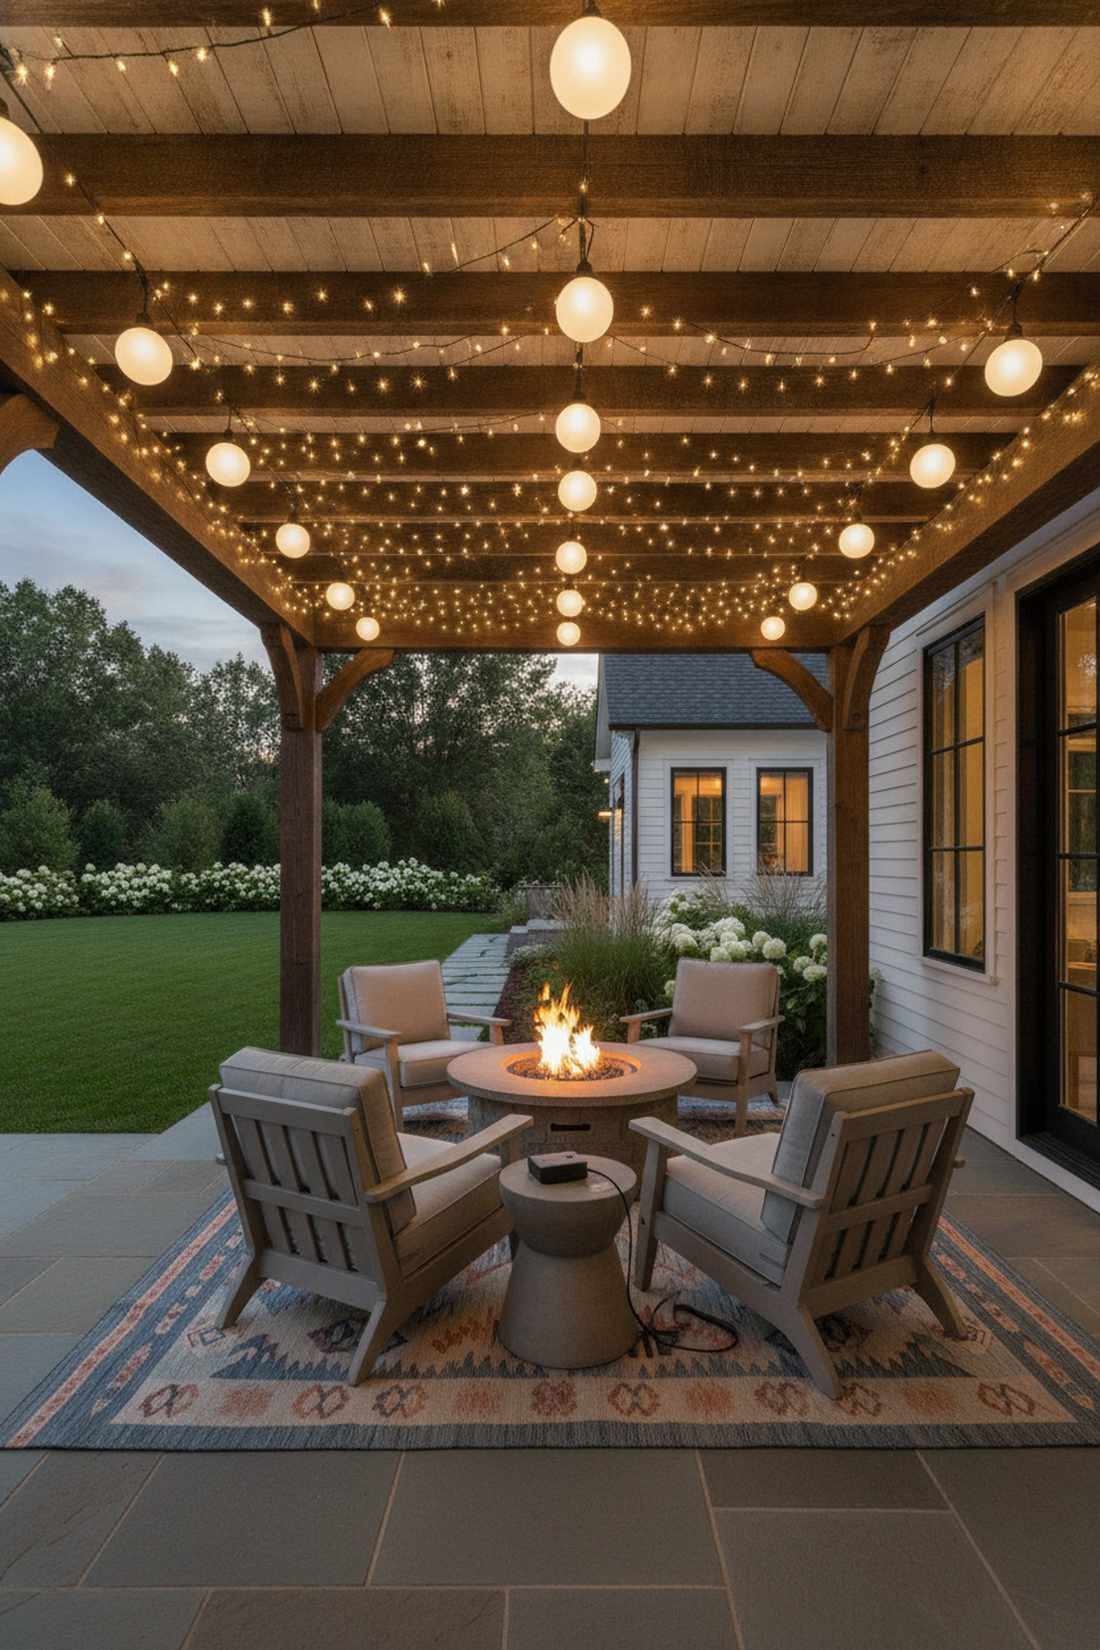
30. Rafter Line Definition
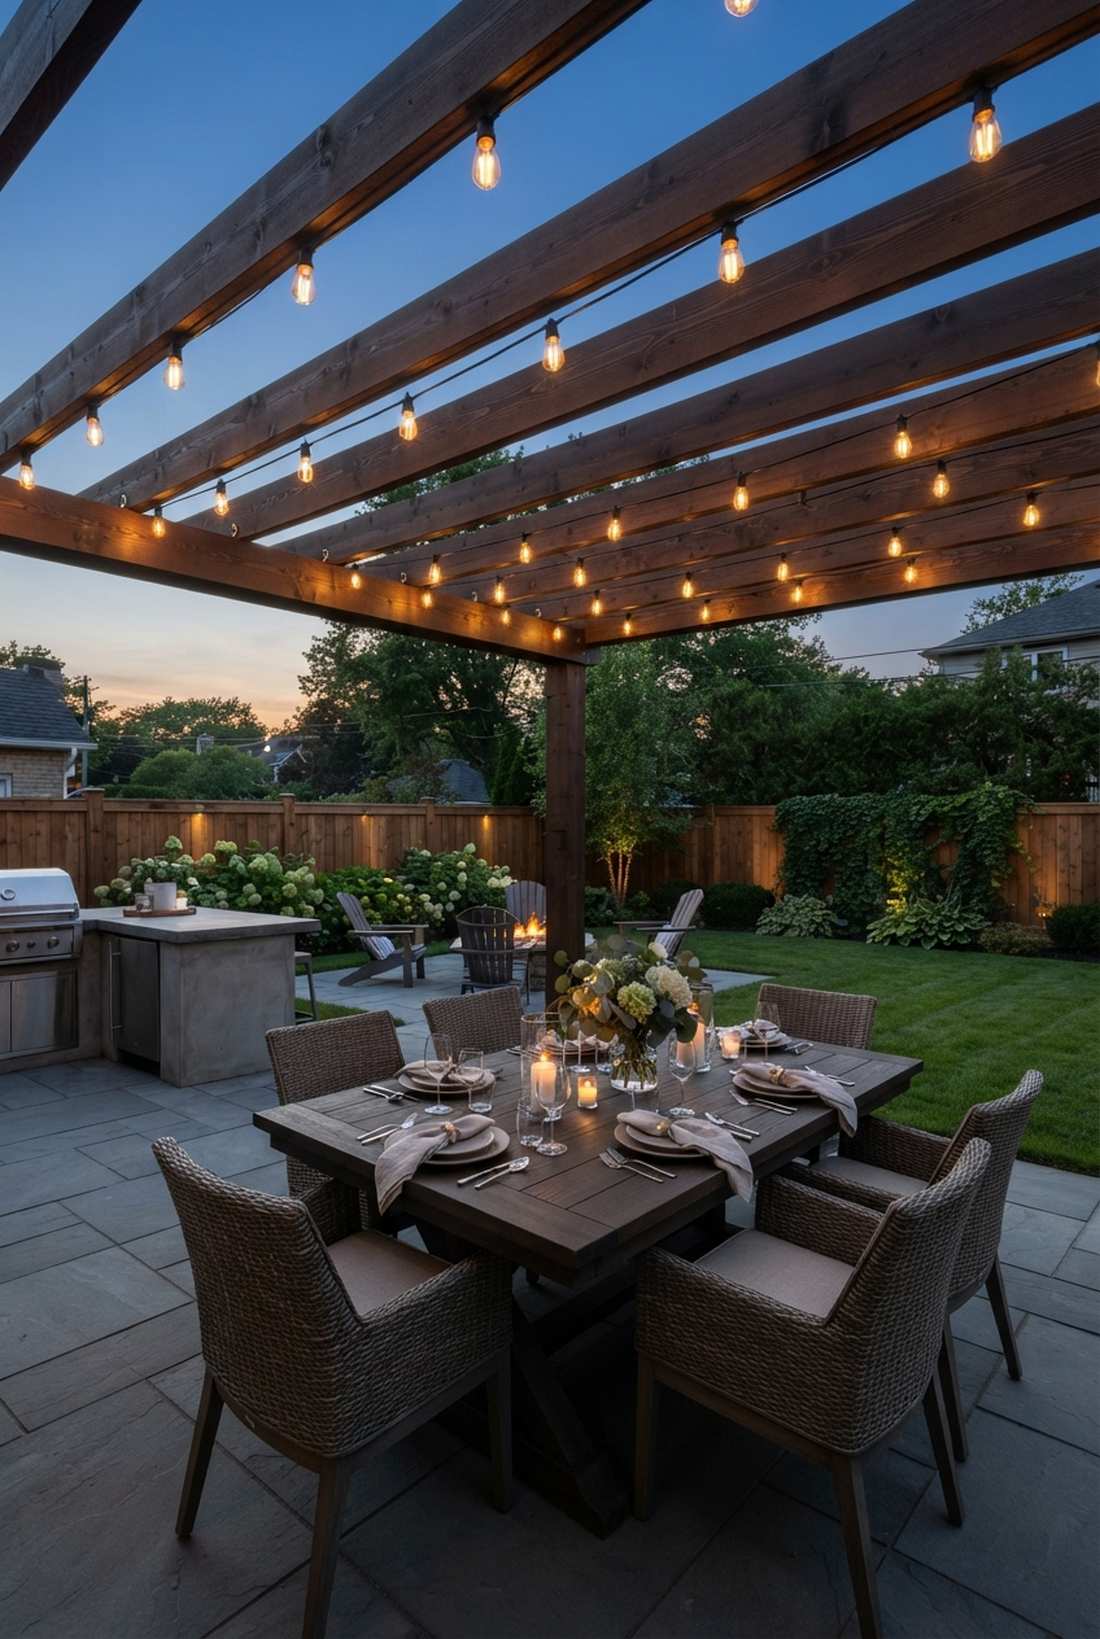
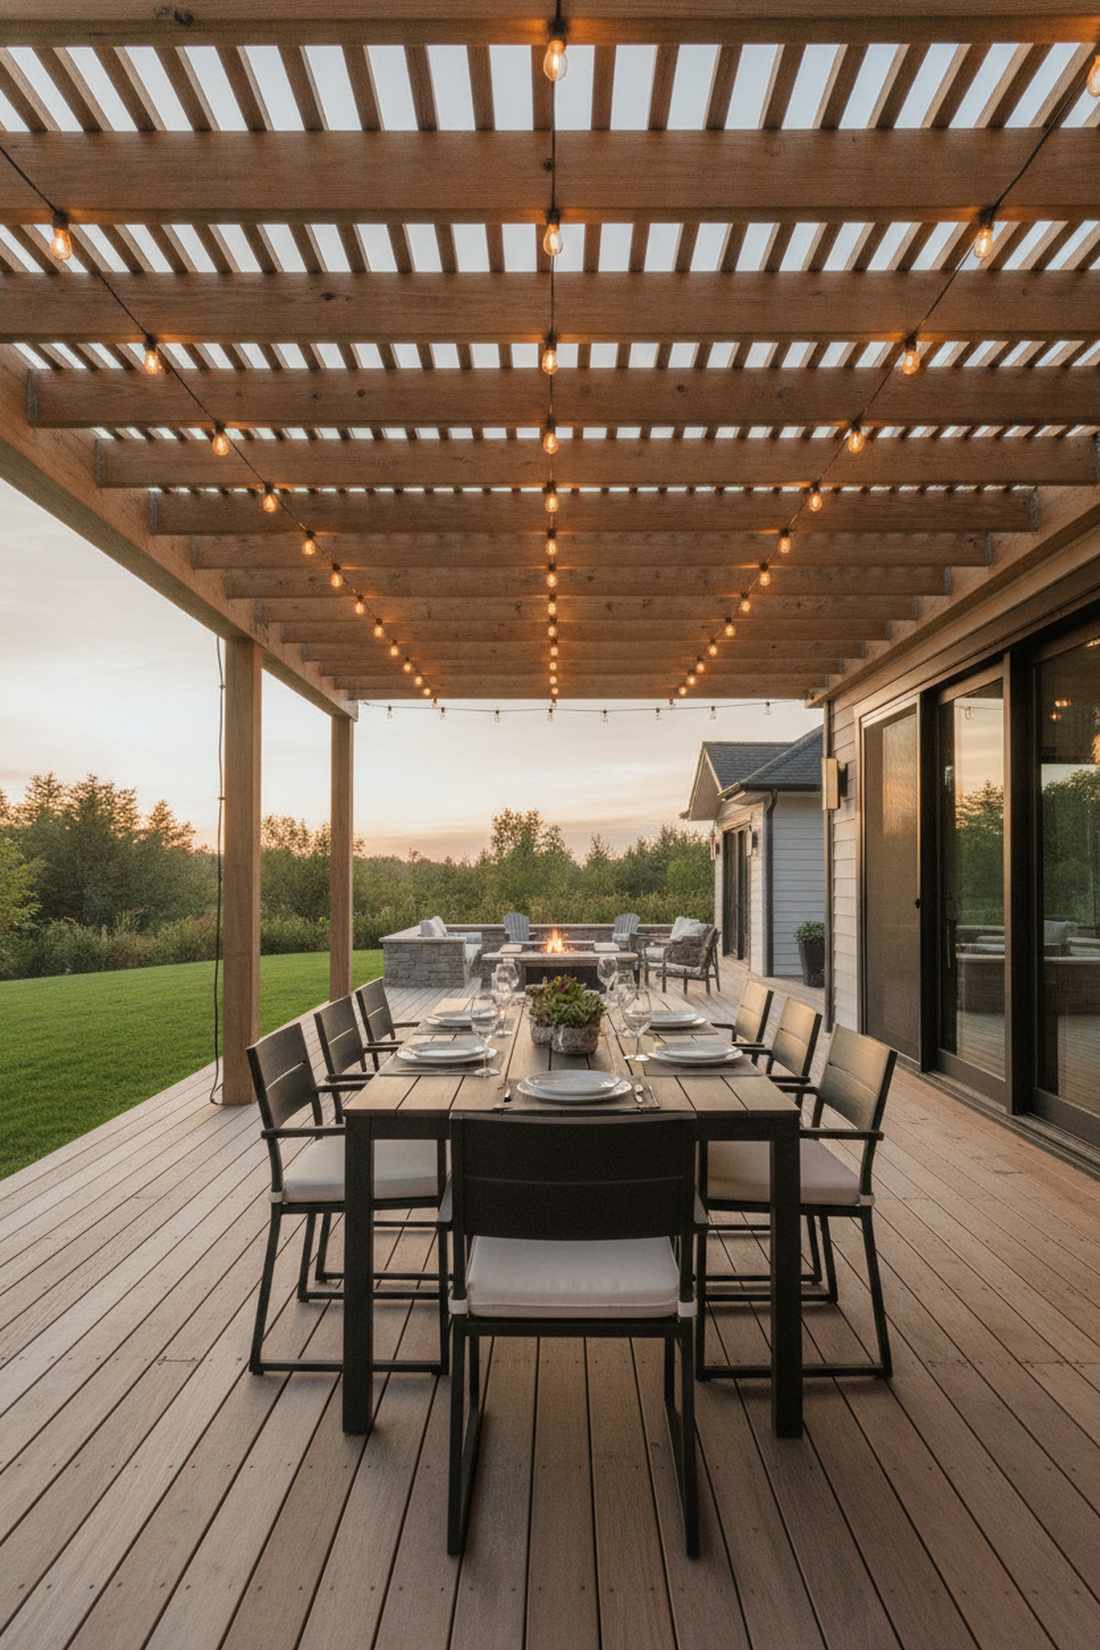
Installs a clean parallel ceiling that feels like a sophisticated modern dining room. This is the absolute best way to evenly light a flat-roofed slatted pergola.
Running straight lines directly underneath each rafter delivers a surprisingly premium look without any hanging clutter. Use screw-in cup hooks every two feet to keep the heavy-duty wires perfectly taught, avoiding that cheap sagging patio aesthetic.
You can execute this crisp ceiling for $40–$70. It completely changes the evening atmosphere of your outdoor dining table.
- Key Materials: Edison bulbs, small metal screw hooks
- Vibe / Style: Minimalist outdoor dining
- Difficulty: Lots of overhead drilling
- Budget Breakdown: Hooks: $10 | Edison strings: $40.
- Creator’s Tip: Hide the extension cord by running it flat along the top of the outermost rafter before dropping it down the back post.
- Smart Sourcing: Buy an S14 LED outdoor cafe string kit and brass cup hooks (bulk pack).
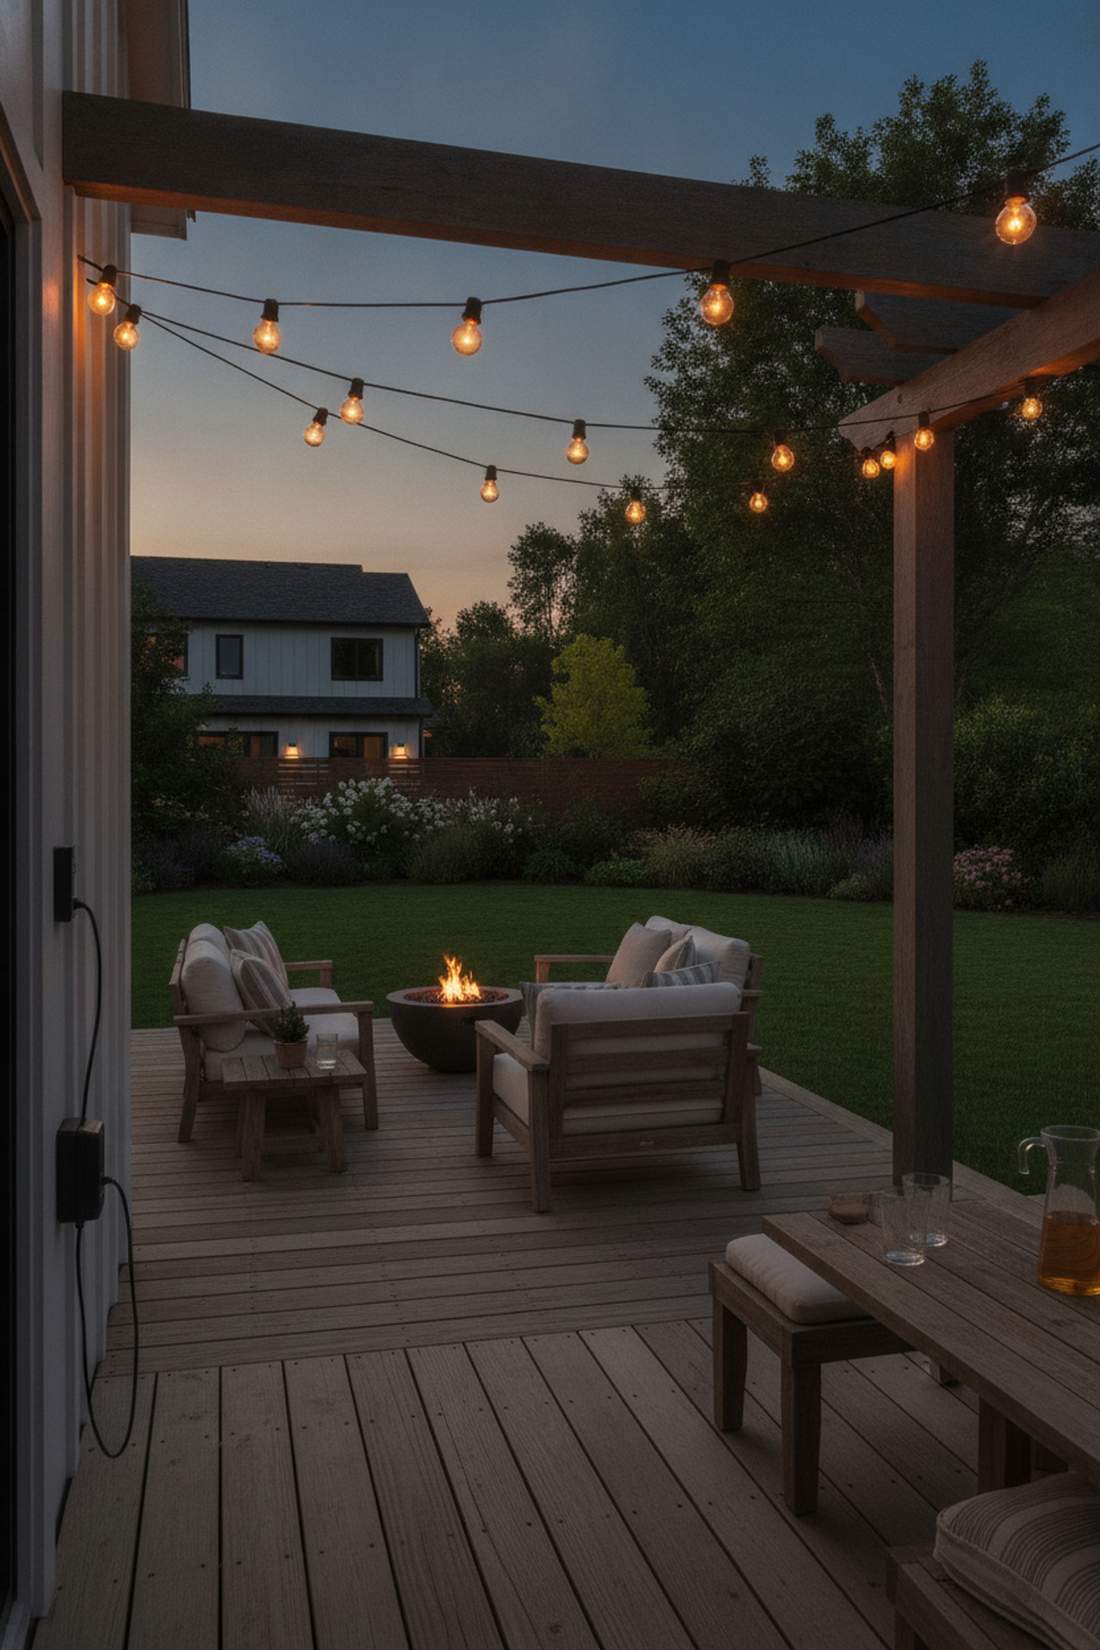
31. Post to Post Swags
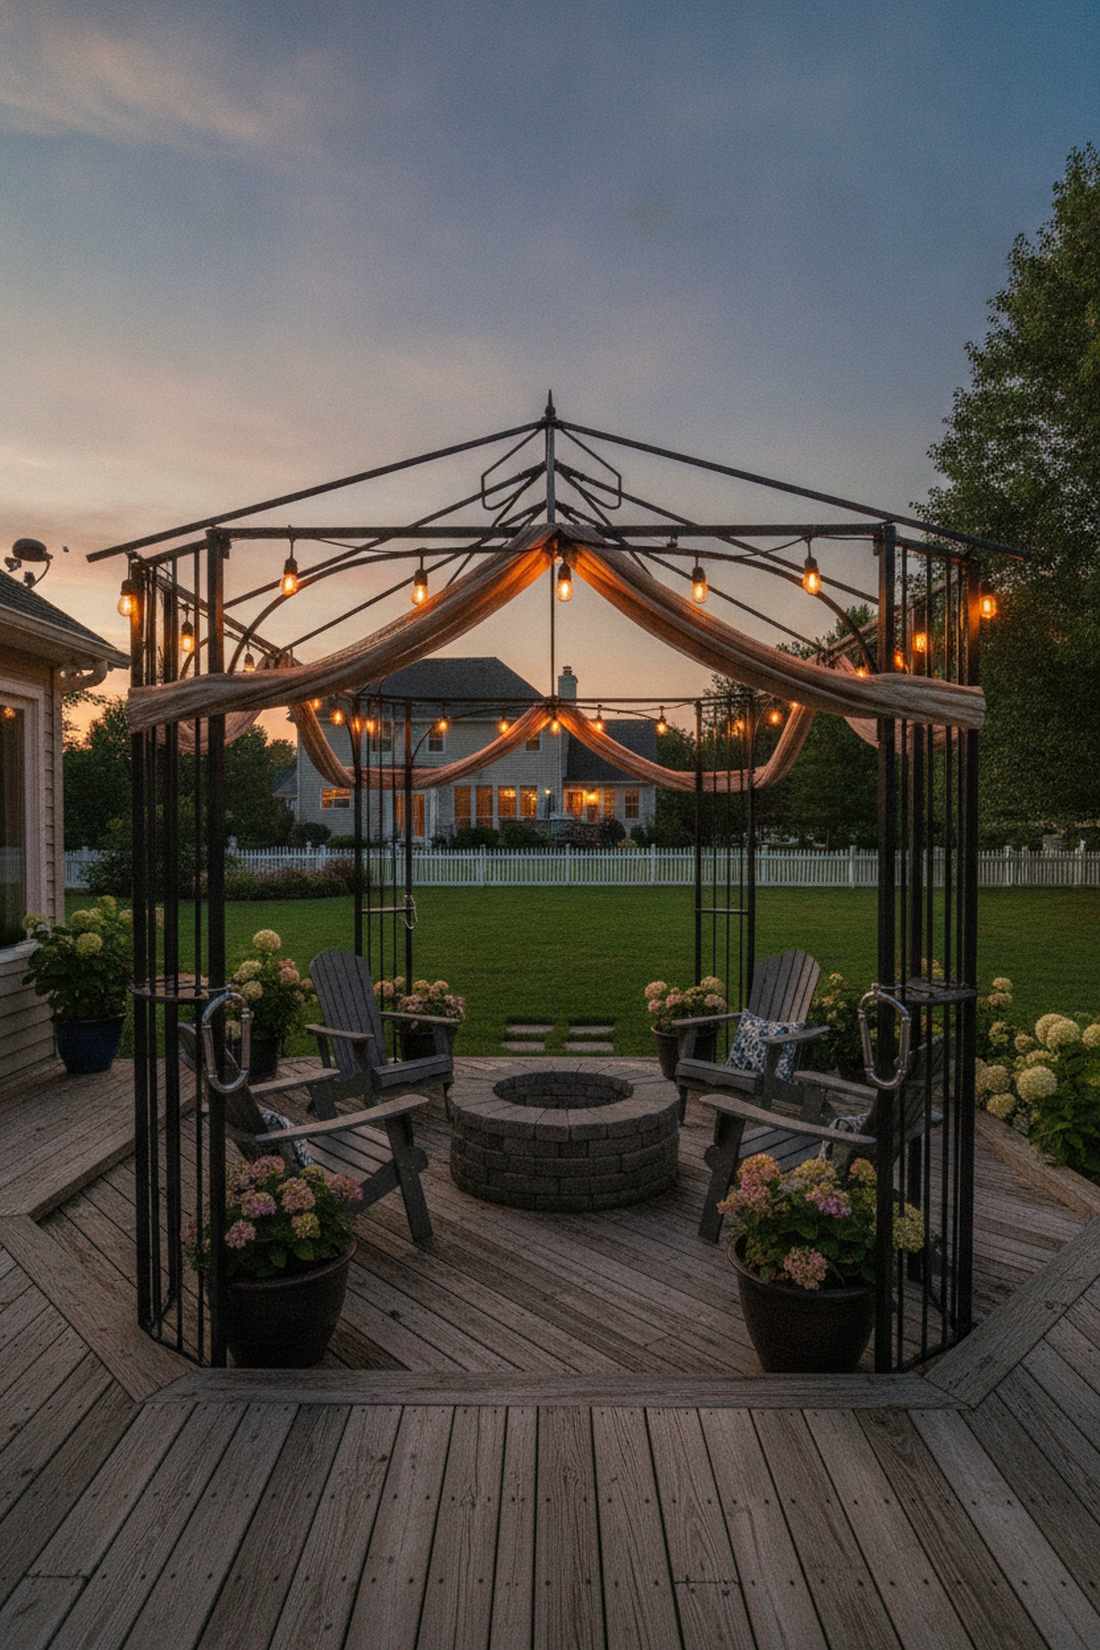
Creates a softly draped perimeter that feels elegant, welcoming, and relaxed. Beautifully suited for softening the rigid, boxy edges of a metal gazebo or carport.
Allowing graceful dips between the columns completely elevates a boring structure into a luxury retreat. Anchor the endpoints with heavy-duty carabiners so you can easily unhook the swags during hurricane season or intense winter snows.
A simple perimeter swag layout costs a mere $30–$50. Save this idea if you want a romantic vibe with minimal hardware.
- Key Materials: Vintage globe strings, steel carabiners
- Vibe / Style: Breezy romantic canopy
- Difficulty: Very fast hook-and-drop
- Budget Breakdown: Carabiners: $10 | Lights: $30.
- Creator’s Tip: Count the exact number of bulbs in the droop on each side to ensure your swags are perfectly symmetrical.
- Smart Sourcing: Order a vintage globe patio light strand and stainless steel spring-snap carabiners.
32. Lattice Panel Integration
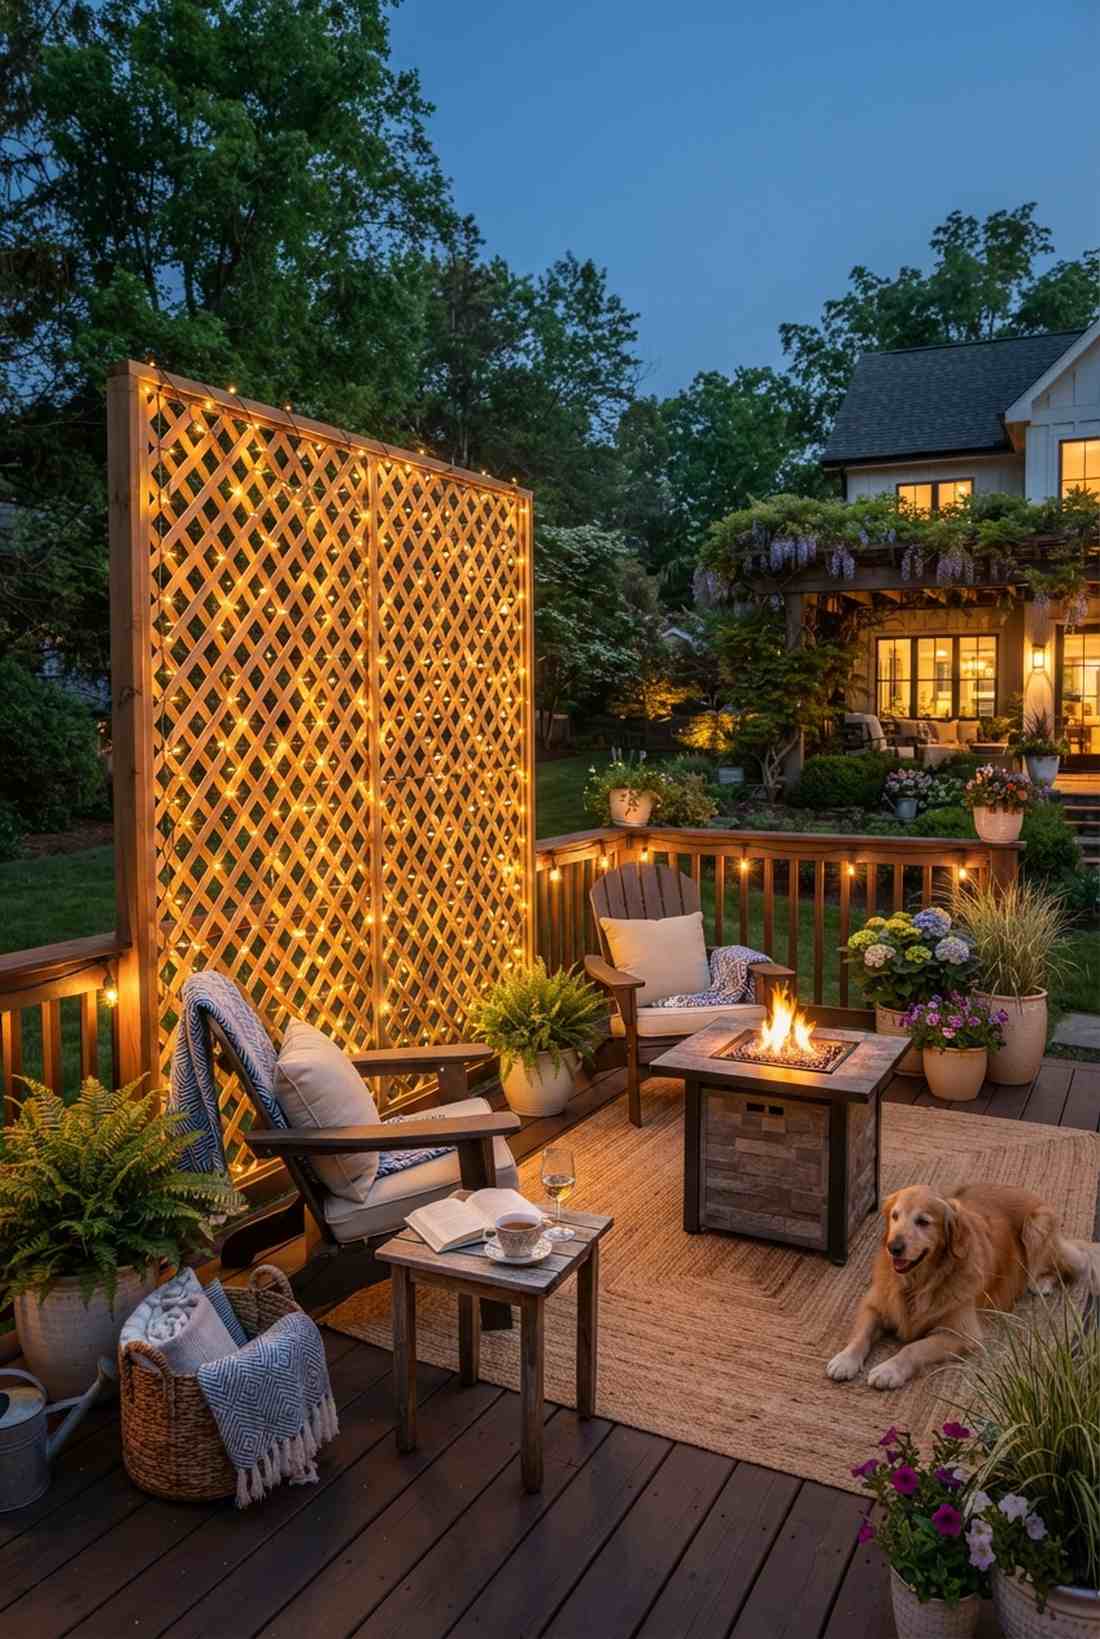
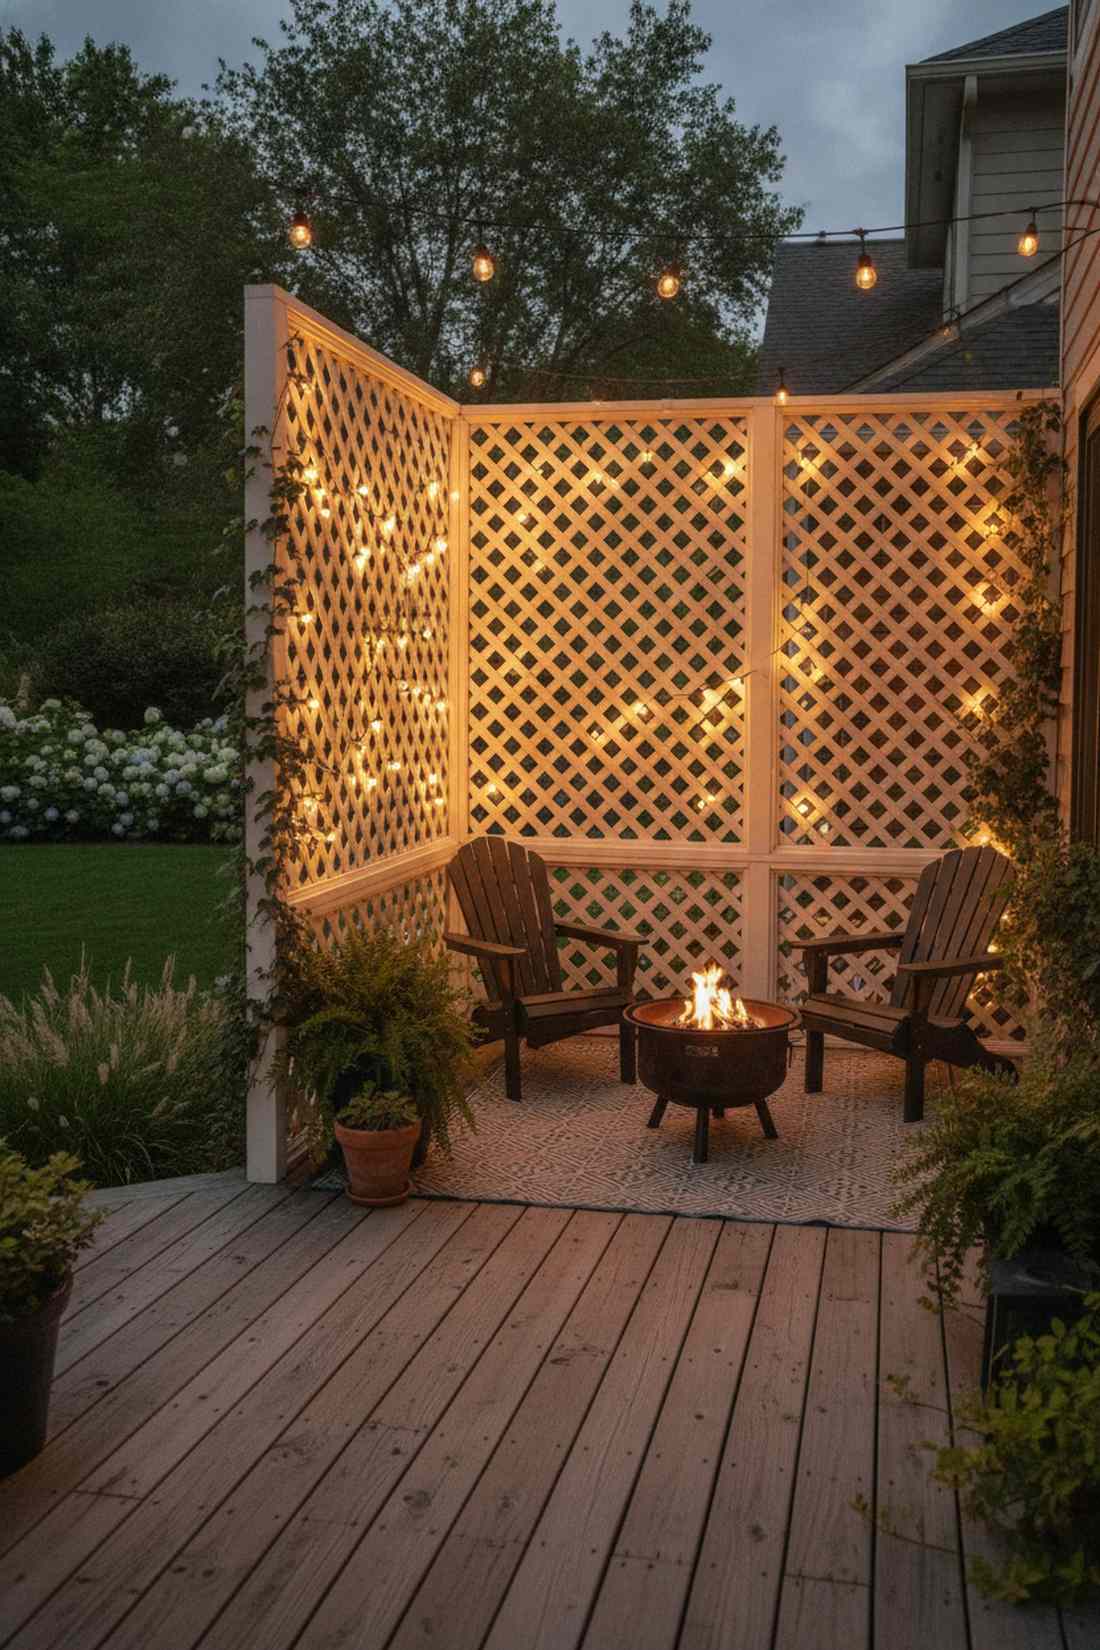
Weaves a glowing privacy screen that feels incredibly cozy and secluded. It is a genius trick to upgrade cheap plastic or wood lattice privacy walls on a side deck.
Pushing the bulbs through the diamond gaps looks far more expensive than it is, turning an ugly neighbor-blocking screen into a giant lamp. Ensure you use low-heat LED bulbs specifically so the wooden lattice doesn’t scorch or dry out over the summer.
Covering a large lattice panel runs about $25–$45. Pin this to your small balcony upgrade board immediately.
- Key Materials: LED mini-lights, zip-ties
- Vibe / Style: Secret garden hideaway
- Difficulty: Easy weaving
- Budget Breakdown: Zip-ties: $5 | LEDs: $25.
- Creator’s Tip: Weave the wire predominantly on the side facing away from your seating area so only the bulb heads poke through to your side.
- Smart Sourcing: Pick up an outdoor LED mini light spool and UV-resistant clear zip ties.
33. Corner Post Uplighting Combination
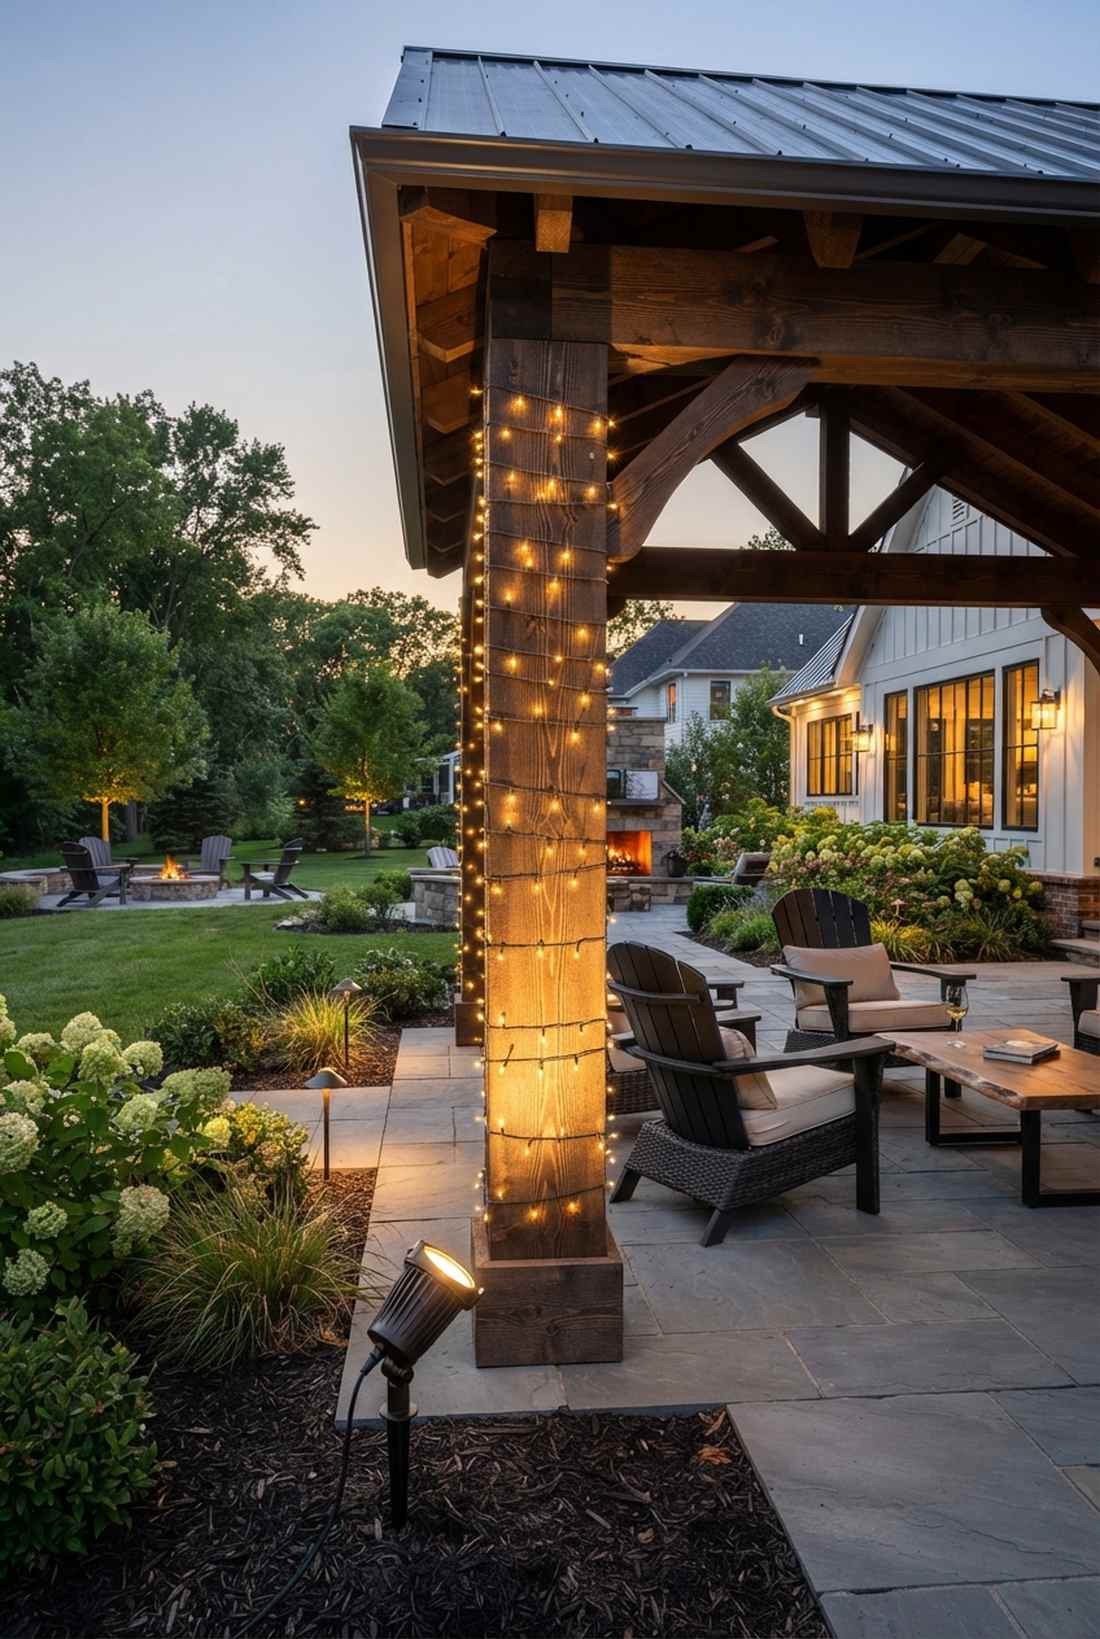
Generates a dual-layered architectural highlight that feels like a professional $2,000 lighting contractor job. This technique is incredibly powerful for massive pavilion corners.
Combining the wrapped string lights with a hard ground spotlight bypasses that cheap DIY aesthetic entirely, adding intense vertical depth. Use heavy-duty landscape lighting accessories to stake the uplight securely into the dirt, washing the entire wrapped post in a warm glow.
This hybrid lighting hack costs about $60–$90 per corner. It is the absolute secret to expensive-looking architecture.
- Key Materials: Solar spotlights, wrap strings
- Vibe / Style: Luxury estate pavilion
- Difficulty: Two-step combination
- Budget Breakdown: Spotlights: $30 | String lights: $40.
- Creator’s Tip: Angle the ground spotlight slightly inward toward the post so the light skims the wood grain rather than blasting into the yard.
- Smart Sourcing: Grab a high-lumen solar ground spotlight (2-pack) and a commercial string wrap kit.
34. Gazebo Dome Outline
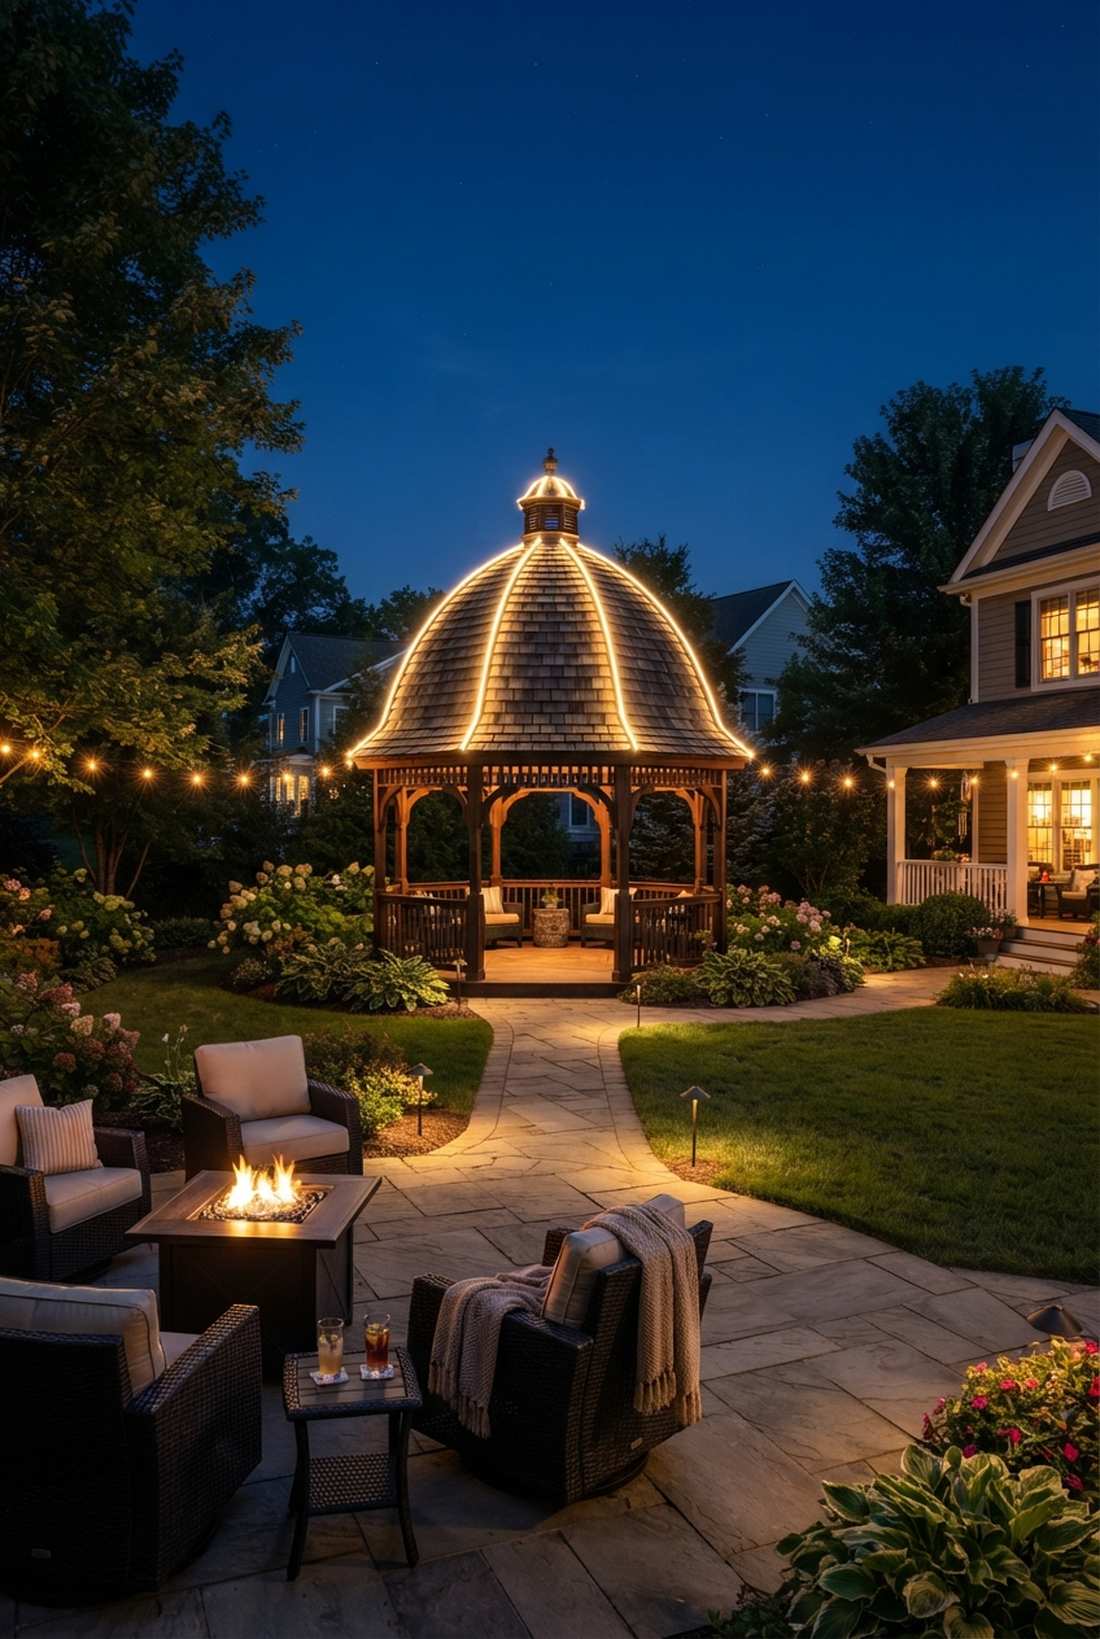
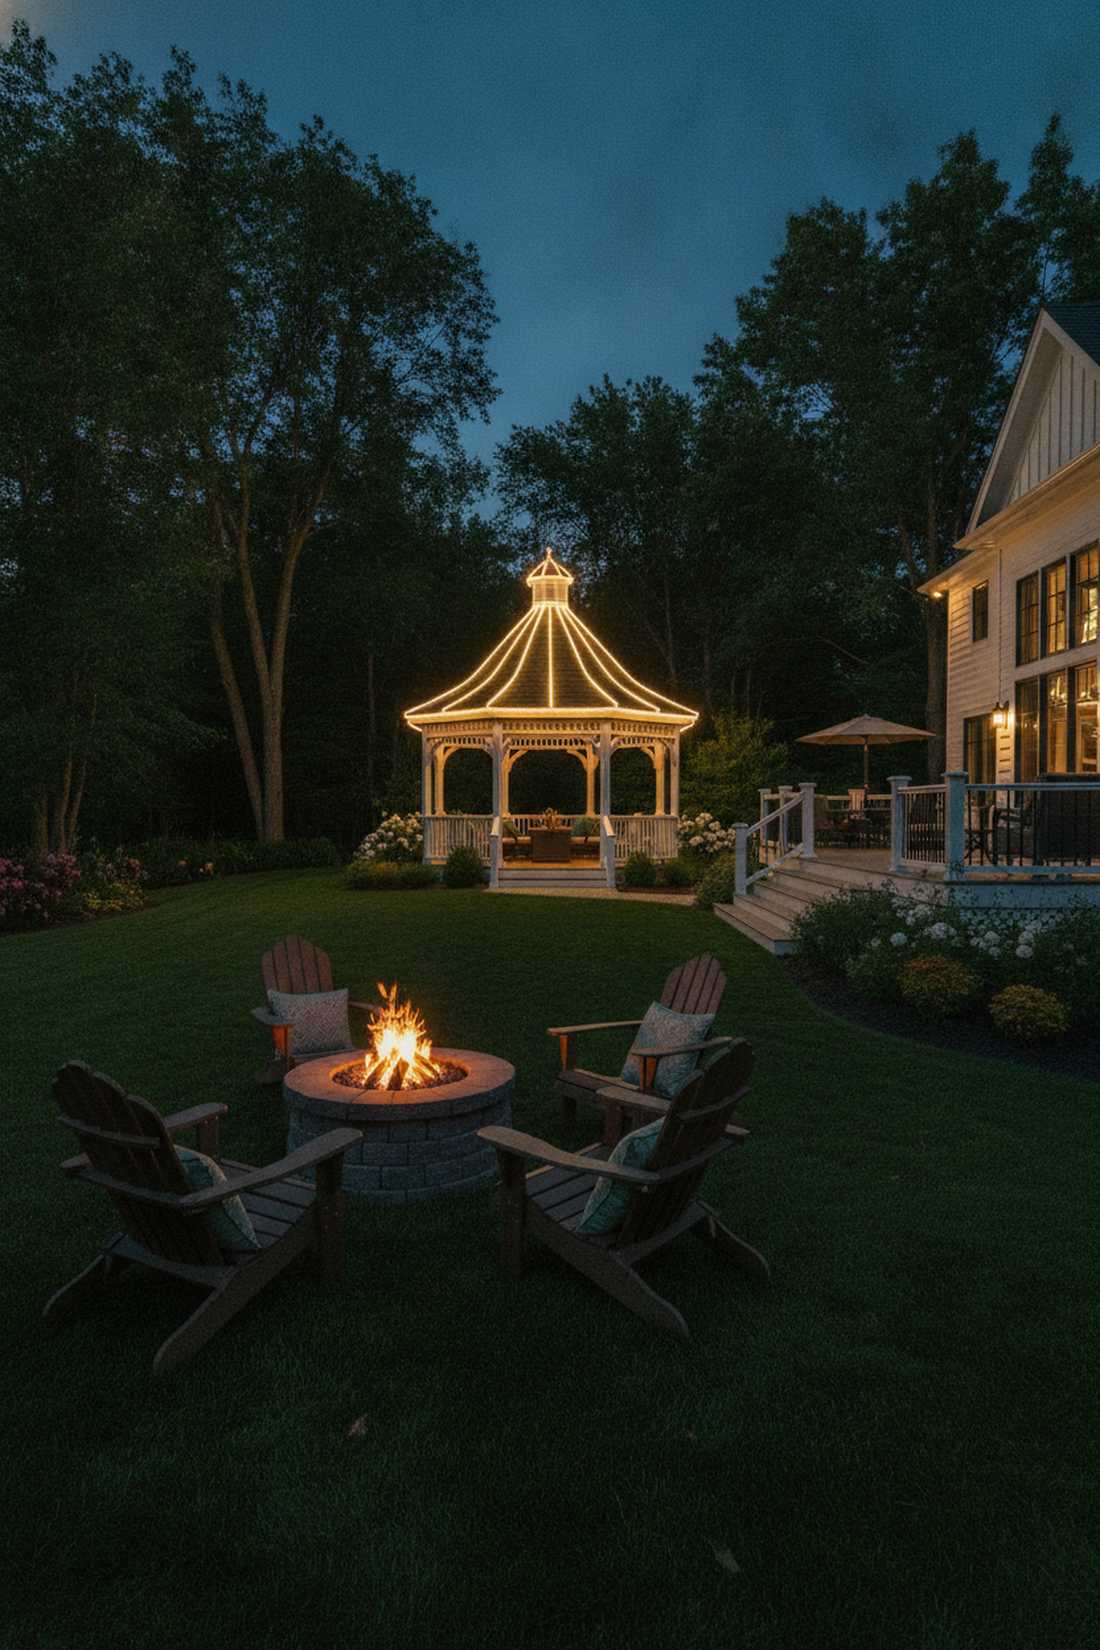
Outlines a luminous architectural crown that feels like a majestic focal point in the dark. It is the perfect treatment for traditional octagonal garden gazebos.
Tracing the roof ribs straight up to the apex gives a designer-level finish that highlights the carpentry from hundreds of feet away. Use exterior-grade adhesive hooks right on the aluminum or wood ribs so you don’t drill holes that could cause the roof to leak.
Outlining an entire dome usually runs $45–$75. Save this to your backyard renovation board for a massive nighttime impact.
- Key Materials: Long rope lights or C9 strands, outdoor adhesive clips
- Vibe / Style: Grand park bandstand
- Difficulty: Requires ladder balancing
- Budget Breakdown: Adhesive clips: $15 | Lights: $40.
- Creator’s Tip: Start wiring from the top center peak and work your way down the ribs to hide all the excess cord at the bottom corners.
- Smart Sourcing: Buy exterior-grade sticky cable clips (bulk pack) and a flexible outdoor LED rope spool.
Most people get this completely wrong… until they try the exact layout coming up next.
Seasonal & Festive Arrangements
35. Holiday Evergreen Wrapping
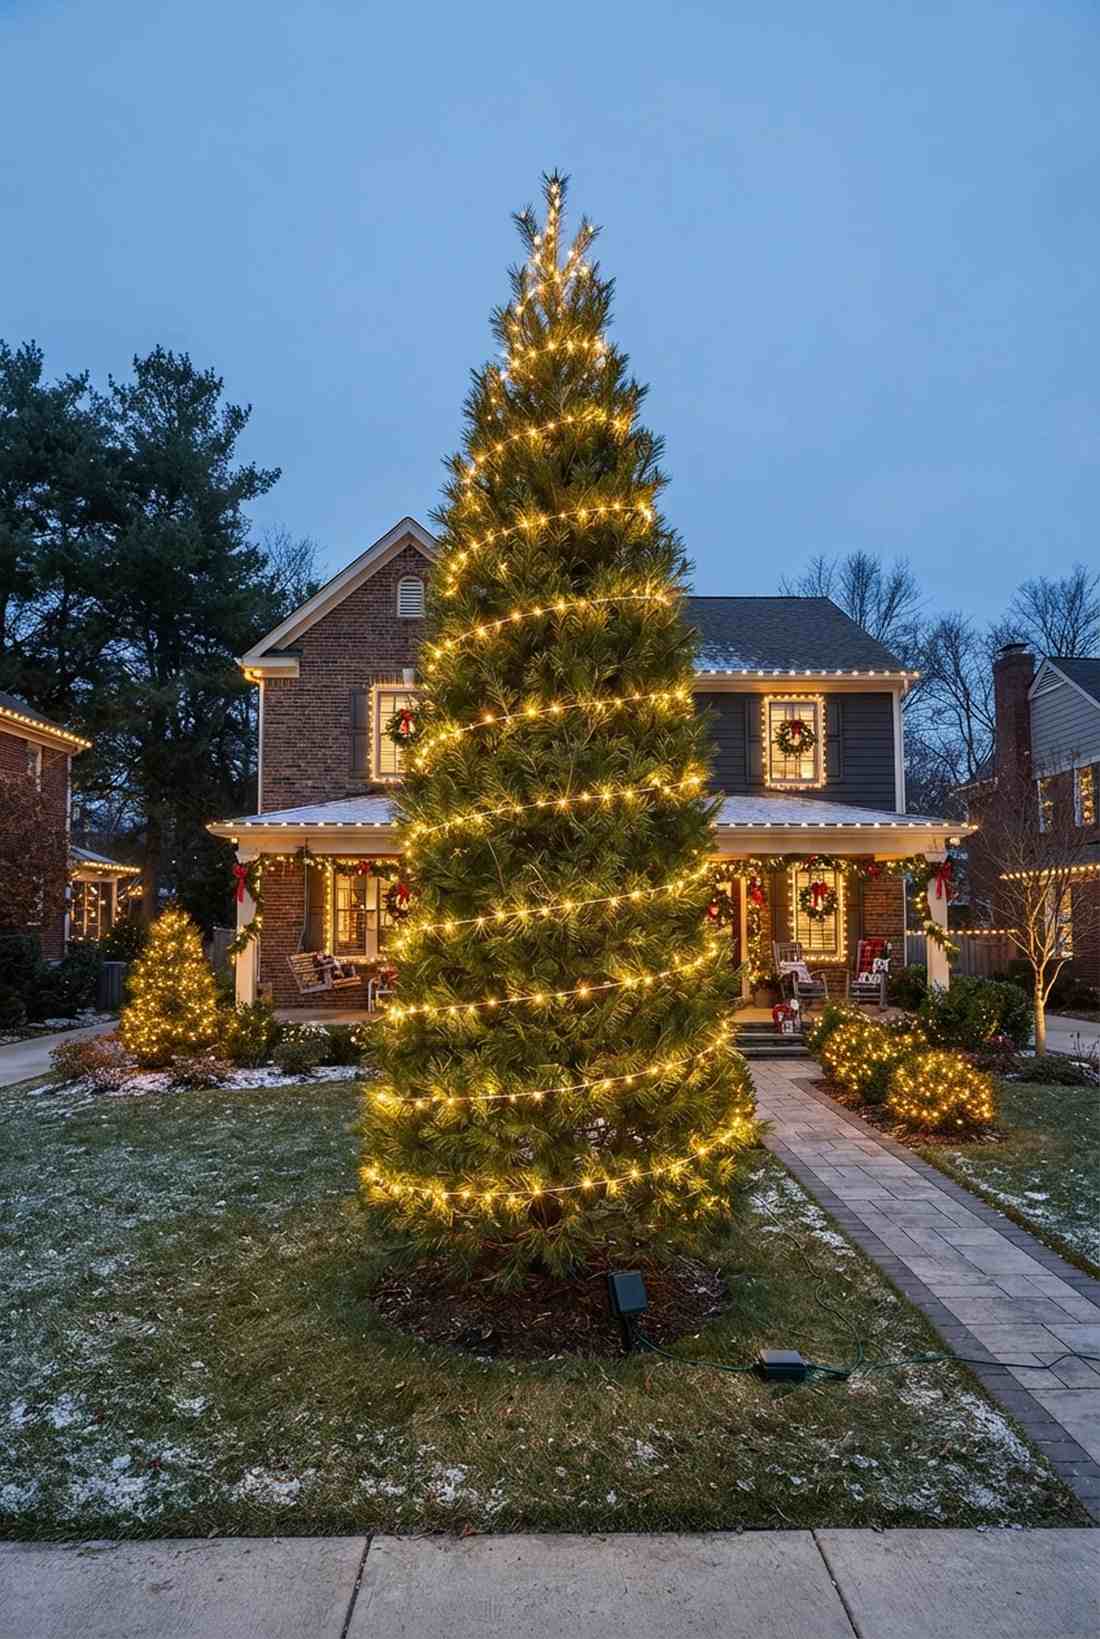
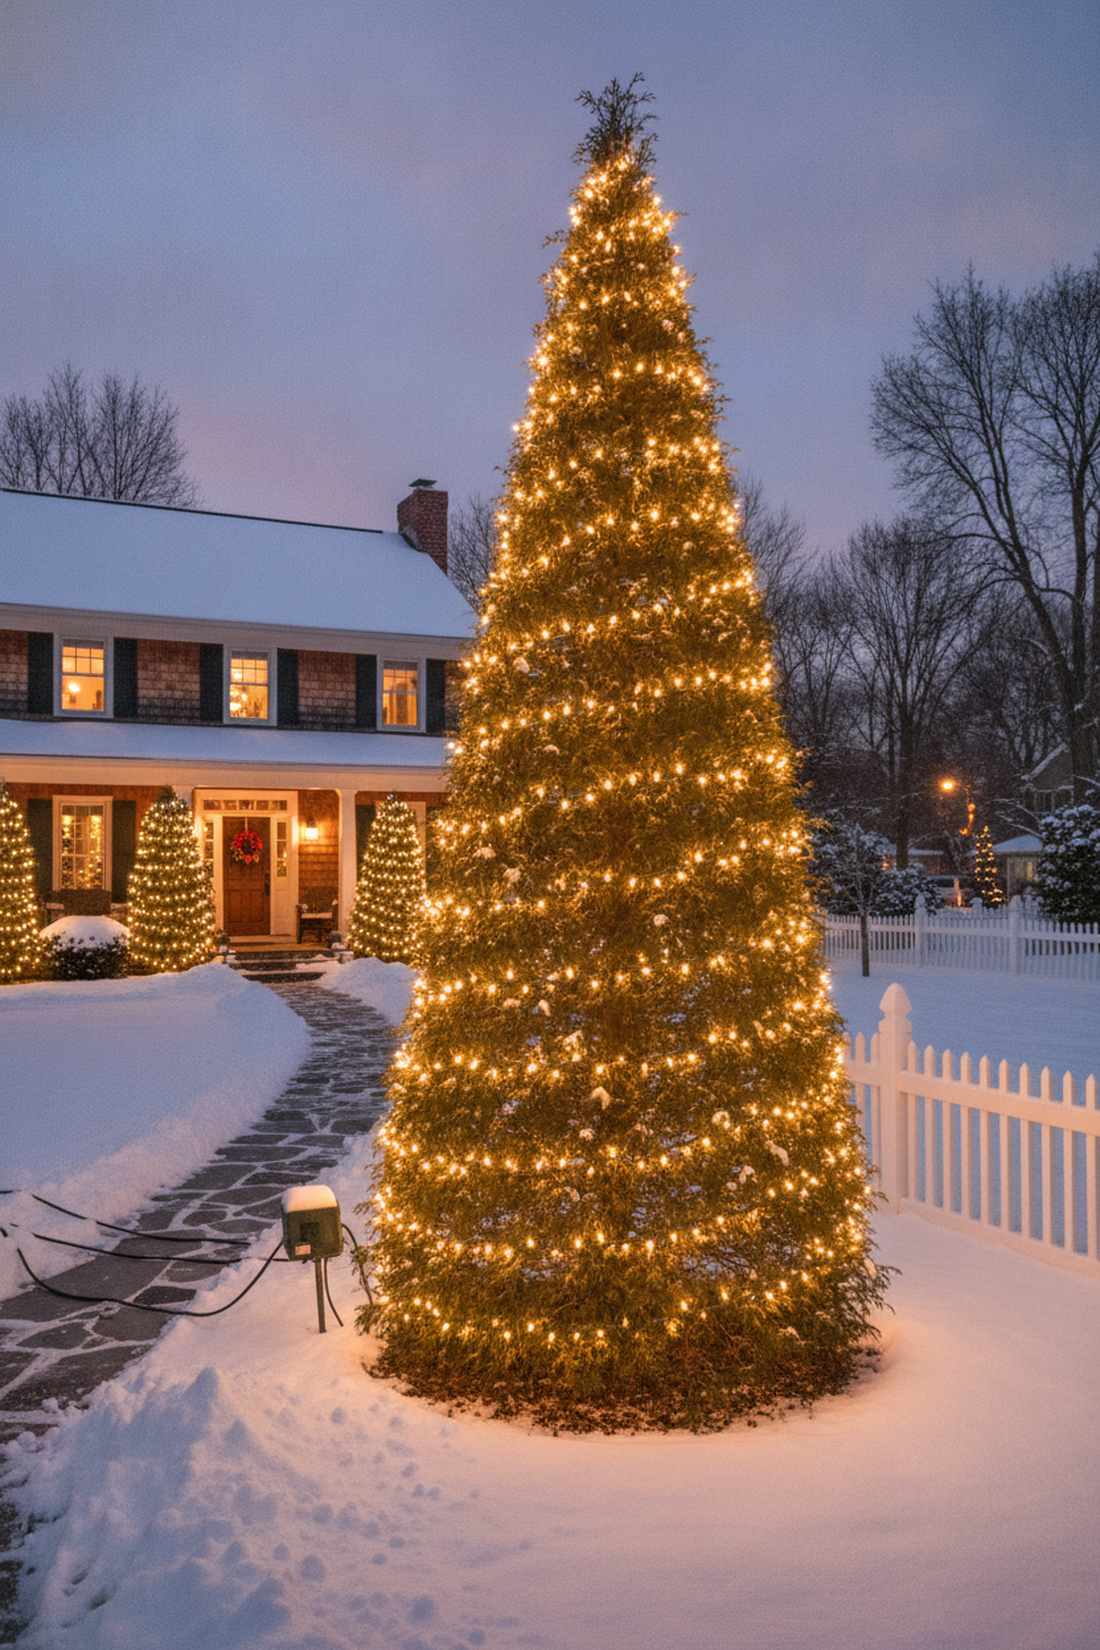
Builds a classic glowing cone that feels deeply nostalgic and incredibly festive. The quintessential technique for illuminating front yard pines or tall arborvitae during winter.
Starting at the trunk and spiraling tightly upward delivers a surprisingly premium look, avoiding the messy “tossed on” look that plagues most suburban lawns. Utilize heavy-duty extension cords and a weatherproof timer box to fully automate your holiday display.
A pristine evergreen wrap costs roughly $30–$55 per tree. Pin this to your winter curb appeal board for an immaculate holiday yard.
- Key Materials: Green-wire LED strings, outdoor timer
- Vibe / Style: Classic winter wonderland
- Difficulty: Easy but prickly
- Budget Breakdown: Timer: $15 | Lights: $30.
- Creator’s Tip: Push the lights deep into the branches near the bottom, and keep them closer to the surface near the top to create a perfect glowing triangle.
- Smart Sourcing: Invest in a green-wire outdoor holiday string kit and an outdoor photocell light timer.
36. Party Canopy Celebration
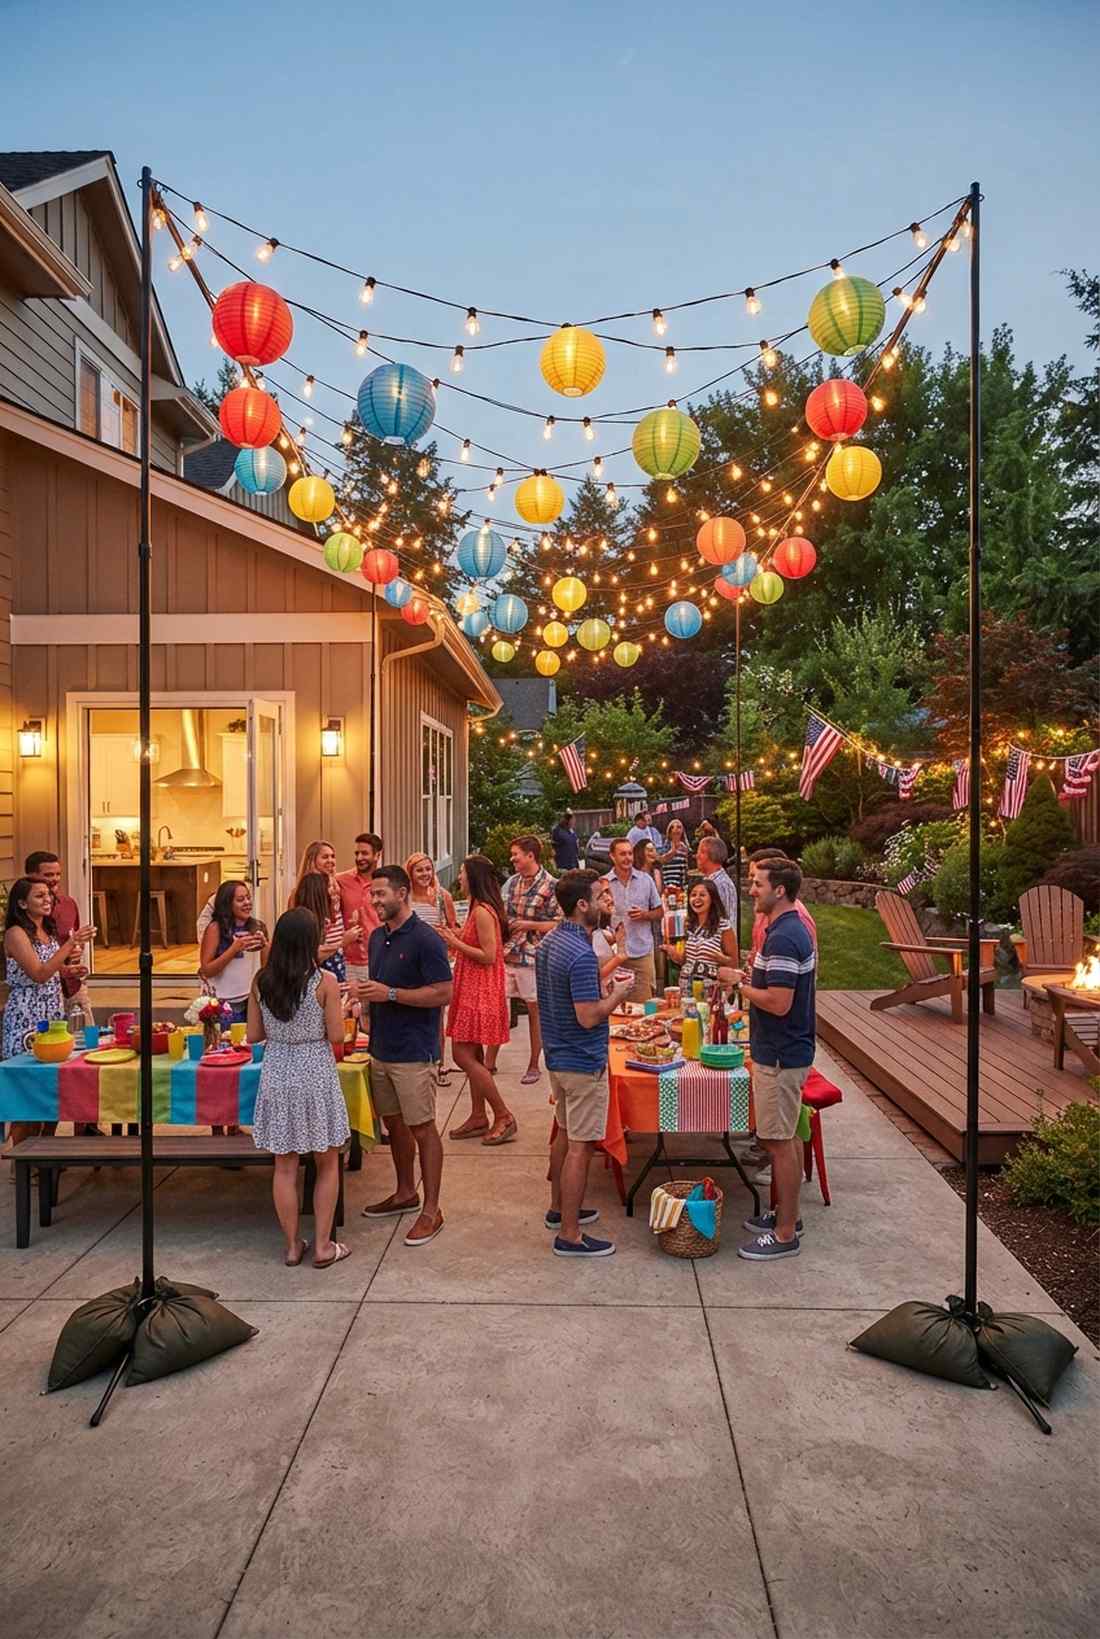
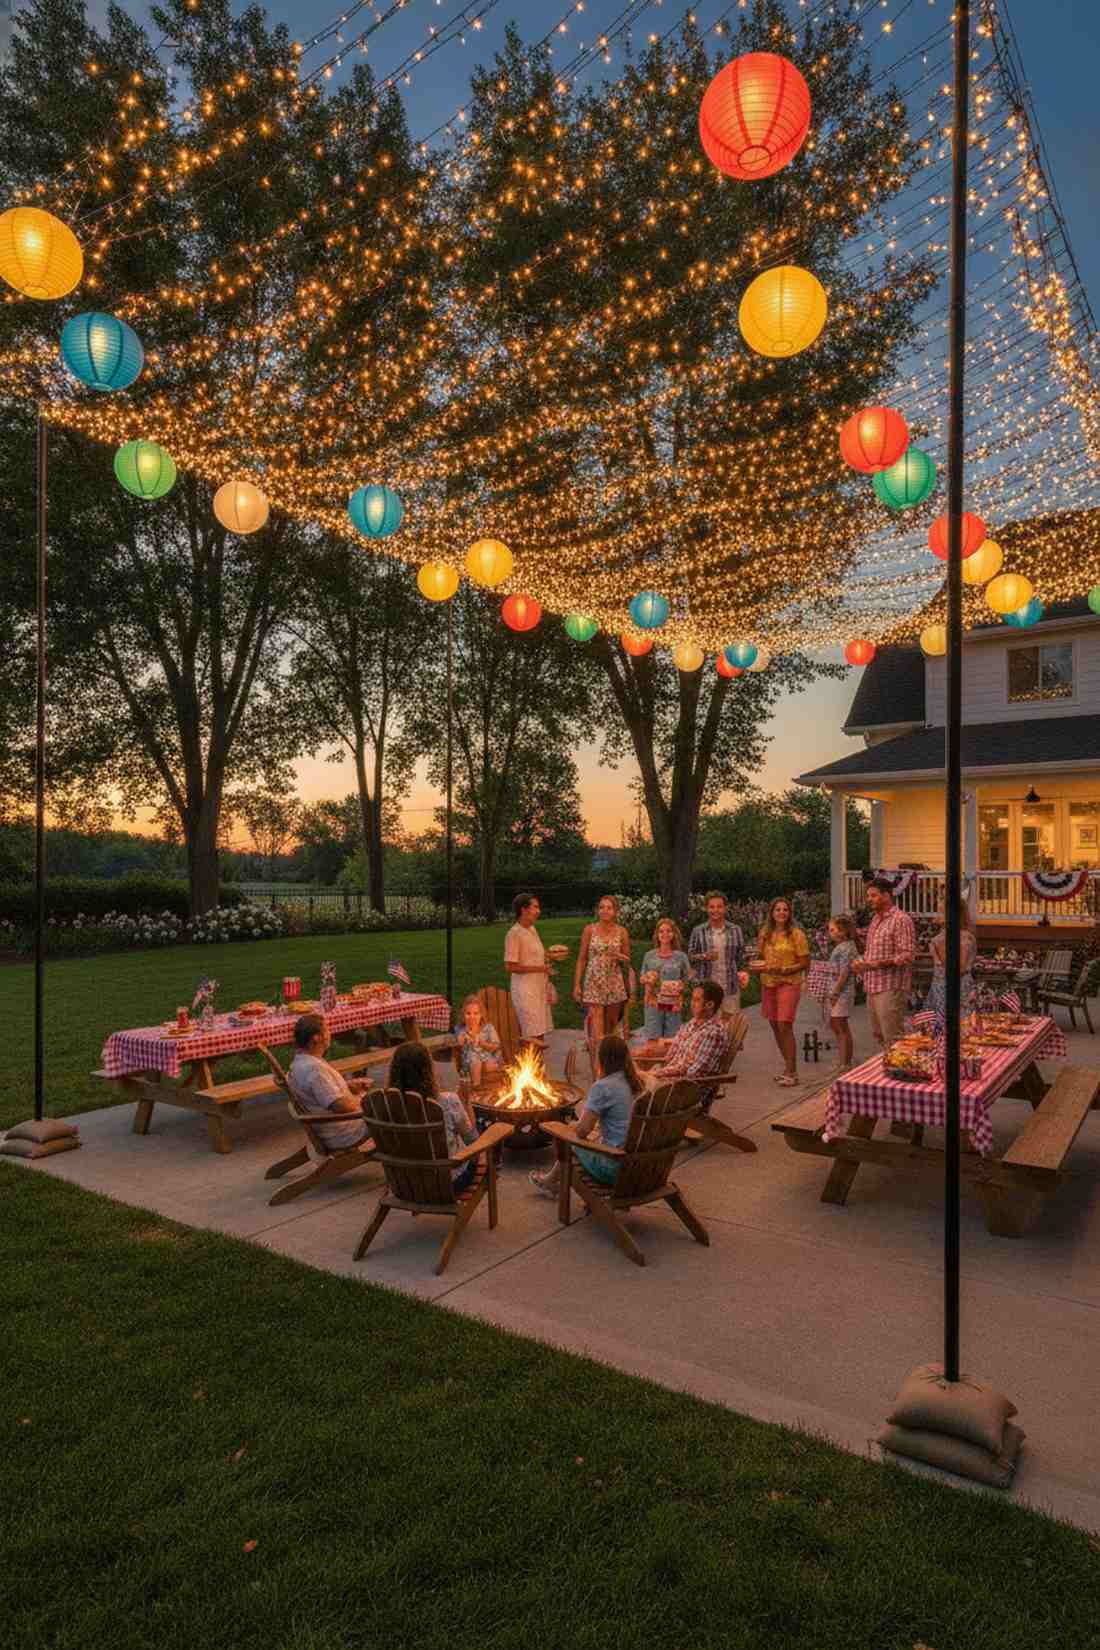
Erects a dense festival ceiling that feels like a high-energy summer block party. It is the ultimate temporary layout for a graduation backyard bash or a 4th of July BBQ.
Crisscrossing massive amounts of cheap bulbs transforms basic landscaping into a magazine cover for exactly one night. Use temporary telescoping poles weighted down with sandbags so you don’t have to drill into your patio or damage the lawn.
You can execute this dense temporary canopy for $60–$100. It completely changes the vibe of a basic concrete slab.
- Key Materials: Bulk cafe lights, sandbag bases, temporary poles
- Vibe / Style: Vibrant summer festival
- Difficulty: Fast temporary setup
- Budget Breakdown: Bases/Poles: $40 | Bulk lights: $50.
- Creator’s Tip: Use colorful paper lanterns clipped directly over the bulbs to double the visual volume of the canopy for pennies.
- Smart Sourcing: Purchase a multi-color outdoor cafe string (bulk pack) and a portable string light pole stand kit.
37. Halloween Pathway Drama
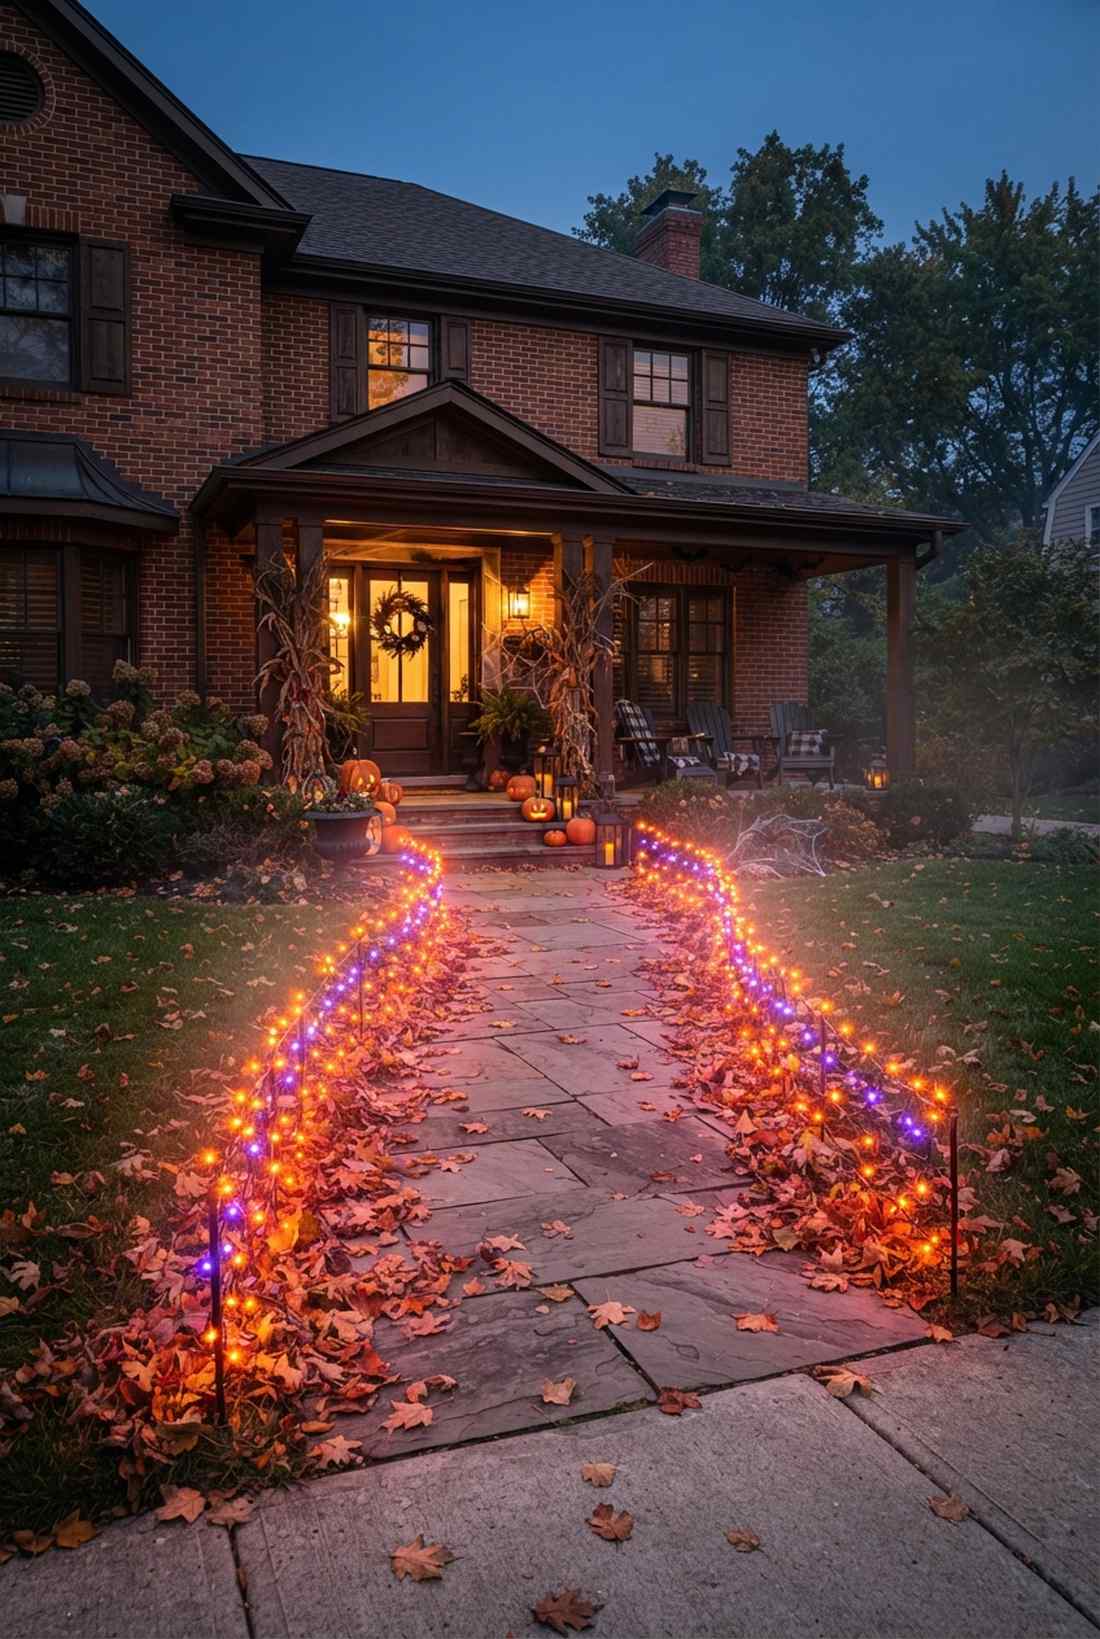
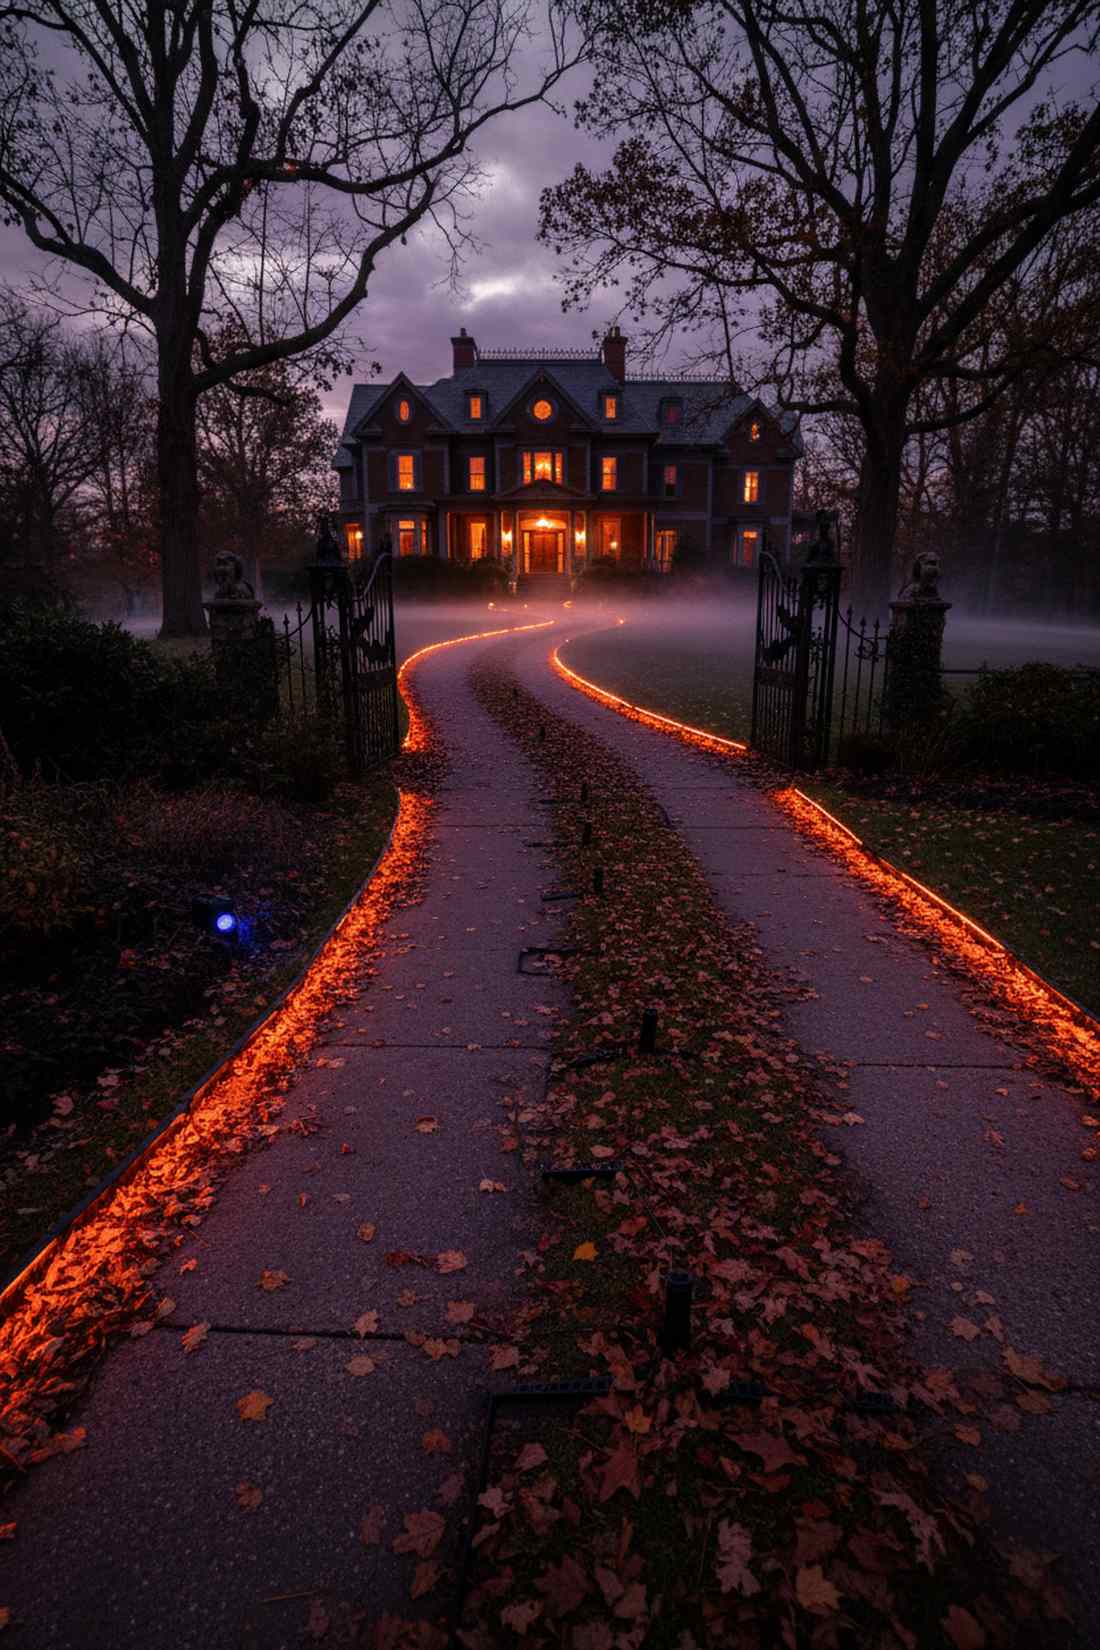
Casts a spooky colored runway that feels like a haunted mansion entrance. Perfectly designed to guide trick-or-treaters safely up a long driveway while maintaining an eerie ambiance.
Layering intense orange and purple bulbs completely elevates a boring space into a luxury seasonal experience. Swap out standard white bulbs for high-pigment LED colors, and bury the wires under fallen autumn leaves to keep the ground looking natural.
This moody seasonal pathway costs about $30–$50. Save this trick for your October party planning board.
- Key Materials: Orange/purple LED strings, lawn staples
- Vibe / Style: High-end haunted estate
- Difficulty: Fast ground lining
- Budget Breakdown: Staples: $10 | Colored lights: $30.
- Creator’s Tip: Hide a small Bluetooth speaker in the bushes near the path lights to pair the eerie glow with a low, rumbling sound effect.
- Smart Sourcing: Find an orange and purple outdoor LED kit and heavy-duty yard staples (bulk pack).
38. Summer Solstice Extended Hours
Radiates a soft amber twilight glow that feels like an endless midsummer evening. This subtle layout is perfect for maintaining the vibe on a deck after a late July sunset.
Using an inline dimmer switch bypasses that cheap DIY aesthetic entirely, allowing you to fade the brightness down as the natural light disappears. Stick strictly to 2200K amber bulbs to avoid attracting swarms of night bugs to your seating area.
Adding dimmer control usually only costs an extra $20–$35. It is the ultimate secret to expensive-looking patio entertaining.
- Key Materials: Amber Edison bulbs, outdoor dimmer box
- Vibe / Style: Warm sunset lounge
- Difficulty: Easy plug-and-play
- Budget Breakdown: Dimmer box: $20 | Amber strings: $30.
- Creator’s Tip: Set the dimmer to 40% exactly when the sun dips below the horizon for a seamless transition into night.
- Smart Sourcing: Get an outdoor plug-in dimmer module (remote controlled) and amber glass outdoor Edison strings.
39. Spring Blossom Highlighting
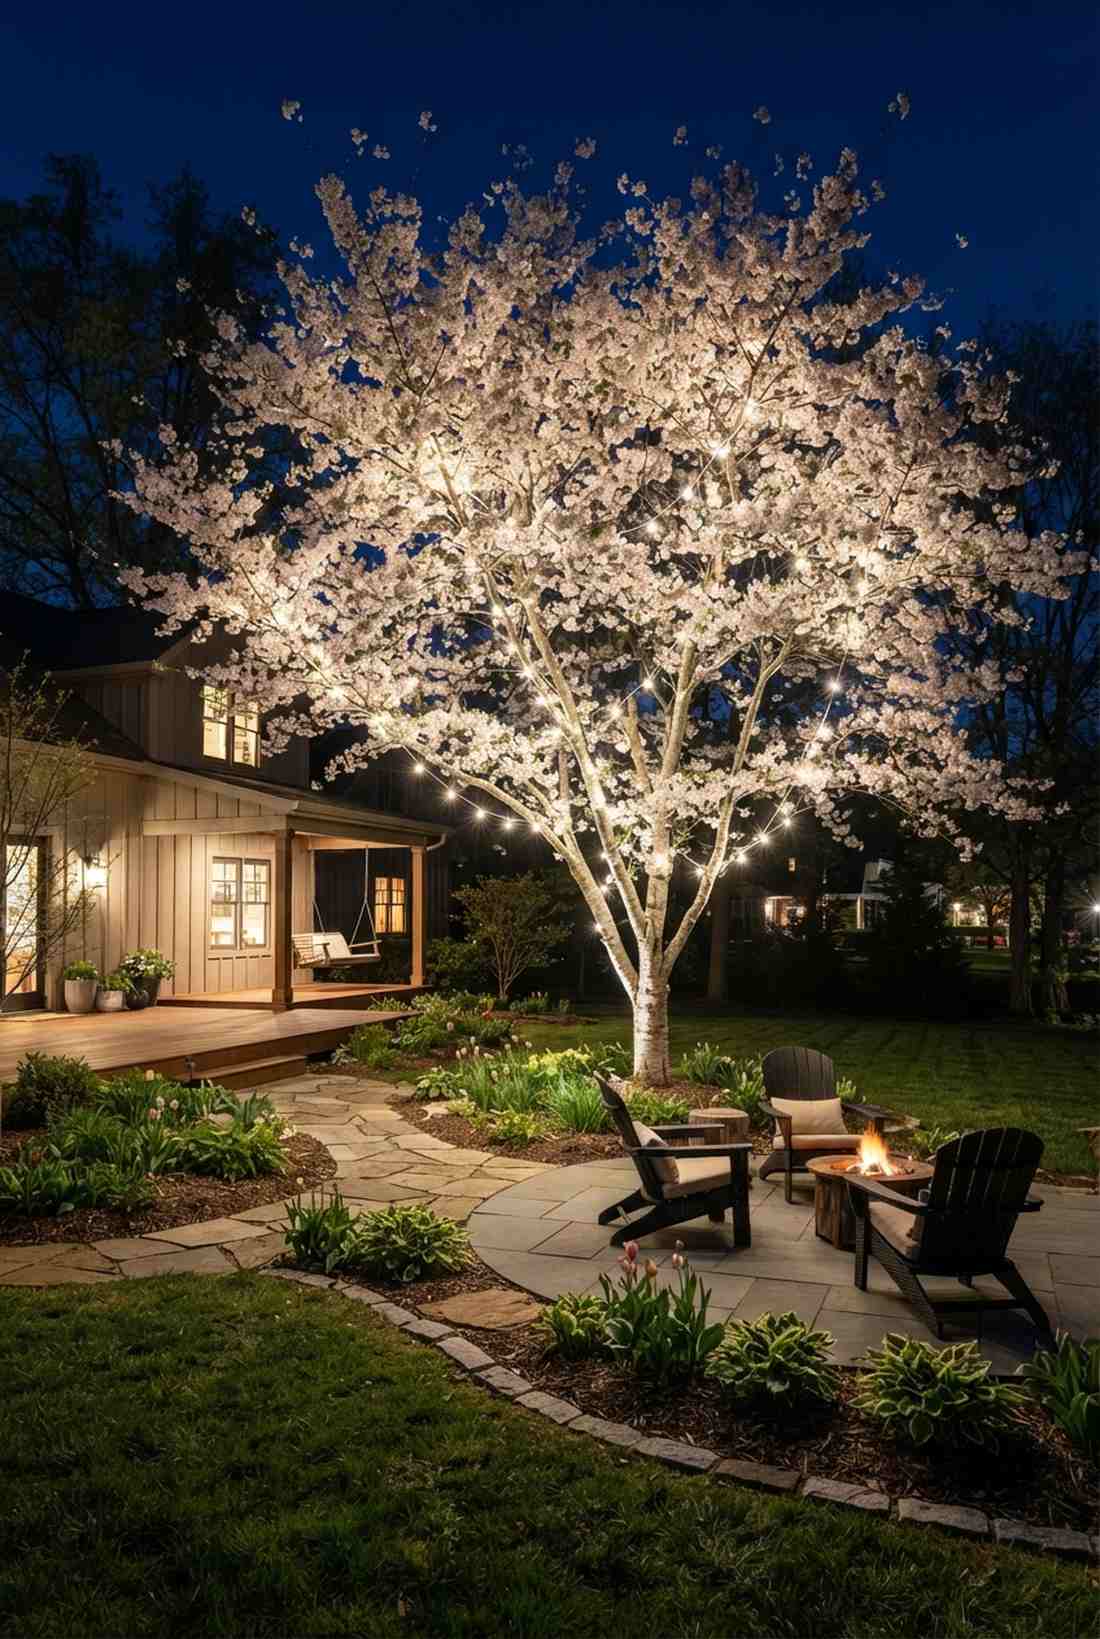

Creates a glowing floral canvas that feels delicate, fresh, and temporary. The absolute best trick for making your blooming cherry or dogwood trees visible at night.
Under-lighting the temporary blooms delivers a surprisingly premium look, turning the white petals into giant natural reflectors. Loosely drape the cords rather than wrapping them tight, so you can rip the lights down instantly once the flowers drop.
This quick 2-week installation costs around $25–$40. Pin this to your spring gardening board to maximize your short blooming season.
- Key Materials: White-wire LED strings, loose zip-ties
- Vibe / Style: Fresh spring awakening
- Difficulty: Very fast drape
- Budget Breakdown: Zip-ties: $5 | White-wire lights: $25.
- Creator’s Tip: Use white wire instead of green so the cords blend perfectly into the light-colored spring branches during the day.
- Smart Sourcing: Order a white-wire outdoor LED string kit and reusable release cable ties.
This next layout is ridiculously cheap but looks like a $200 custom landscape sculpture…
Creative & Artistic Installations
40. Geometric Shape Sculptures
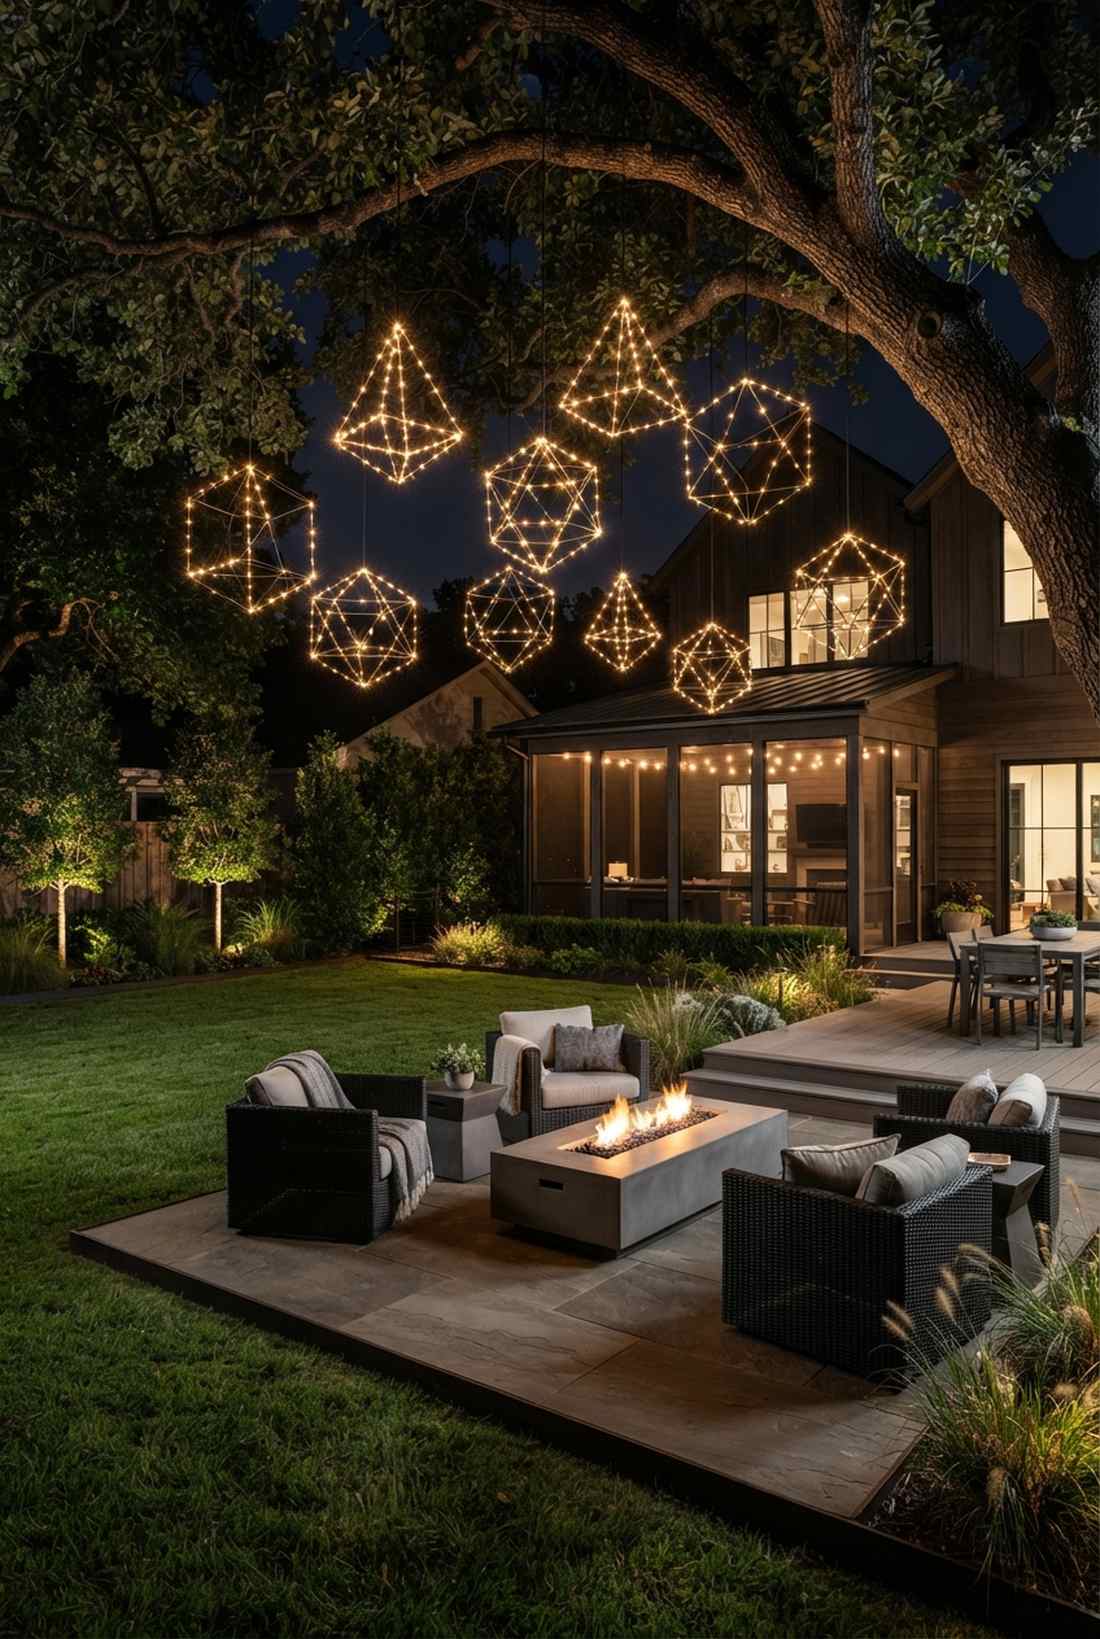
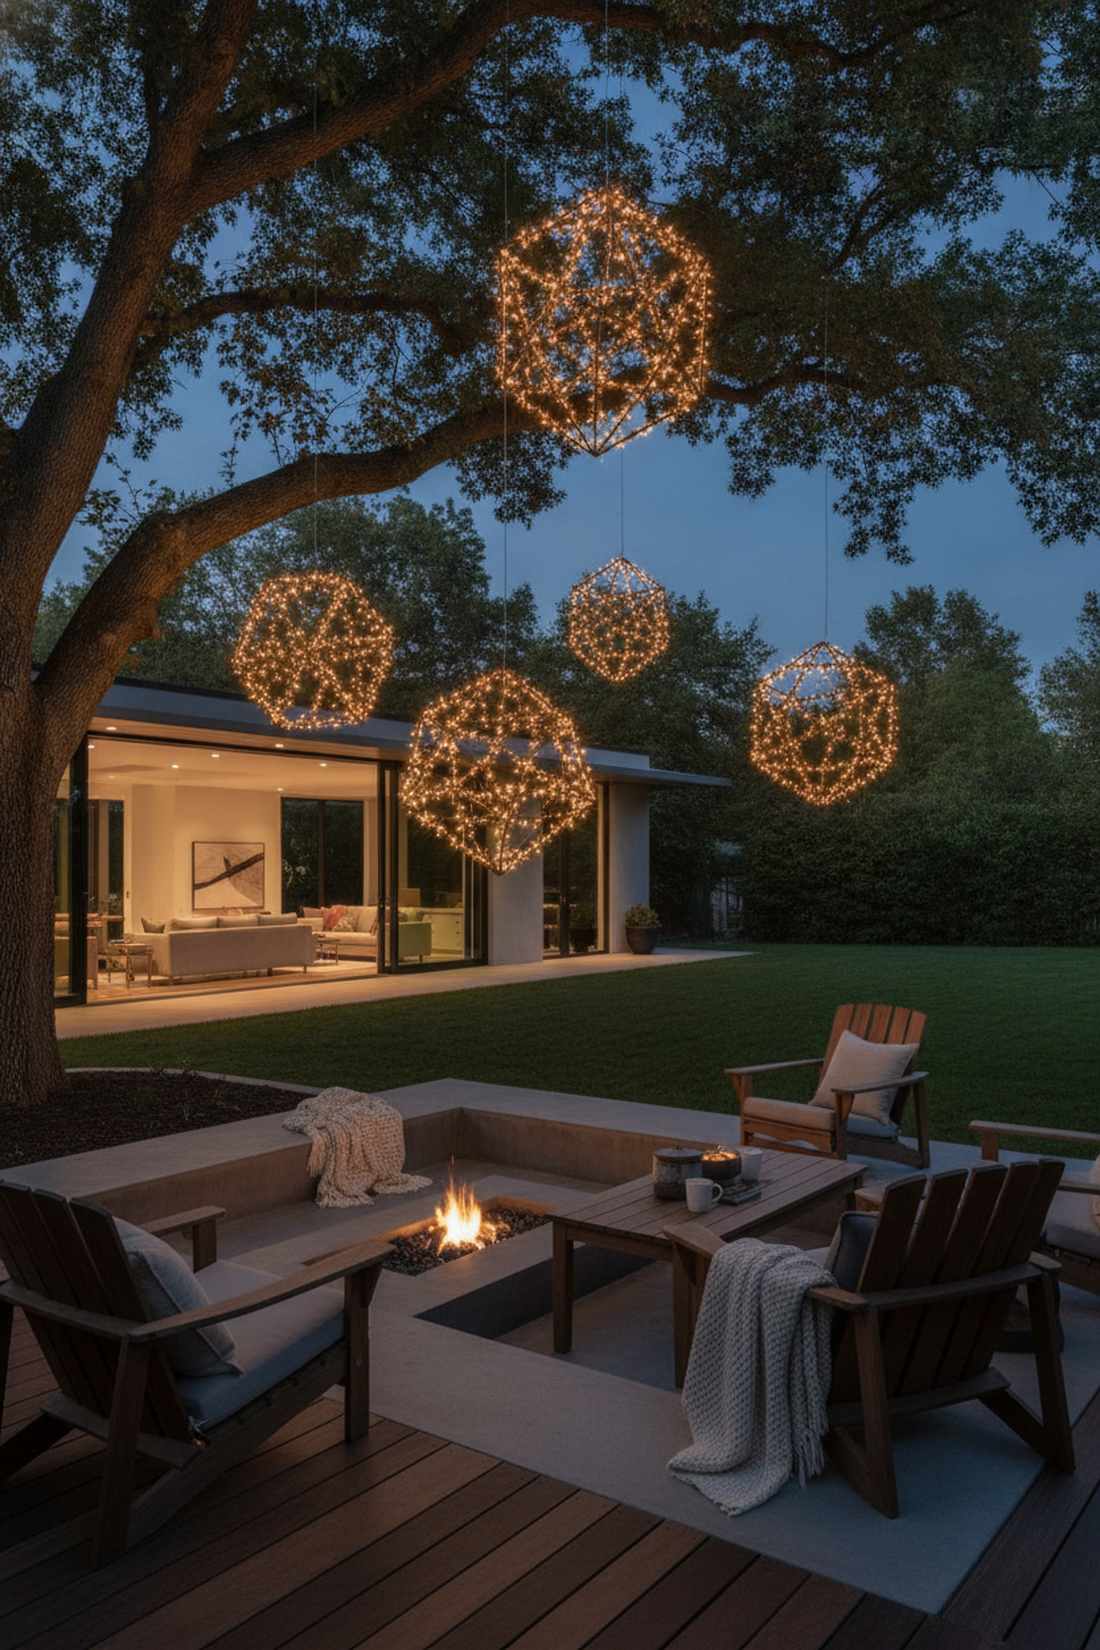
Constructs a floating 3D wireframe that feels like a high-end contemporary art exhibit. Ideal for suspending above a modern minimalist patio or a sleek concrete fire pit.
Wrapping lights around a cheap structural frame looks far more expensive than it is, giving a designer-level finish to basic hardware store wire. Tie the corners of a tomato cage or custom wire-mesh together to build glowing pyramids or cubes that hang invisibly from tree branches.
You can build a glowing geometric sculpture for about $15–$30. It completely changes the vibe of a boring, flat backyard.
- Key Materials: Metal wire frames, copper LED strands
- Vibe / Style: Contemporary art gallery
- Difficulty: Fun DIY crafting
- Budget Breakdown: Wire frames: $10 | LED strands: $15.
- Creator’s Tip: Spray paint the metal frames matte black before wrapping them so the structure vanishes completely into the night sky.
- Smart Sourcing: Pick up a copper wire fairy light multi-pack and a geometric wire frame starter kit.
41. Word Message Displays
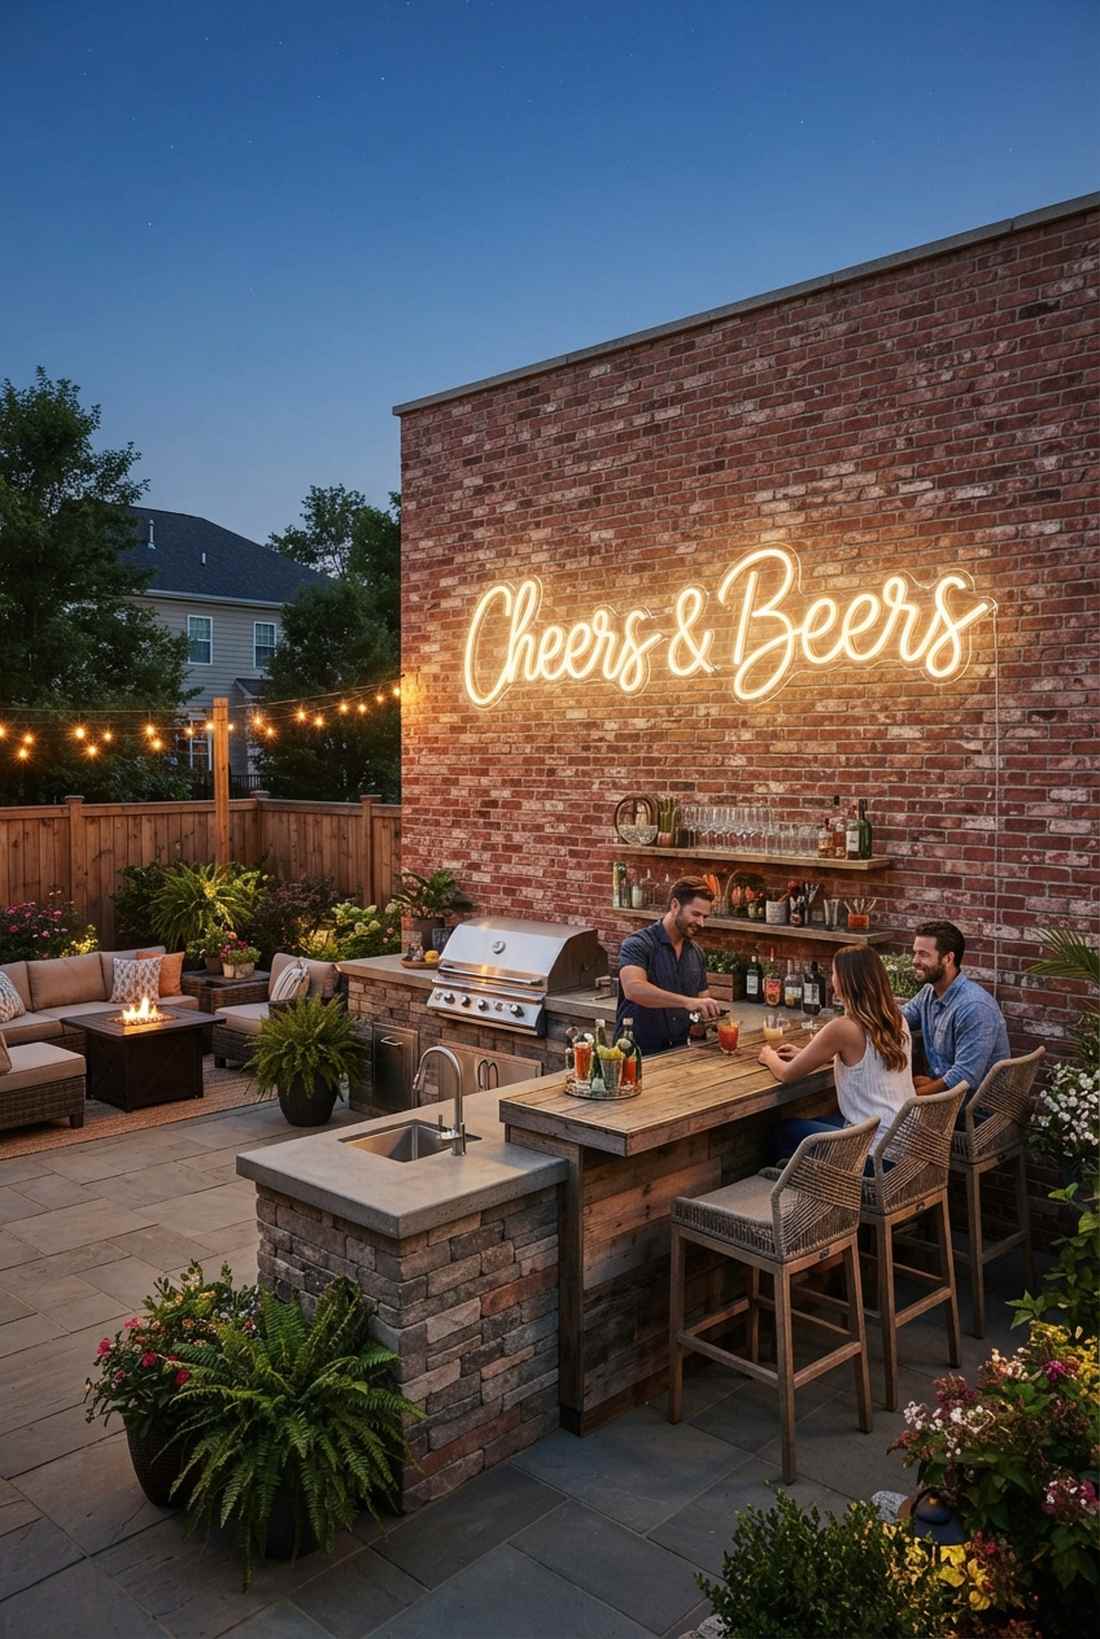
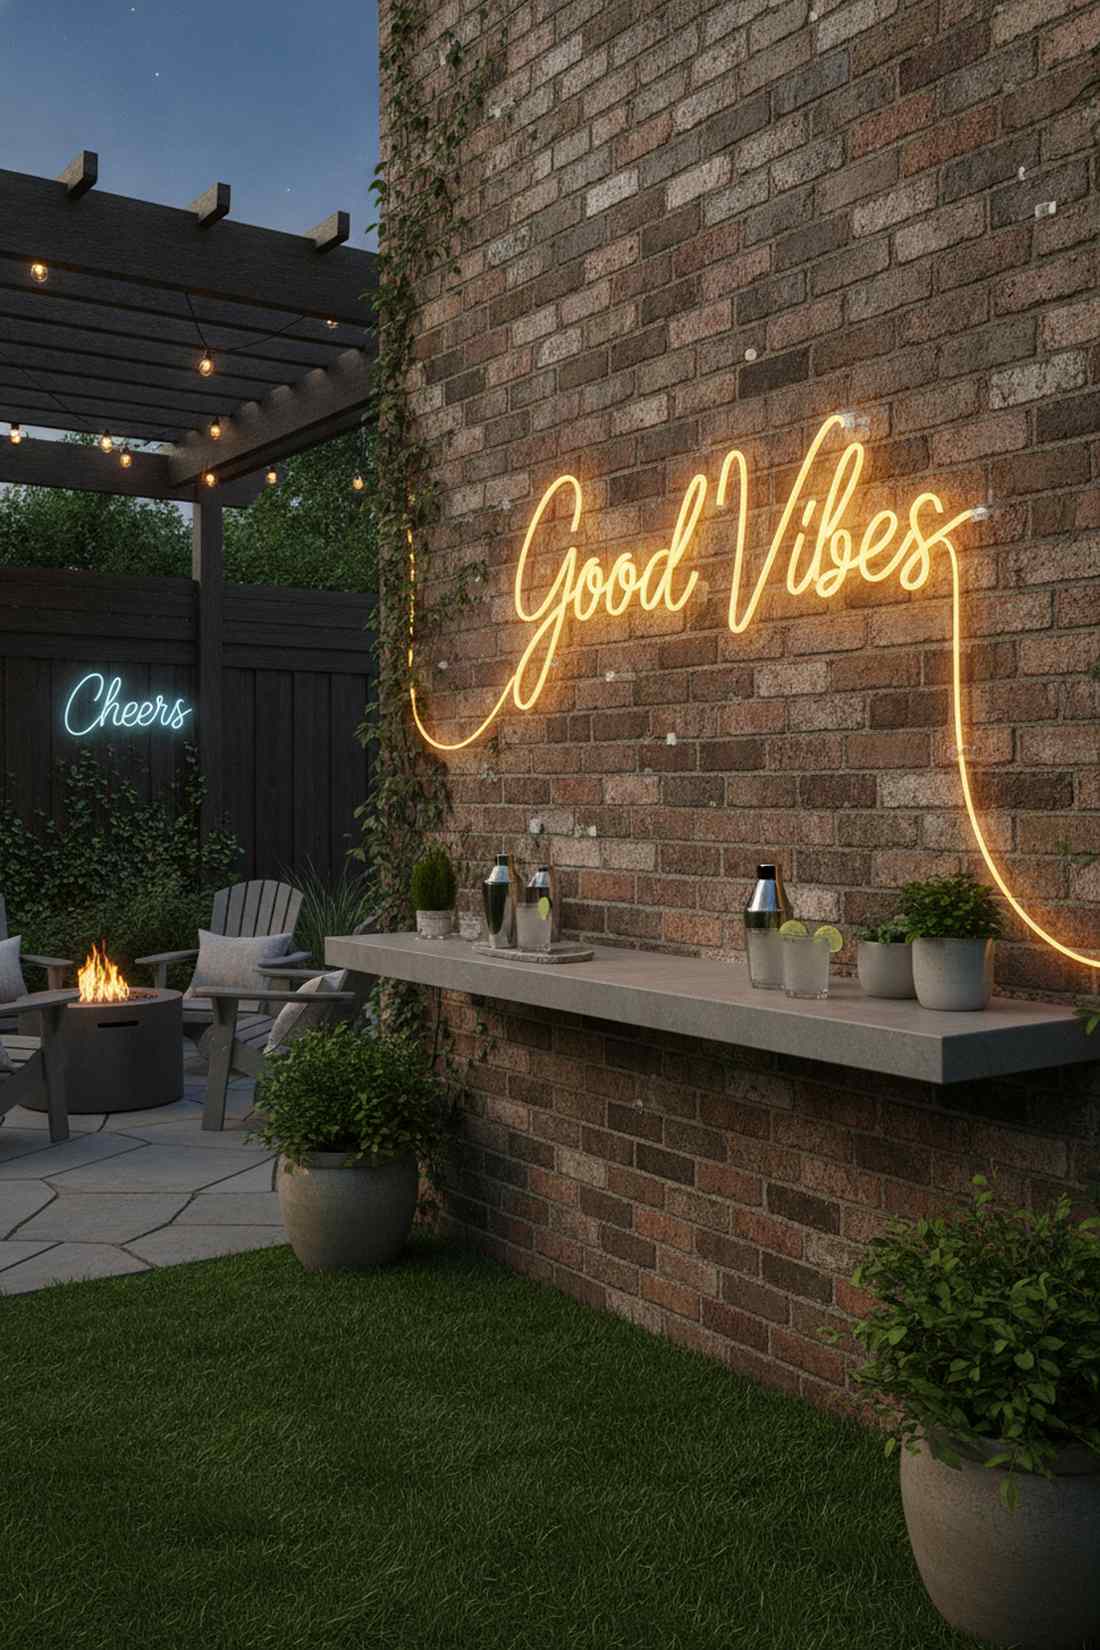
Writes a glowing cursive sign that feels incredibly personalized and trendy. A brilliant way to customize a blank brick wall or a flat wooden privacy fence near an outdoor bar.
Bending a flexible neon-style rope into words bypasses that cheap DIY aesthetic entirely, mimicking the look of expensive custom glass neon. Use clear acrylic mounting clips precisely at the curves to hold the difficult letter shapes firmly against the wall.
Drafting your own neon sign costs roughly $35–$60. Save this to your outdoor kitchen or patio bar inspiration board.
- Key Materials: Flexible LED neon rope, clear wall clips
- Vibe / Style: Trendy rooftop bar
- Difficulty: Requires patience and precise bending
- Budget Breakdown: Clips: $10 | Neon rope: $35.
- Creator’s Tip: Draw the word onto a giant piece of cardboard first, then pre-bend the rope over the template before taking it to the wall.
- Smart Sourcing: Grab a flexible LED neon rope light (cuttable) and clear acrylic mounting clips (bulk pack).
42. Color Gradient Transitions
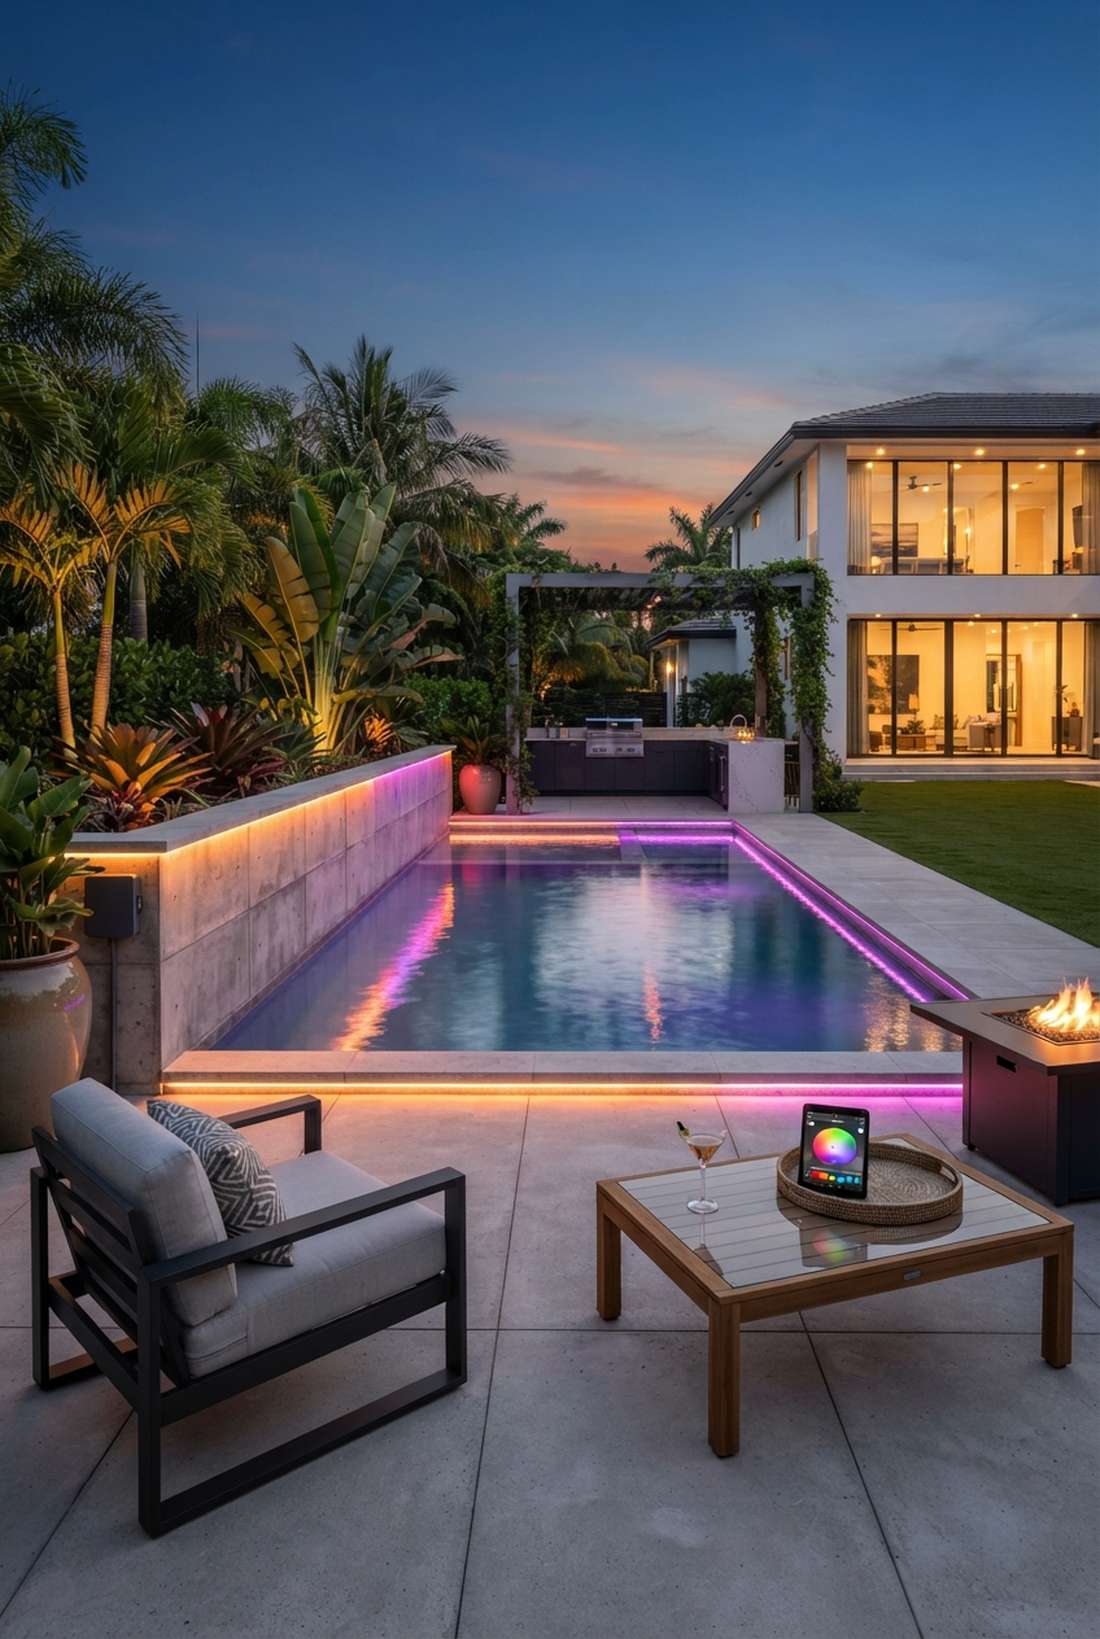
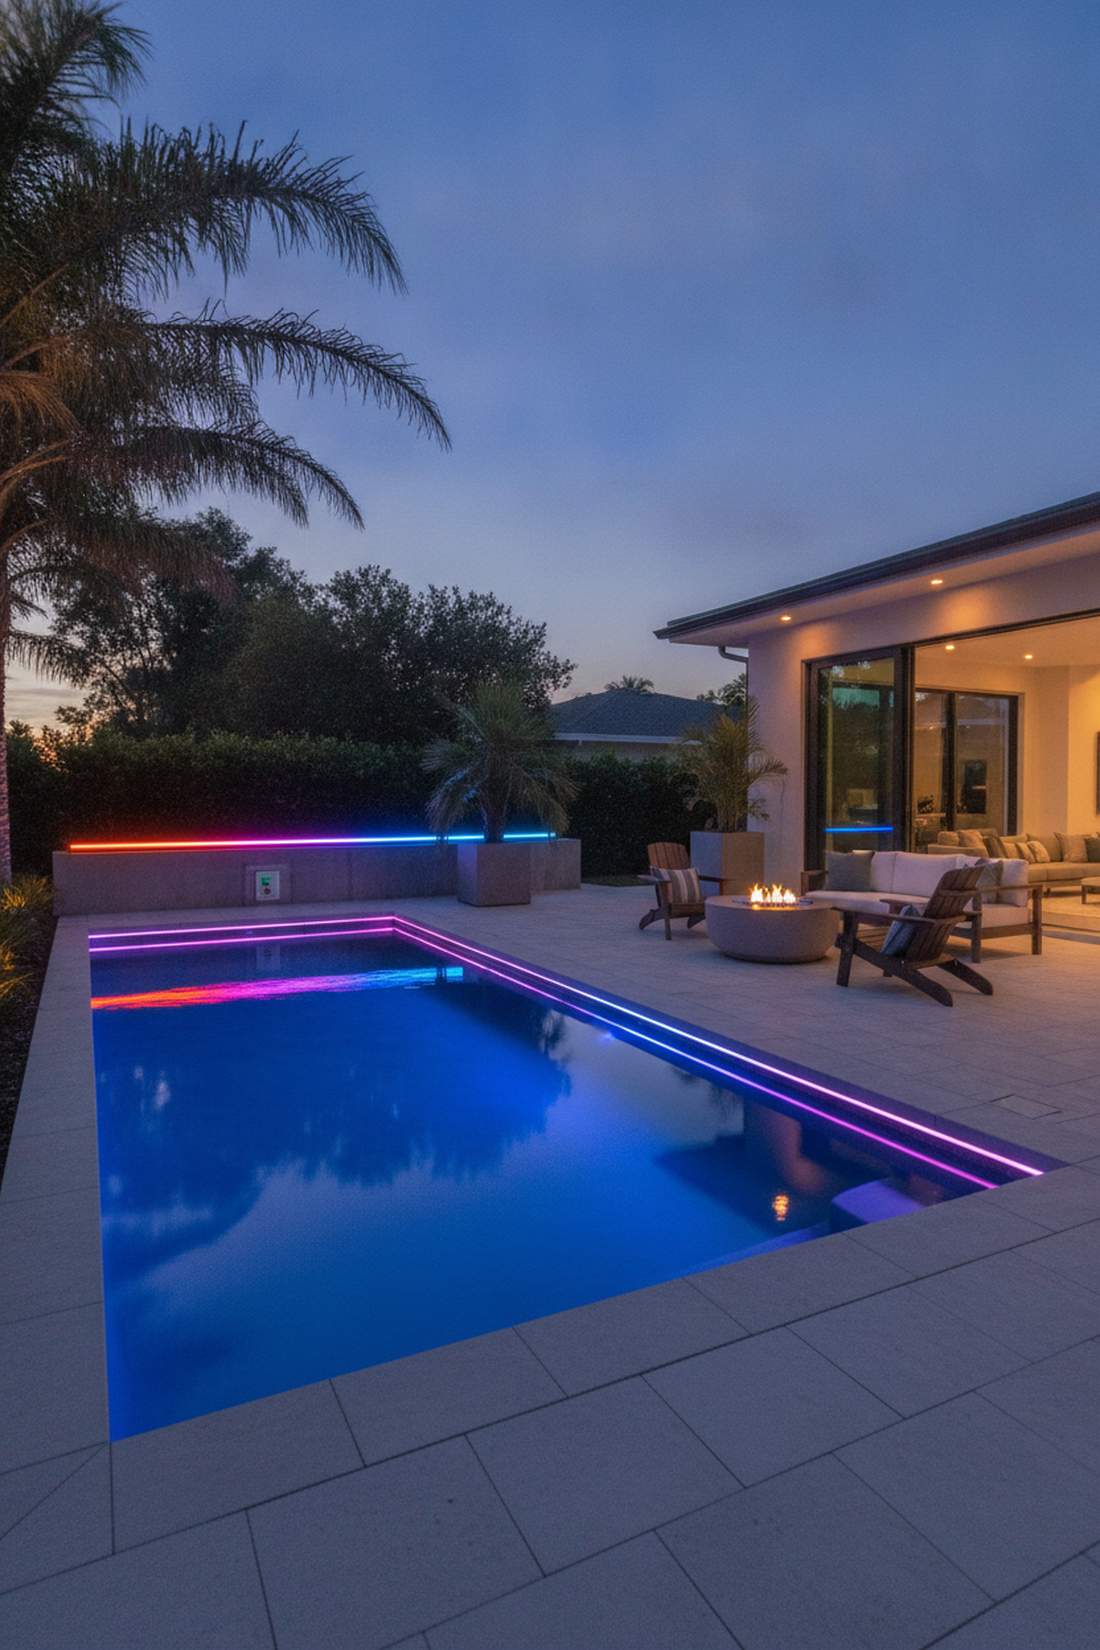
Paints a shifting neon atmosphere that feels like a high-tech modern lounge. Perfectly adapted for outlining a sleek plunge pool or a sharp, modern concrete retaining wall.
Deploying smart RGB app-controlled cables entirely elevates a boring space into a luxury retreat. You can program slow, seamless fades from sunset orange to deep purple, proving your backyard technology is highly advanced and intentional.
A smart gradient setup will run about $50–$90 for the controller and lights. Pin this if you love hosting high-energy evening parties.
- Key Materials: Smart RGB outdoor string lights, WiFi controller
- Vibe / Style: Miami luxury lounge
- Difficulty: Easy app setup
- Budget Breakdown: Smart lights: $65.
- Creator’s Tip: Hide the bulky WiFi controller box inside a weatherproof junction box behind a planter to keep the aesthetic clean.
- Smart Sourcing: Buy a smart RGB outdoor string light kit (app controlled) and a waterproof electrical connection box.
43. Starburst Explosion Focal
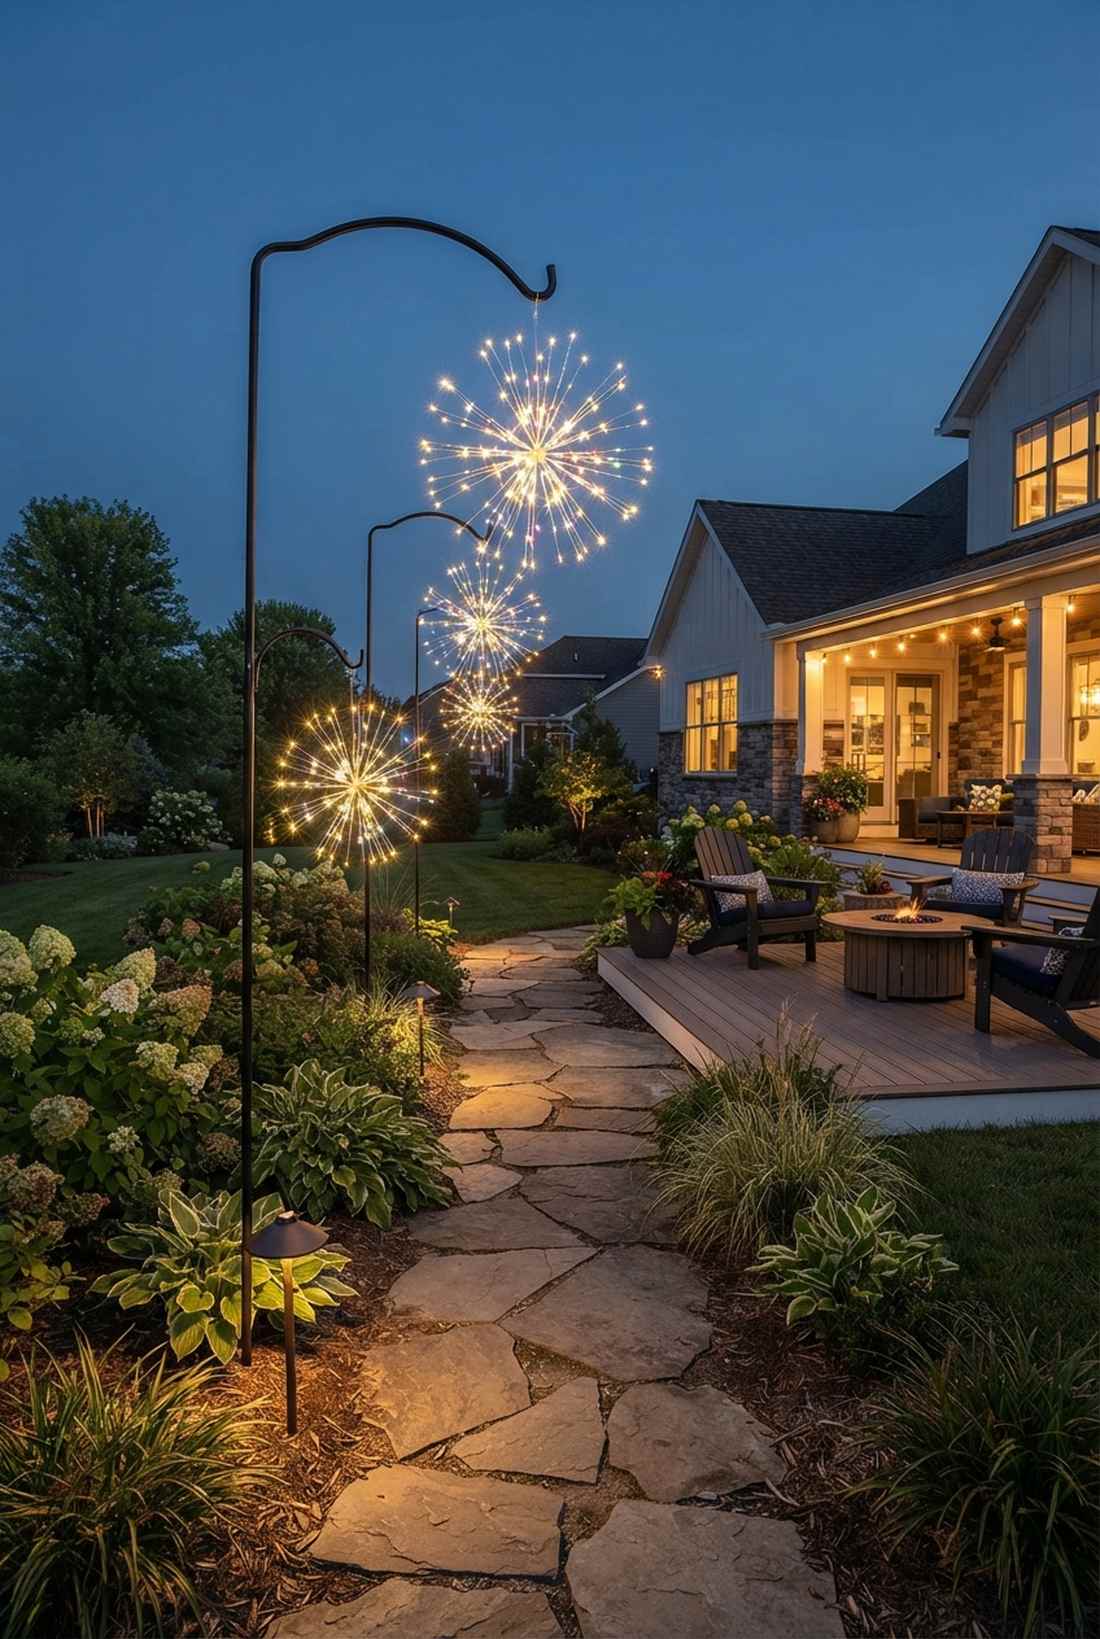
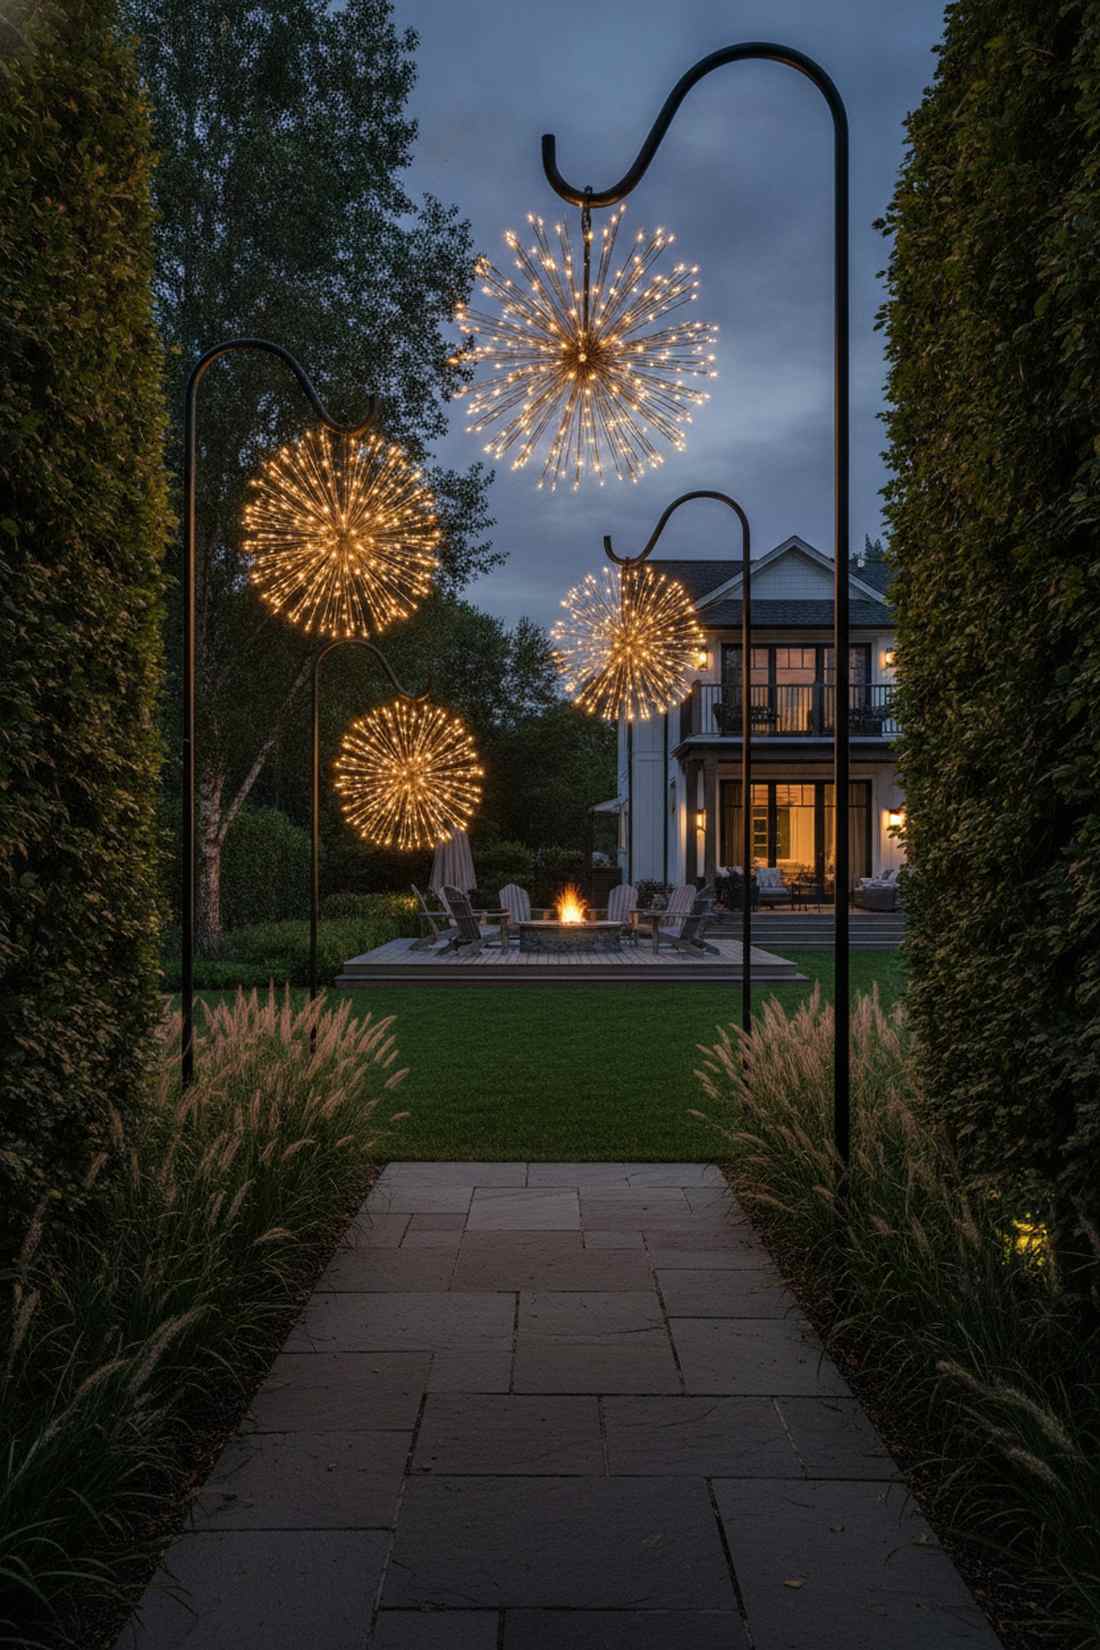
Sparks a suspended glowing firework that feels explosive, dramatic, and highly celebratory. The absolute best way to terminate a long sightline down a dark garden path.
Fanning stiff wire rods outward from a central hub delivers a surprisingly premium look, mimicking a custom $300 lighting fixture. You can assemble this using pre-made starburst spheres that run on battery power, hanging them from thin shepherd’s hooks.
Creating this explosive focal point costs a mere $20–$35. It is the ultimate secret to expensive-looking landscape depth.
- Key Materials: Pre-wired starburst spheres, shepherd’s hooks
- Vibe / Style: Dramatic event grounds
- Difficulty: Instant hanging
- Budget Breakdown: Hooks: $15 | Starburst lights: $15.
- Creator’s Tip: Group three of these at staggered heights (4ft, 5ft, 6ft) to create a massive, multi-dimensional glowing sculpture.
- Smart Sourcing: Find an LED starburst sphere light kit (2-pack) and heavy-duty metal shepherd’s hooks.
44. Chandelier Style Clusters
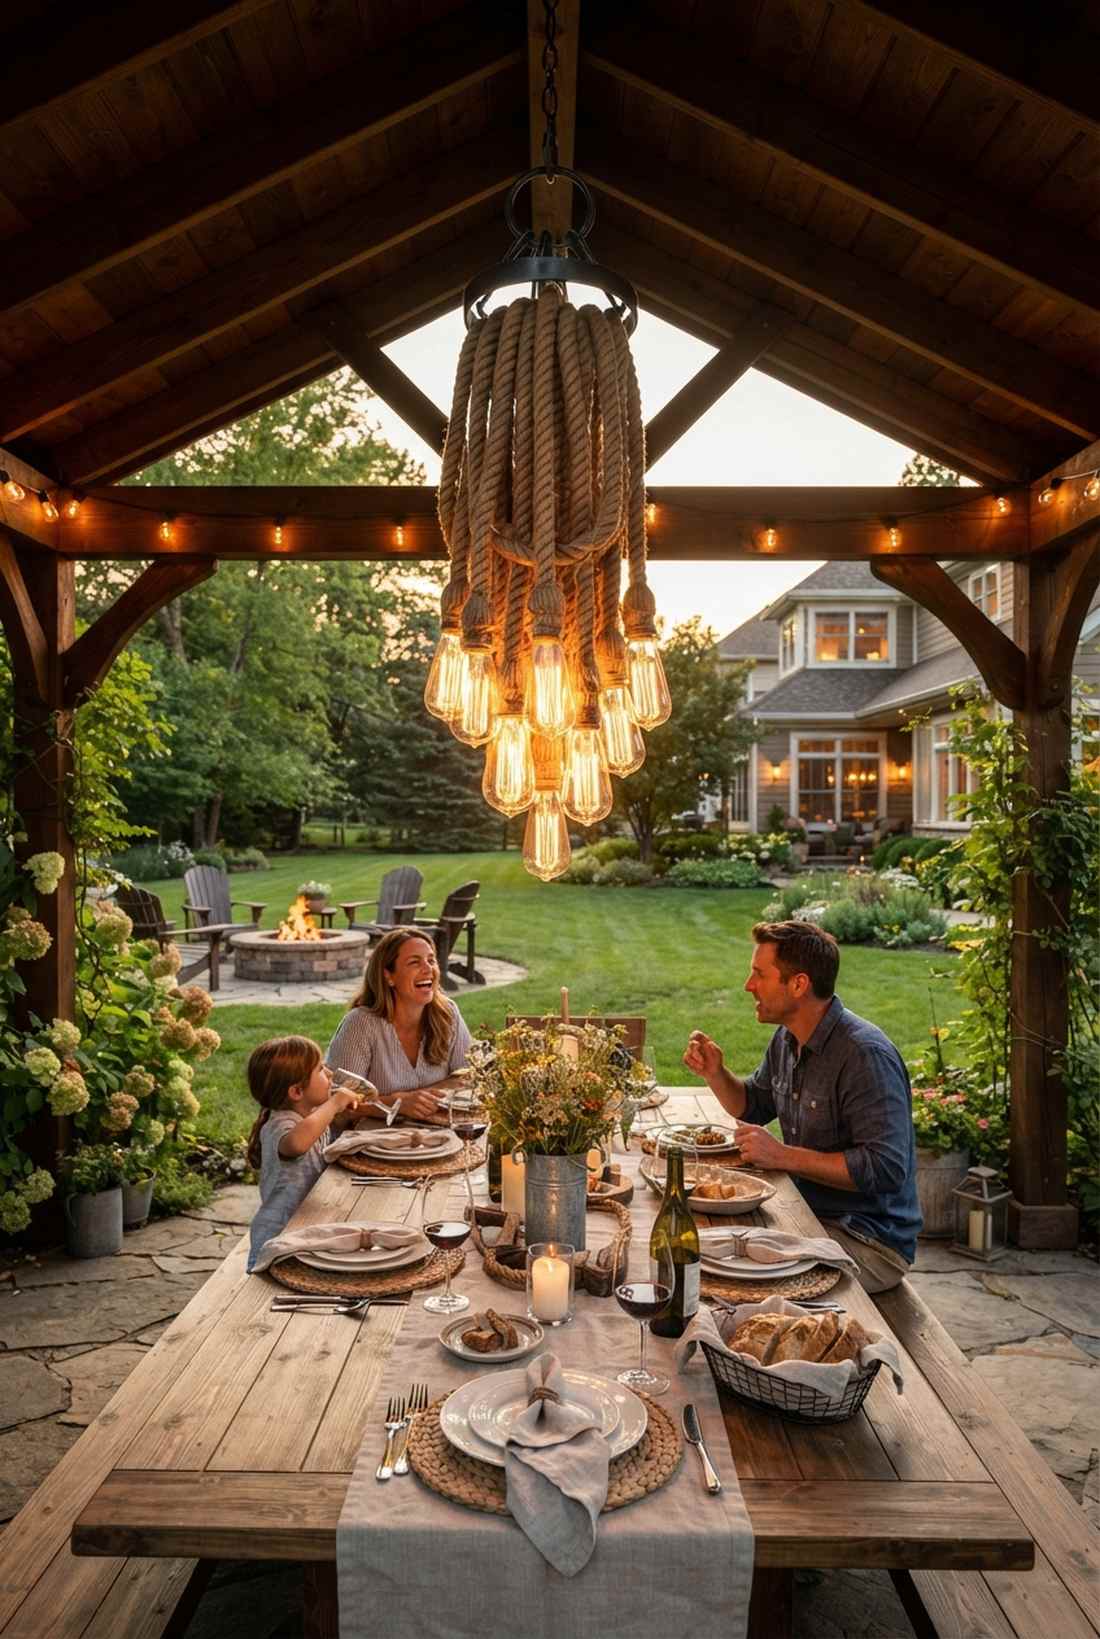
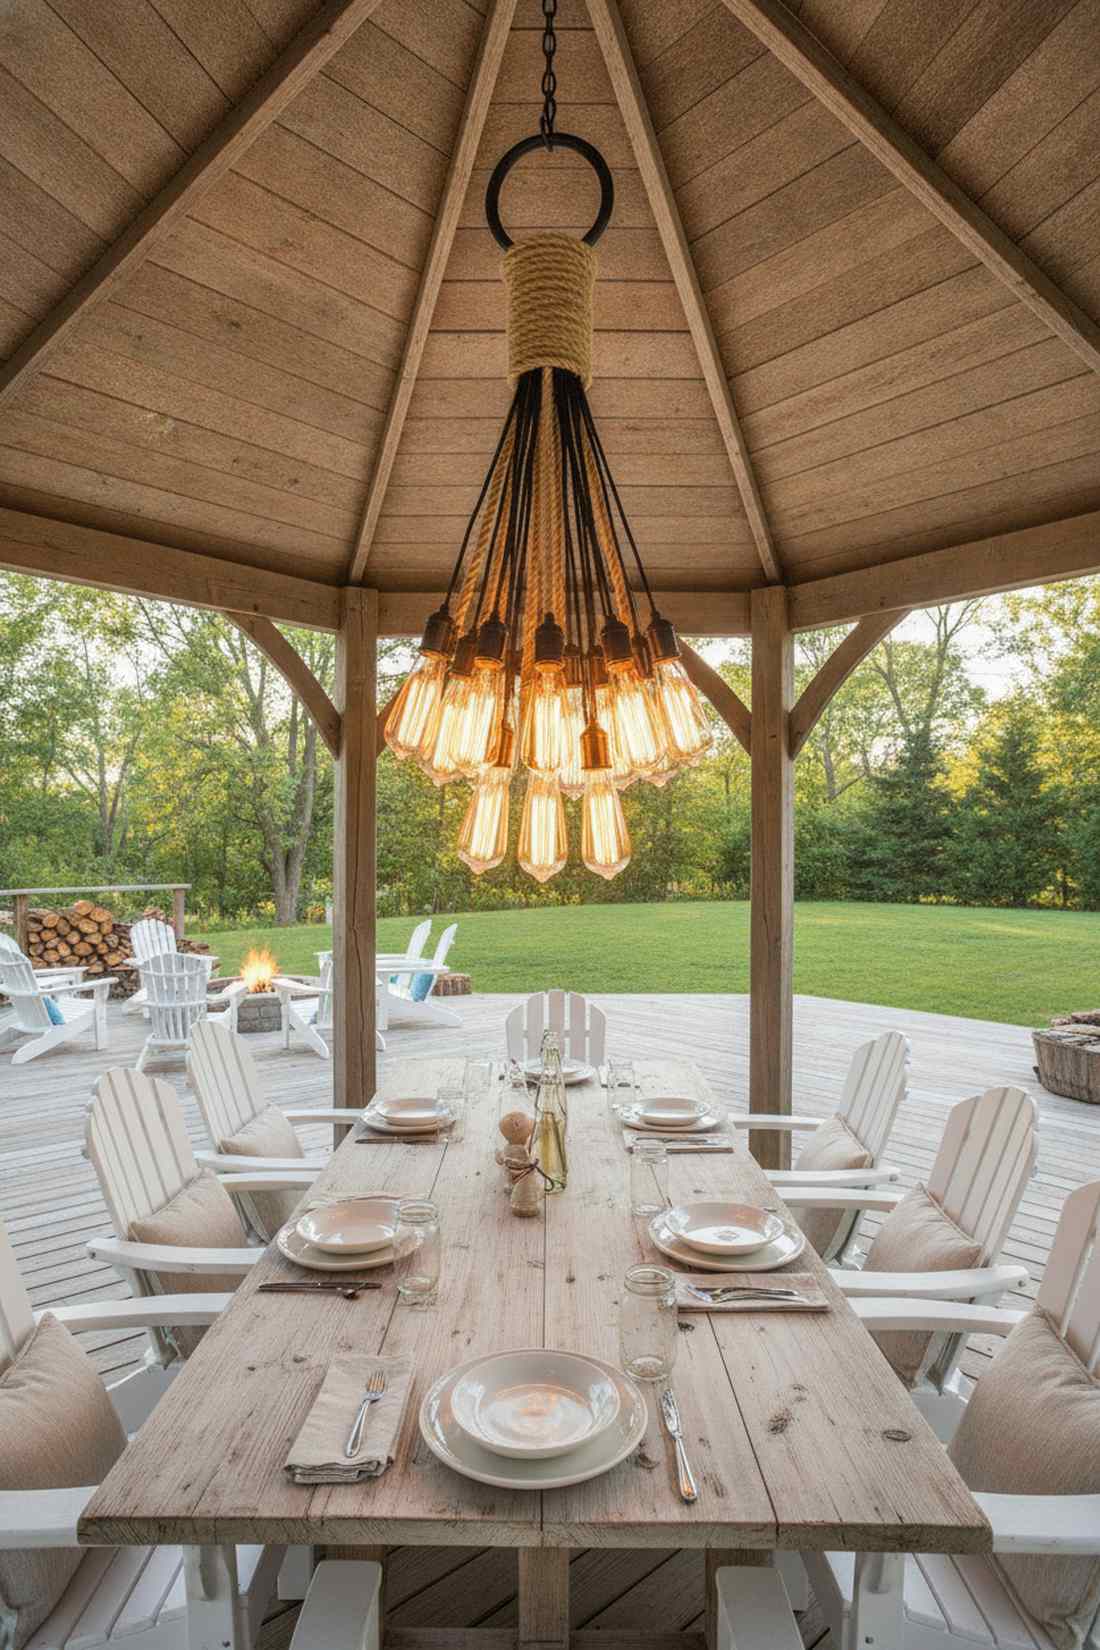
Bunches a glowing industrial pendant that feels like it belongs in a high-end designer catalog. An incredible trick for lighting the center of a gazebo or hanging above a rustic farm table.
Gathering multiple long bulbs into a tight, staggered bundle looks far more expensive than it is, giving a designer-level finish using cheap cafe strings. Wrap the upper bundled wires in thick nautical rope to hide the ugly black plastic cords completely.
You can hack this rustic chandelier for about $30–$50. Save this to your DIY outdoor dining board for a brilliant weekend project.
- Key Materials: Edison string lights, thick jute rope
- Vibe / Style: Upscale rustic dining
- Difficulty: Simple bundling and tying
- Budget Breakdown: Rope: $10 | Edison lights: $30.
- Creator’s Tip: Use a large steel ring at the top of the bundle so you can easily clip the whole heavy chandelier to an overhead hook.
- Smart Sourcing: Order an outdoor heavy-duty Edison string kit and a thick twisted jute rope spool.
45. Fiber Optic Effect Scatter
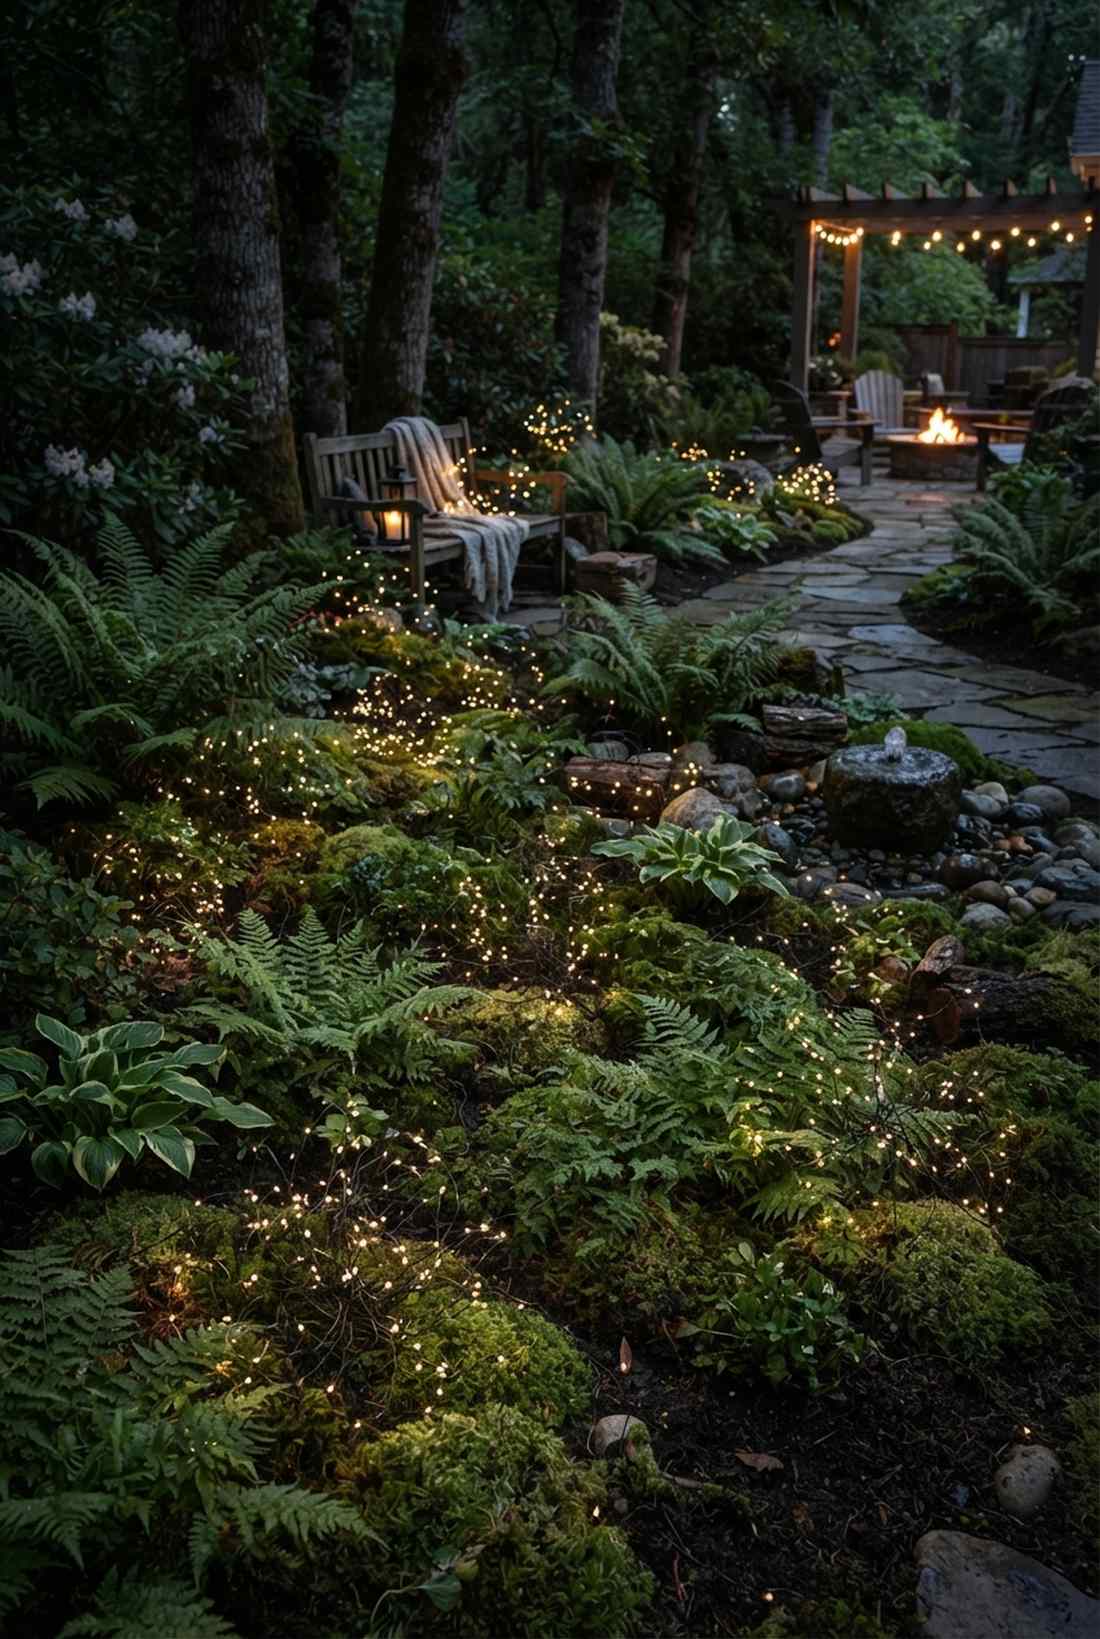
Sprinkles a micro-dot glowing mist that feels deeply ethereal and magically subtle. Works flawlessly when woven through thick moss gardens or dense fern beds.
Using microscopic bulbs on invisible wire completely elevates a boring space into a luxury retreat without any glaring spotlights. Integrate premium miniature garden supplies to mask the small battery receivers, allowing the tiny pinpricks of light to float naturally.
This ultra-subtle scattering effect only costs $15–$25. It completely changes the vibe of a dark woodland garden corner.
- Key Materials: Micro-dot fairy wires, camouflage tape
- Vibe / Style: Ethereal woodland floor
- Difficulty: Delicate weaving
- Budget Breakdown: Micro wires: $15 | Tape: $5.
- Creator’s Tip: Scrunch the thin wire into random, messy balls rather than laying it flat; it makes the lights look like a hovering cloud of fireflies.
- Smart Sourcing: Pick up a micro-dot LED wire string kit (bulk pack) and brown camouflage outdoor tape.
46. Mixed Bulb Size Composition
Layers a textured luminous canopy that feels visually rich and complex. A fantastic approach for deep, covered patios where a single bulb size feels too repetitive and boring.
Twisting massive globe bulbs alongside tiny twinkle strands bypasses that cheap DIY aesthetic entirely, creating a high-end designer contrast. Run the large bulbs on the main structural lines, using the micro lights to fill the empty canopy gaps softly.
Mixing these varying strands costs roughly $60–$90. Pin this layout if you want your patio to look professionally staged.
- Key Materials: Large G40 globes, mini LED strands
- Vibe / Style: Staged designer patio
- Difficulty: Requires managing two separate plugs
- Budget Breakdown: G40 globes: $45 | Mini LEDs: $20.
- Creator’s Tip: Plug both strands into a dual-outlet smart plug so you can turn on the massive, complex canopy with one tap on your phone.
- Smart Sourcing: Get a G40 globe outdoor string light bundle and an outdoor smart plug dual-outlet.
47. Motion Activated Pathway Sequences
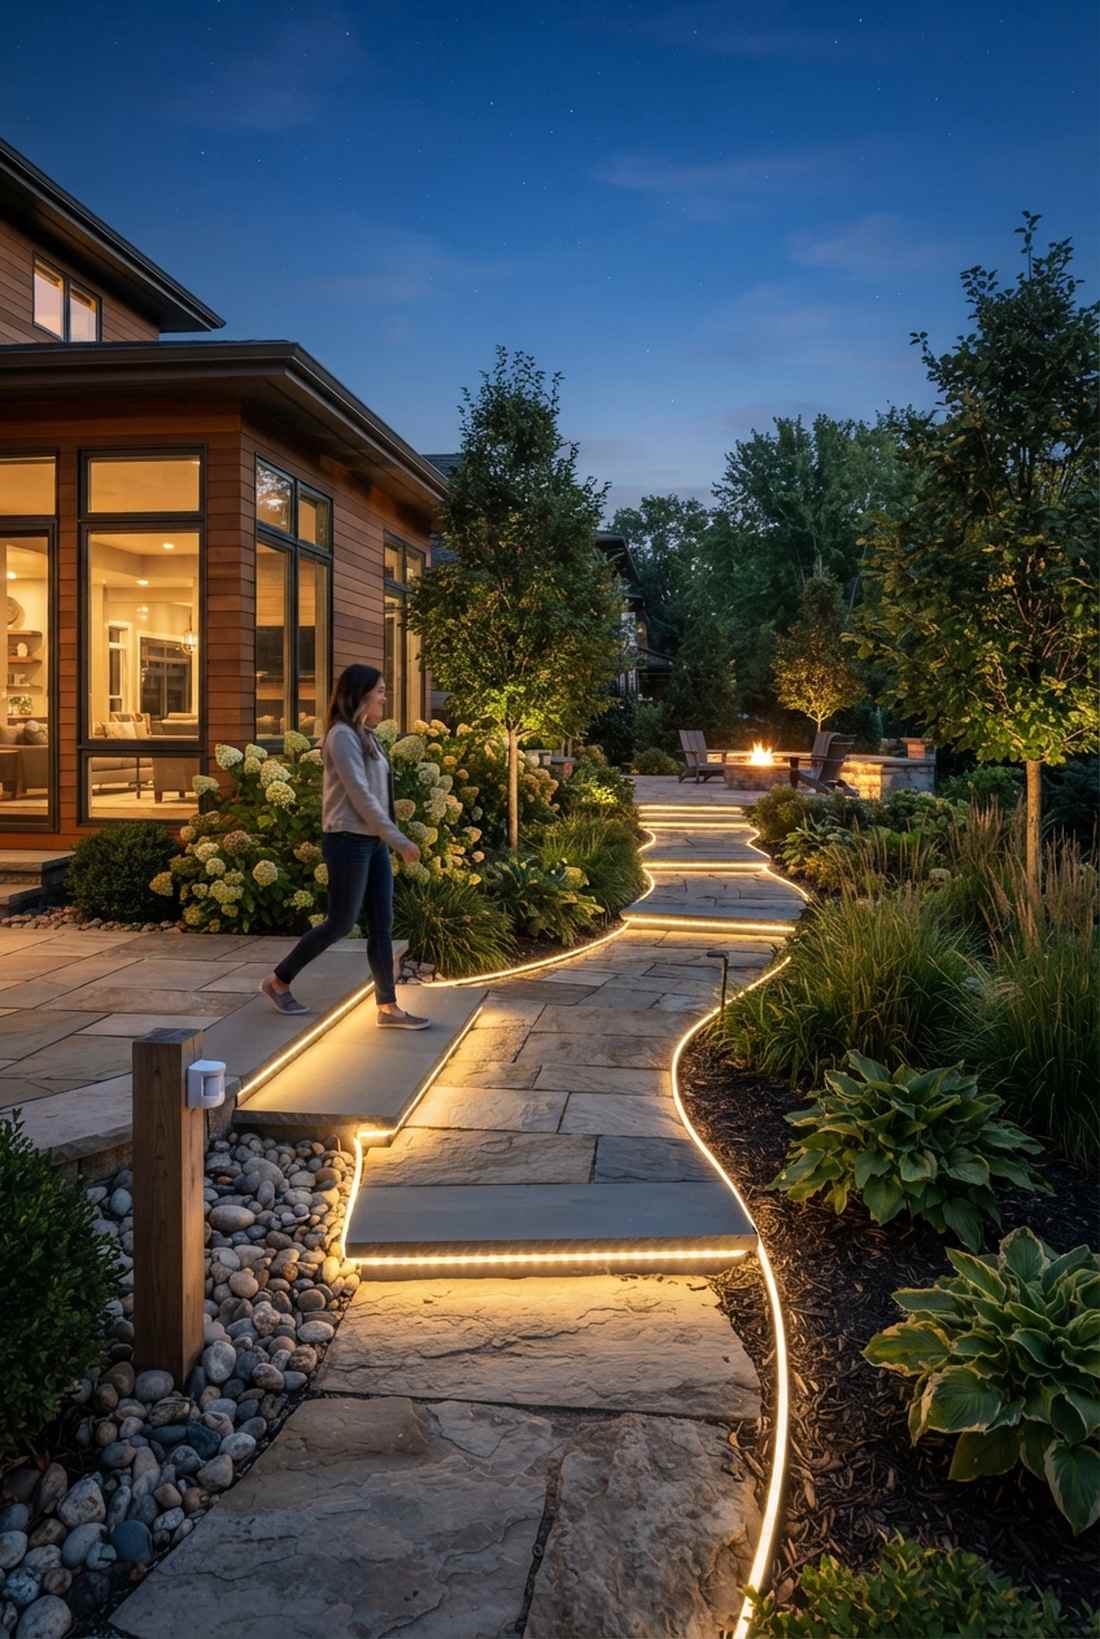
Programs an interactive walking trail that feels like entering a futuristic luxury estate. This is the absolute best way to handle long side-yard paths that don’t need to be lit all night long.
Linking the strands to a waterproof motion trigger delivers a surprisingly premium look, lighting up the path exactly as you step forward. Use a low-voltage transformer with a built-in sensor to bypass complex hardwiring, saving hundreds of dollars on an electrician.
This automated pathway upgrade runs about $50–$85. Save this to your smart-home exterior board for a brilliant functional tweak.
- Key Materials: Low-voltage LED ropes, outdoor motion sensor
- Vibe / Style: High-tech luxury estate
- Difficulty: Easy plug-and-play automation
- Budget Breakdown: Motion sensor: $25 | LED ropes: $35.
- Creator’s Tip: Aim the motion sensor at knee height so it catches walking humans instantly but ignores tree branches blowing in the wind.
- Smart Sourcing: Buy a plug-in outdoor motion sensor trigger and a low-voltage outdoor LED rope spool.
Conclusion
Executing these 47 premium garden lights string blueprints proves that you don’t need a massive landscaping budget to create a luxury backyard retreat. By aggressively sourcing the right UV-coated, shatterproof, and waterproof starter kits, you completely bypass the cheap DIY look. Whether you’re draping a high-end Tuscan canopy or weaving subtle fairy garden kits into a potted olive tree, smart placement and commercial-grade materials are the ultimate secrets to expensive-looking architecture.
Stop settling for a dark, uninviting patio. Pick one of these 47 high-impact layouts, grab a bulk pack of tension wire, and completely transform your outdoor living space this weekend. The visual payoff—and the boost to your home’s evening curb appeal—is absolutely unmatched for the price.
Frequently Asked Questions
What is the best spacing for overhead garden string lights?
The absolute best spacing for overhead garden lights string setups is 24-30 inches if you are using premium, large Edison-style bulbs. If you cram them too close, your patio looks like a cheap runway. For smaller fairy garden kits or mini LEDs, tighten the spacing to 18 inches. To nail this layout without sagging, always buy a pre-cut stainless tension wire kit so your spans remain perfectly parallel and highly professional.
How do I protect outdoor string lights from weather damage?
To avoid dead bulbs and electrical shorts, you must use IP65 or IP68 rated fixtures—do not buy generic indoor/outdoor craft aisle junk. Protect all your plug connections by wrapping them in electrical tape and housing them in a weatherproof silicone-sealed enclosure box. This cheap $15 accessory prevents water from destroying your $100 lighting investment during heavy summer storms.
Can I leave garden string lights up year-round?
Yes, but only if you invest in commercial-grade, UV-resistant cables. Cheap plastic wiring will bake, crack, and turn brittle under the summer sun, looking terrible by winter. For a permanent installation that actually lasts, purchase a shatterproof LED Edison string kit (bulk pack) with thick rubberized sockets that easily survive year-round freeze and thaw cycles.
What color temperature works best for garden string lights?
For that expensive, luxury resort aesthetic, strictly stick to warm white bulbs between 2200K and 2700K. Anything above 4000K looks like a sterile hospital room and completely ruins the cozy evening vibe. If you are buying a low-voltage outdoor string light starter kit, verify the box explicitly says “Warm Amber” or “Soft White” to guarantee that flattering, high-end glow.
How much power do garden string lights require?
Modern LED garden lights string kits draw almost no power—usually 0.5 to 1 watt per bulb—meaning you can string hundreds of them together on a standard cheap extension cord without blowing a breaker. Skip outdated incandescent glass bulbs; they burn 7 watts each and break easily. Save money on your electric bill by upgrading to an outdoor smart plug dual-outlet to run your low-wattage LEDs on an exact automated schedule.
What is the safest way to hang string lights in trees?
Never choke a living tree by wrapping thin wire tightly around a growing branch—it slices into the bark and kills the limb. The safest, most professional method is using heavy-duty stainless steel tree lags (bulk pack). Drill them cleanly into the trunk and use a carabiner to clip the wire, giving the tree room to grow while ensuring your heavy lighting canopy never crashes down in the wind.