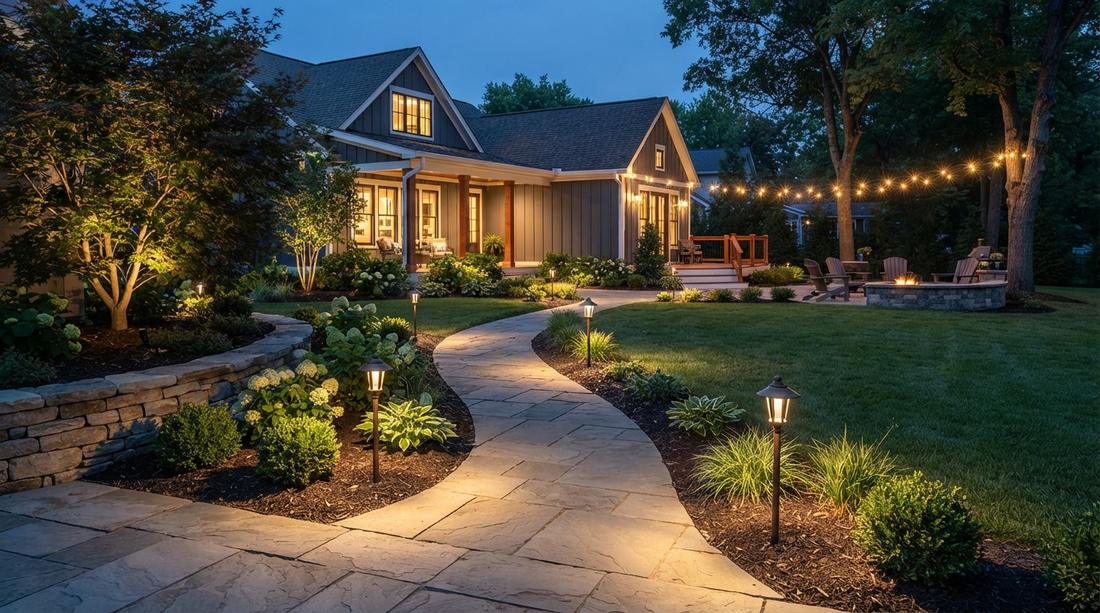
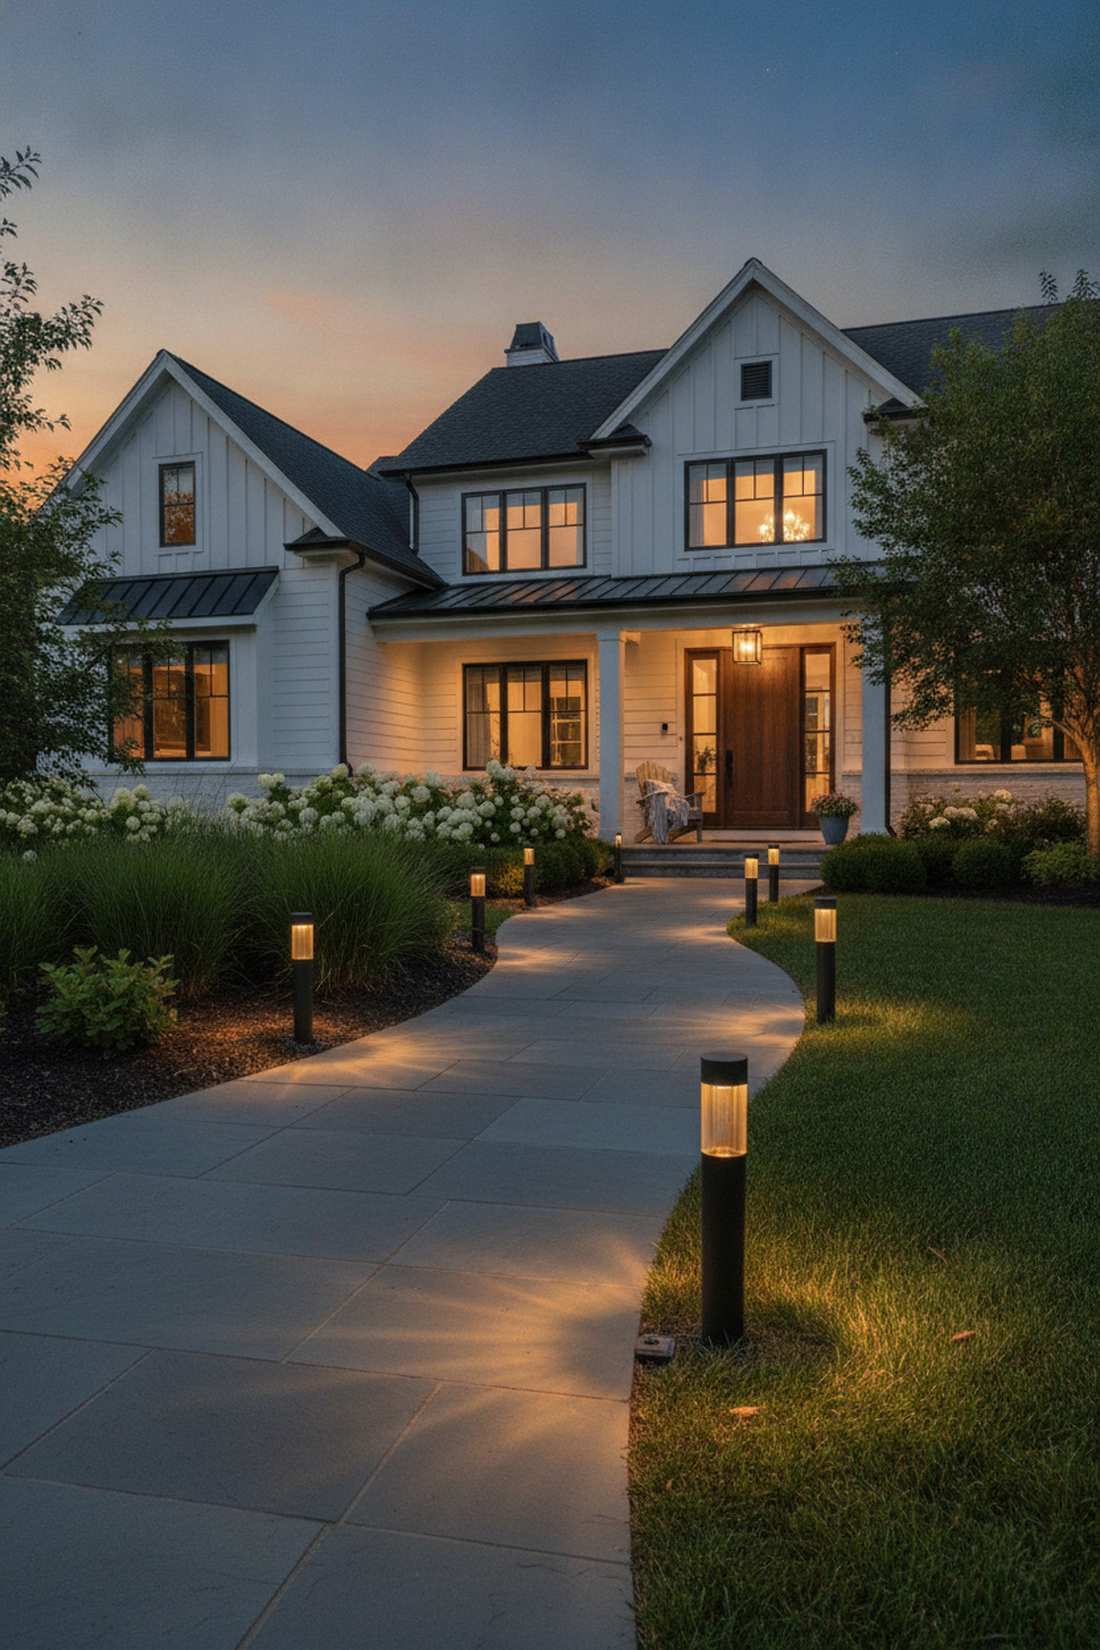
An exceptional outdoor lighting pathway installation instantly elevates nighttime safety and architectural appeal. Discover exact material blueprints, budget breakdowns, and smart sourcing tricks for every layout. Transform basic exterior routes into high-end, visually striking pedestrian walkways without overspending.
Design Snapshot Key Principles
- Uniform Illumination: Maintain consistent light levels along pathways to prevent dark zones that compromise pedestrian safety.
- Glare Mitigation: Position fixtures below eye level to direct light downward, avoiding direct exposure that impairs night vision.
- Layered Lighting: Combine ambient, task, and accent lighting to create depth while meeting functional requirements.
- Energy Integration: Specify low-voltage LED systems with smart controls to reduce operational costs and maintenance frequency.
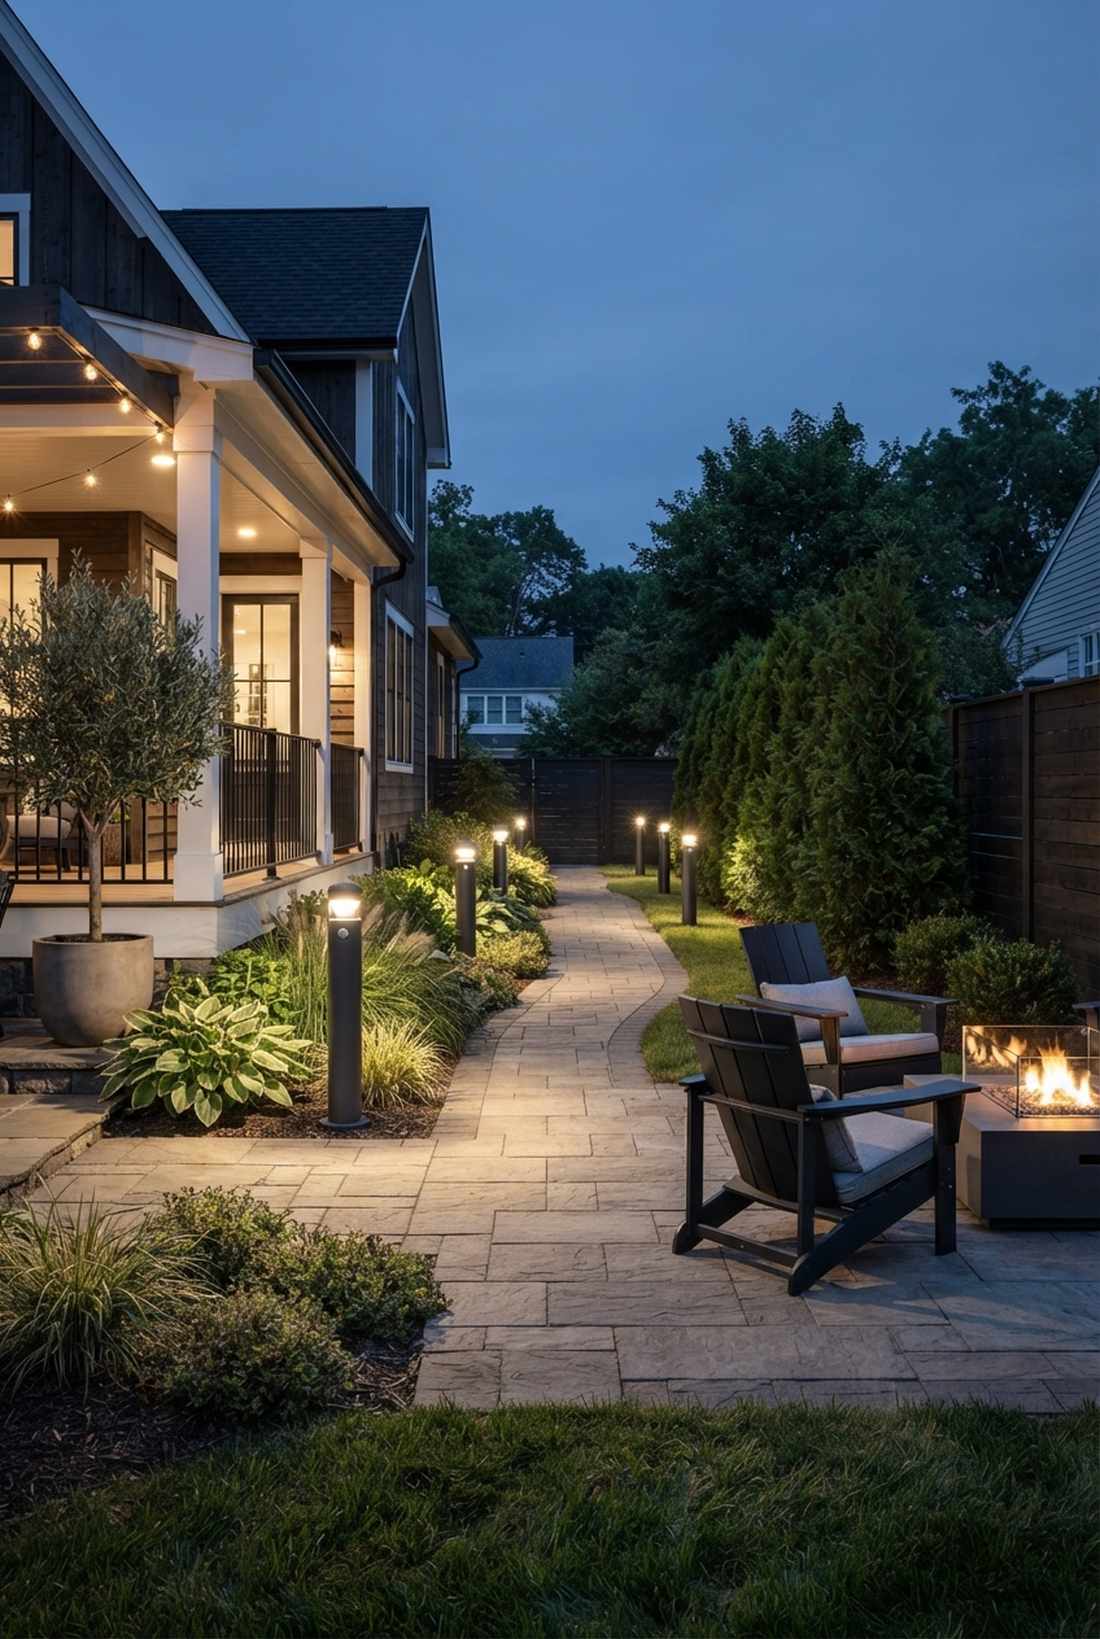
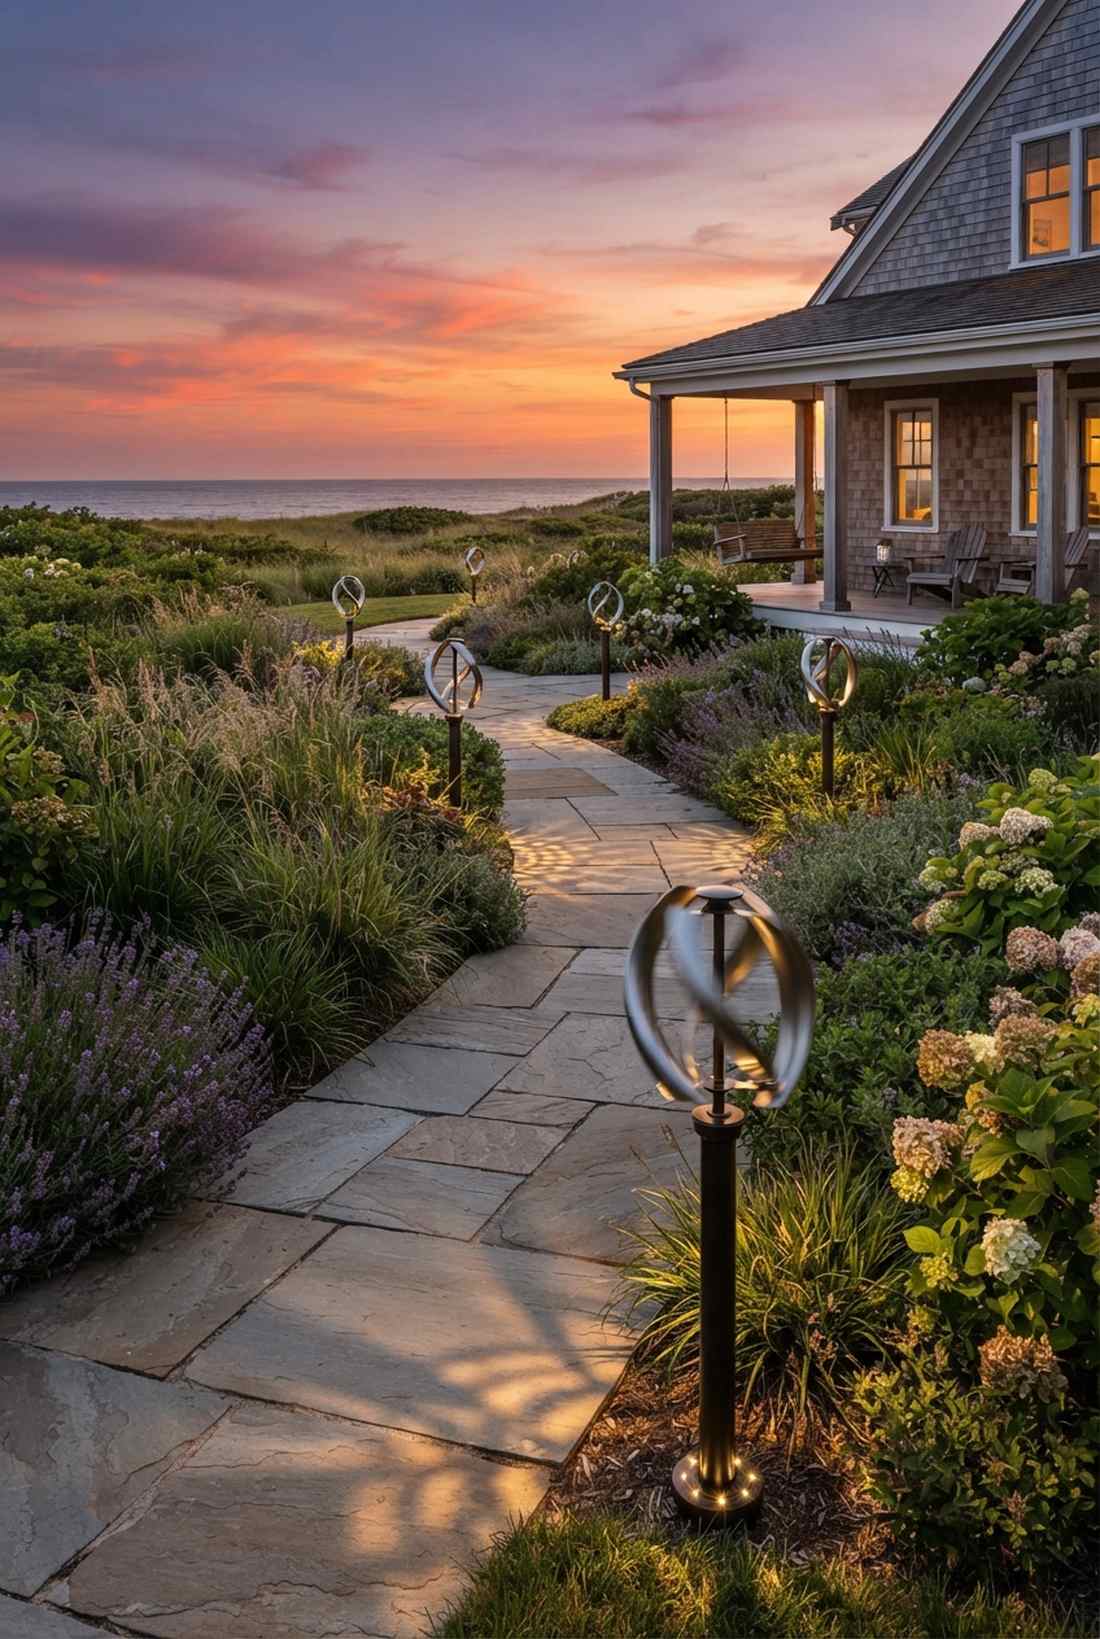
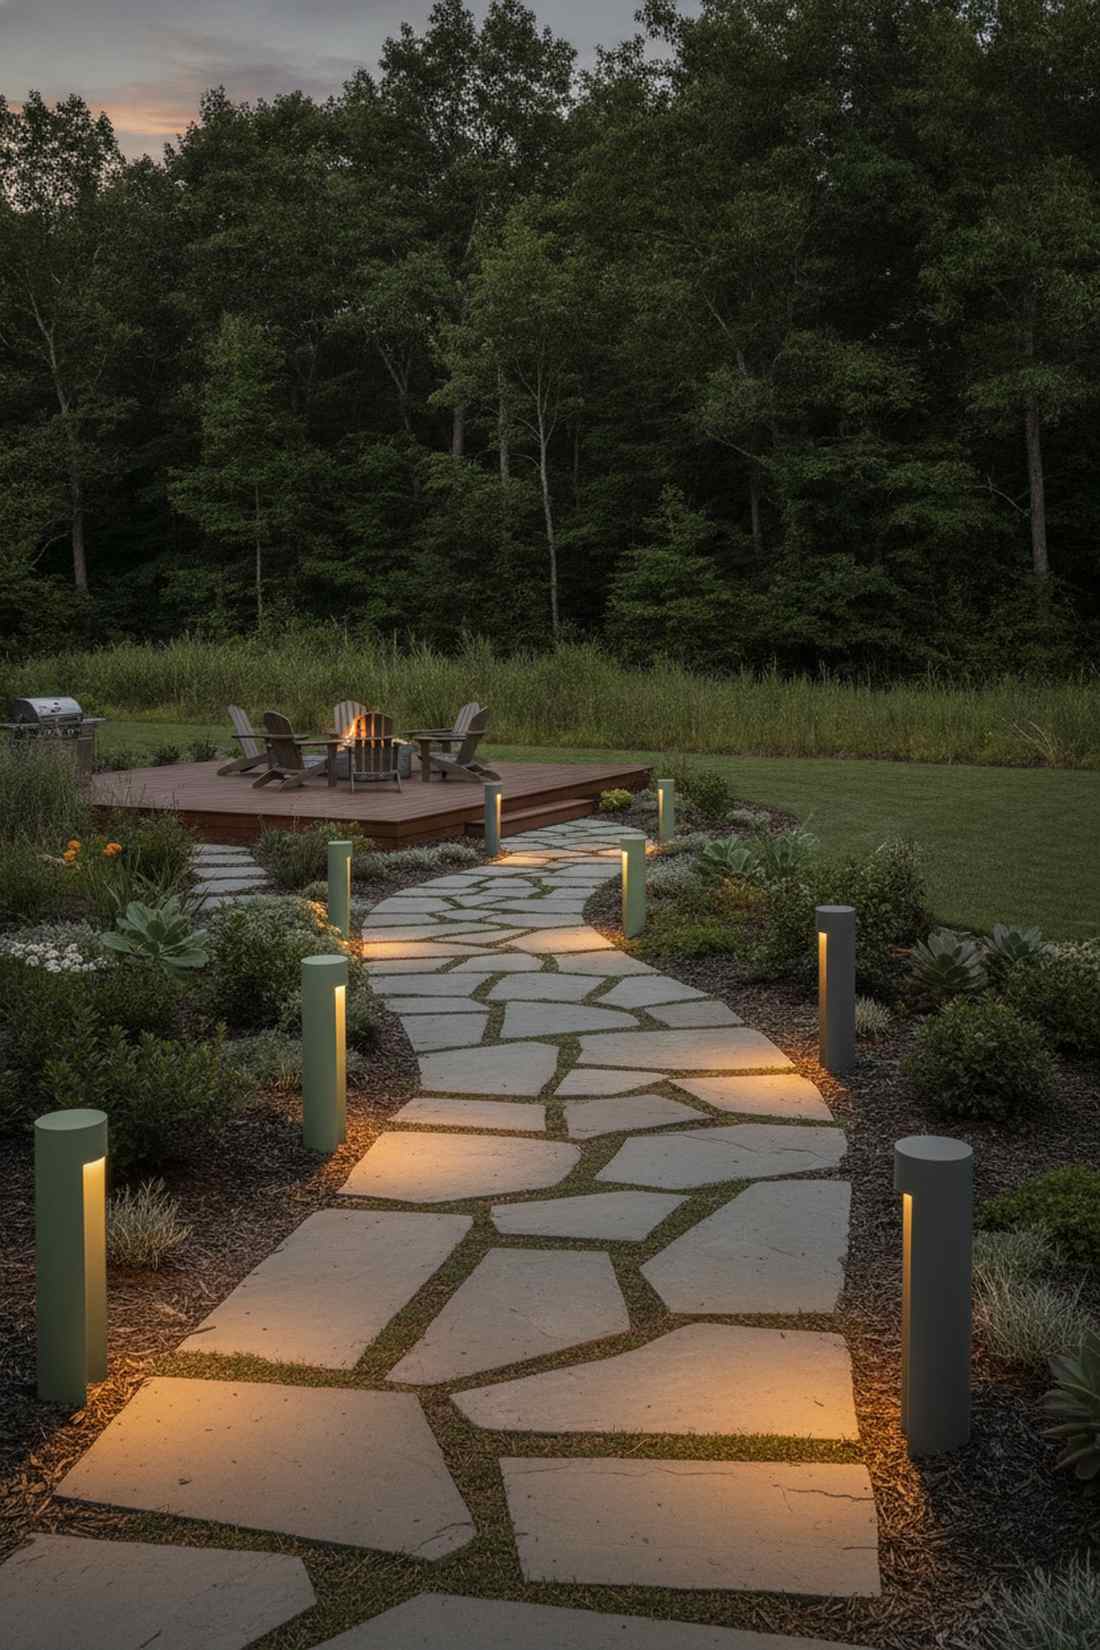
Walkway Illumination Strategies That Guide Movement
Proper outdoor lighting walkway design creates immediate visual cues that define borders without overwhelming natural plants. Fixture spacing heavily impacts whether a visitor feels guided by a continuous luxurious glow or scattered cheap dots.
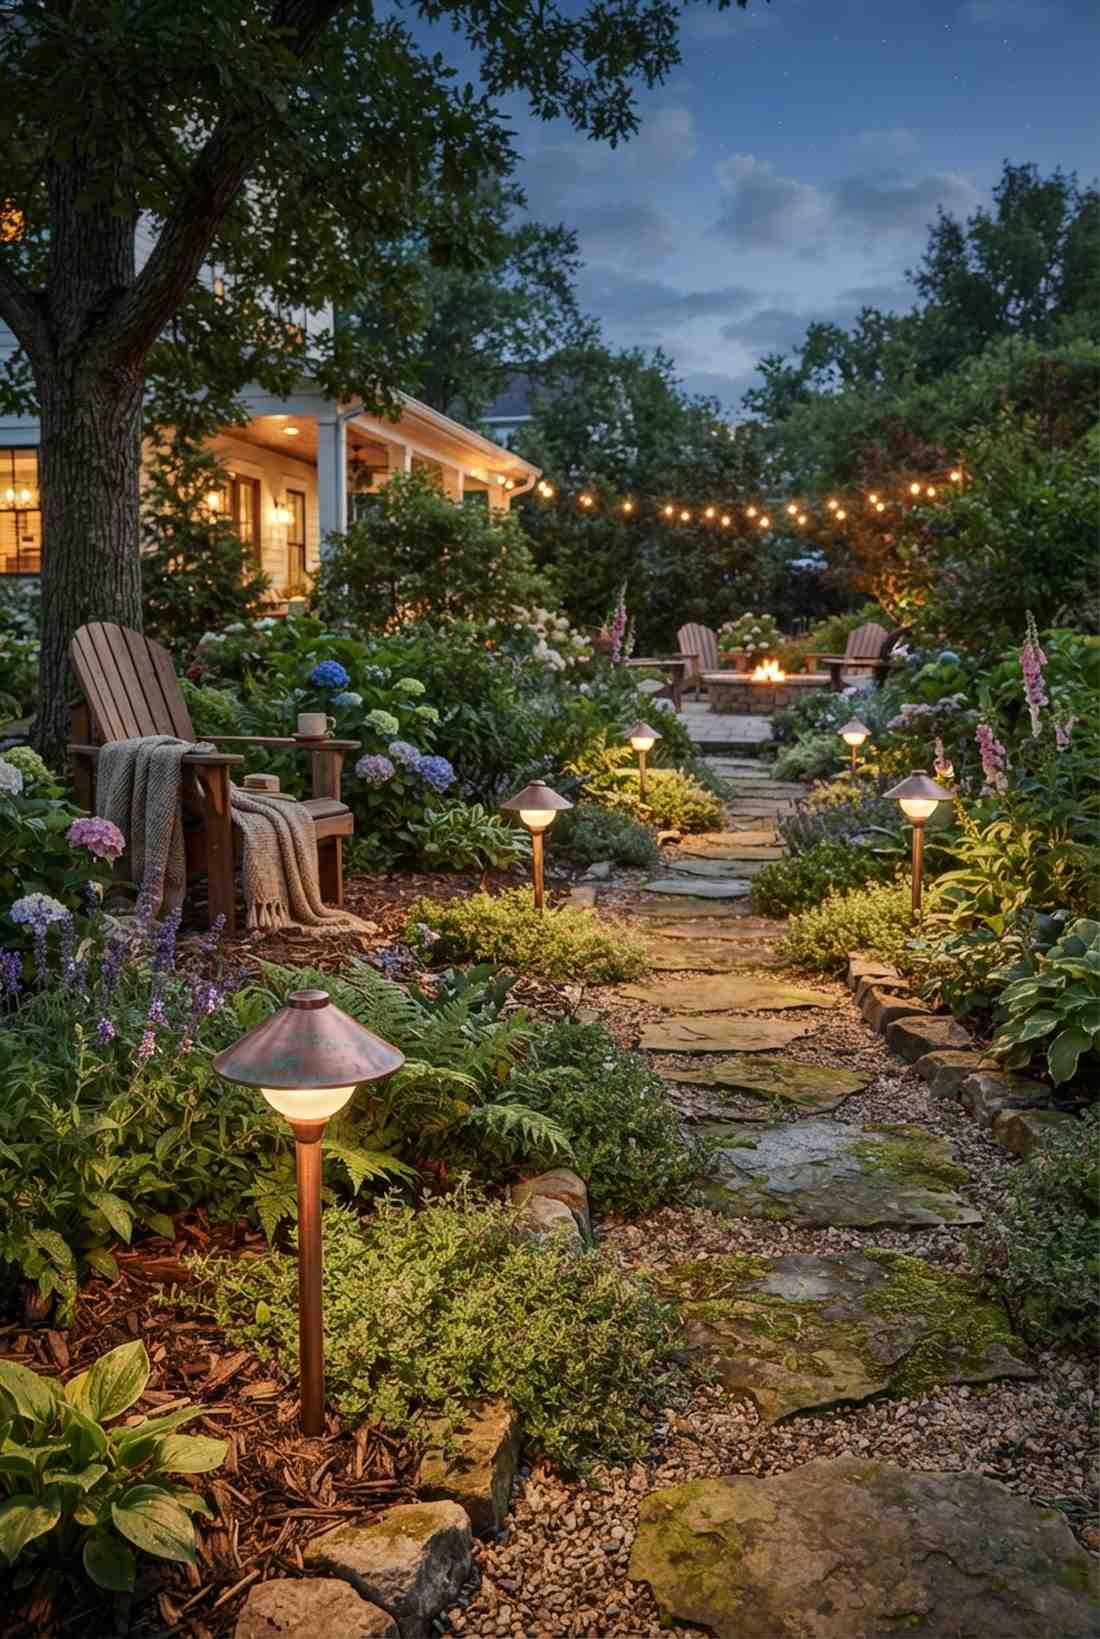
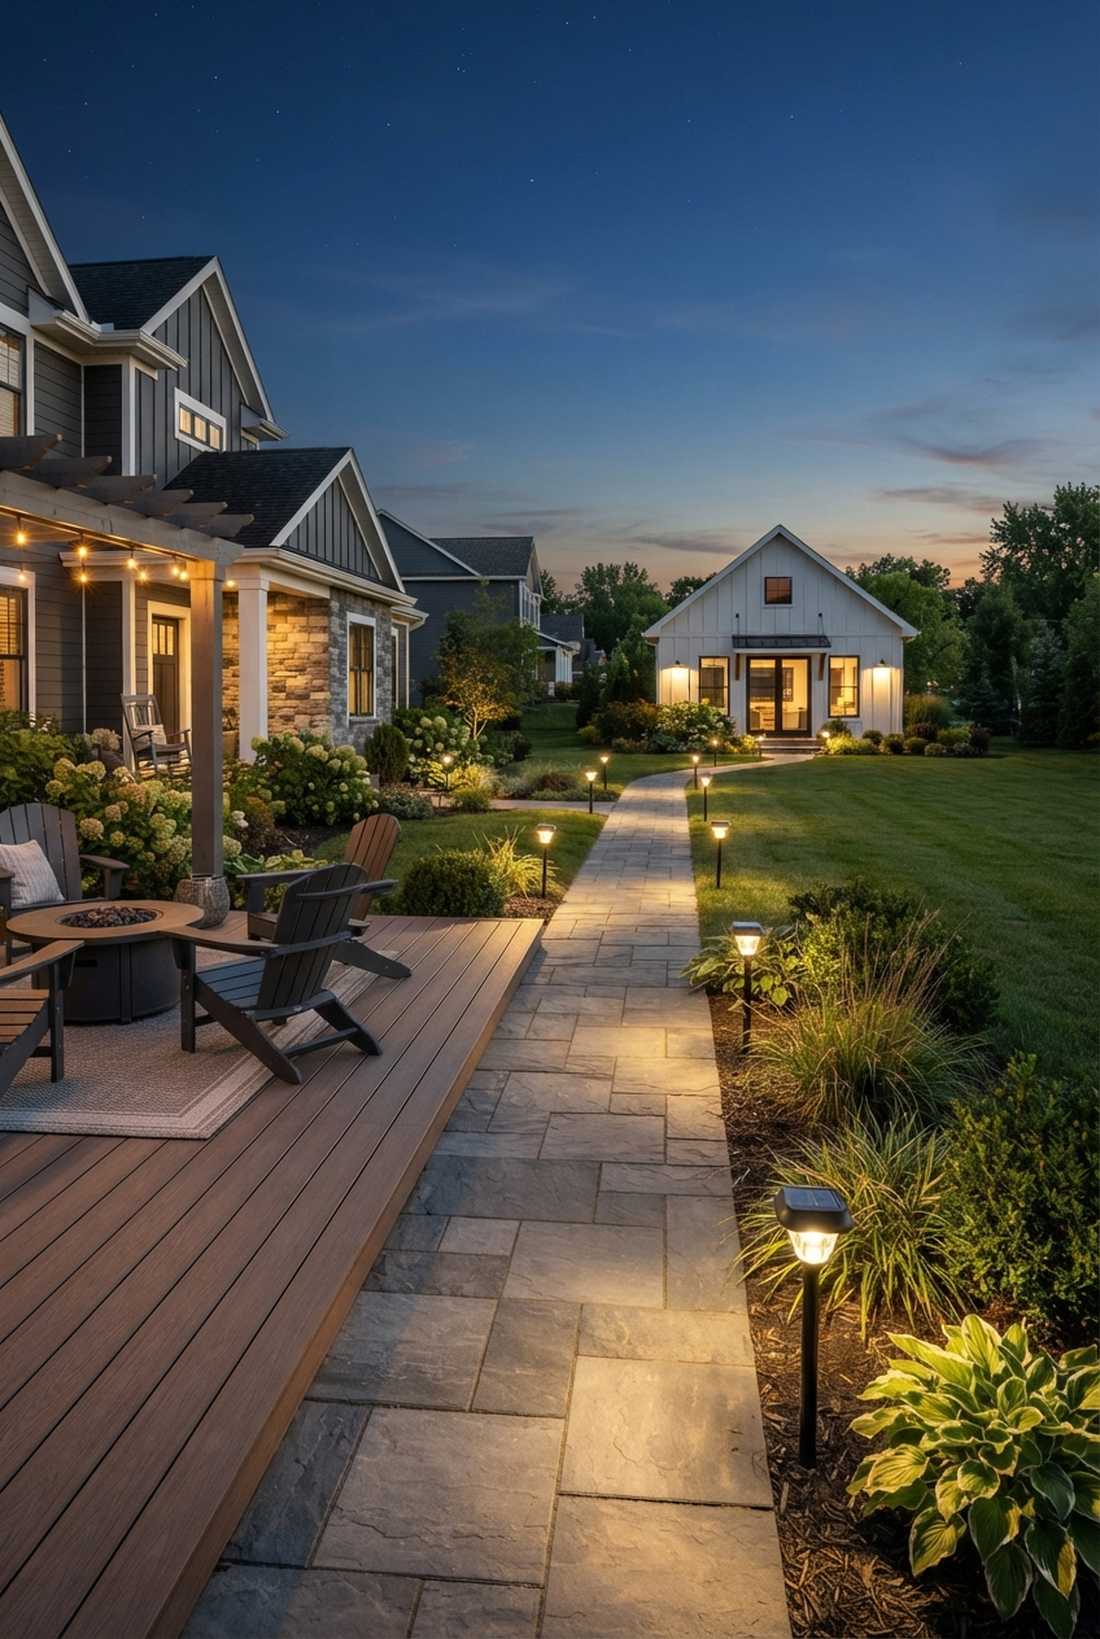
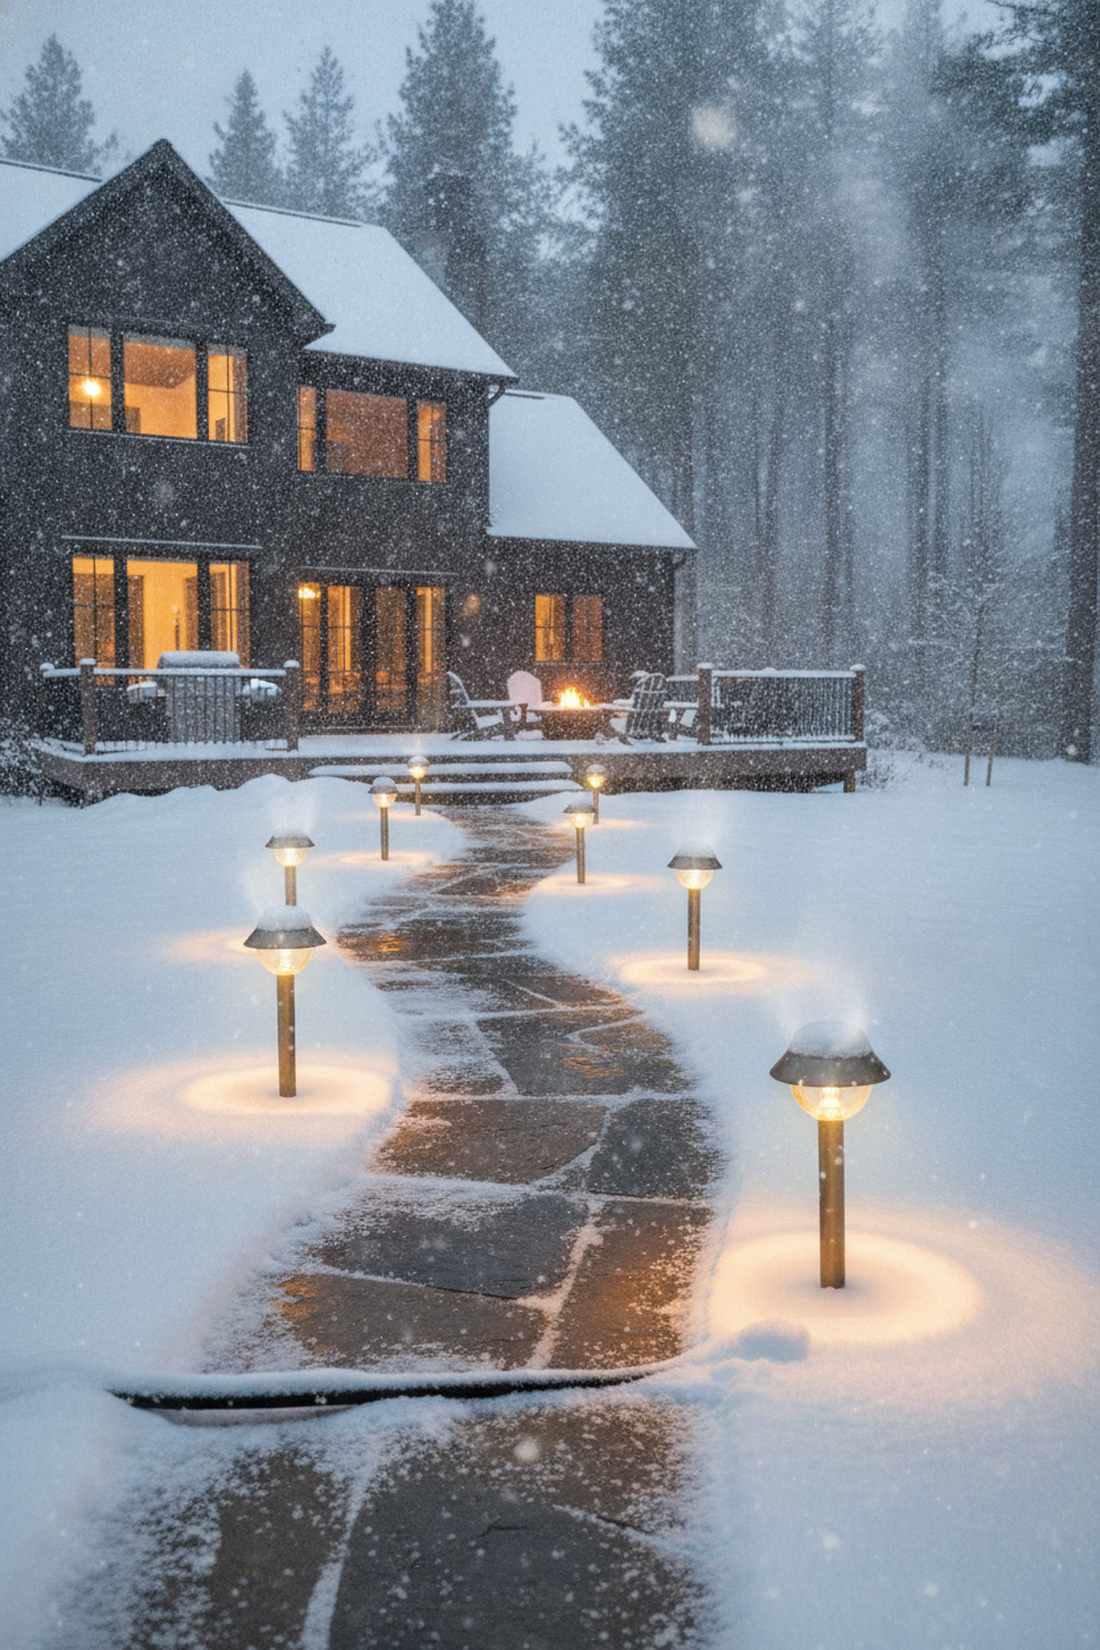
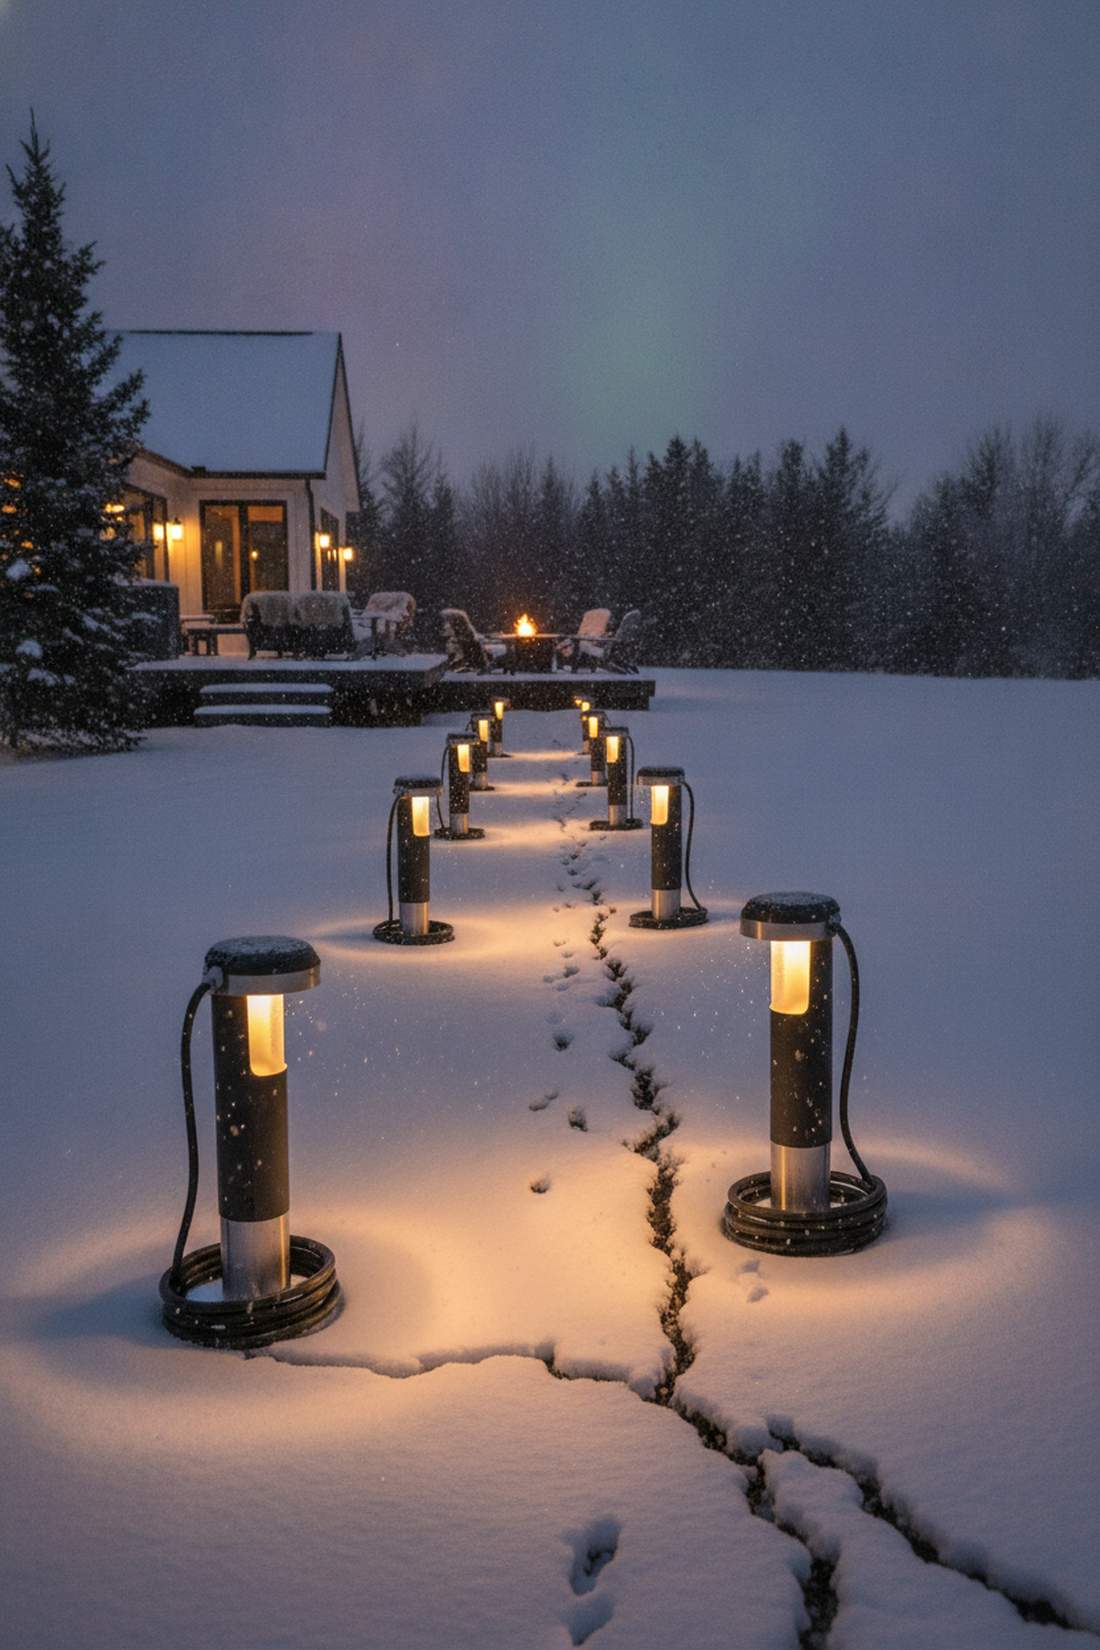
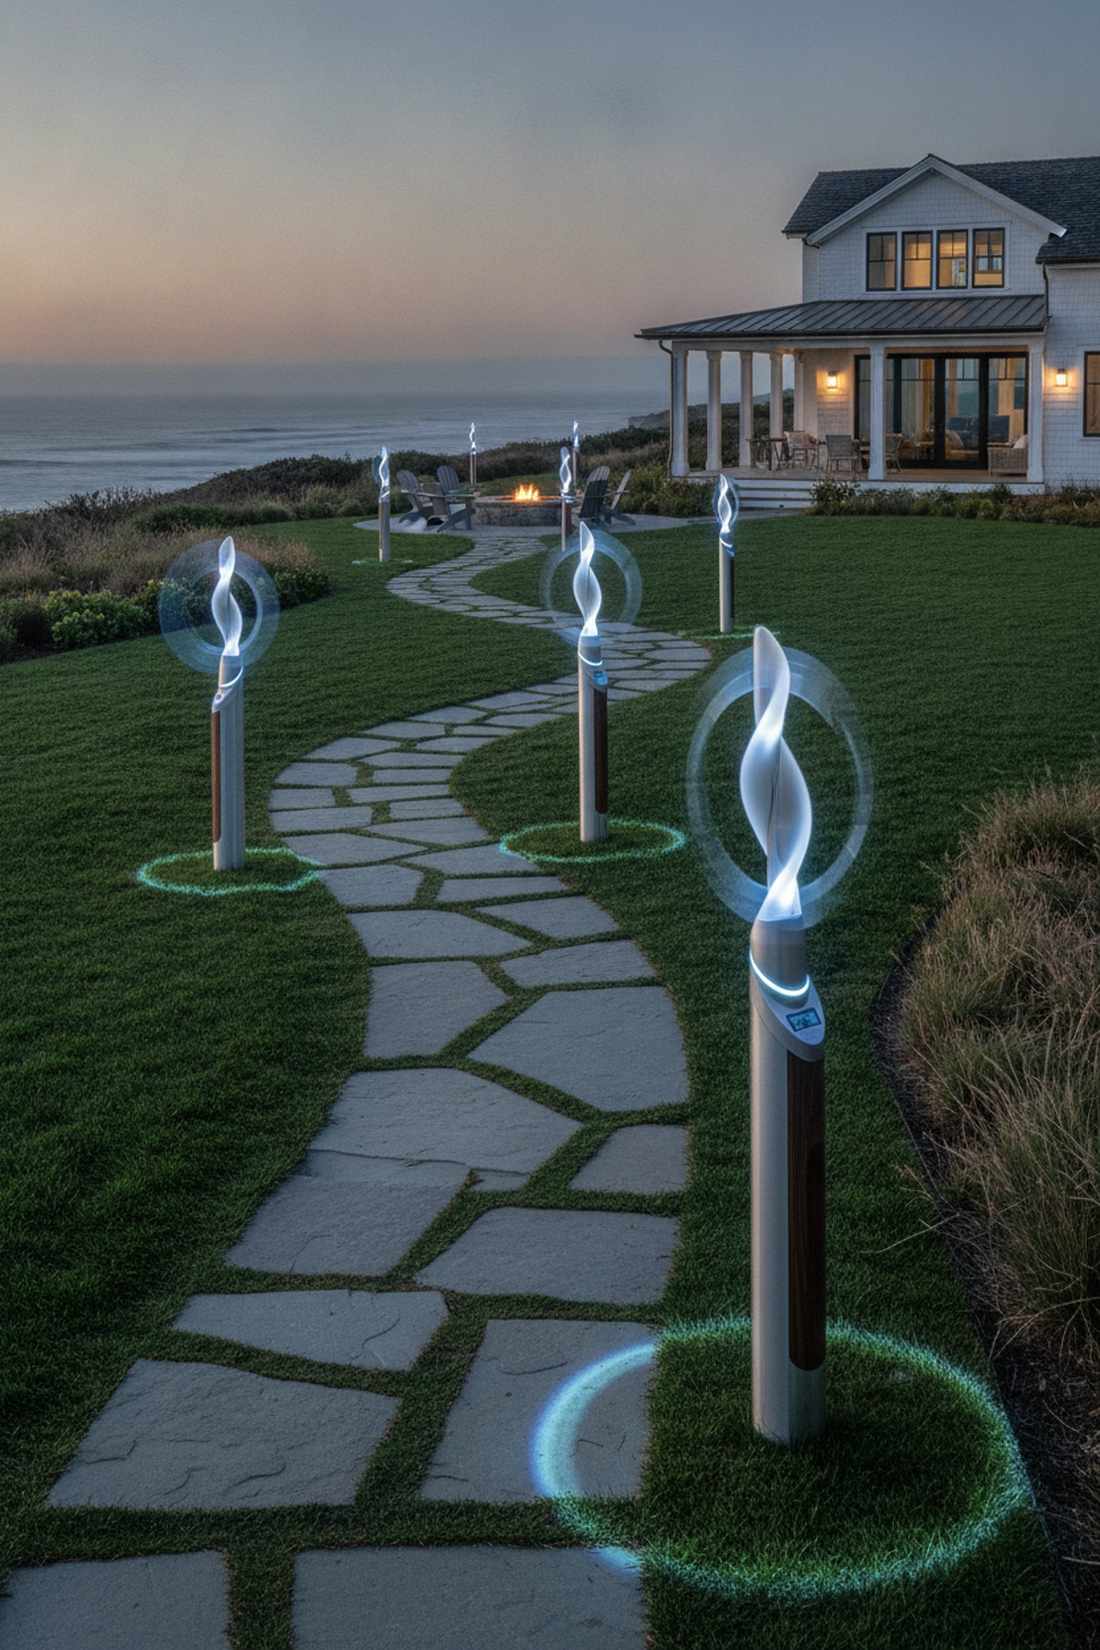
1. Low-Profile Path Stakes
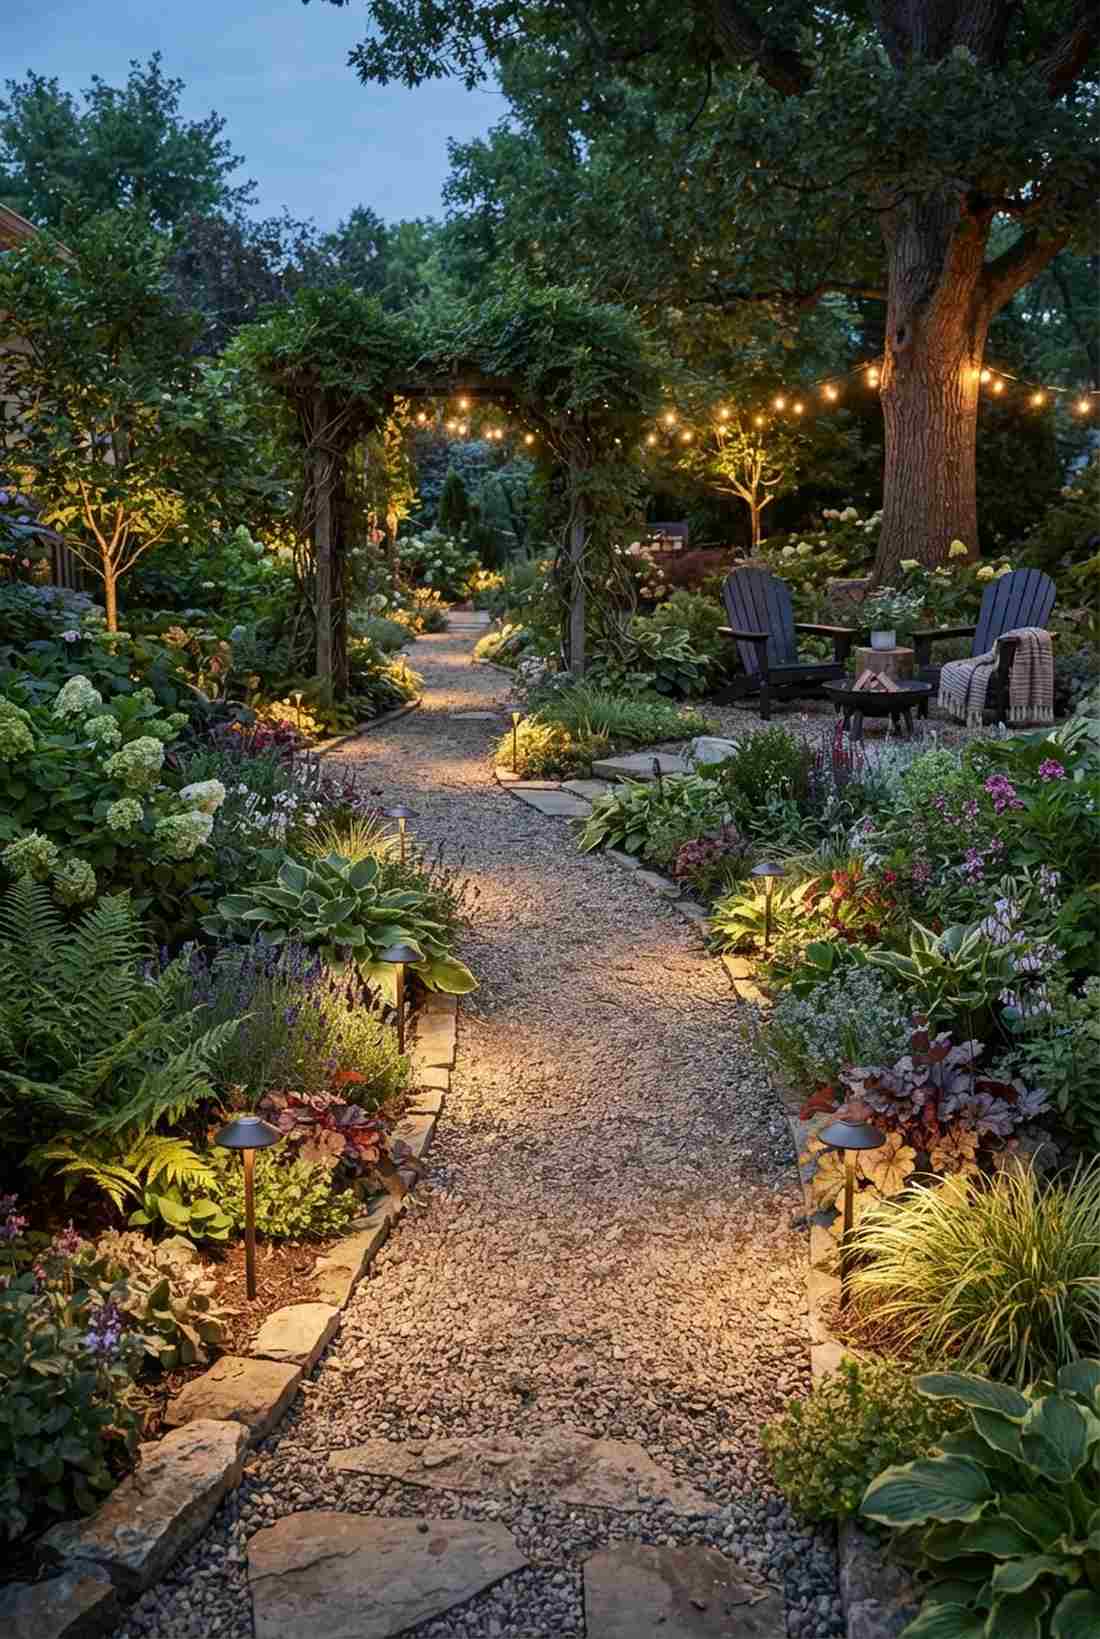
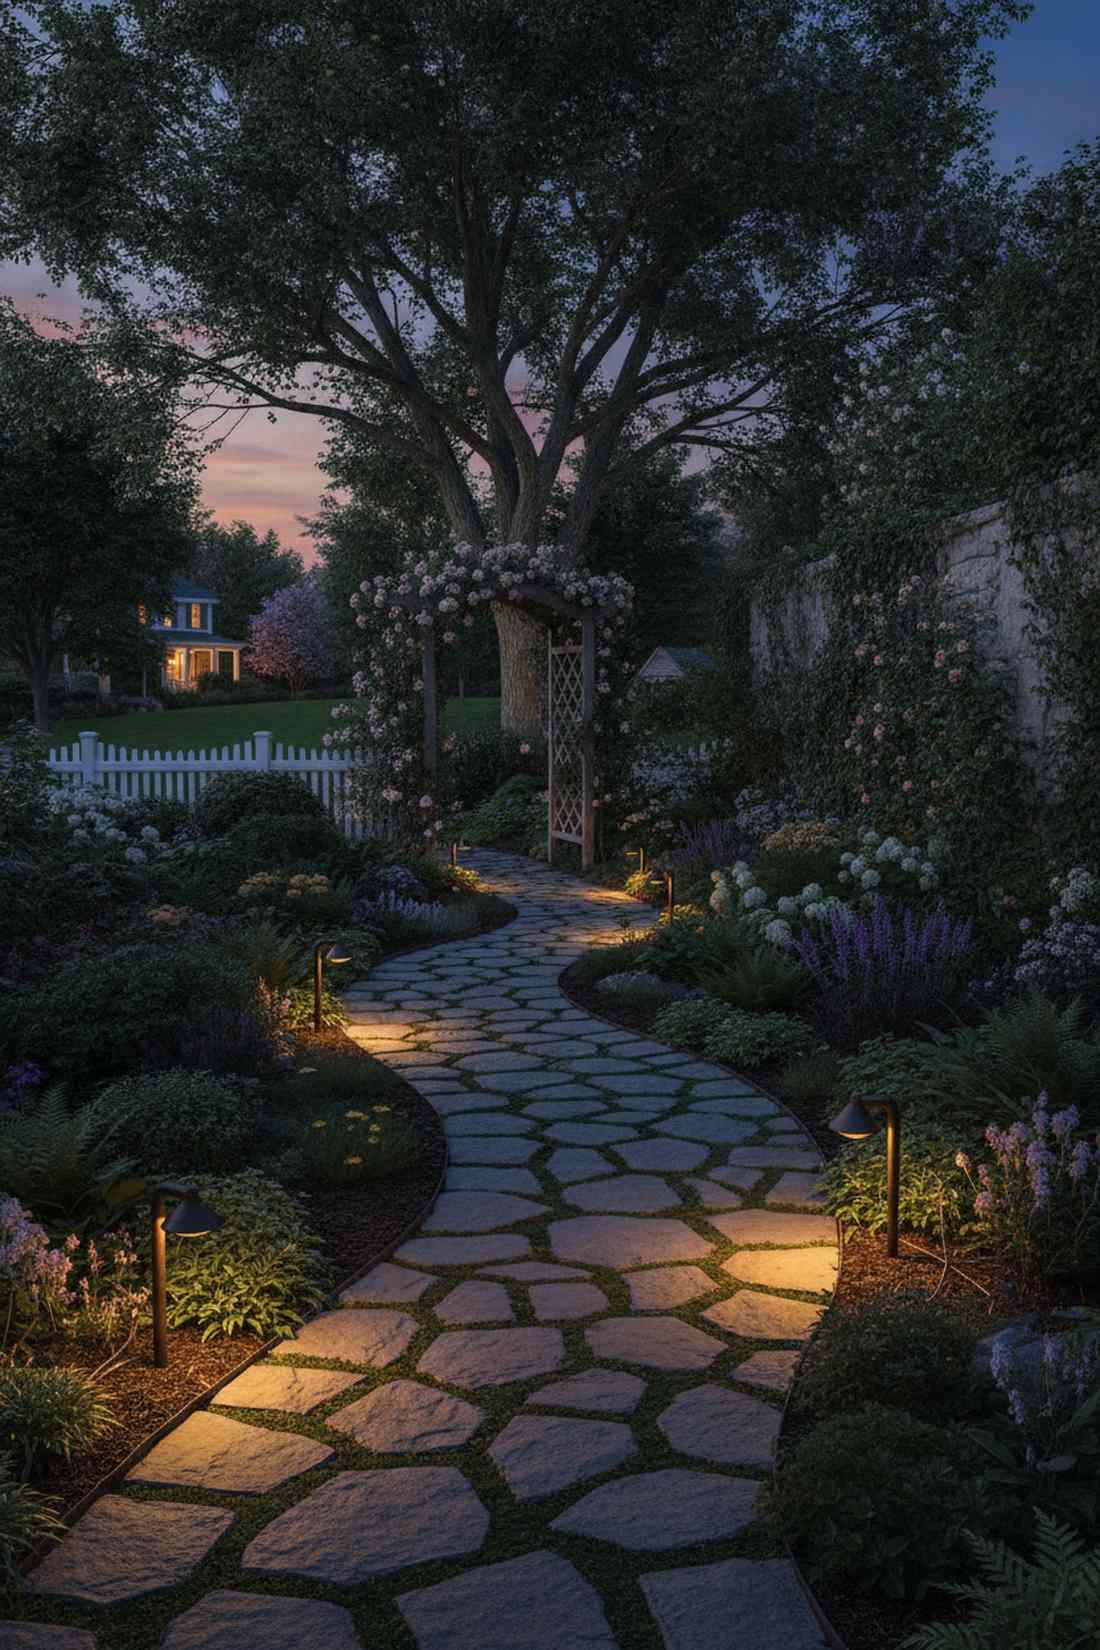
Feels like a magical glowing trail leading to a secret garden escape. Miniature garden path stakes work exceptionally well for narrow, heavily planted borders where tall fixtures feel intrusive.
Many homeowners mistakenly buy oversized lamps, but this subtle approach looks far more expensive than it is. Integrate professional low-voltage landscape lighting kits to ensure reliable all-night operation without blinding guests.
You can easily pull this off for around $25–$40 per illuminated section. Save this to your DIY weekend garden board for easy reference later.
- Key Materials: UV-coated powder-finish aluminum stakes.
- Vibe / Style: Secret botanical garden escape.
- Difficulty: Beginner-friendly quick push-in setup.
- Budget Breakdown: Stakes: $15 | Heavy-duty wiring: $10.
- Creator’s Tip: Angle the bulb hood slightly inward to highlight pavement textures.
- Smart Sourcing: Pre-wired mini brass stake lights (bulk pack) and waterproof quick-connect wire terminals.
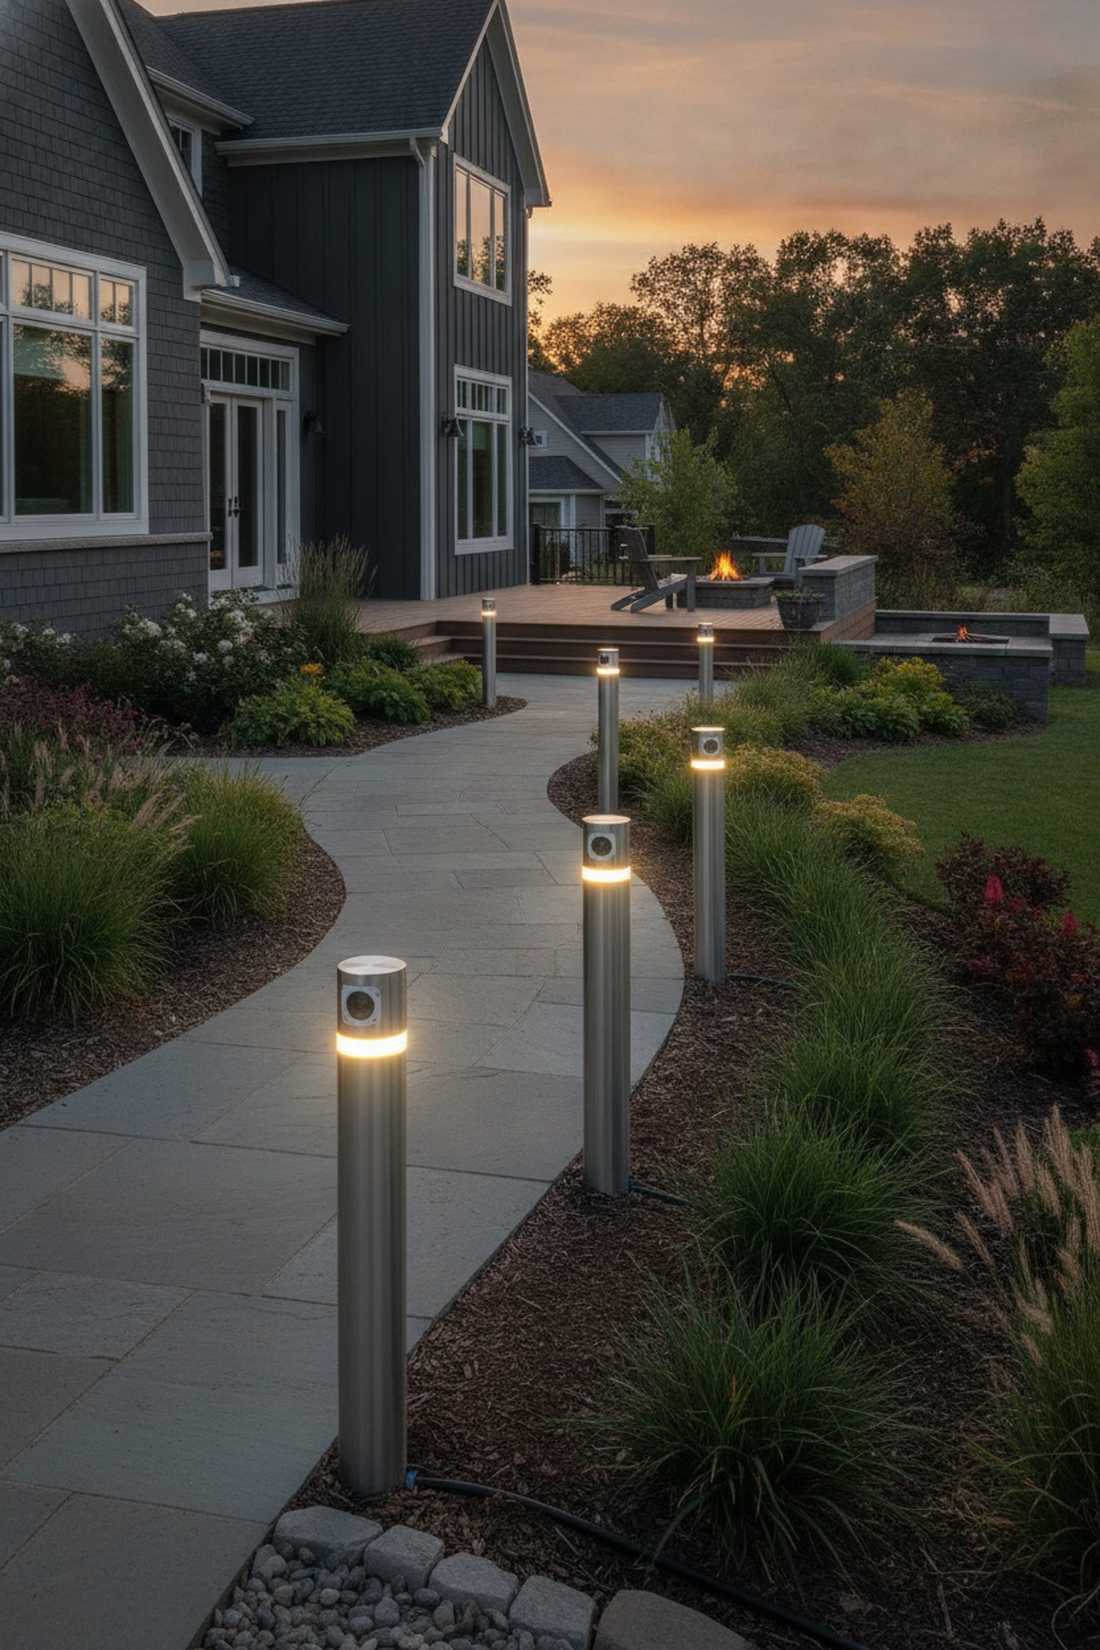
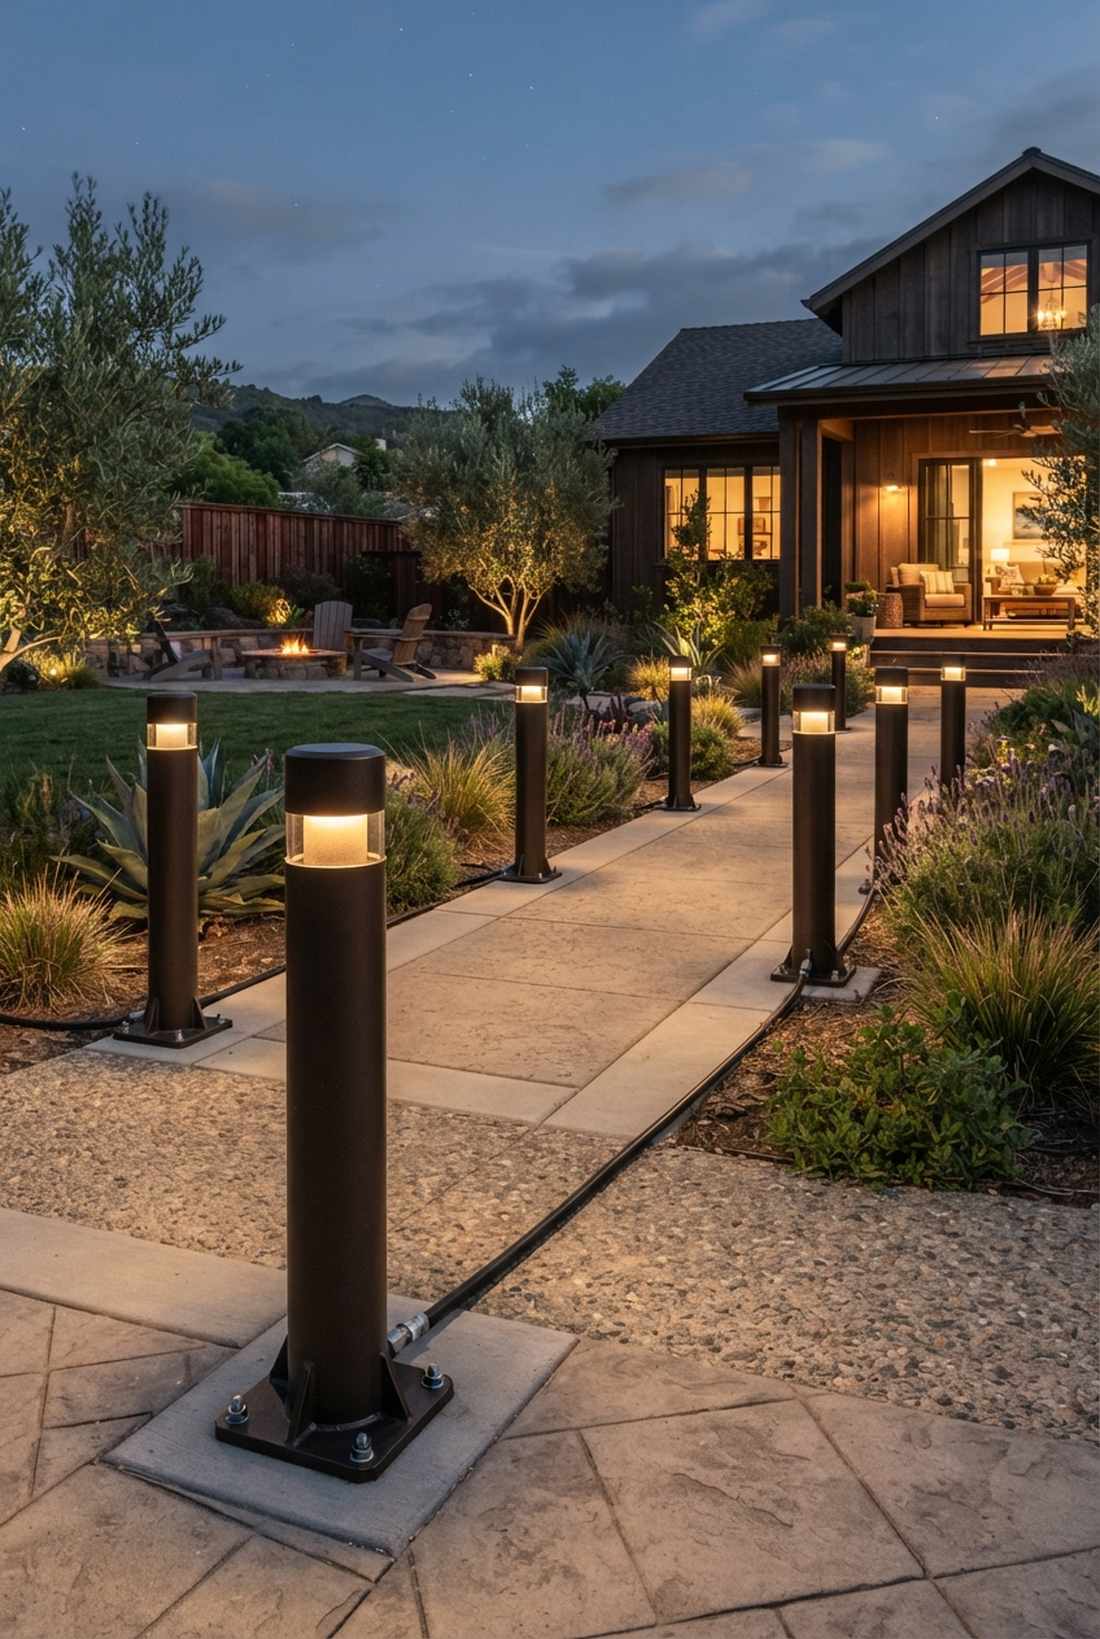
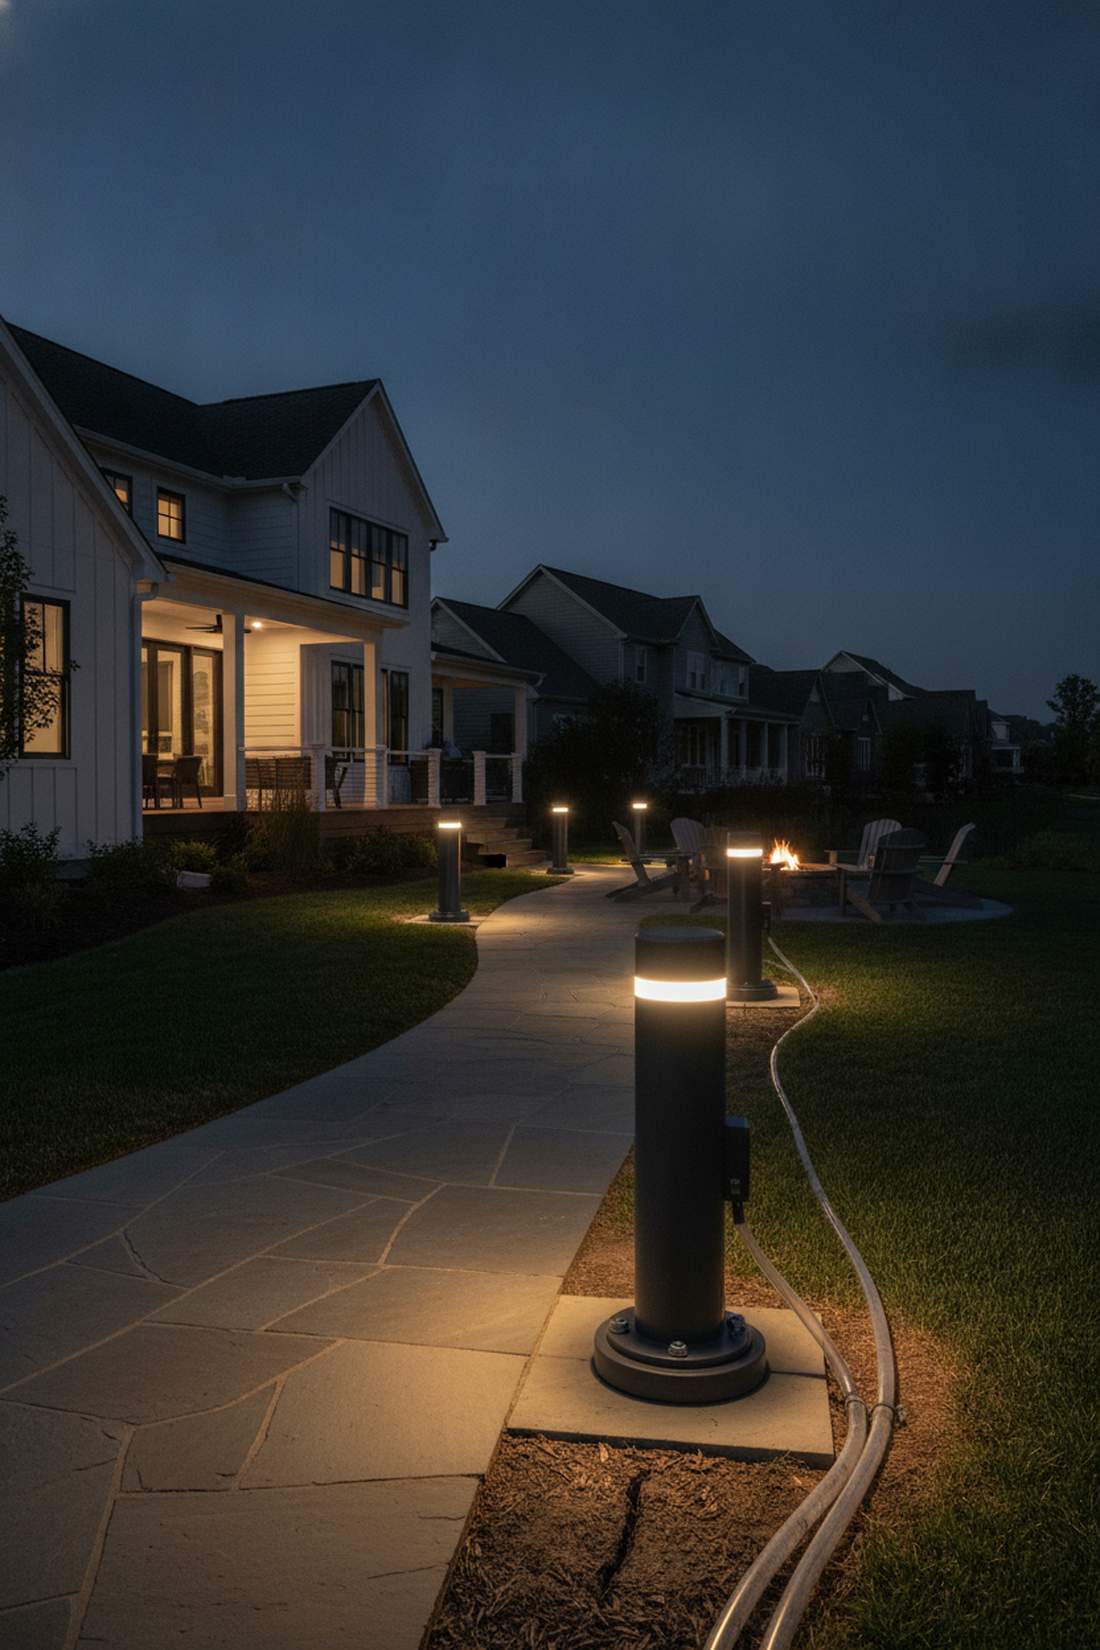
2. Staggered Walkway Fixtures
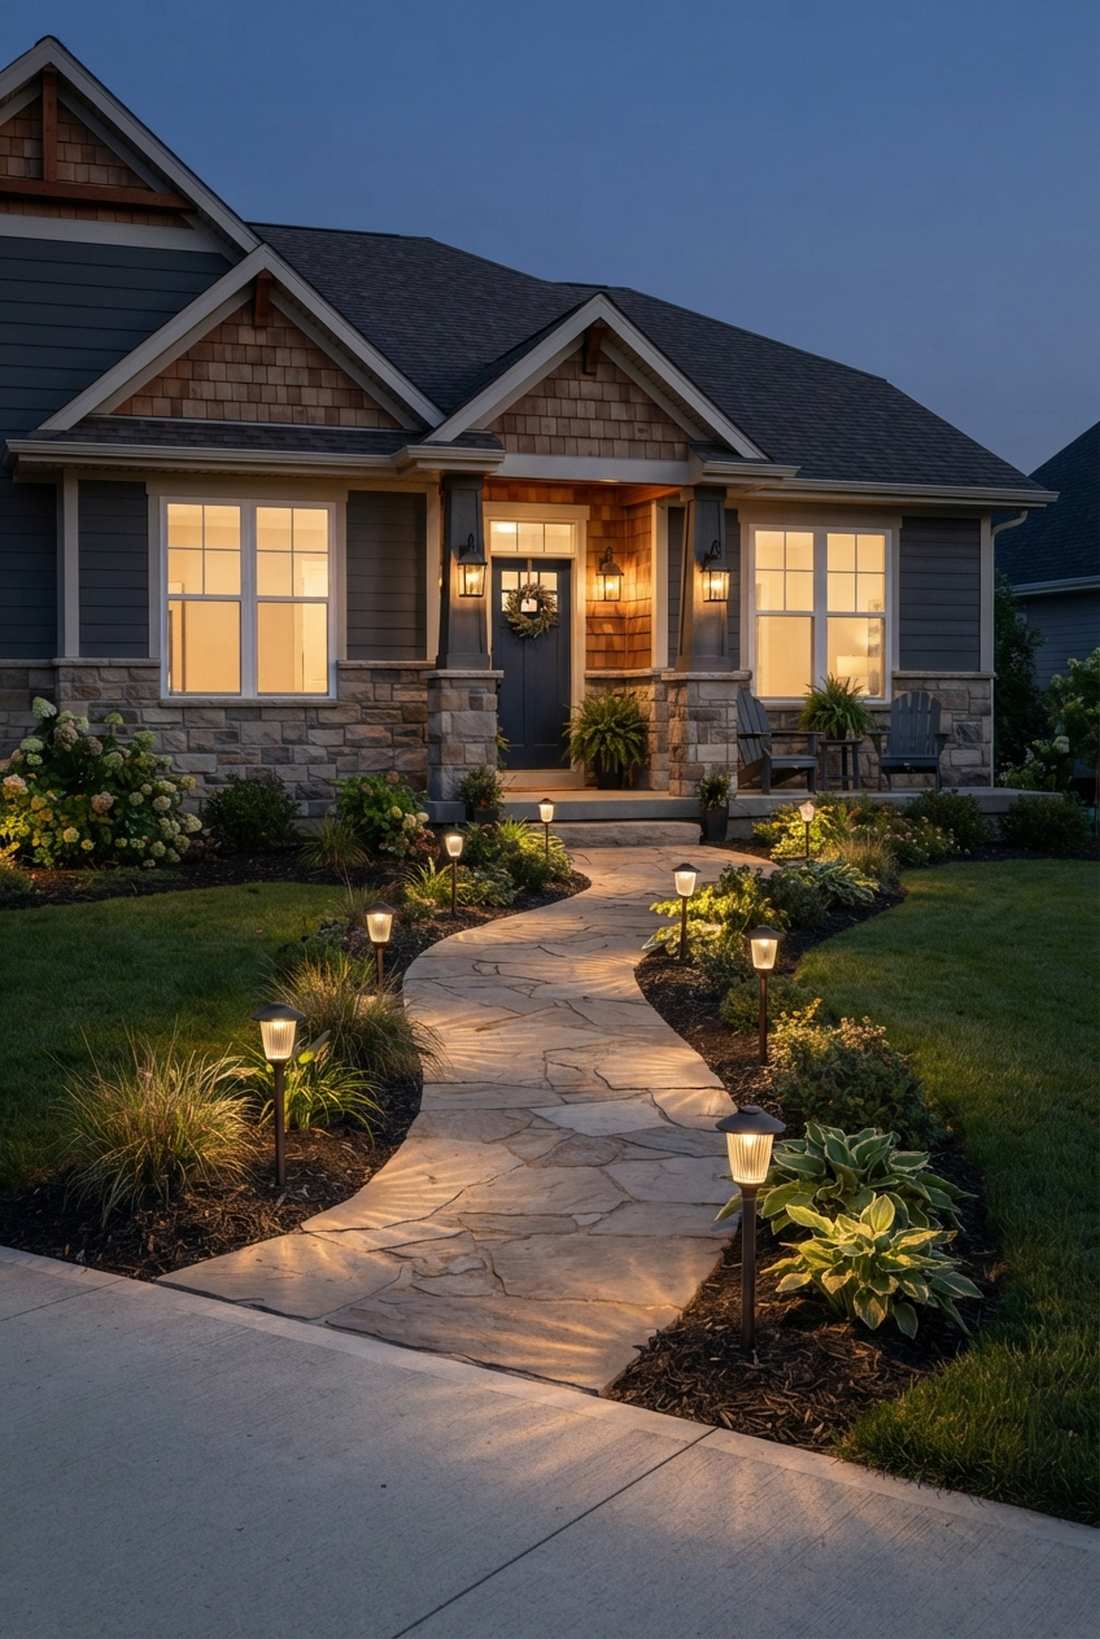
Gives off an inviting, rhythmic energy that completely transforms a boring front yard. Asymmetrical modern pathway decor is perfect for gently curved residential entryways needing a soft touch.
Symmetrical lines often look rigid and overly formal, whereas an alternating layout delivers a designer-level finish. Utilizing weatherproof path light sets allows you to achieve this elegant cascade effect while minimizing wire trenching.
Expect to invest about $30 per fixture for high-end optical clarity. It’s a fast upgrade that completely changes the evening vibe.
- Key Materials: Fluted glass lens LED pathway lamps.
- Vibe / Style: Relaxed contemporary luxury.
- Difficulty: Intermediate spacing and measuring.
- Budget Breakdown: Fixtures: $30 | Transformer: $45.
- Creator’s Tip: Map out the zigzag pattern with yard flags before digging any trenches.
- Smart Sourcing: Cast-aluminum staggered path lights (starter kits) and heavy-duty landscape wire spools.
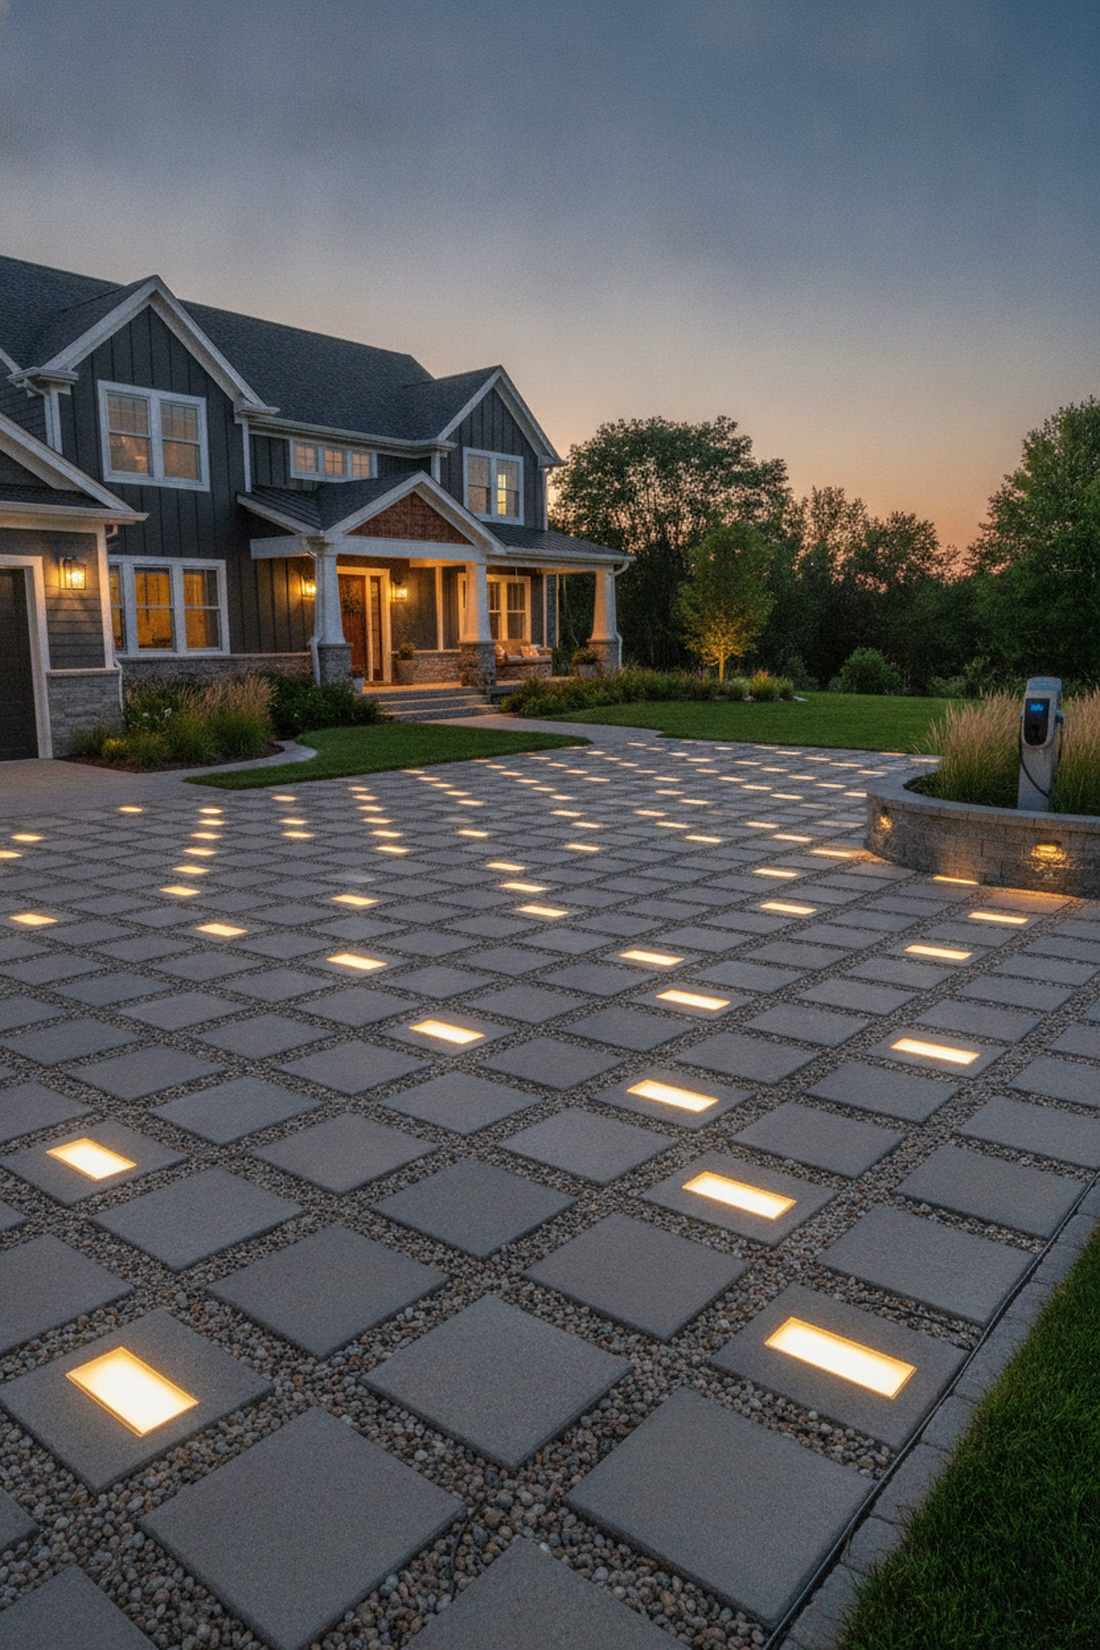
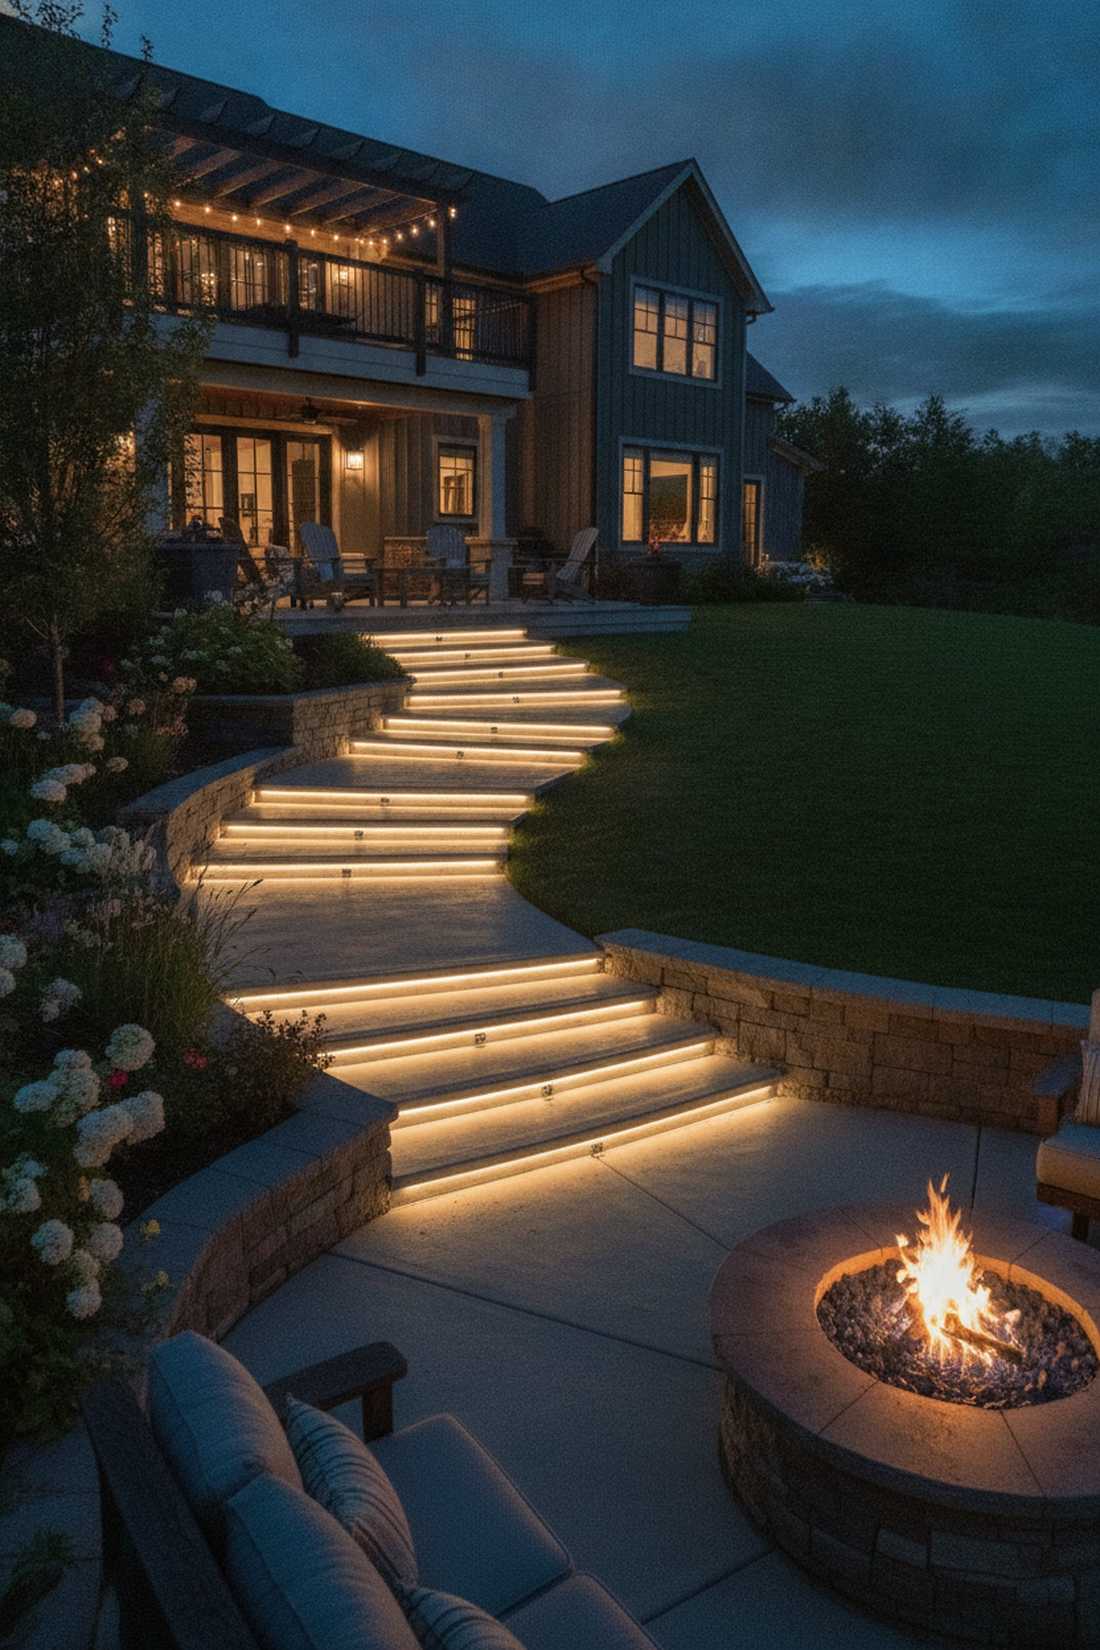
3. Recessed Pathway Markers
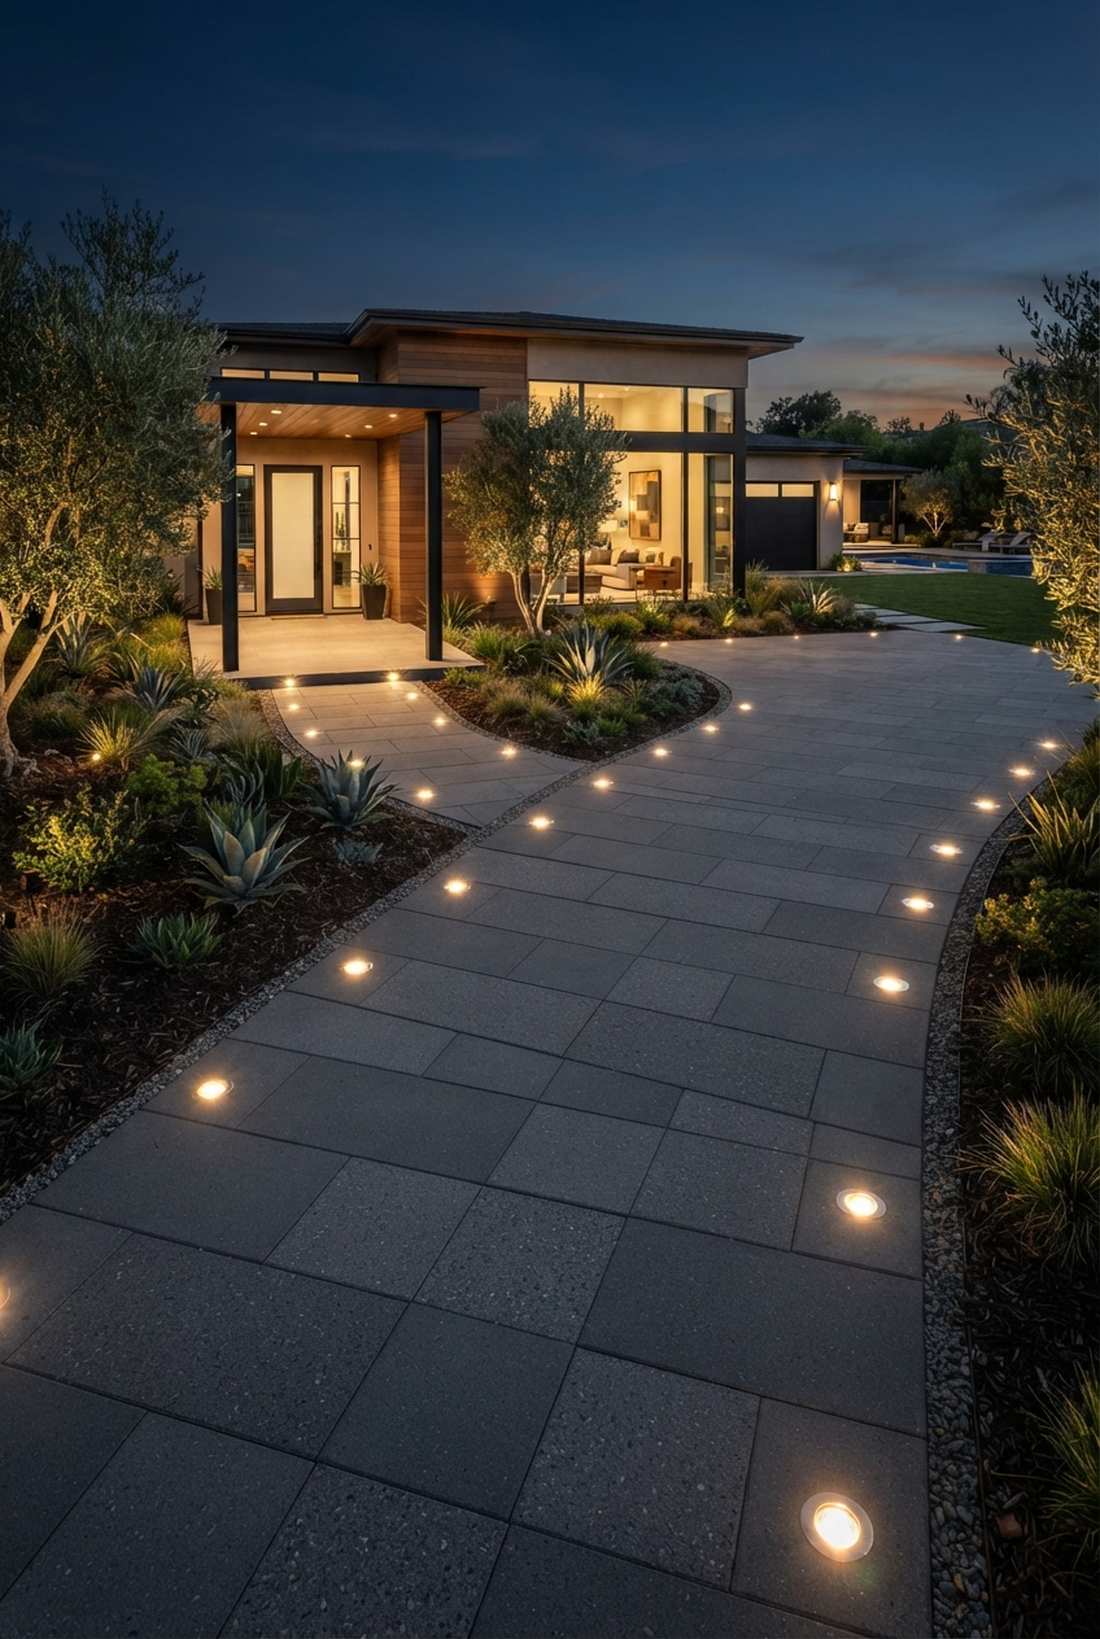
Feels like walking down an exclusive five-star resort promenade. Flush-mount ground lighting features are brilliant for commercial plazas or seamless minimalist driveway borders.
Surface lights constantly get kicked or run over, making recessed housings a highly durable and visually striking alternative. Securing commercial grade drive-over LEDs guarantees your investment survives heavy foot traffic and lawnmowers.
This layout costs roughly $45–$65 per flush marker depending on load ratings. Pin this if you’re planning a sophisticated hardscape upgrade.
- Key Materials: Tempered glass load-bearing puck lights.
- Vibe / Style: Ultra-sleek architectural minimalism.
- Difficulty: Advanced concrete or paver cutting required.
- Budget Breakdown: Markers: $45 | Sealant/Base: $15.
- Creator’s Tip: Ensure a 2-inch gravel base under each light for optimal water drainage.
- Smart Sourcing: IP67-rated recessed well lights (multi-pack) and outdoor-grade silicone sealant tubes.
4. Edge-Lit Stone Borders
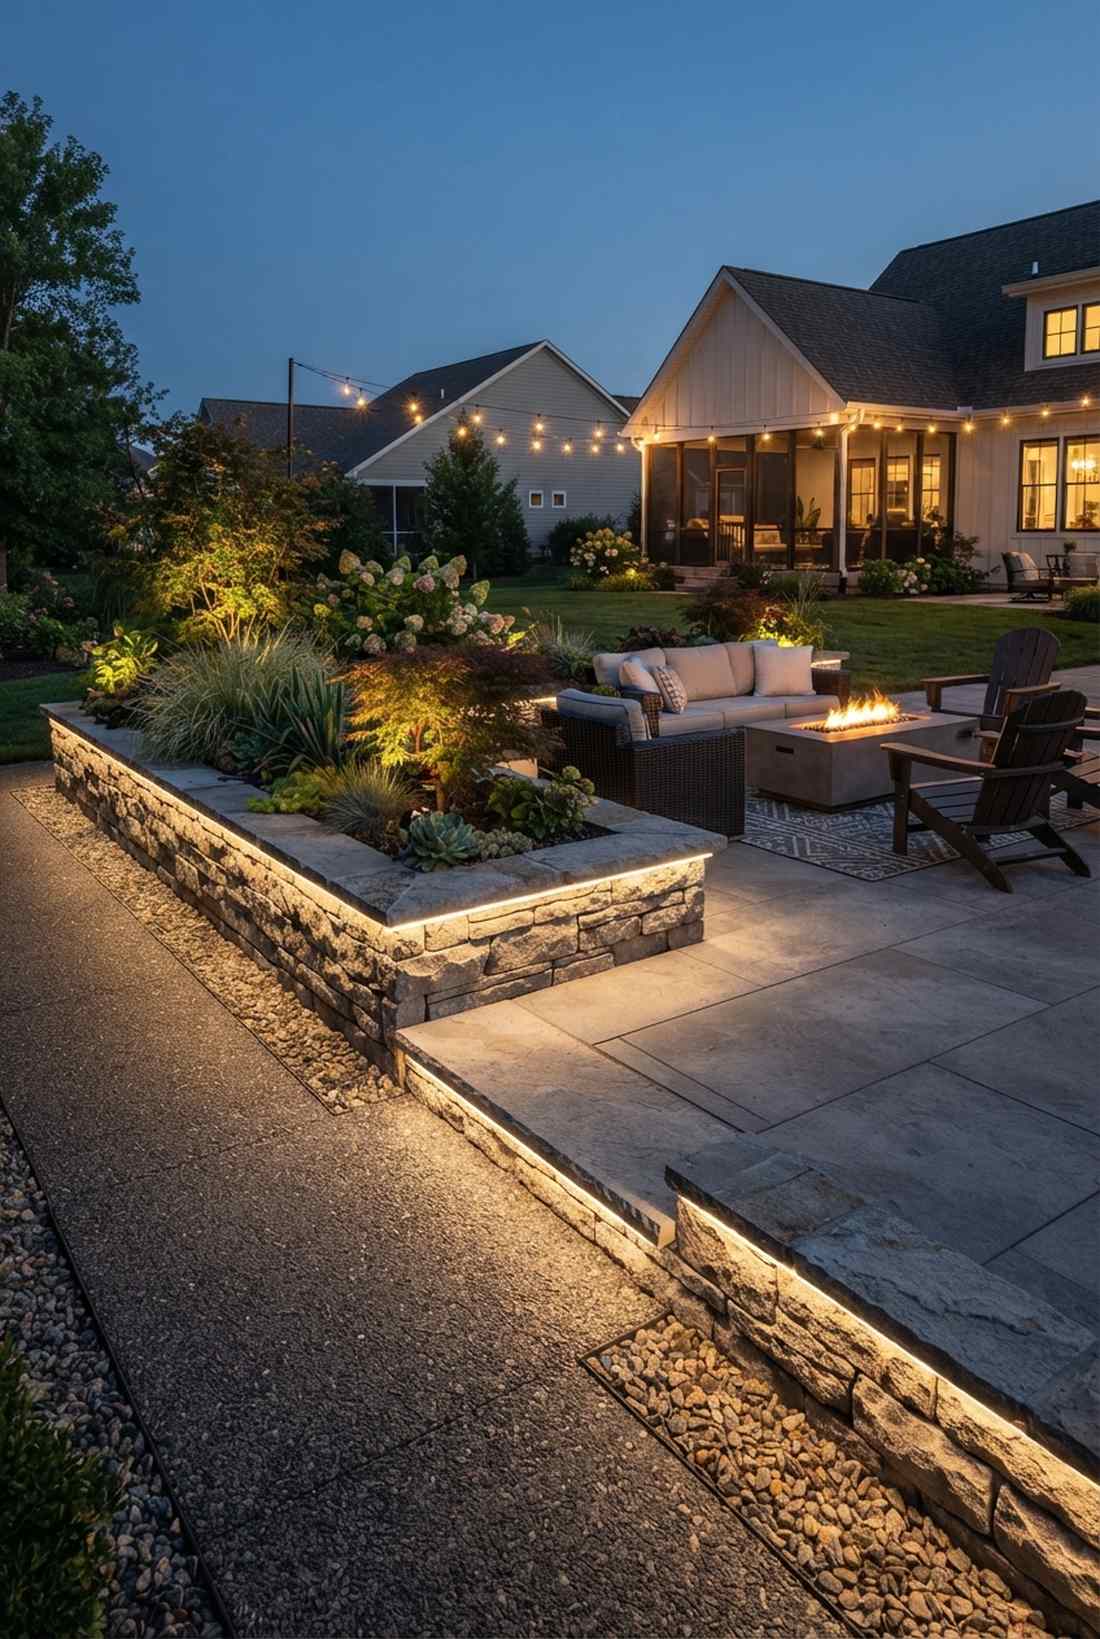
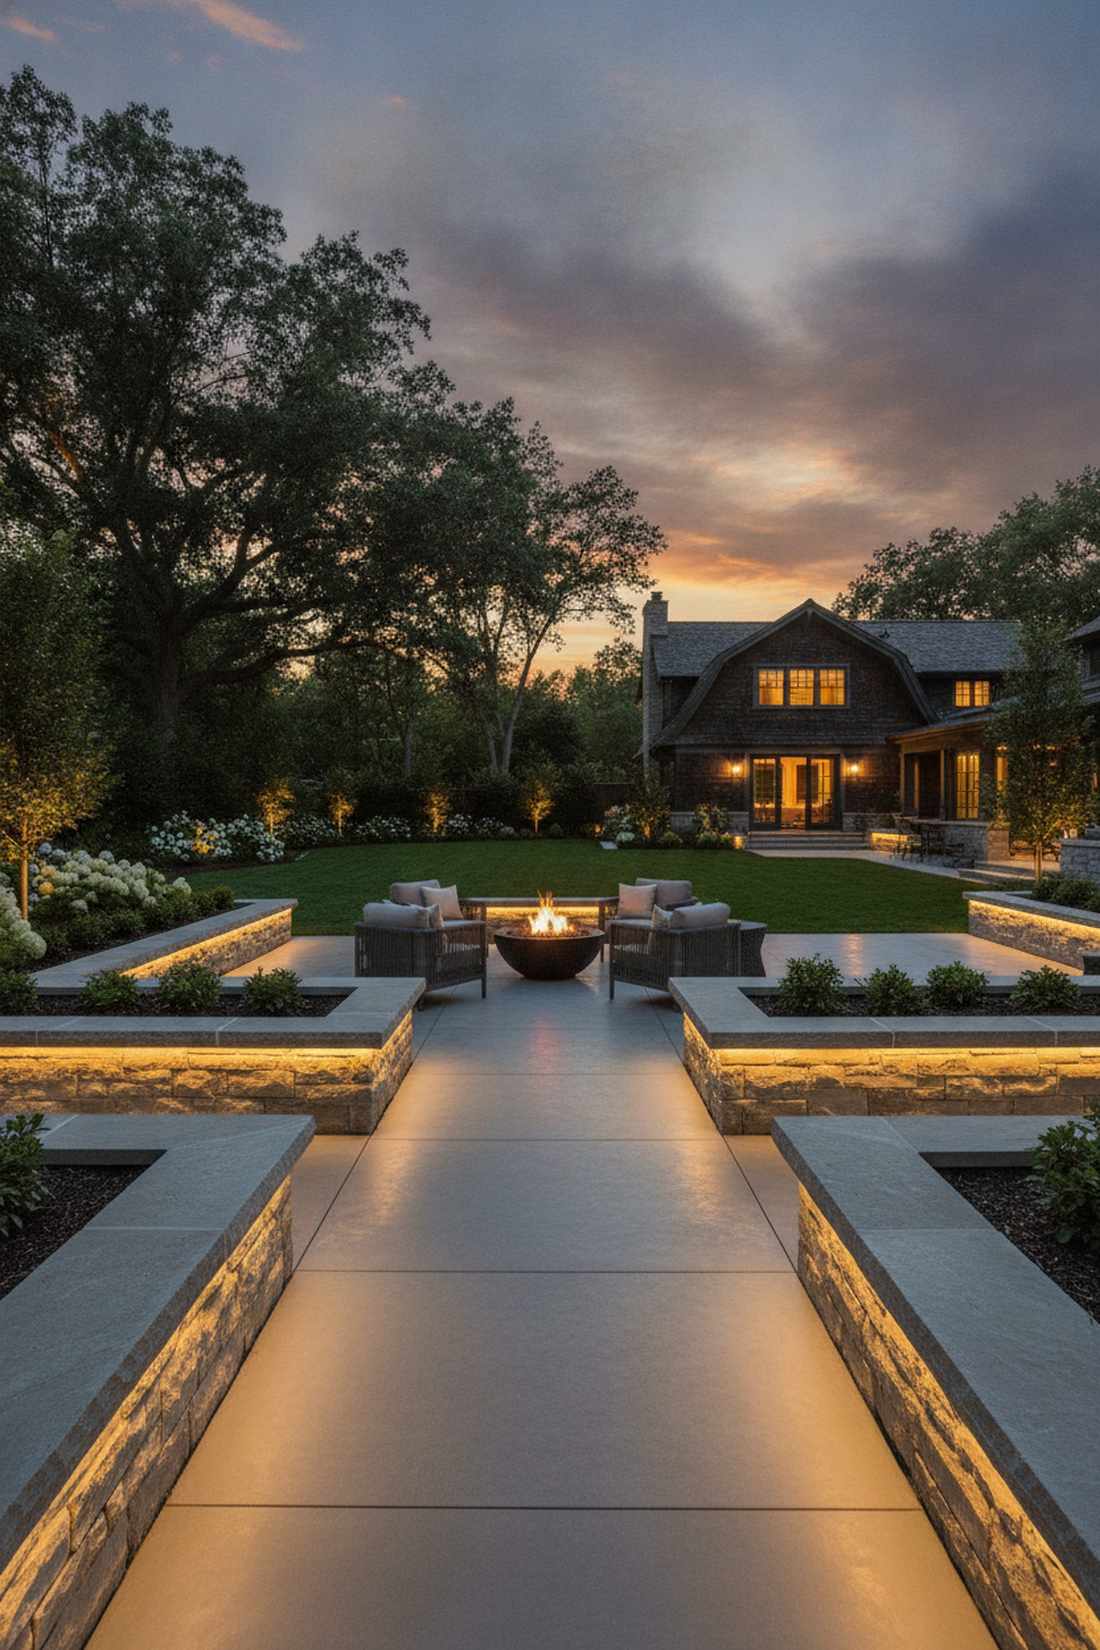
Radiates a captivating floating effect straight out of a modern art museum. Hidden linear LED border lights completely elevate raised planters and stone coping edges.
Traditional spotlights create harsh shadows, but this hidden strip method provides an incredibly smooth, continuous glow. Installing UV-coated exterior LED tape lights ensures the silicone jacket won’t yellow or crack under the sun.
This impressive illusion runs about $3–$5 per linear foot. Highly recommended if you want maximum visual impact with zero visible hardware.
- Key Materials: Flexible warm-white waterproof LED strips.
- Vibe / Style: Ethereal floating stonework.
- Difficulty: Easy peel-and-stick with minor wiring.
- Budget Breakdown: Strip spool: $25 | Aluminum channels: $15.
- Creator’s Tip: Always mount the strips facing downward to wash the stone and prevent direct eye glare.
- Smart Sourcing: Cuttable waterproof LED light strips (50ft spool) and extruded aluminum diffuser channels.
You probably haven’t considered the next layout, but it makes cheap materials look completely custom…
5. Mushroom Cap Diffusers
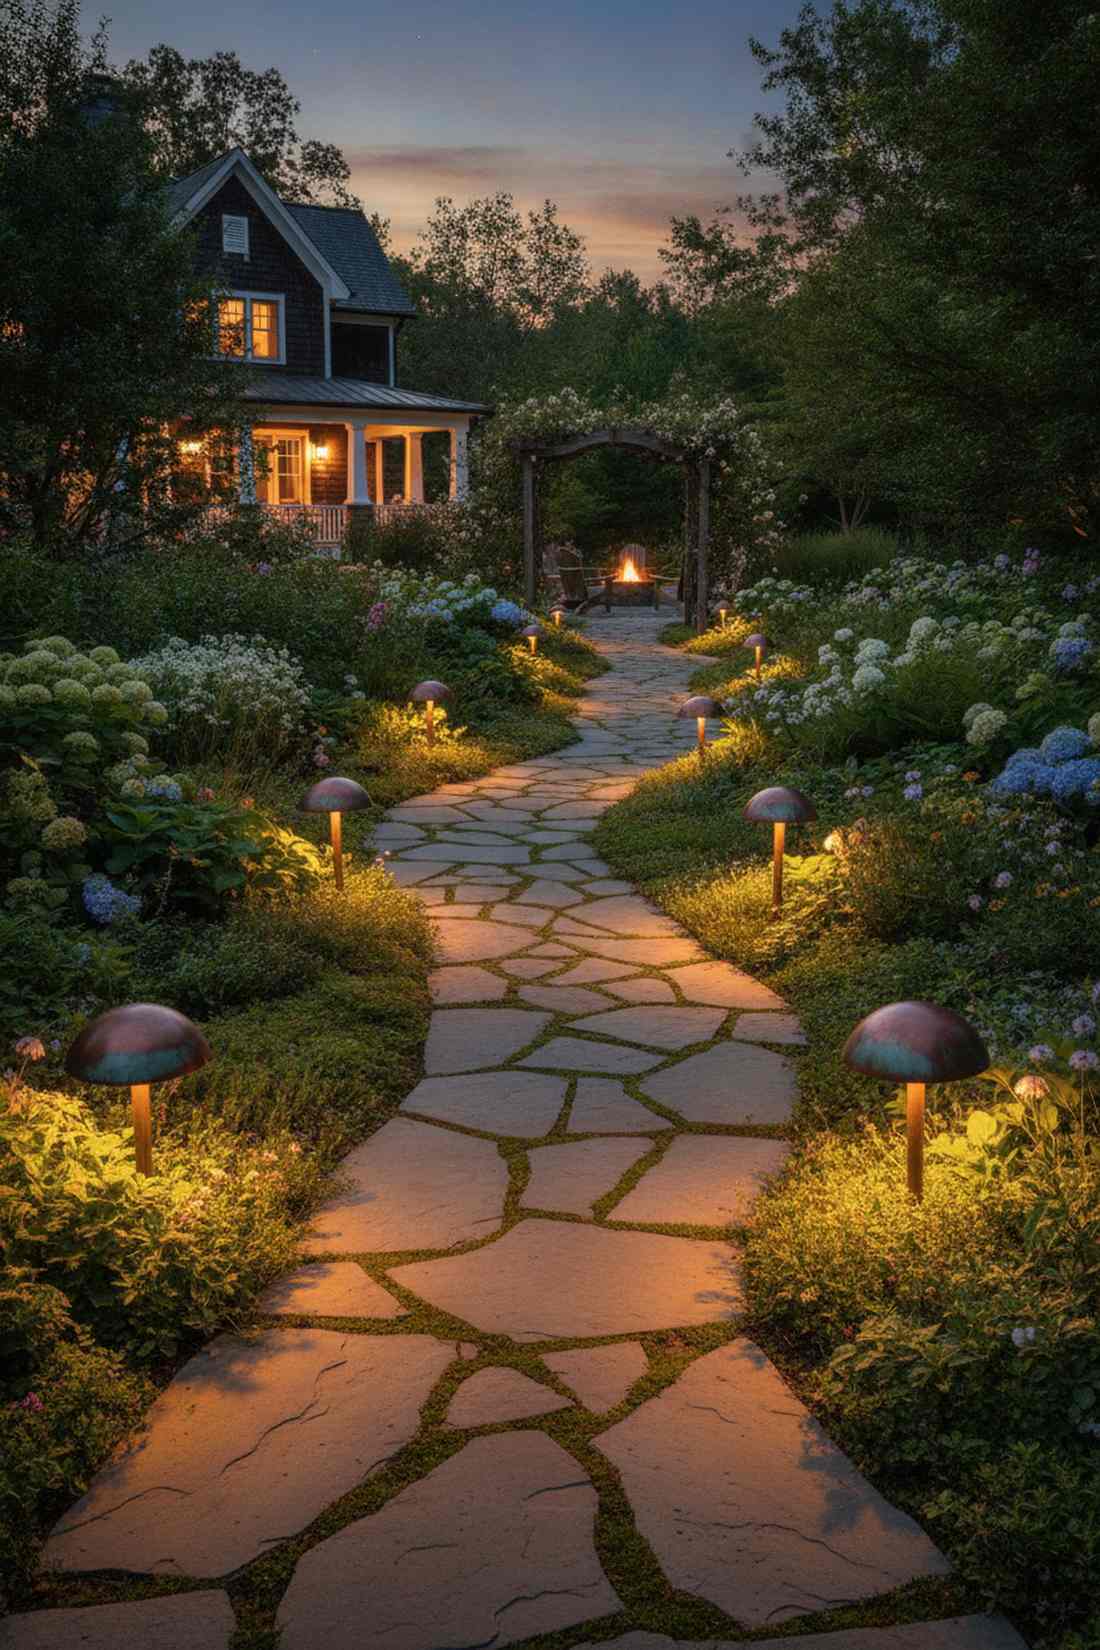
Feels like stepping into a peaceful enchanted forest straight out of a fairytale. Wide-spread botanical path lights are the ultimate choice for winding gardens rich with groundcover.
Directional spots leave plants in the dark, but a 360-degree dome cap washes both the walkway and surrounding flora beautifully. Sourcing high-quality copper landscape lighting supplies allows the fixtures to develop a stunning natural patina over time.
You can achieve this elegant spread for about $35–$50 per unit. Save this to your whimsical landscaping inspiration board!
- Key Materials: Spun-copper dome lights with frosted lenses.
- Vibe / Style: Classic cottage core elegance.
- Difficulty: Beginner-friendly yard placement.
- Budget Breakdown: Copper fixtures: $45 | Base spikes: $5.
- Creator’s Tip: Space them out by at least 15 feet since the light pool is exceptionally wide.
- Smart Sourcing: Solid brass mushroom path lights (premium pack) and anti-corrosion gel caps.
6. Ground-Level Wash Lights
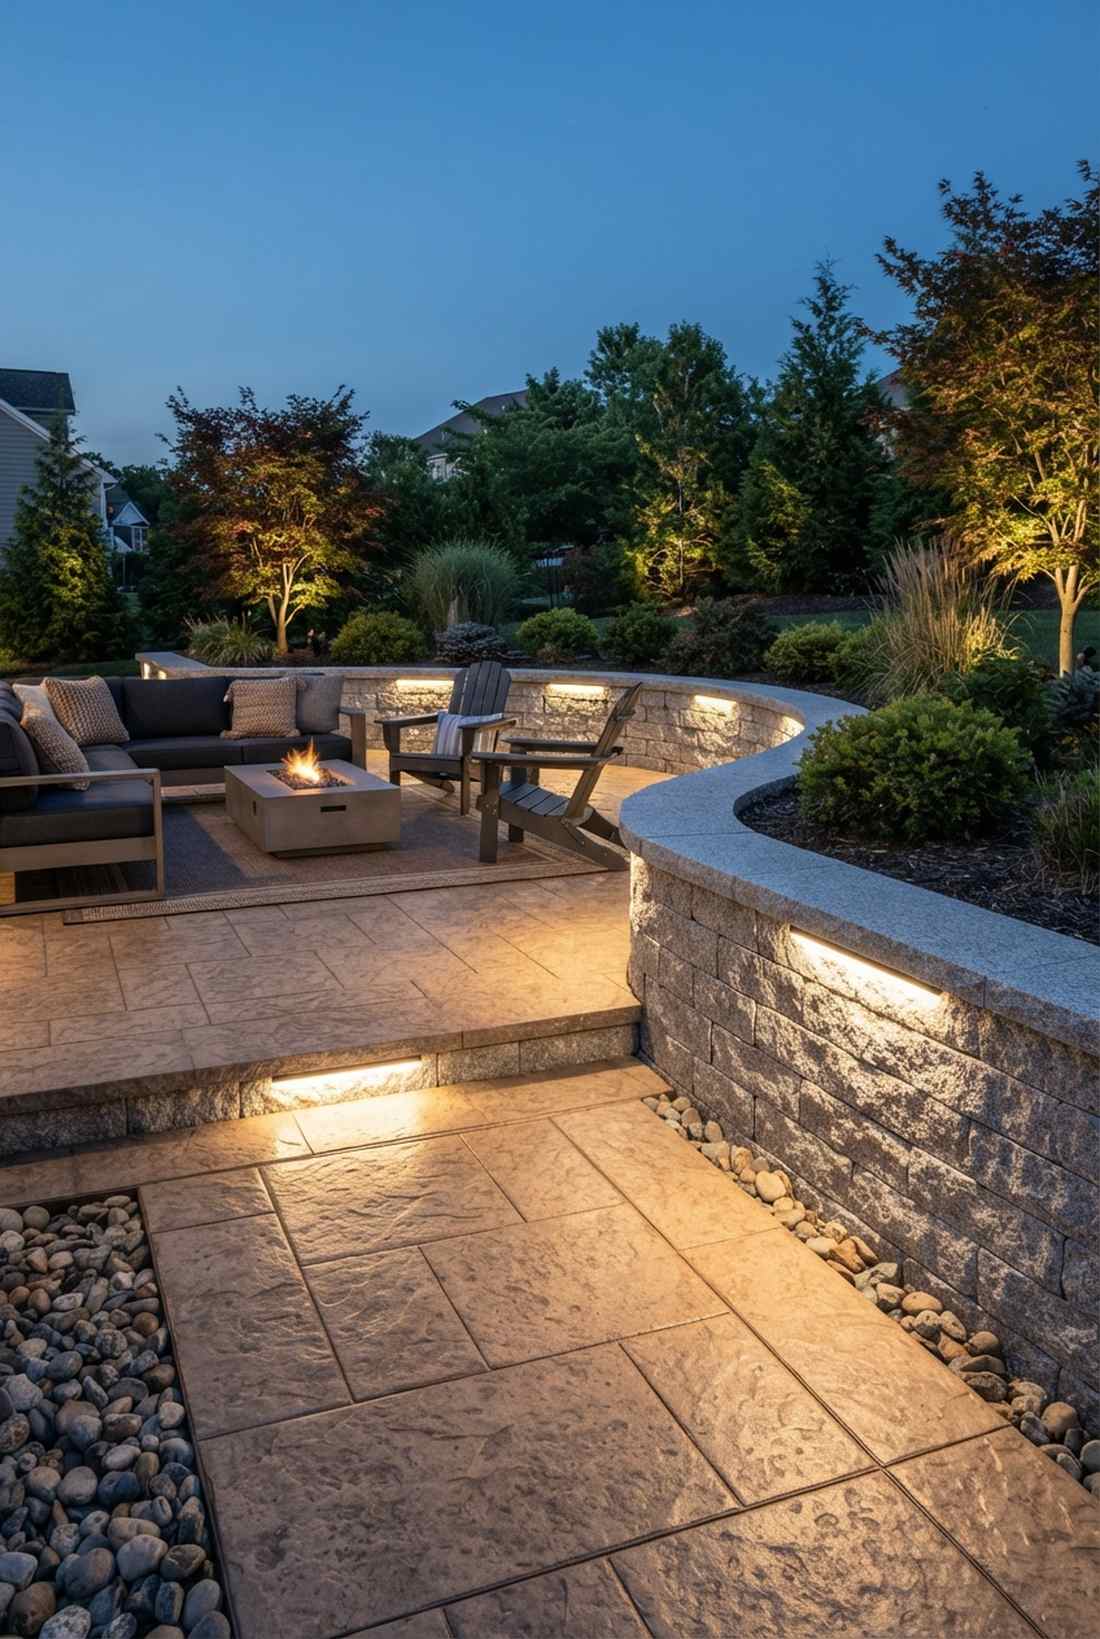
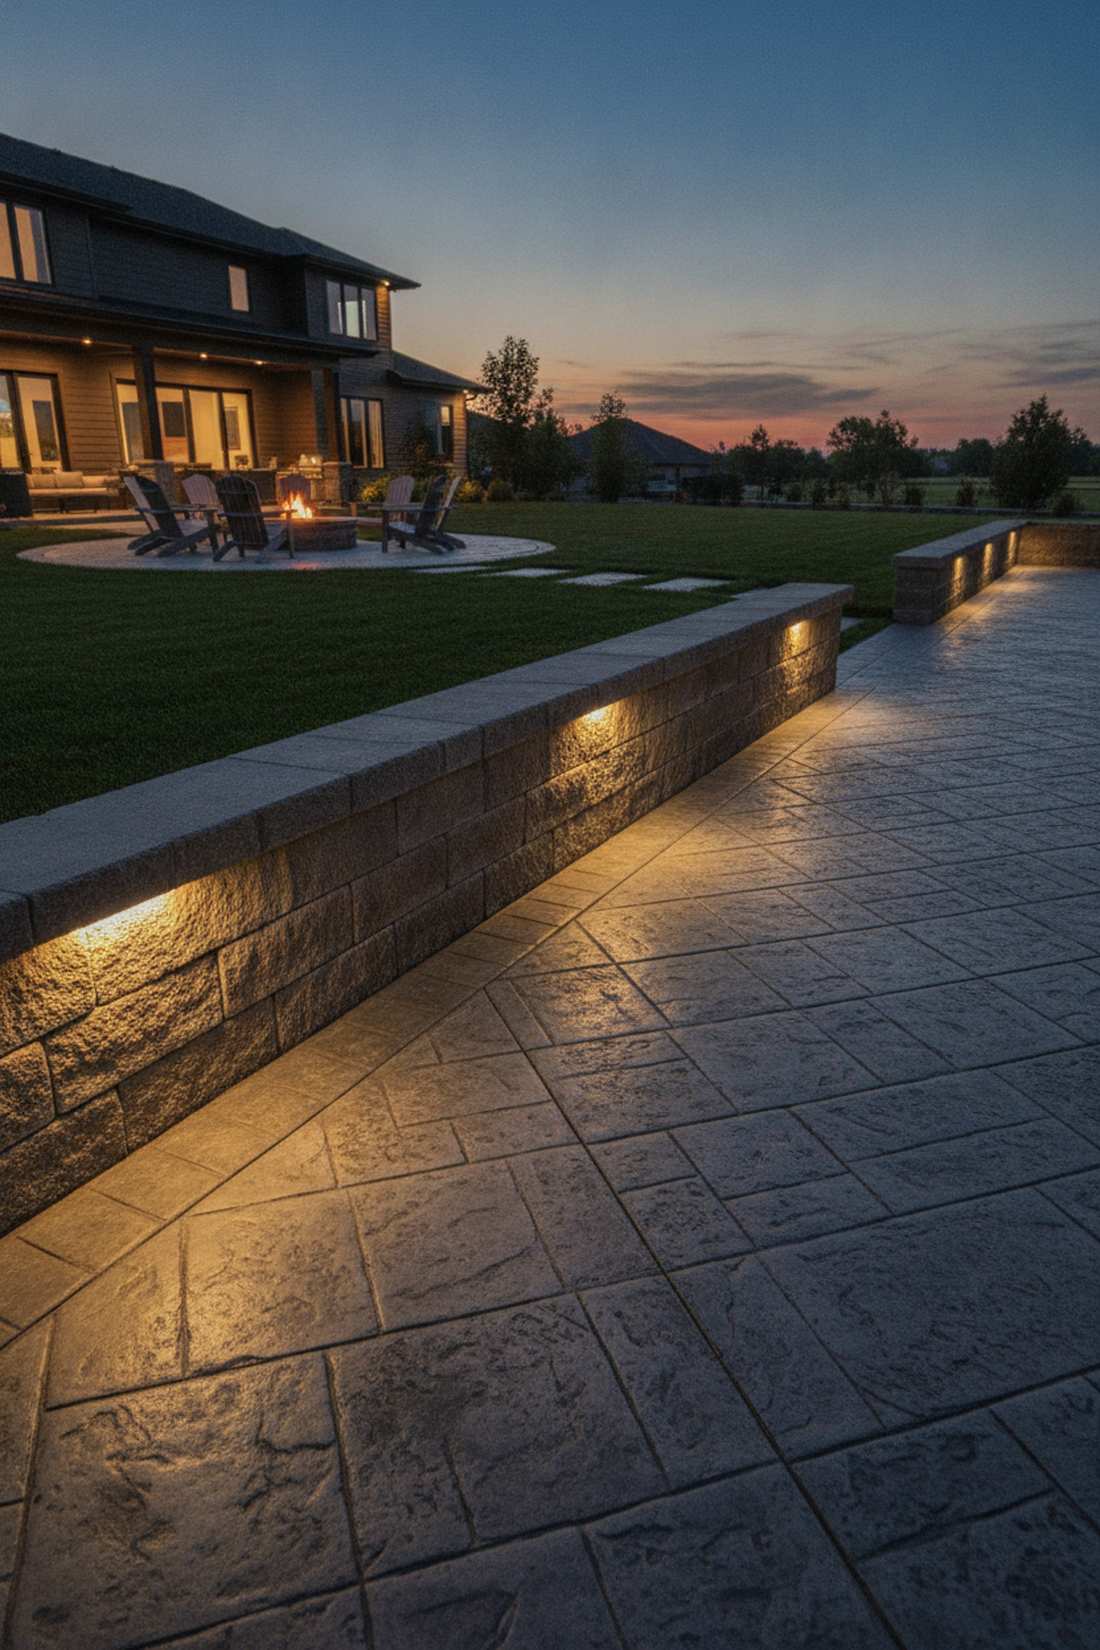
Emits a razor-sharp, low-profile glow that feels intensely modern and clean. Horizontal paver wash lighting fits flawlessly alongside crisp retaining walls and geometric paths.
Up-lighting can blind walkers, but this strict grazing technique emphasizes expensive pavement textures while keeping the light source completely hidden. Picking up hardscape retainer wall kits gives you the exact brackets needed for a flawless horizontal beam.
This textured upgrade costs roughly $20–$35 per light bracket. A must-try strategy for showcasing high-end stamped concrete.
- Key Materials: Low-voltage cast aluminum lip lights.
- Vibe / Style: High-end modern suburban estate.
- Difficulty: Intermediate masonry integration.
- Budget Breakdown: Wash fixture: $25 | Masonry bits: $10.
- Creator’s Tip: Mount exactly 3 inches above grade to get that perfect shadow-play on textured stone.
- Smart Sourcing: Low-voltage hardscape wash lights (multi-pack) and heavy-duty masonry anchors.
7. Solar Pathway Stakes
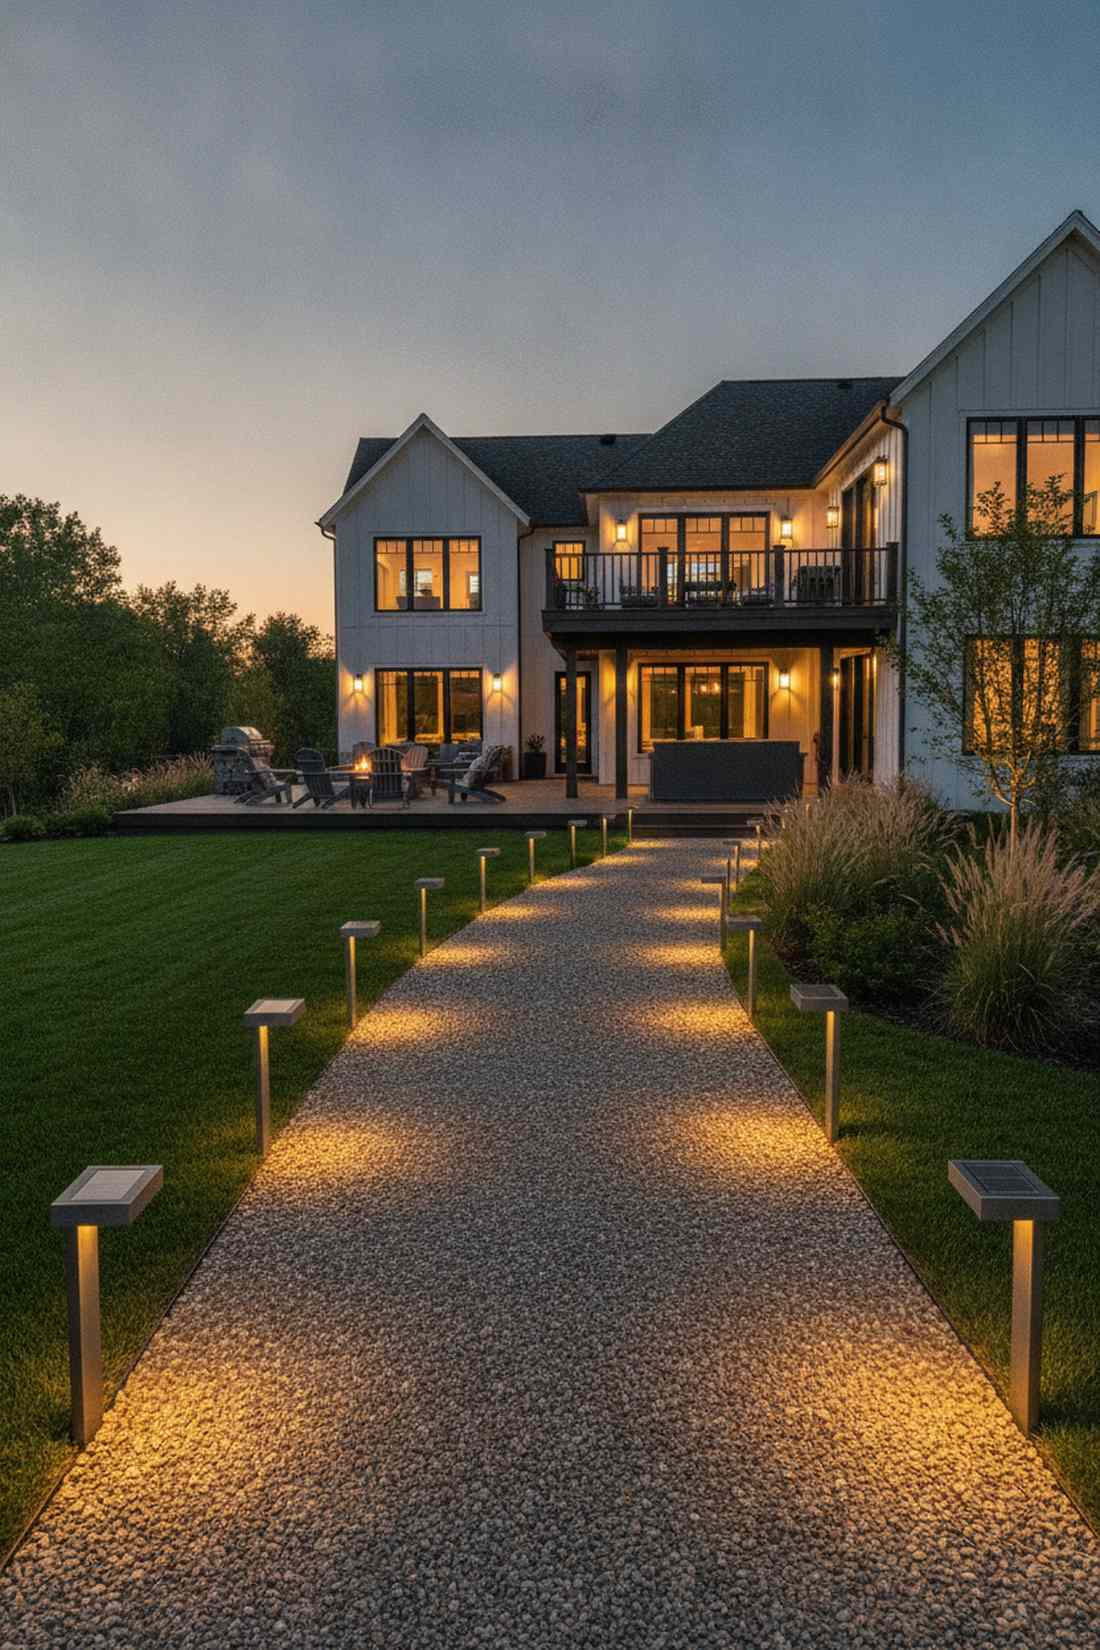
Delivers a bright, eco-friendly welcome without the hassle of digging trenches. High-lumen solar walkway decor is the absolute savior for distant backyard paths far from power outlets.
Cheap dollar-store solar lights fade in a month, but investing in larger panels delivers a surprisingly premium look that lasts all night. Opting for commercial grade solar pathway kits ensures you actually get usable navigation light rather than a dim blue glow.
Expect to spend $40–$60 for durable, high-capacity solar units. Pin this to your off-grid DIY garden ideas folder!
- Key Materials: Monocrystalline solar panel LED stakes.
- Vibe / Style: Clean, wire-free modern living.
- Difficulty: Incredibly easy plug-and-play setup.
- Budget Breakdown: Solar unit: $45 | Battery upgrades: $10.
- Creator’s Tip: Wipe the top panels with a damp cloth monthly to maximize battery charging efficiency.
- Smart Sourcing: High-output warm white solar stakes (bulk pack) and replacement lithium-ion solar batteries.
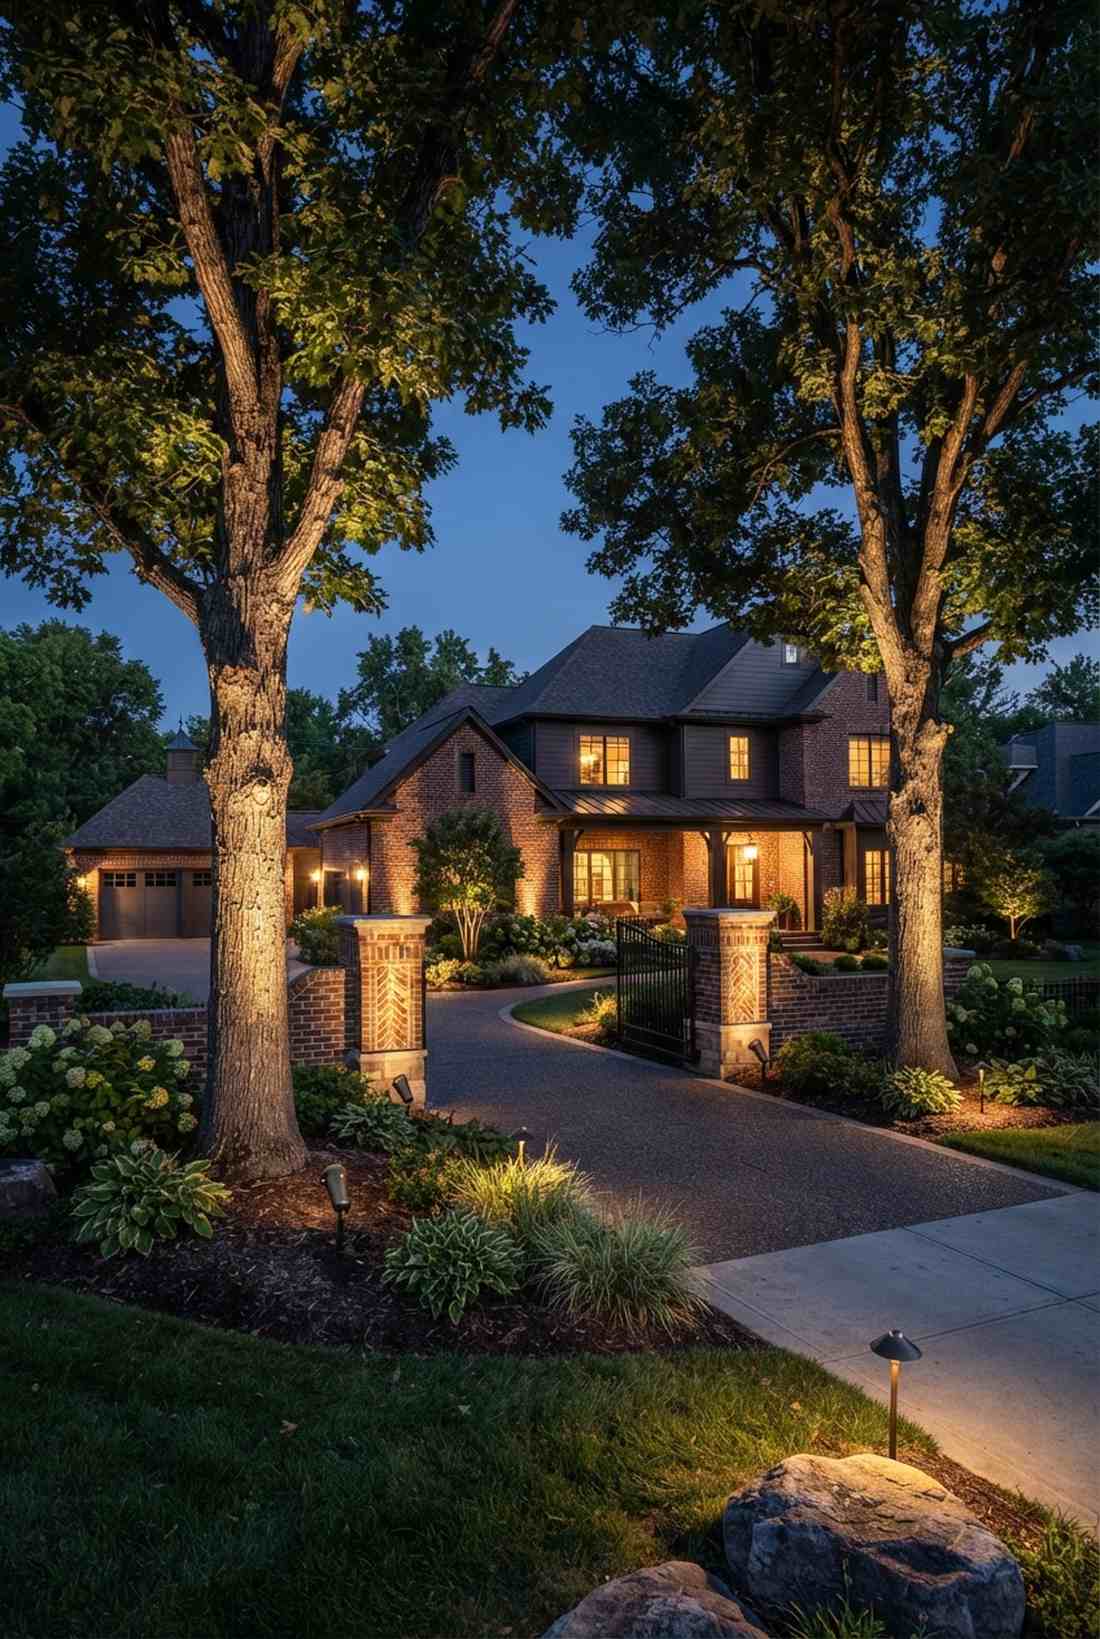
Driveway Lighting Configurations for Vehicle and Pedestrian Safety
Executing an outdoor lighting driveway setup requires fixtures tough enough to survive vehicle exhaust and rogue tires. We must blend robust physical barriers with inviting, glare-free aesthetic illumination.
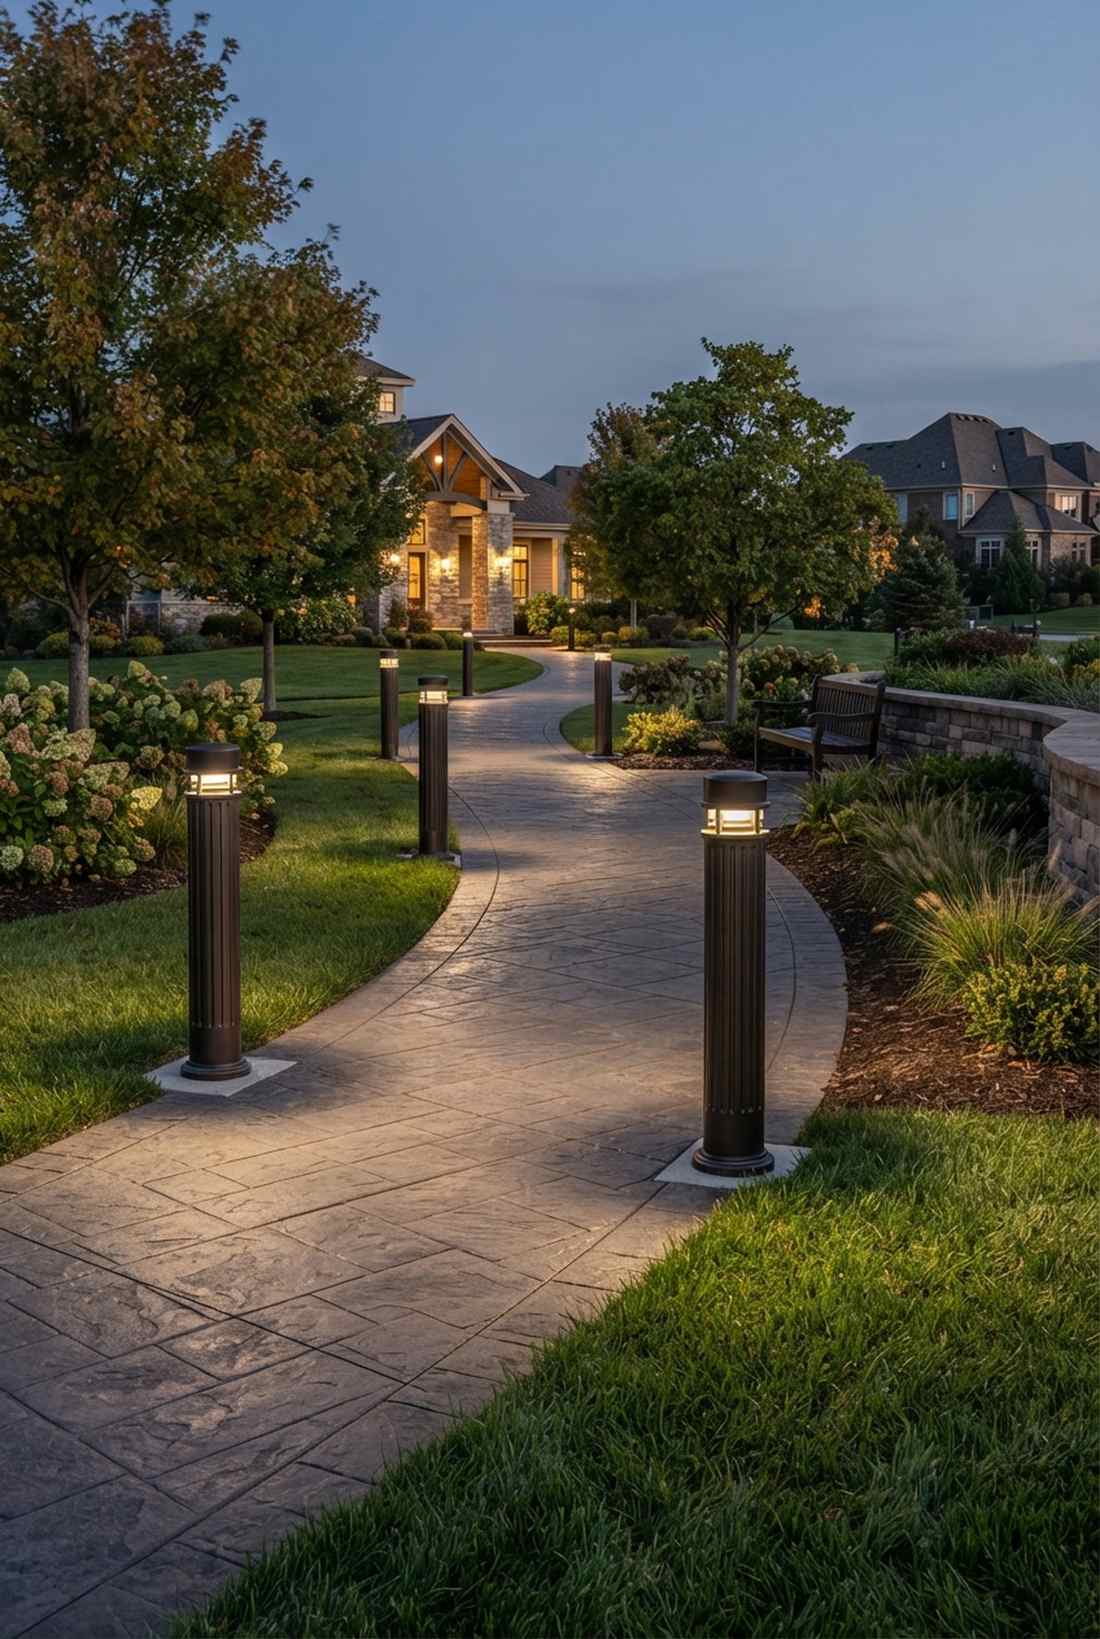
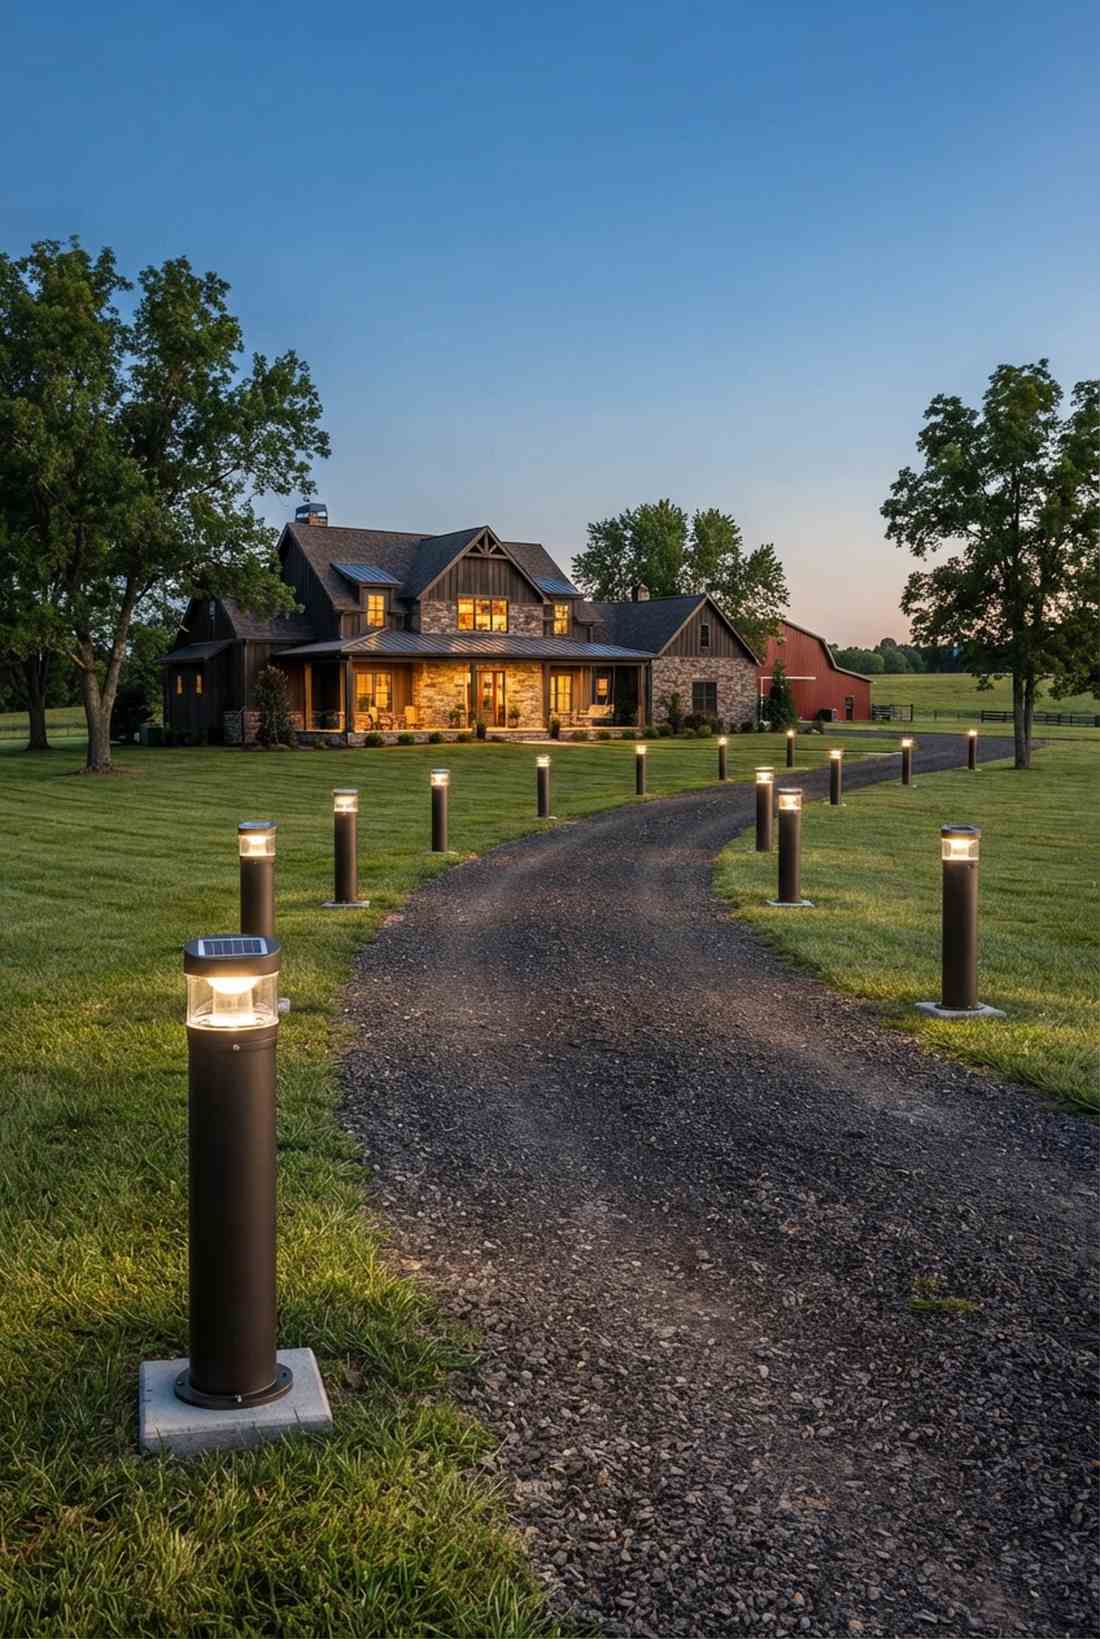
8. Driveway Edge Bollards

Projects an undeniable sense of safety and grand estate authority. Architectural driveway boundary pillars are crucial for long, curved driveways where backing up at night is a nightmare.
Flimsy plastic markers get crushed instantly, whereas this solid metal layout gives a designer-level finish that protects your lawn from tire tracks. Installing heavy-duty driveway lighting bollards ensures they remain standing perfectly straight after harsh winter storms.
A solid bollard setup runs about $80–$150 per pillar. It completely eliminates nighttime parking anxiety while boosting curb appeal.
- Key Materials: Powder-coated steel or aluminum pillars.
- Vibe / Style: Bold, secure manor entryway.
- Difficulty: Advanced deep-post digging required.
- Budget Breakdown: Bollard: $100 | Concrete footing: $15.
- Creator’s Tip: Sink the base in at least 18 inches of concrete to prevent frost heave leaning.
- Smart Sourcing: Commercial aluminum LED bollards (starter kits) and fast-setting concrete mix bags.
9. Flush Driveway Markers
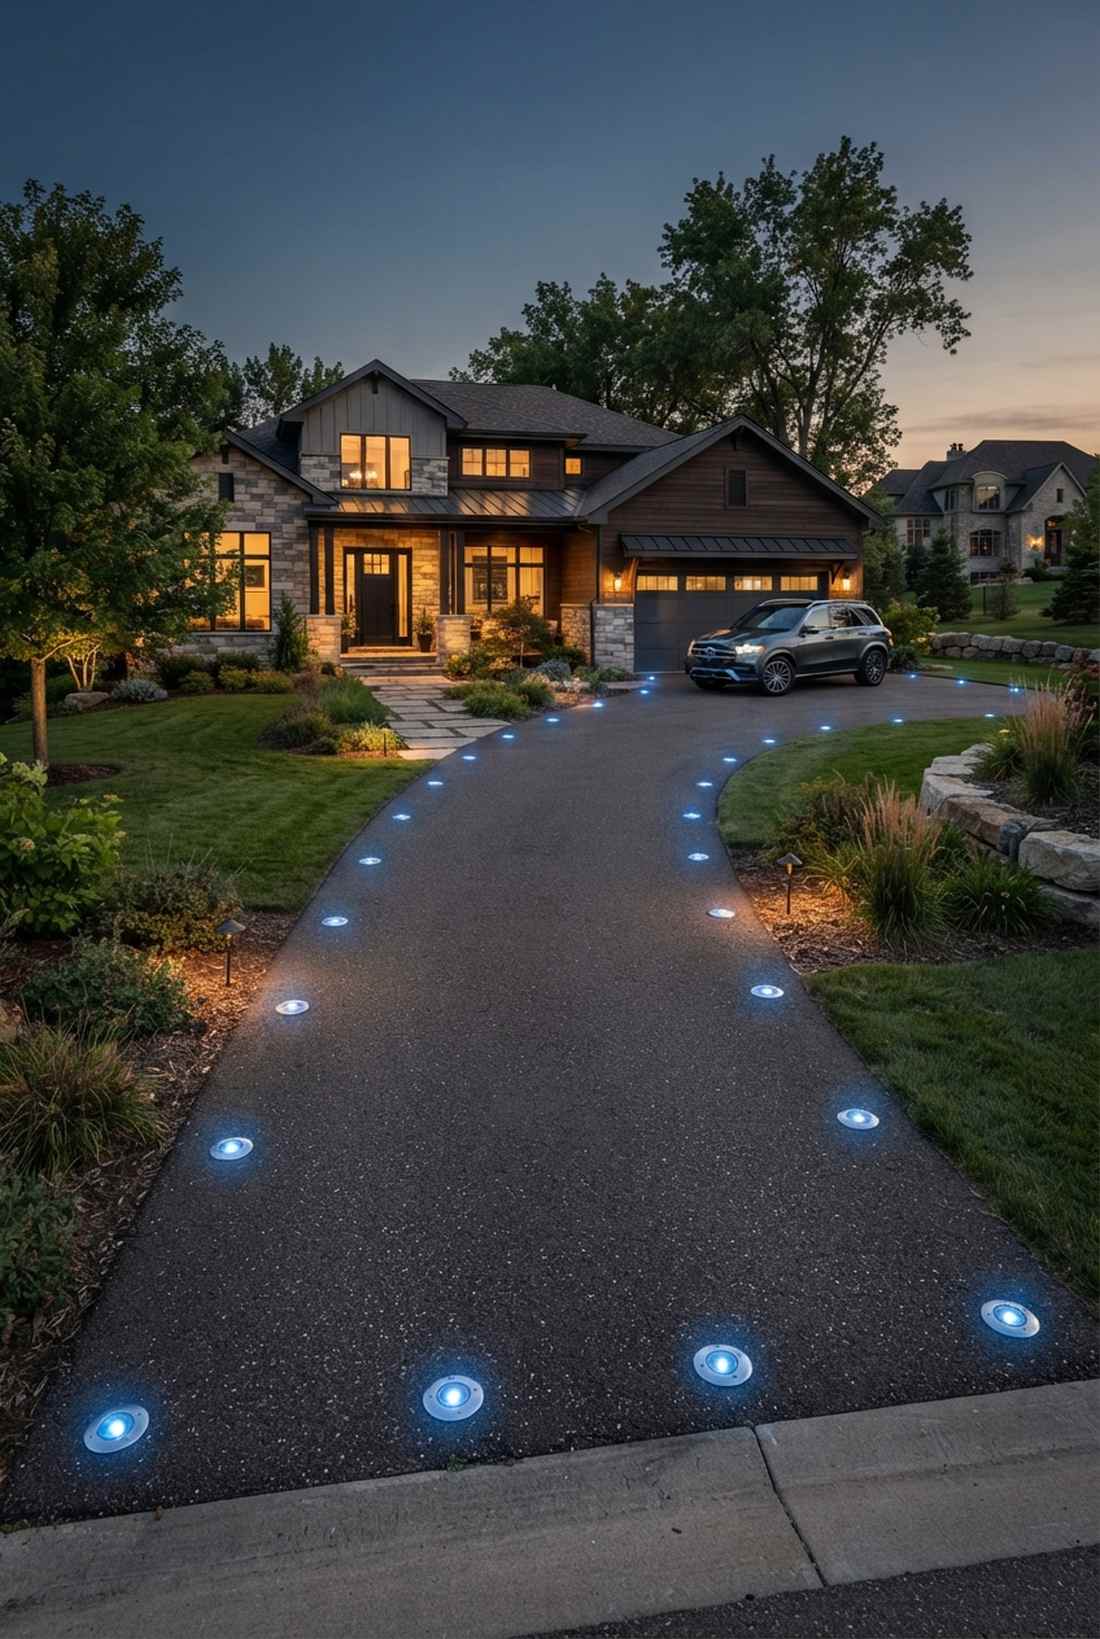
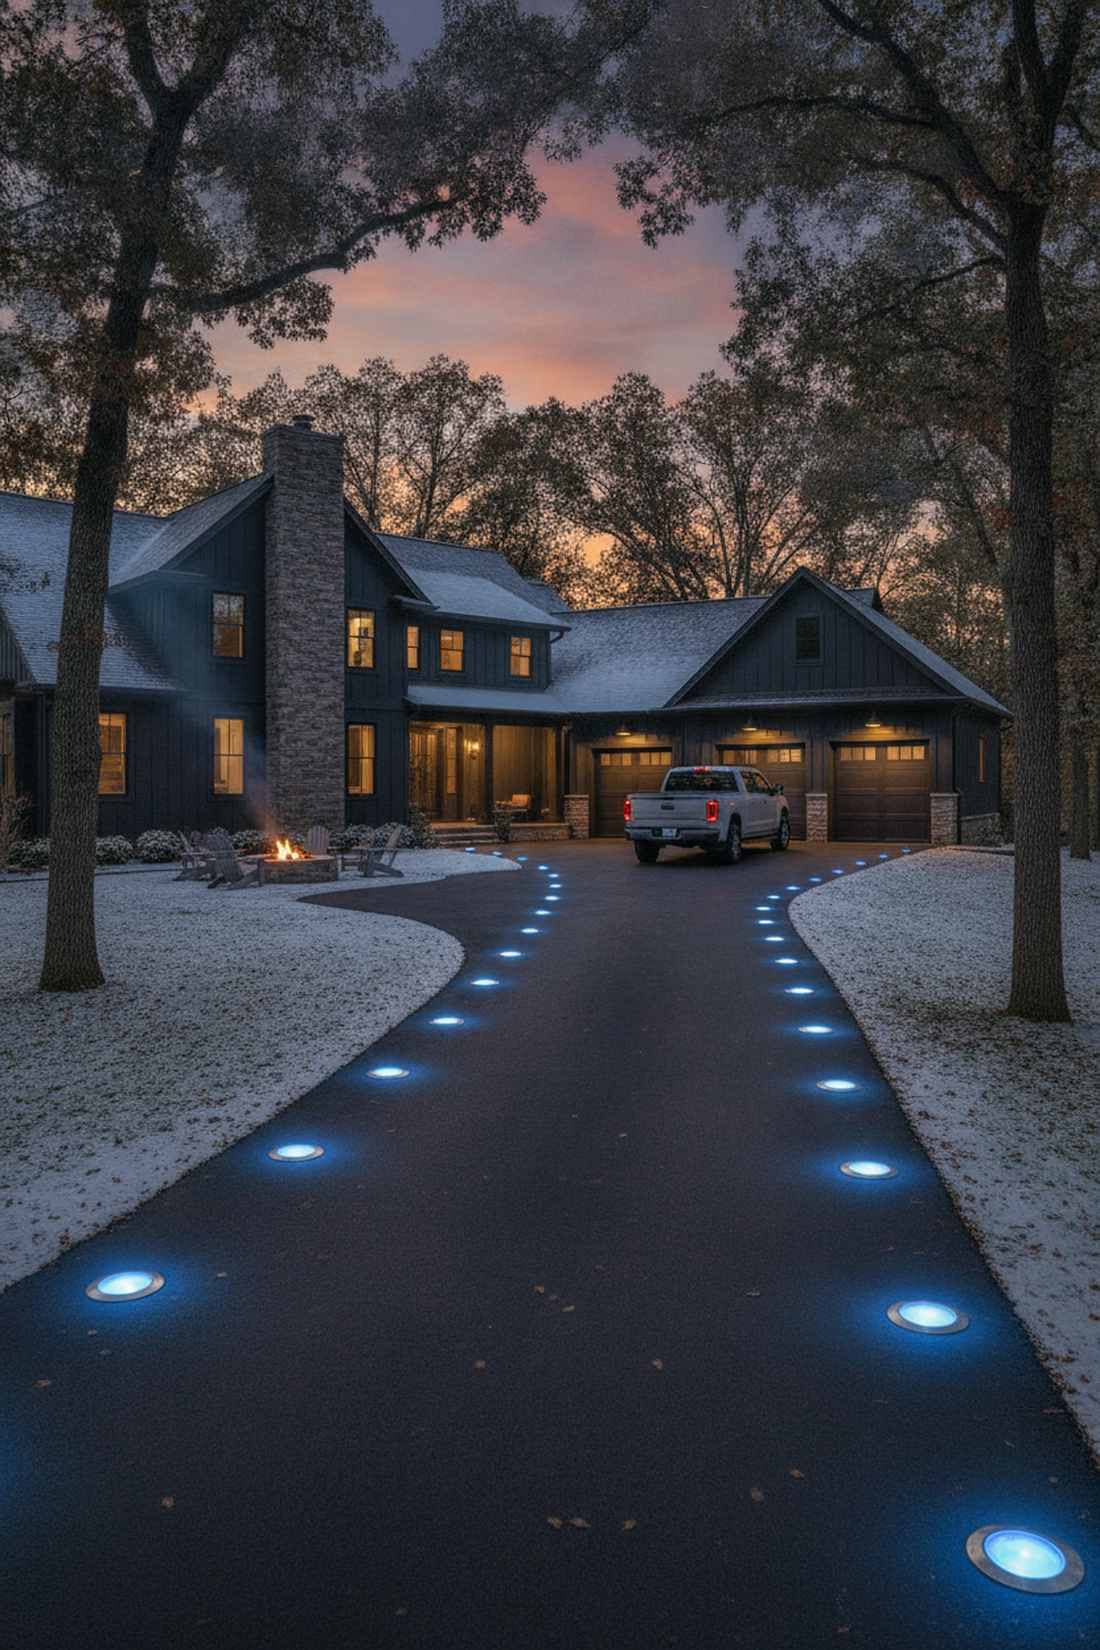
Creates a futuristic runway effect that feels incredibly satisfying to drive over. Drive-over LED pavement markers are an absolute game-changer for homes with heavy snowplow traffic.
Vertical posts constantly snap under pressure, but this flush approach looks far more expensive than it is while being virtually indestructible. Sourcing stainless steel driveway marker lights guarantees they won’t succumb to harsh road salts or vehicle weight.
These robust units cost roughly $35–$60 each. Pin this if you want an ultra-modern vehicle entrance!
- Key Materials: Salt-resistant stainless steel pucks.
- Vibe / Style: Sleek aviation-style driveway runway.
- Difficulty: Advanced core drilling into asphalt.
- Budget Breakdown: Puck light: $40 | Epoxy core: $10.
- Creator’s Tip: Use a slight blue tint for the markers so guests don’t confuse the driveway with a pedestrian path.
- Smart Sourcing: 10,000lb-rated flush deck lights (multi-pack) and high-strength concrete epoxy syringes.
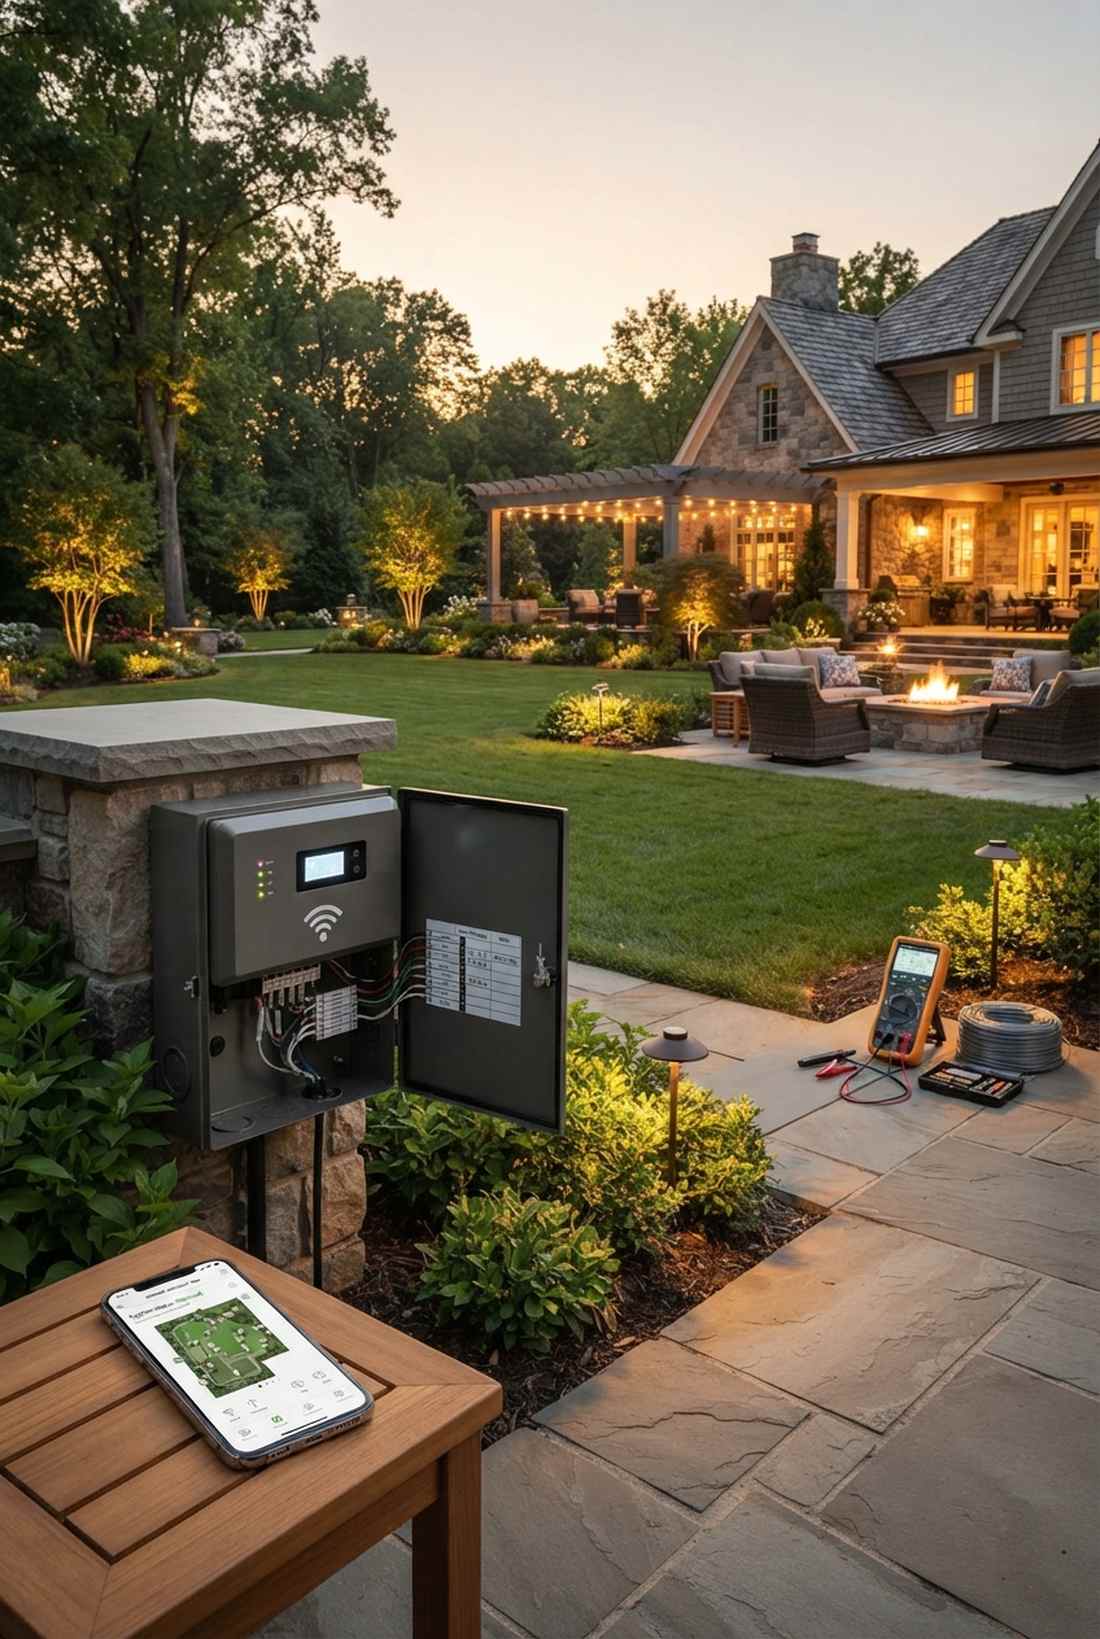
💡 Must-Have Supplies for High-End Setups
To build these setups faster and ensure they last, skip the generic craft aisles and invest in the right foundational kits.
- Base & Support: Heavy-duty low voltage direct burial cables
- Setup Tools: Smart Wi-Fi enabled outdoor transformer kits
- Weather/Durability Protection: Dielectric grease and waterproof wire nuts
Most DIYers completely ruin their curb appeal here… until they try the exact configuration coming up next.
10. Column-Mounted Driveway Lights
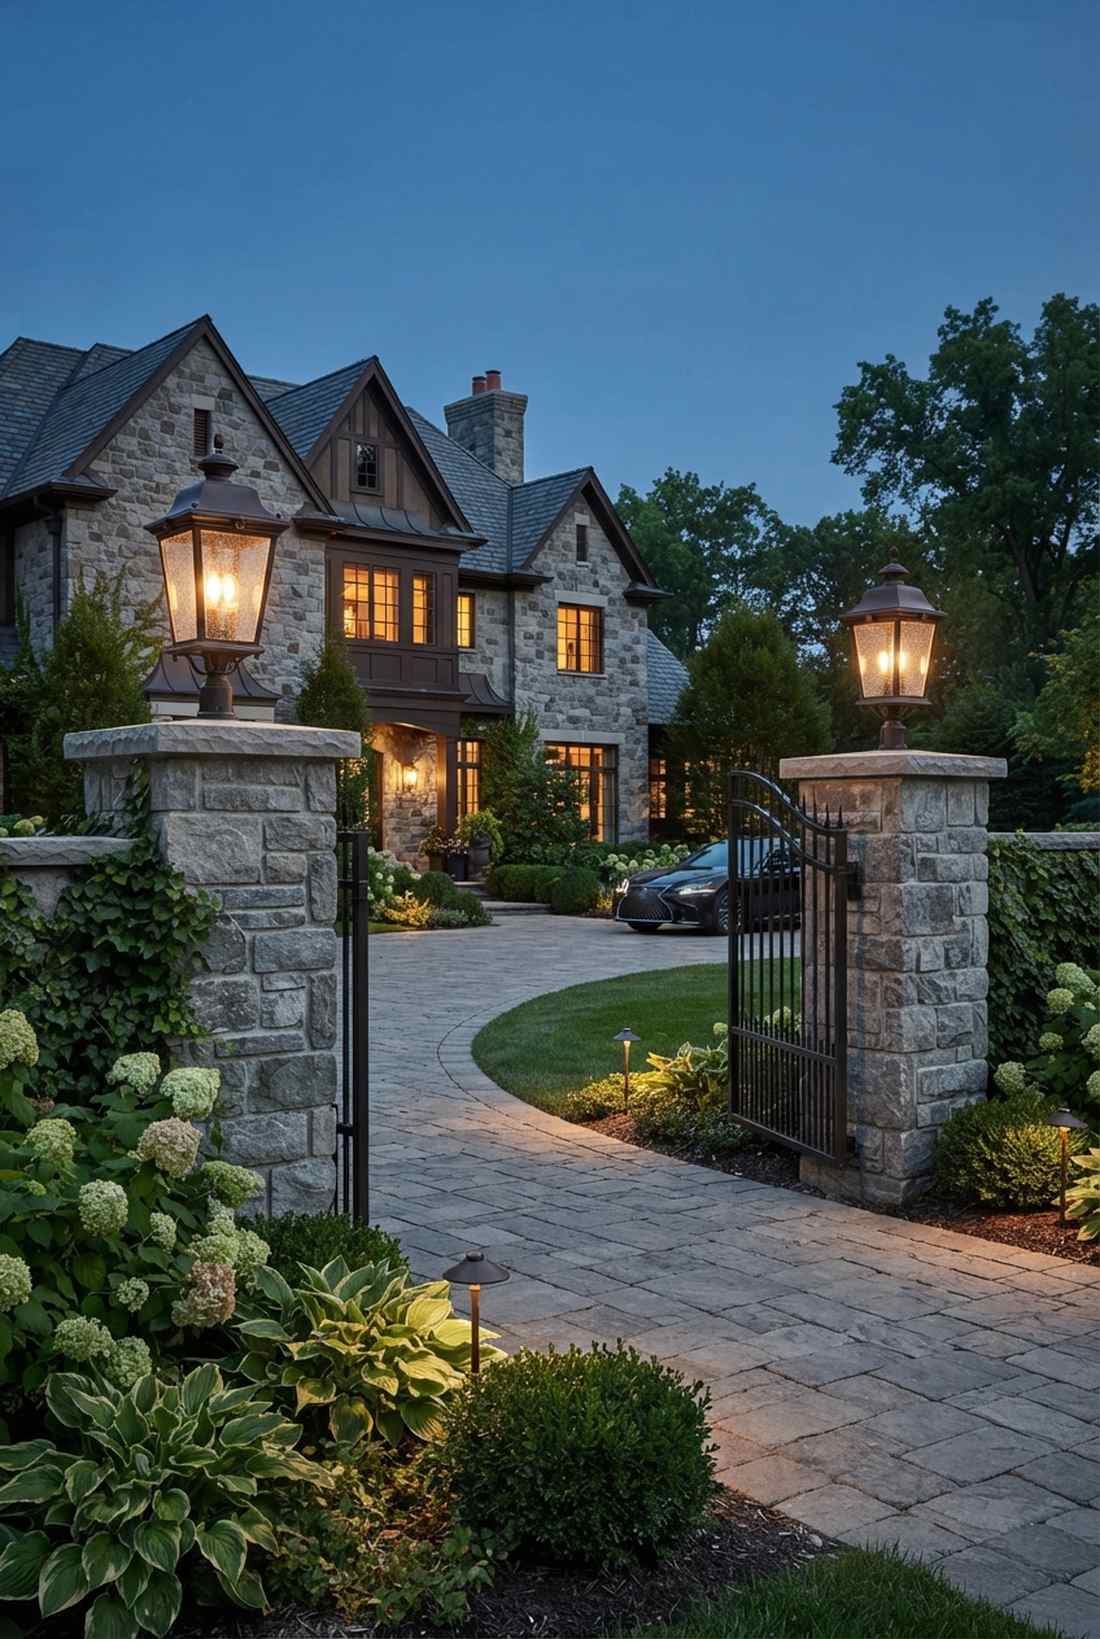
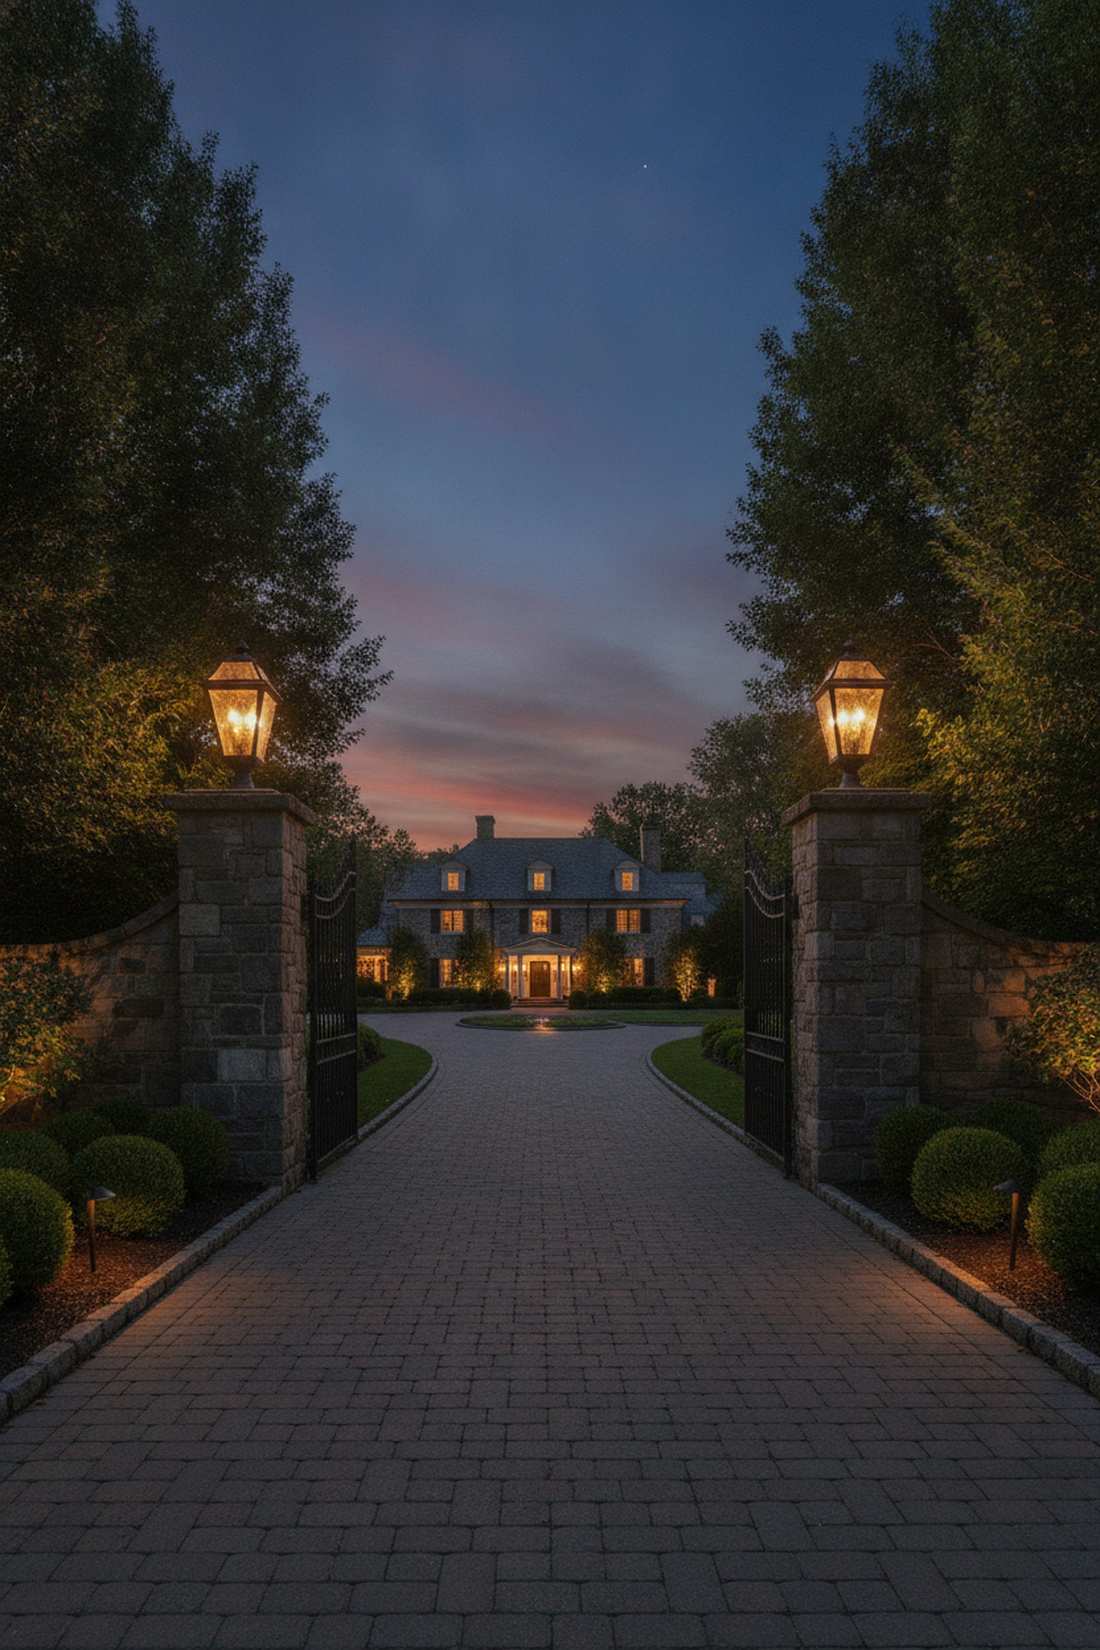
Radiates a majestic, gated-community aura that greets you after a long day. Elevated pillar entry lanterns serve as the ultimate grand focal point for properties with existing masonry walls.
Relying purely on ground lights feels incomplete, yet this elevated strategy delivers a highly balanced, imposing glow. Equipping these with smart outdoor LED bulbs allows you to automate the greeting sequence right from your phone.
This architectural touch costs $70–$200 per fixture, depending on the glass details. An absolute necessity for a premium property entrance.
- Key Materials: Seeded glass and cast bronze lanterns.
- Vibe / Style: Stately classic manor arrival.
- Difficulty: Intermediate masonry wiring.
- Budget Breakdown: Lantern: $120 | Masonry screws: $5.
- Creator’s Tip: Mount them at least 72 inches high to prevent blinding drivers in standard sedans.
- Smart Sourcing: Pier-mount outdoor column lights (premium finish) and dusk-to-dawn smart LED bulbs.
11. Linear Driveway Strip Lighting
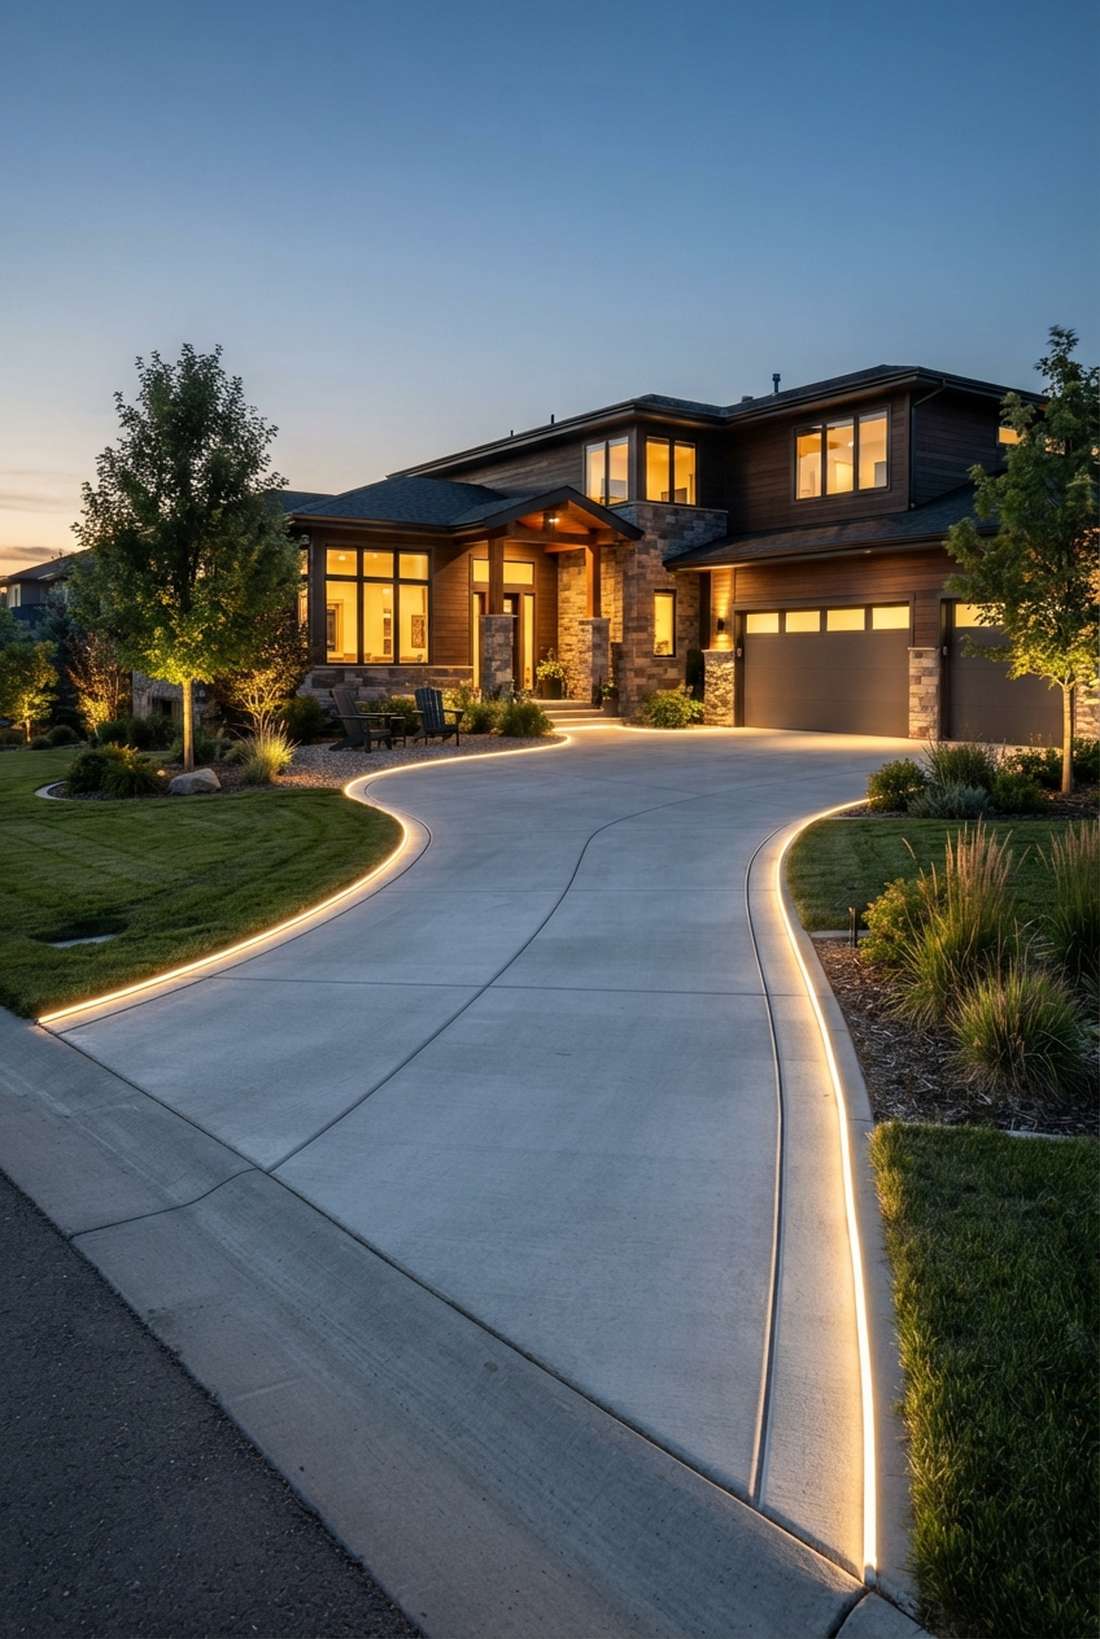
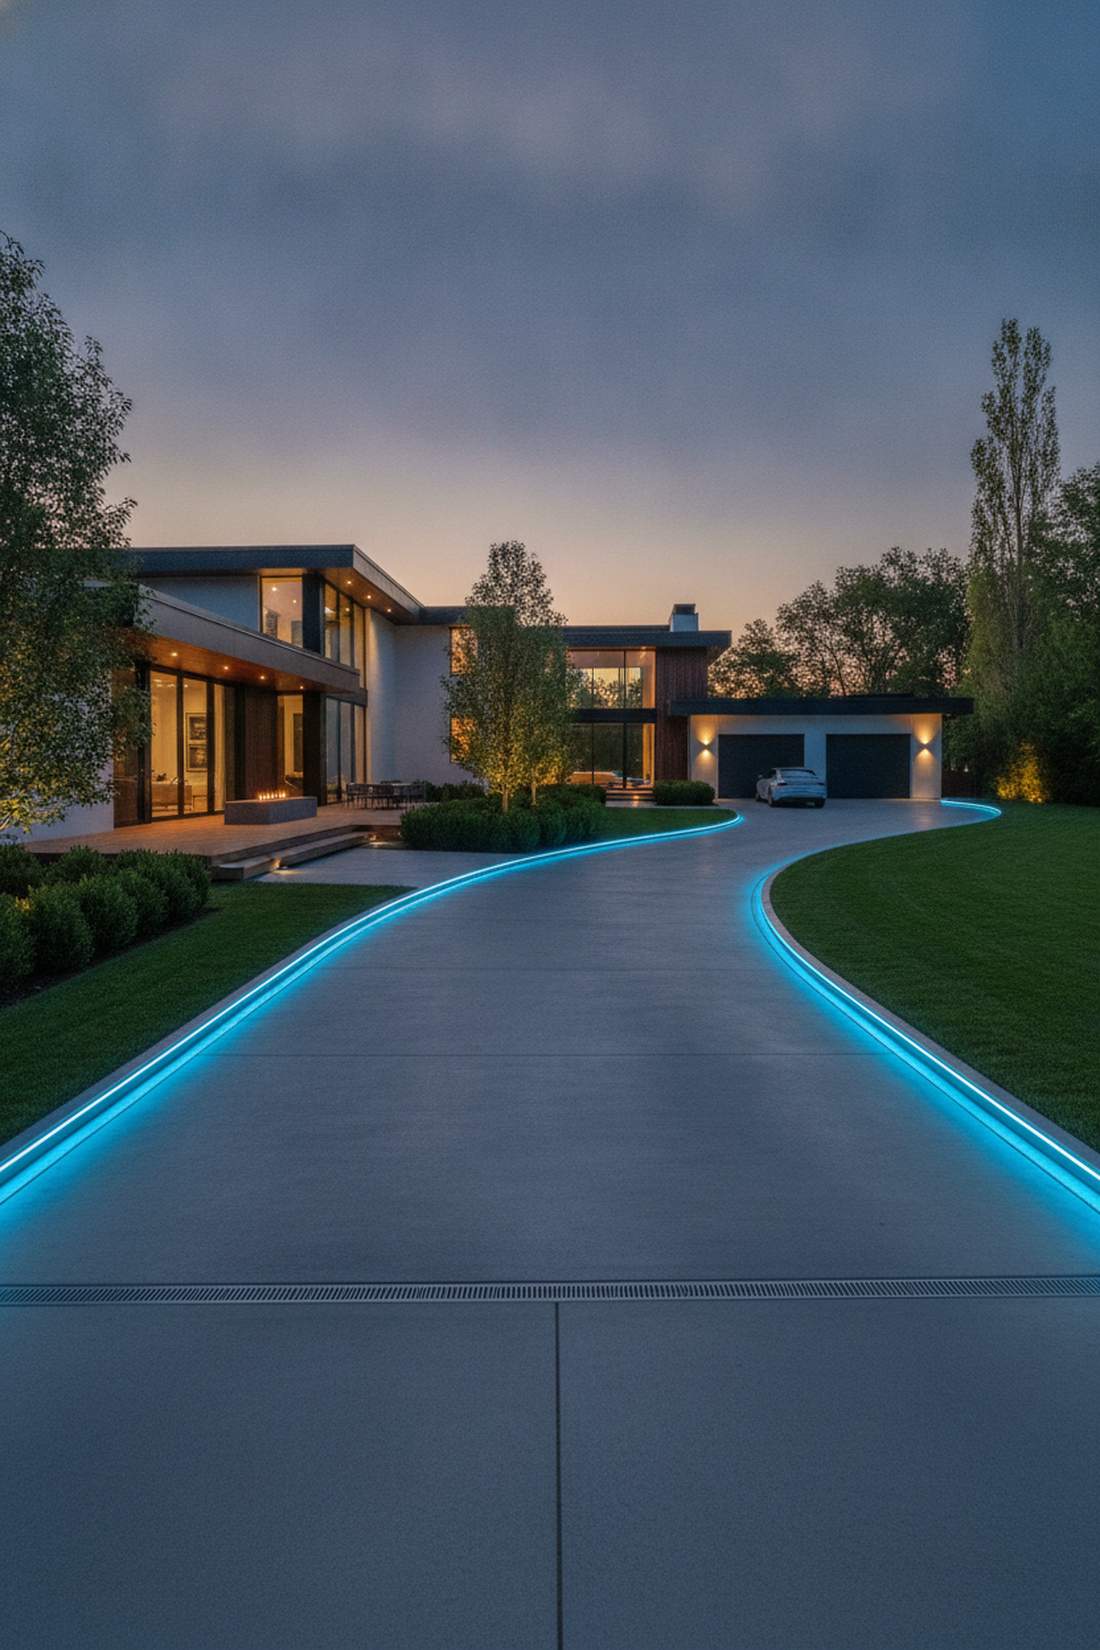
Feels exactly like navigating a high-tech modern art installation. Continuous neon-flex driveway borders are a jaw-dropping solution for sharply curved or newly poured concrete entries.
Standard dots of light can look messy, but this unbroken neon line gives a shockingly precise architectural boundary. You’ll want to embed heavy-duty silicone LED neon rope inside a protective channel to survive hot tires and freezing rain.
This unbroken glow costs about $4–$7 per foot. Save this to your ultra-modern exterior mood board!
- Key Materials: Cuttable silicone neon-flex LED tape.
- Vibe / Style: Sharp, unbroken contemporary edge.
- Difficulty: Advanced concrete saw-cutting required.
- Budget Breakdown: Neon spool: $80 | Extrusion channel: $40.
- Creator’s Tip: Hook this up to an automated dimmer so it softens down to 30% brightness after midnight.
- Smart Sourcing: Waterproof silicone LED neon rope (bulk roll) and drive-over aluminum strip channels.
12. Parking Zone Downlights
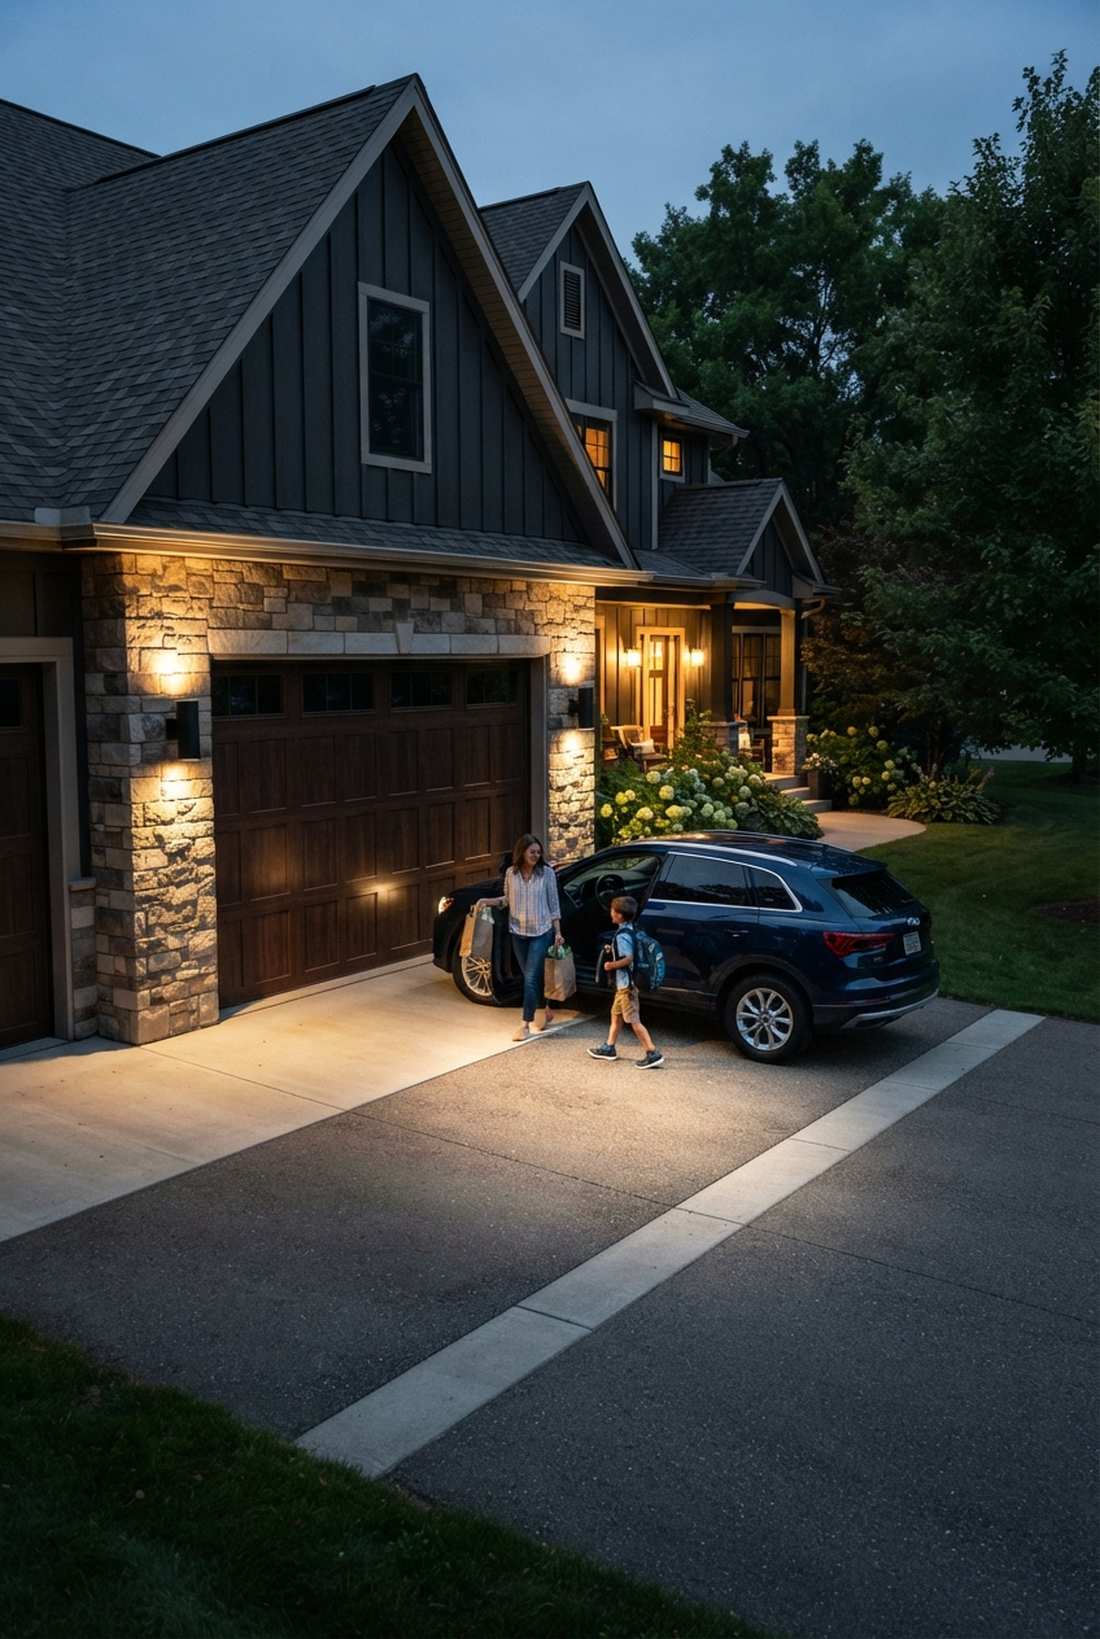

Bathes your garage apron in crisp, clear visibility perfect for late-night unpacking. Overhead exterior garage downlights drastically improve safety when wrestling with groceries or kids in the dark.
Wall-mounted floodlights often blind the neighbors, but this targeted overhead approach provides a highly practical, glare-free zone. Installing directional architectural wall cylinders ensures the beam hits the asphalt exactly where you need it most.
This functional safety upgrade runs around $60–$100 per cylinder. Highly recommended for busy family driveways.
- Key Materials: Matte black aluminum wall cylinders.
- Vibe / Style: Functional modern utility.
- Difficulty: Intermediate exterior wall mounting.
- Budget Breakdown: Cylinder unit: $75 | Weatherproof box: $10.
- Creator’s Tip: Choose an IES Type V distribution pattern bulb to get the widest circle of light on the pavement.
- Smart Sourcing: Up/down architectural wall cylinder lights and exterior waterproof junction boxes.
13. Permeable Paver Lighting
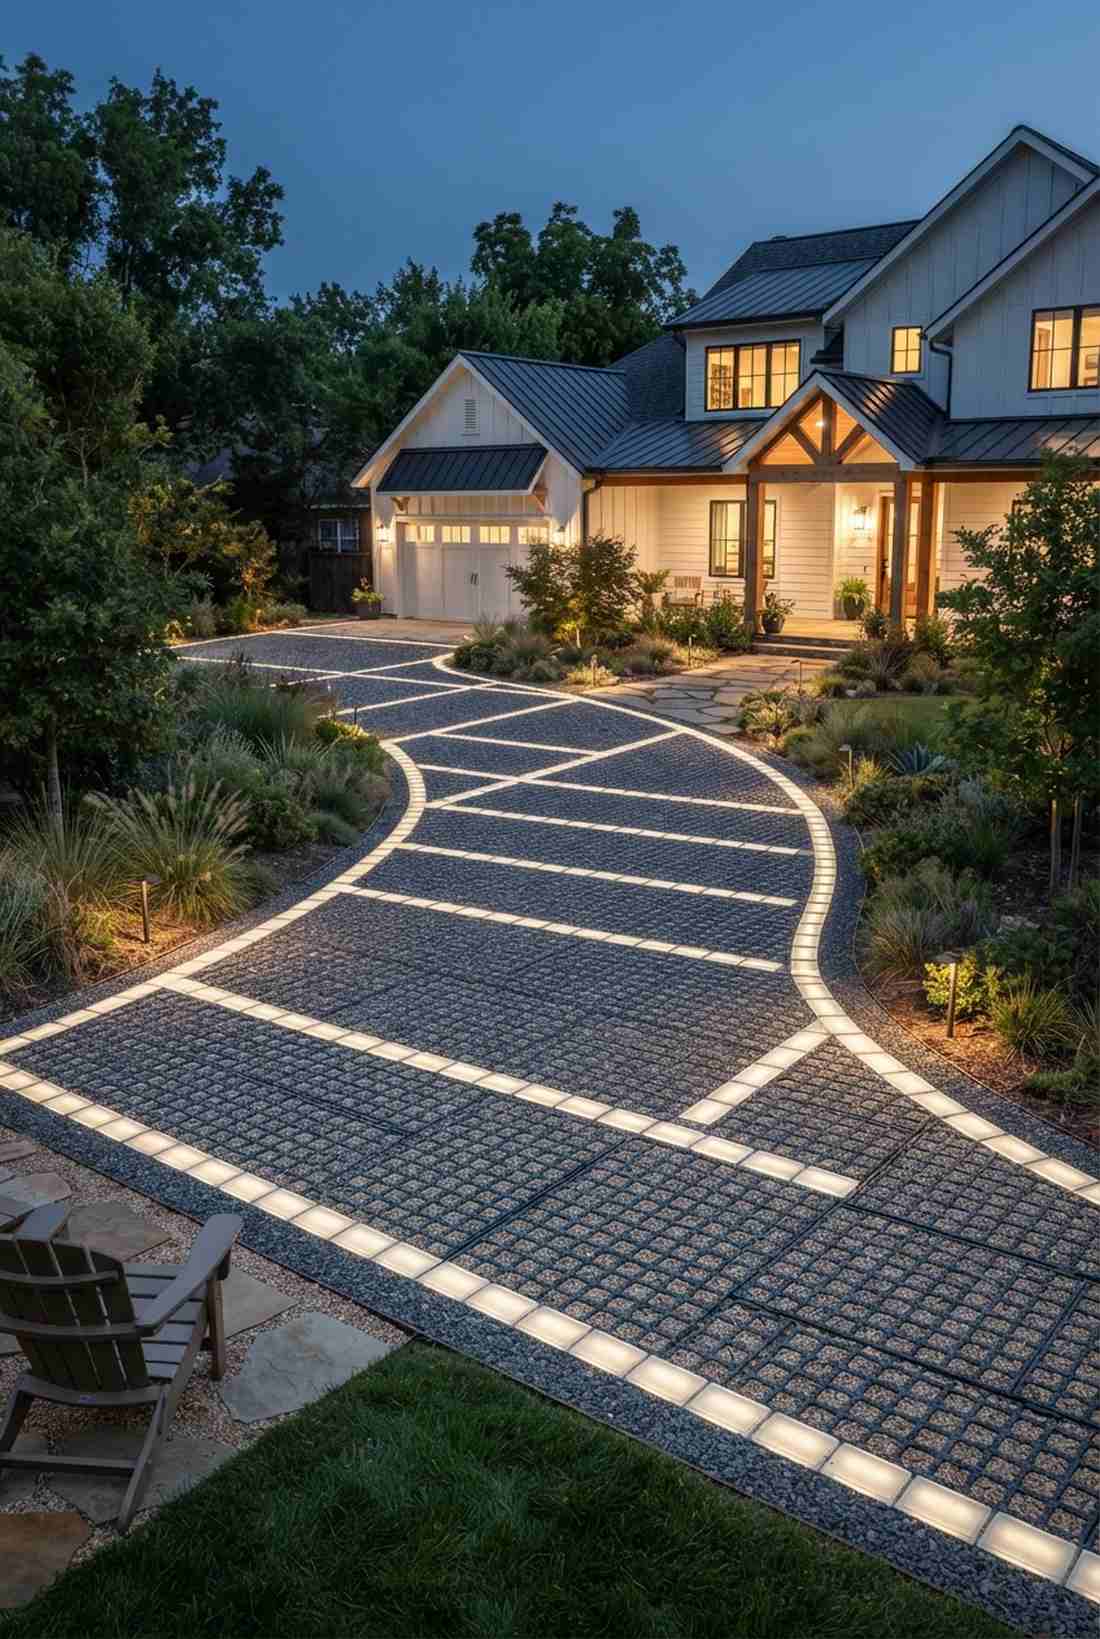
Gives off an incredibly subtle, eco-conscious glow that blends right into the earth. Integrated paver block lighting works wonders for sustainable driveways utilizing gravel grid systems.
Sticking stakes into a driveway edge looks messy, whereas this flush-fitted integration looks far more expensive than it is. Utilizing weatherproof paver light inserts ensures you maintain perfect stormwater drainage while getting a high-end illuminated grid.
These modular inserts cost $30–$50 each. Pin this if you are planning a green, LEED-certified driveway overhaul!
- Key Materials: Exact-fit frosted acrylic paver blocks.
- Vibe / Style: Sustainable, earthy modern grid.
- Difficulty: Advanced integration during initial paving.
- Budget Breakdown: Light block: $40 | Grid base: $10.
- Creator’s Tip: Run all low-voltage wires through heavy PVC conduit underneath the gravel bed to prevent crushing.
- Smart Sourcing: LED paver light inserts (multi-pack) and underground PVC wire conduit sleeves.
14. Driveway Entrance Uplights
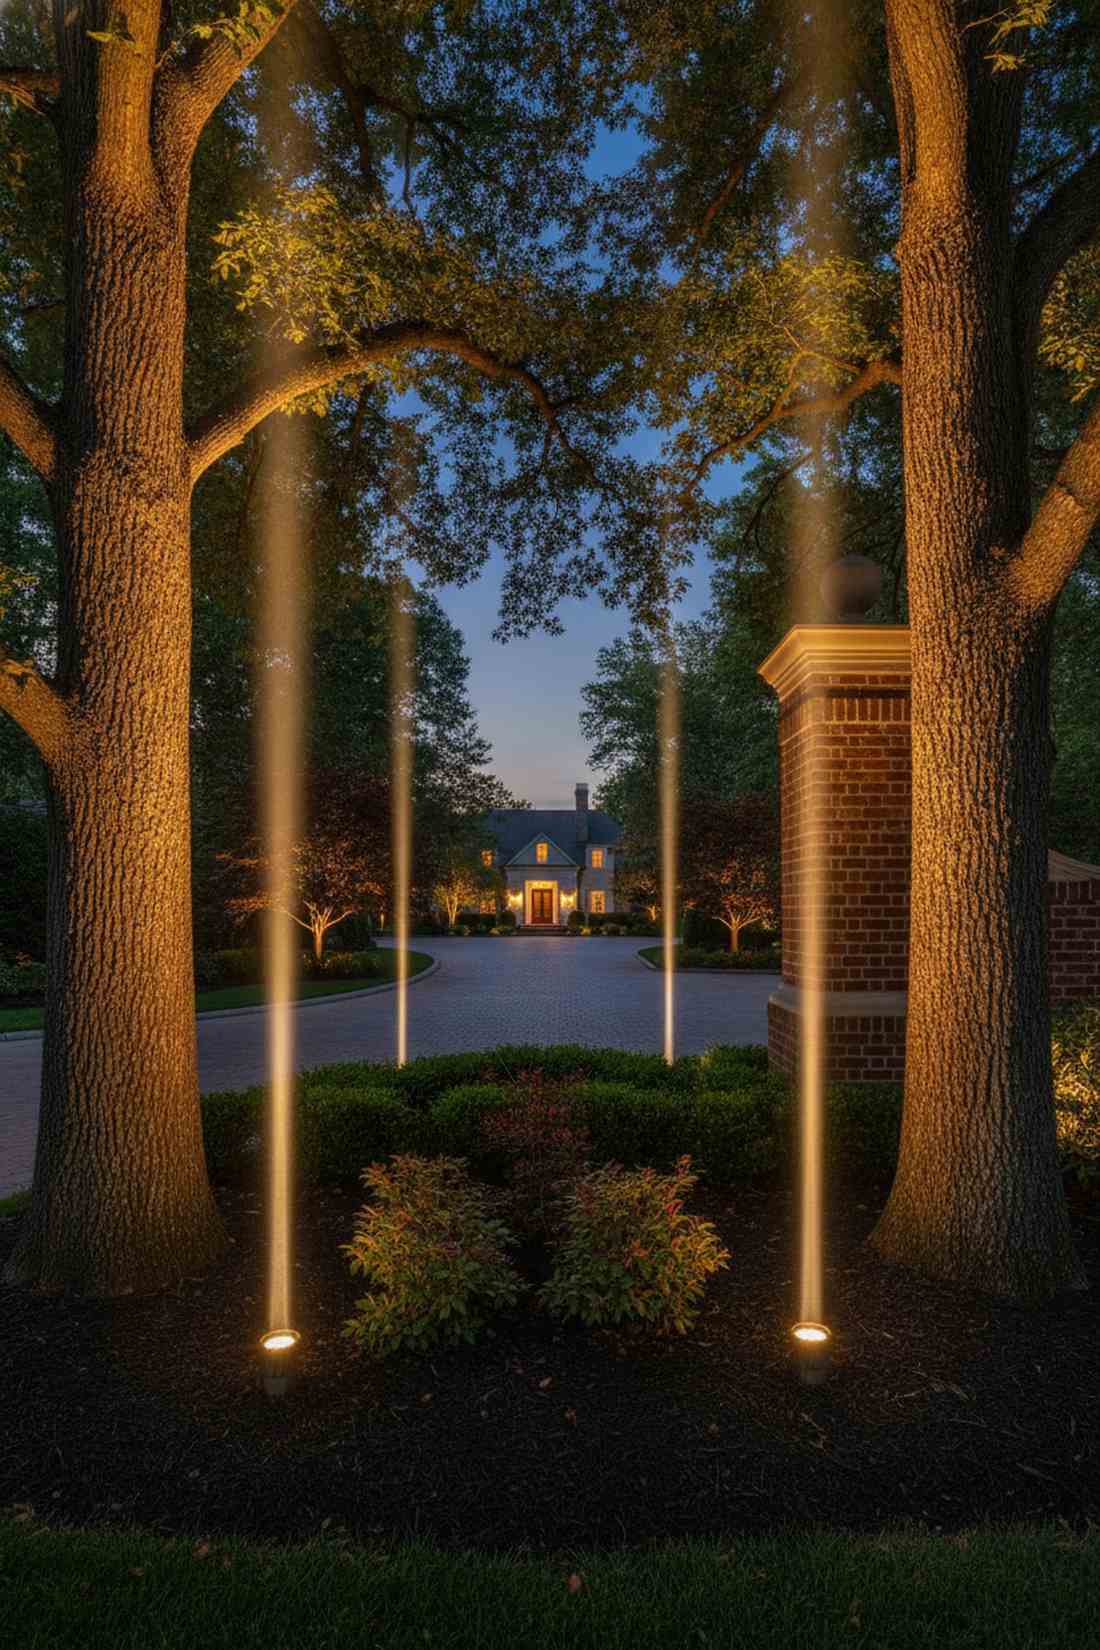
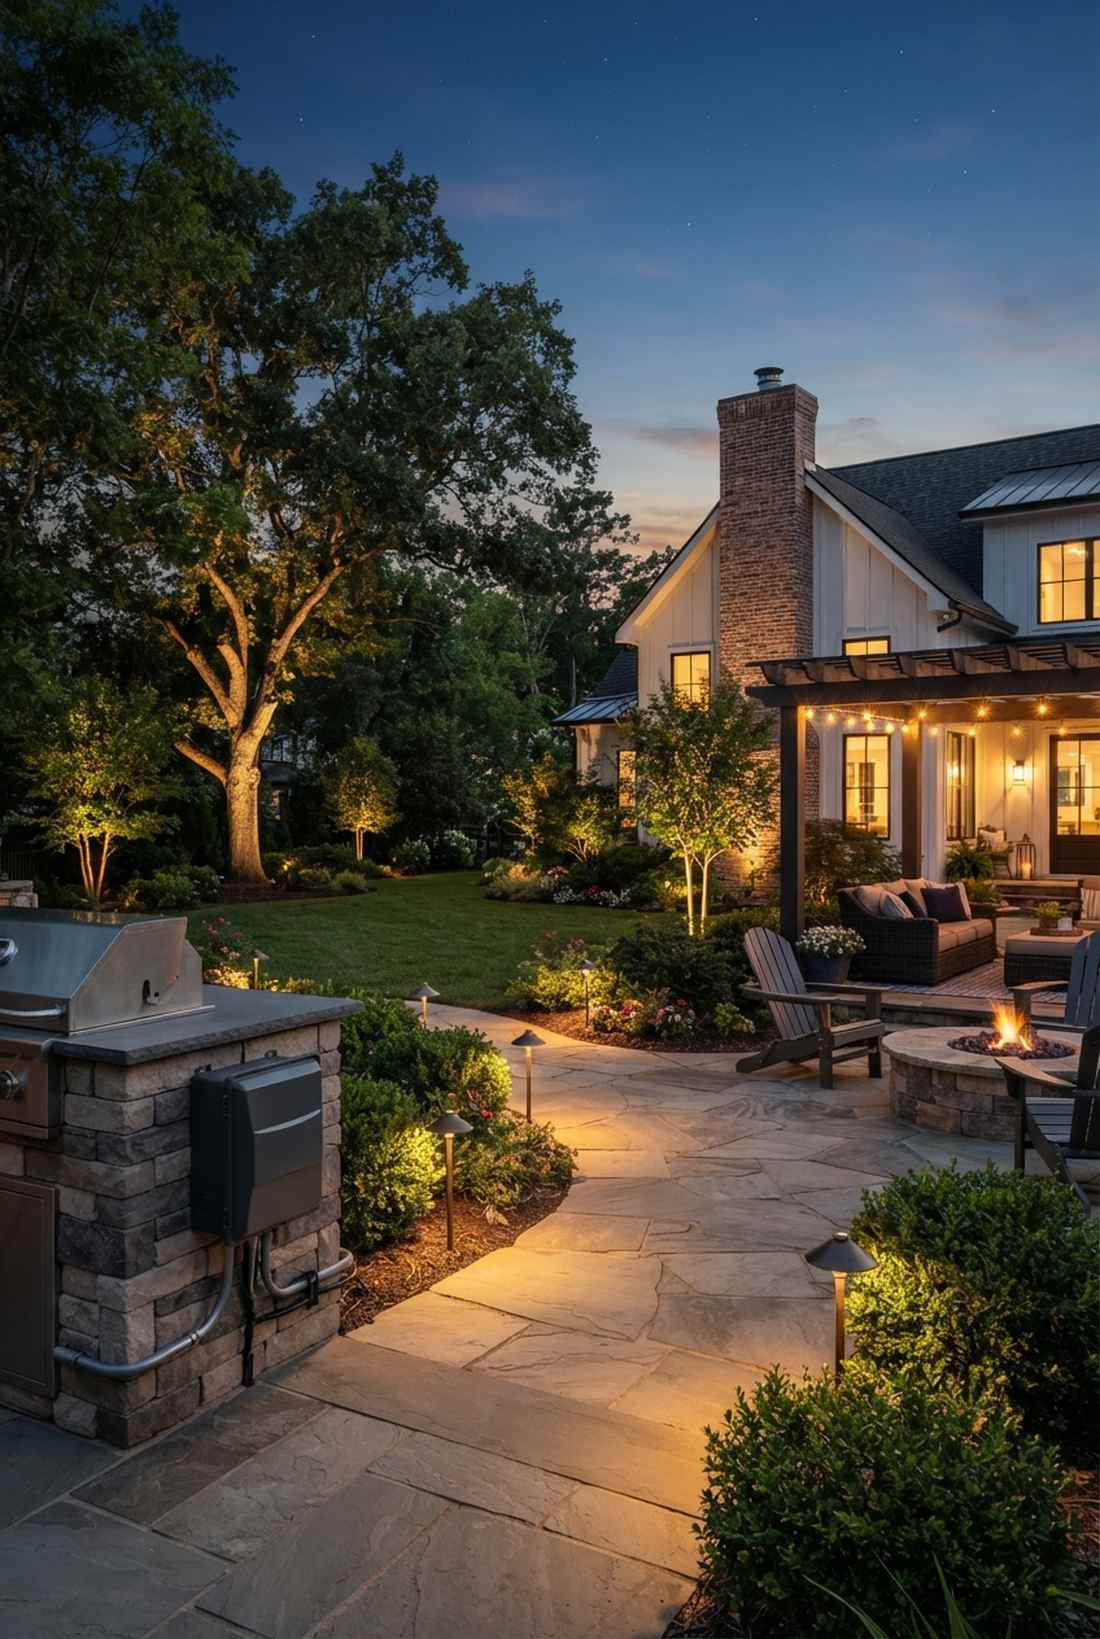
Creates a dramatic, towering silhouette that highlights gorgeous landscaping and brickwork. Directional landscape uplighting is a phenomenal way to frame the entrance using your property’s existing mature trees.
Flat pathway lights ignore vertical space, but shooting a focused beam upwards completely transforms the scale of your property. Grabbing some brass directional bullet spotlights ensures you can pinpoint the exact branch or column without wasting energy.
You can execute this theatrical effect for roughly $40–$70 per spotlight. It’s an instant curb appeal multiplier.
- Key Materials: Adjustable brass bullet fixtures.
- Vibe / Style: Dramatic estate landscape framing.
- Difficulty: Easy spike placement and aiming.
- Budget Breakdown: Bullet light: $50 | Colored lenses: $5.
- Creator’s Tip: Keep the beam angle tight (around 15 degrees) when lighting columns to emphasize extreme height.
- Smart Sourcing: Heavy-duty brass bullet uplights (starter kits) and narrow-beam LED MR16 bulbs.
Wait until you see how this next lighting trick completely hides ugly concrete borders.
Stair and Step Lighting Systems That Prevent Missteps
Mastering outdoor lighting stairs is non-negotiable for injury prevention and structural aesthetics. Treads and risers must be sharply defined using specialized waterproof housings to eliminate dangerous nighttime ambiguity.
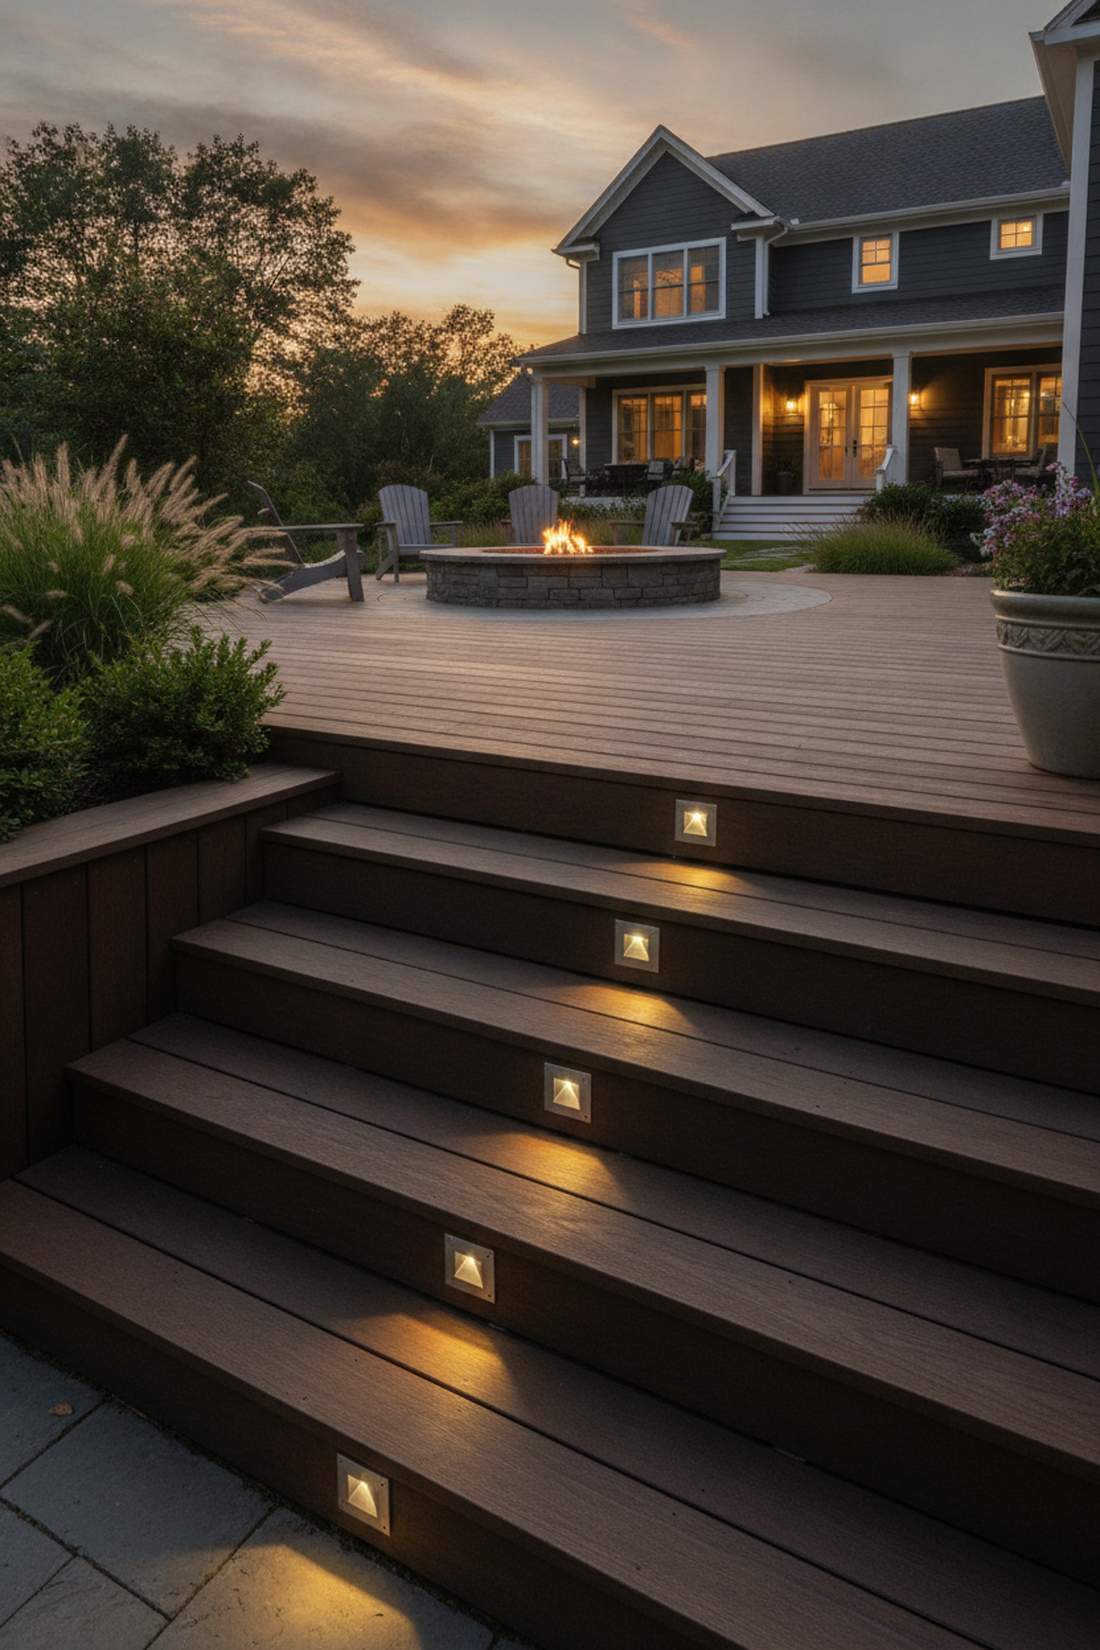
15. Riser-Mounted Step Lights
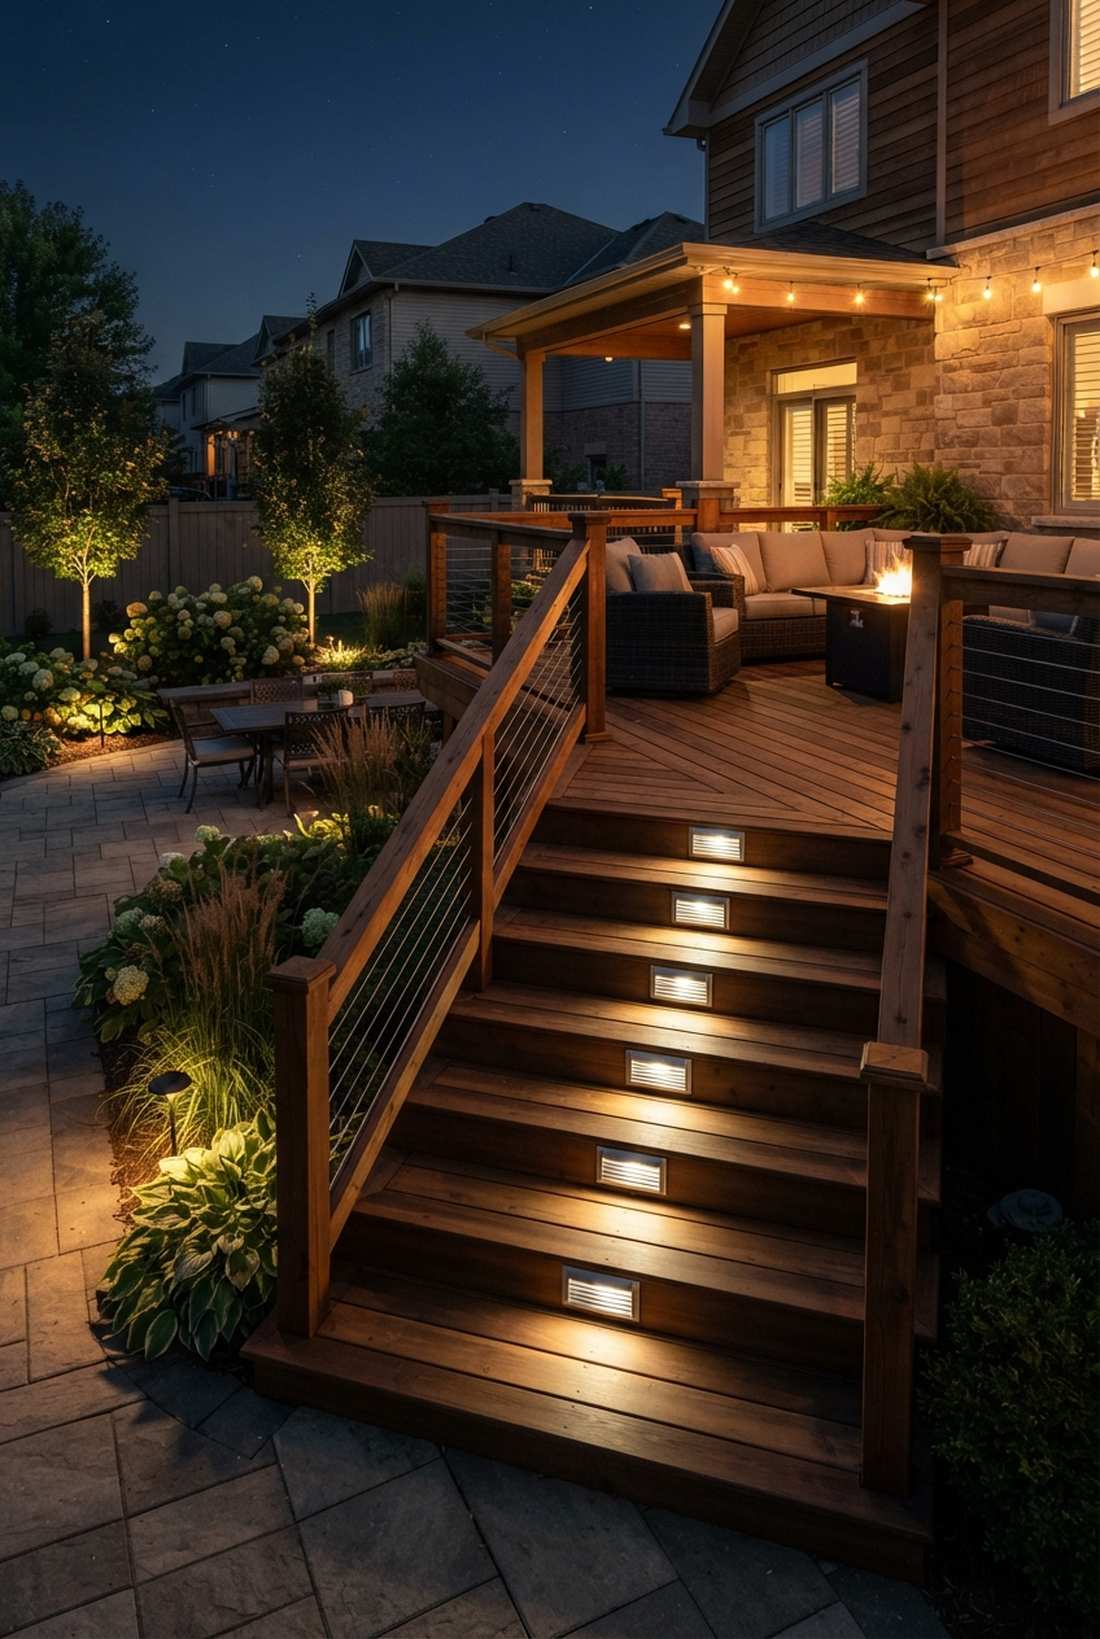
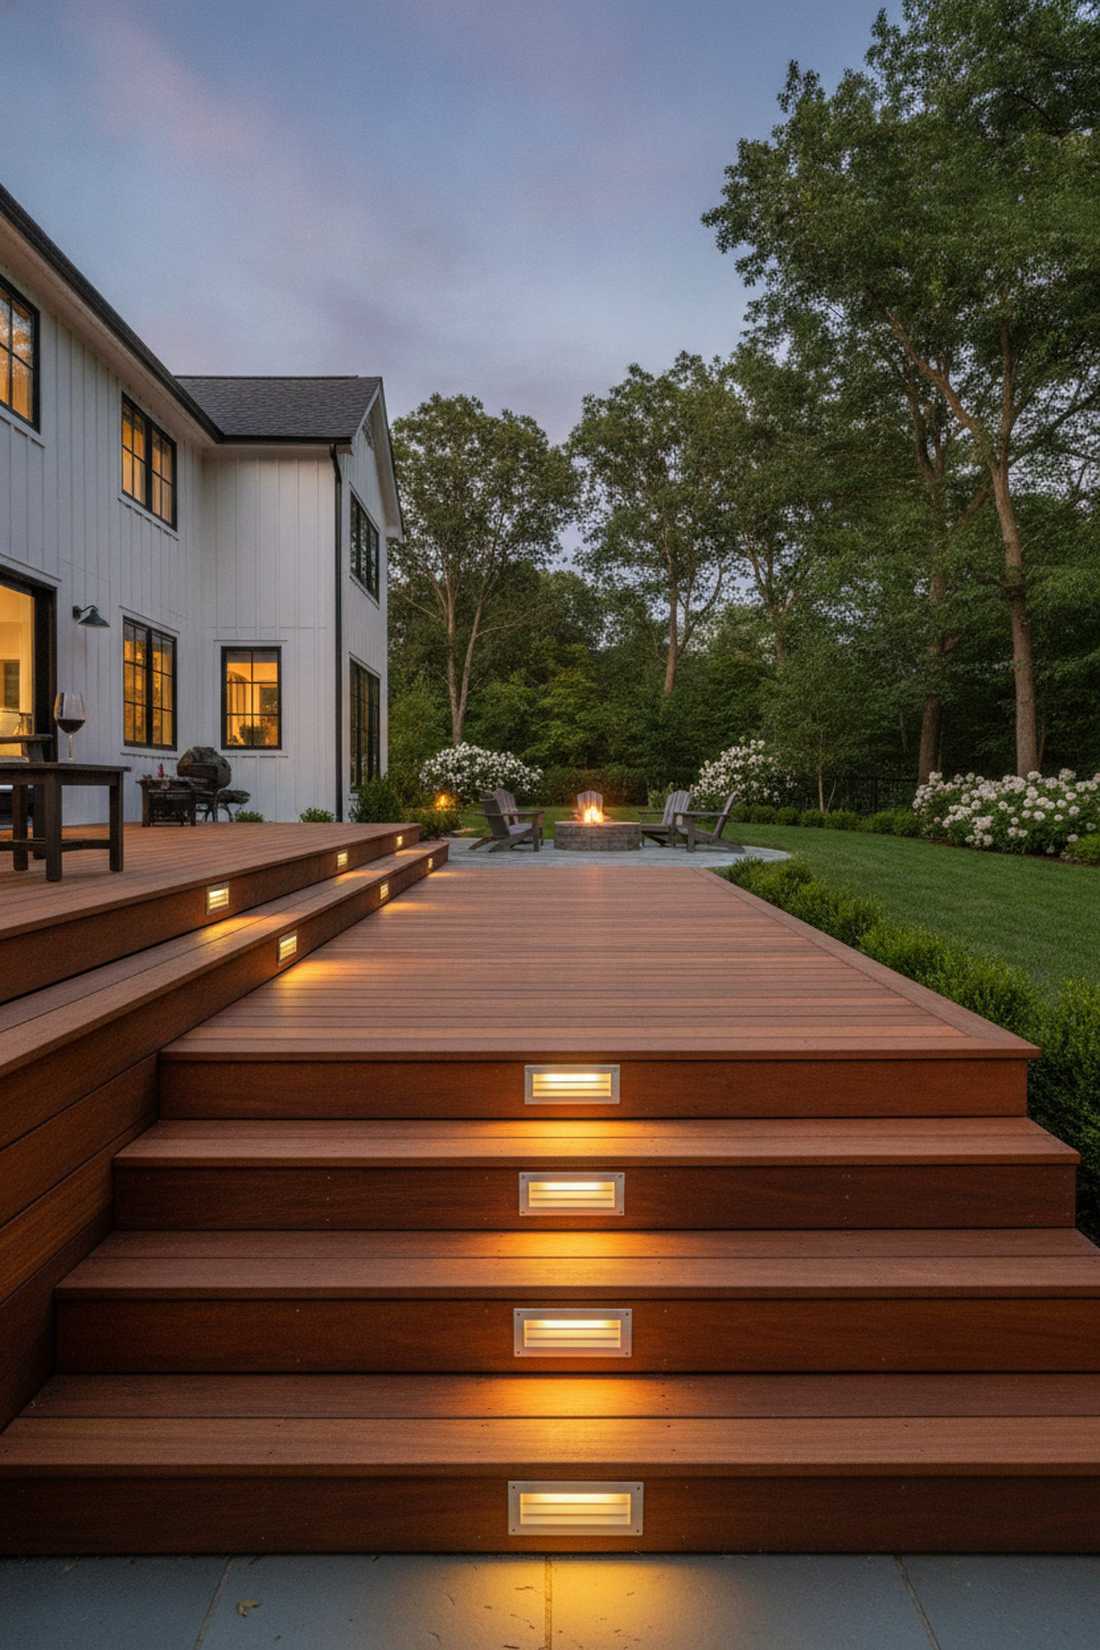
Casts a reassuring, crisp beam that makes late-night backyard navigation completely stress-free. Recessed stair riser lights are an absolute necessity for wide wooden decks or concrete porch entryways.
Overhead porch lights cast dangerous body shadows over stairs, whereas this direct riser layout delivers a surprisingly premium look with zero glare. Stocking up on waterproof LED step lighting kits ensures the metal faceplates won’t rust from winter rock salt.
Expect to spend $20–$40 per step. Save this to your deck renovation board to ensure your family’s safety!
- Key Materials: Louvered stainless steel rectangular faceplates.
- Vibe / Style: Clean, safe modern decking.
- Difficulty: Intermediate carpentry cutting.
- Budget Breakdown: Fixture: $25 | Wiring: $5.
- Creator’s Tip: Center the light exactly on the riser, or double them up symmetrically if the stair is wider than 48 inches.
- Smart Sourcing: Louvered outdoor LED step lights (bulk pack) and marine-grade wood sealants.
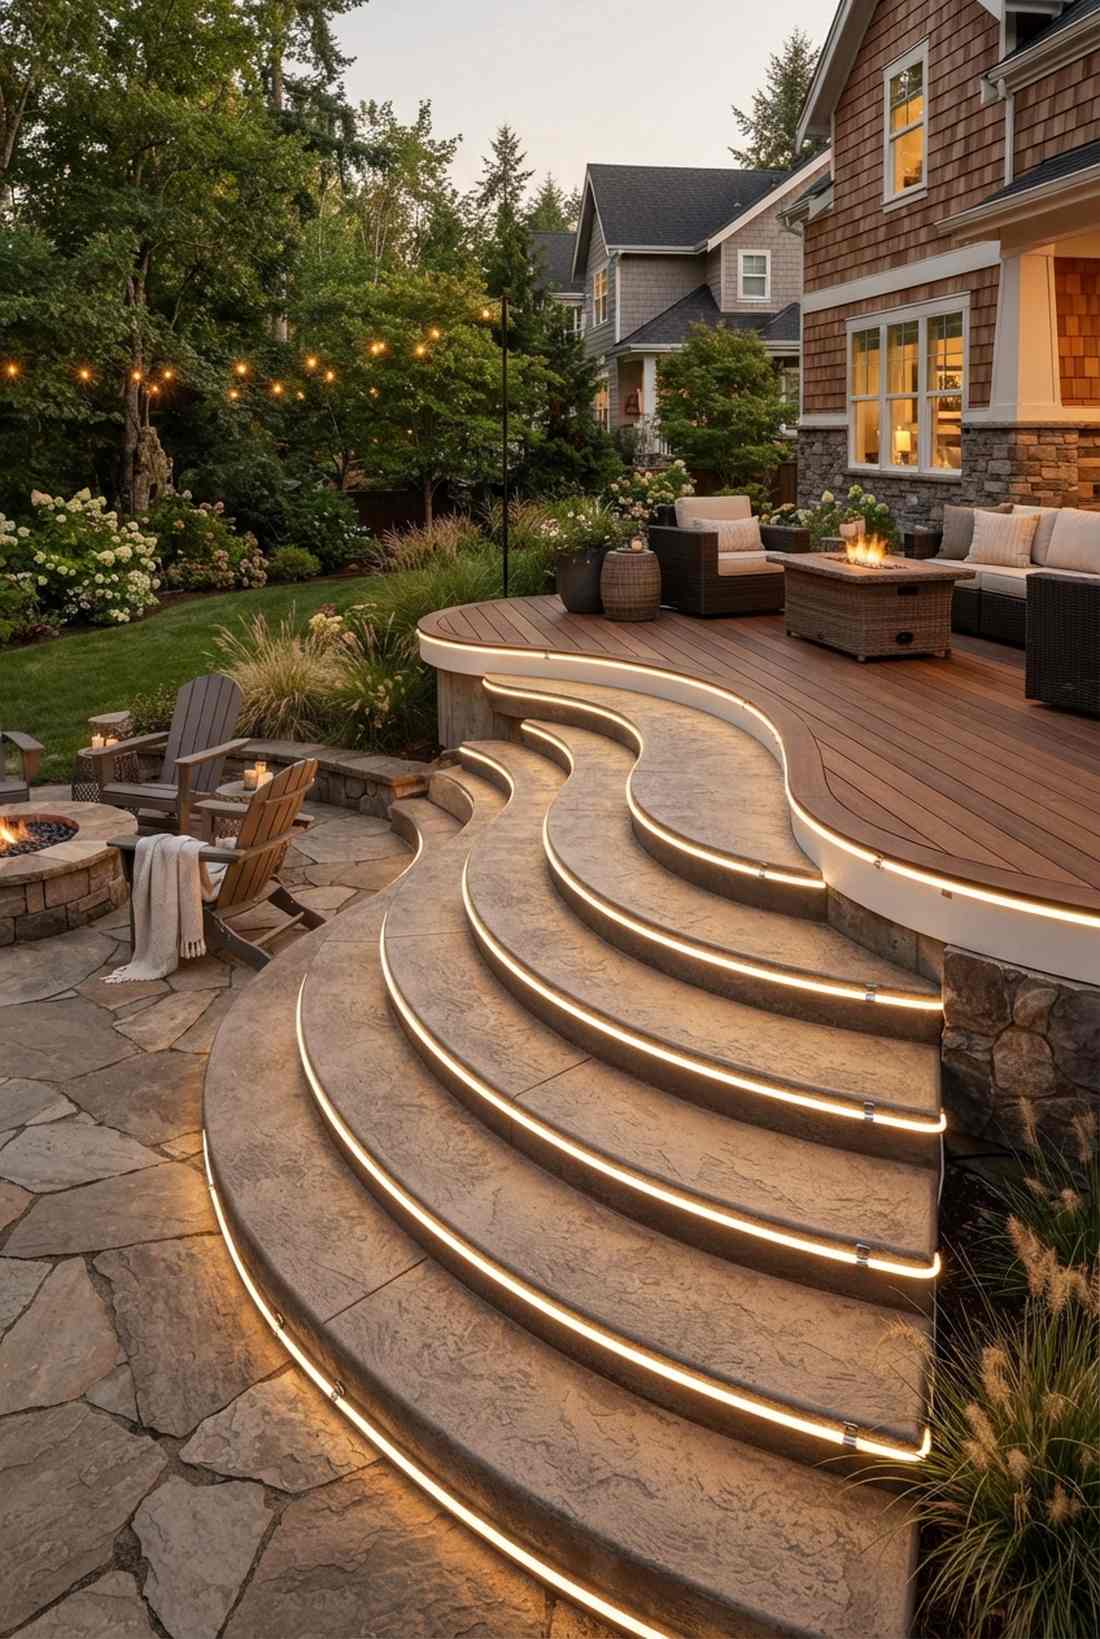
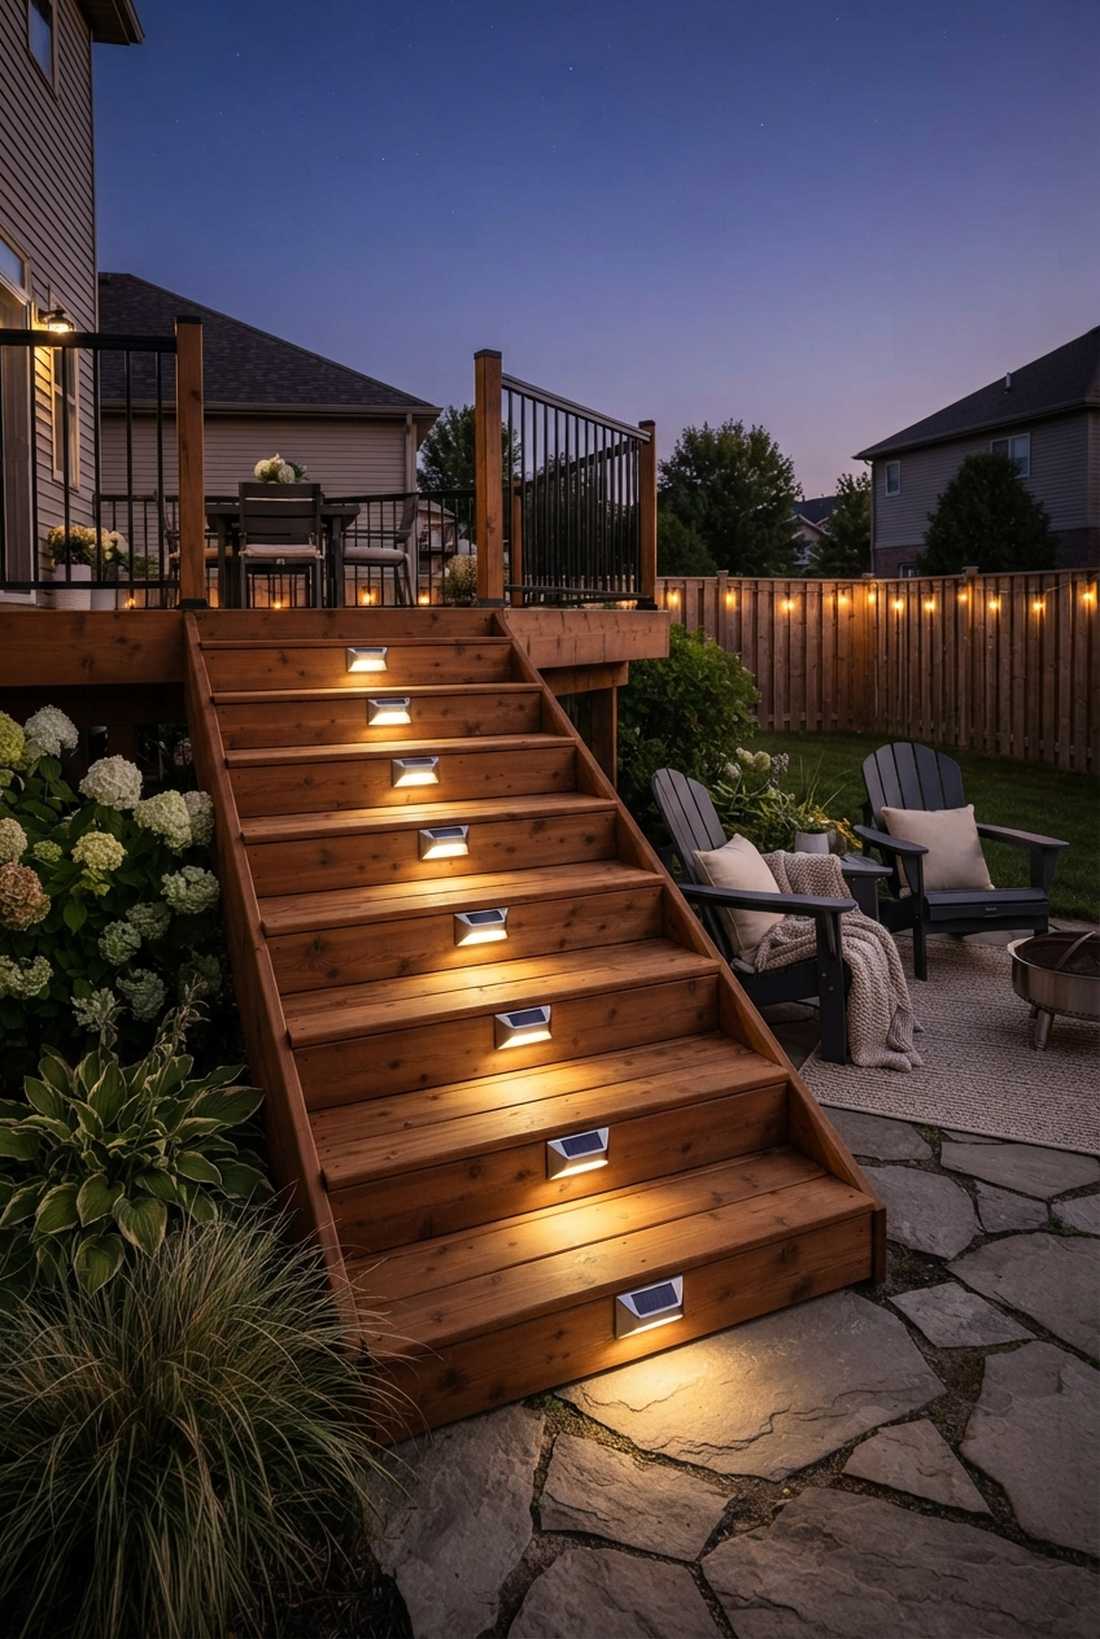
16. Under-Tread Lighting Strips
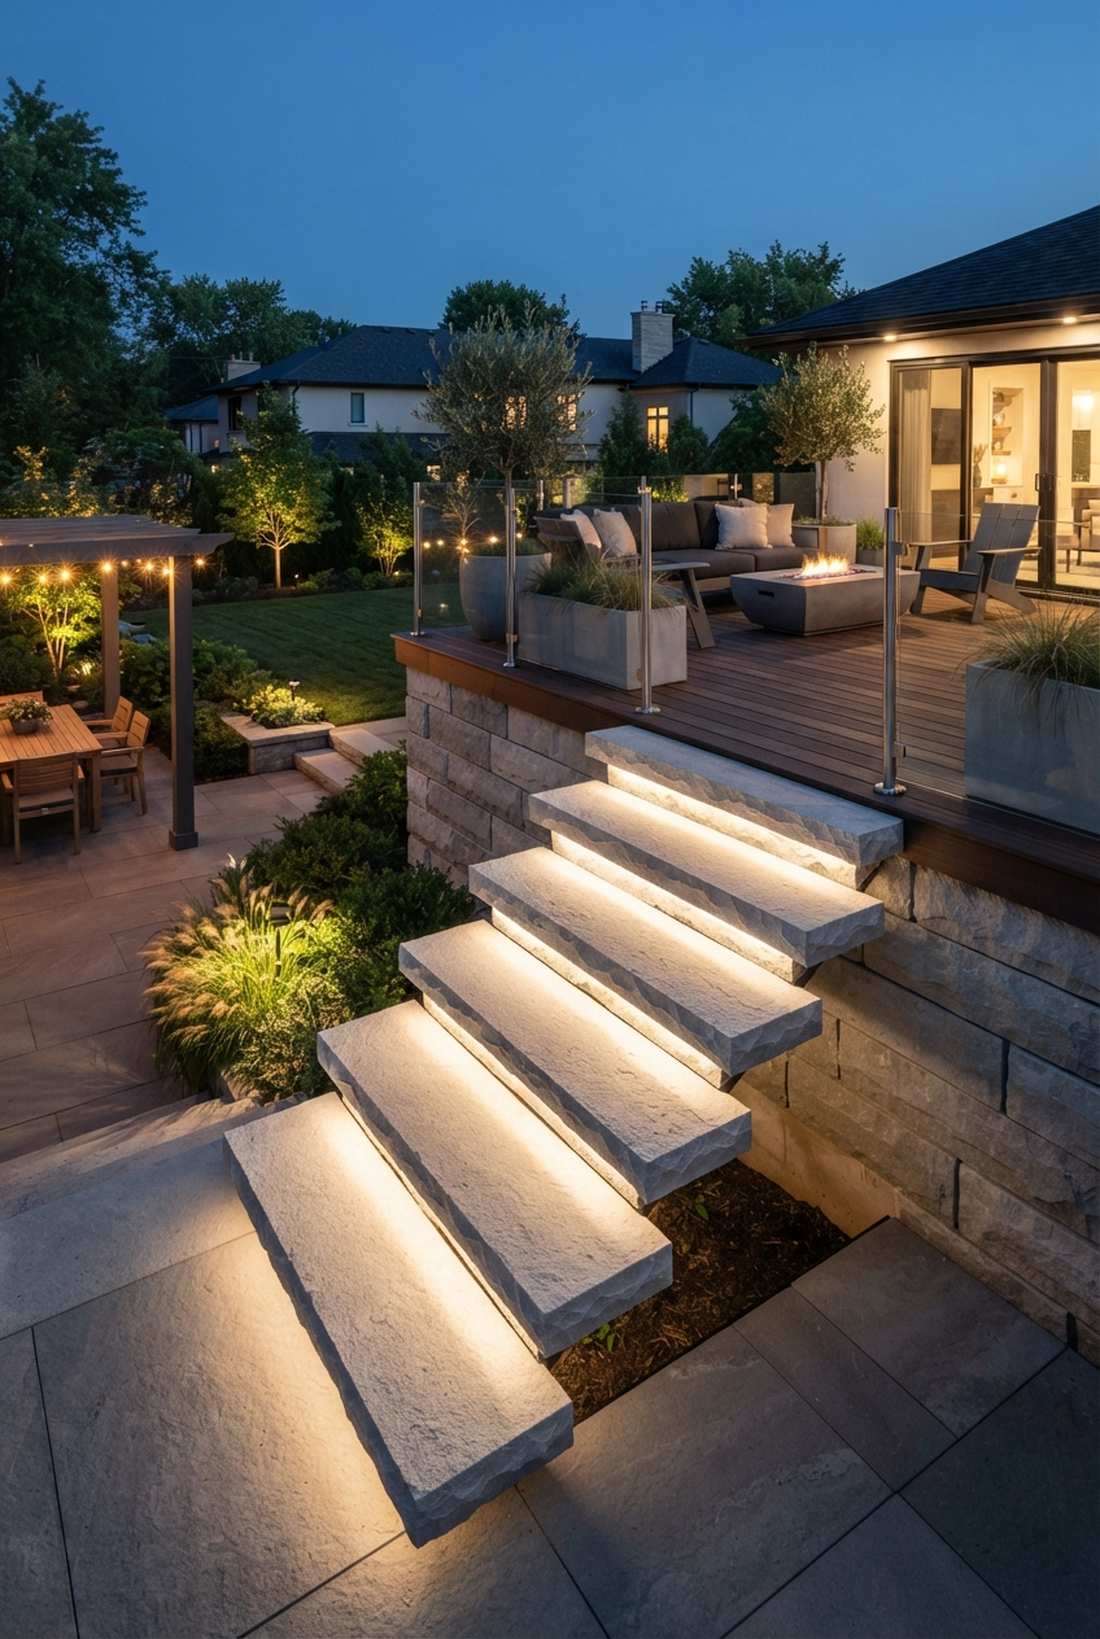
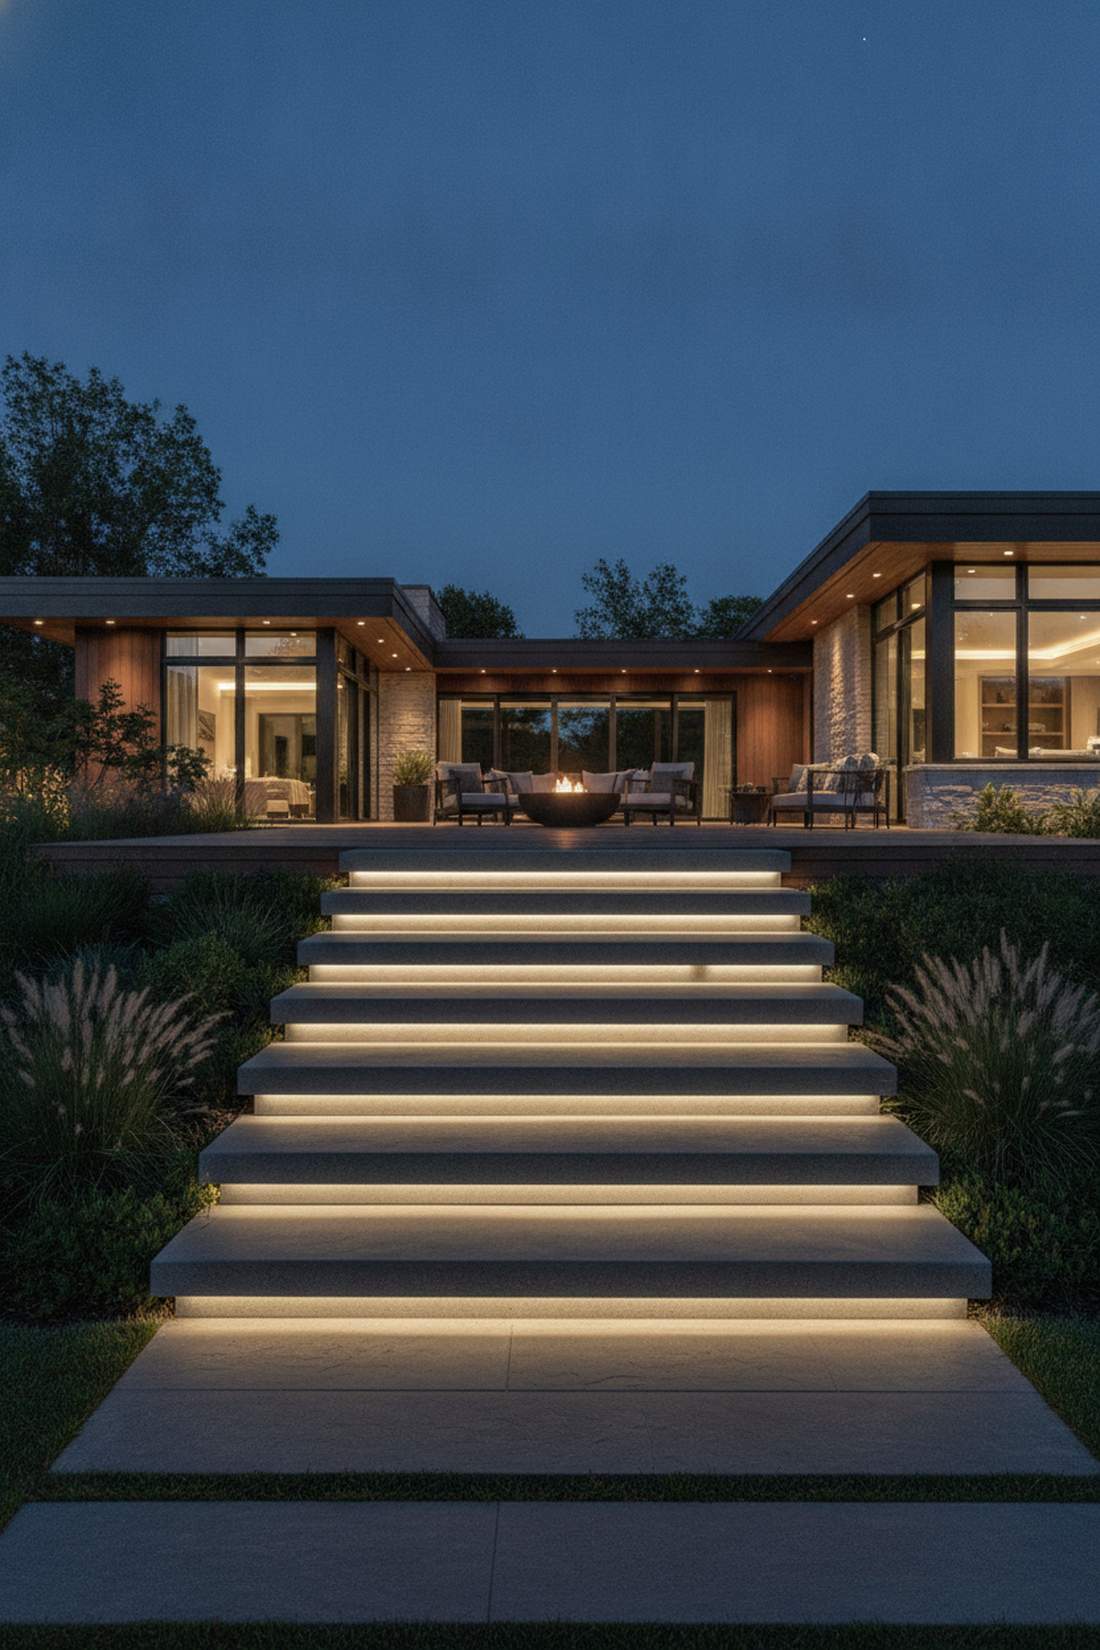
Generates an incredible floating illusion that makes heavy stone stairs look weightless. Concealed under-tread LED lips are the hottest trend in high-end contemporary hardscape design.
Standard surface bumps look dated and bulky, but this hidden glow technique looks far more expensive than it is. Using high-adhesion outdoor waterproof tape light reels under an overhanging lip completely protects the diodes from rain and foot scuffs.
This seamless shadow-gap effect costs roughly $15–$25 per step. Pin this immediately if you love the minimalist floating aesthetic.
- Key Materials: Diffused LED tape hidden under stair nosing.
- Vibe / Style: Ultra-modern floating architecture.
- Difficulty: Intermediate routing and hiding wires.
- Budget Breakdown: Tape strip: $15 | Aluminum track: $10.
- Creator’s Tip: Rout a shallow groove under the stair lip so the light strip sits flush and is invisible from below.
- Smart Sourcing: IP68 waterproof LED strip lights (pre-cut) and silicone strip mounting brackets.
17. Handrail-Integrated Lighting
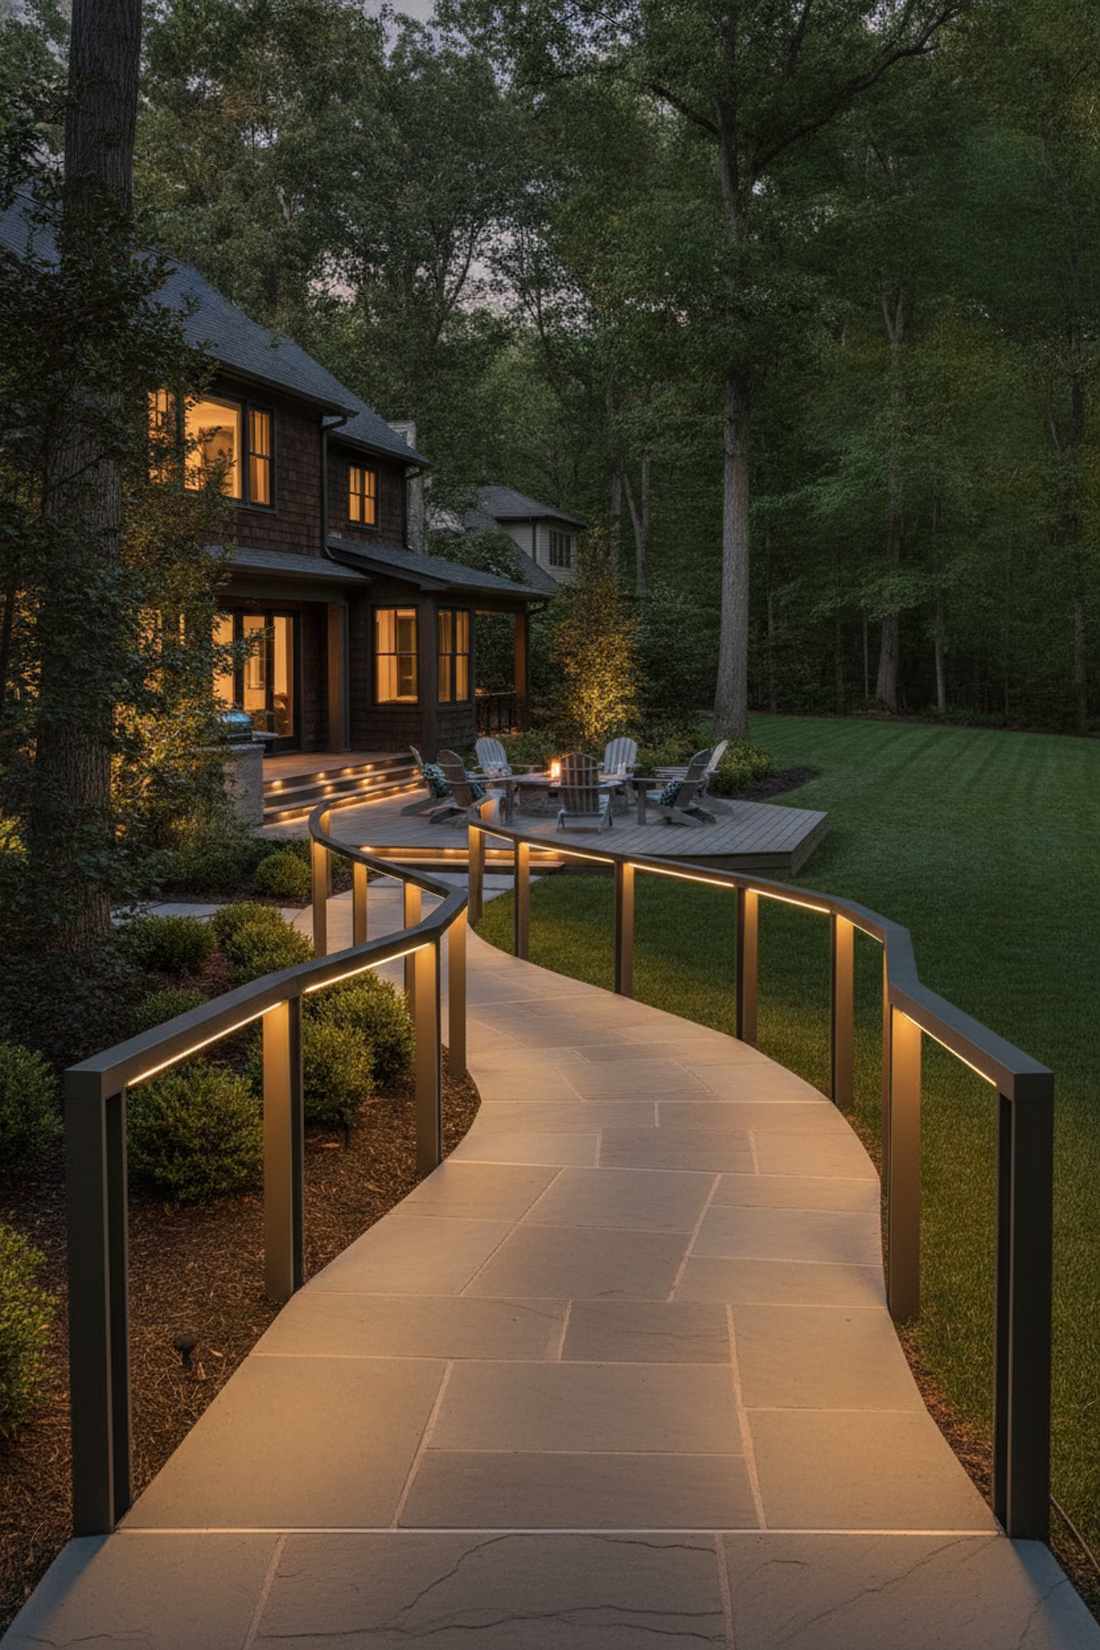
Provides a comforting, guiding touch that beautifully outlines steep exterior walkways. Illuminated railing profiles are perfect for long, sloping pathways where digging into the steps isn’t possible.
Floor-level lights can get buried by heavy snow, but this waist-high approach gives a designer-level finish while marking exactly where to grip. Sourcing extruded aluminum handrail light channels gives you a sturdy grip while discreetly hiding the wiring underneath.
This dual-purpose safety feature runs around $25–$40 per linear foot. A highly practical solution that completely changes the vibe.
- Key Materials: Custom aluminum rails with LED under-grooves.
- Vibe / Style: Resort-style assisted navigation.
- Difficulty: Advanced metal fabrication and wiring.
- Budget Breakdown: Handrail tube: $30 | LED insert: $10.
- Creator’s Tip: Connect these to a smart dimmer so you can lower the waist-high glare when hosting patio parties.
- Smart Sourcing: LED handrail extrusion channels (starter kits) and low-voltage dimmable drivers.
18. Wall-Mounted Step Lights
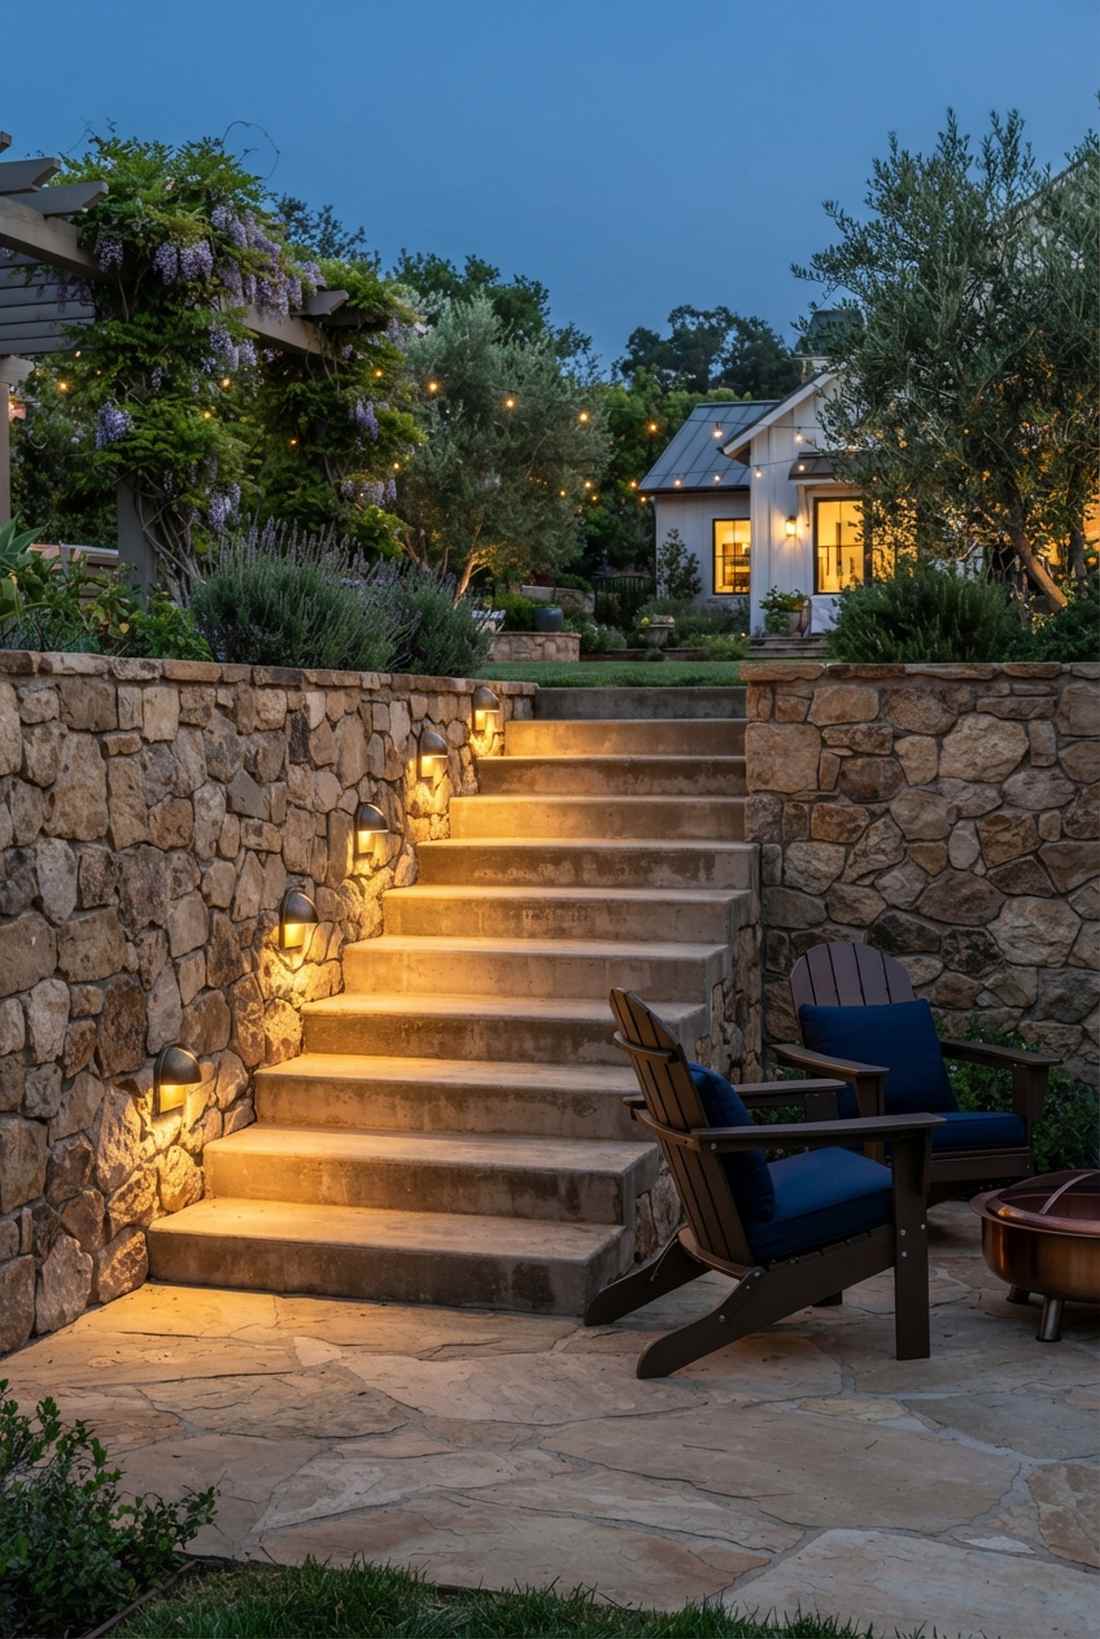
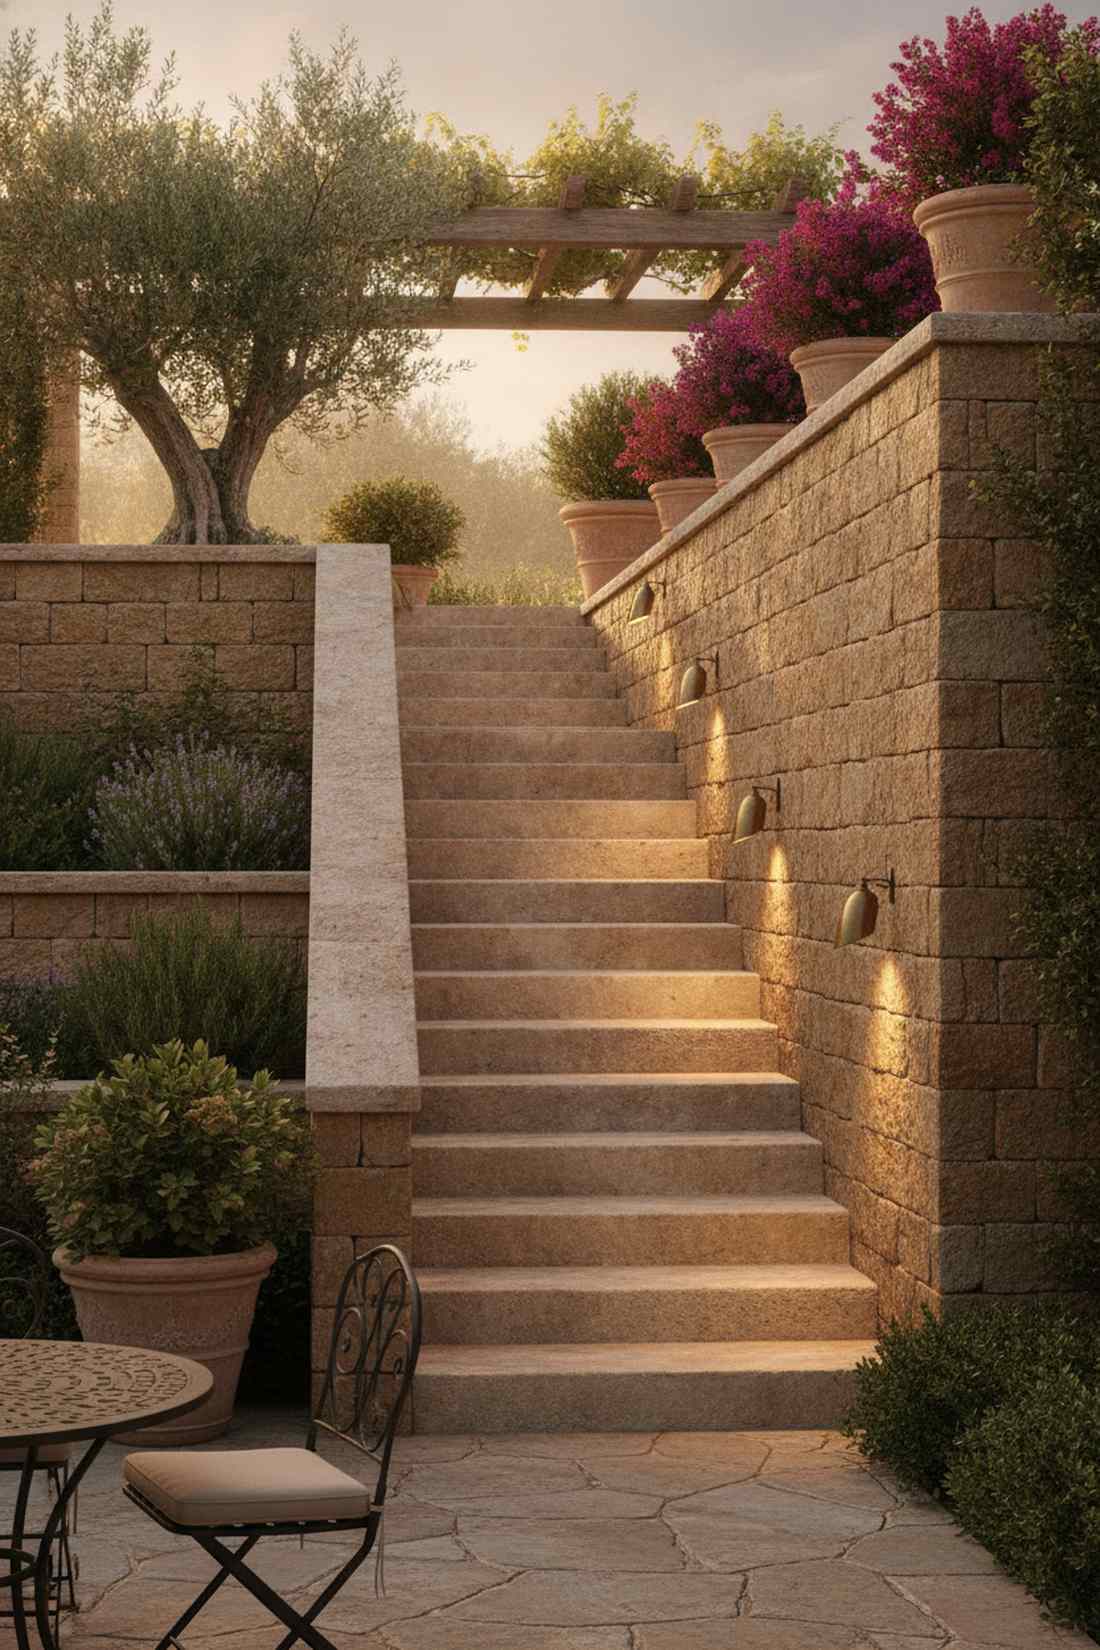
Bathes a tight, walled-in staircase with a gorgeous asymmetric cascade of light. Retaining wall step wash lighting is an elegant problem-solver for staircases sandwiched between solid masonry blocks.
Drilling into the actual stair treads ruins waterproofing, so moving the fixtures to the side wall completely bypasses structural risks. Grabbing shielded hardscape wall fixtures allows you to shoot light diagonally across three steps at once.
You can light a whole staircase this way for about $40–$60 per wall unit. Pin this if you’re dealing with tricky concrete stairs!
- Key Materials: Asymmetric cast-brass wall sconces.
- Vibe / Style: Tuscan courtyard staircase.
- Difficulty: Intermediate masonry drilling.
- Budget Breakdown: Wall sconce: $45 | Masonry bits: $10.
- Creator’s Tip: Mount them exactly 30 to 36 inches above the tread to get the perfect downward wash angle.
- Smart Sourcing: Asymmetric LED wall step lights (multi-pack) and weather-resistant wire splice kits.
19. Stair Edge Rope Lights
Traces the exact outline of complex sweeping stairs like a glowing architectural pencil. Flexible edge rope lighting is the absolute best way to illuminate radius decks and dramatically curved concrete steps.
Rigid fixtures can’t handle curves smoothly, but this bendable neon approach delivers a surprisingly premium look on unusual shapes. Investing in thick, UV-jacketed exterior LED rope light spools prevents the plastic from cracking and turning yellow after one summer.
This continuous outline costs about $2–$4 per foot. It’s a fast weekend upgrade that completely changes the nighttime layout.
- Key Materials: Heavy-duty silicone neon rope.
- Vibe / Style: Playful, sweeping contemporary curves.
- Difficulty: Easy surface-clip mounting.
- Budget Breakdown: Rope spool: $30 | Mounting clips: $10.
- Creator’s Tip: Never pull the rope perfectly tight on curves; leave slight slack for extreme winter temperature shrinkage.
- Smart Sourcing: Silicone exterior LED rope lights (bulk roll) and stainless steel saddle clips.
This upcoming setup is ridiculously cheap but gives off serious five-star resort vibes.
20. Post-Mounted Step Downlights
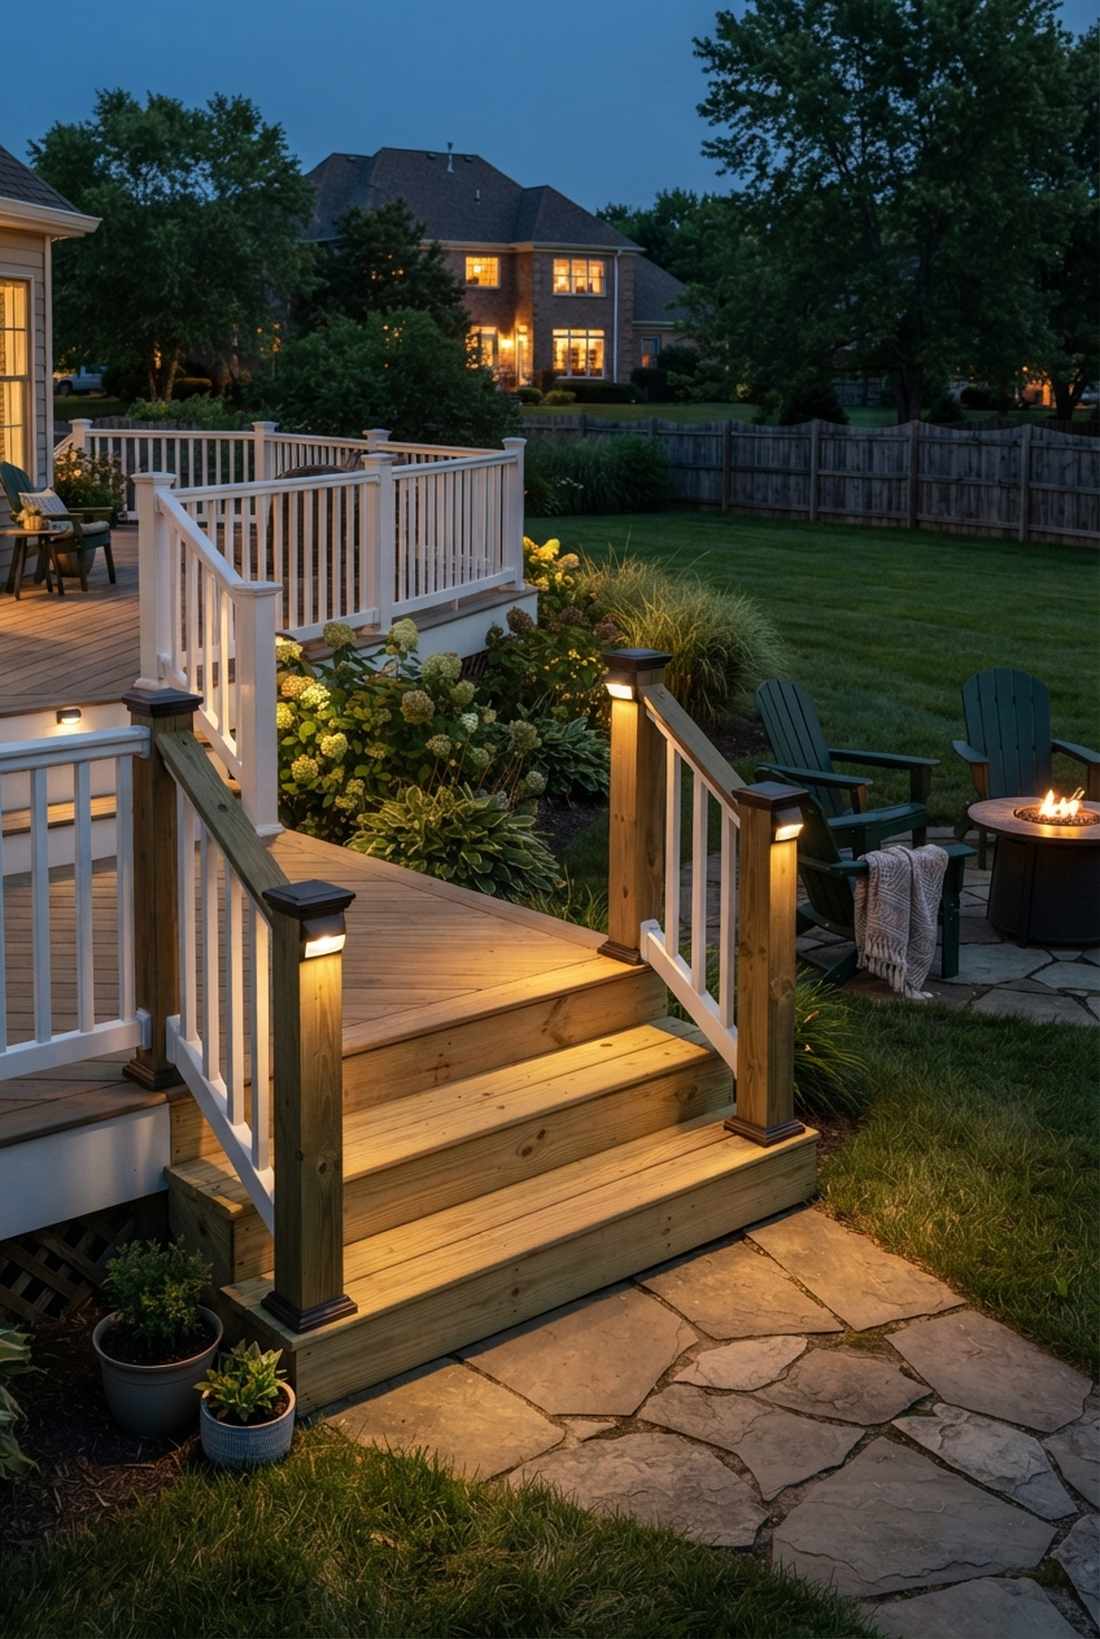
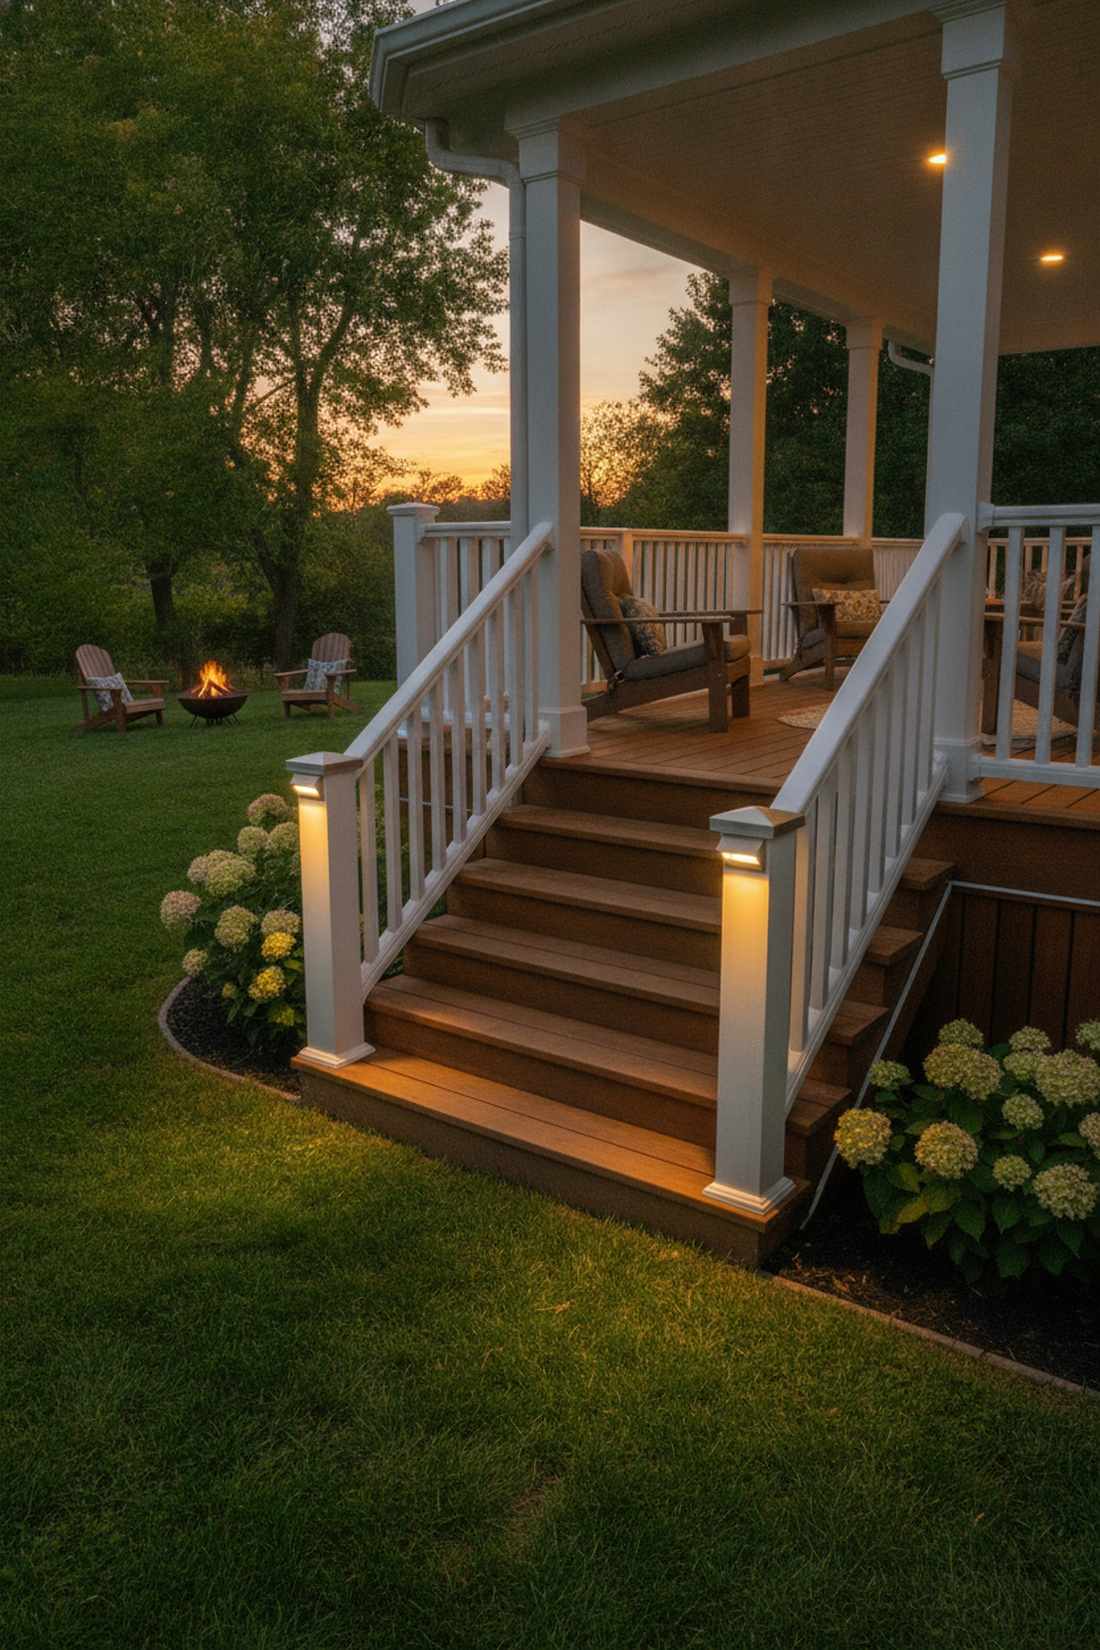
Creates a warm, spotlighted landing zone right at the bottom of your deck stairs. Newel post cap downlights are excellent for highlighting the transition space where stairs hit the lawn.
Relying only on low step lights leaves the railing dark, but this overhead post method adds a crucial vertical layer of safety. Securing deck post cap lighting kits gives you a clean finished look while flooding the entire turning radius with light.
A pair of premium post caps runs about $50–$80. Save this to your deck building board for the ultimate finishing touch.
- Key Materials: Aluminum 4×4 or 6×6 post caps with built-in downward LEDs.
- Vibe / Style: Classic American wrap-around porch.
- Difficulty: Easy slip-on and wire-nut setup.
- Budget Breakdown: Post cap pair: $70 | Wire concealers: $10.
- Creator’s Tip: Choose models with downward-only frosted lenses so the glare doesn’t hit your eyes as you climb the steps.
- Smart Sourcing: Low-voltage LED post cap downlights (multi-pack) and deck wire concealment trims.
21. Solar Step Markers
Offers a lightning-fast, zero-wiring solution for dark secondary patio steps. Self-contained solar stair risers are a lifesaver for back decks where running an electrical line is totally out of the budget.
Hardwiring an old deck can take days, but this peel-and-stick approach looks far more expensive than it is and takes ten minutes. Look for high-capacity compact solar step lights so they actually stay illuminated past midnight.
You can light a whole back stairwell for under $35. Highly recommended for a fast, satisfying weekend win.
- Key Materials: Triangular plastic or steel solar wedges.
- Vibe / Style: Quick, modern convenience.
- Difficulty: Ultimate beginner peel-and-stick.
- Budget Breakdown: 6-pack solar units: $30 | Screws: $5.
- Creator’s Tip: Ensure the stairs face South or West, otherwise they won’t get enough charge in the winter months.
- Smart Sourcing: Stainless steel solar step markers (bulk pack) and heavy-duty double-sided exterior tape.
Bollard Lighting Applications That Define Boundaries
Thick, visually imposing outdoor lighting bollards act as dual-purpose landscape features. They physically block foot traffic from sensitive garden beds while casting wide, reliable pools of guidance lighting.
22. Architectural Metal Bollards
Radiates a heavy, muscular presence that commands respect along a high-end walkway. Commercial metal landscape bollards are perfect for wide pedestrian paths in HOAs or luxury suburban parks.
Cheap plastic stakes snap if you look at them wrong, whereas this solid steel layout gives a seriously permanent, designer-level finish. Upgrading to commercial-grade outdoor bollard supplies guarantees they can take a hit from a lawnmower and not even flinch.
These heavy-duty monuments cost $120–$250 each. Pin this if you want ultimate durability and massive light coverage.
- Key Materials: Cast aluminum 42-inch pillars.
- Vibe / Style: Imposing luxury public space.
- Difficulty: Advanced deep concrete anchoring.
- Budget Breakdown: Bollard: $150 | Anchor bolts: $15.
- Creator’s Tip: Always buy models with replaceable LED modules inside, so you don’t have to replace the entire steel post if a bulb dies.
- Smart Sourcing: Commercial cast-aluminum bollard lights (starter kits) and J-bolt concrete anchor kits.
23. Decorative Pattern Bollards
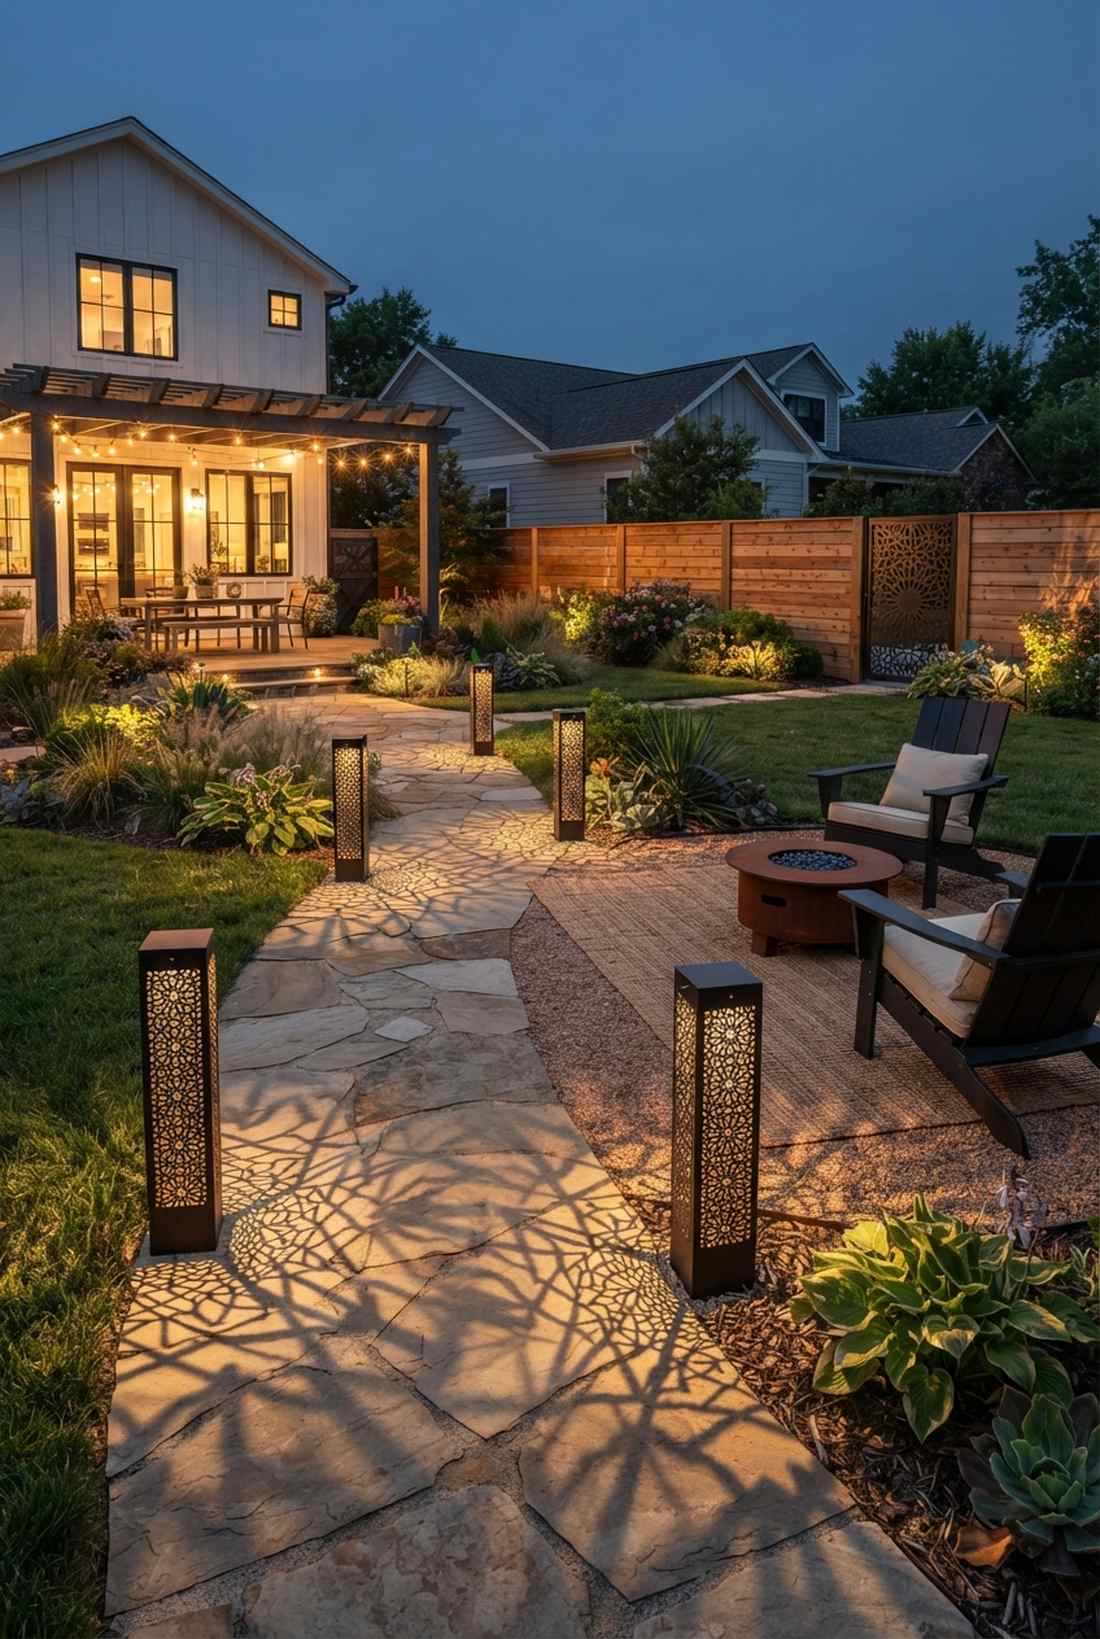
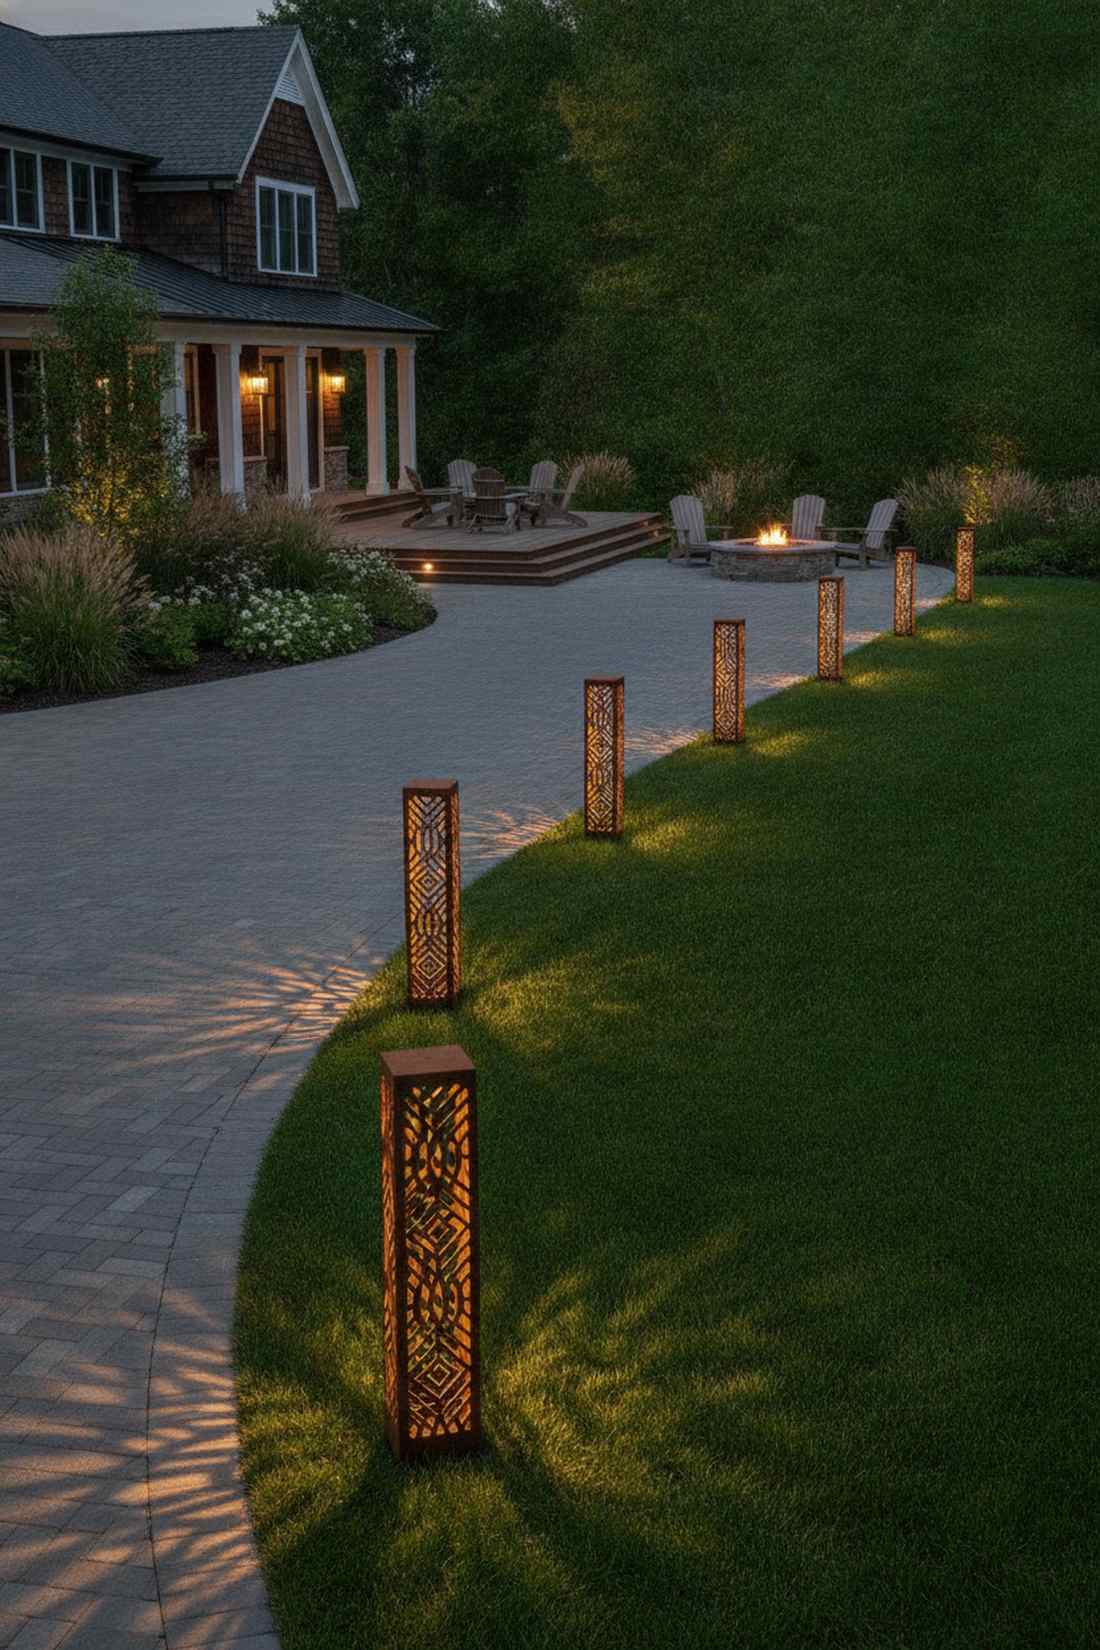
Casts a mesmerizing, delicate lace of shadows across your driveway and lawn. Laser-cut shadow bollards are an incredible artistic feature for contemporary courtyards craving visual texture.
Plain clear glass can feel intensely boring, but this geometric shadow-play looks completely custom and highly expensive. Snagging some decorative laser-cut metal lanterns turns a simple sidewalk into a dynamic nighttime art exhibit.
These artistic pillars run about $80–$180 per unit. Save this idea to inject pure artistic magic into your landscaping!
- Key Materials: Cor-Ten steel or powder-coated patterned towers.
- Vibe / Style: Dynamic bohemian courtyard.
- Difficulty: Intermediate post-mounting.
- Budget Breakdown: Pattern bollard: $120 | Base plate: $15.
- Creator’s Tip: Coordinate the cut-out shapes (like leaves or geometric diamonds) with your existing fence or gate patterns.
- Smart Sourcing: Laser-cut steel pathway bollards (premium styles) and weatherproof ground spike bases.
24. Solar-Powered Bollards
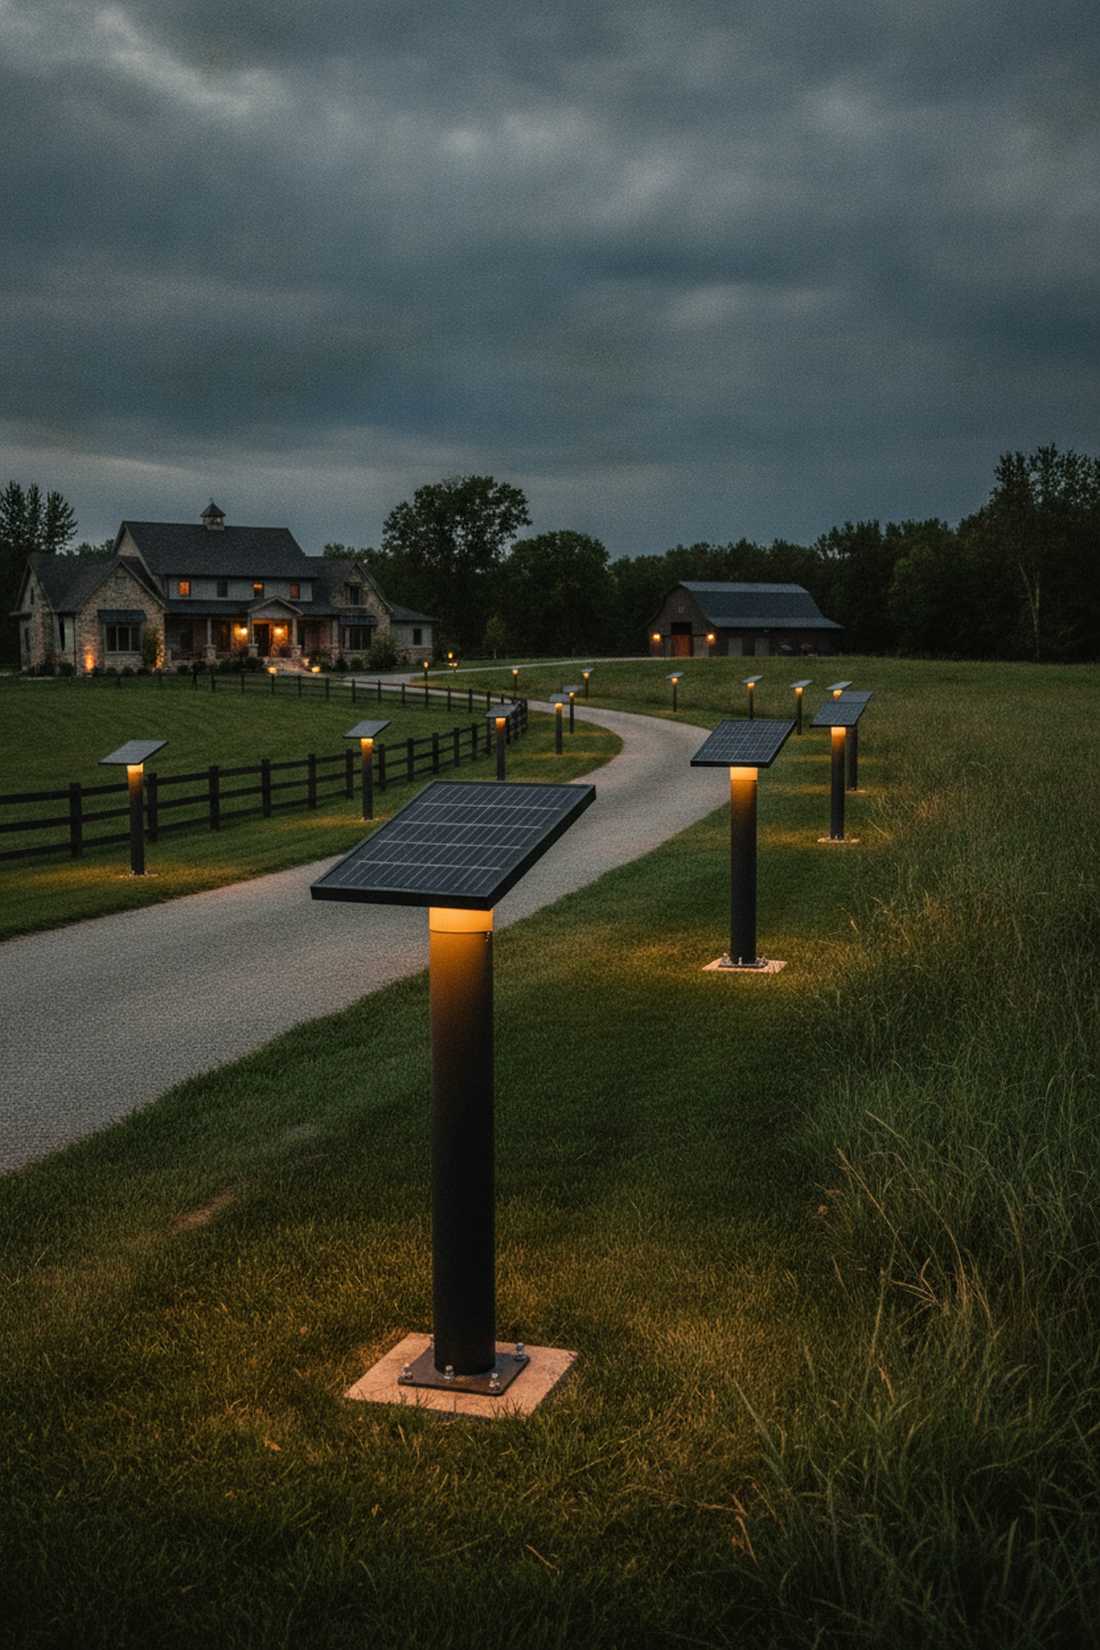
Offers massive industrial-sized illumination without digging up a single inch of grass. Heavy-duty solar path pillars are the holy grail for long, remote property borders or rural driveways.
Trenching 300 feet of wire is a nightmare, but this robust sun-powered method completely bypasses the electrical grid. Investing in top-tier commercial solar bollard fixtures ensures you get a massive battery bank that actually survives cloudy winter weeks.
Expect a higher upfront cost of $150–$300, but zero electricity bills forever. A brilliant choice for large, sprawling acreage.
- Key Materials: Monocrystalline-topped thick metal columns.
- Vibe / Style: Eco-friendly rural estate.
- Difficulty: Easy surface or spike mounting.
- Budget Breakdown: Solar pillar: $200 | Mounting plate: $20.
- Creator’s Tip: Ensure absolutely no tree branches overhang these units, as even partial shade drastically ruins charging efficiency.
- Smart Sourcing: High-capacity solar LED bollards (multi-pack) and heavy-duty surface mount anchors.
Stop scrolling if you hate high electric bills, because this next method is pure genius.
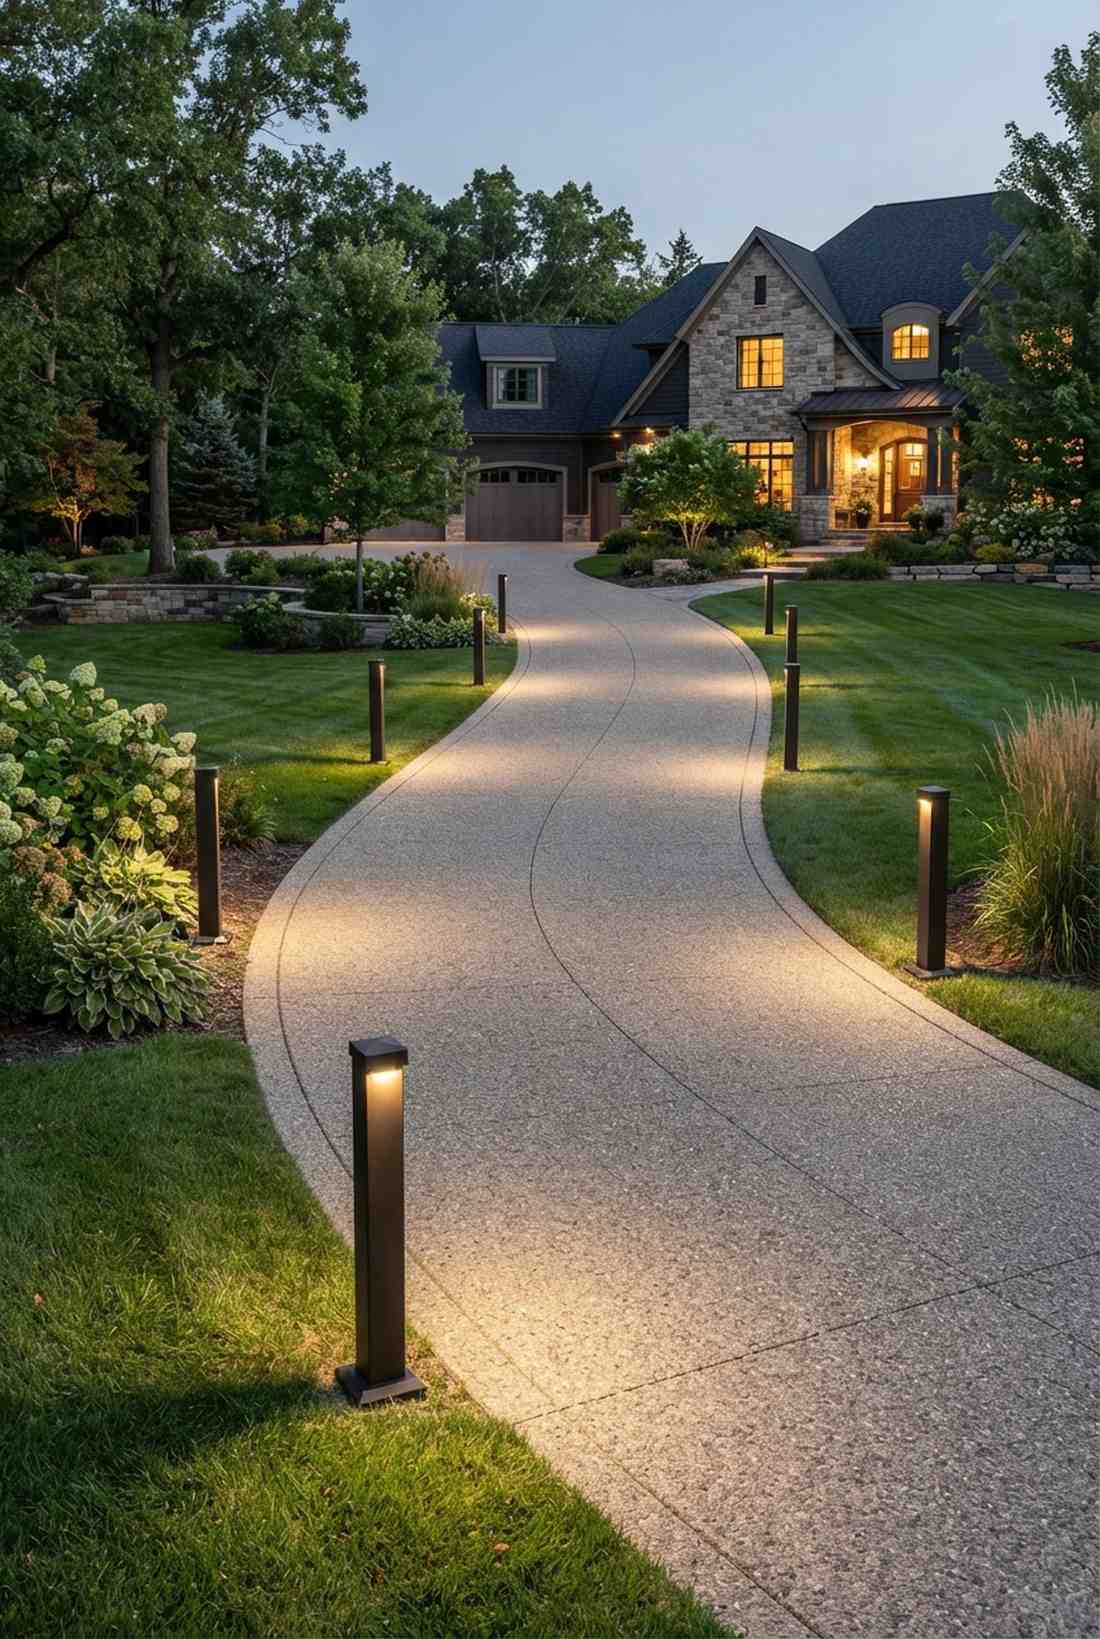
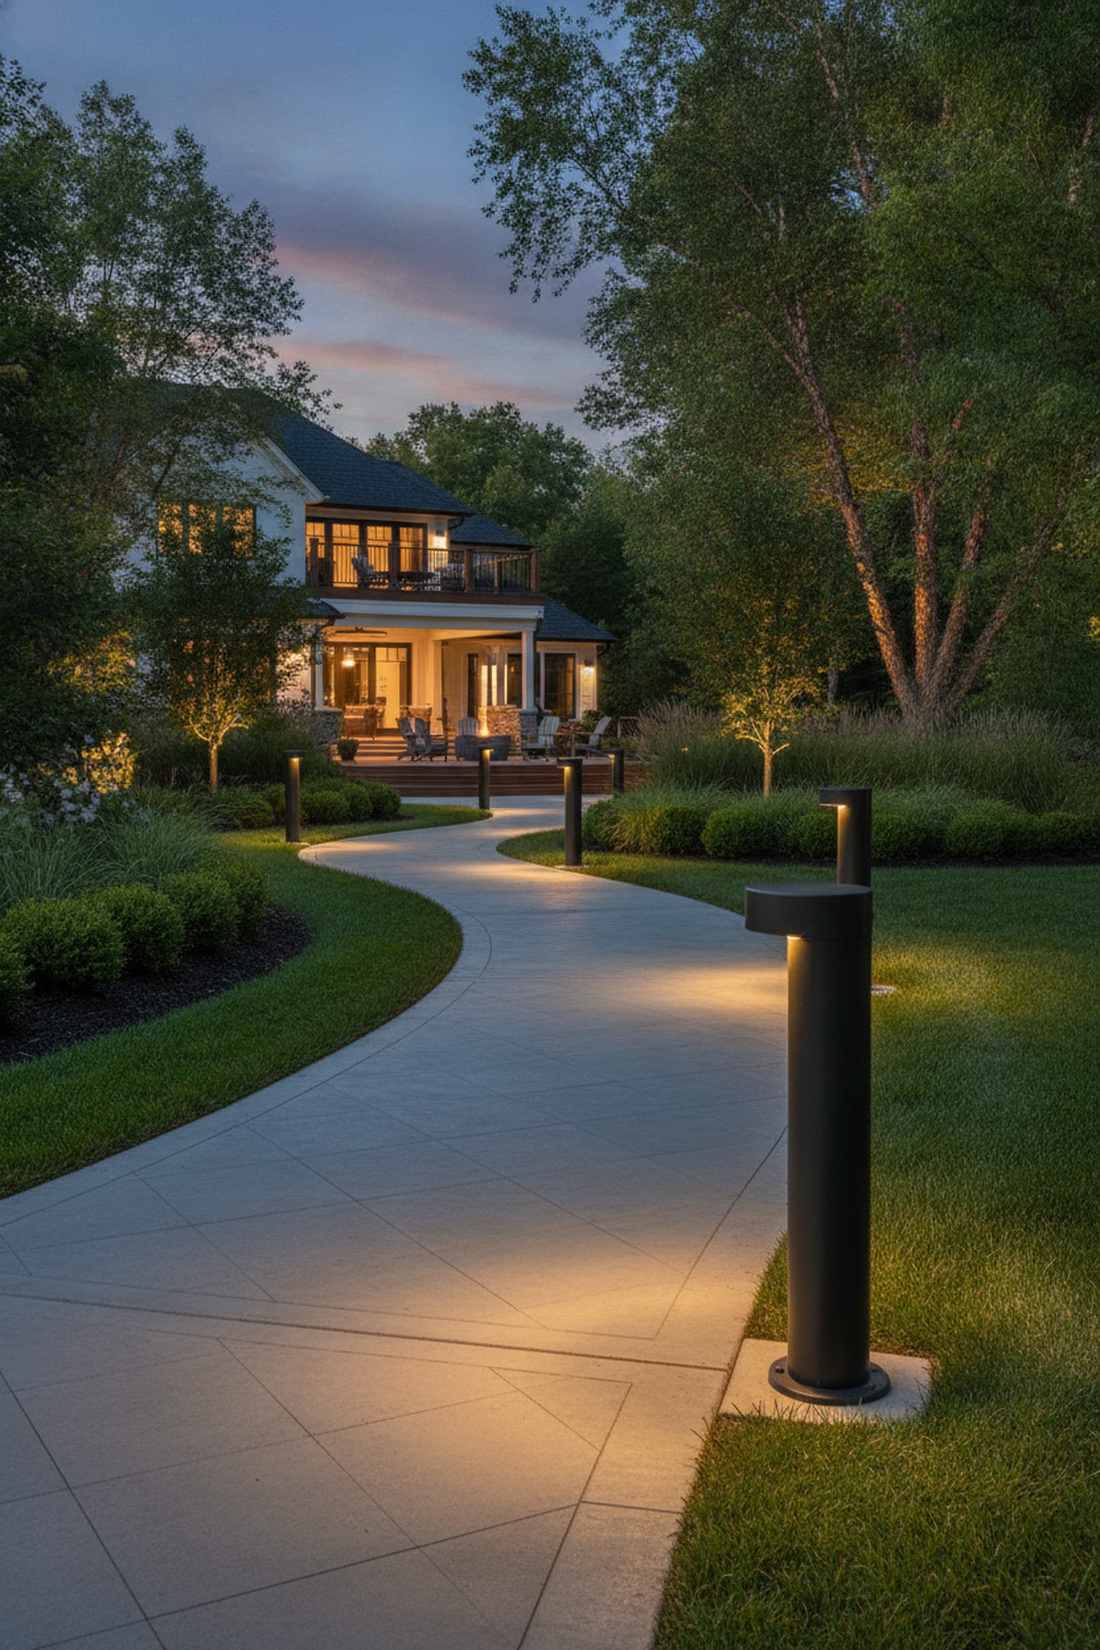
25. Low-Profile Bollard Lights

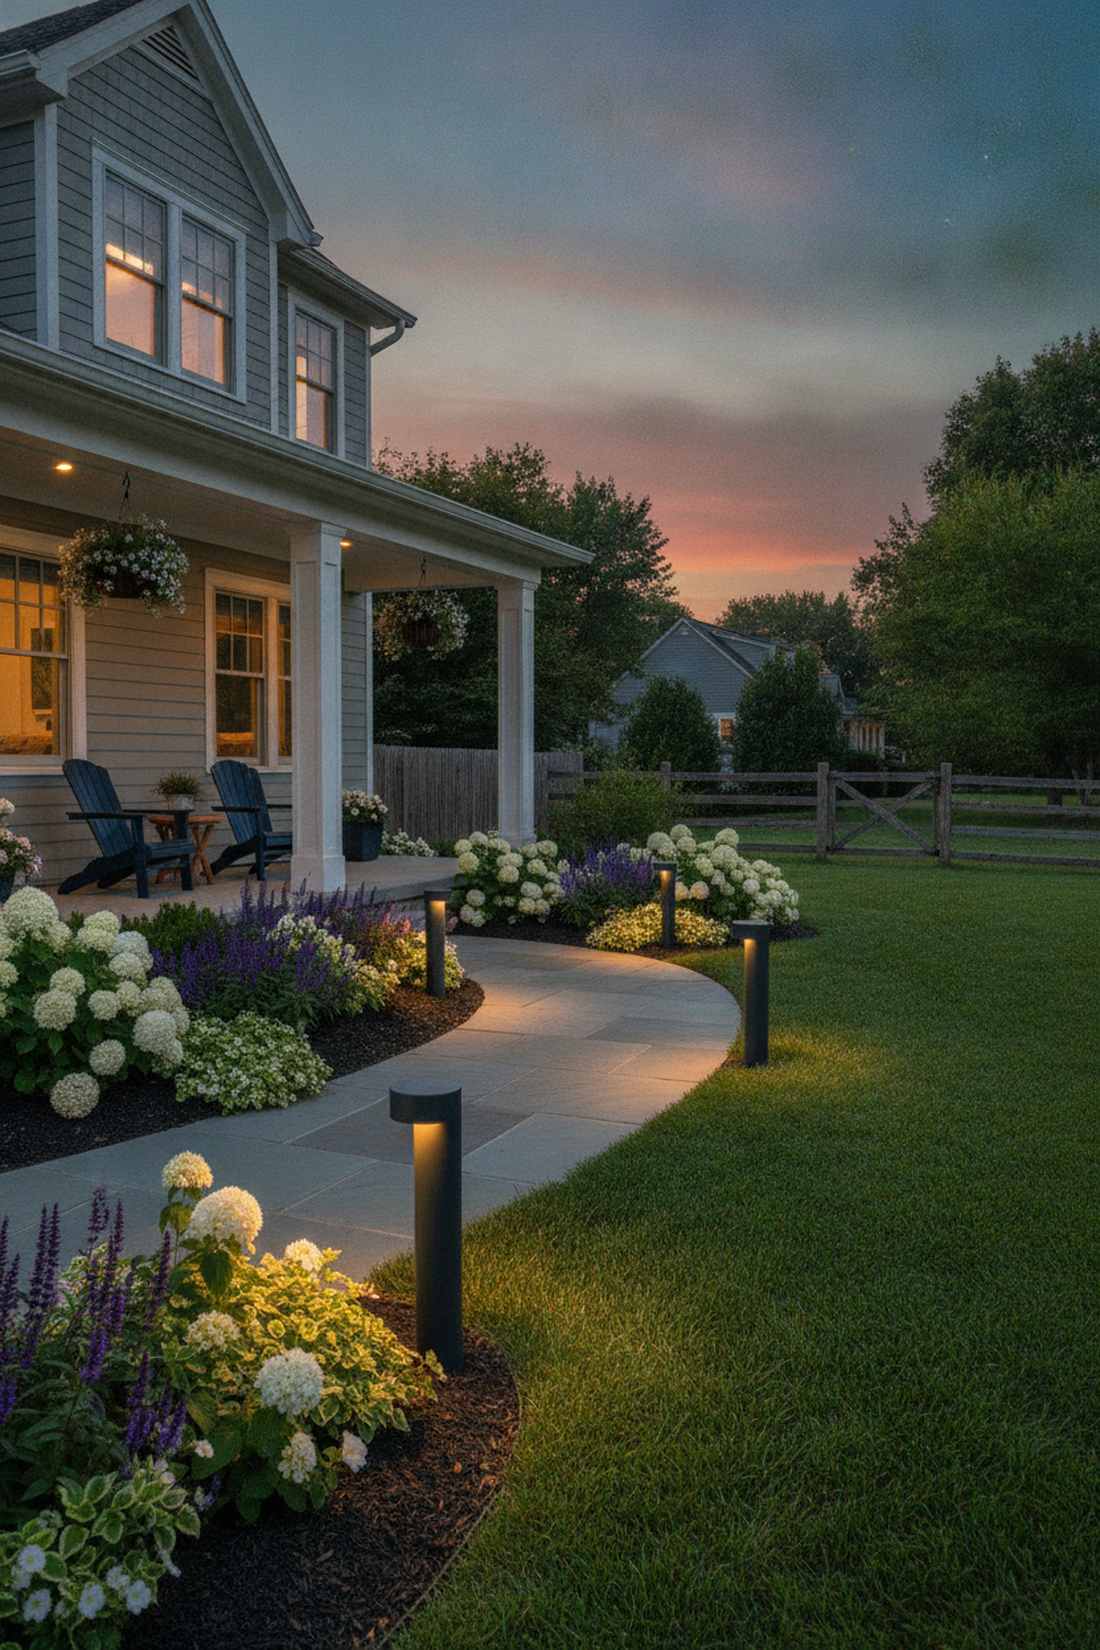
Delivers a stout, adorable, yet highly functional glow perfect for tight residential spaces. Miniature architectural bollards work perfectly in small flowerbeds where massive 4-foot towers would look ridiculous.
Most people default to flimsy wire stakes in small beds, but this chunky, compact layout delivers a surprisingly premium look. Utilizing low-voltage landscape lighting supplies with full cutoff optics keeps the beam firmly on the ground, away from bedroom windows.
These stubby defenders run about $60–$90 each. Pin this to your small-space garden board!
- Key Materials: 18-inch thick powder-coated aluminum posts.
- Vibe / Style: Stout, modern suburban charm.
- Difficulty: Intermediate wire trenching.
- Budget Breakdown: Mini bollard: $75 | Ground stake: $10.
- Creator’s Tip: Space these closer together (around 10 feet) since their shorter height means the light pool doesn’t spread as far.
- Smart Sourcing: Low-profile LED bollard lights (bulk pack) and heavy-duty ABS ground spikes.
26. Color-Changing Bollards
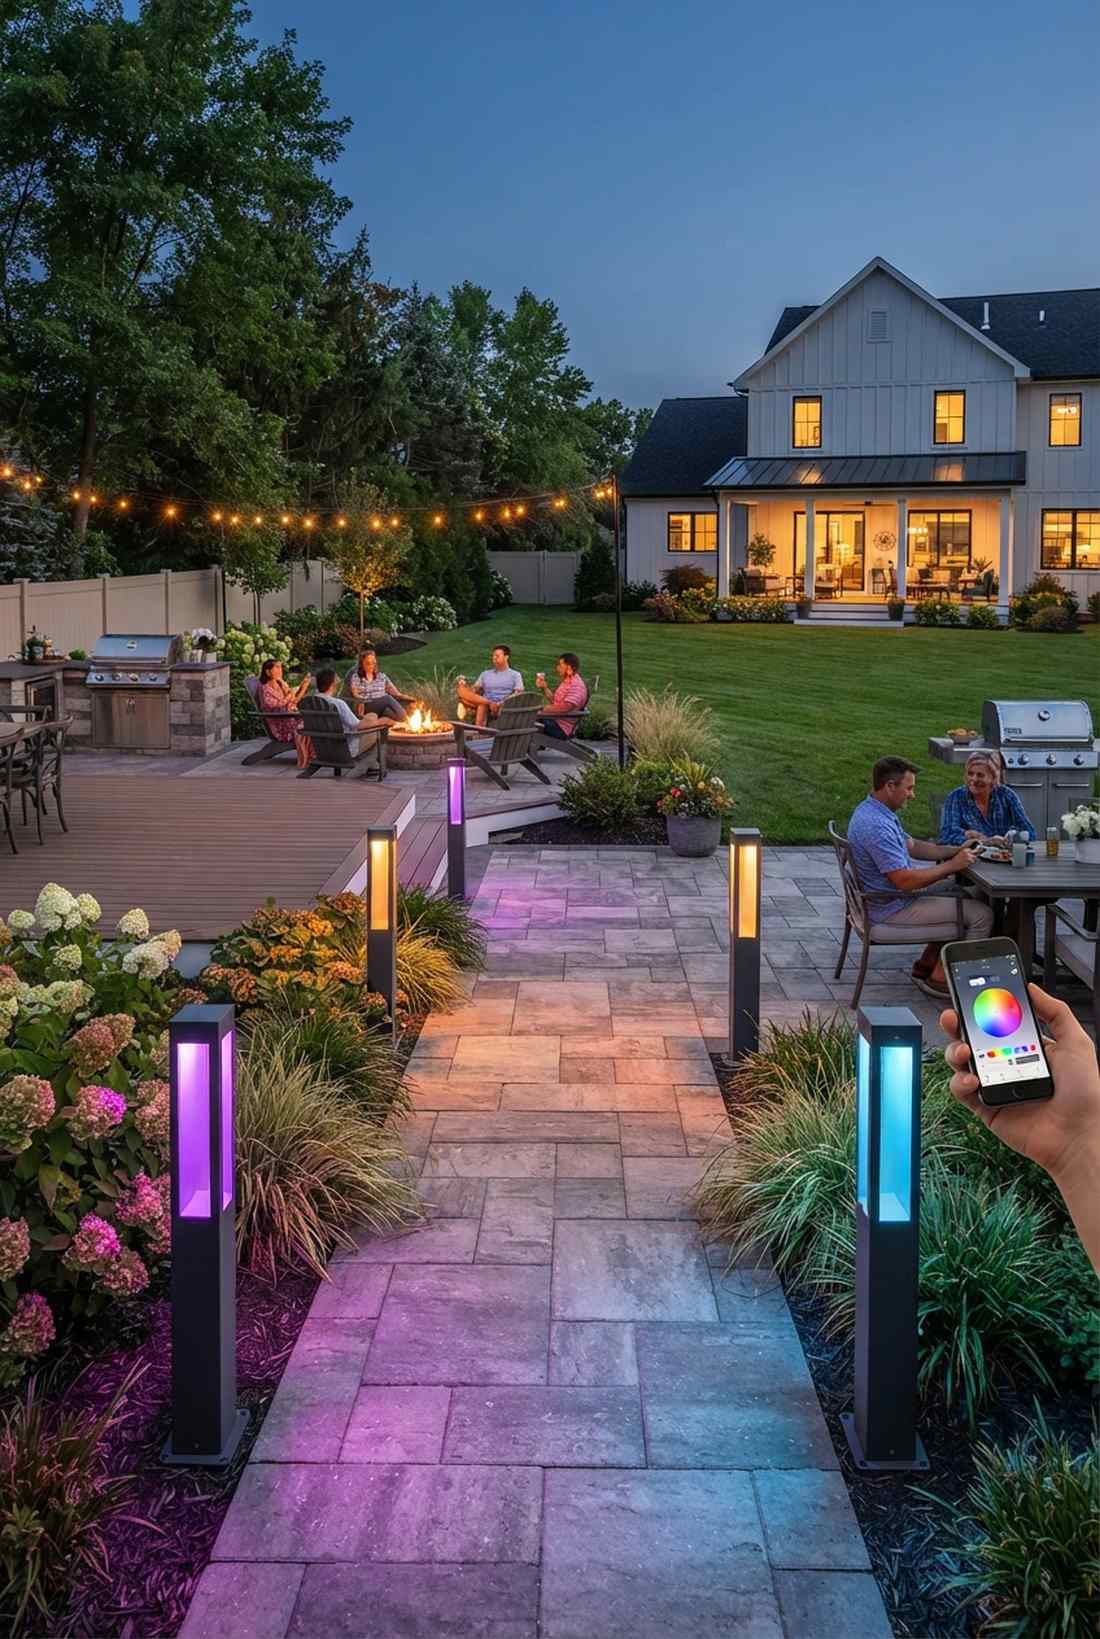
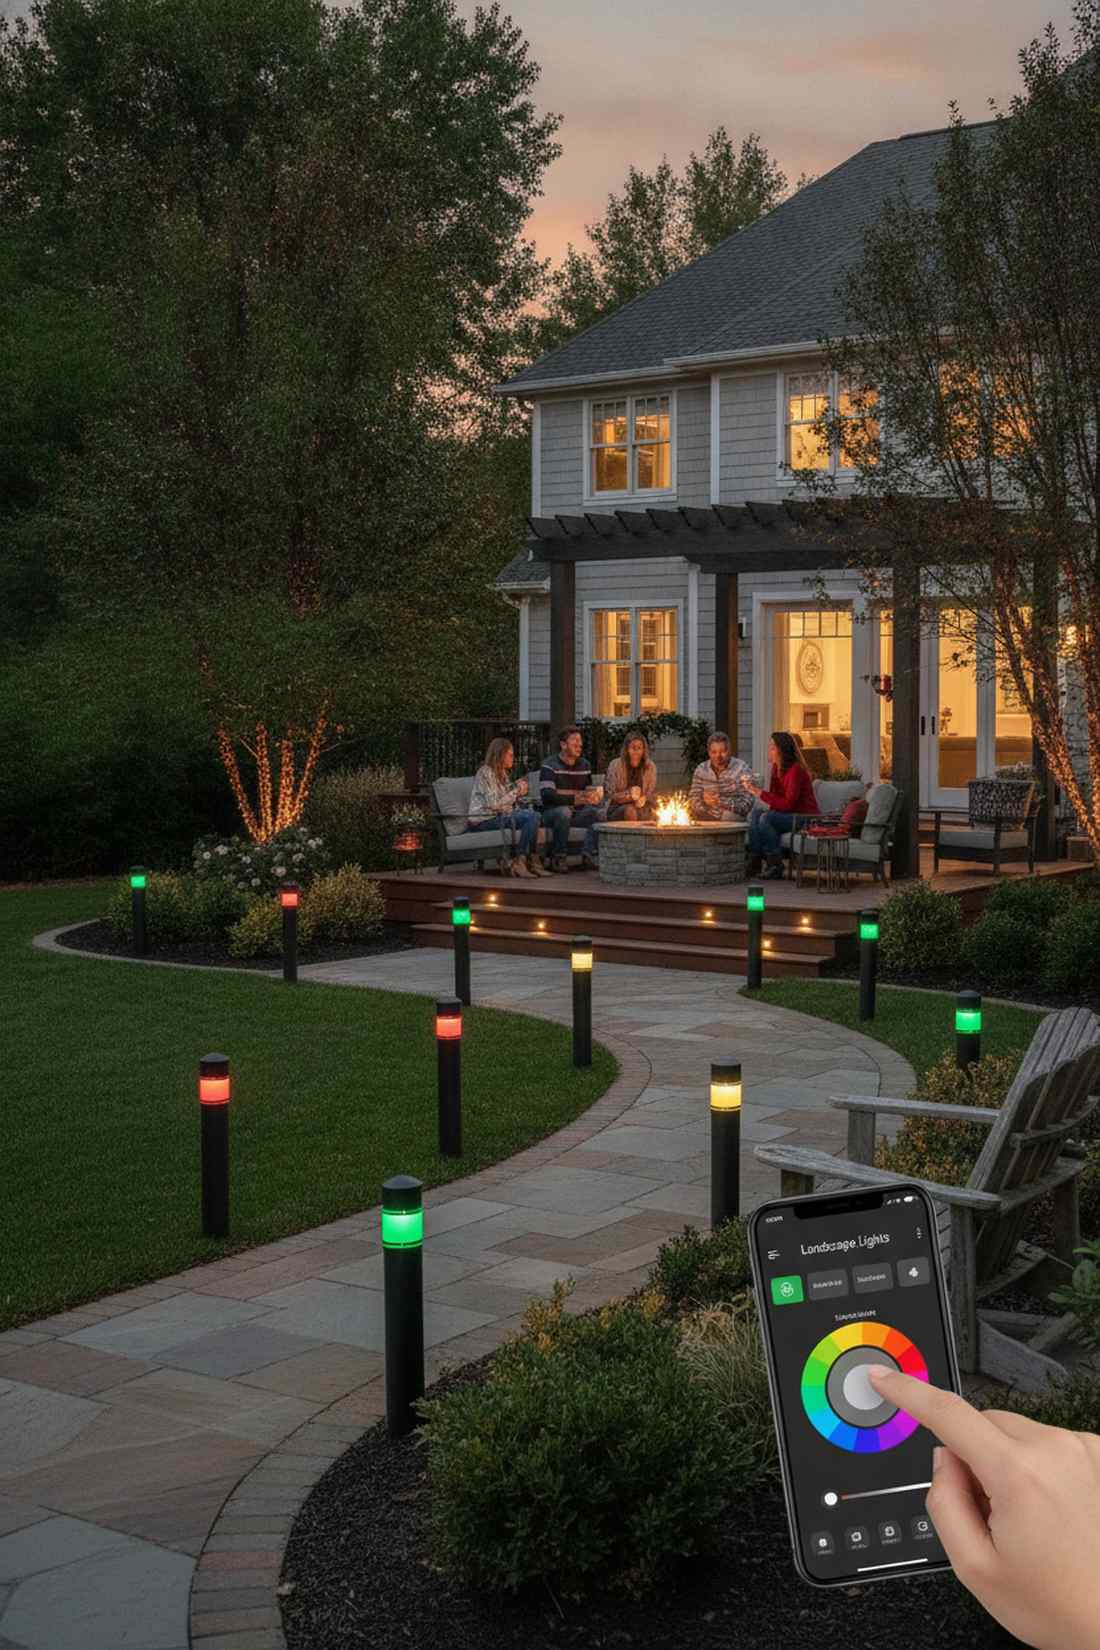
Injects instant party vibes or spooky holiday cheer with a simple tap on your smartphone. Smart RGB outdoor bollards completely revolutionize how you decorate the exterior for different seasons.
Stringing up temporary Christmas lights takes hours, whereas this app-controlled approach gives a designer-level finish all year long. Equipping your yard with smart Wi-Fi landscape light kits allows you to switch from classic warm white to spooky purple in a second.
Smart RGB units cost around $90–$140 each. Highly recommended if you love hosting massive backyard holiday events.
- Key Materials: Wi-Fi enabled RGBW aluminum pillars.
- Vibe / Style: Dynamic, high-tech entertainer’s dream.
- Difficulty: Intermediate wiring and app sync.
- Budget Breakdown: RGB unit: $110 | Smart hub: $40.
- Creator’s Tip: Set a default “midnight schedule” so the crazy colors automatically revert to elegant warm white for late-night security.
- Smart Sourcing: Smart RGBW landscape bollards (starter kits) and outdoor Wi-Fi range extenders.
27. Illuminated Bollard Covers
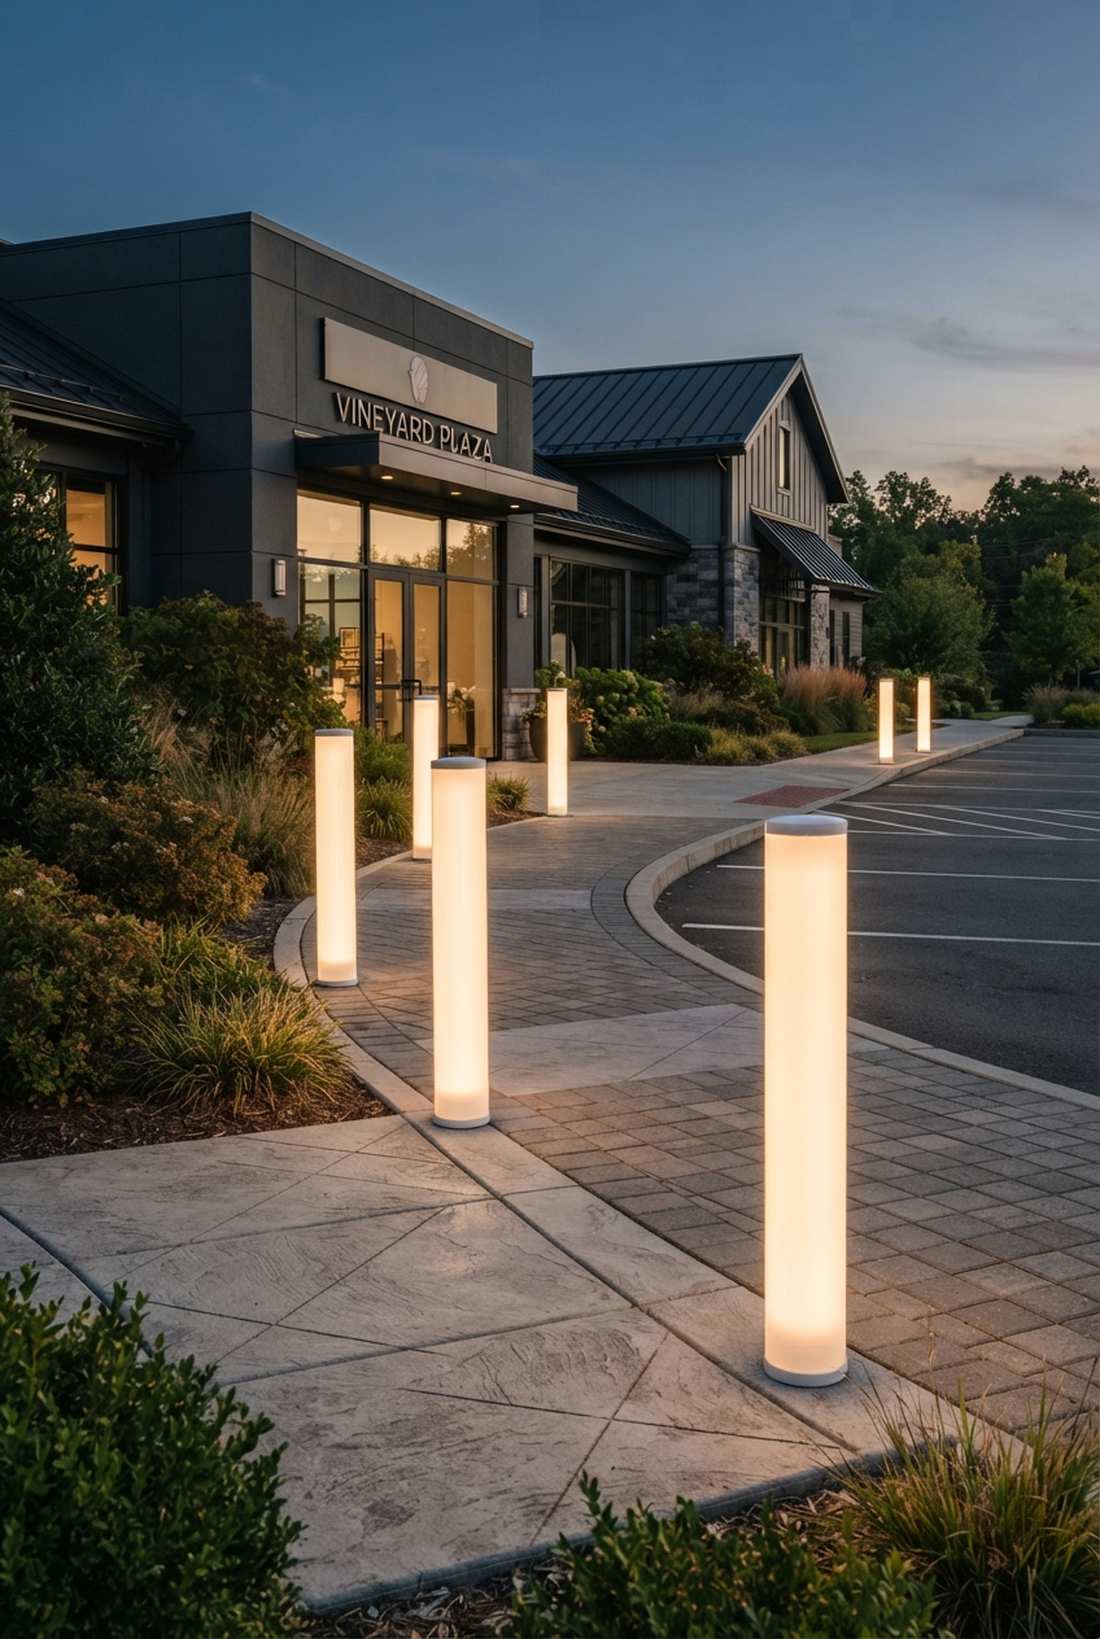
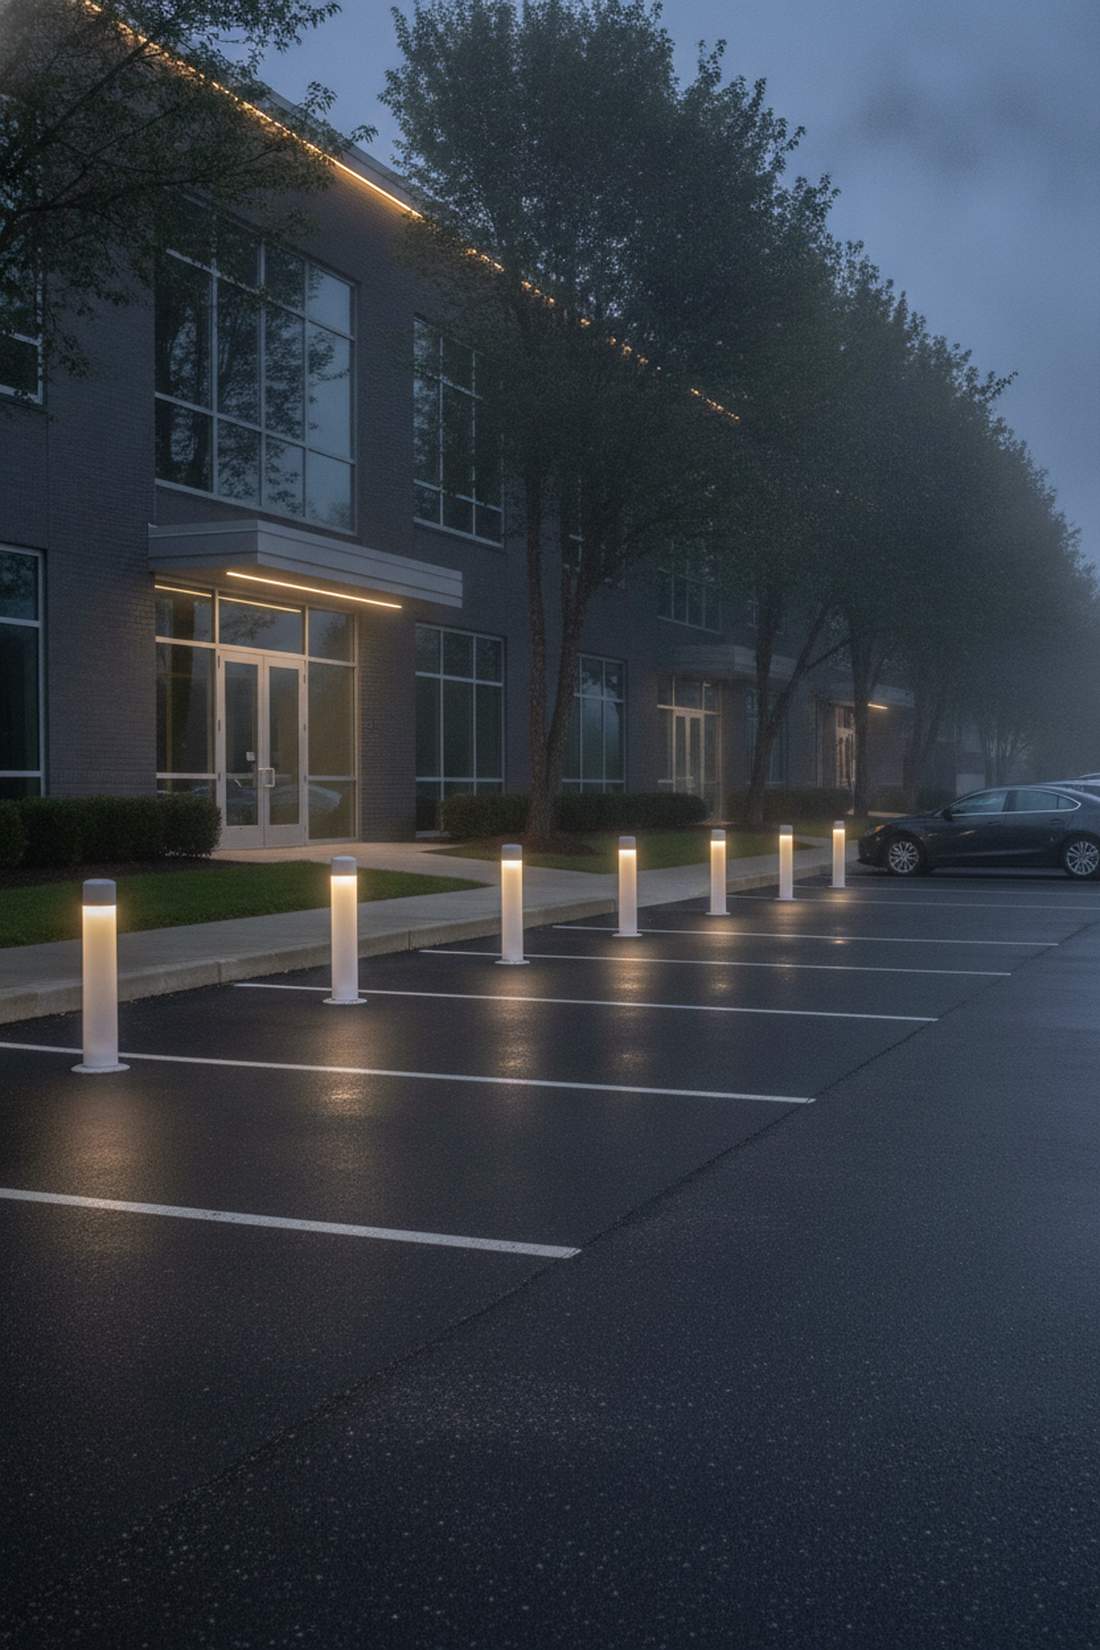
Transforms ugly, rusting steel safety pipes into glowing, modern architectural columns. Translucent slip-over bollard sleeves are an absolute miracle worker for outdated commercial parking lots or heavily used driveways.
Ripping out old concrete-filled pipes costs thousands, but this quick slip-on method looks far more expensive than it is. Sliding on heavy-duty polycarbonate light sleeves completely hides rust while emitting a soft, diffuse glow perfect for foggy nights.
A glowing retrofit sleeve costs roughly $70–$120. Pin this if you’re trying to update an ugly commercial exterior on a strict budget!
- Key Materials: UV-resistant high-density polyethylene covers.
- Vibe / Style: Clean, commercial retrofit aesthetic.
- Difficulty: Beginner-friendly slip-on installation.
- Budget Breakdown: Light sleeve: $90 | Set screws: $5.
- Creator’s Tip: Ensure there is adequate venting space at the top of the sleeve so the internal LED driver doesn’t overheat and burn out.
- Smart Sourcing: Translucent illuminated bollard covers (multi-pack) and LED driver retrofit kits.
28. Motion-Activated Bollards
Flares to life like a personal security escort the second you step onto the path. Radar-sensing security bollards are brilliant for side-yard alleys or paths that only get occasional late-night foot traffic.
Running lights at 100% all night burns electricity, but this adaptive 20-to-100% dimming approach is incredibly eco-friendly. Integrating outdoor motion sensor lighting supplies extends the lifespan of the LED diodes while startling away potential trespassers instantly.
These smart-sensing towers cost about $100–$160. An absolute necessity for dark, vulnerable property lines.
- Key Materials: Aluminum posts with built-in infrared sensors.
- Vibe / Style: High-security modern efficiency.
- Difficulty: Intermediate sensor programming and wiring.
- Budget Breakdown: Sensor unit: $130 | Wiring: $15.
- Creator’s Tip: Program the detection zone to overlap; when one light triggers, the next one down the path should also wake up.
- Smart Sourcing: Motion-activated LED landscape bollards (starter kits) and weatherproof low-voltage splice caps.
You’ll want to steal this exact lighting blueprint before your neighbors do…
Specialty Pathway Solutions for Unique Conditions
Extreme environments demand highly specialized lighting tactics. We have to adapt our fixture housings to survive heavy snow, dense fog, deep water, or strict eco-friendly regulations.
29. Underwater Pathway Lights

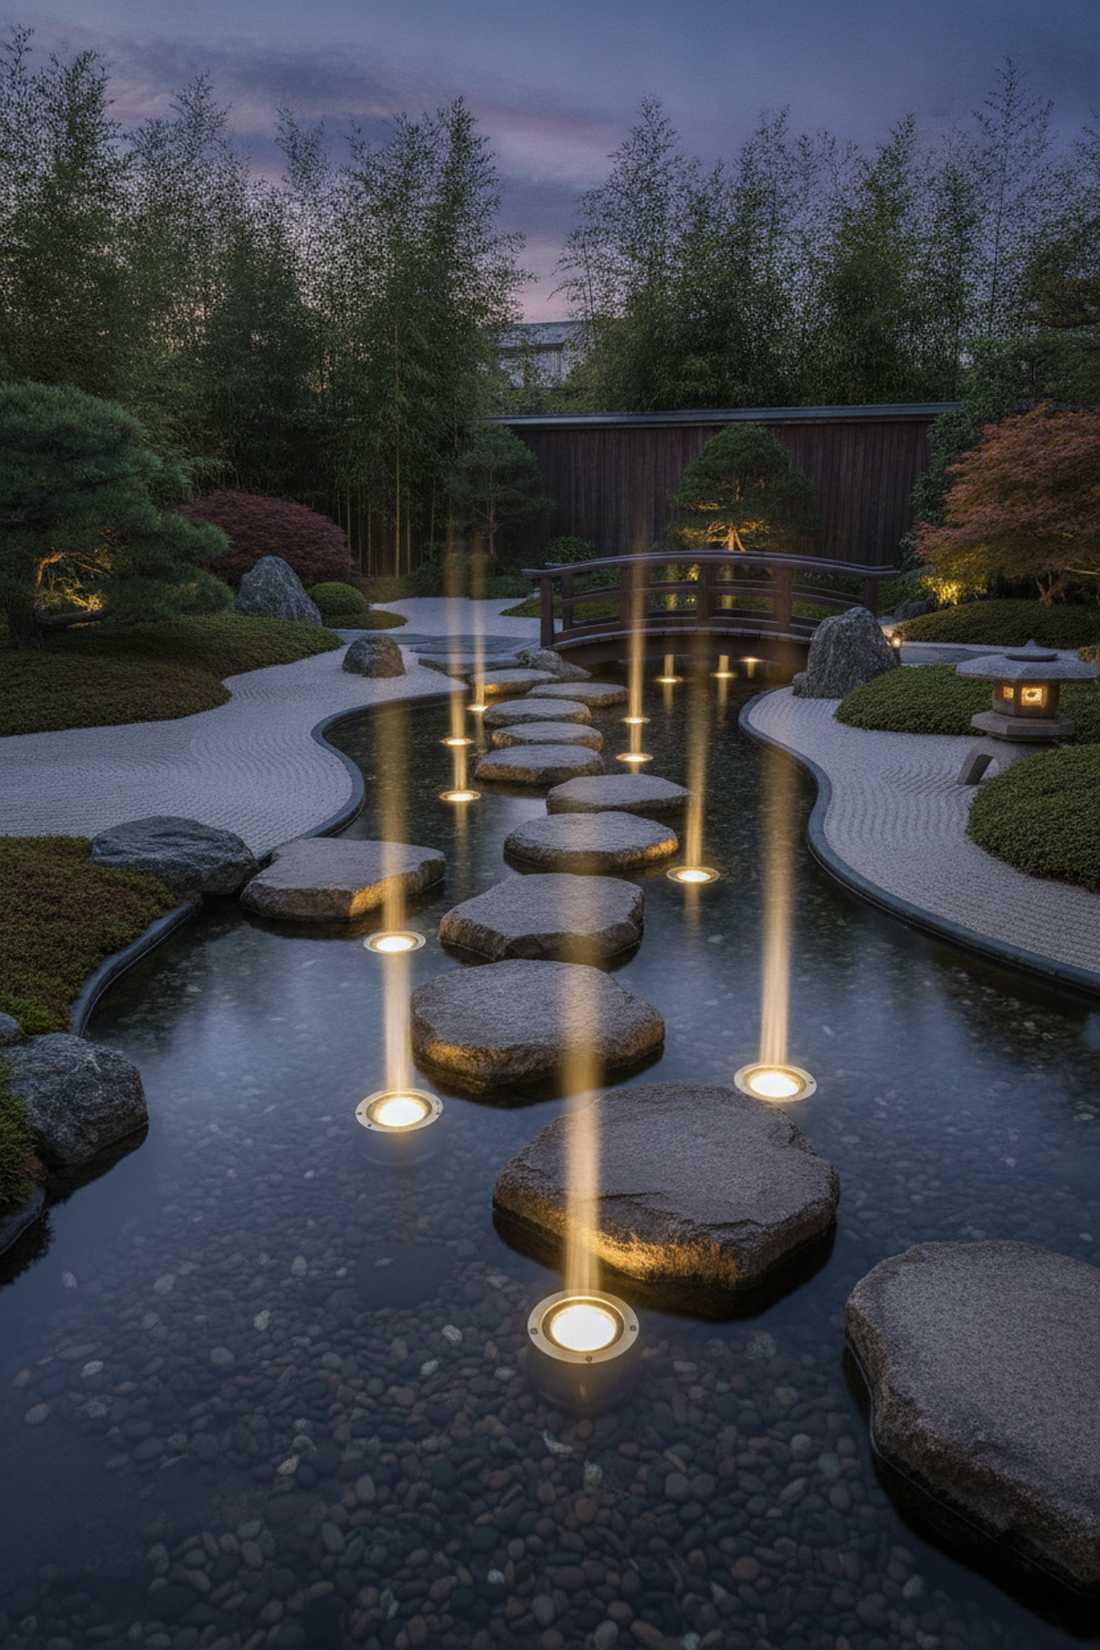
Creates a breathtaking, mystical glow that makes aquatic stepping stones look like magic. Submersible pond path lighting is the ultimate flex for a Zen garden featuring a shallow water crossing.
Standard outdoor lights instantly short-circuit in water, whereas this IP68-rated approach looks far more expensive than it is while being completely safe. Picking up marine-grade underwater lighting kits allows you to shoot beams up through the rippling water onto the stone treads.
These sealed aquatic units run about $40–$75 each. Save this to your extreme garden makeover board!
- Key Materials: IP68-rated heavy brass submersible pucks.
- Vibe / Style: Ethereal Japanese Zen water garden.
- Difficulty: Advanced waterproof splicing required.
- Budget Breakdown: Submersible puck: $60 | Weighted base: $15.
- Creator’s Tip: Attach the fixtures to a heavy steel base plate so they don’t float or shift around in the pond’s muddy bottom.
- Smart Sourcing: IP68 brass underwater pond lights (multi-pack) and marine-grade waterproof wire nuts.
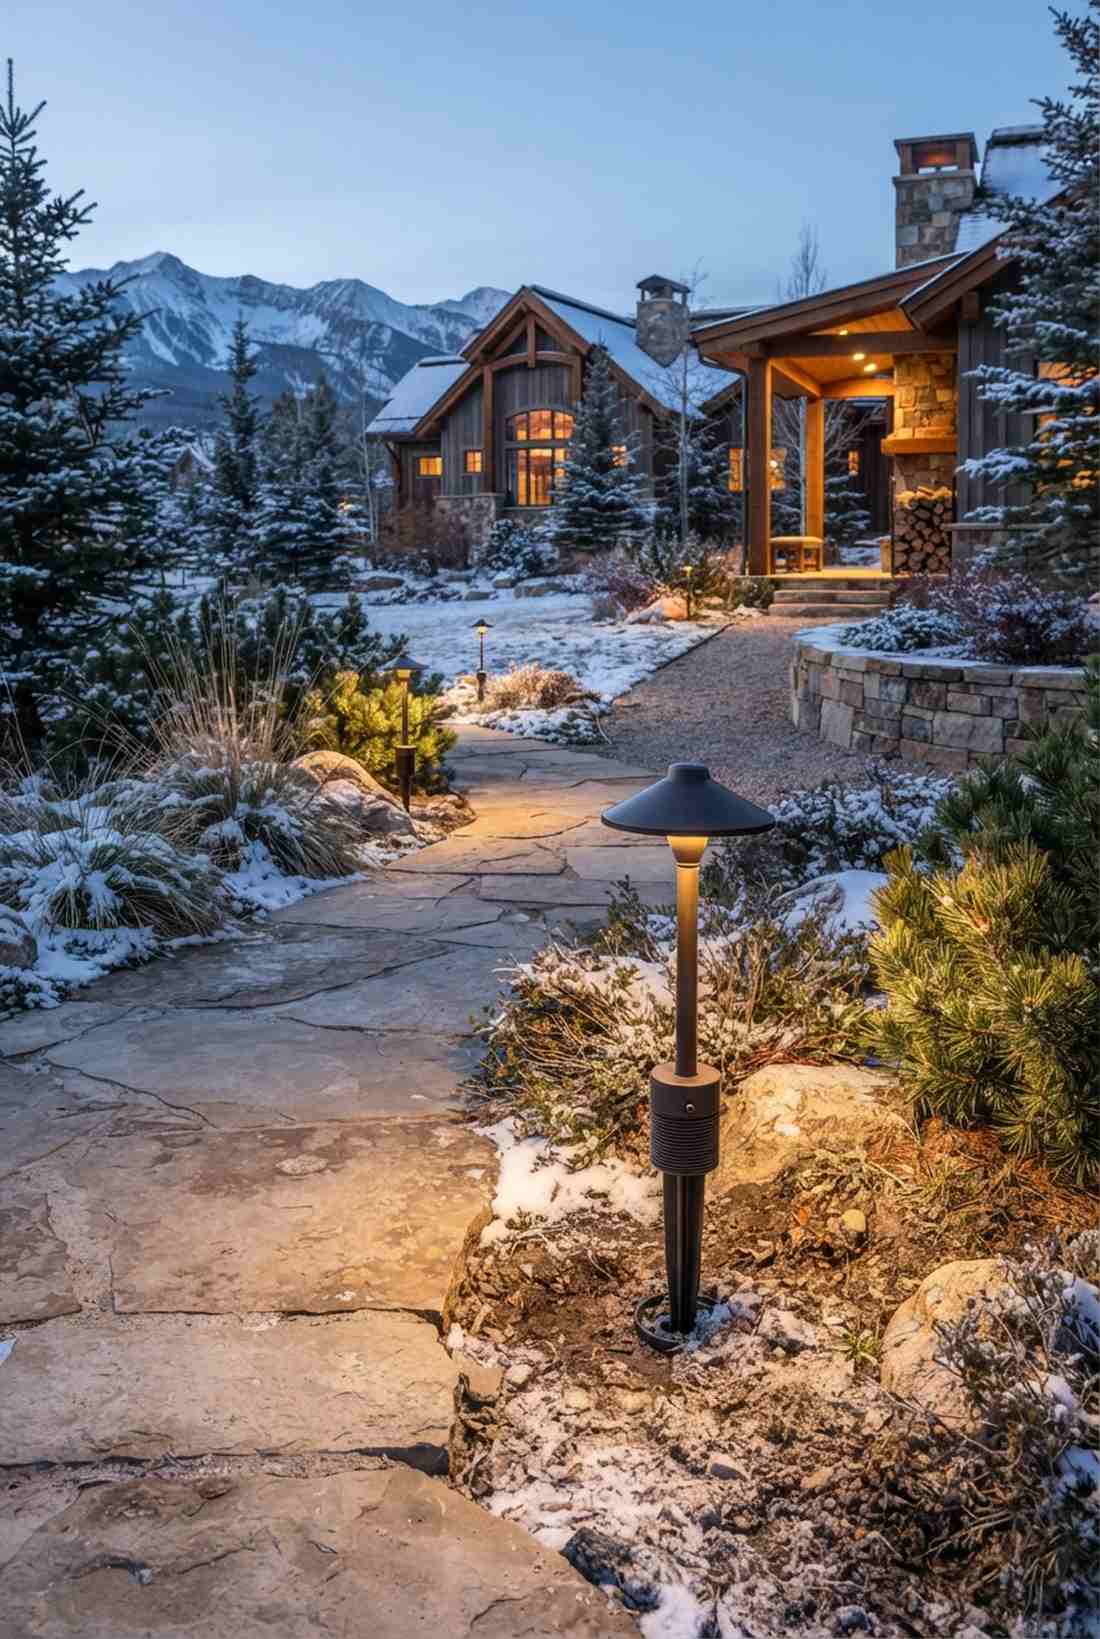
30. Fog-Penetrating Amber Lights
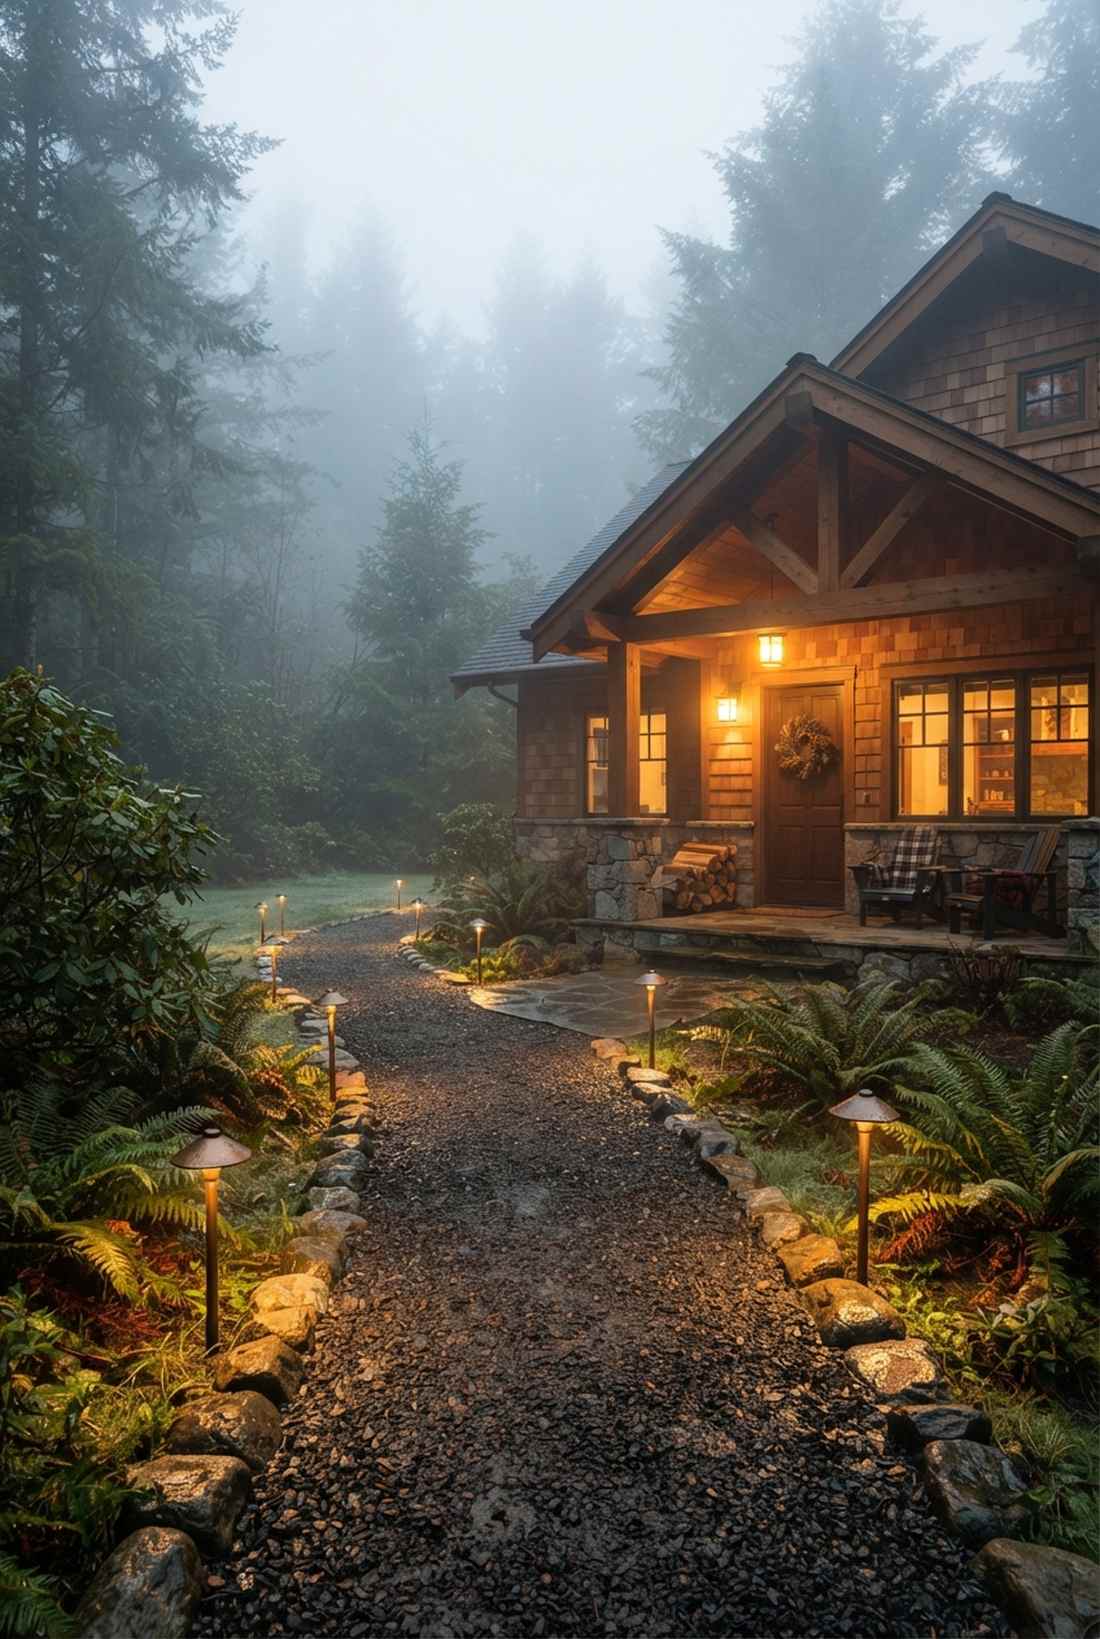
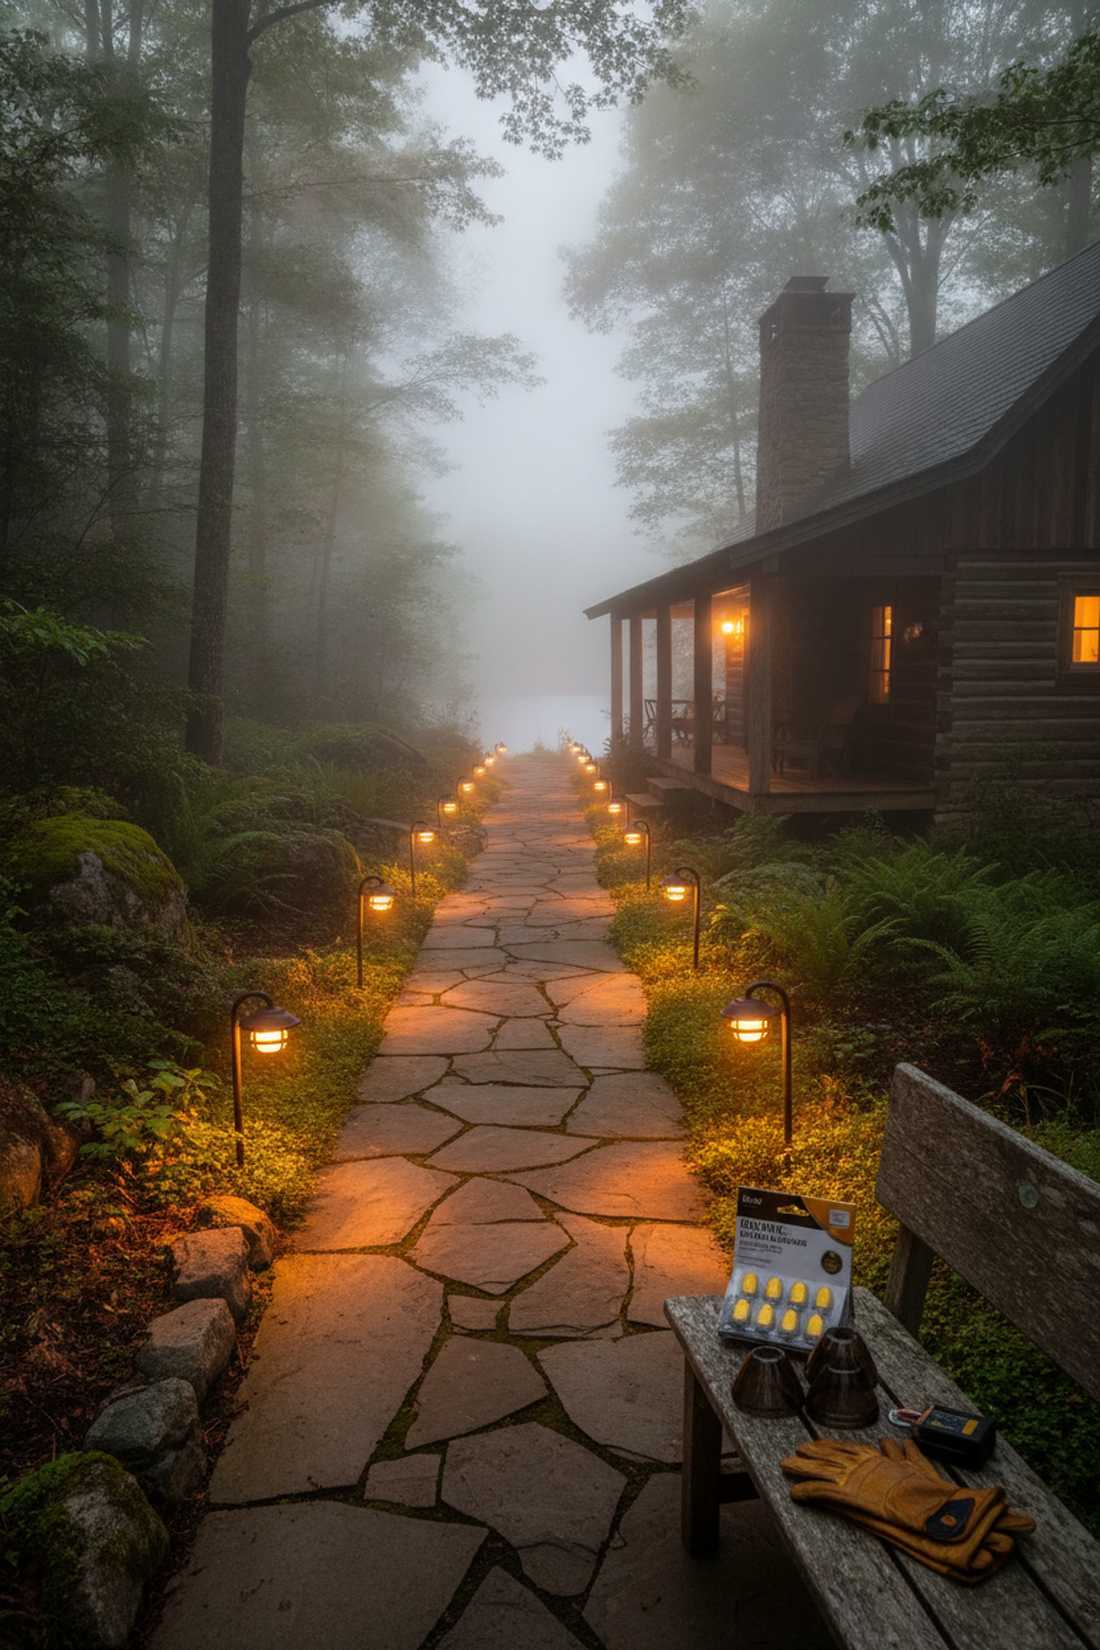
Cuts straight through heavy morning mist like a warm, guiding beacon of safety. Ultra-warm amber pathway fixtures are an absolute godsend for homes located near lakes or deep, foggy valleys.
Bright white LEDs simply bounce off water vapor and blind you, but this specific 2000K wavelength pierces the fog perfectly. Opting for amber LED landscape bulbs totally changes the atmosphere, making a chilly, damp path feel warm and inviting.
Swapping to an amber system costs about $15–$30 per bulb. Pin this if you live in a dense coastal or mountain climate!
- Key Materials: 1800K to 2200K low-voltage LED diodes.
- Vibe / Style: Cozy, misty mountain cabin.
- Difficulty: Easy bulb swap or fixture replacement.
- Budget Breakdown: Amber bulb: $15 | Fixture housing: $30.
- Creator’s Tip: Wire these on a separate switch from your white lights so you can activate the fog-cutters only when the weather turns bad.
- Smart Sourcing: Amber LED landscape replacement bulbs (bulk pack) and tinted glass fixture lenses.
31. Wildlife-Friendly Red Lighting
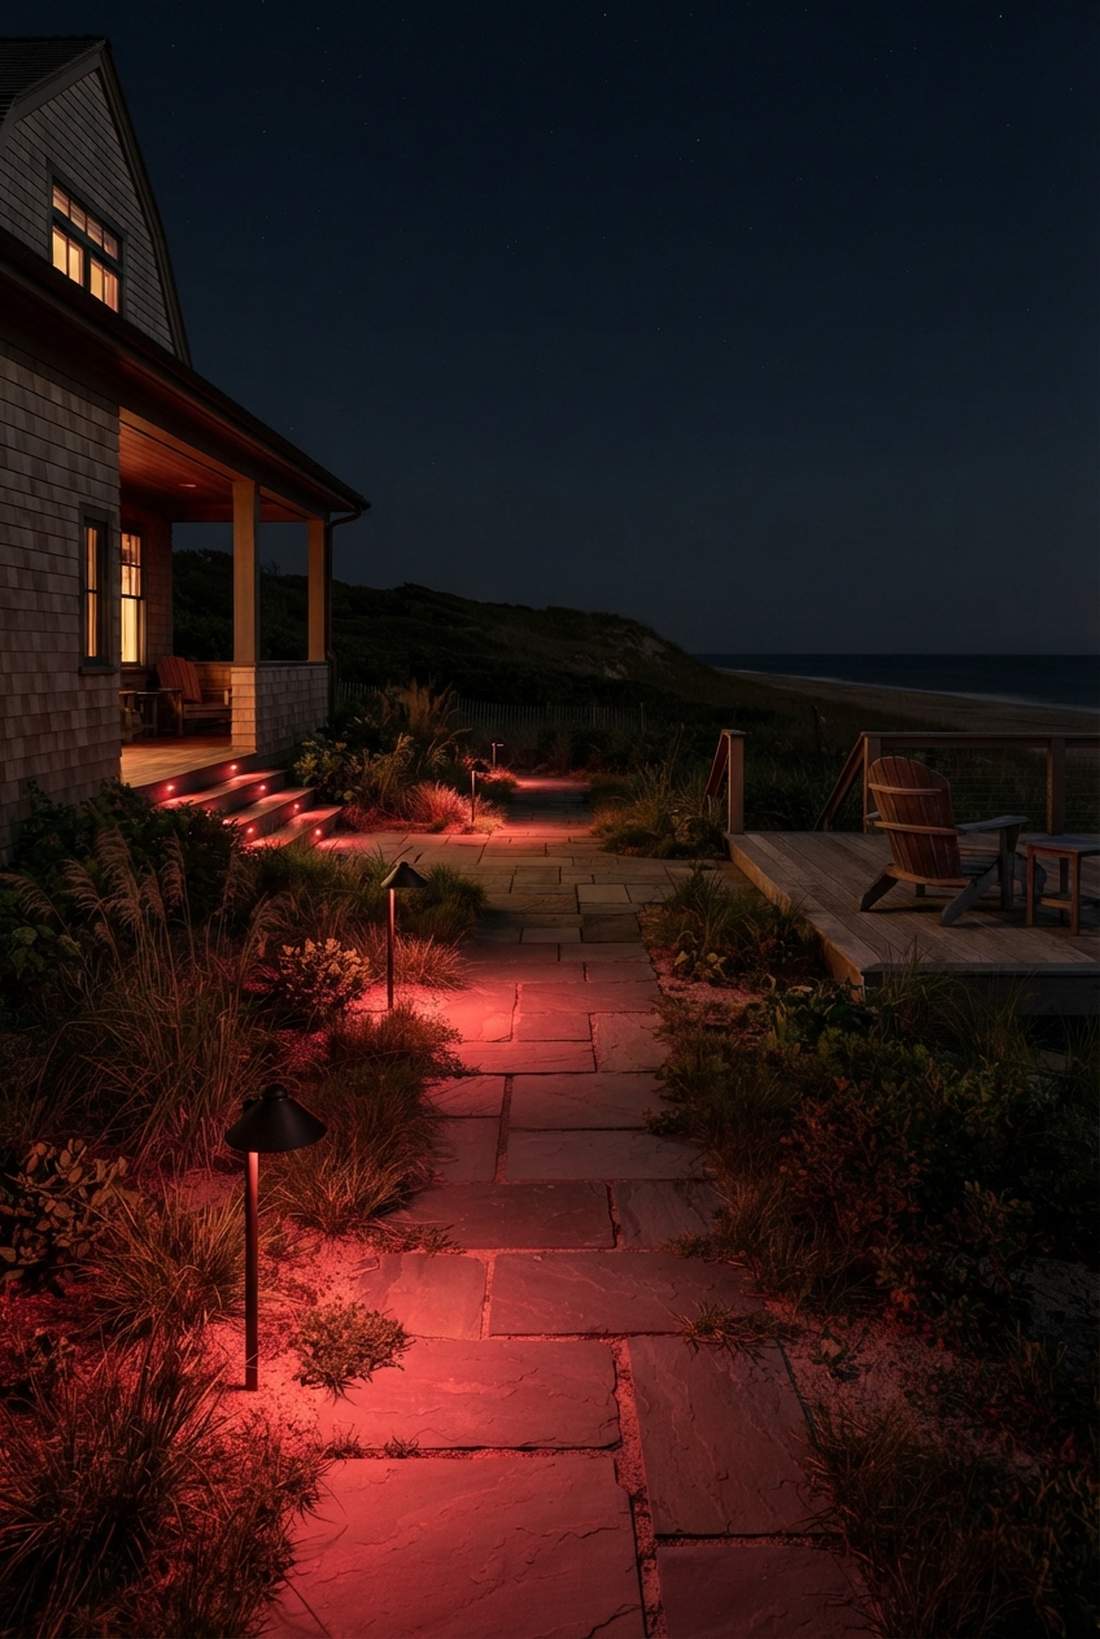
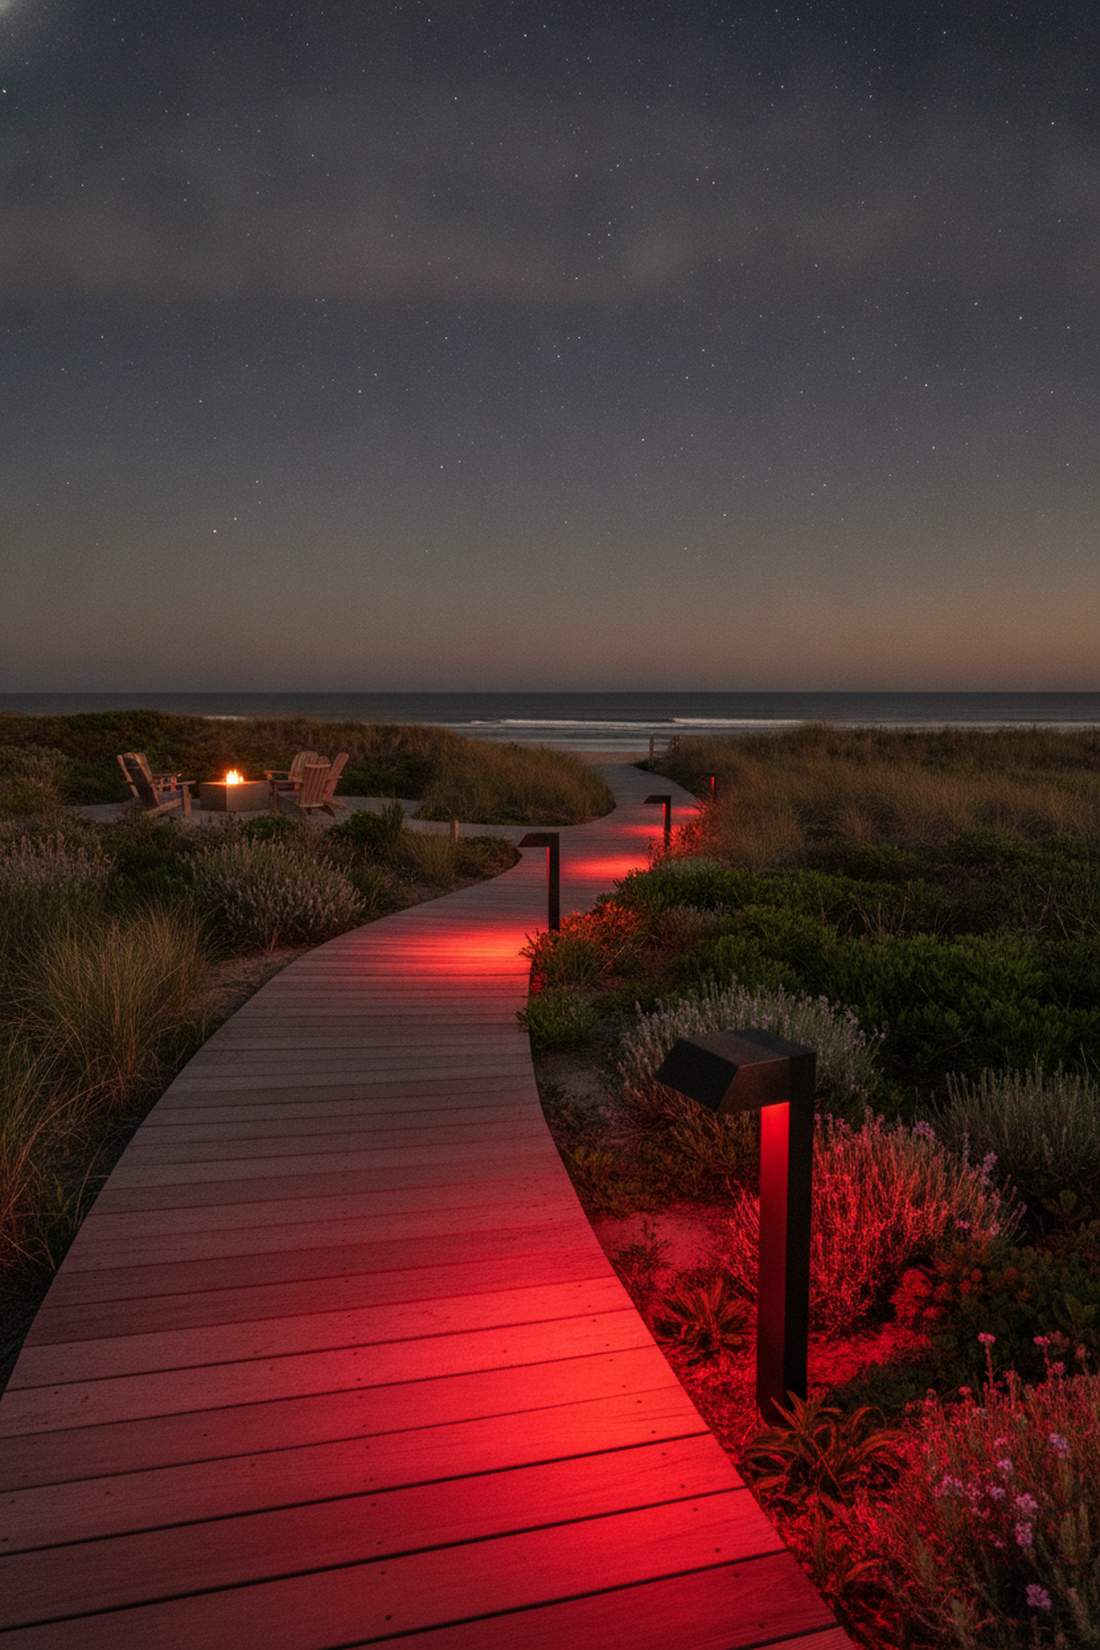
Maintains crucial human safety without confusing or blinding local nocturnal animals. Dark-sky compliant red path lights are essential for properties bordering nature preserves or sea turtle nesting beaches.
Normal bright blue-white lights destroy natural animal navigation, but this long-wavelength red approach looks striking and respects the ecosystem. Utilizing specialty wildlife-certified outdoor supplies ensures you pass strict coastal zoning laws while keeping your walkway safe.
Eco-friendly red fixtures cost about $40–$70 per unit. A brilliant compromise for the environmentally conscious homeowner.
- Key Materials: Full-cutoff downward hoods with red LED boards.
- Vibe / Style: Eco-conscious coastal stewardship.
- Difficulty: Intermediate yard installation.
- Budget Breakdown: Red fixture: $55 | Low-voltage wire: $10.
- Creator’s Tip: Use full-cutoff hoods that physically block any light from escaping upwards into the night sky.
- Smart Sourcing: Turtle-safe red LED path lights (starter kits) and dark-sky compliant fixture hoods.
32. Heated Snow-Melting Path Lights
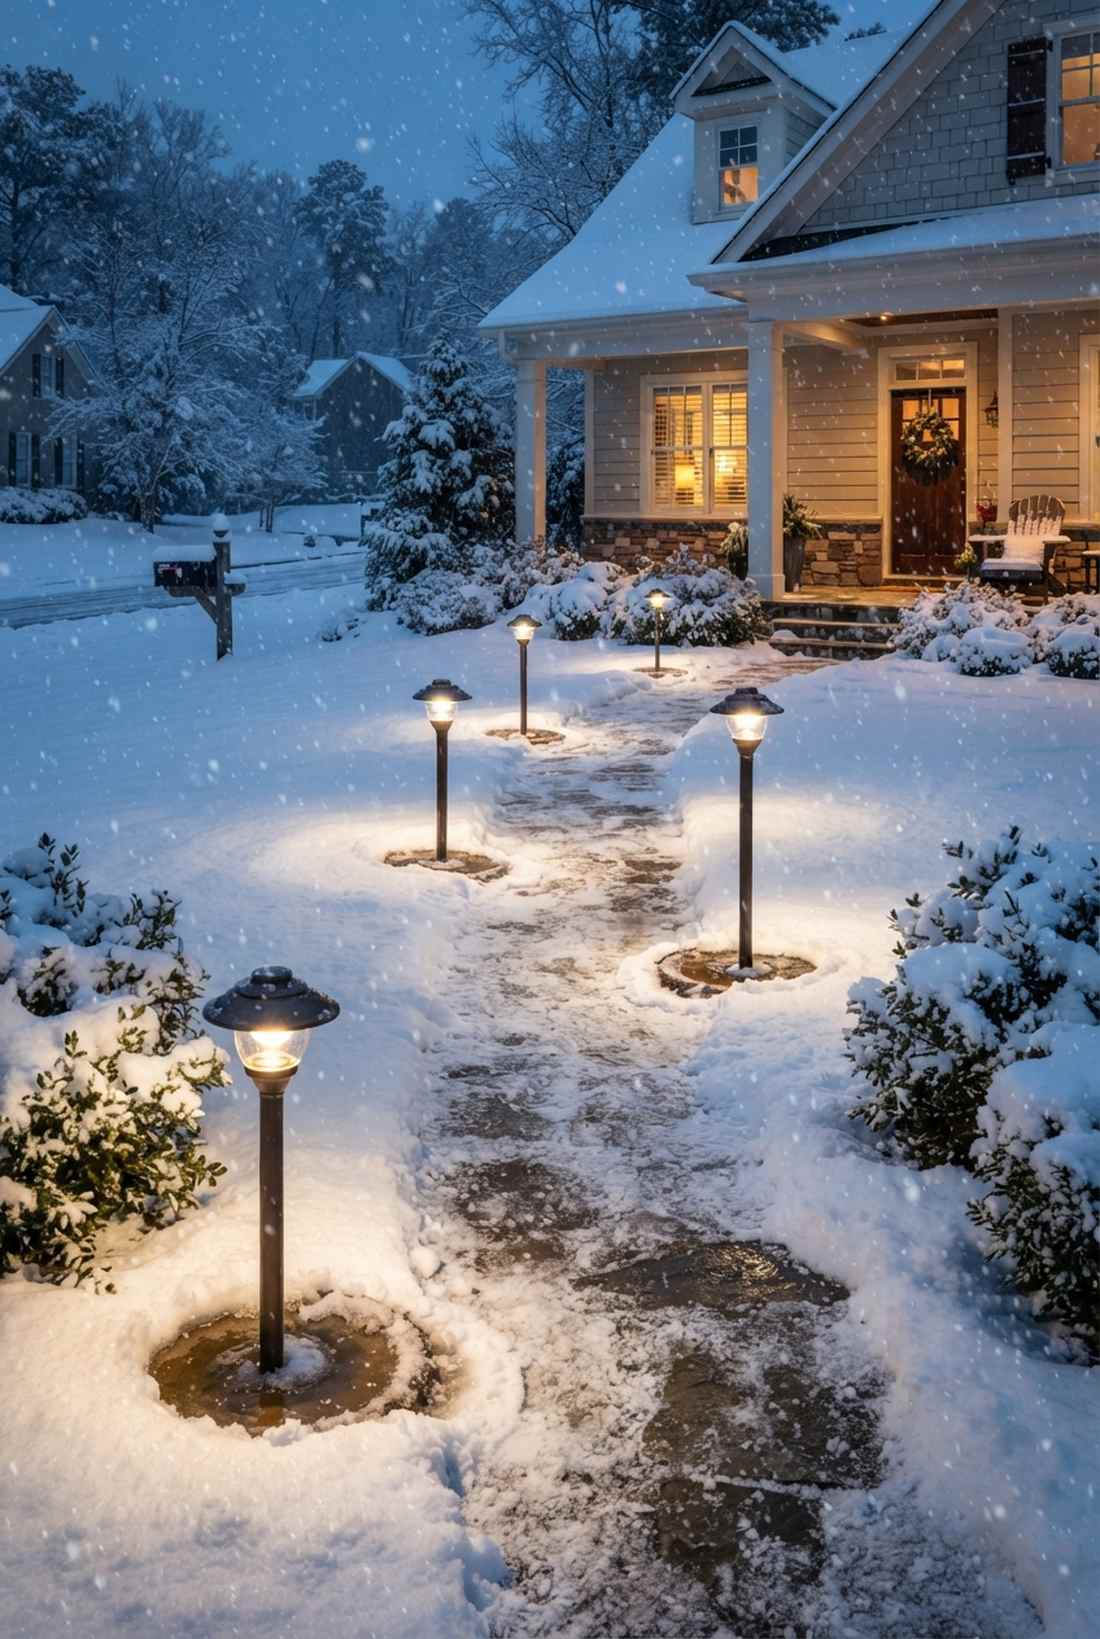
Fights off freezing blizzards so your walkway remains brightly lit even under a foot of snow. Thermostatic heated lens lights are an absolute game-changer for brutal Northern winters.
Cold LEDs never melt off ice accumulation, meaning traditional fixtures just become useless dark bumps until spring. Incorporating winterized outdoor lighting kits with built-in heating elements automatically clears the glass without you ever lifting a shovel.
These advanced winter warriors run $80–$140 each. Pin this immediately if you’re tired of digging out your path lights every December!
- Key Materials: Fixtures with internal thermostatic heating rings.
- Vibe / Style: Ultimate winter-proof reliability.
- Difficulty: Advanced high-draw electrical planning.
- Budget Breakdown: Heated fixture: $100 | Upgraded transformer: $80.
- Creator’s Tip: You must upgrade your transformer size, as the heating elements draw significantly more wattage than standard LEDs.
- Smart Sourcing: Snow-melting LED pathway lights (multi-pack) and high-capacity landscape transformers.
Material Guide: Cheap vs. Premium Aesthetic
Knowing exactly where to save and where to spend makes all the difference in achieving that “looks expensive but isn’t” vibe.
- Standard vs. UV-Resistant/Premium: Cheap plastic lenses turn hazy yellow in six months, while UV-coated polycarbonate or tempered glass stays crystal clear for decades.
- Pre-made Kits vs. Sourcing Locally: Buying a fully matched starter kit prevents voltage drop issues and guarantees the color temperature matches flawlessly across your entire yard.
33. Floating Dock Pathway Lights
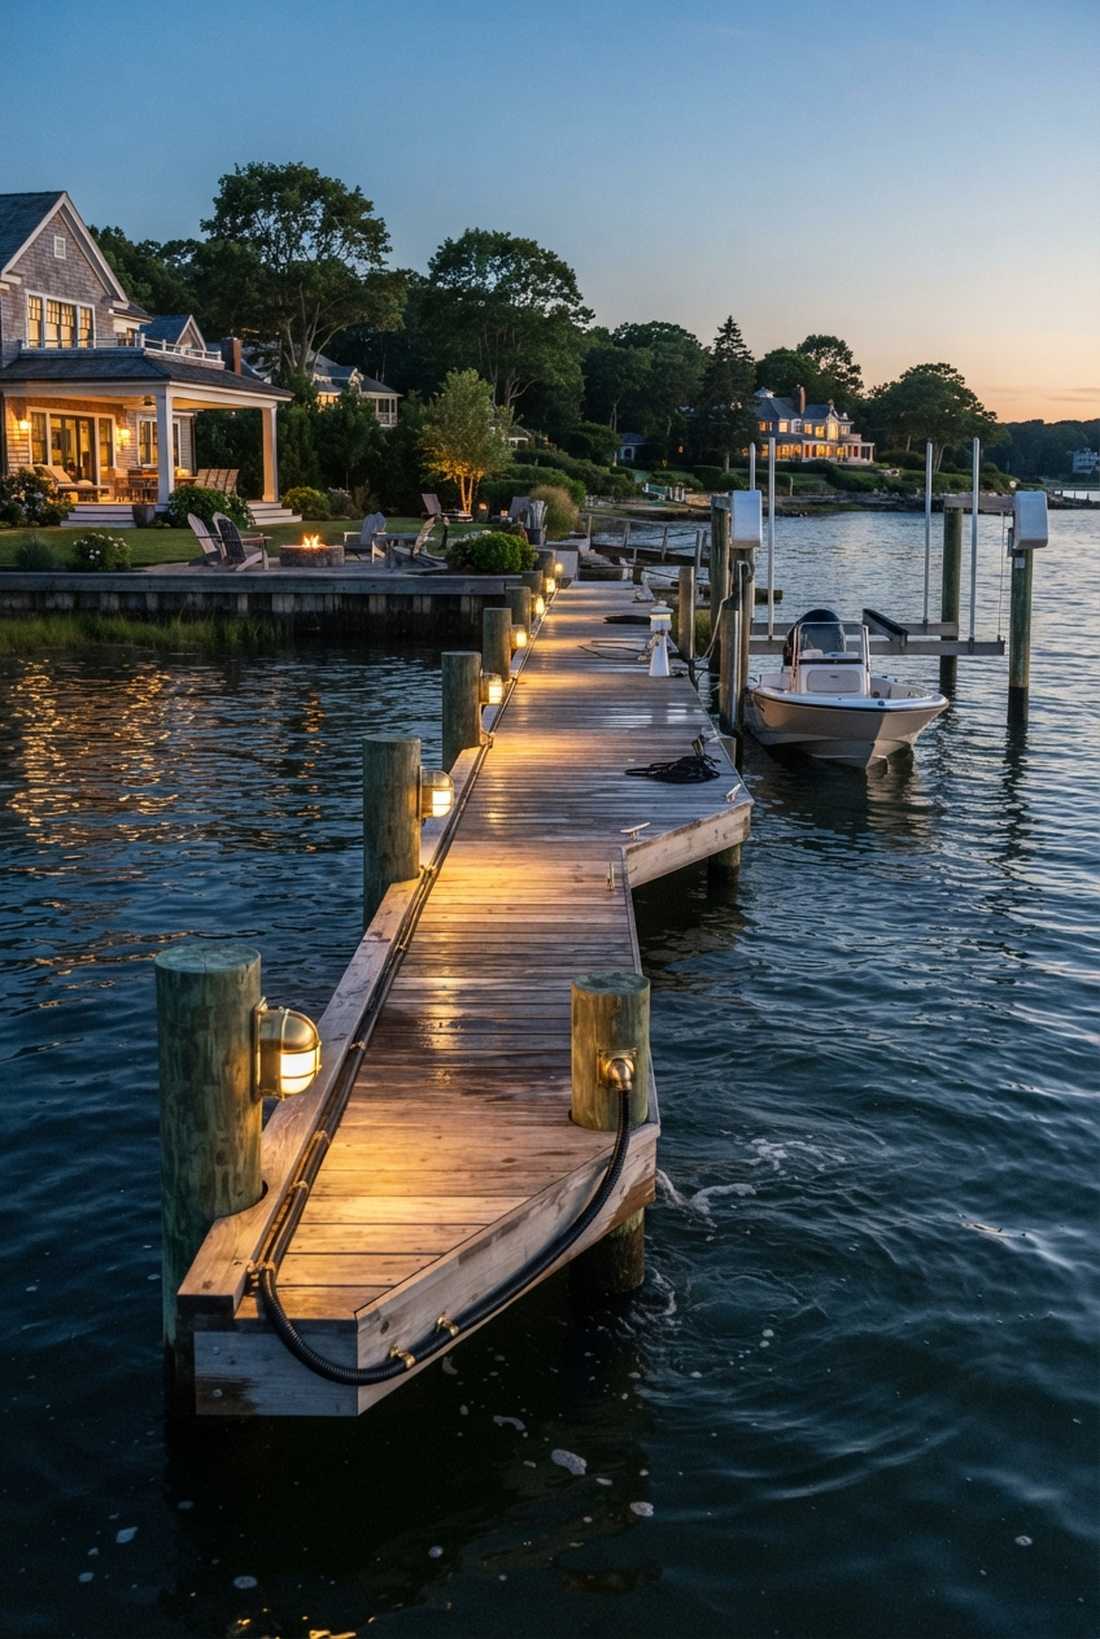
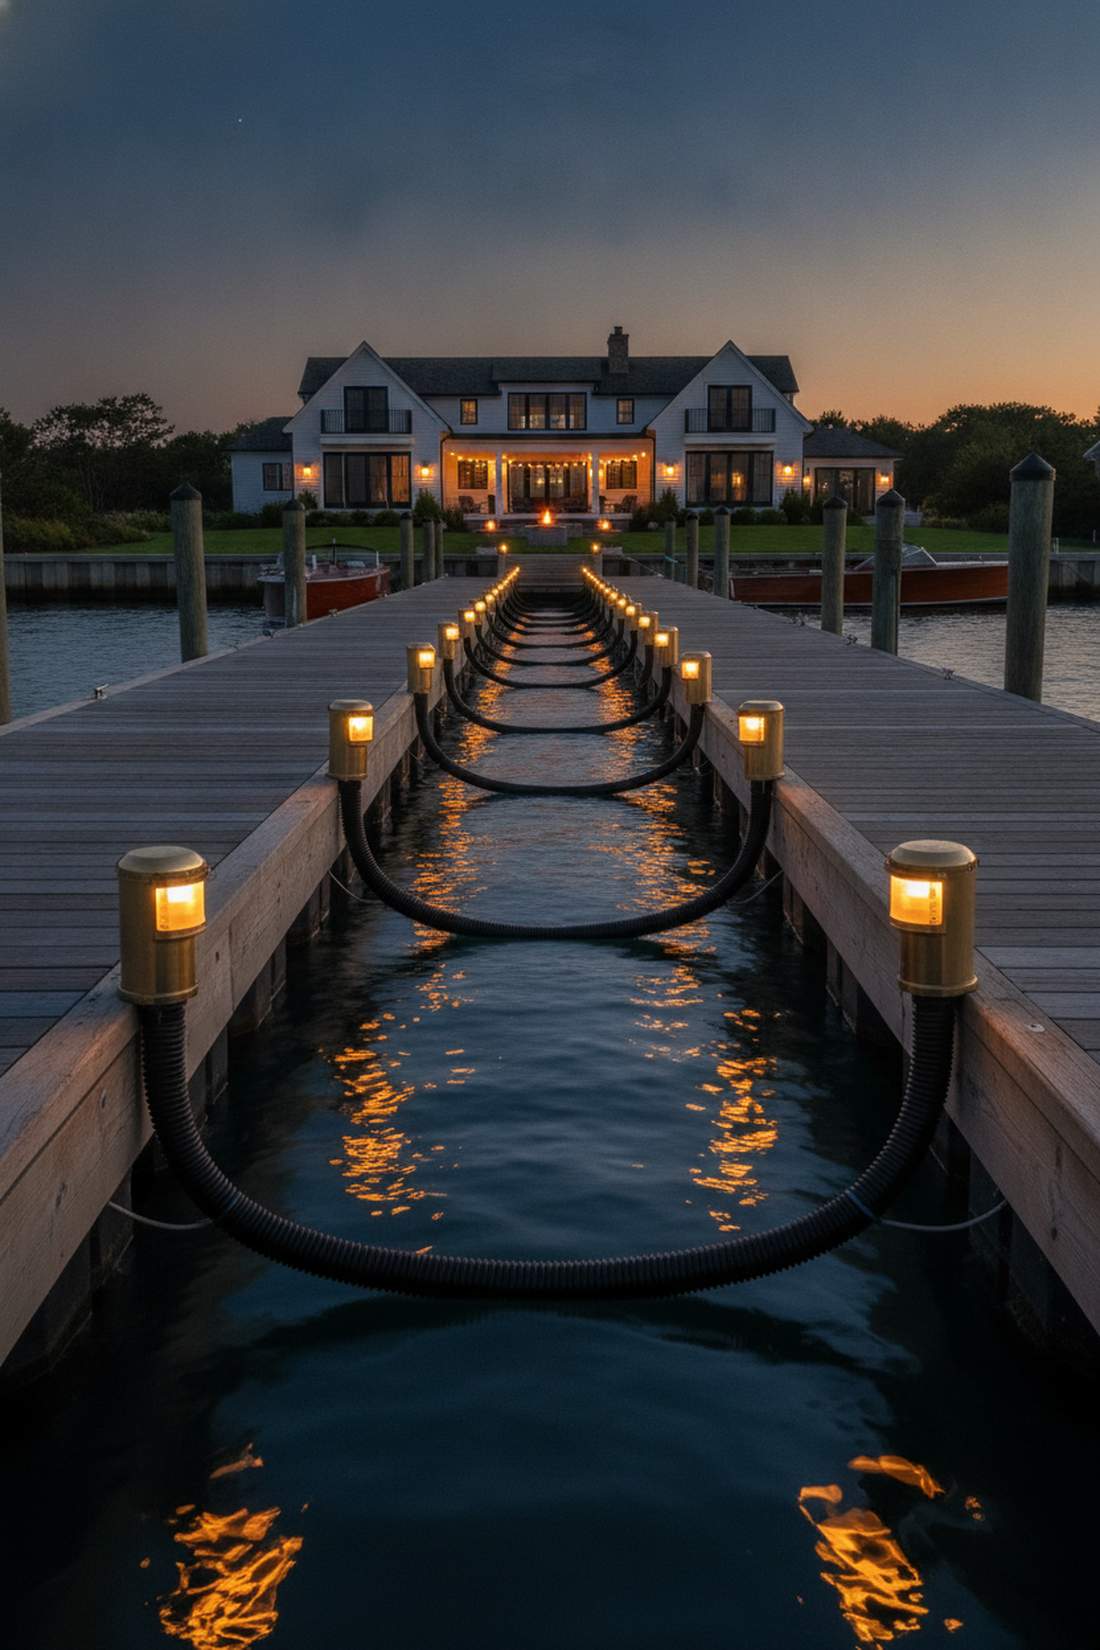
Dances beautifully with the waves while keeping your late-night boating arrivals totally safe. Marine-grade dock walkway lights are critical for surviving the constant bounce and salt spray of waterfront living.
Standard garden lights will corrode and snap on a moving dock, whereas this specialized layout delivers a surprisingly premium look that bends with the tide. Stocking up on corrosion-resistant marine lighting supplies guarantees your circuits won’t fry the second a wave crashes over the wood.
Heavy-duty dock lights cost about $60–$100 each. A crucial safety upgrade for any waterfront property.
- Key Materials: Brass or composite housings with flexible conduit.
- Vibe / Style: High-end nautical marina.
- Difficulty: Advanced marine electrical wiring.
- Budget Breakdown: Marine fixture: $80 | Flexible conduit: $20.
- Creator’s Tip: Never mount the fixture directly to the top decking boards; mount it to the solid side-framing so it doesn’t get kicked by dock boots.
- Smart Sourcing: Marine-grade brass dock lights (starter kits) and waterproof flexible marine conduit.
34. Permafrost Region Fixtures
Tackles the violent ground-shifting of extreme freezes without cracking a single wire. Adjustable frost-heave light bases are the only true solution for paths located in arctic or sub-arctic climates.
Rigid pipes snap in half when frozen ground expands, but this clever flexible approach looks far more expensive than it is. Integrating heavy-duty thermal-break lighting kits completely separates the frozen ground movement from your delicate electrical connections.
These highly engineered mounts run $90–$150 per unit. Save this to your extreme-climate building board!
- Key Materials: Sliding thermal-break mounting sleeves.
- Vibe / Style: Rugged, unstoppable arctic survival.
- Difficulty: Advanced seasonal adjustment planning.
- Budget Breakdown: Telescopic base: $60 | Fixture: $50.
- Creator’s Tip: Leave a massive “service loop” of extra wire underground so the fixture can be pulled up and down 6 inches without snapping the cord.
- Smart Sourcing: Adjustable permafrost ground spikes (multi-pack) and extreme-cold weather electrical tape.
Almost everyone ignores this crucial step, yet it completely transforms outdoor safety overnight.
35. Seismic-Rated Path Lighting
Stands strong and keeps the path illuminated even when the ground is violently shaking. Earthquake-resilient pathway fixtures are absolutely vital for emergency egress routes in high-risk fault zones.
Basic aluminum poles snap under heavy vibration, whereas this resilient design guarantees your family can escape a blackout safely. Sourcing battery-backed seismic outdoor supplies means the path stays brightly lit even if the entire neighborhood loses power.
These emergency-rated setups cost roughly $150–$250 each. A non-negotiable insurance policy for earthquake-prone regions.
- Key Materials: Shock-absorbing bases with integrated battery backups.
- Vibe / Style: Commercial-grade emergency preparedness.
- Difficulty: Advanced structural bolting.
- Budget Breakdown: Seismic fixture: $180 | Backup battery: $40.
- Creator’s Tip: Use flexible liquid-tight conduit for all connections so ground displacement doesn’t guillotine your copper wires.
- Smart Sourcing: Seismic-rated LED pathway bollards (premium kits) and liquid-tight flexible conduit rolls.
Smart and Sustainable Options for Modern Landscapes
Future-proofing your outdoor lighting pathway involves stripping away old manual timers and embracing intelligent, energy-saving networks. These smart upgrades completely change how your yard interacts with the changing seasons.
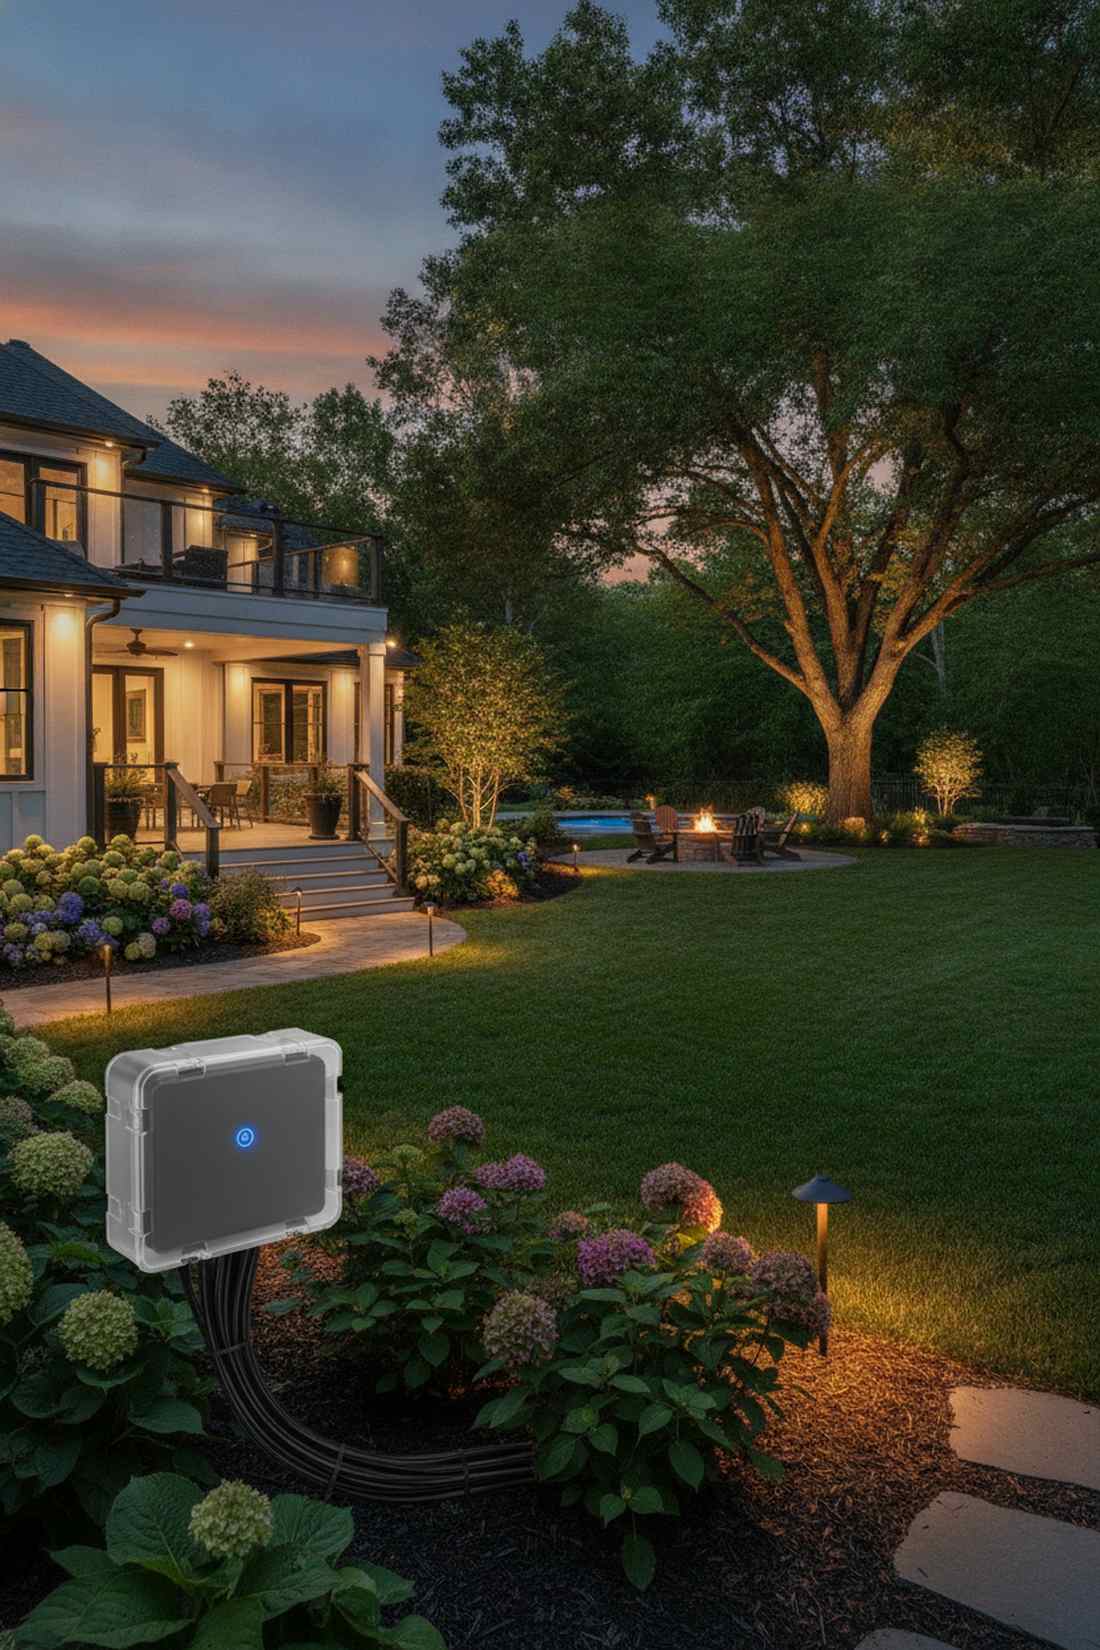
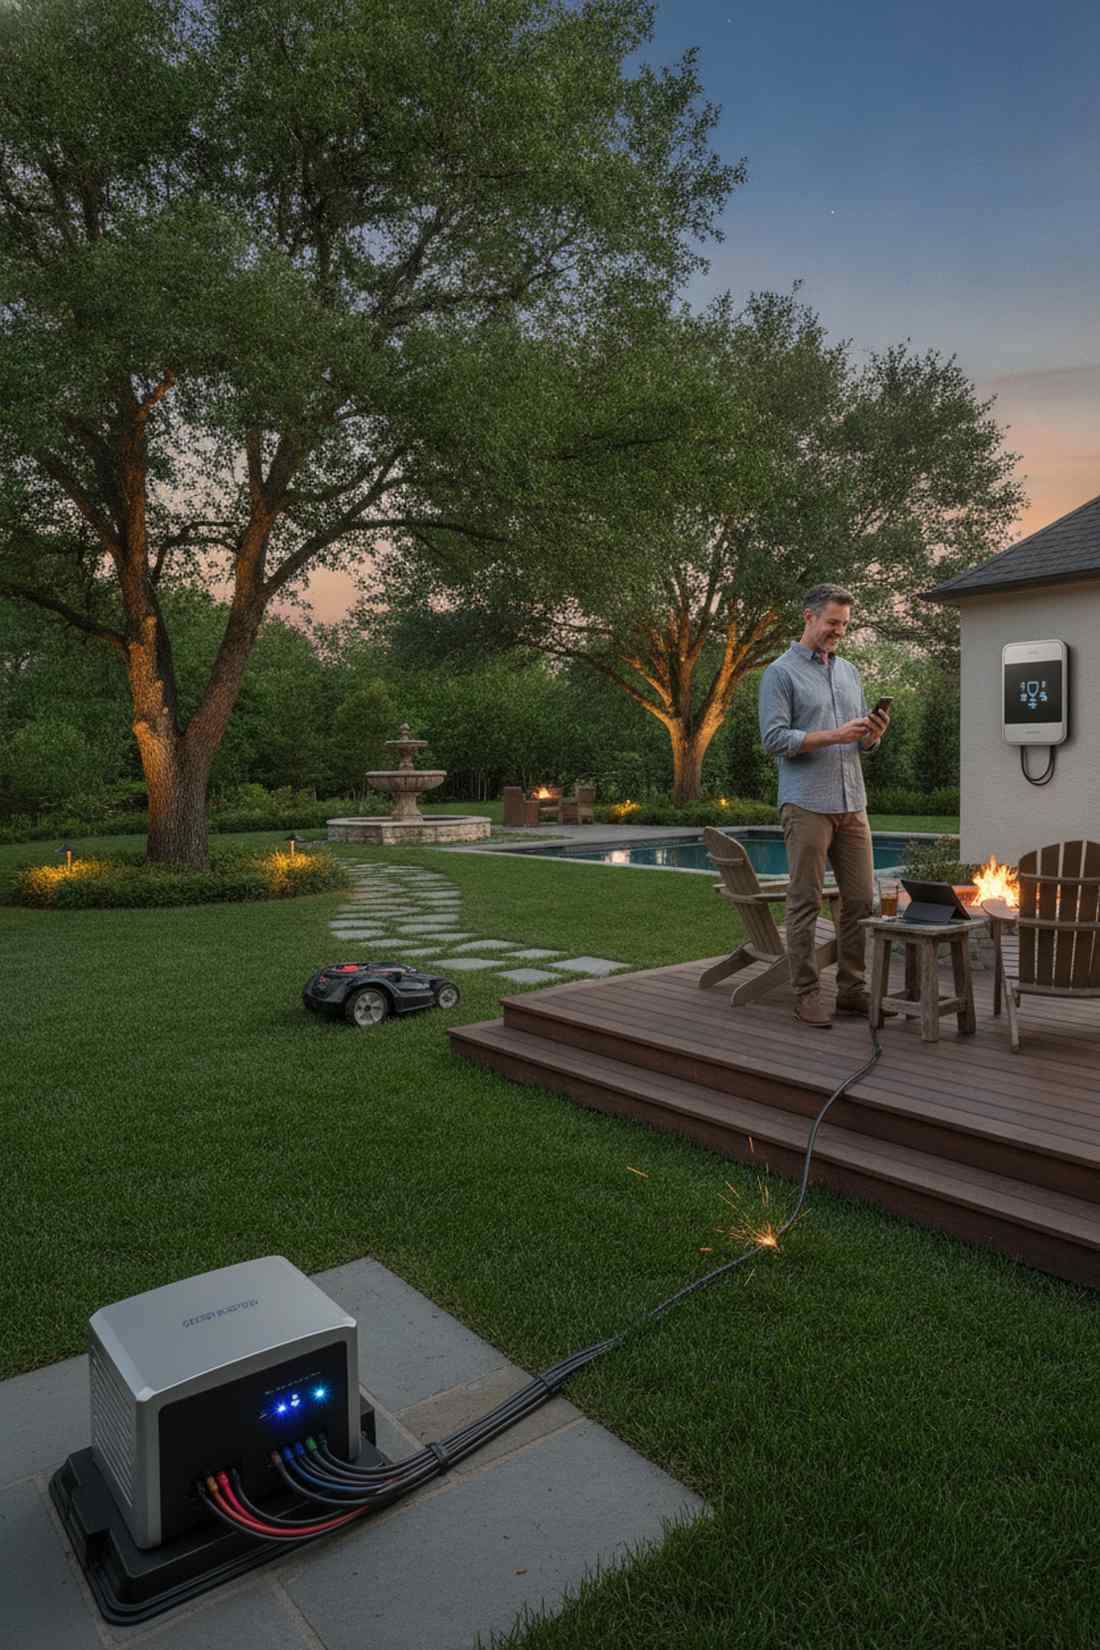
36. Astronomical Timer Systems
Tracks the exact movement of the sun so you never have to adjust a dial ever again. GPS-based landscape lighting transformers are the ultimate convenience upgrade for massive yard networks.
Old mechanical dials fall out of sync after a power outage, but this smart tech delivers a completely hands-off experience. Grabbing a smart Wi-Fi landscape transformer automatically shifts your on/off times daily based on your specific zip code’s sunset.
This central brain upgrade costs about $100–$180. Pin this if you are tired of tweaking your lights every Daylight Saving Time!
- Key Materials: Wi-Fi connected smart transformer box.
- Vibe / Style: Hands-free modern automation.
- Difficulty: Easy plug-and-play app sync.
- Budget Breakdown: Smart transformer: $150 | Wall anchors: $5.
- Creator’s Tip: Program a midpoint dimming rule so the lights automatically drop to 50% brightness at 1:00 AM to save on your energy bill.
- Smart Sourcing: Wi-Fi astronomical landscape transformers (top-rated) and heavy-duty outdoor timer covers.
37. Occupancy-Sensing Networks
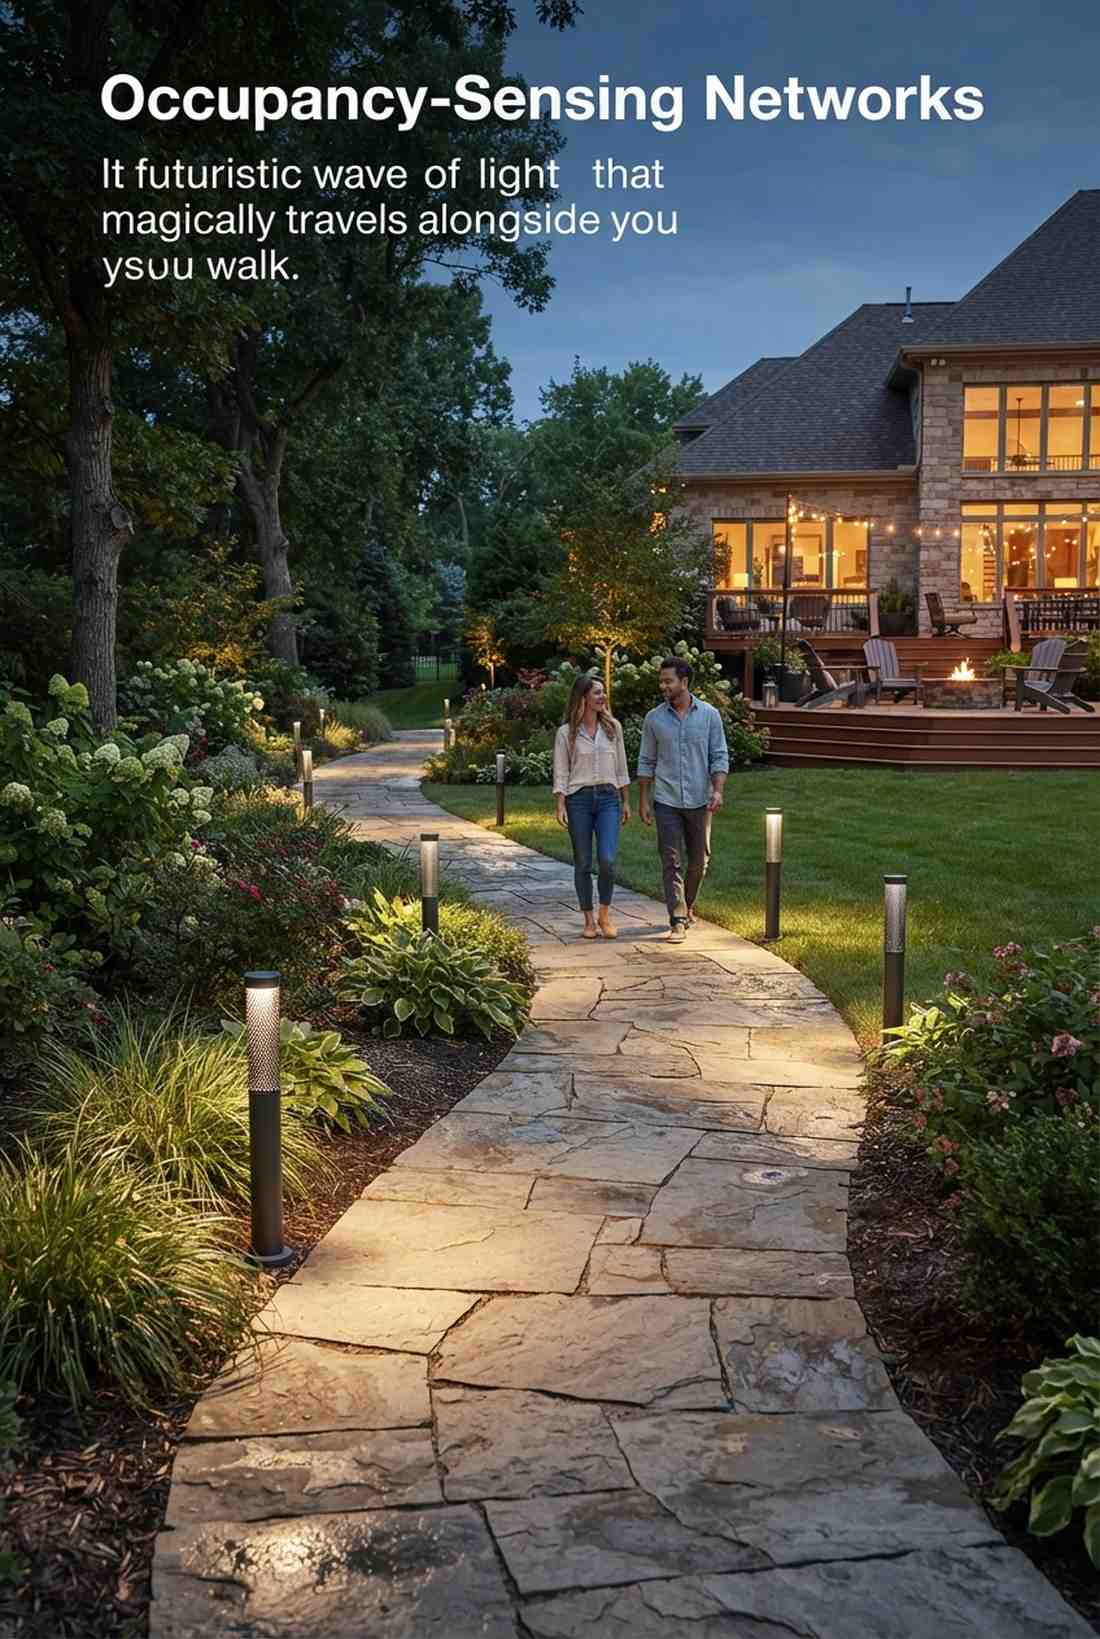
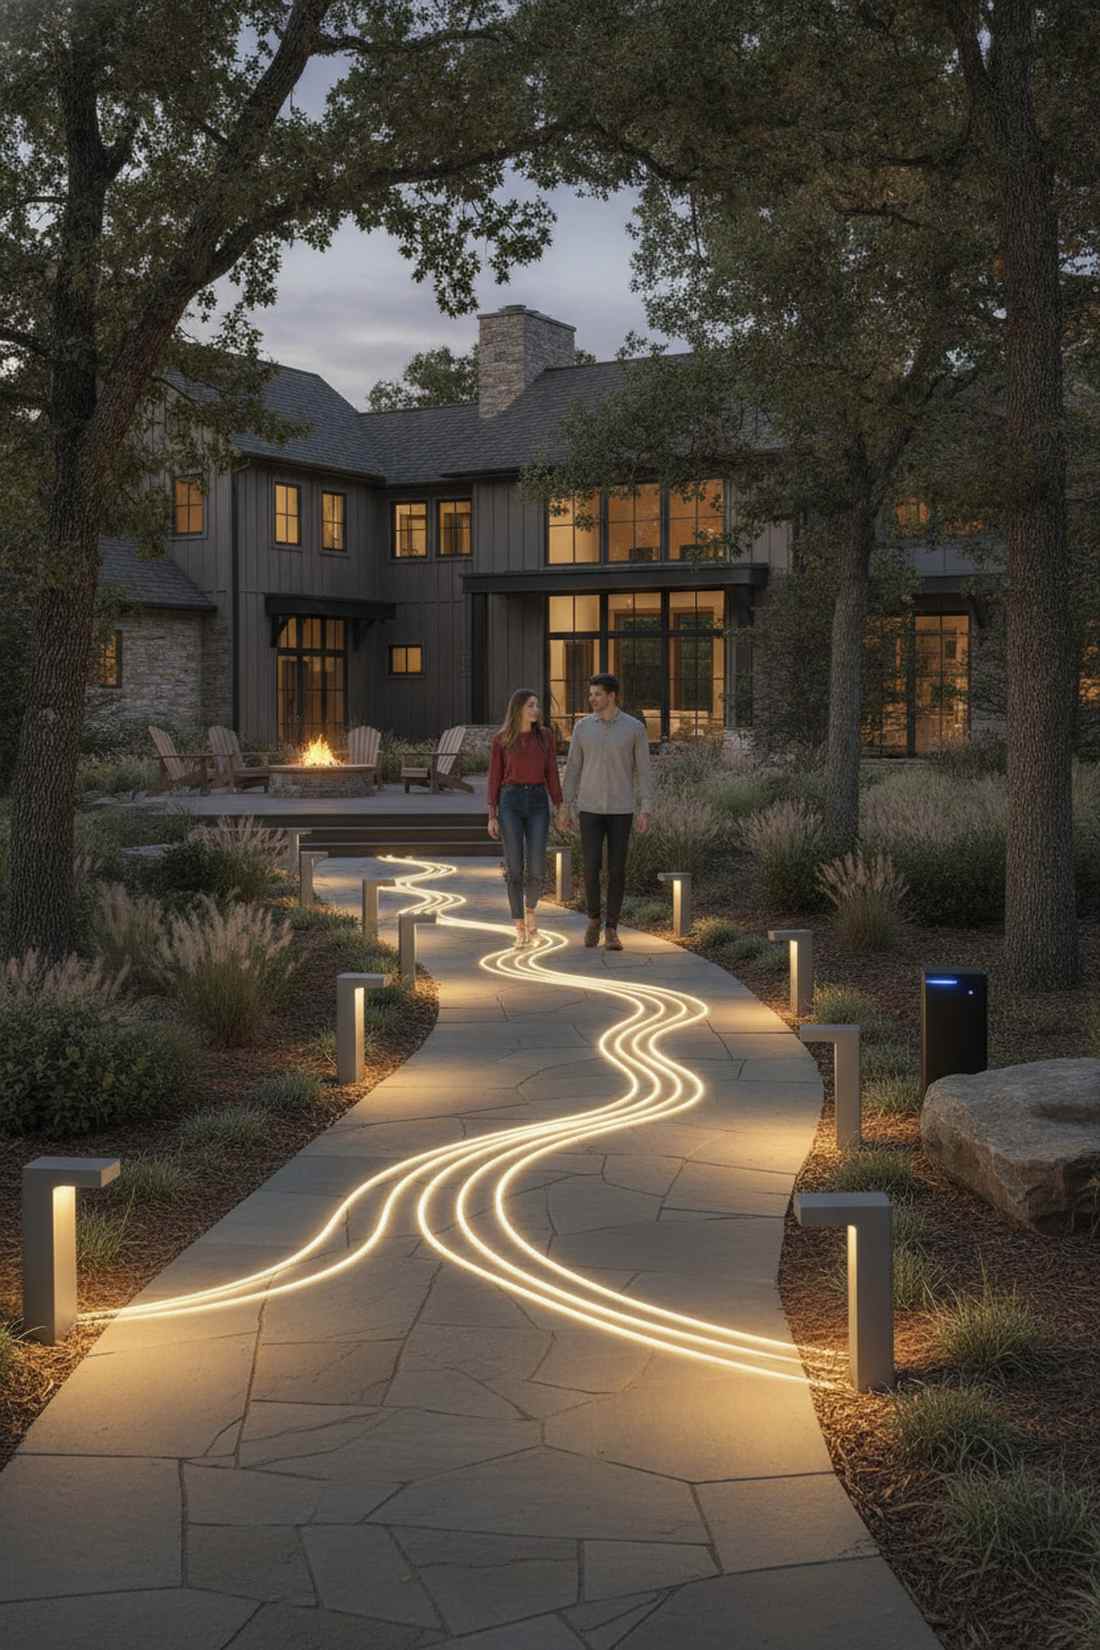
Creates a futuristic wave of light that magically travels alongside you as you walk. Mesh-networked path sensors are an incredibly cool feature for long corporate paths or sprawling estate walkways.
Instead of blinding the whole yard constantly, this chained-reaction layout delivers a surprisingly premium look while slashing electricity use. Utilizing smart outdoor mesh lighting kits allows fixture A to tell fixture B that someone is coming, fading them up smoothly in advance.
Networked smart units run about $90–$150 each. A phenomenal way to balance high-end luxury with serious energy conservation.
- Key Materials: Bluetooth-mesh enabled pathway lamps.
- Vibe / Style: Futuristic smart-home luxury.
- Difficulty: Advanced digital grouping and zoning.
- Budget Breakdown: Mesh fixture: $120 | Control hub: $50.
- Creator’s Tip: Set the detection zones to overlap by 25% so the light seamlessly transitions without any dark dead zones in between.
- Smart Sourcing: Bluetooth-mesh outdoor pathway lights (starter kits) and smart home integration hubs.
38. Photovoltaic-Hybrid Systems
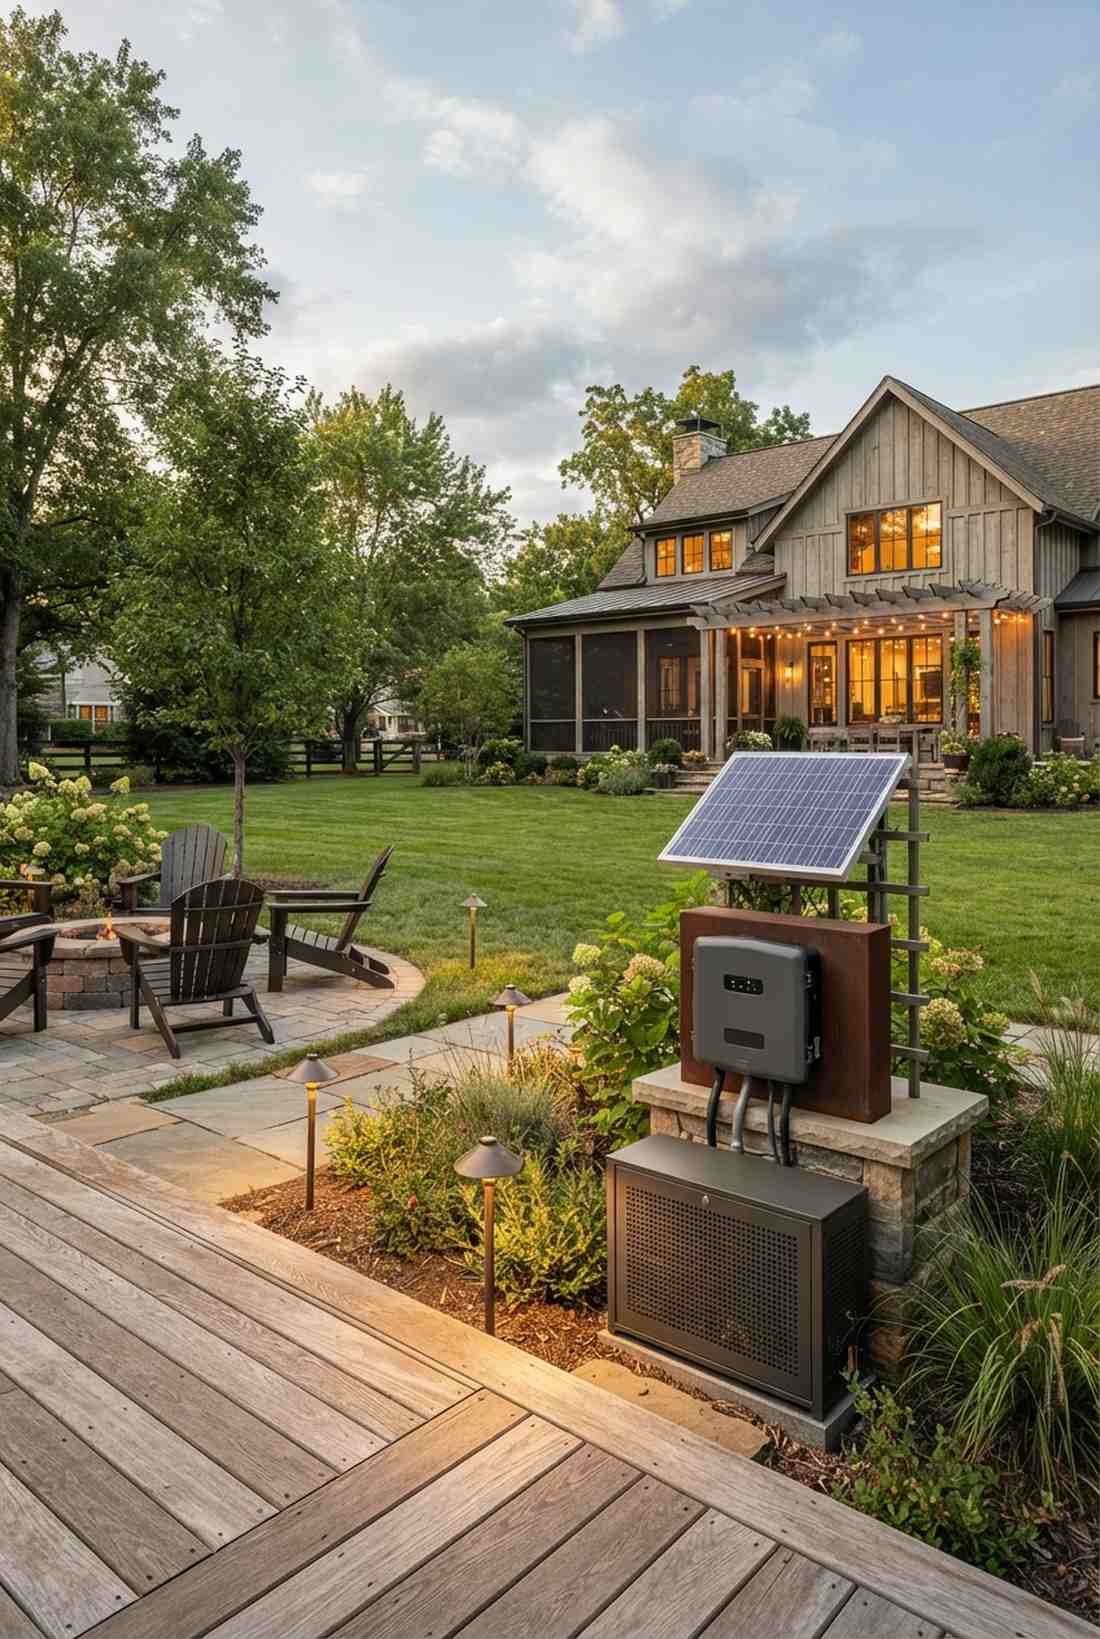
Harnesses free energy from the sun but seamlessly taps into the house grid when winter clouds roll in. Hybrid solar landscape hubs are the absolute smartest investment for eco-conscious homeowners who demand 100% reliability.
Pure solar systems completely die during a week of rain, but this dual-power approach looks far more expensive than it is by never failing. Installing a high-capacity hybrid lighting inverter lets you sip free battery power first, then automatically switch to house power as a backup.
This robust power station costs around $300–$500 to set up. Save this to your ultimate sustainable living board!
- Key Materials: Central solar panel array with grid-tied inverter.
- Vibe / Style: Off-grid resilience with on-grid reliability.
- Difficulty: Advanced electrical panel integration.
- Budget Breakdown: Hybrid inverter: $250 | Battery bank: $150.
- Creator’s Tip: Size your solar panel array to handle 80% of your summer needs, letting the grid handle the tougher winter months.
- Smart Sourcing: Hybrid low-voltage lighting inverters (premium kits) and deep-cycle lithium solar batteries.
39. Color-Tunable Adaptive Lighting
Matches your exact biological clock, fading from crisp white at dusk to a cozy, sleepy amber at midnight. Tunable white landscape fixtures create the perfect psychological transition for relaxing evening patios.
Stuck on one harsh white color forever? This smart color-shifting method completely updates the vibe to match your mood. Leveraging tunable LED pathway lighting kits gives you the power to dial in the perfect warmth for a dinner party, then shift to cool white for security later.
These color-shifting units cost about $60–$95 each. Highly recommended if you are obsessed with creating the perfect evening ambiance.
- Key Materials: App-controlled 2700K-to-5000K variable LED chips.
- Vibe / Style: Ultra-customized mood architecture.
- Difficulty: Intermediate app programming.
- Budget Breakdown: Tunable fixture: $75 | Smart controller: $40.
- Creator’s Tip: Set a slow 45-minute fade from bright white to warm amber so your guests’ eyes adjust completely naturally without noticing the shift.
- Smart Sourcing: Tunable white smart path lights (multi-pack) and weatherproof low-voltage cable splitters.
If you love smart tech, this next upgrade feels like living in the year 2030.
40. Wind-Powered Pathway Lighting
Spins beautifully in the coastal breeze while generating its own free electricity for the night. Micro-turbine pathway bollards are an incredibly unique, kinetic art piece for beachfront or mountain properties.
Solar panels are useless in heavily shaded windy gorges, whereas this spinning kinetic approach looks completely custom and highly expensive. Snagging some hybrid wind-solar outdoor lighting supplies ensures the battery charges regardless of whether it’s sunny or just blowing a gale.
These kinetic art generators cost $200–$350 each. Pin this immediately if you want the coolest, most unique yard in the neighborhood!
- Key Materials: Vertical-axis micro wind turbines mounted on posts.
- Vibe / Style: Kinetic eco-art installation.
- Difficulty: Easy spike and post assembly.
- Budget Breakdown: Turbine unit: $250 | Heavy anchor: $25.
- Creator’s Tip: Place these entirely clear of house walls or dense hedges; they need clean, unobstructed airflow to spin efficiently.
- Smart Sourcing: Micro-turbine landscape bollards (premium styles) and vibration-dampening mounting pads.
41. Maintenance-Alert Connectivity
Texts your phone the exact second a bulb burns out or a wire gets cut by the lawnmower. Diagnostic smart-monitoring transformers take all the guessing out of maintaining a massive landscape system.
Walking the entire property searching for a dead bulb is exhausting, but this self-diagnosing network delivers a strictly professional, resort-level experience. Integrating smart property management lighting hubs completely eliminates the frustration of troubleshooting dead zones.
A diagnostic hub upgrade runs about $200–$400. An absolute must-have for massive estates with dozens of hidden fixtures.
- Key Materials: Wi-Fi connected diagnostic transformer.
- Vibe / Style: Elite, worry-free estate management.
- Difficulty: Advanced network pairing.
- Budget Breakdown: Diagnostic hub: $300 | App subscription: $0.
- Creator’s Tip: Log the exact installation date in the app; the system will use the manufacturer’s 50,000-hour rating to predict exactly when the bulb will die.
- Smart Sourcing: Diagnostic Wi-Fi landscape transformers (top-tier) and heavy-duty voltage multimeters.
42. Biodegradable Fixture Housings
Feels like a beautiful, guilt-free harmony between modern architectural design and Mother Nature. Eco-friendly sustainable garden path decor fits perfectly into zero-waste backyard renovations.
Standard cheap plastics crack under the summer heat and sit in landfills forever, but this plant-based alternative ages gracefully into the soil. We highly recommend pairing them with low-voltage landscape lighting supplies for maximum energy efficiency while respecting the earth.
Expect to spend $35–$50 per eco-unit for these. A fantastic conversation starter for any green-certified home project.
- Key Materials: Plant-based bioplastic exterior housings.
- Vibe / Style: Earth-first zero-waste modernism.
- Difficulty: Easy standard low-voltage wiring.
- Budget Breakdown: Bio-fixture: $45 | Base stake: $5.
- Creator’s Tip: These units are incredibly tough but avoid using chemical weed killers near them, as harsh solvents can prematurely break down the bioplastics.
- Smart Sourcing: Biodegradable LED landscape lights (multi-pack) and eco-friendly organic yard stakes.
Designing for Safety and Experience
Successful outdoor lighting pathway implementation perfectly balances technical performance with high-end aesthetic integration, creating luxury environments where pedestrians move confidently after dark. The exactly 42 solutions presented here demonstrate how smart material sourcing, strategic placement, and premium product kits reduce environmental impact while effortlessly mimicking a massive custom budget.
Whether you’re upgrading a simple garden walkway or trenching a massive estate driveway, investing in fully productized starter kits and UV-coated supplies pays massive dividends. By leveraging these specific blueprints, you secure a visually striking, weather-resistant landscape that dramatically extends your outdoor usable hours and boosts your overall property value.
Frequently Asked Questions
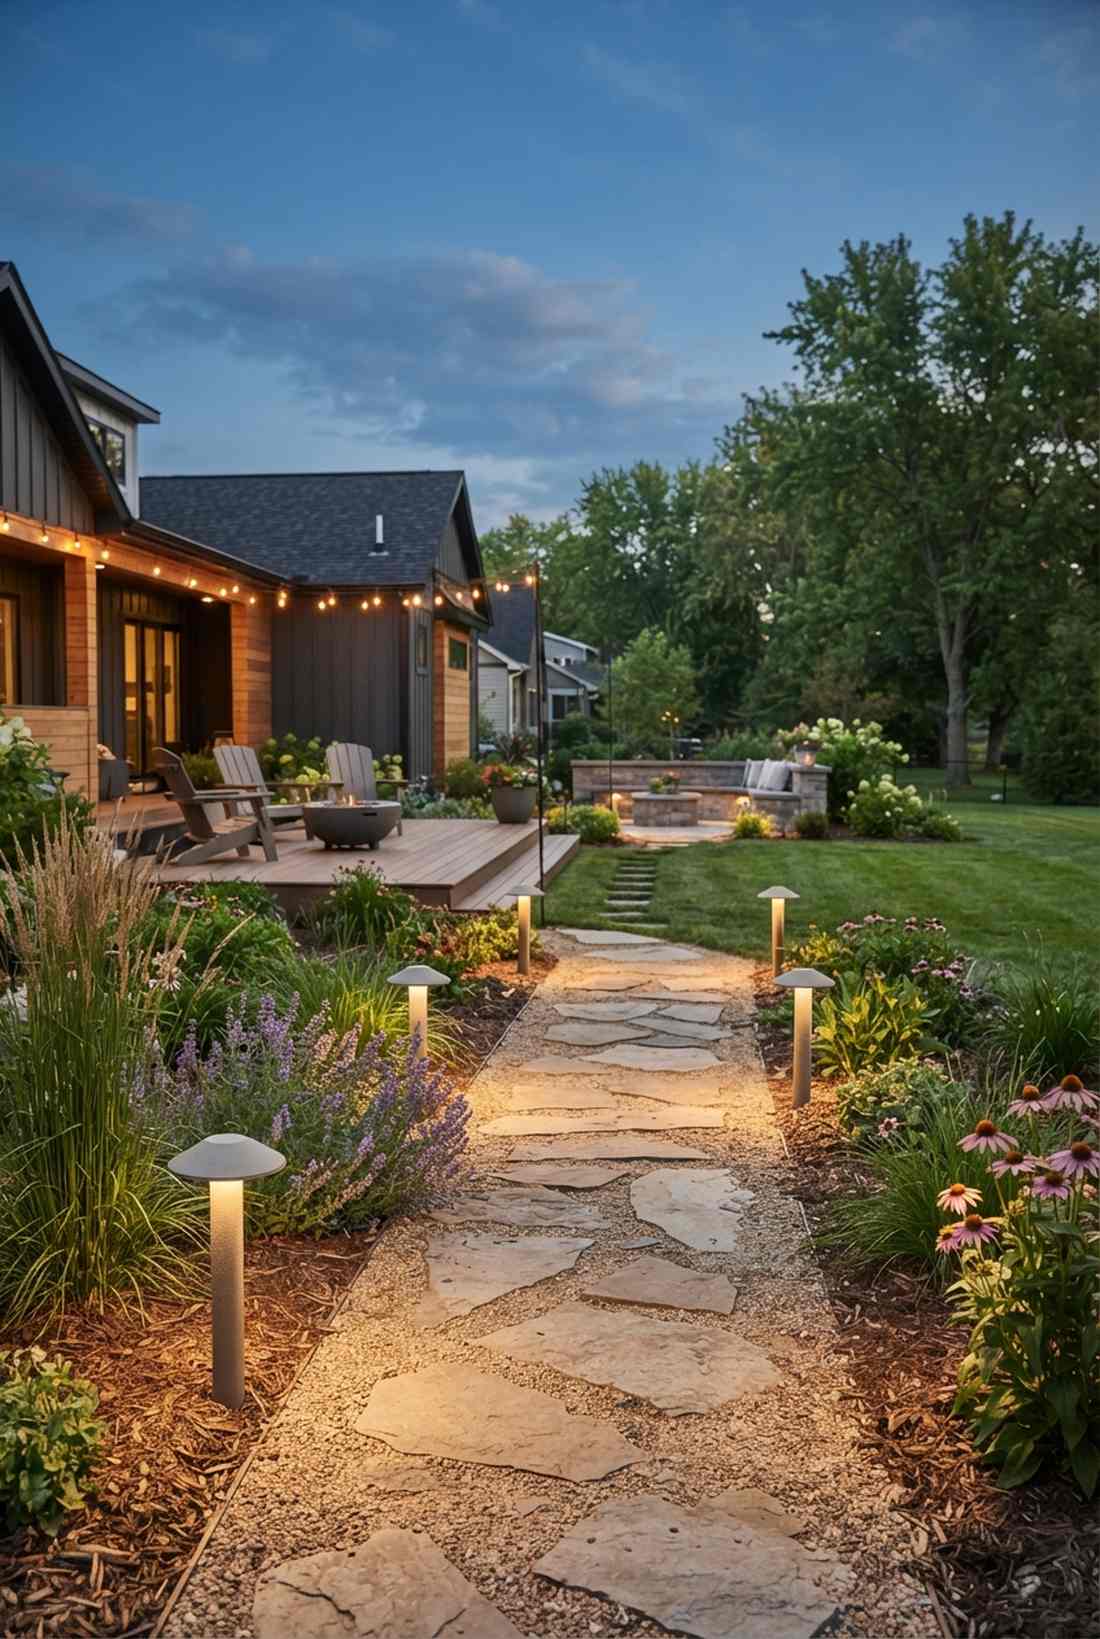
What spacing should I use between pathway lights?
To avoid a cheap, cluttered look, standard pathway fixtures demand 8 to 12-foot spacing for a smooth, continuous glow on straight paths. If you upgrade to high-output commercial grade bollards or specialized kits, you can easily stretch that to 15 or 25-foot intervals. Always measure the specific lumen output of your chosen pre-cut landscape lighting packs and tighten the spacing on curved corners to maintain maximum visibility.
Are solar pathway lights bright enough for safety?
Absolutely, provided you skip the generic dollar-store plastics and invest directly in premium commercial-grade solar pathway kits. High-end monocrystalline models push 100 to 300 lumens per unit, fully rivaling traditional hardwired systems. If your yard suffers from heavy shade, you must secure higher-capacity lithium battery upgrades or hybrid grid-backup solutions to guarantee the path remains safe all night long.
How do I prevent glare from pathway lights?
The secret to a high-end, glare-free aesthetic is explicitly buying fixtures engineered with full-cutoff optics. These premium hoods physically block the bulb from shining upwards, directing the beam exclusively onto the pavement. Keep your mounting stakes under 24 inches tall, and stagger the multi-pack starter kits along the outer edges rather than dead-center to completely preserve your nighttime vision.
What color temperature works best for outdoor pathways?
For that cozy, expensive resort vibe, you should always source warm white LEDs strictly in the 2700K to 3000K range. If you are lighting a modern commercial driveway or security zone, shifting to a 3500K to 4000K neutral white kit offers sharper contrast for vehicle safety. Never buy cheap blue-tinted 5000K bulbs; they instantly ruin the yard’s ambiance and make the landscaping look incredibly artificial.
How long do LED pathway lights last?
When you invest in fully sealed, waterproof LED step lights and premium low-voltage kits, the diodes themselves easily push 50,000 to 70,000 hours. That translates to nearly two decades of nightly use. The trick to maximizing your budget is sourcing fixtures with easily replaceable driver modules, ensuring a cheap electrical surge doesn’t force you to throw away an entire expensive brass housing.
Do I need permits for low-voltage pathway lighting?
In most regions, plugging in a standard 12-volt or 24-volt low-voltage landscape lighting transformer completely bypasses the need for an expensive electrical permit. However, if you are trenching 120-volt line-voltage wires for heavy-duty driveway markers or permanent bollards, a licensed inspection is mandatory. Always check local codes, but sticking to plug-and-play starter kits is the ultimate workaround for fast, budget-friendly weekend DIYs.