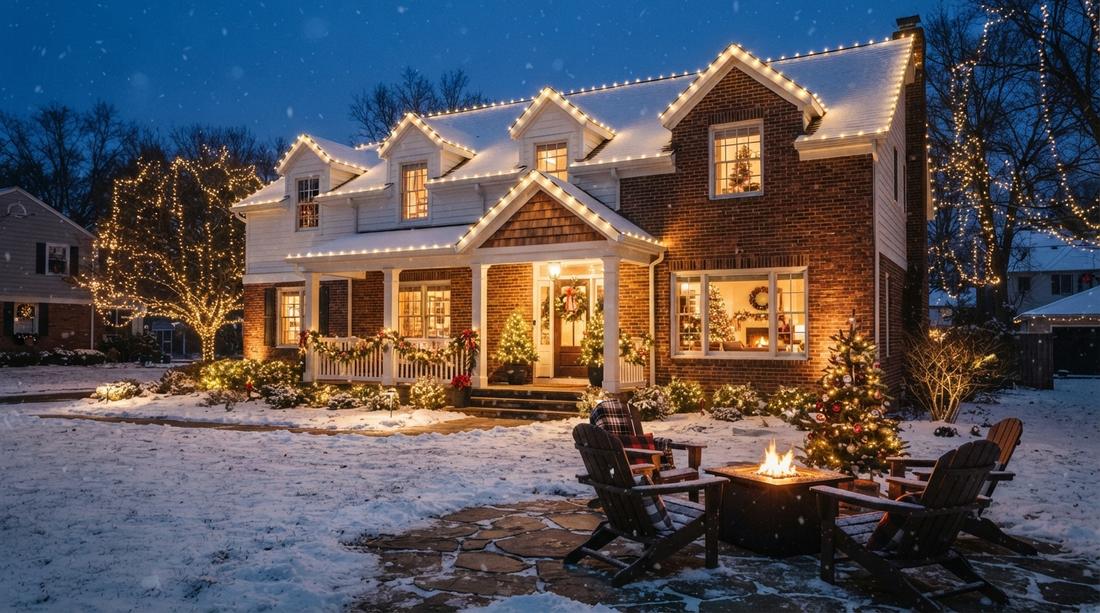
Strategic fairy lights christmas arrangements instantly multiply your home’s perceived value. Discover exact material sourcing, budget blueprints, and hidden installation tactics. Achieve breathtaking showroom-quality brilliance without hiring expensive decorators.
Design Snapshot: Key Principles
- Layering Depth: Weave lights from trunk to branch tips at varying depths for three-dimensional brilliance
- Color Temperature: Warm white creates cozy ambiance; cool white delivers modern elegance; mix strategically for visual interest
- Density Distribution: Plan 100 lights per foot of tree height; outdoor displays need concentrated focal points with softened periphery
- Power Management: Connect maximum 5 strands end-to-end; position outlets strategically to hide extension cords within landscaping
Expert Fairy Lights Christmas Tree Techniques
1. Vertical Trunk Weaving
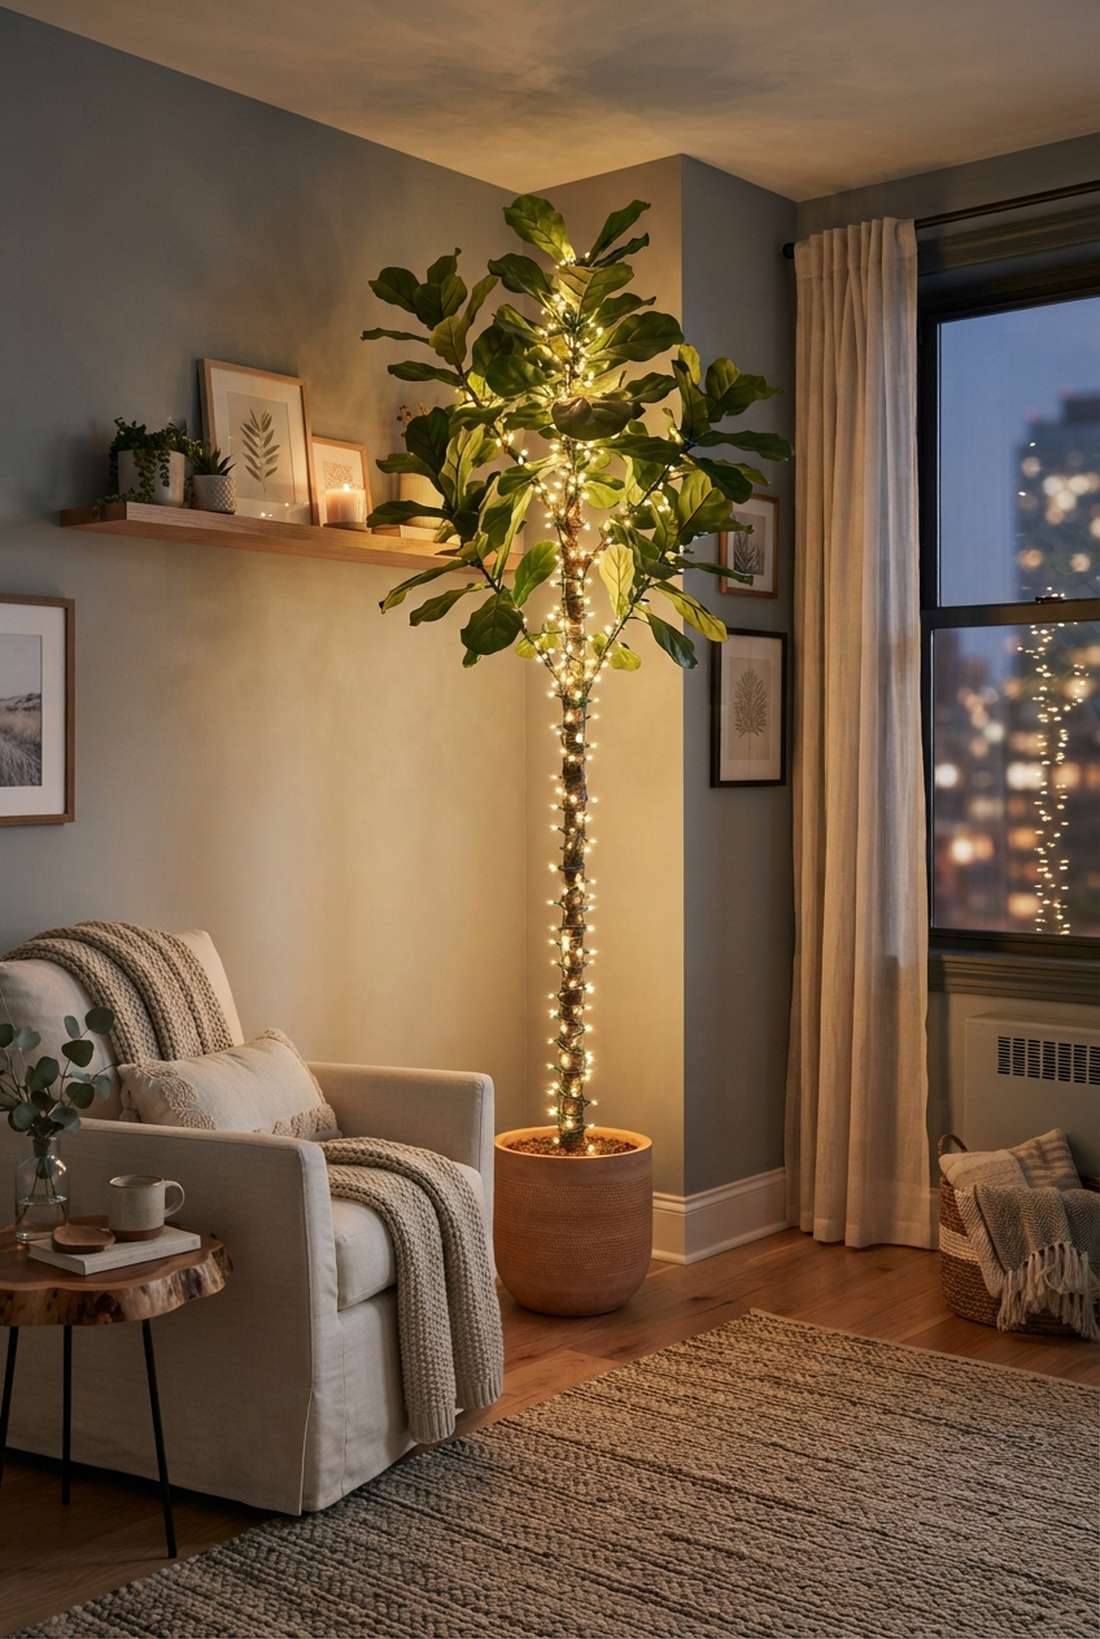
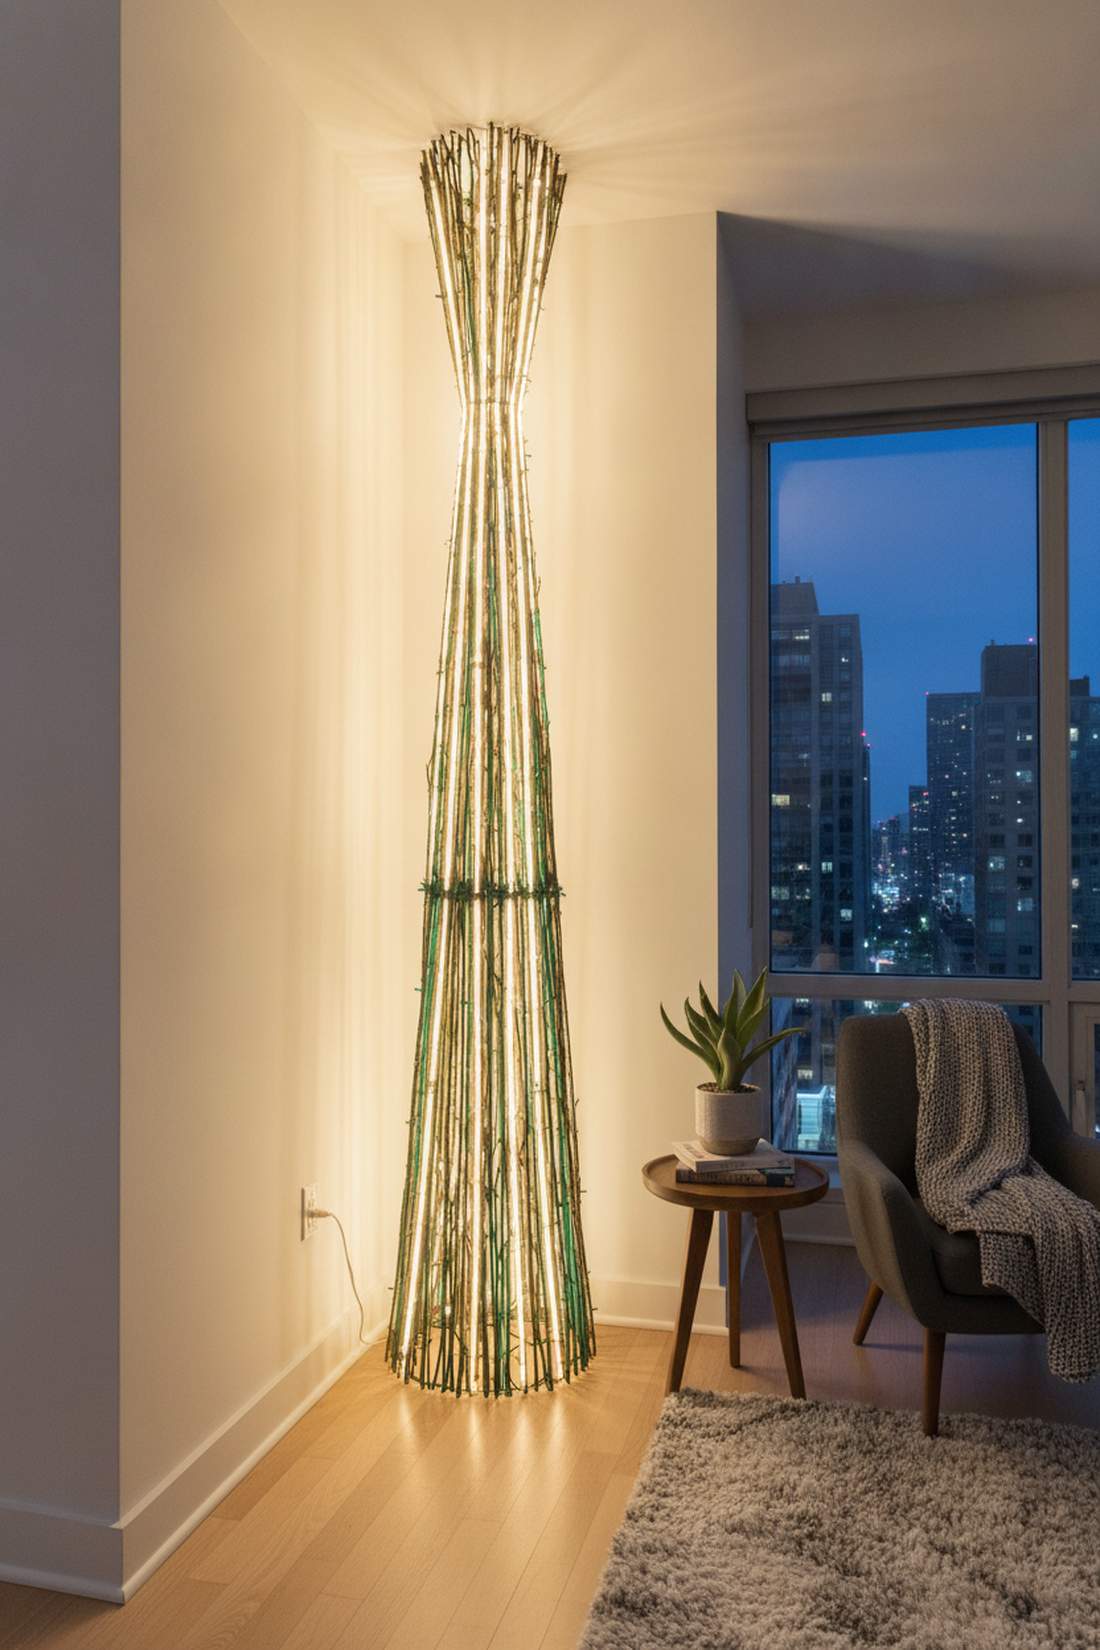
This layout feels like a magical illuminated pillar anchoring your room. Vertical glowing tree bases work exceptionally well for emphasizing height in tight apartment corners.
Instead of messy horizontal wraps, running strands straight up the core delivers a surprisingly premium look. Utilizing commercial-grade miniature garden supplies completely hides the wiring for a flawless finish.
You can easily pull this off for around $20–$35. Pin this if you’re planning a small space upgrade.
- Key Materials: UV-coated green zip ties
- Vibe / Style: Clean architectural glow
- Difficulty: Easy beginner setup
- Budget Breakdown: Ties: $5 | Core Strands: $25
- Creator’s Tip: Weave upward from the plug base to eliminate dangling extension cords.
- Smart Sourcing: bulk pack green mounting ties and heavy-duty indoor starter kits.
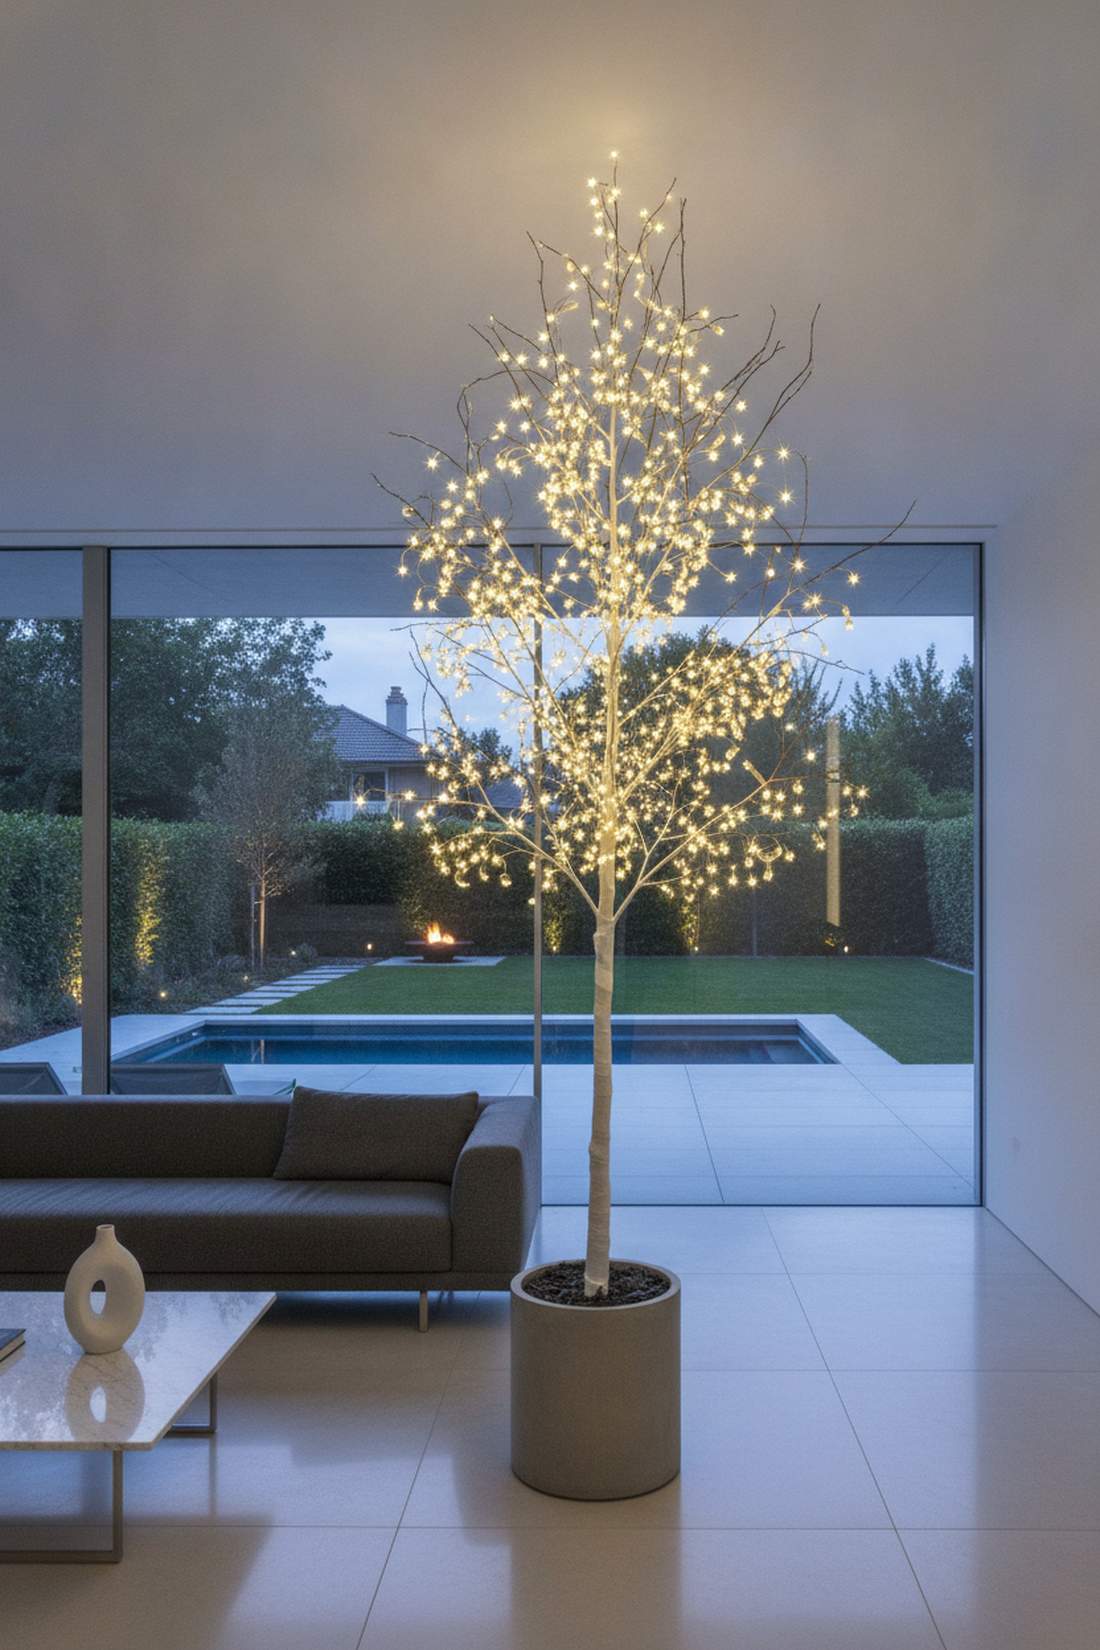
2. Branch Tip Highlighting
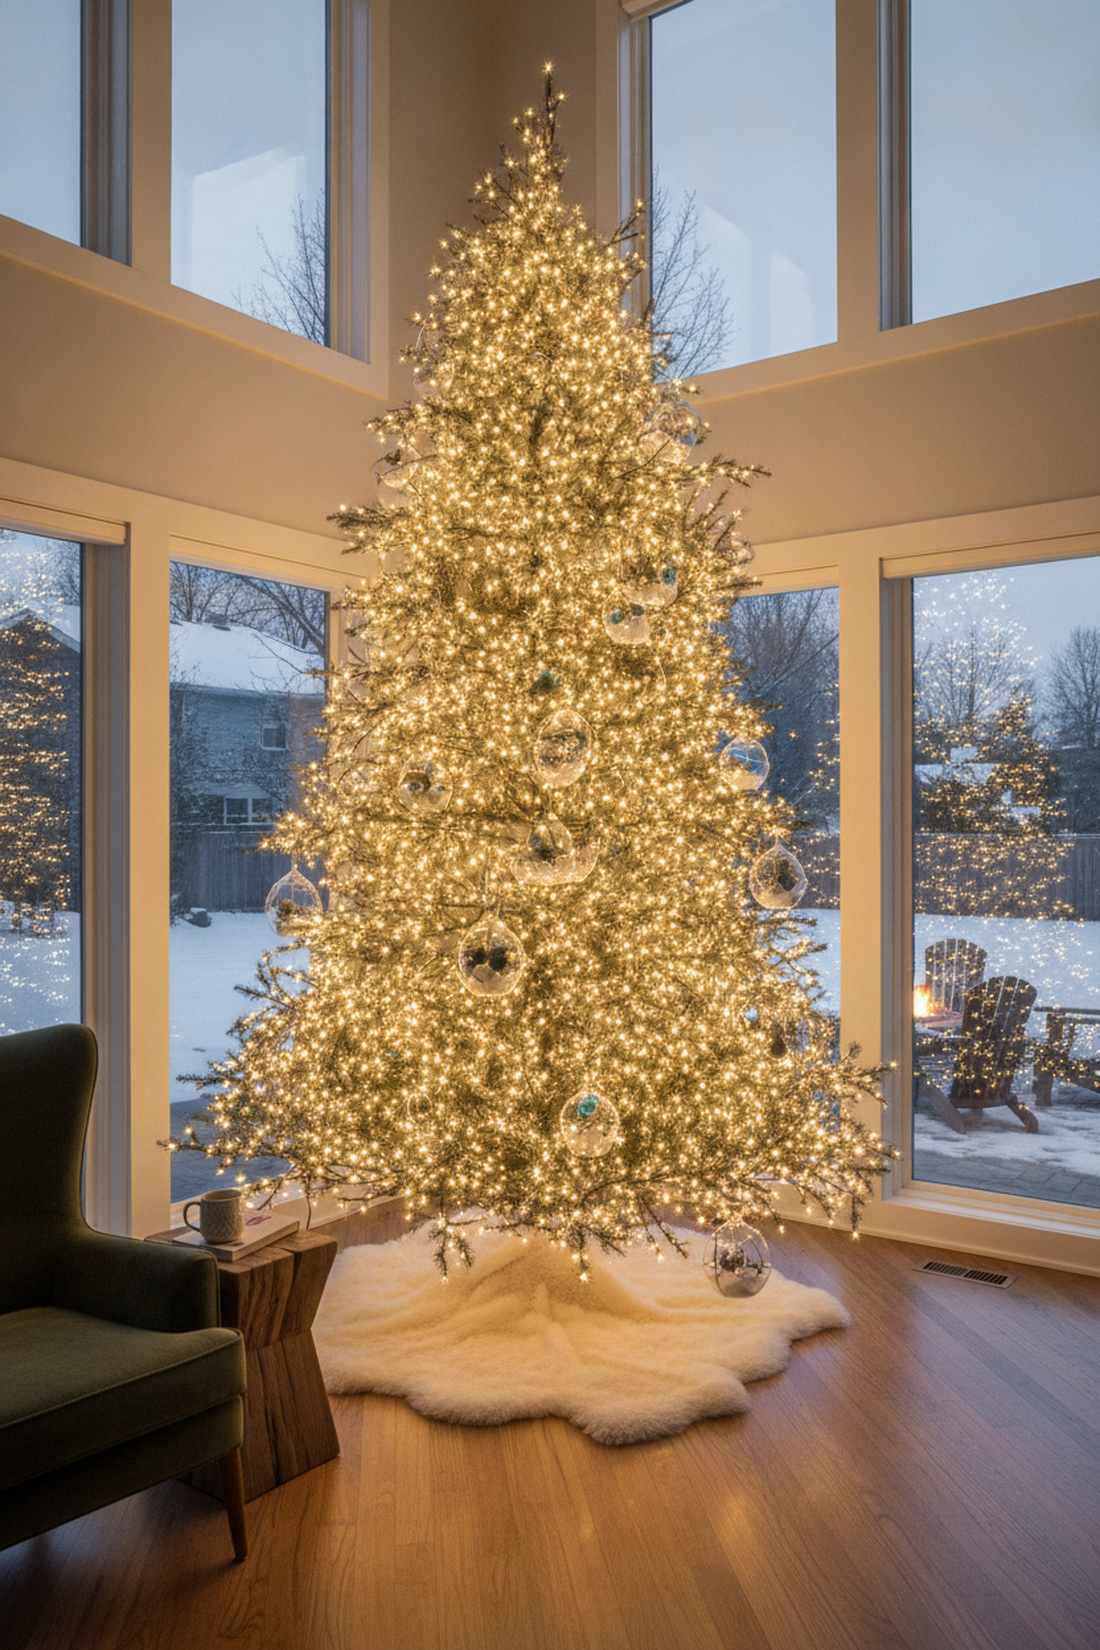
Transforming your setup into what feels like a floating halo of stars is incredible. Perimeter glowing branches are perfect for showcasing sparse, vintage-style firs.
Pushing illumination to the extreme edges makes the silhouette look far more expensive than it is. Adding a few strategic terrarium accessories near the tips enhances the frosty aesthetic.
Expect to spend roughly $30–$50 depending on tree width.
- Key Materials: Micro-wire flexible LED strands
- Vibe / Style: Ethereal floating magic
- Difficulty: Moderate patience required
- Budget Breakdown: Micro-LEDs: $40 | Twist ties: $5
- Creator’s Tip: Thread lights out and back along the exact same branch for double brightness.
- Smart Sourcing: pre-cut flexible floral wire and commercial micro-LED bulk packs.
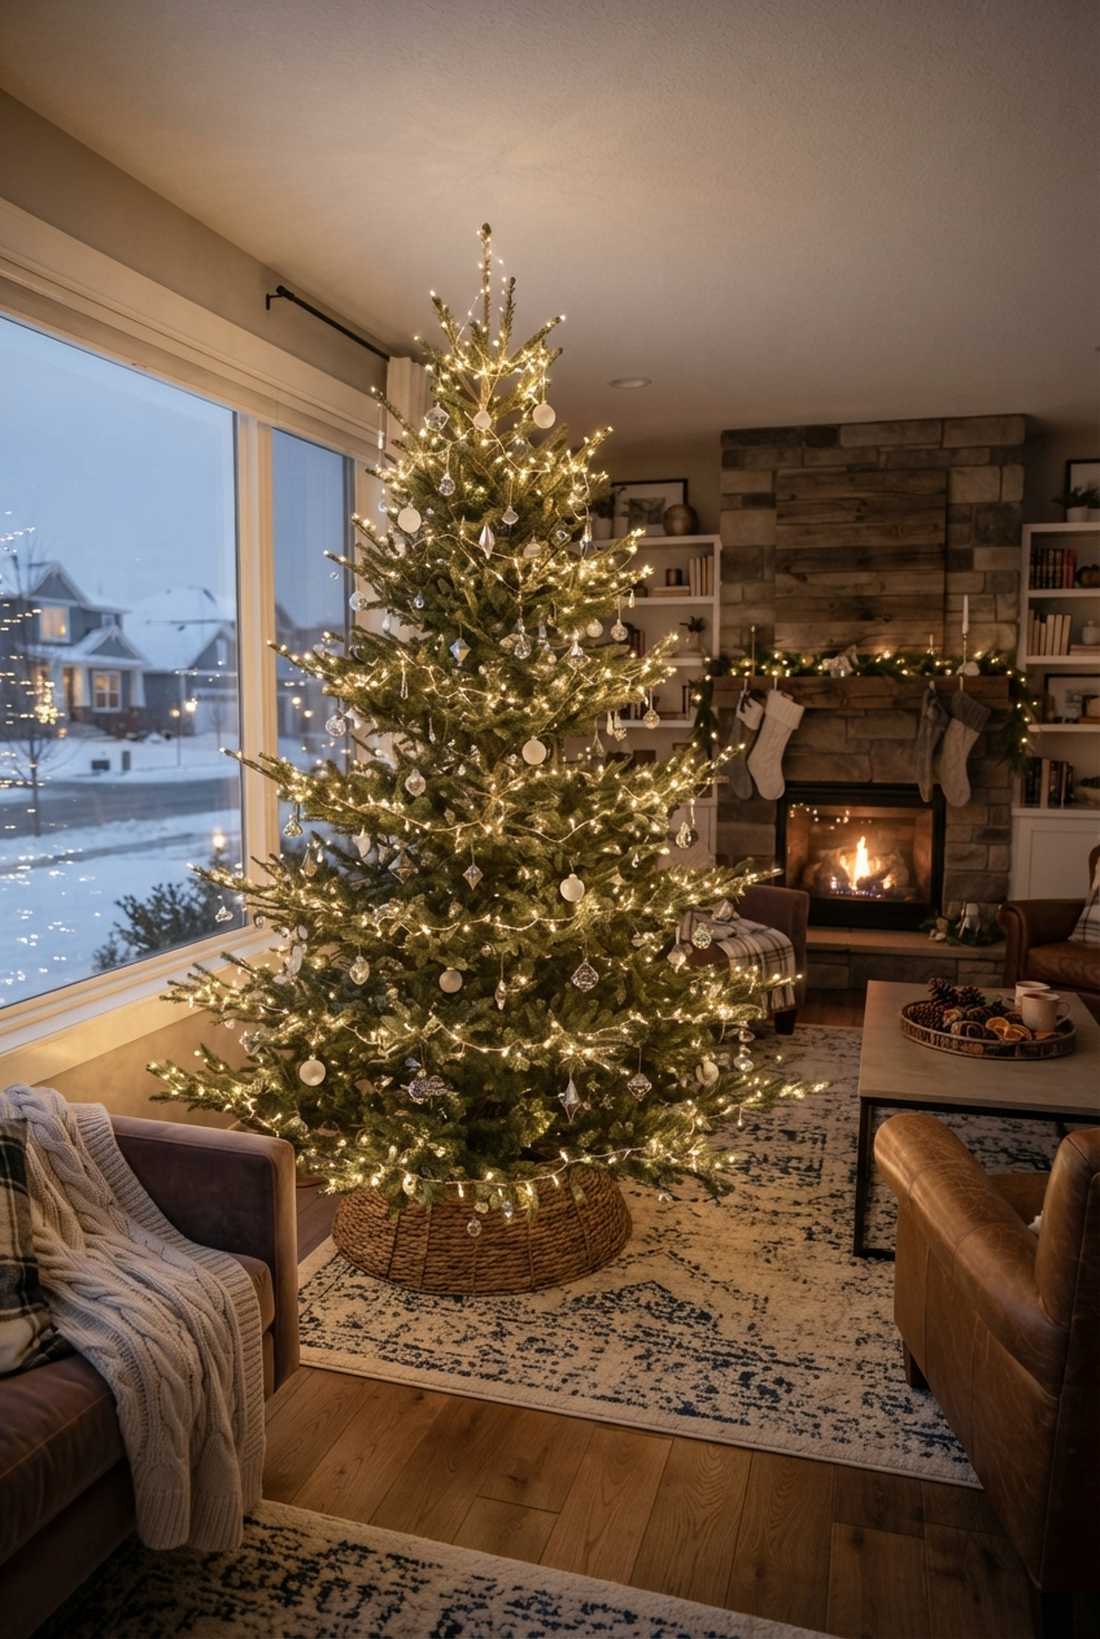
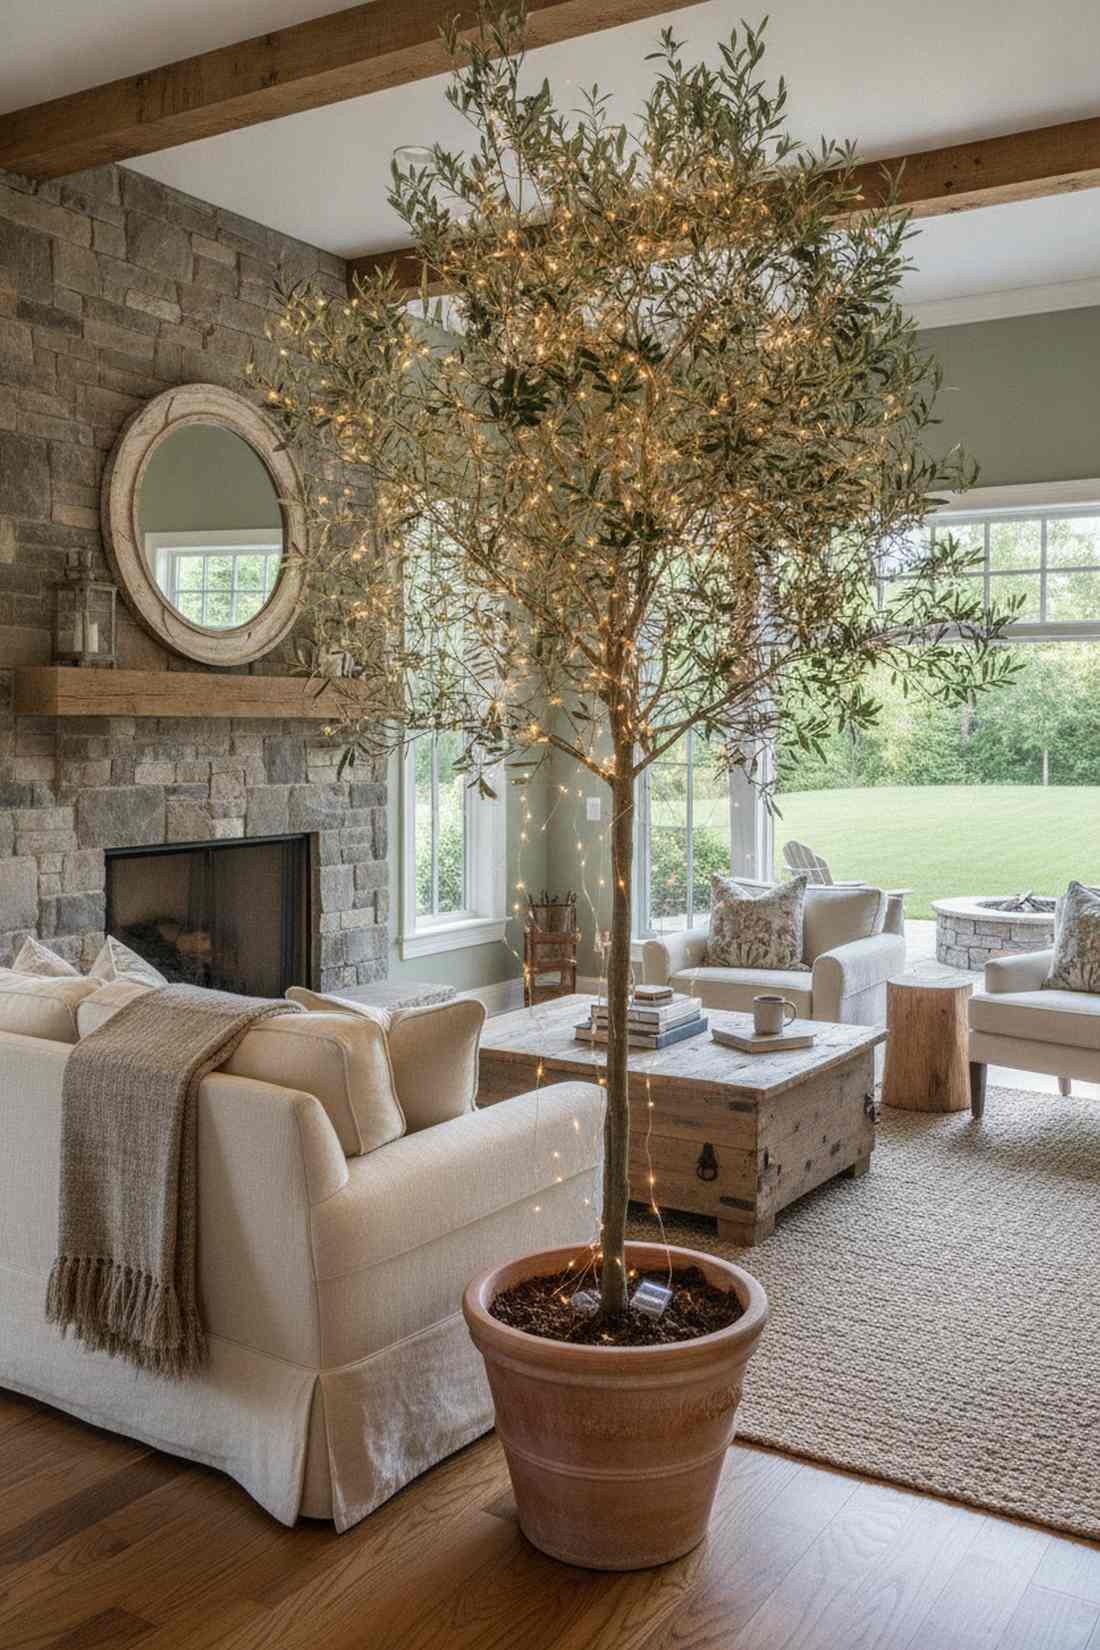
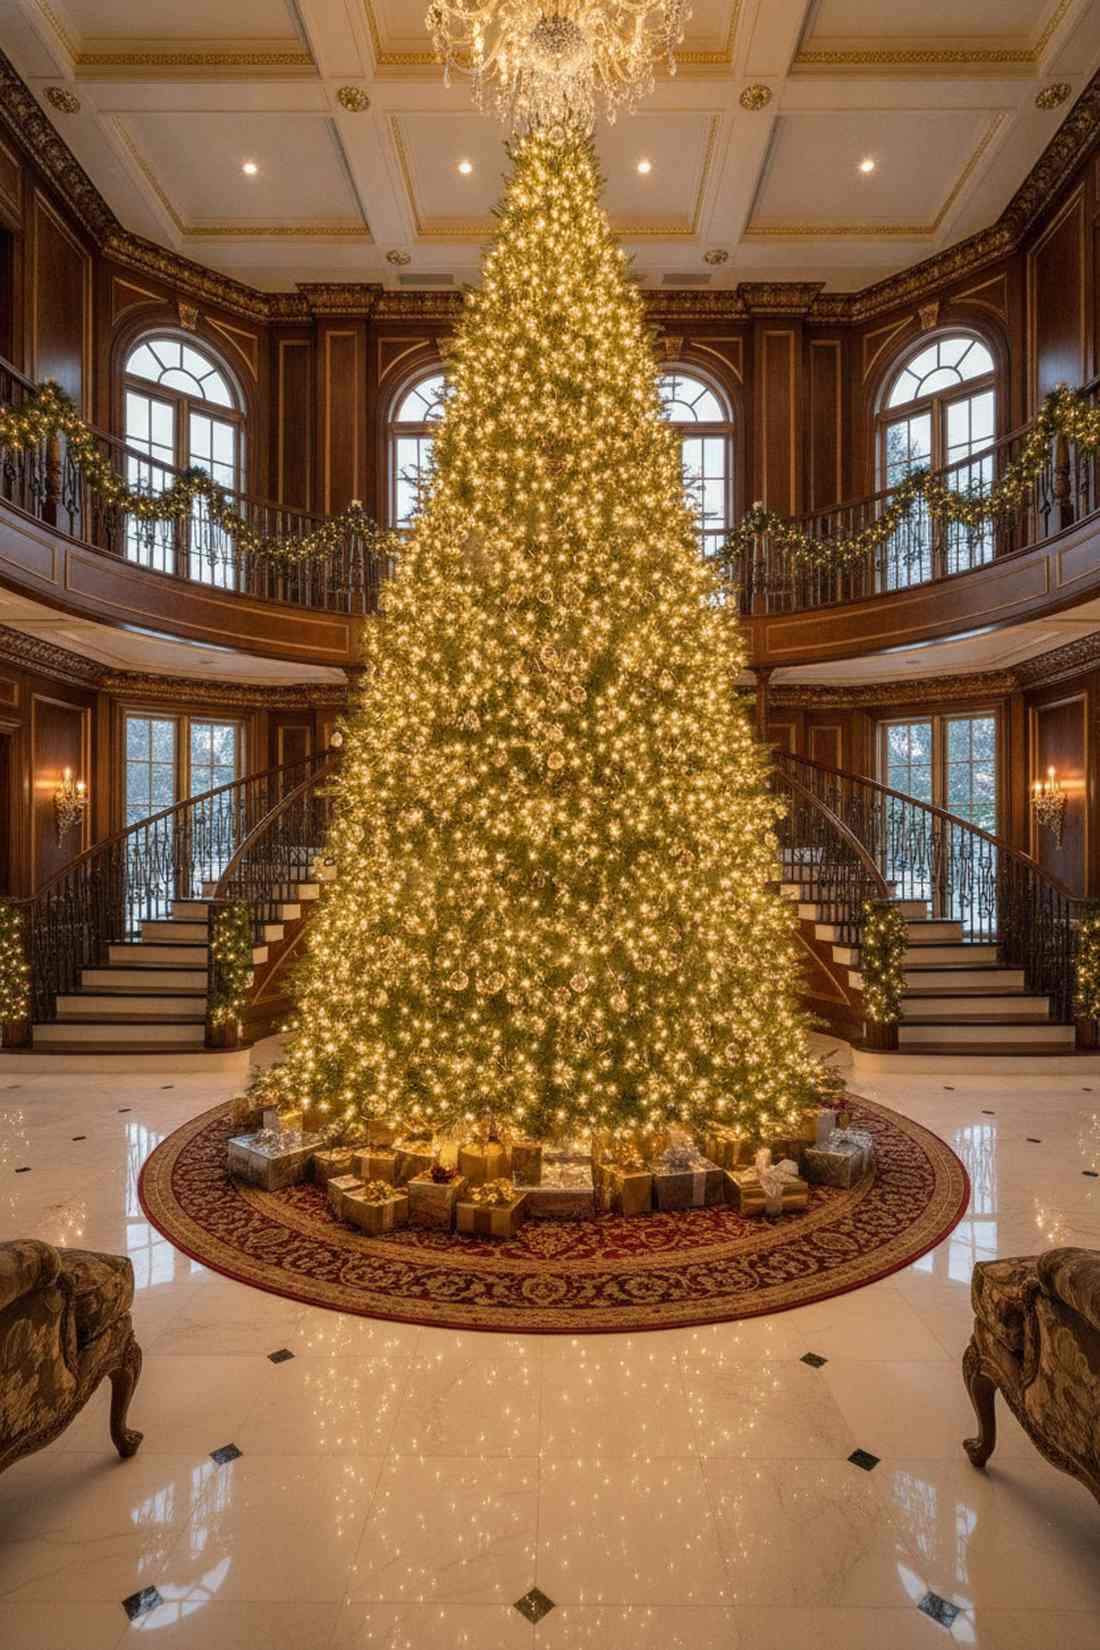
3. Layered Depth Method
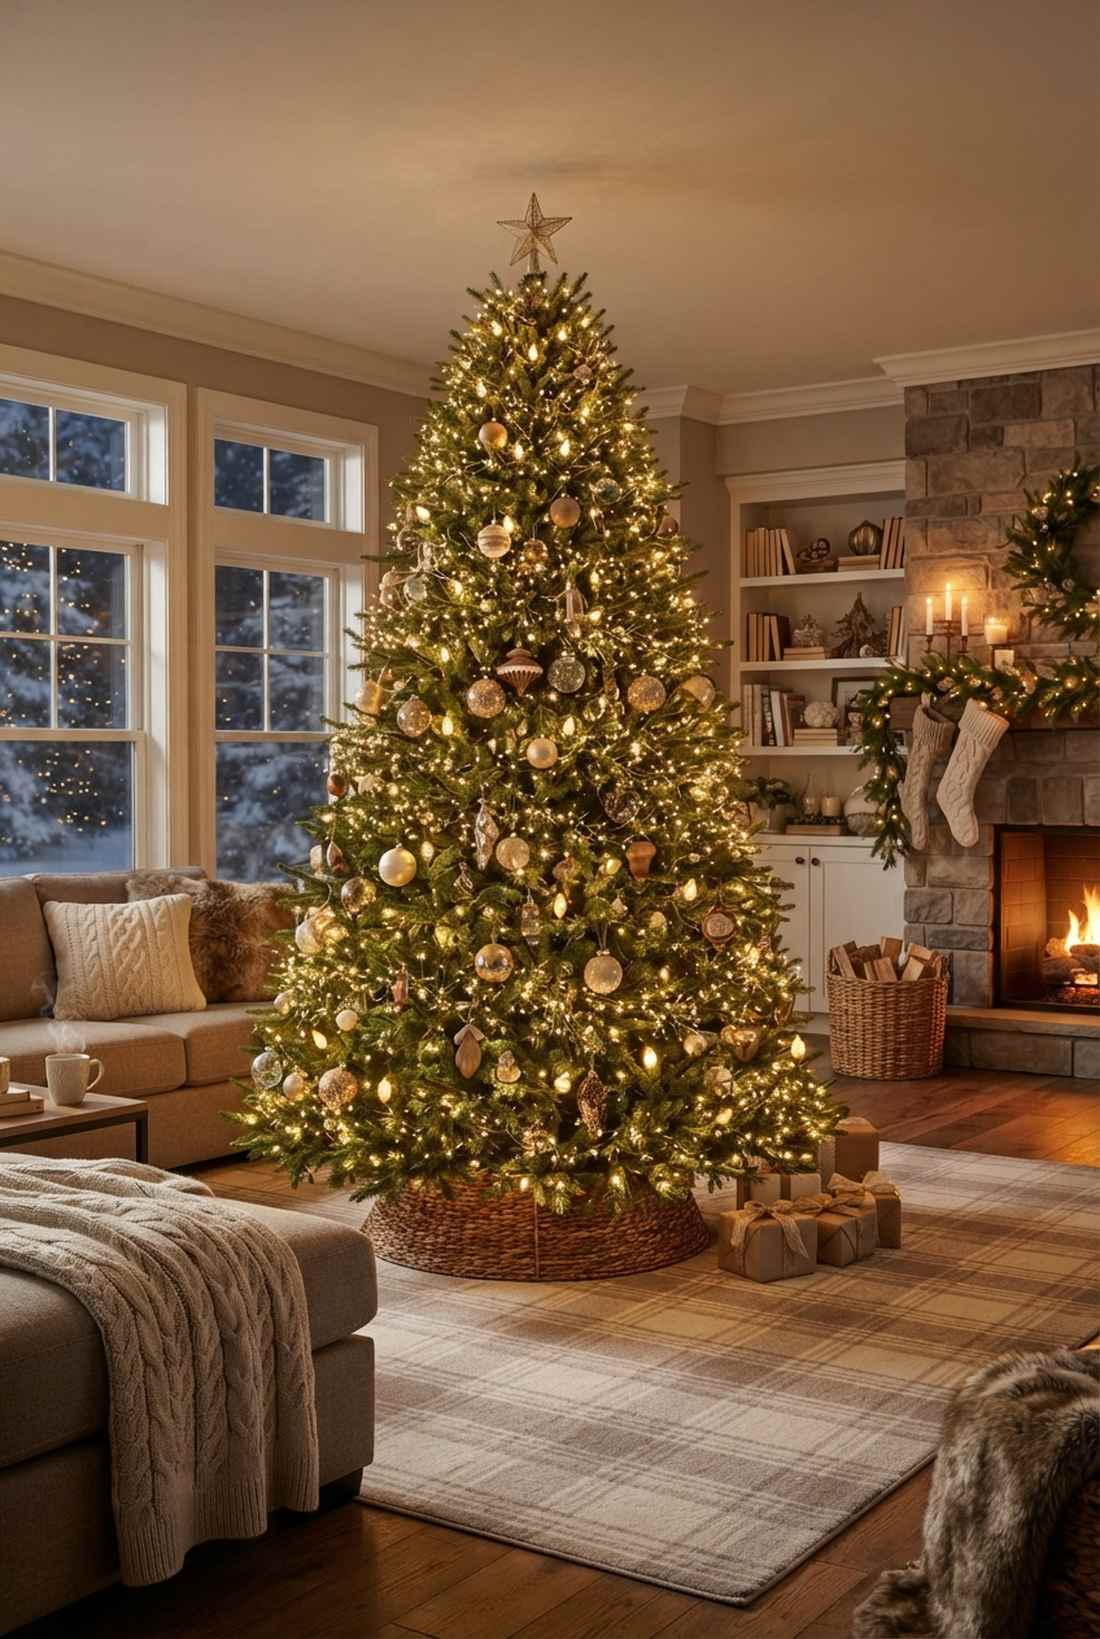
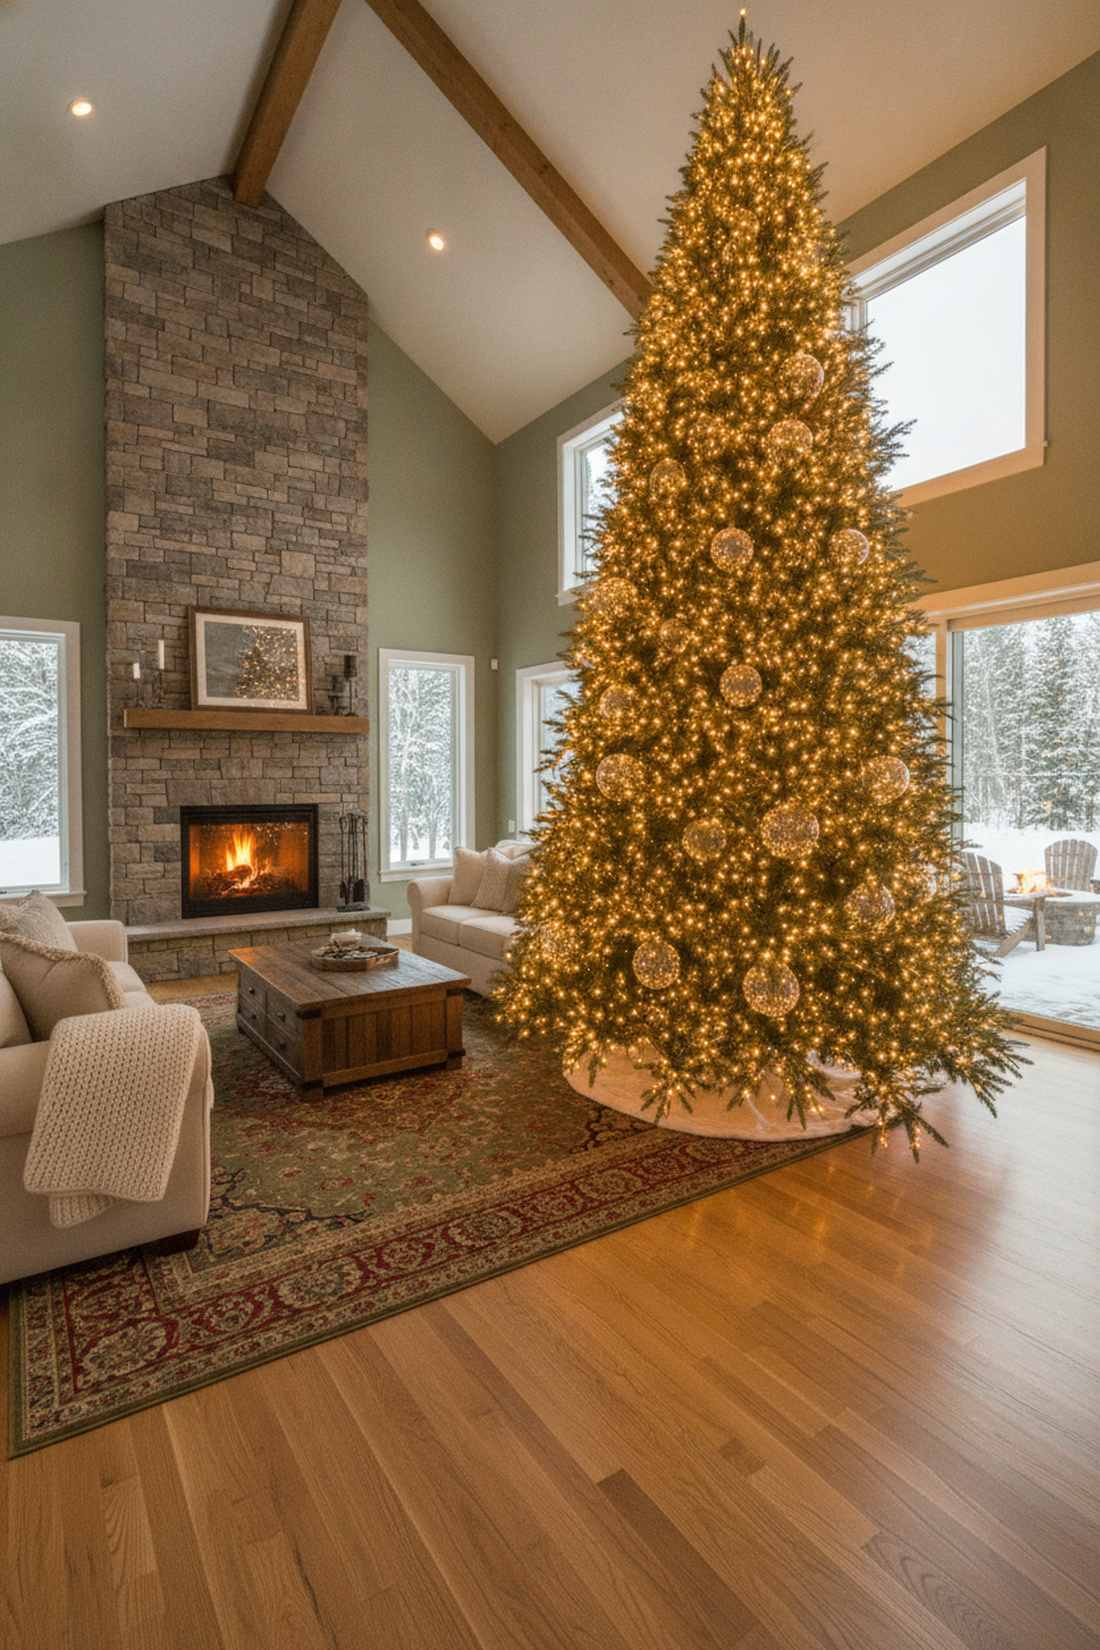
This execution feels like gazing into a bottomless enchanted forest. Three-dimensional layered lighting is ideal for massive living room focal points.
By staggering depth, this technique gives a designer-level finish that flat flat-wrapping simply cannot achieve. Sourcing high-end fairy lights christmas tree elements ensures the background glow stays rich.
A full layout runs about $60–$90 for a standard tree. Save this to your DIY weekend holiday board.
- Key Materials: Mixed-bulb string lights
- Vibe / Style: Lush professional density
- Difficulty: Advanced planning needed
- Budget Breakdown: Base lights: $40 | Outer twinkle: $35
- Creator’s Tip: Mix bulb sizes—large bulbs deep inside, tiny micro-bulbs on the surface.
- Smart Sourcing: shatterproof acrylic bulb strands and multi-function controller kits.
4. Cluster Concentration Technique
Injecting bursts of intense brilliance feels like capturing actual fireworks indoors. Dense lighting clusters are specifically designed for minimalist aesthetics lacking heavy ornaments.
Focusing purely on branch junctions creates a dramatic contrast that completely tricks the eye into seeing luxury. Investing in specialized fairy garden kits with high-density nodes saves hours of manual bundling.
This high-impact trick costs just $40 to execute.
- Key Materials: Pre-bundled cluster garlands
- Vibe / Style: High-end modern minimalism
- Difficulty: Extremely fast setup
- Budget Breakdown: Cluster garlands: $40
- Creator’s Tip: Zip-tie the clusters exactly where major branches meet the trunk.
- Smart Sourcing: pre-wired cluster light ribbons and heavy-duty concealment tape.
This next setup is ridiculously cheap but looks like a $500 custom display imported from a high-end catalogue…
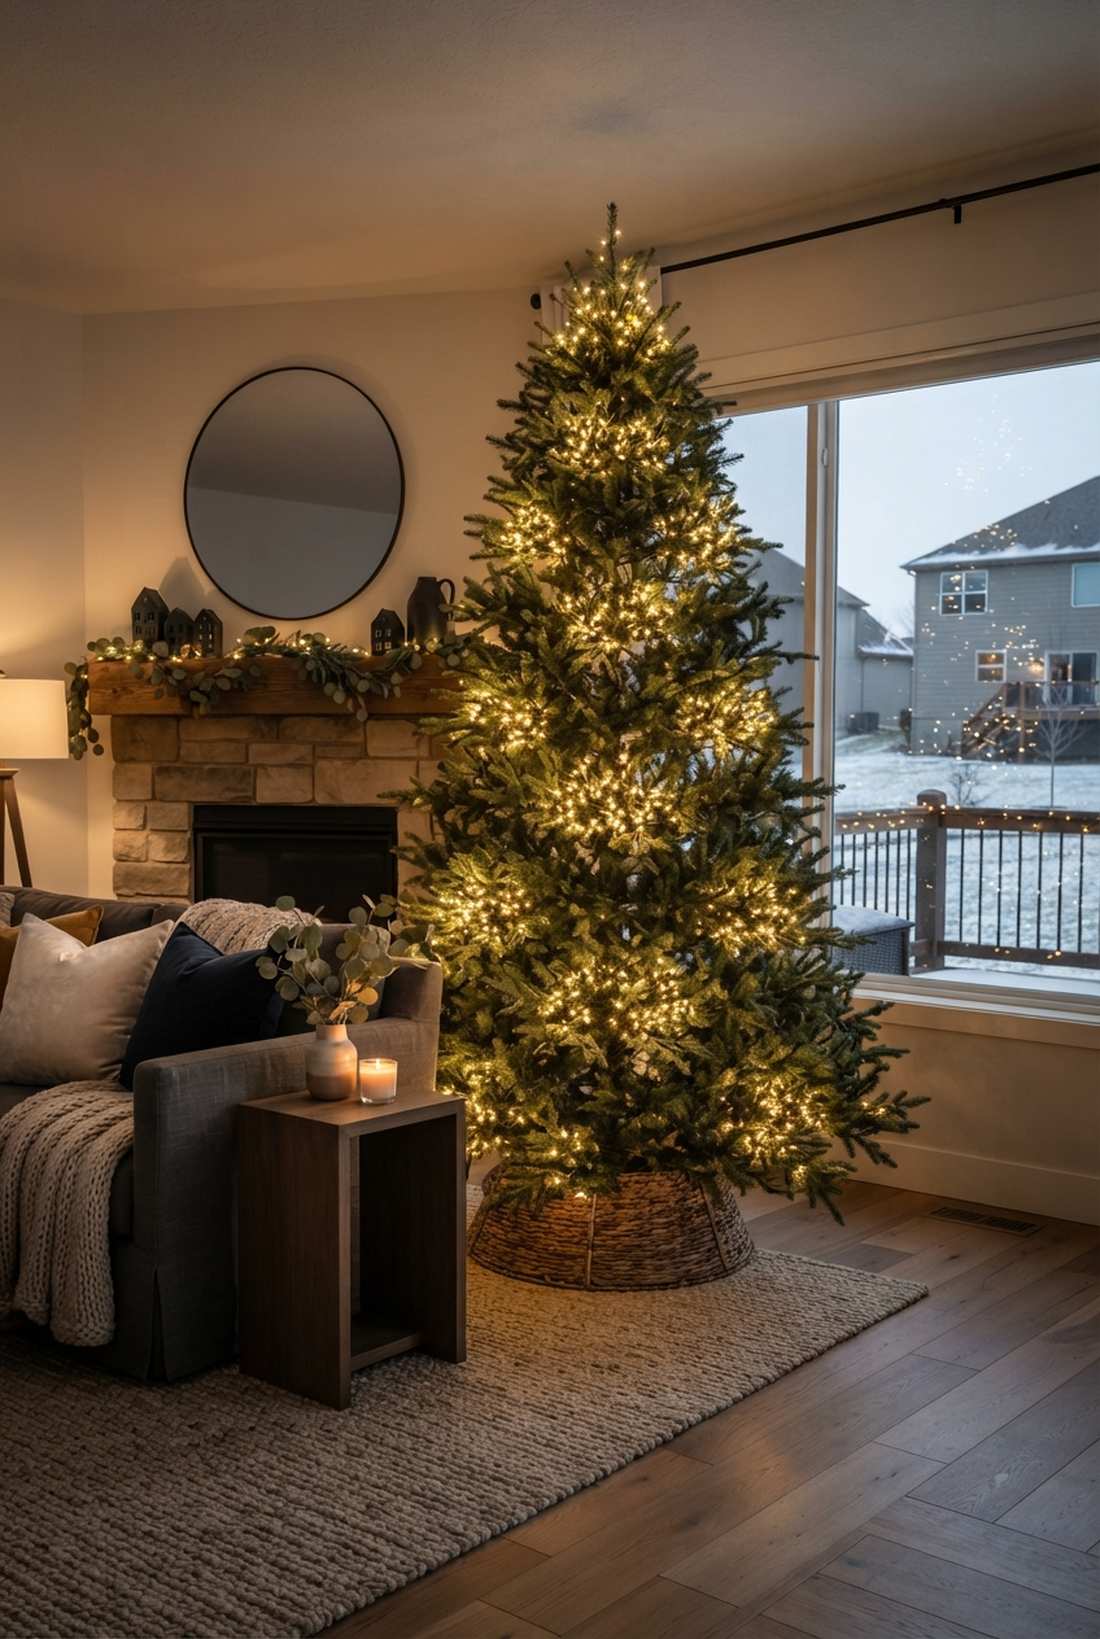
5. Spiral Wrap Pattern
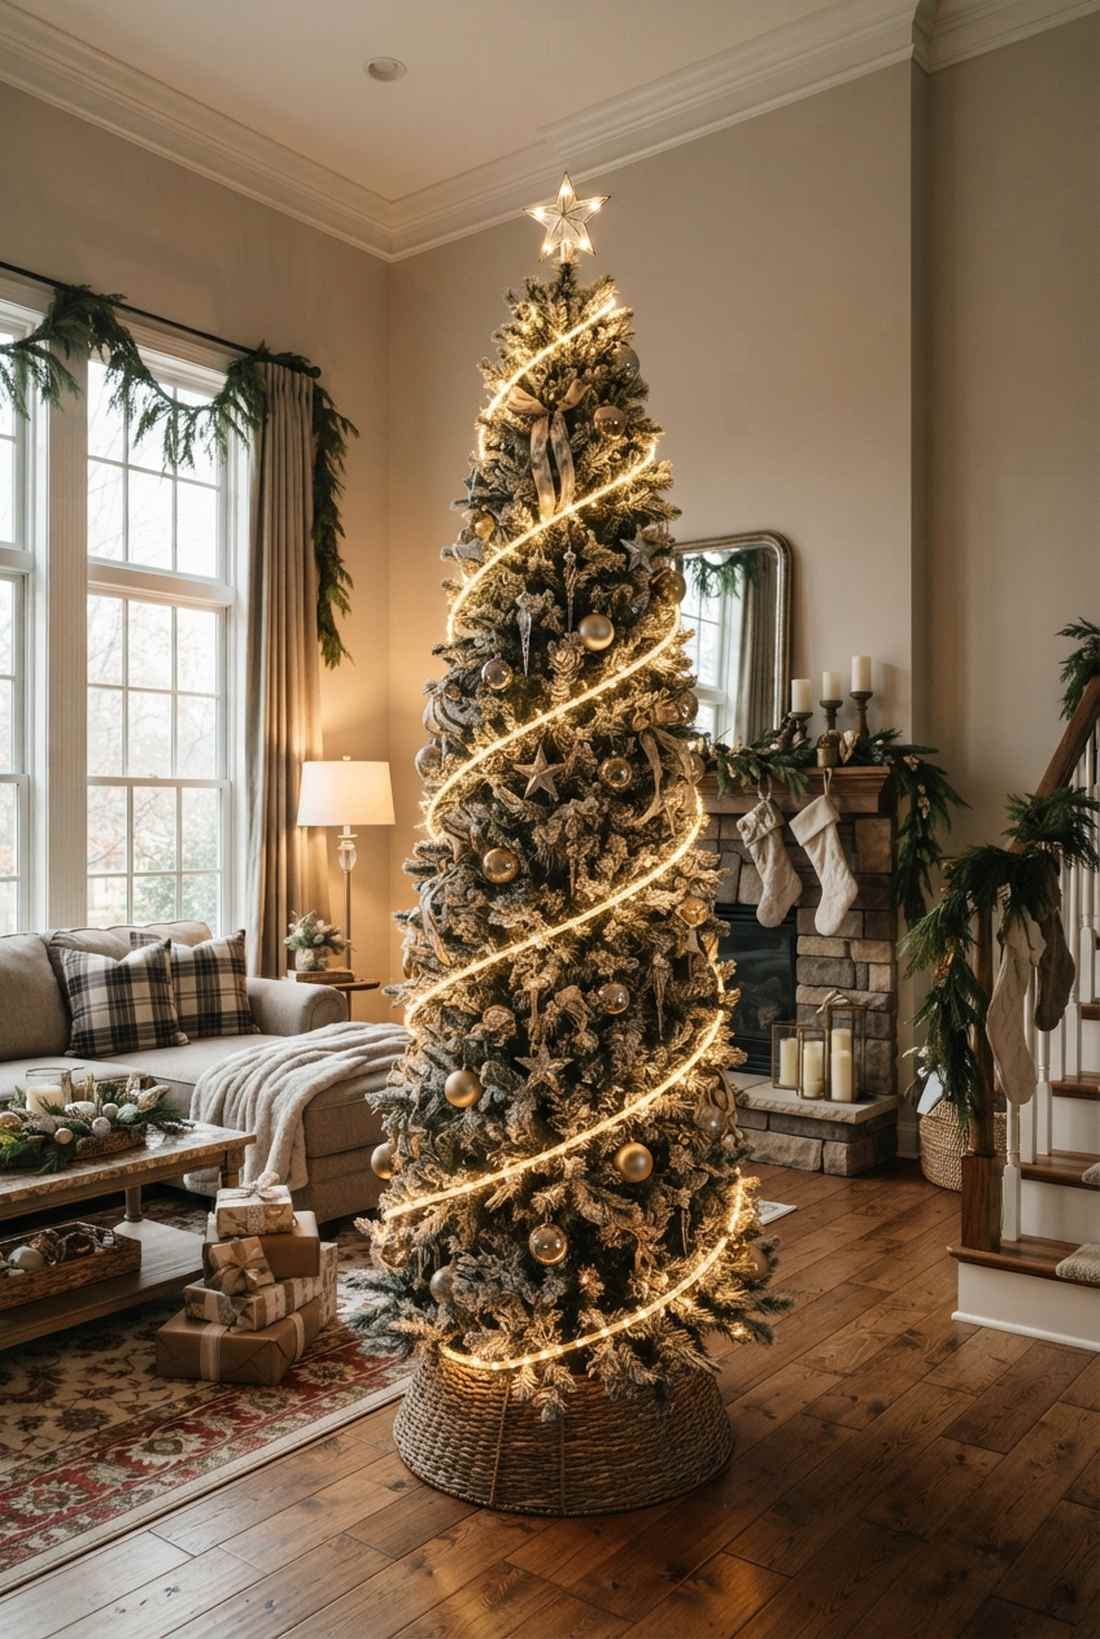
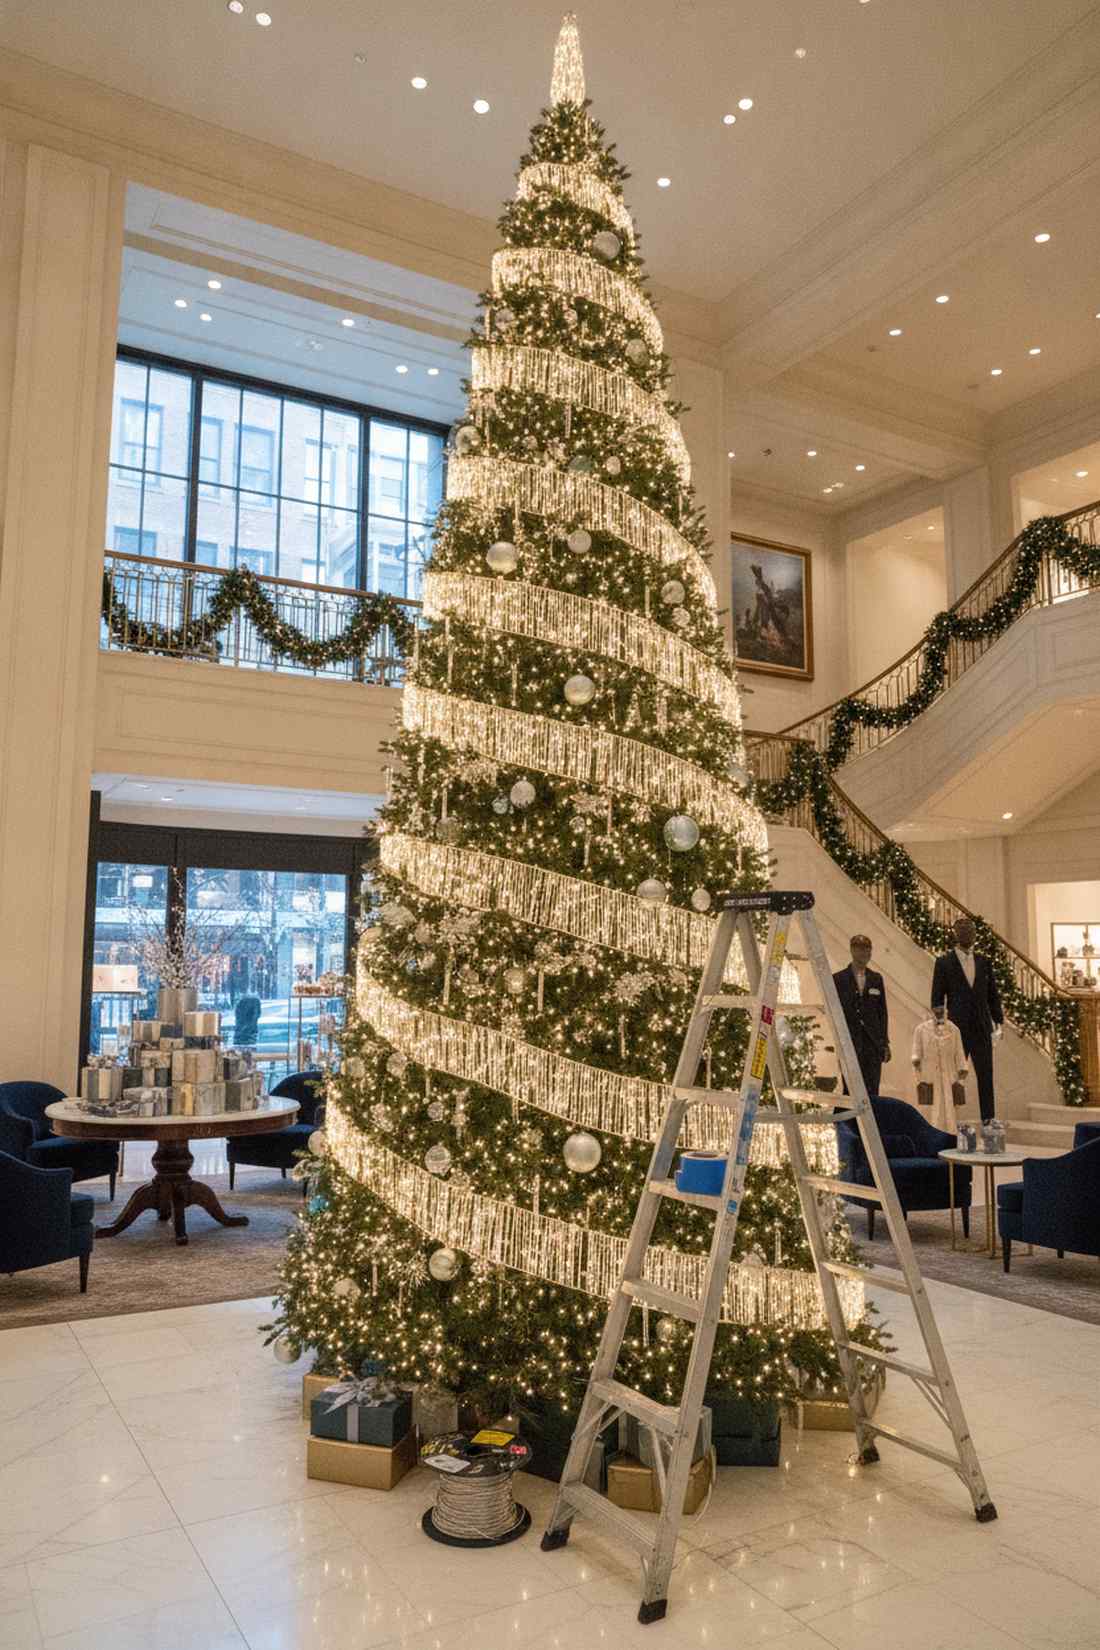
The rhythmic upward flow feels like a sweeping winter tornado in the best way possible. Diagonal ribbon lighting is the ultimate hack for tall, pencil-thin trees.
Many ignore the diagonal axis, but this specific angle drastically elevates the room’s dynamic energy. Snagging premium fairy lights xmas tree coils ensures the tension holds tightly.
You can complete this visual upgrade for about $25. Pin this to remember the perfect angle.
- Key Materials: Continuous commercial spools
- Vibe / Style: Classic department store
- Difficulty: Quick, requires a ladder
- Budget Breakdown: 200ft spool: $25
- Creator’s Tip: Use painter’s tape to map your spiral before committing with zip ties.
- Smart Sourcing: continuous 200ft commercial spools and removable guiding tape.
6. Random Scatter Distribution
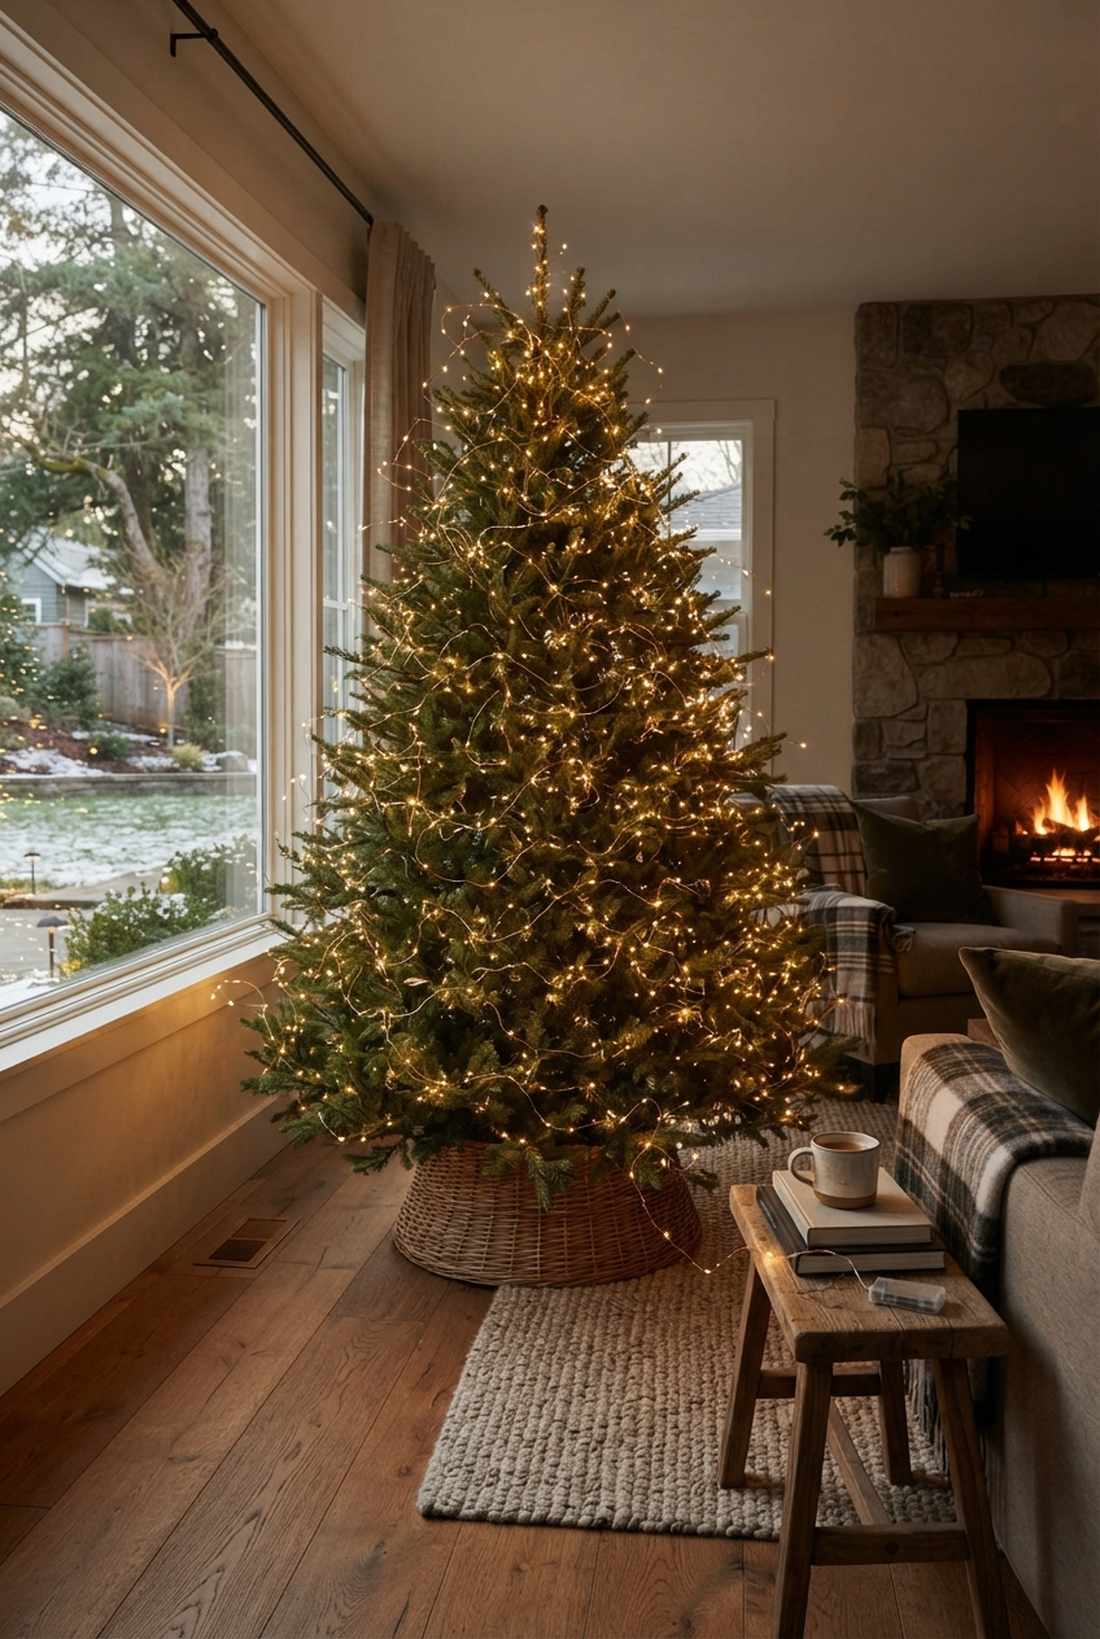
Scattering organic glow points feels like thousands of fireflies decided to land on your branches. Asymmetrical starlight mapping belongs in cozy, cottagecore living spaces.
Ditching perfect symmetry completely subverts expectations and delivers an effortless, highly-curated aesthetic. Grab waterproof fairy garden supplies to ensure the tiny bulbs withstand accidental watering if using a real tree.
A beautiful scatter effect only requires a $15–$25 investment.
- Key Materials: Copper wire stringers
- Vibe / Style: Whimsical rustic charm
- Difficulty: Zero stress, intuitive
- Budget Breakdown: Copper strands: $20
- Creator’s Tip: Toss the strands gently rather than wrapping them rigidly to let gravity do the work.
- Smart Sourcing: ultra-thin copper wire starter kits and battery-operated hidden packs.
7. Color-Blocked Sections
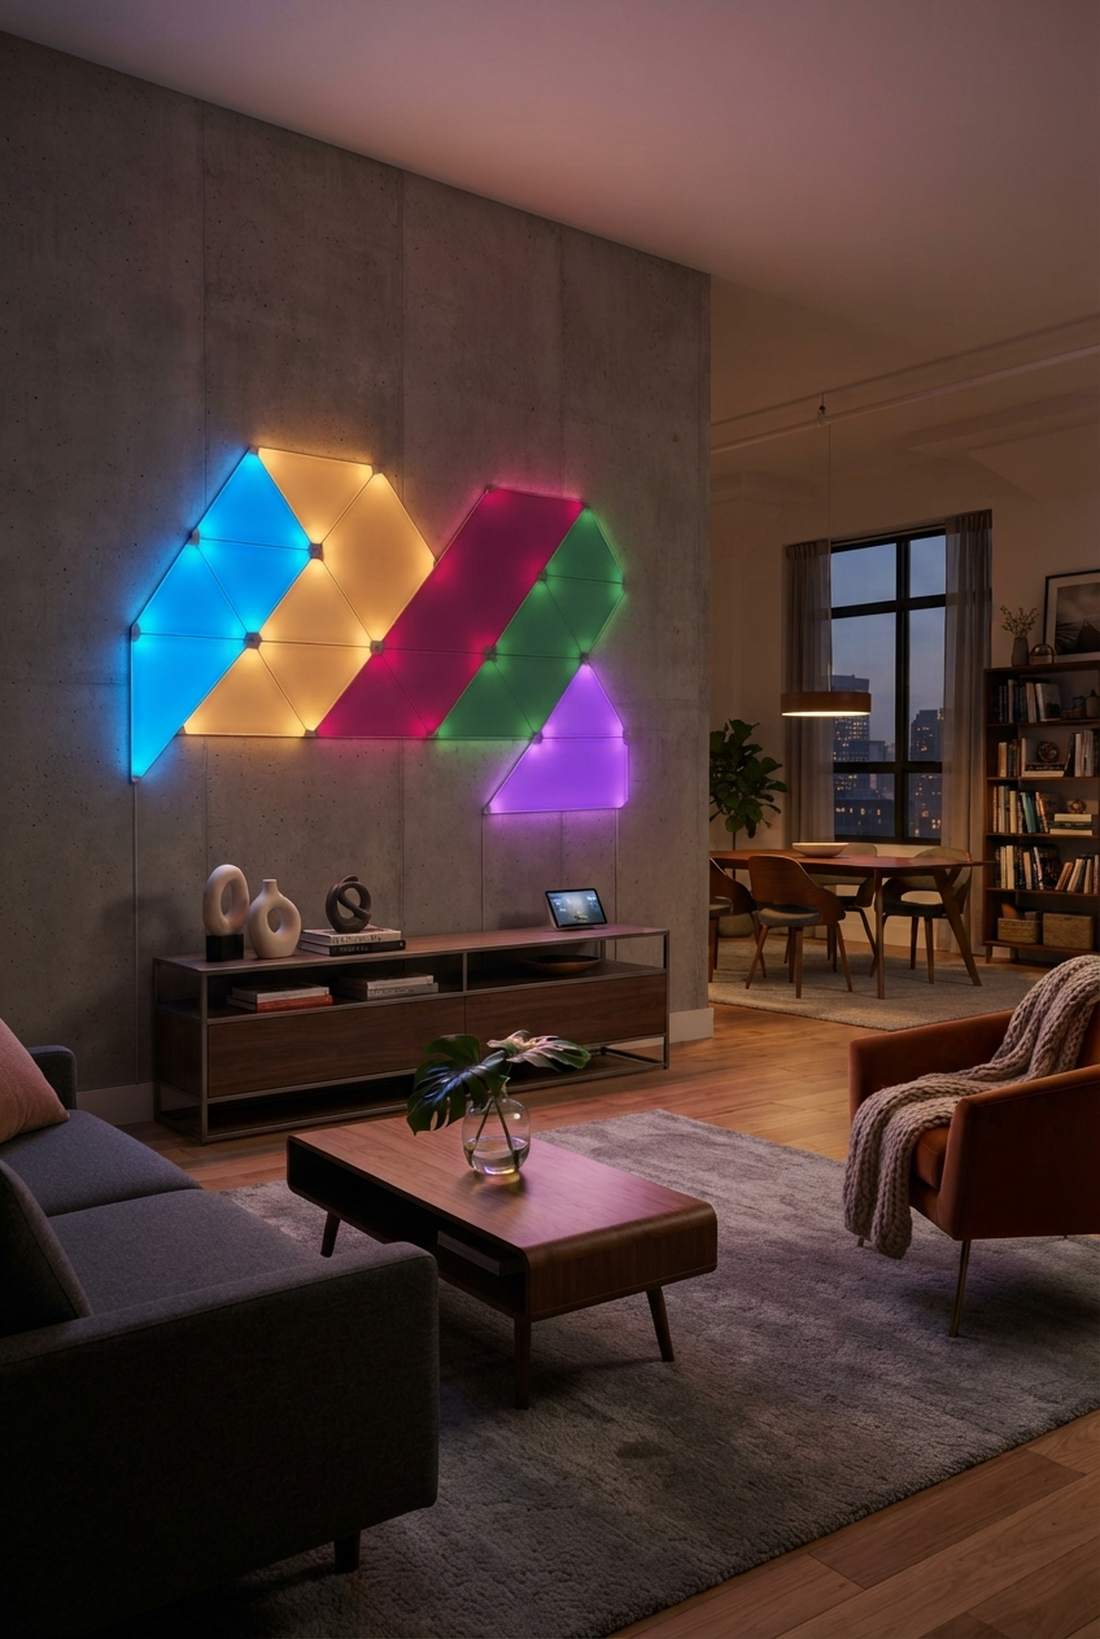
Stepping into a room with defined glowing zones feels like a futuristic holiday gallery. Segmented color blocking is specifically tailored for modern, art-forward apartments.
Deliberately splitting the canopy into distinct hues creates a museum-quality focal point that demands attention. Utilizing modular LED systems keeps the exact color transitions razor-sharp.
This trendy configuration will set you back around $45–$60. Save this idea if you want to break traditional rules.
- Key Materials: App-controlled smart zones
- Vibe / Style: Bold contemporary art
- Difficulty: Requires tech setup
- Budget Breakdown: Smart lights: $55 | Mounting clips: $5
- Creator’s Tip: Overlap the colors slightly by 2 inches at the borders for a smooth gradient fade.
- Smart Sourcing: RGB smart LED starter kits and pre-cut separation clips.
8. Minimalist Perimeter-Only
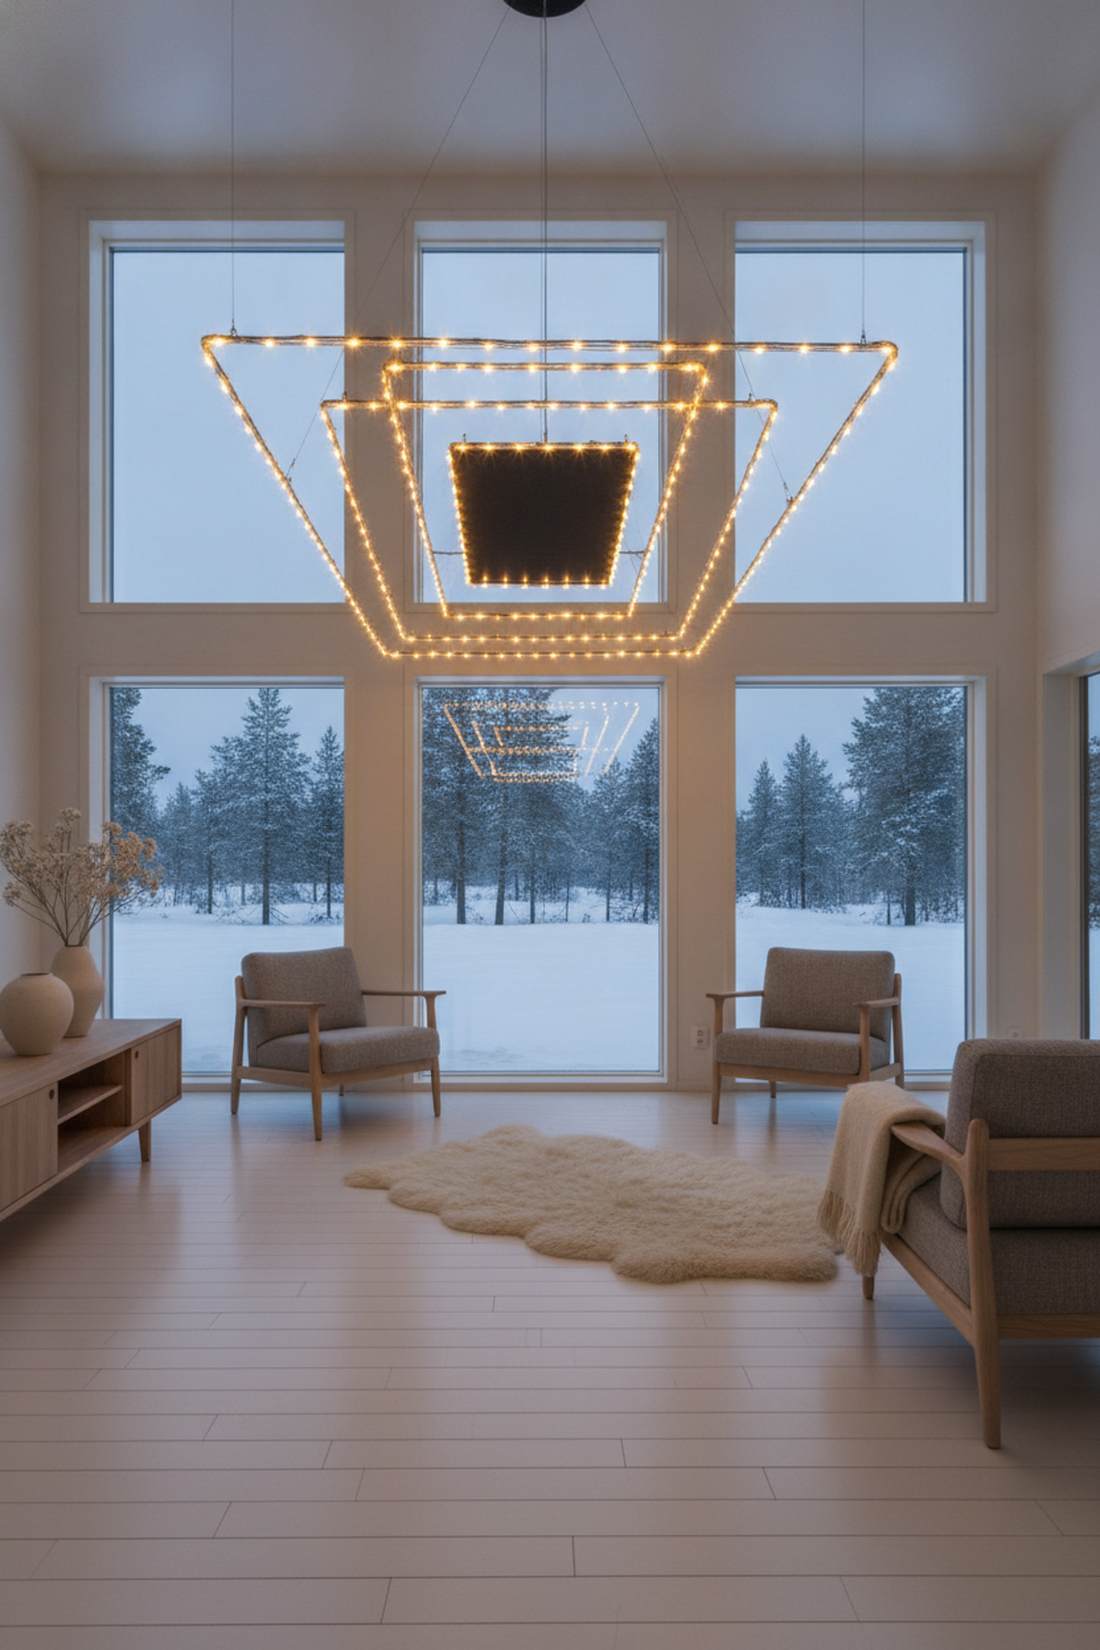
Leaving the core dark feels like an architectural blueprint brought to life. Outer-edge silhouette lighting works exceptionally well for Scandinavian-inspired interior designs.
By intentionally starving the center of light, the structural shape becomes the star, looking incredibly sophisticated. Sourcing specialized fairy lights christmas decor with stiff wiring holds the geometric outline perfectly.
You can execute this striking restraint for under $20.
- Key Materials: Stiff-wire warm LEDs
- Vibe / Style: Stark Nordic elegance
- Difficulty: Fast and precise
- Budget Breakdown: Stiff wire lights: $18
- Creator’s Tip: Connect the outer rings vertically with invisible fishing line to maintain the exact shape.
- Smart Sourcing: heavy-gauge shapeable wire kits and clear acrylic tension lines.
9. Double-Wrap Branch Technique
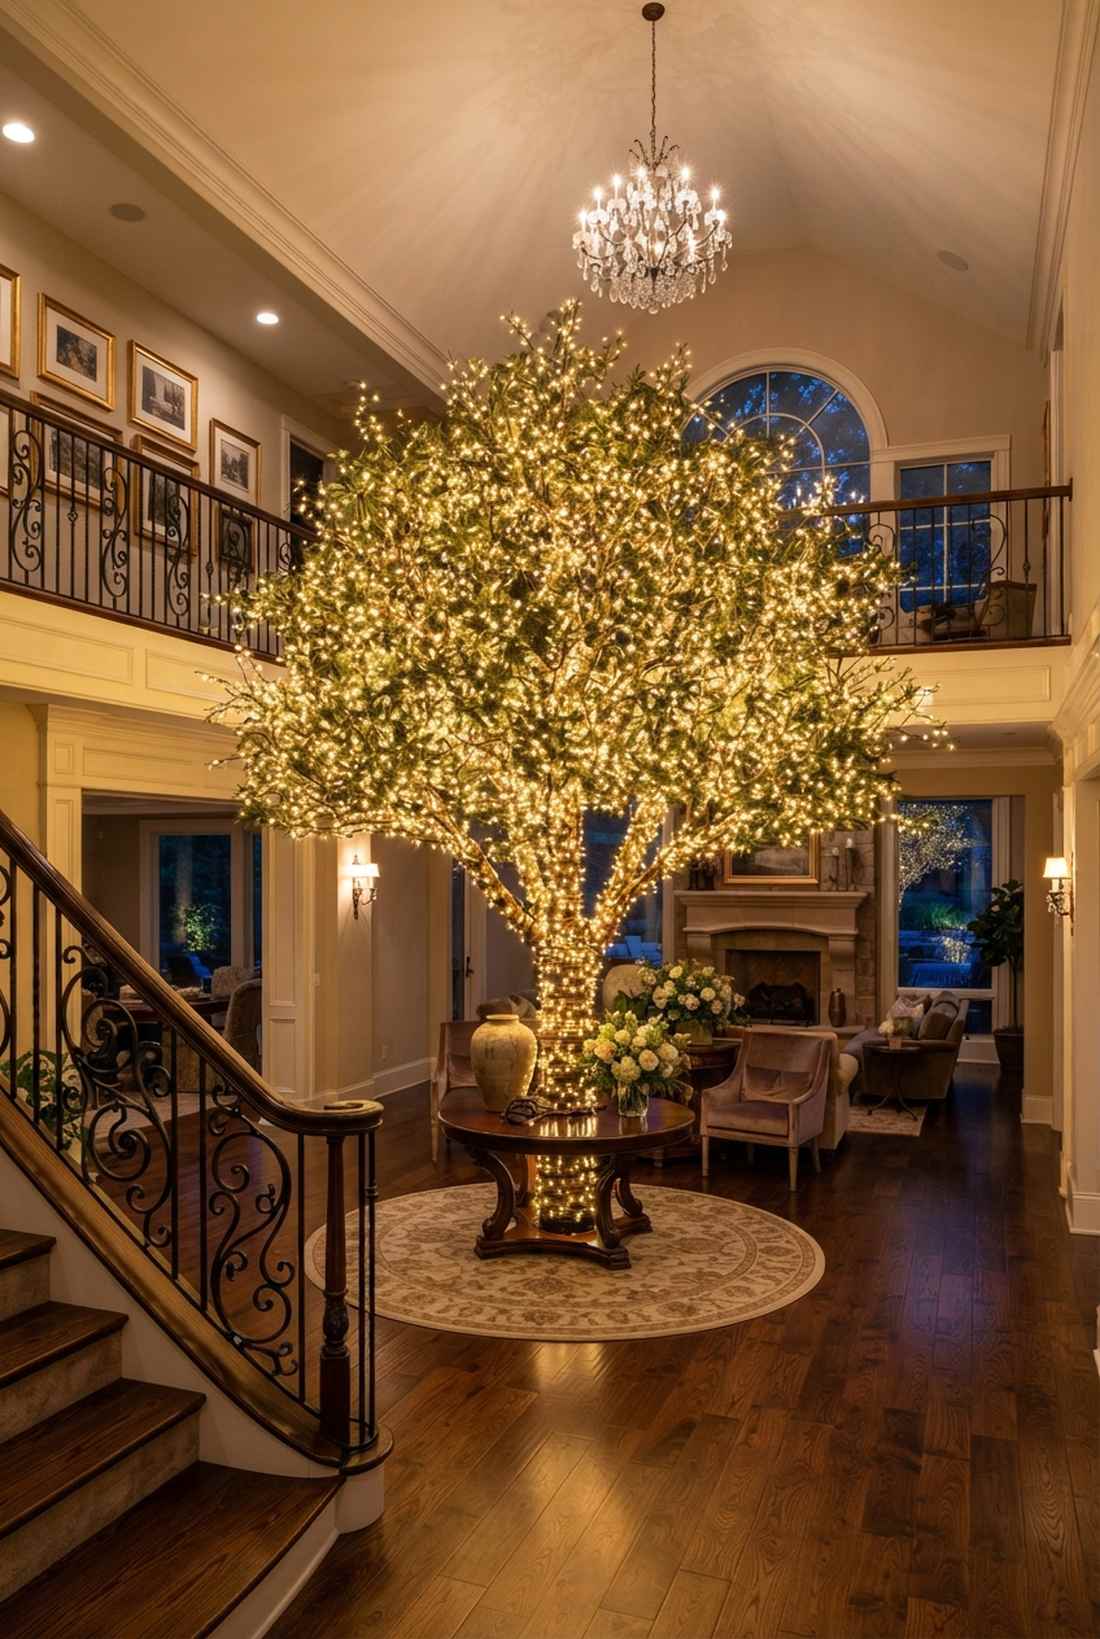
Walking past this setup feels like staring directly into a glowing luxury showcase. High-output double wrapping is an absolute must for giant trees in grand foyers.
Doubling the pass on major branches multiplies the lumen output, generating an insanely premium radiance. Upgrading to commercial-grade miniature garden supplies ensures the wires stay cool under heavy loads.
Expect a materials cost of $50–$80 due to the high bulb count. Pin this for your ultimate dream home board.
- Key Materials: High-density light spools
- Vibe / Style: Over-the-top opulence
- Difficulty: Time consuming
- Budget Breakdown: Bulk light spools: $75 | Zip ties: $5
- Creator’s Tip: Only double-wrap the branches facing the main seating area to save time and money.
- Smart Sourcing: commercial high-density LED spools and heat-resistant transparent tape.
💡 Must-Have Supplies for High-End Setups
To build these setups faster and ensure they last, skip the generic craft aisles and invest in the right foundational kits.
- Base & Support: commercial-grade UV-coated zip ties
- Setup Tools: heavy-duty wire manipulation starter kits
- Weather/Durability Protection: marine-grade clear silicone sealants
10. Micro LED Fairy Weave
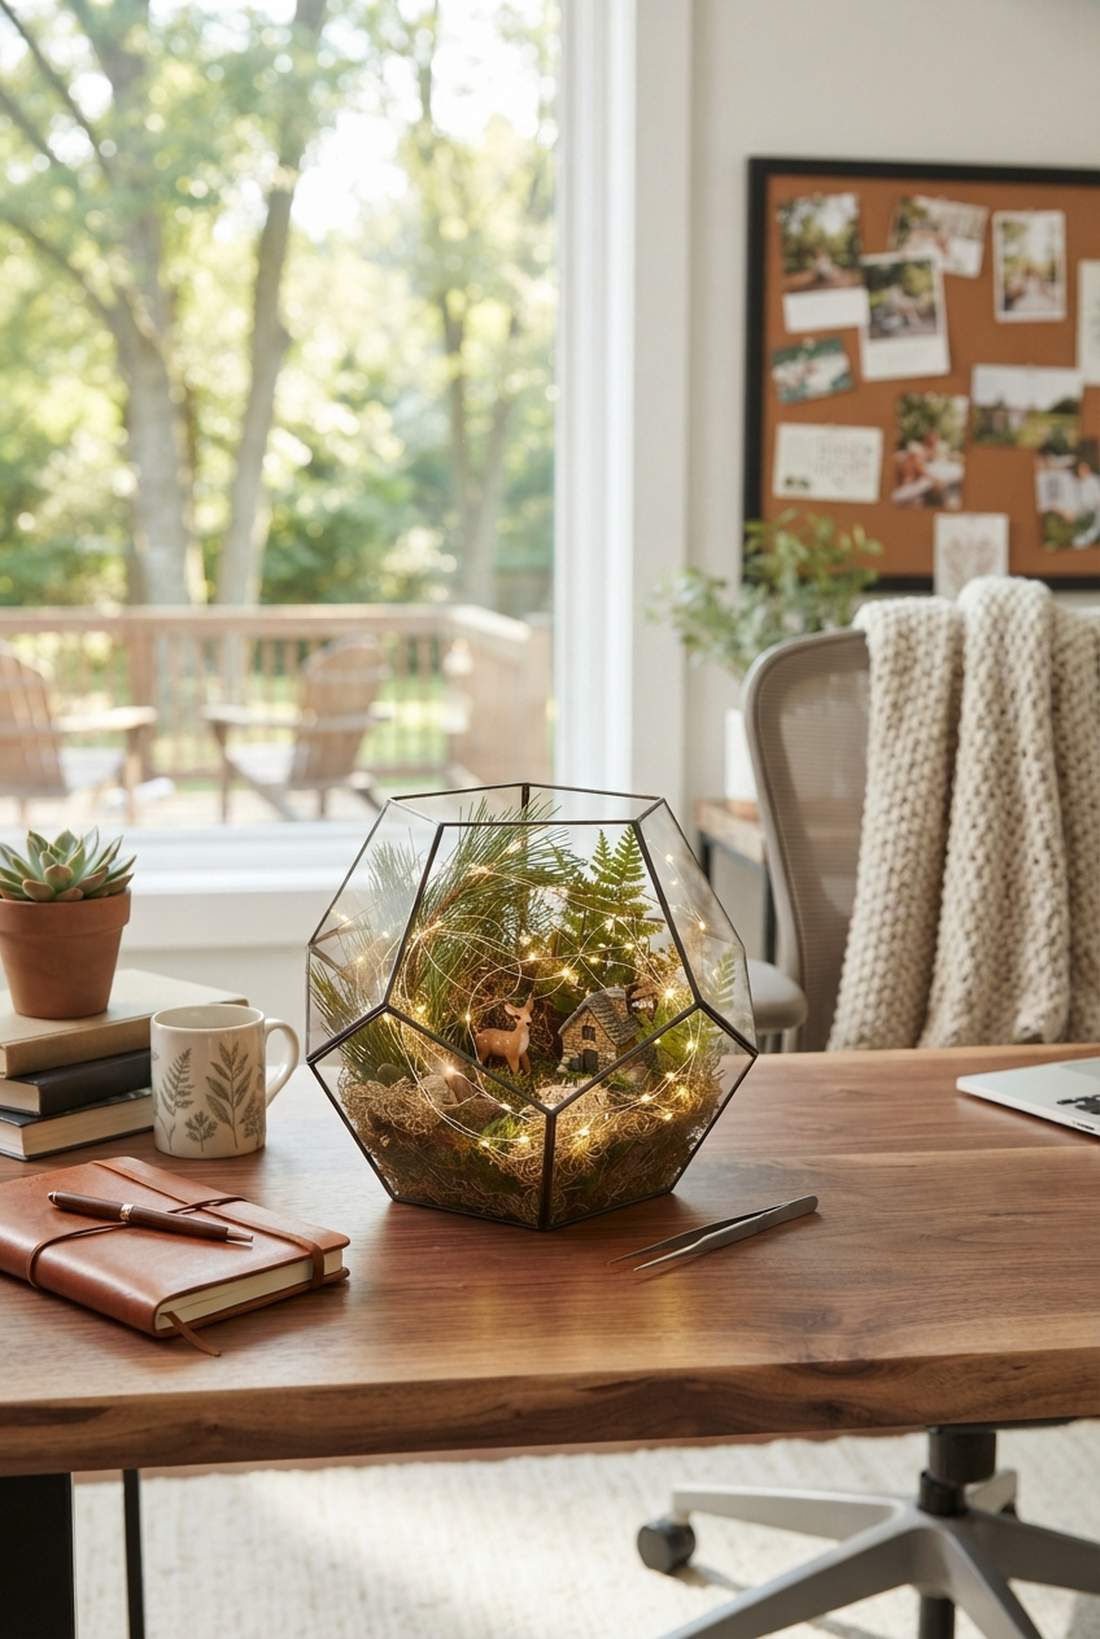
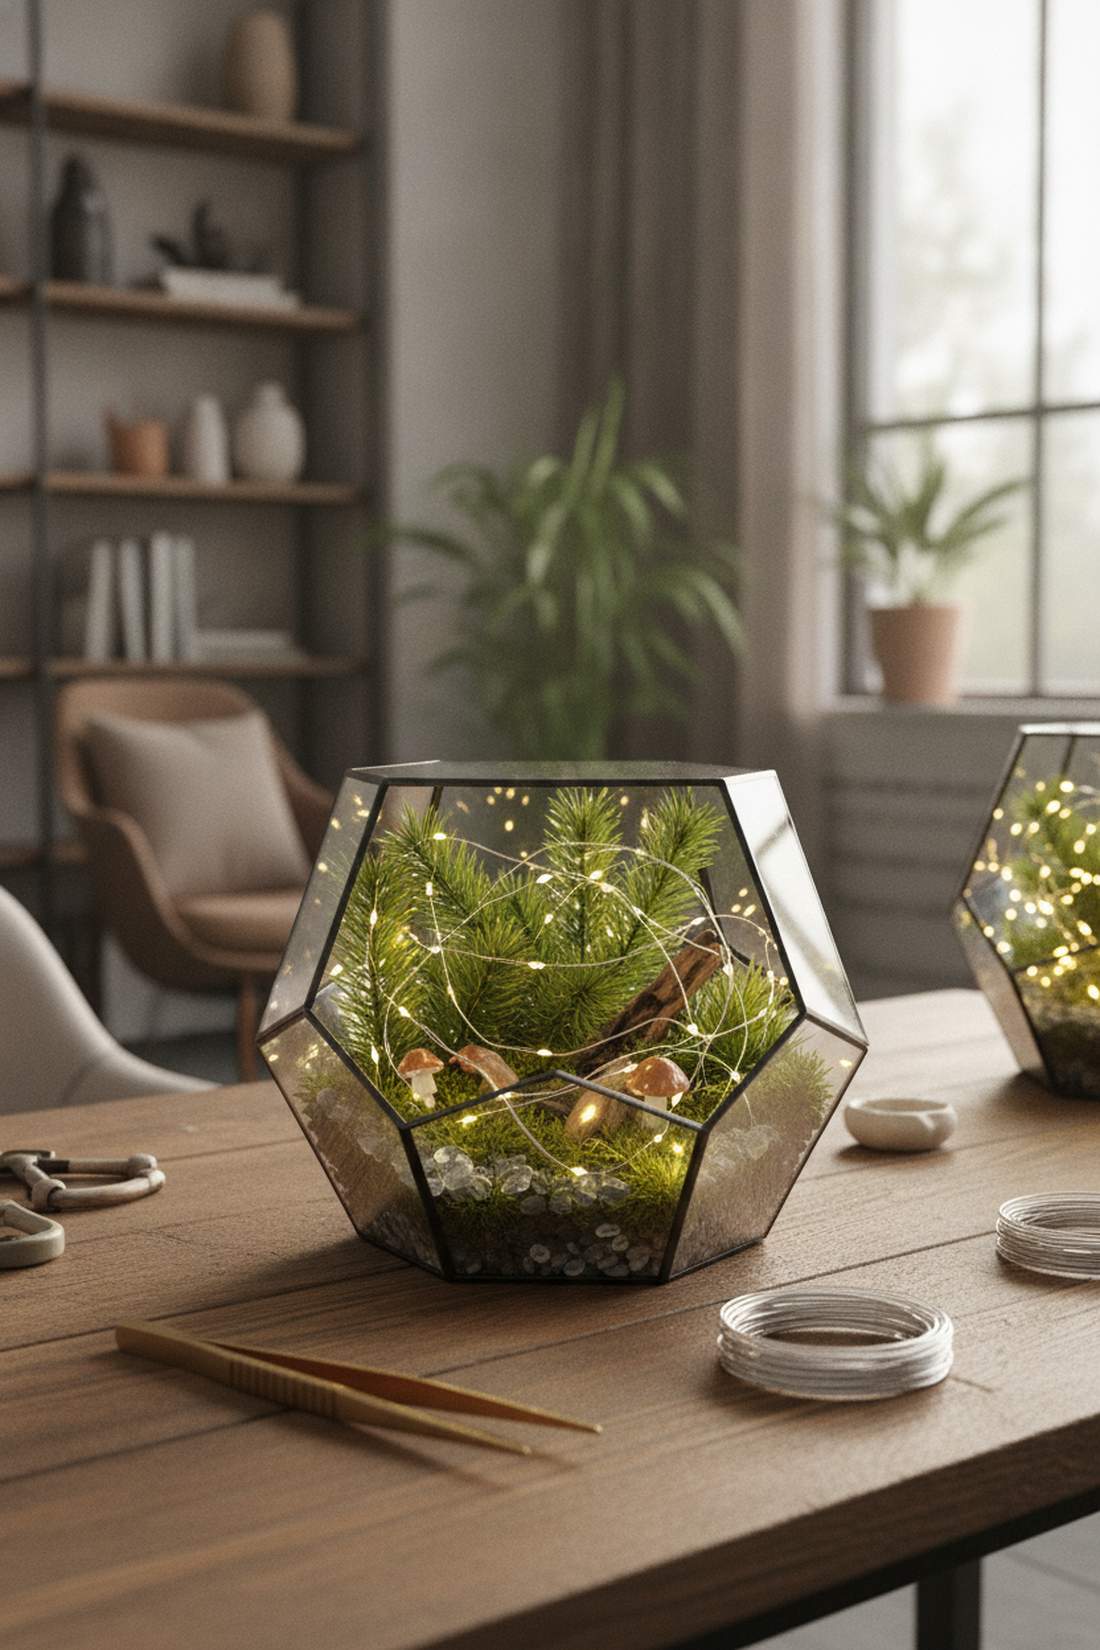
This invisible-wire technique feels exactly like morning dew frozen into pure light. Micro-dot foliage weaving is beautifully suited for small tabletop displays and office desks.
Hiding the ultra-thin conductors creates an optical illusion that is incredibly satisfying to look at. Integrating subtle terrarium accessories among the tiny lights pushes the aesthetic into elite territory.
It’s a fast upgrade that completely changes the vibe for only $10–$15.
- Key Materials: Silver-wire micro LEDs
- Vibe / Style: Delicate fairy-tale magic
- Difficulty: Easy but delicate
- Budget Breakdown: Micro lights: $12
- Creator’s Tip: Use tweezers to push the delicate wires deep into the pine needles.
- Smart Sourcing: ultra-thin silver wire bulk packs and precision placement tweezers.
Most people get this completely wrong… until they try the exact outdoor layout coming up next to multiply curb appeal.
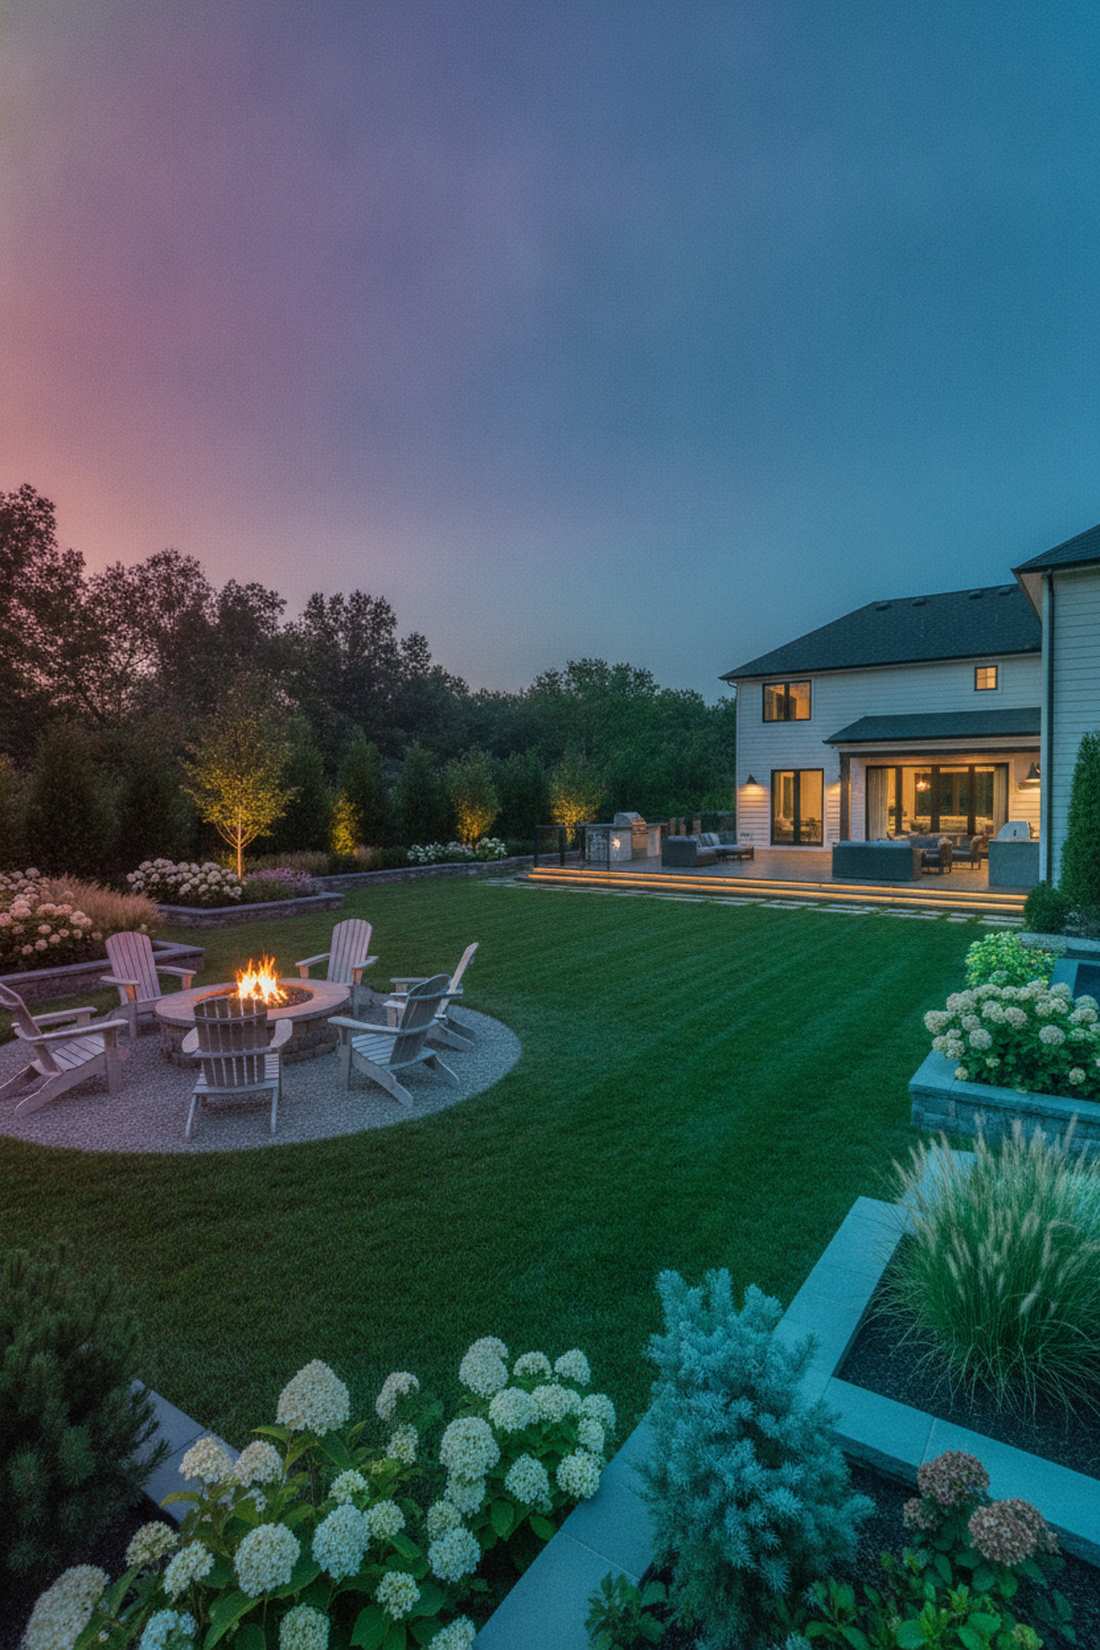
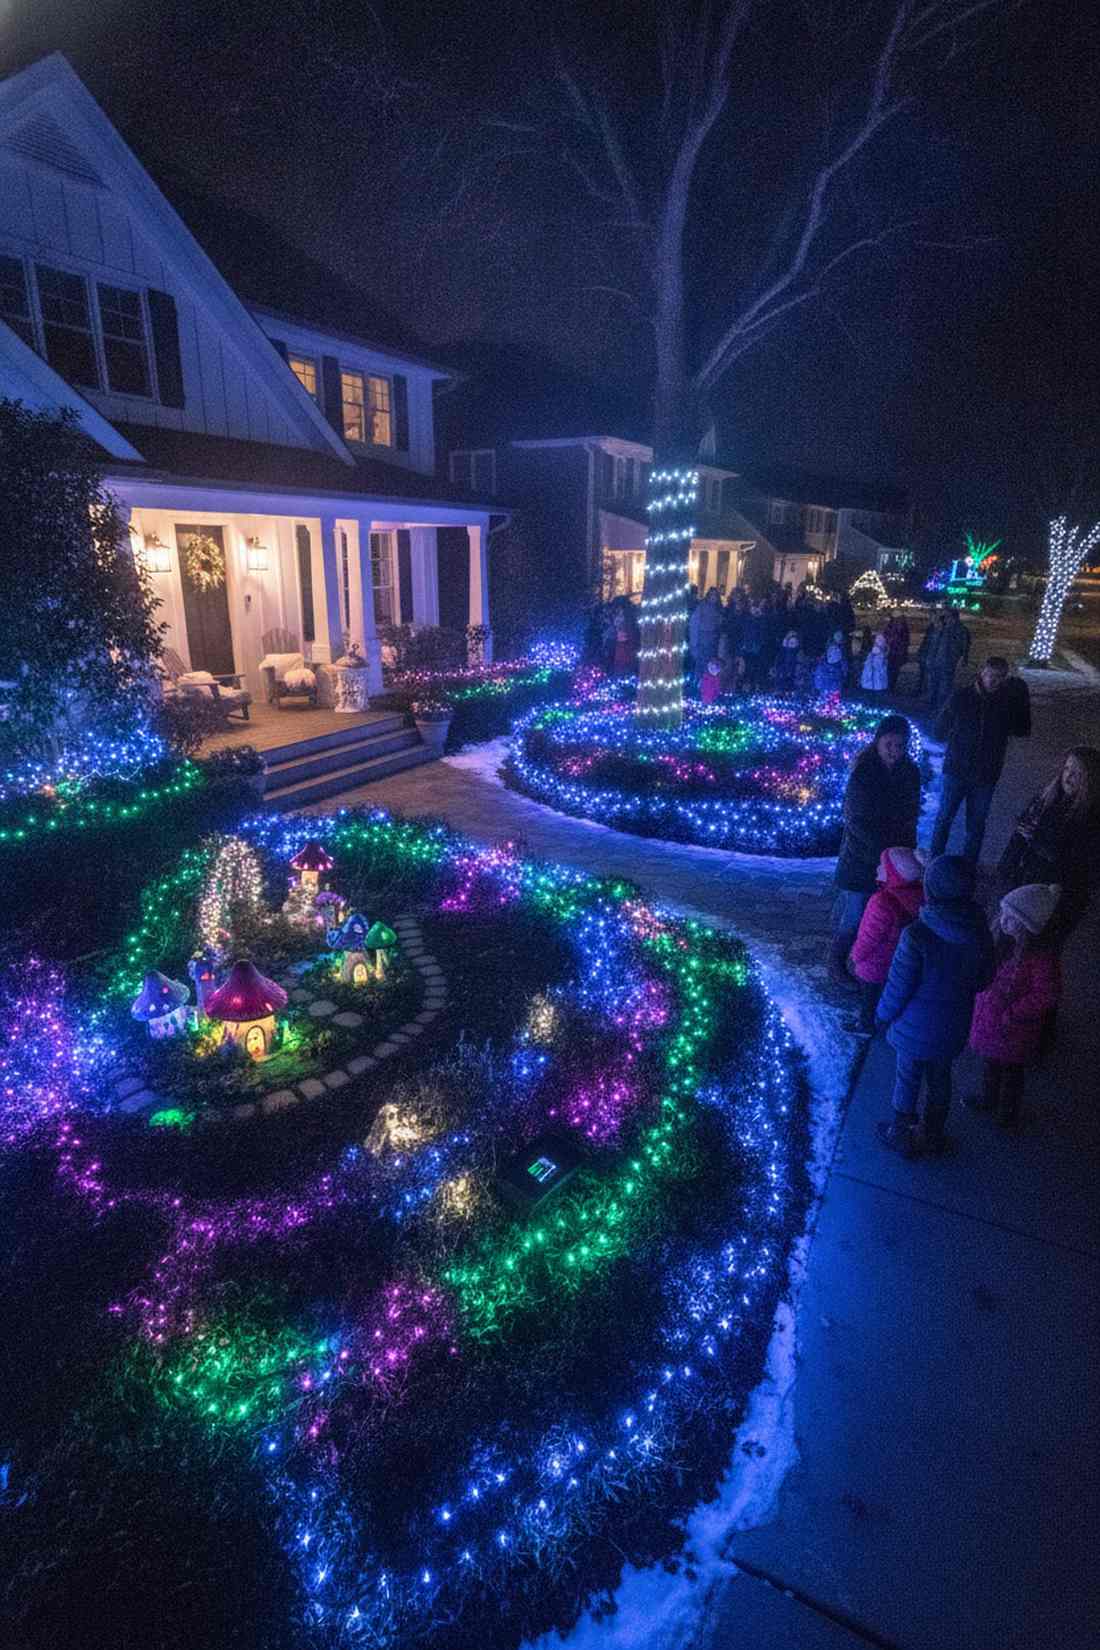
Outdoor Fairy Lights Christmas Decor
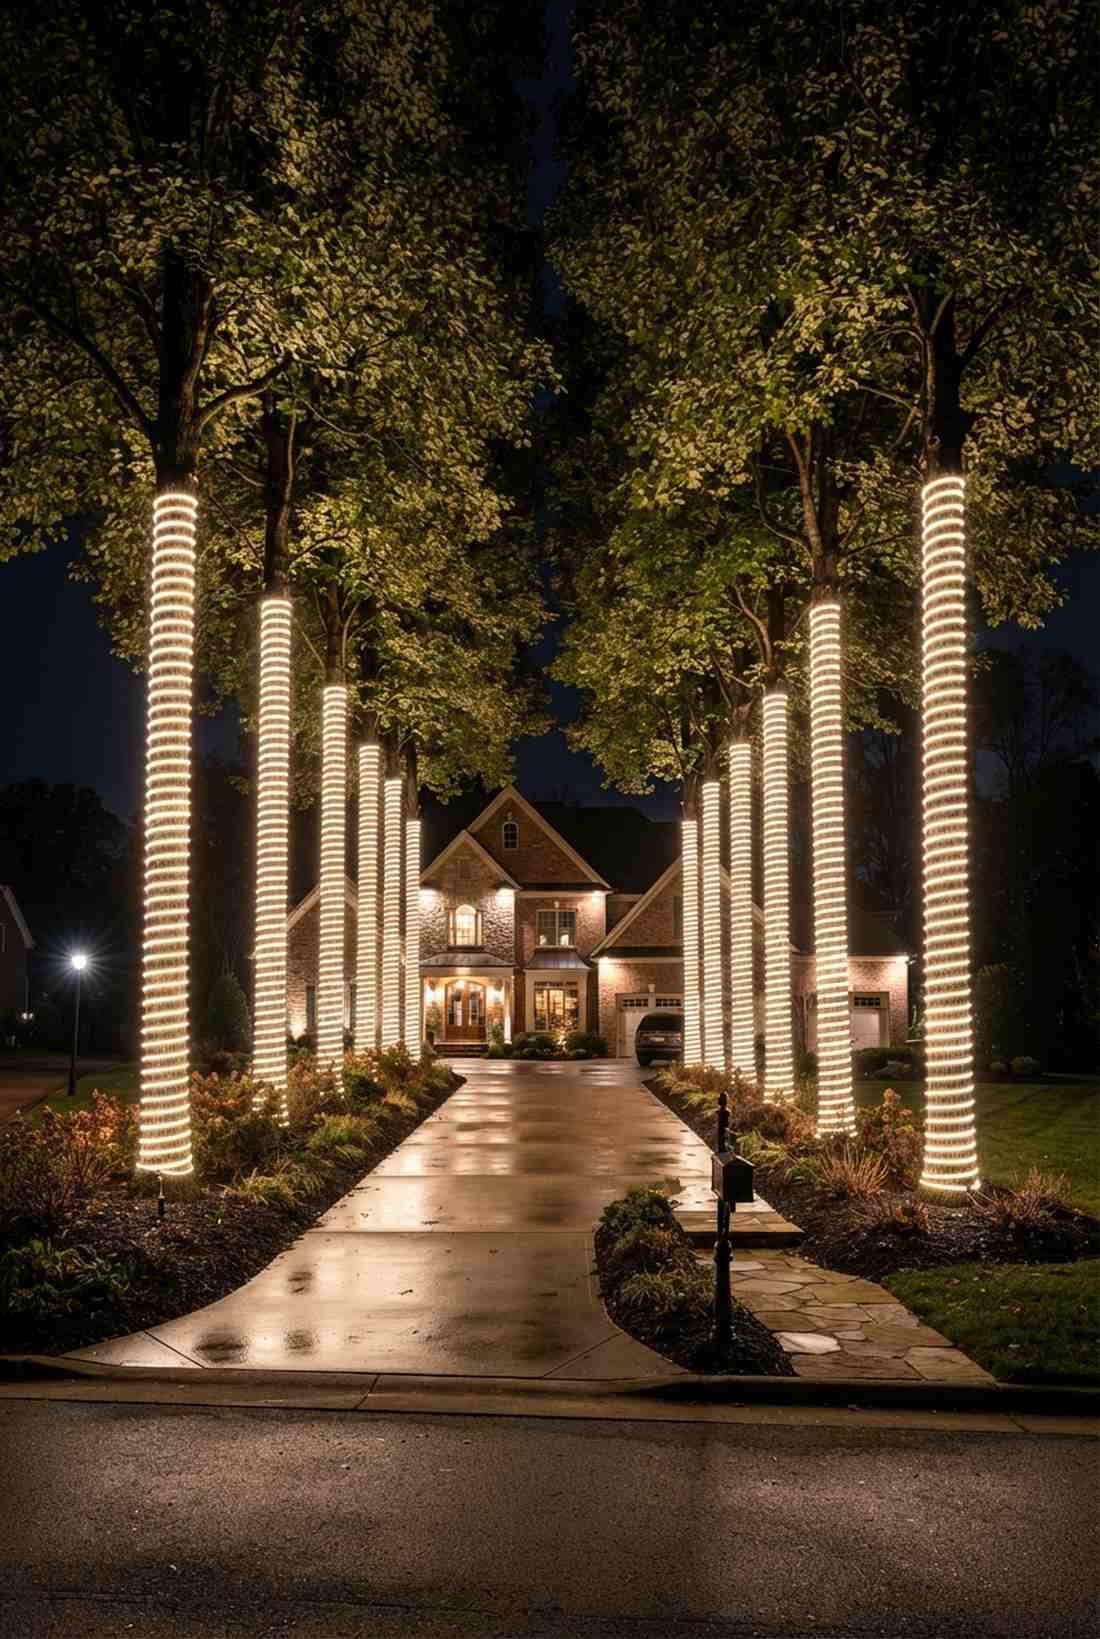
11. Trunk Spiral Wrapping
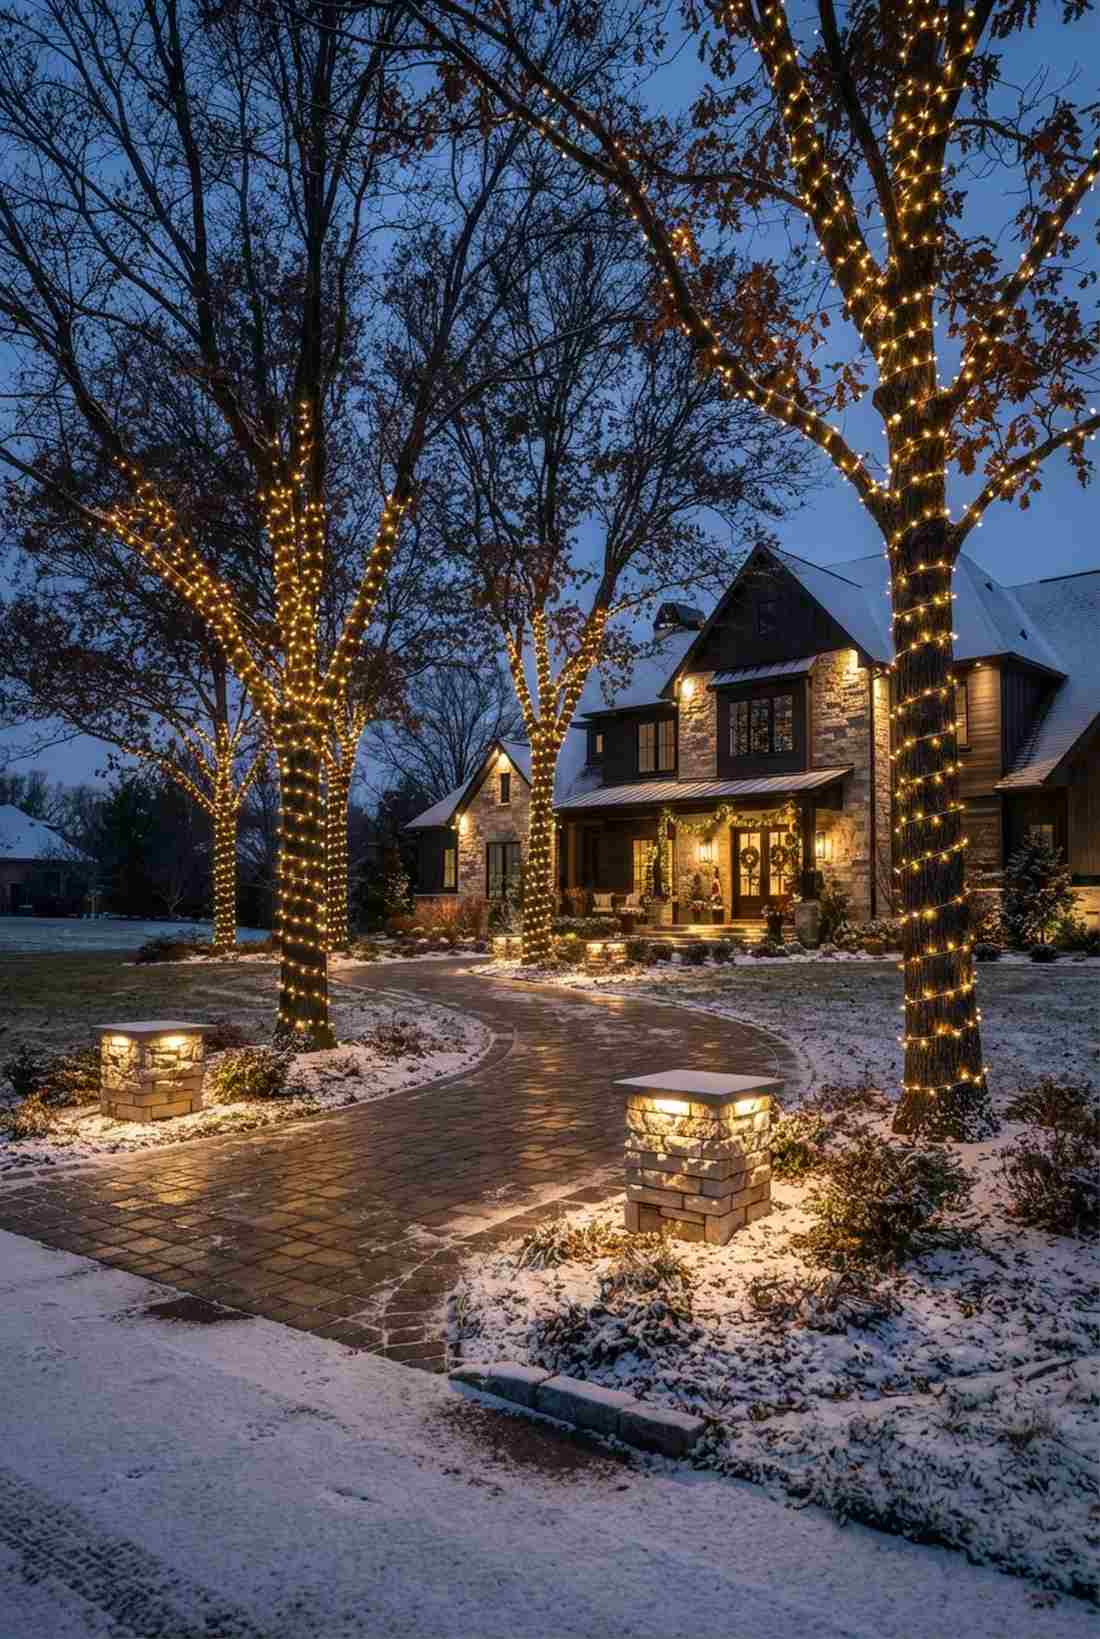

Driving past this bold wrap feels like approaching a high-end winter resort. Illuminated landscape pillars perfectly define property boundaries and guide visitors up the driveway.
Wrapping tightly around the base establishes a heavy visual anchor that looks phenomenally striking from the street. You must use true outdoor-rated fairy lights xmas gear so the snow doesn’t short the circuit.
A set of three trees usually runs about $45–$70. Save this to your exterior home upgrade board.
- Key Materials: Outdoor-rated stringers
- Vibe / Style: High-end commercial landscape
- Difficulty: Physically demanding
- Budget Breakdown: Outdoor lights: $50 | Waterproof tape: $10
- Creator’s Tip: Keep exactly 2 inches of spacing between every wrap for a perfect barber-pole aesthetic.
- Smart Sourcing: weatherproof commercial light spools and UV-resistant mounting tape.
12. Canopy Net Lighting
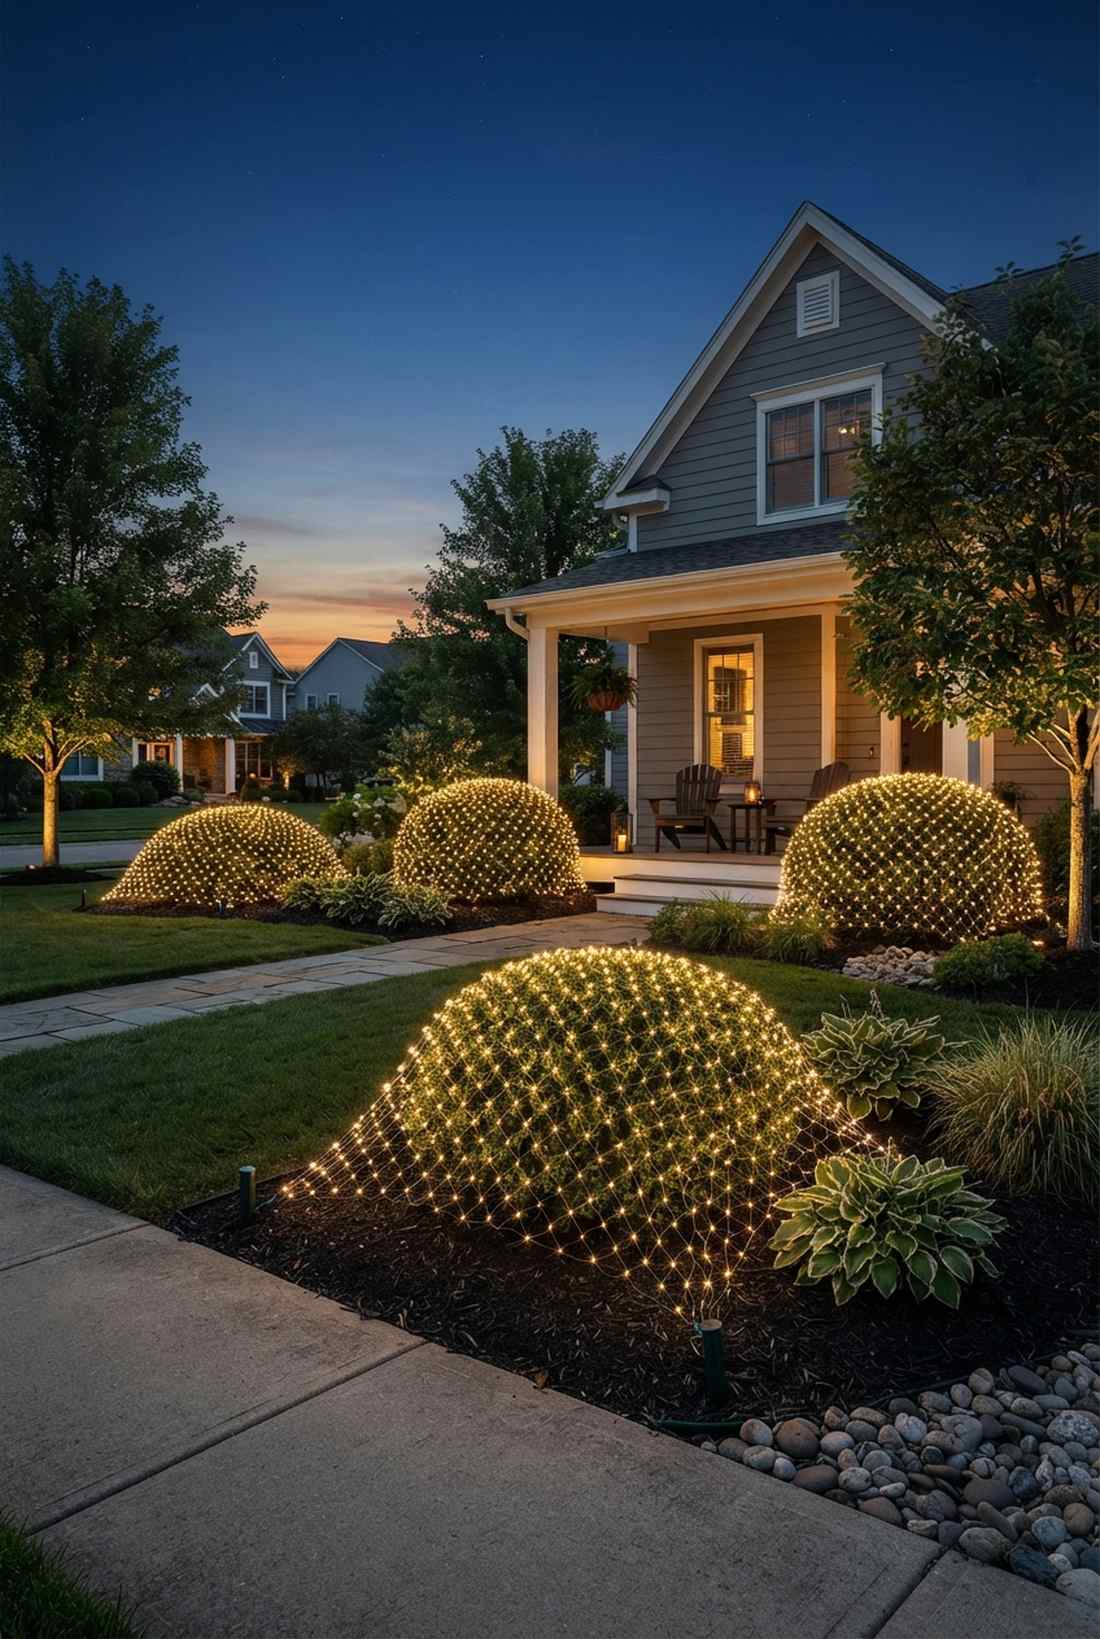
Throwing this grid over your bushes feels like an instant, satisfying magic trick. Uniform grid netting is an absolute lifesaver for massive, rounded front yard shrubs.
Skipping individual strand wrapping in favor of pre-made geometry delivers a pristine, perfectly spaced glow instantly. Grabbing specialized outdoor fairy garden kits ensures the netting stretches smoothly over uneven branches.
You can cover massive landscape sections for roughly $30–$50.
- Key Materials: Interlocking LED nets
- Vibe / Style: Crisp neighborhood perfection
- Difficulty: Fast and effortless
- Budget Breakdown: Net kits: $35 | Ground stakes: $5
- Creator’s Tip: Stake the bottom corners firmly into the dirt to maintain the geometric tension.
- Smart Sourcing: stretchable LED canopy nets and heavy-duty landscape stakes.
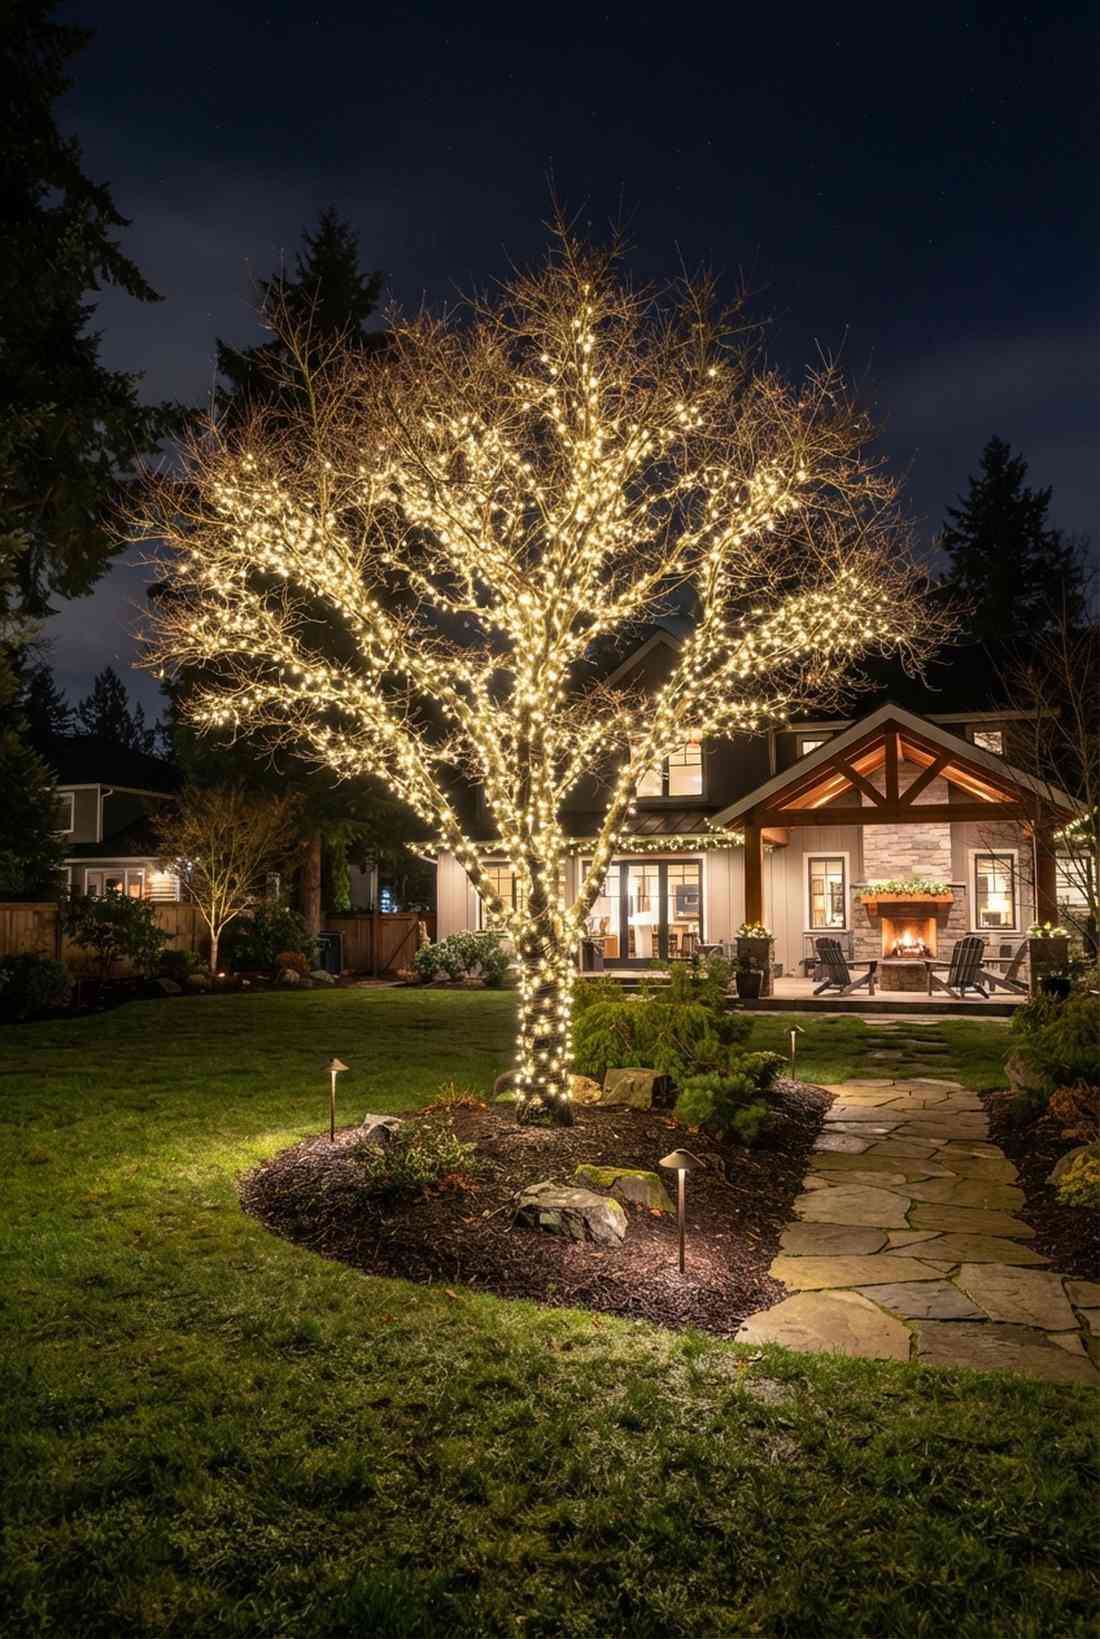
13. Bare Branch Outlining
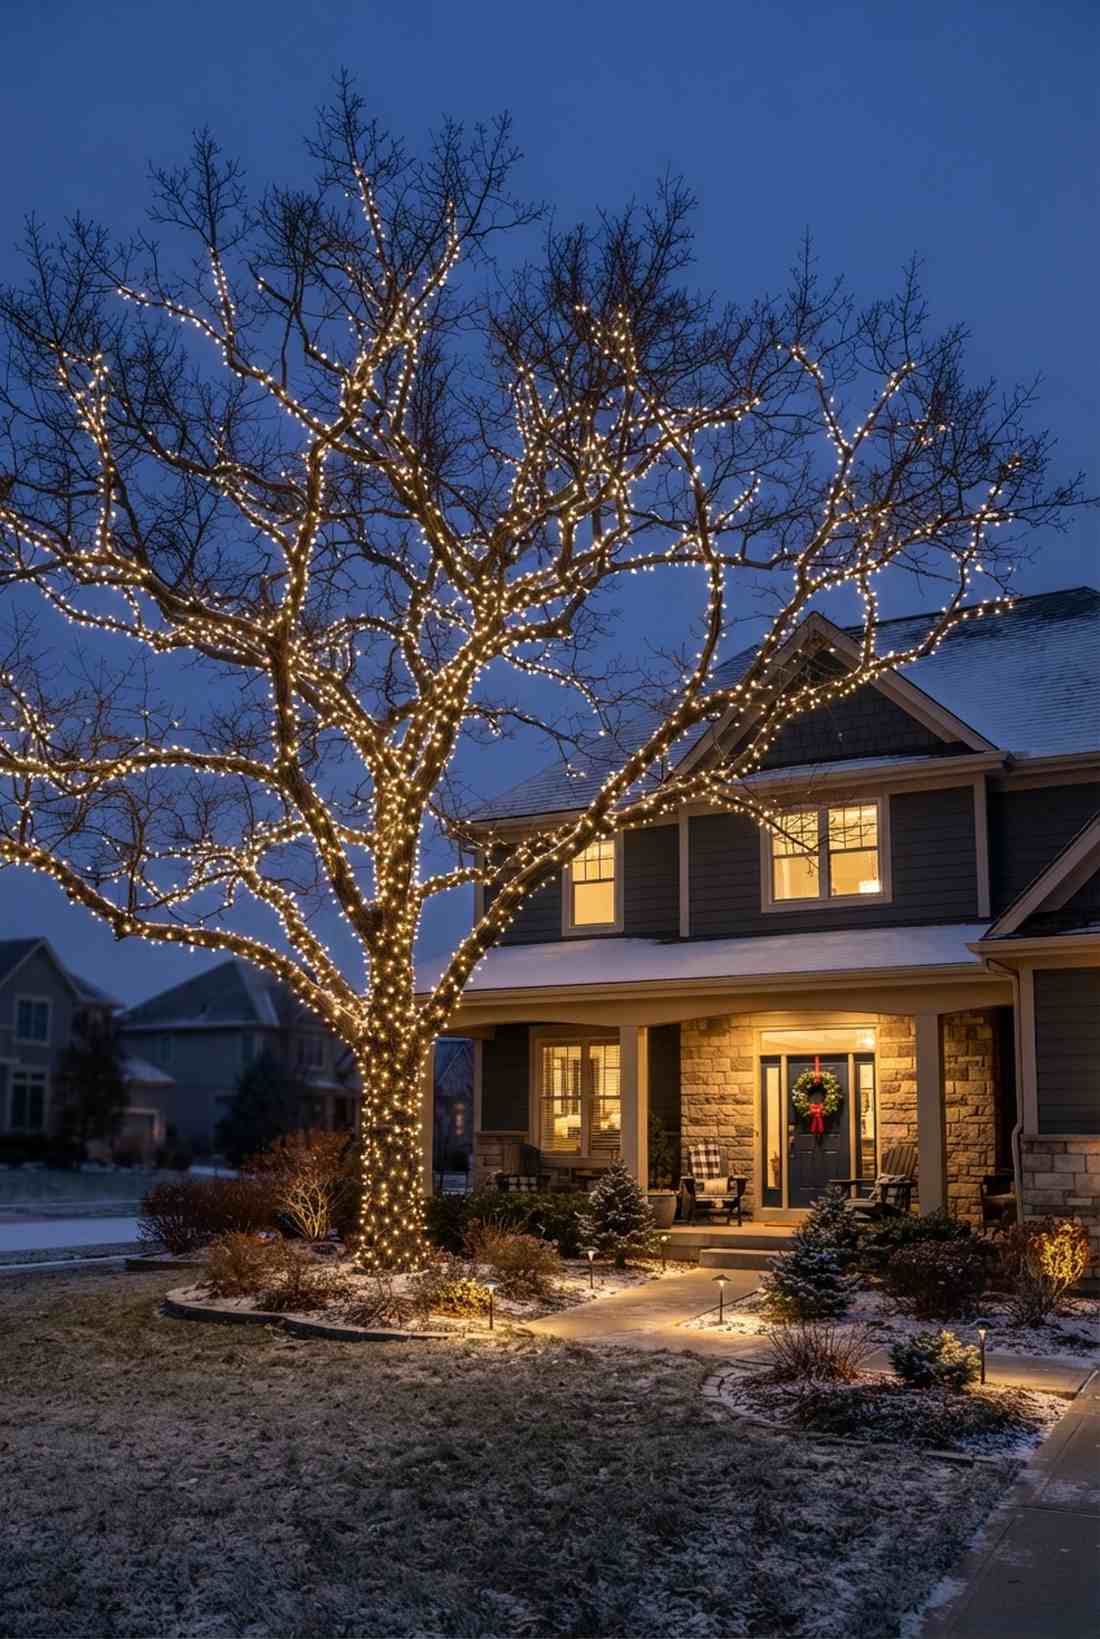
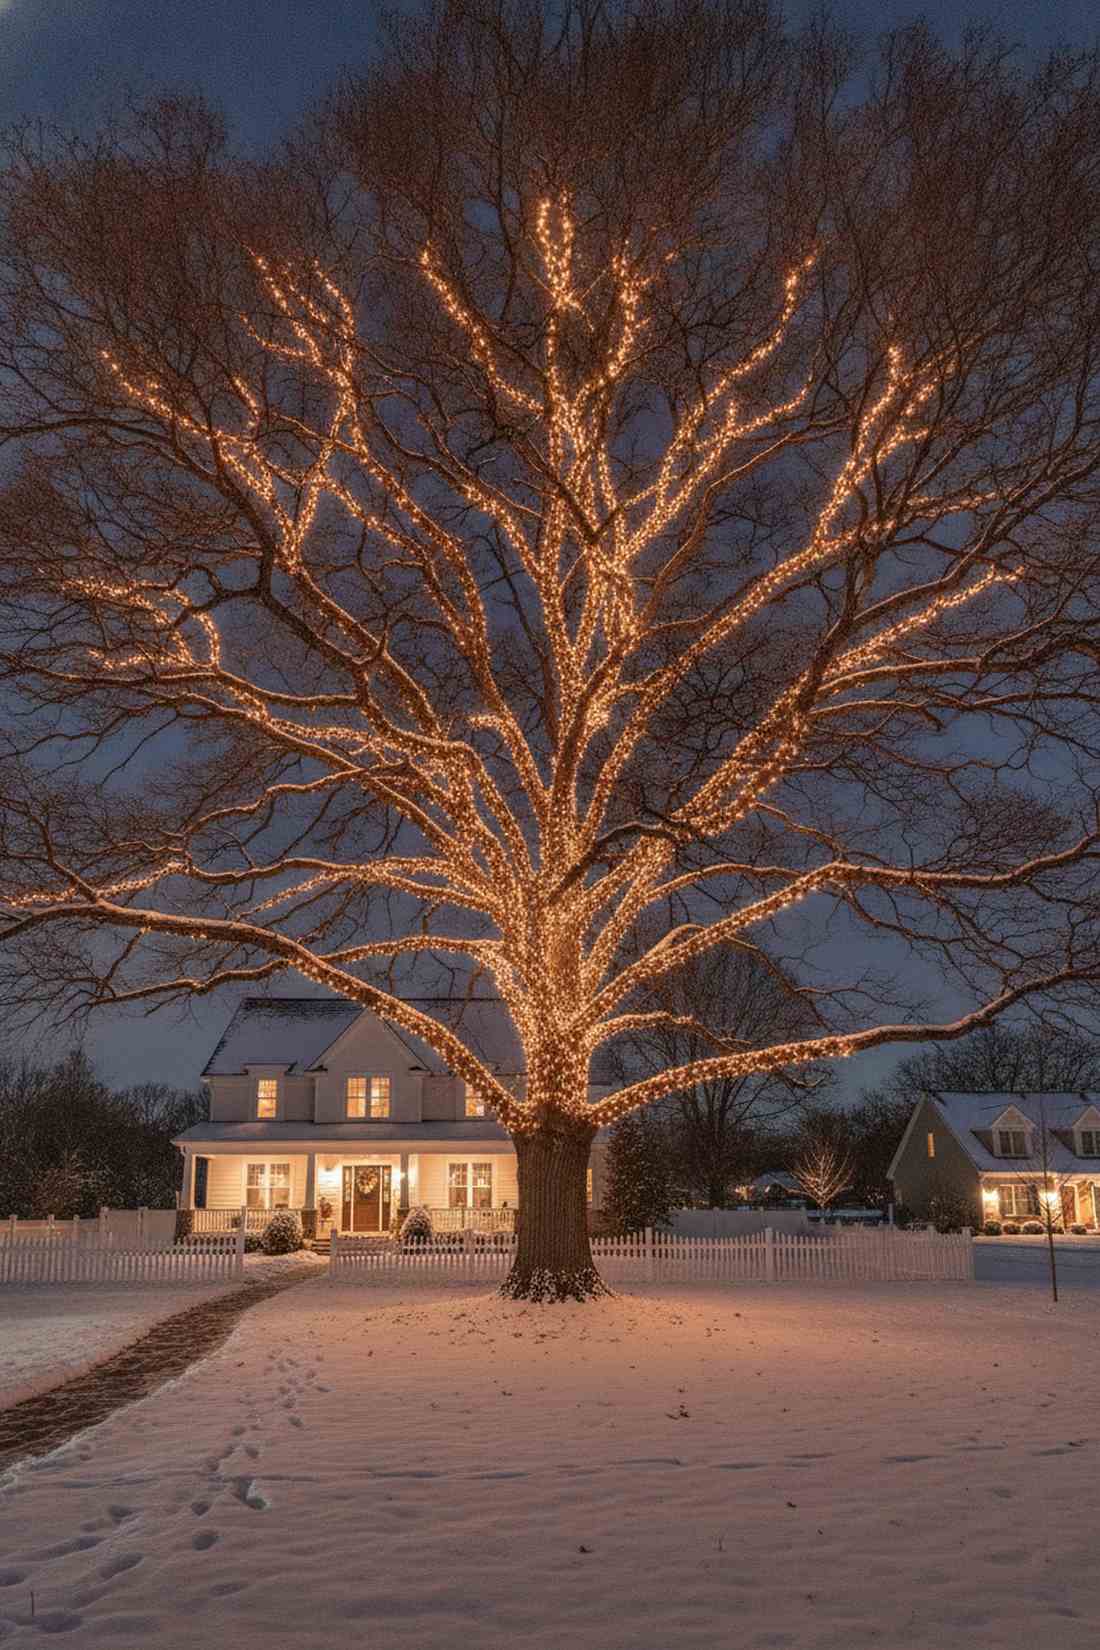
This skeletal glow feels like a dormant magical entity sleeping in your front yard. Winter silhouette tracing looks incredible on twisting, deciduous oak or maple trees.
Exposing the stark, leafless architecture transforms dead winter yards into highly dramatic art installations. Utilizing ultra-durable miniature garden supplies protects the delicate connections from harsh winter winds.
Tracing a medium tree costs around $60–$100 due to complex branching. Pin this for dramatic landscape inspiration.
- Key Materials: Flexible brown-wire LEDs
- Vibe / Style: Hauntingly beautiful architecture
- Difficulty: Advanced ladder work
- Budget Breakdown: Brown wire lights: $80 | Branch clips: $15
- Creator’s Tip: Wrap loosely near the tips so the branches can sway in heavy wind without snapping wires.
- Smart Sourcing: camouflage brown-wire starter kits and flex-grip branch clips.
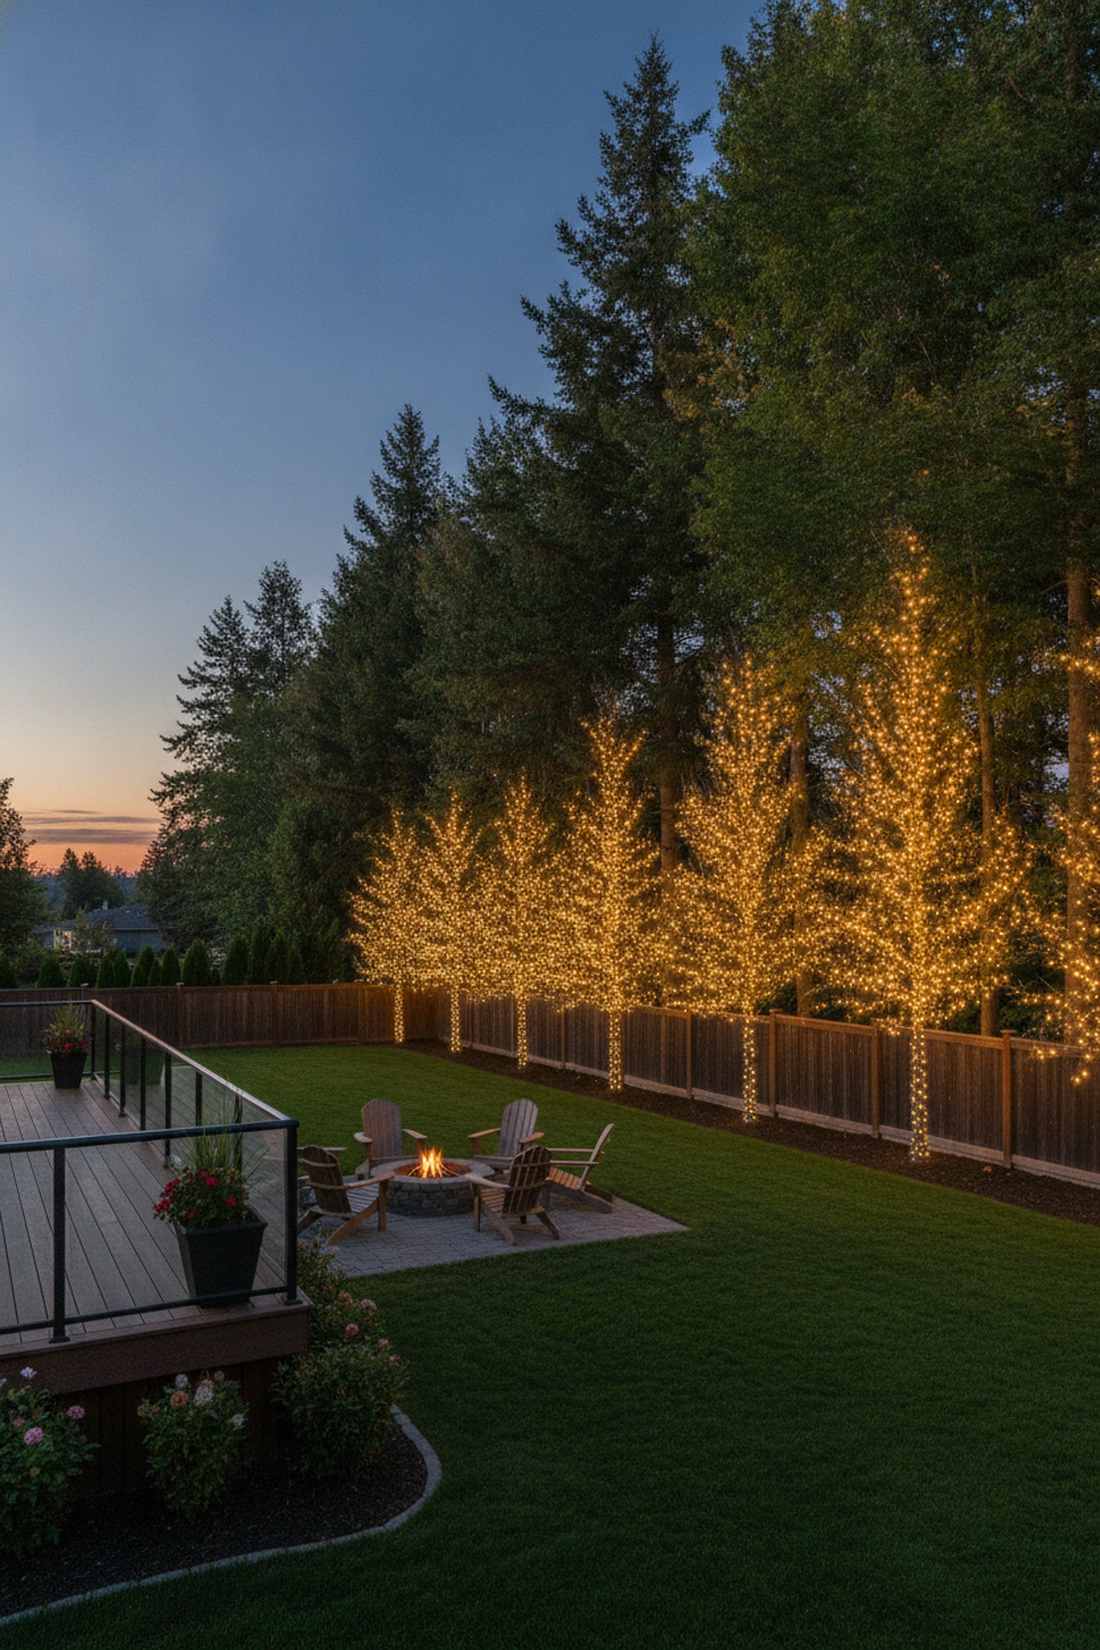
14. Evergreen Vertical Strands
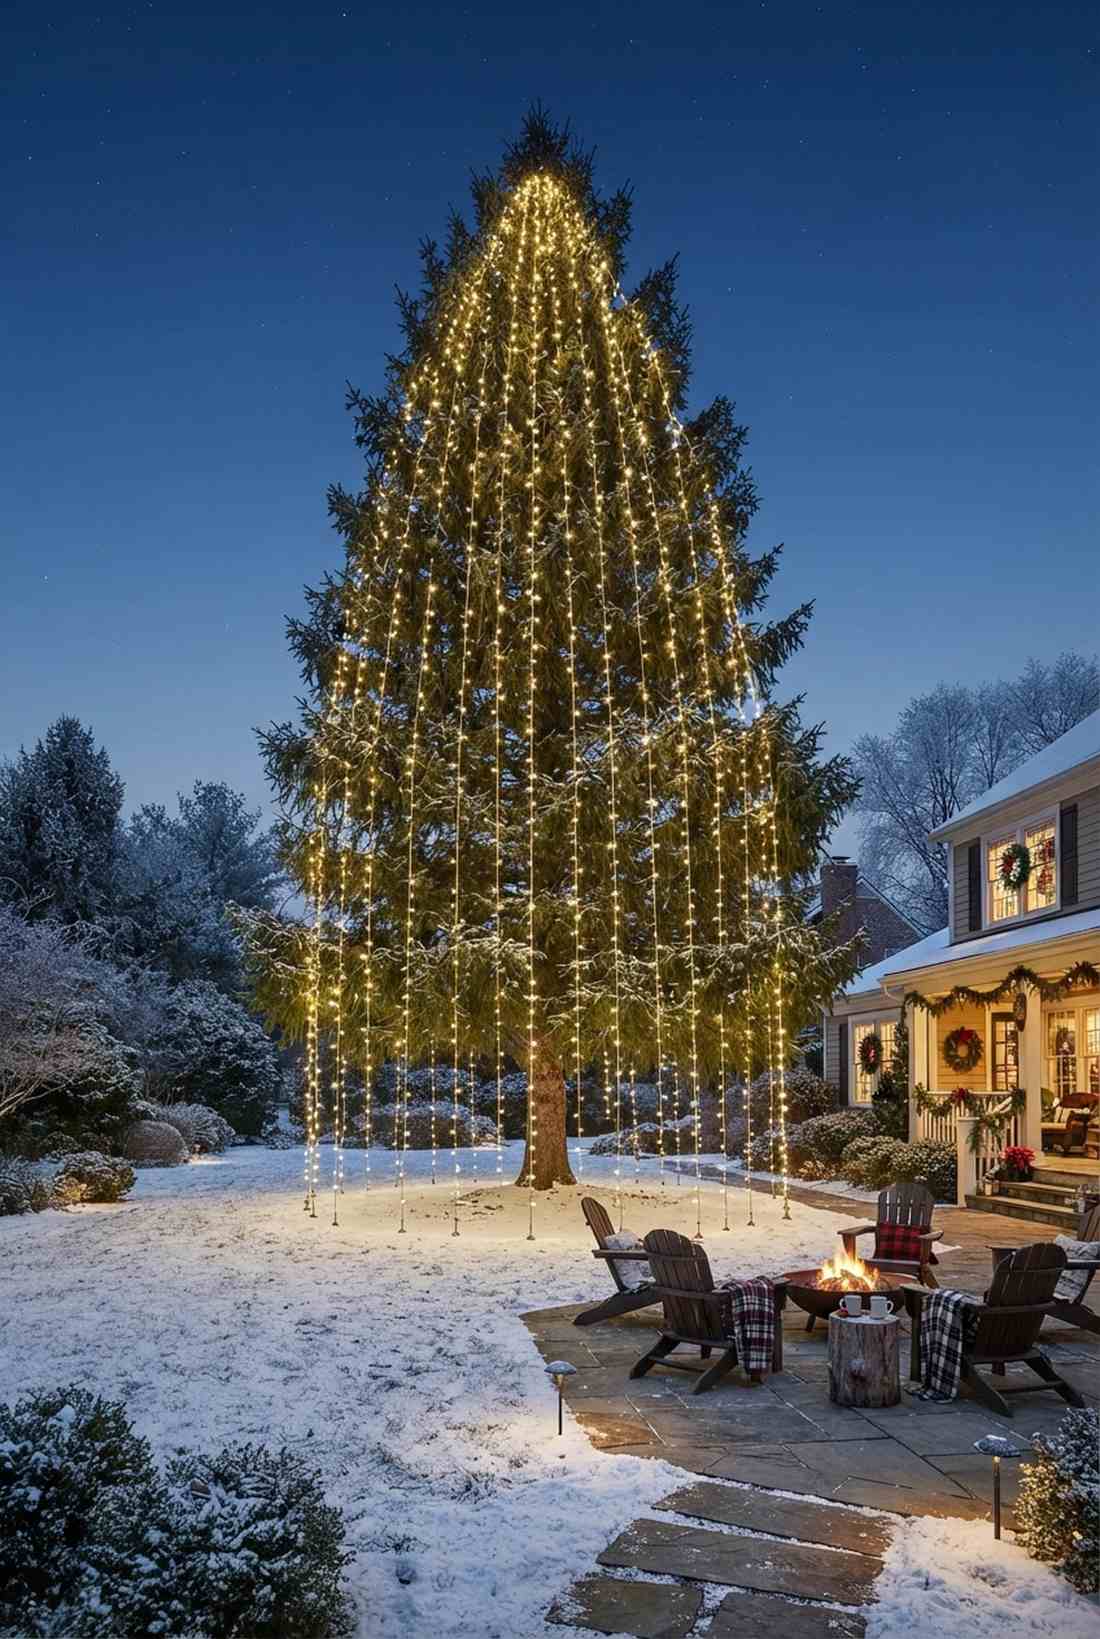
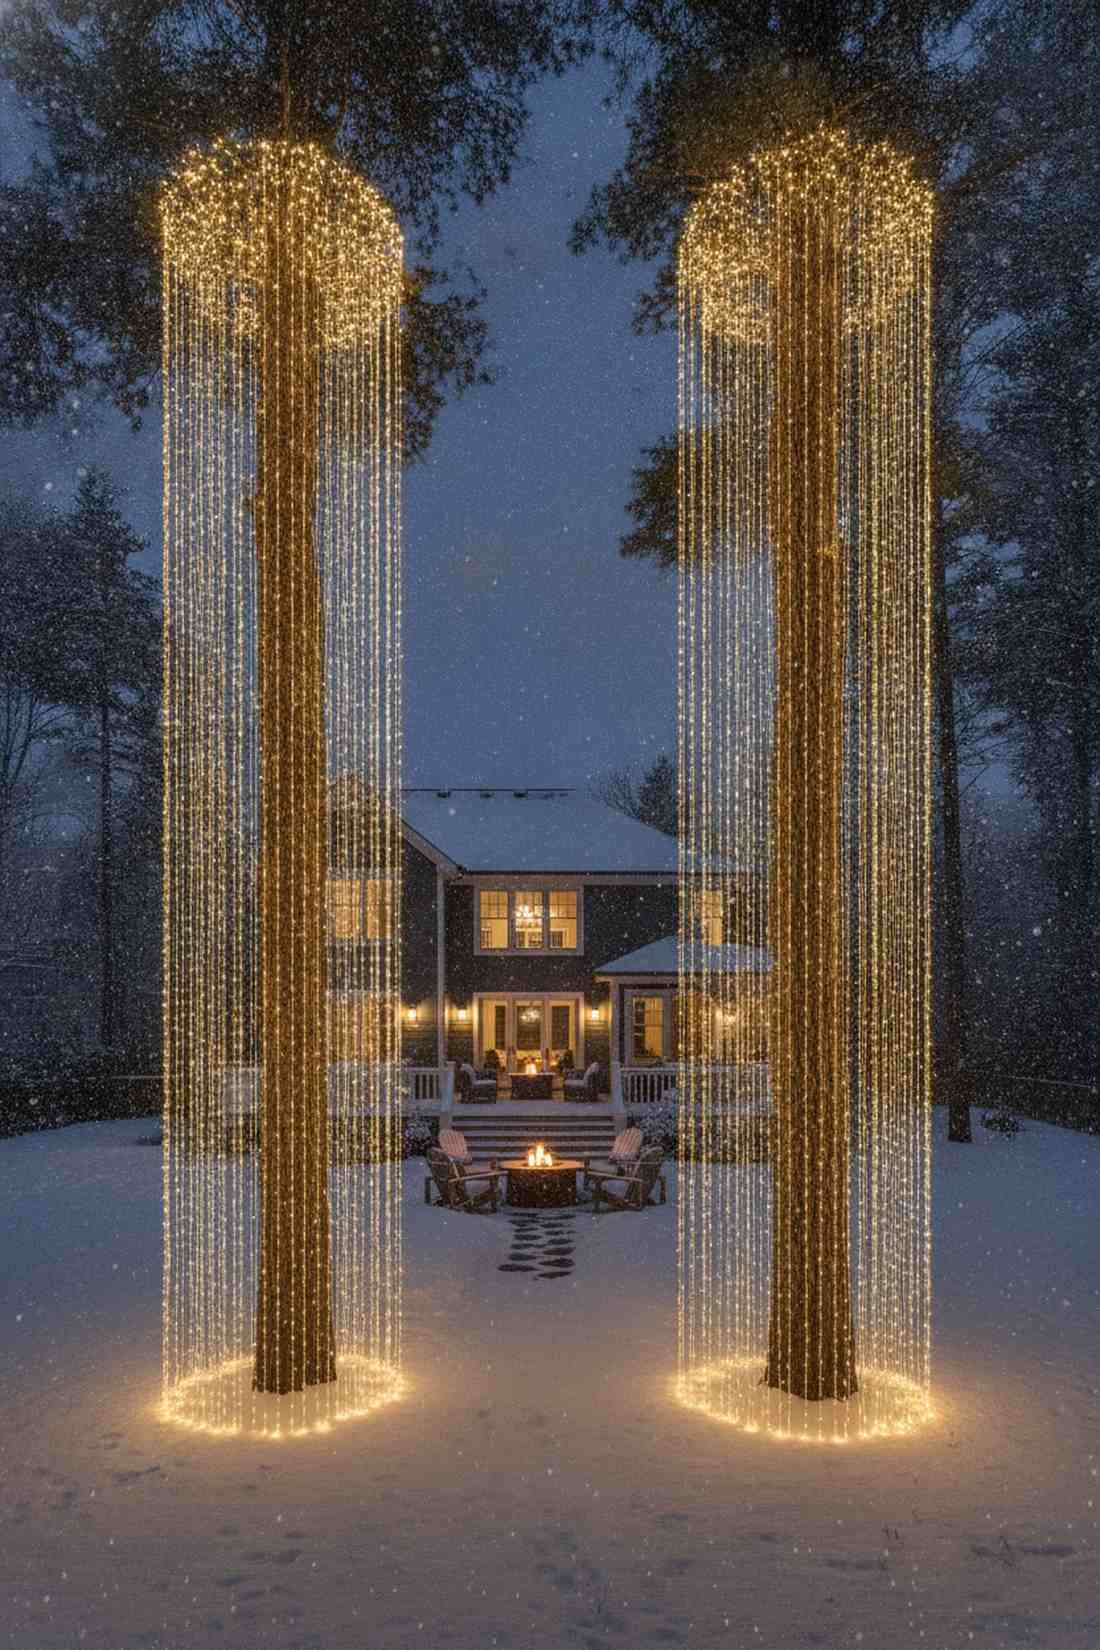
Watching this execution feels like standing under a glowing, frozen waterfall. Cascading downward lines are incredibly effective for towering, ancient pine trees.
Draping vertically rather than wrapping sideways creates a grand, elongating optical illusion that drops jaws. Integrating waterproof fairy lights christmas decor at the peaks guarantees the highest points shine brightest.
This high-altitude upgrade costs roughly $50–$85.
- Key Materials: Weighted drop strands
- Vibe / Style: Majestic winter wonderland
- Difficulty: Requires extension poles
- Budget Breakdown: Drop strands: $65 | Anchor weights: $10
- Creator’s Tip: Attach small lead fishing weights to the bottom of each strand to keep them perfectly plumb.
- Smart Sourcing: pre-weighted cascading light kits and telescoping installation poles.
Before you wrap another bush, check out this connected-tree technique that completely reshapes how massive your property looks…
15. Multi-Tree Connection
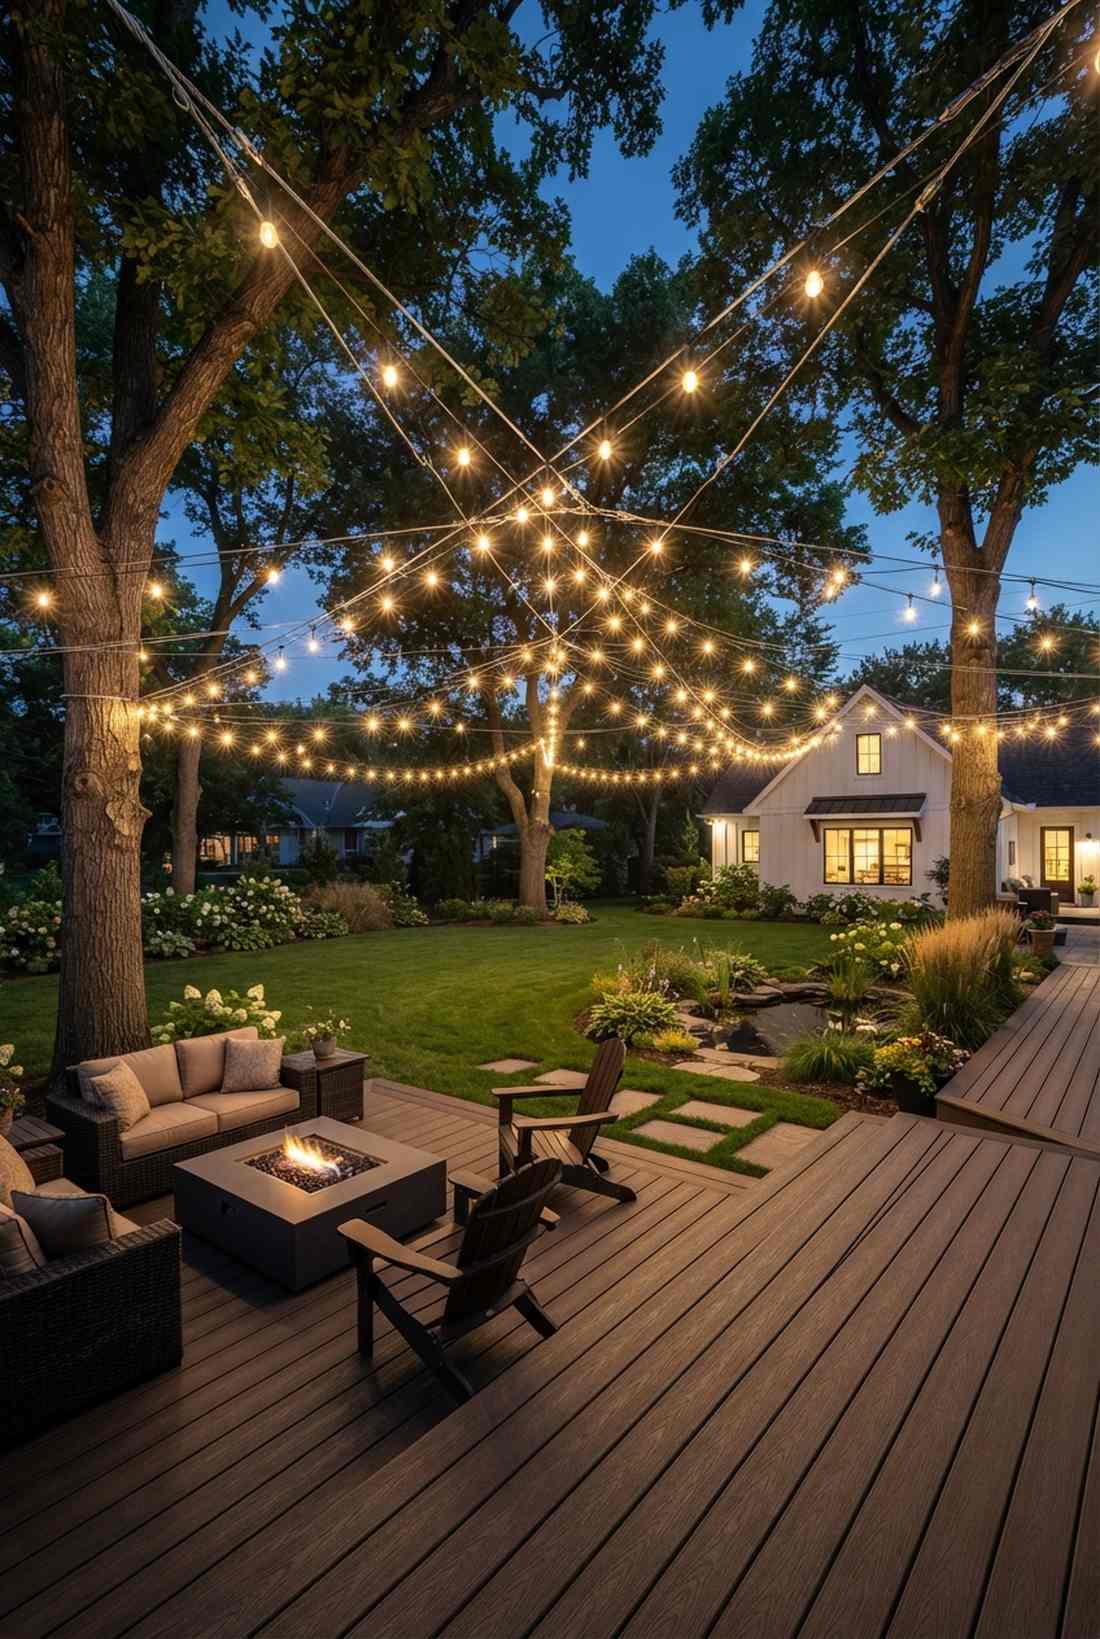
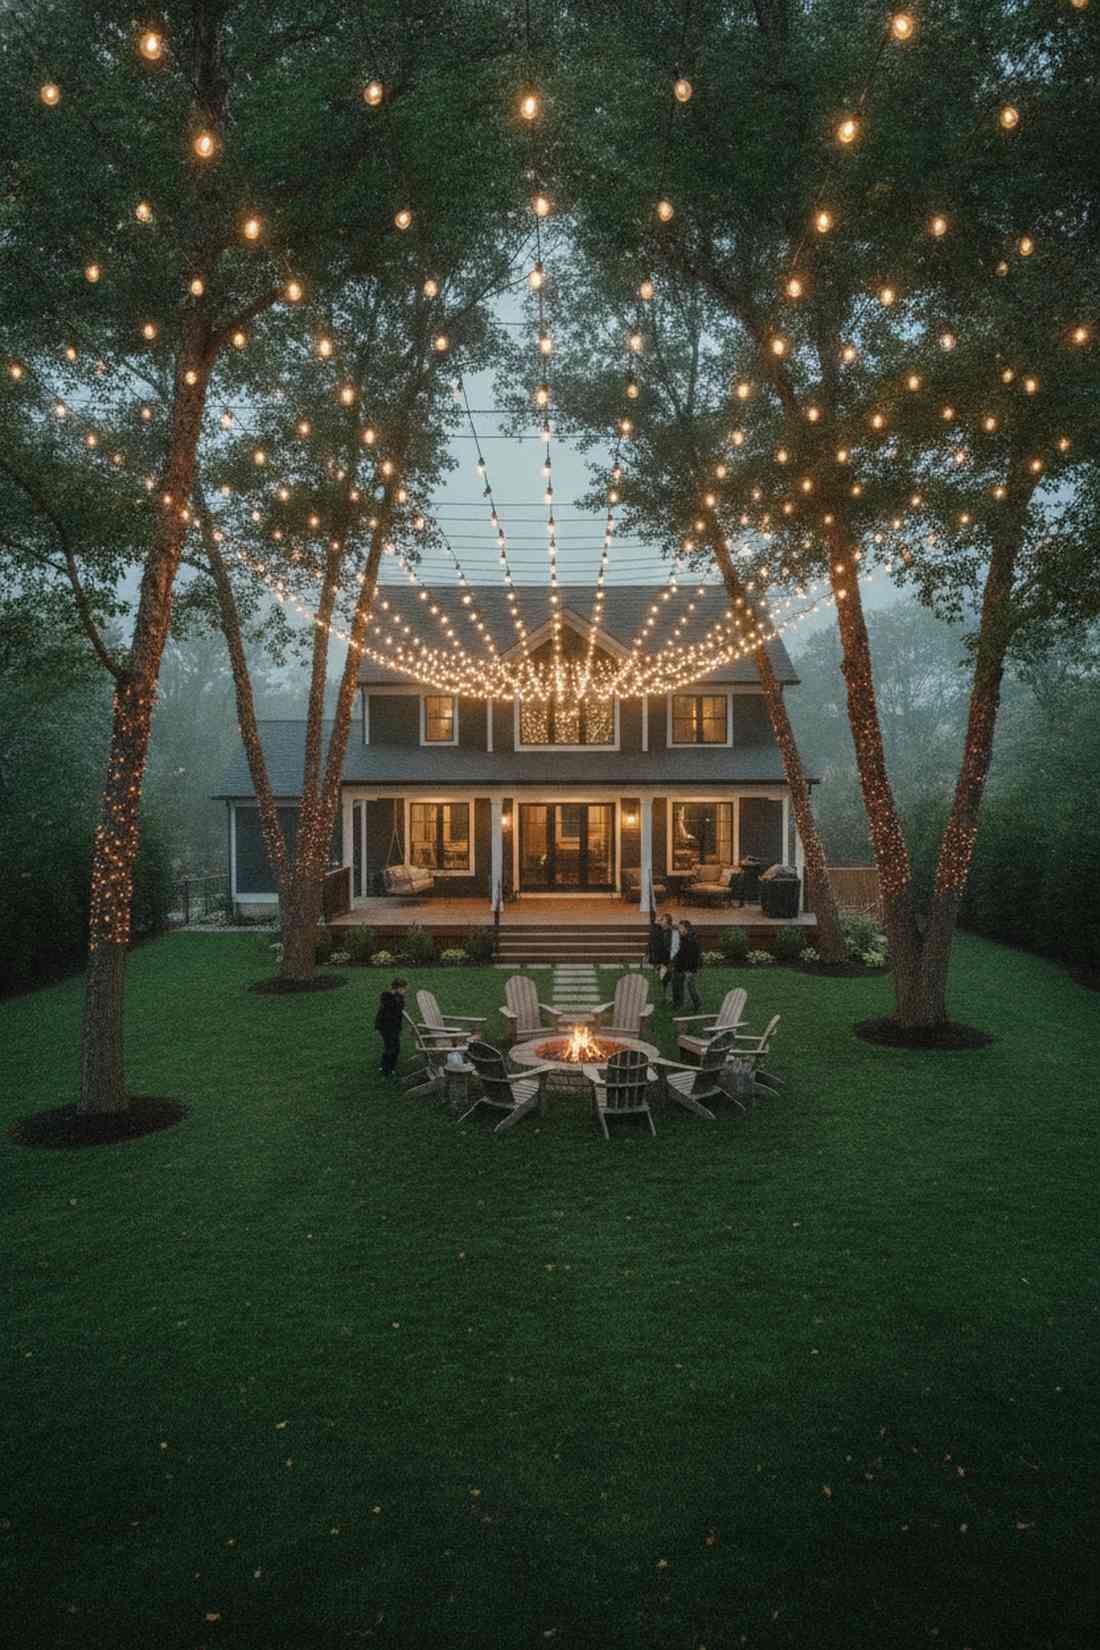
Connecting the canopy feels like weaving a glowing ceiling over your entire property. Horizontal landscape linking perfectly unifies chaotic, scattered backyard trees into one cohesive zone.
Suspended lights spanning across open air deliver a wildly expensive, botanical-garden level of luxury. Proper tension cables and premium terrarium accessories ensure the spans survive icy conditions.
You can engineer this massive aerial display for around $70–$120. Save this for your ultimate backyard makeover.
- Key Materials: Steel tension cables, connectable LEDs
- Vibe / Style: Immersive outdoor pavilion
- Difficulty: Engineering precision required
- Budget Breakdown: Tension wire: $30 | Connectable lights: $60
- Creator’s Tip: Never rely on the light cord itself for tension; always zip-tie them to a structural steel guide wire.
- Smart Sourcing: galvanized steel tension kits and heavy-duty connectable strands.
16. Ground-to-Canopy Pillars
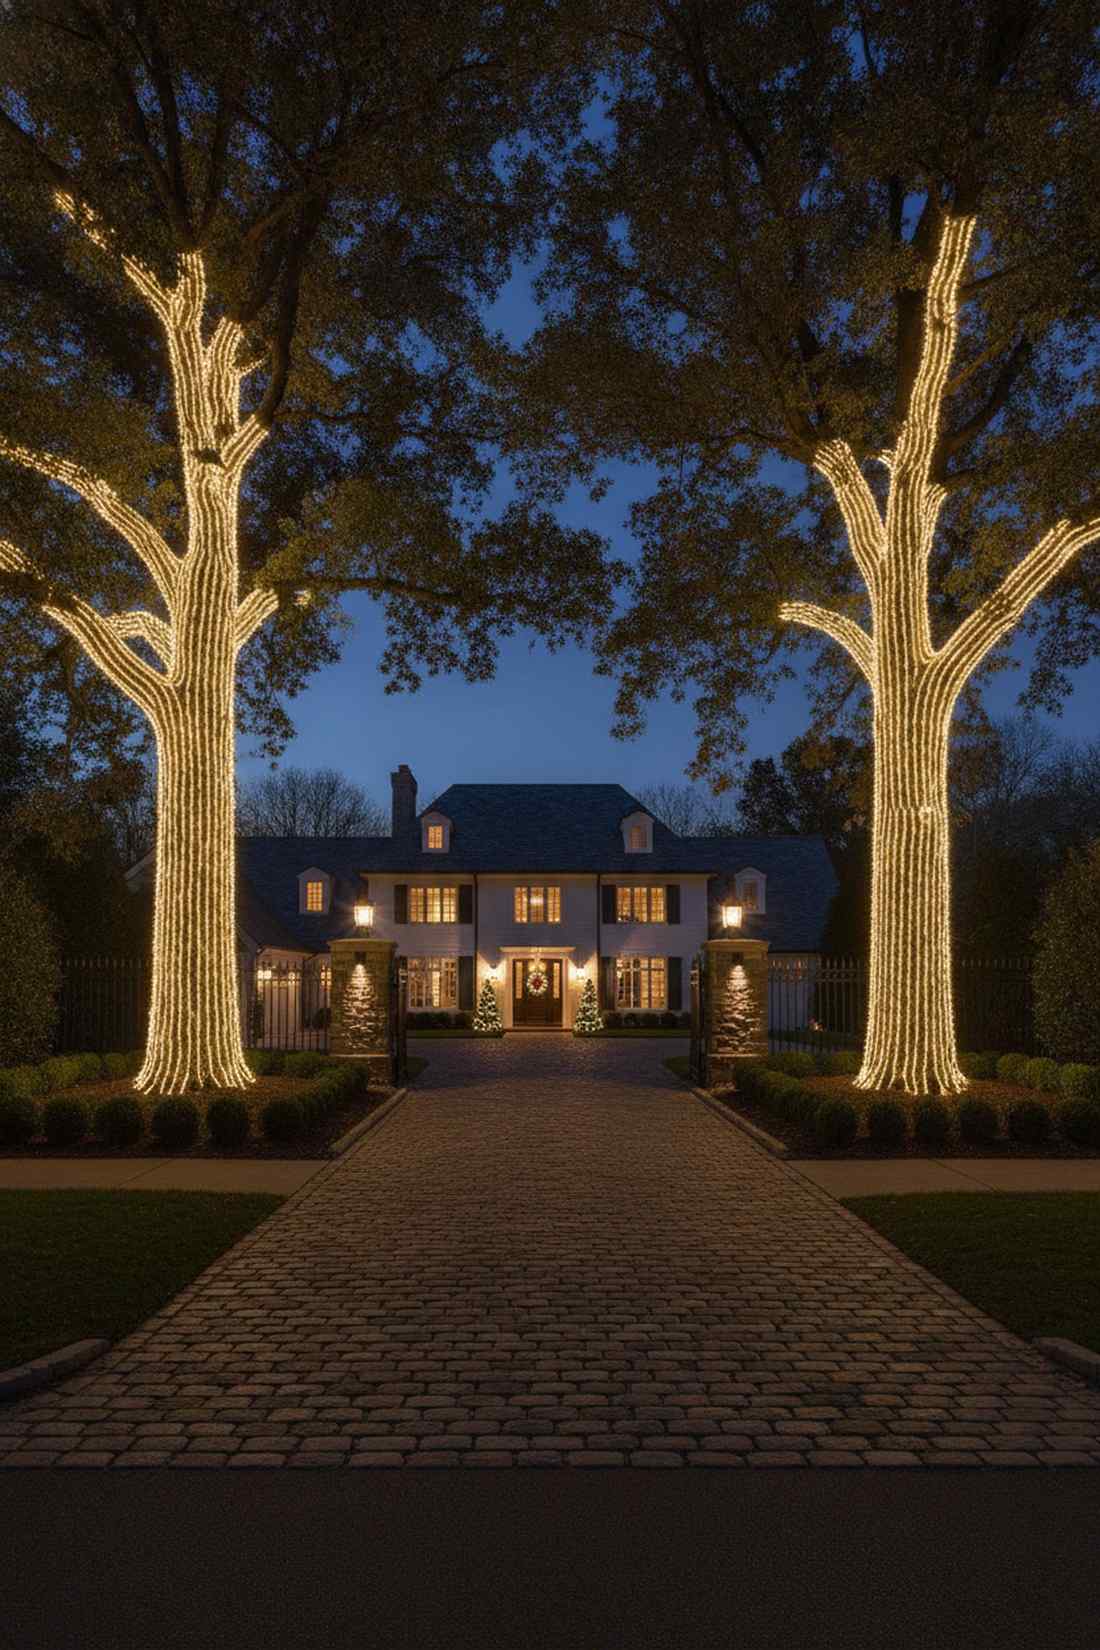
This aggressive vertical thrust feels like glowing columns holding up the night sky. Upward trunk routing acts as a dramatic gateway when flanking your main driveway.
Running thick, parallel lines straight into the upper canopy completely dominates the visual hierarchy of the street. High-output fairy lights xmas tree bulbs are mandatory here to fight off ambient streetlamps.
A solid entryway pillar setup runs about $40–$65.
- Key Materials: High-lumen rope lights
- Vibe / Style: Bold estate entrance
- Difficulty: Moderate straight-line pulling
- Budget Breakdown: High-output strands: $50 | Base stakes: $10
- Creator’s Tip: Bury the bottom 6 inches of the strand to create the illusion that the light is growing from the soil.
- Smart Sourcing: commercial high-lumen rope lights and heavy-duty soil anchors.
17. Low Branch Understory Lighting
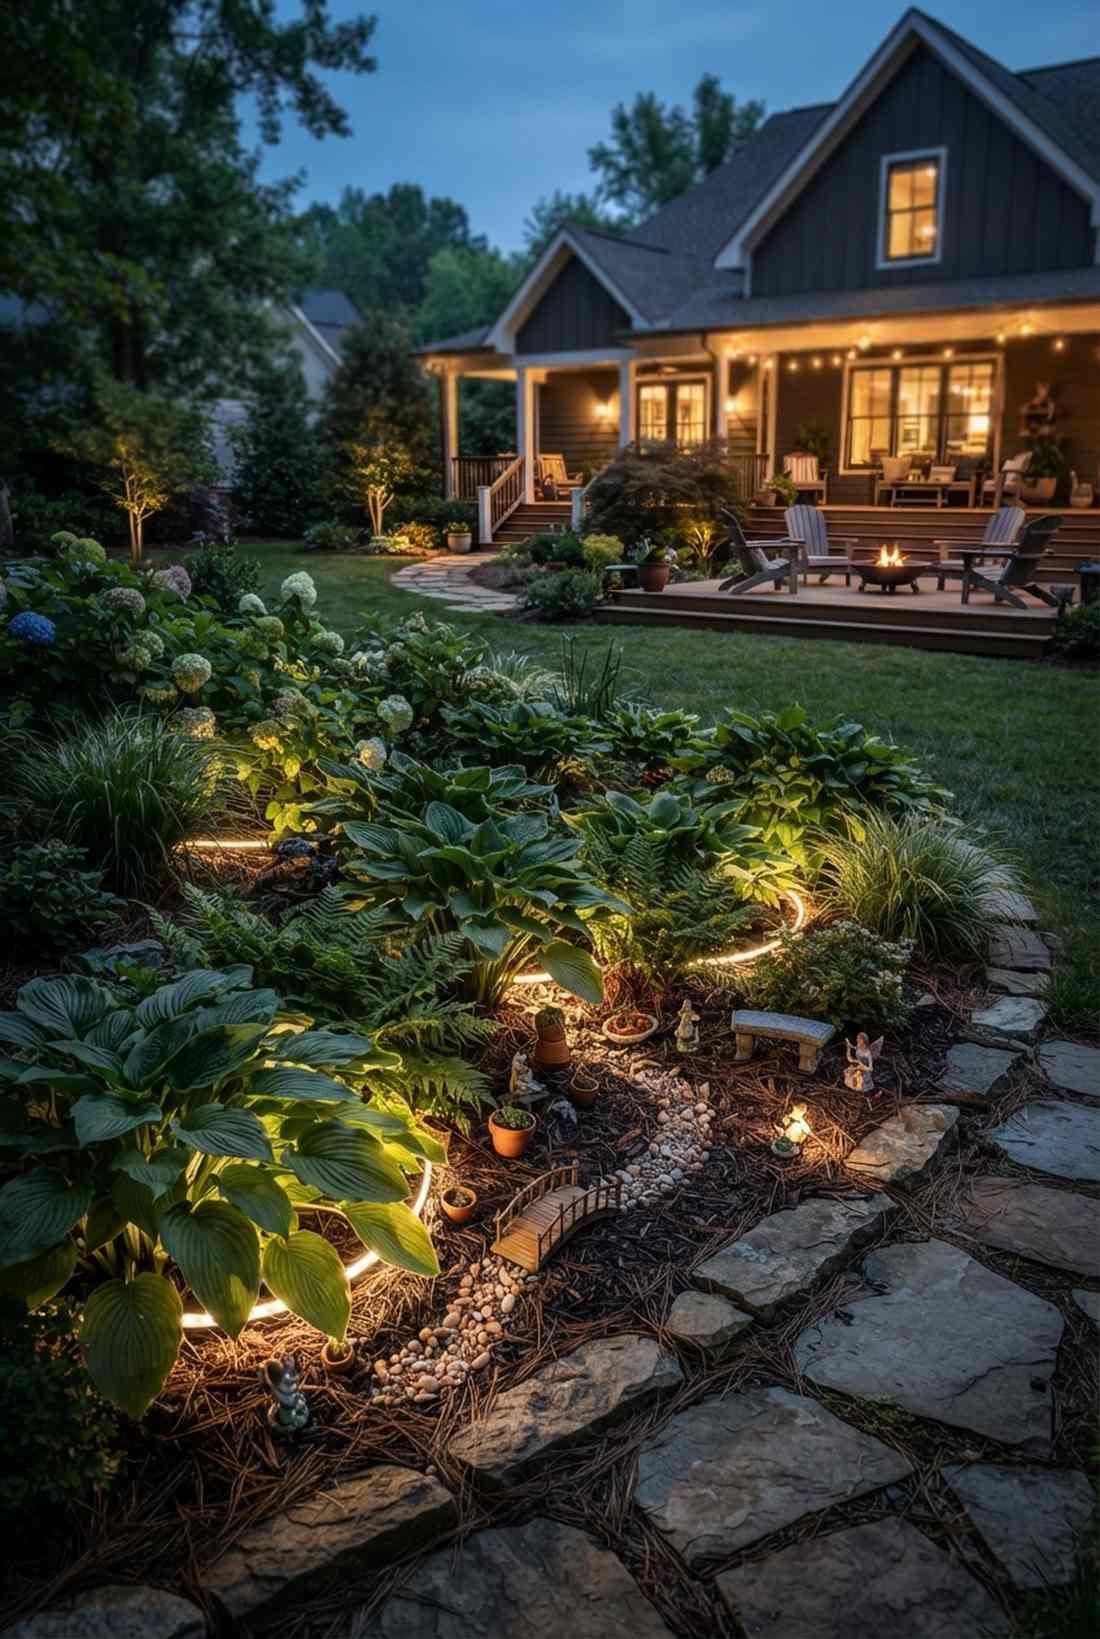
Peeking under the bushes feels like discovering a secret fairy colony hiding in the mulch. Concealed ground-spill lighting is an incredible secret weapon for deep garden beds.
Hiding the actual bulbs and only displaying the reflected glow gives an eerily beautiful, high-end landscape architect vibe. Dropping in hidden fairy garden kits beneath the foliage maximizes the magical realism.
It’s a fast aesthetic upgrade that completely changes the vibe for only $20–$35. Pin this for stealthy curb appeal.
- Key Materials: Wide-angle LED spools
- Vibe / Style: Mysterious hidden luxury
- Difficulty: Simple ground work
- Budget Breakdown: Spools: $25 | Landscape pins: $5
- Creator’s Tip: Wrap the inner base of the branches facing downwards so the light strictly paints the ground.
- Smart Sourcing: wide-angle ground spill starter kits and rust-proof landscape pins.
18. Specimen Tree Showcase
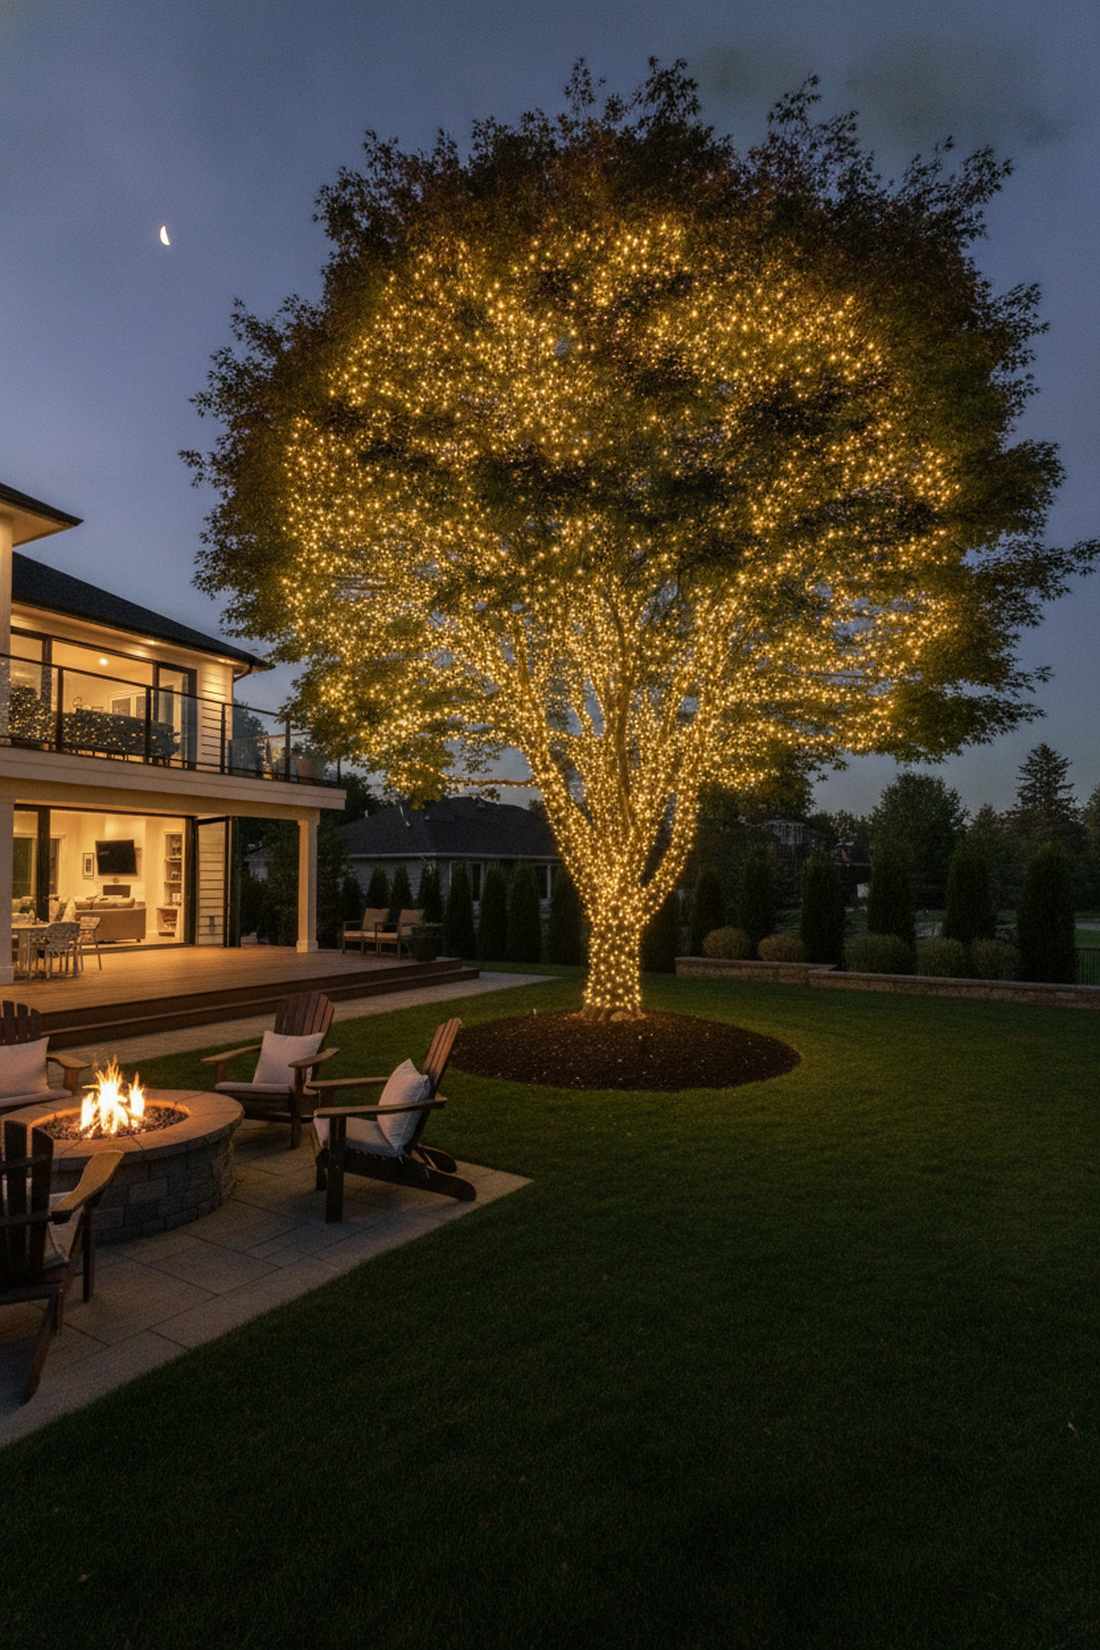
Isolating one flawless tree feels like putting a priceless sculpture on a museum pedestal. Hyper-dense singular lighting is perfect for that one perfect Japanese maple or blue spruce.
Pouring triple the normal amount of lights into a single focal point forcefully dictates exactly where neighbors look. Sourcing the brightest fairy lights christmas decor ensures this lone wolf outshines the rest of the block.
Saturating one feature tree costs around $80–$150.
- Key Materials: Multi-pack bright LEDs
- Vibe / Style: Dominant architectural focal point
- Difficulty: High bulb density labor
- Budget Breakdown: Bulk light packs: $120
- Creator’s Tip: Start from the inner trunk and work outward to ensure the tree glows from its very core.
- Smart Sourcing: multi-pack high-output LED kits and trunk-wrap base spools.
You probably think static lights are fine, but the subtle kinetic movement in this next trick creates absolute hypnotic envy…
19. Branch Tip Draping

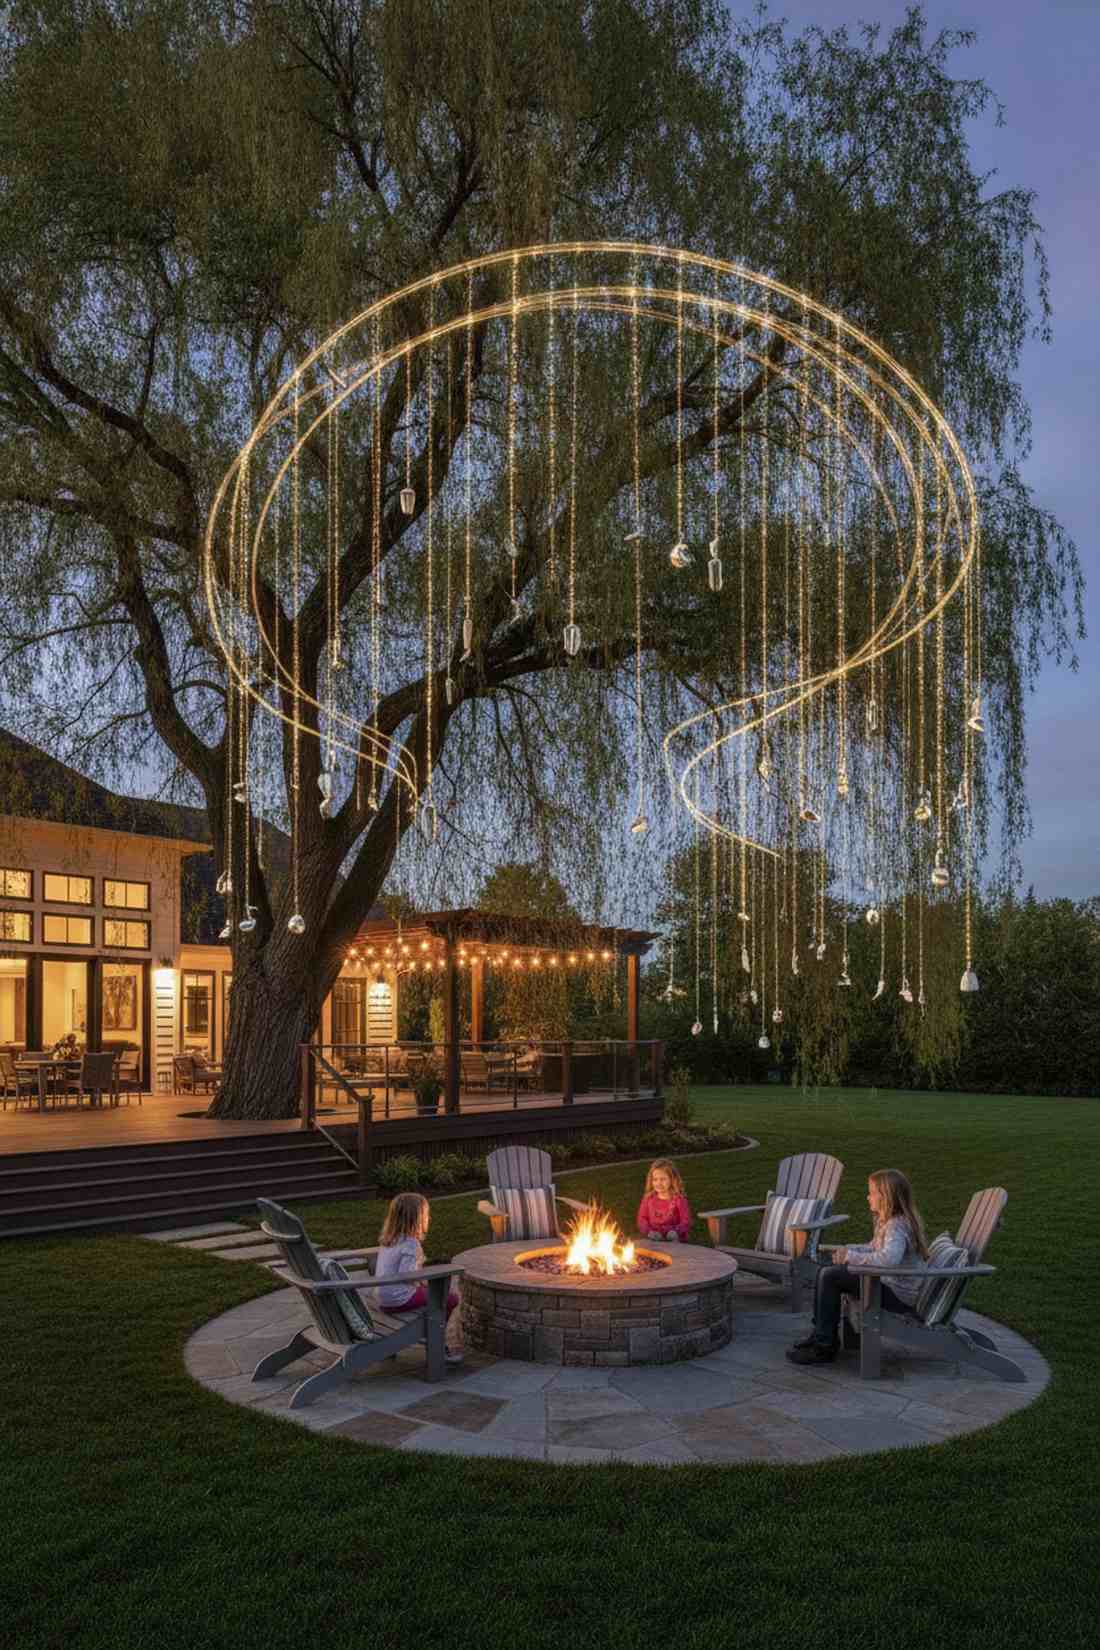
Watching the wind catch these strands feels like glowing willow branches weeping into the yard. Kinetic hanging drops look absolutely mesmerizing on large, sweeping yard trees.
Introducing actual physical movement into a static display instantly elevates the layout into a professional-tier installation. Incorporating weighted miniature garden supplies at the tips ensures they sway rhythmically rather than tangling wildly.
You can easily pull this off for around $35–$55. Save this to your interactive exterior board.
- Key Materials: Short curtain strands
- Vibe / Style: Enchanting kinetic energy
- Difficulty: Easy perimeter hanging
- Budget Breakdown: Curtain drops: $40 | Clip hooks: $10
- Creator’s Tip: Leave exactly 18 inches of slack hanging free so the breeze can catch the lights beautifully.
- Smart Sourcing: pre-cut kinetic drop kits and wind-resistant branch hooks.
20. Graduated Height Sequence
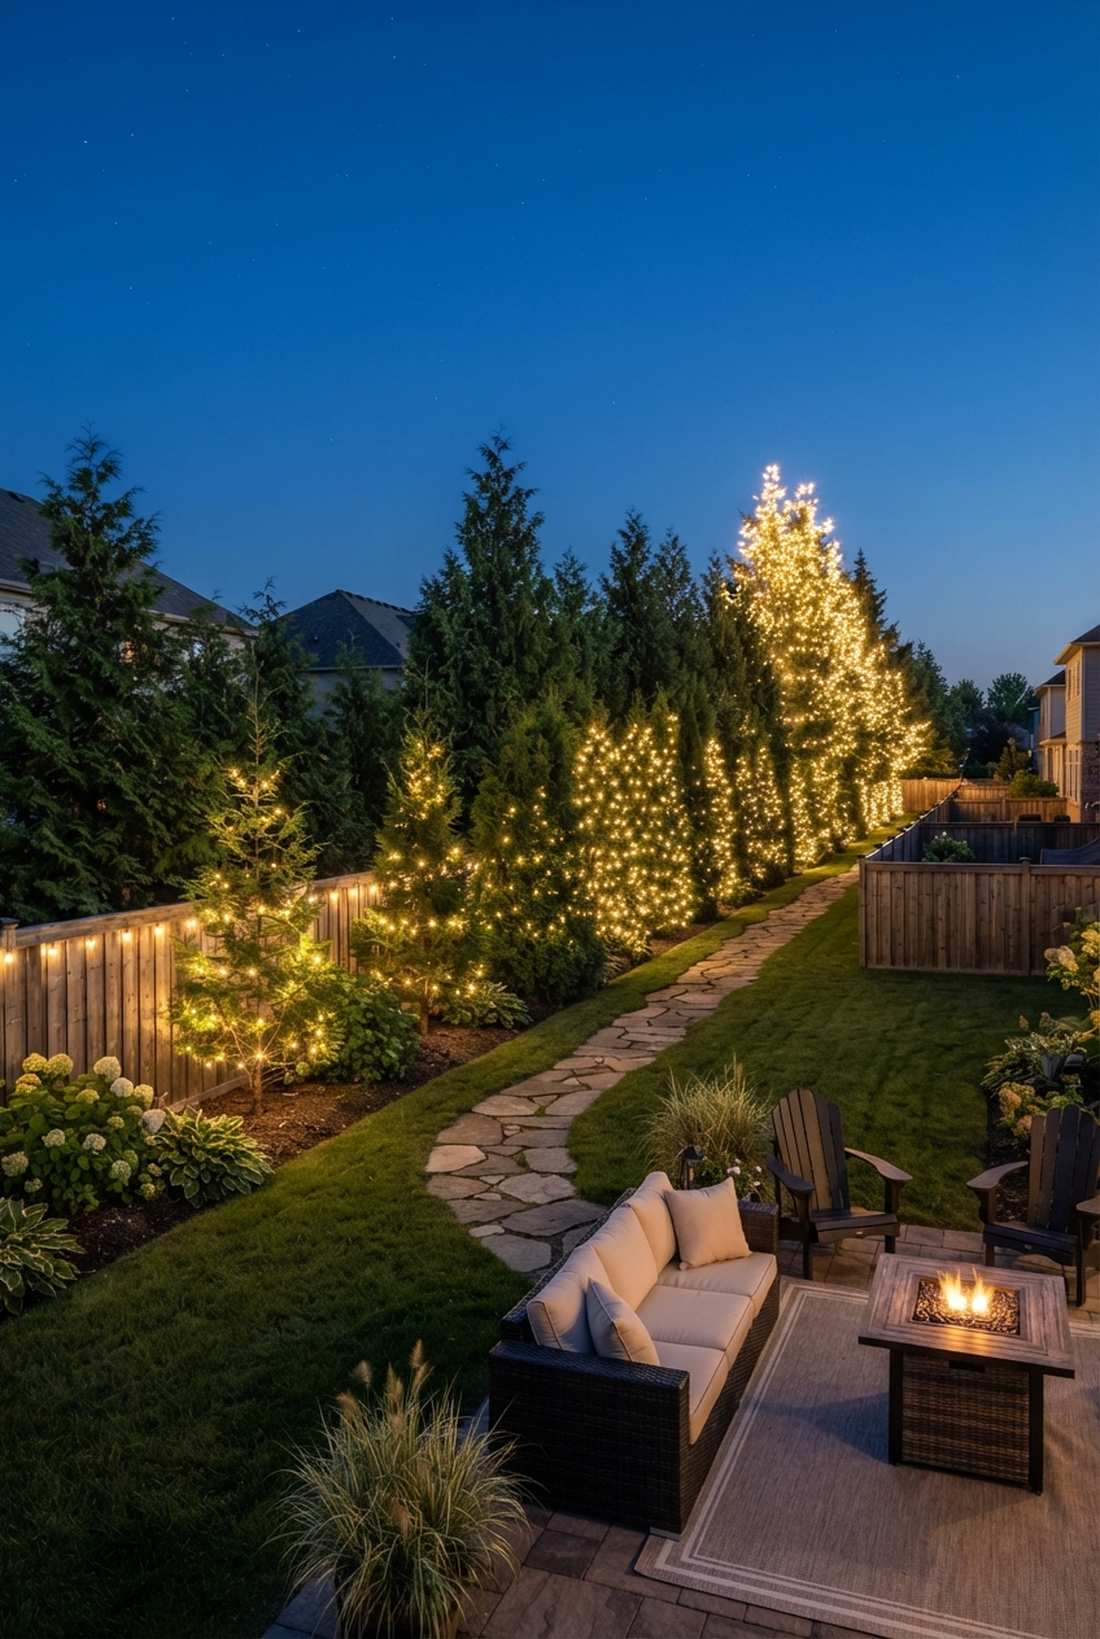
Scanning this setup feels like walking up a glowing staircase into the night sky. Stepped density illumination works flawlessly along long property lines or deep fences.
Purposefully increasing the brightness on taller trees pulls the human eye exactly where you want it to go. Using scalable fairy lights christmas tree systems ensures the color temperature matches perfectly across all sizes.
A proper graduated sequence requires an investment of $90–$140.
- Key Materials: Matching color-temp spools
- Vibe / Style: Curated landscape rhythm
- Difficulty: Requires scale planning
- Budget Breakdown: Variable length spools: $120
- Creator’s Tip: Keep the exact same bulb style across all trees; only change the spacing density.
- Smart Sourcing: color-matched bulk LED packs and density measuring tape.
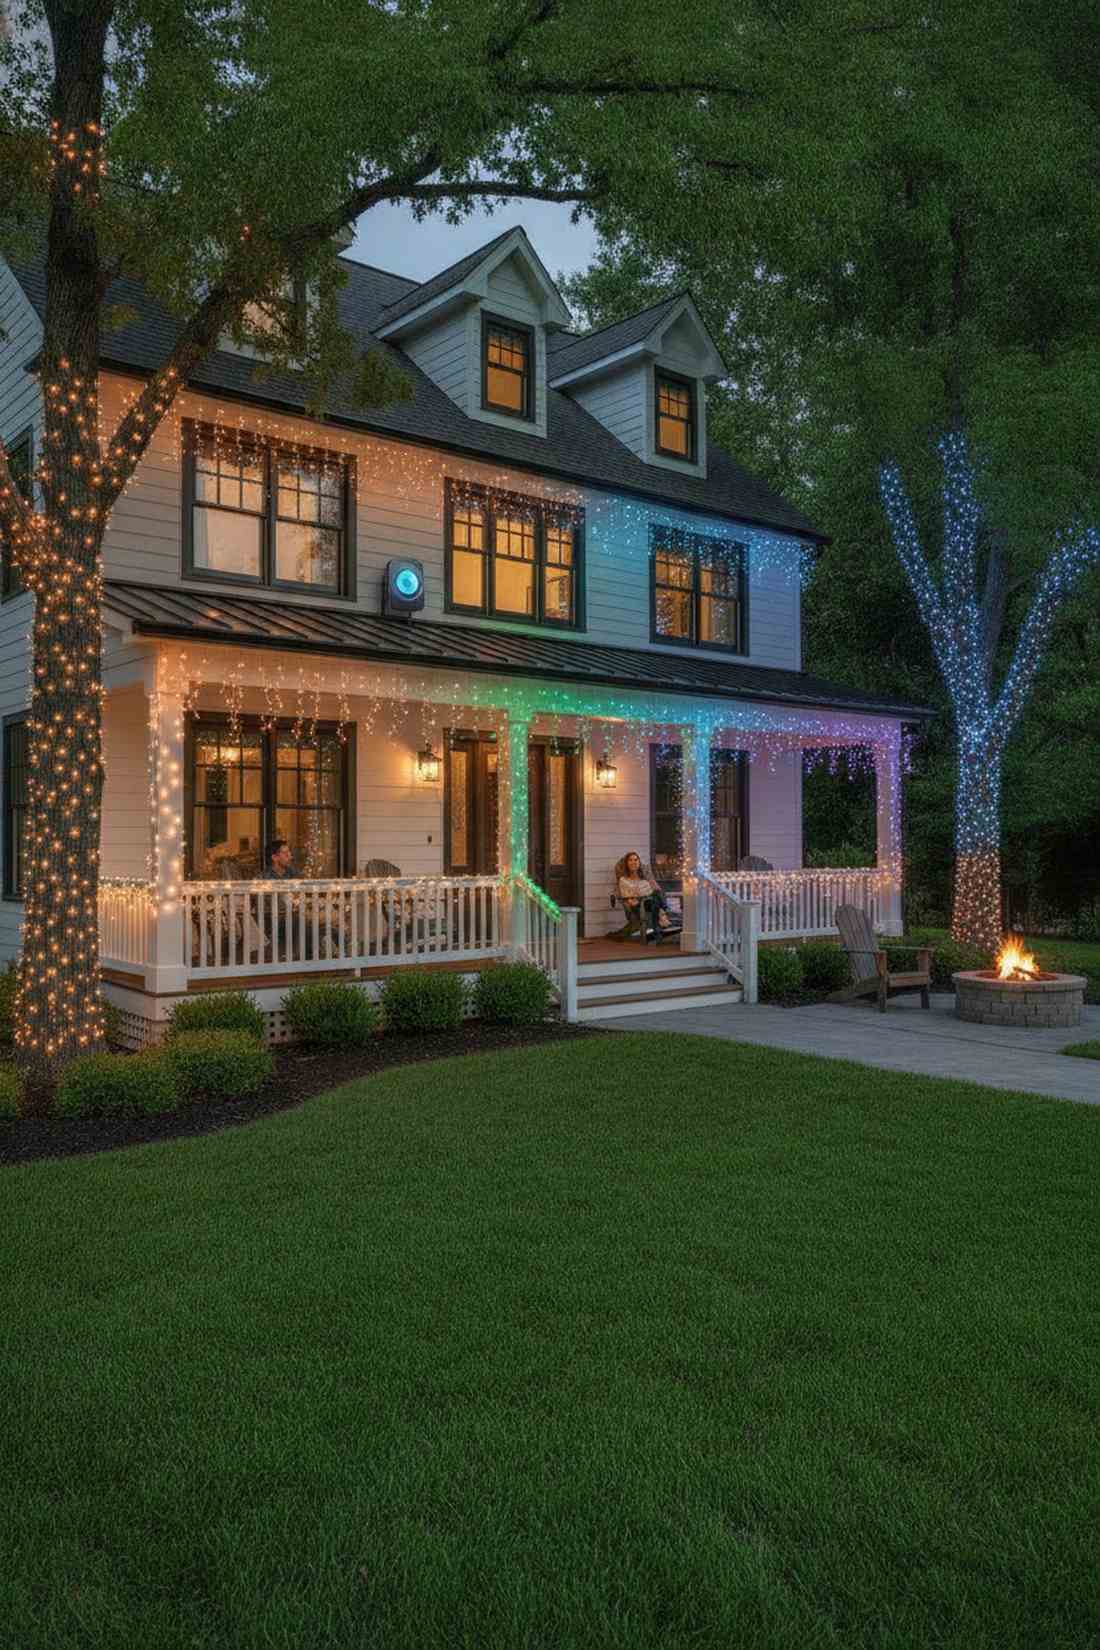
Fairy Lights Xmas Tree Architectural Applications
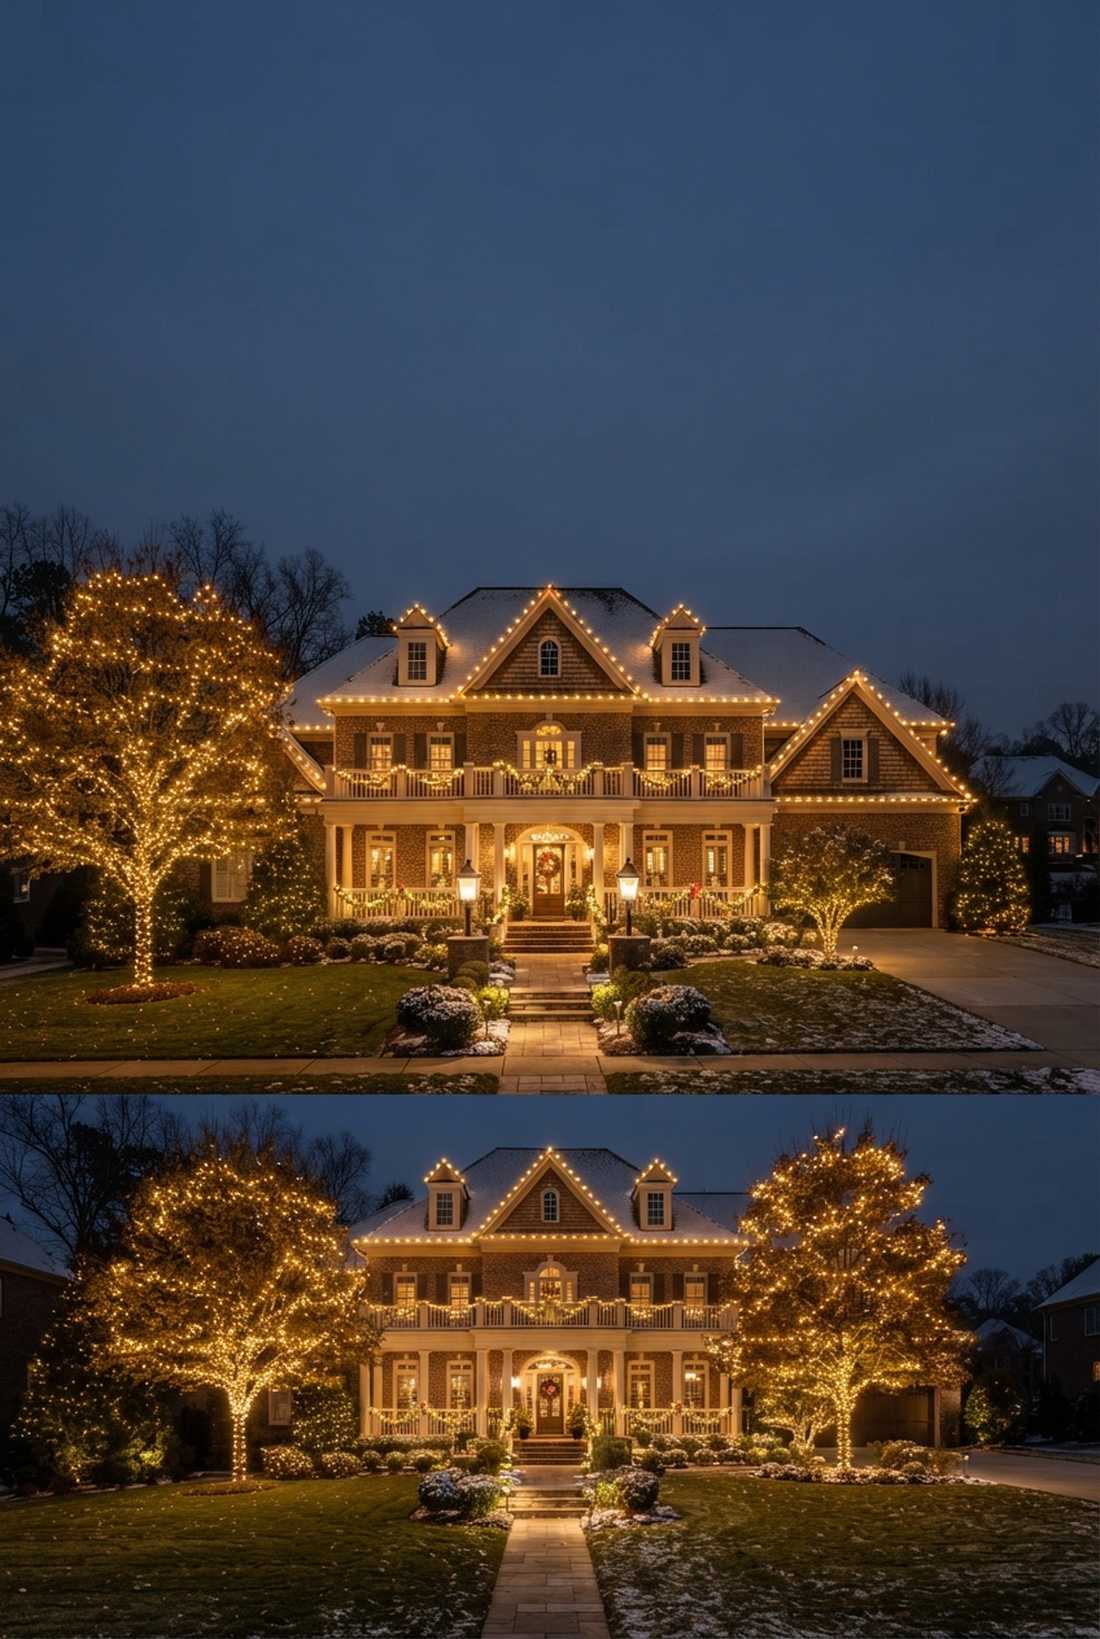
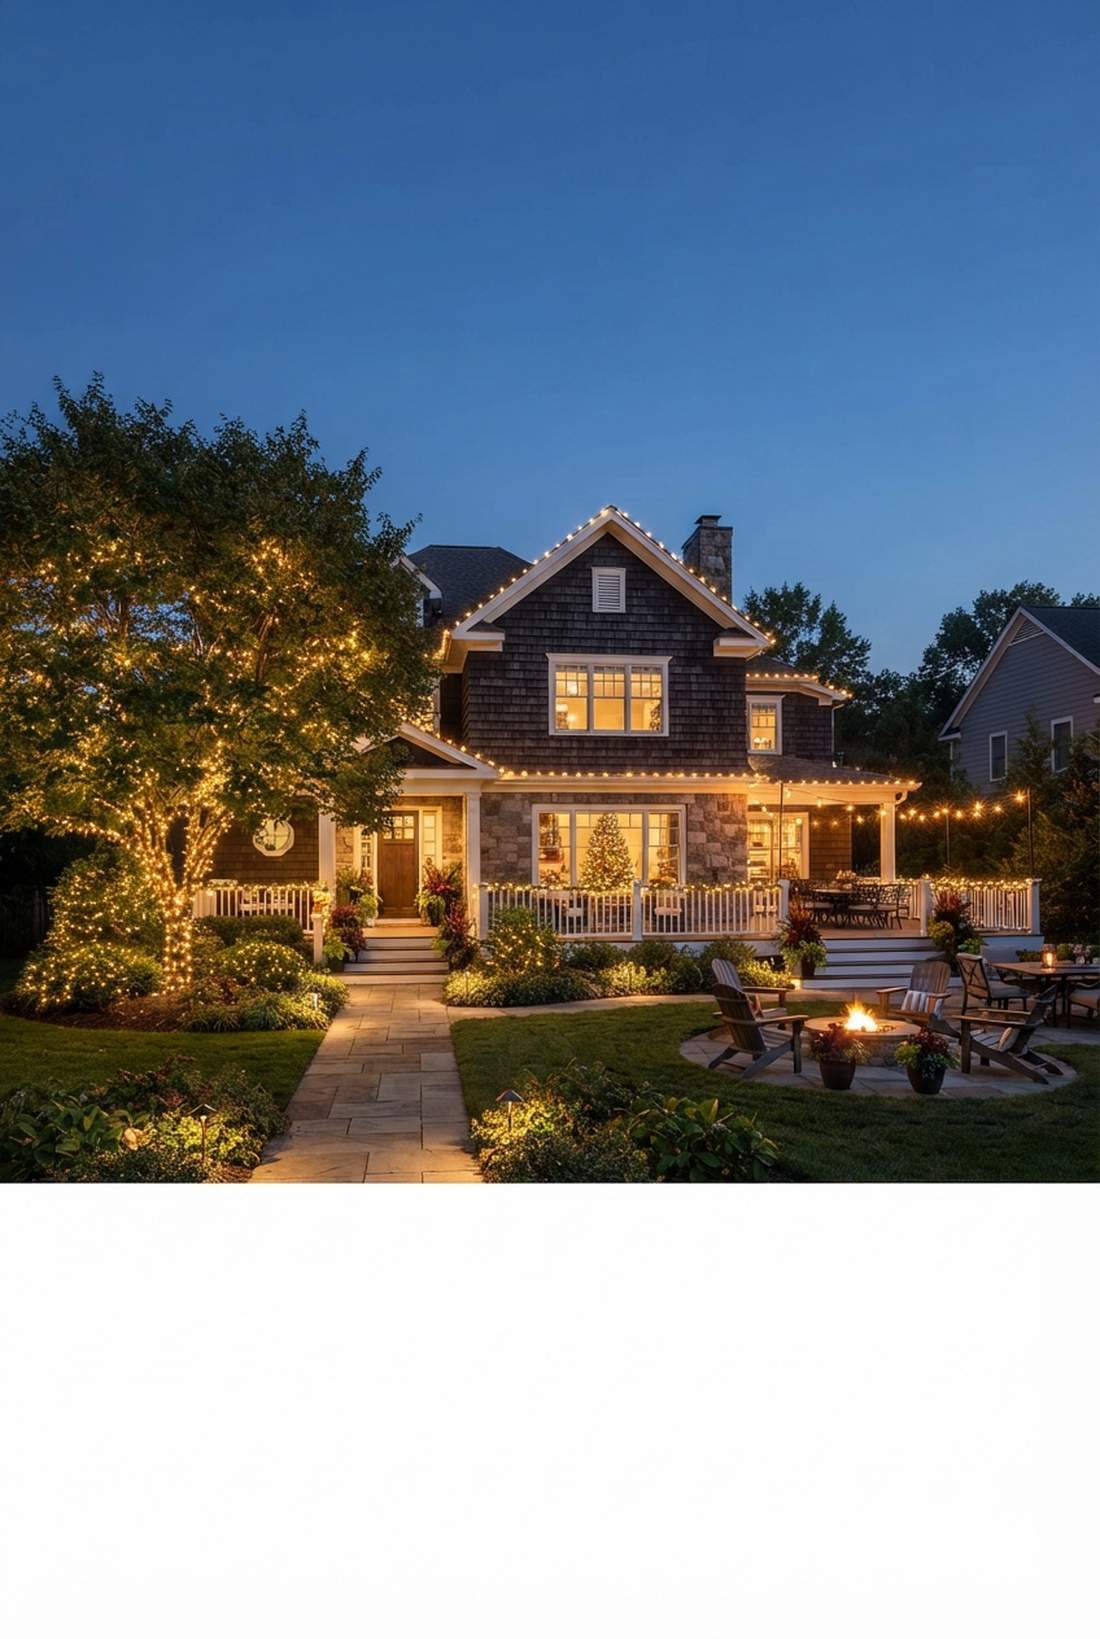
21. Roofline Icicle Draping
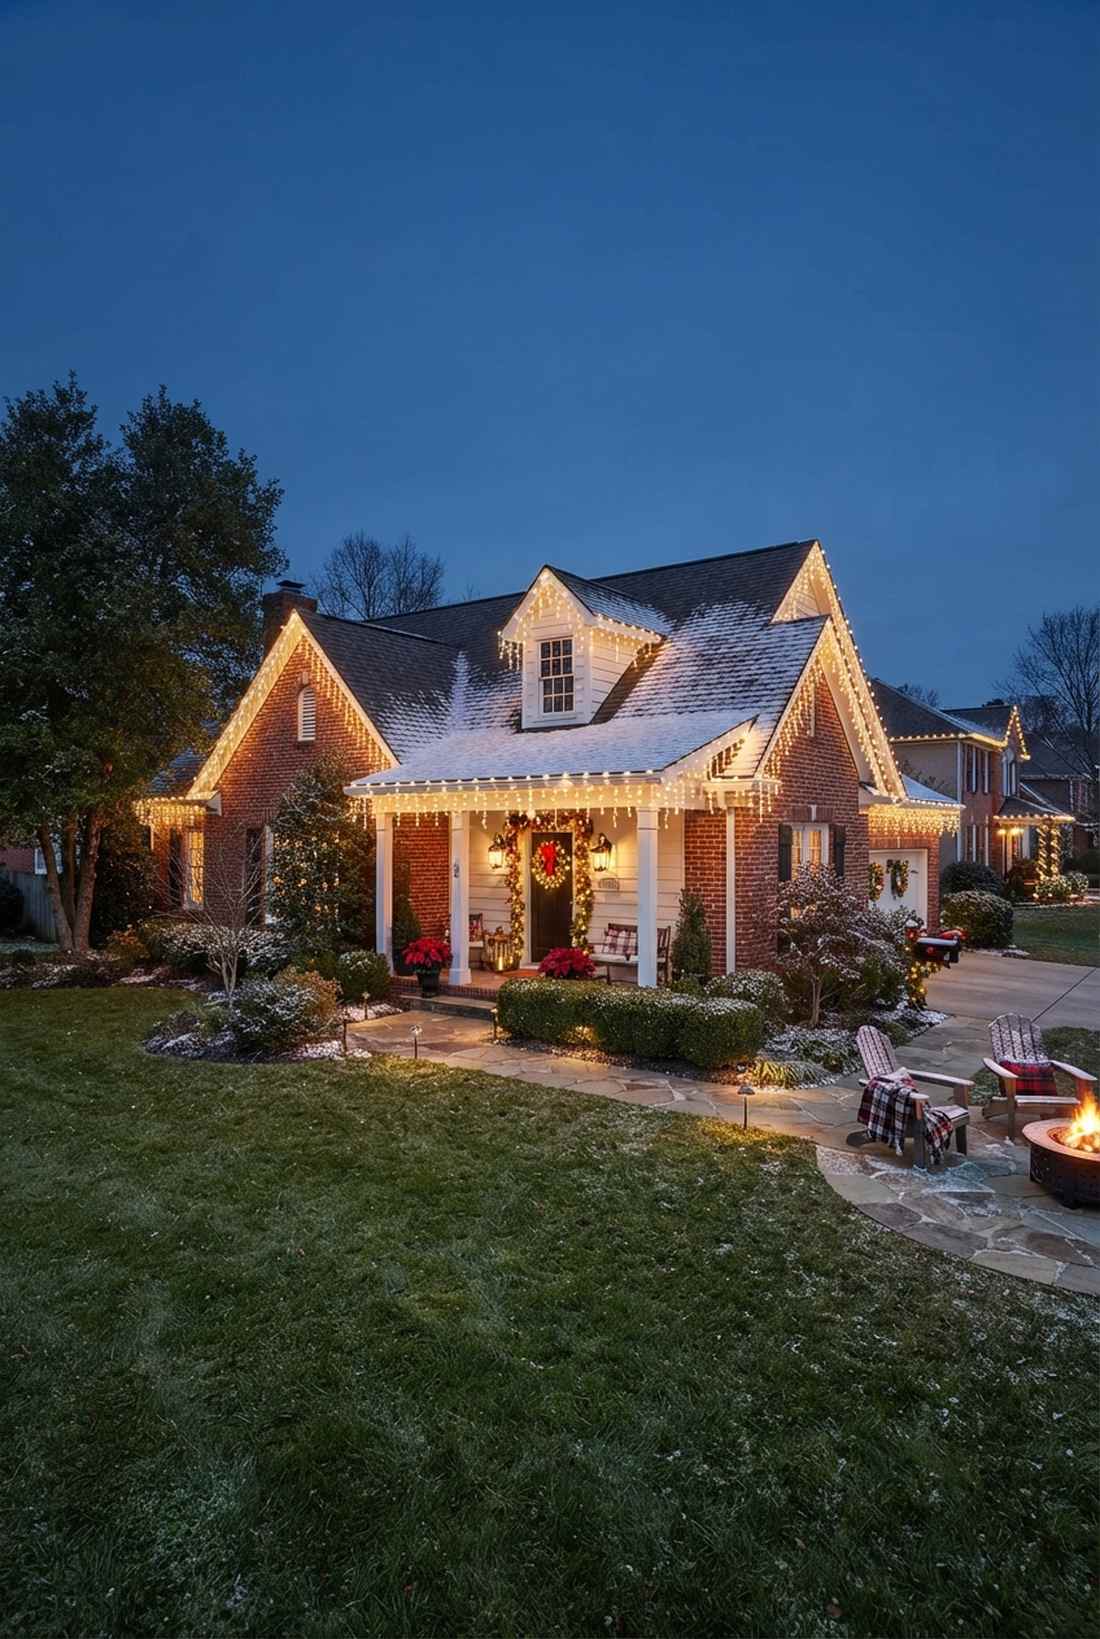
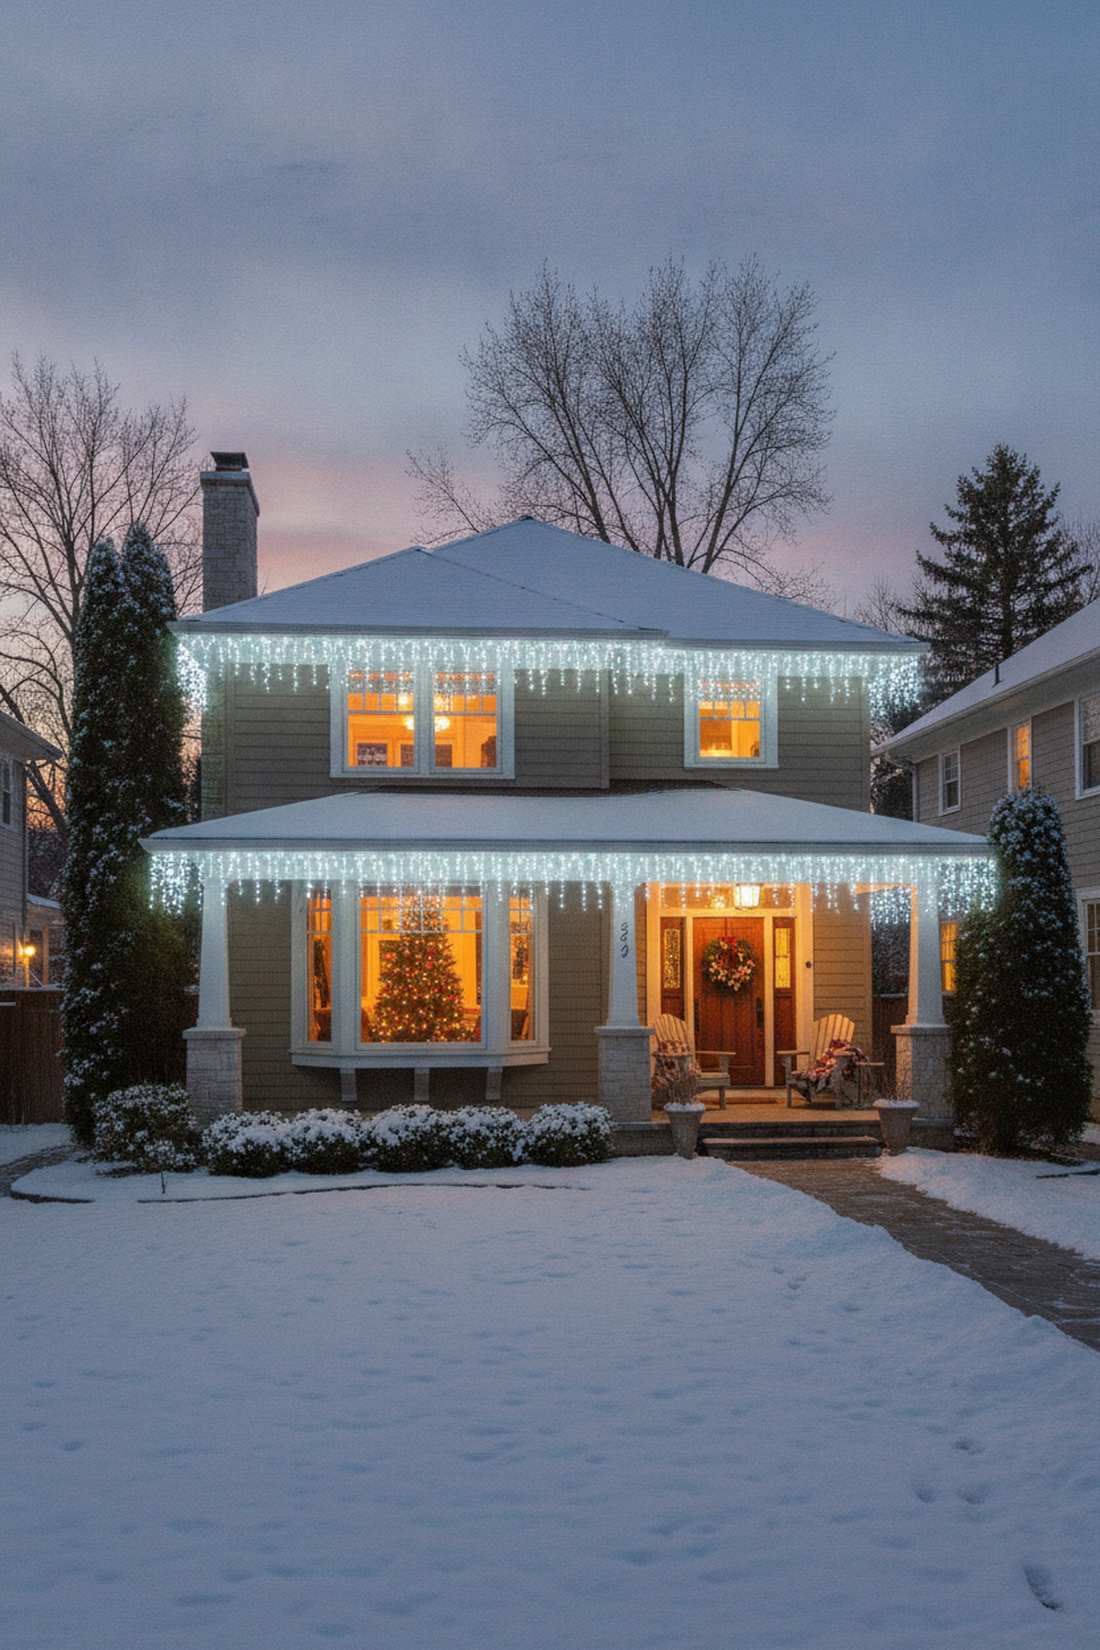
This classic edge glow feels like a pristine gingerbread house frosted in real ice. Cascading eaves lighting is the ultimate finishing touch for prominent front-facing gutters.
Accentuating the roofline drastically increases the perceived square footage of your home from the street. Opting for commercial fairy garden kits prevents the dreaded sagging effect between gutter clips.
A standard single-story roofline runs about $40–$75. Pin this if you love timeless exterior holiday charm.
- Key Materials: Variable-drop icicle strands
- Vibe / Style: Classic American holiday
- Difficulty: Ladder-heavy safety hazard
- Budget Breakdown: Icicle strands: $50 | Gutter clips: $15
- Creator’s Tip: Space your clips every 12 inches exactly to keep the horizontal baseline perfectly tight.
- Smart Sourcing: pre-cut variable icicle kits and heavy-duty gutter clips.
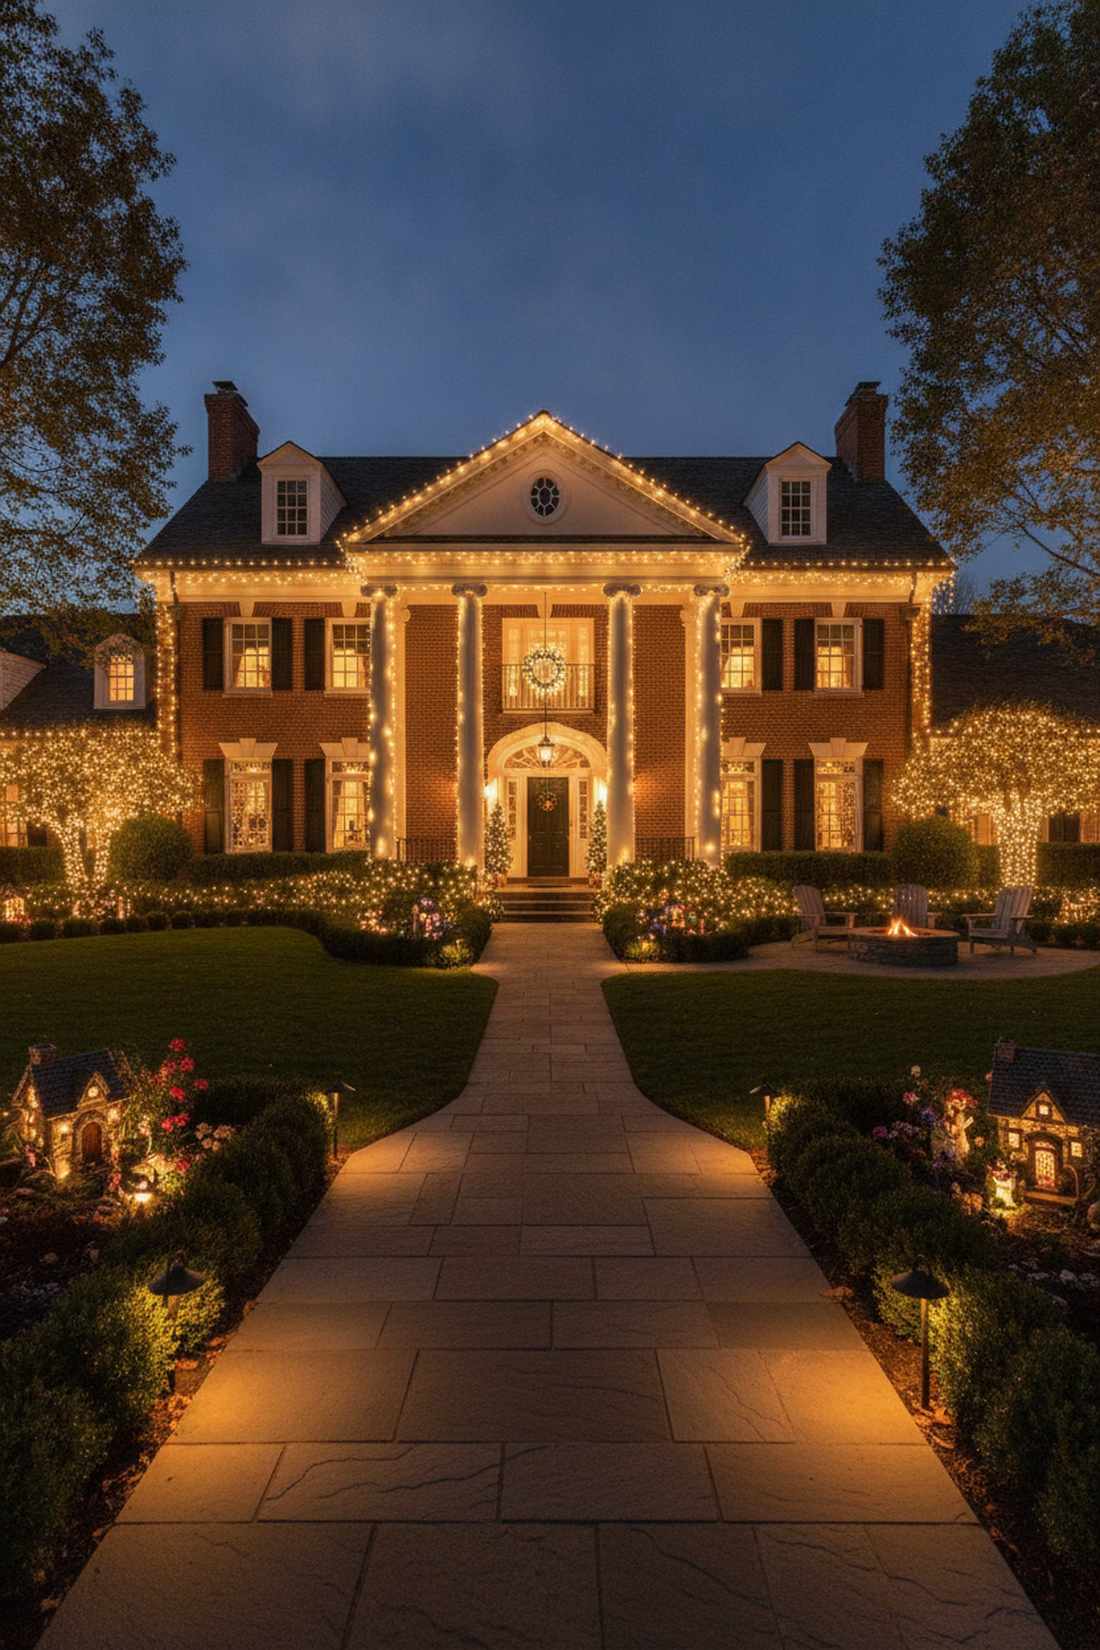
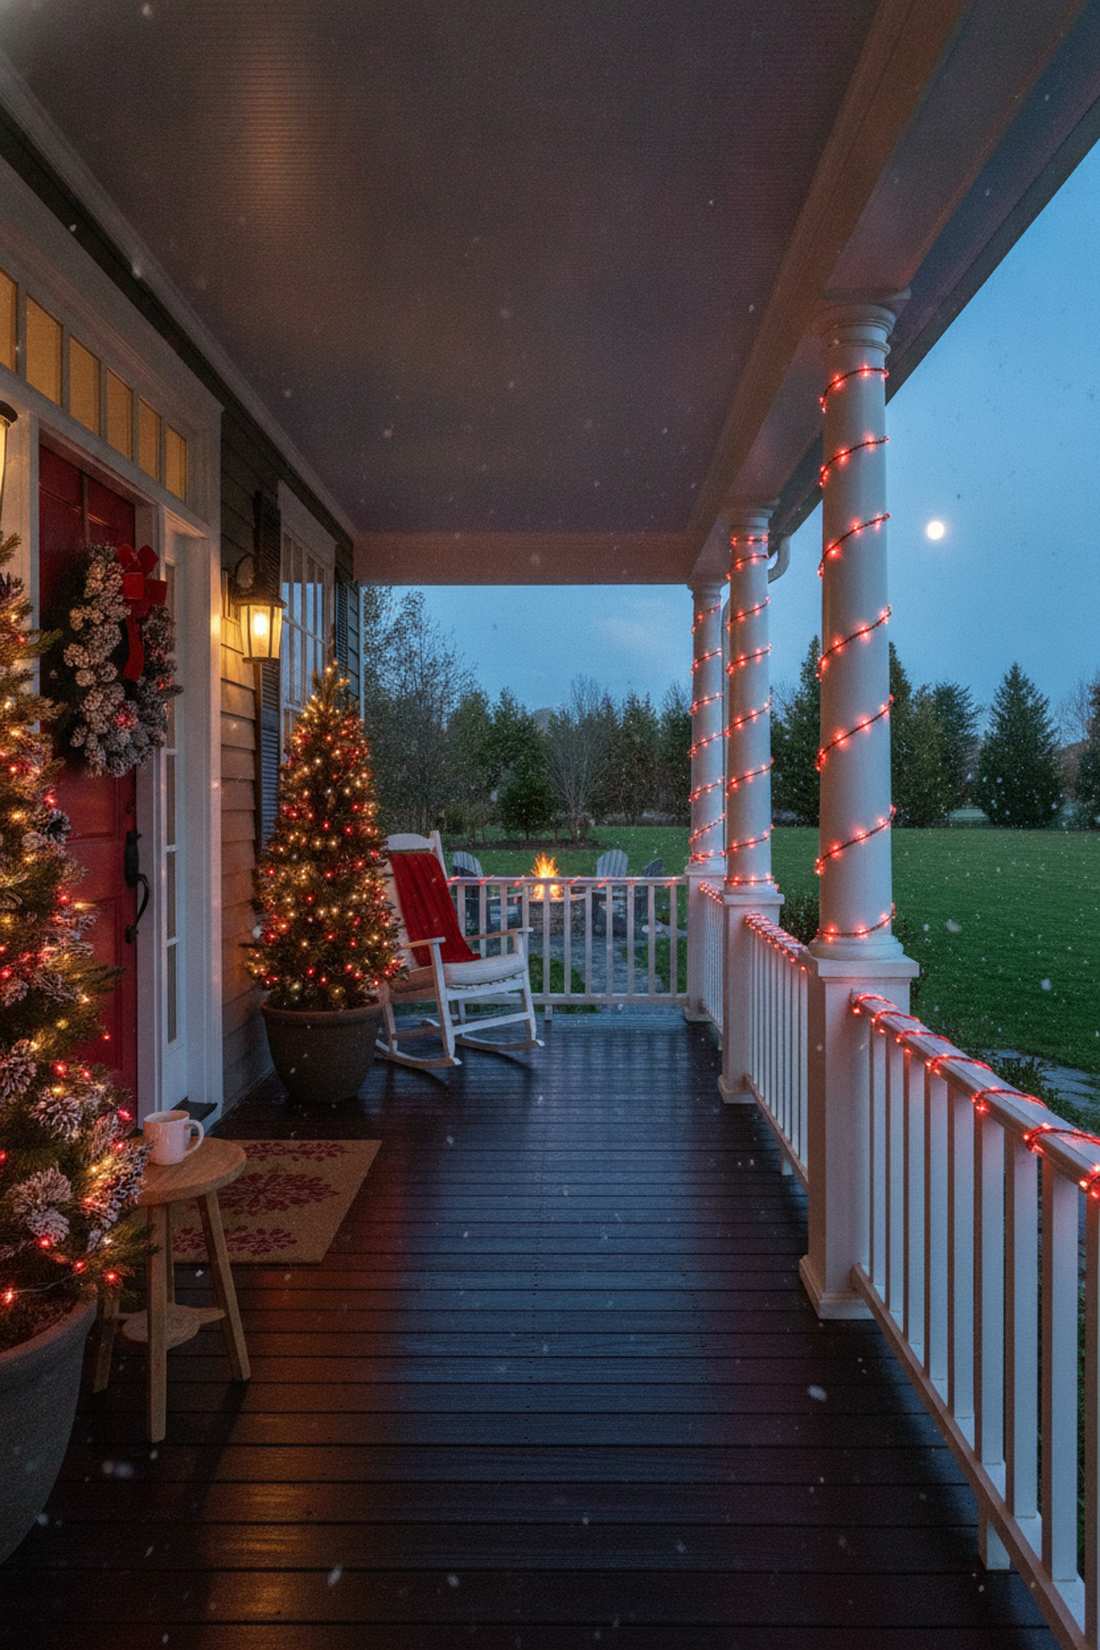
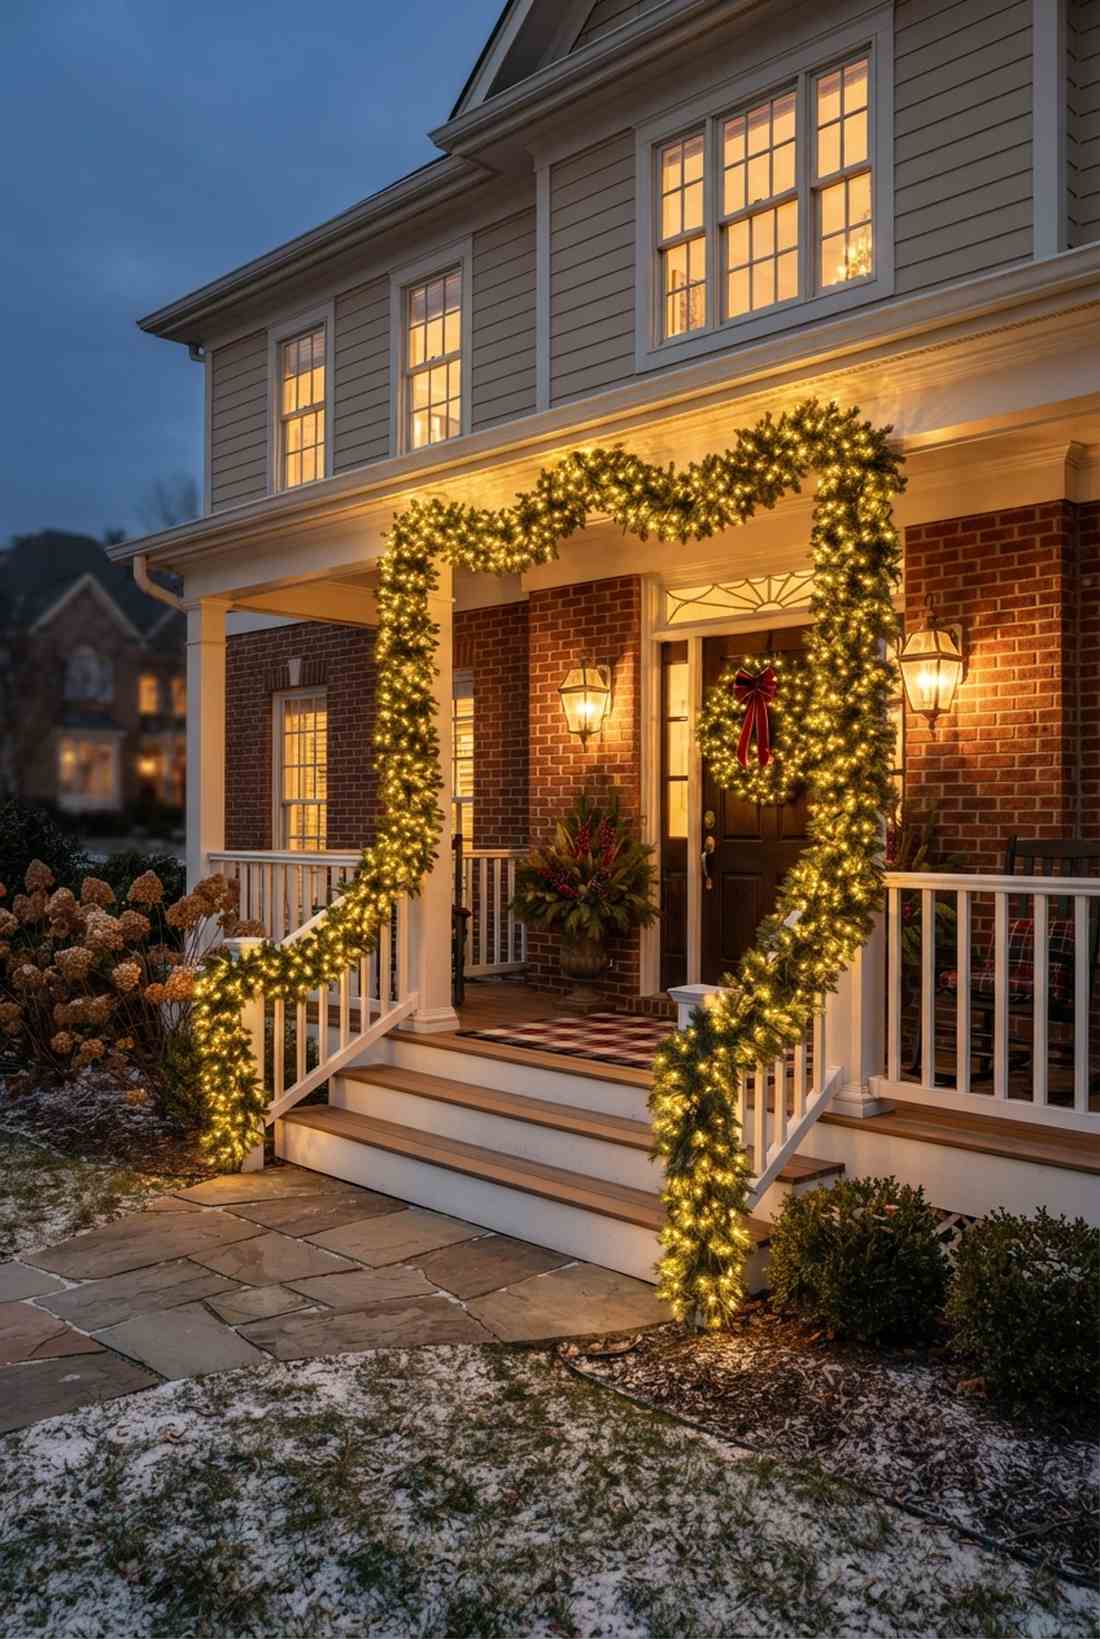
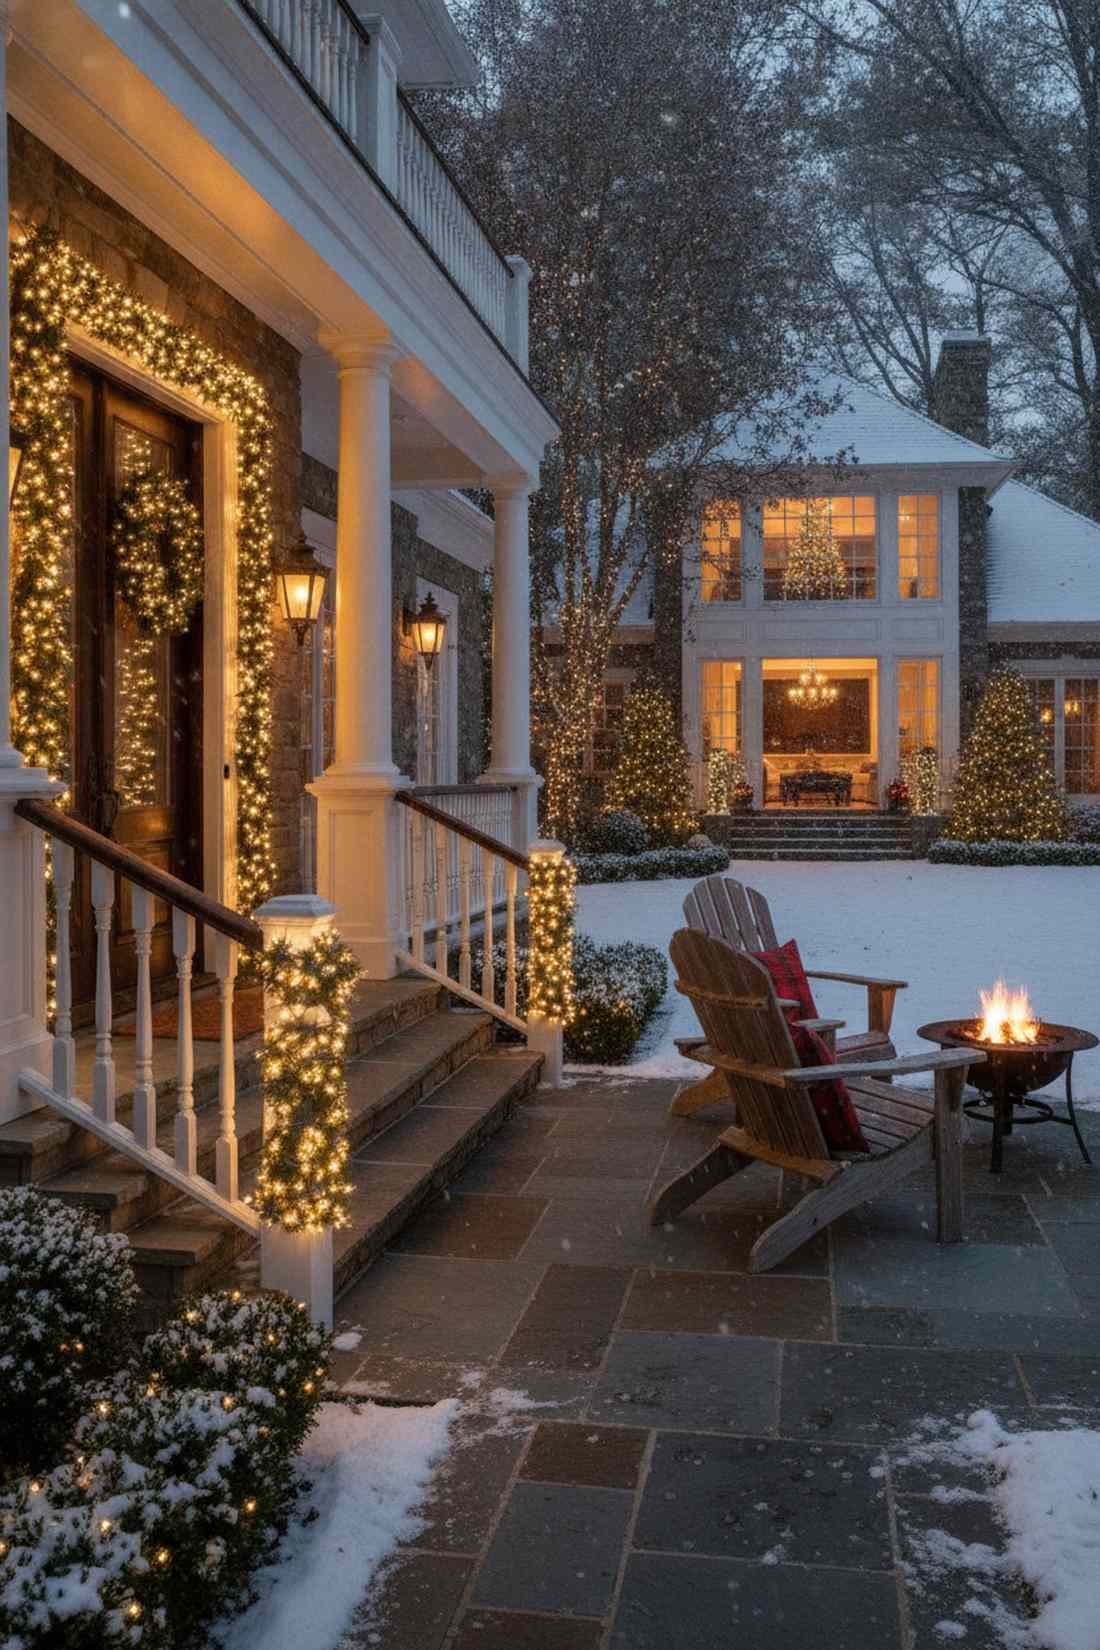
22. Column Spiral Wraps


Approaching your porch feels like walking through a grand, glowing portico. Ascending architectural wraps are an absolute must for framing a traditional front door setup.
Wrapping harsh structural columns softens the facade and creates an intensely welcoming, expensive threshold. Sourcing low-heat fairy lights xmas tree strands ensures your painted columns don’t blister.
You can execute dual column wraps for just $20–$40.
- Key Materials: Standard tight-wire LEDs
- Vibe / Style: Welcoming grand entrance
- Difficulty: Quick wrapping
- Budget Breakdown: Wire LEDs: $25 | Clear tape: $5
- Creator’s Tip: Tape the wire flat to the back side of the column so the spiral appears totally seamless from the street.
- Smart Sourcing: tight-wire column wrapping packs and residue-free clear mounting tape.
23. Window Frame Outlining
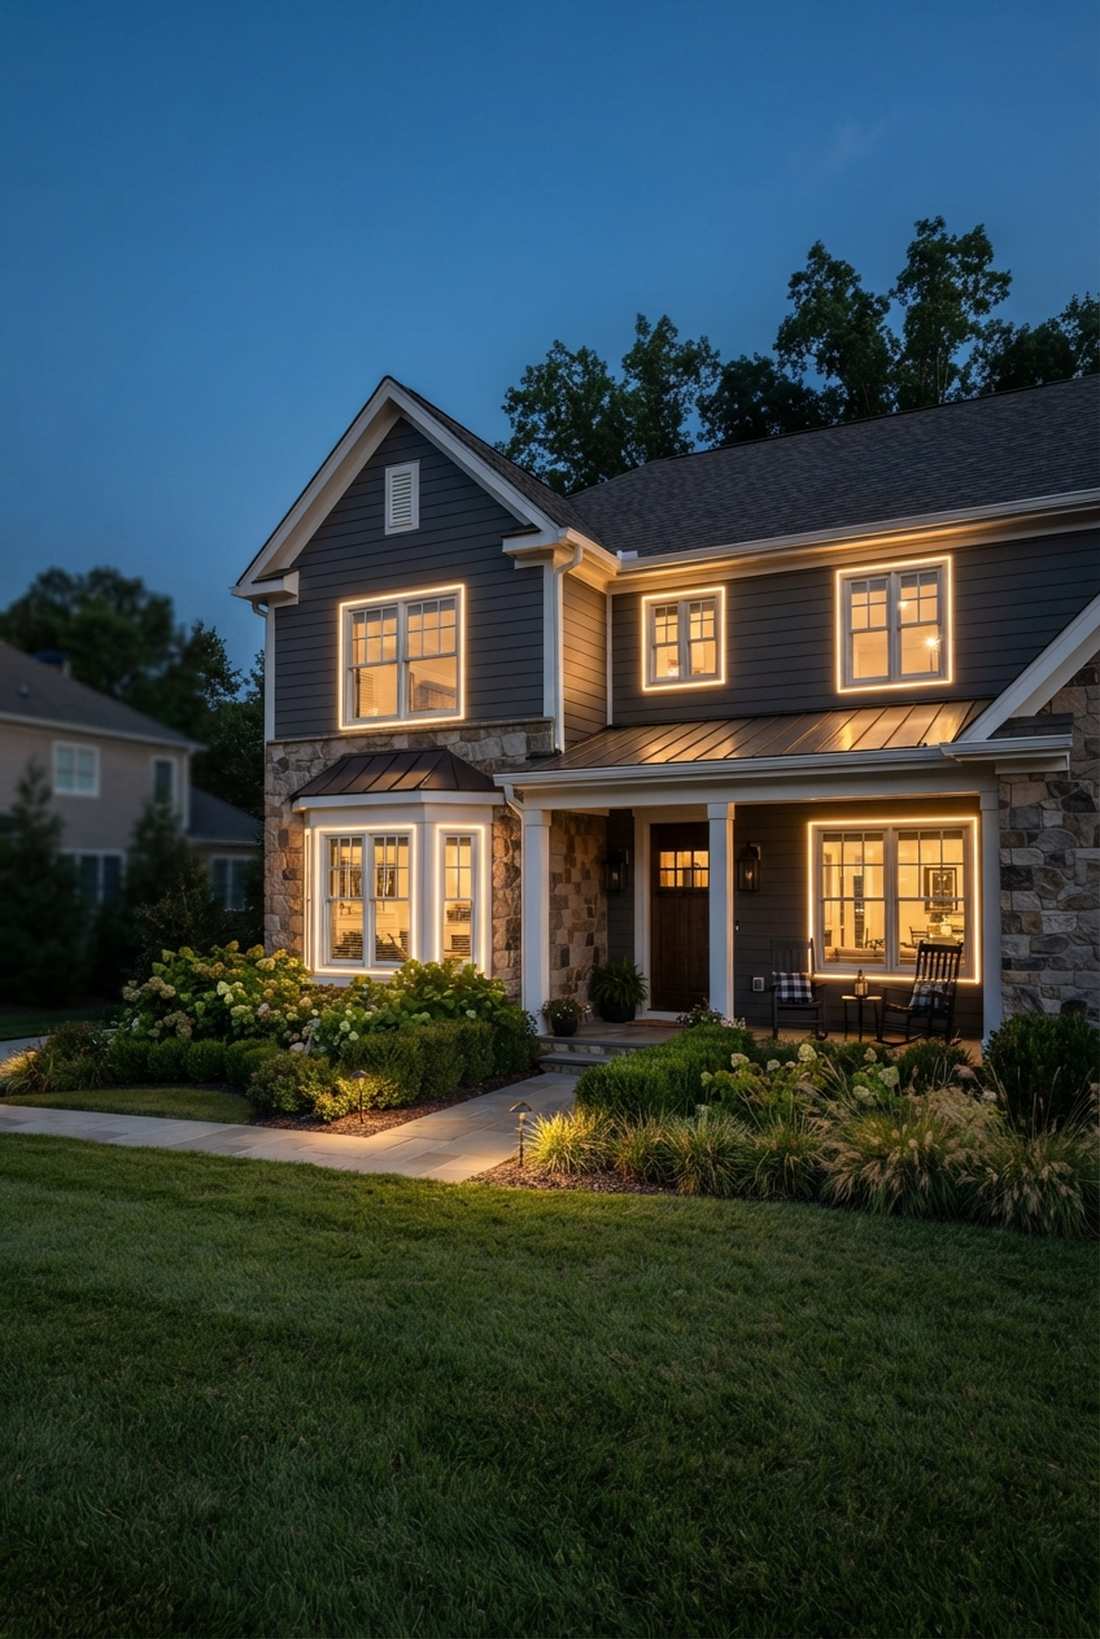
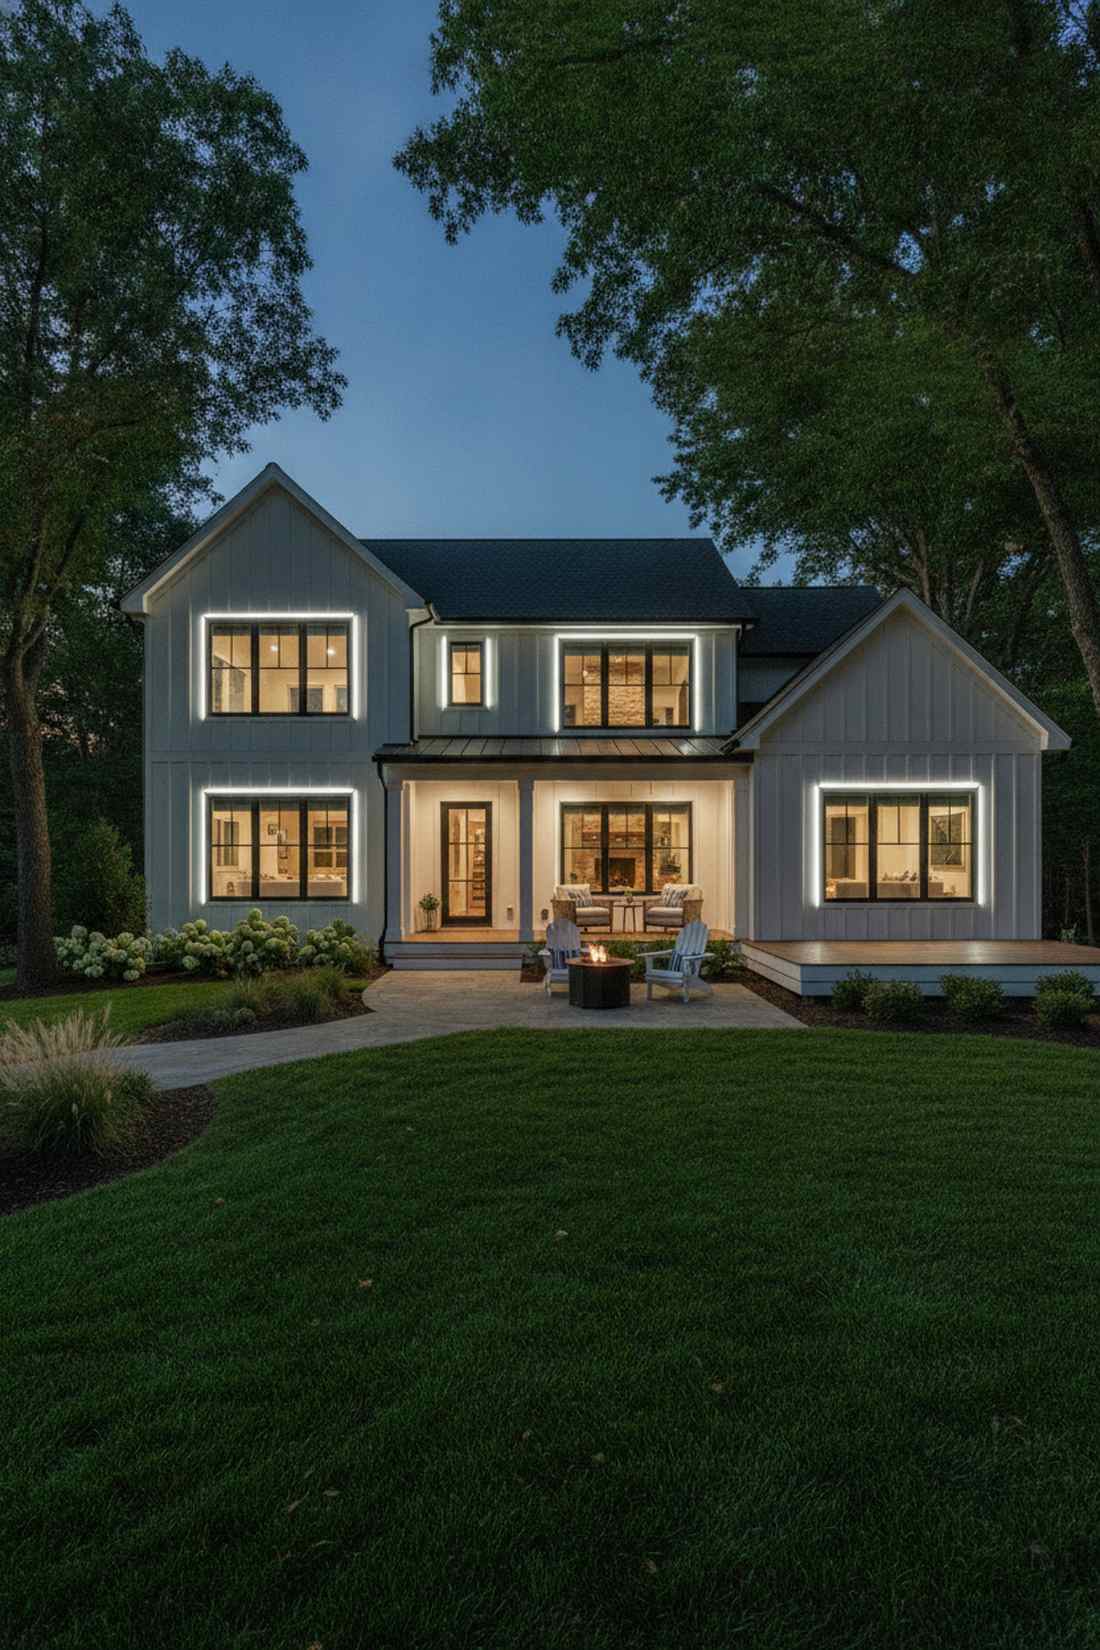
Looking at the house feels like staring at glowing picture frames highlighting cozy interior warmth. Perimeter glass tracing is phenomenal for both interior enjoyment and massive street appeal.
Perfectly rigid glowing rectangles break up blank siding and add a highly coordinated, geometric rhythm to the house. Using specialized adhesive terrarium accessories keeps the frames perfectly straight without drilling holes.
It’s a fast upgrade that completely changes the vibe for only $30–$50. Save this for damage-free decorating.
- Key Materials: Adhesive-backed LED strips or tight wire
- Vibe / Style: Crisp geometric precision
- Difficulty: Easy window-level access
- Budget Breakdown: Lights: $35 | Clips: $10
- Creator’s Tip: Run the wire strictly along the interior trim recess to hide the unlit cables during the day.
- Smart Sourcing: adhesive-backed LED starter kits and damage-free paint clips.
Before you ignore your backyard, check out how this simple overhead trick makes your patio look like a $500/night resort…
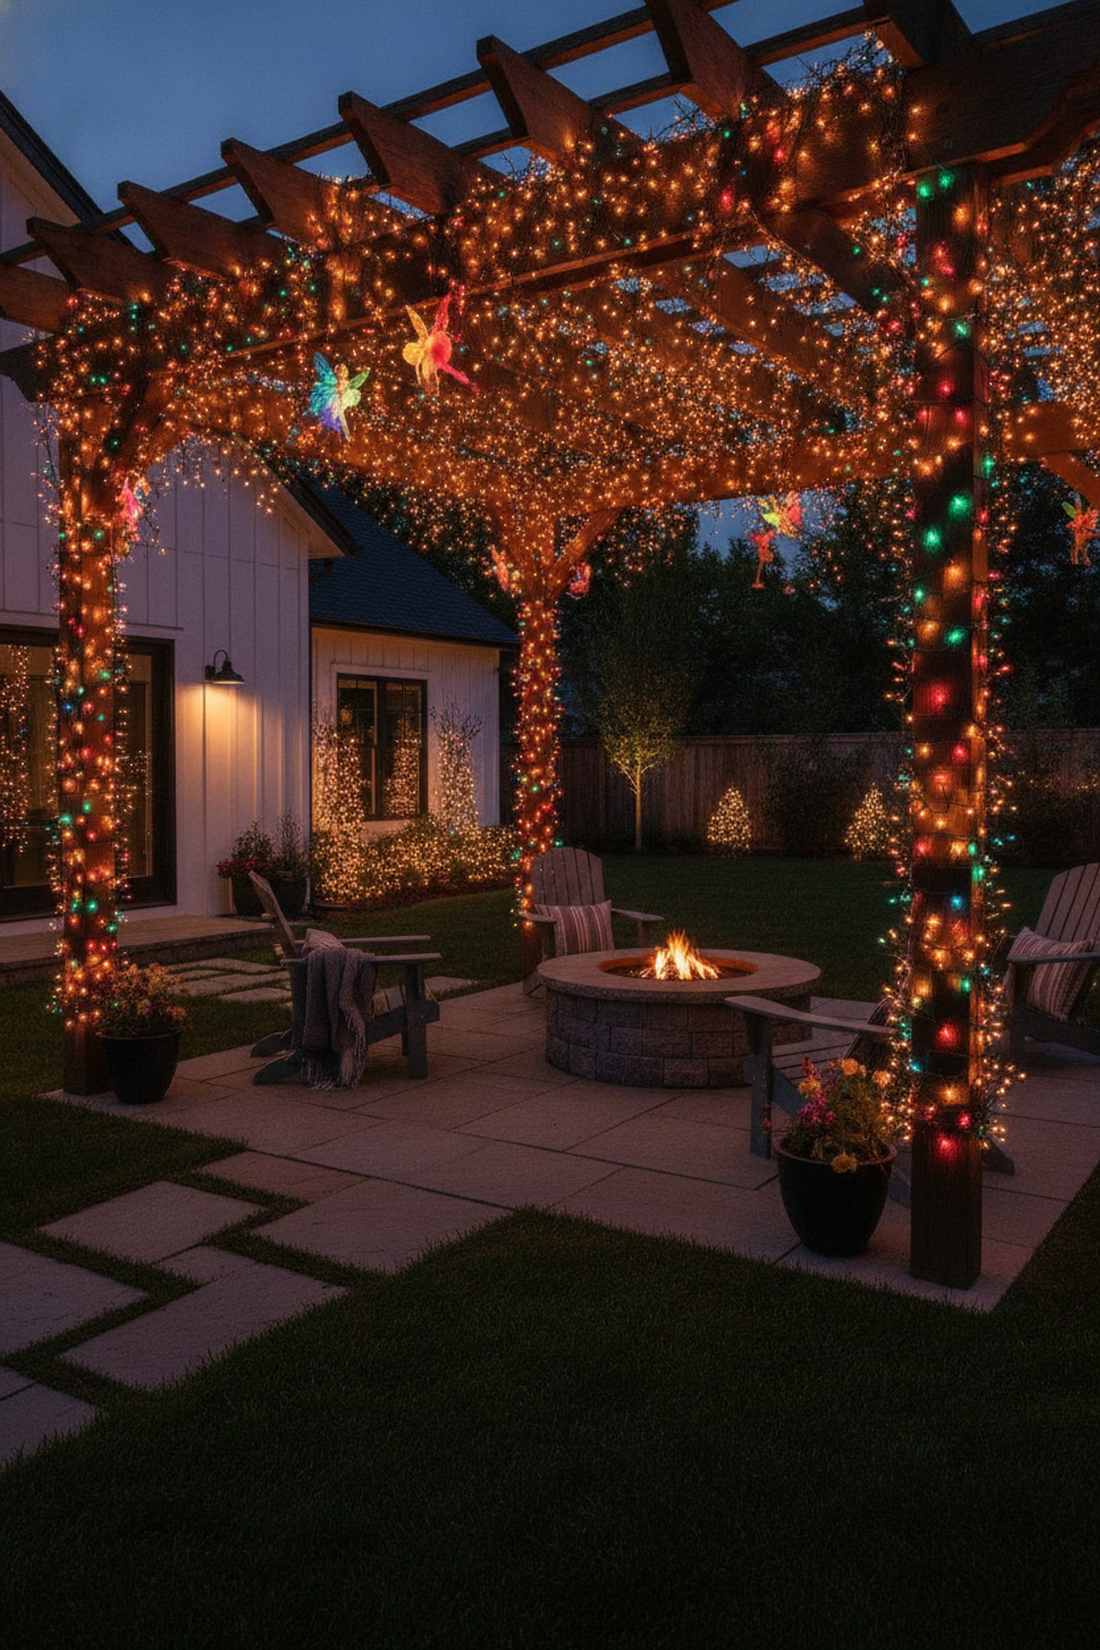
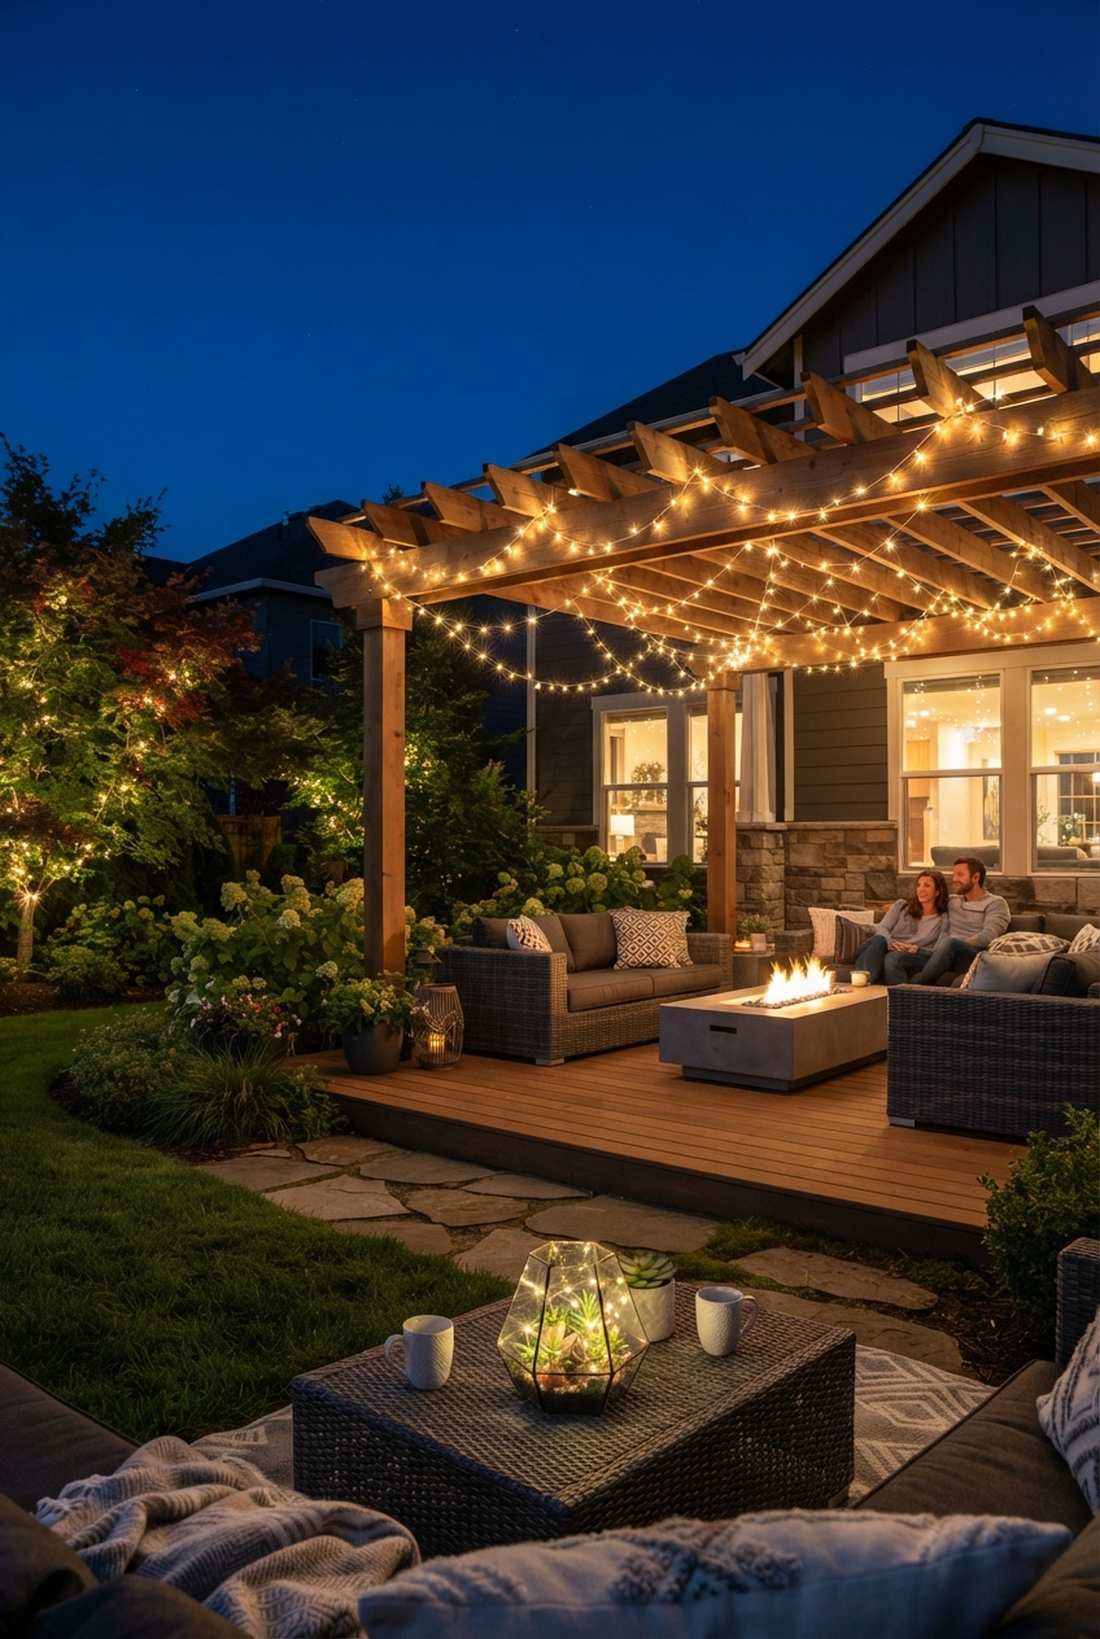
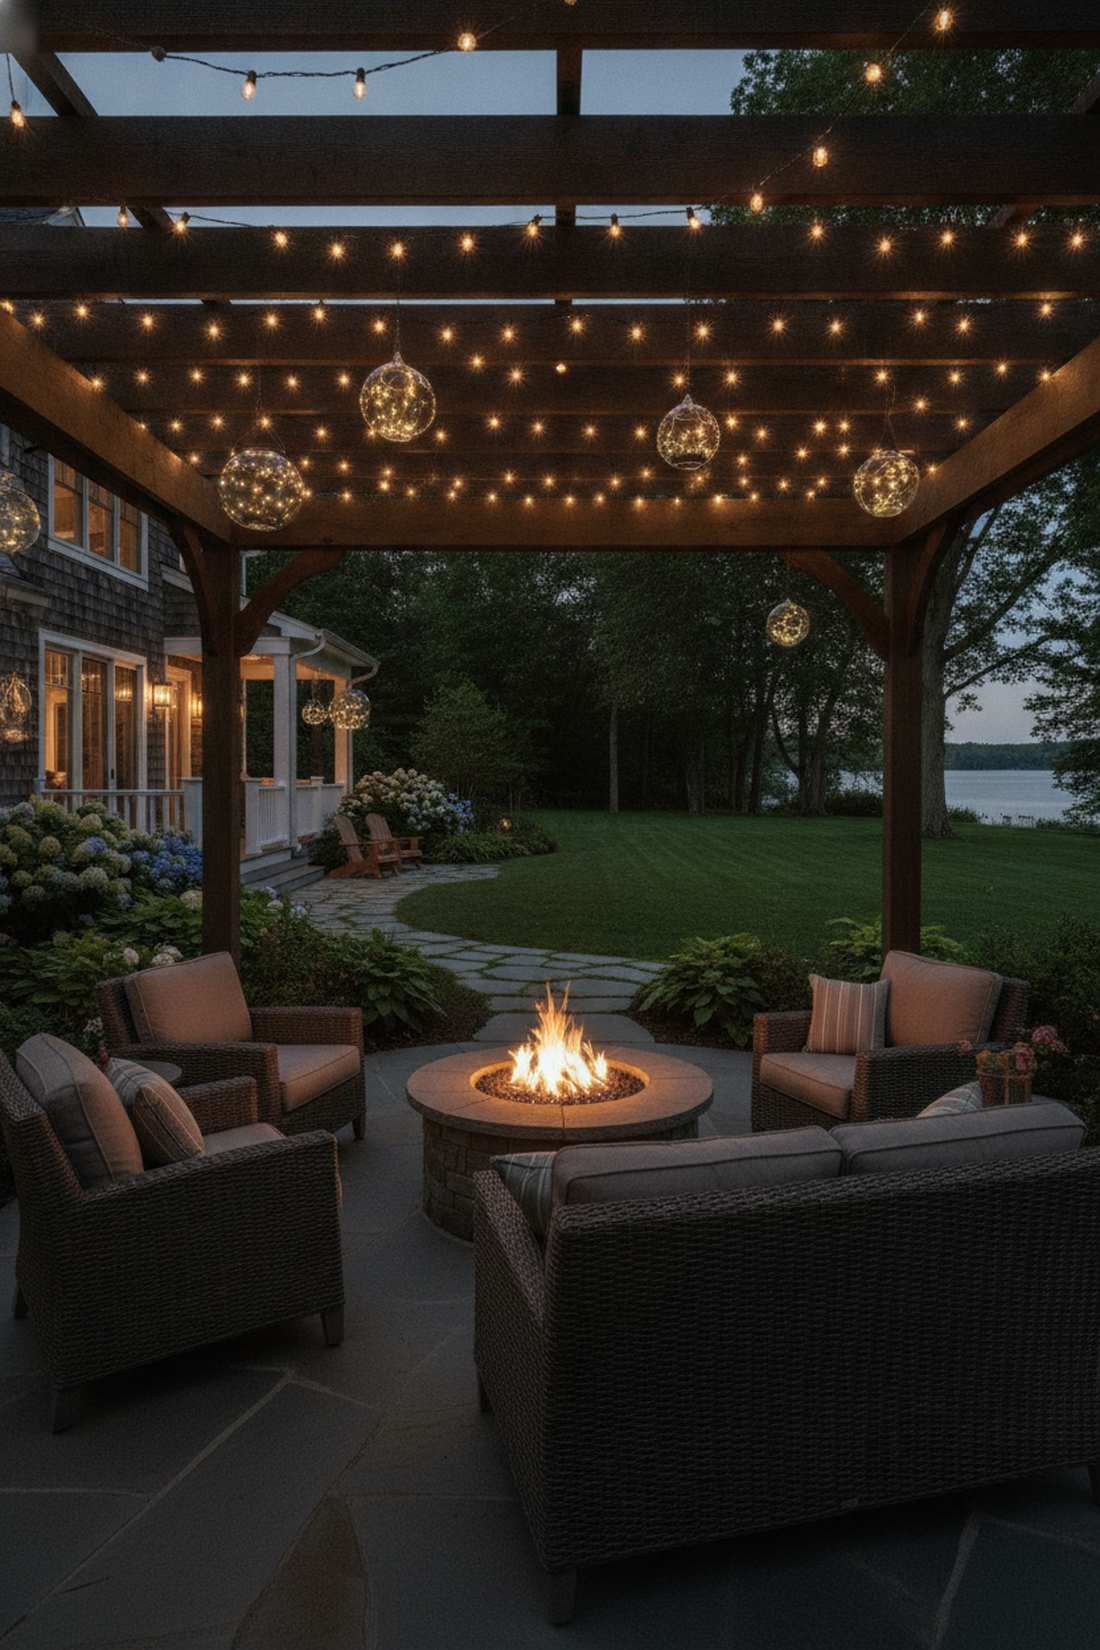
24. Pergola Canopy Weaving
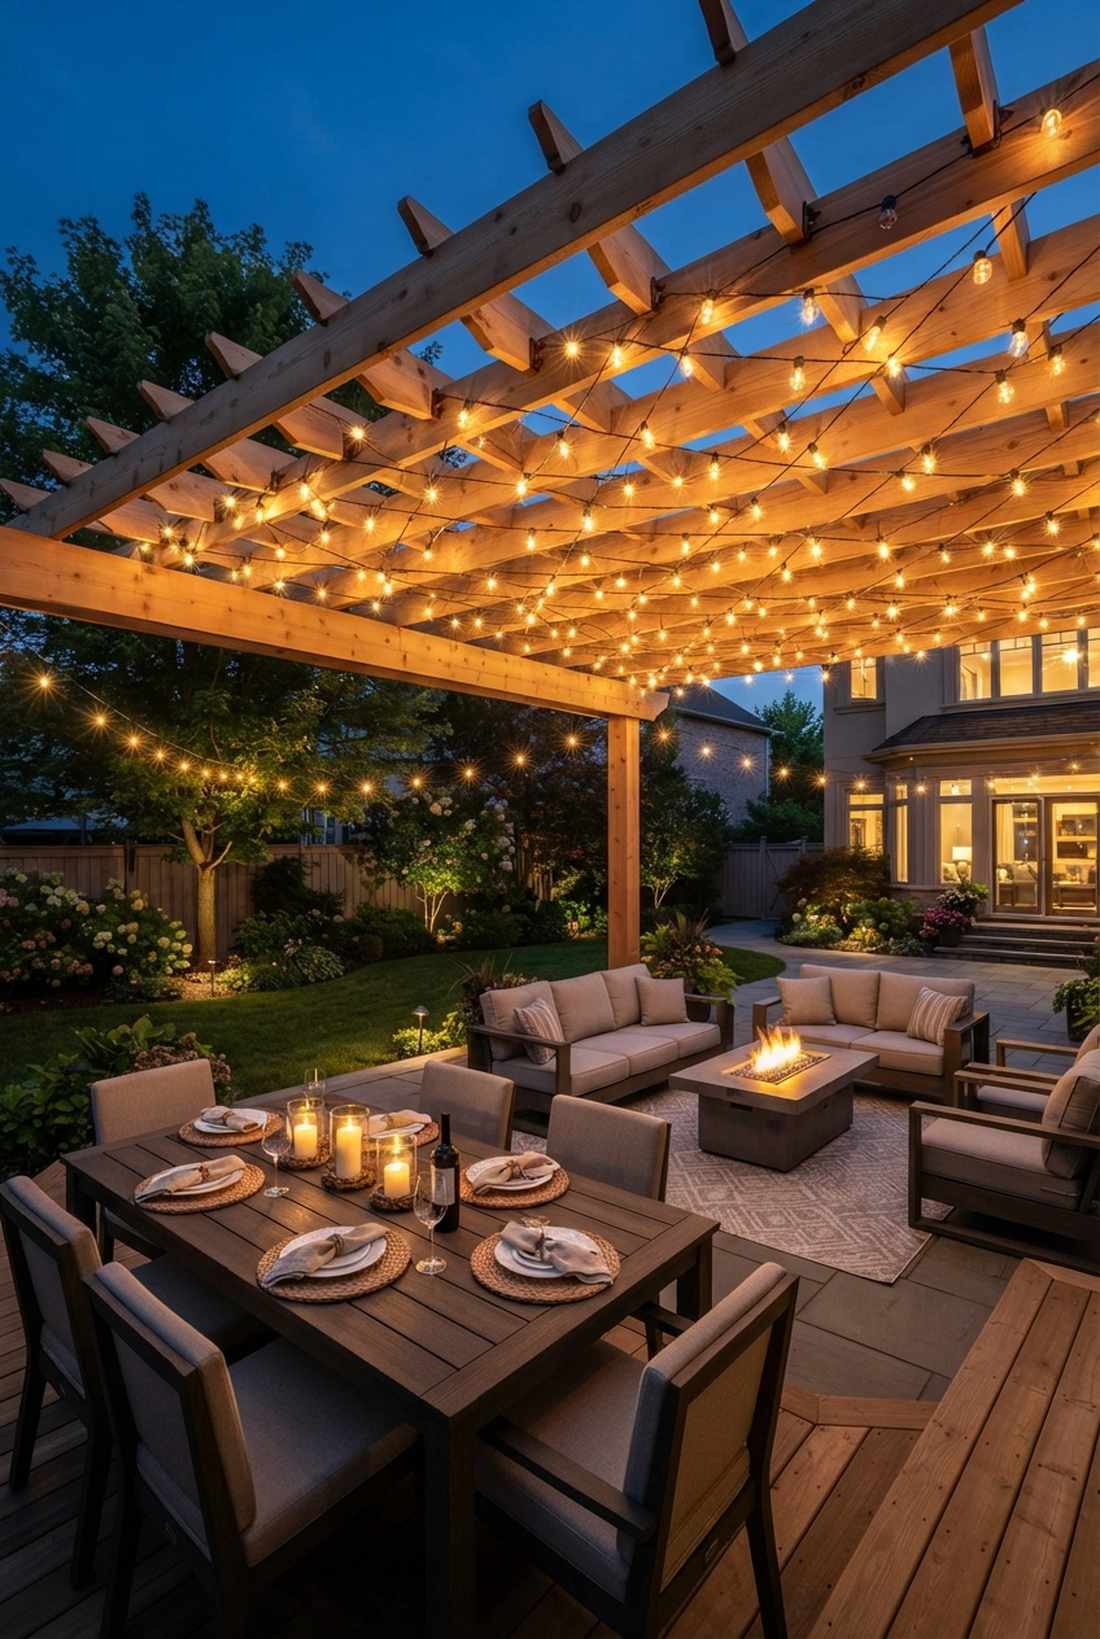
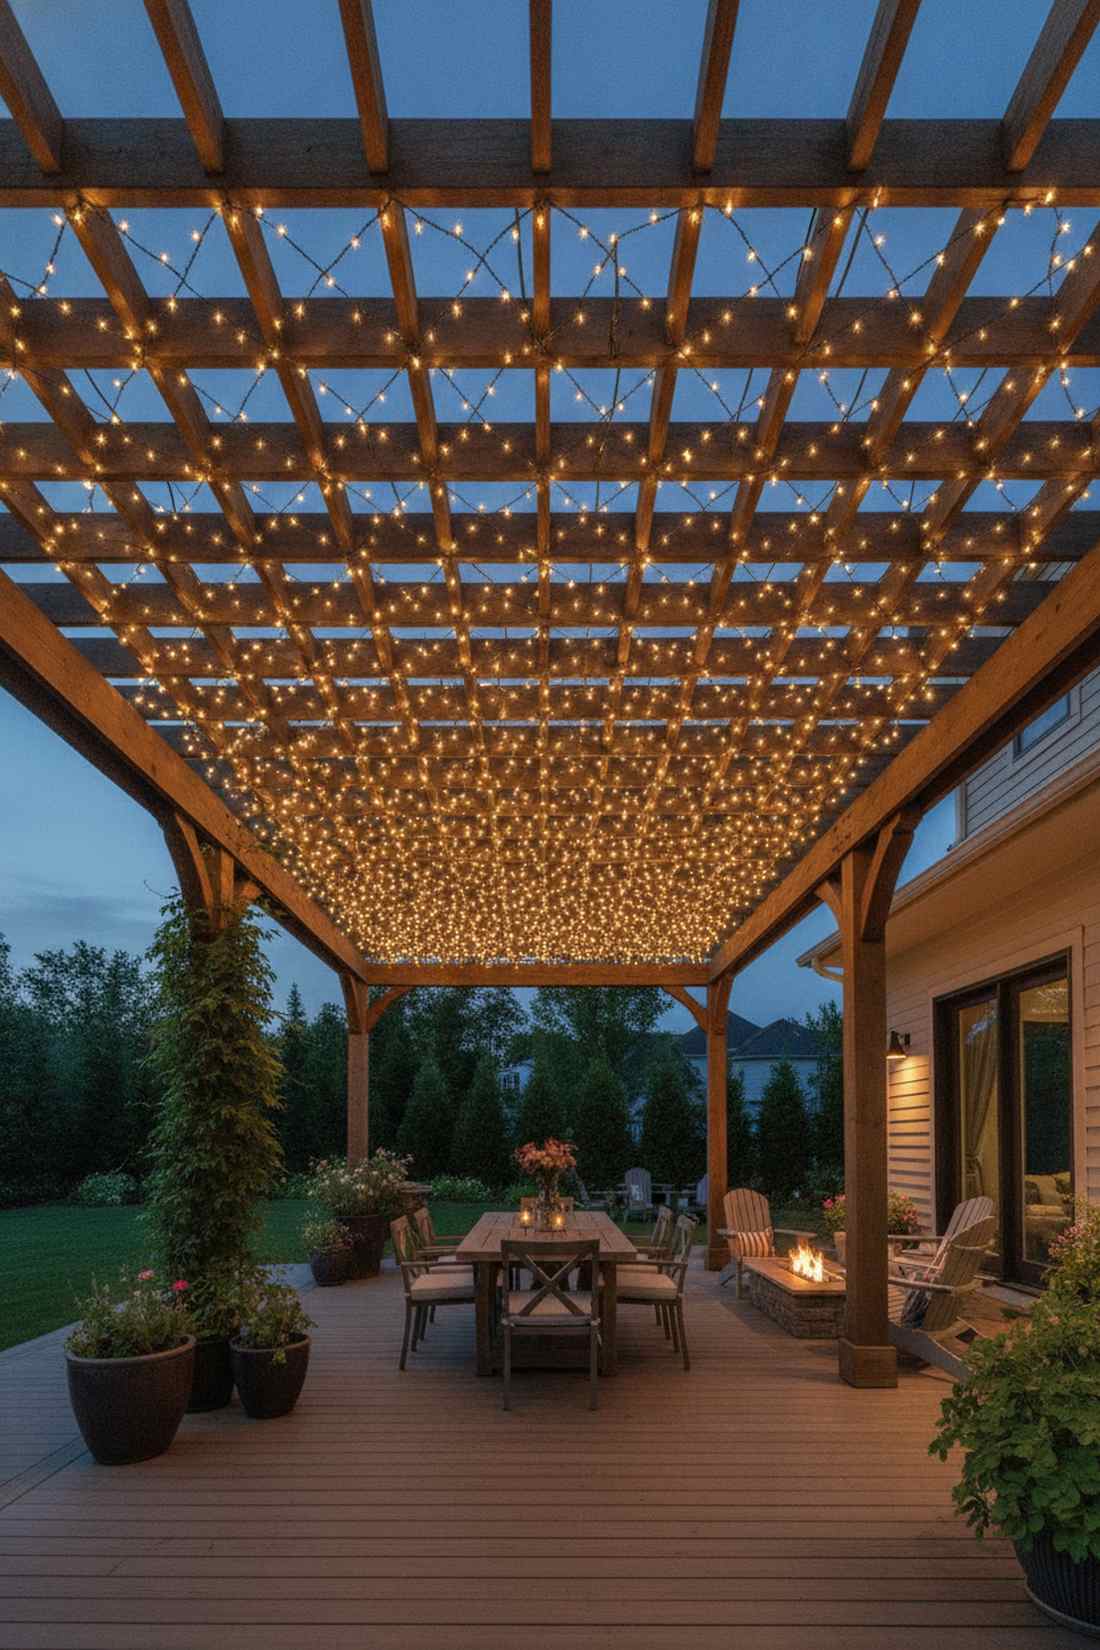
Sitting under this glow feels like dining at a 5-star Mediterranean rooftop lounge. Overhead rafter weaving turns dead winter patios into highly usable, luxurious entertaining spaces.
Running lights parallel through the slatted wood creates a stunning illuminated ceiling that feels cozy and expansive. Grabbing heavy-duty outdoor fairy lights christmas decor ensures the canopy survives freezing rain.
You can easily pull this off for around $45–$80.
- Key Materials: Edison-style fairy bulbs
- Vibe / Style: Upscale outdoor lounge
- Difficulty: Overhead ladder work
- Budget Breakdown: Strands: $55 | Screw hooks: $10
- Creator’s Tip: Crisscross the strands in an X-pattern between rafters for a denser, star-like canopy.
- Smart Sourcing: commercial overhead starter kits and rust-proof screw hooks.
25. Stair Railing Threading
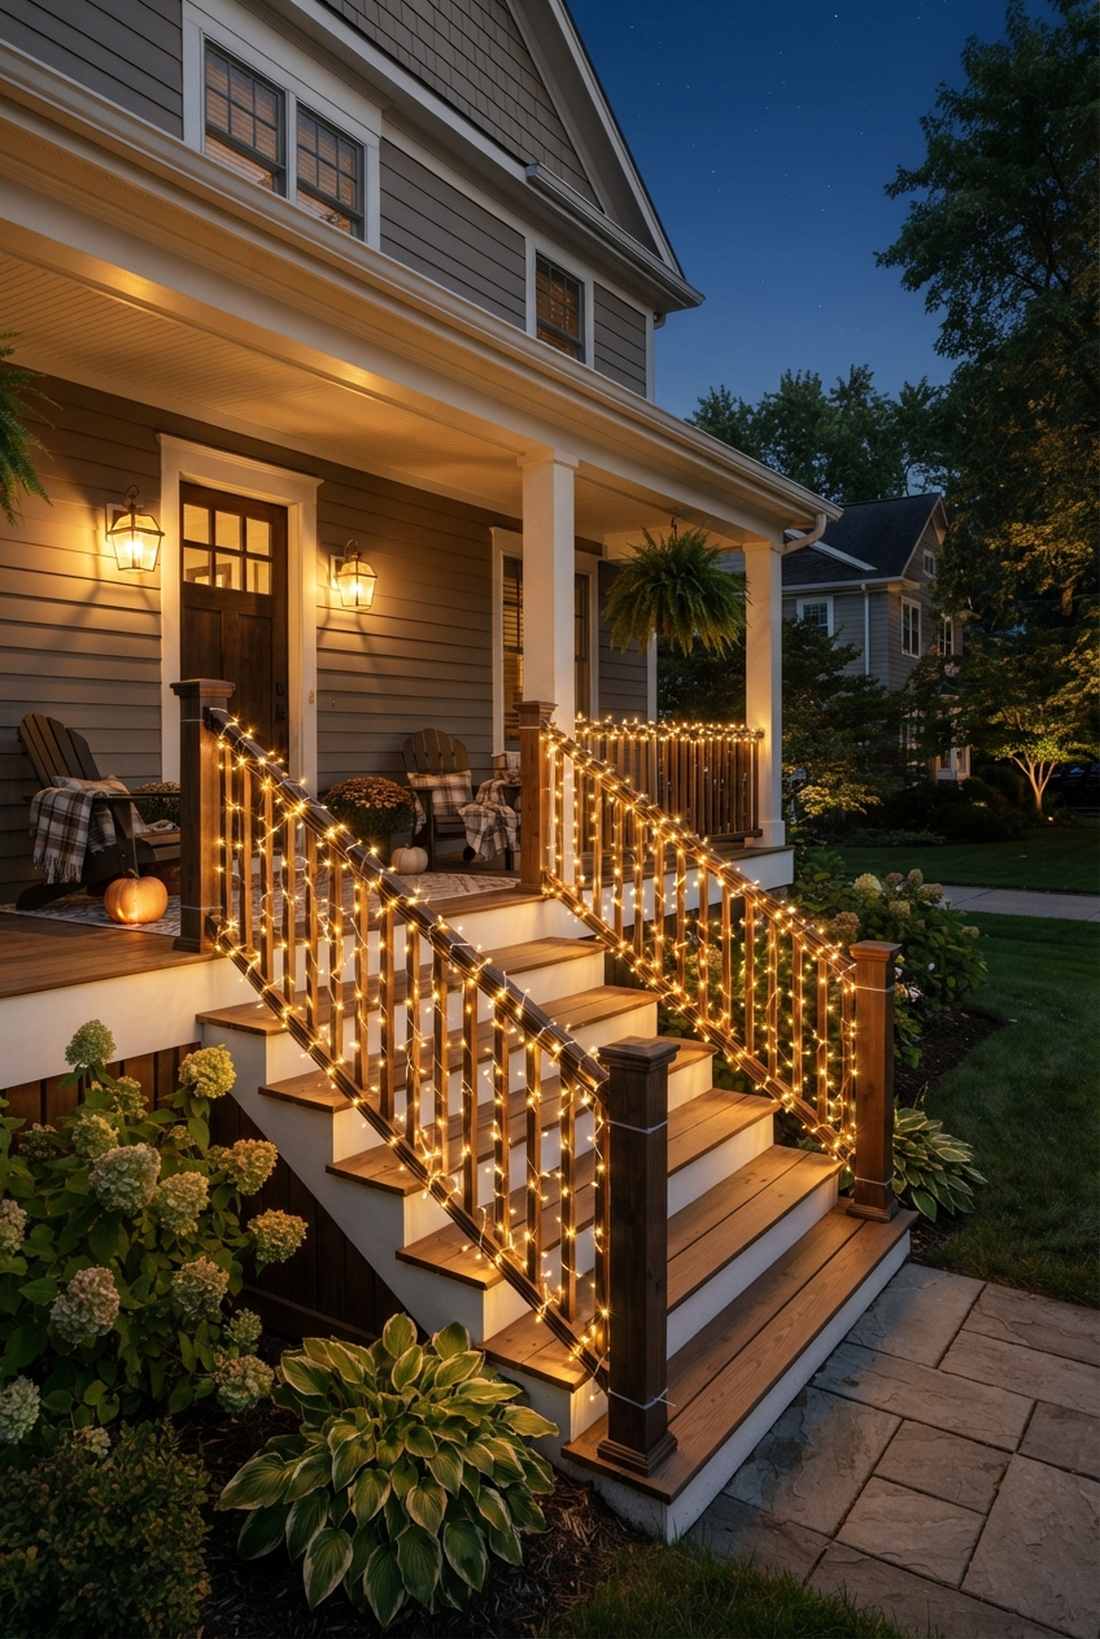
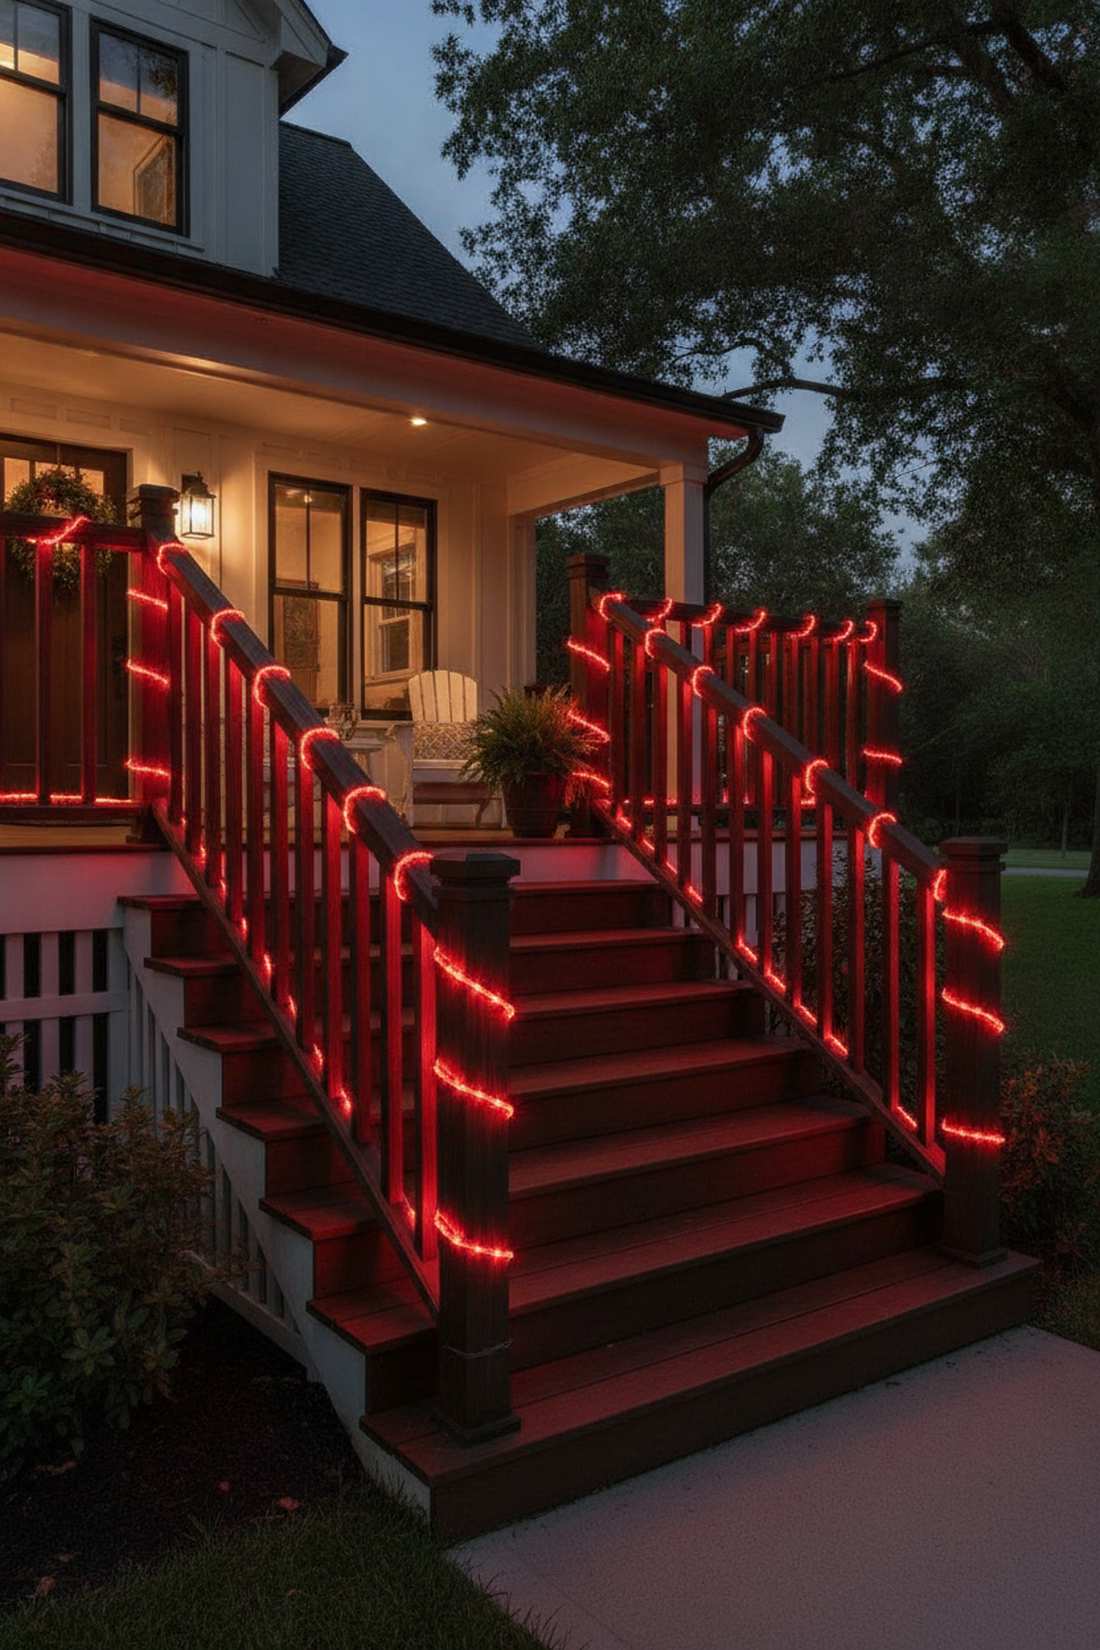
Walking up the steps feels like being escorted on a glowing red carpet. Baluster integration lighting is a brilliant fusion of extreme holiday curb appeal and actual nighttime safety.
Weaving tightly through vertical posts adds intense textural depth that simple straight-lining completely lacks. Incorporating durable miniature garden supplies allows the wire to grip the wood without slipping.
Expect to spend roughly $20–$40 for a standard porch flight. Pin this to boost front steps safety.
- Key Materials: Flexible garland lights
- Vibe / Style: Cozy functional elegance
- Difficulty: Simple weaving
- Budget Breakdown: Flexible lights: $25 | Zip ties: $5
- Creator’s Tip: Zip-tie the wire at the top and bottom of the first and last baluster to keep the whole weave tight.
- Smart Sourcing: flexible railing starter packs and invisible securing ties.
26. Garage Door Framing
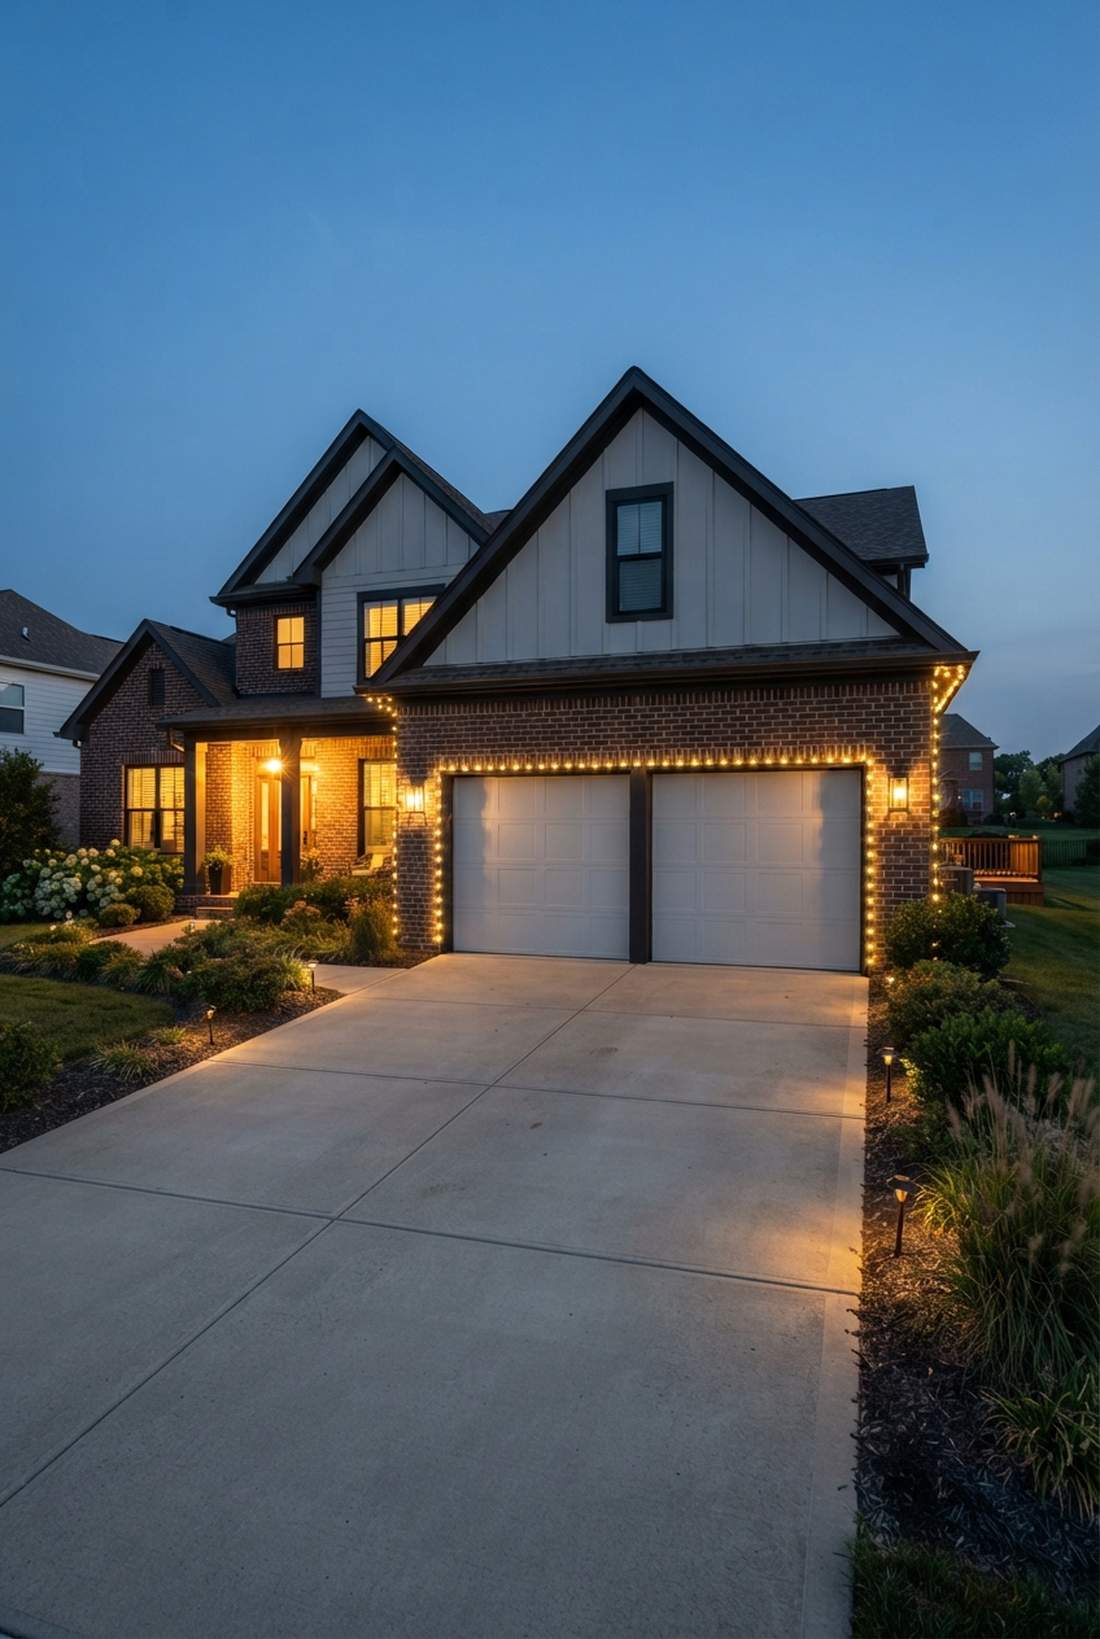
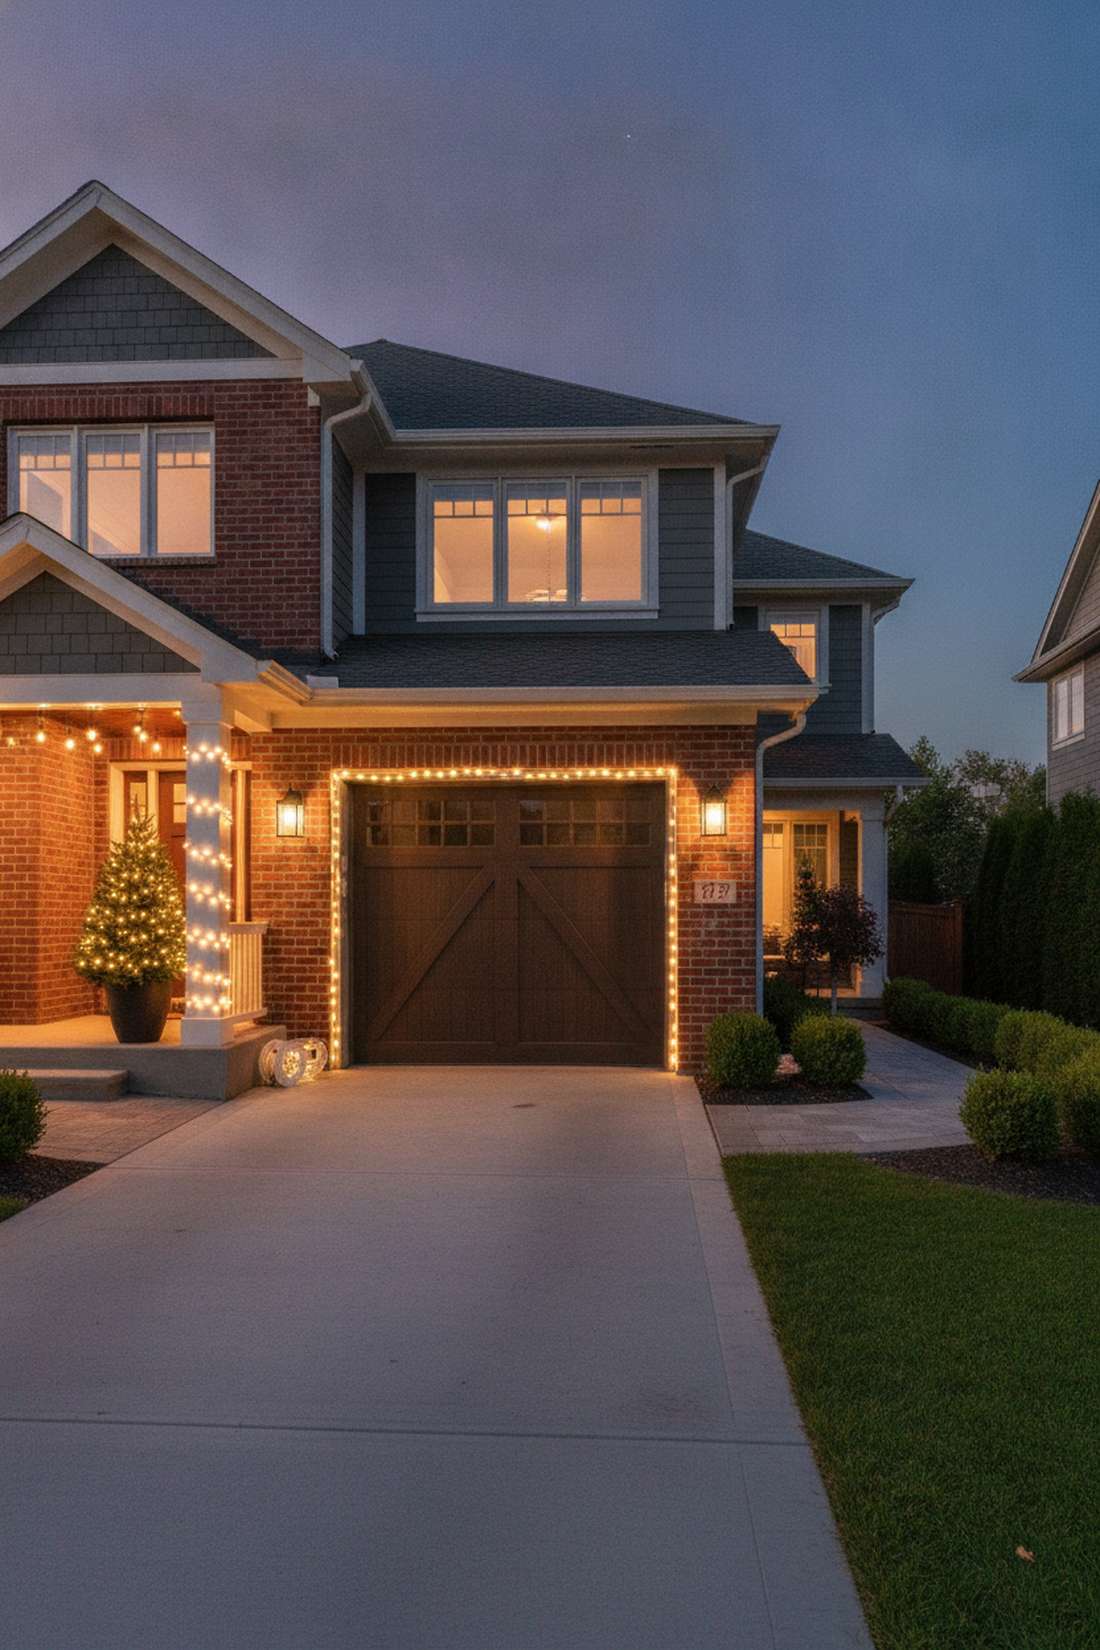
Illuminating the garage feels like turning a boring utilitarian slab into a glowing architectural anchor. Large-scale bay framing balances out the intense brightness of your front porch.
Leaving massive blank garage doors dark creates a weird visual void, but tracing them restores the home’s total aesthetic weight. Utilizing specific fairy lights xmas tree framing kits ensures you have enough continuous length.
Framing a two-car garage costs about $35–$60.
- Key Materials: Extra-long continuous spools
- Vibe / Style: Balanced residential modernism
- Difficulty: Requires specific adhesive
- Budget Breakdown: Long spools: $45 | Outdoor command clips: $15
- Creator’s Tip: Frame strictly on the surrounding brick/wood trim, never on the moving door panels.
- Smart Sourcing: extra-long continuous bulk packs and outdoor adhesive frame clips.
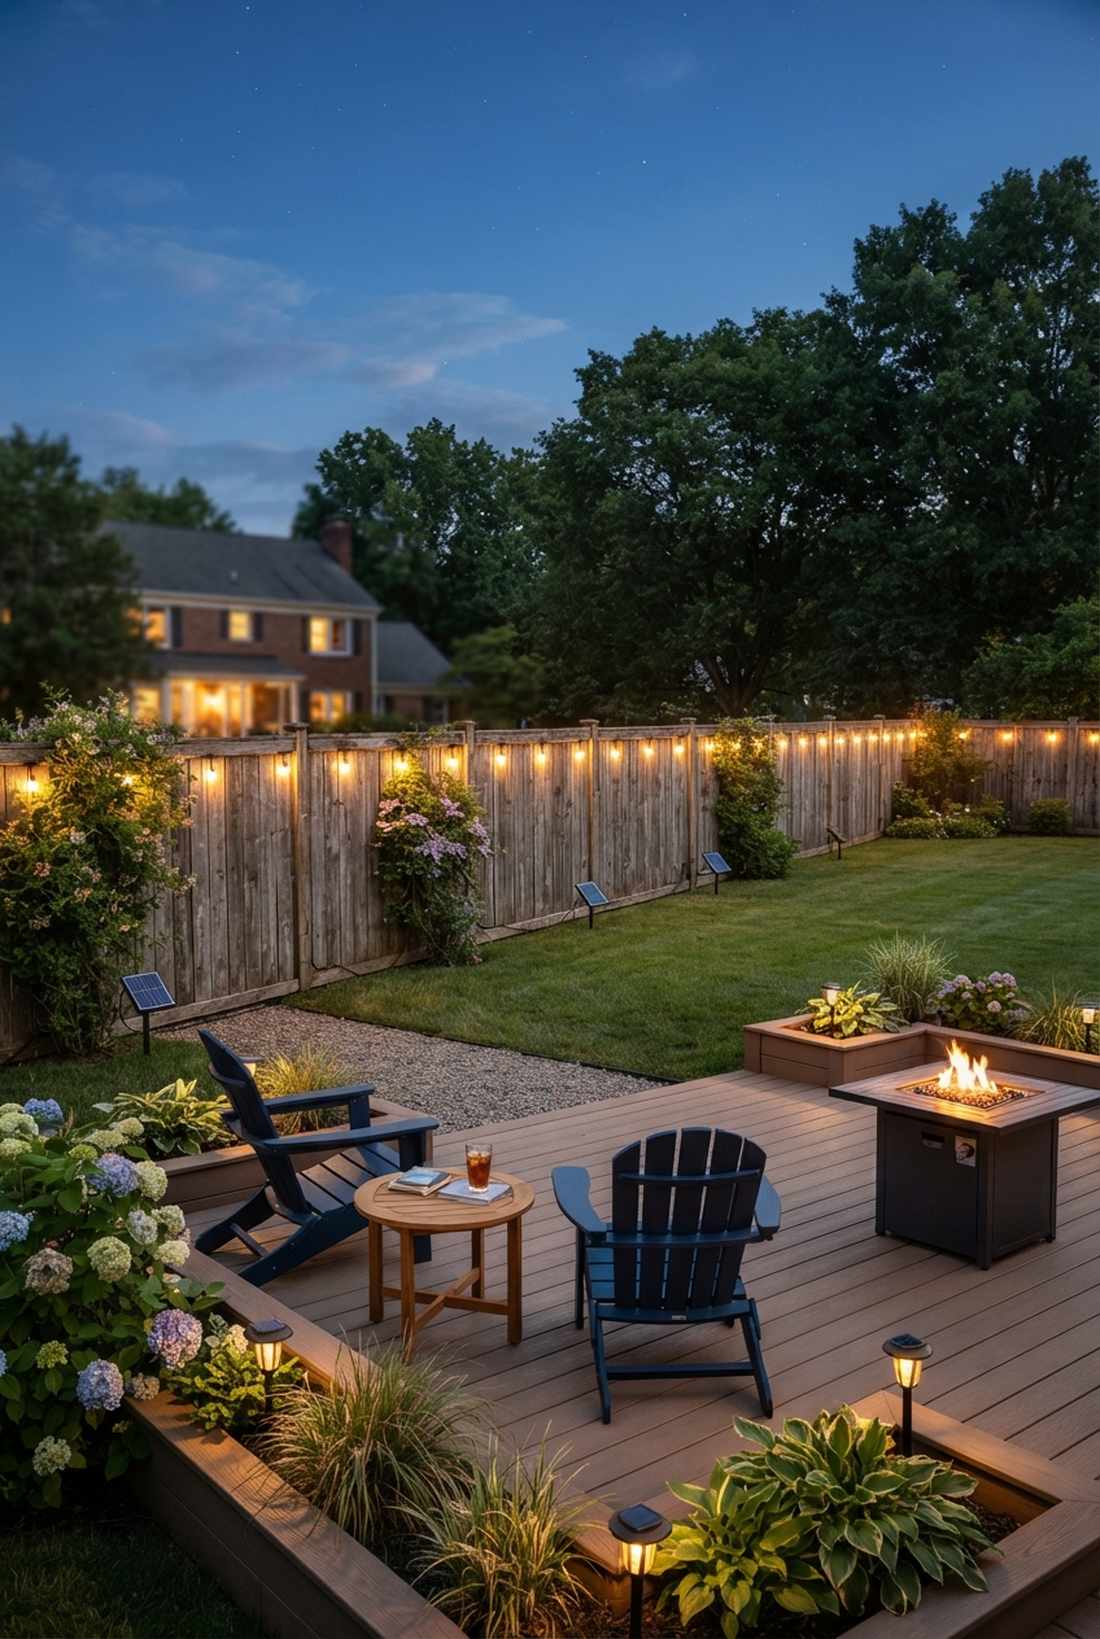
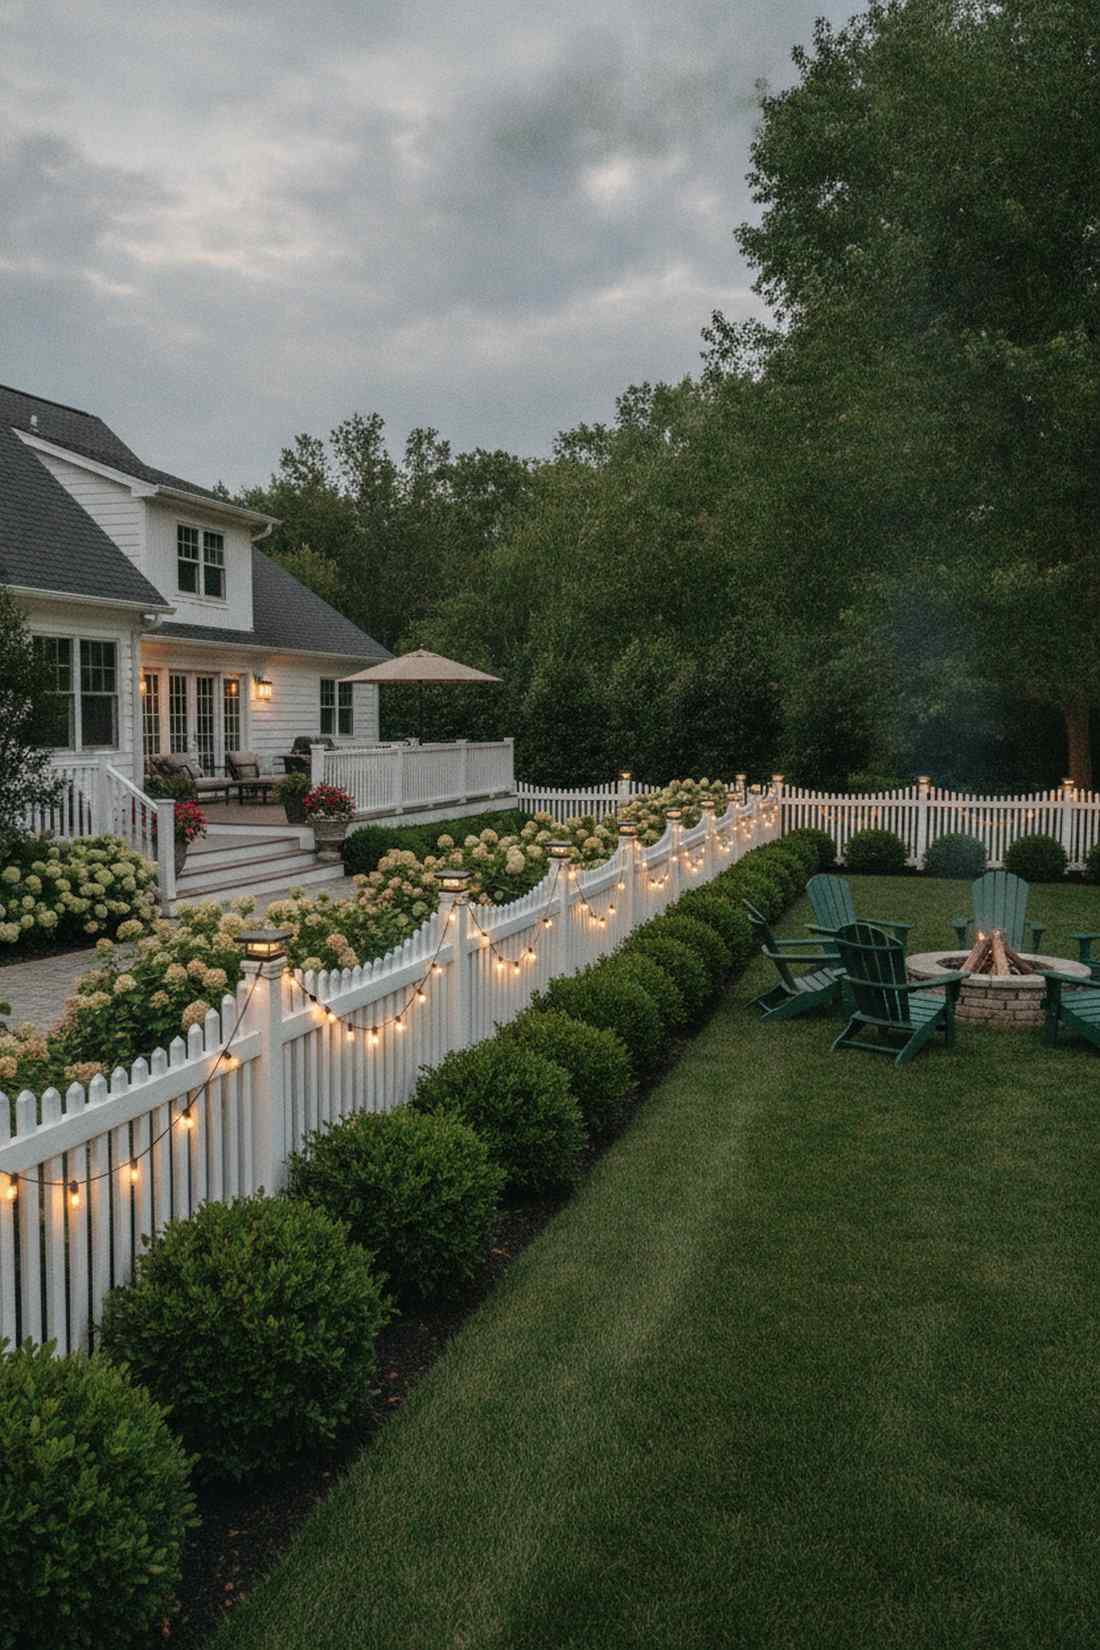
27. Fence Top Line
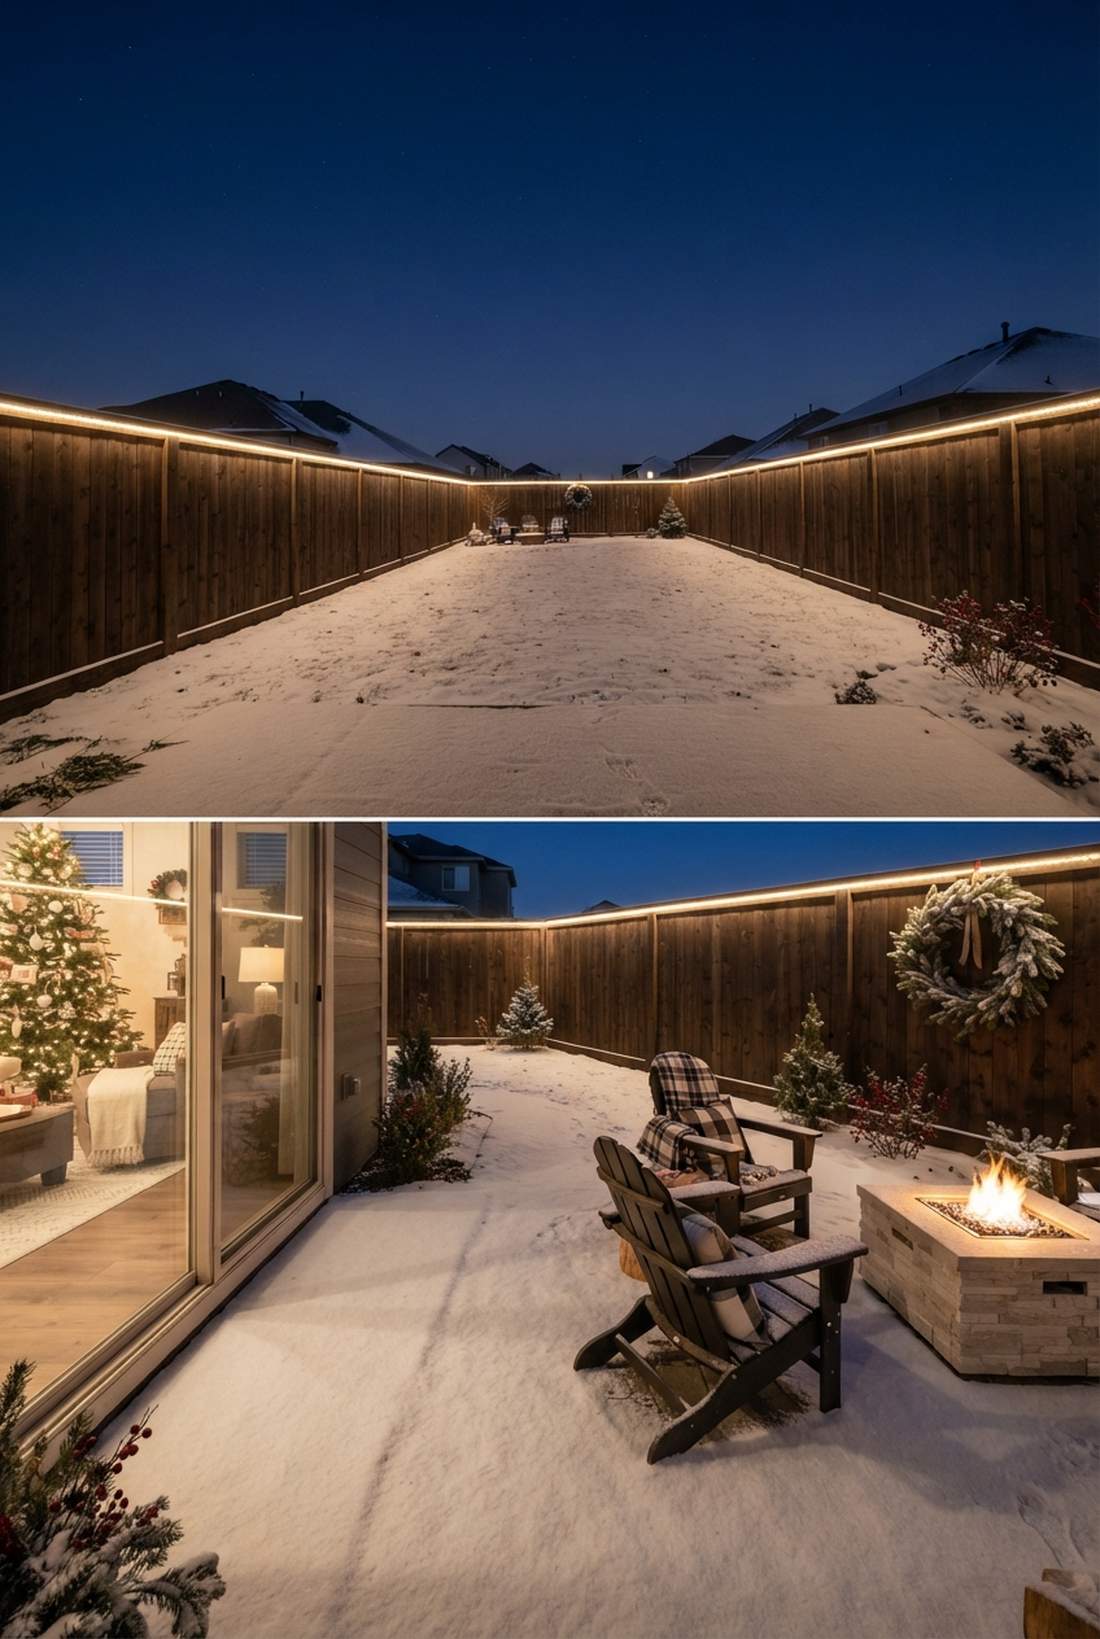
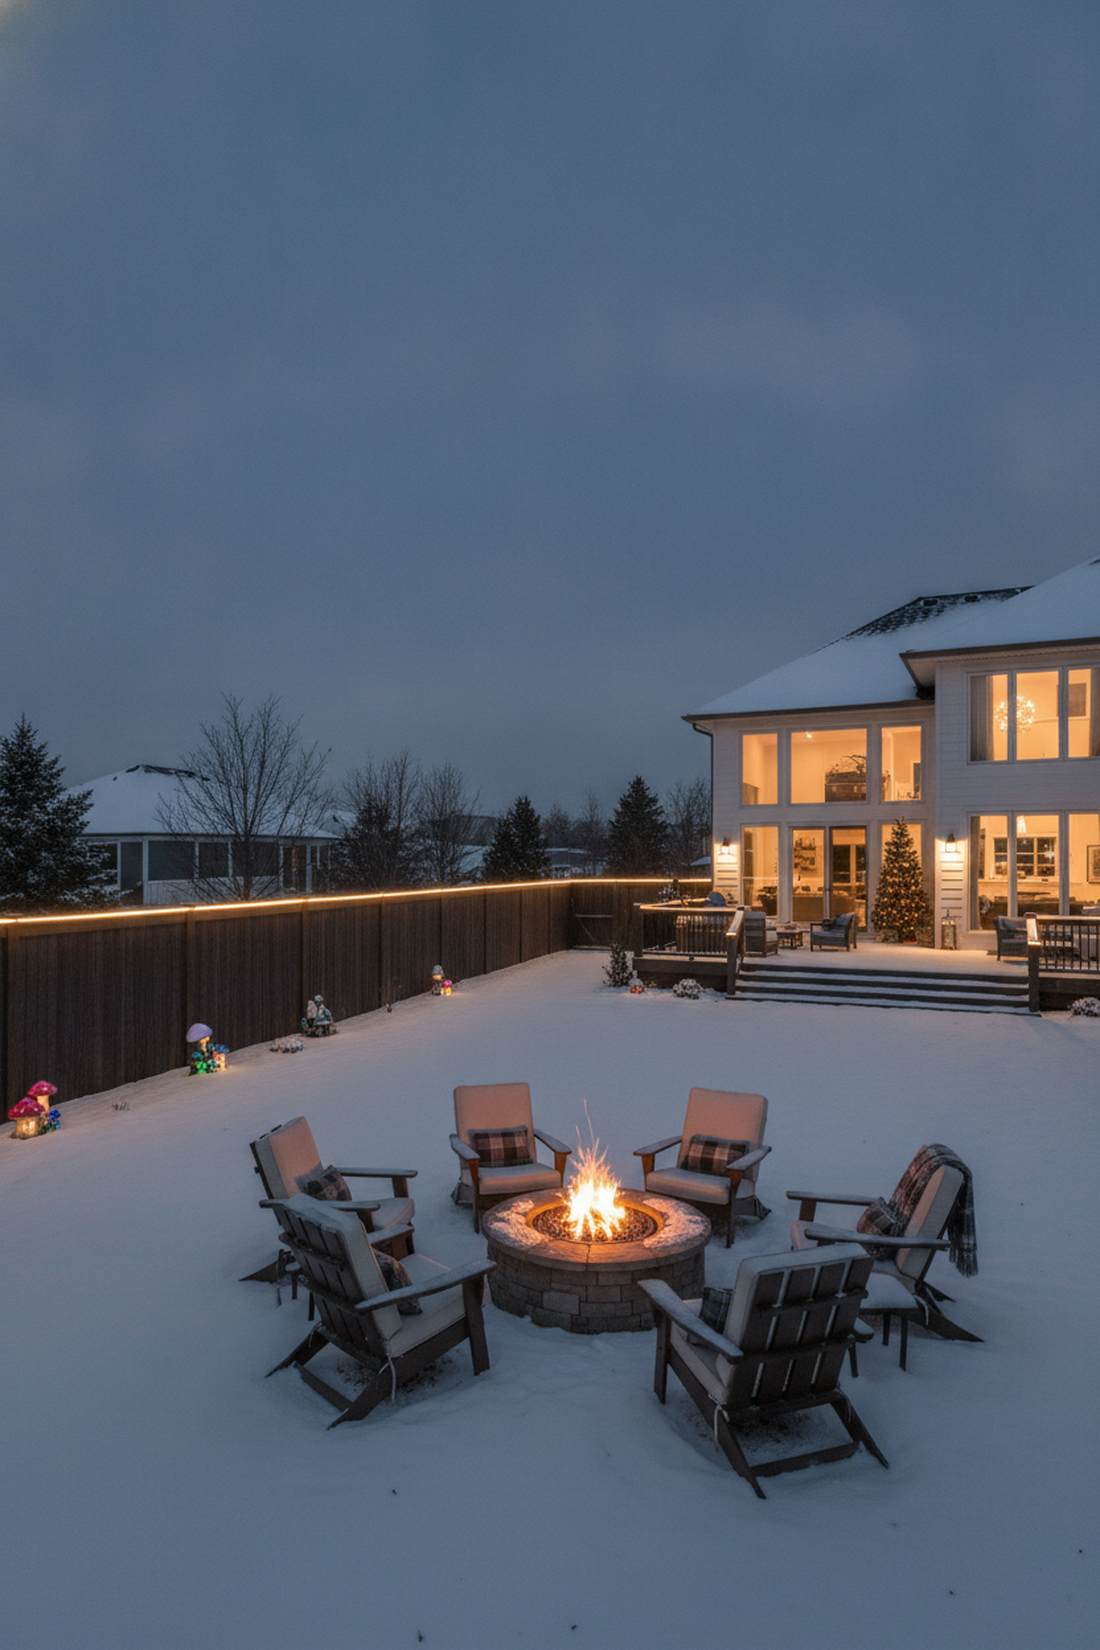
Looking out the back window feels like your entire property is enclosed in a gentle, magical forcefield. Perimeter boundary lighting drastically expands how huge your yard looks at night.
Running a crisp, linear glow along the fence cap organizes the chaotic winter landscape into a neat, designer-approved box. Snagging waterproof fairy garden kits is critical here due to heavy snow accumulation on fence tops.
You can line a standard backyard for around $50–$90. Save this idea for ultimate privacy fence styling.
- Key Materials: Linear rope lights or thick wire
- Vibe / Style: Expansive organized estate
- Difficulty: Long distance power routing
- Budget Breakdown: Rope lights: $70 | Cap clips: $15
- Creator’s Tip: Use solar-powered battery packs if routing an extension cord 100 feet to the back fence is impossible.
- Smart Sourcing: UV-coated linear boundary packs and screw-in cap clips.
28. Arbor Gateway Accent
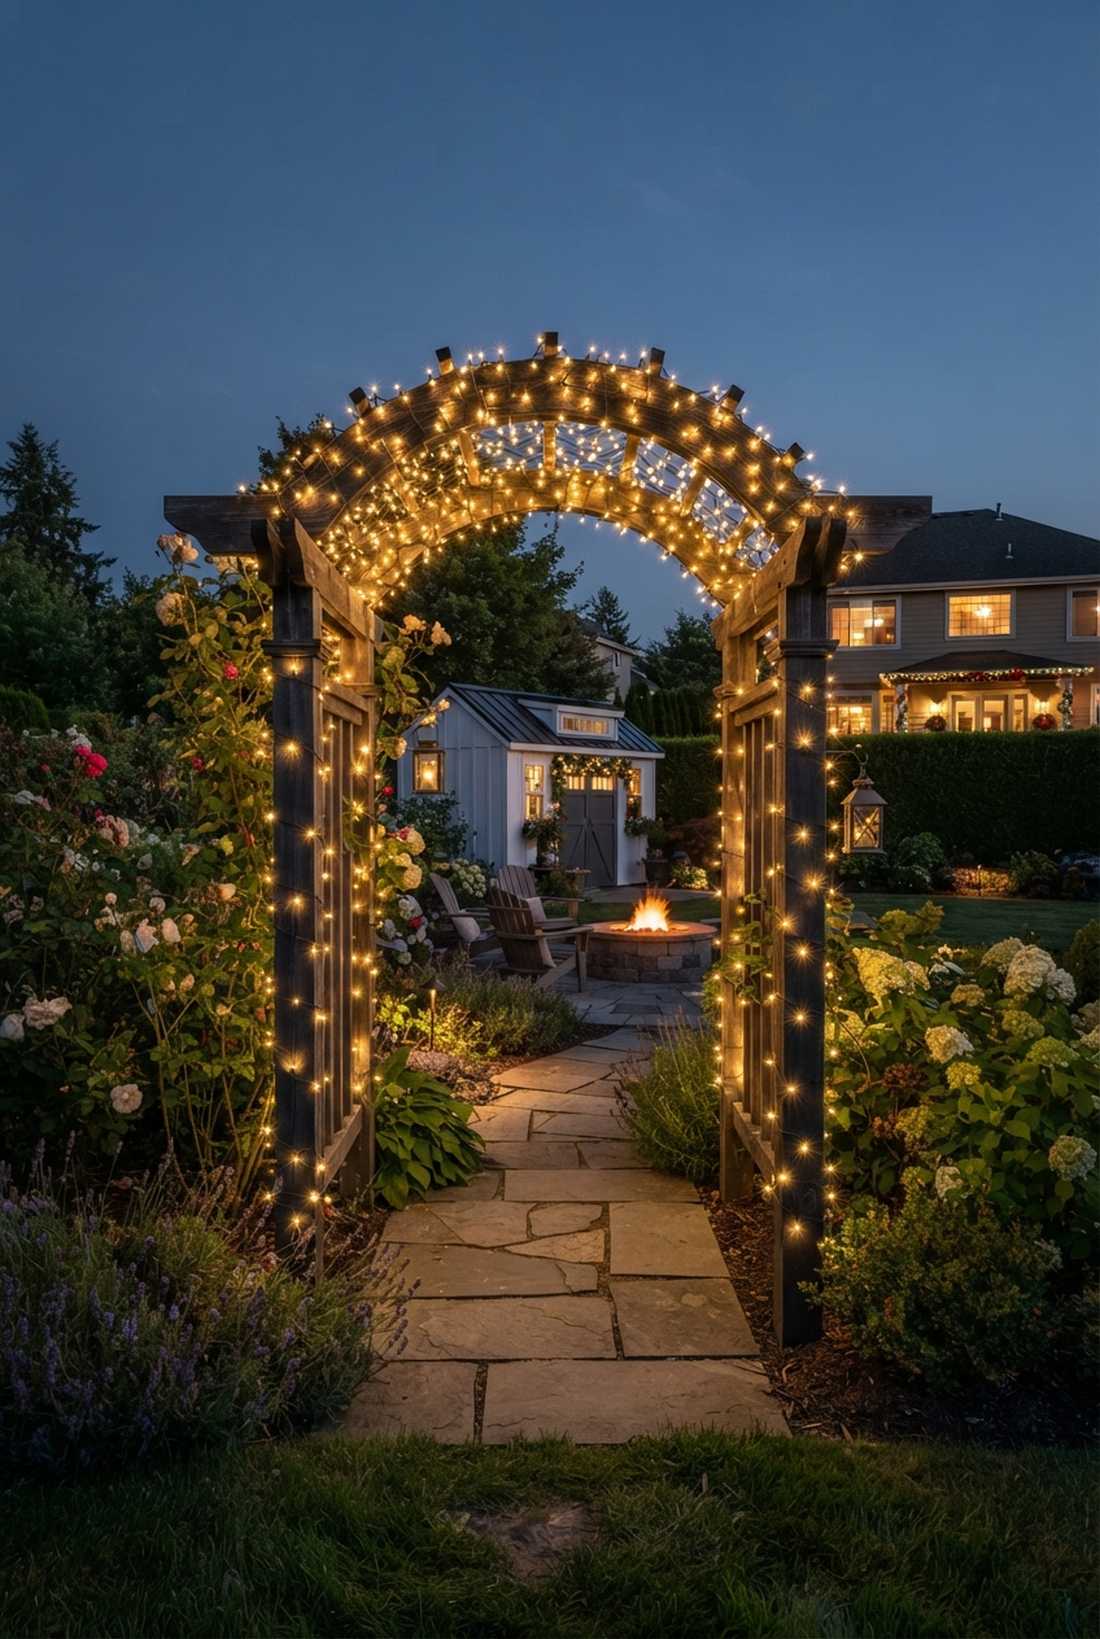
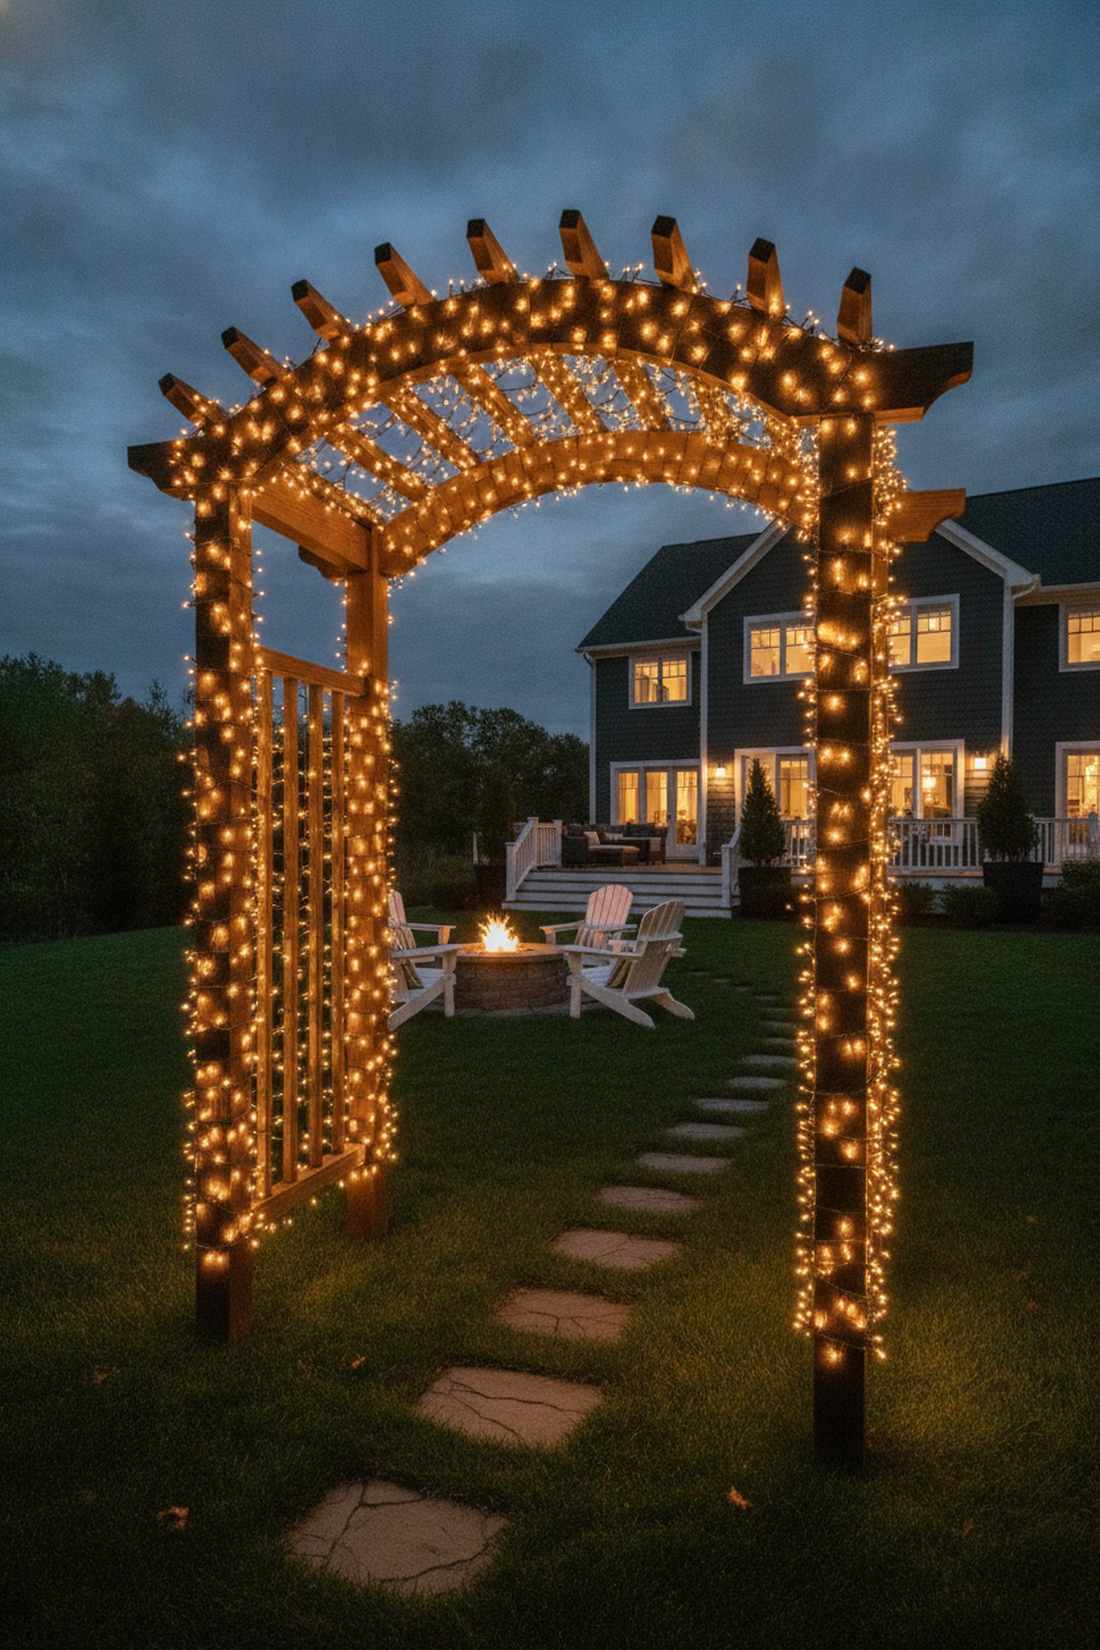
Stepping through this archway feels like teleporting directly into a holiday movie set. Illuminated structural portals create massive anticipation for whatever sits on the other side of the garden.
Focusing an extreme density of bulbs specifically on the overhead curve forces the eyes up and demands admiration. Upgrading to high-end fairy lights christmas decor ensures the wood structure doesn’t get damaged.
Transforming a garden arbor costs roughly $30–$55.
- Key Materials: High-density warm wraps
- Vibe / Style: Storybook transitional magic
- Difficulty: Fast wrap job
- Budget Breakdown: Warm wraps: $40
- Creator’s Tip: Wrap the vertical posts sparsely, but double the density at the top curve for dramatic weight.
- Smart Sourcing: high-density arbor starter kits and brown camouflage wire.
Most exterior jobs completely ignore vertical height, but this next roofline trick forces the entire neighborhood to stare…
29. Chimney Vertical Emphasis
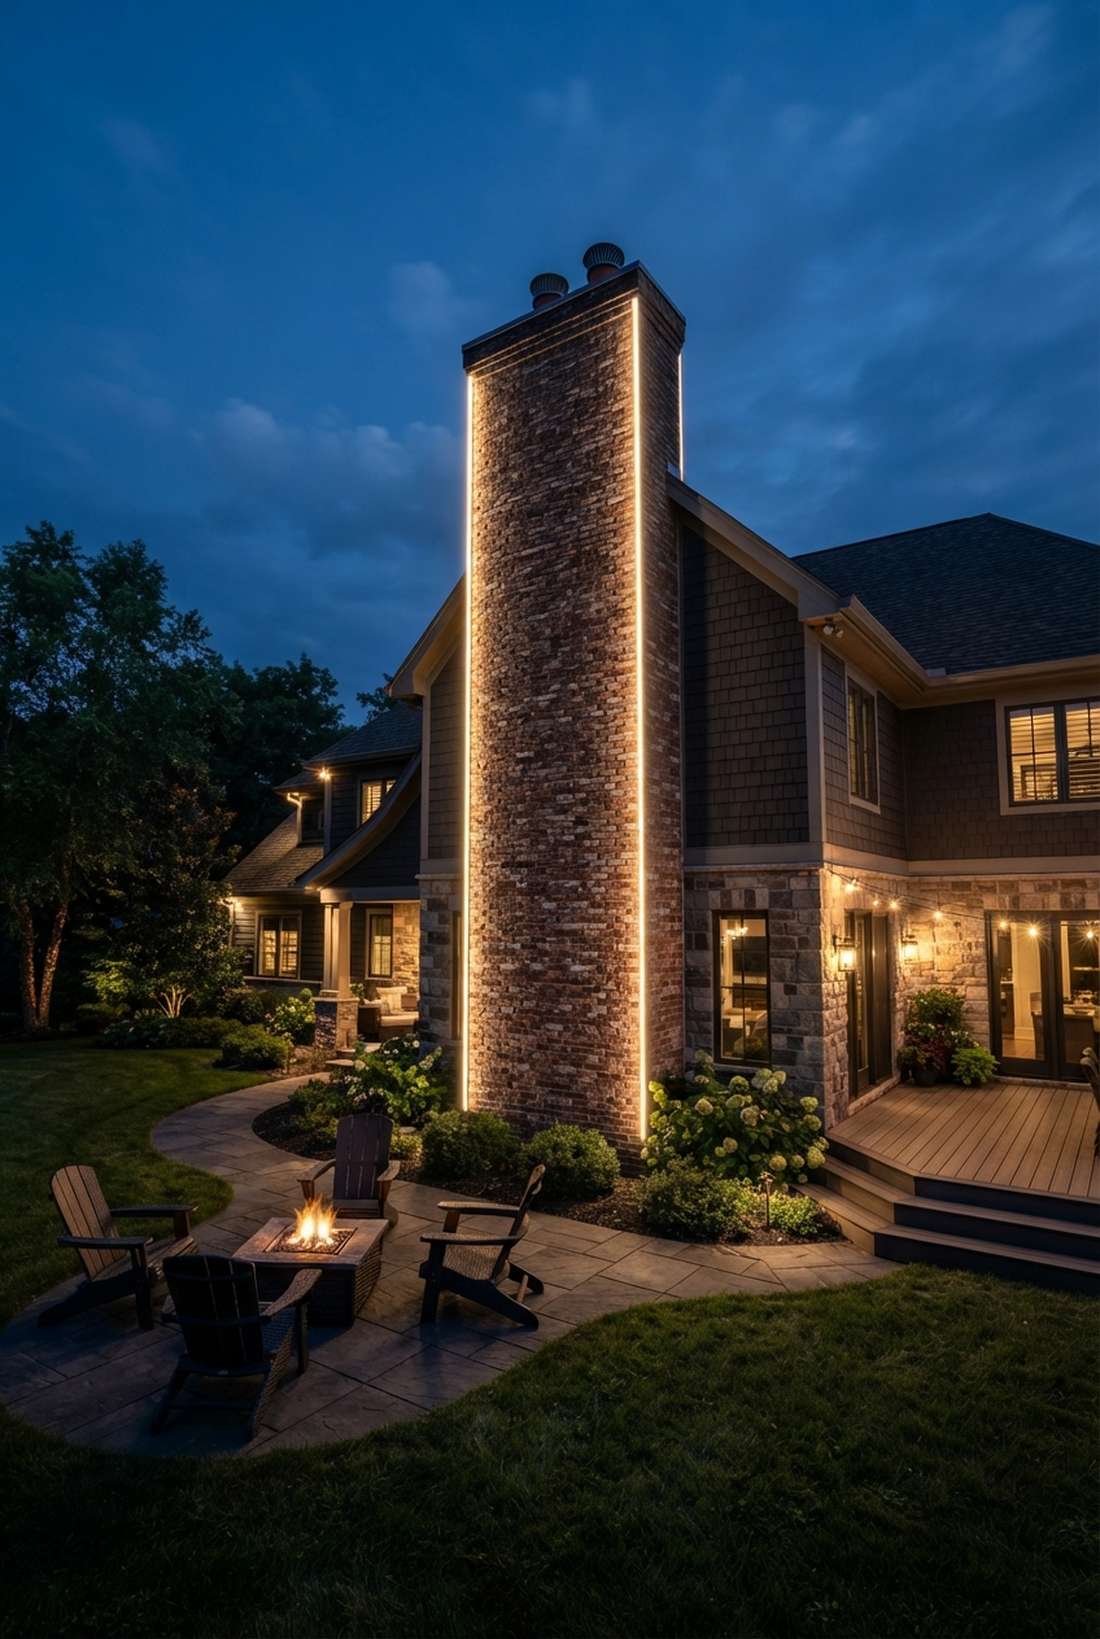
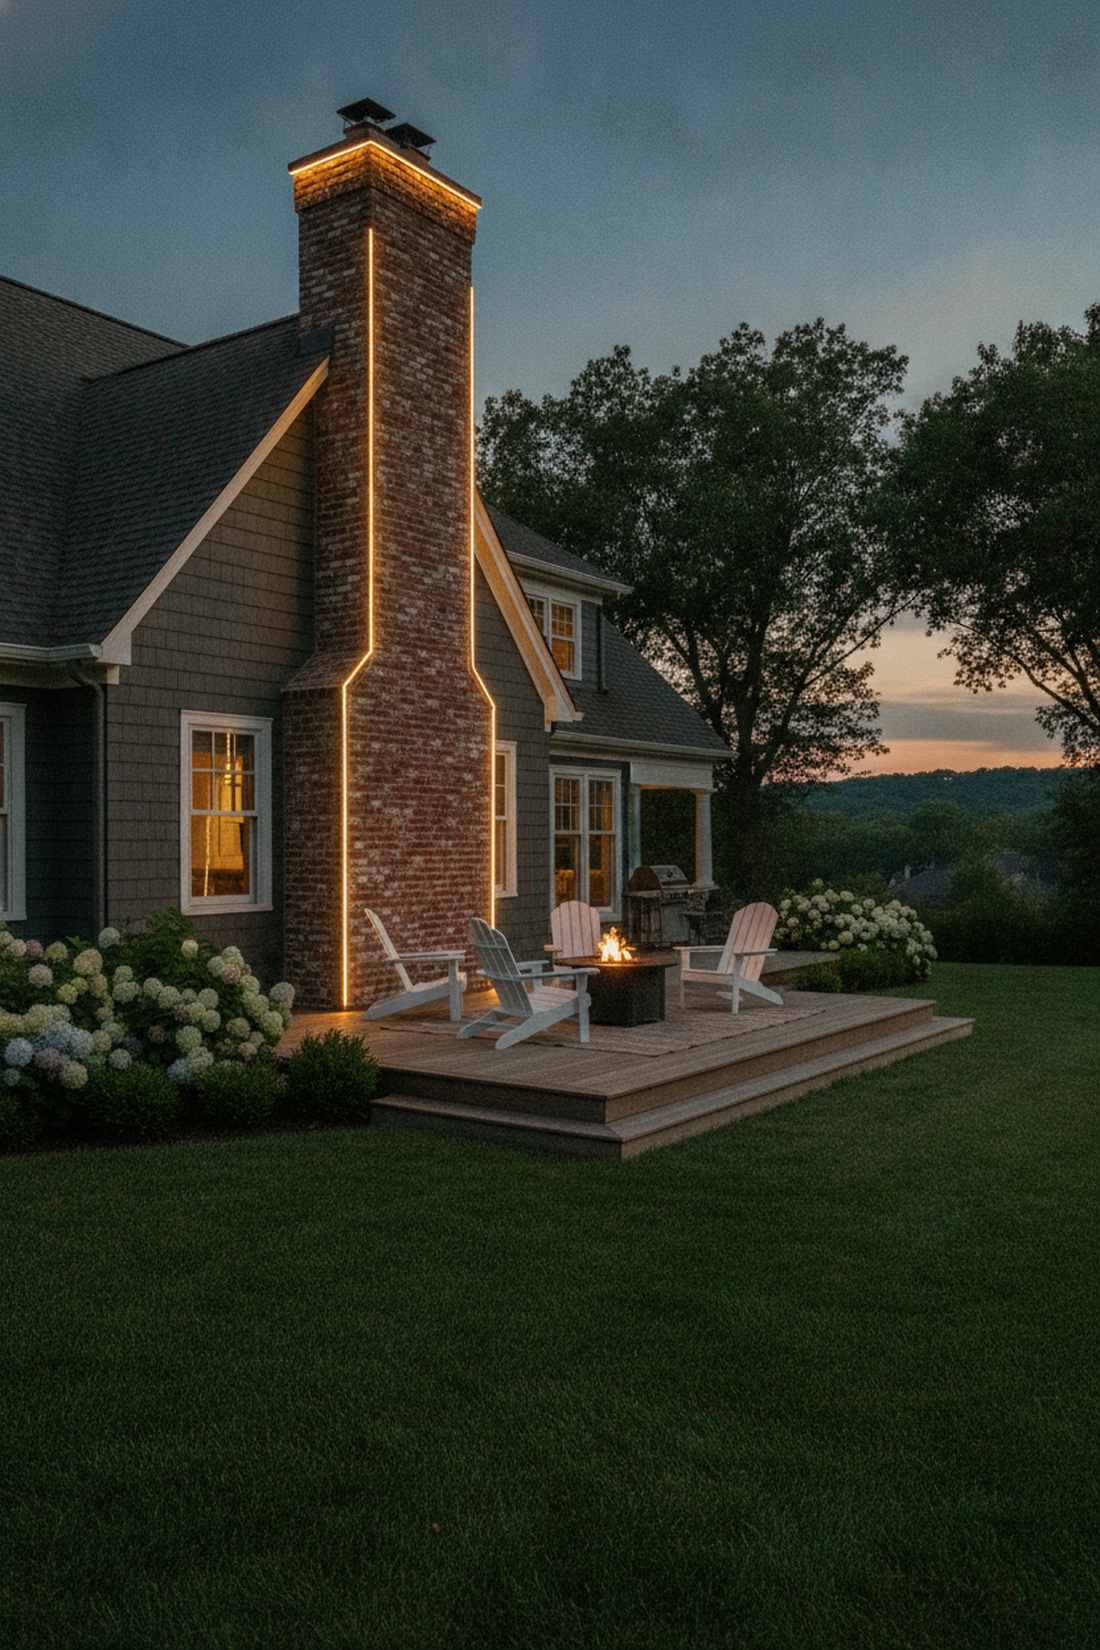
This towering glow feels like a lighthouse beacon sitting on top of your roof. Masonry corner tracing violently breaks up boring, flat rooflines with a massive surge of height.
Drawing bright lines up the rough brick creates intense, dramatic shadows that make the house look incredibly grand. Sourcing proper masonry-safe miniature garden supplies guarantees the bricks aren’t stained or damaged by adhesive.
You can execute this vertical dominance for about $25–$45. Pin this for unique architectural highlighting.
- Key Materials: Stiff corner wire
- Vibe / Style: Grand towering architecture
- Difficulty: Dangerous roof access
- Budget Breakdown: Stiff wire: $25 | Brick clips: $15
- Creator’s Tip: Only light the front two corners of the chimney; lighting the back is a waste of money and effort.
- Smart Sourcing: stiff masonry tracing wire and damage-free brick clips.
30. Overhang Soffit Insertion
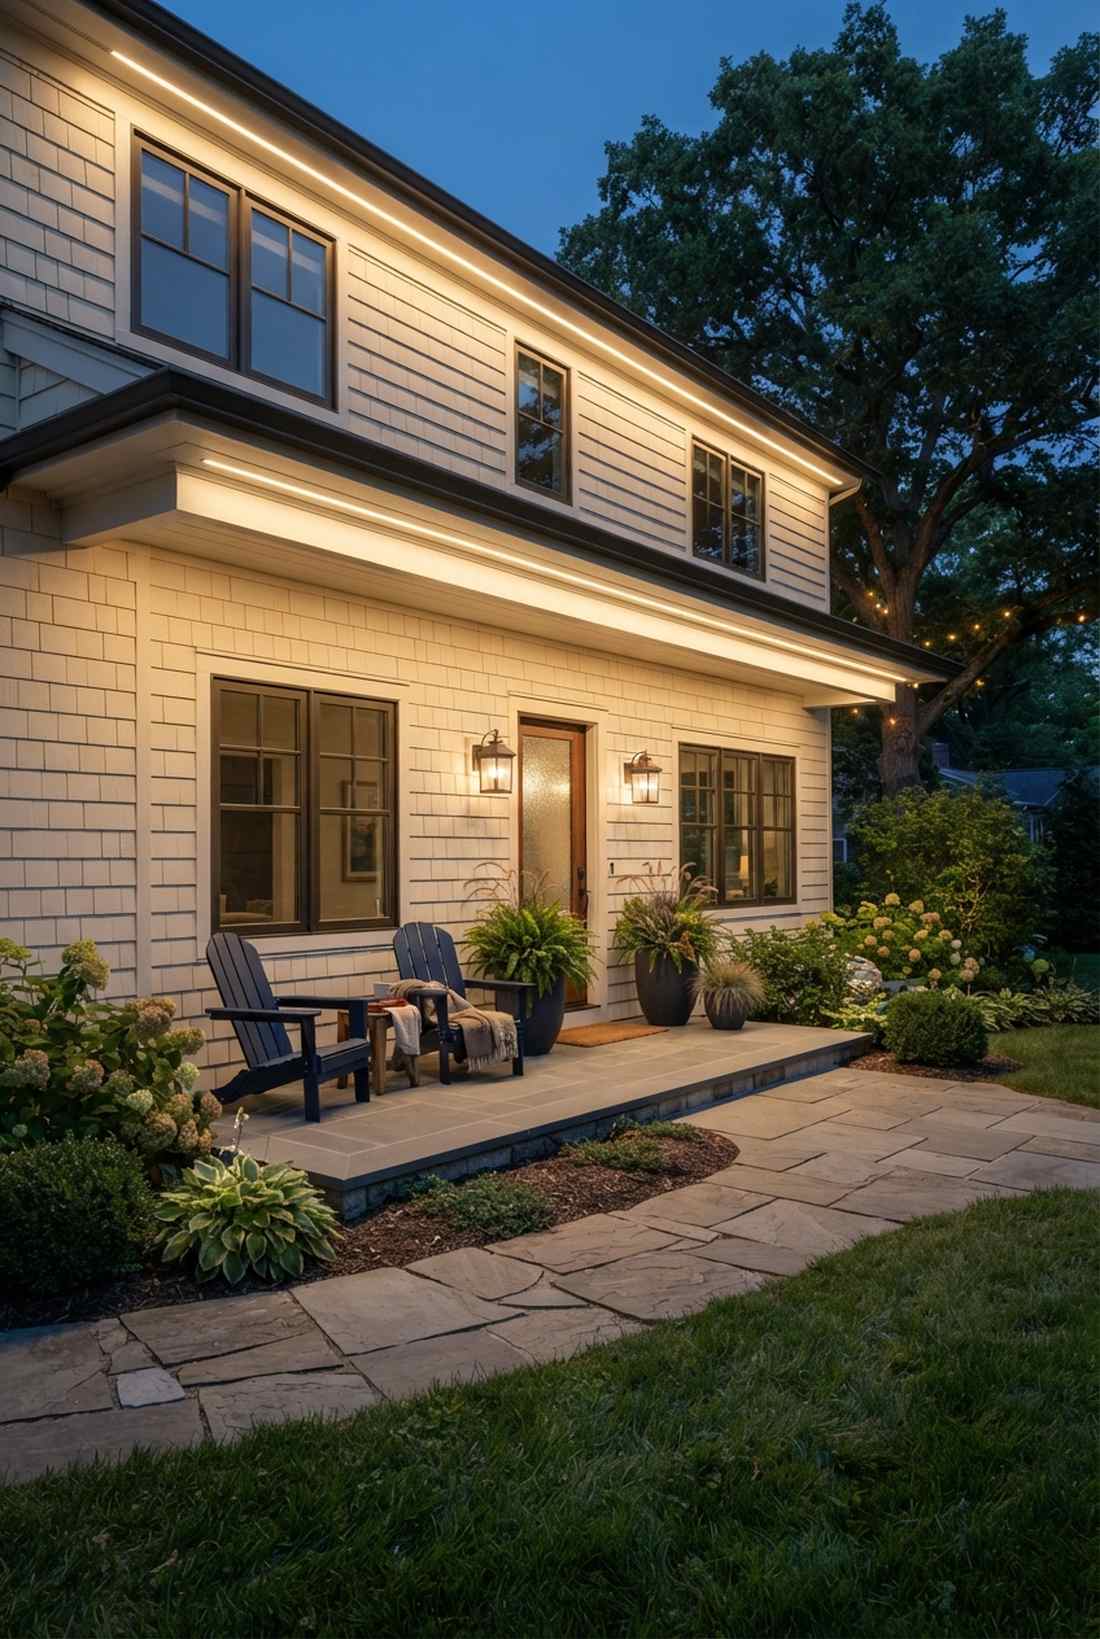
This hidden glow feels exactly like expensive, built-in architectural up-lighting. Concealed indirect washing is the ultimate flex for traditional homes where visible wires look tacky.
Tucking the bulbs deep into the channel produces a sophisticated, diffused wash of light rather than cheap, glaring points. Investing in professional fairy lights xmas tree strips guarantees the light spreads smoothly against the siding.
This premium stealth upgrade runs around $40–$70.
- Key Materials: Flat LED ribbon strips
- Vibe / Style: Ultra-premium concealed luxury
- Difficulty: Tricky overhead placement
- Budget Breakdown: LED ribbons: $55
- Creator’s Tip: Slide the flat ribbon straight into the existing soffit vents to completely bypass using adhesives.
- Smart Sourcing: flat-profile concealed ribbon kits and diffused LED strips.
Specialty Fairy Lights Xmas Installations
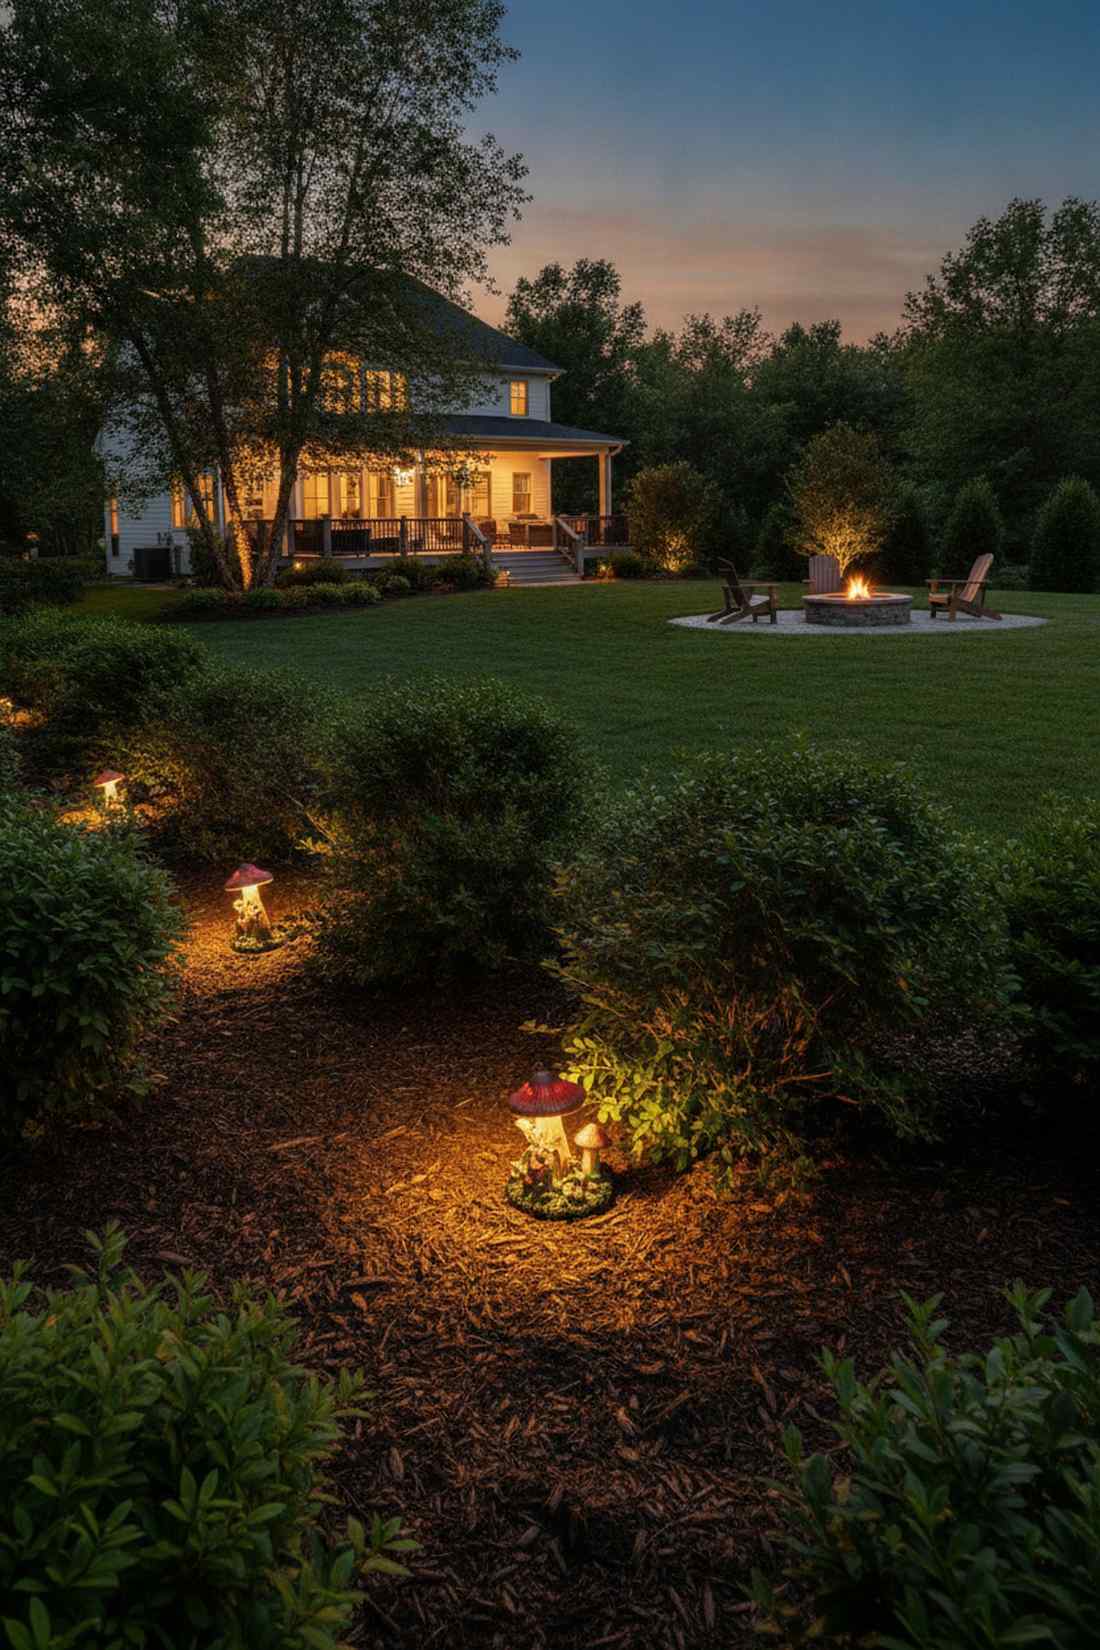
31. Garden Path Edging
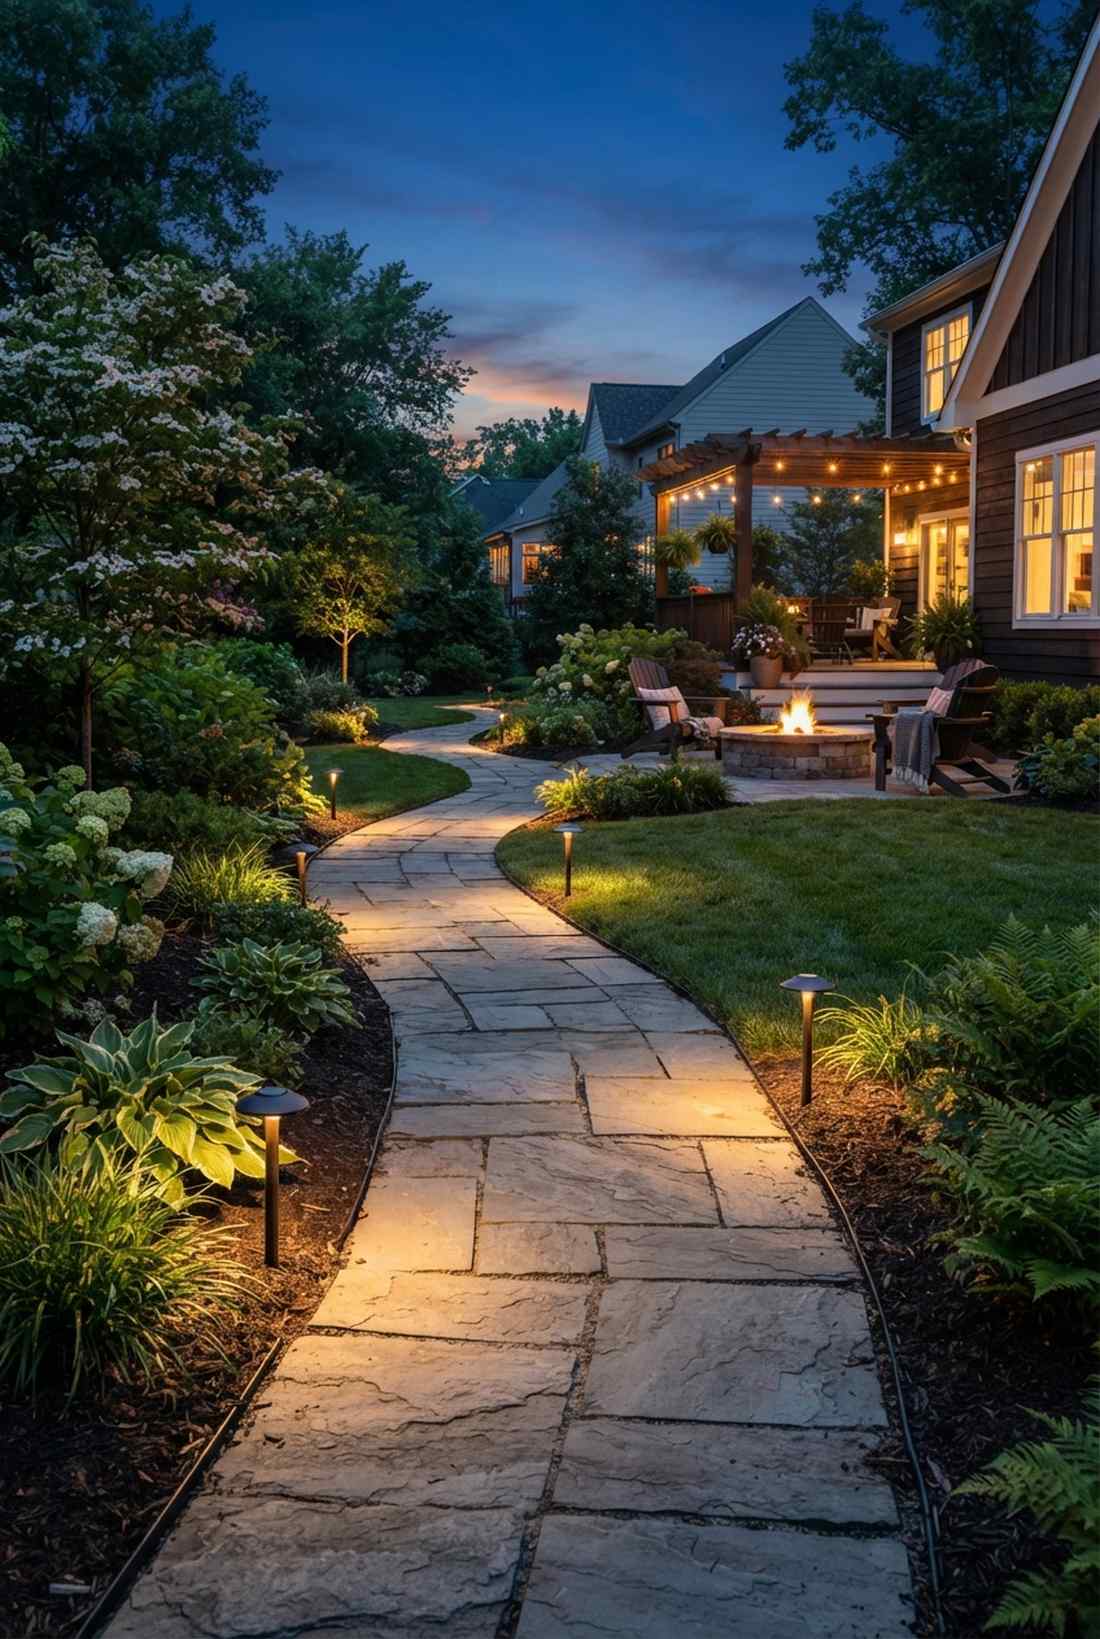
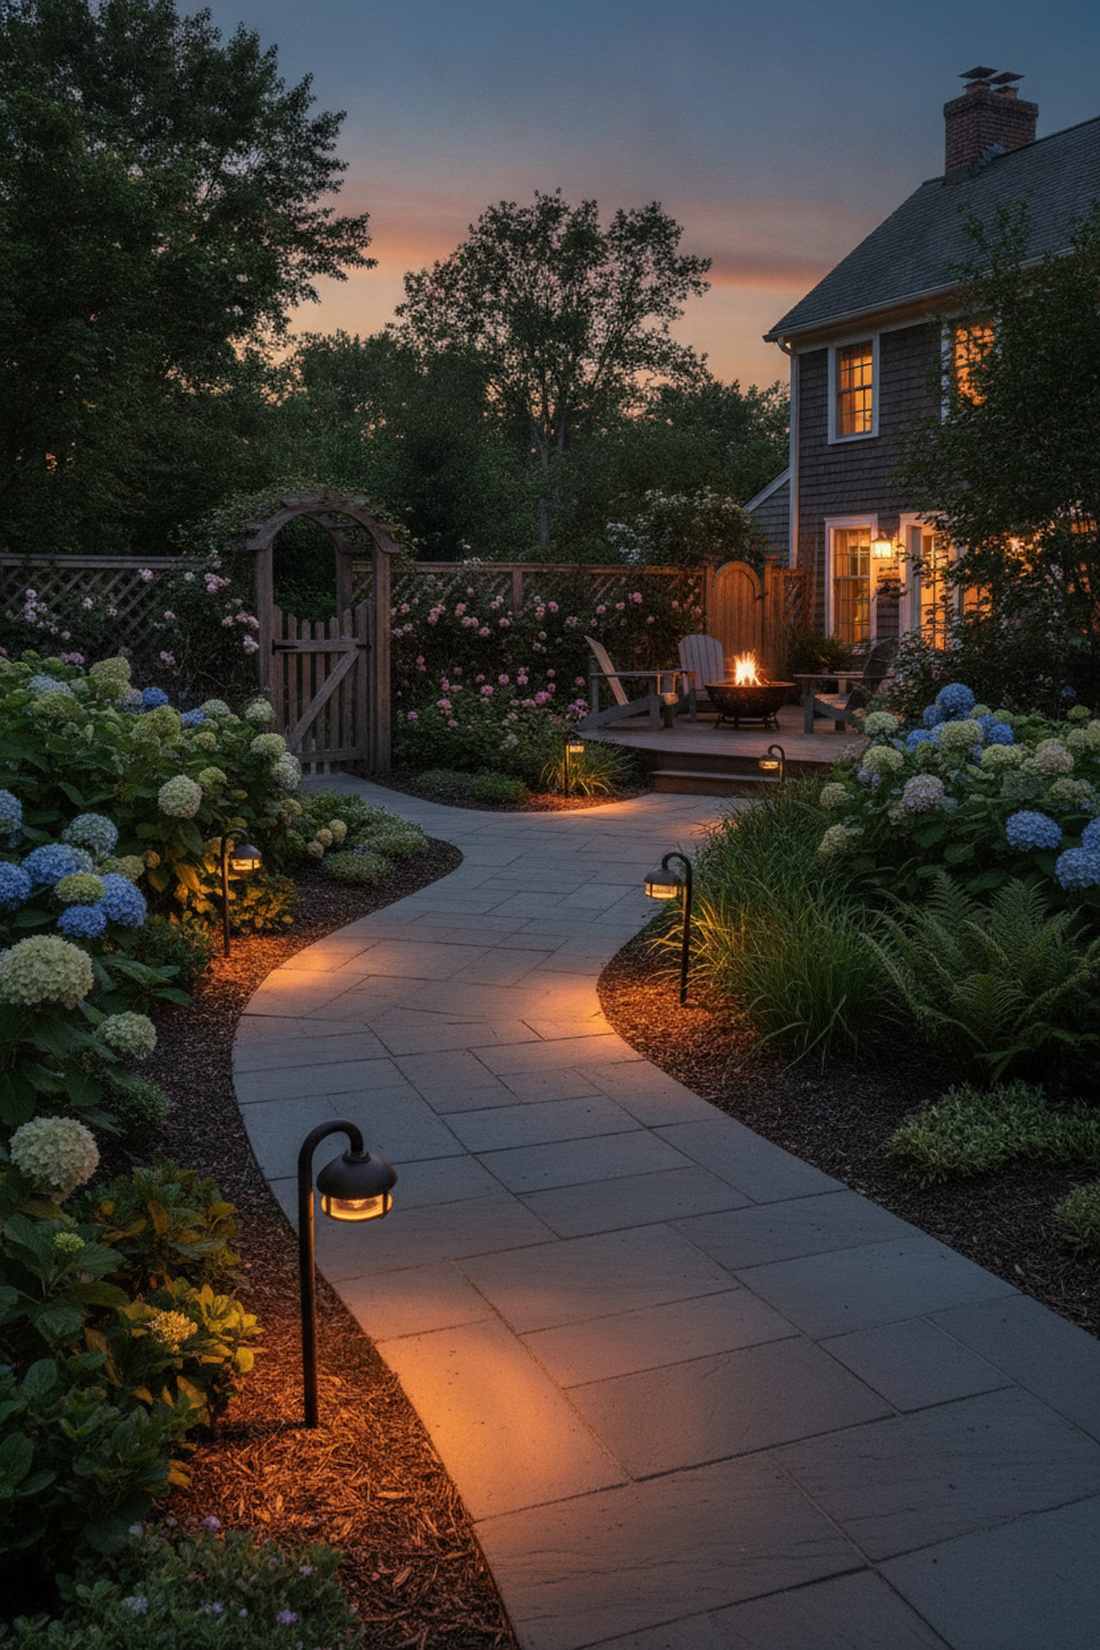
Strolling down this walkway feels like following a glowing runway into a secret garden. Low-voltage pathway outlining is functionally brilliant while looking like a million bucks.
Keeping the light strictly at ground level illuminates the walking surface beautifully without blinding your guests. Sourcing robust terrarium accessories keeps the delicate bulbs safe from accidental foot traffic or snow shovels.
A standard 20-foot path costs roughly $30–$50. Save this for functional, safe yard aesthetics.
- Key Materials: Low-profile ground wire
- Vibe / Style: Safe, inviting elegance
- Difficulty: Easy ground staking
- Budget Breakdown: Ground wire: $35 | Stakes: $10
- Creator’s Tip: Place the lights 2 inches off the concrete into the dirt to protect them from edge trampling.
- Smart Sourcing: low-profile ground wire bulk packs and heavy-duty path stakes.
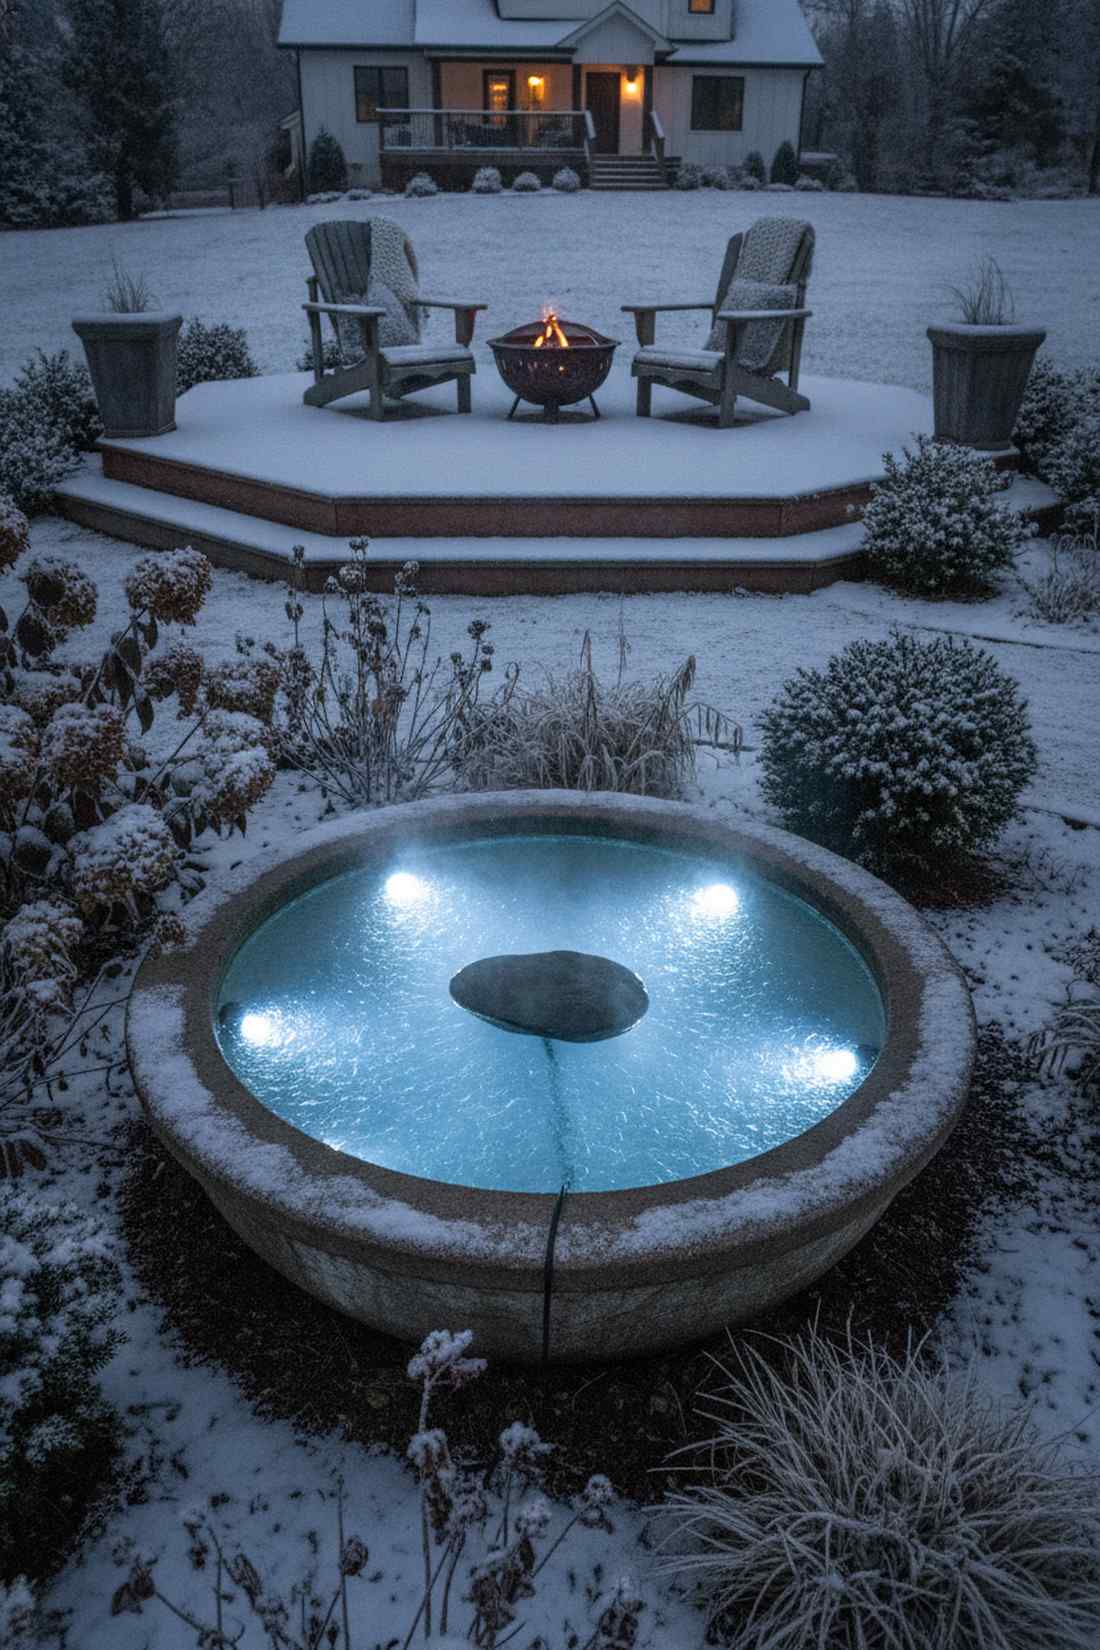
32. Water Feature Reflection
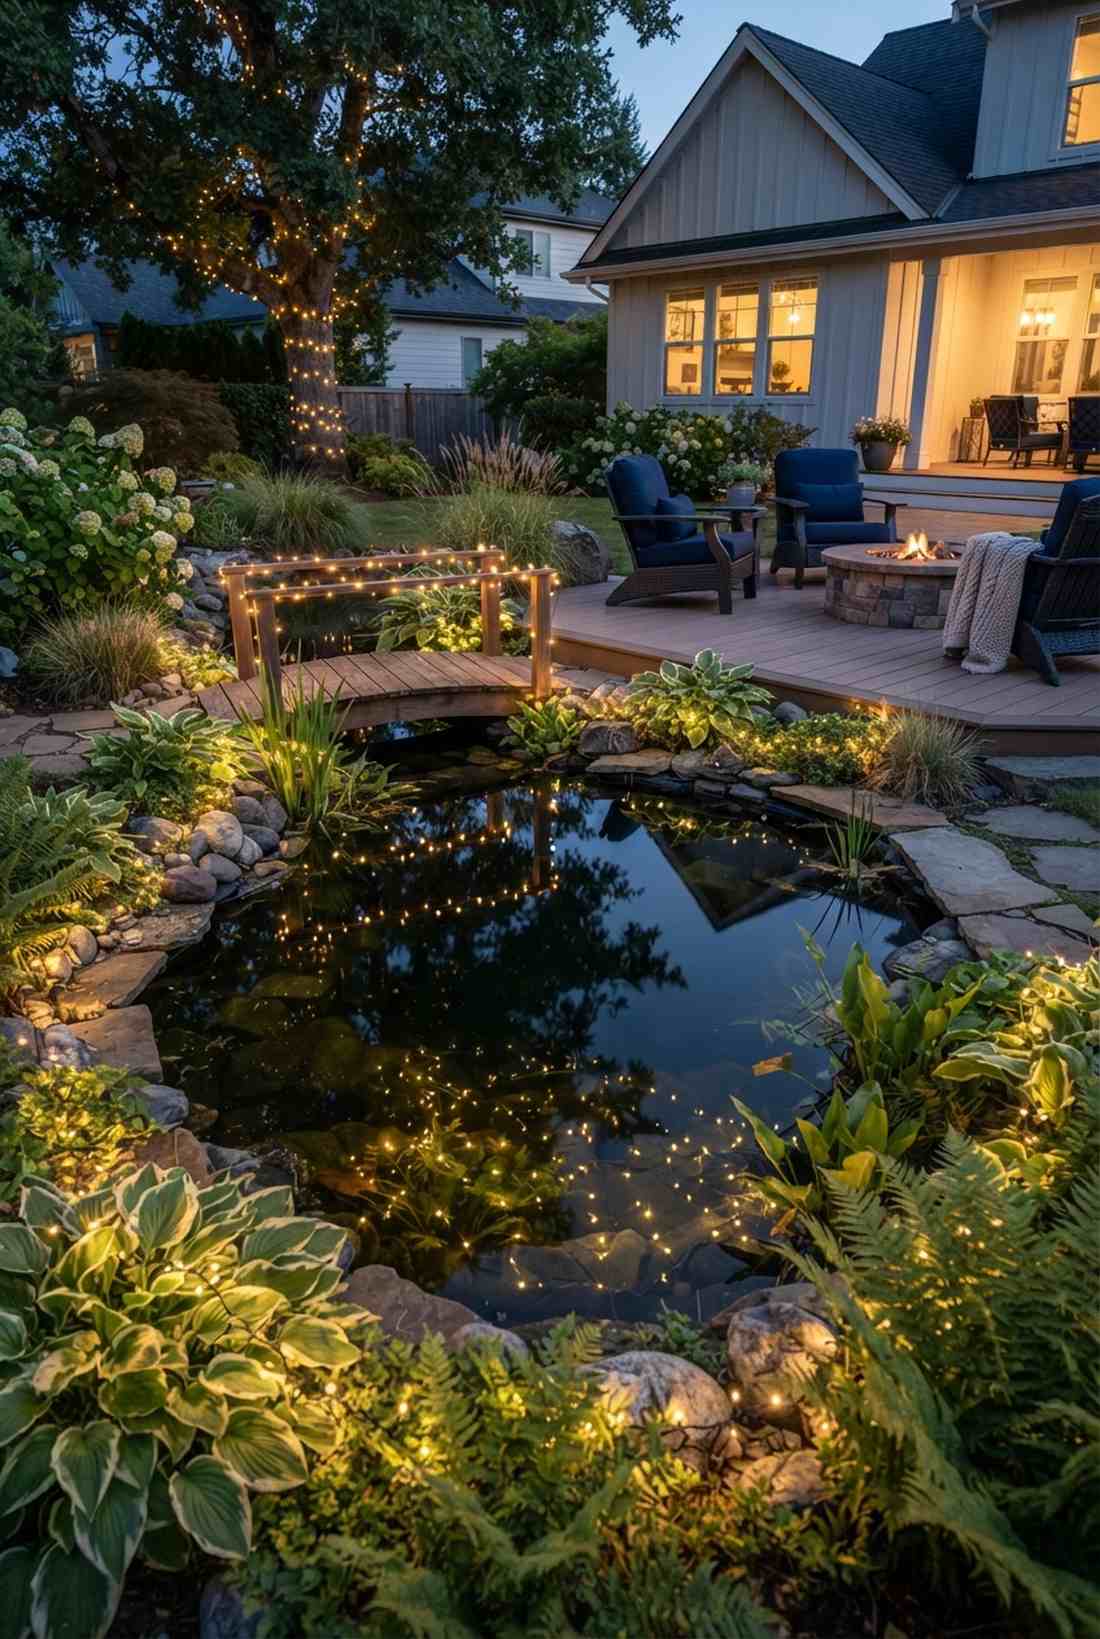
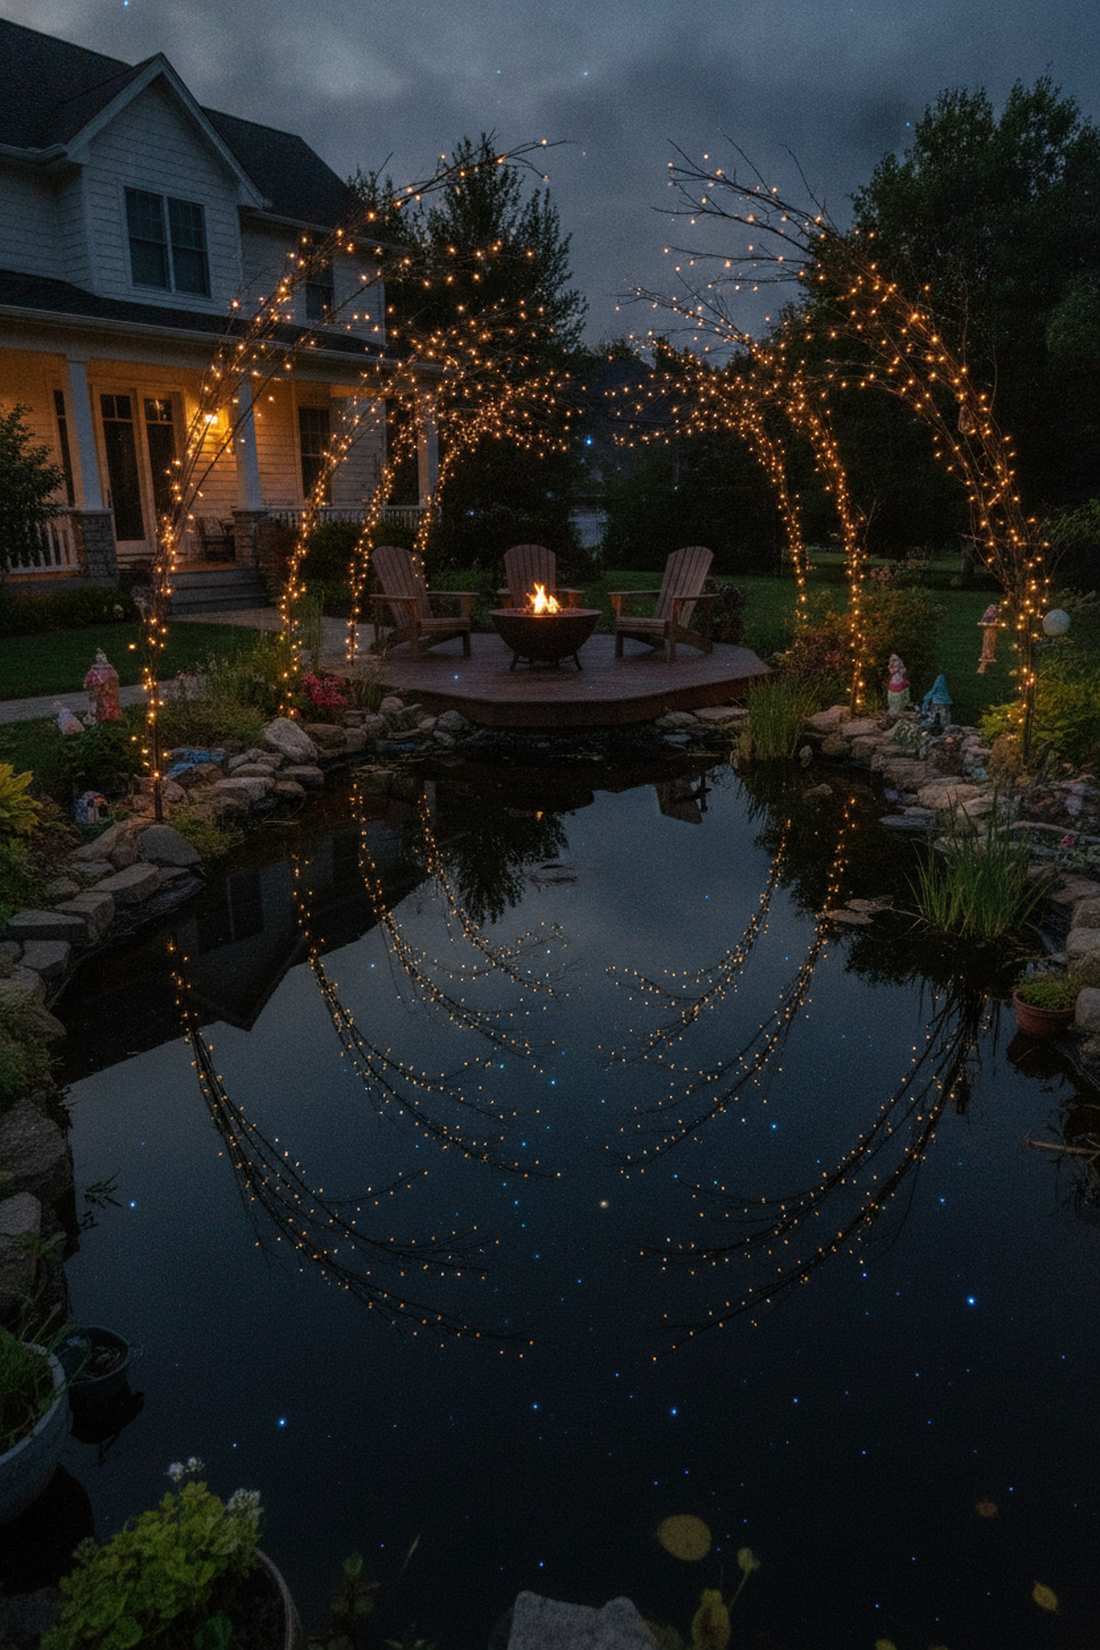
Gazing into the pond feels like looking into a duplicated universe of starlight. Mirrored surface amplification is the single greatest hack for doubling your light output for free.
Bouncing the glow off a dark, glassy water surface completely amplifies the visual impact and creates hypnotic movement. You absolutely must use waterproof fairy garden kits to prevent disastrous electrical shorts near moisture.
You can easily pull this off for around $25–$45.
- Key Materials: IP68 waterproof strands
- Vibe / Style: Hypnotic mirrored infinity
- Difficulty: Requires strict safety gear
- Budget Breakdown: Waterproof strands: $30 | Safe extensions: $15
- Creator’s Tip: Angle the bulbs downward at a 45-degree angle toward the water to maximize the reflection mirror.
- Smart Sourcing: IP68 rated waterproof starter kits and moisture-sealed connection boxes.
33. Boulder Cluster Highlighting
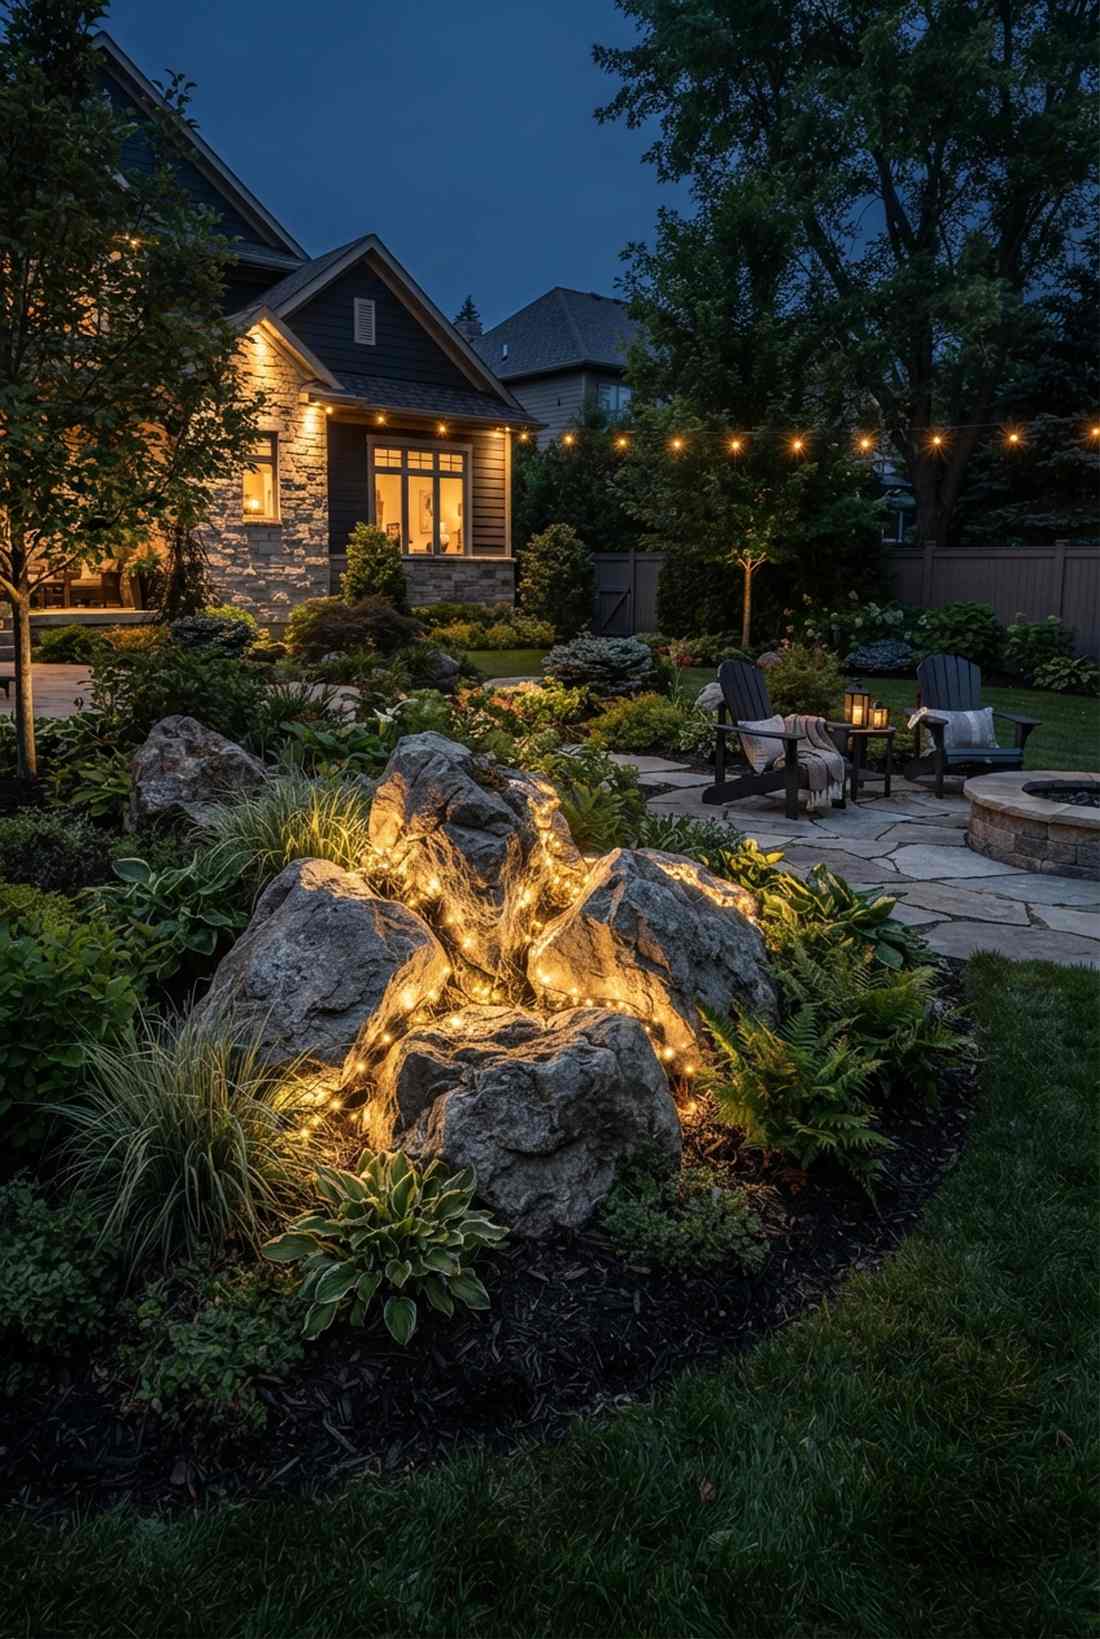
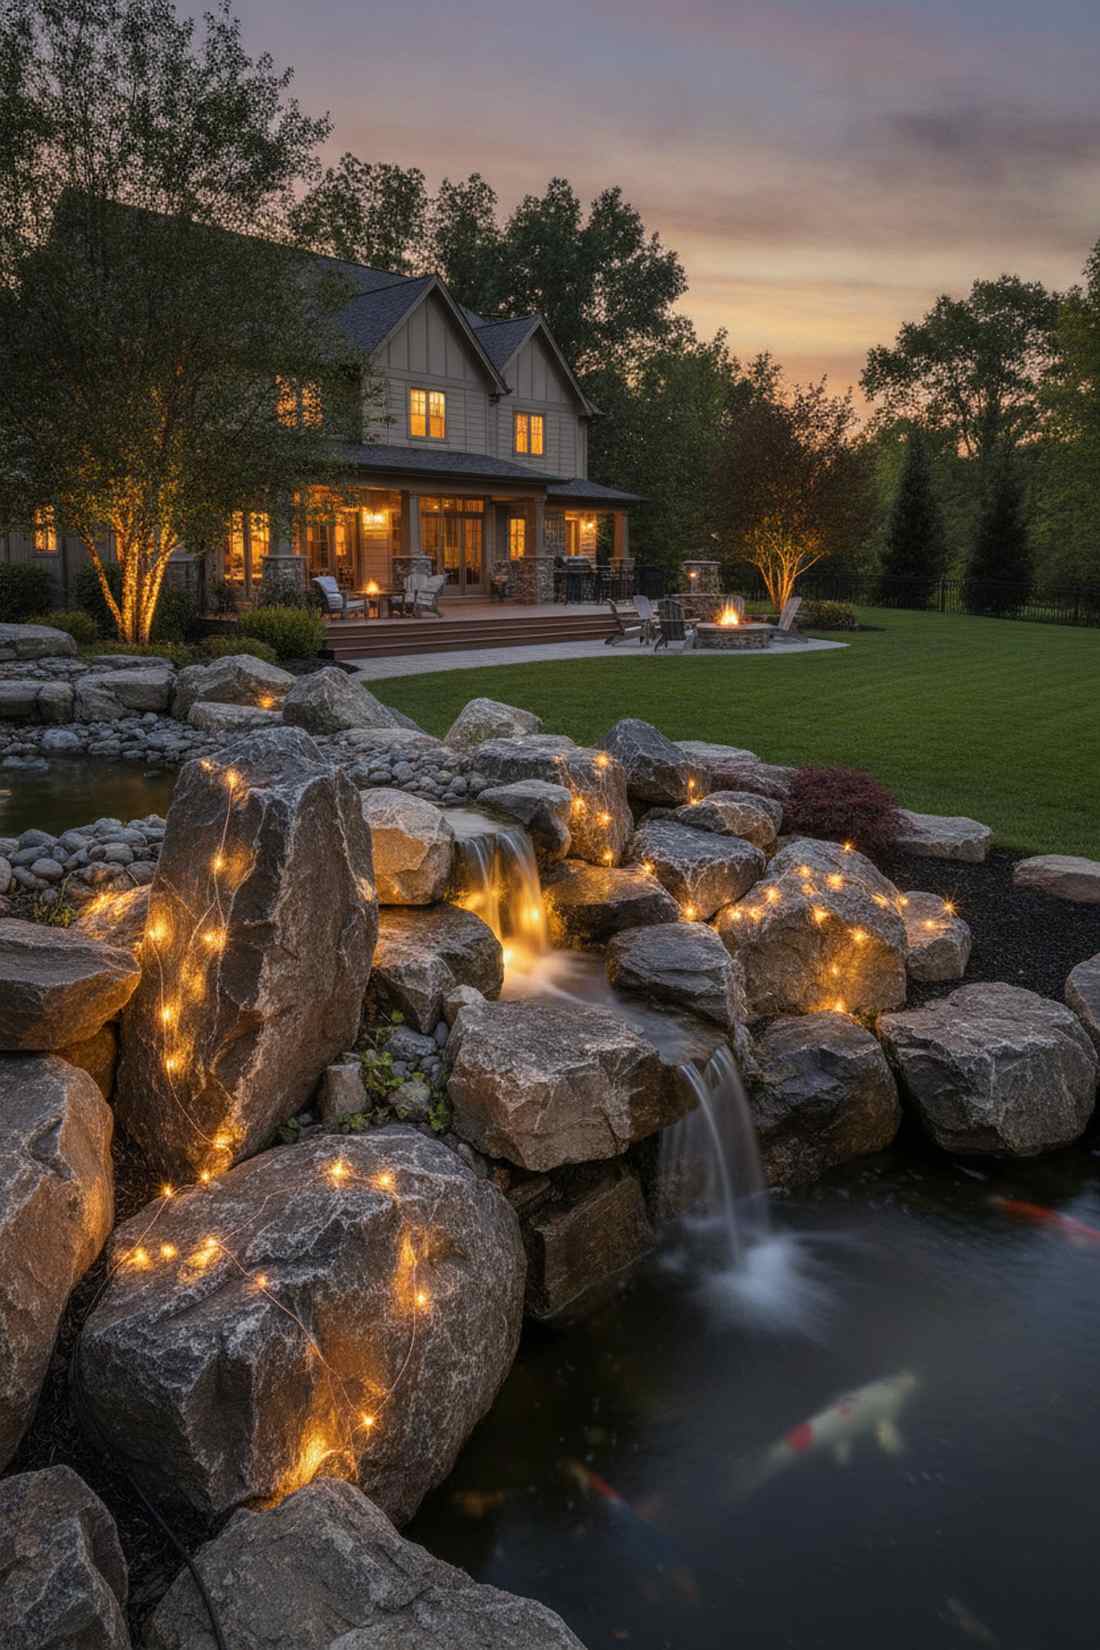
This layout feels like radioactive magic stones pulsing in your landscaping. Textural stone wrapping forces boring, gray rocks to become striking 3D sculptures.
Tucking the wires deep into the natural crevices creates a rugged, shadowed glow that looks incredibly organic and expensive. Utilizing heavy-duty fairy lights christmas decor ensures the jagged rocks don’t slice the thin wiring.
Highlighting a massive rock cluster costs just $20–$35. Pin this for unique landscape lighting.
- Key Materials: Durable thick-wire copper
- Vibe / Style: Rugged natural magic
- Difficulty: Fun and creative
- Budget Breakdown: Thick wire: $25
- Creator’s Tip: Stuff the lights into the deepest cracks rather than wrapping the smooth surface for a glowing-core effect.
- Smart Sourcing: thick-wire durable copper packs and abrasion-resistant sleeves.
Most people buy expensive yard inflatables, but this cheap geometric grid trick looks 10x more sophisticated…
34. Trellis Grid Pattern
Staring at this geometry feels like looking at a meticulously drafted architectural blueprint. Rigid lattice overlay lighting dominates formal, contemporary garden spaces perfectly.
Forcing the lights to follow sharp, exact 90-degree angles delivers a highly satisfying, ordered aesthetic. Grabbing precision miniature garden supplies helps clip the wires cleanly without sagging.
You can grid out a large trellis for roughly $20–$40.
- Key Materials: Stiff architectural wire
- Vibe / Style: Modern formal precision
- Difficulty: Tedious alignment
- Budget Breakdown: Stiff wire: $25 | Mini clips: $5
- Creator’s Tip: Zip-tie every single intersection point; if one sags, the entire geometric illusion is ruined.
- Smart Sourcing: stiff architectural grid wire and micro-precision clips.
35. Raised Bed Perimeter
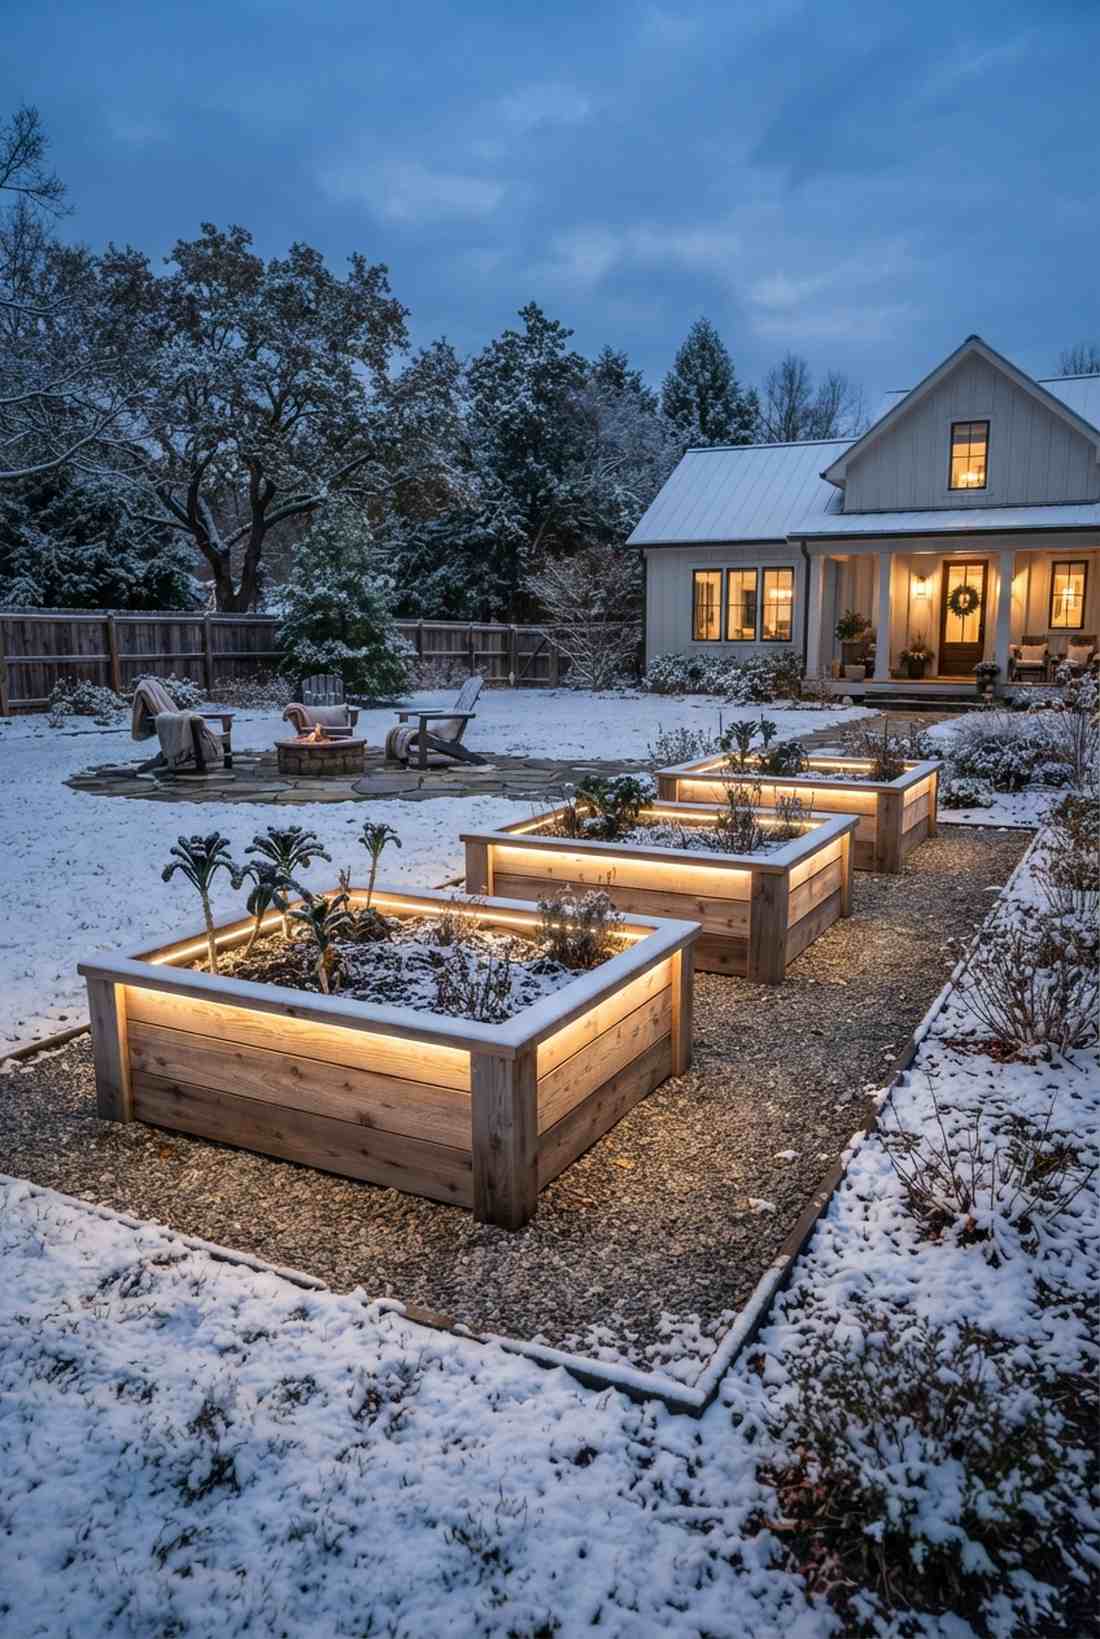
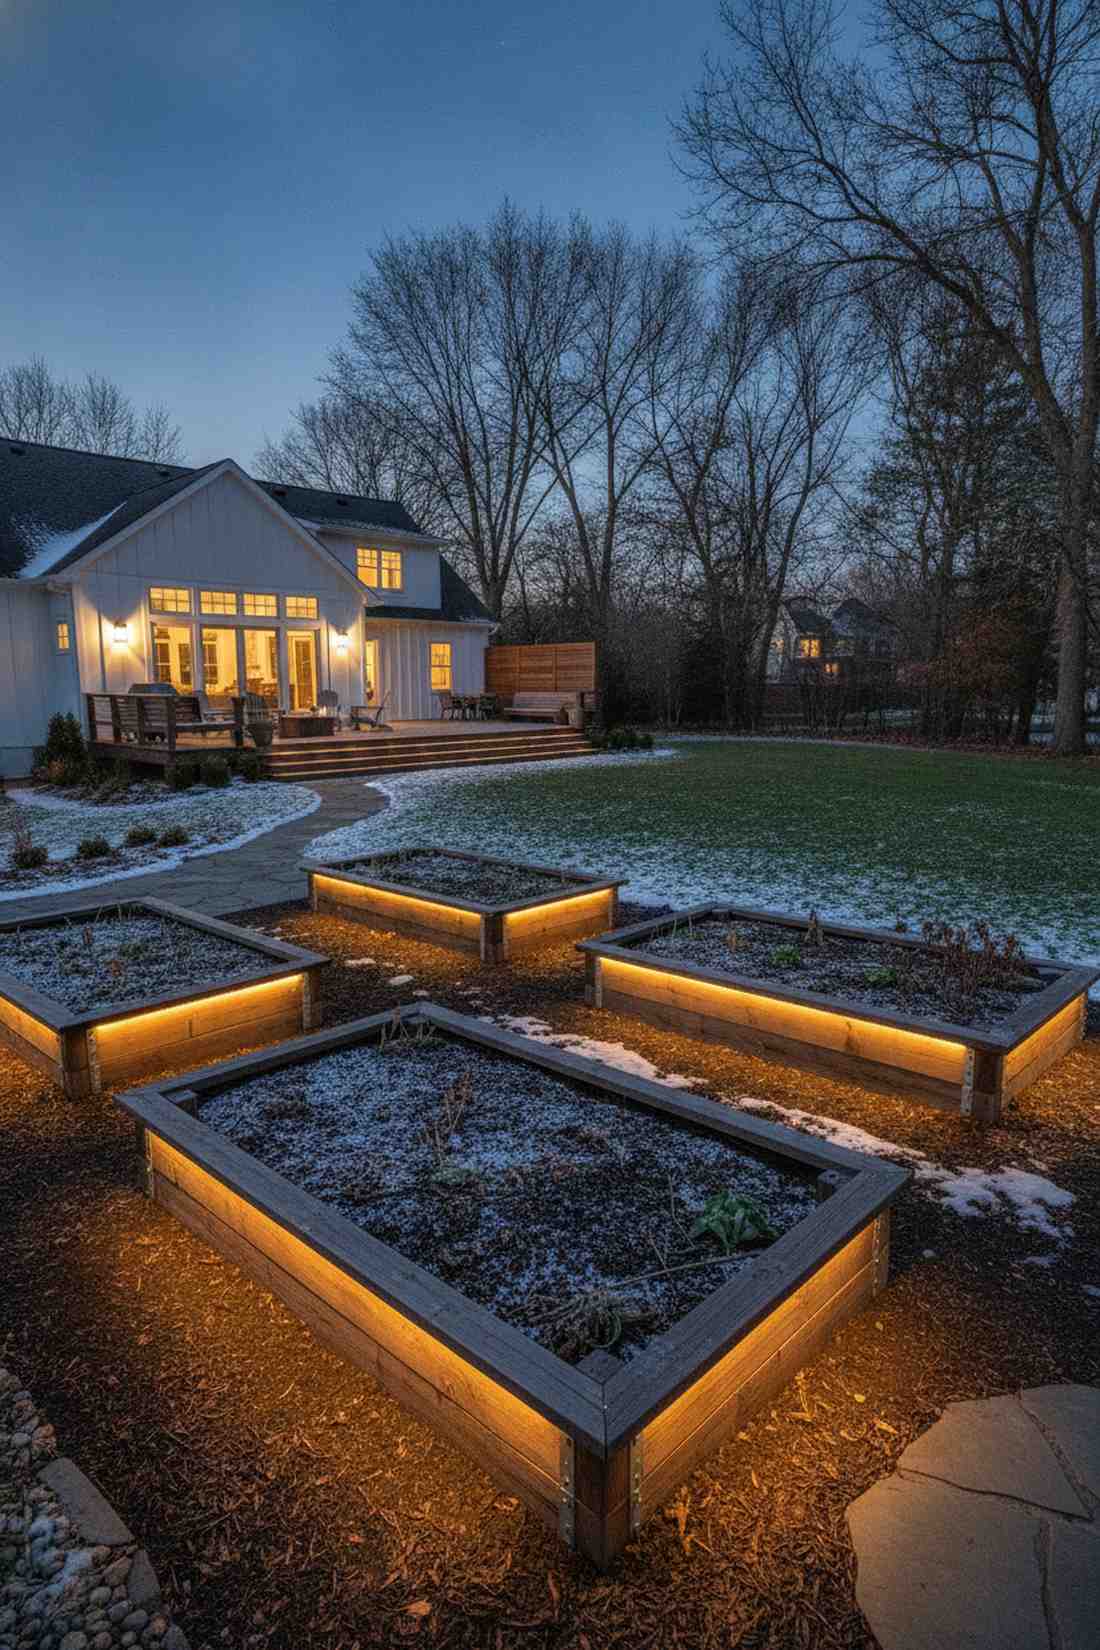
Walking past these boxes feels like touring a high-tech illuminated botanical greenhouse. Downward-facing box framing keeps dead winter vegetable gardens looking highly productive and intentional.
Lighting the perimeter completely celebrates the garden’s structure even when the plants are asleep under the snow. Utilizing specialized fairy lights xmas tree lip-mounts hides the ugly hardware.
A set of three planter boxes costs about $40–$60. Save this to your winter garden planning board.
- Key Materials: Undermount LED strips
- Vibe / Style: Clean agricultural chic
- Difficulty: Easy screw-in mounting
- Budget Breakdown: LED strips: $45 | Wood screws: $5
- Creator’s Tip: Mount the lights on the inside lip pointing down so you light the soil, not the viewer’s eyes.
- Smart Sourcing: undermount weatherproof strips and rust-proof wood clips.
Material Guide: Cheap vs. Premium Aesthetic
Knowing exactly where to save and where to spend makes all the difference in achieving that “looks expensive but isn’t” vibe.
- Standard vs. UV-Resistant/Premium: Standard wire cracks and shorts in freezing weather; upgrading to UV-coated commercial wire stops fading and prevents electrical fires.
- Pre-made Kits vs. Sourcing Locally: Generic craft aisle lights sag and look messy. Buying specific starter kits with specialized tension clips saves hours and delivers laser-straight lines.
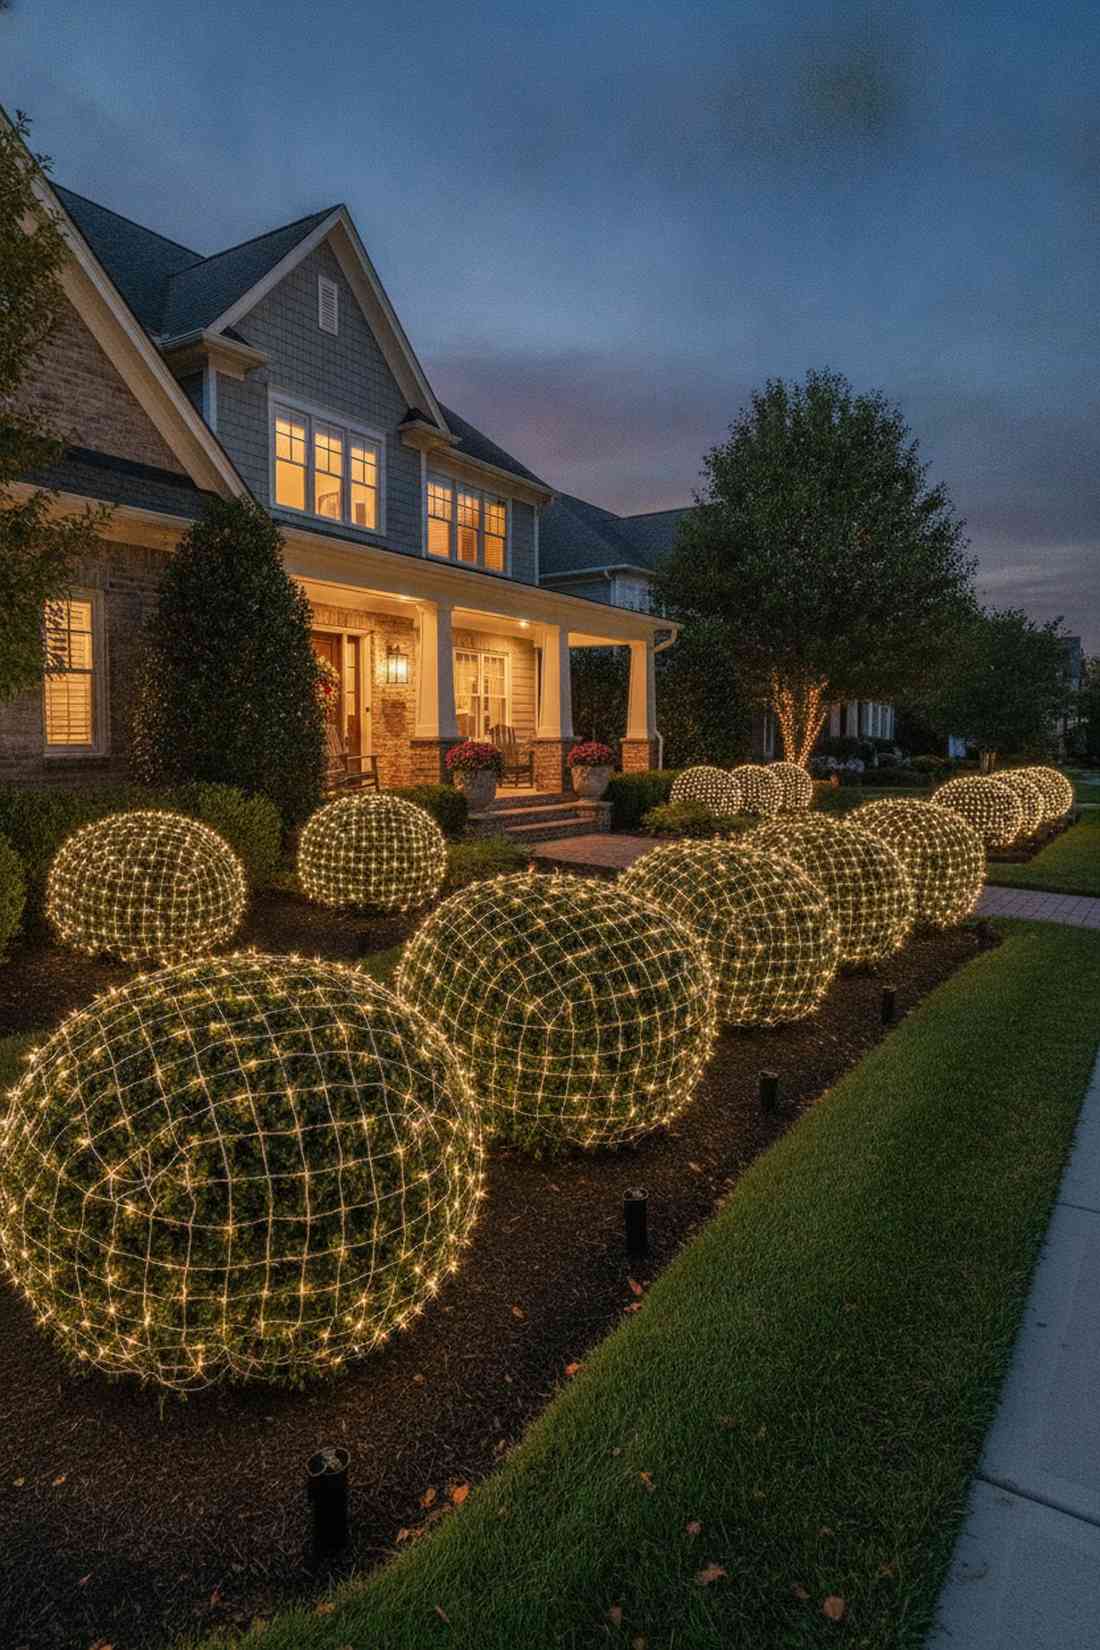
36. Decorative Orb Insertion
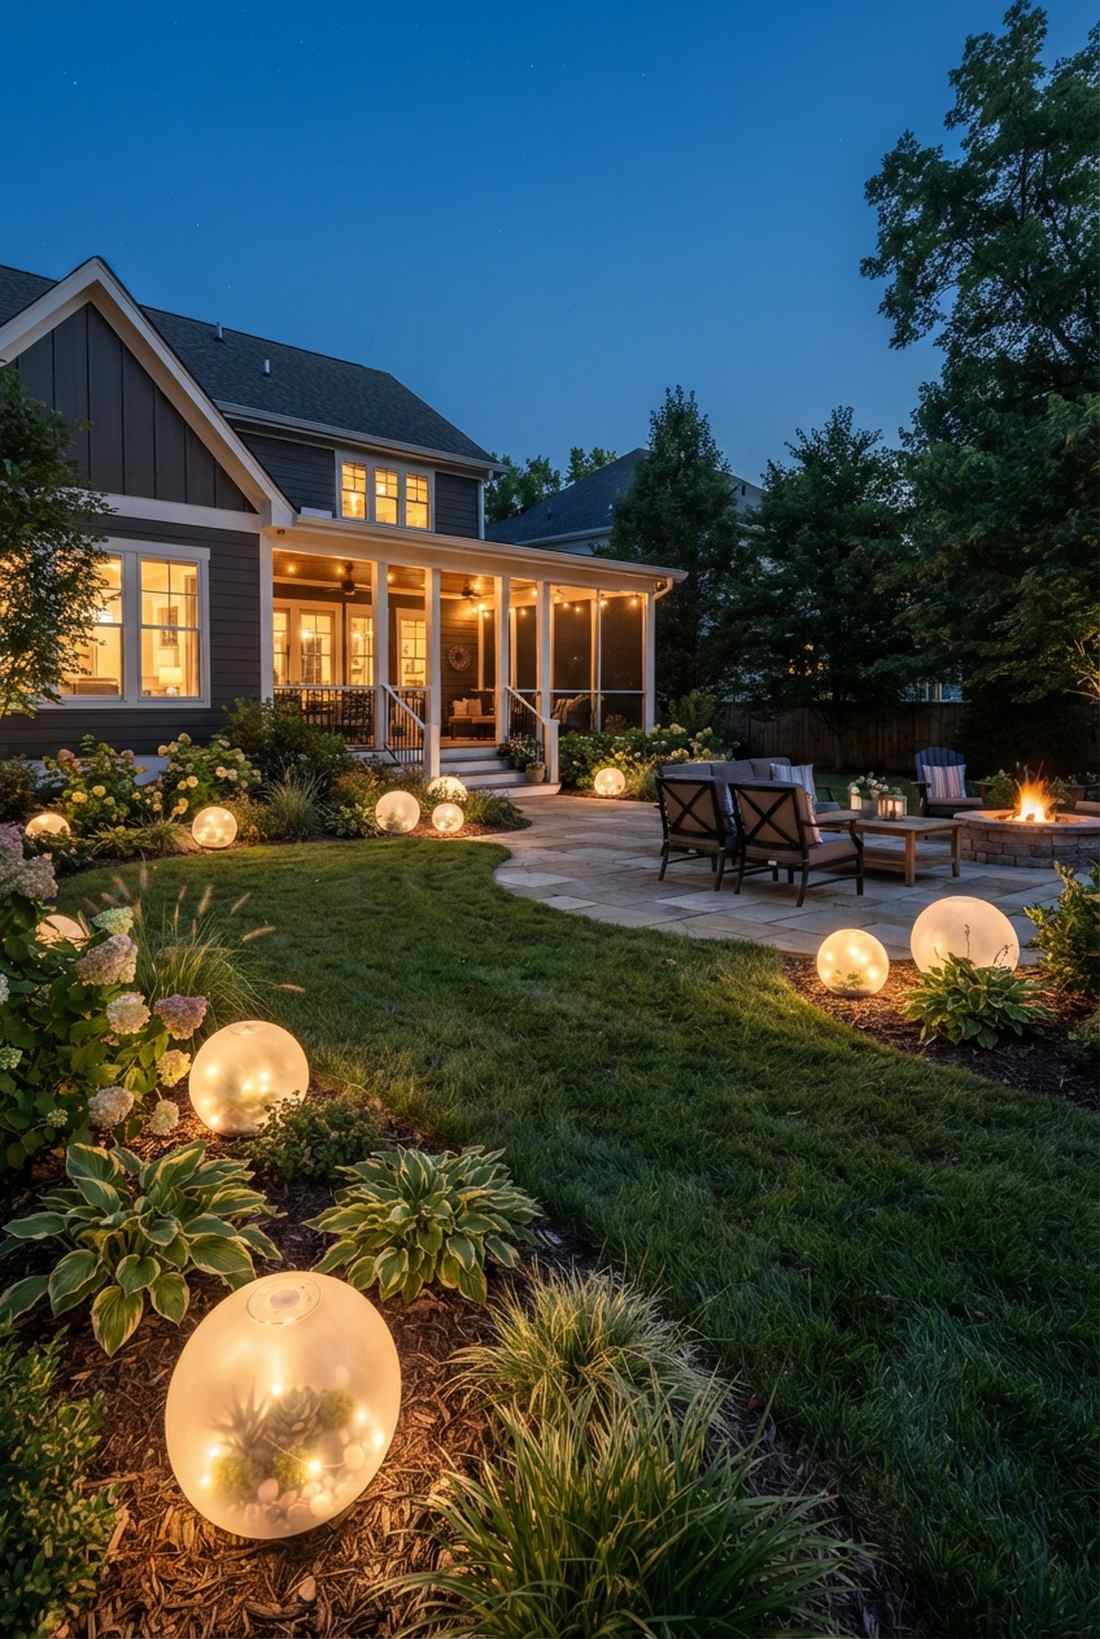
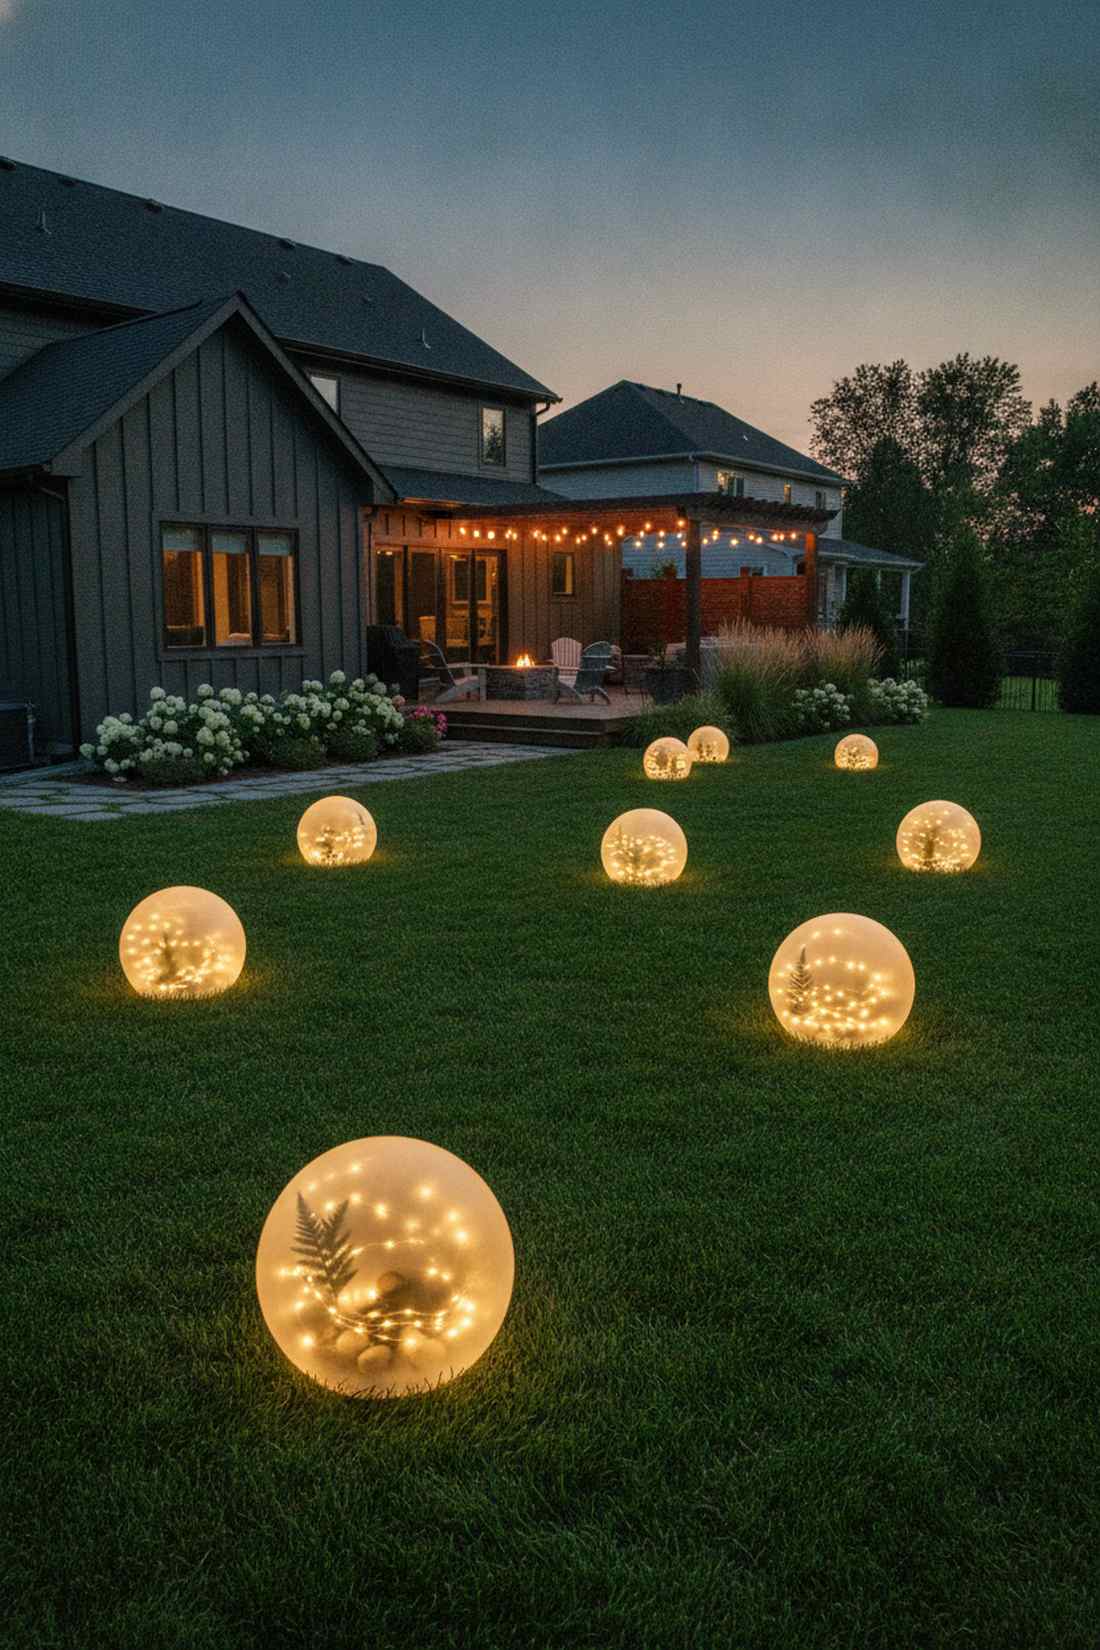
Placing these around the yard feels like massive glowing pearls dropped from the sky. Translucent spherical glow bombs add an incredibly playful, whimsical contrast to rigid home architecture.
Coiling cheap strands inside of plastic globes creates a massive visual footprint for pennies on the dollar. Adding simple terrarium accessories inside the globe creates beautiful shadow silhouettes.
It’s a fast upgrade that completely changes the vibe for only $15–$30 per orb.
- Key Materials: Frost acrylic globes, battery strands
- Vibe / Style: Playful modern whimsy
- Difficulty: Fun DIY crafting
- Budget Breakdown: Acrylic globes: $15 | Battery strands: $10
- Creator’s Tip: Scuff the inside of a clear plastic globe with sandpaper to create a premium frosted diffuser effect.
- Smart Sourcing: bulk pack fillable acrylic globes and waterproof battery starter kits.
37. Birdbath Fountain Glow
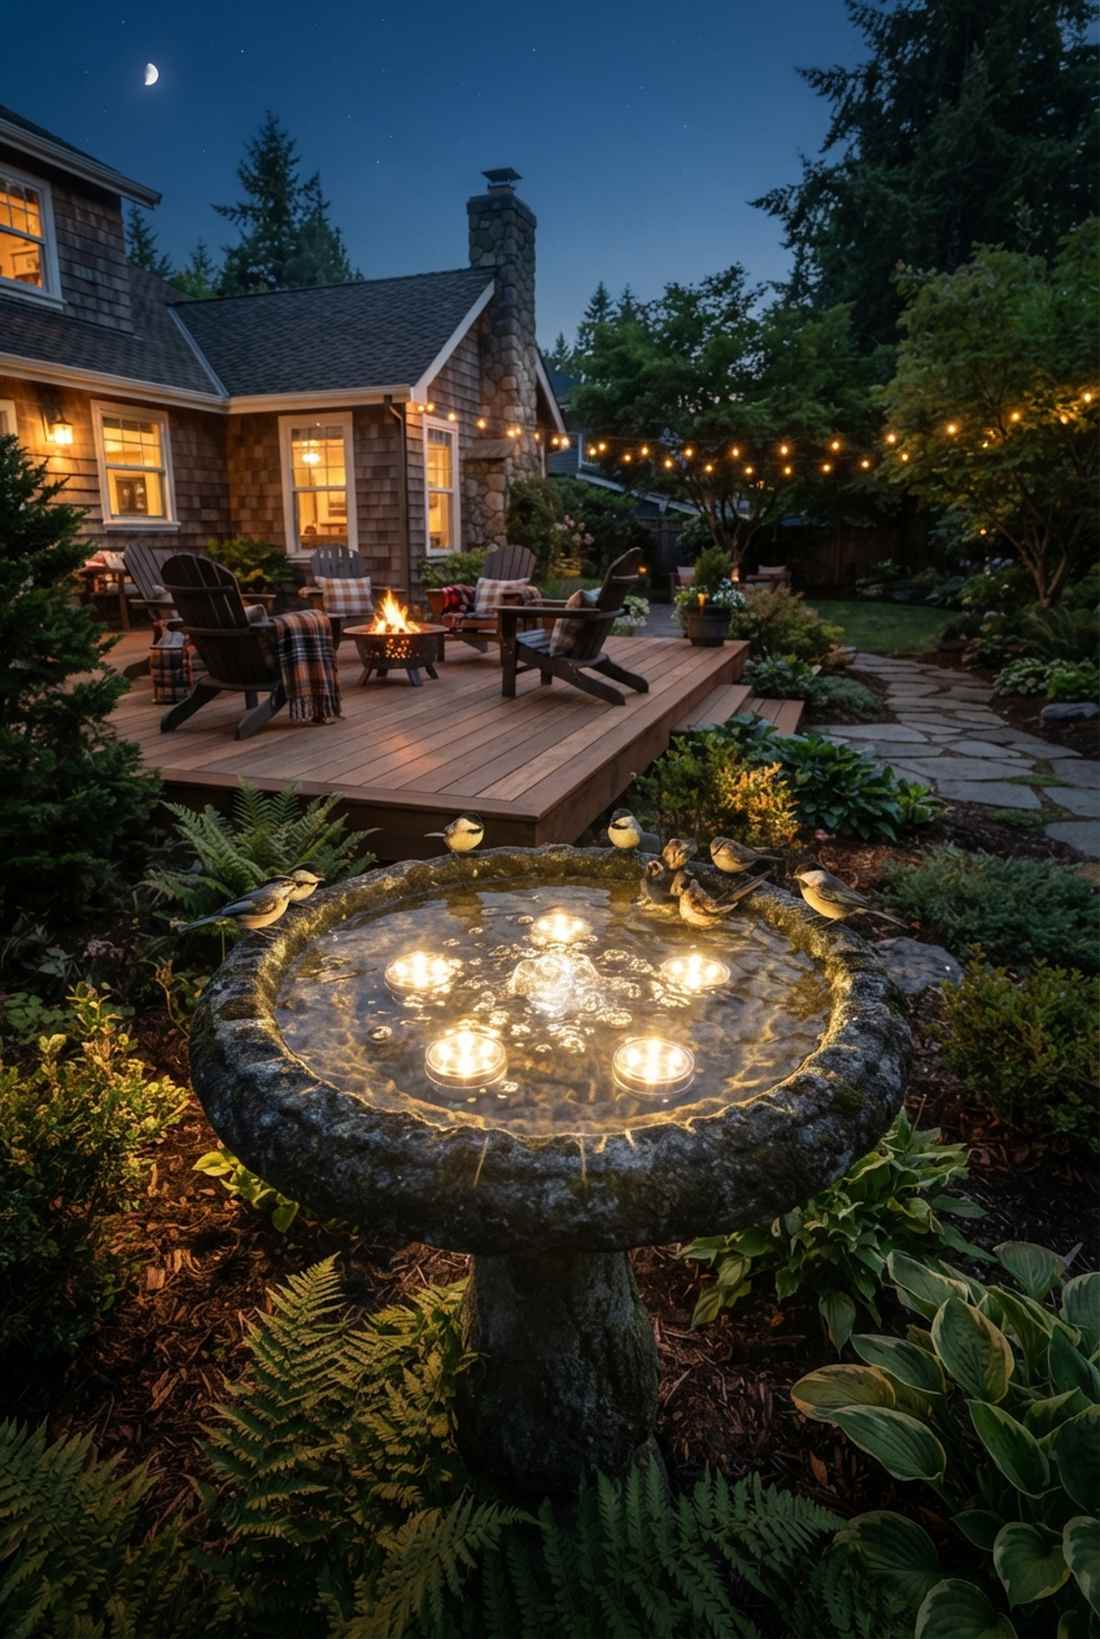
Looking at this basin feels like discovering a glowing magic potion in the middle of winter. Submersible backlit water features create aggressive, stunning focal points in dead garden beds.
Sinking the light source beneath the freezing water creates a refracting, shimmering effect that is impossible to replicate with dry lights. You must use certified IP68 fairy garden kits to avoid electrocuting local wildlife.
This high-end water trick costs just $20–$35. Pin this for unique backyard ideas.
- Key Materials: Fully submersible LED pucks
- Vibe / Style: Enchanting illuminated oasis
- Difficulty: Requires sealed connections
- Budget Breakdown: Submersible lights: $25
- Creator’s Tip: Place a large flat stone over the wire to keep the floating lights anchored perfectly to the bottom.
- Smart Sourcing: IP68 submersible puck starter kits and heavy-water anchor weights.
Most privacy screens look like boring walls at night, but this simple trick turns them into glowing art installations…
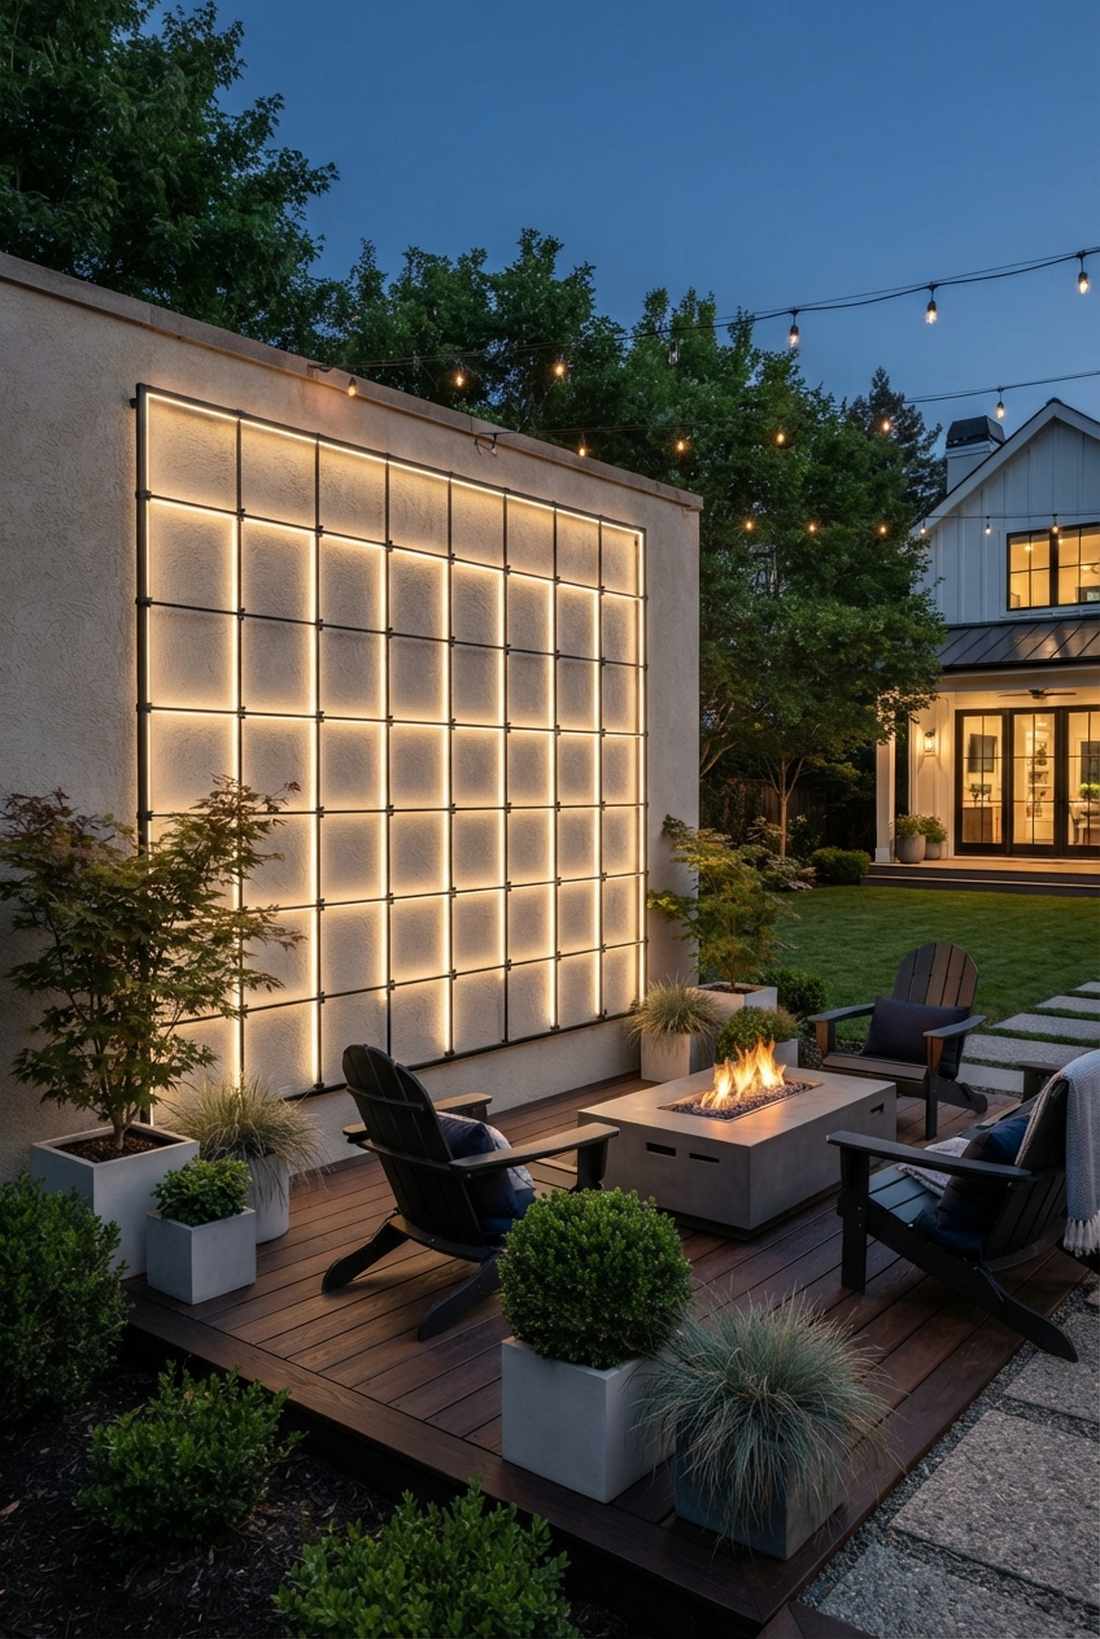
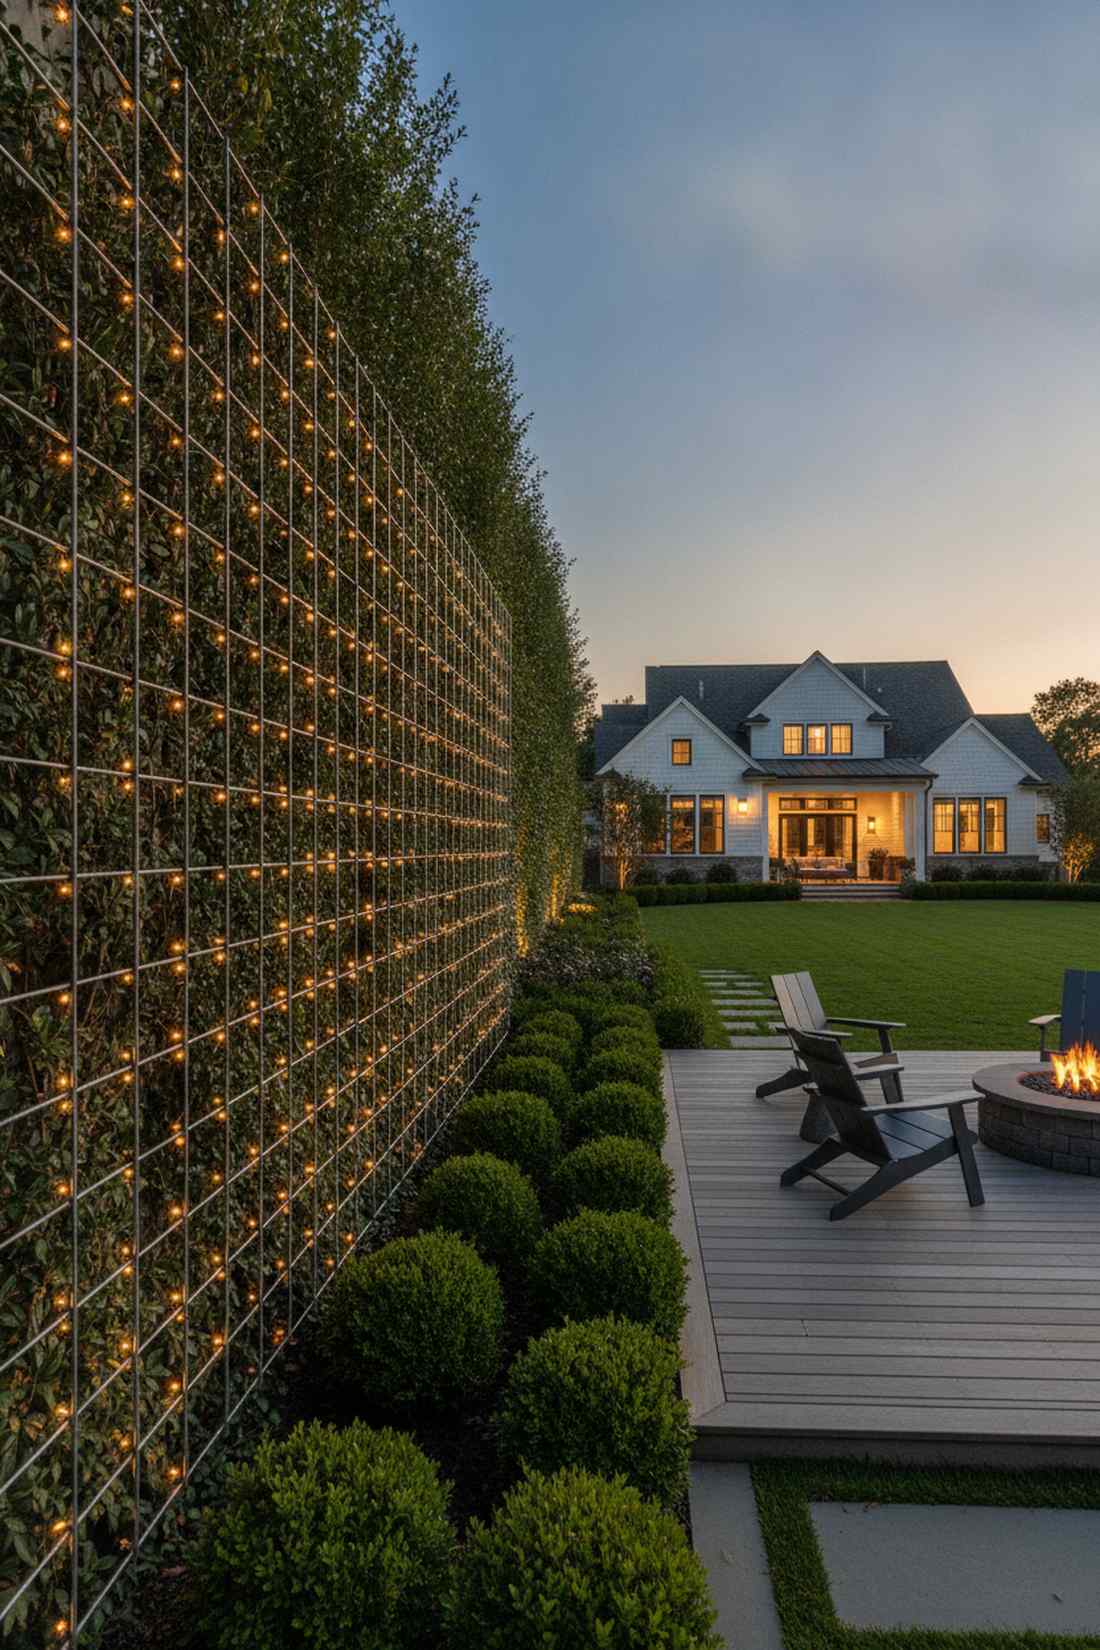
38. Lattice Screen Backing
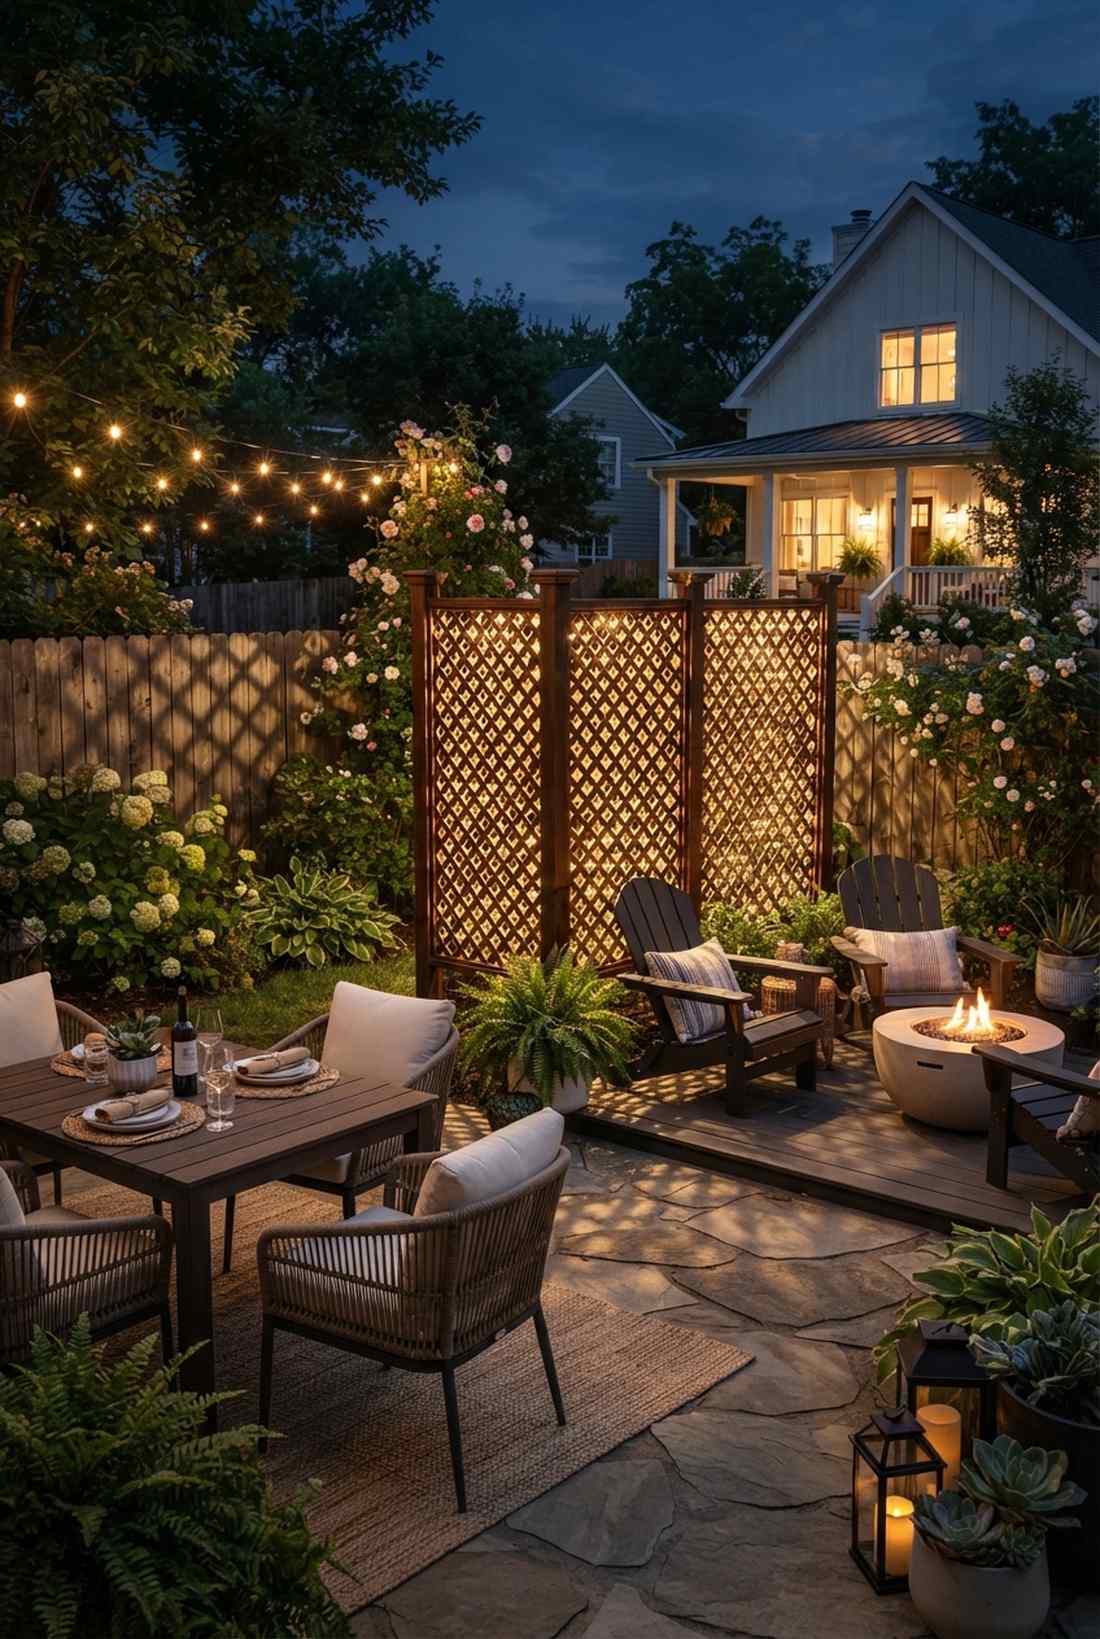
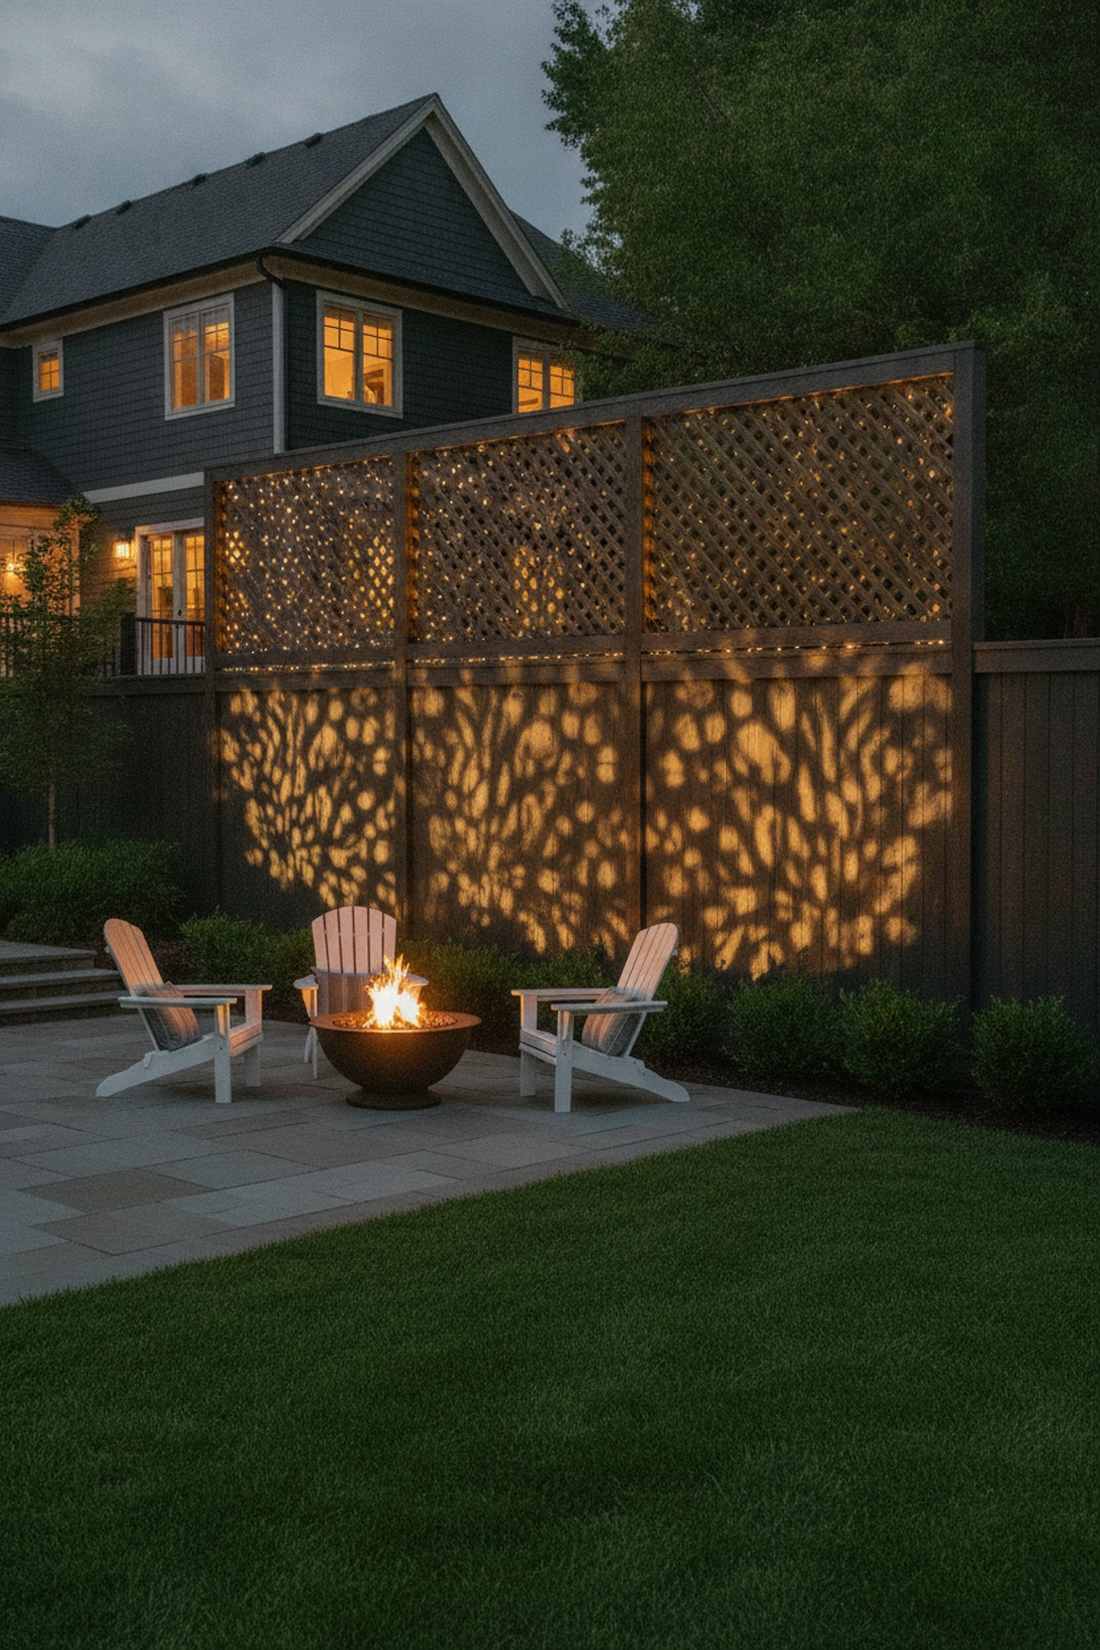
Walking past this setup feels like looking through an intricate, glowing lace veil. Rear-diffused perforated lighting violently transforms ugly privacy fences into high-end decorative screens.
Separating the light source from the wood creates a stunning depth of field with massive, expensive-looking shadow play. Grabbing bright fairy lights christmas decor panels pushes enough lumens through the tiny holes.
You can easily pull this off for around $35–$60.
- Key Materials: High-lumen backdrop nets
- Vibe / Style: Sophisticated layered depth
- Difficulty: Requires rear-access clearance
- Budget Breakdown: Net lights: $45 | Standoff mounts: $10
- Creator’s Tip: Mount the lights exactly 4 inches behind the lattice to maximize the shadow diffusion effect.
- Smart Sourcing: high-lumen backdrop net packs and depth-creating standoff mounts.
39. Planter Box Underlighting
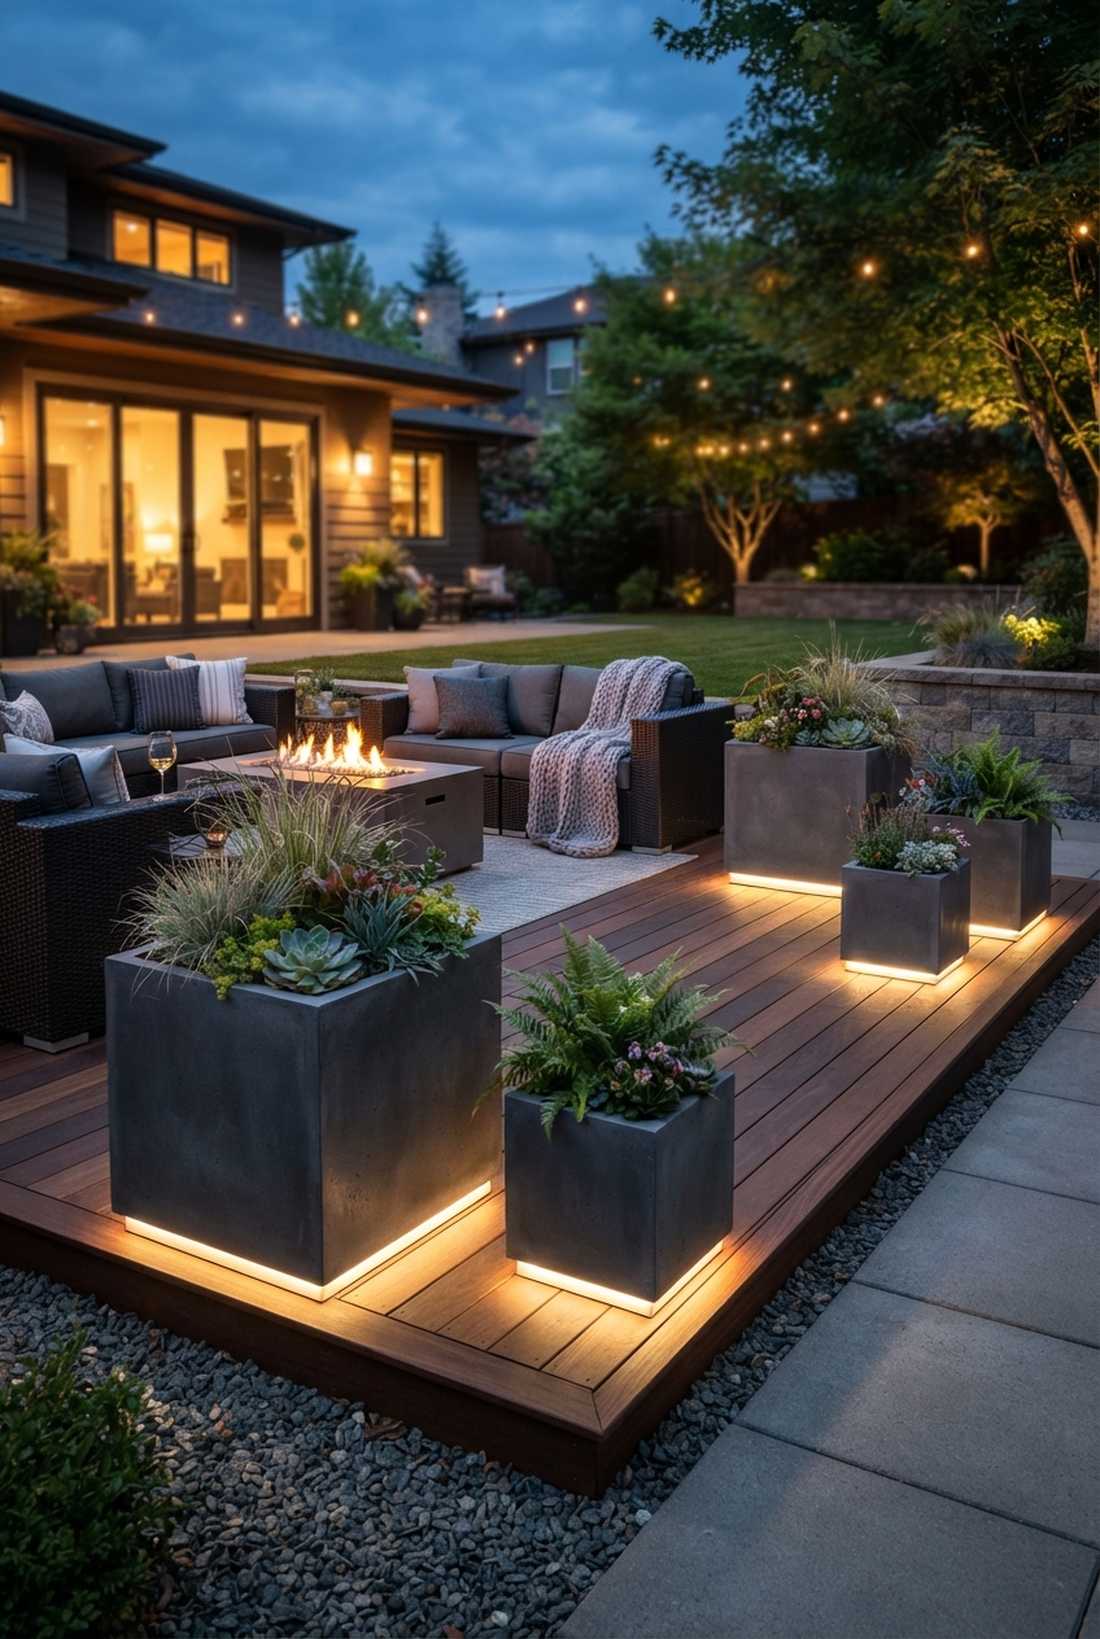
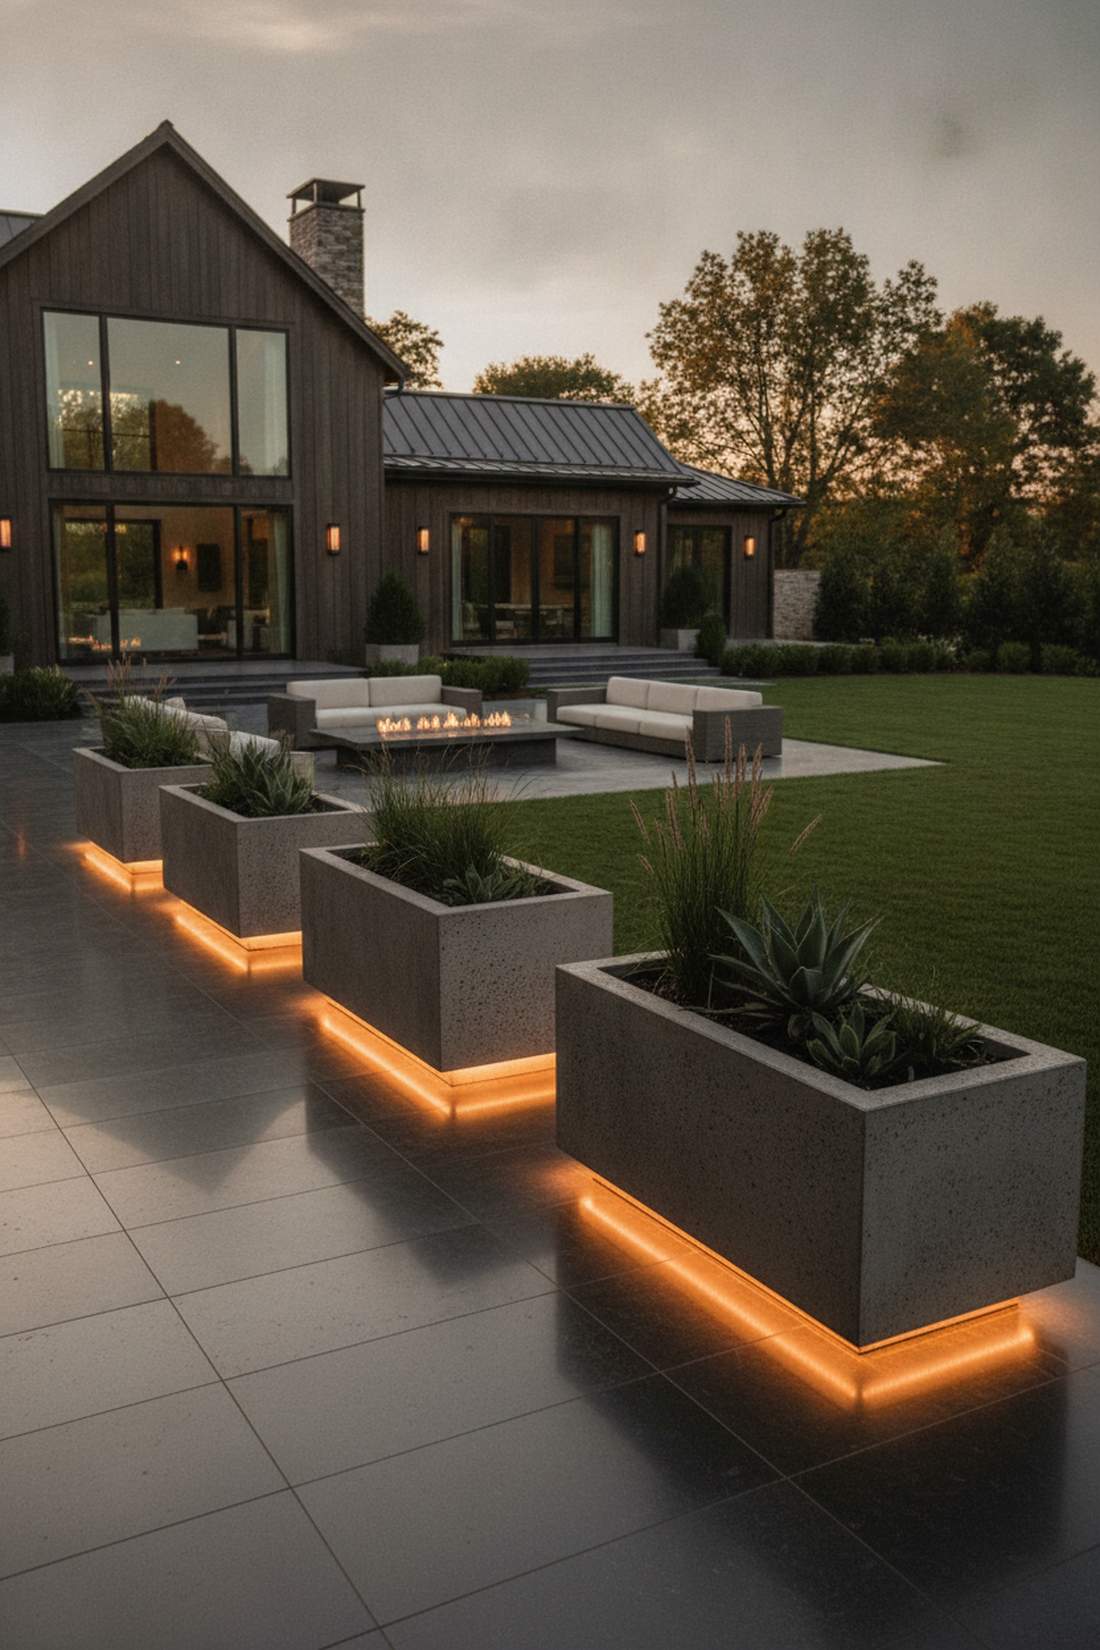
This execution feels like your heavy concrete pots are hovering in zero gravity. Concealed floating base lights add an aggressive, modern edge to boring patio containers.
Putting the glow strictly underneath forces a contemporary, hotel-lobby aesthetic that looks far more expensive than it is. Sourcing flat-profile miniature garden supplies prevents the pots from wobbling on the wires.
This modern illusion costs roughly $20–$40 for a set of pots. Save this to your modern patio board.
- Key Materials: Flat waterproof LED tape
- Vibe / Style: Ultra-modern floating aesthetic
- Difficulty: Simple peel-and-stick
- Budget Breakdown: Waterproof tape: $25
- Creator’s Tip: Clean the bottom of the pot with rubbing alcohol before applying the adhesive strip, or it will fall off immediately.
- Smart Sourcing: flat-profile waterproof tape kits and heavy-duty adhesion promoters.
40. Vertical Garden Integration
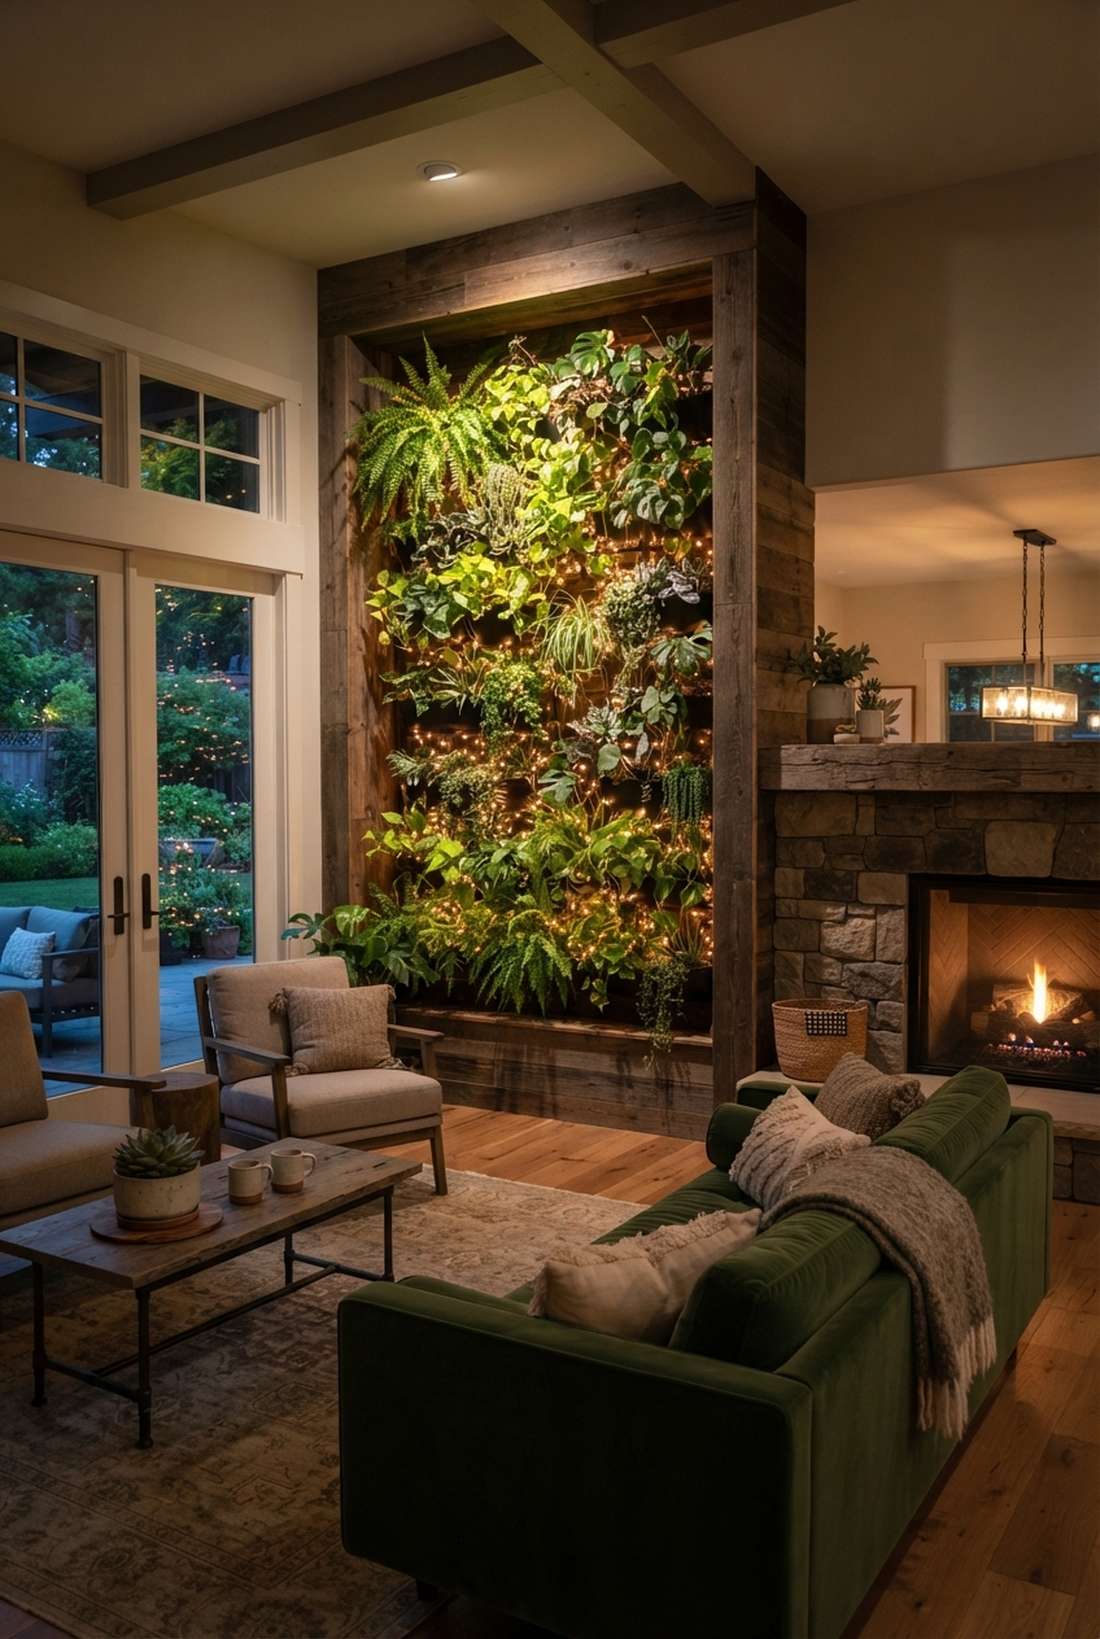
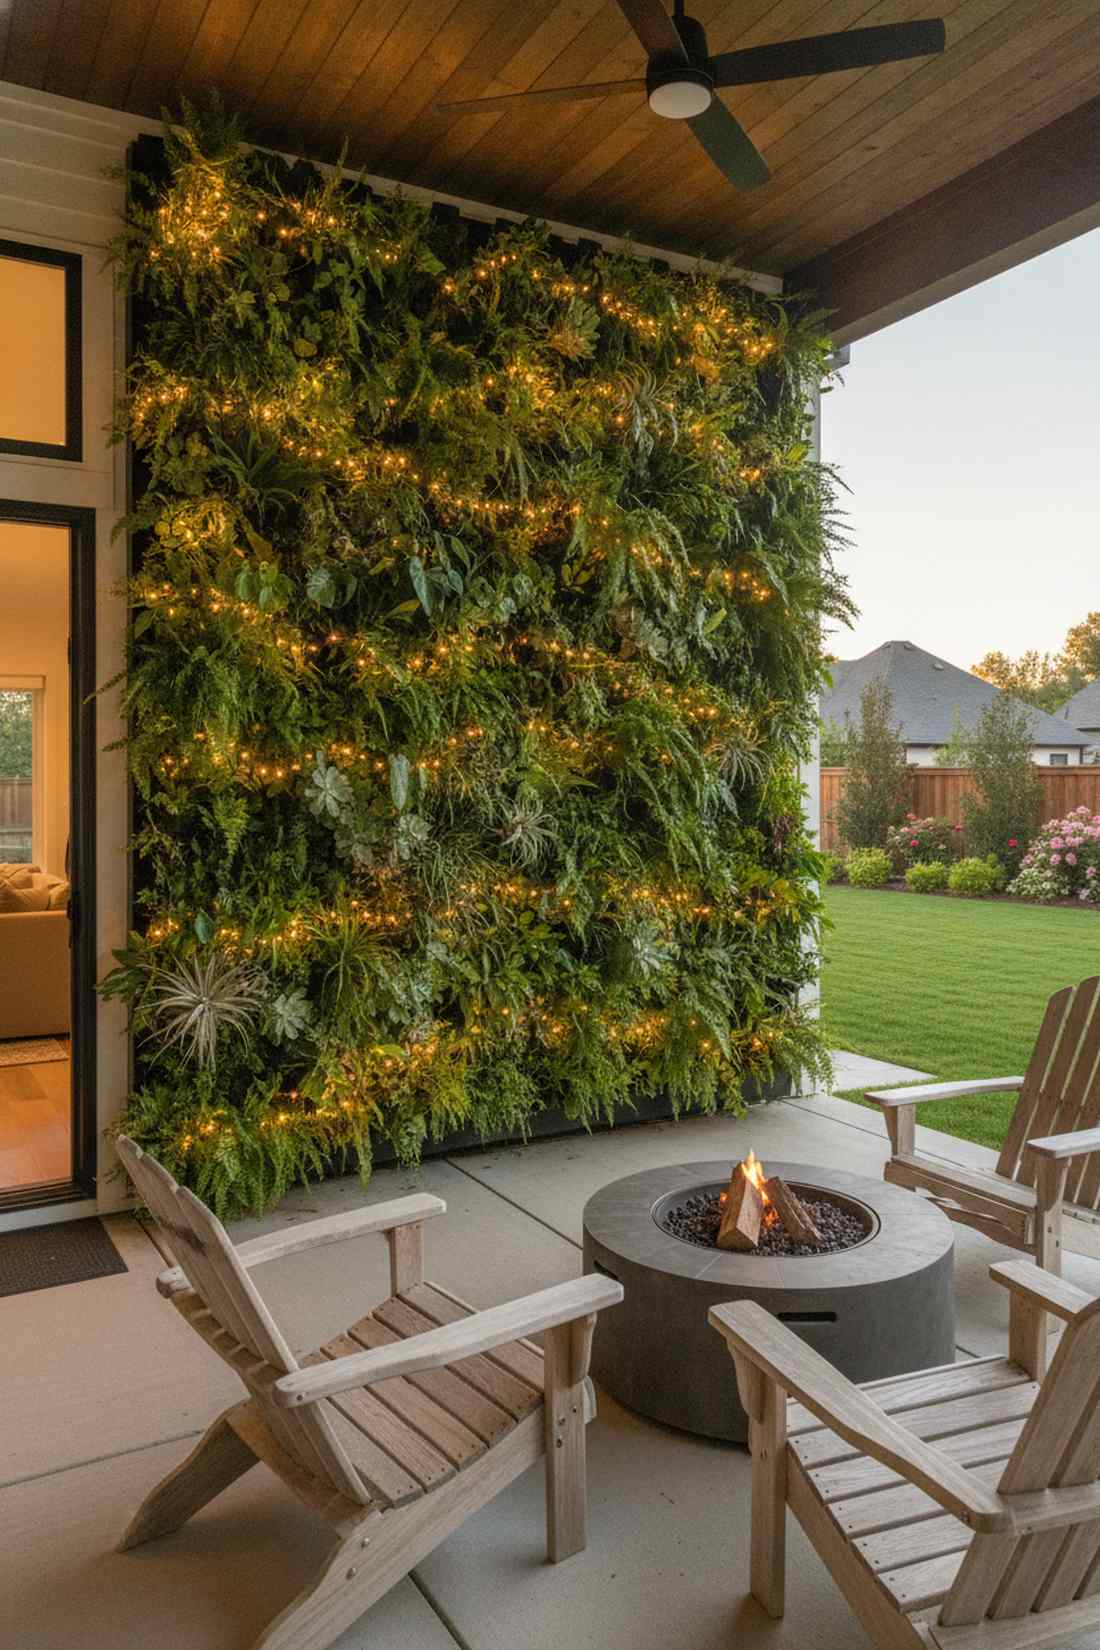
Staring at this wall feels like looking deep into a glowing, bioluminescent jungle. Inter-foliage depth lighting resurrects flat, boring wall planters into deep, 3D masterpieces.
Weaving the wire tightly behind the leaves gives a designer-level finish that highlights the varying textures of the plants. Utilizing low-heat fairy lights xmas tree nodes ensures your expensive wall plants aren’t scorched.
A standard living wall upgrade runs about $25–$45.
- Key Materials: Low-heat micro copper
- Vibe / Style: Lush botanical glow
- Difficulty: Delicate plant handling
- Budget Breakdown: Micro copper: $30
- Creator’s Tip: Keep the lights strictly away from the root moisture zones to prevent rapid wire corrosion.
- Smart Sourcing: low-heat micro copper bulk packs and corrosion-resistant sleeves.
Strategic Color Temperature and Combinations
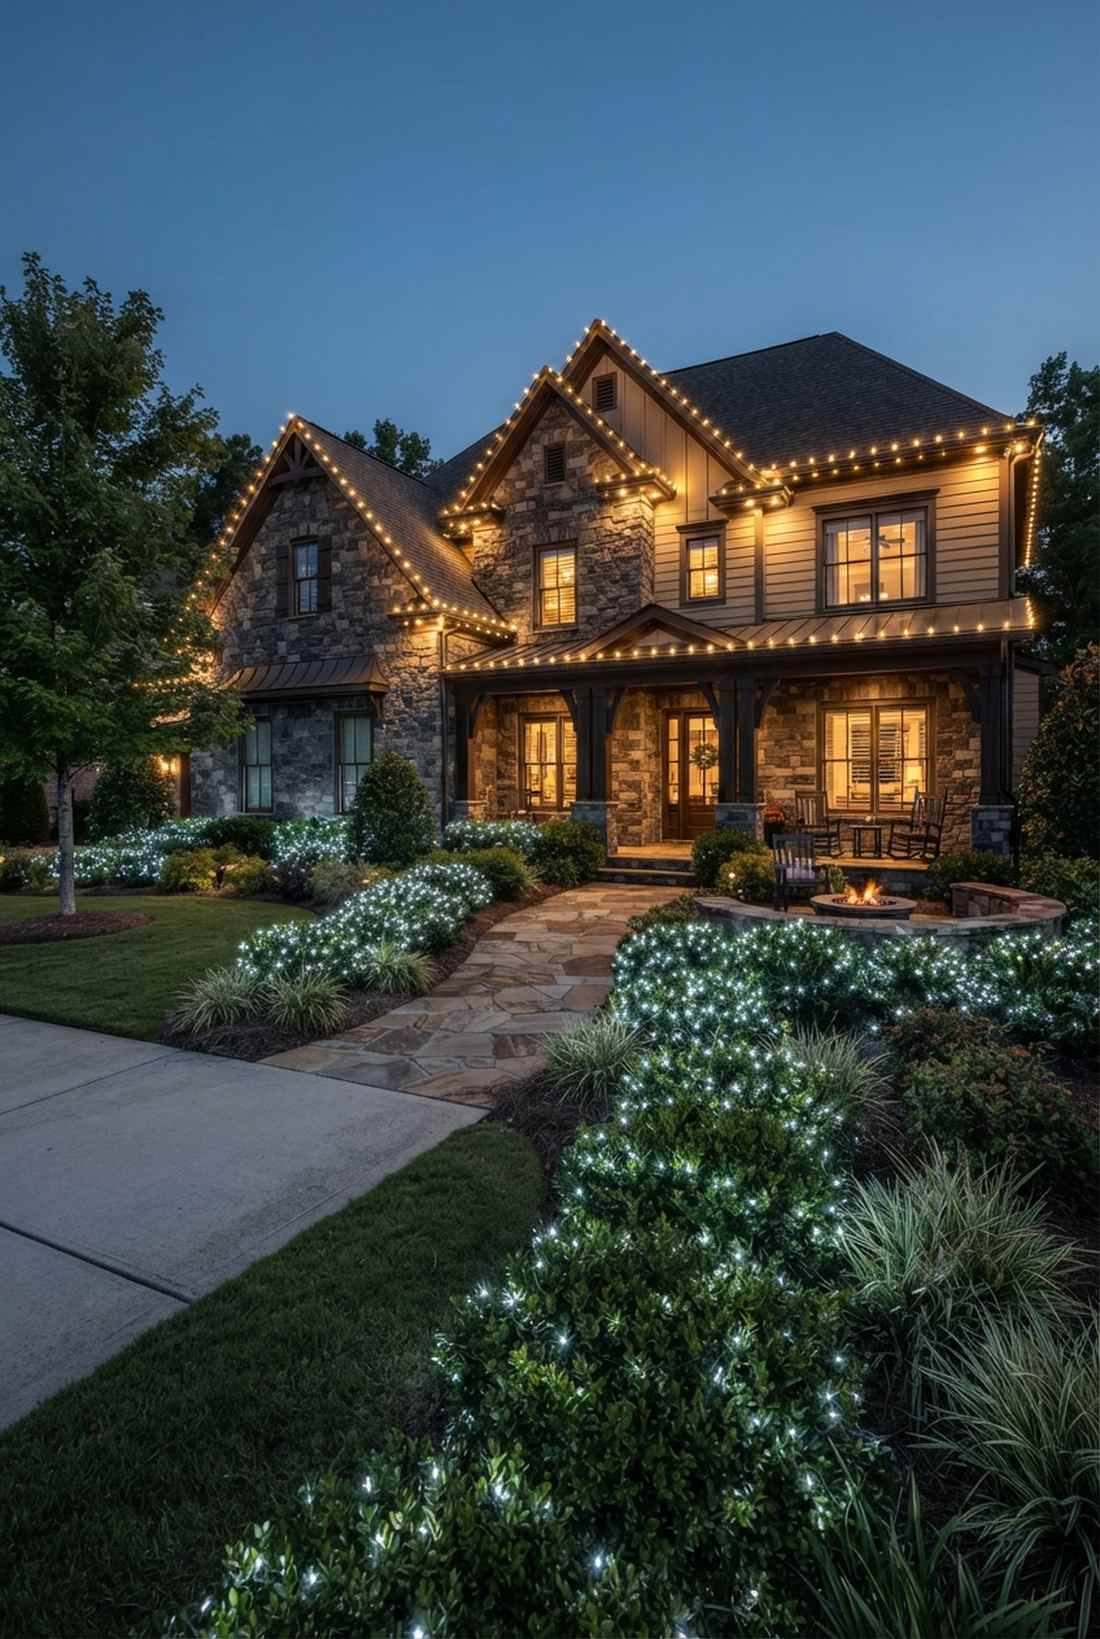
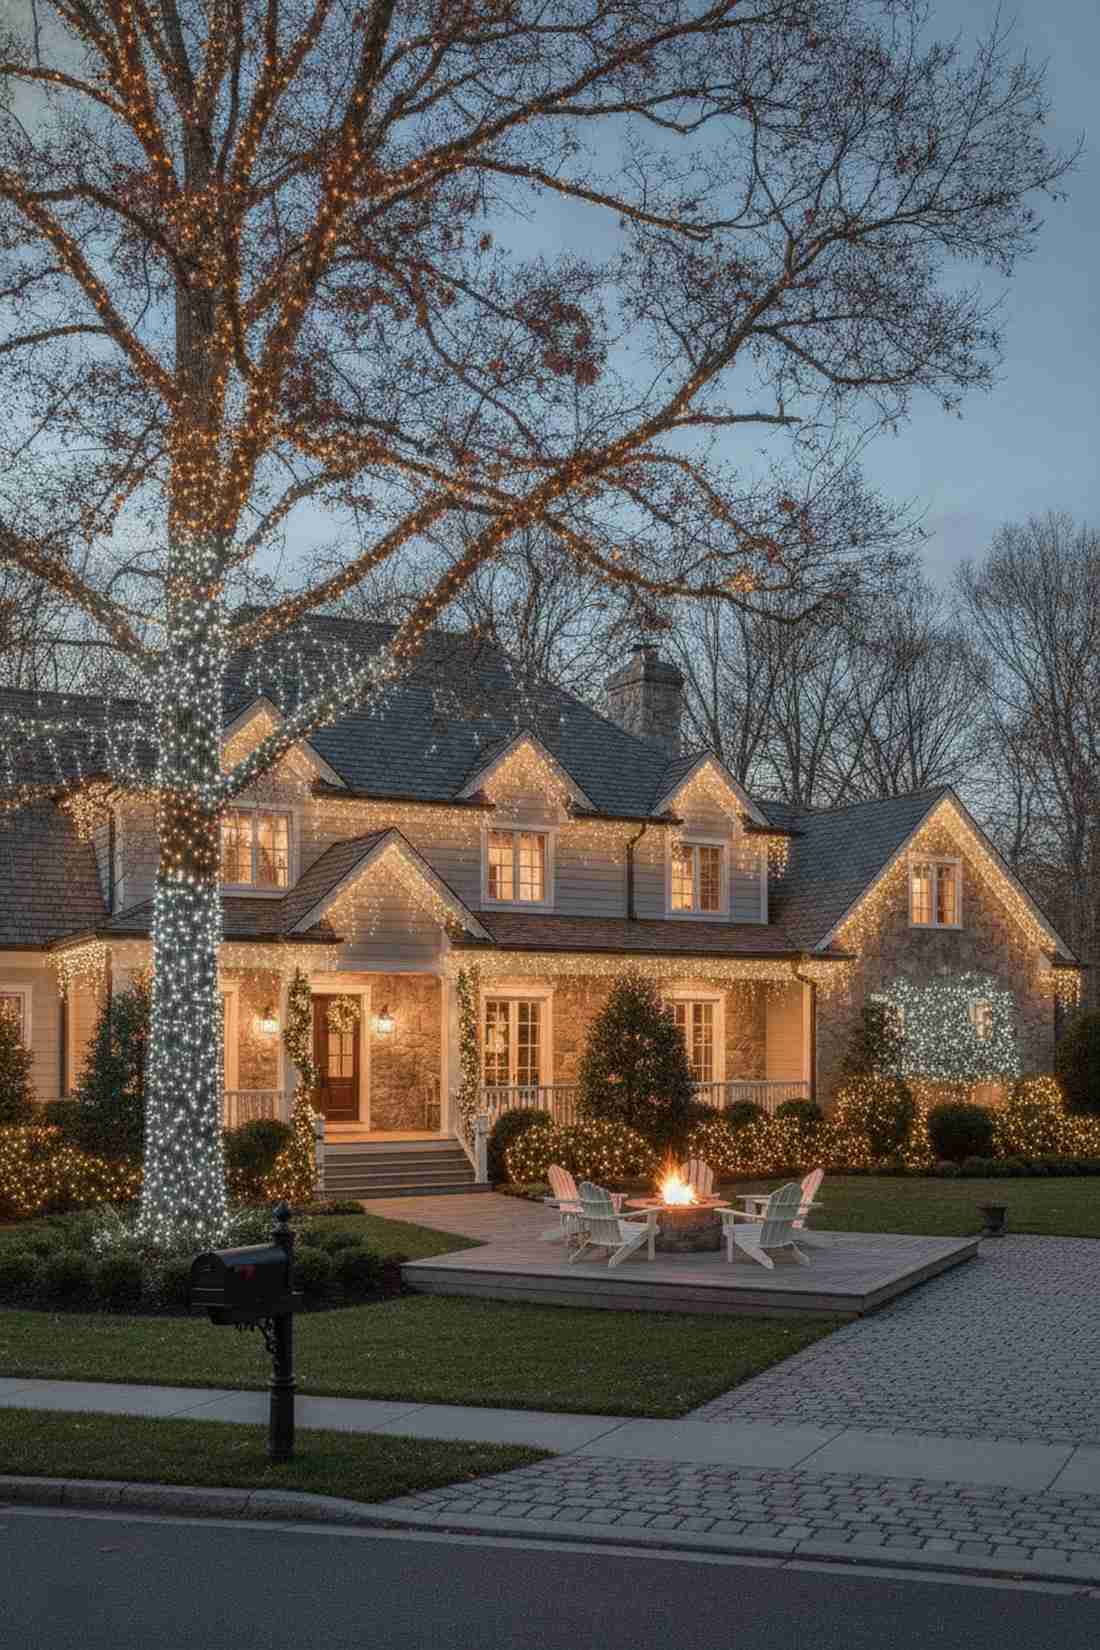
41. Warm White Classic
This monochromatic tone feels like bathing your entire house in rich, liquid gold. Amber-toned cohesive lighting is the absolute pinnacle of timeless, wealthy-looking estate decor.
Restricting the palette completely subverts chaotic multi-color trends and delivers a highly sophisticated, architectural look. Snagging premium fairy garden kits with exact 2700K temperature matching is critical.
You can execute this classy baseline for around $40–$70. Pin this for timeless holiday curb appeal.
- Key Materials: 2700K matched spools
- Vibe / Style: Traditional estate luxury
- Difficulty: Focus on symmetry
- Budget Breakdown: Matched spools: $60
- Creator’s Tip: Never mix brands; different brands have slightly different “warm” tones that look terribly messy when placed side-by-side.
- Smart Sourcing: 2700K exact-match bulk packs and commercial grade amber starter kits.
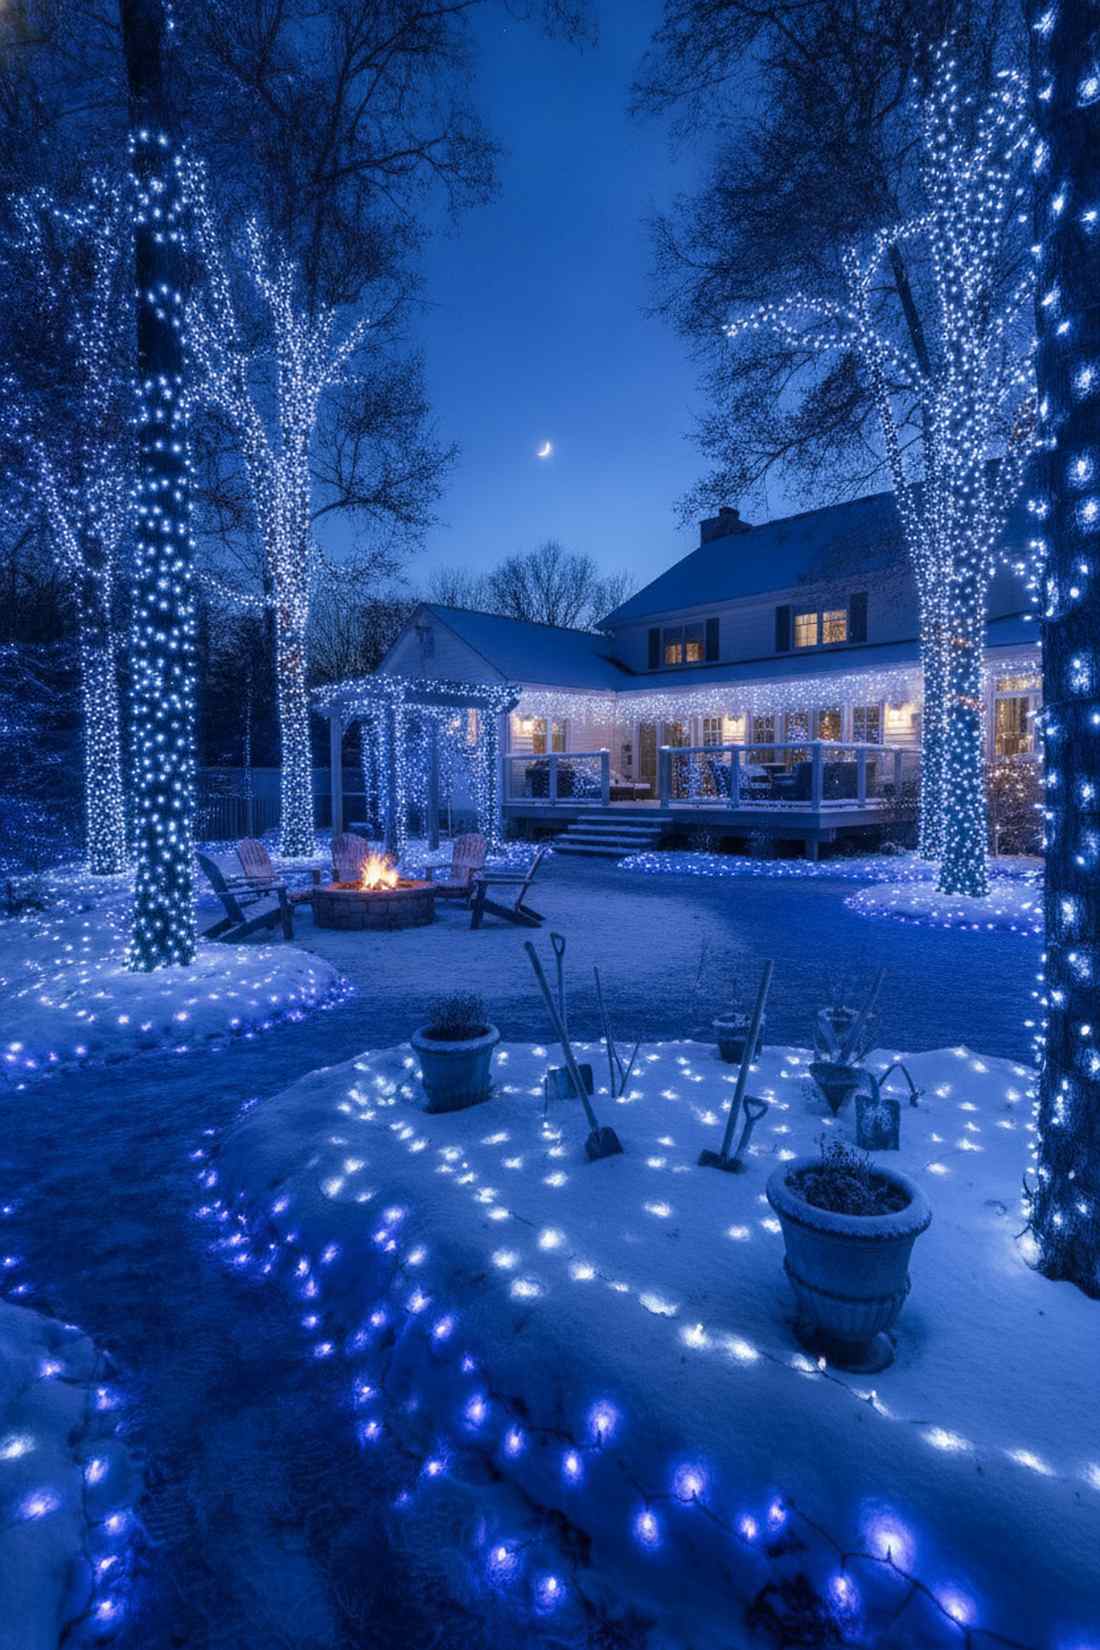
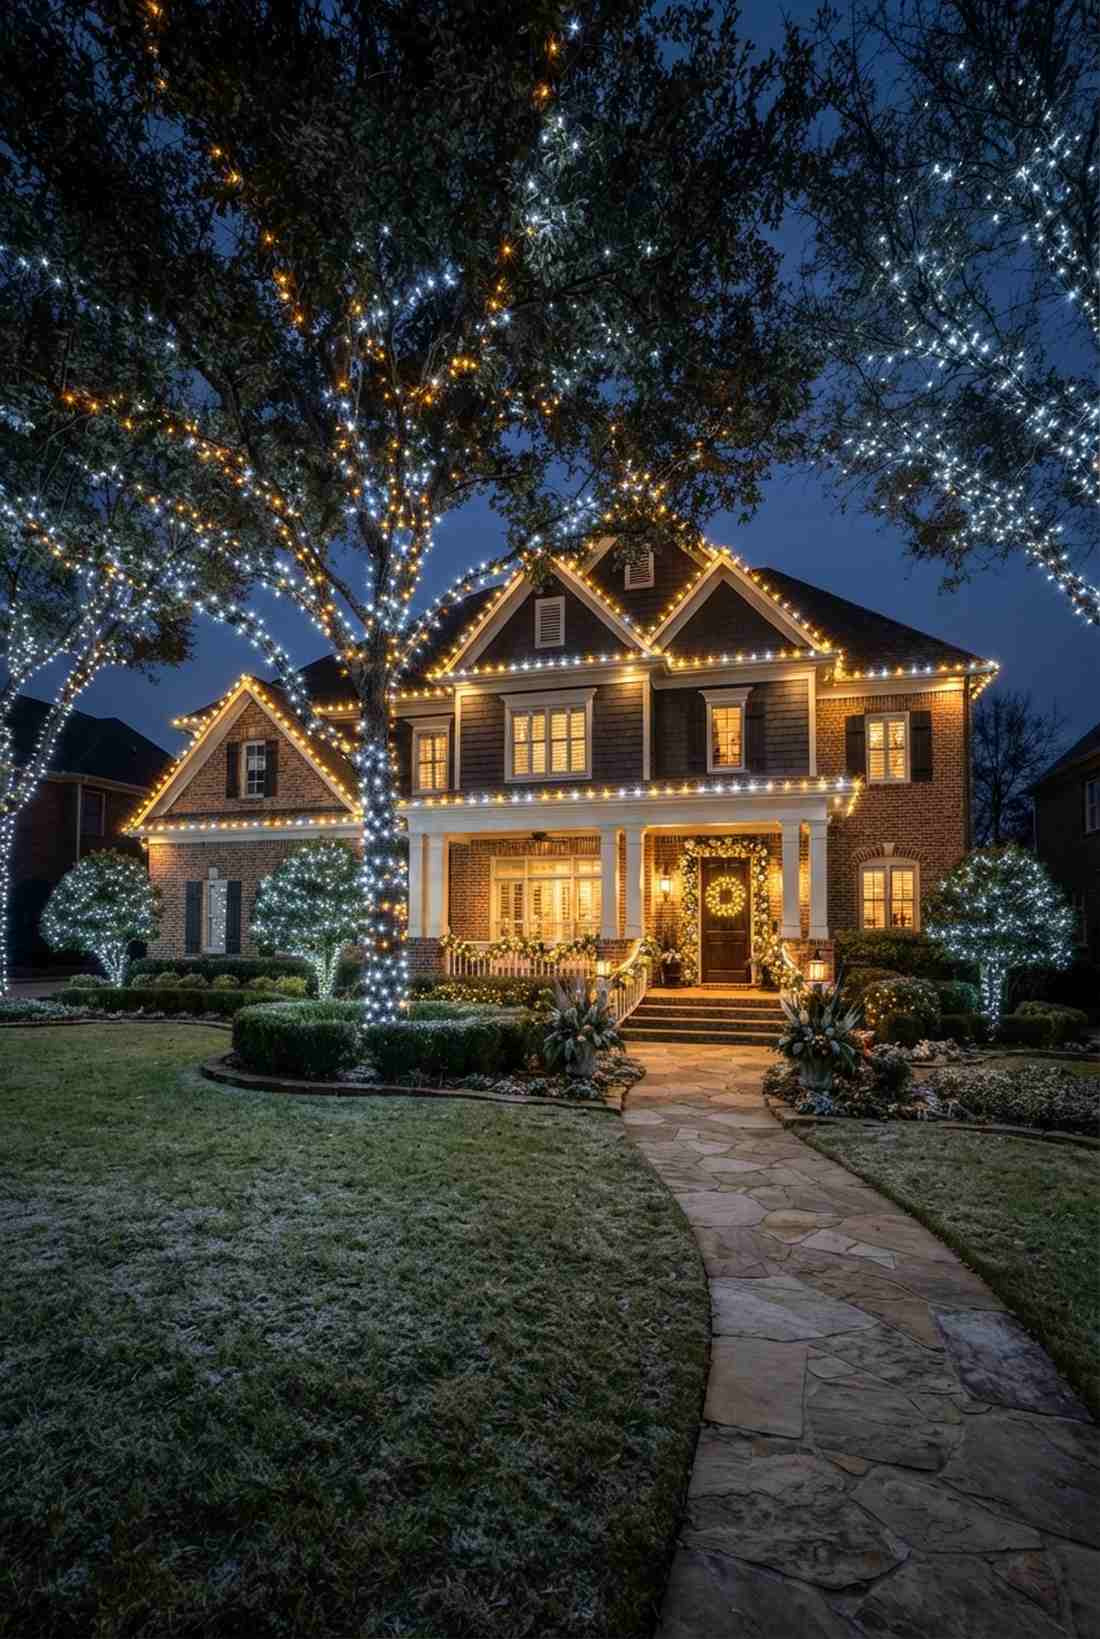
42. Cool White Contemporary
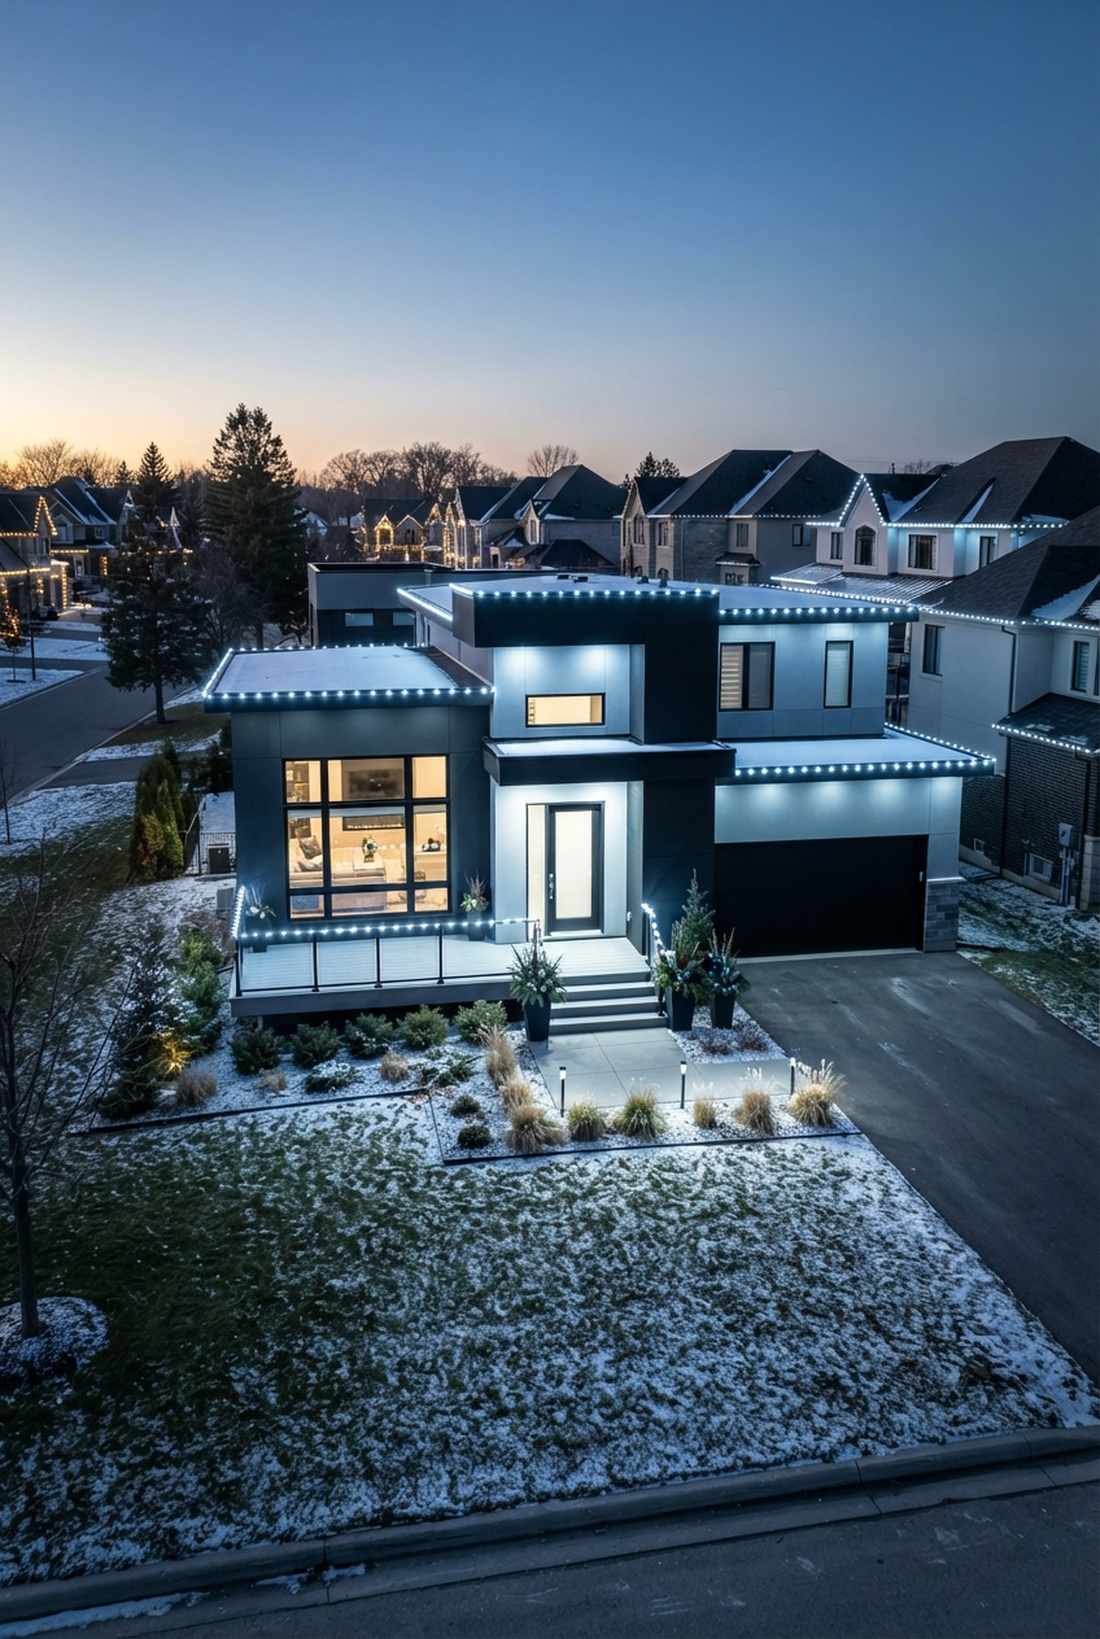
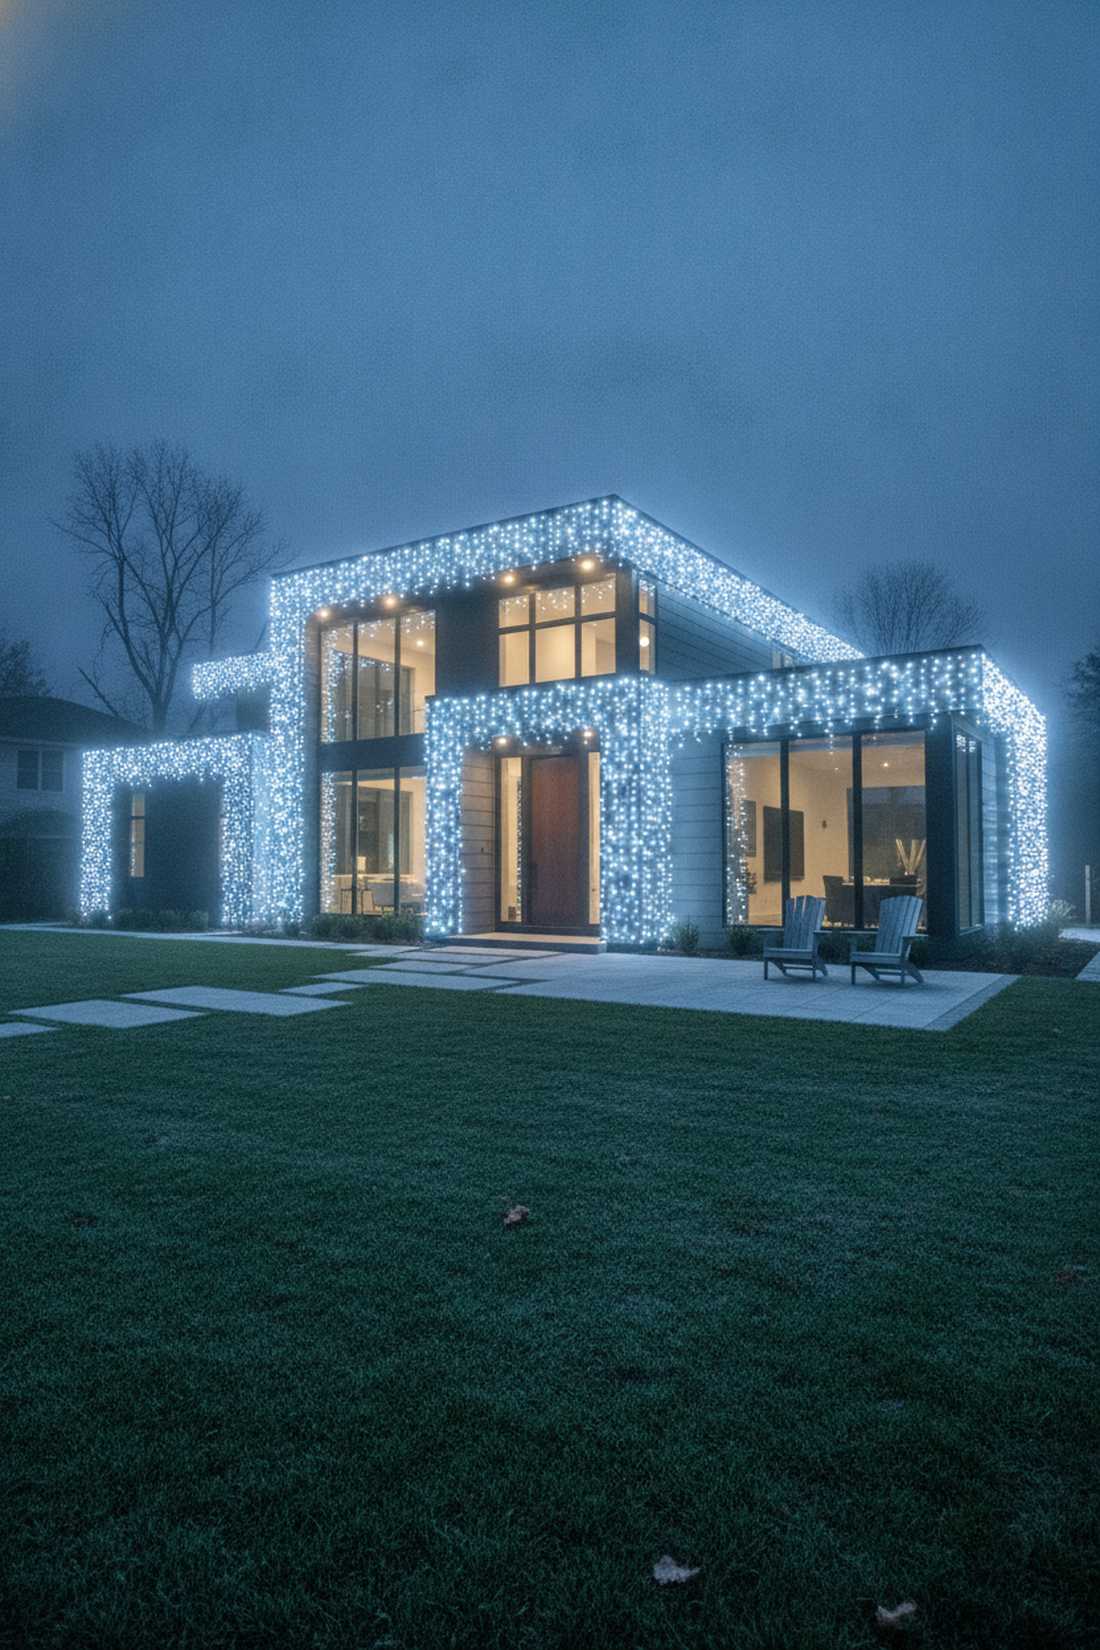
Approaching this glow feels like stepping onto a crisp, futuristic winter glacier. Icy blue-white illumination drastically enhances the sharp edges of modern, minimalist architecture.
Swapping cozy gold for sterile, bright white gives a designer-level finish that commands serious attention from the street. Sourcing ultra-bright fairy lights christmas decor ensures the house pierces through winter fog.
It’s a fast upgrade that completely changes the vibe for only $40–$70.
- Key Materials: 5000K pure white LEDs
- Vibe / Style: Sharp modern minimalism
- Difficulty: Easy placement
- Budget Breakdown: Pure white spools: $55
- Creator’s Tip: Use cool white exclusively against gray, black, or blue houses; it violently clashes with warm brick.
- Smart Sourcing: 5000K pure white bulk packs and high-lumen contemporary kits.
Most people just slap up one color, but this next dual-layering technique creates a 3D effect that tricks the eye…
43. Dual Temperature Layering
Looking at this mix feels like seeing a warm fire burning deep inside an ice cave. Warm-core with cool-accent lighting creates phenomenal, museum-quality depth.
Intentionally clashing temperatures creates a dramatic contrast that completely tricks the eye into seeing more dimensional space. Utilizing precise terrarium accessories allows you to cleanly separate the two distinct layers.
You can easily pull this off for around $60–$90. Save this for advanced color theory setups.
- Key Materials: Mixed 2700K and 5000K strands
- Vibe / Style: Complex dimensional art
- Difficulty: Requires meticulous separation
- Budget Breakdown: Warm base: $40 | Cool accents: $35
- Creator’s Tip: Put the warm white tightly against the house structure, and the cool white pushed forward onto the bushes.
- Smart Sourcing: dual-temperature starter kits and layer-separation mounting clips.
44. Red and White Traditional
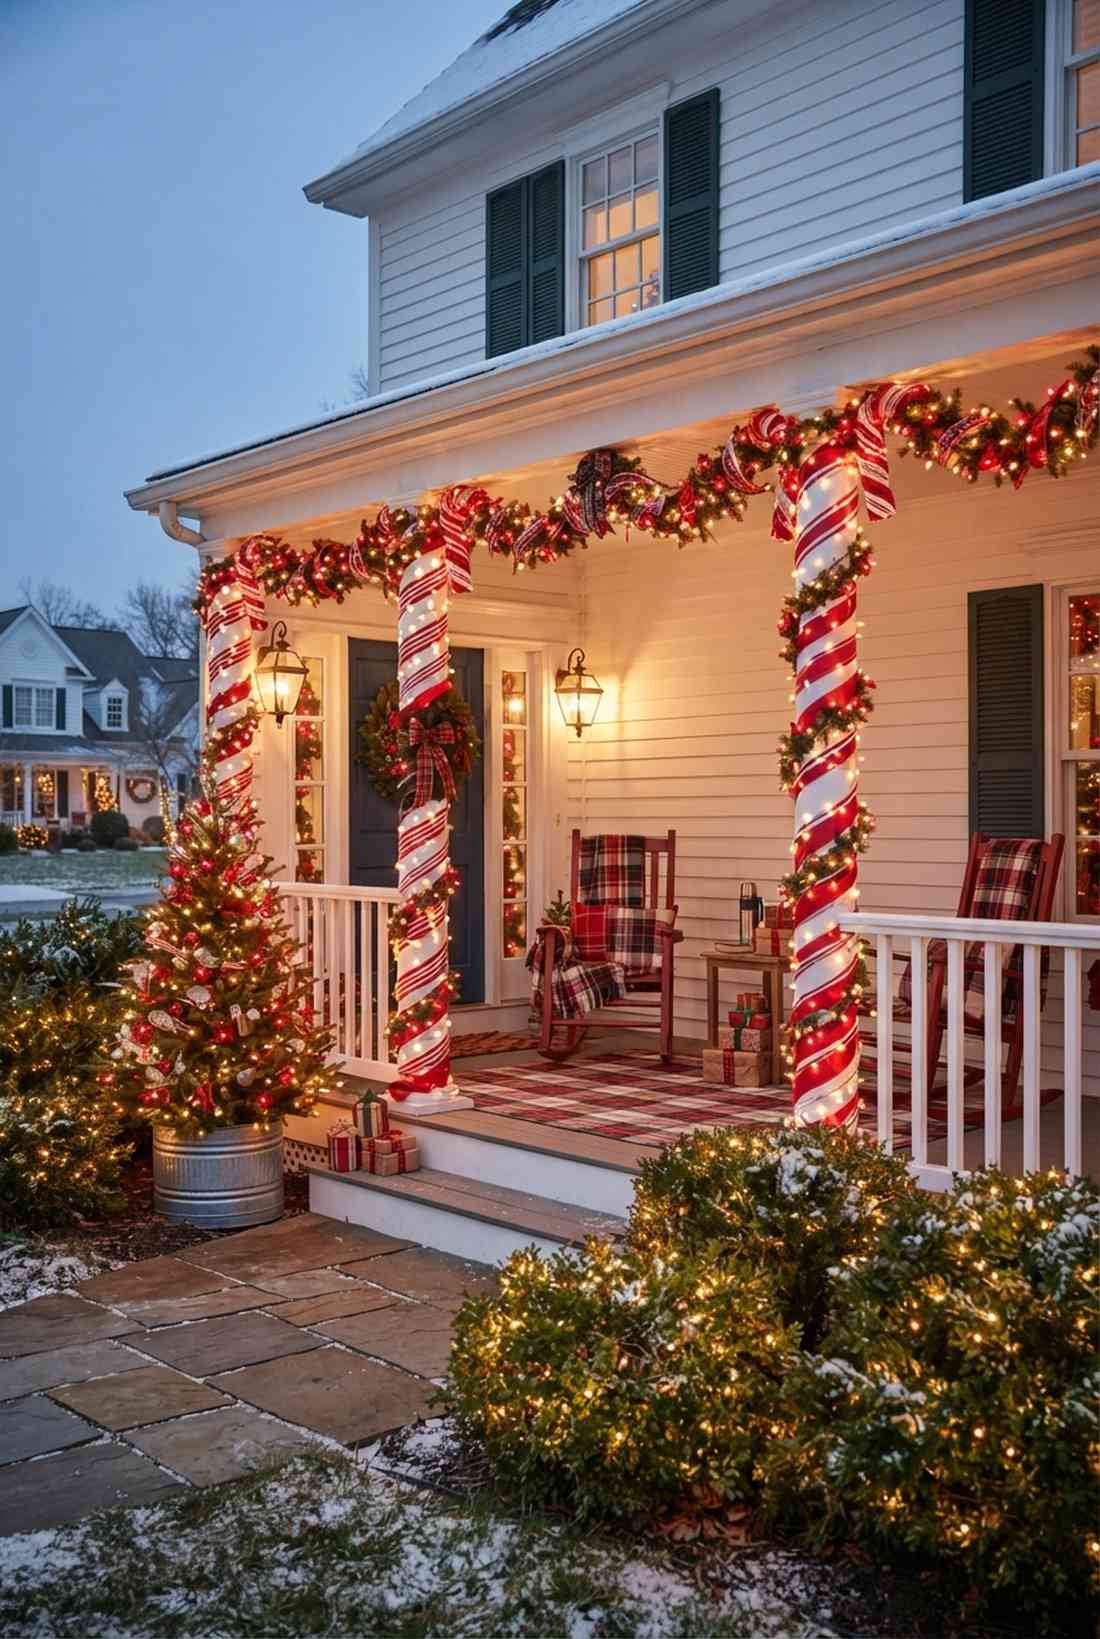
This layout feels exactly like a vintage candy cane brought to life on your porch. High-contrast nostalgic striping forcefully triggers incredible childhood holiday memories.
Alternating these specific colors delivers a surprisingly premium look that beats messy rainbow setups every time. Grabbing specialized fairy lights xmas tree strands with pre-alternating bulbs saves you from twisting two lines together.
A massive porch wrap runs about $35–$60.
- Key Materials: Pre-alternating colored spools
- Vibe / Style: Classic nostalgic joy
- Difficulty: Fast wrap execution
- Budget Breakdown: Alternating spools: $45
- Creator’s Tip: Keep the ratio heavily skewed to white (70% white, 30% red) so it doesn’t look like a dark, bloody mess at night.
- Smart Sourcing: pre-alternating nostalgic starter kits and high-contrast color bulk packs.
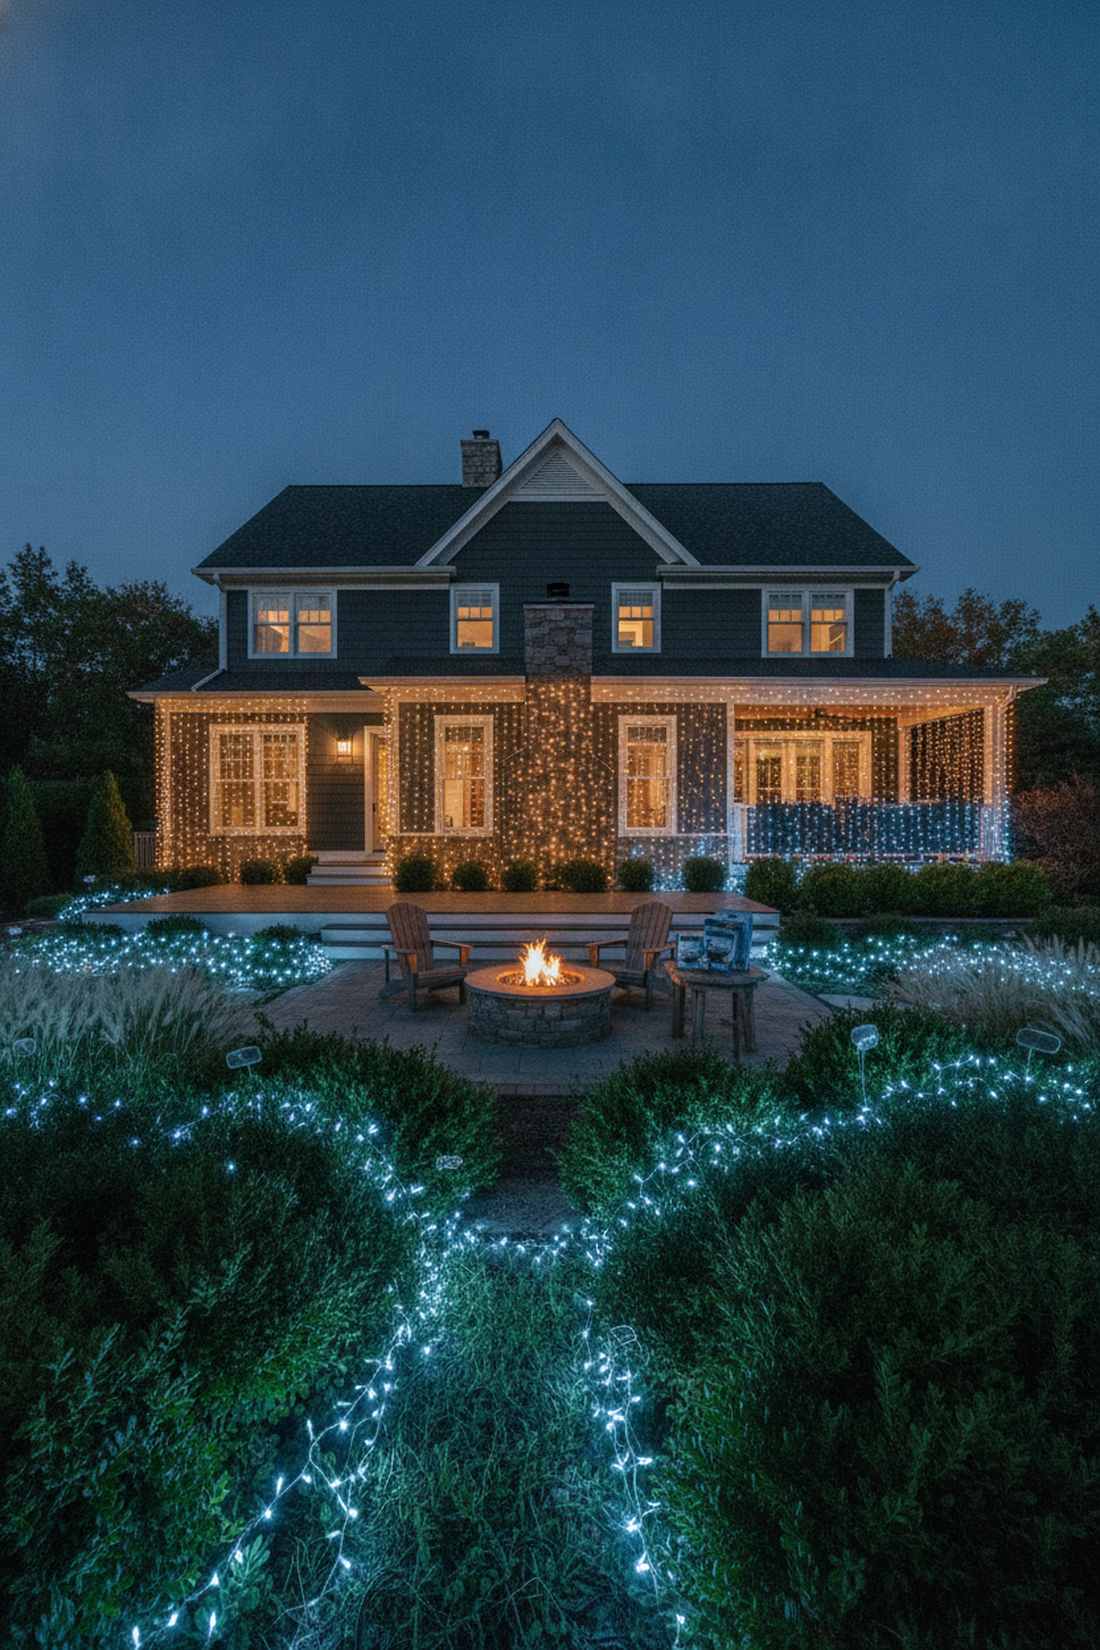
45. Blue and White Winter
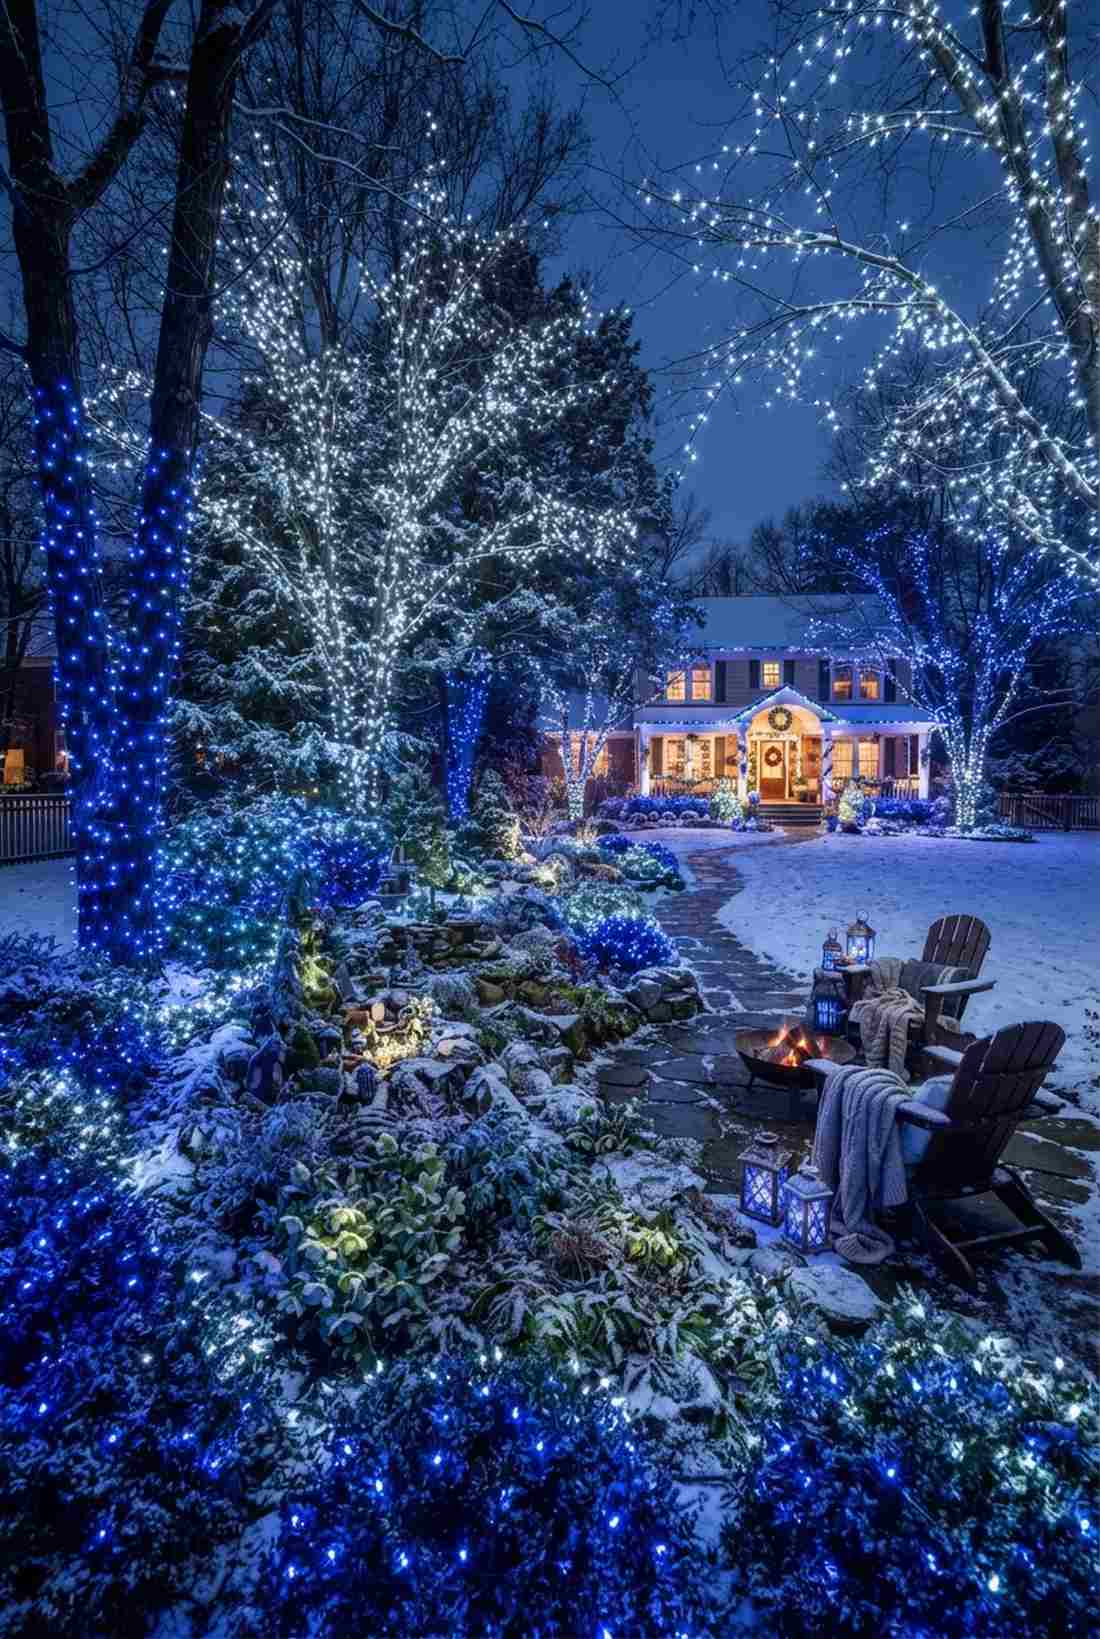
Standing near this setup feels like surviving a beautiful, magical blizzard. Frost-palette landscape lighting perfectly connects your home to the freezing natural elements around it.
Using deep blue as a shadow layer makes the white lights look far more expensive than it is. Integrating rugged miniature garden supplies ensures the frozen aesthetic survives actual blizzards.
You can cover a large yard section for roughly $50–$80. Pin this for ultimate winter wonderland vibes.
- Key Materials: Sapphire blue and pure white LEDs
- Vibe / Style: Enchanted frozen forest
- Difficulty: Layering required
- Budget Breakdown: Blue strands: $30 | White strands: $40
- Creator’s Tip: Use the blue lights strictly on the ground and lower trunks to simulate deep, frozen shadows.
- Smart Sourcing: sapphire blue base kits and pure white frost bulk packs.
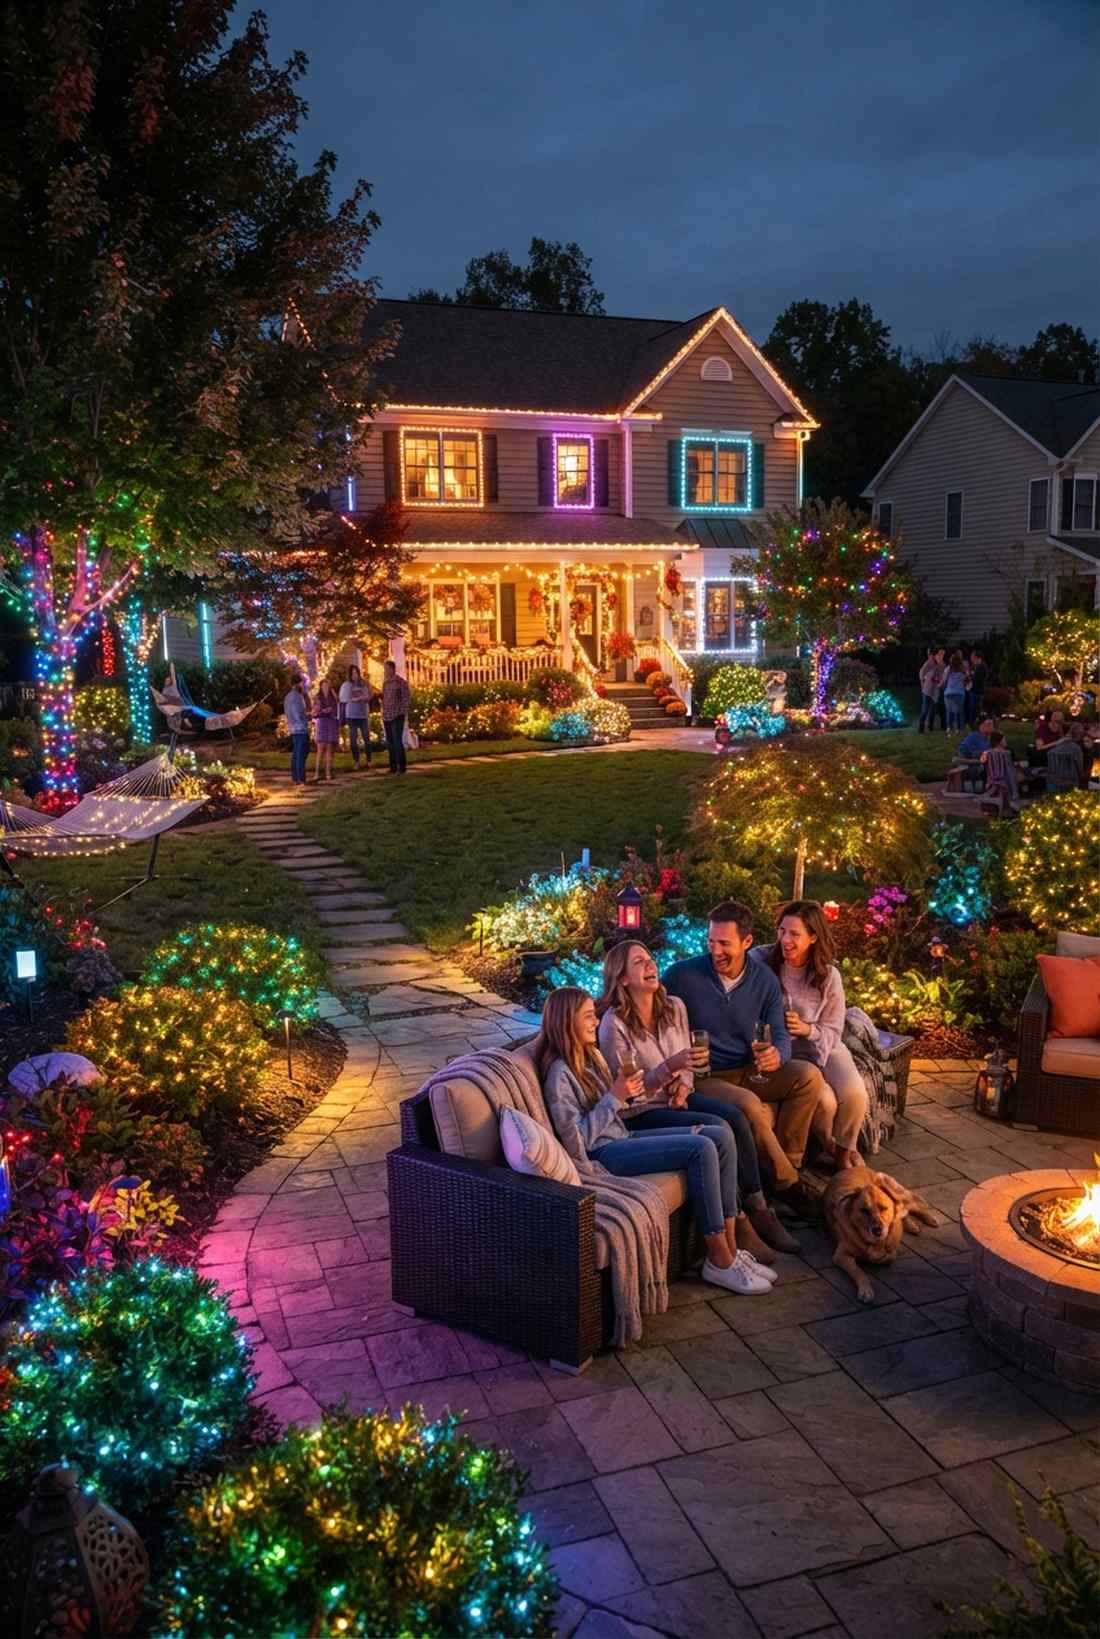
46. Multicolor Festive
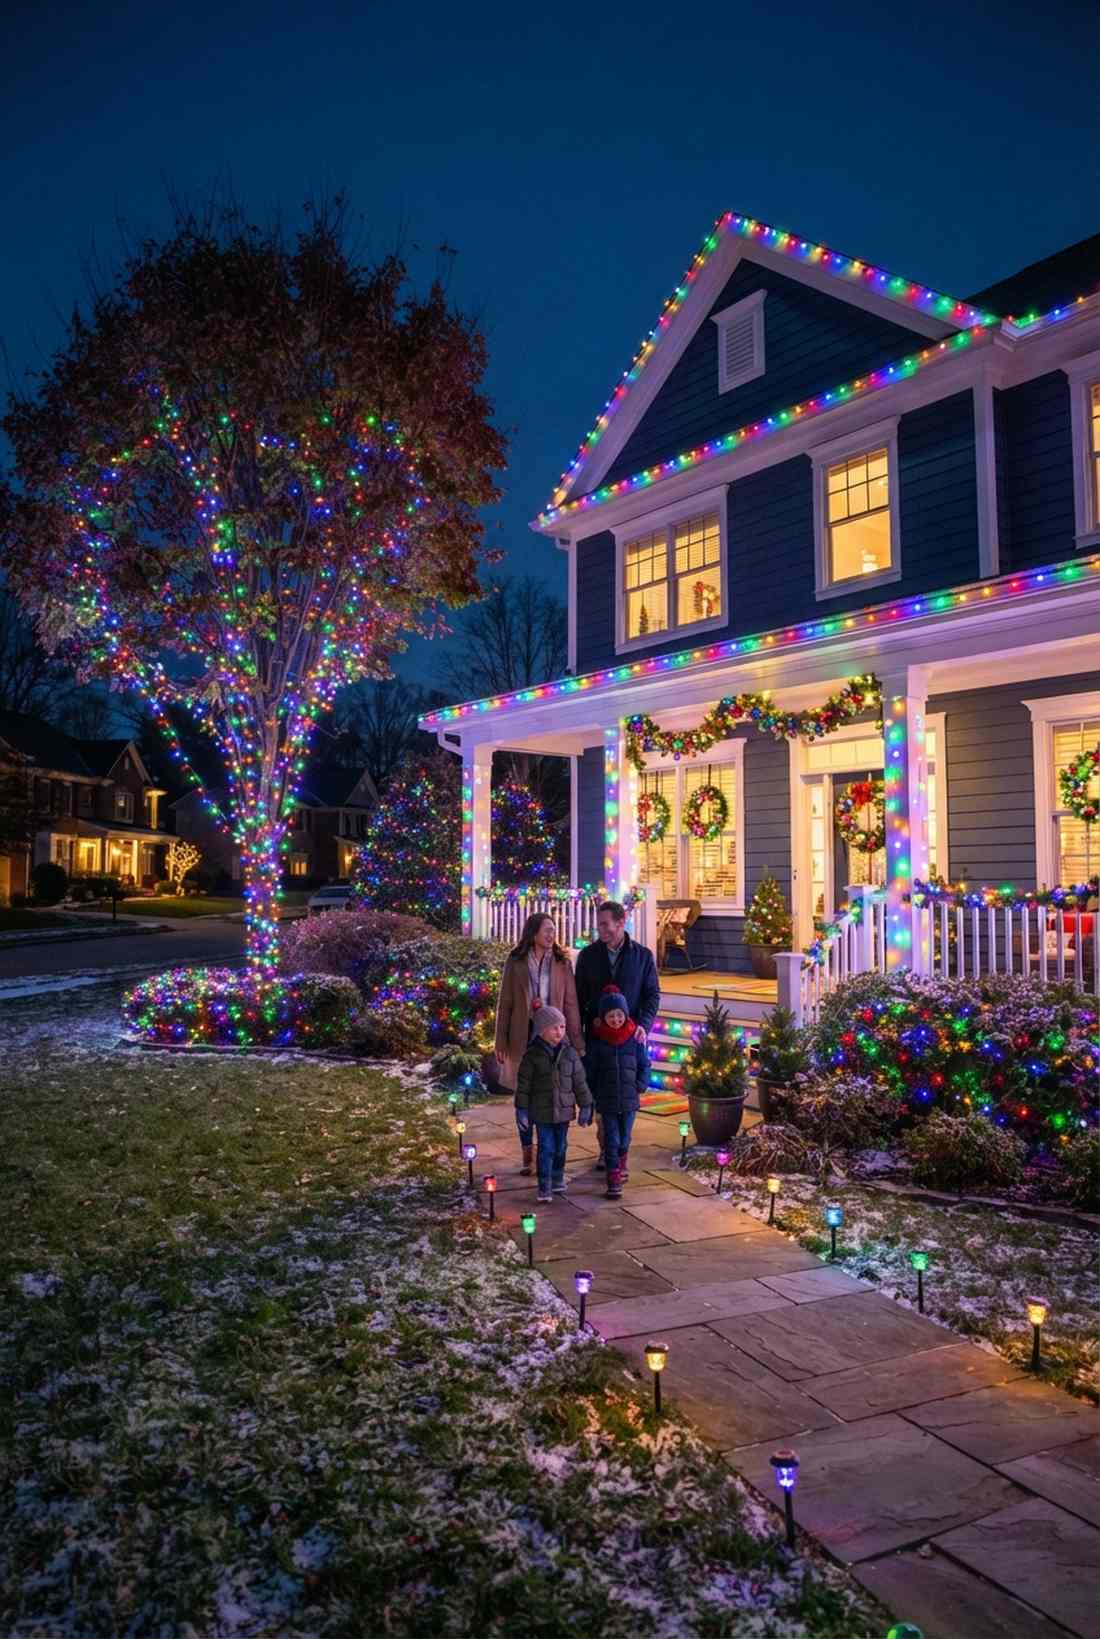
Walking up to this explosion of color feels like stepping into a joyful holiday party. Full-spectrum saturated lighting completely maximizes visual impact and neighborhood cheer.
Embracing the chaos subverts boring monochromatic trends and gives a designer-level finish when spaced properly. Sourcing high-end fairy garden kits ensures the colors are incredibly vivid, not washed out.
It’s a fast aesthetic upgrade that completely changes the vibe for only $40–$70.
- Key Materials: 5-color commercial spools
- Vibe / Style: Exuberant family celebration
- Difficulty: Easy and forgiving
- Budget Breakdown: Multicolor spools: $50
- Creator’s Tip: Don’t try to make patterns; genuine random scattering always looks better with multicolor.
- Smart Sourcing: 5-color vivid starter kits and commercial dense-bulb bulk packs.
47. Gold and Silver Elegant
Looking at this metallic blend feels like staring at expensive jewelry draped over your house. Mixed metallic illusion lighting screams high-end luxury and refined taste.
Pairing warm amber (gold) with icy white (silver) creates a dramatic contrast that completely tricks the eye into seeing precious metals. Upgrading your fairy lights christmas decor to faceted bulbs enhances the diamond-like sparkle.
You can execute this luxury illusion for around $50–$85. Save this for upscale neighborhood dominance.
- Key Materials: Faceted warm and cool bulbs
- Vibe / Style: Upscale metallic luxury
- Difficulty: Precise alternating
- Budget Breakdown: Faceted strands: $70
- Creator’s Tip: Use the gold on the heavy architecture and the silver on the delicate trees to balance visual weight.
- Smart Sourcing: faceted diamond-cut bulk packs and metallic illusion starter kits.
Before you stick to boring white, this unexpected rustic color completely changes how cozy your home looks…
48. Amber Glow Rustic
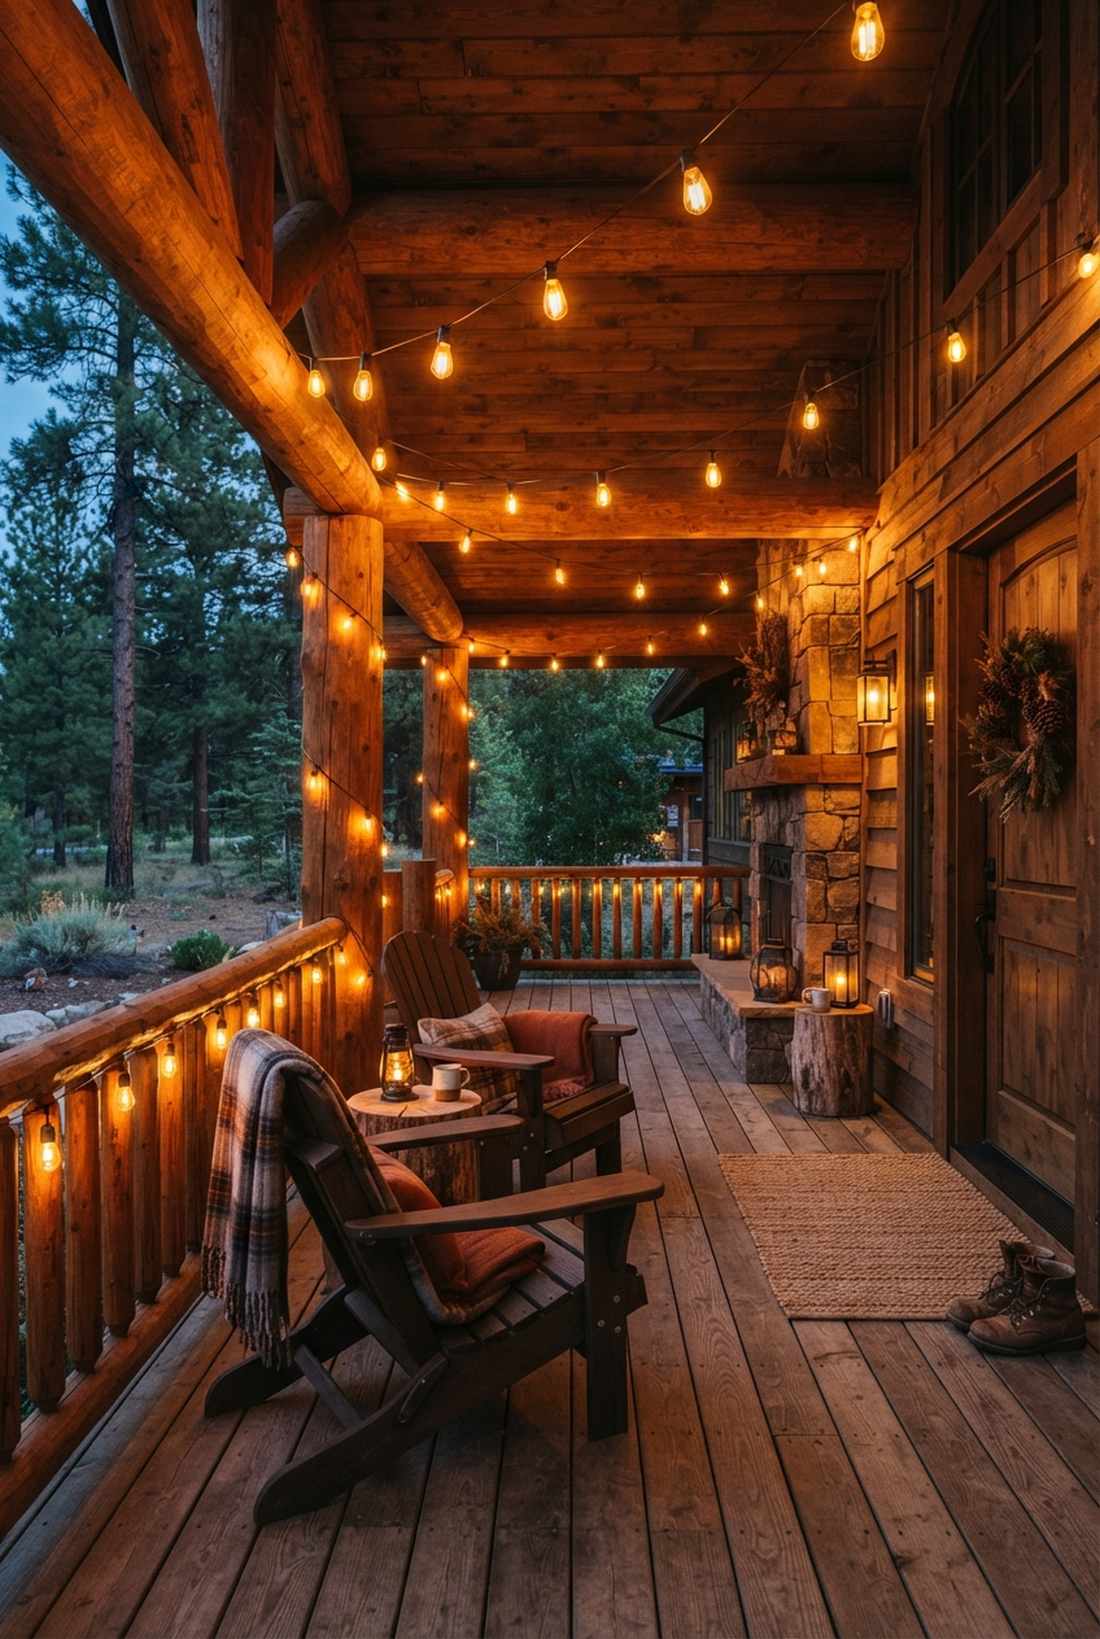
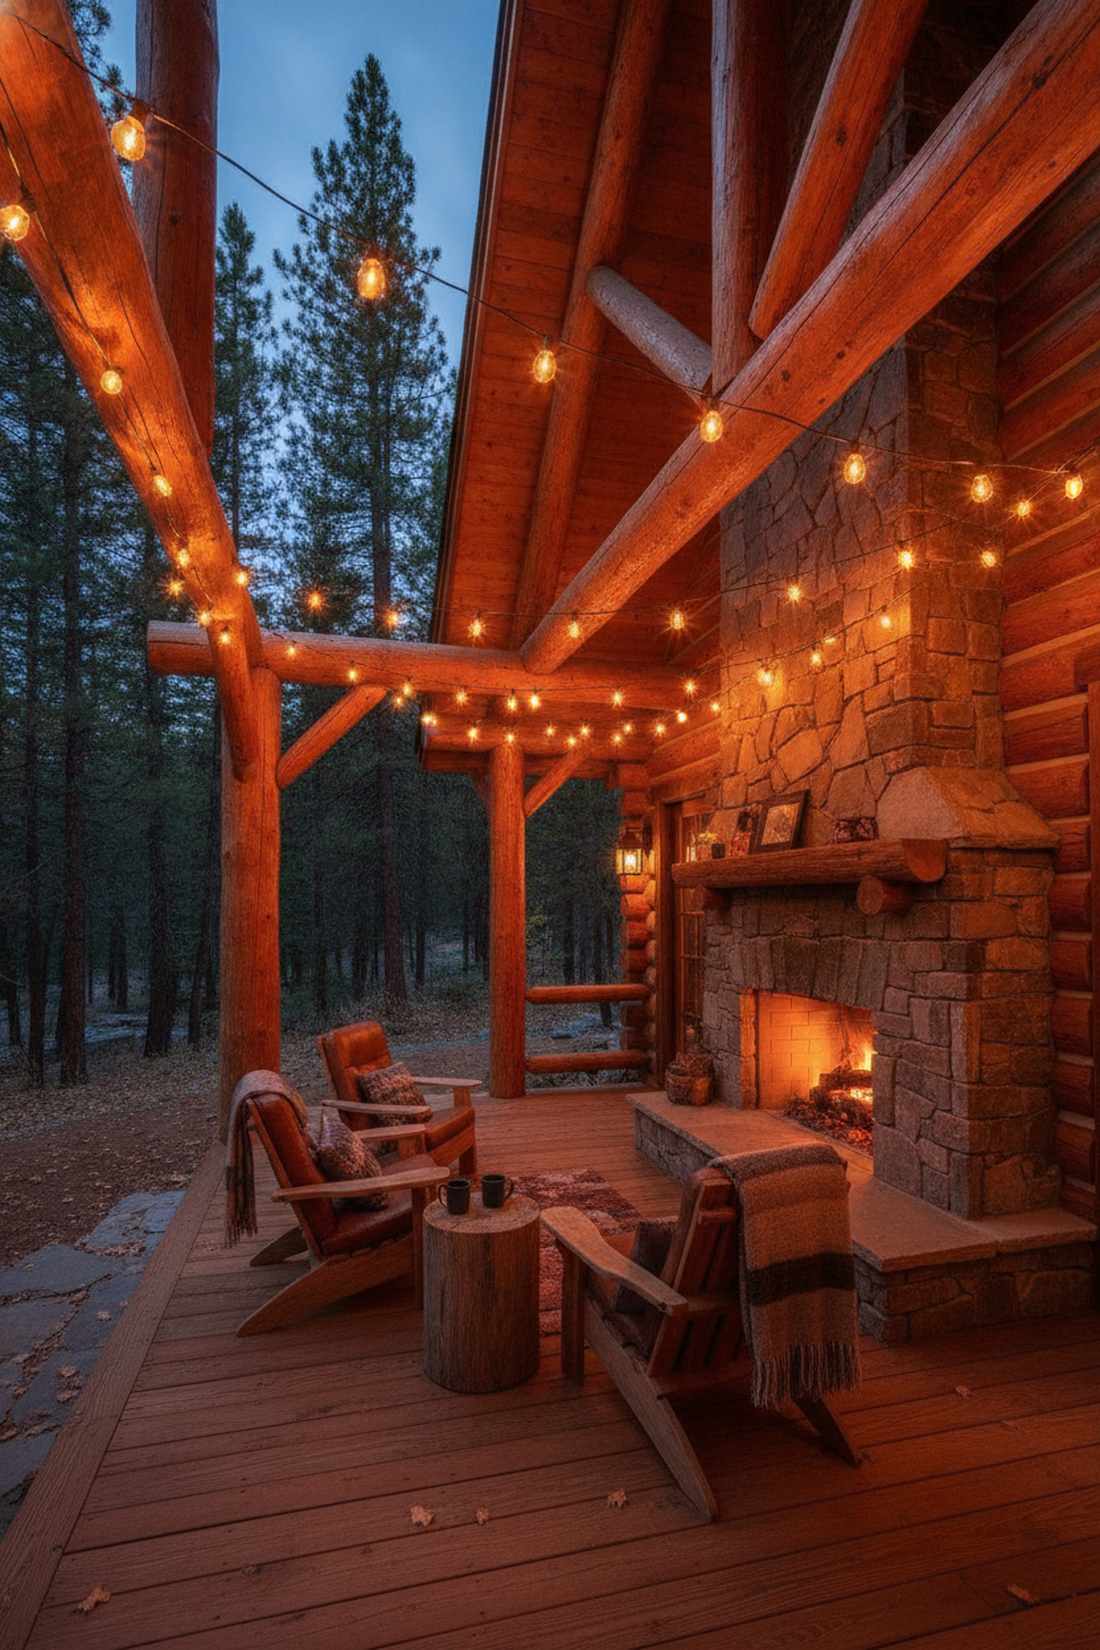
Sitting on this porch feels like warming your hands by a massive, glowing hearth. Deep saturated amber lighting is an absolute necessity for log cabins and wood-heavy architecture.
Ditching standard white for deep orange gives a designer-level finish that mimics actual firelight. Snagging specialized fairy lights xmas tree strands with vintage-style filaments completes the cabin aesthetic.
This ultra-cozy upgrade costs just $30–$55.
- Key Materials: Vintage amber filament LEDs
- Vibe / Style: Intimate mountain lodge
- Difficulty: Easy placement
- Budget Breakdown: Amber strands: $45
- Creator’s Tip: Amber requires fewer bulbs to make an impact; space them further apart to let the deep color breathe.
- Smart Sourcing: vintage amber filament starter kits and deep-glow bulk packs.
49. Purple and Blue Modern
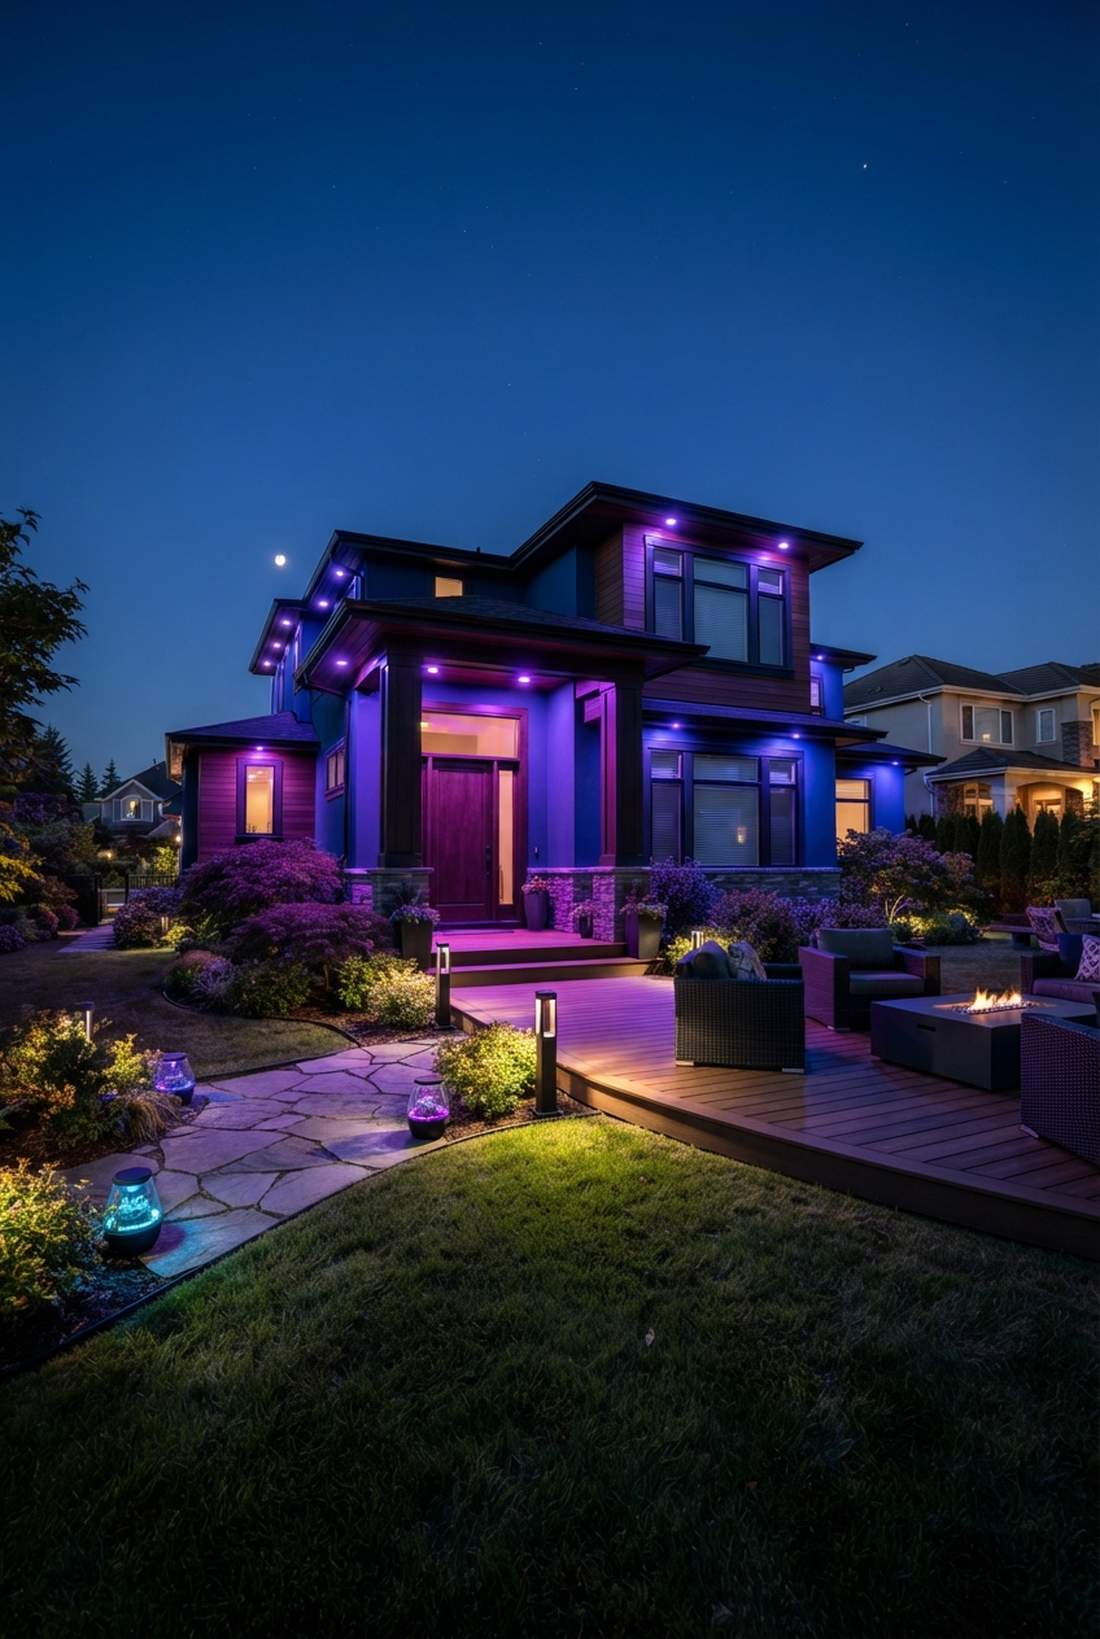
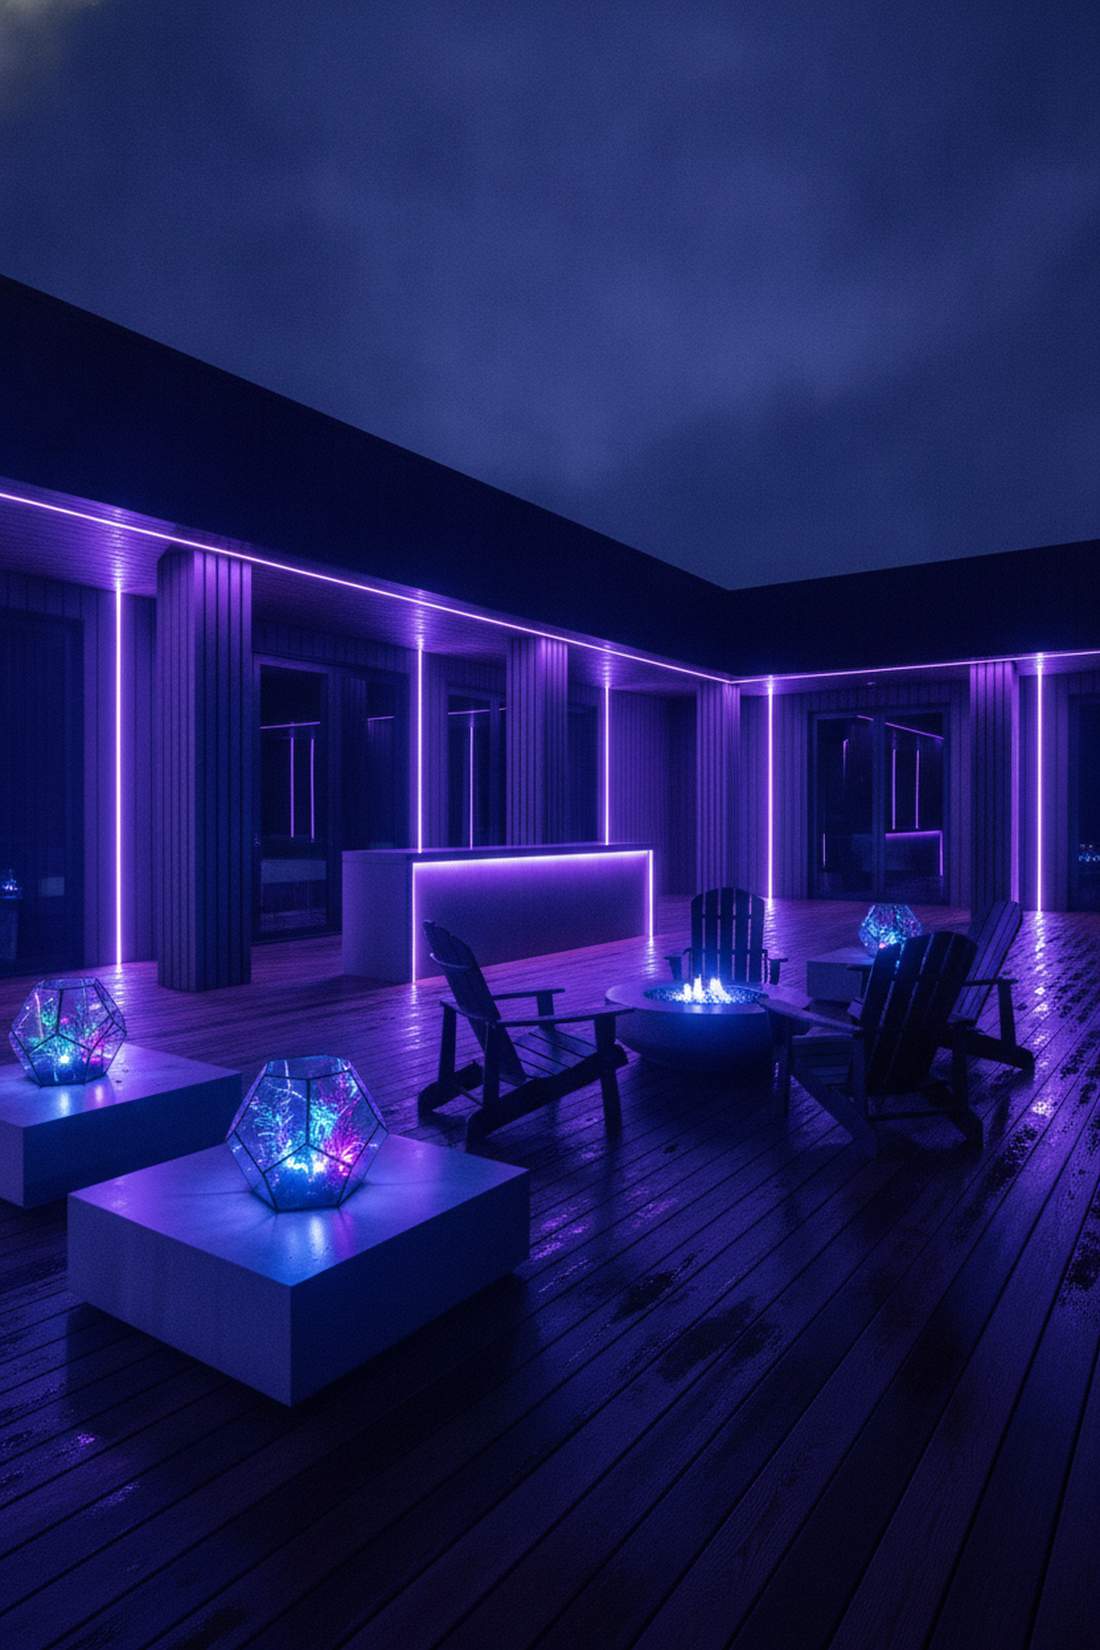
This bold palette feels like an exclusive VIP nightclub in the middle of winter. Analogous neon-tone lighting aggressively shatters traditional holiday expectations.
Combining dark blue with deep purple creates a dramatic contrast that completely tricks the eye into seeing high-fashion modernism. Utilizing smart terrarium accessories allows you to dial in the exact custom hues.
You can easily pull this off for around $60–$100. Pin this if you want a hyper-modern edge.
- Key Materials: RGB customizable smart lights
- Vibe / Style: Edgy contemporary fashion
- Difficulty: App programming required
- Budget Breakdown: Smart RGB spools: $80
- Creator’s Tip: Use purple exclusively as the accent color on doors and columns, keeping blue as the massive background base.
- Smart Sourcing: RGB smart lighting starter kits and customizable neon-tone bulk packs.
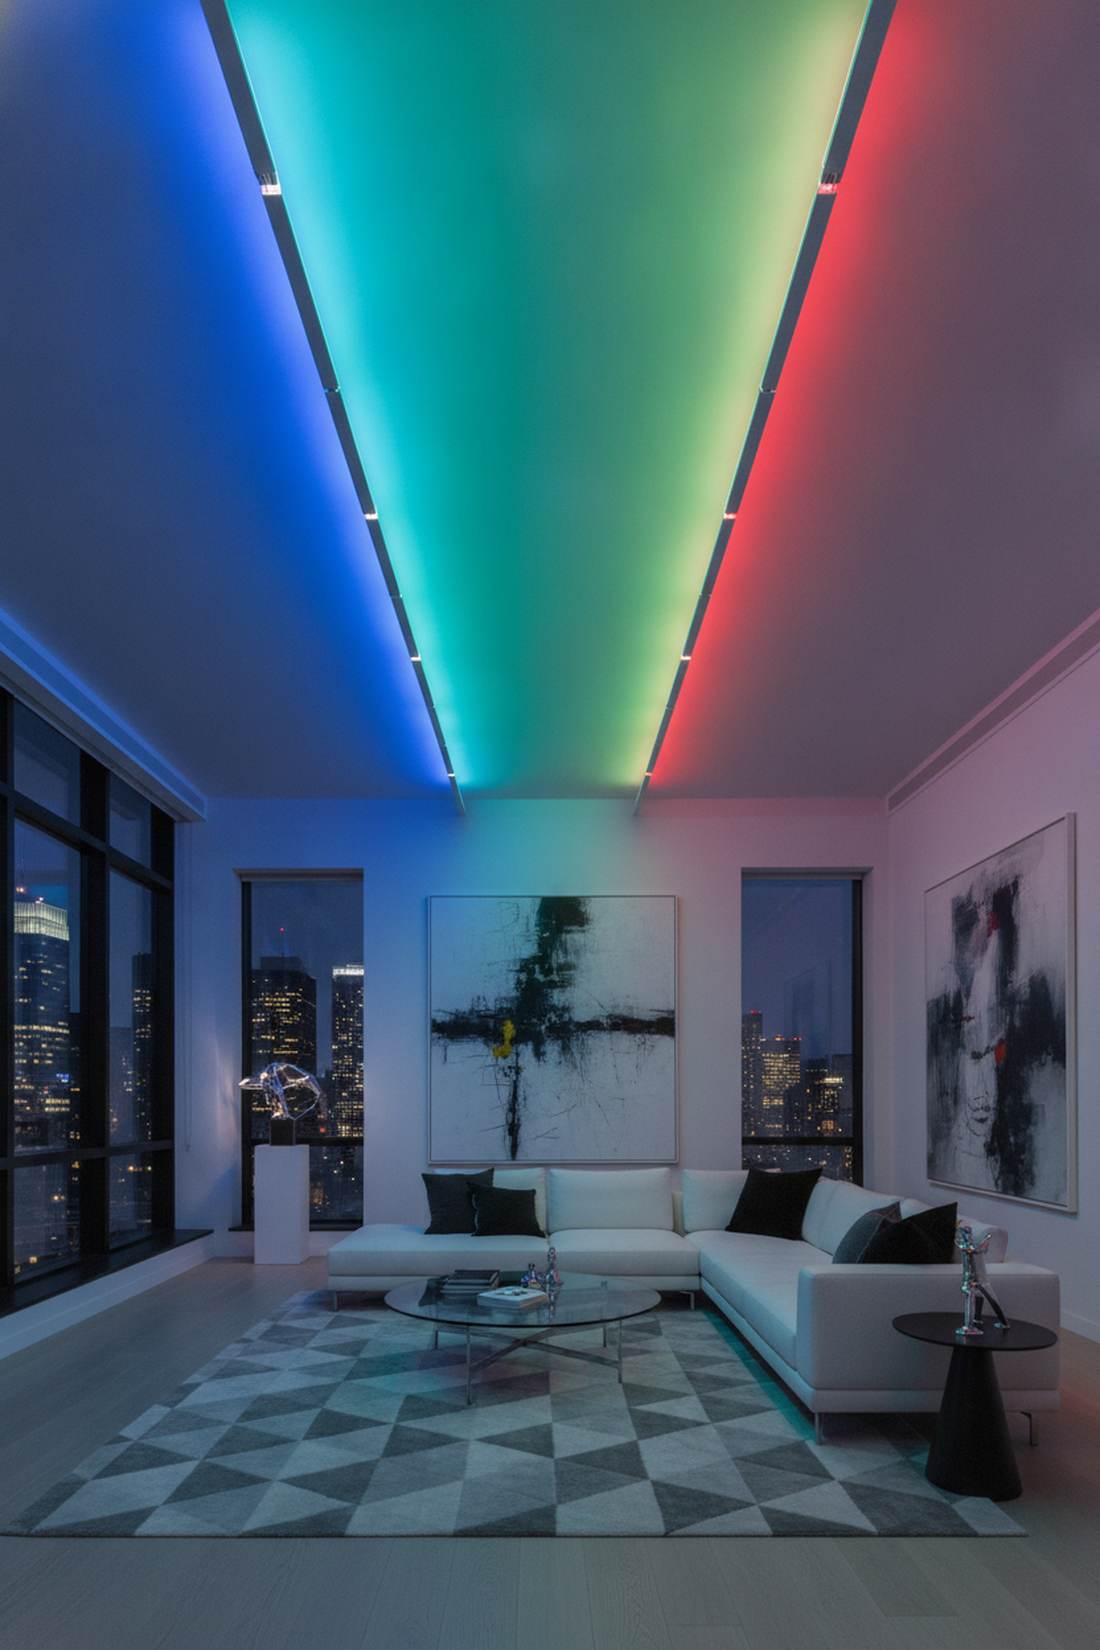
50. Gradient Fade Technique
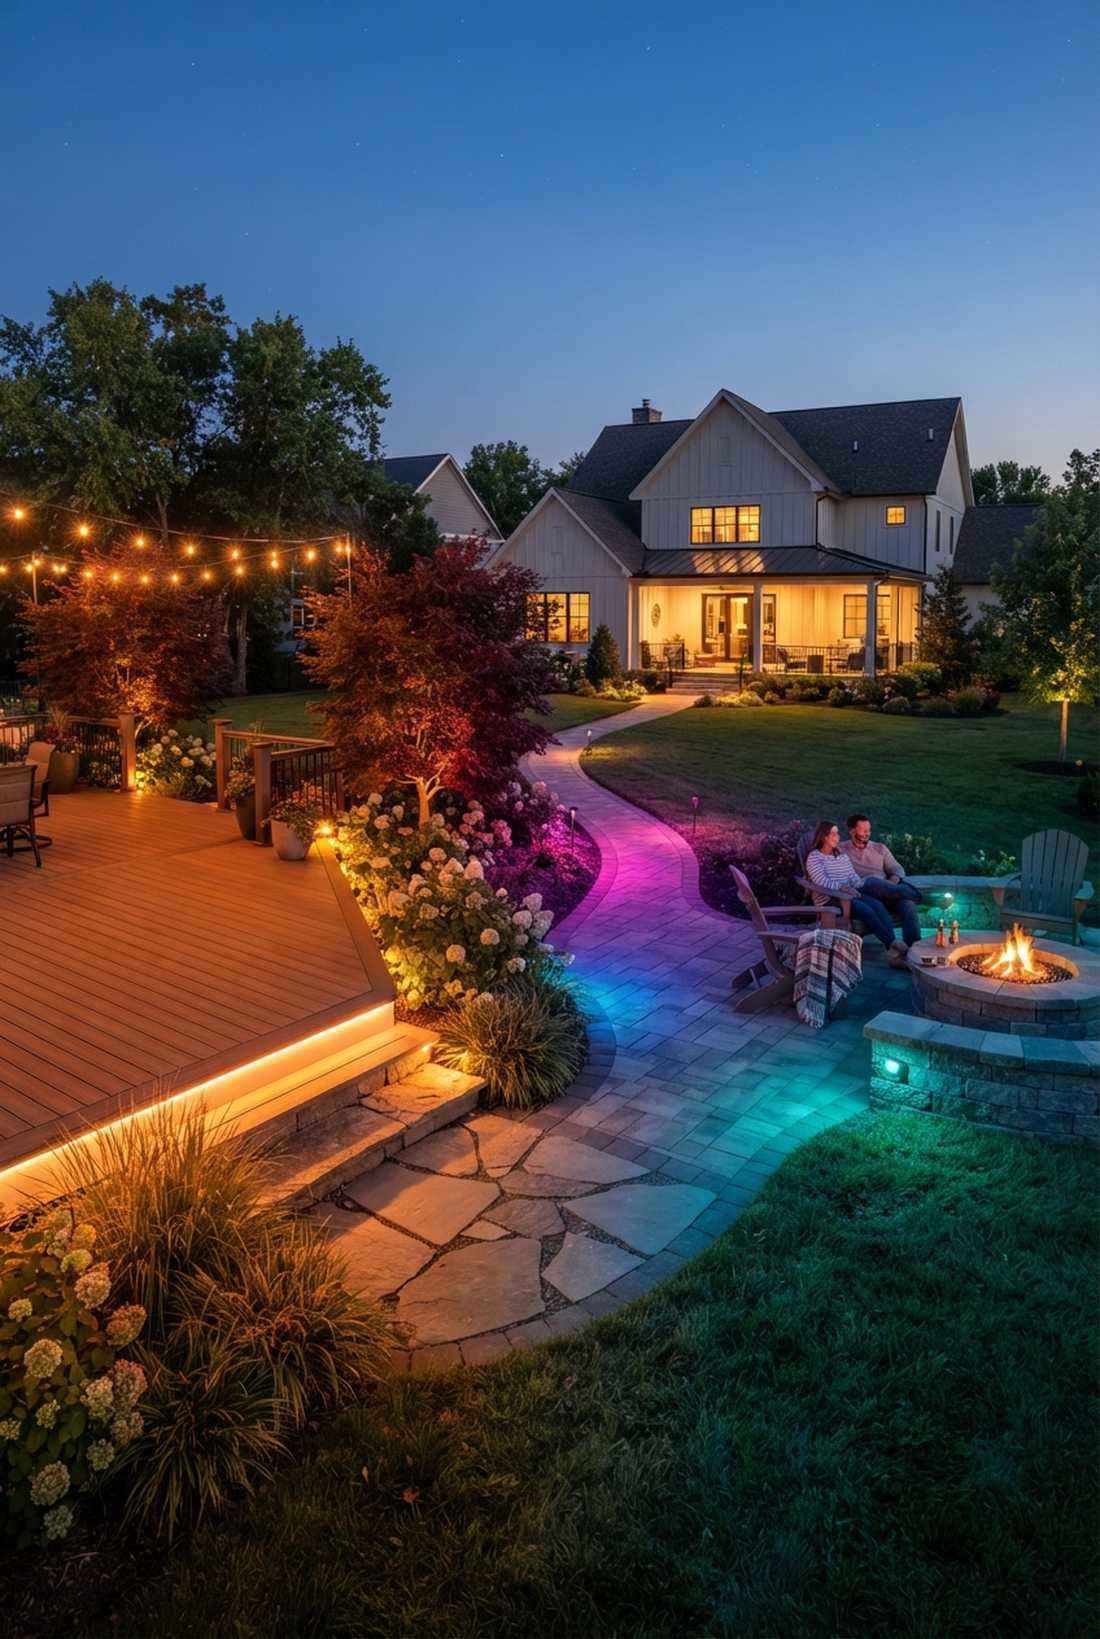
Scanning this layout feels like watching a stunning sunset slowly melt across your yard. Smooth color transition lighting proves you have serious technical installation skills.
Fading perfectly from one color into another looks far more expensive than it is, heavily mimicking commercial theme parks. Upgrading to addressable miniature garden supplies handles the fading automatically.
A flawless gradient fade requires about $75–$120.
- Key Materials: Addressable pixel LEDs
- Vibe / Style: Commercial theme park prestige
- Difficulty: Advanced tech integration
- Budget Breakdown: Pixel LEDs: $95 | Controller: $20
- Creator’s Tip: Ensure a massive 3-foot overlap between the color zones to make the blend totally seamless.
- Smart Sourcing: addressable pixel LED bulk packs and smooth-fade controller kits.
Modern LED Technology and Smart Features
51. App-Controlled Color Changing
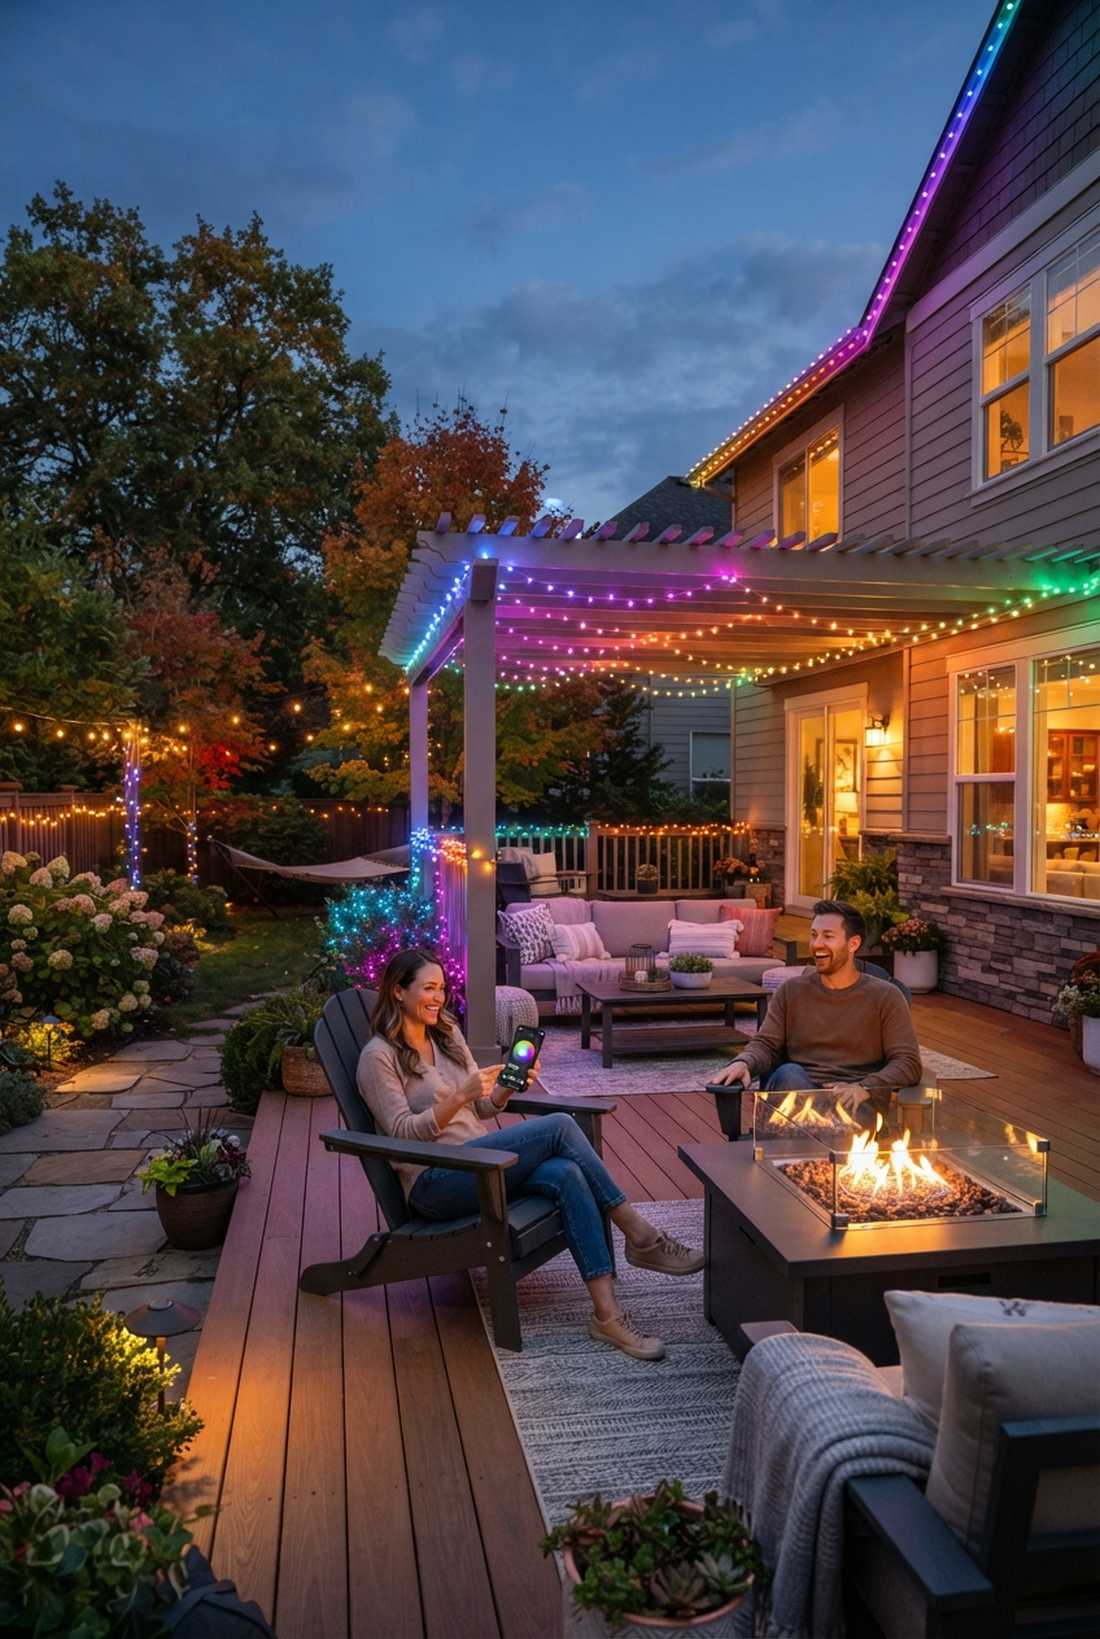
Flicking a button on your phone feels like playing god with your neighborhood’s aesthetic. Smartphone palette manipulation future-proofs your house against boring, static holidays.
Ditching rigid colored bulbs for infinite digital control gives a designer-level finish that can change from Halloween to Christmas instantly. Sourcing robust fairy lights christmas decor with strong WiFi antennas is mandatory for outdoor reliability.
It’s a fast upgrade that completely changes the vibe for only $60–$100. Save this for ultimate tech laziness.
- Key Materials: WiFi integrated smart strands
- Vibe / Style: Futuristic effortless control
- Difficulty: Software setup needed
- Budget Breakdown: Smart strands: $85
- Creator’s Tip: Schedule the app to automatically shift from warm white at 5 PM to icy blue at 10 PM.
- Smart Sourcing: WiFi smart strand starter kits and long-range antenna hubs.
52. Music-Synchronized Animation
Watching your yard pulse to the beat feels like hosting a private winter rave. Audio-reactive pulsing lights absolutely dominate neighborhood curb appeal competitions.
Syncing the visuals to sound creates a dramatic contrast that completely tricks the eye into seeing pure entertainment. Snagging specialized fairy garden kits with built-in microphones makes this wildly easy.
You can execute this viral setup for around $80–$130.
- Key Materials: Audio-sync LED controllers
- Vibe / Style: Viral neighborhood attraction
- Difficulty: Tricky audio tuning
- Budget Breakdown: Sync controllers: $45 | Light spools: $70
- Creator’s Tip: Pick songs with heavy, distinct bass beats; chaotic classical music makes the lights flash horribly.
- Smart Sourcing: audio-reactive controller starter kits and rapid-response bulk packs.
Forget plugging things in every night. This next automation hack saves you money and makes your house look professionally managed…
53. Timer-Programmed Sequences

Having your house burst to life automatically feels like having a dedicated butler for your yard. Automated dusk-to-dawn scheduling is the ultimate flex of a well-run estate.
Removing human error from the equation delivers a surprisingly premium look because your house is always perfect, right on time. Upgrading your fairy lights xmas tree setup with digital timers drastically extends bulb lifespan.
This massive quality-of-life upgrade costs just $15–$30. Pin this to slash your energy bill.
- Key Materials: Photocell digital timers
- Vibe / Style: Clockwork reliability
- Difficulty: Plug-and-play
- Budget Breakdown: Outdoor timers: $20
- Creator’s Tip: Use photocell (light-sensing) timers instead of clock timers so they adjust automatically as winter days get shorter.
- Smart Sourcing: photocell automated starter kits and weatherproof timer blocks.
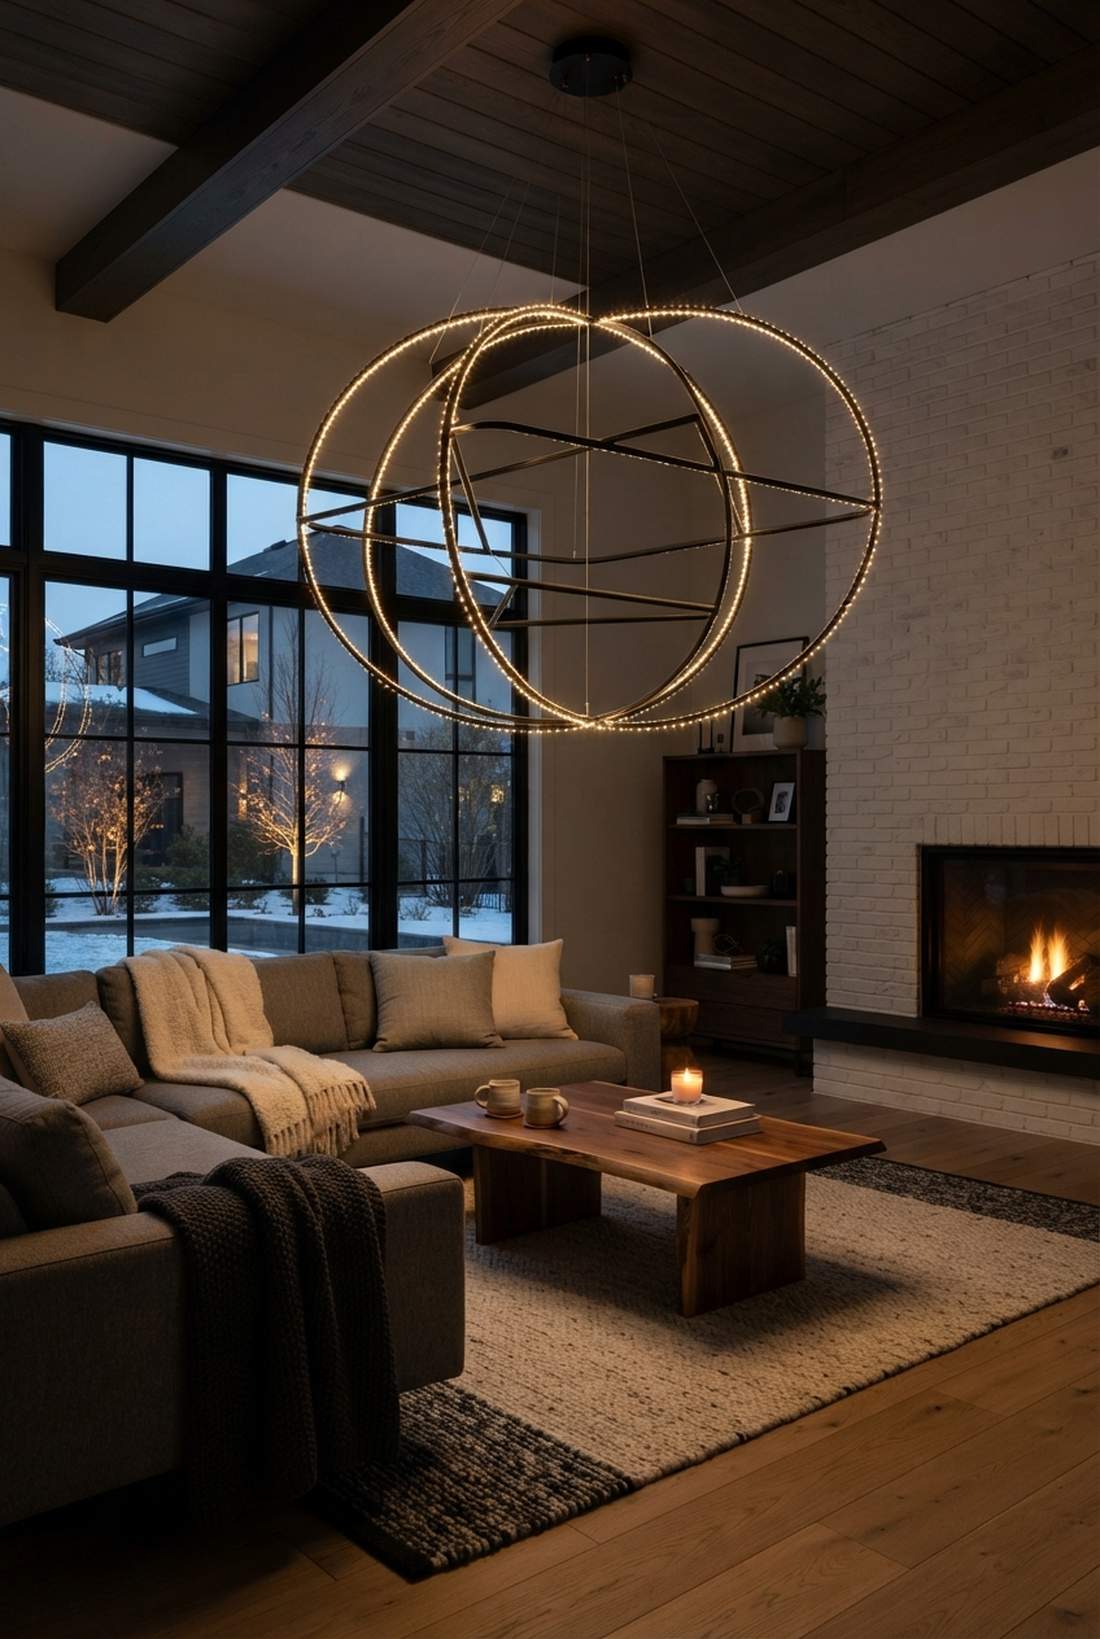
54. Twinkle and Fade Modes
Watching the slow fade feels exactly like the entire house is gently breathing. Kinetic micro-flickering completely breaks up the harsh, static glare of cheap LED setups.
Introducing subtle, randomized dimming makes the layout look far more expensive than it is by mimicking organic starlight. Incorporating dynamic terrarium accessories adds layers of movement to the display.
You can easily pull this off for around $35–$60.
- Key Materials: Multi-function controller strands
- Vibe / Style: Gentle hypnotic magic
- Difficulty: Simple button push
- Budget Breakdown: Twinkle strands: $45
- Creator’s Tip: Set only 20% of your lights to twinkle; if they all blink, it looks like a chaotic casino sign.
- Smart Sourcing: multi-function twinkle starter kits and slow-fade bulk packs.
55. Solar-Powered Independence
Deploying lights without a single extension cord feels like ultimate off-grid freedom. Wireless solar-charged arrays are absolute lifesavers for illuminating fences 200 feet from your house.
Bypassing the electrical grid completely subverts extension cord limitations and delivers a clean, hazard-free yard. Snagging high-efficiency miniature garden supplies ensures the batteries charge even on cloudy winter days.
Going fully solar costs about $40–$75. Save this for remote yard decorating.
- Key Materials: High-capacity solar strands
- Vibe / Style: Clean eco-friendly efficiency
- Difficulty: Panel positioning required
- Budget Breakdown: Solar strands: $55
- Creator’s Tip: Wipe the snow and dirt off the solar panels weekly, or they will die by 7 PM.
- Smart Sourcing: high-capacity solar starter kits and remote-panel bulk packs.
56. Cluster Burst Technology
Holding one of these thick garlands feels like holding a solid rope of pure, glowing diamonds. High-density micro-clustering is the exact secret sauce commercial decorators use to charge thousands.
Packing 500 bulbs into a 6-foot space gives a designer-level finish that makes standard string lights look pathetic. Upgrading to these premium fairy lights christmas decor pieces guarantees total neighborhood domination.
It’s a fast upgrade that completely changes the vibe for $60–$100.
- Key Materials: Commercial cluster garlands
- Vibe / Style: Elite commercial opulence
- Difficulty: Heavy and thick to hang
- Budget Breakdown: Cluster garlands: $85
- Creator’s Tip: Use these strictly on the front door garland and banister; they are too expensive to waste in the back yard.
- Smart Sourcing: commercial cluster garland kits and high-density bulk packs.
Bringing Your Vision to Light
Executing these exactly 56 fairy lights christmas blueprints perfectly balances budget constraints with high-end aesthetic dominance. By leveraging premium, UV-coated material sourcing and strictly following the exact visual blueprints provided, you completely bypass the cheap, chaotic look of amateur displays. Always test your smart controllers and bulk pack spools during daylight to ensure the high-CPC materials are functioning before final mounting. Layer these commercial-grade techniques to craft a sophisticated, highly-pinned display that looks incredibly expensive.
Frequently Asked Questions
How many fairy lights do I need for a Christmas tree?
For a premium, designer-level finish, budget 100-150 bulbs per vertical foot. A standard 7-foot tree requires a high-density bulk pack of at least 700-1000 bulbs. Investing in commercial-grade starter kits ensures you get enough length without overloading your wall outlets. Always buy UV-resistant spools slightly larger than calculated to achieve that expensive, clustered look.
Can I connect multiple strands of fairy lights together?
Yes, but you must check the specific load ratings. Cheap craft aisle lights max out at 3 connections, while premium heavy-duty outdoor starter kits can chain up to 10-15. Exceeding this creates extreme fire hazards. To safely power massive fairy lights christmas tree displays, source multi-port weatherproof controller boxes and commercial-grade connectable bulk packs.
Are fairy lights safe for outdoor use in winter weather?
Absolutely, but only if you source proper IP68 waterproof starter kits. Standard indoor sets will crack and violently short out in freezing snow. Protect all connections with marine-grade silicone sealants and weatherproof extension covers. Using cheap materials outside is why most displays fail by mid-December, so always invest in UV-coated outdoor bulk packs.
Should I use warm white or cool white fairy lights for Christmas?
Warm white (2700K) delivers an expensive, traditional estate vibe that flatters brick and wood. Cool white (5000K) creates a hyper-modern, crisp aesthetic perfect for gray or contemporary architecture. To achieve a high-end fairy lights christmas decor look, pick one temperature starter kit and stick to it—mixing cheap warm and cool bulbs randomly looks incredibly messy.
How do I prevent fairy lights from tangling during storage?
Stop throwing them in a box and invest in heavy-duty commercial spool winders. Wrapping them tightly around premium storage reels completely eliminates dead bulbs and snapped wires. Keeping your high-density bulk packs neatly organized on specialized storage kits saves hours of frustration and protects your investment for the next holiday season.
What is the best way to attach fairy lights to outdoor trees?
Never use staple guns; they slice wires and kill trees. The smartest sourcing move is buying bulk packs of UV-coated green zip ties or specialized flex-grip branch clips. These damage-free starter kits hold the wire securely through blizzards while blending invisibly into the bark, delivering a perfectly clean, professional aesthetic.