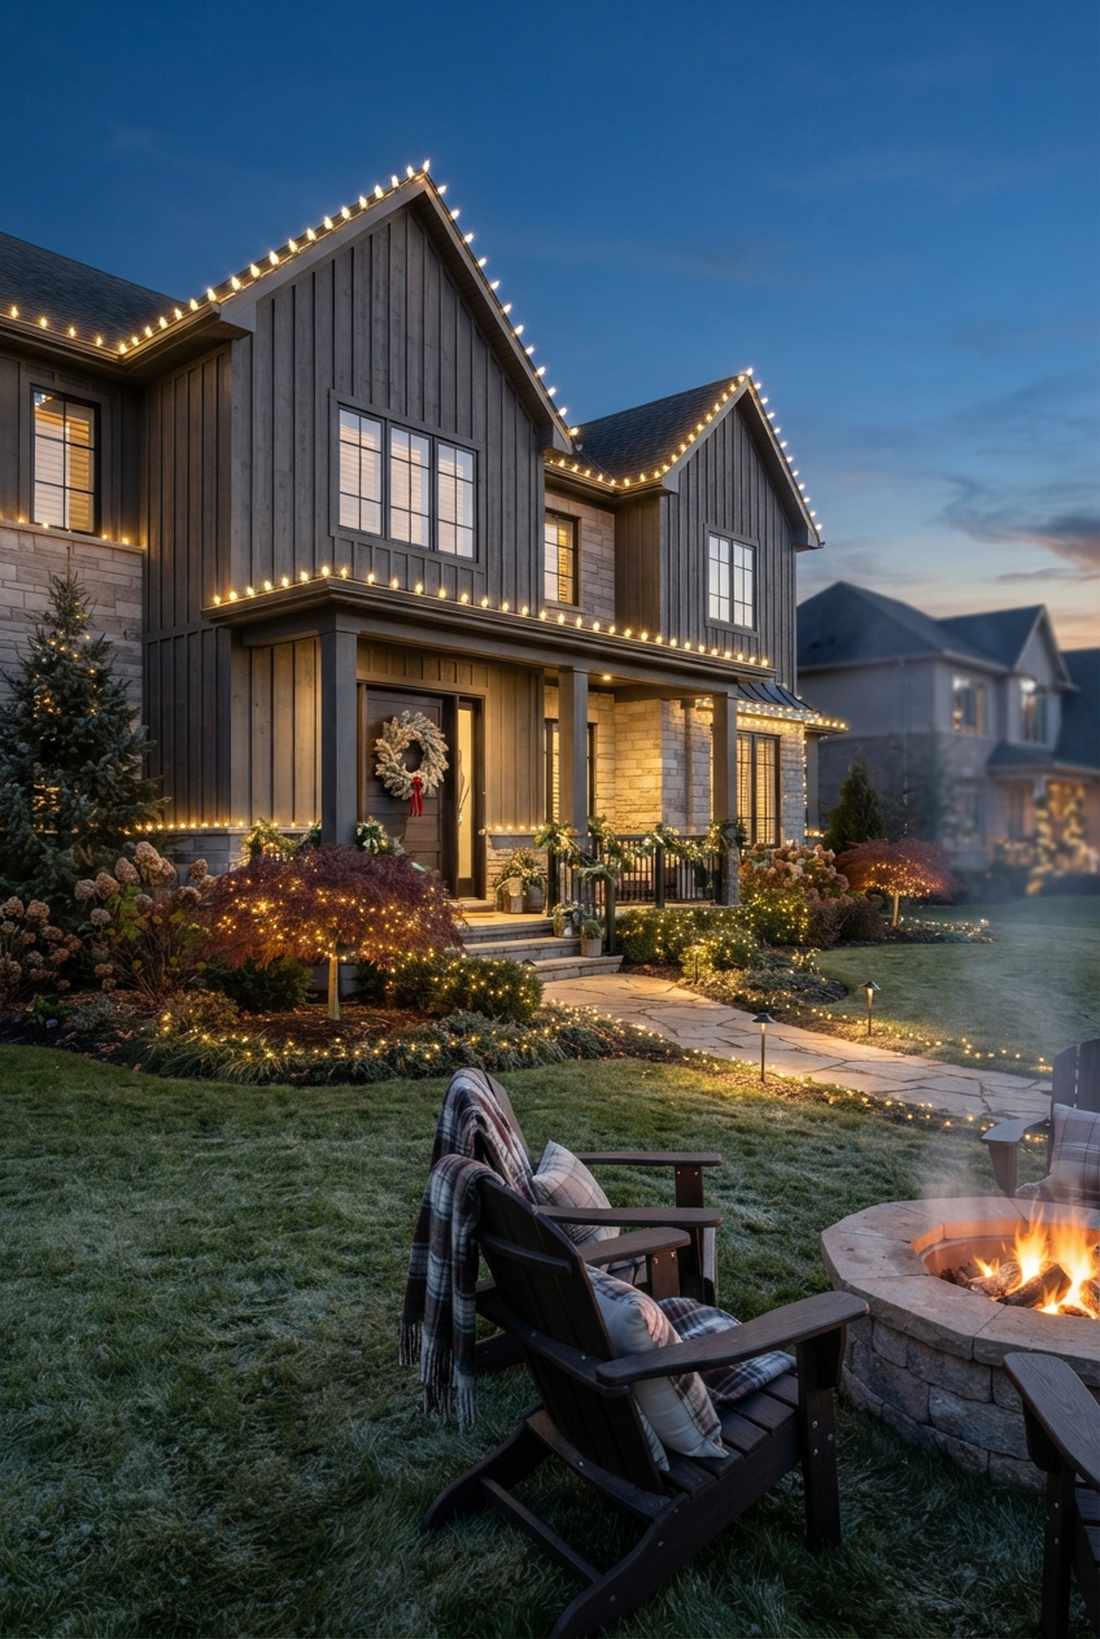
A striking xmas lights garden relies on smart layering, not endless extension cords. Discover precise material blueprints that deliver premium holiday aesthetics on a realistic budget. Upgrade your landscape effortlessly with commercial-grade essentials.
Design Snapshot Key Principles
- Layered Lighting: Combine ground-level, mid-height, and overhead elements to create depth and visual interest throughout your garden space
- Color Temperature Strategy: Use warm whites for cozy traditional looks, cool whites for elegant winter effects, or multicolor for playful nostalgic displays
- Power Planning: Map electrical sources early and consider solar or battery options for remote garden areas to maximize coverage without extension cord clutter
- Focal Point Balance: Distribute visual weight evenly across your landscape while establishing one or two hero features that anchor the entire display
Classic Tree Lighting Techniques That Elevate Your Garden
Trees serve as natural canvases for vertical illumination that draws the eye upward and creates dramatic focal points. Professional designers use specific wrapping and placement techniques to maximize visual impact while maintaining clean, polished results.
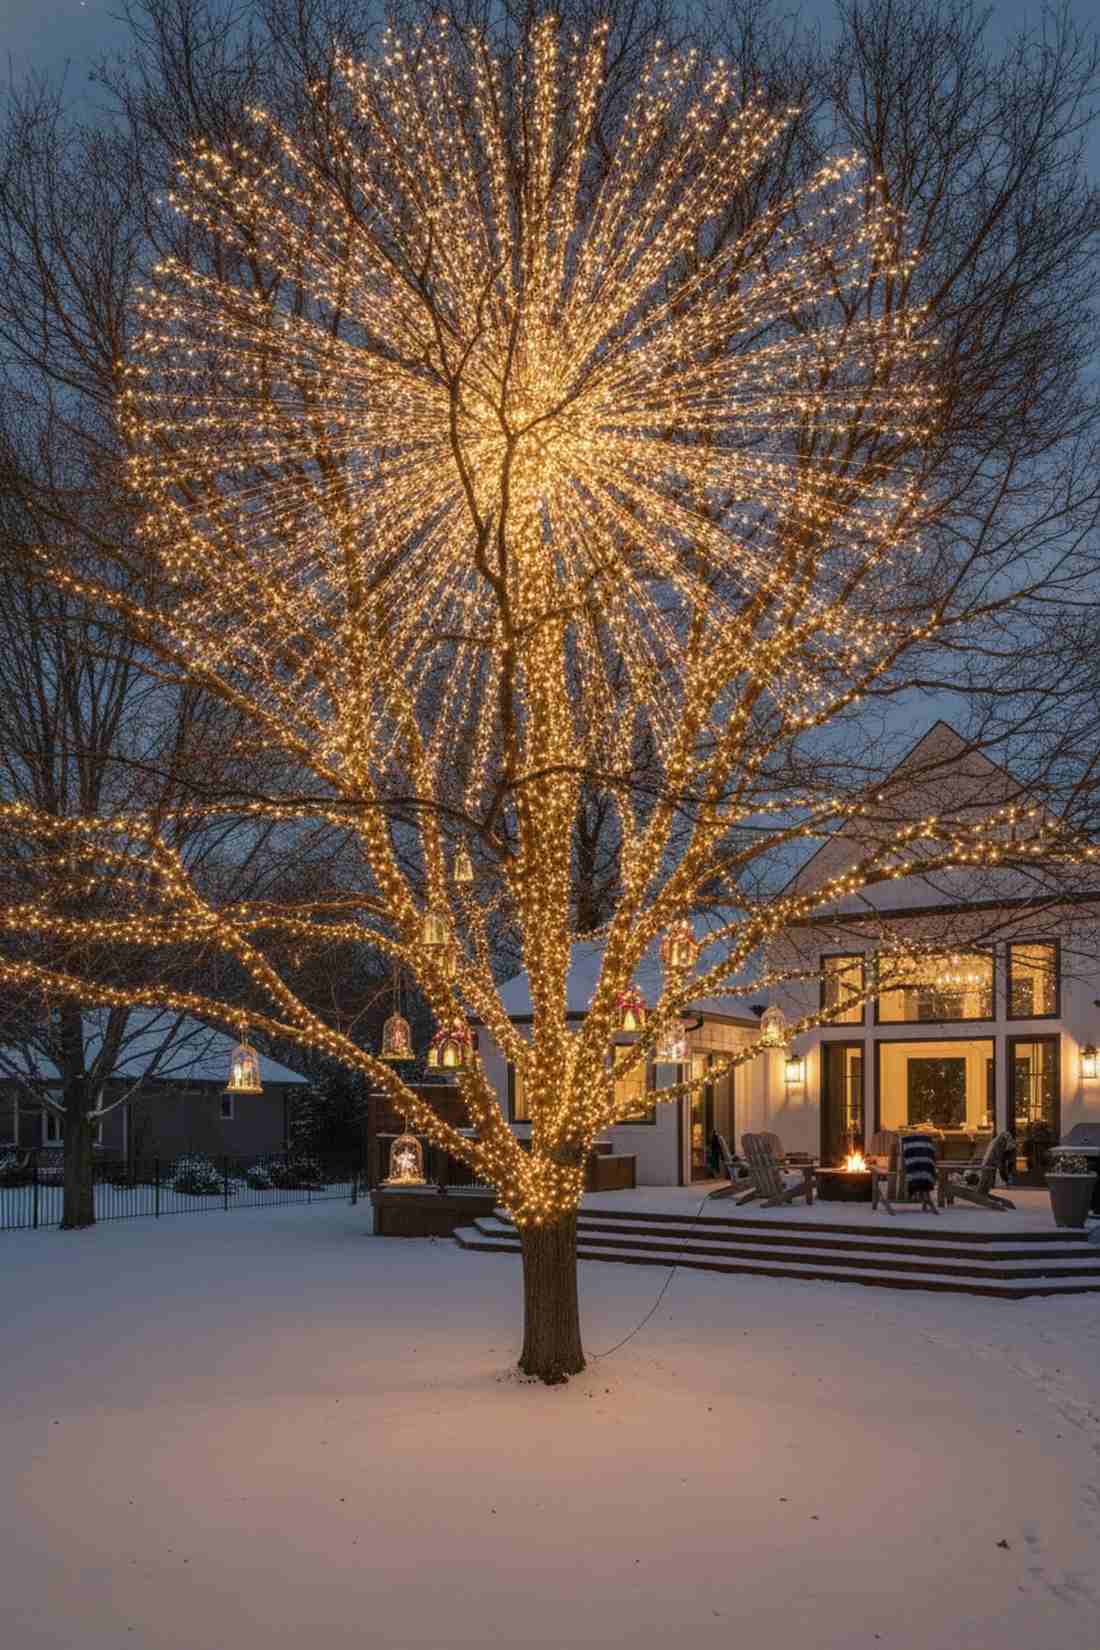
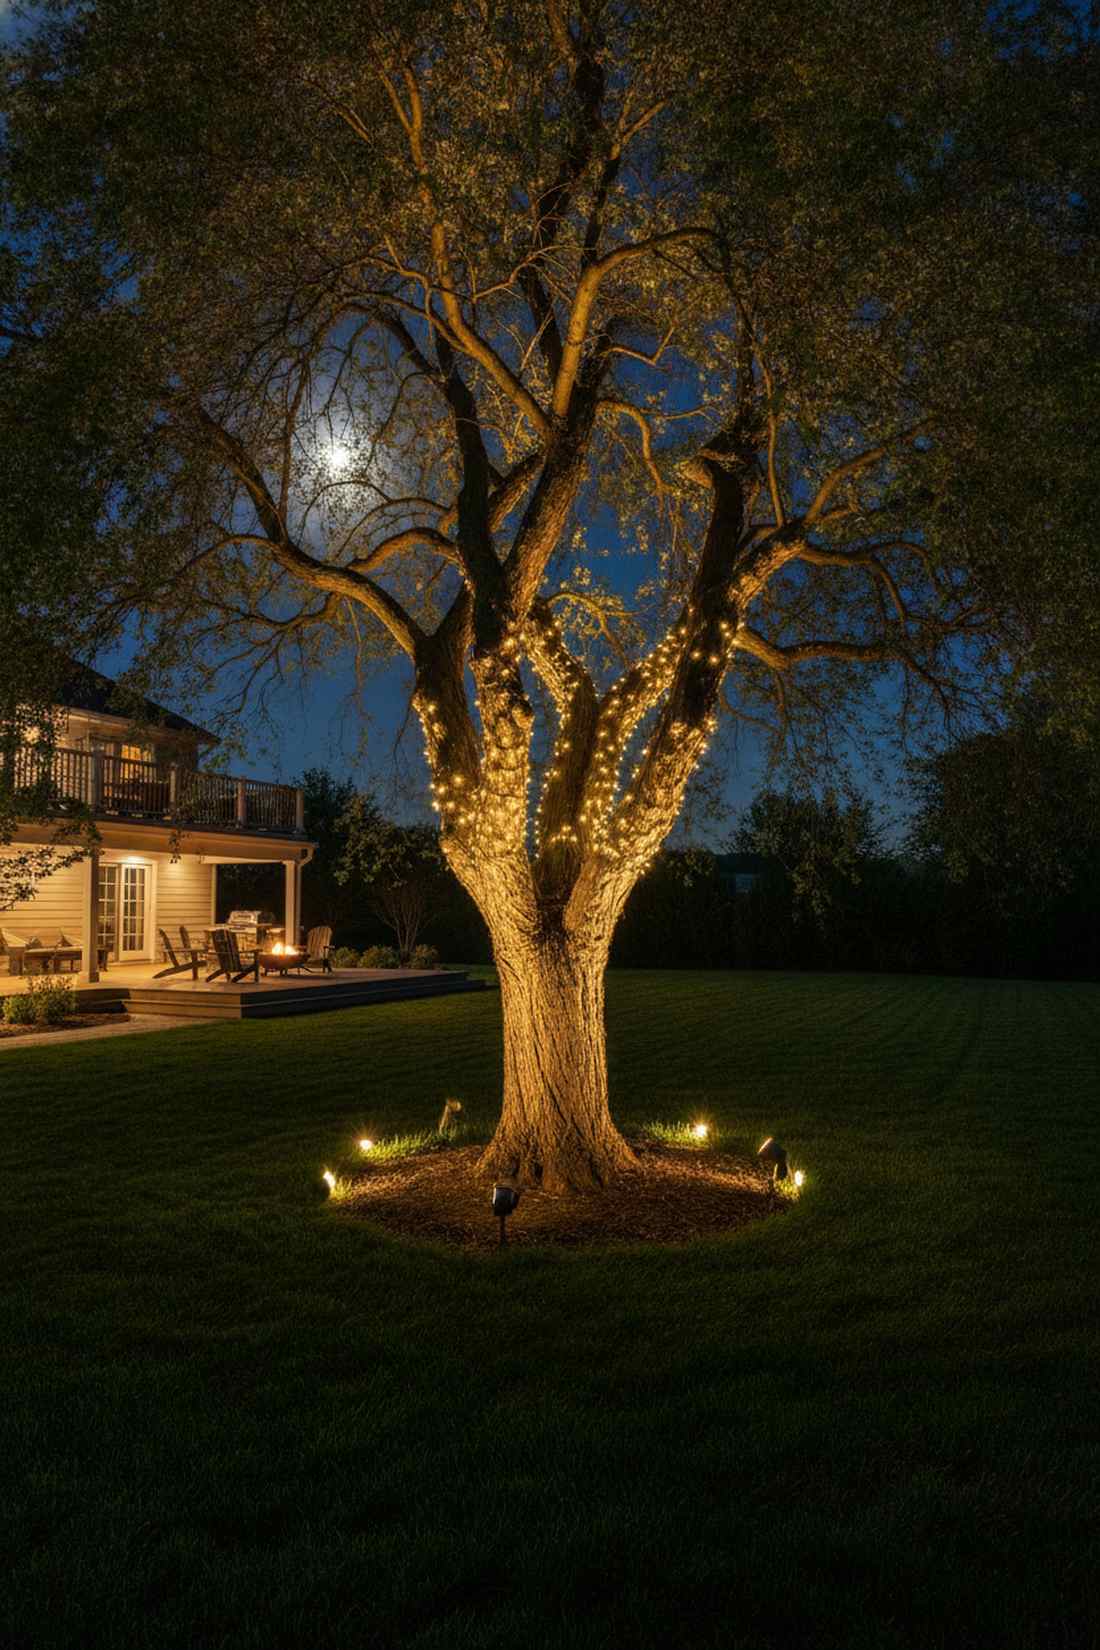
1. Trunk-Wrapped Spiral Trees
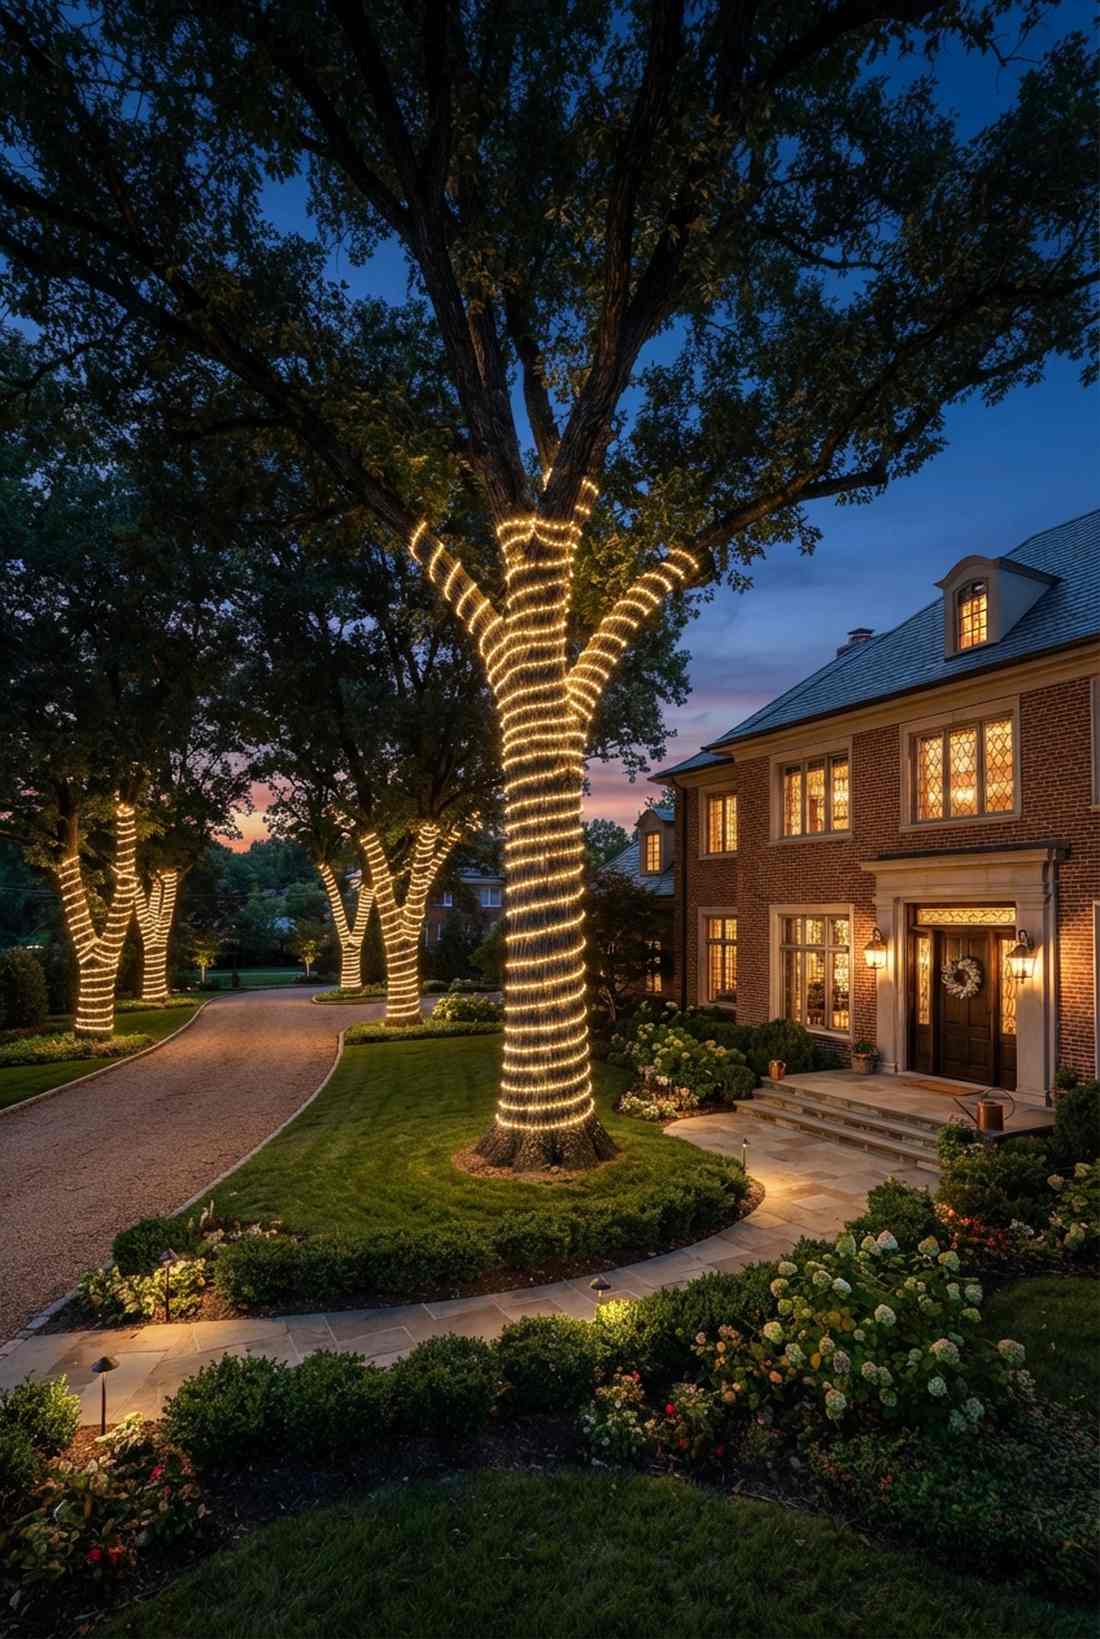
This towering illuminated oak design feels like a glowing pillar anchoring a luxury estate. It works exceptionally well for mature front yard shade trees demanding attention.
Most homeowners wrap loosely, but a tight continuous spiral delivers a surprisingly premium look. Investing in top-tier miniature garden supplies prevents the dreaded mid-season string burnout.
You can easily pull this off for around $40–$60 per tree. Save this to your DIY weekend garden board.
- Key Materials: Heavy-duty outdoor LED strings
- Vibe / Style: High-end traditional estate
- Difficulty: Moderate, requires ladder work
- Budget Breakdown: Lights: $45 | Timers: $15
- Creator’s Tip: Use green zip ties at the base to prevent slipping.
- Smart Sourcing: commercial-grade warm white LEDs (bulk pack) and heavy-duty weatherproof zip ties.
2. Branch-Tip Illumination
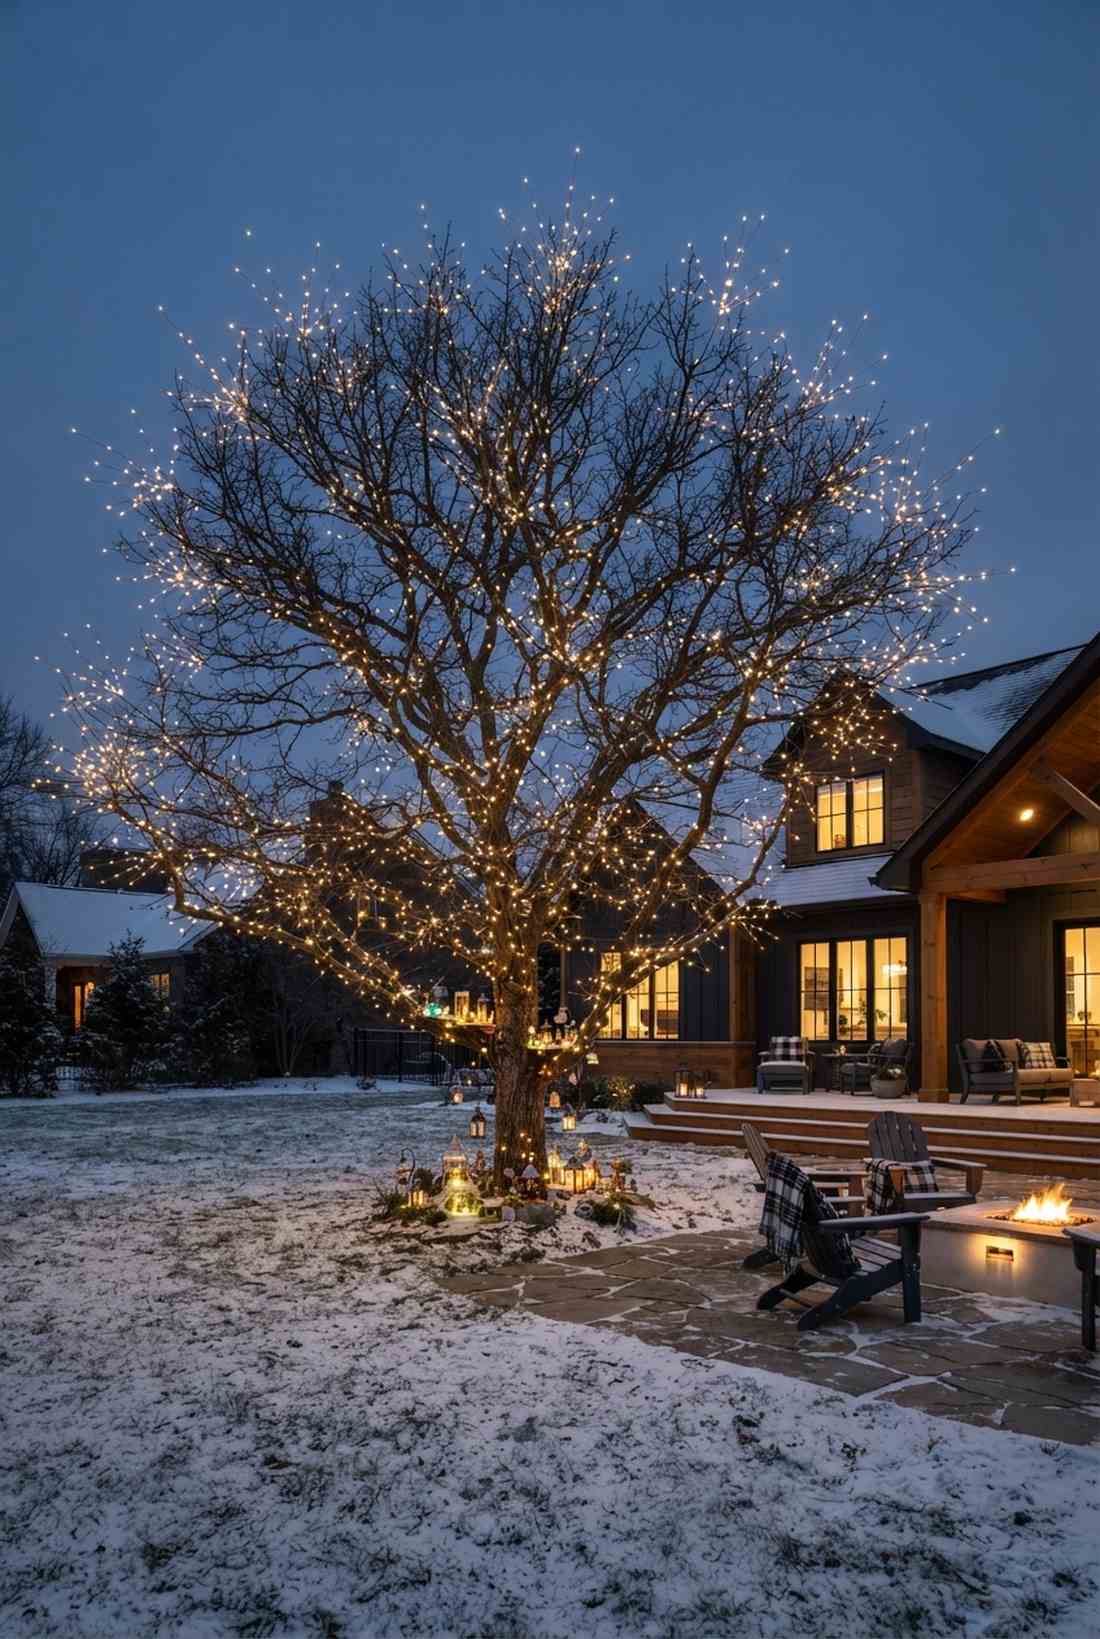
Creating a starburst branch light effect feels like a frozen meteor shower caught in mid-air. It is perfect for highlighting leafless deciduous trees during the deep winter months.
Instead of wrapping the entire trunk, targeting just the tips looks far more expensive than it is. Seamlessly weaving fairy garden kits into the lower branches adds an unexpected layer of magic.
Expect to spend about $30–$50 depending on tree size. It’s a fast upgrade that completely changes the vibe.
- Key Materials: Micro LED fairy lights on copper wire
- Vibe / Style: Delicate winter magic
- Difficulty: Intermediate shaping required
- Budget Breakdown: Micro LEDs: $35 | Wire clips: $10
- Creator’s Tip: Work outward from the trunk to hide the main power cord.
- Smart Sourcing: copper wire fairy light bundles (bulk pack) and UV-coated tree clips.
3. Canopy Drape Lighting
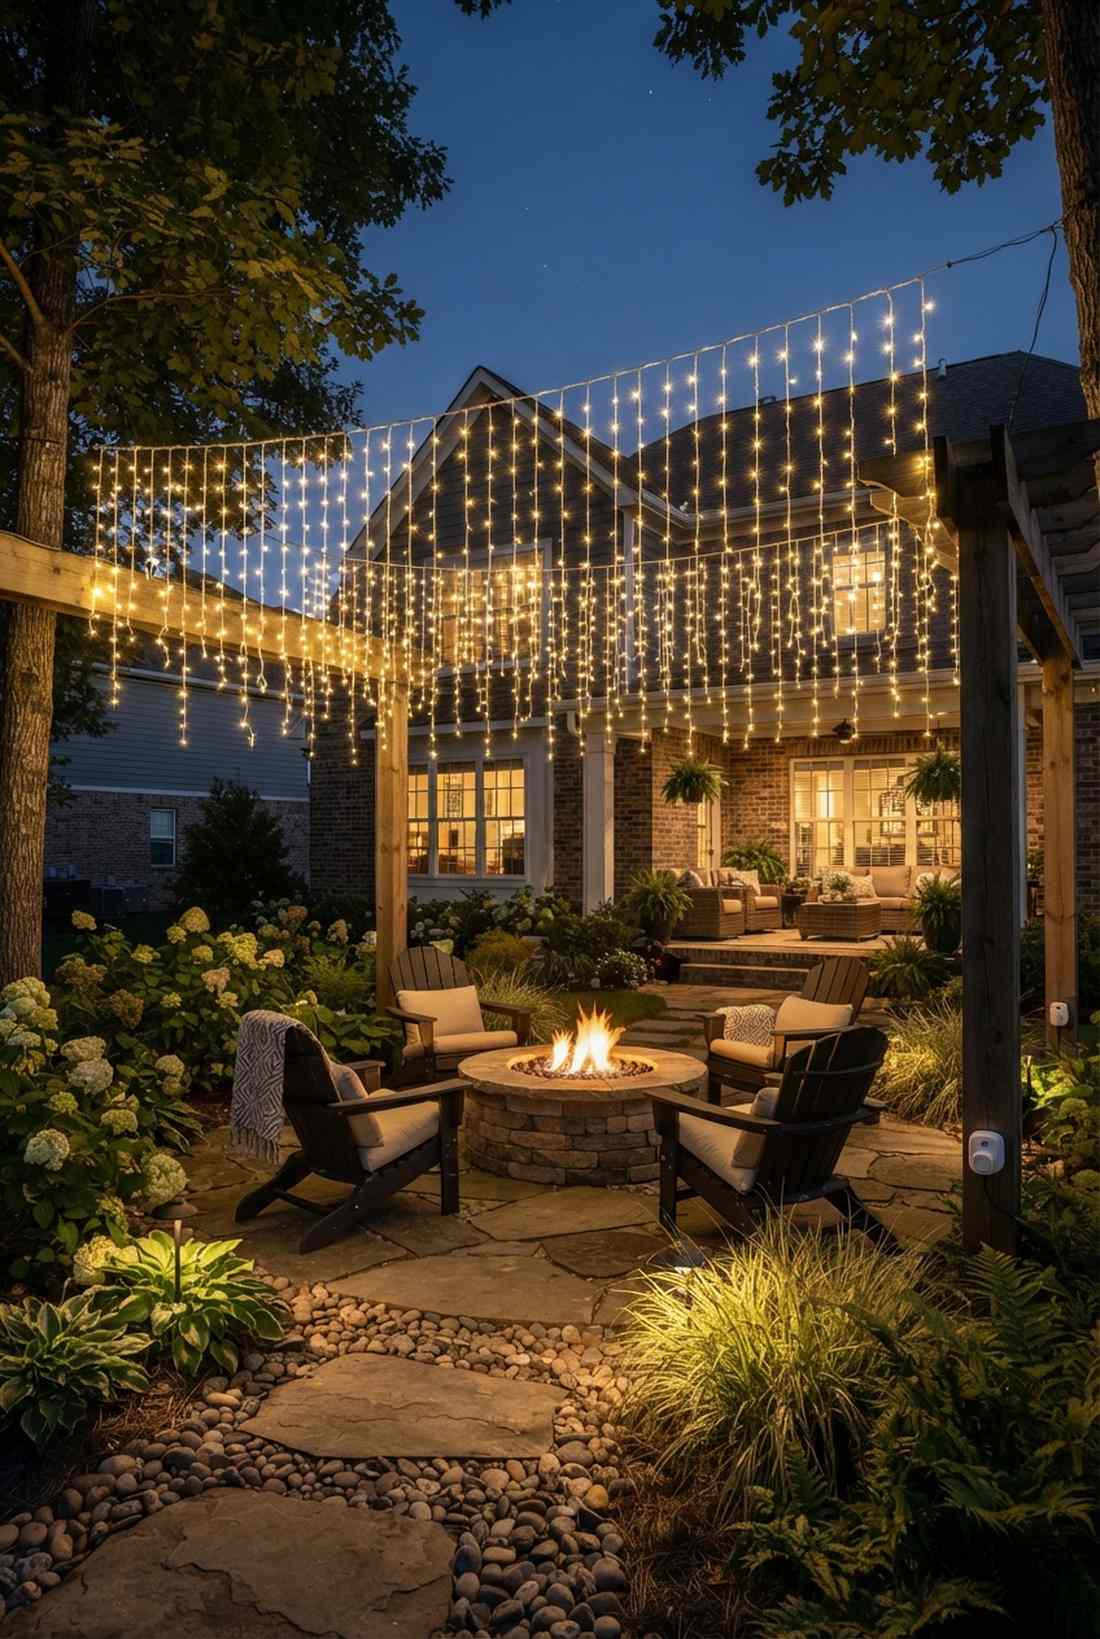
This cascading forest light canopy feels like a hidden realm you accidentally discovered. This setup is perfect for shading over an outdoor fire pit or cozy seating nook.
Hanging lights vertically instead of horizontally gives a designer-level finish. Upgrading to outdoor smart plugs lets you control this weeping willow effect directly from your phone.
This stunning overhead display usually costs around $70–$90. Pin this if you’re planning a backyard seating upgrade.
- Key Materials: Suspended icicle-style drop strands
- Vibe / Style: Enchanted woodland retreat
- Difficulty: High, requires safe overhead reaching
- Budget Breakdown: Light drops: $75 | Extension cords: $15
- Creator’s Tip: Hang strands at staggered lengths for an organic, natural flow.
- Smart Sourcing: pre-measured cascading LED sets and outdoor Wi-Fi smart plugs.
4. Multi-Tree Cluster Display
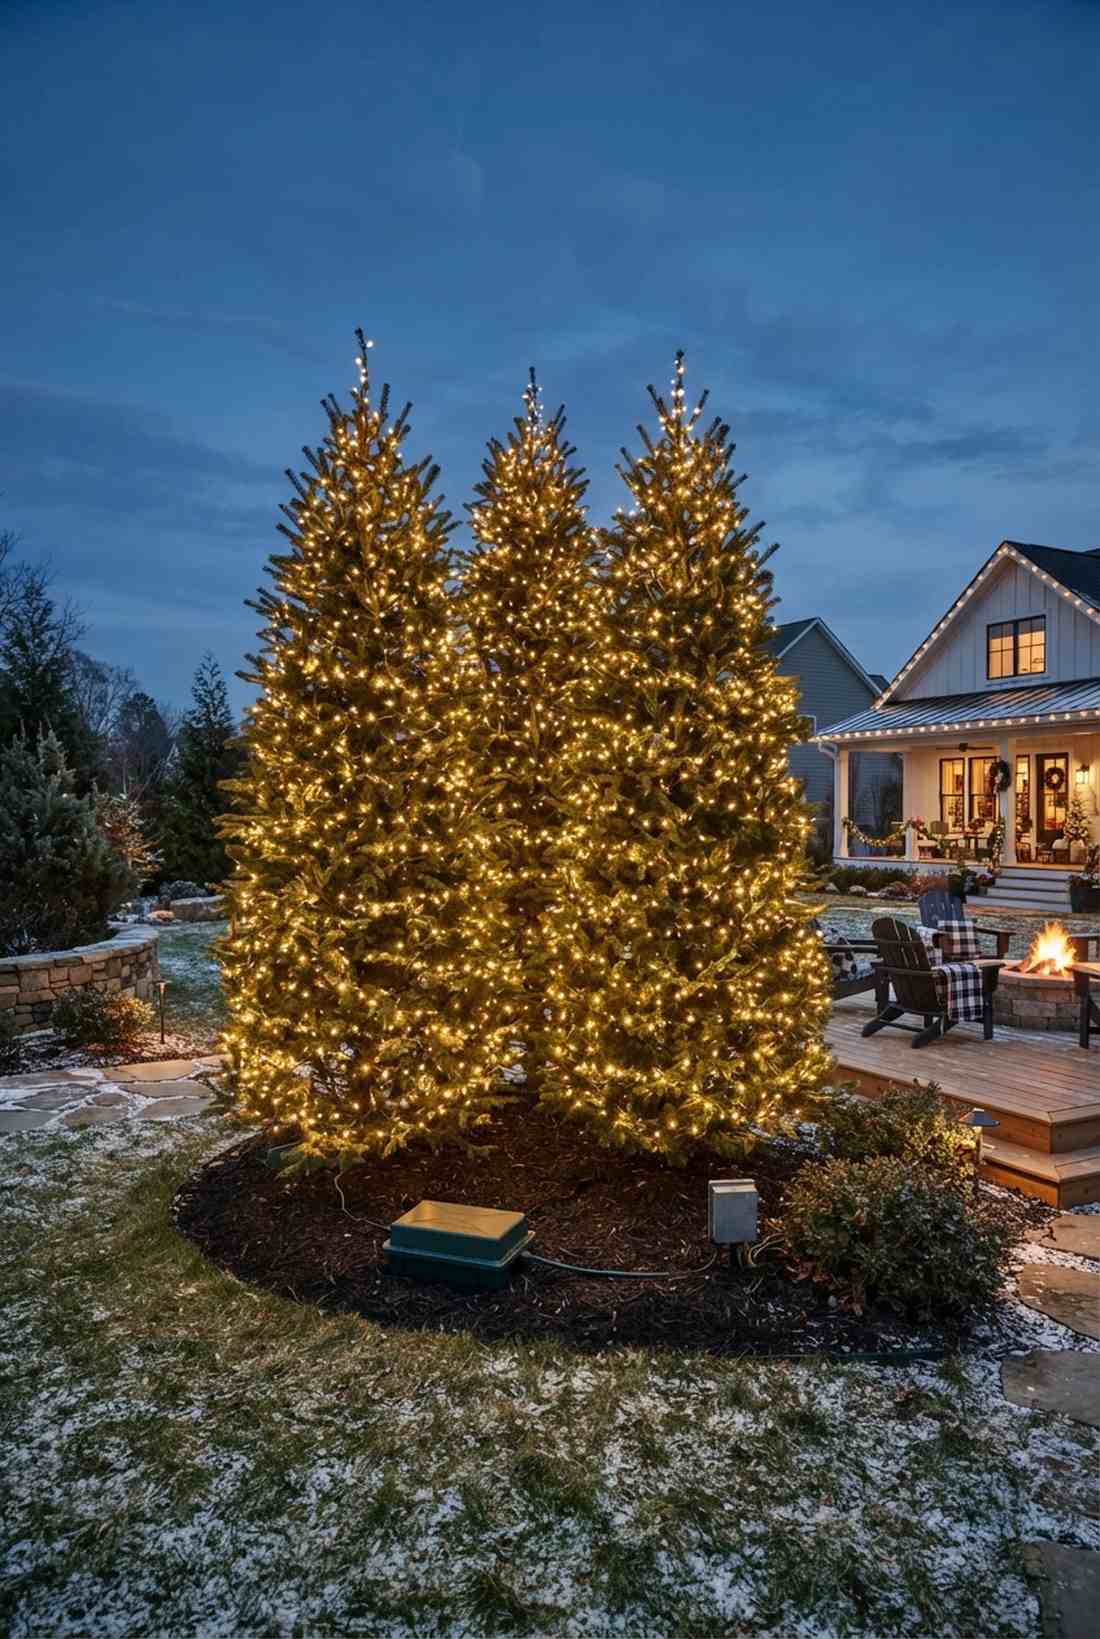
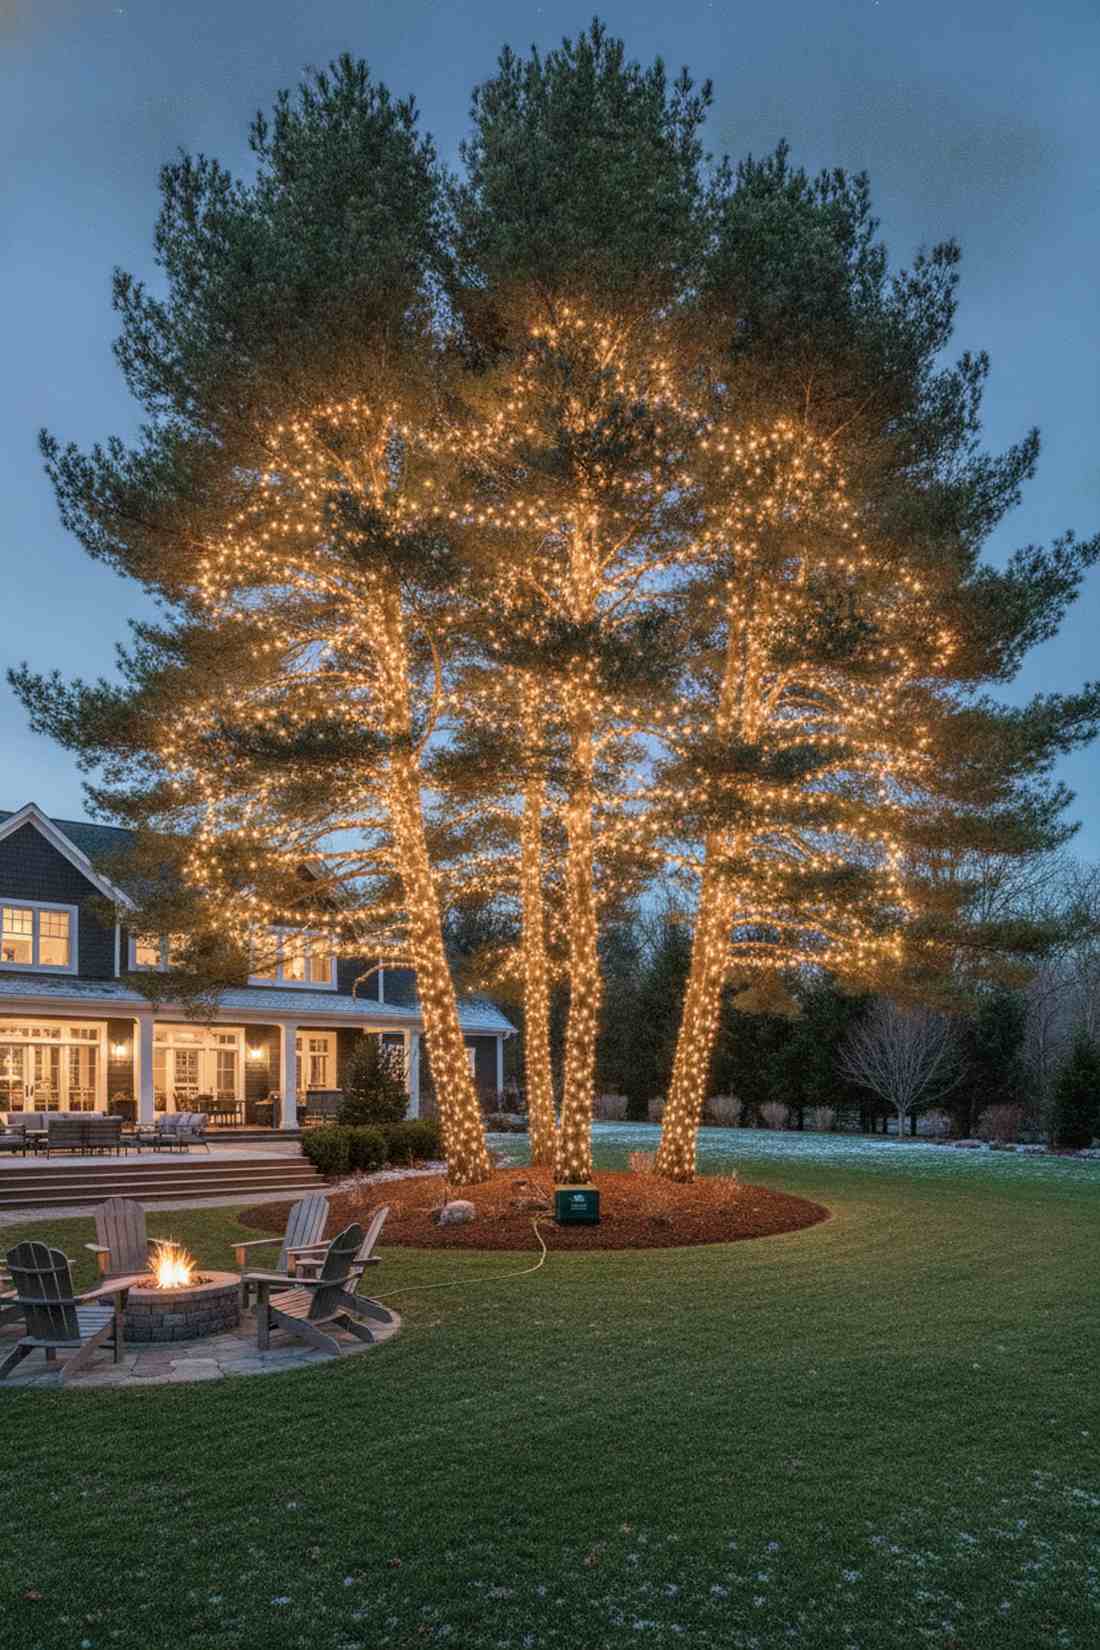
A unified glowing grove landscape design feels like stepping straight out of a storybook. It completely transforms a mundane group of pines into a cohesive winter focal point.
Linking multiple trees together creates a visual mass that outshines standalone wraps. High-quality outdoor landscape lighting transformers are necessary to handle the linked voltage safely.
Budget around $100–$150 for a cluster of three trees. Highly recommended for a high-impact weekend win.
- Key Materials: Connectable end-to-end LED strings
- Vibe / Style: Cohesive modern neighborhood showstopper
- Difficulty: Intermediate, requires cord management
- Budget Breakdown: Lights: $110 | Hub: $30
- Creator’s Tip: Bury the linking extension cords in the mulch to maintain a clean aesthetic.
- Smart Sourcing: end-to-end connectable LED spools and waterproof cord protector boxes.
Most people get this completely wrong… until they try the exact layout coming up next.
5. Juvenile Tree Full Wrap
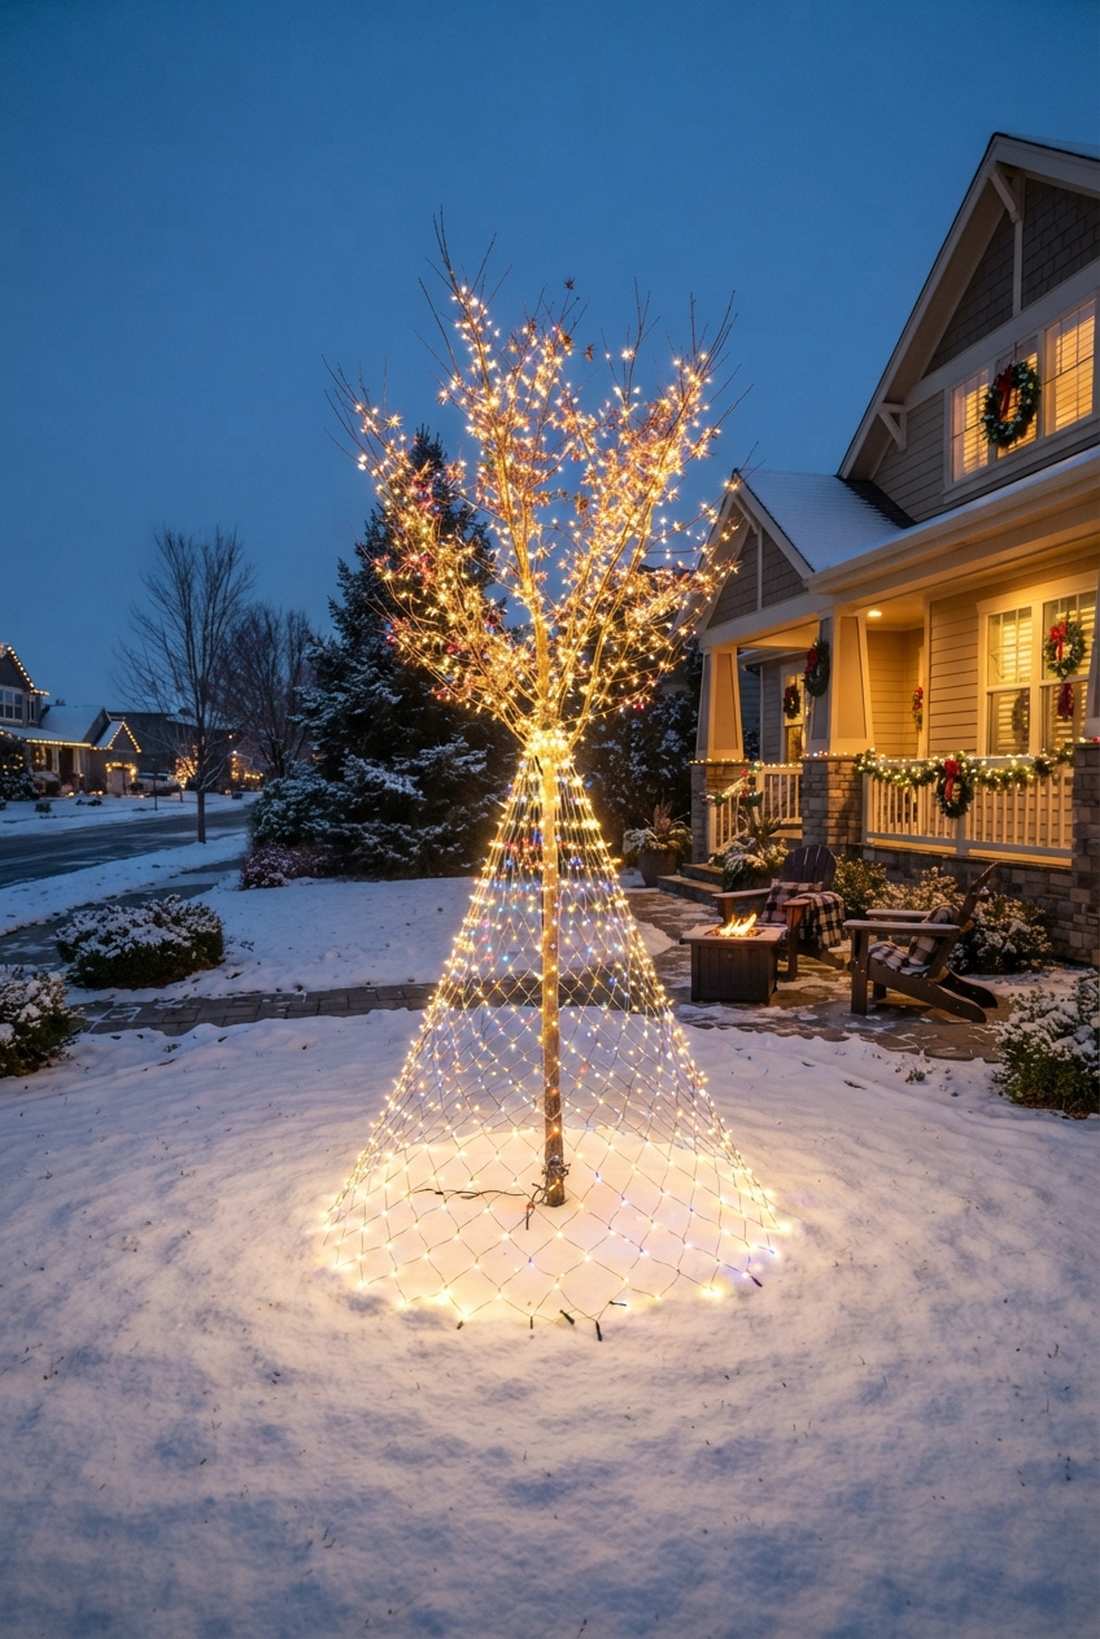
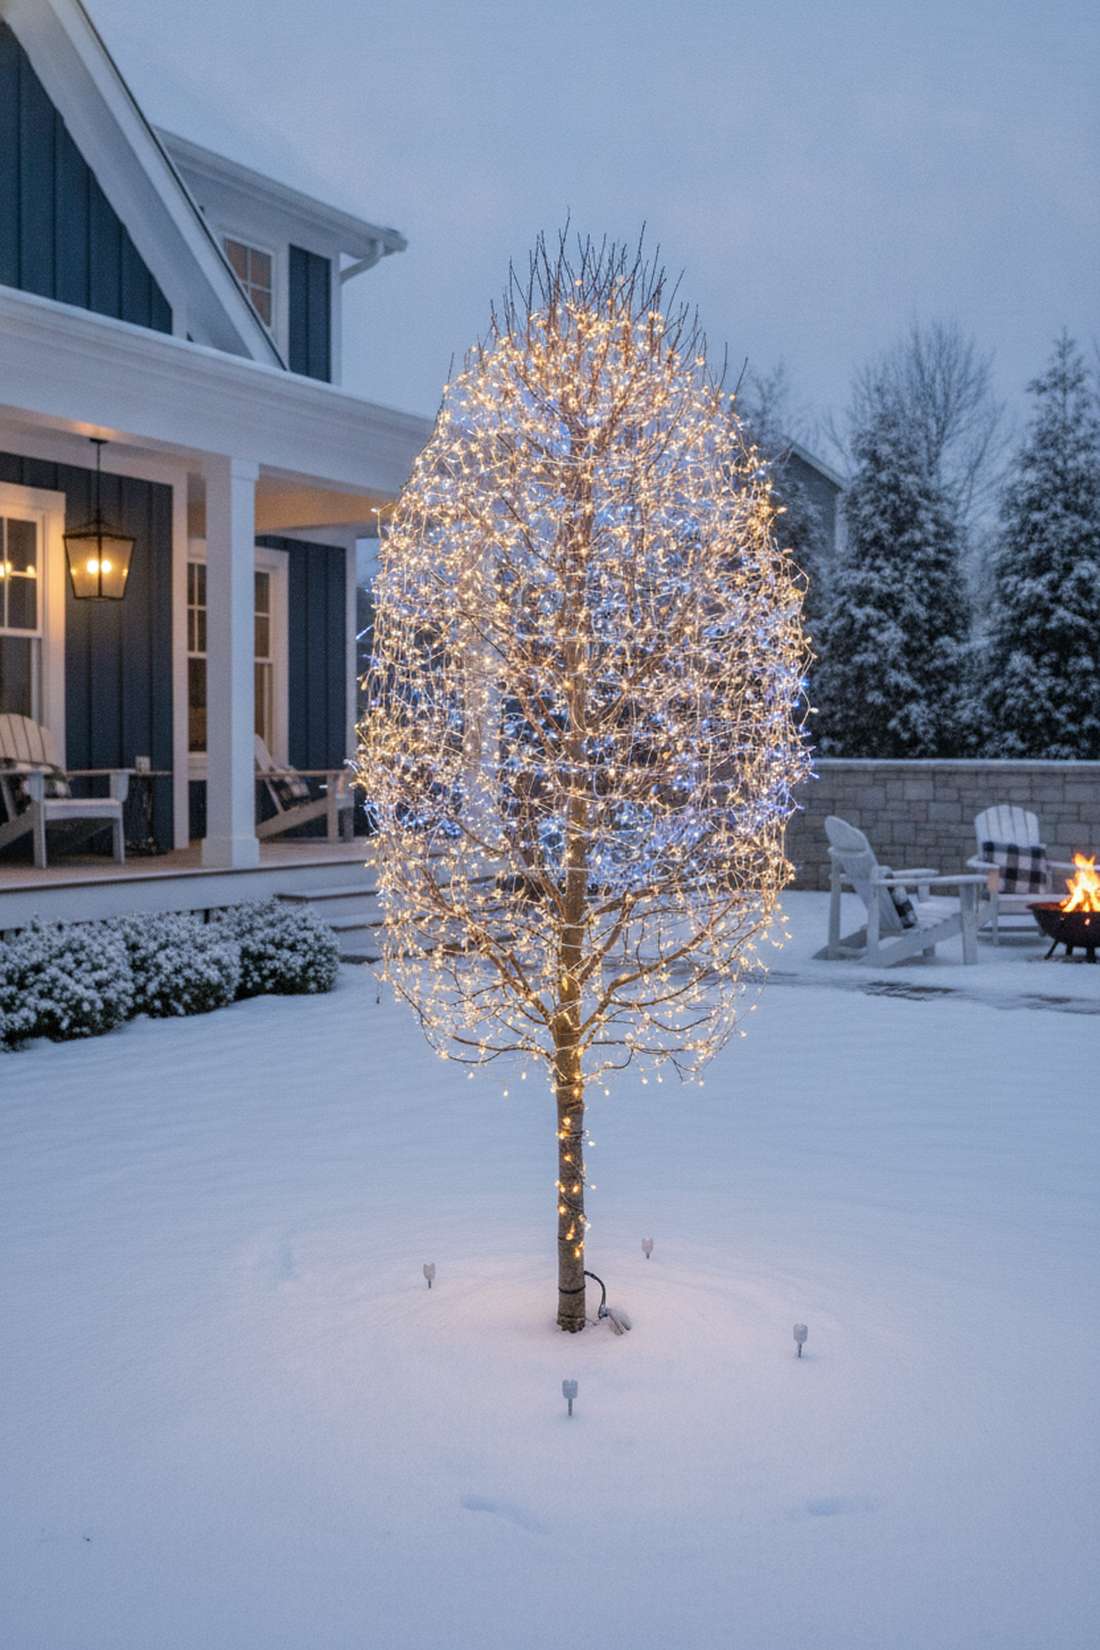
This dense luminous sapling wrap feels like an oversized, glowing ornament planted in the snow. Excellent for newly planted trees or smaller Japanese maples in front yards.
Skipping the sparse look and wrapping tightly from root to tip creates an intense, premium aesthetic. Utilizing professional terrarium accessories for cord anchoring at the base keeps everything invisible.
You can achieve this bold statement for roughly $20–$40. Save this idea for your young landscape additions.
- Key Materials: Tightly woven net lights or mini strings
- Vibe / Style: Ultra-bright modern pop
- Difficulty: Easy beginner setup
- Budget Breakdown: Net lights: $25 | Anchors: $5
- Creator’s Tip: Crisscross two different light colors for a custom multi-dimensional glow.
- Smart Sourcing: stretchable LED net light kits and heavy-duty landscape staples.
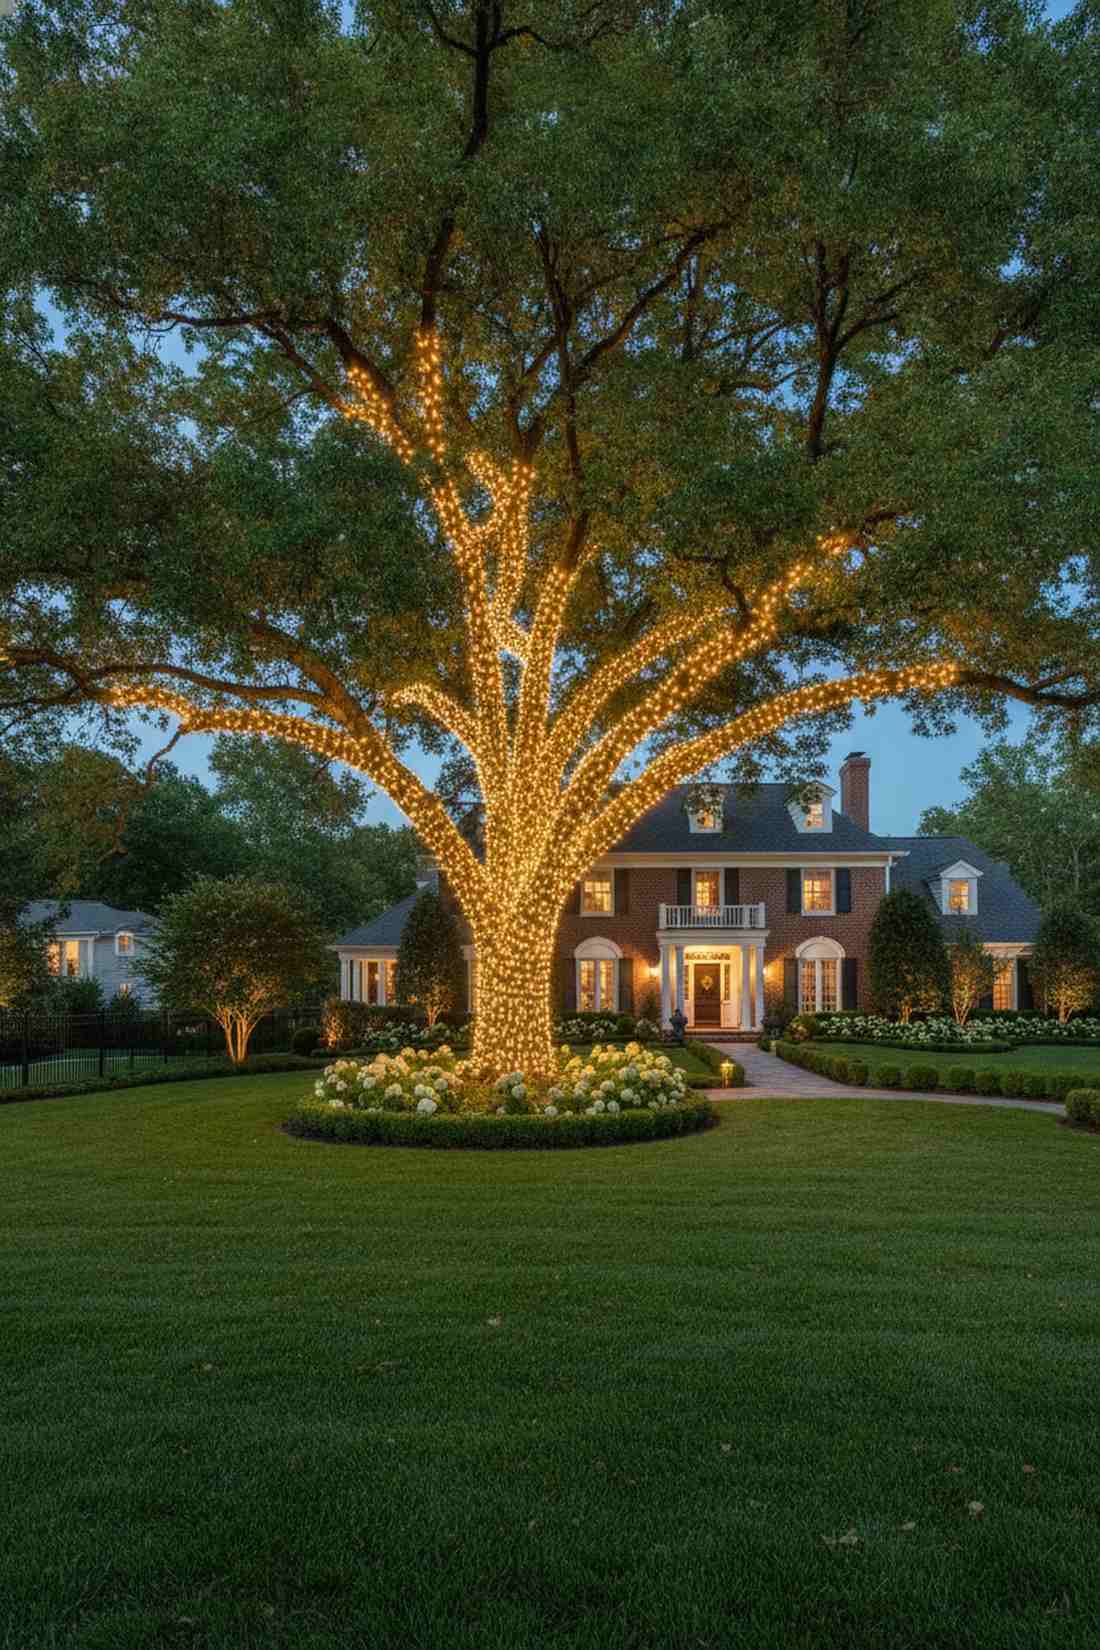
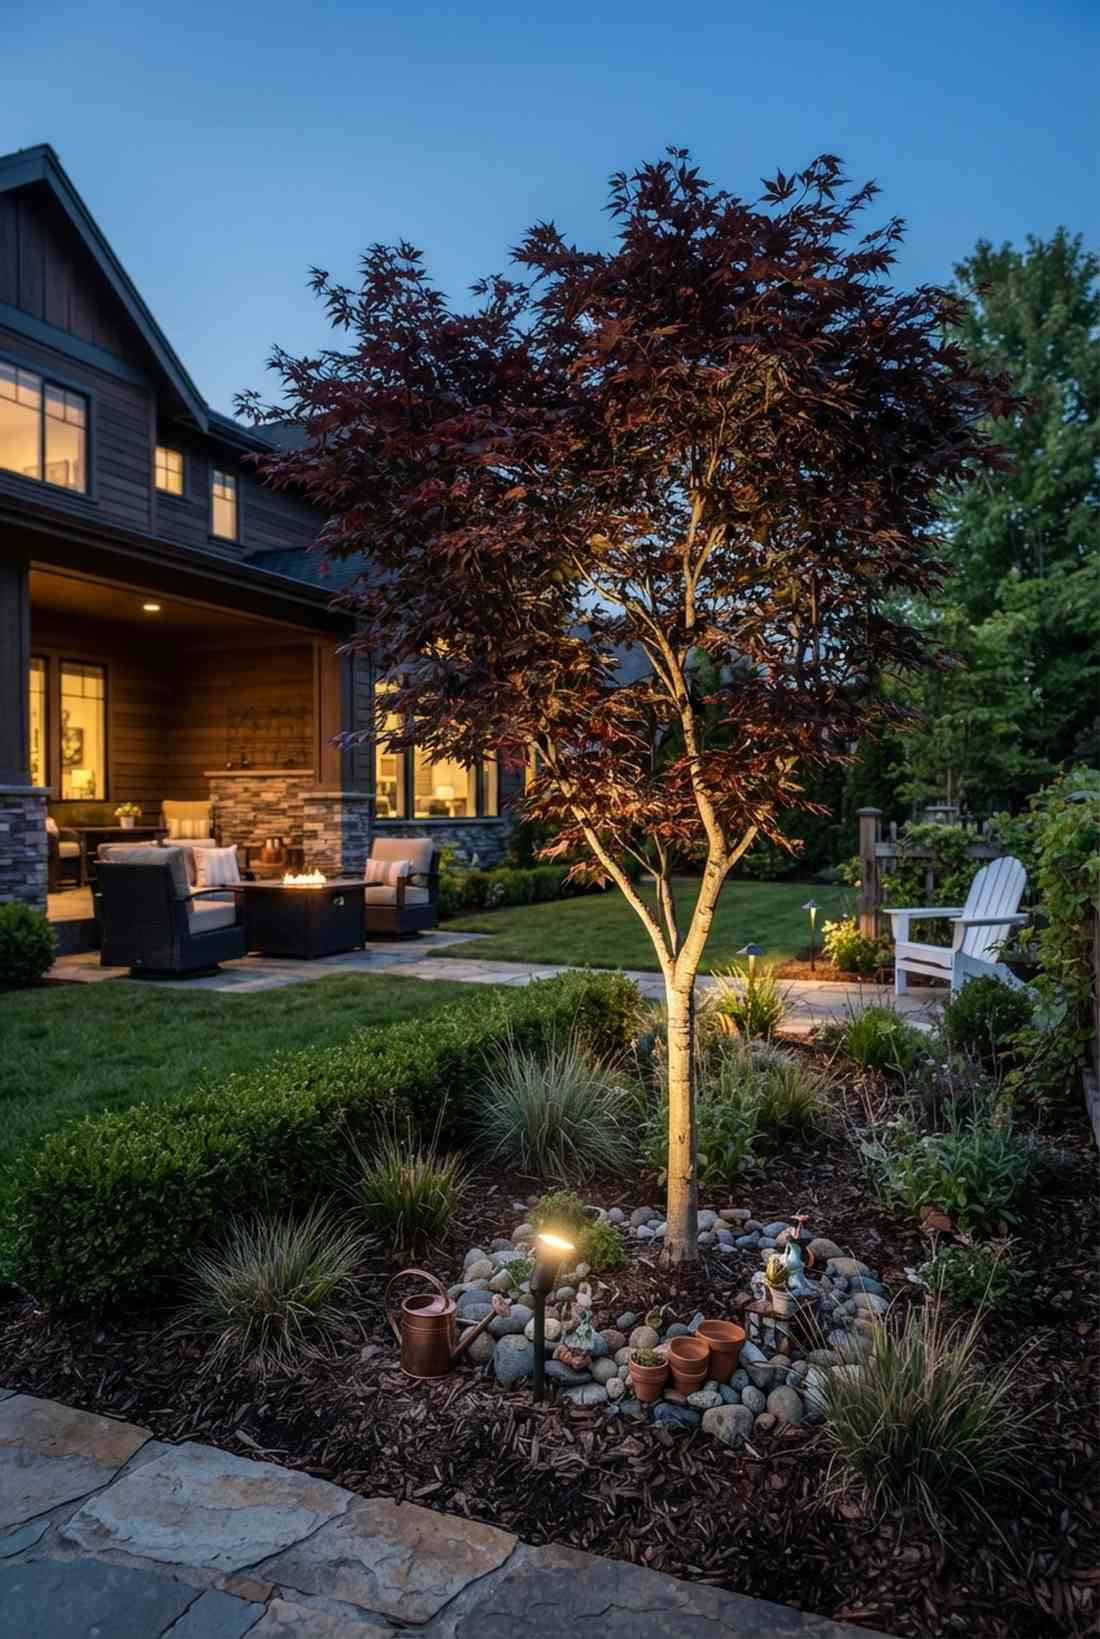
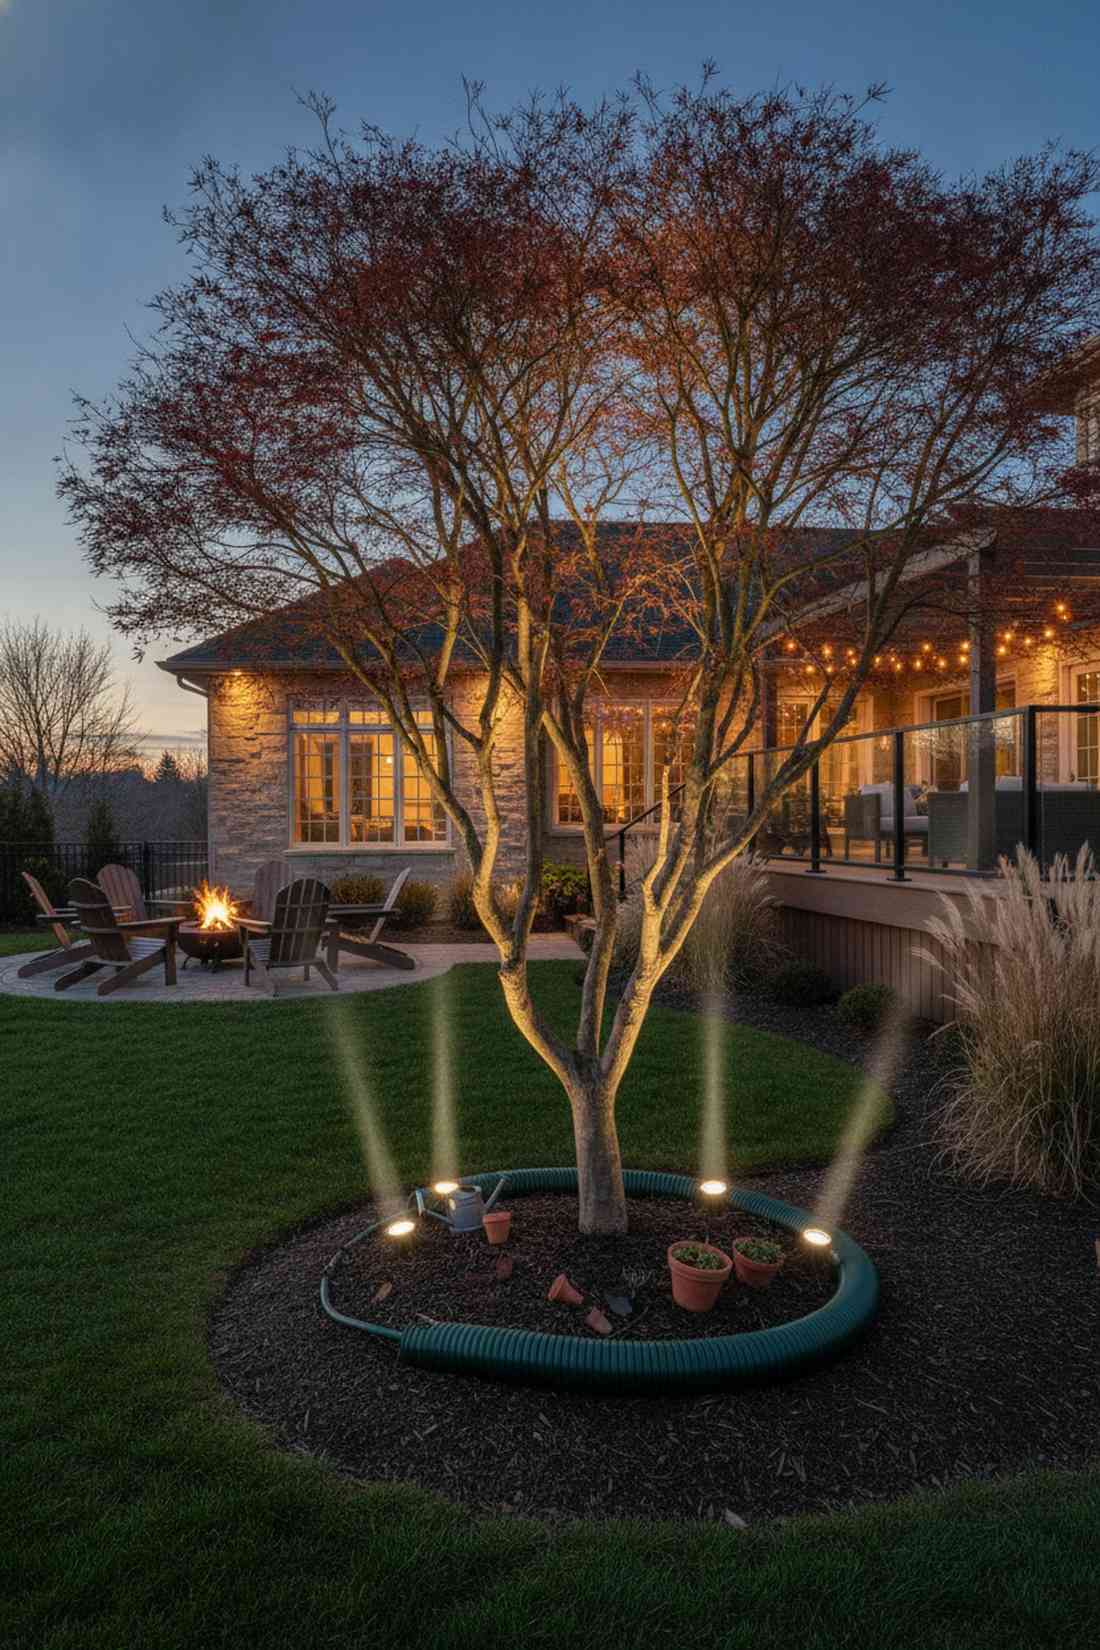
6. Specimen Tree Spotlight
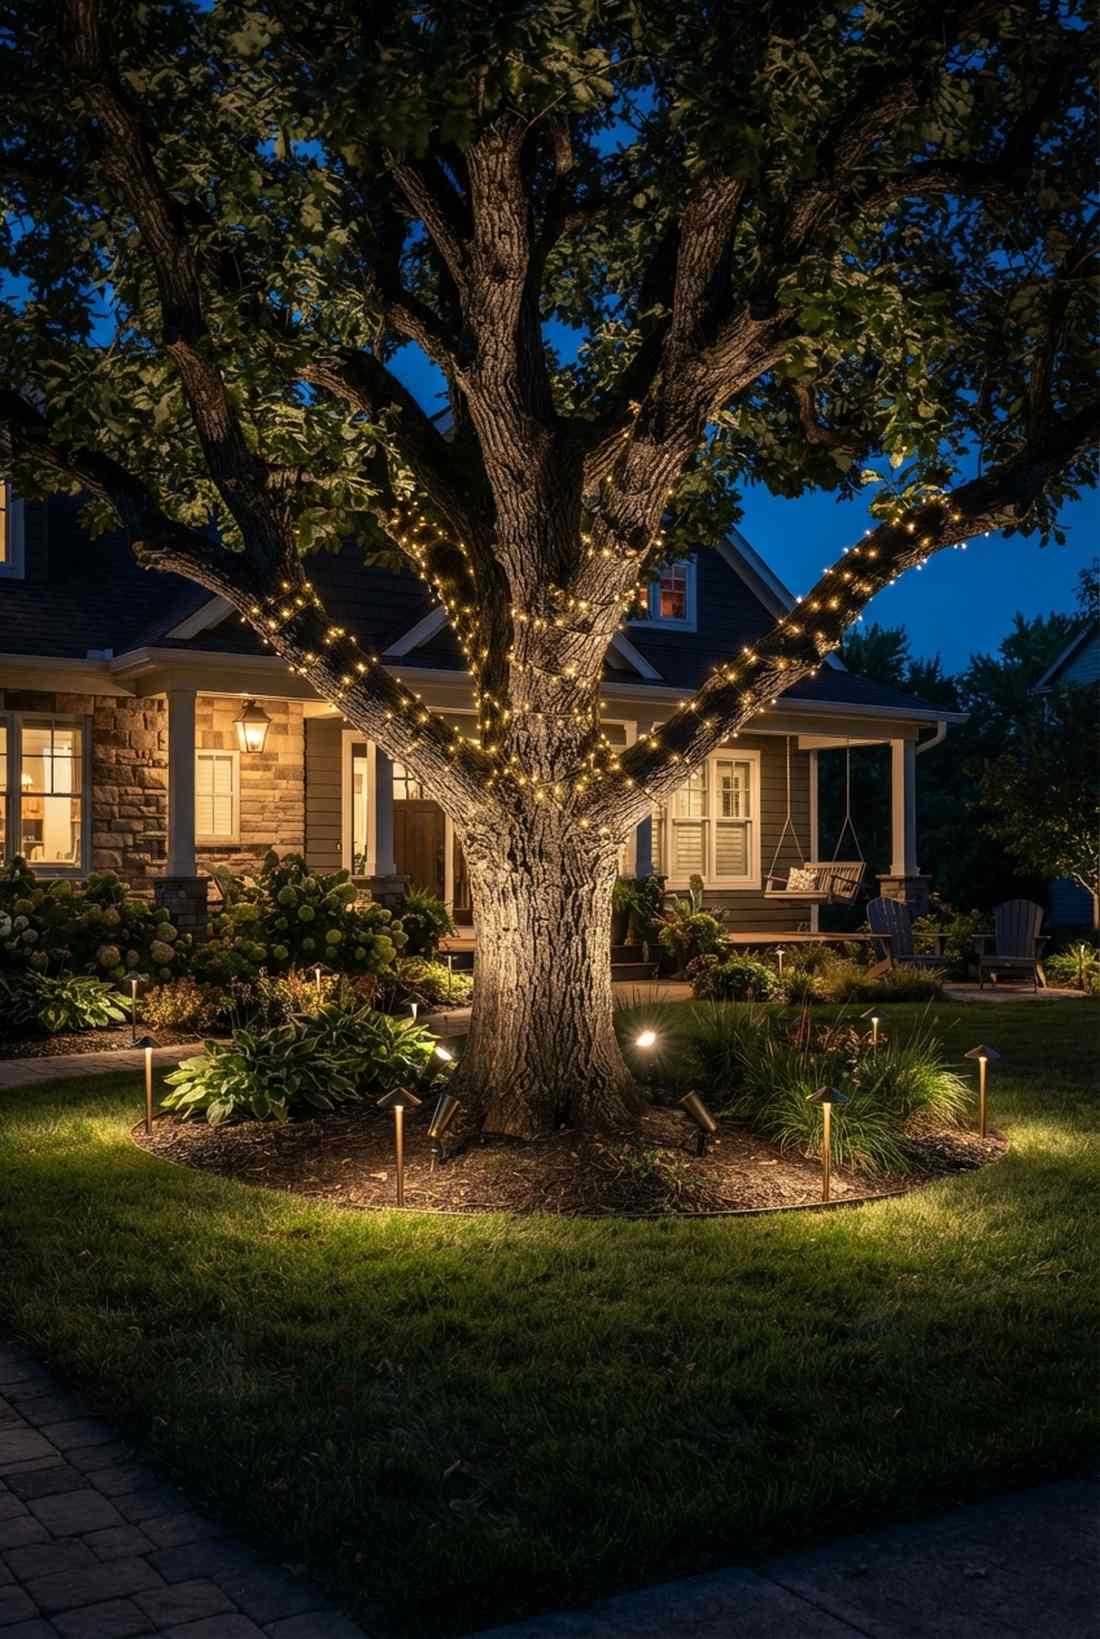
An up-lit hero tree spotlight arrangement feels like a dramatic museum exhibit right on your lawn. Perfect for highlighting uniquely shaped weeping cherries or ancient oaks.
Combining base spotlights with wrapped branches instantly elevates your home’s curb appeal. Adding solar pathway kits around the base frames the focal point perfectly without extra wiring.
This dual-lighting approach generally costs $50–$80. Pin this to remember the layered lighting secret.
- Key Materials: High-lumen LED uplights
- Vibe / Style: Architectural gallery glow
- Difficulty: Easy, plug and play
- Budget Breakdown: Spotlights: $60 | Mini wraps: $20
- Creator’s Tip: Angle the spotlight at 45 degrees to capture the texture of the bark.
- Smart Sourcing: high-lumen brass landscape spotlights and weatherproof outdoor timers.
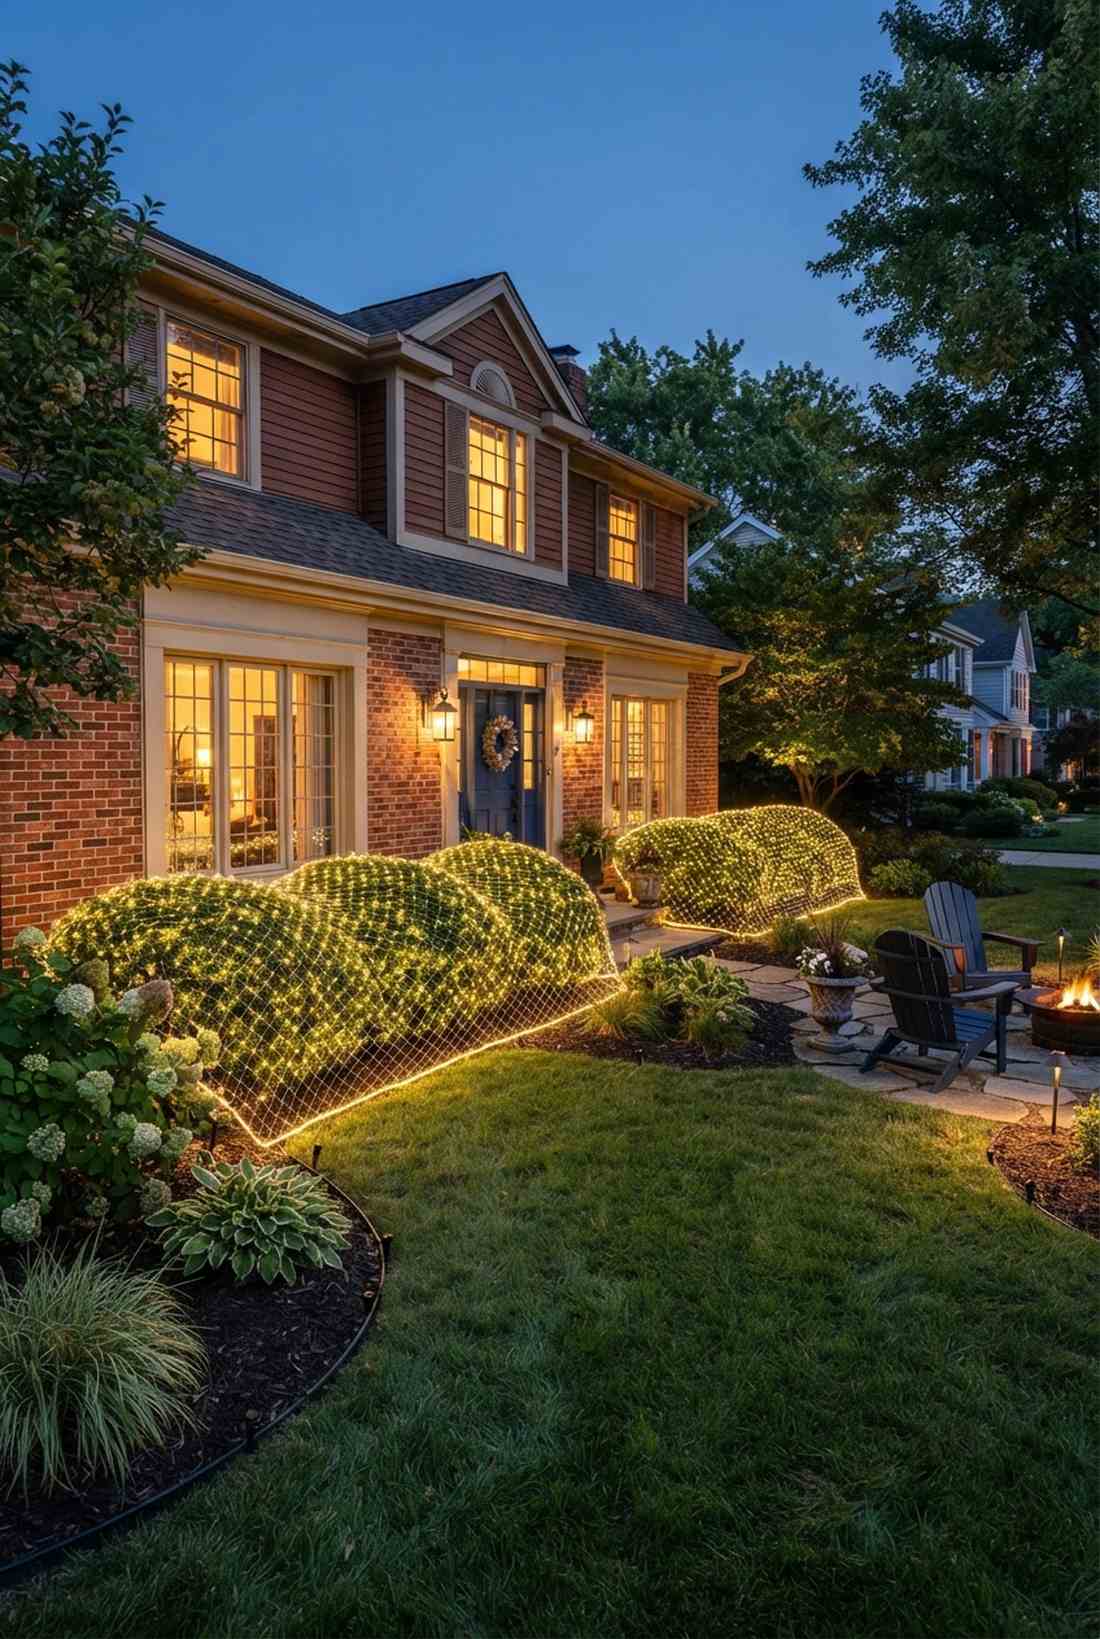
7. Evergreen Net Coverage
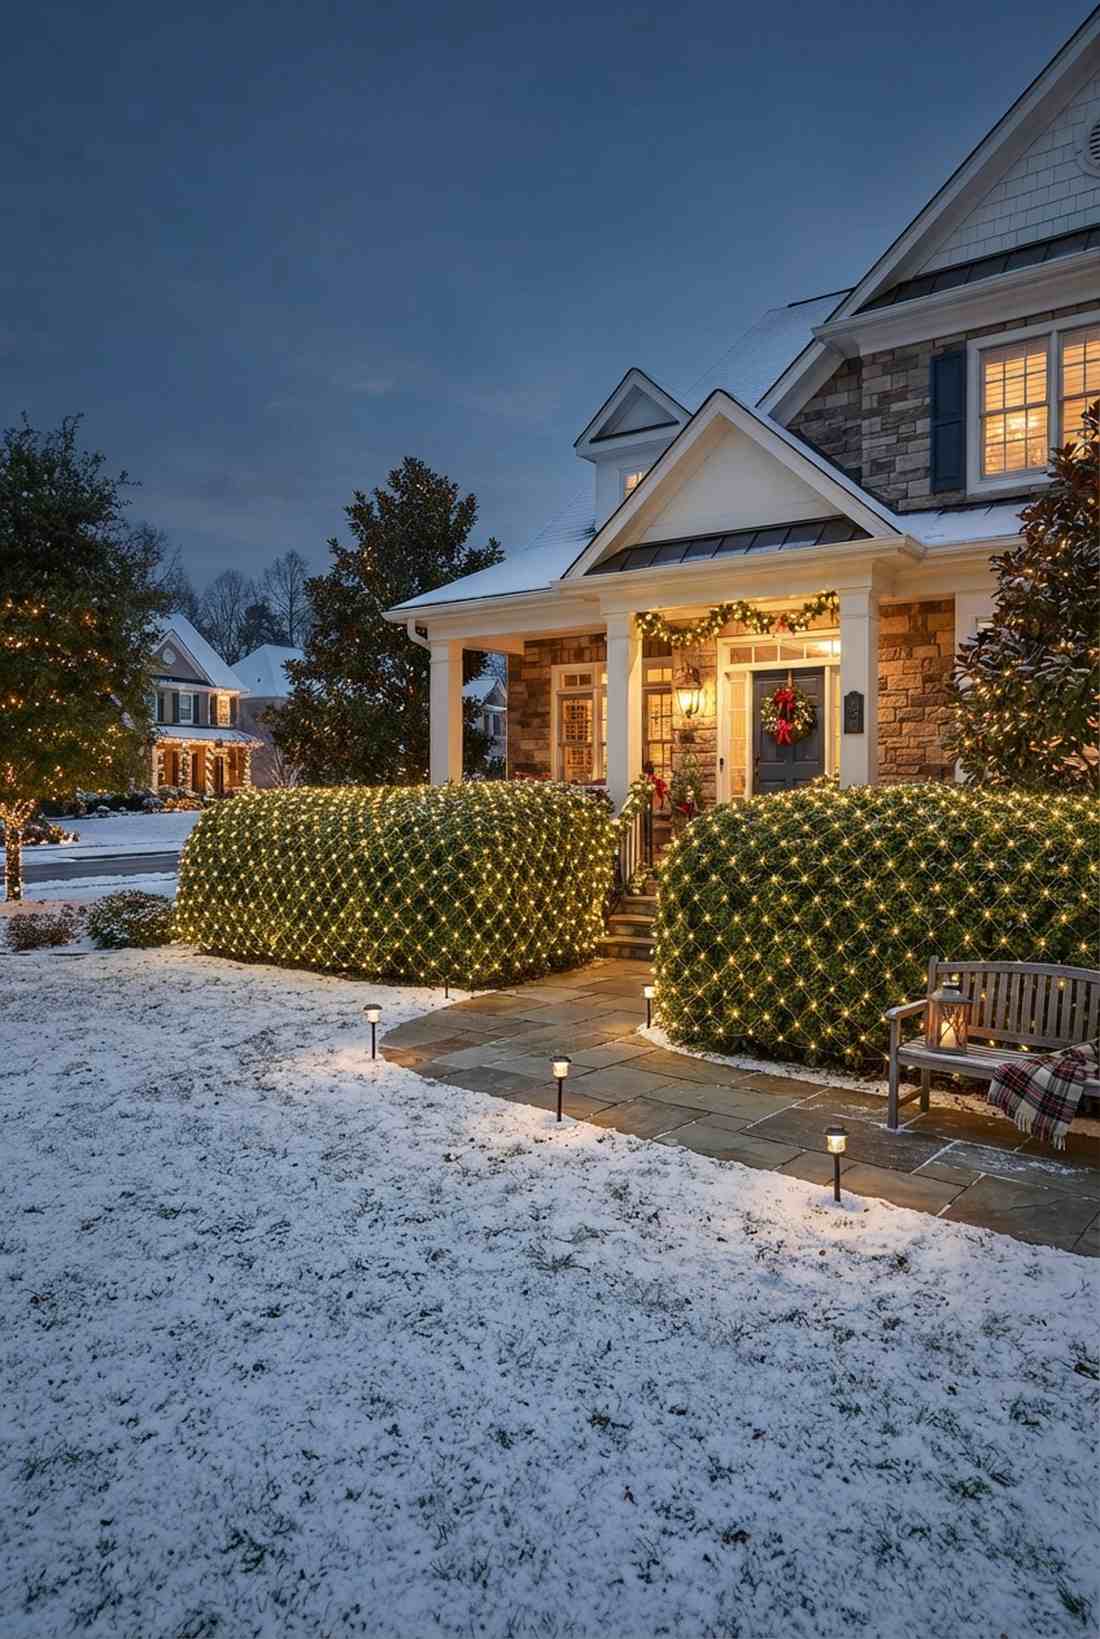
This uniform illuminated evergreen bush feels like a perfectly tailored winter coat for your shrubs. It is an absolute lifesaver for homeowners with massive front-yard hedges.
Using pre-made grids instead of random wrapping saves hours while delivering a flawless, even finish. Commercial-grade miniature garden supplies handle heavy snowfall without shorting out.
Expect to spend around $30 per bush. It’s the ultimate lazy-but-luxurious holiday lighting hack.
- Key Materials: Heavy-duty 4×6 LED nets
- Vibe / Style: Clean, symmetrical suburban charm
- Difficulty: Extremely easy
- Budget Breakdown: Net lights: $30 | Zip ties: $2
- Creator’s Tip: Tuck the edges of the net deep into the foliage to hide the grid wire.
- Smart Sourcing: pre-sized evergreen net light packs and UV-resistant green cable ties.
Pathway & Walkway Illumination For Safe, Festive Navigation
Lighting pathways serves dual purposes—guiding visitors safely while creating inviting approach sequences. These techniques balance functionality with decorative appeal.
8. Stake Light Runway
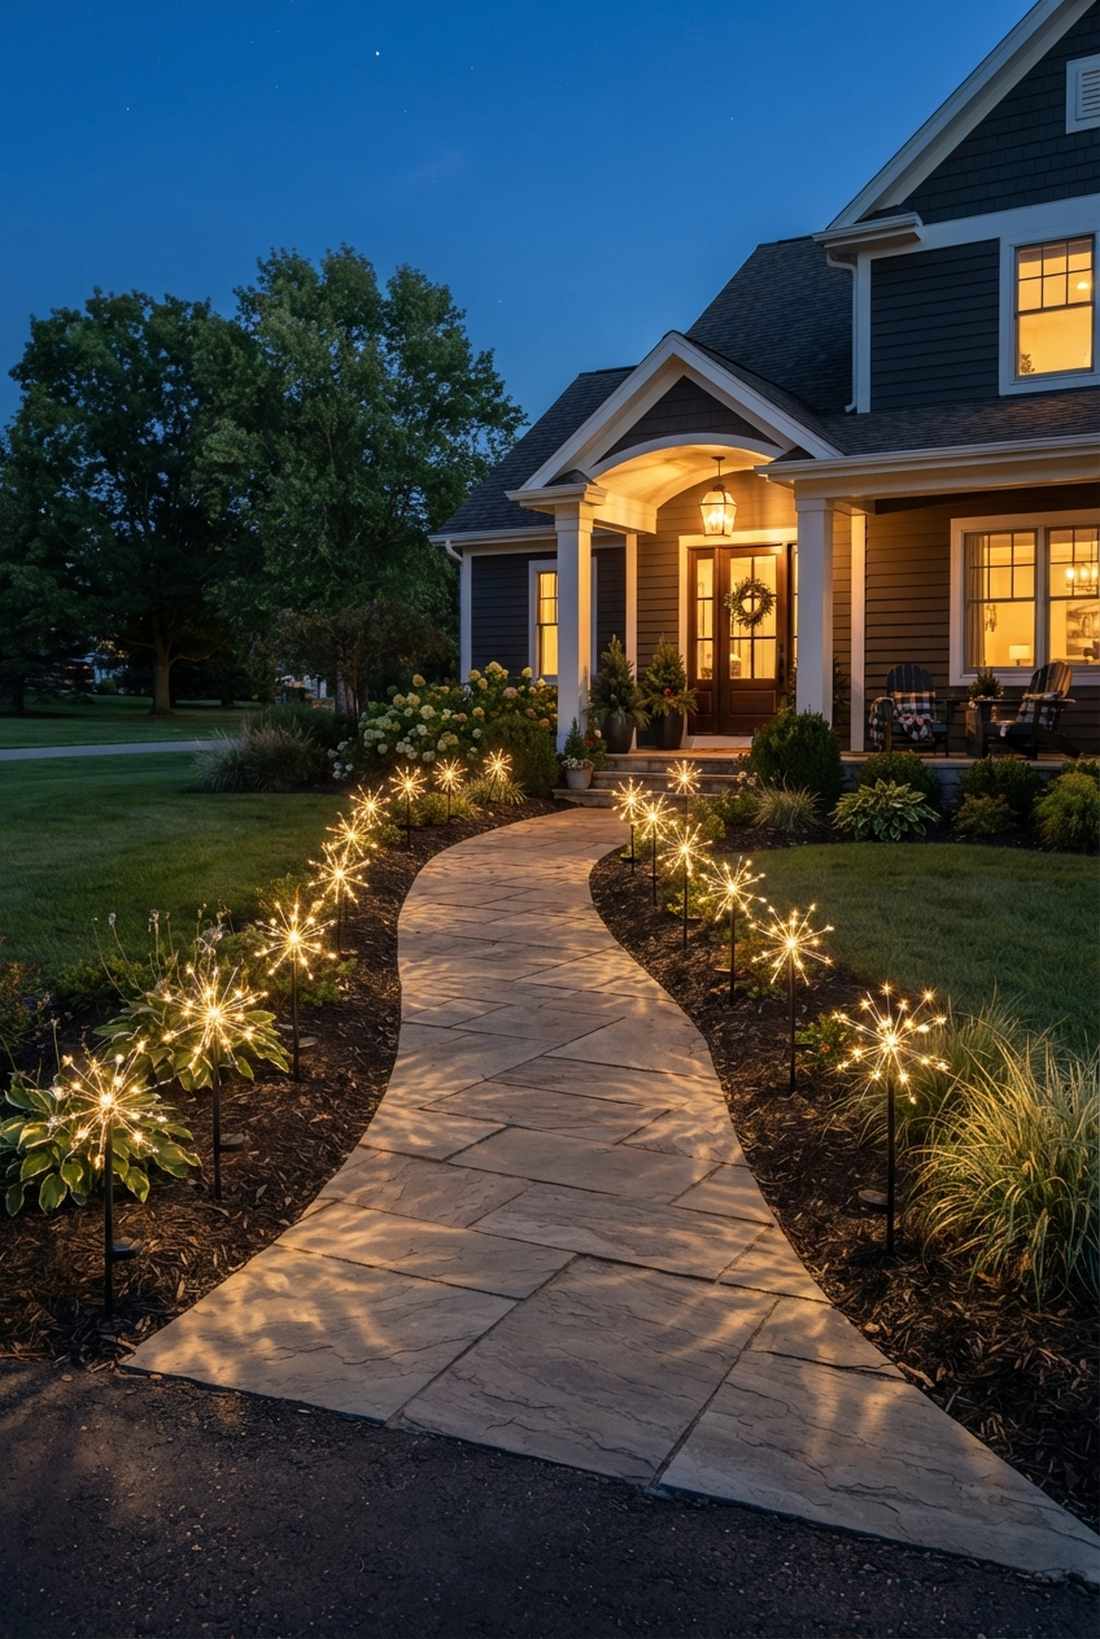
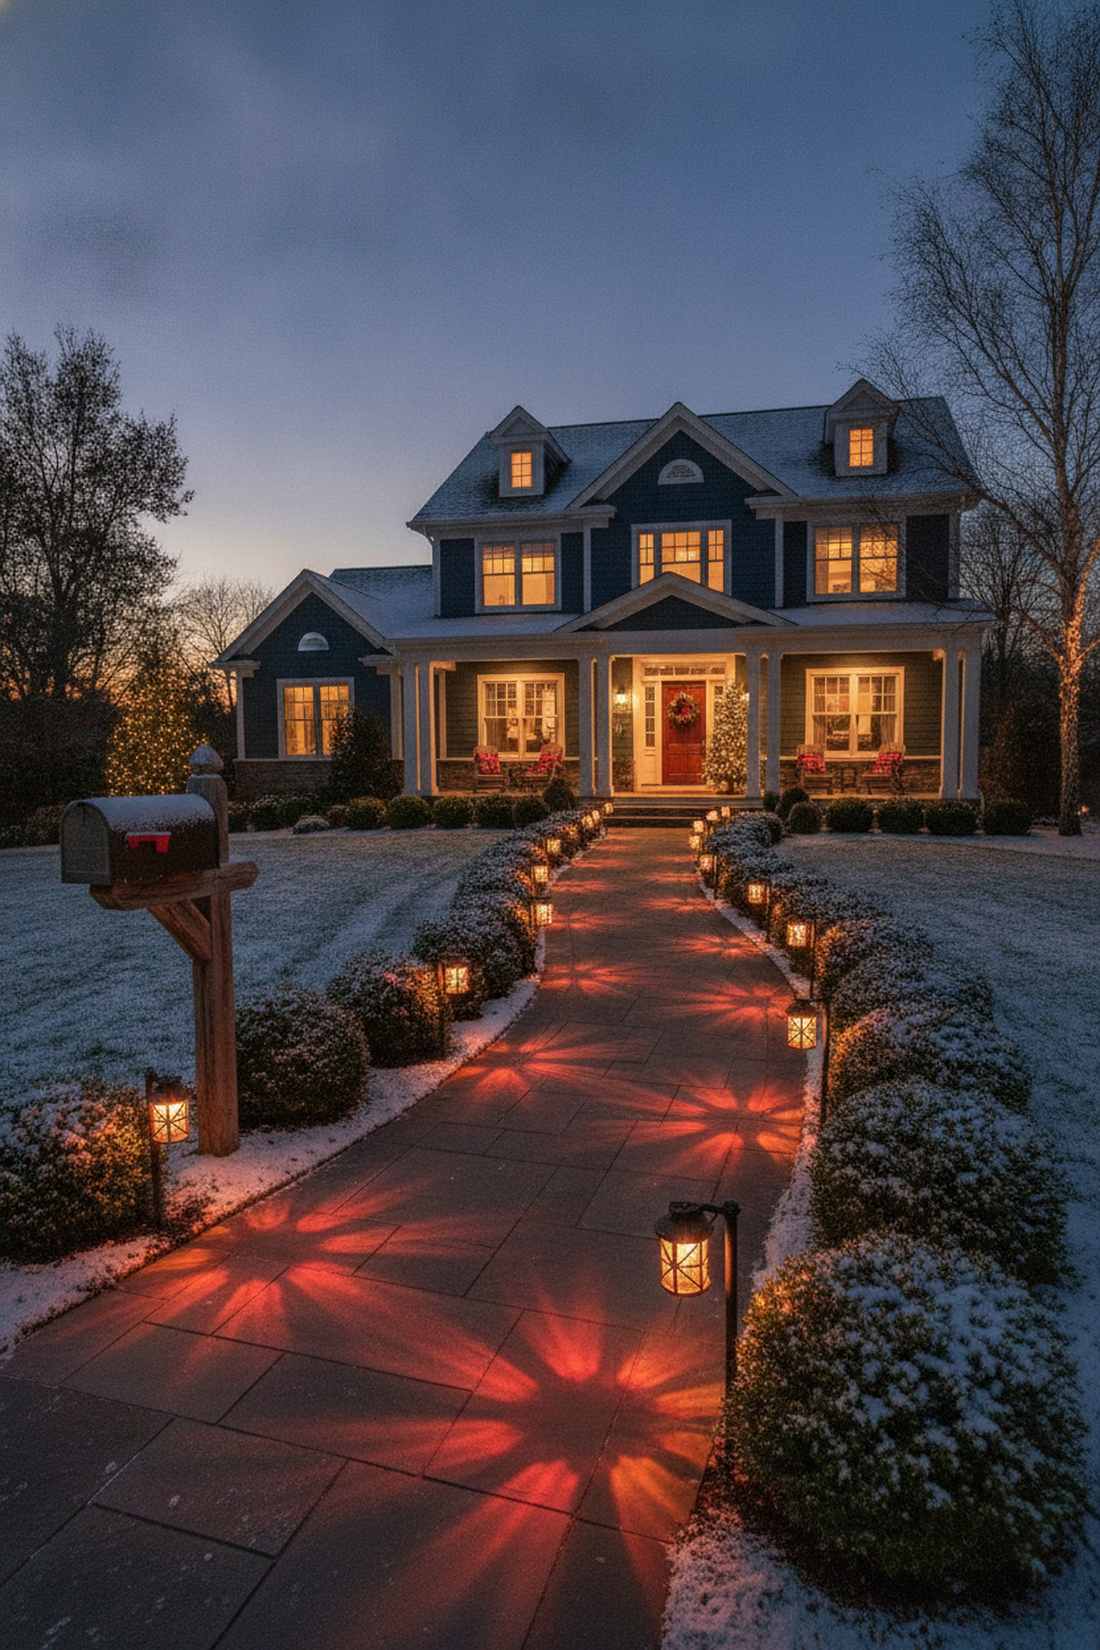
A welcoming starburst pathway runway feels like rolling out a glowing red carpet for your guests. Beautifully suited for long, sweeping front door walkways.
Staggering the lights asymmetrically creates a designer-level finish compared to rigid straight lines. High-quality landscape lighting accessories ensure these stakes survive winter yard maintenance.
You can execute this welcoming trail for $40–$70. Save this if you want to boost your evening curb appeal.
- Key Materials: Decorative LED ground stakes
- Vibe / Style: Welcoming holiday promenade
- Difficulty: Easy push-in installation
- Budget Breakdown: Stakes: $50 | Mallet: $10
- Creator’s Tip: Measure exactly 24 inches between stakes to prevent a cluttered appearance.
- Smart Sourcing: solar-powered pathway stake kits and waterproof ground anchors.
9. Rope Light Edging
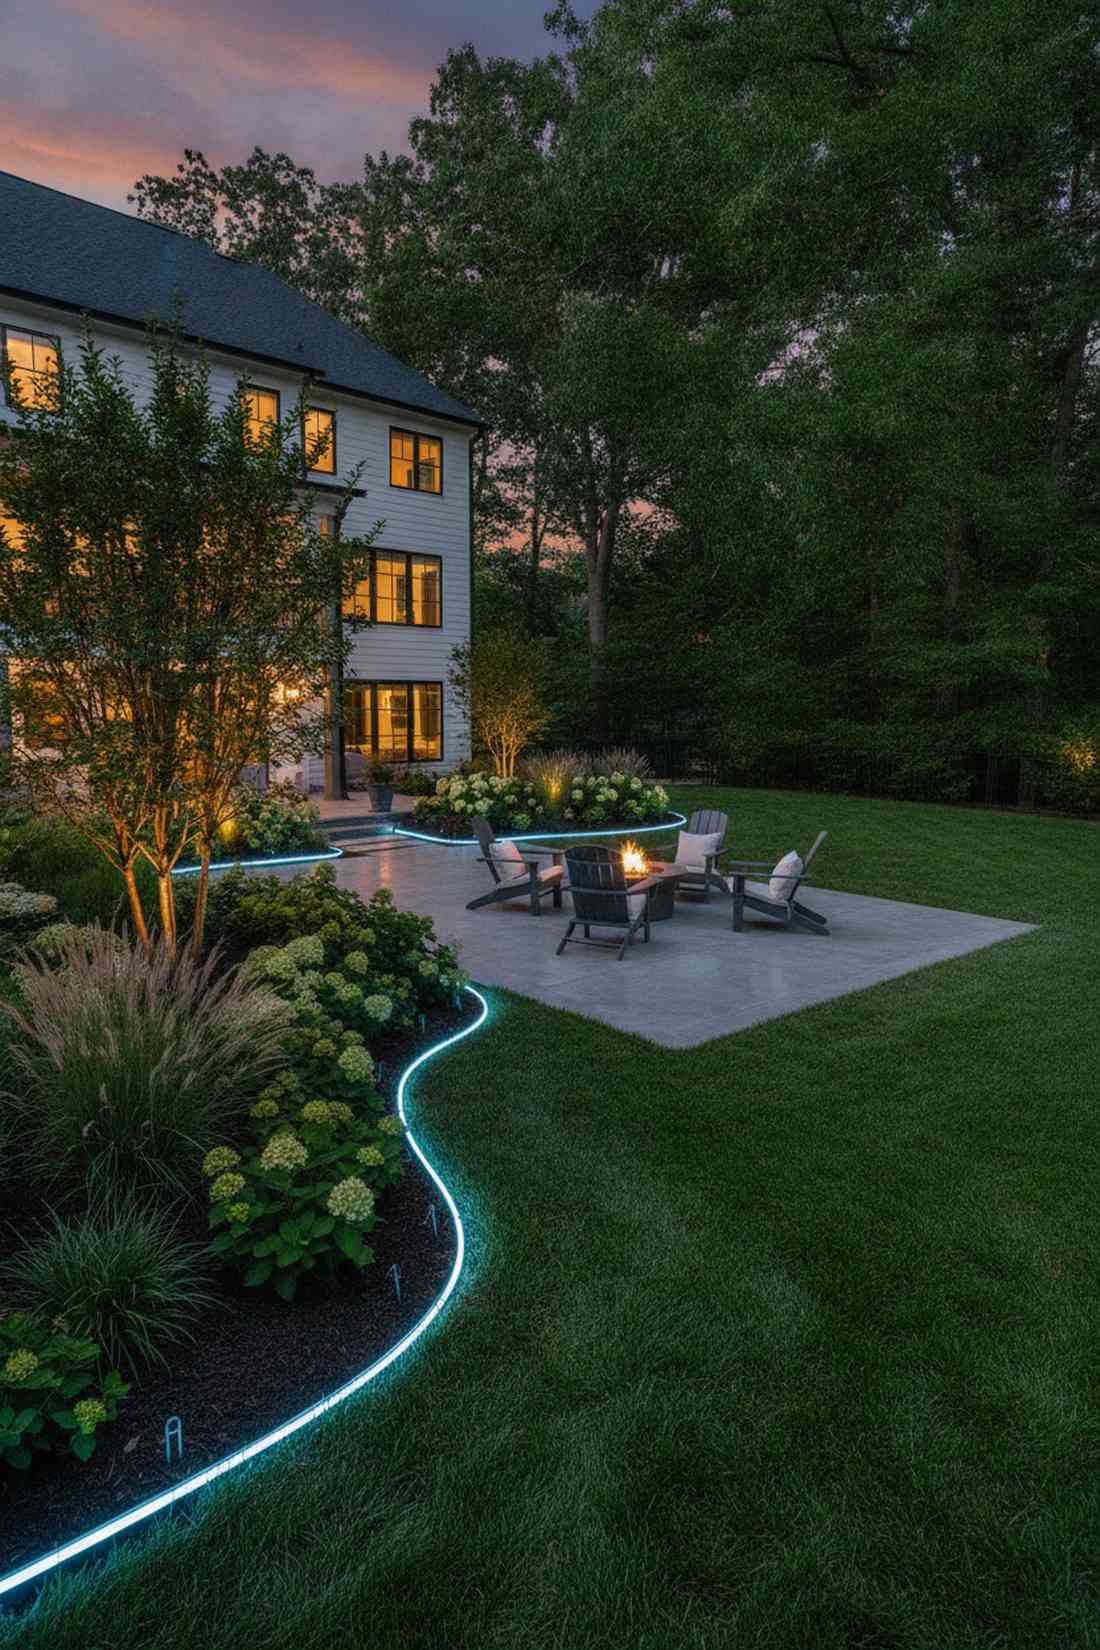
This sleek neon-style glowing garden border feels like a modern art installation on your lawn. Fantastic for defining sharp curved flowerbeds and geometric patios.
Ditching standard bulbs for a continuous glowing line looks far more expensive than it is. Securing the line with premium terrarium accessories stops the tubing from shifting during heavy rain.
This clean-cut edging project runs about $35–$50. It’s a fast upgrade that completely modernizes a yard.
- Key Materials: Flexible LED rope tubing
- Vibe / Style: Crisp contemporary edge
- Difficulty: Easy layout
- Budget Breakdown: Rope spool: $40 | Staples: $10
- Creator’s Tip: Pull the rope completely taut before pinning to avoid wavy, amateur lines.
- Smart Sourcing: flexible LED rope spools (bulk pack) and galvanized landscaping pins.
💡 Must-Have Supplies for High-End Setups
To build these setups faster and ensure they last, skip the generic craft aisles and invest in the right foundational kits.
- Base & Support: commercial-grade weatherproof extension hubs
- Setup Tools: UV-coated exterior light clip starter kits
- Weather/Durability Protection: dielectric grease for outdoor plug seals
The difference between a messy yard and a magazine cover is literally just this next technique…
10. Illuminated Orb Path Markers
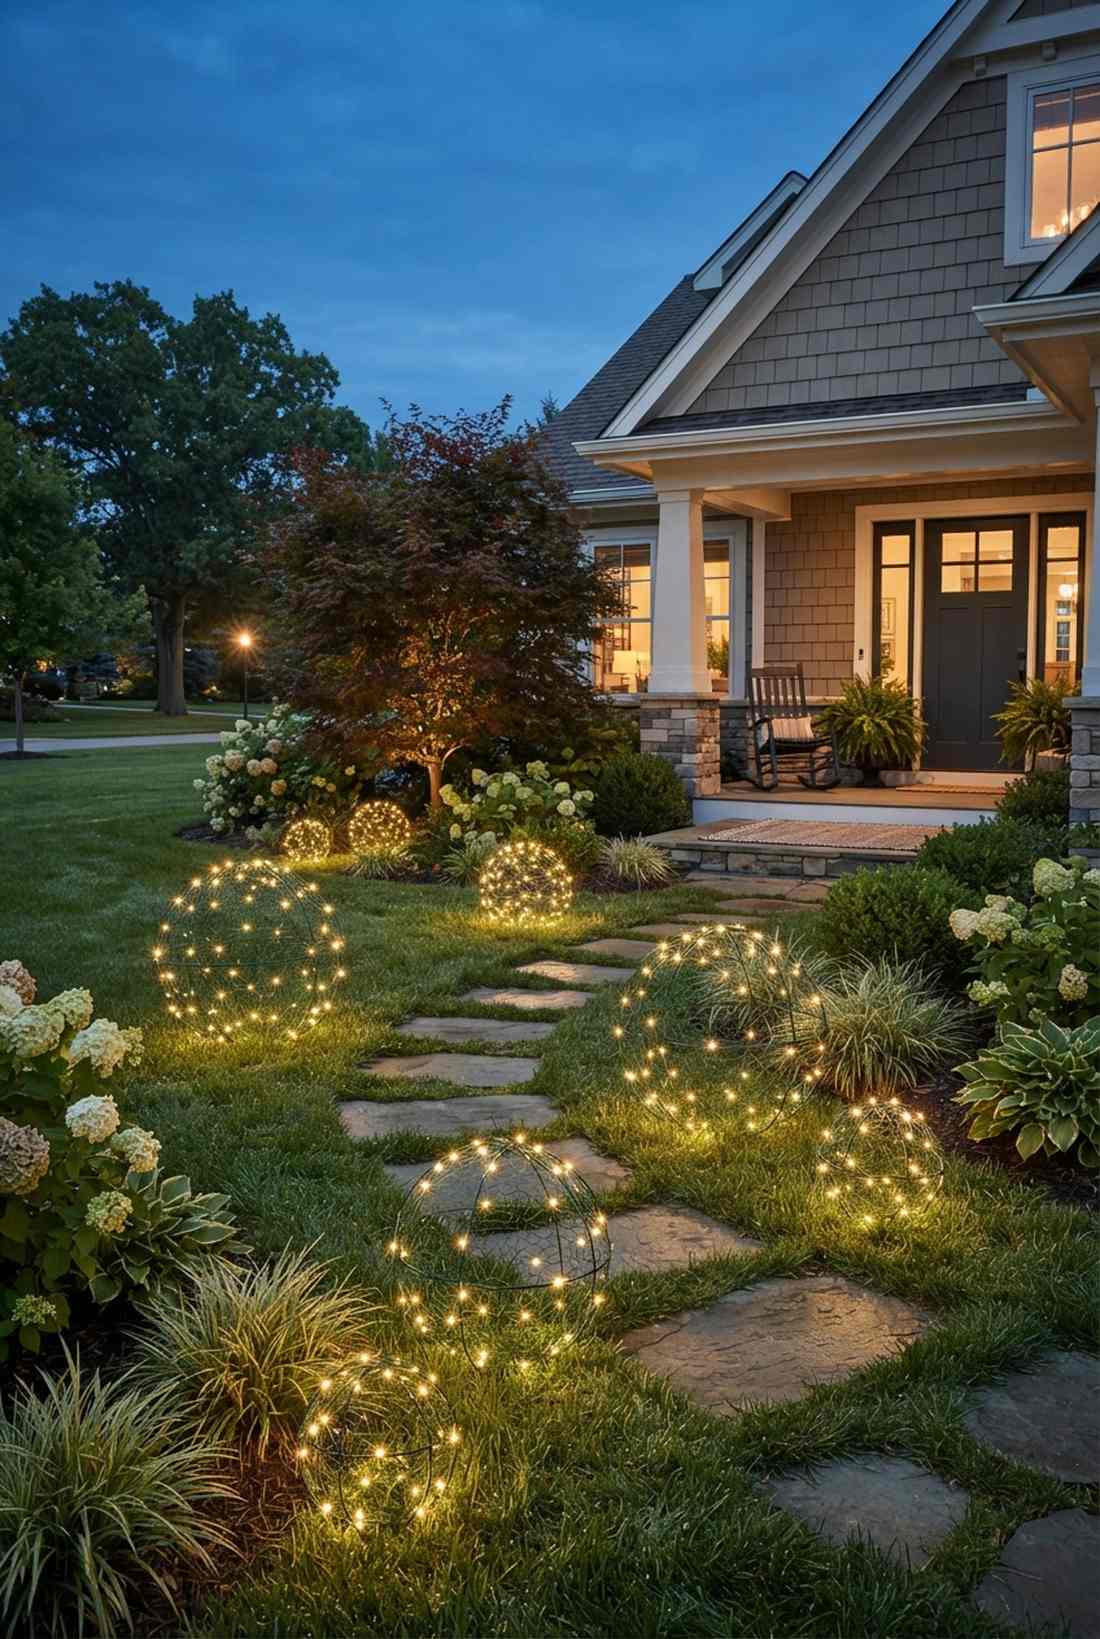
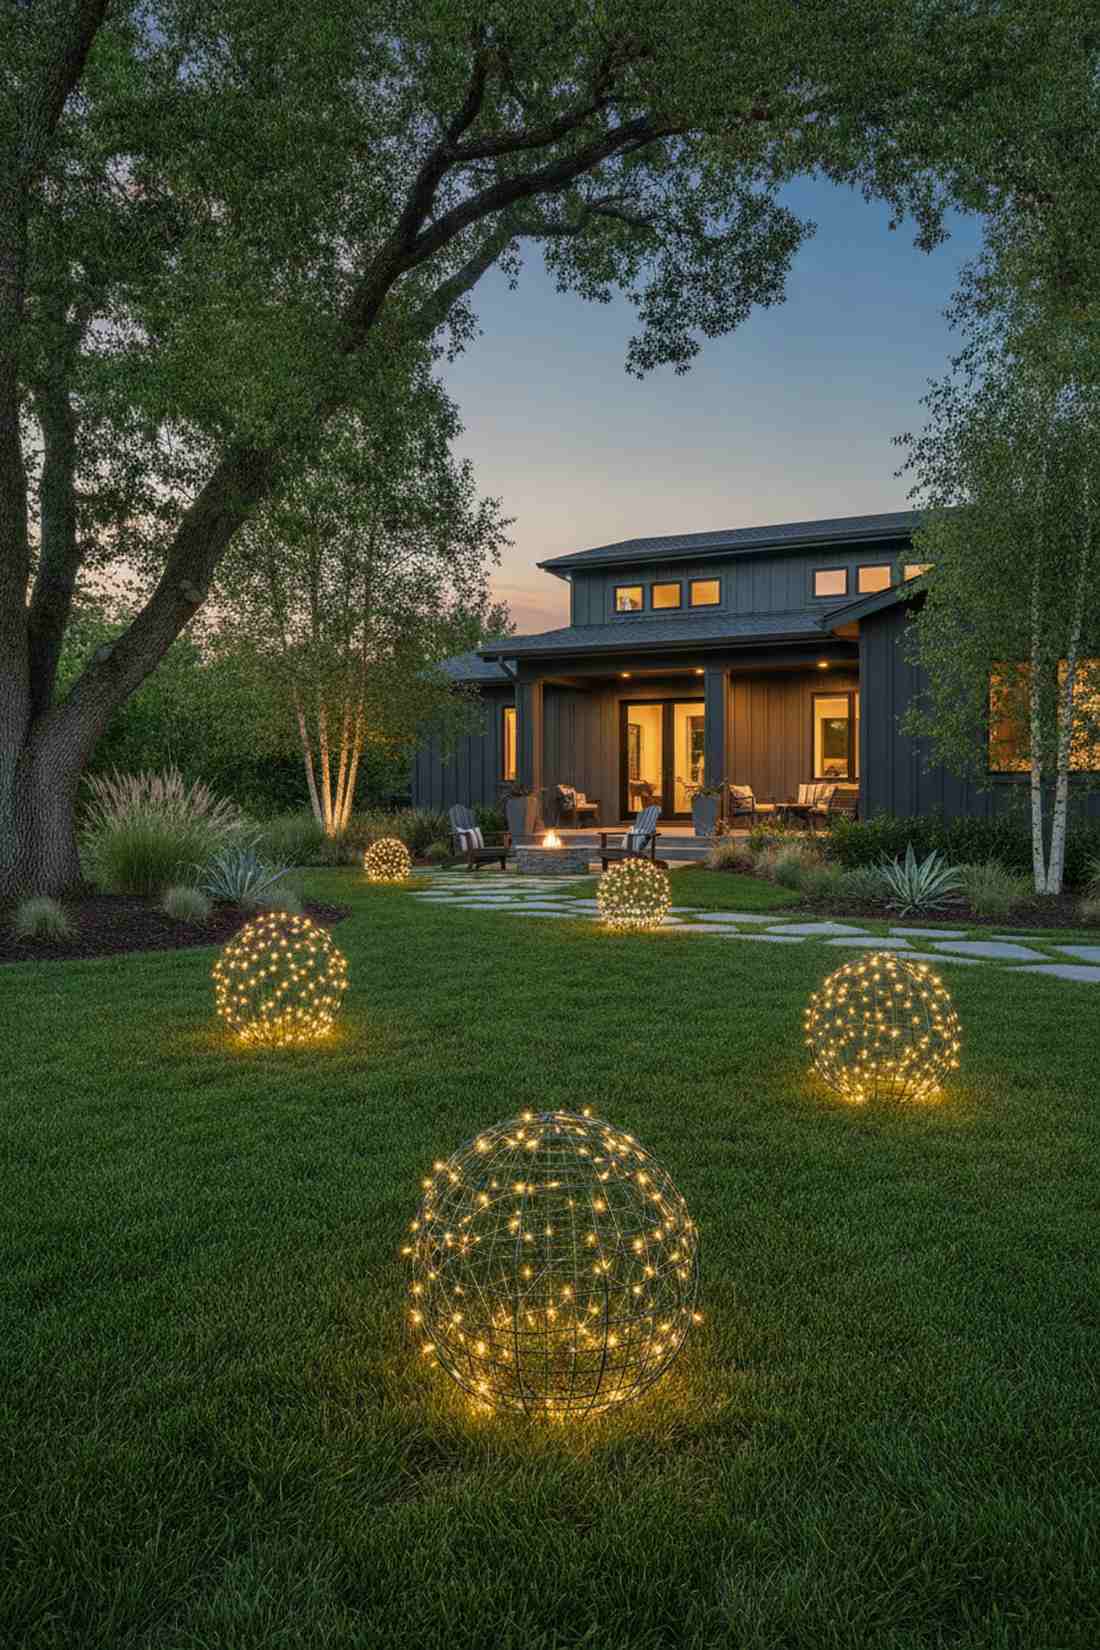
Scattering glowing wireframe garden spheres feels like giant drops of moonlight fell onto your grass. A breathtaking choice for minimalist front yards craving a dramatic focal point.
Building these from scratch delivers a surprisingly premium look without the high retail markup. Incorporating sturdy fairy garden supplies ensures the wireframe won’t crush under snow.
Crafting three of these custom orbs costs around $25–$40. Pin this to your DIY outdoor crafts board.
- Key Materials: Chicken wire and warm white micro LEDs
- Vibe / Style: Modern botanical fantasy
- Difficulty: Intermediate DIY molding
- Budget Breakdown: Wire: $15 | Lights: $20
- Creator’s Tip: Paint the chicken wire dark green before wrapping to make the frame invisible at night.
- Smart Sourcing: pre-cut galvanized wire mesh and outdoor battery-operated LED strands.
11. Mini Potted Tree Lineup
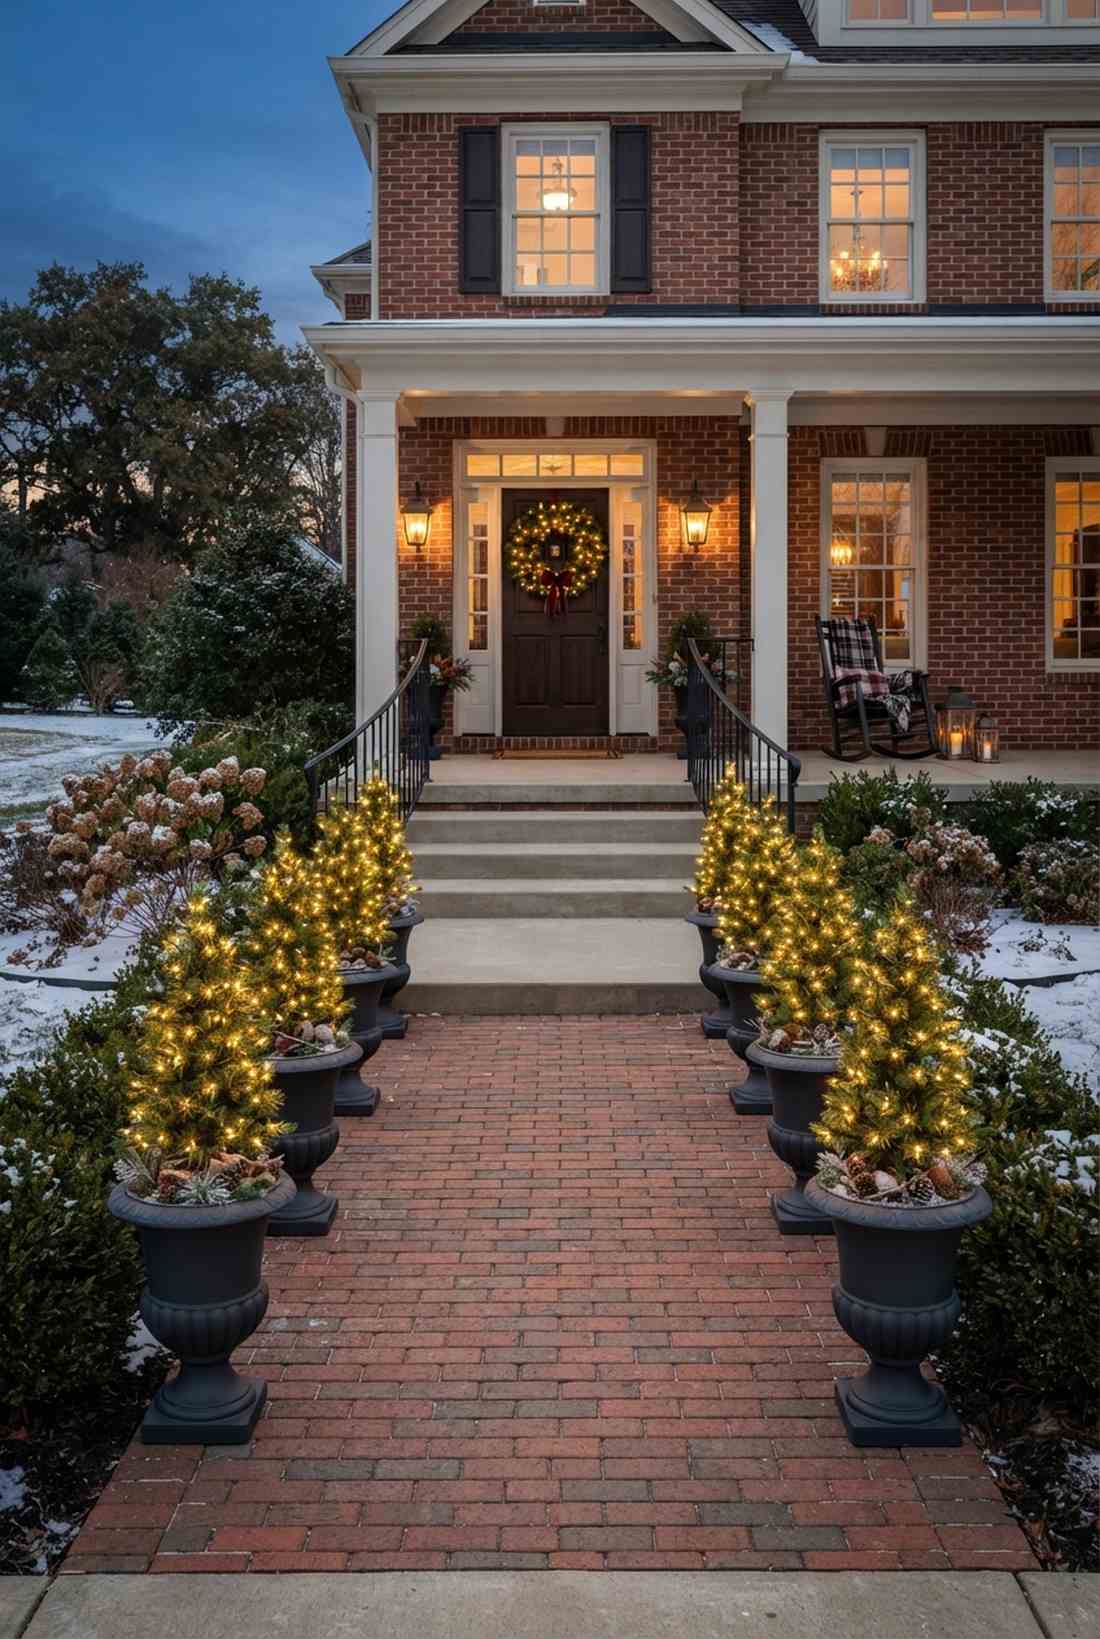
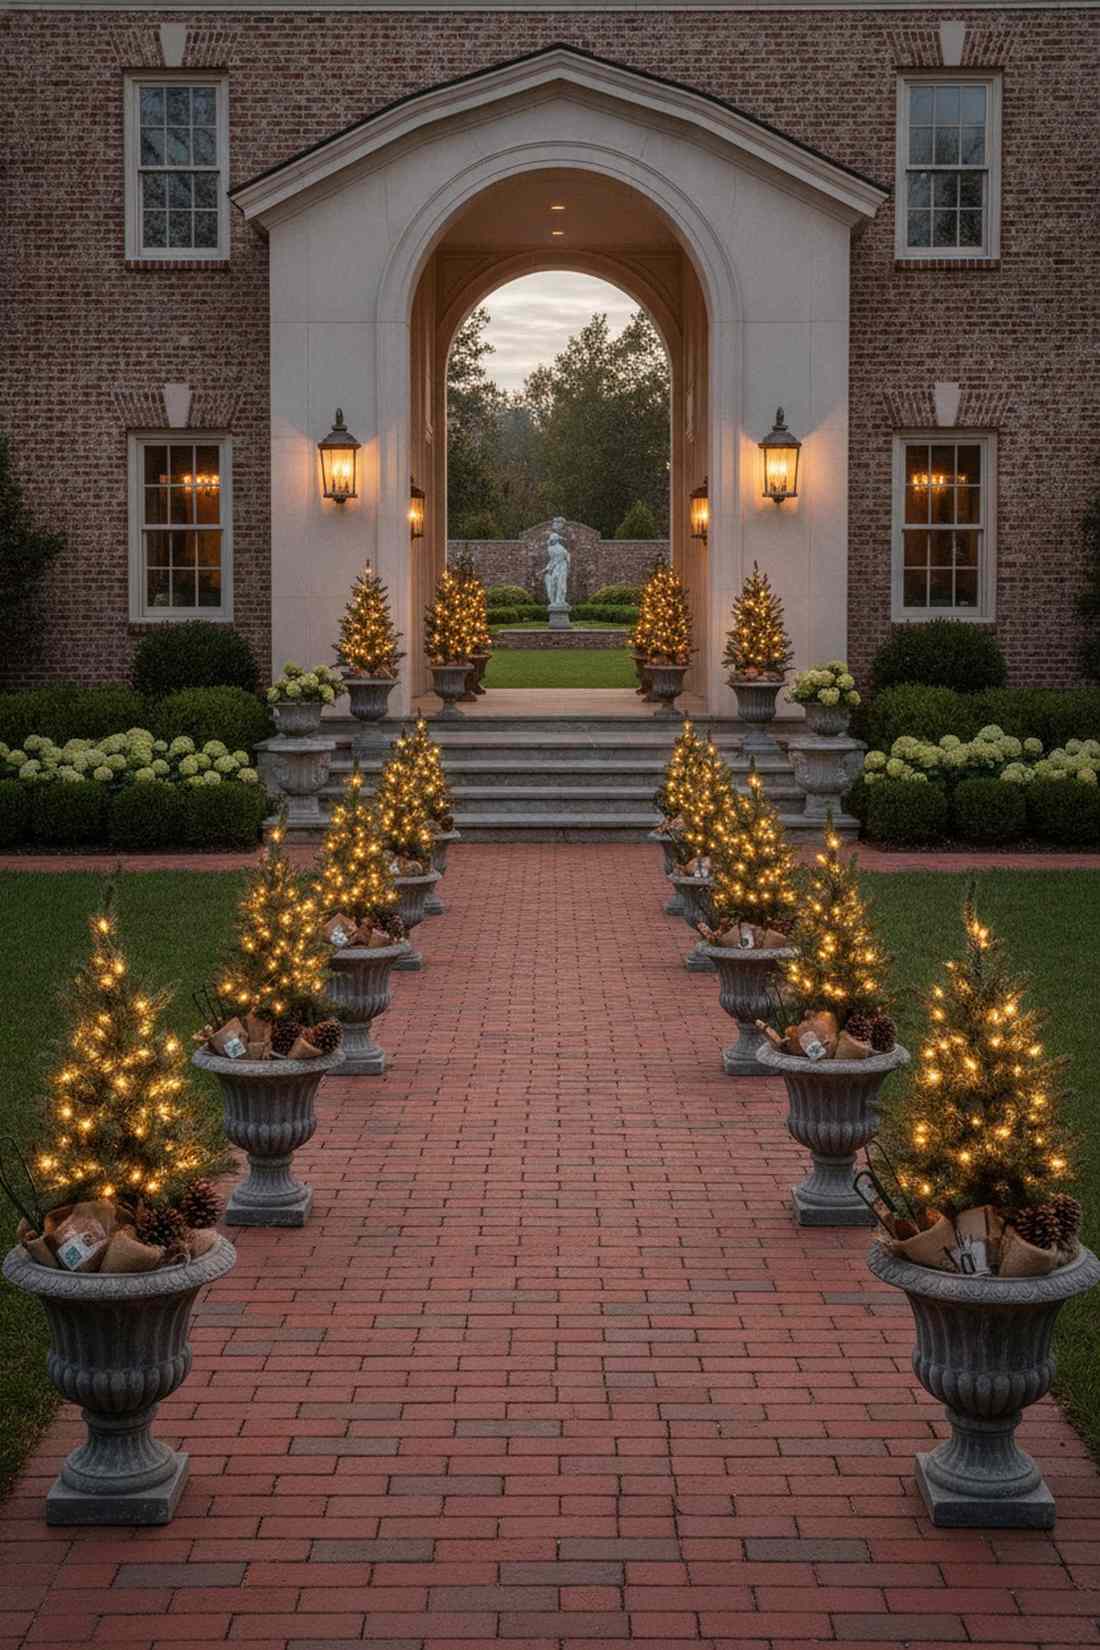
An elegant miniature lighted porch forest feels like a classic holiday greeting card brought to life. Perfect for wide brick walkways or framing expansive concrete stoops.
Using identical heavy-weight planters creates an upscale, symmetrical rhythm that screams luxury. Tucking miniature garden supplies around the base of the soil hides the battery packs flawlessly.
This sophisticated container display costs around $60–$100. It adds instant architectural weight to an empty path.
- Key Materials: Pre-lit faux evergreens and matching urns
- Vibe / Style: Traditional luxury estate
- Difficulty: Easy, requires heavy lifting for pots
- Budget Breakdown: Trees: $60 | Planters: $40
- Creator’s Tip: Weigh down the bottom of the pots with gravel so they survive winter windstorms.
- Smart Sourcing: battery-operated pre-lit porch trees and weather-resistant resin urns.
12. Lantern Post Pathway

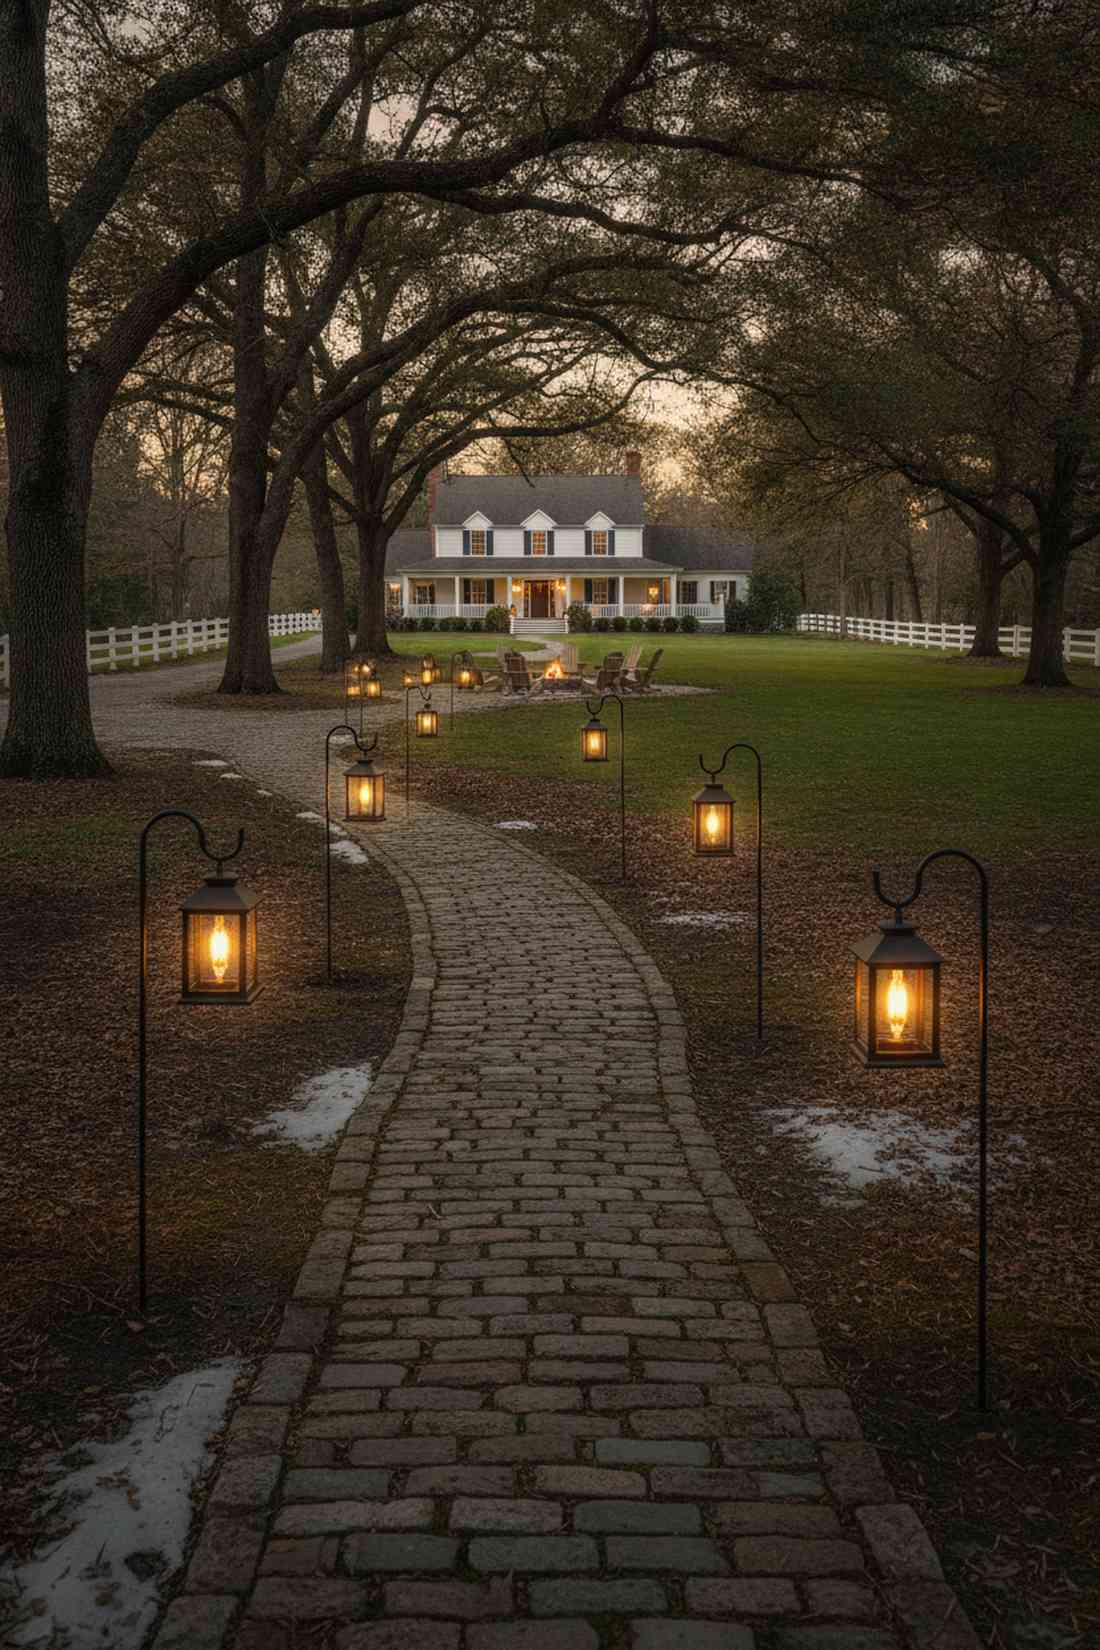
A nostalgic flickering pathway lantern sequence feels like walking through an 18th-century cobblestone village. It provides brilliant eye-level illumination for deeply shaded rural driveways.
Hanging vintage-style bulbs instead of standard stakes gives a designer-level finish. Utilizing durable outdoor mounting hardware keeps the posts completely vertical even in thawing soil.
You can set up this rustic path for about $80–$120. Save this if you love a moody, vintage aesthetic.
- Key Materials: Shepherd’s hooks and faux-flame lanterns
- Vibe / Style: Rustic vintage charm
- Difficulty: Moderate ground prep
- Budget Breakdown: Hooks: $45 | Lanterns: $70
- Creator’s Tip: Alternate the heights of the shepherd’s hooks slightly to create an organic, charming flow.
- Smart Sourcing: heavy-duty steel shepherd hooks (bulk pack) and solar flickering flame lantern kits.
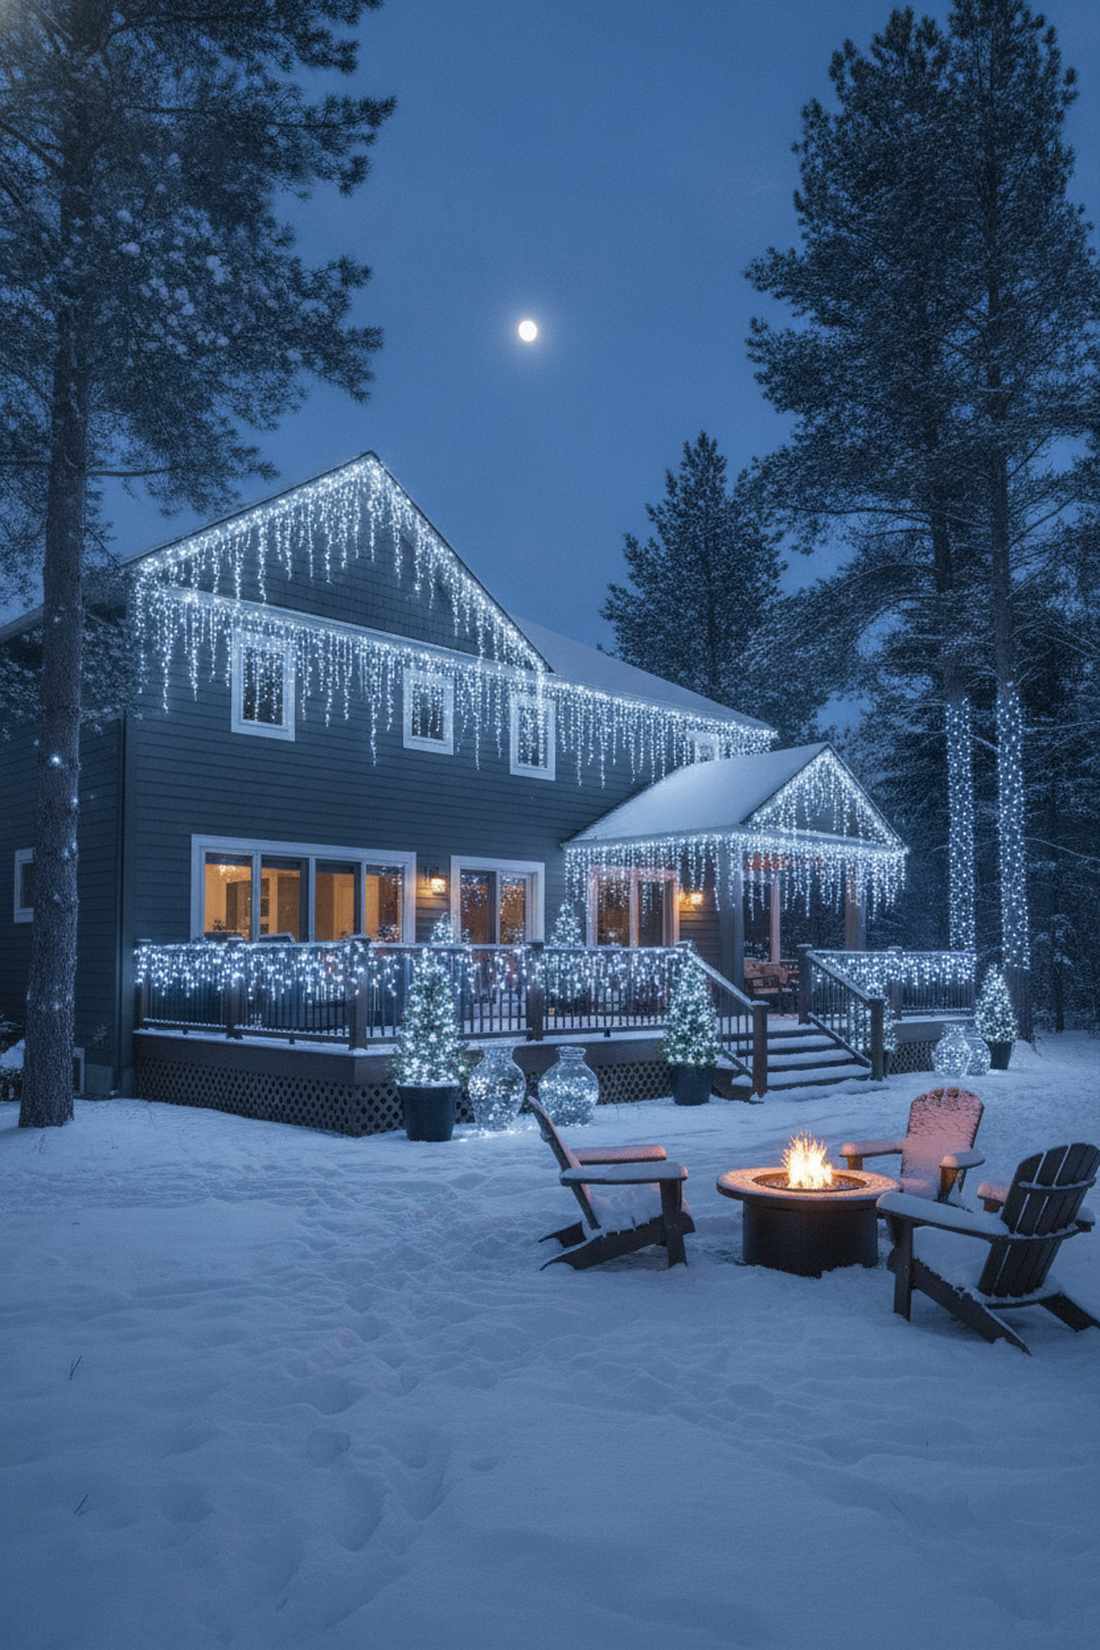
13. Icicle Stake Pathway

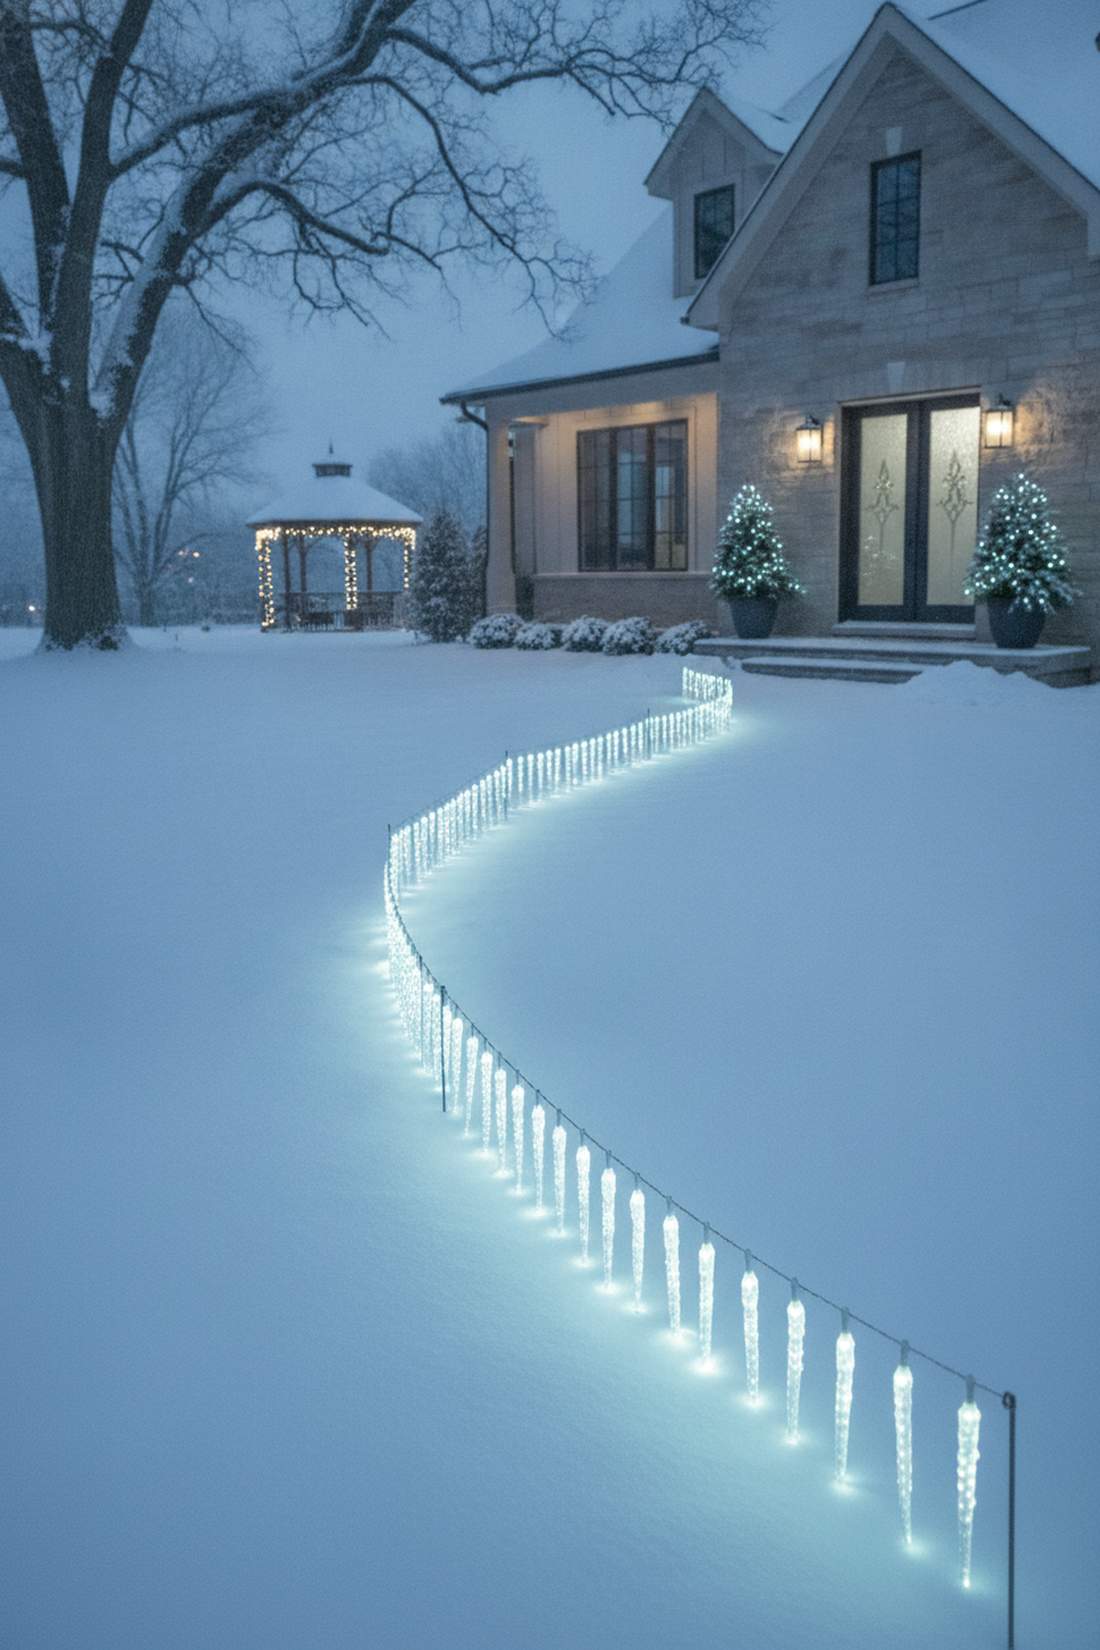
This frosty ground-level icicle drop border feels like tiptoeing through an ice queen’s private courtyard. Exquisite for lining the edges of pristine, snow-covered front lawns.
Inverting roof decorations to border the ground is a clever hack that looks incredibly custom. Securing the drops with professional landscape anchors ensures the wind won’t ruin the illusion.
You can effortlessly pull this off for $30–$50. Highly recommended for a unique, icy landscape contrast.
- Key Materials: Icicle string lights and short metal stakes
- Vibe / Style: Frozen winter wonderland
- Difficulty: Easy assembly
- Budget Breakdown: Icicle sets: $35 | Stakes: $10
- Creator’s Tip: Use cool white LEDs strictly to emphasize the frozen, icy illusion.
- Smart Sourcing: commercial outdoor icicle strands and metal garden staple kits.
14. Luminaria Bag Borders

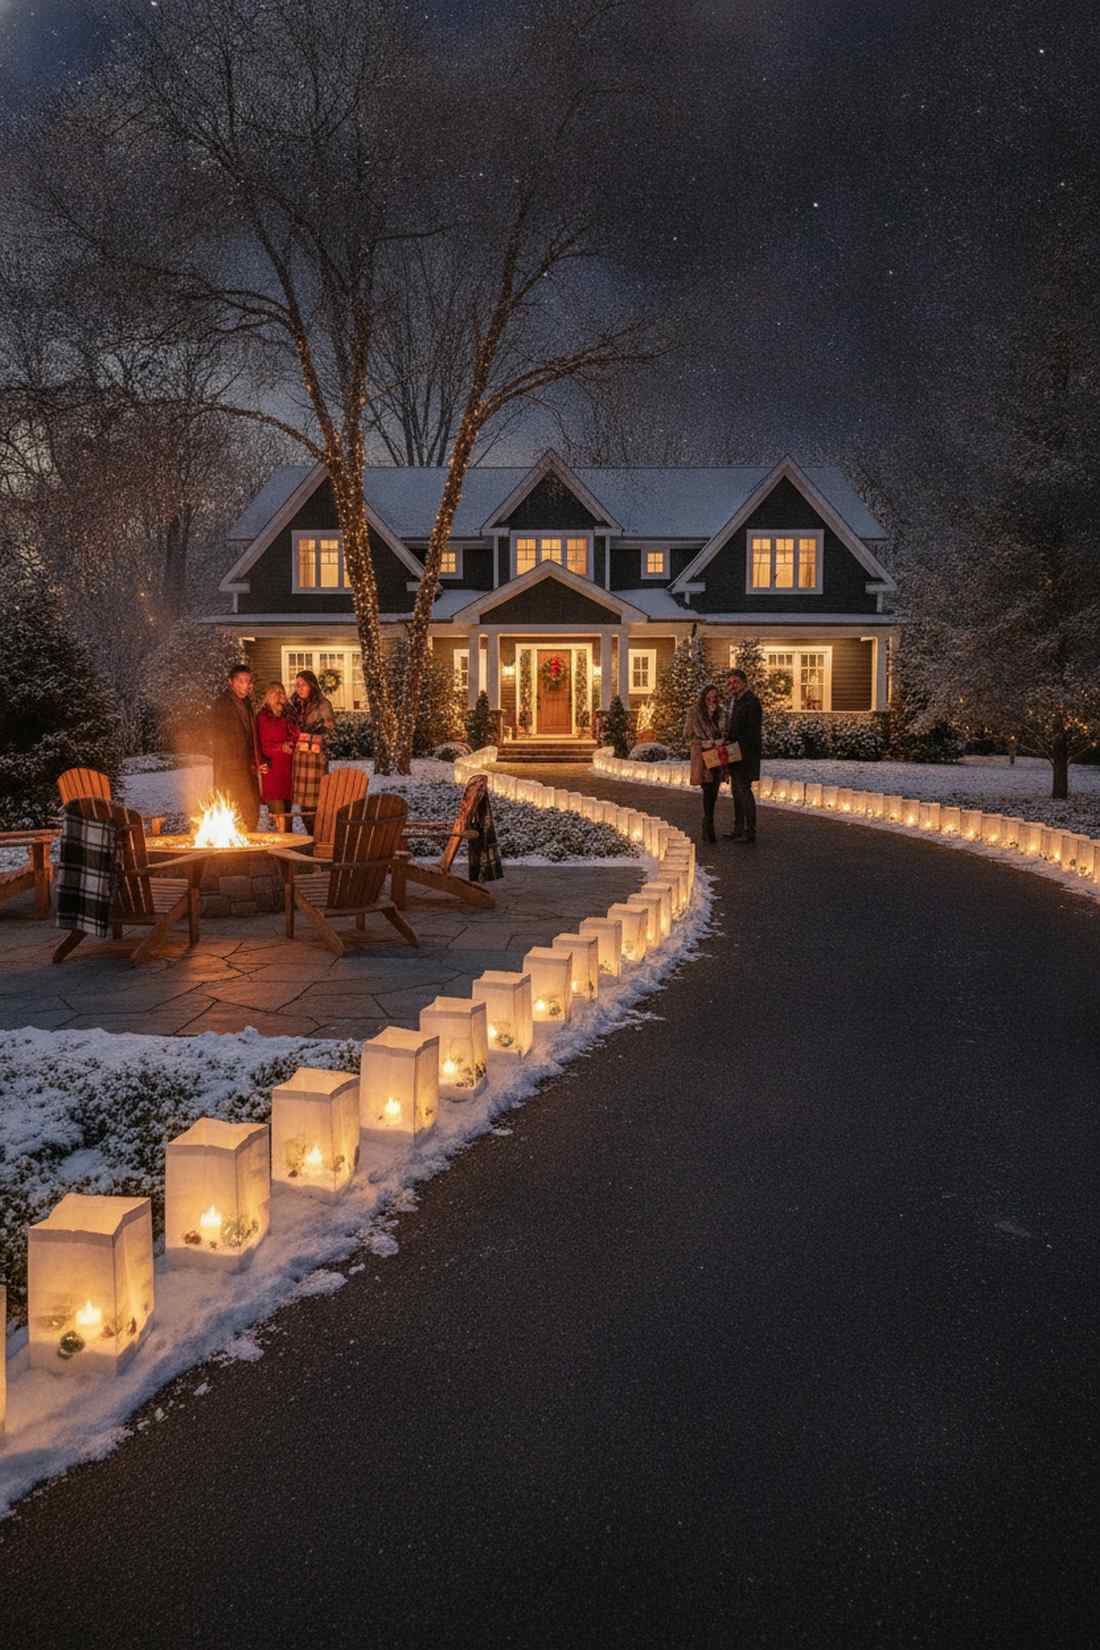
A classic glowing paper bag driveway trim feels like a warm, comforting hug on a freezing night. It is the absolute best temporary setup for hosting grand holiday dinner parties.
Upgrading from real candles to weather-proof electric tea lights delivers a surprisingly premium look. Adding high-quality terrarium accessories as base weights prevents the bags from blowing into the street.
This nostalgic party trick only costs around $20–$35. Pin this for your next big holiday gathering.
- Key Materials: Weatherproof plastic luminaria bags and LED tea lights
- Vibe / Style: Cozy neighborhood tradition
- Difficulty: Very easy but time-consuming
- Budget Breakdown: Bags: $20 | LED candles: $15
- Creator’s Tip: Use cheap playground sand inside the bags to anchor them perfectly flat.
- Smart Sourcing: weather-resistant reusable luminaria bags and long-lasting LED tea light bulk packs.
Wait until you see this next brilliant hack that hides all the ugly wires instantly…
Architectural Feature Highlights For Polished Curb Appeal
Framing architectural elements with lights emphasizes home structure and creates professional, finished displays. These techniques require planning but deliver high visual impact.
15. Roofline Icicle Draping
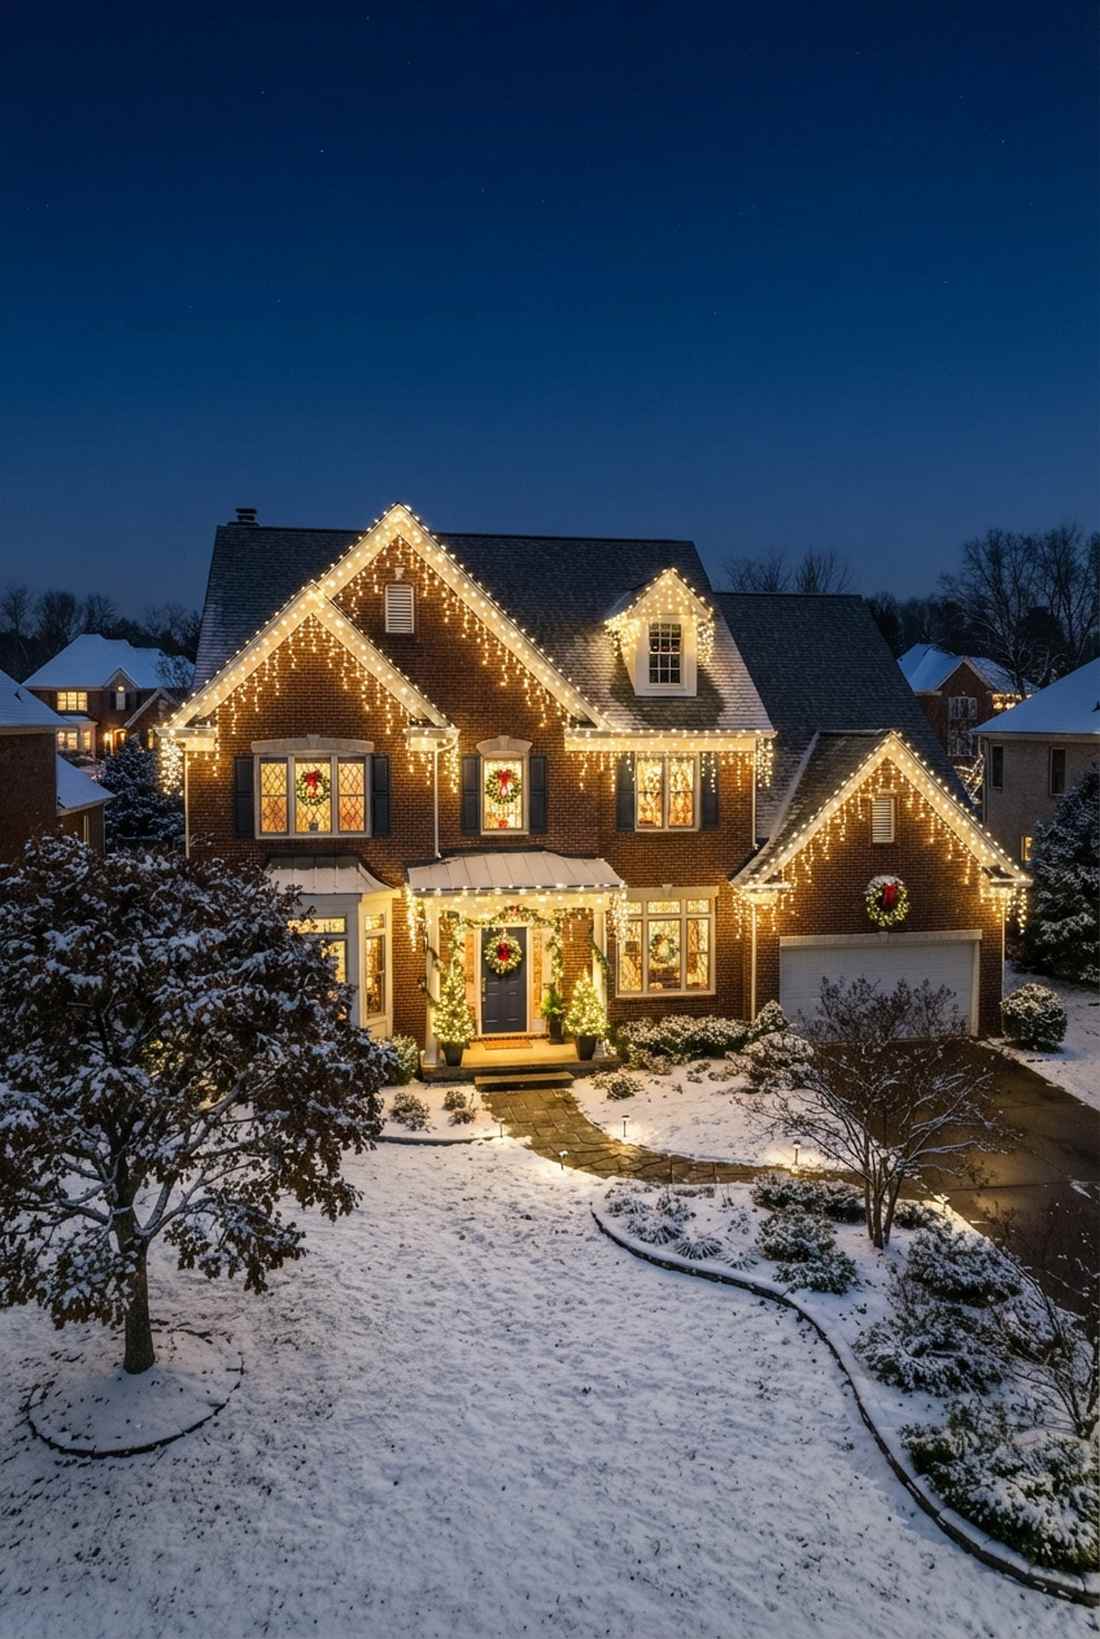
This dramatic cascading roofline ice effect feels like a majestic frozen waterfall framing your home. It instantly turns boring suburban rooflines into an eye-catching nighttime spectacle.
Using proper gutter-mounting hardware instead of staples gives a designer-level finish that doesn’t damage trim. Integrating heavy-duty commercial extension cables guarantees the display survives extreme winter storms.
A standard roofline project usually runs $100–$200. Save this for your major exterior weekend overhaul.
- Key Materials: Long-drop LED icicle lights and gutter clips
- Vibe / Style: Classic American holiday home
- Difficulty: Hard, requires tall ladder safety
- Budget Breakdown: Lights: $150 | Clips: $20
- Creator’s Tip: Plug in and test every single strand on the ground before climbing the ladder.
- Smart Sourcing: heavy-duty LED icicle spools and damage-free plastic gutter hooks.
16. Window Frame Outlining
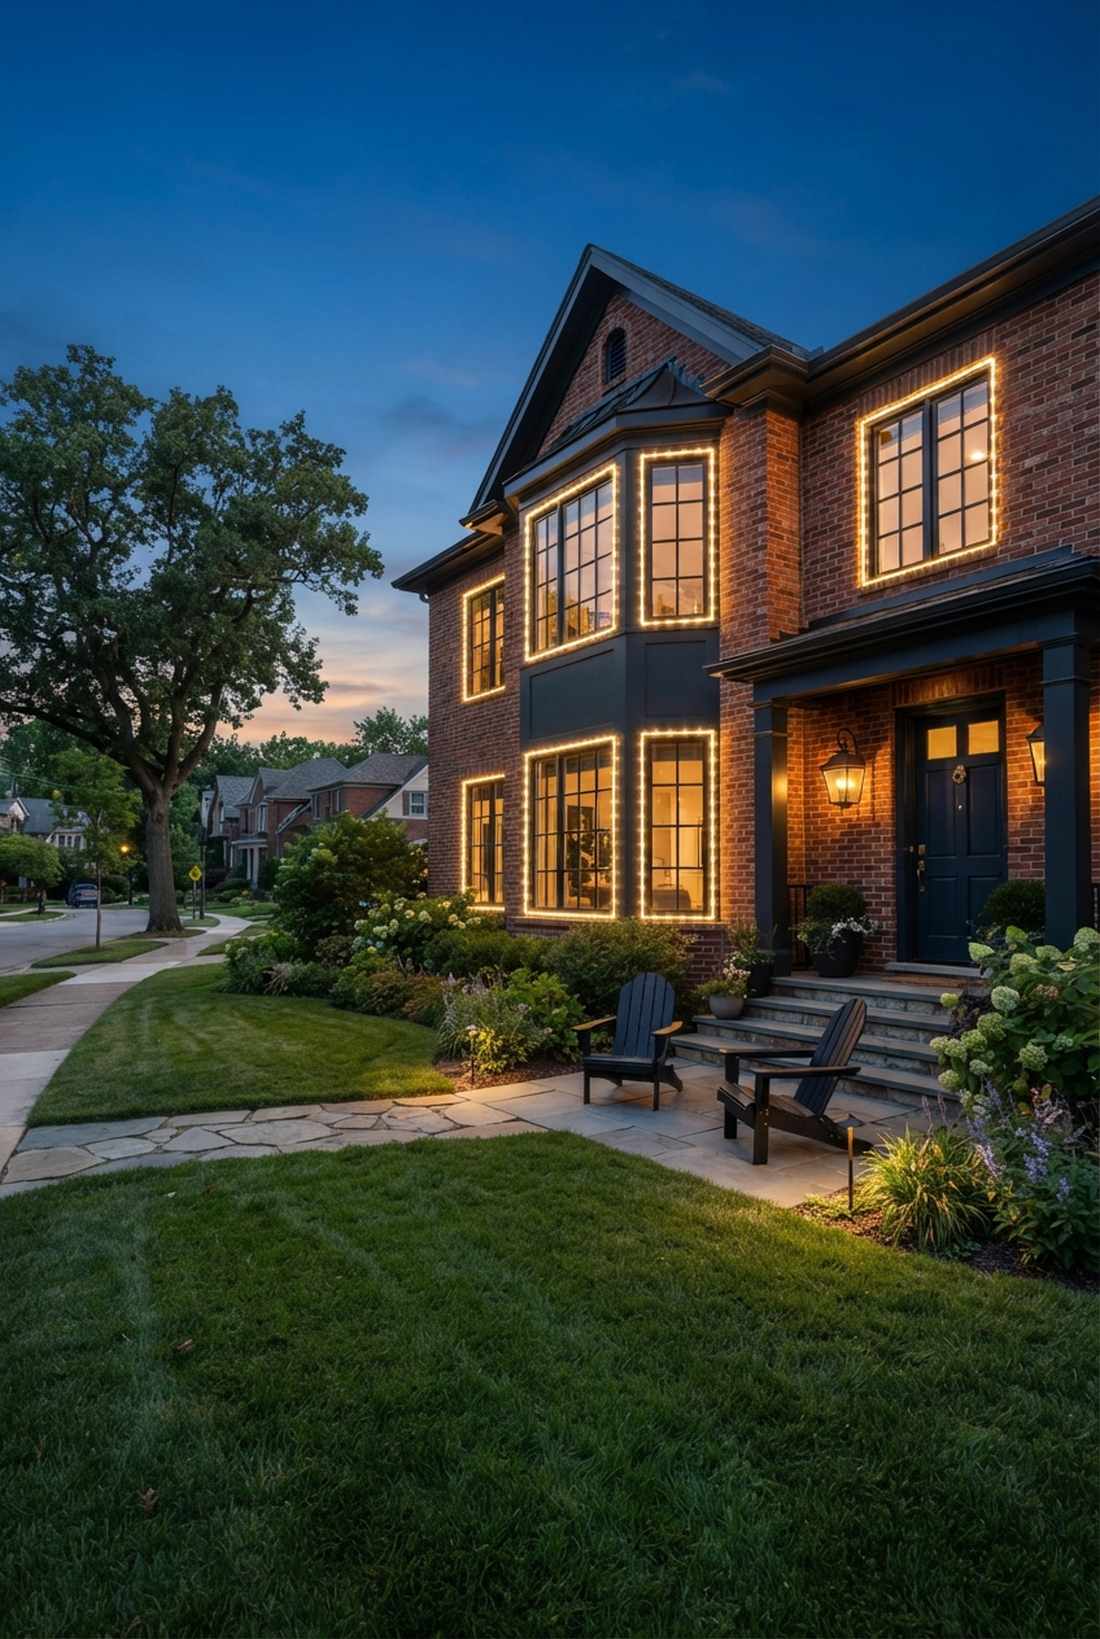
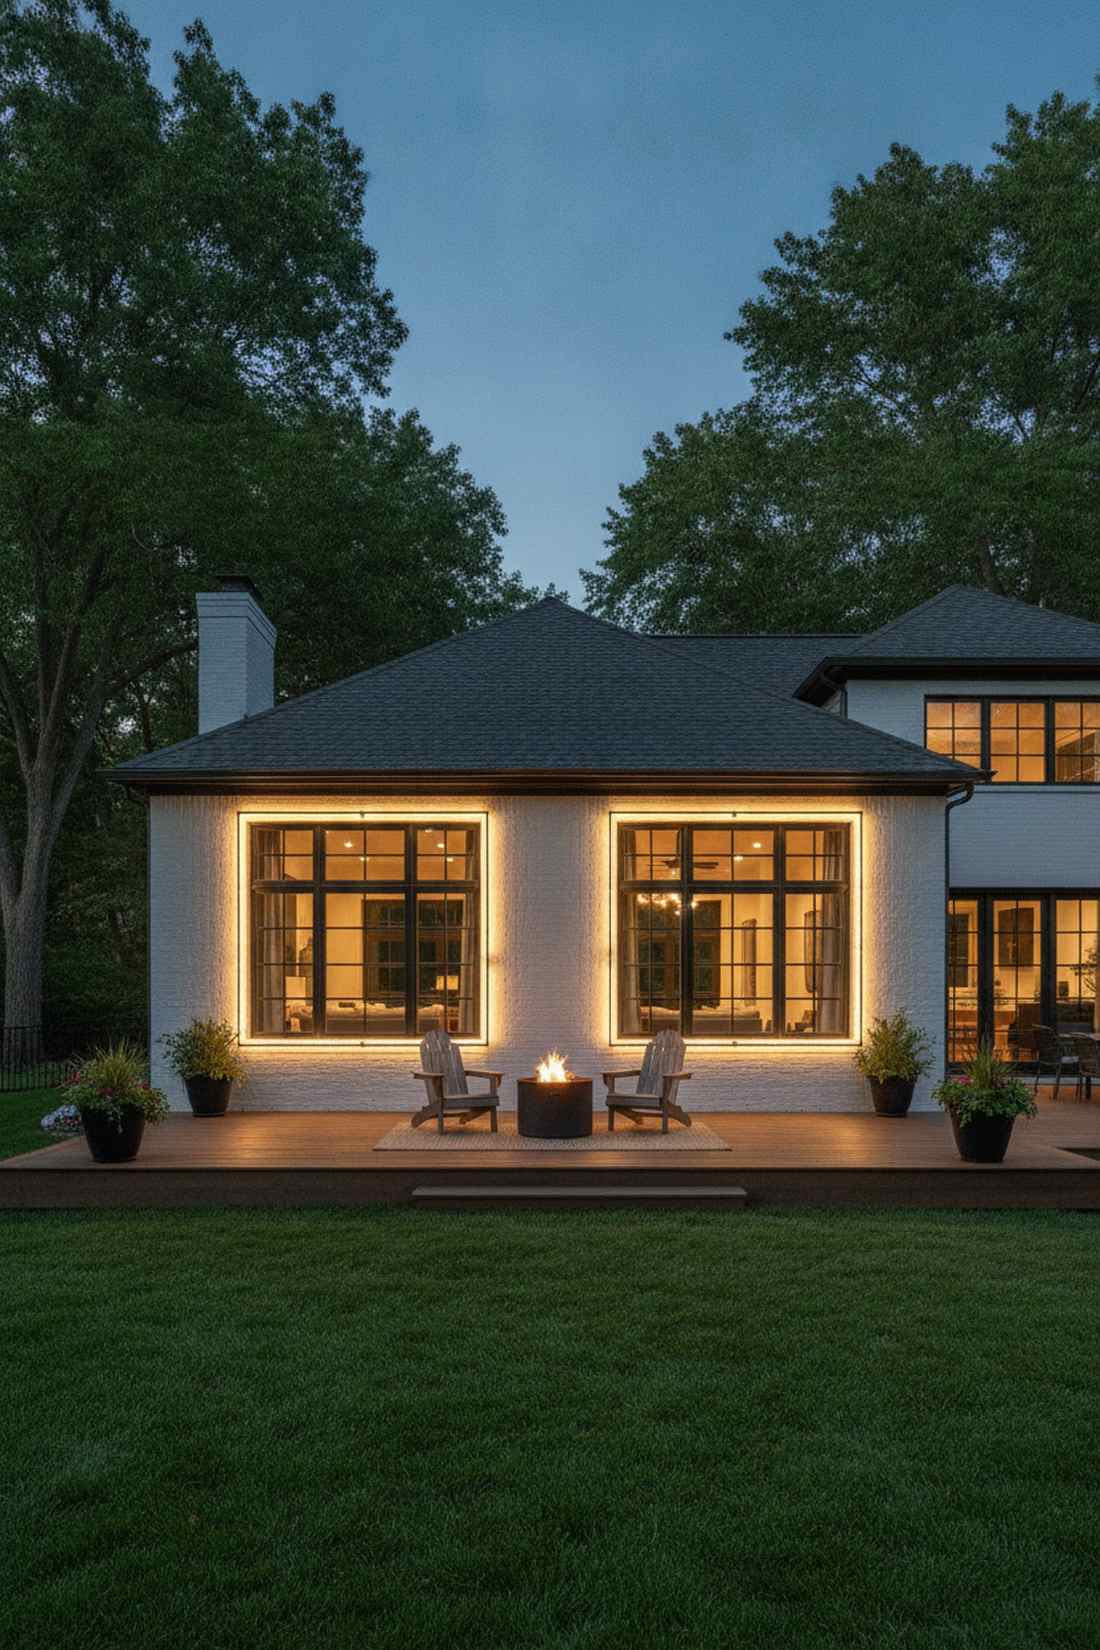
A sharp custom window sill light box feels like creating glowing picture frames for your living room. It works exceptionally well for homes with large bay windows or symmetrical facades.
Custom-cutting wire to fit the glass perfectly looks far more expensive than it is. Using magnetic tracking kits eliminates the need for messy adhesives or permanent nail holes.
You can execute these tailored frames for $60–$90. It’s a fast upgrade that completely changes the vibe from the street.
- Key Materials: C9 bulb strands and custom cut-to-size wire
- Vibe / Style: Crisp, tailored professional
- Difficulty: Intermediate measuring required
- Budget Breakdown: Custom wire: $40 | Bulbs: $45
- Creator’s Tip: Use hot glue on brick frames for a temporary, weather-resistant hold that peels right off in spring.
- Smart Sourcing: magnetic C9 light track kits and custom-cut socket wire spools.
17. Door Frame Accent
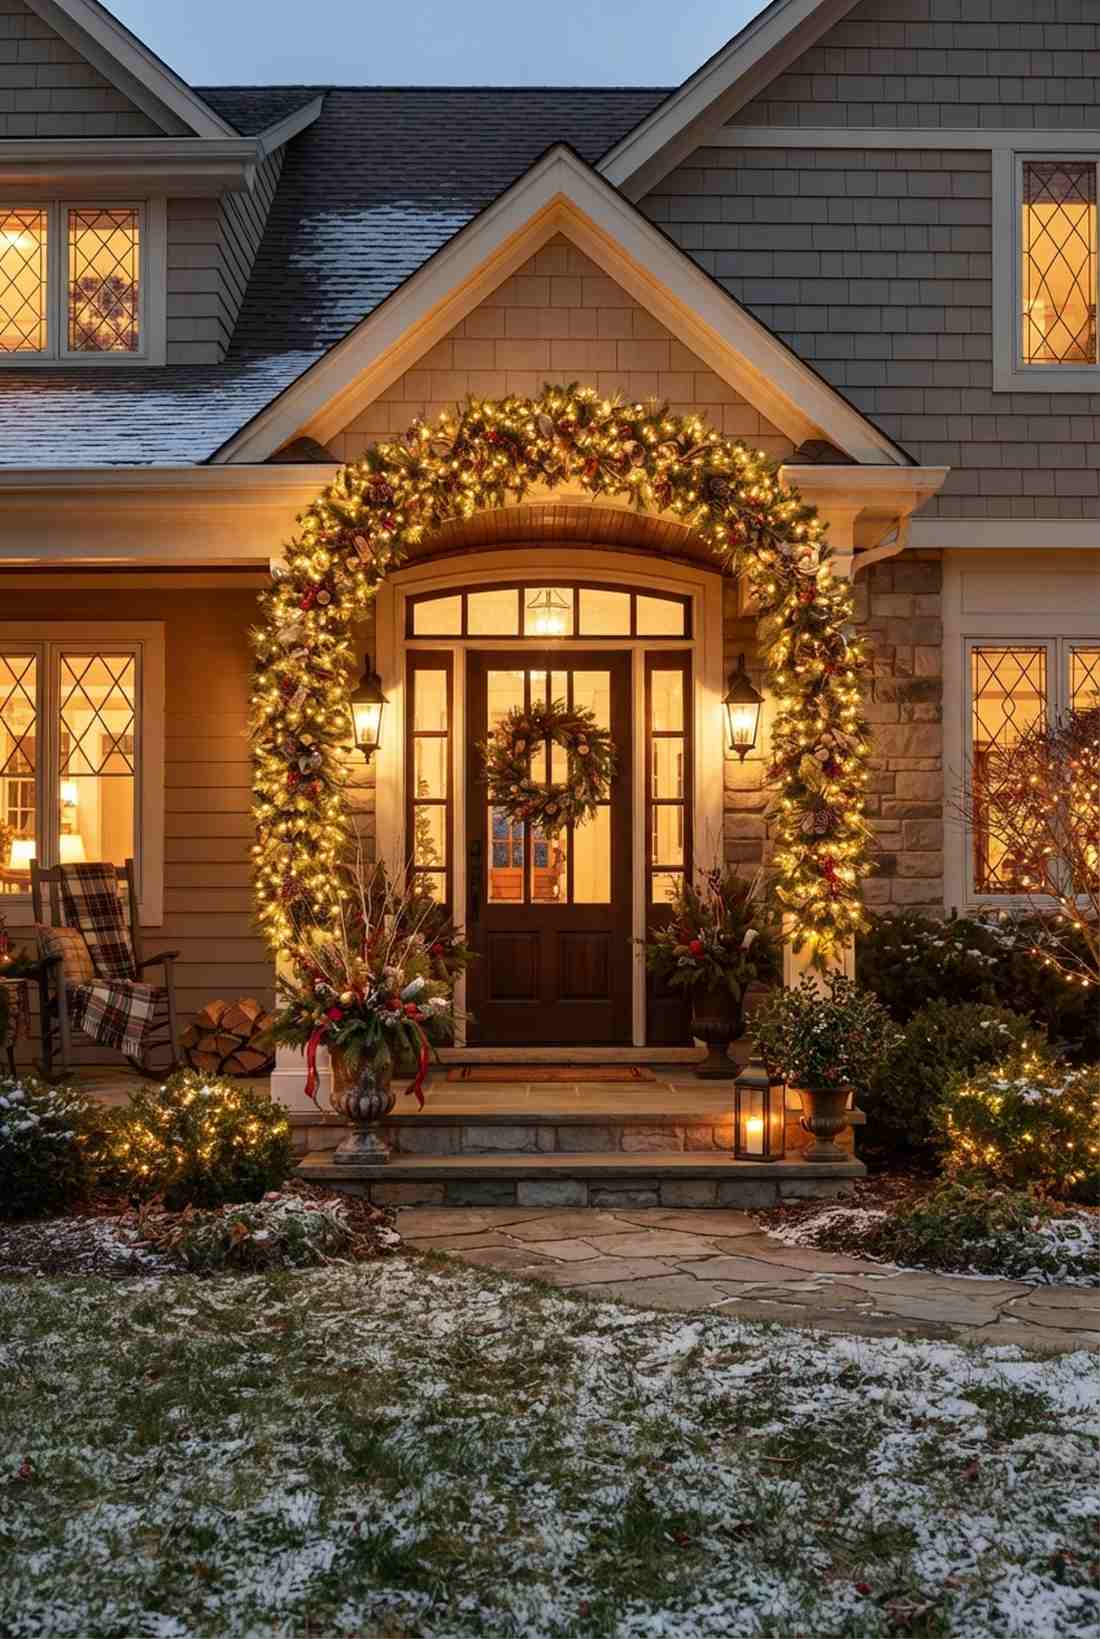

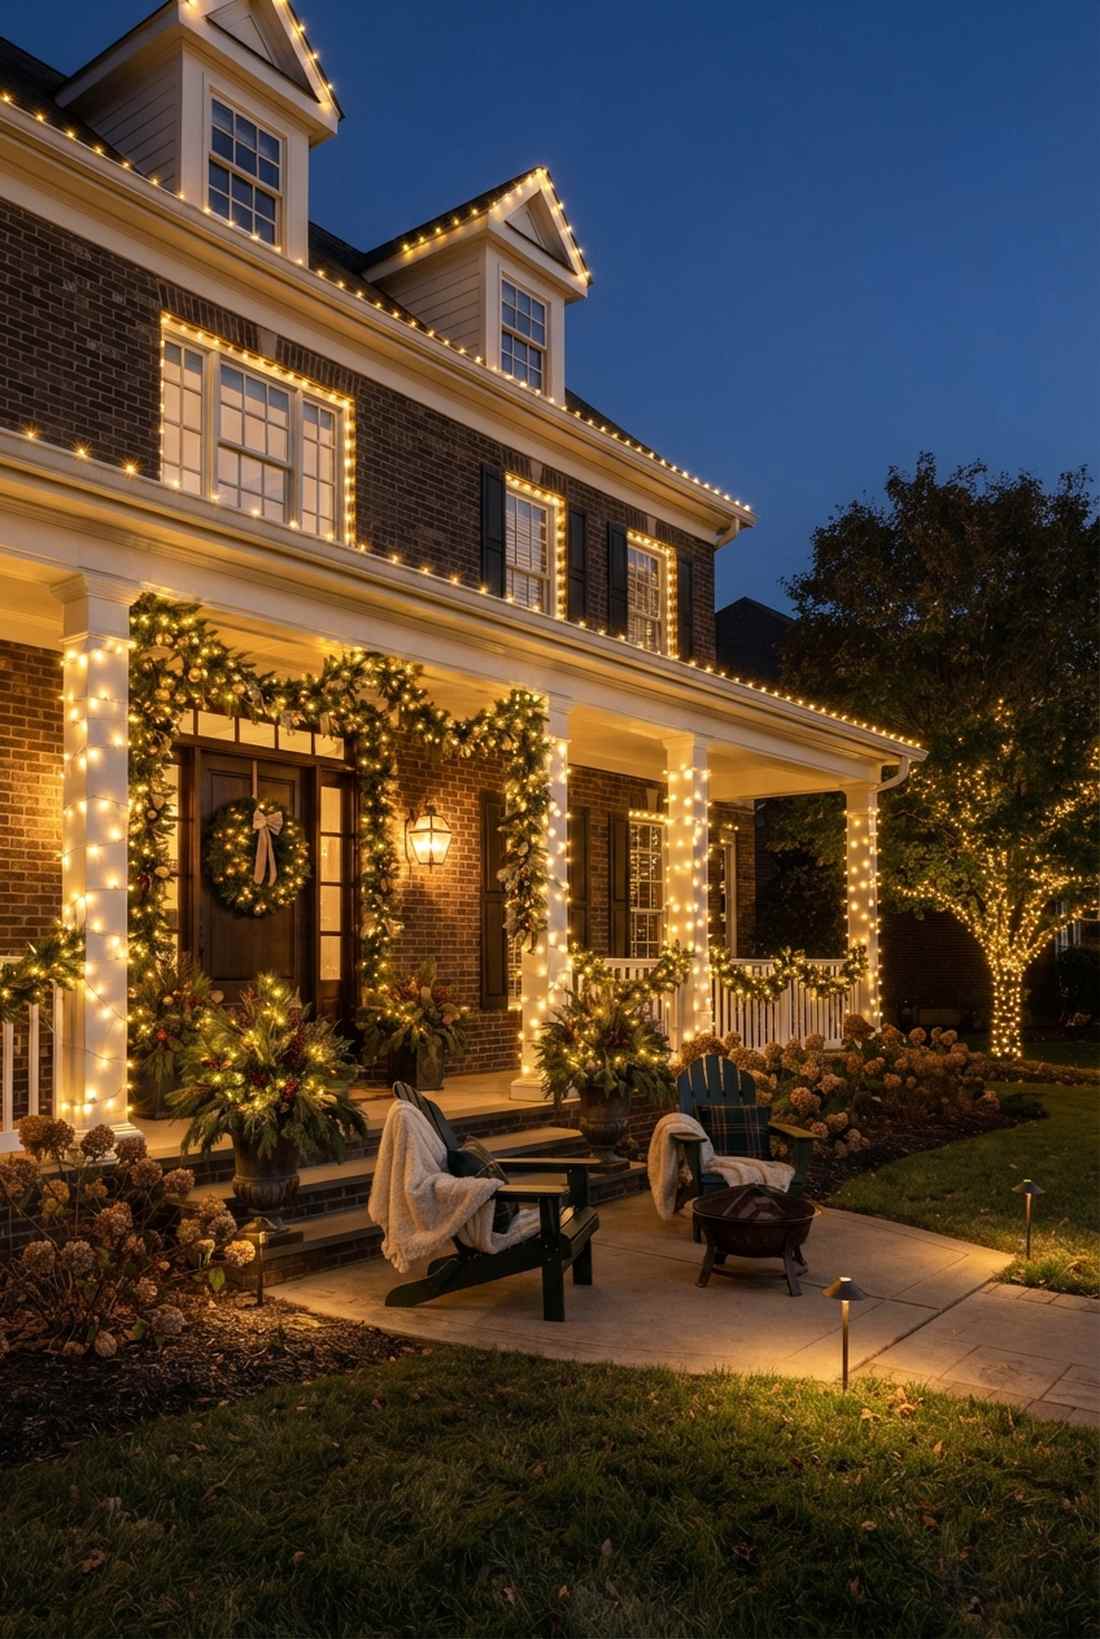
This inviting glowing front entryway arch feels like a portal into a magical holiday cabin. Absolutely perfect for highlighting beautiful front doors and complimenting a festive wreath.
Building a tension-mounted frame instead of nailing into the wood delivers a surprisingly premium look. Using high-grade miniature garden supplies for garland attachment keeps the greenery looking lush and full.
This damage-free entryway hack costs roughly $40–$65. Pin this if you rent and can’t use nails on your house.
- Key Materials: Pre-lit faux garland and PVC tension rods
- Vibe / Style: Warm, welcoming grand entrance
- Difficulty: Easy beginner project
- Budget Breakdown: Garland: $45 | PVC pipe: $10
- Creator’s Tip: Wrap the PVC pipe tightly in green floral tape so it blends seamlessly into the garland.
- Smart Sourcing: pre-lit thick holiday garland and adjustable tension rod frames.
18. Column-Wrapped Pillars
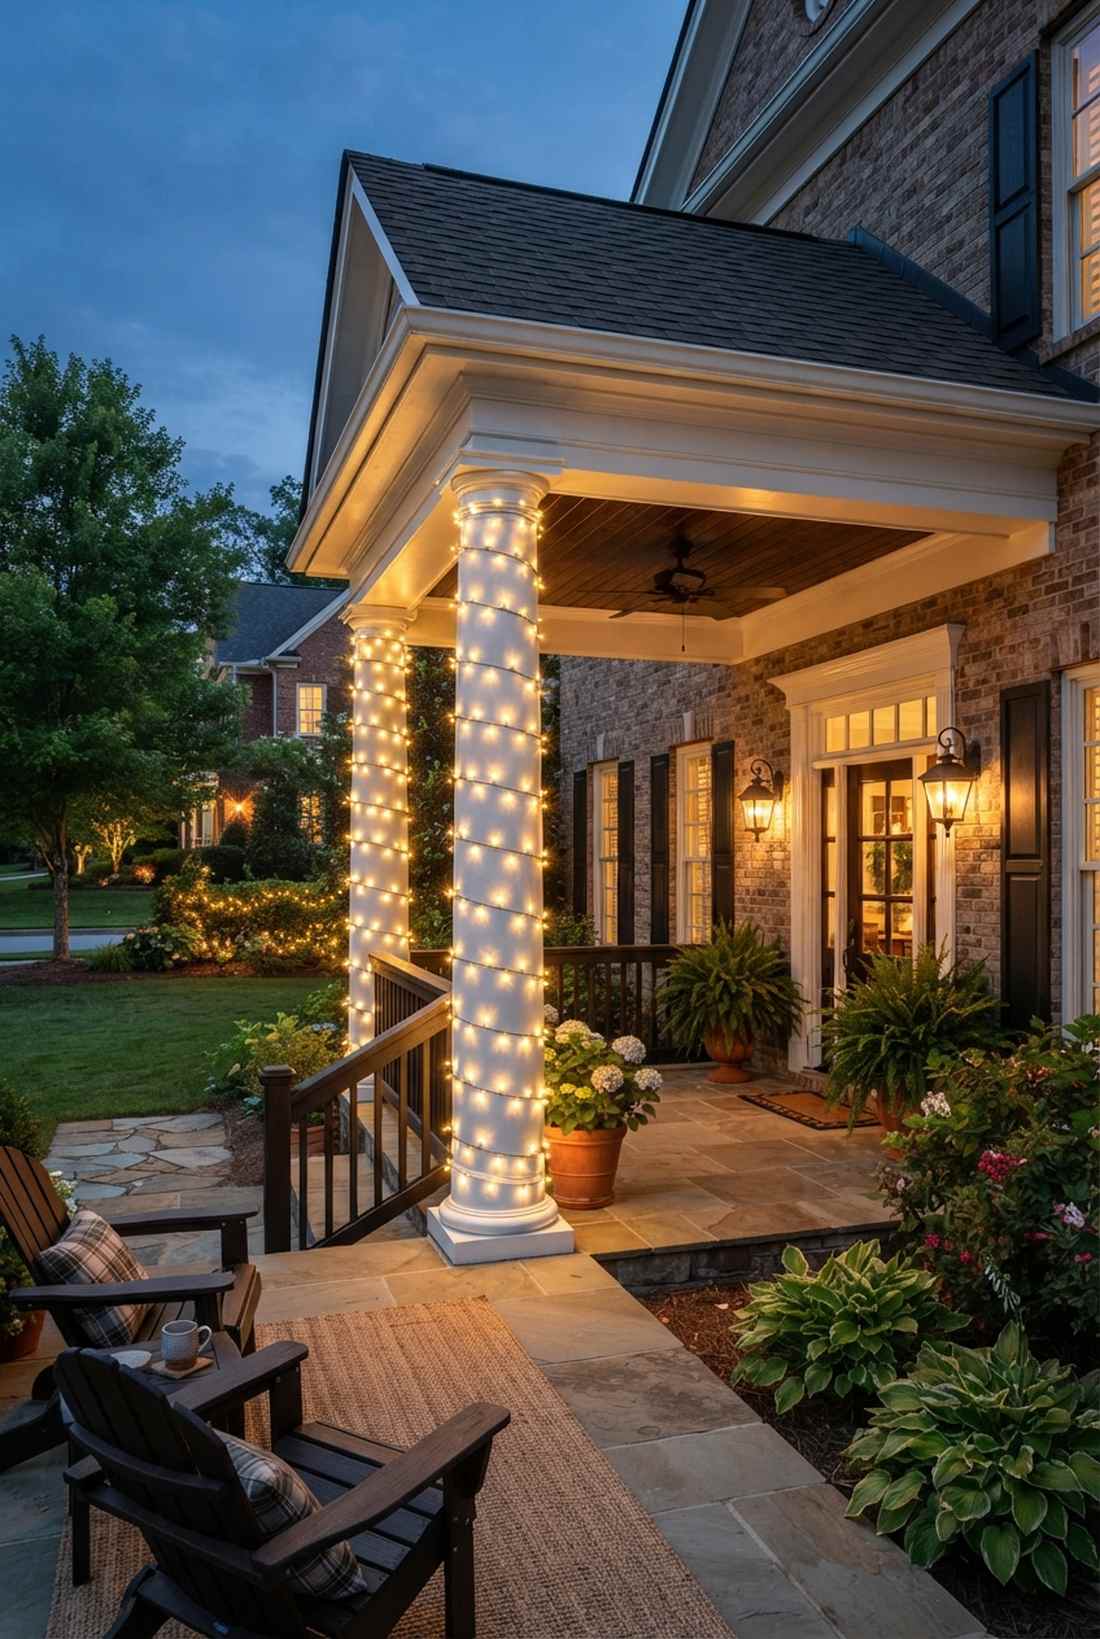

A spiraled illuminated porch column wrap feels like a glowing candy cane holding up your roof. Incredible for sprawling southern front porches or grand entryway pillars.
Keeping the wrapping distance mathematically identical gives a designer-level finish. Utilizing clear, heavy-duty zip ties keeps the lights from sliding down smooth painted wood.
You can wrap twin pillars easily for around $30–$50. Highly recommended for highlighting architectural height.
- Key Materials: Standard mini LED strings
- Vibe / Style: Regal, structured elegance
- Difficulty: Easy wrapping
- Budget Breakdown: Lights: $35 | Clear ties: $5
- Creator’s Tip: Start the wrap from the top down so the plug ends up perfectly at the base near the outlet.
- Smart Sourcing: extra-long LED string bundles and transparent UV-resistant zip ties.
19. Garage Door Perimeter
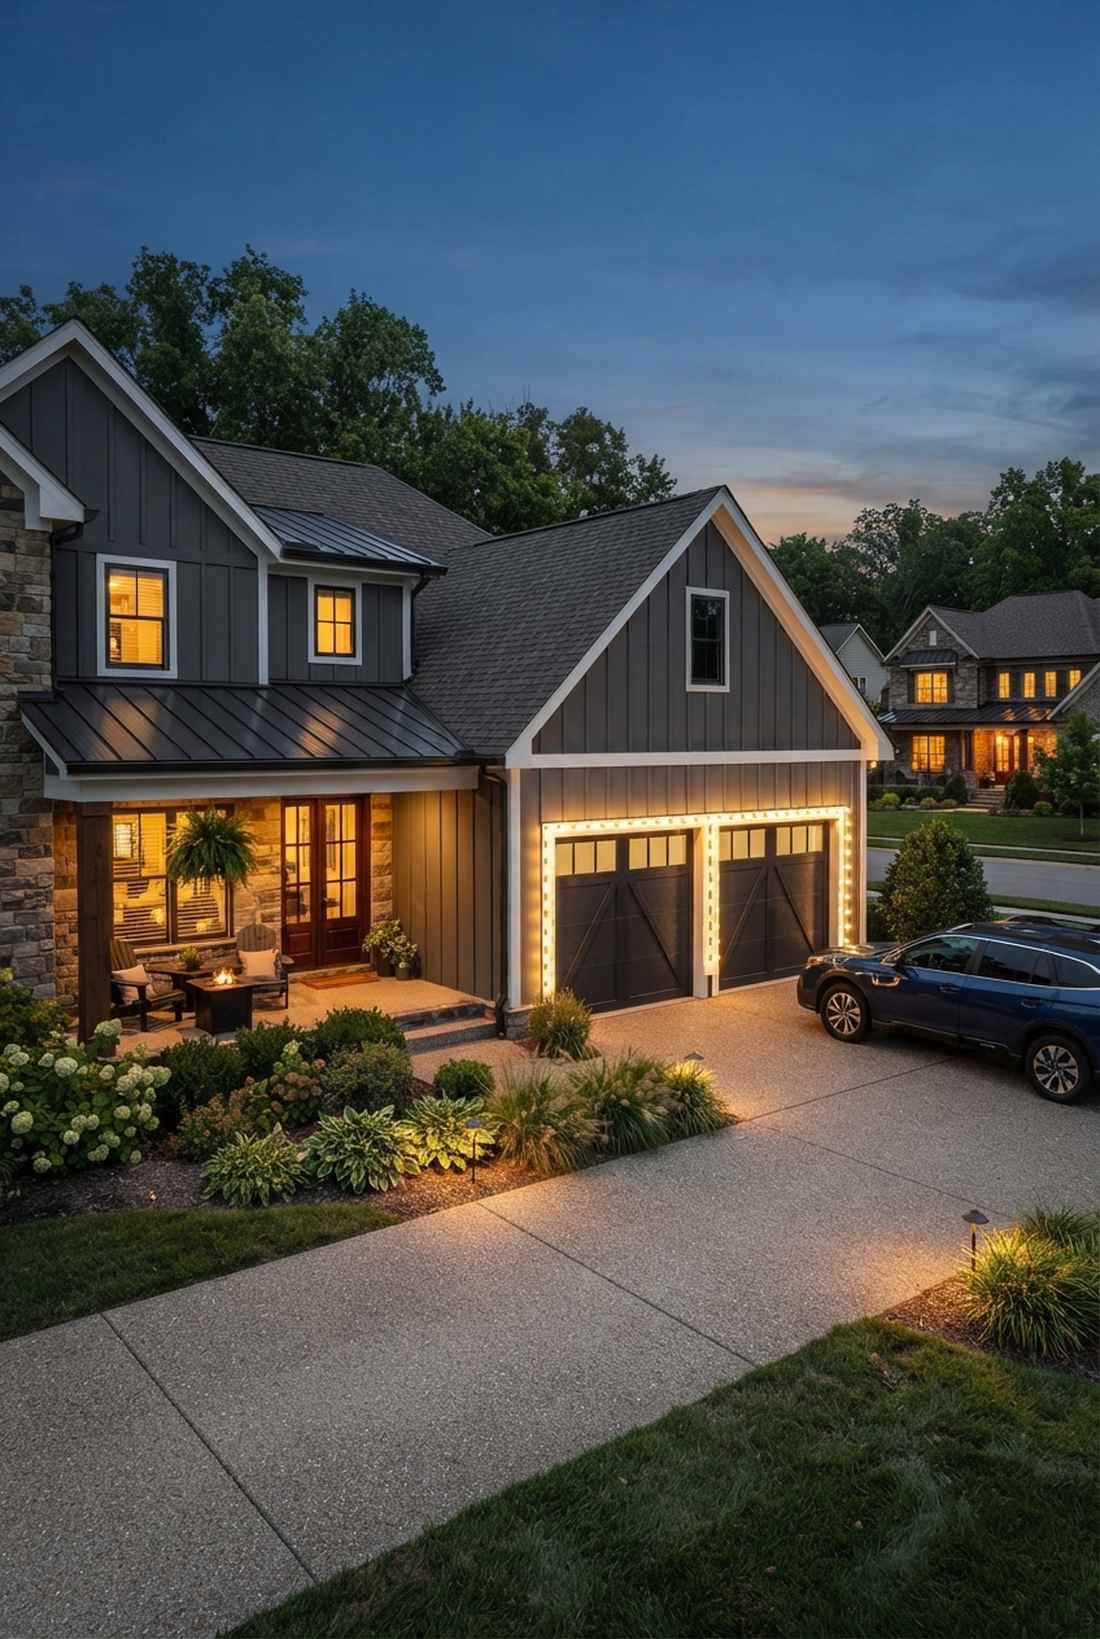
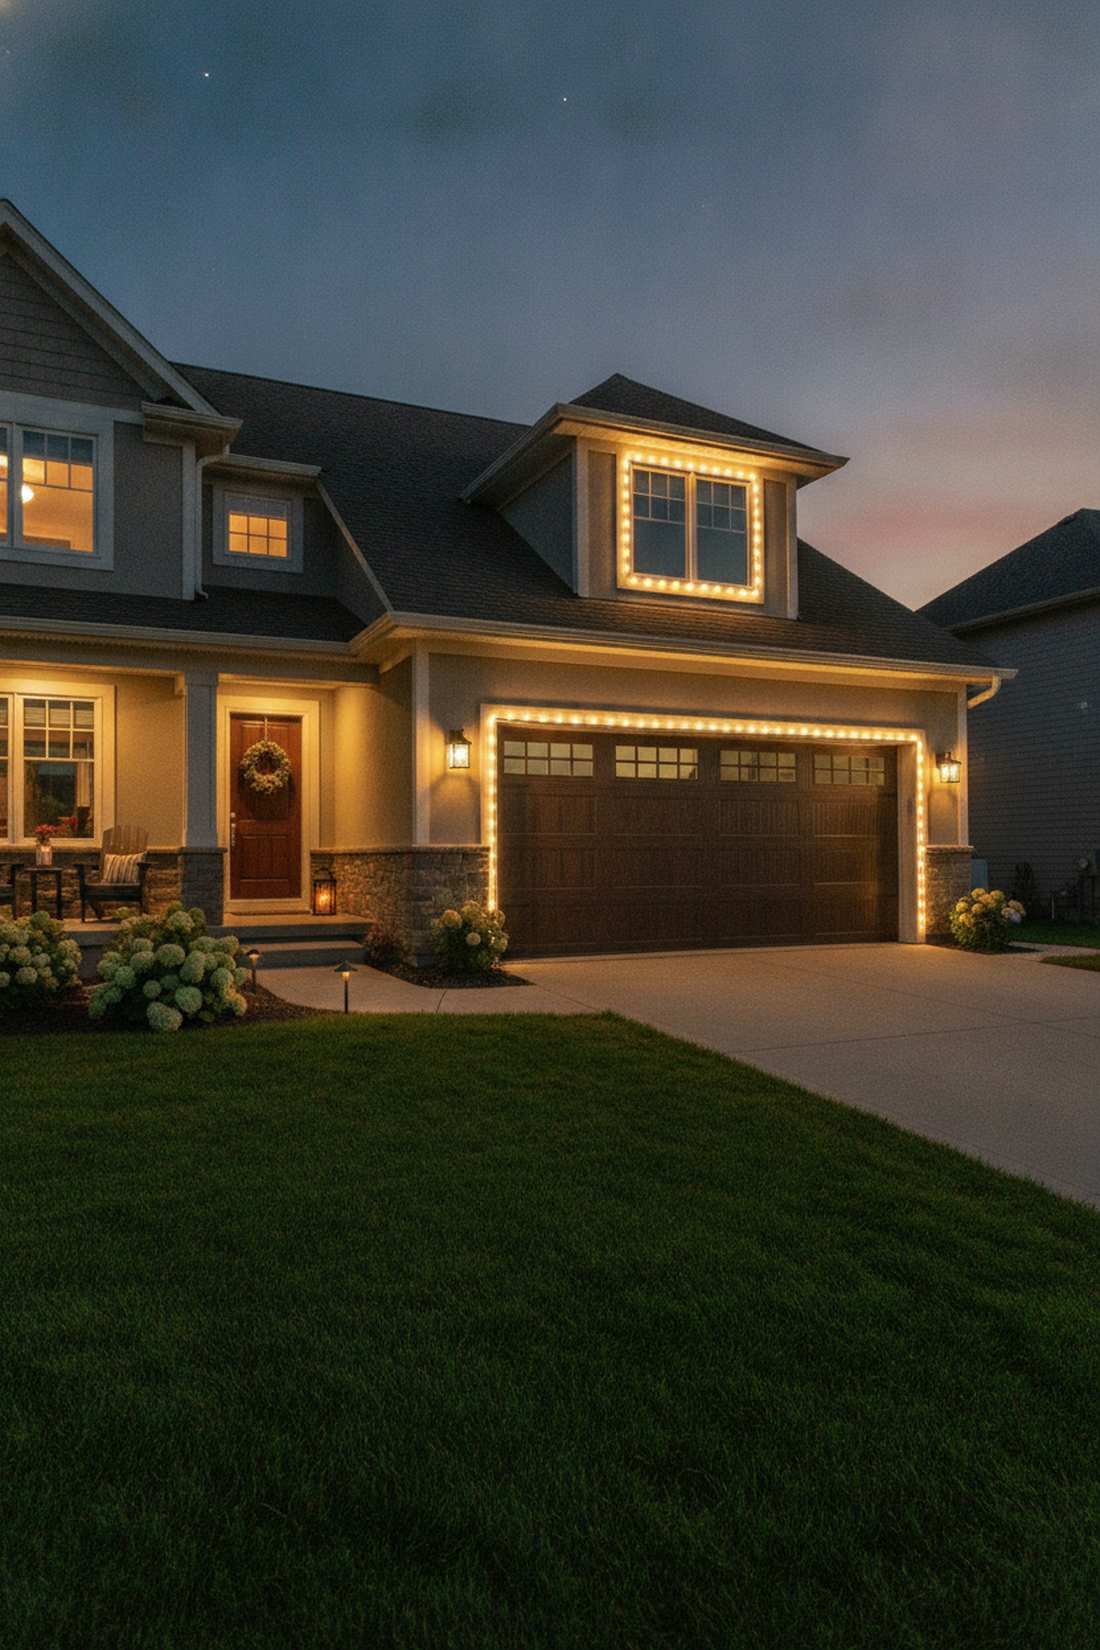
This brilliant luminous garage door border feels like a massive, glowing drive-in movie screen. A brilliant solution for balancing the visual weight of a home with a large front-facing garage.
Sticking lights purely to the trim rather than the moving door avoids a tangled, disastrous mess. High-end adhesive outdoor clips hold strong in freezing weather without ripping the paint.
This balancing visual trick runs about $50–$80. Save this to ensure your home looks evenly lit from afar.
- Key Materials: Long-run C7/C9 strands and adhesive clips
- Vibe / Style: Complete, symmetrical balance
- Difficulty: Moderate, requires ladder
- Budget Breakdown: Bulbs: $60 | Adhesive hooks: $15
- Creator’s Tip: Leave a slight bit of slack at the corners to prevent the wire from snapping during deep freezes.
- Smart Sourcing: outdoor-rated adhesive light clips (bulk pack) and shatterproof C9 LED kits.
Contractors charge hundreds for this specific look, but you can do it in under an hour…
Garden Structure Accents That Maximize Existing Features
Fences, arbors, pergolas, and other hardscape elements provide ready-made frameworks for lighting installations. Enhancing these structures integrates your display with permanent landscape features.
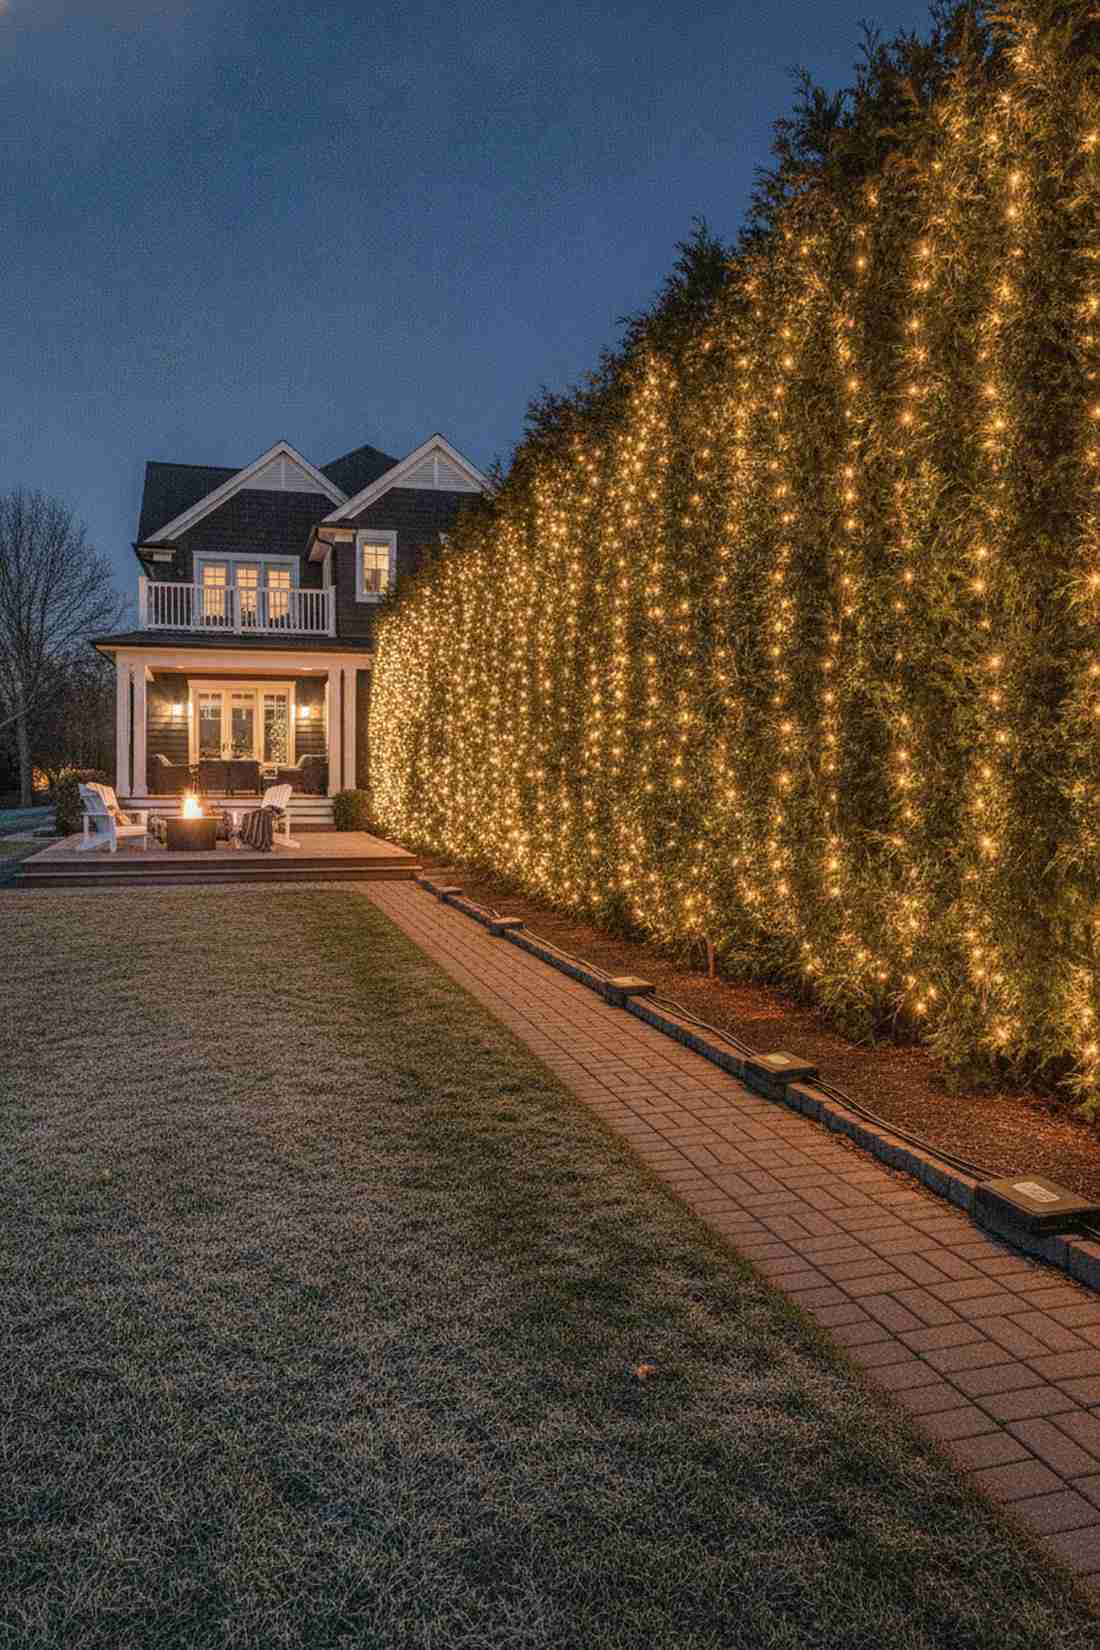
20. Fence-Line Curtain Lights
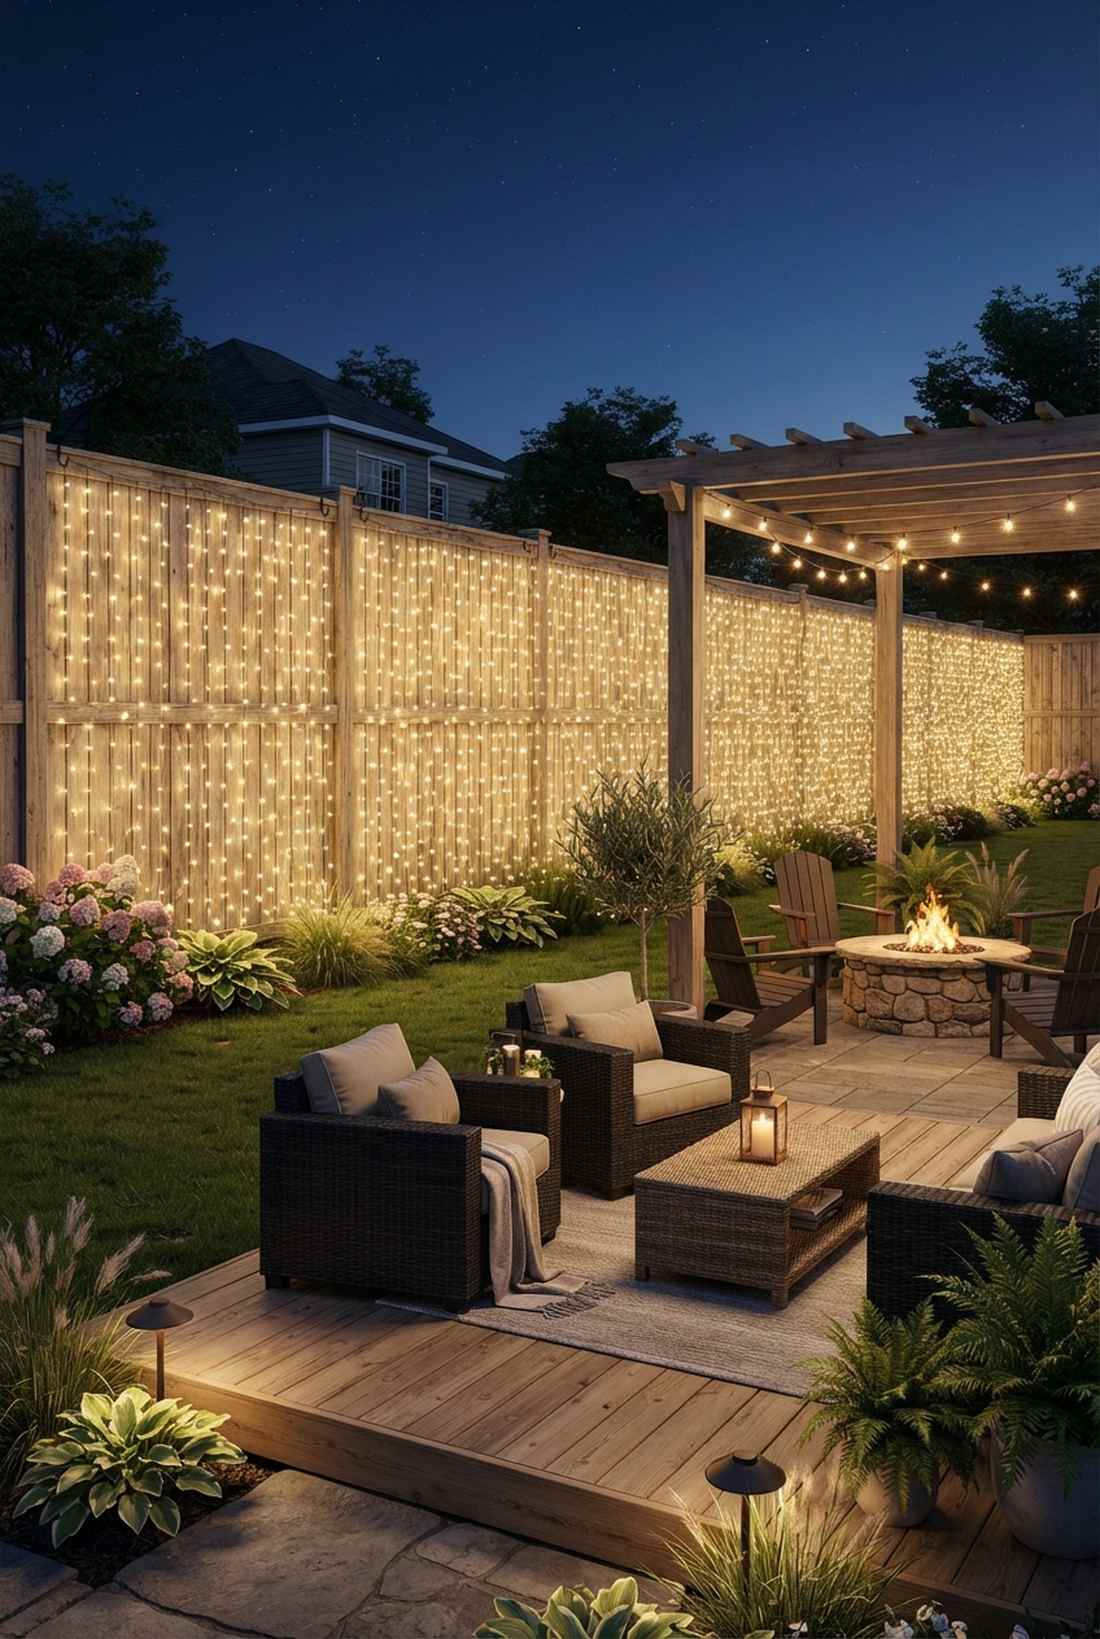
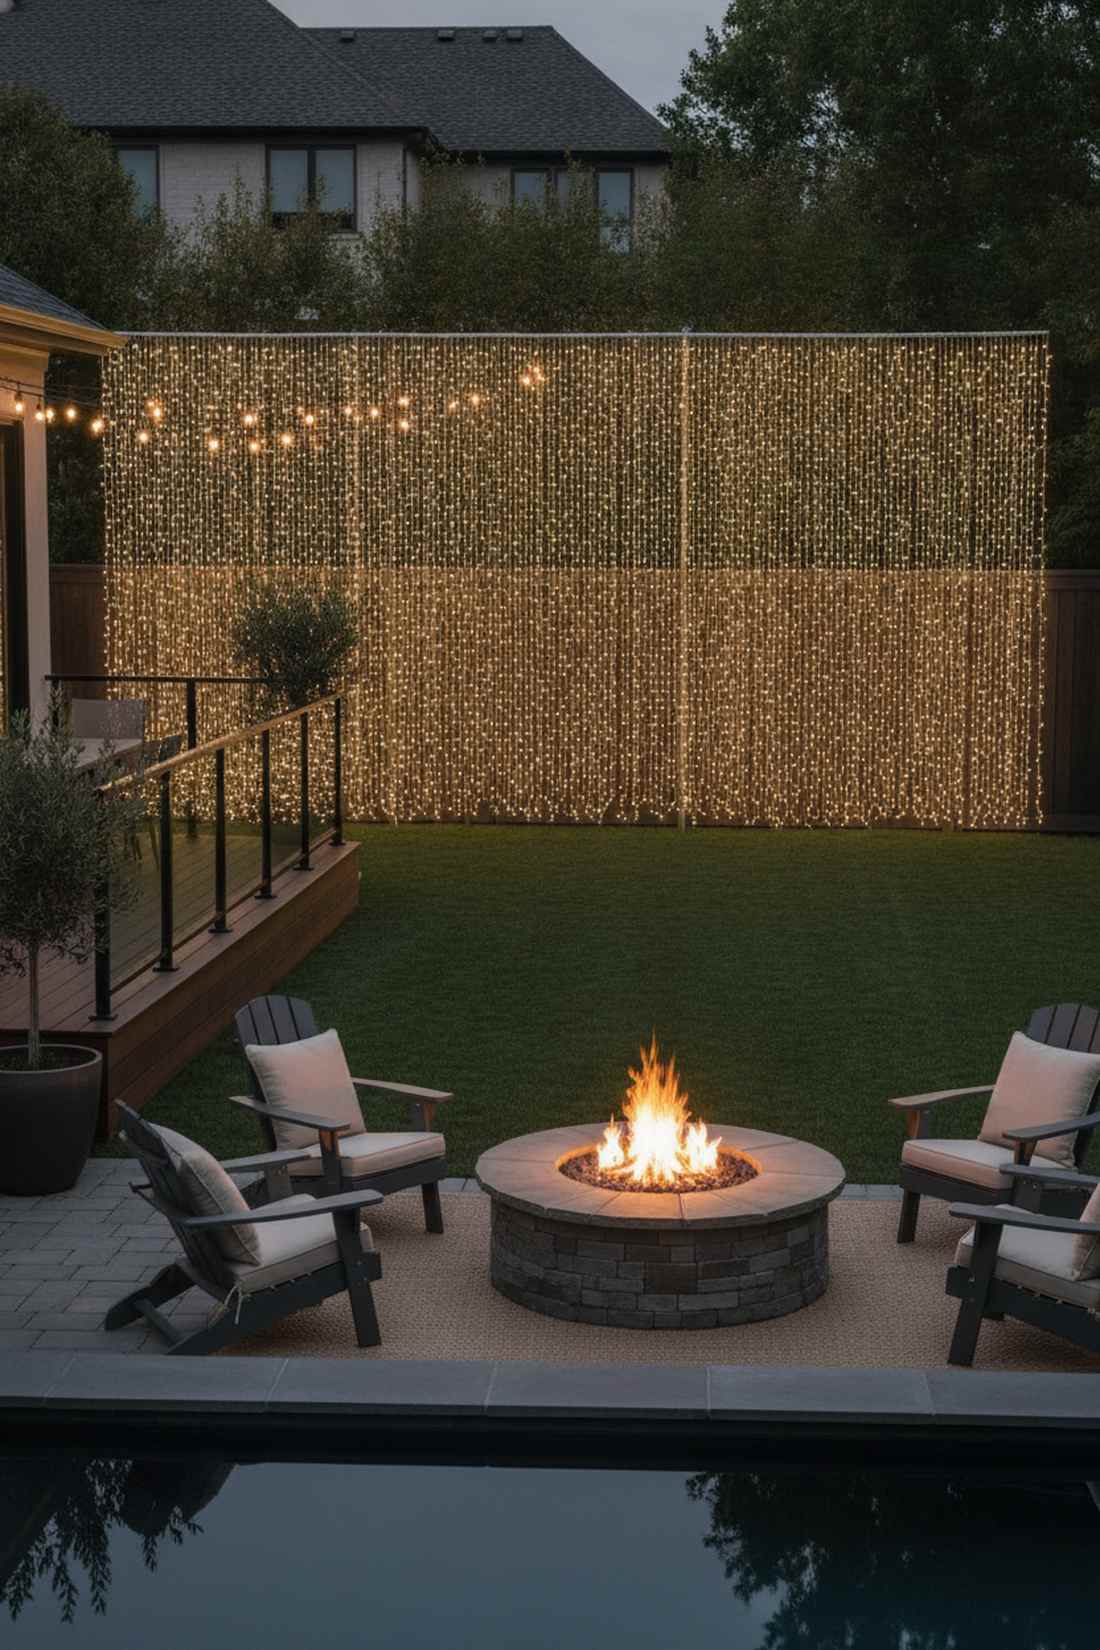
This glowing backyard perimeter light wall feels like a sparkling waterfall protecting your privacy. Exceptional for making cramped backyards feel expansive and deeply magical at night.
Layering sheer light curtains over dull wooden fences delivers a surprisingly premium look. Sourcing commercial-grade fairy garden supplies prevents the bottom strands from getting ruined by damp soil.
This massive backyard transformation costs roughly $80–$130. Pin this if you want to completely hide an ugly fence.
- Key Materials: Wide LED curtain light panels
- Vibe / Style: Immersive illuminated boundary
- Difficulty: Easy but large scale
- Budget Breakdown: Curtain panels: $110 | Hooks: $15
- Creator’s Tip: Use cup hooks screwed into the top rail for a permanent hanging solution year after year.
- Smart Sourcing: heavy-duty LED curtain panels and rust-proof outdoor cup hooks.
21. Arbor Archway Framing
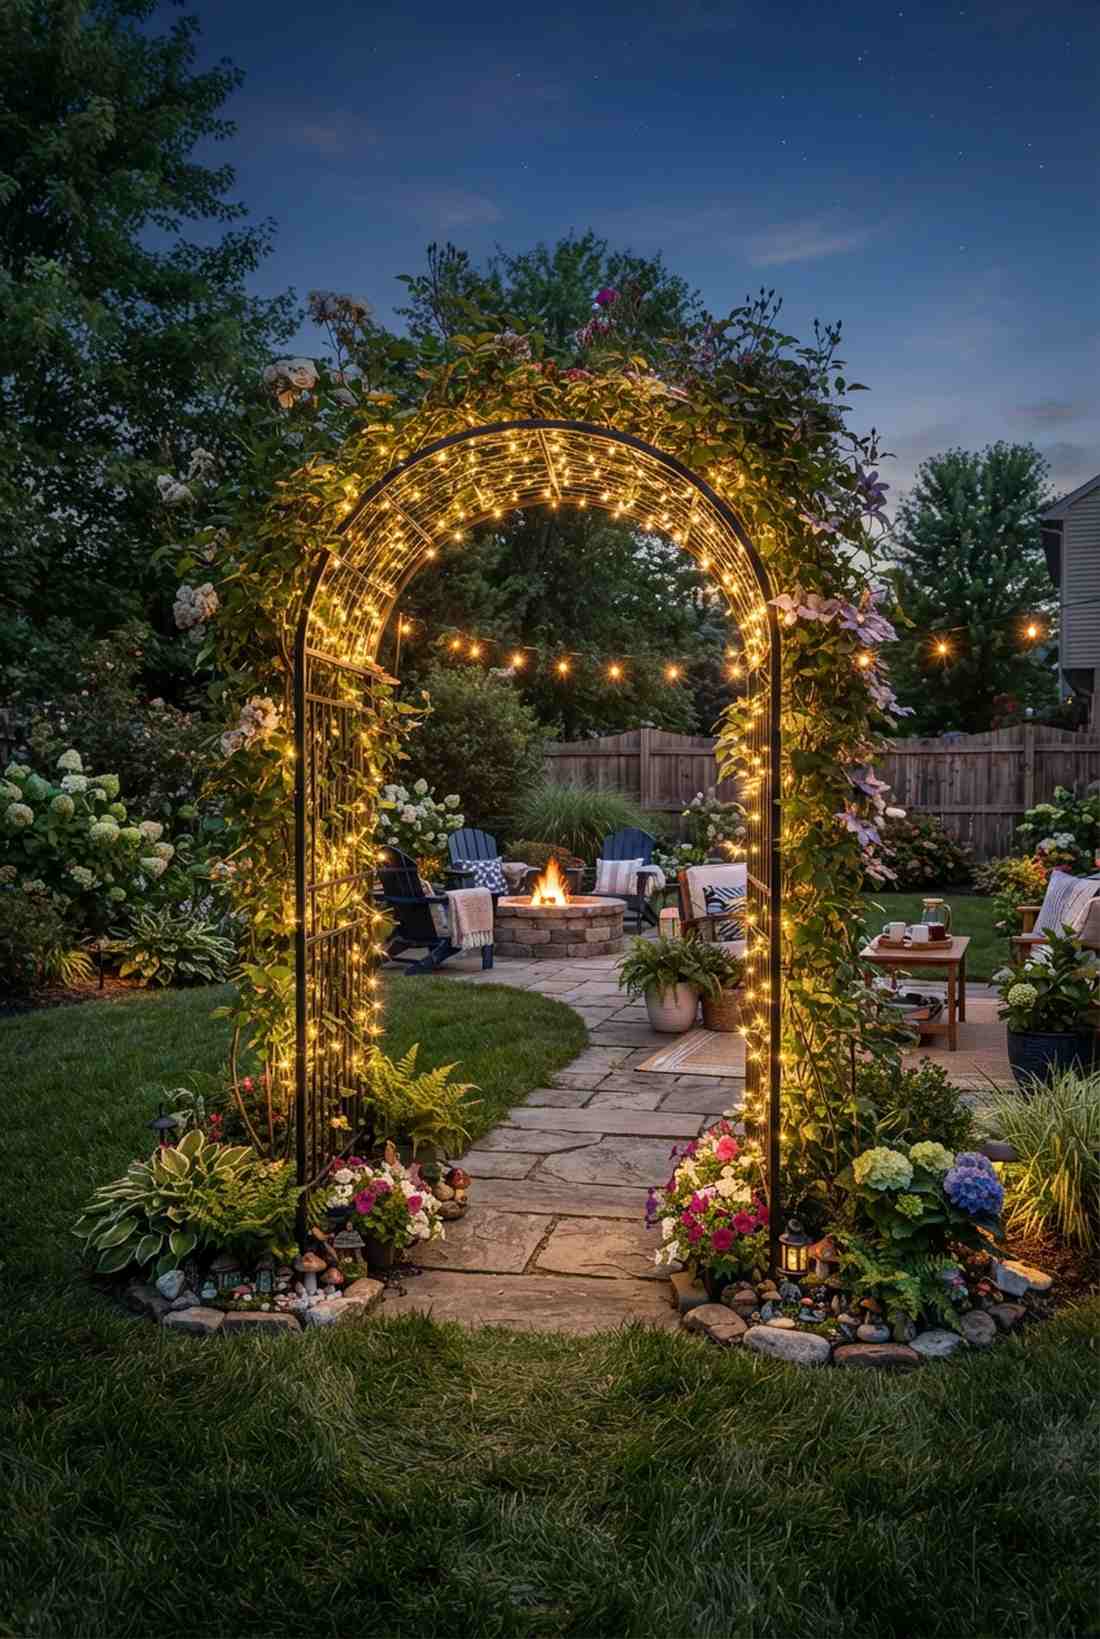
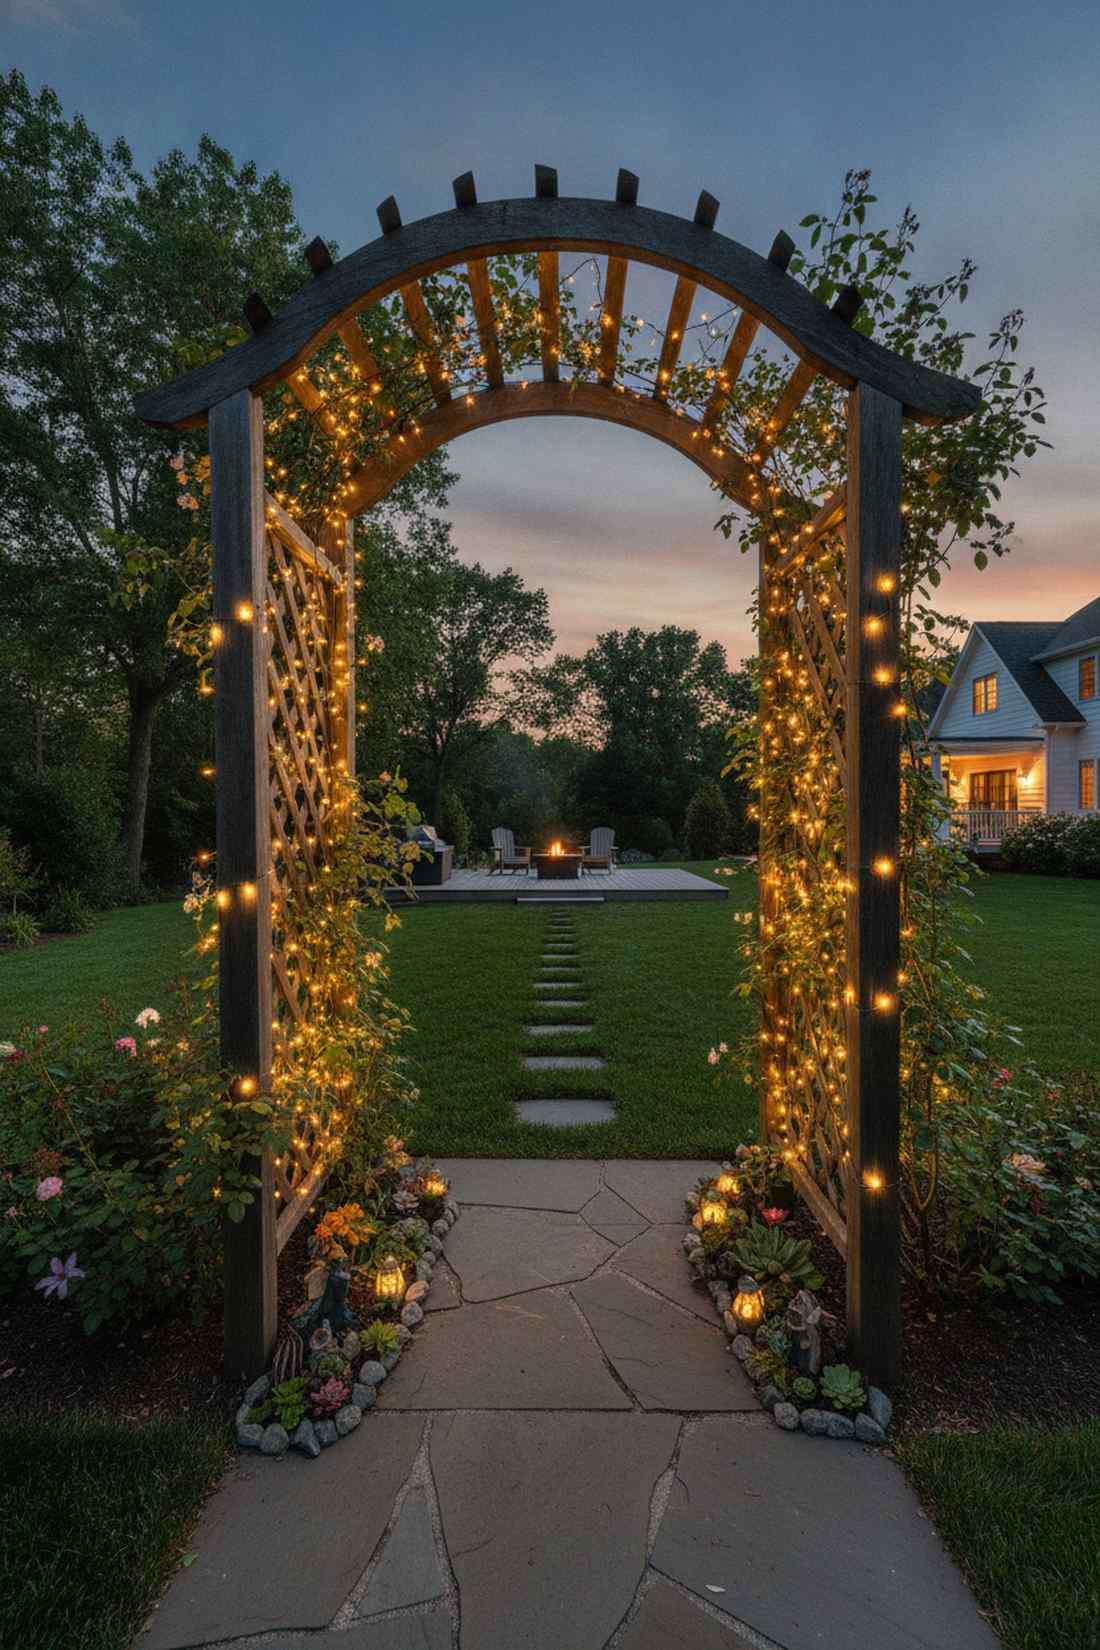
A mesmerizing glowing garden trellis portal feels like stepping into a secret fairy kingdom. It creates a stunning, highly photogenic entrance to a backyard garden or patio path.
Wrapping the internal latticework instead of just the outer edges looks far more expensive than it is. Weaving small miniature garden kits through the base foliage roots the structure beautifully.
You can light an arbor magnificently for $40–$60. Save this idea for a magical backyard wedding or party vibe.
- Key Materials: Warm white copper wire LEDs
- Vibe / Style: Romantic, enchanting gateway
- Difficulty: Intermediate weaving
- Budget Breakdown: Lights: $45 | Wire ties: $5
- Creator’s Tip: Use a twinkling strand mixed with a solid static strand to give the archway dynamic movement.
- Smart Sourcing: copper fairy lights with remote timers and green floral binding wire.
22. Pergola Canopy Netting
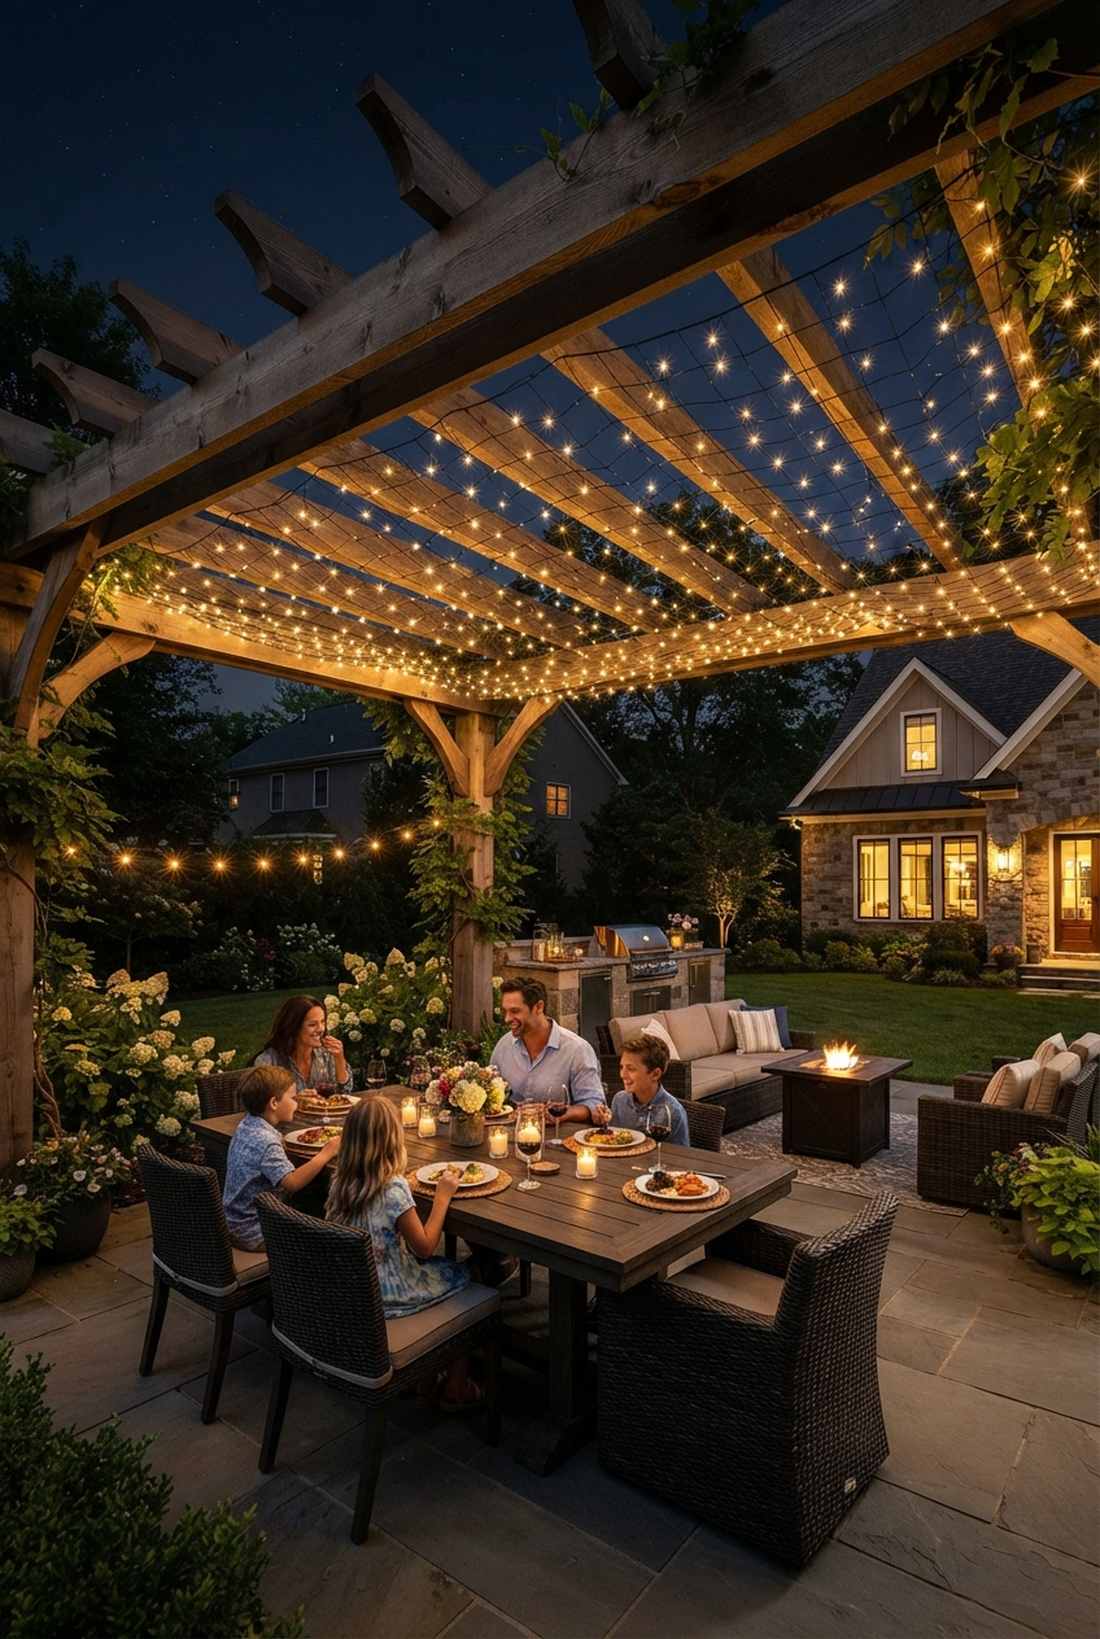
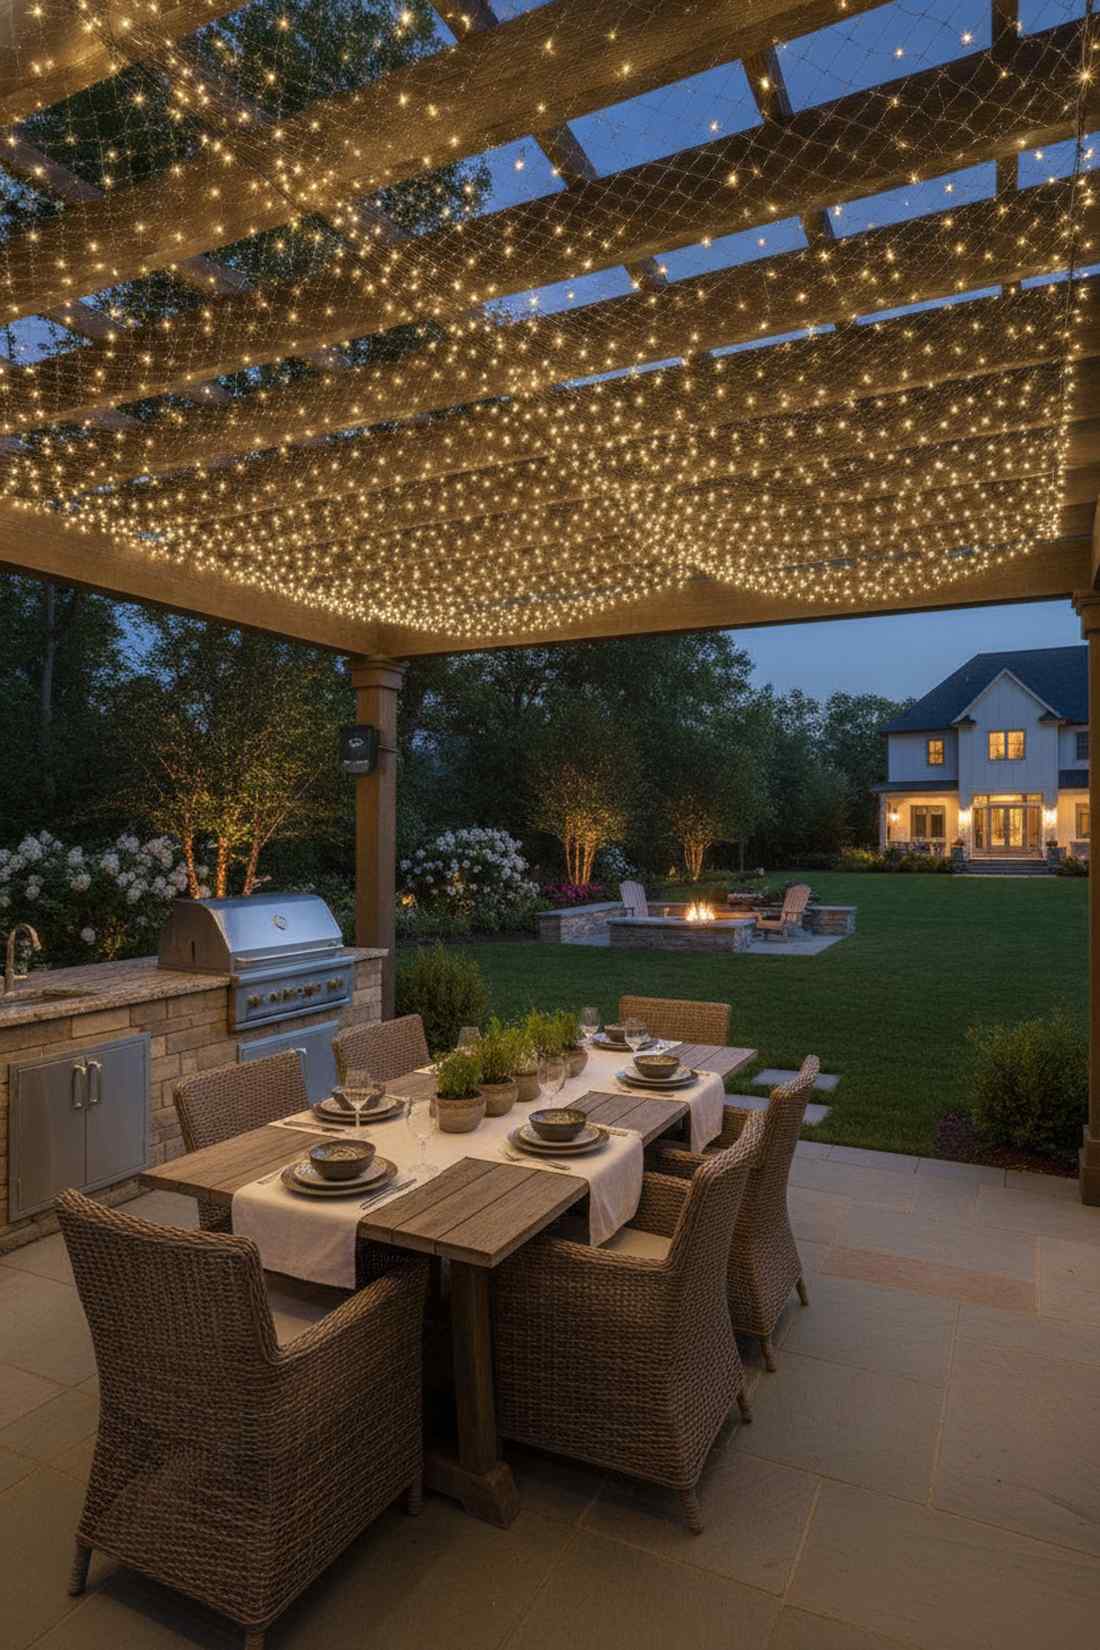
This dazzling overhead starry patio ceiling feels like dining under a crystal clear night sky. The ultimate lighting upgrade for outdoor kitchens and pergola seating areas.
Draping flexible net grids over the rafters gives a designer-level finish instantly without painstaking weaving. Utilizing heavy-duty outdoor smart controls ensures you never have to step out in the cold to unplug it.
This cozy outdoor room upgrade costs about $70–$110. It’s a fast upgrade that completely changes the vibe of a patio.
- Key Materials: Large dimension LED net lights
- Vibe / Style: Cozy, high-end alfresco dining
- Difficulty: Moderate, requires overhead ladder work
- Budget Breakdown: Net grids: $85 | Zip ties: $10
- Creator’s Tip: Allow the netting to sag slightly between the wooden beams to create a soft, romantic drape.
- Smart Sourcing: oversized pergola LED net blankets and outdoor Wi-Fi timer hubs.
23. Trellis Panel Illumination
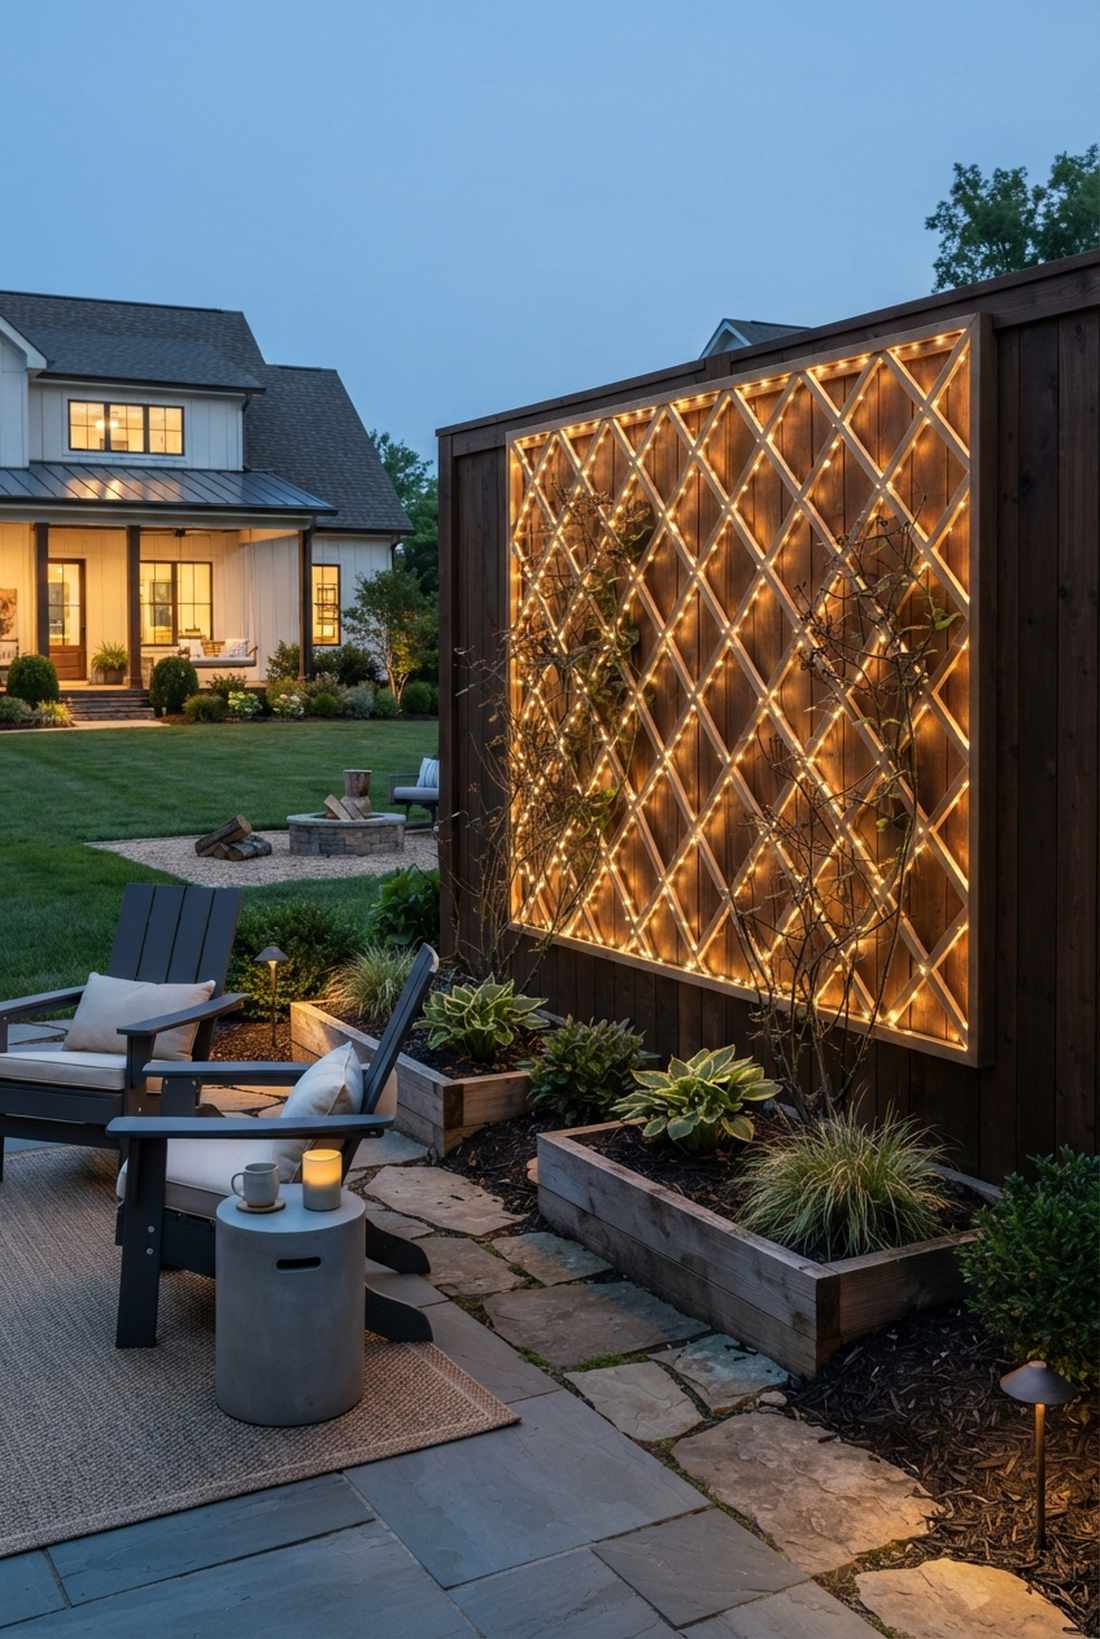
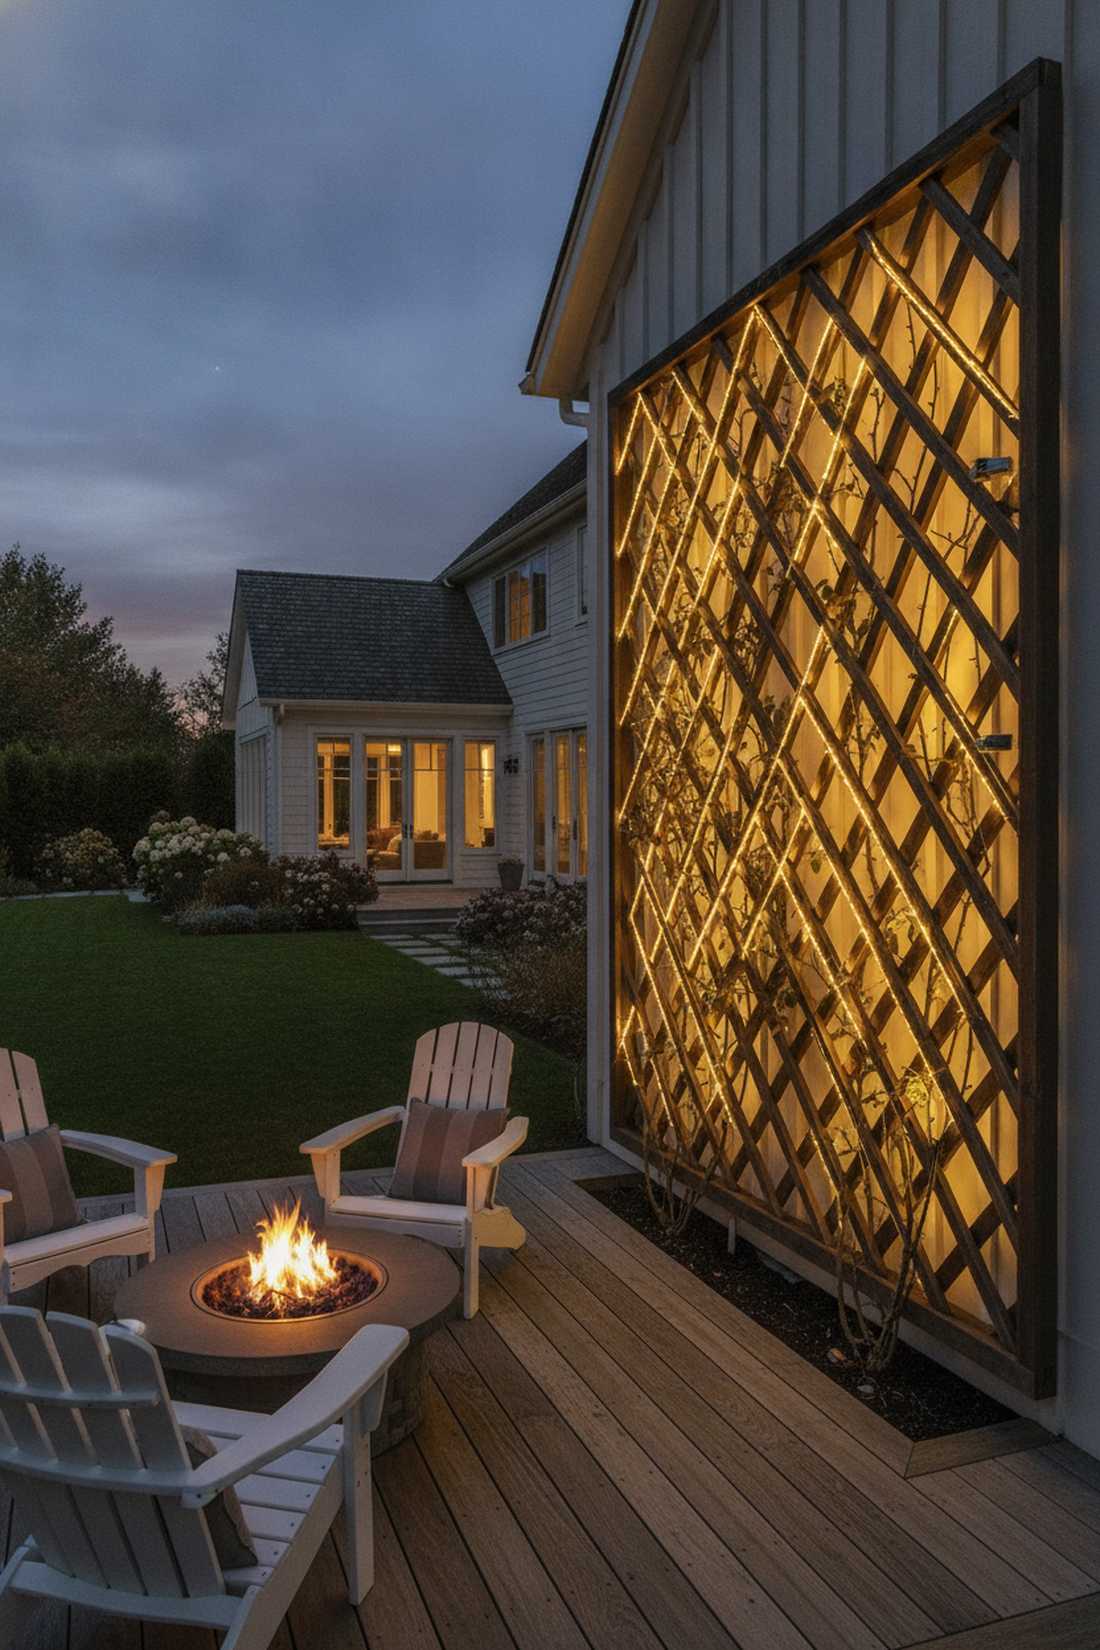
An intricate geometric glowing lattice screen feels like a brilliant piece of modern architectural art. Brilliant for highlighting climbing rose structures even after the flowers have died off.
Following the wooden diamond patterns precisely delivers a surprisingly premium look. Using high-quality terrarium accessories to pin the wires tightly keeps the geometry razor-sharp.
You can execute this precise geometric display for $25–$45. Pin this to your architectural garden board.
- Key Materials: Thin-wire micro LEDs
- Vibe / Style: Sharp, geometric modernism
- Difficulty: Tedious, requires exact tracing
- Budget Breakdown: String lights: $30 | Mini staples: $8
- Creator’s Tip: Work entirely with battery-operated packs tucked behind the wood to avoid ugly cords ruining the aesthetic.
- Smart Sourcing: battery-powered micro LED kits and heavy-duty staple guns with brads.
24. Gazebo Wrapped Railings
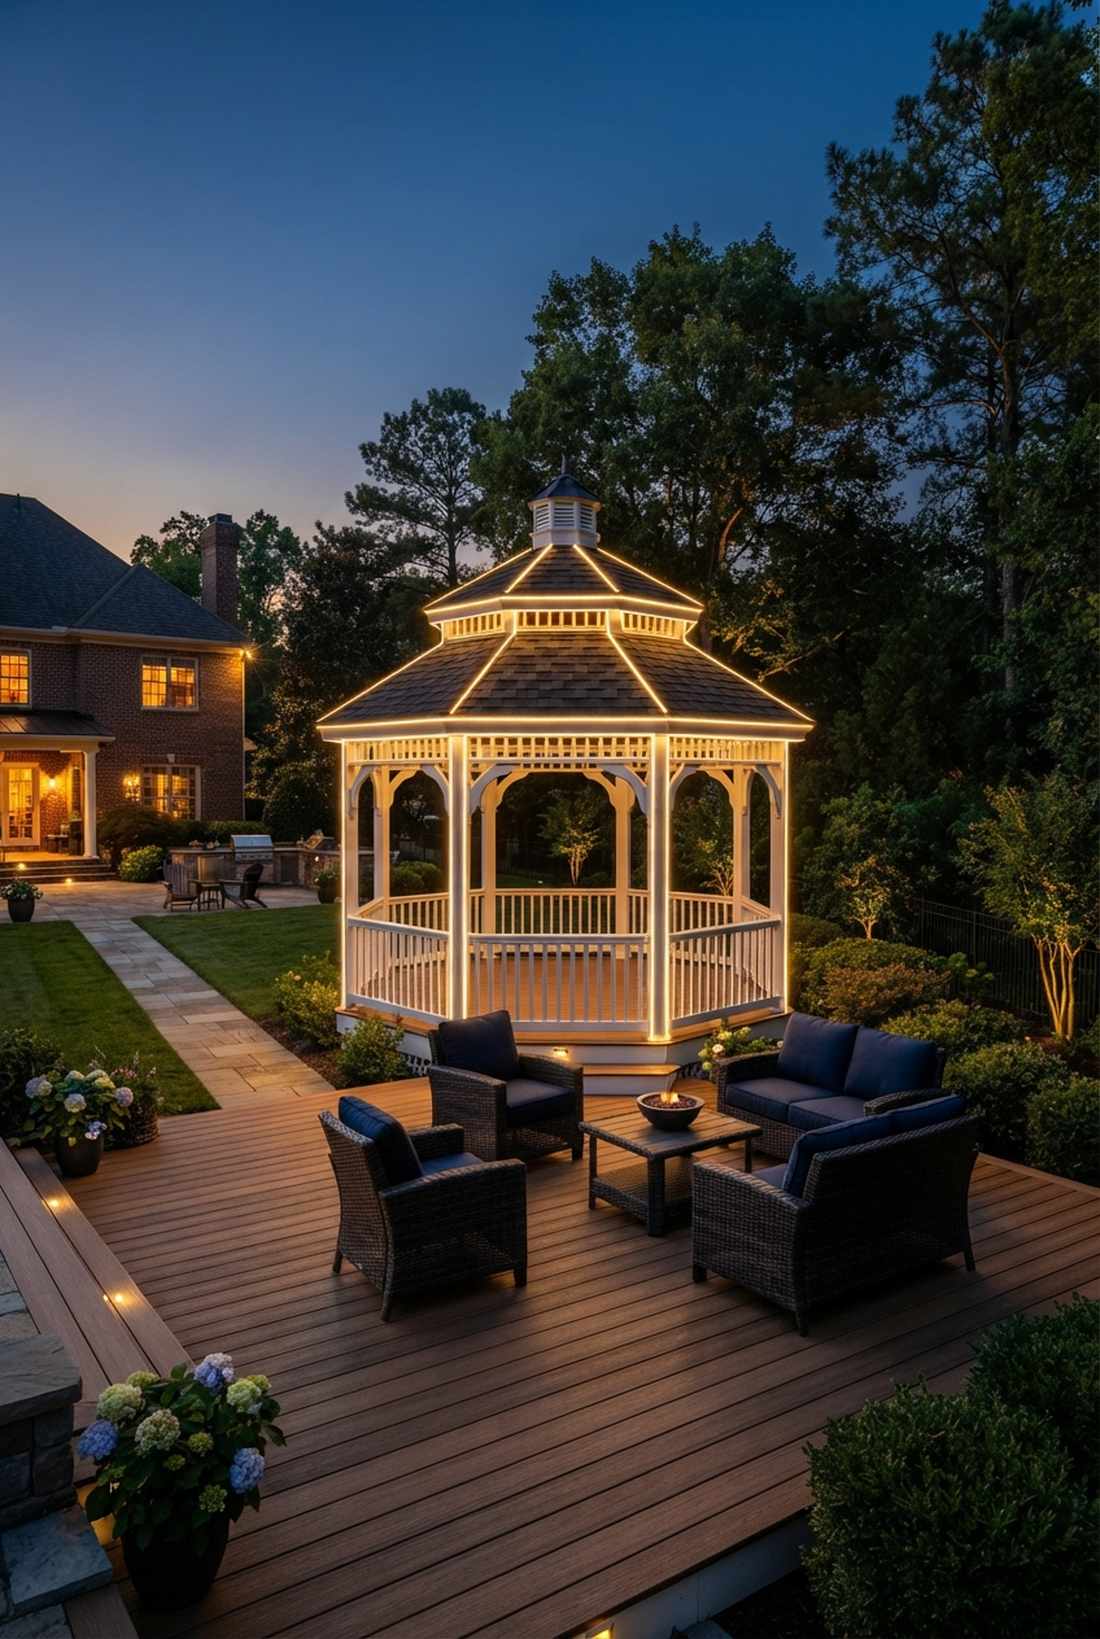

This stunning luminous pavilion outline feels like a glowing carousel sitting in the middle of your yard. Essential for highlighting the grand structure of a backyard gazebo.
Defining just the structural lines rather than blanketing it looks far more expensive than it is. Employing durable outdoor lighting hubs centralizes the power safely away from snowdrift buildup.
Outlining a standard gazebo runs around $80–$140. Save this for your ultimate backyard entertaining space.
- Key Materials: Commercial C7 strings or thick rope lights
- Vibe / Style: Grand architectural centerpiece
- Difficulty: Intermediate, requires precise measuring
- Budget Breakdown: Rope lights: $100 | Mounting tracks: $30
- Creator’s Tip: Focus heavily on the vertical posts and the roofline rim, leaving the inner ceiling dark for contrast.
- Smart Sourcing: waterproof LED rope lighting spools and clear mounting track clips.
If your backyard feels like a dark void, this incoming setup completely flips the script…
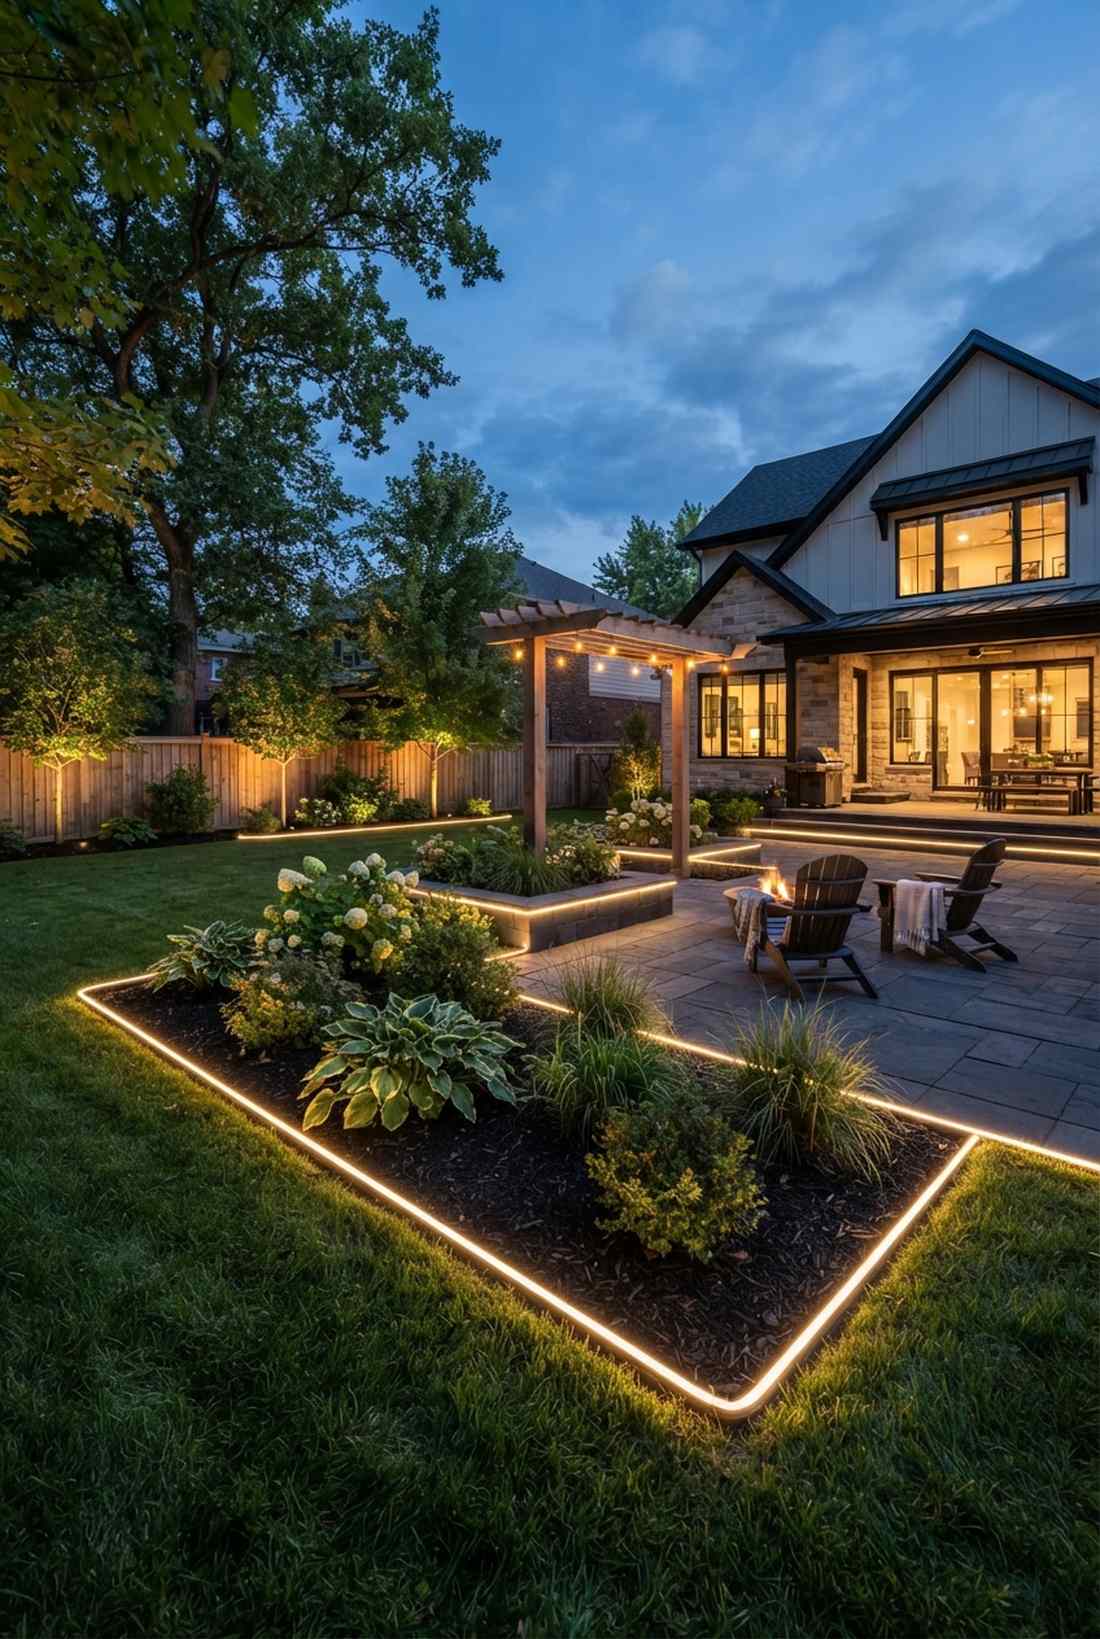
25. Deck Railing Weaving
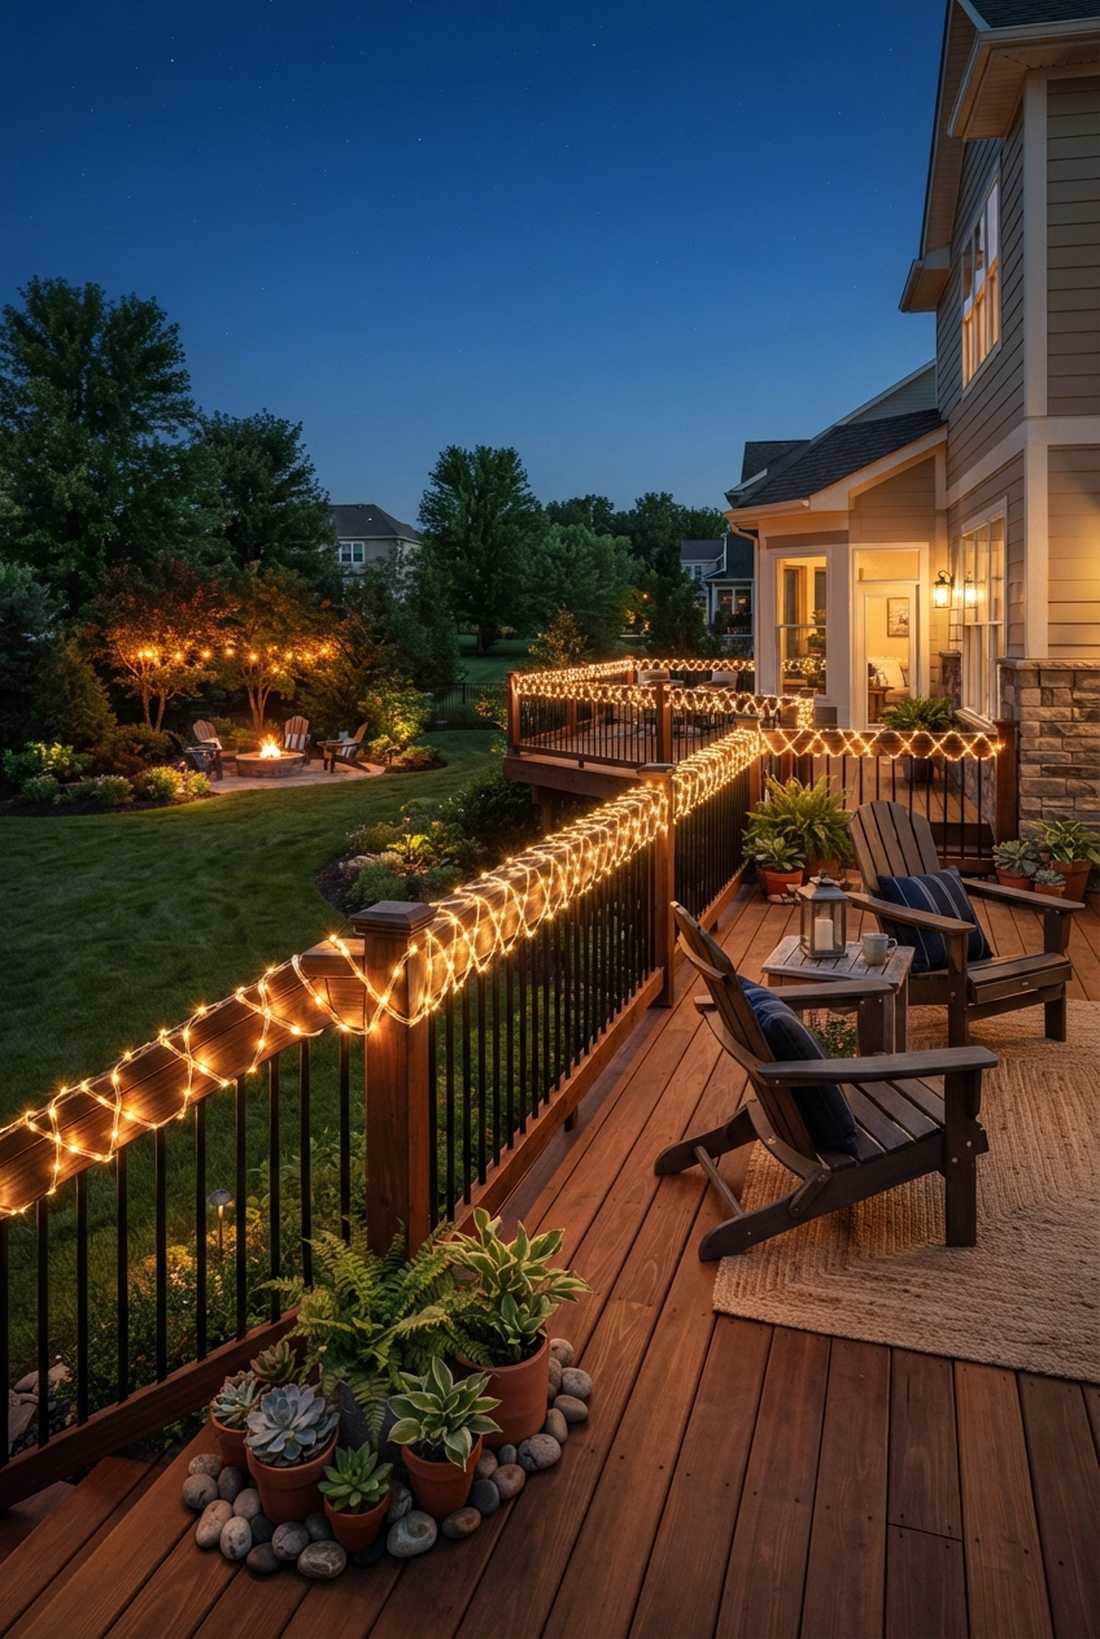

A zig-zagging illuminated deck baluster glow feels like a ship’s radiant railing lighting the night. Perfect for adding functional, ambient lighting to second-story wooden decks.
Weaving the lights tightly under and over the wood gives a designer-level finish. Integrating premium miniature garden supplies around the corner posts masks the transition wires flawlessly.
This functional deck lighting setup costs roughly $40–$75. It’s a fantastic, low-profile safety lighting trick.
- Key Materials: Durable outdoor string lights
- Vibe / Style: Warm, textured ambient safety
- Difficulty: Easy but repetitive
- Budget Breakdown: Light strings: $50 | Cord clips: $15
- Creator’s Tip: Keep the wire tension incredibly tight during the weave so it doesn’t droop and look sloppy.
- Smart Sourcing: commercial-grade deck string lights and nail-in cable management clips.
Creative Statement Pieces That Command Attention
Hero features and unique installations create memorable focal points that define your display. These ambitious projects showcase design creativity and technical skill.
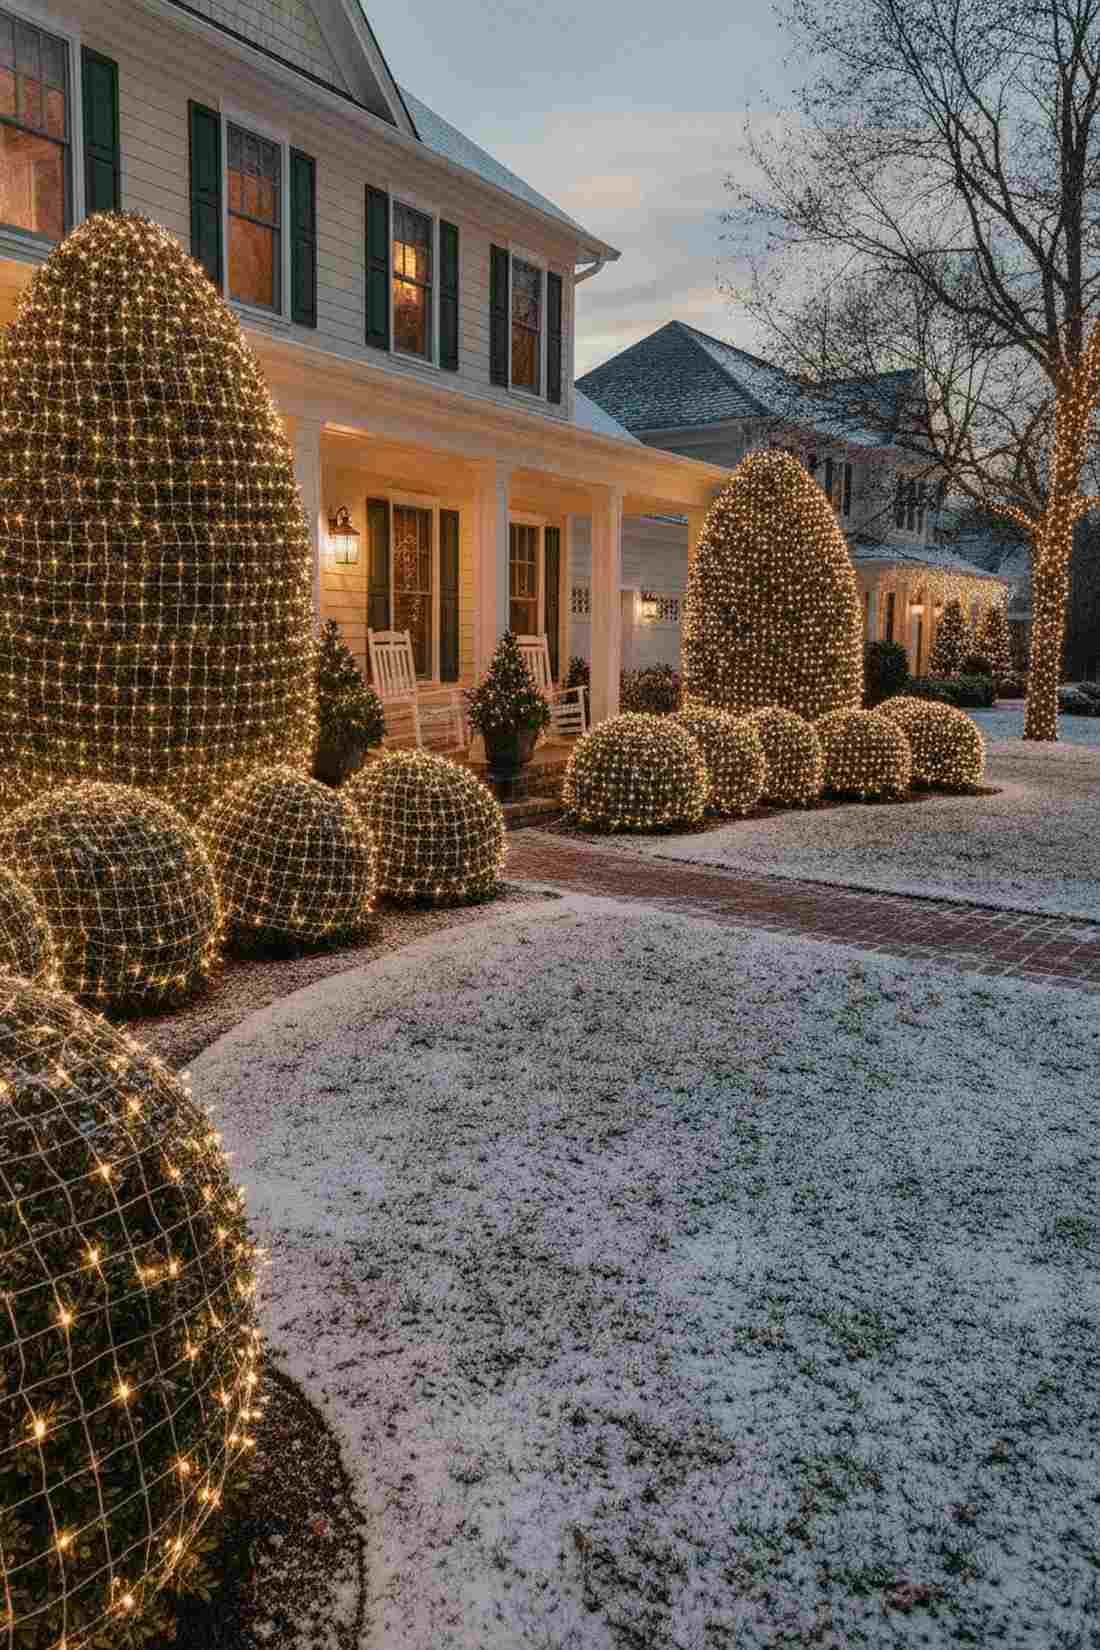
26. Lighted Topiary Sculptures
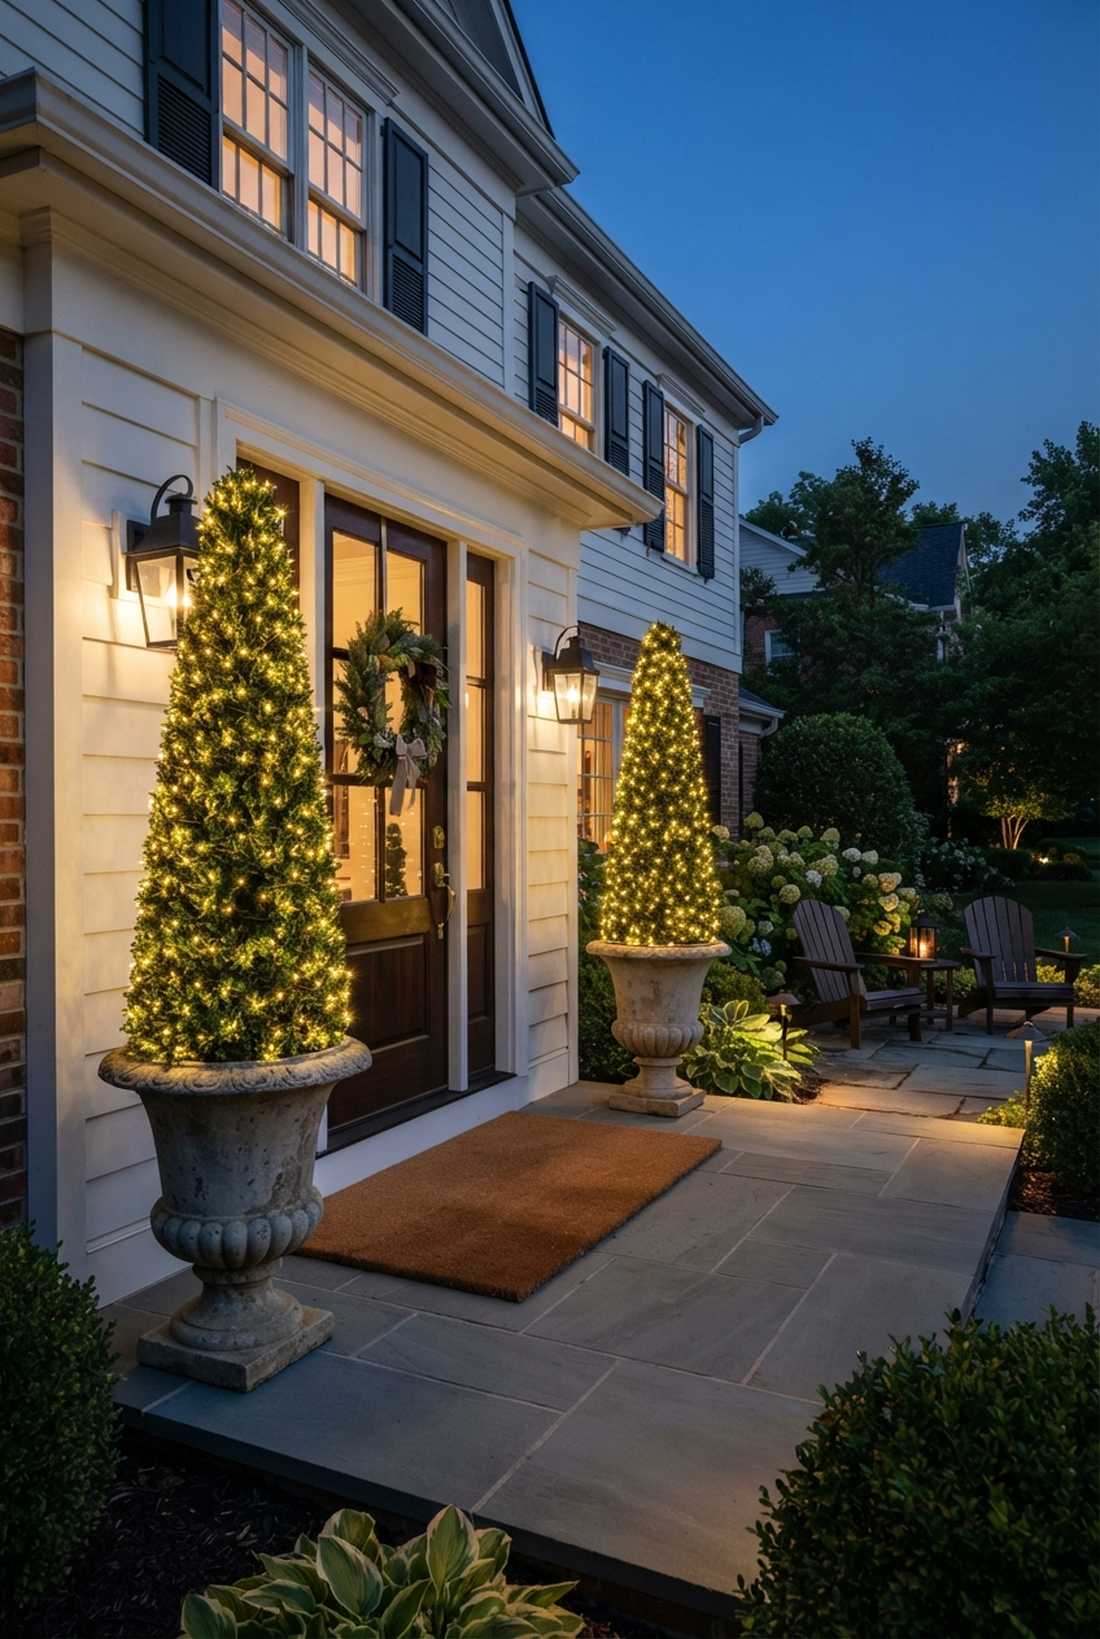
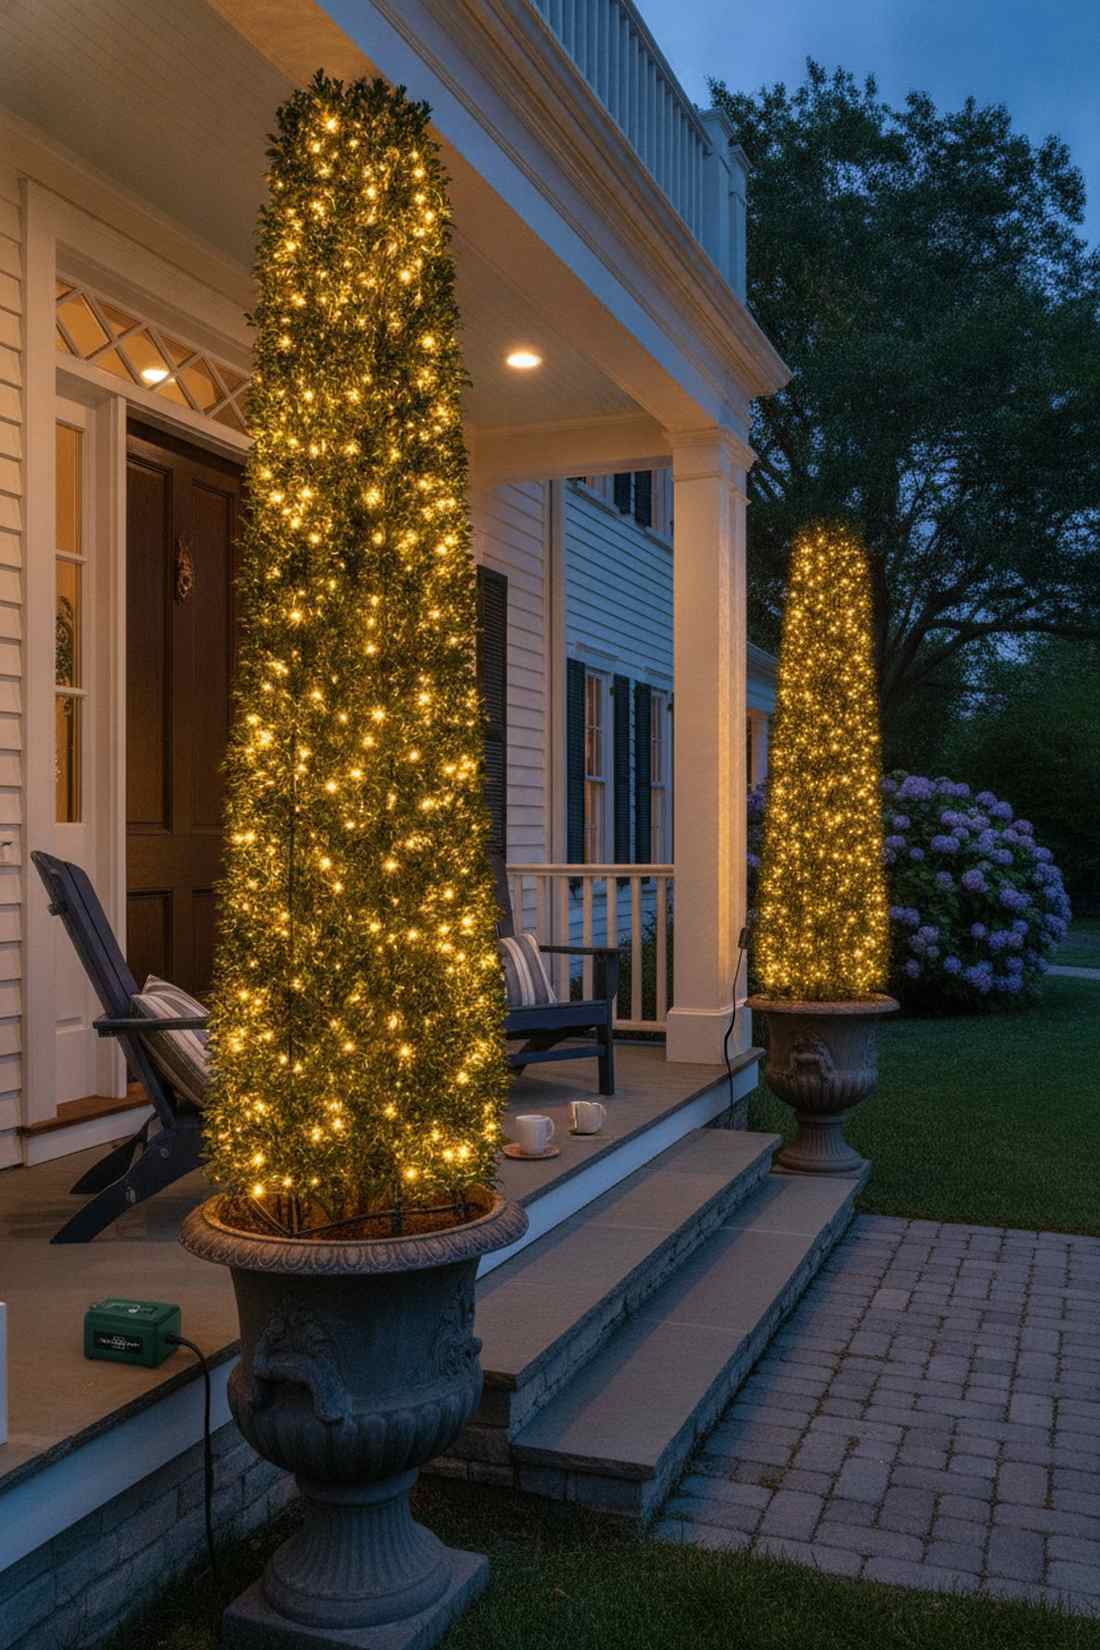
These glowing manicured boxwood light pillars feel like guarding statues at a royal palace entrance. Extremely effective when placed in matching urns framing a front doorway.
Using clustered bulb technology rather than standard strings delivers a surprisingly premium look. Utilizing sturdy outdoor terrarium accessories keeps the heavy light clusters anchored safely into the foliage.
Wrapping two porch topiaries costs around $50–$80. Pin this to your luxury front porch aesthetic board.
- Key Materials: High-density cluster light strands
- Vibe / Style: Formal, manicured luxury
- Difficulty: Easy wrapping
- Budget Breakdown: Cluster strands: $65 | Timers: $10
- Creator’s Tip: Use cluster lights (which have bulbs sticking out of the sides) to get a dense, 3D fluffy glow.
- Smart Sourcing: high-density LED cluster lights and battery-operated outdoor timer boxes.
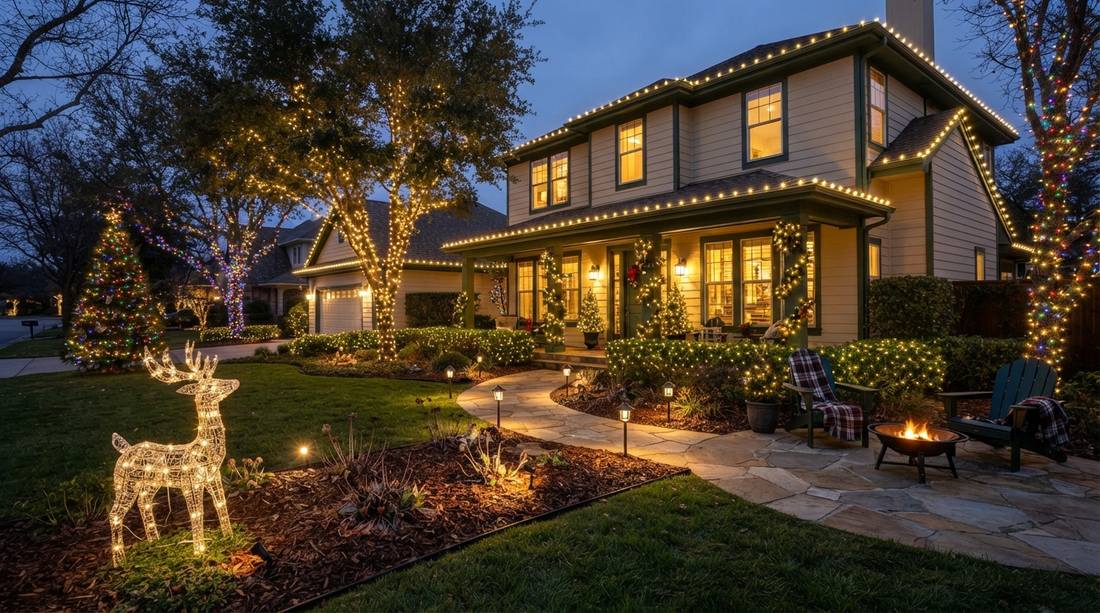
27. Wireframe Light Sculptures
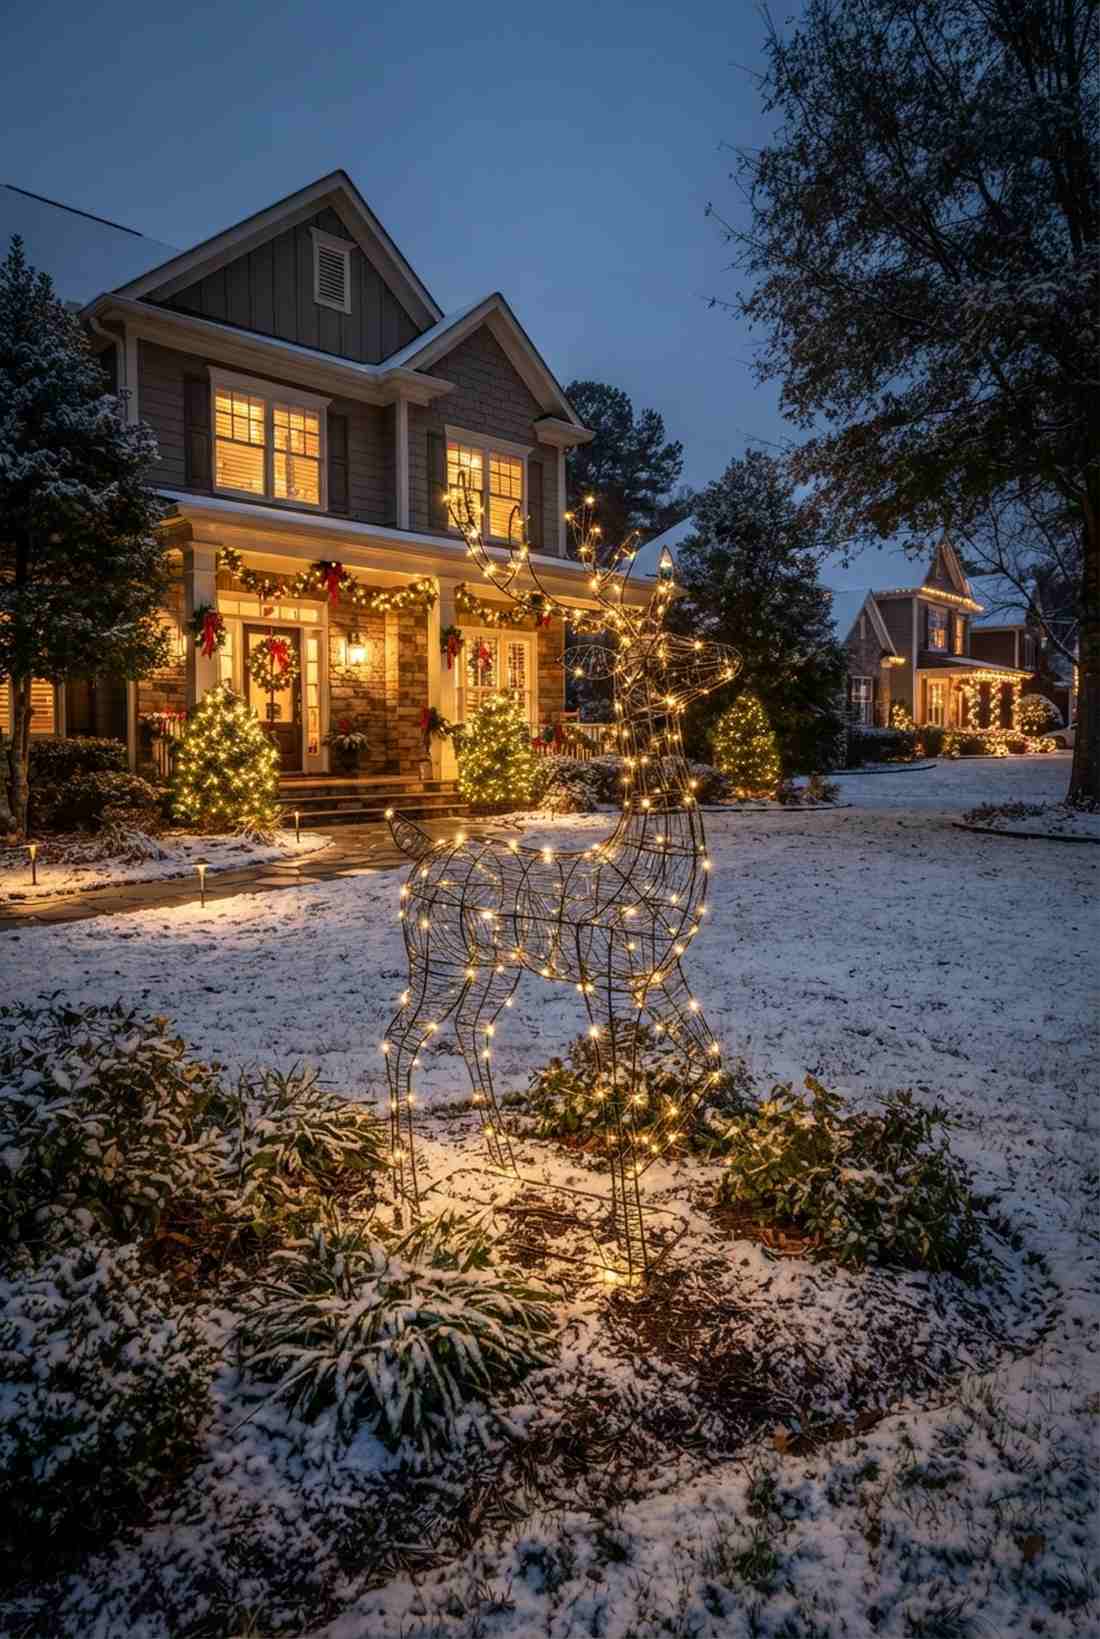
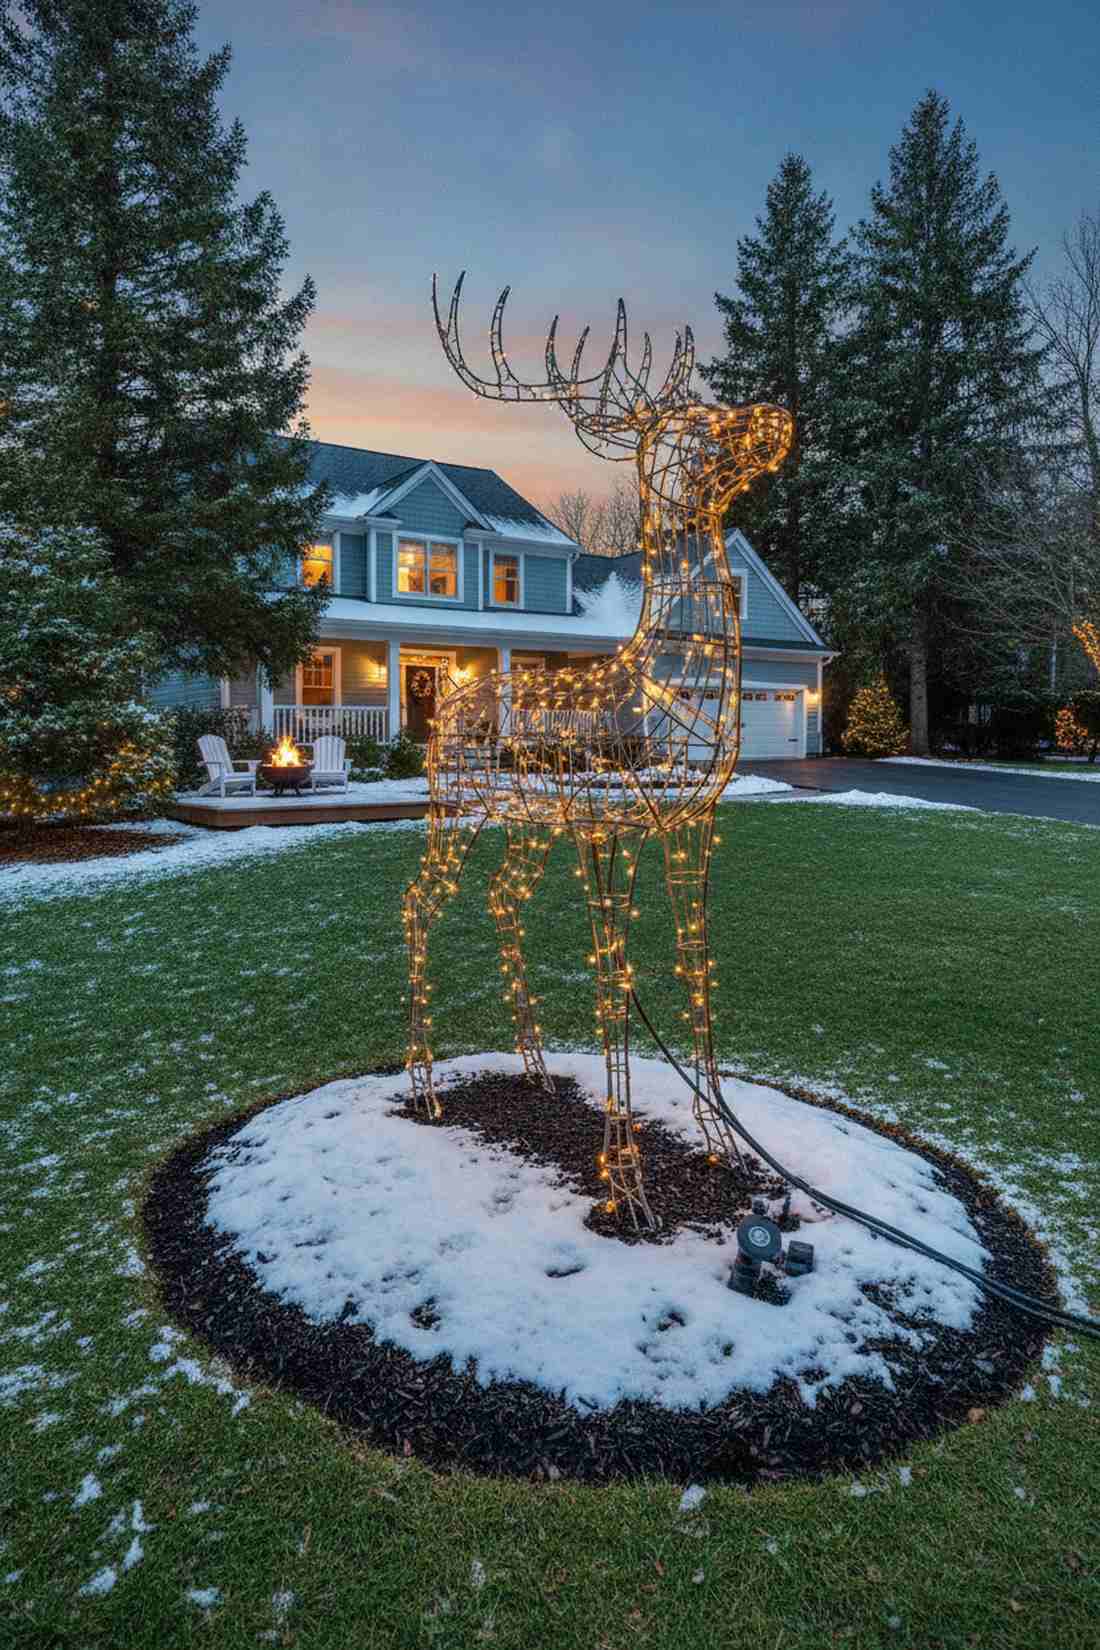
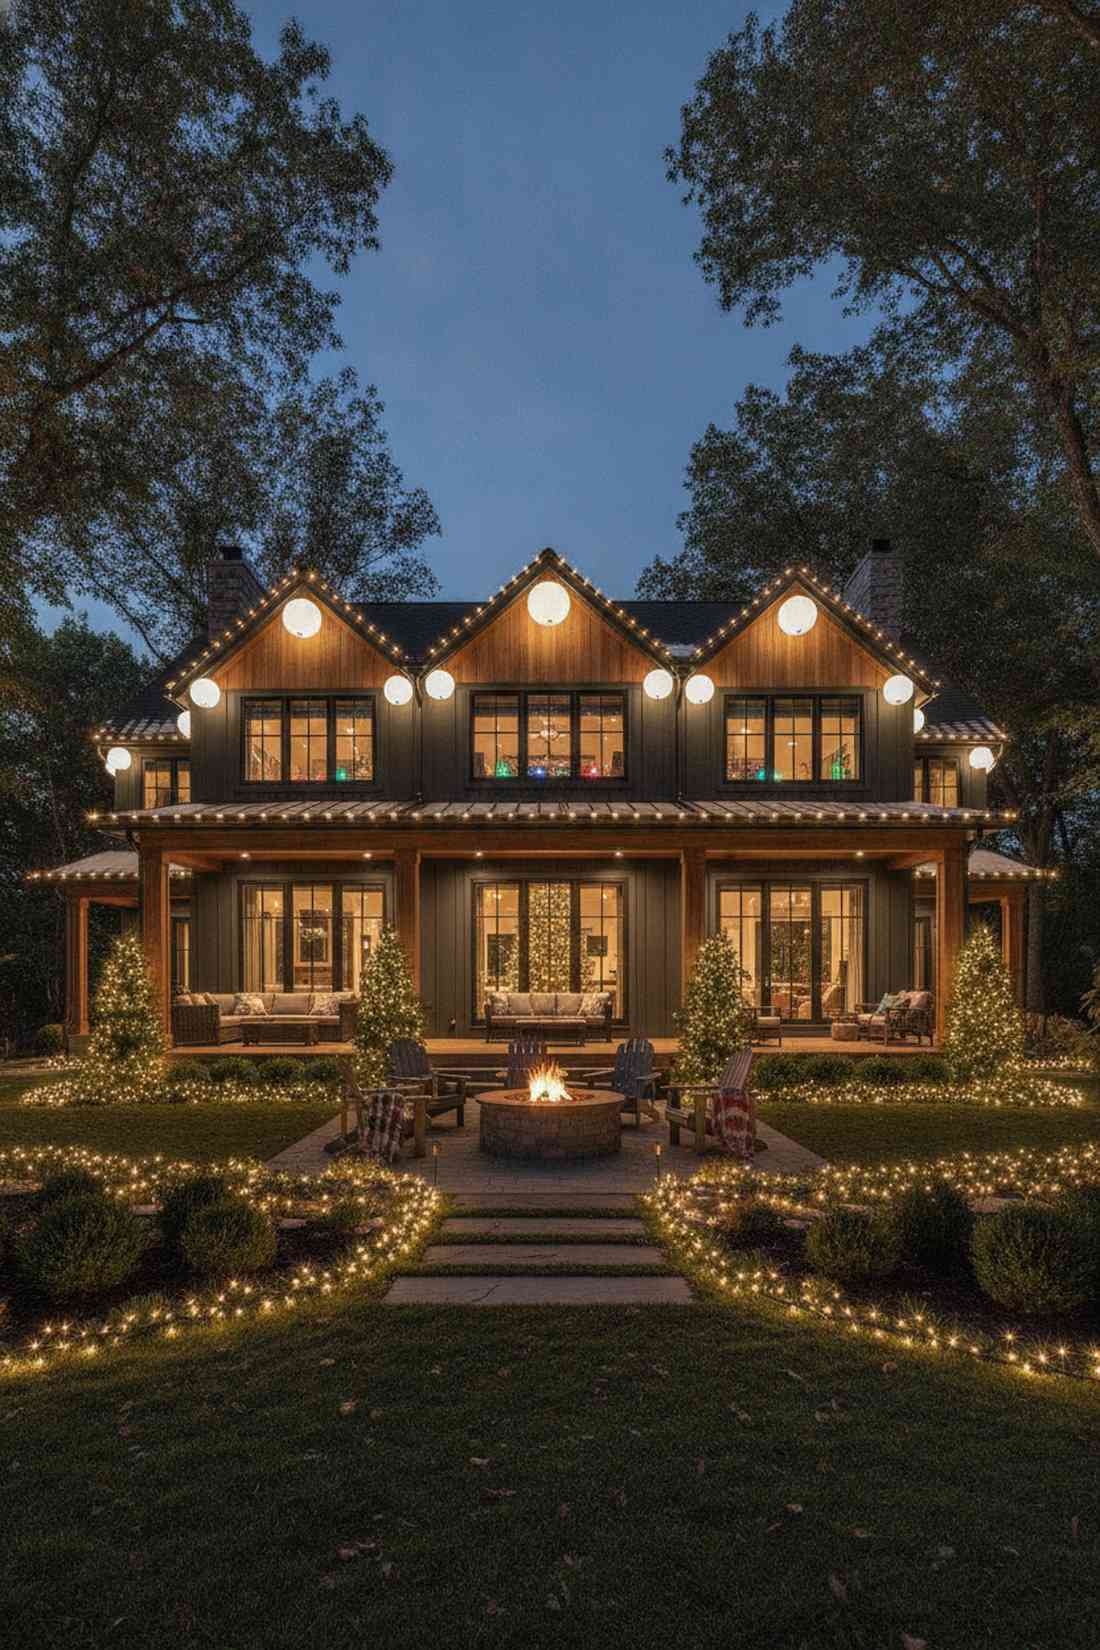
A standalone glowing reindeer lawn sculpture feels like a piece of vintage holiday magic resting on the grass. An incredible centerpiece to anchor large, empty suburban front lawns.
Investing in thick, pre-built frames looks far more expensive than flimsy store-bought inflatables. Securing them with deep earth anchors ensures they won’t topple over during harsh winter gusts.
These heavy-duty metal statements run $80–$150. Highly recommended for establishing a strong neighborhood focal point.
- Key Materials: Pre-lit metal wireframe figures
- Vibe / Style: Nostalgic, bold yard art
- Difficulty: Easy plug and stake
- Budget Breakdown: Sculpture kit: $100 | Stakes: $15
- Creator’s Tip: Put the sculpture on a slightly elevated mound of snow or mulch to make it visible from down the street.
- Smart Sourcing: weather-resistant wireframe holiday kits and heavy-duty steel ground augers.
28. Light Ball Sphere Clusters
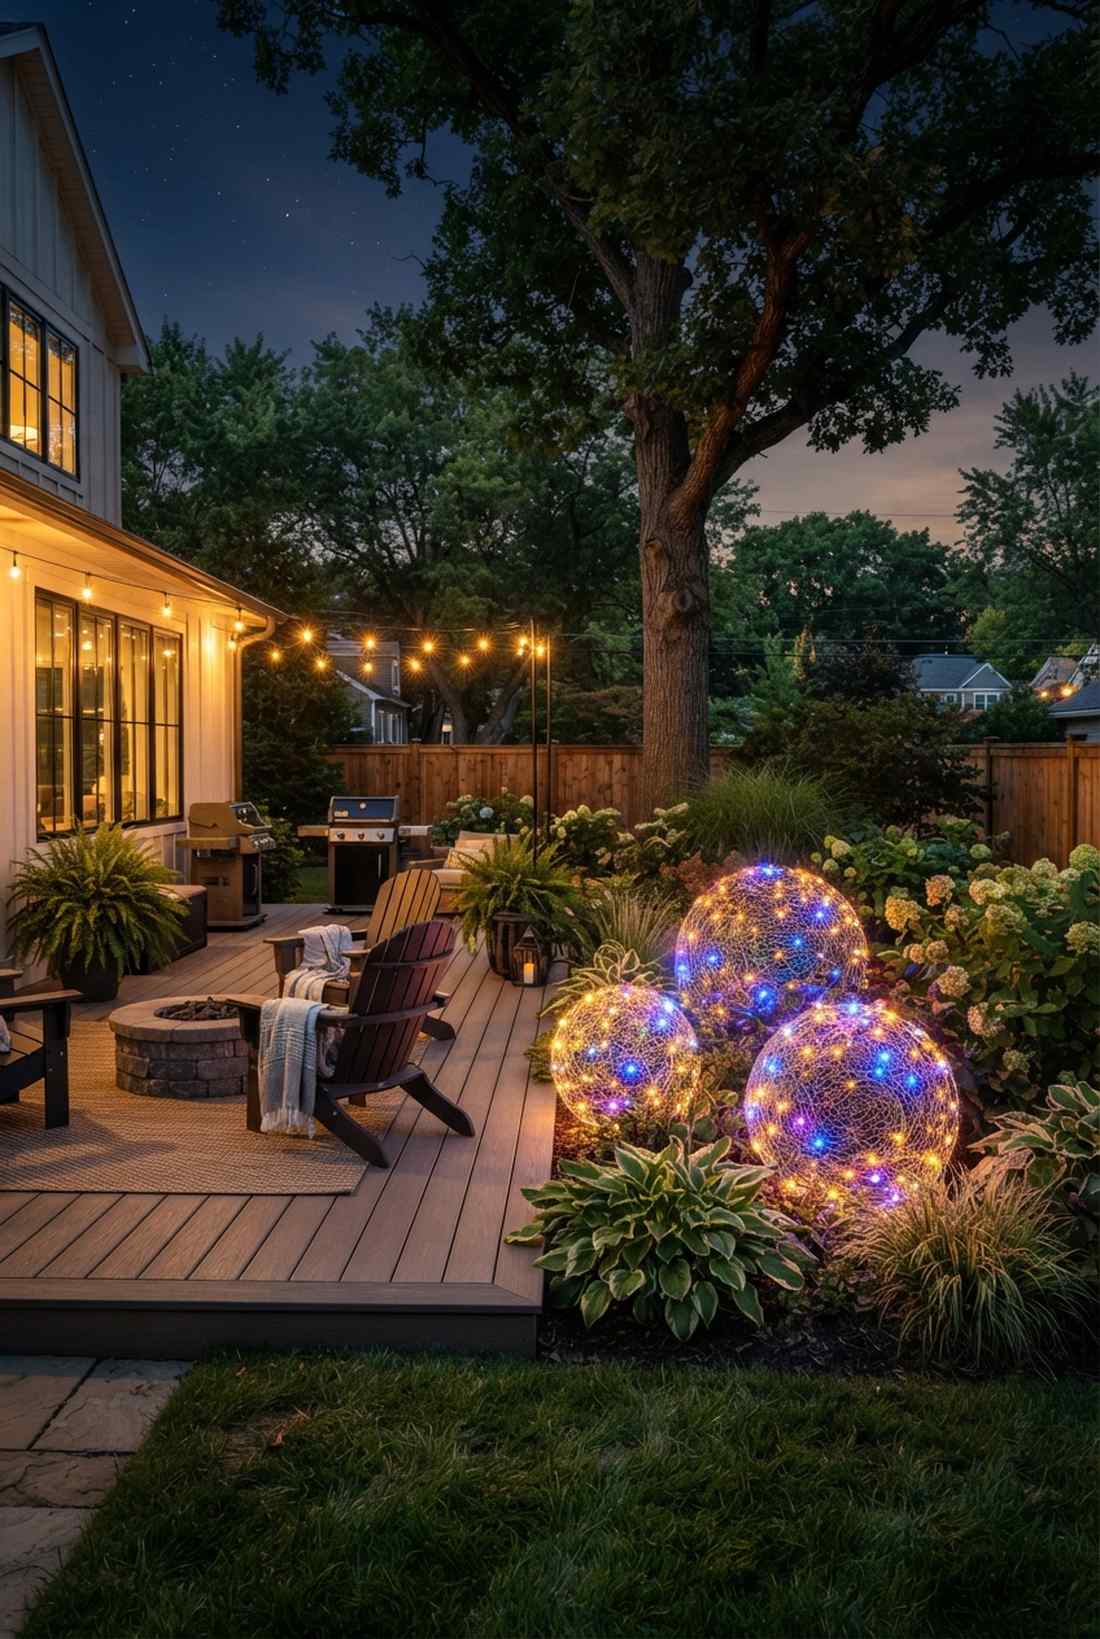
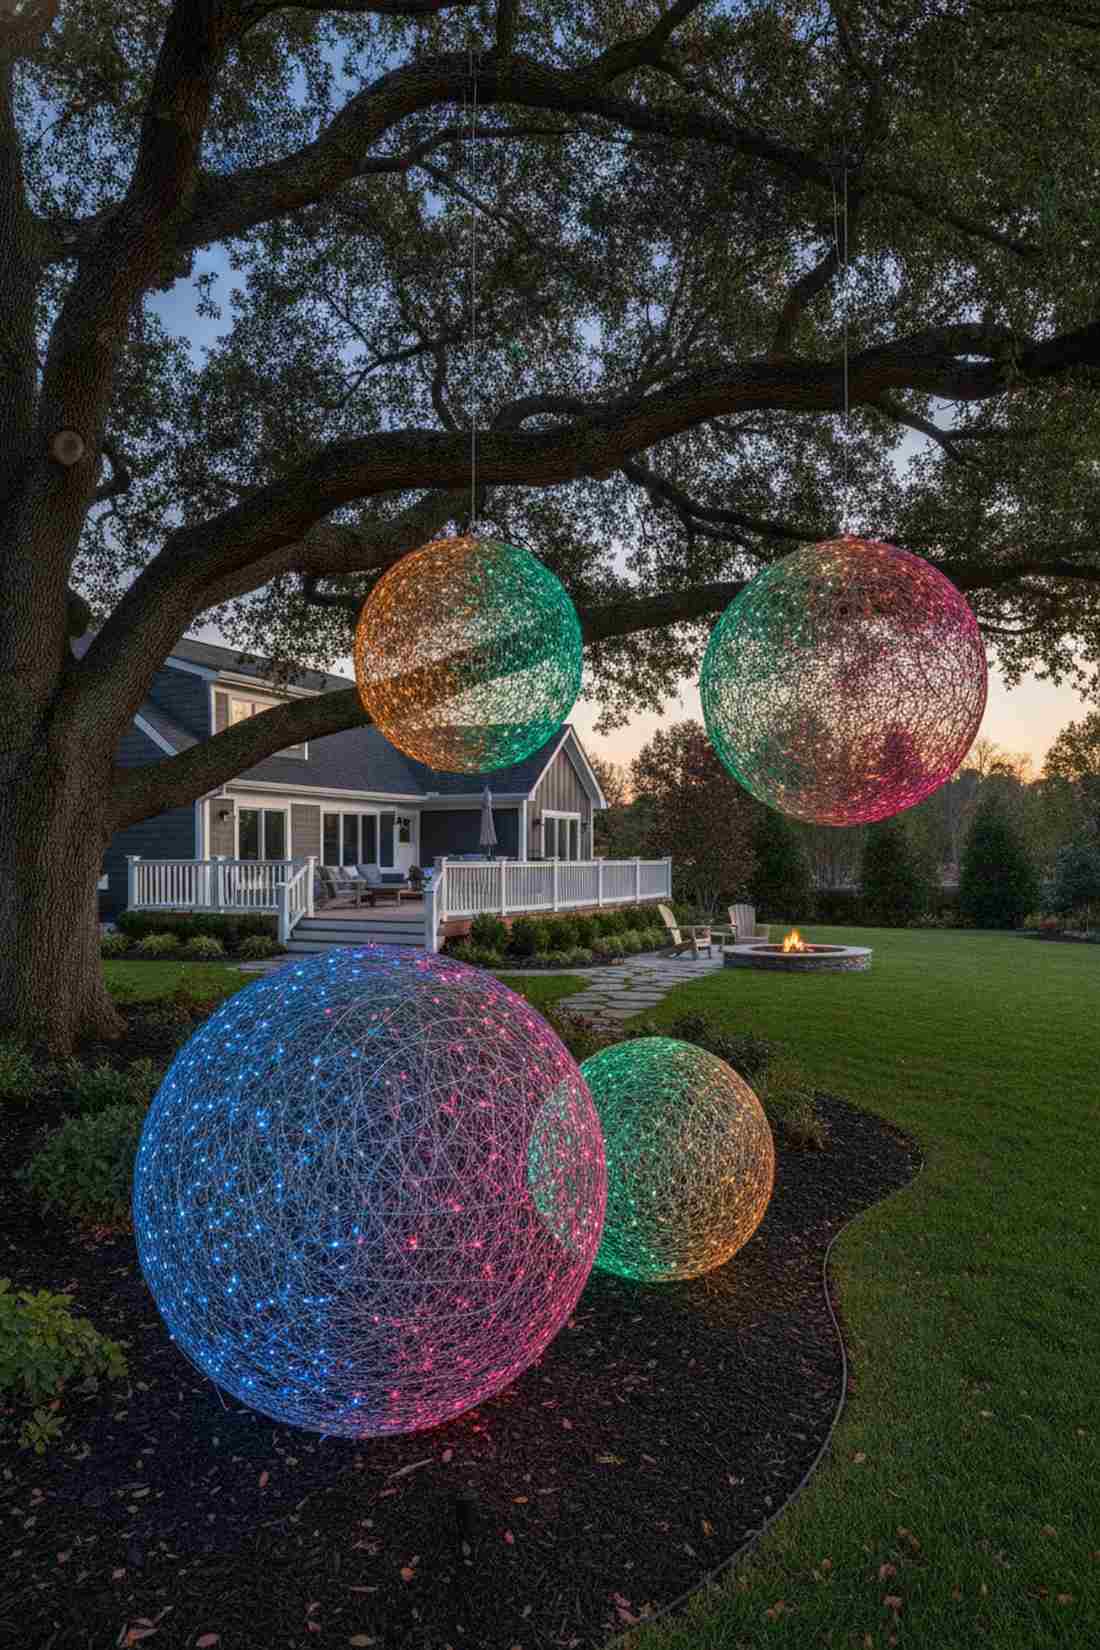
An oversized glowing courtyard sphere trio feels like massive radiant ornaments dropped from the sky. Breathtaking when placed directly in garden beds or hanging from massive oak trees.
Building spherical cages from raw fencing wire gives a designer-level finish for pennies. Incorporating outdoor smart lighting kits allows you to change the orb colors via your phone.
Creating a trio of these massive orbs costs about $40–$70. Save this if you want an ultra-modern holiday aesthetic.
- Key Materials: Chicken wire spheres and multi-color LEDs
- Vibe / Style: Contemporary abstract art
- Difficulty: Intermediate frame building
- Budget Breakdown: Wire mesh: $20 | LED spools: $35
- Creator’s Tip: Wrap the spheres erratically, not in neat lines, to get a solid, glowing ball of light effect.
- Smart Sourcing: pre-cut chicken wire rolls and color-changing RGB outdoor string lights.
29. Vertical Light Columns
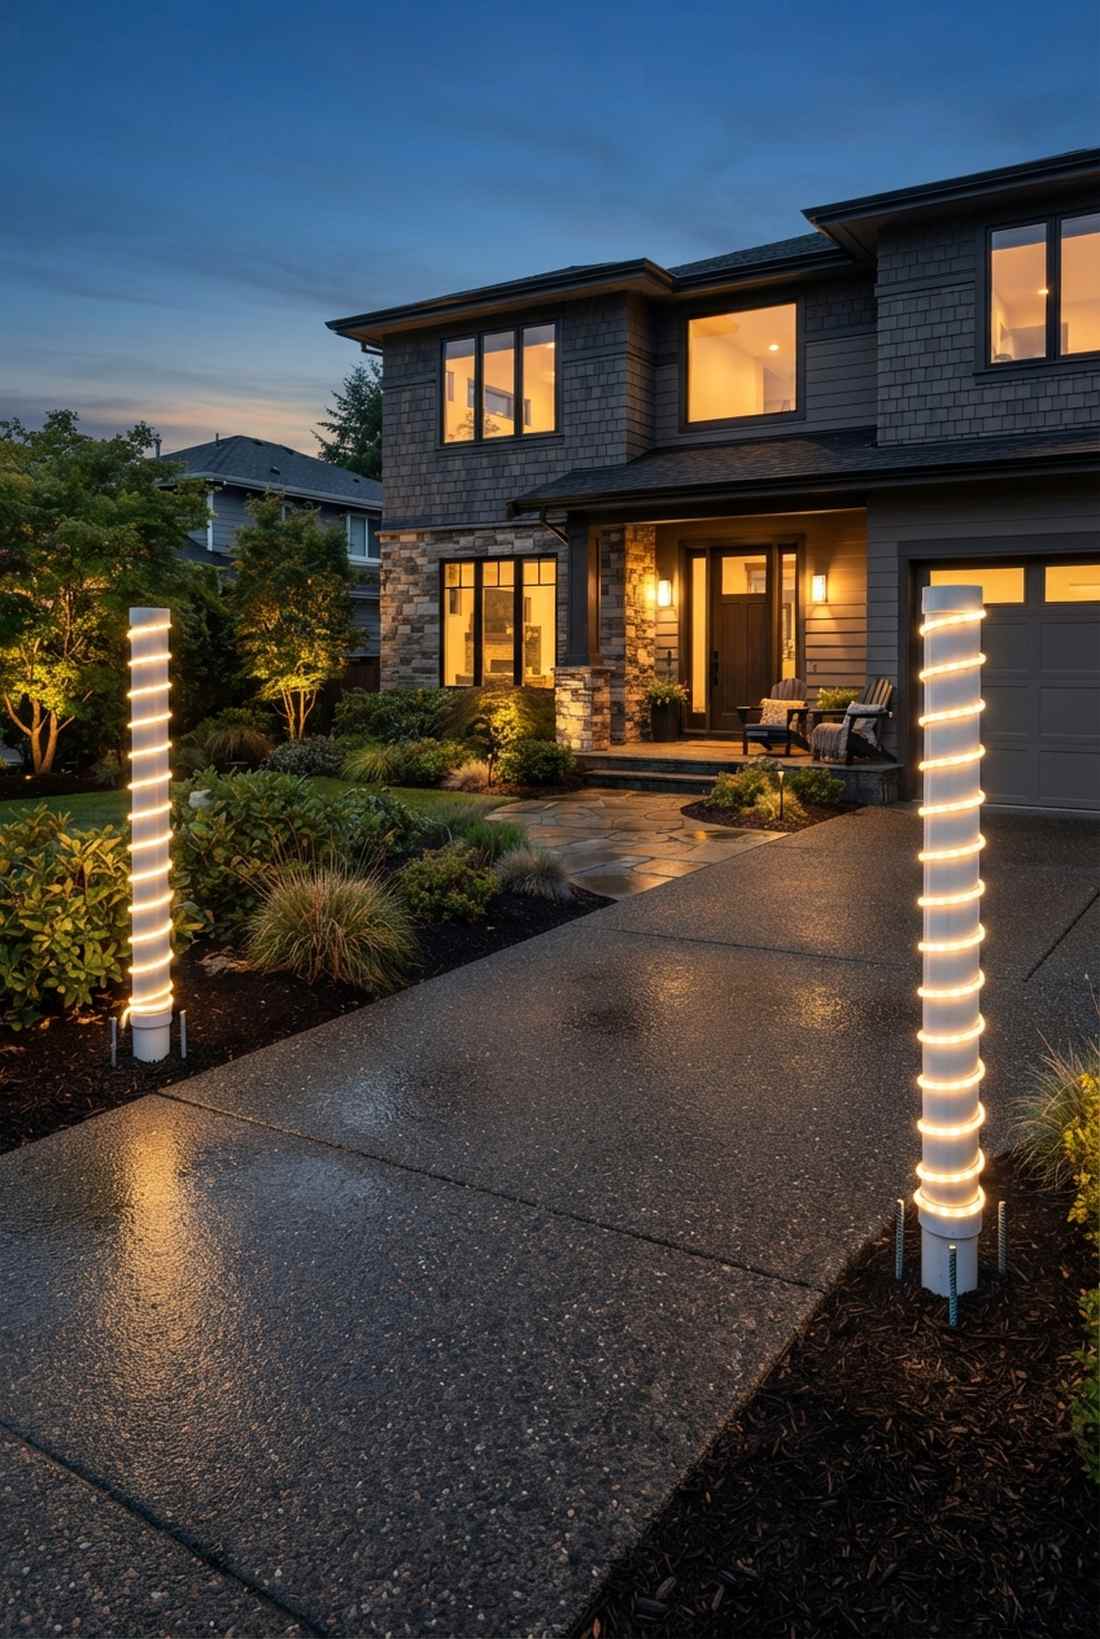
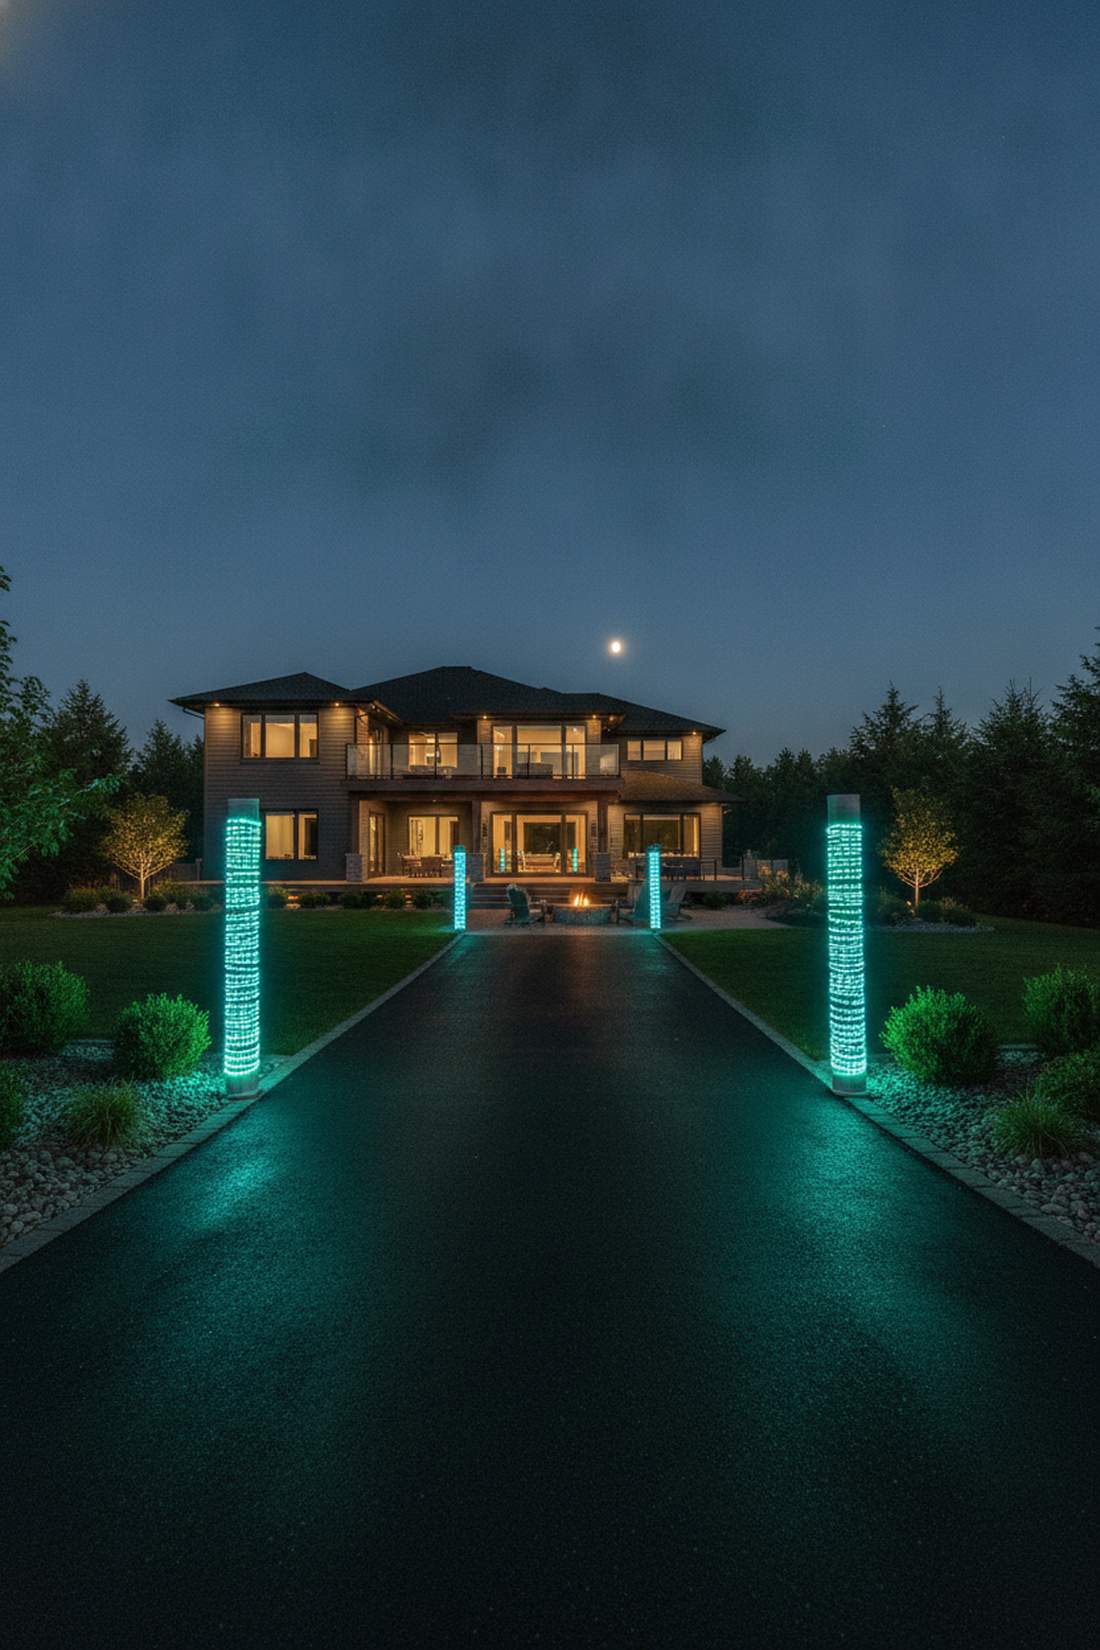
These towering neon garden driveway beacons feel like glowing modern monoliths leading the way. A genius architectural trick to define the edges of an obscure, dark driveway.
Wrapping PVC pipes in tight lighting coils delivers a surprisingly premium look from standard hardware store materials. Using robust landscape supplies to sink the rebar base ensures they stand dead straight.
Building two of these glowing pillars runs roughly $50–$90. It’s a fast upgrade that completely changes the driveway profile.
- Key Materials: Thick PVC pipes, rebar stakes, and rope lights
- Vibe / Style: High-end contemporary resort
- Difficulty: Intermediate assembly
- Budget Breakdown: Plumbing pipe: $20 | Rope lights: $50
- Creator’s Tip: Pound a piece of rebar 2 feet into the ground, then simply slide the lit PVC pipe over it.
- Smart Sourcing: bright LED neon rope spools and thick galvanized steel rebar pegs.
This next visual trick manipulates the eye to make small front lawns look twice as big…
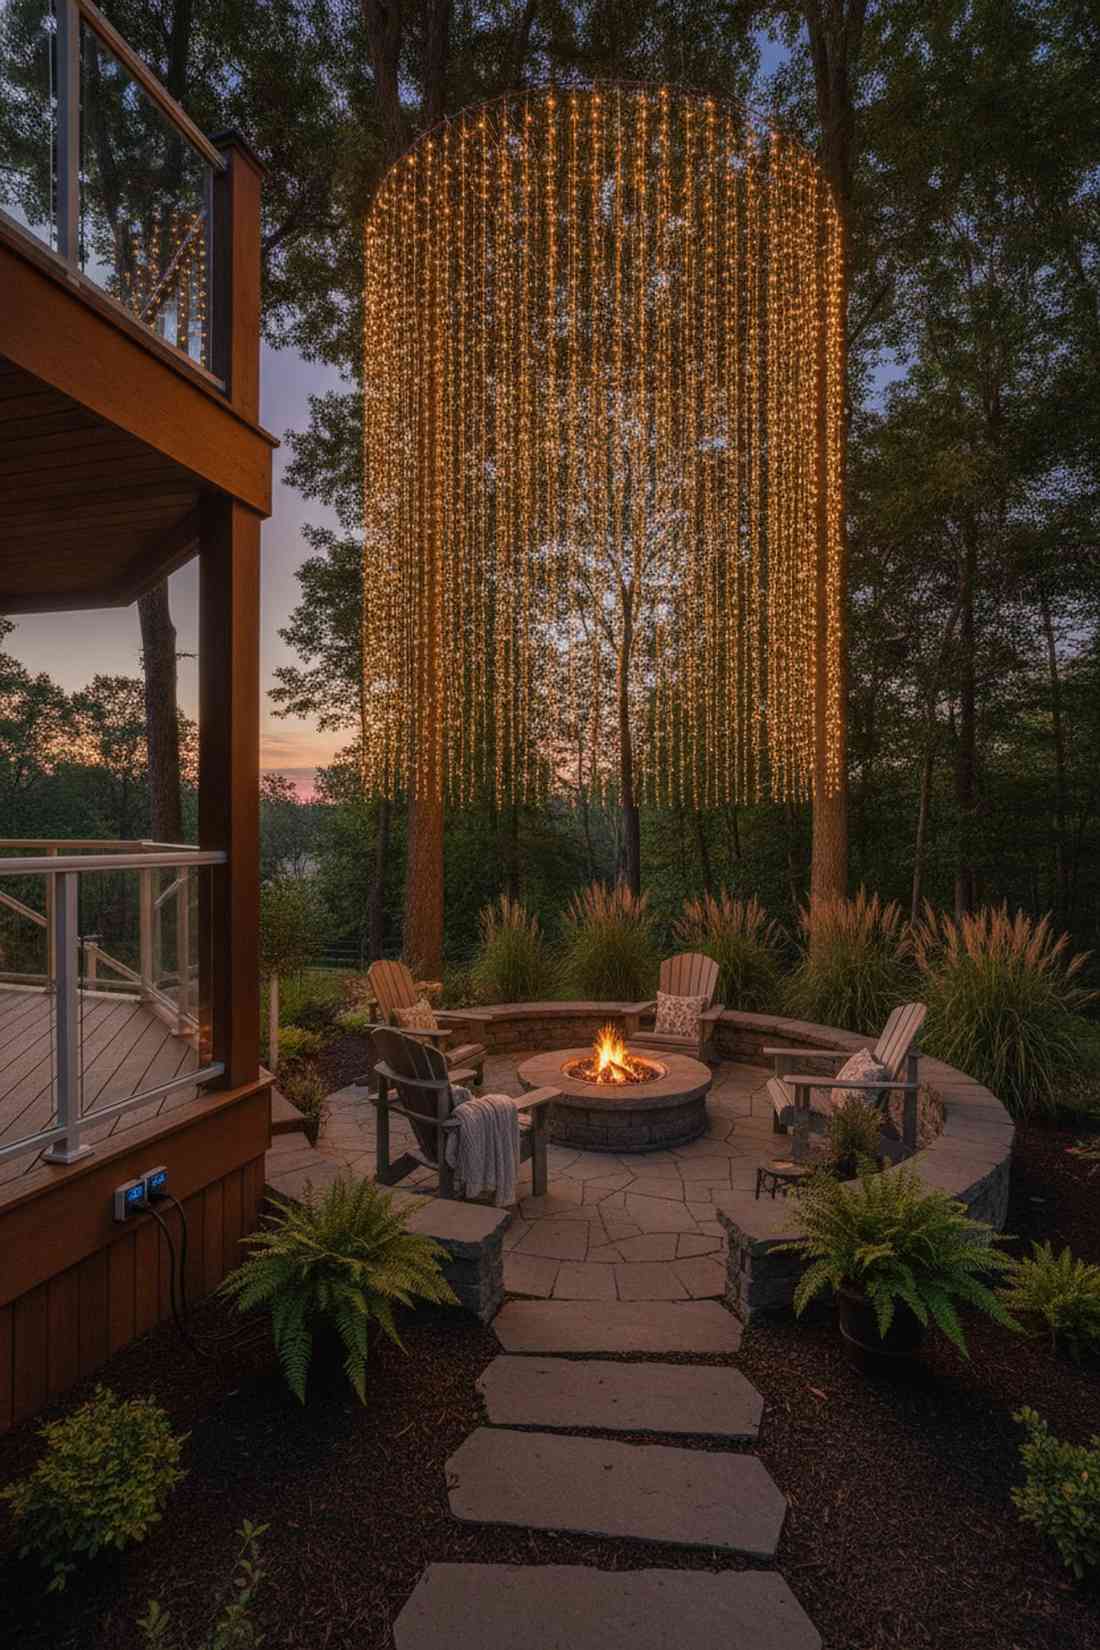
30. Cascading Willow Tree Effect
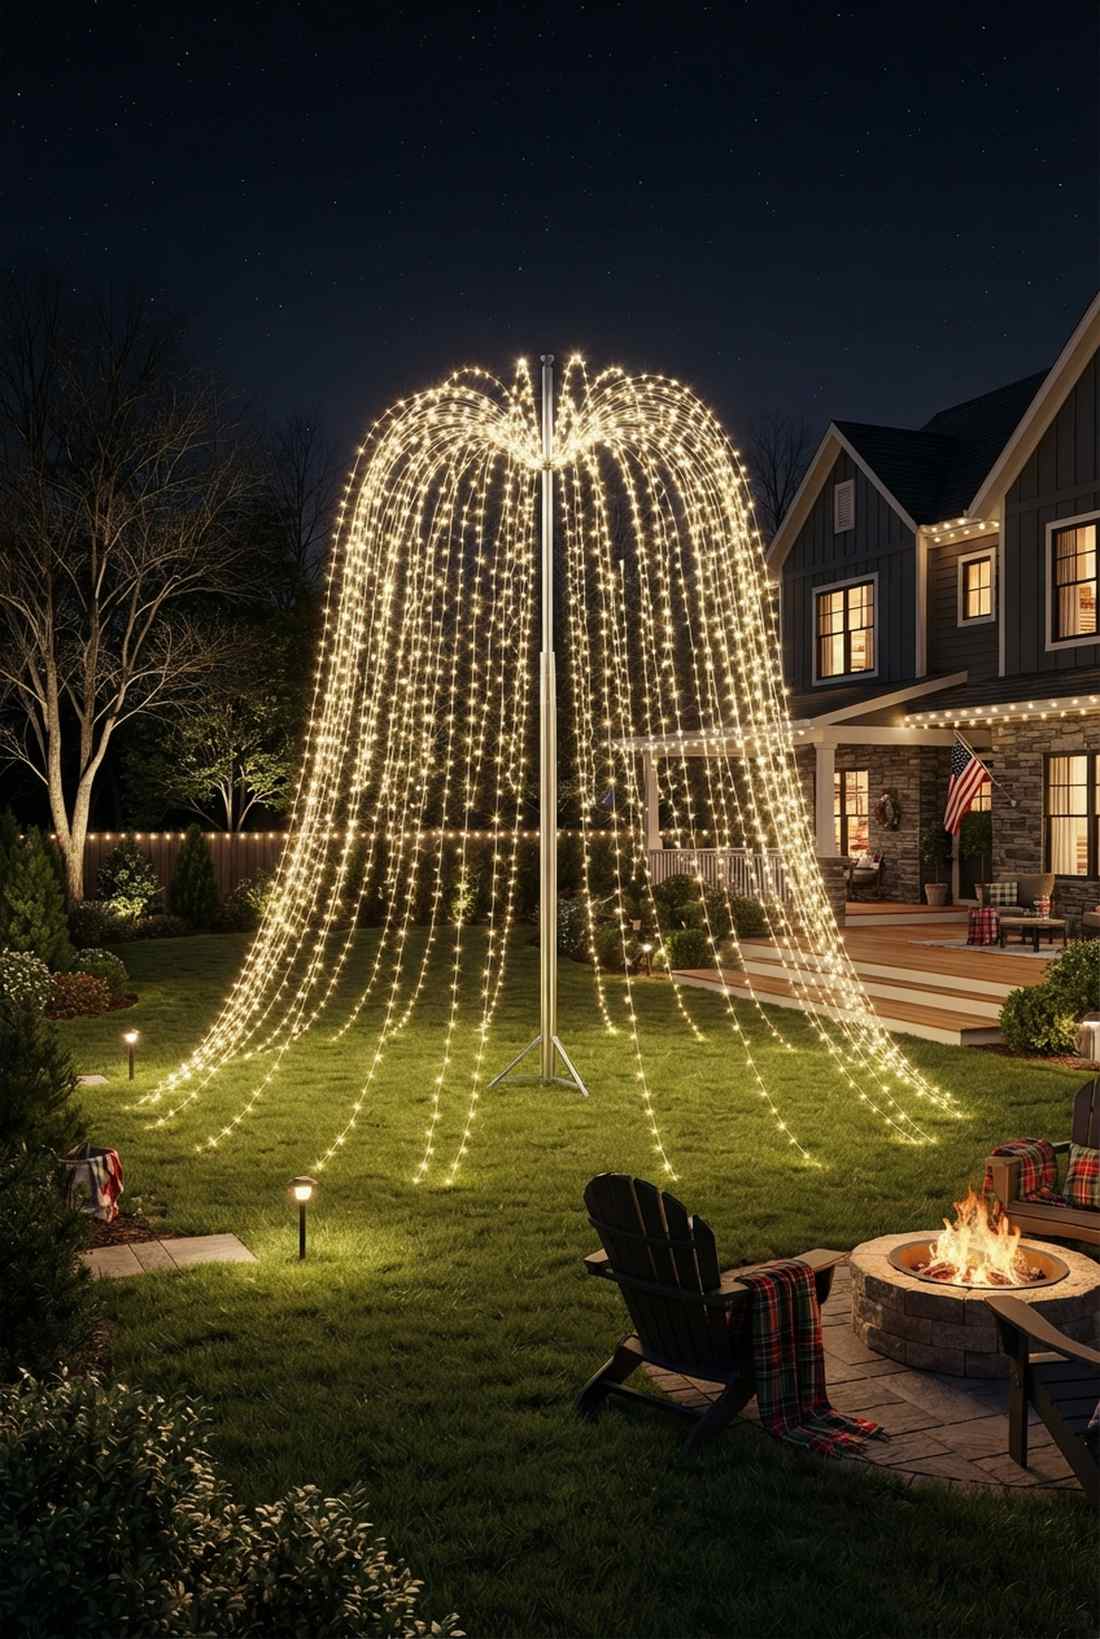
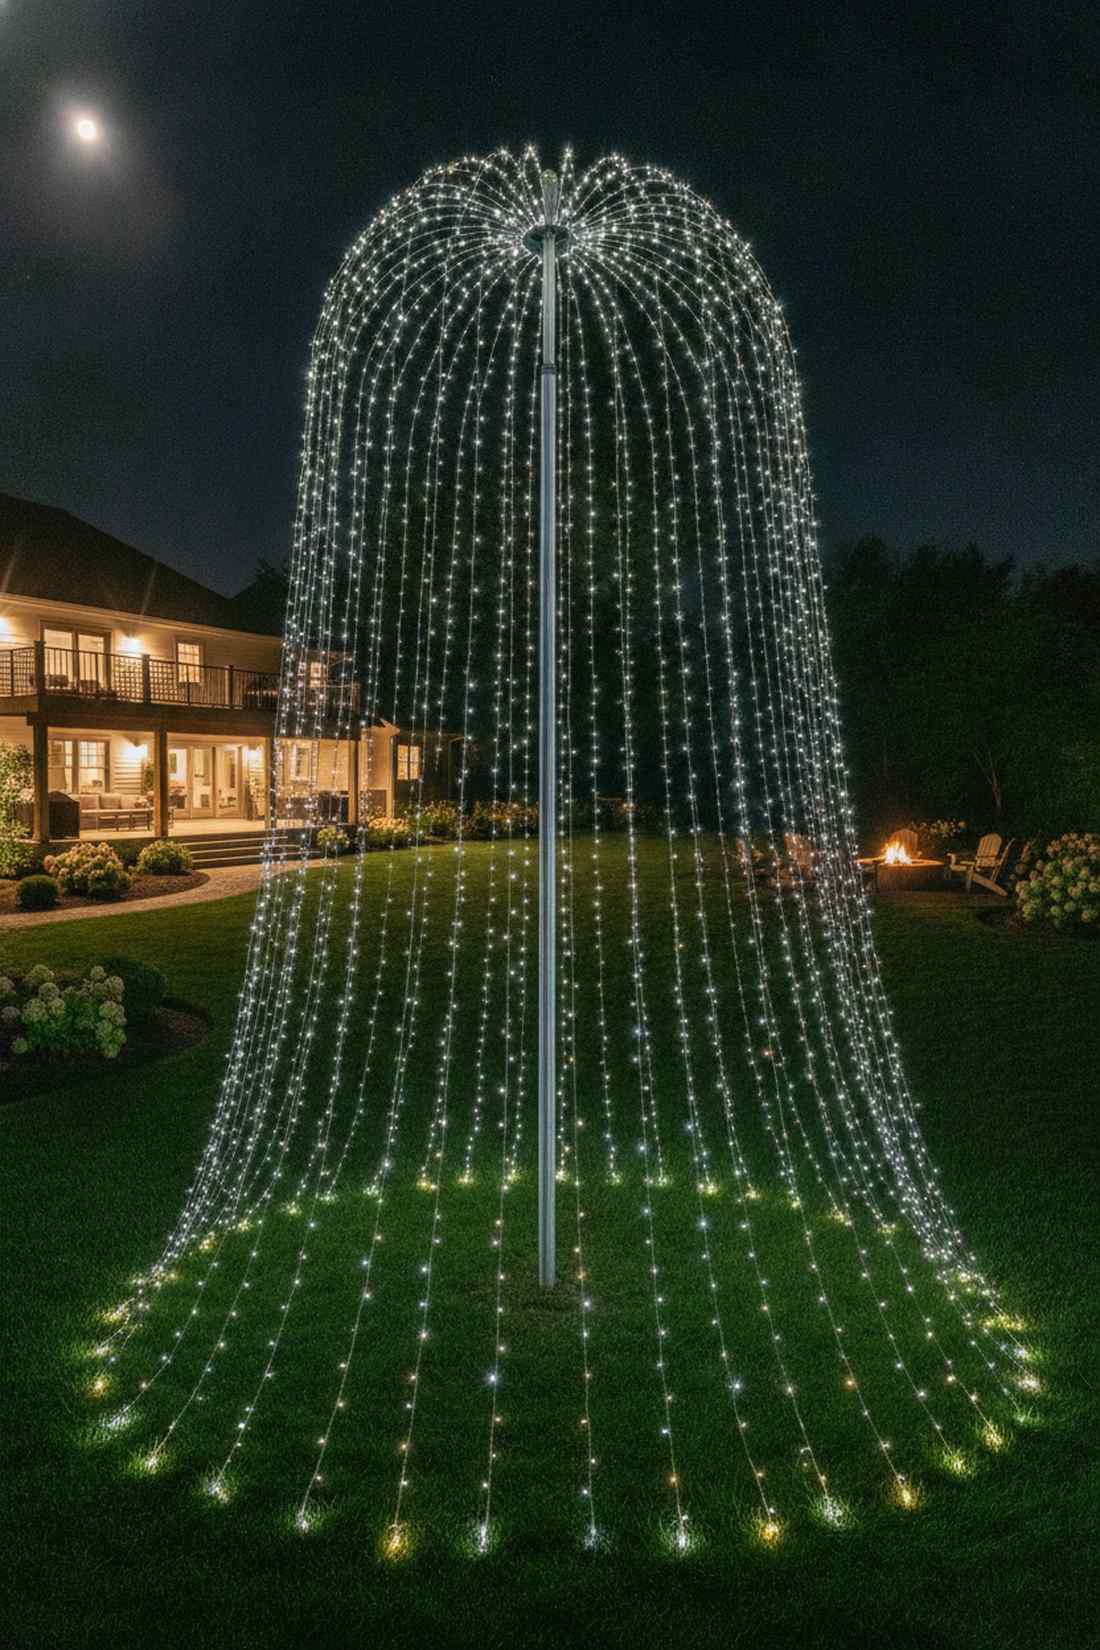
A sweeping weeping willow light canopy feels like a magnificent waterfall of frozen light. The ultimate yard transformation if you don’t actually have any large trees to wrap.
Creating an artificial canopy from a central flagpole looks far more expensive than it is. Securing the sweeping lines with sturdy fairy garden supplies creates a massive 3D volume of light.
You can engineer this massive display for $90–$140. Pin this to your extreme DIY holiday decor board.
- Key Materials: Telescoping pole and multiple long LED strands
- Vibe / Style: Immersive grand spectacle
- Difficulty: High, requires center pole anchoring
- Budget Breakdown: Center pole: $50 | Long strands: $75
- Creator’s Tip: Use a specialized ring at the top of the pole to easily clip on a dozen different light strands.
- Smart Sourcing: telescoping aluminum outdoor flagpoles and multi-strand light hanging rings.
31. Lighted Garden Signage
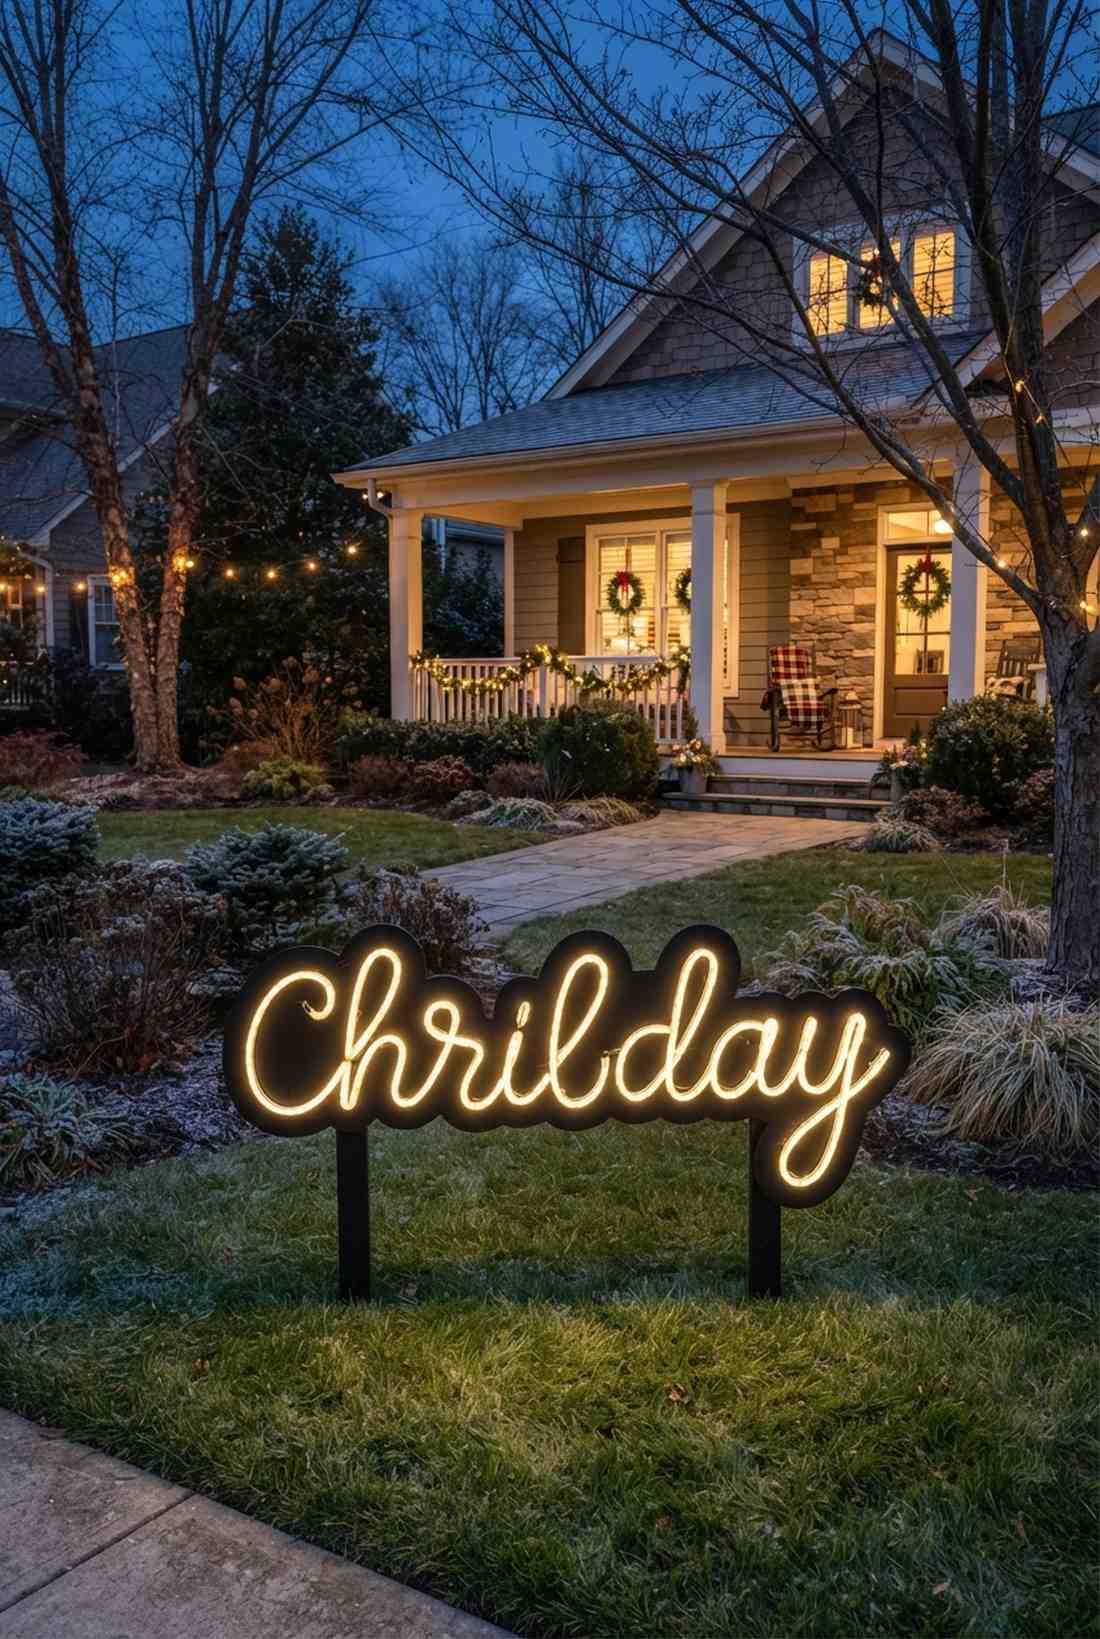
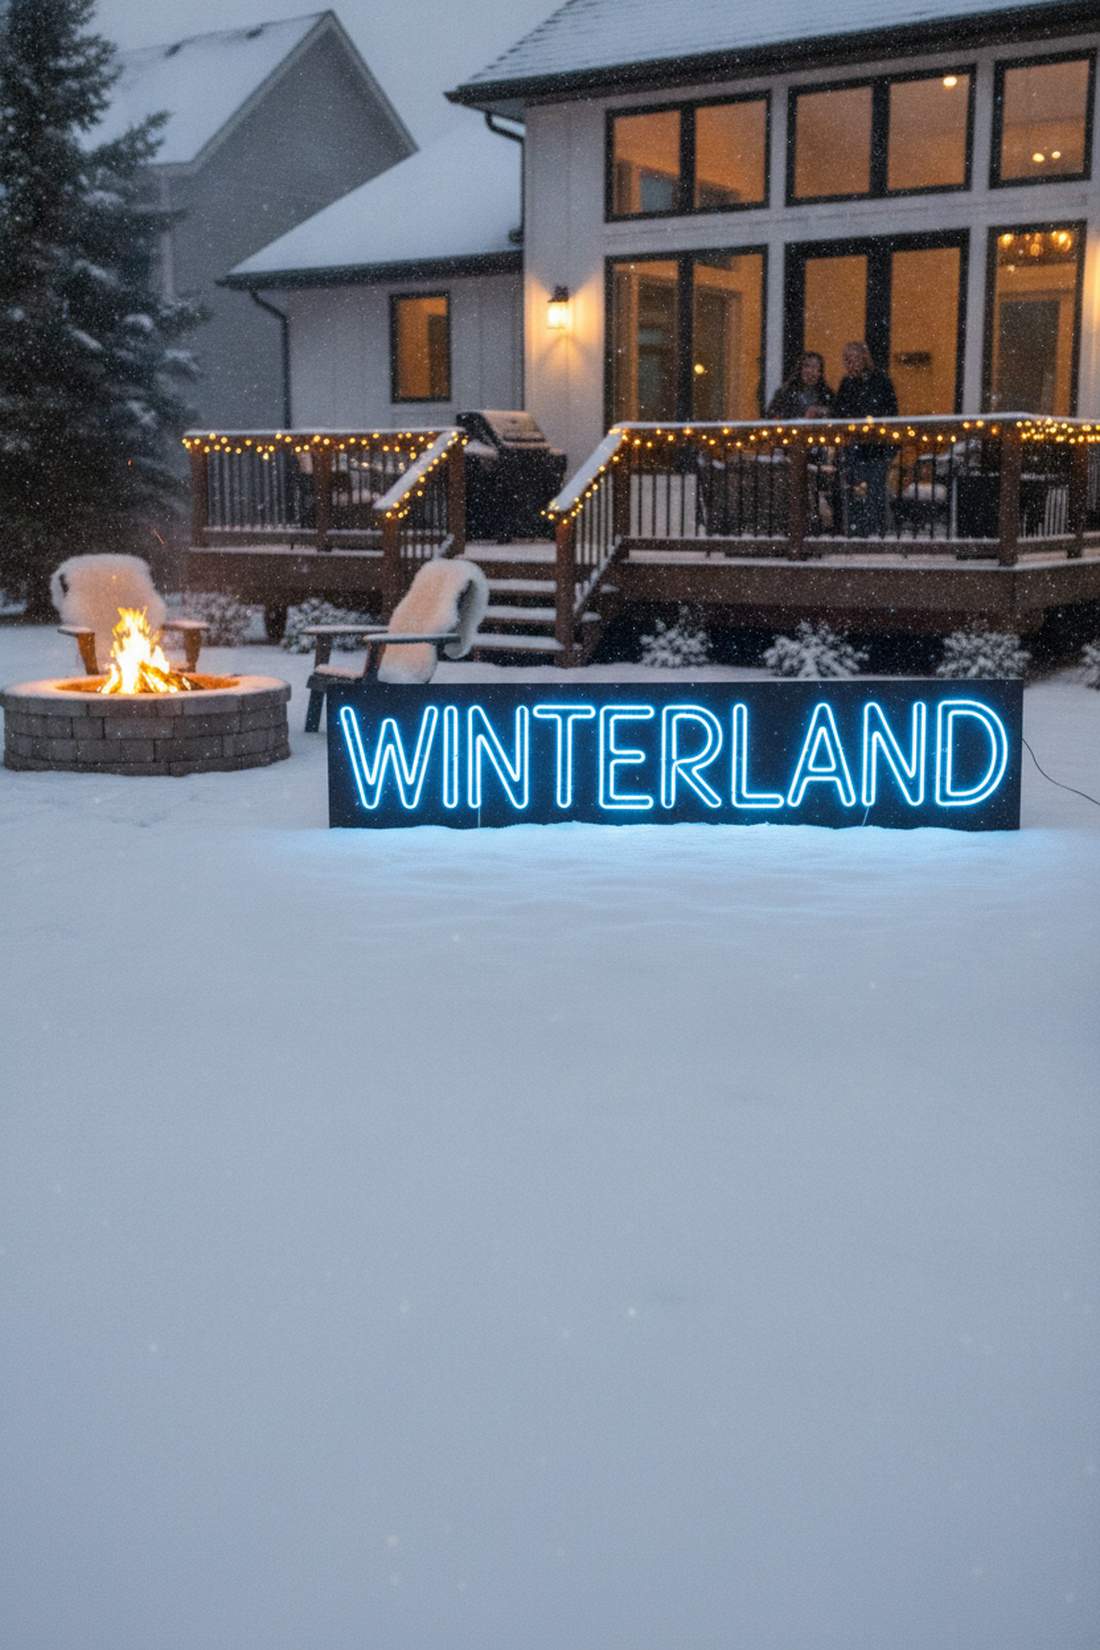
A custom illuminated cursive yard greeting feels like a glowing neon sign at a vintage winter festival. A brilliant way to spell out family names or cheerful messages on a blank lawn.
Bending flexible neon rope onto painted plywood gives a designer-level finish compared to cheap plastic signs. Applying premium outdoor wood sealants ensures the backing board won’t rot under the snow.
This personalized glowing sign project costs about $40–$65. Save this for a fun family weekend craft project.
- Key Materials: LED rope lights, plywood, and cable clips
- Vibe / Style: Fun, personalized vintage pop
- Difficulty: Intermediate woodworking and bending
- Budget Breakdown: Rope light: $35 | Wood/Clips: $20
- Creator’s Tip: Paint the plywood backing entirely black so it completely vanishes at night, leaving only the floating letters.
- Smart Sourcing: flexible LED neon sign tubing and screw-in wire cable clamps.
Material Guide: Cheap vs. Premium Aesthetic
Knowing exactly where to save and where to spend makes all the difference in achieving that “looks expensive but isn’t” vibe.
- Standard vs. UV-Resistant/Premium: Standard wire insulation cracks and yellows in freezing temps; investing in UV-coated commercial lines stops fading and prevents dangerous mid-winter electrical shorts.
- Pre-made Kits vs. Sourcing Locally: Running to the local store for every extension cord gets expensive fast. Buying heavy-duty outdoor power starter kits online saves time and provides proper weatherproof seals out of the box.
Shrub & Hedge Displays For Landscape Integration
Foundation plantings and hedges benefit from strategic lighting that enhances their natural forms. These approaches integrate lighting seamlessly with existing plantings.
32. Foundation Shrub Netting
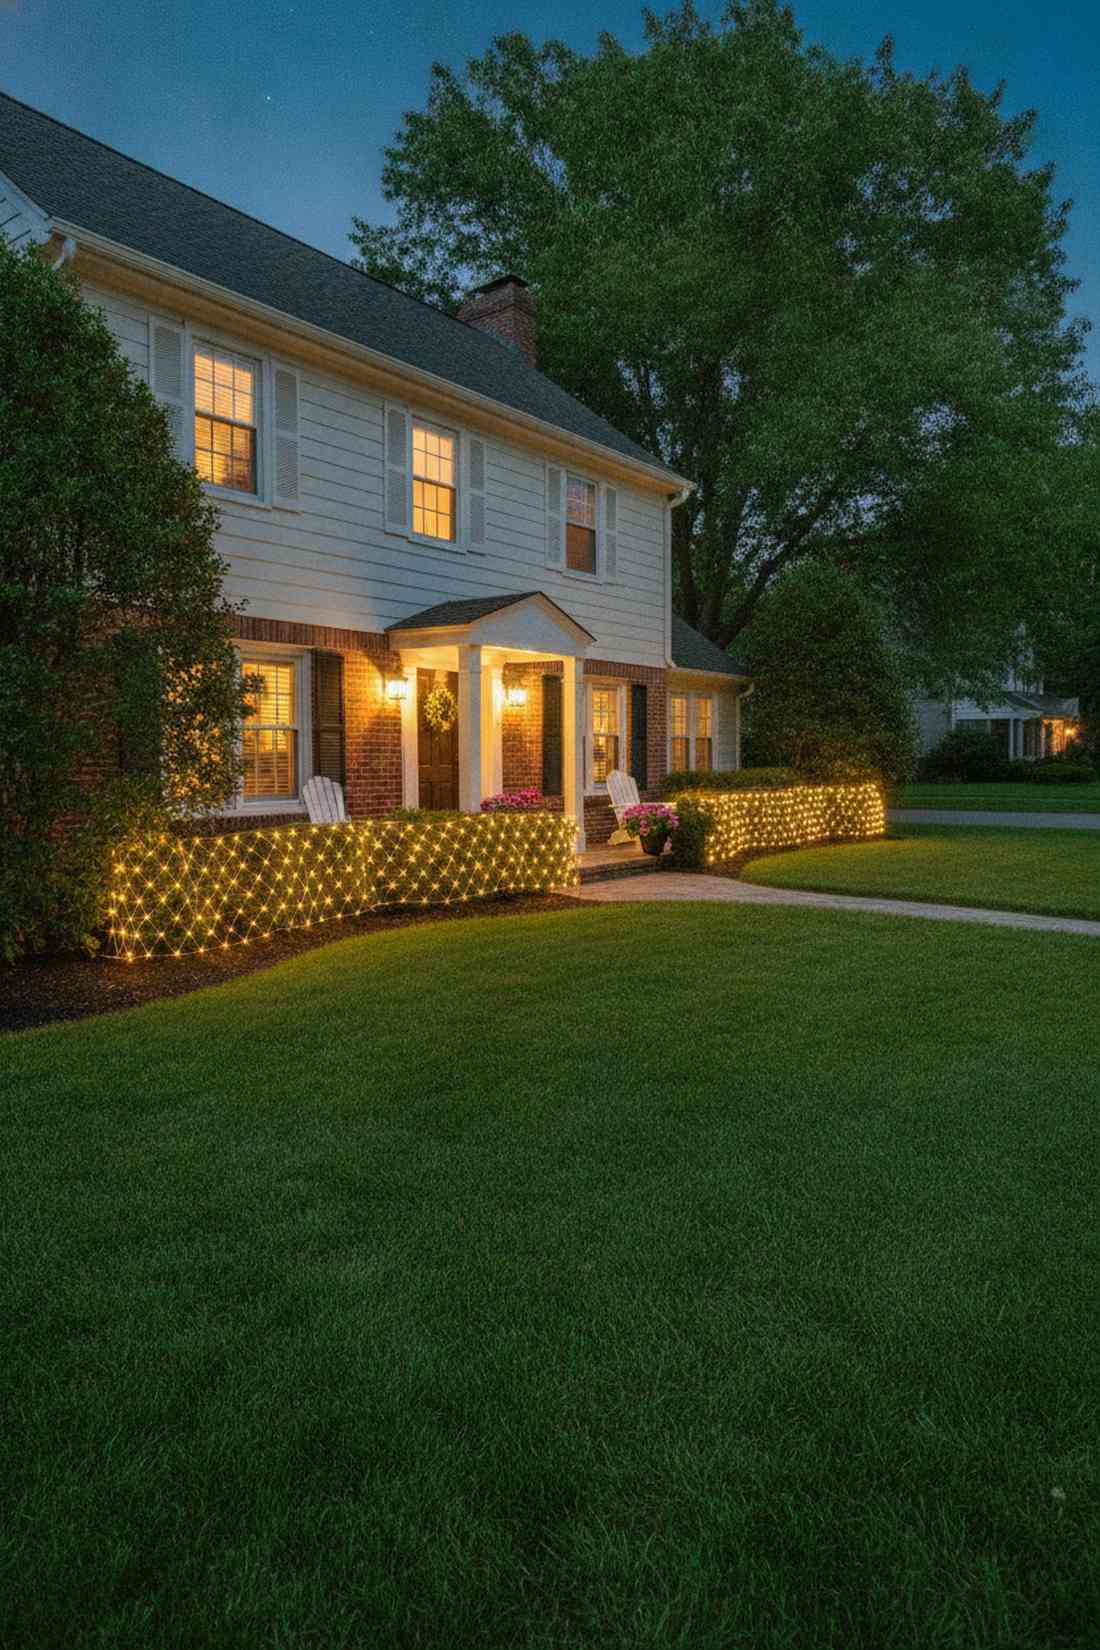
This seamless glowing house foundation border feels like a warm, radiant cushion sitting beneath your windows. Essential for blending the hard angles of brick architecture with the lawn.
Tossing pre-measured nets over bushes delivers a surprisingly premium look in literally five minutes. Staking the bottom edges with high-quality landscape supplies keeps the netting taut during windstorms.
You can blanket a foundation for roughly $40–$70. It’s the fastest upgrade that completely changes the yard’s vibe.
- Key Materials: Standard square LED net meshes
- Vibe / Style: Classic, neat suburban glow
- Difficulty: Extremely easy
- Budget Breakdown: Net grids: $50 | Ground stakes: $10
- Creator’s Tip: Measure the exact width of your bushes before buying; overlapping nets look messy and bright-spotted.
- Smart Sourcing: heavy-duty shrub LED netting packs and steel landscape anchor pins.
33. Hedge Row Continuous Glow
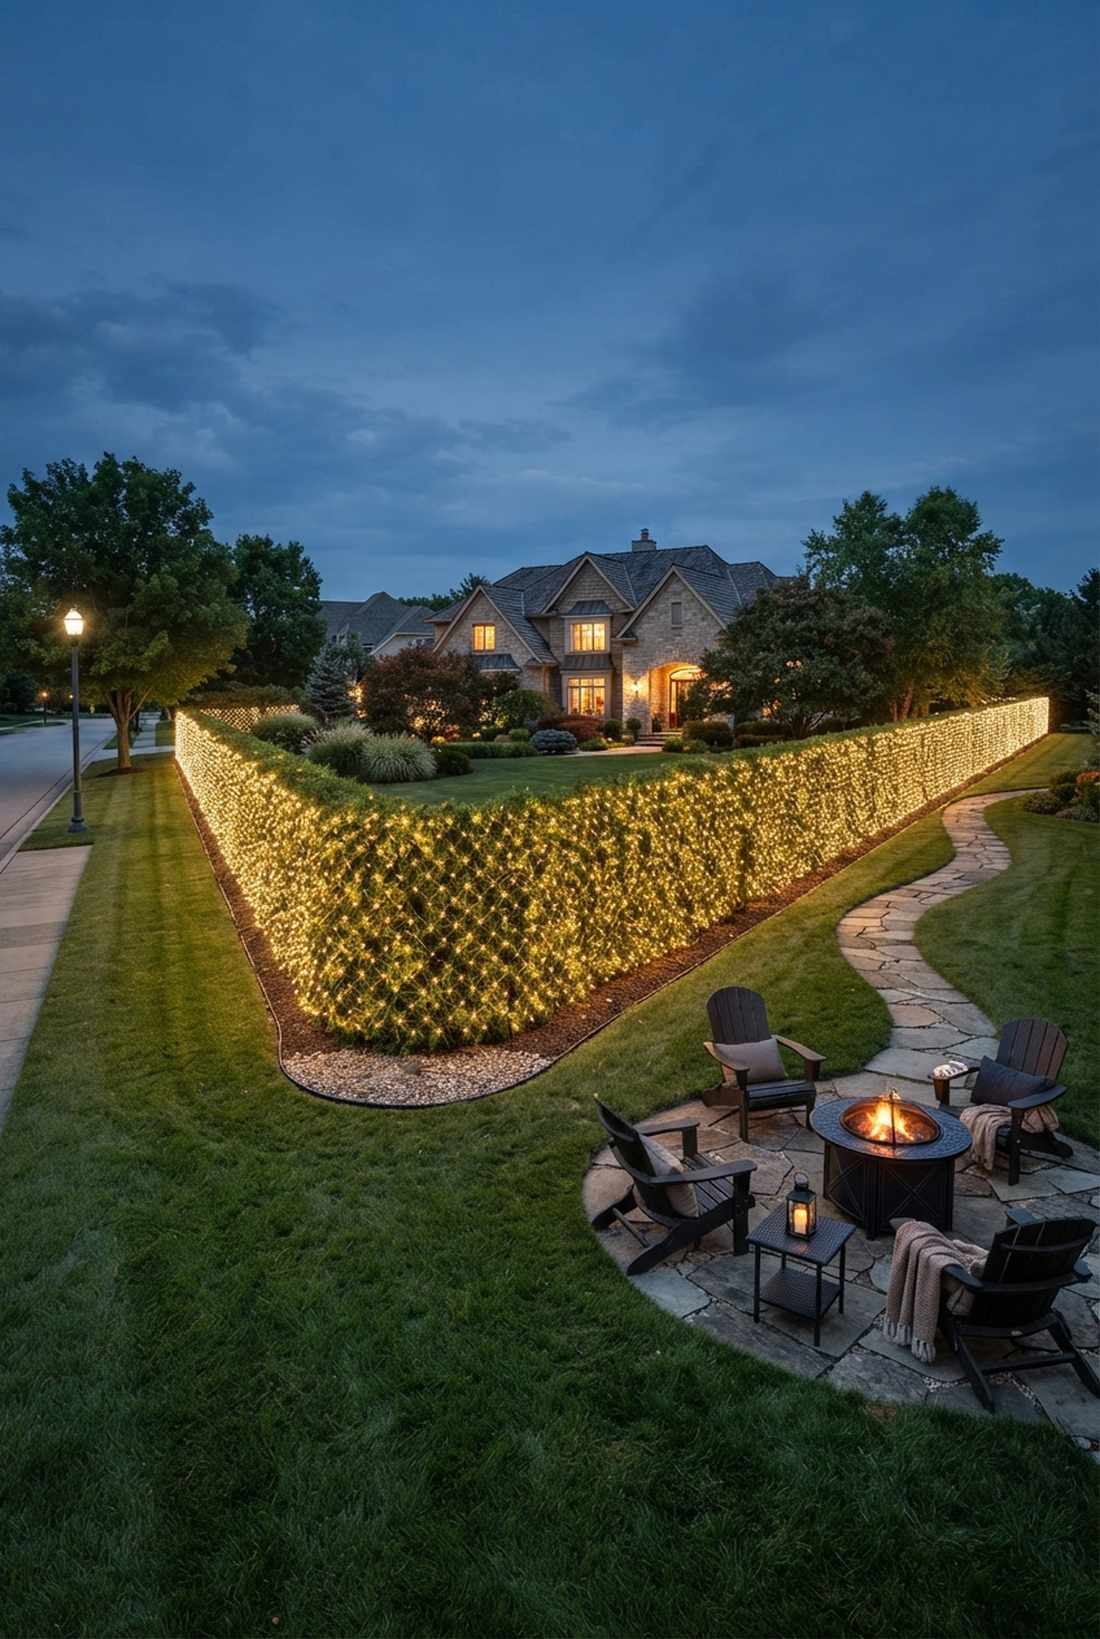
A sweeping illuminated privacy hedge wall feels like a massive fortress of light surrounding your property. Incredible for corner-lot homes with long, defining evergreen borders.
Connecting multiple net grids seamlessly looks far more expensive than piecemeal string wrapping. Using heavy-duty commercial extension cords ensures safe voltage drops across long property lines.
Lighting a massive hedge row usually costs $100–$200. Pin this to your ultimate outdoor landscaping board.
- Key Materials: End-to-end connectable long net grids
- Vibe / Style: Grand, sprawling estate border
- Difficulty: Moderate, requires extensive cord management
- Budget Breakdown: Net links: $150 | Power hub: $25
- Creator’s Tip: Zip-tie the connections between nets so a heavy snowfall doesn’t pull the plugs apart.
- Smart Sourcing: connectable long-run LED net sheets and weatherproof extension cord safety covers.
34. Accent Shrub Spotlighting
This targeted botanical focal spotlighting feels like standing in a professionally curated botanical winter exhibit. Perfect for highlighting unique Japanese maples or ornamental grasses.
Hitting a dark shrub with a high-lumen ground beam gives a designer-level finish. Strategically placing miniature garden supplies near the base hides the spotlight housing completely.
You can achieve this high-end gallery look for $30–$50. Highly recommended to break up the monotony of string lights.
- Key Materials: Warm white LED landscape spotlights
- Vibe / Style: Upscale architectural landscape
- Difficulty: Easy plug-and-aim
- Budget Breakdown: Spot beam: $35 | Outdoor cord: $10
- Creator’s Tip: Bury the spotlight cord just beneath the mulch for a flawless, wire-free presentation.
- Smart Sourcing: adjustable outdoor LED spotlights and heavy-duty landscape wire concealers.
Forget everything you know about standard lighting—this incoming aesthetic is pure winter magic…
35. Border Plant Fairy Lights
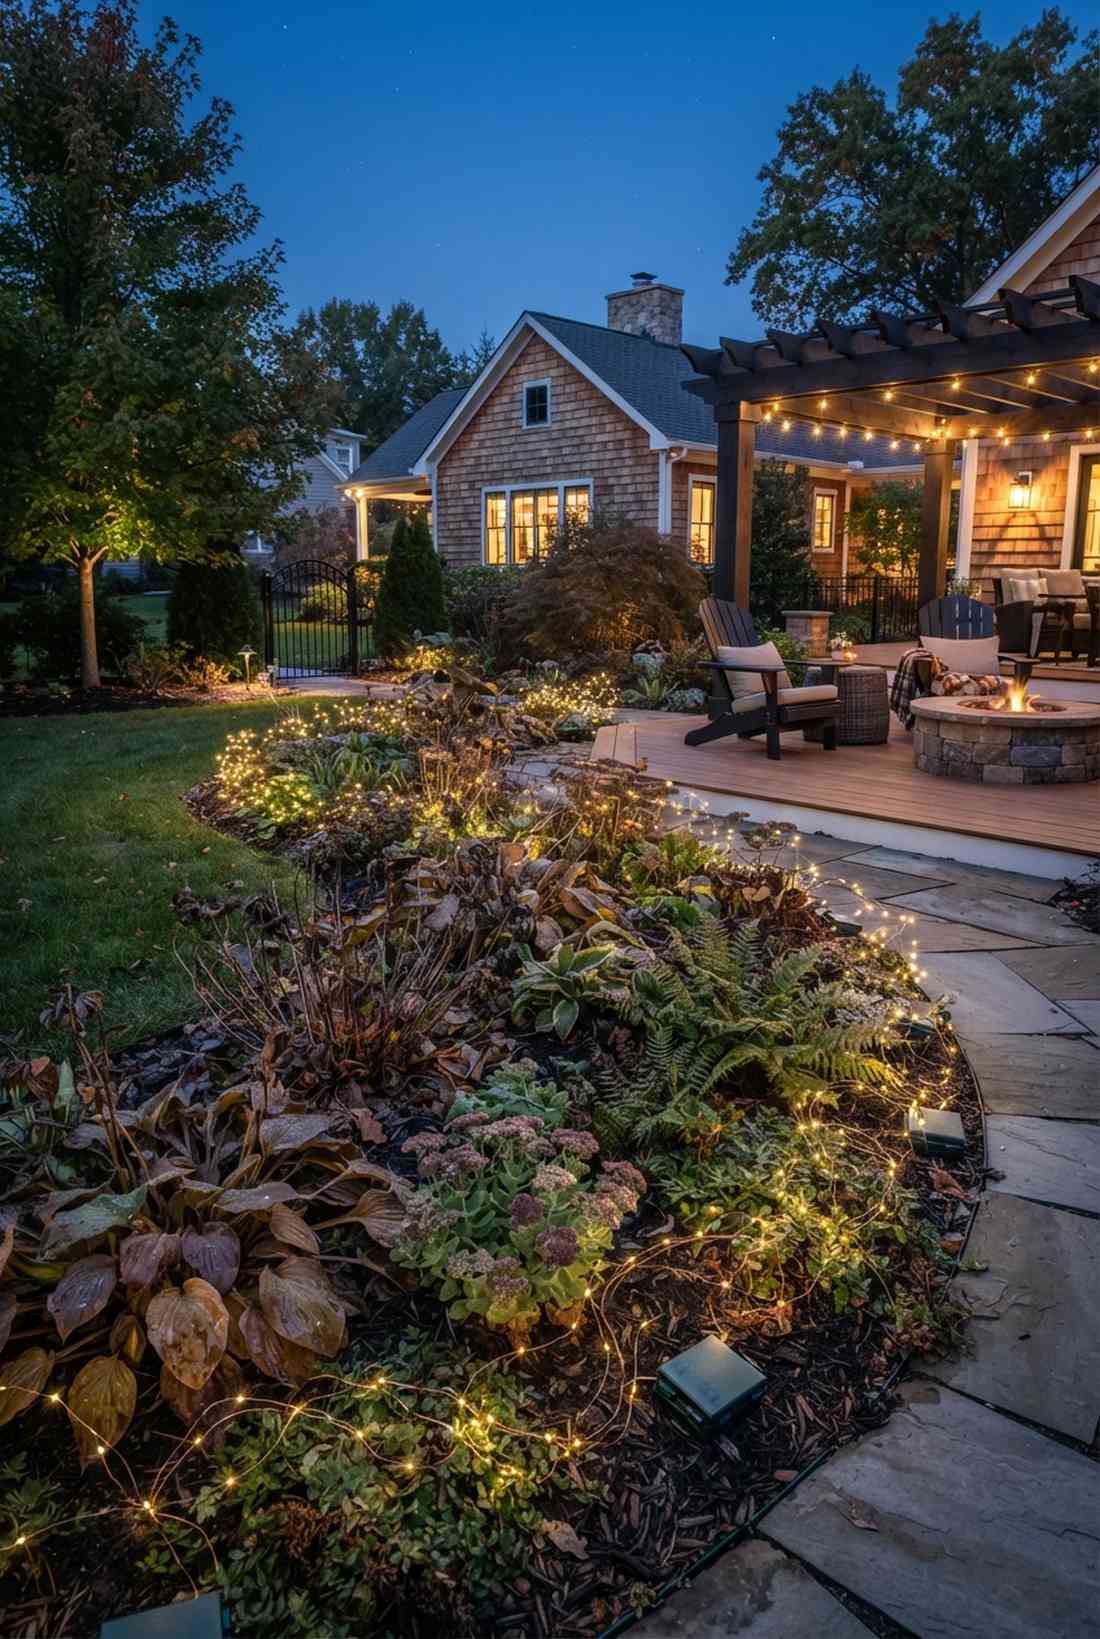
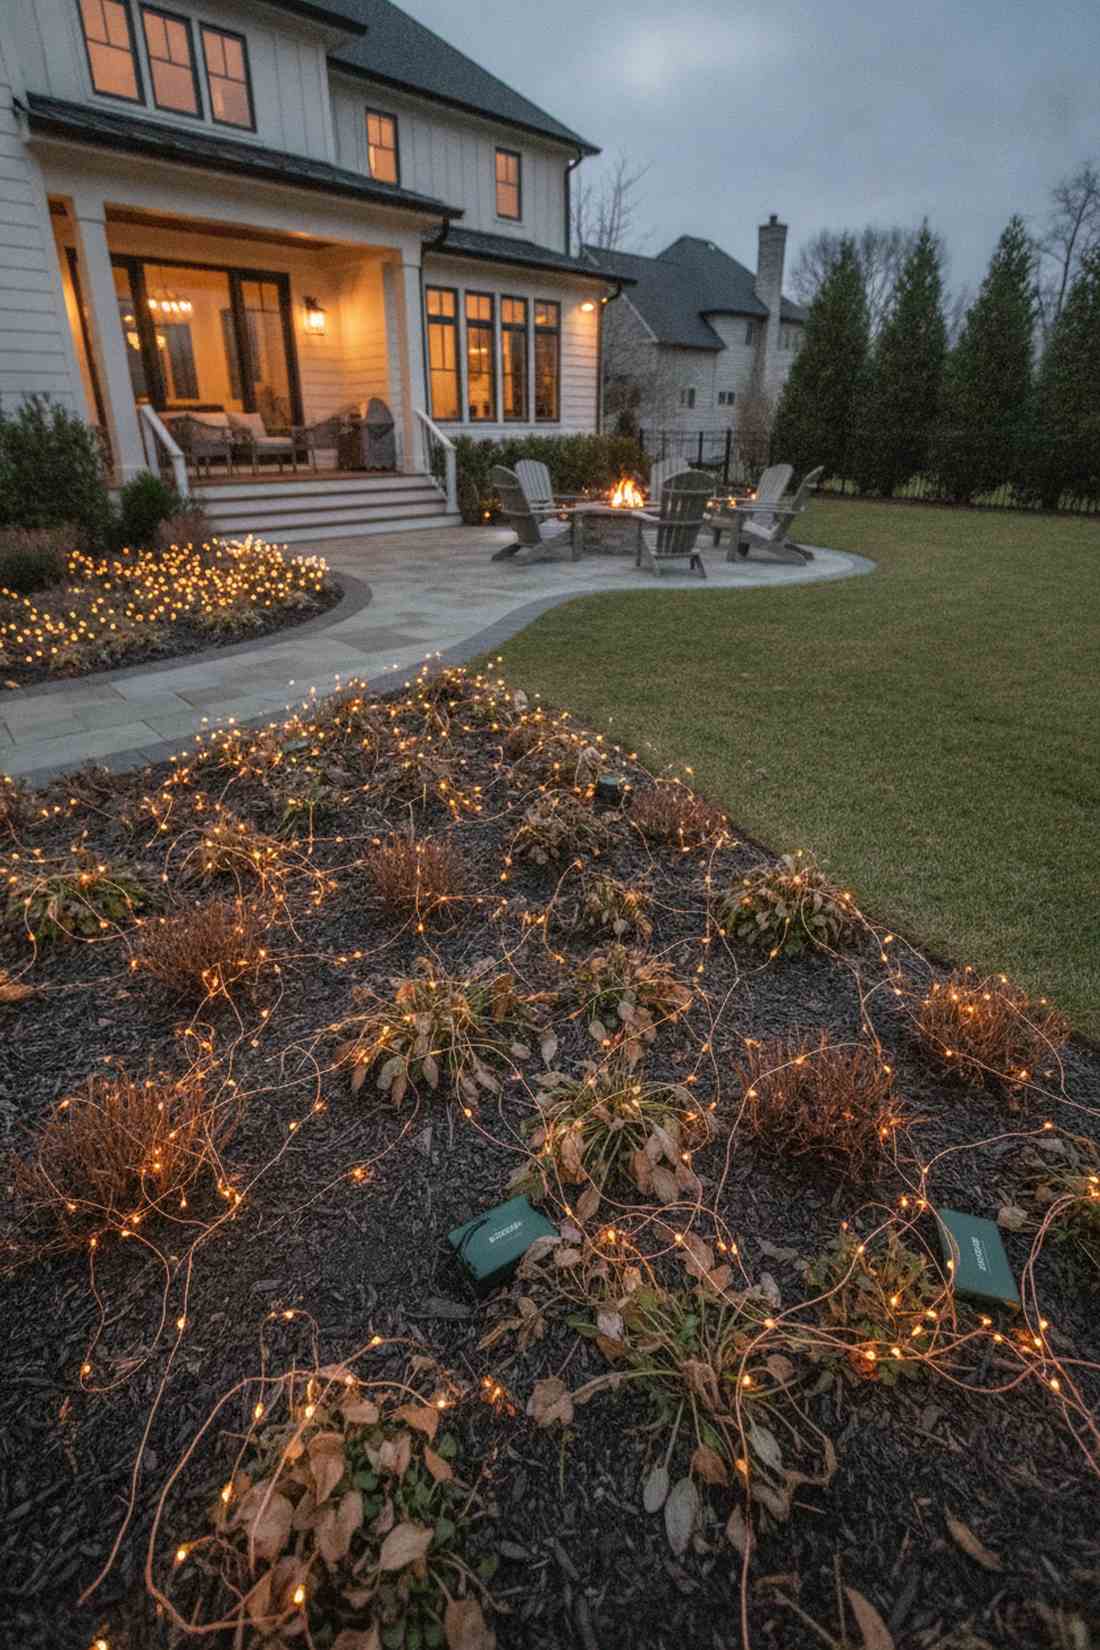
A delicate twinkling groundcover fairy bed feels like a million fireflies settled into your garden for the winter. Breathtaking when woven through dormant perennial borders and hostas.
Using ultra-thin copper wire instead of thick green cords delivers a surprisingly premium look. Utilizing waterproof battery boxes from professional fairy garden kits ensures they glow flawlessly without bulky extension cords.
This subtle, magical detail costs around $20–$35. Save this for an enchanting, delicate patio edge.
- Key Materials: Micro copper wire LEDs with waterproof battery packs
- Vibe / Style: Delicate hidden woodland magic
- Difficulty: Intermediate, requires gentle weaving
- Budget Breakdown: Fairy wires: $25 | Batteries: $8
- Creator’s Tip: Buy the variants with built-in 6-hour timers so you never have to walk out in the cold to turn them on.
- Smart Sourcing: waterproof copper fairy lights (bulk pack) and heavy-duty lithium outdoor batteries.
Color & Theme Combinations For Cohesive Design
Intentional color selection and thematic consistency elevate displays from random collections to designed experiences. These approaches help you make deliberate aesthetic choices.
36. Classic Warm White Elegance
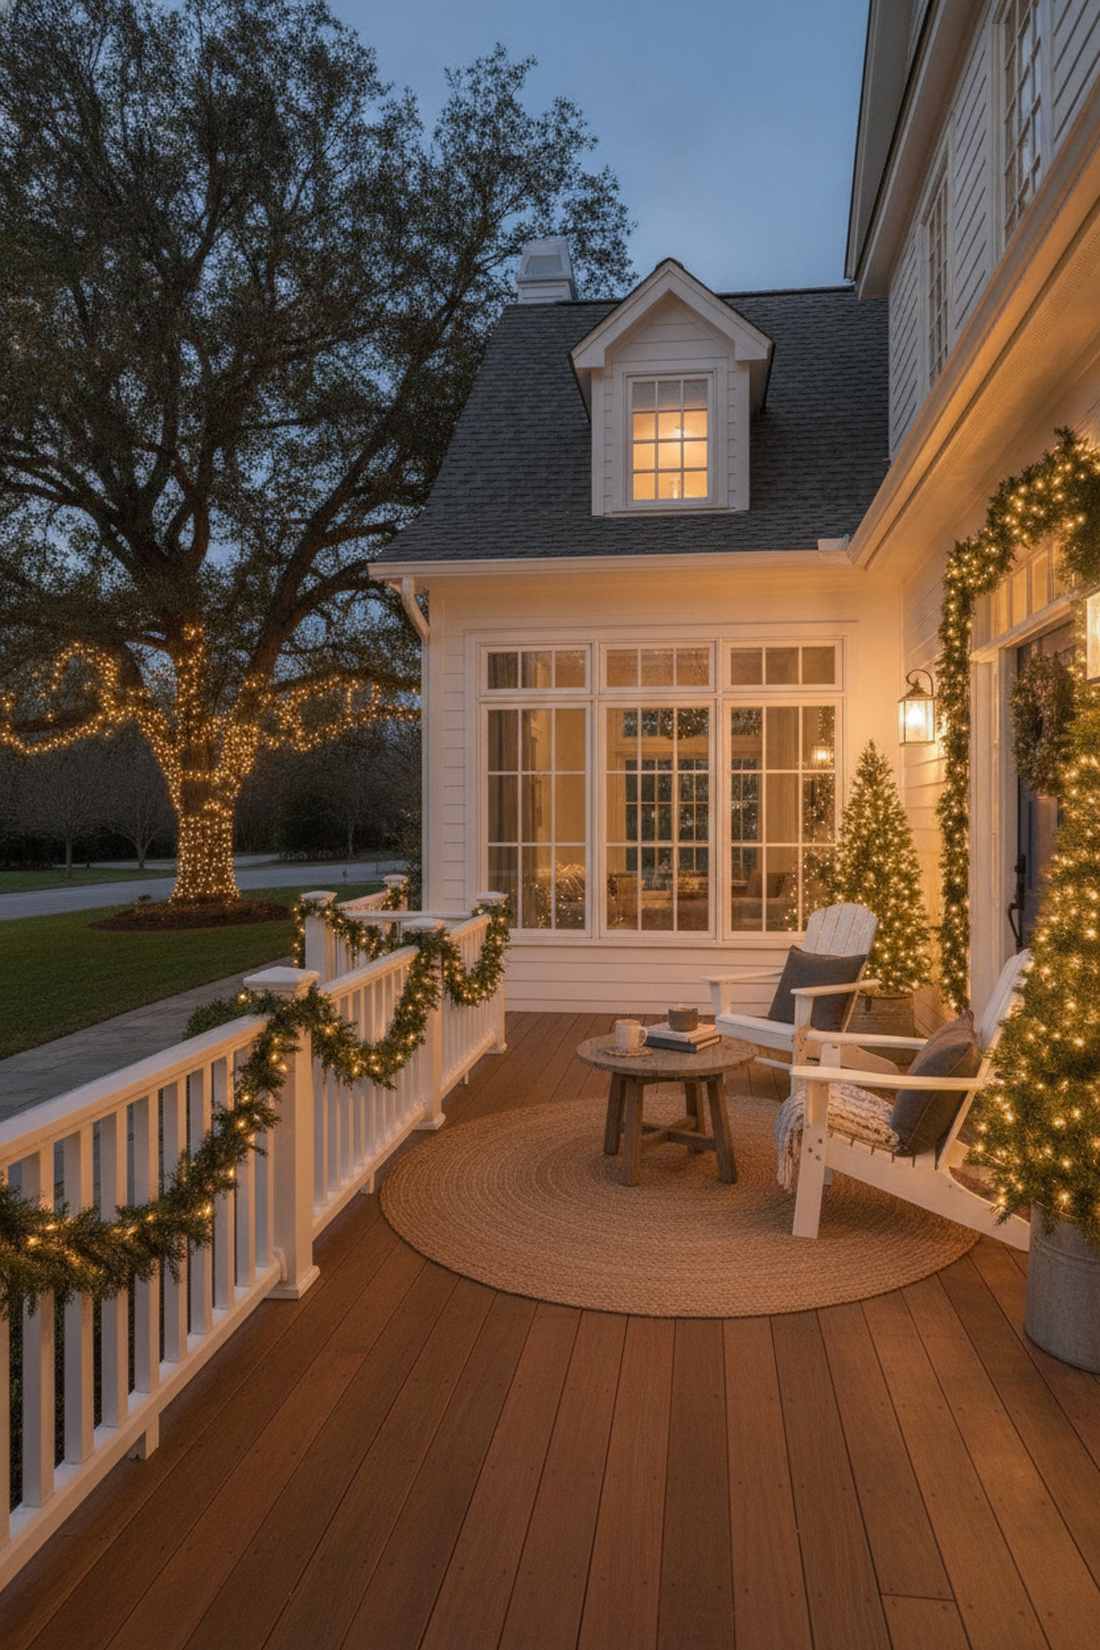
This timeless monochromatic golden glow setup feels like an expensive scene from a luxury holiday movie. The absolute gold standard for historic homes and high-end suburban architecture.
Ditching the chaotic rainbow for strict warm white looks far more expensive than it is. Pairing this glow with high-quality faux greenery supplies completely transforms a dull porch.
Upgrading to uniform warm white lighting runs $60–$100. Pin this if you want maximum sophisticated curb appeal.
- Key Materials: Uniform 2700K warm white LED sets
- Vibe / Style: Timeless, wealthy sophistication
- Difficulty: Easy bulb matching
- Budget Breakdown: Warm strings: $75 | Greenery: $20
- Creator’s Tip: Ensure every single box of lights you buy says “Warm White” (2700K-3000K). Mixing warm and cool white ruins the upscale illusion.
- Smart Sourcing: 2700K commercial warm white LED spools and realistic outdoor faux garland.
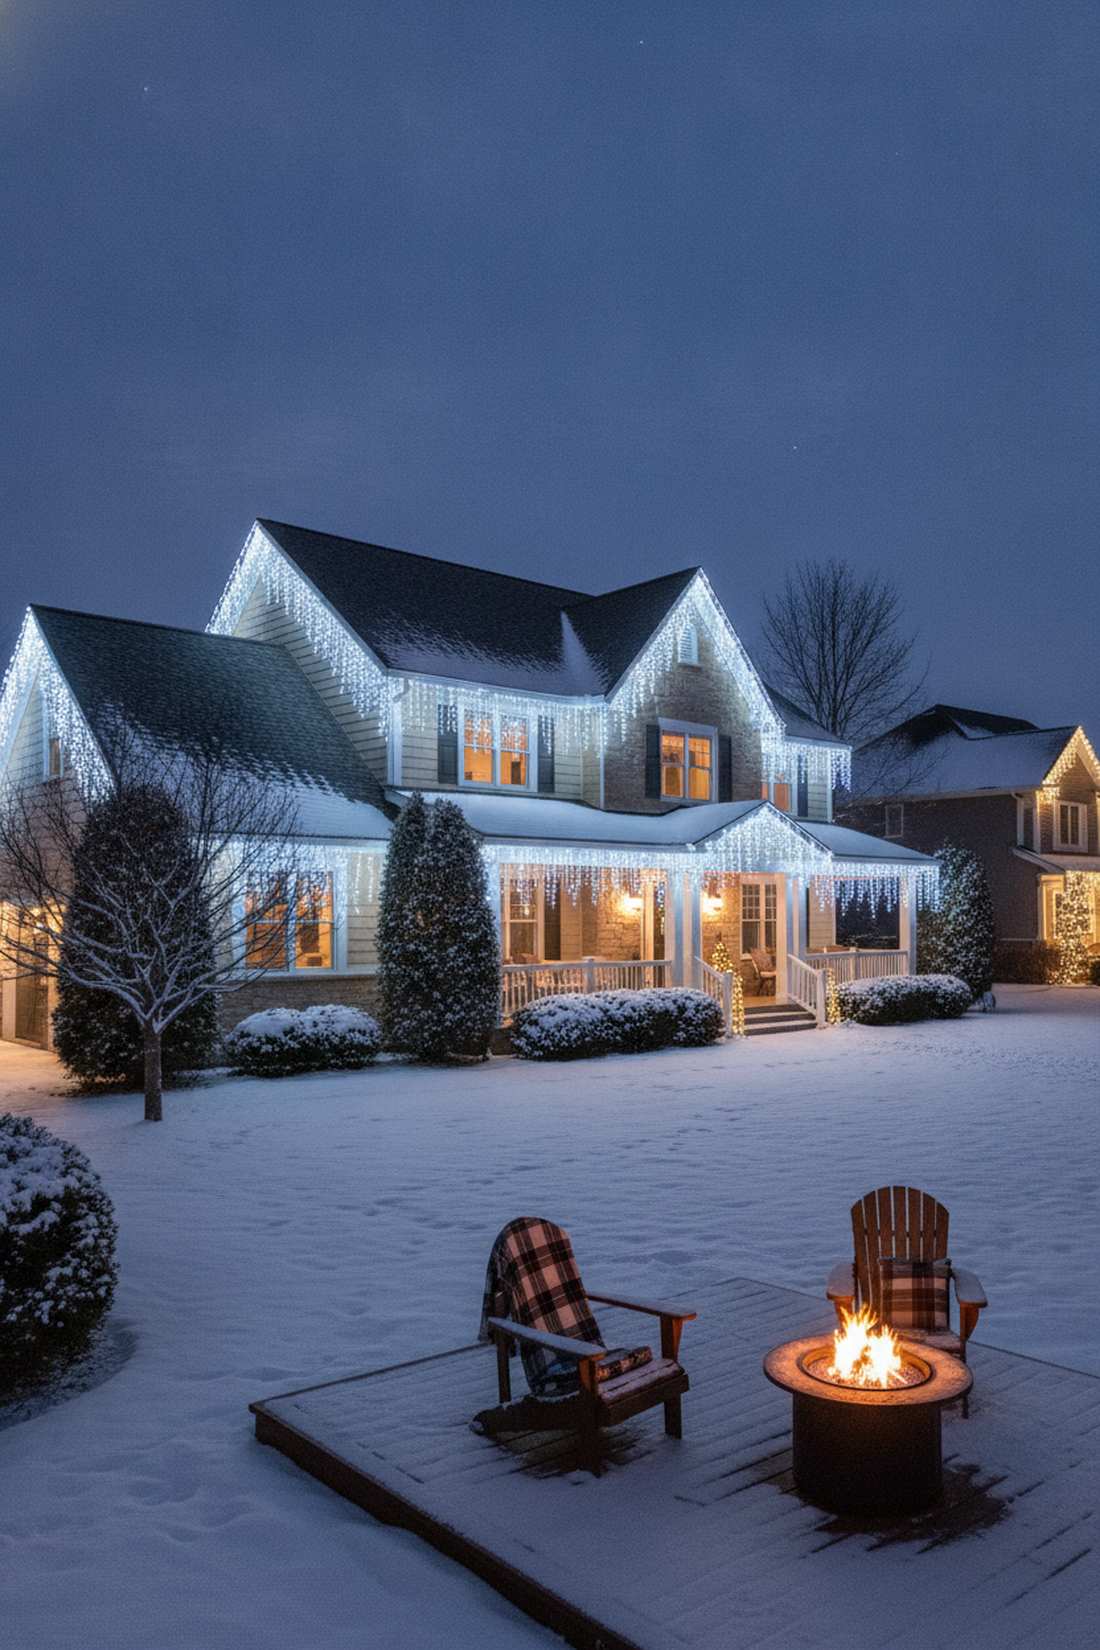
37. Cool White Winter Wonderland
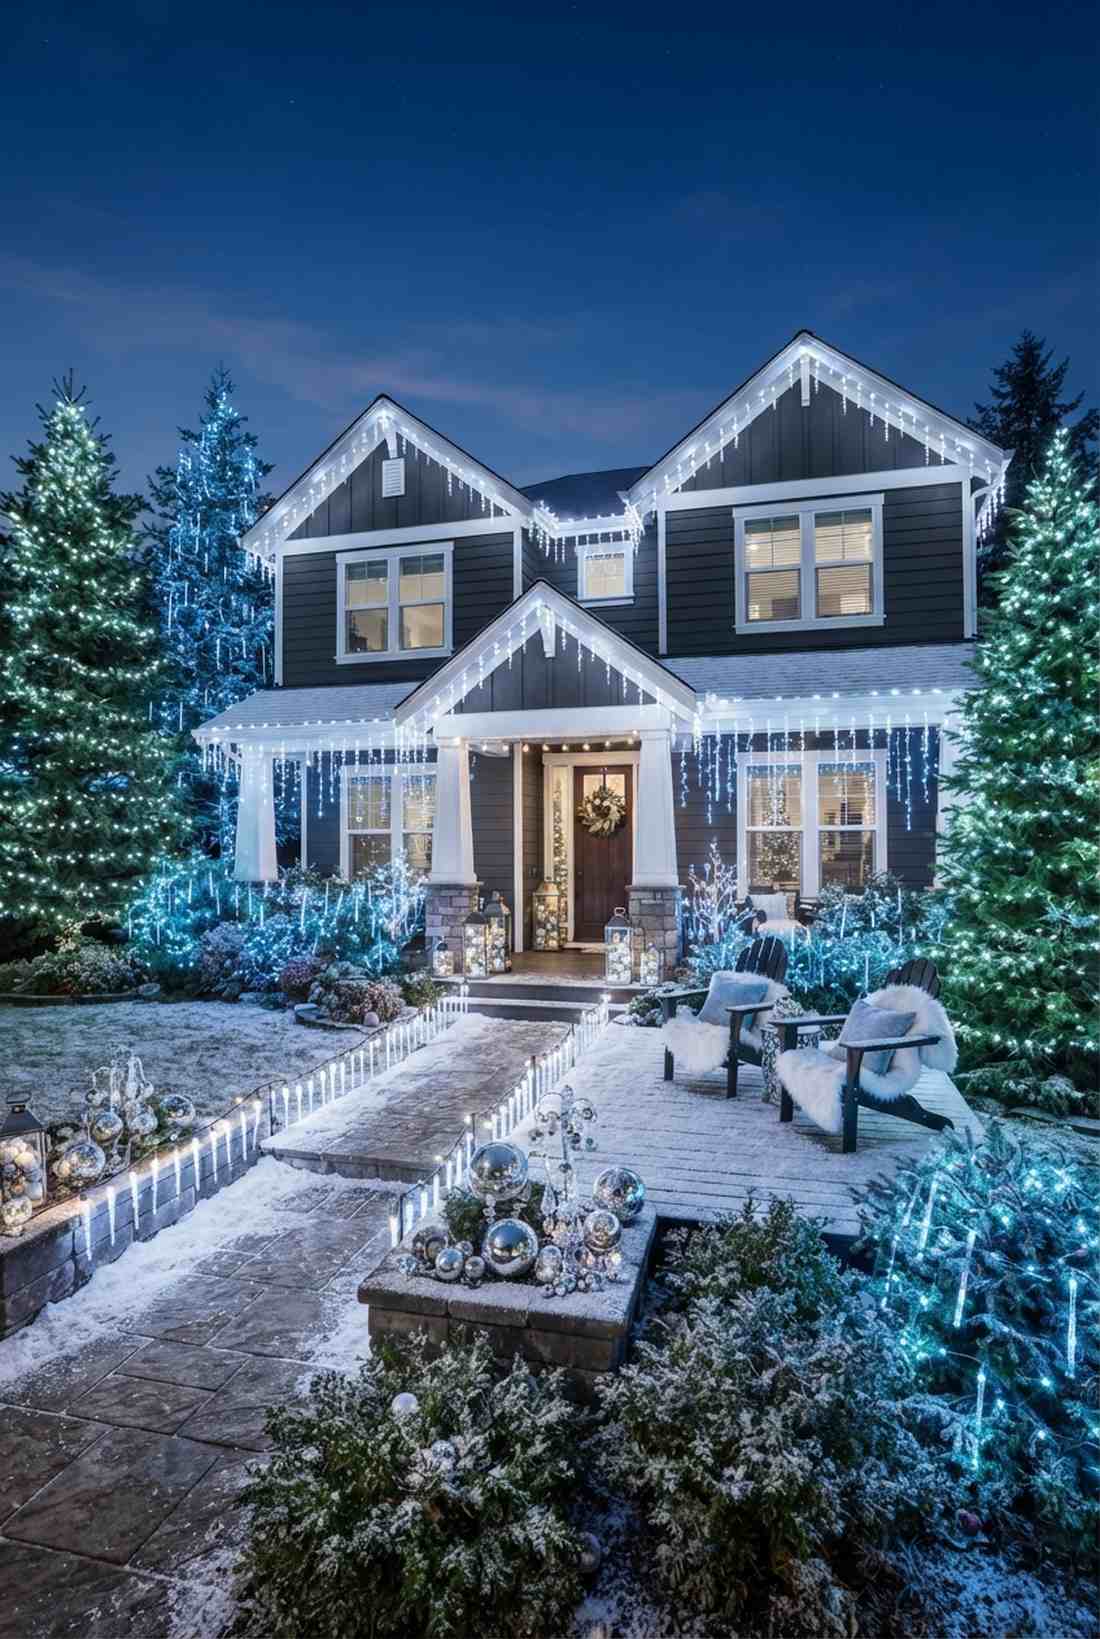
A crisp icy blue and white frosty landscape feels like wandering into a frozen arctic palace. Stunning when contrasted against very dark siding or deep green pine trees.
Using stark white combined with crystal clear bulb covers gives a designer-level finish. Integrating reflective terrarium accessories around the base of the displays catches the icy light brilliantly.
This crisp, modern theme costs about $60–$90. It’s a fast upgrade that completely changes the vibe of your home.
- Key Materials: 5000K cool white and icy blue LEDs
- Vibe / Style: Modern frozen elegance
- Difficulty: Easy color coordination
- Budget Breakdown: Cool strings: $70 | Blue accents: $20
- Creator’s Tip: Add a few strands of purely twinkling blue lights to mimic the look of falling, shimmering snow.
- Smart Sourcing: pure white 5000K LED icicle kits and shimmering blue accent string lights.
38. Traditional Multicolor Nostalgia
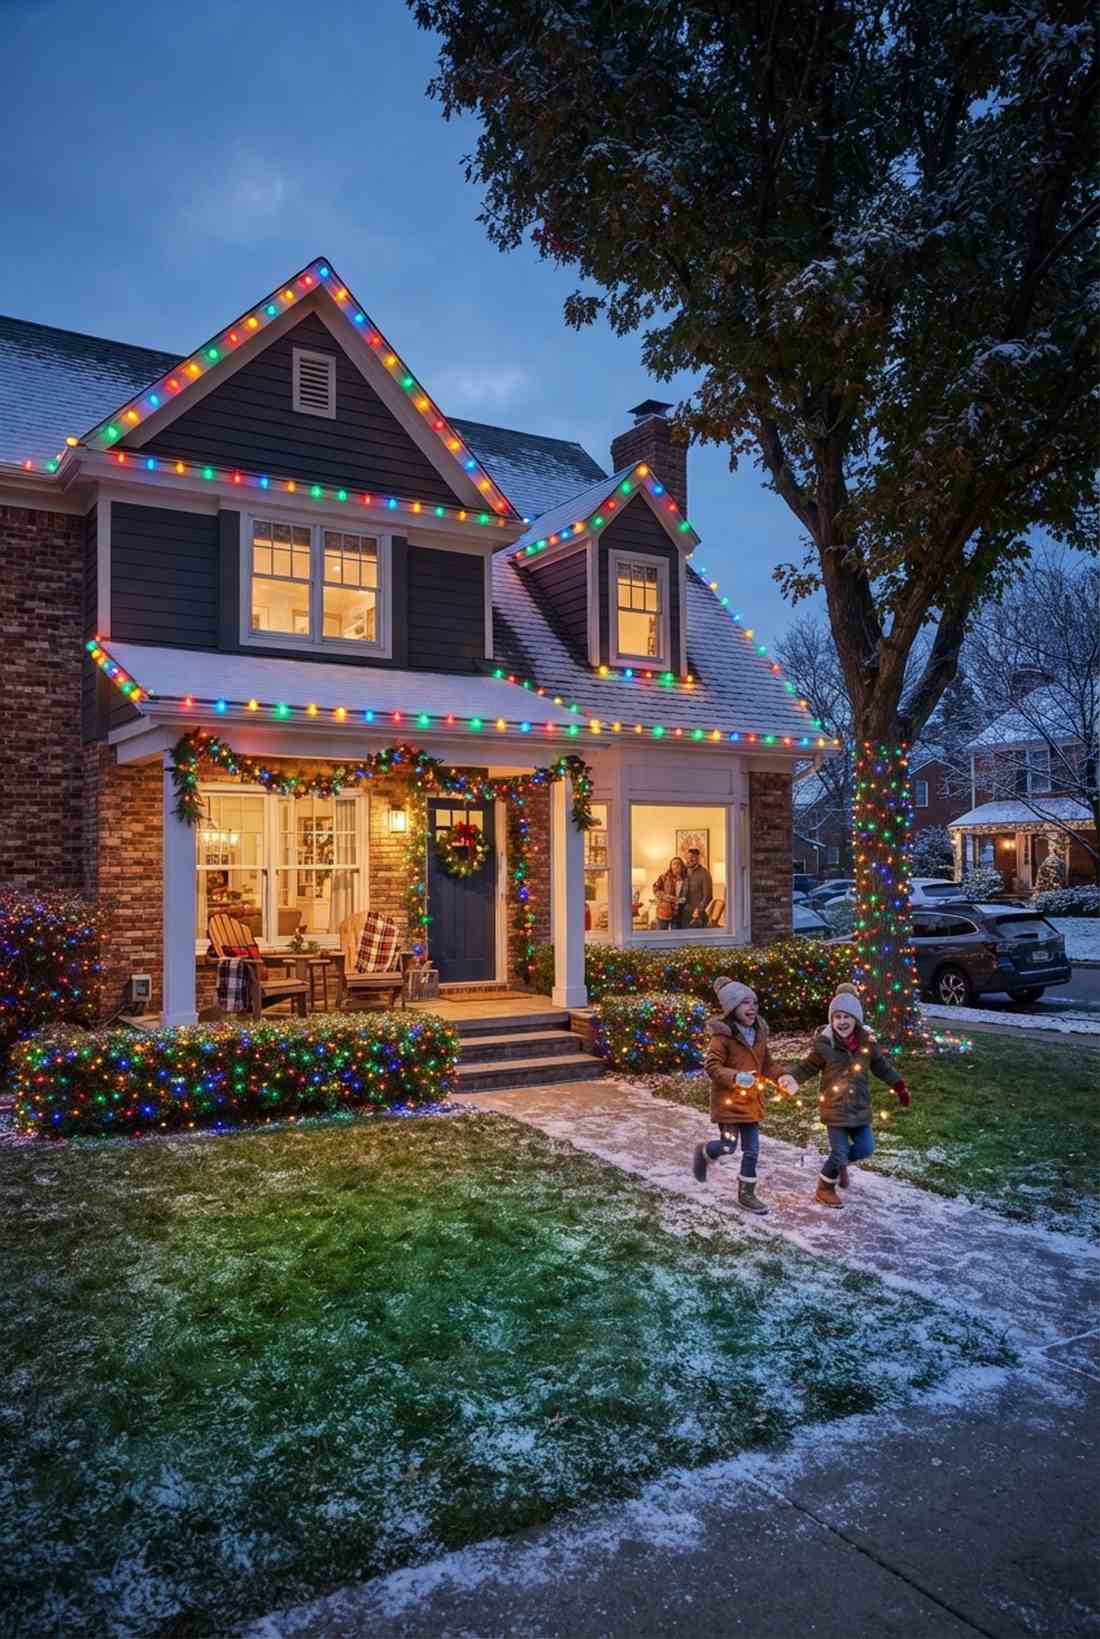
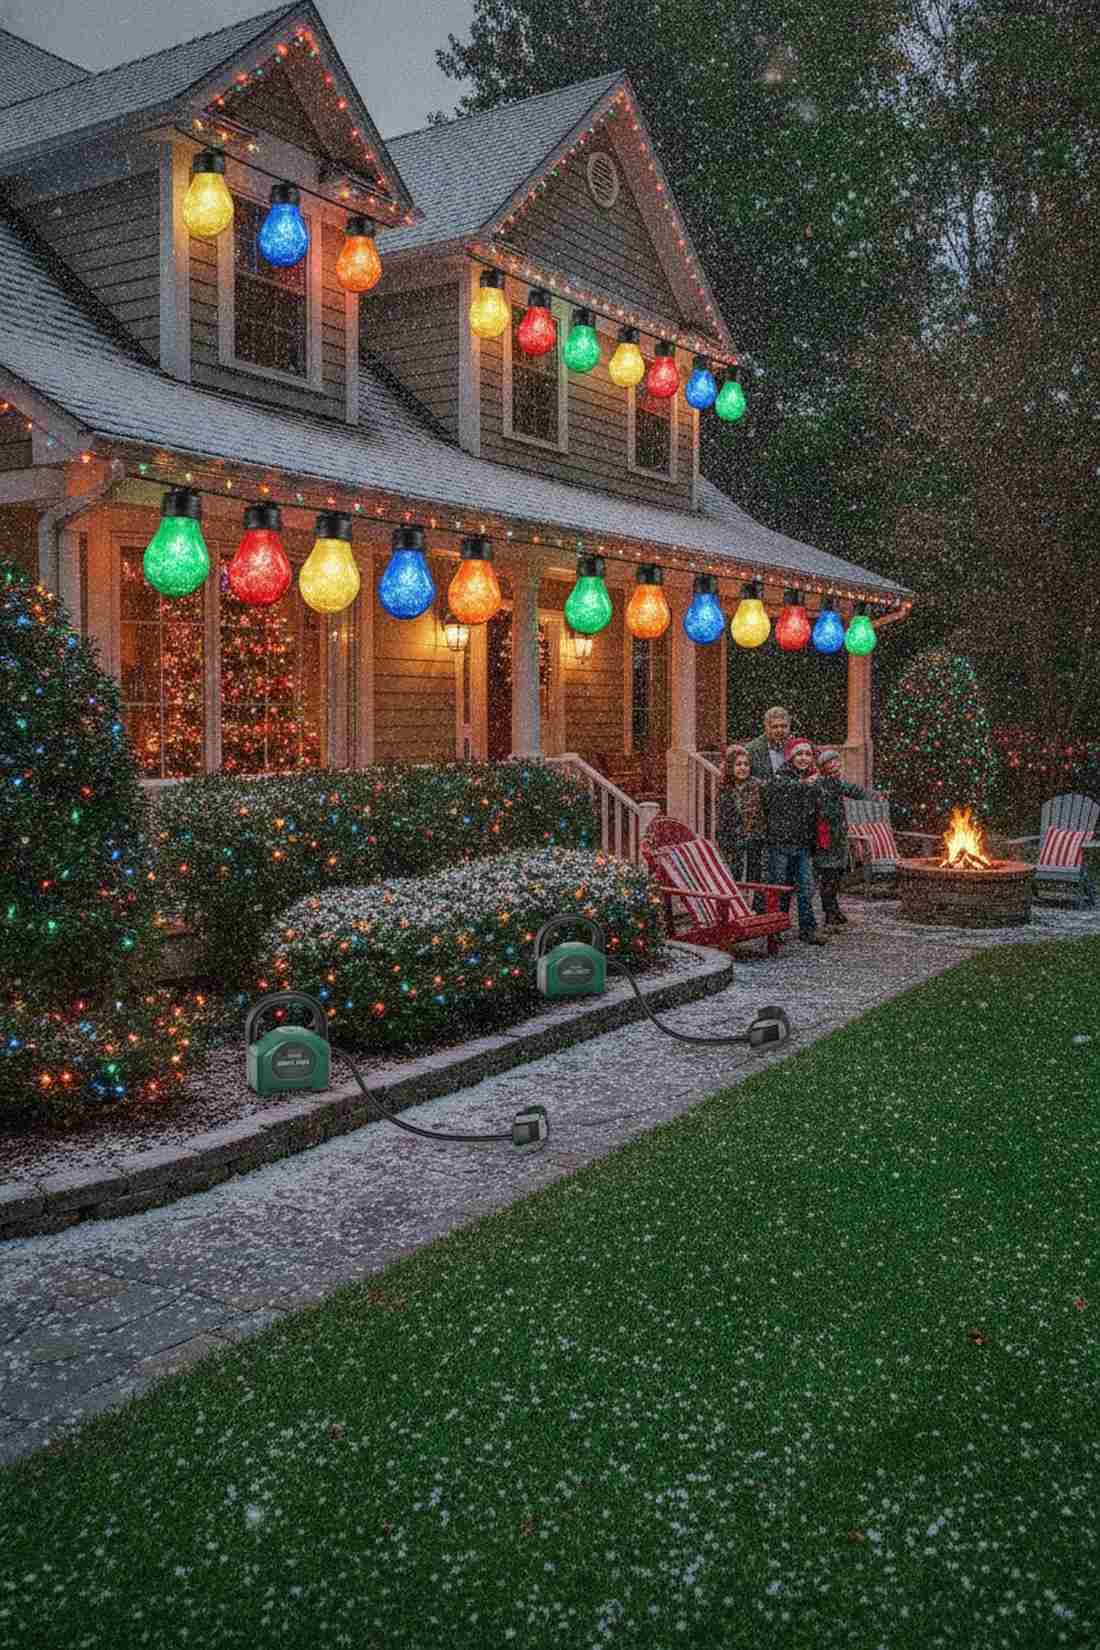
This vibrant retro rainbow yard display feels like stepping back into a joyful 1990s childhood memory. Absolutely incredible for families with young children looking for maximum festive energy.
Committing fully to heavy-duty C9 multicolored bulbs delivers a surprisingly premium look. Utilizing commercial outdoor timer systems ensures the heavy power draw is managed safely.
Going full retro usually runs $80–$130. Save this for a fun, high-energy family yard project.
- Key Materials: Large vintage-style C9 multicolored bulbs
- Vibe / Style: Loud, nostalgic holiday cheer
- Difficulty: Moderate, requires heavy-duty string hanging
- Budget Breakdown: C9 spools: $100 | Timers: $25
- Creator’s Tip: Use the massive C9 bulbs for the roofline and the smaller mini-multicolors for the bushes to create depth.
- Smart Sourcing: shatterproof retro C9 LED string sets and heavy-duty dual-outlet outdoor timers.
39. Red & Green Classic Palette
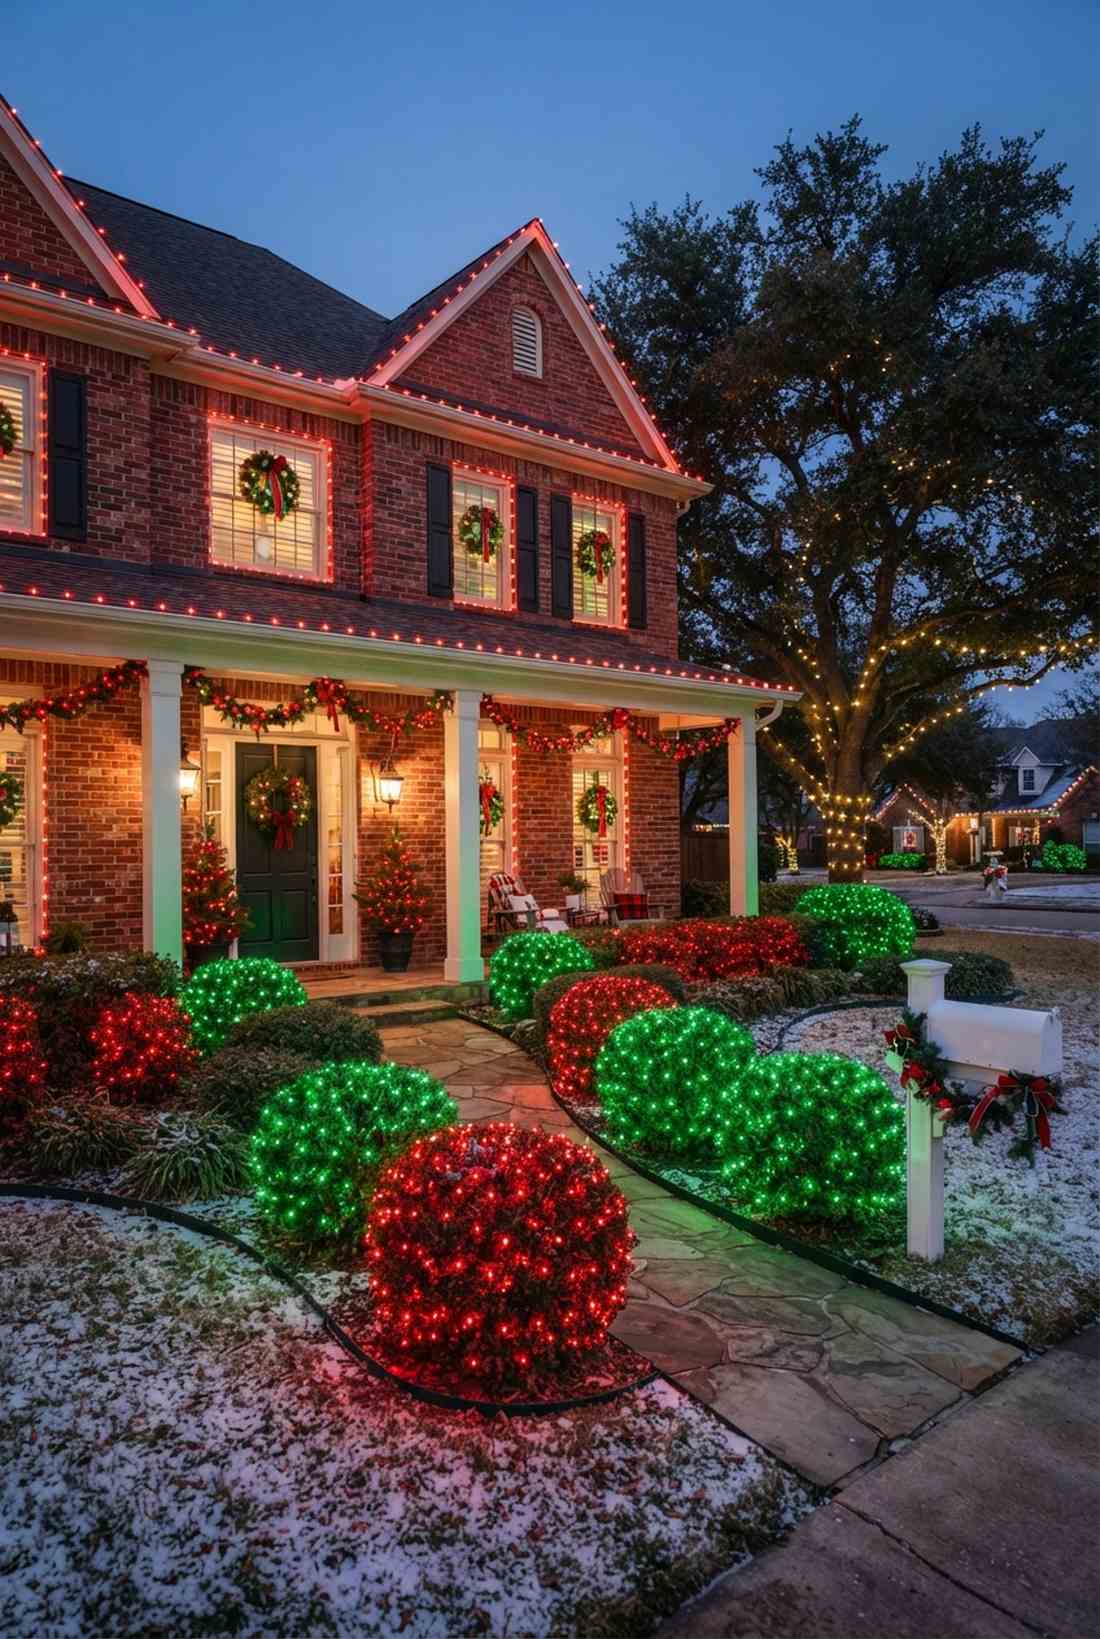
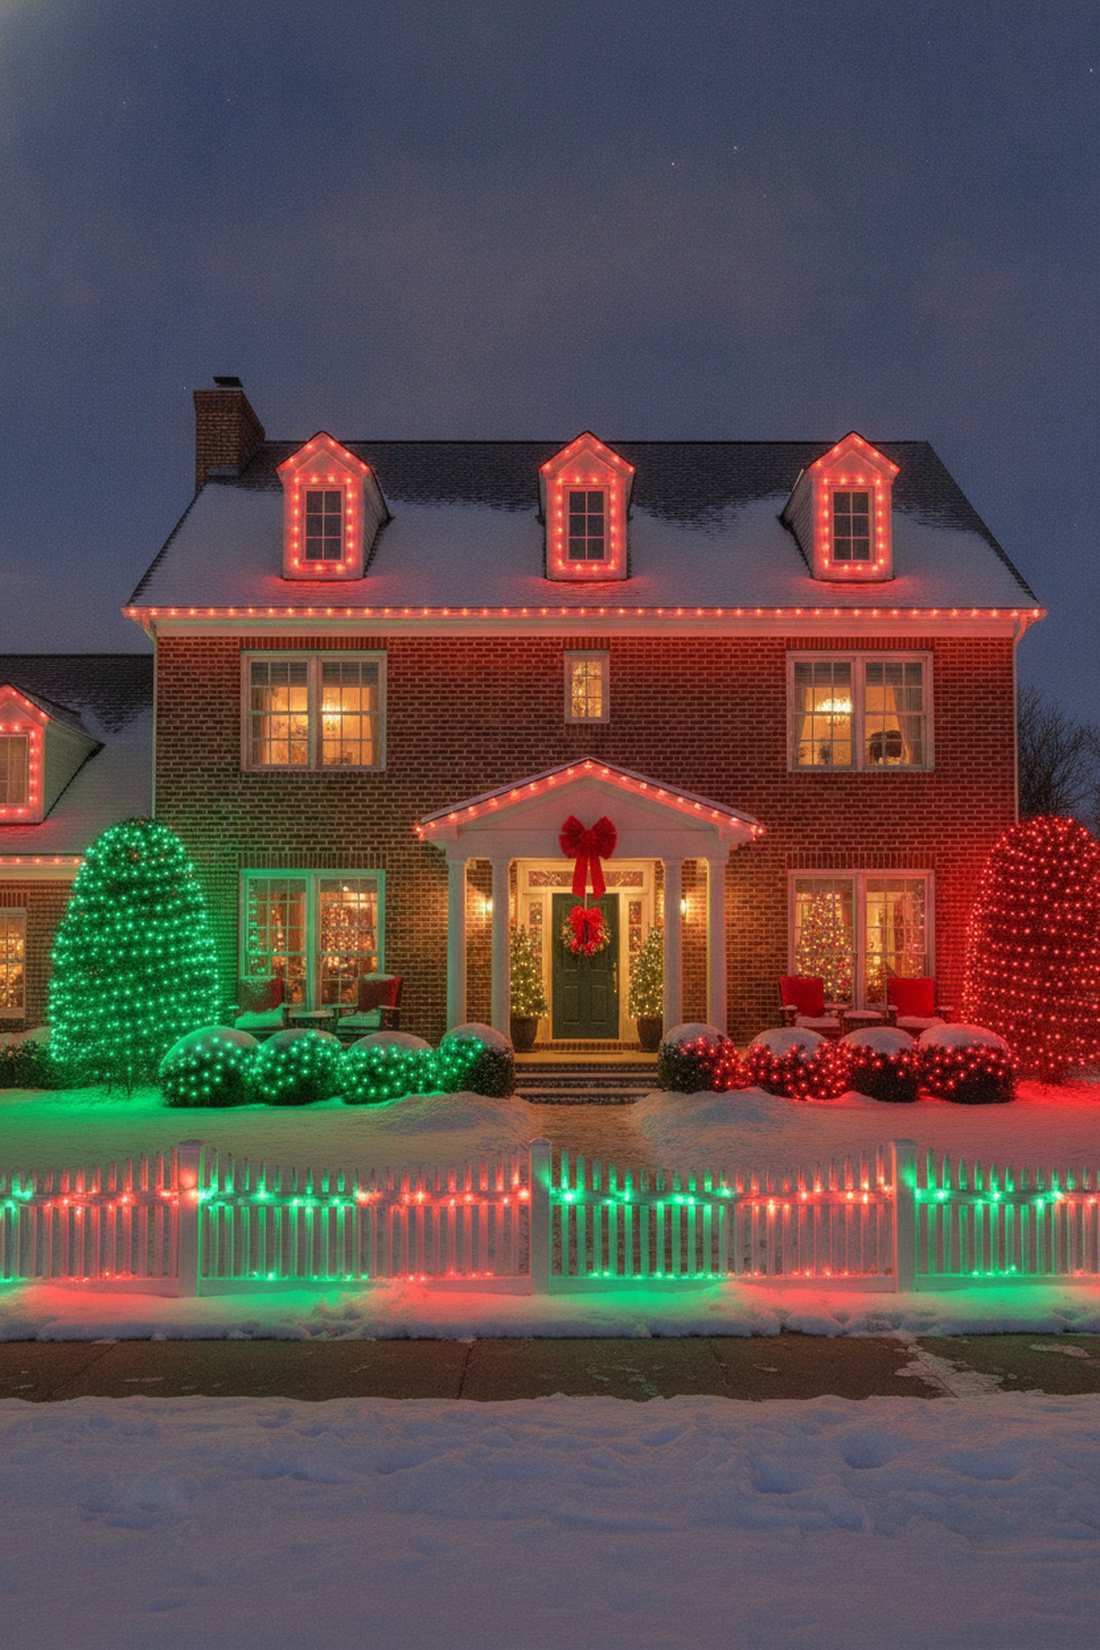
A striking two-tone peppermint yard theme feels like walking right up to Santa’s personal workshop. Highly effective for brick homes where the red lights make the masonry pop.
Restricting the palette to just two bold colors looks far more expensive than a random chaotic mix. Sourcing professional-grade colored bulbs stops the green from fading to an ugly yellow by January.
This tightly controlled color scheme costs around $50–$80. Highly recommended for a clean but festive traditional look.
- Key Materials: Solid red and solid green light strands
- Vibe / Style: Crisp, classic holiday identity
- Difficulty: Easy color blocking
- Budget Breakdown: Color strands: $65 | Ext cords: $15
- Creator’s Tip: Do not mix red and green on the same bush. Wrap one bush entirely in red, and the next entirely in green for massive visual impact.
- Smart Sourcing: commercial solid color LED bundles and fade-resistant colored bulb kits.
One simple color tweak coming up next separates the absolute pros from the amateurs…
40. Purple & Gold Regal Theme
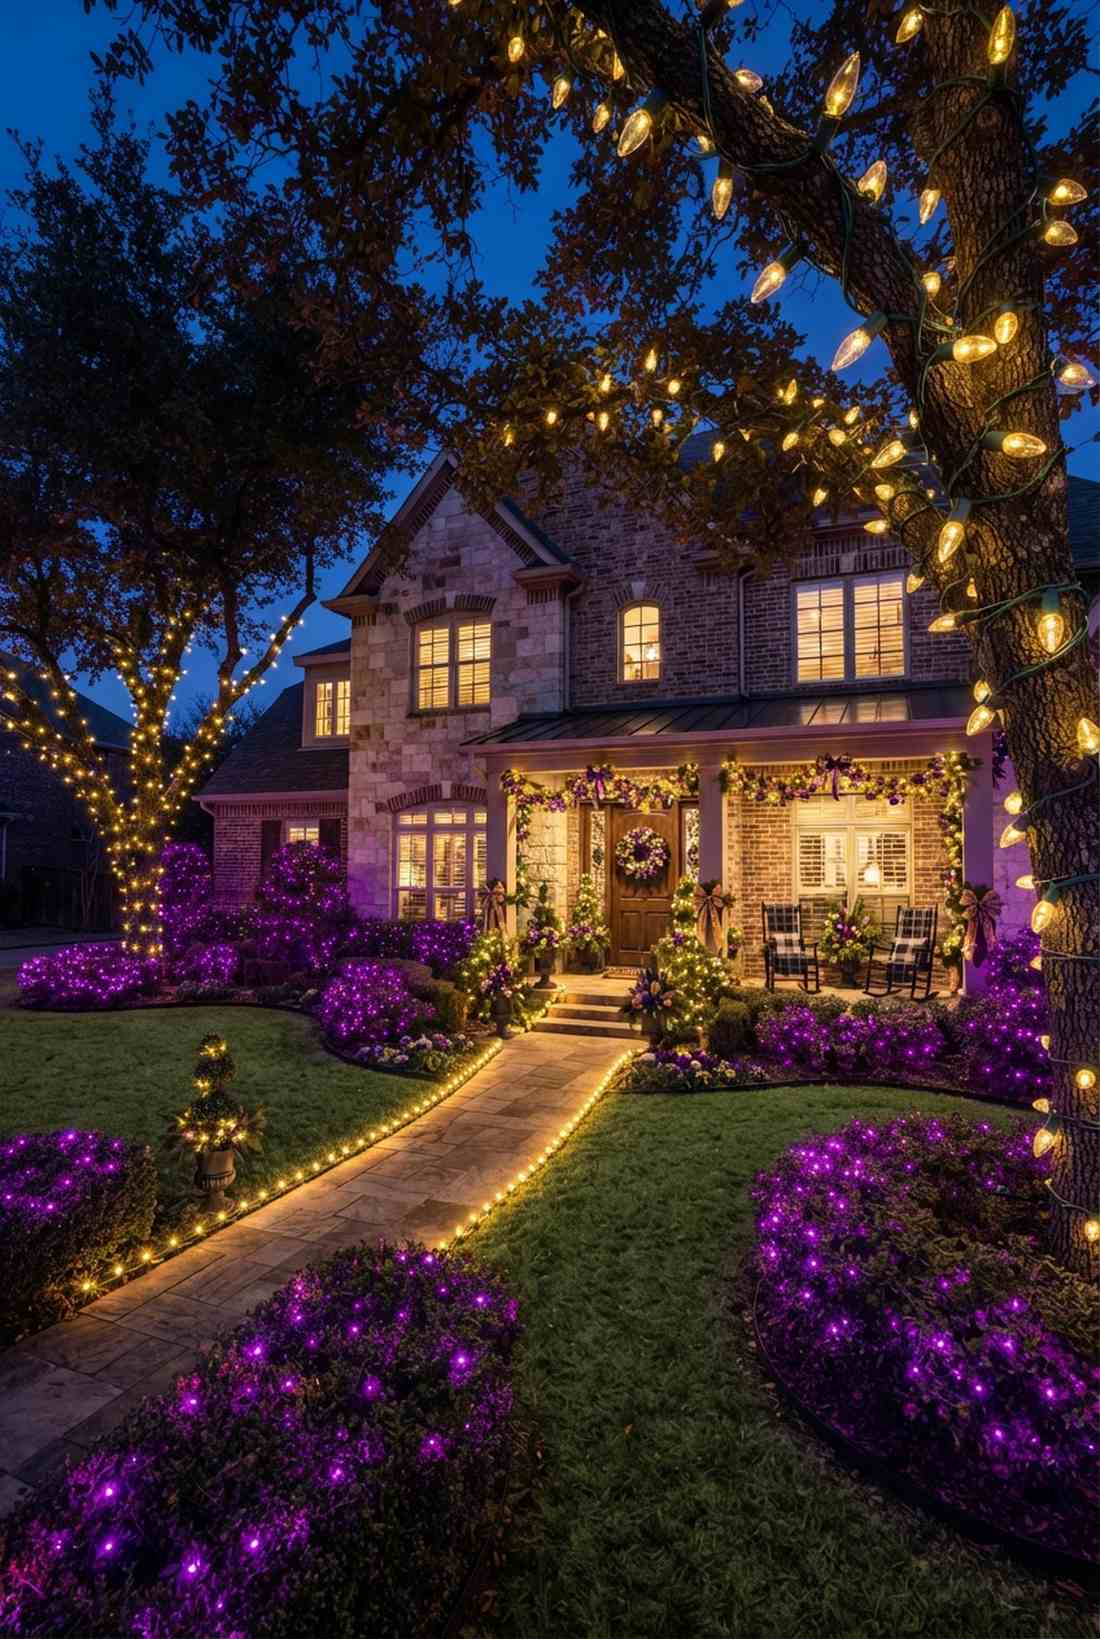
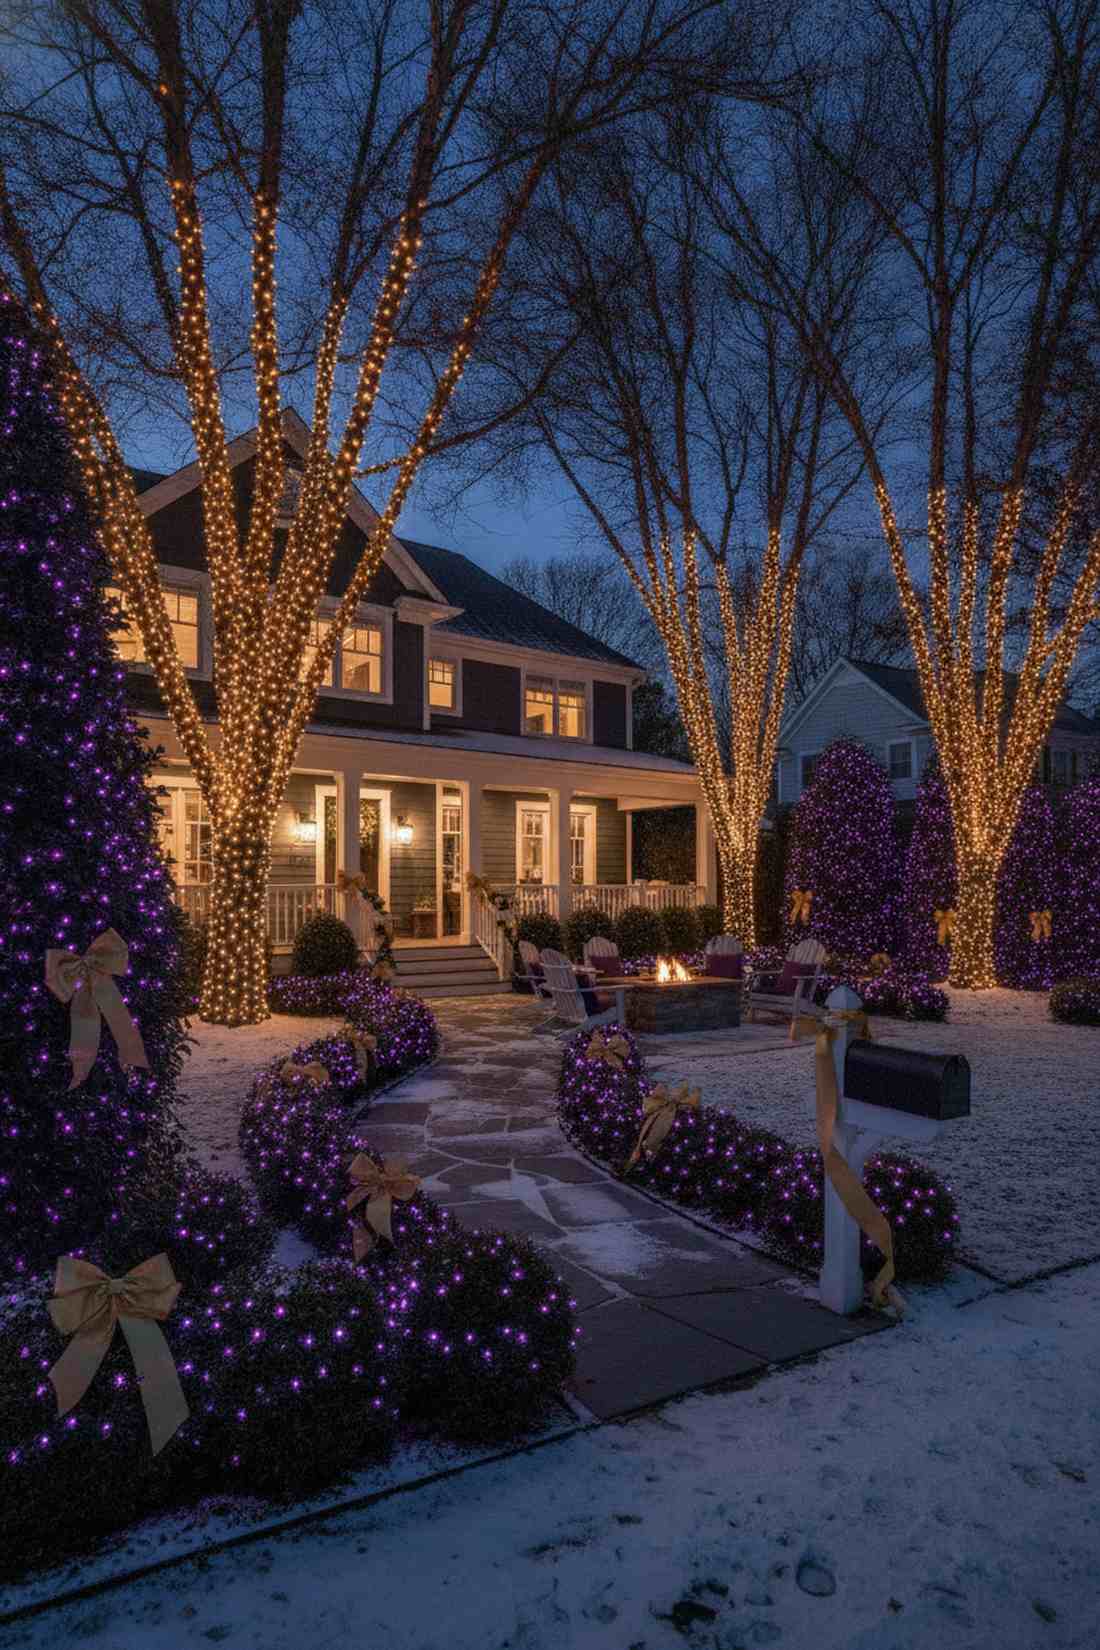
This lavish jewel-toned royal garden glow feels like an exclusive VIP winter gala. The ultimate standout choice if you want to be completely unique from every other house on the block.
Pairing deep violet with warm gold gives a designer-level finish that screams luxury. Adding high-end miniature garden supplies like golden outdoor ribbon elevates the display even further.
This rich, non-traditional palette runs about $70–$110. Pin this to your alternative holiday aesthetics board.
- Key Materials: Purple mini LEDs and golden warm white accents
- Vibe / Style: Extravagant, moody luxury
- Difficulty: Intermediate color balancing
- Budget Breakdown: Purple strings: $50 | Gold C7s: $45
- Creator’s Tip: Use the purple lights deep inside the bushes for an ambient base glow, and wrap the gold tightly around the trunks as the highlight.
- Smart Sourcing: deep purple outdoor LED spools and shatterproof gold-tinted C7 bulb sets.
41. Gradient Color Transitions
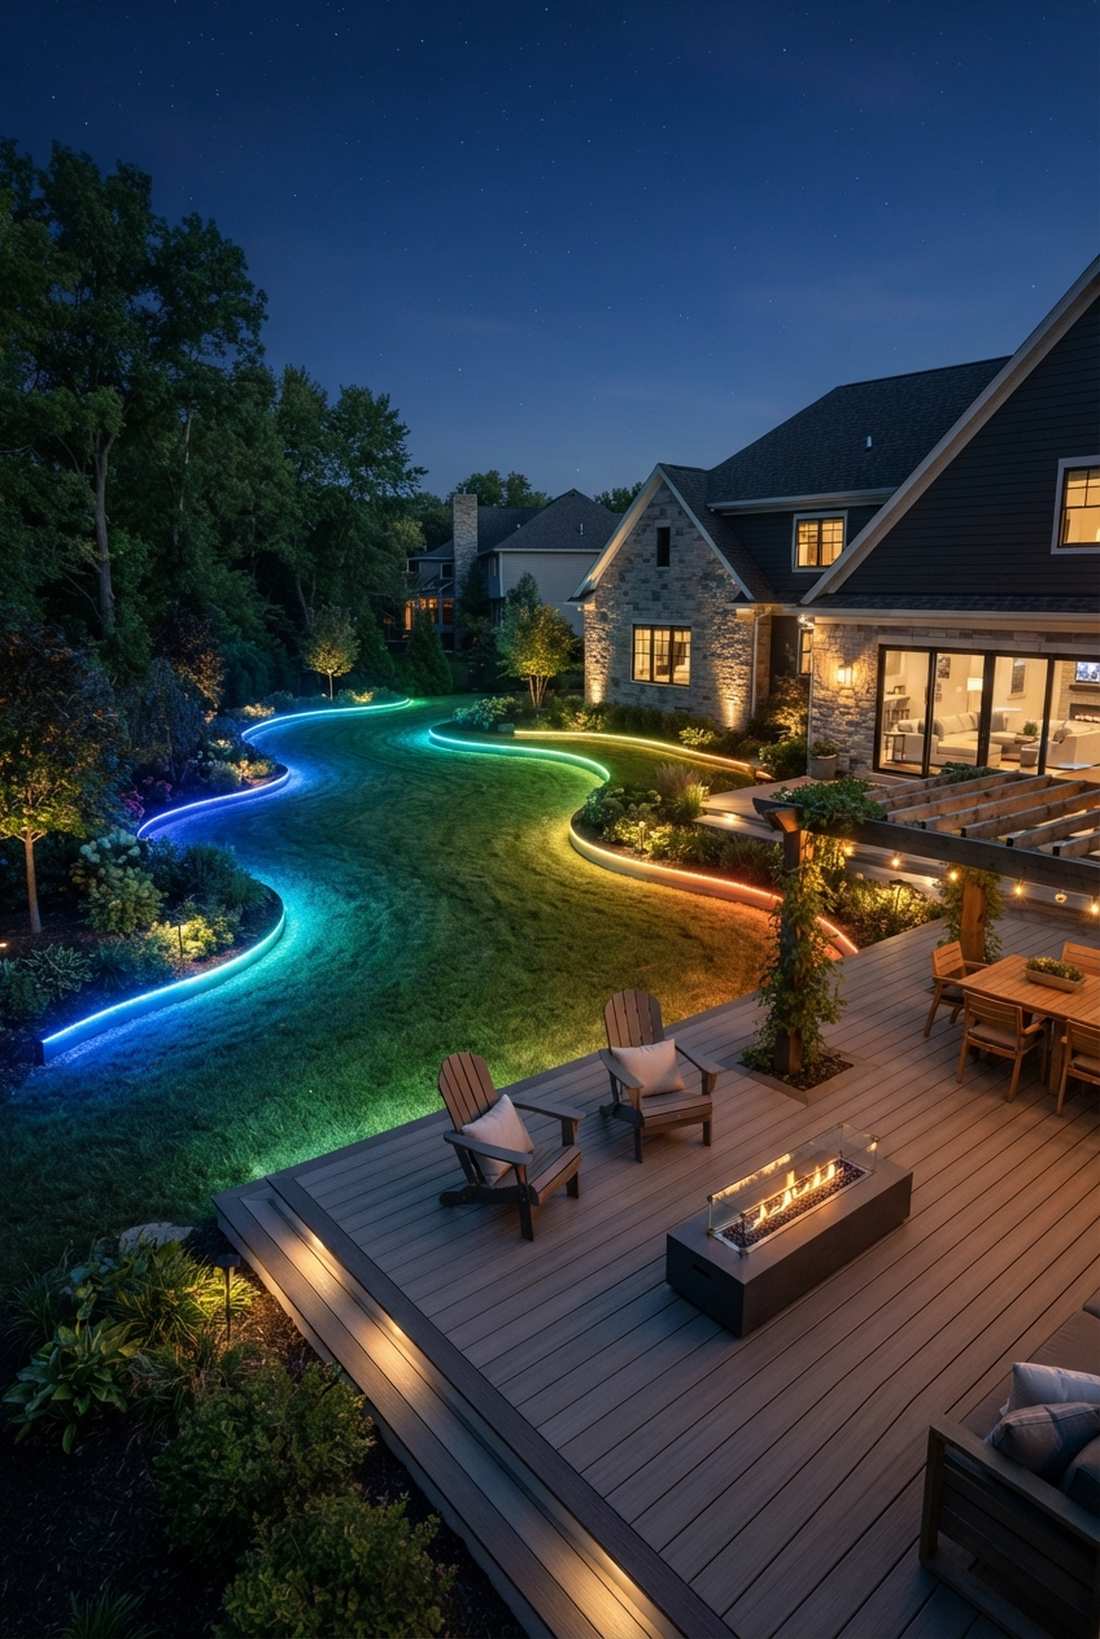
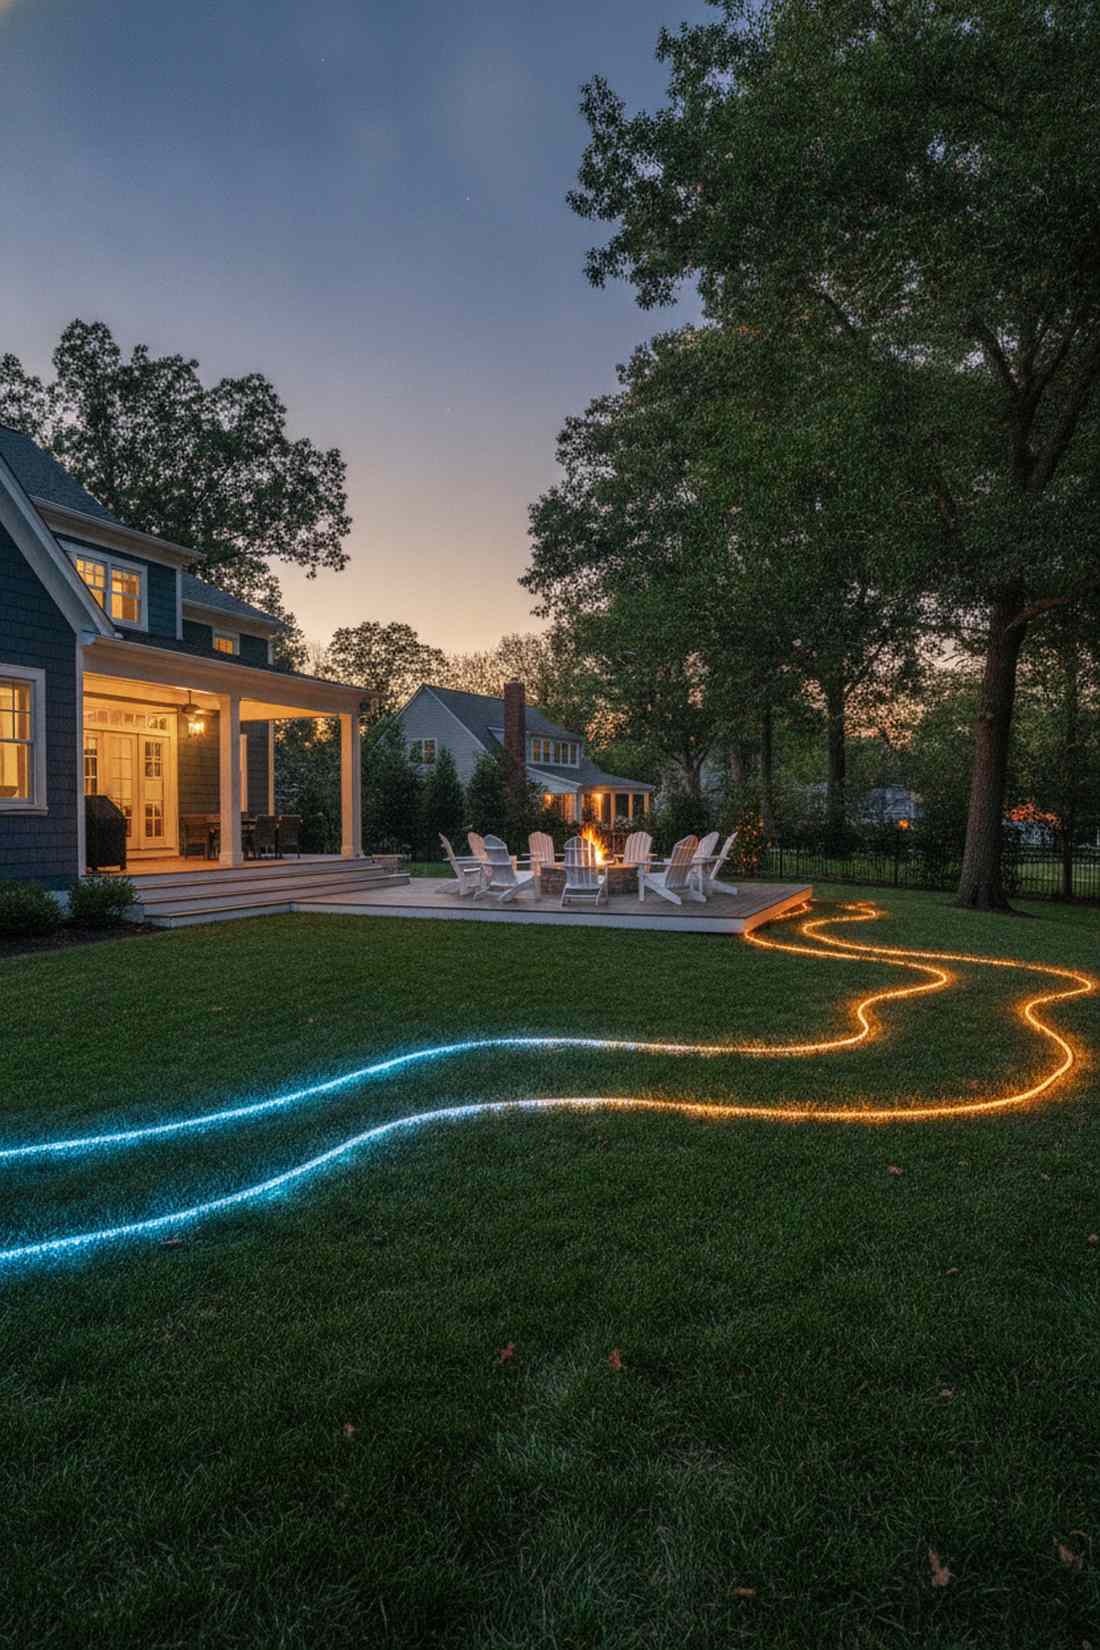
A flowing color-shifting landscape wave feels like an interactive light show melting across your lawn. Perfect for wide properties where the eye travels continuously from left to right.
Programming a subtle shift from cool blue to warm amber delivers a surprisingly premium look. Utilizing modern RGB outdoor smart technology eliminates the need to buy dozens of different colored boxes.
This advanced tech-driven display costs roughly $120–$200. It’s a massive upgrade that completely dominates the neighborhood.
- Key Materials: App-controlled RGB smart light stringers
- Vibe / Style: Ultra-modern tech showcase
- Difficulty: High, requires app programming
- Budget Breakdown: Smart RGB kits: $160 | Hub: $30
- Creator’s Tip: Keep the transition incredibly slow. Rapidly flashing colors look cheap, while a slow 5-minute fade looks like a high-end resort.
- Smart Sourcing: app-controlled outdoor RGB light kits and waterproof smart lighting hubs.
42. Mixed Bulb Texture Layering
A highly textured dimensional mixed-bulb facade feels like a rich, layered tapestry of glowing jewels. Brilliant for creating massive depth on flat-faced modern homes.
Combining massive C9 globes with tiny micro-fairies looks far more expensive than using one uniform size. Mixing in high-grade fairy garden kits alongside heavy roofline cables creates spectacular visual contrast.
This master-level layering technique runs about $90–$150. Save this if you want the absolute most professional aesthetic possible.
- Key Materials: A mix of C9 bulbs, C7 bulbs, and micro fairy strings
- Vibe / Style: Professional masterclass display
- Difficulty: Hard, requires complex layout planning
- Budget Breakdown: Big bulbs: $70 | Micro lights: $40
- Creator’s Tip: Put the largest bulbs on the highest architectural peaks, and use the smallest, finest lights closest to the ground pathways.
- Smart Sourcing: mixed-size commercial LED bundles and multi-gauge outdoor wire clips.
Bringing Your Xmas Lights Garden Vision to Life
Executing an expensive-looking xmas lights garden requires a strategic blend of visual creativity and high-end material sourcing, completely transforming an ordinary yard into a premium holiday destination. By implementing these 42 exacting blueprints, you skip the amateur mistakes and guarantee a designer-level aesthetic that stops traffic. Before you start wrapping, map out your heavy-duty power hubs, invest in commercial-grade LED starter kits, and layer your focal points using the high-CPC setups outlined above. Focus on robust, weather-resistant gear rather than cheap retail boxes to ensure your display survives the harshest winter weather.
The exact item blueprints presented here provide a tactical approach for generating massive curb appeal regardless of your property’s size. Whether you opt for a sleek, cool-white winter architectural highlight or a nostalgic multi-colored tree cluster, combining these 42 setups guarantees a cohesive, luxurious result. Take photos of your high-end installation to refine your layout next season, and rely on smart outdoor timers to cut energy costs while maintaining a flawless nightly glow. With smart sourcing and a strict adherence to these pro blueprints, your landscape will become a breathtaking neighborhood landmark.
Frequently Asked Questions
How many lights do I need for a typical front yard Christmas display?
For average front yards of 1,000-1,500 square feet, plan for 200-400 lights to create visible impact without overwhelming the space. To achieve that high-end look without breaking the bank, it is highly recommended to invest in bulk pack LED starter kits rather than buying individual boxes. Calculate your layout precisely: feature trees require heavy-duty string spools (about 100 lights per foot of height), while utilizing premium solar pathway kits saves you from running excessive extension cords across the lawn.
What type of outdoor Christmas lights last the longest?
Commercial-grade LED lights with UV-coated wire insulation offer the longest lifespan, often lasting 50,000-100,000 hours and surviving brutal winter storms easily. Skipping the cheap generic aisles and sourcing professional weatherproof LED light bundles stops mid-season burnout and dramatically lowers your replacement costs over time. LEDs consume 80-90% less electricity, remain cool to the touch, and when paired with dielectric grease for outdoor plug seals, they are the undisputed champion of premium holiday setups.
When should I start planning my xmas lights garden display?
Begin planning in September or early October to secure the best pricing on heavy-duty commercial gear before the holiday retail markup hits. Early planning allows you to source specific high-end products like stretchable net grids and magnetic window track kits before they completely sell out in November. Mapping out your exact layout early means you can buy your materials in bulk, test all connections indoors, and complete the installation using proper outdoor timer hubs before freezing temperatures arrive.
How can I make my Christmas light display energy efficient?
Switch entirely to commercial-grade LED light spools to immediately cut your energy consumption by up to 90% compared to outdated incandescent setups. To save even more money and automate the aesthetic, integrate outdoor-rated smart Wi-Fi plugs that sync directly to the sunset and shut down automatically at midnight. Additionally, weaving in premium solar-powered accent kits for distant landscape features completely eliminates the need for massive, power-draining extension cord webs.
What safety precautions should I take with outdoor holiday lighting?
Never compromise on safety—always utilize commercial-grade weatherproof extension hubs and strictly adhere to 14-gauge wires for any run up to 50 feet. Connect all outdoor arrays directly to ground fault circuit interrupter (GFCI) outlets, and use waterproof cord protector boxes to shield your connection points from melting snow. Discard any generic strands with frayed wires instantly, and employ heavy-duty damage-free gutter clips instead of staples to prevent wire punctures and exterior home damage.