Transform blank walls instantly with these high-yield vertical garden systems. Uncover hidden architectural blueprints and exact material sourcing guides. Achieve designer-level botanical displays without premium landscaping fees.
Design Snapshot: High-End Principles
- Load Distribution: Structural integrity requires specific wall anchoring hardware that seamlessly handles the weight of premium, moisture-rich botanical setups.
- Water Management: Upgraded automated irrigation prevents wall rot while establishing a hands-off, zero-maintenance environment.
- Modular Flexibility: Panel-based setups adapt instantly, letting you swap out trending seasonal foliage without rebuilding the base framework.
- Material Durability: Leveraging UV-resistant polymers and heavy-duty stainless steel ensures your installation survives harsh climates without fading.
Modular Panel and Pocket Systems for Vertical Garden Structure
Modular layouts offer the absolute best return on investment for any modern aesthetic. These high-capacity interlocking grids perfectly balance extreme weight loads while creating a flawless, uniform backdrop for expensive-looking trailing vines or dense herb clusters.
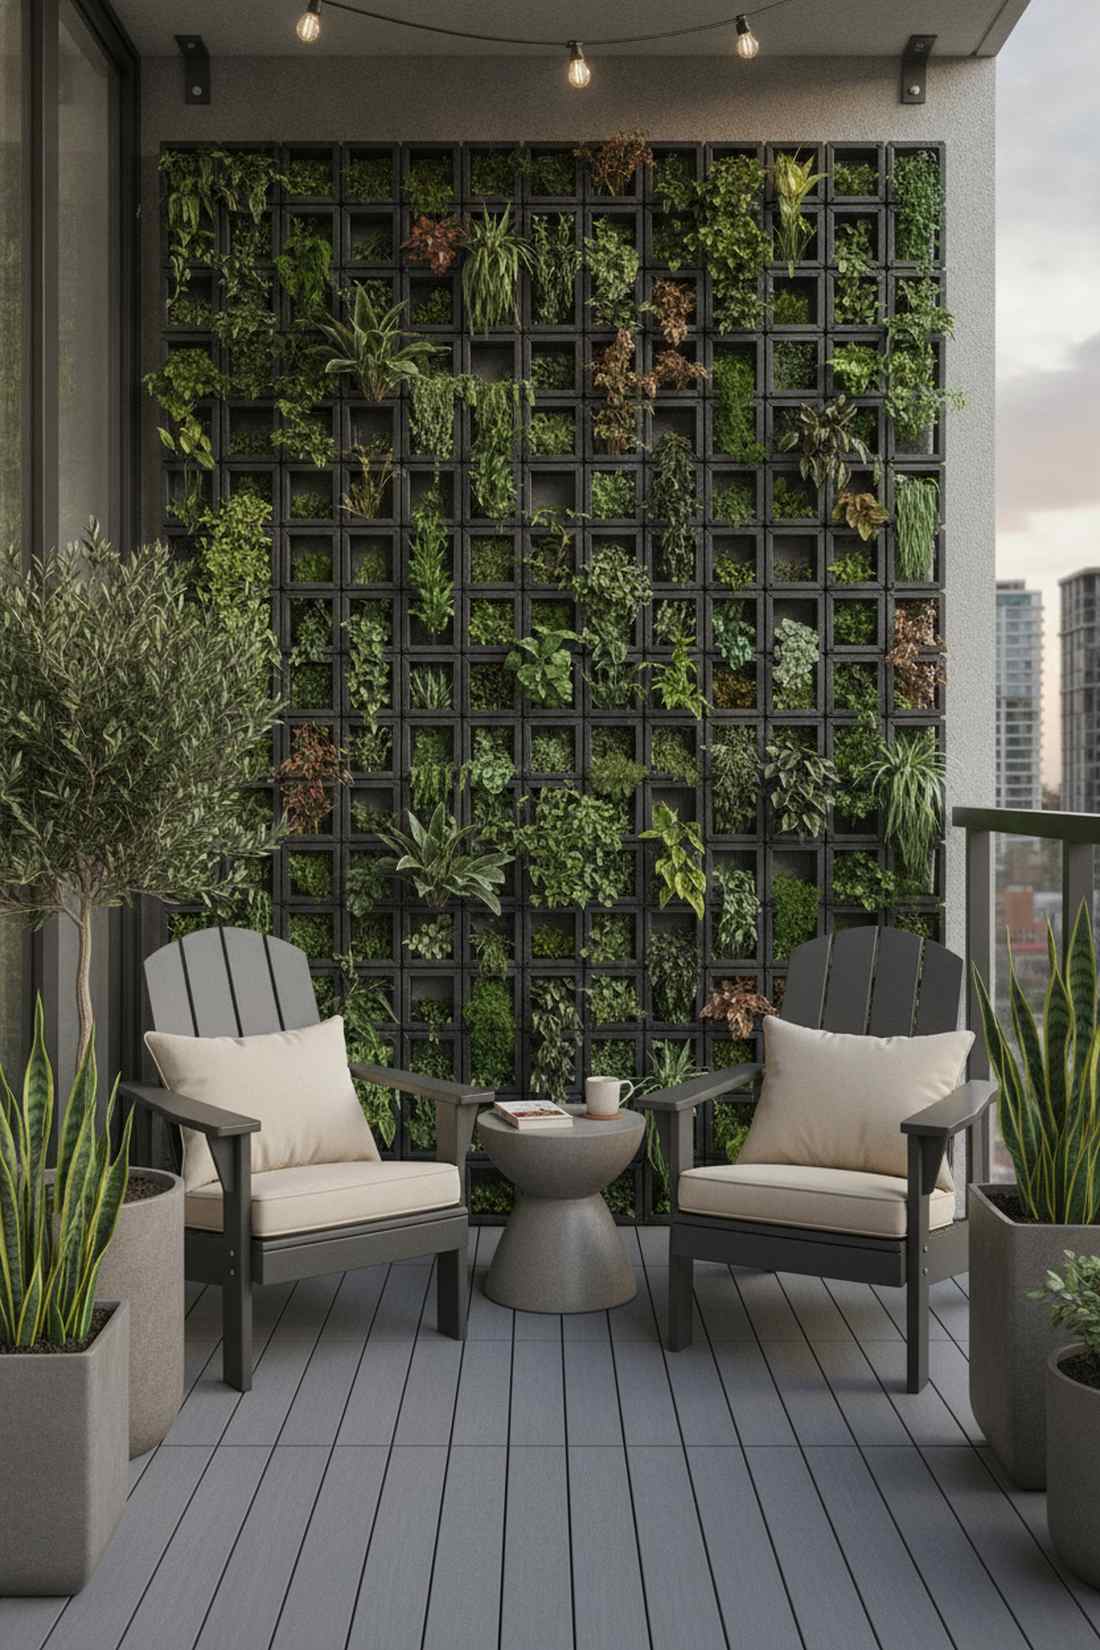
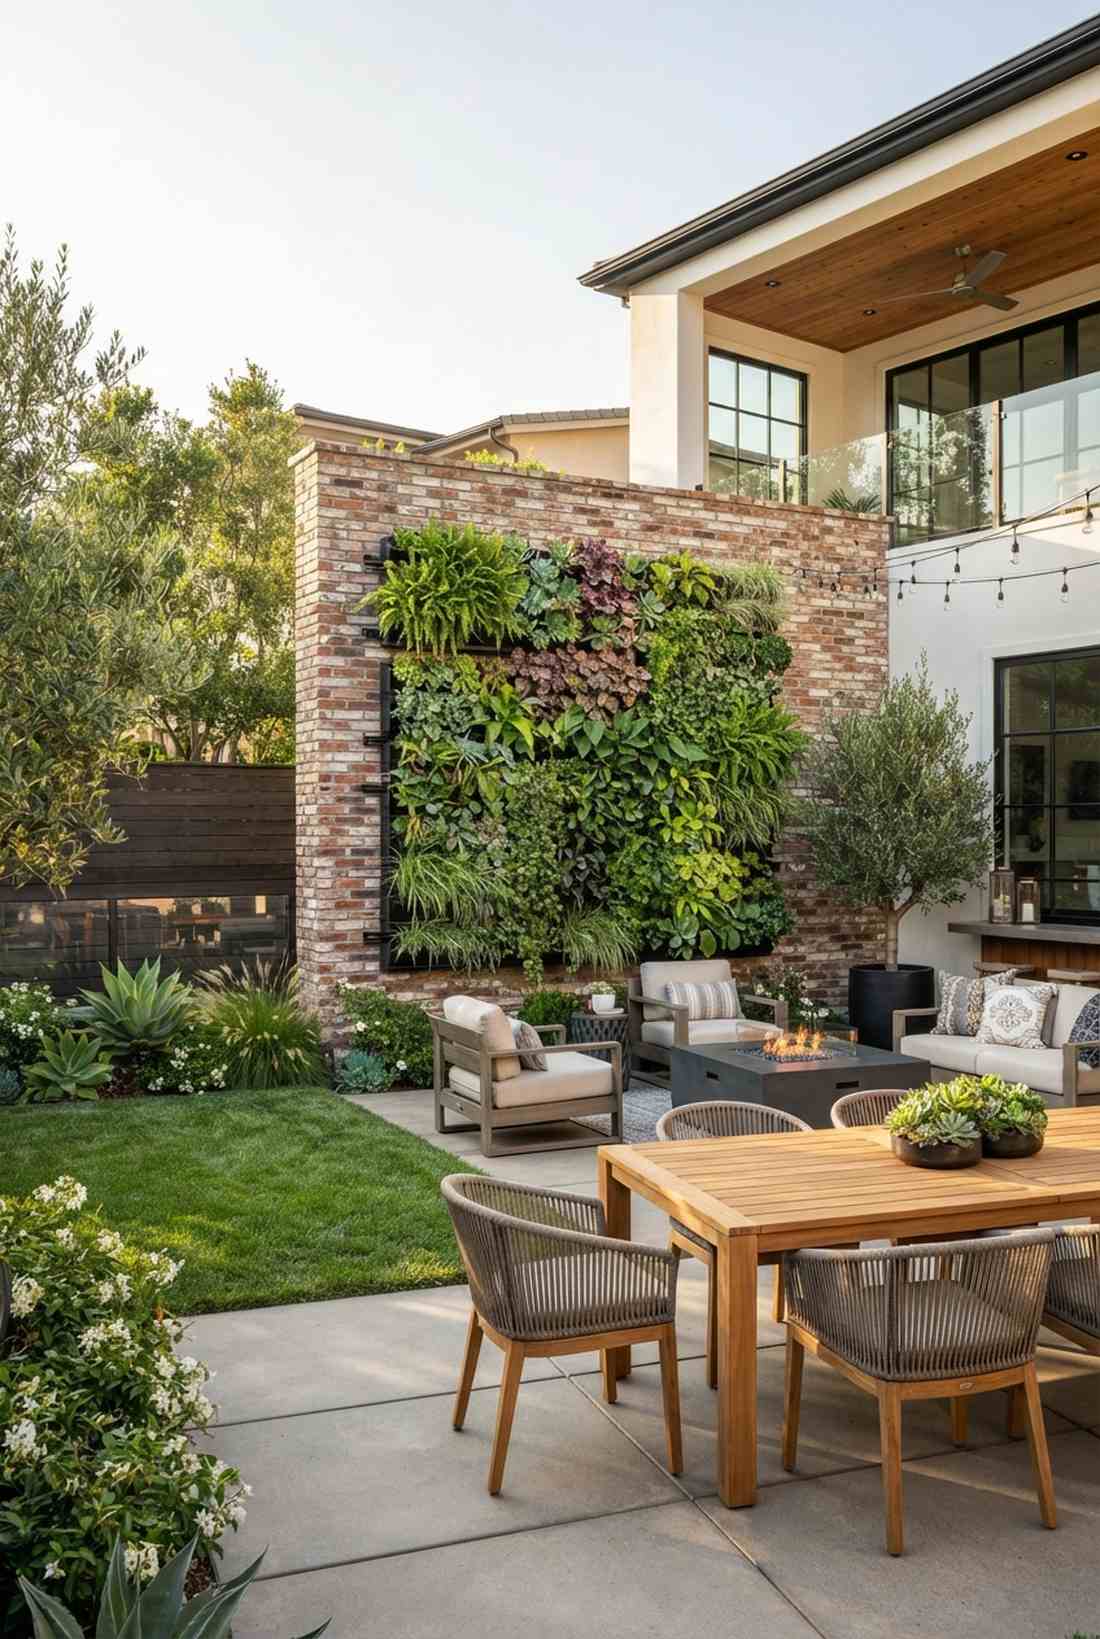
1. Interlocking Grid Panels with Individual Cell Compartments

Feels like a high-end botanical sanctuary right at home. This modern vertical patio wall works exceptionally well for a shaded apartment balcony.
Designers often charge thousands for this layout, yet the snap-together structure is deceptively simple. Utilizing heavy-duty UV-resistant modular grids instantly gives a designer-level finish.
You can easily pull this off for around $40–$80 per section. Pin this if you’re planning a small space upgrade!
- Key Materials: Pre-cut UV-resistant interlocking grid kits
- Vibe / Style: Ultra-modern urban oasis
- Difficulty: Easy weekend project
- Budget Breakdown: Materials: $45 | Hardware: $15.
- Creator’s Tip: Use lag bolts into structural studs to prevent sagging over time.
- Smart Sourcing: pre-cut interlocking planter modules and heavy-duty exterior lag bolts.
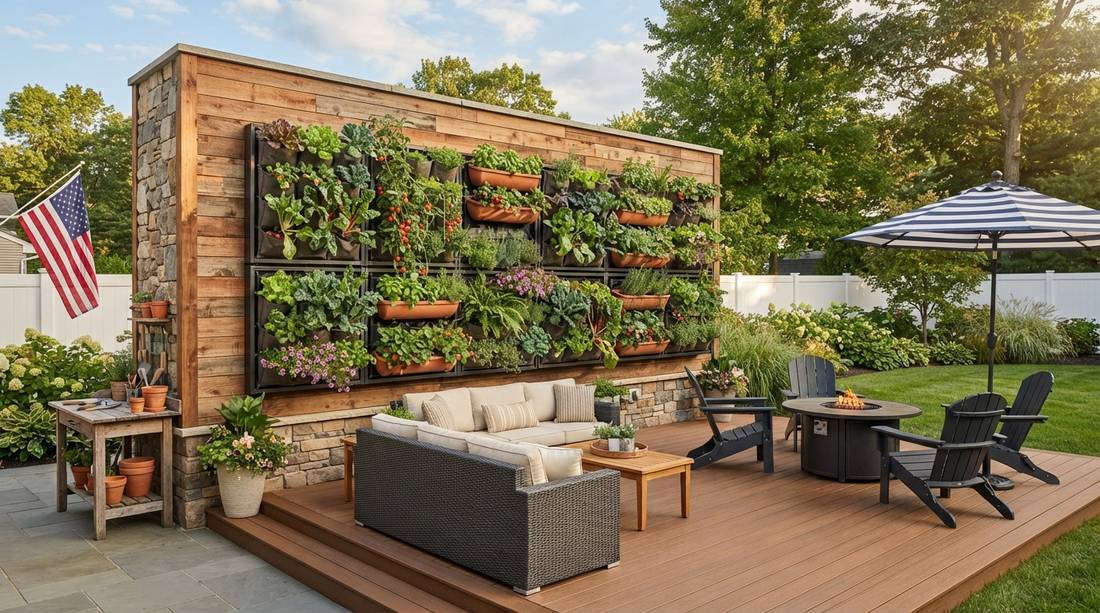
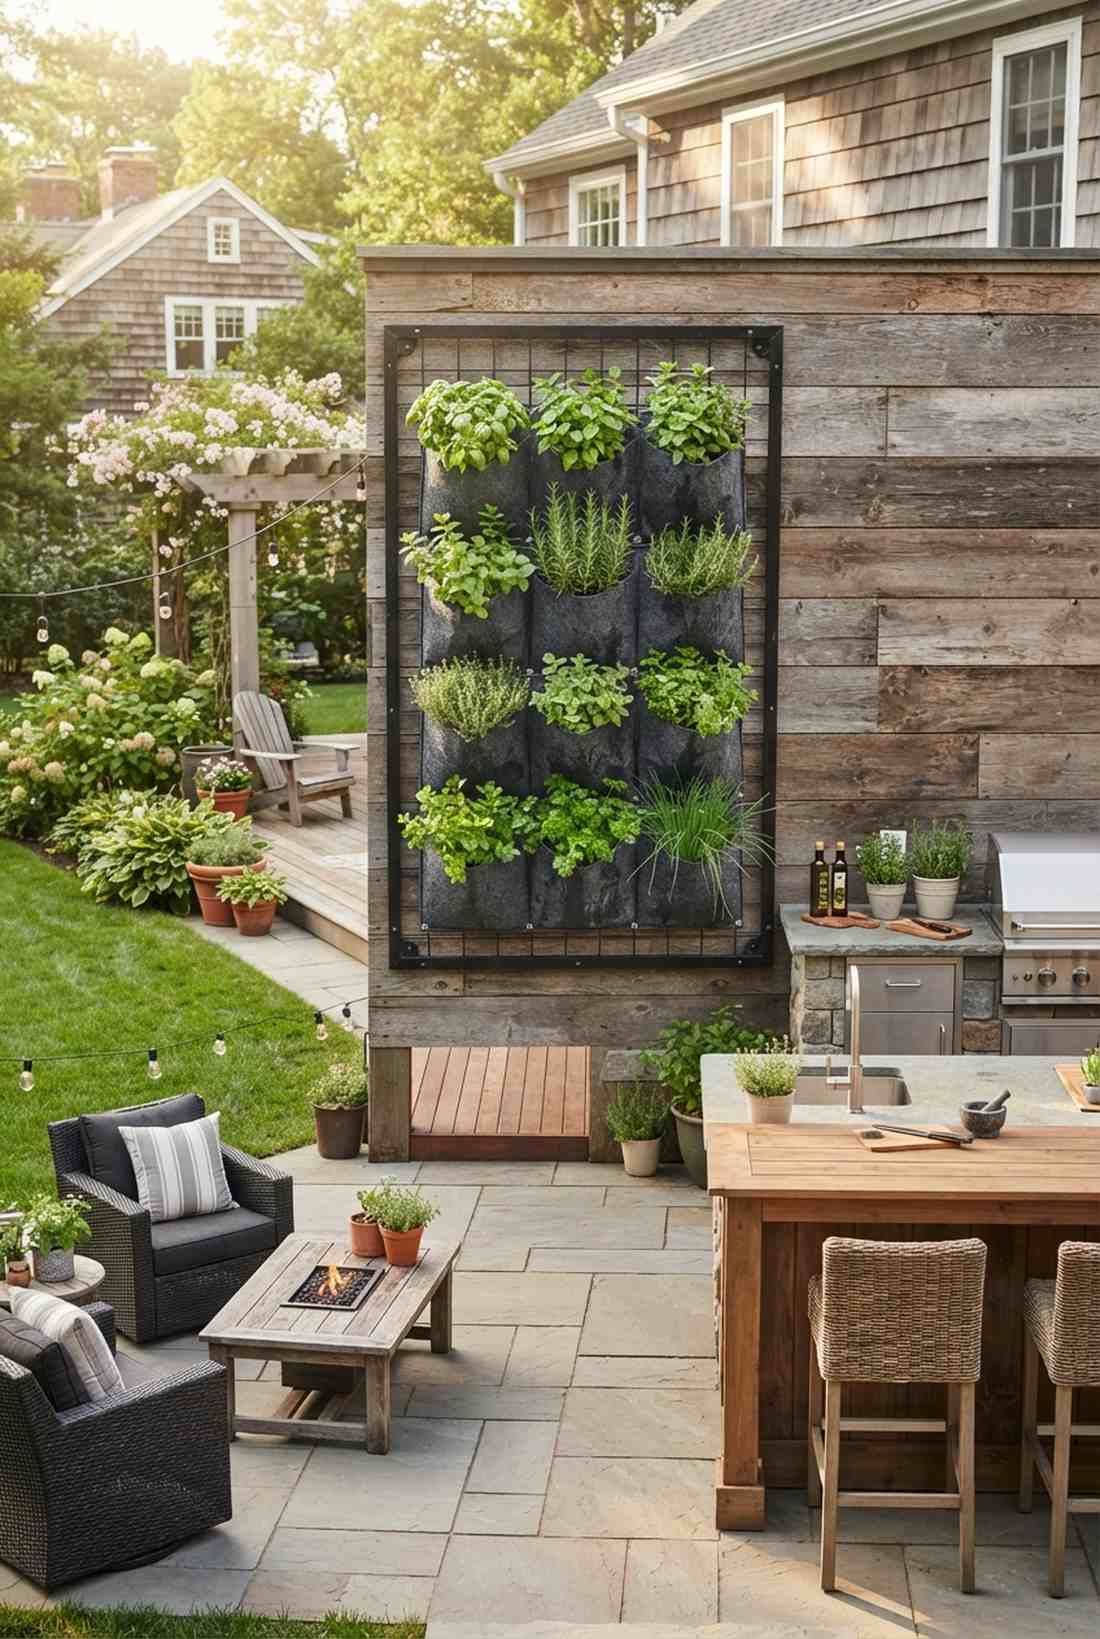
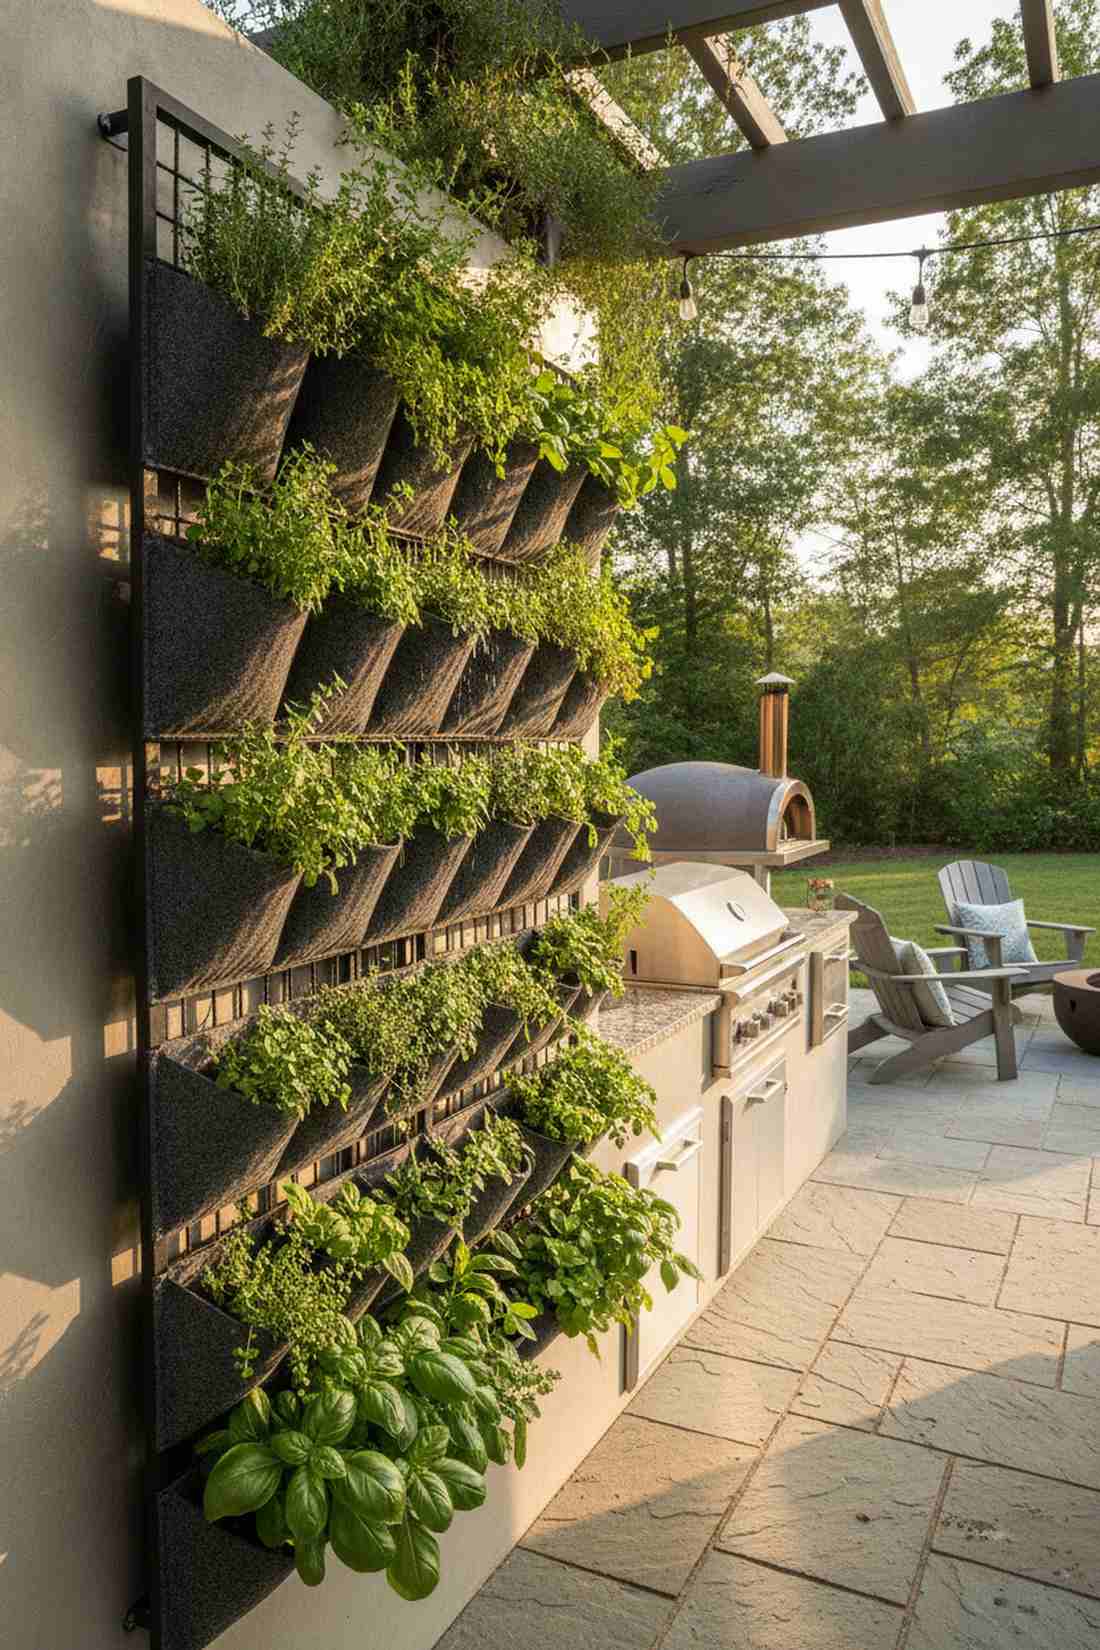
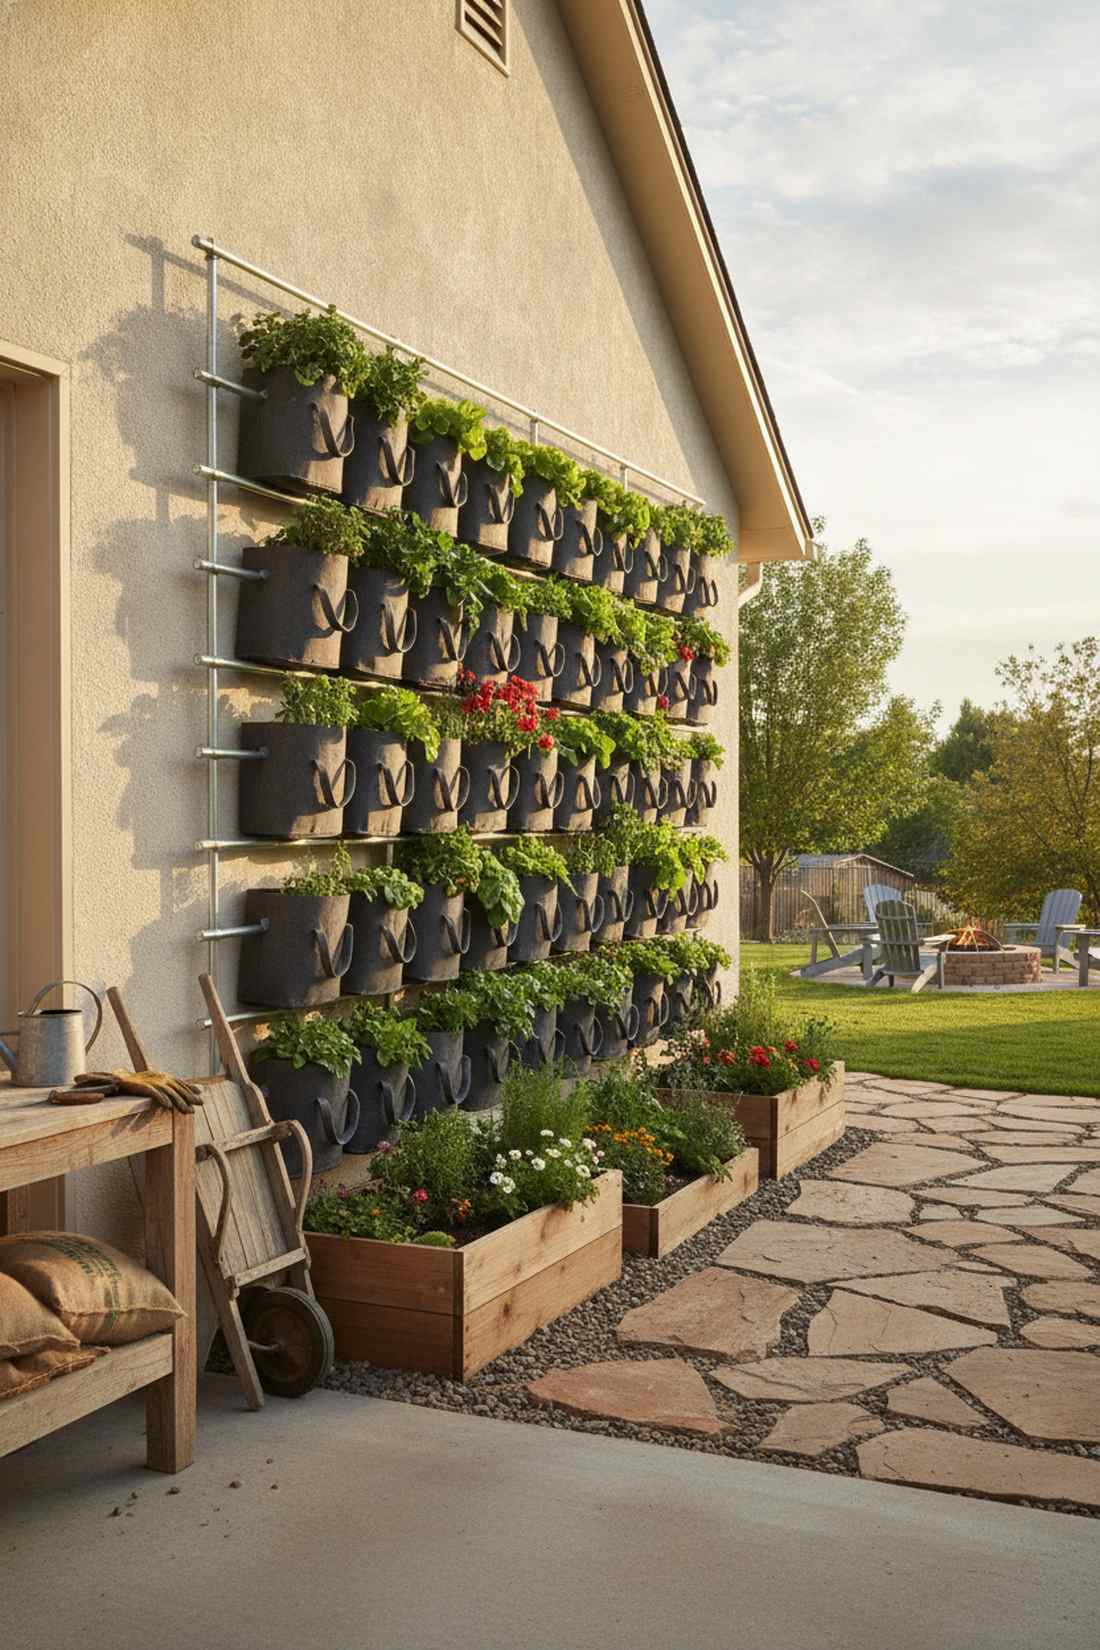
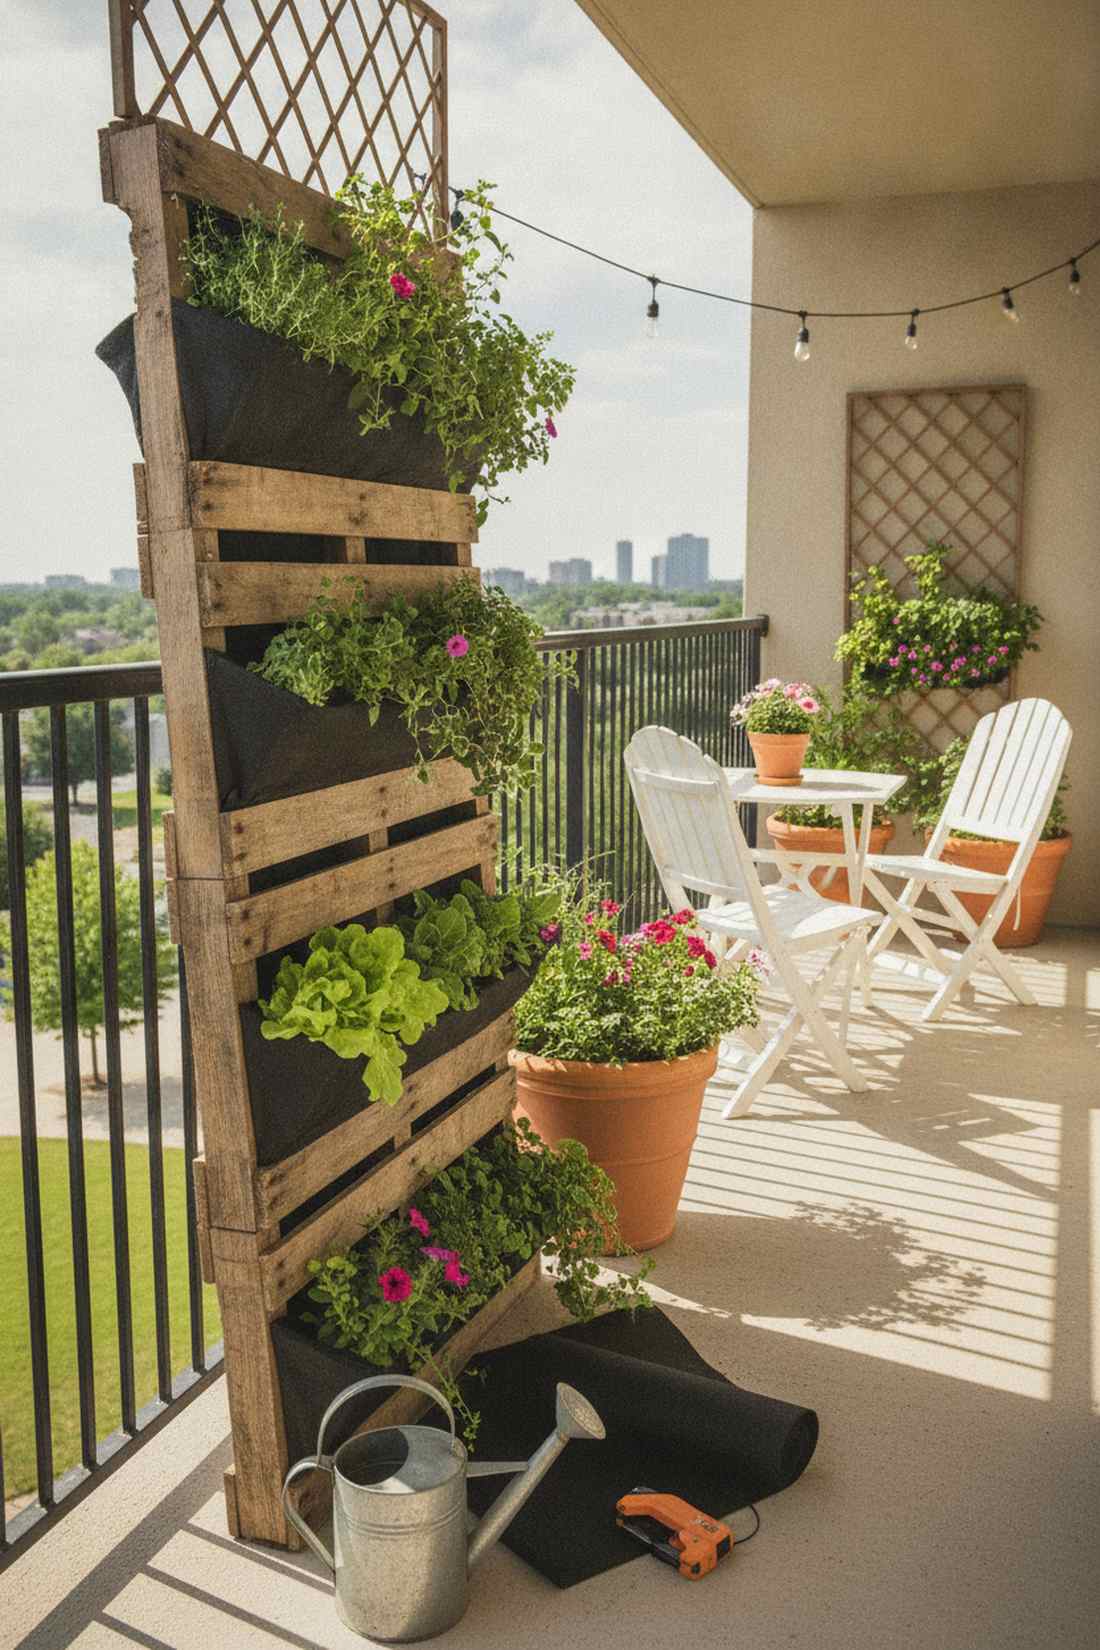
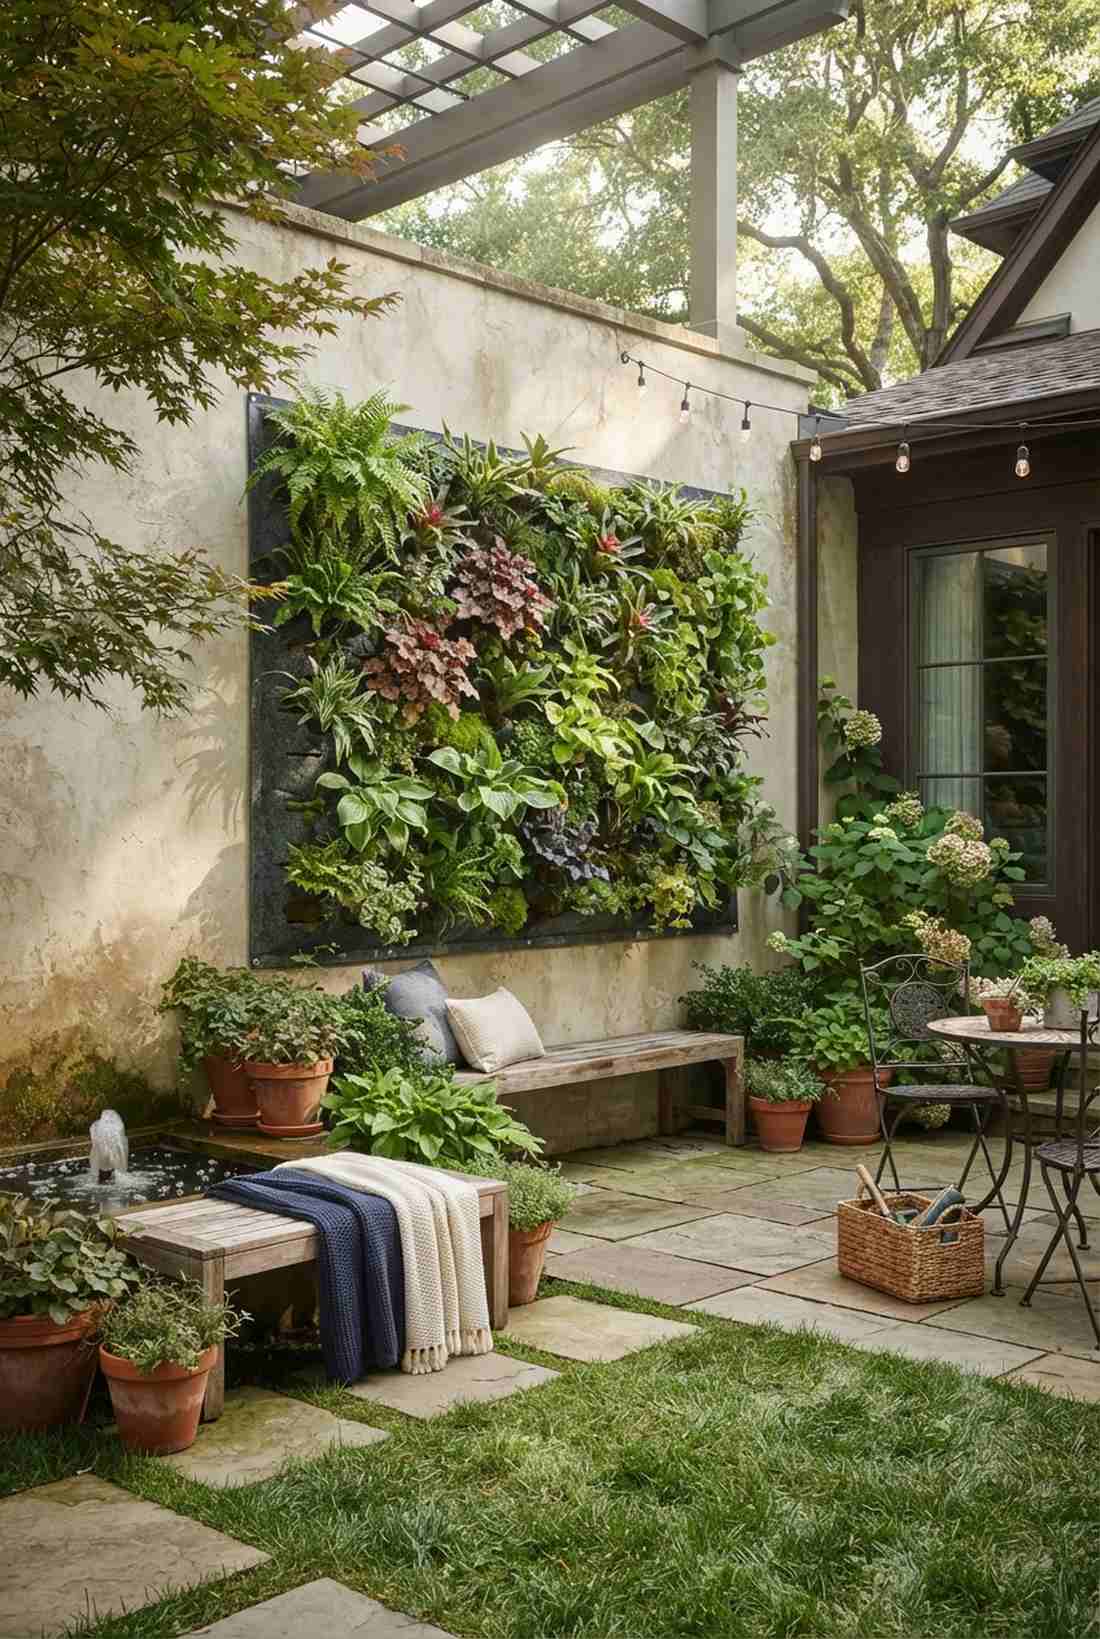
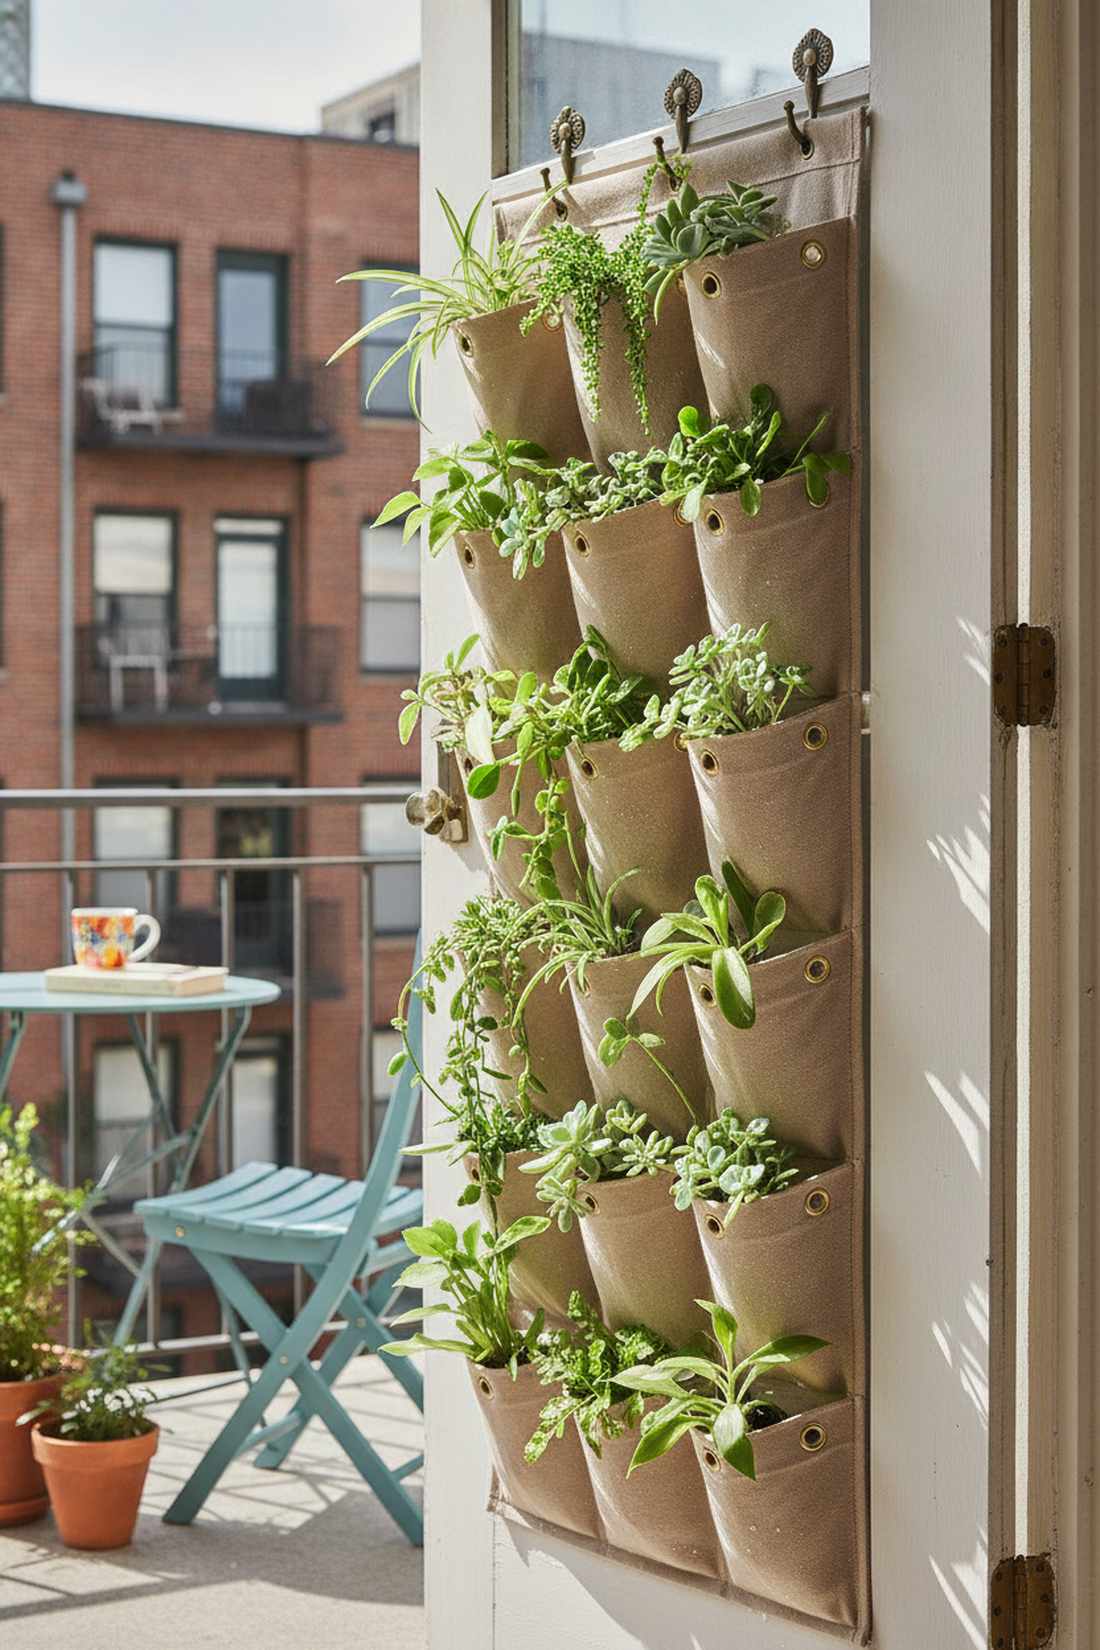
2. Felt Pocket Planters on Metal Frame Grids
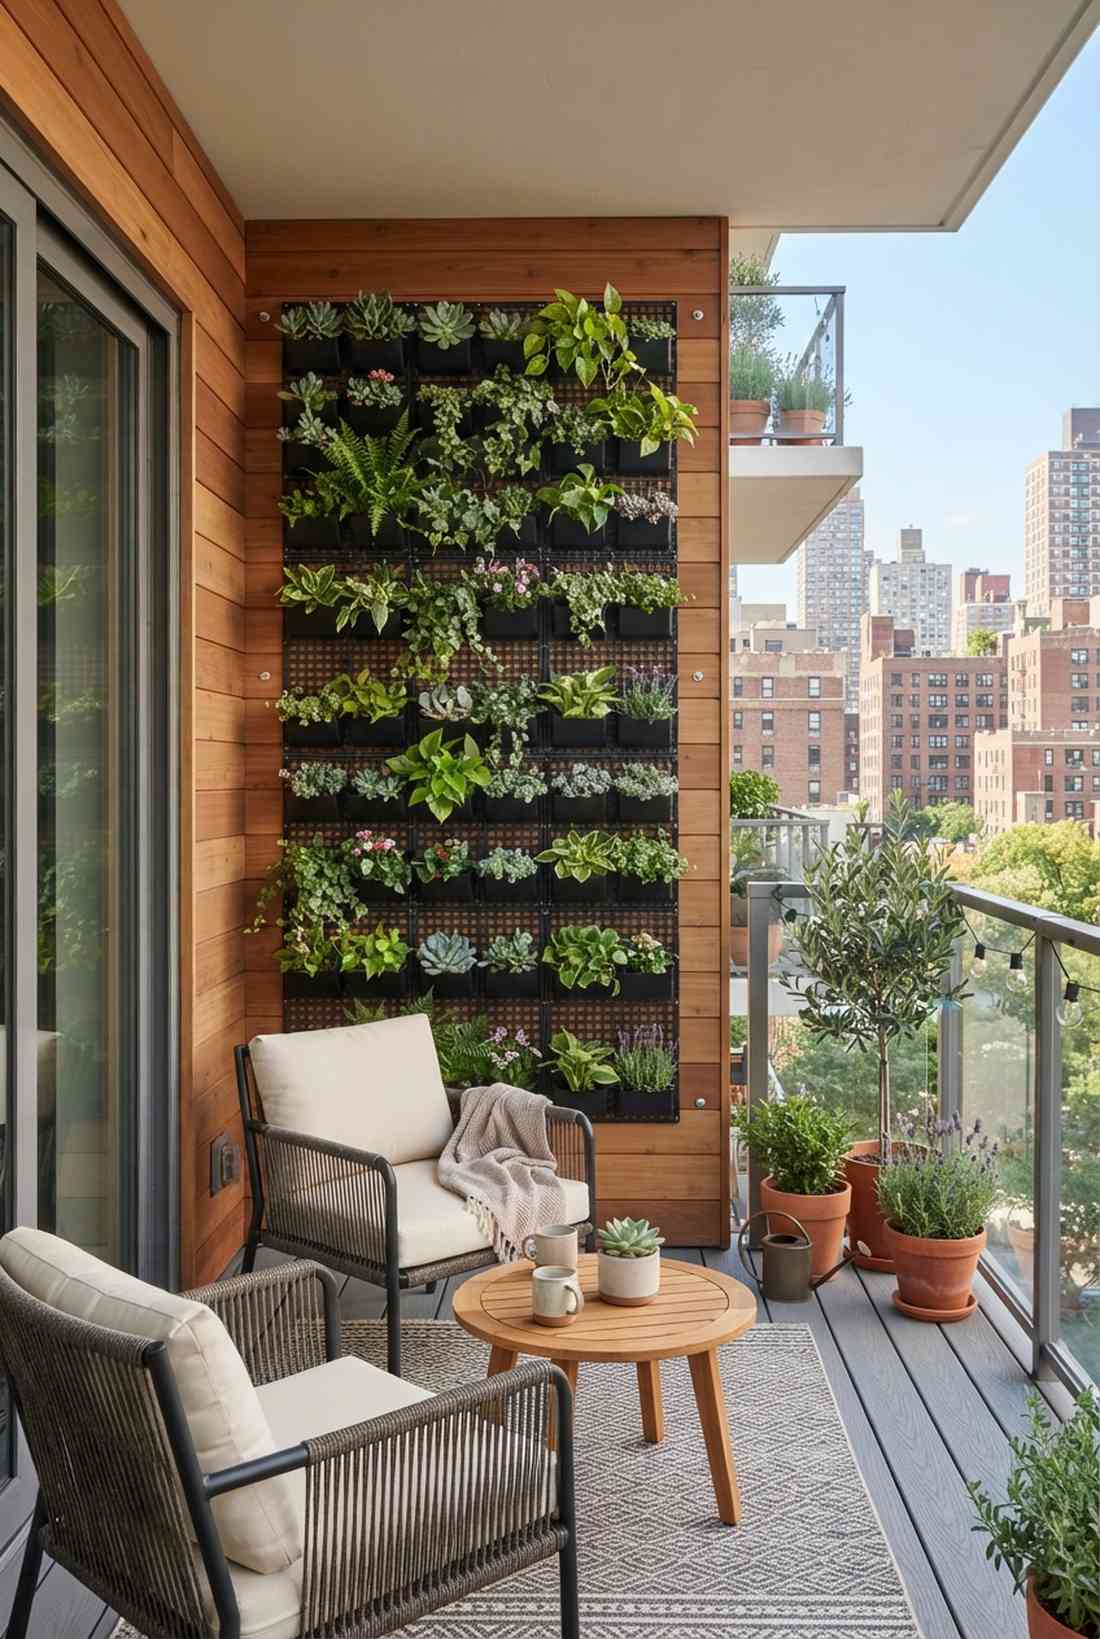
Like a living tapestry breathing life into your space. A cascading felt garden display is perfect for an outdoor kitchen herb station.
Forget the flimsy fabric you see in big box stores; industrial-grade polyester completely transforms root aeration. This breathable vertical garden installation perfectly prevents waterlogging while supporting rapid, dense foliage growth.
Expect to spend roughly $20–$45 depending on the frame size. Highly recommended for a quick weekend win.
- Key Materials: 12-ounce recycled polyester felt pockets
- Vibe / Style: Lush culinary green wall
- Difficulty: Beginner friendly
- Budget Breakdown: Felt system: $30 | Metal grid: $20.
- Creator’s Tip: Layer water-loving plants at the bottom since moisture naturally drips down.
- Smart Sourcing: 12-pocket breathable felt planters and rust-proof metal backing grids.
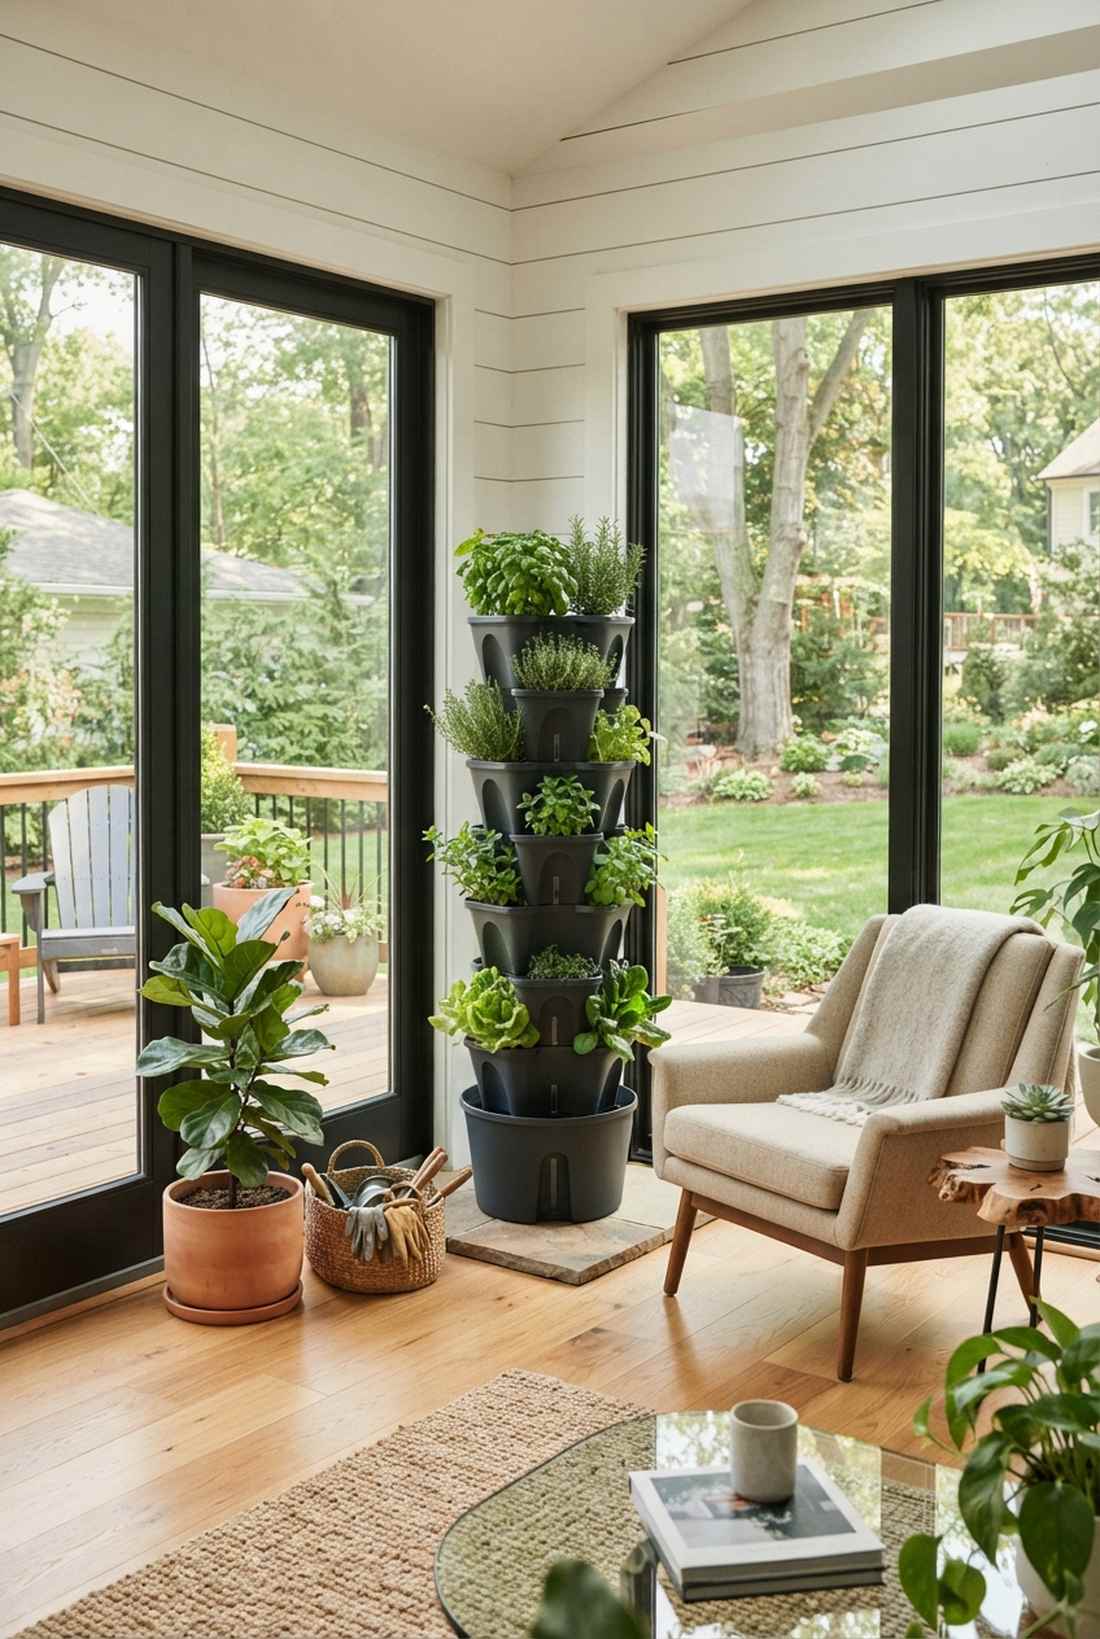
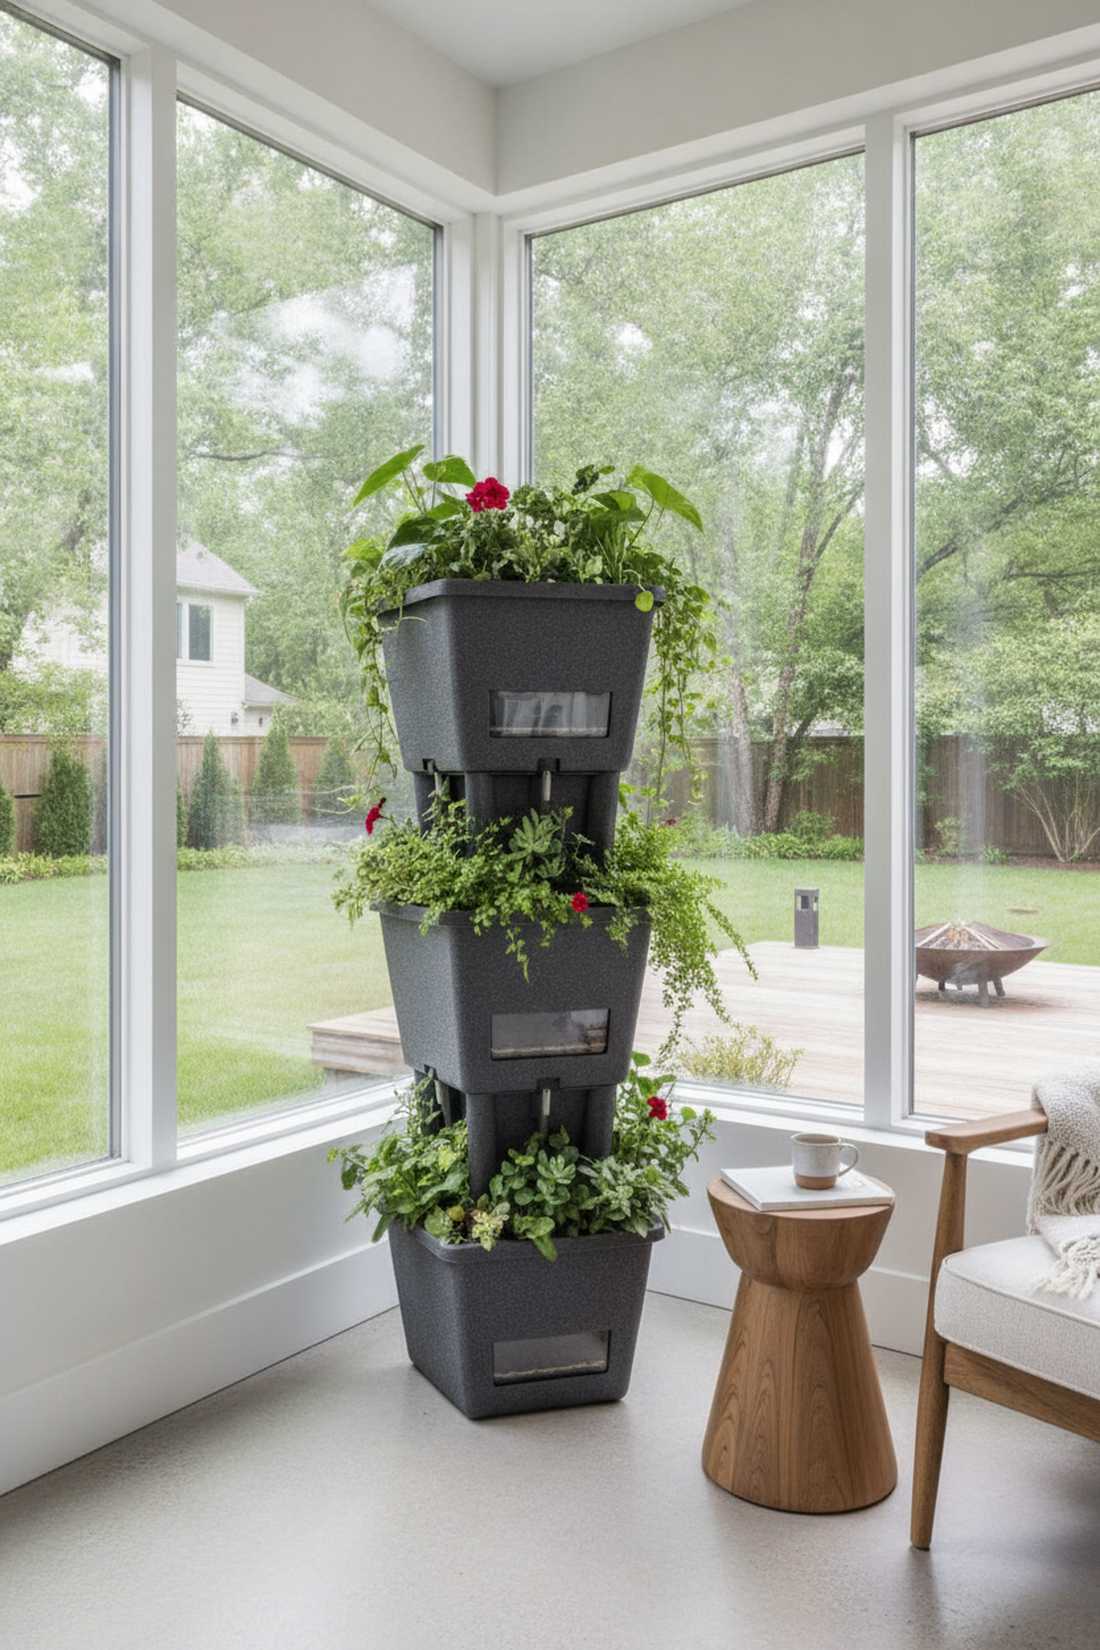
3. Stacked Planter Modules with Self-Watering Reservoirs
Straight out of a smart-home architectural magazine. These tiered self-watering columns fit flawlessly into tight corner sunrooms.
Many beginners struggle with hydration, but these capillary-action reservoirs eliminate that issue entirely. Sourcing premium polypropylene resin kits ensures a setup that looks far more expensive than it actually is.
This layout runs about $50–$100 for a multi-level stack. Save this to your DIY weekend garden board!
- Key Materials: Polypropylene self-watering planter stacks
- Vibe / Style: Minimalist tech-forward garden
- Difficulty: No-tool assembly
- Budget Breakdown: Planter base: $60 | Soil mix: $15.
- Creator’s Tip: Mix perlite into your soil to maximize the capillary watering effect.
- Smart Sourcing: self-watering vertical tower starter kits and premium moisture-control potting mix.
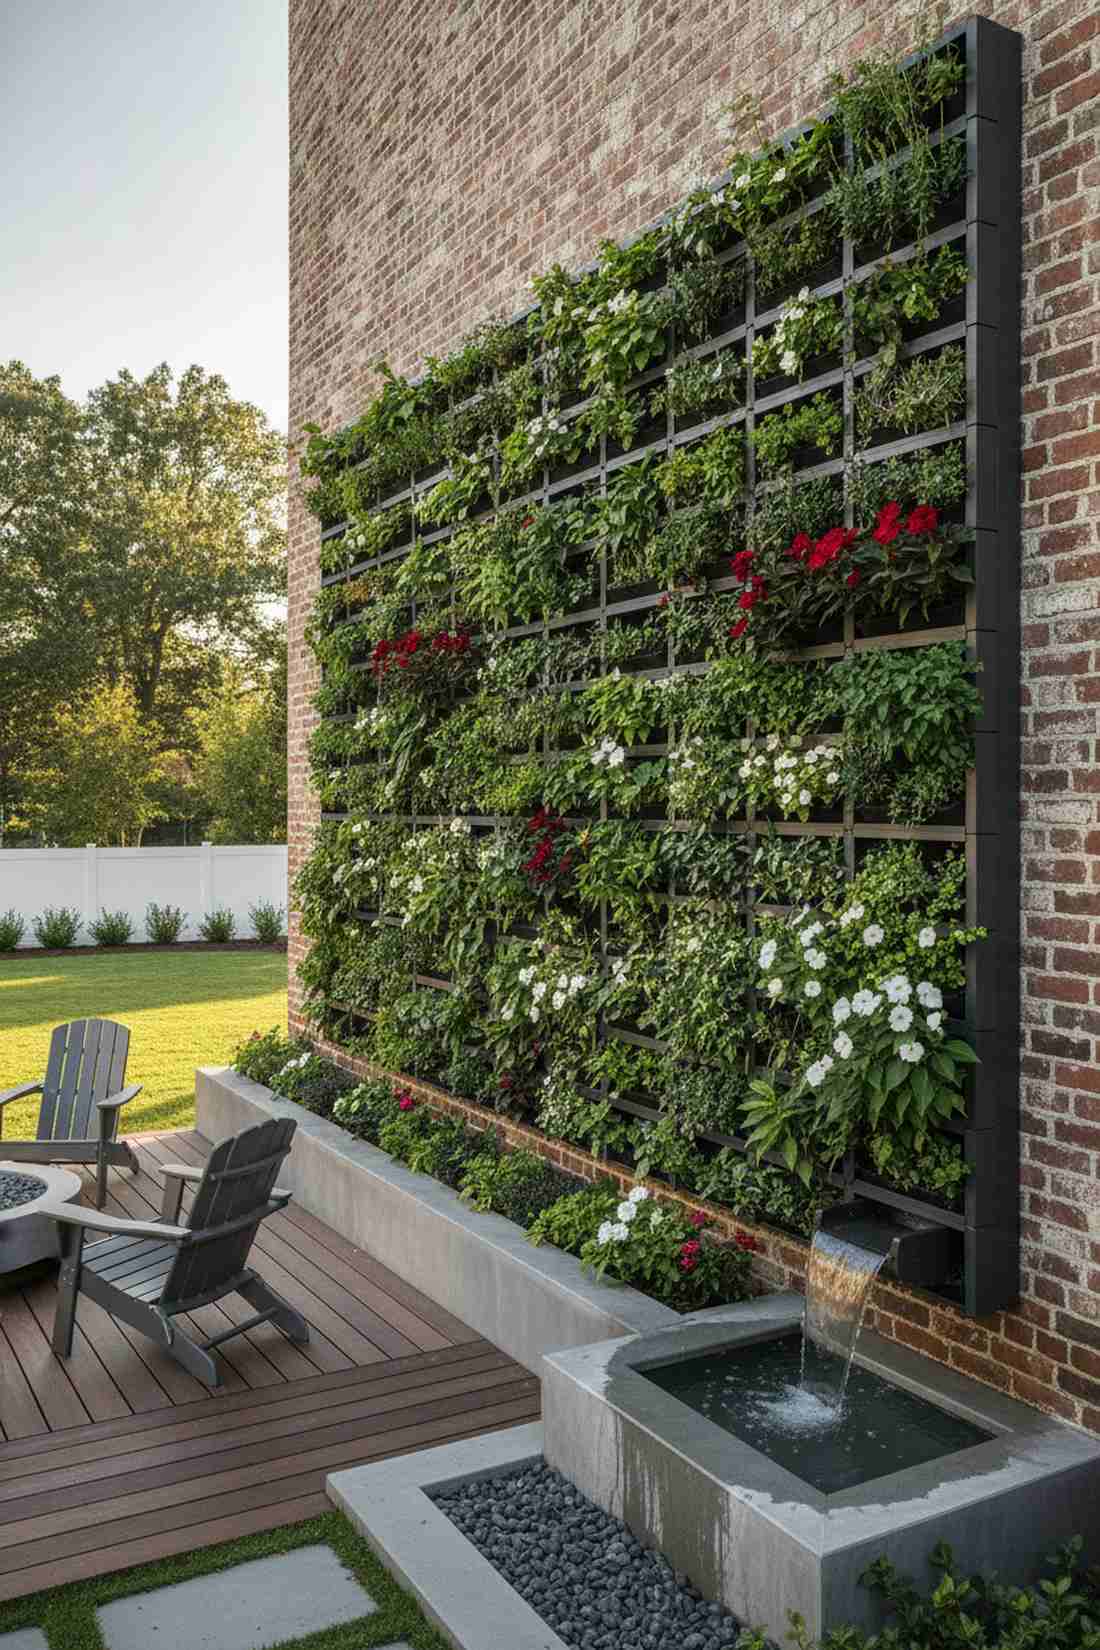
4. Living Wall Cassette System with Quick-Release Brackets
Radiates pure corporate luxury but scaled down for residential magic. A professional living wall layout transforms standard privacy fences completely.
Landscaping companies keep these quick-release aluminum brackets a closely guarded secret. Anchoring this robust vertical garden frame onto brick delivers a stunningly crisp, uniform aesthetic that commands attention.
Building this costs approximately $150–$300 for a statement wall. It’s a fast upgrade that completely changes the backyard vibe.
- Key Materials: Aluminum rail brackets and pre-formed cassettes
- Vibe / Style: High-end resort exterior
- Difficulty: Intermediate structural setup
- Budget Breakdown: Cassettes: $120 | Mounting rails: $45.
- Creator’s Tip: Pre-grow your plants in the cassettes for 3 weeks before mounting them to the wall.
- Smart Sourcing: commercial living wall cassette packs and anodized aluminum mounting rails.
Most people get this completely wrong… until they try the exact rugged layout coming up next.
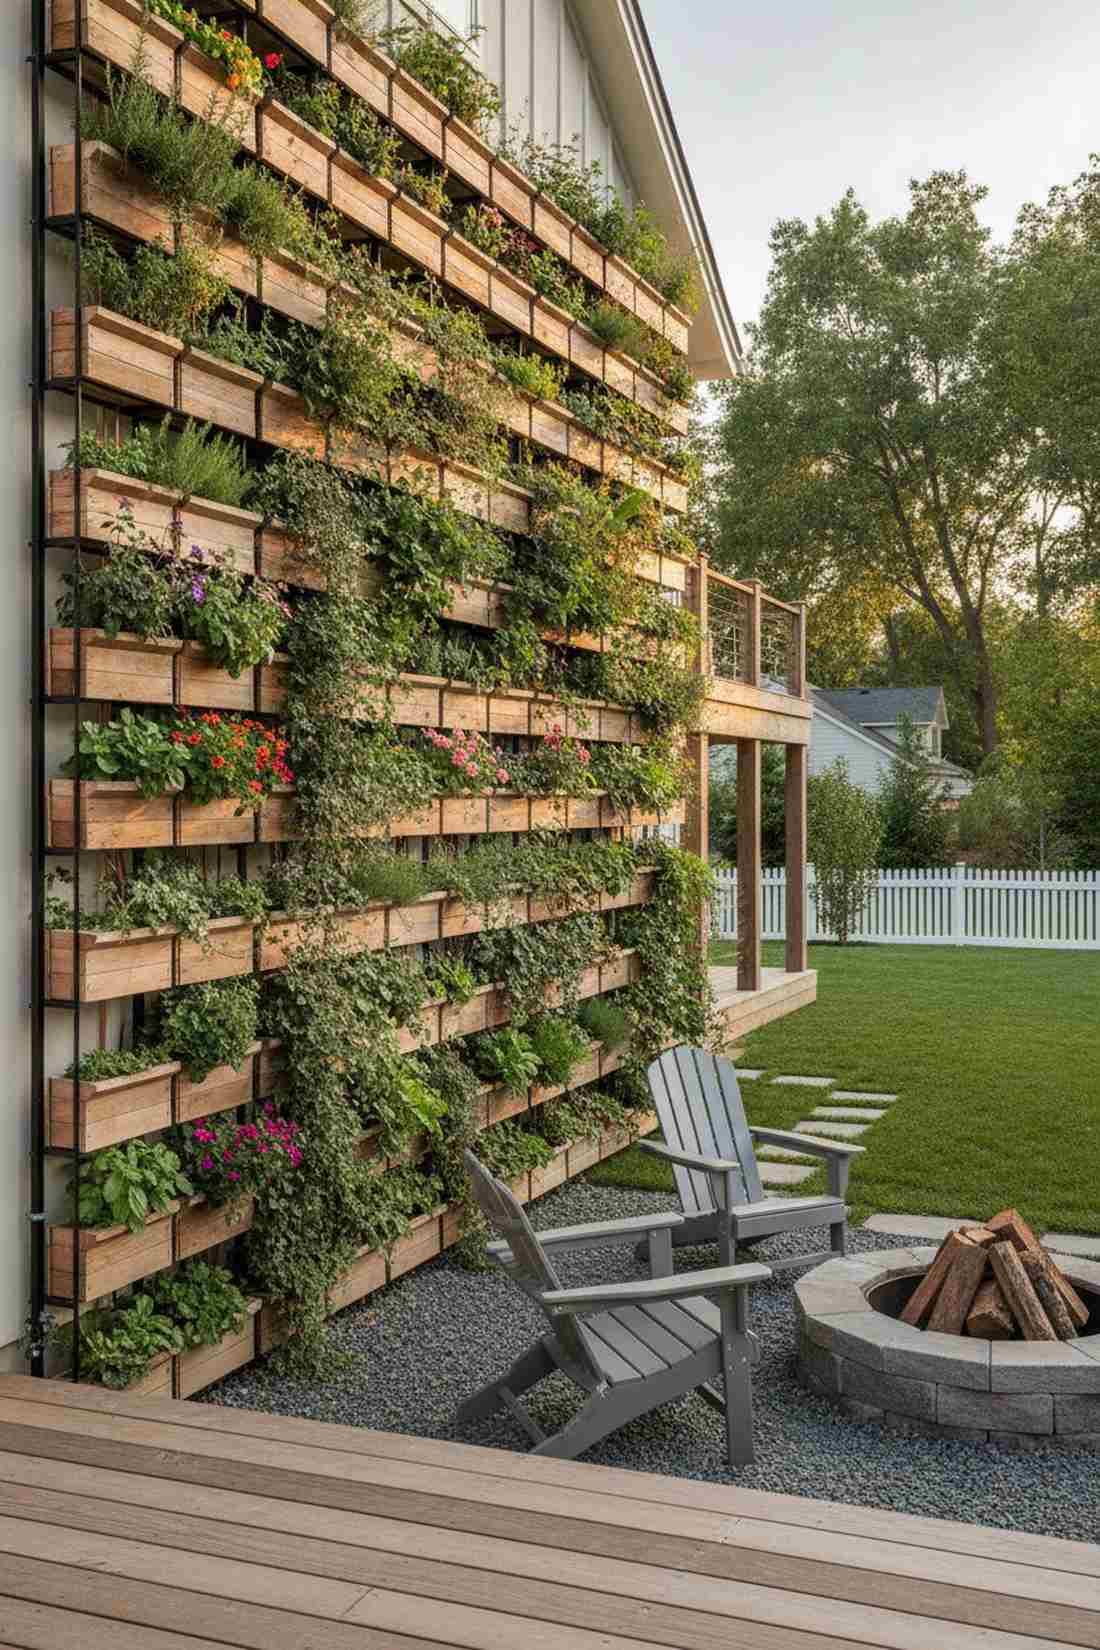
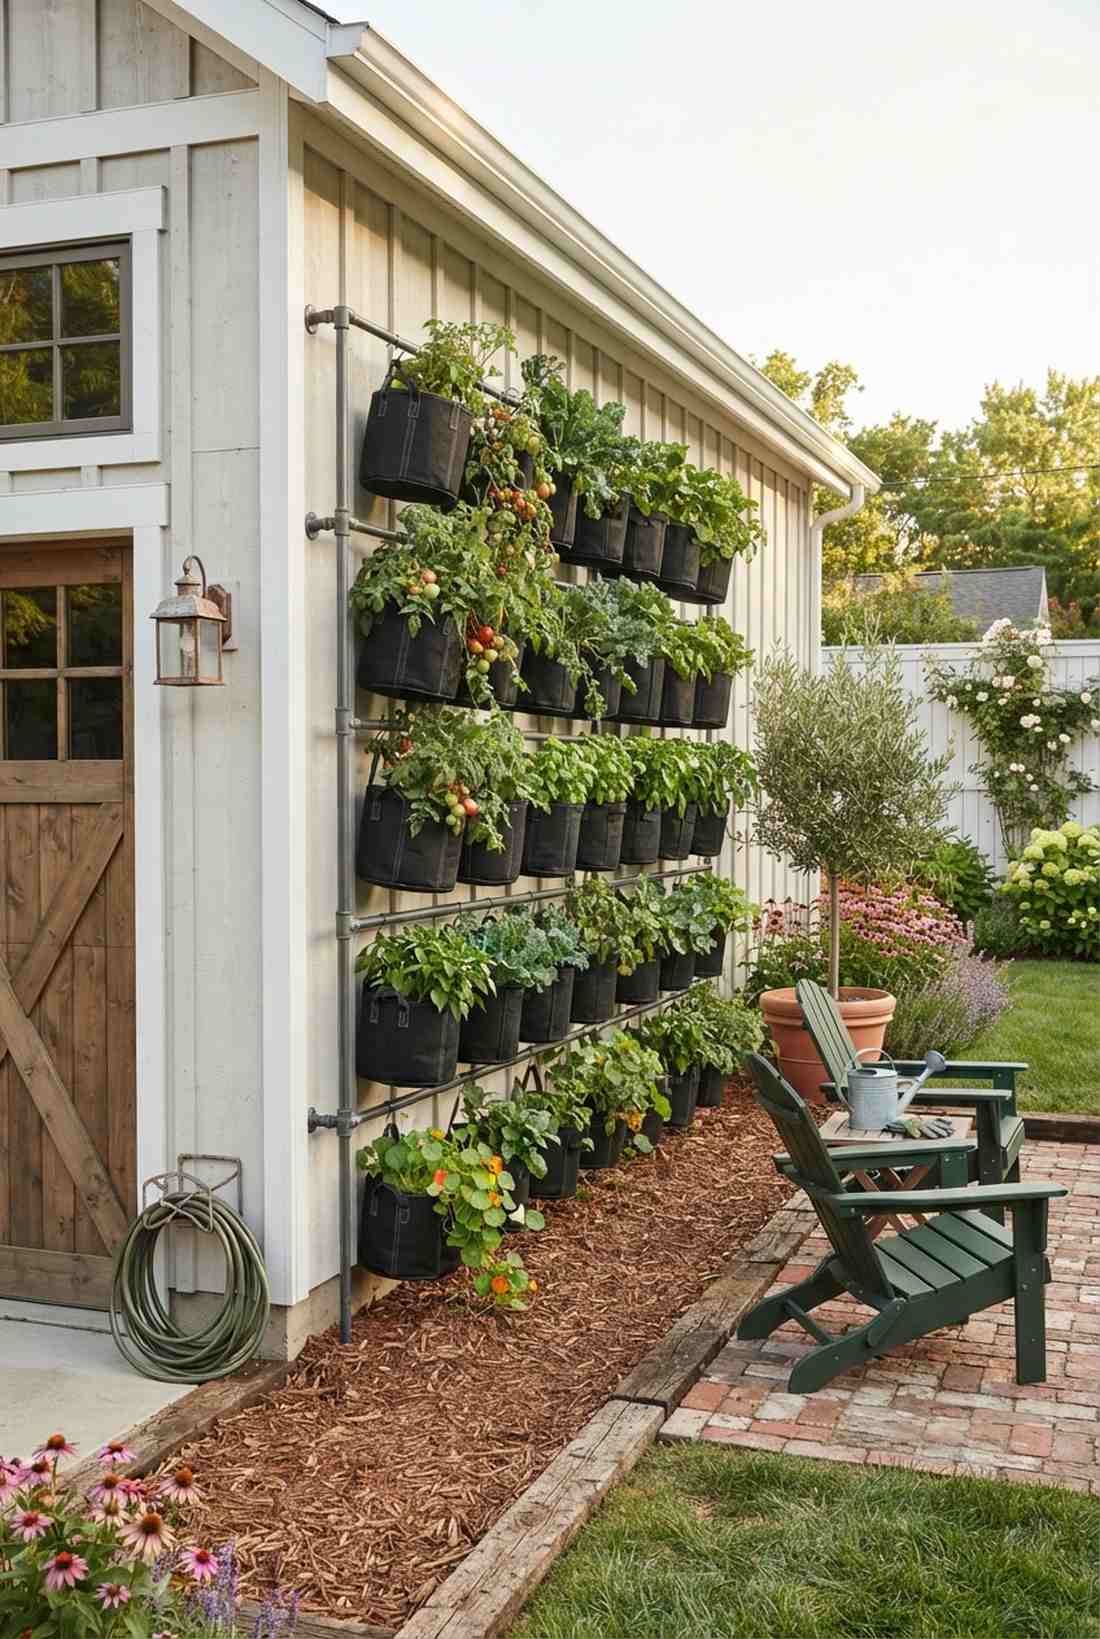
5. Fabric Grow Bag Wall with Horizontal Support Bars
Feels like a rustic artisan greenhouse ready for harvest. A fabric grow bag grid thrives perfectly along sunny garage exteriors.
While traditional plastic pots crack, heavy-duty aerated fabric prevents root circling entirely. Bolting galvanized horizontal bars into your vertical garden structure produces a rugged yet surprisingly premium look.
You can set this up for a budget-friendly $30–$60. Pin this if you’re plotting a high-yield urban harvest!
- Key Materials: 5-gallon fabric grow bags with reinforced handles
- Vibe / Style: Industrial farmhouse production
- Difficulty: Basic drilling required
- Budget Breakdown: Fabric bags: $25 | Steel bars: $30.
- Creator’s Tip: Space the horizontal bars exactly 18 inches apart to allow for mature plant droop.
- Smart Sourcing: reinforced fabric grow bag bulk packs and galvanized horizontal support bars.
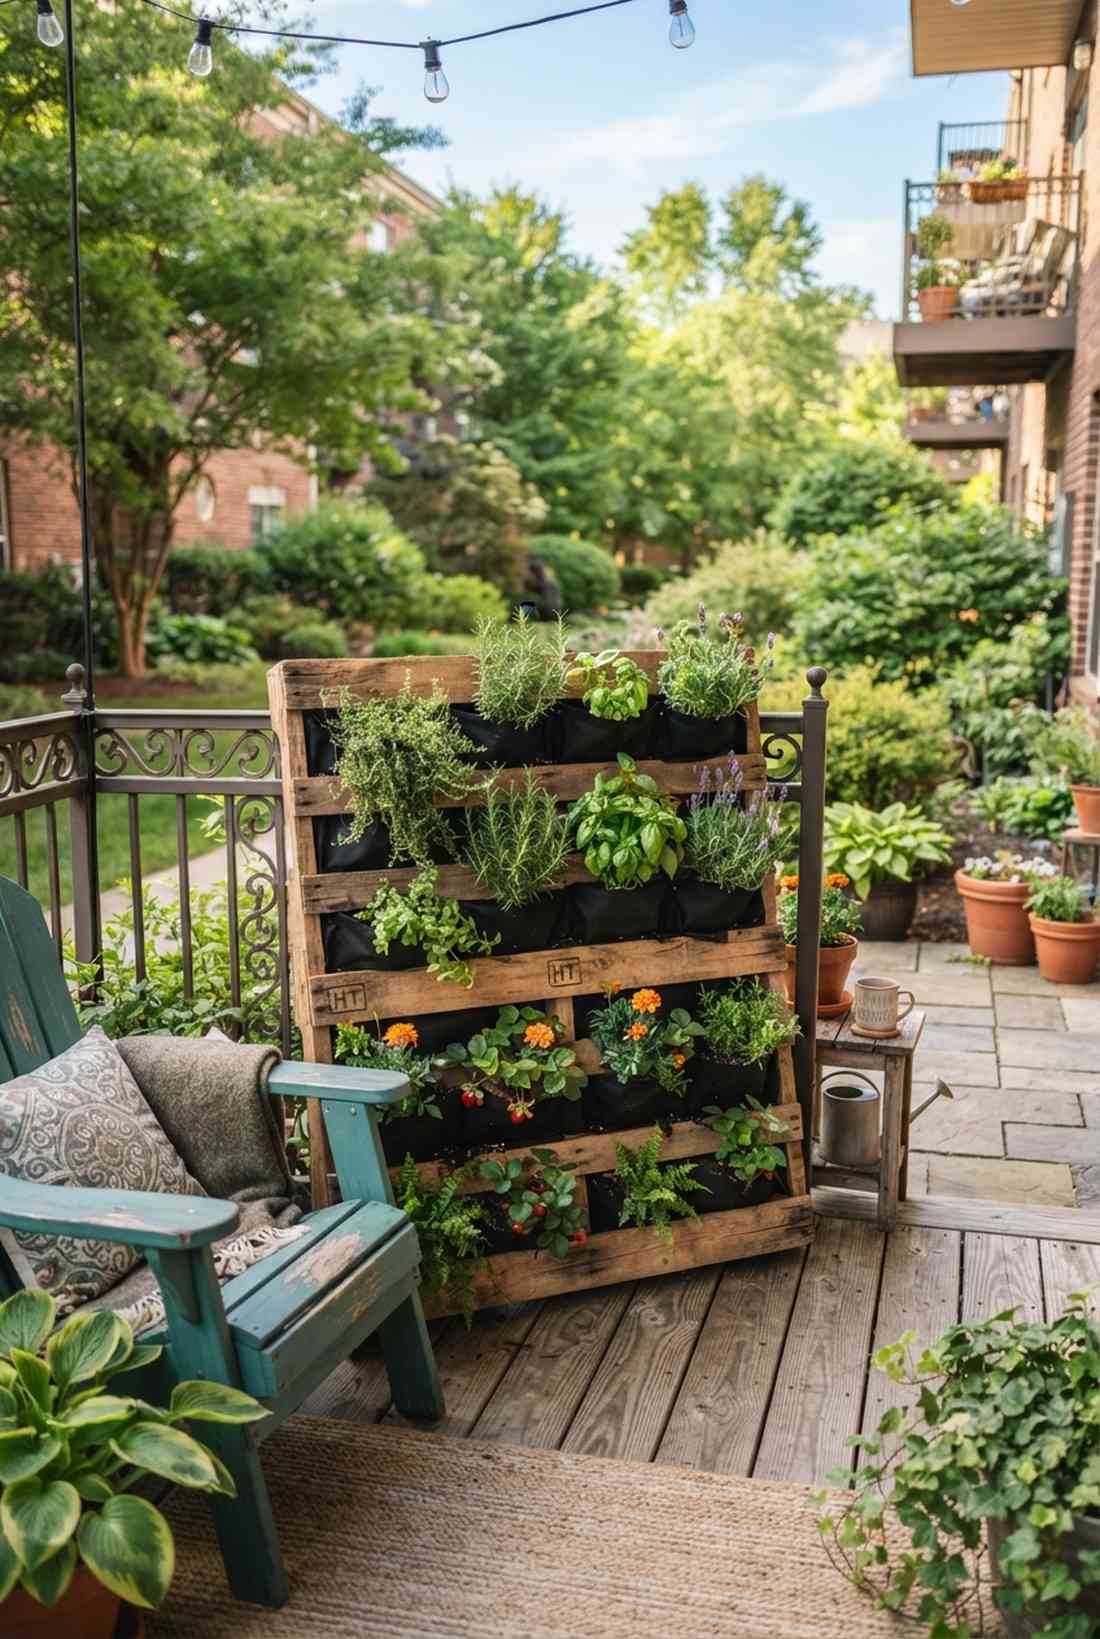
6. Vertical Pallet Garden with Landscape Fabric Backing
Brings a heavy dose of cozy cottage charm to dead spaces. This upcycled wood planter wall looks phenomenal leaning against an apartment patio railing.
Contractors often discard the perfect foundation for this, but heat-treated wood is an incredible hidden gem. Stapling commercial-grade landscape fabric to the back turns basic scrap into top-tier miniature garden supplies.
This virtually free project costs under $20 for the backing materials. Absolutely perfect for a tight-budget weekend.
- Key Materials: Heat-treated pallets and weed-barrier fabric
- Vibe / Style: Rustic cottage core
- Difficulty: Quick beginner craft
- Budget Breakdown: Pallet: $0 | Heavy fabric & staples: $15.
- Creator’s Tip: Only use pallets stamped “HT” (Heat Treated) to avoid toxic chemical leaching.
- Smart Sourcing: heavy-duty landscape fabric rolls and rust-resistant staple gun kits.
Hydroponic and Soil-Free Vertical Garden Installation
Soil-free installations are the ultimate shortcut to accelerated, pristine botanical growth. By dialing in exact nutrient delivery, these cutting-edge systems eliminate heavy soil loads, bypass ground pests, and slash daily water consumption by up to 90%.
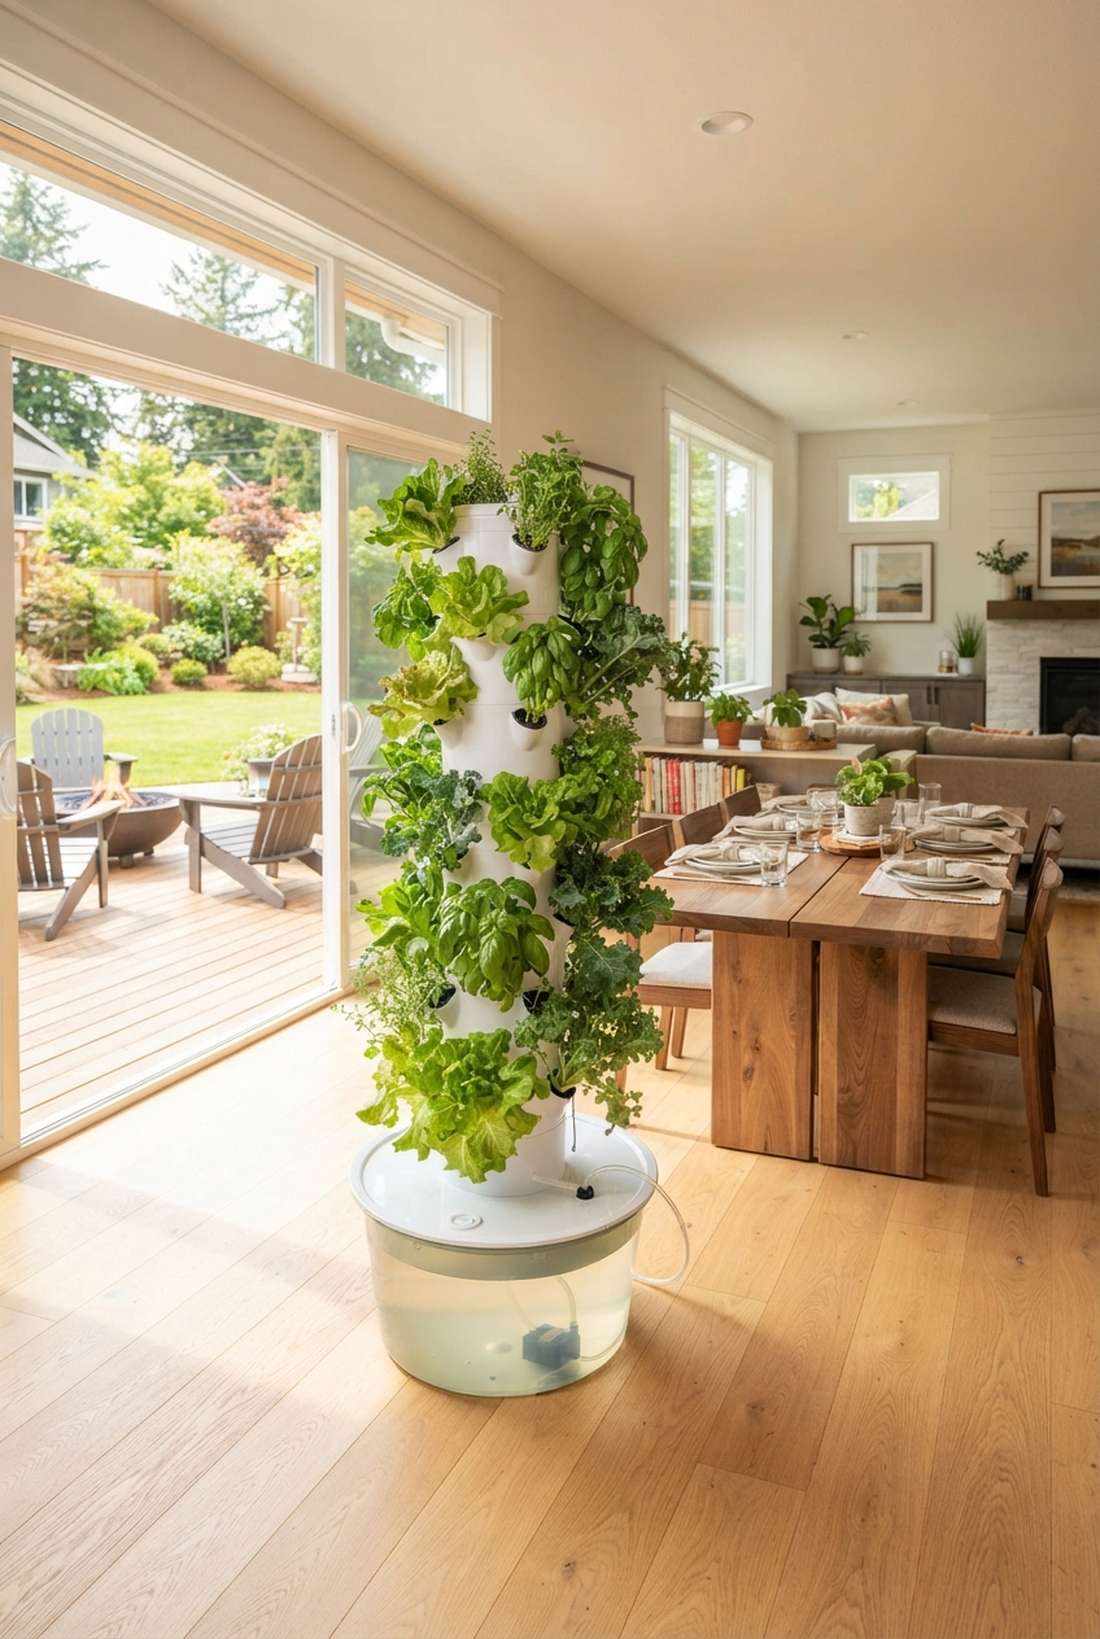
7. Aeroponic Tower Garden with Rotating Tiers
Looks like a futuristic bio-dome experiment in the best way possible. An automated aeroponic column is the ultimate showpiece for a sunny indoor dining room.
Most soil growers are stunned when they see lettuce ready in just 30 days. Pumping oxygen-rich nutrient mist directly into the root zone delivers unparalleled growth and looks incredibly high-tech.
This premium investment starts around $200–$400. Save this to your indoor farming inspiration board!
- Key Materials: Food-grade PVC aeroponic towers with internal pumps
- Vibe / Style: Ultra-modern eco-tech
- Difficulty: Plug-and-play assembly
- Budget Breakdown: Tower kit: $250 | Nutrients: $30.
- Creator’s Tip: Add a smart plug to automate the misting cycles perfectly without buying a premium controller.
- Smart Sourcing: aeroponic tower starter kits and liquid hydroponic nutrient bundles.
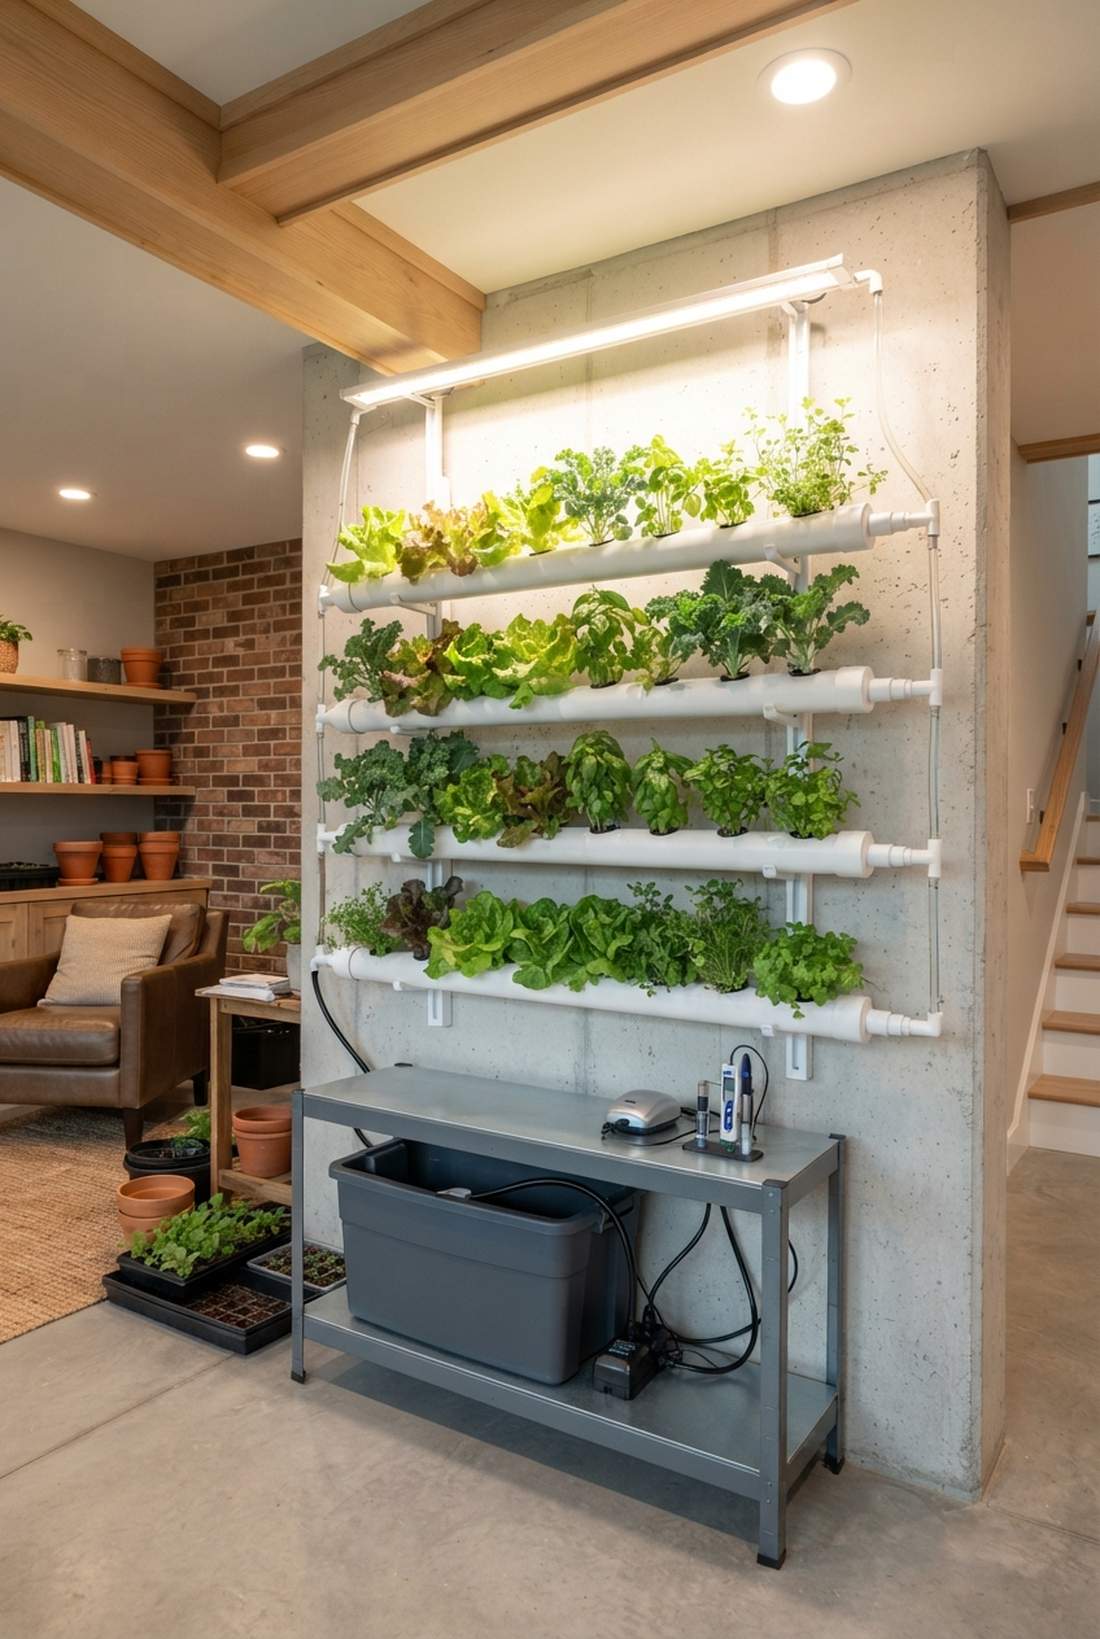
8. NFT Vertical Channels with Continuous Nutrient Flow
Feels like walking through a commercial urban farm facility. These sleek hydroponic tracks are an absolute game-changer for mounting on blank basement walls.
Many DIYers mess up the gravity slope, but getting the angle right makes this completely maintenance-free. Using high-quality opaque channels prevents algae blooms while maintaining a crisp, architectural look.
Building an impressive 4-rail system costs roughly $150. Highly recommended if you want massive leafy green yields.
- Key Materials: Opaque NFT channels and submersible water pumps
- Vibe / Style: Commercial indoor agriculture
- Difficulty: Moderate plumbing skills
- Budget Breakdown: Channels: $80 | Pump & Tubing: $40.
- Creator’s Tip: Keep the water flow extremely thin—roots need air just as much as they need the nutrient solution.
- Smart Sourcing: food-grade NFT channel bulk packs and adjustable flow submersible pumps.
This next layout totally rethinks how restaurants grow their herbs… and you can steal it for your kitchen.
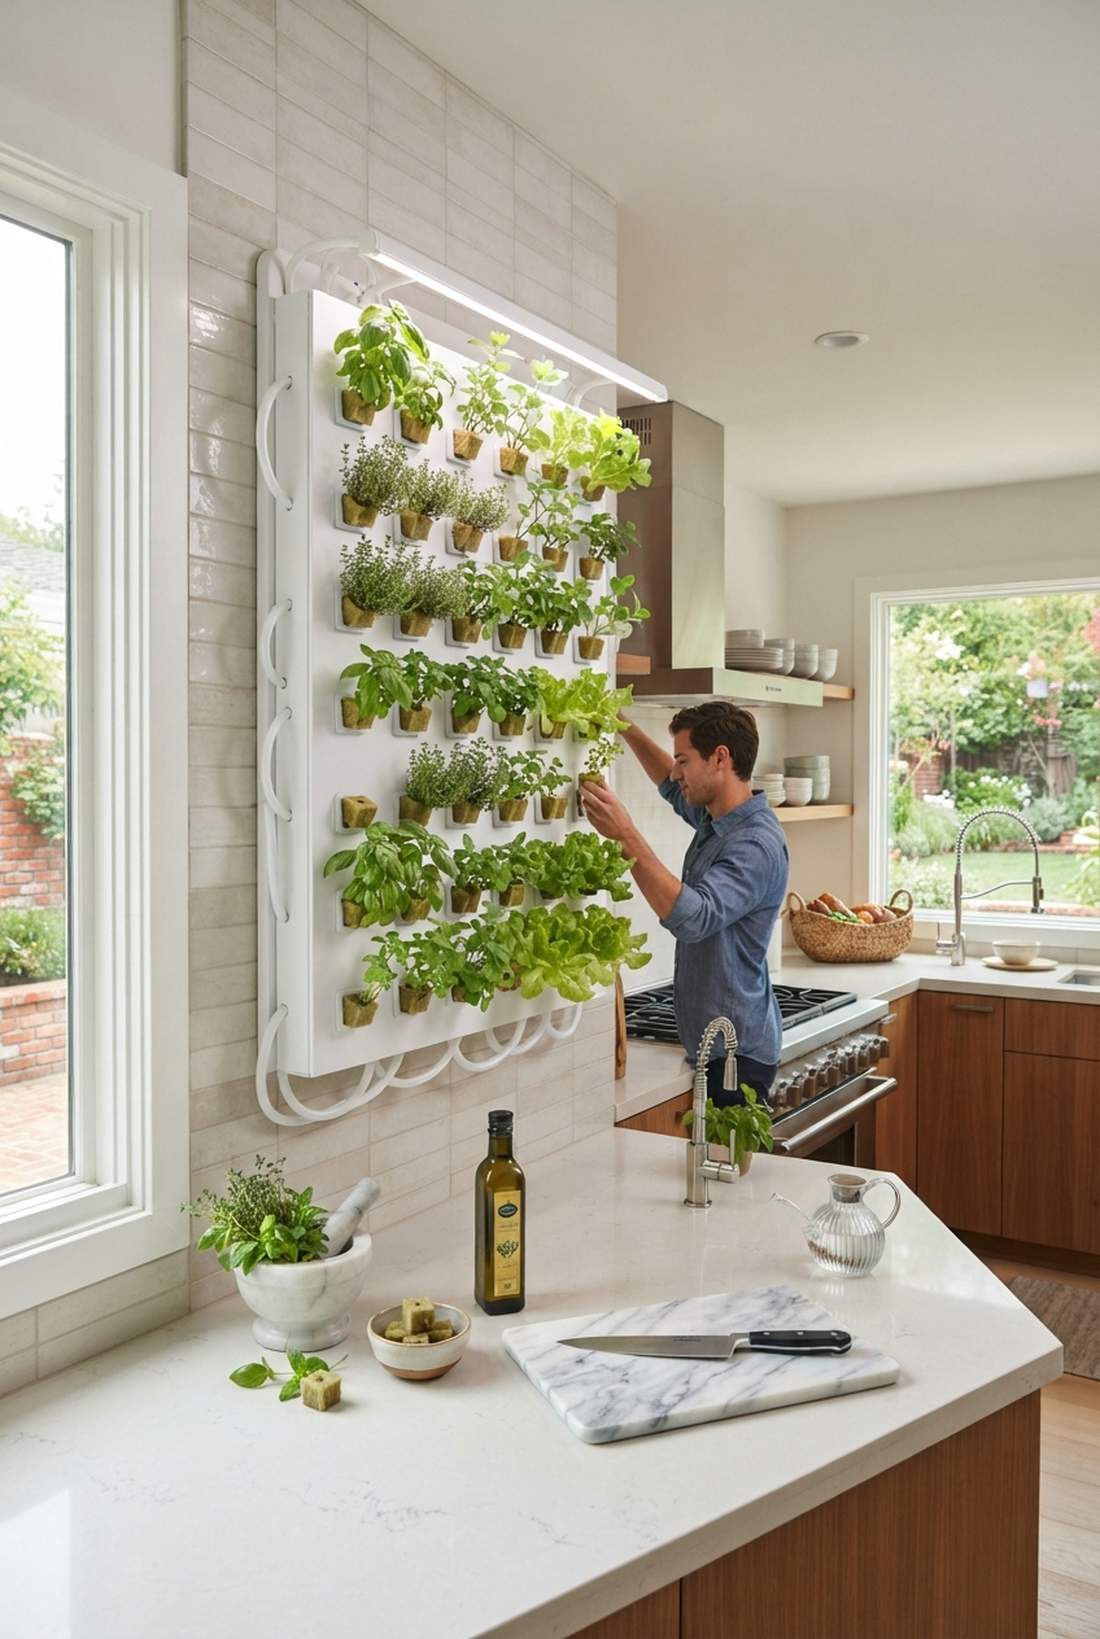
9. Hydroponic Wall Panel with Rockwool Growing Medium
Radiates the clean, fresh vibe of a Michelin-star restaurant kitchen. A flush-mounted hydroponic panel creates a stunning, living culinary station indoors.
Avoiding messy soil inside the house is a huge priority for modern decorators. Seeding directly into premium rockwool cubes wicks moisture perfectly and gives a designer-level finish with zero dirt.
This hyper-clean setup runs about $100–$200 for a medium panel. Pin this for your ultimate kitchen renovation!
- Key Materials: Wall-mounted drip panels and rockwool slabs
- Vibe / Style: Minimalist gourmet kitchen
- Difficulty: Intermediate
- Budget Breakdown: Panel system: $110 | Rockwool: $20.
- Creator’s Tip: Always soak and pH-balance your rockwool before inserting seeds for maximum germination.
- Smart Sourcing: hydroponic wall panel kits and pre-cut rockwool starter cubes.
💡 Must-Have Supplies for High-End Setups
To build these setups faster and ensure they last, skip the generic craft aisles and invest in the right foundational kits.
- Base & Support: commercial-grade anodized mounting rails
- Setup Tools: heavy-duty masonry anchor starter kits
- Weather/Durability Protection: clear UV-resistant structural sealants
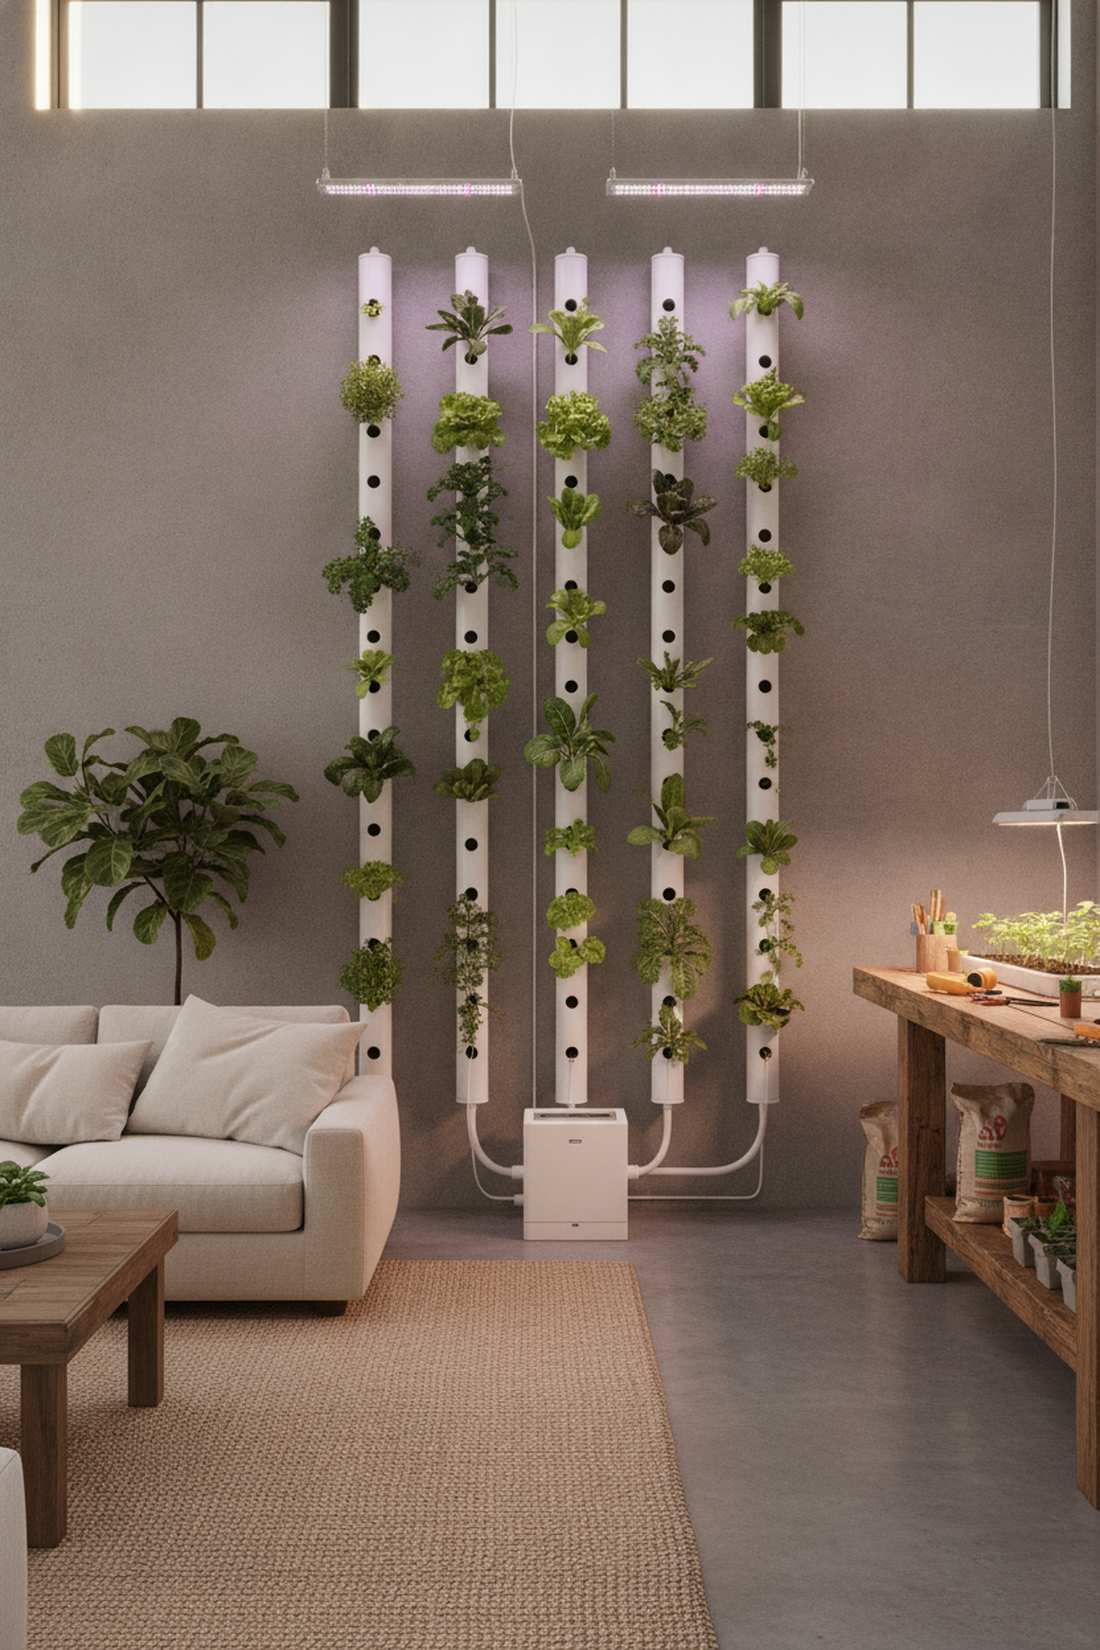
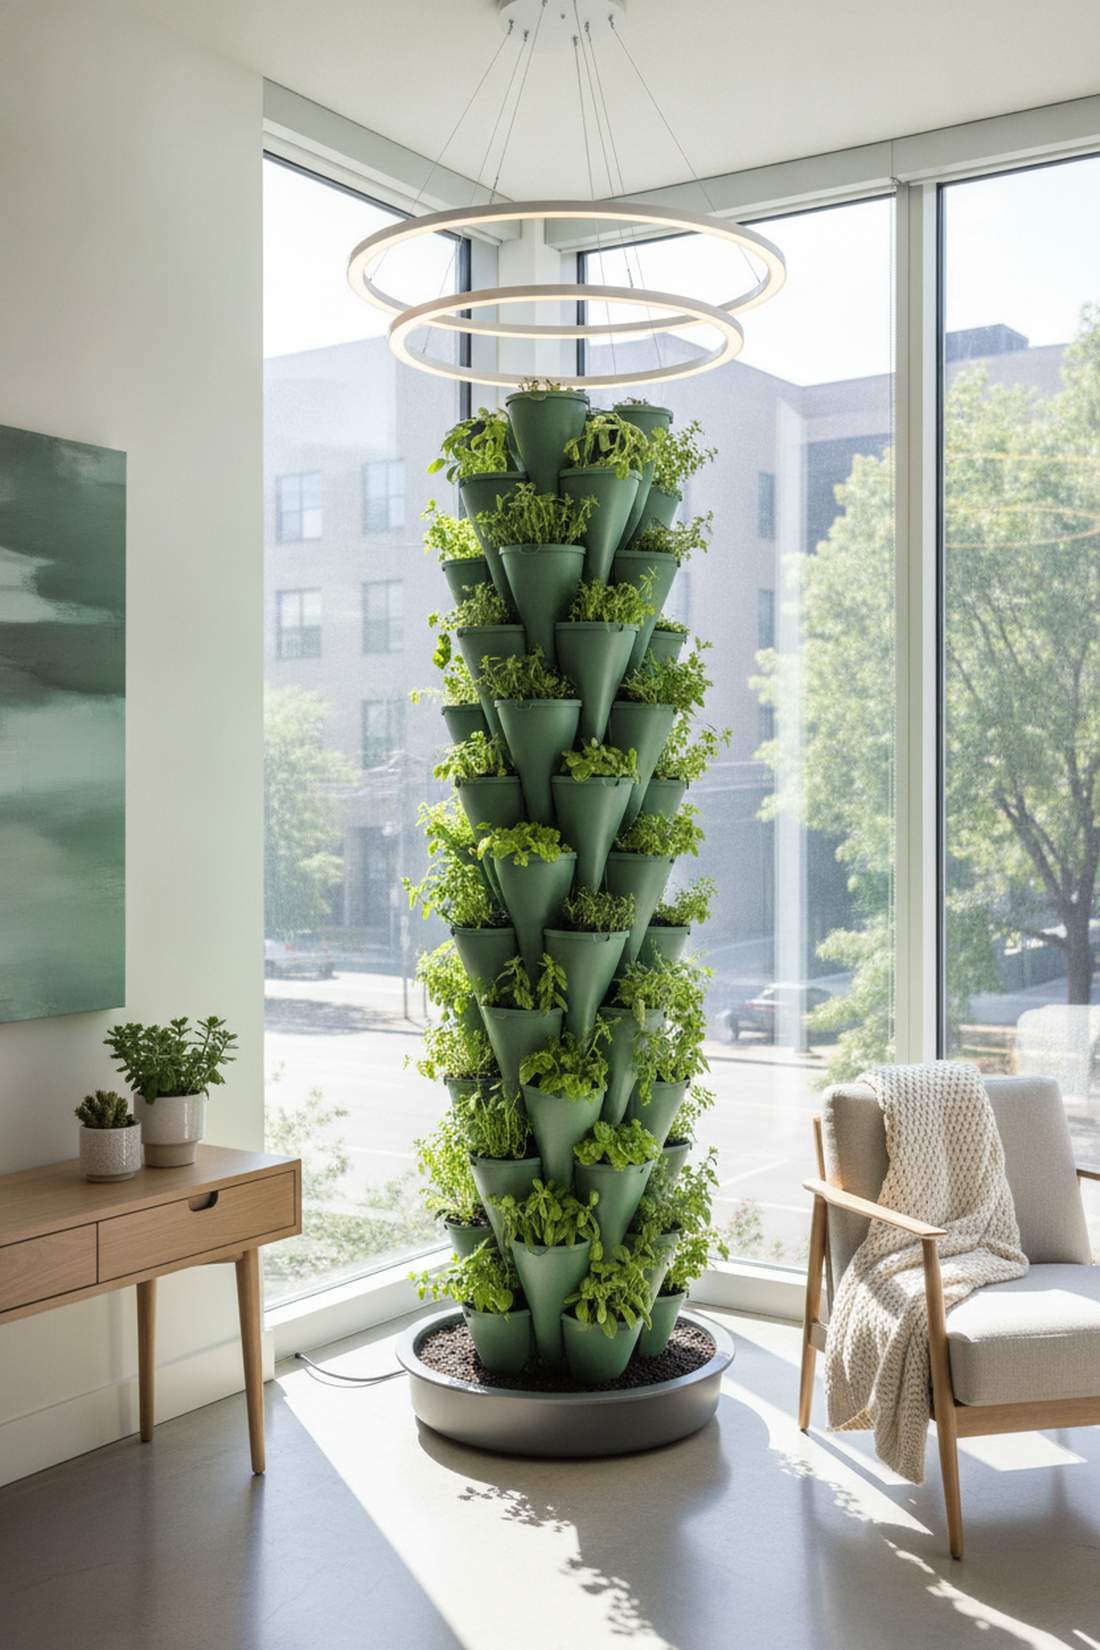
10. Zip Tower System with Modular Stacking Rings
Looks like a beautifully sculpted green pillar rising from the floor. A spiral modular tower fits flawlessly into compact apartment corners.
Most vertical frames are rigid, but adding or removing stacking rings lets you dictate the exact height. Utilizing this interlocking system completely hides the internal plumbing, delivering a remarkably expensive aesthetic.
You can set this up in 90 minutes for roughly $150. A brilliant solution for renters wanting high impact!
- Key Materials: Interlocking spiral planting rings
- Vibe / Style: Sculptural modern greenery
- Difficulty: Easy tool-free setup
- Budget Breakdown: Tower kit: $120 | Base reservoir: $30.
- Creator’s Tip: Rotate the tower a quarter turn every three days to ensure completely even light exposure.
- Smart Sourcing: modular hydroponic stacking towers and high-yield indoor grow light rings.
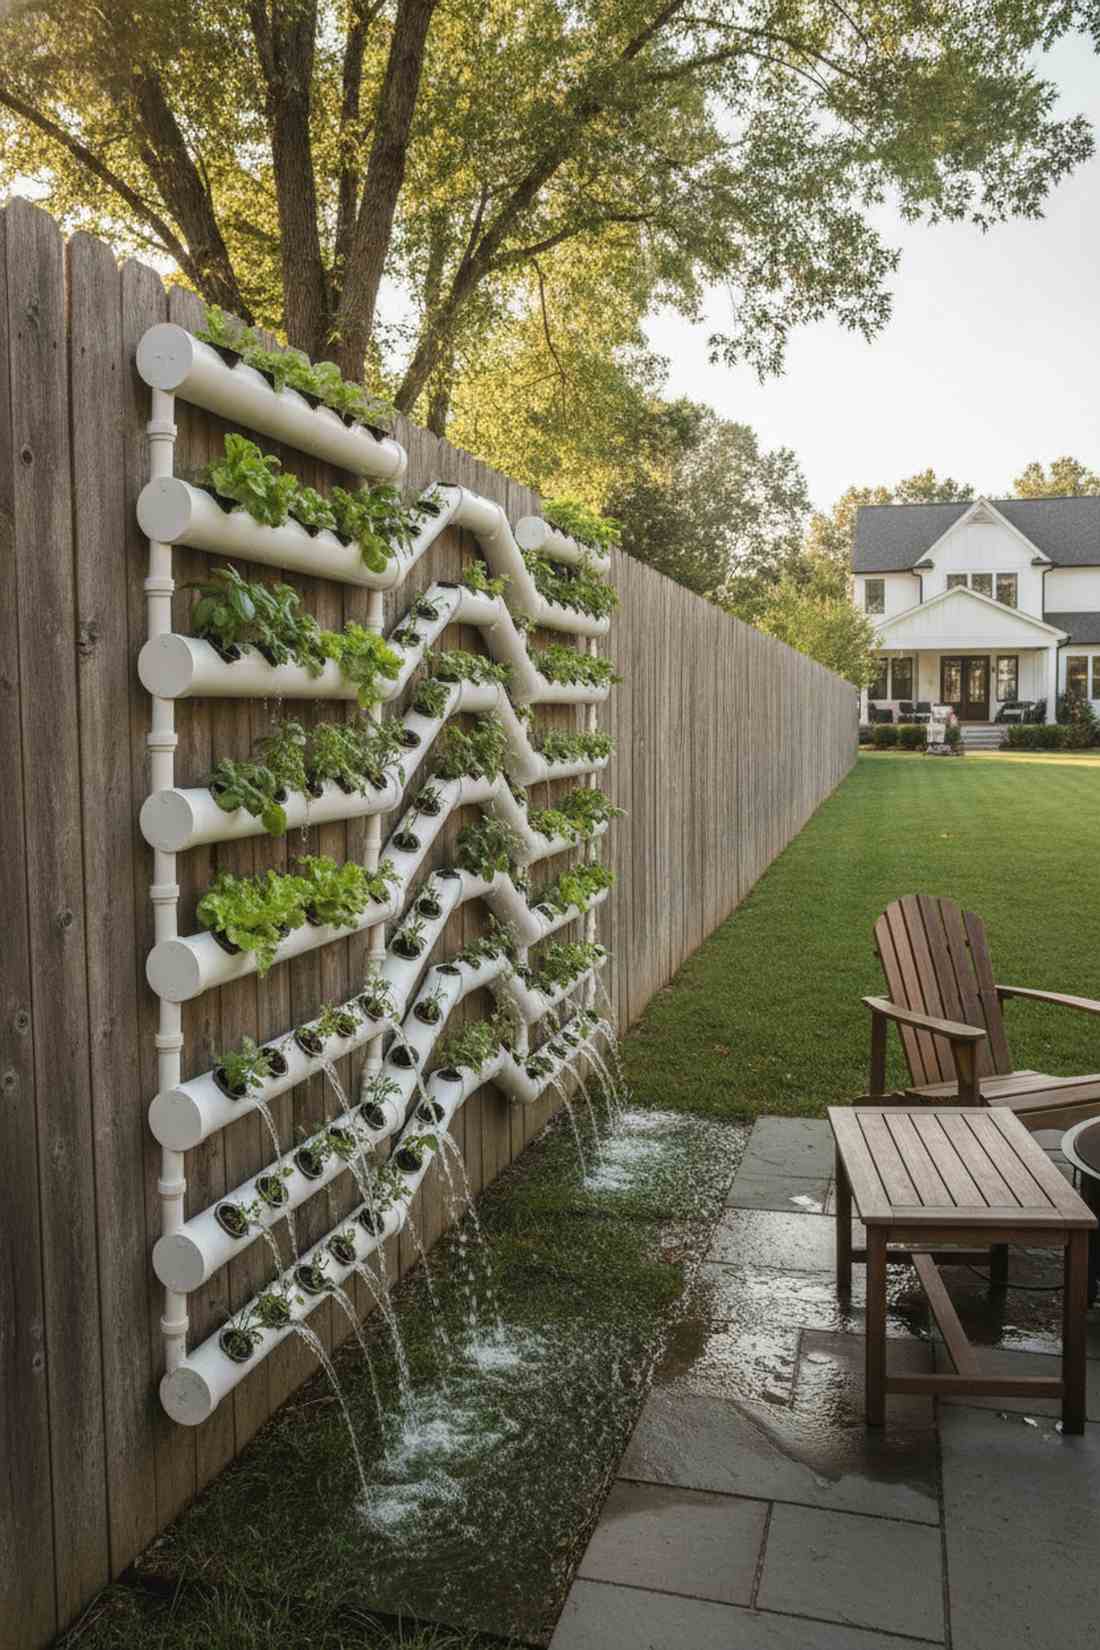
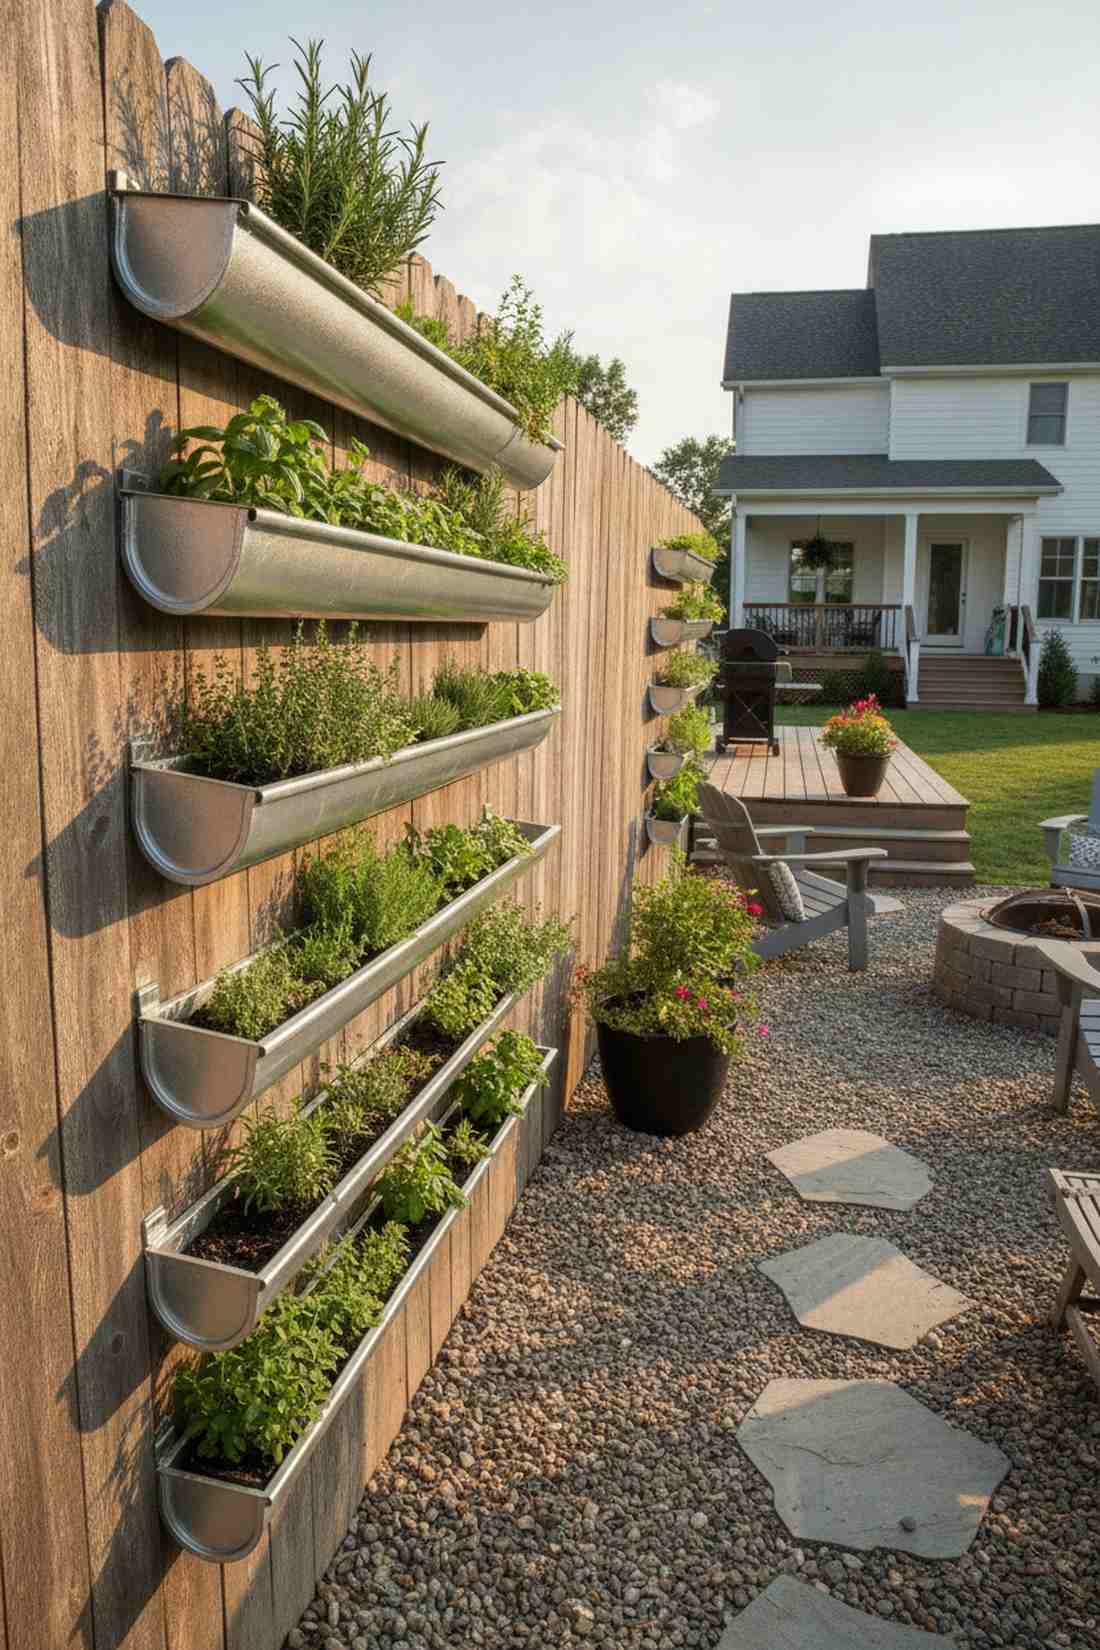
11. Vertical Gutter Hydroponics with Cascading Flow

Brings a brilliant, functional geometry to stark outdoor fences. This cascading zig-zag water system makes an incredible feature wall for a sunny backyard.
Contractors overlook standard vinyl materials, but leveraging rain gutters saves a massive amount of money. The natural waterfall effect from tier to tier introduces massive oxygen levels, making standard fairy garden kits look purely amateur.
You can easily pull this off for around $80–$120. Pin this if you love clever hardware store hacks!
- Key Materials: Vinyl rain gutters, end caps, and net pots
- Vibe / Style: Clever DIY geometric
- Difficulty: Moderate DIY
- Budget Breakdown: Gutters/Caps: $50 | Net pots & clay pebbles: $35.
- Creator’s Tip: Use a hole saw bit for perfectly clean cuts to prevent your net pots from slipping through.
- Smart Sourcing: heavy-duty vinyl gutter packs and 2-inch slotted hydroponic net pots.
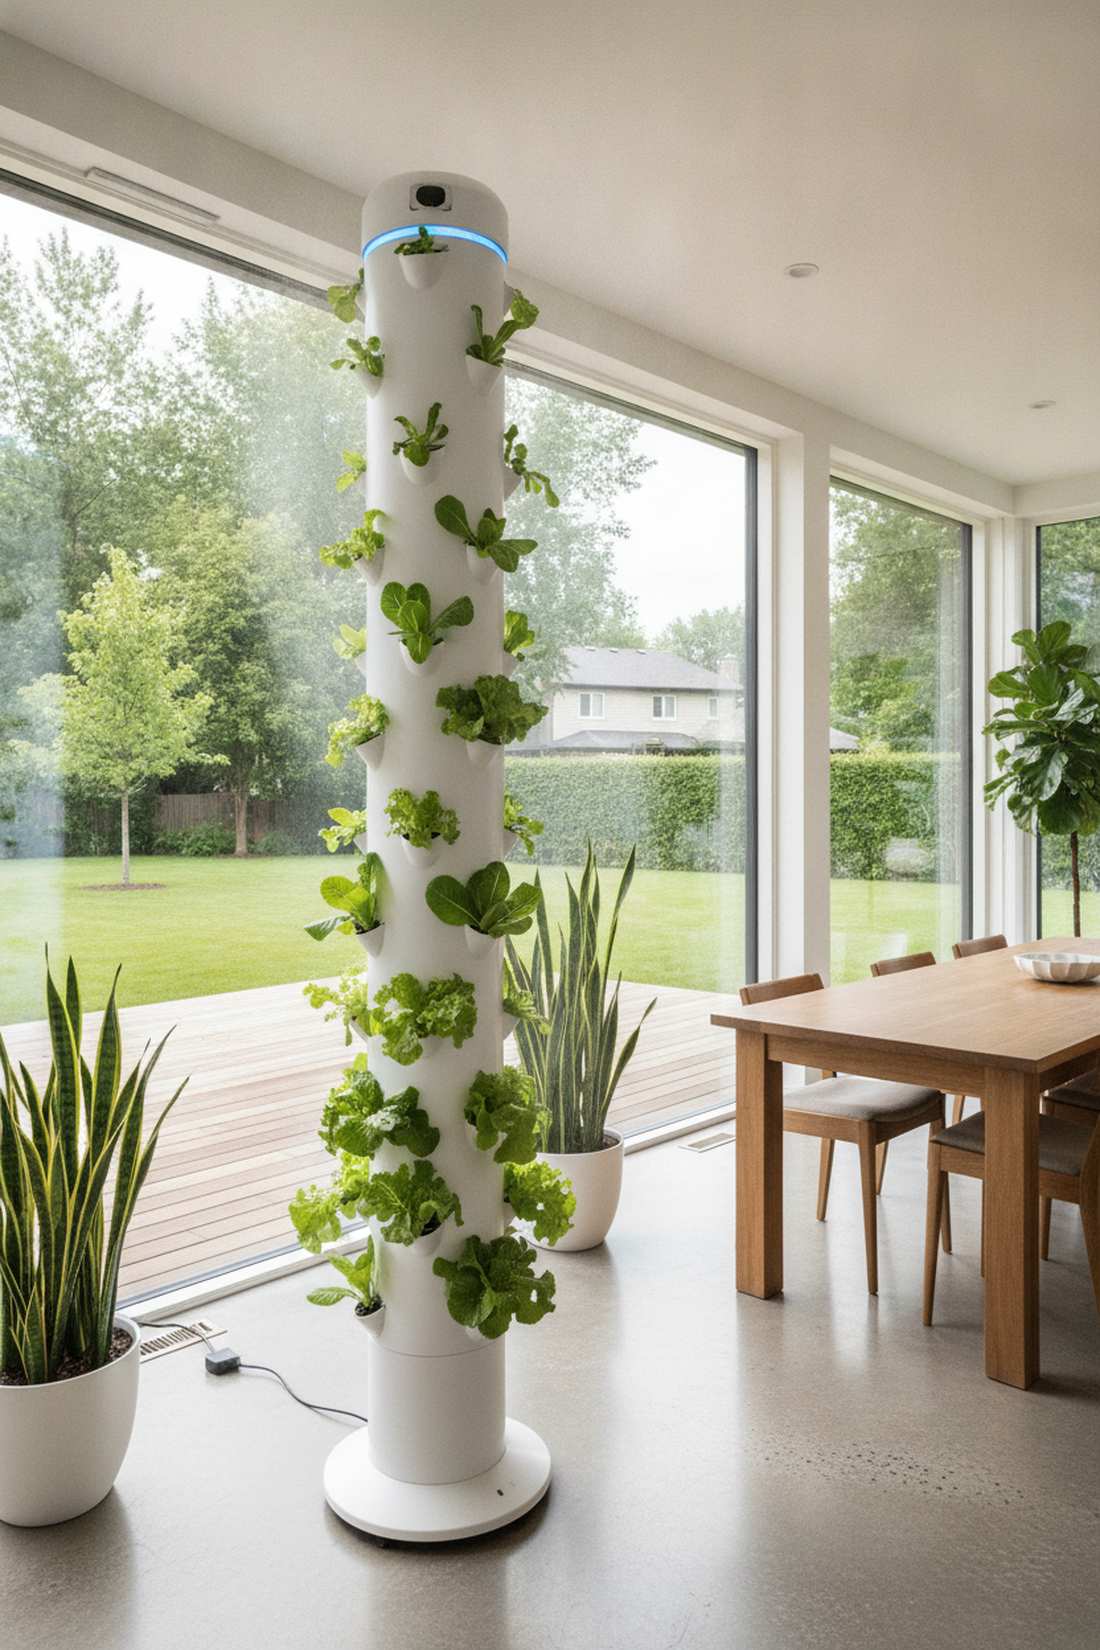
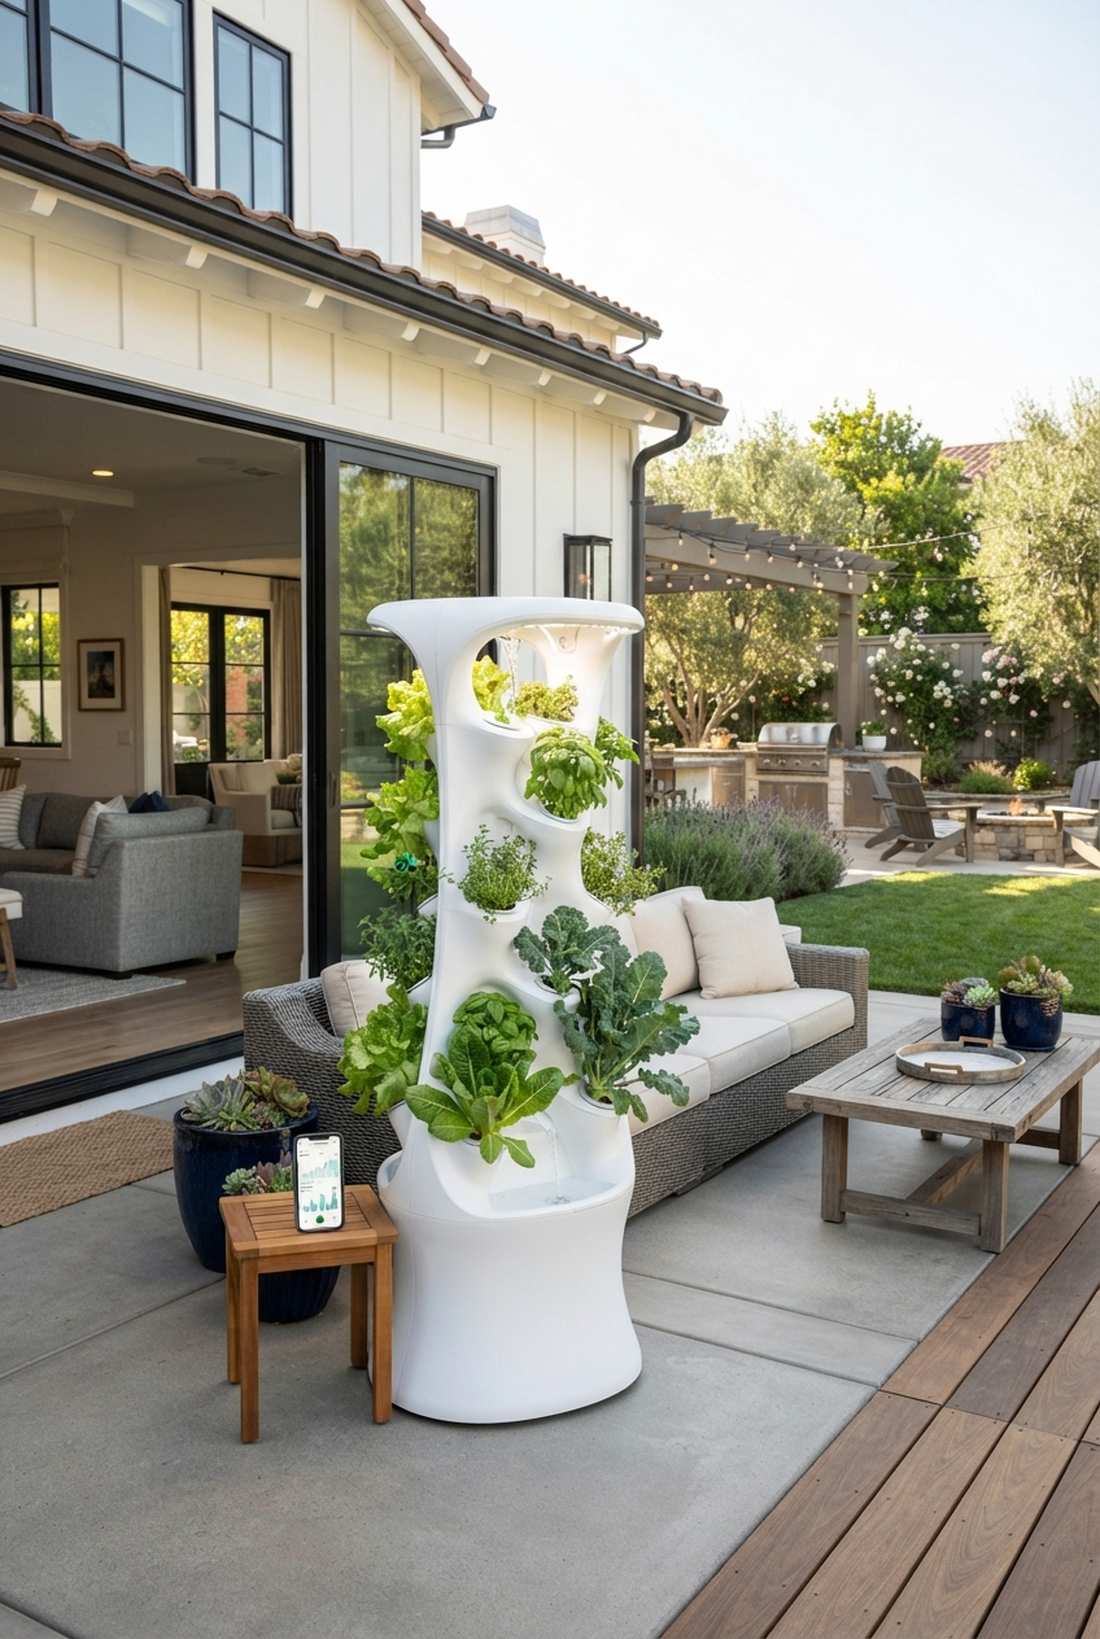
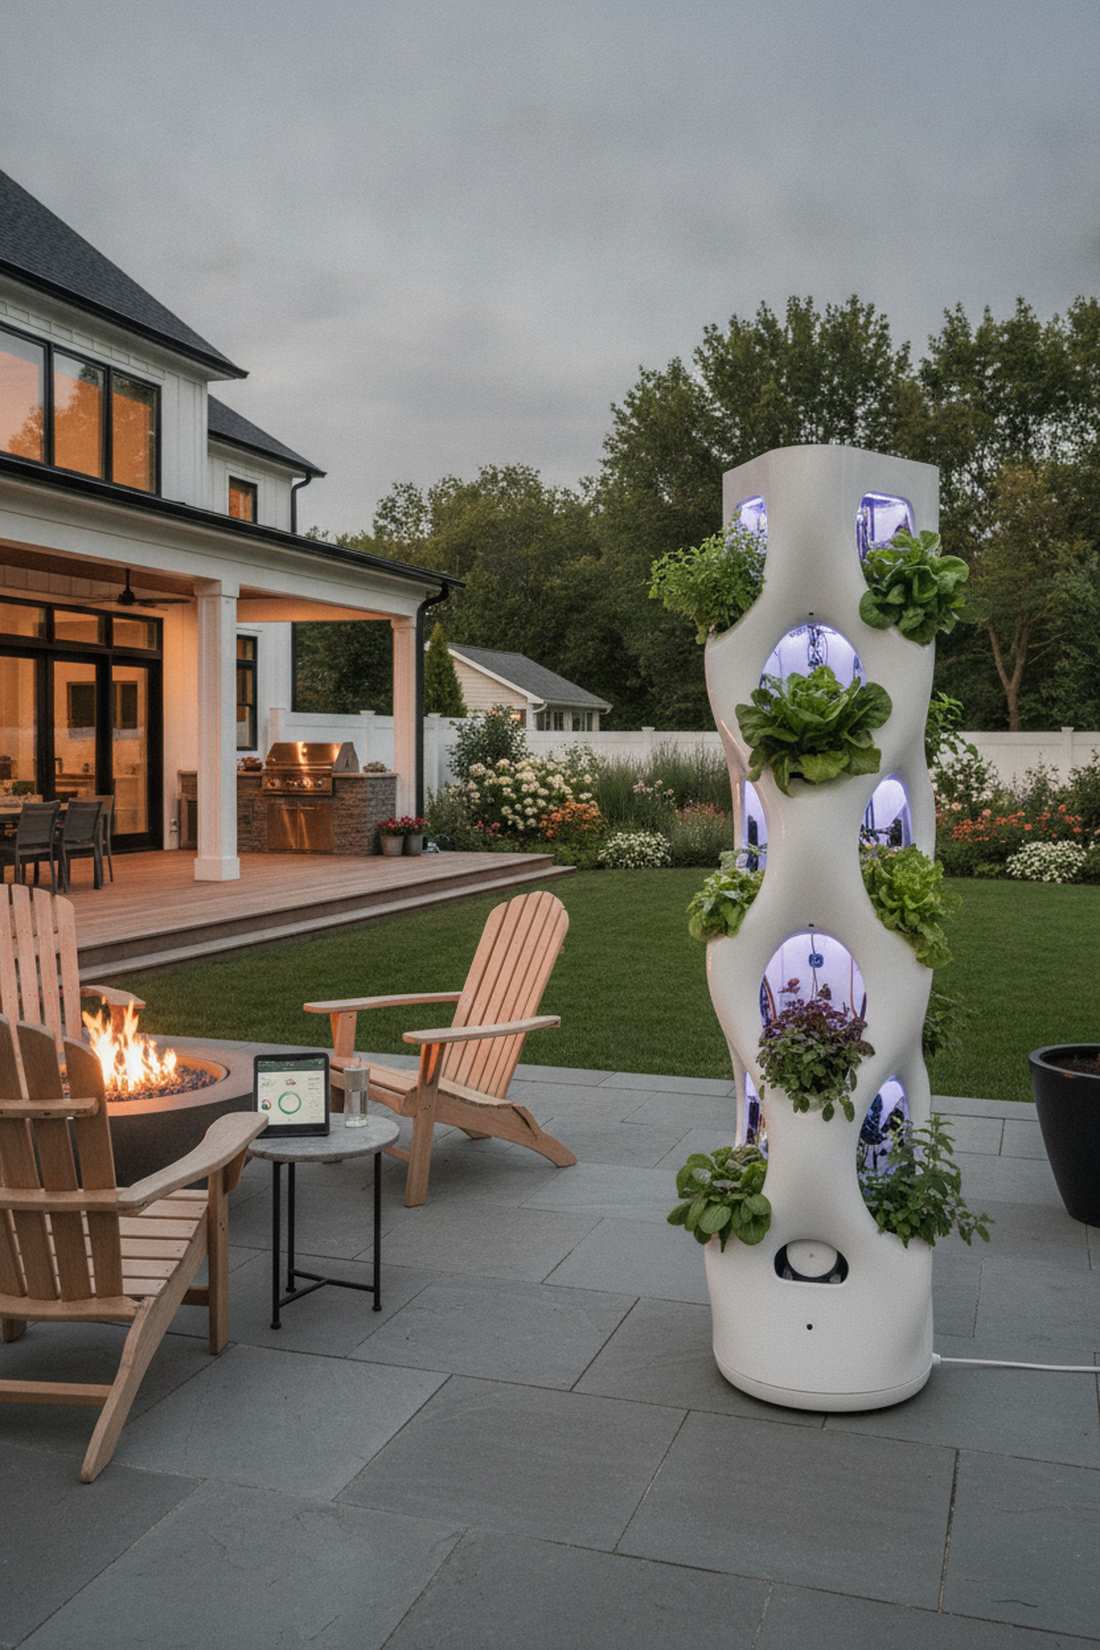
12. Lettuce Grow Farmstand with App-Based Monitoring
Feels like the ultimate luxury appliance for plant lovers. An app-monitored smart tower transforms an empty patio into a high-end conversation starter.
While DIY saves money, investing in a fully automated consumer ecosystem guarantees success with zero guesswork. The sleek, organic curves of this premium unit look far more expensive than standard PVC builds.
This premium system starts at $500. Save this if you want the absolute highest aesthetic with zero maintenance!
- Key Materials: Injection-molded smart tower with internal sensors
- Vibe / Style: Silicon Valley luxury
- Difficulty: Extremely easy
- Budget Breakdown: Smart Tower Kit: $450 | Initial seedlings: $50.
- Creator’s Tip: Sync the lighting schedule directly with your local sunrise/sunset via the app for optimal growth.
- Smart Sourcing: smart hydroponic farmstand kits and pre-seeded hydroponic starter pods.
Most homeowners settle for ugly wooden stakes… until they discover this invisible architectural trick.
Trellis and Cable Support Frameworks for Vertical Garden Frame
Cable and trellis frameworks provide the invisible muscle needed to support massive, heavy botanical displays. By properly tensioning steel or welded wire, you create an indestructible vertical garden frame that lets the foliage take center stage without ugly supports showing.
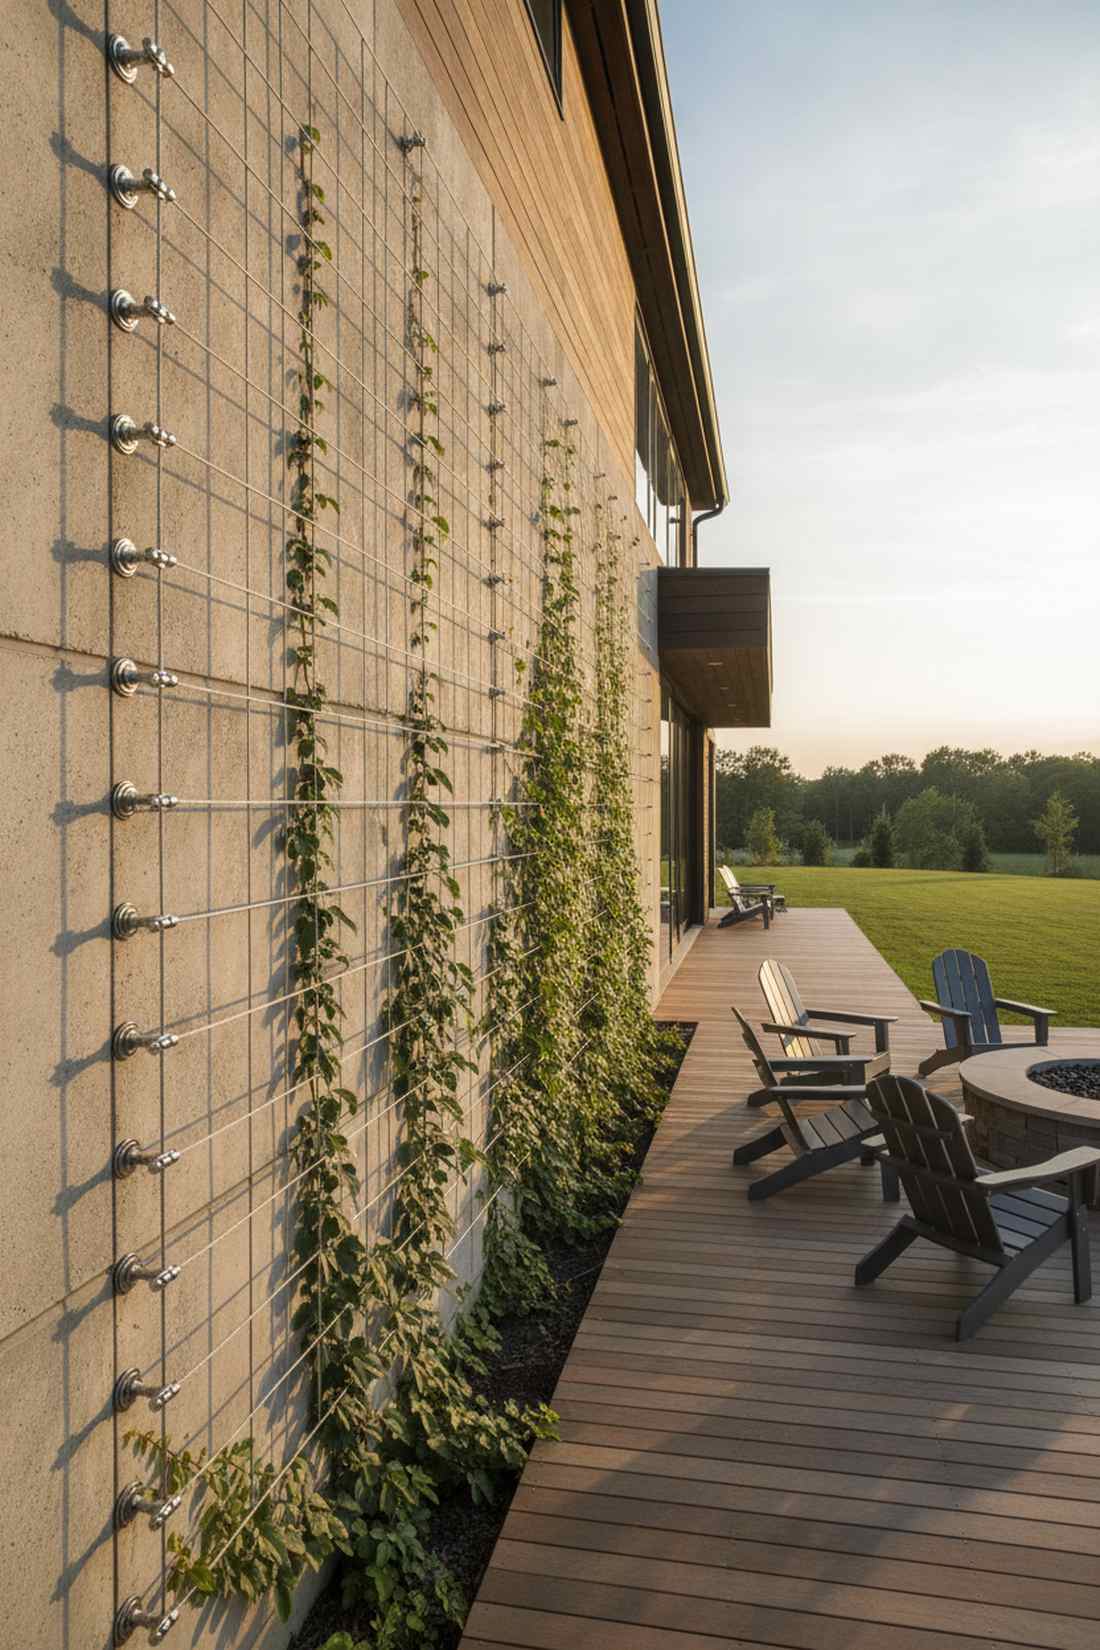
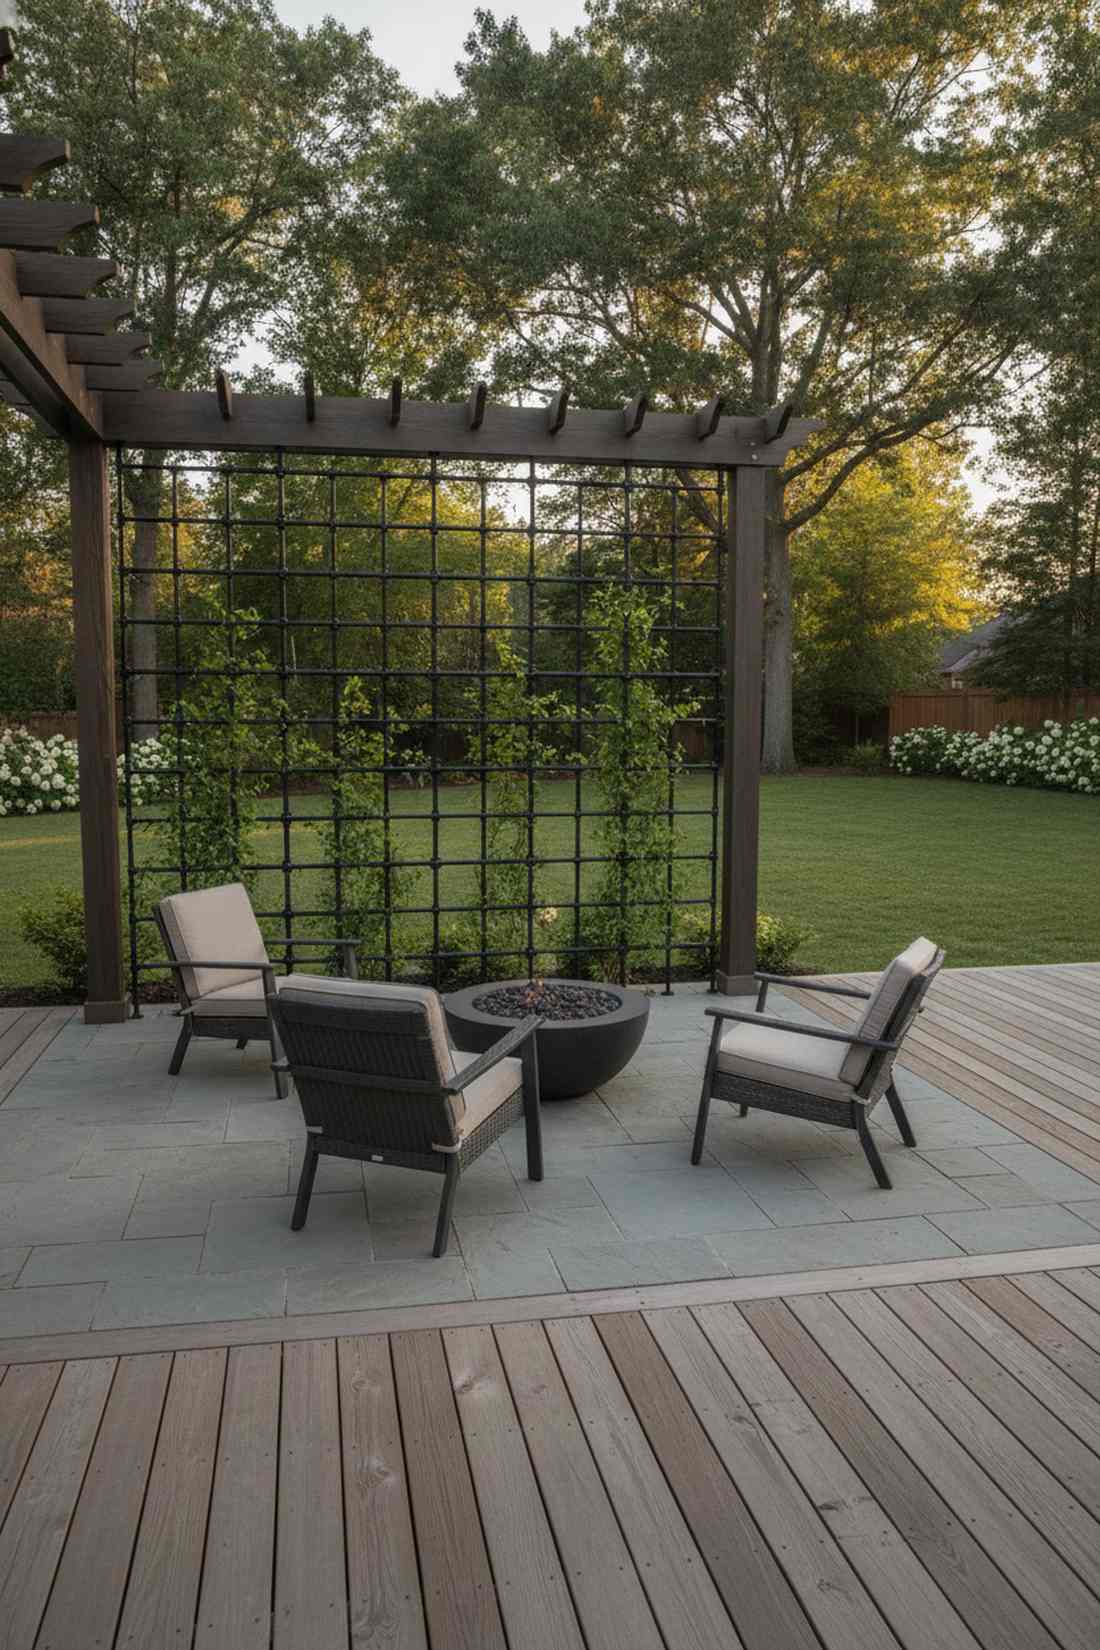
13. Stainless Steel Cable Grid with Turnbuckle Tensioners
Looks like a floating illusion once the vines take over. A marine-grade wire tension grid is the absolute perfect upgrade for a massive modern exterior wall.
Builders charge a fortune for this exact finish, yet installing it yourself is shockingly straightforward. Using premium stainless turnbuckles creates an indestructible matrix that gives a designer-level finish for decades.
You can execute this premium look for roughly $100–$150. Pin this if you want a permanent luxury facade!
- Key Materials: Stainless steel wire rope, turnbuckles, and masonry anchors
- Vibe / Style: Invisible architectural modernism
- Difficulty: Intermediate drilling required
- Budget Breakdown: Steel cable spool: $45 | Tension hardware: $65.
- Creator’s Tip: Over-tighten the turnbuckles initially, as heavy fruiting vines will cause the cables to sag over time.
- Smart Sourcing: marine-grade steel cable kits and heavy-duty turnbuckle hardware packs.
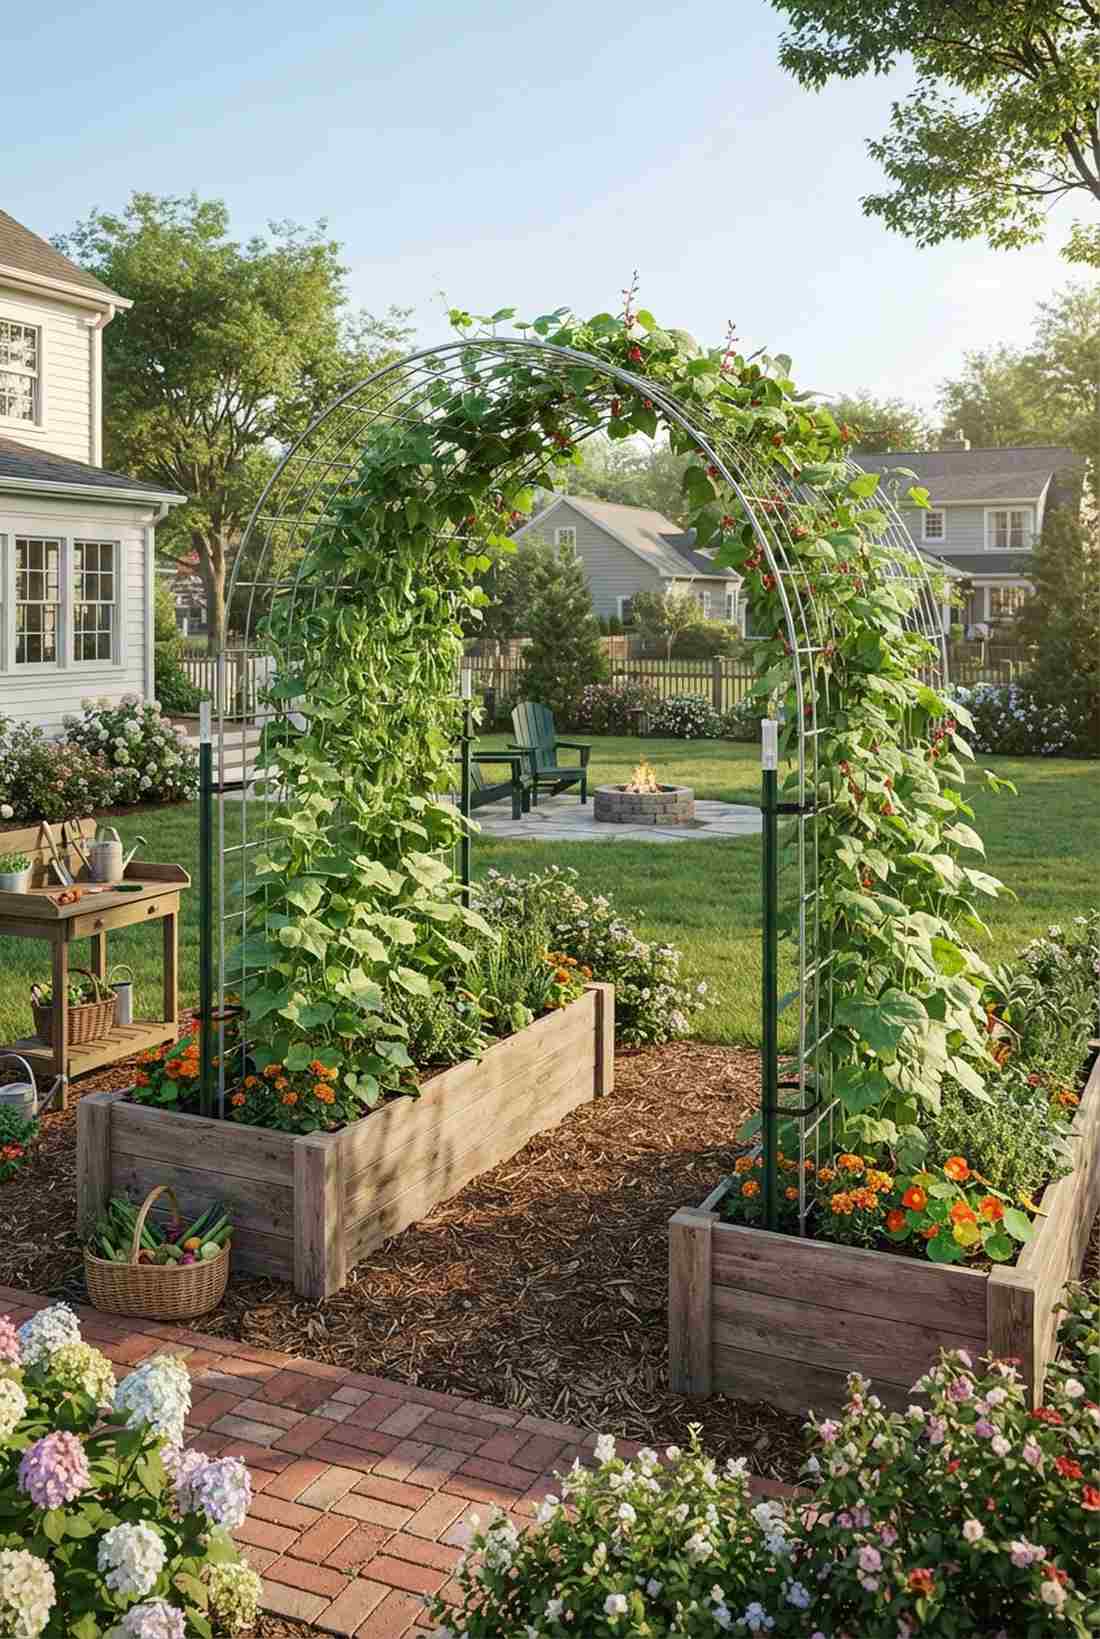
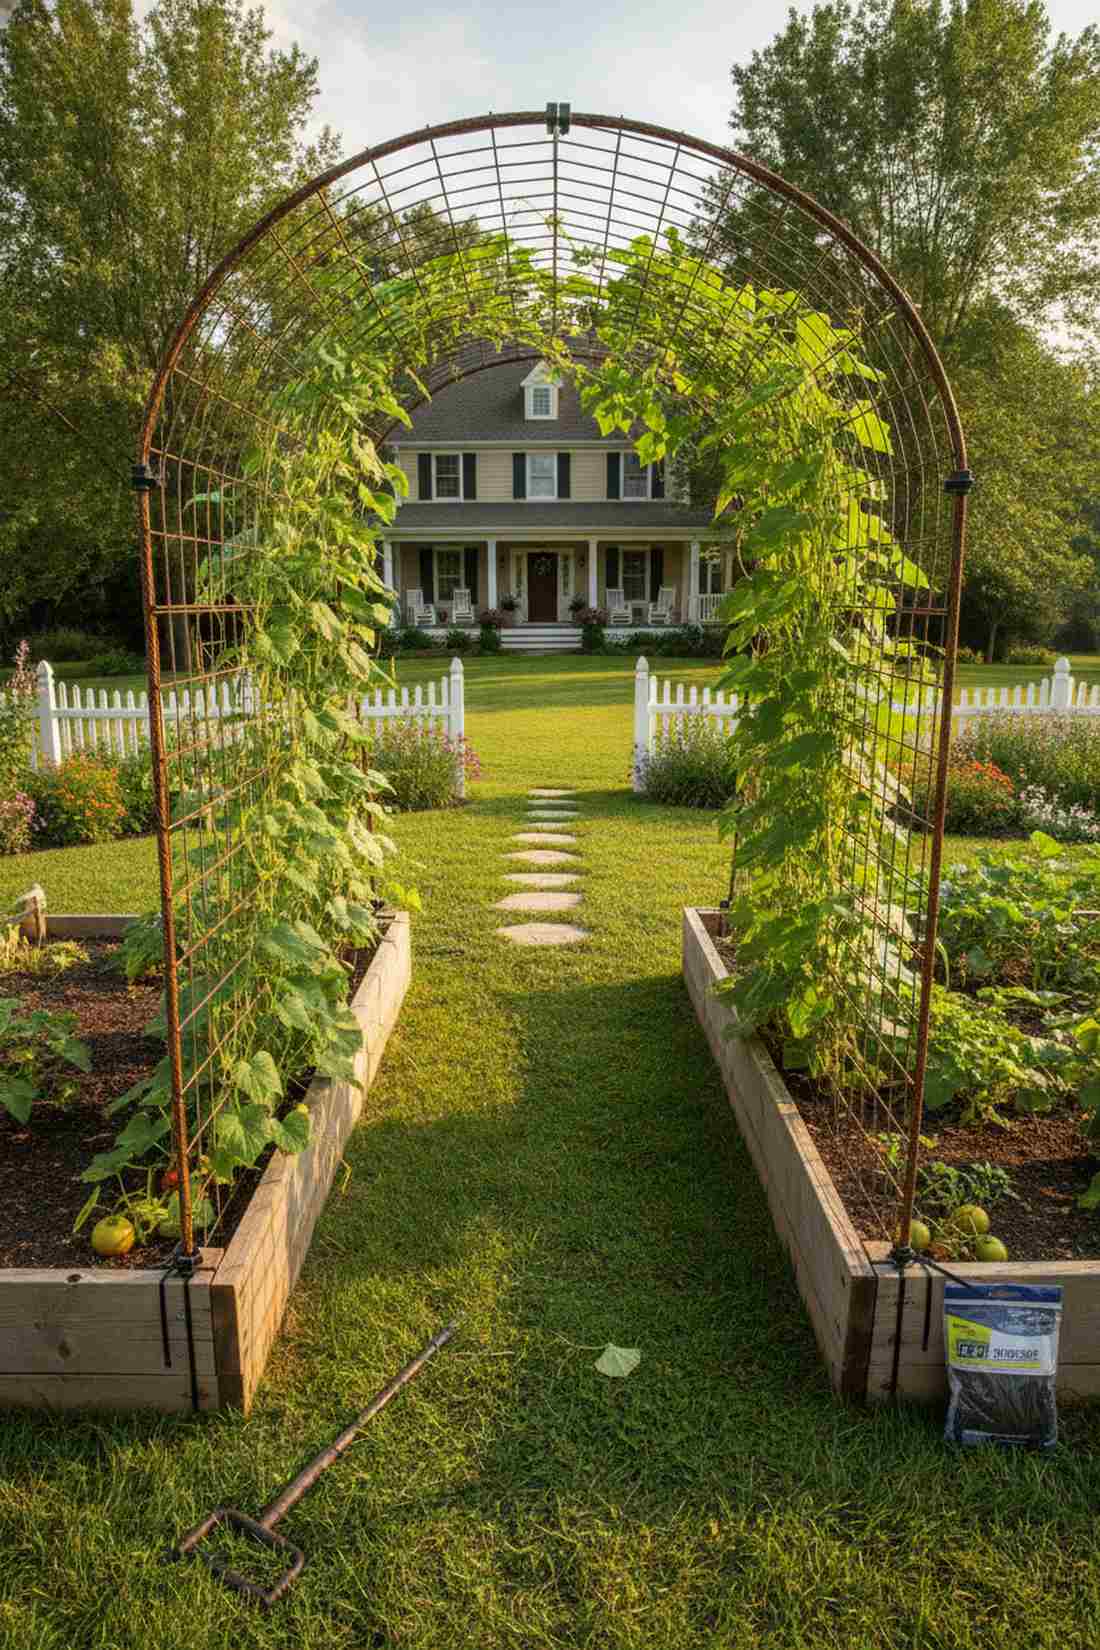
14. Cattle Panel Trellis with T-Post Anchoring
Brings a stunning structural archway right into your vegetable patch. This curved heavy-wire tunnel works incredibly well connecting two raised planter beds.
Most flimsy garden center trellises collapse by mid-summer, but this agricultural secret is practically hurricane-proof. Bending this welded steel creates a massive canopy that looks far more expensive than it is.
This massive structure costs a mere $40–$60 to construct. Save this for your ultimate spring garden layout!
- Key Materials: 16-foot welded wire panels and steel T-posts
- Vibe / Style: Grand homestead archway
- Difficulty: Requires two people to bend
- Budget Breakdown: Cattle panel: $30 | T-posts (x4): $20.
- Creator’s Tip: Use heavy-duty UV-resistant zip ties to secure the panel to the posts for zero rust issues.
- Smart Sourcing: heavy-duty UV-resistant zip ties (bulk pack) and steel T-post drivers.
15. Bamboo Teepee Framework with Natural Lashing
Feels like a magical, towering centerpiece in the middle of a yard. A classic lashed bamboo cone is ideal for adding massive height to a flat children’s garden.
While plastic poles look incredibly cheap, utilizing thick natural bamboo delivers a highly authentic, organic aesthetic. Tying them off with weatherproof jute twine ensures a setup that radiates surprisingly premium charm.
You can build this entirely for under $20. Highly recommended for a fast afternoon project with kids.
- Key Materials: 8-foot bamboo poles and heavy garden twine
- Vibe / Style: Organic whimsical garden
- Difficulty: Very easy
- Budget Breakdown: Bamboo bundle: $15 | Twine: $5.
- Creator’s Tip: Coat the bottom 12 inches of the bamboo in raw linseed oil to prevent ground rot.
- Smart Sourcing: thick structural bamboo pole bundles and weatherproof garden lashing twine.
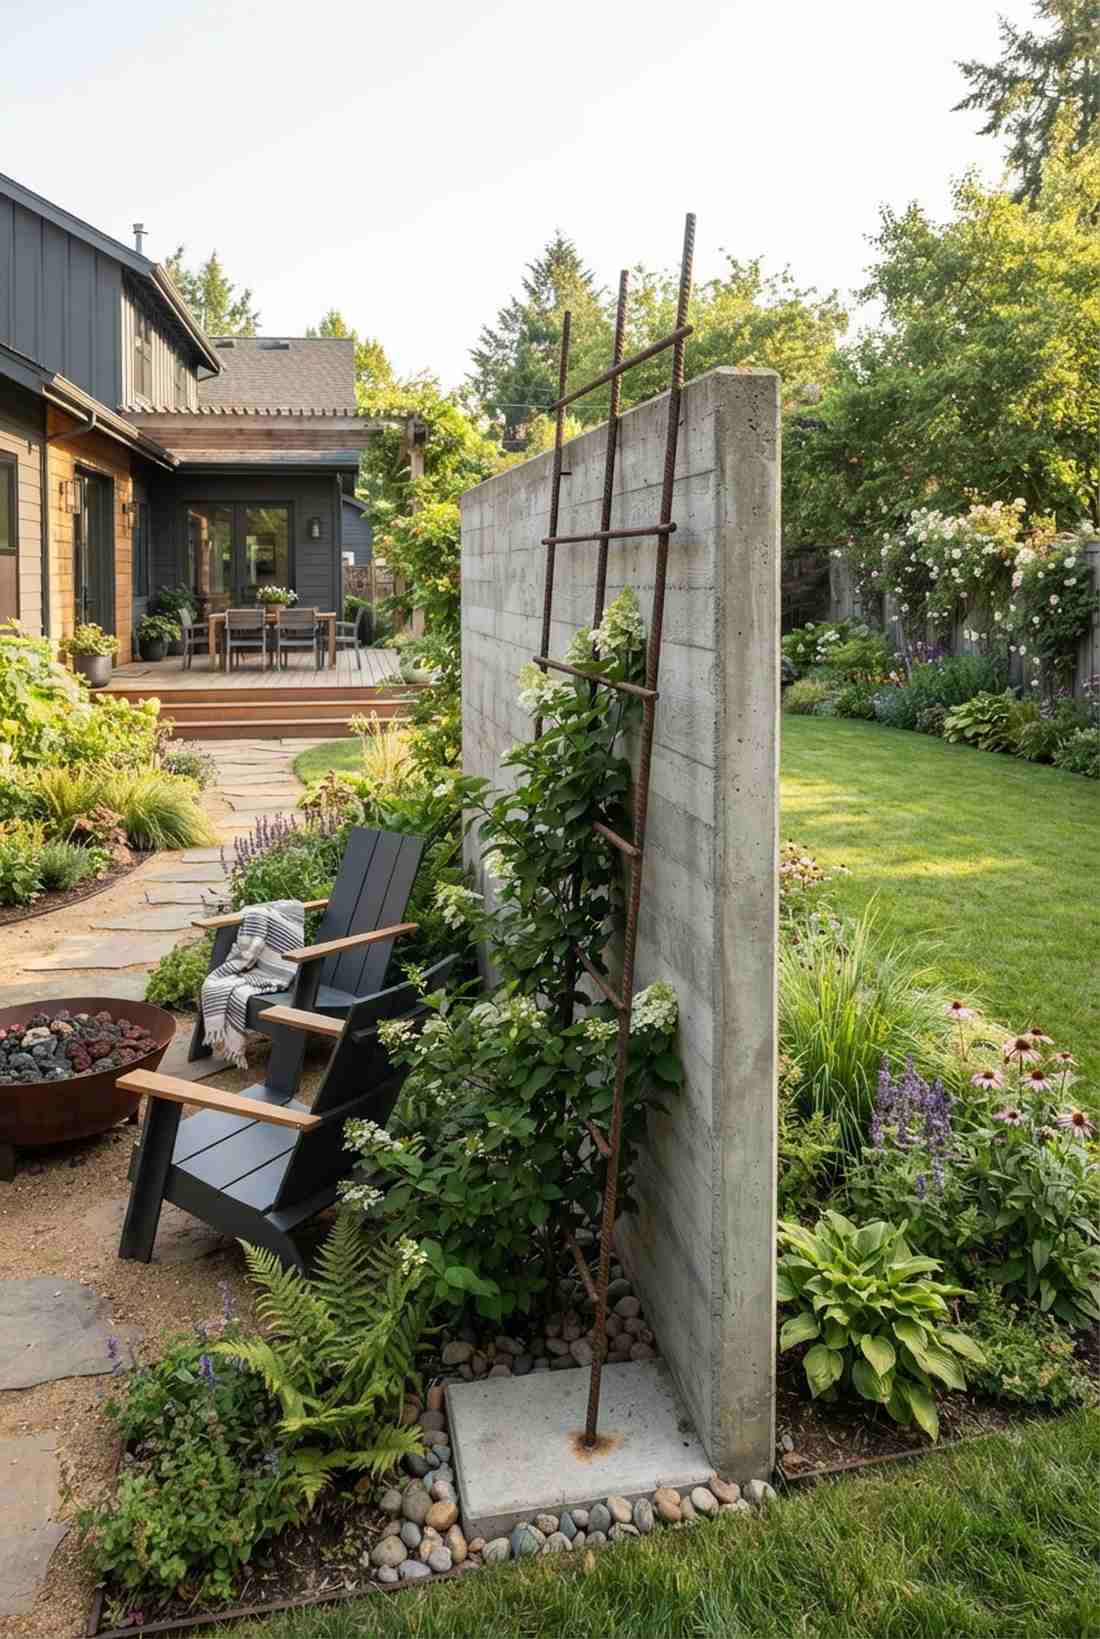
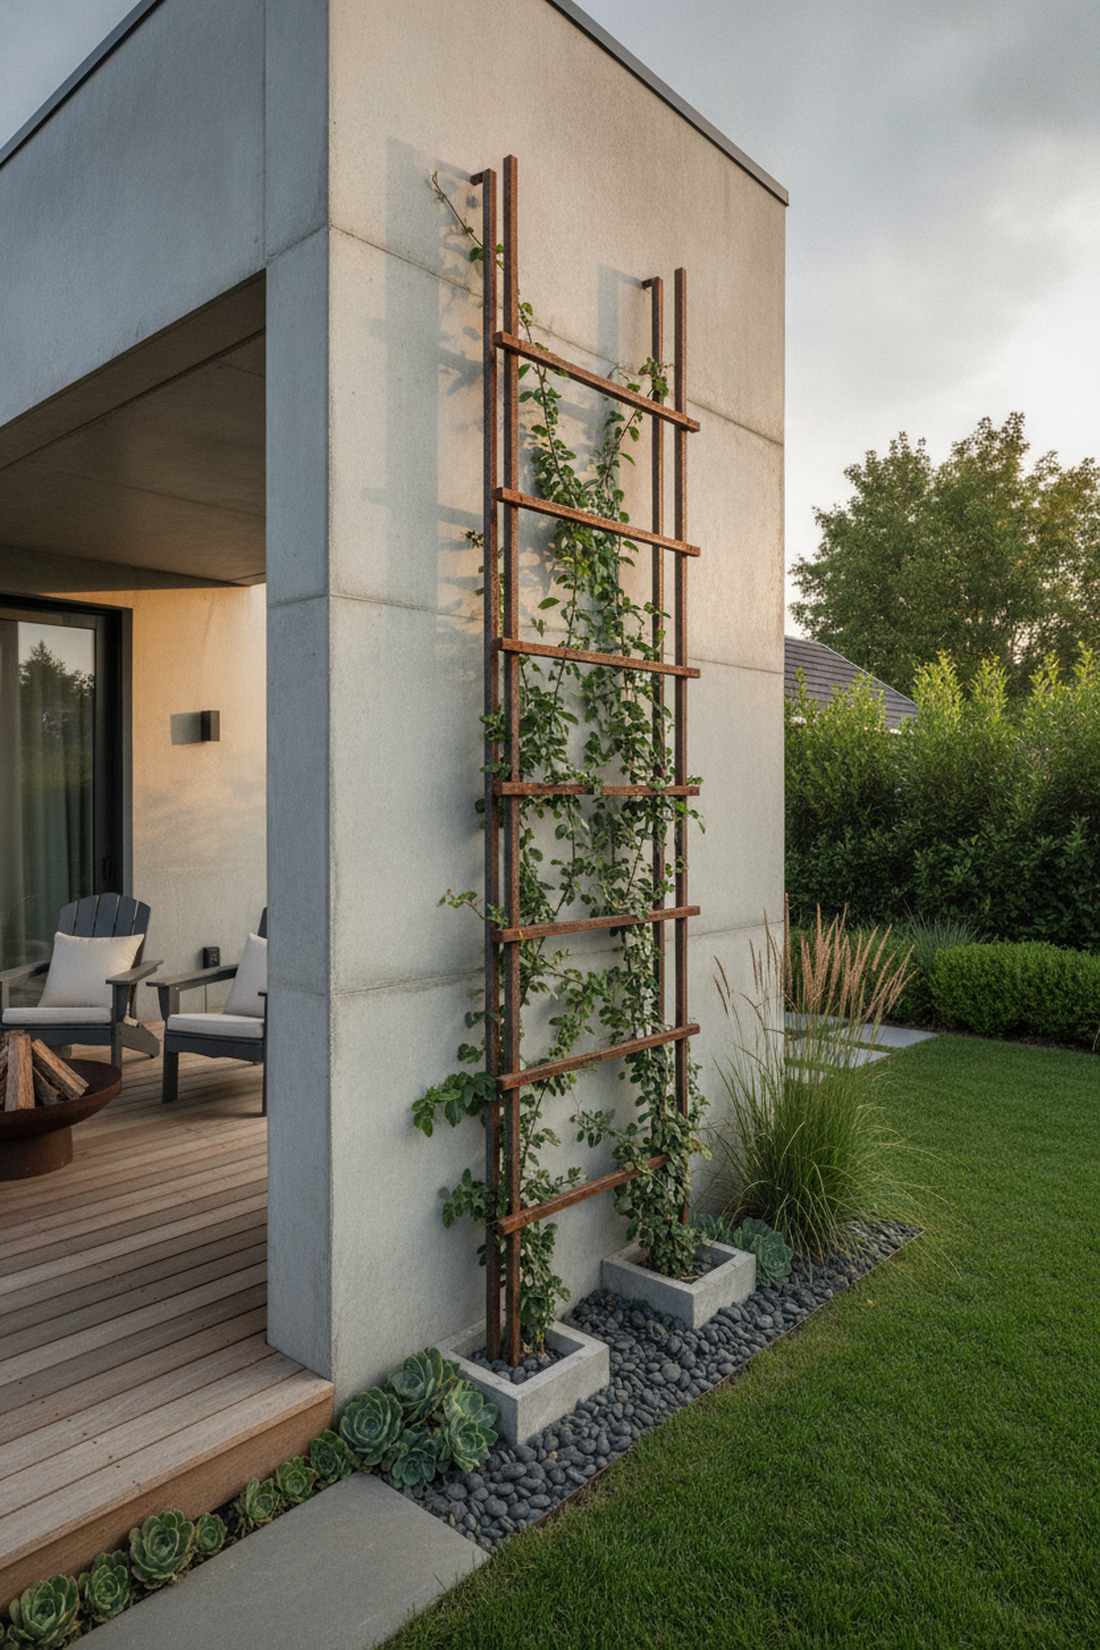
16. Welded Rebar Ladder Trellis with Permanent Installation


Radiates a stark, beautiful industrial vibe against soft greenery. A heavy steel rebar ladder looks exceptionally striking leaning against a modern concrete wall.
Flimsy wood rots away quickly, but raw steel actually improves aesthetically as it develops a rich rust patina. Embedding this heavy-duty metal deep into footings delivers an indestructible terrarium accessories vibe on a macro scale.
Material costs are rock-bottom at around $30–$50. Pin this if you love permanent, rugged landscaping!
- Key Materials: 1/2-inch steel rebar and concrete mix
- Vibe / Style: Industrial modern permanence
- Difficulty: Welding or heavy tying required
- Budget Breakdown: Rebar lengths: $25 | Concrete: $10.
- Creator’s Tip: If you can’t weld, use heavy-gauge steel wire wrapped tightly with pliers to bind the joints.
- Smart Sourcing: heavy-gauge steel binding wire and quick-set concrete mix bags.
Wait until you see how this next farm-hack doubles your growing space without spending more than $50…
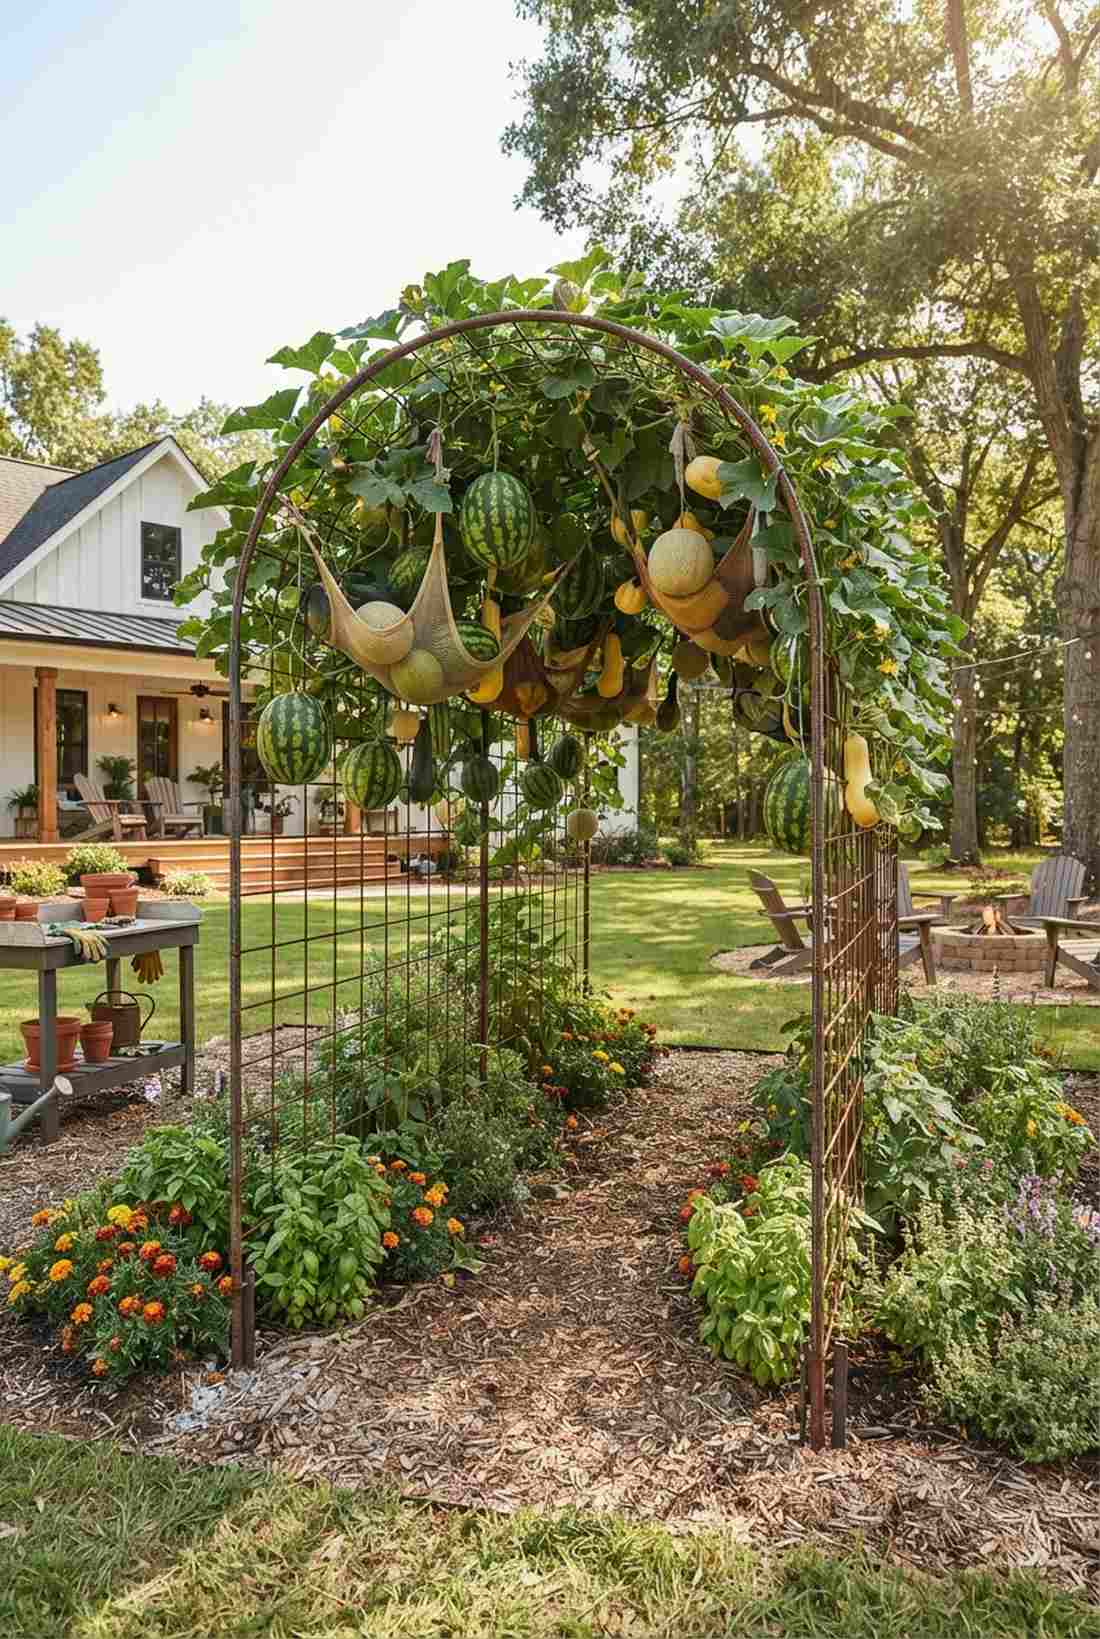
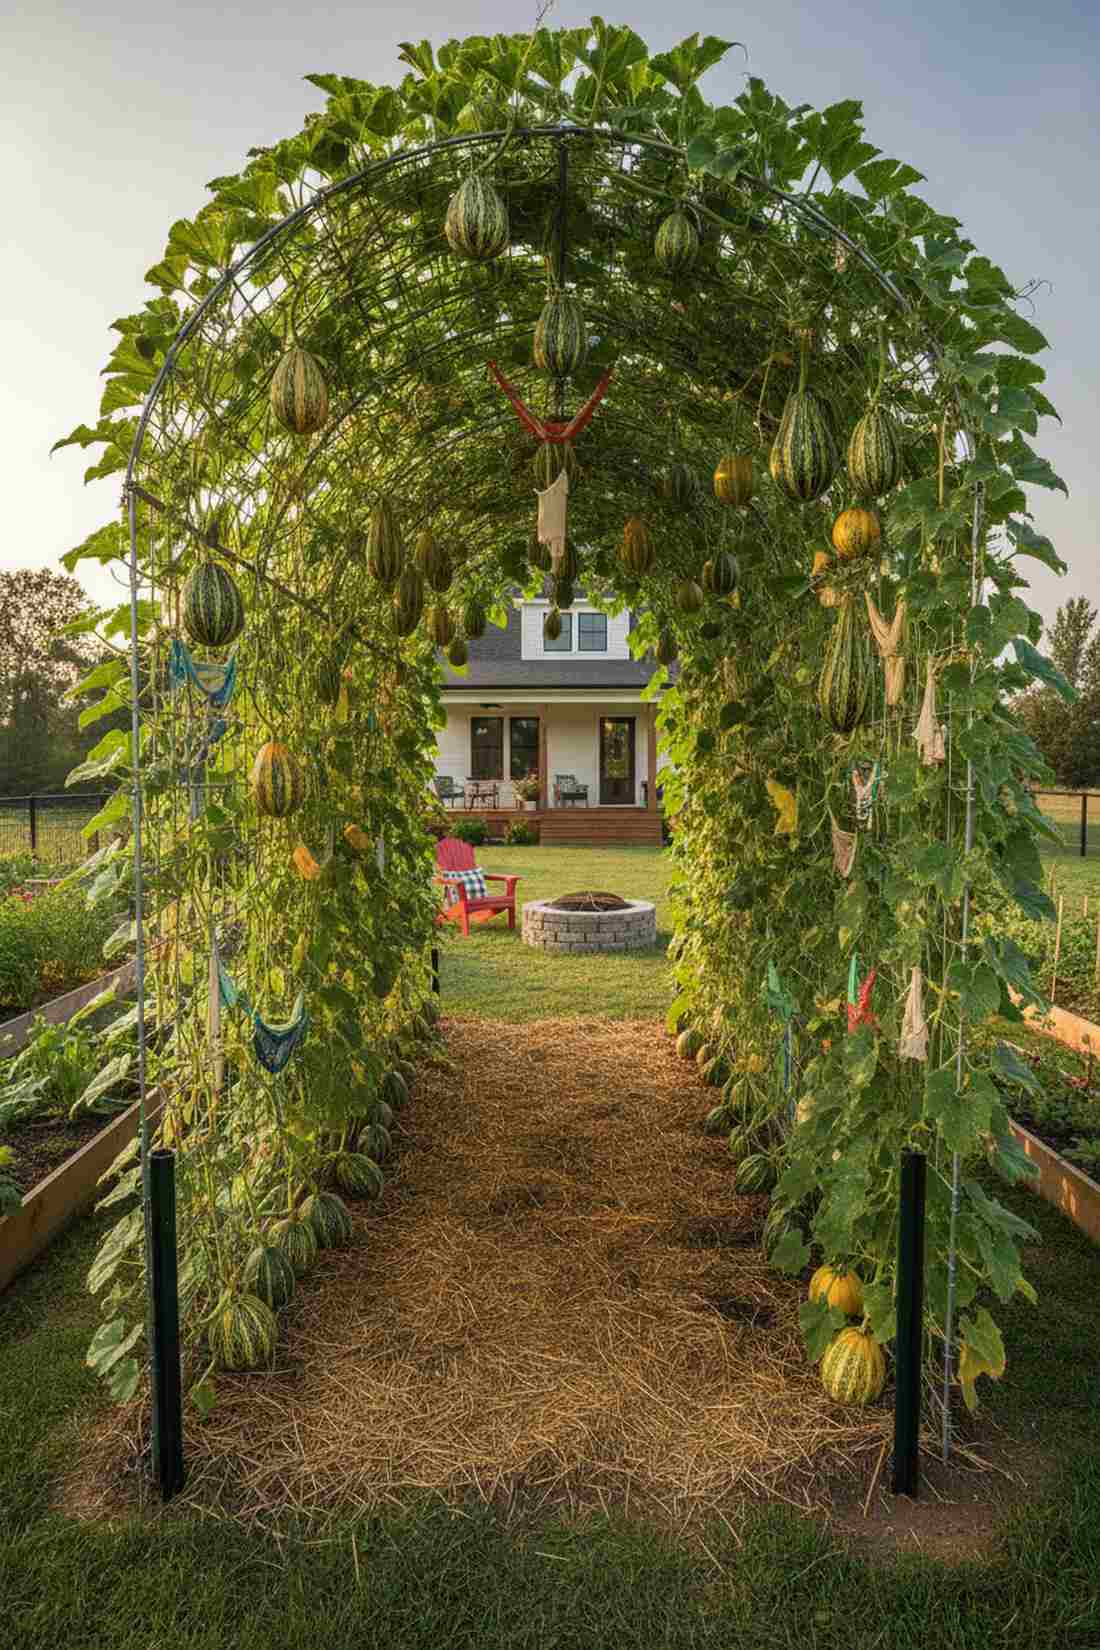
17. Livestock Panel Arch for Squash and Melon Support
Looks like an abundant, shaded green cave bursting with produce. An elevated heavy-fruiting canopy transforms flat ground into a multi-dimensional harvest zone.
Growing melons on the ground guarantees rot, but elevating them onto thick gauge steel completely solves the issue. This massive load-bearing archway gives a designer-level finish to an otherwise chaotic vegetable patch.
Expect to spend around $50 for this massive upgrade. Save this trick for your heavy summer crops!
- Key Materials: 4×4 mesh livestock panels and heavy-duty stakes
- Vibe / Style: High-yield functional homestead
- Difficulty: Moderate physical effort
- Budget Breakdown: Wire panel: $35 | Ground anchors: $15.
- Creator’s Tip: Support the heavy hanging melons with old pantyhose tied to the grid so the stems don’t snap.
- Smart Sourcing: heavy-duty steel ground anchors and mesh plant support hammocks.
18. PVC Conduit Trellis with UV-Resistant Construction
Feels like a pristine, custom-built geometric screen. A modular PVC pipe grid creates incredible custom privacy fencing for an exposed patio.
Many ignore PVC because the white color looks cheap, but hitting it with high-grade exterior matte black paint changes everything. Snapping together these lightweight tubes produces a framework that looks far more expensive than it is.
You can frame a massive area for roughly $25–$40. Pin this for a brilliant budget privacy hack!
- Key Materials: 3/4-inch electrical conduit and PVC connector fittings
- Vibe / Style: Modern matte-black geometric
- Difficulty: Simple cutting and gluing
- Budget Breakdown: PVC & fittings: $25 | Matte spray paint: $10.
- Creator’s Tip: Lightly sand the PVC before painting to ensure the spray paint bonds perfectly without flaking.
- Smart Sourcing: exterior-grade matte black spray paint and bulk PVC connector fitting packs.
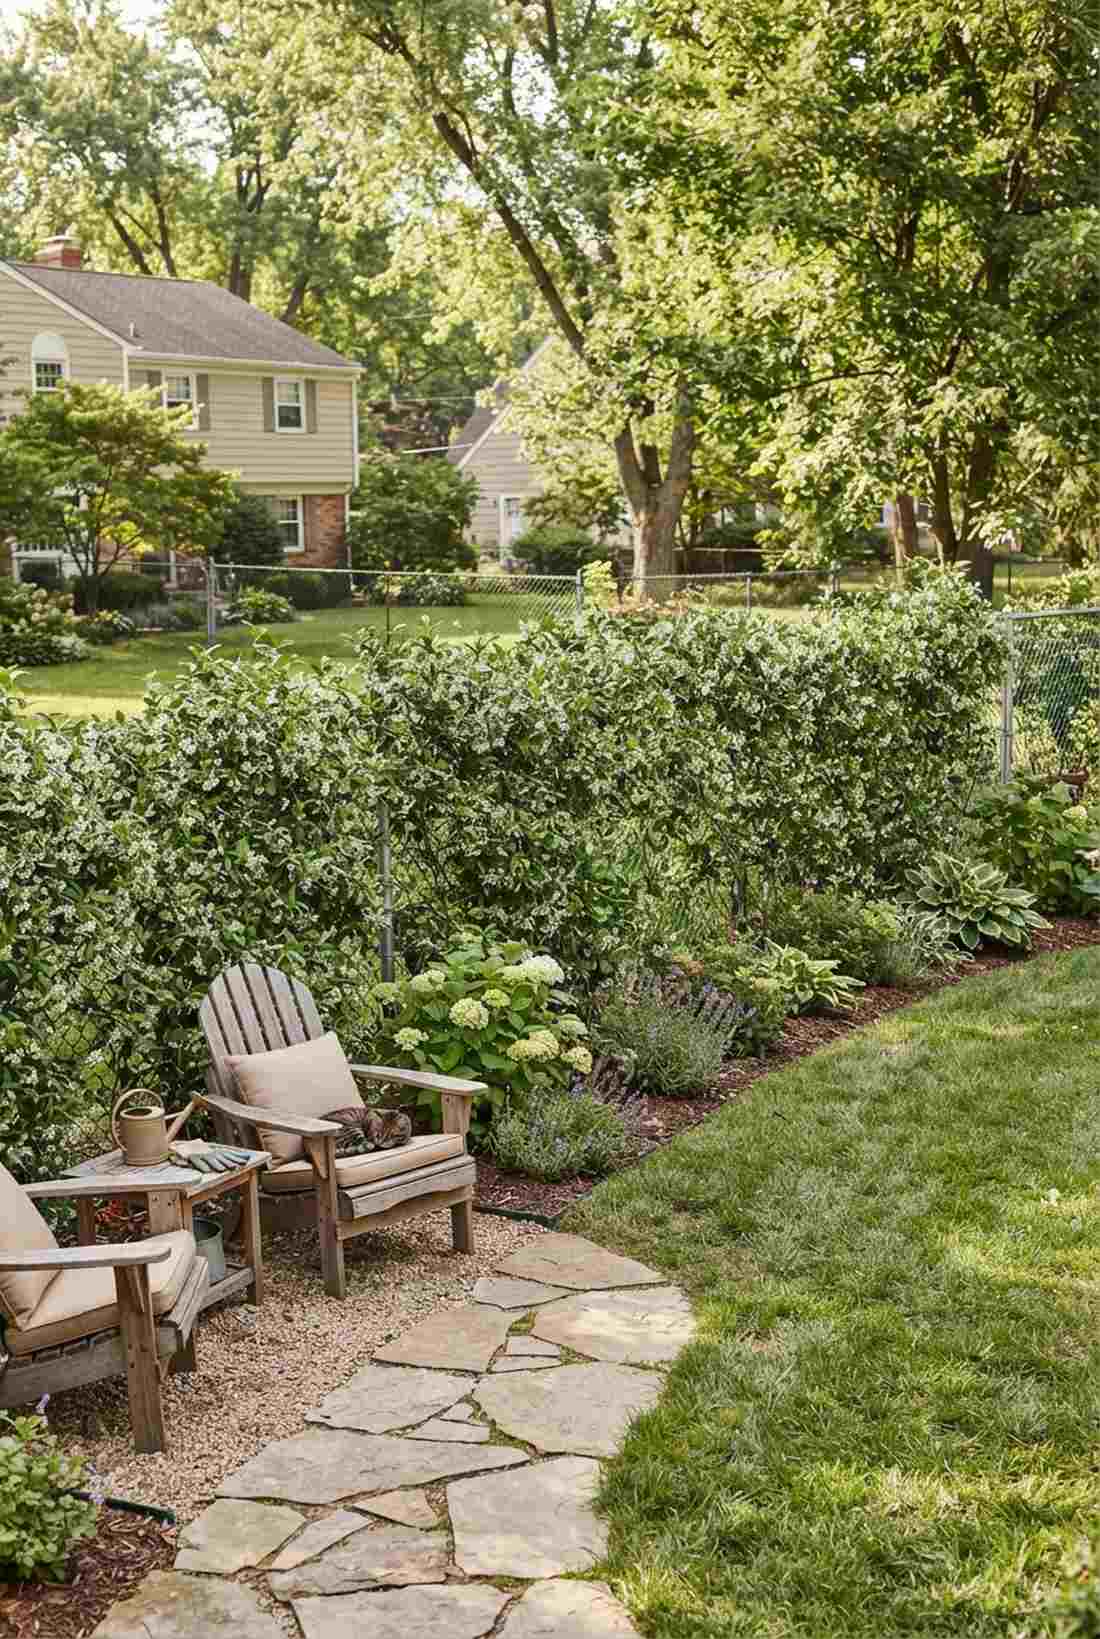
19. Chain-Link Fence Conversion with Existing Infrastructure

Transforms a massive eyesore into a breathtaking wall of green. A living fence conversion is the smartest way to hide ugly property lines.
Removing chain-link costs thousands, but using it as a readymade vertical garden installation requires zero new construction. Weaving hardy perennial vines through the existing diamond mesh delivers a surprisingly premium look over time.
This is a zero-cost structure, you only pay for the plants! Highly recommended for an effortless property upgrade.
- Key Materials: Existing fencing and soft plant ties
- Vibe / Style: Lush neighborhood boundary
- Difficulty: Zero setup required
- Budget Breakdown: Framework: $0 | Plant ties: $10.
- Creator’s Tip: Plant evergreen climbers like Star Jasmine to ensure the ugly fence stays hidden even through winter.
- Smart Sourcing: soft rubber-coated plant ties and heavy-duty landscaping bypass pruners.
Freestanding and Mobile Vertical Garden Structure
Mobile setups completely bypass landlord restrictions while giving you total control over sun exposure. A well-designed freestanding vertical garden structure uses wide, weighted bases to prevent wind-tipping, allowing you to move lush greenery anywhere on your deck.
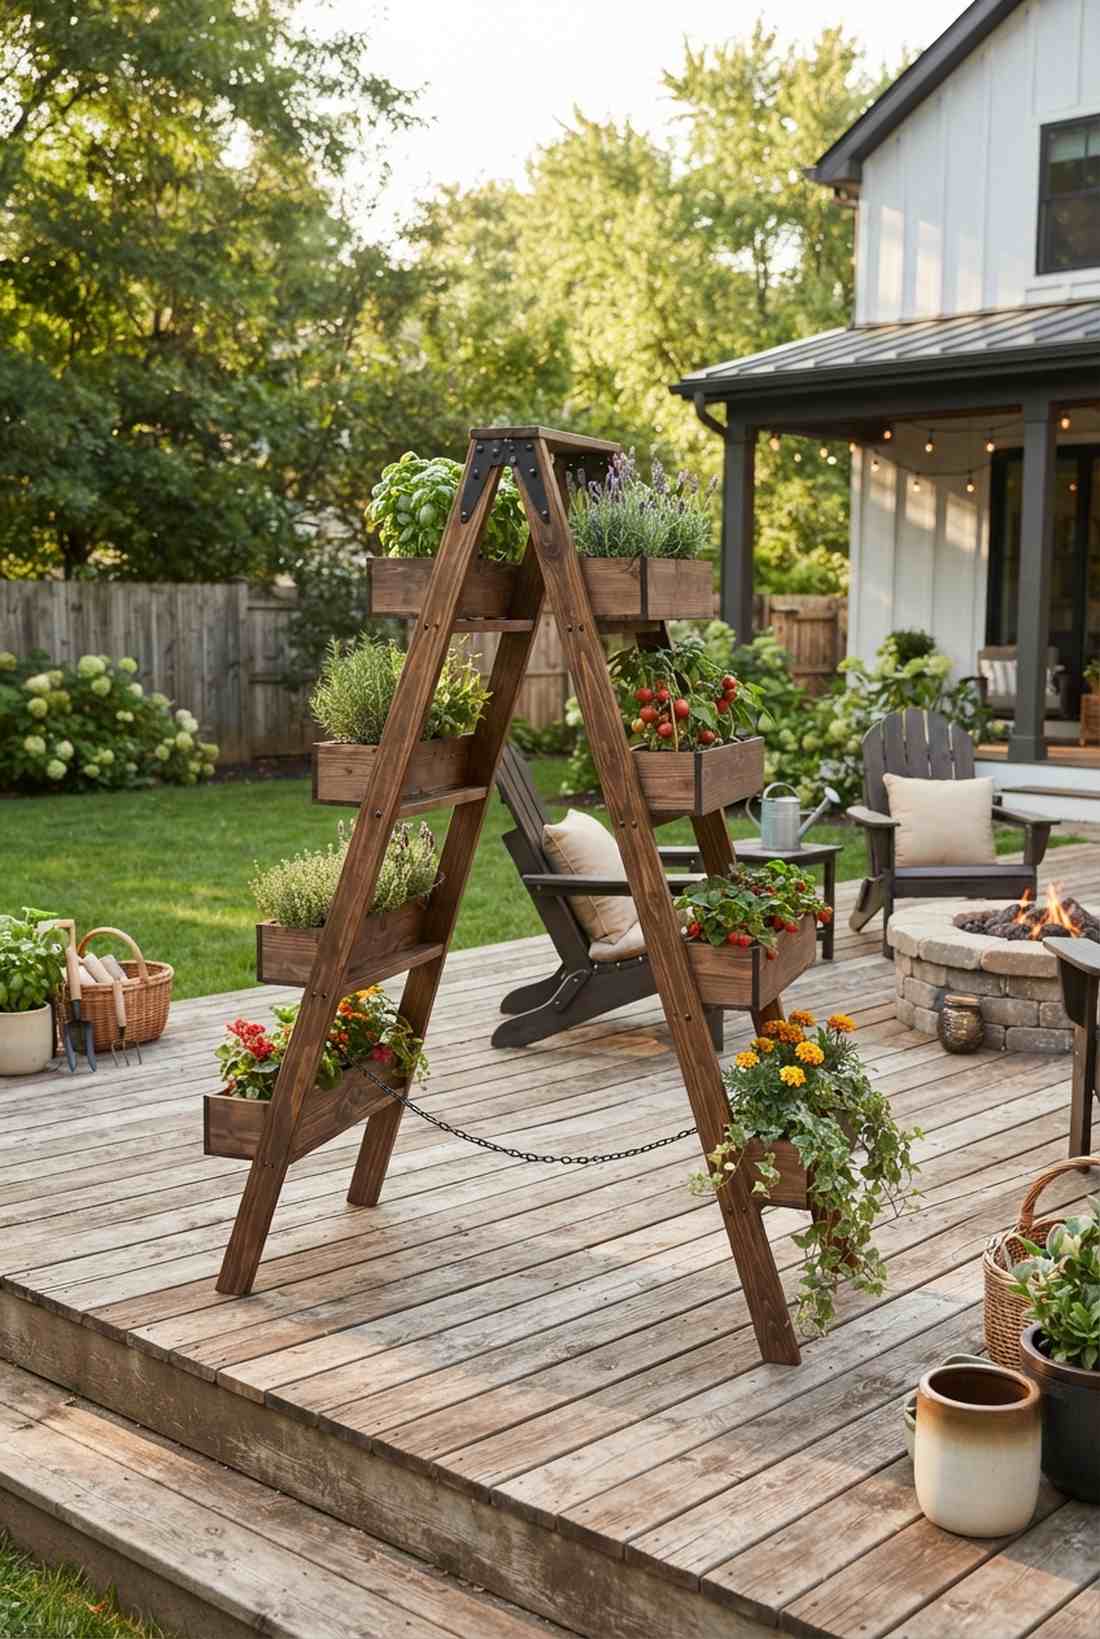
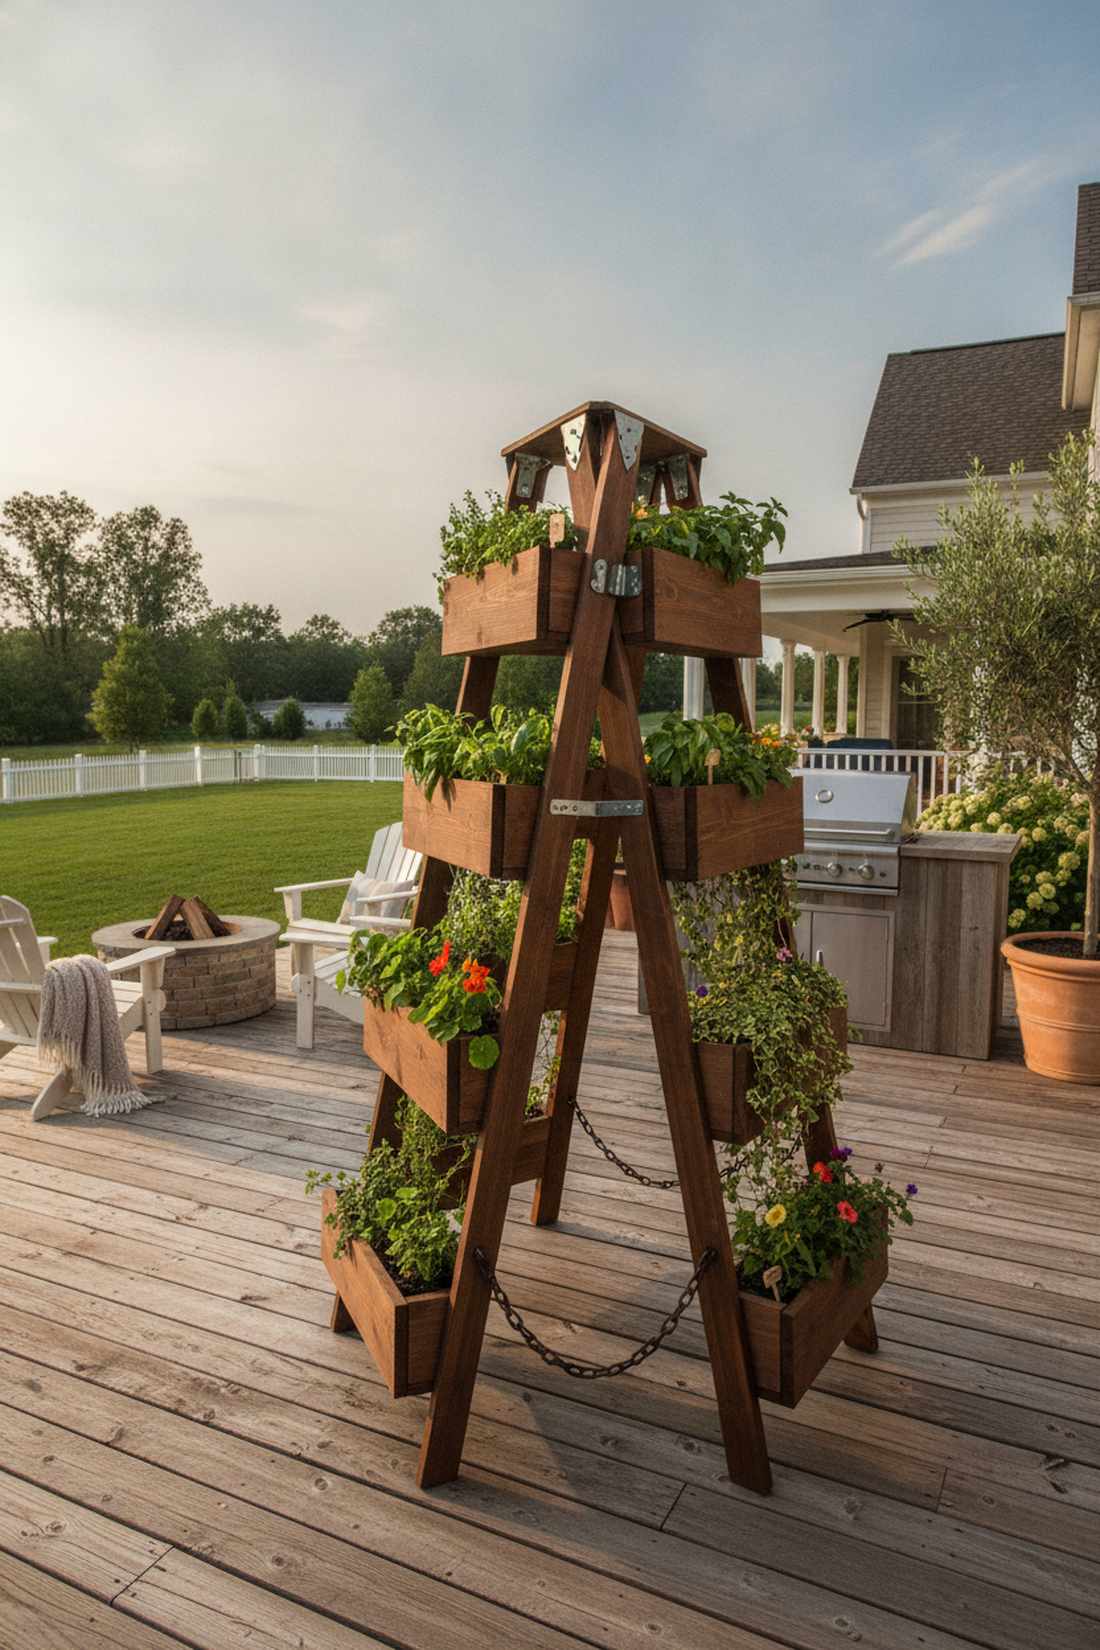
20. A-Frame Ladder Garden with Dual-Sided Growing
Looks like a quaint, rustic display you’d find outside a boutique cafe. A folding wooden A-frame acts perfectly as a standalone space divider on a large deck.
Building a single-sided shelf risks tipping in the wind, but the dual-sided A-frame geometry provides massive natural stability. Staining the wood in a deep walnut shade completely elevates it beyond generic miniature garden supplies.
You can craft this piece for about $40–$60 in lumber. Save this to your weekend woodworking board!
- Key Materials: 2×4 lumber, heavy-duty hinges, and wooden planter boxes
- Vibe / Style: Boutique farmhouse chic
- Difficulty: Basic woodworking
- Budget Breakdown: Lumber & hinges: $45 | Exterior stain: $15.
- Creator’s Tip: Add a strong chain across the bottom span so the A-frame can’t slide open and collapse.
- Smart Sourcing: heavy-duty galvanized strap hinges and weatherproofing wood stain kits.
Renters usually assume they can’t have massive privacy screens… until they build this exact rolling layout.
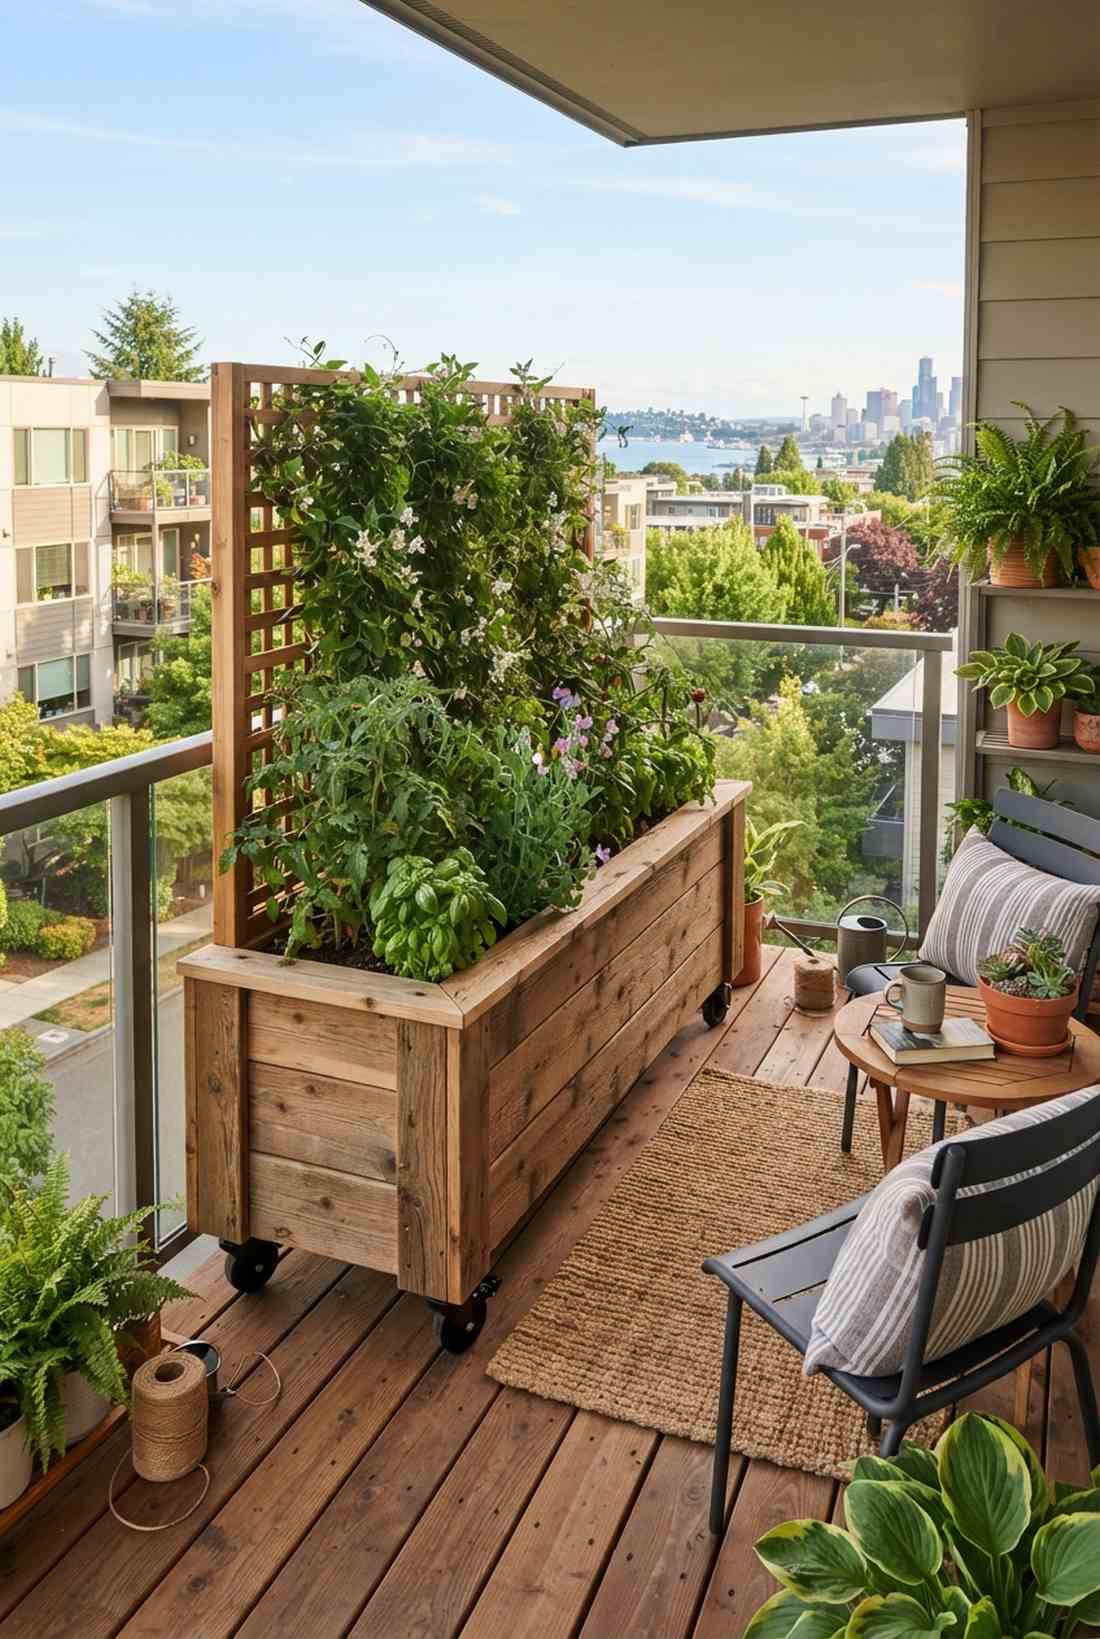
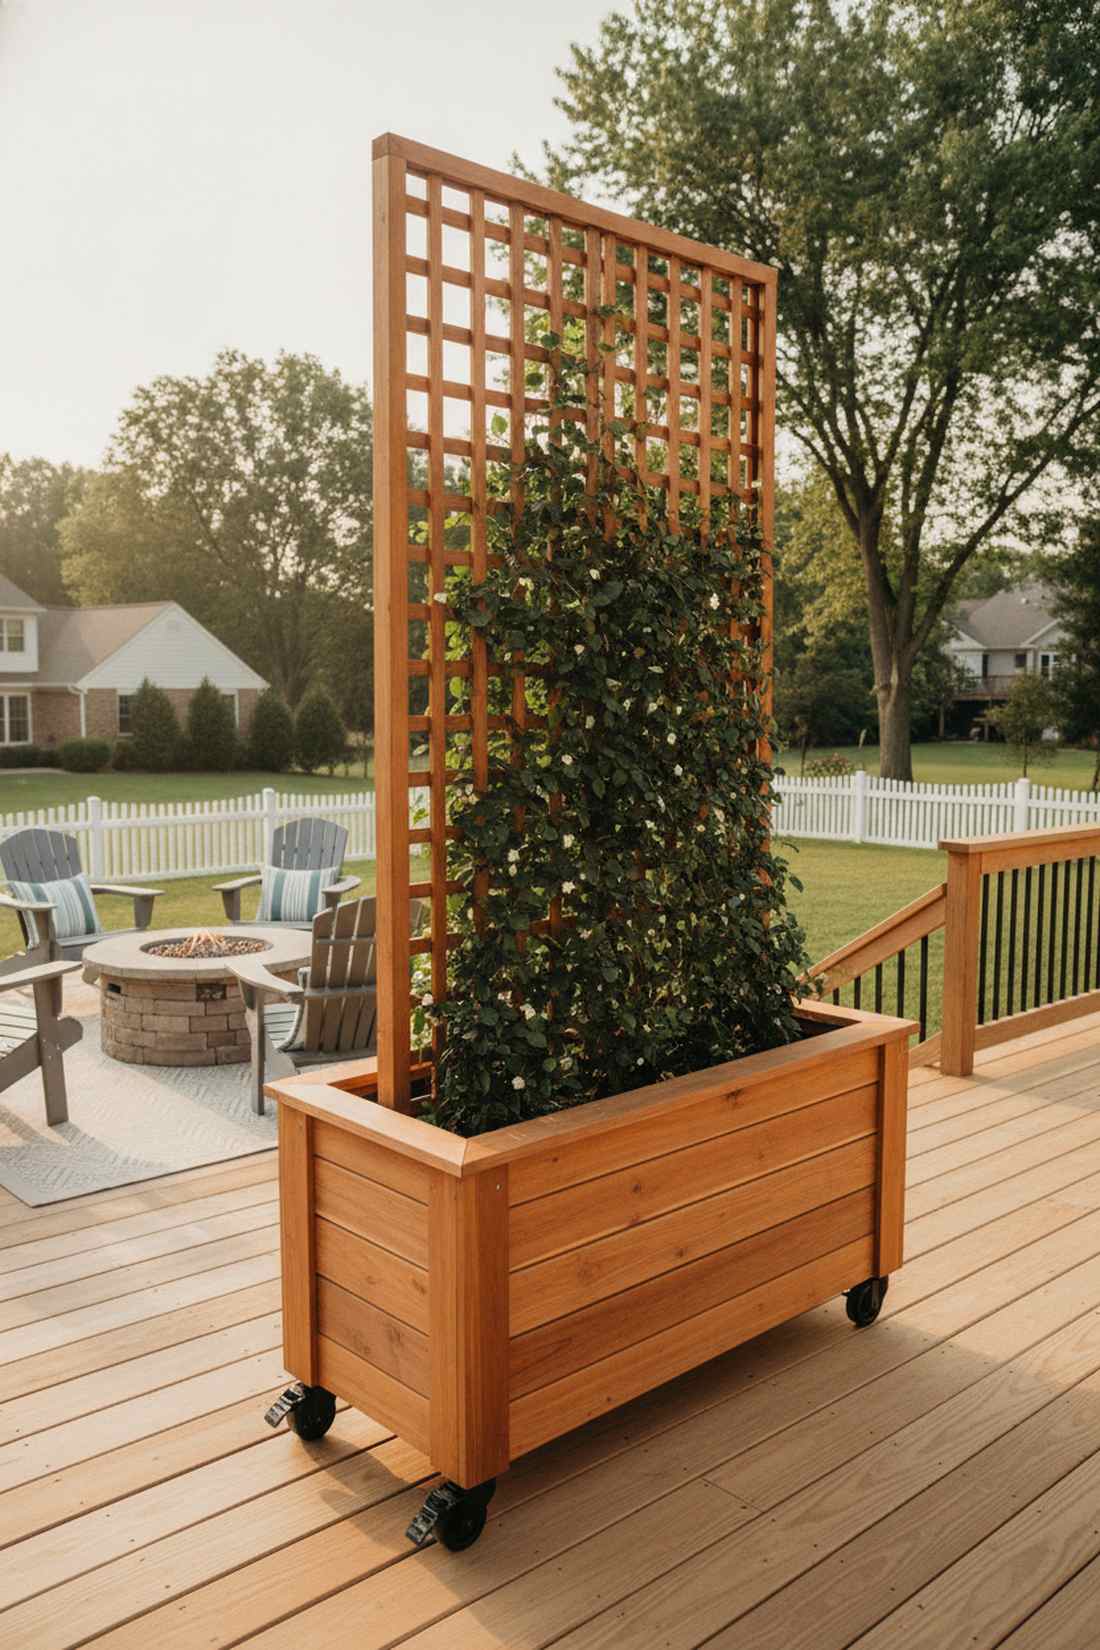
21. Rolling Trellis Planter with Caster Wheels
Feels like having a dynamic, movable wall of lush privacy. A wheeled deep-box trellis is the ultimate hack for blocking nosy neighbors on an apartment balcony.
Fixed screens limit your patio layout, but bolting locking casters onto a heavy base box offers total spatial freedom. Securing a sleek wooden lattice to the back gives a designer-level finish that maneuvers effortlessly.
Expect to spend around $75–$120 for premium materials. Pin this if you desperately need flexible outdoor privacy!
- Key Materials: Thick cedar planks, wooden lattice, and locking casters
- Vibe / Style: Premium adaptive outdoor living
- Difficulty: Moderate assembly
- Budget Breakdown: Wood box materials: $60 | Premium casters: $30.
- Creator’s Tip: Always buy polyurethane wheels rated for at least 300 lbs, as wet soil gets incredibly heavy.
- Smart Sourcing: heavy-duty locking polyurethane casters and pre-cut cedar planter panels.
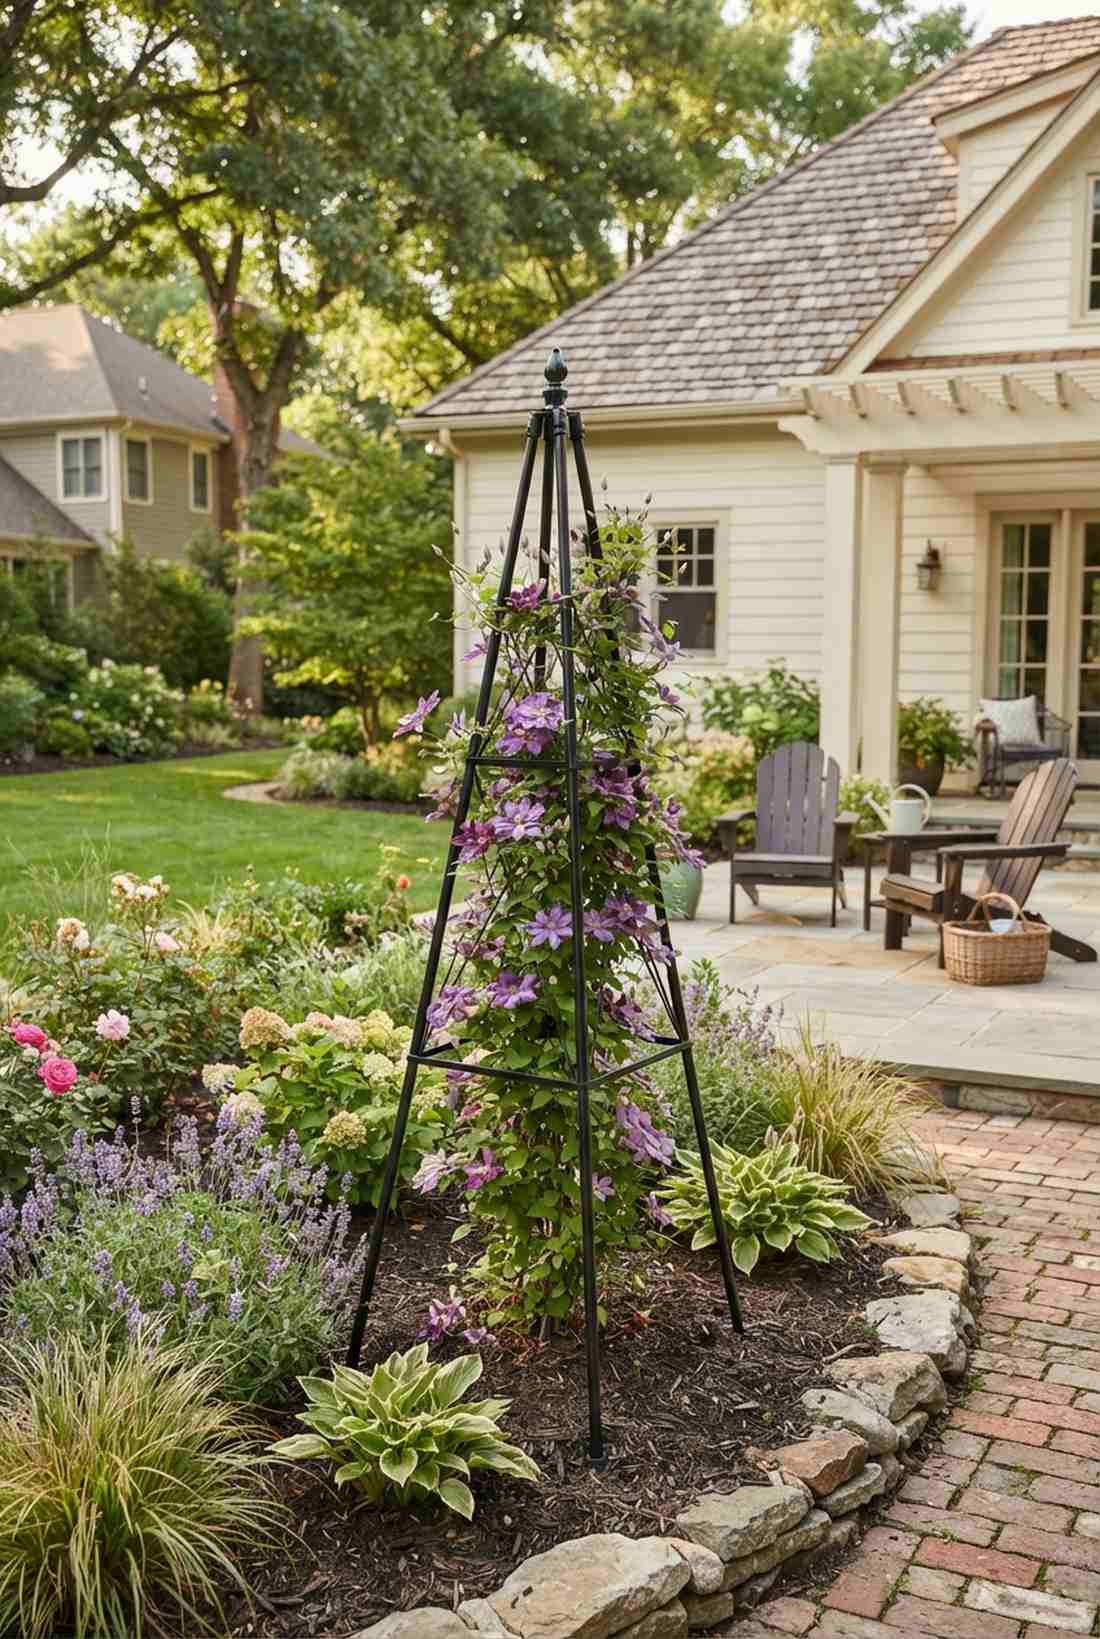
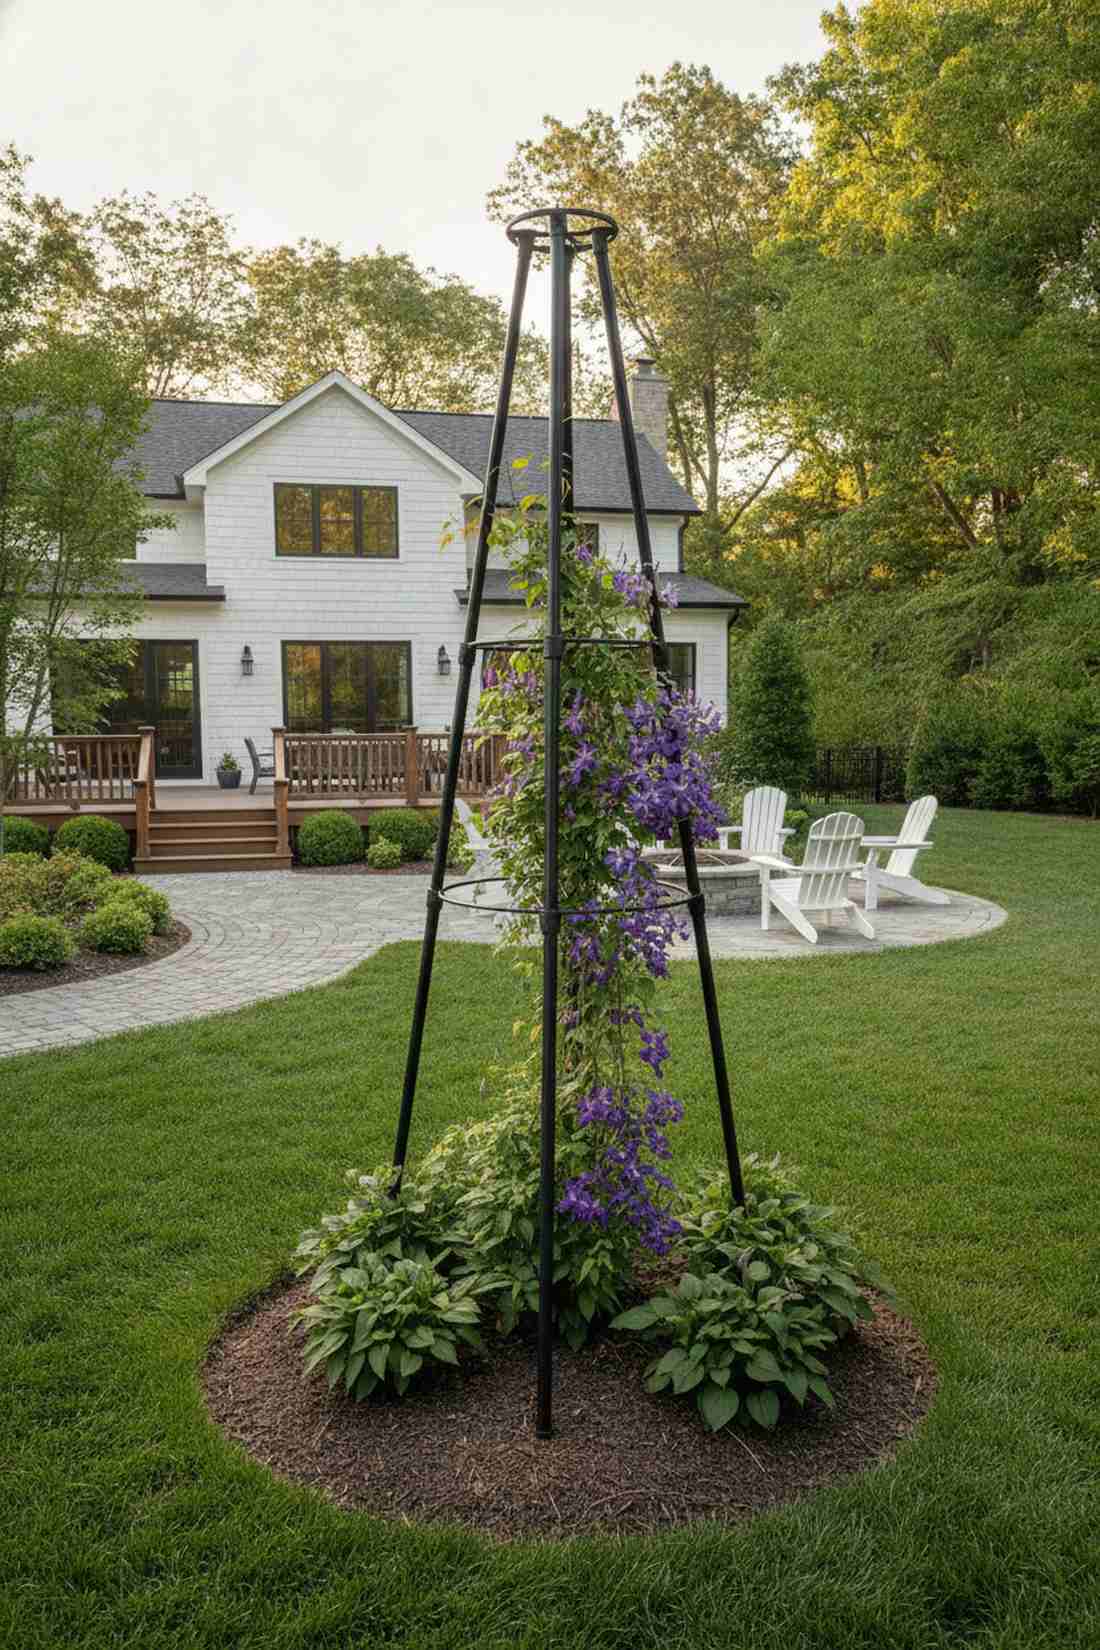
22. Tripod Tower System with Adjustable Legs
Looks like a sleek, architectural obelisk rising from the garden bed. A freestanding telescoping tripod works brilliantly to highlight an ornamental flowering vine.
Many tall structures require deep digging, but the wide stance of three adjustable legs provides immense surface stability. Opting for powder-coated steel instead of cheap plastic instantly produces a far more expensive aesthetic.
This portable upgrade runs roughly $35–$55. Highly recommended for a fast visual focal point.
- Key Materials: Telescoping metal legs and top-binding hardware
- Vibe / Style: Classic English garden accent
- Difficulty: 5-minute setup
- Budget Breakdown: Tripod frame kit: $45.
- Creator’s Tip: Sink the feet just 2 inches into the soil to lock it down against sudden high wind gusts.
- Smart Sourcing: powder-coated metal garden obelisk kits and adjustable telescoping tripod frames.
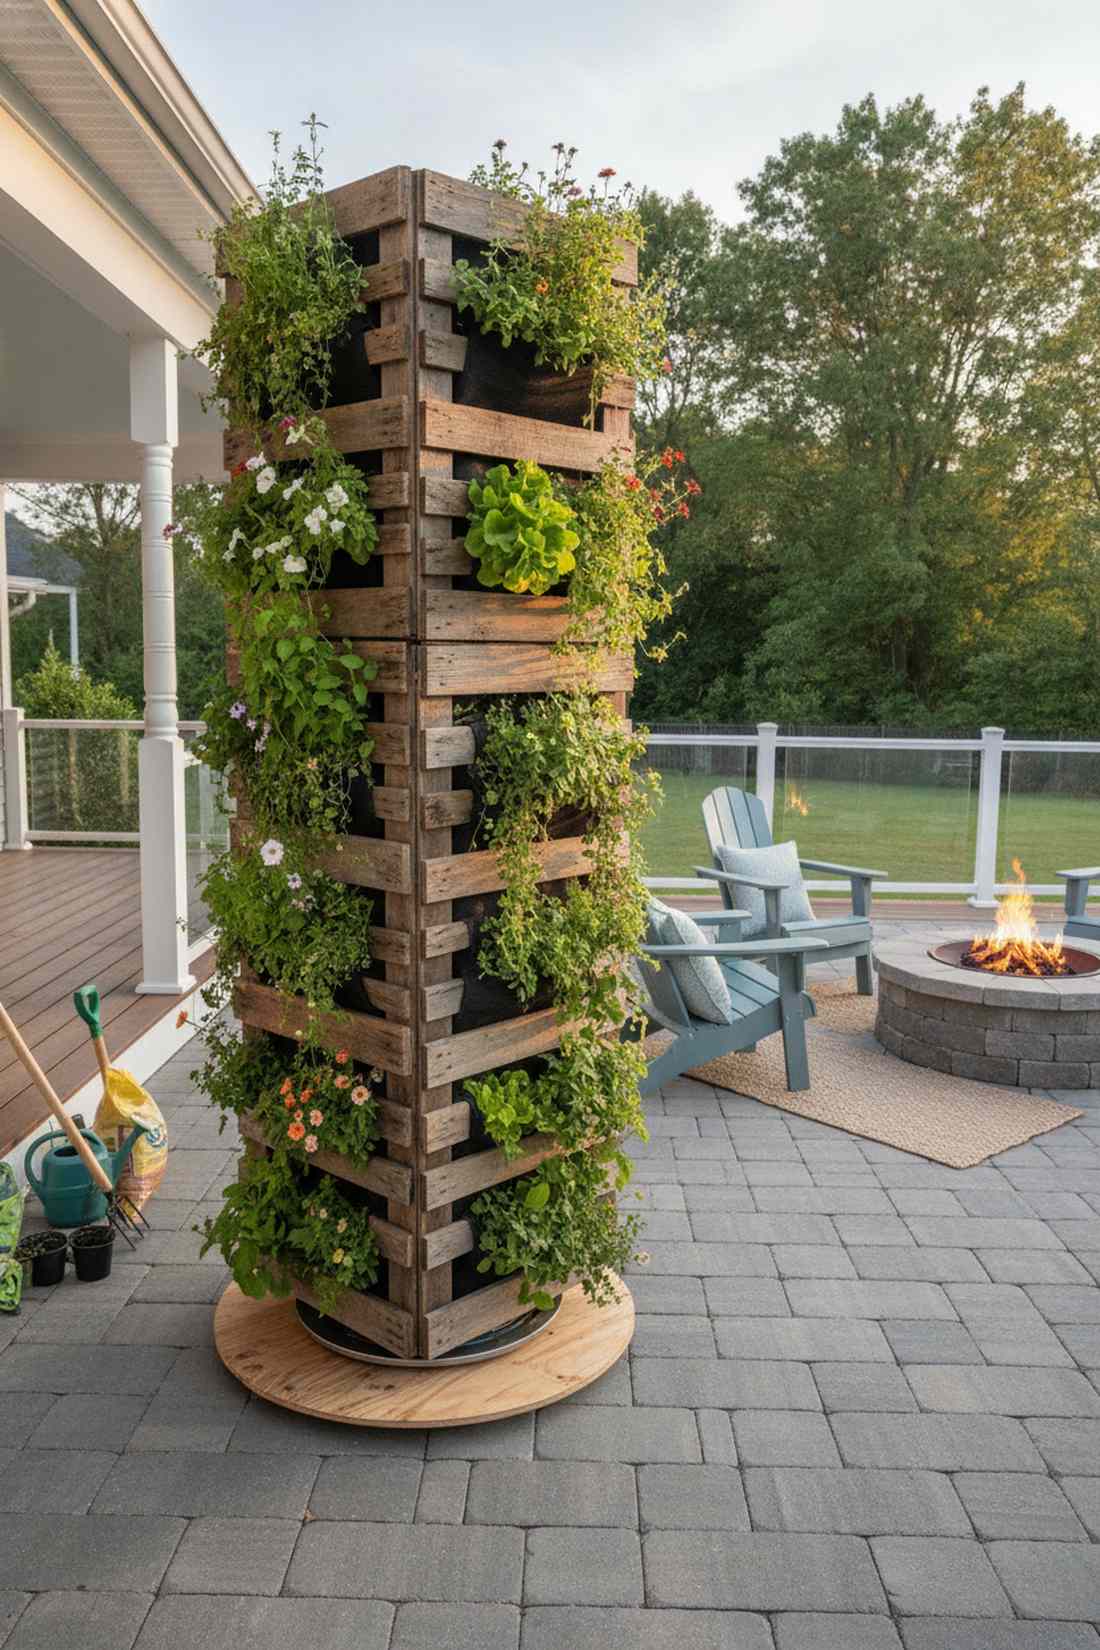
23. Vertical Pallet Tower with Rotating Base
Feels like a massive, four-sided tower of botanical abundance. A rotating upcycled block is absolutely genius for a patio corner that only gets side-sun.
Most stationary towers suffer from severe lopsided growth, but hiding a heavy-duty lazy Susan underneath solves it perfectly. Wrapping the interior column with premium landscape fabric looks far more expensive than it actually is.
You can build this beast for around $40–$60. Save this for your high-yield small space garden!
- Key Materials: Four matching pallets and a heavy-duty rotation bearing
- Vibe / Style: Clever rustic engineering
- Difficulty: Intermediate drilling
- Budget Breakdown: Bearing hardware: $25 | Fabric & Screws: $20.
- Creator’s Tip: Bolt the lazy Susan to a wide piece of thick plywood at the base to distribute the extreme weight.
- Smart Sourcing: 1000-lb capacity lazy Susan bearings and heavy-duty exterior wood screws.
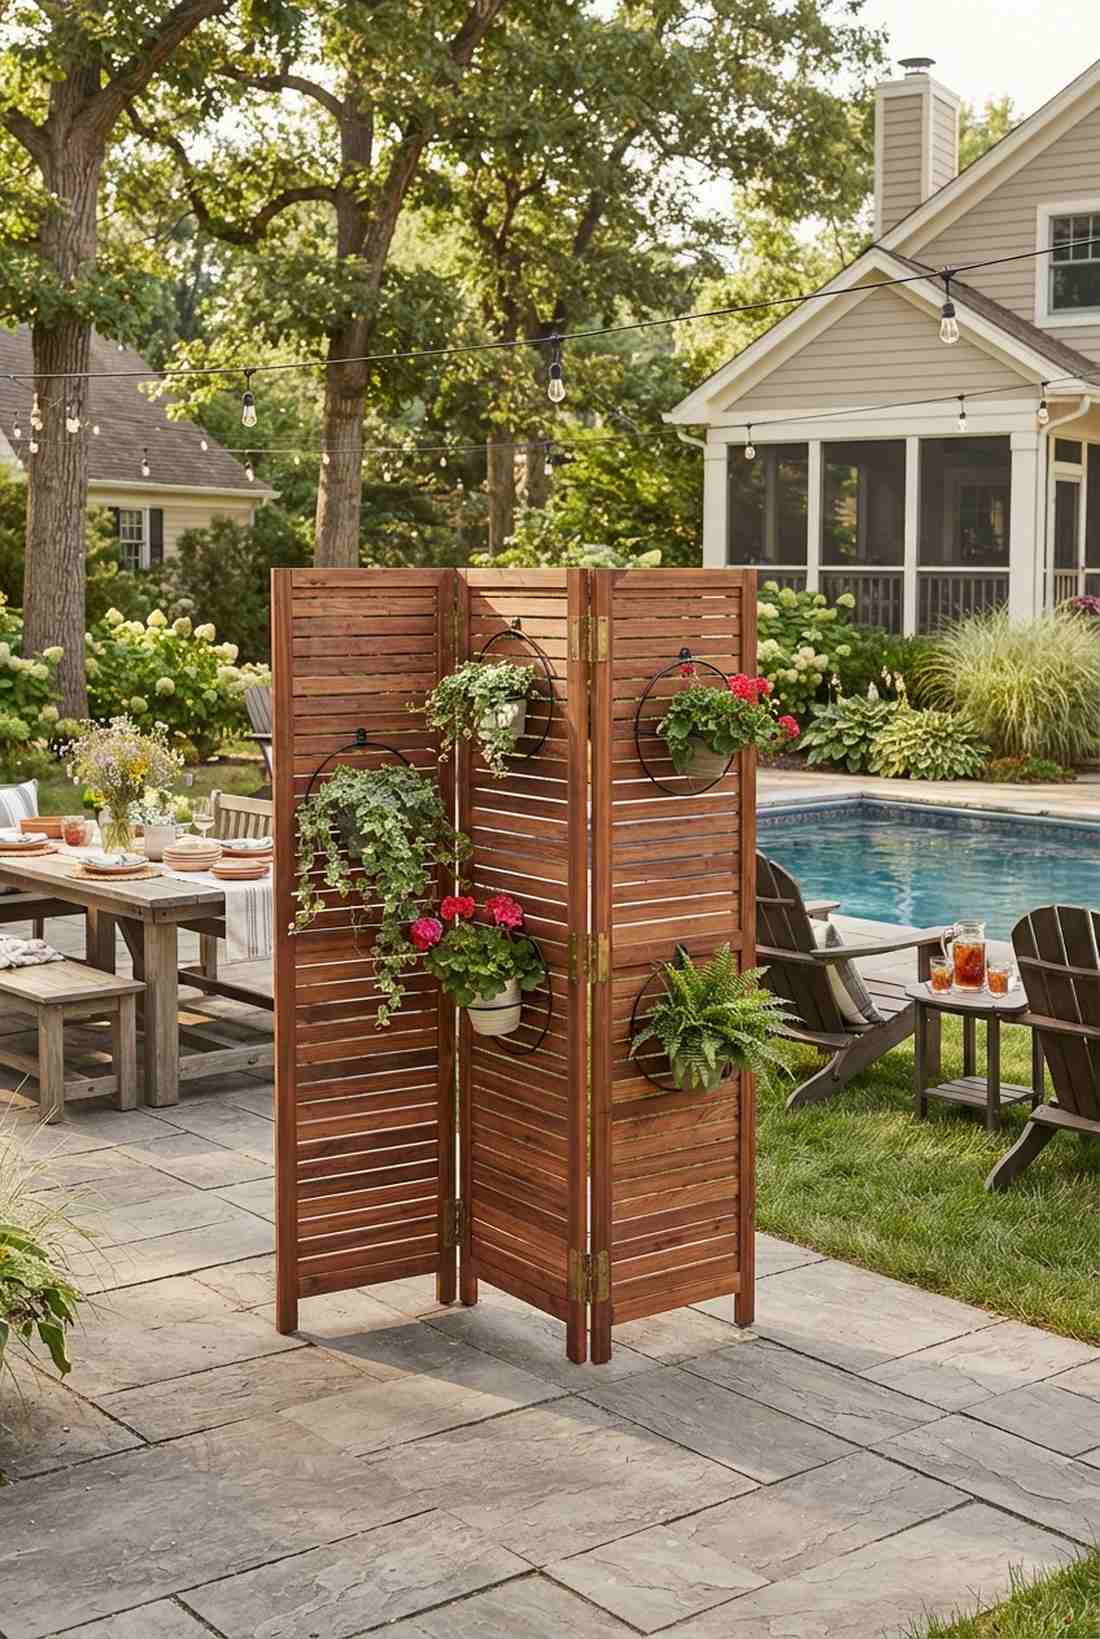
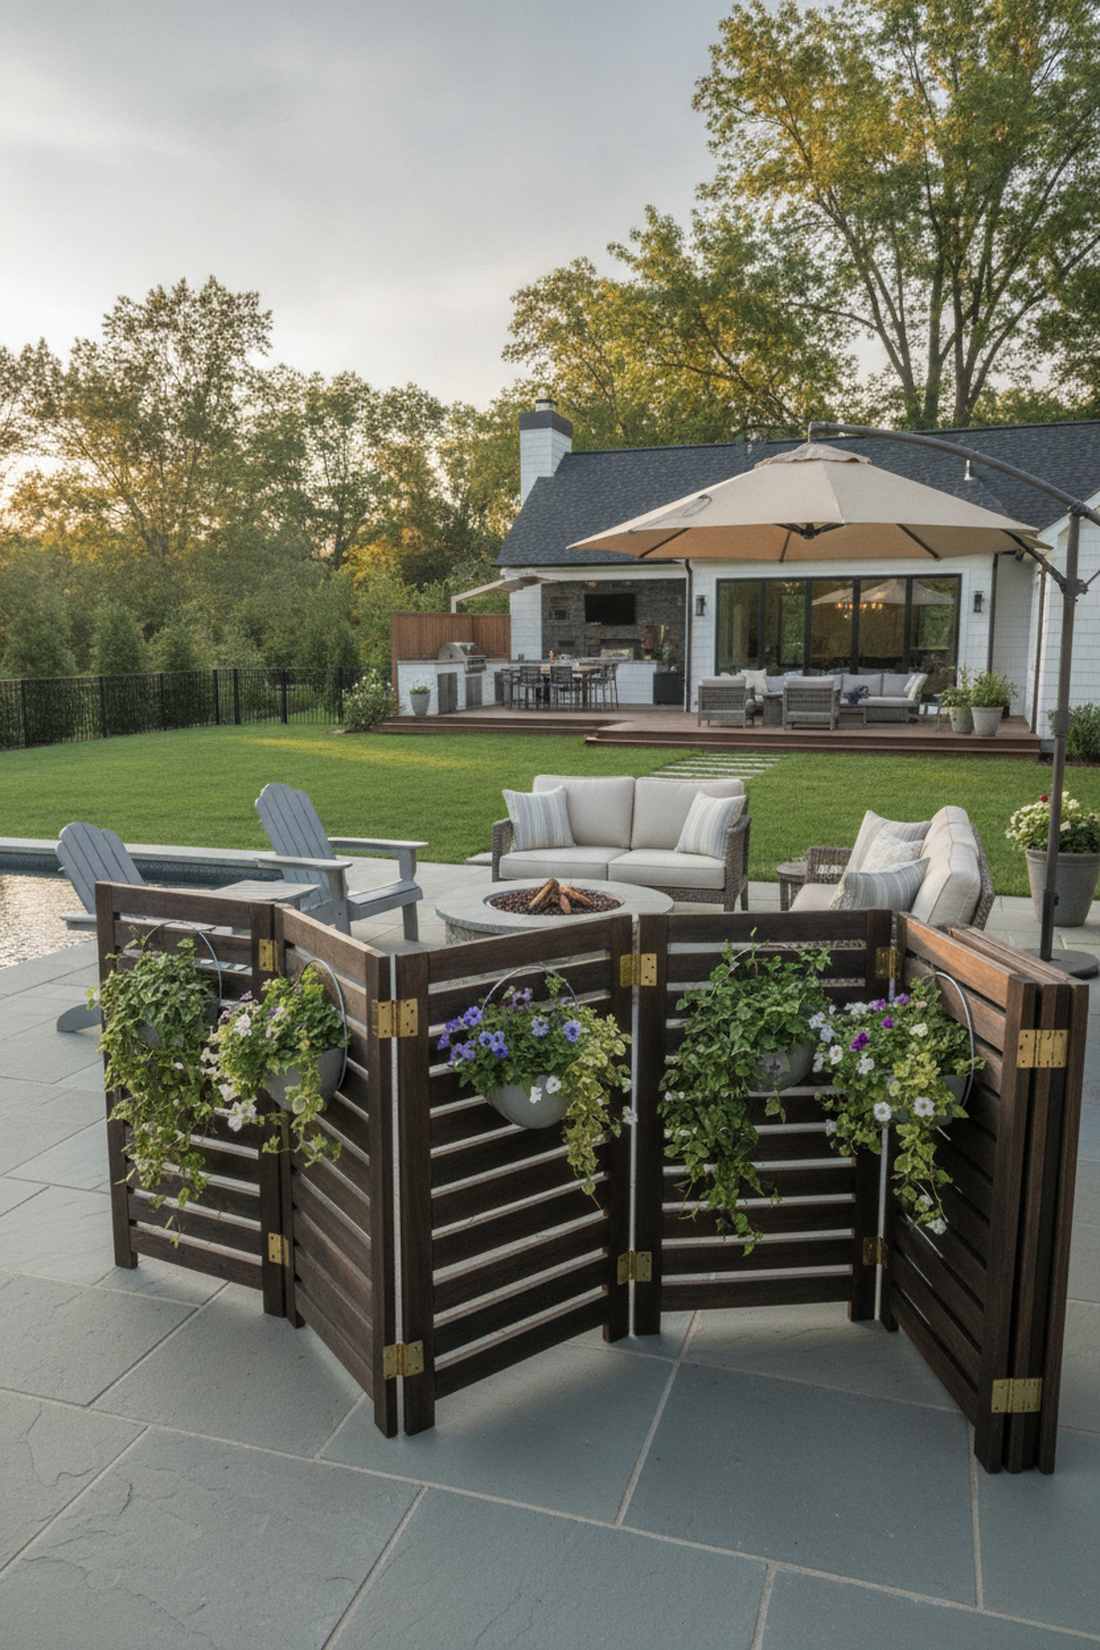
24. Folding Privacy Screen Planter with Accordion Design

Brings a highly flexible, chic room-divider vibe to the outdoors. An accordion-style hanging rack works beautifully to block off a temporary pool lounge area.
Permanent walls require permits, but this hinged approach deploys instantly and folds completely flat for winter storage. Staining the hinges and wood with weather-protectant sealants gives a designer-level finish that resists the elements.
This layout runs about $80–$140 depending on width. Pin this if you host outdoor events frequently!
- Key Materials: Hinged slatted wood panels and adjustable pot rings
- Vibe / Style: Event-ready flexible chic
- Difficulty: Moderate hinge alignment
- Budget Breakdown: Wood panels: $90 | Brass hinges: $20.
- Creator’s Tip: Zig-zag the panels at sharp 45-degree angles—it prevents the entire screen from blowing over.
- Smart Sourcing: weatherproof brass strap hinges and wall-mounted metal planter rings.
Material Guide: Cheap vs. Premium Aesthetic
Knowing exactly where to save and where to spend makes all the difference in achieving that “looks expensive but isn’t” vibe.
- Standard Wood vs. UV-Coated Composites: Raw pine rots in two seasons, but upgrading to sealed cedar or UV-resistant composites ensures your setup maintains a pristine, high-end look for a decade.
- DIY Patchwork vs. Pre-made Starter Kits: Cobbling together cheap irrigation tubing often leaks; investing in premium drip starter kits saves massive headaches and completely hides the water lines for a seamless designer finish.
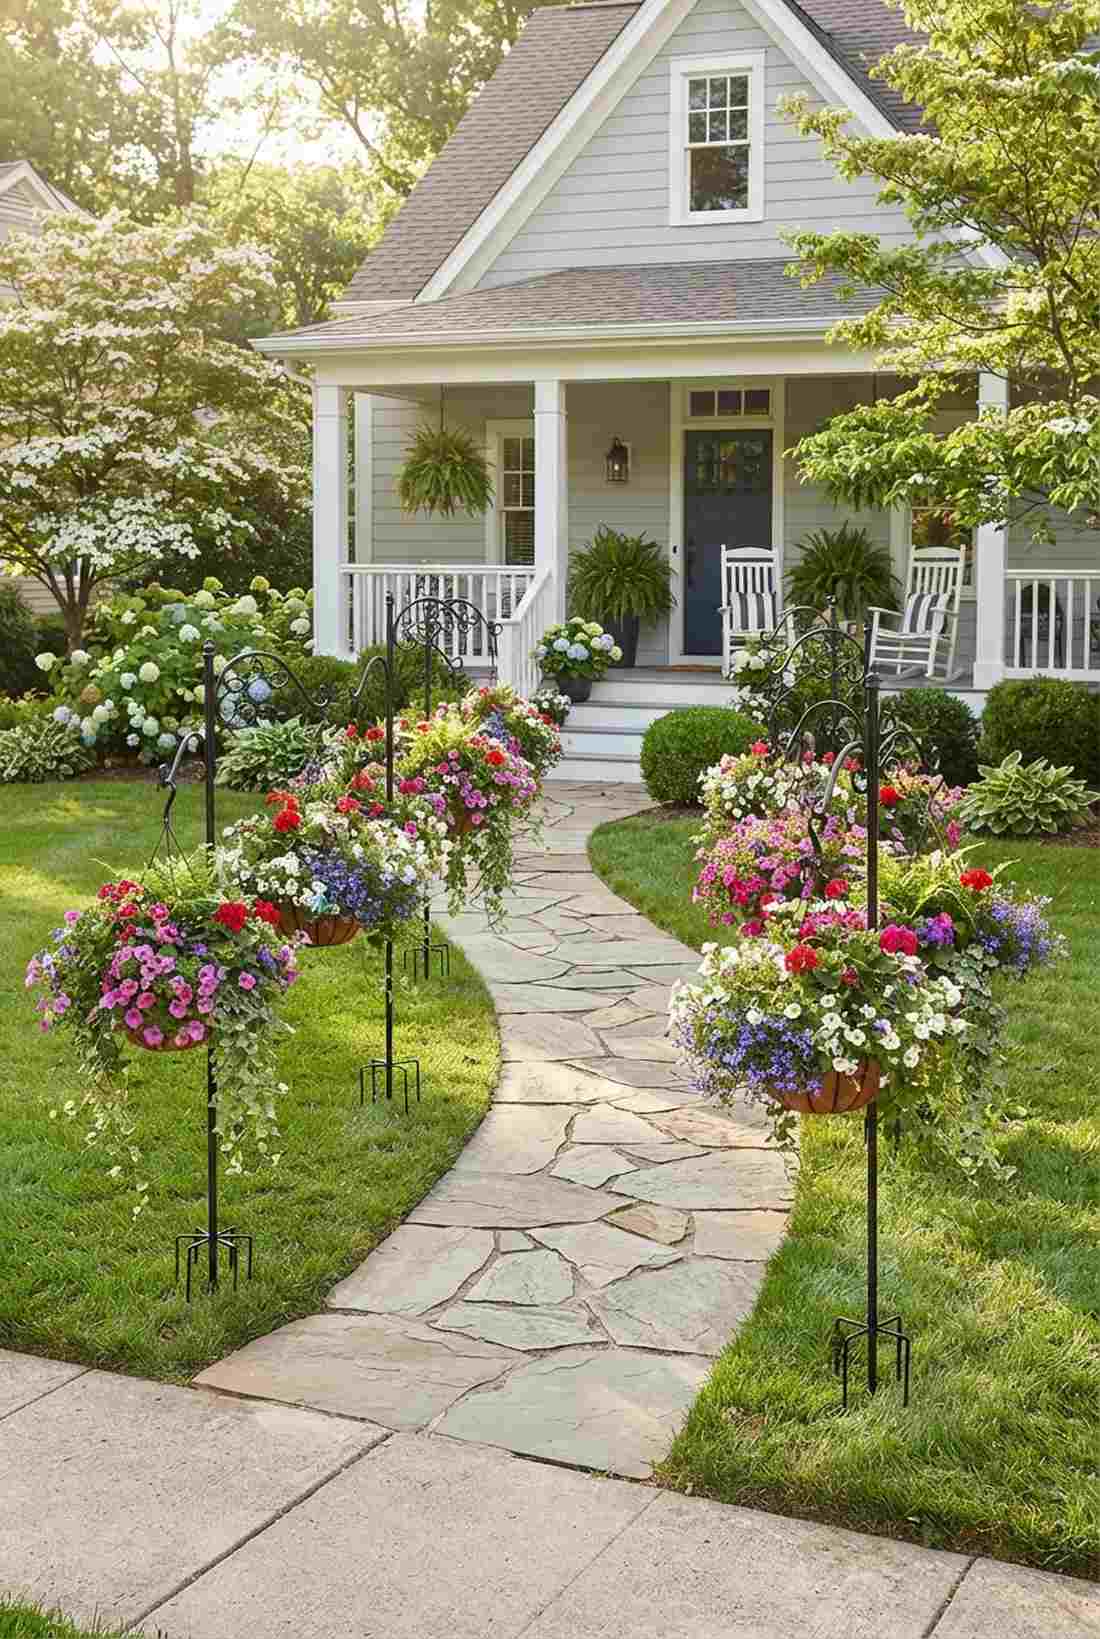
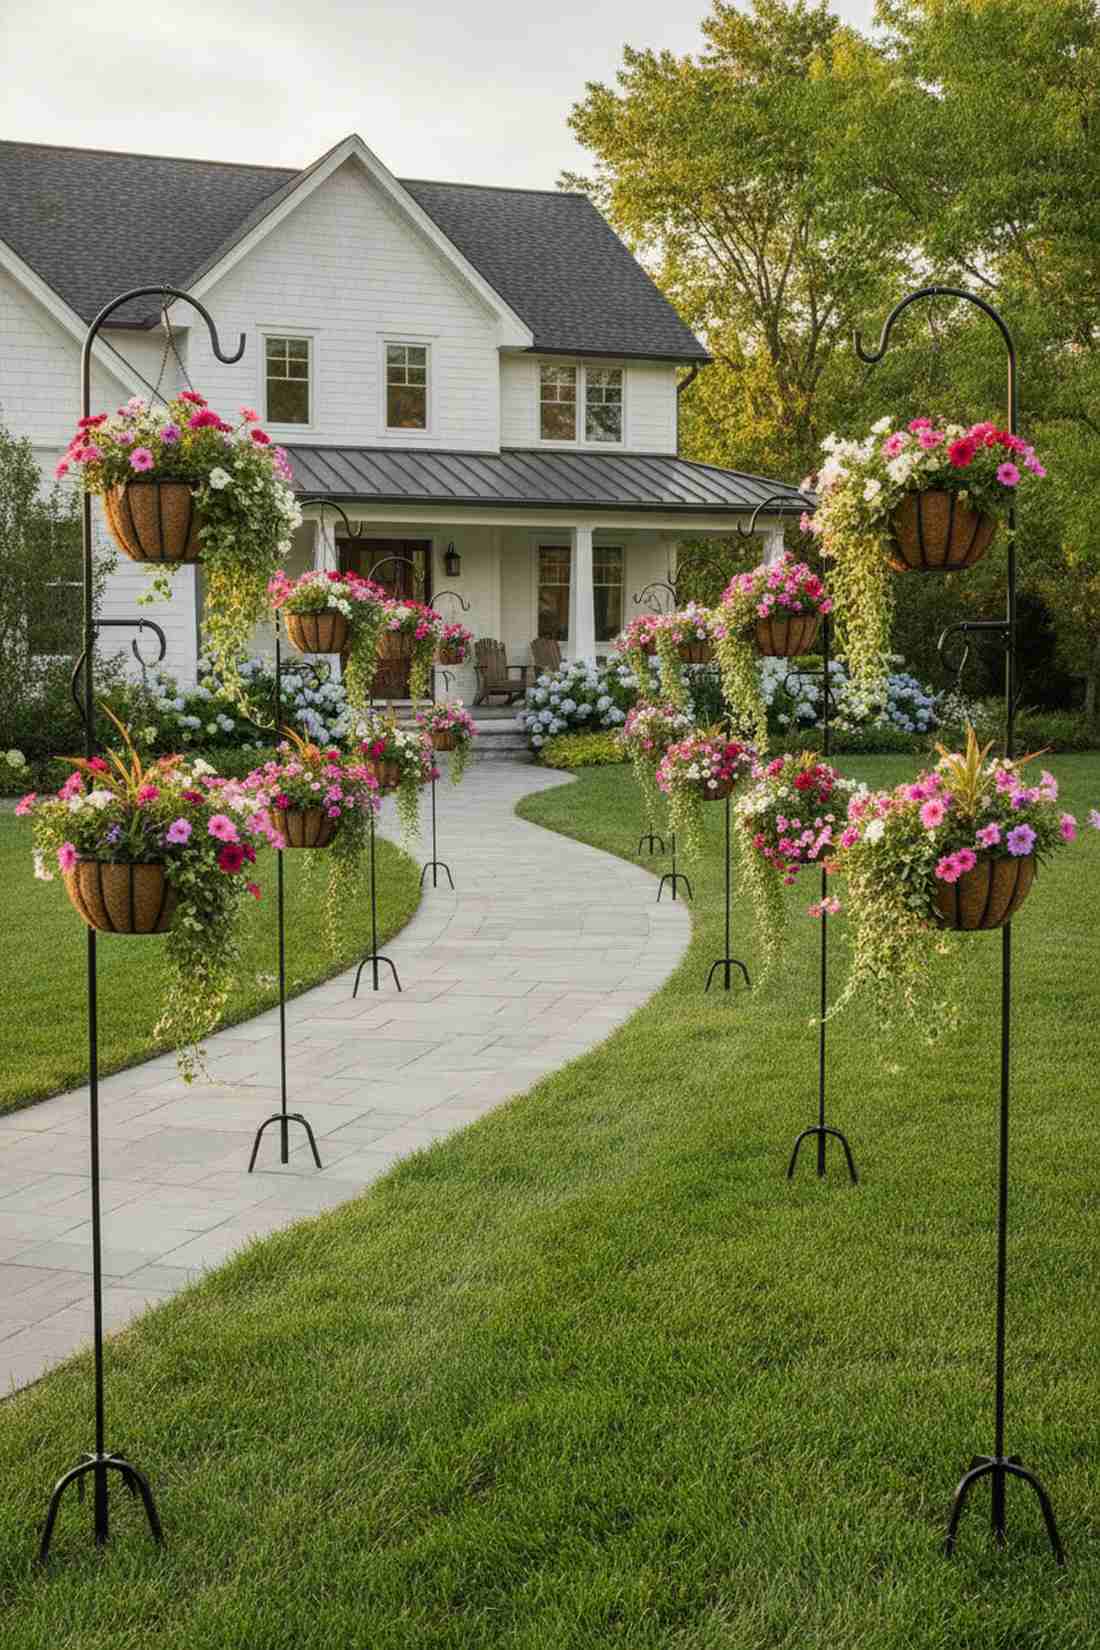
25. Shepherd Hook Hanging Garden with Multiple Tiers
Looks like an elegant Victorian pathway display right in your grass. A staggered heavy-iron hanging setup is perfect for lining a bland front yard walkway.
Struggling with concrete footings is a nightmare, but using extra-long multi-pronged ground spikes provides massive unshakeable leverage. Selecting thick, powder-coated iron hooks delivers a surprisingly premium look without any tools.
You can execute this instantly for around $30–$50 per tower. Highly recommended for a fast weekend curb appeal boost.
- Key Materials: 9-foot multi-arm shepherd hooks and large hanging baskets
- Vibe / Style: Classic botanical elegance
- Difficulty: Zero-tool push-in setup
- Budget Breakdown: Premium iron hook: $40 | Baskets: $20.
- Creator’s Tip: Stomp the 5-prong base deep into the soil after a heavy rain when the ground is softest.
- Smart Sourcing: heavy-duty 5-prong shepherd hooks and coco-liner hanging basket bundles.
Most commercial spaces pay top dollar for this next system… but you can install the exact same modules yourself.
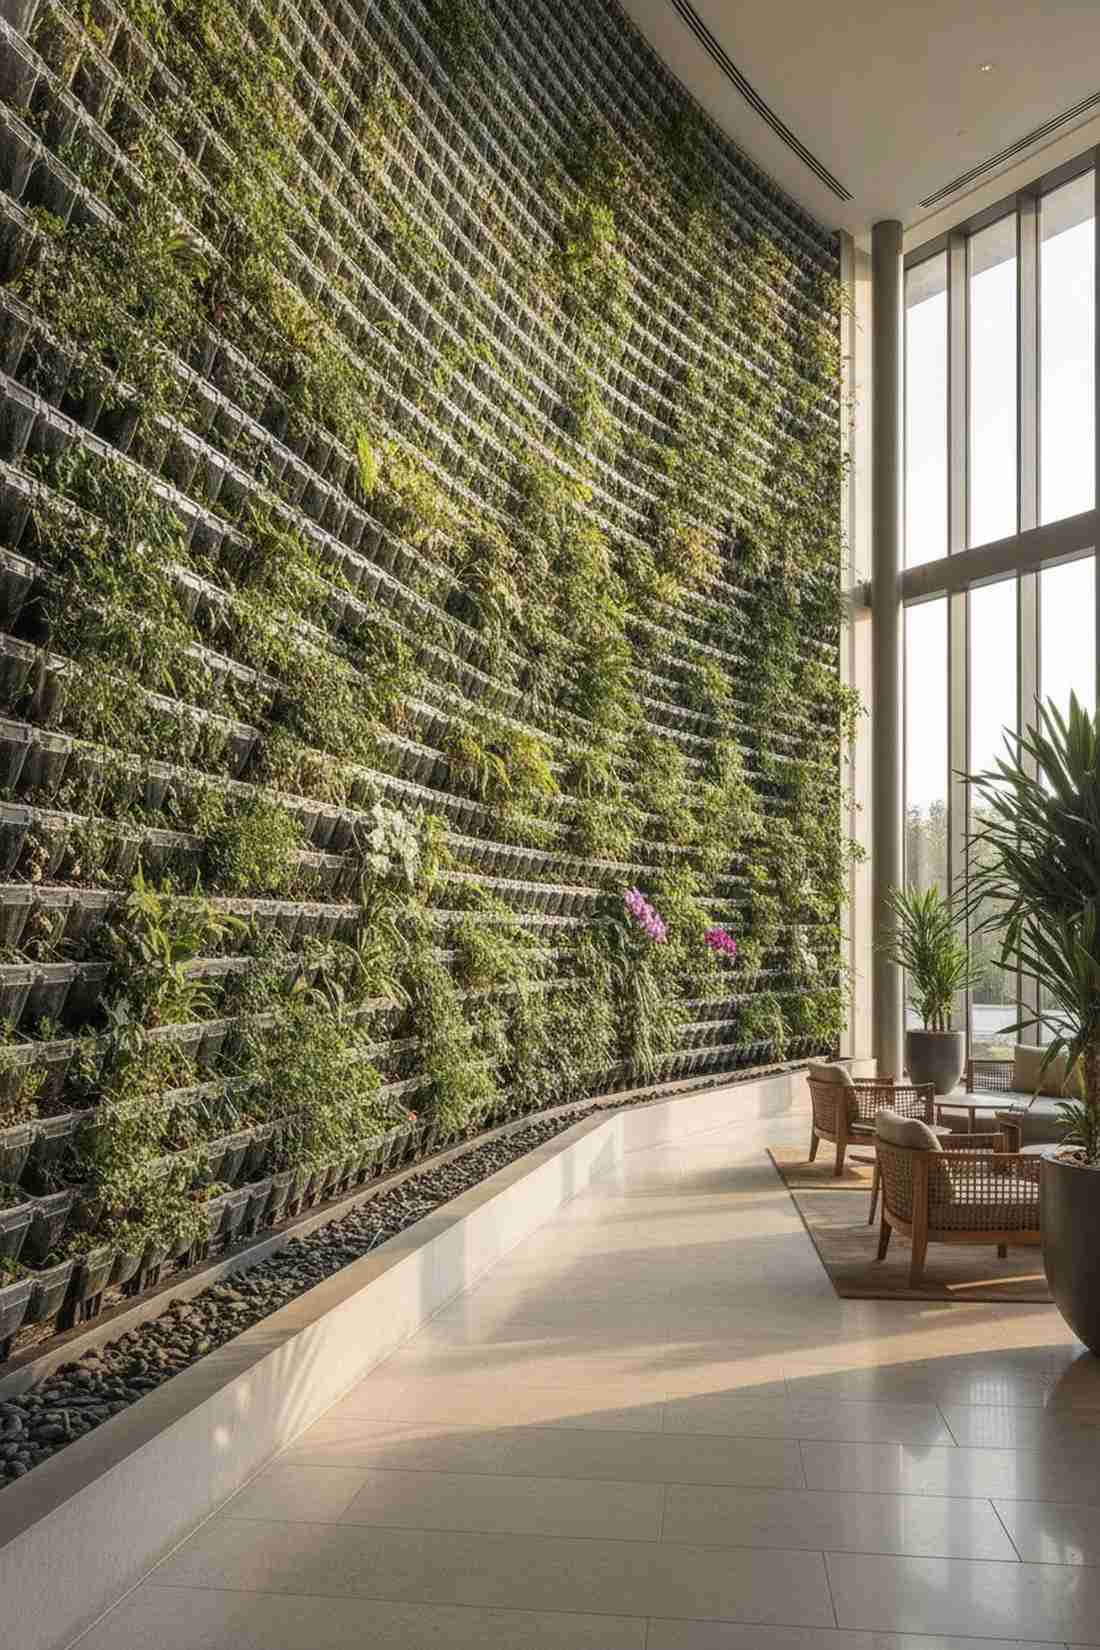
Living Wall Installation Systems for Large-Scale Projects
When you need to cover massive square footage, architectural living walls are the only answer. These engineered, heavy-duty setups integrate seamless internal drip lines and heavy load-bearing brackets, completely transforming barren architecture into a breathtaking bio-facade.
26. Modular Tray System with Integrated Irrigation Channels
Feels like stepping into the lobby of a premium eco-hotel. A seamless interlocking tray matrix is the ultimate flex for a massive bare retaining wall.
Exposed tubing completely ruins the illusion, but this system hides all the drip lines inside hidden rear channels. Snapping these highly engineered polycarbonate modules together looks incredibly high-tech and flawless.
This premium system starts around $250 for a small section. Save this to your ultimate dream home board!
- Key Materials: Polycarbonate modular trays and micro-drip tubing
- Vibe / Style: High-end commercial eco-luxury
- Difficulty: Advanced planning needed
- Budget Breakdown: Tray kits: $200 | Irrigation lines: $45.
- Creator’s Tip: Install a pressure regulator at the spigot to prevent the micro-emitters from blowing off the line.
- Smart Sourcing: commercial modular living wall trays and pressure-regulated drip irrigation kits.
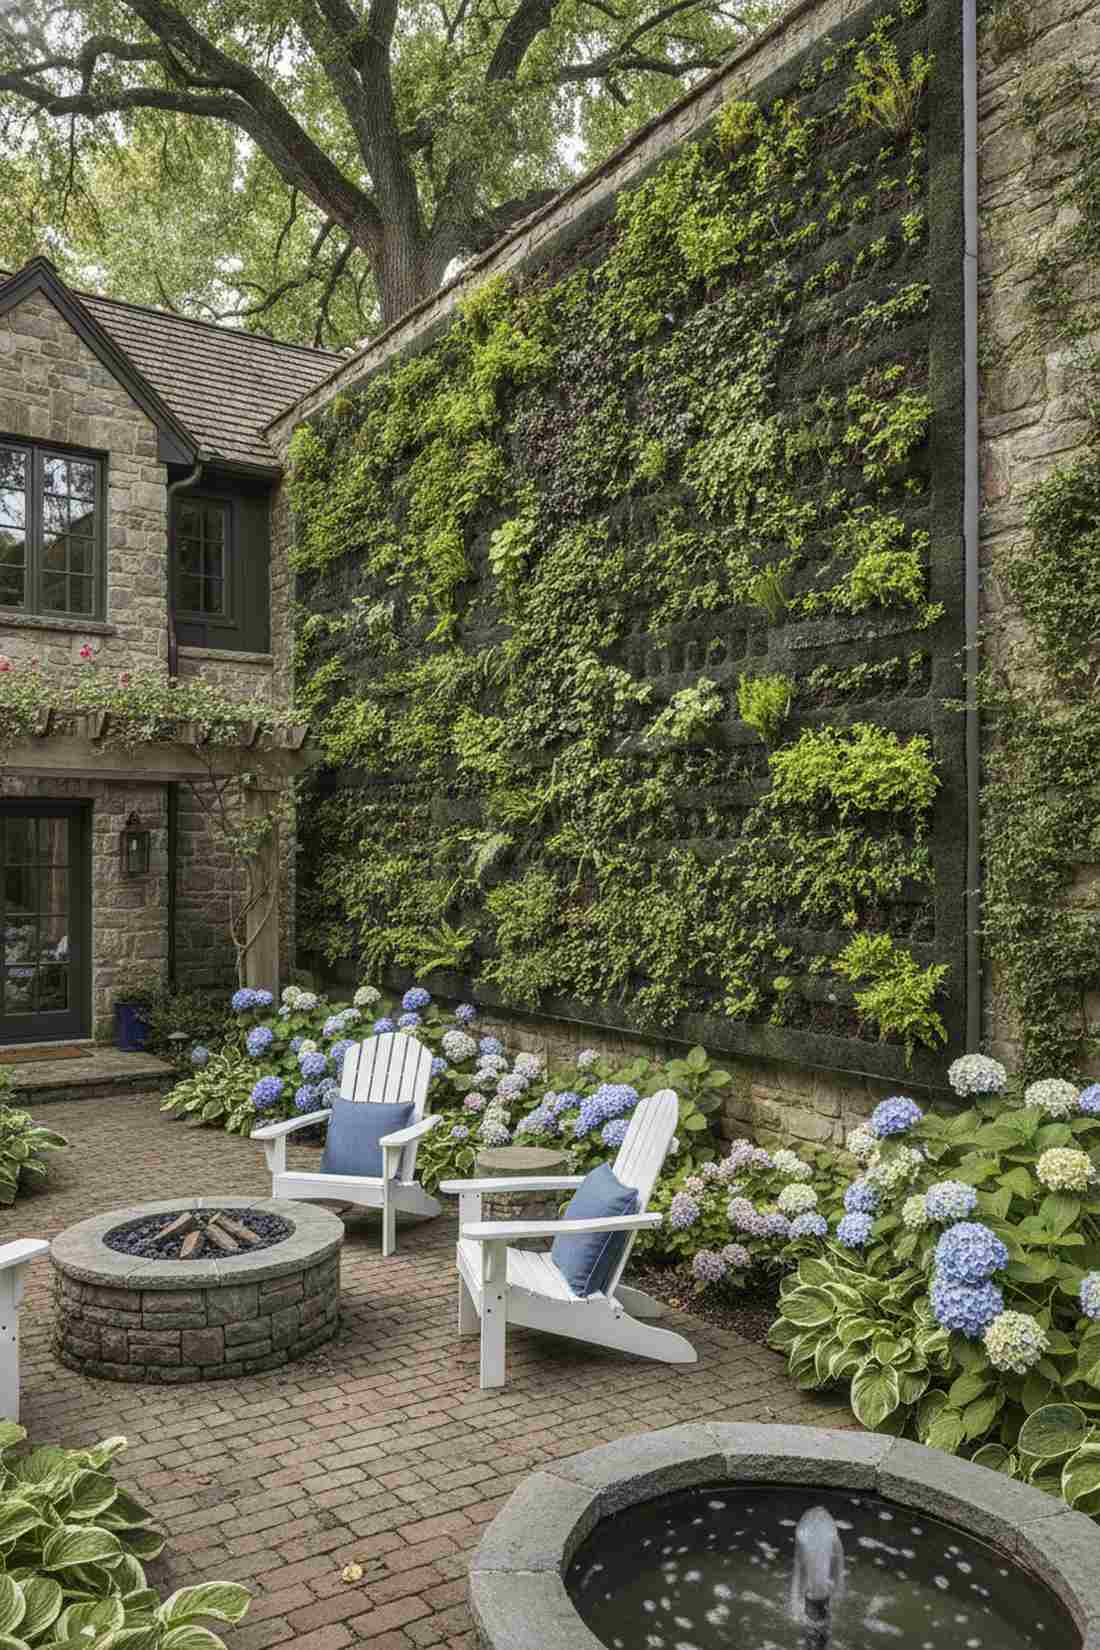
27. Felt Layer System with Moisture Retention Properties
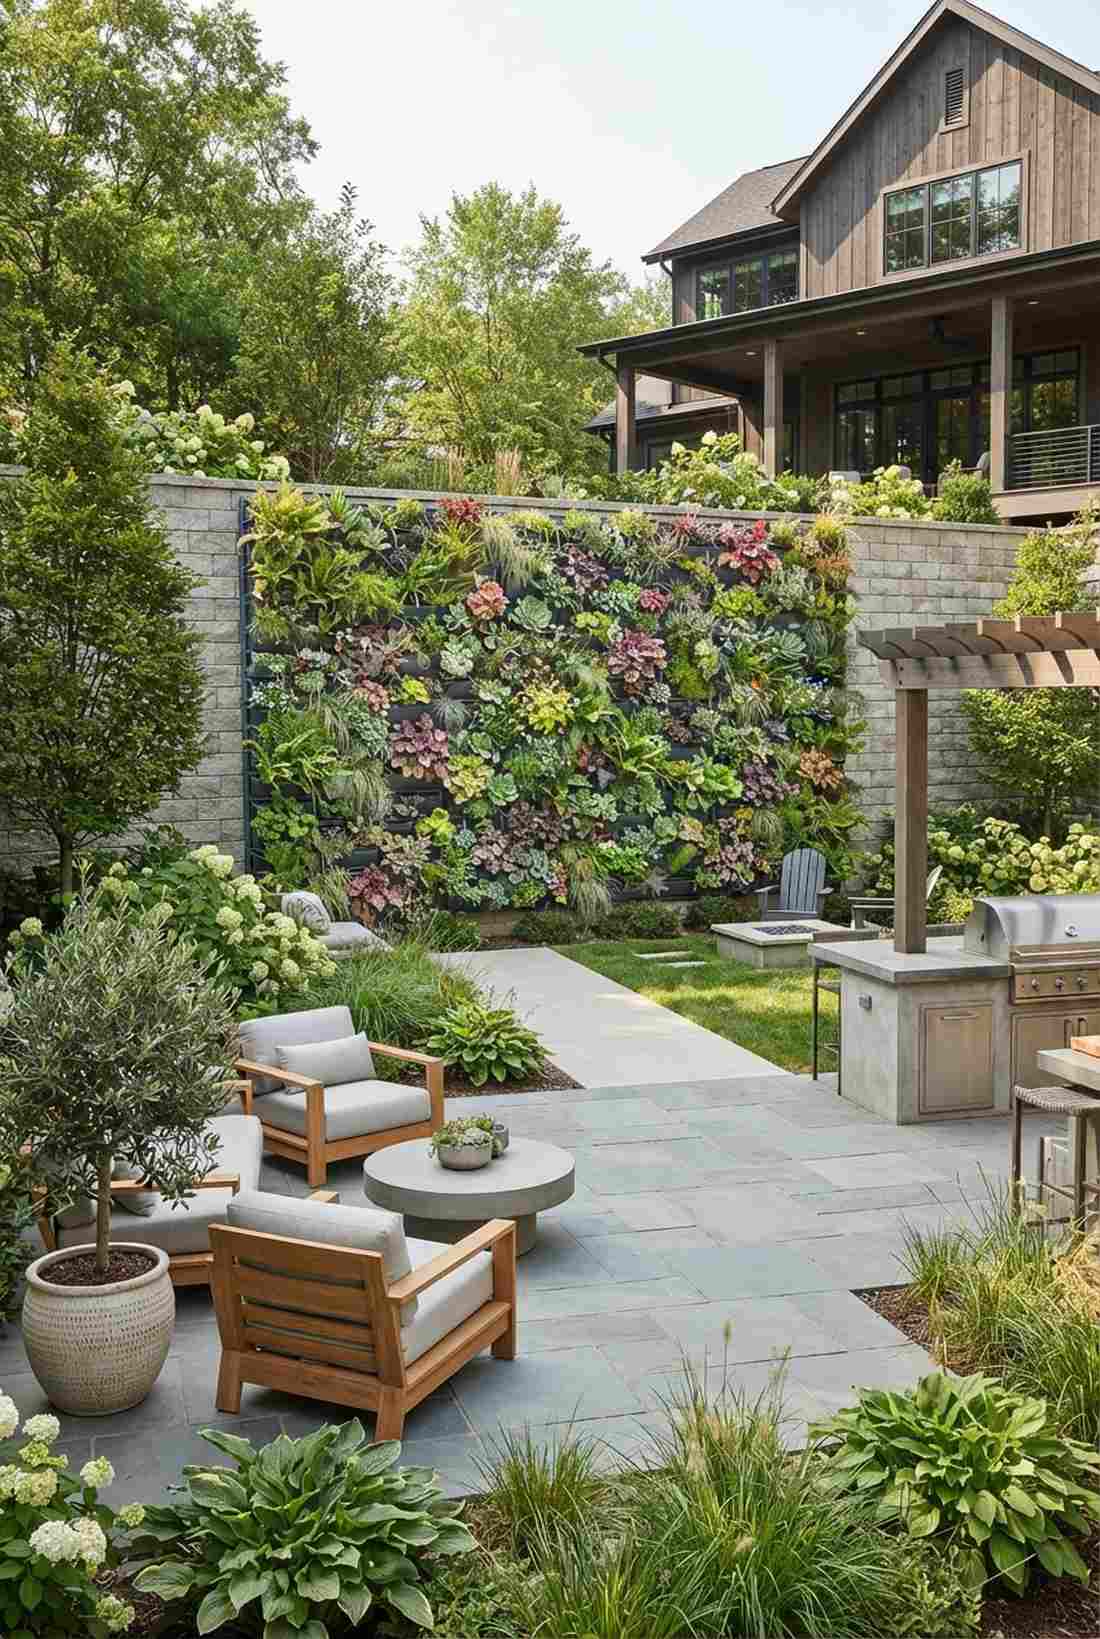
Looks like an organic, living skin hugging the architecture. A multi-layer synthetic felt backdrop thrives exceptionally well in a humid, shaded courtyard.
Rigid plastic panels are incredibly heavy, but leveraging aerospace-grade synthetic fabric cuts the wall load by 60%. Embedding the roots directly into this wicking material is a genius fairy garden kits trick applied on a massive, elegant scale.
Material costs hover around $100–$150 per square meter. Pin this if you have older walls that can’t hold heavy weight!
- Key Materials: Waterproof backing board and dual-layer synthetic felt
- Vibe / Style: Lush organic architectural skin
- Difficulty: Moderate stapling and cutting
- Budget Breakdown: Synthetic felt rolls: $80 | PVC backing sheet: $40.
- Creator’s Tip: Slice small horizontal slits in the outer felt layer to slip the plant root balls perfectly inside.
- Smart Sourcing: heavy-duty synthetic horticultural felt rolls and waterproof PVC backing panels.
28. Soil-Based Panel Wall with Natural Growing Medium
Radiates the rich, vibrant energy of a traditional sprawling garden. A wire-caged soil block layout is perfect for cultivating deep-rooted vegetables vertically.
Many systems force you into hydroponics, but clamping dense wire mesh over real soil mimics Mother Nature perfectly. Using premium stainless wire grilles prevents any soil spillage while giving a designer-level finish.
Expect to spend $150–$250 for a heavily fortified setup. Highly recommended for purists who love real soil!
- Key Materials: Heavy-gauge wire mesh panels and structural metal framing
- Vibe / Style: Robust traditional agriculture
- Difficulty: Heavy lifting required
- Budget Breakdown: Steel framing: $120 | Mesh & soil: $80.
- Creator’s Tip: Mix peat moss and coconut coir tightly into your soil to prevent it from washing out the front mesh.
- Smart Sourcing: heavy-gauge stainless steel mesh rolls and premium compressed coco coir bricks.
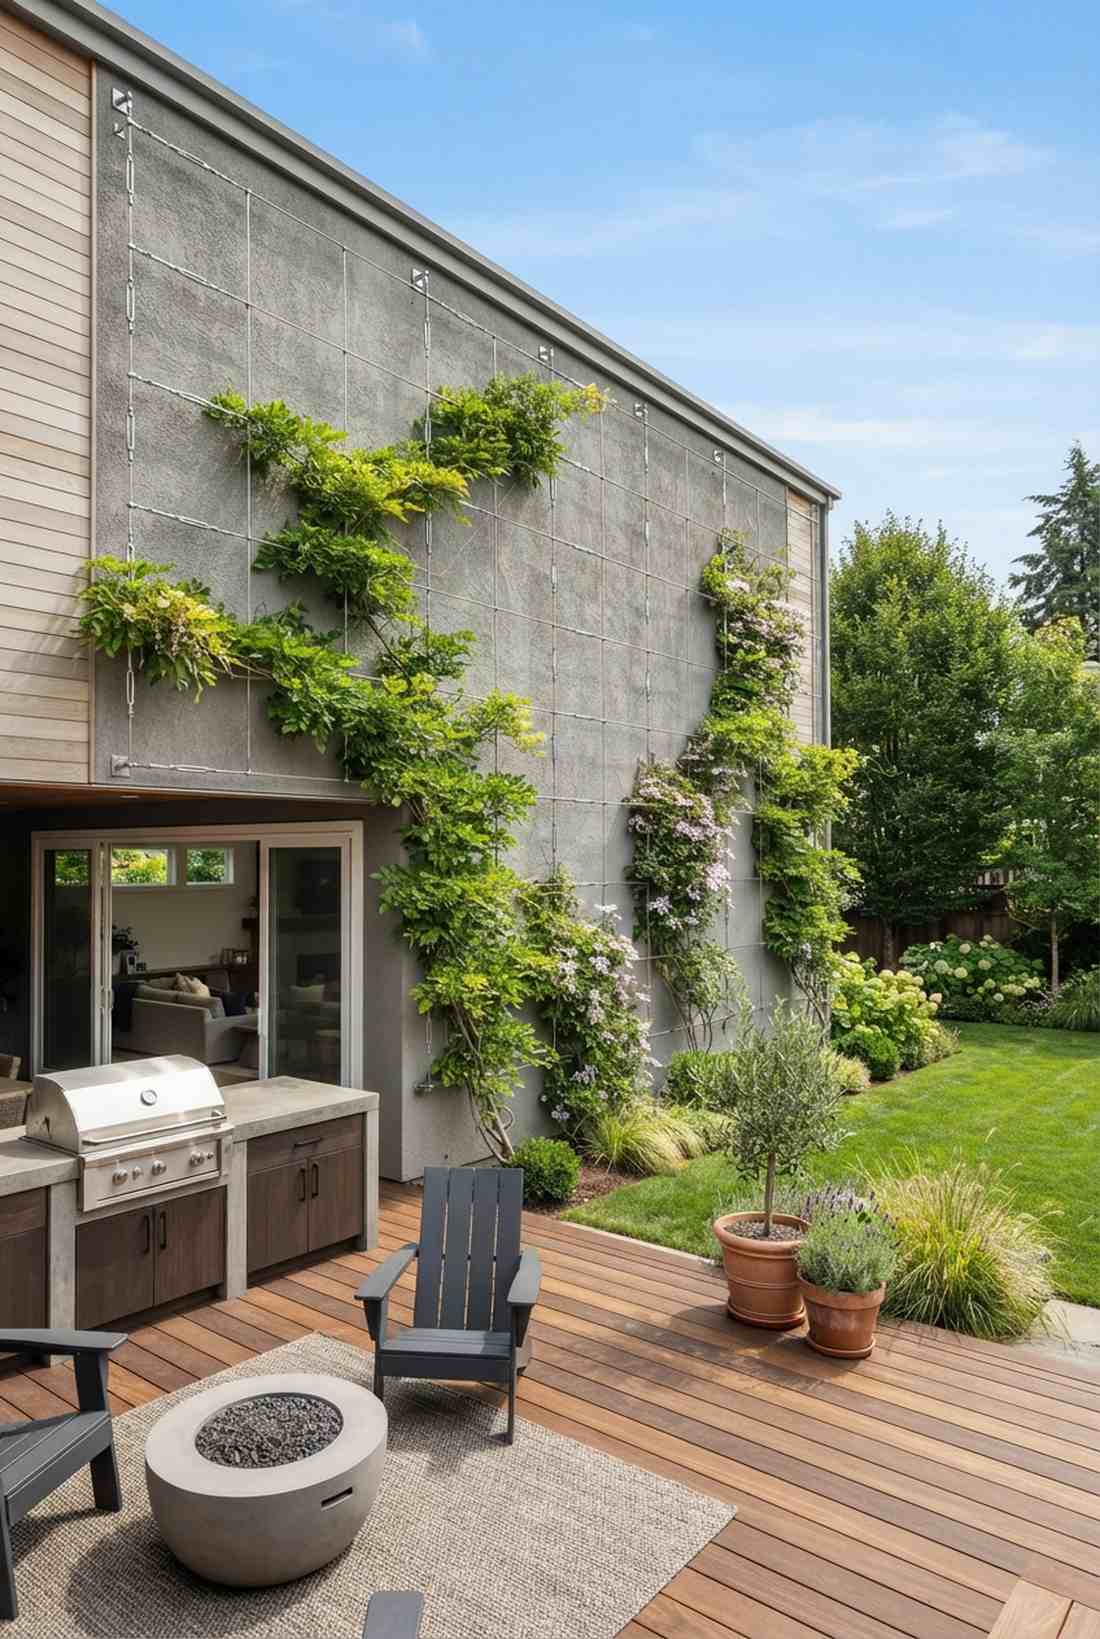
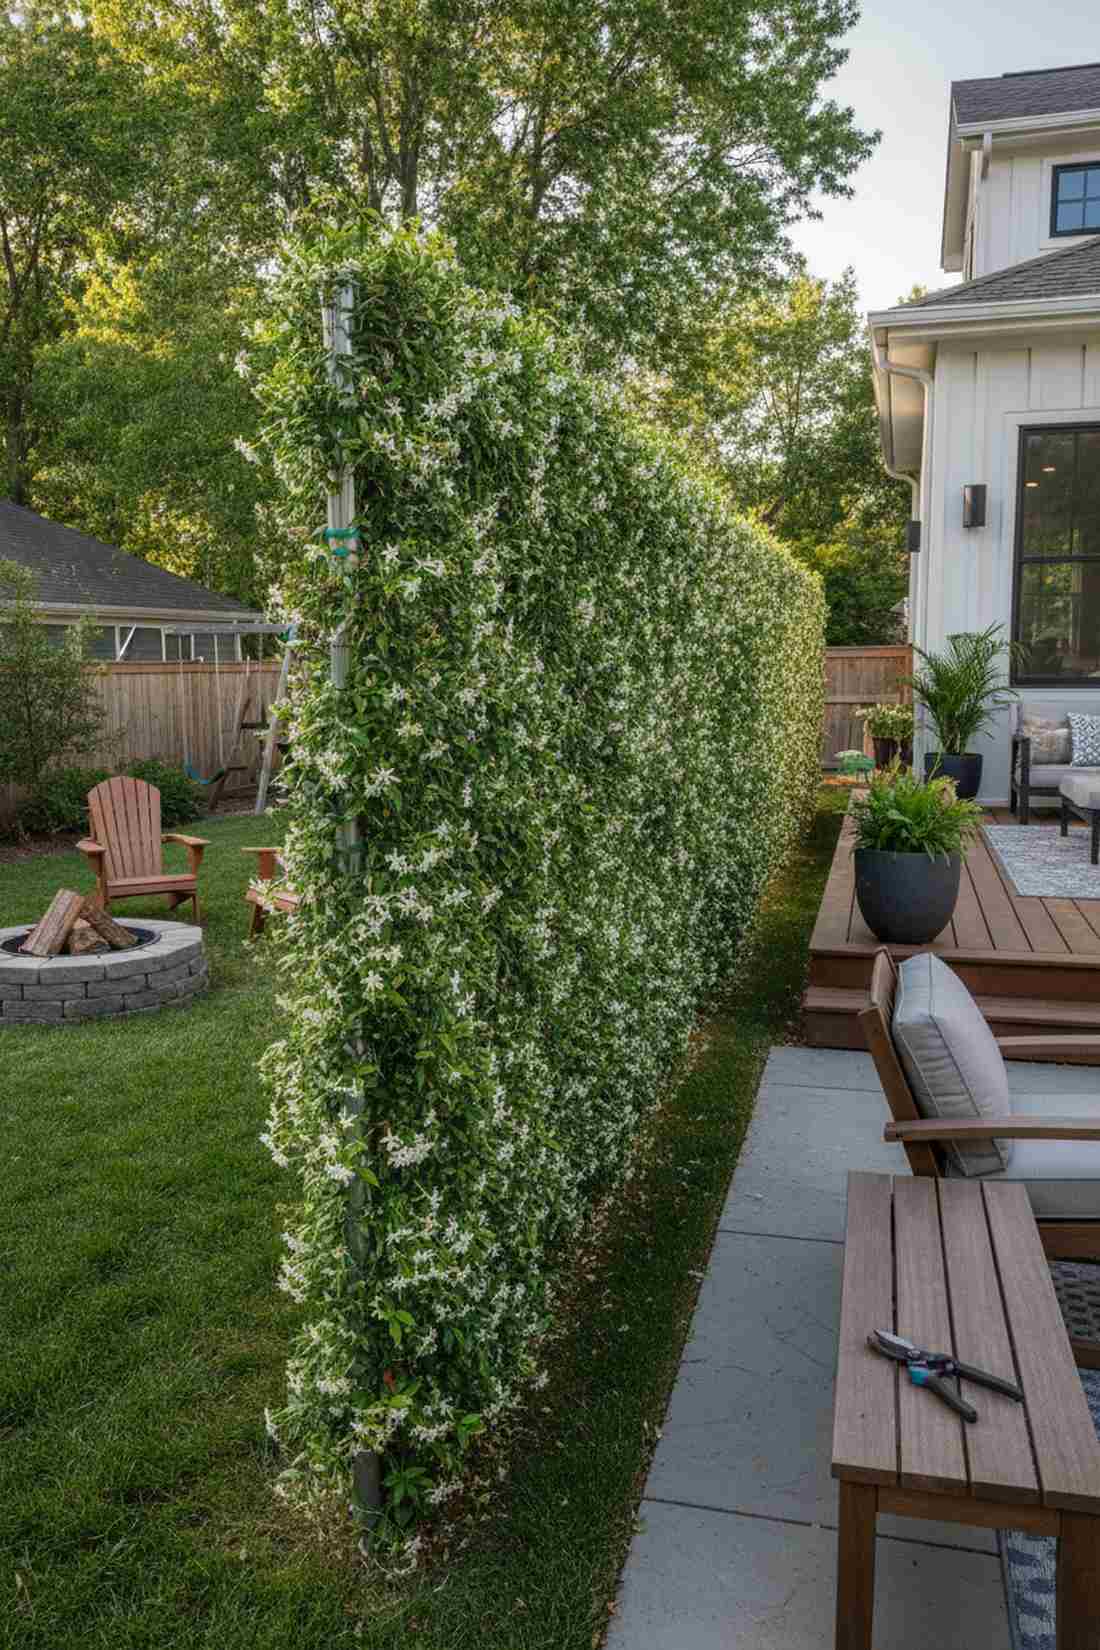
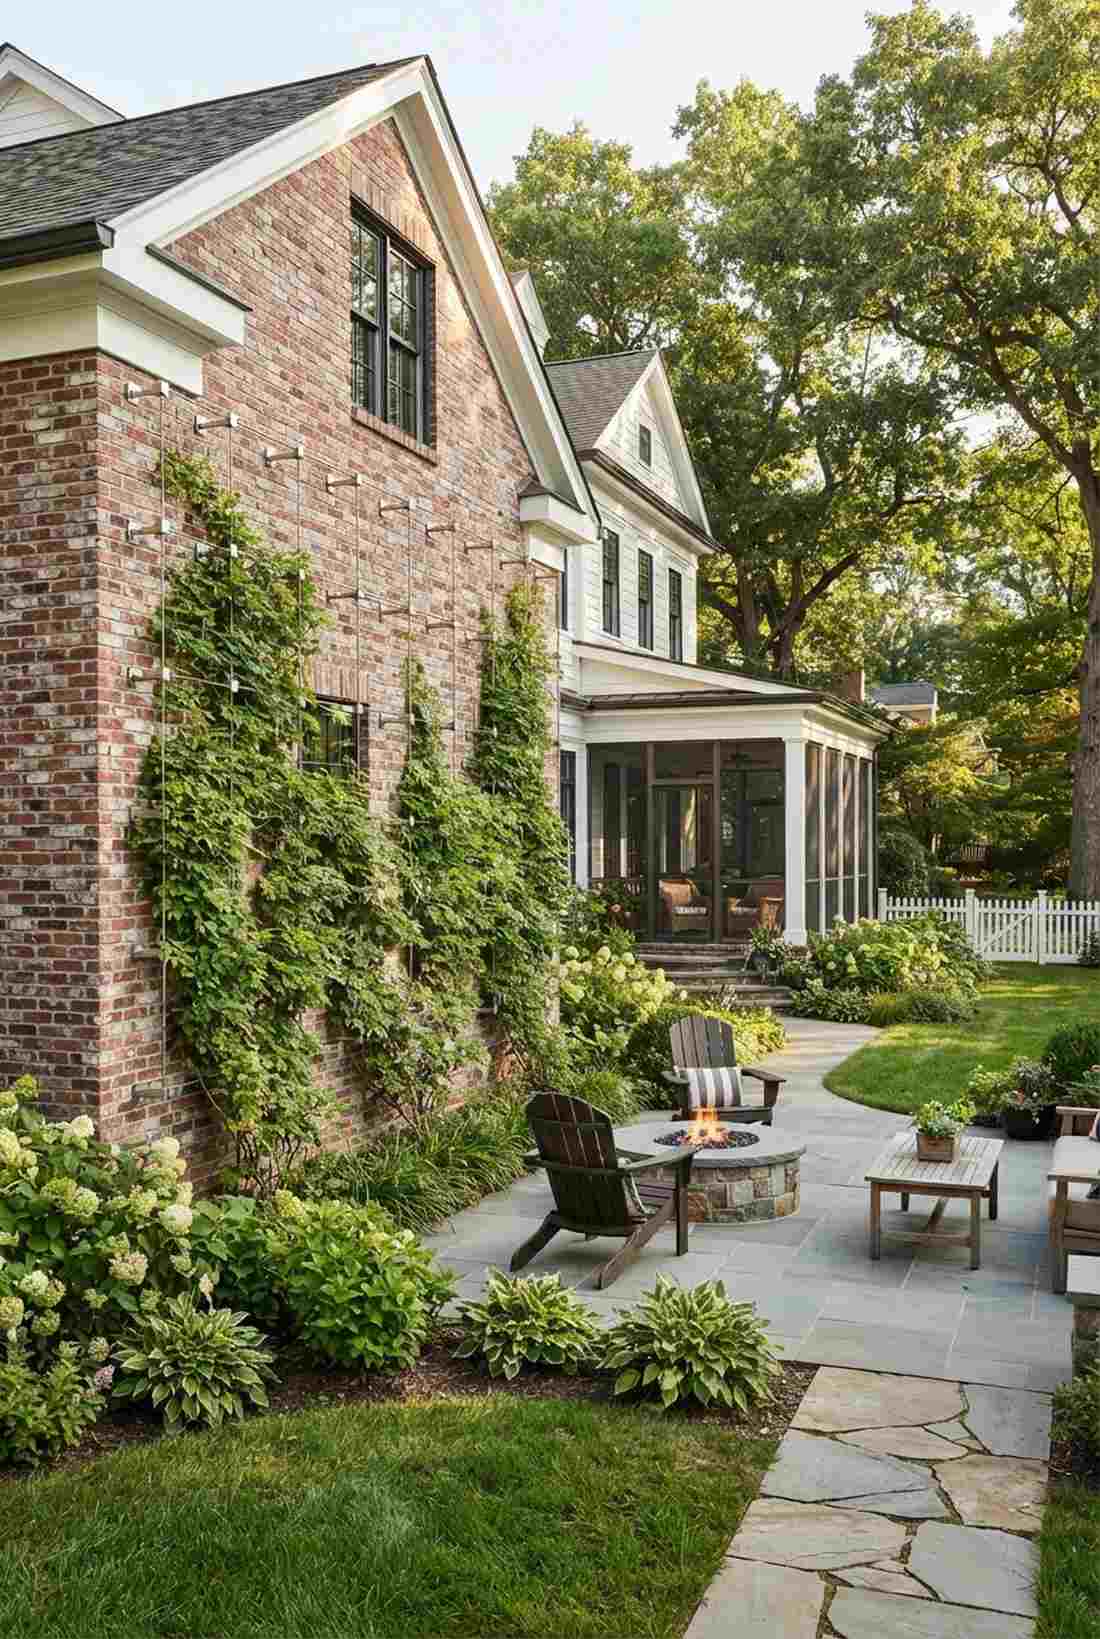
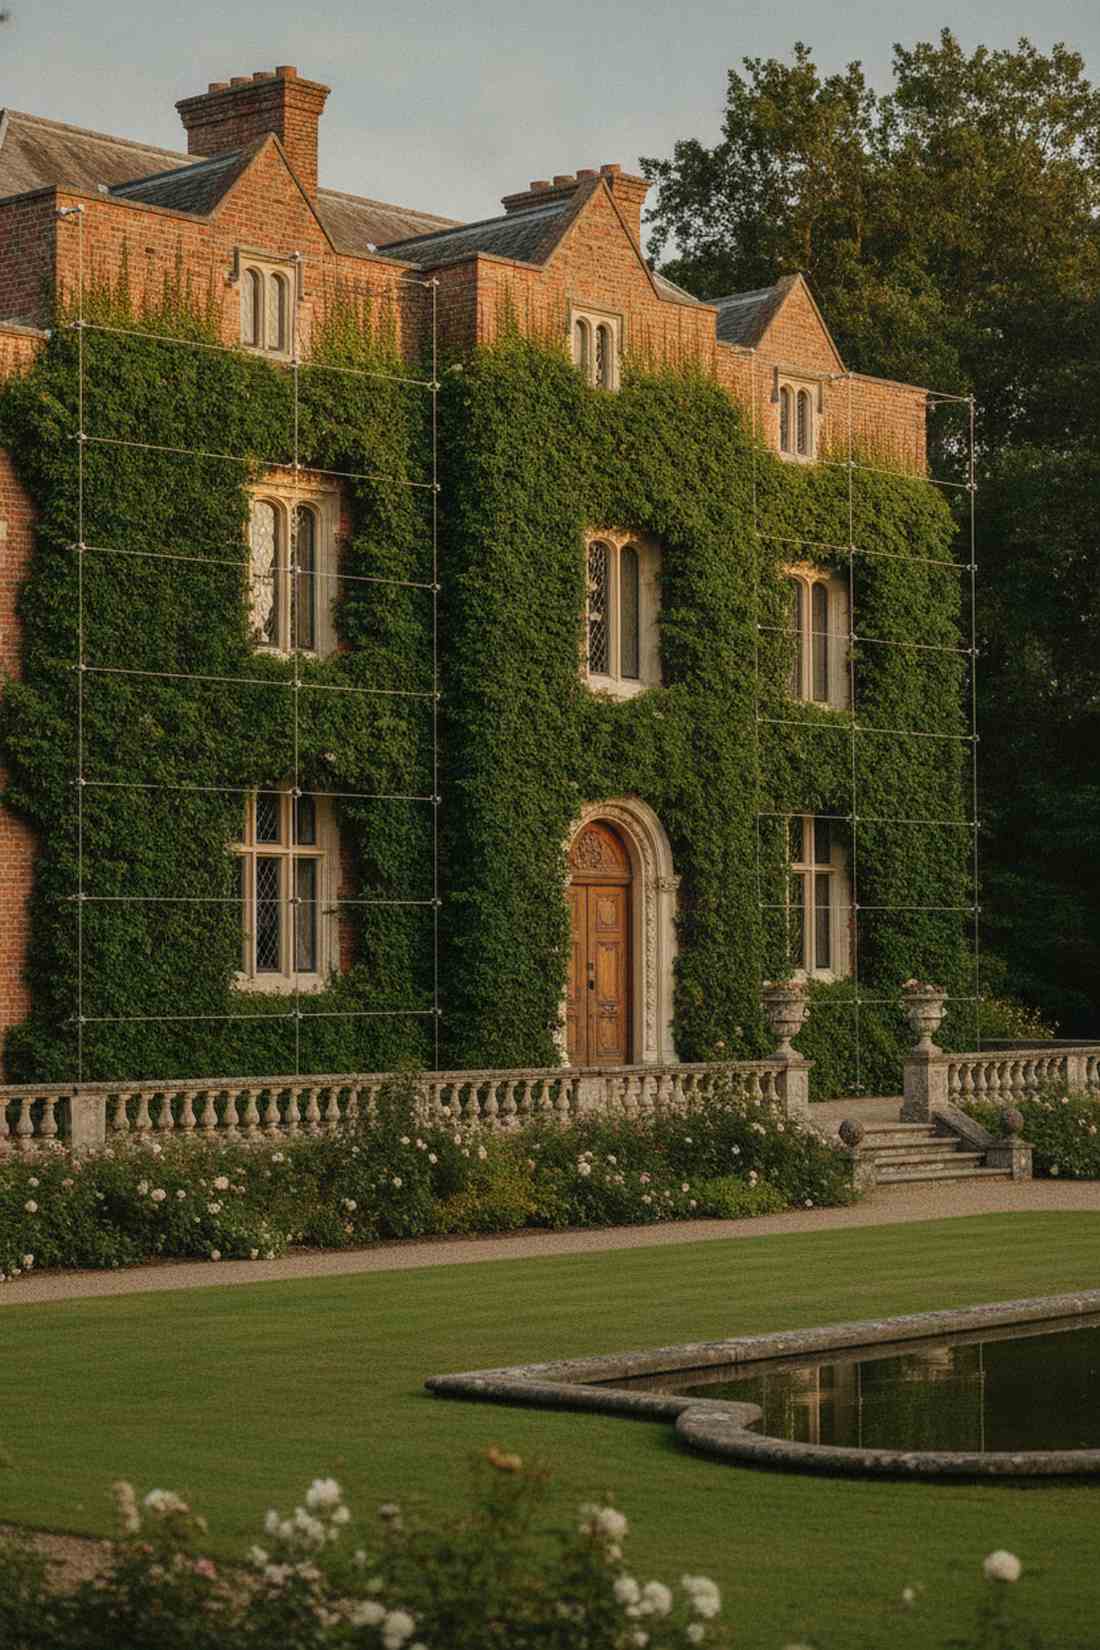
29. Green Facade Cable System with Standoff Brackets


Feels like a centuries-old European ivy-covered estate. A standoff wire grid facade is the absolute best way to upgrade a boring brick exterior.
Allowing vines to grip your siding destroys your home, but utilizing 6-inch metal standoffs creates a safe, protective air gap. Tensioning aircraft-grade cables across these brackets produces a framework that looks far more expensive than it is.
You can execute this pro-level trick for roughly $120–$180. Save this if you want massive impact with minimal maintenance!
- Key Materials: Stainless standoff brackets and tensioned wire rope
- Vibe / Style: Grand European manor
- Difficulty: Precise masonry drilling
- Budget Breakdown: Standoff hardware: $90 | Steel cable: $50.
- Creator’s Tip: Always use a hammer drill and proper masonry bits when installing the standoff anchors into brick.
- Smart Sourcing: stainless steel standoff bracket kits and carbide-tipped masonry drill bits.
Before you spend $300 on a commercial display, check out this brilliant budget trick using standard nursery pots…
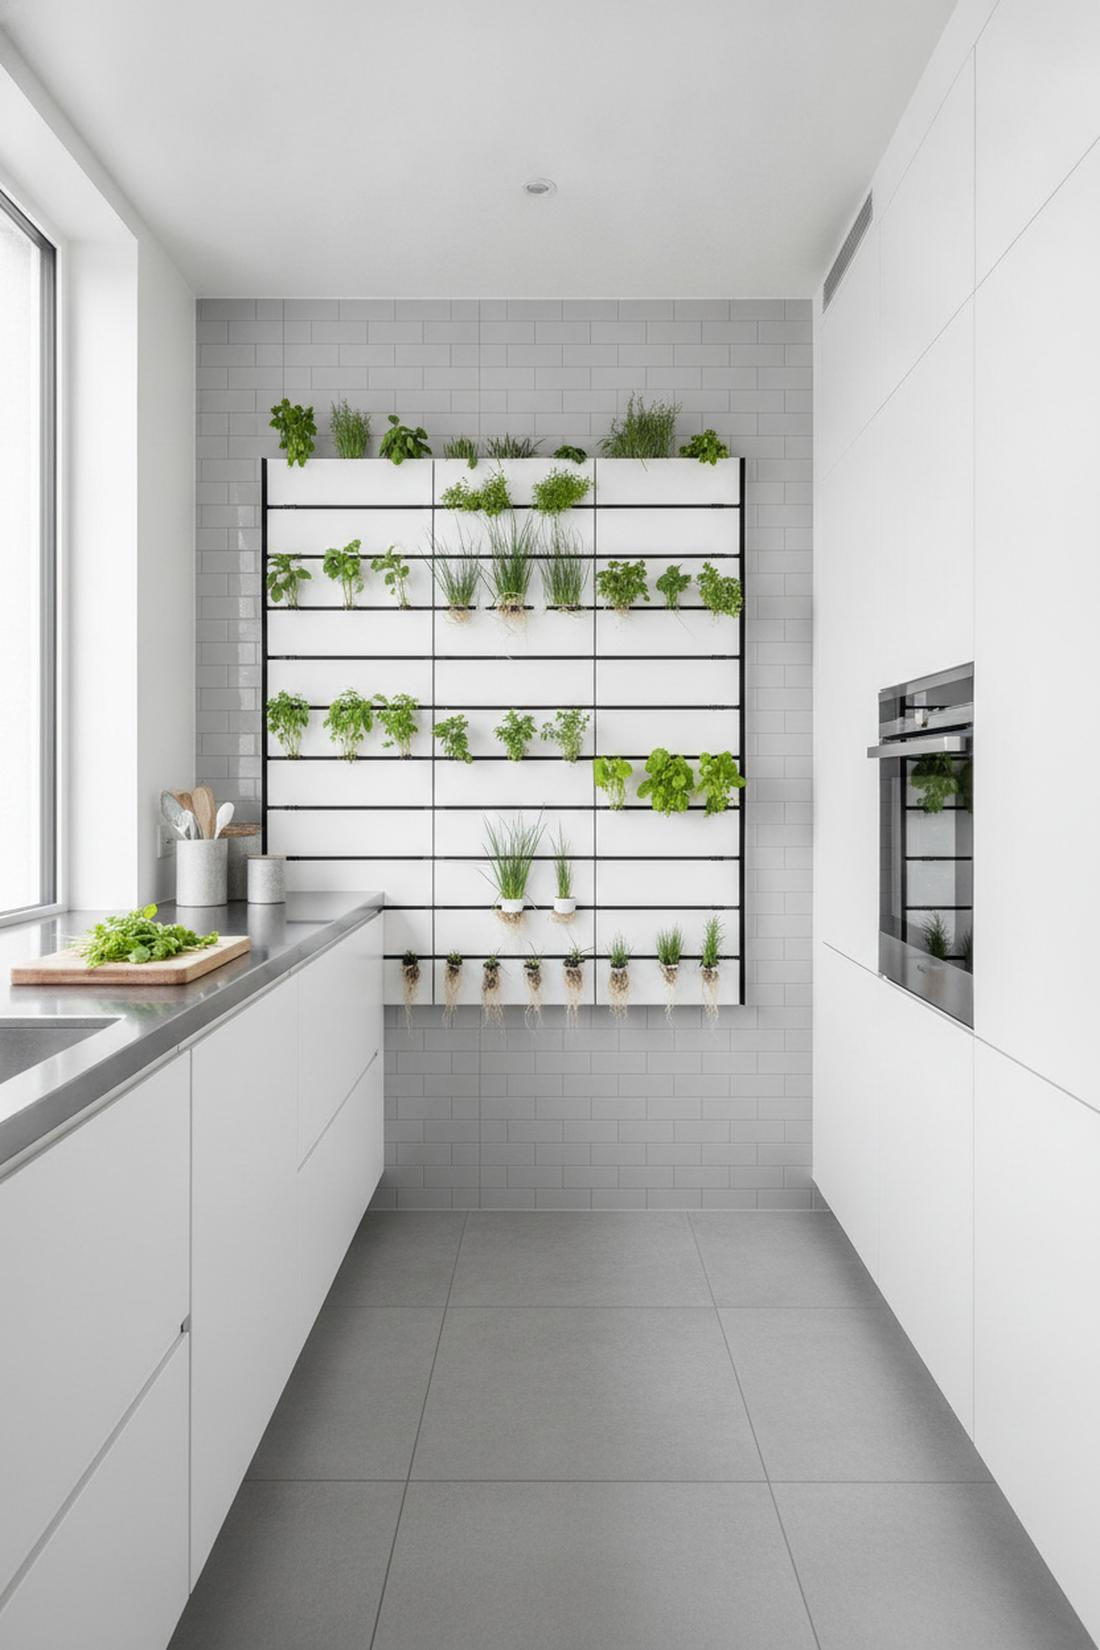
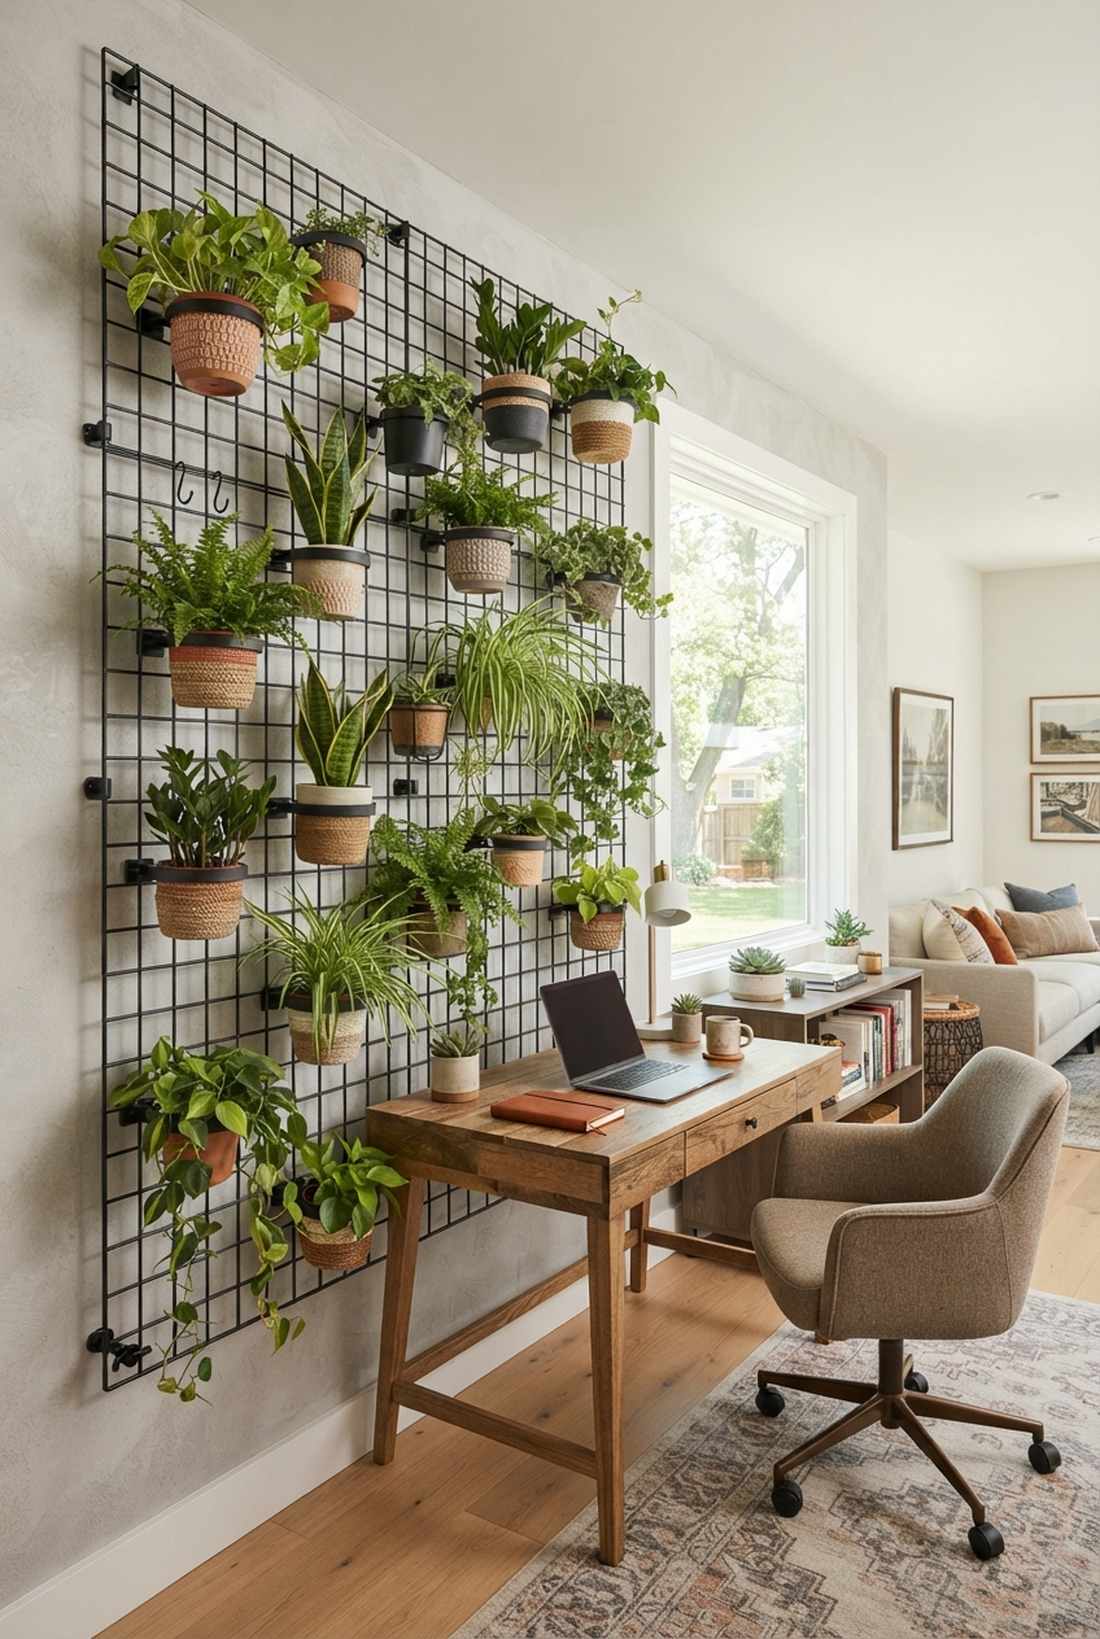
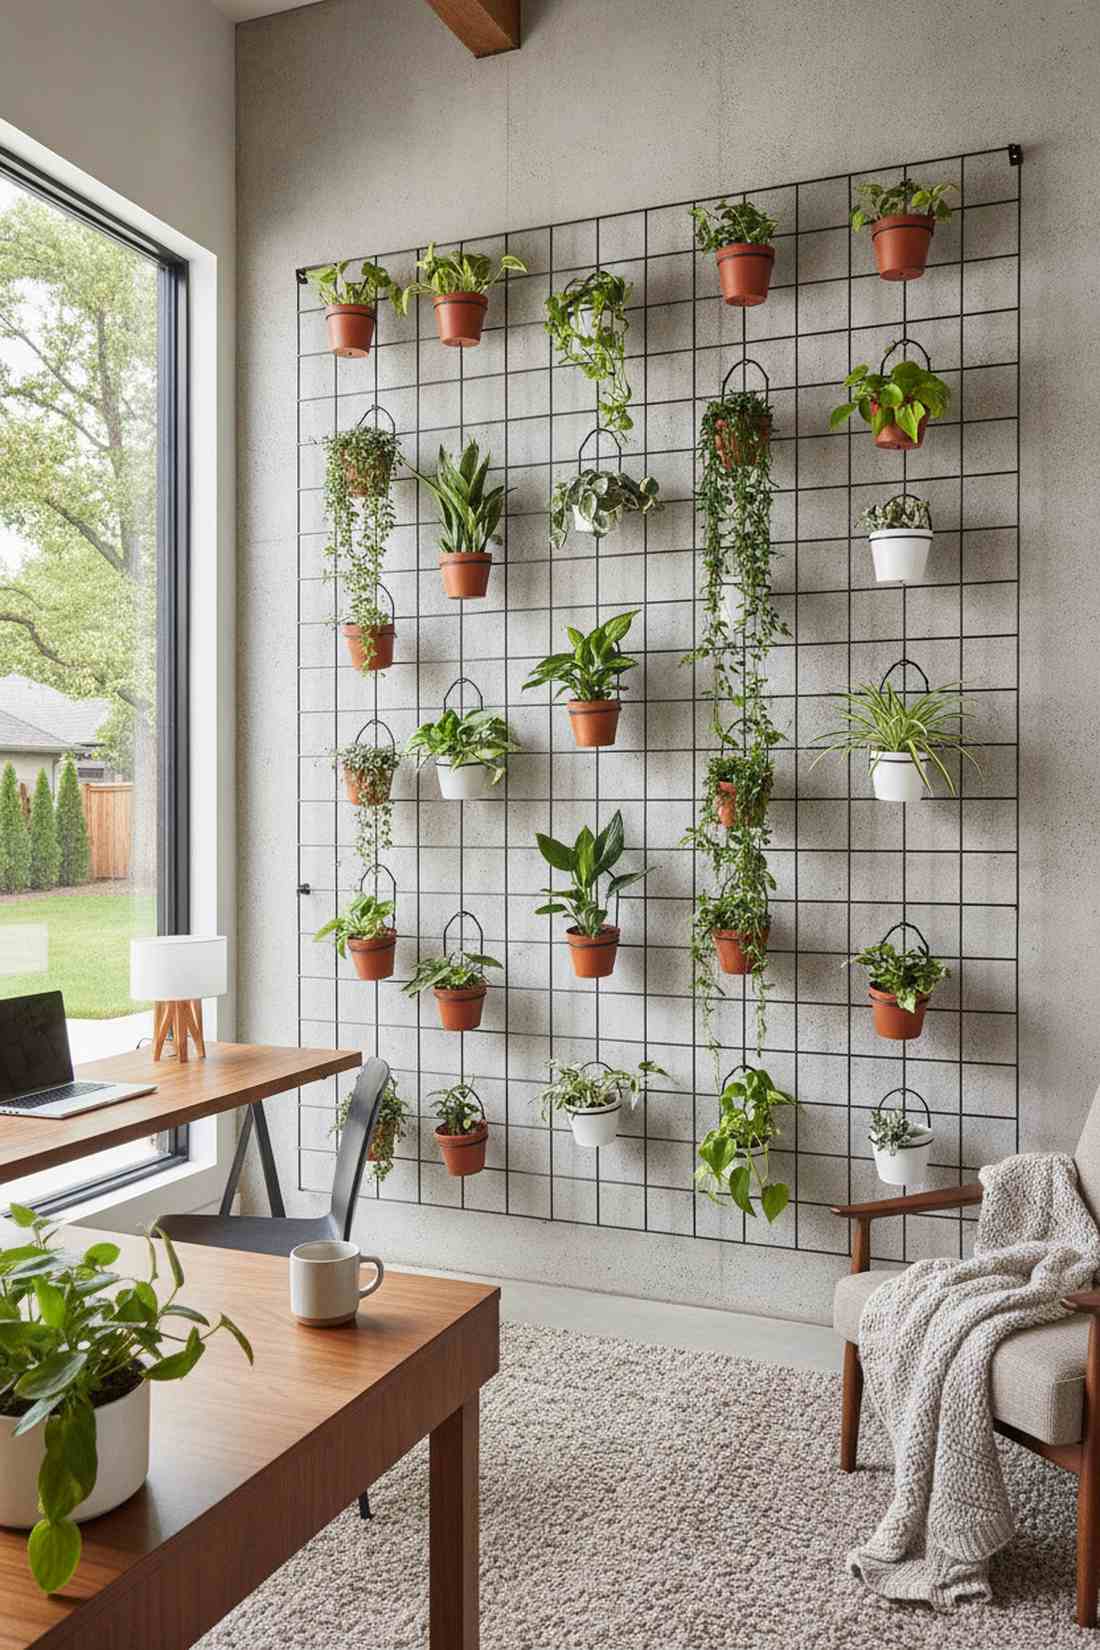
30. Hanging Planter Grid with Individual Container Access
Looks like a beautifully curated, ever-changing gallery of plants. A steel grid hook system is fantastic for a bright indoor home office wall.
Repotting plants is a massive chore, but dropping standard nursery pots directly into adjustable iron rings bypasses the mess entirely. Snapping these matte-black rings onto an industrial grid delivers a surprisingly premium look instantly.
This flexible layout runs a very affordable $40–$70. Pin this for the ultimate low-effort room makeover!
- Key Materials: Wall-mounted wire grids and clamp-on pot rings
- Vibe / Style: Modern dynamic studio
- Difficulty: Very easy
- Budget Breakdown: Grid base: $30 | Ring clamps: $25.
- Creator’s Tip: Leave the plants in their cheap plastic grow pots and simply drop them into decorative covers in the rings.
- Smart Sourcing: heavy-duty wall grid panels and matte black iron planter rings.
DIY and Upcycled Vertical Garden Frame Solutions
You do not need a massive budget to achieve an incredible visual impact. By cleverly repurposing everyday materials with a coat of high-grade paint and smart hardware, these upcycled frames turn trash into high-yield, aesthetic masterpieces.
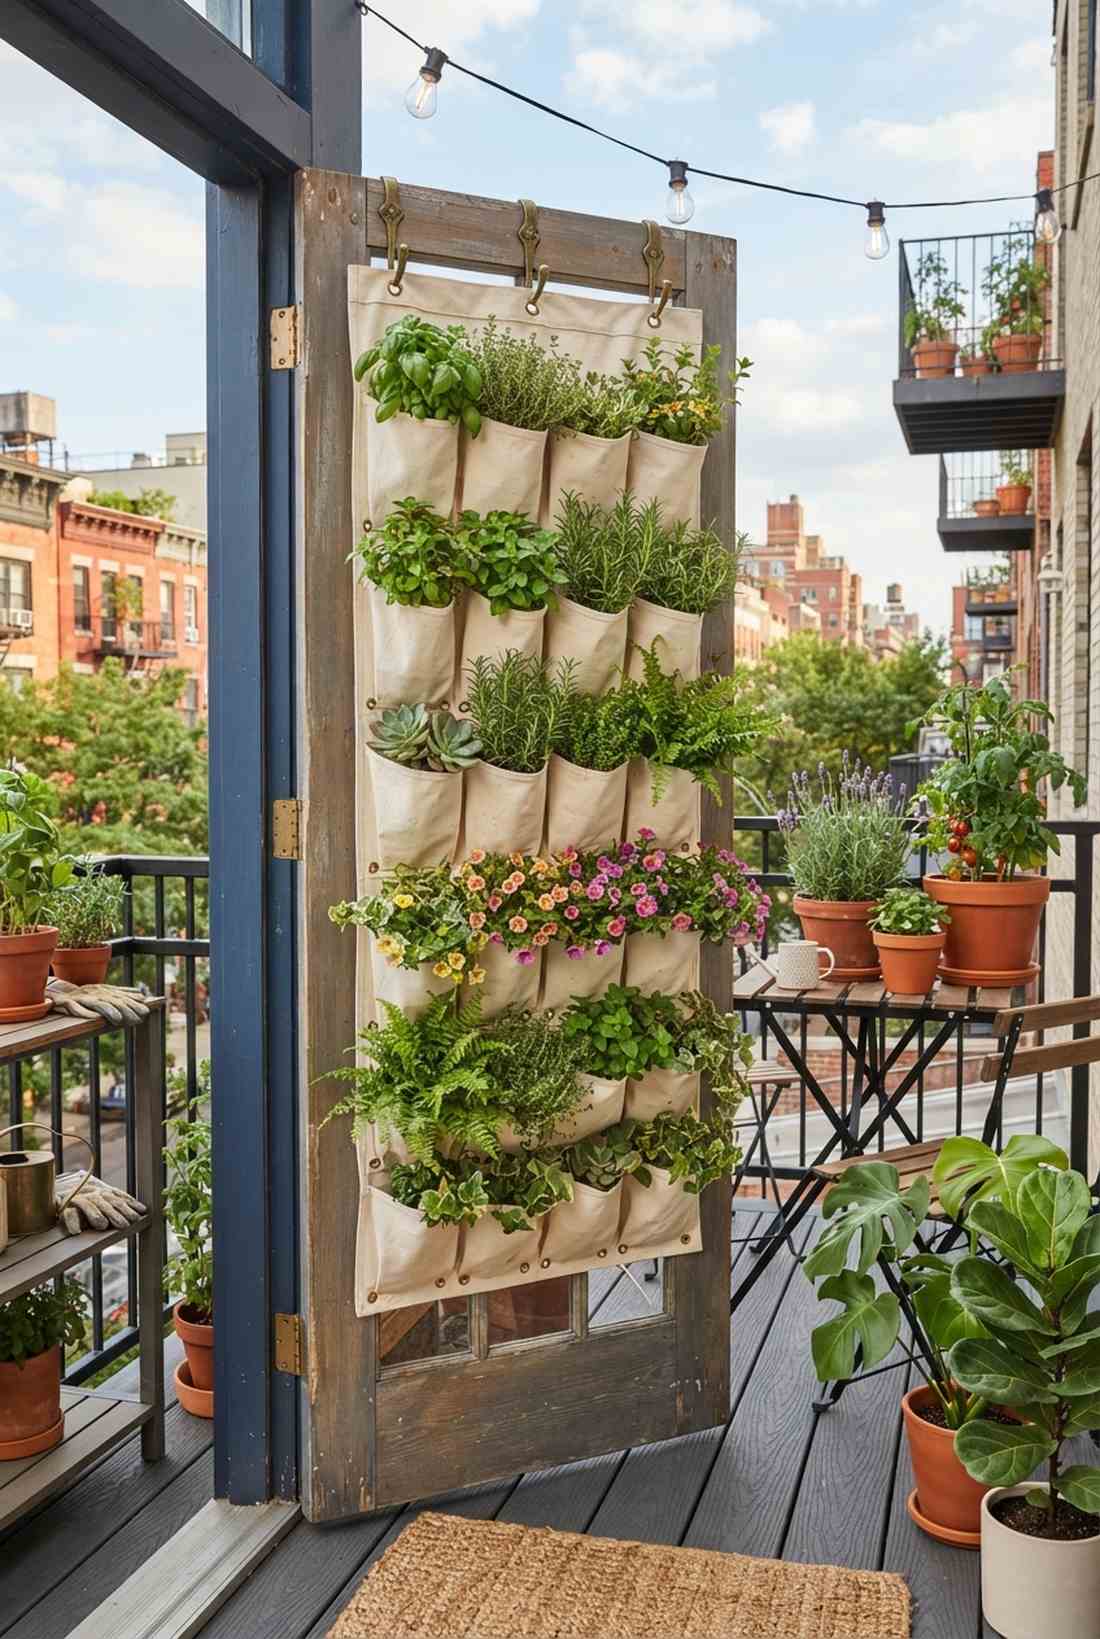
31. Shoe Organizer Planter with Over-Door Hanging
Feels like a quirky, lush little pocket jungle. An over-the-door canvas pocket setup is a brilliant space-saver for a tiny sunlit apartment balcony.
Most beginners ignore fabric organizers, but heavy-duty canvas drains perfectly and acts like premium root-pruning fabric. Punching custom brass grommets into the bottom for drainage makes this cheap trick look shockingly intentional and stylish.
You can set this up for an unbelievable $10–$20. Save this to your ultimate budget college-dorm board!
- Key Materials: Heavy-duty canvas shoe organizer and brass hooks
- Vibe / Style: Clever compact urban
- Difficulty: Zero tools required
- Budget Breakdown: Canvas organizer: $12 | Hooks: $5.
- Creator’s Tip: Avoid clear plastic organizers—they trap extreme heat and will quickly boil your plant roots in the sun.
- Smart Sourcing: heavy-duty breathable canvas pocket organizers and over-the-door brass hanging hooks.
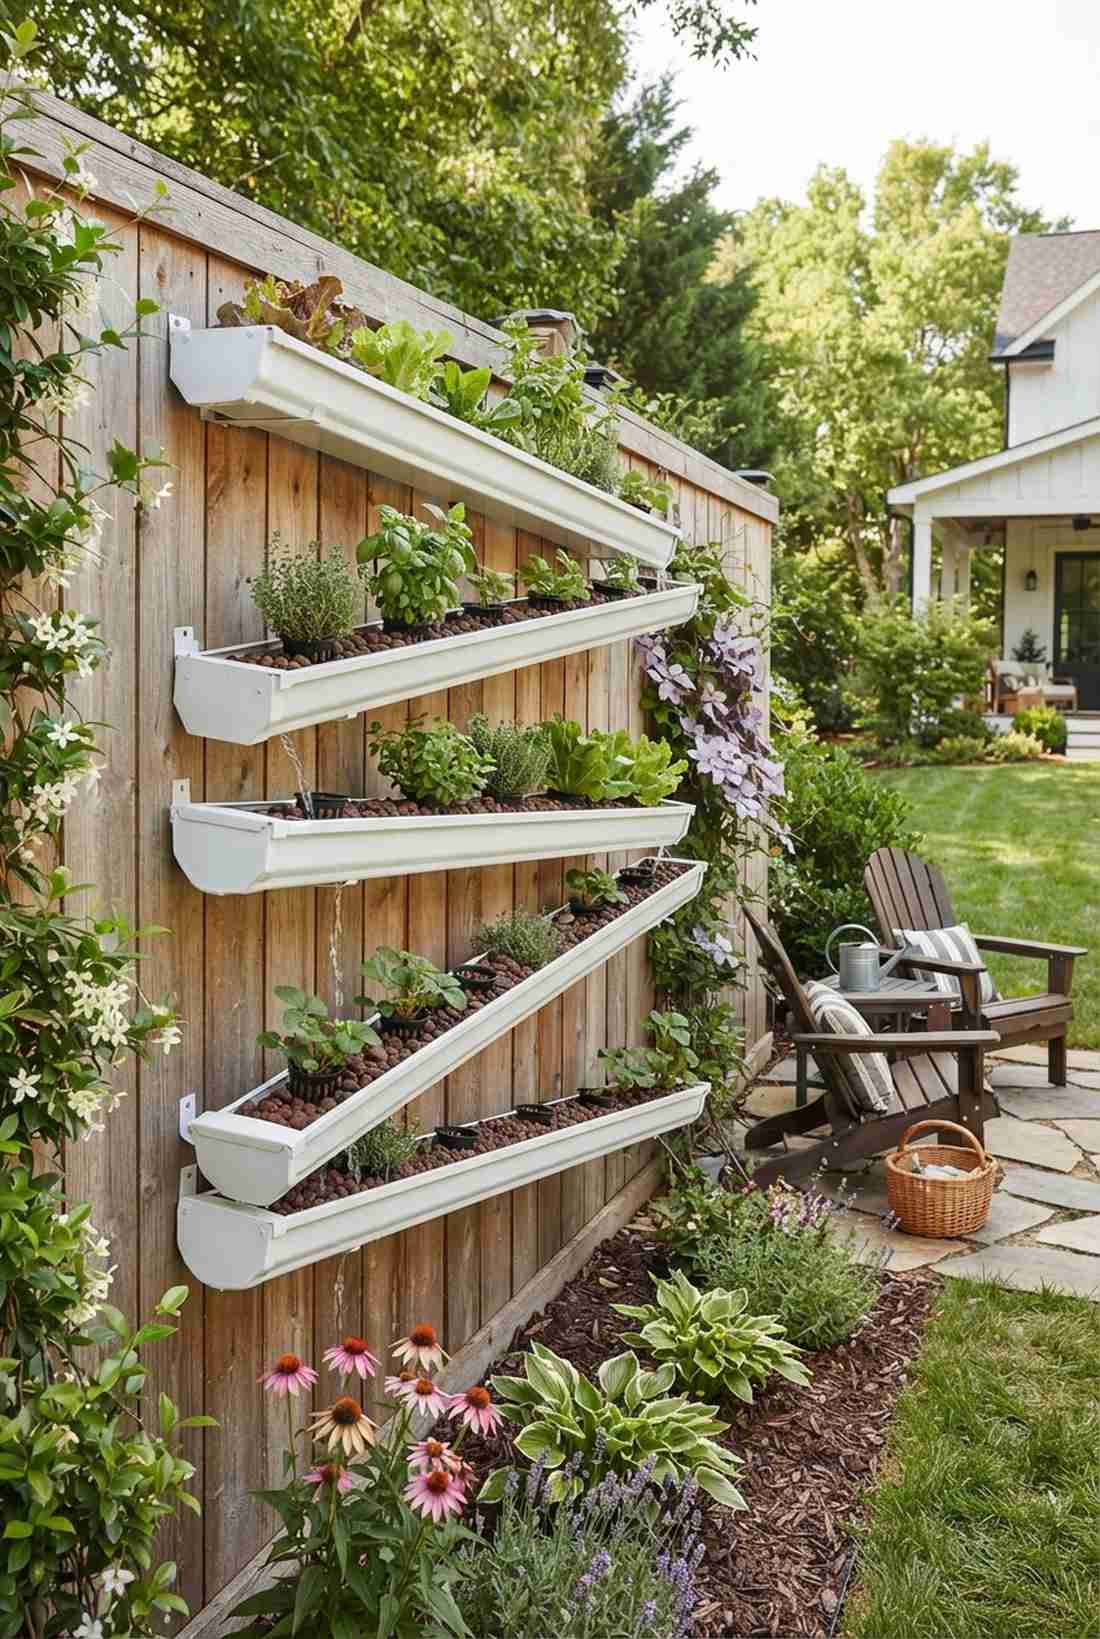
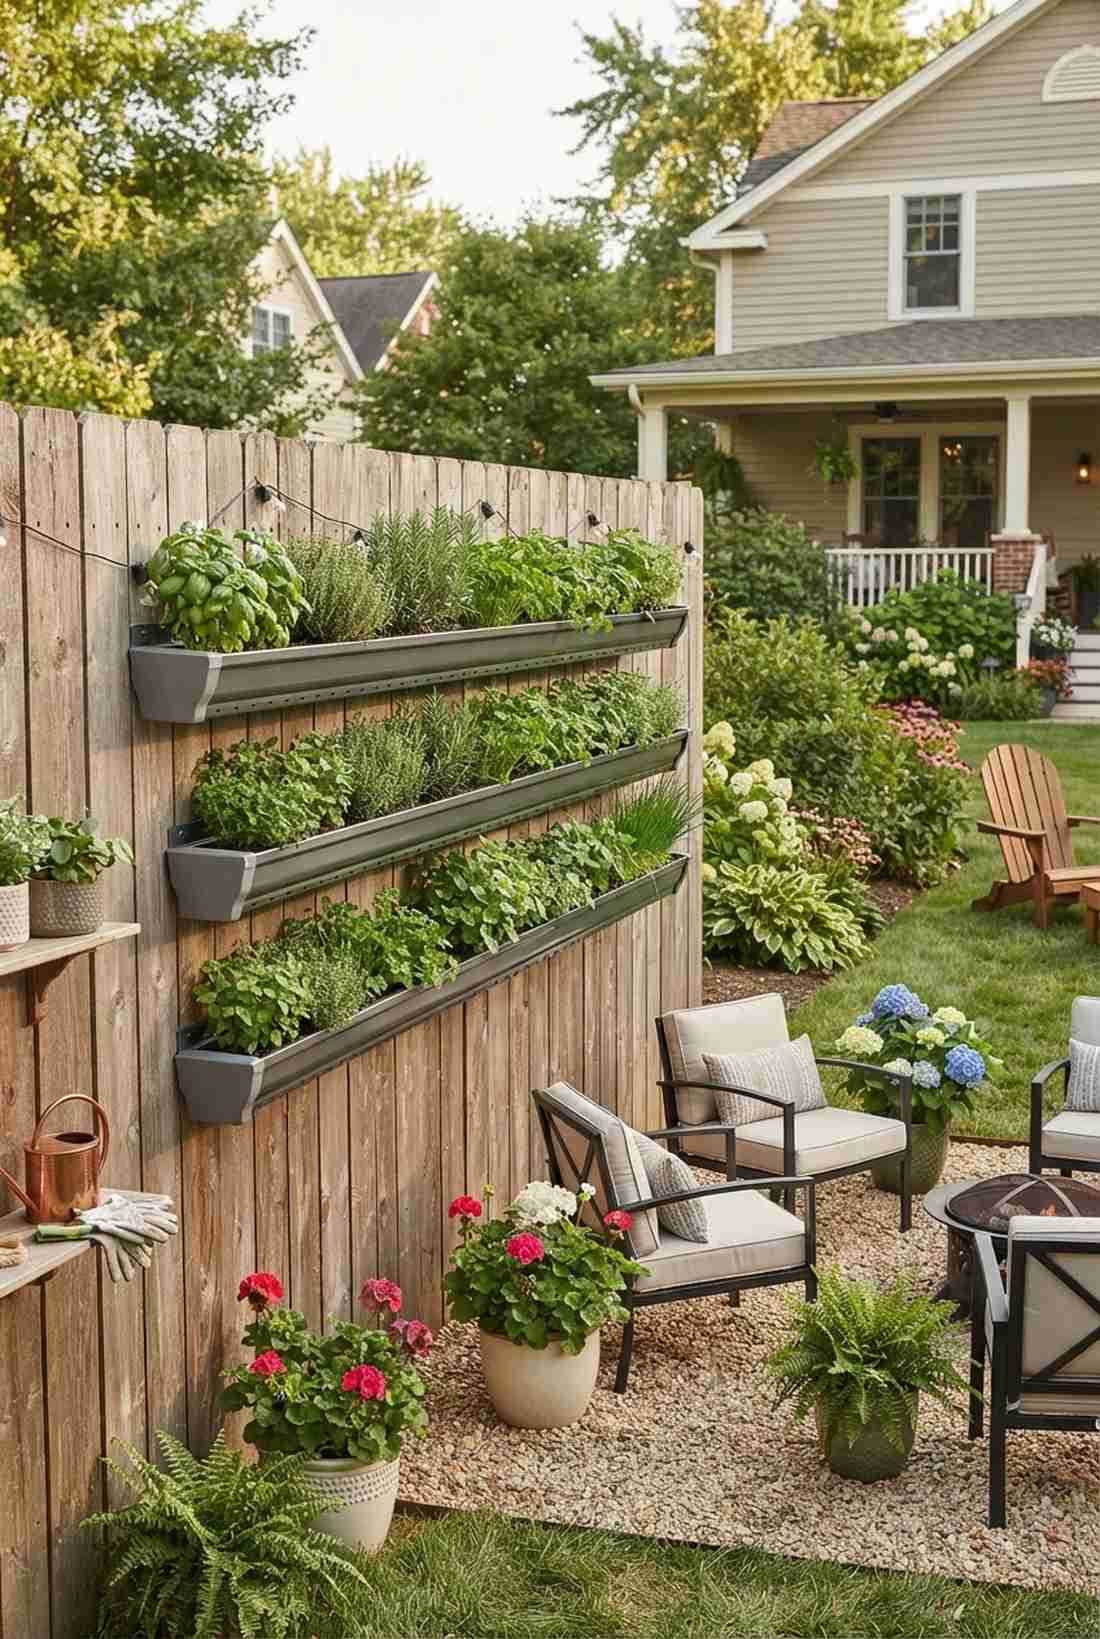
32. Gutter Garden Wall with Vinyl Rain Gutter Sections
Looks like a sleek, continuous ribbon of fresh herbs. A horizontal vinyl gutter array completely reinvents a dull wooden backyard fence.
Builders throw this stuff away daily, but capping the ends of standard house gutters creates the perfect shallow-root planter. Spraying the vinyl with a premium metallic exterior paint delivers a surprisingly premium look on a dime.
This entire setup costs around $25–$45. Pin this if you love mind-blowing hardware store transformations!
- Key Materials: 5-inch vinyl gutters, end caps, and mounting brackets
- Vibe / Style: Streamlined modern farmhouse
- Difficulty: Basic cutting and drilling
- Budget Breakdown: Gutter sections: $20 | Hardware & paint: $15.
- Creator’s Tip: Drill a quarter-inch drainage hole every 6 inches along the bottom so the soil never turns to mud.
- Smart Sourcing: snap-on vinyl gutter end caps and heavy-duty hidden gutter brackets.
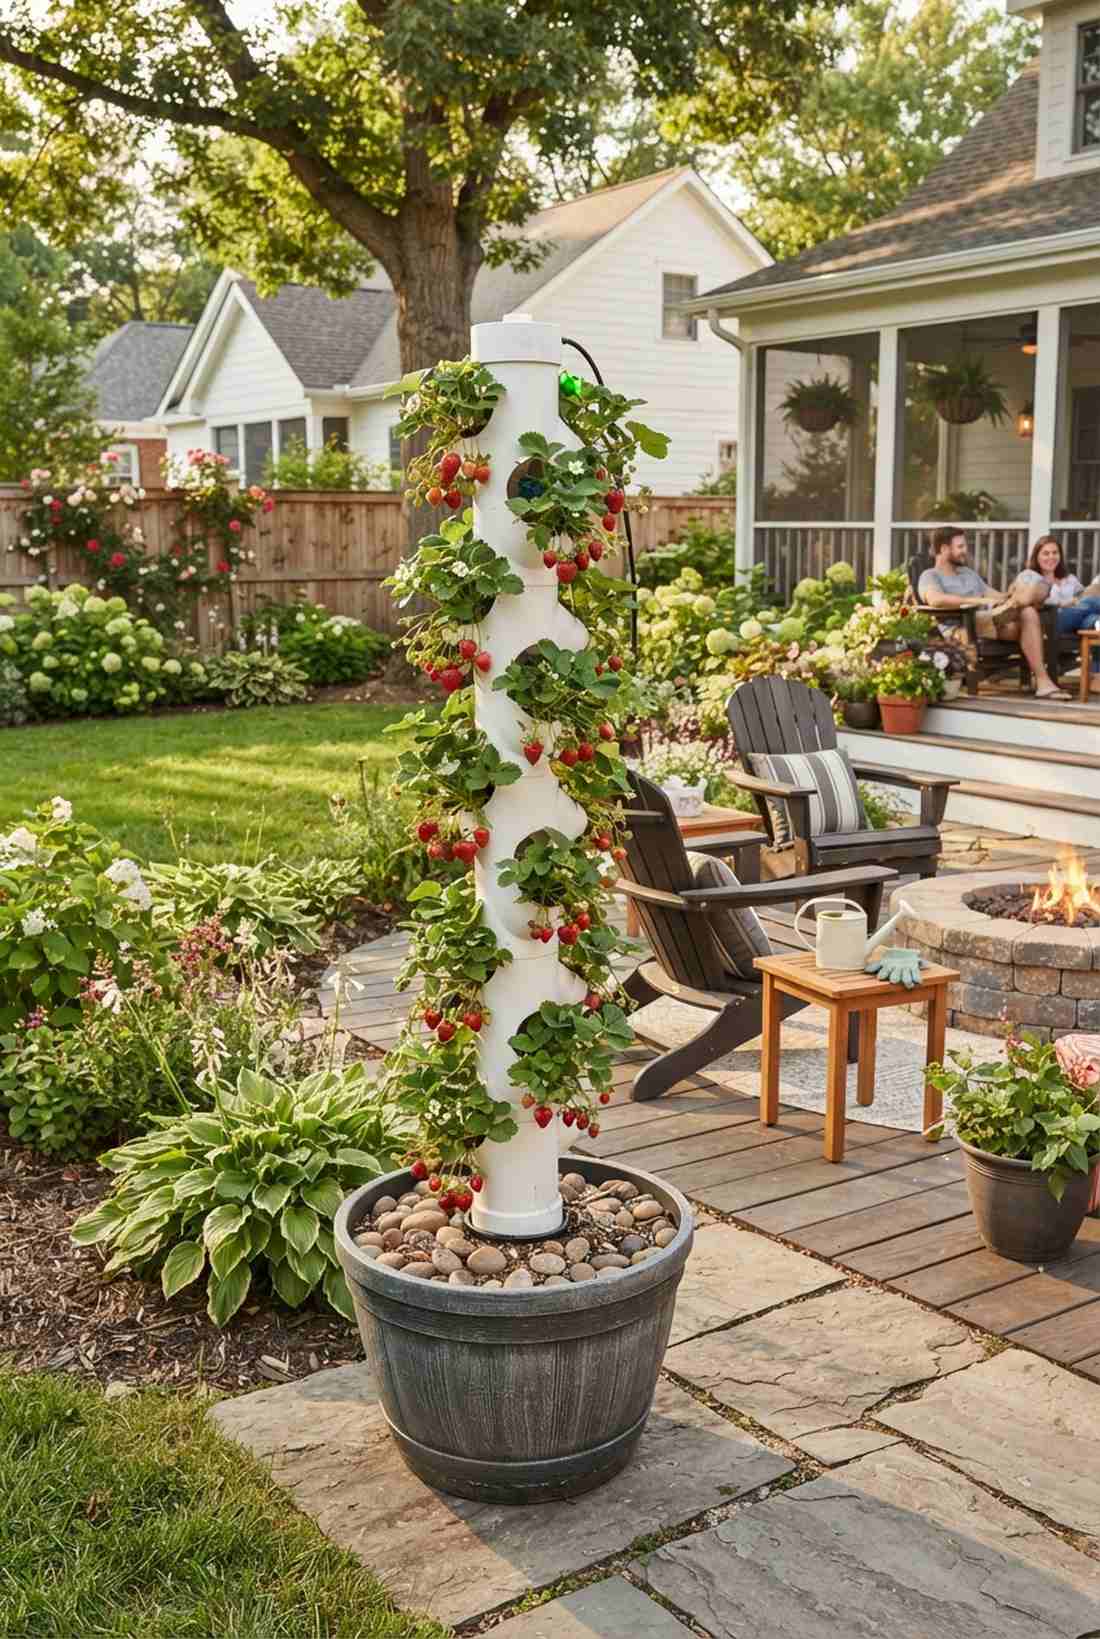
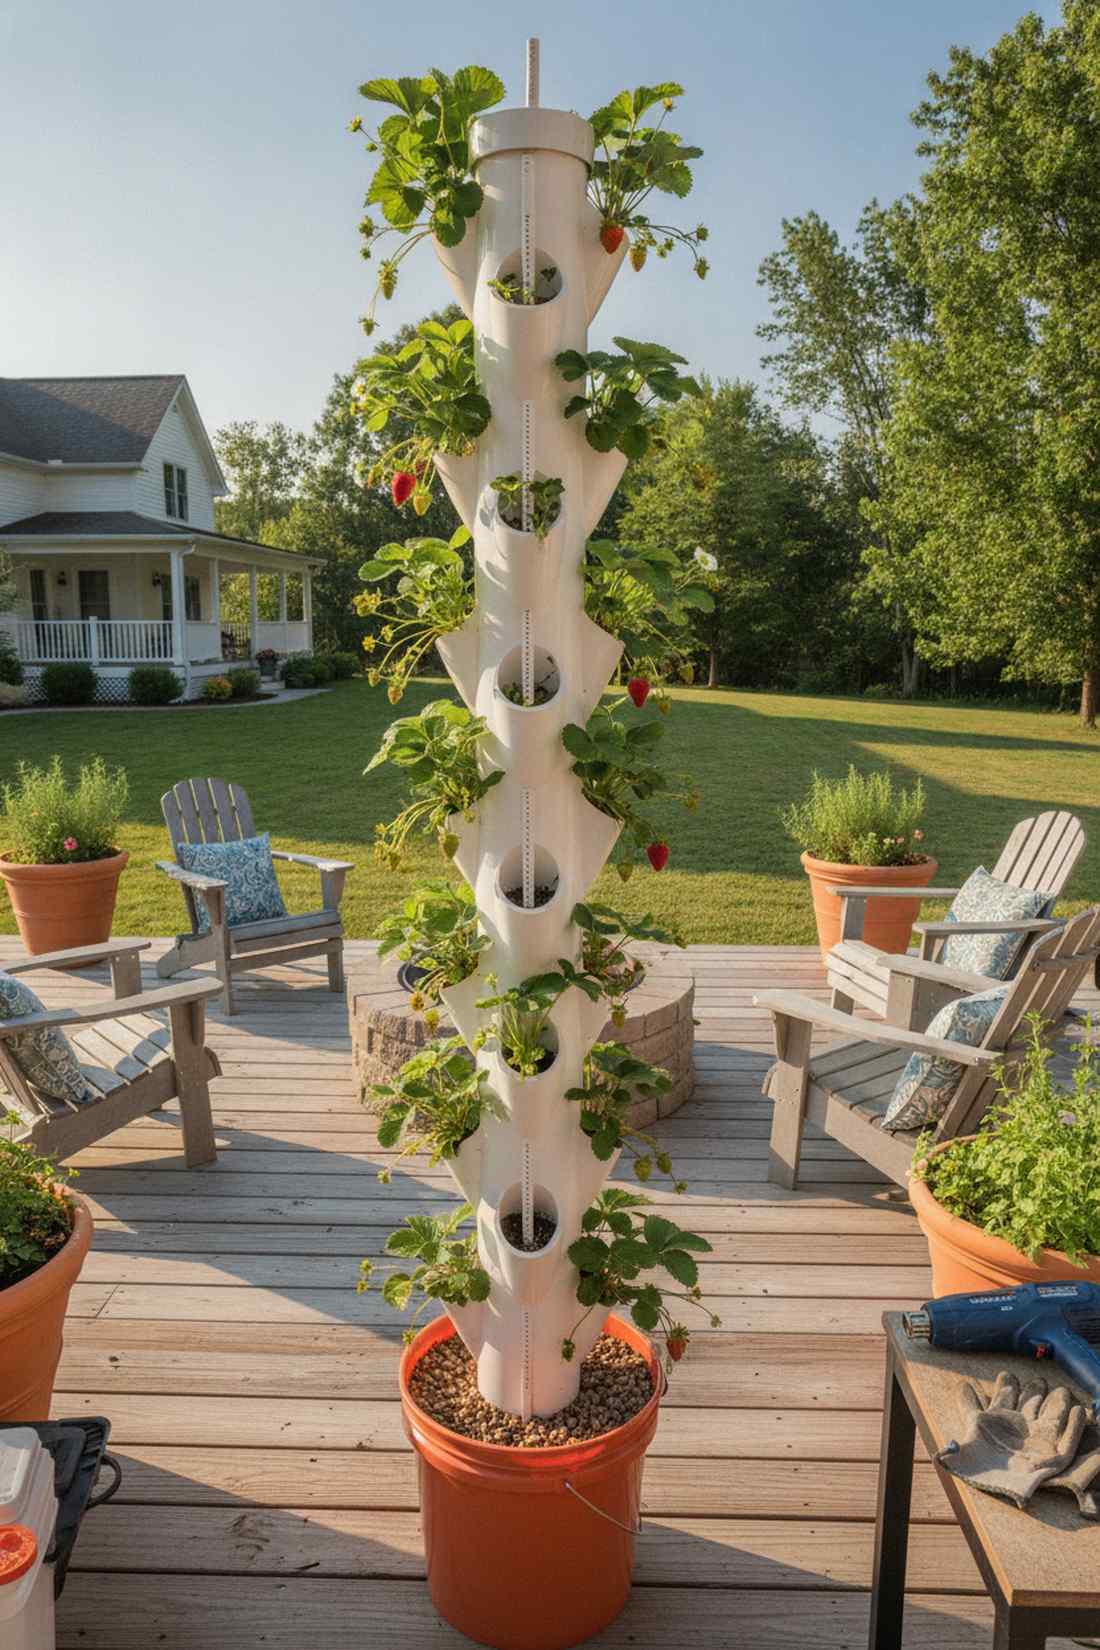
33. PVC Pipe Tower with Diagonal Planting Holes
Feels like a strawberry-producing sculptural masterpiece. A slotted vertical PVC pipe is the ultimate space-saving tower for an outdoor patio corner.
Most commercial strawberry towers are flimsy plastic, but thick Schedule 40 plumbing pipe is virtually indestructible. Heating and bending the slotted holes outwards gives a designer-level finish that catches water perfectly.
You can craft this highly productive tower for roughly $20. Highly recommended for massive berry yields!
- Key Materials: 4-inch PVC pipe, heat gun, and a strong base bucket
- Vibe / Style: Brilliant functional DIY
- Difficulty: Requires a heat gun
- Budget Breakdown: Thick PVC pipe: $15 | Gravel & base: $10.
- Creator’s Tip: Run a smaller 1-inch drilled PVC pipe down the center to ensure water reaches the bottom plants instantly.
- Smart Sourcing: dual-temperature industrial heat guns and 4-inch PVC pipe caps.
Stop paying premium prices for rustic decor when you can stack these specific boxes for $30…
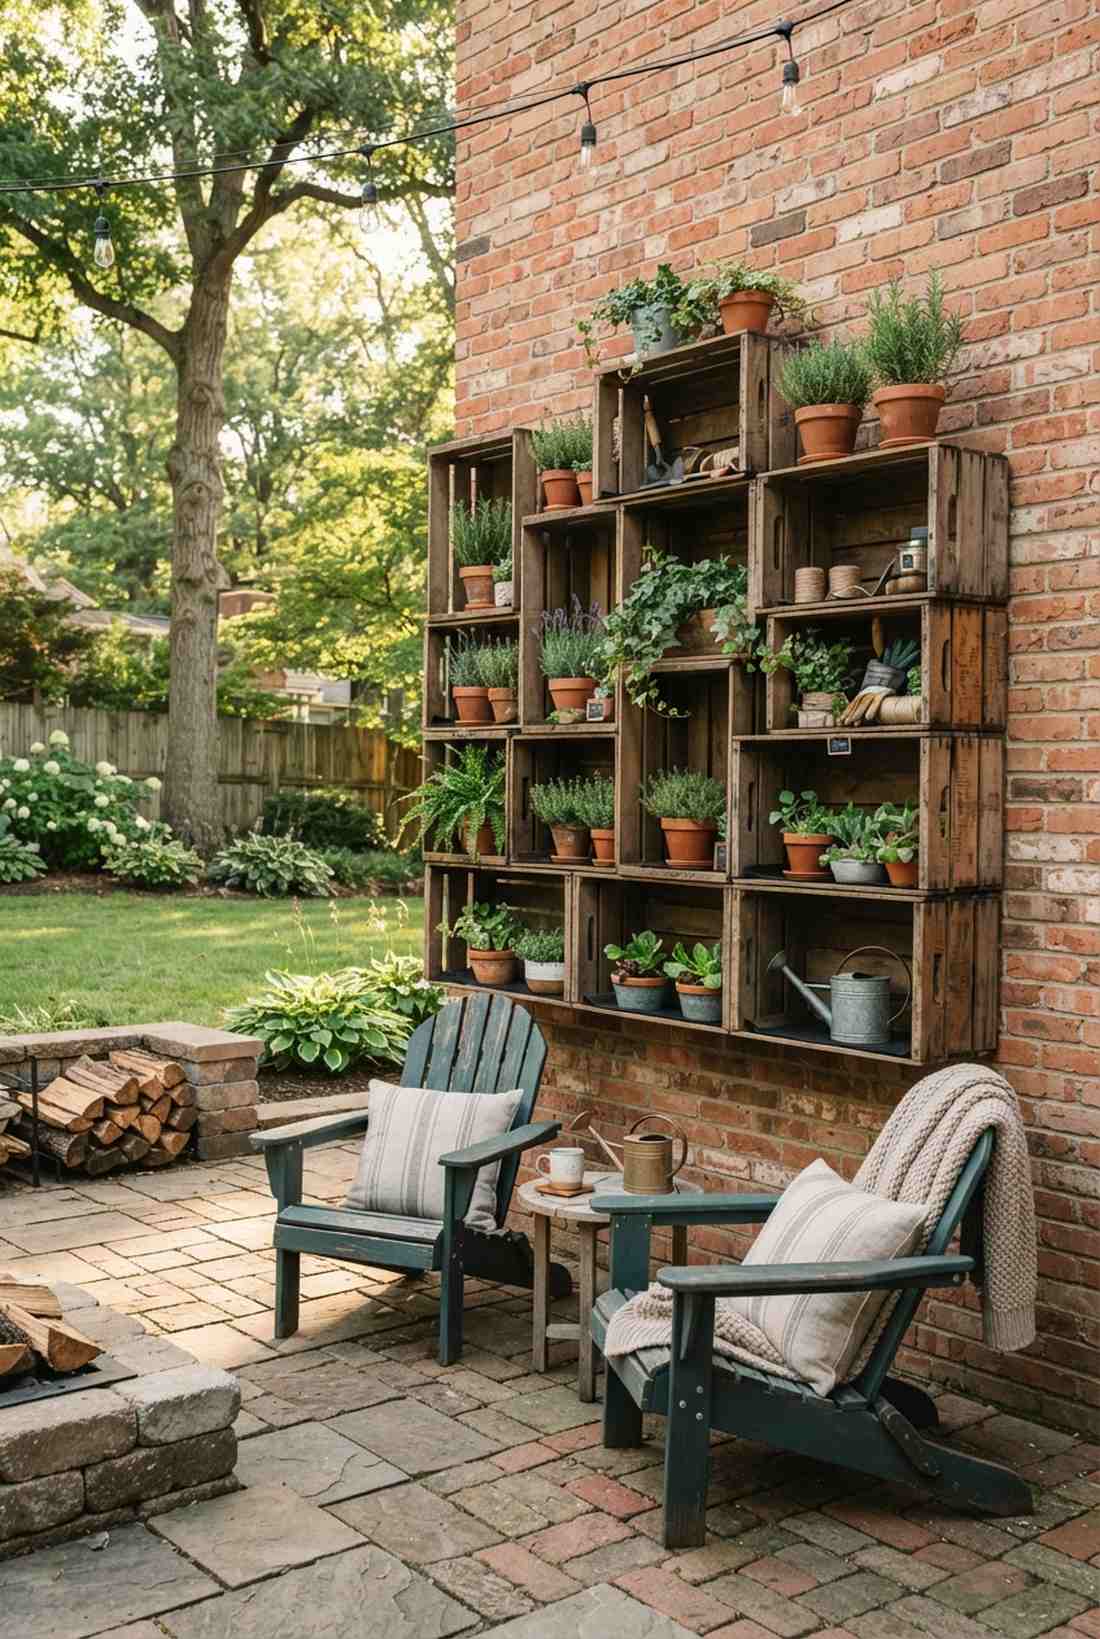
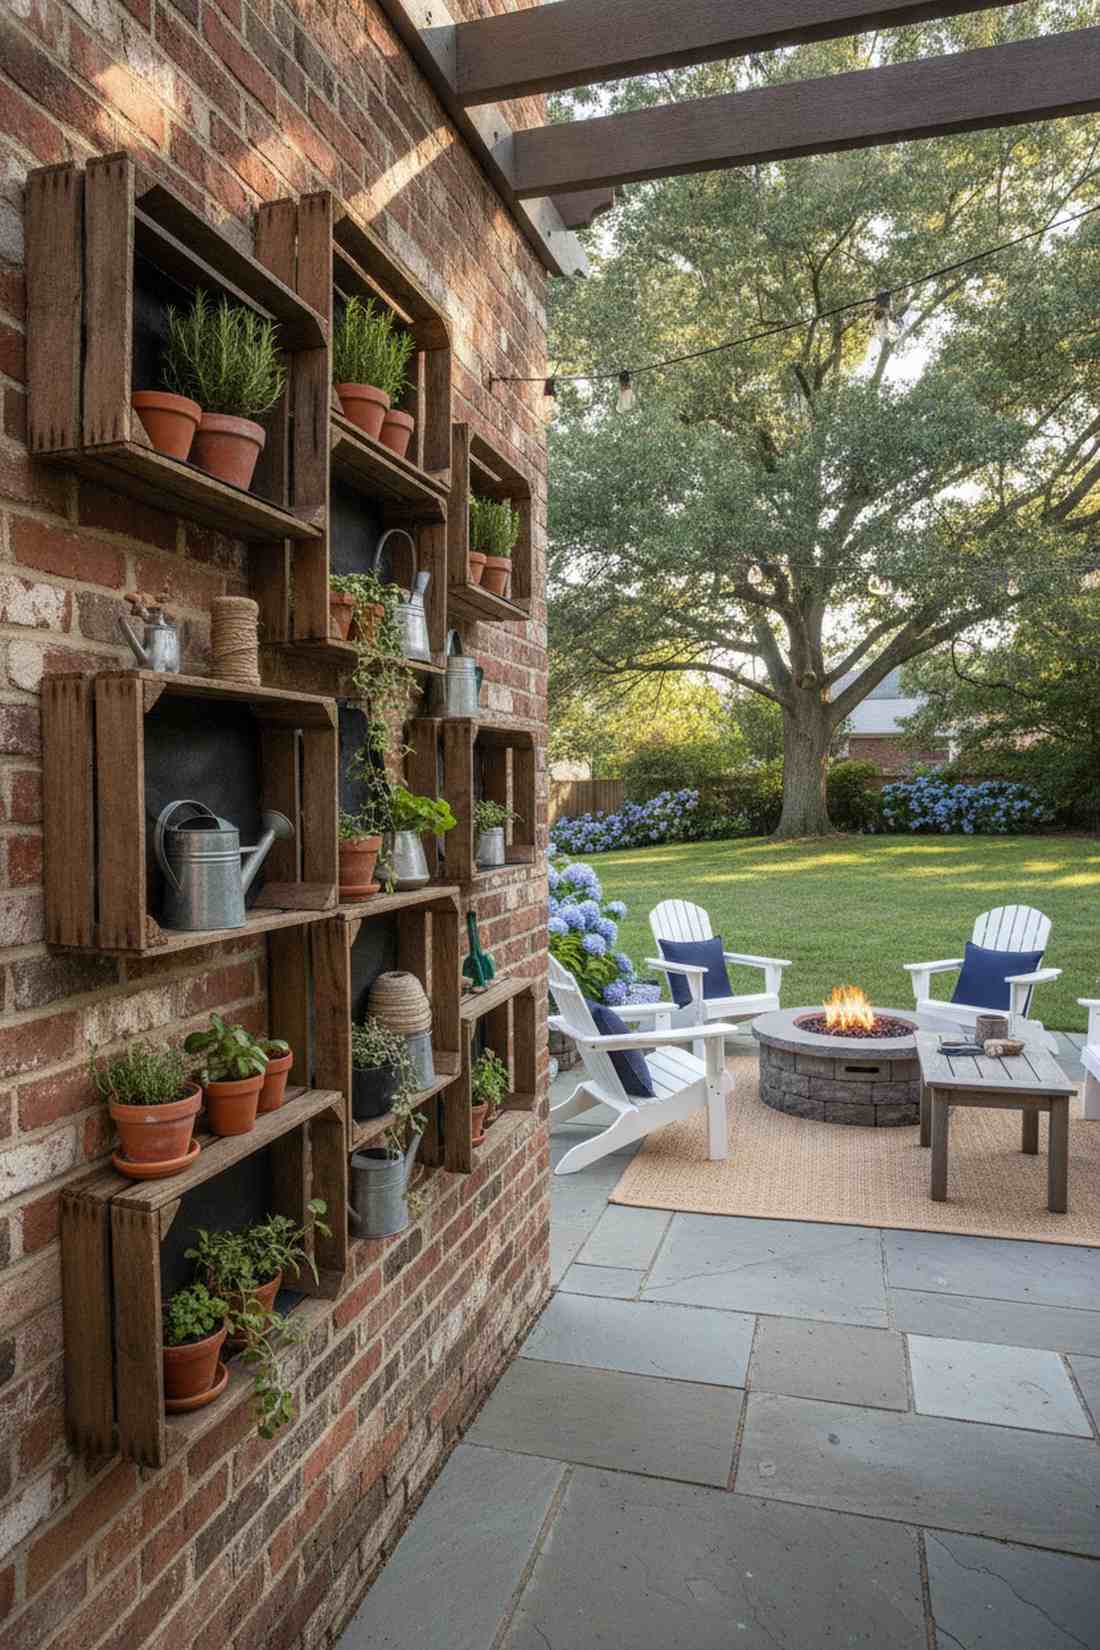
34. Wooden Crate Wall with Stacked Box Configuration
Looks like a beautifully curated vintage market display. A staggered wooden crate stack fits flawlessly against a cozy brick patio wall.
People spend a fortune on antique shelves, but stacking basic vineyard crates securely creates an incredibly rich, textured aesthetic. Reinforcing the backs and lining the bottom with weed barrier turns basic boxes into premium miniature garden supplies.
This layout runs about $30–$50 if you source smart. Save this to your rustic outdoor living board!
- Key Materials: Slatted wooden crates and landscape fabric
- Vibe / Style: Vintage vineyard chic
- Difficulty: Simple stacking and securing
- Budget Breakdown: Crates (bulk): $35 | Fabric liner: $10.
- Creator’s Tip: Always screw the crates into each other and anchor the top crate to the wall to prevent a dangerous collapse.
- Smart Sourcing: rustic slatted wooden nesting crates and heavy-duty wall anchor kits.
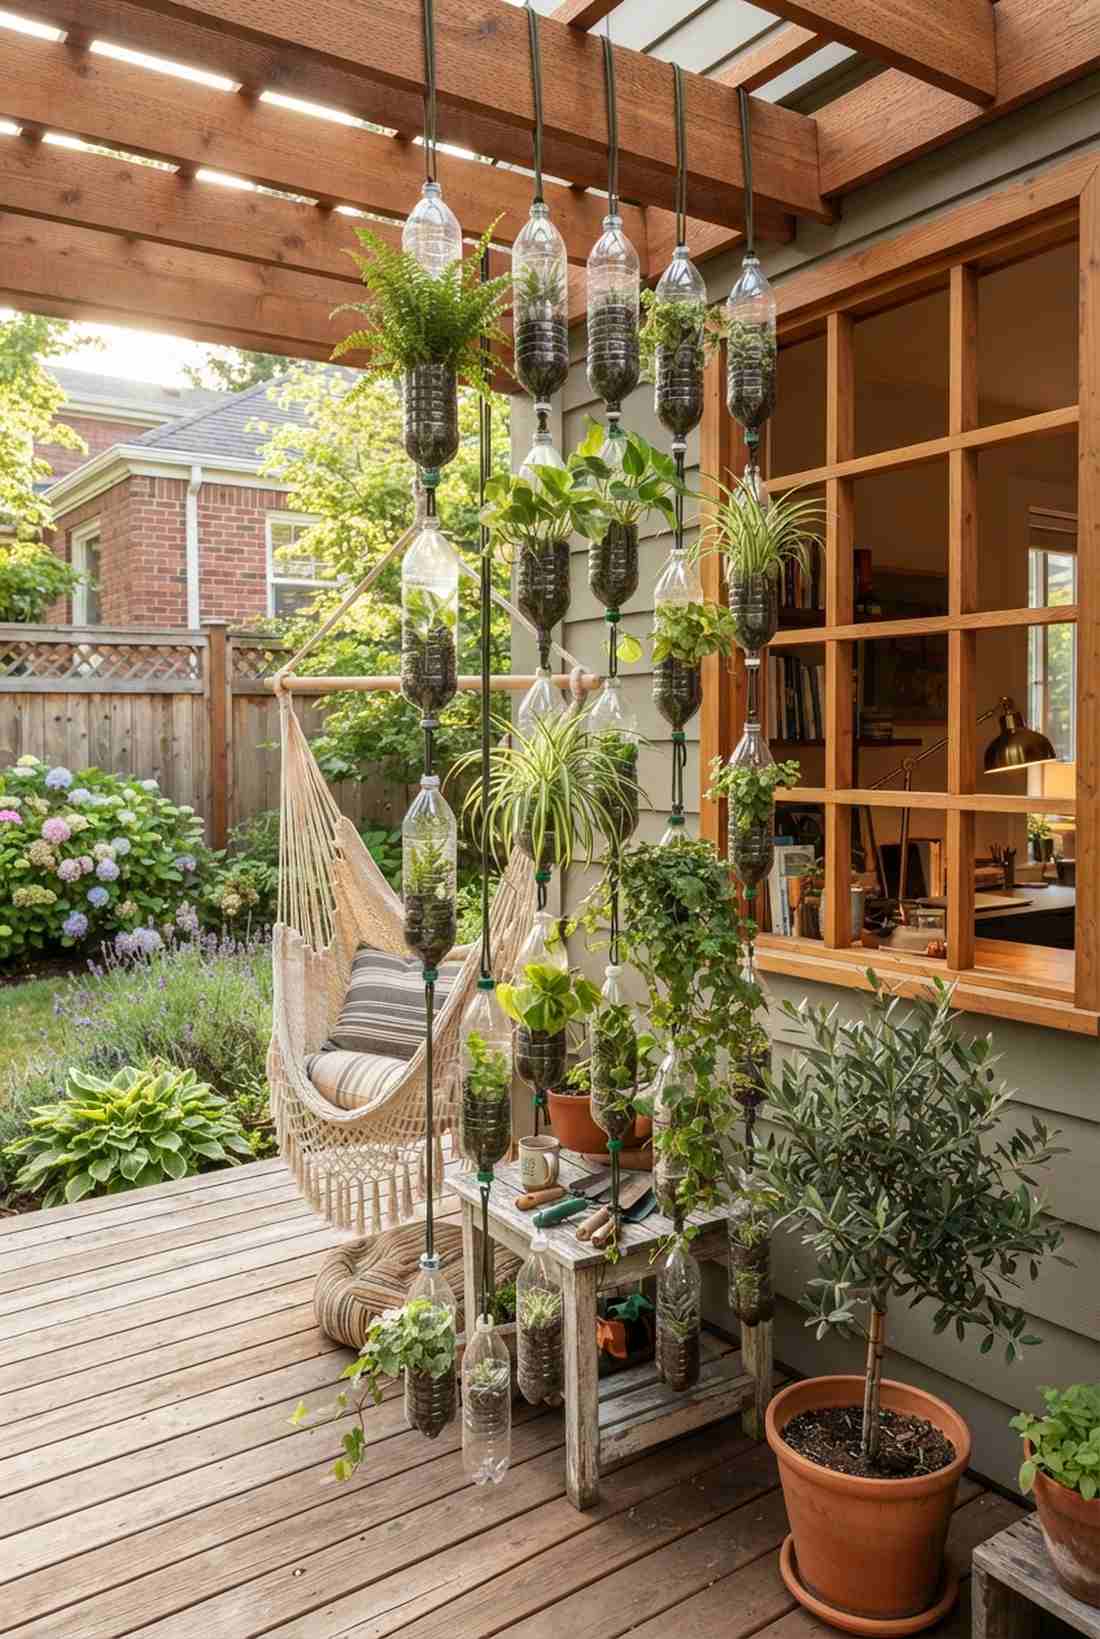
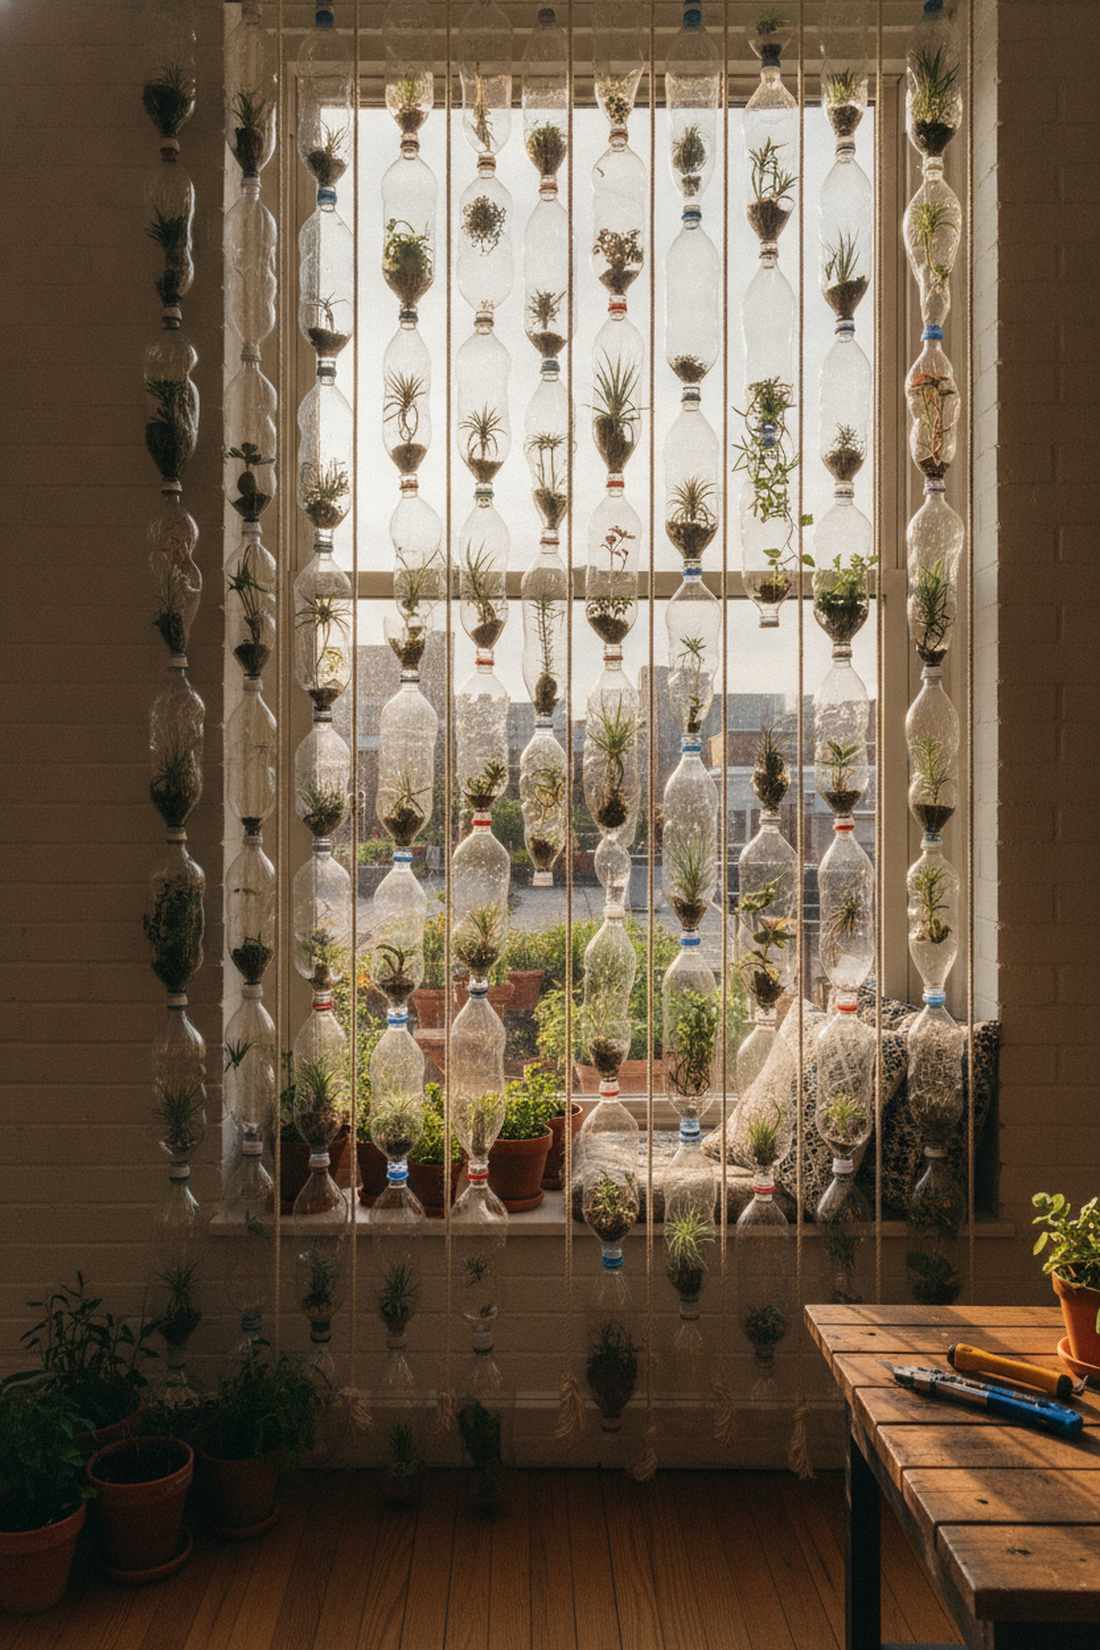
35. Recycled Bottle Cascade with String Suspension
Feels like a whimsical, floating curtain of greenery. A suspended recycled bottle matrix is a brilliant, zero-waste privacy screen for an urban window.
Throwing away plastic is tragic when you can string them together into an invisible cascading water system. Hanging them neatly on thick nylon paracord looks surprisingly intentional and completely mesmerizes guests.
This project is literally free besides the string and dirt. Pin this if you love brilliant eco-friendly upcycling!
- Key Materials: 2-liter plastic bottles and weatherproof paracord
- Vibe / Style: Eco-conscious urban bohemian
- Difficulty: Easy cutting and tying
- Budget Breakdown: Bottles: $0 | Heavy paracord: $8.
- Creator’s Tip: Poke a hole in the cap so excess water slowly drips directly into the bottle hanging beneath it.
- Smart Sourcing: 550lb UV-resistant nylon paracord and precision hobby knife sets.
36. Pegboard Planter Wall with Adjustable Container Hooks
Looks like a hyper-organized, vibrant botanical workshop. A customizable painted pegboard layout is the absolute perfect addition to a bright crafting room.
Stationary shelves dictate your layout forever, but pegboard allows you to totally reconfigure your plant wall in seconds. Sealing the board with a high-gloss waterproof enamel gives a designer-level finish that wipes clean instantly.
You can execute this genius wall for around $30–$50. Highly recommended for plant collectors who love rearranging!
- Key Materials: Heavy-duty pegboard, enamel paint, and assorted metal hooks
- Vibe / Style: Colorful creative studio
- Difficulty: Basic wall mounting
- Budget Breakdown: Pegboard sheet: $20 | Premium hooks: $15.
- Creator’s Tip: Frame the pegboard with cheap 1×2 furring strips so the hooks have room to lock in behind the board.
- Smart Sourcing: heavy-duty steel pegboard hook assortments and high-gloss waterproof enamel paint.
Creating Your Ideal Vertical Growing Space
Selecting the perfect setup from these 36+ vertical garden systems ultimately depends on your spatial constraints and aesthetic goals. Whether you are investing in a premium automated hydroponic tower or utilizing smart material sourcing to build a rugged DIY trellis framework, getting the structural foundation right is the critical first step. By utilizing high-end starter kits and UV-resistant materials, you bypass the amateur mistakes and guarantee a designer-level botanical display that instantly elevates your property’s value and visual appeal. Pick the layout that matches your budget, grab the right gear, and start transforming those bare walls today!
Frequently Asked Questions
What is the strongest vertical garden structure for heavy plants?
Welded rebar ladder systems and marine-grade stainless steel cable grids with heavy-duty turnbuckles provide the ultimate load capacity. By integrating premium masonry anchor kits and concrete footings, these frameworks effortlessly support massive 50-pound fruiting vines. For a zero-worry setup, utilizing commercial-grade wire rope bundles ensures a permanent, high-end architectural finish that won’t snap.
How do I prevent wall damage from vertical garden installation?
Always create a protective air gap using stainless steel standoff brackets or install a waterproof PVC backing board behind your panels. Never let wet soil or damp felt touch your drywall or siding directly. Investing in a high-quality pressure-regulated drip irrigation kit also prevents accidental water spraying, ensuring moisture only goes exactly where the roots are.
What is the most cost-effective vertical garden system?
Repurposing materials offers the highest ROI, specifically using heavy-duty vinyl gutter packs mounted horizontally for under $5 a section. If you want a complete soil-free setup on a budget, building a PVC pipe tower with bulk PVC connector fitting packs gives you massive vertical yield for under $30, completely outperforming expensive pre-built retail models.
Which vertical garden frame works best for renters?
Freestanding setups like the rolling trellis planter or the dual-sided A-frame are absolute lifesavers for renters since they require zero wall drilling. By upgrading to heavy-duty locking polyurethane casters, you create a massive, high-end privacy screen that can easily roll inside during winter or relocate perfectly when your lease is up.
How much weight can a vertical garden system hold?
Weight capacity depends entirely on your hardware; saturated soil-based panels can easily exceed 80 pounds per square foot. To avoid a catastrophic wall collapse, skip cheap plastic plugs and always use heavy-duty exterior lag bolts driven directly into the structural studs. If you are mounting on brick, using a carbide-tipped masonry drill bit with expanding metal anchors is absolutely non-negotiable for a premium, safe build.