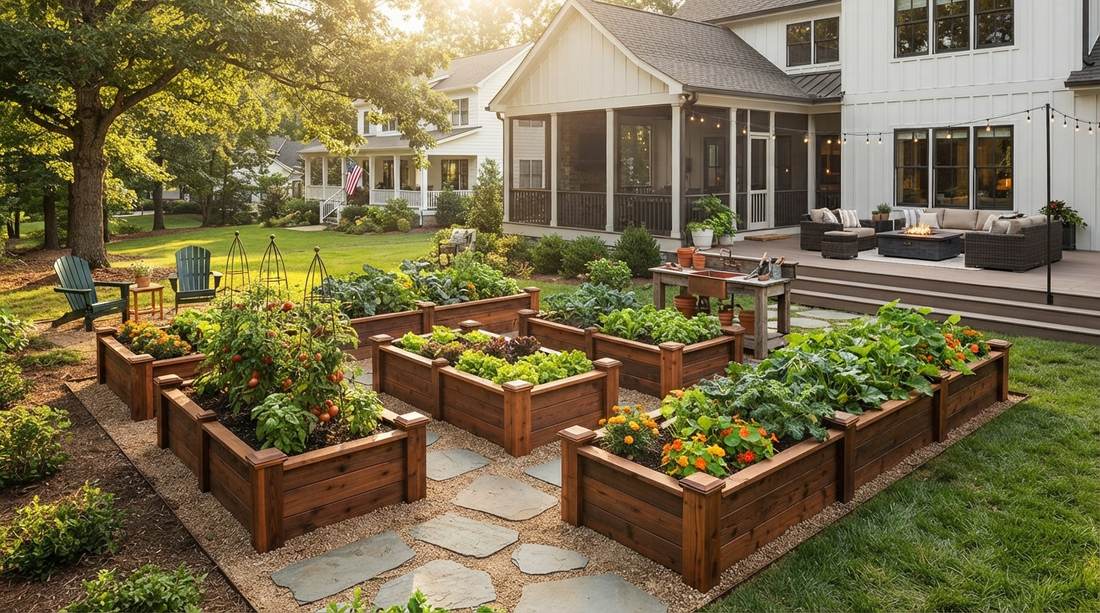
Strategic raised beds instantly upgrade barren backyards into premium producing sanctuaries. Discover exact material breakdowns and high-end sourcing secrets below. Build an expensive aesthetic without breaking your garden budget.
Design SnapshotKey Principles
- Height Matters: Beds between 12-24 inches optimize drainage and reduce back strain during planting and harvest.
- Width Control: Limit bed width to 4 feet maximum to ensure comfortable reach from both sides without stepping on soil.
- Material Selection: Choose untreated cedar, galvanized metal, or composite materials that balance durability with soil safety.
- Spacing Strategy: Maintain 2-3 feet between beds to accommodate wheelbarrows, comfortable walking paths, and plant overgrowth.
Classic Rectangular Raised Beds Designs
Traditional rectangular beds remain the foundation of productive raised beds garden design because they optimize space efficiency and material usage. These straightforward layouts adapt to any property size while providing consistent growing conditions across multiple plantings.
1. Standard 4×8 Production Bed
This layout delivers the energy of a professional organic farm straight to your yard, functioning perfectly as a high-yield backyard garden setup. It works exceptionally well for flat, sunny patches of lawn that need immediate definition.
Most beginners build these with cheap lumber that rots, but investing slightly more changes everything. A quick upgrade to heavy-duty raised garden kits ensures the frame holds massive soil weight without bowing. Adding a UV-resistant protective liner guarantees longevity through harsh seasons.
You can easily pull this off for around $40–$75 depending on wood choice. Save this to your DIY weekend garden board so you don’t lose the blueprint.
- Key Materials: UV-coated raised planter box hardware
- Vibe / Style: Classic Homestead
- Difficulty: Easy beginner setup
- Budget Breakdown: Materials: $45 | Base Soil: $30
- Creator’s Tip: Line the bottom with thick cardboard before adding soil to choke out stubborn lawn weeds naturally.
- Smart Sourcing: Heavy-duty steel corner brackets (4-pack) or Pre-cut untreated cedar plank kits.
2. Compact 3×6 Herb Station
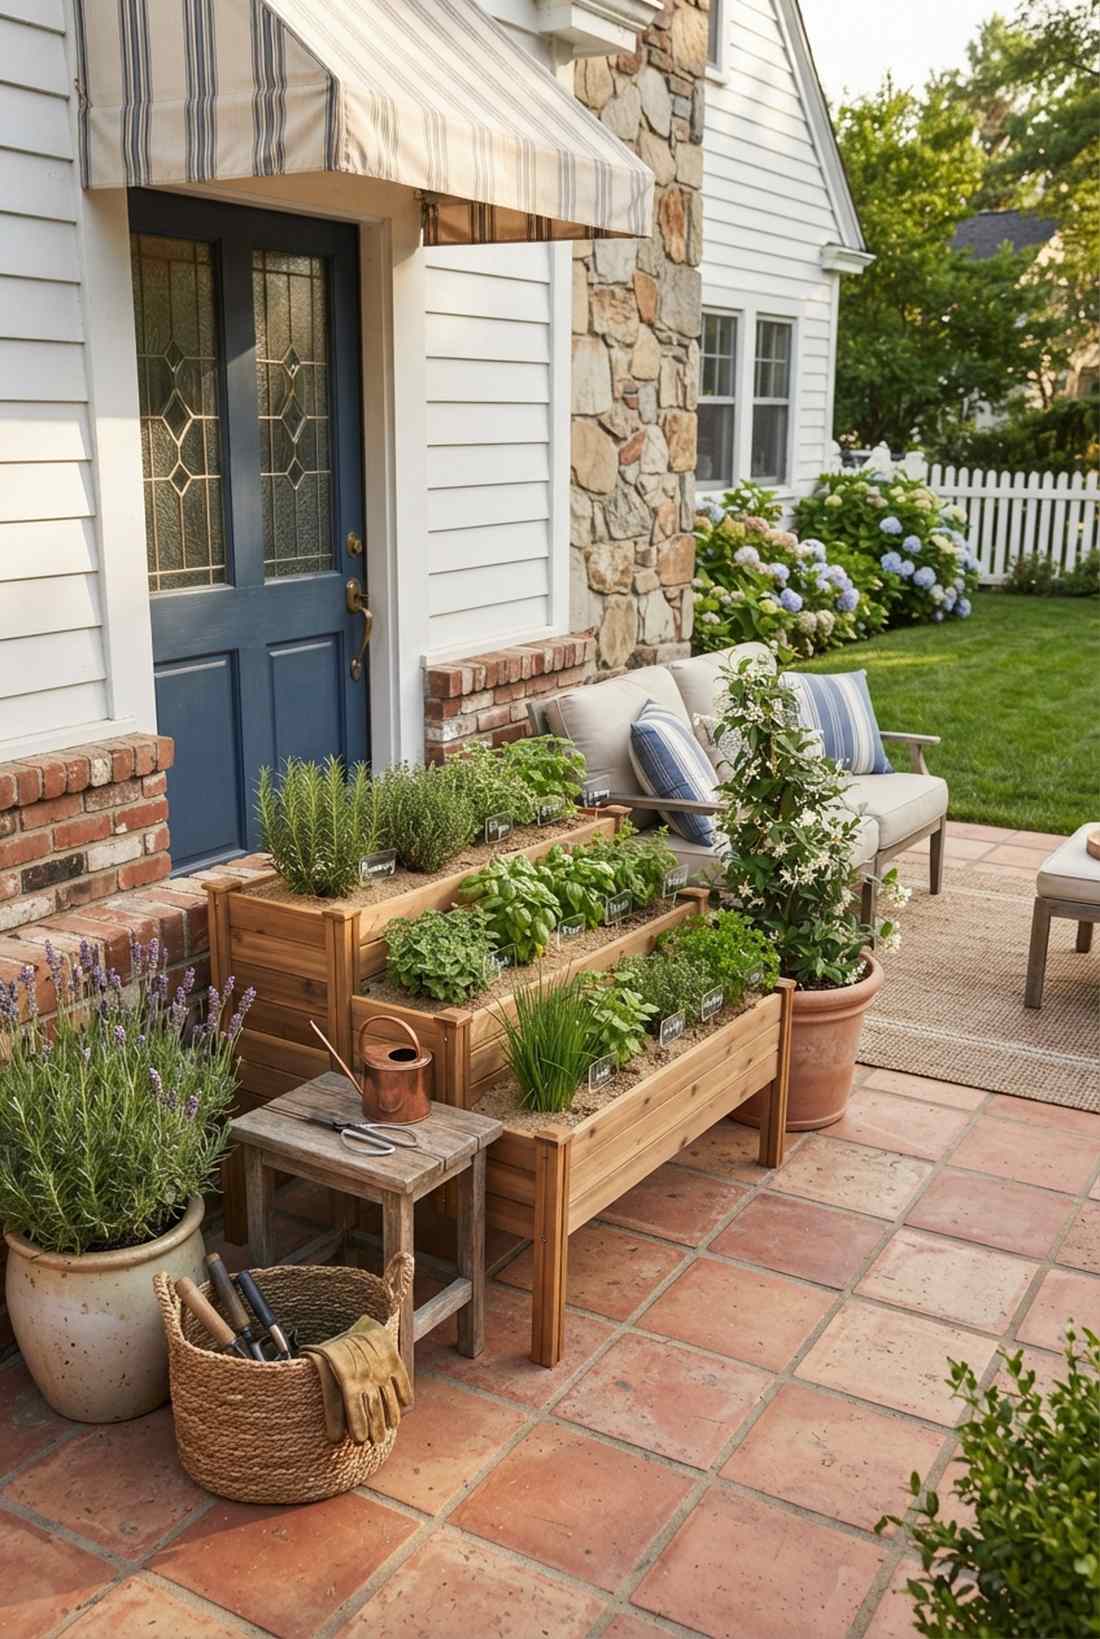
Creates an atmosphere reminiscent of an Italian villa kitchen, thriving brilliantly as a small patio garden decor concept. Ideal for positioning right next to your back door for mid-cooking harvest runs.
People assume small frames lack visual impact, yet this compact footprint delivers a surprisingly premium look when packed tightly. Using modular herb planter accessories elevates the aesthetic from basic wood to deliberate design. Sneak in some acrylic plant markers for a chic finishing touch.
Expect to spend roughly $30–$50 for the frame and seeds. It’s a fast upgrade that completely changes the vibe of a blank concrete slab.
- Key Materials: Weatherproof herb garden starter kit
- Vibe / Style: Culinary Minimalist
- Difficulty: Absolute beginner
- Budget Breakdown: Frame: $25 | Herbs/Soil: $25
- Creator’s Tip: Use a sandy loam mix here; culinary herbs rot quickly in heavily compacted, wet soils.
- Smart Sourcing: Weather-sealed wooden planter box kits or Organic indoor/outdoor herb seed vaults.
3. Double-Wide 4×12 Row System
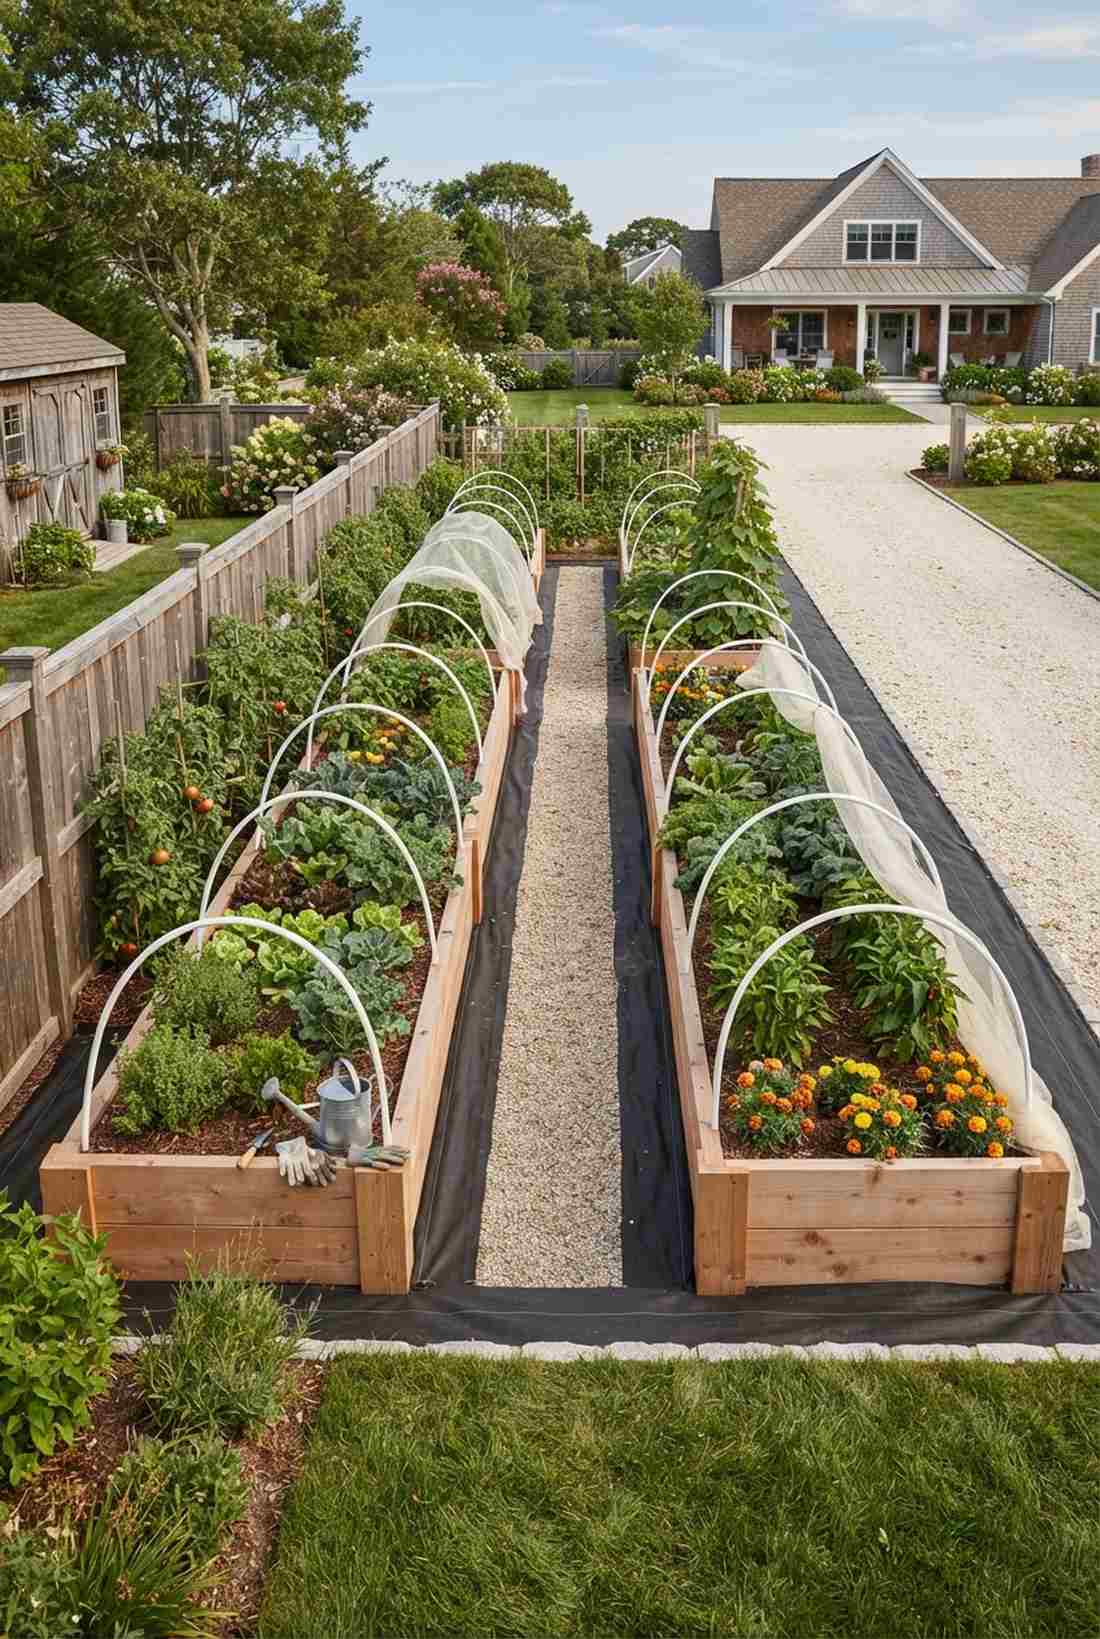
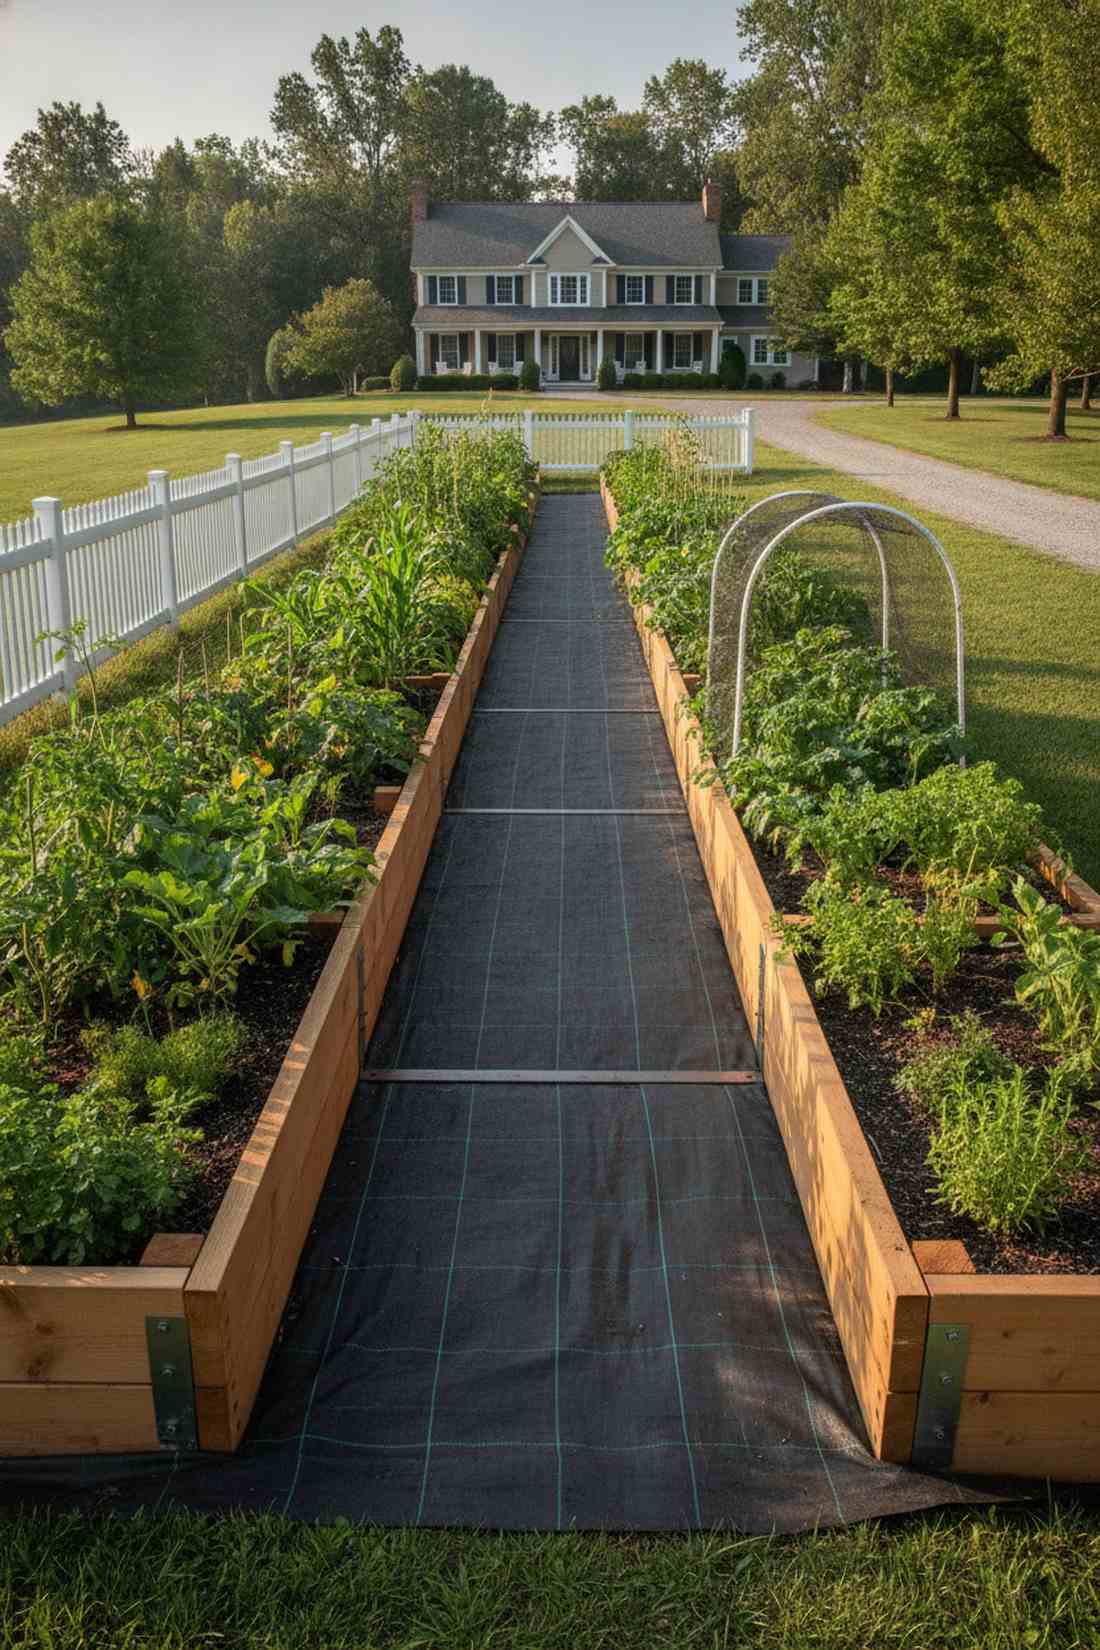
Feels like stepping into a well-funded community agriculture project, serving beautifully as a fenceline vegetable landscape. Fantastic for stretching along long driveway borders or unused property boundaries.
Traditional advice says avoid long beds due to bowing, but slipping in hidden center braces solves this instantly. By weaving in professional-grade weed barrier fabric beneath the paths, the whole perimeter stays pristine. It looks far more expensive than it is once the greens erupt.
Building this behemoth runs about $90–$140 depending on your timber choices. Pin this if you’re planning a massive property-line upgrade this spring.
- Key Materials: Professional grade landscape fabric
- Vibe / Style: Expansive Estate
- Difficulty: Intermediate measuring
- Budget Breakdown: Lumber: $80 | Hardware/Fabric: $40
- Creator’s Tip: Add a PVC hoop system early on so you can easily drop bird netting over your precious crops.
- Smart Sourcing: Bulk roll heavy-duty weed barrier or Reinforced anti-bowing metal crossbars.
4. Raised Platform 3×3 Grid
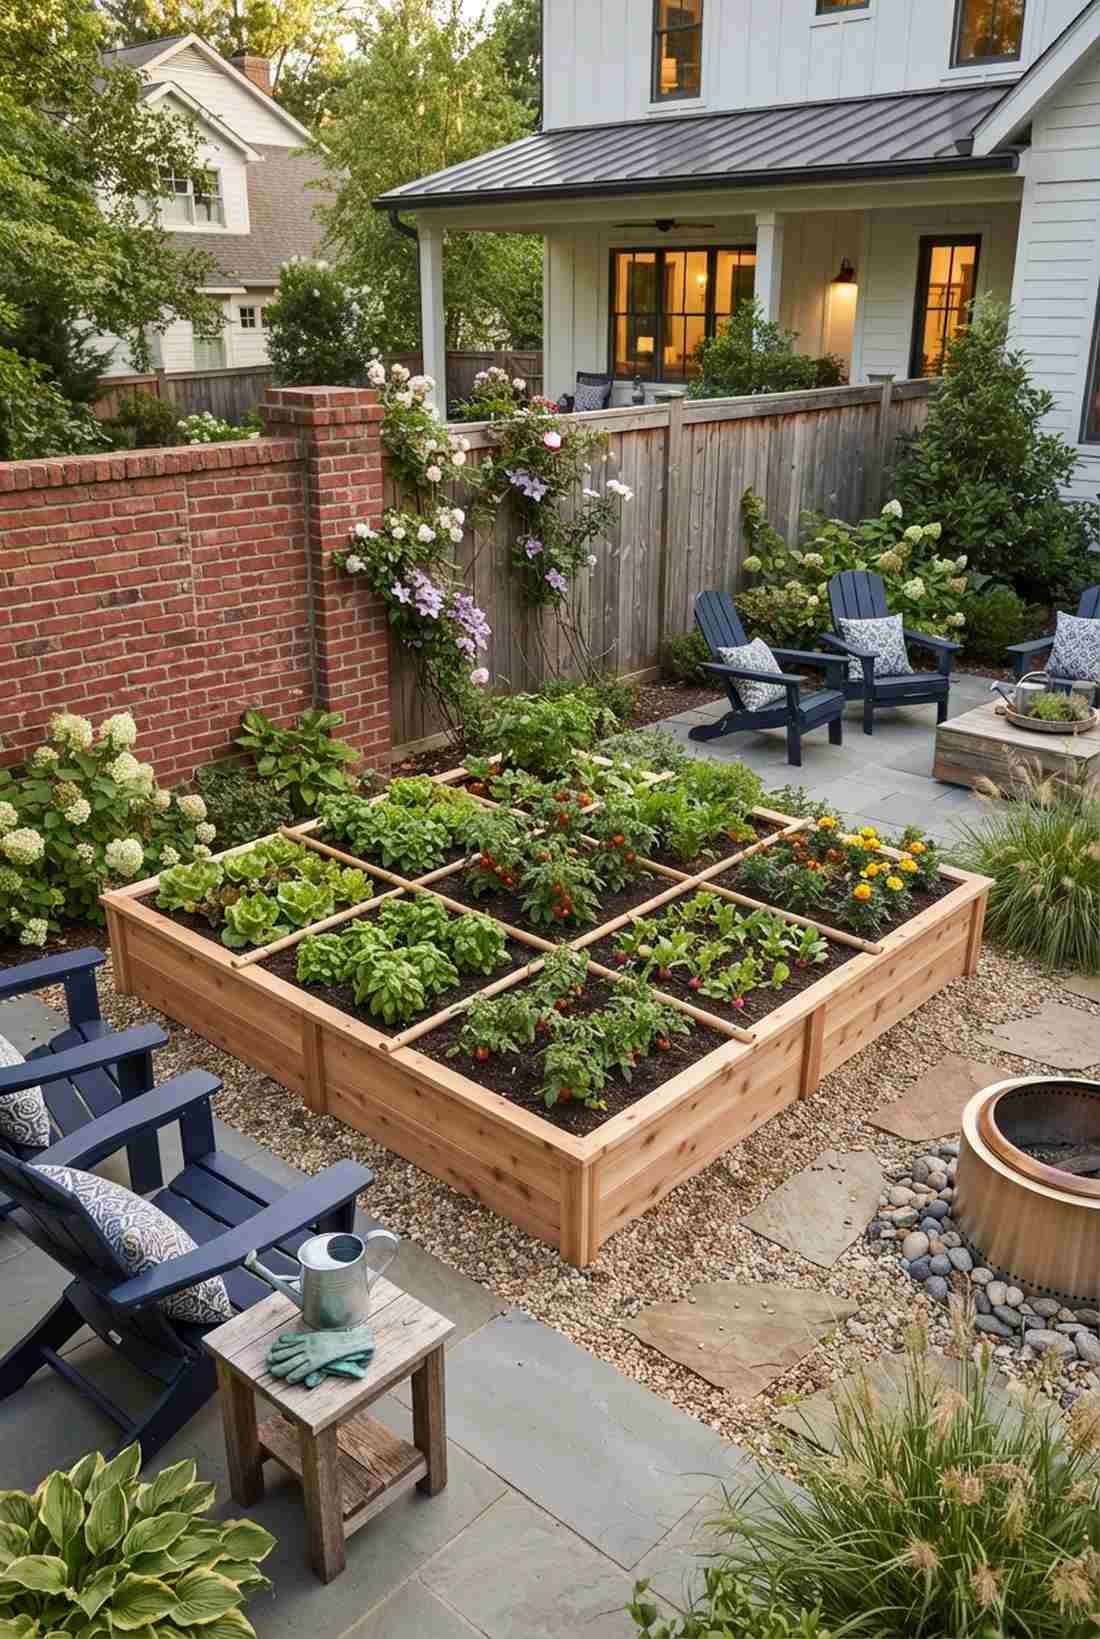
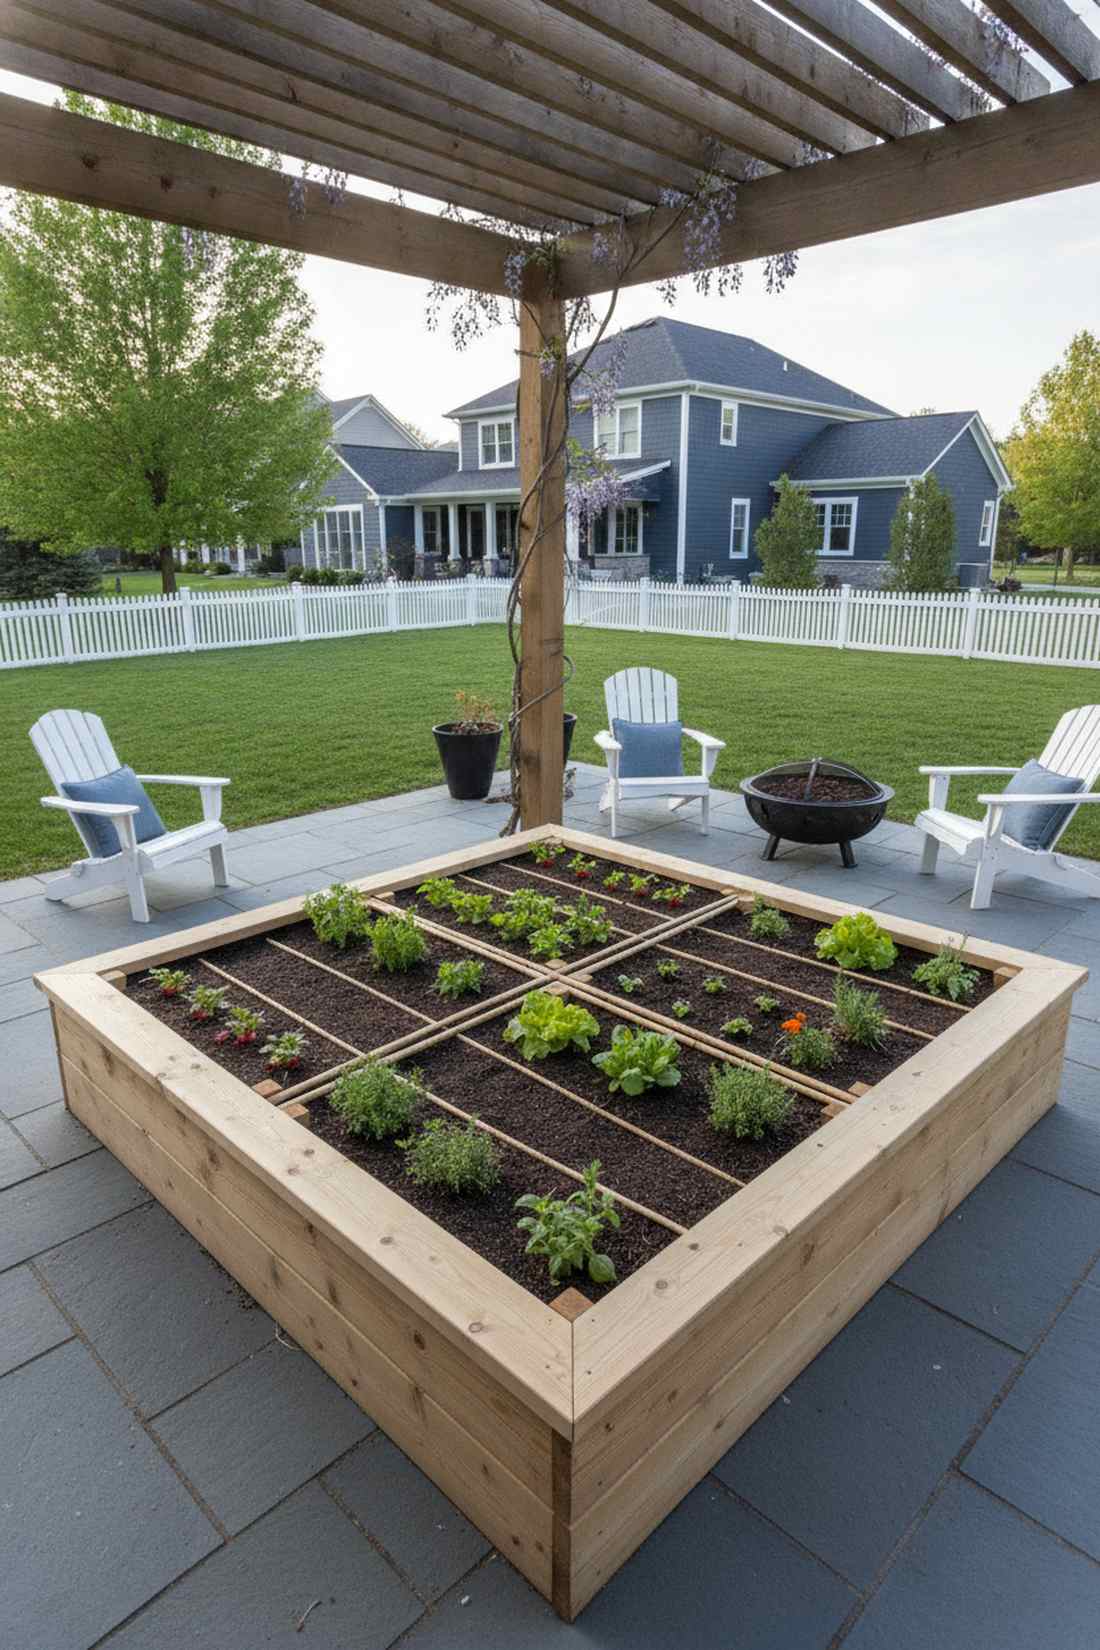
Exudes the meticulous charm of an organized botanical exhibit, hitting the mark perfectly as a square-foot garden planner layout. It fits miraculously well into awkwardly square courtyard corners.
Gardeners often waste space with random planting, but a strict geometric grid forces absolute efficiency. Grabbing some premium garden soil mix ensures these tight quarters pump out maximum foliage. It gives a designer-level finish when gridded with sleek bamboo slats.
You can throw this together for merely $25–$40 for the raw shell.
- Key Materials: Bamboo dividing markers
- Vibe / Style: Modern Grid
- Difficulty: Beginner friendly
- Budget Breakdown: Box materials: $20 | Grids: $15
- Creator’s Tip: Use twine or thin wood strips permanently screwed to the top edge to maintain your planting zones permanently.
- Smart Sourcing: Pre-cut square foot gardening templates or Bulk pack bamboo garden stakes.
This next setup is ridiculously cheap but looks like a $300 custom terraced display…
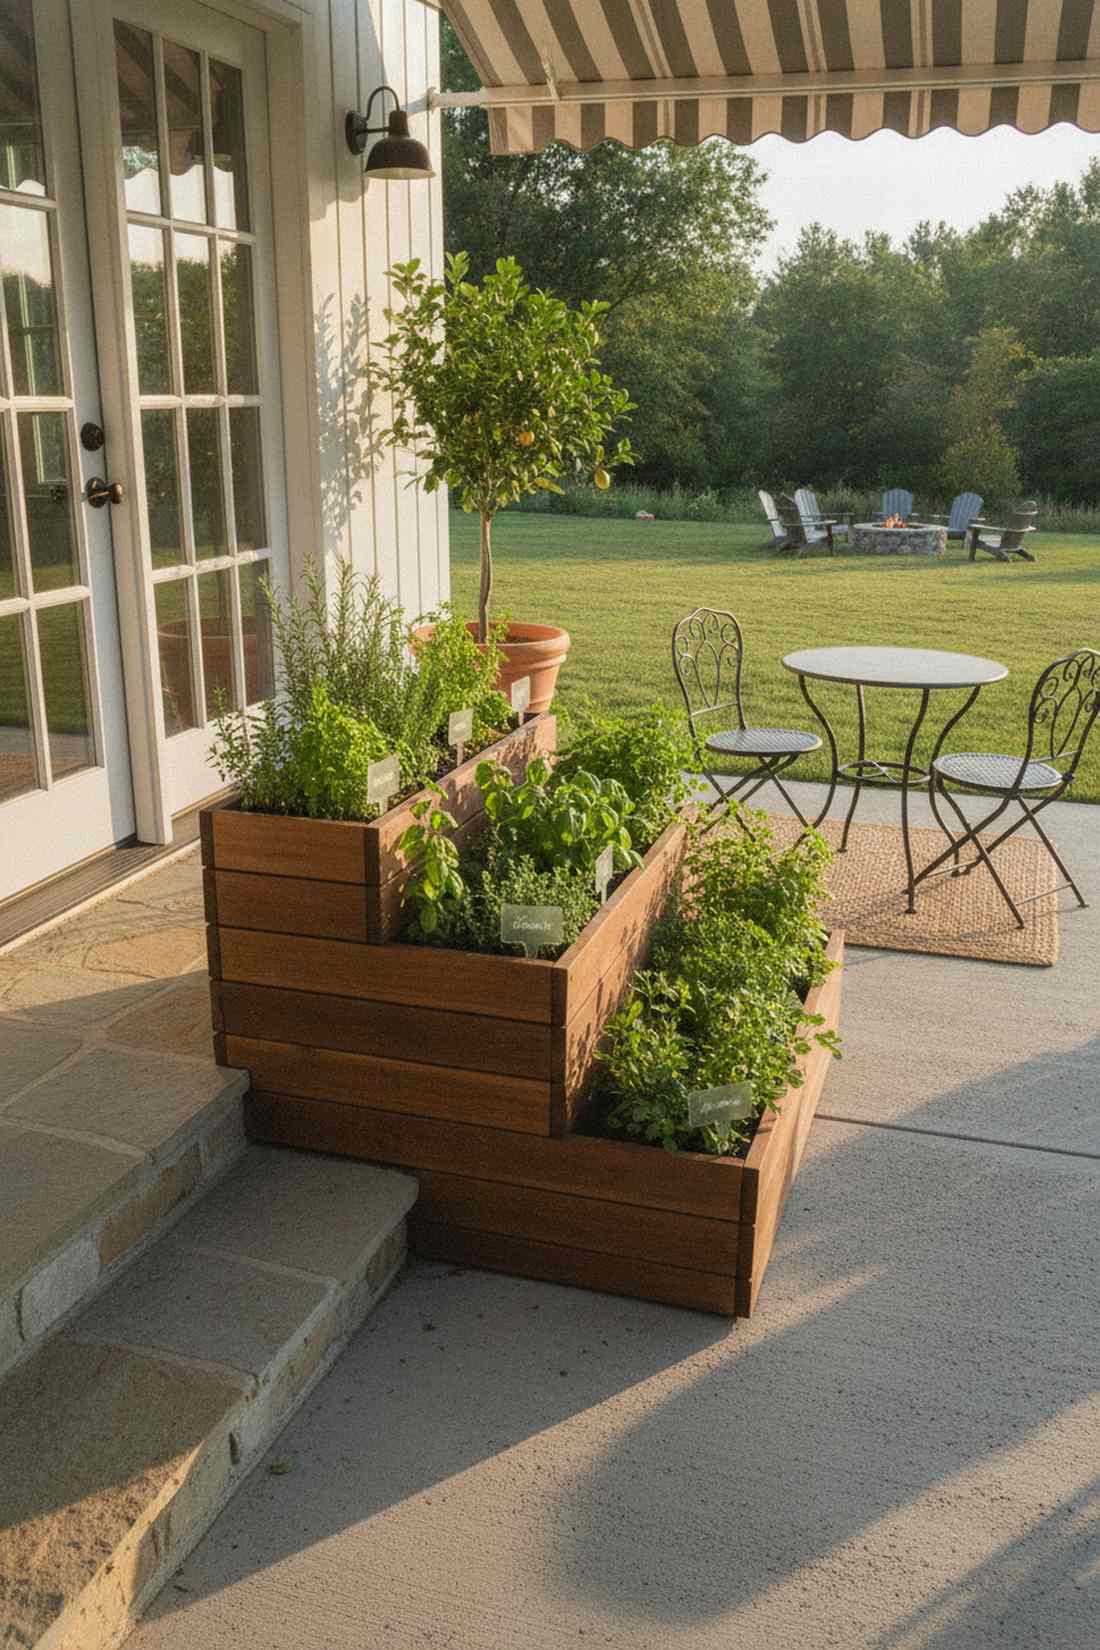
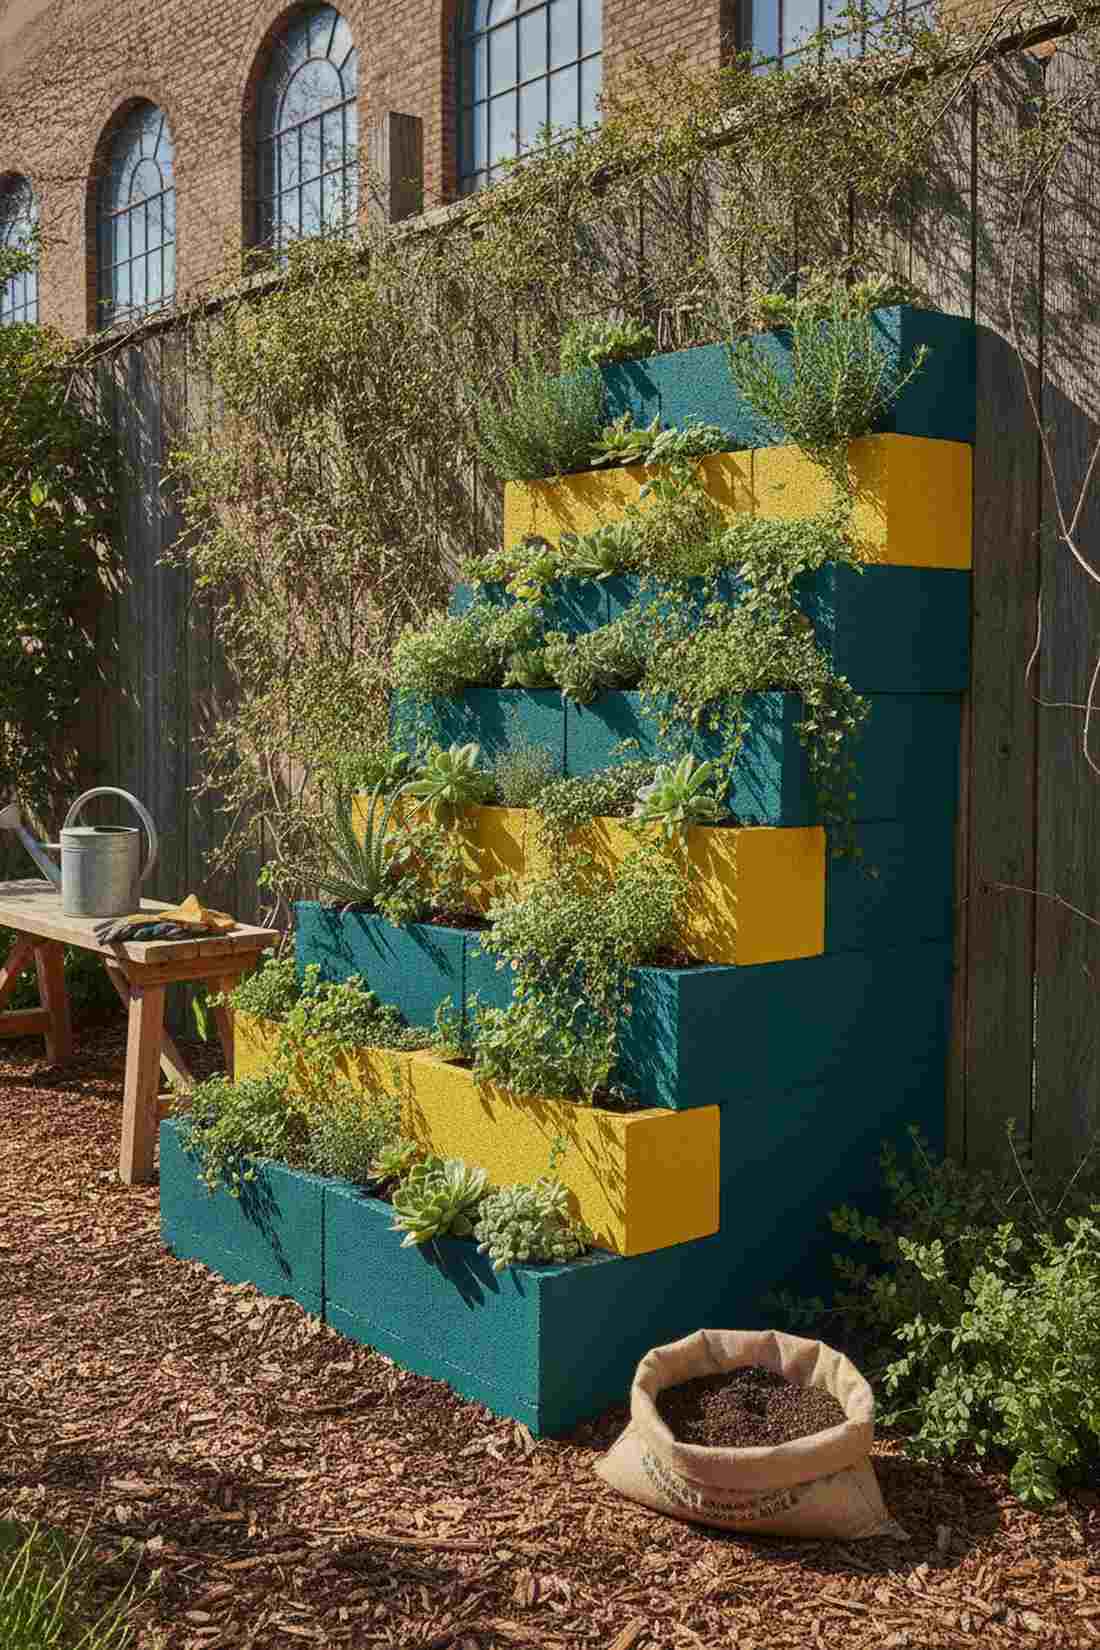
5. Tiered Step Bed System
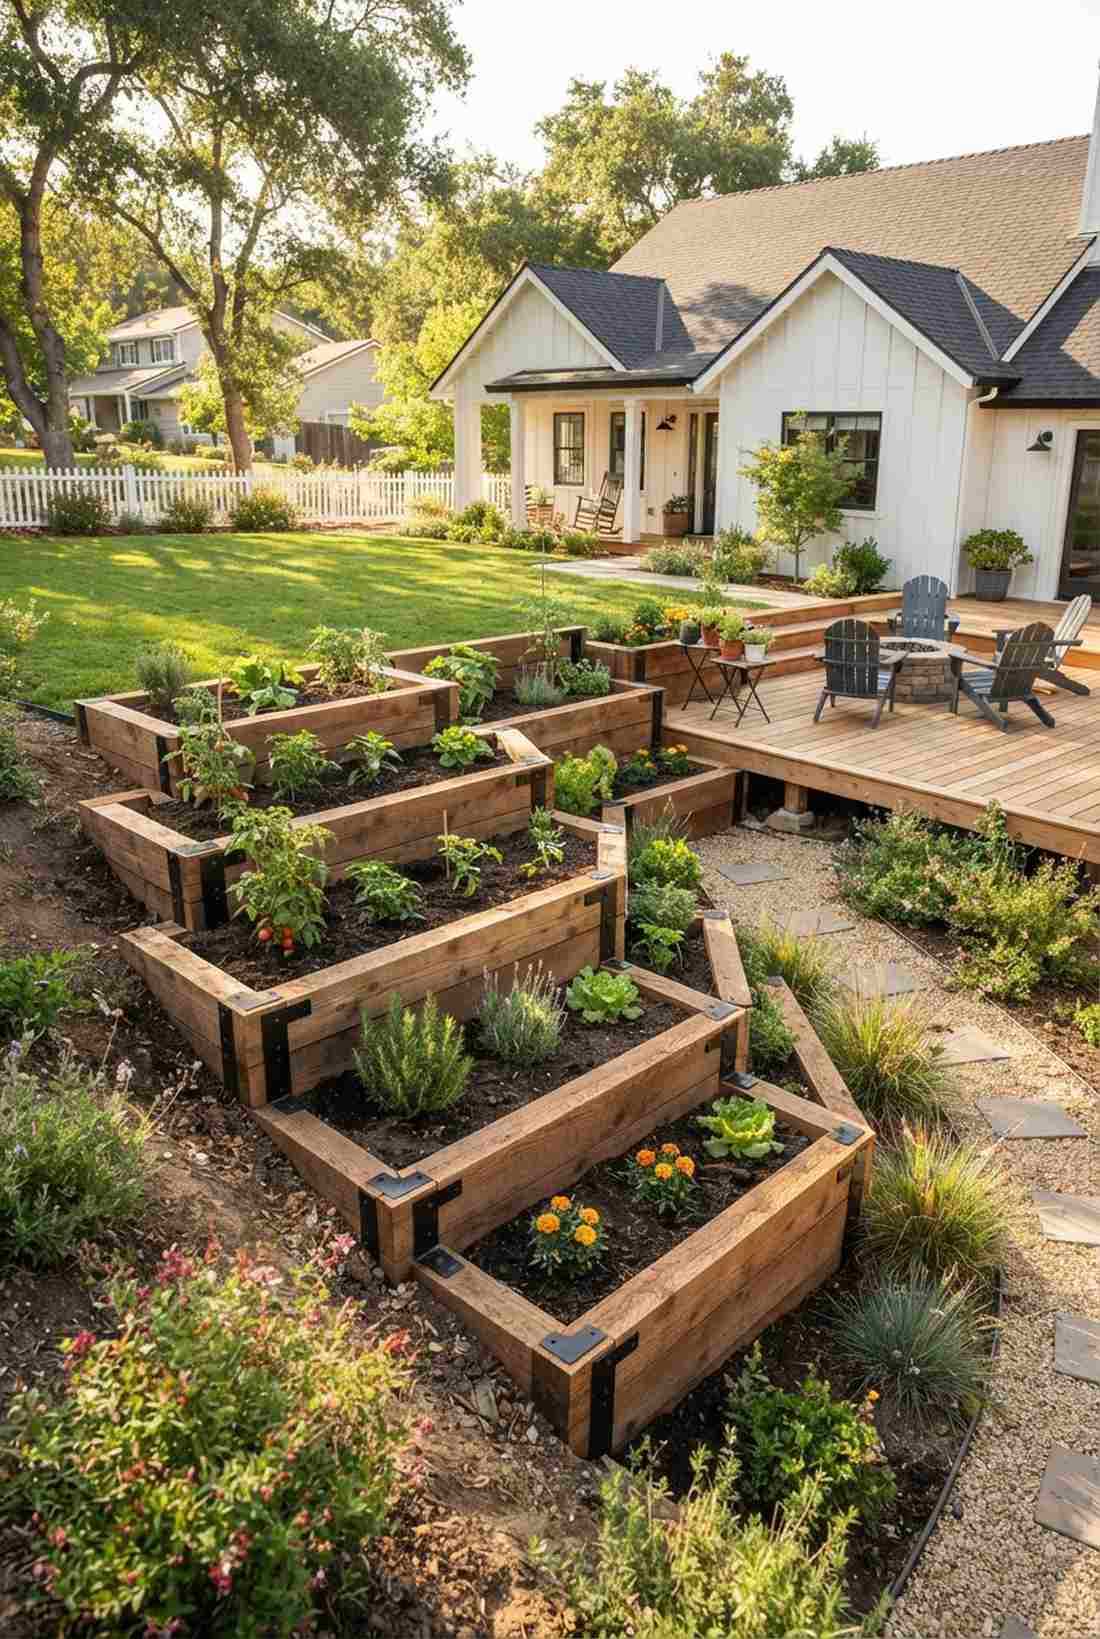
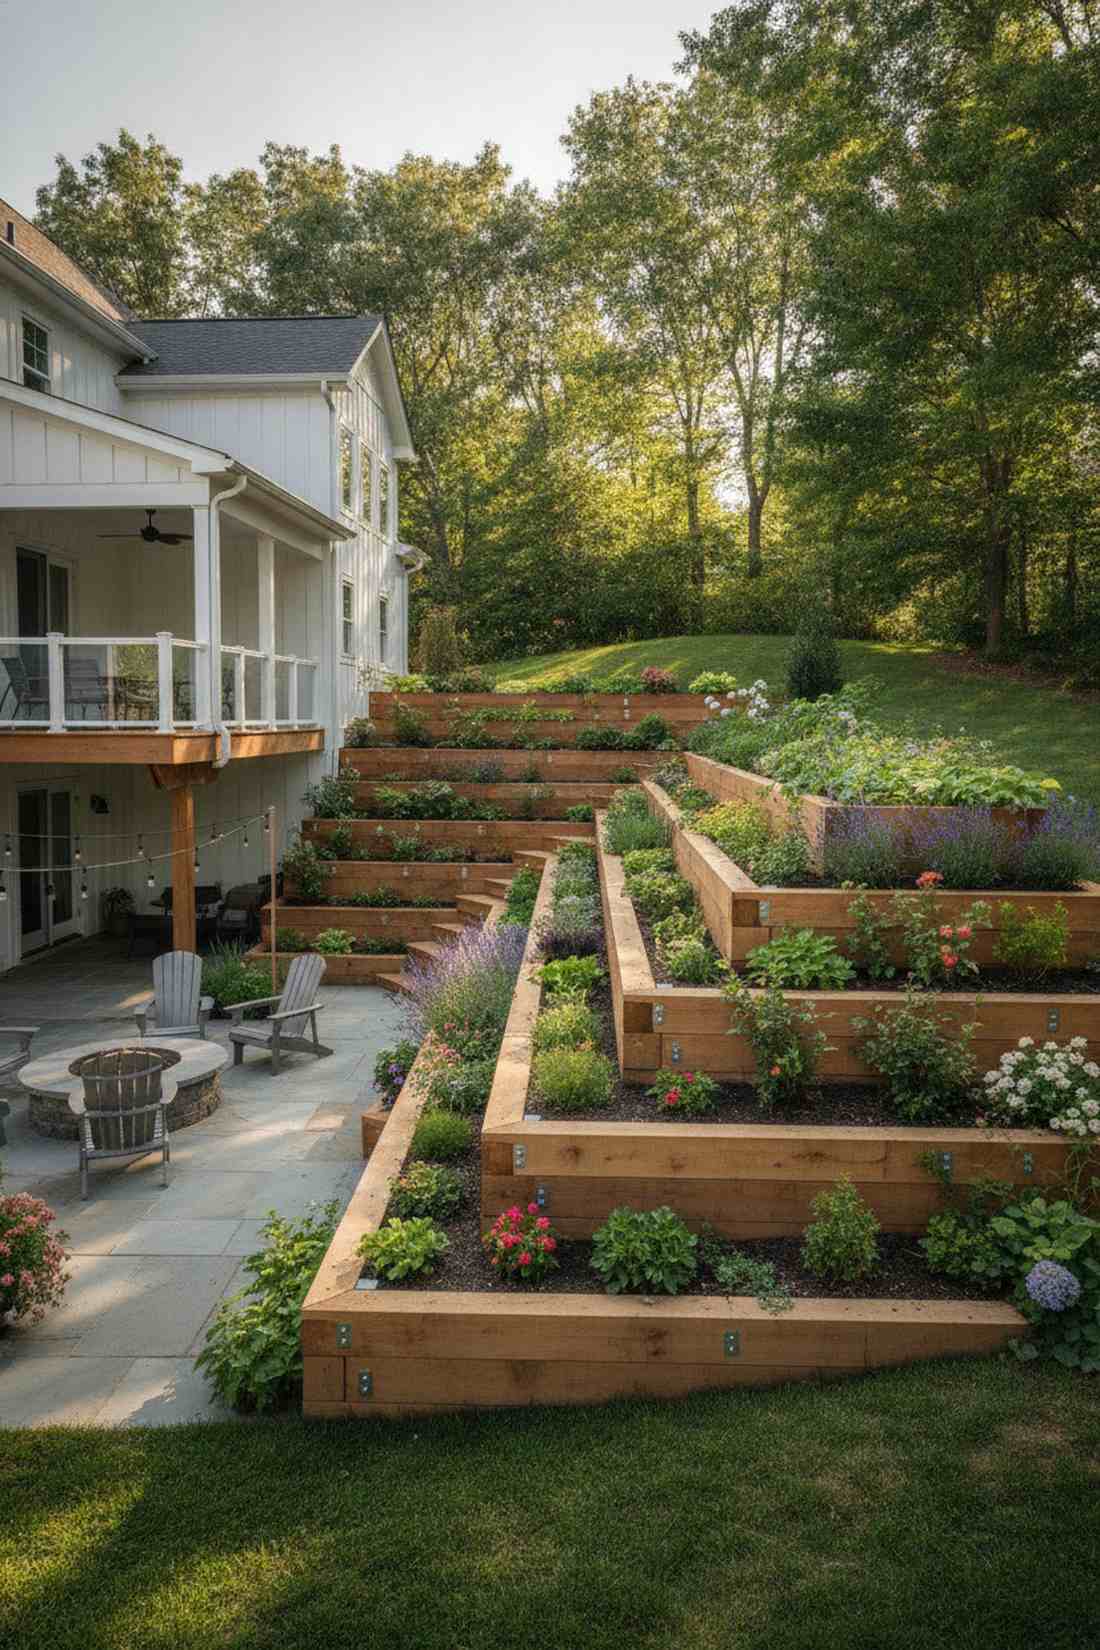
Instantly brings the drama of a hillside vineyard down to your level, acting perfectly as a sloped yard landscaping solution. Brilliant for uneven terrain that usually washes out during heavy rain.
Landscapers charge thousands to correct slopes, but cascading wooden steps handle it beautifully. Incorporating heavy-duty retaining wall hardware keeps the soil blocks strictly in place. The resulting amphitheater aesthetic outshines basic flat boxes completely.
Plan on a budget of around $70–$120 for the stepped timber. Save this to your landscape problem-solvers board for later.
- Key Materials: Heavy-duty timber screws
- Vibe / Style: Terraced Vineyard
- Difficulty: Intermediate leveling
- Budget Breakdown: Timber: $80 | Soil/Screws: $40
- Creator’s Tip: Always overlap your corner joints heavily on the bottom tier; it takes the brunt of the water weight.
- Smart Sourcing: Pre-drilled modular corner brackets (bulk pack) or Waterproof wood sealant gallons.
6. Corner Accent Bed
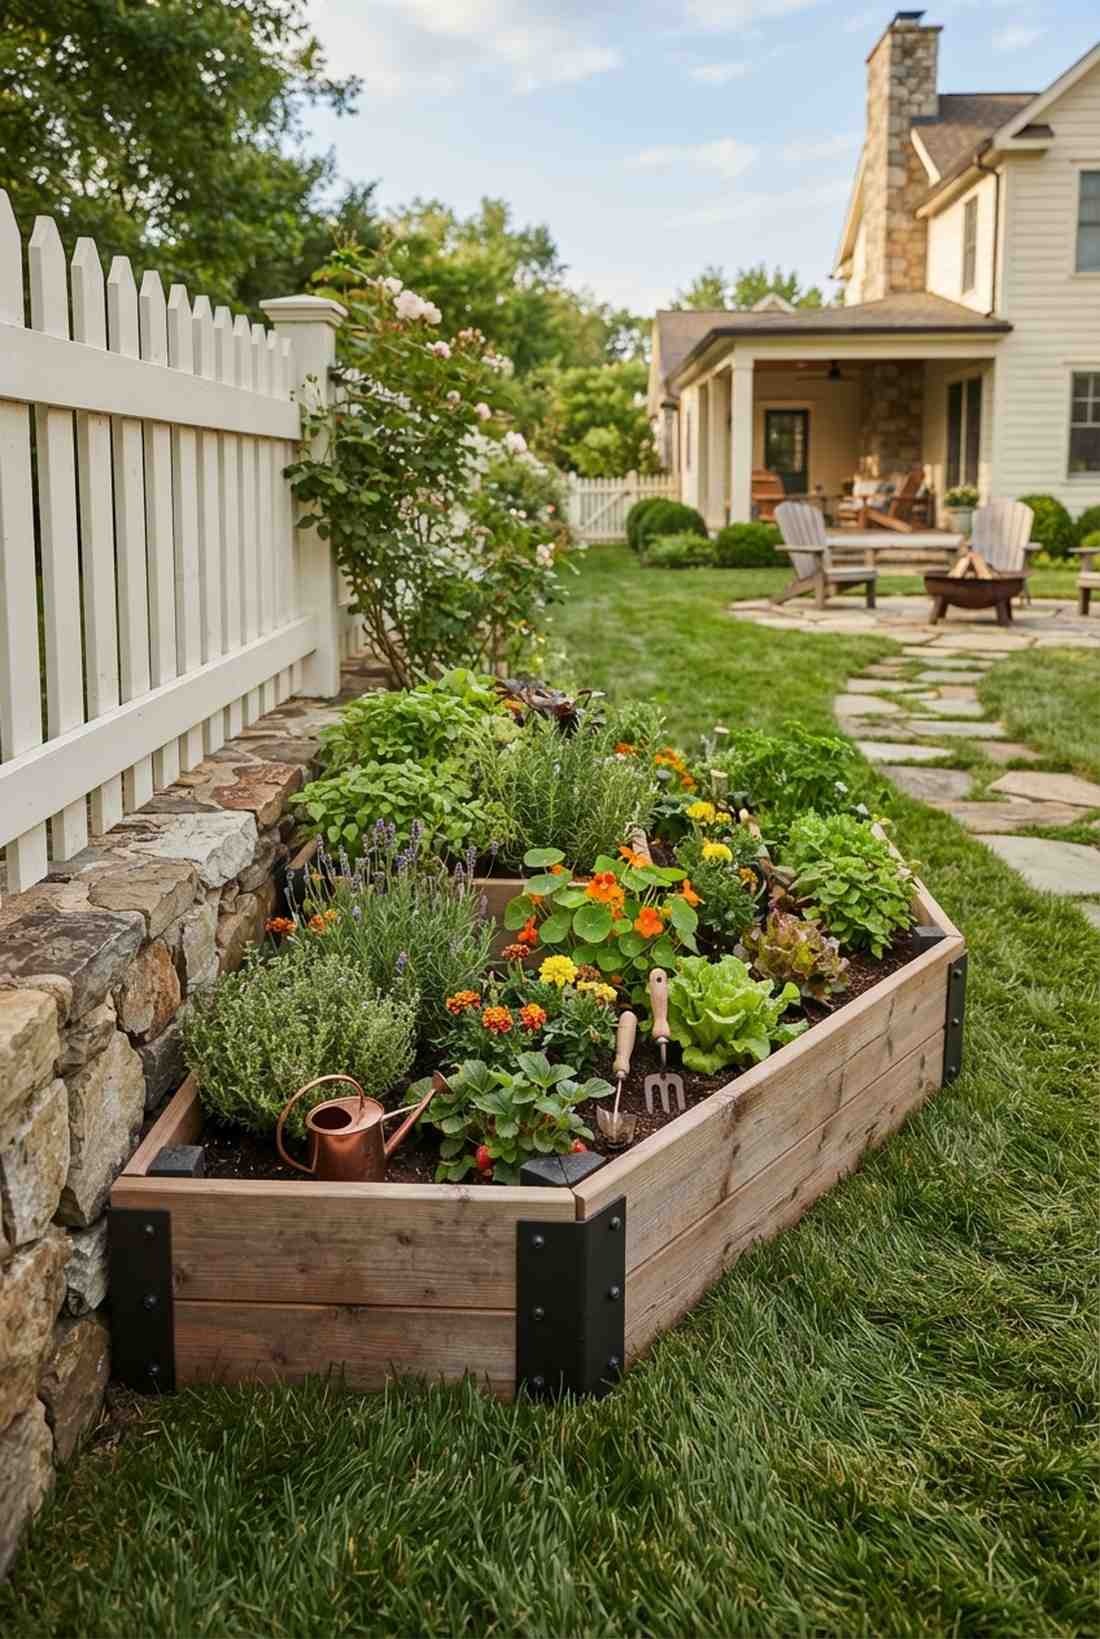
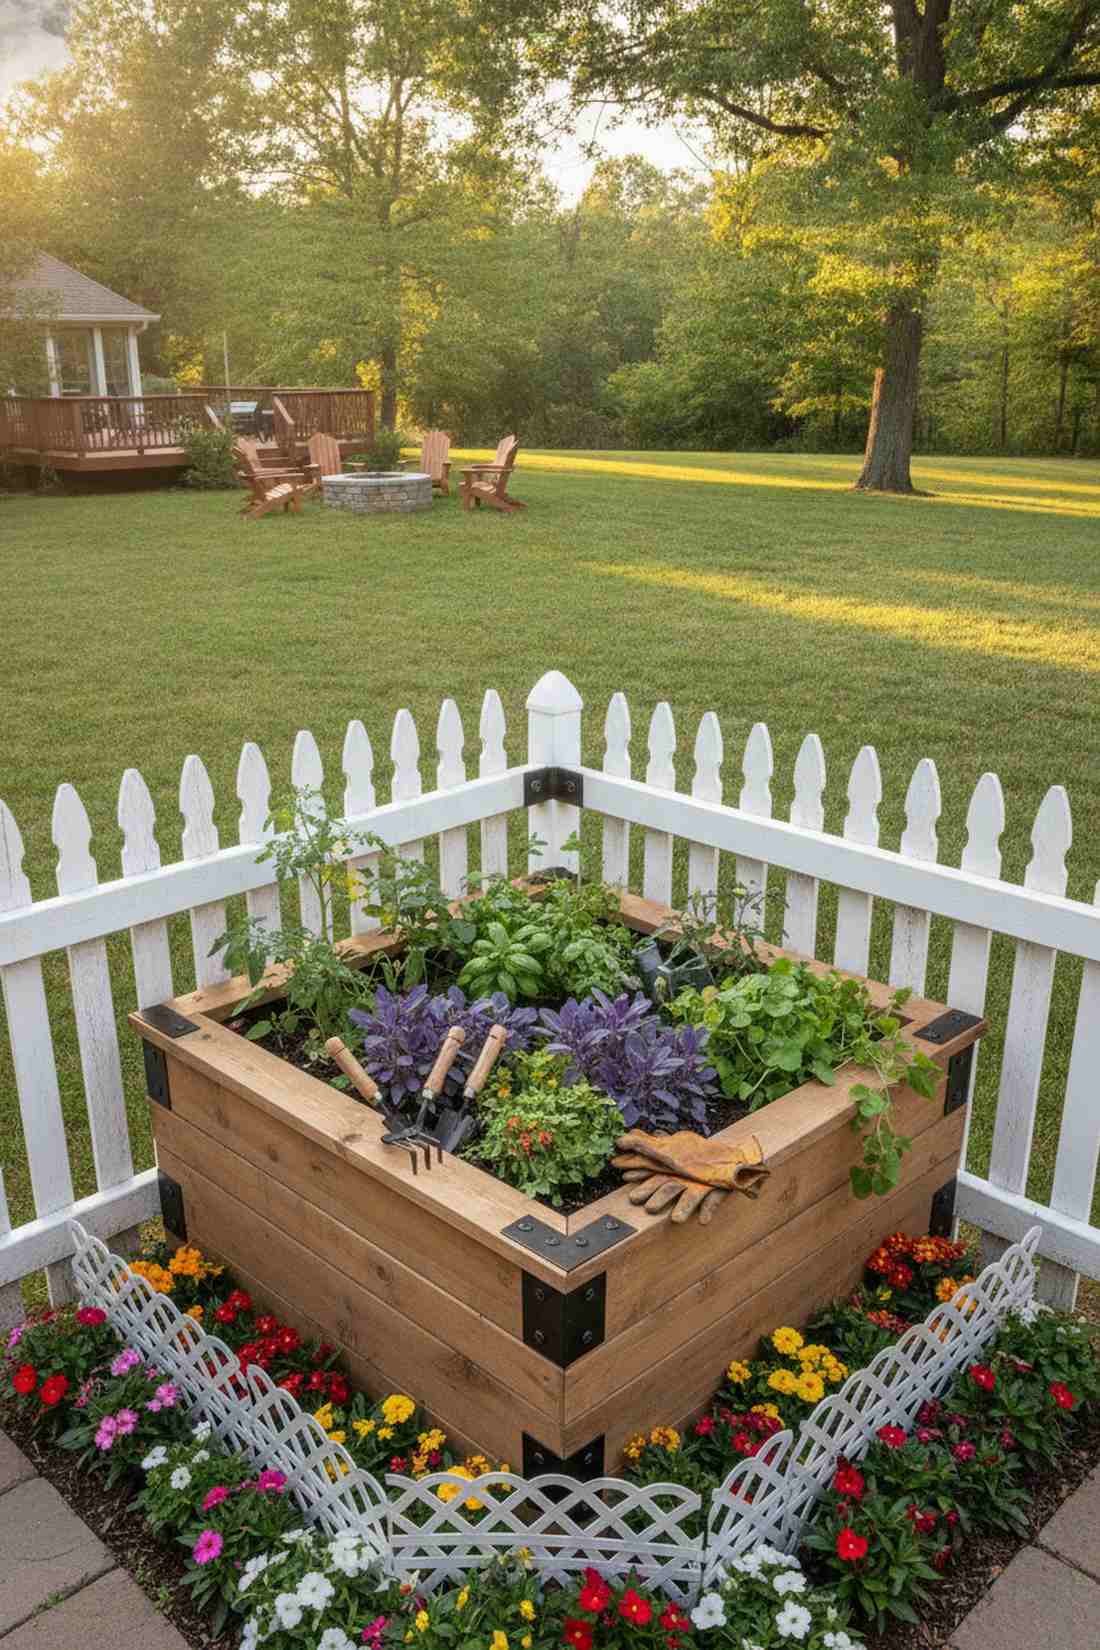
Radiates the quaint energy of a hidden architectural gem, functioning flawlessly as a fence corner focal point. A massive win for tight, dead-space angles where mowers struggle to reach.
Many homeowners ignore corners completely, but wrapping an angled box here tricks the eye into seeing a larger yard. Throwing in some miniature garden supplies alongside edible plants creates an enchanting layered effect. It transforms an awkward void into the hottest visual asset on the property.
This customized wedge usually costs $40–$60 in custom cuts. Highly recommended for a quick weekend curb-appeal win.
- Key Materials: Custom-angle mending plates
- Vibe / Style: Cozy Cottage Corner
- Difficulty: Requires angular cuts
- Budget Breakdown: Wood: $35 | Corner Hardware: $15
- Creator’s Tip: Use a miter saw to get clean 45-degree angles, then reinforce the inside with 2×2 stakes driven into the dirt.
- Smart Sourcing: Adjustable heavy-duty angle brackets or UV-coated decorative garden fencing.
7. Narrow Border Bed

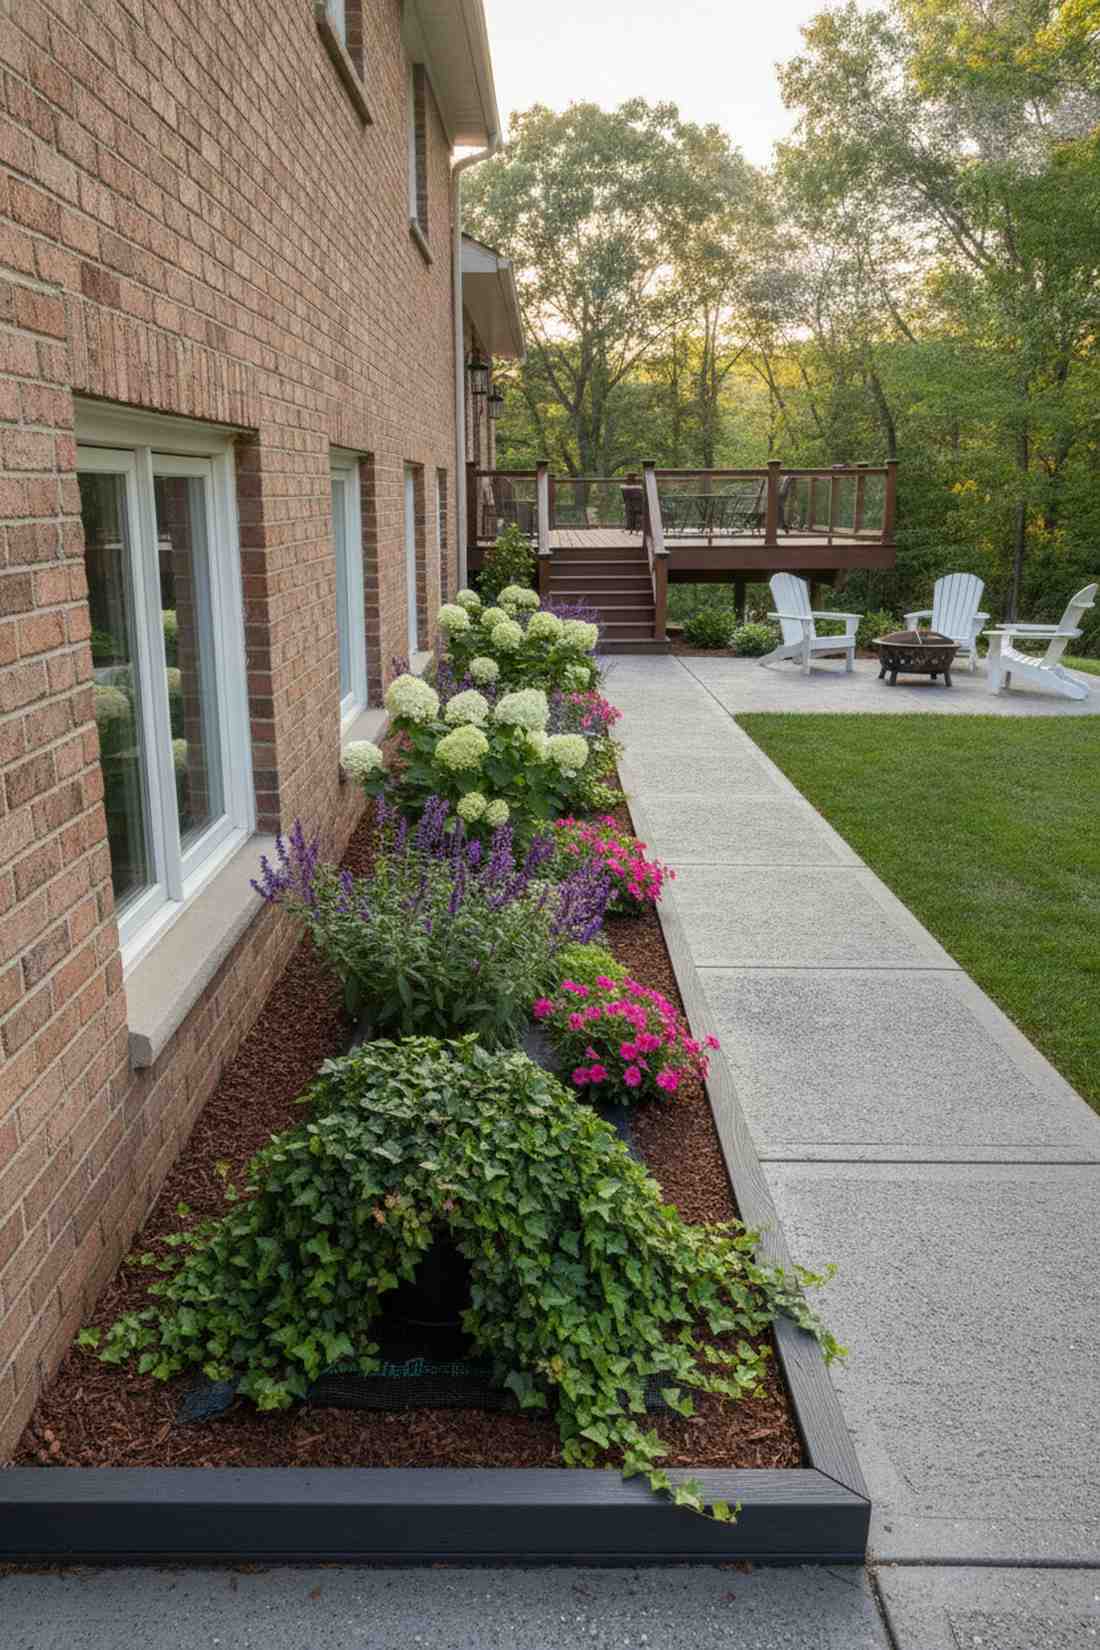
Delivers the crisp lines of a high-end estate walkway, acting as a stunning foundation planting border. Incredible for sliding right alongside brick walls or directly beneath low windowsills.
Most folks think you need depth for a real garden, but two-foot widths push the blooms right up to the walkway. By filling it with a premium potting soil blend, even deep roots find plenty of nutrients. It creates an instant lush corridor that feels meticulously planned.
Setting up this skinny strip costs around $30–$55. Pin this layout if you need to soften a harsh concrete path.
- Key Materials: Slim profile composite boards
- Vibe / Style: Elegant Corridor
- Difficulty: Easy straight build
- Budget Breakdown: Boards: $30 | Dirt: $25
- Creator’s Tip: Plant trailing vines at the front edge to spill over and soften the wooden or composite border lines.
- Smart Sourcing: Slim modular raised bed kits or Pre-cut weed barrier strips.
8. Modular Interlocking System
Gives off the hyper-efficient vibe of a futuristic eco-pod, serving as the ultimate expandable garden framework. Best for renters or new gardeners who might need to completely shift their layout next season.
Rigid designs punish you if you change your mind, whereas these puzzle-piece boxes adapt instantly. Grabbing specialized composite interlocking bed kits means zero tools and zero splinters. It’s the ultimate hack for getting a level, clean setup without ever touching a saw.
A starter pack of modules hovers around $60–$90 online.
- Key Materials: Tool-free interlocking panels
- Vibe / Style: Ultra-Modern Adaptable
- Difficulty: Extremely easy
- Budget Breakdown: Modular Kit: $75 | Soil filler: $20
- Creator’s Tip: Set them up on top of a crushed gravel base; it makes moving and re-leveling them infinitely easier later.
- Smart Sourcing: Tool-free composite planter kits (4-pack) or Heavy-duty modular corner hinges.
Most people get this completely wrong… until they discover the game-changing ergonomic setup coming up next.
💡 Must-Have Supplies for High-End Setups
To build these setups faster and ensure they last, skip the generic craft aisles and invest in the right foundational kits.
- Base & Support: Heavy-duty galvanized steel corner brackets (Bulk Pack)
- Setup Tools: Premium automatic drip irrigation starter kits
- Weather/Durability Protection: Eco-friendly waterproof wood sealant spray
Elevated & Accessible Raised Beds Garden Configurations
Elevated designs bring growing surfaces to comfortable working heights that eliminate bending and kneeling. These raised beds gardening solutions serve aging gardeners, those with mobility challenges, and anyone prioritizing ergonomic garden maintenance.
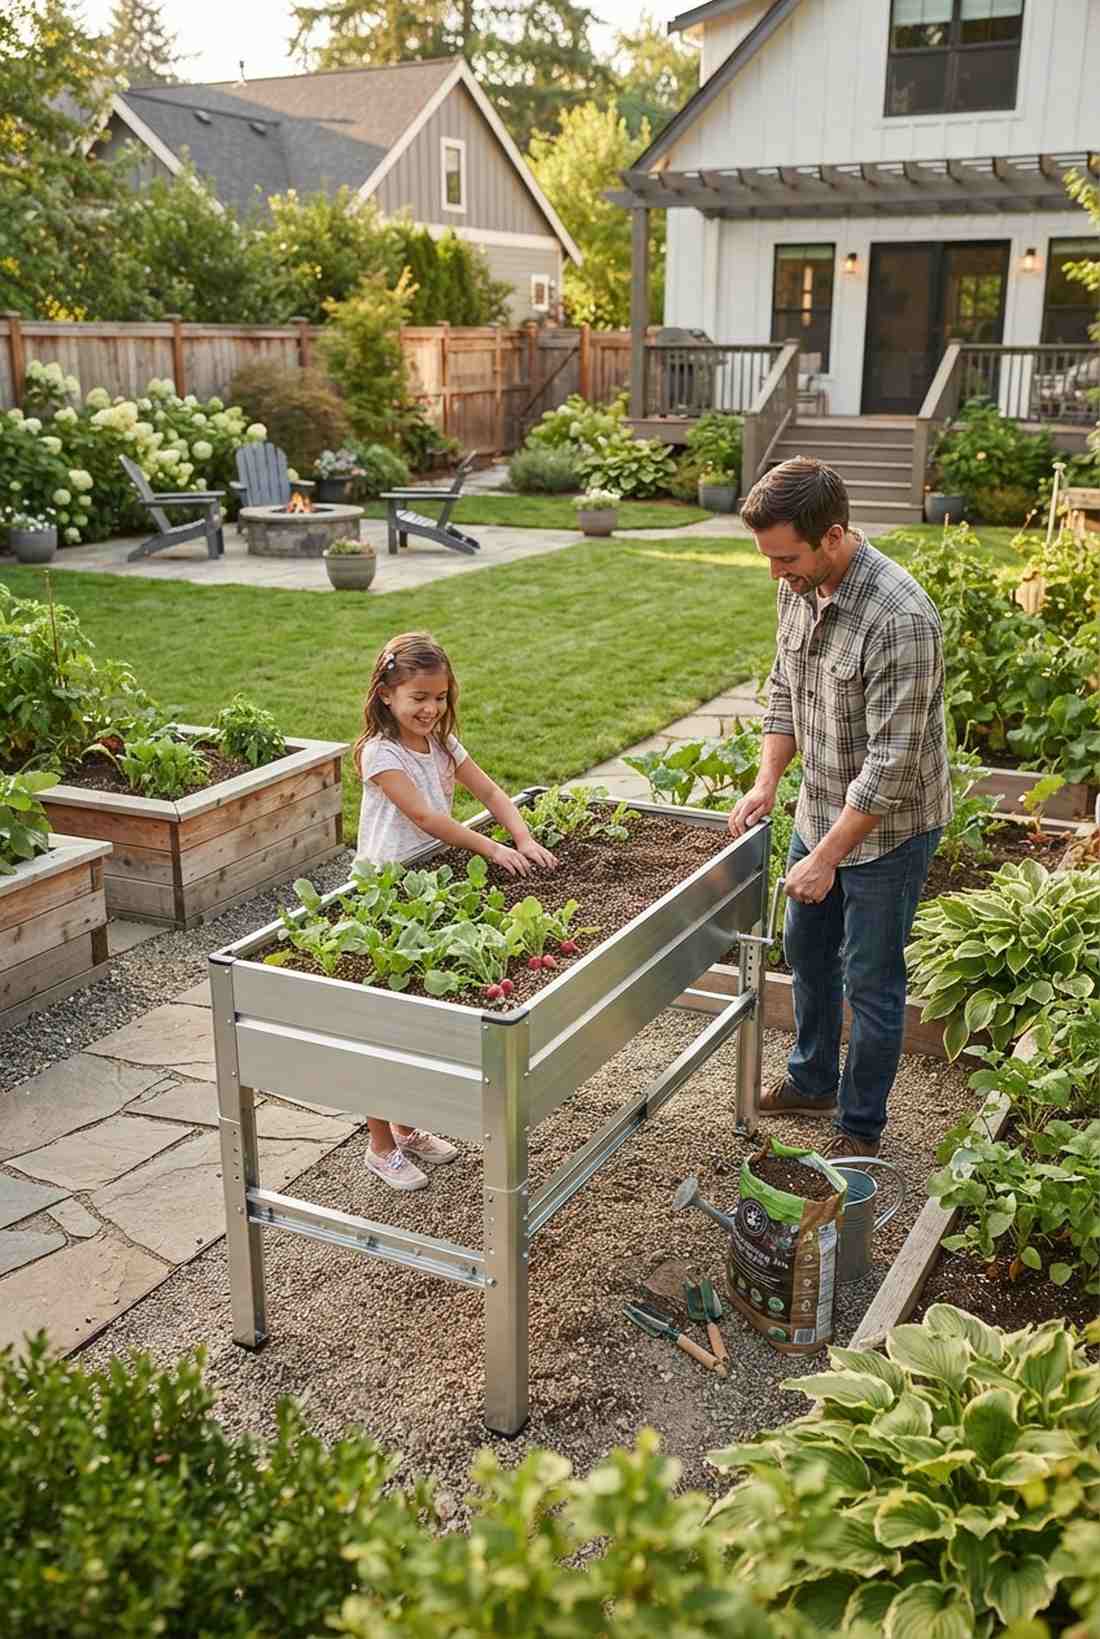
9. Waist-High Standing Bed
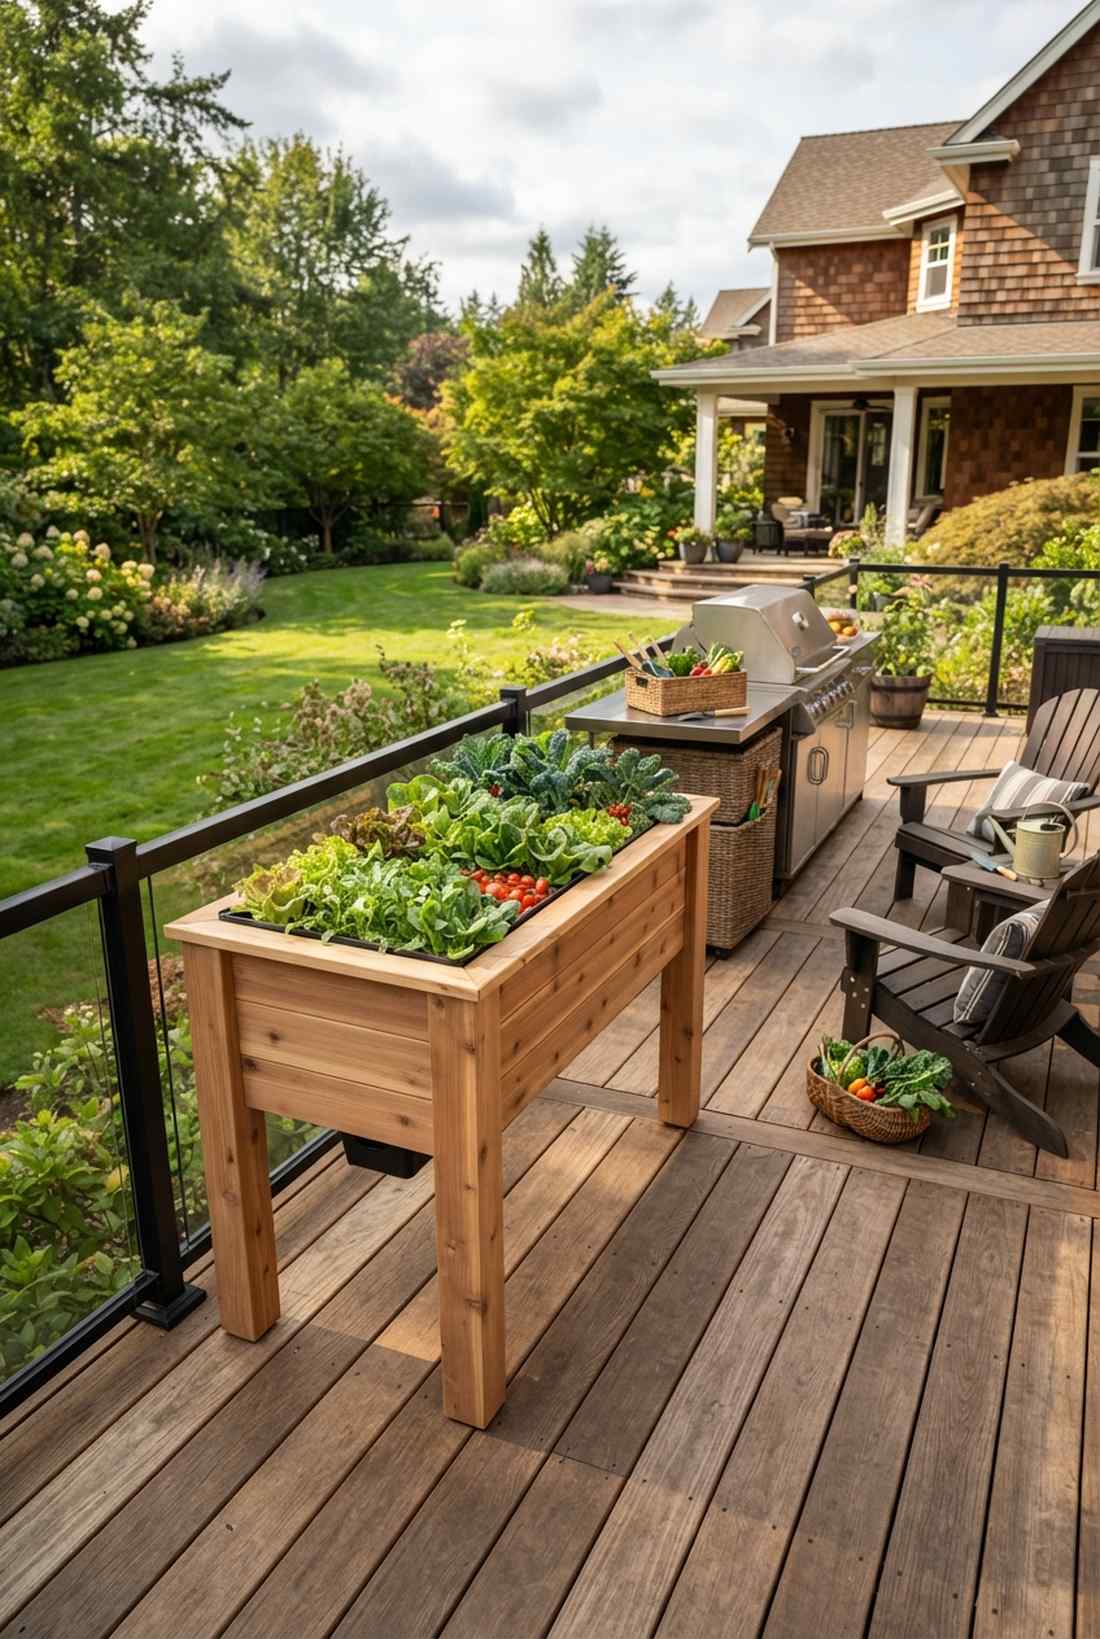
Radiates the clean luxury of an outdoor chef’s prep station, shining as a top-tier ergonomic patio planter. Phenomenal for deck corners where you want to harvest salad greens without ever bending down.
Ground-level boxes murder your lower back, but lifting the earth changes the entire hobby. Snagging some high-end self-watering container systems to drop inside keeps the moisture perfect despite the elevation. The sheer convenience makes it look and feel like a wealthy lifestyle upgrade.
Creating this lifted oasis runs between $80–$150. Save this to your back-friendly DIY garden board immediately.
- Key Materials: Sturdy 4×4 support posts
- Vibe / Style: Gourmet Deck Setup
- Difficulty: Intermediate woodworking
- Budget Breakdown: Heavy timber: $100 | Liner: $20
- Creator’s Tip: Use a false bottom made of sealed plywood half-way down so you don’t have to fill 3 feet of pure soil.
- Smart Sourcing: Pre-cut elevated cedar planter kits or Heavy-duty waterproof bed liners.
10. Wheelchair-Accessible Table Bed
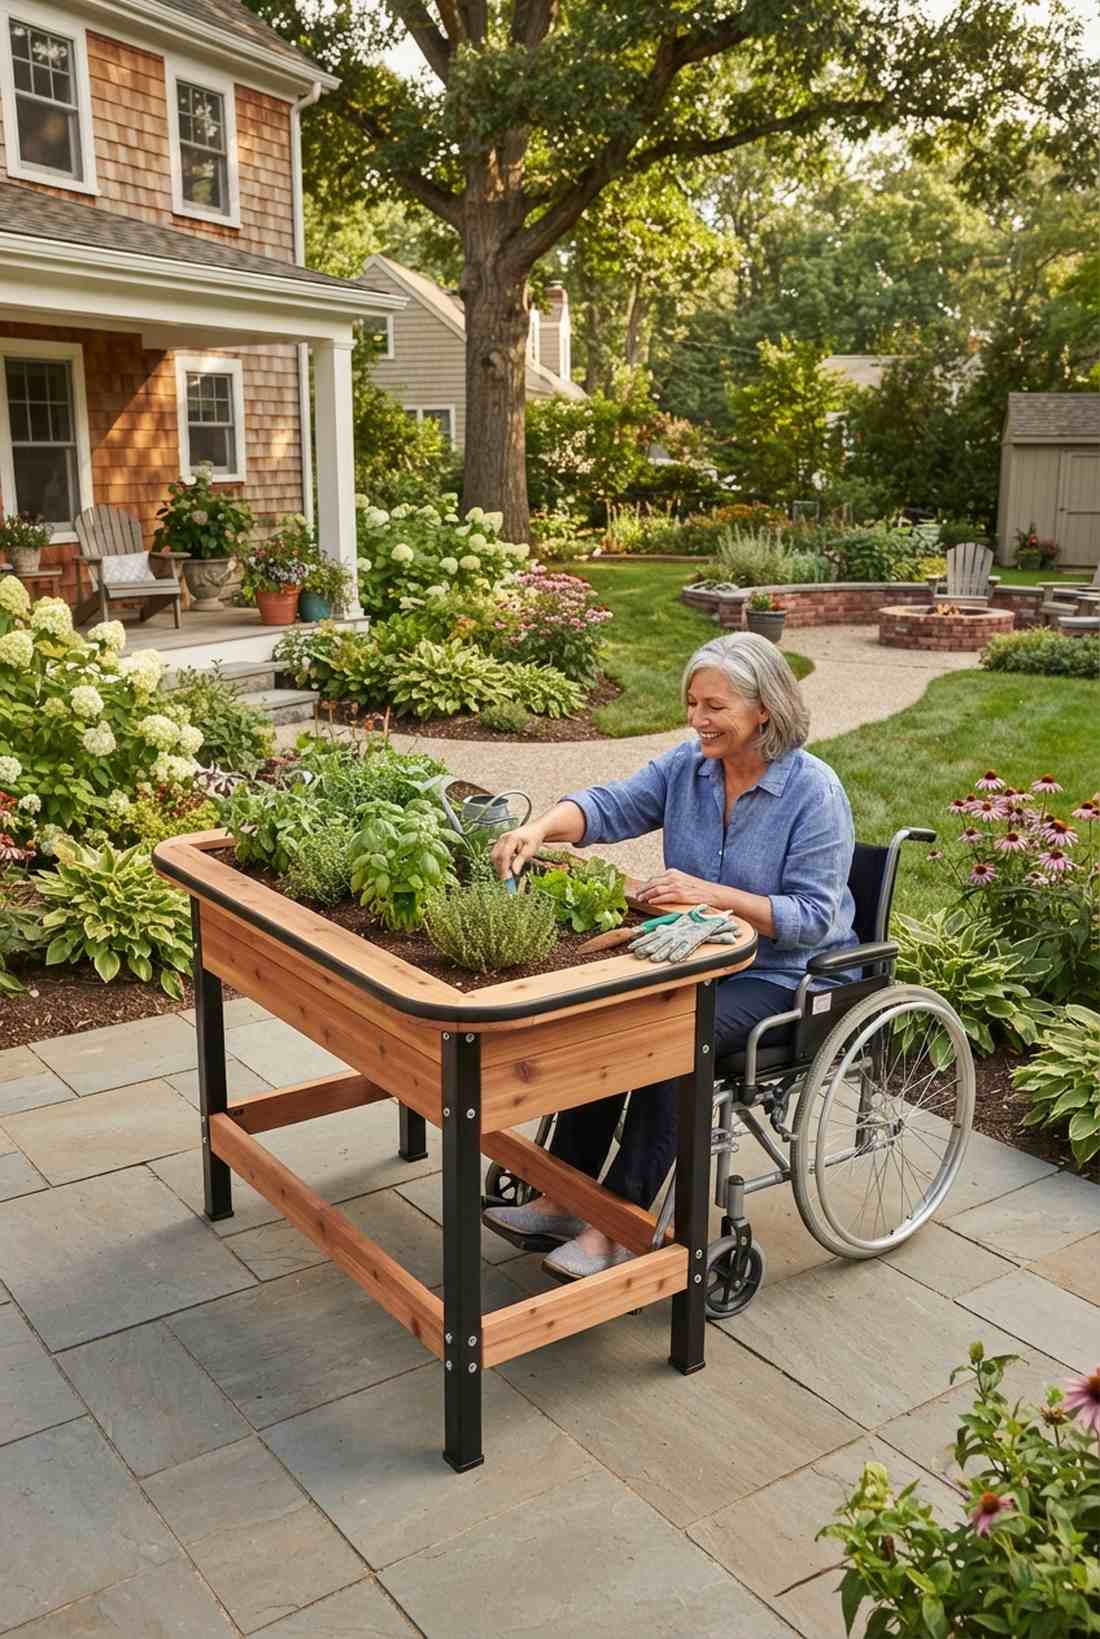
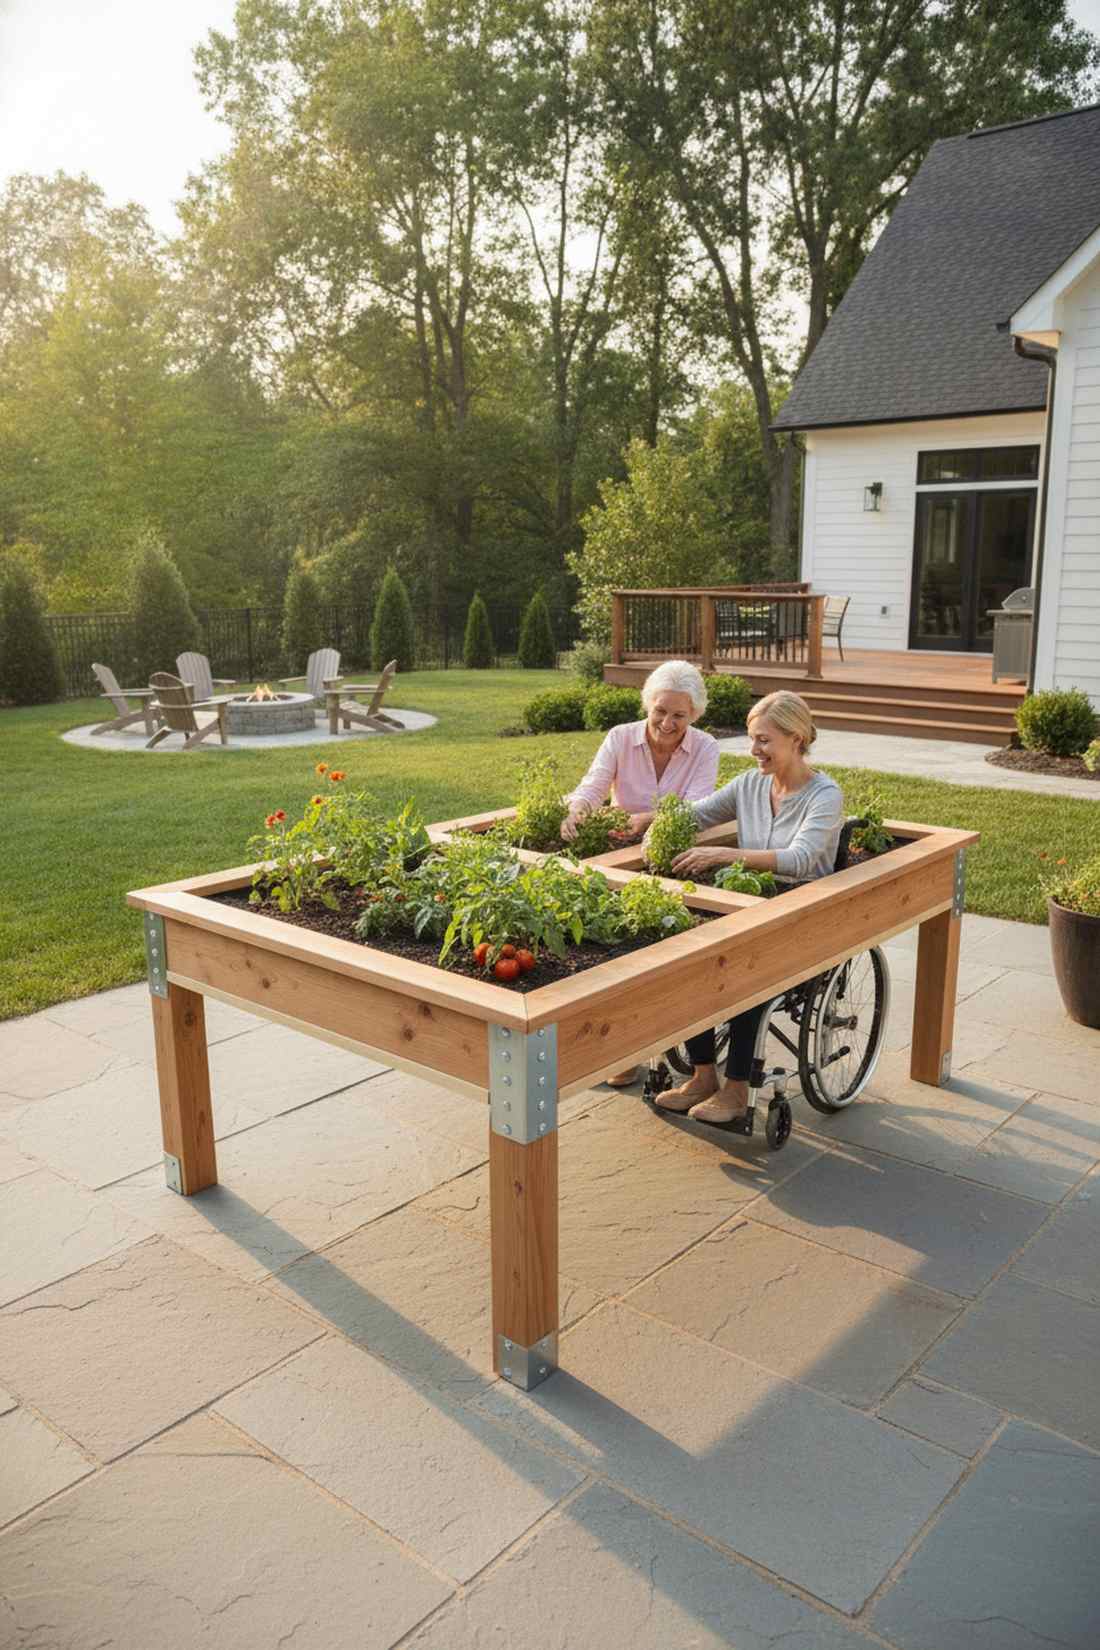
Brings a deeply thoughtful, inclusive warmth to the yard, operating beautifully as an ADA-compliant garden table. Absolute perfection for therapy centers, flat patios, or multigenerational family homes.
Standard boxes lock out anyone with mobility issues, but an open-underbelly design invites everyone to the dirt. Bolting in rust-proof galvanized steel hardware ensures the cantilevered edges never sag. It delivers immense practical value while looking like a custom-ordered landscape feature.
Building this supportive structure costs roughly $100–$160. A life-changing upgrade that completely democratizes your outdoor space.
- Key Materials: Heavy-gauge support brackets
- Vibe / Style: Universal Design
- Difficulty: Advanced bracing
- Budget Breakdown: Lumber: $90 | Heavy Hardware: $40
- Creator’s Tip: Wrap the bottom edge of the grow tray in smooth edge-banding to prevent any knee scrapes when rolling under.
- Smart Sourcing: Steel table-leg corner supports or Pre-fabricated accessible metal planter kits.
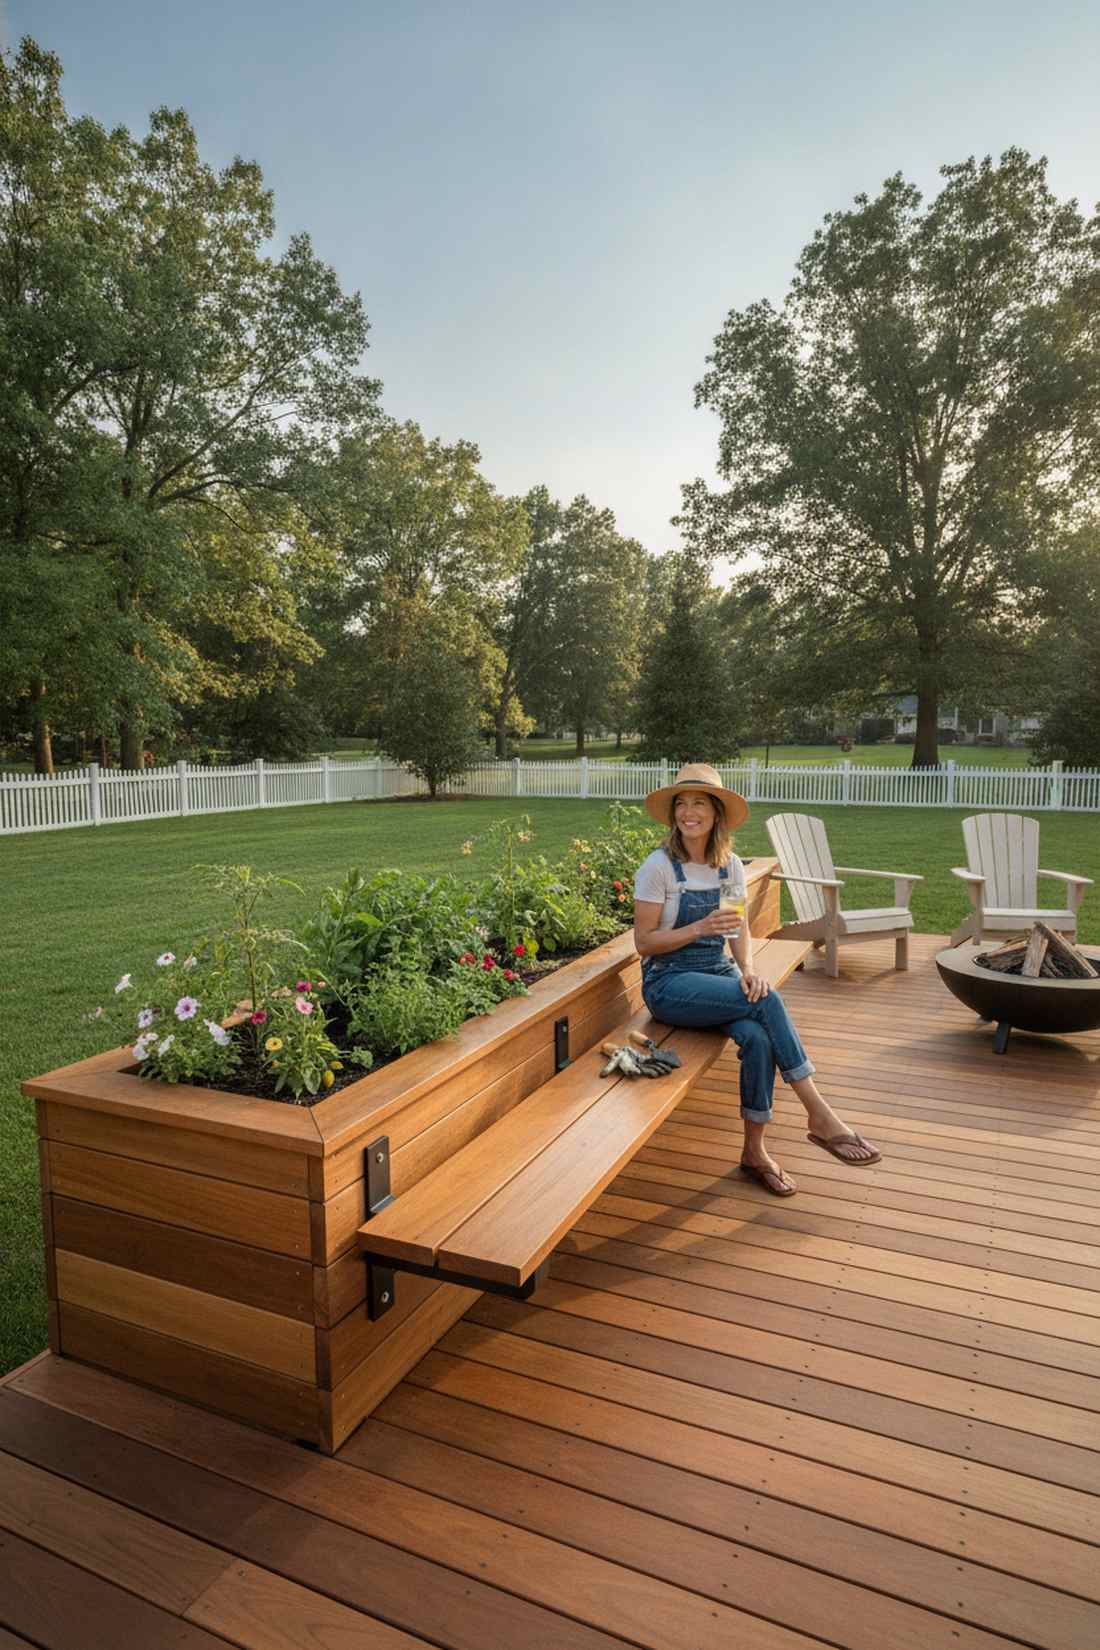
11. Bench-Edge Sitting Bed
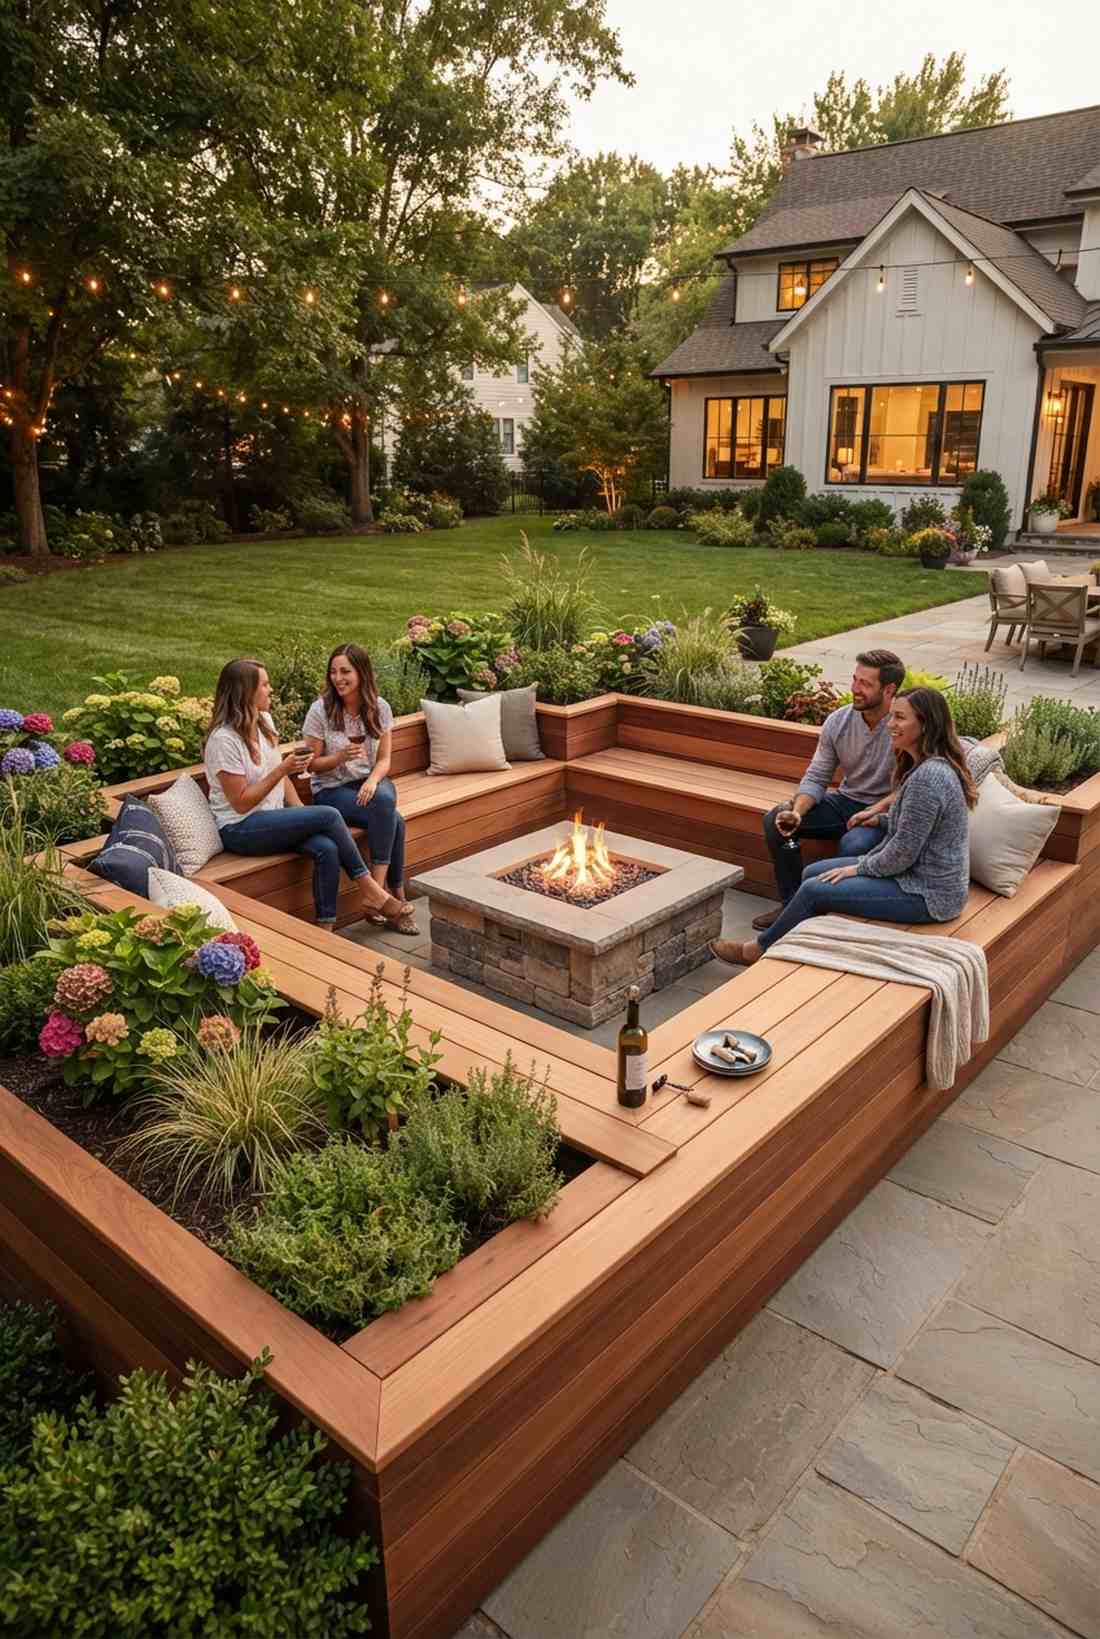
Feels like discovering a secret garden alcove at a luxury resort, working magic as an integrated seating planter. The ultimate choice for fire-pit perimeters where people love to sip wine and chat.
Flimsy thin edges crack when sat on, but capping the perimeter with wide, sanded planks fixes that forever. Utilizing premium deck sealant across the top boards stops splinters and repels morning dew. It instantly doubles the utility of the yard by merging furniture with flora.
You can execute this dual-purpose build for around $75–$130. Pin this if you love hosting outdoor evening gatherings.
- Key Materials: Extra-wide capping planks
- Vibe / Style: Social Sanctuary
- Difficulty: Intermediate carpentry
- Budget Breakdown: Box frame: $60 | Bench cap: $50
- Creator’s Tip: Use hidden deck fasteners from underneath so no ugly screw heads disrupt the smooth sitting surface.
- Smart Sourcing: Hidden deck fastener starter kits or Premium UV-blocking wood stain.
12. Adjustable Height Bed
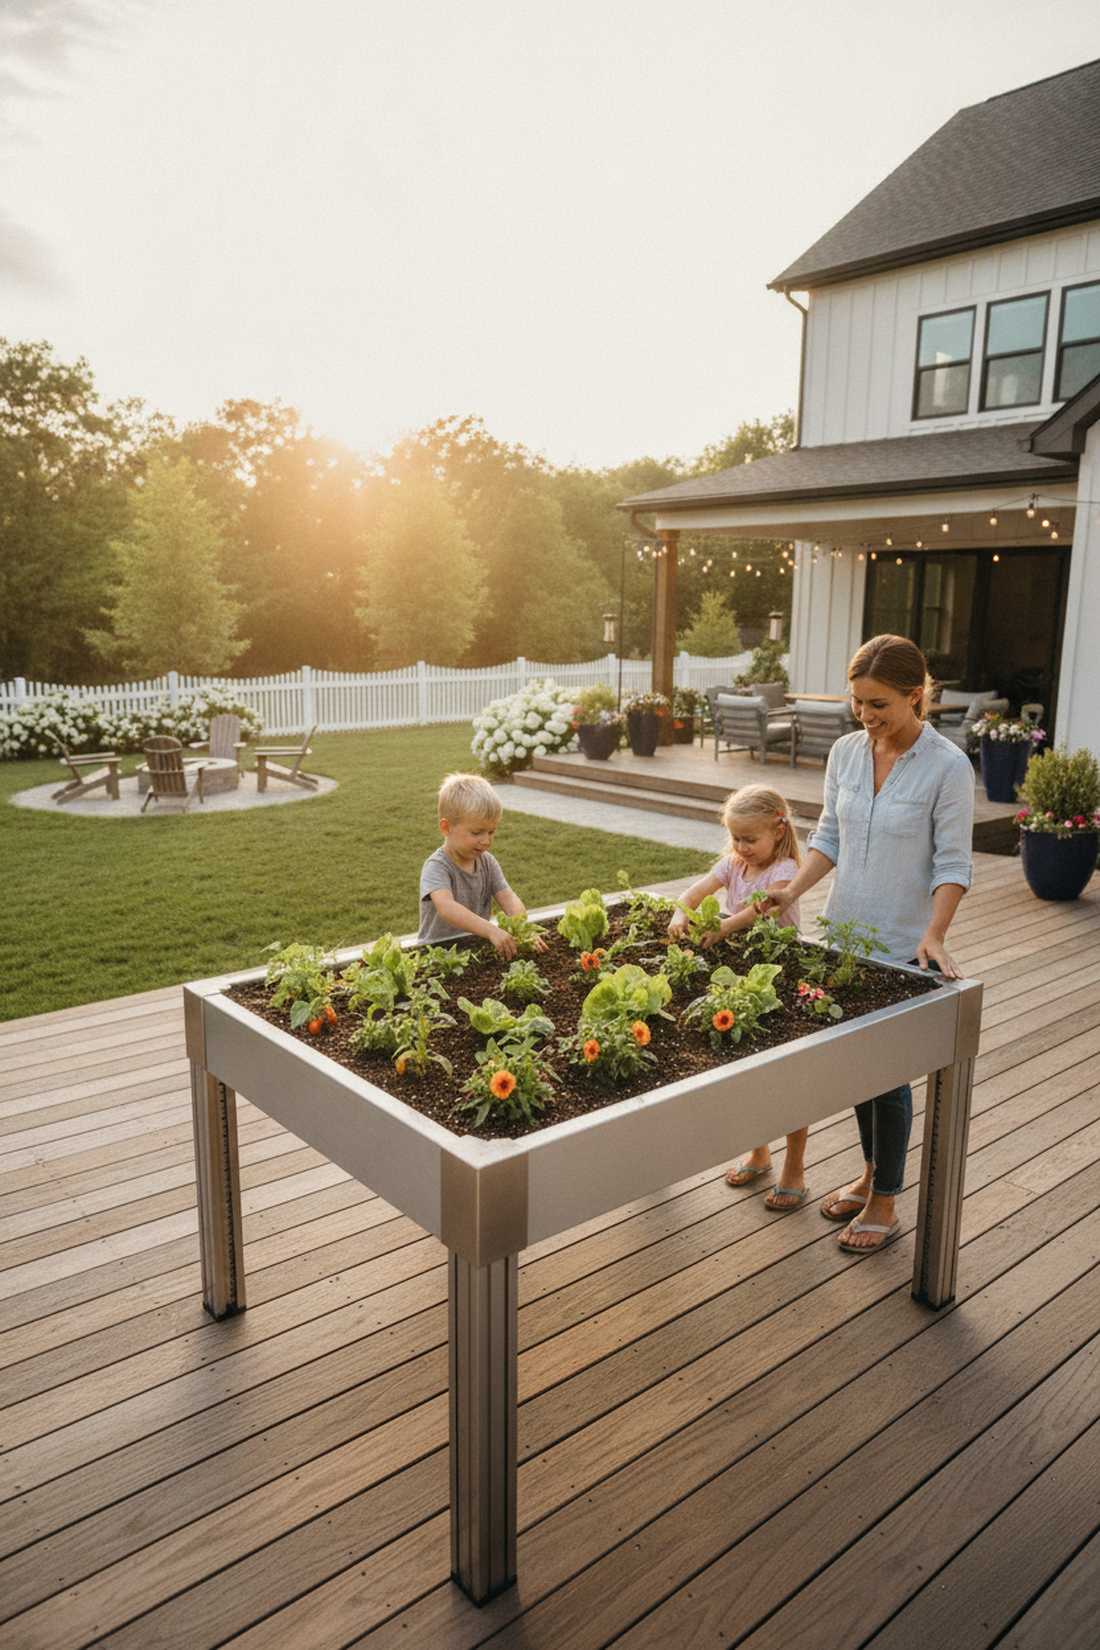
Looks like a sleek piece of commercial greenhouse technology, functioning flawlessly as a customizable growth station. Brilliant for families with kids who want to lower the soil level for tiny hands.
Fixed heights trap you, while a telescoping leg system future-proofs your entire investment. Integrating high-quality aluminum sliding tracks ensures the bed glides up or down without rusting shut. It’s a wildly clever flex that makes your neighbors fiercely jealous.
Expect to drop $150–$250 on a solid mechanical setup.
- Key Materials: Telescoping metal legs
- Vibe / Style: Industrial Tech
- Difficulty: Advanced hardware
- Budget Breakdown: Aluminum frame: $180 | Soil: $30
- Creator’s Tip: Use a lightweight vermiculite/coco-coir soil blend so adjusting the height doesn’t require a bodybuilder.
- Smart Sourcing: Adjustable steel leg hardware kits or Ultra-lightweight organic potting mixes.
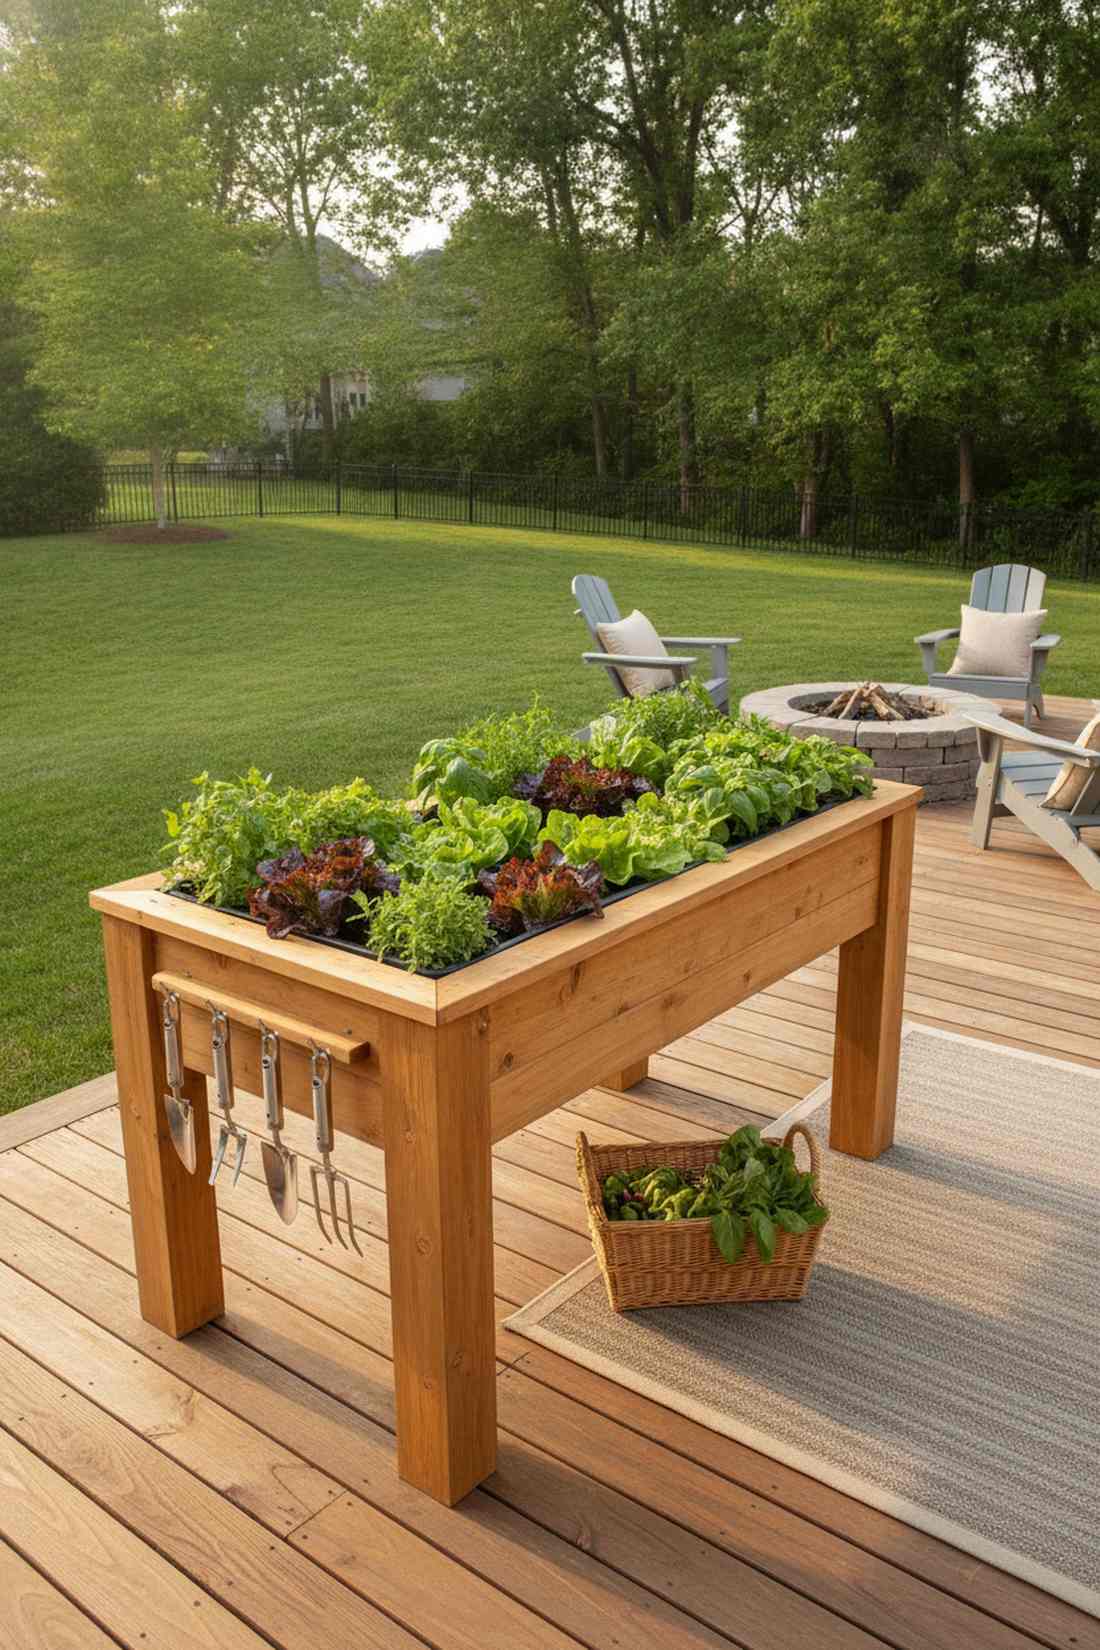
13. Counter-Height Potting Station
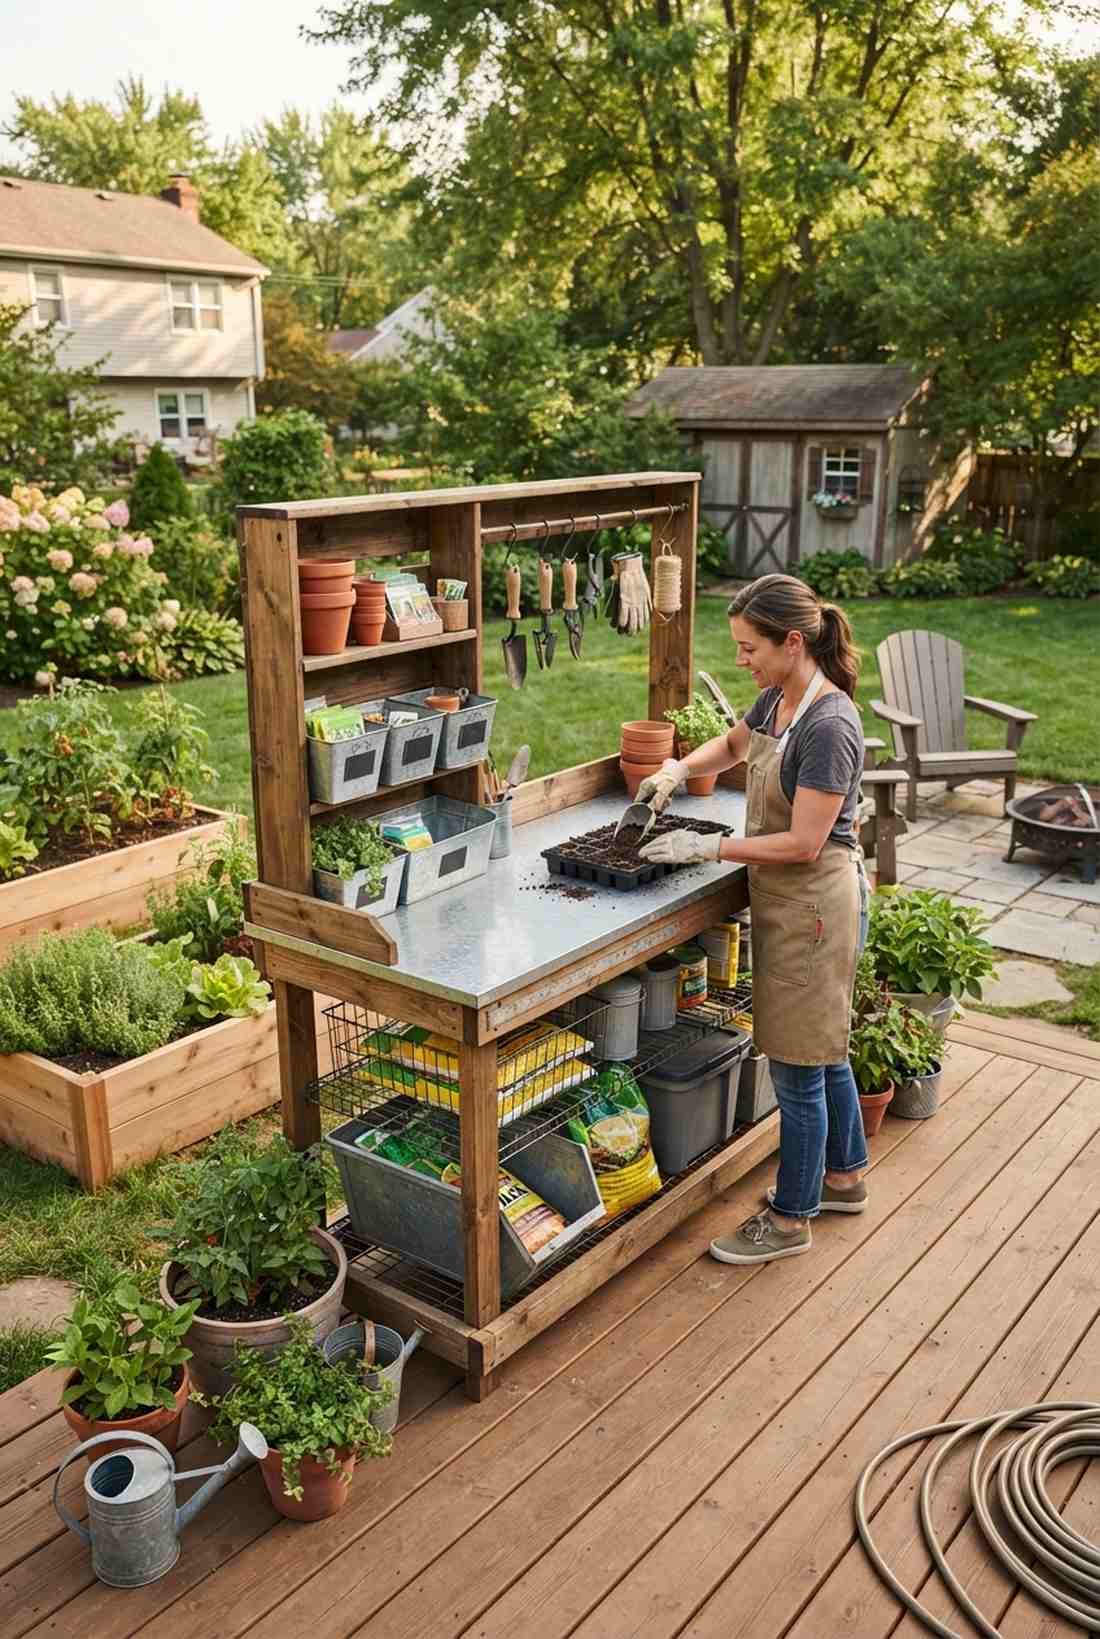
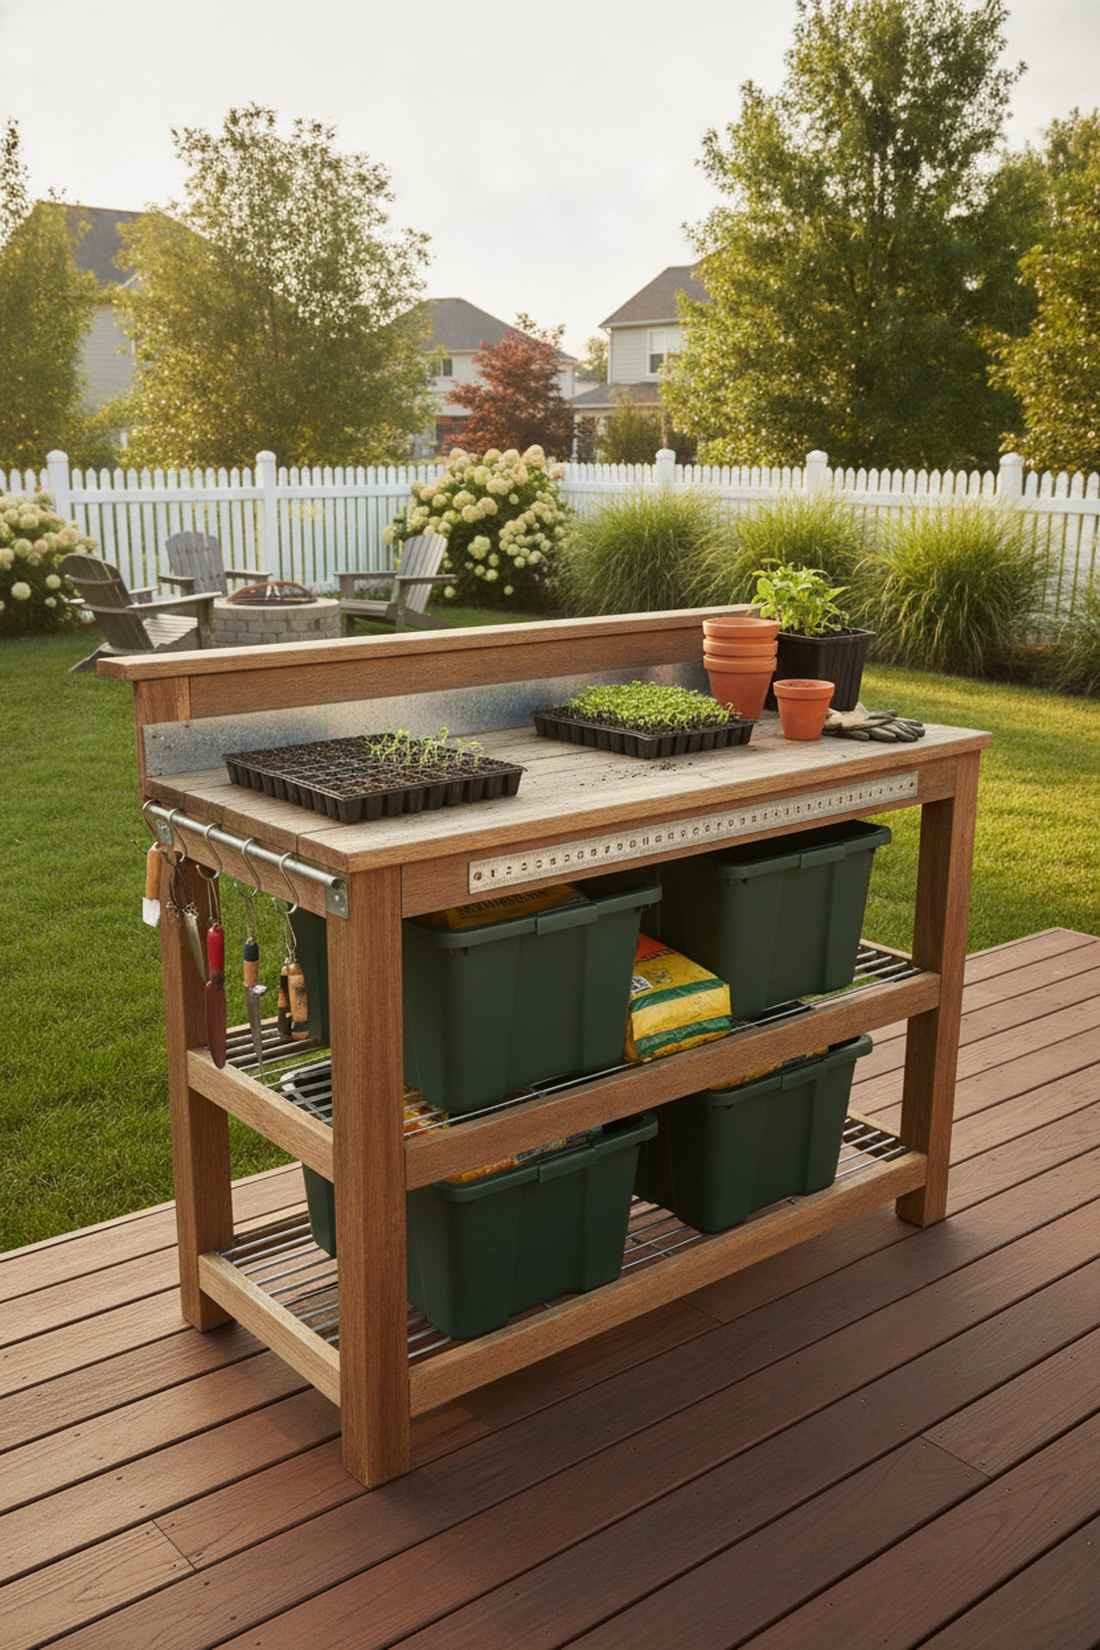
Exudes the rustic charm of a dedicated hobbyist’s workshop, perfect as a backyard potting bench combo. An absolute lifesaver for organizing messy seed-starting trays away from the garage floor.
Throwing pots on the ground destroys your knees, whereas a tall staging bed streamlines the whole process. Equipping it with weatherproof outdoor shelving accessories underneath hides the ugly bags of fertilizer. The result is a hyper-organized command center that looks incredibly professional.
Putting together this workstation costs around $90–$140. Save this idea to clean up your chaotic gardening workflow.
- Key Materials: S-hooks and wire shelving
- Vibe / Style: Rustic Command Center
- Difficulty: Intermediate
- Budget Breakdown: Wood: $80 | Hooks & Bins: $35
- Creator’s Tip: Screw a cheap metal yardstick directly onto the front lip so you always have a measurement tool handy.
- Smart Sourcing: Galvanized outdoor potting bench kits or Weatherproof outdoor storage bins.
You won’t believe how this next mobile trick absolutely breaks the rules of traditional landscaping…
14. Rolling Mobile Bed
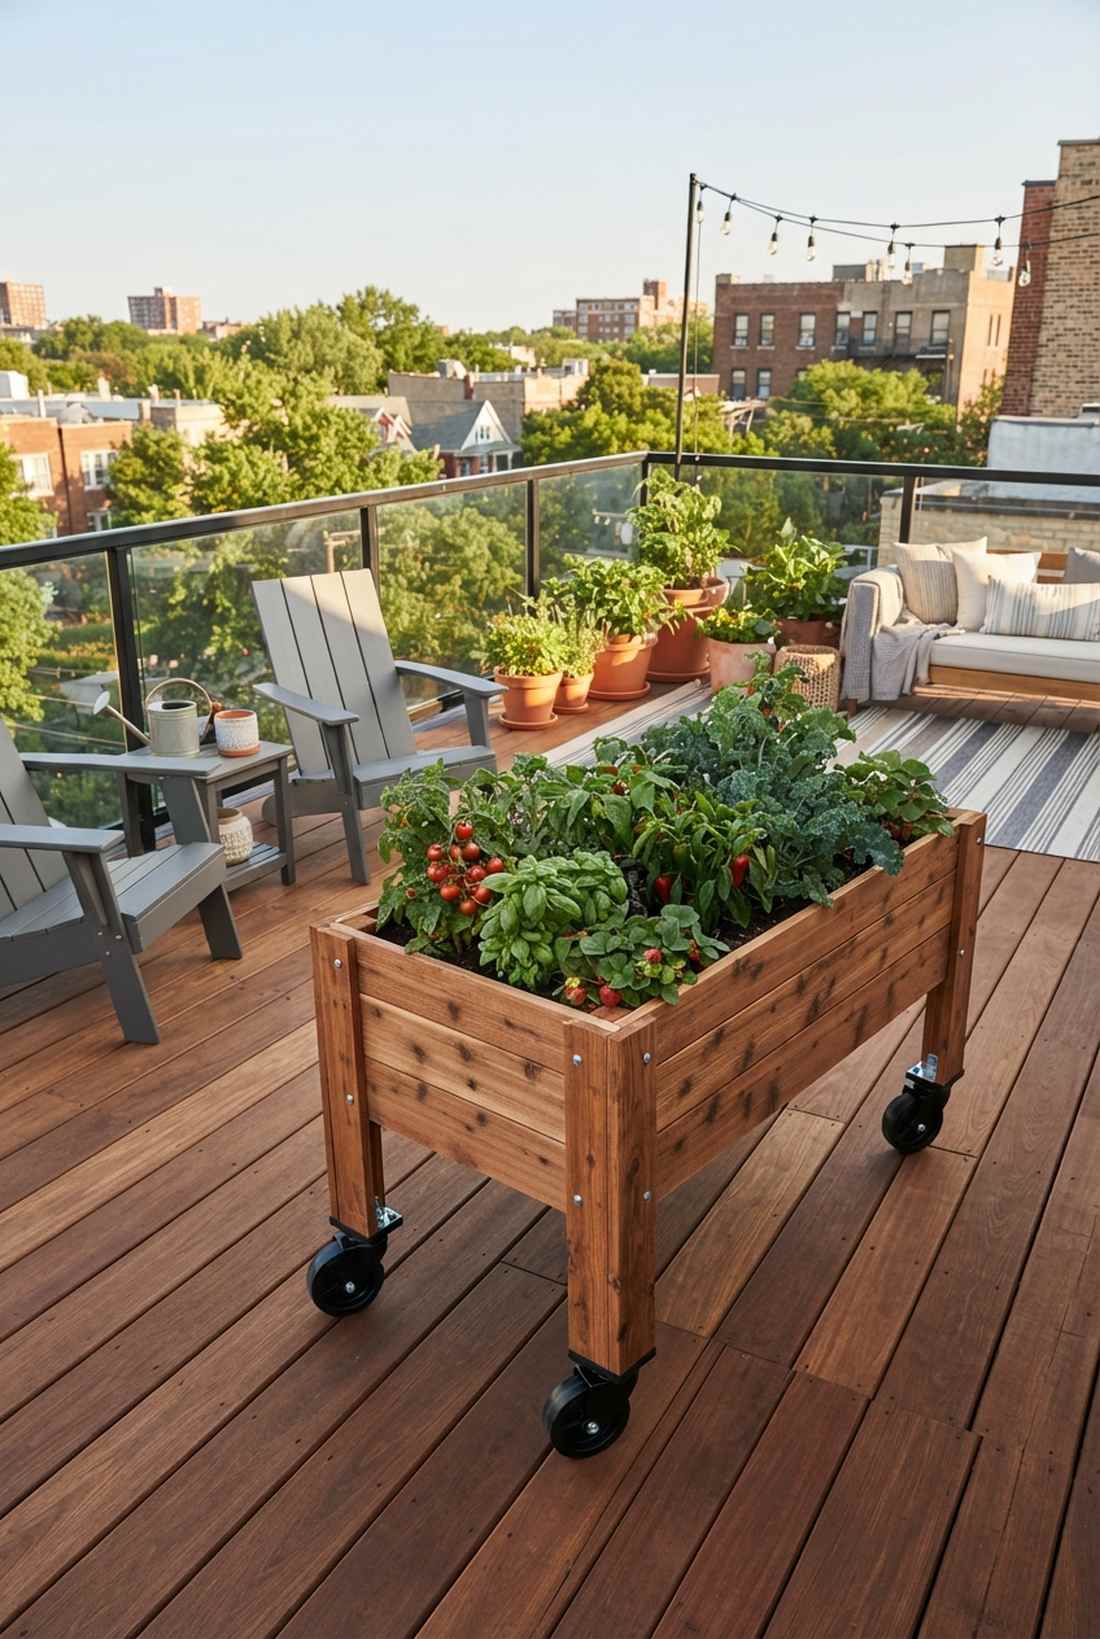
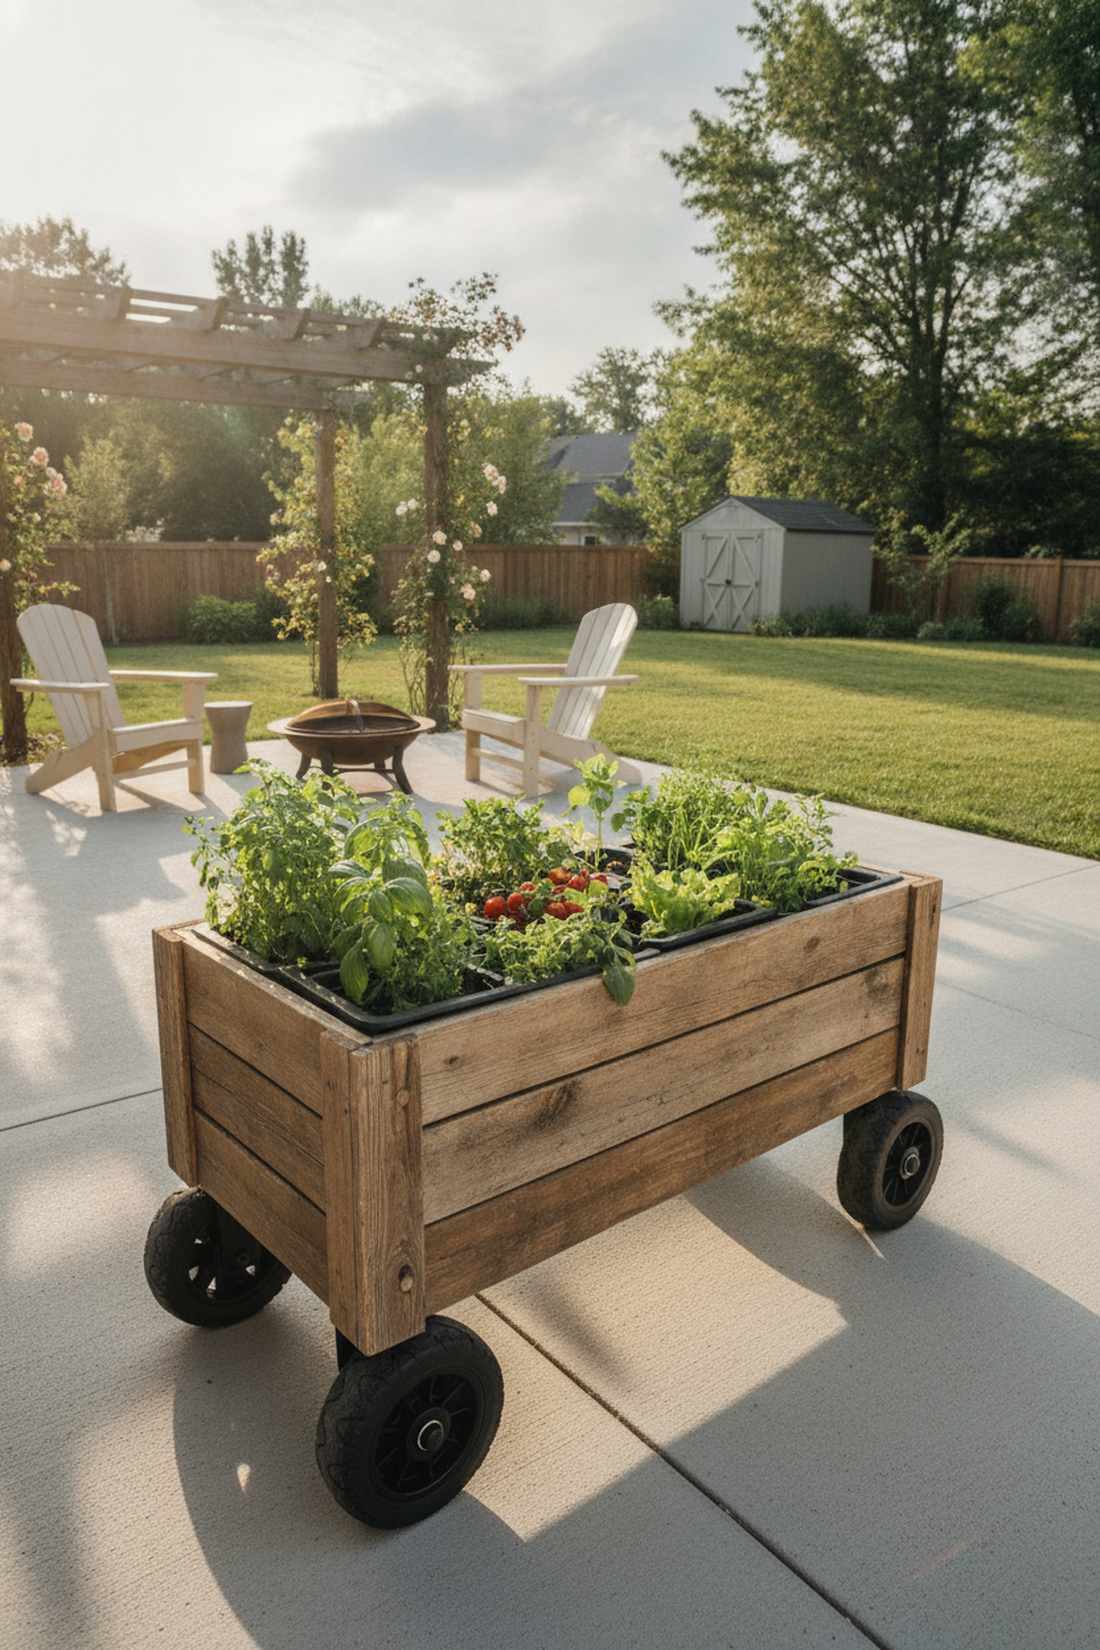
Delivers the fluid energy of a pop-up urban farm, standing out as an incredible portable balcony garden. Phenomenal for tracking the sunlight across a shaded deck throughout changing seasons.
Concrete patios usually mean dead space, but bolting on heavy-duty locking casters changes the rules of real estate. Adding lightweight self-watering inserts keeps the overall mass low enough to push with one hand. It completely frees you from the tyranny of bad shade angles.
This rolling rig can be built for $60–$110. Pin this if you live in an apartment or have terrible yard sunlight.
- Key Materials: Heavy-duty locking caster wheels
- Vibe / Style: Urban Nomad
- Difficulty: Easy bolt-on
- Budget Breakdown: Planter: $40 | Casters: $35
- Creator’s Tip: Buy wheels rated for at least double the weight you expect; wet soil is shockingly heavy.
- Smart Sourcing: Heavy-duty locking polyurethane casters (4-pack) or Mobile raised planter carts.
15. Split-Level Accessible Design
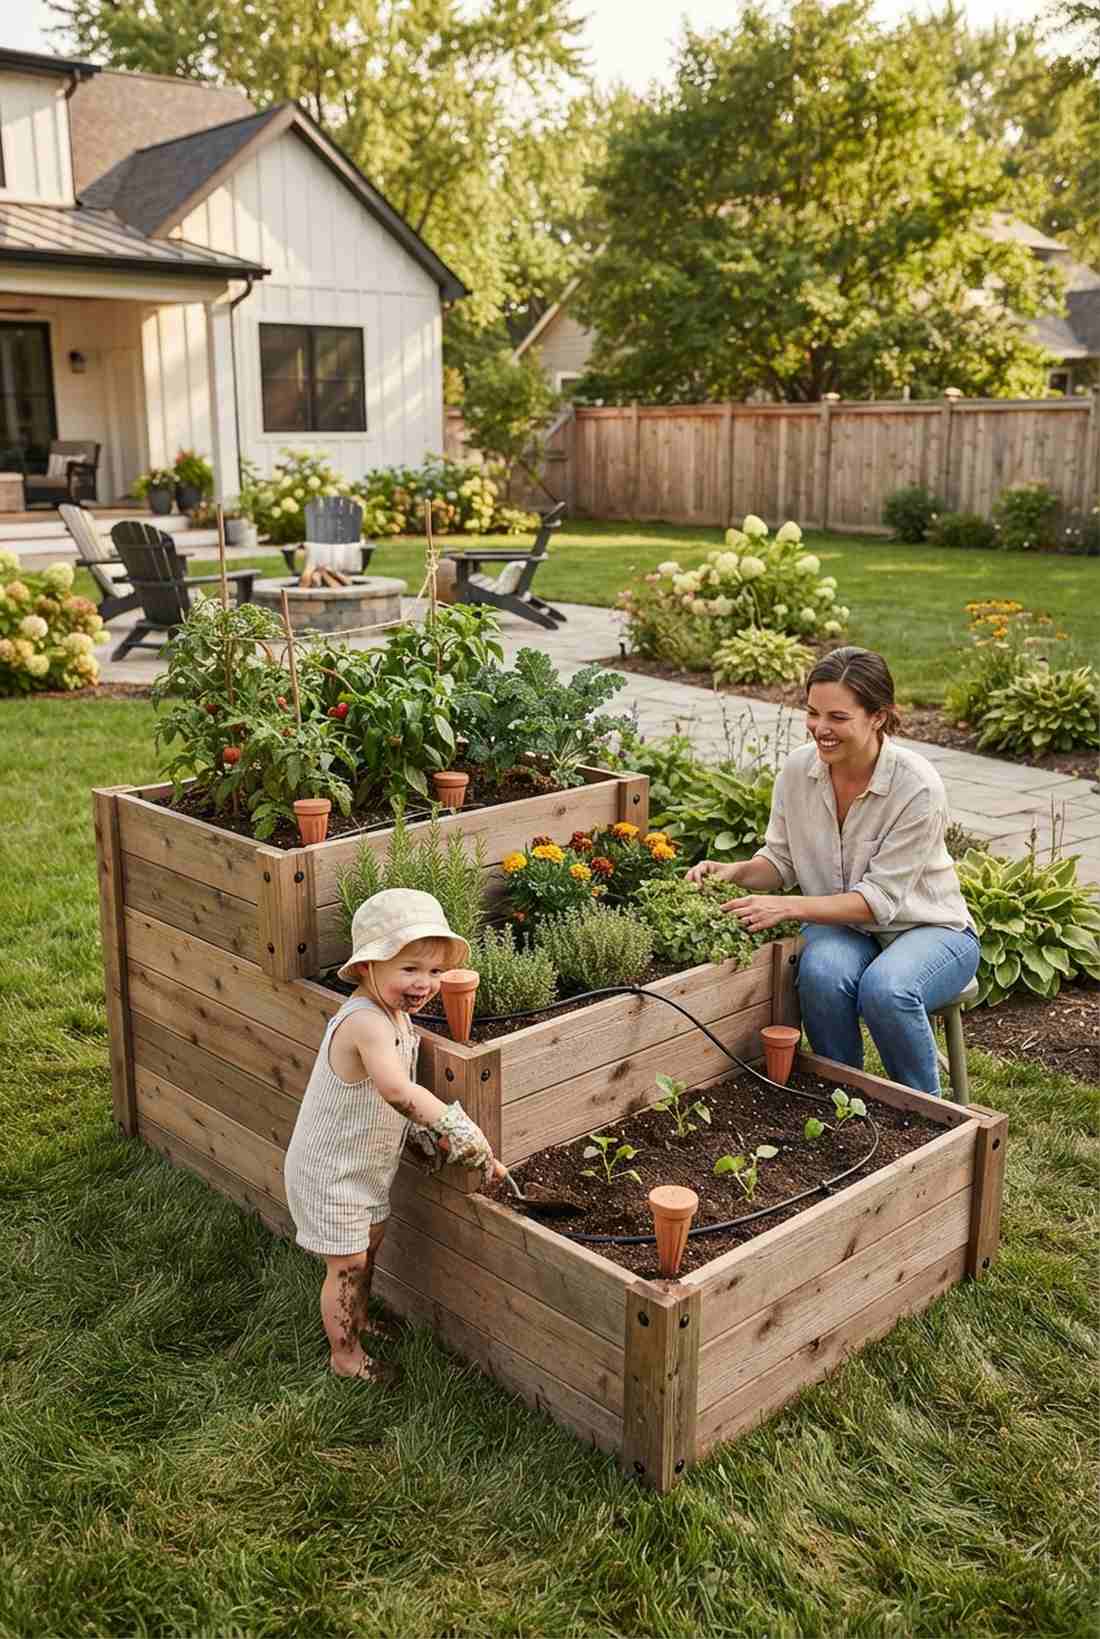
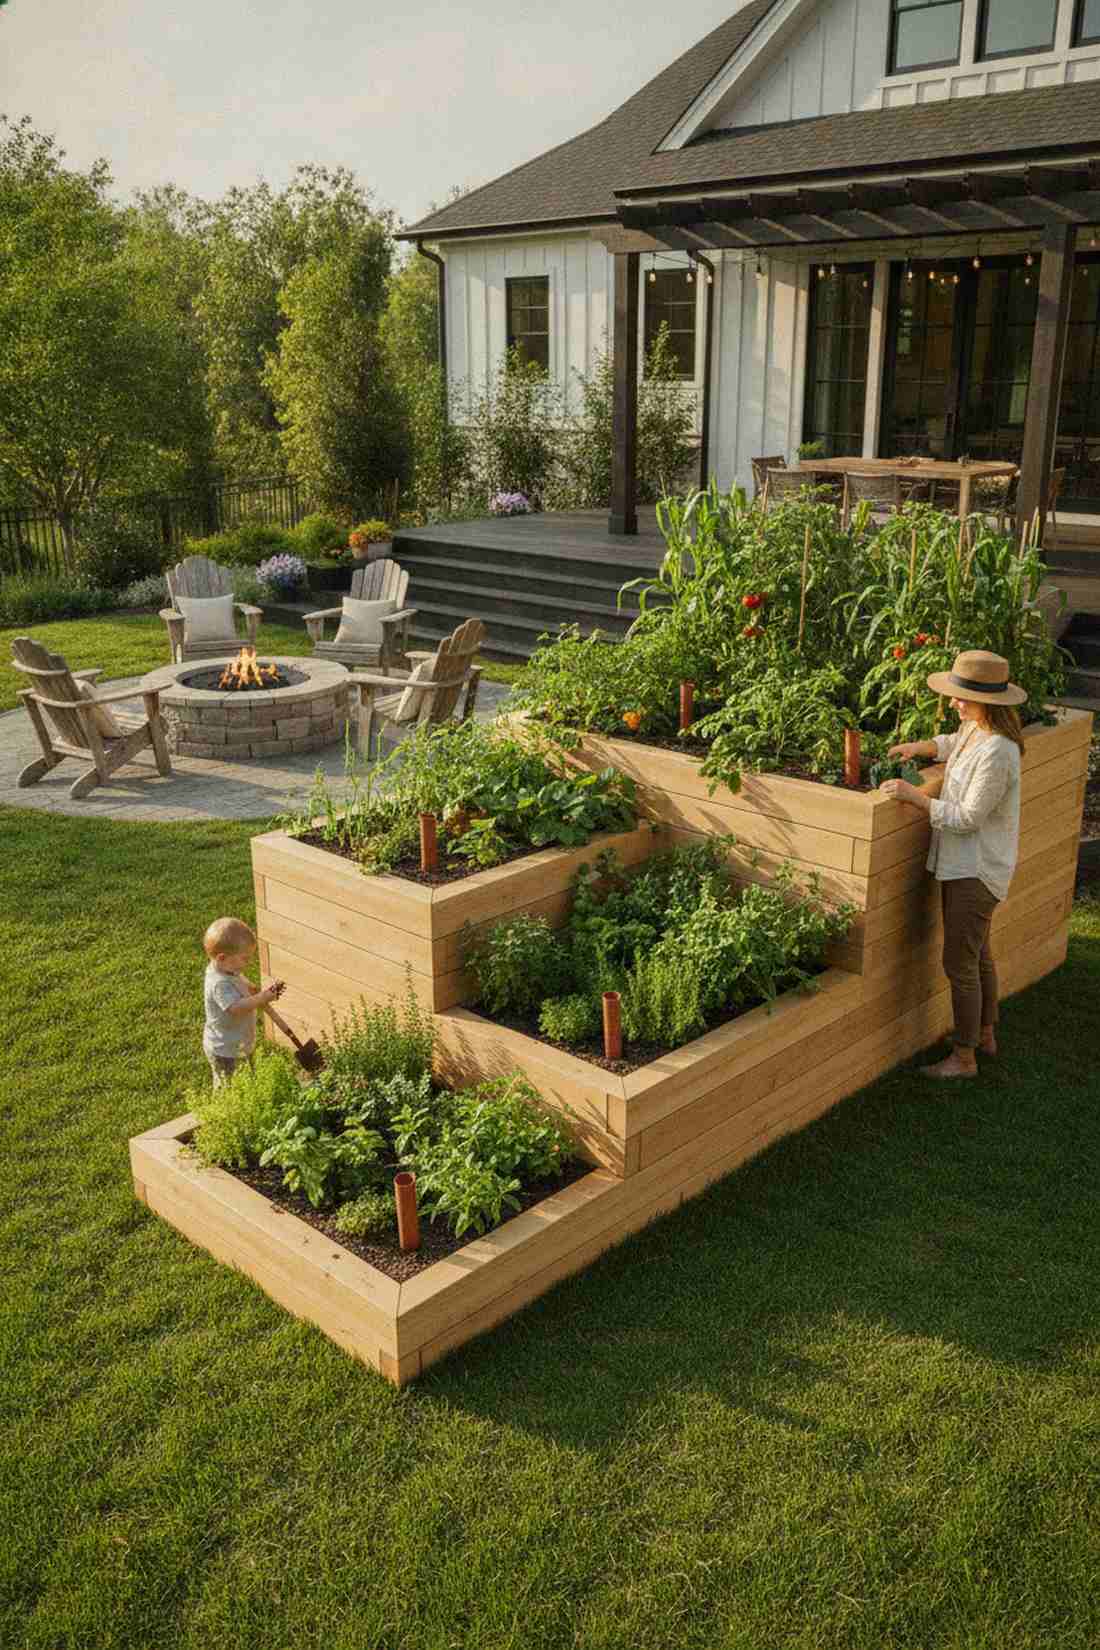
Radiates the dynamic flow of an expensive modern art museum, shining as a multi-height family garden. The perfect bridge between small toddlers who want to dig and adults who refuse to kneel.
Most uniform beds look boring, but stacking them into a multi-tiered staircase breaks up visual monotony. Dropping in a few terra-cotta watering spikes ensures every level gets perfectly hydrated despite the elevation differences. It creates a massive architectural statement for a fraction of the cost.
Budget around $120–$180 for this dual-layered masterpiece.
- Key Materials: Staggered wood planks
- Vibe / Style: Modern Architectural
- Difficulty: Intermediate
- Budget Breakdown: Lumber: $130 | Fasteners: $20
- Creator’s Tip: Plant deep-rooted veggies in the tall back section and shallow herbs in the front knee-high zone.
- Smart Sourcing: Multi-tier wooden raised bed kits or Automatic terracotta watering spikes.
Vertical Growing Systems with Raised Beds Landscaping
Vertical elements multiply growing capacity by utilizing airspace above raised beds ideas. These three-dimensional approaches suit climbing vegetables while creating dramatic landscape focal points that draw the eye upward.
16. Cattle Panel Arch Bed
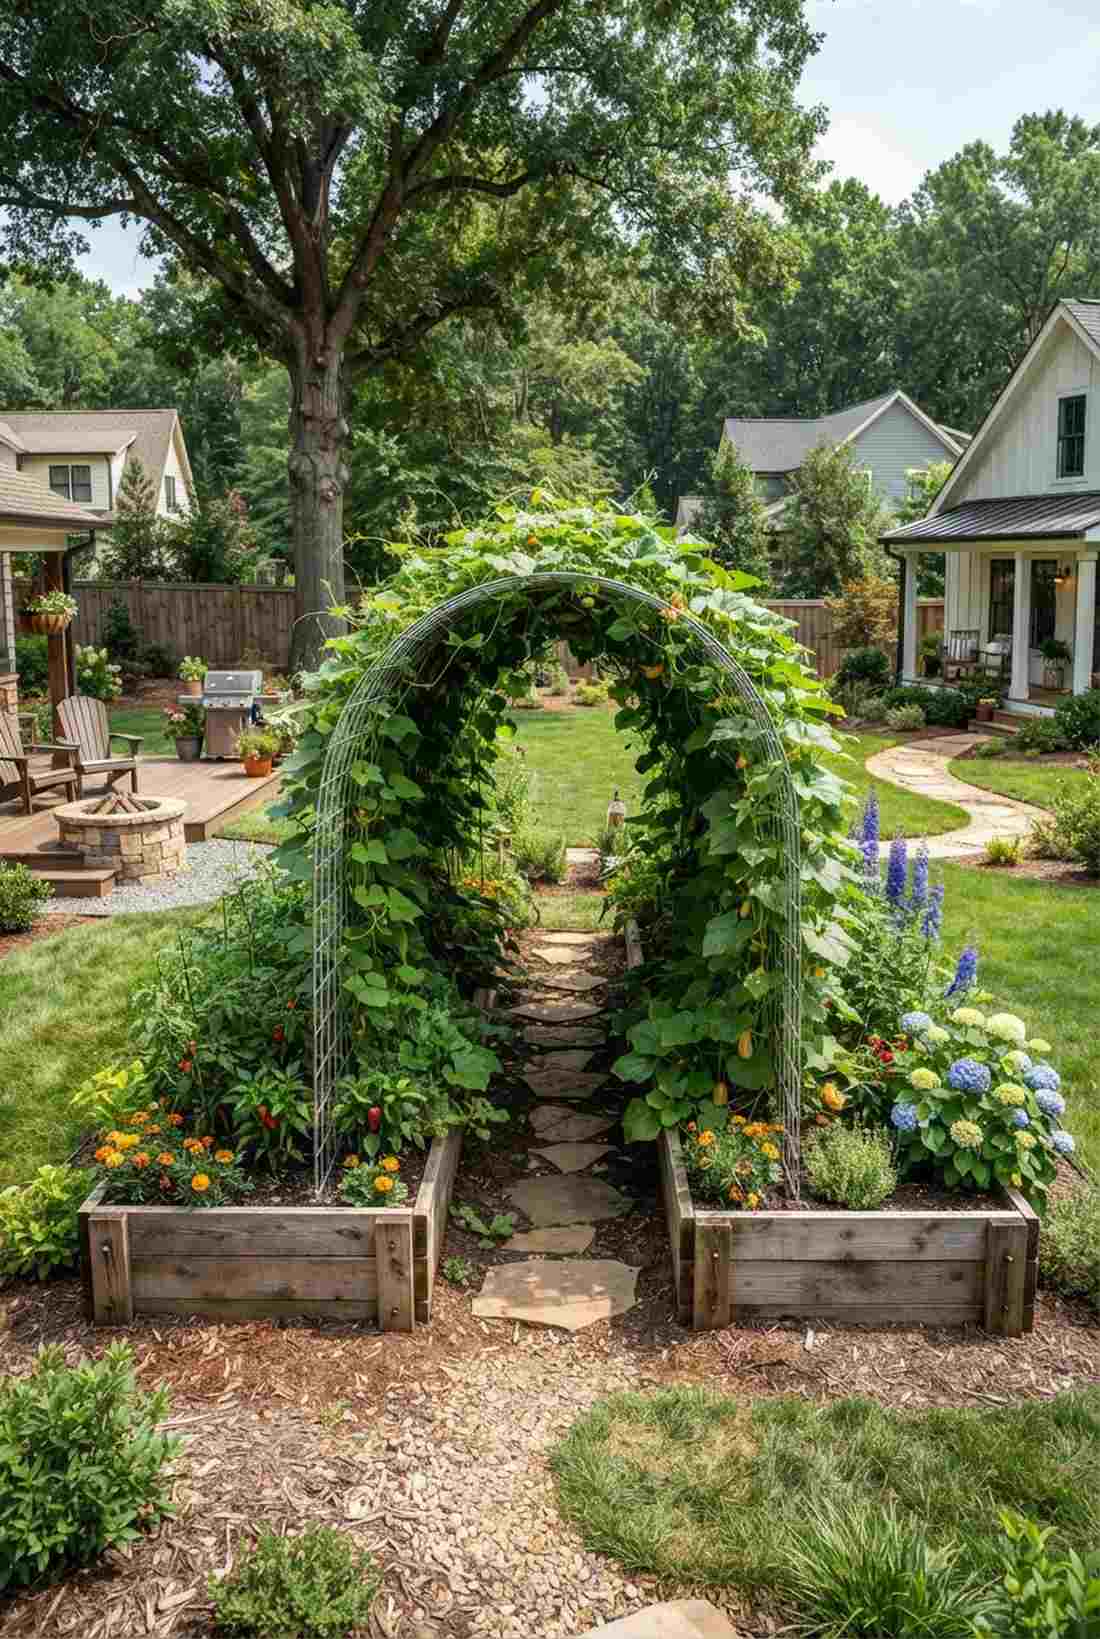
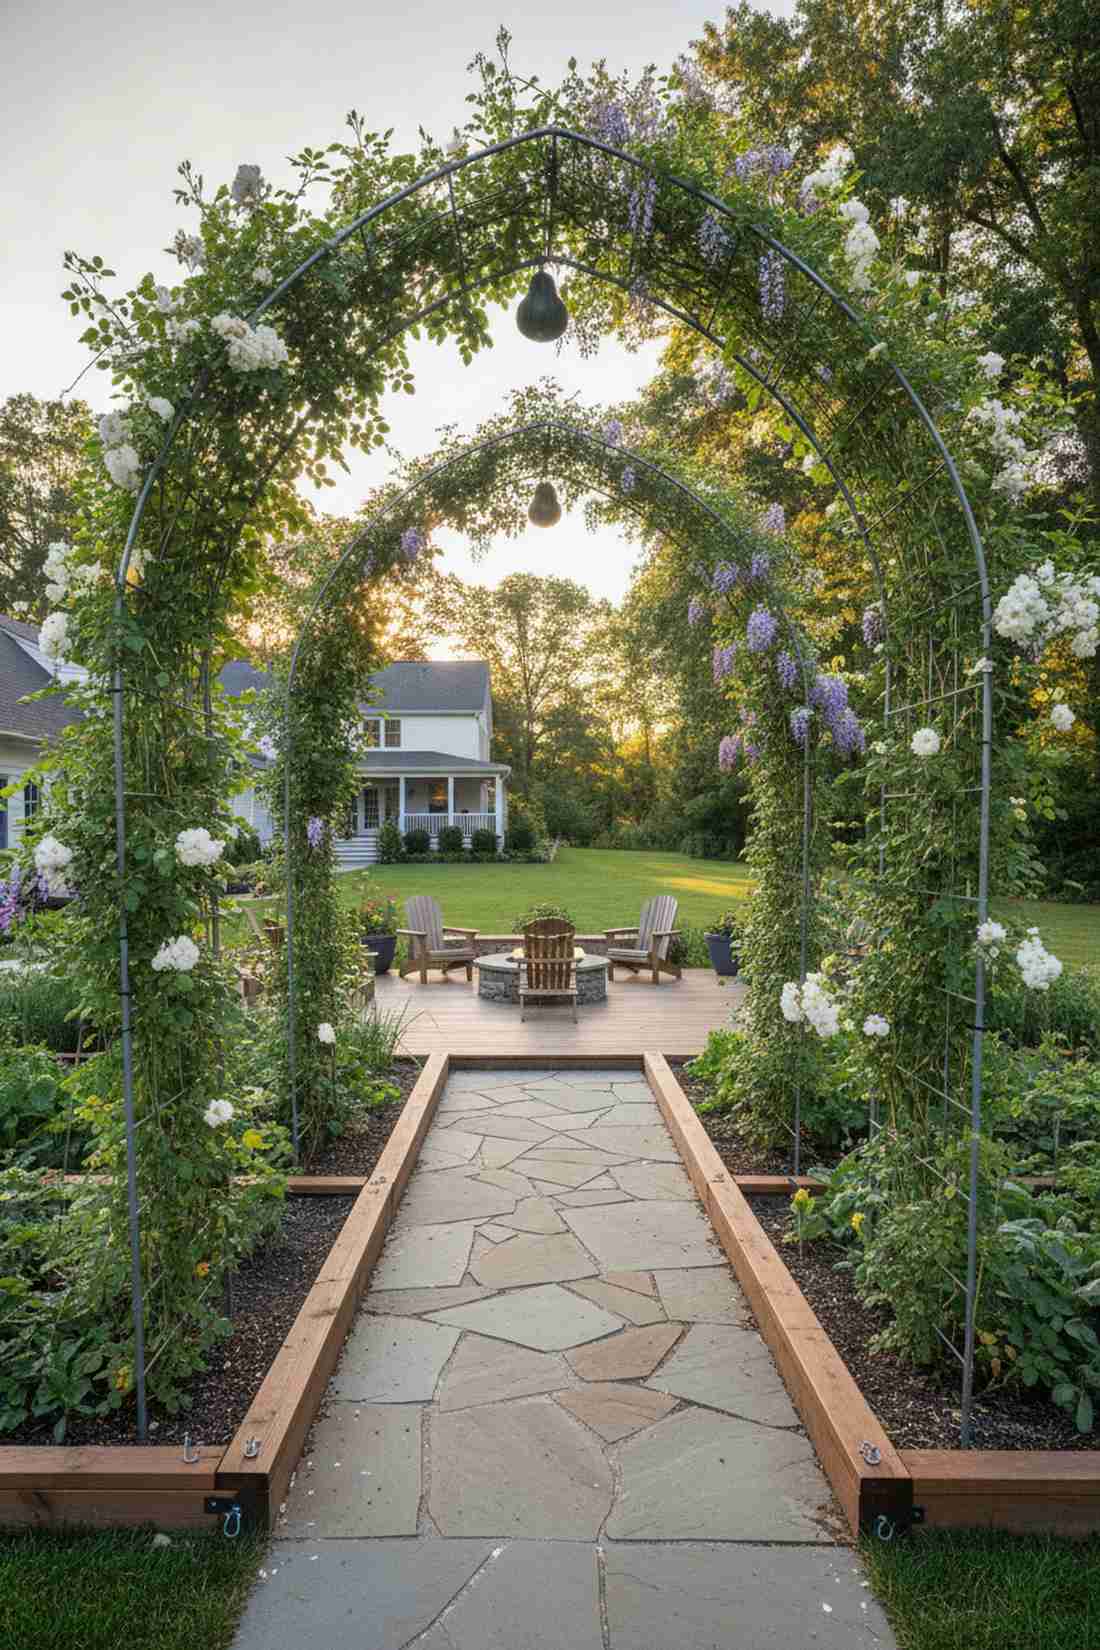
Feels like wandering through a fairytale gothic archway, functioning flawlessly as a vine-covered garden tunnel. Breathtaking when positioned over a central walkway to create an immersive green canopy.
Standard trellises snap under heavy squash, but bending galvanized livestock panels creates unbreakable architecture. Securing the edges with heavy-duty steel U-nails into the bed frames makes it hurricane-proof. The visual height instantly upgrades a flat yard into a multi-dimensional escape.
Constructing this tunnel of green costs roughly $60–$95. Save this to your extreme garden makeovers board.
- Key Materials: 16-foot galvanized cattle panels
- Vibe / Style: Secret Garden Tunnel
- Difficulty: Requires two people to bend
- Budget Breakdown: Panels: $50 | Fasteners: $15
- Creator’s Tip: Zip-tie the panels to steel T-posts driven deep into the ground before attaching them to the wood for maximum stability.
- Smart Sourcing: Heavy-duty steel T-posts (bulk pack) or UV-resistant industrial zip ties.
17. Obelisk Trellis Quartet
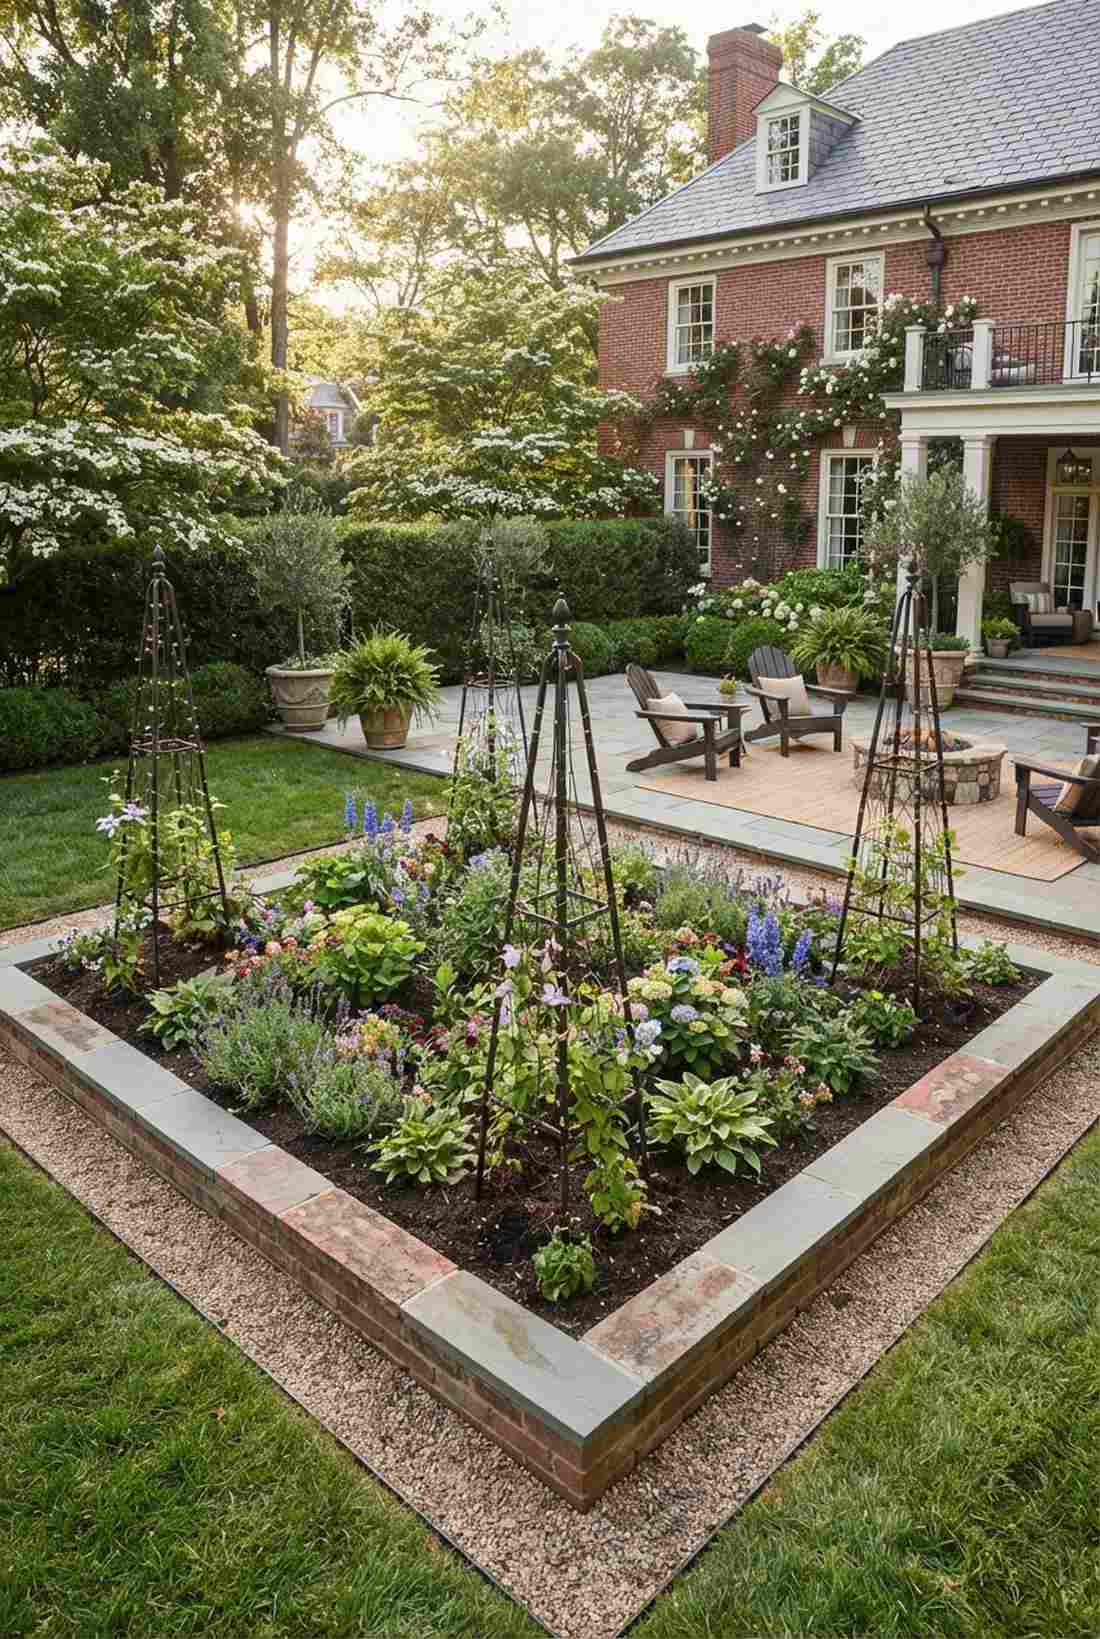
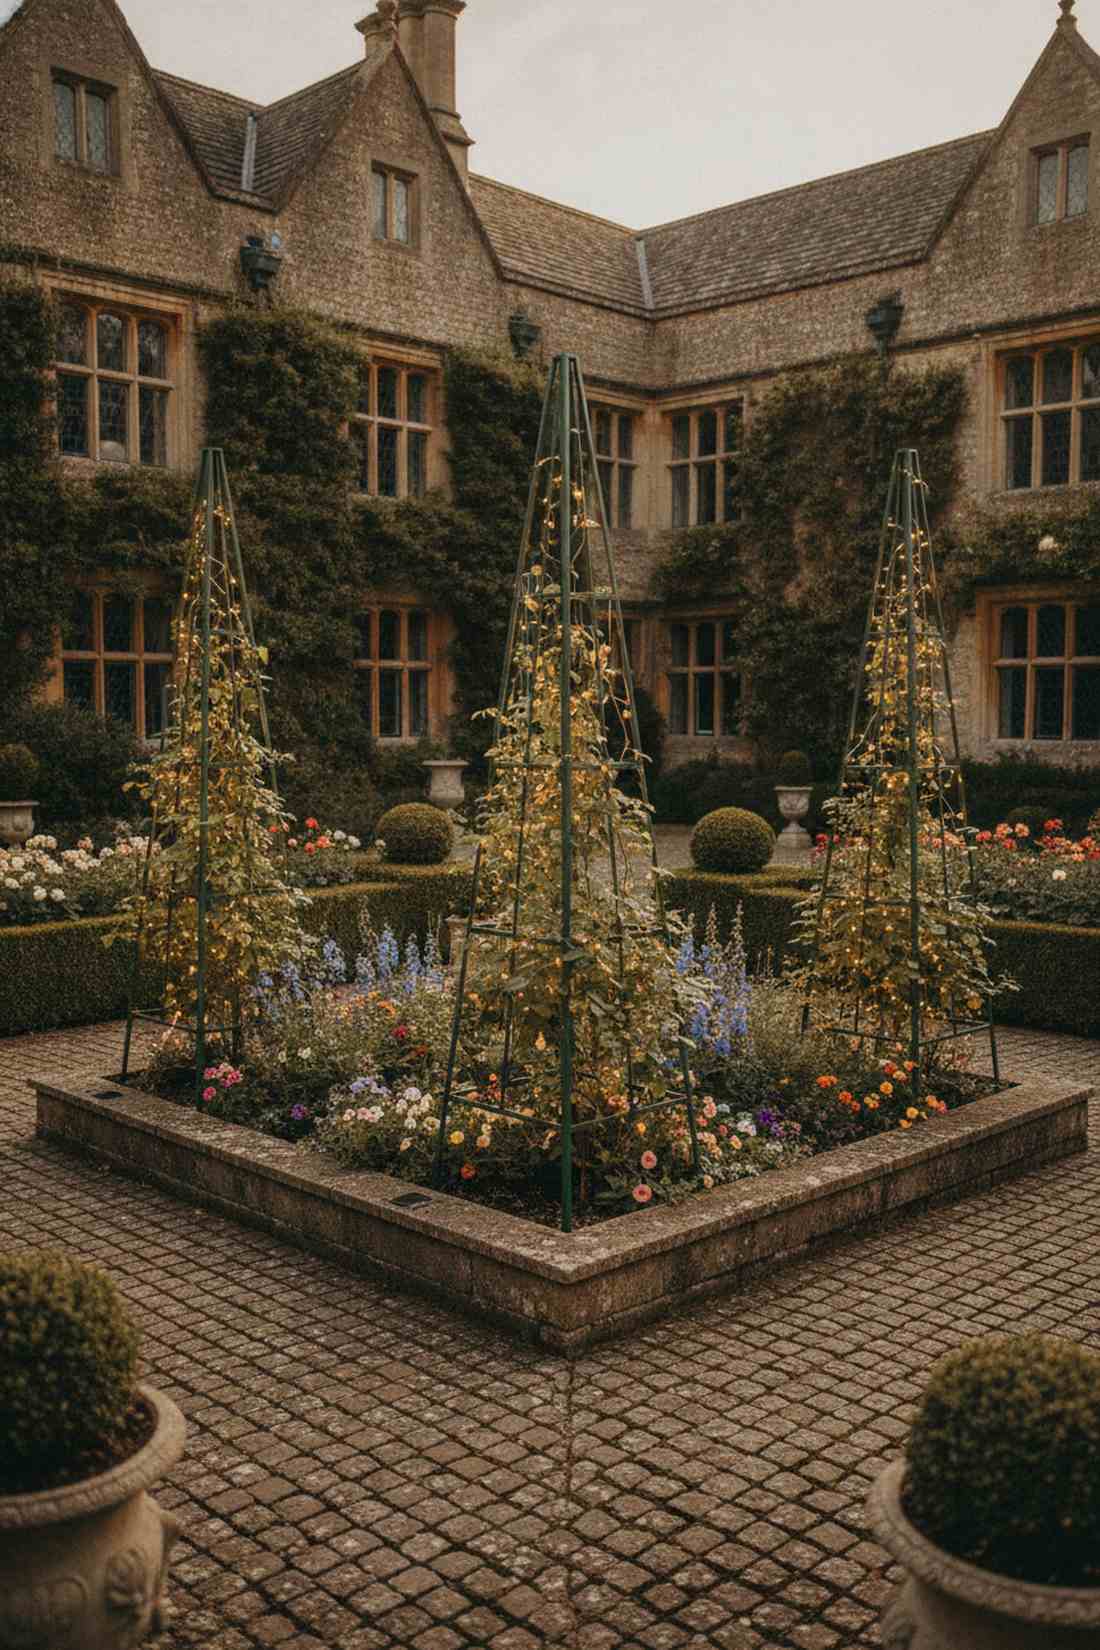
Exudes the refined elegance of an old-English estate, serving perfectly as a vertical focal point setup. A massive win for framing the four corners of a central courtyard planting box.
Most gardens lack vertical authority, yet popping these sharp pyramids in the dirt fixes it instantly. Utilizing pre-fabricated metal garden obelisks saves you from hours of frustrating woodworking angles. It pulls the eyes upward, making the entire planting zone feel grand and historic.
Sourcing these obelisks runs about $80–$150 for a set of four.
- Key Materials: Metal obelisk structures
- Vibe / Style: Classic English Manor
- Difficulty: Zero setup (just unbox)
- Budget Breakdown: Obelisks: $120 | Climbing seeds: $10
- Creator’s Tip: Wrap them in cheap fairy lights before the vines grow in for a stunning night-time glowing silhouette.
- Smart Sourcing: Rust-proof steel garden obelisk sets or Solar-powered outdoor fairy string lights.
18. A-Frame Trellis Wall
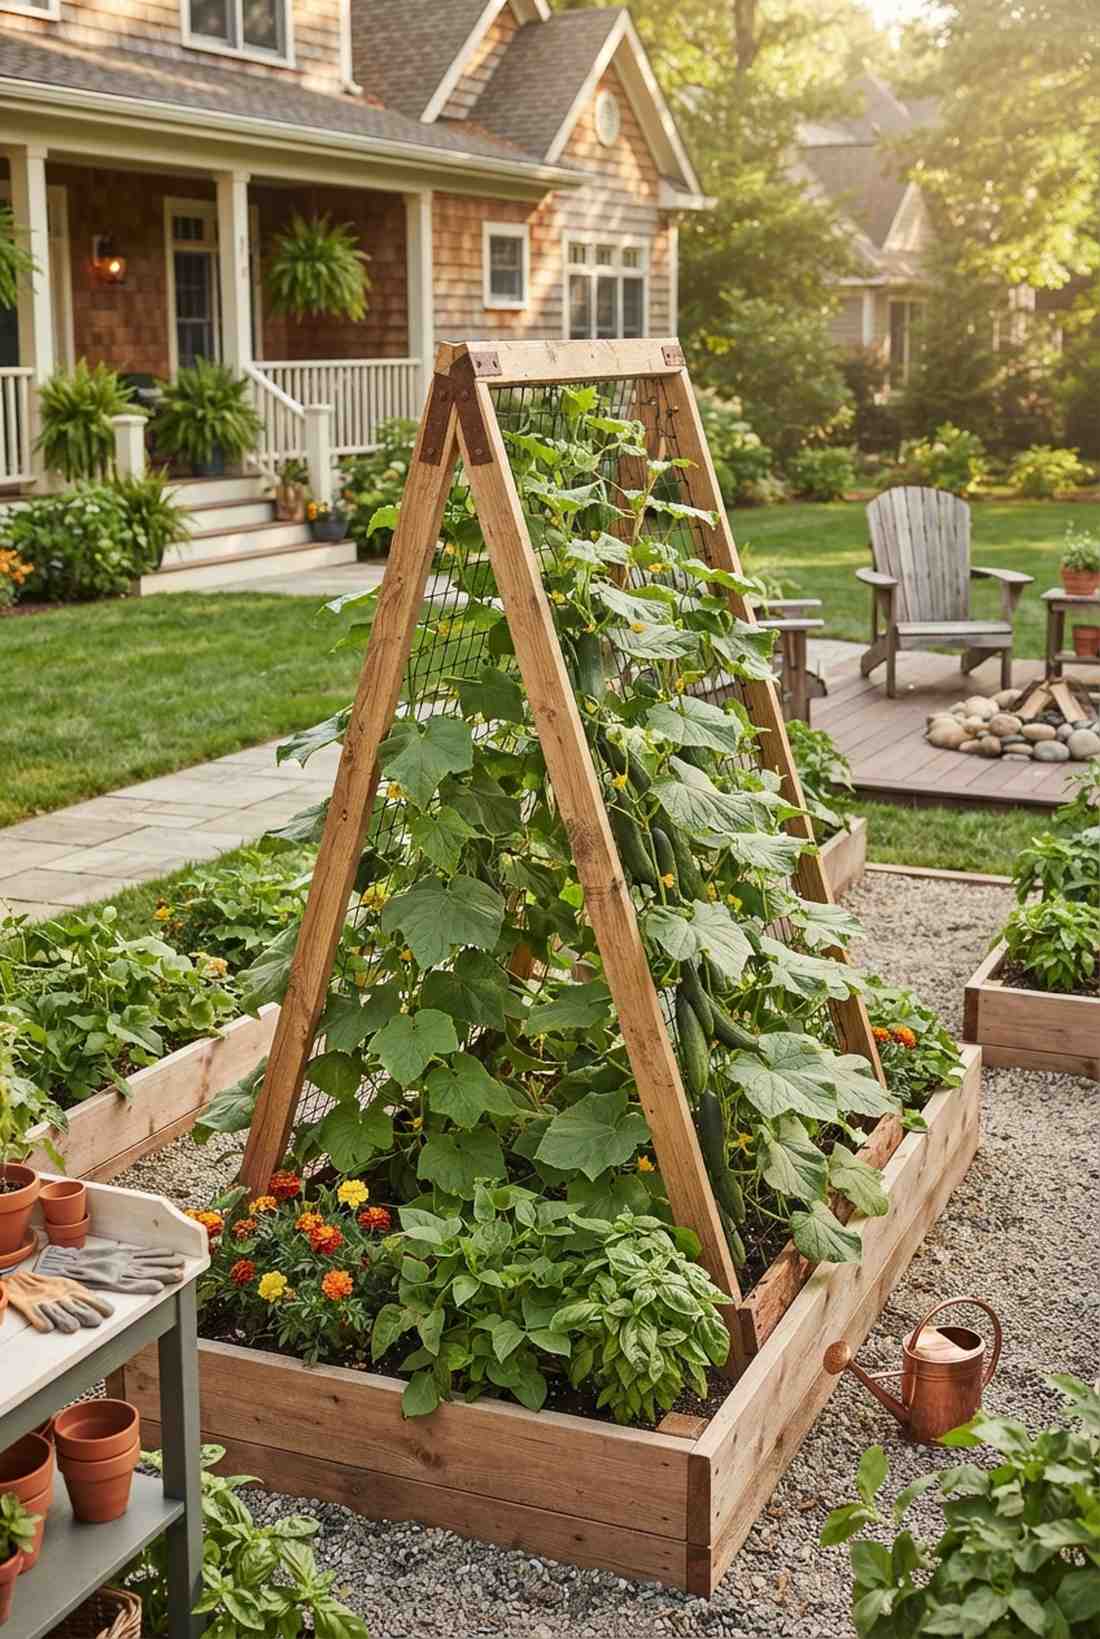
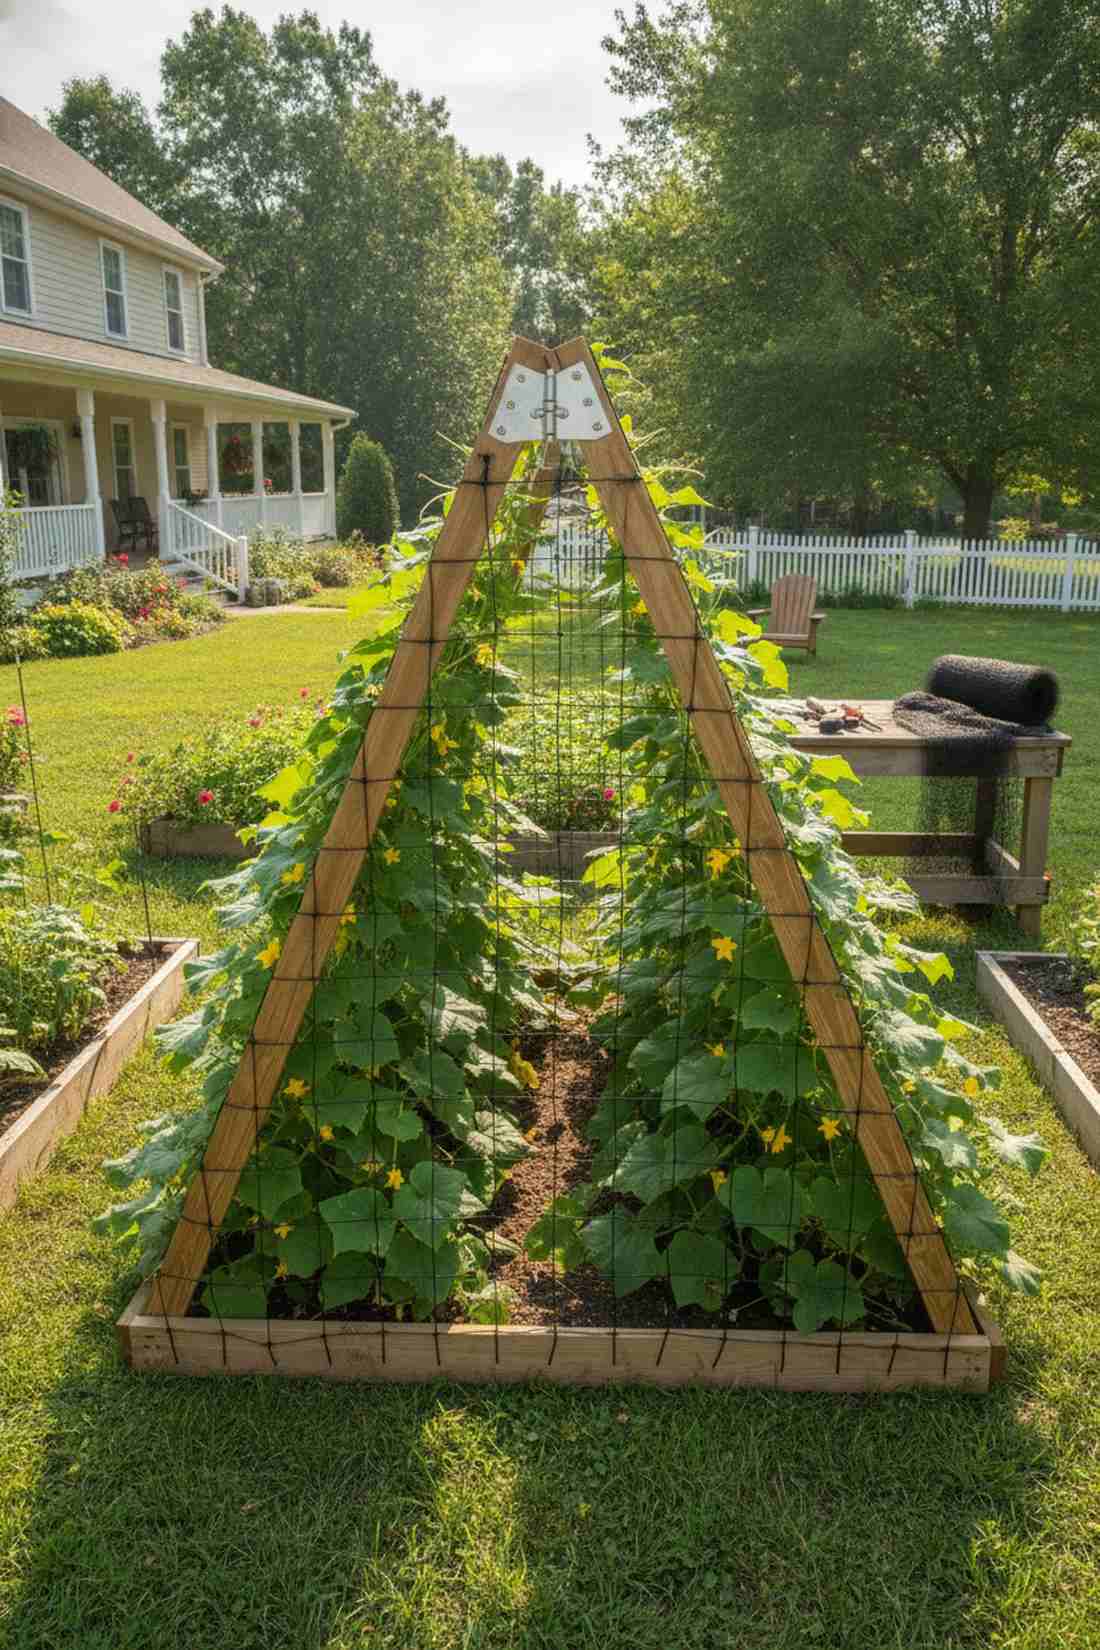
Looks like a clever piece of rugged pioneer ingenuity, acting brilliantly as a dual-sided cucumber climb. Highly recommended for splitting a wide bed directly down the middle for maximum sunlight.
Flat netting always tangles, whereas a rigid A-frame provides a sturdy, harvestable slope on two sides. Stapling durable nylon climbing netting across the wooden spine ensures massive yields won’t rip the support. It maximizes square footage so aggressively that small yards feel enormous.
You can knock this out for merely $20–$40. Pin this if you’re trying to grow massive vines in tiny spaces.
- Key Materials: Heavy-duty trellis netting
- Vibe / Style: Homestead Practical
- Difficulty: Easy hinge build
- Budget Breakdown: 2×2 Wood: $15 | Netting: $15
- Creator’s Tip: Put hinges at the top peak so you can fold the whole structure flat and store it during winter.
- Smart Sourcing: Heavy-duty nylon trellis netting (bulk roll) or Rust-resistant folding gate hinges.
Most people waste hundreds on fencing… wait until you see the genius upcycling trick right below.
19. Lean-To Fence Trellis
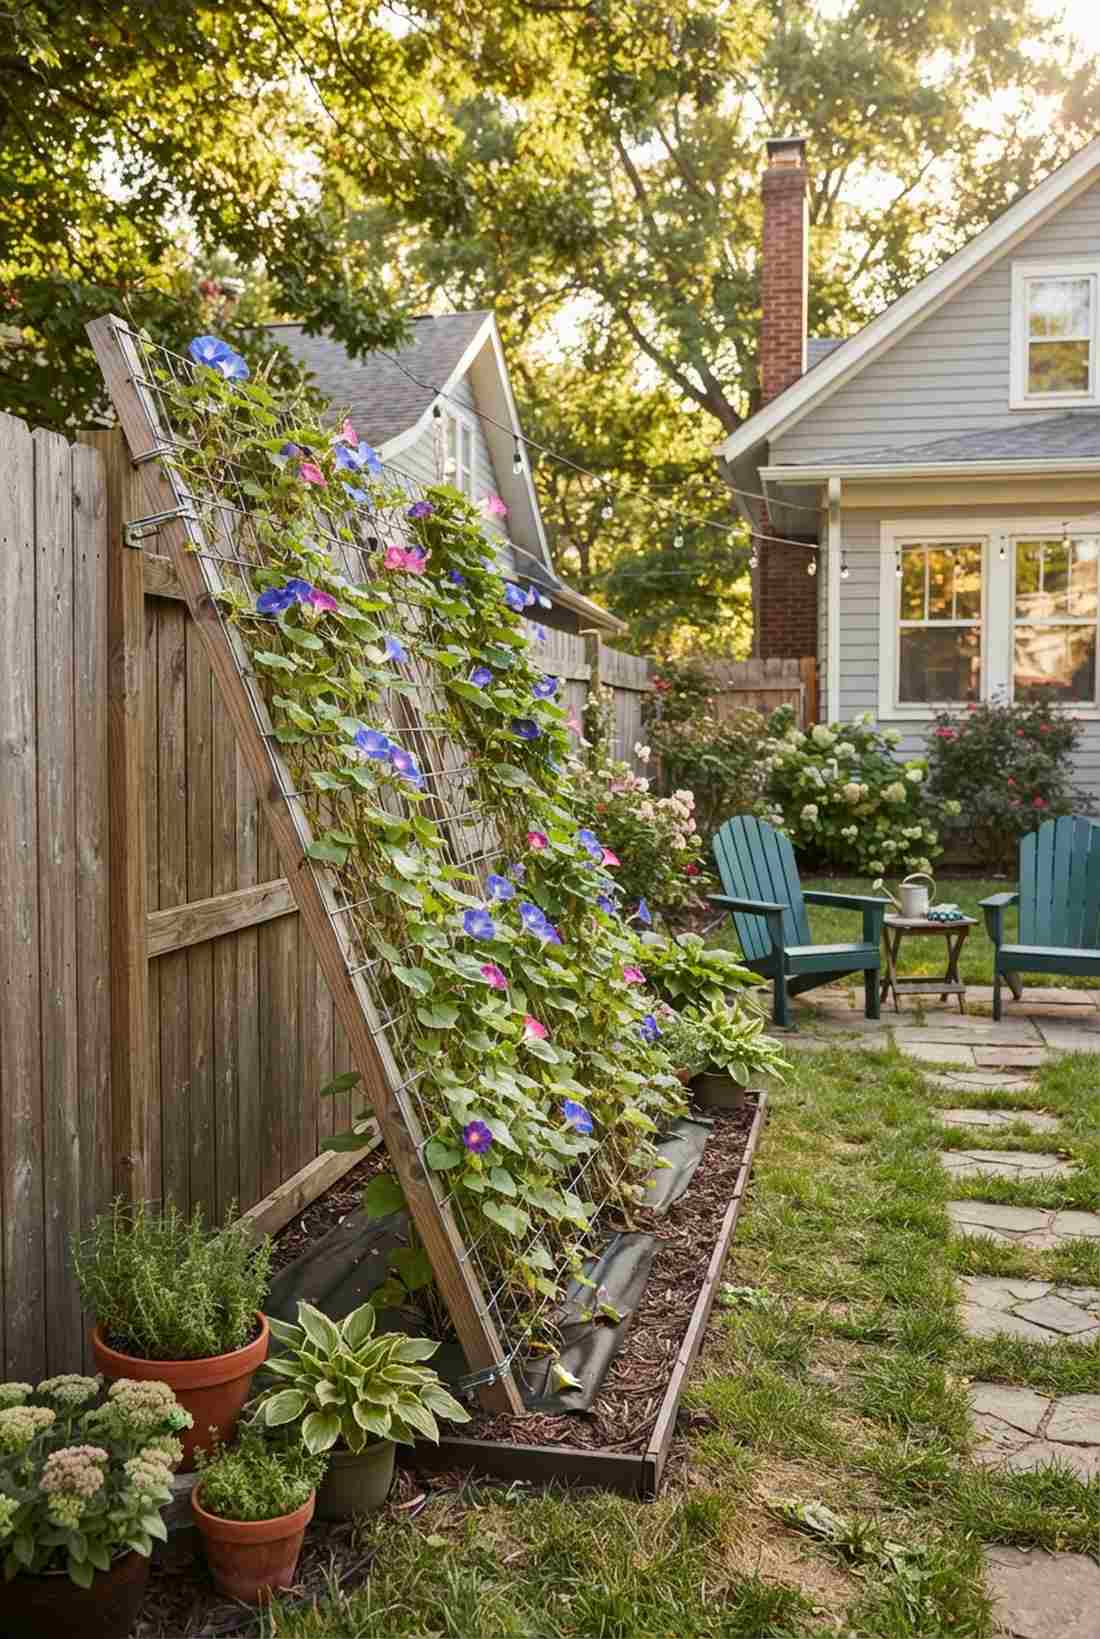
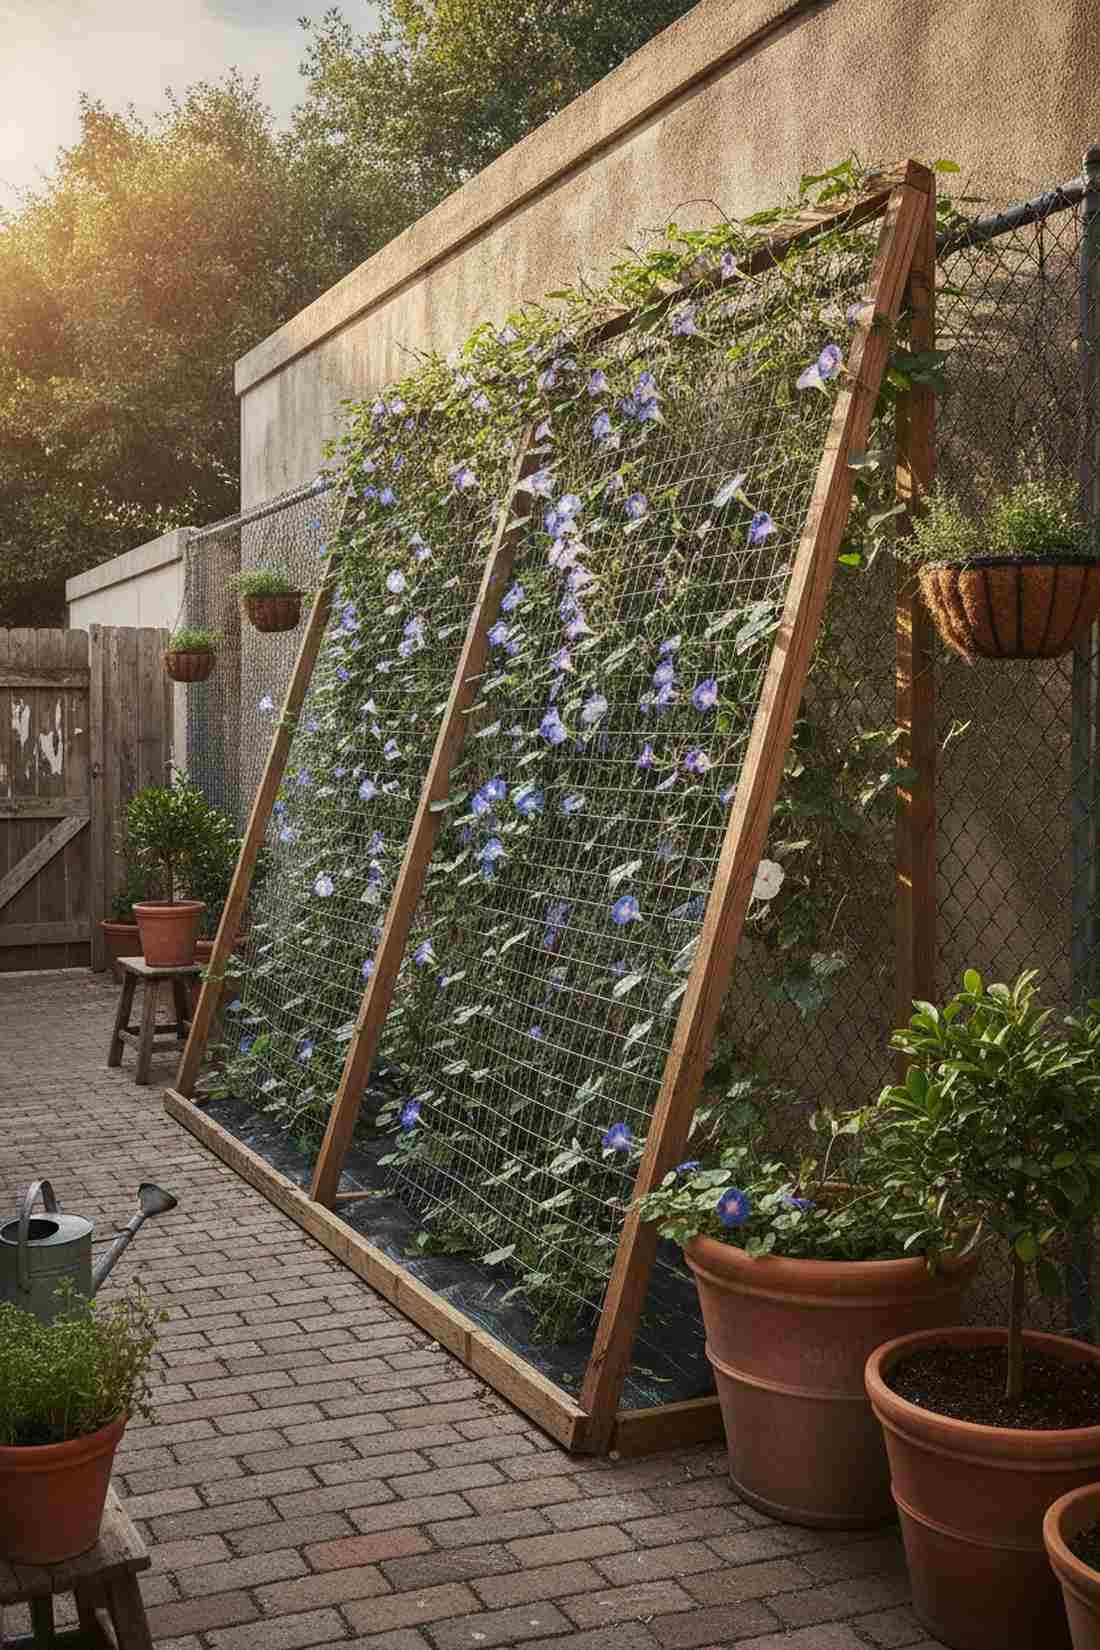
Delivers the cozy vibe of a sun-drenched Mediterranean alleyway, shining as an upcycled boundary climber. Phenomenal for hiding ugly chain-link fences or blank garage walls.
Staring at a boring fence is depressing, but angling a grid against it turns dead space into food. Snagging some organic weed barrier fabric for the base stops grass from choking out your climbers. It looks far more expensive than it is once the morning glories completely take over.
This angled rig costs a shockingly low $15–$30. It’s a highly recommended weekend win for tight urban alleys.
- Key Materials: String grids or wire mesh
- Vibe / Style: Urban Oasis
- Difficulty: Absolute beginner
- Budget Breakdown: Mesh: $20 | Staples: $5
- Creator’s Tip: Leave at least 6 inches of air gap between the trellis and the fence to prevent the wood fence from rotting due to trapped moisture.
- Smart Sourcing: Galvanized welded wire mesh rolls or Heavy-duty staple gun kits.
20. Tipi Pole Structure
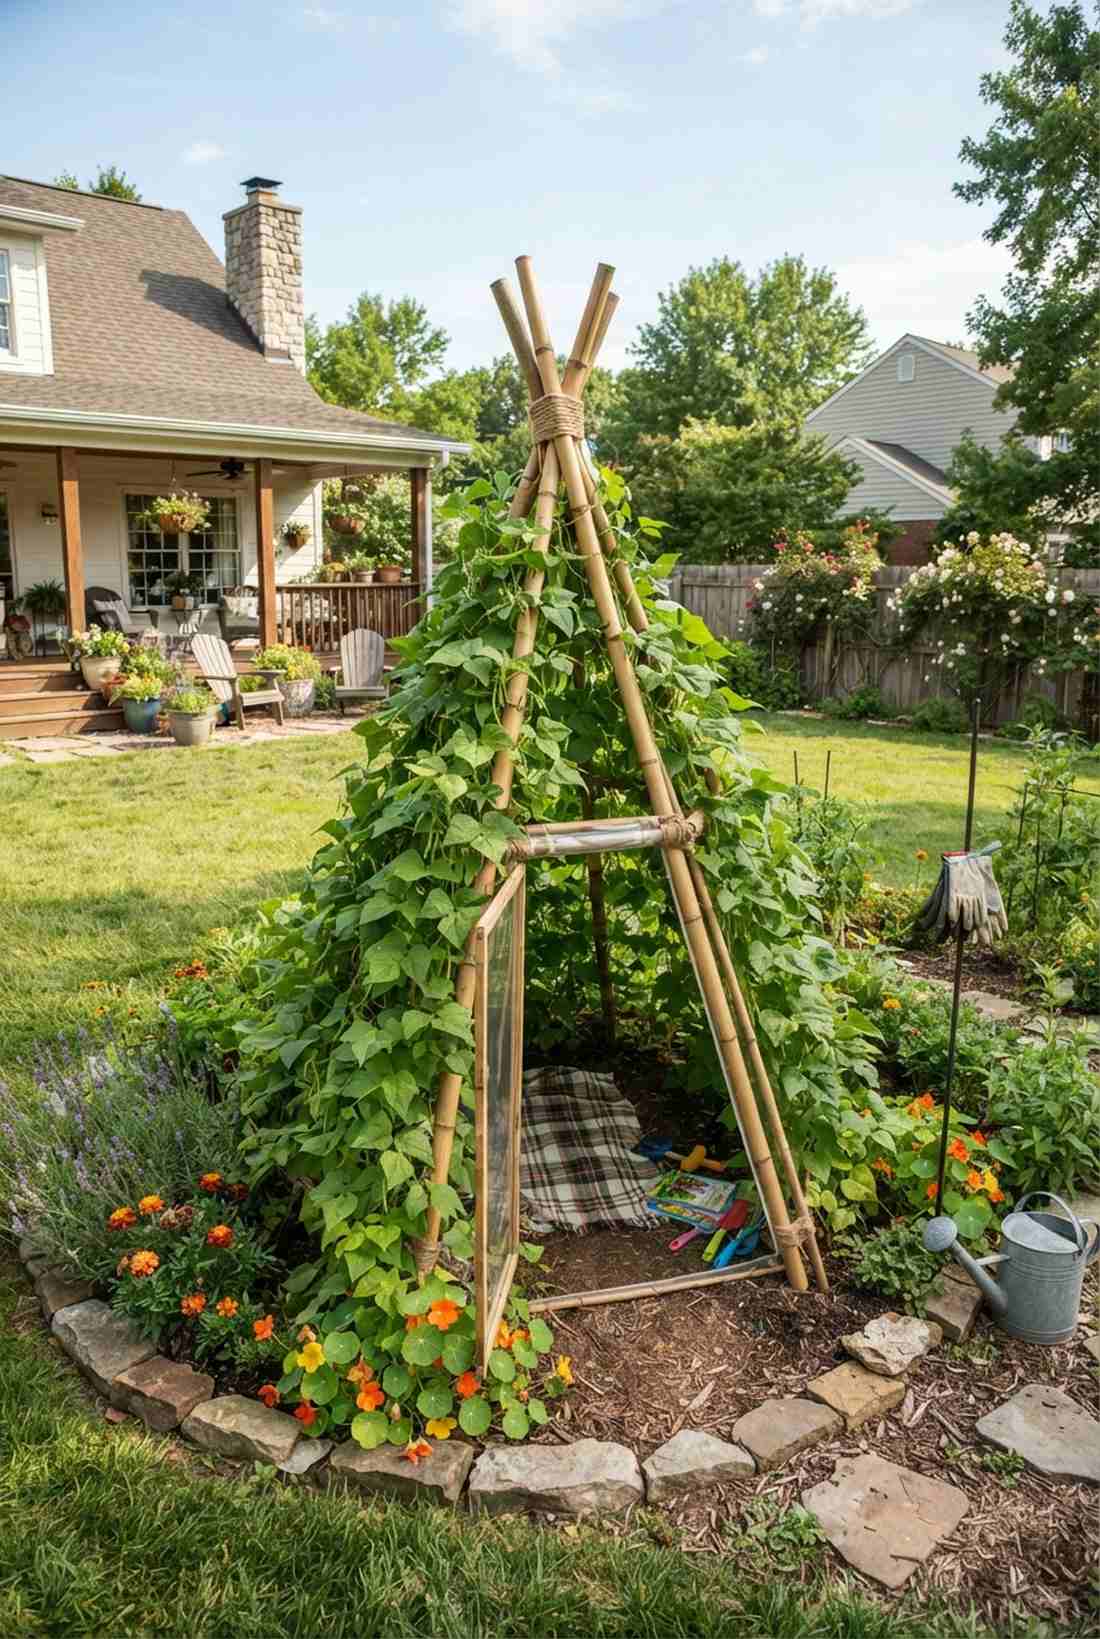
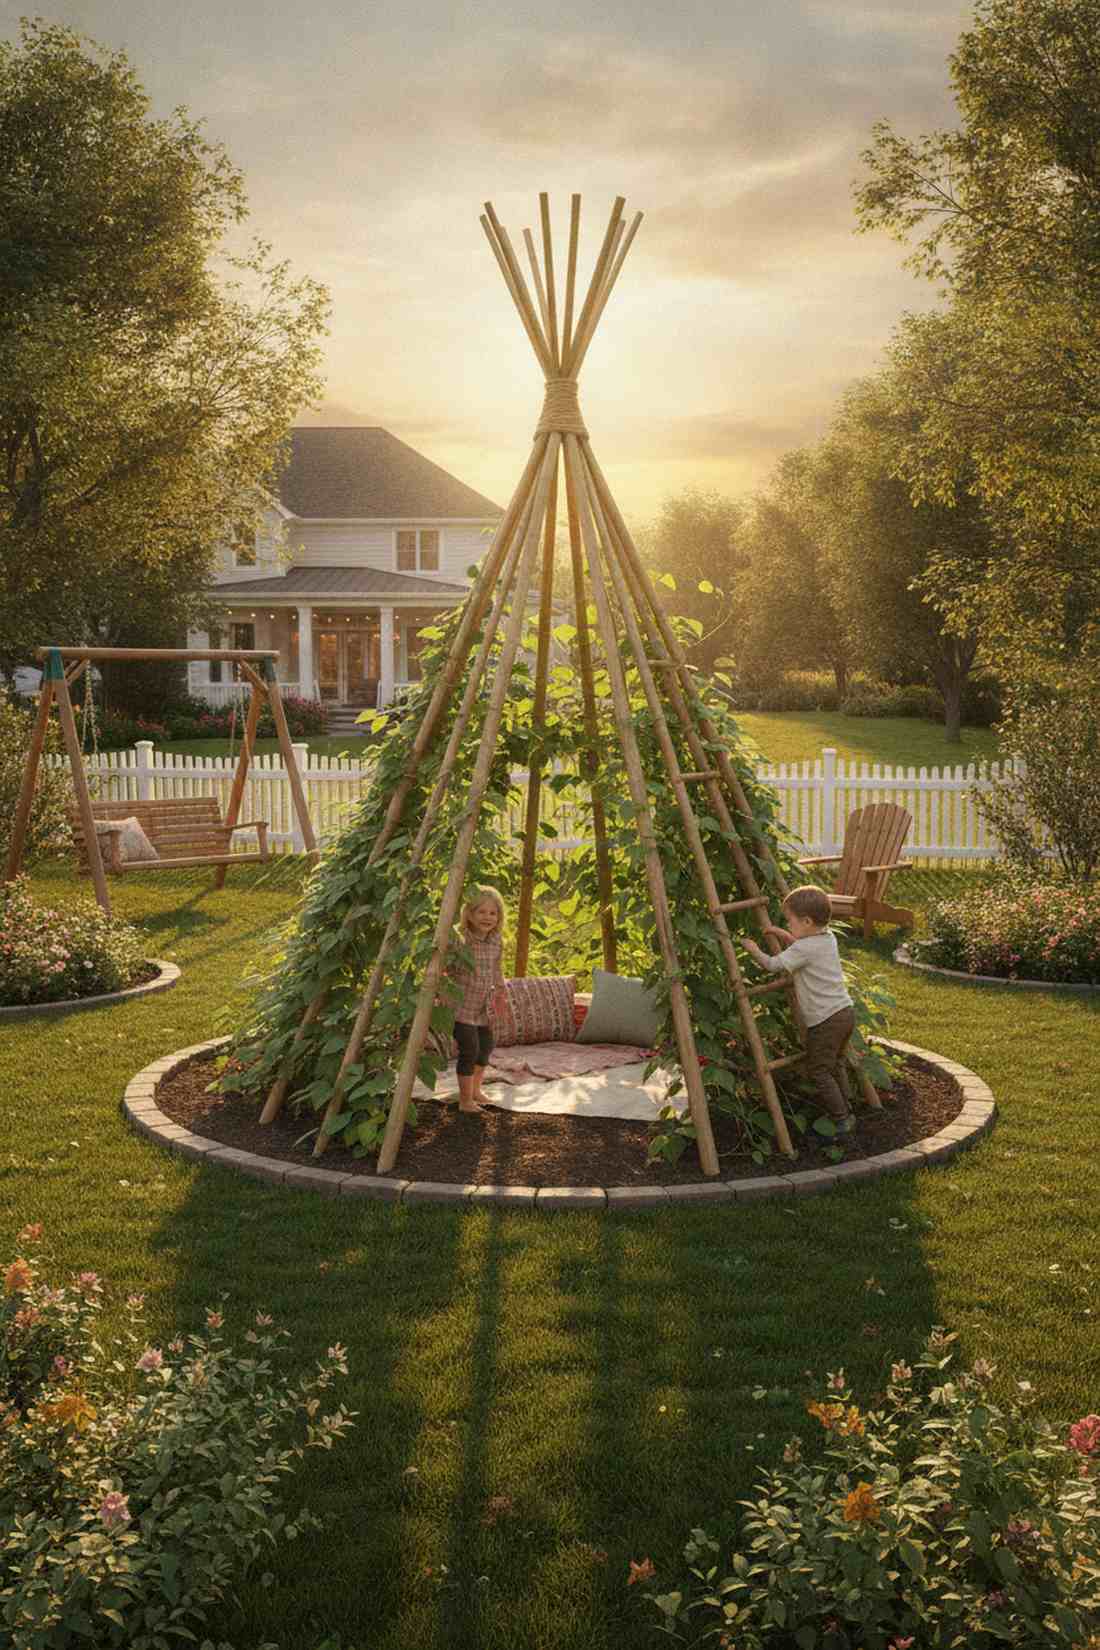
Creates an atmosphere reminiscent of a playful rustic retreat, working magic as a kids’ climbing bean tent. Fantastic for plopping right in the center of a circular bed for an instant centerpiece.
Boring stakes get lost in the foliage, while a lashed teepee commands immediate visual attention. Using thick natural bamboo pole kits ensures it won’t snap during heavy summer windstorms. It gives off a whimsical, storybook charm that neighbors will constantly ask about.
Building this living sculpture runs about $20–$35. Save this to your kid-friendly backyard board.
- Key Materials: 6-foot bamboo poles
- Vibe / Style: Whimsical Storybook
- Difficulty: Easy lashing
- Budget Breakdown: Bamboo: $25 | Twine: $5
- Creator’s Tip: Leave a wide gap between two of the front poles to create a literal “doorway” for kids to hide inside the bean fort.
- Smart Sourcing: Thick natural bamboo poles (bulk pack) or Weather-resistant jute twine rolls.
21. String Trellis Grid
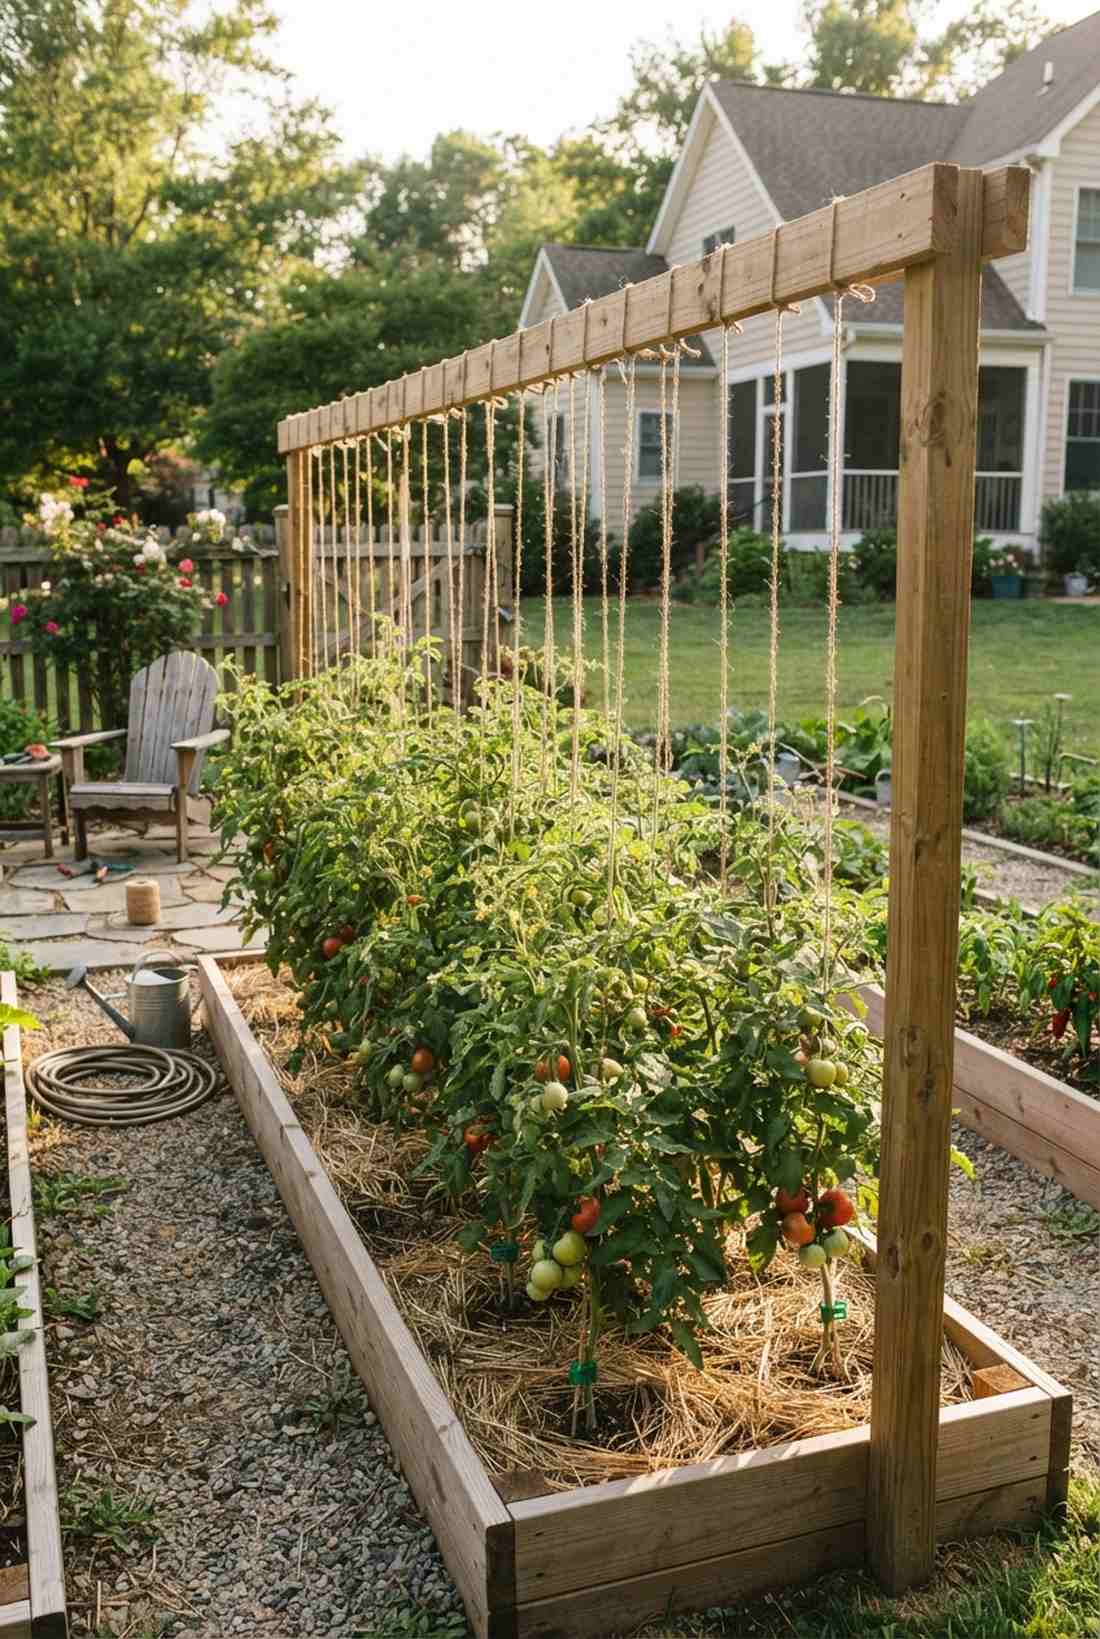
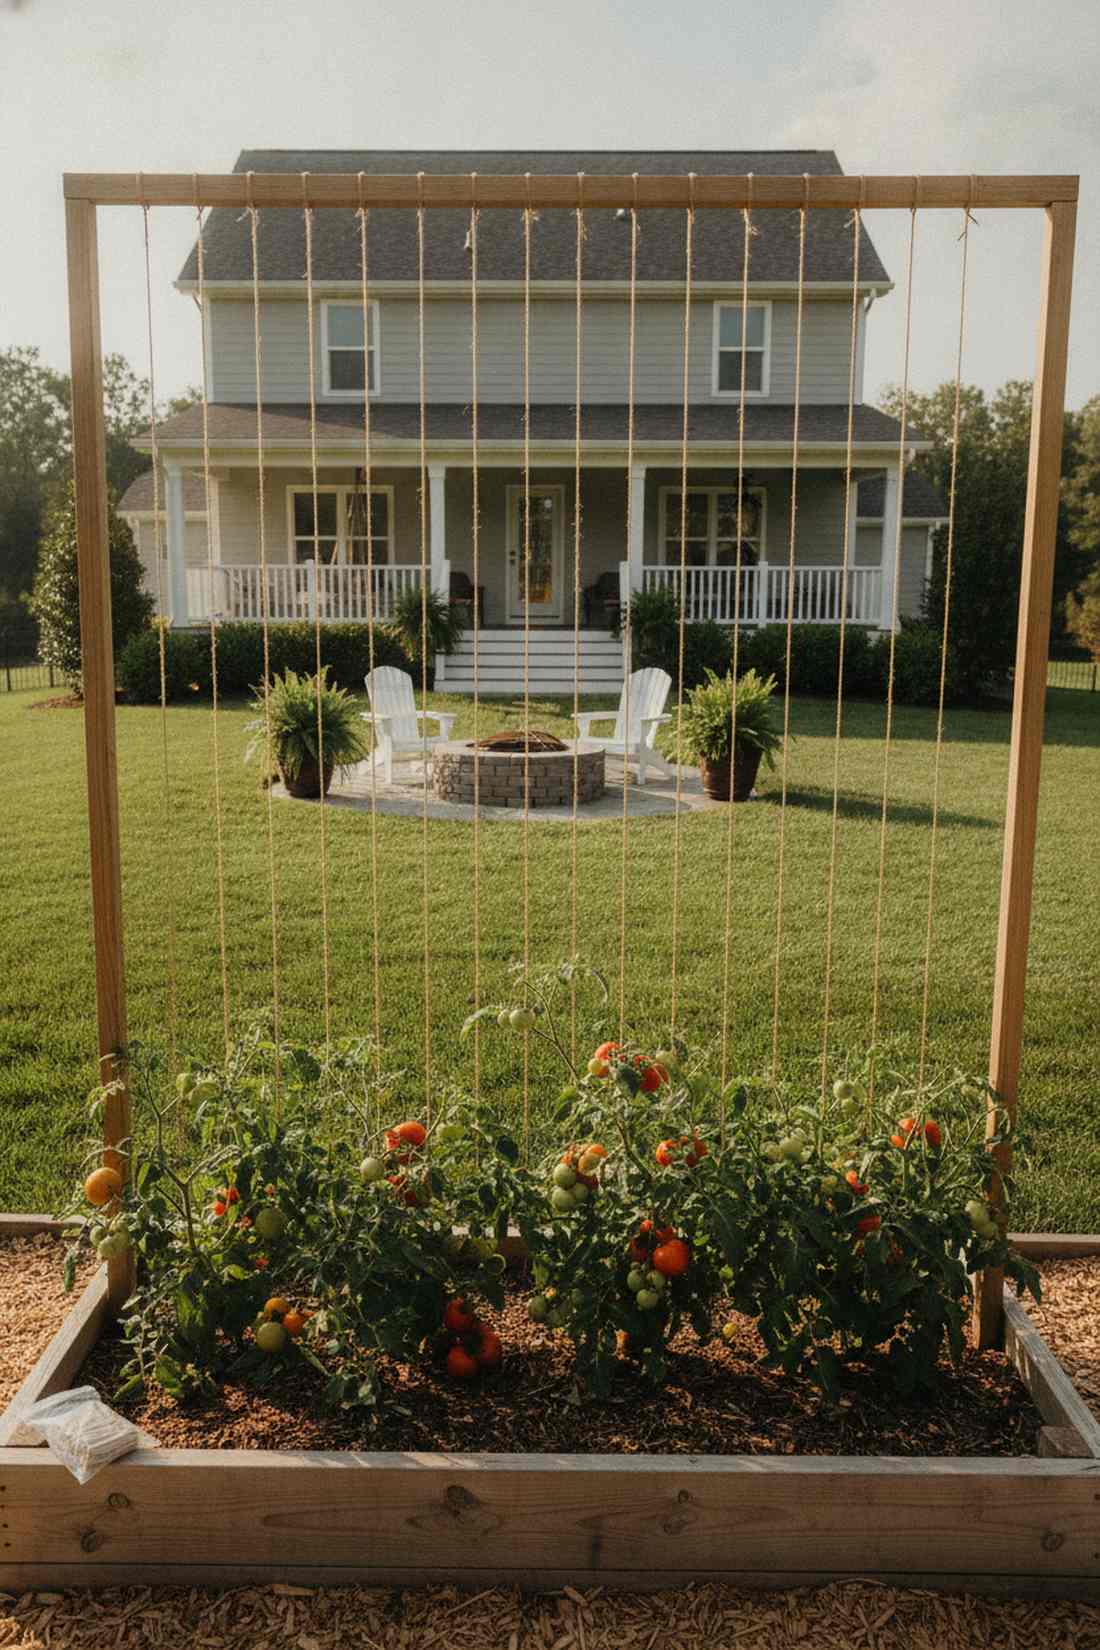
Exudes the laser-precise energy of a commercial hydroponic farm, serving as an ultra-cheap tomato support system. Ideal for gardeners who want high-volume harvests without giant wooden structures blocking views.
Messy wire cages mangle plants, but dropping taut vertical strings guides tomatoes perfectly upward. Investing in biodegradable garden twine means at the end of the season, you just compost the whole mess. It’s an intensely practical, clean-lined setup that strips away visual clutter.
You can execute this minimalist trick for $10–$20.
- Key Materials: Nylon or jute twine
- Vibe / Style: Minimalist Pro
- Difficulty: Simple knot tying
- Budget Breakdown: Twine: $10 | Top Rail Wood: $10
- Creator’s Tip: Use a slipknot at the top rail so you can easily tighten the string if it stretches out after a heavy rain.
- Smart Sourcing: Heavy-duty biodegradable garden twine or Pre-cut tomato support clips (bulk pack).
22. Ladder Trellis Lean
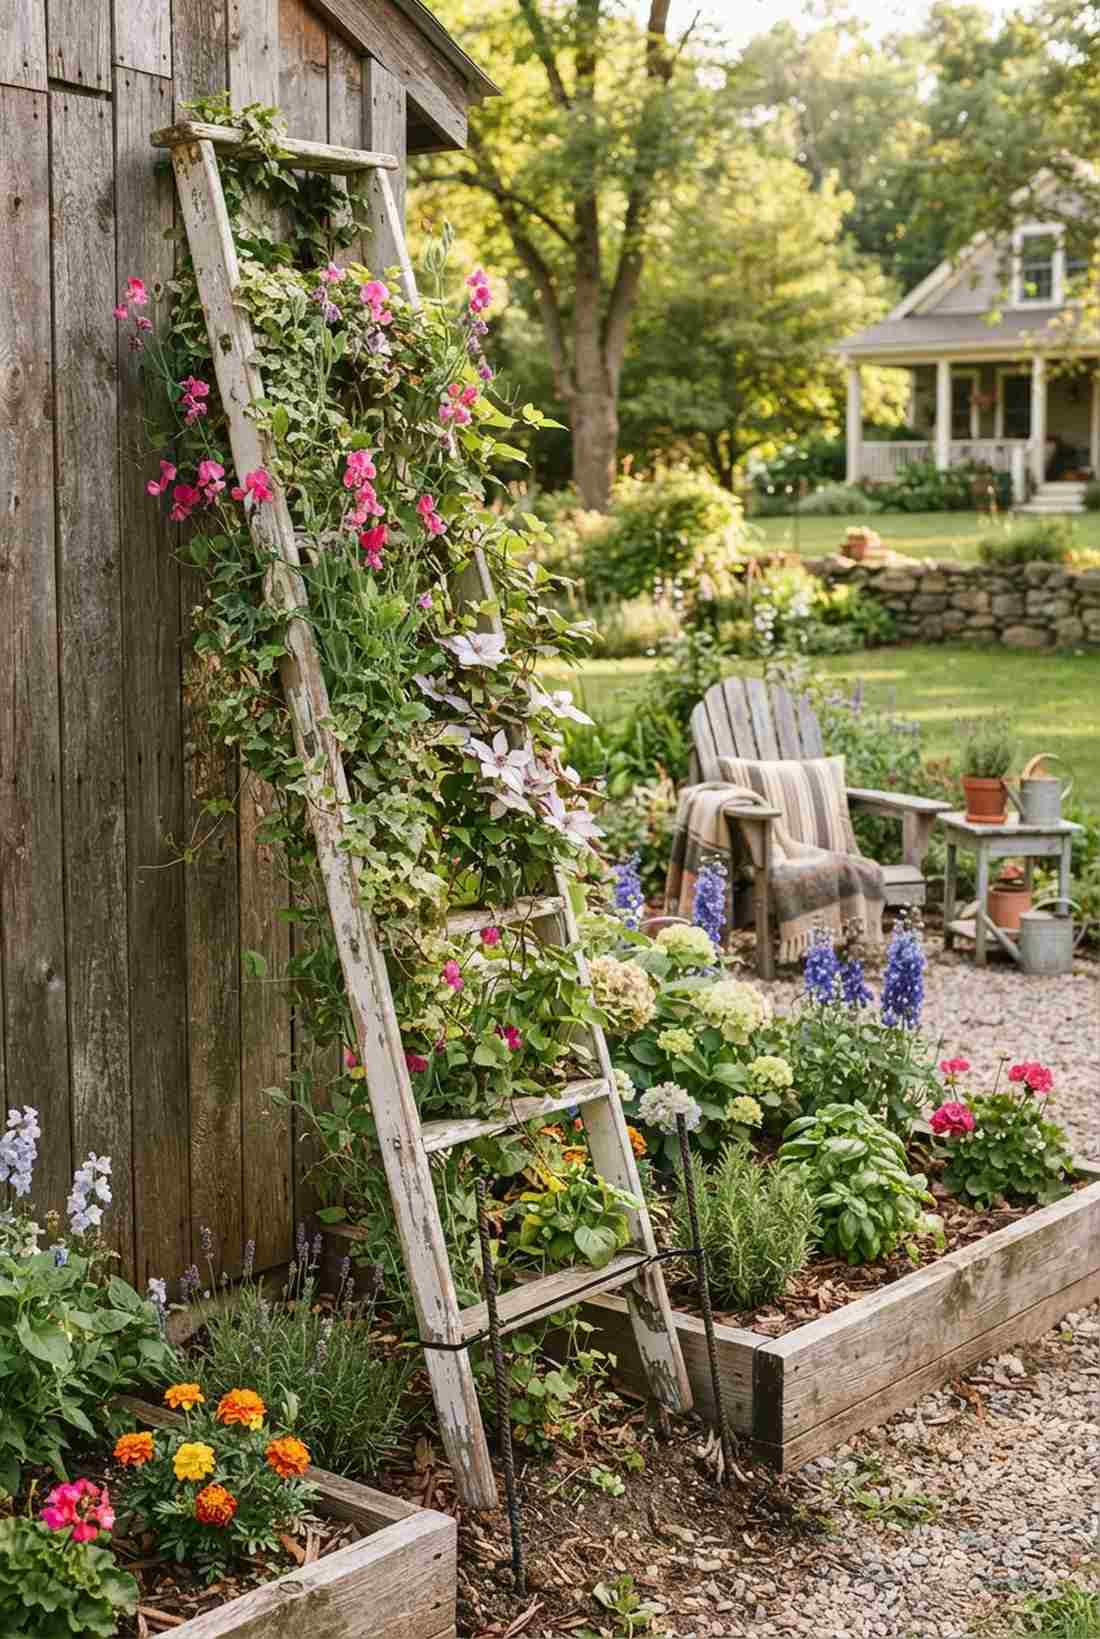
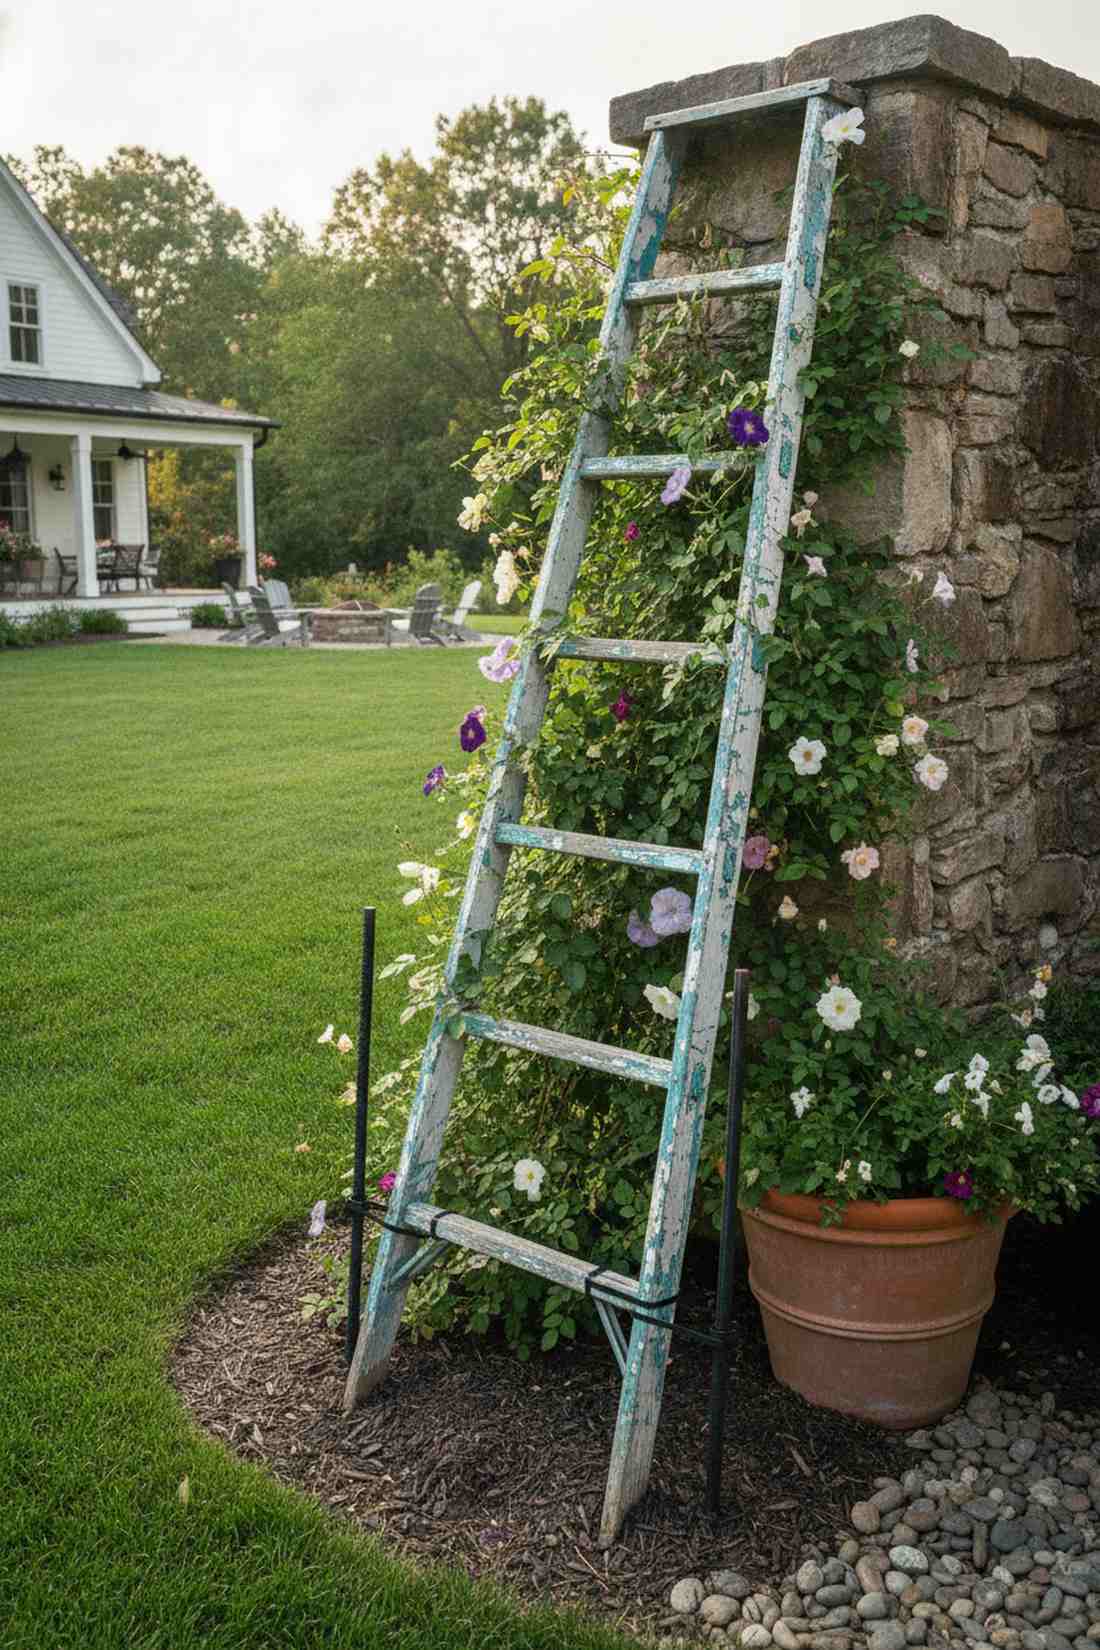
Feels like a brilliant page pulled from a shabby-chic magazine, standing out as a vintage upcycled garden feature. A stunning way to repurpose old junk while adding immense vertical growing room.
Throwing away broken ladders is a waste when they naturally perfectly space out vine tendrils. Coating the wood in a clear food-safe wood sealant locks in the chipped-paint aesthetic without poisoning the soil. It completely redefines trash into treasure with almost zero physical effort.
This literal trash-to-treasure hack is basically free, or $15 for sealant. Pin this if you love rustic flea-market vibes.
- Key Materials: Old wooden ladder
- Vibe / Style: Shabby-Chic Upcycle
- Difficulty: Zero (just lean it)
- Budget Breakdown: Ladder: $0 | Sealant: $15
- Creator’s Tip: Pound two rebar stakes into the ground at the base of the ladder and zip-tie the bottom rung so it never slips.
- Smart Sourcing: Clear food-safe waterproofing sealants or Heavy-duty ground rebar stakes.
23. Espalier Wire System

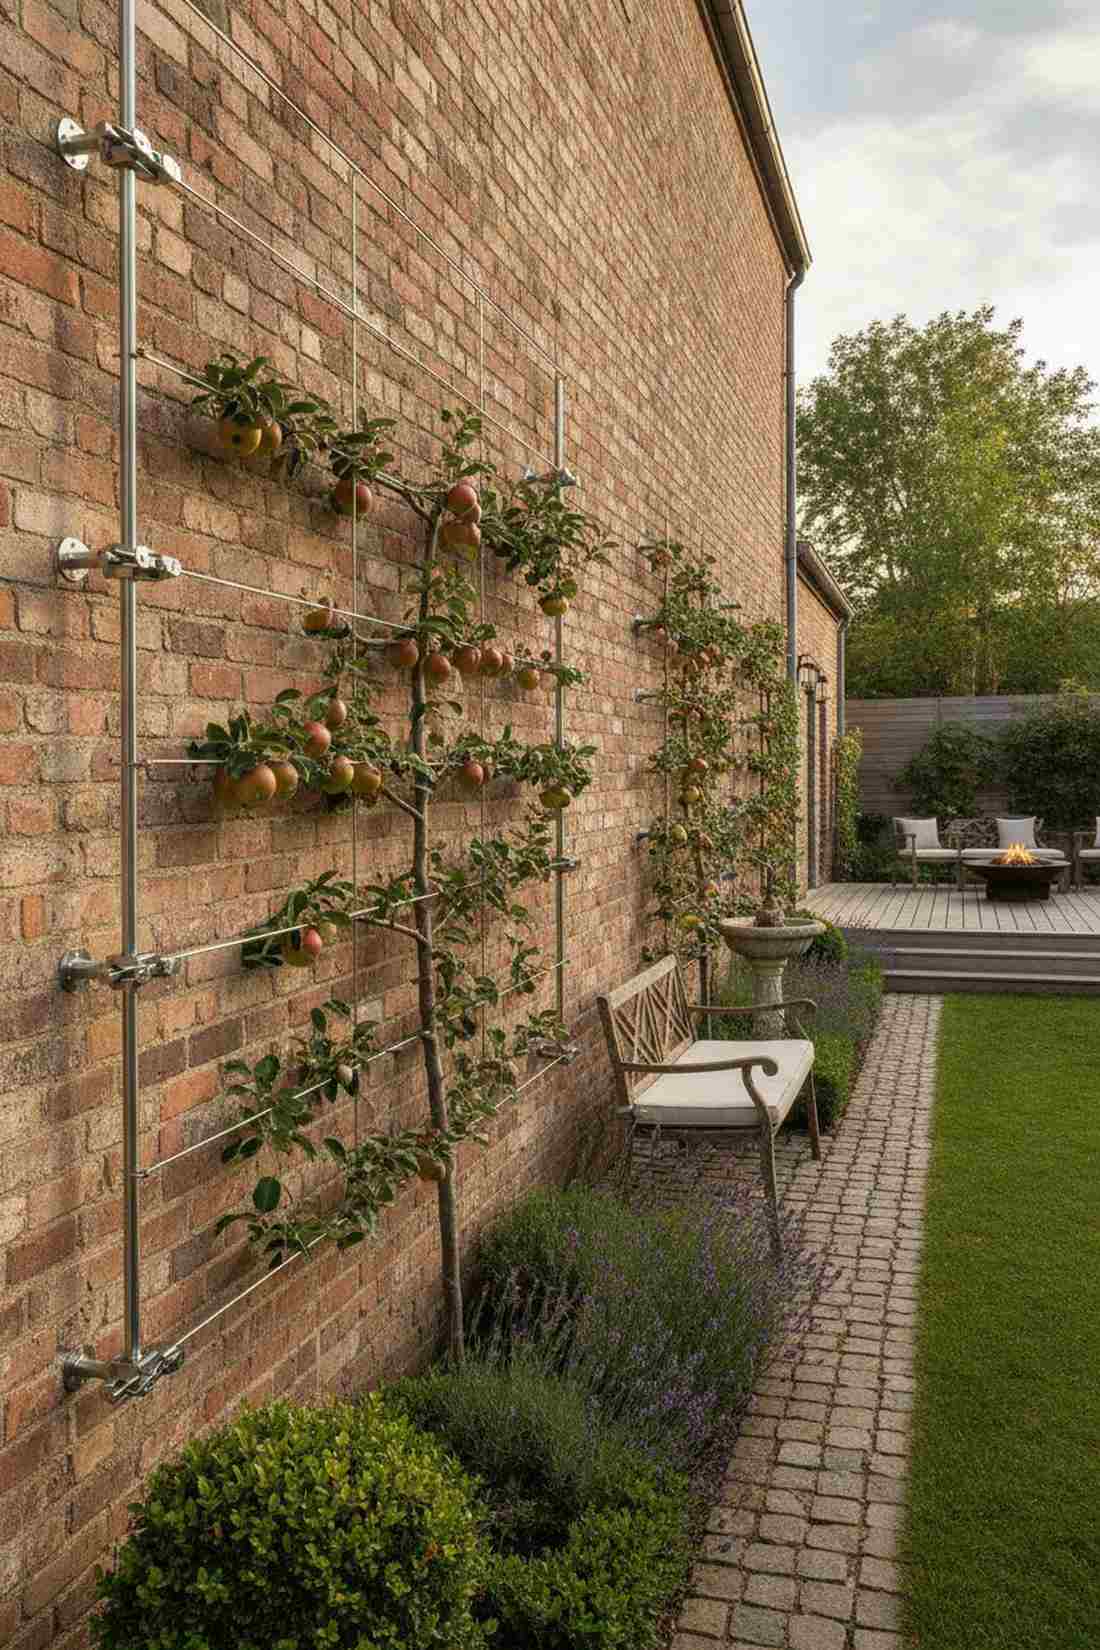
Radiates the hyper-luxurious precision of a French chateau courtyard, functioning as a two-dimensional fruit tree wall. The absolute pinnacle of maximizing yield in narrow side-yards against brick.
Most assume you need acres for an orchard, but stretching tension wires forces trees to grow flat. Utilizing a heavy-duty stainless wire rope kit guarantees the cables won’t snap under the weight of autumn apples. It delivers a breathtakingly expensive look that completely transforms bland fences.
Wiring up this high-end system costs roughly $40–$80 for hardware.
- Key Materials: Stainless tension wire and turnbuckles
- Vibe / Style: French Aristocracy
- Difficulty: Advanced pruning required
- Budget Breakdown: Wire Kit: $40 | Anchor Hooks: $15
- Creator’s Tip: Buy turnbuckles for one end of every wire; the metal will stretch in the summer heat and you’ll need to re-tighten them.
- Smart Sourcing: Stainless steel wire rope tensioning kits or Heavy-duty eyelet wall anchors.
Wait until you see the absolute cheapest way to mimic high-end stone finishes coming up shortly…
Material-Focused Raised Beds Ideas
Material selection influences durability, aesthetics, and environmental impact of raised beds design. Each option brings distinct characteristics that suit different climates, budgets, and landscape styles.
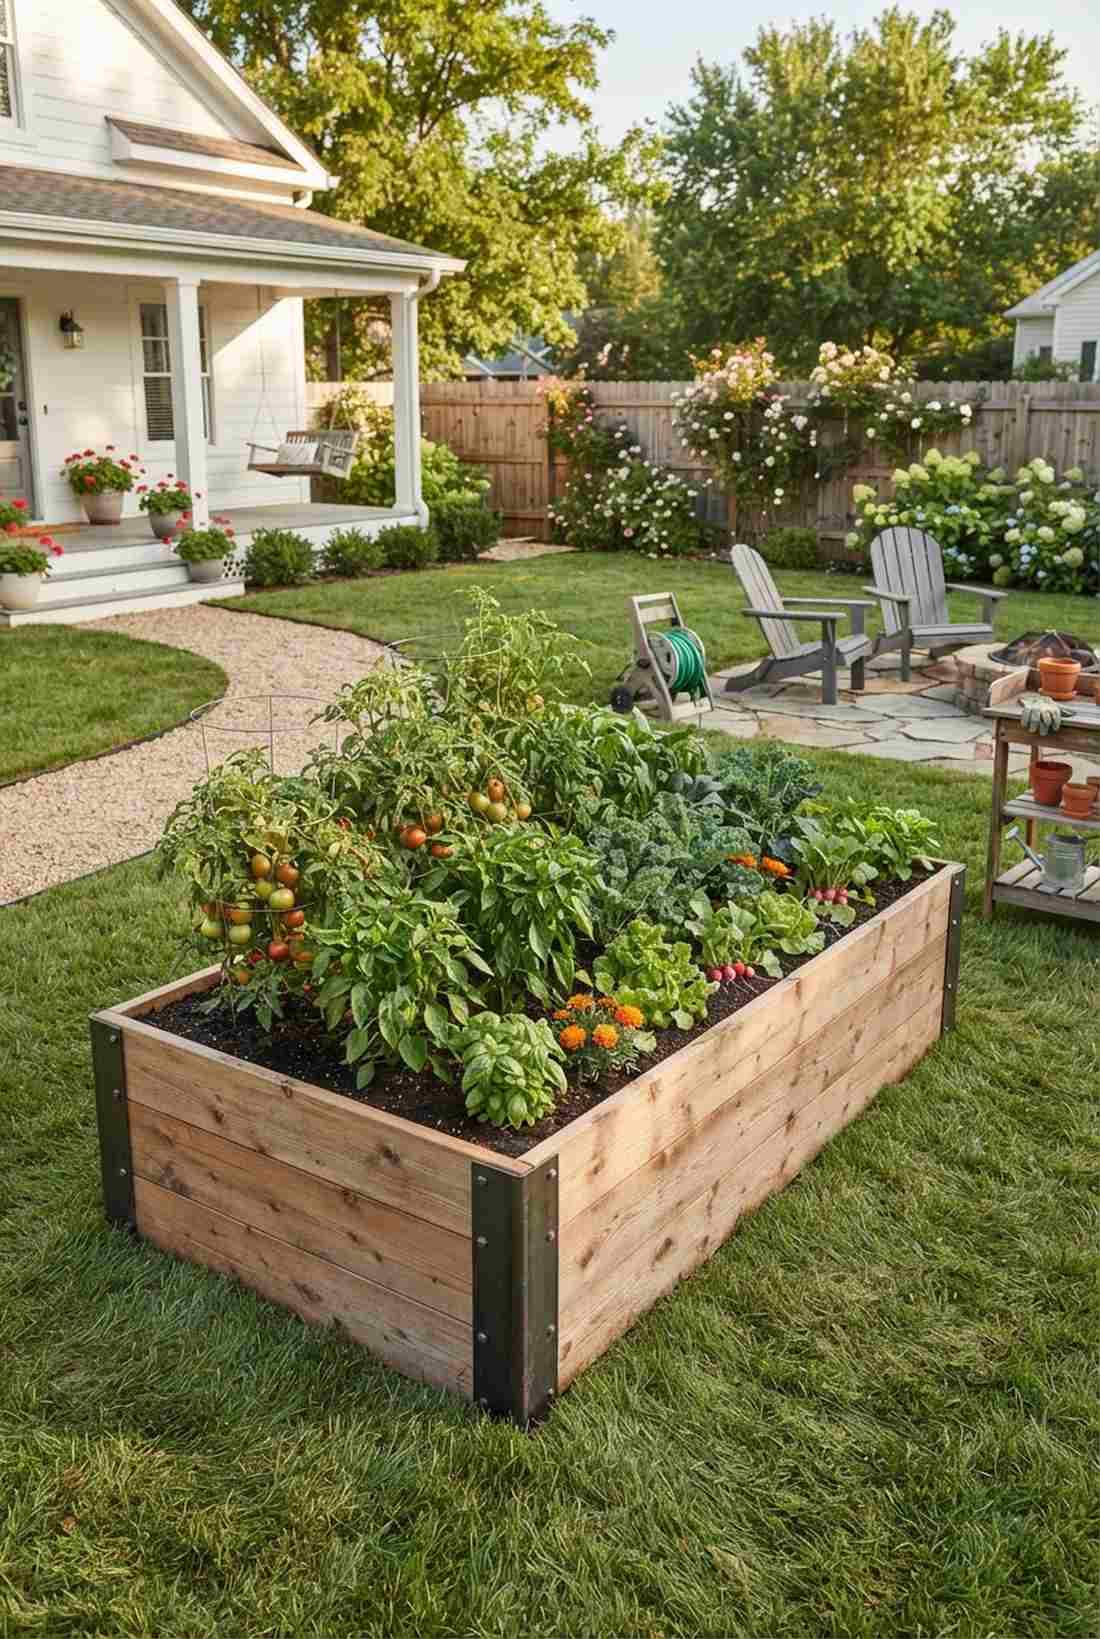
24. Cedar Plank Classic
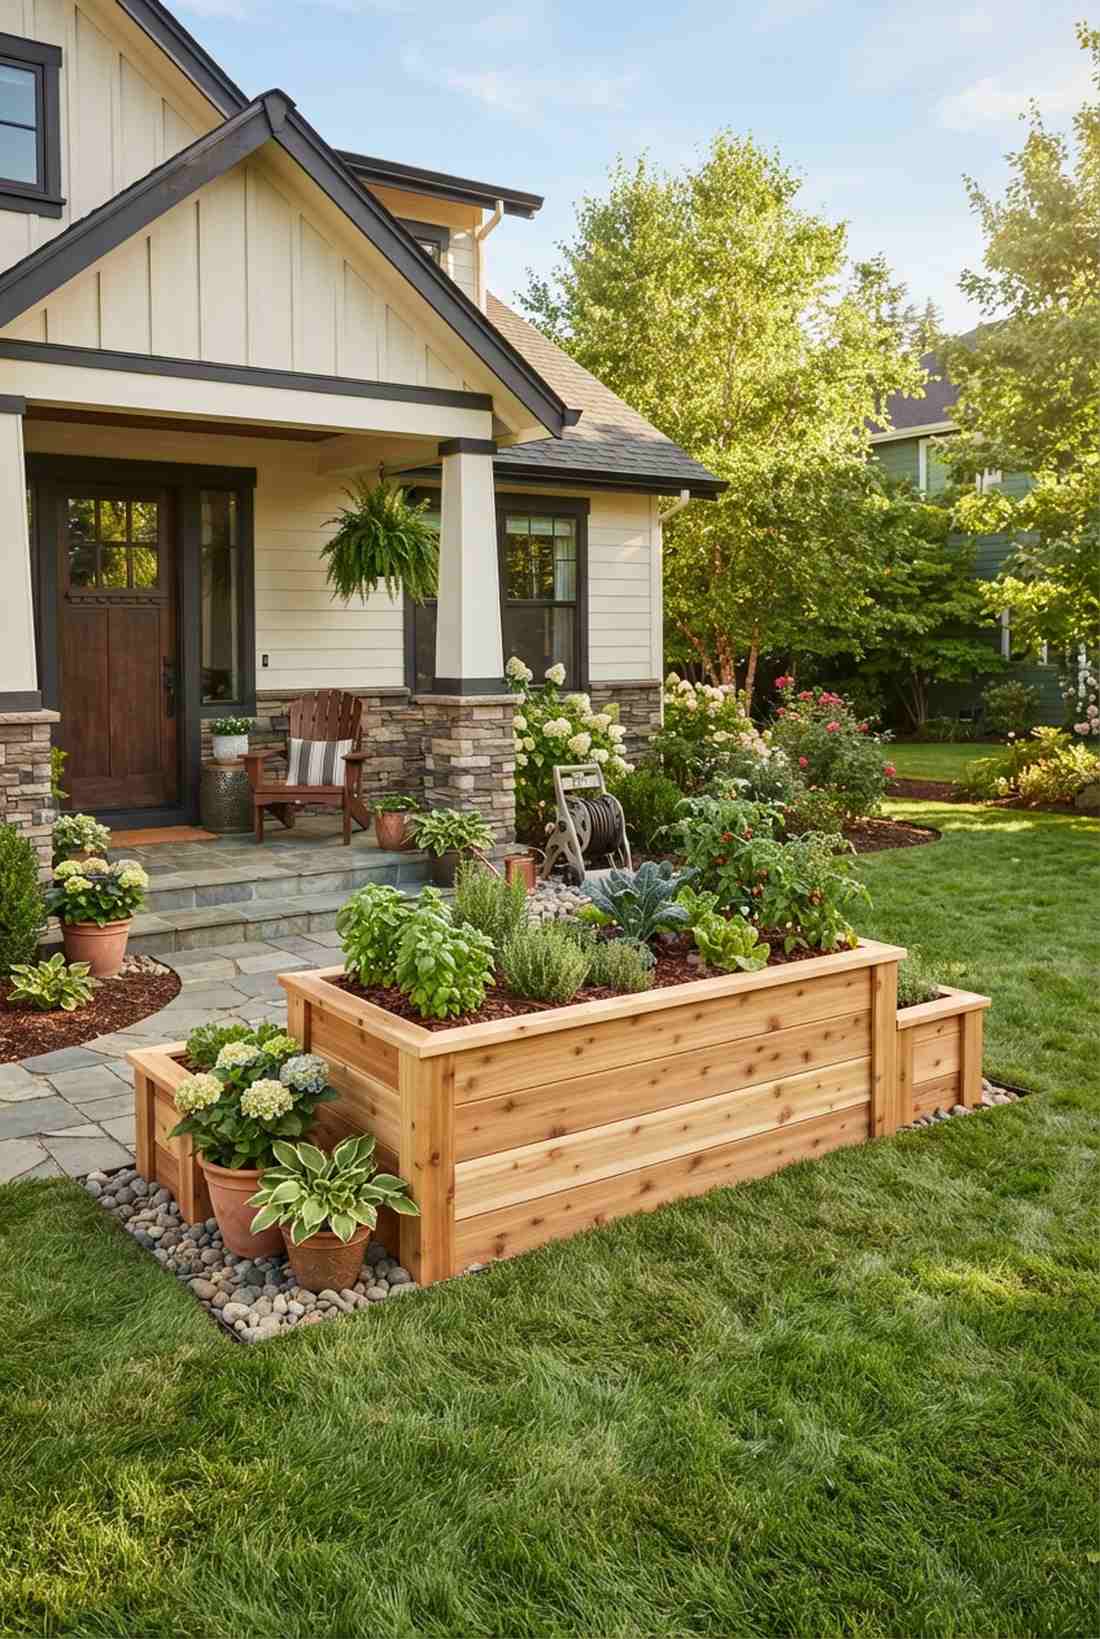
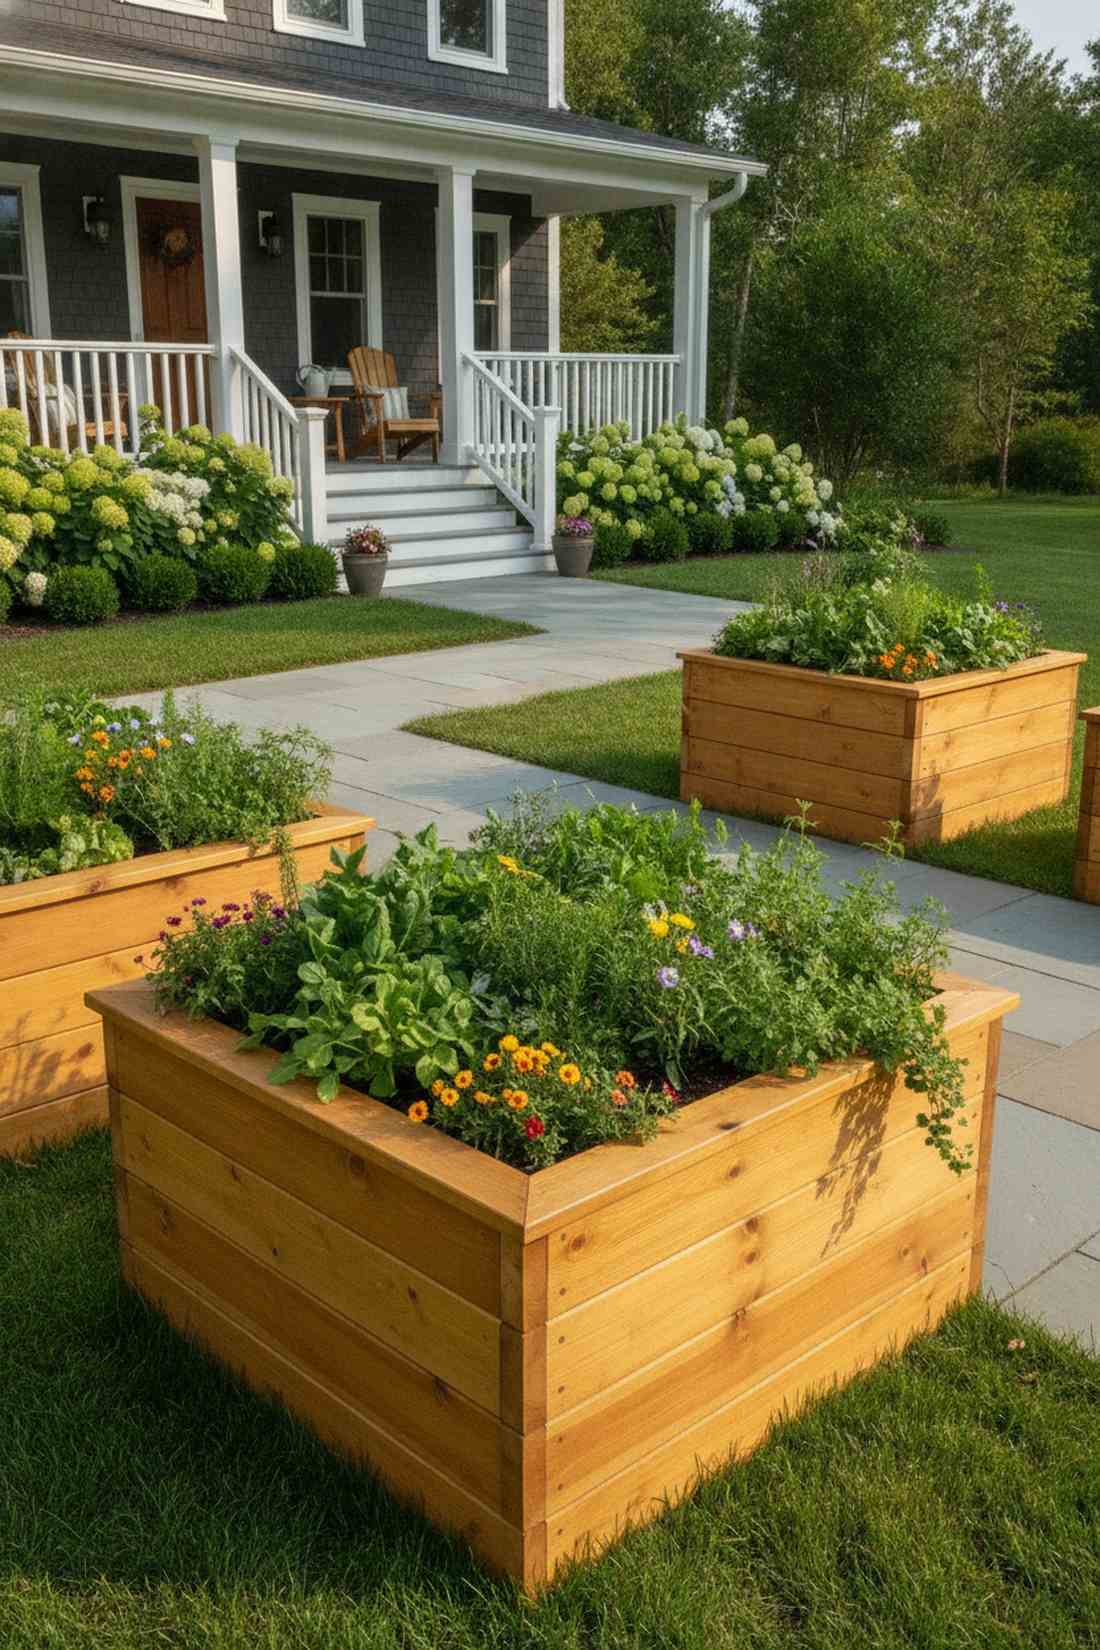
Delivers the crisp, aromatic essence of a premium organic sanctuary, standing out as the gold standard wooden planter. Exceptionally perfect for front-yard displays where neighborhood HOA rules demand a neat, expensive aesthetic.
Pine boards rot away in two years, whereas natural cedar fights off moisture and pests naturally. Coating the exterior with premium UV-resistant wood stain prevents that gorgeous blonde grain from turning a dull grey. It provides a flawless, designer-level finish that elevates everything around it.
Investing in real cedar runs about $80–$140 per box. Save this to your permanent landscape upgrade board.
- Key Materials: 2-inch thick raw cedar planks
- Vibe / Style: Premium Organic
- Difficulty: Easy beginner build
- Budget Breakdown: Cedar lumber: $110 | Screws: $10
- Creator’s Tip: Never paint the inside of the boards; let the soil touch the raw wood to avoid chemical leaching into your veggies.
- Smart Sourcing: Pre-cut cedar raised garden box kits or Exterior UV-blocking wood stain finishes.
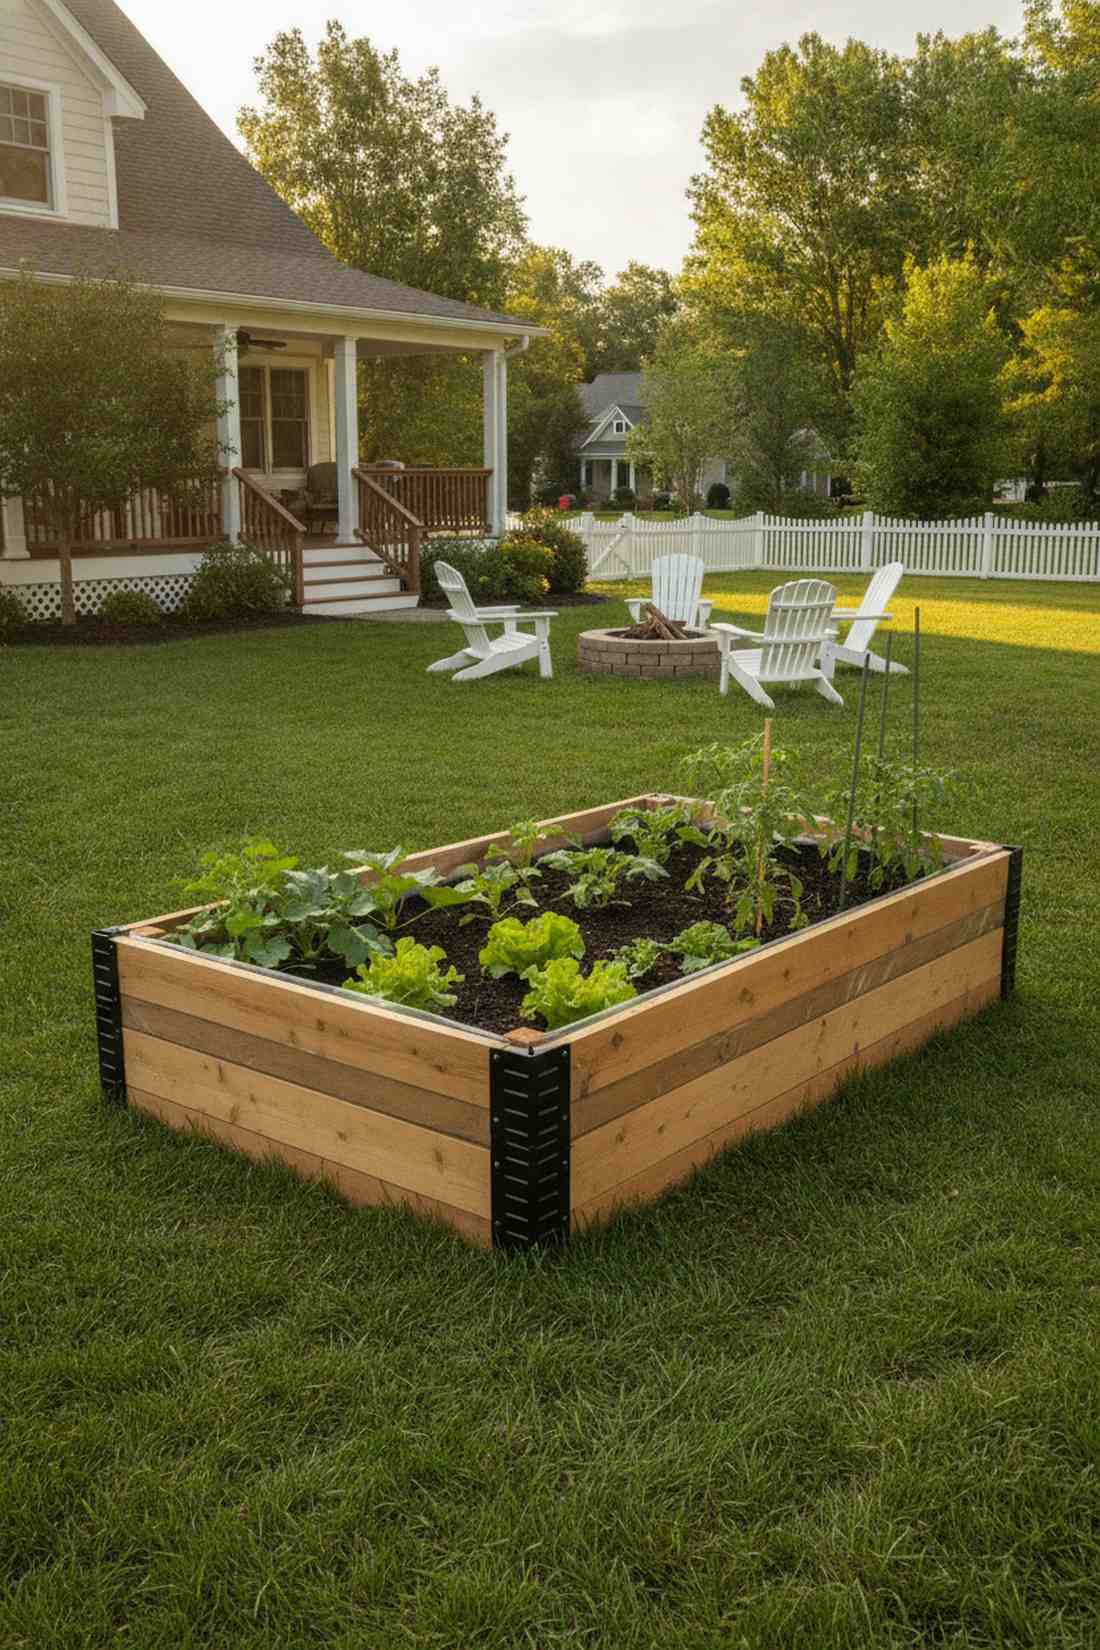
25. Galvanized Metal Moderne
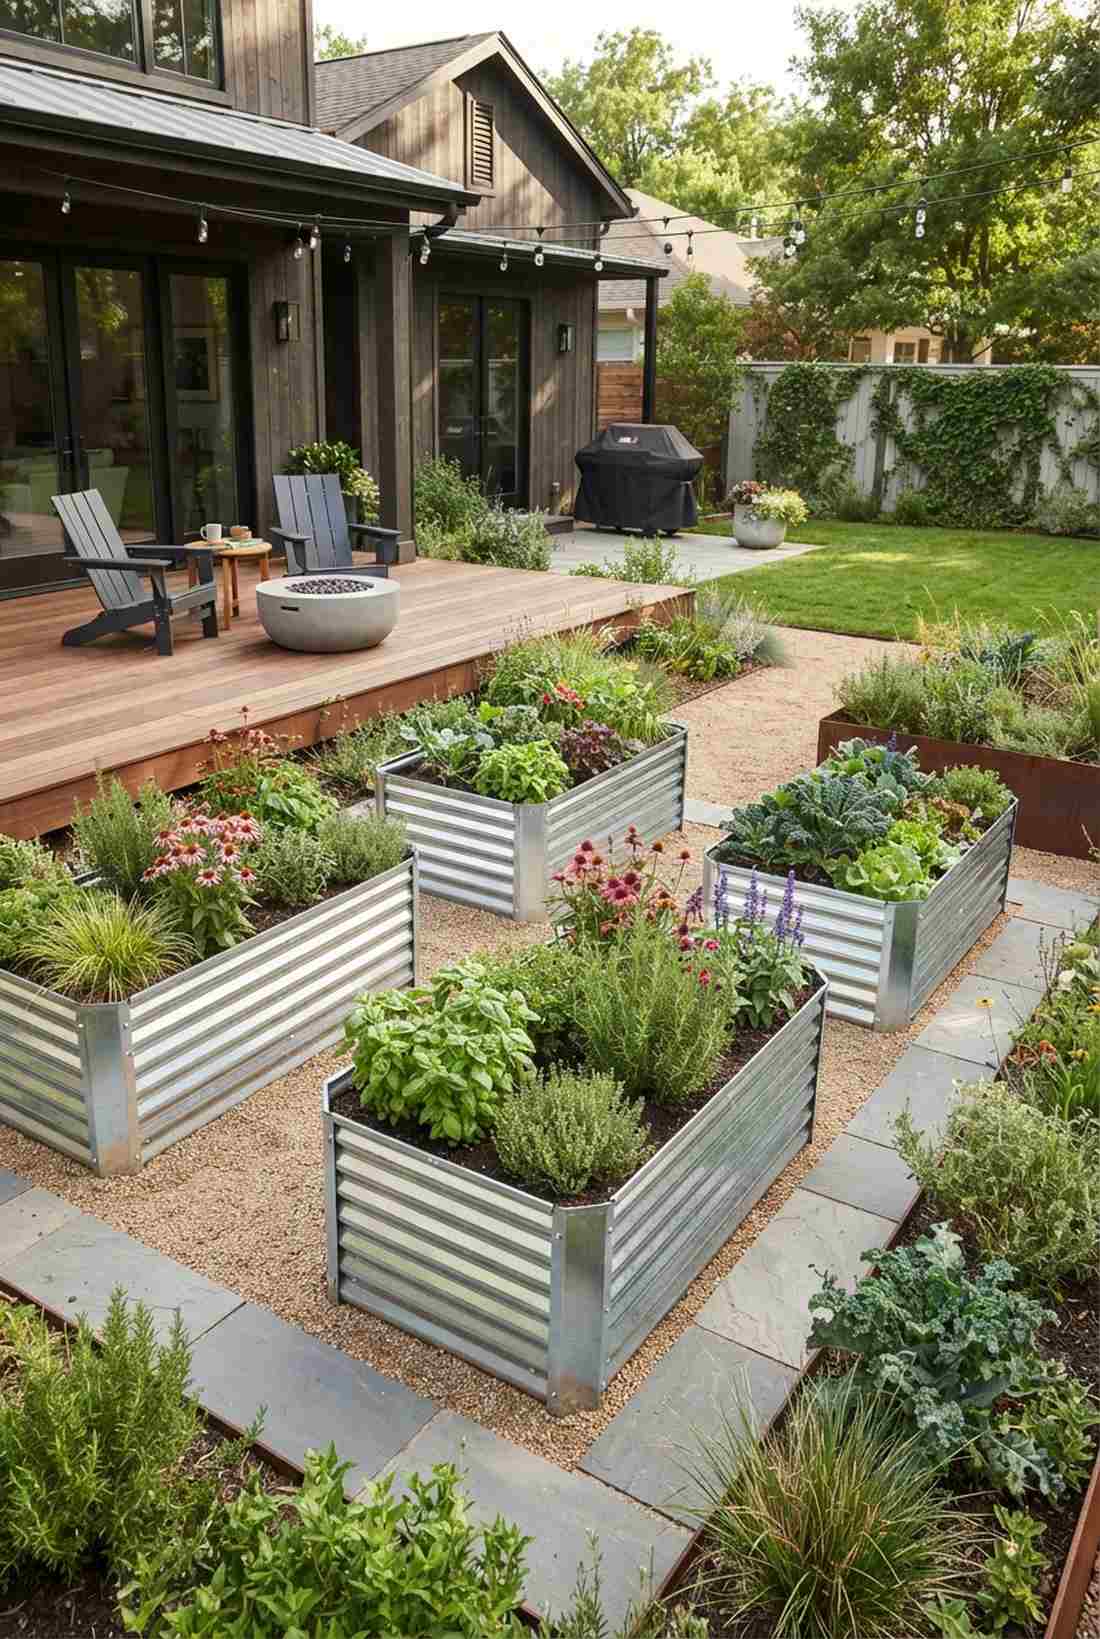
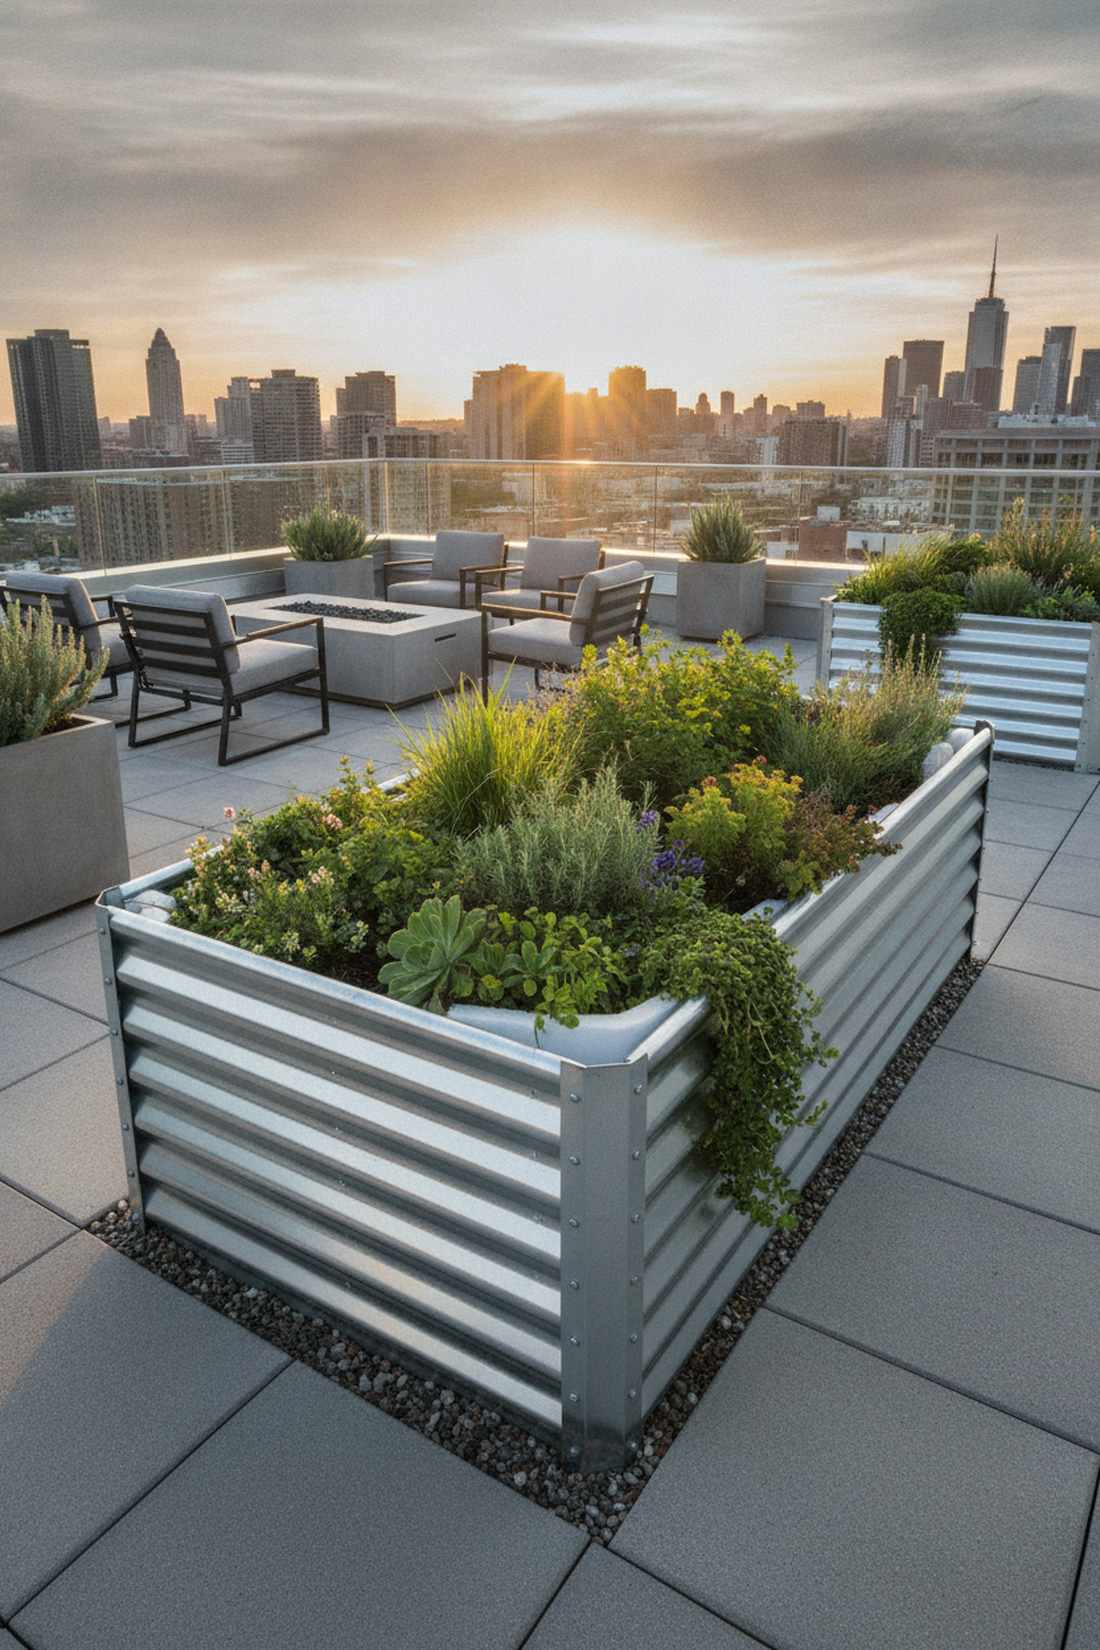
Exudes the edgy, hyper-durable vibe of an industrial loft, hitting the mark beautifully as a modern corrugated steel bed. Fantastic for brutal desert climates or urban rooftops where wood rapidly perishes.
Timber warps and splits, but heavy-gauge metal laughs at extreme weather for decades. Opting for a pre-drilled modular metal planter kit saves you from wrestling with razor-sharp sheet metal edges. It delivers a highly coveted architectural contrast against soft, lush green foliage.
You can snag a sleek metal setup for $60–$110 online. Pin this if you are absolutely sick of replacing rotten wood every spring.
- Key Materials: Corrugated metal panels
- Vibe / Style: Industrial Chic
- Difficulty: Easy bolt-together
- Budget Breakdown: Metal Kit: $90 | Base gravel: $15
- Creator’s Tip: Line the inside of the sun-facing metal panels with cheap foam board insulation so it doesn’t cook your delicate roots in August.
- Smart Sourcing: Galvanized steel raised garden bed kits or Safety edge guard stripping (bulk roll).
26. Composite Board System
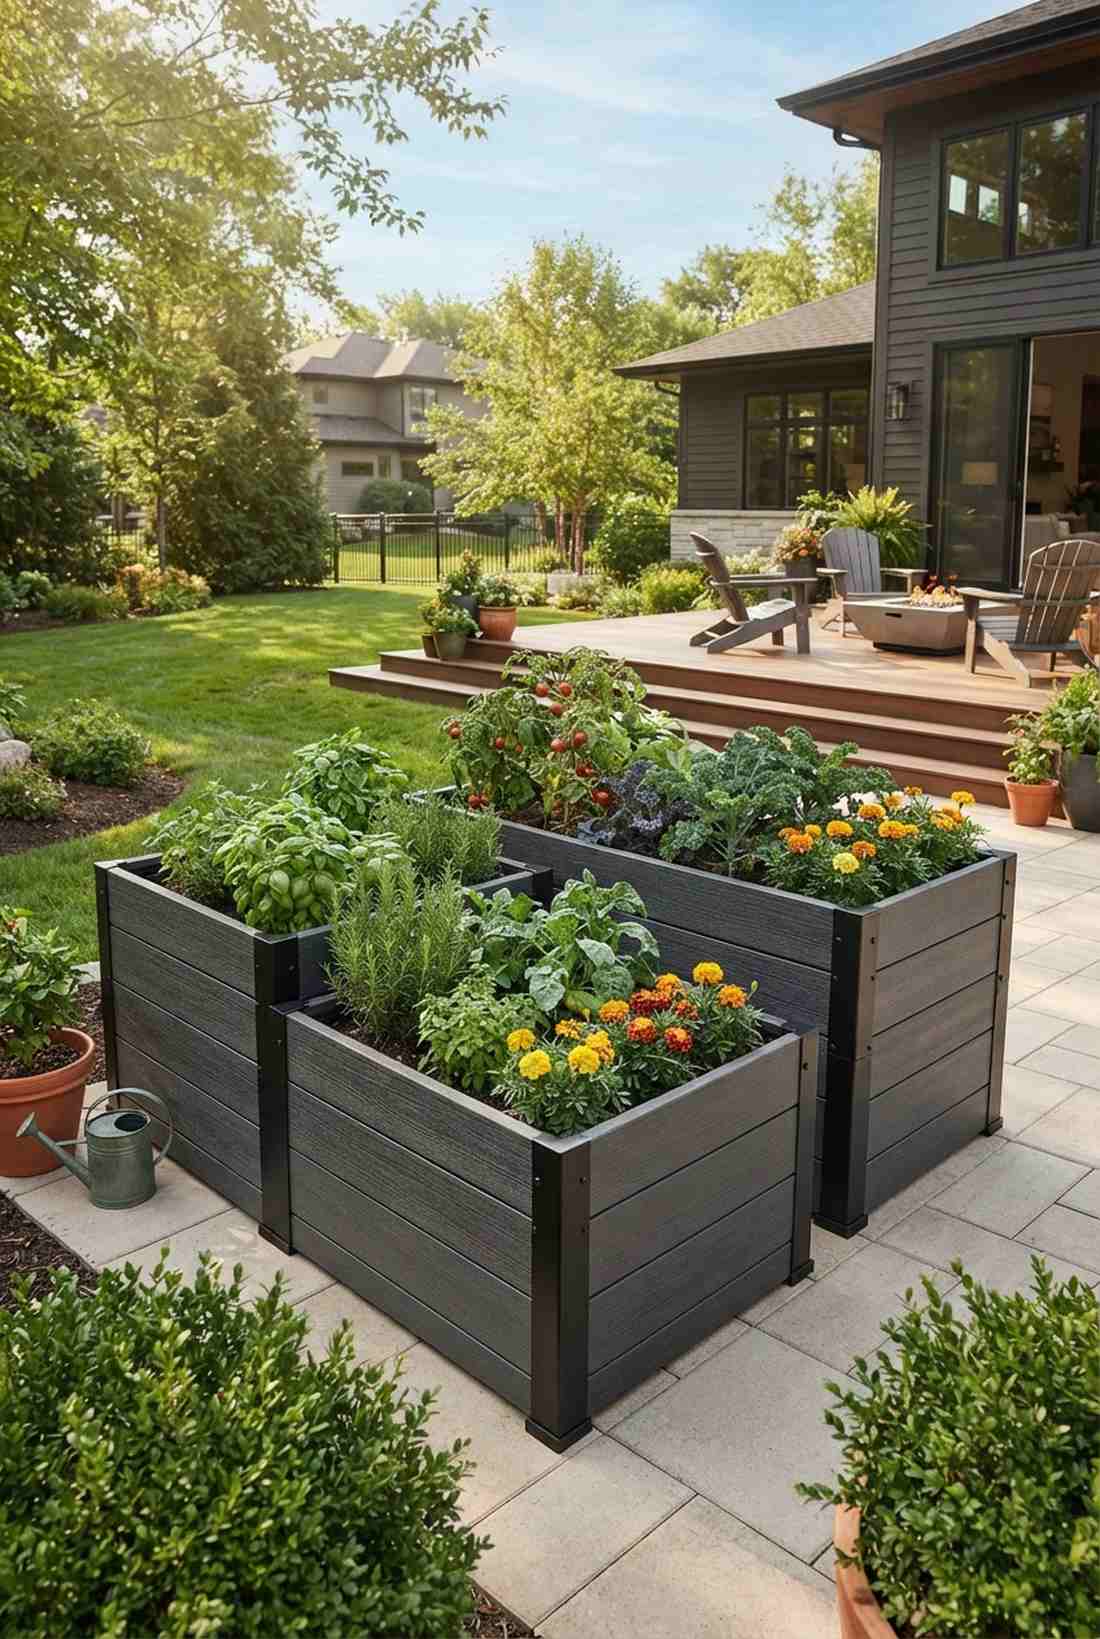
Feels like the sleekest, most futuristic deck material available, functioning as a zero-maintenance lifetime planter. The ultimate hands-off solution for busy homeowners who refuse to sand or stain.
Wood requires endless babysitting, but recycled plastic-wood composite literally never deteriorates. By picking up a specialized composite corner bracket set, you guarantee the massive soil expansion won’t blow out the sides. It looks far more expensive than it is while eliminating weekend chore anxiety.
A lifetime composite rig costs roughly $130–$200. Highly recommended for the “set it and forget it” crowd.
- Key Materials: Recycled composite decking boards
- Vibe / Style: Flawless Modern Suburban
- Difficulty: Moderate power tools
- Budget Breakdown: Composite panels: $140 | Brackets: $30
- Creator’s Tip: Pre-drill all your holes! Composite material is incredibly dense and will snap your screws if you try to drive them straight in.
- Smart Sourcing: Tool-free composite raised bed kits or Heavy-duty exterior composite screws.
27. Dry-Stacked Stone Wall


Creates an atmosphere reminiscent of an ancient Scottish castle garden, serving beautifully as a natural hardscape planting zone. Phenomenal for integrating seamlessly into existing rocky terrain or woodland borders.
Mortar requires painful masonry skills, whereas dry-stacking relies entirely on beautiful, rugged gravity. Sneaking in an organic weed barrier fabric behind the stones stops dirt from bleeding through the cracks during rain. It gives off a wealthy estate vibe that completely anchors the yard.
Sourcing local fieldstone usually costs $50–$150 depending on your quarry. Save this to your high-end hardscaping board.
- Key Materials: Flat natural fieldstones
- Vibe / Style: Ancient Woodland
- Difficulty: Heavy lifting required
- Budget Breakdown: Stone: $100 | Backing Fabric: $20
- Creator’s Tip: Always angle the face of the stone wall slightly inward toward the dirt (batter) so gravity holds it together permanently.
- Smart Sourcing: Heavy-duty woven landscape fabric (bulk roll) or Faux-stone lightweight modular garden borders.
28. Mortared Brick Bed
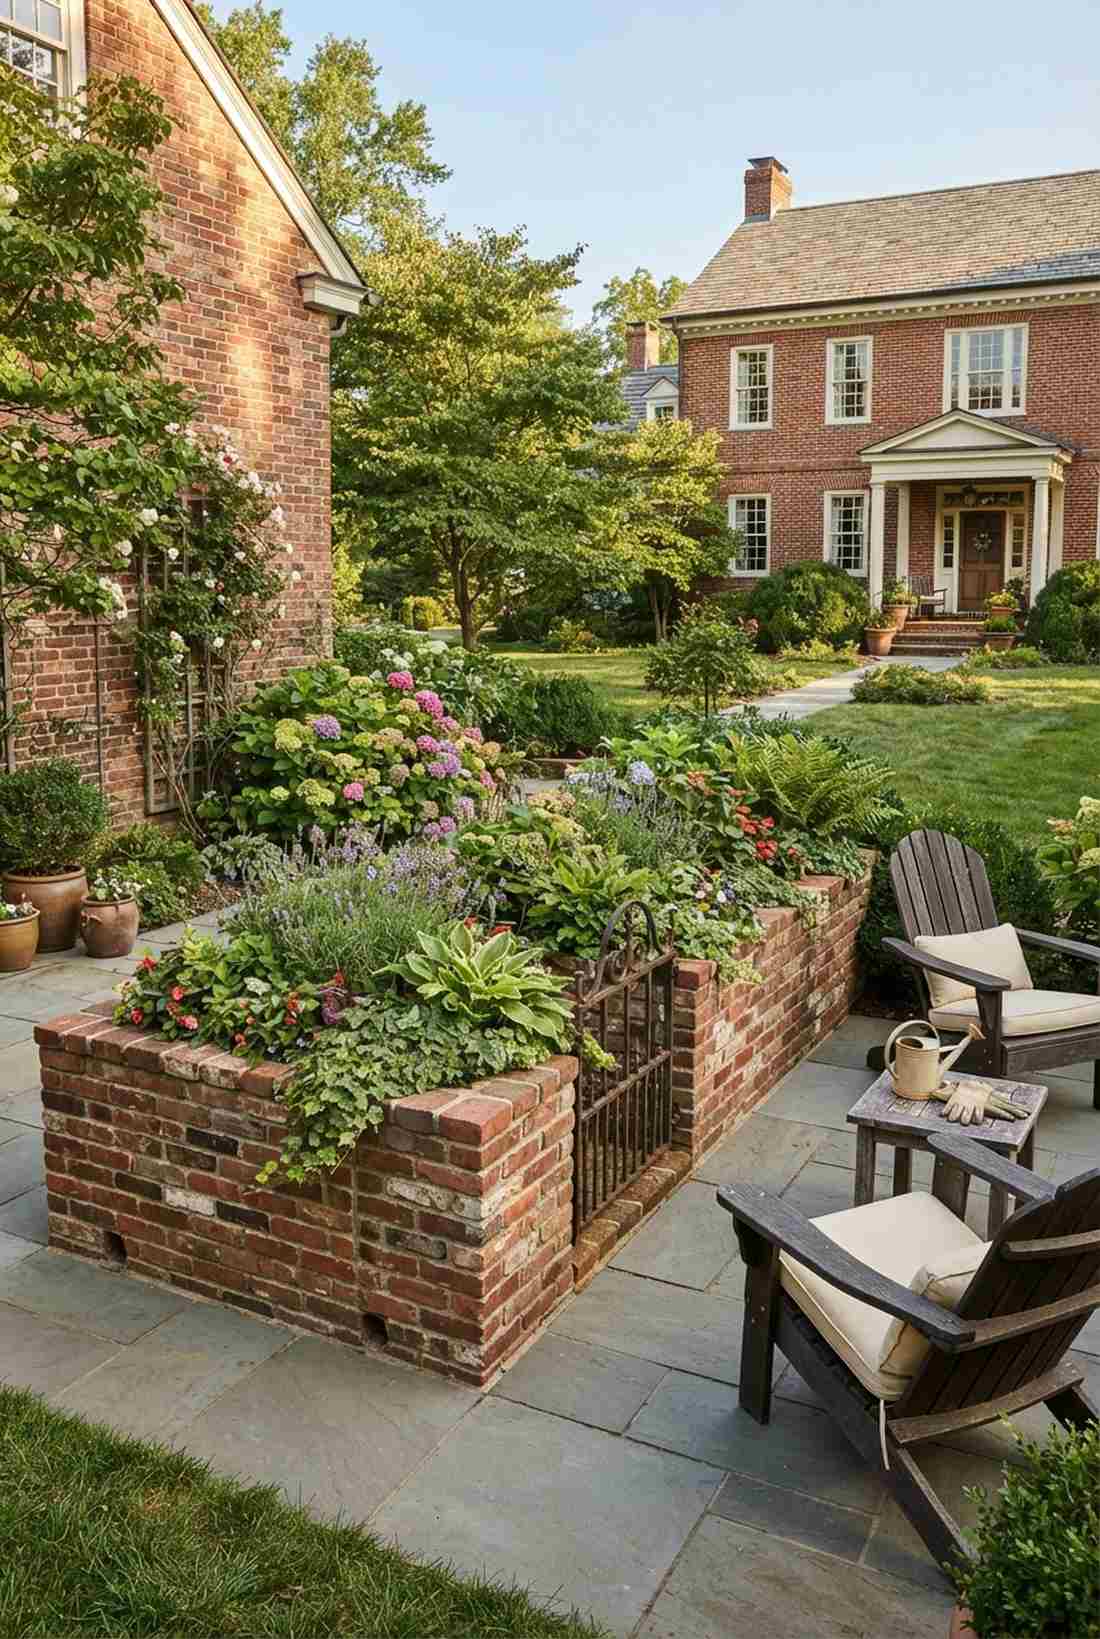

Radiates the historic permanence of a traditional colonial courtyard, acting flawlessly as a heritage brick planter feature. Incredible for matching existing brick house exteriors for a seamless, built-in aesthetic.
Loose blocks shift over winter, but a solid mortared footing locks the geometry in forever. Utilizing some miniature garden supplies like a tiny wrought-iron gate can contrast the heavy masonry gorgeously. It’s an intensely permanent upgrade that genuinely increases property value.
Bricking out a custom bed runs about $100–$200 in materials.
- Key Materials: Fired clay bricks and masonry mortar
- Vibe / Style: Historic Colonial
- Difficulty: Advanced masonry
- Budget Breakdown: Bricks: $90 | Mortar/Tools: $40
- Creator’s Tip: Leave a few vertical gaps (weep holes) in the bottom row of bricks without mortar so excess water can escape.
- Smart Sourcing: Pre-mixed high-strength masonry mortar or Professional brick-laying trowel sets.
Most DIYers completely ignore this incredibly cheap, brutalist material… until they see the genius hack below.
29. Concrete Block Utility Bed
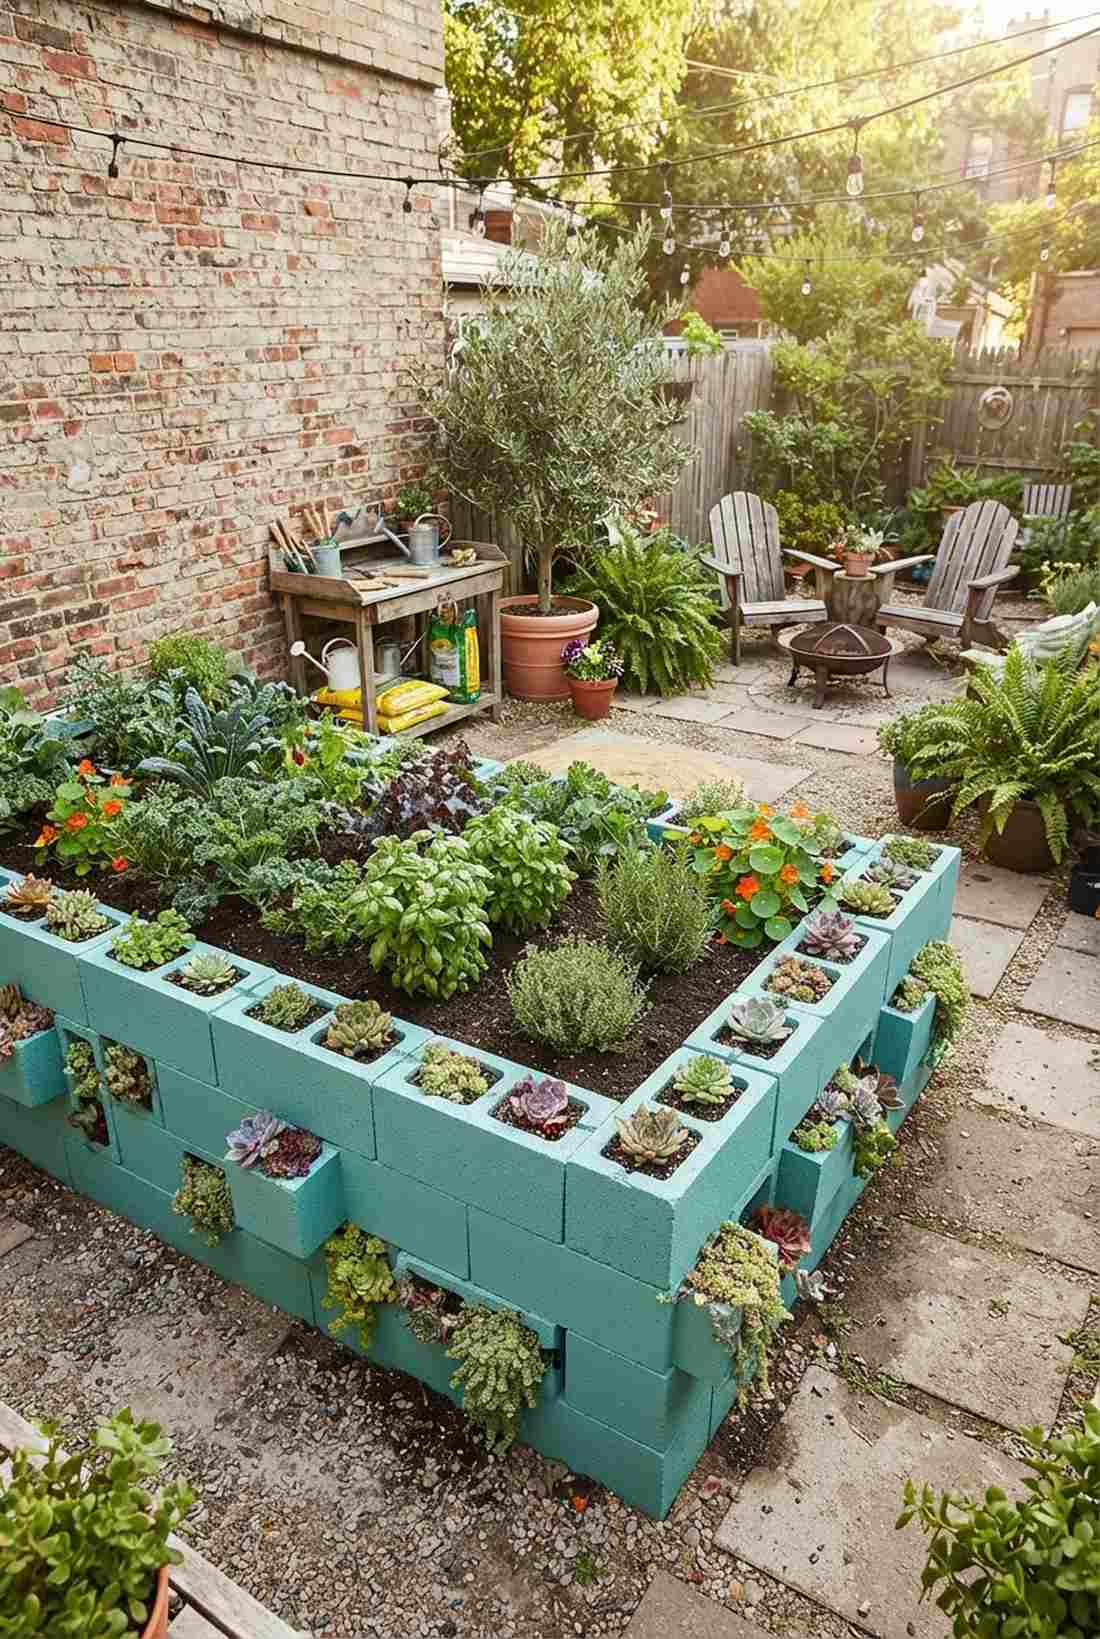
Delivers the unapologetic, ultra-functional energy of a punk-rock urban garden, shining as a cinder block quick-build planter. Absolute perfection for messy alleyways or rough-and-tumble community garden plots.
People hate the gray brutalist look, but capping the holes changes everything. Dropping a few succulent soil starter bags into the hollow cores turns the ugly wall into a living, cascading herb rack. It completely bypasses construction skills while delivering a surprisingly premium look.
This heavy-duty setup only costs about $30–$60. Pin this if you want an indestructible bed by tomorrow afternoon.
- Key Materials: Standard 8x8x16 cinder blocks
- Vibe / Style: Urban Brutalist
- Difficulty: Just heavy lifting
- Budget Breakdown: Blocks: $40 | Core Soil: $10
- Creator’s Tip: Paint the outside of the cinder blocks with a vibrant masonry waterproof paint to instantly erase the dreary gray industrial vibe.
- Smart Sourcing: Waterproof exterior masonry paint kits or Premium well-draining succulent soil mix.
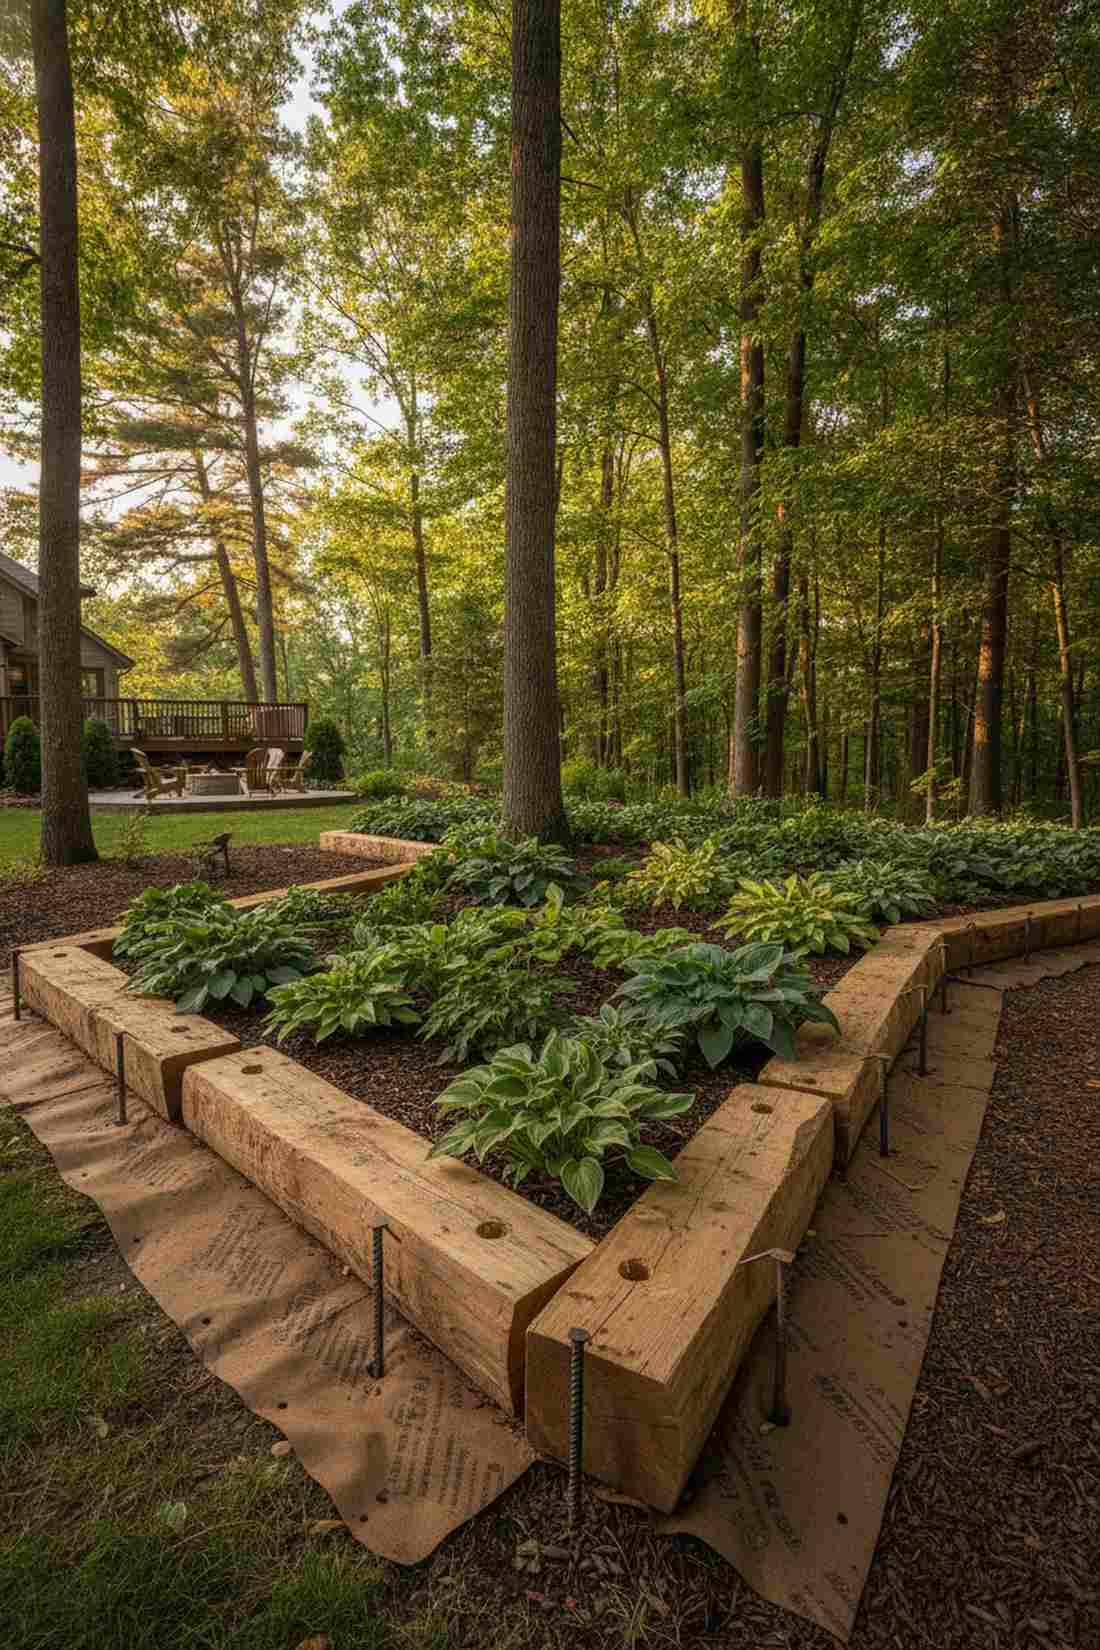
30. Reclaimed Lumber Rustic
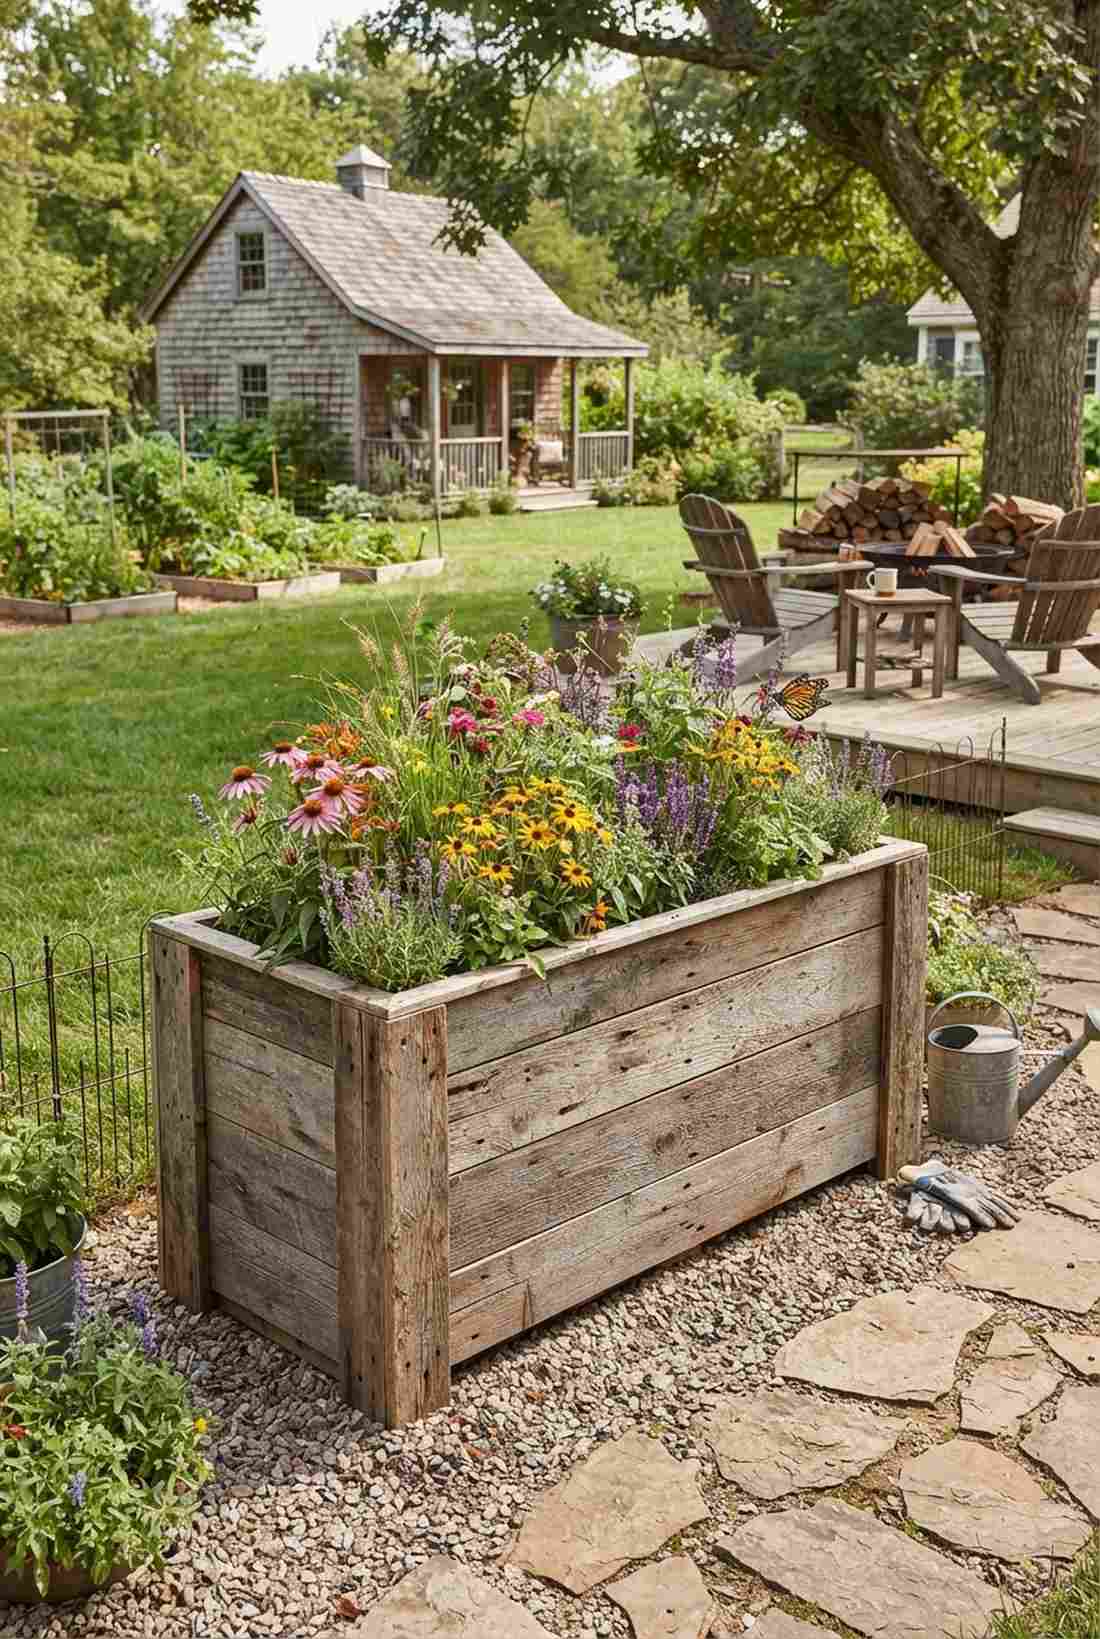
Feels like stepping onto a beautifully weathered pioneer farmstead, working magic as an eco-friendly upcycled wood box. A massive win for blending into wildflower patches or native grass lawns.
New lumber is obnoxiously expensive, whereas salvaged barn wood brings authentic texture for pennies. Coating the interior with a food-safe wood sealant is mandatory to block whatever unknown chemicals the pallet originally carried. It turns discarded trash into a wildly charismatic focal point.
You can usually source this wood for free or up to $30. Save this idea if you love the thrill of salvage hunting.
- Key Materials: Weathered pallets or barn boards
- Vibe / Style: Rugged Farmhouse
- Difficulty: Intermediate nail pulling
- Budget Breakdown: Wood: $0 | Sealant/Hardware: $25
- Creator’s Tip: Run a cheap metal detector wand over salvaged wood before cutting it; a hidden nail will destroy your saw blade instantly.
- Smart Sourcing: Eco-friendly waterproof wood sealant or Heavy-duty pallet buster tools.
31. Log Border Natural
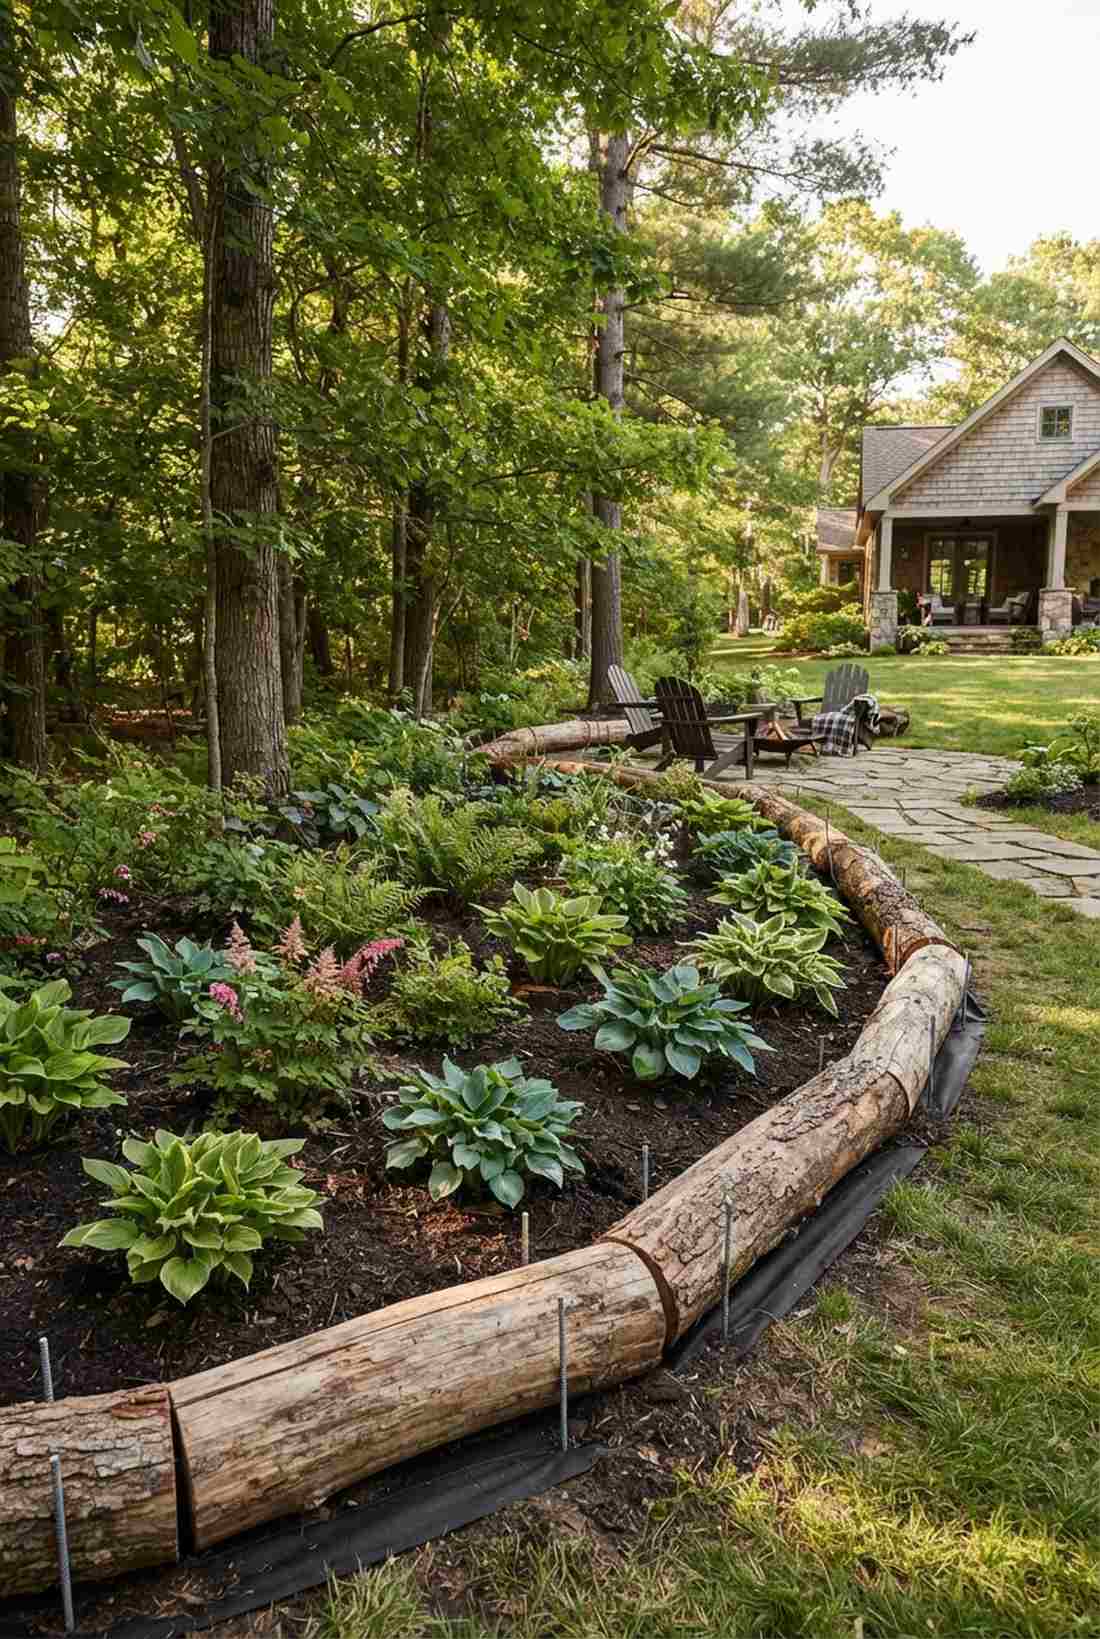
Exudes the deeply grounding aura of an undisturbed forest floor, functioning flawlessly as a woodland perimeter planter. Fantastic for edging directly against dense tree lines or shaded hosta gardens.
Sharp plastic borders look intensely fake, but raw logs rot down slowly to feed the earth. Adding a layer of organic weed barrier fabric underneath stops invasive tree roots from stealing your vegetable nutrients. It blends into the native landscape so seamlessly it looks naturally grown.
Snagging fallen timber costs absolutely nothing. Pin this if you want to harmonize your yard with surrounding nature.
- Key Materials: 8-12 inch thick hardwood logs
- Vibe / Style: Naturalist Forest
- Difficulty: Easy positioning
- Budget Breakdown: Logs: $0 | Rebar Pins: $15
- Creator’s Tip: Drill a half-inch hole through the logs and pound a rebar stake through them directly into the dirt so they don’t roll away.
- Smart Sourcing: Heavy-duty galvanized rebar ground stakes or Pre-cut heavy-duty weed barrier fabric.
32. Plastic Panel Kit
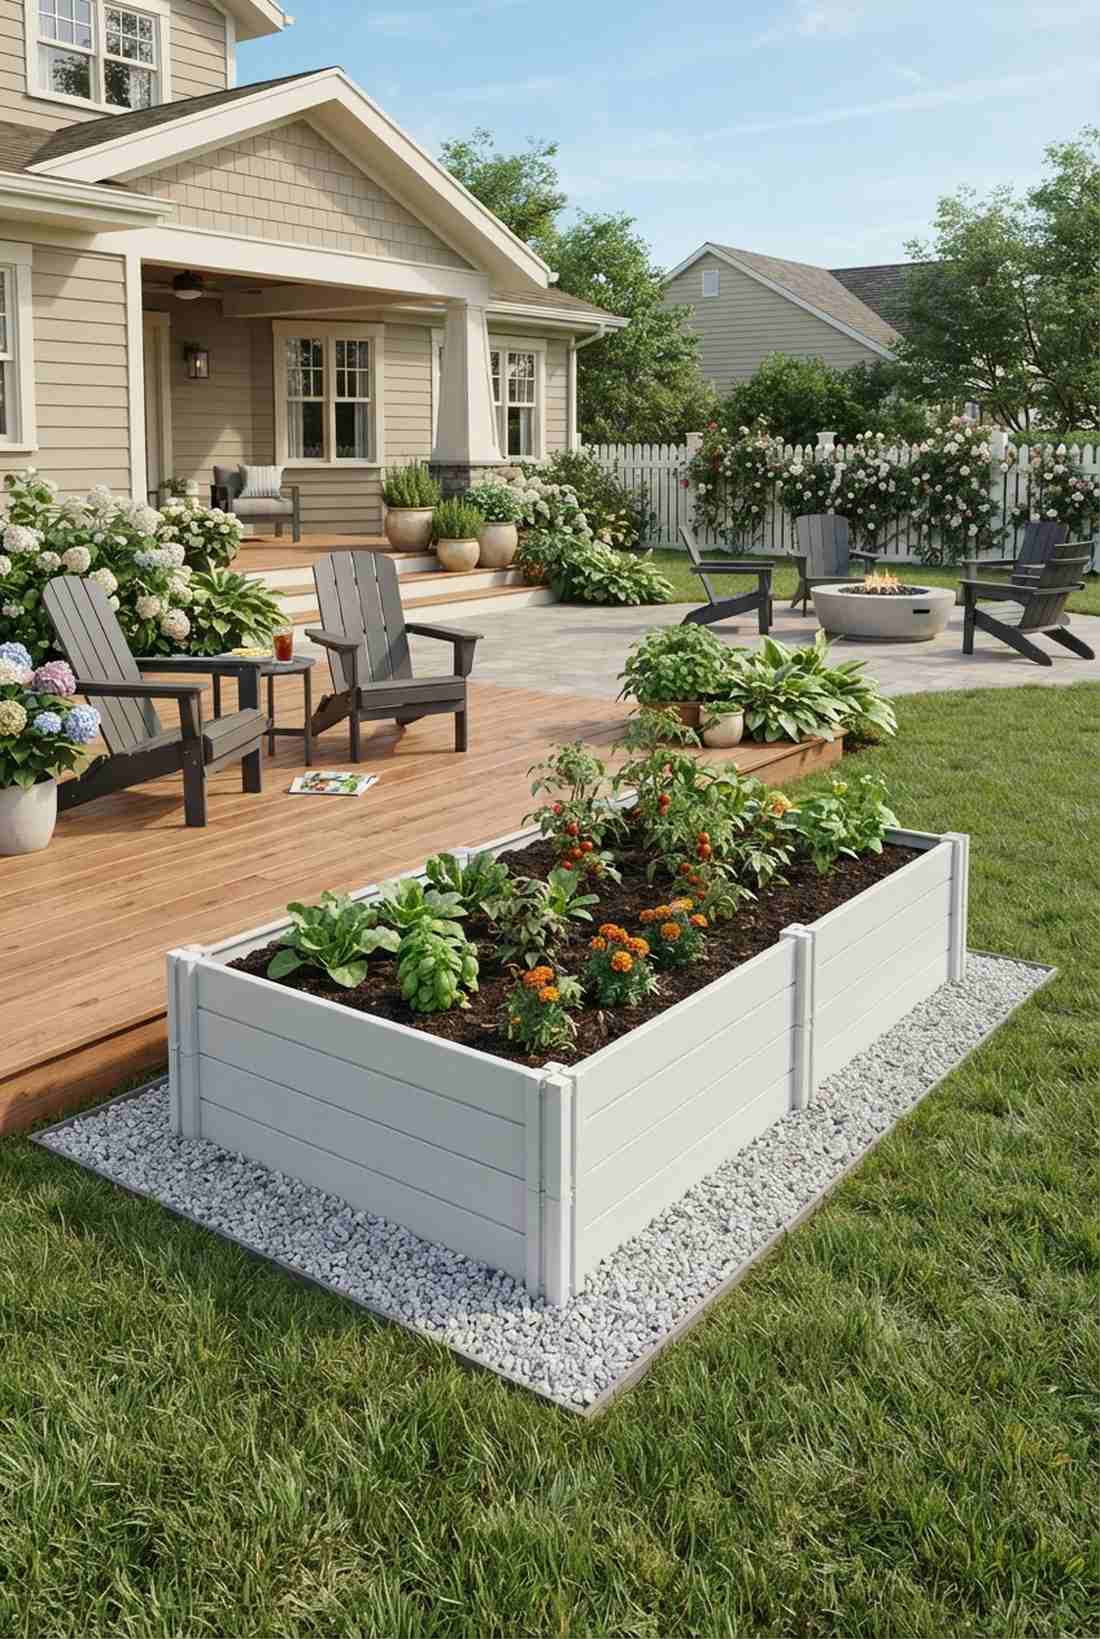
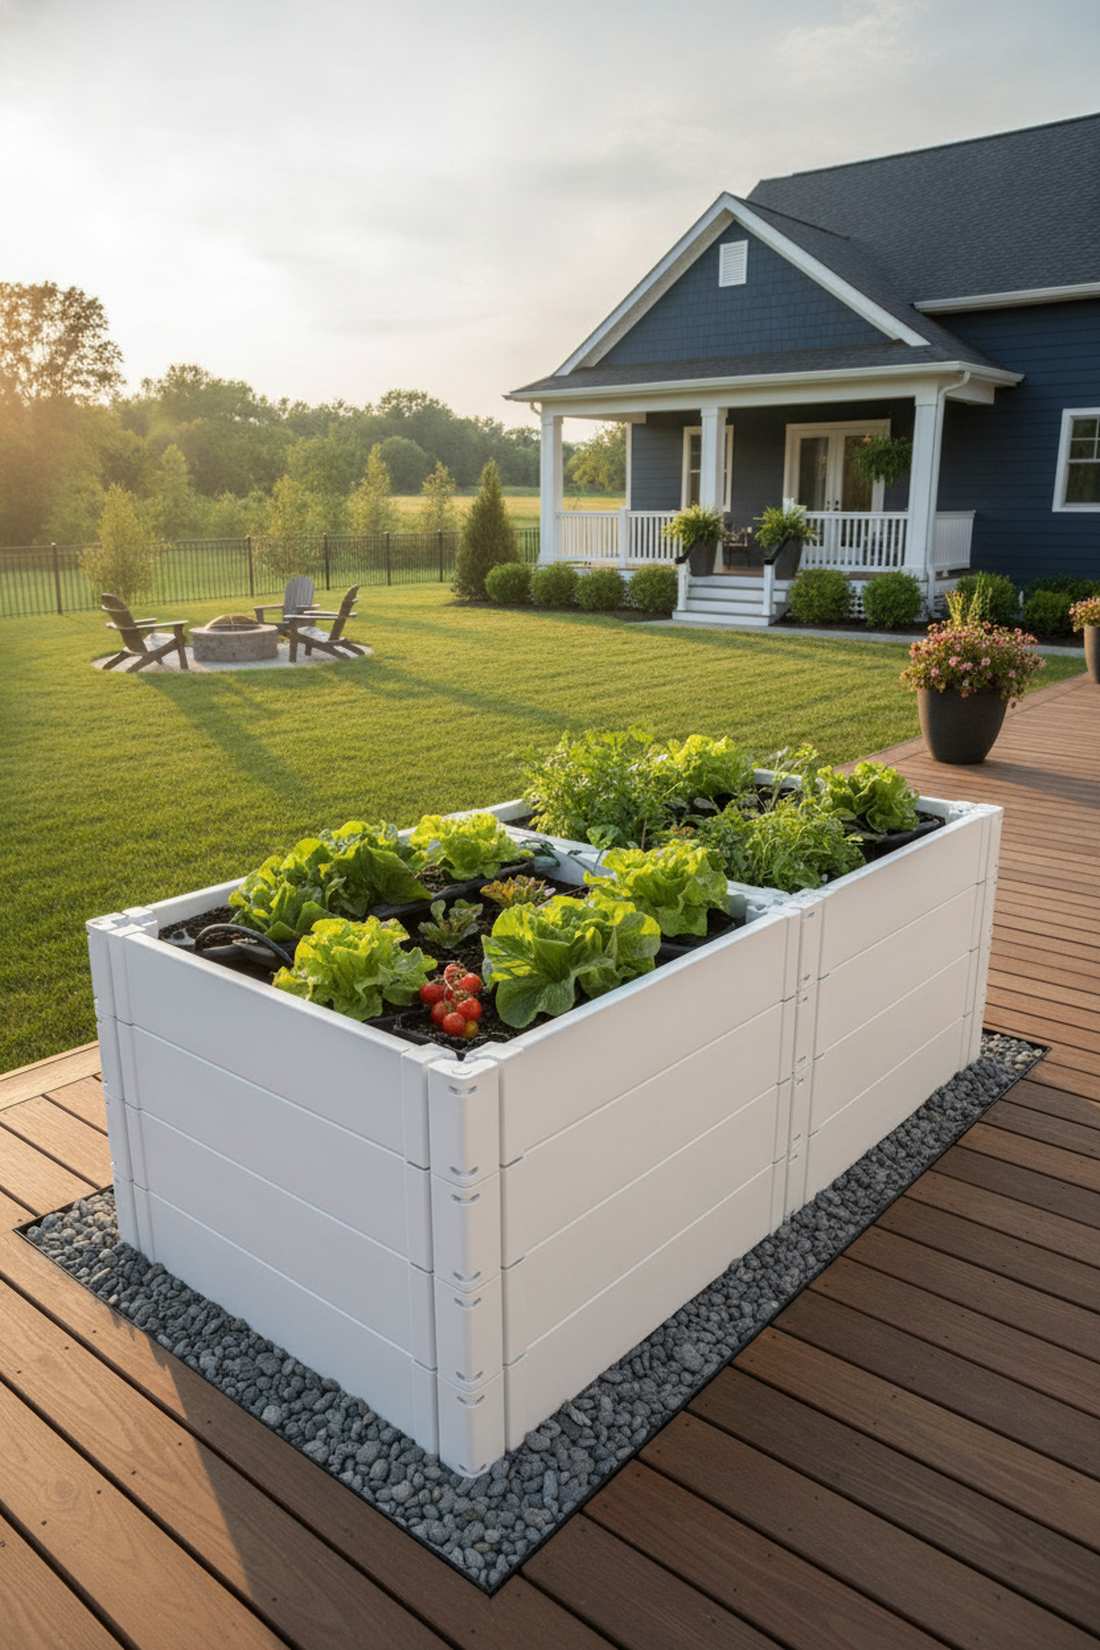
Looks like a crisp, flawlessly clean piece of commercial patio furniture, shining as a snap-together temporary bed. The ultimate cheat code for busy renters who might need to pack up and move next year.
Building from scratch is exhausting, while these HDPE kits literally click together like childhood toys. Utilizing a self-watering container system inside them maximizes growth while keeping the plastic shell pristine. It’s a wildly clever flex that makes backyard farming completely effortless.
A high-quality snap kit runs about $40–$80 online.
- Key Materials: HDPE plastic interlocking panels
- Vibe / Style: Crisp Suburban
- Difficulty: Absolute beginner
- Budget Breakdown: Panel kit: $60 | Soil: $20
- Creator’s Tip: Don’t hit these with a weed whacker! The plastic will shatter. Put a small perimeter of gravel around the outside base instead.
- Smart Sourcing: Tool-free HDPE raised bed kits or Self-watering insert starter packs.
This next shape completely breaks the rules of traditional geometry… and yields twice the harvest.
Shaped & Specialty Raised Beds Garden Design
Non-traditional configurations optimize space utilization while creating distinctive landscape features that elevate raised beds landscaping from functional to sculptural. These innovative layouts address specific site challenges with creative solutions.
33. Keyhole Garden Design
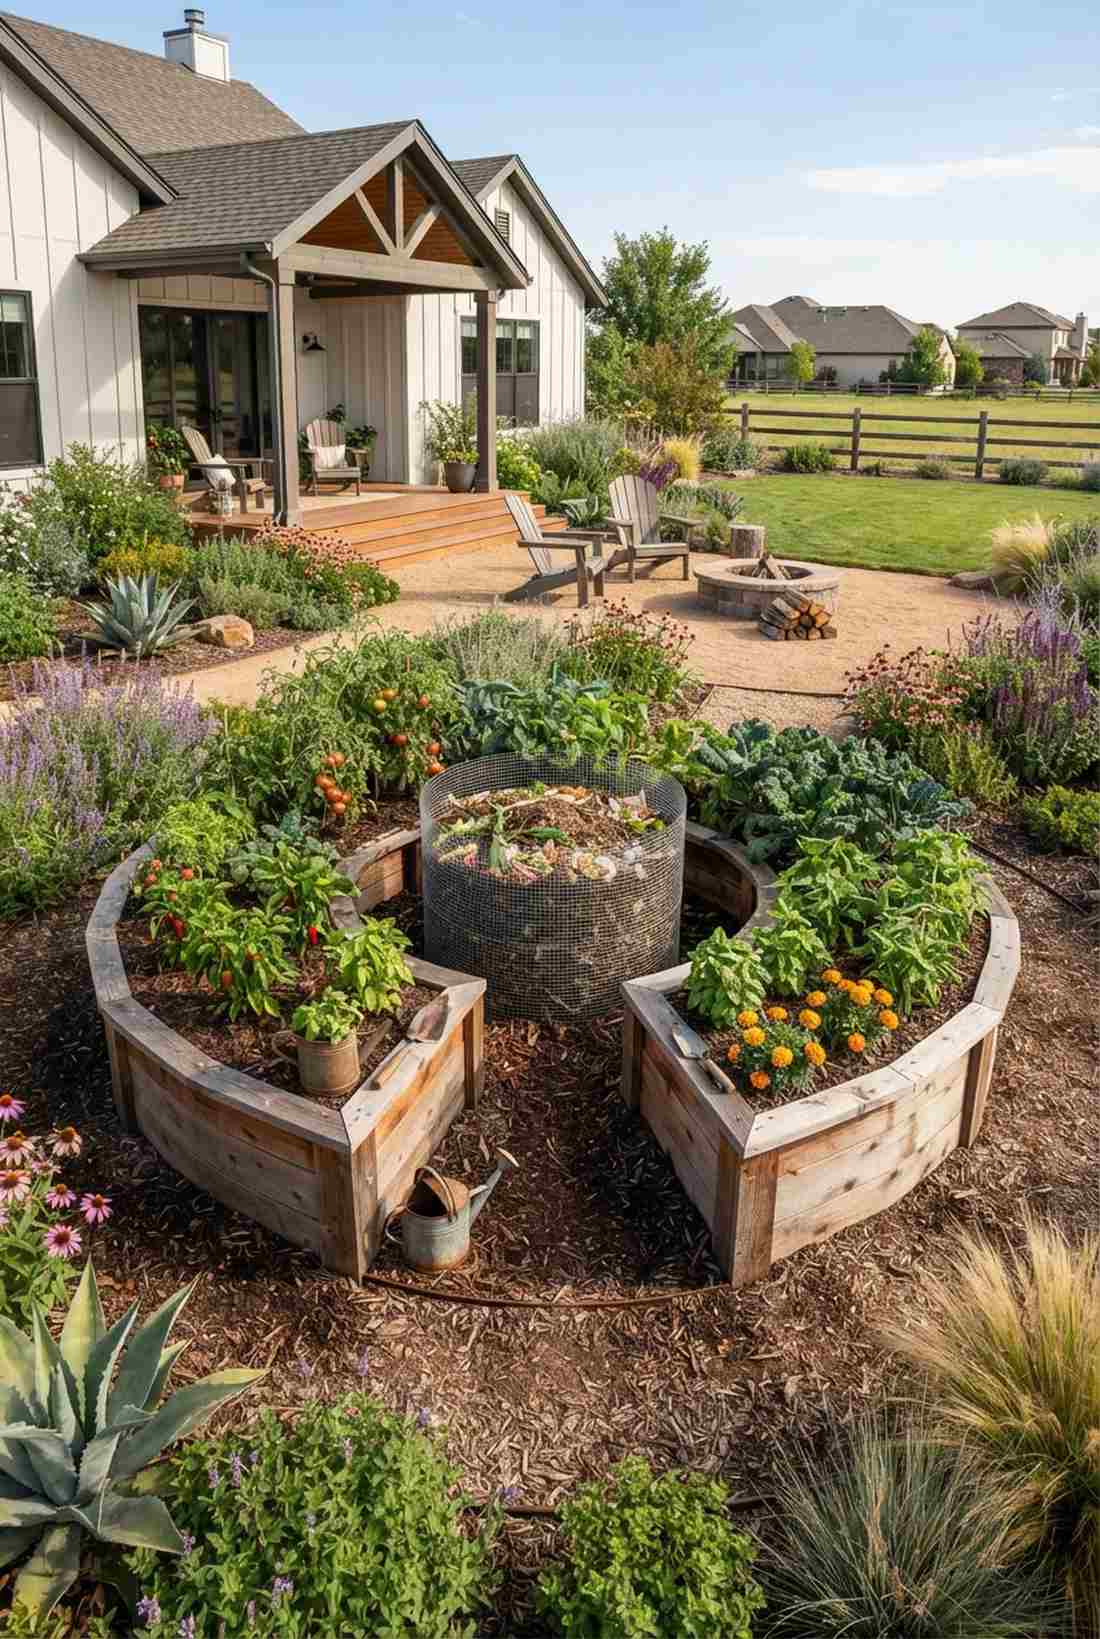
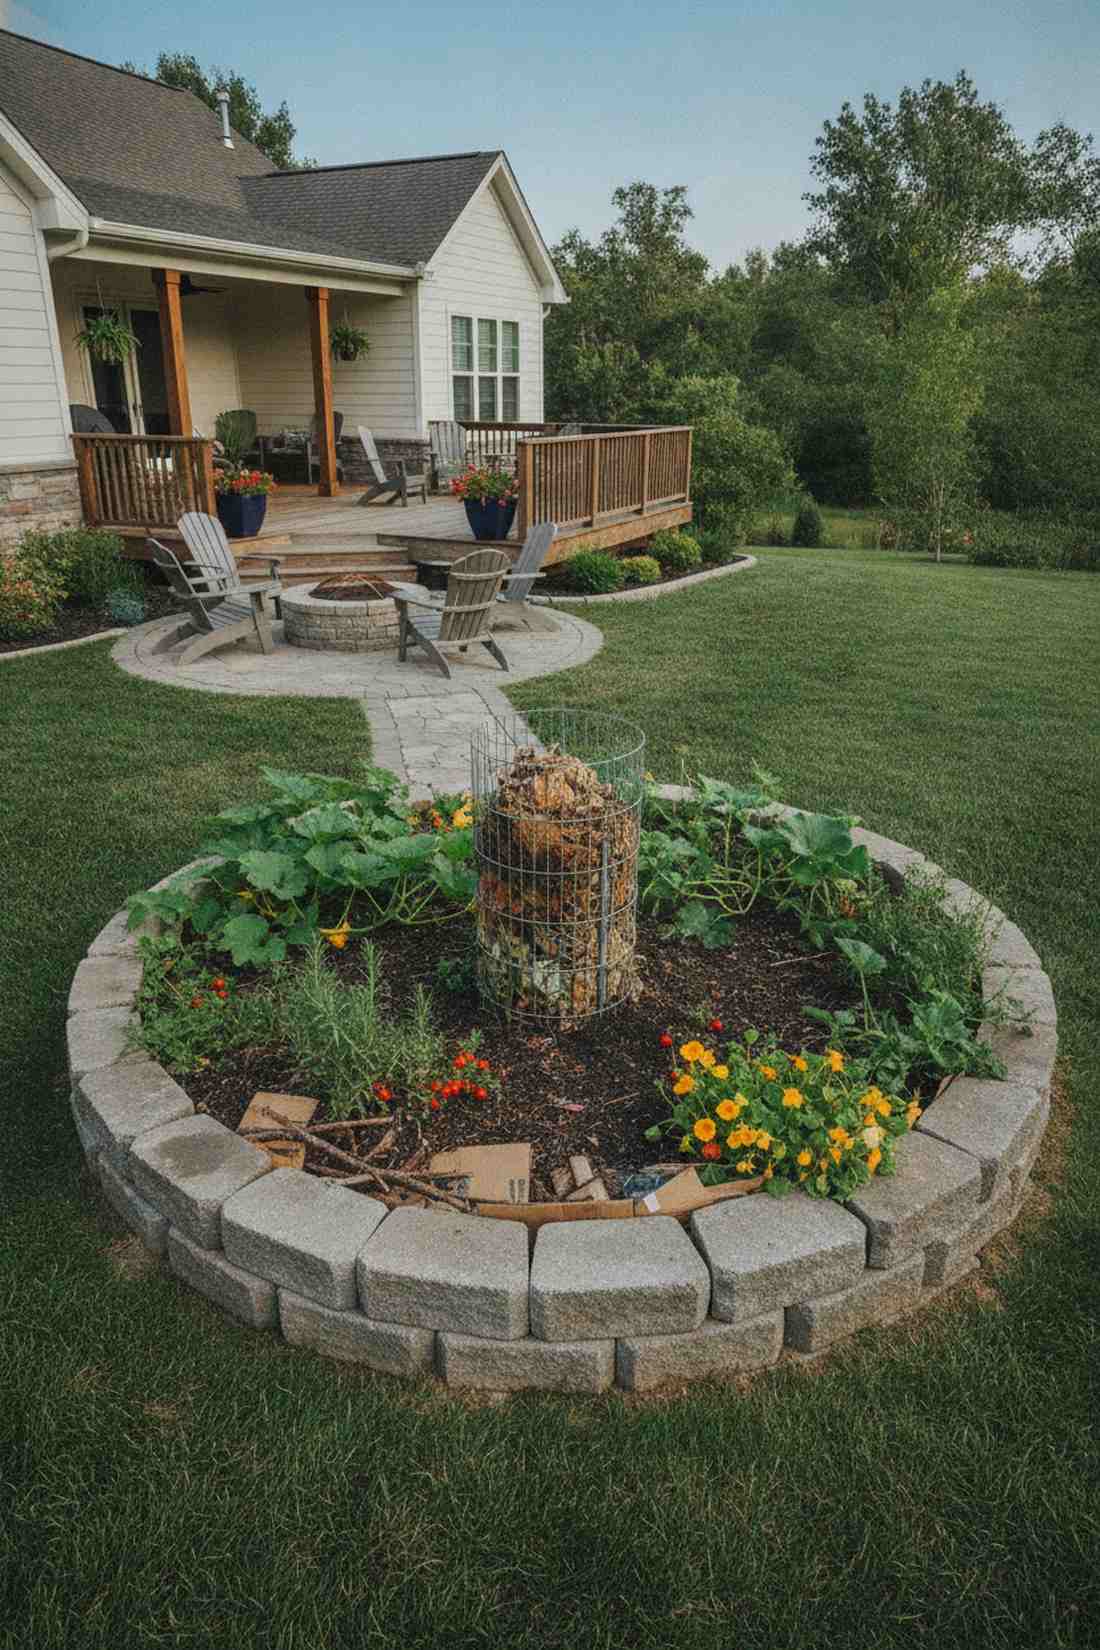
Radiates the brilliant efficiency of ancient sustainable agriculture, acting perfectly as an all-in-one compost planter hub. Unbelievably effective for arid climates or homesteaders trying to maximize every drop of water.
Traditional watering wastes runoff, but a central composting basket leaches moisture and nutrients directly into the roots. Equipping the core with a heavy-duty wire mesh column keeps the rotting scraps neatly contained. It delivers the energy of a permaculture masterclass right in your backyard.
Constructing this circular engine costs roughly $70–$120. Save this to your off-grid survival gardening board.
- Key Materials: Wire mesh for the center basket
- Vibe / Style: Permaculture Genius
- Difficulty: Intermediate circular layout
- Budget Breakdown: Wall materials: $80 | Center Mesh: $15
- Creator’s Tip: Layer the bottom of the bed with cardboard, twigs, and old logs to hold moisture and reduce the massive amount of soil needed.
- Smart Sourcing: Galvanized hardware cloth rolls or Premium organic compost starter powder.
34. Herb Spiral Tower
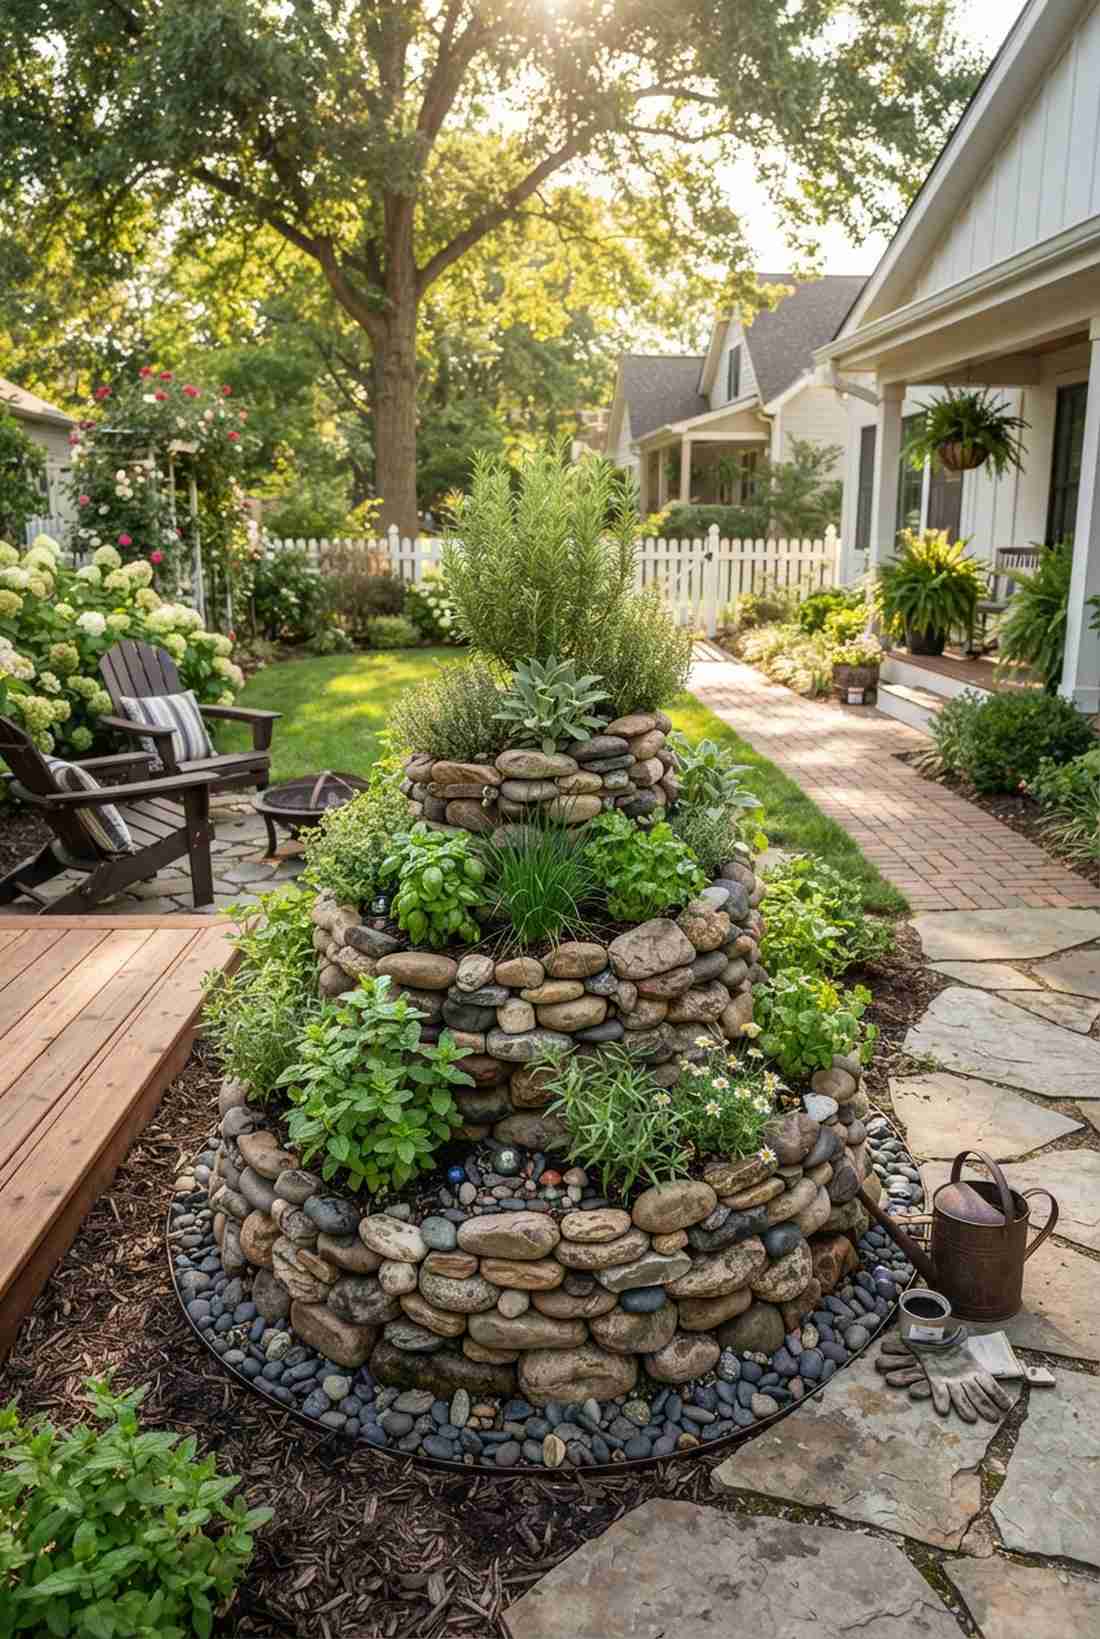
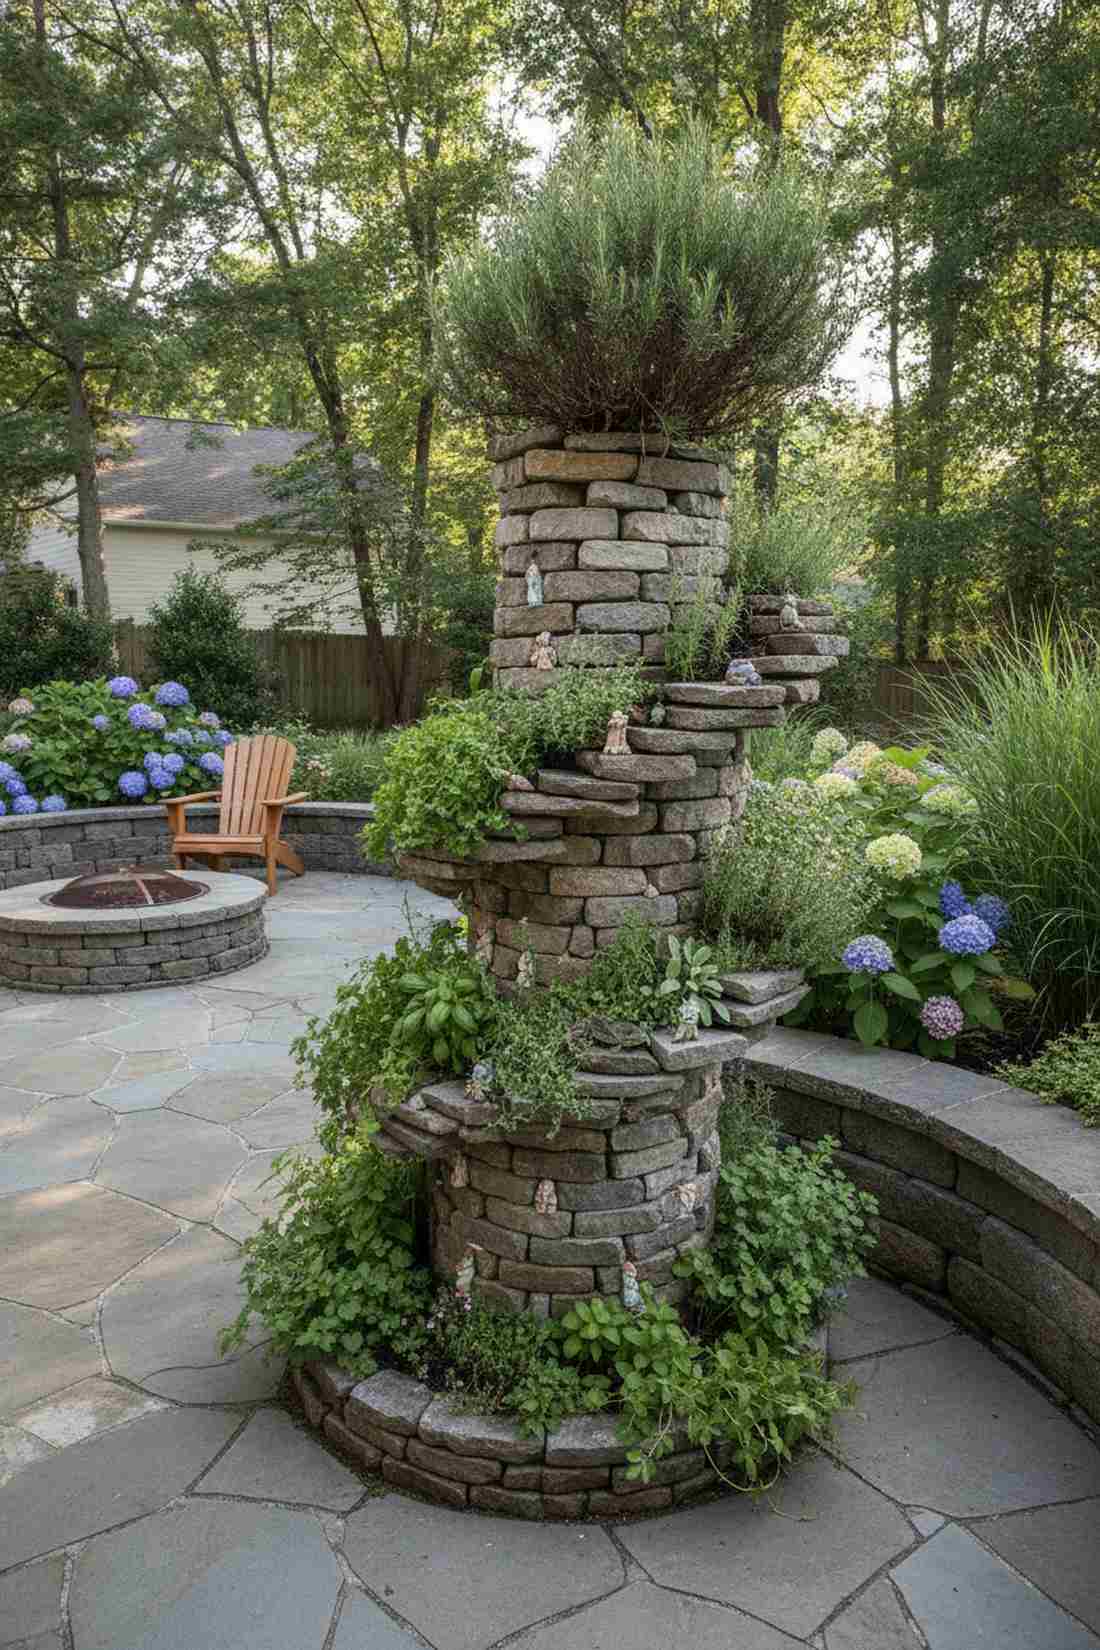
Feels like discovering a mystical monument in a secret fantasy garden, serving brilliantly as a multi-climate herb mountain. A stunning way to compress 15 different herbs into a tiny 4-foot footprint near the patio.
Flat boxes drown dry herbs and starve wet ones, but this spiral gives every plant its perfect altitude. Incorporating some terrarium accessories or fairy stones into the nooks creates a spellbinding visual texture. It transforms an awkward void into a fragrant, sculptural masterpiece.
Stacking this stone spiral runs about $40–$90. Highly recommended for culinary enthusiasts with zero space.
- Key Materials: Cobblestones or river rock
- Vibe / Style: Mystical Culinary
- Difficulty: Fun puzzle-stacking
- Budget Breakdown: Stones: $50 | Herb plugs: $30
- Creator’s Tip: Put rosemary at the dry, sunny top, and mint at the shaded, damp bottom to keep both extremes perfectly happy.
- Smart Sourcing: Faux-stone garden border kits or Miniature fairy garden decorative stone kits.
35. L-Shaped Corner Bed
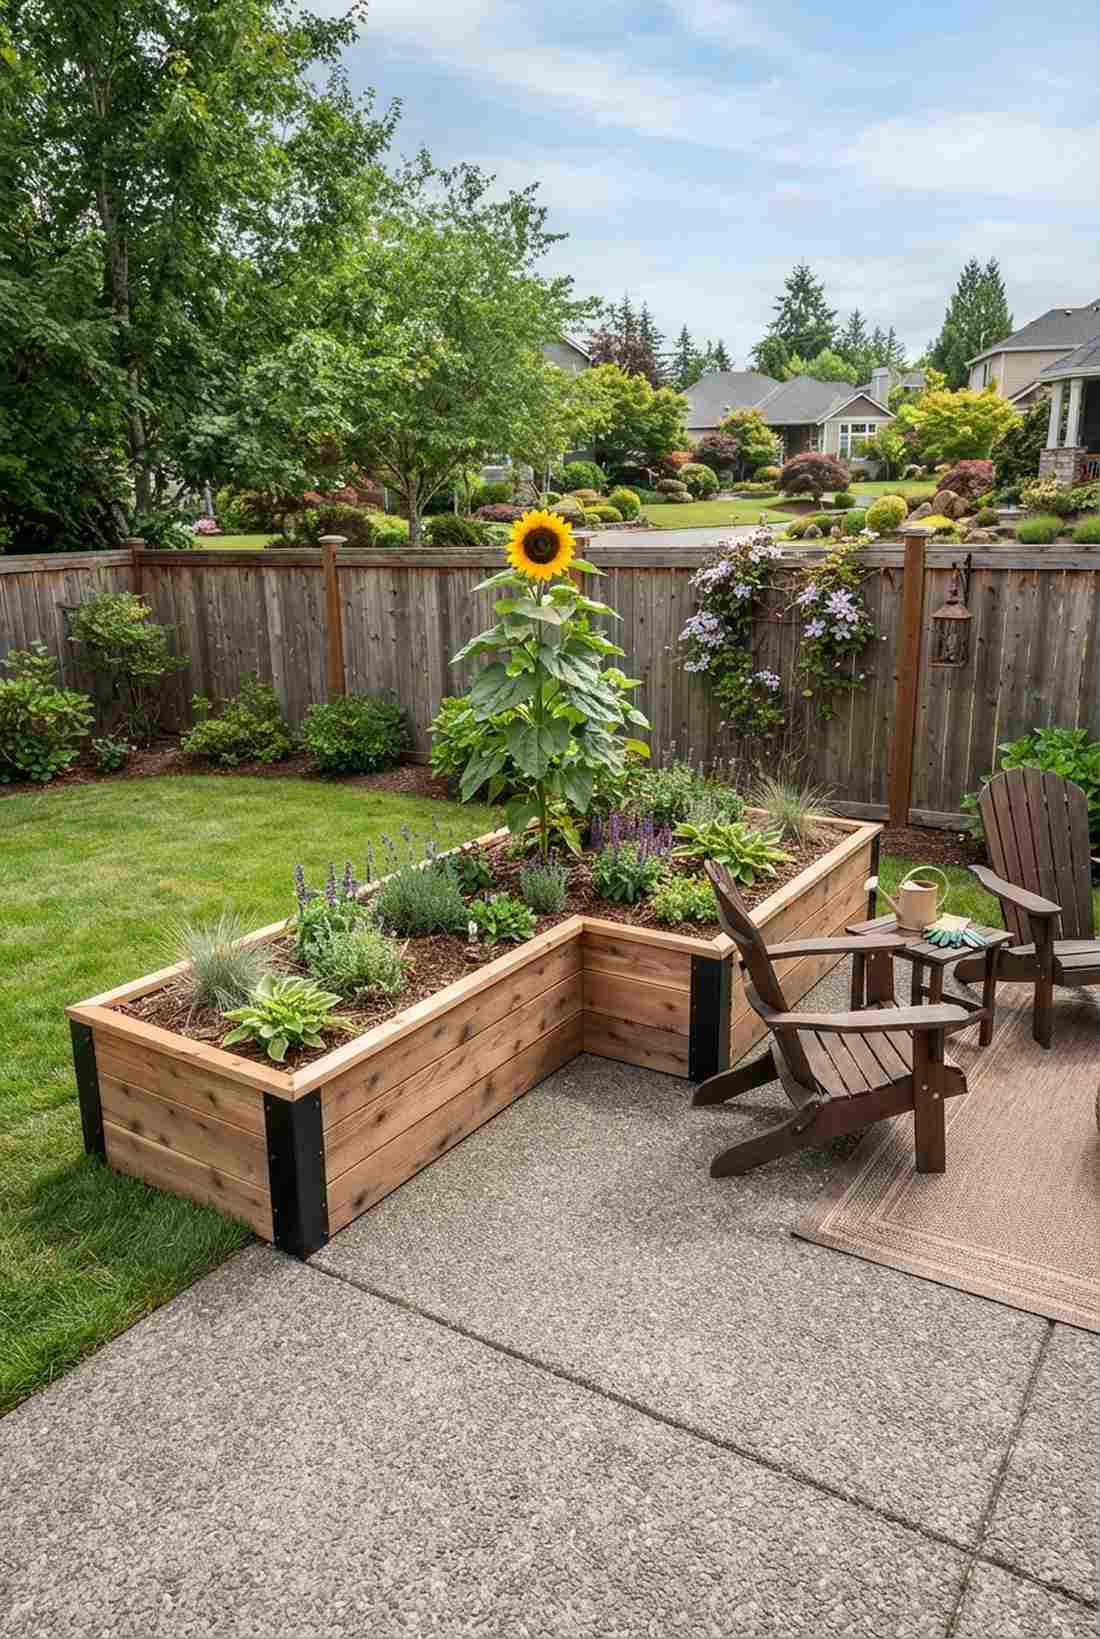
Exudes the clean, architectural logic of a custom-built luxury deck, working magic as an angular patio border fence. Ideal for hugging the dead space around a square concrete slab.
Standard rectangles leave awkward gaps, but wrapping a corner perfectly locks the landscape together. Utilizing pre-drilled modular corner brackets ensures that critical 90-degree joint never splits open. It creates an instant lush corridor that feels meticulously planned by a pro.
Building this custom corner costs around $80–$130. Pin this layout to maximize every inch of a tiny yard.
- Key Materials: 90-degree steel joining brackets
- Vibe / Style: Architectural Hug
- Difficulty: Intermediate measuring
- Budget Breakdown: Wood: $90 | Brackets: $25
- Creator’s Tip: The inner corner is the hardest to reach; plant something tall and low-maintenance there, like a single massive sunflower.
- Smart Sourcing: Heavy-duty steel 90-degree bracket packs or Pre-cut cedar corner raised bed kits.
Material Guide: Cheap vs. Premium Aesthetic
Knowing exactly where to save and where to spend makes all the difference in achieving that looks expensive but isn’t vibe.
- Standard vs. UV-Resistant/Premium: Upgrading to UV-coated composite boards or applying food-safe sealant to raw wood stops fading and splitting, saving you massive replacement costs by year three.
- Pre-made Kits vs. Sourcing Locally: High-end pre-cut galvanized starter kits often save both time and money compared to custom fabricating, cutting, and deburring raw metal sheets yourself.
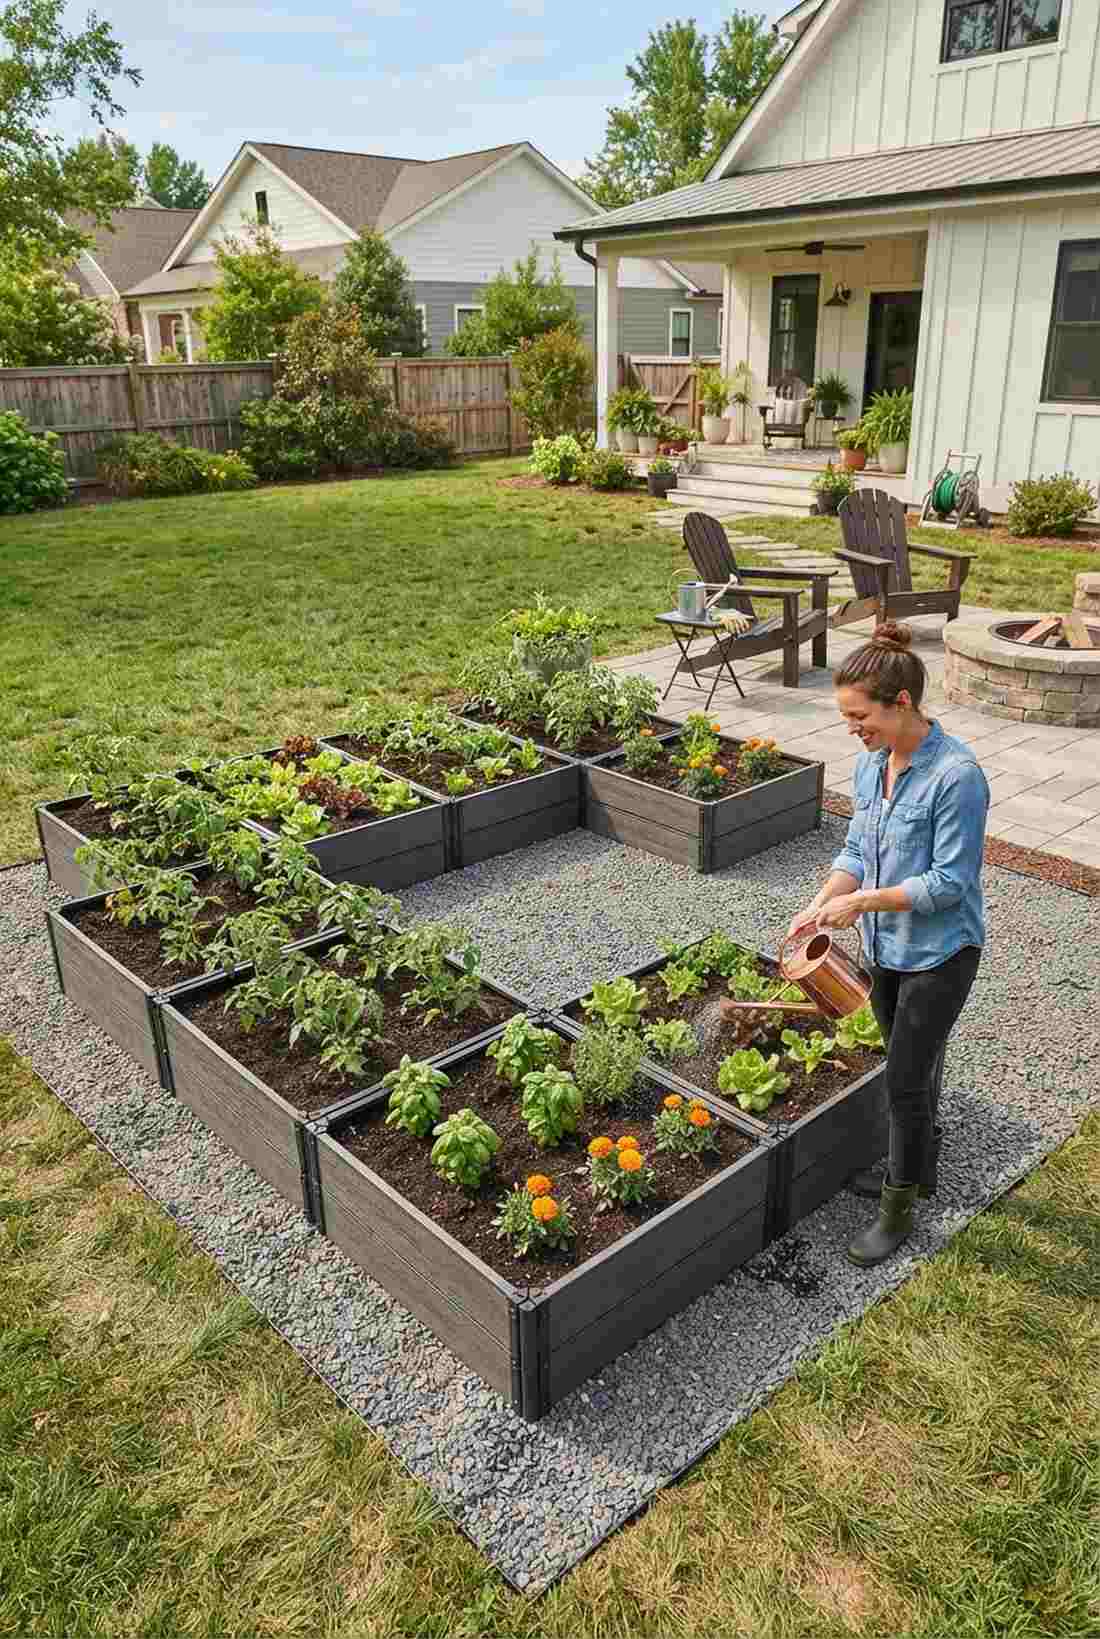
36. U-Shaped Courtyard Bed
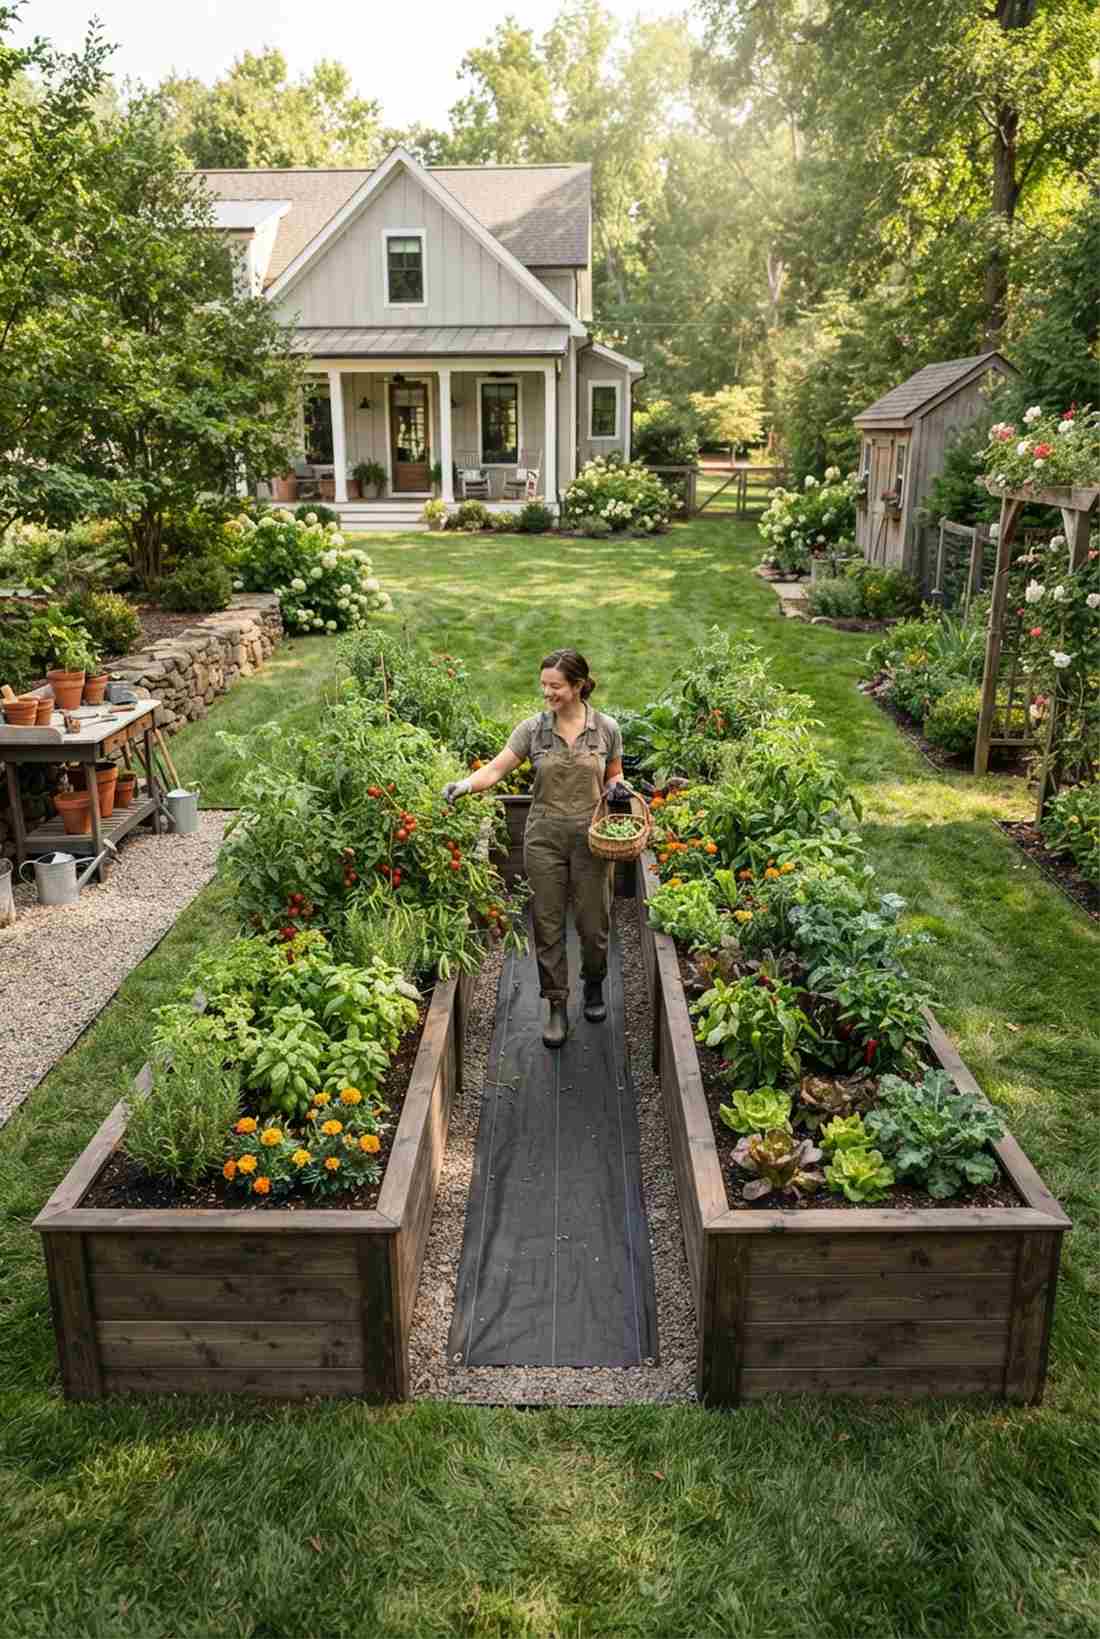
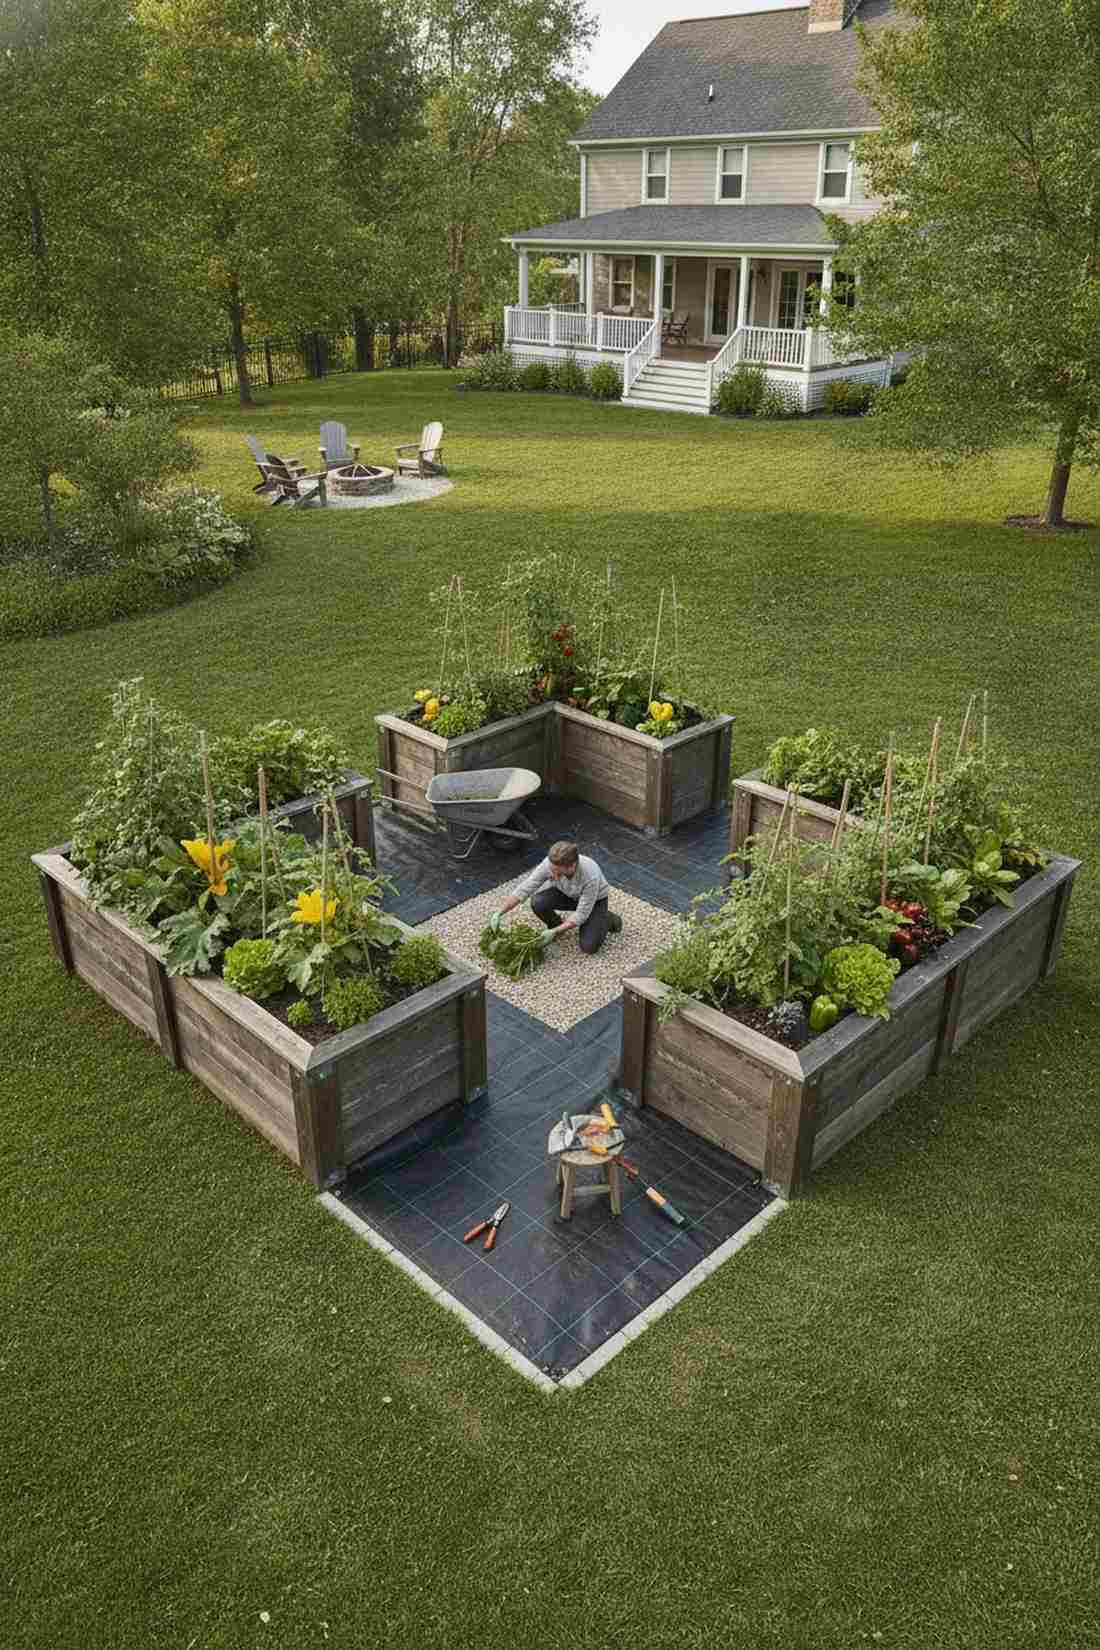
Creates an atmosphere reminiscent of an immersive botanical command center, functioning perfectly as an enclosed garden workspace. A massive win for gardeners who want to stand in one spot and harvest in three directions.
Straight rows require endless pacing, while a U-shape envelops you completely in the foliage. Adding professional-grade weed barrier fabric in the center walkway keeps the command post pristinely mud-free. It gives a designer-level finish that looks like a high-end nursery display.
Wrapping this triple-sided box costs roughly $120–$180.
- Key Materials: Massive amounts of soil
- Vibe / Style: Immersive Command Post
- Difficulty: Advanced alignment
- Budget Breakdown: Frame: $110 | Pathway base: $30
- Creator’s Tip: Make sure the interior walking path is at least 3 feet wide so you can easily turn a wheelbarrow around inside the “U”.
- Smart Sourcing: Pre-fabricated U-shaped modular planter kits or Heavy-duty commercial weed barrier rolls.
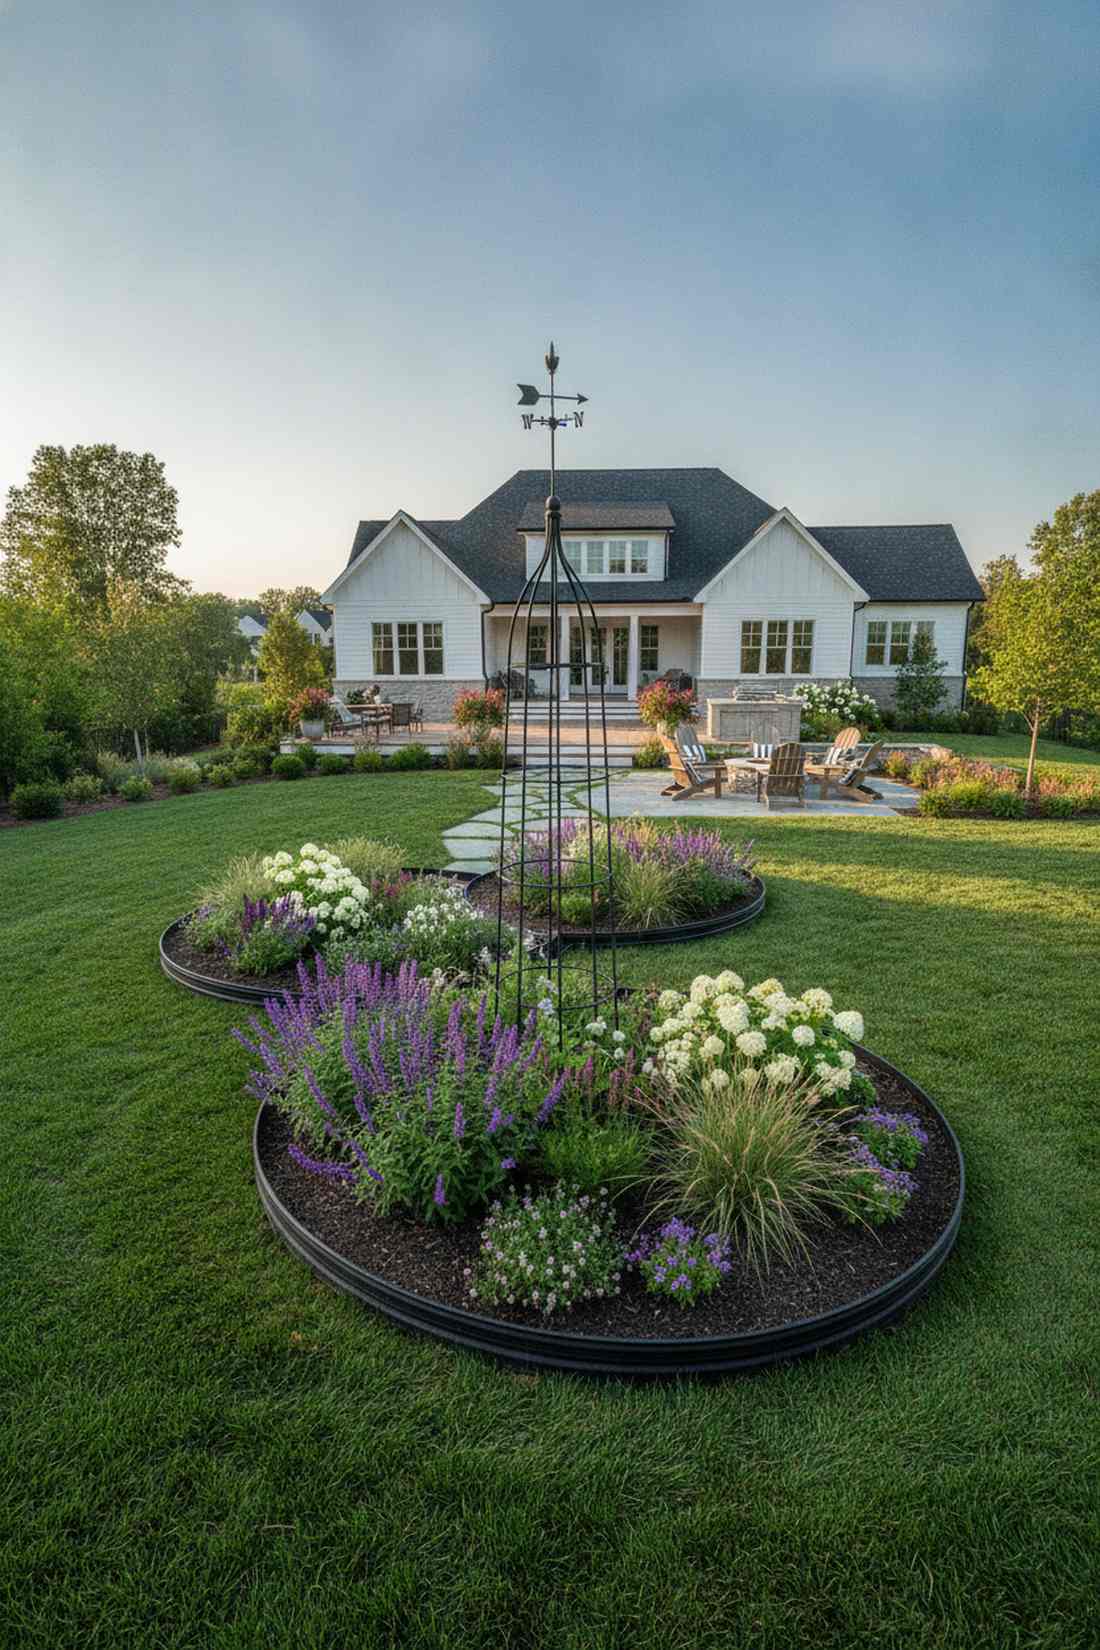
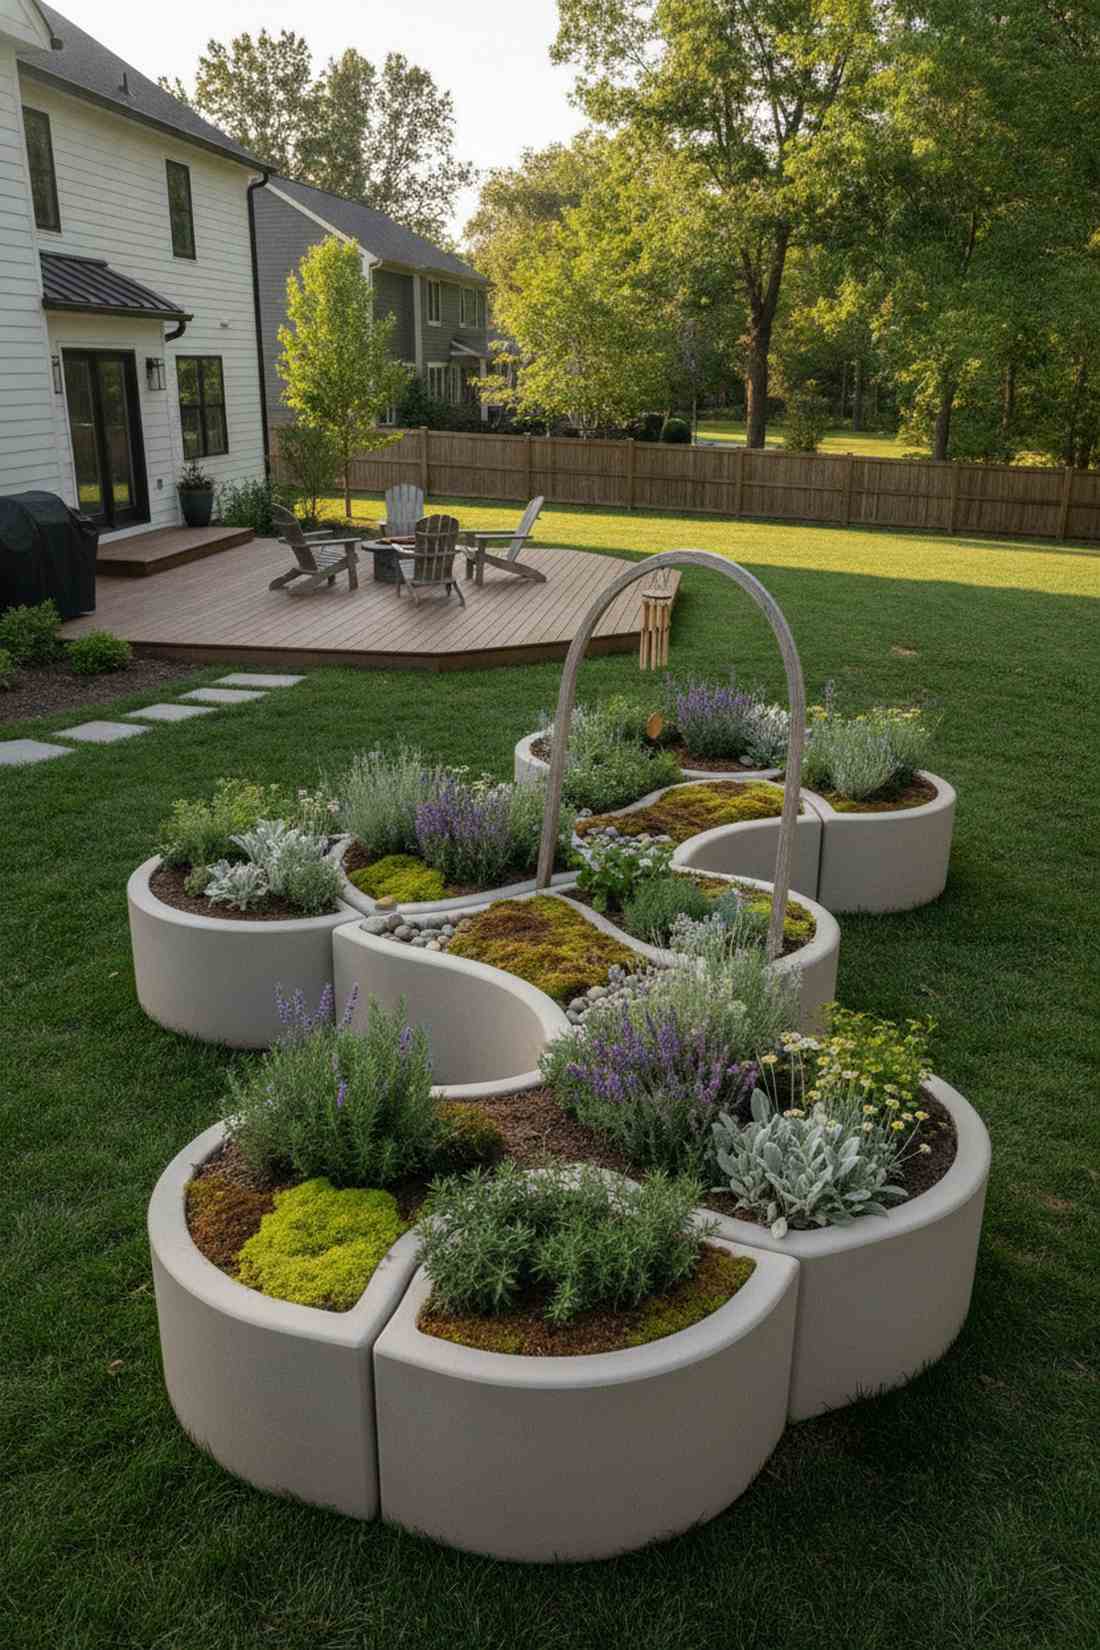
37. Circular Mandala Garden
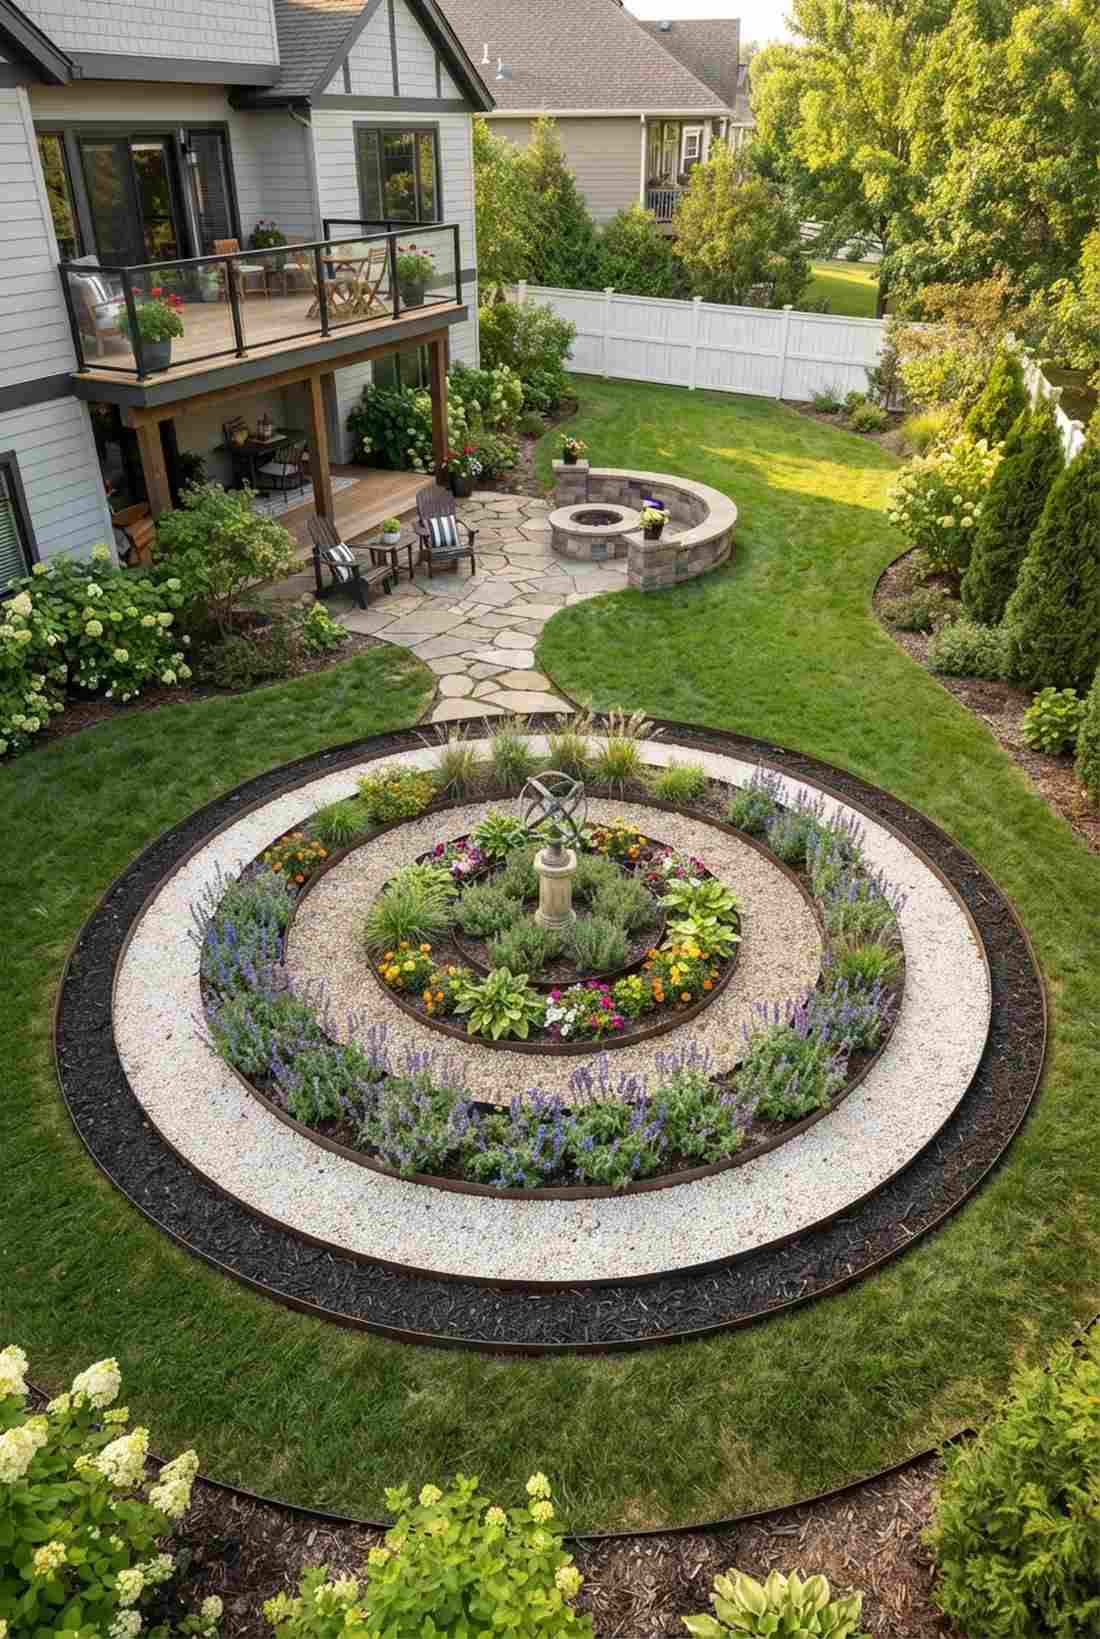
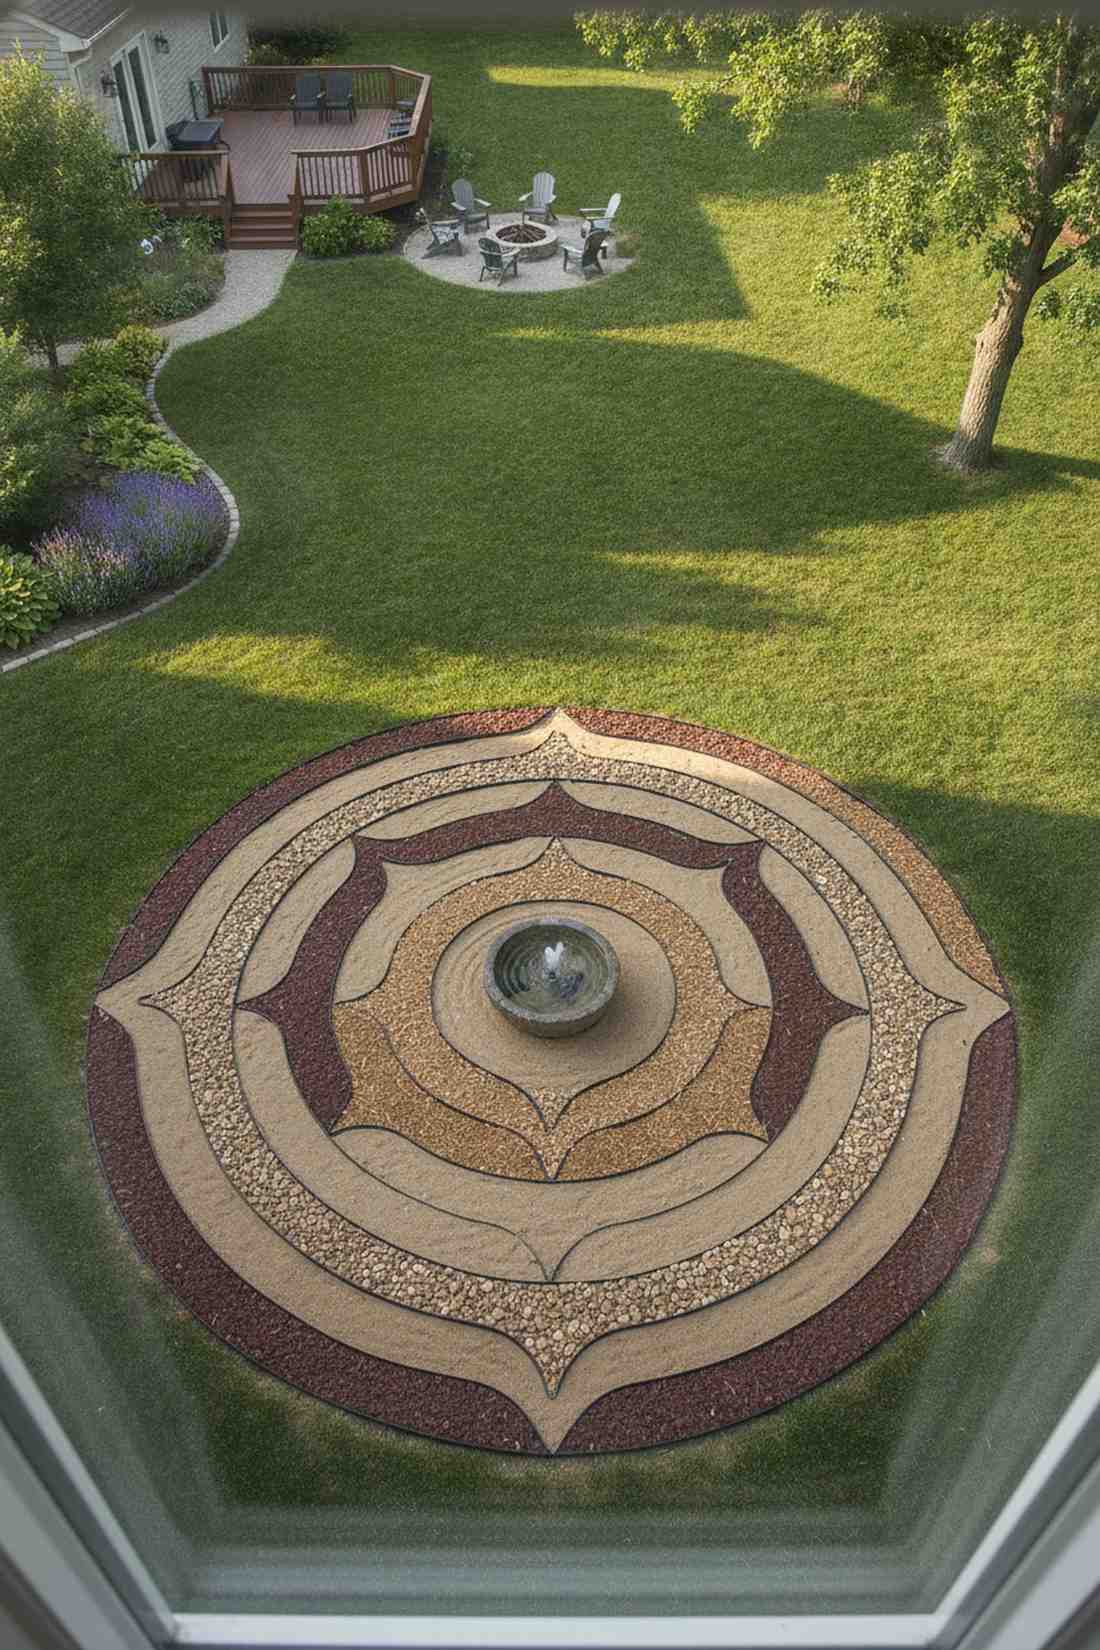
Delivers the deeply calming energy of an ancient meditative labyrinth, standing out as a geometric centerpiece display. Unbelievably stunning when viewed from a second-story window overlooking the backyard.
Boxy grids feel rigid, but sweeping concentric circles flow beautifully into organic lawn shapes. Using flexible landscape edging kits instead of rigid wood makes bending the perfect rings completely effortless. It completely transforms a boring lawn patch into a spiritual art installation.
Bending these rings into shape costs about $60–$100. Save this idea if you want your yard to feel like a retreat.
- Key Materials: Flexible plastic or metal edging
- Vibe / Style: Meditative Art
- Difficulty: Intermediate geometry
- Budget Breakdown: Edging: $70 | Centerpiece: $20
- Creator’s Tip: Drive a stake in the exact center and use a string tied to some flour to draw perfectly mathematical circles before you dig.
- Smart Sourcing: Flexible no-dig metal landscape edging kits or Heavy-duty flexible garden border rolls.
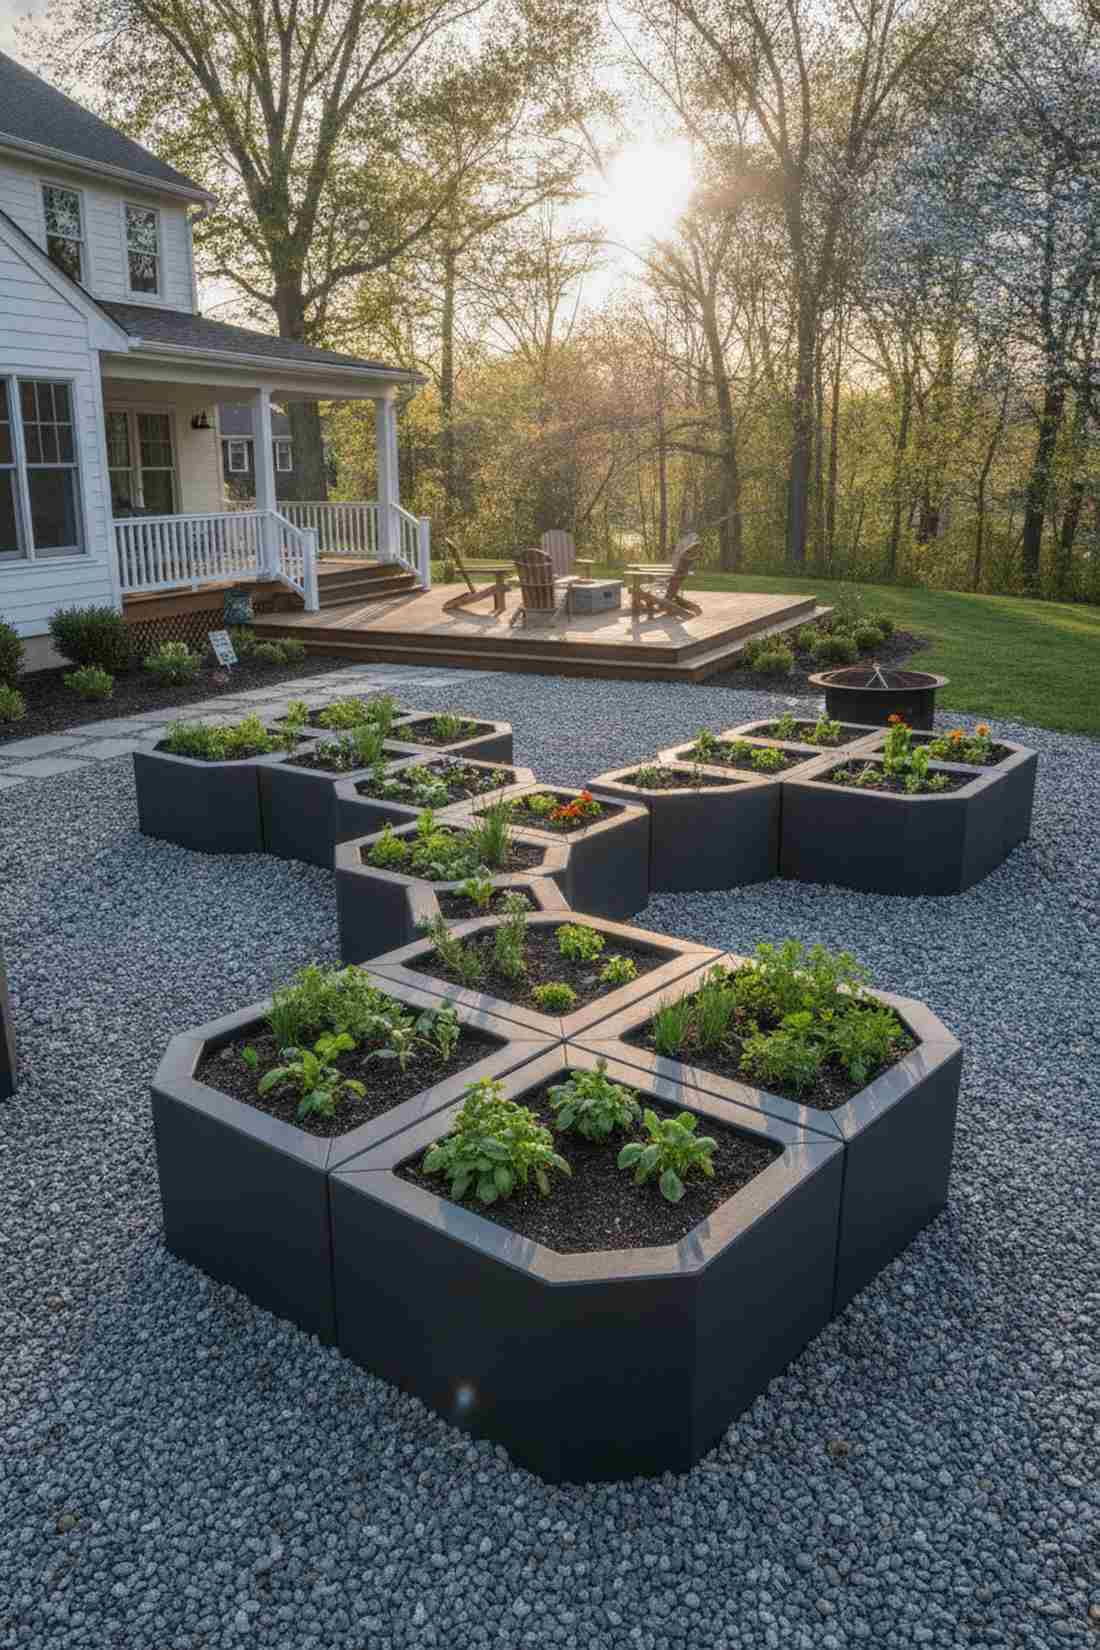
38. Hexagonal Honeycomb Cluster
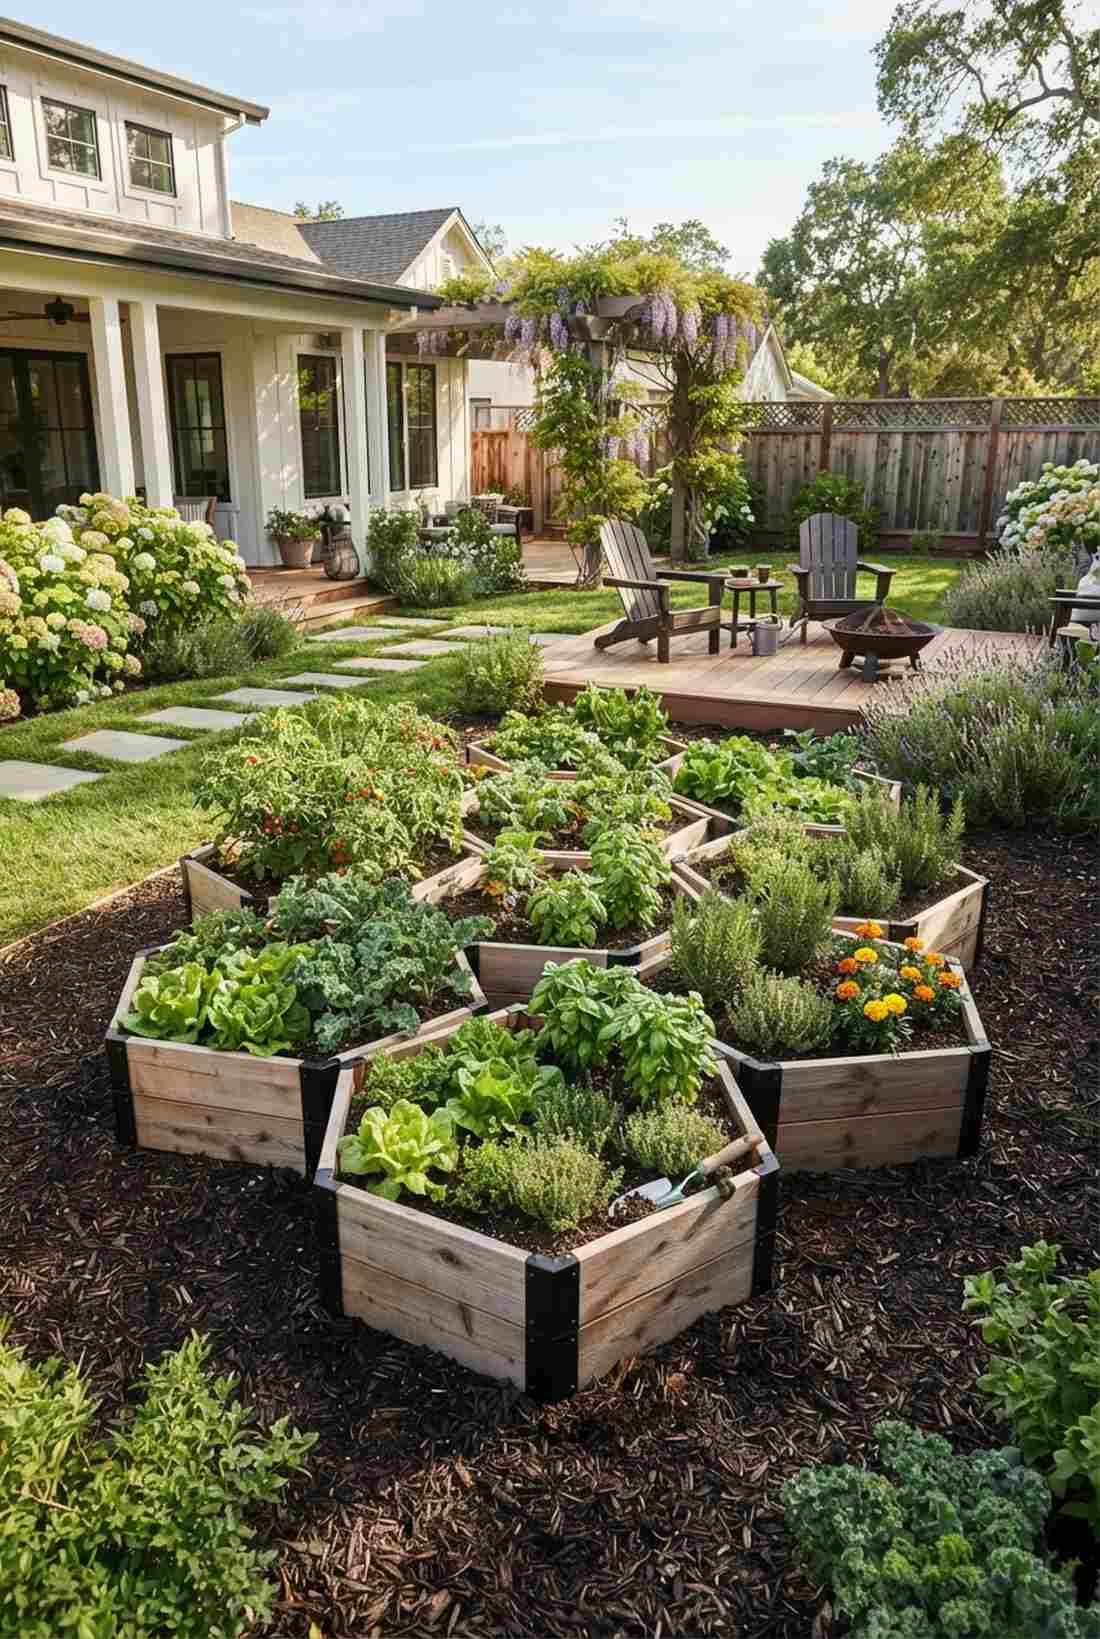
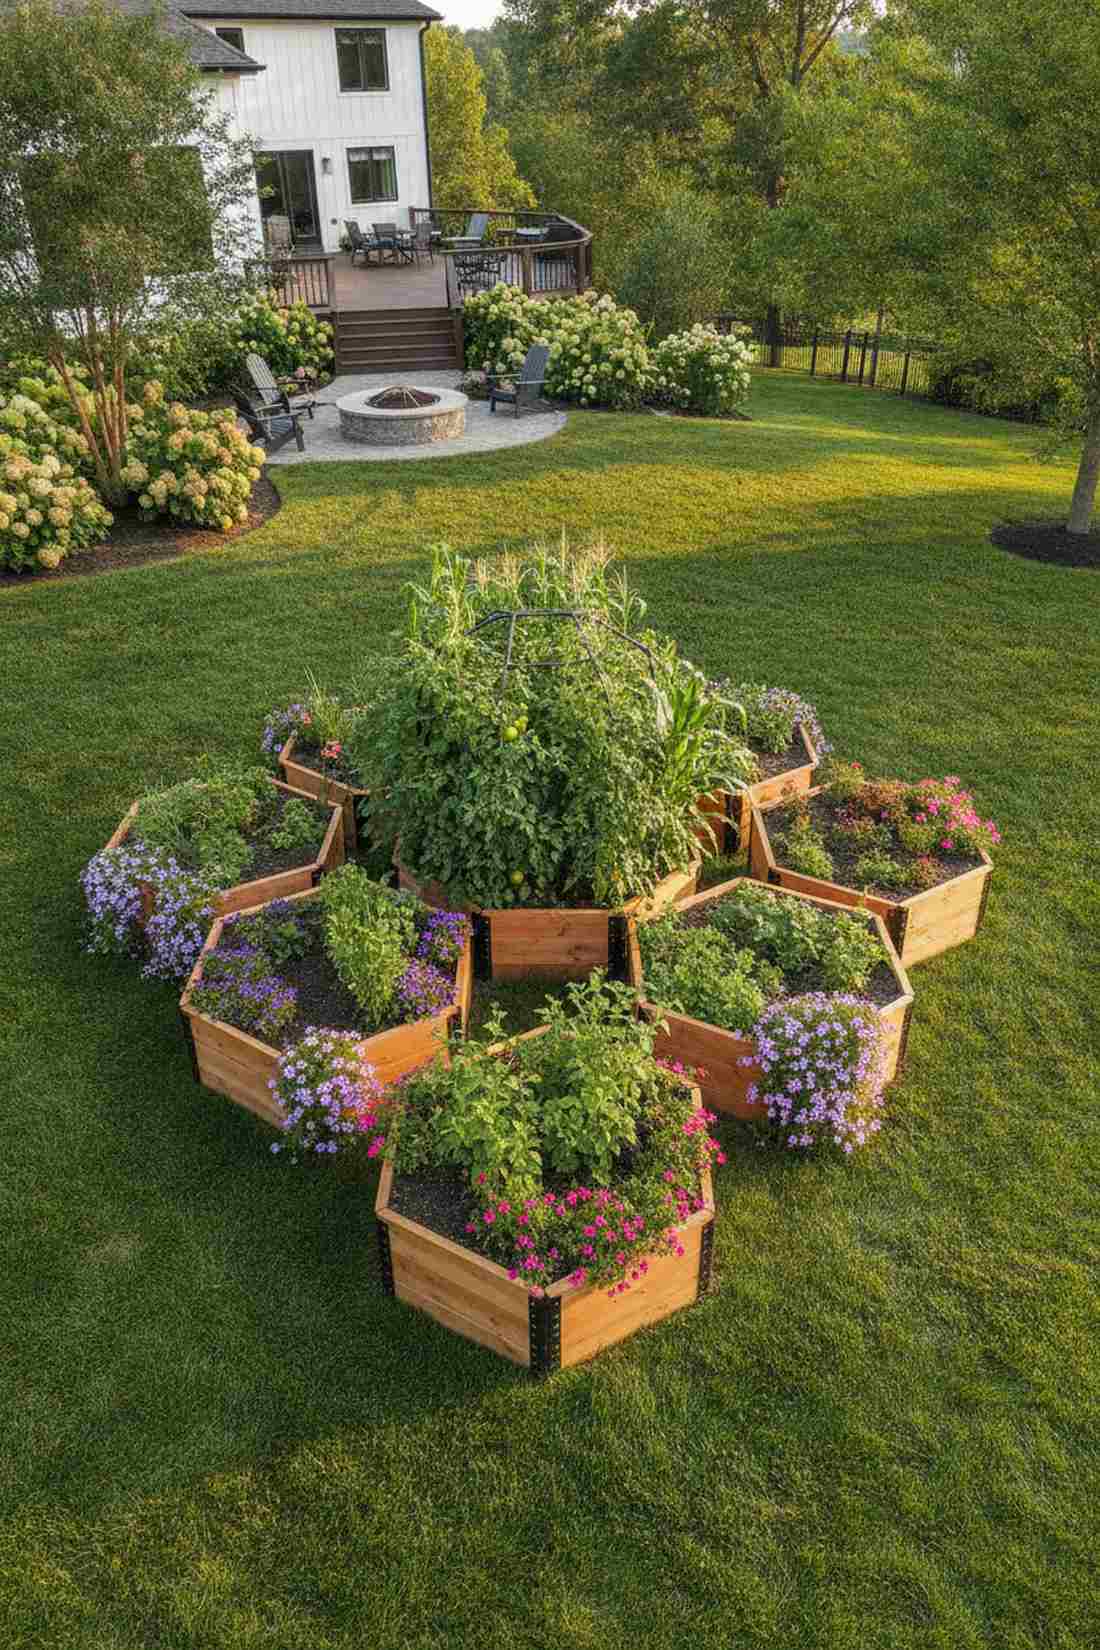
Radiates the hyper-efficient charm of a biological marvel, acting brilliantly as a modular expanding geometric layout. The ultimate choice for people who want to slowly add on new boxes over several years without it looking messy.
Squares leave awkward dead corners, whereas hexagons lock together flawlessly in any configuration. Snagging tool-free interlocking panel kits means you skip the nightmare of cutting perfect 60-degree wood angles. It’s an intensely practical, modern setup that looks like pure architectural genius.
A starter pack of three hexagons runs about $90–$140.
- Key Materials: 60-degree corner brackets
- Vibe / Style: Organic Modern
- Difficulty: Advanced cuts (if using wood)
- Budget Breakdown: Wood: $80 | Brackets: $45
- Creator’s Tip: Group them tightly so the shared walls save you money on lumber, just like real bees do it.
- Smart Sourcing: Pre-cut modular hexagonal planter kits or Adjustable heavy-duty angle hinges (bulk pack).
Most designers charge thousands to plan what you can build this weekend with the next trick…
39. Infinity Loop Bed

Feels like a luxurious landscape feature plucked from a modern art park, serving as an organic flowing figure-eight planter. Phenomenal for breaking up rigid, square property lines with soft, sweeping movement.
Straight lines are boring, but intersecting circles draw the eye continuously around the yard. Utilizing a flexible bender-board edging strip allows you to create these tight curves without snapping lumber. It looks far more expensive than it is while creating naturally separated planting zones.
Weaving this shape together costs roughly $50–$90. Pin this to add immediate high-end flow to your yard.
- Key Materials: Composite bender board
- Vibe / Style: Flowing Modern Art
- Difficulty: Intermediate bending
- Budget Breakdown: Bender Board: $60 | Stakes: $15
- Creator’s Tip: Use the intersection of the figure-eight as a focal point for a large birdbath or an obelisk to anchor the design.
- Smart Sourcing: Heavy-duty composite bender board rolls or Premium metal garden obelisk centerpieces.
40. Serpentine Wave Bed
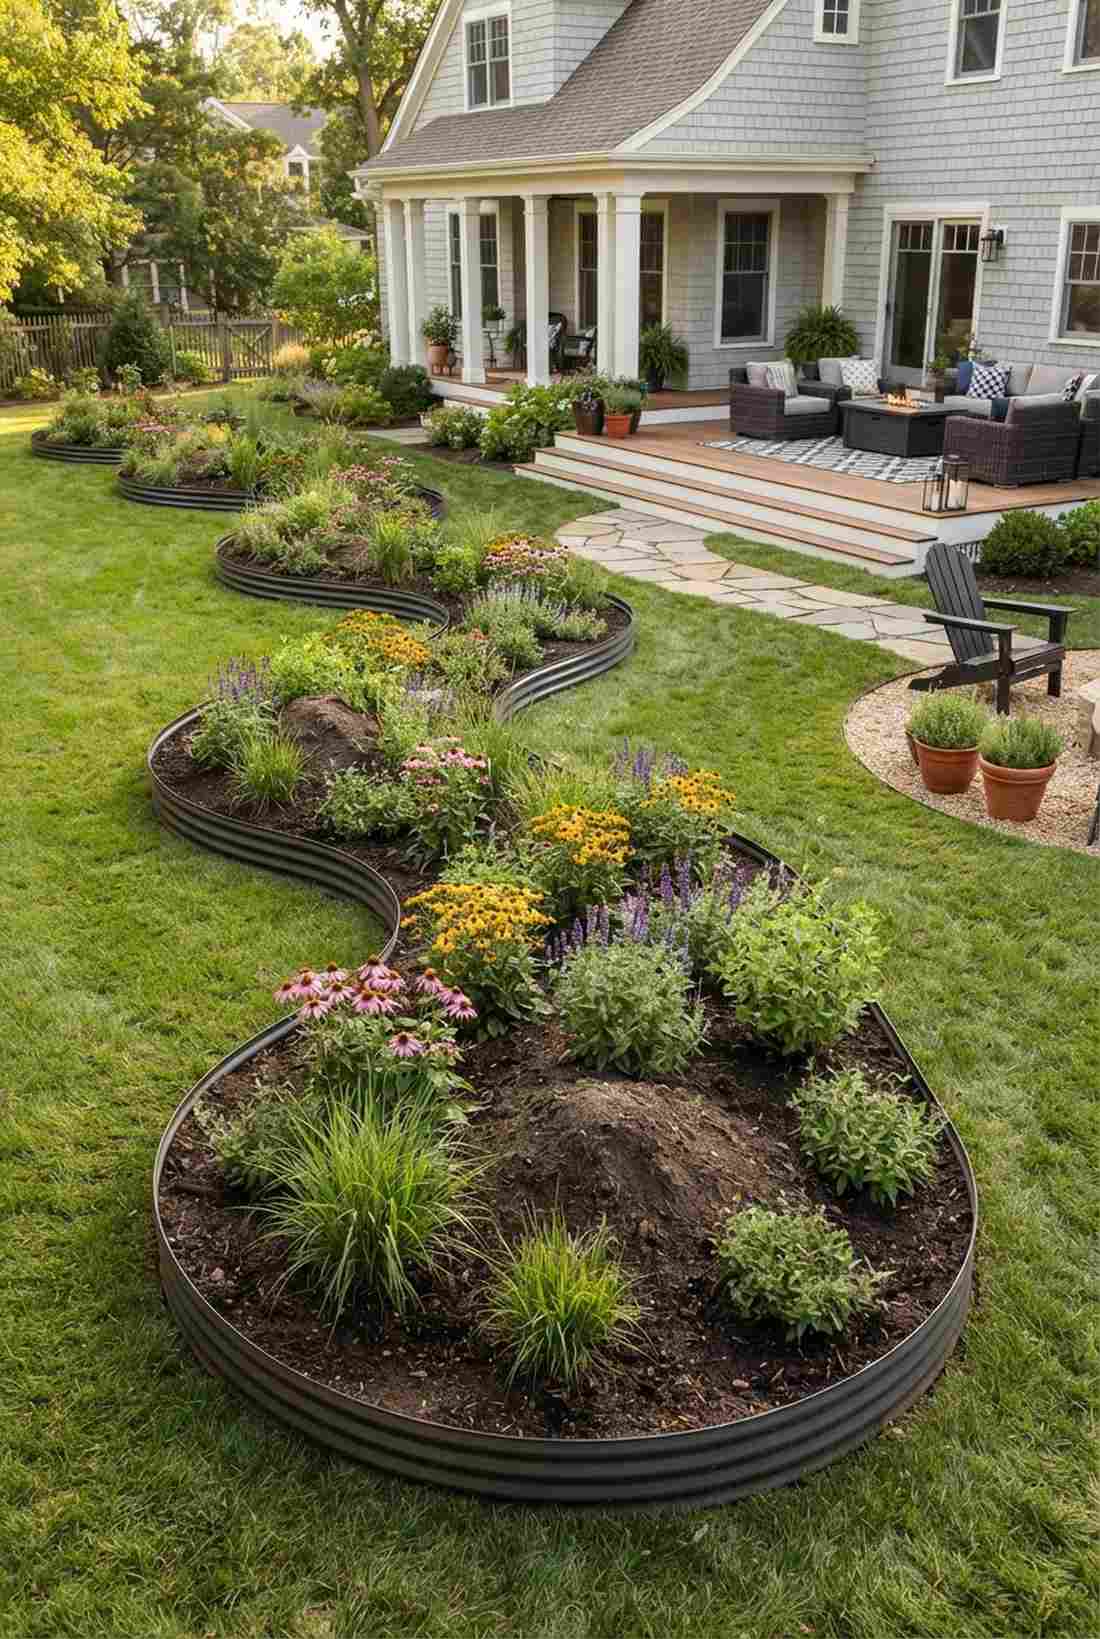
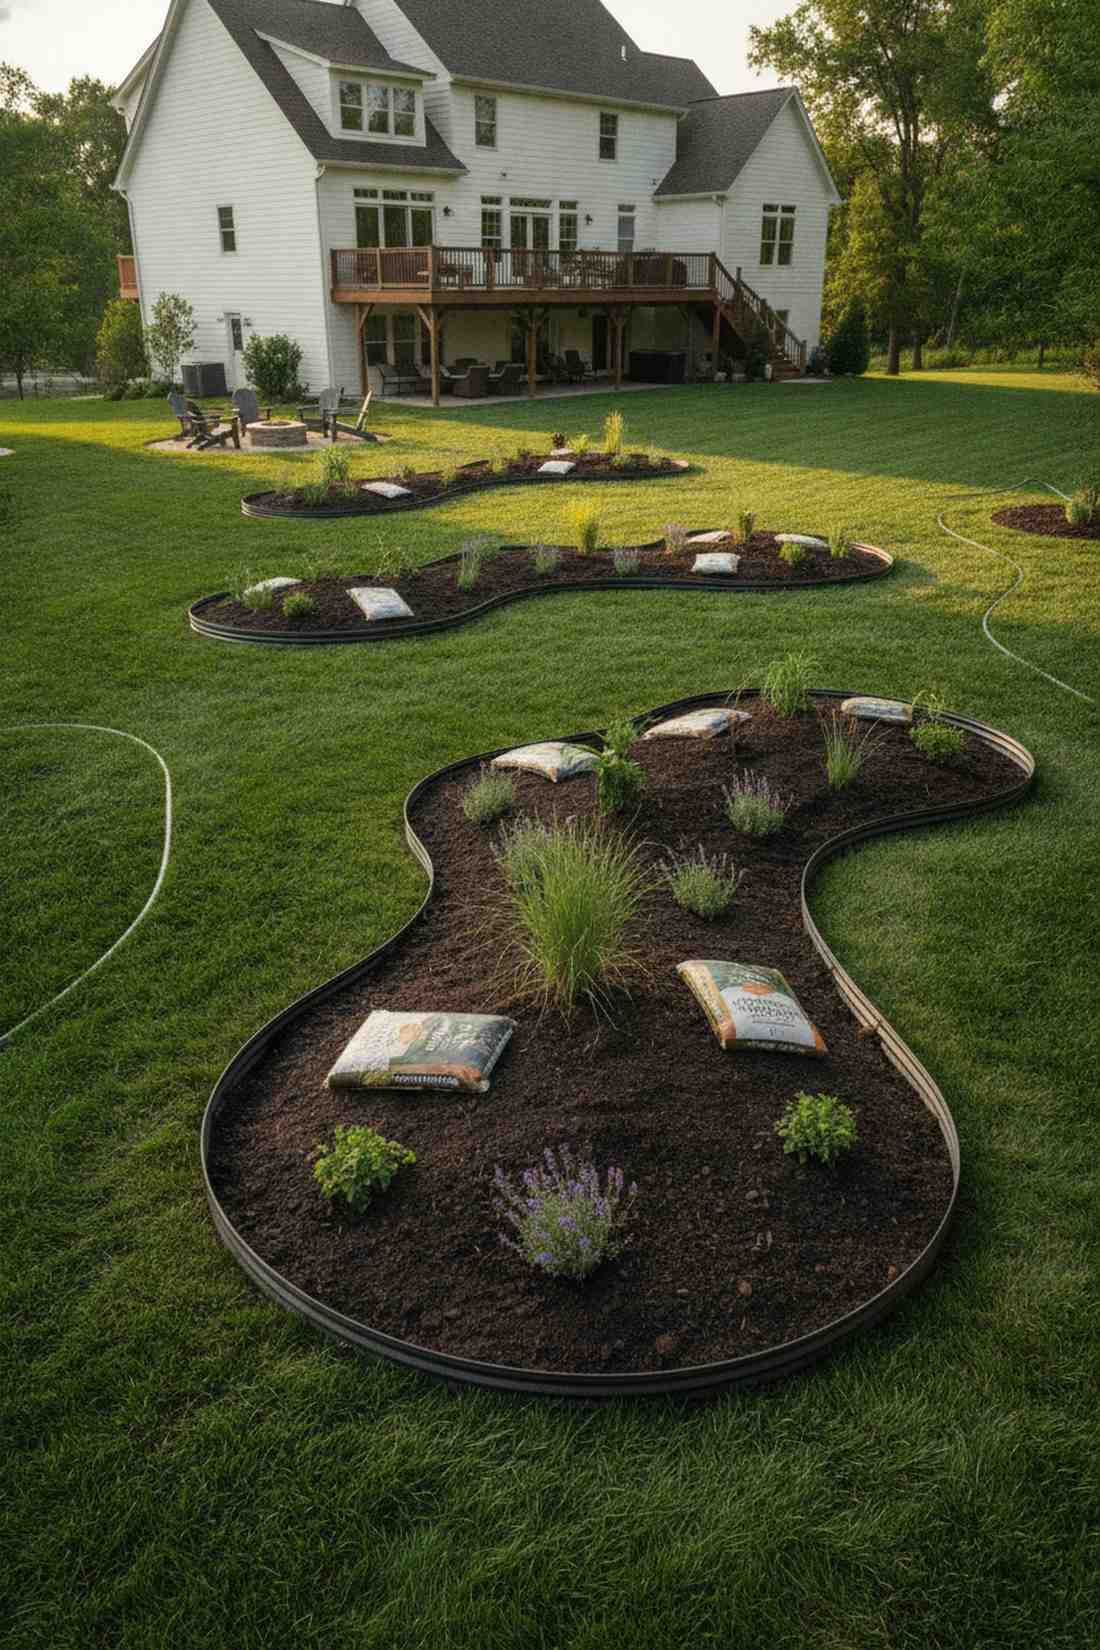
Exudes the wild, dynamic energy of a natural riverbank, hitting the mark perfectly as an undulating landscape border. Ideal for softening the harsh edges of a long, boring rectangular lawn.
Rigid boxes fight against natural topography, while a serpentine wave flows harmoniously with the ground. Grabbing some premium garden soil mix helps build up the berms without requiring heavy wooden retaining walls. It completely redefines the property line into a soft, inviting journey.
This free-flowing earthwork costs around $40–$70. Save this if you want to eliminate the boxy look of suburban yards.
- Key Materials: Flexible metal edging
- Vibe / Style: River Flow
- Difficulty: Easy shaping
- Budget Breakdown: Edging: $45 | Soil: $25
- Creator’s Tip: Lay down a heavy garden hose in the sun to warm it up, then use it to map out your perfect curves before digging.
- Smart Sourcing: Corrugated flexible metal landscape edging or Premium organic soil amendment bags.
Integrated Landscape Features for Raised Beds Gardening
Combining beds with complementary elements creates complete garden experiences that extend functionality beyond simple food production. These multifunctional designs serve aesthetic, ecological, and practical purposes simultaneously.
41. Bed and Pergola Combination
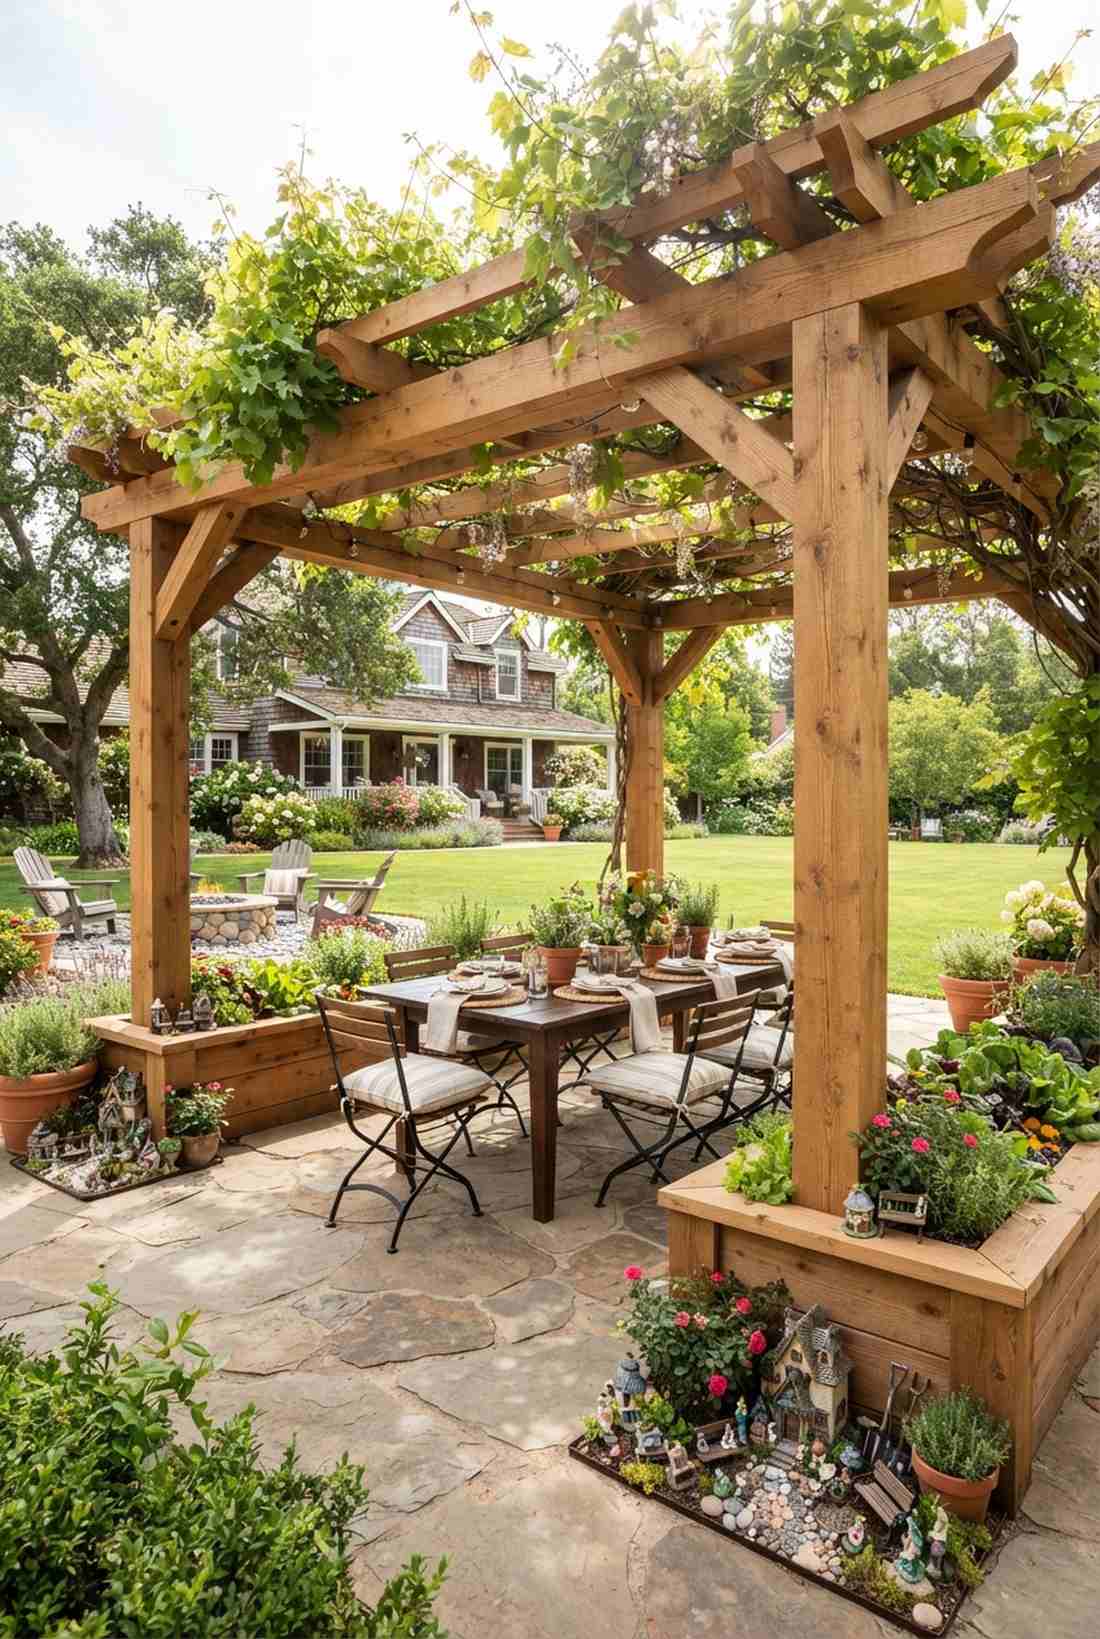
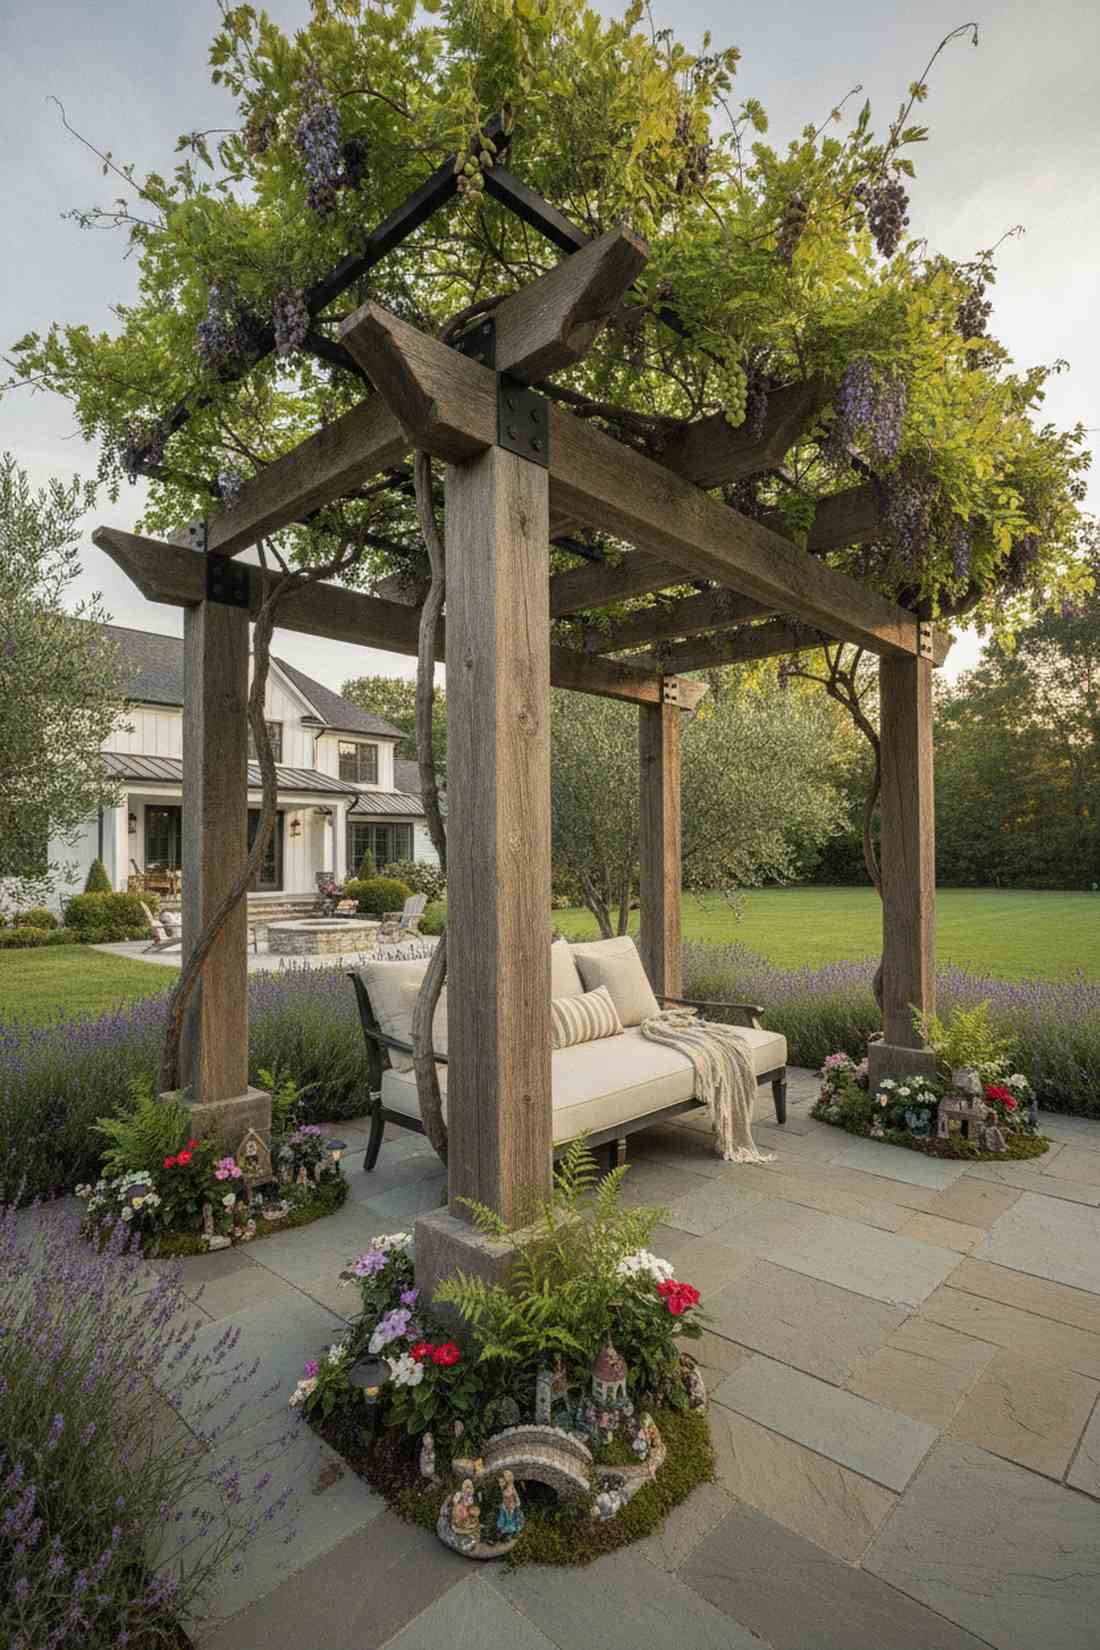
Delivers the breathtaking presence of an Italian vineyard dining area, acting as an overhead shaded oasis planter. The ultimate choice for southern climates where delicate greens incinerate under the August sun.
Most gardens offer zero shade, but extending your bed posts upward into a canopy changes everything. Sneaking in some fairy garden kits around the base of the massive posts softens the heavy timber look. It gives a designer-level finish that doubles as a stunning outdoor room.
Building this towering structure costs about $150–$300. Pin this to completely transform your patio lifestyle.
- Key Materials: 4×4 structural timbers
- Vibe / Style: Tuscan Vineyard
- Difficulty: Advanced carpentry
- Budget Breakdown: Timbers: $200 | Fasteners: $50
- Creator’s Tip: Plant fast-growing climbing vines like grapes or wisteria immediately; the true magic happens when the roof turns completely green.
- Smart Sourcing: Heavy-duty steel pergola bracket kits or UV-coated miniature fairy garden accessories.
You are losing money on water bills until you implement this ridiculously simple integration…
42. Water Feature Edge Bed
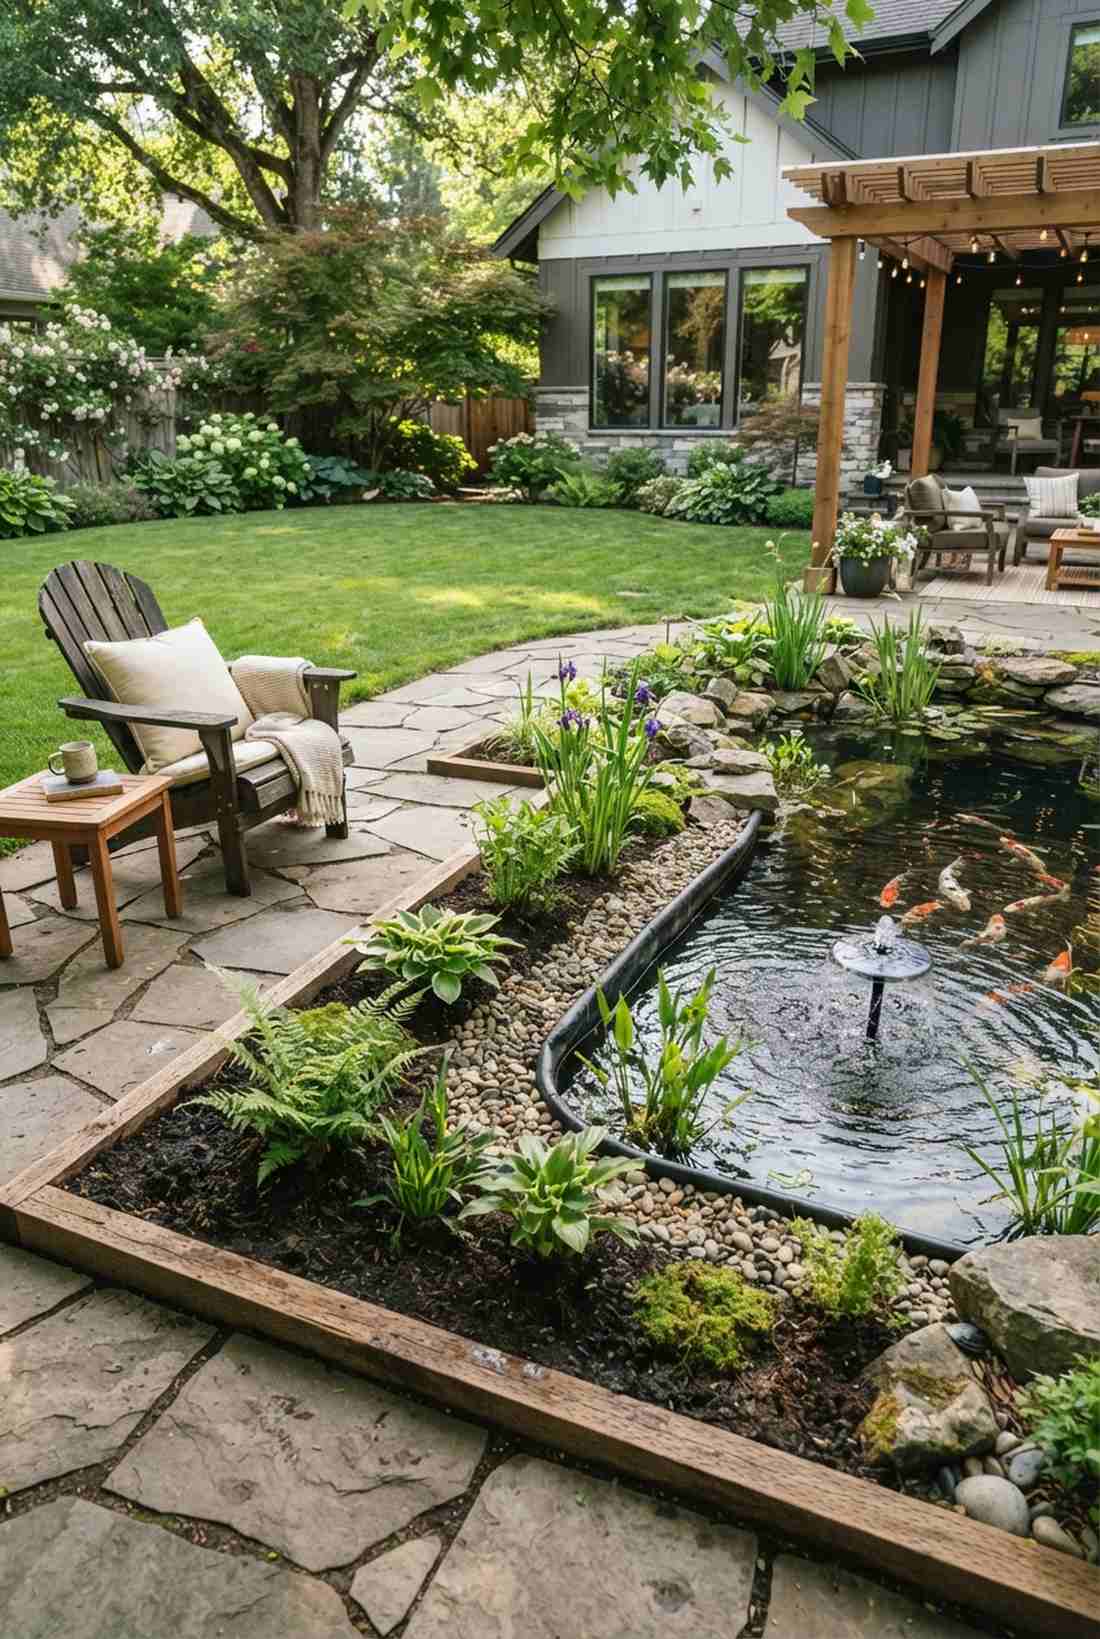
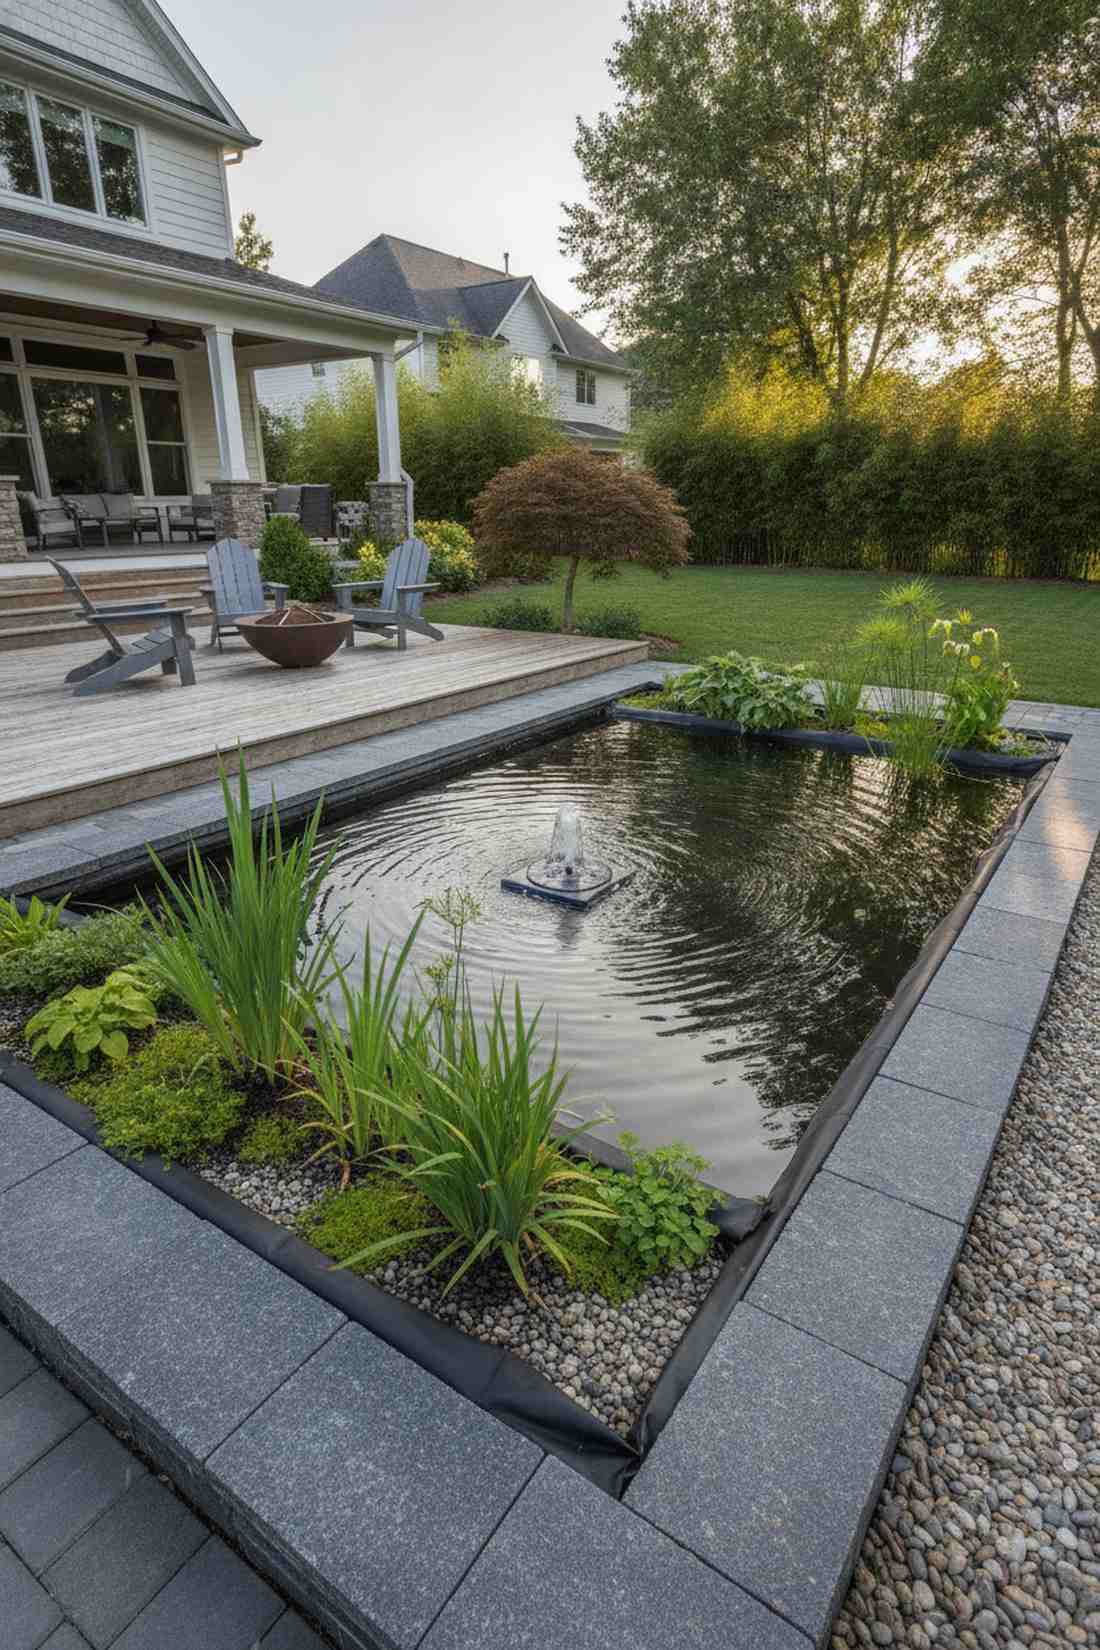
Radiates the tranquil, deeply cooling energy of a zen monastery, serving beautifully as a pond-side humidity planter. Phenomenal for integrating water-loving plants right into the hardscape of a patio.
Standalone boxes dry out constantly, whereas sitting near a water feature creates an automatic micro-climate. Utilizing an organic weed barrier fabric between the water and dirt stops muddy runoff from ruining the pond filter. It delivers a deeply expensive, multi-sensory aesthetic of splashing water and lush greens.
Adding this wet-zone bed costs roughly $80–$140. Highly recommended for sensory garden upgrades.
- Key Materials: Pond liner scrap or barrier tape
- Vibe / Style: Zen Sanctuary
- Difficulty: Intermediate leveling
- Budget Breakdown: Frame: $60 | Barrier liners: $30
- Creator’s Tip: Leave a 2-inch gravel buffer zone between the dirt and the water to catch splashing and prevent mudslides into the pond.
- Smart Sourcing: Heavy-duty EPDM pond liner rolls or Solar-powered floating water fountain kits.
43. Living Fence Bed System
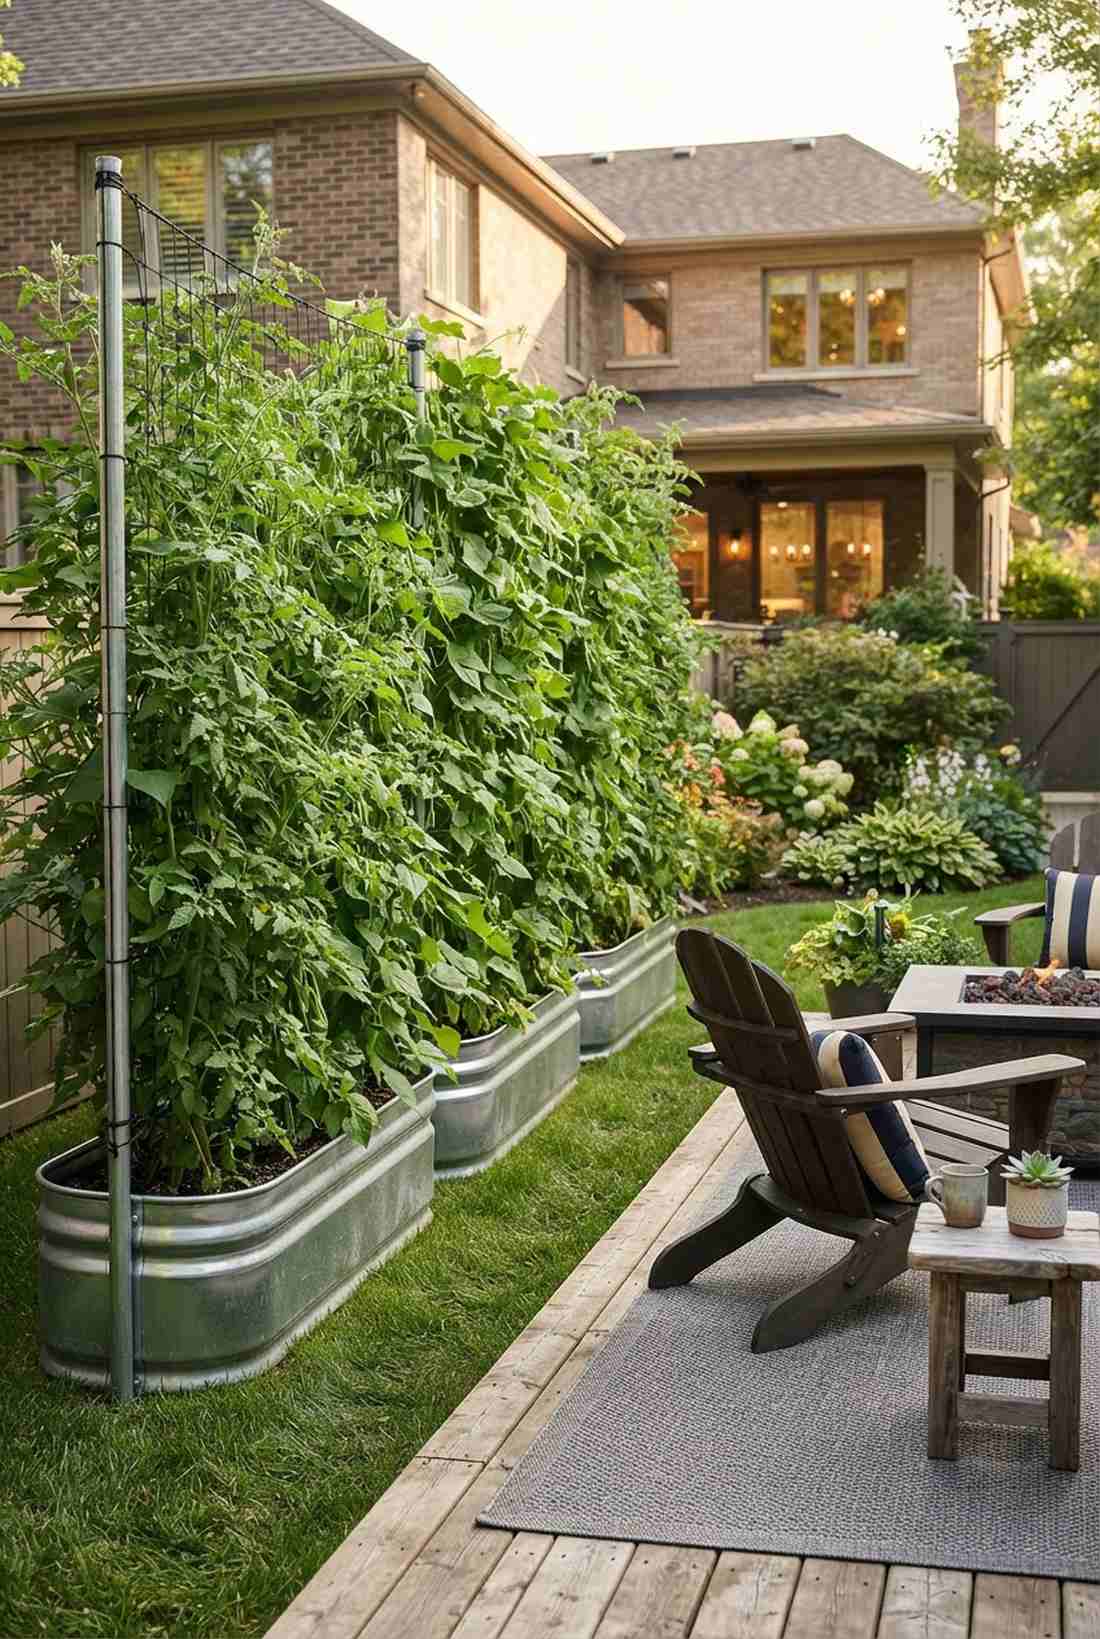
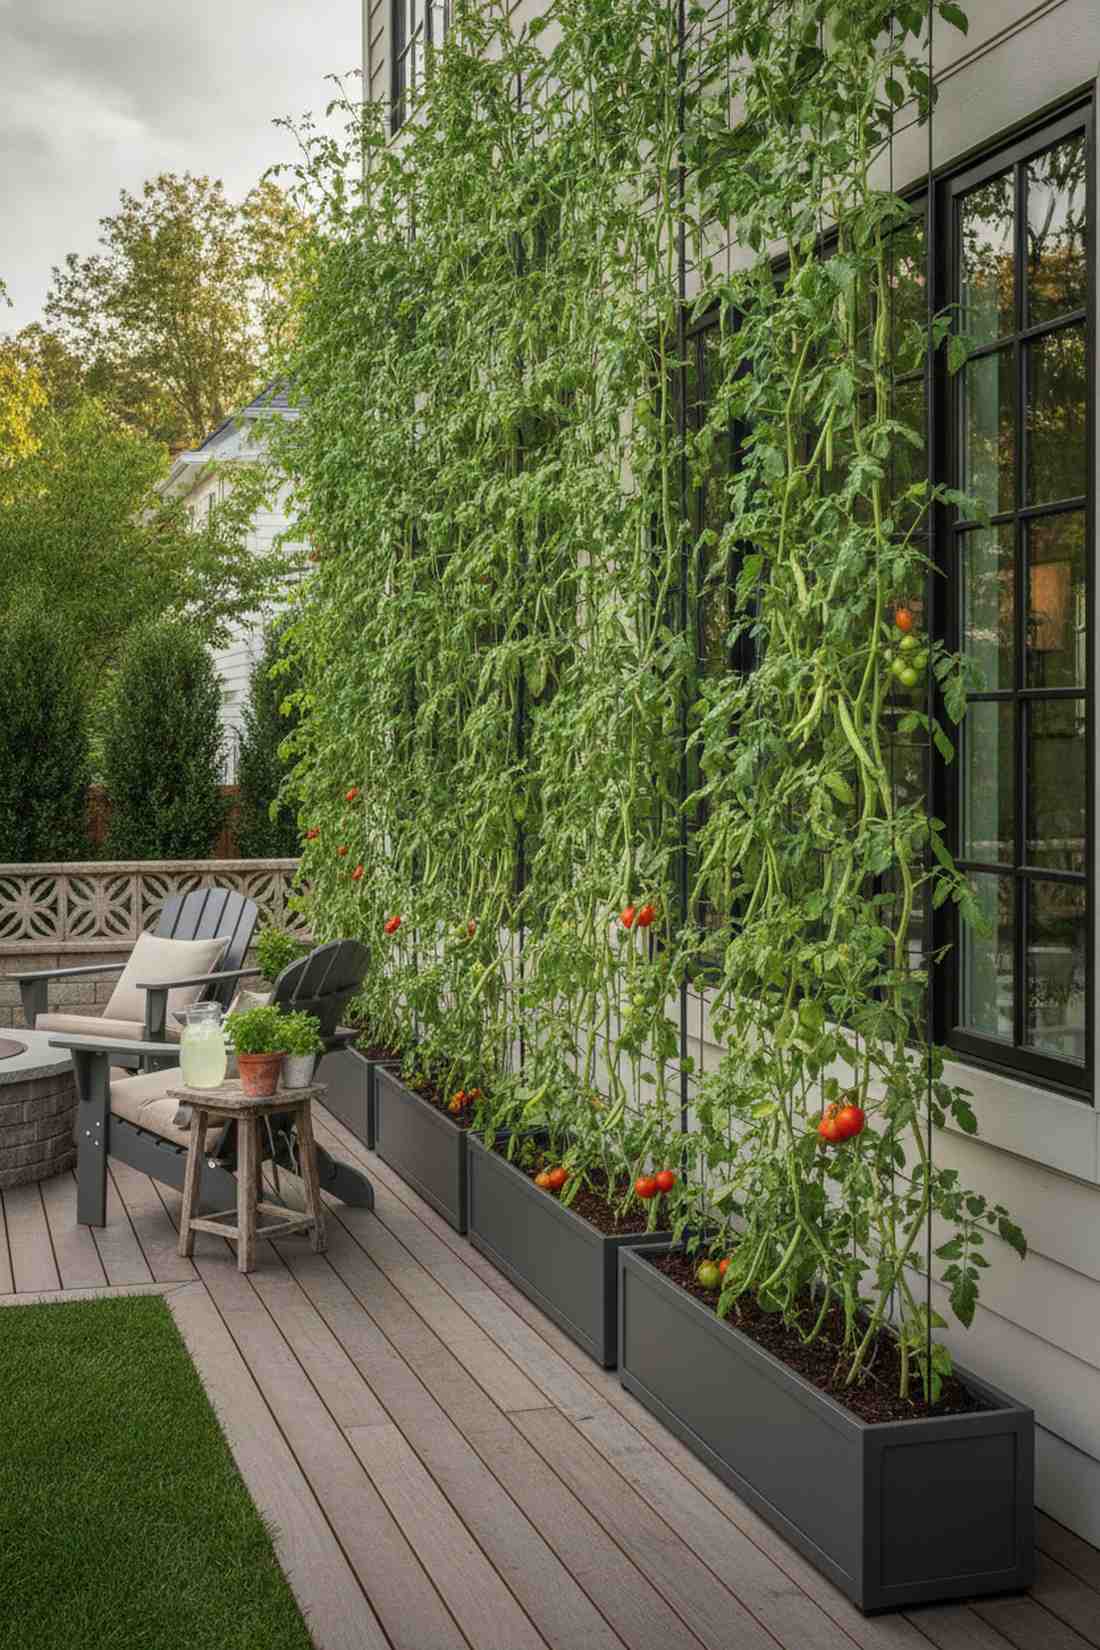
Creates an atmosphere reminiscent of an exclusive gated estate, working magic as a natural privacy screen planter. Absolute perfection for urban yards where neighbors can look directly into your kitchen windows.
Wooden fences look hostile and block breezes, but a towering wall of green beans feels incredibly welcoming. Snagging heavy-duty raised garden kits ensures the narrow base won’t tip over when heavy vines catch the wind. It transforms an awkward property line into a fiercely productive, private fortress.
Erecting this living barrier runs about $100–$160.
- Key Materials: Tall trellis mesh and narrow planters
- Vibe / Style: Urban Fortress
- Difficulty: Easy vertical setup
- Budget Breakdown: Planters: $90 | Netting/Posts: $40
- Creator’s Tip: Use indeterminate tomatoes mixed with pole beans; they will aggressively climb 8 feet high and form a solid wall of leaves.
- Smart Sourcing: Slim profile modular metal planter kits or Heavy-duty nylon trellis netting rolls.
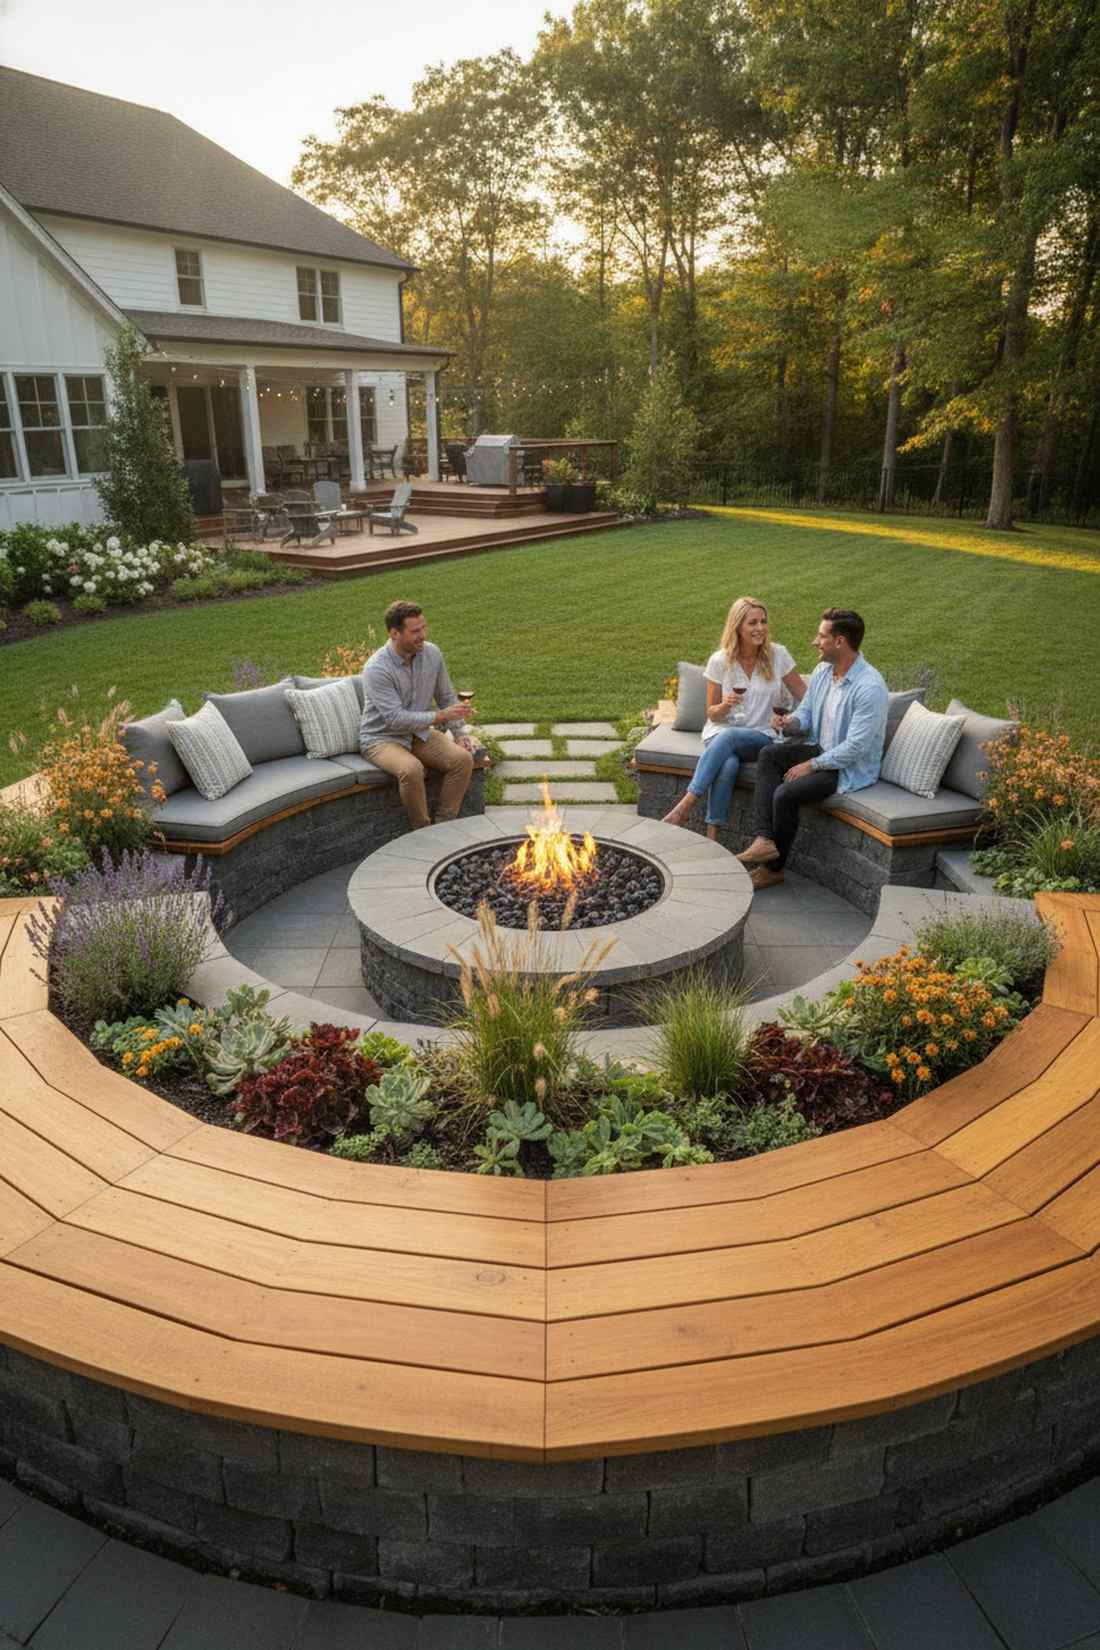
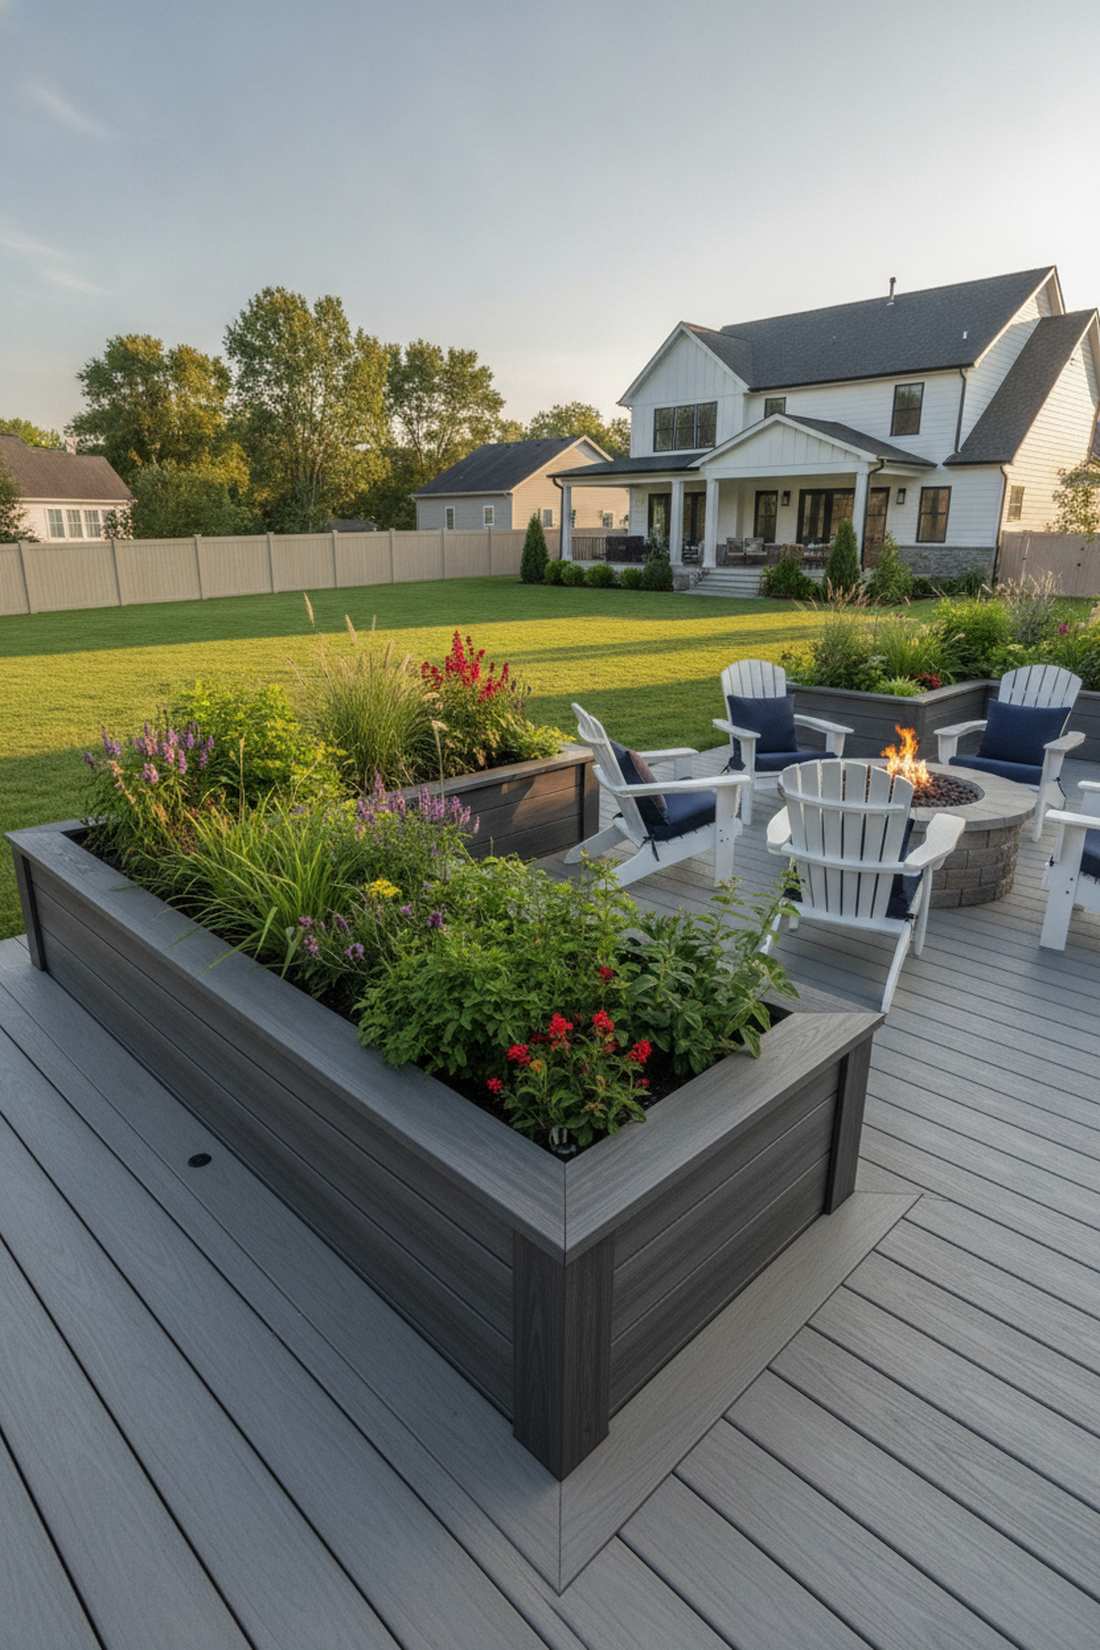
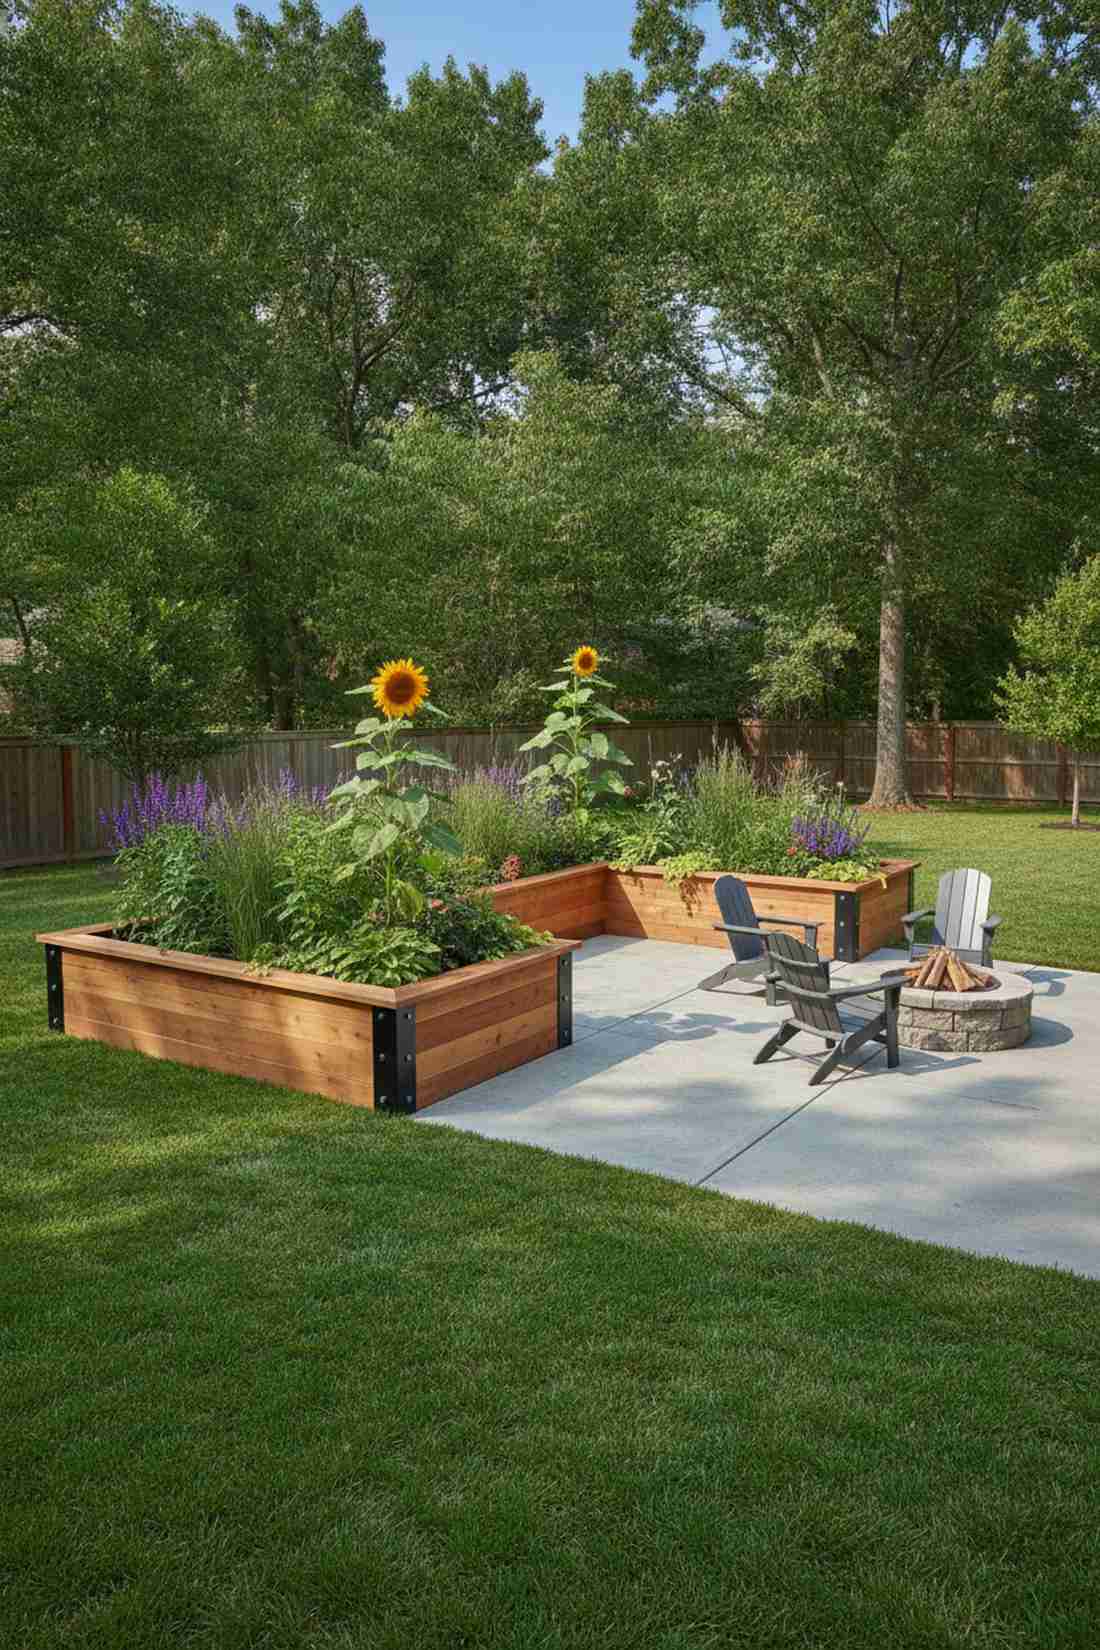
44. Fire Pit Surround Beds
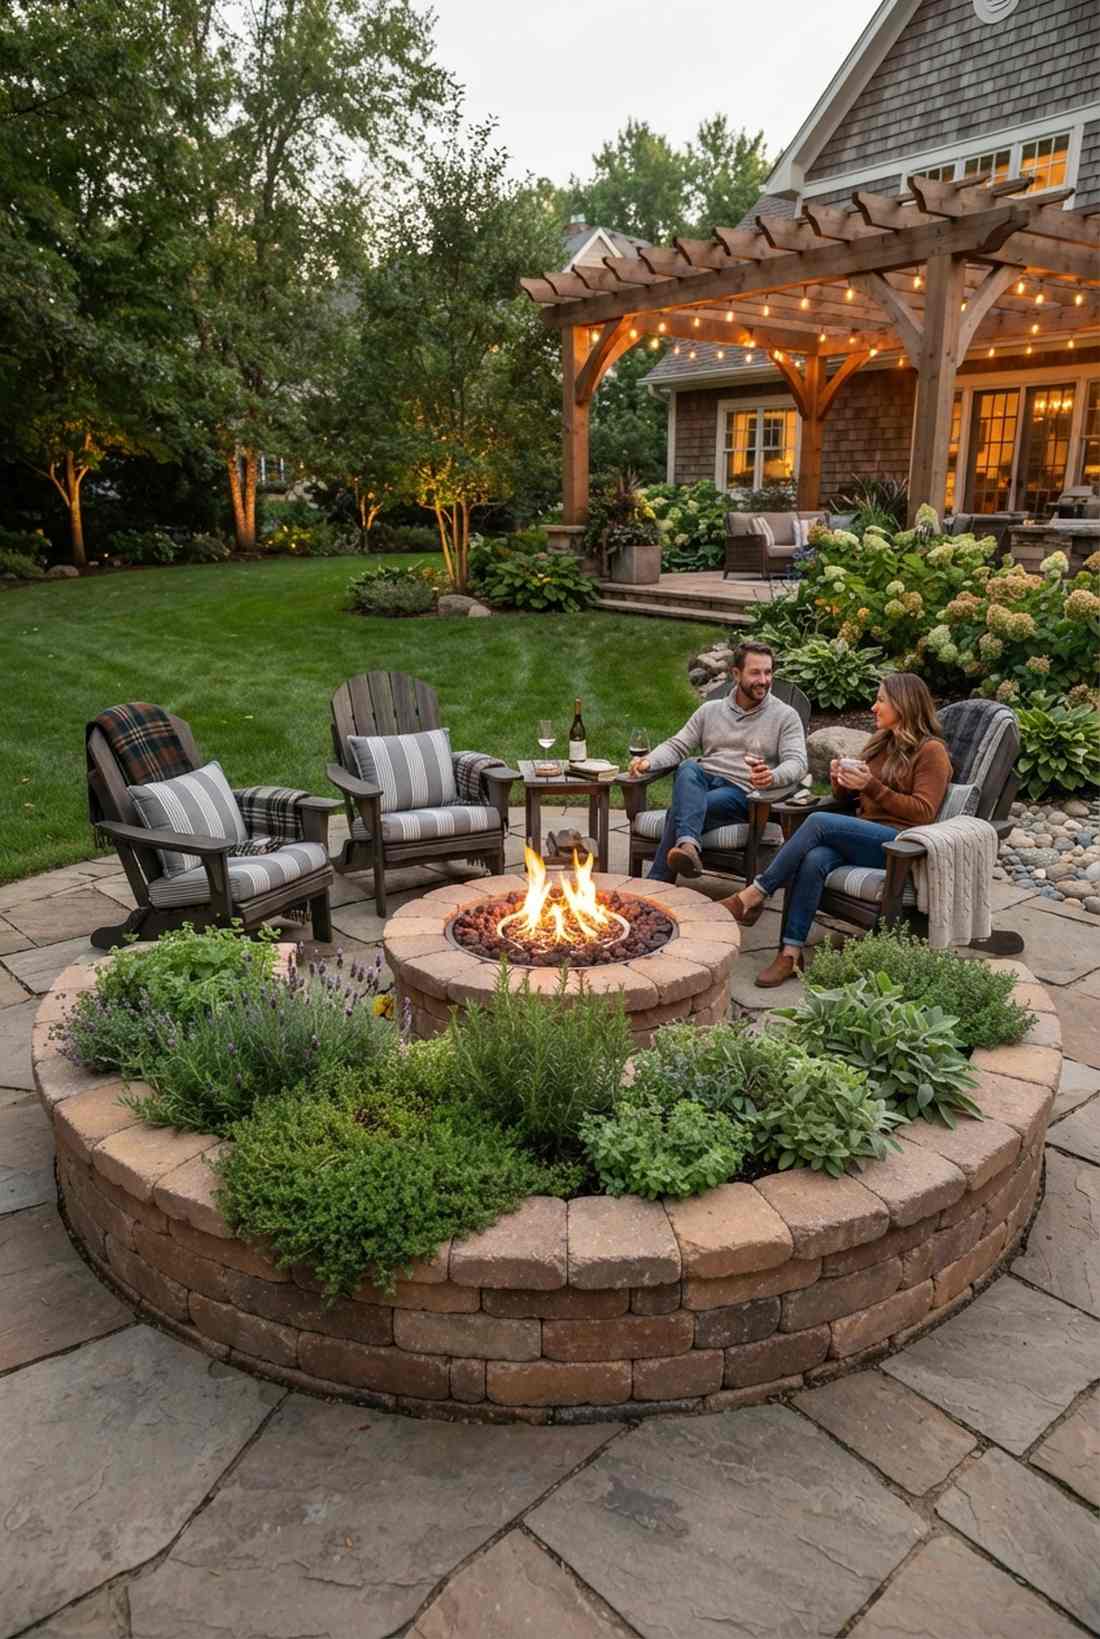
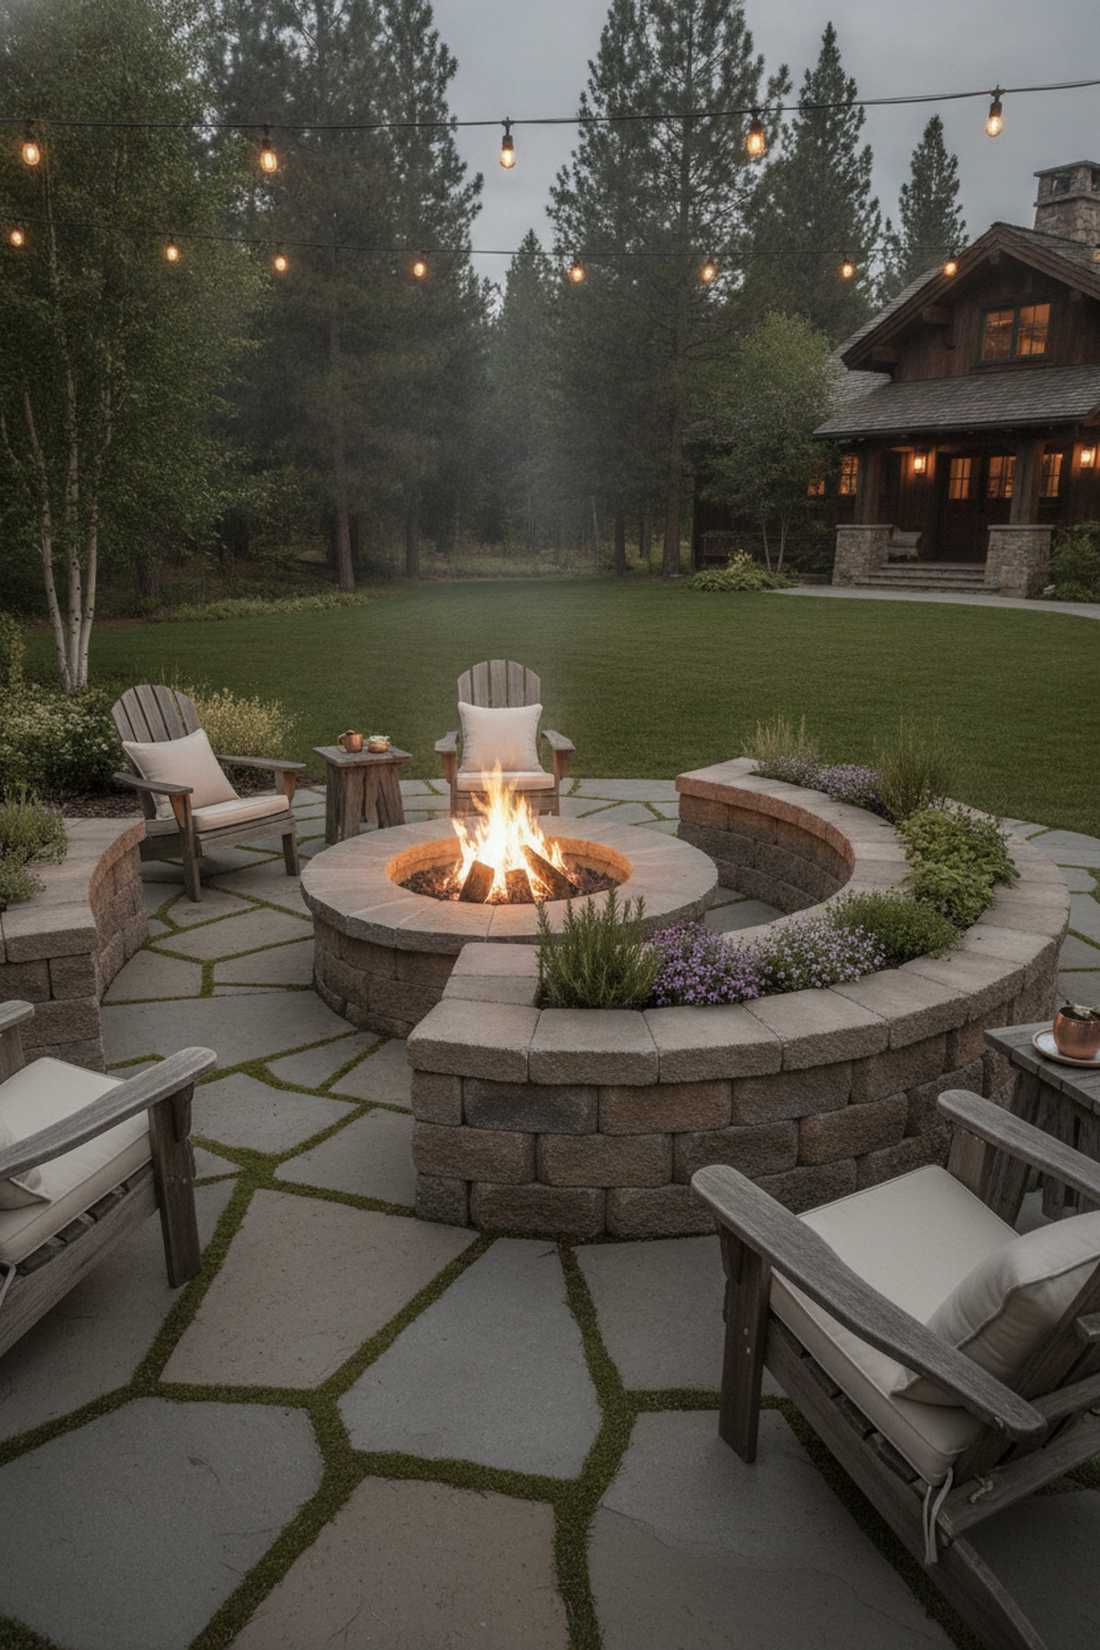
Feels like stepping into a high-end ski lodge courtyard, functioning flawlessly as an aromatic entertainment perimeter. A massive win for defining a cozy seating area while growing herbs that smell amazing when warmed.
Most fire pits float awkwardly in the grass, but wrapping them in low planters anchors the whole zone. Using a premium garden soil mix loaded with perlite keeps the herbs thriving despite the intense radiant heat. It completely bypasses boring landscaping to create a hyper-social centerpiece.
Wrapping a pit costs around $80–$130. Save this to your ultimate patio upgrade board.
- Key Materials: Heat-resistant stone or metal edges
- Vibe / Style: Cozy Lodge Lounge
- Difficulty: Intermediate layout
- Budget Breakdown: Stone blocks: $90 | Herb packs: $30
- Creator’s Tip: Plant creeping thyme and rosemary on the inner edge; when the fire warms them, the whole seating area smells like an expensive spa.
- Smart Sourcing: Curved concrete retaining wall block kits or Premium organic Mediterranean herb seed vaults.
45. Pathway Border Beds
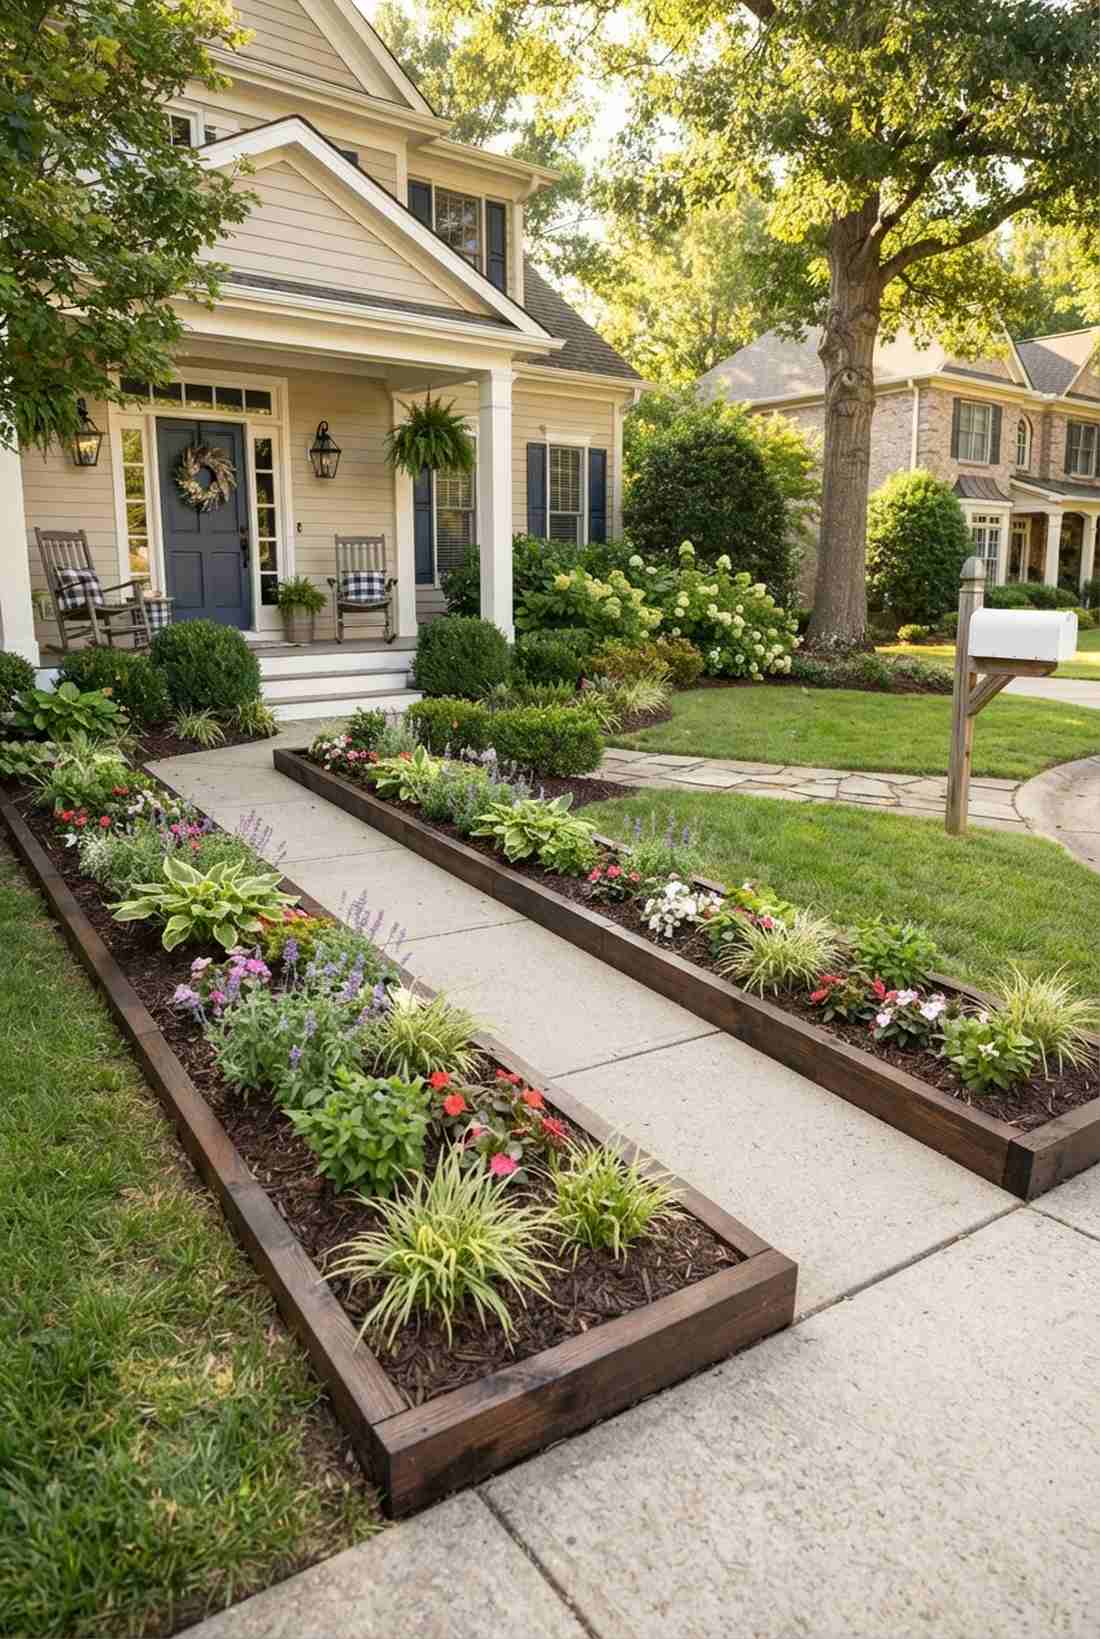
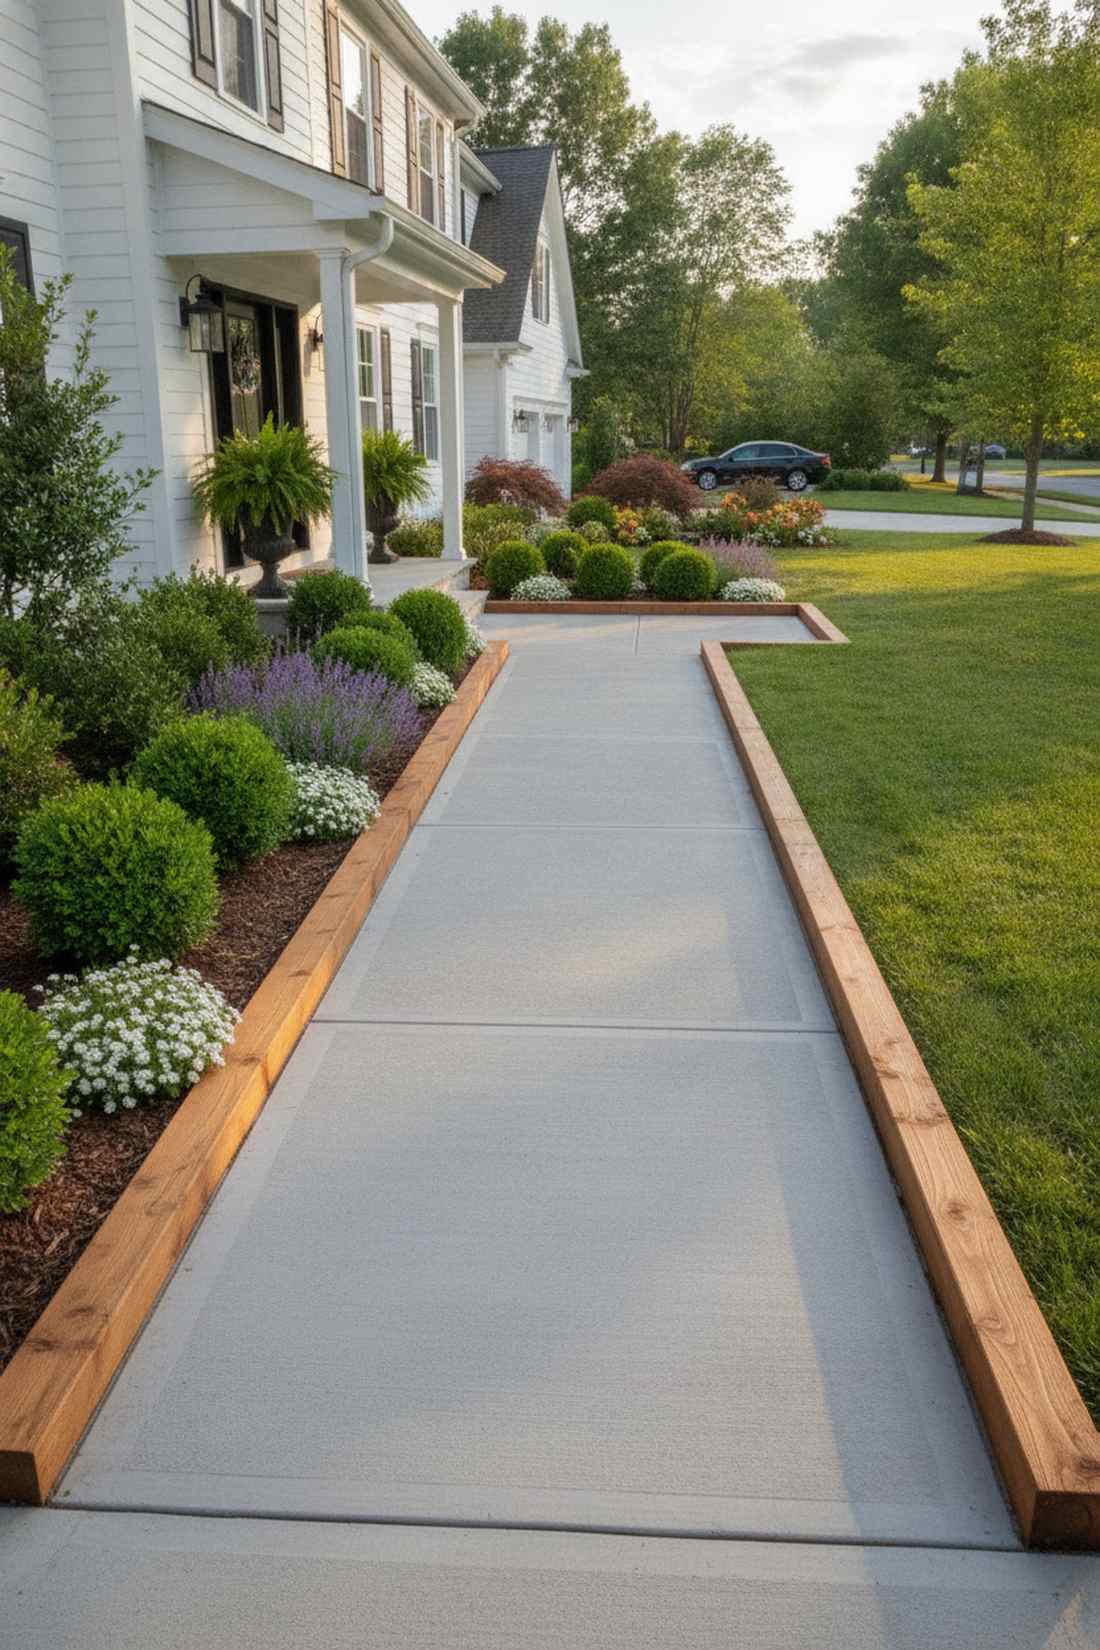
Delivers the crisp, manicured logic of a botanical garden entrance, shining as a walkway definition planting strip. Incredible for stopping mulch from washing onto the sidewalk while framing your front door.
Bare sidewalks look incredibly cheap, but low wooden borders instantly elevate the curb appeal. Opting for a food-safe wood sealant locks the timber color in against the harsh runoff from the driveway. It gives off a wealthy estate vibe that completely anchors the front yard.
Edging a walkway runs about $40–$70. Pin this to fix your messy yard borders forever.
- Key Materials: Low profile timber or composite
- Vibe / Style: Manicured Entrance
- Difficulty: Easy straight lines
- Budget Breakdown: Wood: $40 | Spikes: $15
- Creator’s Tip: Keep these beds under 10 inches tall so they don’t visually close off the pathway or trip people walking at night.
- Smart Sourcing: Pre-cut low profile composite edging borders or Eco-friendly clear wood sealant gallons.
46. Shed-Attached Bed
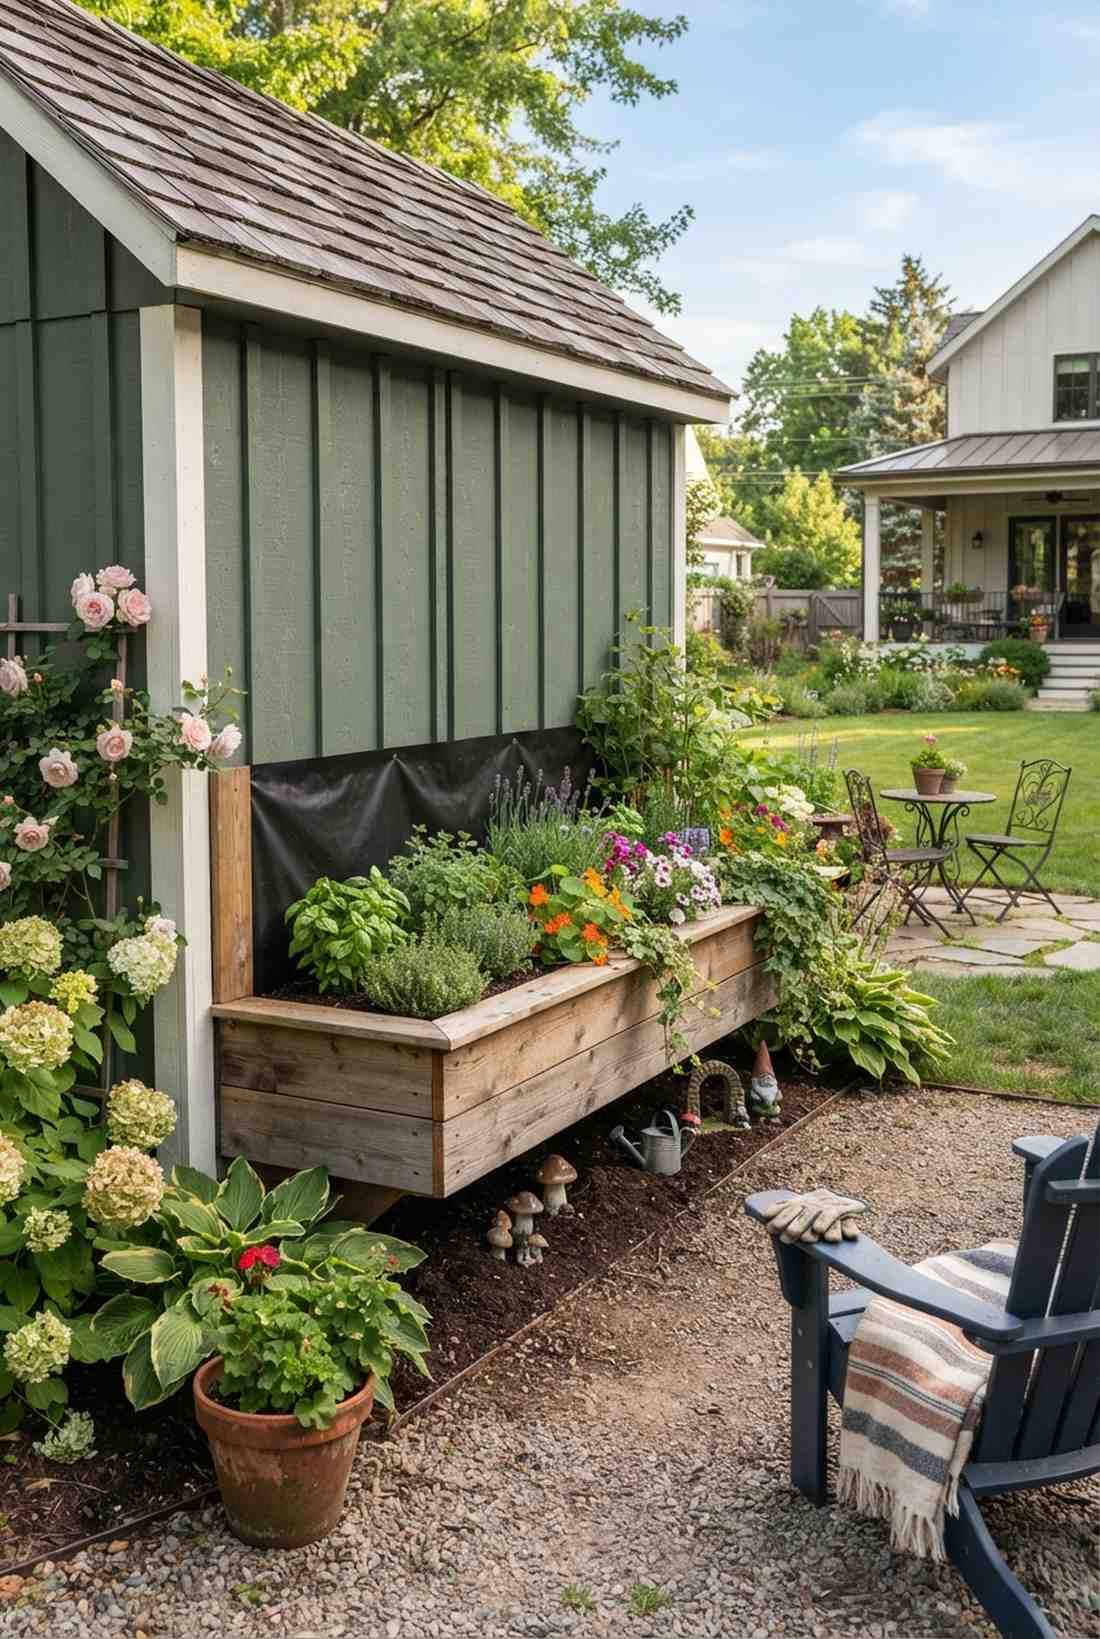
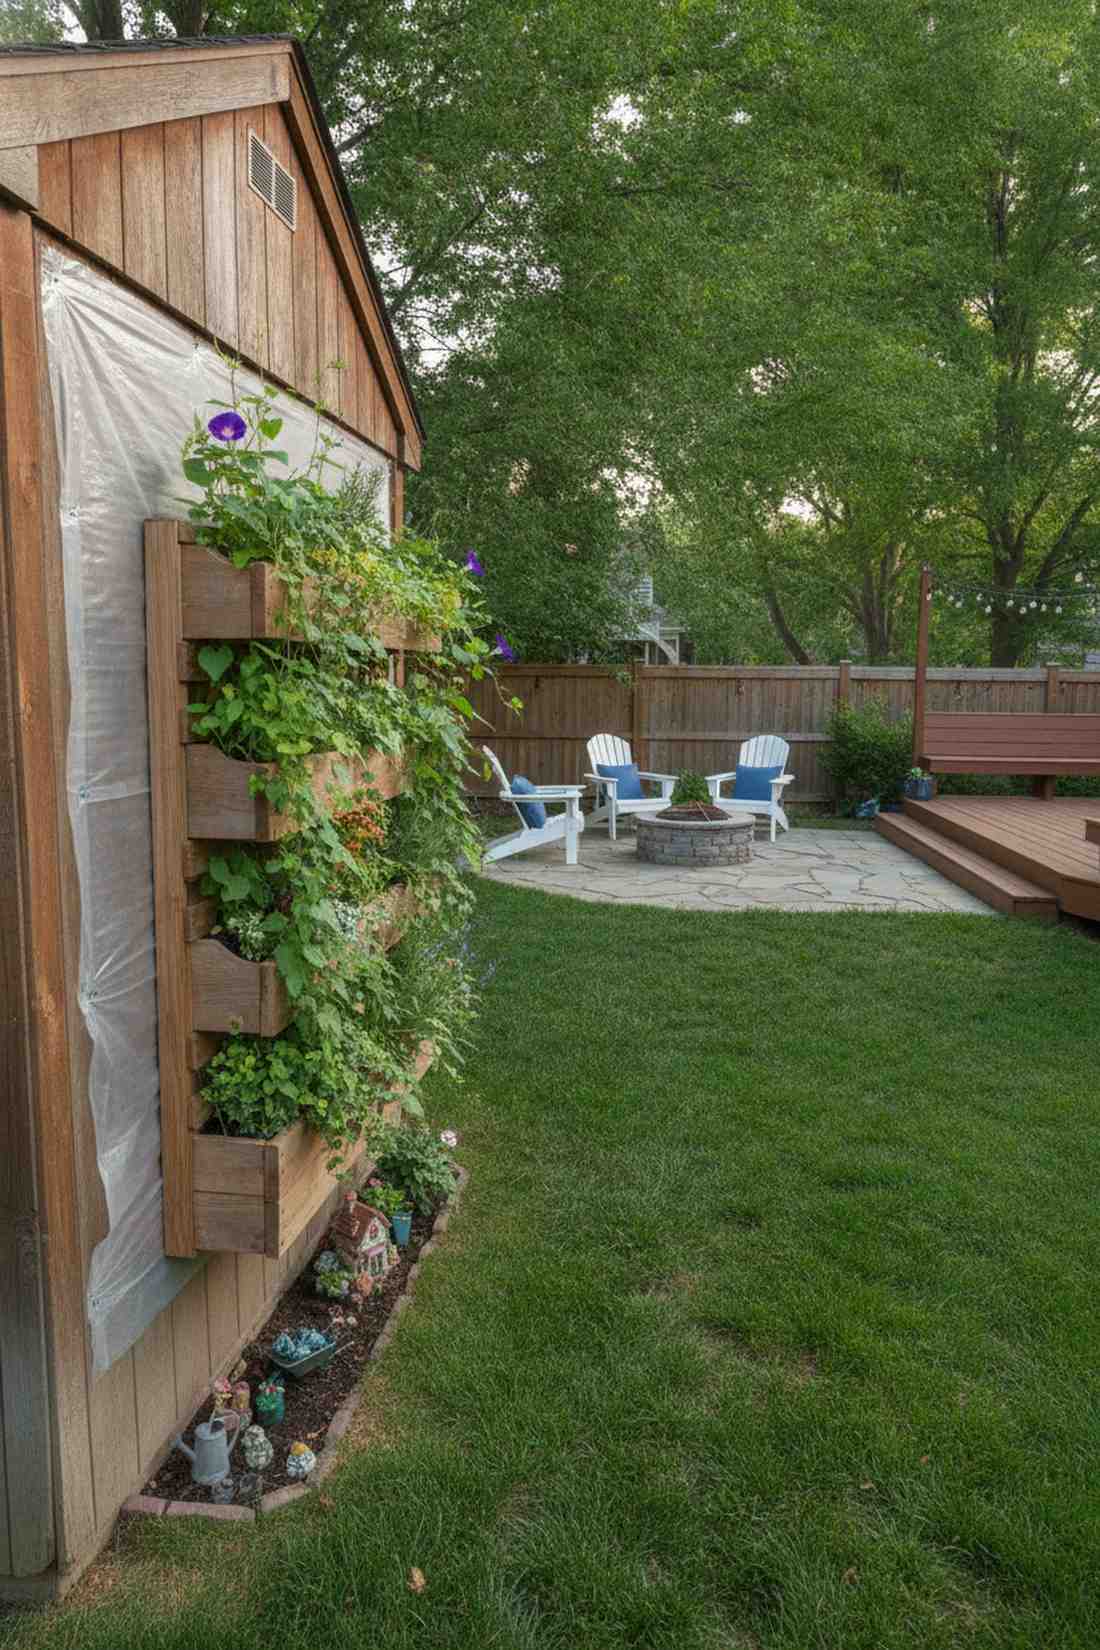
Exudes the rustic, hyper-efficient charm of a working homesteader’s cabin, hitting the mark perfectly as a micro-climate wall planter. Fantastic for utilizing the warm, south-facing side of a boring storage shed.
Most sheds are ugly eyesores, but wrapping the base in greenery completely integrates them into the landscape. Grabbing some miniature garden supplies and tucking them under the tall plants adds a touch of hidden whimsy. It completely redefines a utility building into a charming garden feature.
Slapping a box against the shed costs a mere $30–$50.
- Key Materials: Moisture barrier plastic
- Vibe / Style: Cottage Utility
- Difficulty: Easy attachment
- Budget Breakdown: Wood: $25 | Wall barrier: $15
- Creator’s Tip: Staple thick plastic sheeting directly to the shed wall behind the dirt to ensure the moisture never rots your building’s siding.
- Smart Sourcing: Heavy-duty waterproof vapor barrier rolls or UV-coated resin fairy cottage kits.
Most people complain about back pain in the garden, yet they ignore this brilliant architectural solution…
47. Bench-Integrated Bed
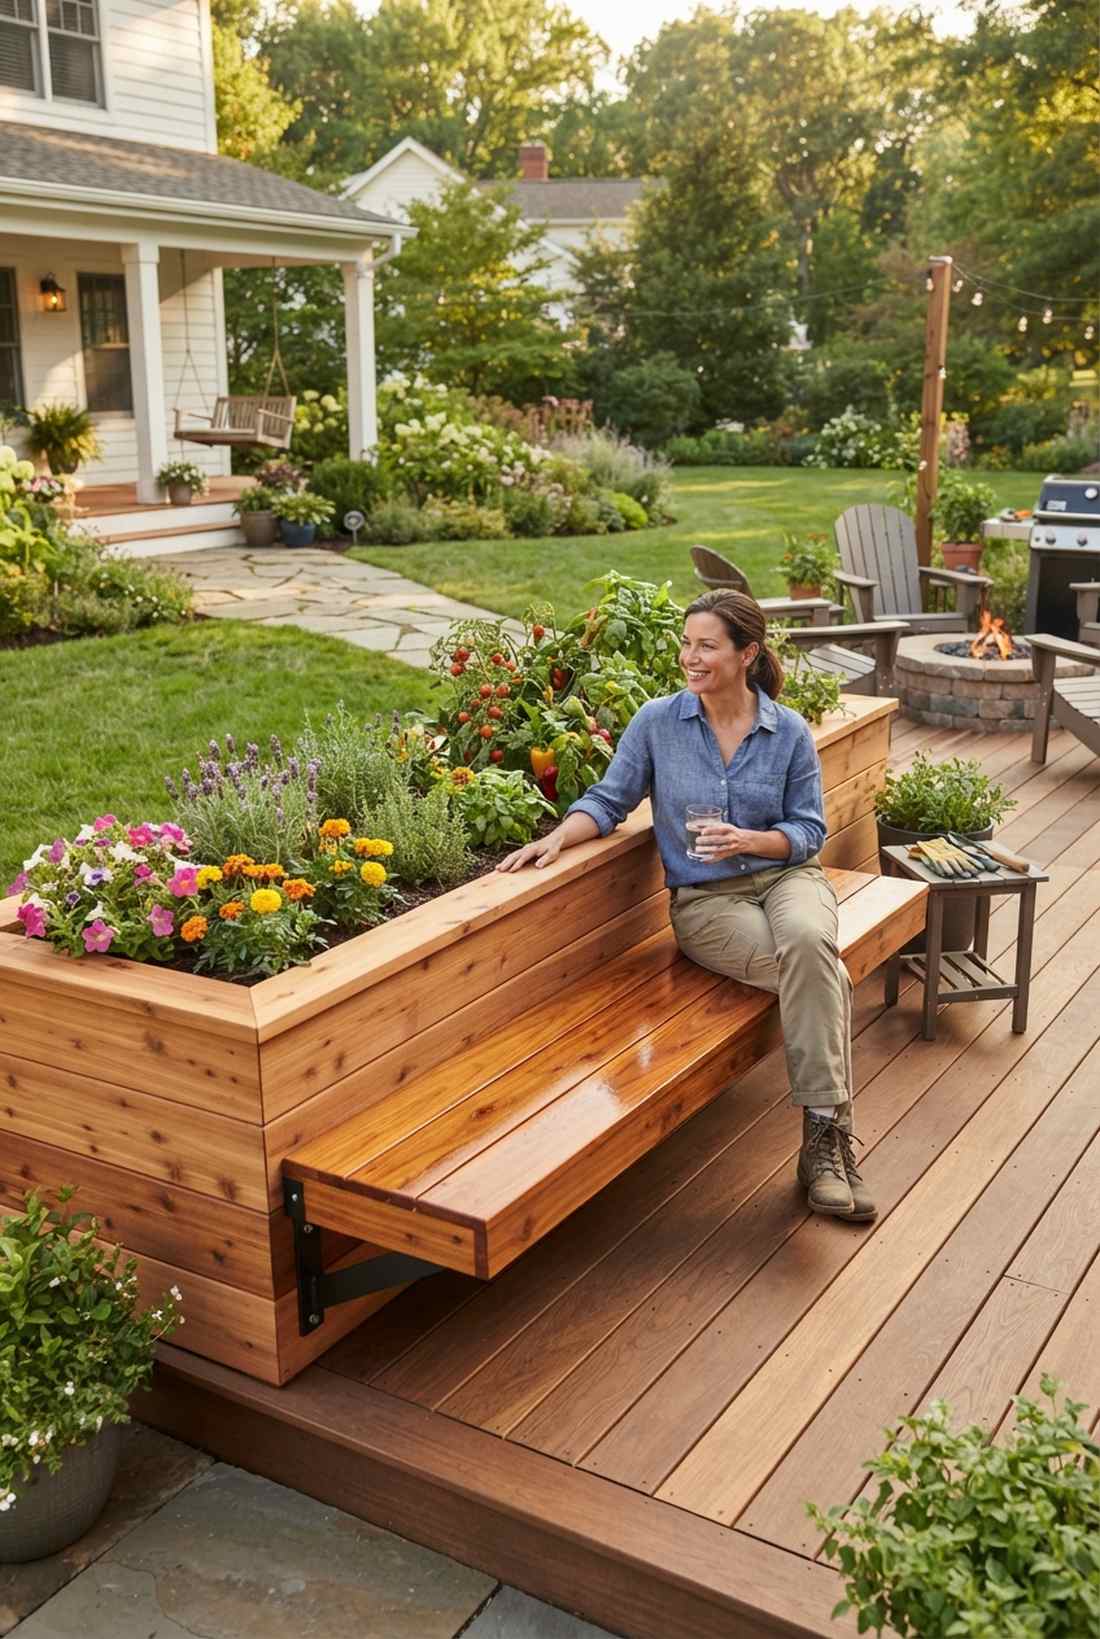
Radiates the clean luxury of an expensive custom deck, serving perfectly as a cantilevered resting planter. The ultimate solution for long days weeding when you desperately need a place to sit and sip water.
Squatting ruins your knees, whereas a built-in heavy plank seat turns chore time into lounge time. Utilizing heavy-duty raised garden kits as the base ensures the walls won’t buckle when someone sits heavily. It delivers a deeply expensive, multi-functional aesthetic that friends will constantly compliment.
Adding the seat extension costs roughly $60–$90. Pin this to save your knees this summer.
- Key Materials: Extra thick 2×8 seating planks
- Vibe / Style: Deck Lounge Integration
- Difficulty: Intermediate carpentry
- Budget Breakdown: Seating planks: $40 | Heavy Brackets: $25
- Creator’s Tip: Sand the absolute life out of the seating plank and hit it with three coats of marine varnish so nobody gets a splinter.
- Smart Sourcing: Heavy-duty steel corner brackets (4-pack) or Premium marine-grade exterior wood spar varnish.
48. Raised Bed Cold Frame
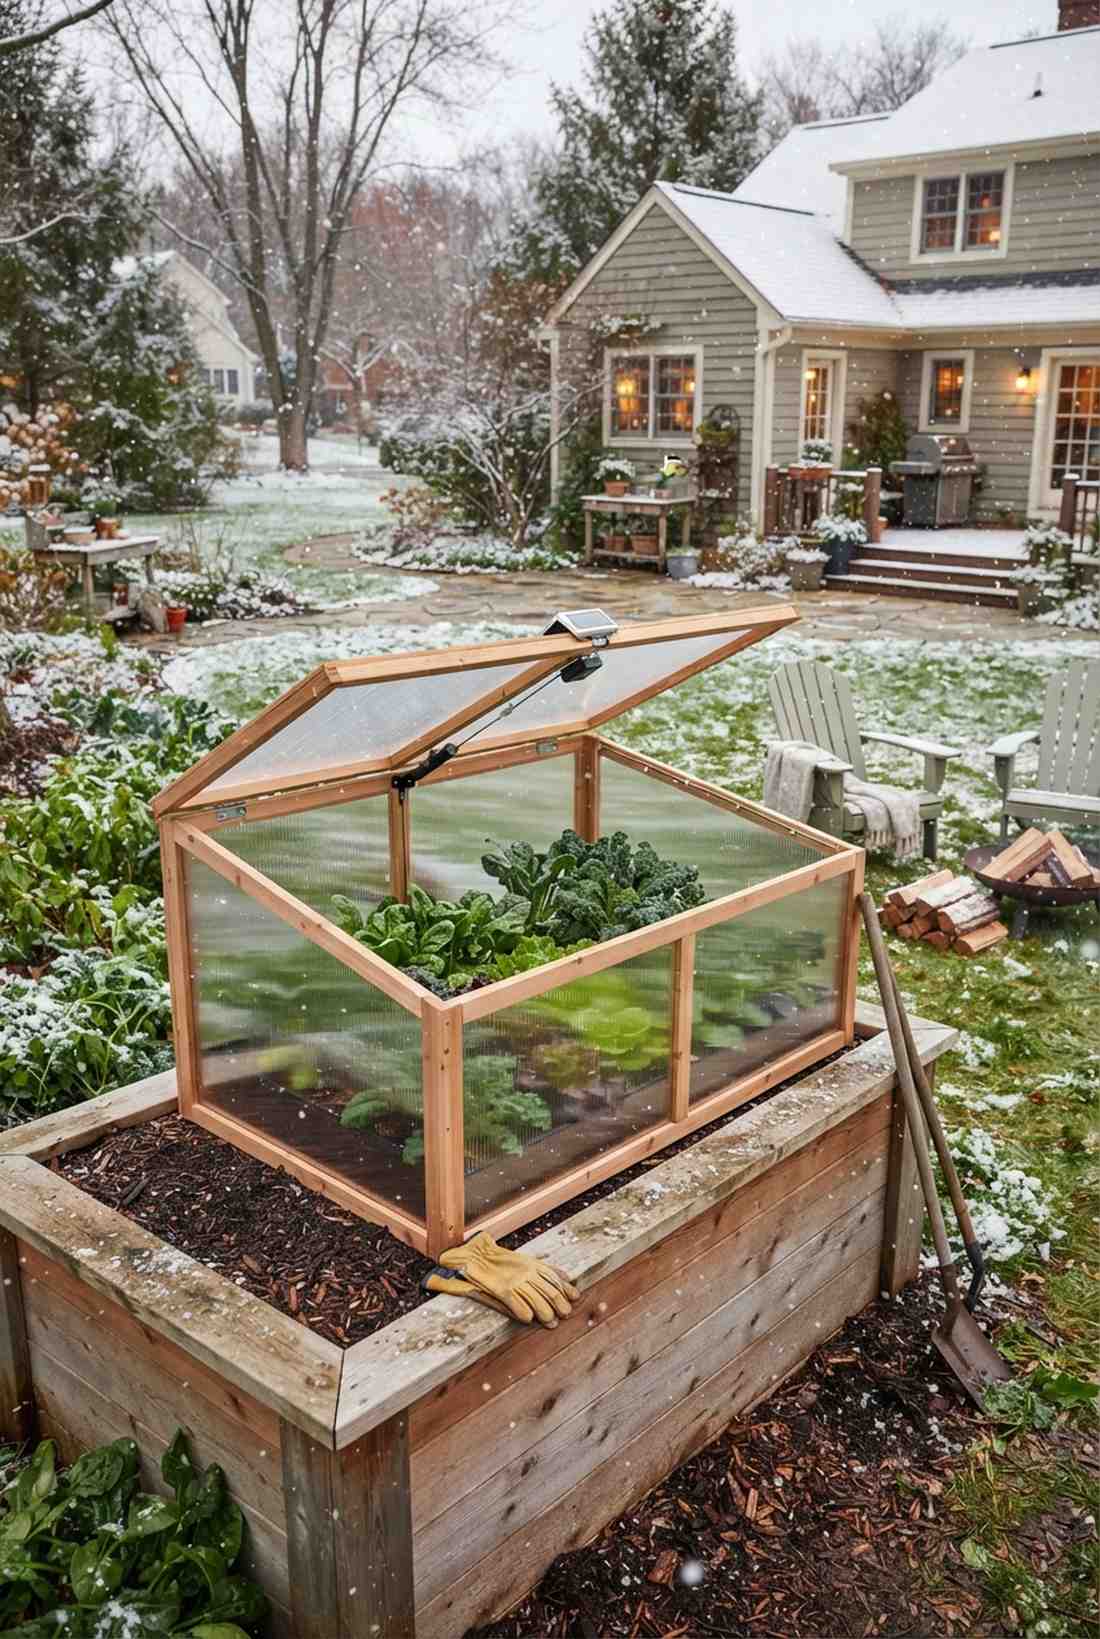

Feels like unlocking a secret cheat code for winter farming, working magic as an all-season greenhouse box. Absolute perfection for northern climates where you want to harvest fresh spinach while it’s snowing outside.
Winter usually kills everything, but a hinged glass lid traps massive amounts of free solar heat. Snagging automated temperature-sensitive vent openers means you don’t even have to walk outside to stop them from overheating. It completely bypasses the growing season rules, giving you a designer-level finish all year long.
Building this winter-proof vault runs about $70–$120. Highly recommended for hardcore vegetable lovers.
- Key Materials: Polycarbonate panels and hinges
- Vibe / Style: Winter Survivalist
- Difficulty: Intermediate framing
- Budget Breakdown: Poly panels: $60 | Auto-vents: $40
- Creator’s Tip: Slant the roof exactly to the angle of the winter sun in your area to catch maximum rays when days are shortest.
- Smart Sourcing: Twin-wall clear polycarbonate panel kits or Solar-powered automatic greenhouse vent openers.
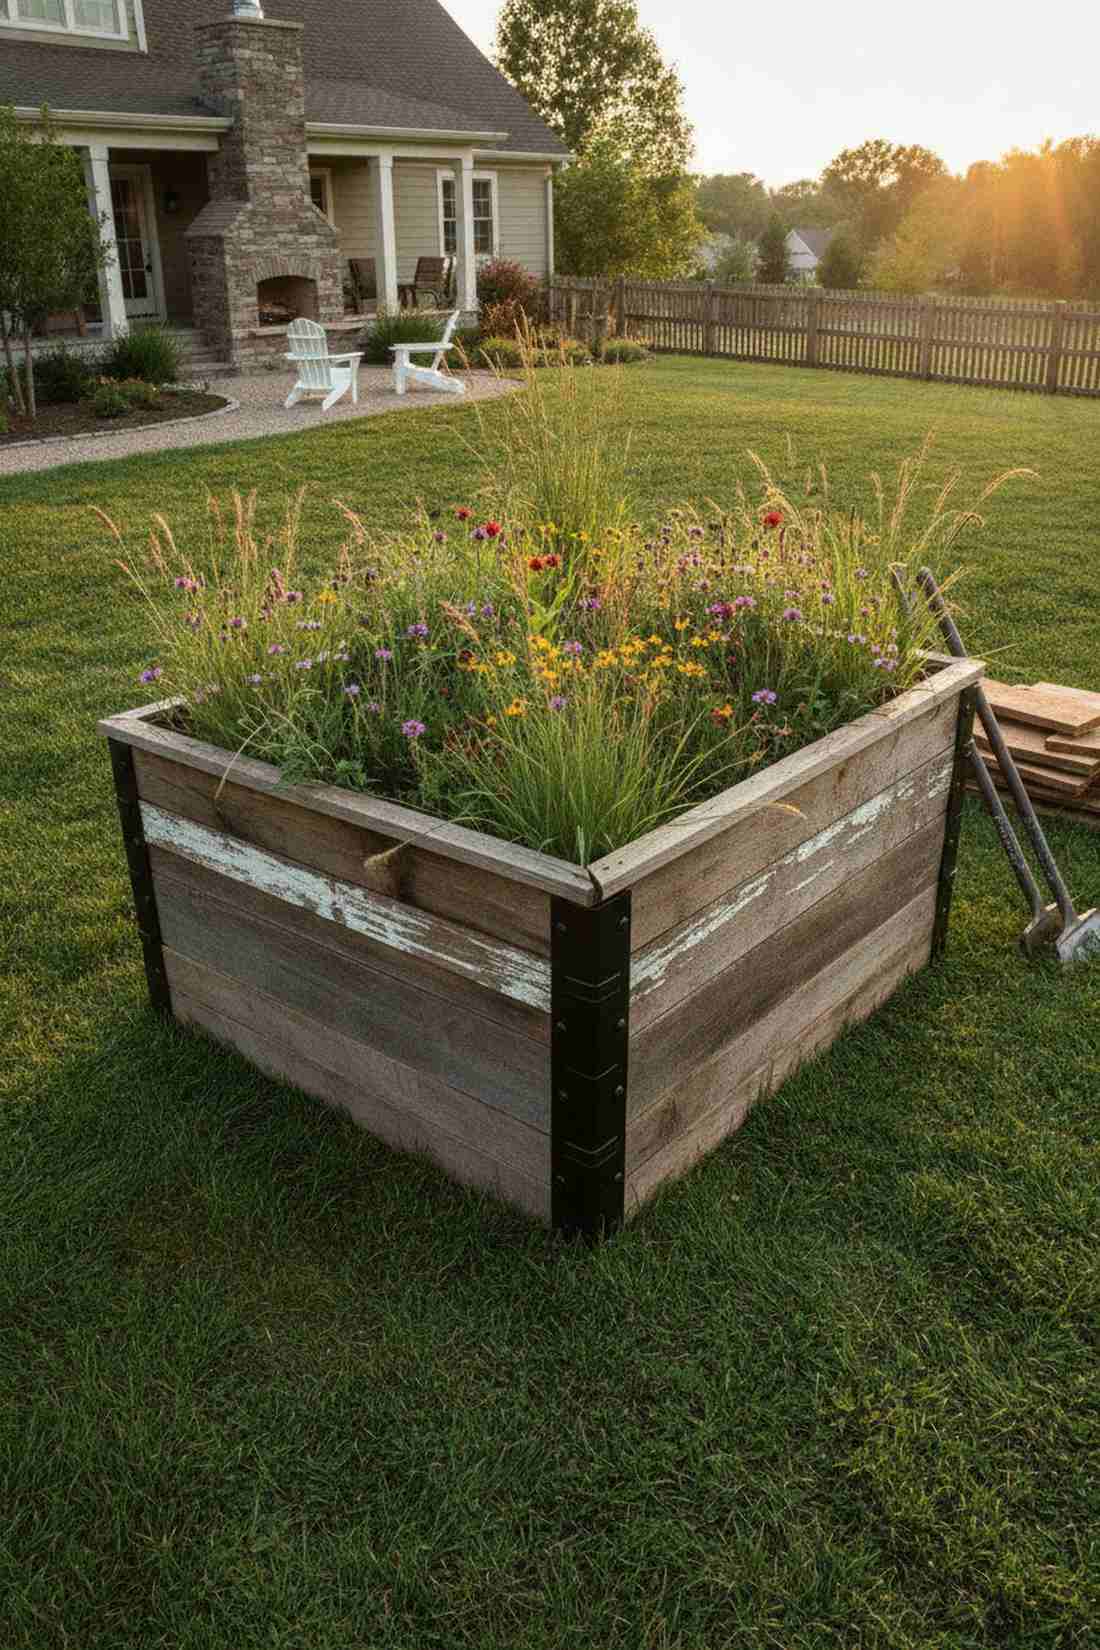
49. Pollinator Hedge Bed
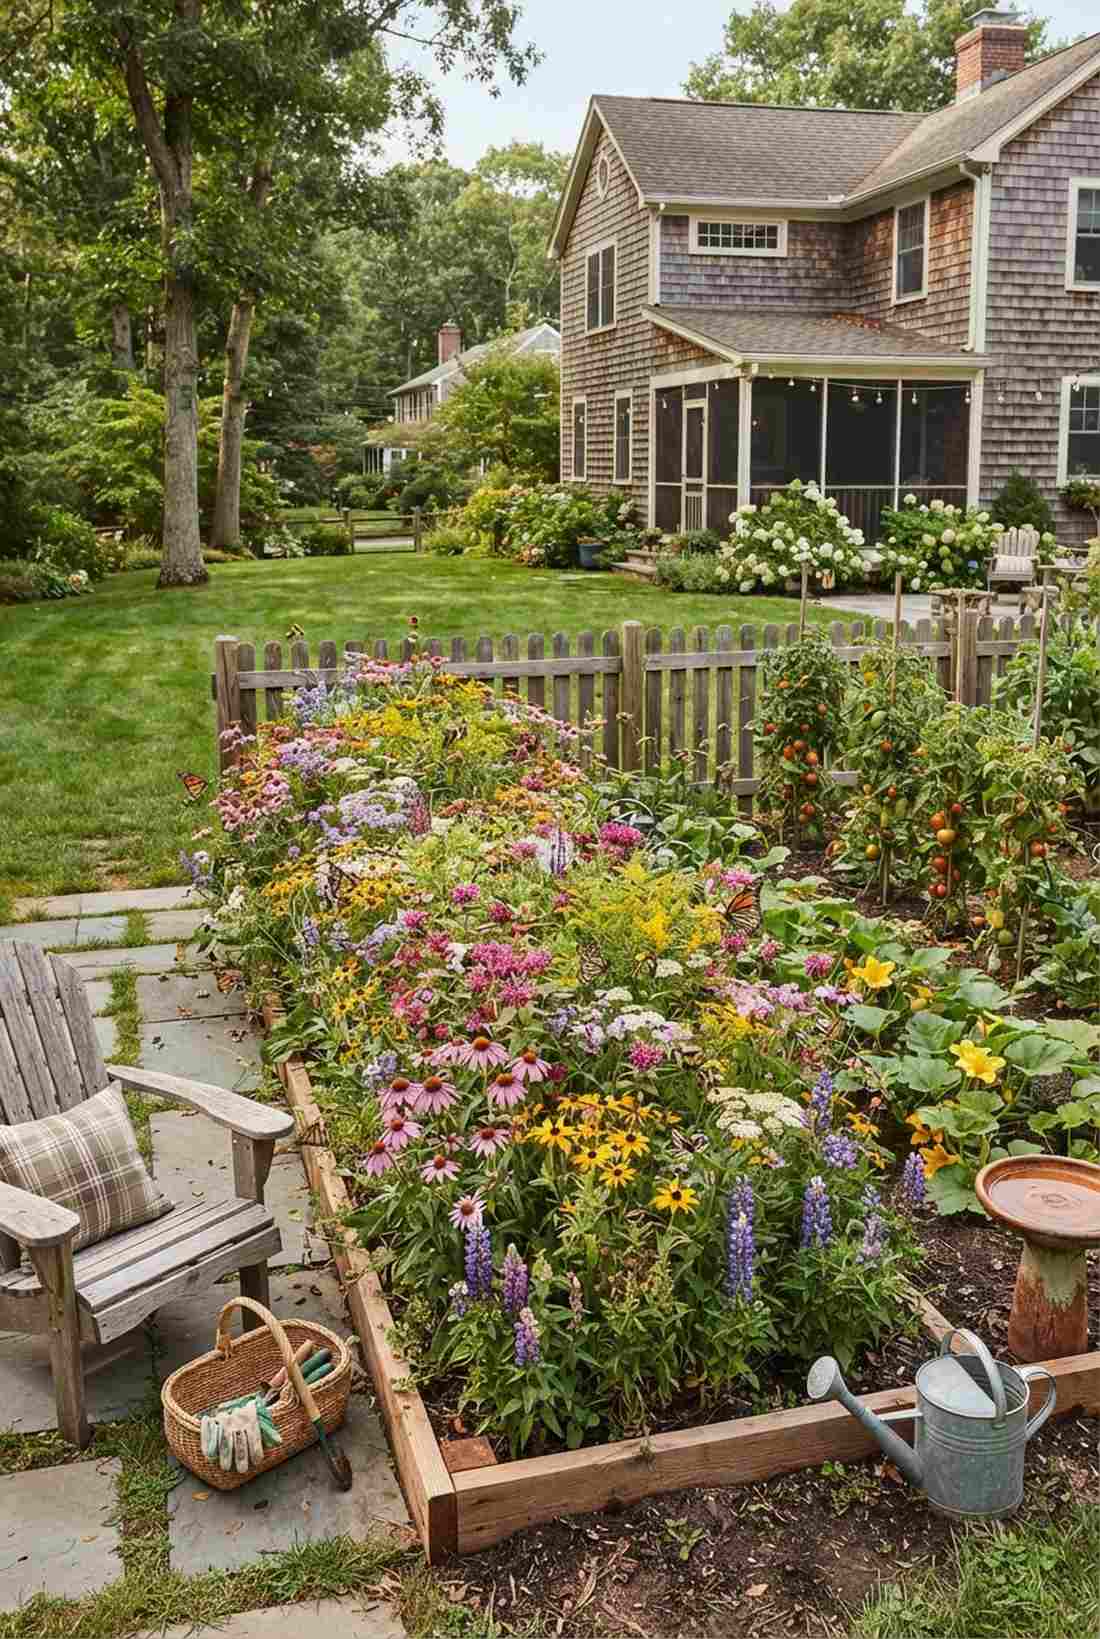
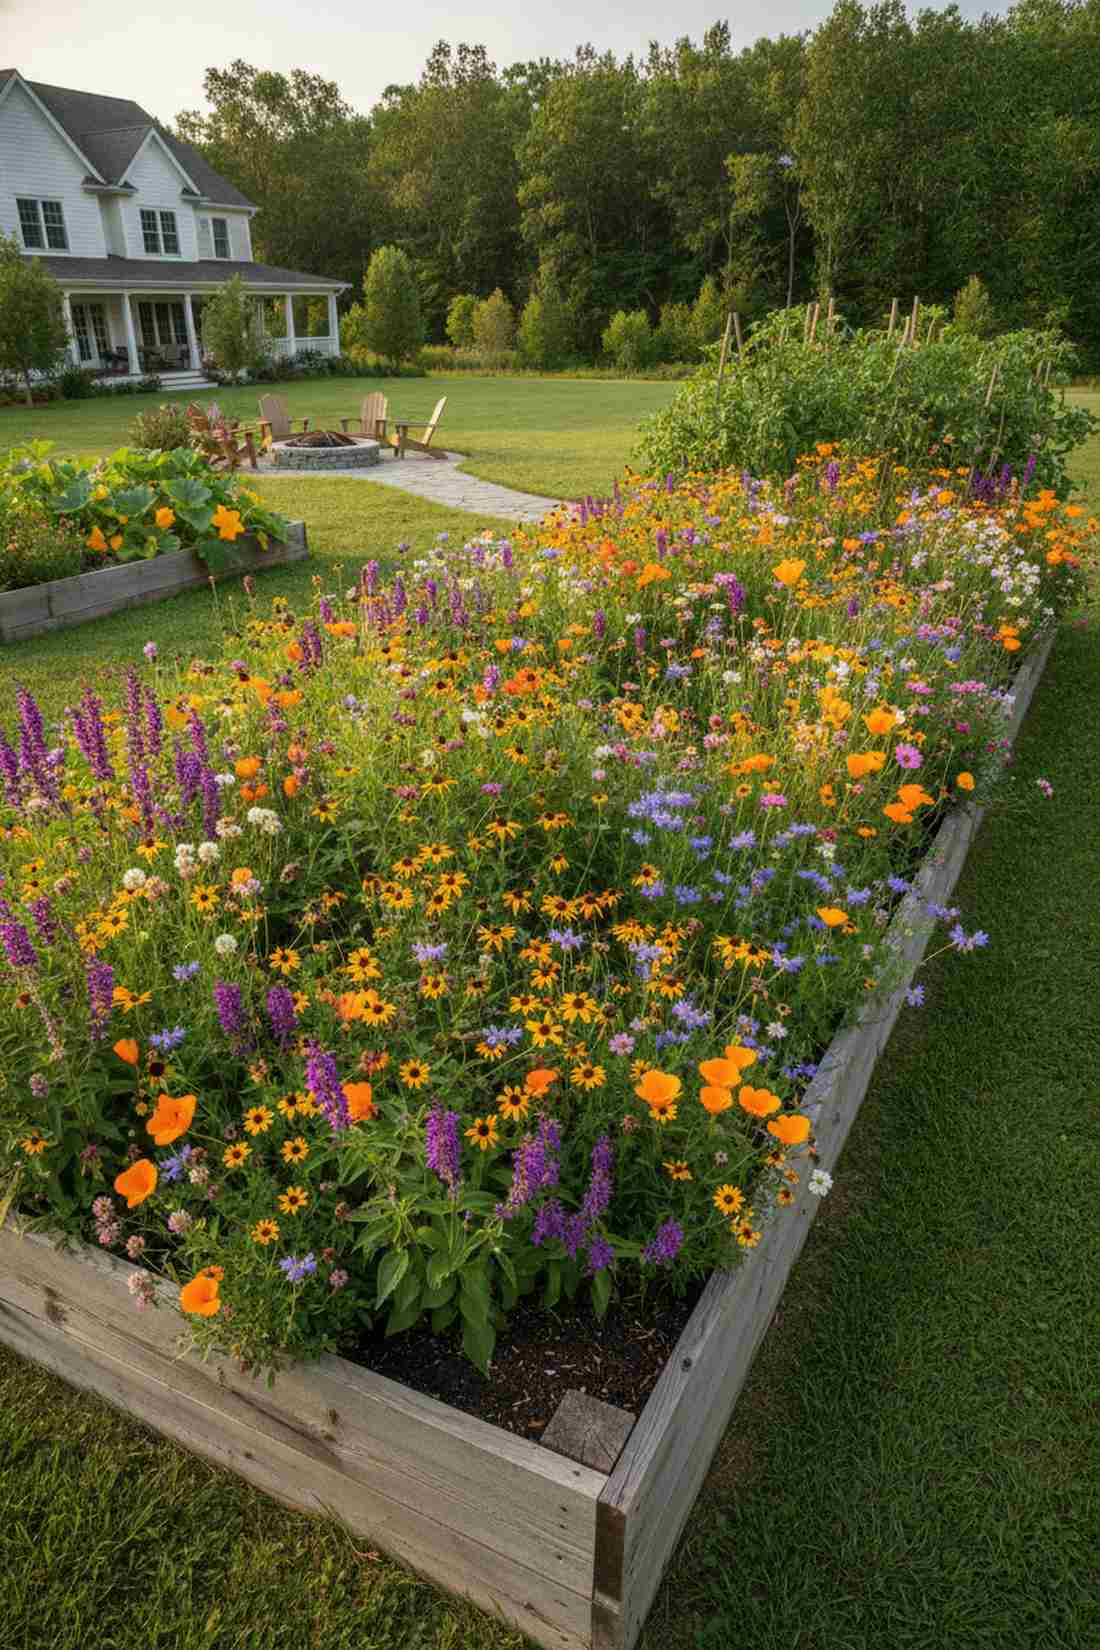
Creates an atmosphere reminiscent of a buzzing, vibrant wildflower meadow, standing out as an ecological perimeter defender. Incredible for drawing in massive amounts of bees to dramatically increase your tomato and squash yields.
Barren yards yield tiny vegetables, but dedicating one border box entirely to flowers changes the entire ecosystem. Grabbing a premium garden soil mix ensures these native perennials explode into a riot of color immediately. It gives off a wealthy estate vibe while acting as an aggressive, natural pest-control army.
Seeding this chaotic beauty costs a mere $20–$40.
- Key Materials: Bulk native wildflower seeds
- Vibe / Style: Wildflower Chaos
- Difficulty: Absolute beginner
- Budget Breakdown: Seed mix: $15 | Border wood: $20
- Creator’s Tip: Don’t just buy generic “wildflowers”—buy seeds strictly native to your specific state to attract the exact bees your veggies need.
- Smart Sourcing: Bulk regional native pollinator seed vaults or Organic slow-release flower fertilizer spikes.
50. Compost Bin Adjacent Bed
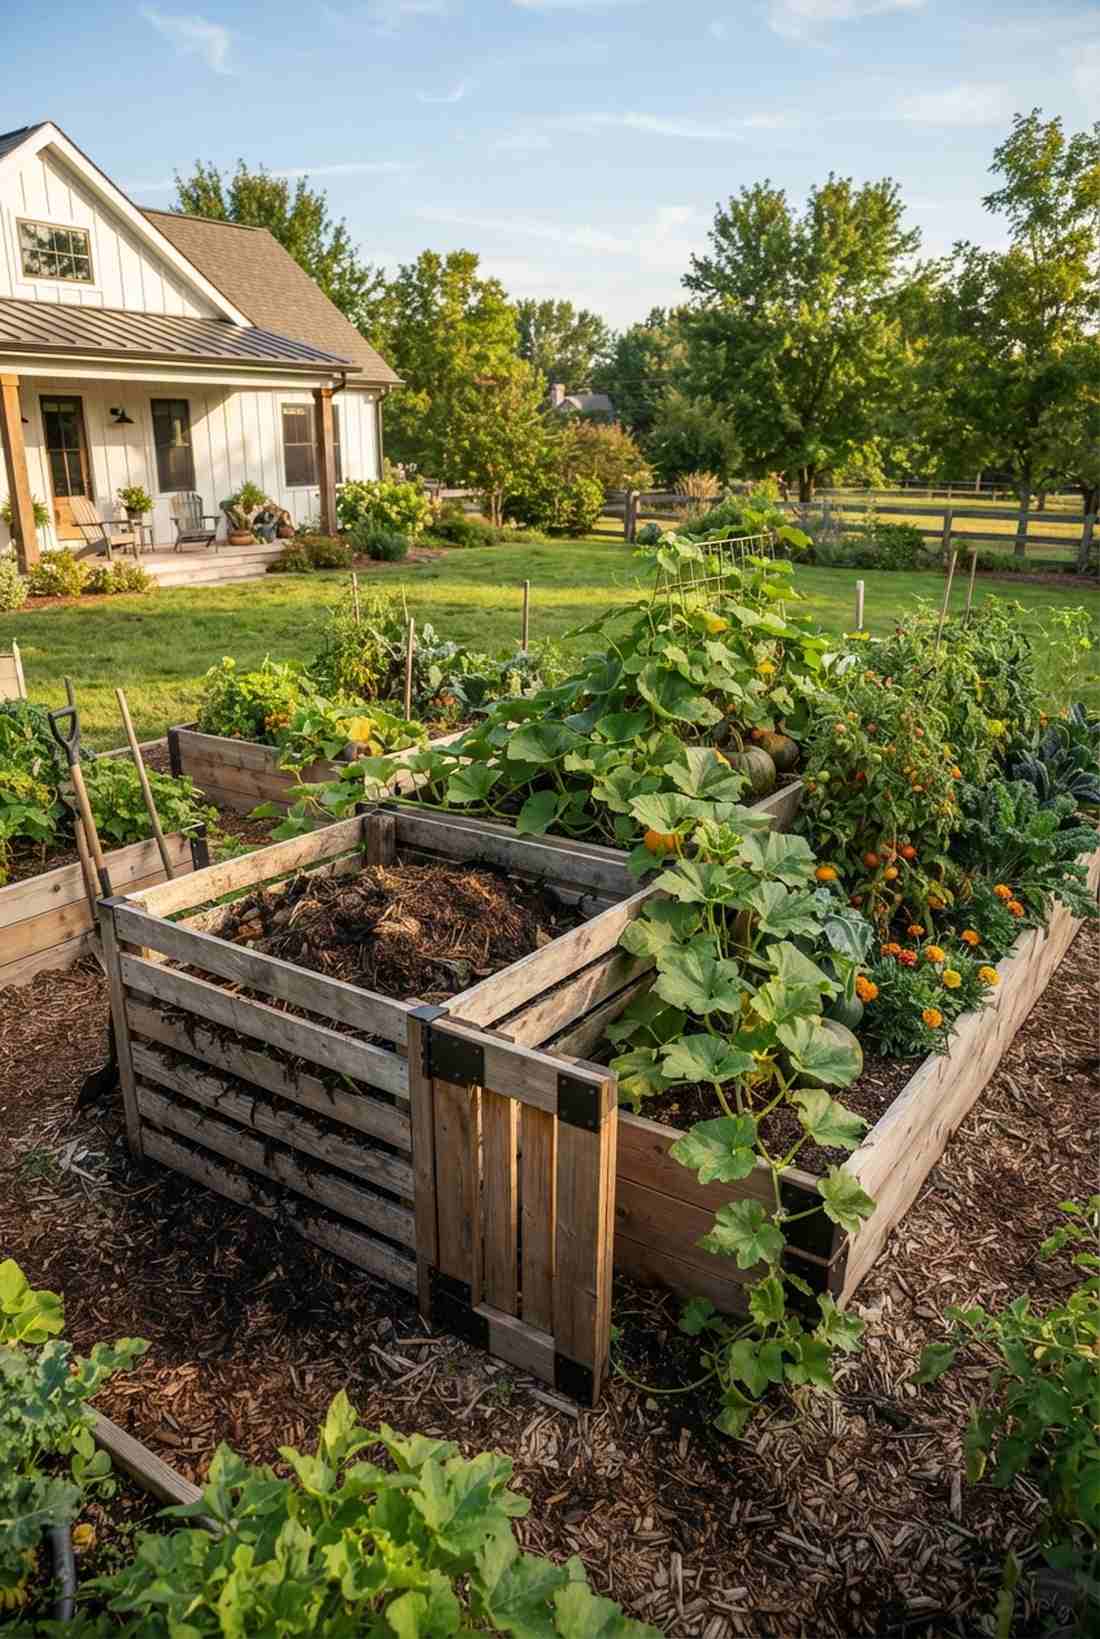

Exudes the laser-focused efficiency of a master permaculture setup, hitting the mark perfectly as a nutrient-looping harvest zone. Fantastic for placing right next to heavy feeders like pumpkins that demand massive fertilizer.
Hauling compost across the yard is exhausting, whereas planting directly beside the bin lets roots steal nutrients organically. Snagging heavy-duty raised garden kits for the dividing wall ensures the rotting pile doesn’t spill into the clean walking paths. It completely redefines yard waste into black gold with zero transportation effort.
Setting up this adjacent system costs around $50–$90. Pin this to streamline your weekend chores forever.
- Key Materials: Wooden slats for airflow
- Vibe / Style: Zero-Waste Homestead
- Difficulty: Easy division build
- Budget Breakdown: Divider wood: $40 | Hardware: $15
- Creator’s Tip: Make the wall between the bed and the compost removable (like a slotted gate) so you can literally shovel dirt straight across.
- Smart Sourcing: Heavy-duty modular steel corner brackets or Odor-blocking organic compost starter kits.
51. Rain Garden Overflow Bed
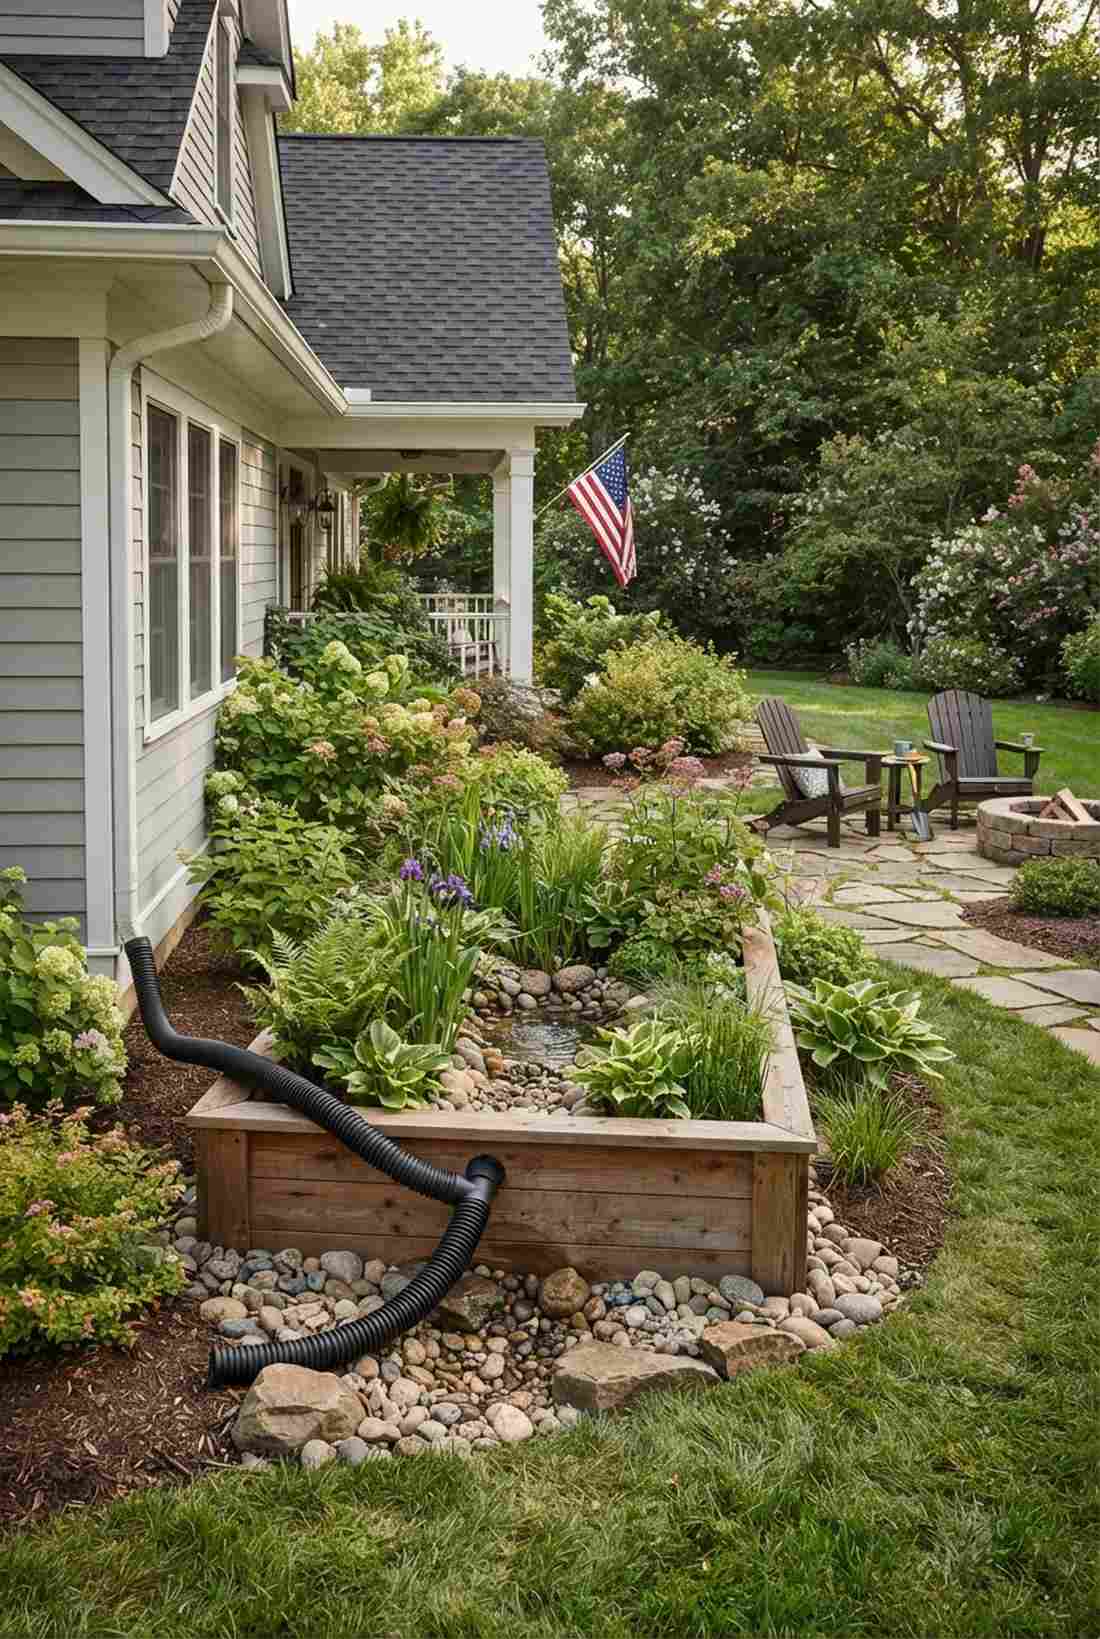
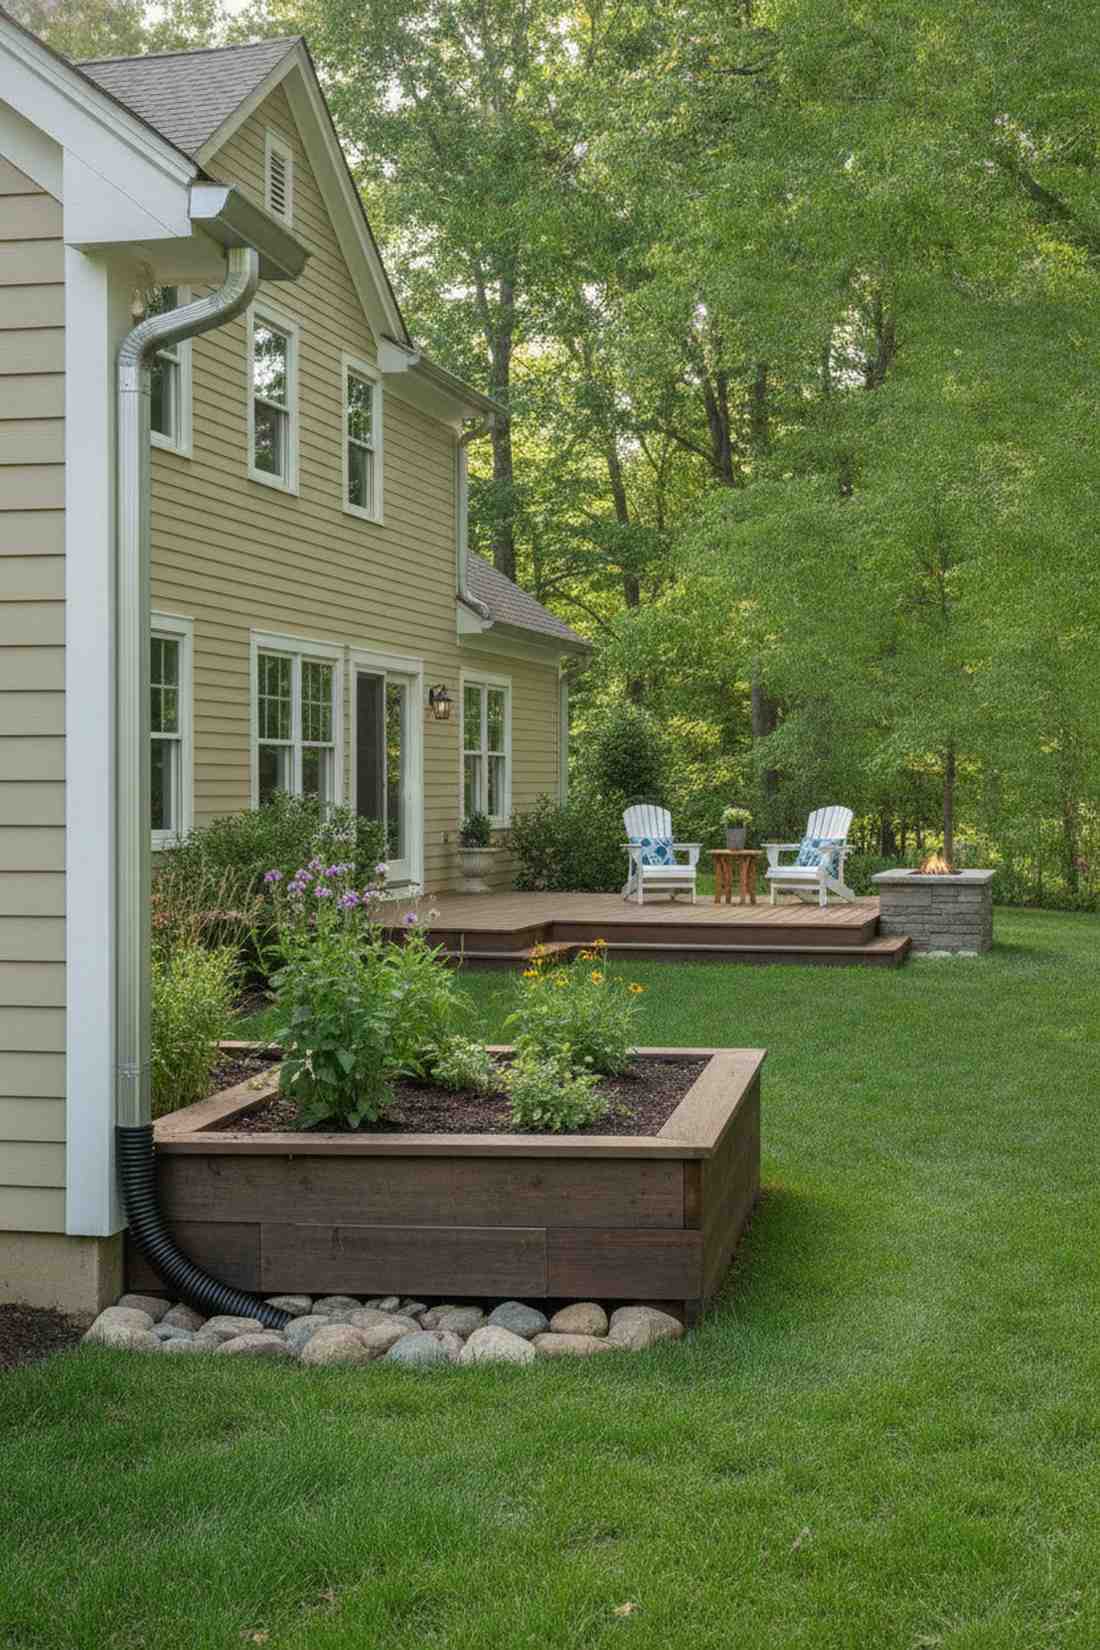
Delivers the brilliant, self-sustaining energy of a smart-eco landscape, acting flawlessly as an auto-irrigating drainage planter. Ideal for sticking at the bottom of a gutter downspout that constantly floods your lawn.
Most downspouts just create muddy swamps, but channeling that water into an elevated trench feeds thirsty plants for free. Utilizing a self-watering container system at the base catches the deluge and slowly releases it over the week. It looks far more expensive than it is while solving a massive property drainage headache.
Diverting the water into this bed runs about $40–$75.
- Key Materials: Corrugated drainage pipe
- Vibe / Style: Smart Eco-Tech
- Difficulty: Intermediate trenching
- Budget Breakdown: Pipe/Gravel: $35 | Box material: $30
- Creator’s Tip: Line the bottom with heavy river rock before adding soil so the massive influx of gutter water doesn’t wash your dirt away.
- Smart Sourcing: Flexible downspout diverter extension kits or Heavy-duty landscape drainage fabric rolls.
52. Outdoor Classroom Bed
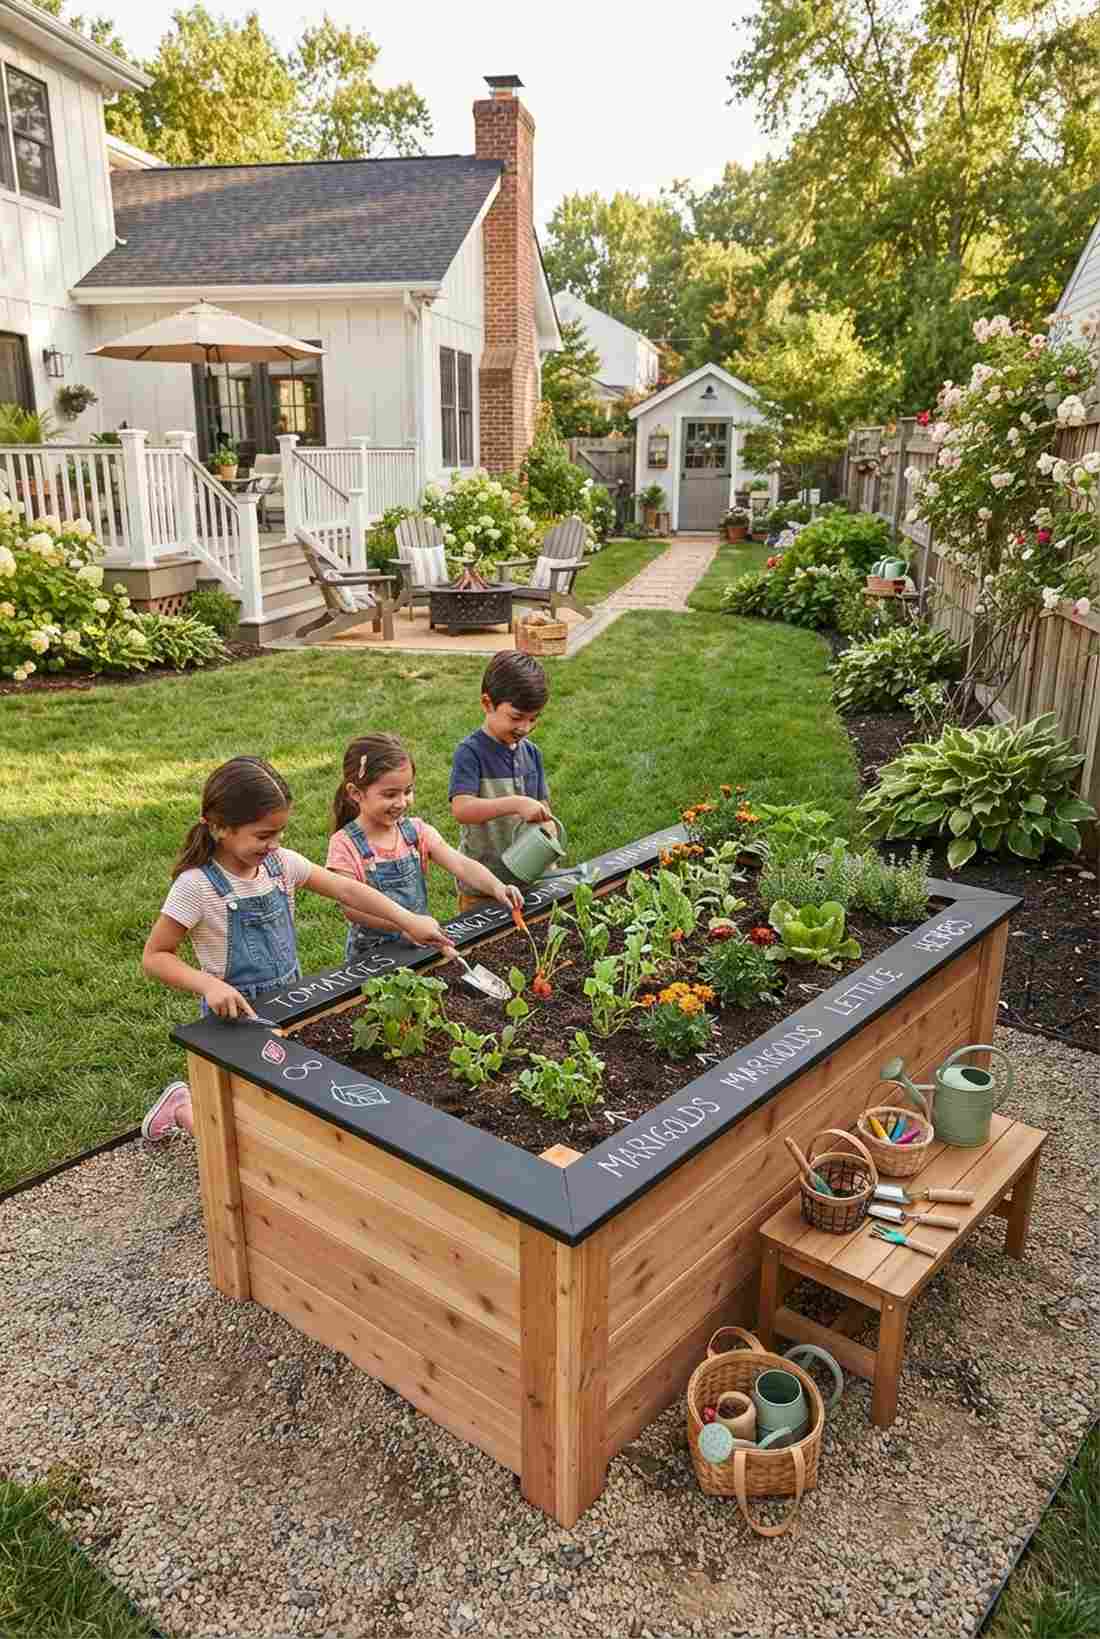
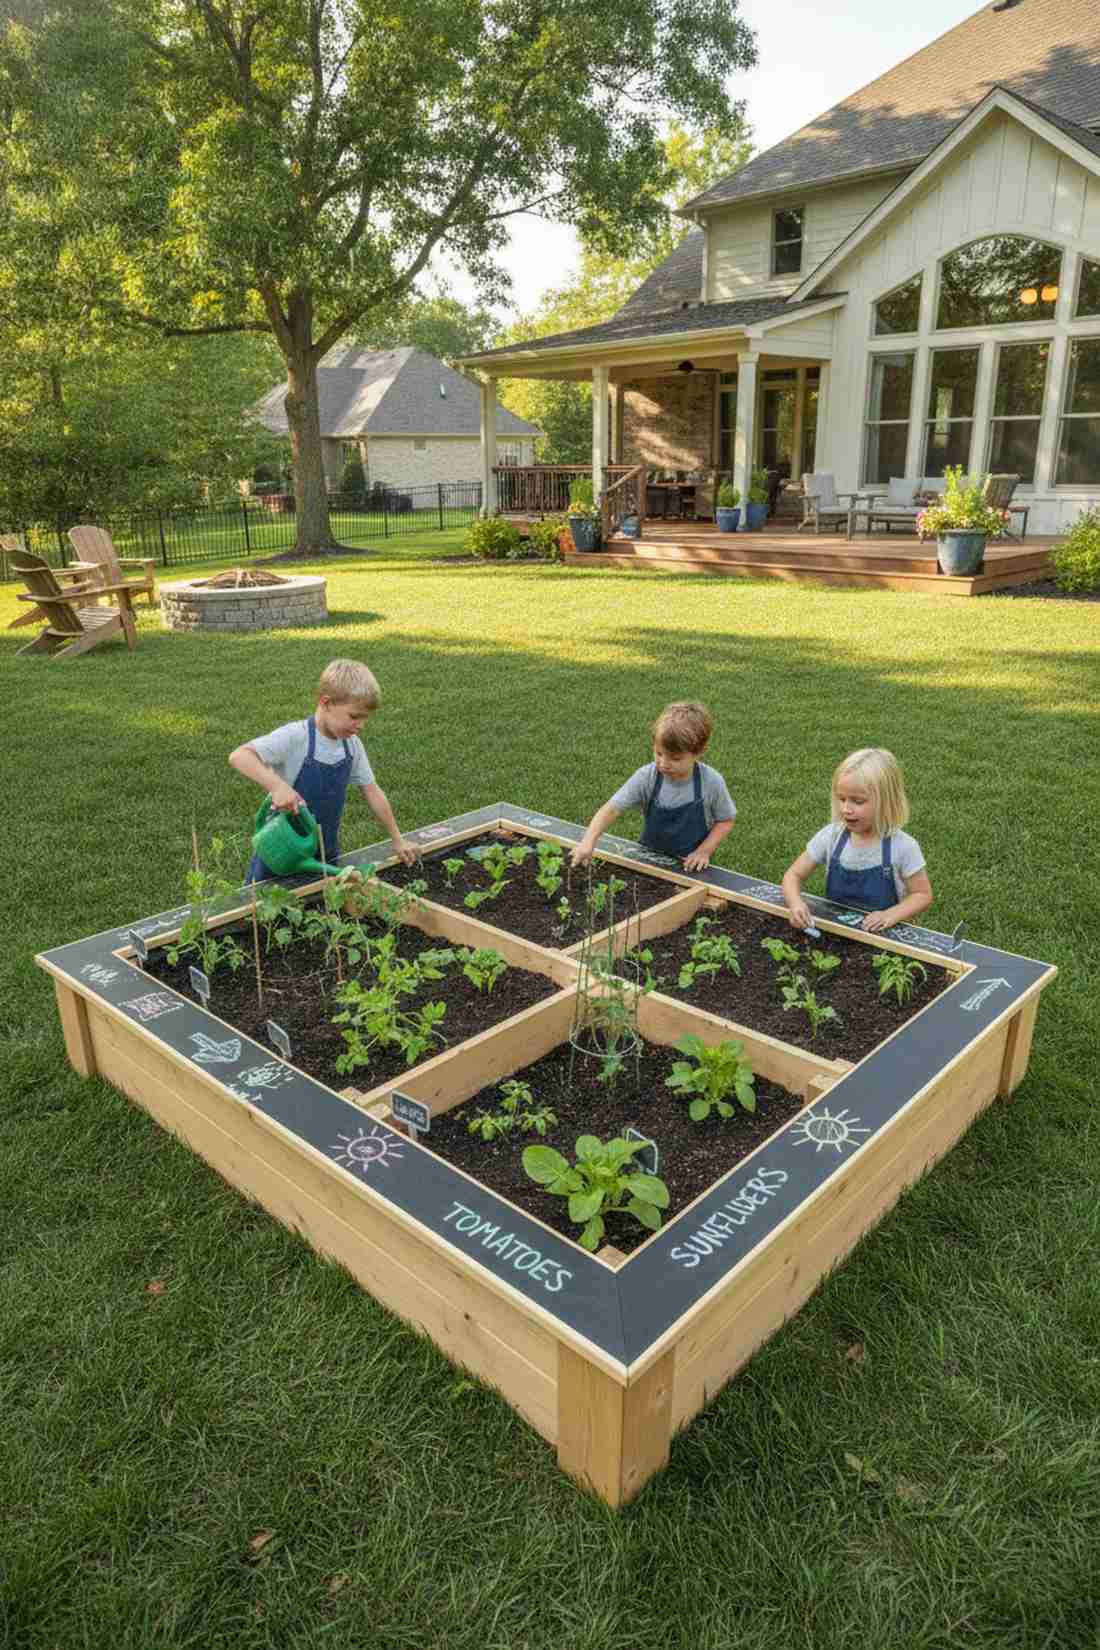
Radiates the playful, structured charm of a Montessori learning center, serving perfectly as a kid-friendly botanical lab. A massive win for homeschooling families or community centers wanting to teach biology hands-on.
Boring adult setups frustrate kids, while bright, labeled, knee-high boxes invite constant interaction. Grabbing some premium garden soil mix guarantees their first seeds actually sprout, preventing early disappointment. It creates an instant lush corridor of education that feels meticulously planned and deeply engaging.
Building this learning hub costs roughly $60–$100. Save this idea if you want your kids off their iPads.
- Key Materials: Chalkboard paint and smooth edges
- Vibe / Style: Interactive Montessori
- Difficulty: Easy friendly build
- Budget Breakdown: Lumber: $50 | Paint/Labels: $25
- Creator’s Tip: Paint the entire top rim with exterior chalkboard paint so kids can draw arrows to their specific sprouts and write the names.
- Smart Sourcing: Exterior waterproof chalkboard paint (quart) or Weatherproof metallic plant marker kits.
53. Therapy Garden Bed
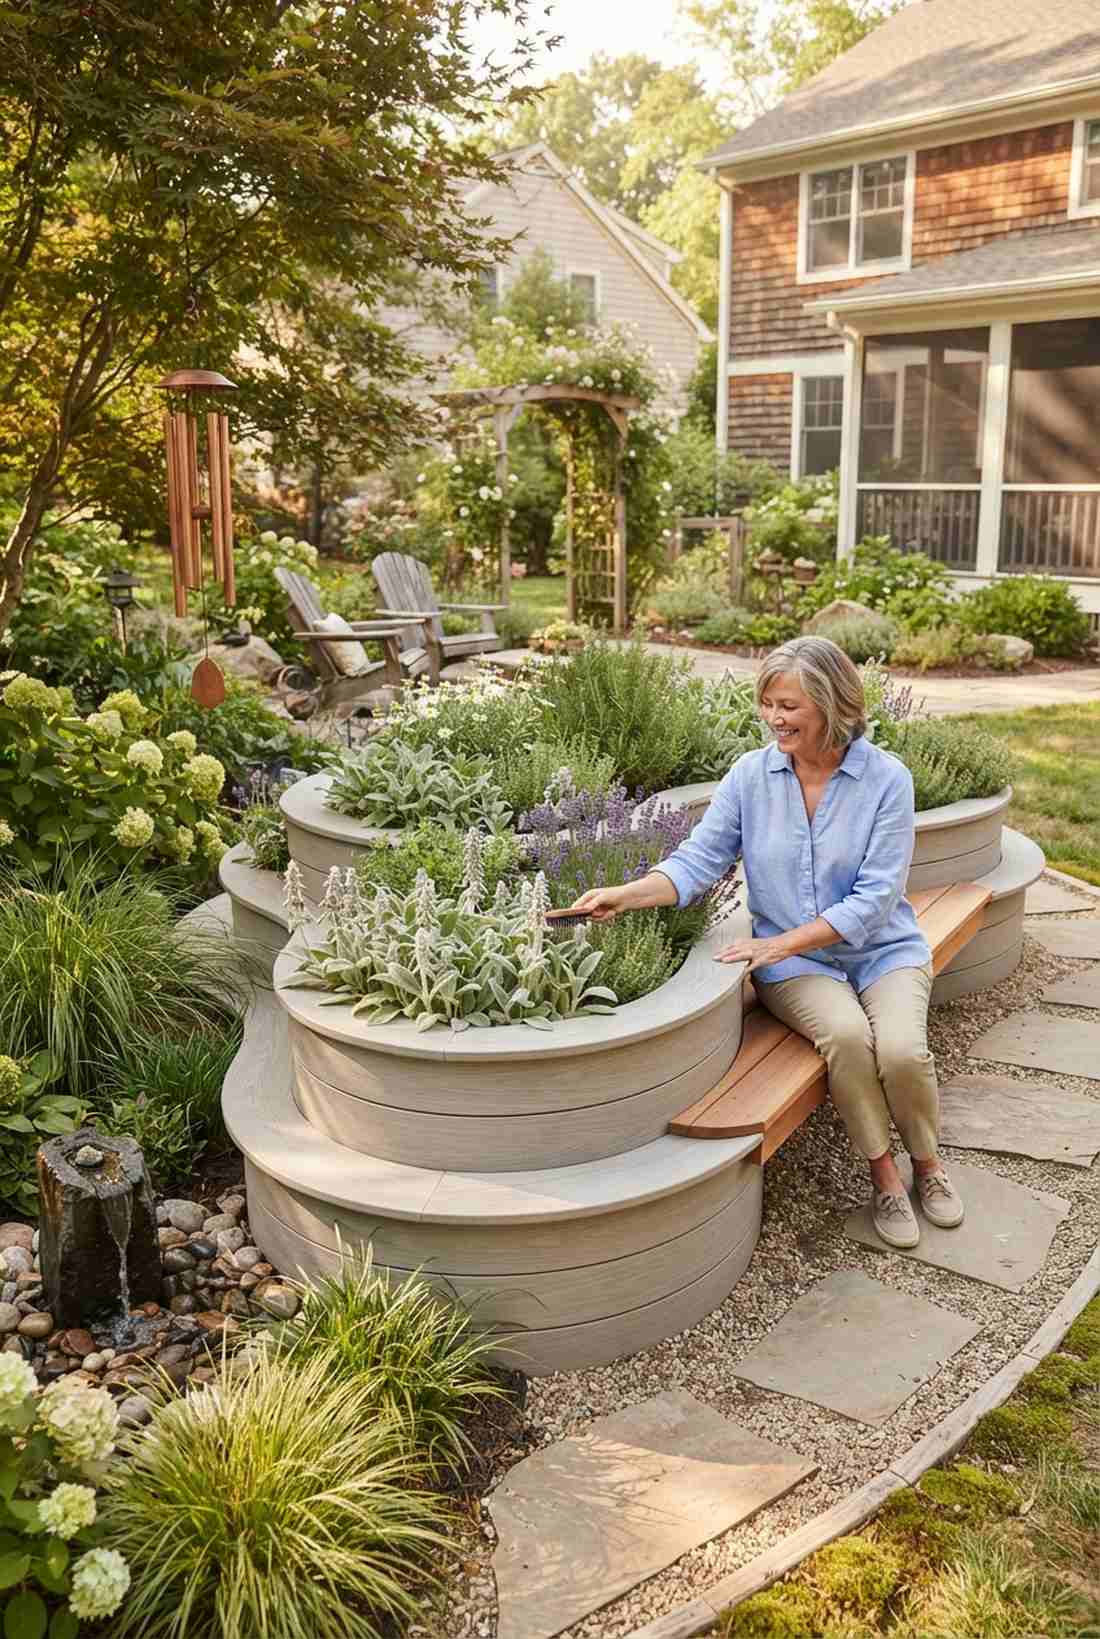
Feels like stepping into an incredibly calming, sensory-rich sanctuary, working magic as an accessible healing planter. Unbelievably effective for assisted living facilities or anyone recovering from physical trauma.
Sharp edges and deep reaches cause anxiety and pain, whereas smooth, multi-height curves welcome everyone gently. Utilizing some miniature garden supplies like wind chimes and textured mosses turns the bed into a full sensory experience. It gives a designer-level finish that actively promotes mental and physical well-being.
Crafting this therapeutic space costs about $100–$160. Highly recommended for creating a true backyard refuge.
- Key Materials: Soft-touch composite edging
- Vibe / Style: Zen Healing Center
- Difficulty: Intermediate smooth finishing
- Budget Breakdown: Soft Edging: $80 | Aromatic plants: $40
- Creator’s Tip: Heavily plant fuzzy things (like lamb’s ear) and fragrant things (like lavender) right at the edge where hands naturally rest.
- Smart Sourcing: Smooth-edge modular composite planter kits or Organic sensory herb and flower starter vaults.
Bringing Your Raised Beds Vision to Life
Strategic raised beds design transforms any property into a premium, high-yield growing space that delivers superior harvests with drastically reduced maintenance demands. Whether you implement classic rectangular layouts, innovative vertical systems, or sculptural specialty configurations, deploying any of these 53 unique setups ensures your yard looks expensive while remaining hyper-functional.
Start with a single well-placed bed to test your high-end materials, organic soil mixes, and heavy-duty hardware before expanding. The brilliant modular nature of raised bed gardening allows you to incrementally upgrade your setup using pre-cut starter kits and UV-resistant gear as your confidence develops. Choose designs that match your physical capabilities, available time, and aesthetic preferences—successful gardens reflect smart sourcing and durable blueprints.
Visit Fresh Garden Ideas regularly for budget breakdowns, material comparisons, and high-CPC design inspiration that keeps your luxury garden thriving year-round. Transform your outdoor space into a deeply intentional, perfectly structured sanctuary that produces abundantly while looking absolutely stunning every single day.
Frequently Asked Questions
What is the ideal depth for raised garden beds?
Most vegetables thrive in beds 12-18 inches deep, which easily accommodates the root systems for heavy feeders like tomatoes and peppers. If you are growing shallow-rooted herbs, saving money by using a 6-8 inch deep premium modular metal kit works perfectly. Deeper 24-inch beds require significantly more organic soil bulk delivery, but they drastically reduce your daily watering frequency and provide expensive-looking, insulated protection for your plants during severe temperature spikes.
How far apart should multiple raised beds be spaced?
Maintain 24-36 inches between beds to allow comfortable walking and ensure a standard wheelbarrow can fit through for heavy harvest days. While narrow 18-inch paths save space, they often feel cramped and trap humidity, which breeds disease. Upgrading to a wider 48-inch spacing allows you to easily run a mower through or lay down wide swaths of heavy-duty commercial weed barrier fabric to keep your luxury setup looking pristine and completely maintenance-free.
What materials are safest for edible garden raised beds?
Untreated cedar, redwood, and cypress resist rot naturally, making them the absolute gold standard for organic food production. If you want a lifetime guarantee without wood rot, investing in food-safe galvanized steel planter kits or UV-coated composite boards presents zero contamination risk. Always avoid cheap pressure-treated lumber from big box stores or old railroad ties, as they can rapidly leach heavy metals and toxic creosote straight into your expensive organic soil.
Should raised beds be placed directly on grass or bare soil?
Beds function perfectly on both surfaces, though aggressively smothering the grass first prevents invasive weeds from ruining your pristine setup. Lay down overlapping layers of heavy cardboard, or invest in a professional grade landscape weed barrier roll beneath the dirt to permanently block turf intrusion. If you are building on bare soil, stapling heavy galvanized hardware cloth to the very bottom of your frame is a mandatory upgrade to stop gophers and voles from eating your expensive roots.
How do you fill raised beds economically without compromising soil quality?
Use the highly effective “lasagna method” (Hugelkultur) to avoid going broke buying pure dirt. Start the bottom half with bulky yard waste like thick logs and twigs, layer in grass clippings or a heavy organic compost starter powder, and only fill the top 6 inches with expensive, premium well-draining garden soil mix. This brilliantly slashes your soil costs by up to 50% while creating a sponge-like interior that retains massive amounts of water during brutal summer heat.
What orientation produces the best growing conditions for raised beds?
A strict north-south orientation ensures both the long sides of your beds receive perfectly equal sun exposure as the sun tracks across the sky, maximizing your harvest yield. If you are utilizing a heavy-duty vertical trellis kit, an east-west layout works better so the massive climbing plants on the north side won’t cast deadly shadows over your smaller greens in the front. Ultimately, as long as you position your boxes in a zone receiving 6-8 hours of direct light, the exact angle won’t break your setup.