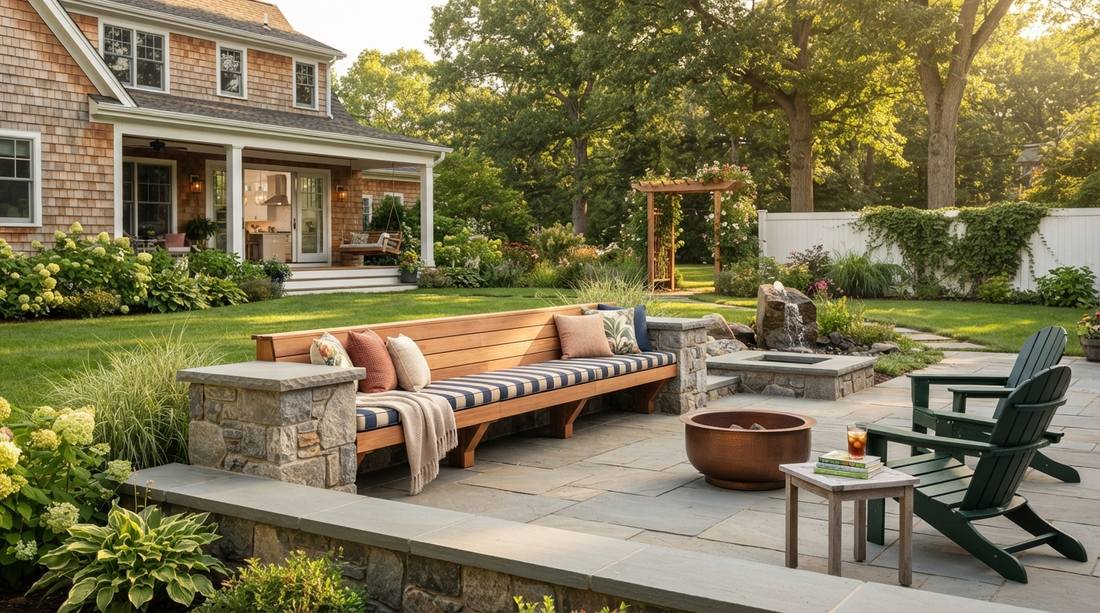
Anchoring your landscape with a permanent outdoor seating bench elevates any backyard into a year-round architectural masterpiece. Skip flimsy seasonal furniture and invest in these structural blueprints engineered for maximum durability. Discover premium layout hacks below.
Design Snapshot: Key Principles
- Material Durability: Concrete, stone, and treated hardwoods withstand decades of exposure with minimal maintenance.
- Structural Integration: Permanent benches function as retaining walls, planters, or architectural accents beyond simple seating.
- Scale Hierarchy: Bench height (16-18 inches), depth (18-24 inches), and width determine comfort and spatial relationship to plantings.
- Climate Response: Material selection and orientation directly impact thermal comfort—stone stays cool, wood warms naturally.
Classic Wooden Permanent Benches
1. Cedar Plank Bench With Mortised Legs
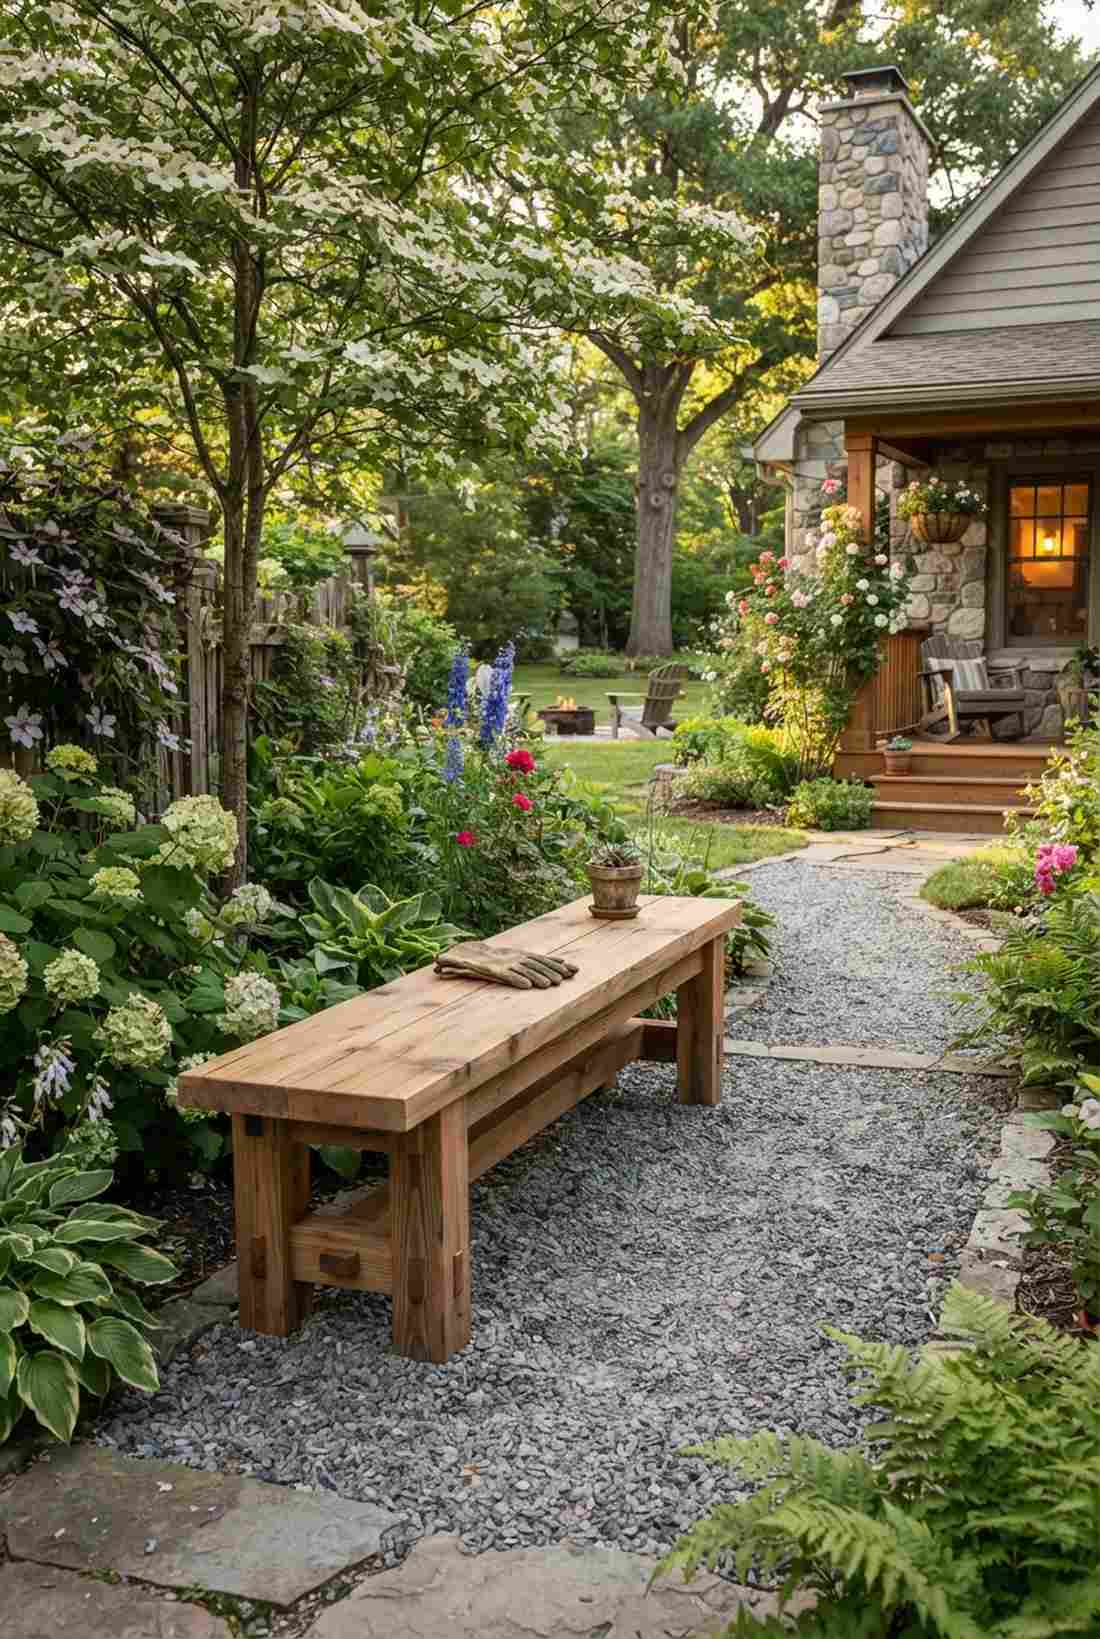
Feels like a timeless heirloom passed down through generations of gardeners. This classic timber pathway seating works exceptionally well for a shaded gravel walkway or a cozy cottage garden entrance.
While most beginners rely on cheap metal brackets, executing proper joint work delivers a surprisingly premium look that never rusts. Sourcing dense lumber and a high-end outdoor wood preservation kit guarantees the grain pattern dominates the visual space.
You can realistically build this beast for around $150–$250 depending on local lumber prices. Pin this to your DIY weekend garden board!
- Key Materials: Thick-sawn western red cedar, waterproof epoxy
- Vibe / Style: Rustic craftsman elegance
- Difficulty: Intermediate woodworking
- Budget Breakdown: Lumber: $180 | Sealant: $35.
- Creator’s Tip: Cut mortises 3 inches deep into the base posts for maximum lateral stability.
- Smart Sourcing: pre-cut western red cedar slabs (bulk pack), UV-blocking marine-grade wood sealant.
2. Teak Memorial Bench With Brass Plaques
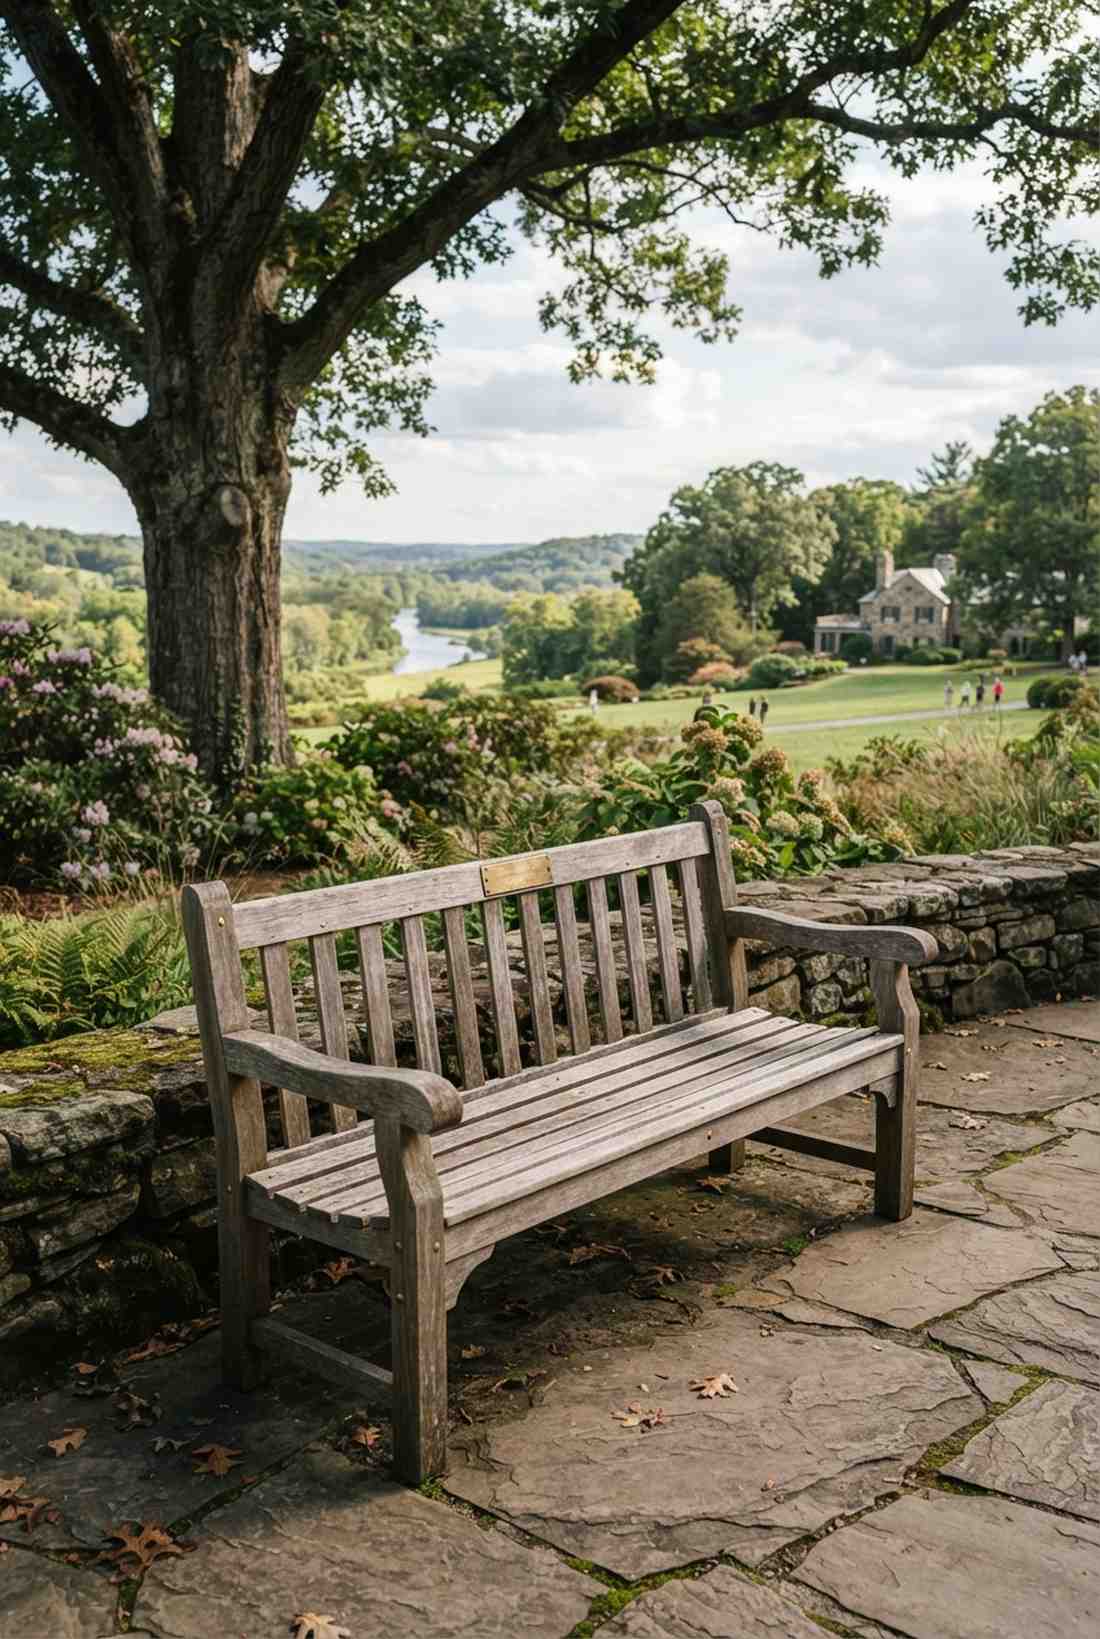
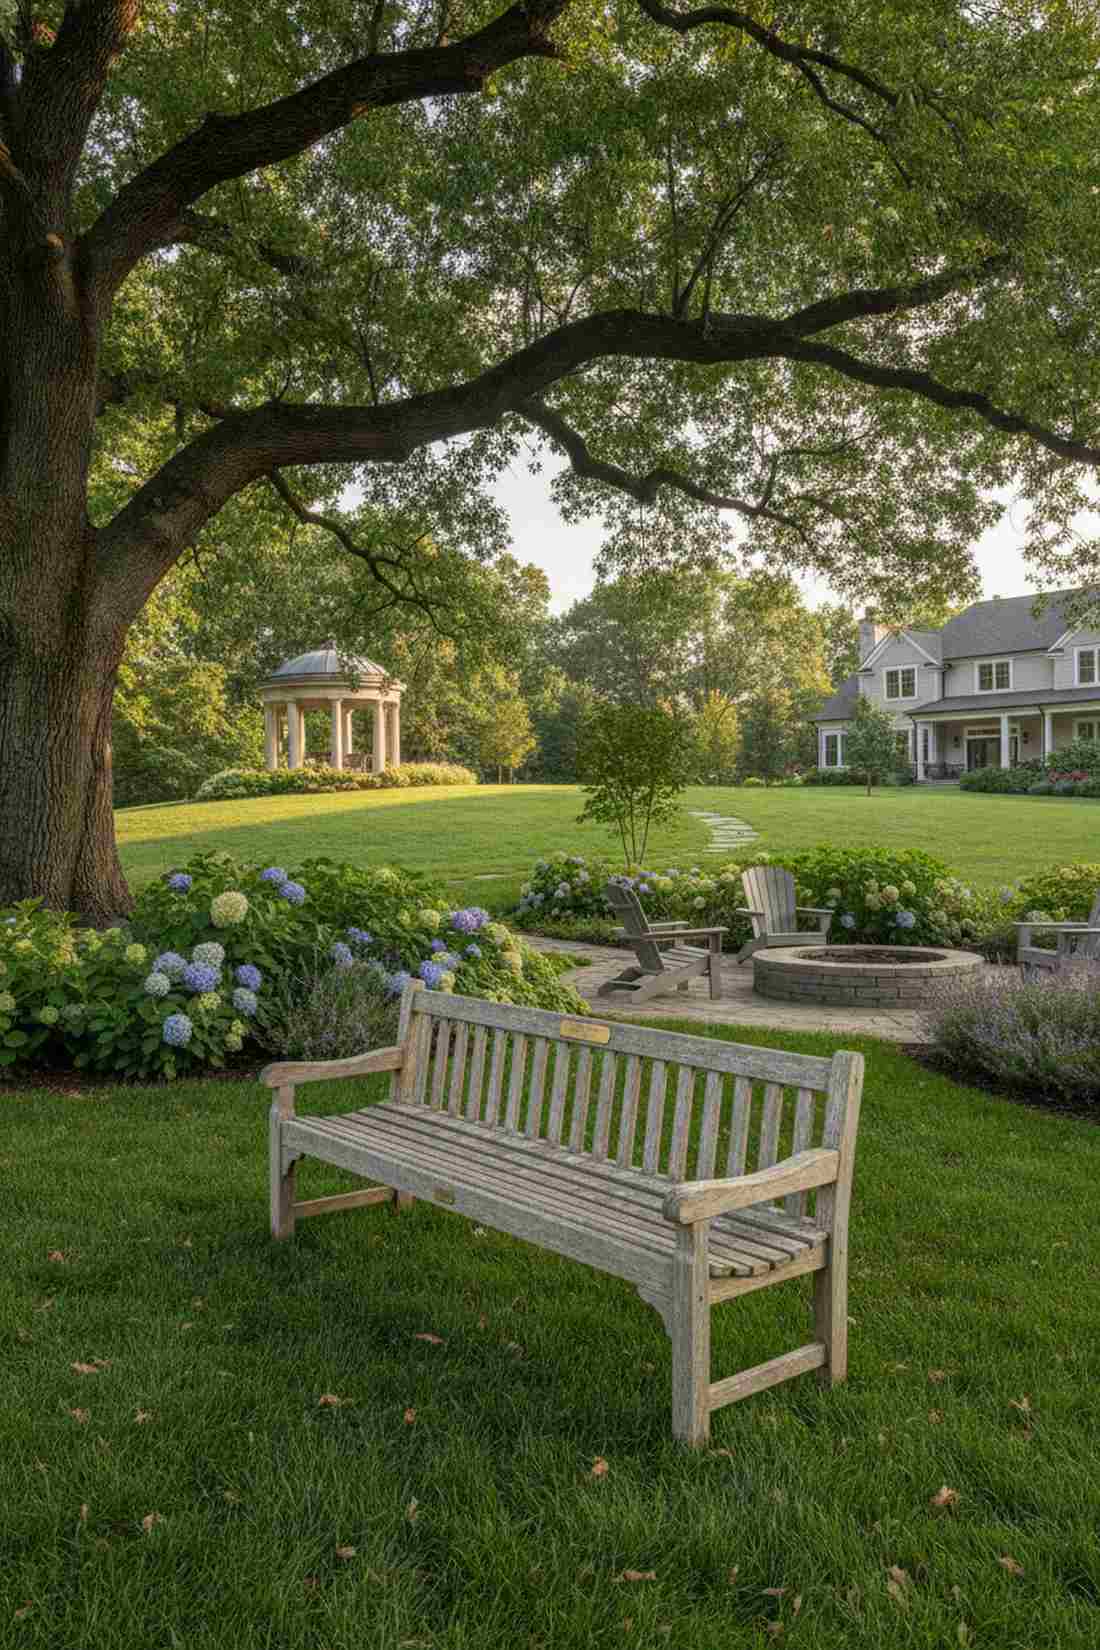
Evokes the quiet, reflective atmosphere of a historic British park. A formal teak garden bench is perfect for framing a spectacular viewpoint or resting under an ancient shade tree.
It’s a common mistake to paint over exotic hardwoods, but letting the wood naturally oxidize gives a designer-level finish that requires zero upkeep. Investing in commercial-grade outdoor seating hardware ensures the frame remains perfectly rigid for decades.
Expect to invest $400–$800 for true heartwood, but it outlasts cheaper woods by a lifetime. It’s a gorgeous investment that completely changes the vibe.
- Key Materials: Teak heartwood, countersunk brass screws
- Vibe / Style: Heritage park estate
- Difficulty: Advanced assembly
- Budget Breakdown: Teak Lumber: $600 | Hardware: $45.
- Creator’s Tip: Seal the end-grains with specialized teak oil to prevent micro-splitting during the first winter.
- Smart Sourcing: sustainable teak lumber starter kits, custom-engraved brass dedication plaques (weatherproof).
3. Floating Ipe Bench on Concealed Steel Frame
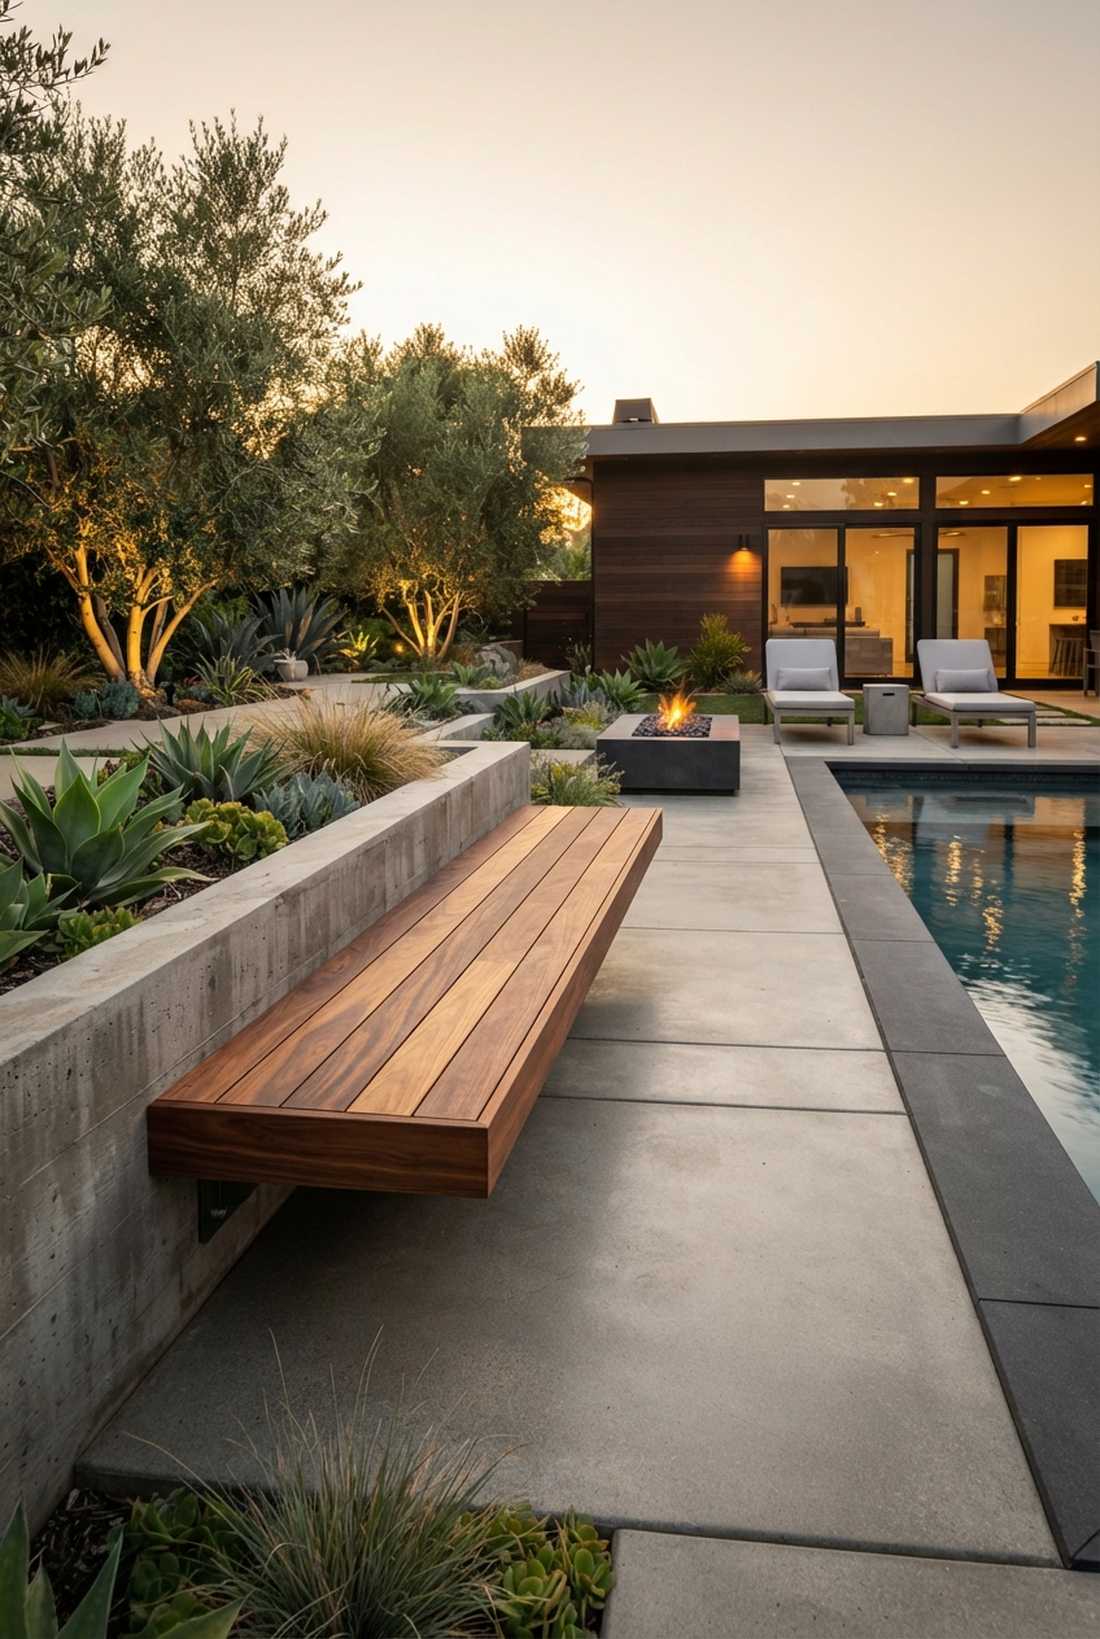
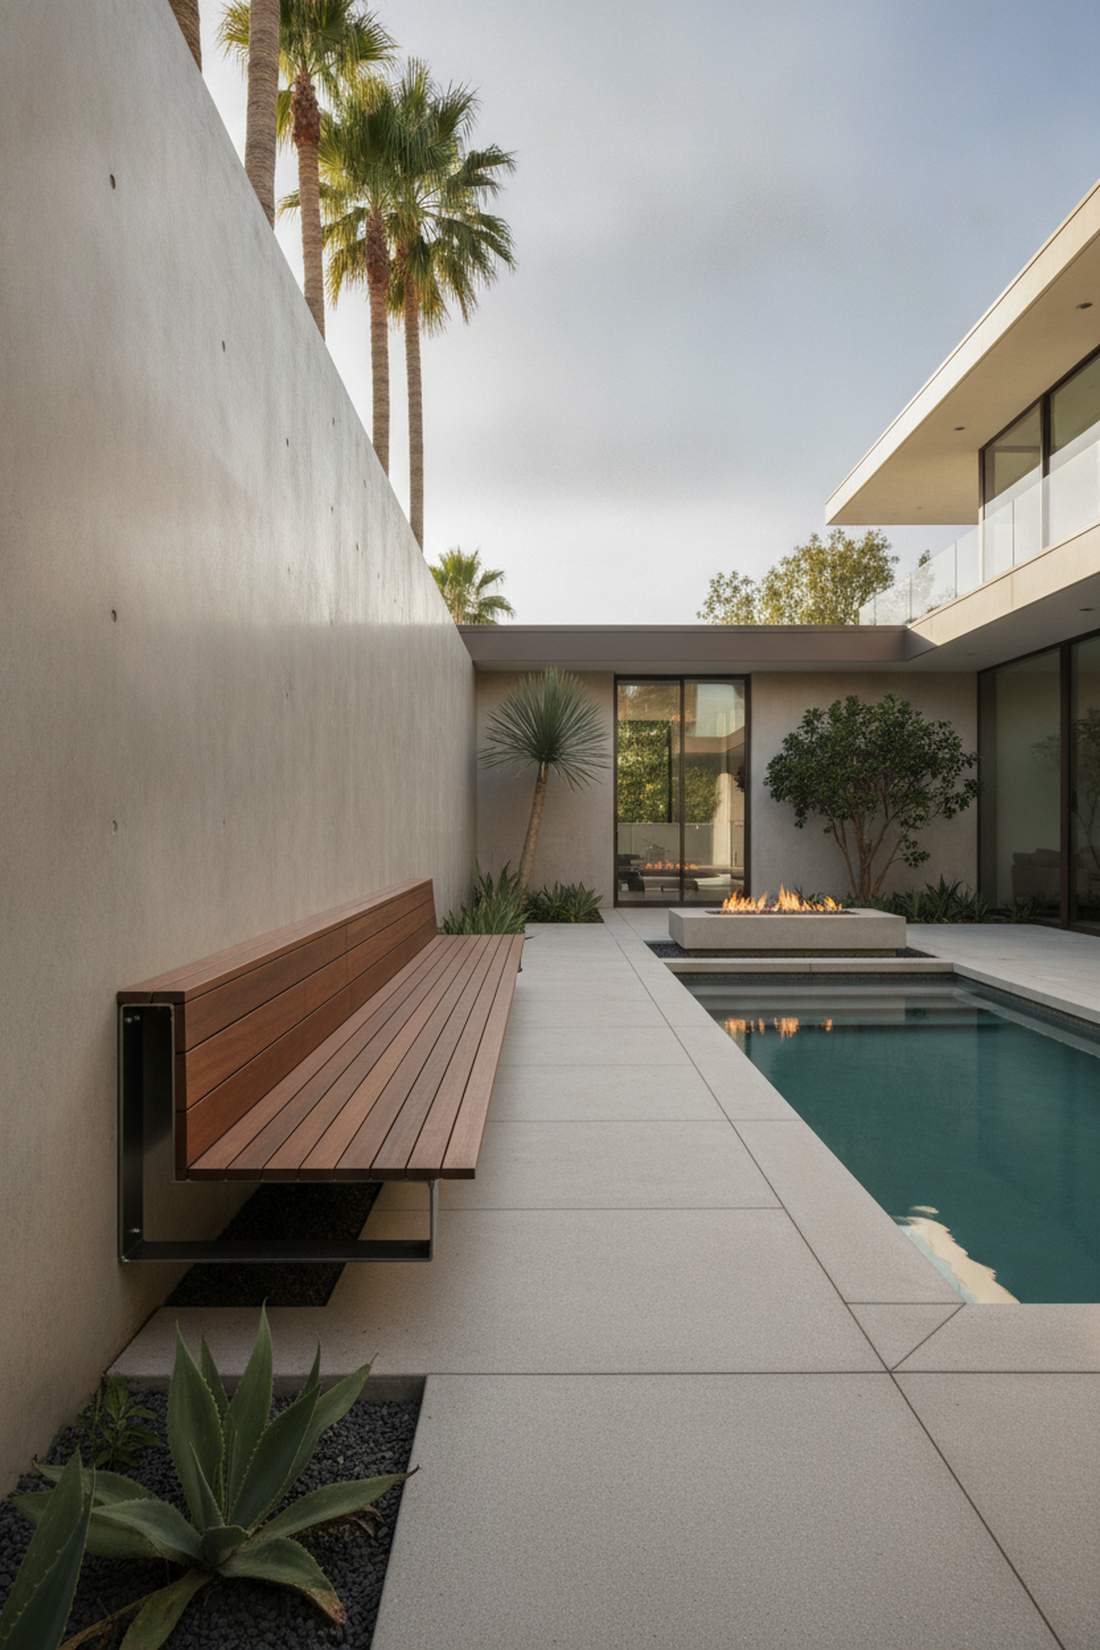
Looks like it’s defying gravity in a high-end architectural digest. This cantilevered minimalist seating is an absolute showstopper for modern courtyard patios or sleek poolside decking.
Many designers overpay for custom installations, but using hidden sub-surface channels looks far more expensive than it is. Utilizing heavy-duty steel frame supports securely anchored below grade provides that magical floating illusion without compromising safety.
Materials will run you around $300–$450 for a six-foot span. Save this if you are planning a sleek, modern space upgrade!
- Key Materials: Ipe decking boards, U-shaped steel channels
- Vibe / Style: Ultra-modern floating illusion
- Difficulty: Advanced (requires light welding or heavy bolting)
- Budget Breakdown: Ipe Wood: $200 | Steel & Concrete: $150.
- Creator’s Tip: Always pre-drill Ipe with carbide-tipped bits; the wood is so dense it will snap standard drill bits instantly.
- Smart Sourcing: pre-drilled ipe decking boards (premium bundle), powder-coated hidden steel brackets.
4. Reclaimed Timber Beam Bench

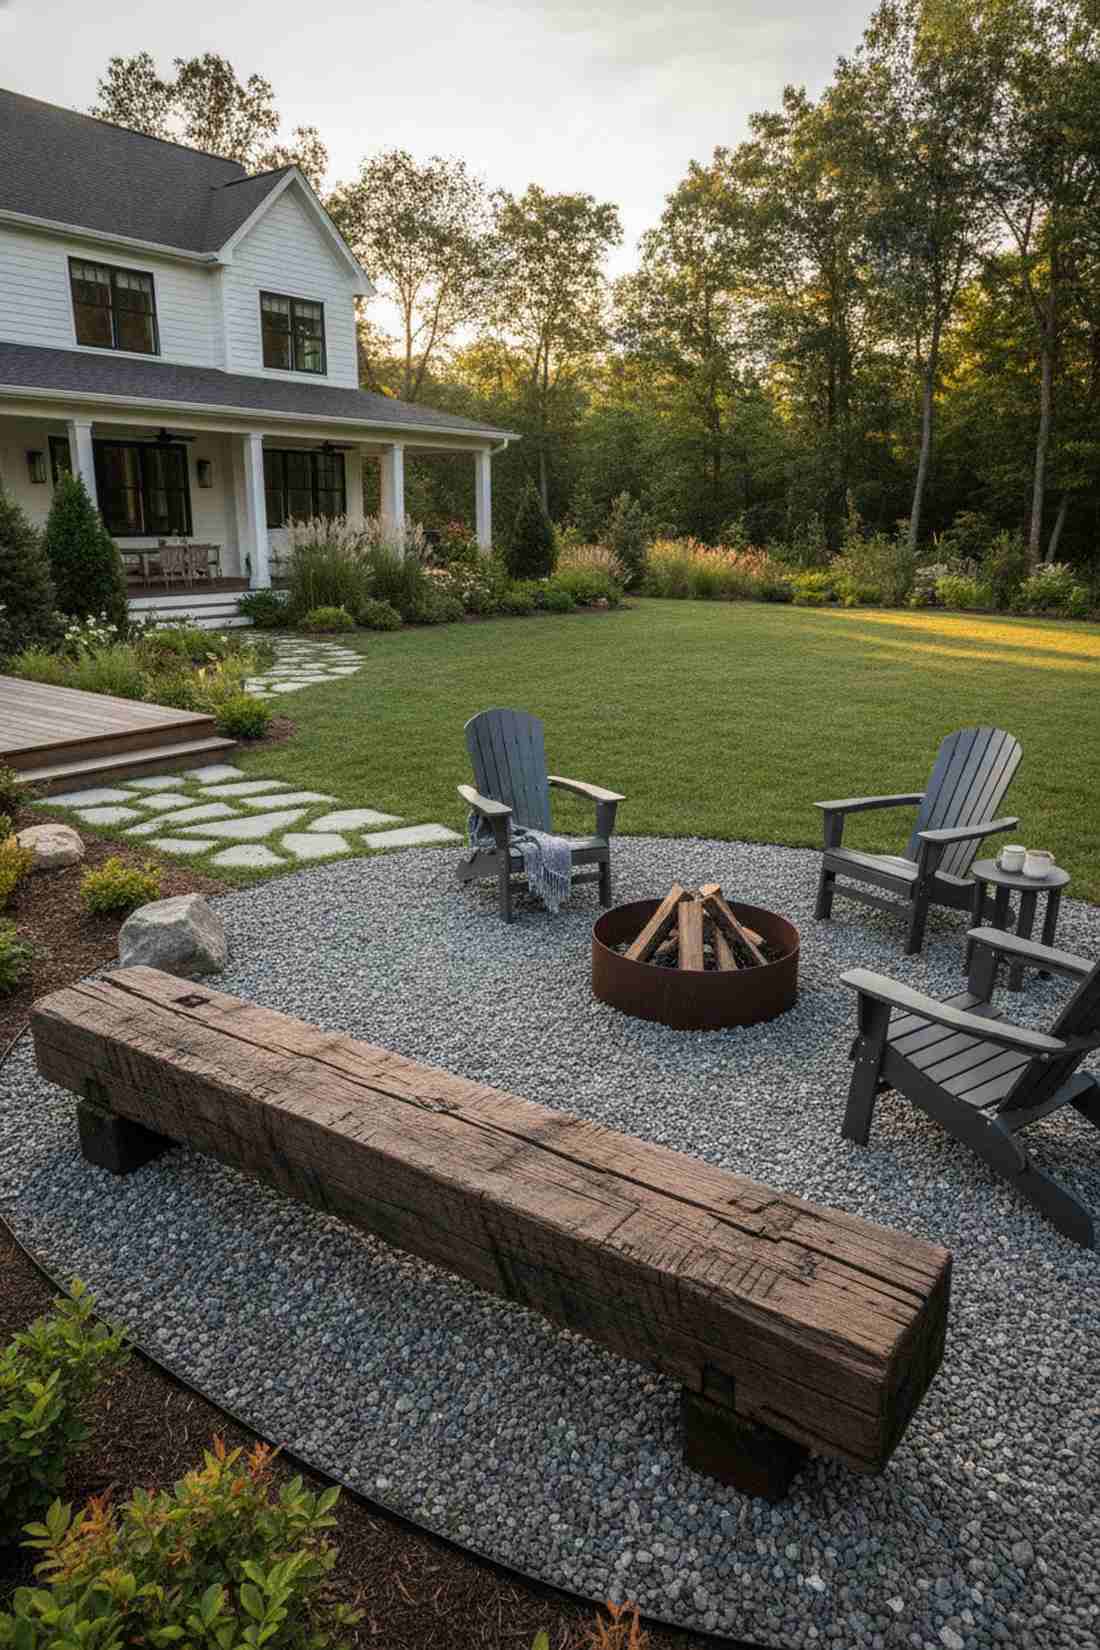
Radiates a raw, earthy energy straight out of an alpine lodge. This heavy timber rustic resting spot works brilliantly alongside gravel fire pits or integrated into dense, naturalistic forest planting beds.
People often over-engineer rustic furniture, but relying on sheer gravitational mass provides an effortlessly rugged aesthetic. Coating the salvaged wood with an industrial penetrating oil finish stabilizes the antique checking patterns while stopping active decay.
You can often find salvaged beams for $50–$150 at local architectural yards. Highly recommended for a massive impact with minimal actual building.
- Key Materials: 10×10 salvaged barn beams, crushed stone base
- Vibe / Style: Industrial farmhouse retreat
- Difficulty: Beginner (heavy lifting required)
- Budget Breakdown: Salvaged Beam: $100 | Oil Finish: $30.
- Creator’s Tip: Use an angle grinder with a flap disc to knock down splinters while keeping the weathered patina intact.
- Smart Sourcing: heavy-duty timber penetrating oil, commercial-grade leveling gravel (bulk bags).
This next composite layout completely solves the rotting wood problem, and it looks like a $1,000 custom job…
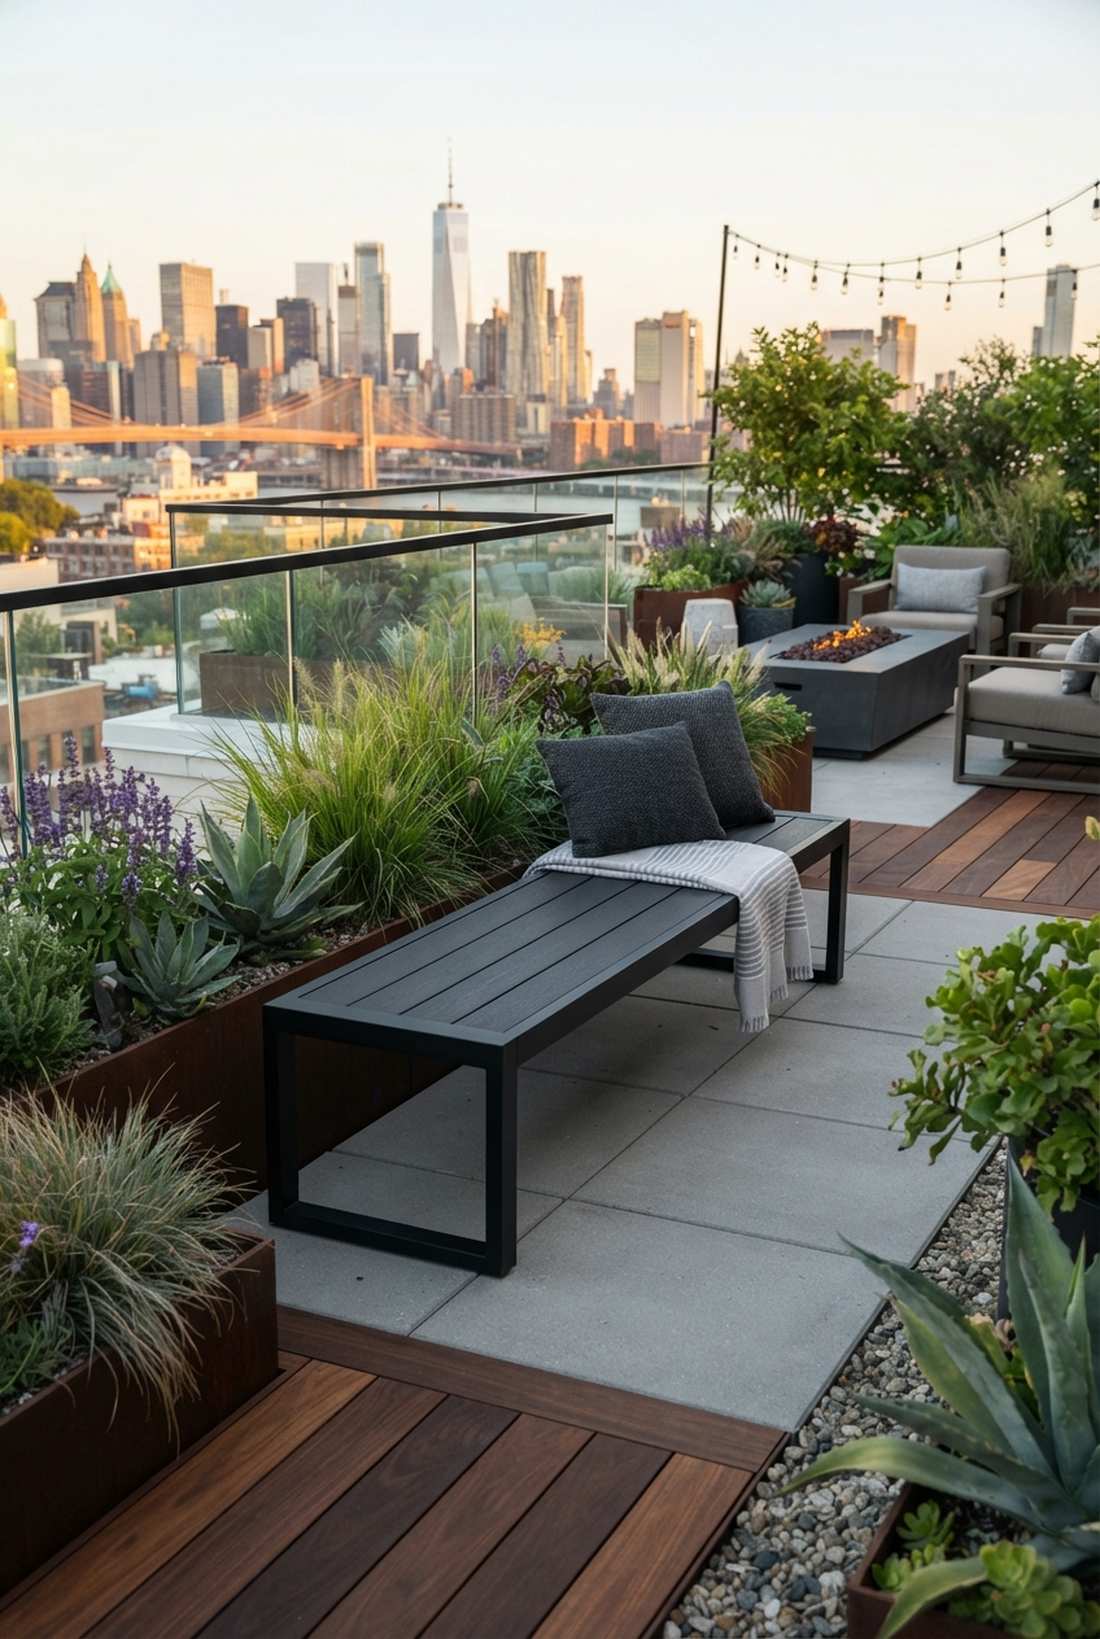
5. Composite Lumber Bench With Aluminum Frame
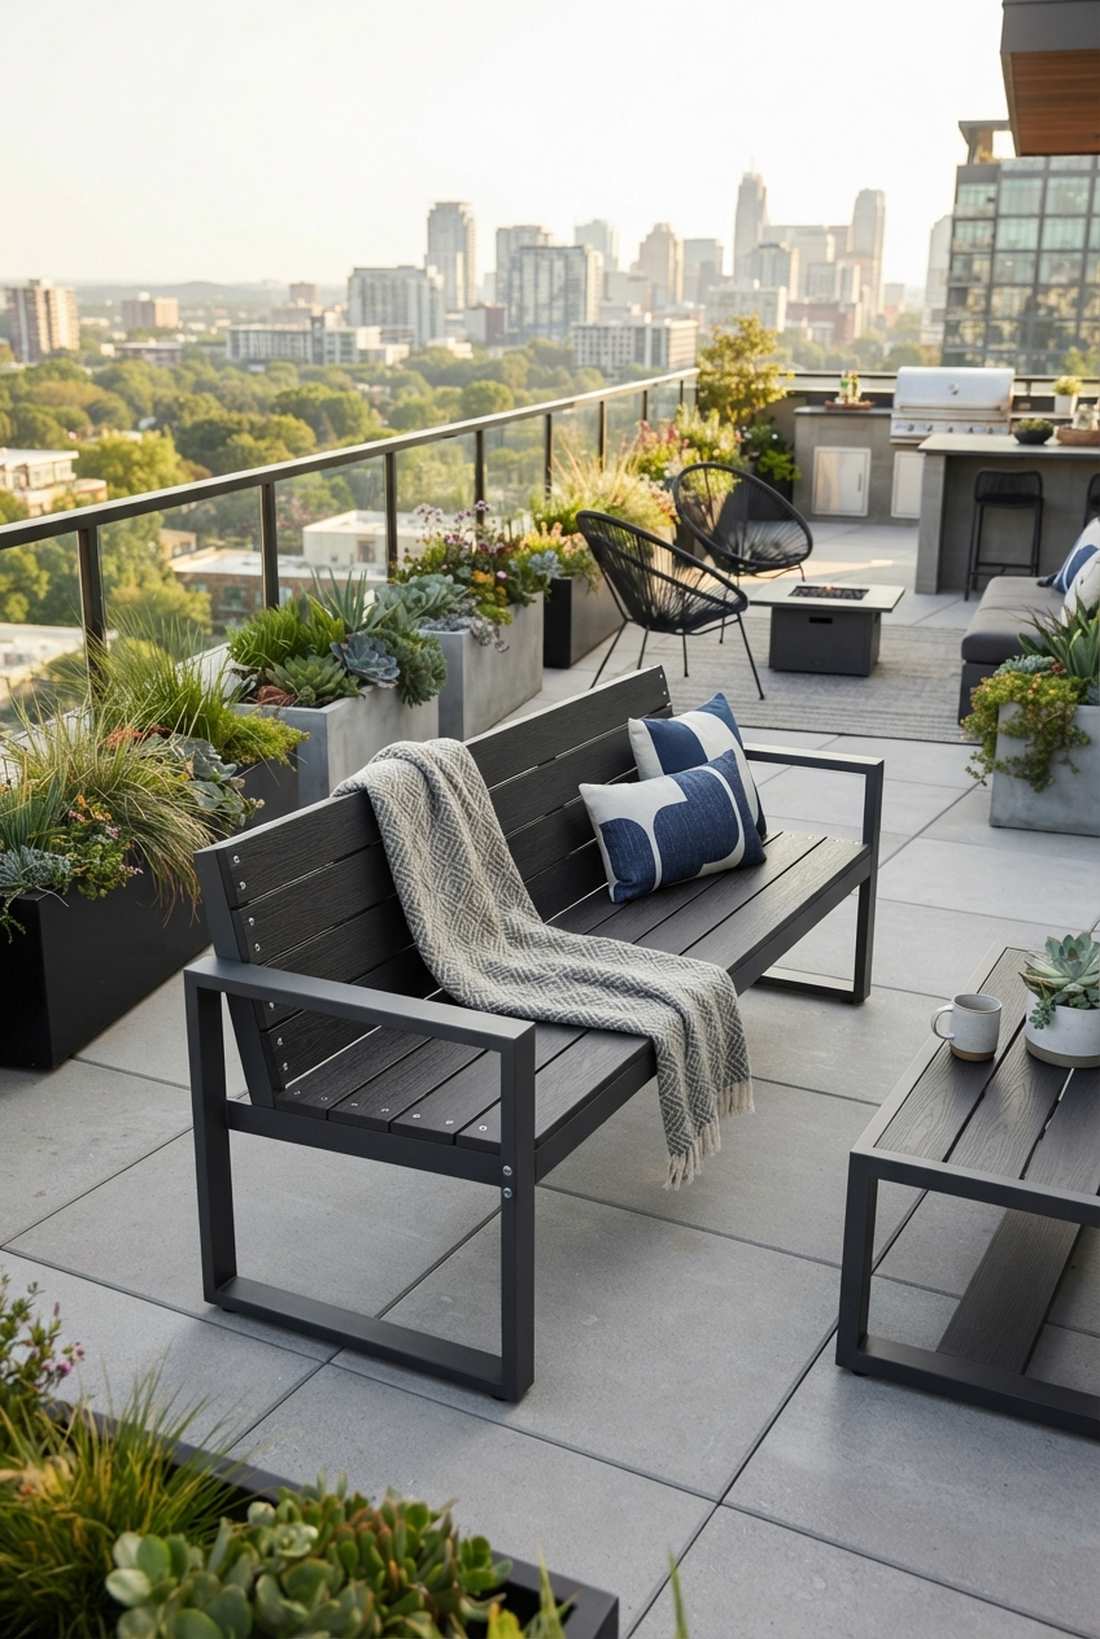
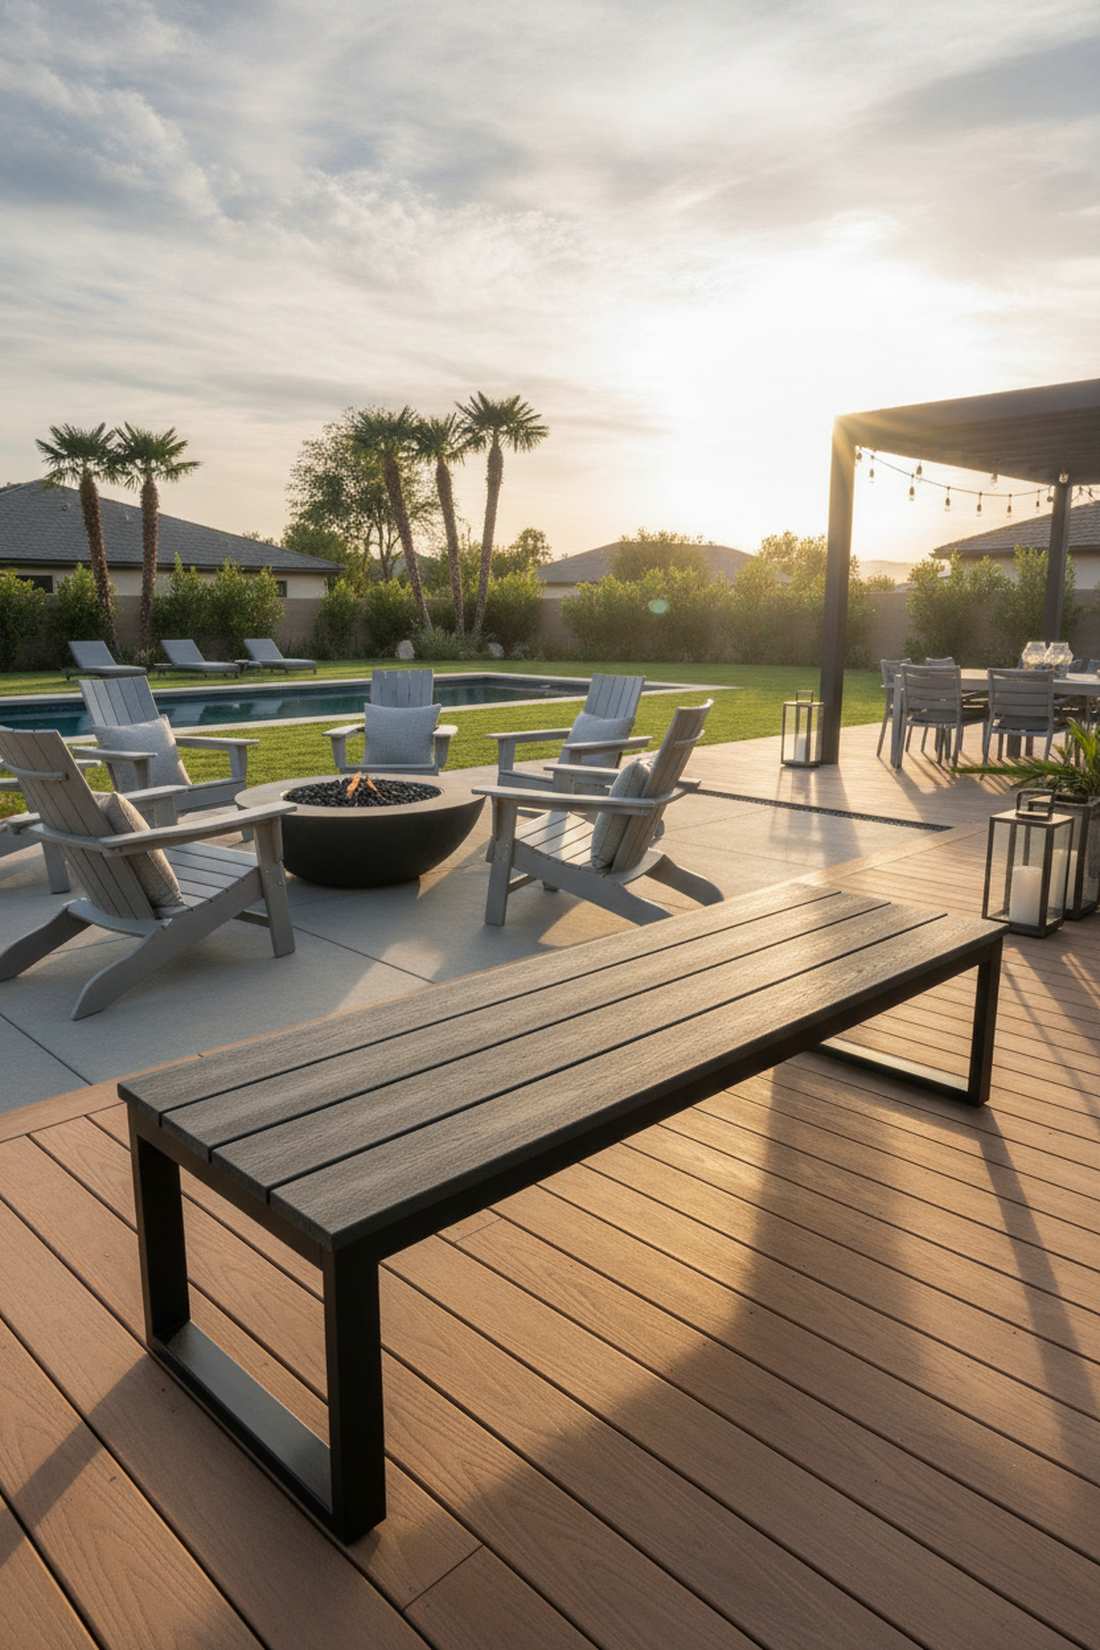
Offers the crisp, clean lines of a luxury resort terrace. Modern composite patio seating is the ultimate zero-hassle addition to sun-drenched rooftops or exposed urban balconies.
Wood purists hate it, but utilizing engineered materials practically guarantees a 50-year lifespan without a single splinter. Bolting these boards to a weatherproof aluminum structural frame creates a hyper-modern silhouette that survives harsh UV rays.
Building this setup costs approximately $200–$350 from scratch. Pin this if you want gorgeous aesthetics with absolutely zero seasonal maintenance.
- Key Materials: Recycled plastic-wood composite, powder-coated aluminum tubing
- Vibe / Style: Contemporary maintenance-free
- Difficulty: Easy bolt-together assembly
- Budget Breakdown: Composite Planks: $150 | Aluminum Frame: $120.
- Creator’s Tip: Choose darker composite tones in cooler climates; they absorb passive solar heat and stay warm into the evening.
- Smart Sourcing: UV-coated composite lumber planks (pre-cut), rust-proof aluminum bracket kits.
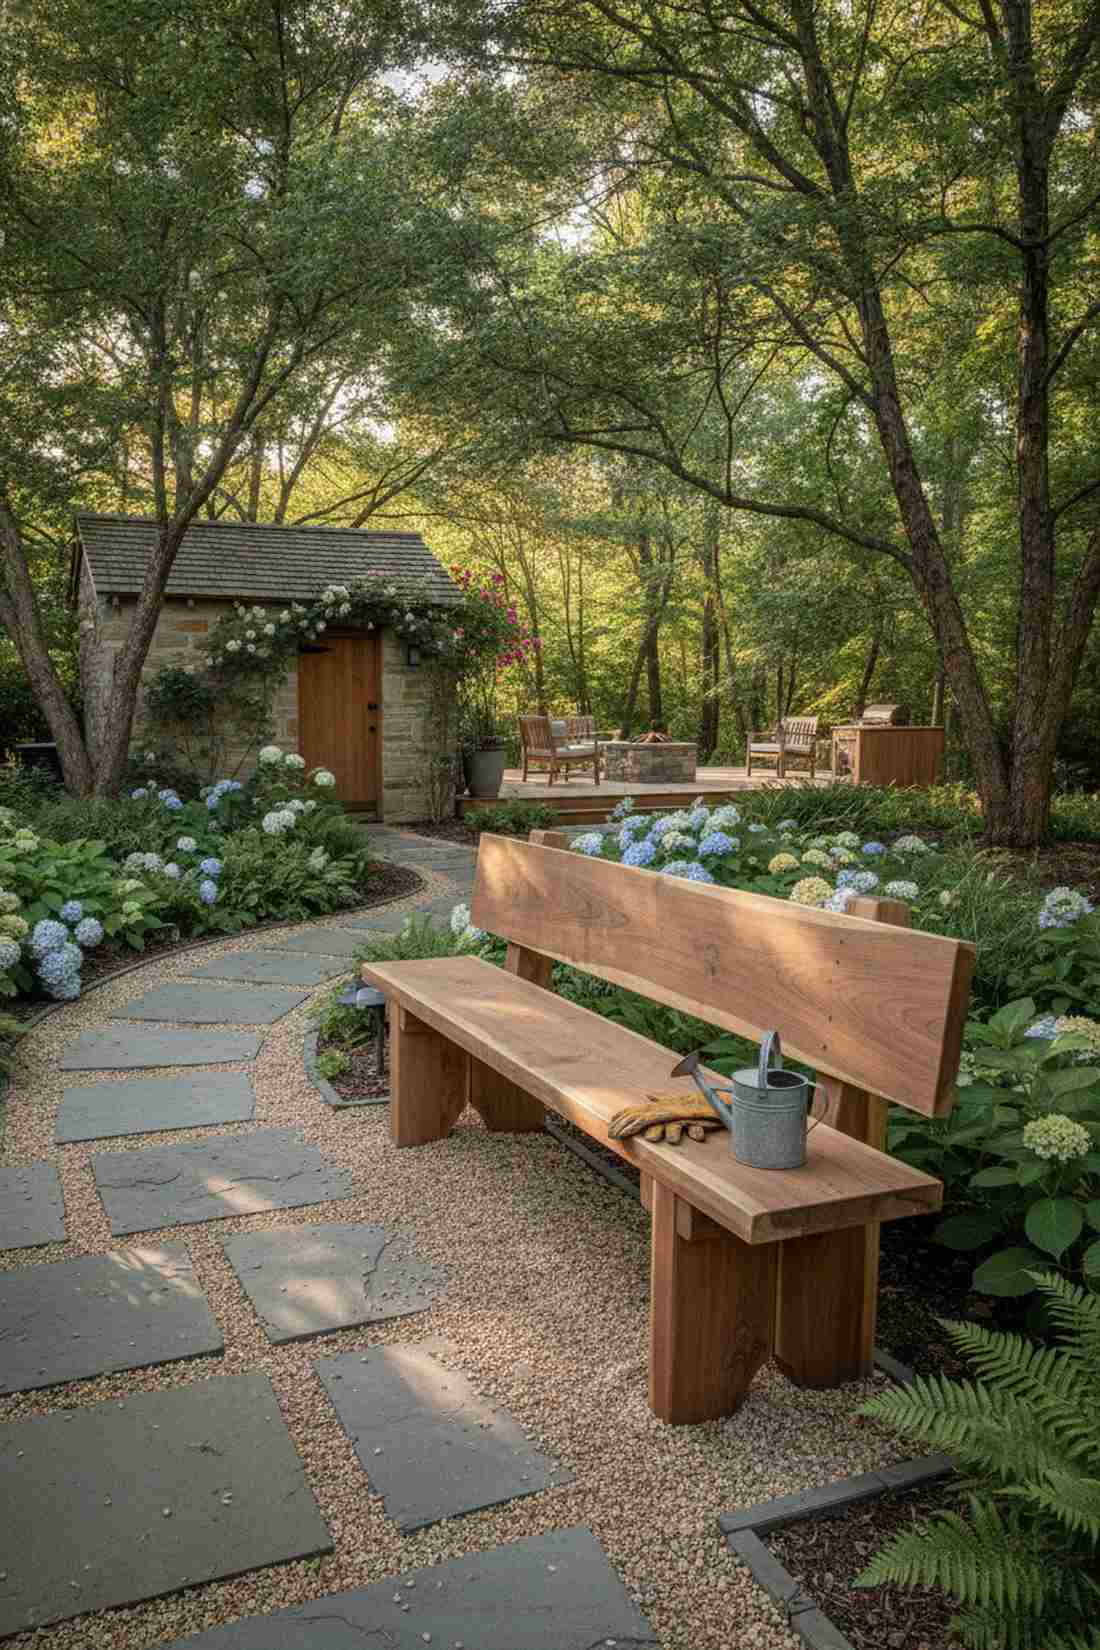
6. Live-Edge Slab Bench With Hairpin Legs
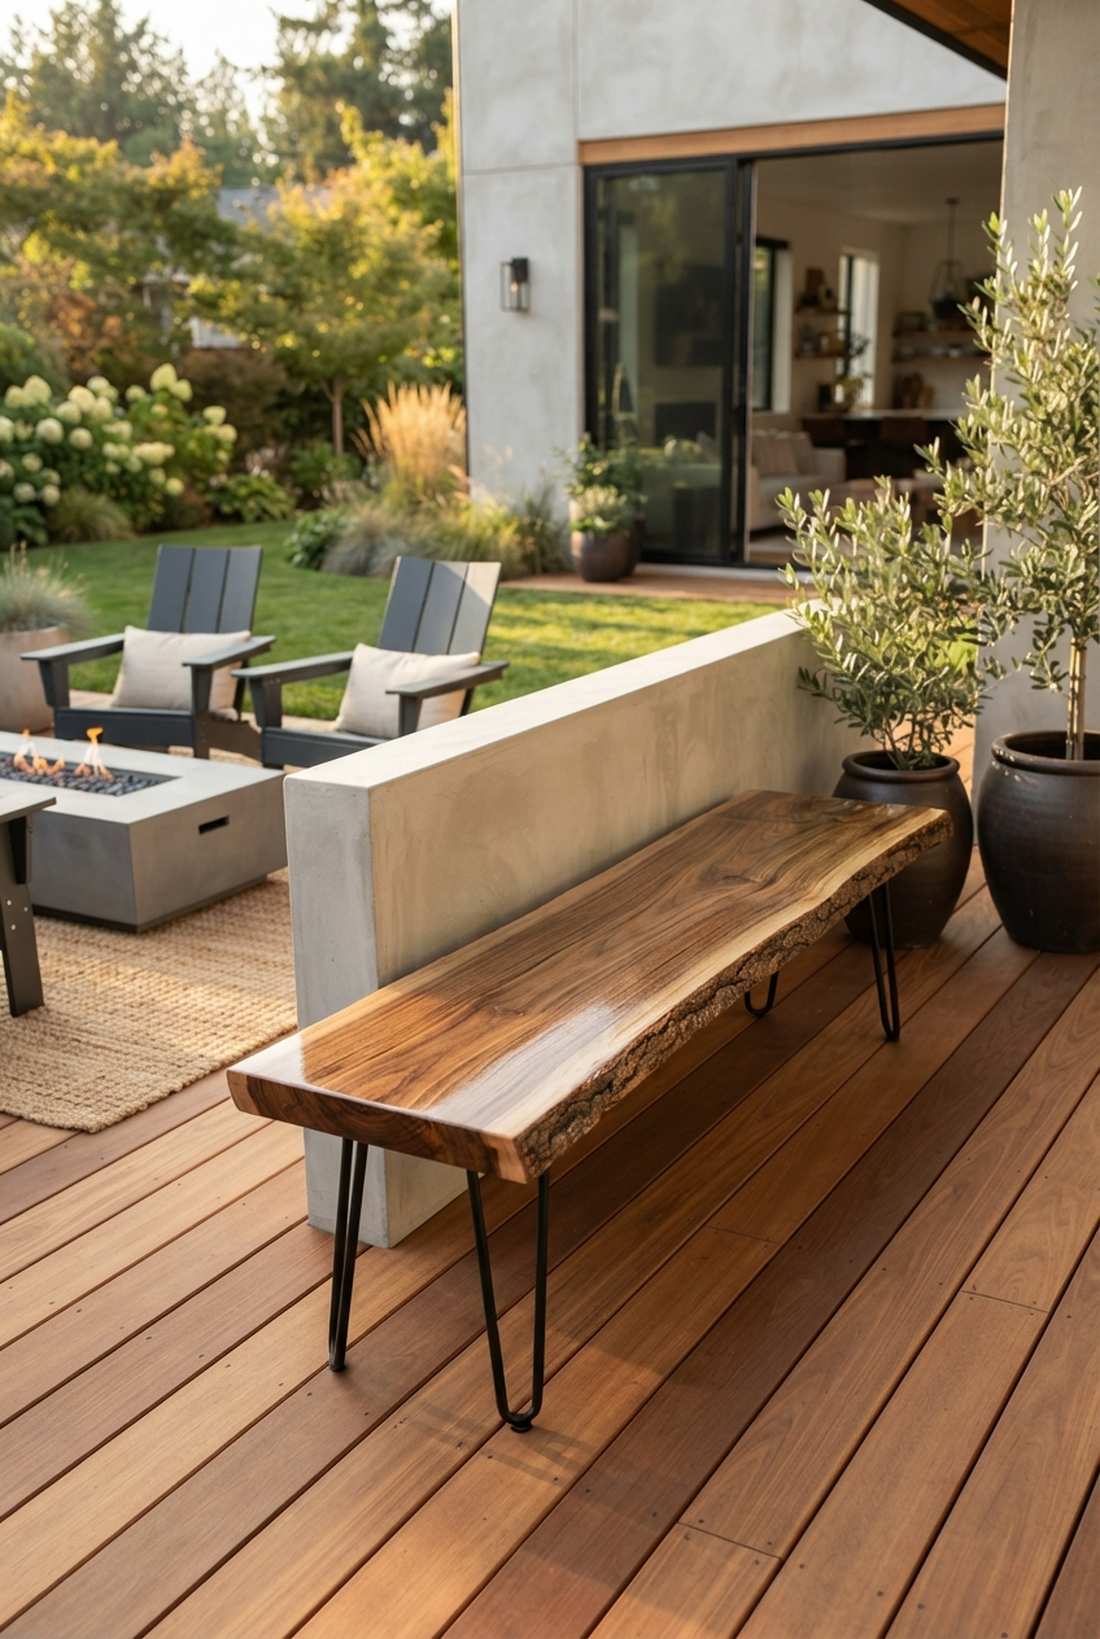
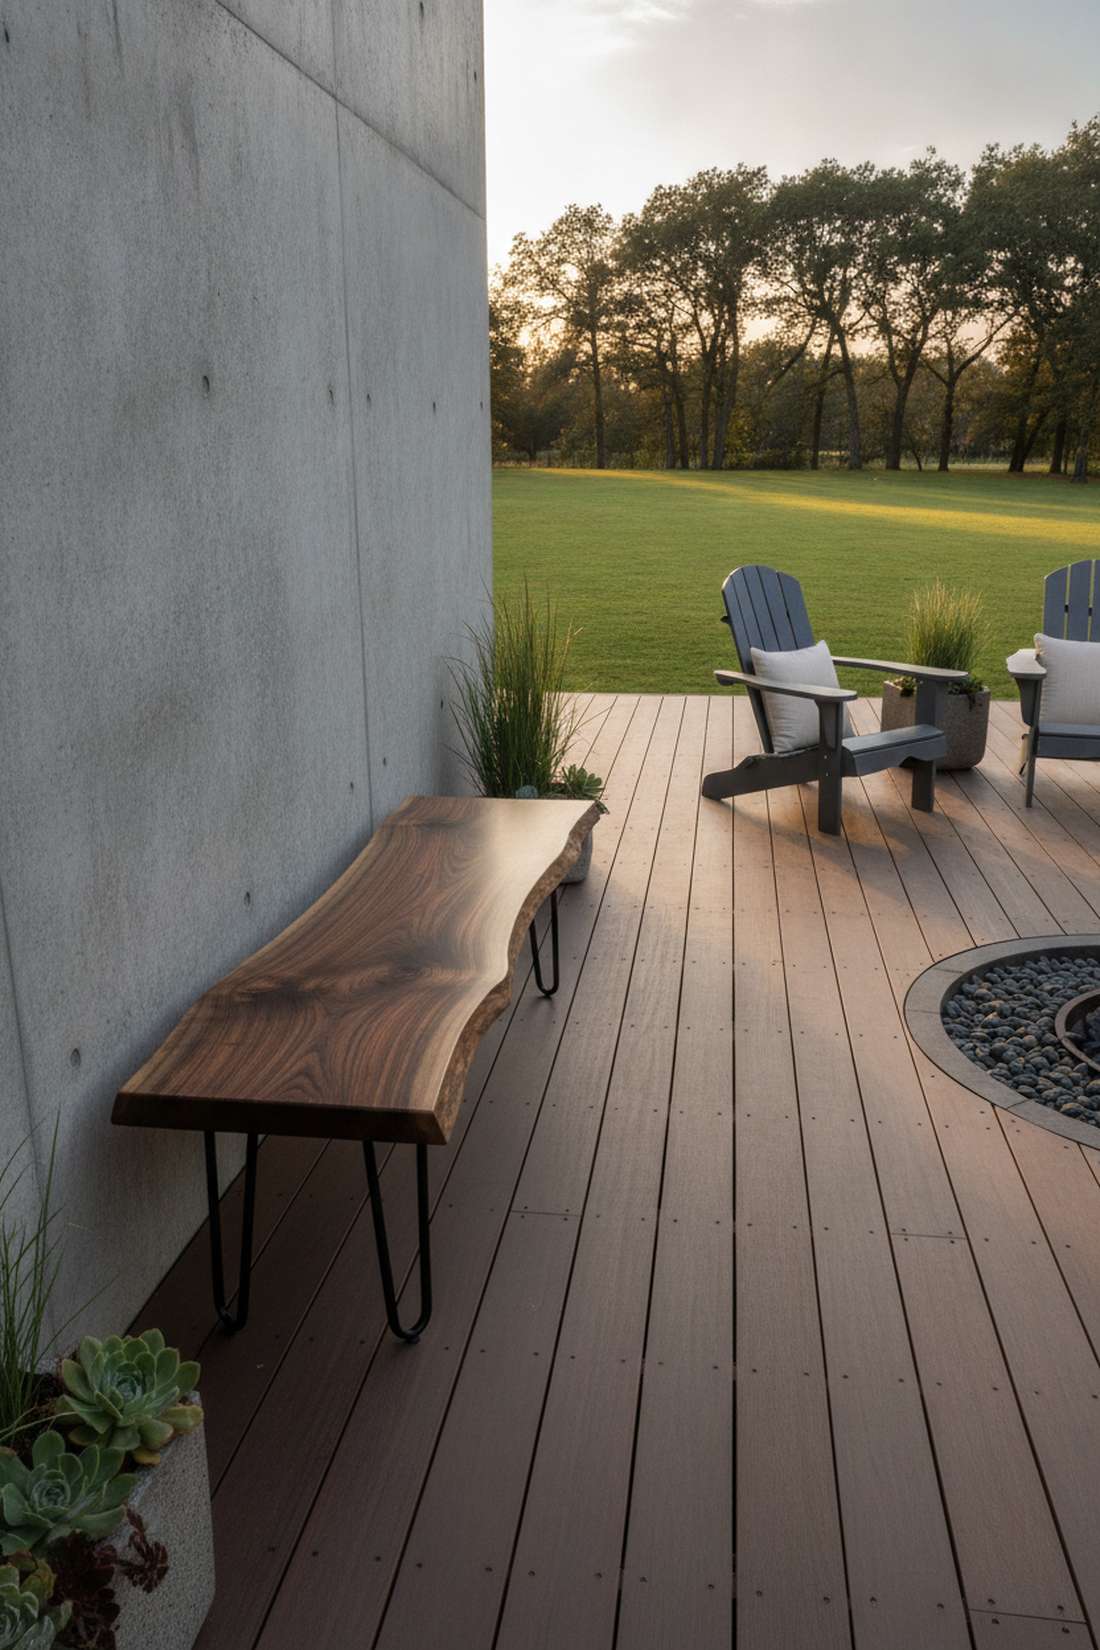
Feels like bringing a piece of the wild forest directly into your curated space. A natural live-edge focal piece is breathtaking when positioned as a solitary statement piece against a minimalist concrete wall.
You might assume this requires a master carpenter, but combining raw slabs with prefabricated metal legs is a shortcut to high-end design. Sourcing a thick slab and applying a premium exterior-grade polyurethane prevents moisture warping while highlighting the dramatic wood grain.
Slabs run from $100–$300, while the legs cost about $60. It’s a fast upgrade that completely changes the landscape’s vibe.
- Key Materials: 3-inch thick hardwood slab, steel hairpin legs
- Vibe / Style: Organic modernism
- Difficulty: Beginner-friendly
- Budget Breakdown: Wood Slab: $200 | Hairpin Legs: $65.
- Creator’s Tip: Sand the bark edges meticulously to remove soft cambium layers where outdoor insects love to nest.
- Smart Sourcing: heavy-duty steel hairpin table legs (set of 4), high-gloss outdoor epoxy resin starter kit.
Outdoor Seating Concrete & Modern Forms
7. Floating Concrete Bench Cantilever
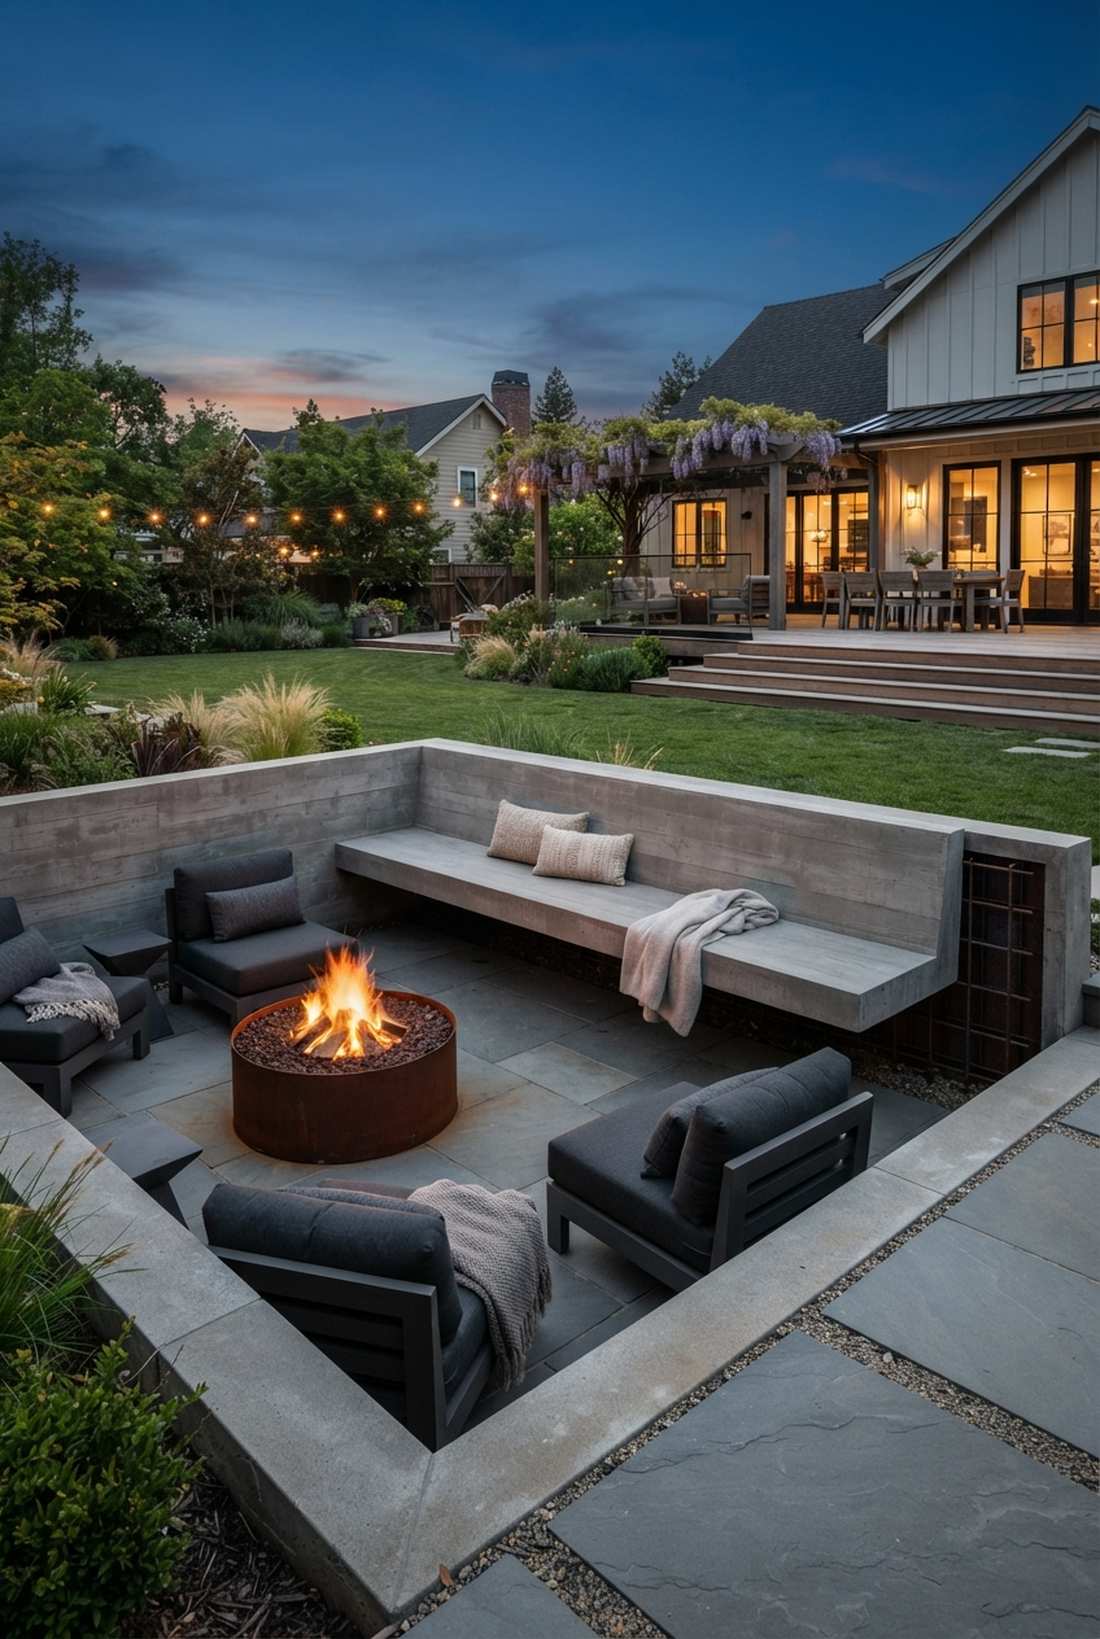
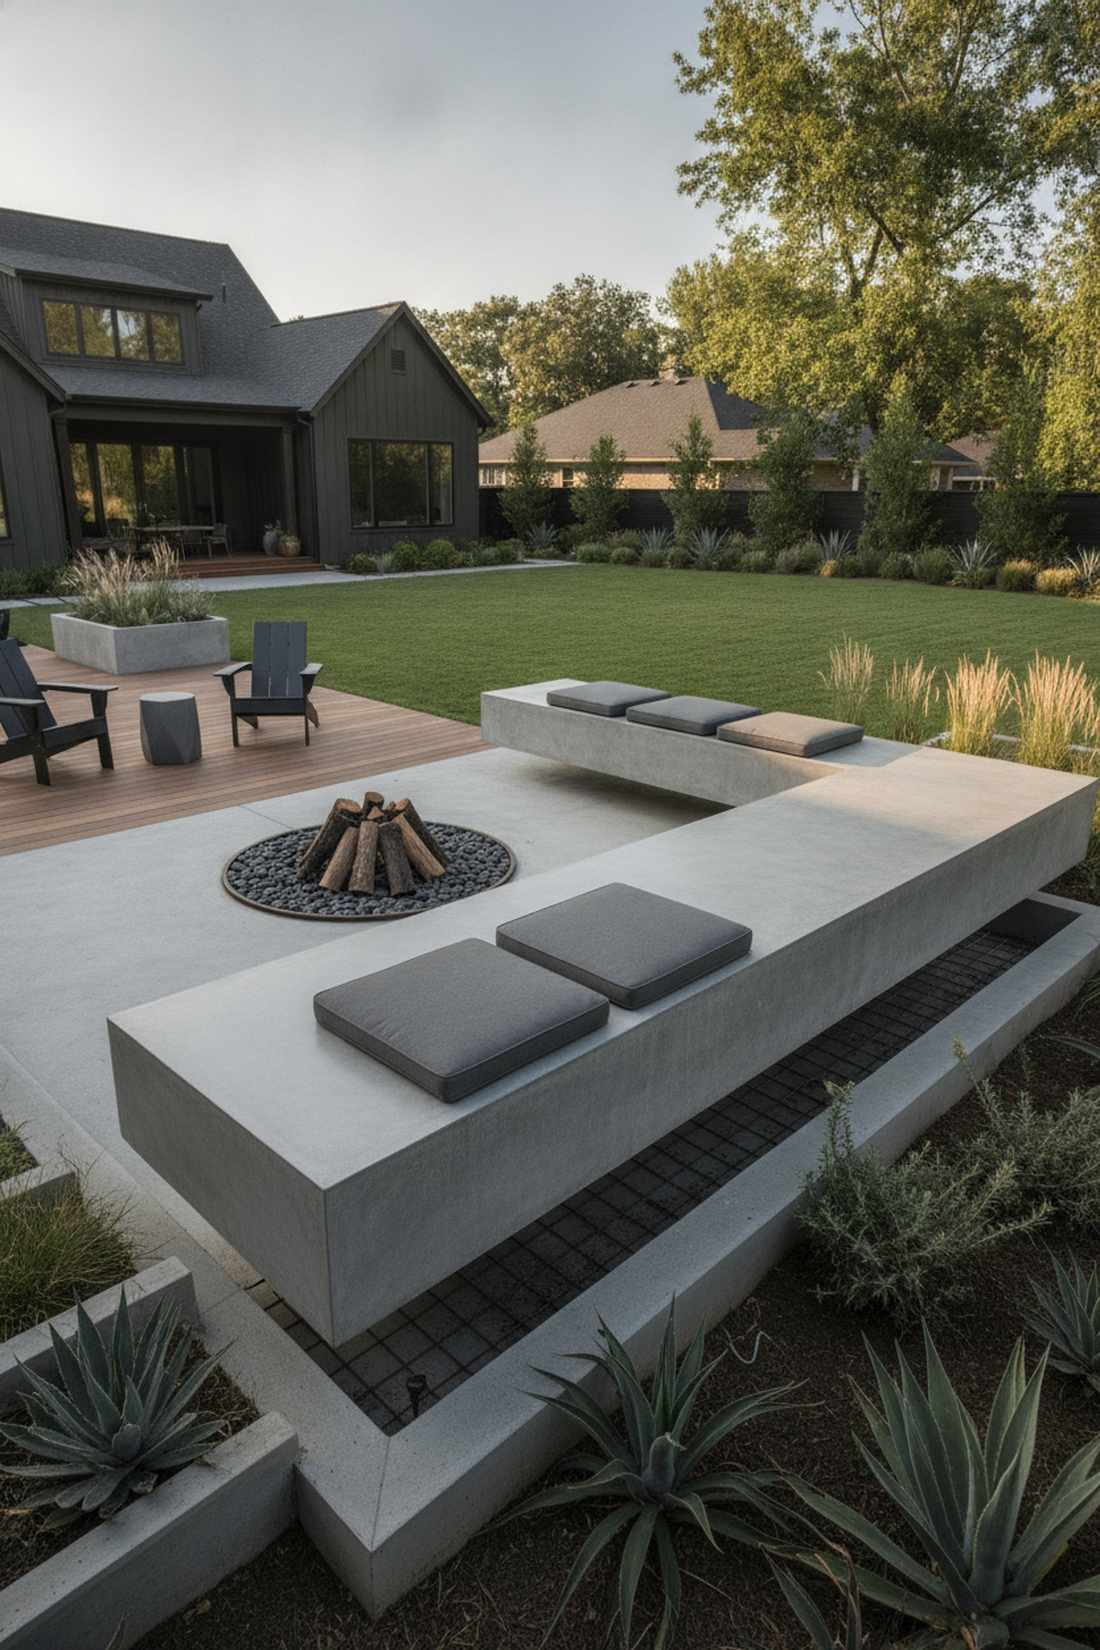
Brings the dramatic, heavy-yet-weightless energy of brutalist architecture. This outdoor seating concrete ledge is the ultimate luxury touch for sunken fire pits or sleek retaining wall systems.
Most DIYers are terrified of structural pours, but mastering the 4:1 cantilever ratio delivers a staggeringly premium look. Embedding a heavy rebar grid reinforcement system deep into the wall ensures the massive slab hovers perfectly without sagging.
Concrete and steel will cost around $200, though formwork adds another $100. Save this blueprint to your ultimate hardscaping dream board!
- Key Materials: High-strength concrete mix, #4 rebar, plywood forms
- Vibe / Style: Brutalist floating architecture
- Difficulty: Advanced (requires precise concrete work)
- Budget Breakdown: Concrete/Steel: $180 | Formwork Lumber: $120.
- Creator’s Tip: Vibrate the formwork aggressively during the pour to eliminate air pockets and achieve a glass-smooth modern finish.
- Smart Sourcing: commercial-grade concrete form release agent, pre-cut #4 steel rebar bundles.
8. Precast Concrete Plank Bench
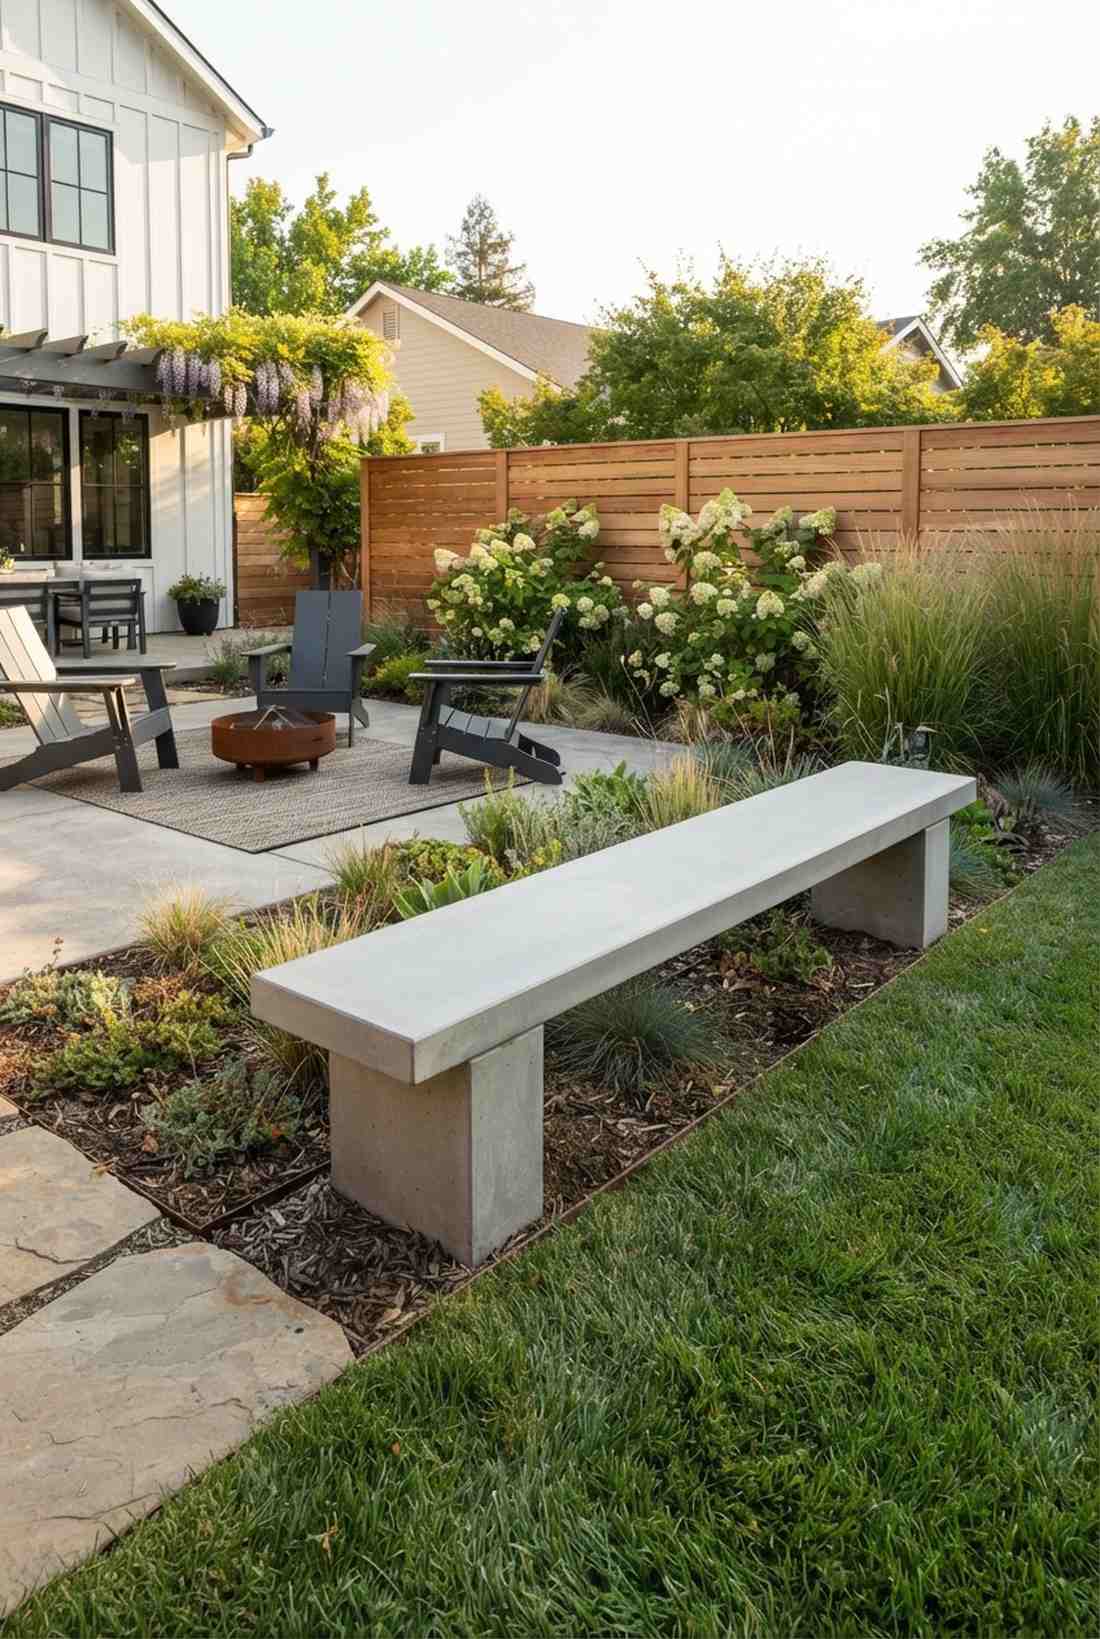
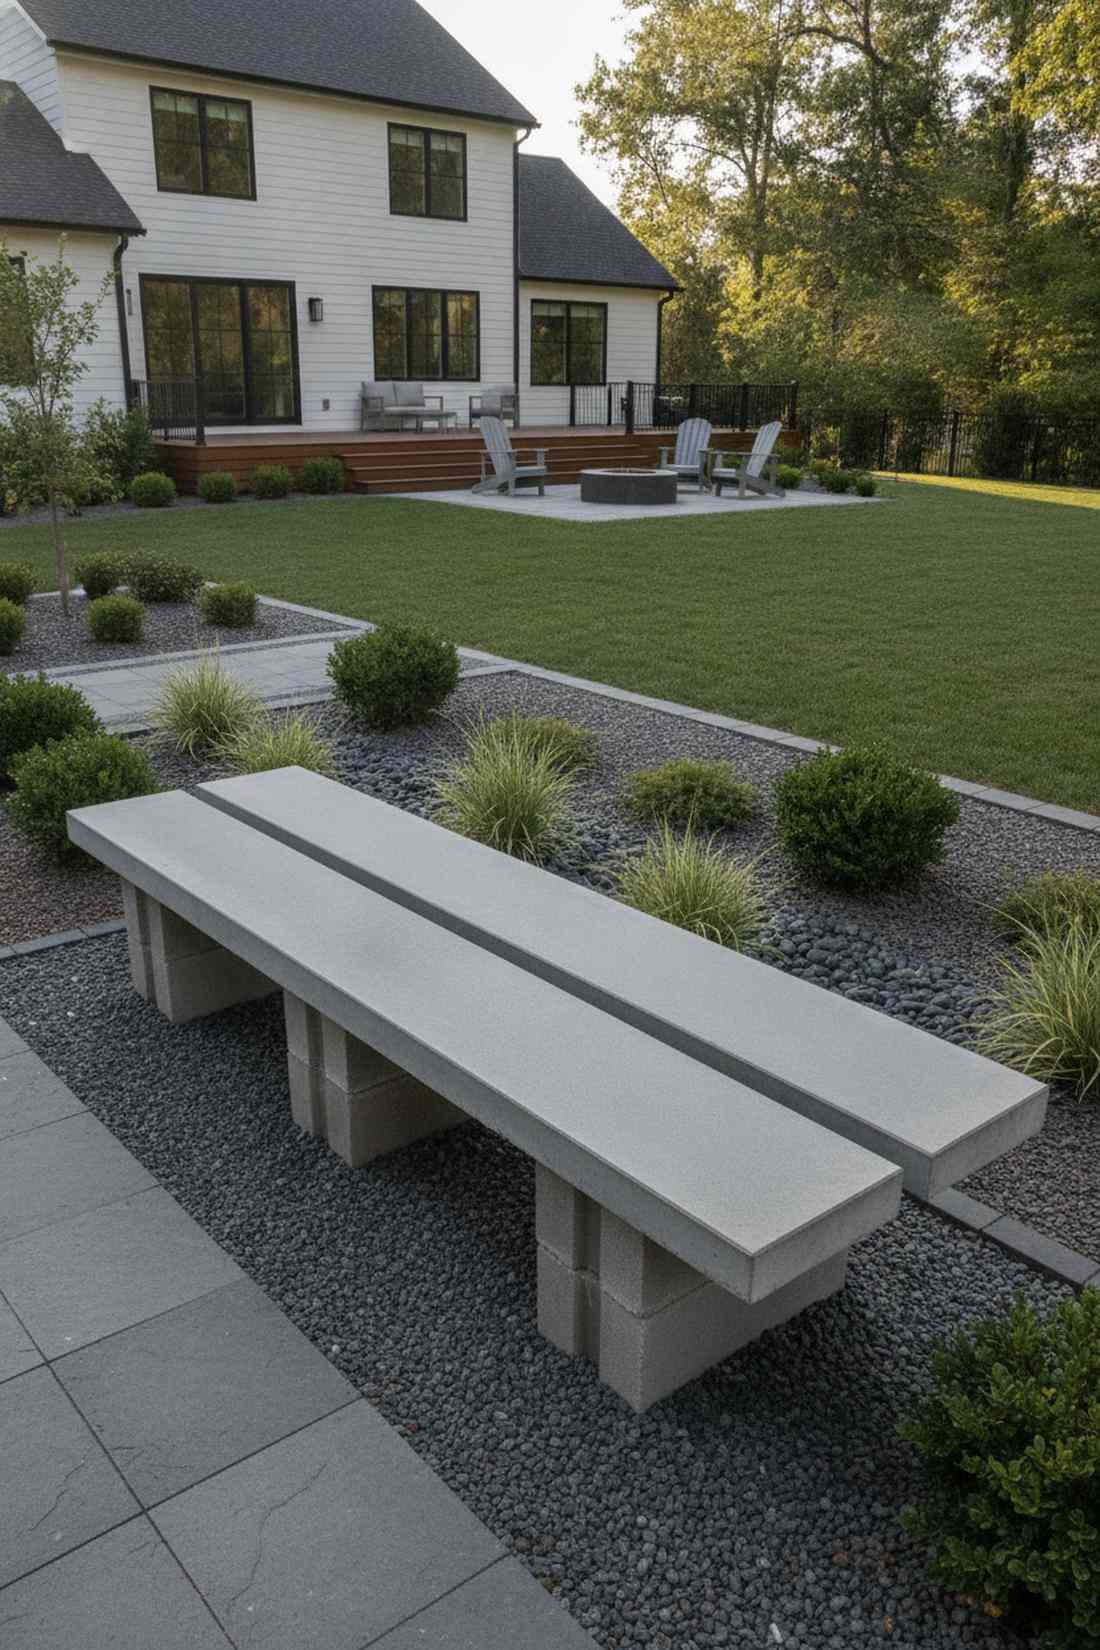
Delivers the crisp perfection of a professionally installed city park. Utilizing modular precast bench slabs works wonders along boundary lines or edging a geometric modern garden.
Pouring on-site is risky due to weather, but ordering factory-cured slabs gives a flawless designer-level finish every time. Pairing these heavy planks with a high-strength construction adhesive onto block piers makes assembly surprisingly fast.
Precast planks cost roughly $150–$300 depending on the aggregate finish. Highly recommended for a quick weekend win with massive visual weight.
- Key Materials: 8-foot factory precast planks, concrete block piers
- Vibe / Style: Streamlined civic elegance
- Difficulty: Intermediate (very heavy materials)
- Budget Breakdown: Precast Slab: $250 | Base Blocks: $40.
- Creator’s Tip: Set the base piers on deeply compacted gravel pads to prevent the immense weight from settling unevenly over winter.
- Smart Sourcing: heavy-duty landscape block adhesive (bulk tube), fiber-reinforced concrete patching kits.
9. Board-Formed Concrete Bench Wall
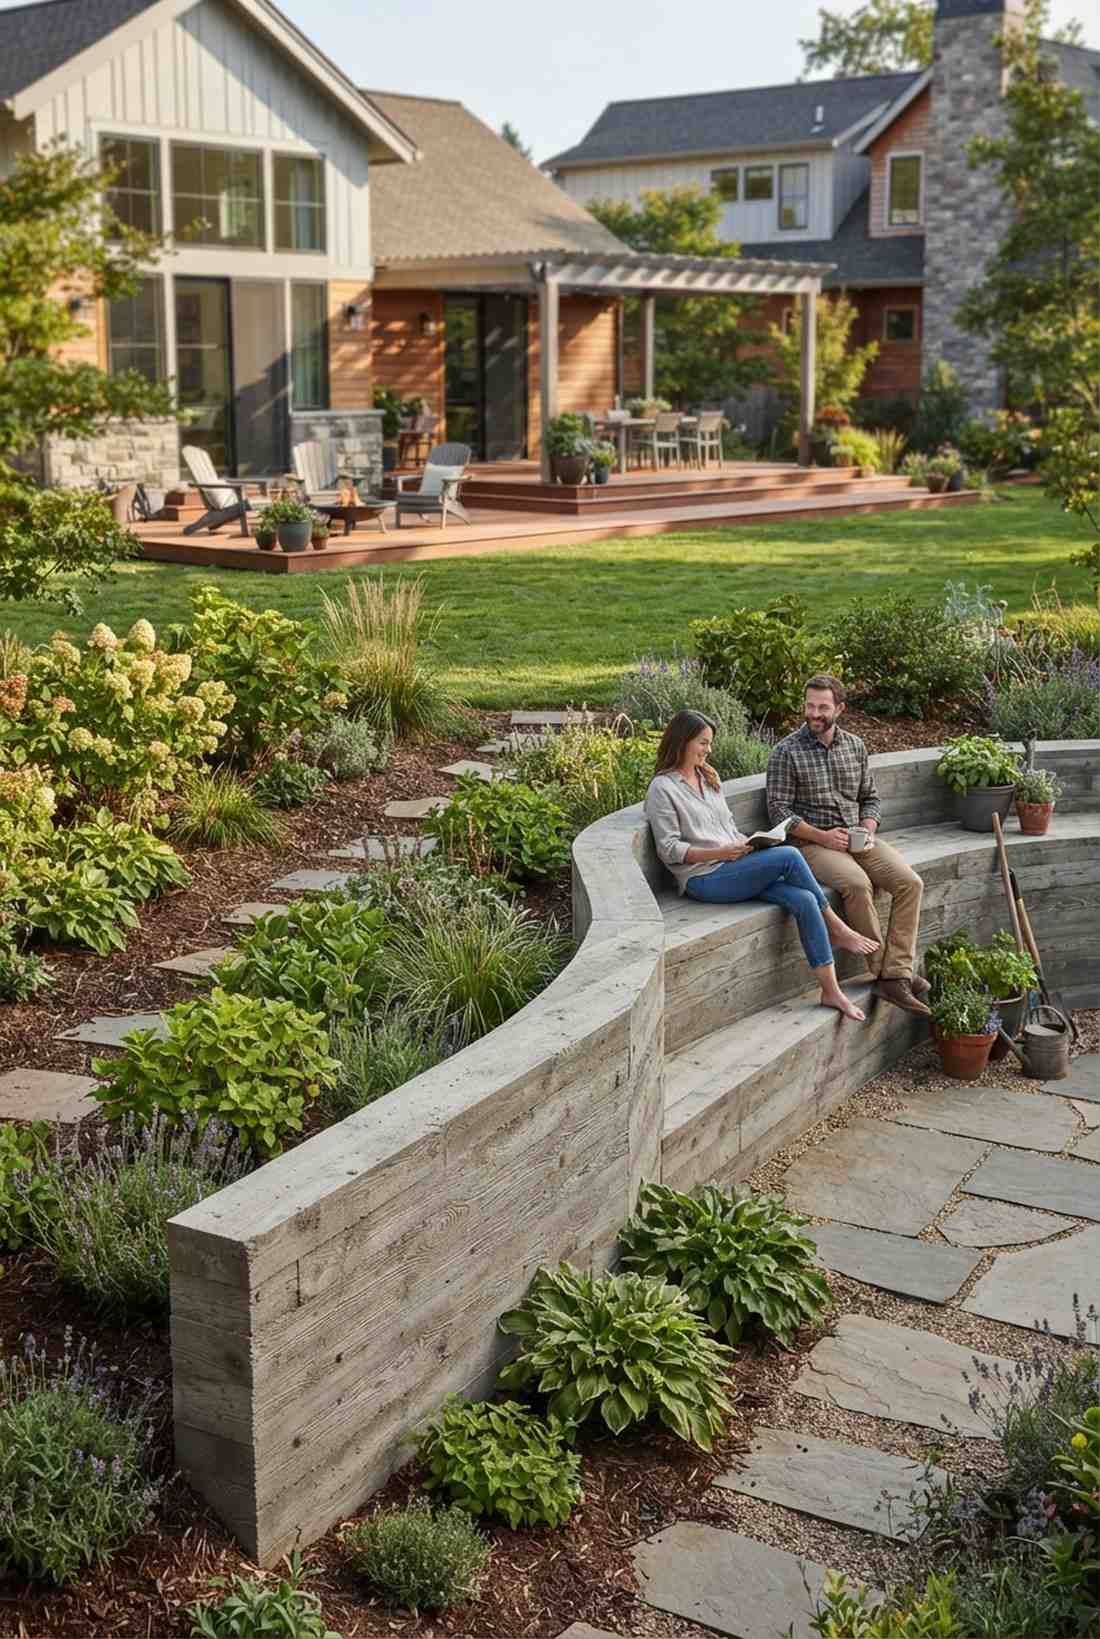
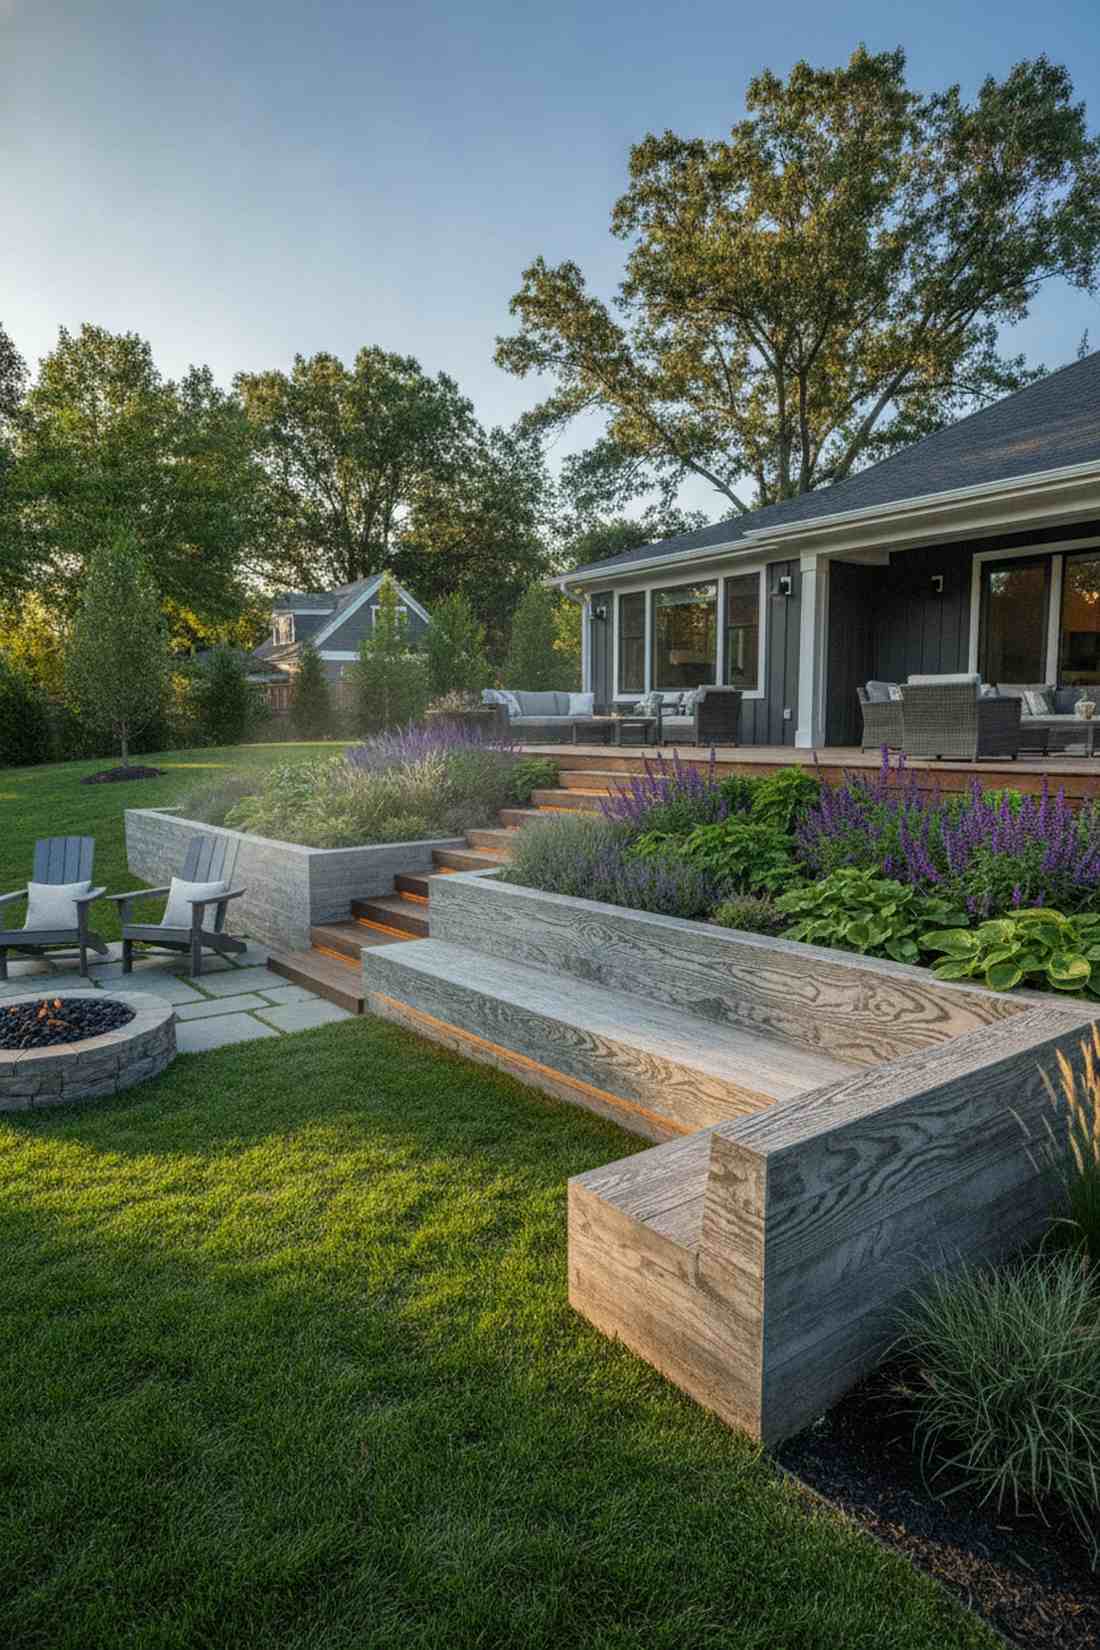
Creates a stunning textural illusion that bridges the gap between raw timber and cold stone. A wood-textured concrete seating wall is perfect for framing sloped garden beds while providing hidden resting spots.
Standard smooth concrete can look sterile, but imprinting cedar wood grain directly into the pour gives a surprisingly premium, bespoke aesthetic. Treating the finished surface with a penetrating concrete densifier locks in the micro-textures and prevents winter spalling.
Material costs hover around $300–$400 due to the sacrificial cedar formwork required. Pin this layout if you love tactile, architectural details!
- Key Materials: Rough-sawn cedar boards, structural concrete
- Vibe / Style: Tactile organic modern
- Difficulty: Advanced
- Budget Breakdown: Cedar Forms: $150 | Concrete: $200.
- Creator’s Tip: Strip the wood formwork exactly at the 48-hour mark while the concrete is still slightly green to preserve the crispest wood grain details.
- Smart Sourcing: commercial concrete wire brush sets, silane-based penetrating concrete sealer.
Most homeowners settle for basic lawn chairs until they see the sheer permanence of the monolithic setups coming up next.
💡 Must-Have Supplies for High-End Setups
To build these architectural structures faster and ensure they survive decades of weather, skip the generic hardware aisles and invest in the right foundational kits.
- Base & Support: heavy-duty galvanized post anchors (bulk pack)
- Assembly Tools: carbide-tipped masonry drill bit starter kits
- Weather Protection: UV-blocking silane concrete sealers
10. Minimalist Concrete Block Bench
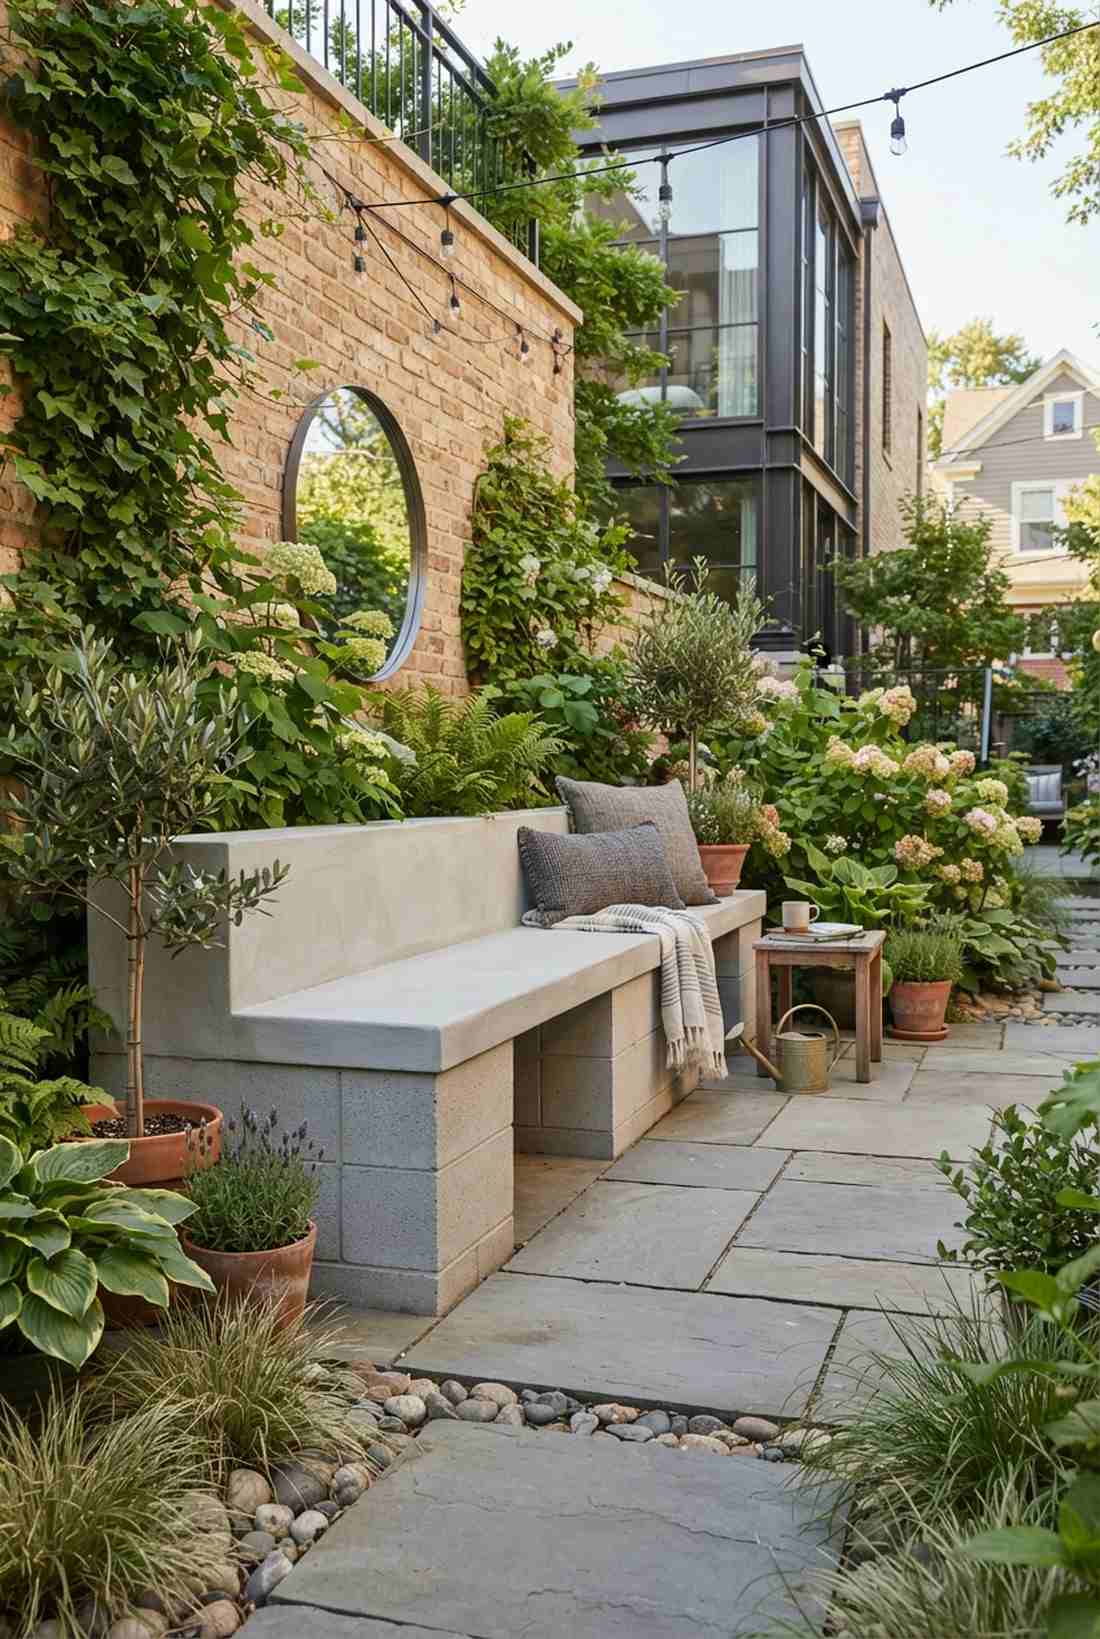
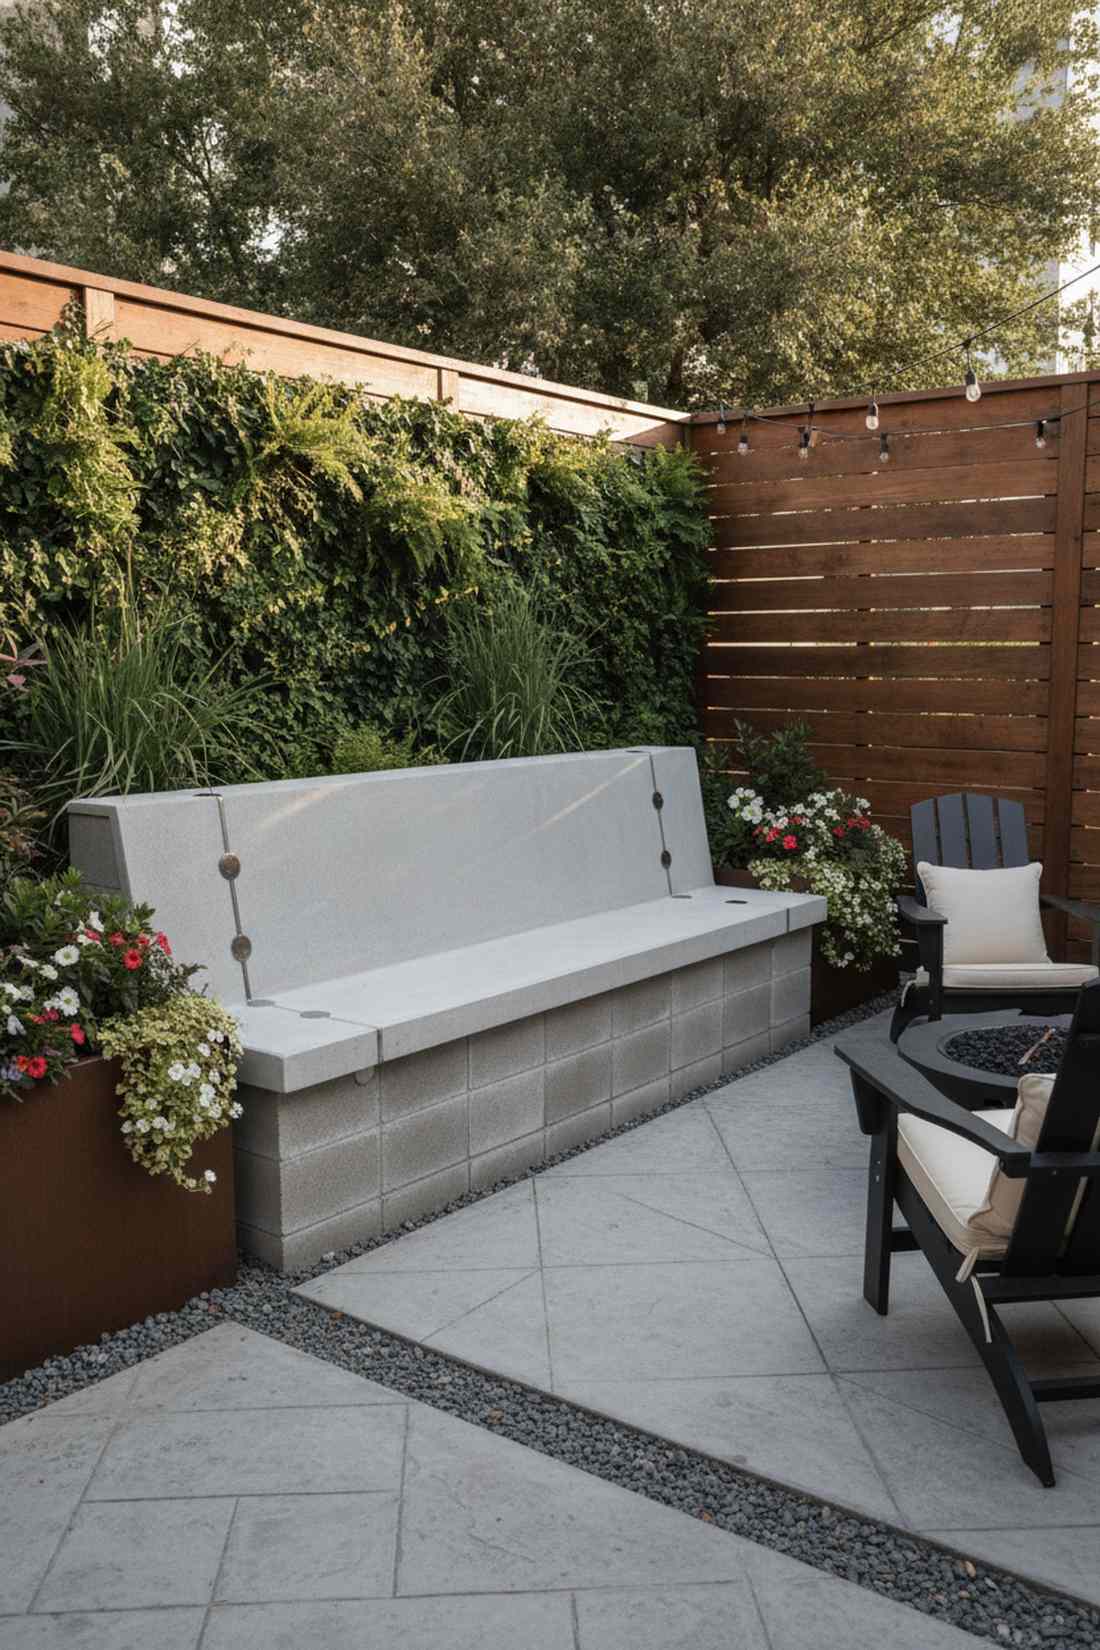
Exudes a trendy, industrial chic vibe that looks incredible against lush green foliage. A stucco-finished cinder block bench is the ultimate modular hack for outfitting a tight urban courtyard.
People often ignore cinder blocks because they look cheap, but capping them with a smooth-troweled finish looks far more expensive than it is. Dropping vertical rebar support pins down the block cores guarantees it won’t shift or crack under heavy seating loads.
You can effortlessly pull this off for under $100 in basic masonry supplies. It’s an incredibly cheap setup that delivers maximum modern impact.
- Key Materials: 8x8x16 concrete blocks, mortar, rebar
- Vibe / Style: Bauhaus industrial
- Difficulty: Easy to Intermediate
- Budget Breakdown: Blocks & Mortar: $65 | Rebar/Cap: $35.
- Creator’s Tip: Slope the top cap slightly (about 1/4 inch drop) so rainwater instantly sheds off the seating surface.
- Smart Sourcing: pre-mixed structural mortar (bulk bags), professional masonry trowel starter kits.
11. Aggregate Concrete Bench With Integral Color
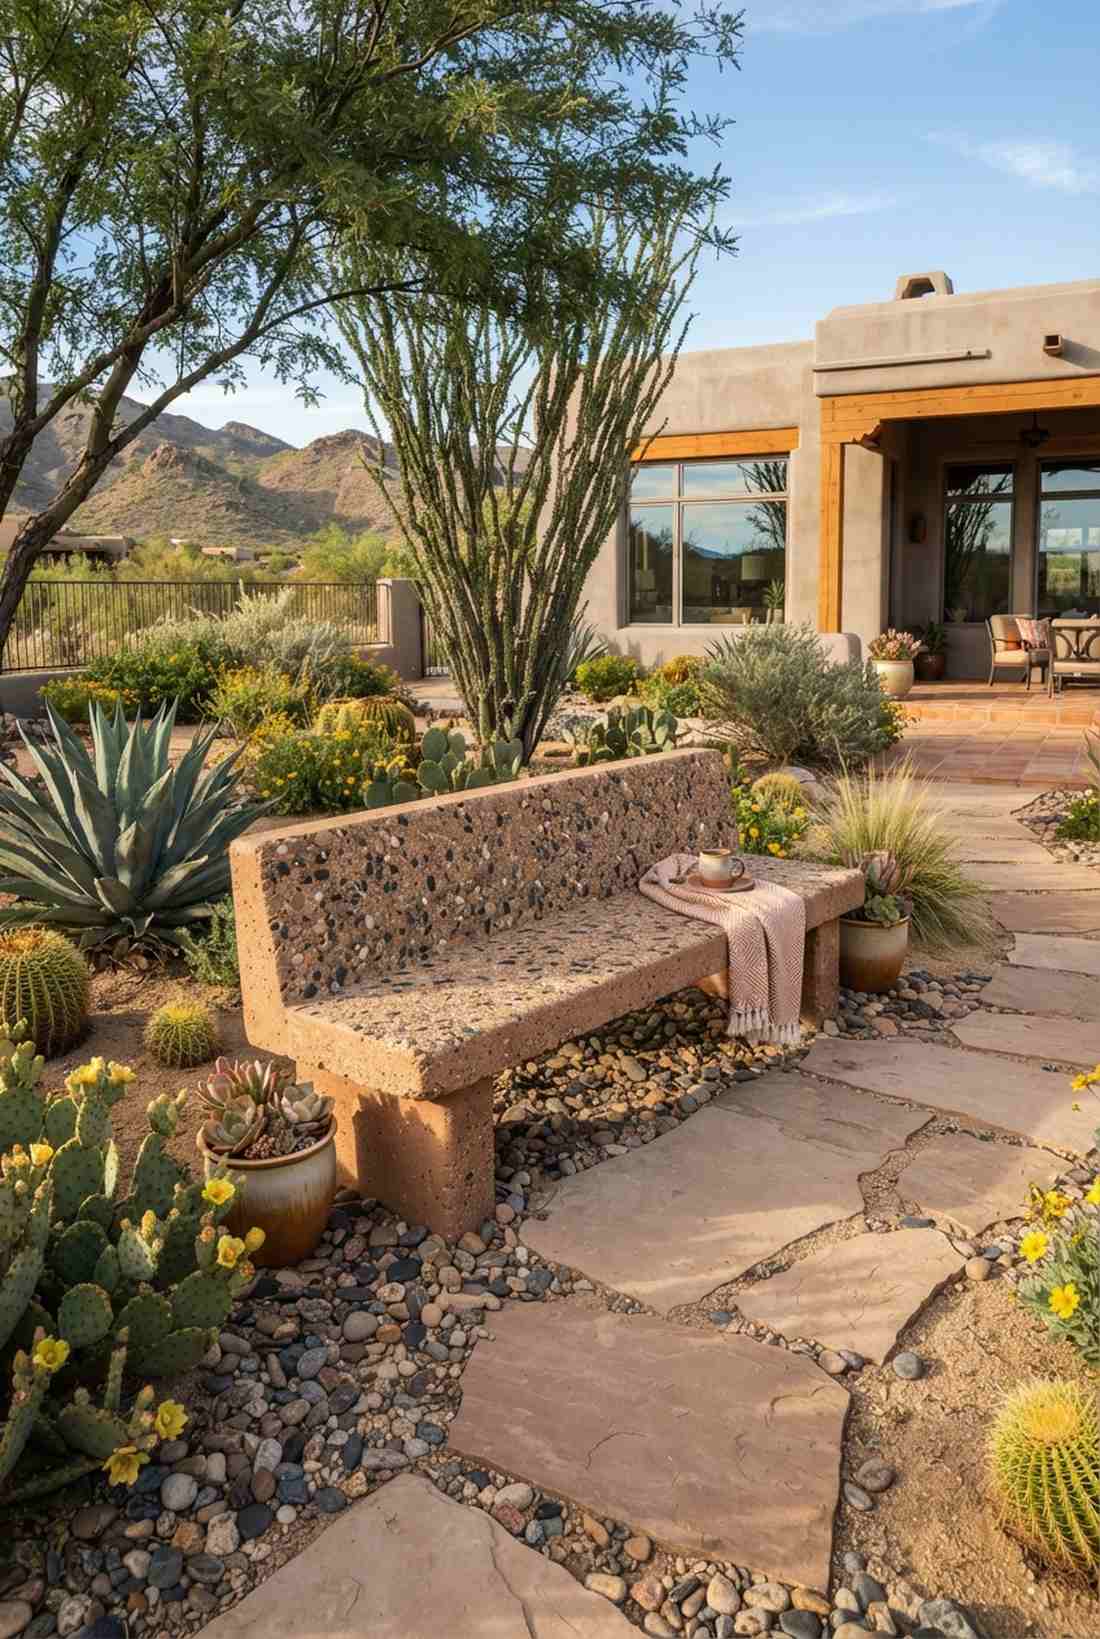
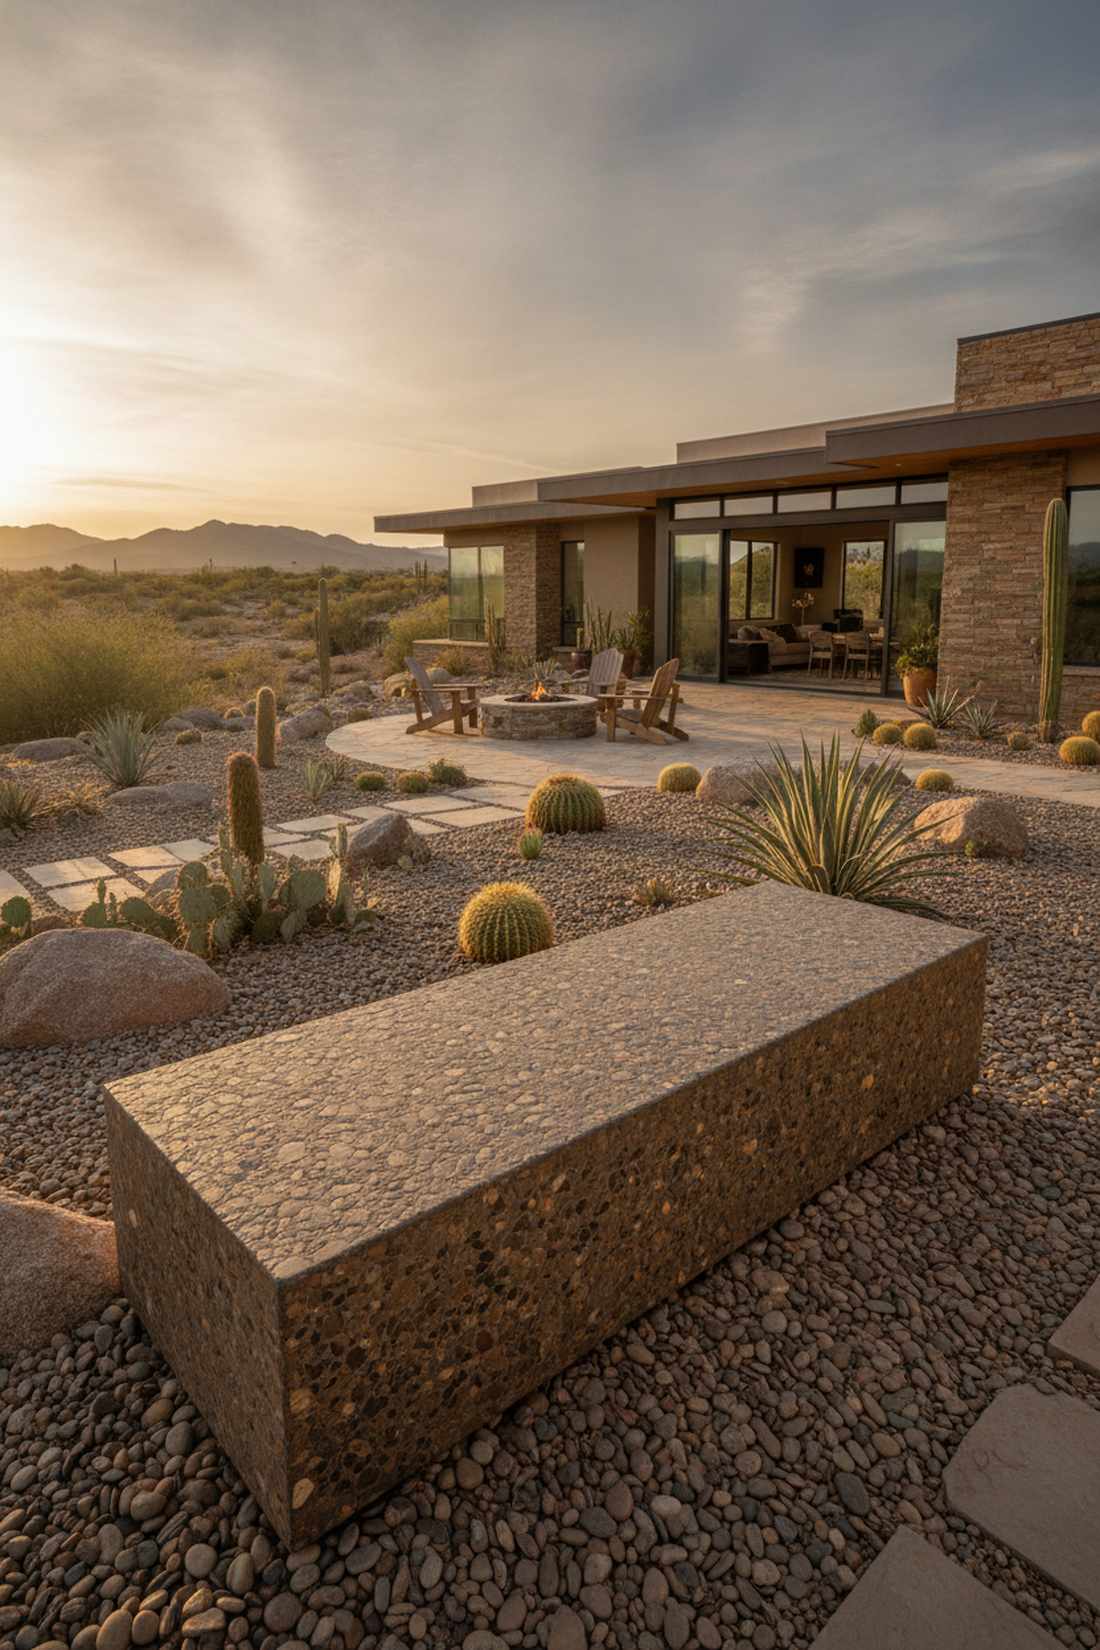
Looks like a solid slab of polished river rock pulled straight from nature. This exposed aggregate garden bench blends seamlessly into desert landscaping or pebble-heavy hardscape designs.
Painting outdoor concrete inevitably leads to peeling, but mixing integral color powder directly into the wet mud guarantees a fade-proof, designer-level finish. Utilizing a surface retarder spray makes washing away the top layer to expose the beautiful hidden stones incredibly easy.
The specialty pigments and retarders add about $80 to a standard concrete project. Pin this if you want permanent, chip-proof color!
- Key Materials: Concrete mix, pea gravel, integral color pigments
- Vibe / Style: Earthy monolithic
- Difficulty: Intermediate
- Budget Breakdown: Concrete/Stone: $90 | Pigments & Retarder: $85.
- Creator’s Tip: Wash the surface with a gentle garden hose spray exactly when the surface retarder activates to avoid blasting out the stones.
- Smart Sourcing: UV-stable liquid concrete colorant (starter kit), exposed aggregate surface retarder formula.
12. Concrete Bench With Wood Inlay Strips
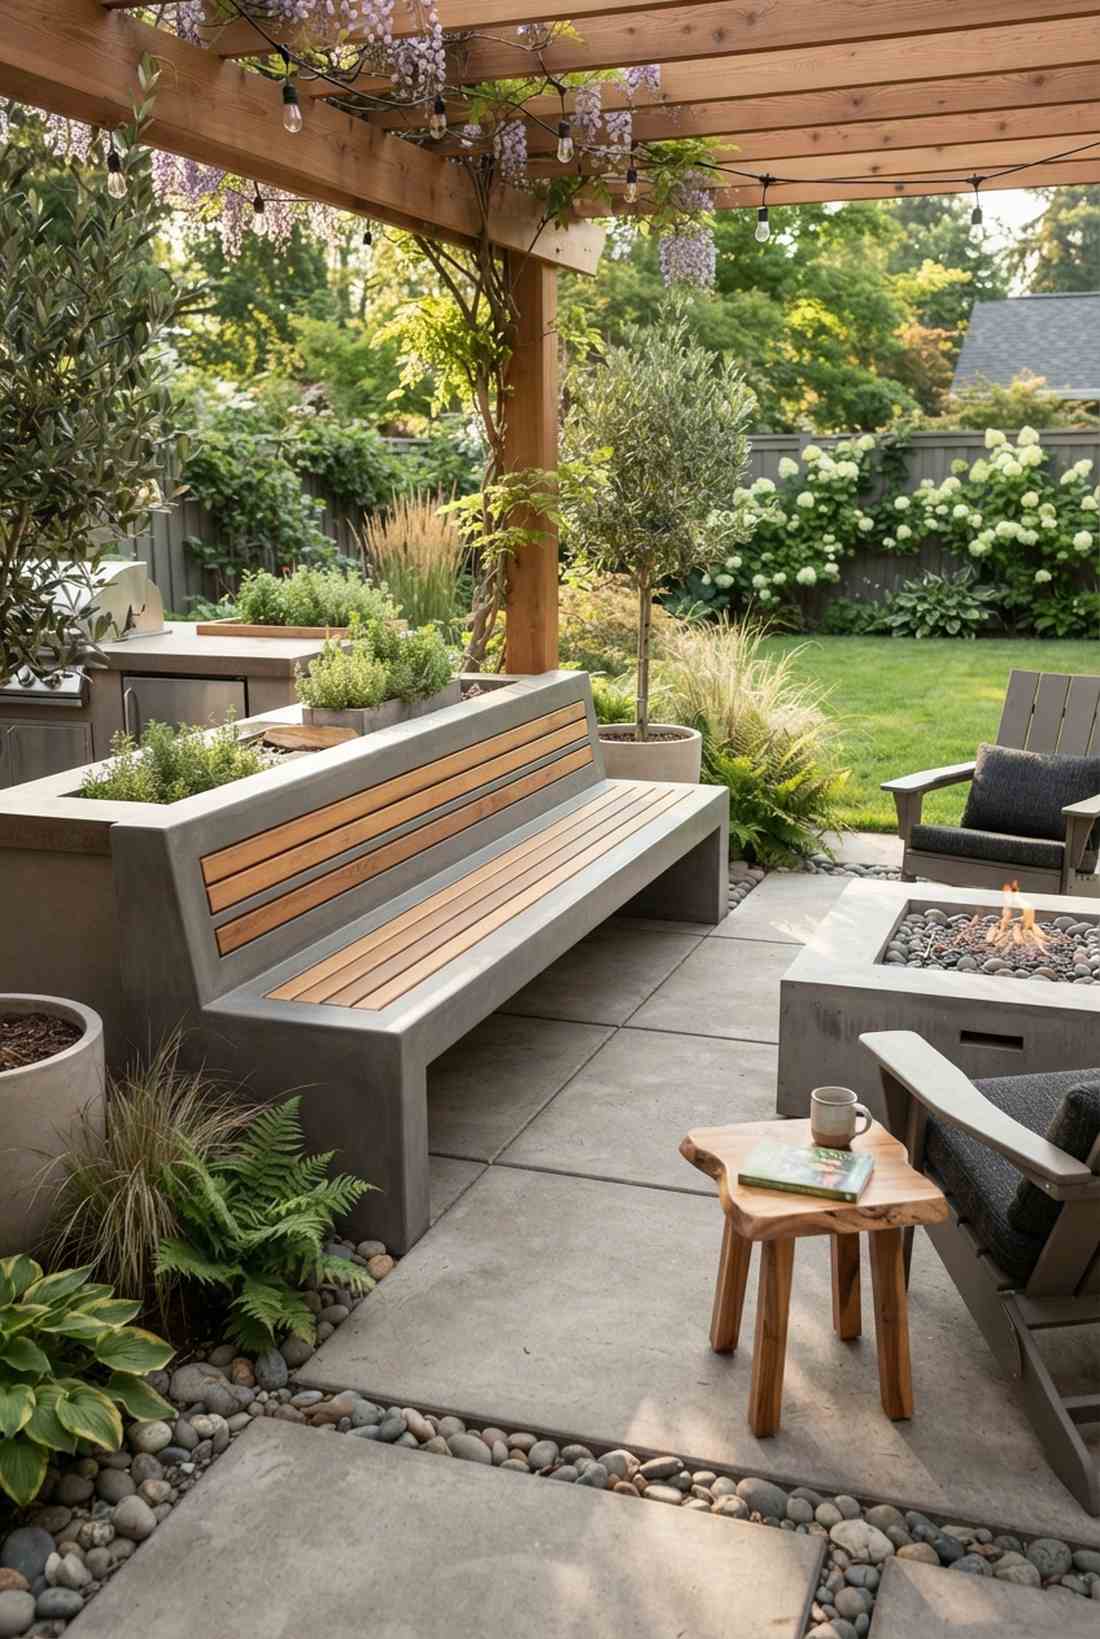

Captures the essence of premium Scandinavian spa architecture. Combining a concrete base with warm wood runners offers brilliant thermal comfort for seating areas exposed to chilly morning air.
Solid concrete is notoriously cold to sit on in winter, but this hybrid layout gives a surprisingly premium look while solving the temperature issue. Sinking pressure-treated inlay timber directly into the formwork channels creates a flush, striped aesthetic that screams high-end design.
Expect to spend about $180 total for the mixed materials. Save this idea for a luxurious, comfort-focused patio upgrade.
- Key Materials: Foam formwork liners, 1×3 treated wood strips, concrete
- Vibe / Style: Scandinavian hybrid design
- Difficulty: Advanced (requires routing foam forms)
- Budget Breakdown: Foam/Wood: $80 | Concrete: $100.
- Creator’s Tip: Use dense foam board for the form liner and a hot knife to carve perfectly straight channels for the wood strips.
- Smart Sourcing: rigid foam insulation carving kits, weatherproof wood-to-concrete adhesive.
Metal & Hybrid Construction Systems
13. Cor-Ten Steel Bench With Wood Seat
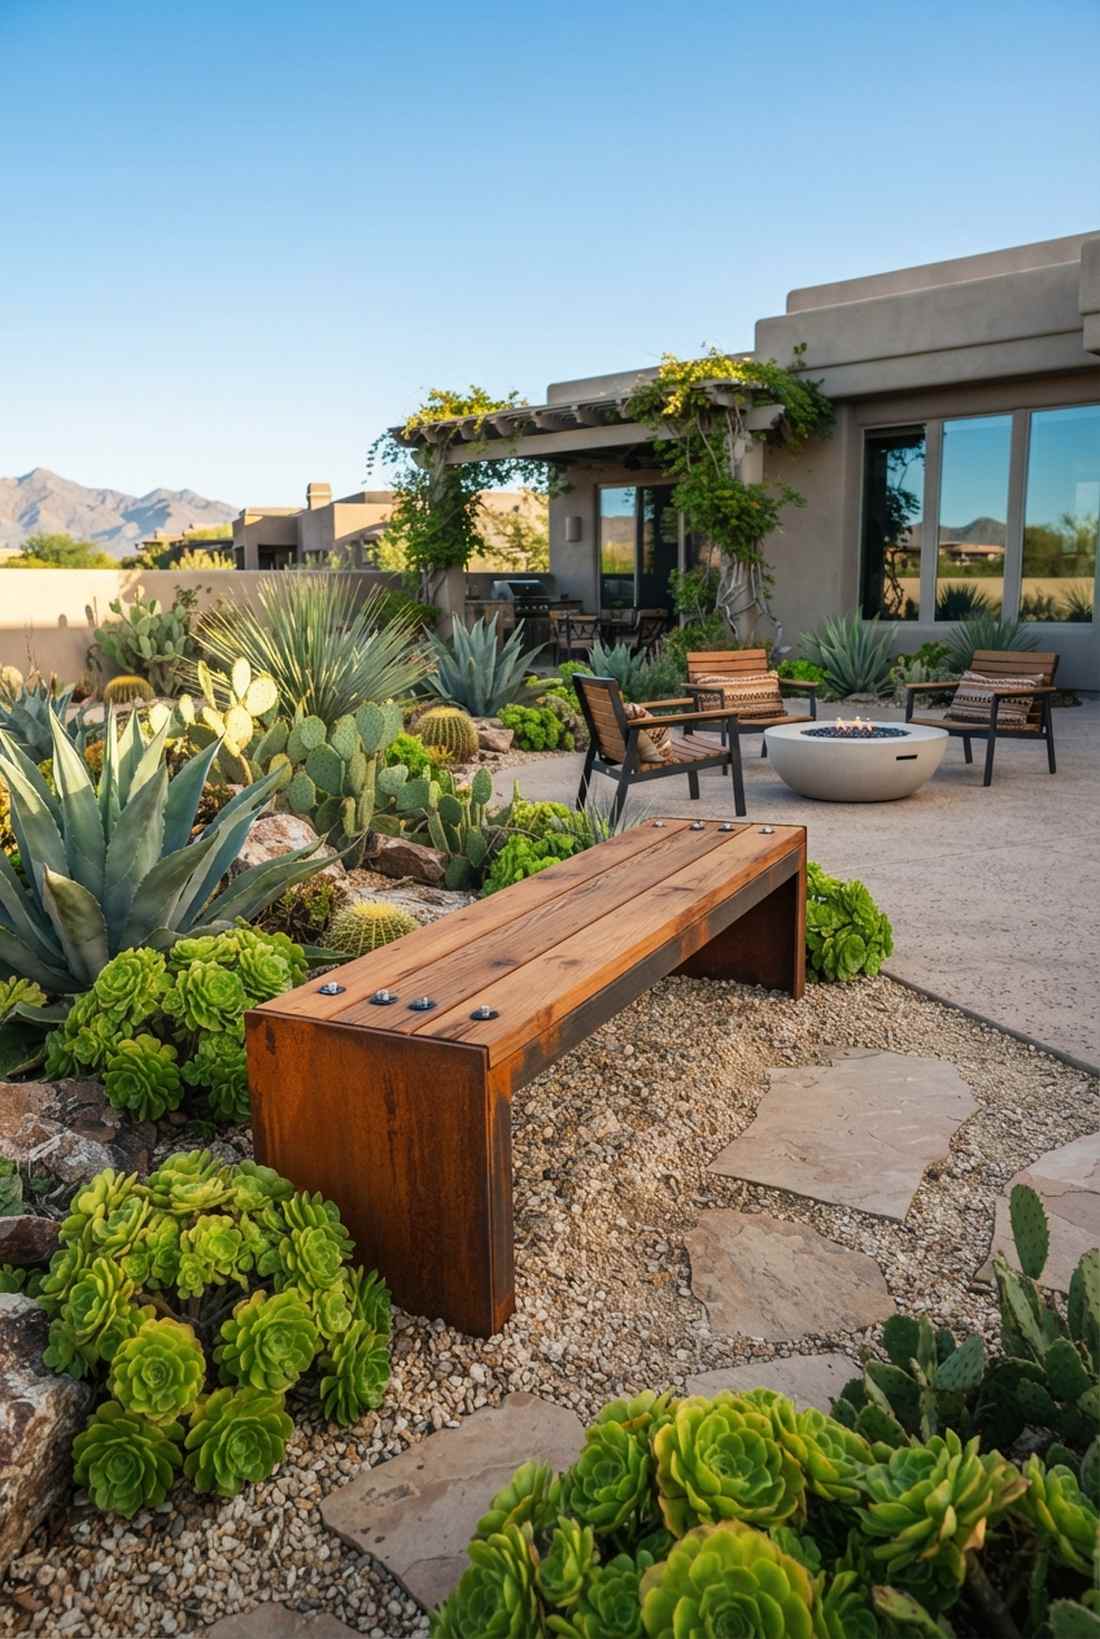
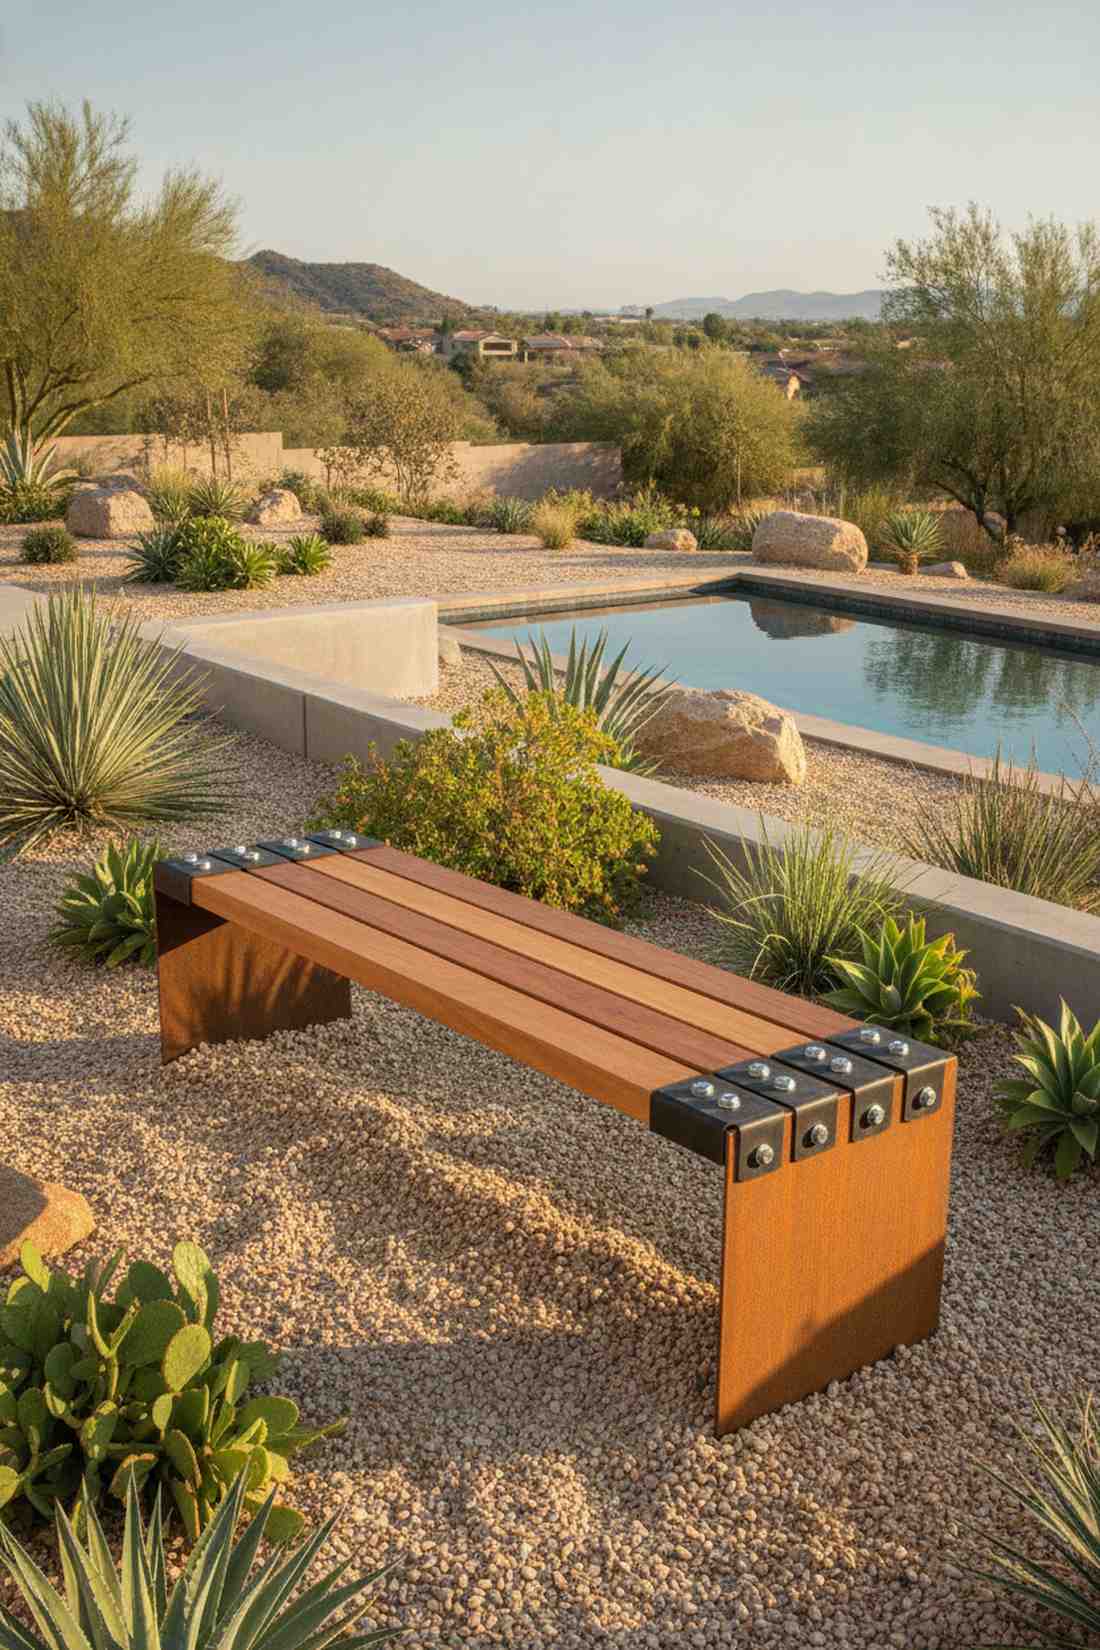
Erupts with a gorgeous, fiery orange-brown patina that contrasts perfectly against green succulents. This weathering steel landscape seating is the absolute pinnacle of trendy xeriscape or desert garden design.
Many worry about rust staining, but placing this engineered metal on a gravel bed delivers a shockingly premium aesthetic that actually protects itself from corrosion. Securing the timber top with heavy-duty neoprene washers ensures the wood never stains from direct metal contact.
Custom bent Cor-Ten plates cost around $250–$400, but they literally last lifetimes. Pin this bold industrial statement to your modern exterior board!
- Key Materials: 1/4 inch Cor-Ten steel plate, hardwood planks
- Vibe / Style: Desert contemporary
- Difficulty: Advanced (requires metal fabrication)
- Budget Breakdown: Steel Plate: $300 | Hardwood: $100.
- Creator’s Tip: Accelerate the rust patina instantly by spraying the raw steel with a mixture of hydrogen peroxide, white vinegar, and salt.
- Smart Sourcing: stainless lag bolts with neoprene washers (bulk pack), accelerated metal patina spray kits.
14. Powder-Coated Aluminum Frame Bench
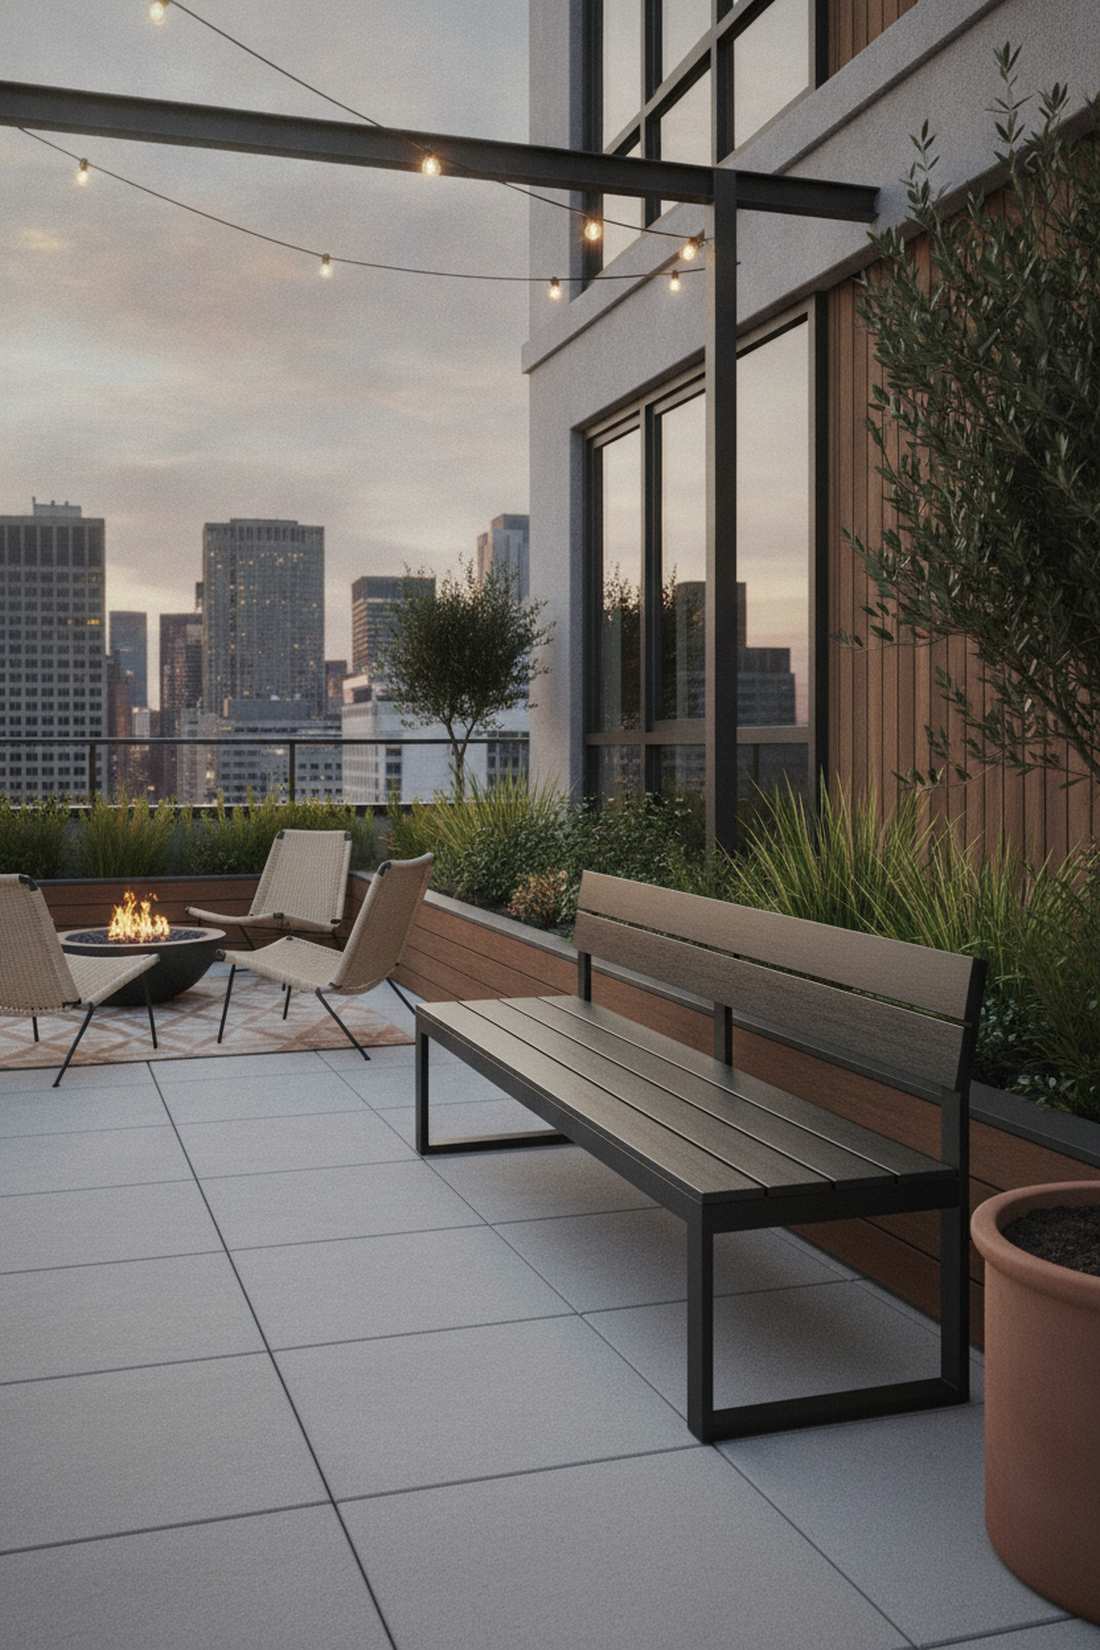
Projects a razor-sharp, lightweight aesthetic perfect for high-end rooftops. A matte black aluminum garden bench blends invisibly into modern architectural trim while providing rock-solid support.
Wrought iron requires constant repainting, but upgrading to extruded aluminum tube frames provides a surprisingly high-end look that literally never rusts. Using concealed corner bracket systems ensures the bolt heads are hidden, maintaining that flawless factory-fresh silhouette.
You can assemble a robust aluminum frame setup for about $200. It’s a remarkably clean upgrade that requires zero future maintenance.
- Key Materials: Powder-coated aluminum profiles, composite seating
- Vibe / Style: Sleek minimalist architecture
- Difficulty: Easy
- Budget Breakdown: Aluminum Tubing: $140 | Connectors: $60.
- Creator’s Tip: Buy pre-cut aluminum extrusions online to avoid dealing with messy metal shavings and specialized saw blades at home.
- Smart Sourcing: heavy-duty aluminum corner brackets (bulk pack), matte black touch-up paint pens.
Wait until you see this hybrid metal frame trick—it literally cuts assembly time in half while doubling the weight capacity.
15. Stainless Steel Cable Rail Bench
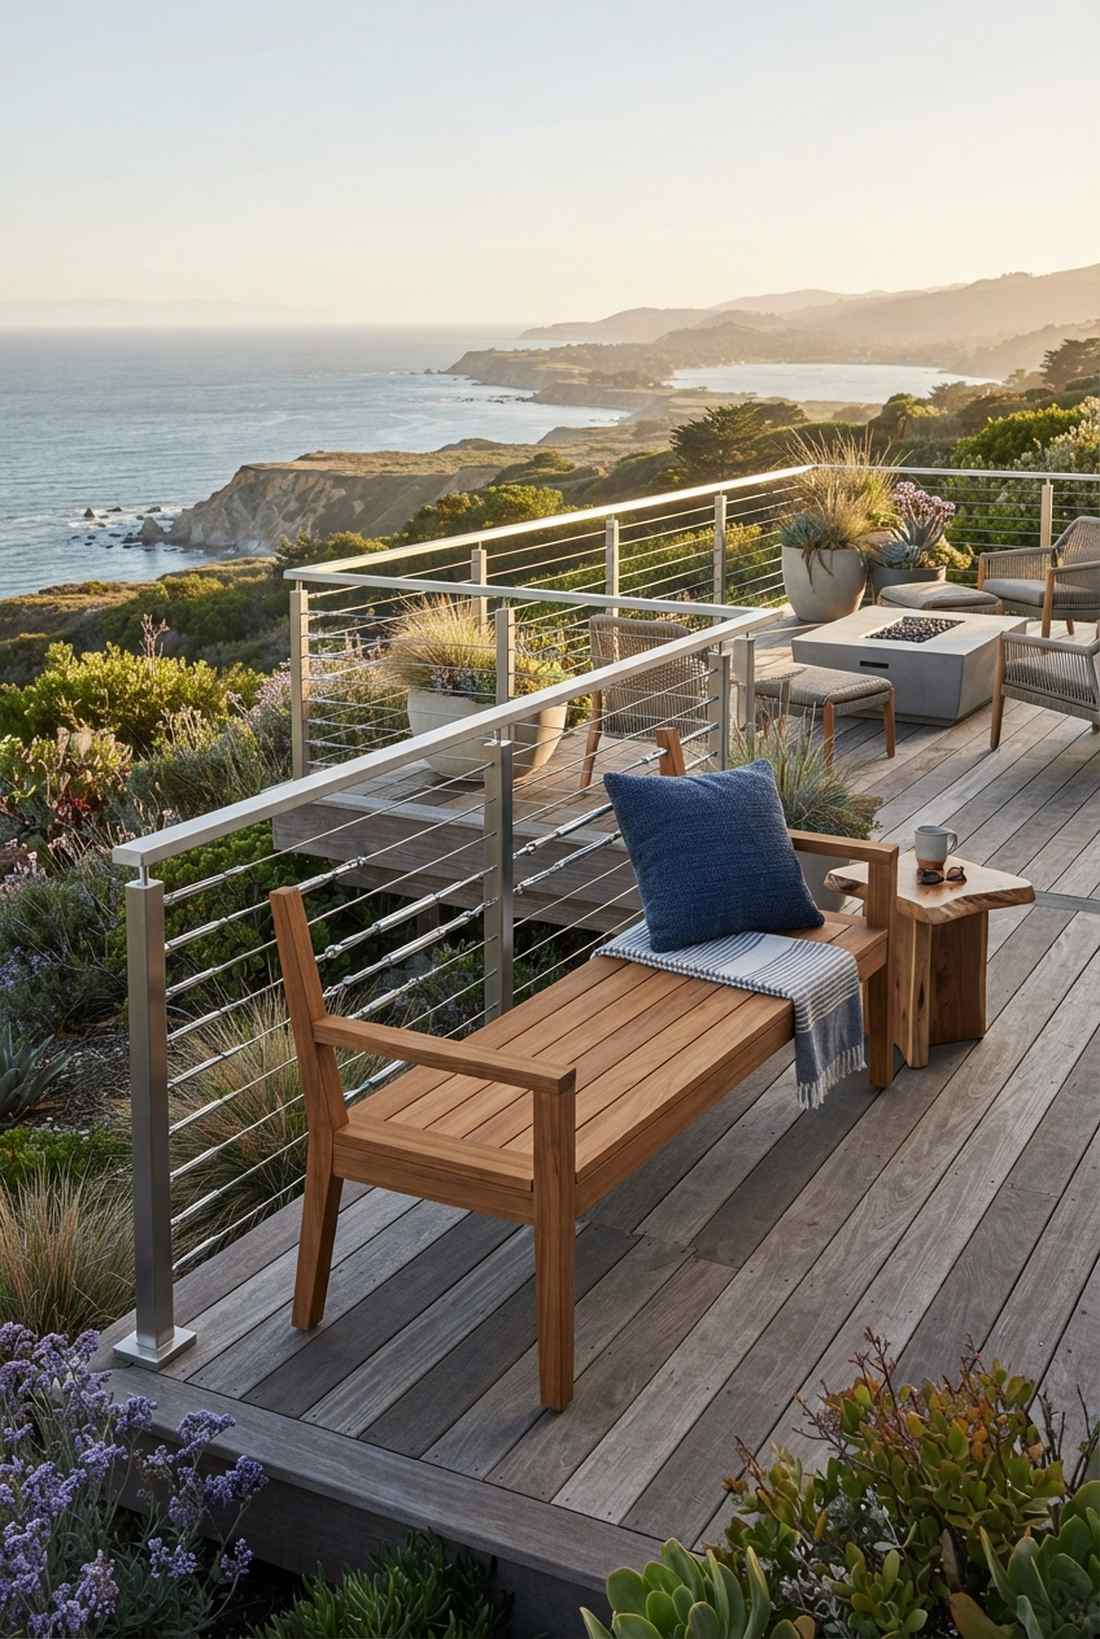
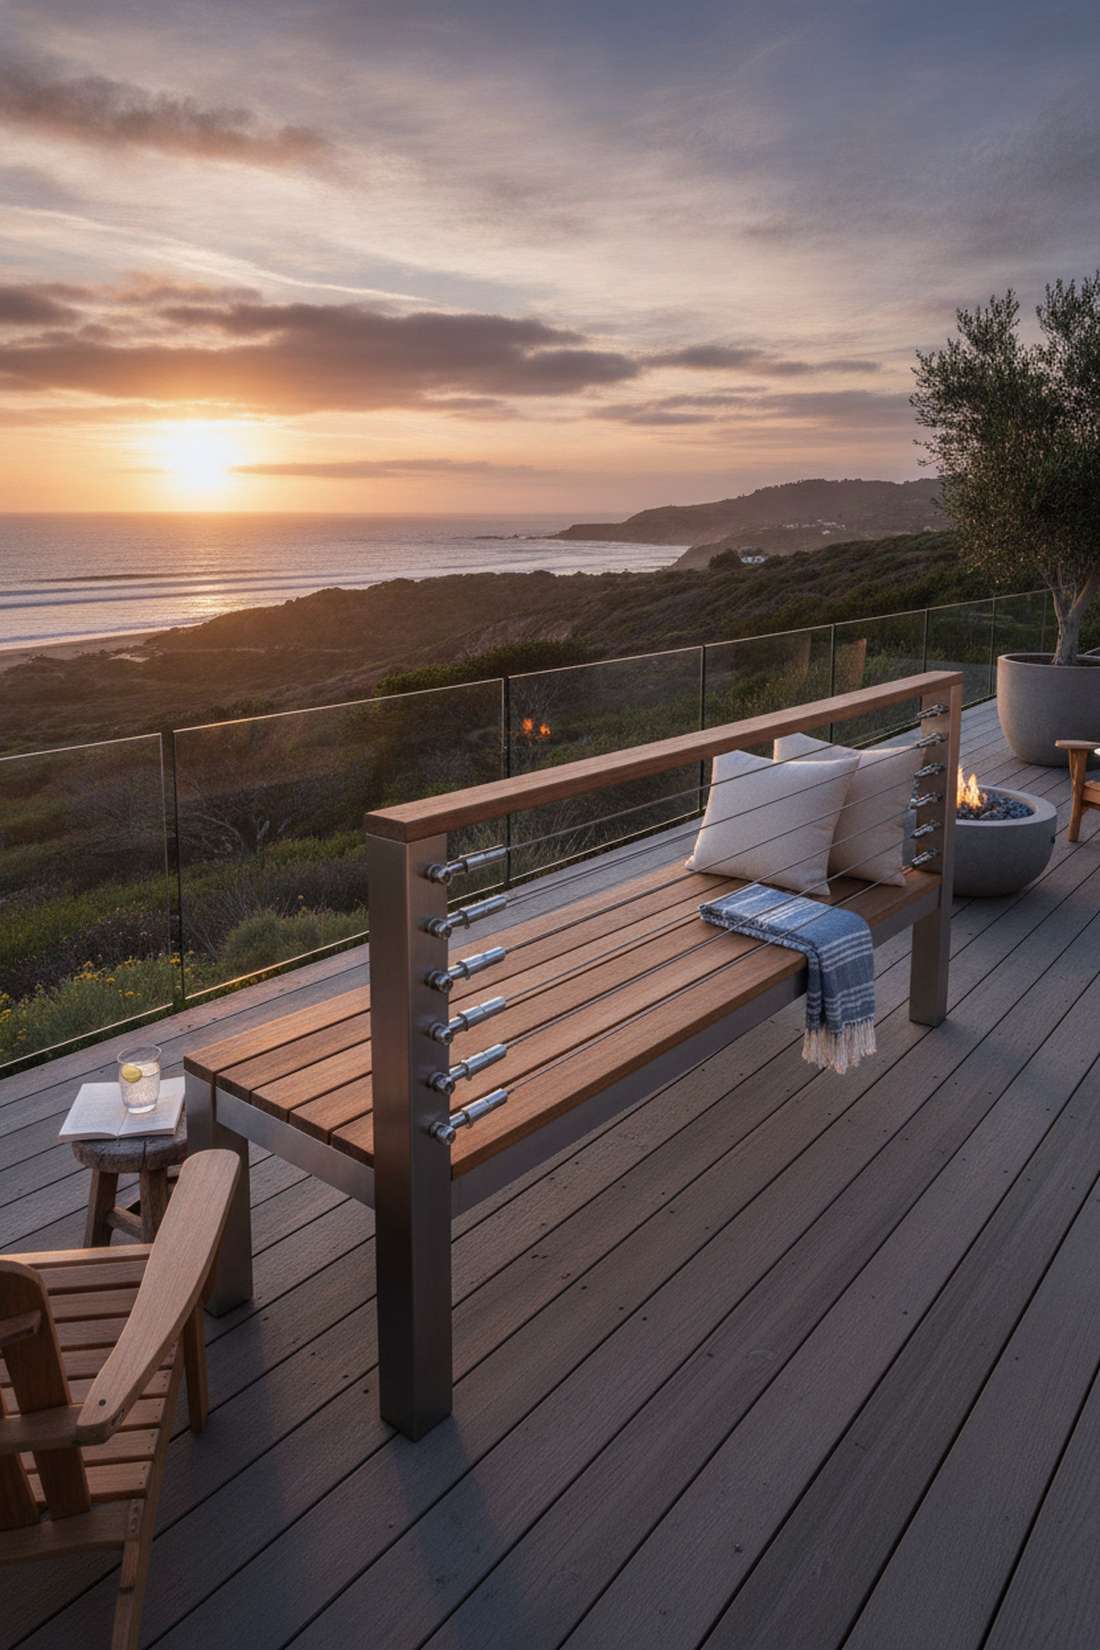
Feels like sitting on the deck of a luxury marine yacht overlooking the coast. Implementing transparent cable-back seating is a genius move for hillside properties where you refuse to block the sweeping view.
Traditional wooden backrests create visual walls, but tensioned horizontal cables deliver a designer-level finish that preserves absolute visibility. Cranking the lines tight with marine-grade steel turnbuckles creates a rigid, supportive backrest that won’t warp in the sun.
A full cable kit and hardware will run about $150–$250. Save this if you need structural seating that won’t ruin your landscape views!
- Key Materials: 1/8 inch stainless cable, steel posts, turnbuckles
- Vibe / Style: Coastal contemporary
- Difficulty: Intermediate
- Budget Breakdown: Steel Posts: $120 | Cable System: $130.
- Creator’s Tip: Tension the cables to at least 300 pounds; anything less will sag noticeably when someone leans against the backrest.
- Smart Sourcing: stainless steel cable railing starter kits, heavy-duty wire rope tensioners.
16. Galvanized Steel Trough Planter Bench
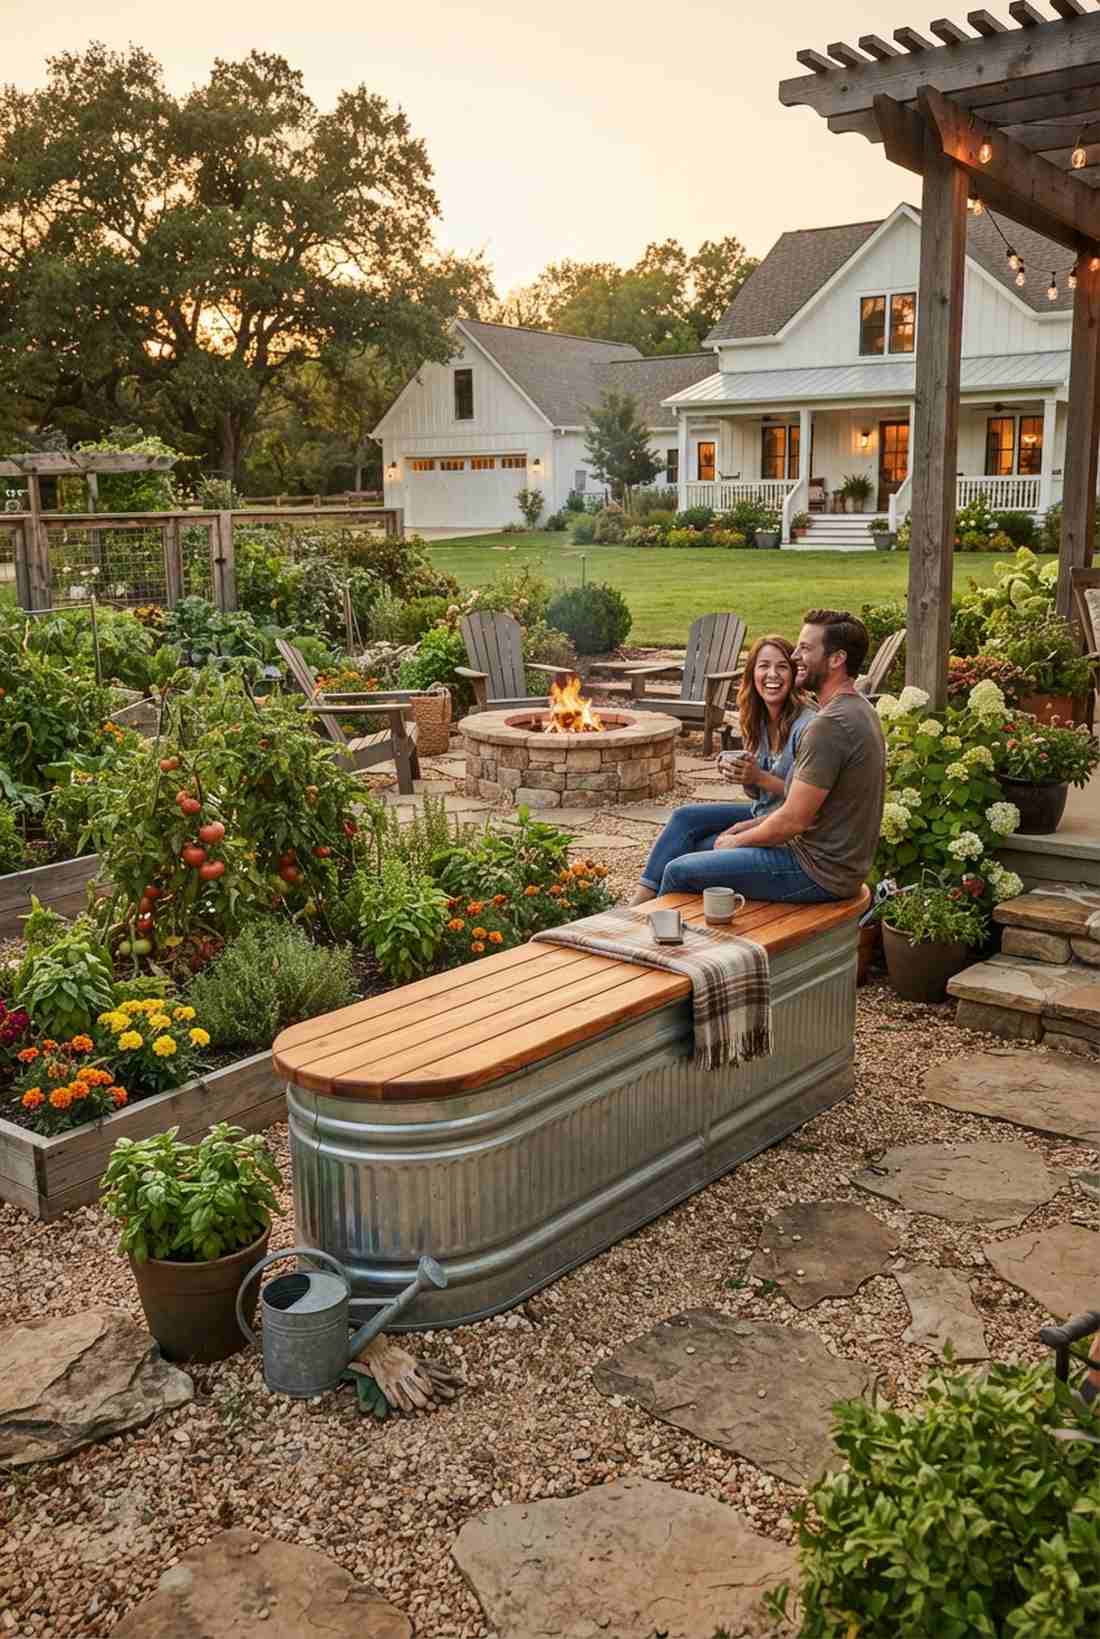
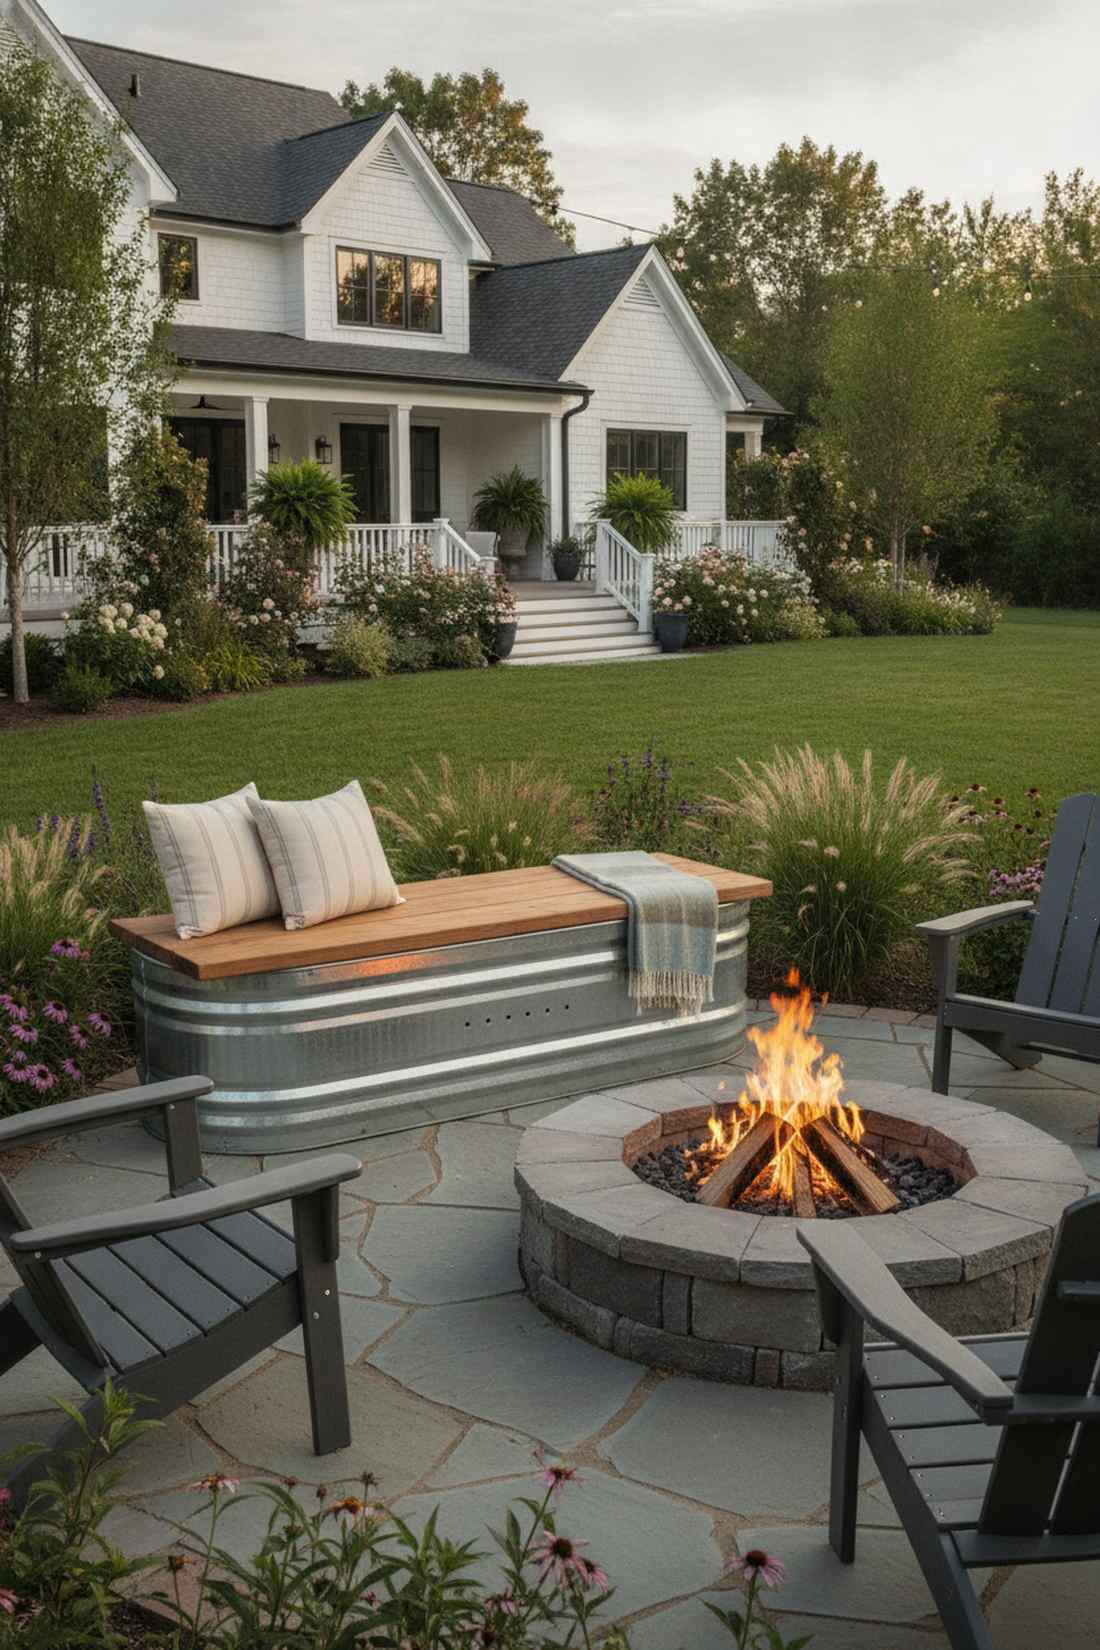
Emanates a charming, resourceful farmhouse energy that begs for evening campfires. A flipped galvanized trough bench is the ultimate quick-hack seating solution for vegetable gardens or rustic patios.
Most people just use troughs for tomatoes, but flipping them upside down provides a surprisingly premium base that is structurally bomb-proof. Topping the corrugated zinc with a weather-treated cedar cap board softens the industrial edge into comfortable, usable furniture.
You can buy a 100-gallon trough for $100 and top it for $40. Highly recommended for a massive visual transformation in under two hours.
- Key Materials: 100-gallon livestock trough, 2×12 cedar planks
- Vibe / Style: Upcycled modern farmhouse
- Difficulty: Very Easy
- Budget Breakdown: Galvanized Trough: $110 | Cedar Cap: $45.
- Creator’s Tip: Drill several half-inch holes in the bottom of the flipped trough to prevent humid air from trapping and causing internal condensation.
- Smart Sourcing: heavy-duty metal drill bit starter sets, outdoor cedar wood preservative.
17. Wrought Iron Scroll Bench With Stone Seat
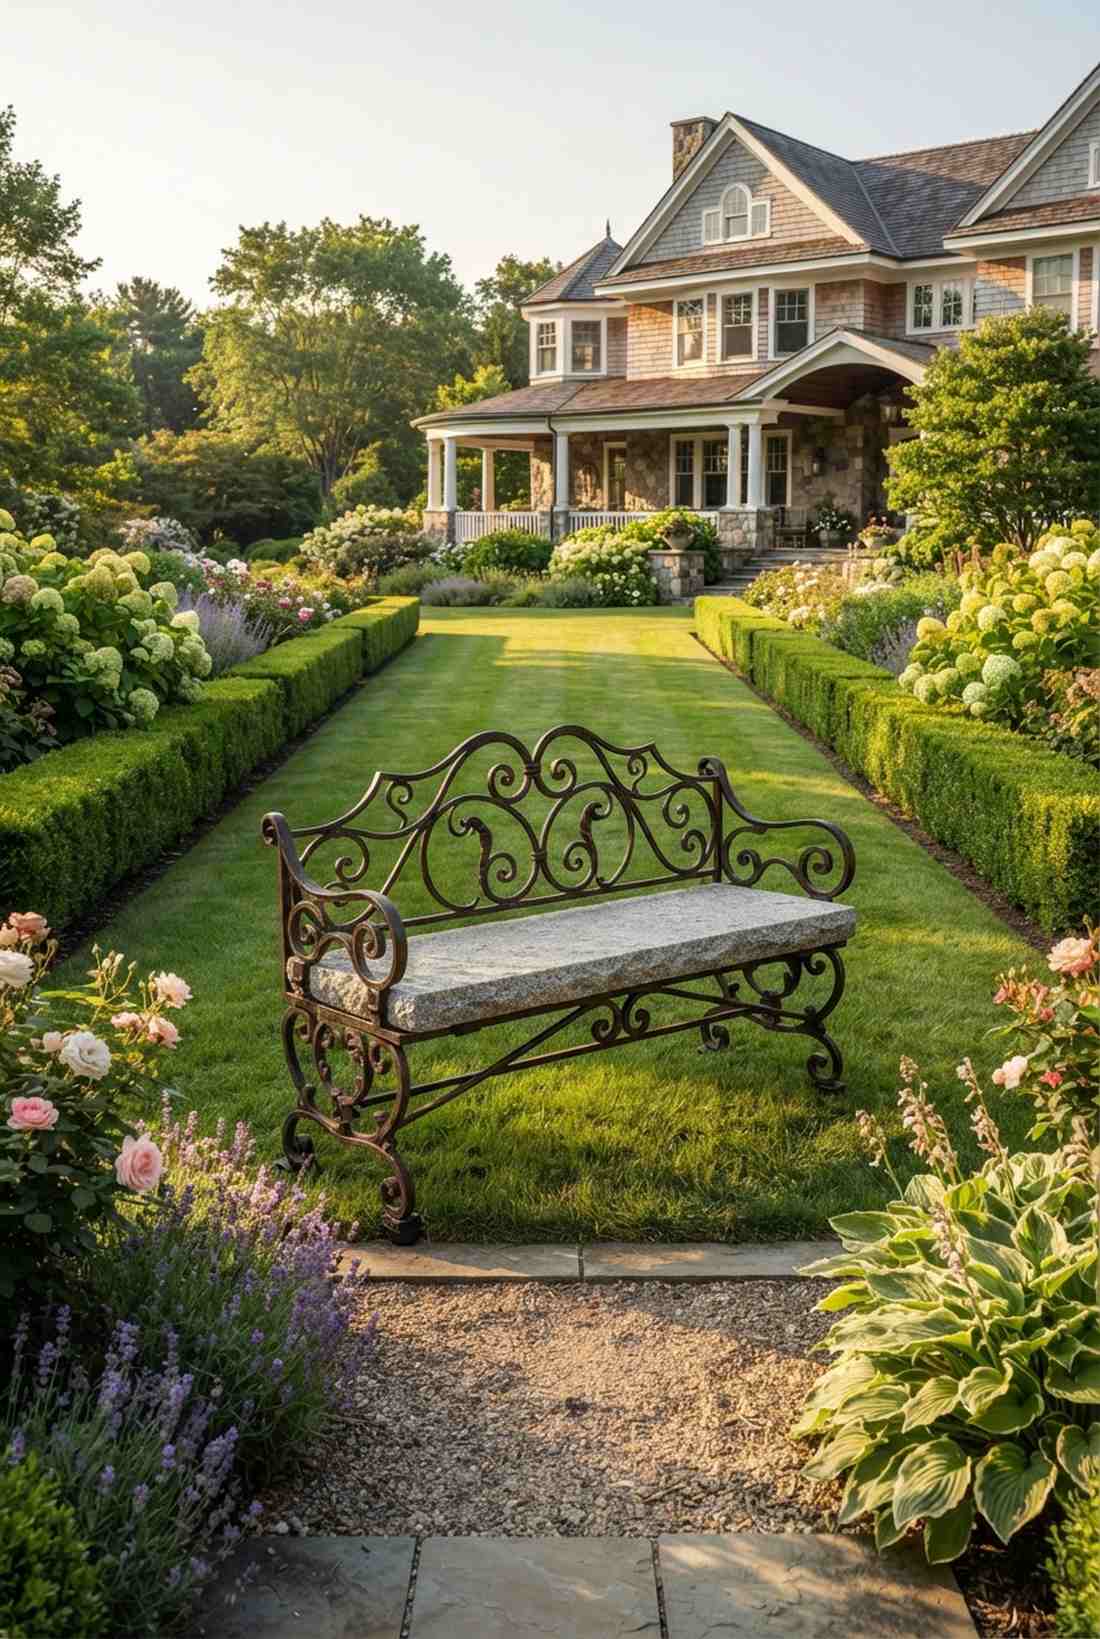
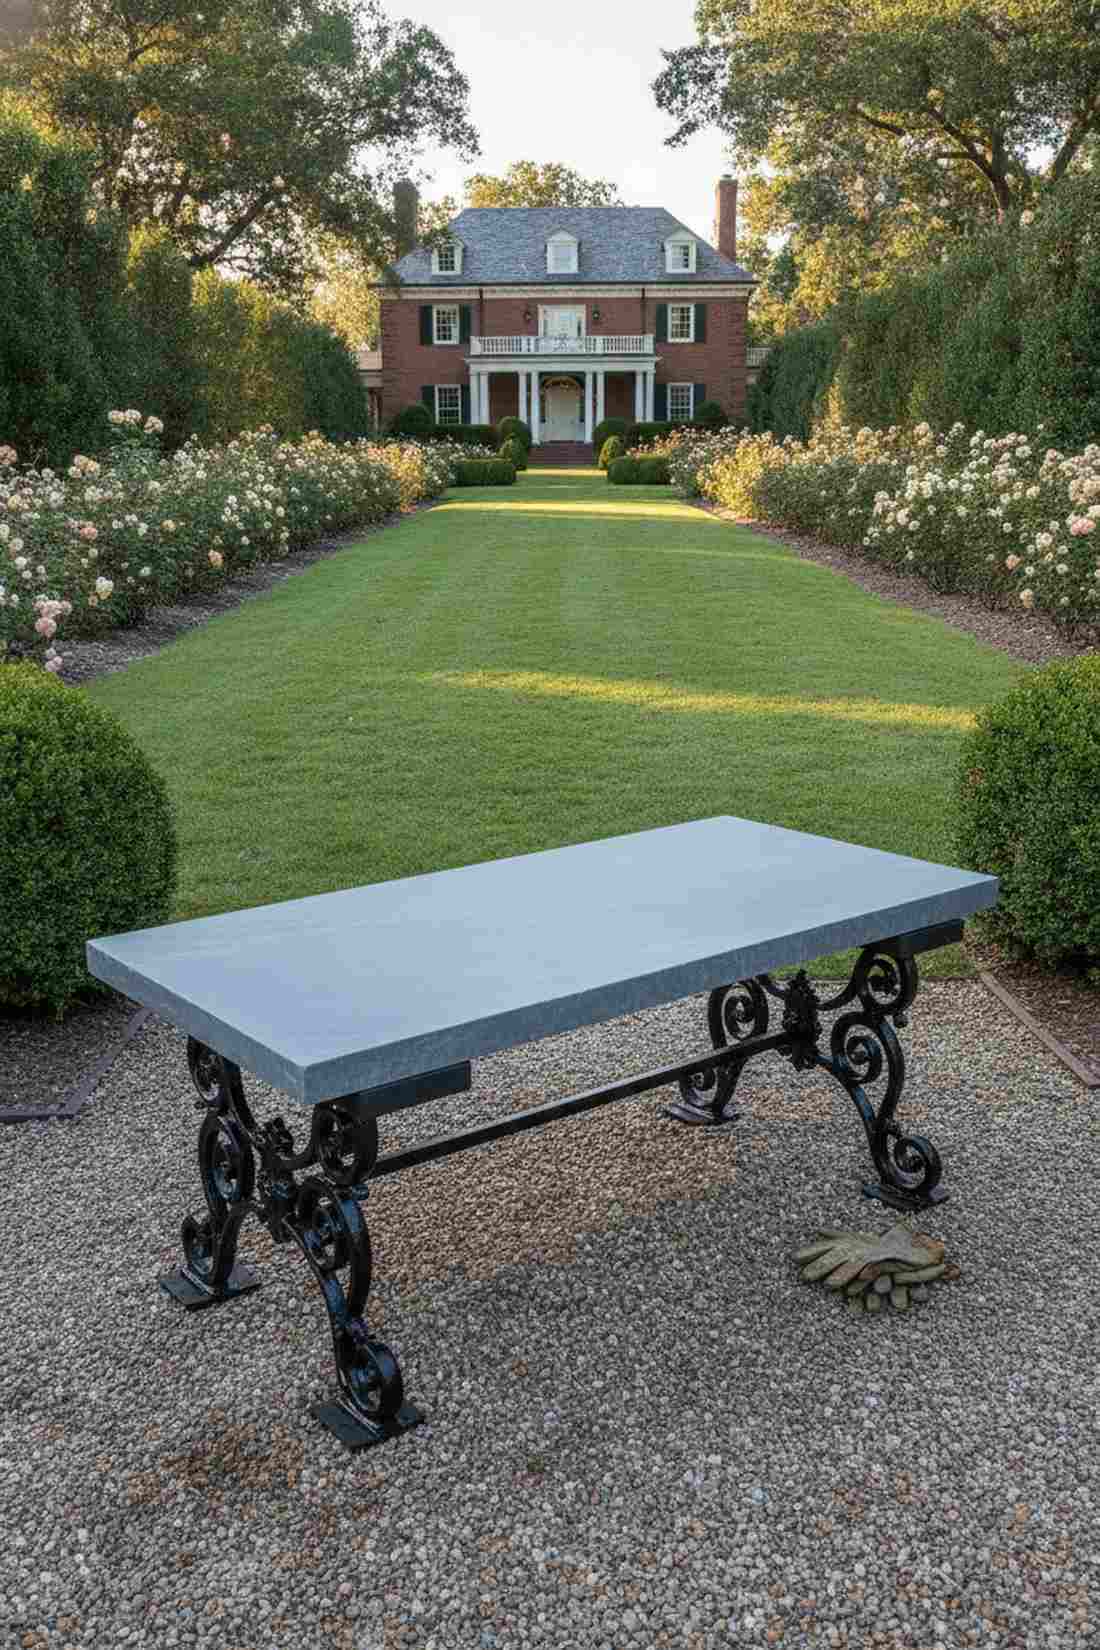
Looks like a forgotten piece of romantic Victorian garden architecture. This classic iron and stone resting place commands attention as a formal focal point at the end of a long, manicured lawn.
Basic wood slats rot out of old iron frames, but dropping a heavy granite slab onto the metal looks far more expensive than it is. Cushioning the stone with industrial rubber shock pads allows the metal to expand in the summer heat without cracking the beautiful seating surface.
Restoring an antique base and adding stone costs roughly $150–$250. Pin this to your vintage garden restoration board!
- Key Materials: Forged iron base, 2-inch bluestone or granite slab
- Vibe / Style: Victorian estate elegance
- Difficulty: Intermediate (stone handling)
- Budget Breakdown: Vintage Iron Frame: $80 | Stone Slab: $150.
- Creator’s Tip: Always coat the old iron with a rust-converting primer before applying the final oil-based enamel to prevent blistering.
- Smart Sourcing: rust-inhibiting spray primer (bulk pack), heavy-duty rubber isolation pads.
Curved Outdoor Seating Sculptural Designs
18. Serpentine Concrete Bench Wall
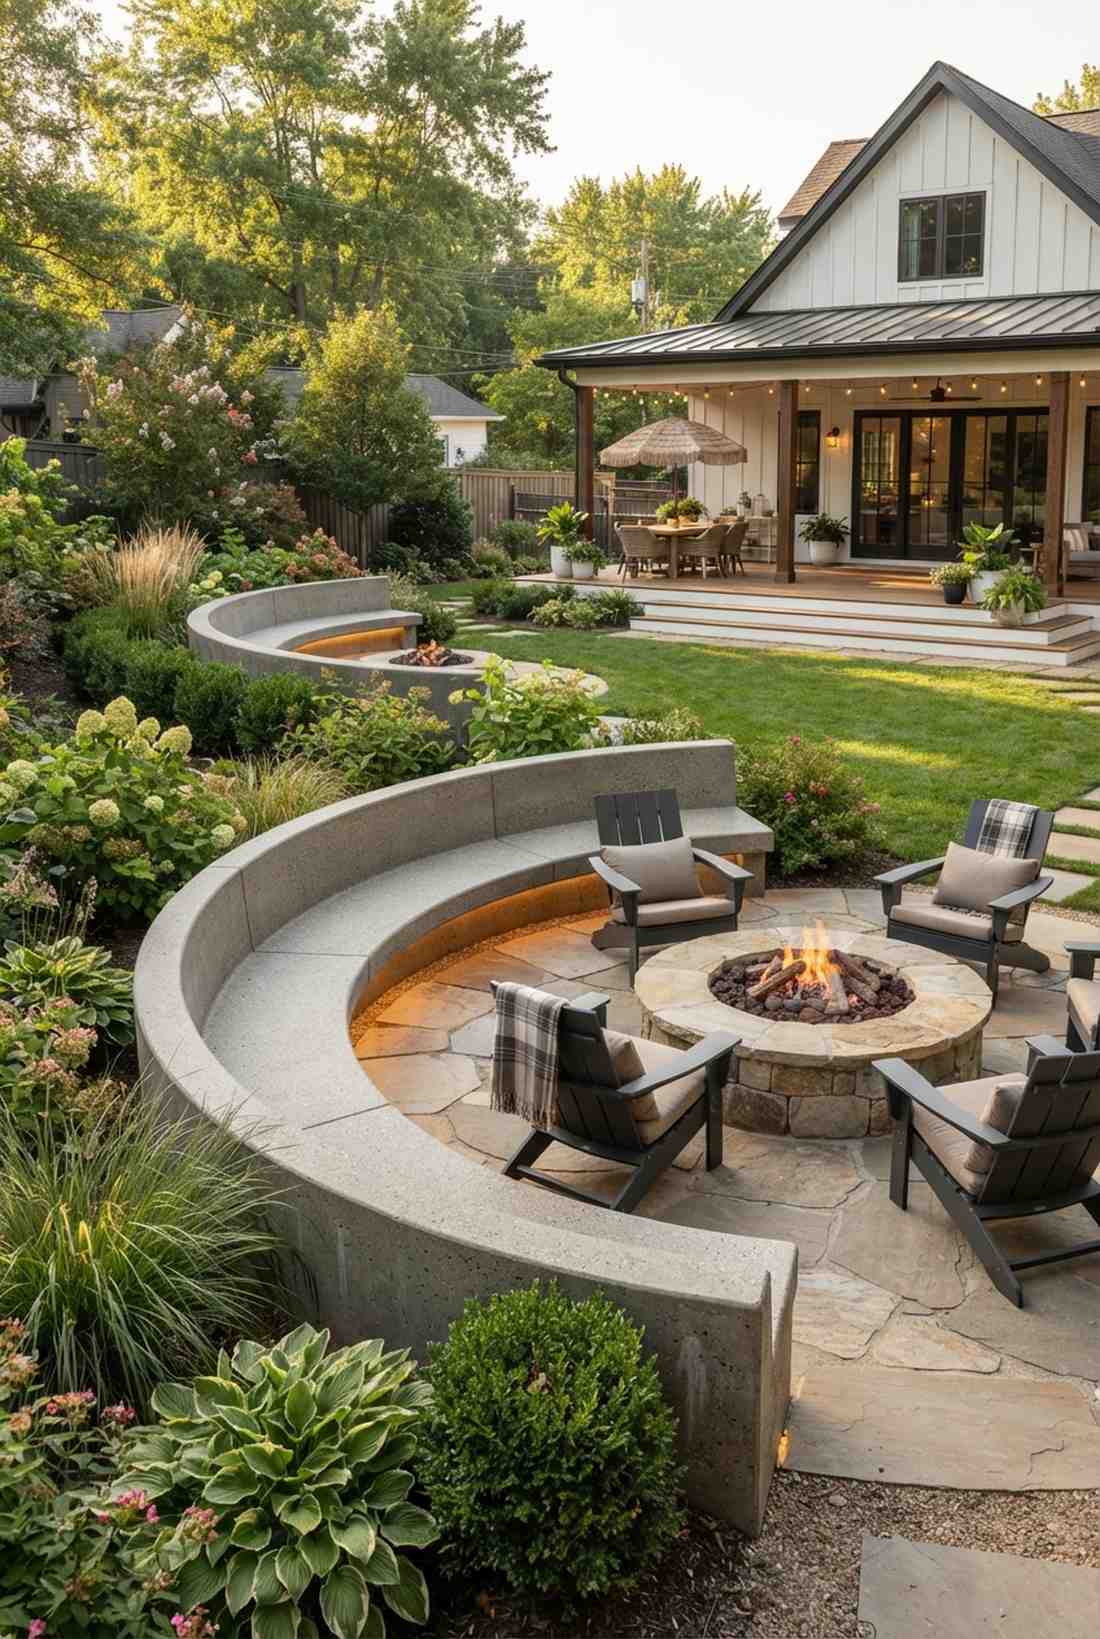

Flows through the landscape like a gentle, organic river of stone. This curved outdoor seating concrete structure is incredible for wrapping around circular fire pits or hugging the natural contours of a hillside.
Straight walls are easier to pour, but utilizing a serpentine S-curve design gives a designer-level finish that actually increases the wall’s structural strength. Using flexible metal formwork panels allows you to bend the concrete precisely to your landscape’s unique topography.
Poured curved walls cost around $400–$600 due to the complex bracing required. Save this if you want to break away from boring, boxy backyard designs!
- Key Materials: Flexible plywood/metal forms, reinforced concrete
- Vibe / Style: Organic sculptural landscape
- Difficulty: Advanced
- Budget Breakdown: Flexible Forms: $150 | Concrete/Rebar: $350.
- Creator’s Tip: Stake the flexible forms every 18 inches instead of 24 inches to prevent the heavy wet concrete from bowing the curve out of shape.
- Smart Sourcing: flexible concrete formwork coils, heavy-duty steel form stakes (bulk pack).
19. Laminated Wood Arc Bench
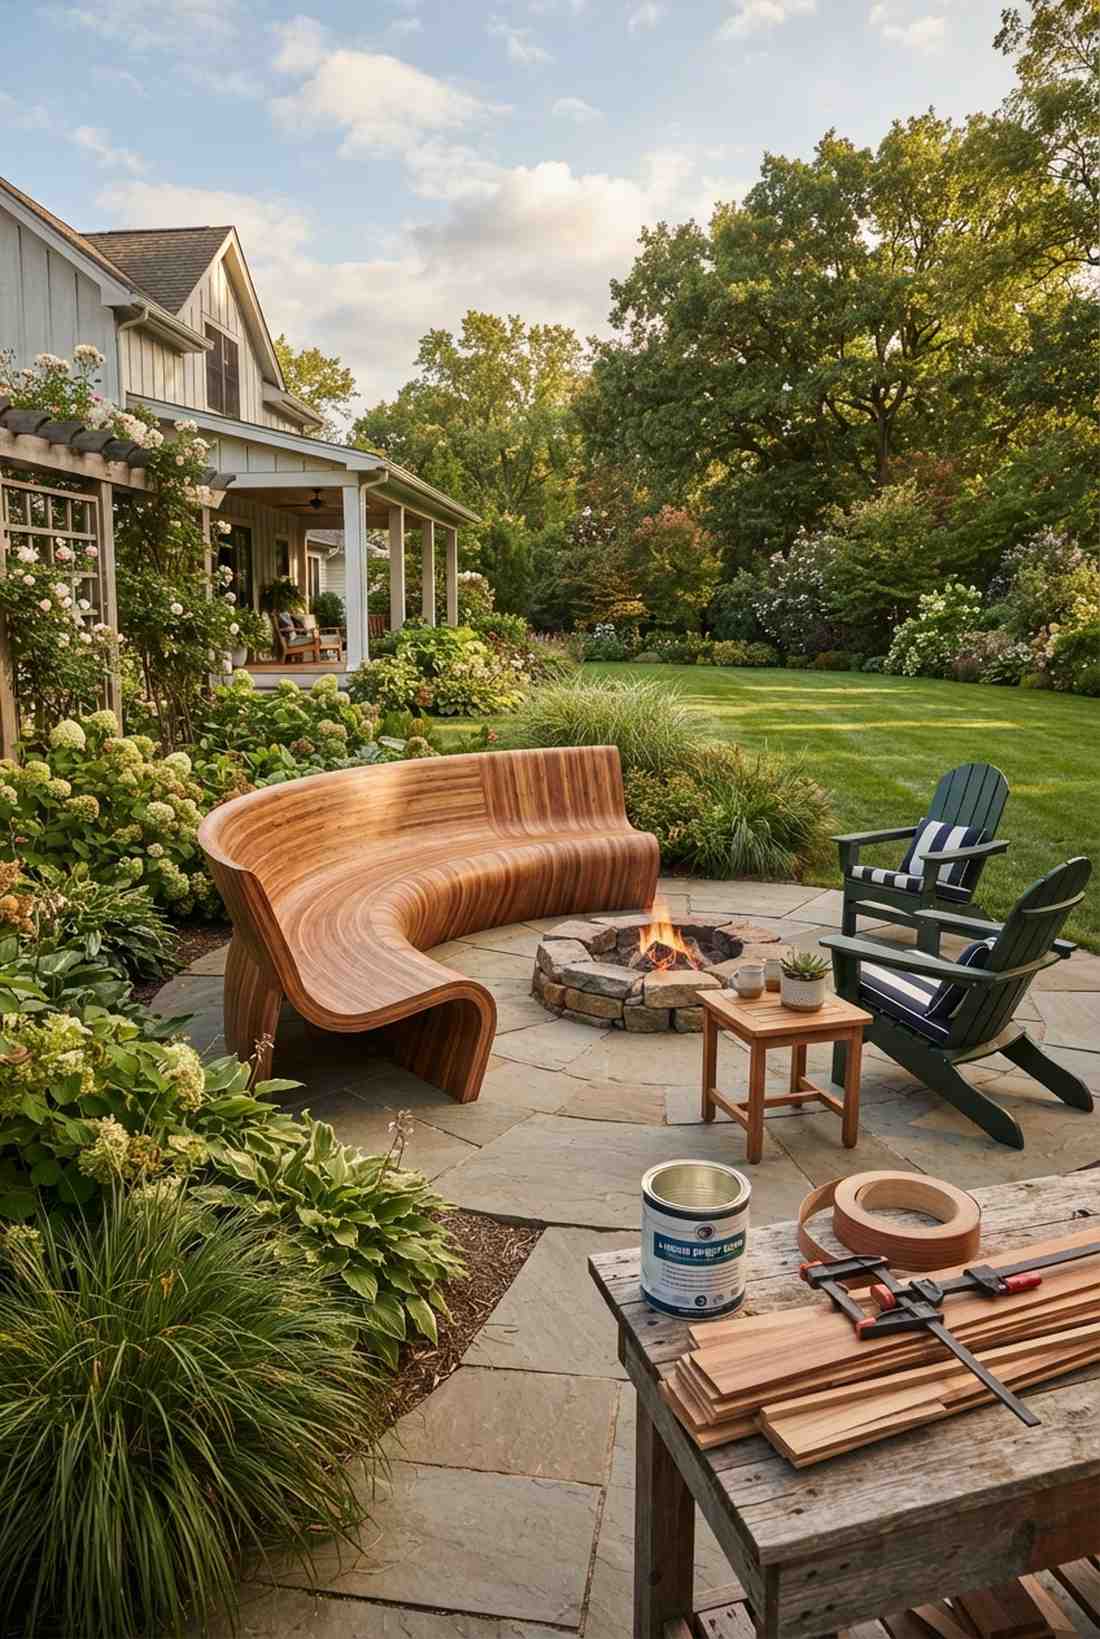
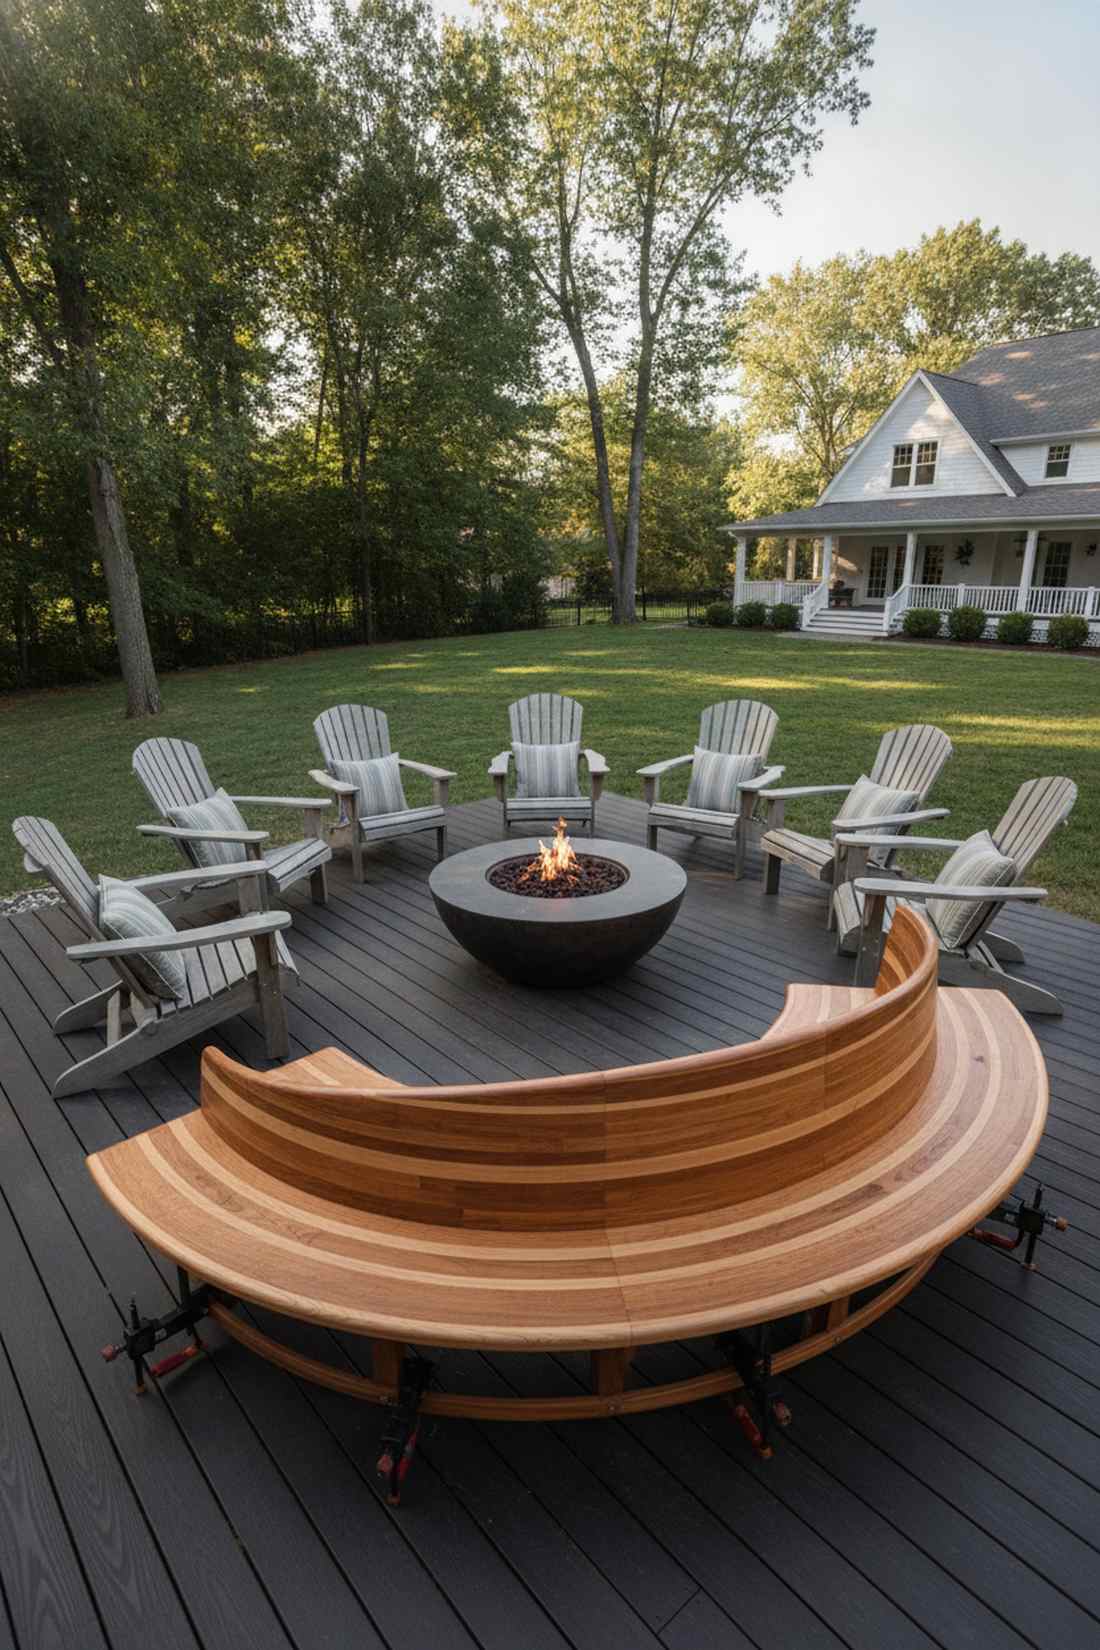
Showcases a sweeping, continuous grain pattern that looks impossibly bent by nature. A glue-laminated curved wooden seat provides a breathtaking, warm enclosure around intimate conversation circles.
Cutting curves out of wide boards wastes expensive lumber, but steam-bending thin strips looks far more expensive than it is and creates unbreakable strength. Clamping the layers together with a structural marine epoxy resin ensures the arc never delaminates in wet weather.
Laminating wood yourself costs about $150 in materials and clamps. Pin this brilliant woodworking hack for your next master-level garden project.
- Key Materials: 1/4-inch wood veneer strips, waterproof epoxy, bar clamps
- Vibe / Style: Custom crafted elegance
- Difficulty: Advanced woodworking
- Budget Breakdown: Wood Strips: $80 | Epoxy/Clamps: $70.
- Creator’s Tip: Always do a “dry run” clamping session without glue to ensure your jigs and forms hold the extreme tension required.
- Smart Sourcing: waterproof marine epoxy kit (large volume), heavy-duty woodworking bar clamps.
People always overcomplicate radiused designs, but the upcoming template is practically foolproof for curved landscapes.
20. Radius-Cut Cedar Bench
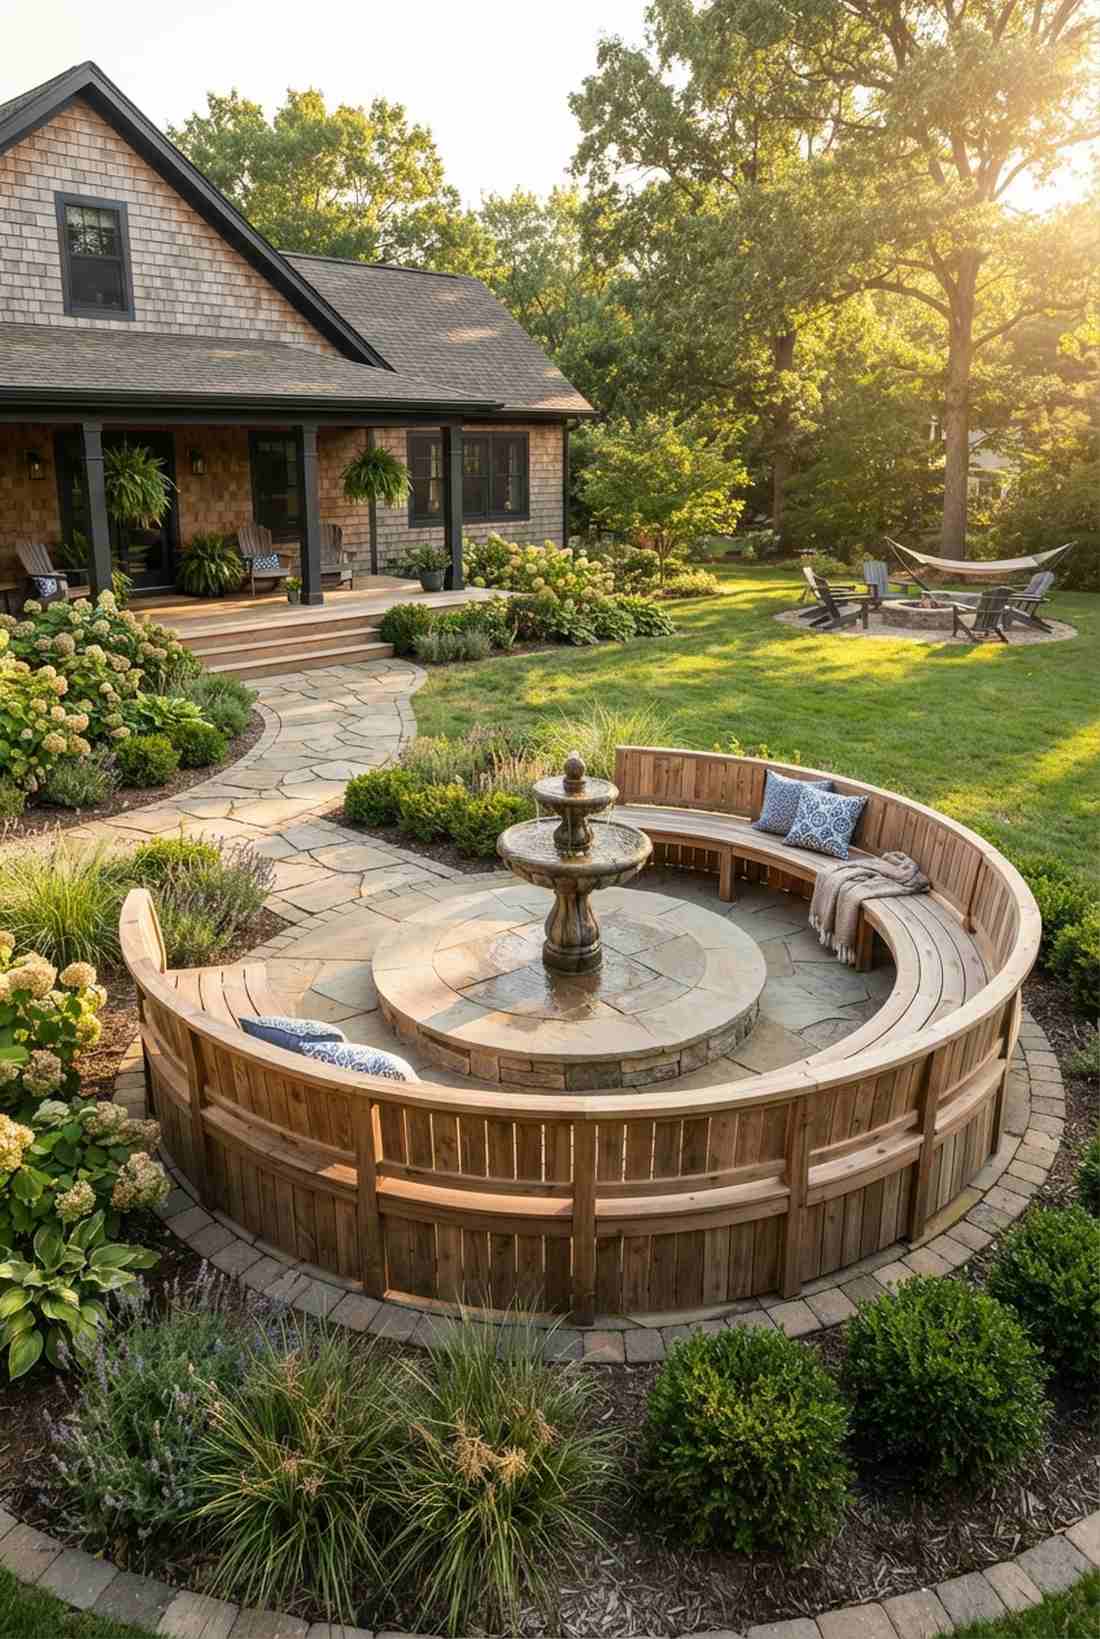
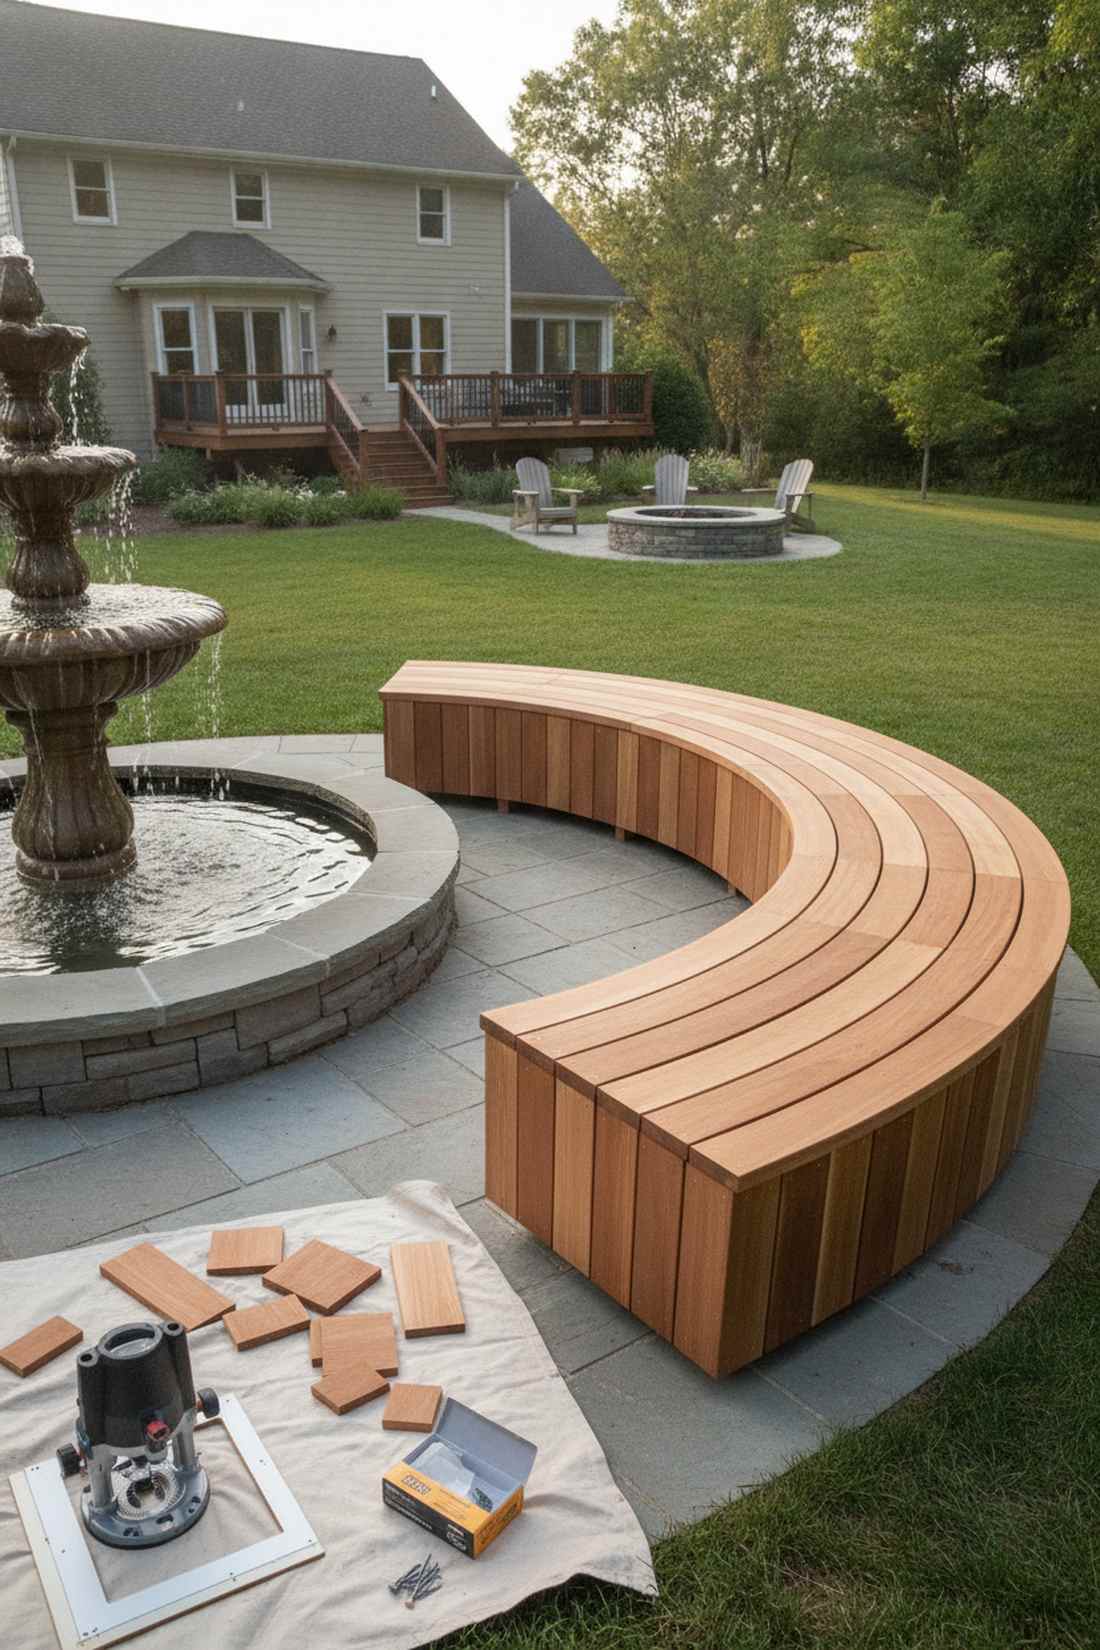
Wraps beautifully around garden features without the nightmare of bending wood. Building segmented curved outdoor seating is the ultimate life-hack for edging around a prized fountain or circular patio.
Most DIYers fear building curves, but utilizing template-cut arc segments delivers a surprisingly premium look with basic power tools. Tracing your line with a heavy-duty router template guide guarantees every single plank nests perfectly together for a seamless radius.
You can execute this faux-bent wood look for about $180 in standard dimensional lumber. Highly recommended for achieving complex geometry on a budget!
- Key Materials: 2×6 cedar planks, template guides, straight frame supports
- Vibe / Style: Tailored geometric garden
- Difficulty: Intermediate
- Budget Breakdown: Cedar Planks: $140 | Fasteners: $40.
- Creator’s Tip: Cut the matching curves using a flush-trim router bit rather than a jigsaw to avoid wavy, amateur-looking edges.
- Smart Sourcing: premium flush-trim router bit starter kits, weather-resistant exterior wood screws.
21. Circular Tree Bench Surround
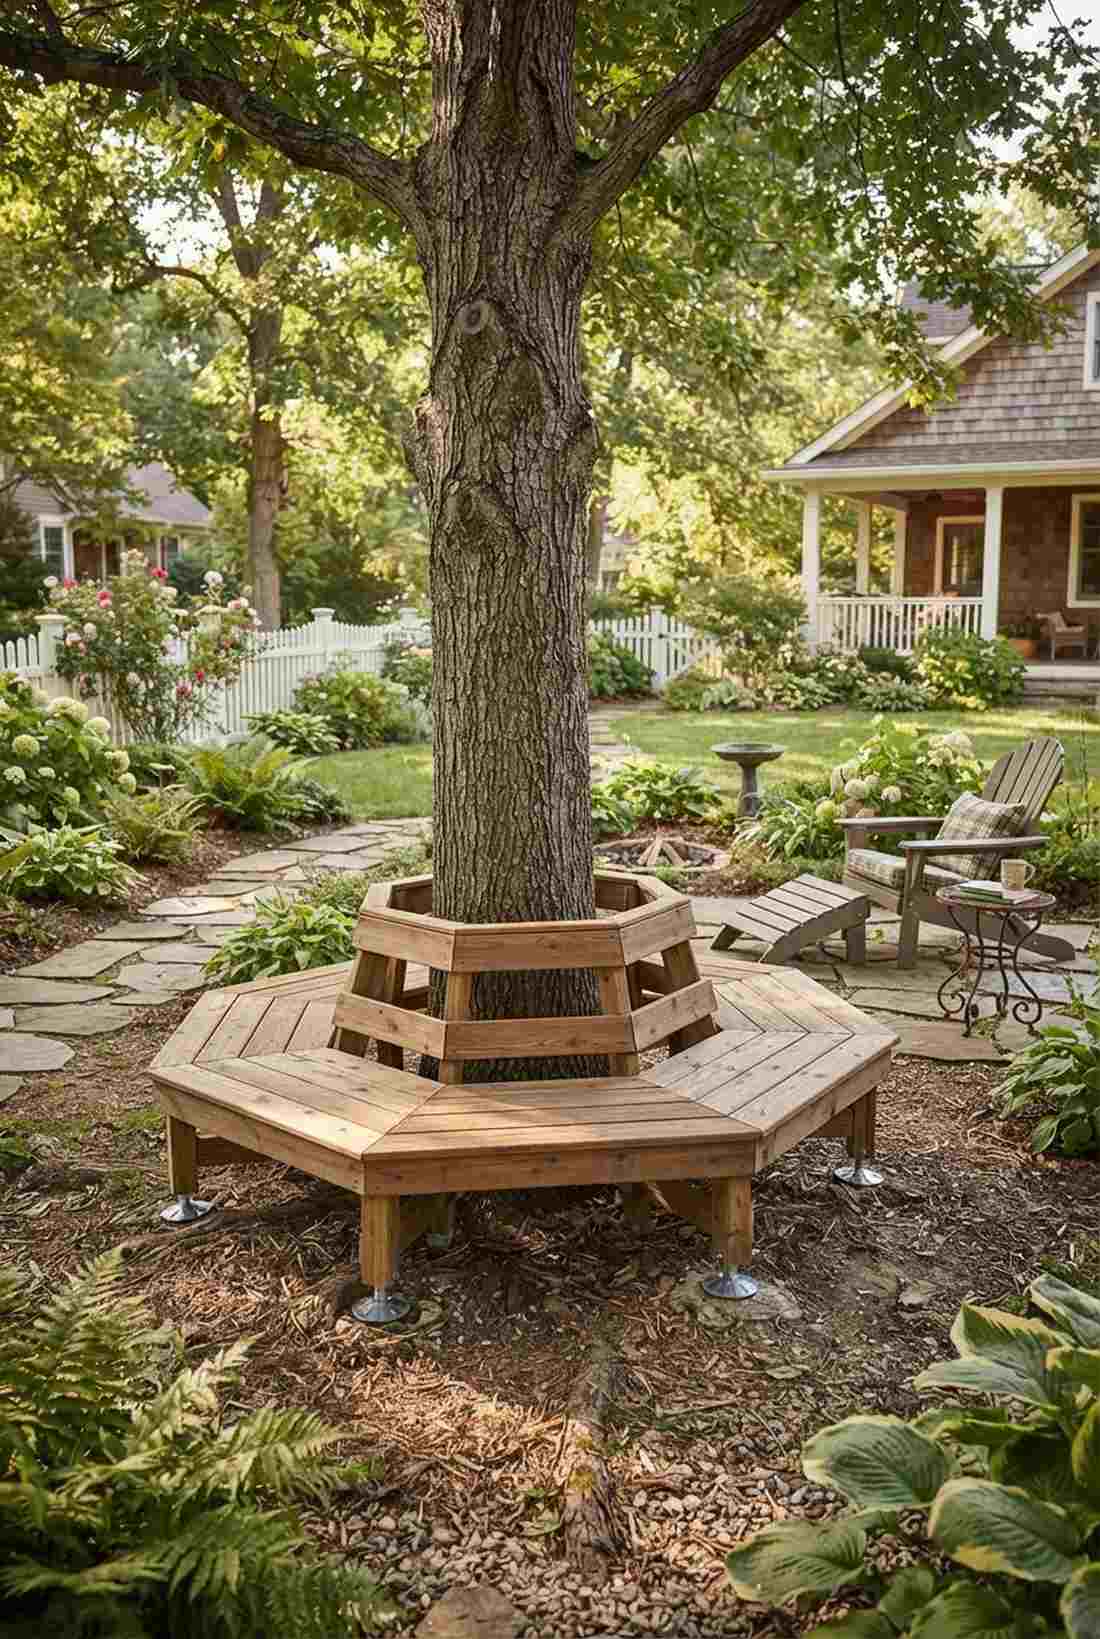
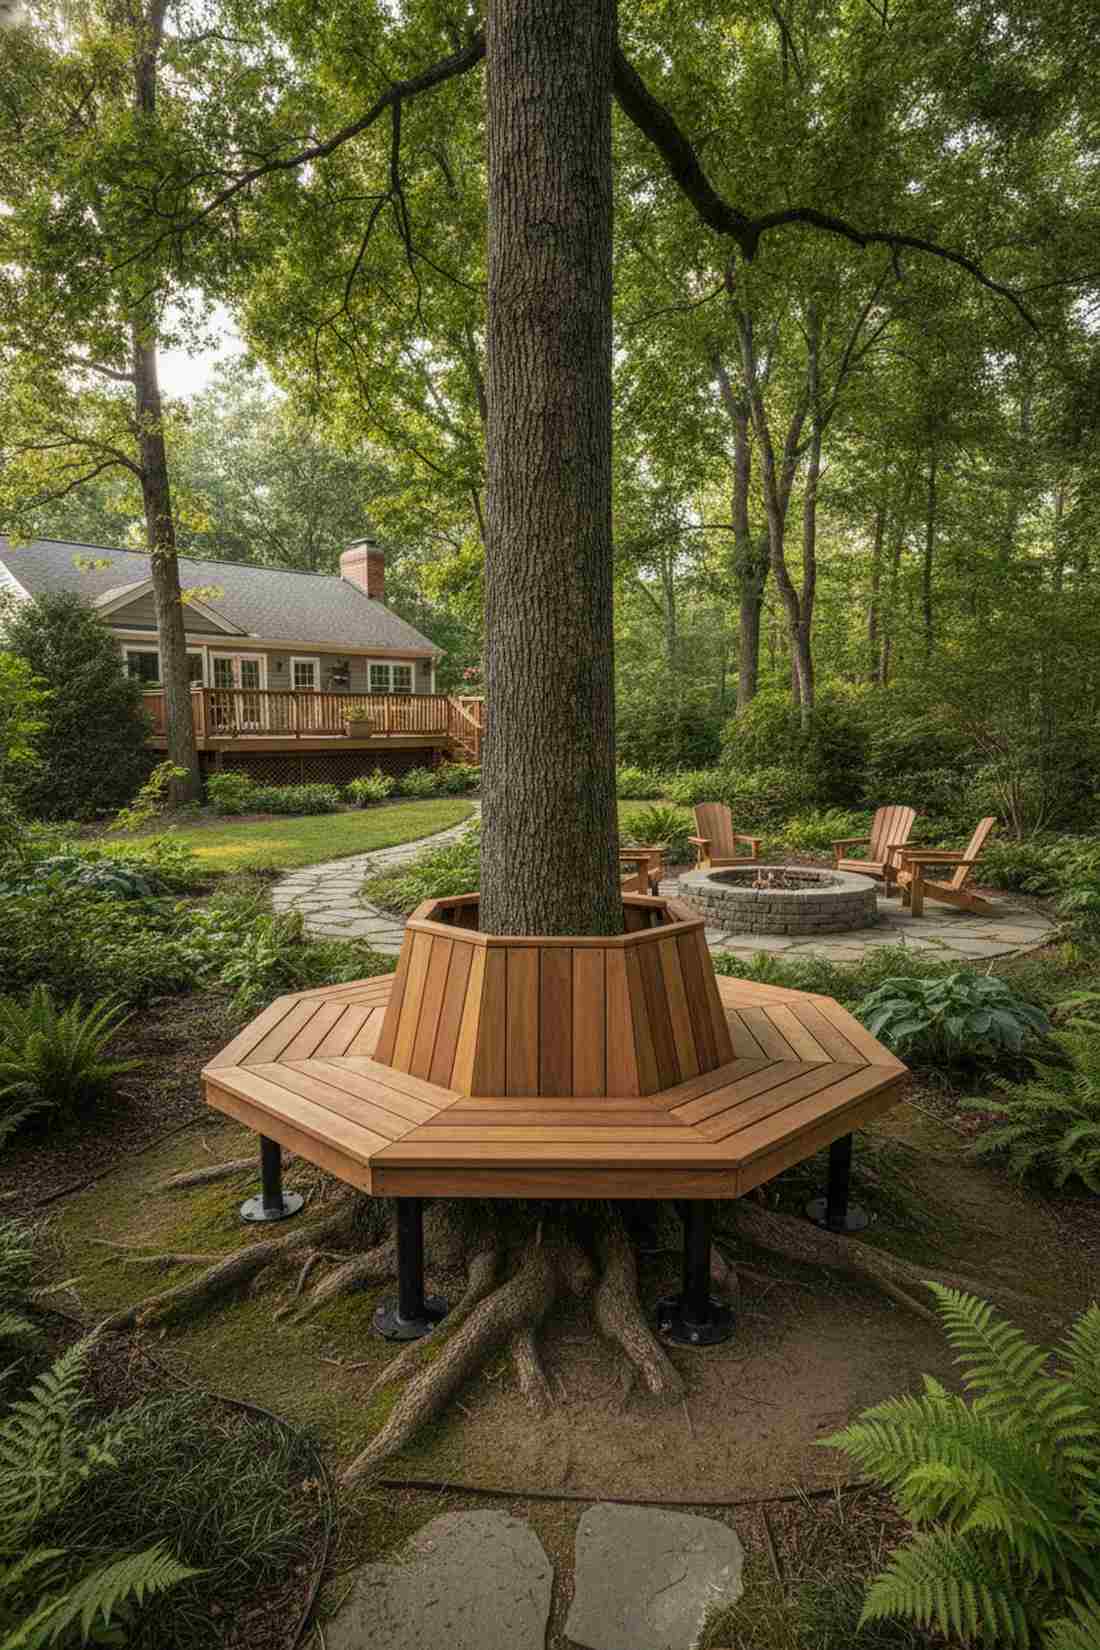
Feels like a magical gathering spot straight out of a storybook courtyard. A wraparound tree trunk bench offers 360-degree shaded seating while protecting delicate root systems from heavy foot traffic.
Nailing boards directly to a tree is a rookie mistake, but building a freestanding hexagonal frame gives a designer-level finish that allows the trunk room to grow. Installing adjustable steel leveling feet accommodates the massive, uneven surface roots without digging into the earth.
Building a modular surround costs approximately $200–$300. Save this to your shaded backyard inspiration board!
- Key Materials: Modular framing lumber, decking boards, leveling feet
- Vibe / Style: Shaded park sanctuary
- Difficulty: Intermediate
- Budget Breakdown: Decking/Frame: $220 | Leveling Feet: $45.
- Creator’s Tip: Leave an absolute minimum of 6 inches of clearance between the inner bench ring and the current tree bark to allow for future growth.
- Smart Sourcing: heavy-duty adjustable leveling feet (set of 8), pre-cut composite decking kits.
22. Wave-Form Outdoor Seating Concrete
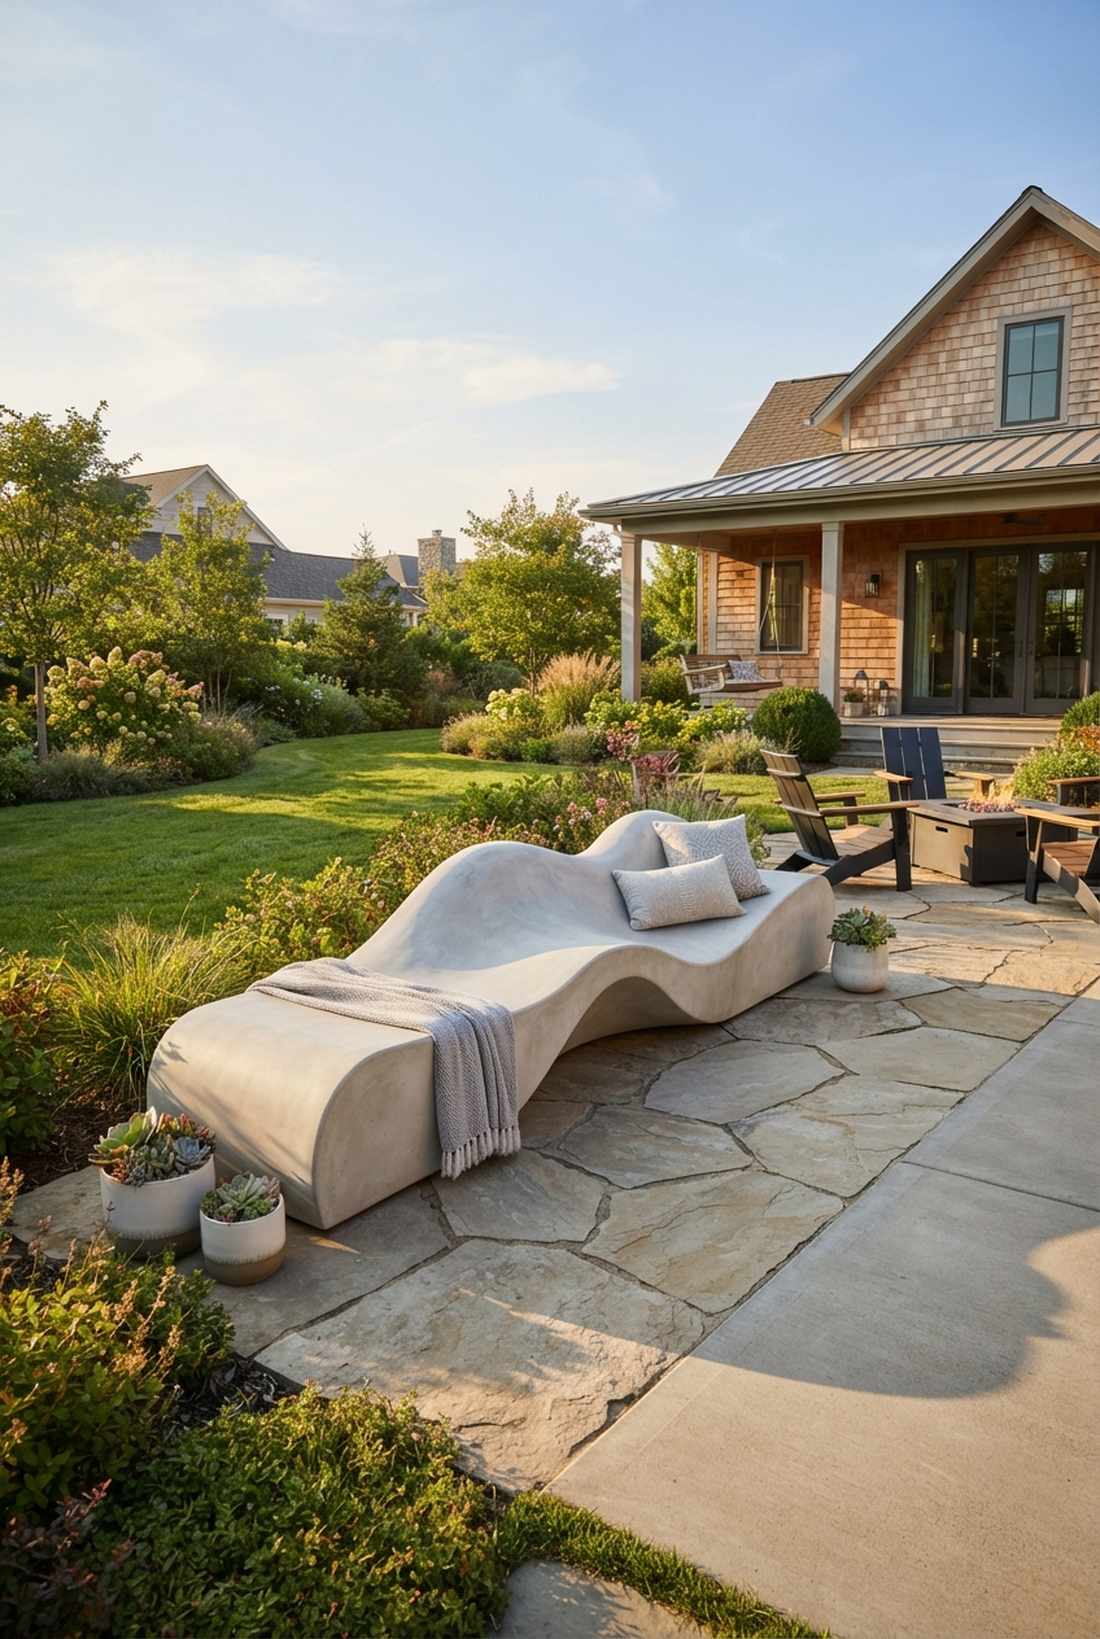
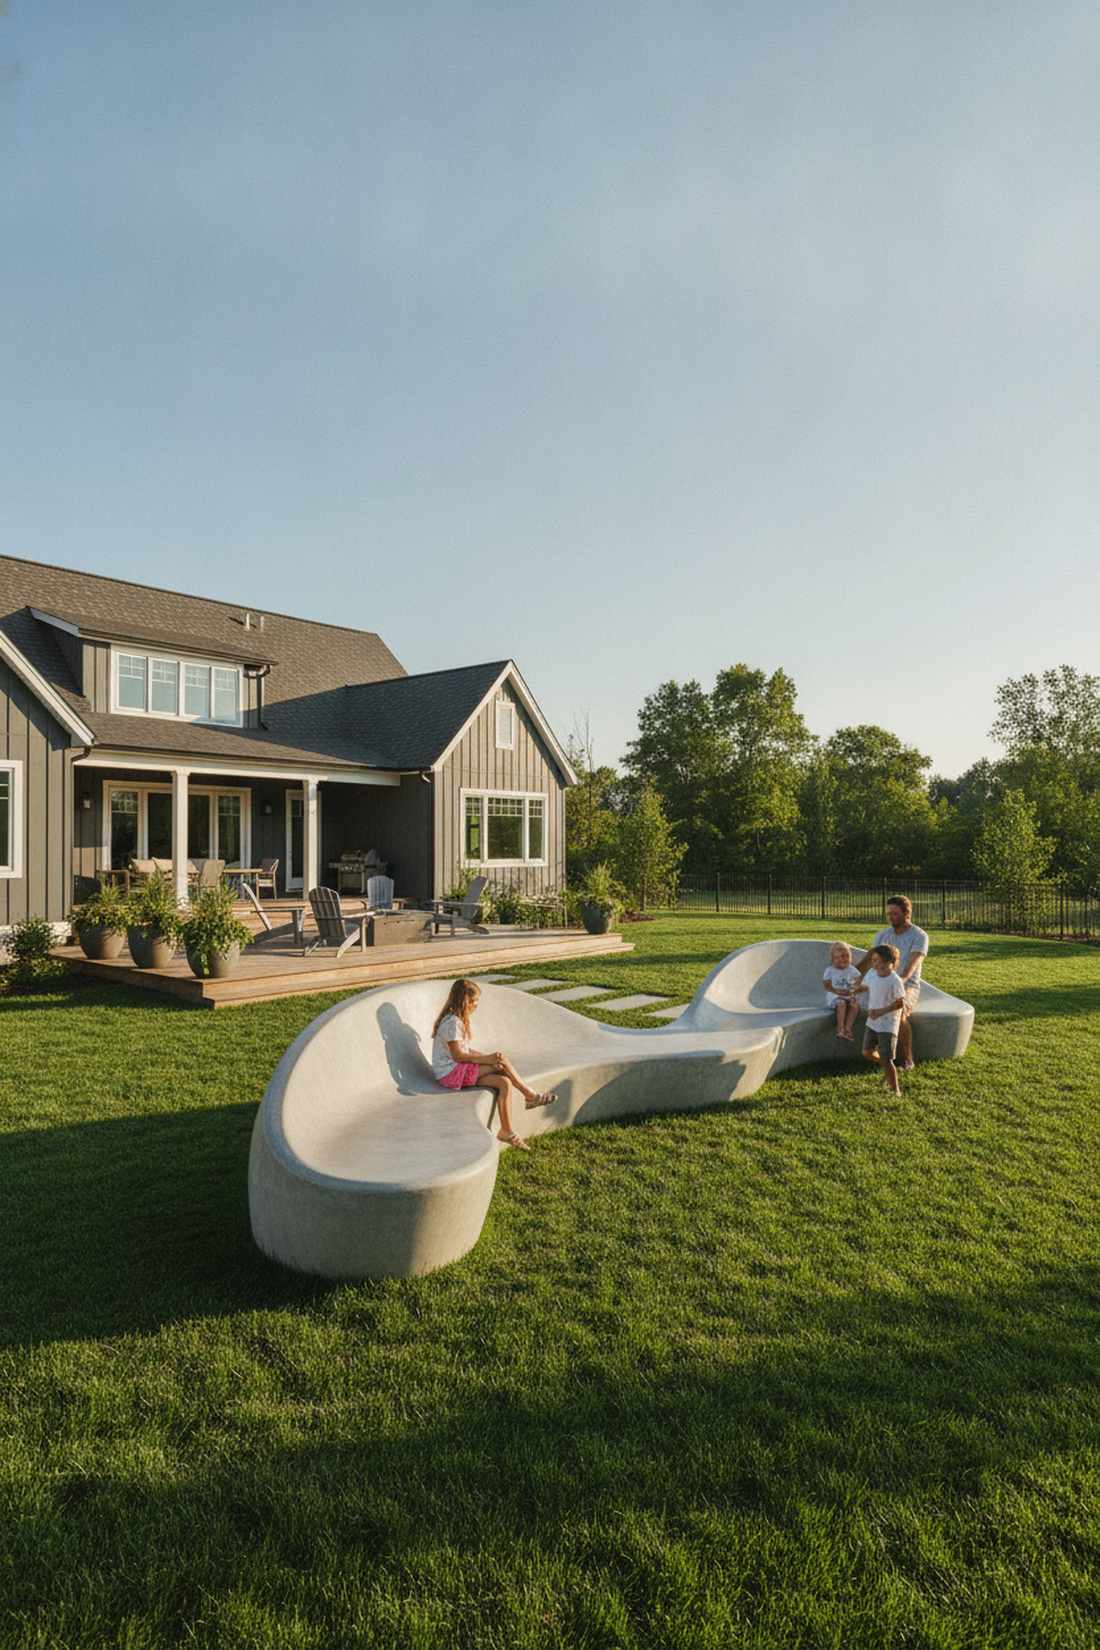
Pops visually with a rhythmic, undulating energy that doubles as landscape art. This sculptural concrete wave bench transforms a flat, boring lawn into an ultra-modern civic playground.
Pouring standard block benches is cheap, but sculpting rhythmic peaks and valleys provides a surprisingly premium aesthetic usually reserved for museum courtyards. Carving the complex molds from dense rigid structural foam blocks allows you to cast perfect, repeatable waves without heavy metal forms.
This highly custom look requires about $300 in concrete and foam. Pin this if you want an absolute show-stopping centerpiece!
- Key Materials: Foam sculpting blocks, reinforced concrete, trowels
- Vibe / Style: Avant-garde public art
- Difficulty: Advanced
- Budget Breakdown: Foam Molds: $120 | Concrete: $180.
- Creator’s Tip: Use a specialized magnesium float tool to smooth the curves; standard steel trowels will catch on the complex wave geometry.
- Smart Sourcing: rigid EPS foam block bundles, professional curved magnesium concrete floats.
Integrated Arbor & Trellis Structures
23. Pergola Bench With Shade Canopy


Creates an immediate, intimate outdoor living room bathed in dappled sunlight. An integrated bench pergola system is the perfect anchor for a lonely corner of the yard that lacks natural tree cover.
Buying separate patio furniture wastes space, but framing seating directly into the massive 6×6 support posts gives a designer-level finish and immense structural rigidity. Utilizing a UV-resistant shade fabric canopy across the overhead rafters provides instant cooling while the climbing vines mature.
A heavy-duty timber setup runs $500–$800 but completely redefines the property. Save this to your ultimate outdoor living board!
- Key Materials: 6×6 timber posts, 2×8 rafters, cap boards
- Vibe / Style: Mediterranean shaded lounge
- Difficulty: Advanced (requires overhead lifting)
- Budget Breakdown: Structural Timbers: $450 | Hardware/Canopy: $150.
- Creator’s Tip: Orient the overhead rafters exactly East-to-West to maximize the shade cast during the brutal afternoon sun hours.
- Smart Sourcing: UV-blocking pergola shade covers (pre-cut), heavy-duty structural timber screws (bulk pack).
24. Arbor Bench With Trellis Sides
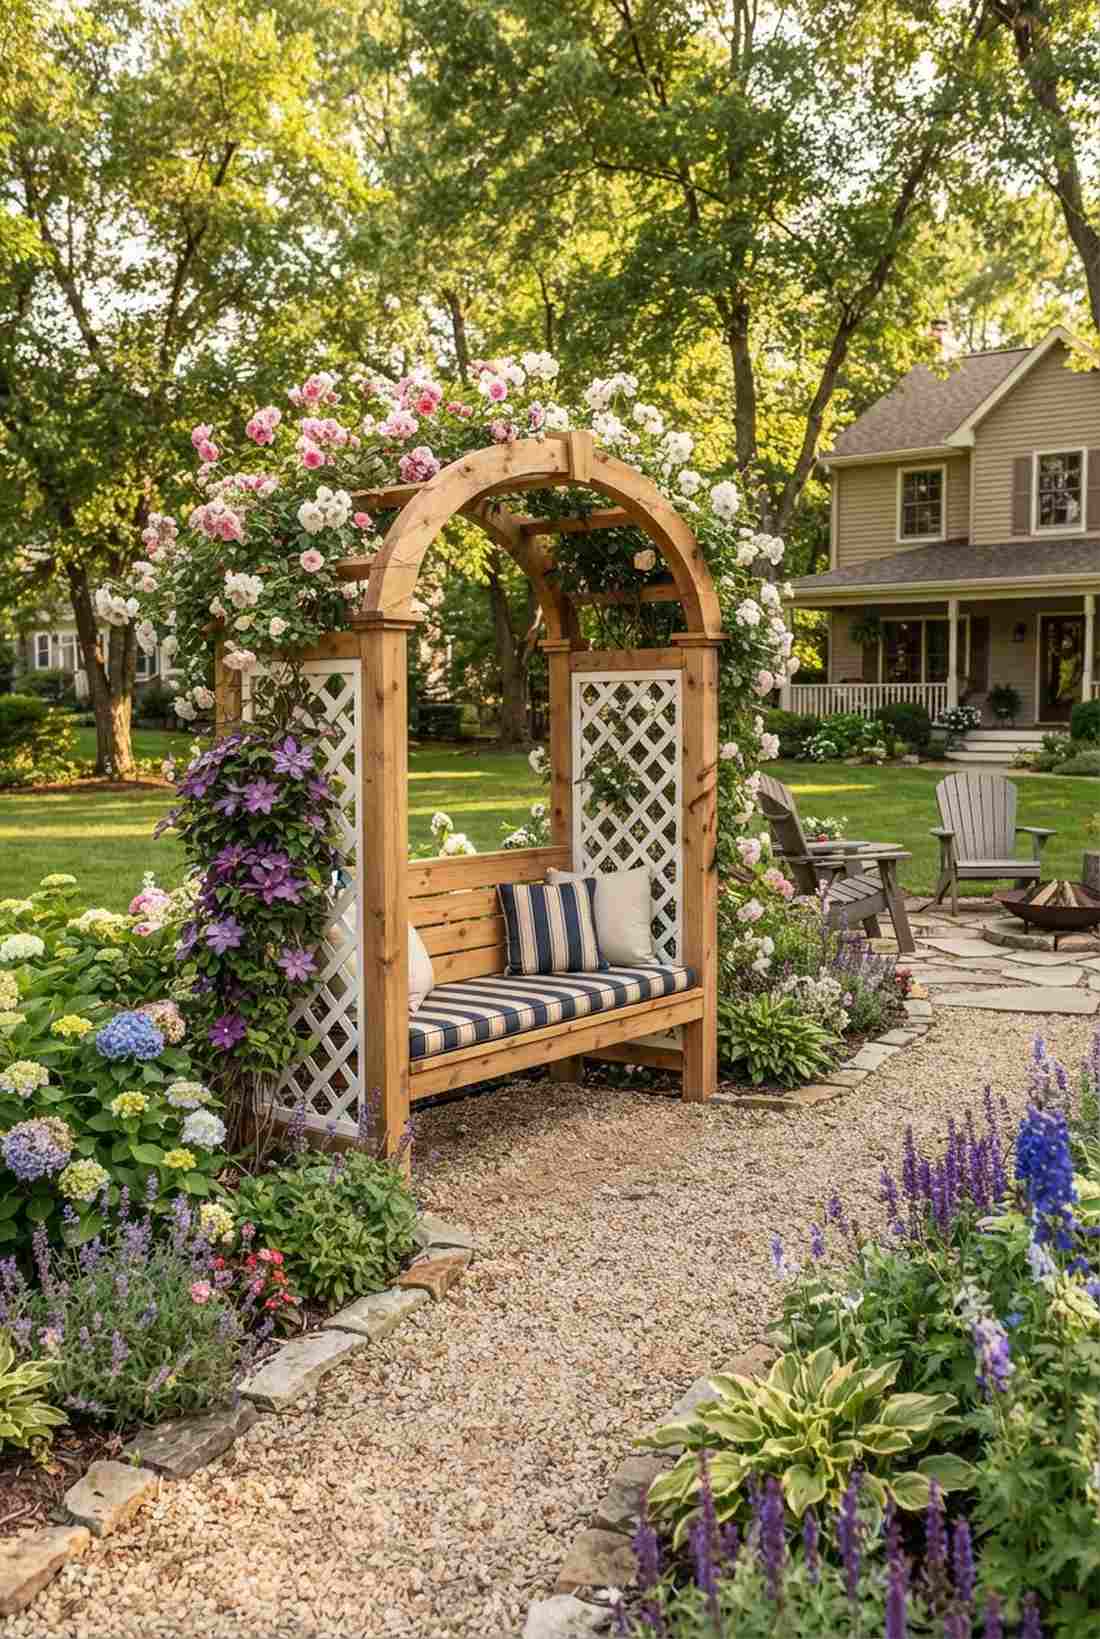
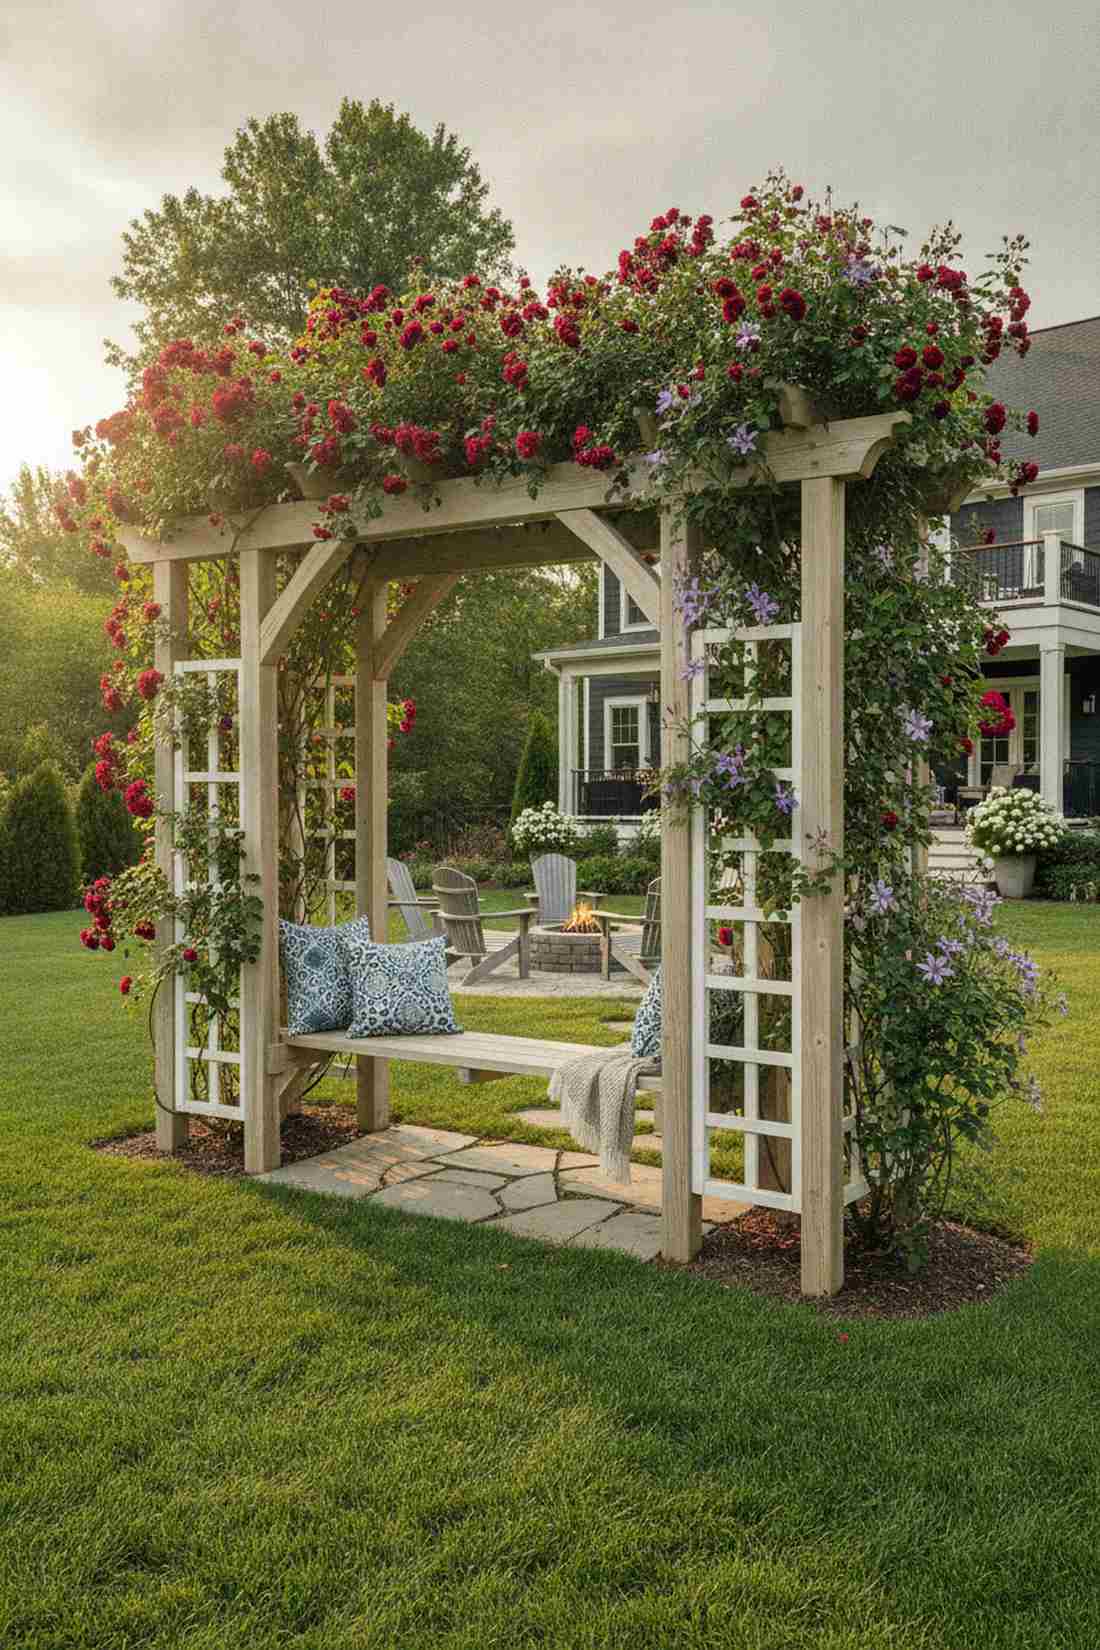
Looks like a lush, blooming entrance to a hidden English garden. A trellis-backed arbor seating nook serves as a stunning standalone feature surrounded by aggressive climbing roses or sweet clematis.
Flimsy wire arches collapse under heavy vines, but building a sturdy timber frame looks far more expensive than it is and supports massive floral weight. Screwing pre-fabricated heavy-duty lattice panels directly to the side supports creates instant vertical gardening space with zero fuss.
You can build a gorgeous, sturdy arbor bench for roughly $250. It’s a remarkably fast way to introduce massive vertical height to a flat yard.
- Key Materials: Timber framing, 4×4 lattice panels, deck screws
- Vibe / Style: Romantic blooming cottage
- Difficulty: Intermediate
- Budget Breakdown: Lumber Frame: $150 | Lattice/Screws: $100.
- Creator’s Tip: Sink the main support posts at least 24 inches deep in concrete so heavy winds don’t topple the vine-heavy structure.
- Smart Sourcing: heavy-duty vinyl lattice panels (bulk pack), commercial-grade post hole concrete.
If you have zero shade in your yard, the next integrated overhead setup is an absolute game-changer…
25. Living Willow Bench Structure
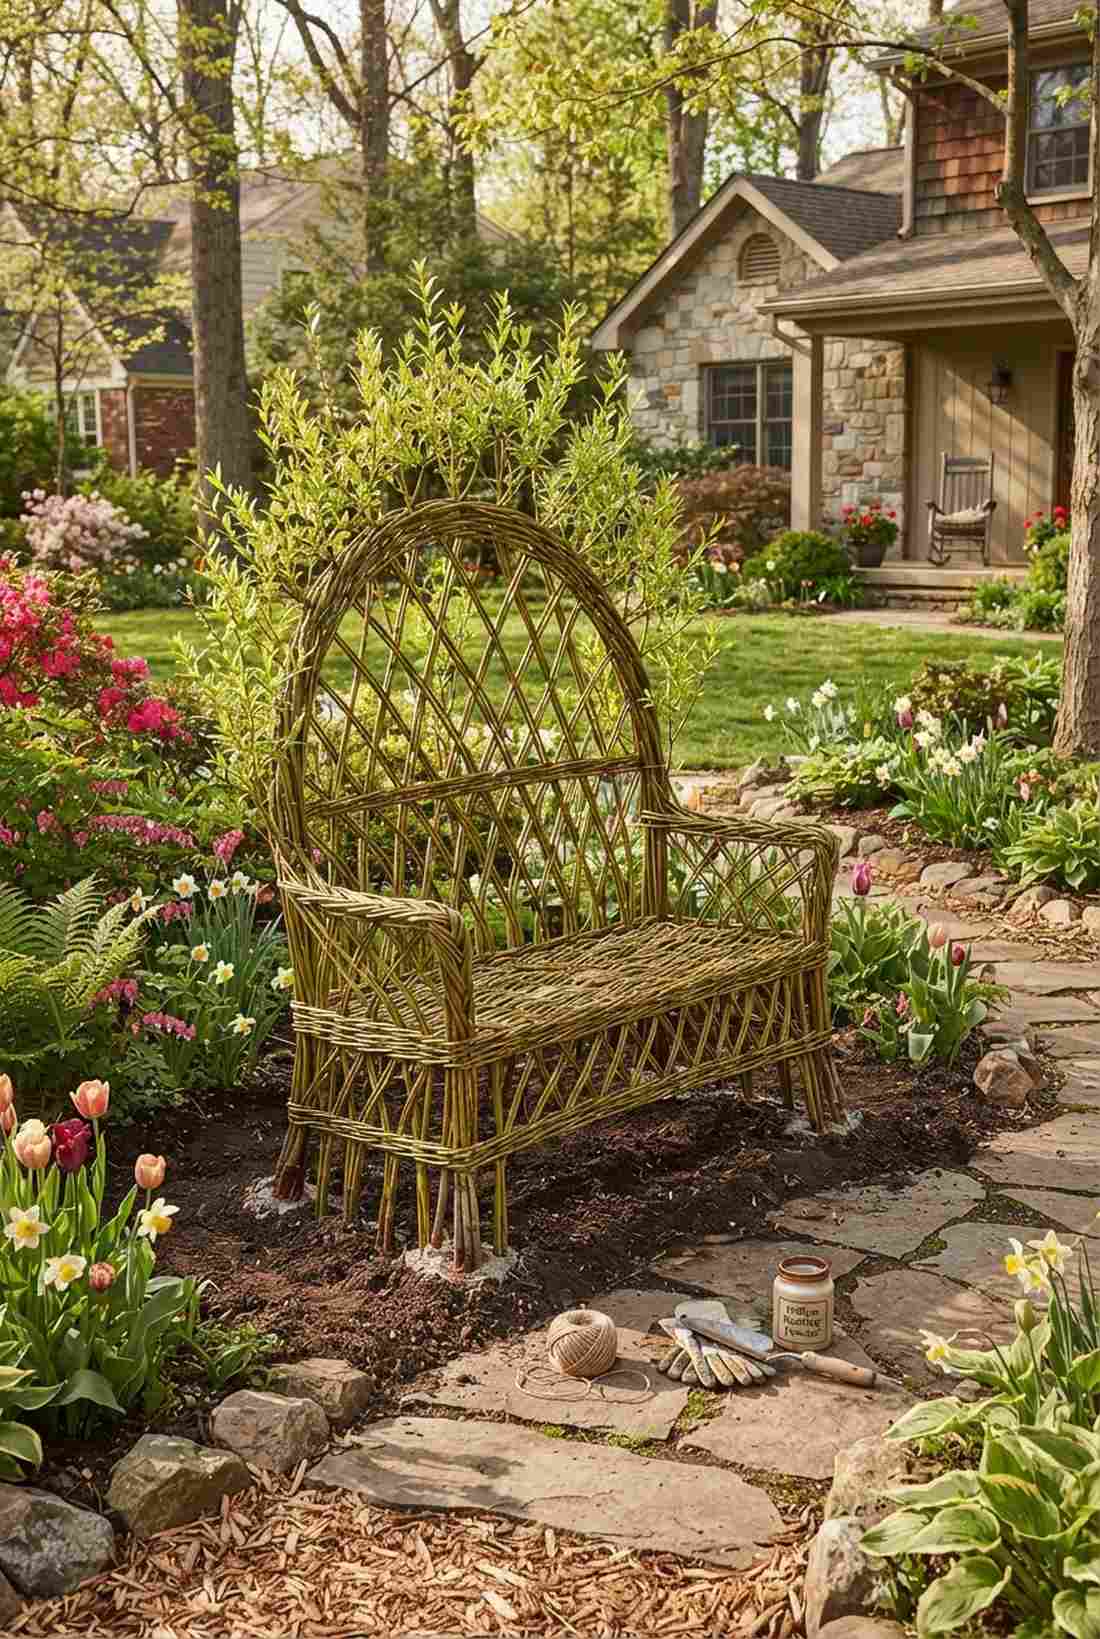
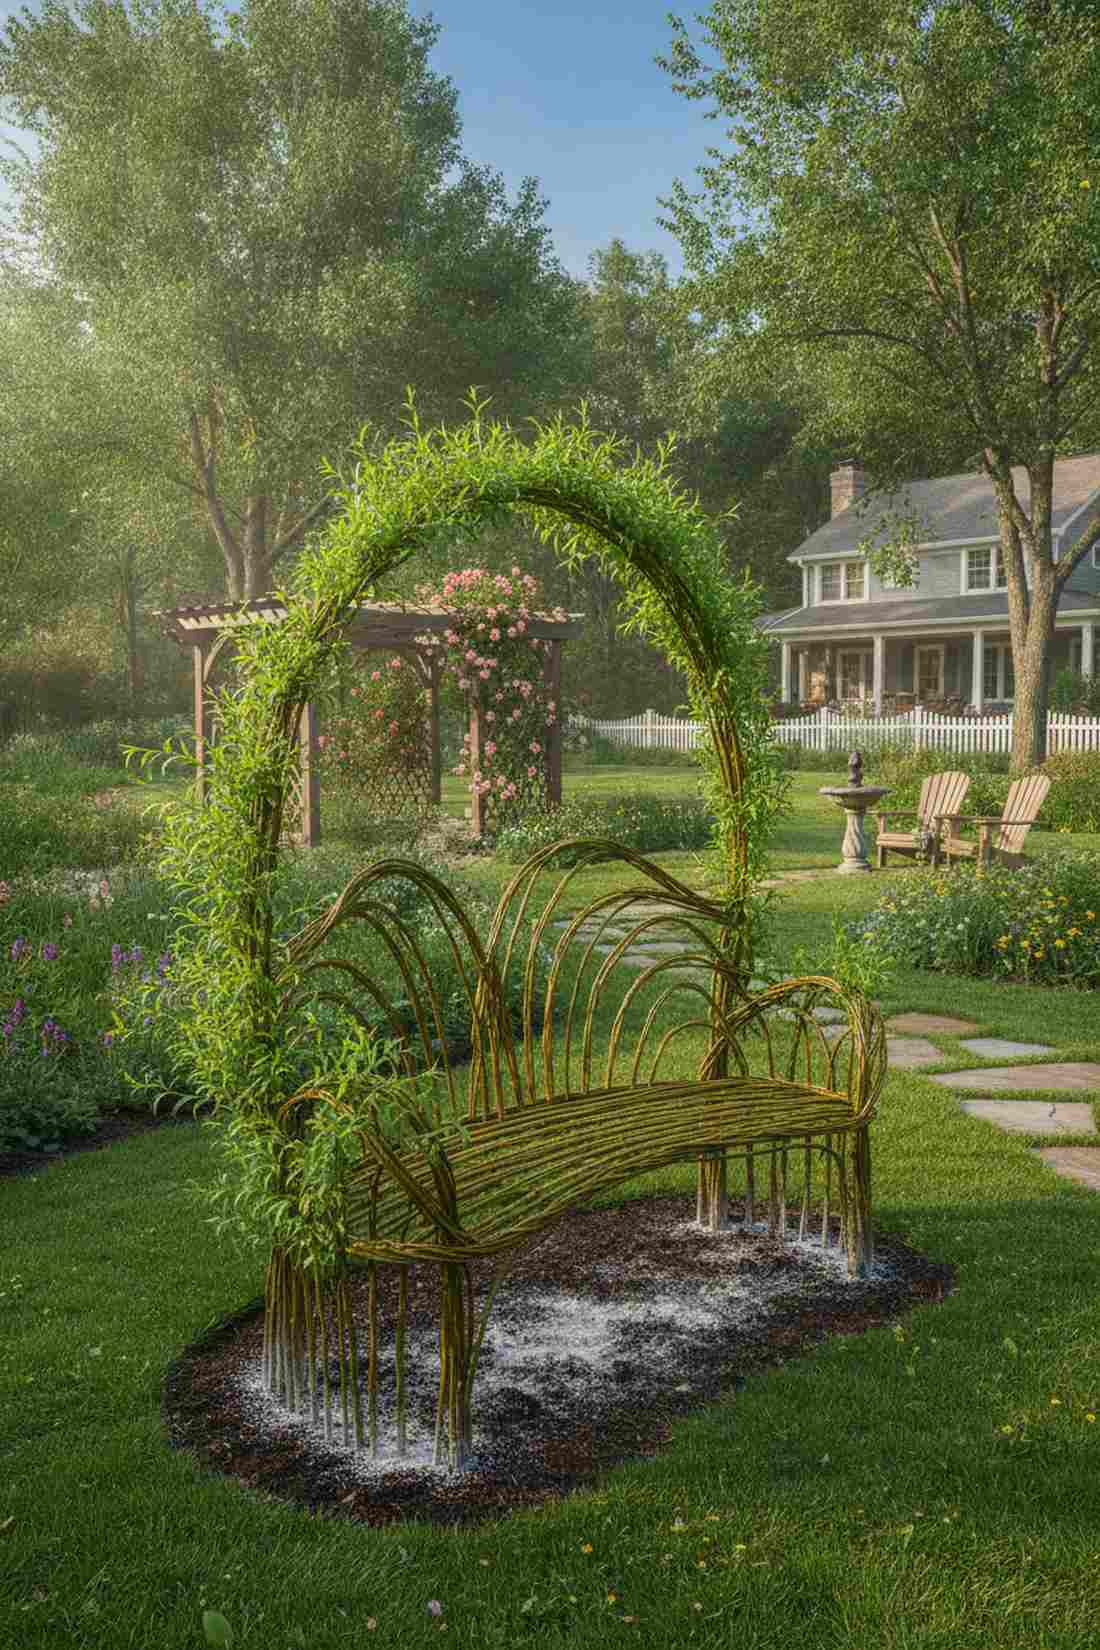
Breathes and grows with the seasons, making it feel like pure elven magic. A woven living willow chair literally roots into the earth, providing a leafy backrest that sprouts vibrant green foliage every spring.
Most seating relies on dead materials, but weaving fresh branches delivers a surprisingly premium look that gets physically stronger every single year. Utilizing a specialized willow rooting hormone ensures the base whips strike roots rapidly before the summer heat dries them out.
Willow bundles are incredibly cheap, costing around $50–$80 total. Pin this if you want the most unique, eco-friendly garden feature possible!
- Key Materials: 6-foot living willow whips, loose soil
- Vibe / Style: Enchanted living woodland
- Difficulty: Intermediate (requires weaving skills)
- Budget Breakdown: Willow Whips: $60 | Rooting Hormone: $15.
- Creator’s Tip: You must plant the whips during their absolute dormant phase in early spring; if they have leaves, they won’t root.
- Smart Sourcing: live willow branch bundles (starter kits), rapid-rooting hormone powder.
26. Metal Arch Bench Combo
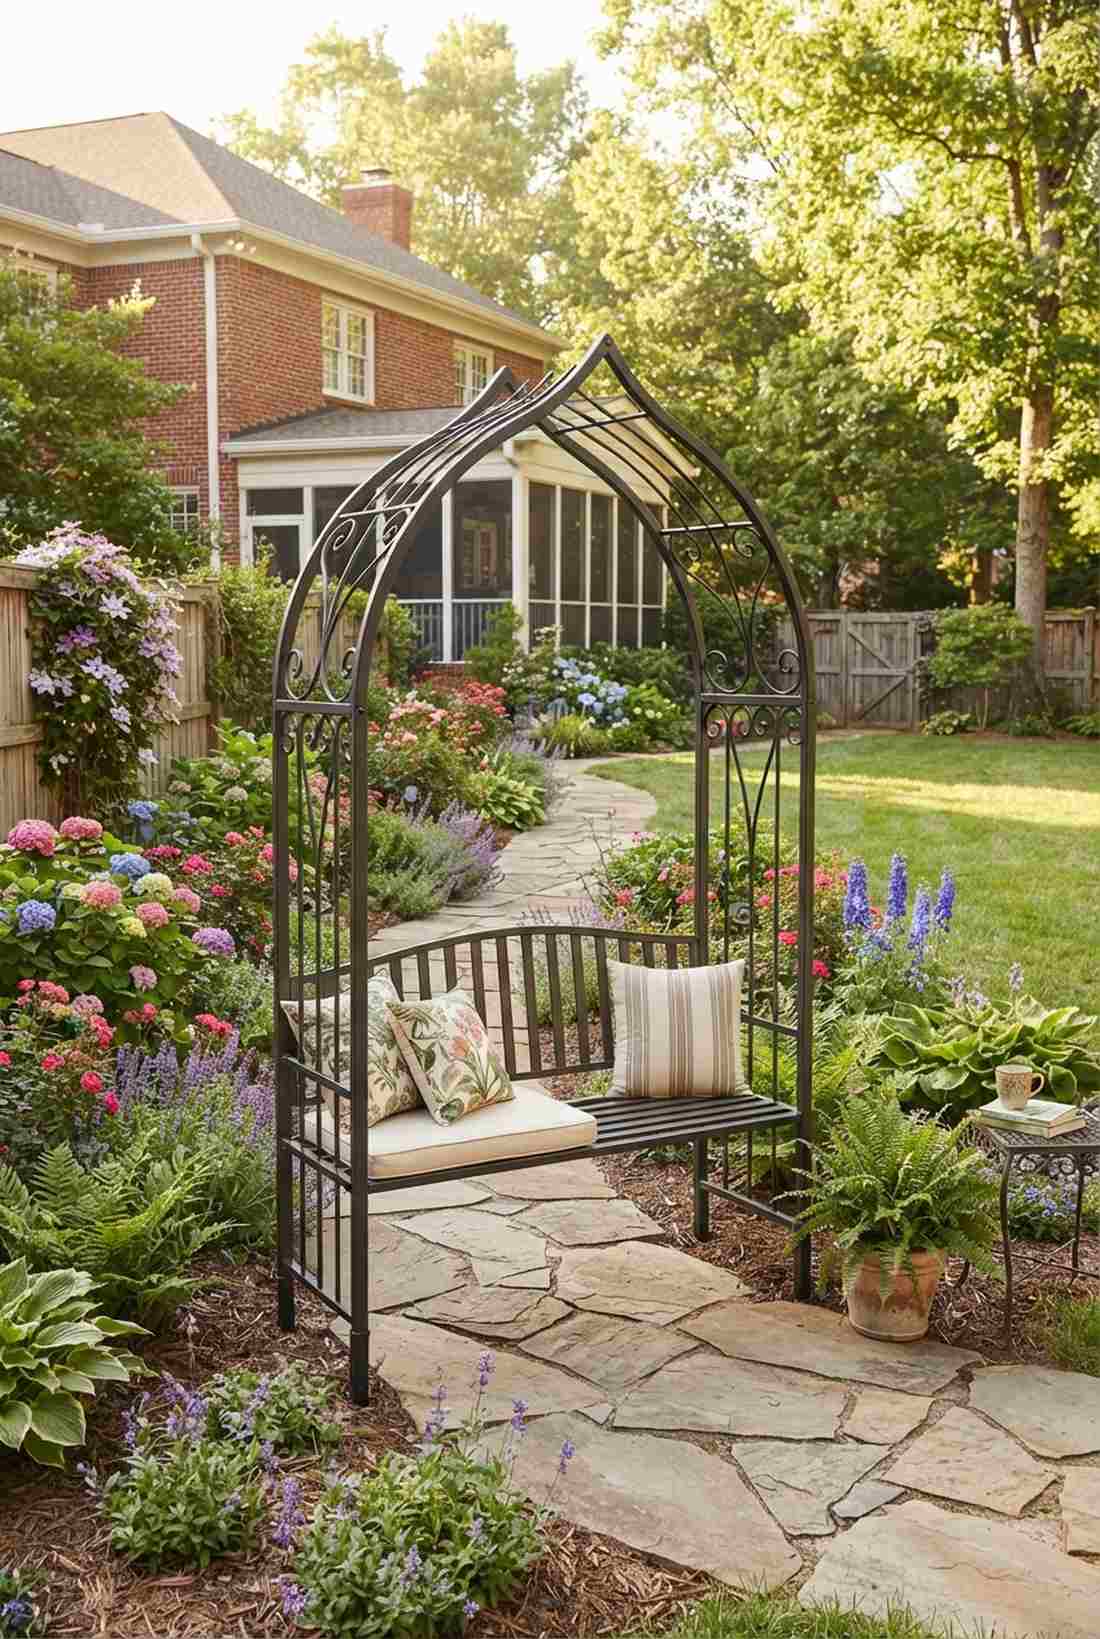
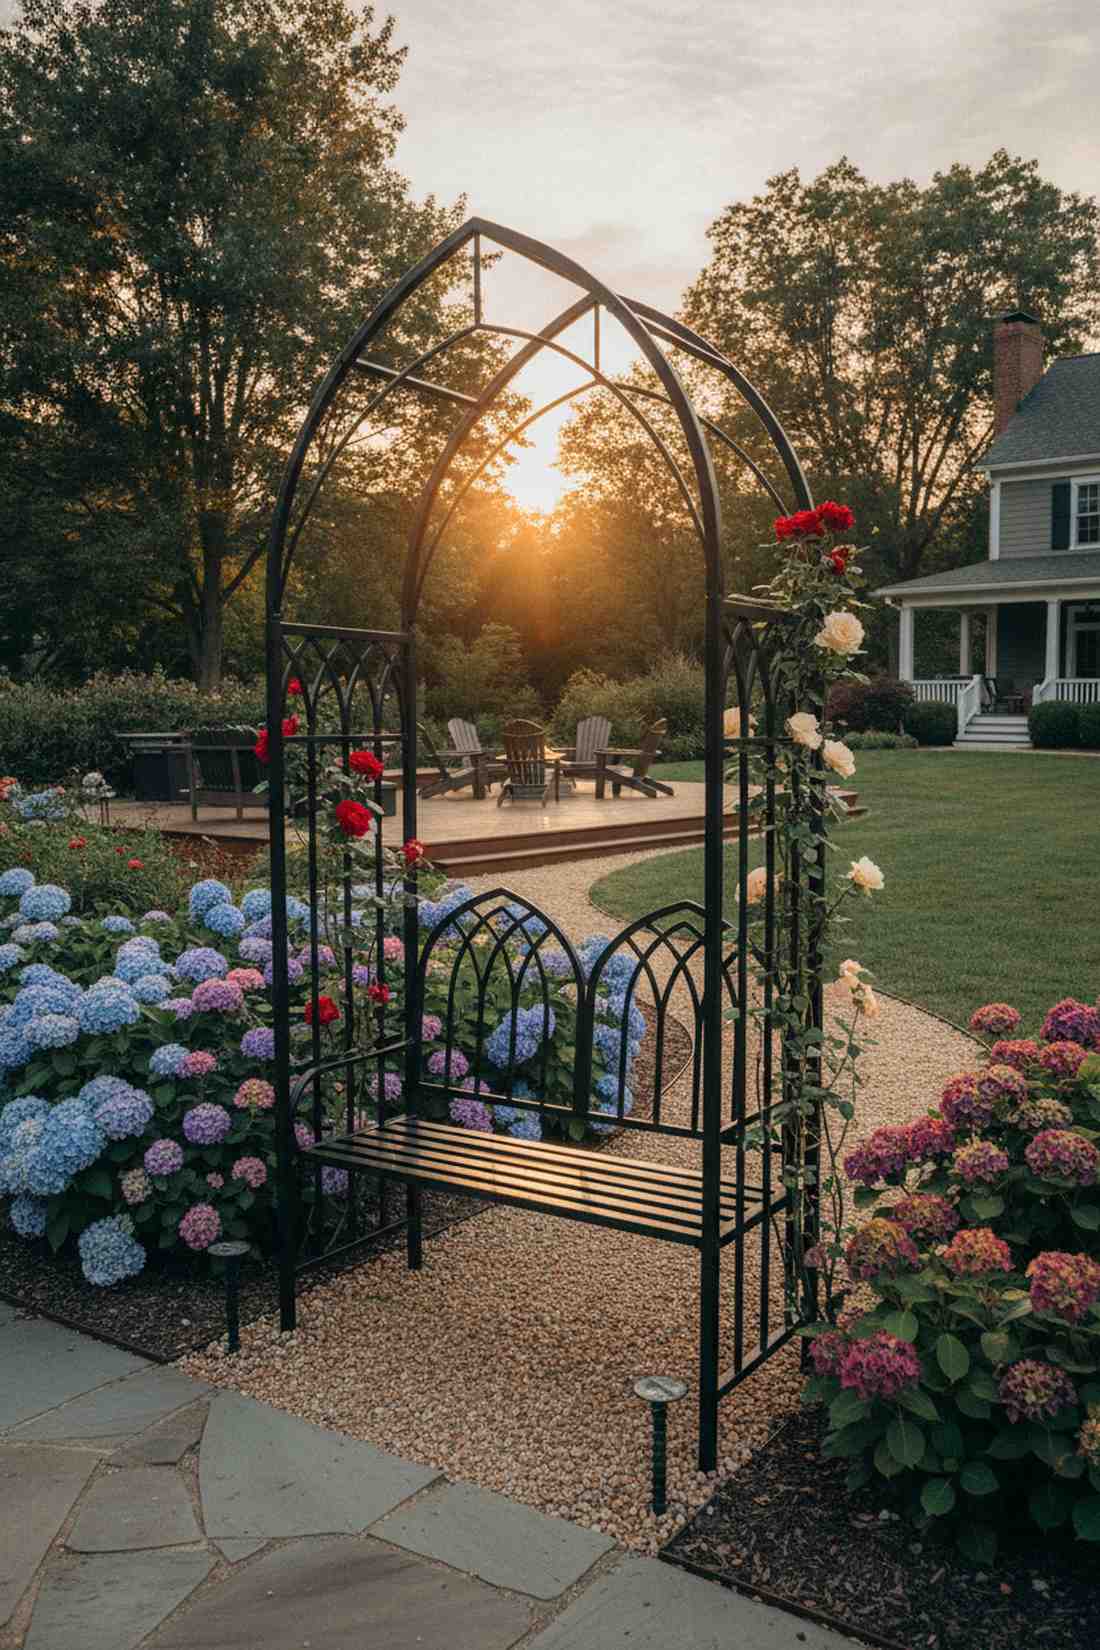
Provides an instantly elegant, Gothic silhouette that pops against bright garden colors. This pre-welded archway seating unit is the ultimate shortcut for defining a pathway transition or capping off a narrow side yard.
Building complex curves from wood takes weeks, but bolting together a powder-coated steel system gives a designer-level finish in under two hours. Upgrading to a heavy-duty anchor stake kit ensures the lightweight metal frame doesn’t tip when heavy guests sit down.
Prefabricated kits range from $150–$350 online. Highly recommended for a massive impact when you’re short on DIY time.
- Key Materials: Powder-coated steel arch kit, ground anchors
- Vibe / Style: Classic Gothic romance
- Difficulty: Very Easy
- Budget Breakdown: Arch Kit: $200 | Anchor Stakes: $30.
- Creator’s Tip: Wrap the arch legs in a layer of protective electrical tape before sinking them in the dirt to drastically slow down rust.
- Smart Sourcing: powder-coated metal garden arch kits, heavy-duty steel ground screw anchors.
Material Guide: Cheap vs. Premium Aesthetic
Knowing exactly where to save and where to spend makes all the difference in achieving that “looks expensive but isn’t” architectural vibe.
- Standard vs. UV-Resistant/Premium: Standard wood stains burn off in a year, leaving grey, cracked timber. UV-resistant marine sealers cost double upfront but prevent rot, saving you massive replacement costs and keeping the bench looking factory-new.
- Pre-made Kits vs. Sourcing Locally: Fabricating metal brackets or complex arches from scratch wastes weekends. Pre-cut bracket kits and starter bundles often save both time and money while delivering flawless geometry.
27. Privacy Screen Bench Wall
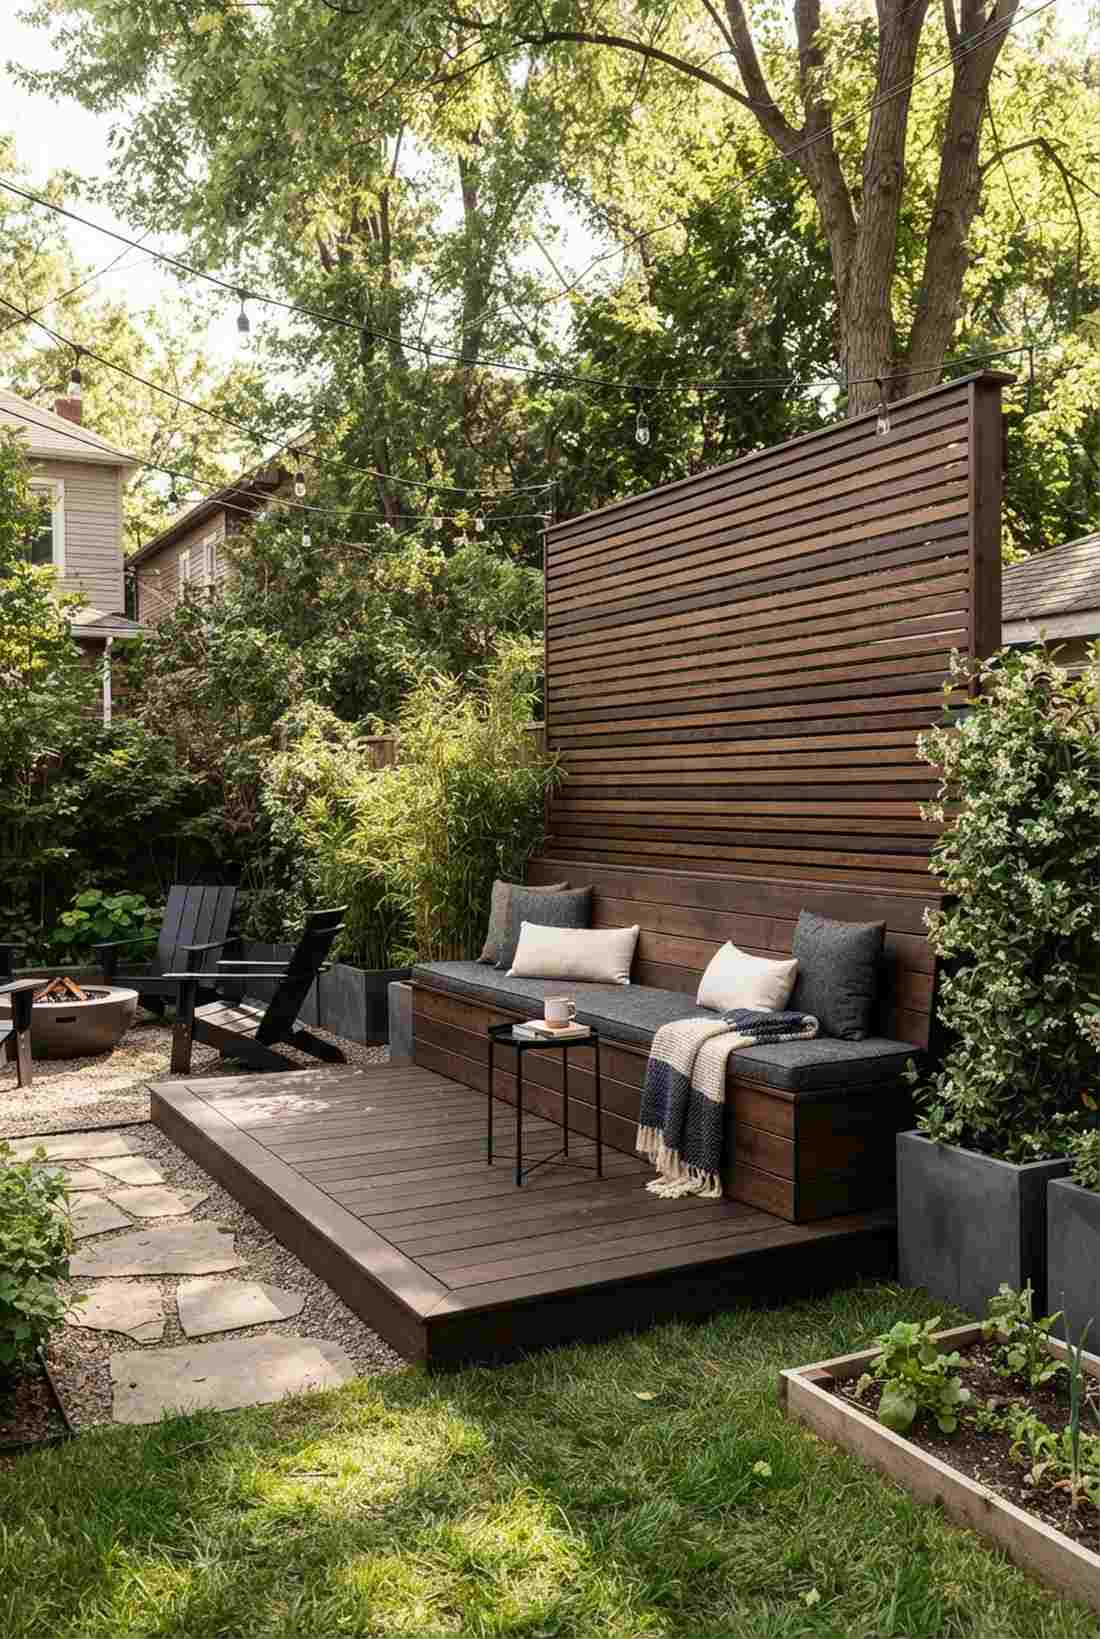
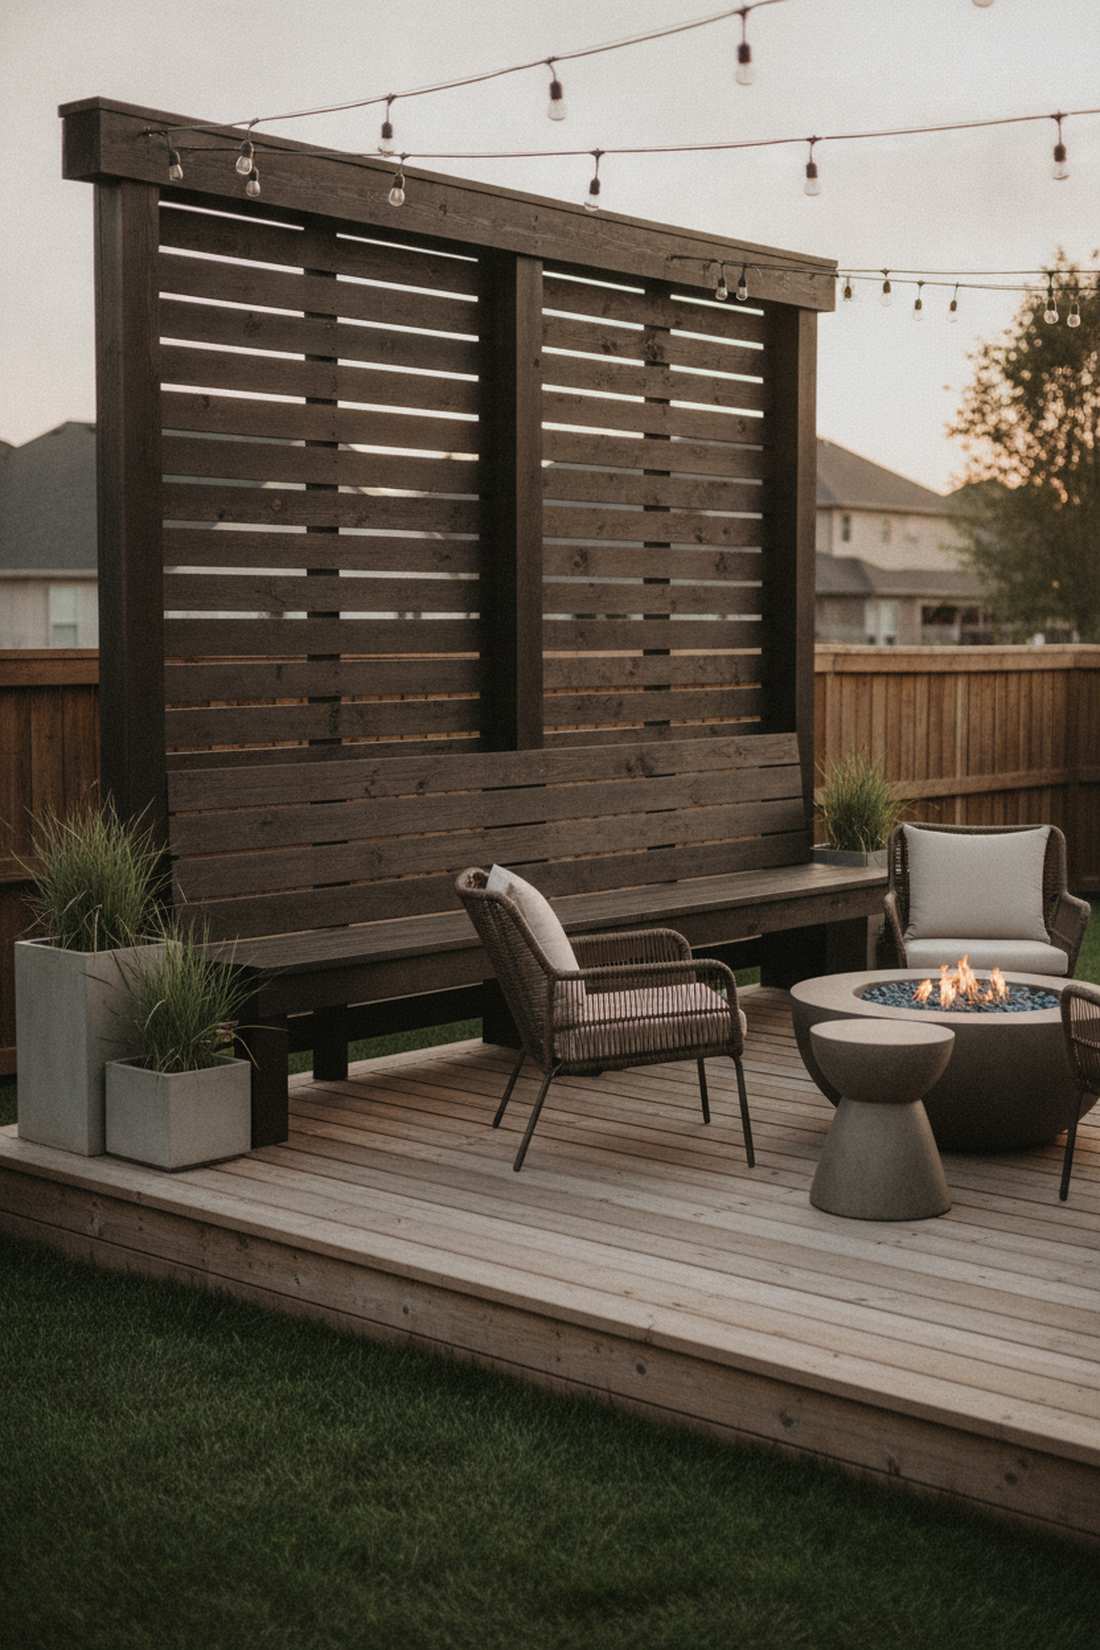
Transforms an exposed, awkward patio into a secluded VIP lounge. Extending a tall slat-wood screen directly up from the seating backrest blocks nosy neighbors while filtering harsh crosswinds.
Fences can feel claustrophobic, but spacing horizontal slats two inches apart looks far more expensive than it is and allows gentle breezes to flow through. Coating the timber in a premium dark modern wood stain immediately elevates the hybrid structure from a basic fence to an architectural feature.
Lumber and stain will cost roughly $200–$350. Save this genius layout to your small urban backyard board!
- Key Materials: 1×4 vertical slats, heavy structural posts
- Vibe / Style: Modern secluded sanctuary
- Difficulty: Intermediate
- Budget Breakdown: Slats & Posts: $200 | Hardware/Stain: $80.
- Creator’s Tip: Alternate slat widths (e.g., using a mix of 1×2 and 1×4 boards) to create a highly custom, barcode-like designer pattern.
- Smart Sourcing: premium dark walnut exterior stain, pre-cut cedar slat bundles (bulk pack).
Built-In Perimeter Seating Solutions
28. Deck Railing Bench Hybrid
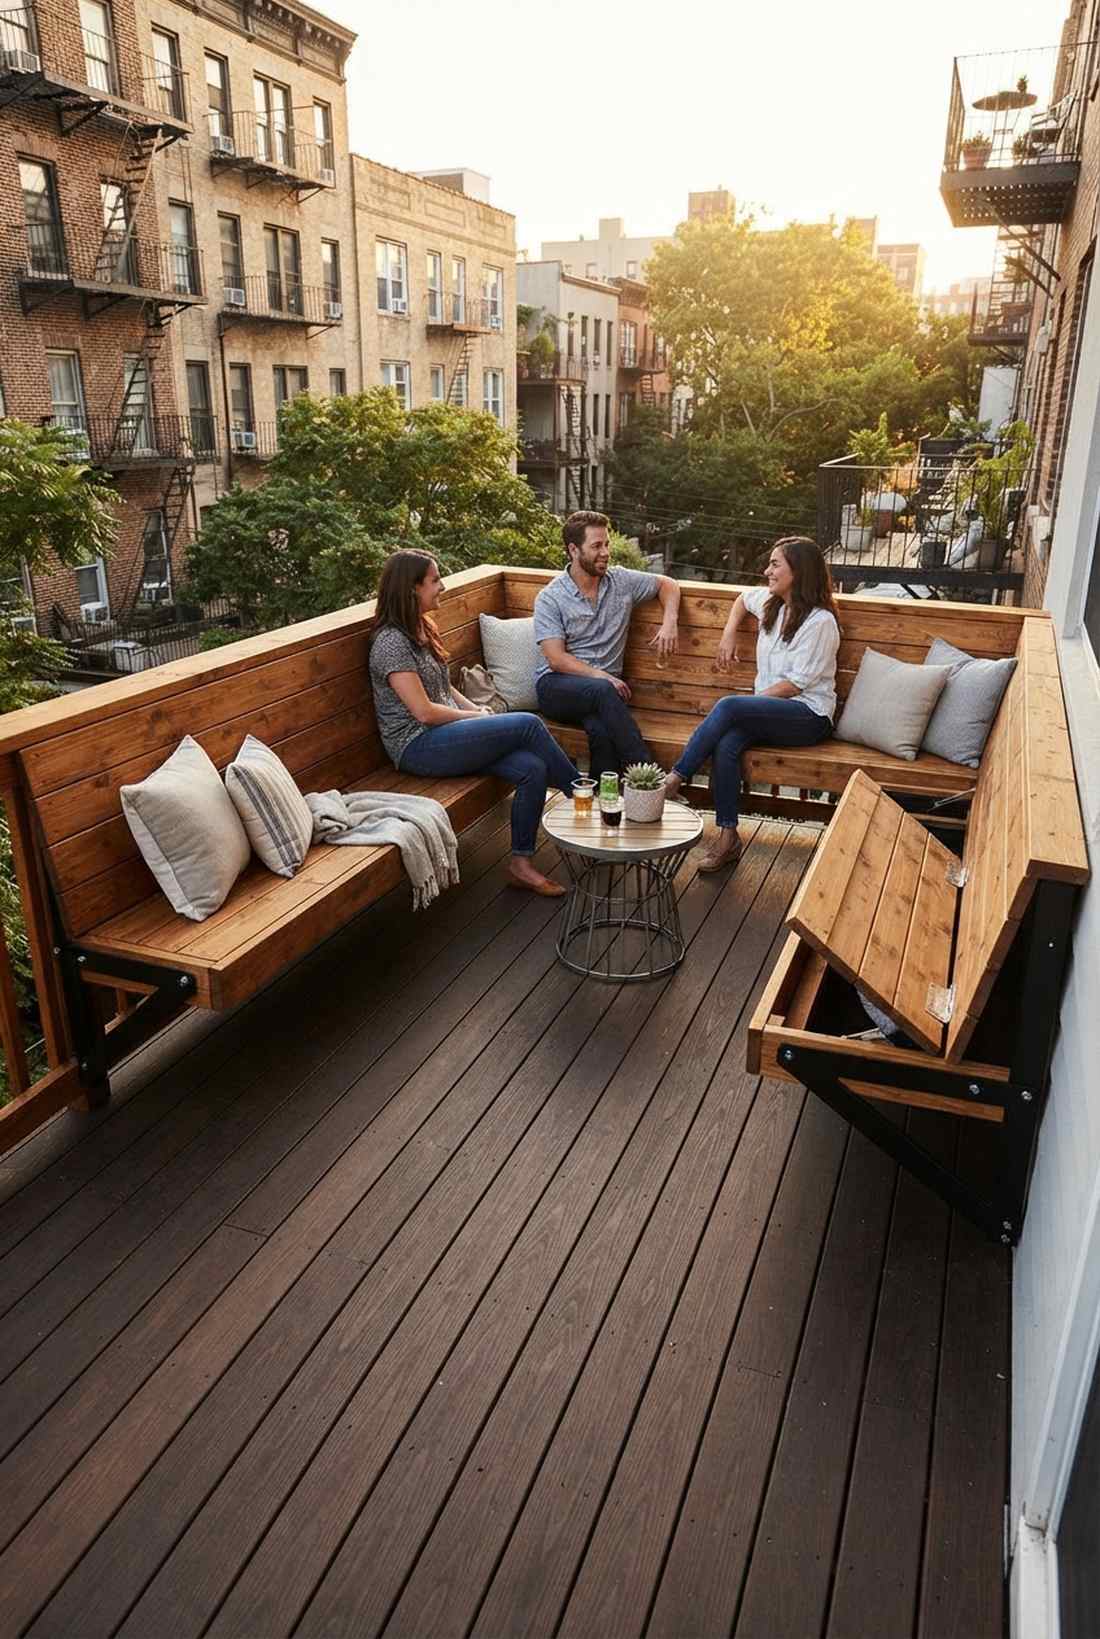
Maximizes every square inch of usable floor space on a cramped balcony. Widening a perimeter deck railing into continuous seating turns a simple safety barrier into a massive social gathering zone.
Crowding a deck with bulky chairs ruins the flow, but pushing the seating to the absolute edge provides a surprisingly premium look that makes the space feel twice as large. Utilizing heavy-duty cantilevered steel joist brackets ensures the seating bears heavy weight without stressing the balusters.
Upgrading a railing costs about $150 in extra lumber per 10-foot section. Pin this brilliant space-saving hack for tiny patios!
- Key Materials: 2×12 seat boards, extended joists, structural brackets
- Vibe / Style: Clever urban space-saver
- Difficulty: Advanced (must meet local railing codes)
- Budget Breakdown: Extra Framing: $100 | Seat Caps: $90.
- Creator’s Tip: Add heavy-duty piano hinges to a few of the seat cap sections to create hidden, waterproof storage boxes inside the railing cavity.
- Smart Sourcing: heavy-duty deck joist bracket kits, stainless steel continuous piano hinges.
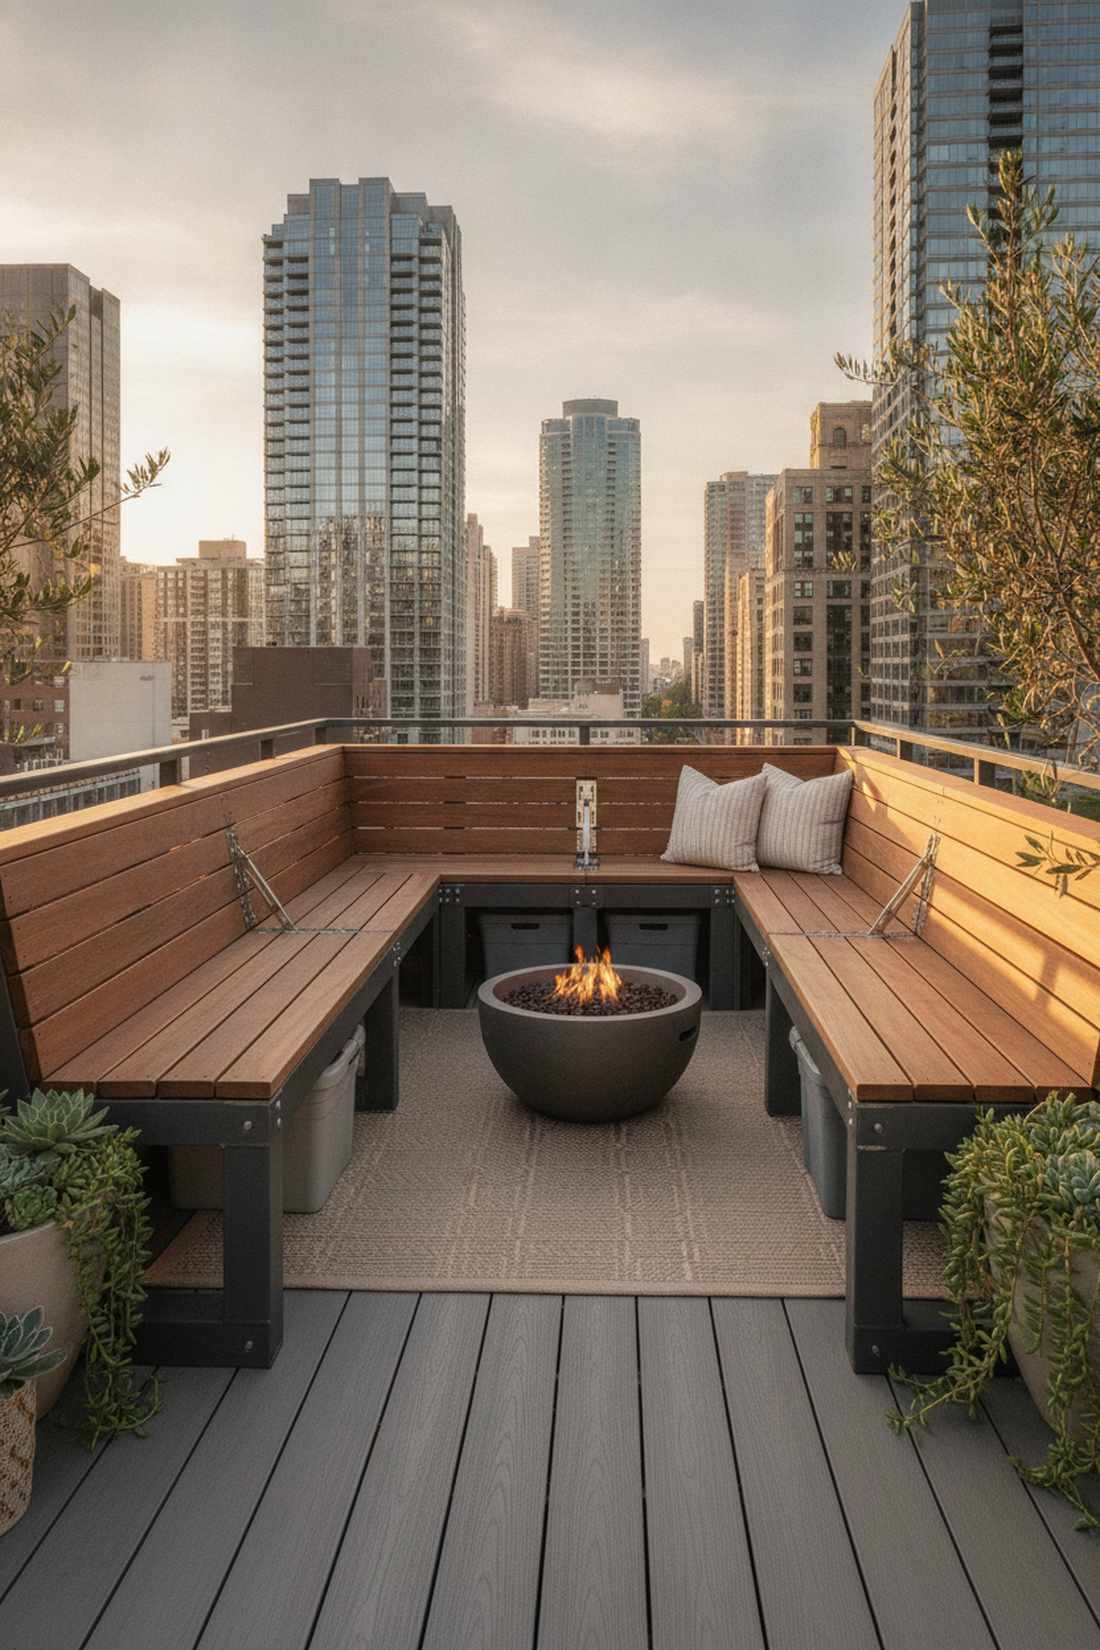
29. L-Shaped Corner Bench With Planters
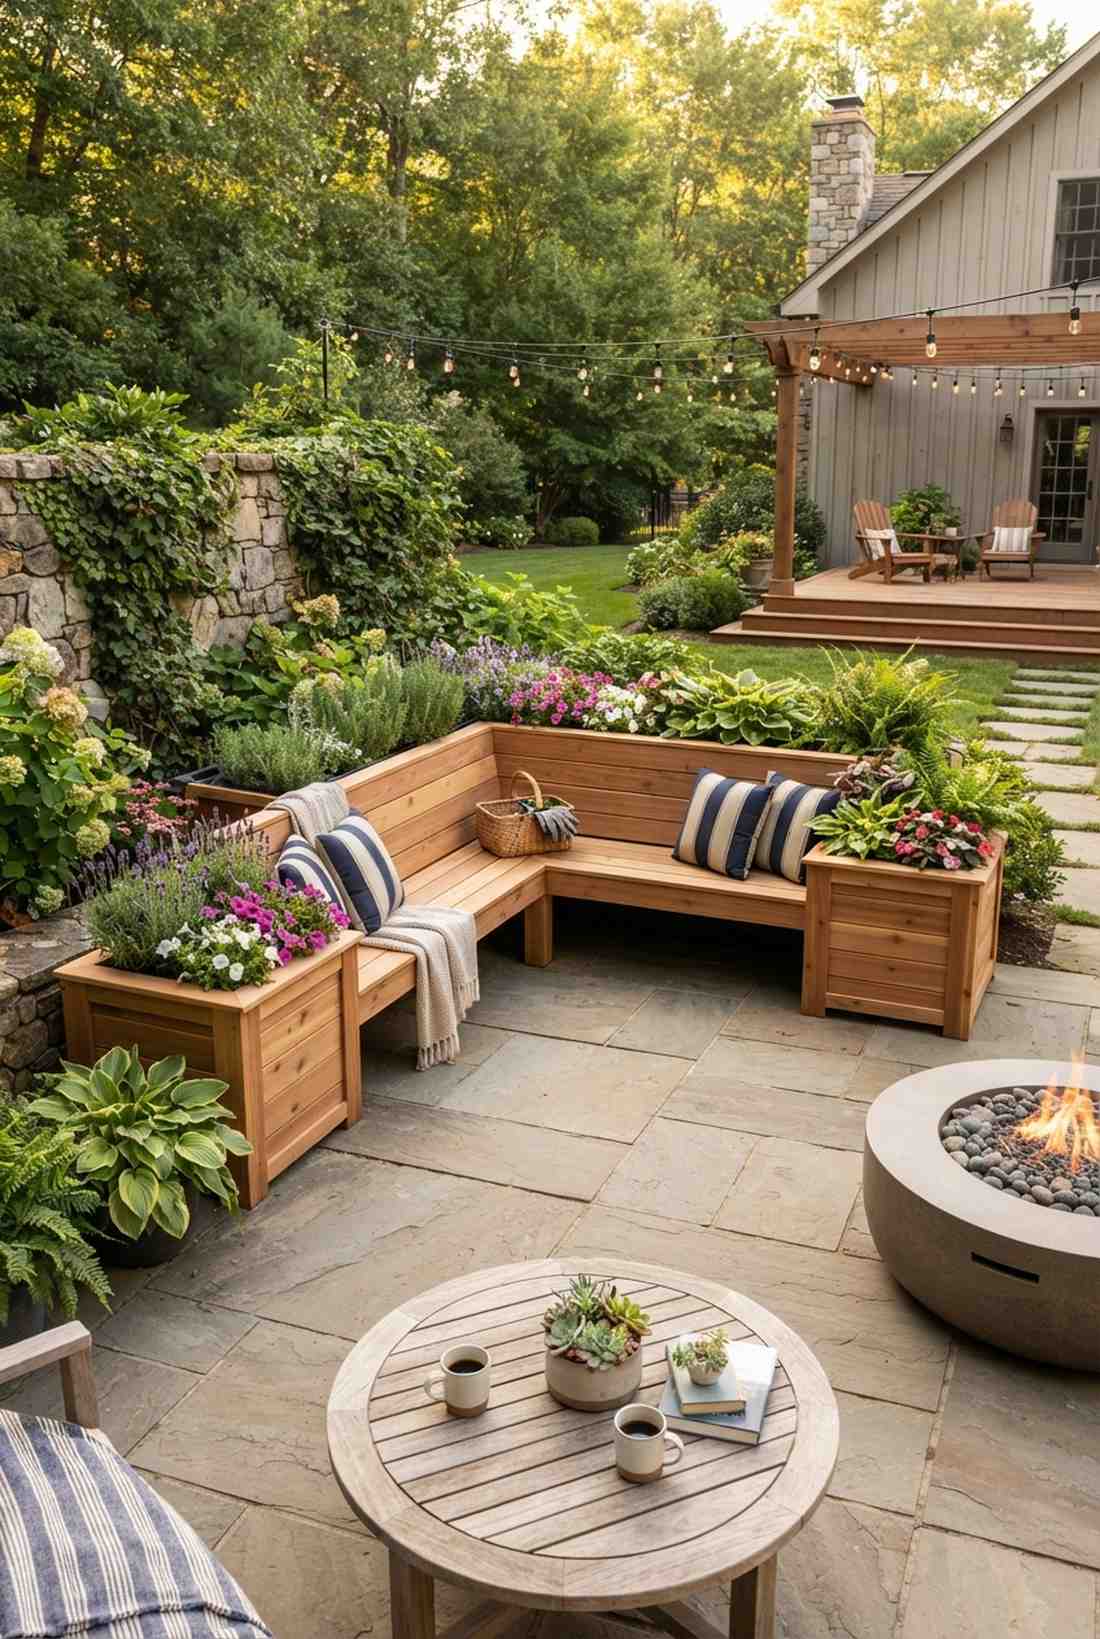
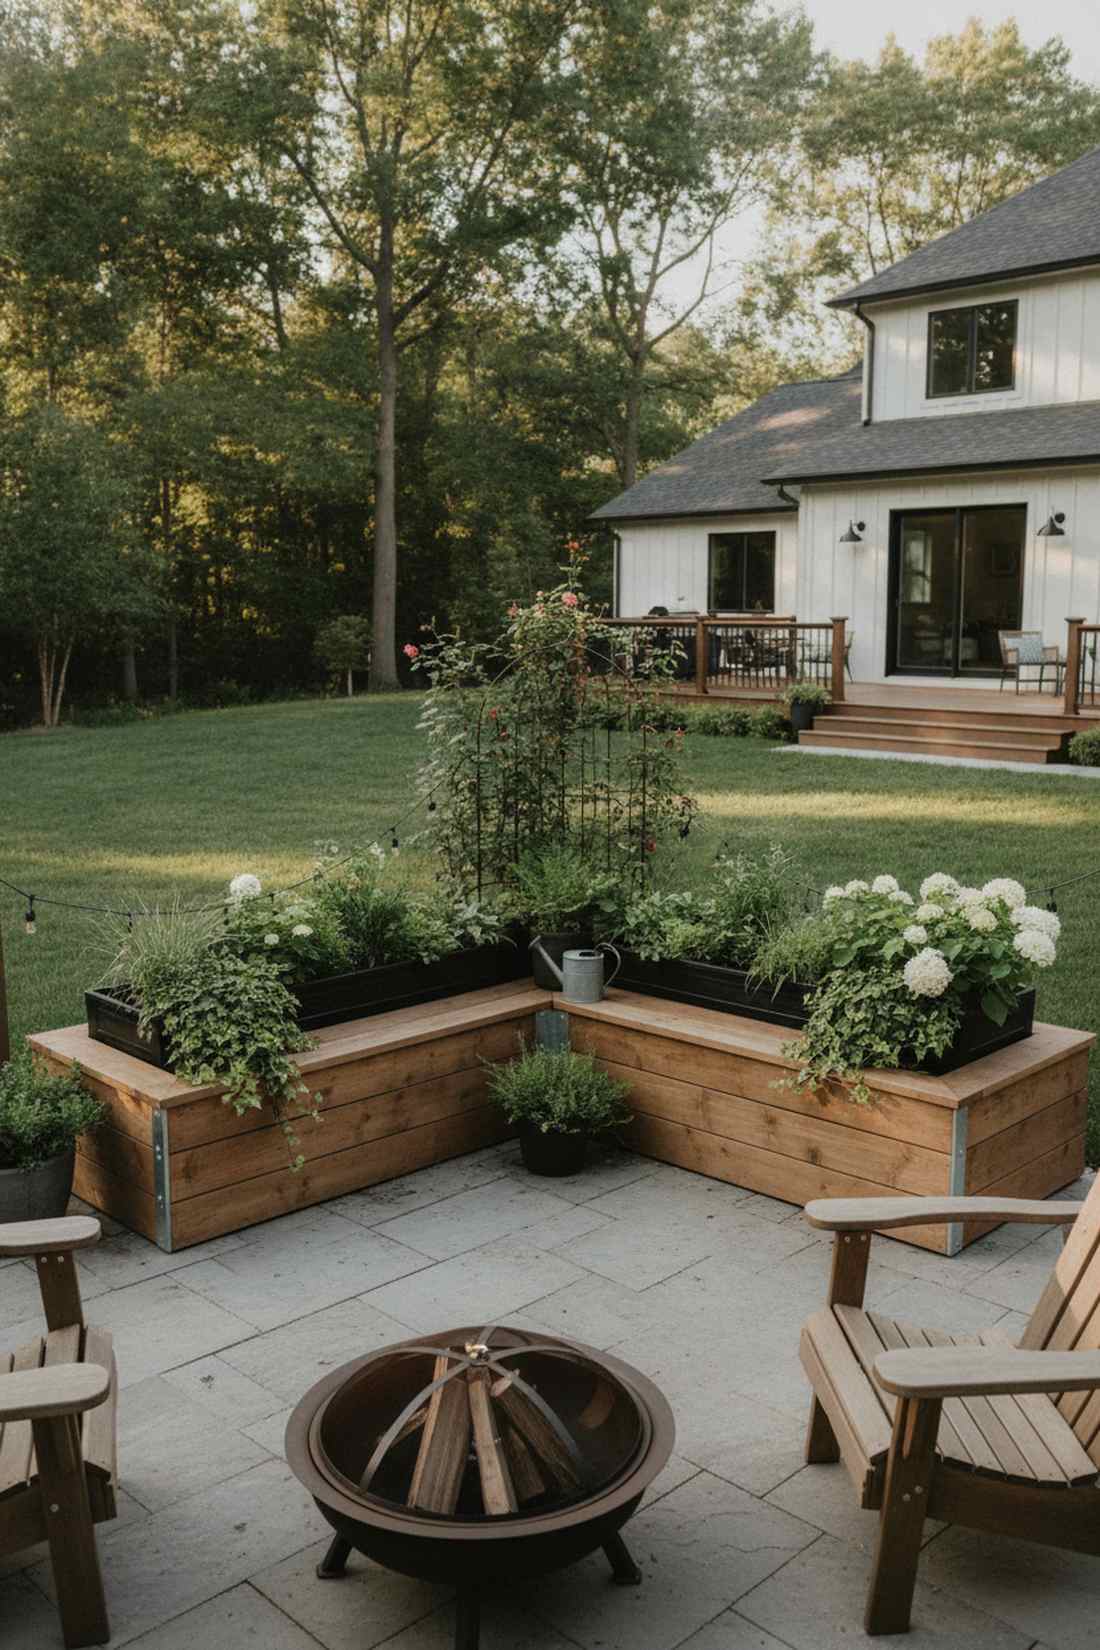
Nests perfectly into awkward patio edges to create a cozy, conversation-ready focal point. An L-shaped planter seating arrangement surrounds guests with fragrant herbs or blooming flowers right at shoulder height.
Empty corners are wasted real estate, but anchoring the space with built-in dirt boxes delivers a designer-level finish that defines the outdoor room. Installing a heavy-duty waterproof landscape membrane inside the boxes guarantees the wet soil won’t rot out your beautiful seating supports.
Lumber and lining materials run roughly $250–$400. Highly recommended for injecting vibrant life into sterile concrete patios.
- Key Materials: Cedar or composite boards, waterproof lining, soil
- Vibe / Style: Lush integrated courtyard
- Difficulty: Intermediate
- Budget Breakdown: Planter Wood: $180 | Bench/Liner: $120.
- Creator’s Tip: Build the planter boxes fully first and ensure they are dead-level before trying to bridge the bench seating across them.
- Smart Sourcing: heavy-duty waterproof planter liners (bulk roll), pre-cut cedar planter starter kits.
Stop buying standalone fire pit chairs. The built-in masonry trick below is safer and looks infinitely more expensive.
30. Fire Pit Surround Bench
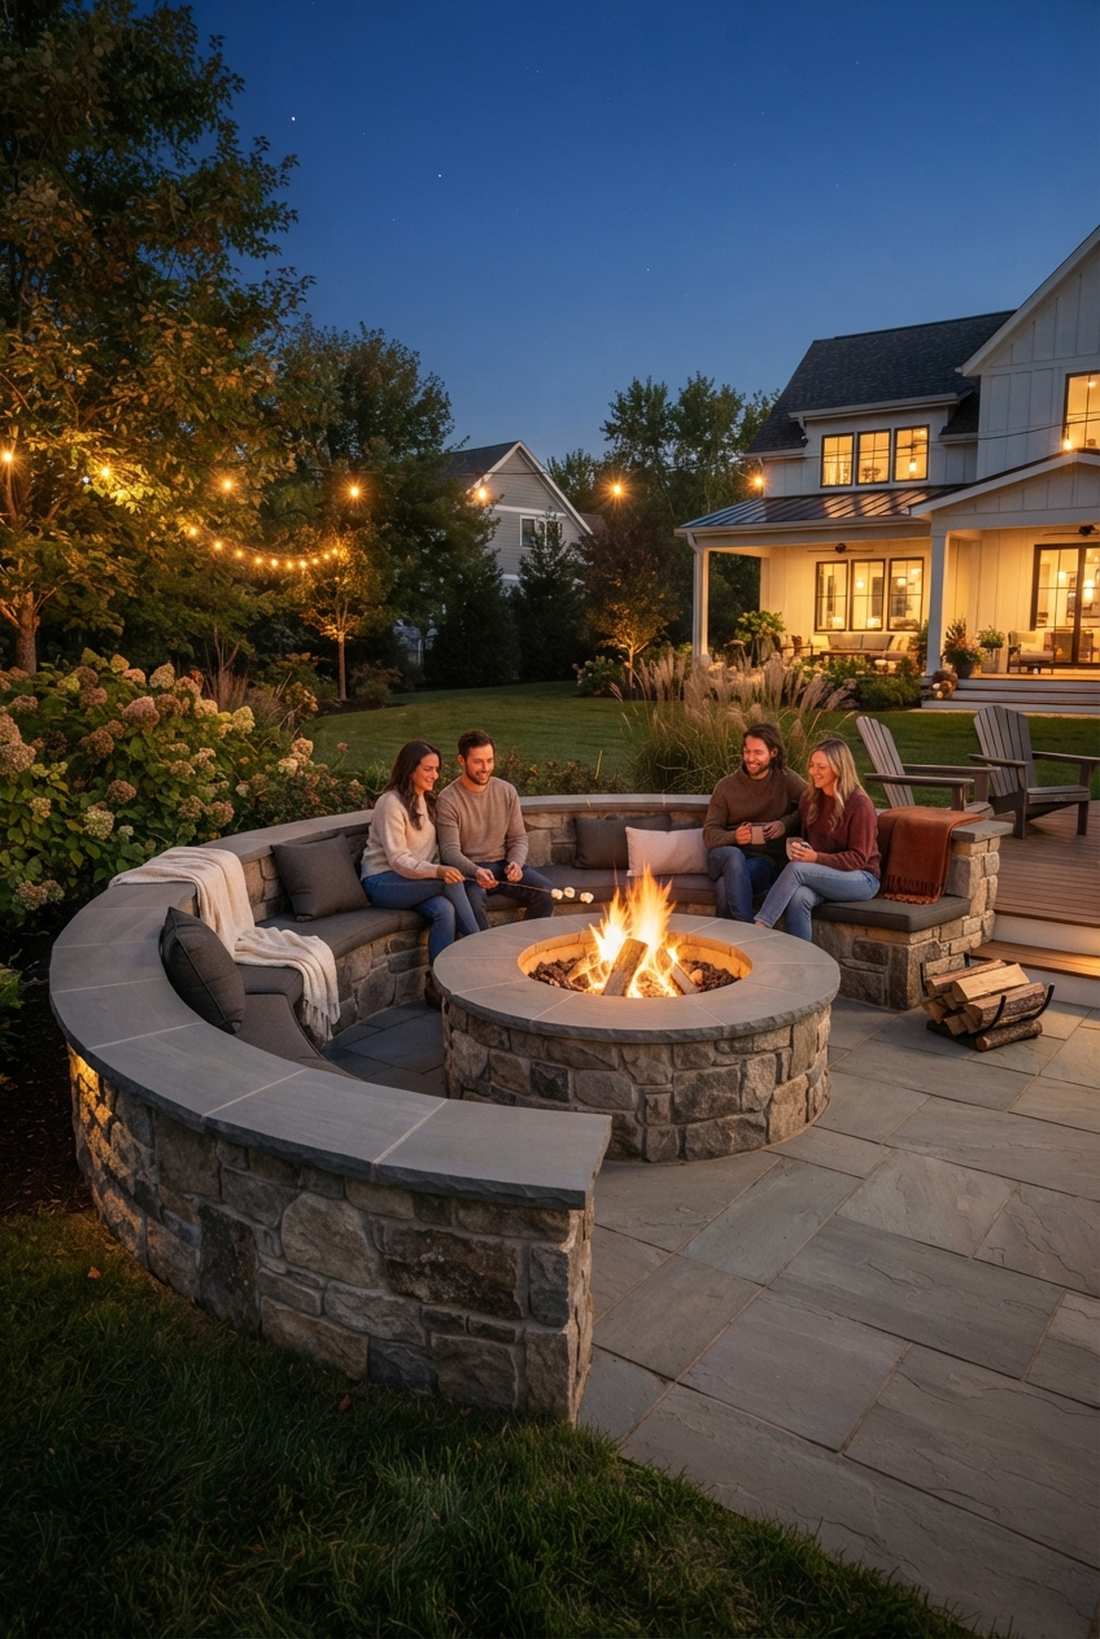
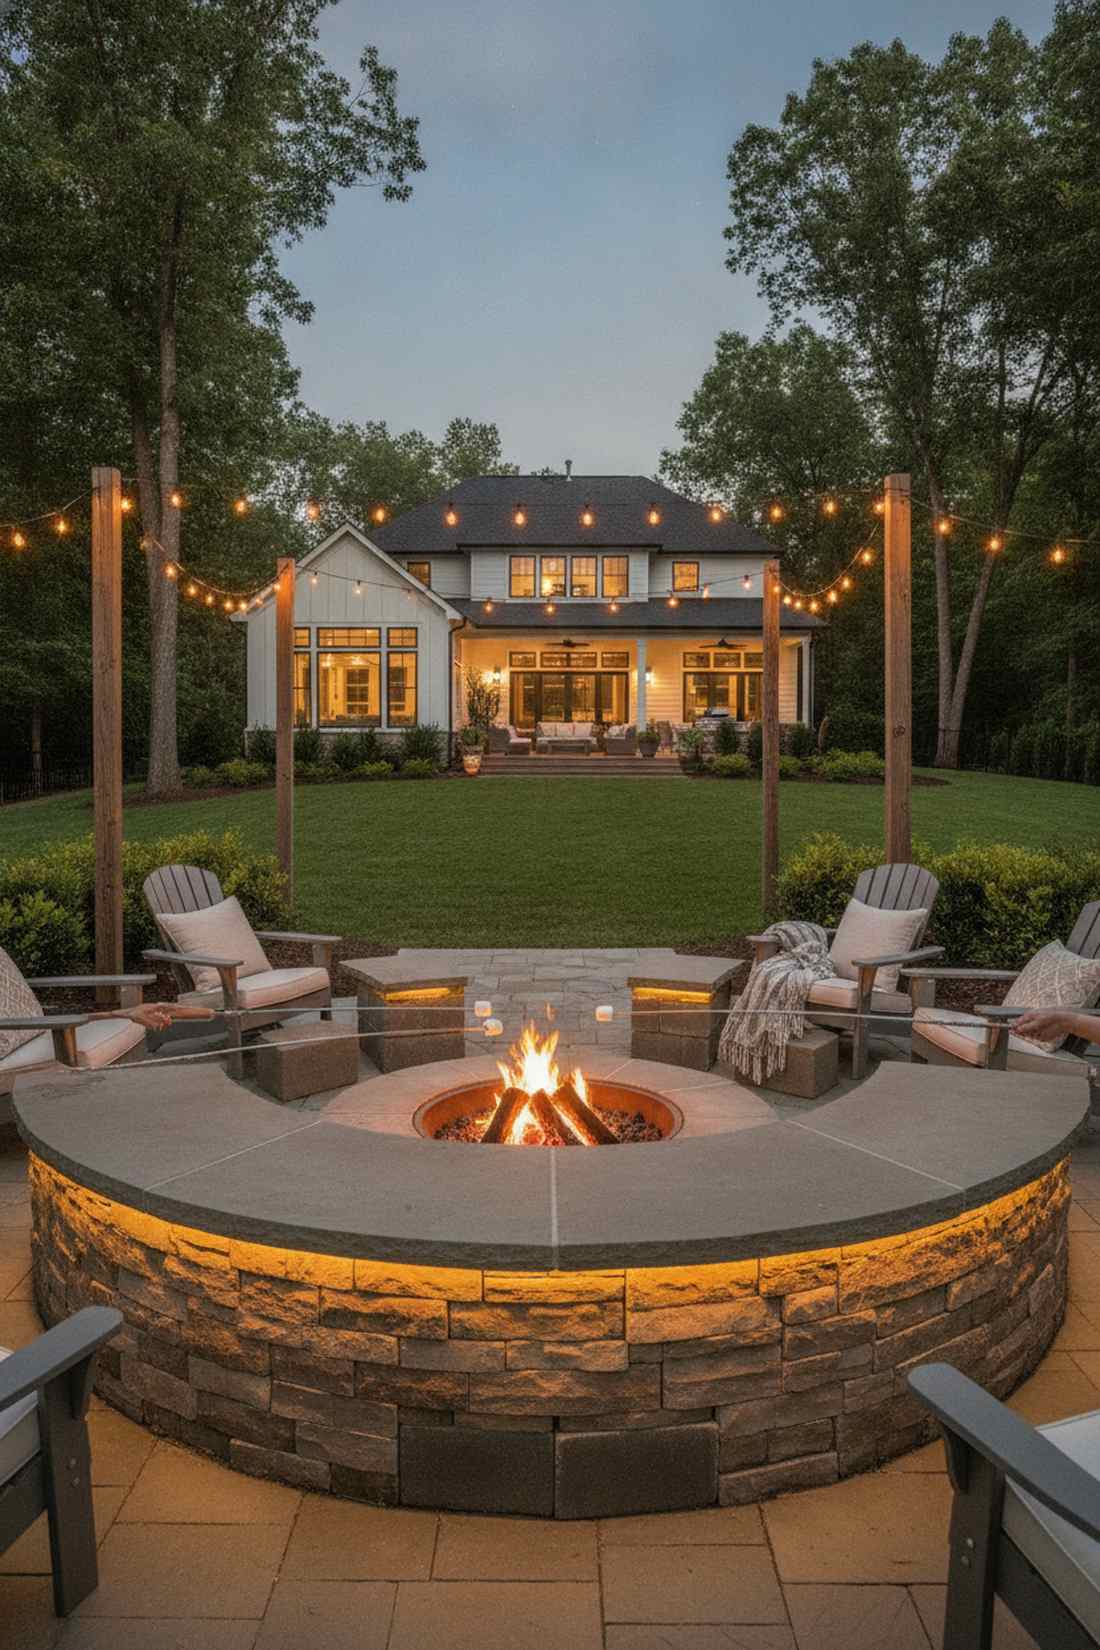
Creates an unbreakable circle of warmth perfect for late-night marshmallow roasting. A curved stone fire pit border provides massive thermal mass that radiates heat long after the embers die down.
Dragging plastic chairs around a fire is a hassle, but building a permanent stone ring looks far more expensive than it is and eliminates fire-safety hazards. Using commercial-grade fireproof mortar ensures the extreme temperature swings won’t crack the seating wall over time.
Masonry and concrete footings cost around $300–$500. Save this blueprint for the ultimate backyard entertainment upgrade!
- Key Materials: Cinder blocks, stone veneer, fire-rated mortar
- Vibe / Style: Cozy resort lounge
- Difficulty: Advanced (masonry skills required)
- Budget Breakdown: Base Blocks: $150 | Veneer & Mortar: $250.
- Creator’s Tip: Keep the seating exactly 36 to 48 inches away from the active flame ring to prevent guests from overheating or scorching their legs.
- Smart Sourcing: commercial-grade refractory mortar kits, natural stone veneer panels (pre-cut).
31. Raised Bed Bench Edge
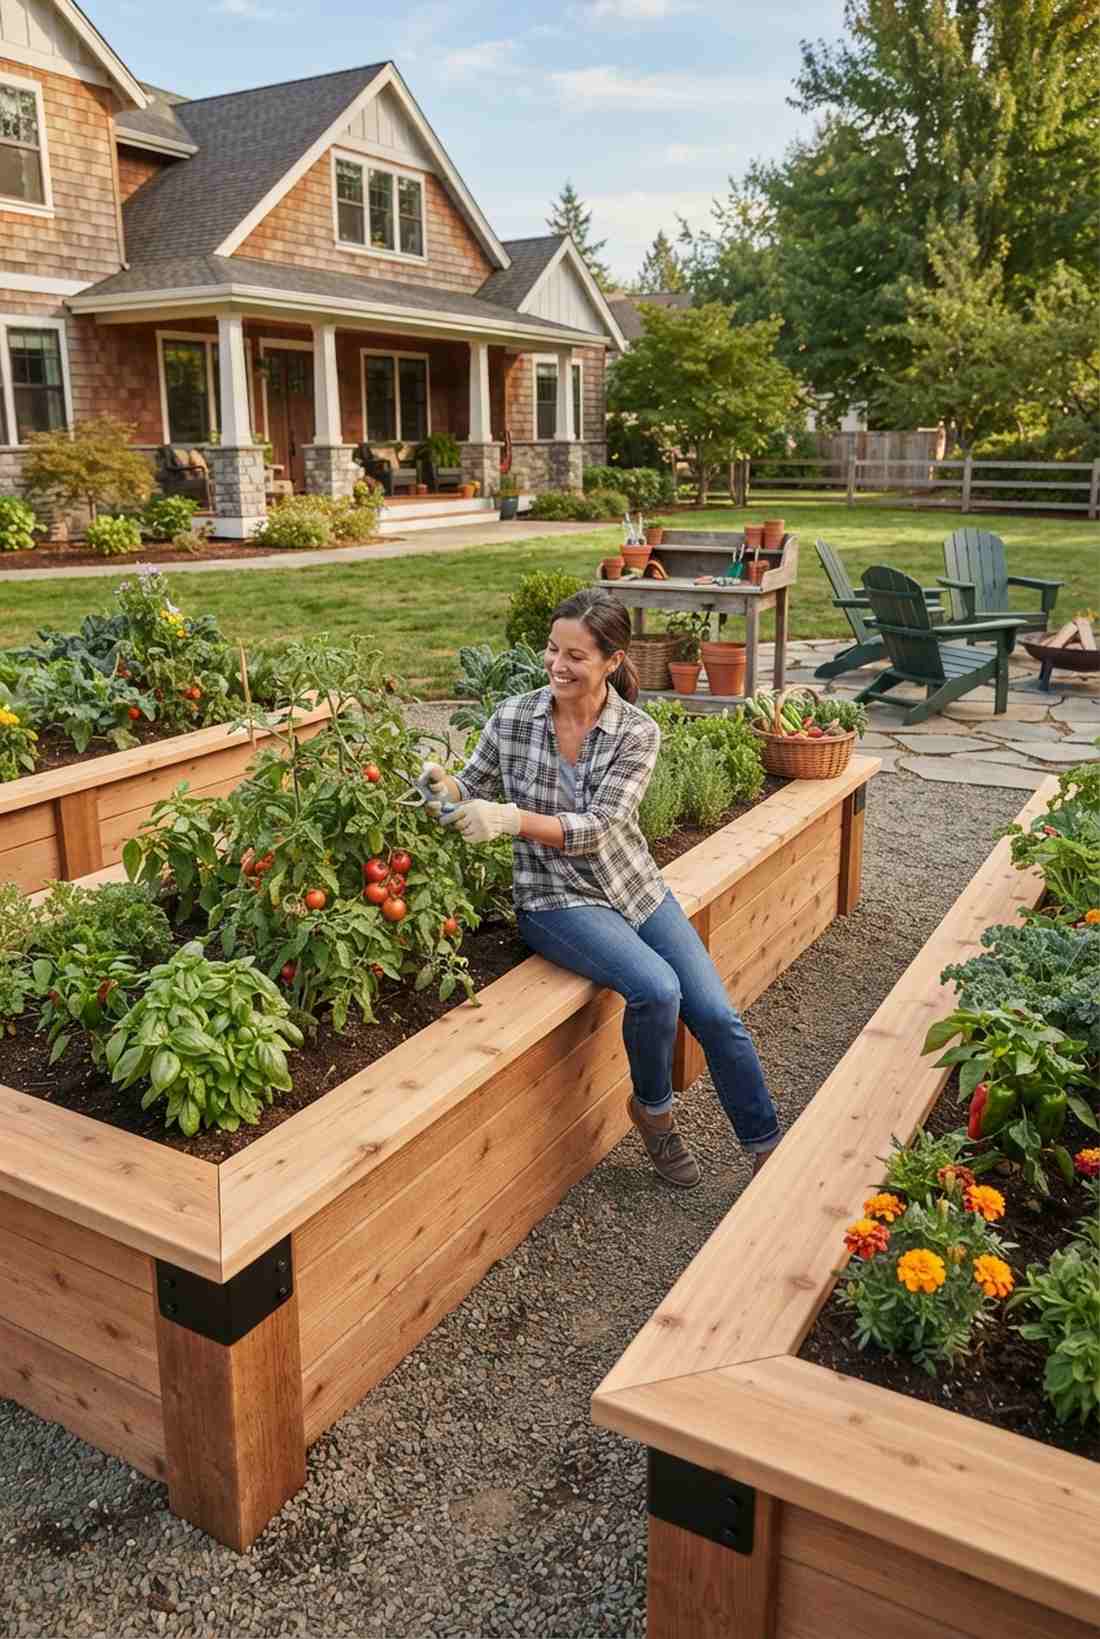
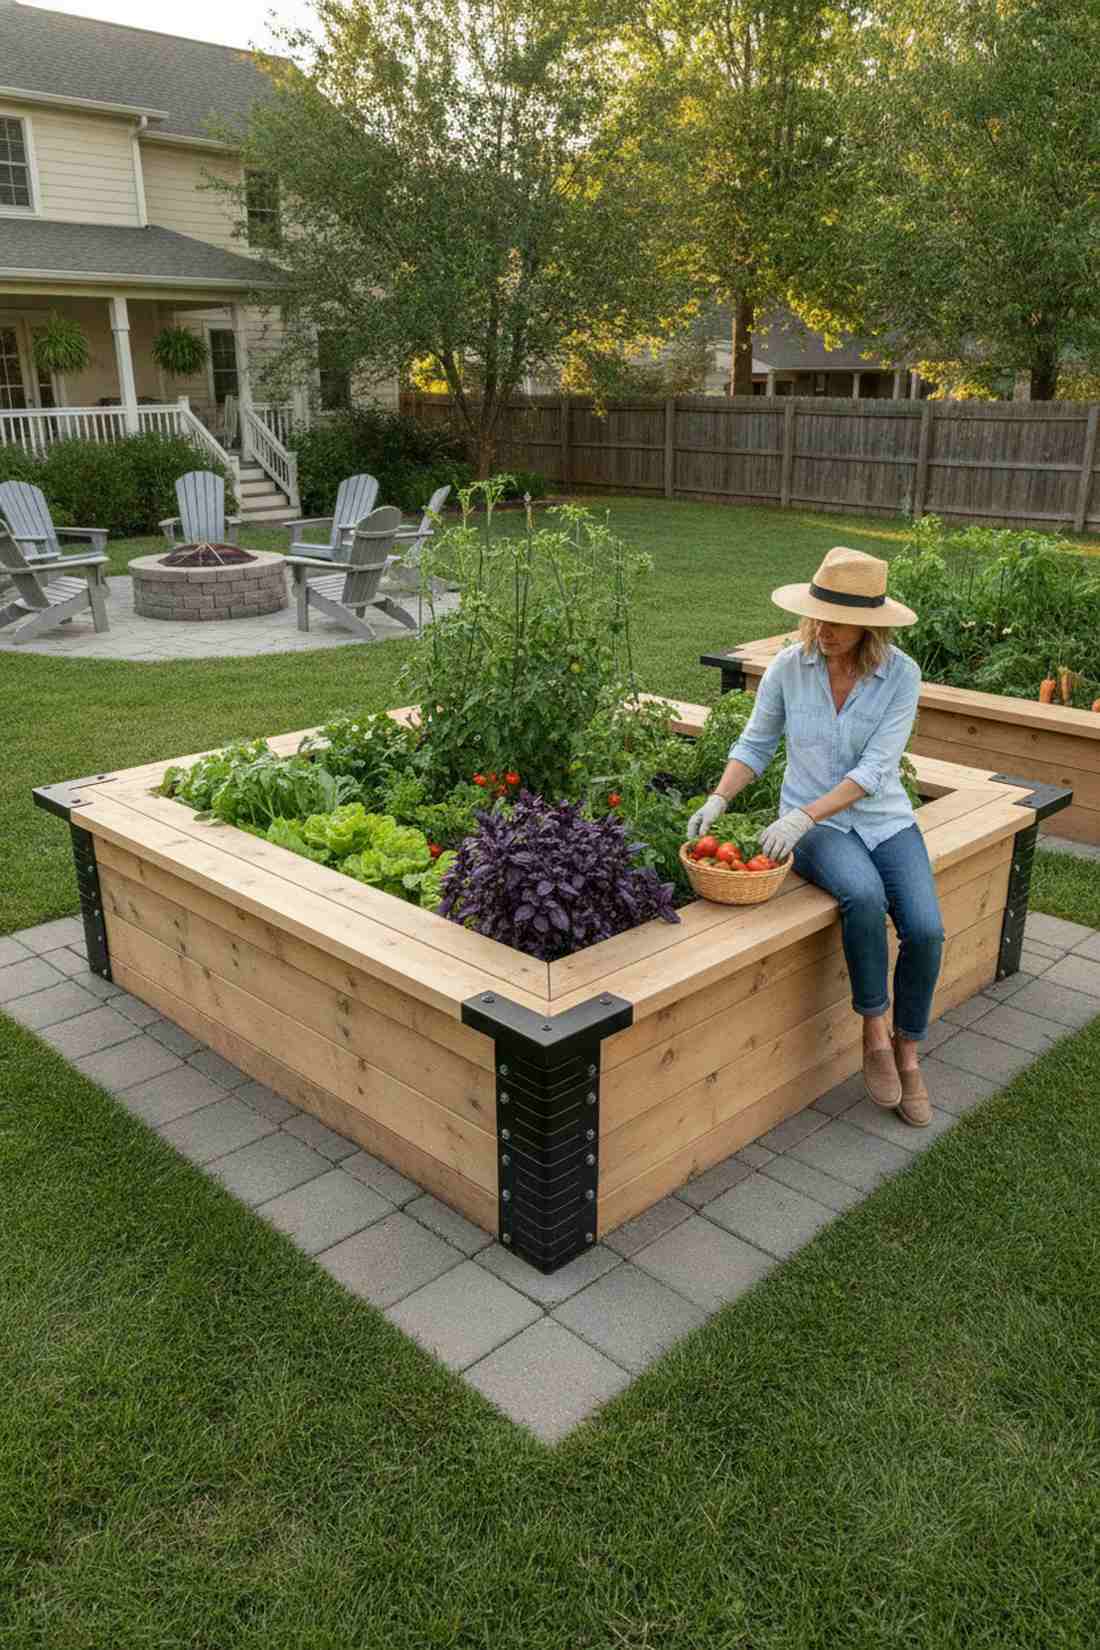
Turns tedious gardening chores into a comfortable, seated luxury. Widening the cap of a raised garden box provides a casual perching spot exactly where you need to prune or harvest.
Thin garden walls hurt your knees, but slapping a massive 12-inch cap board on top gives a surprisingly premium look that makes tending plants effortless. Securing the edges with heavy-duty structural corner brackets ensures the dirt won’t bow the walls outward when someone sits on the edge.
Upgrading your caps costs roughly $80–$150 per bed. Pin this genius hack if you want a smarter, painless vegetable garden!
- Key Materials: 2×12 cap lumber, structural timber screws, retaining blocks
- Vibe / Style: Ergonomic functional farm
- Difficulty: Easy
- Budget Breakdown: Wide Cap Boards: $90 | Corner Brackets: $45.
- Creator’s Tip: Miter the corners of the wide cap boards at a perfect 45-degree angle to hide end-grains and elevate the finished aesthetic.
- Smart Sourcing: heavy-duty structural corner brackets (bulk pack), weatherproof decking screws.
32. Wall-Mounted Fold-Down Bench
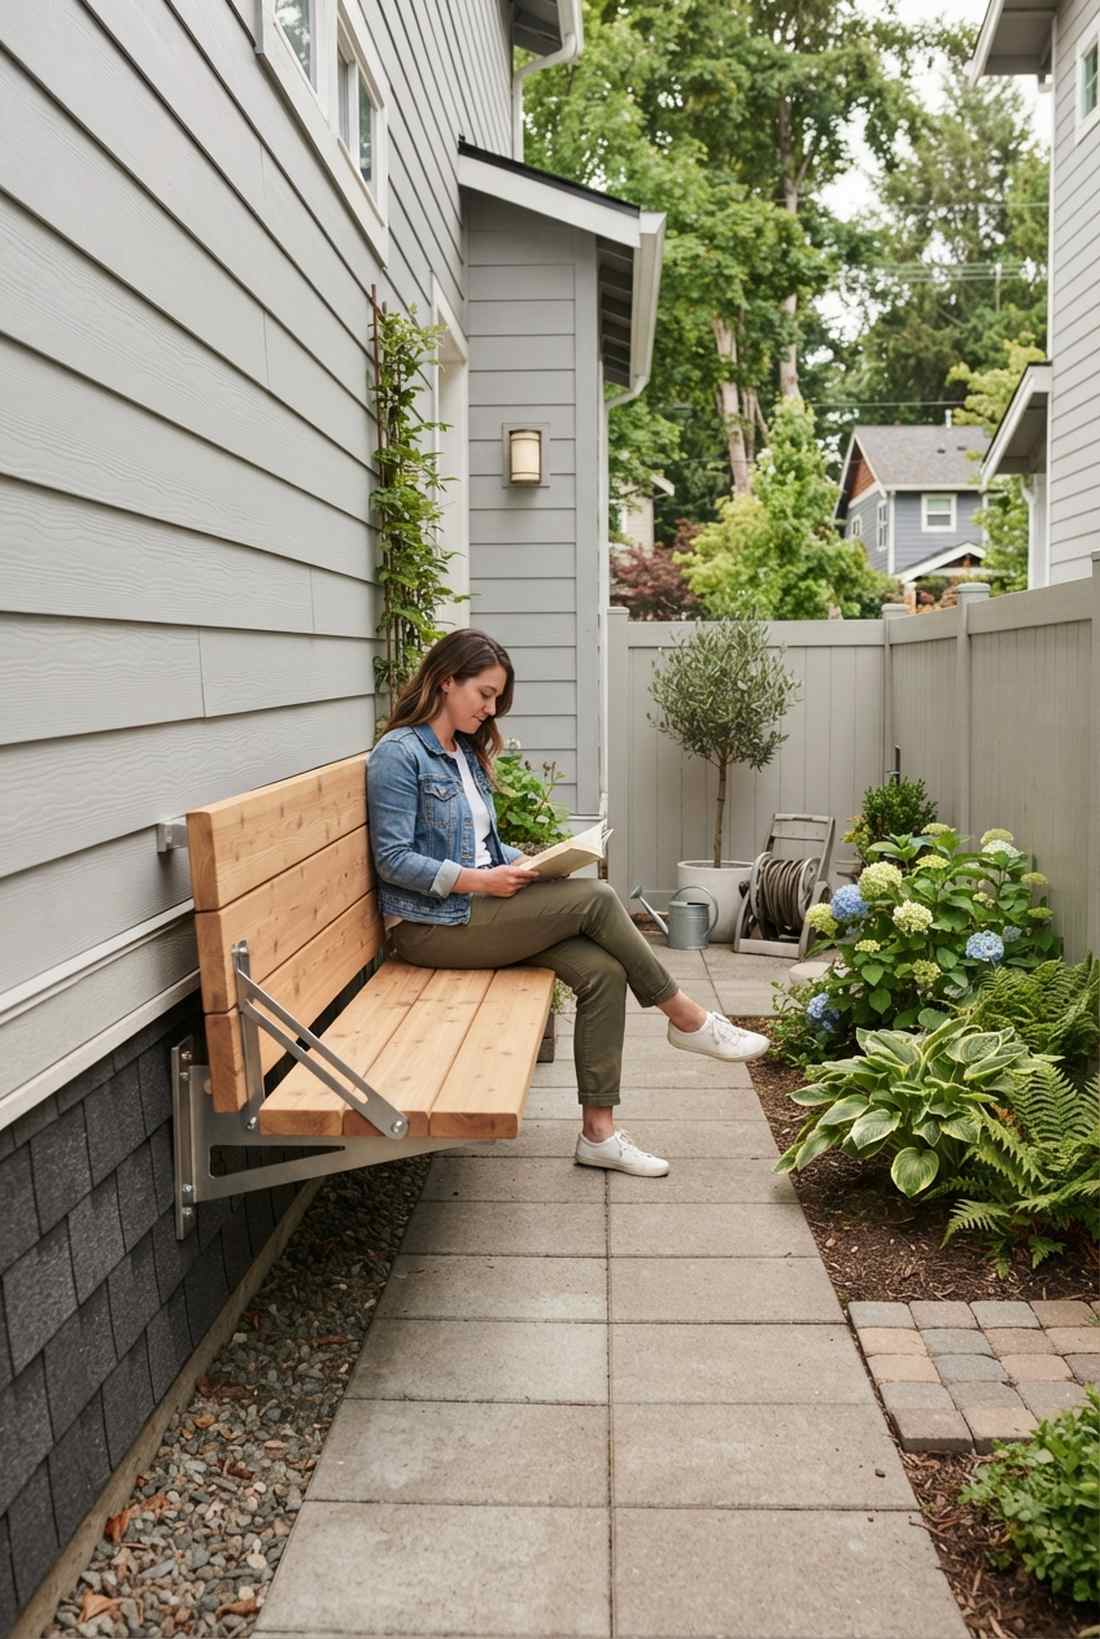
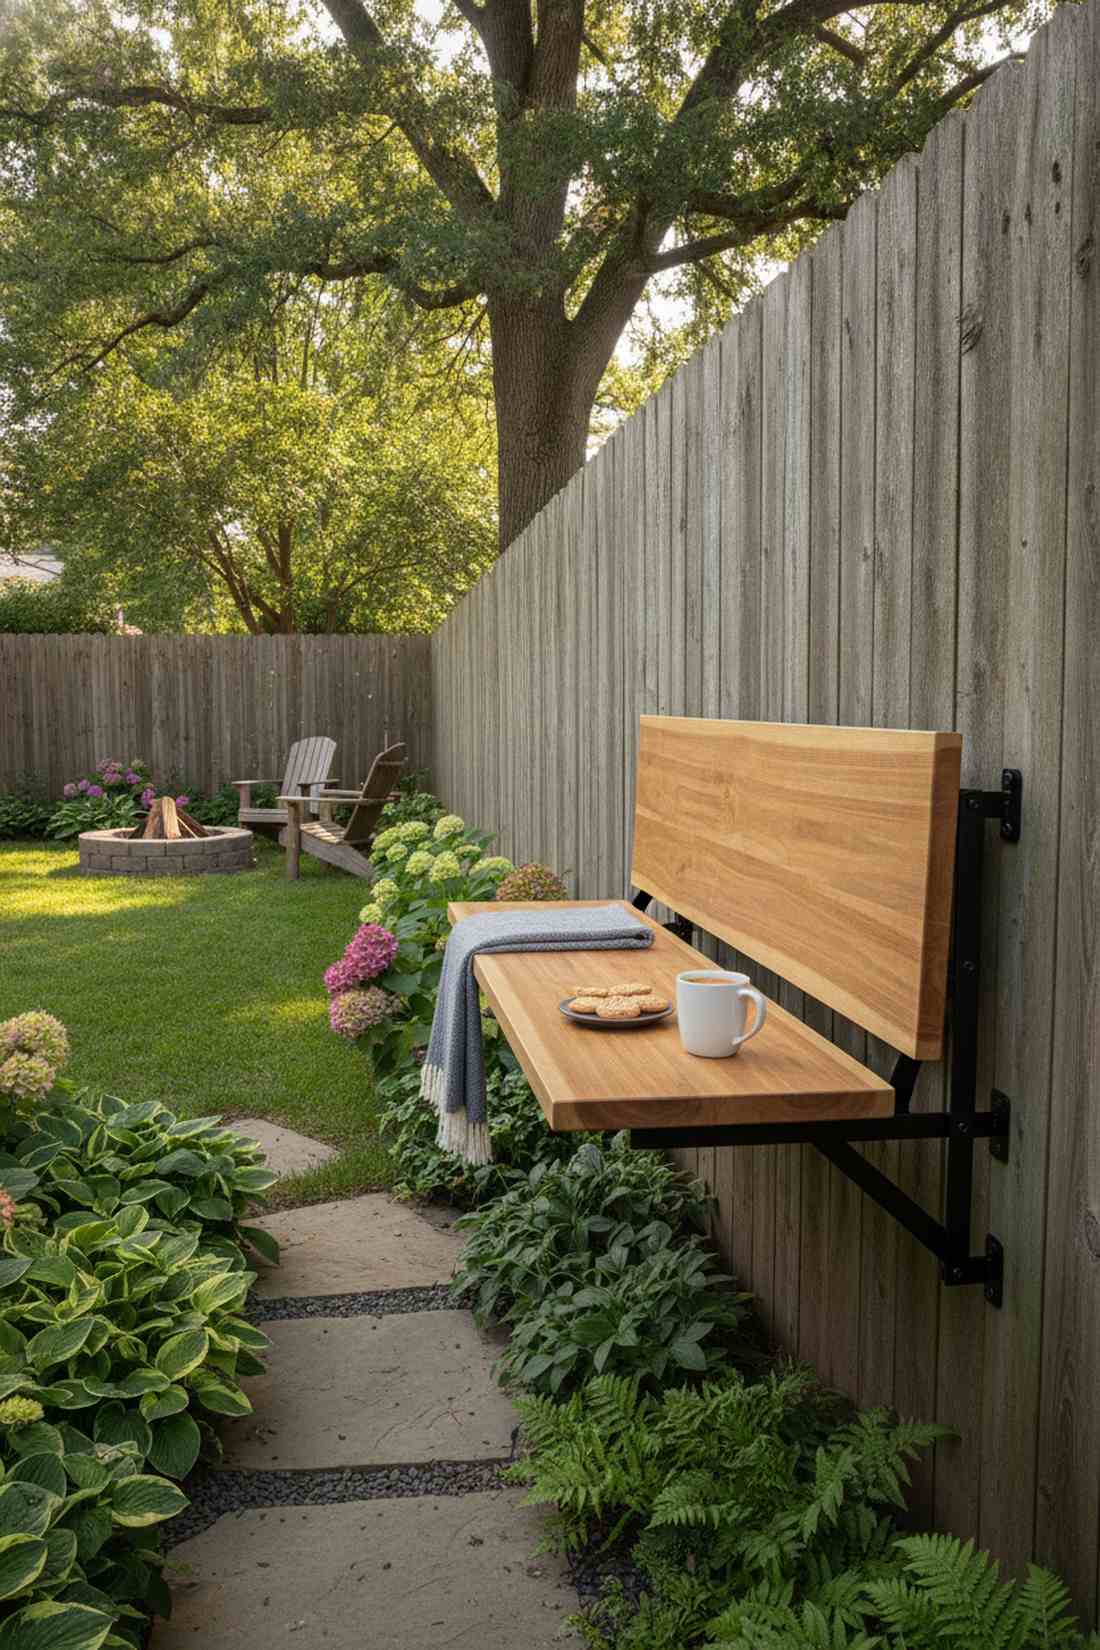
Vanishes like magic to preserve precious walkway space in narrow side-yards. A collapsible wall-hinged seat is the ultimate clever hack for tiny urban alleys or compact garage patios.
Permanent benches choke up small pathways, but installing a heavy-duty folding flap looks far more expensive than it is and saves massive square footage. Utilizing marine-grade stainless folding shelf brackets guarantees the bench holds 500+ pounds without ripping out of the wall.
You can build this space-saving marvel for under $100. It’s a fast upgrade that completely changes the utility of tight spaces.
- Key Materials: 2×12 seat board, heavy-duty folding hinges, wall cleats
- Vibe / Style: Ultra-compact utility
- Difficulty: Intermediate (requires locating wall studs)
- Budget Breakdown: Hinges: $50 | Seat Board: $30.
- Creator’s Tip: Never mount the hinges into drywall or siding alone; you must drive massive lag bolts dead-center into the structural wall studs.
- Smart Sourcing: heavy-duty collapsible shelf brackets (500lb rating), structural steel lag bolts.
Stone & Masonry Benches
33. Dry-Stack Stone Bench
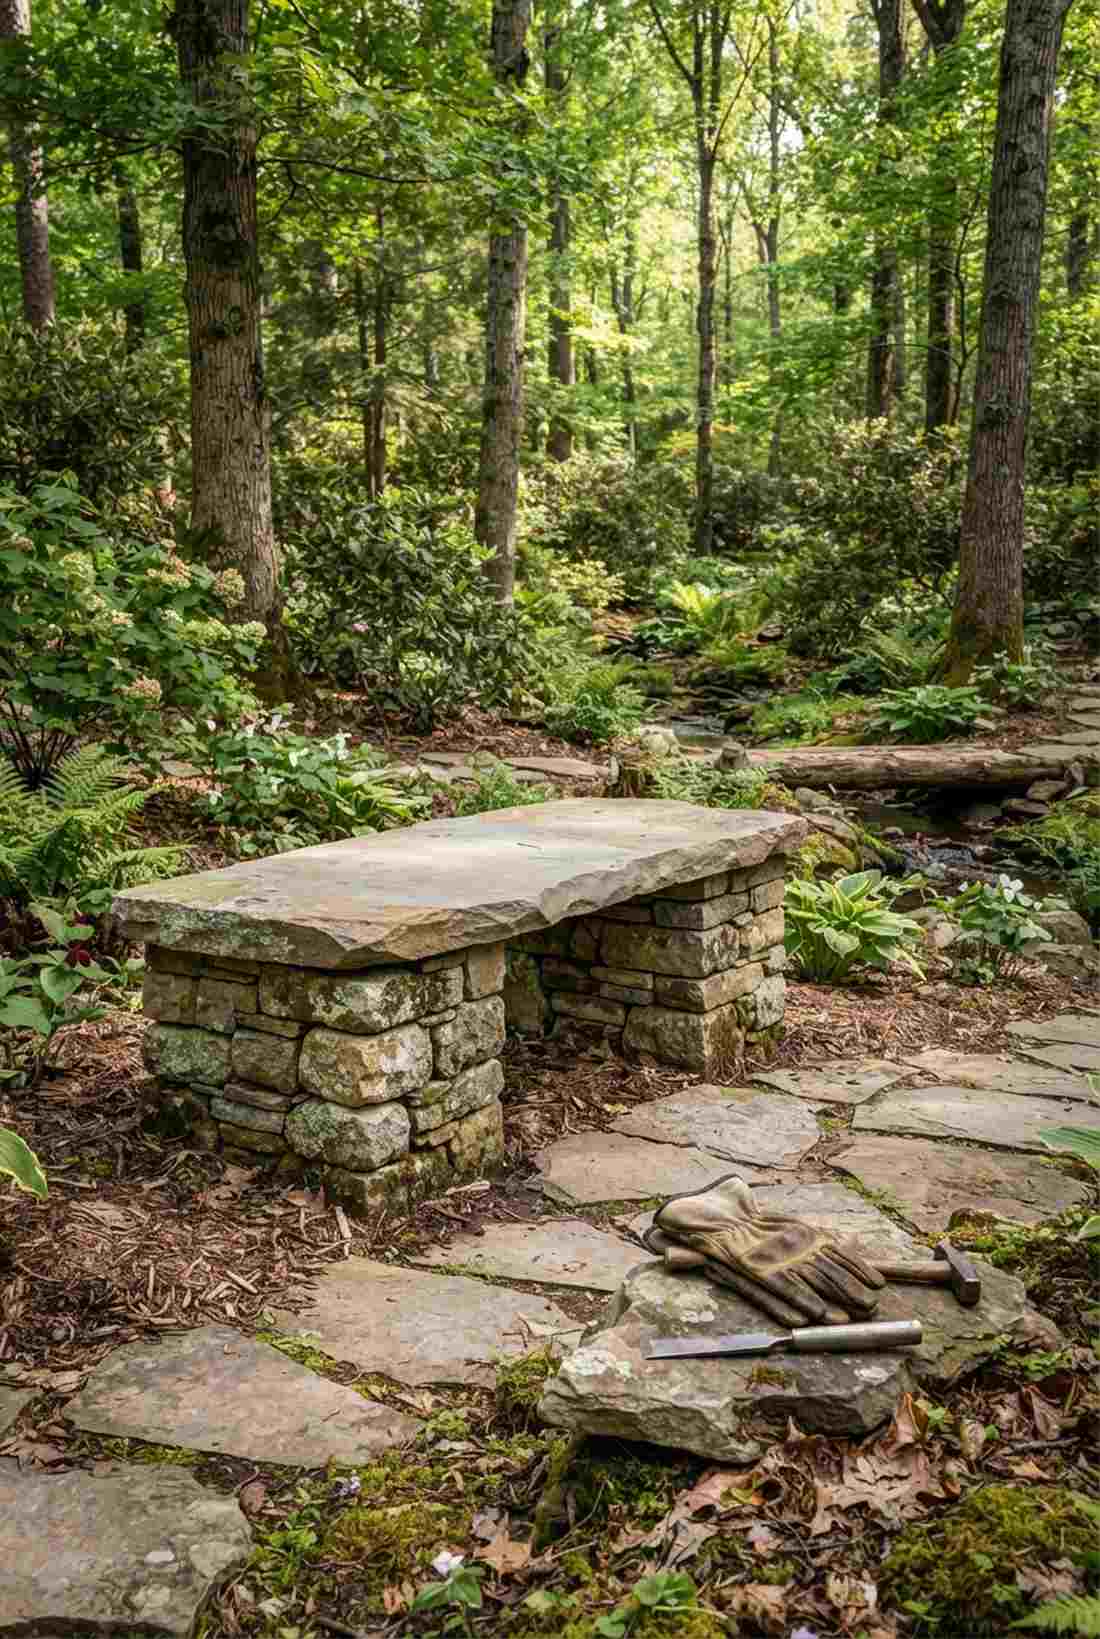
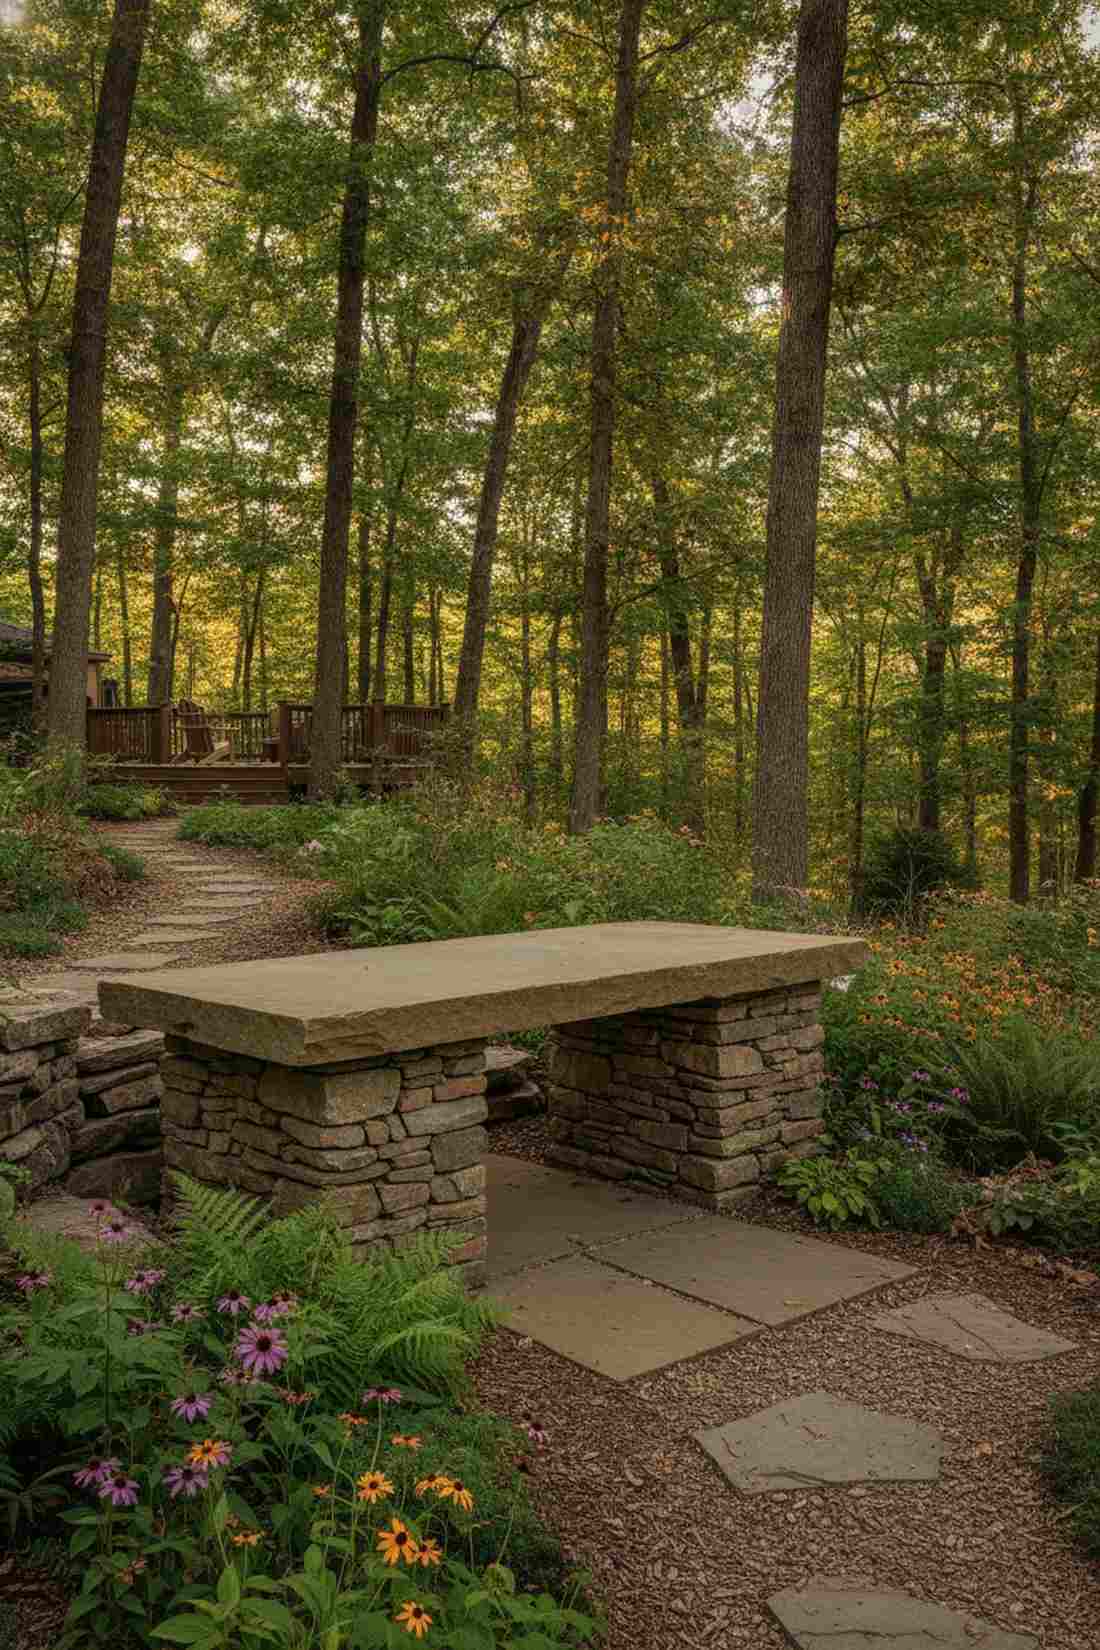
Exudes the ancient, mystical energy of a forgotten Celtic ruin in the woods. A mortarless stacked fieldstone seat blends flawlessly into informal woodland borders and naturalistic native gardens.
Most people think you need messy cement for masonry, but using gravity and friction delivers a surprisingly premium look that allows for easy relocation later. Choosing premium oversized flagstone caps gives you a smooth, flat resting surface while the irregular base stones lock together like a heavy puzzle.
Sourcing local fieldstone can cost $100–$200, or sometimes it’s free from farmers! Pin this to your natural landscaping inspiration board.
- Key Materials: Flat quarried fieldstone, large flagstone cap
- Vibe / Style: Ancient naturalistic woodland
- Difficulty: Beginner-friendly (heavy lifting)
- Budget Breakdown: Base Stone: $90 | Capstone Slab: $80.
- Creator’s Tip: Slightly slope the stacked piers inward (called “batter”) as you build up; this dramatically increases the structural stability without using mortar.
- Smart Sourcing: heavy-duty landscaping work gloves (bulk pack), professional stone mason chisels.
You might think stonework requires a professional mason, but this final dry-stack method is insanely beginner-friendly…
34. Granite Slab Bench on Boulder Piers
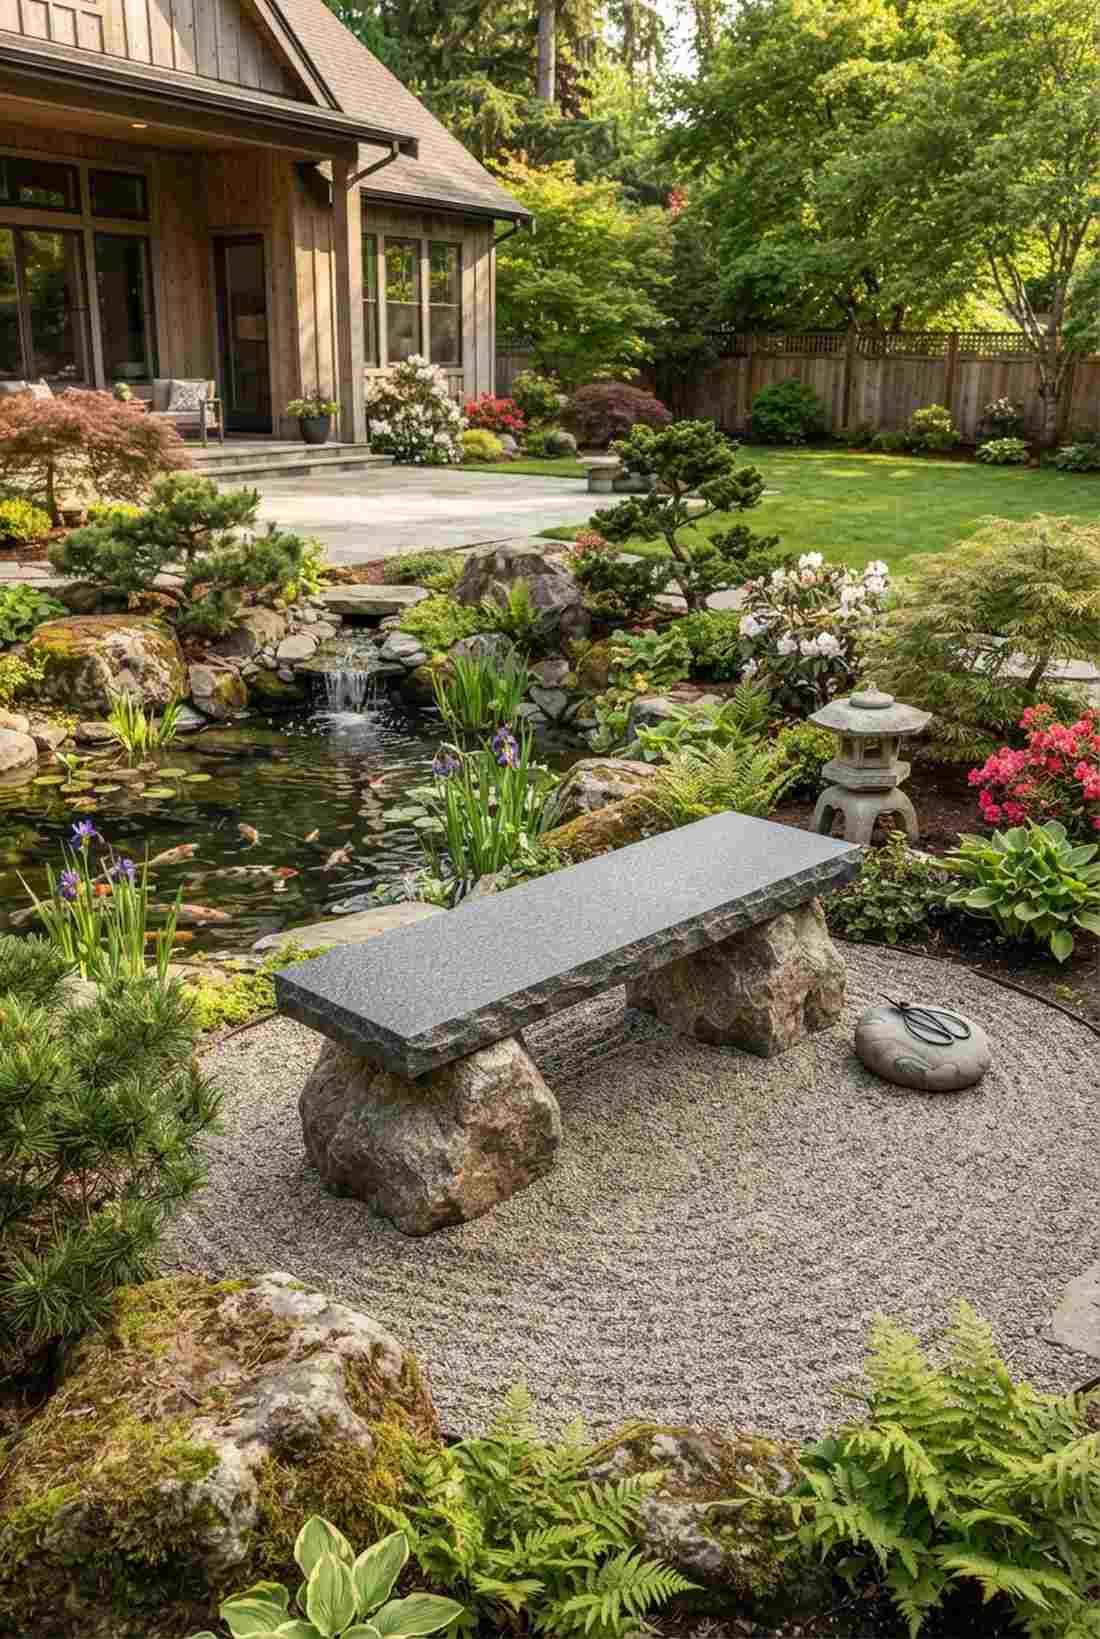
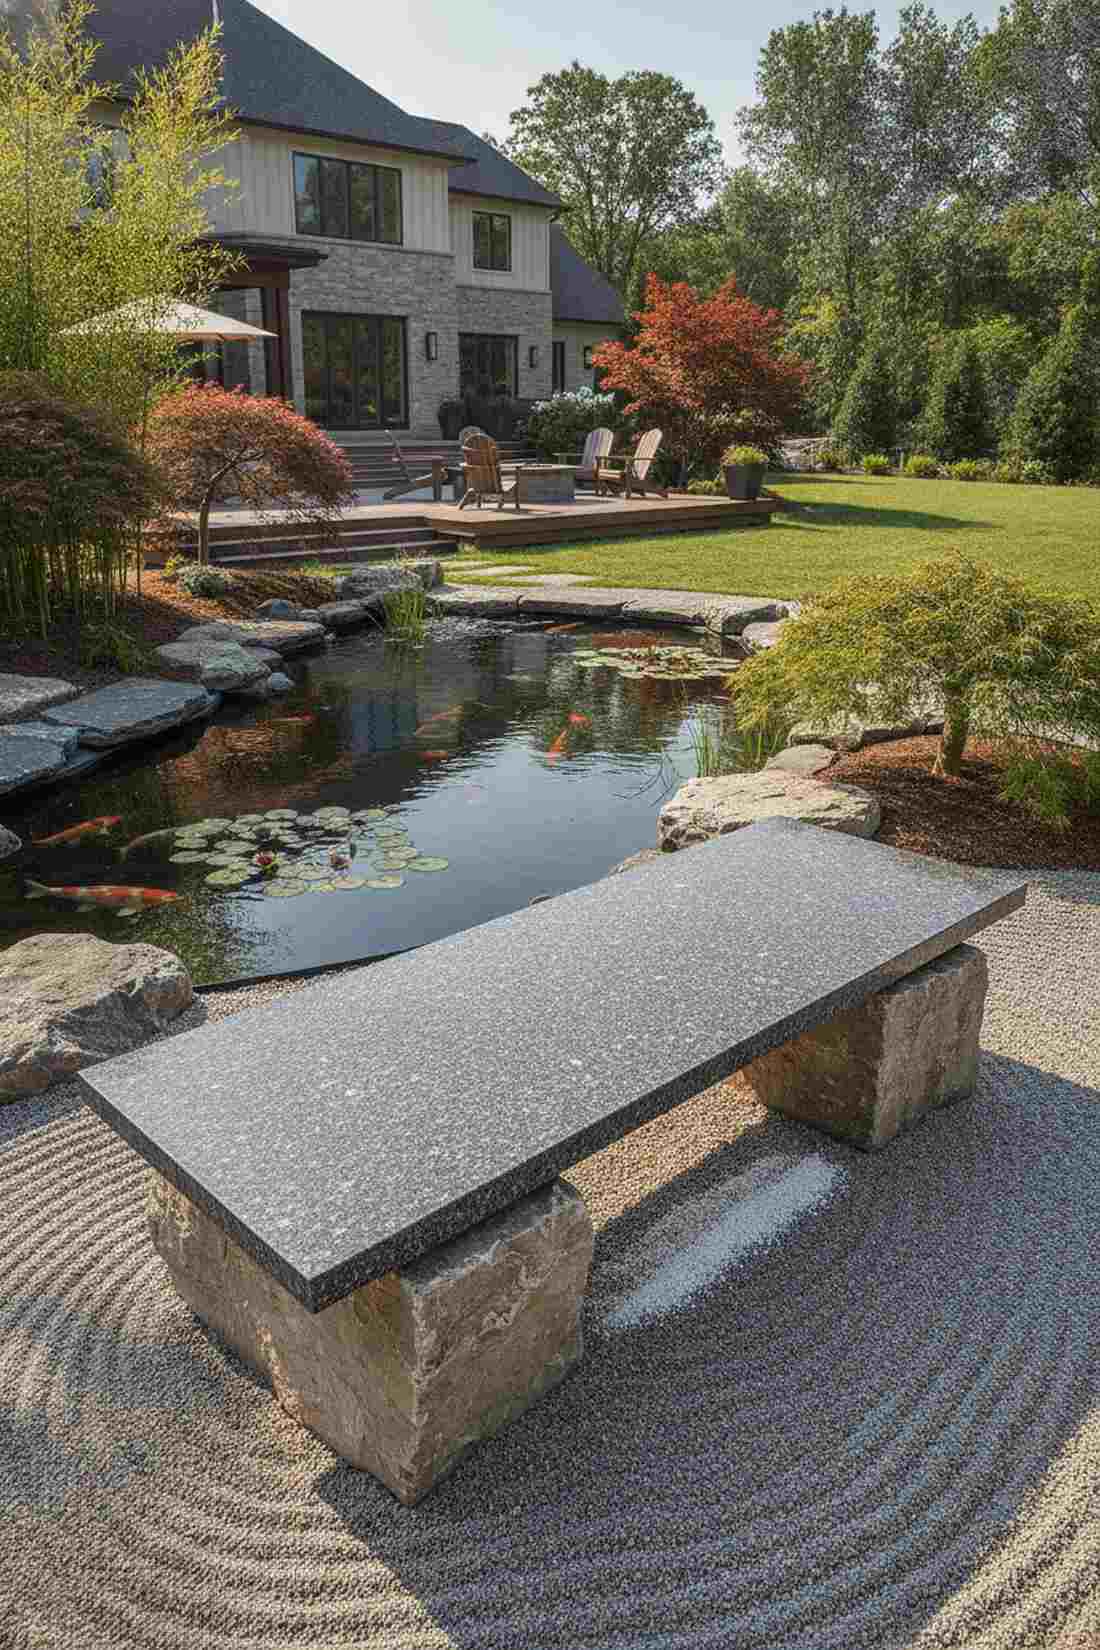
Juxtaposes rugged, wild geology with sleek, modern human engineering. This thermal-finished granite resting block serves as a breathtaking, Zen-like focal piece next to a koi pond or gravel meditation space.
Using basic wooden legs cheapens expensive stone, but balancing a clean slab on raw boulders looks far more expensive than it is. Sourcing a pre-cut thermal textured granite slab provides an incredibly safe, slip-resistant seating surface that highlights the glittering quartz crystals inside.
Granite slabs run $200–$400, while the boulders are relatively cheap. Highly recommended for a high-end, gallery-quality installation.
- Key Materials: 3-inch granite slab, two large base boulders
- Vibe / Style: Zen garden minimalism
- Difficulty: Intermediate (machinery needed to move stone)
- Budget Breakdown: Granite Slab: $300 | Boulders: $80.
- Creator’s Tip: Use a thick layer of crushed stone dust hidden under the slab to perfectly level the granite against the irregular boulder tops.
- Smart Sourcing: pre-cut granite garden slabs (thermal finish), commercial stone dust leveling bags.
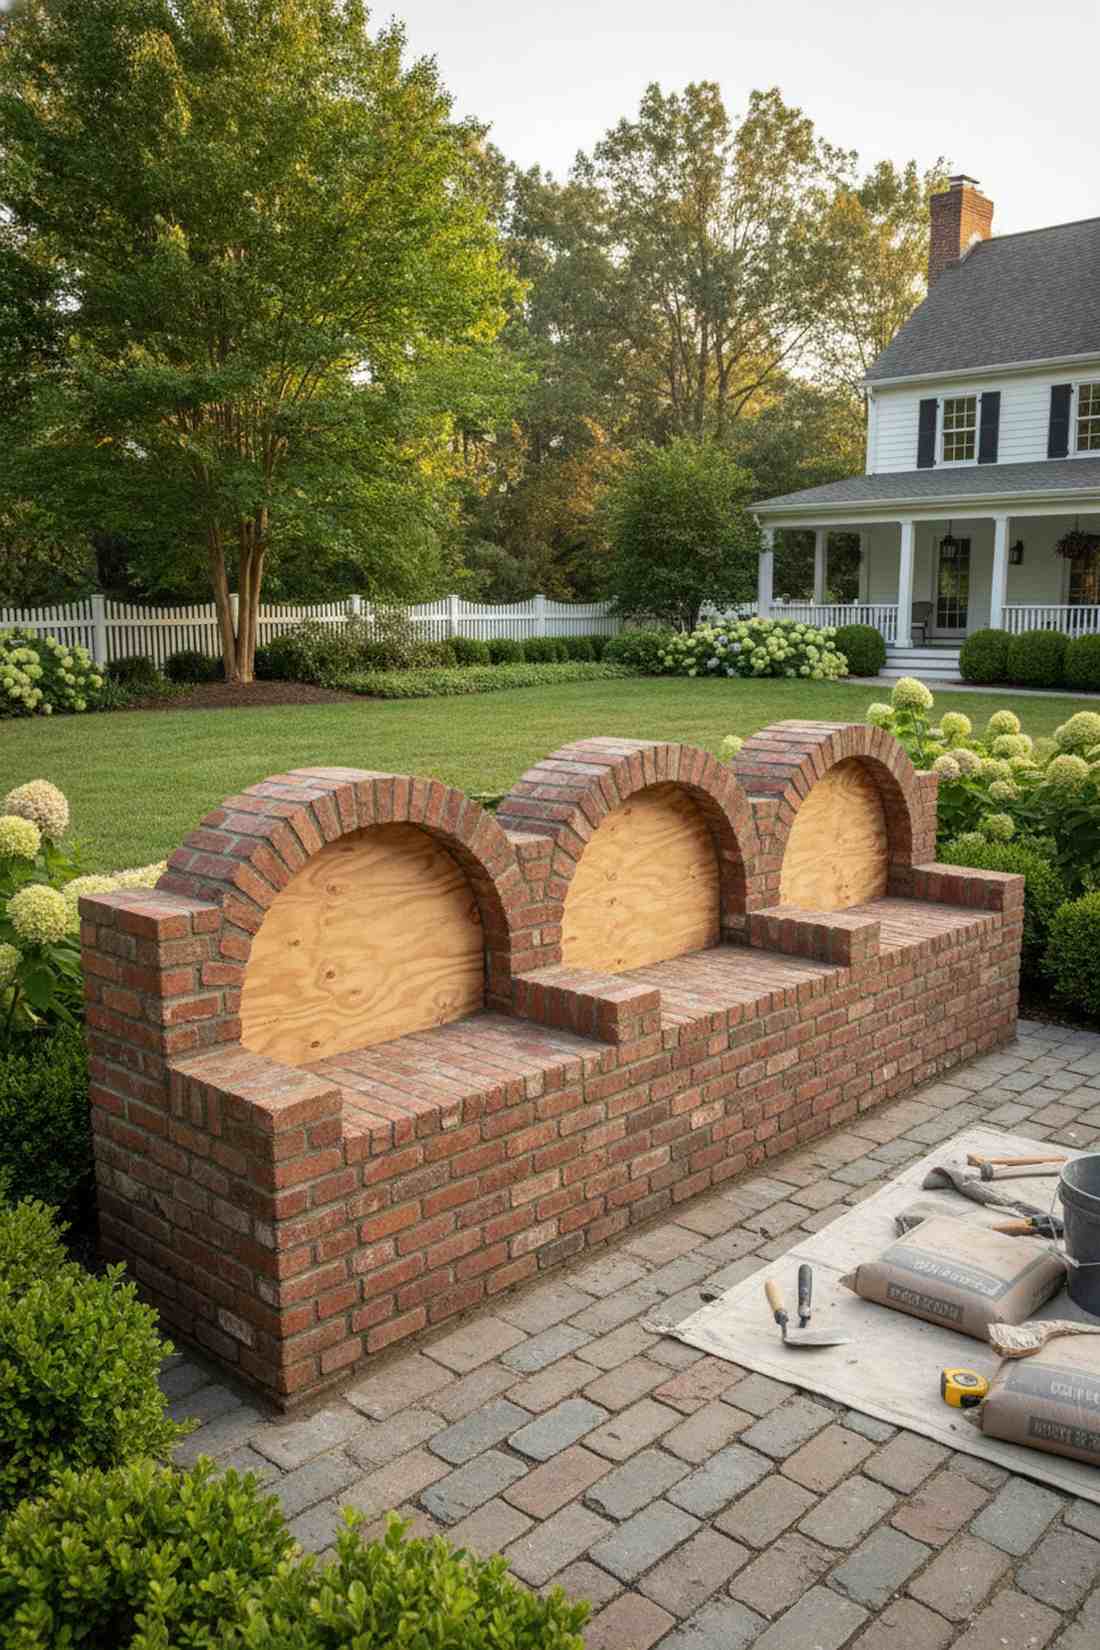
35. Brick Masonry Bench With Arch Details
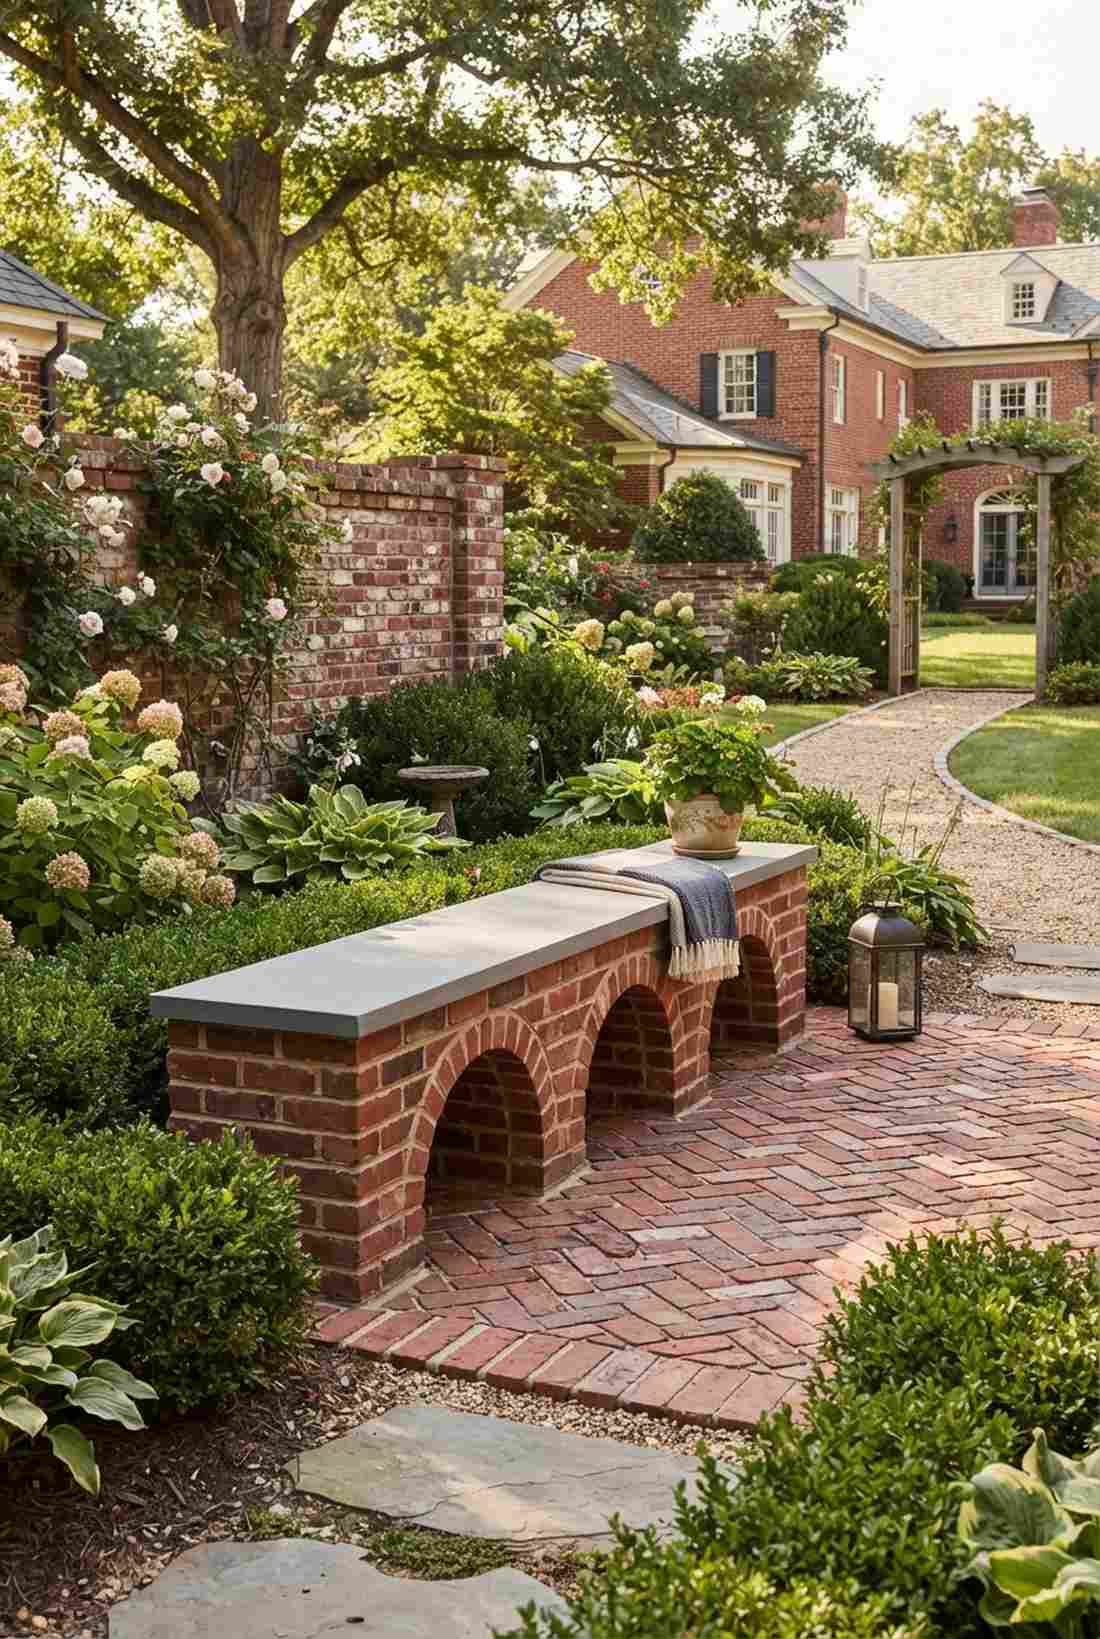
Echoes the rich, warm heritage of historical colonial courtyards. Building a classic red brick bench wall adds immense architectural permanence and formal elegance to any traditional property.
Solid brick blocks look heavy and oppressive, but integrating hollow arched openings delivers a designer-level finish that lightens the visual footprint. Relying on pre-mixed high-adhesion mortar ensures your intricate archwork locks together forever without crumbling.
Bricks and mortar for a 6-foot span cost roughly $200–$300. Save this classic architectural blueprint for a stunning weekend project.
- Key Materials: Clay bricks, mortar, plywood arch templates
- Vibe / Style: Formal colonial heritage
- Difficulty: Advanced (bricklaying skills needed)
- Budget Breakdown: Bricks: $180 | Mortar: $60.
- Creator’s Tip: Build a sturdy plywood template to support the arched bricks; do not remove the wood until the mortar has cured for at least 48 hours.
- Smart Sourcing: professional bricklaying trowel kits, high-adhesion structural mortar (bulk bags).
36. Flagstone Bench With Moss Joints
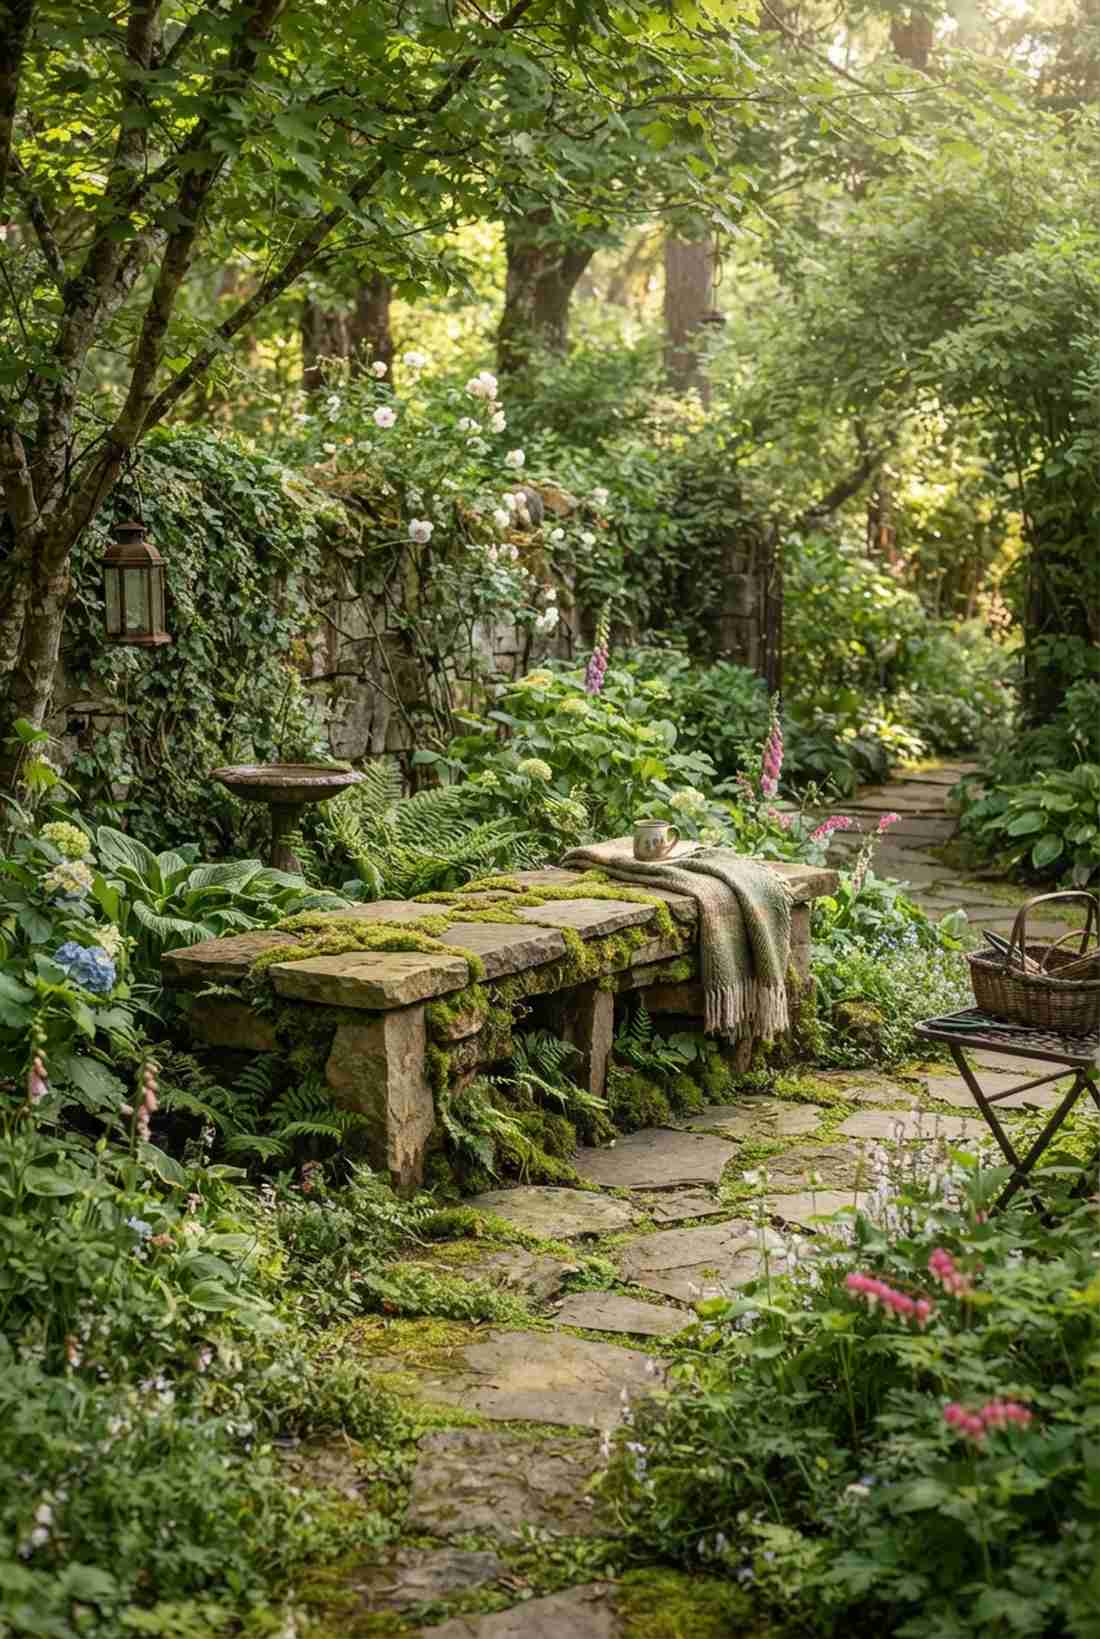
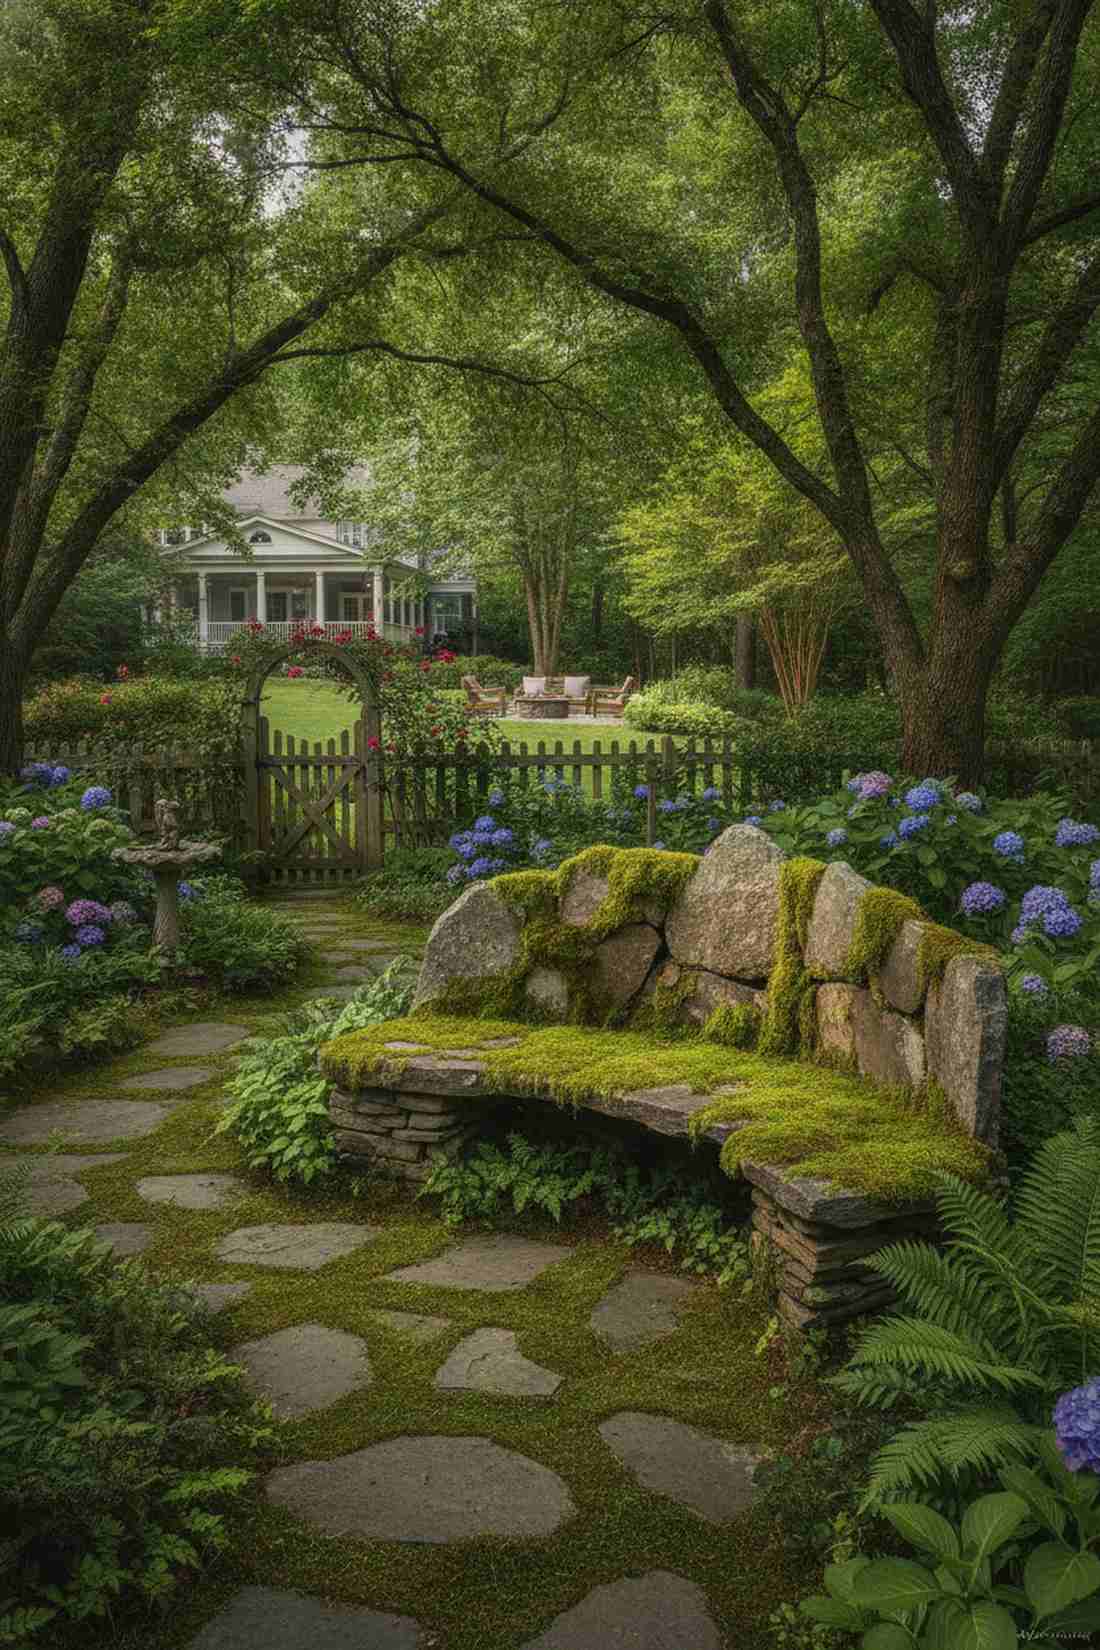
Looks like a lush, living relic reclaimed by the forest floor. A moss-filled flagstone seat softens hard rock edges into a romantic, fairy-tale gathering spot perfect for deep shade.
Standard cement joints look harsh in nature, but intentionally packing the gaps with soil gives a surprisingly premium, aged aesthetic that money can’t buy. Utilizing a specialized moss slurry starter kit accelerates the green growth, filling the cracks in weeks instead of years.
Irregular flagstones cost about $150–$250 per pallet. Pin this idea if you love the overgrown, moody cottage-core aesthetic!
- Key Materials: Irregular flagstone, soil, live moss fragments
- Vibe / Style: Enchanted cottage-core
- Difficulty: Intermediate
- Budget Breakdown: Flagstone: $200 | Moss/Soil: $40.
- Creator’s Tip: Mix buttermilk and live moss fragments in a blender, then paint the slurry directly into the stone joints to force rapid colonization.
- Smart Sourcing: live shade moss starter kits, natural irregular flagstone (pallet bundles).
Conclusion
These 36 permanent outdoor seating bench structures are engineered to anchor your landscape design through heavy-duty material integrity. From brutalist poured cantilevers to premium mortarless stone assemblies, skipping cheap furniture for these structural blueprints transforms any standard yard into a luxurious, high-end outdoor living space. By utilizing smart sourcing hacks—like buying pre-cut materials and UV-resistant starter kits—you secure decades of zero-maintenance durability without paying custom designer prices. Start with a single stunning focal piece, then expand your permanent seating network to elevate your home’s entire architectural footprint.
Frequently Asked Questions
What is the ideal height for a permanent outdoor seating bench?
Standard bench seat height ranges from 16 to 18 inches above grade, matching typical dining chairs to provide maximum ergonomic comfort. Lower benches (12-14 inches) work beautifully for casual perching walls or children’s zones, while 20-inch heights are ideal for guests needing standing assistance. For the highest-end look, ensure your backrest extends 14-18 inches above the seat, and utilize premium pre-cut composite boards for a smooth, flawless finish.
How do I anchor a permanent bench to prevent tipping or movement?
To achieve absolute structural safety in freeze-thaw climates, dig footings 18-24 inches below grade and sink heavy-duty galvanized post anchors directly into wet cement. For massive concrete or natural stone setups, their sheer dead weight (often exceeding 400+ pounds) provides incredible stability. However, if you are building in high-wind hurricane zones, utilizing a commercial-grade structural epoxy kit with steel rebar pins locks heavy materials permanently to the existing patio.
Which outdoor seating bench materials require the least maintenance?
For a true zero-upkeep aesthetic, invest in precast concrete, natural thermal granite, or UV-coated composite lumber starter kits. These high-end materials never splinter, resist aggressive rot, and easily maintain their structural integrity for 50+ years with just a basic hose-down. Powder-coated metal bracket systems rank second, while raw timber requires a dedicated marine-grade exterior wood sealant applied every two years to prevent graying.
Can I build curved outdoor seating without specialized equipment?
Absolutely. You can bypass expensive industrial benders by cutting precise arc segments from standard 2×6 lumber using a heavy-duty flush-trim router template. Assembling these angled cuts produces seamless sweeping curves up to 120 degrees. For poured designs, ditch heavy wood panels and buy flexible concrete formwork coils—they bend effortlessly to your landscape’s unique topography without professional masonry tools.
How far should permanent benches be positioned from planting beds?
You must allow a minimum 18-24 inch clearance between the back of the bench and mature plant foliage. This crucial gap prevents trapped moisture from rotting your wood and stops insects from bridging onto your seating. If your blueprint includes integrated dirt boxes, always install a commercial-grade waterproof planter liner to prevent aggressive roots and wet soil from compromising the expensive structural framing.