Installing outdoor seating concrete elevates a basic backyard into an architectural masterpiece. Sourcing commercial-grade materials keeps budgets intact while achieving a heavy modern look. These permanent fixtures easily outlast any flimsy patio furniture on the market.
Design Snapshot: High-End Principles
- Material Honesty: Expose the raw, industrial texture by skipping cheap veneers and embracing true concrete finishing.
- Geometric Rigor: Prioritize clean angles and heavy masses to achieve that sought-after architectural aesthetic.
- Structural Integration: Anchor these setups deeply into the terrain so they function as permanent, high-value landscape upgrades.
- Commercial Sourcing: Use professional-grade formwork and heavy-duty masonry tools to ensure longevity and precise edges.
Monolithic Statement Pieces for Outdoor Seating Modern Spaces
Large, seamless pours anchor a yard with an undeniable sense of luxury. These heavy installations demand proper foundational prep but reward you with a zero-maintenance, magazine-worthy focal point.
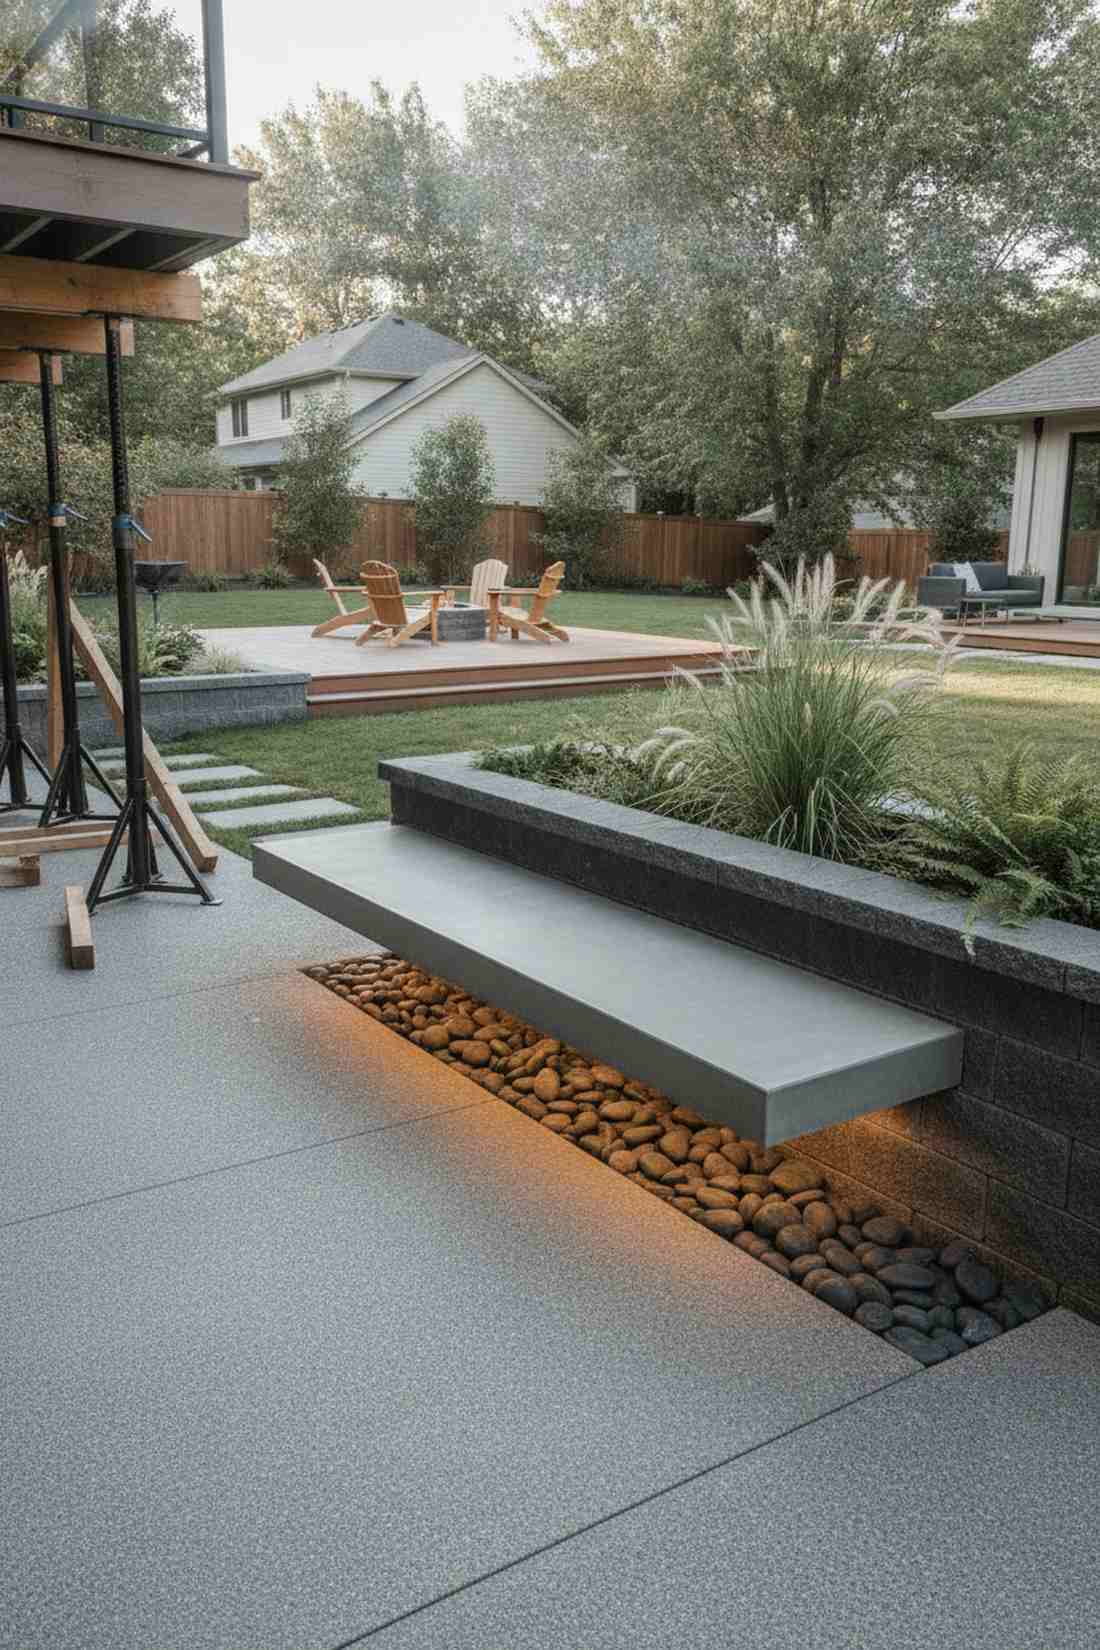
1. Floating Concrete Bench Slab
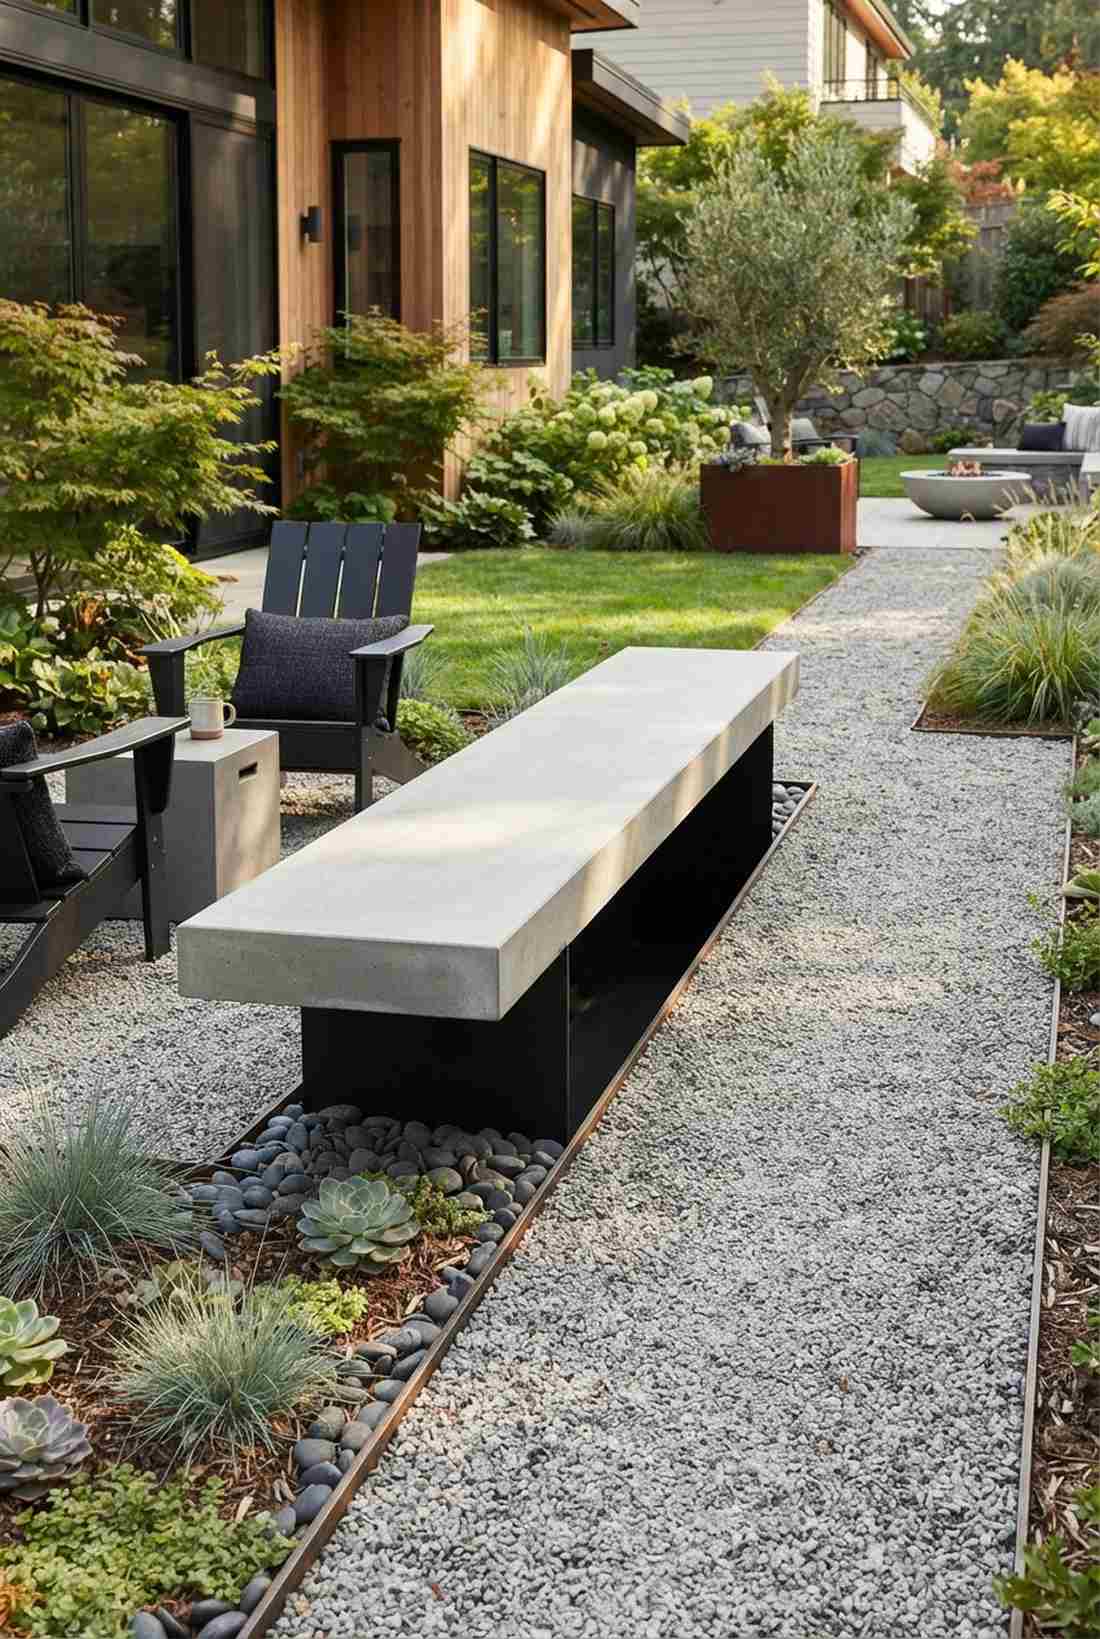

This layout feels like an anti-gravity illusion you accidentally discovered in a modern art exhibit. Utilizing a hidden base concrete bench creates a striking shadow line, making it perfect for bordering a minimalist crushed-gravel pathway.
Most amateur builders rely on bulky exterior legs, but embedding a steel armature delivers a surprisingly premium look. Utilizing professional-grade miniature garden supplies for the surrounding bed enhances the severe, clean lines of the heavy slab while keeping the focus on the illusion.
You can easily pull this off for around $150–$300 depending on your steel source. Pin this if you’re planning a sophisticated, small space upgrade this season.
- Key Materials: High-strength fiber concrete, hidden steel mounting brackets
- Vibe / Style: Ultra-modern gallery aesthetic
- Difficulty: Intermediate to advanced
- Budget Breakdown: Concrete mix: $90 | Steel armature: $120.
- Creator’s Tip: Paint the recessed support pier matte black so it vanishes entirely in the daylight shadows.
- Smart Sourcing: Pre-cut fiberglass rebar rods (bulk pack) and high-yield architectural concrete mix.
2. Stepped Platform Amphitheater
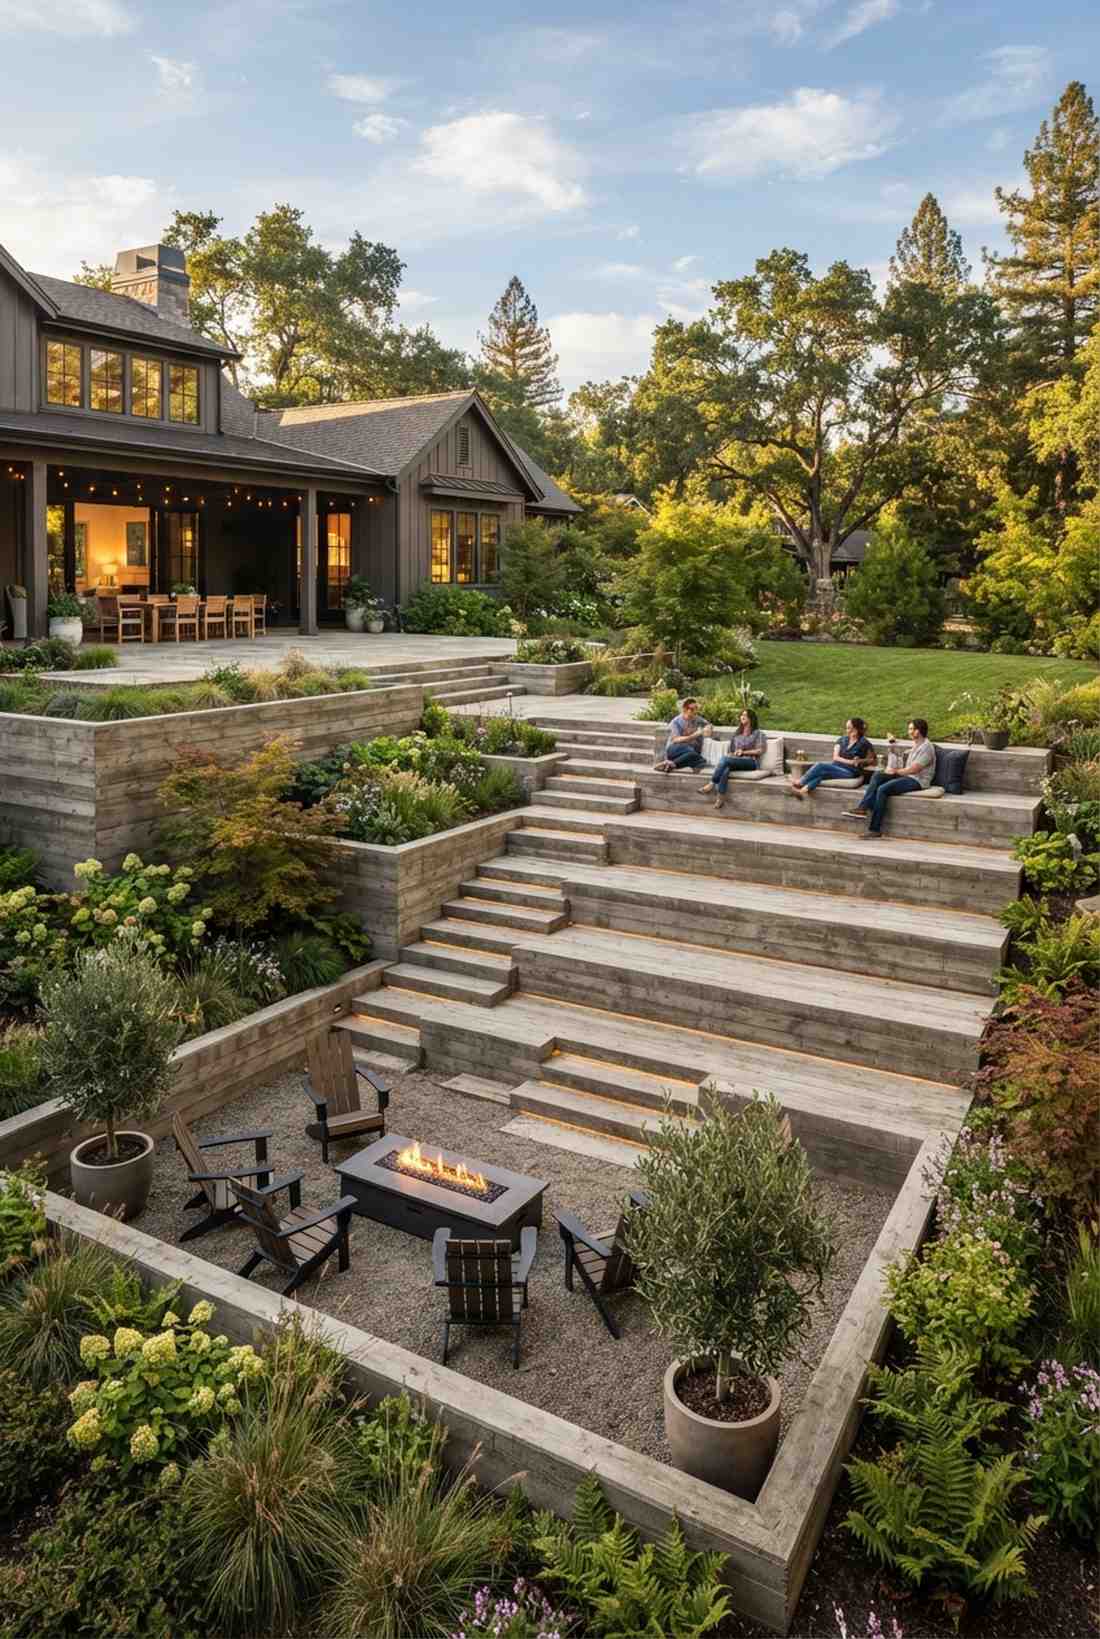
Looks like a forgotten Roman ruin reimagined for a billionaire’s backyard retreat. A tiered garden seating layout works exceptionally well for taming a heavily sloped landscape while providing massive entertaining space.
Standard wooden decks are common here, yet utilizing board-formed pouring techniques gives a designer-level finish that never rots. Stamping wood-grain textures into the raw face fuses industrial strength with organic warmth, boosting property appeal.
Expect to invest roughly $400–$600 for the extensive formwork and volume of material. It’s a massive upgrade that completely changes the yard’s functionality.
- Key Materials: Dimensional lumber for forms, bulk ready-mix delivery
- Vibe / Style: Grand architectural gathering space
- Difficulty: Advanced weekend project
- Budget Breakdown: Lumber forms: $150 | Bulk material: $350.
- Creator’s Tip: Strip the forms while the surface is slightly green to brush the edges for a softer, weathered aesthetic.
- Smart Sourcing: Heavy-duty melamine form boards (contractor pack) and a premium concrete vibrator wand.
3. Cylindrical Drum Seats
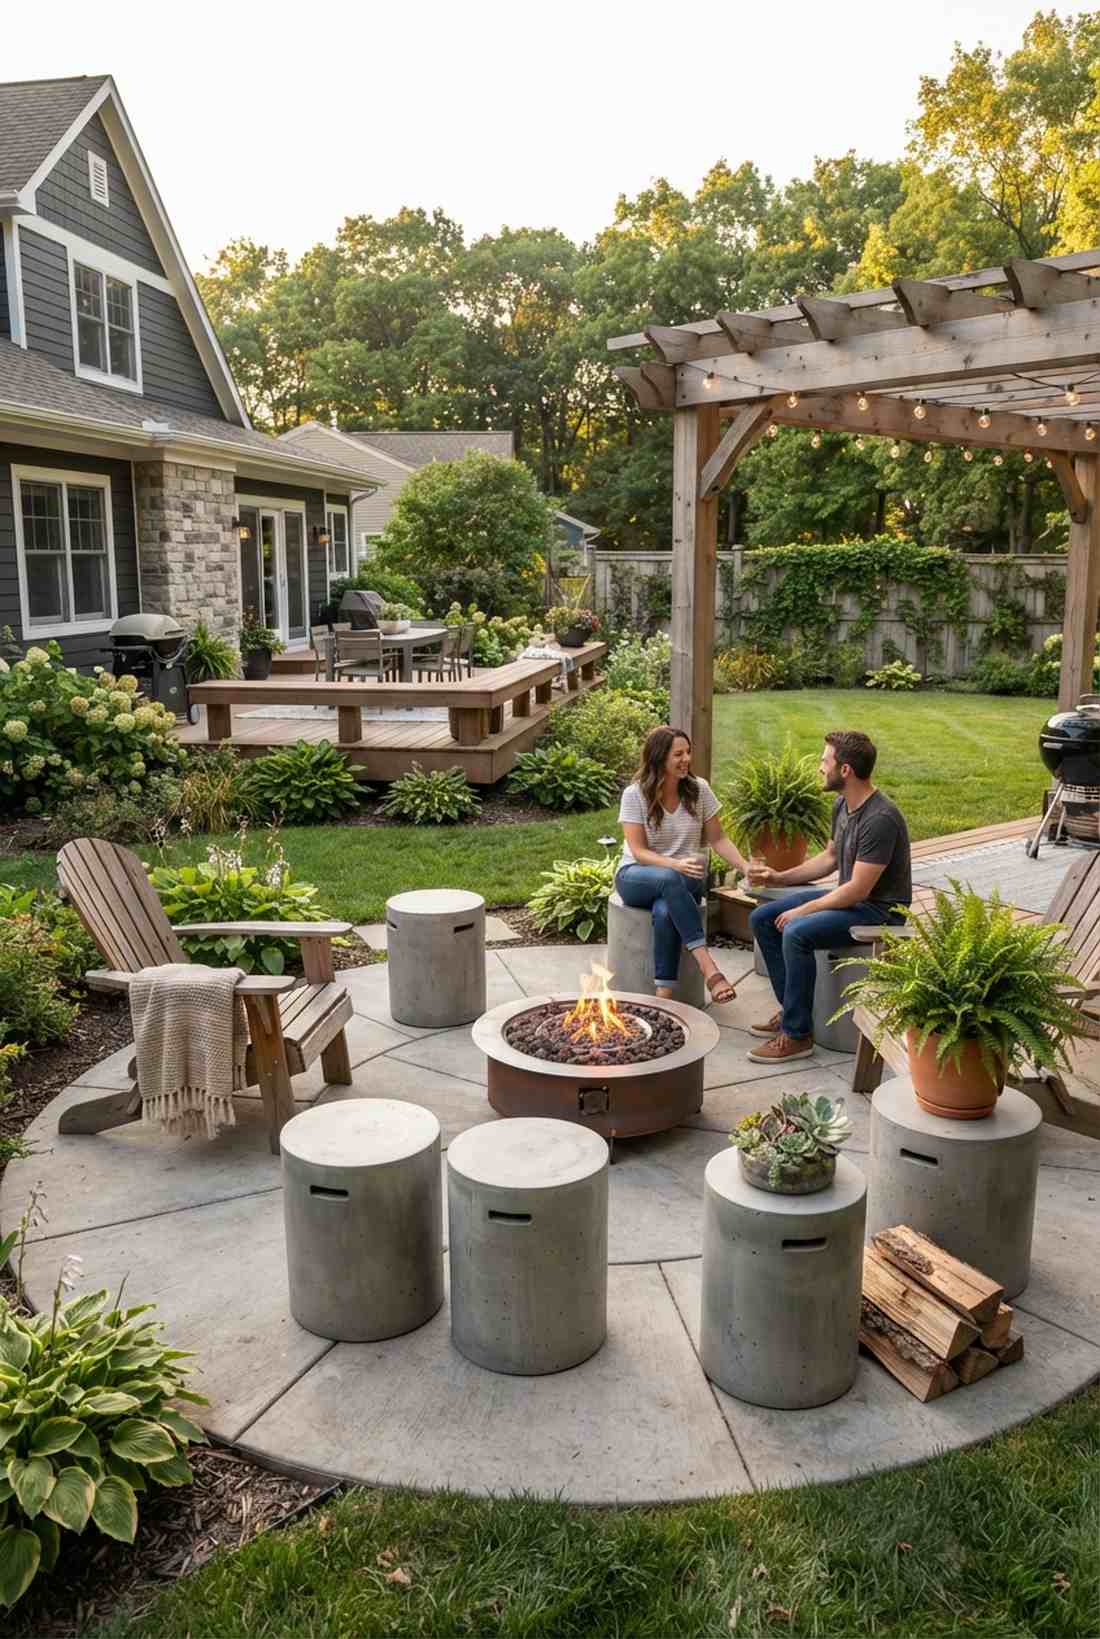
Gives off a chic urban park vibe that perfectly breaks up harsh geometric yard boundaries. A cluster of round concrete patio stools is an incredible solution for scattered, flexible fire pit seating.
Many homeowners assume curved shapes require expensive custom molds, but repurposing industrial tube forms looks far more expensive than it is. Staggering their heights creates a dynamic visual rhythm while doubling as heavy-duty pedestals for potted plants.
Budget around $20–$40 per drum when pouring them yourself. Save this to your DIY weekend garden board for a fast, high-impact weekend win.
- Key Materials: Cardboard tube casting forms, non-shrink grout mix
- Vibe / Style: Playful brutalist scatter
- Difficulty: Easy beginner setup
- Budget Breakdown: Casting tubes: $30 | Fast-setting mix: $60.
- Creator’s Tip: Coat the inside of the cardboard tubes with motor oil or release agent to ensure a flawless, glass-like finish upon removal.
- Smart Sourcing: Pre-waxed cylindrical casting tubes (multipack) and UV-coated concrete sealing spray.
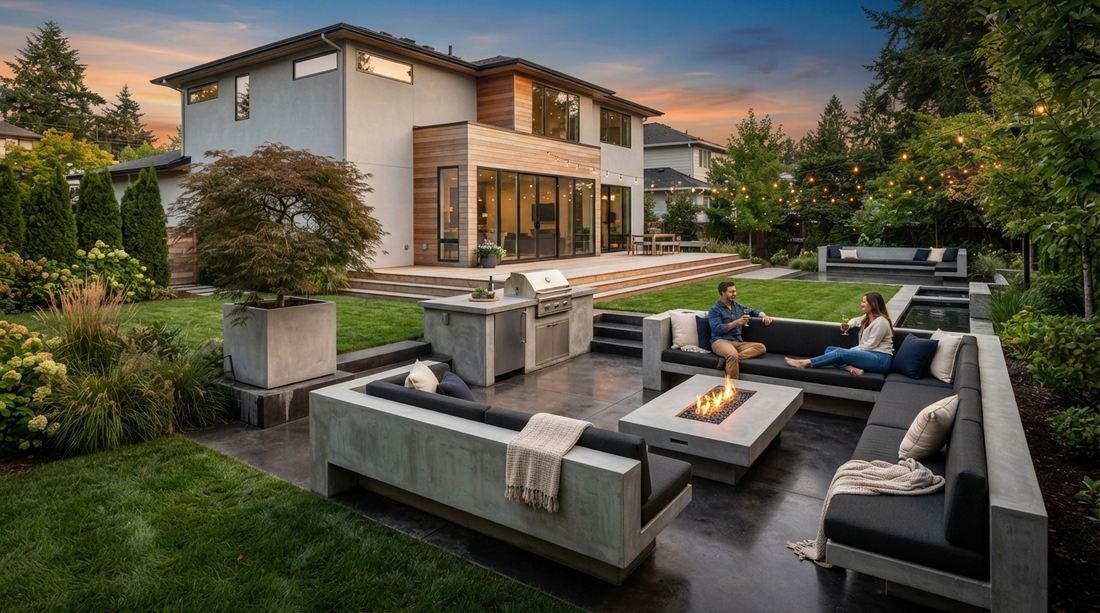
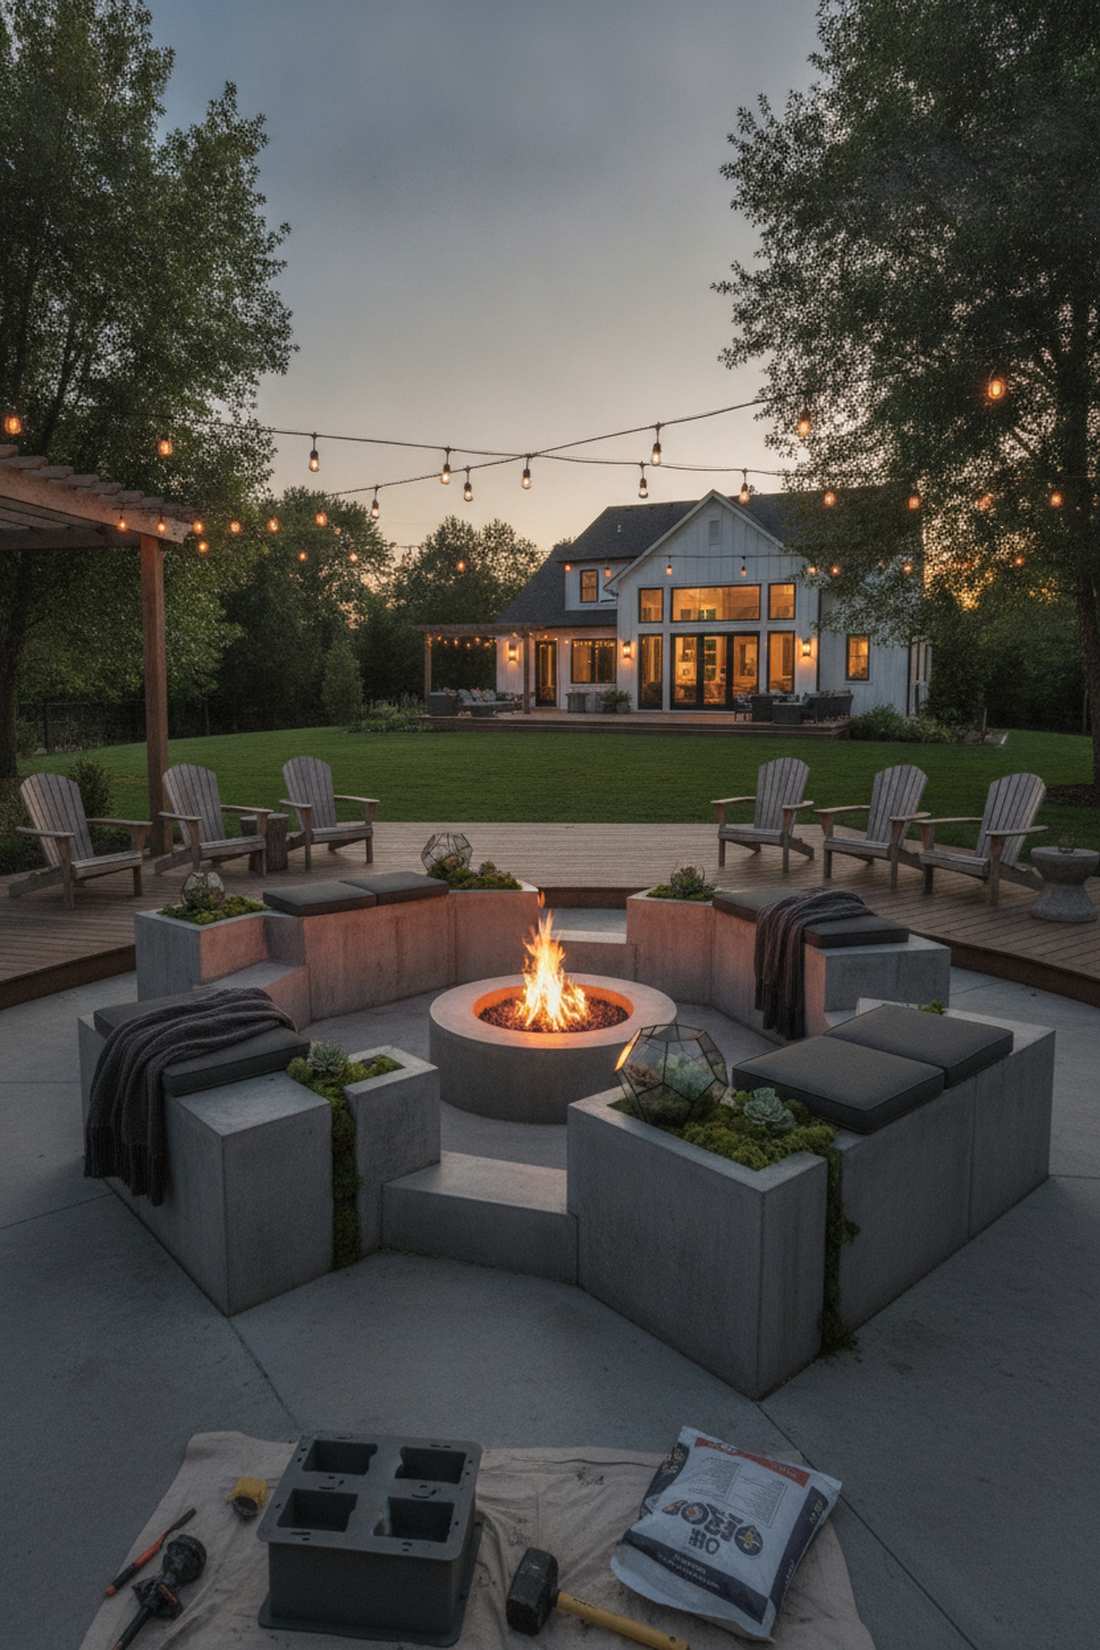
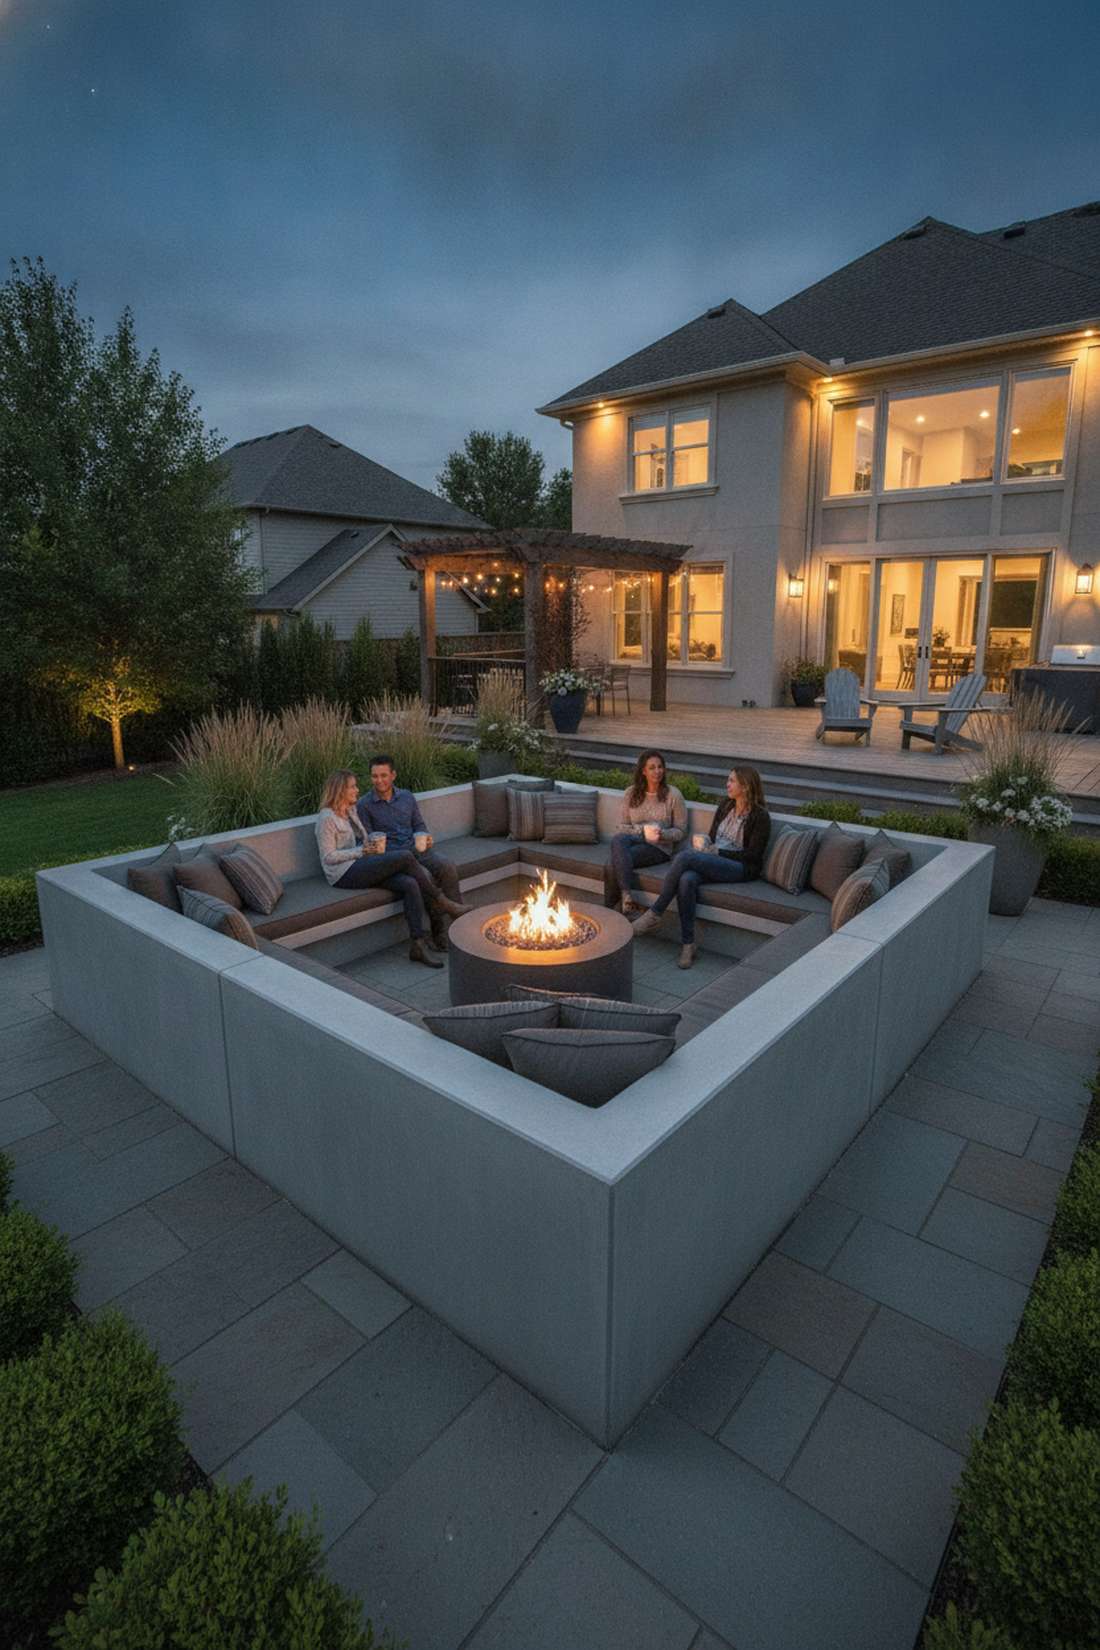
4. Monolithic L-Shaped Bench
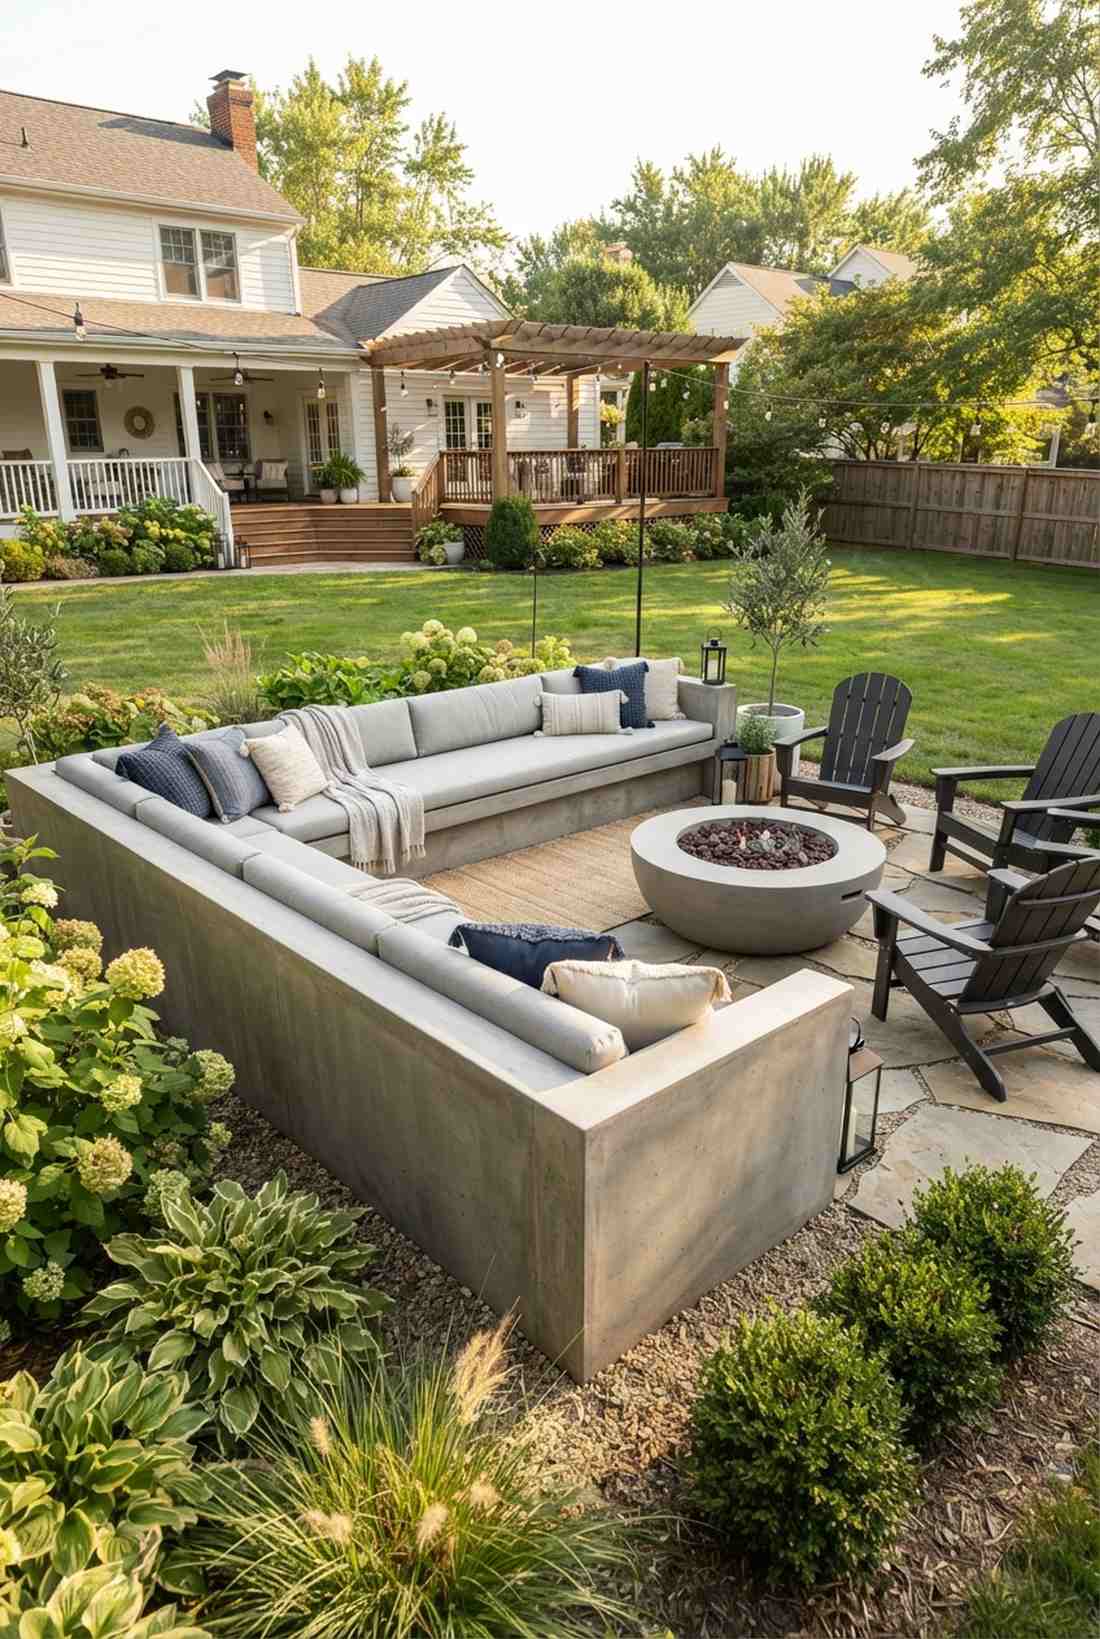
Feels incredibly grounded and permanent, as if the home’s foundation simply grew out into the yard. A continuous corner patio concrete sofa is the ultimate setup for framing an under-utilized property edge.
Instead of assembling modular outdoor couches that blow away, a single seamless pour delivers unmatched luxury. Integrating structural wire mesh throughout the ninety-degree turn prevents stress fractures, securing a lifetime of heavy use.
This will run roughly $250–$450 to properly form and reinforce. Highly recommended if you want to permanently define an outdoor living room.
- Key Materials: Welded wire mesh, crushed gravel base, exterior sealant
- Vibe / Style: Permanent courtyard lounge
- Difficulty: Intermediate team project
- Budget Breakdown: Base prep: $80 | Concrete & Steel: $220.
- Creator’s Tip: Float the top surface repeatedly as it cures to pull the cream to the top, resulting in a buttery smooth seating area.
- Smart Sourcing: Commercial-grade welded wire sheets and penetrating silane siloxane sealer.
Most people get this completely wrong… until they try the insanely efficient seating layout coming up next.
Integrated Wall Seating with Structural Purpose
Why build a wall just to hold back dirt when it can double as premium lounge space? These dual-purpose structures maximize usability in tight, modern yards.
5. Retaining Wall Bench Cap

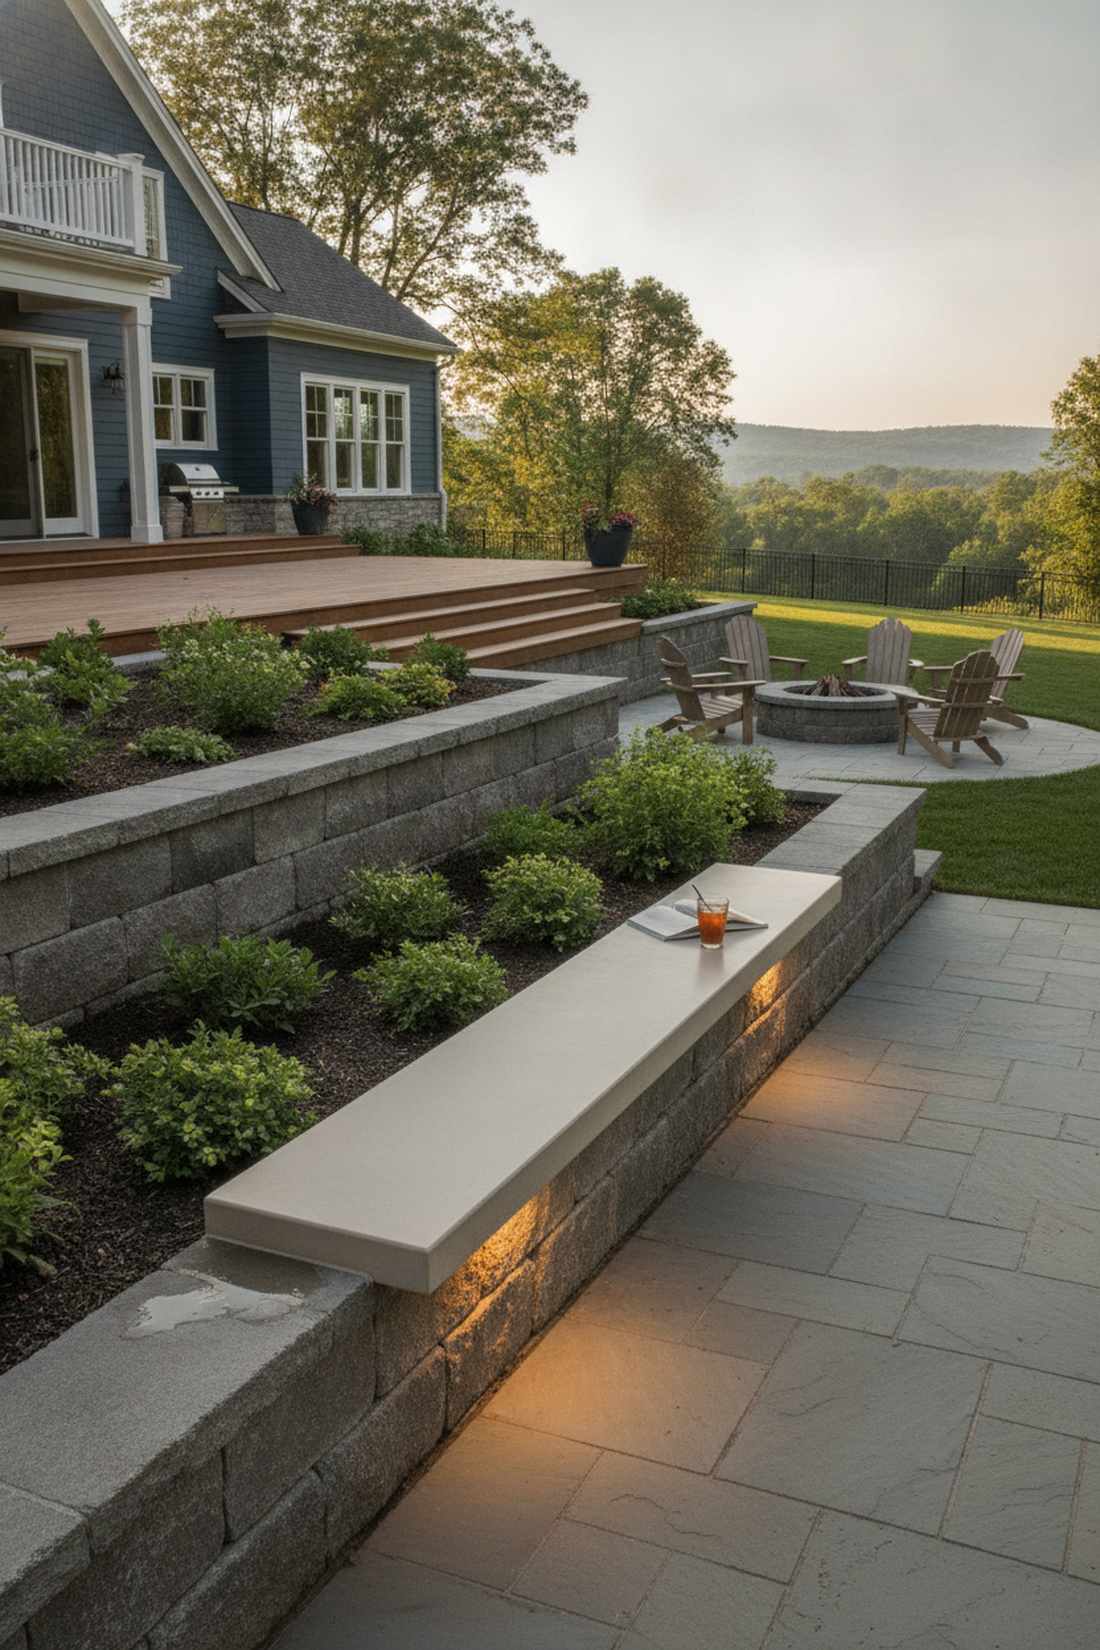
Feels like the edge of a luxury infinity pool overlooking a terraced estate. Capping an existing barrier with an overhanging seat ledge works flawlessly for transforming dead space along a backyard slope.
Standard landscaping ignores the top edge, but extending the cap outward by six inches creates instant functional value. Injecting landscape lighting starter sets right under the overhang illuminates the pathway below, amplifying the high-end evening aesthetic.
You can execute this cap upgrade for around $80–$150 per section. Pin this if you need to squeeze more seating into a narrow side yard.
- Key Materials: Edge formwork, masonry adhesive, structural dowels
- Vibe / Style: Dual-purpose space saver
- Difficulty: Moderate DIY upgrade
- Budget Breakdown: Rebar dowels: $25 | Finishing cement: $75.
- Creator’s Tip: Pitch the top surface back by just two degrees so rainwater runs into the planter bed rather than onto the seating face.
- Smart Sourcing: Heavy-duty masonry drill bit kits and weatherproof LED hardscape lights.
6. Serpentine Wall with Seating Alcoves
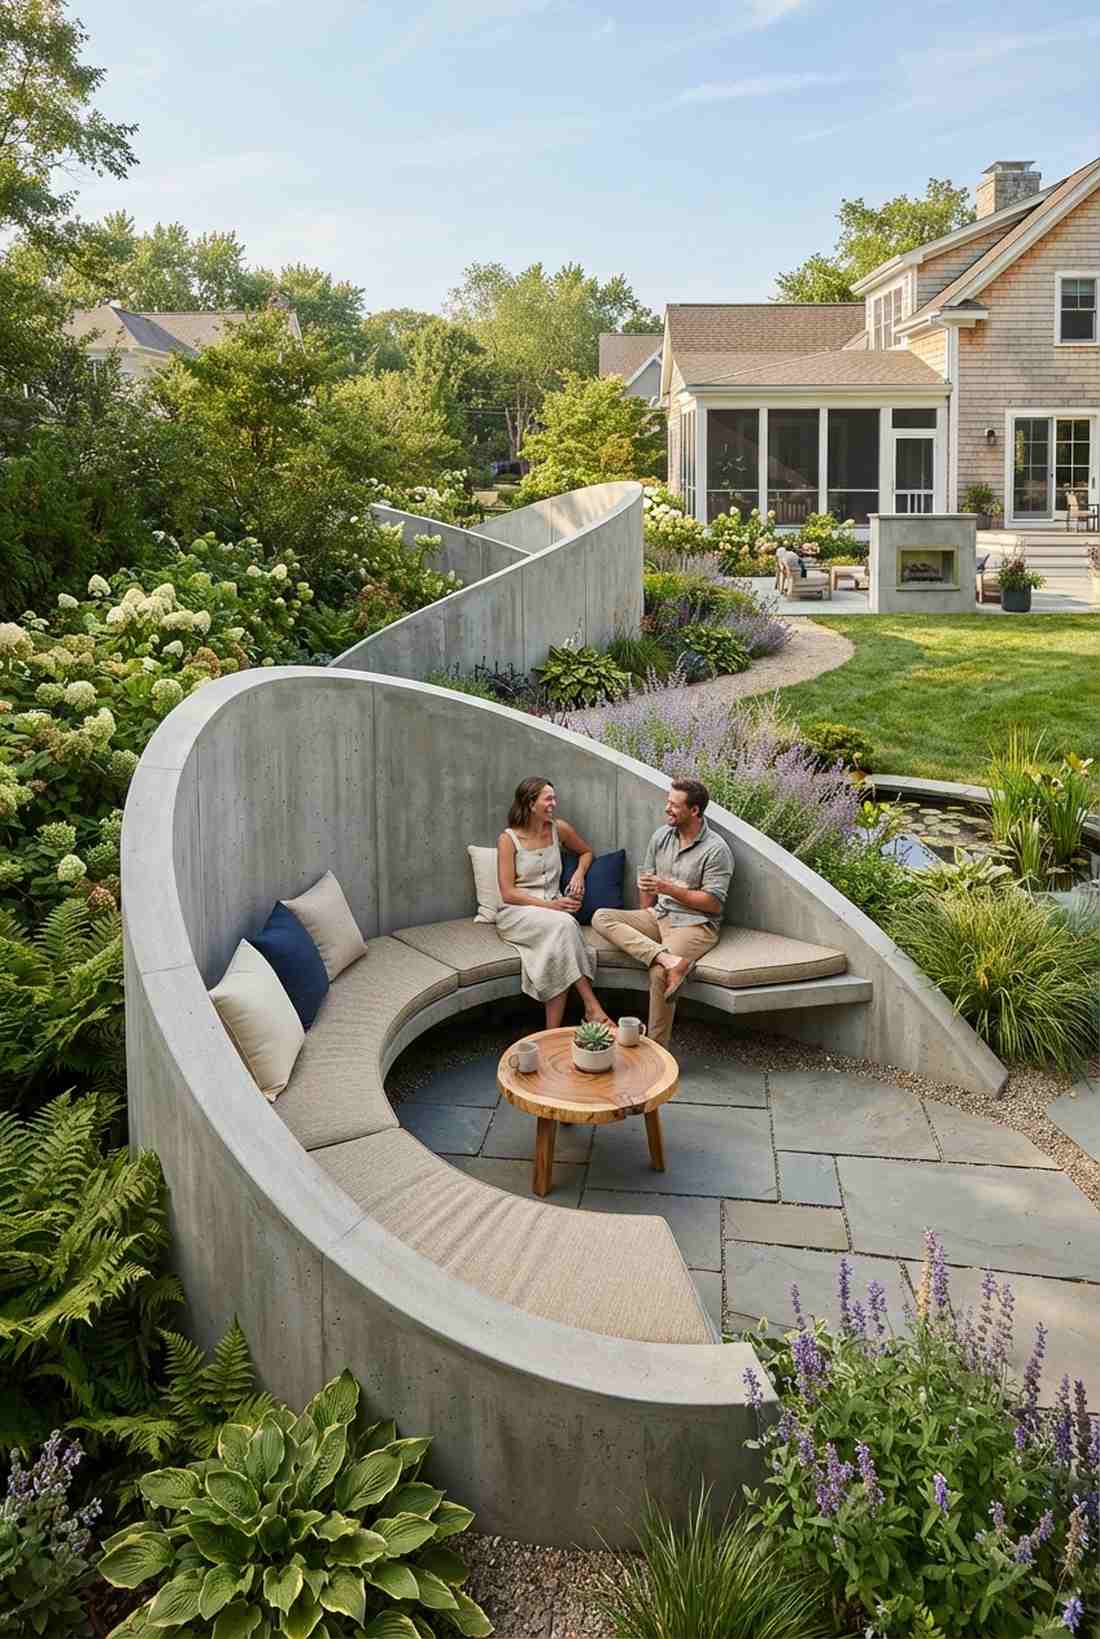
Straight out of a hidden storybook garden reimagined by a modern architect. A curved concrete bench recess offers a brilliant way to create intimate conversational nooks shielded from the wind.
Strictly straight lines dominate amateur yards, so introducing fluid, sweeping curves immediately screams custom design. Building these deep alcoves requires flexible formwork, but the resulting shadow play and privacy are worth every ounce of effort.
This premium feature typically costs $500+ depending on the wall length. It’s an ambitious build that pays massive dividends in property aesthetic.
- Key Materials: Flexible hardboard forms, heavy bracing, structural stakes
- Vibe / Style: Sculptural privacy lounge
- Difficulty: Advanced formwork
- Budget Breakdown: Flexible forms: $120 | Bracing stakes: $60.
- Creator’s Tip: Use kerf-cut lumber or moistened hardboard to achieve perfectly smooth, kink-free radiuses on the inner curves.
- Smart Sourcing: Bendable concrete form strips (commercial pack) and industrial ground stakes.
7. Perimeter Seat Wall
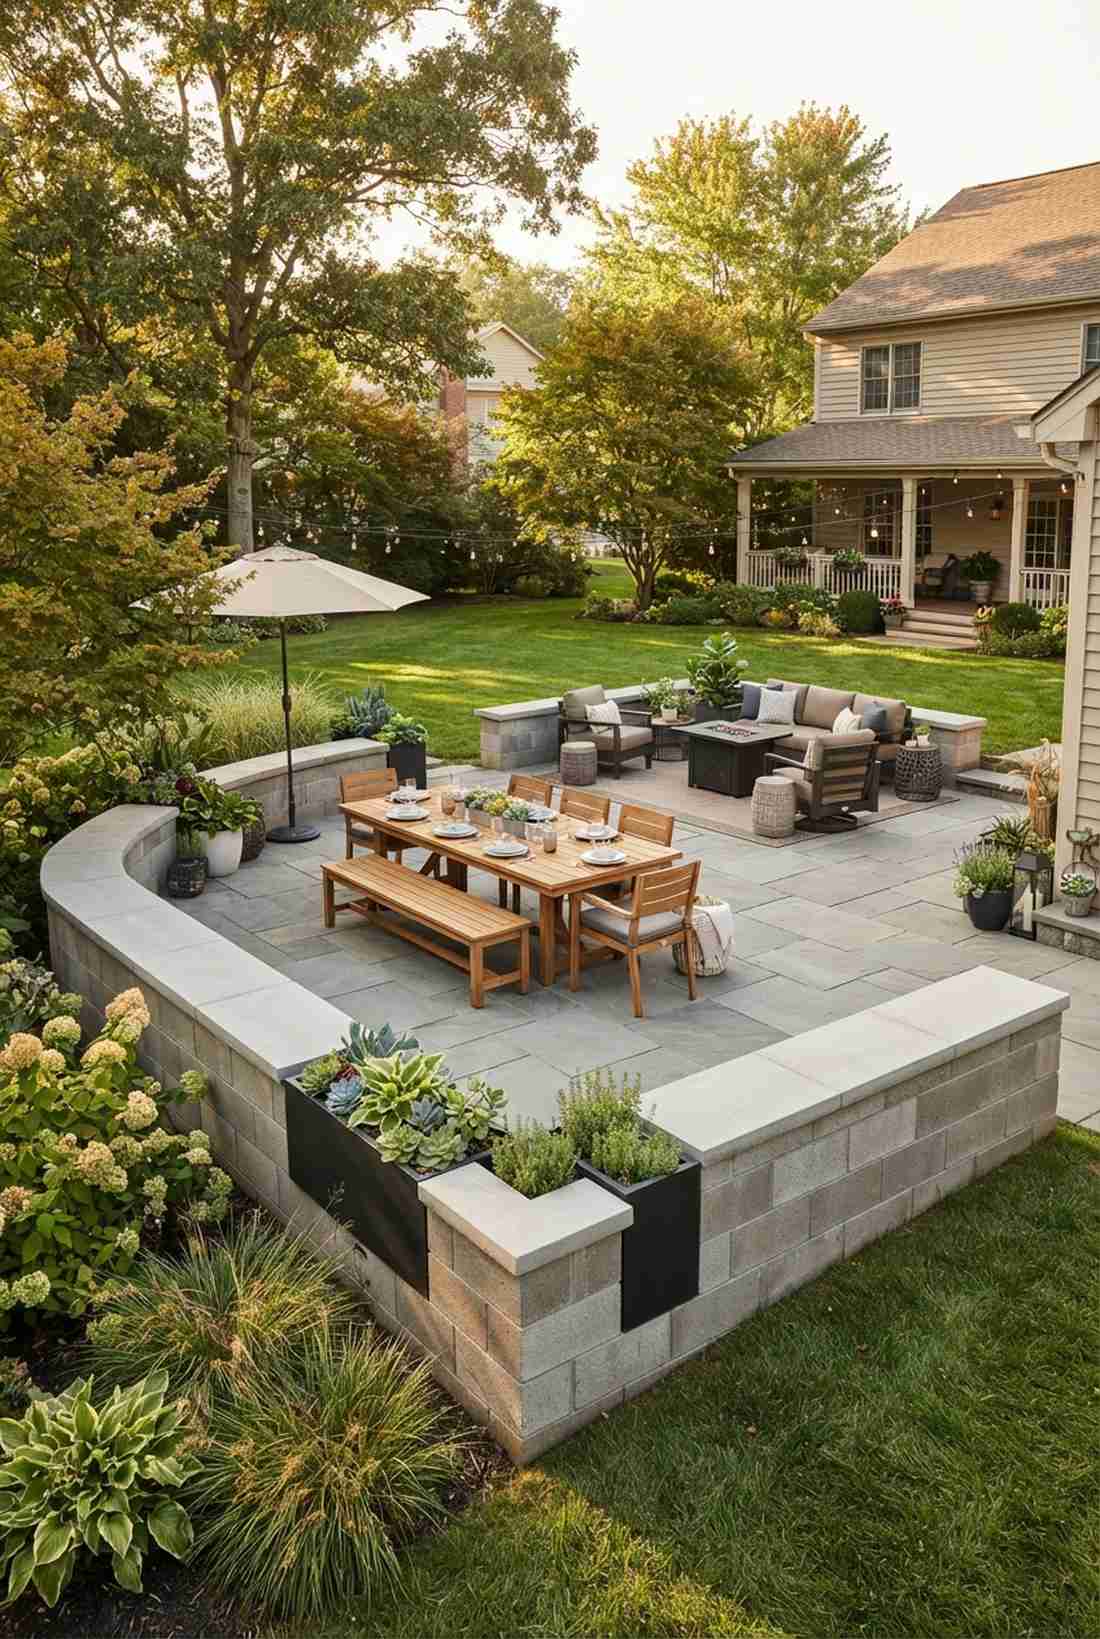
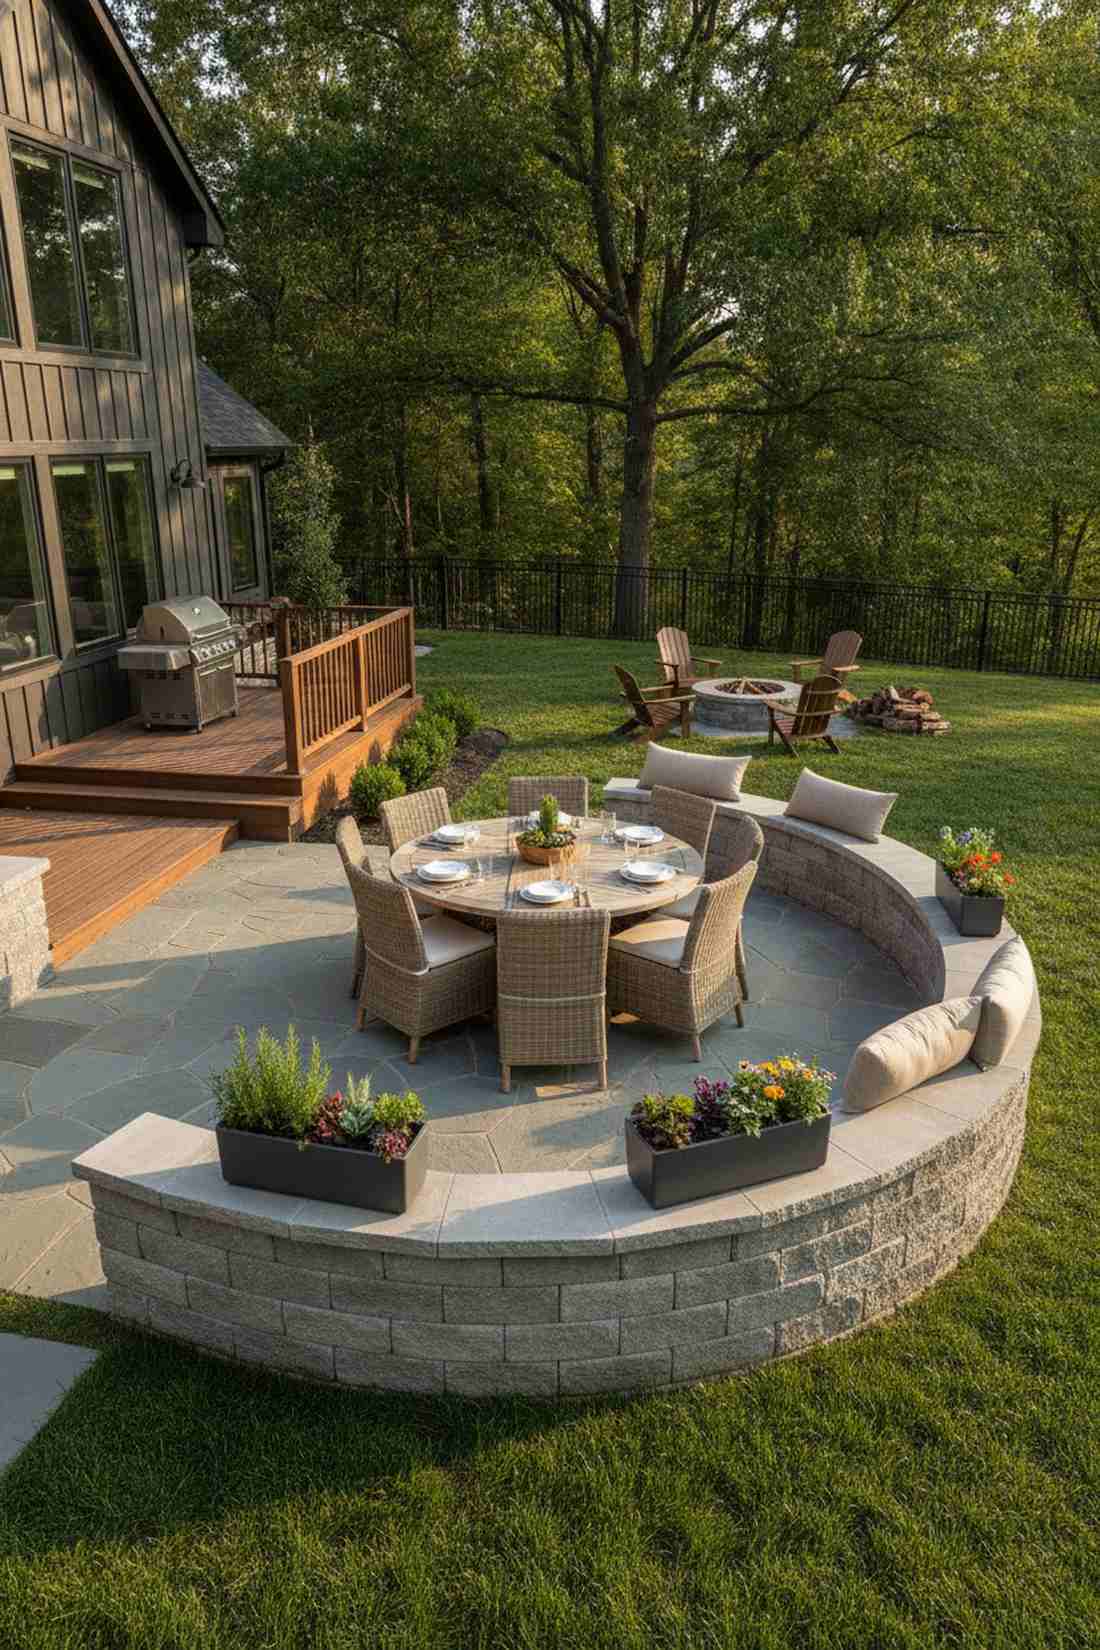
Gives the comforting feel of an enclosed fortress courtyard without blocking the afternoon sun. A continuous low patio boundary wall is perfect for outlining a sprawling dining area while providing overflow seating for large parties.
Most rely on flimsy wooden railings to define spaces, but a solid block perimeter delivers a surprisingly premium look. Leaving occasional gaps to insert miniature garden kits or sleek planters breaks up the visual weight of the heavy masonry.
Expect a material cost of roughly $15–$25 per linear foot. Save this to your hardscaping board for your next major backyard overhaul.
- Key Materials: Cinder blocks, surface bonding cement, flat capstones
- Vibe / Style: Open-air living room
- Difficulty: Intermediate masonry
- Budget Breakdown: Core blocks: $150 | Bonding cement: $90.
- Creator’s Tip: Skip the mortar and use surface bonding cement over dry-stacked blocks to cut your construction time in half.
- Smart Sourcing: Fiber-reinforced surface bonding cement (bulk bags) and pre-cut smooth concrete capstones.
Modular Block Configurations for Flexible Outdoor Seating Concrete
Not ready to commit to a permanent pour? Modular precast blocks offer massive brutalist appeal with the flexibility to rearrange your layout whenever the mood strikes.
8. Stacked Block Bench
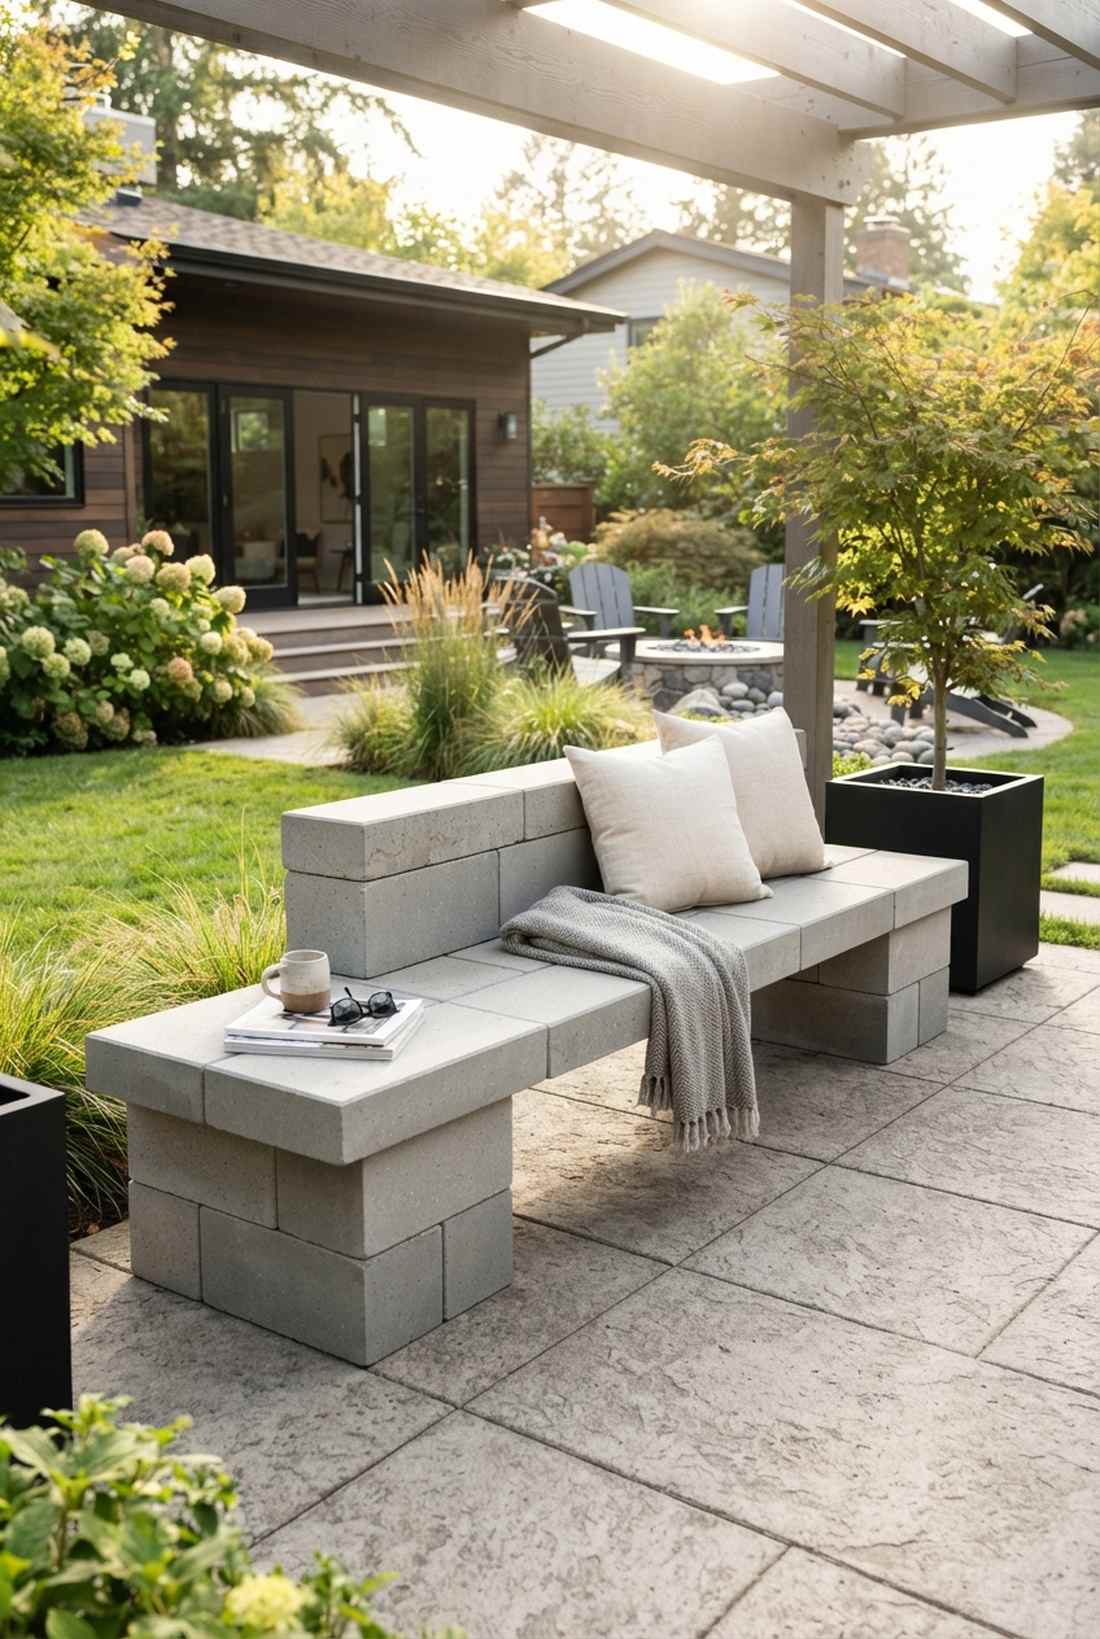
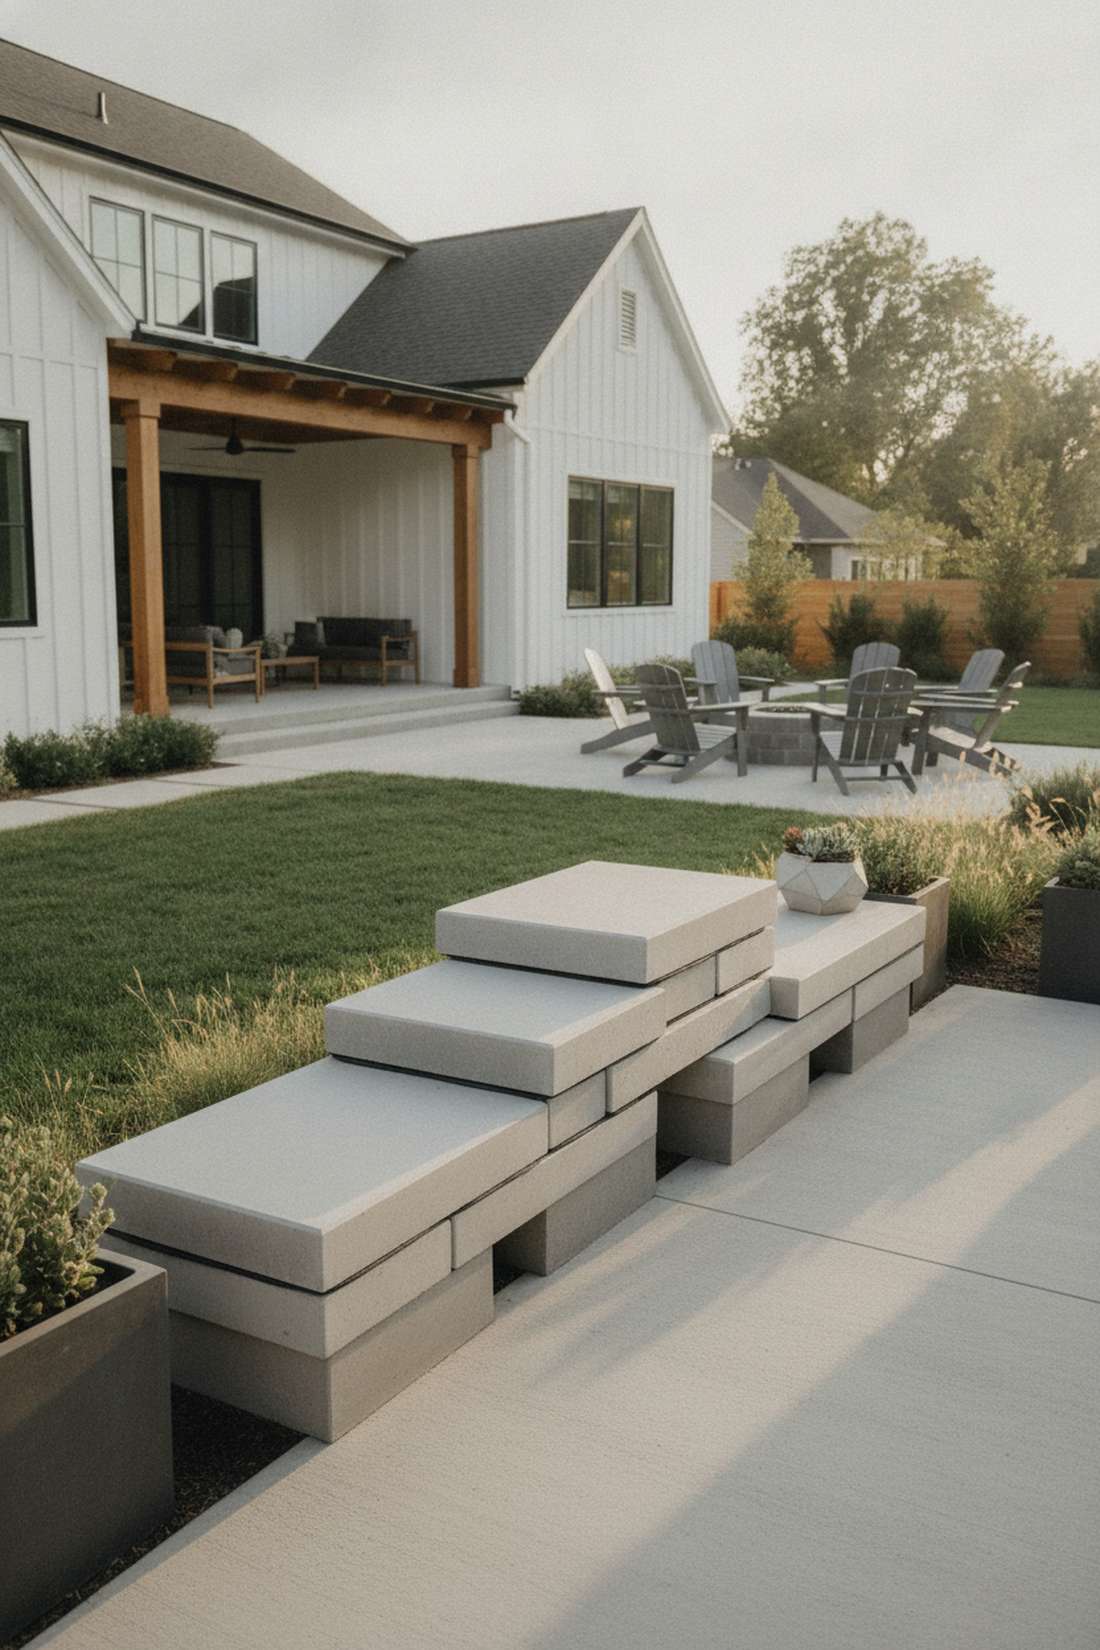
Feels like a chic, minimalist art installation you’d spot outside a trendy coffee shop. This dry-laid block seat is ideal for renters or anyone wanting a rapid modern upgrade on a concrete patio.
Complex formwork scares a lot of beginners away, but simply stacking precast geometric modules eliminates the headache entirely. Keeping the layout dry-laid without mortar lets you experiment with heights and spacing until you find the perfect ergonomic fit.
This is highly affordable, usually costing under $50 total. Definitely Pin this if you want a zero-mess, high-impact afternoon project.
- Key Materials: Smooth-faced precast blocks, leveling sand
- Vibe / Style: Transient modern minimalism
- Difficulty: Ultra-easy beginner
- Budget Breakdown: Precast blocks: $40 | Leveling shims: $5.
- Creator’s Tip: Use outdoor-rated neoprene pads between the stacked blocks to prevent chipping and eliminate wobbling.
- Smart Sourcing: Heavy-duty masonry construction adhesive and pre-cast modular bench kits.
This next setup is ridiculously cheap but looks like a $1,500 custom landscape display…
9. Offset Block Cluster
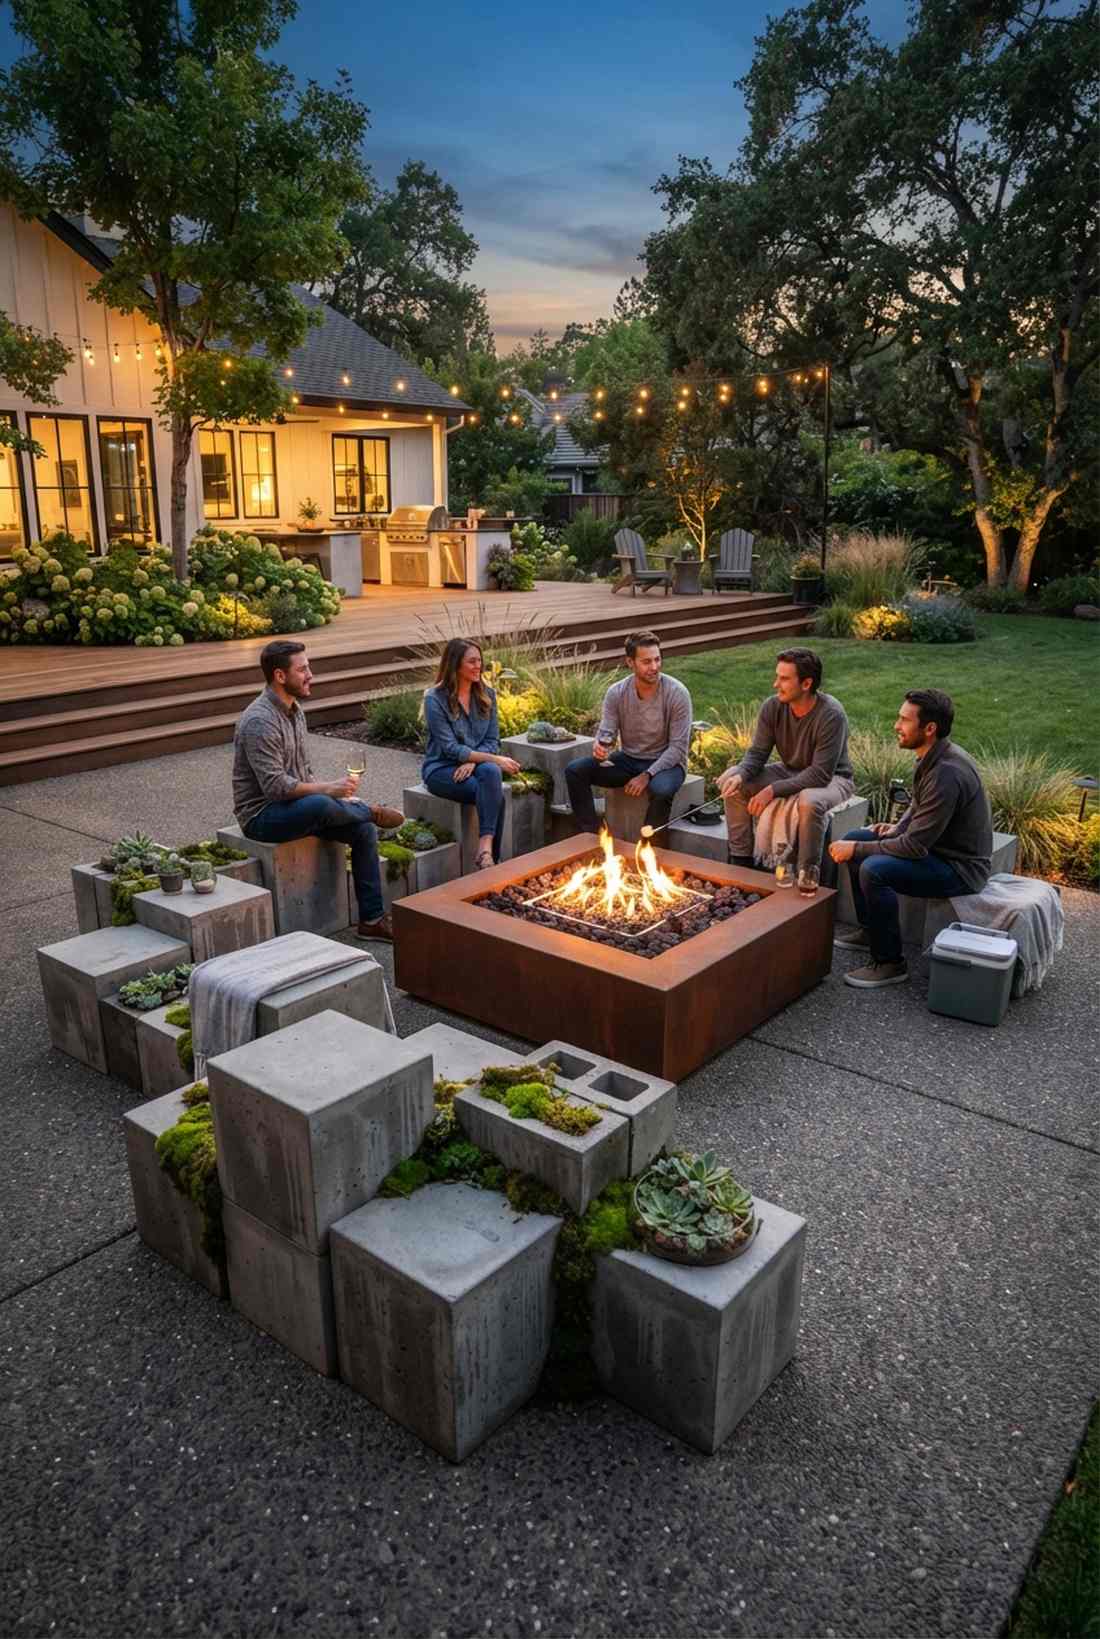
Gives off a moody, industrial warehouse vibe that turns basic seating into abstract art. An asymmetric staggered concrete stool layout works brilliantly for casual, multi-level fire pit gatherings.
Perfectly symmetrical rows are boring, so shifting block heights intentionally creates a designer-level finish. Integrating high-end terrarium accessories or moss into the crevices between the blocks blends the raw brutalist edges right into the surrounding nature.
You can cast this entire cluster for about $80–$120. It’s a fantastic, low-stakes way to practice your mixing skills.
- Key Materials: Reusable square casting molds, standard mix
- Vibe / Style: Abstract geometric scatter
- Difficulty: Easy repetition
- Budget Breakdown: Casting molds: $45 | Concrete mix: $50.
- Creator’s Tip: Vibrate the molds thoroughly with a rubber mallet to bring air bubbles to the surface, ensuring a flawless exterior face.
- Smart Sourcing: Reusable heavy-duty silicone block molds and vibrating concrete consolidation tools.
💡 Must-Have Supplies for High-End Setups
To build these setups faster and ensure they last through brutal winters, skip the generic craft aisles and invest in the right foundational kits from the start.
- Base & Support: Pre-cut fiberglass rebar bundles (bulk pack)
- Setup Tools: Heavy-duty magnesium hand float starter kits
- Weather/Durability Protection: UV-coated silane siloxane penetrating sealer
10. Hollow Block Bench with Planter
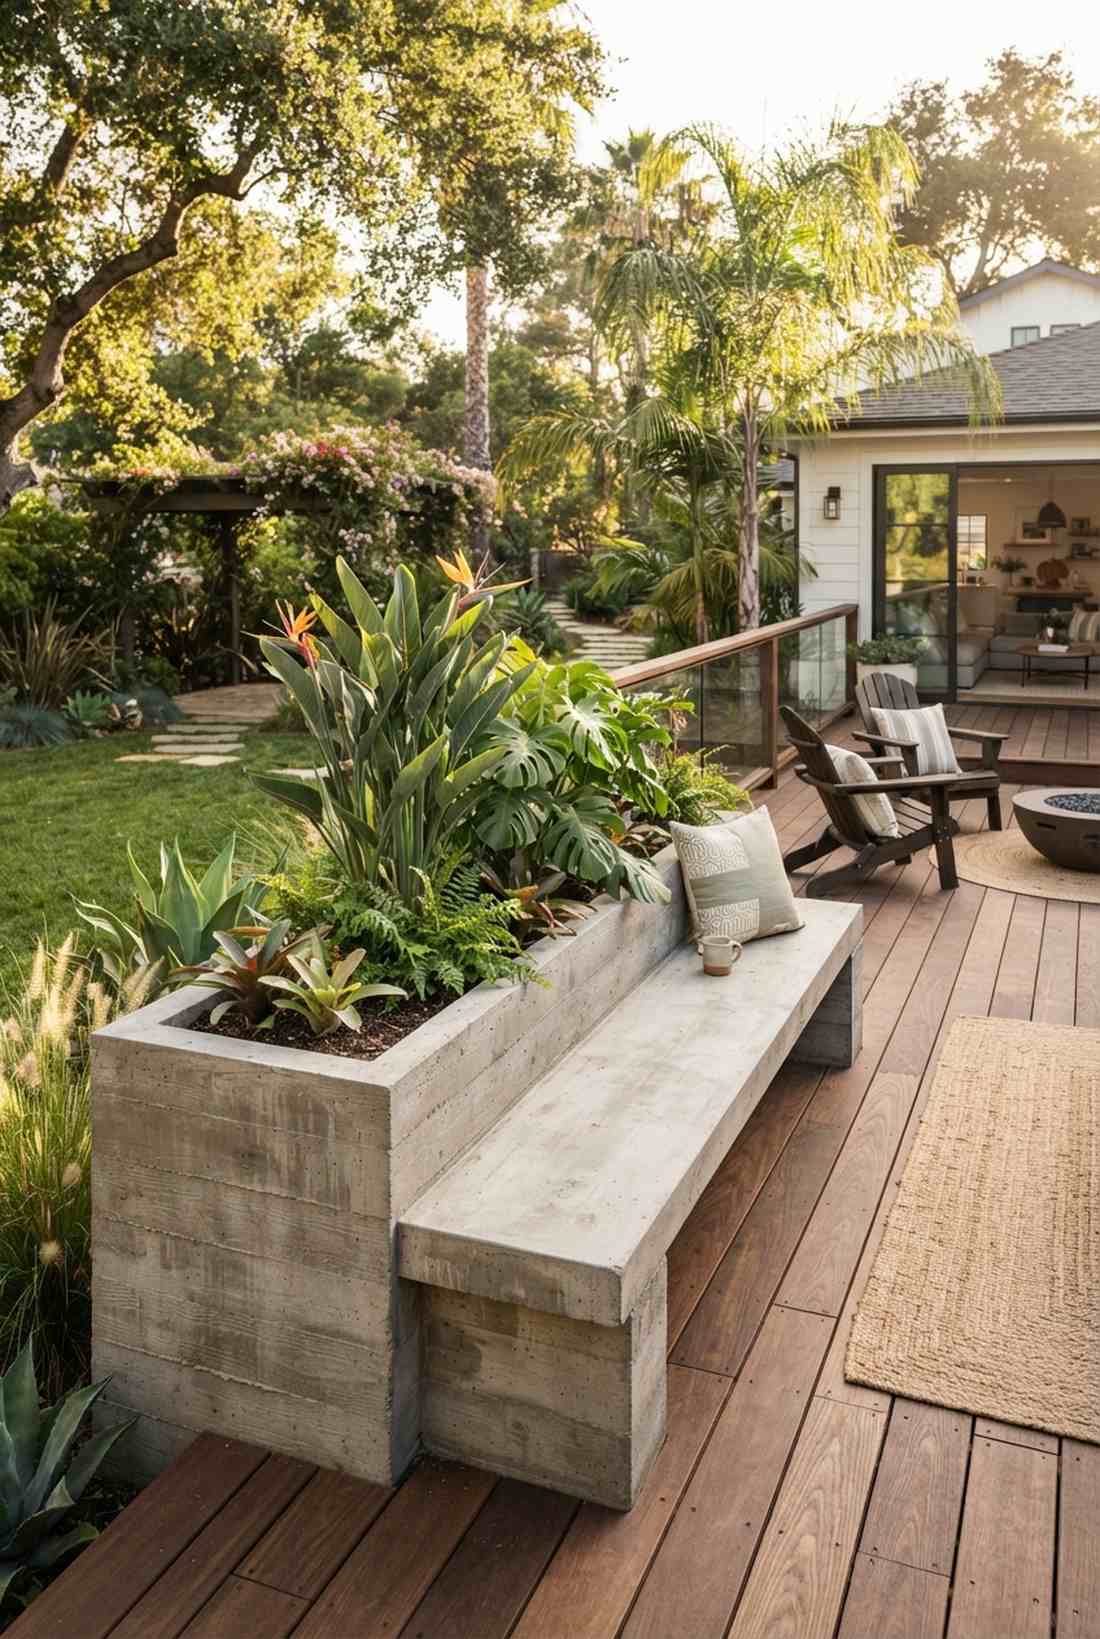
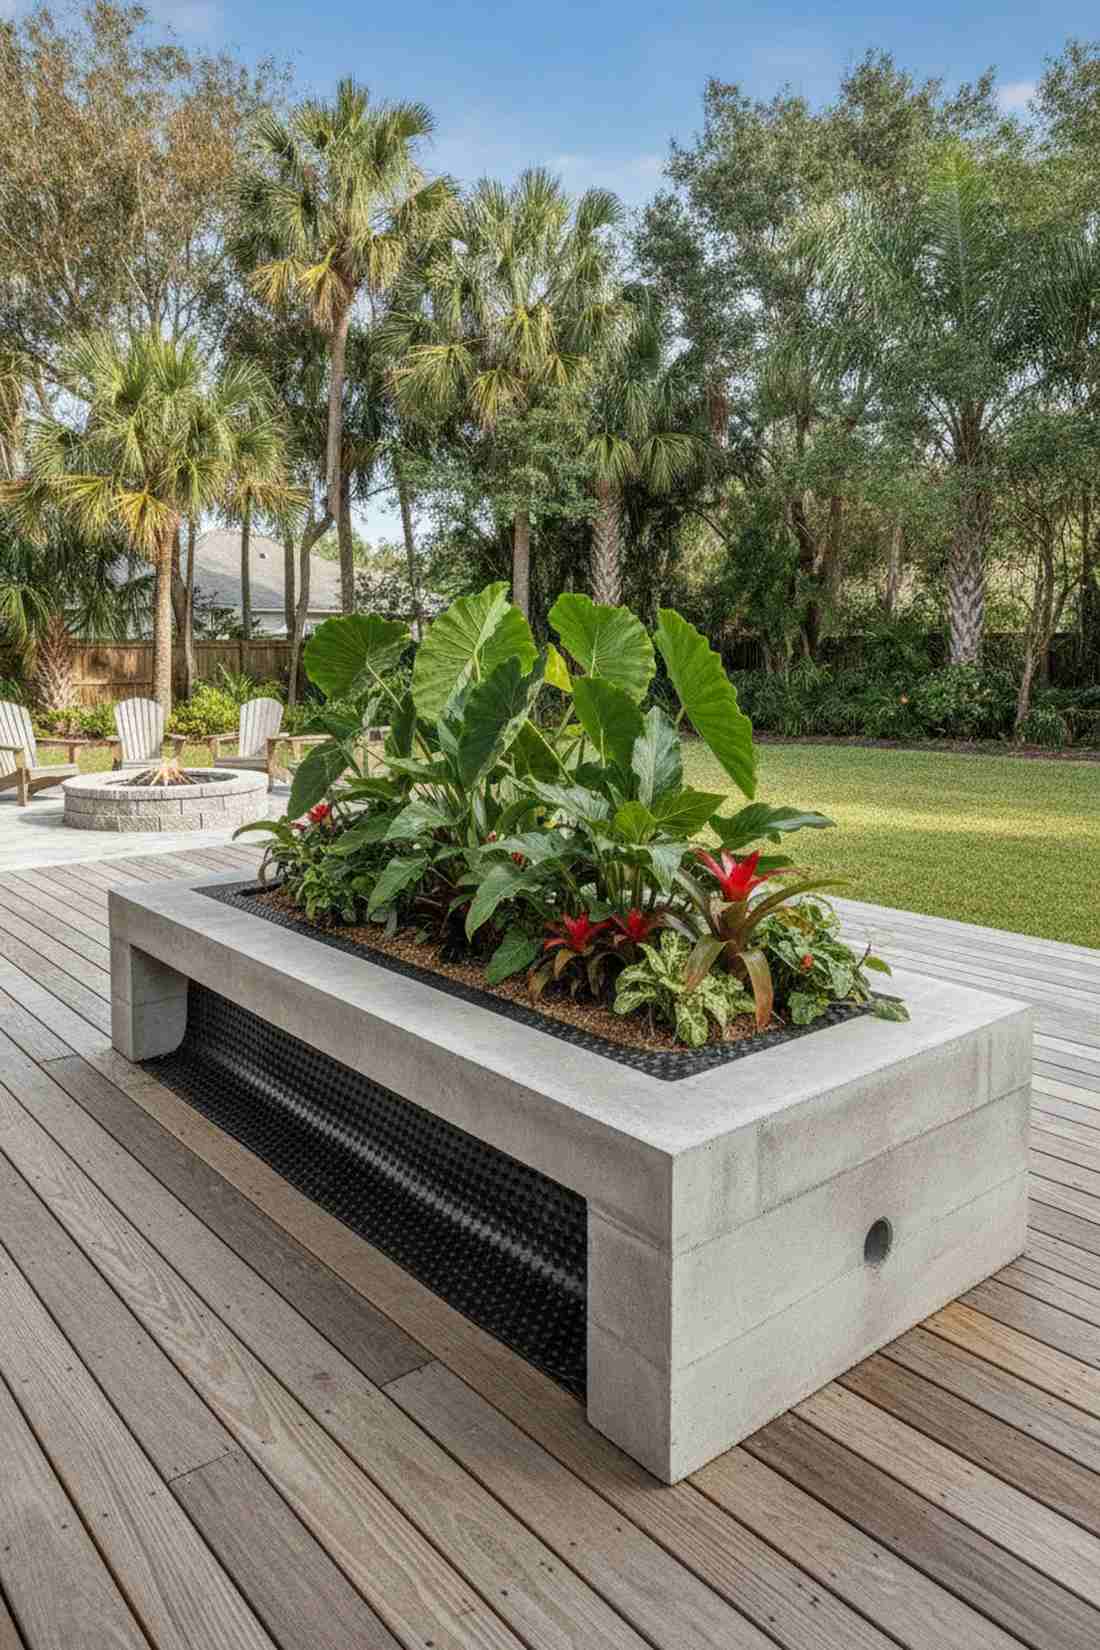
Straight out of a lush, tropical brutalist resort in Bali. Combining a heavy seating ledge with integrated greenery creates the ultimate multi-functional accent for a plain wooden deck.
People often clutter their space with separate pots and chairs, but merging them into one hollow cast eliminates visual noise. Lining the interior cavity with a sturdy waterproofing membrane ensures the structural integrity never degrades from wet potting soil.
Expect to spend around $100–$140 for the complex inner forms. Pin this to your spring garden planning board immediately.
- Key Materials: Inner and outer form lumber, landscape fabric, drainage pipe
- Vibe / Style: Brutalist jungle oasis
- Difficulty: Intermediate dual-form pouring
- Budget Breakdown: Form materials: $60 | Membrane & piping: $30.
- Creator’s Tip: Cast a PVC pipe laterally through the bottom of the form to act as an invisible weep hole for excess watering.
- Smart Sourcing: Heavy-duty dimpled drainage membranes and premium lightweight soil blends.
Cantilevered Platforms that Define Modern Outdoor Seating
Nothing screams high-end architecture quite like heavy materials appearing to float in mid-air. These platforms require careful engineering but deliver the ultimate modern wow factor.
11. Wall-Mounted Cantilevered Bench
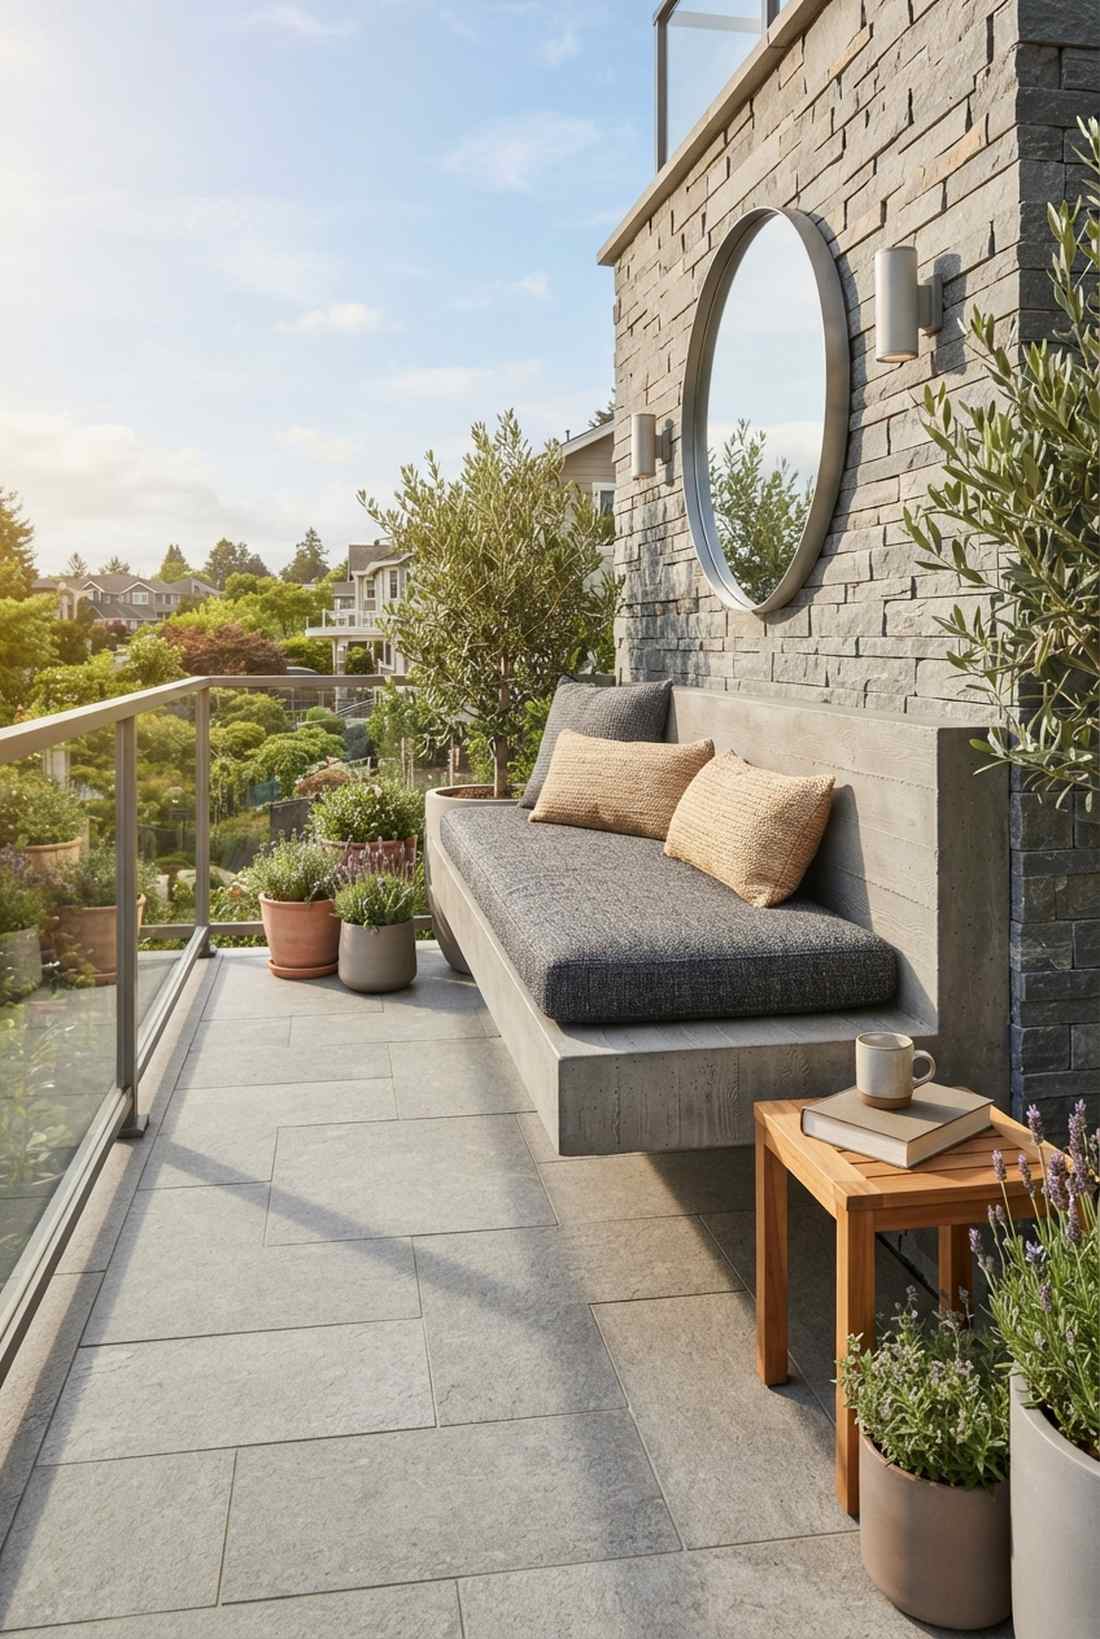
Feels like a gravity-defying magic trick reserved for high-end luxury spas. A floating ledge seat maximizes usable floor area, making it an incredible space-saver for tight balconies or narrow walkways.
Most DIYers are terrified of overhanging weight, yet utilizing specialized chemical anchoring systems makes it totally secure. Tying the internal steel grid directly into the existing retaining wall structural supports ensures the slab won’t sag or snap under pressure.
Budget roughly $200–$350, mostly for the specialized anchors and high-strength mix. It’s an intense build that completely transforms an area.
- Key Materials: Chemical epoxy anchors, heavy rebar, temporary shoring
- Vibe / Style: Weightless modern luxury
- Difficulty: Advanced structural build
- Budget Breakdown: Epoxy anchors: $80 | Shoring & Mix: $150.
- Creator’s Tip: Leave the temporary wooden shoring underneath the bench in place for a full 14 days to allow maximum tensile strength development.
- Smart Sourcing: Commercial-grade chemical anchoring epoxy and heavy-duty adjustable steel shoring jacks.
12. Stairway Cantilevered Seating
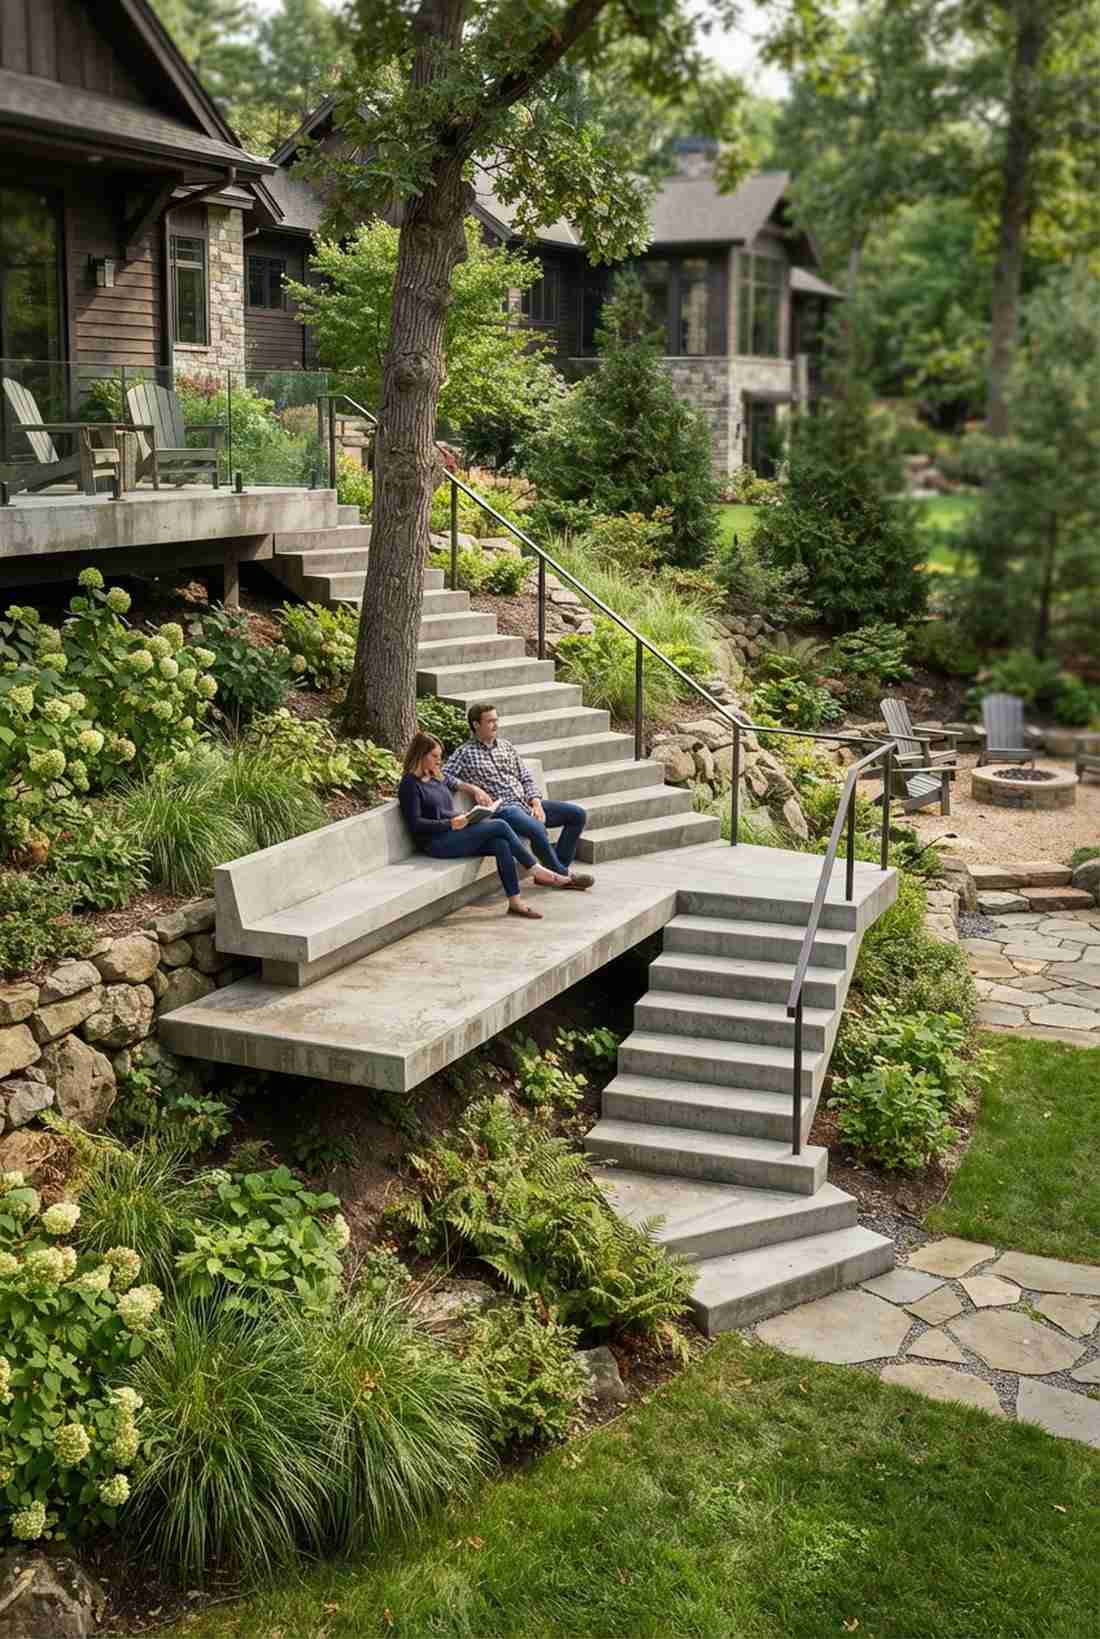
Looks like a bespoke resting point carved into a mountainside hiking trail. Extending a mid-stair landing bench offers a brilliant architectural pause for steeply terraced backyard landscapes.
Transition spaces are almost always ignored, but pushing a slab out from the stair stringer looks far more expensive than it actually is. It essentially turns a utilitarian set of steps into a multi-level amphitheater for casual lounging.
This adds only about $50–$100 to a standard stair pour. Save this idea if you have a massive elevation change to tackle.
- Key Materials: Extended stair formwork, monolithic pouring sequence
- Vibe / Style: Architectural journey rest stop
- Difficulty: Advanced formwork
- Budget Breakdown: Extra lumber: $30 | Extra steel: $20.
- Creator’s Tip: Pour the stairs and the cantilevered seat simultaneously (monolithically) to prevent weak cold joints from forming at the seam.
- Smart Sourcing: High-strength step-face trowels and pre-cut monolithic framing kits.
Almost everyone skips this next step, but it completely dictates whether your yard looks cheap or custom-built…
Courtyard Corner Systems for Intimate Gathering
Corners are notorious dead zones in landscape design. Wrapping heavy forms around these angles maximizes your hosting capacity without eating up the central yard space.
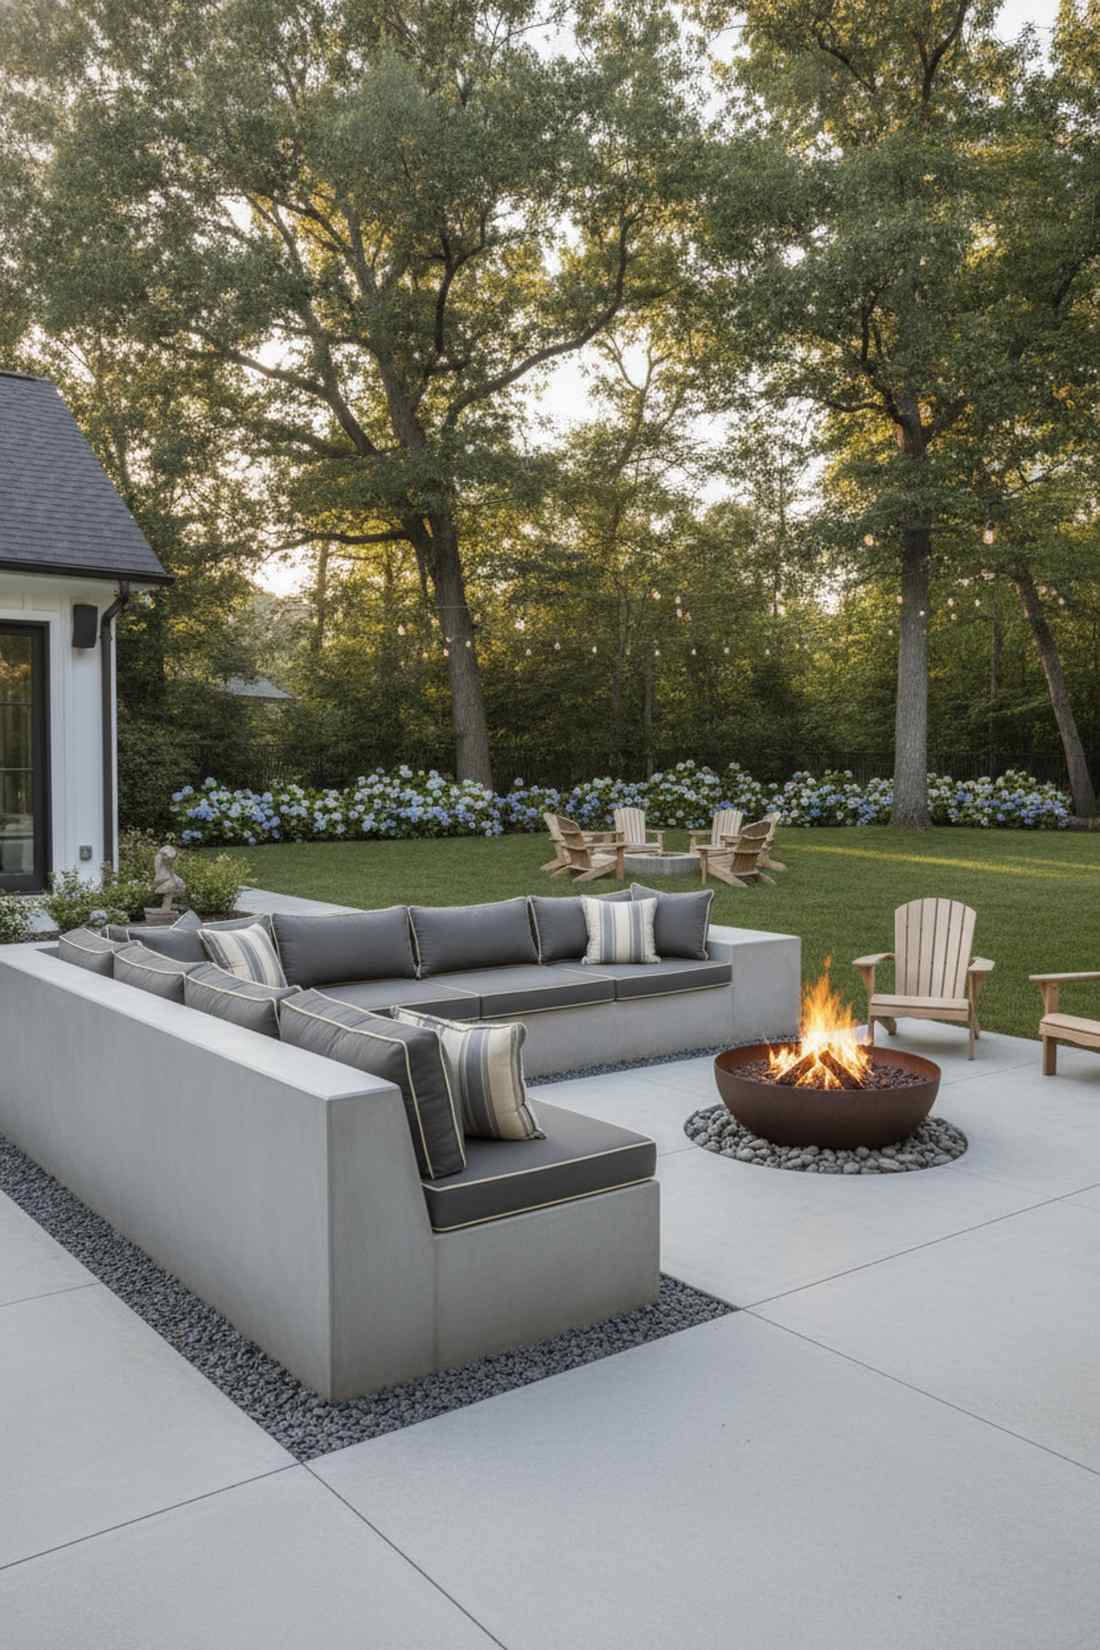
13. Wrap-Around Corner Bench
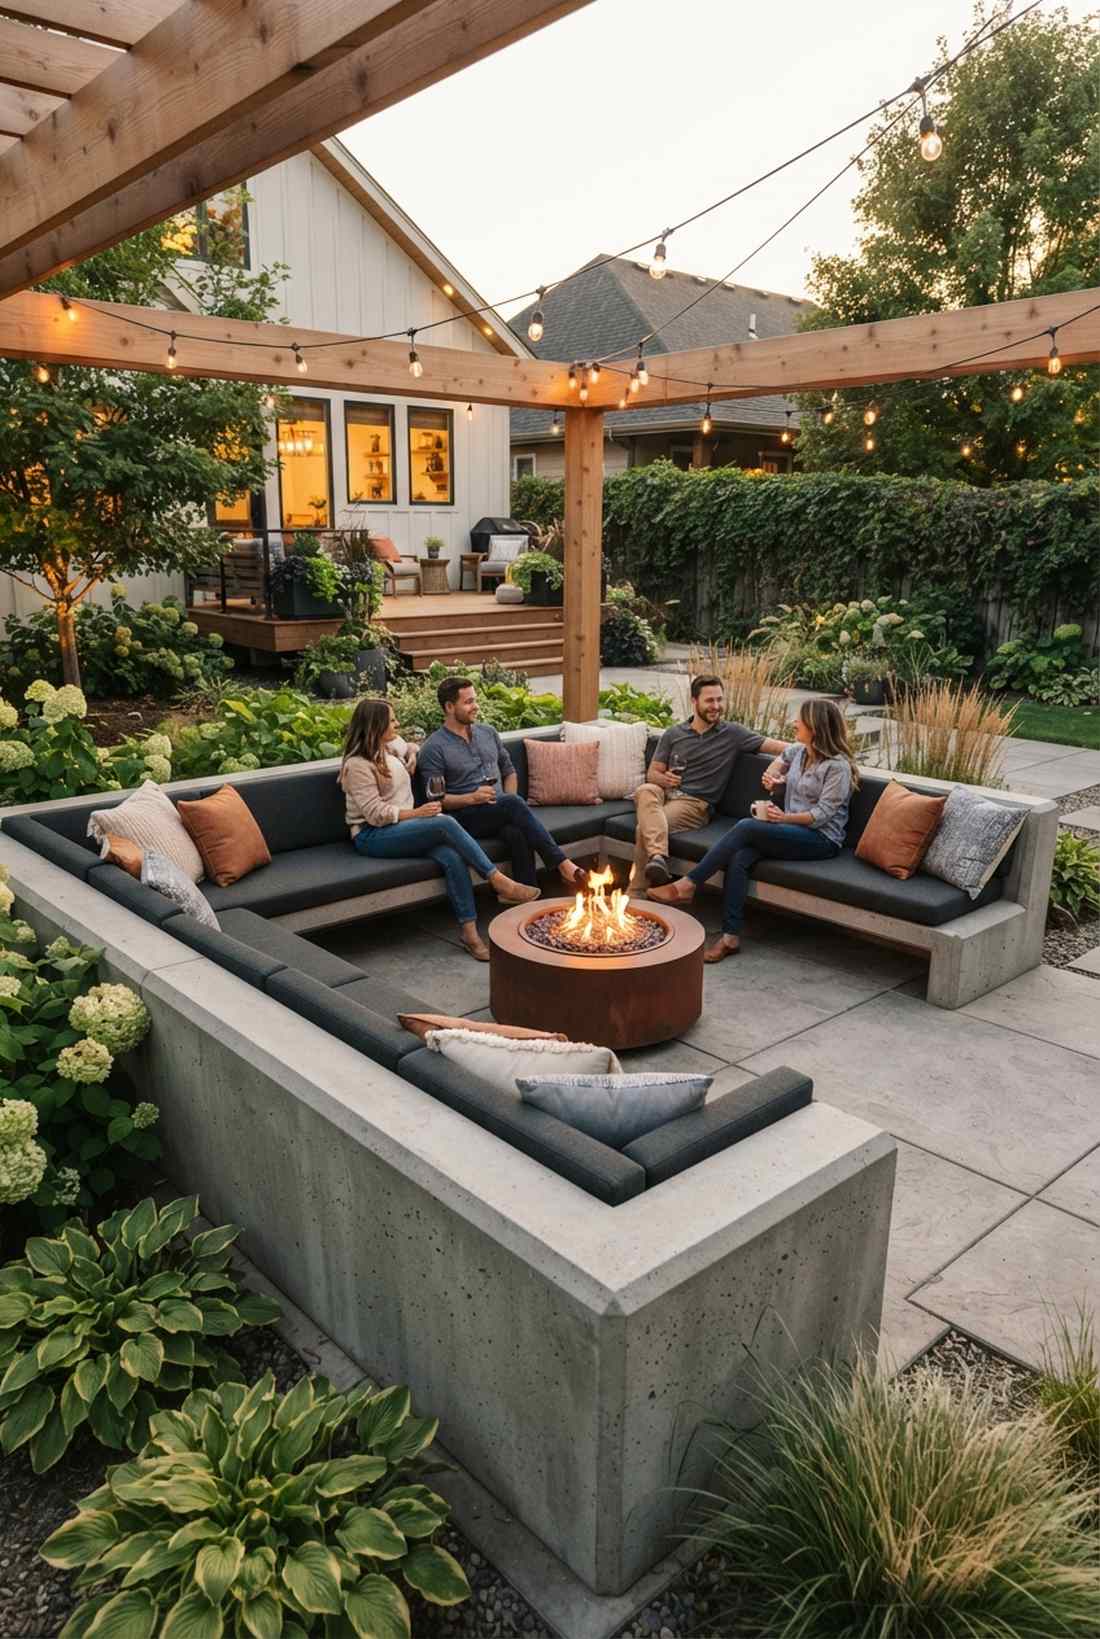
Feels like stepping into an exclusive VIP lounge hidden in the back of a luxury hotel. An enclosed angle bench layout is the definitive way to hug a fire pit tightly in a small suburban courtyard.
Buying matching sectionals for this geometry costs thousands, but forming it yourself delivers a surprisingly premium look for a fraction. Chamfering the front edge with a specialized edging trowel saves the back of your knees while elevating the craftsmanship.
This layout will generally cost $300–$500 to frame and pour properly. Pin this immediately if you love hosting evening gatherings.
- Key Materials: Corner bracing forms, chamfer strips, heavy mesh
- Vibe / Style: Cozy VIP booth
- Difficulty: Intermediate large-scale pour
- Budget Breakdown: Formwork & Chamfer: $100 | Bulk mix: $250.
- Creator’s Tip: Insert a 45-degree wooden chamfer strip into the bottom of your formwork to easily create a polished, angled edge.
- Smart Sourcing: Pre-cut plastic chamfer edge strips (bulk pack) and ergonomic magnesium edger tools.
14. Sunken Seating Pit
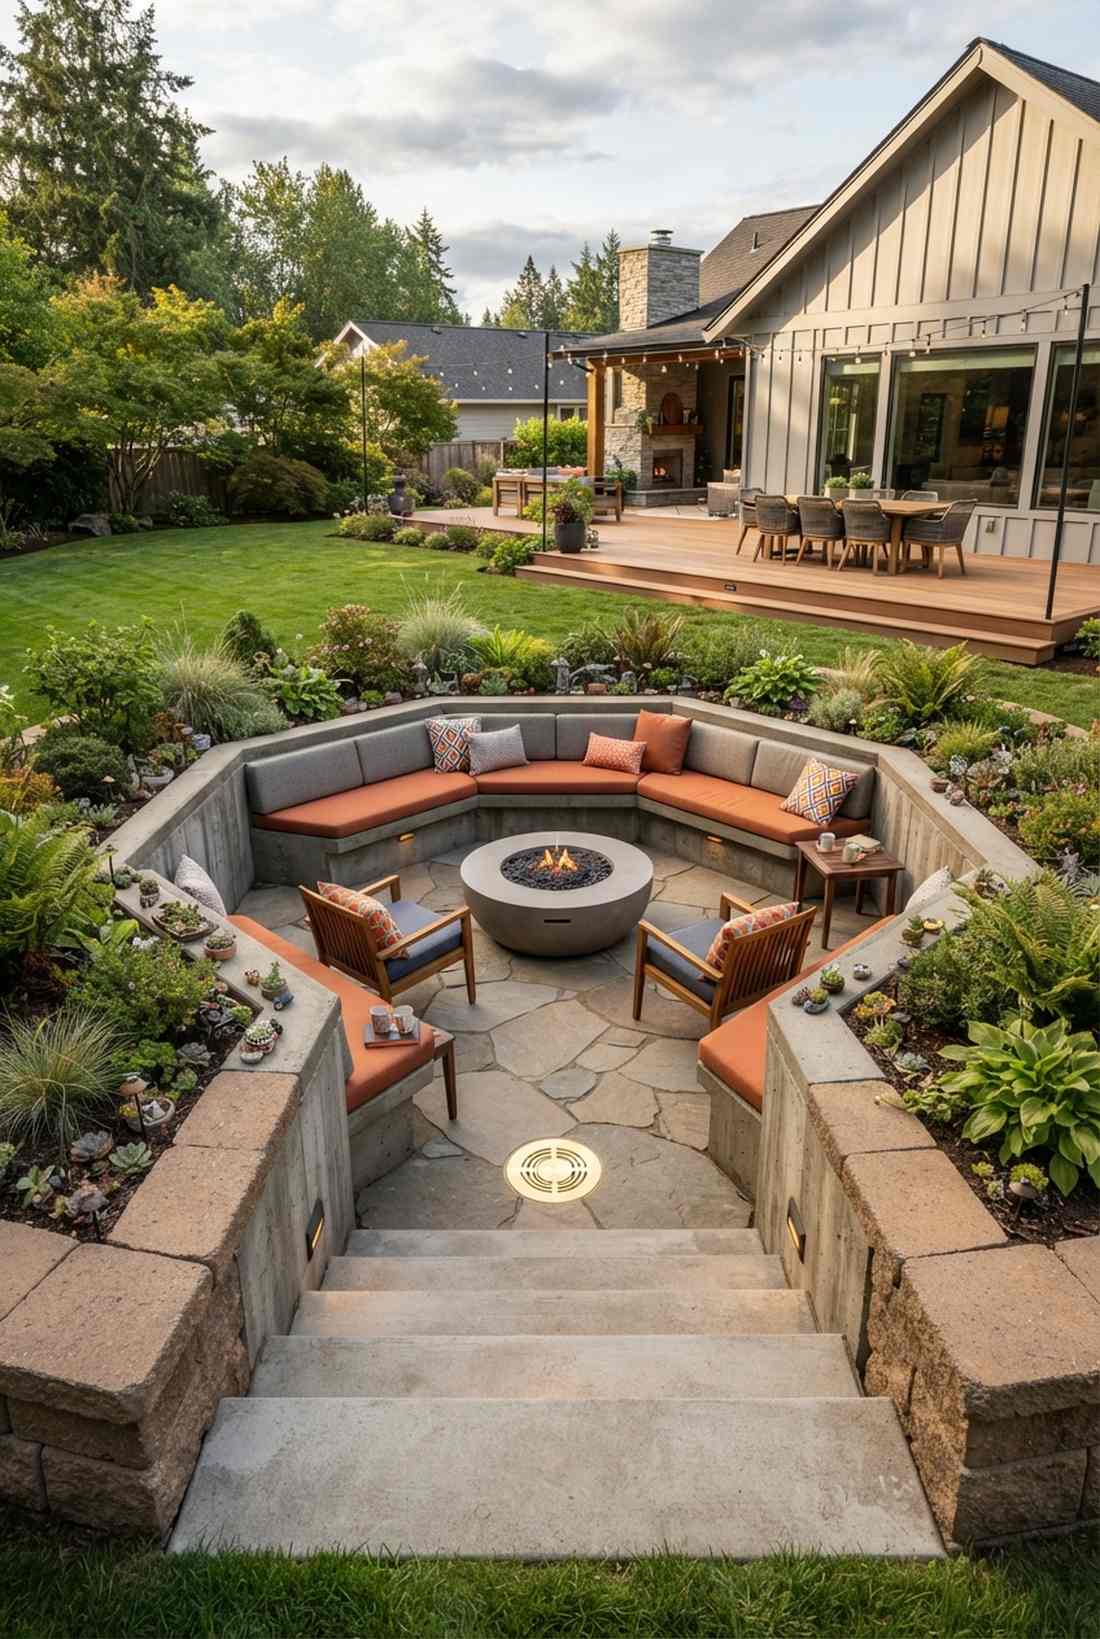
Gives off a flawless mid-century modern retro vibe that acts as the ultimate conversation starter. A recessed conversation lounge completely changes the landscape dynamic by dropping eye-level below the garden beds.
Elevated decks expose you to the neighbors, whereas digging down and retaining the earth provides incredible wind protection and absolute privacy. You can easily integrate fairy garden kits into the upper retaining lip to contrast the heavy industrial floor.
Excavation makes this a $800–$1,500 project. It’s a massive commitment that creates an unforgettable backyard retreat.
- Key Materials: Earthmoving equipment, retaining blocks, floor drain systems
- Vibe / Style: Mid-century hidden lounge
- Difficulty: Expert excavation and drainage
- Budget Breakdown: Excavation rental: $300 | Drainage & Concrete: $700.
- Creator’s Tip: Never skip the central floor drain; tie it directly into your yard’s French drain system or you will build a concrete swimming pool.
- Smart Sourcing: Heavy-duty brass floor drain covers and professional-grade landscape drainage pipe kits.
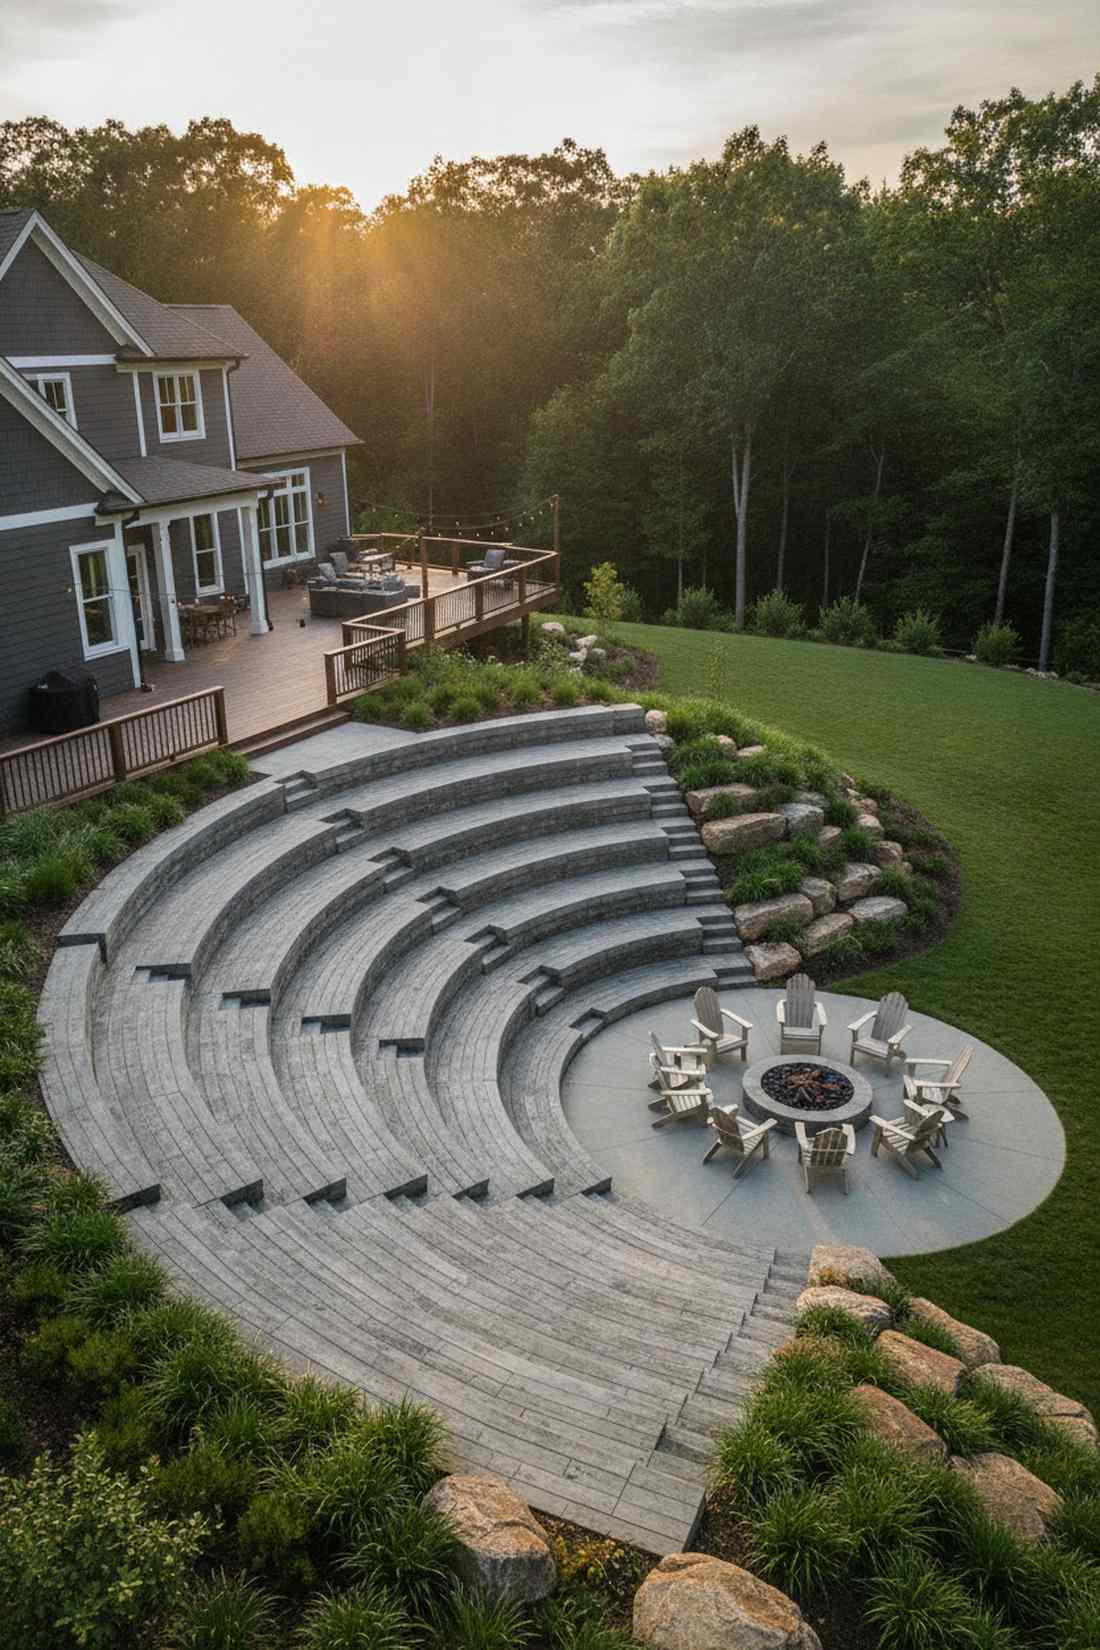
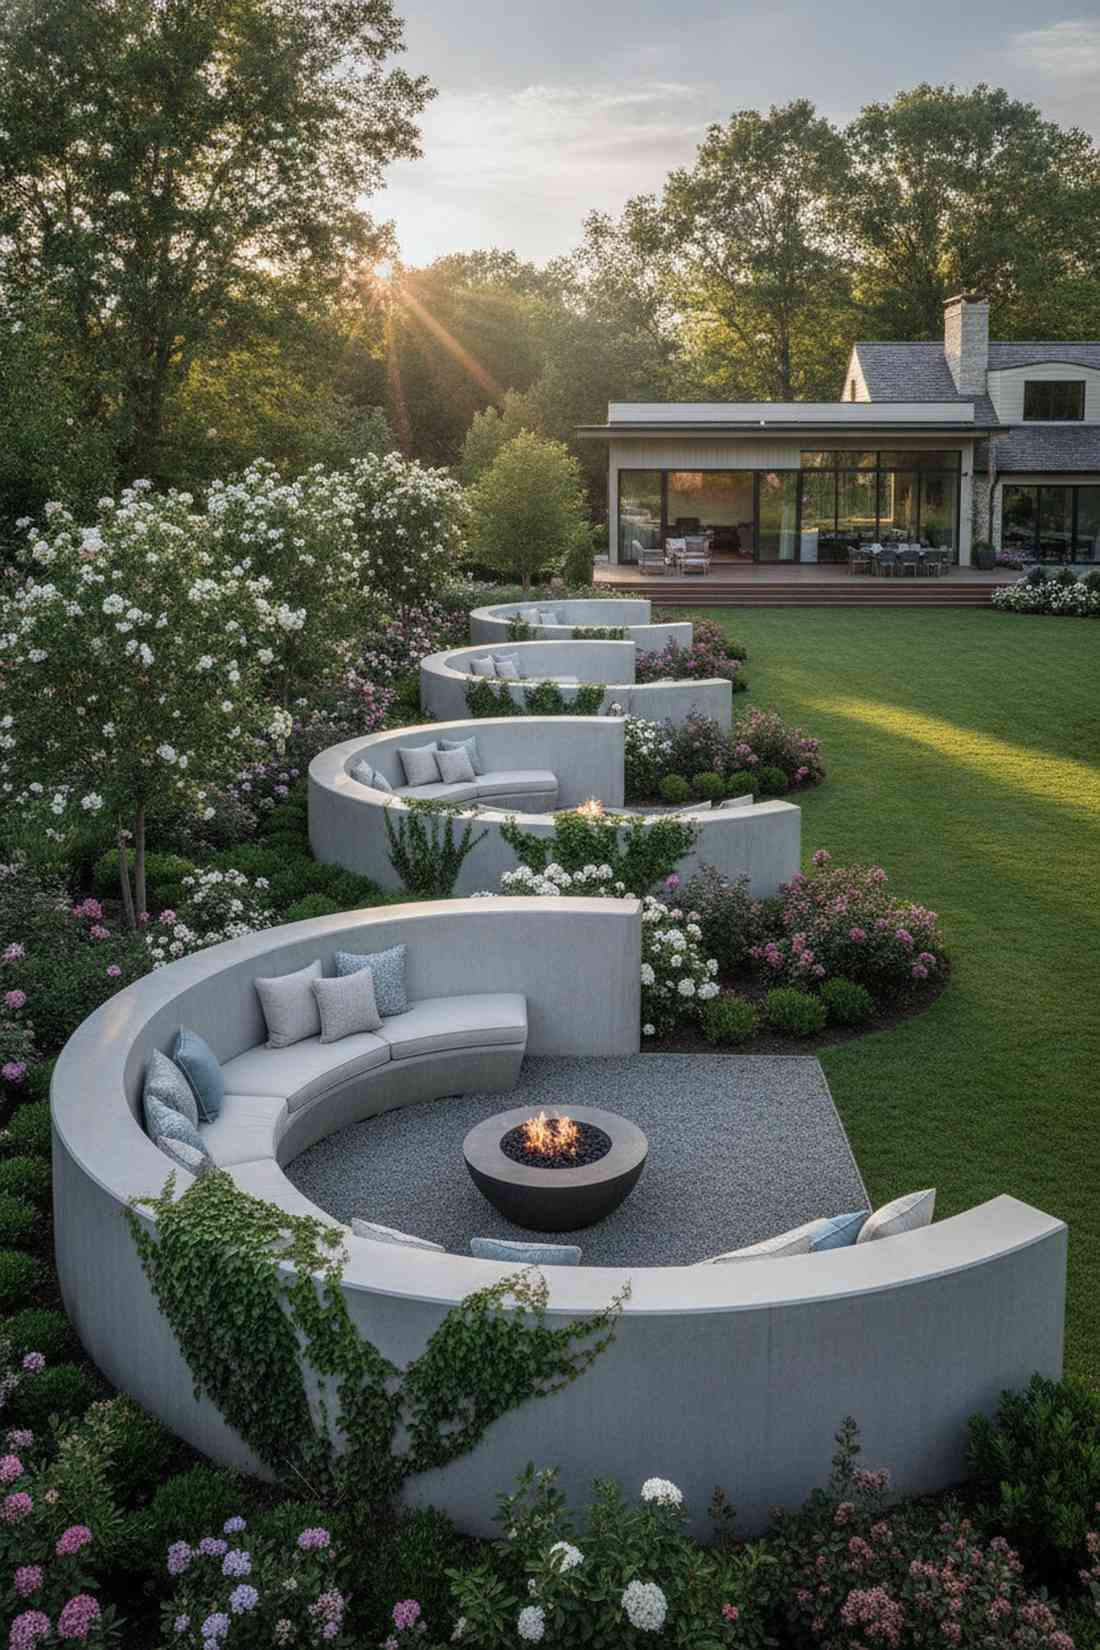
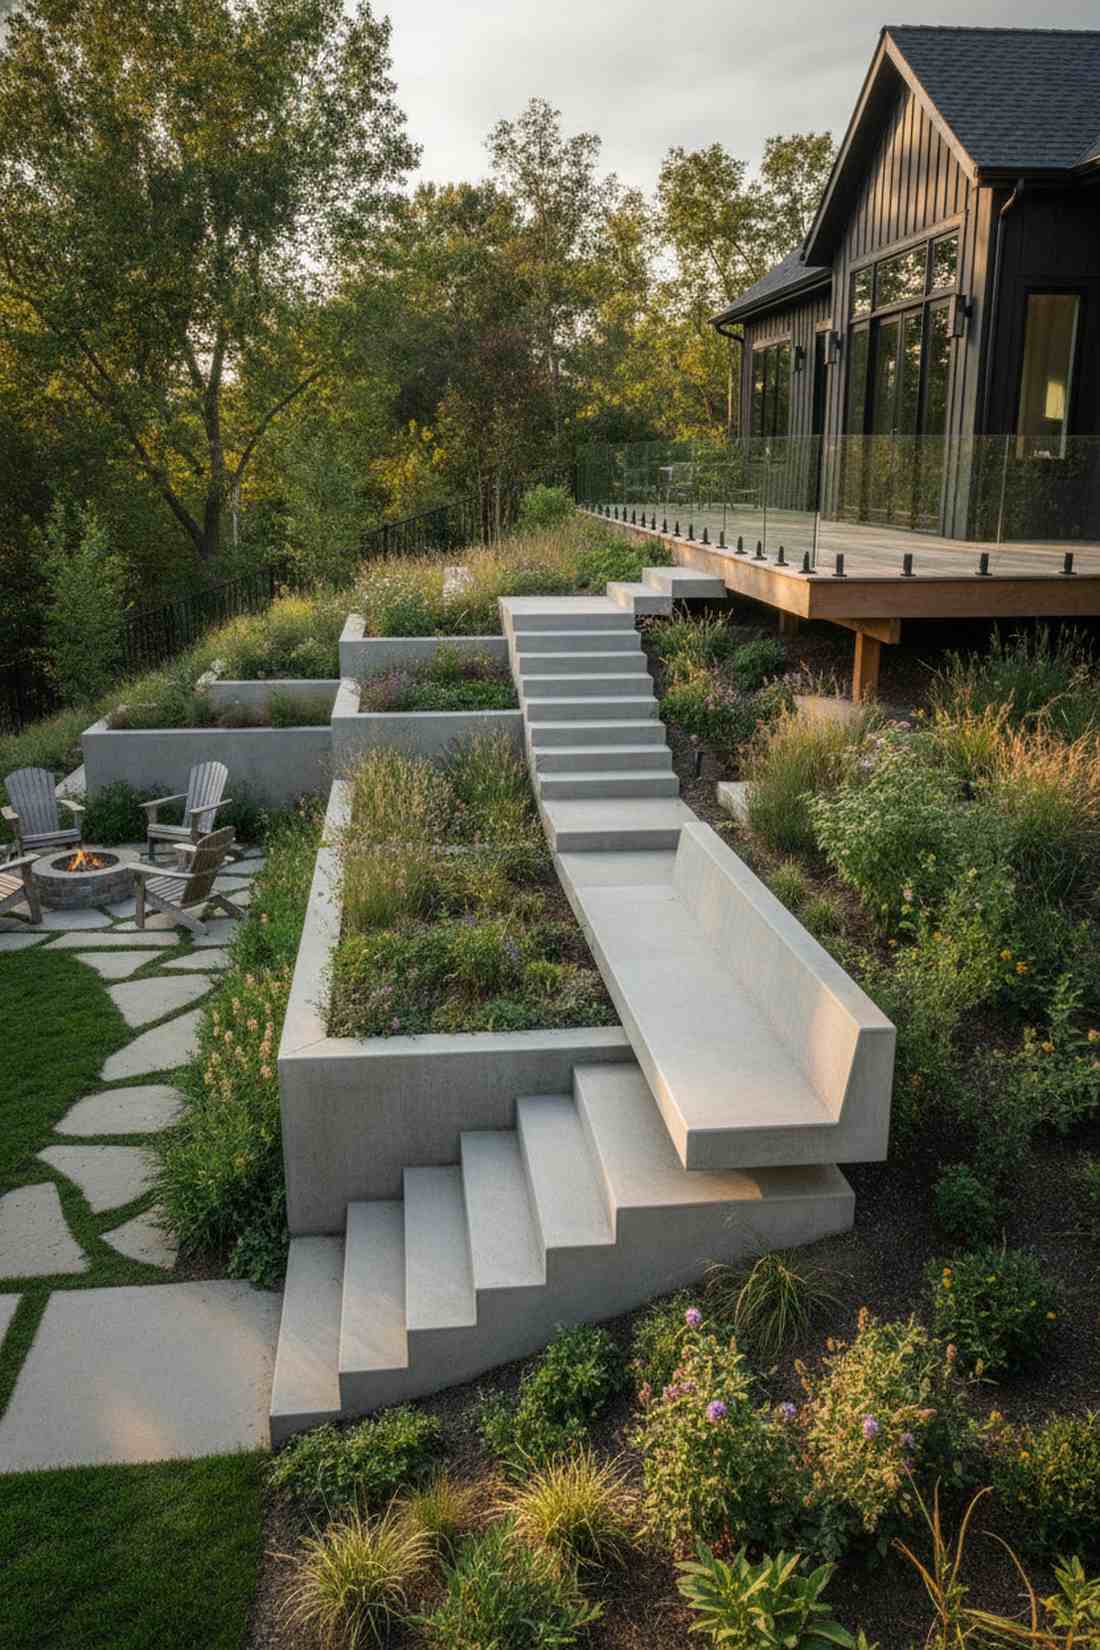
15. Tiered Corner Cascade
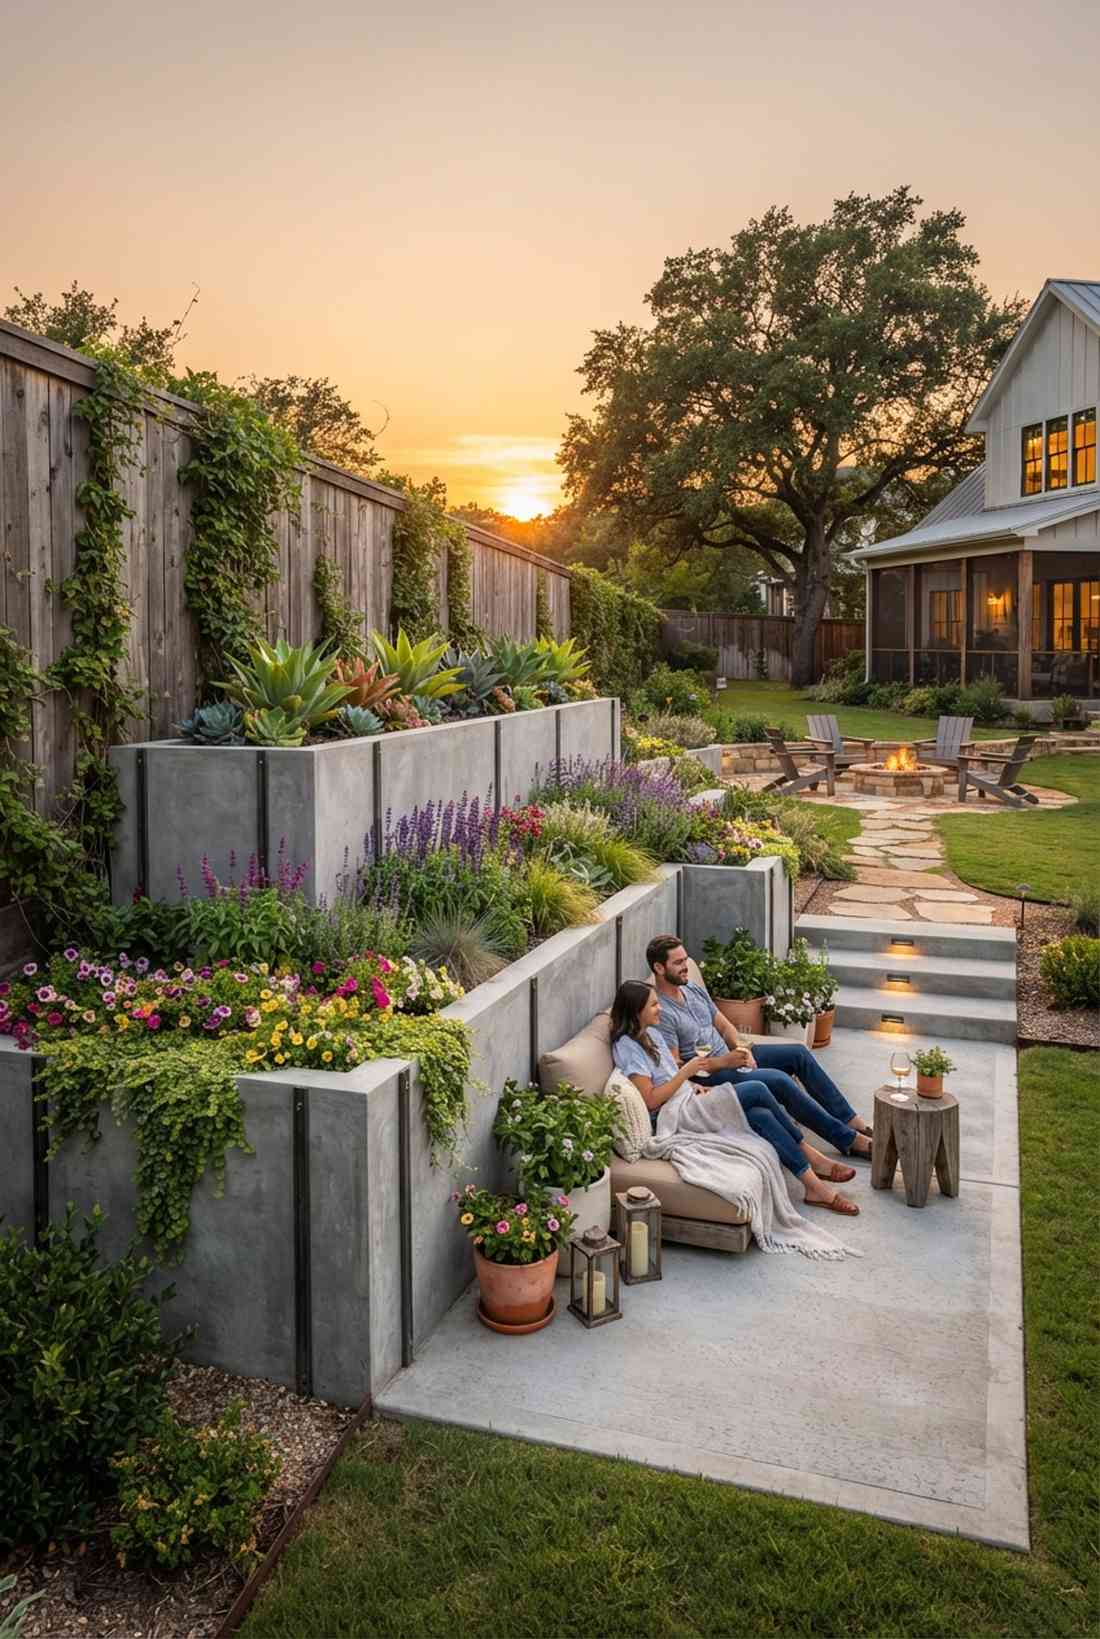
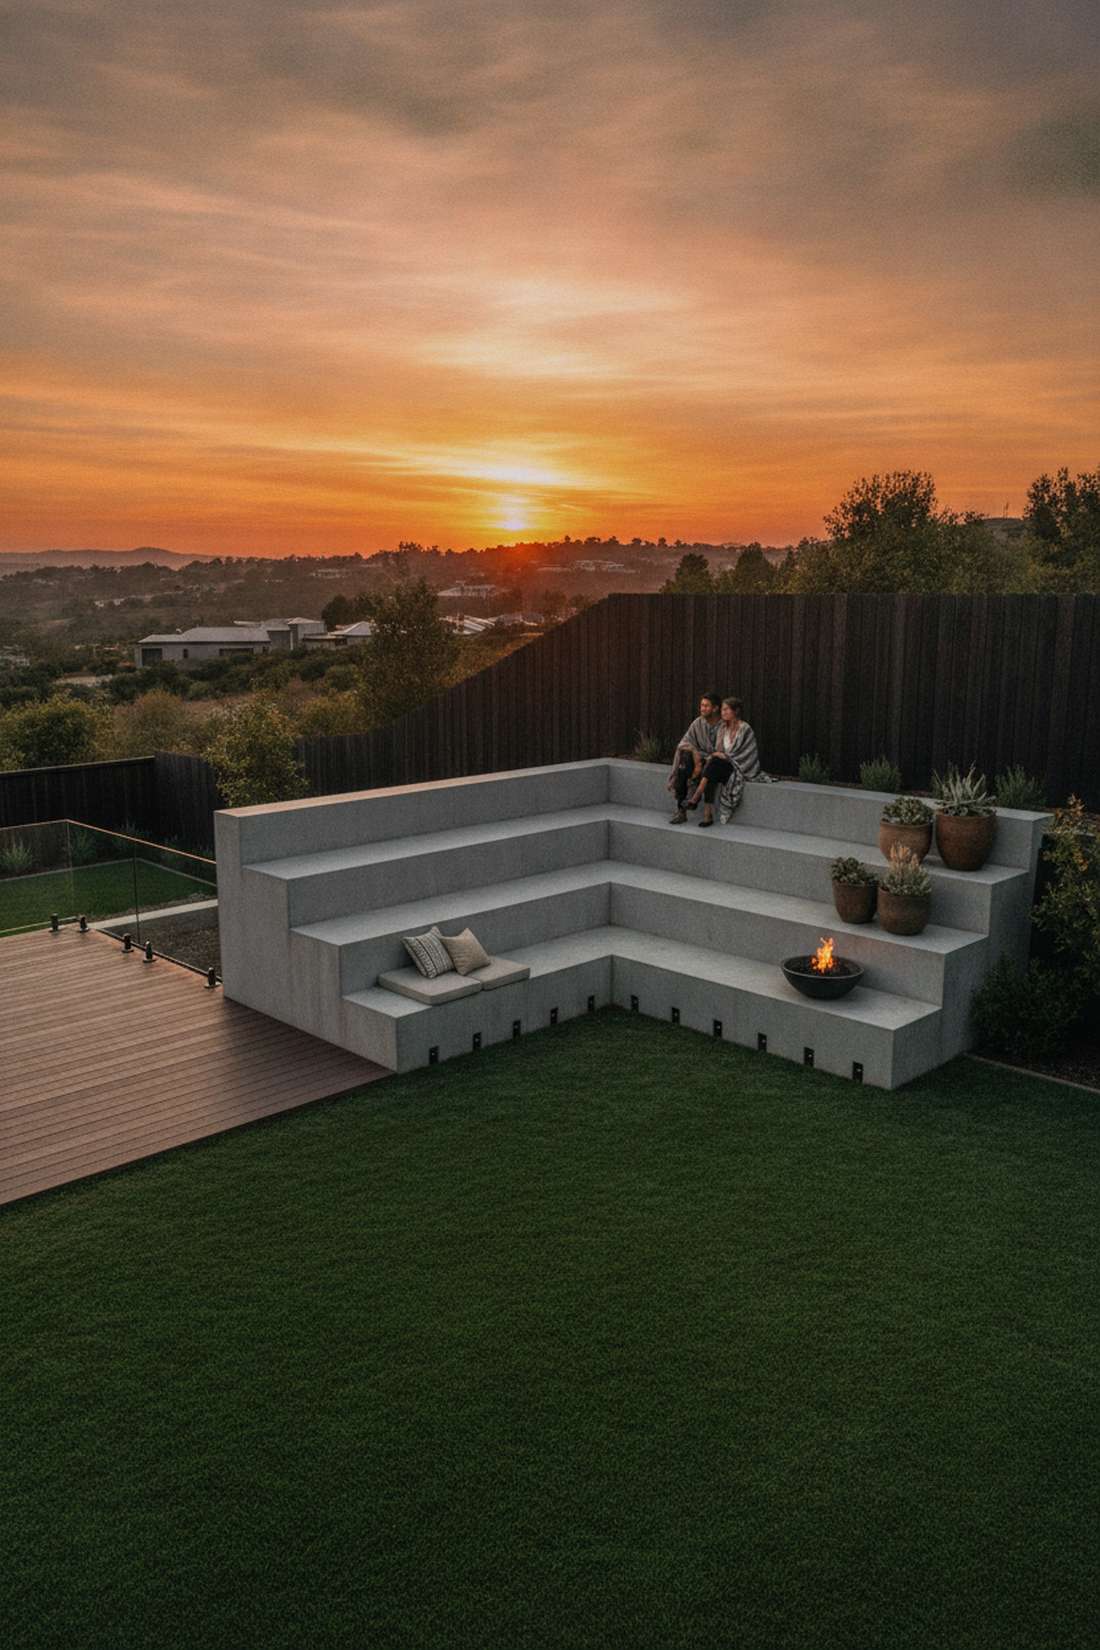
Looks like stadium seating built specifically for viewing spectacular evening sunsets. A multi-level corner step setup maximizes vertical space, performing beautifully against a high fence or tall retaining wall.
Stacking three distinct levels sounds intimidating, yet utilizing interlocking box forms makes the geometry surprisingly manageable. Integrating broad high-cpc terms like heavy-duty masonry tools ensures you get the razor-sharp ninety-degree angles this design demands.
Budget around $400–$600 for the extensive formwork needed here. Save this to your master landscape planning board.
- Key Materials: Stacked box forms, deep structural stakes
- Vibe / Style: Modern stadium viewing
- Difficulty: Advanced formwork stacking
- Budget Breakdown: Tiered forms: $200 | Concrete volume: $300.
- Creator’s Tip: Pour the lowest tier first and let it set up slightly before pouring the next to prevent bottom-form blowout from the extreme weight.
- Smart Sourcing: Contractor-grade form release oil (bulk gallon) and heavy-duty steel form stakes.
Material Guide: Cheap vs. Premium Aesthetic
Knowing exactly where to save and where to spend makes all the difference in achieving that “looks expensive but isn’t” vibe.
- Standard Mix vs. High-Strength Architectural: Cheaping out on the mix leads to flaking after one winter. Upgrading to a 5000 PSI fiber-reinforced mix stops weather damage dead in its tracks.
- Raw Finish vs. UV-Resistant Sealer: Unsealed concrete acts like a sponge, growing green algae within months. A premium silane siloxane coating protects the crisp gray aesthetic for years without adding gloss.
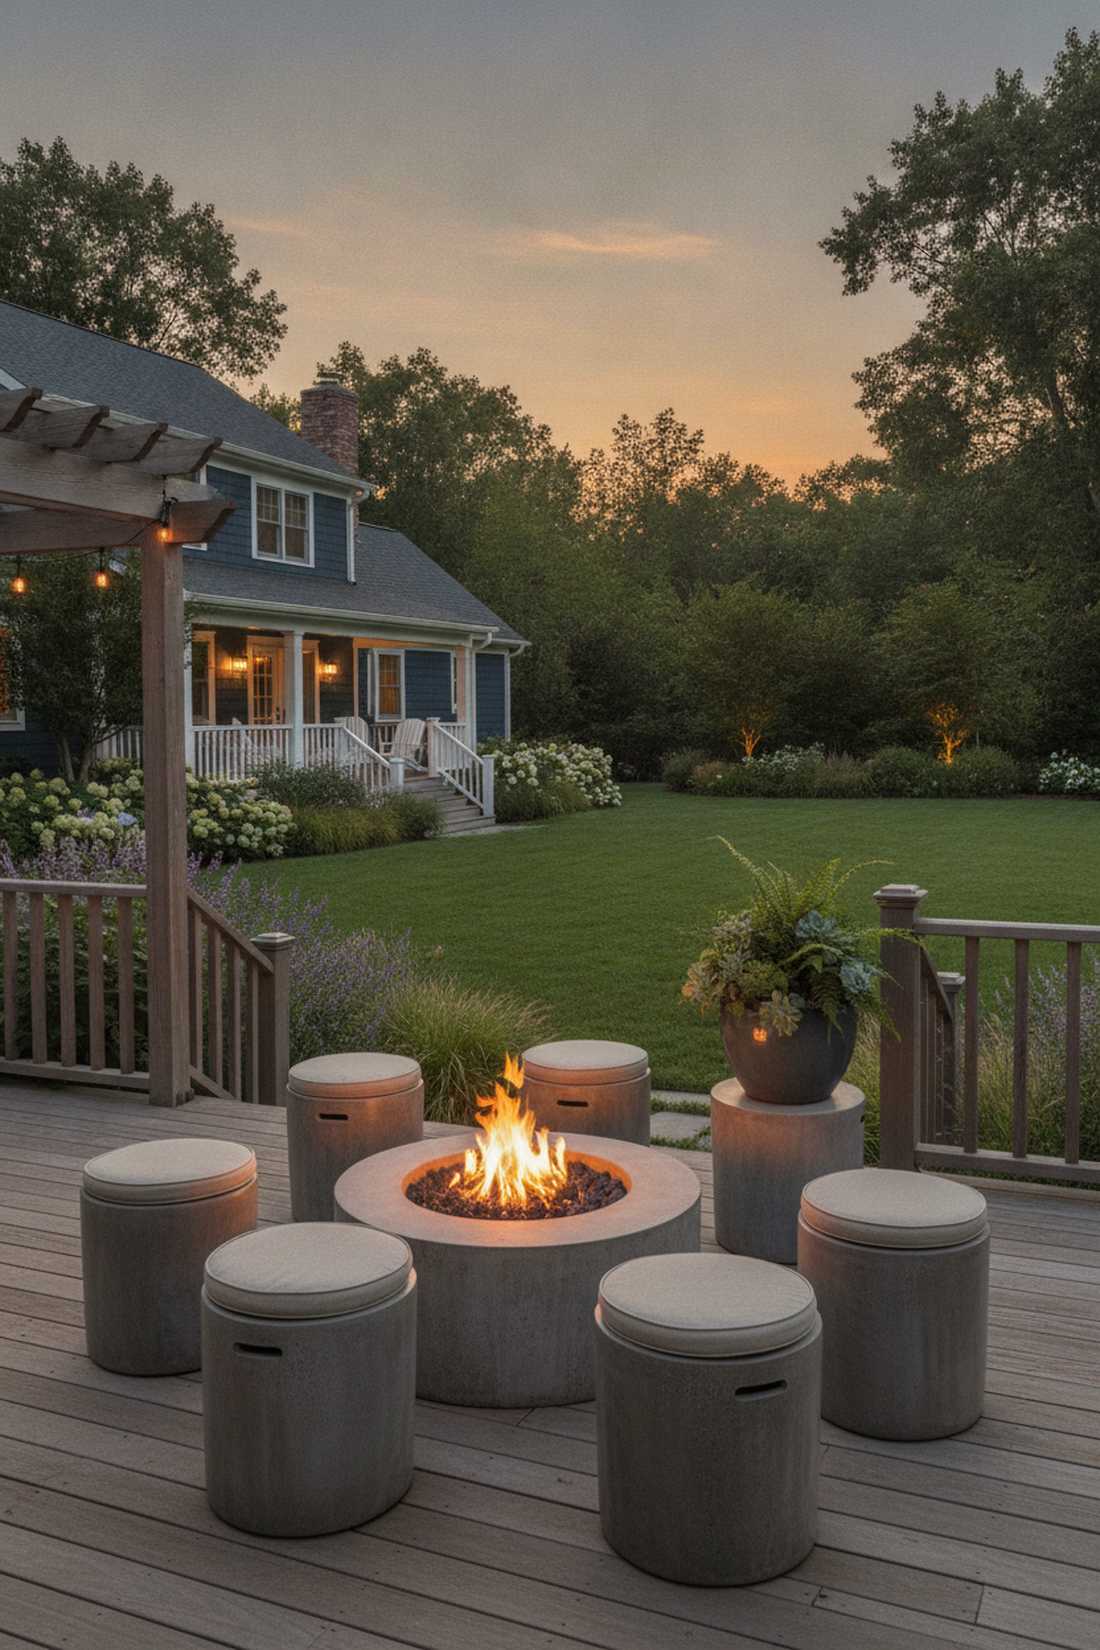
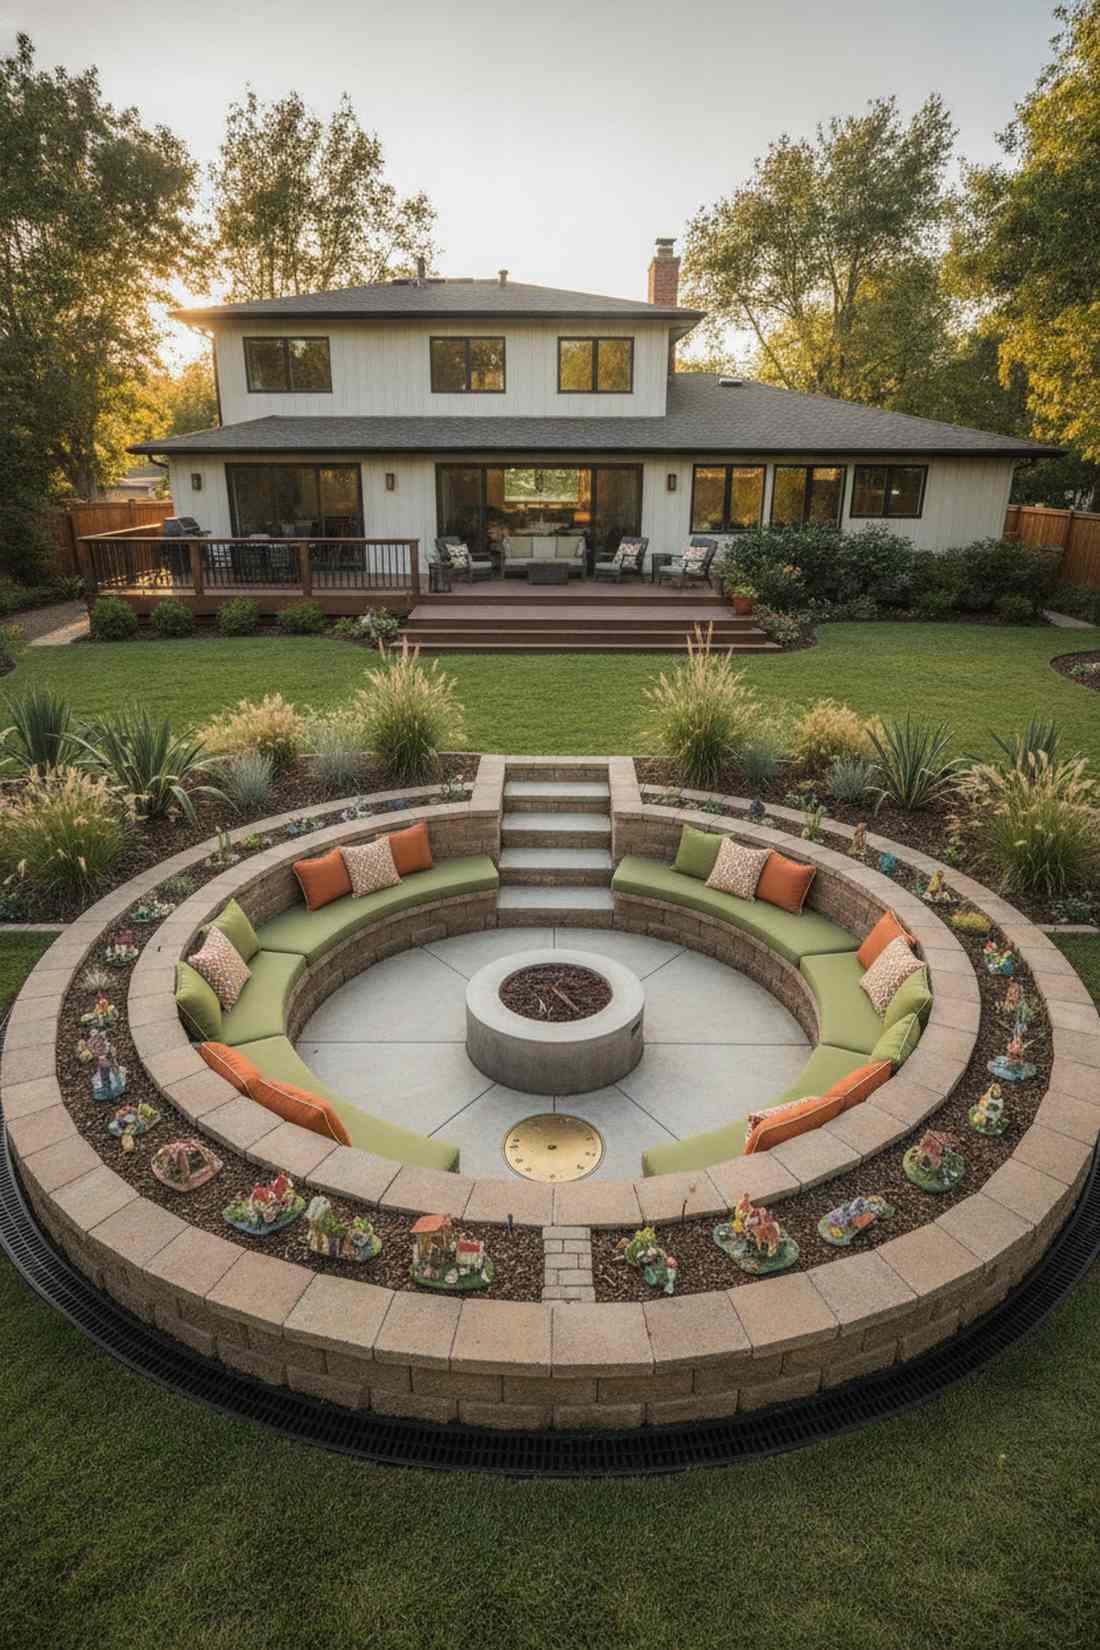
16. Built-In Fire Pit Seating
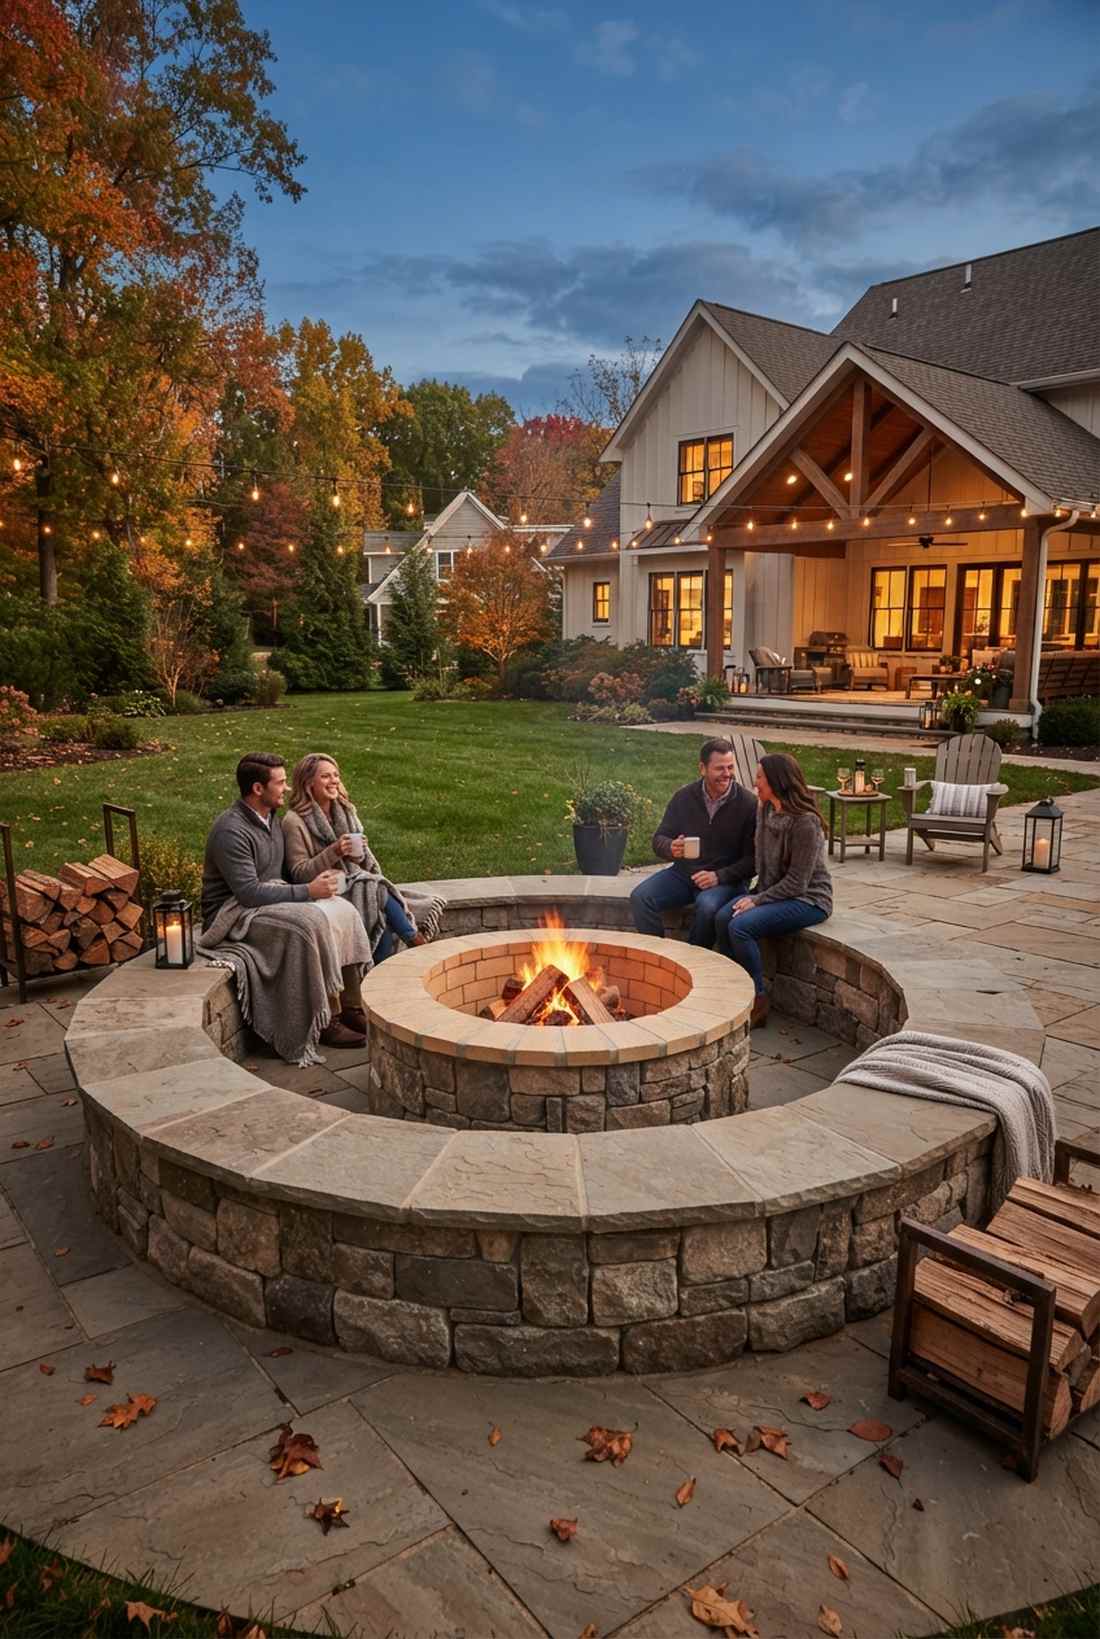
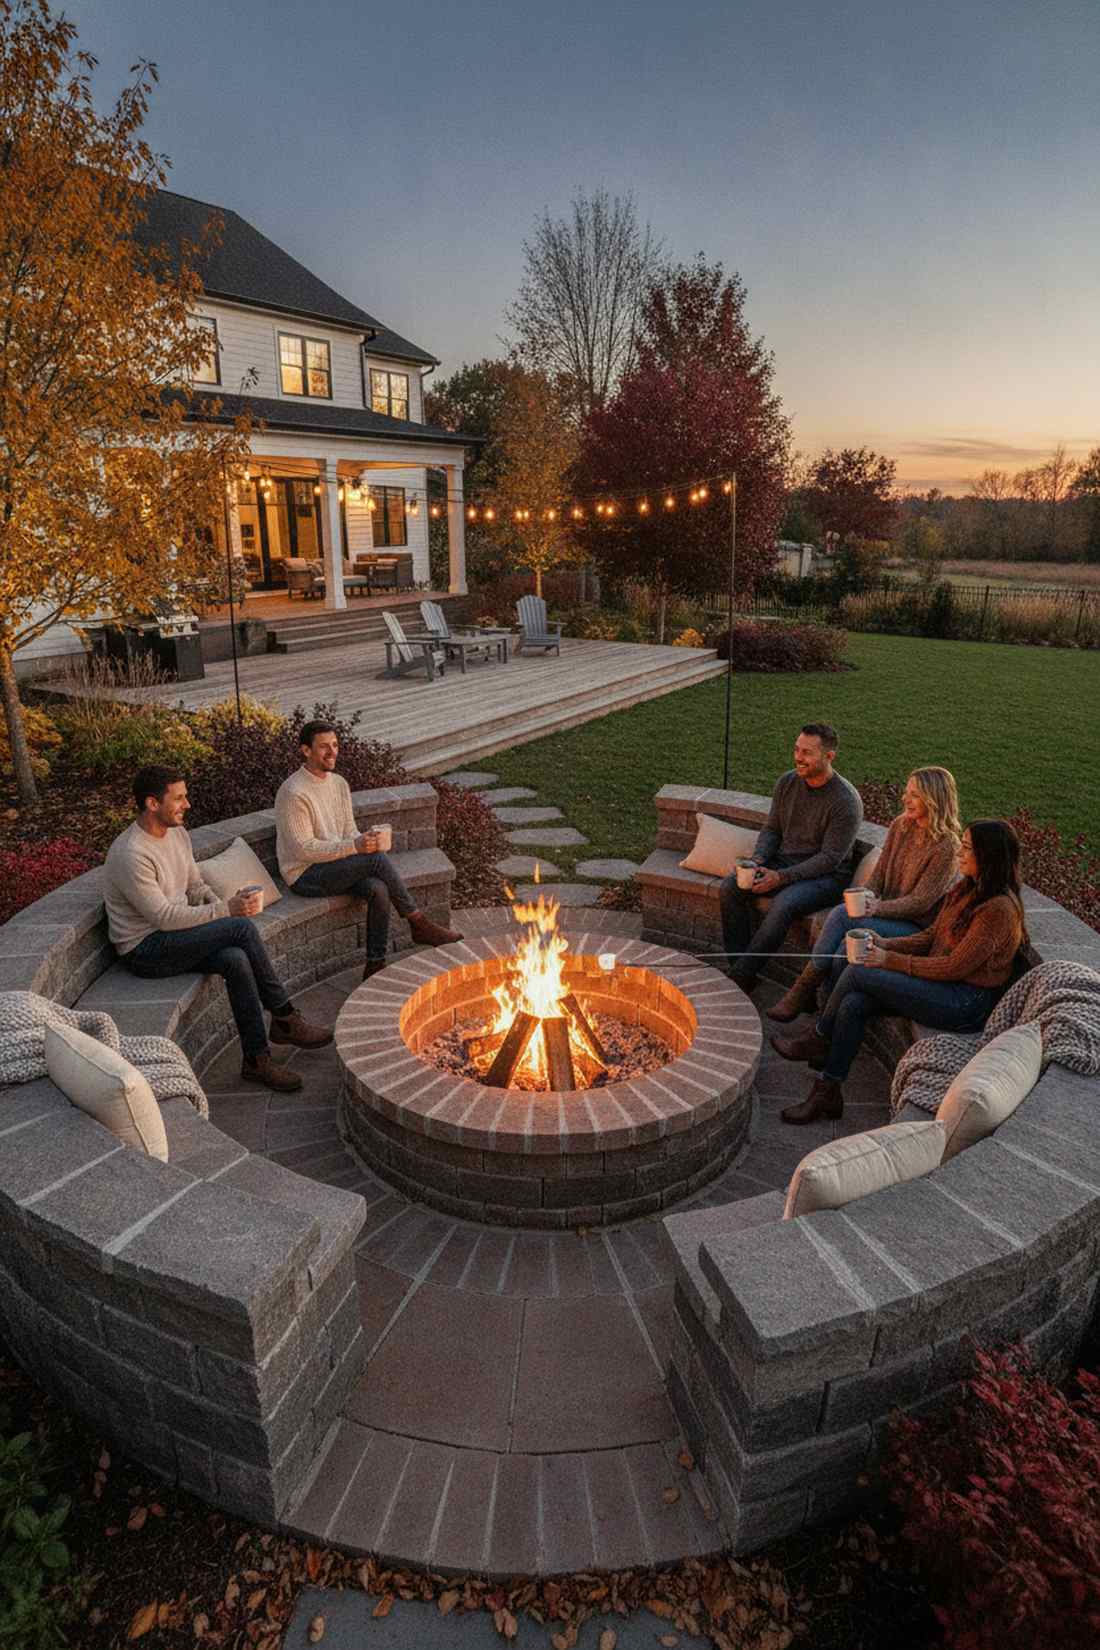
Feels like a permanent, monolithic campfire site crafted by an artisan stonemason. A circular bench wrapping a heat source is the definitive centerpiece for any modern outdoor hosting space.
Free-standing metal bowls rust out in a year, but a unified hardscape element secures a lifetime of late-night entertaining. Using heat-resistant fire brick for the inner core ensures the main structure never cracks from extreme thermal expansion.
This layout runs about $600–$900 with the necessary fireproof materials. It’s highly recommended for families who practically live outside during autumn.
- Key Materials: Refractory fire brick, high-heat mortar, seating forms
- Vibe / Style: Permanent masonry campfire
- Difficulty: Advanced multi-material build
- Budget Breakdown: Fire bricks: $150 | Seating materials: $500.
- Creator’s Tip: Leave a slight air gap between the fire brick core and the outer seating ring to prevent heat transfer from burning someone’s legs.
- Smart Sourcing: Pre-cut refractory fire bricks (bulk pack) and high-temperature refractory mortar kits.
Don’t stop reading now—this final layout is the ultimate trick for turning heavy construction into literal artwork…
17. Sculptural Split Block Bench
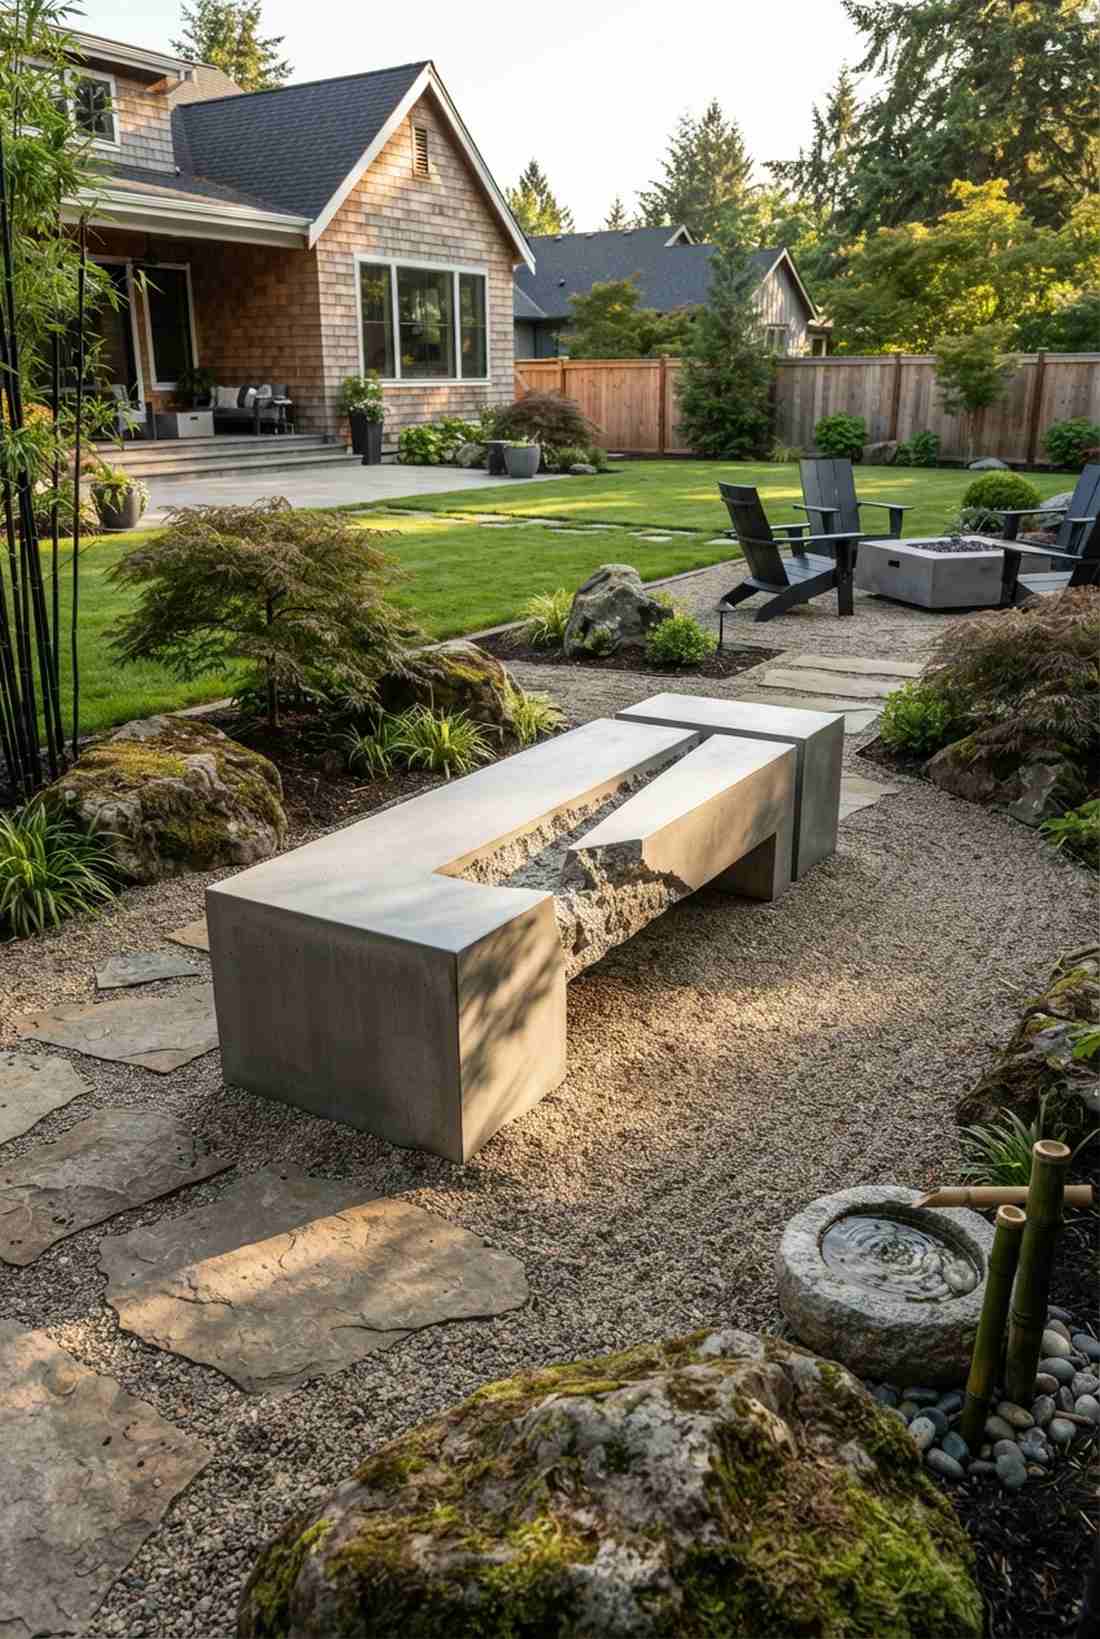
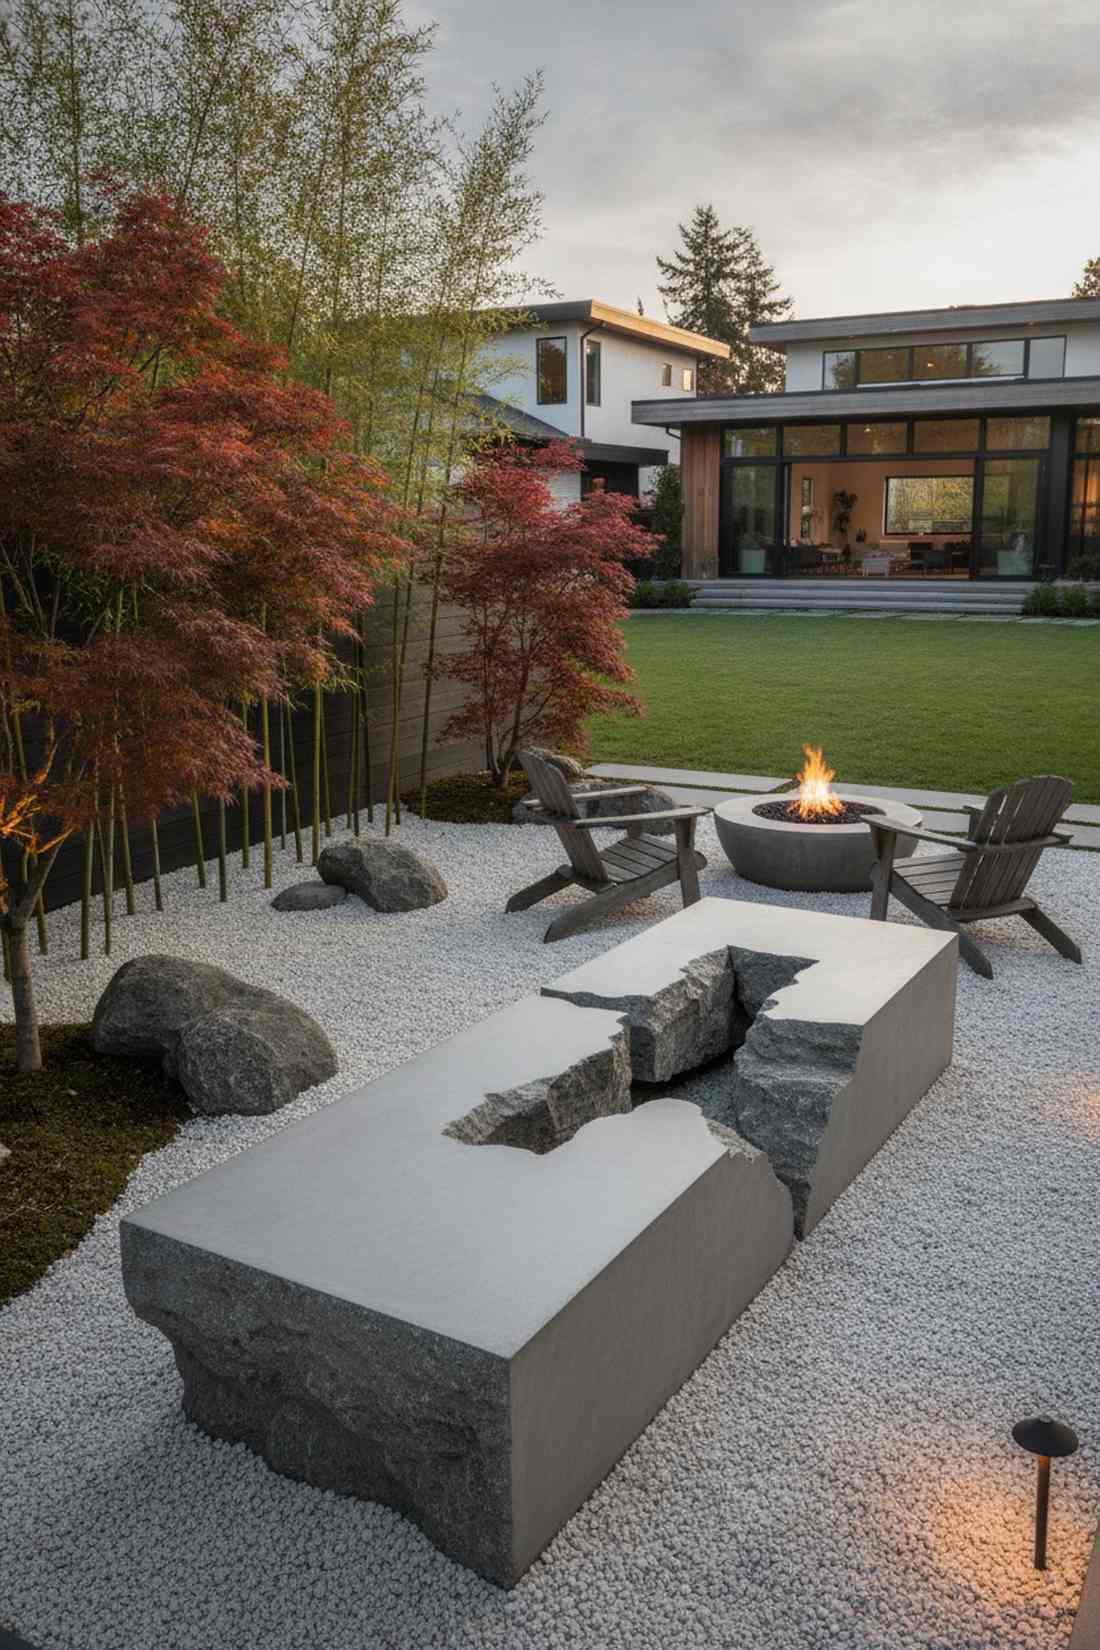
Straight out of a serene Zen garden featuring massive, broken stone relics. Creating intentional gaps and voids in a heavy slab transforms a functional seat into a high-end sculptural statement.
Most beginners try to make everything perfectly flush, but adding negative space looks far more expensive than it actually is. Slipping thin foam blocks into the formwork before pouring creates these dramatic visual breaks, mimicking the look of quarried stone.
You can execute this artistic touch for under $150. Pin this if you want to challenge traditional design norms in your yard.
- Key Materials: Rigid foam inserts, smooth outer forms
- Vibe / Style: Brutalist zen art
- Difficulty: Intermediate artistic pour
- Budget Breakdown: Foam blocks: $20 | Finishing materials: $80.
- Creator’s Tip: Chisel the inside of the split gaps after the cure to expose the rough aggregate, contrasting beautifully with the smooth top.
- Smart Sourcing: Commercial-grade rigid foam blocks and heavy-duty masonry chiseling kits.
Conclusion
Mastering outdoor seating concrete brings uncompromising architectural vision straight to your backyard. These 17 custom blueprints prove that with smart bulk sourcing and high-end protective sealants, you can bypass cheap, temporary patio furniture forever. Start with a simple modular block layout to test your skills, then confidently upgrade to cantilevered setups—your landscape will permanently reflect premium, heavy-duty aesthetic perfection.
Frequently Asked Questions
What concrete mix works best for outdoor seating that withstands weather?
To avoid ugly winter flaking, you absolutely must upgrade to a commercial-grade 5000 PSI architectural mix loaded with fiberglass reinforcement. Standard bag mixes fail quickly under freeze-thaw cycles, whereas investing in bulk ready-mix infused with air-entrainment ensures decades of crack-free durability. Finish it off with a UV-coated silane siloxane penetrating sealer to lock out moisture permanently.
How do I prevent concrete seating from feeling too cold or uncomfortable?
Because the heavy mass acts as a thermal battery, seating placed in full sun stays incredibly warm, while shaded spots hold the chill. To instantly fix cold spots, invest in thick, weather-resistant outdoor cushion starter kits or simply adhere custom-cut teak wood slats directly over the seating face. This blends the harsh brutalist aesthetic with high-end, comfortable warmth.
Can I build concrete seating forms myself or should I hire professionals?
If you leverage pre-cast modular bench kits or reusable silicone block molds, DIYing is ridiculously easy and saves thousands on labor. However, if your design involves heavy cantilevered floating platforms or deep retaining walls, hiring a pro is crucial. For beginners, grabbing a heavy-duty magnesium hand float starter kit and tackling a basic monolithic bench is the best entry point.
What maintenance do brutalist concrete seating forms require?
The beauty of this aesthetic is that it’s practically indestructible if sealed correctly on day one. You only need to reapply a premium weatherproof concrete sealer every three years to repel dirt and organic staining. A quick spring blast with a power washer removes any surface moss, keeping your investment looking like a freshly poured architectural masterpiece.
How can I soften brutalist concrete seating without losing the architectural effect?
Instead of painting or covering the raw texture, let nature do the contrasting by surrounding the base with lush, overflowing greenery. Injecting high-end terrarium accessories into hollow block planters or planting tall ornamental grasses immediately softens the harsh lines. Adding weatherproof LED hardscape lights underneath floating edges also adds an incredibly warm, inviting evening glow.