A strategically designed fairy lights wedding transforms basic venues into breathtaking cinematic experiences. Sourcing commercial-grade LED kits and using smart anchoring techniques delivers a premium aesthetic on a strict budget. This simple foundation guarantees an unforgettable high-end glow.
Design Snapshot: High-End Principles
- Commercial Sourcing: Bypass retail craft aisles for heavy-duty wholesale LED spools
- Color Temperature: Demand exact 2700K-3000K ratings for that expensive, cinematic golden hue
- Structural Integrity: Utilize tension cables and UV-coated zip ties for flawless, no-sag installations
- Power Management: Invest in UL-listed multi-channel splitters for seamless electrical runs
Overhead Canopy & Ceiling Installations
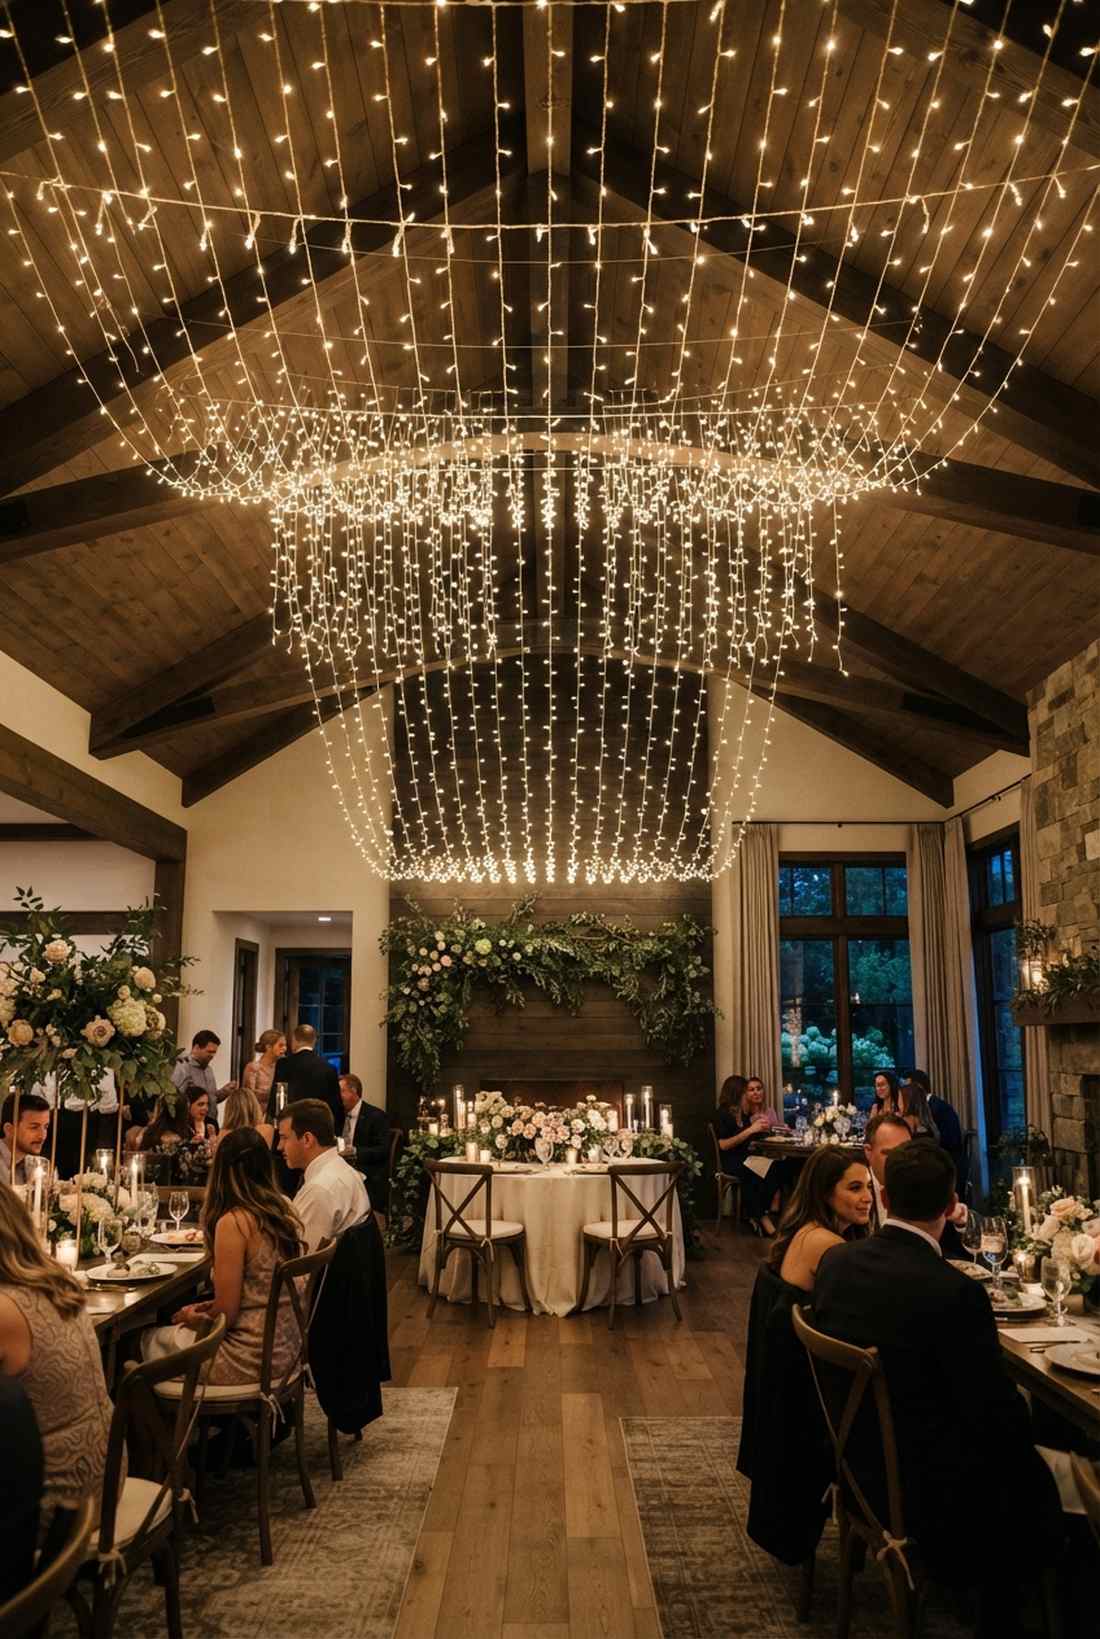
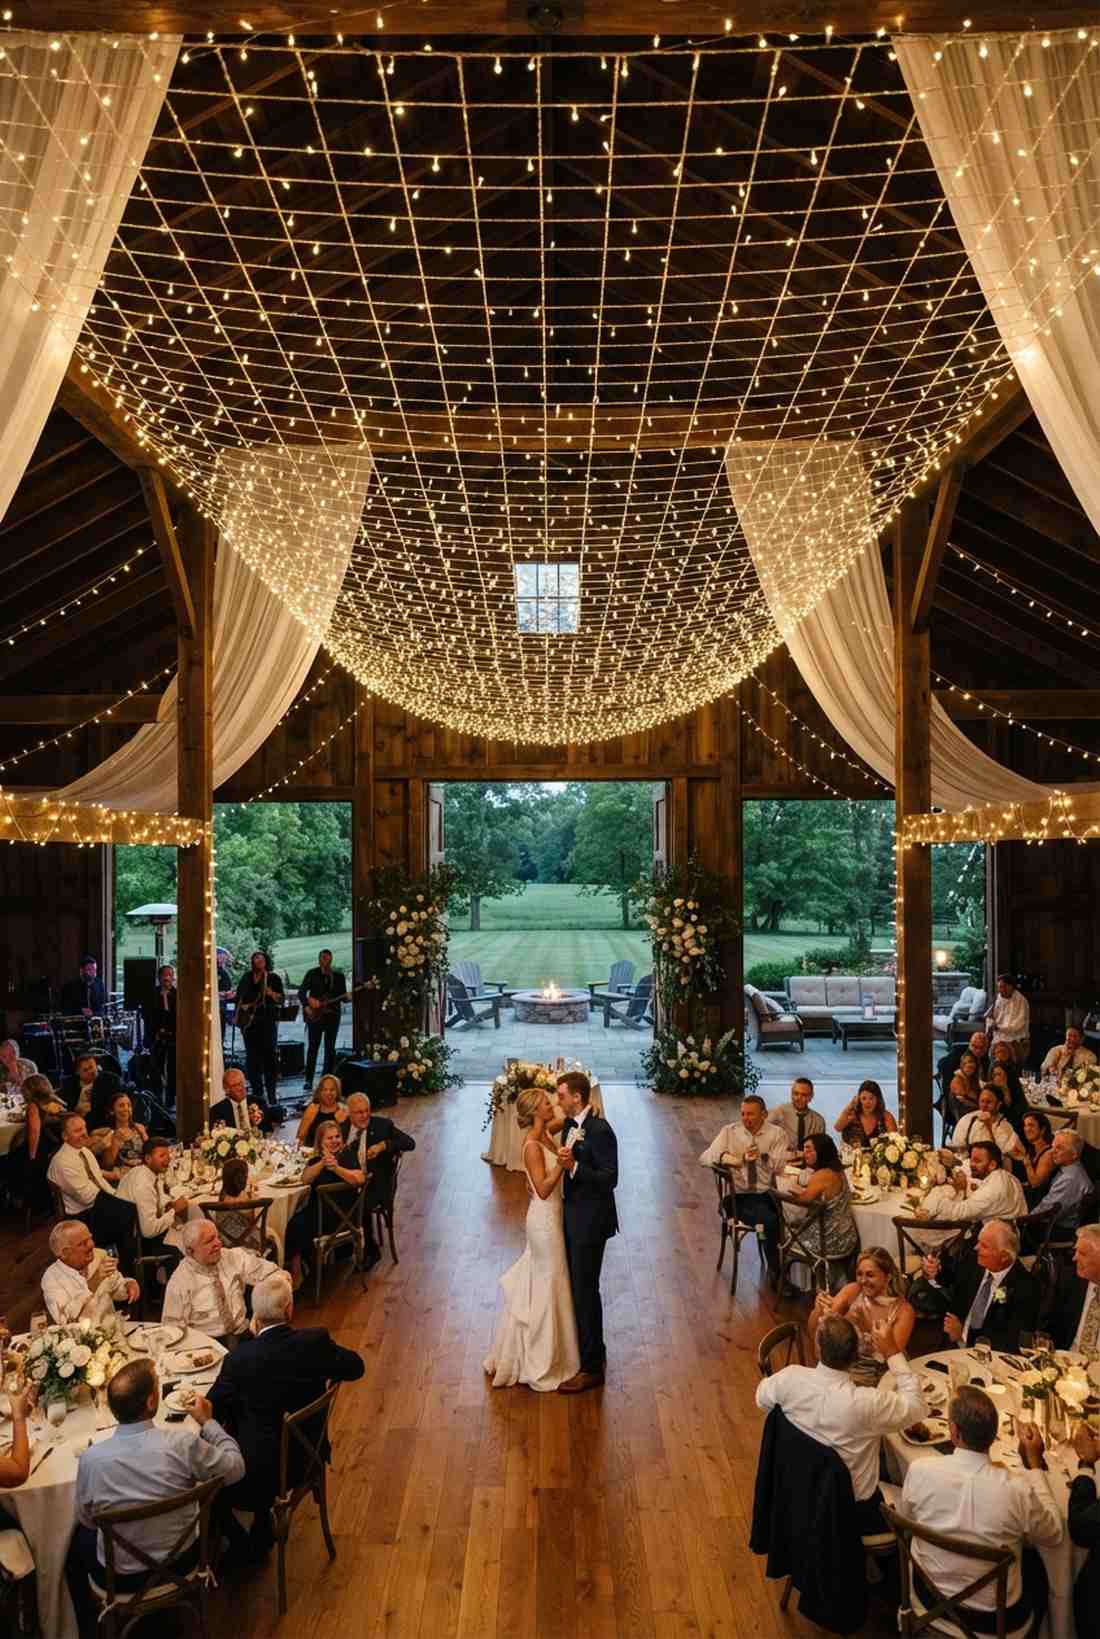
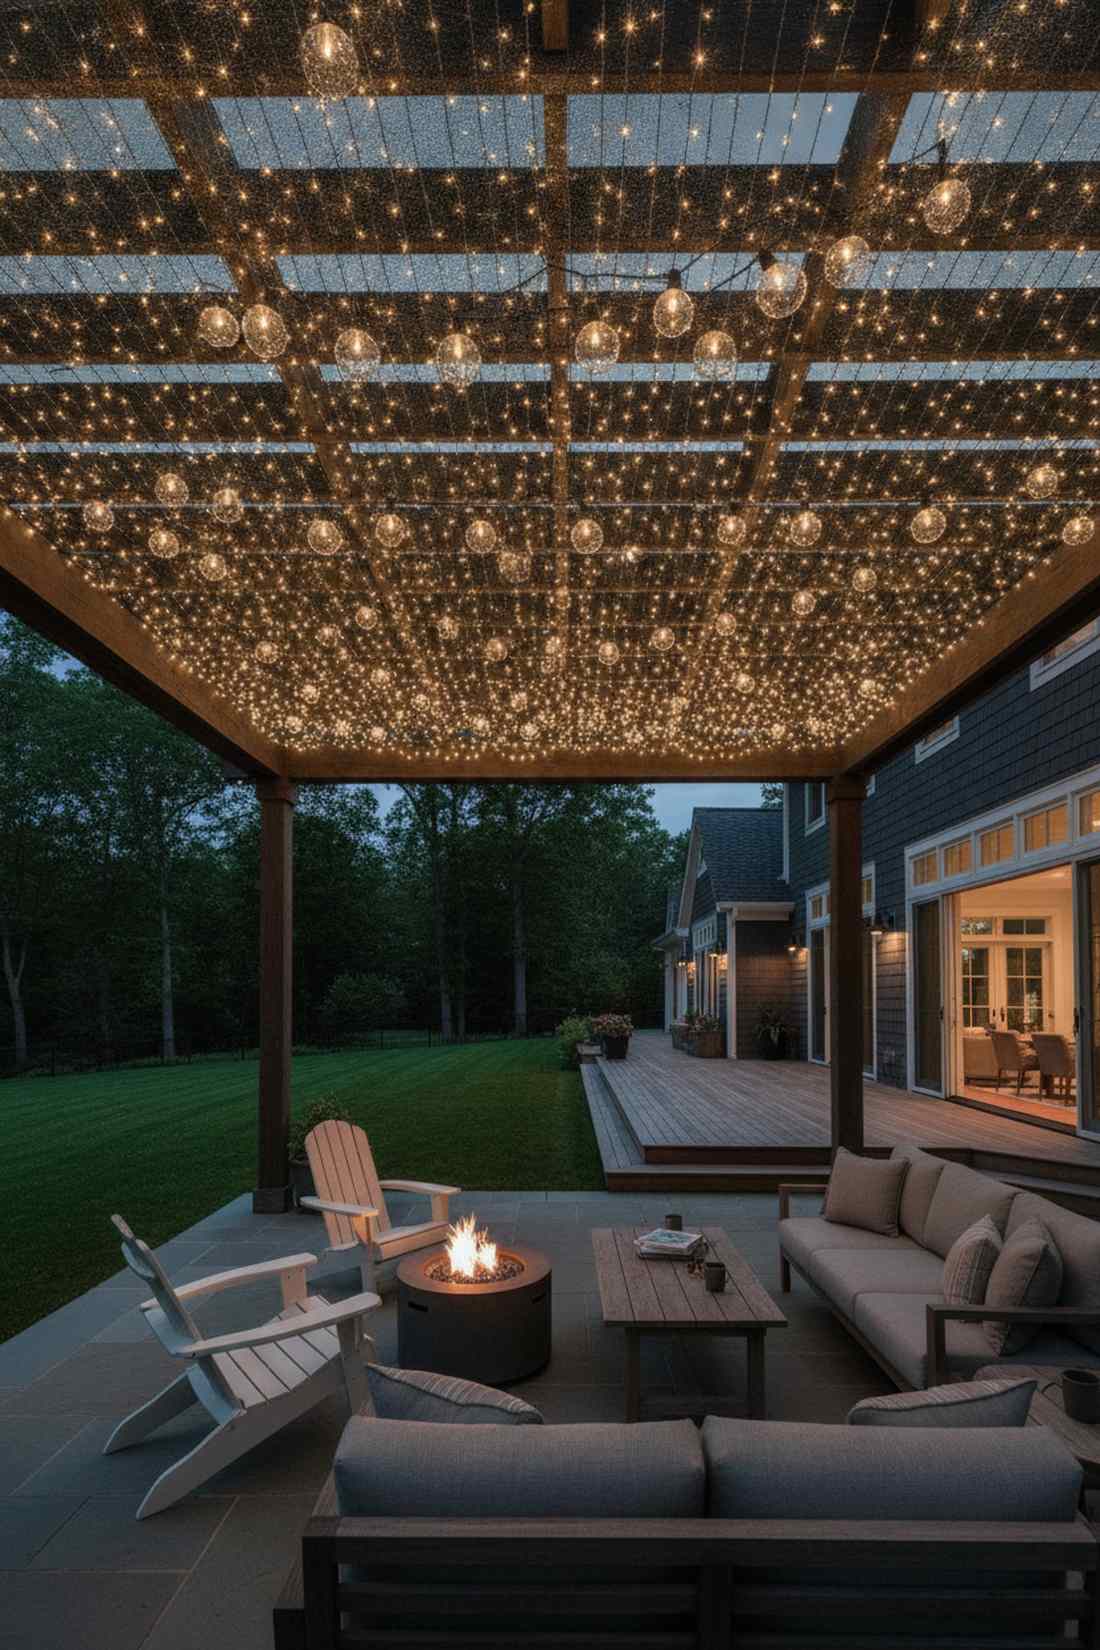
1. Cascading Fairy Light Ceiling Canopy
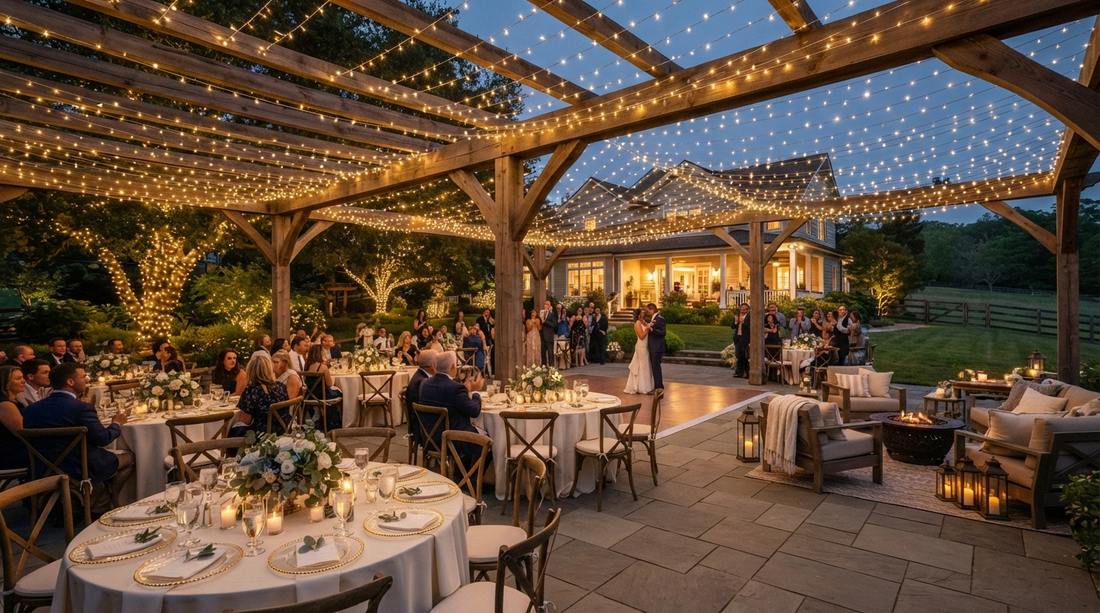
This layout feels like stepping under a breathtaking meteor shower suspended in mid-air. An overhead string light ceiling is highly recommended for massive industrial venues or grand open ballrooms that need immediate intimacy.
Many couples mistakenly use cheap retail boxes that flicker, but running commercial-grade fairy lights wedding decor along steel tension wire delivers a surprisingly premium look. Utilizing a multi-channel remote dimmer allows you to adjust the room’s energy instantly.
You can seamlessly execute this major ceiling transformation for around $150–$300 depending on the square footage. Pin this if you’re planning an epic ballroom reception.
- Key Materials: Tension cable kit, dimmable LED spools
- Vibe / Style: Majestic starlit elegance
- Difficulty: Advanced (requires tall ladders)
- Budget Breakdown: Cables: $40 | Lights: $150
- Creator’s Tip: Use clear zip ties every two feet to prevent heavy strands from sagging over the dance floor.
- Smart Sourcing: Grab a shatterproof warm-white LED spool (bulk pack) and a heavy-duty venue rigging kit.
2. Geometric Grid Ceiling Pattern
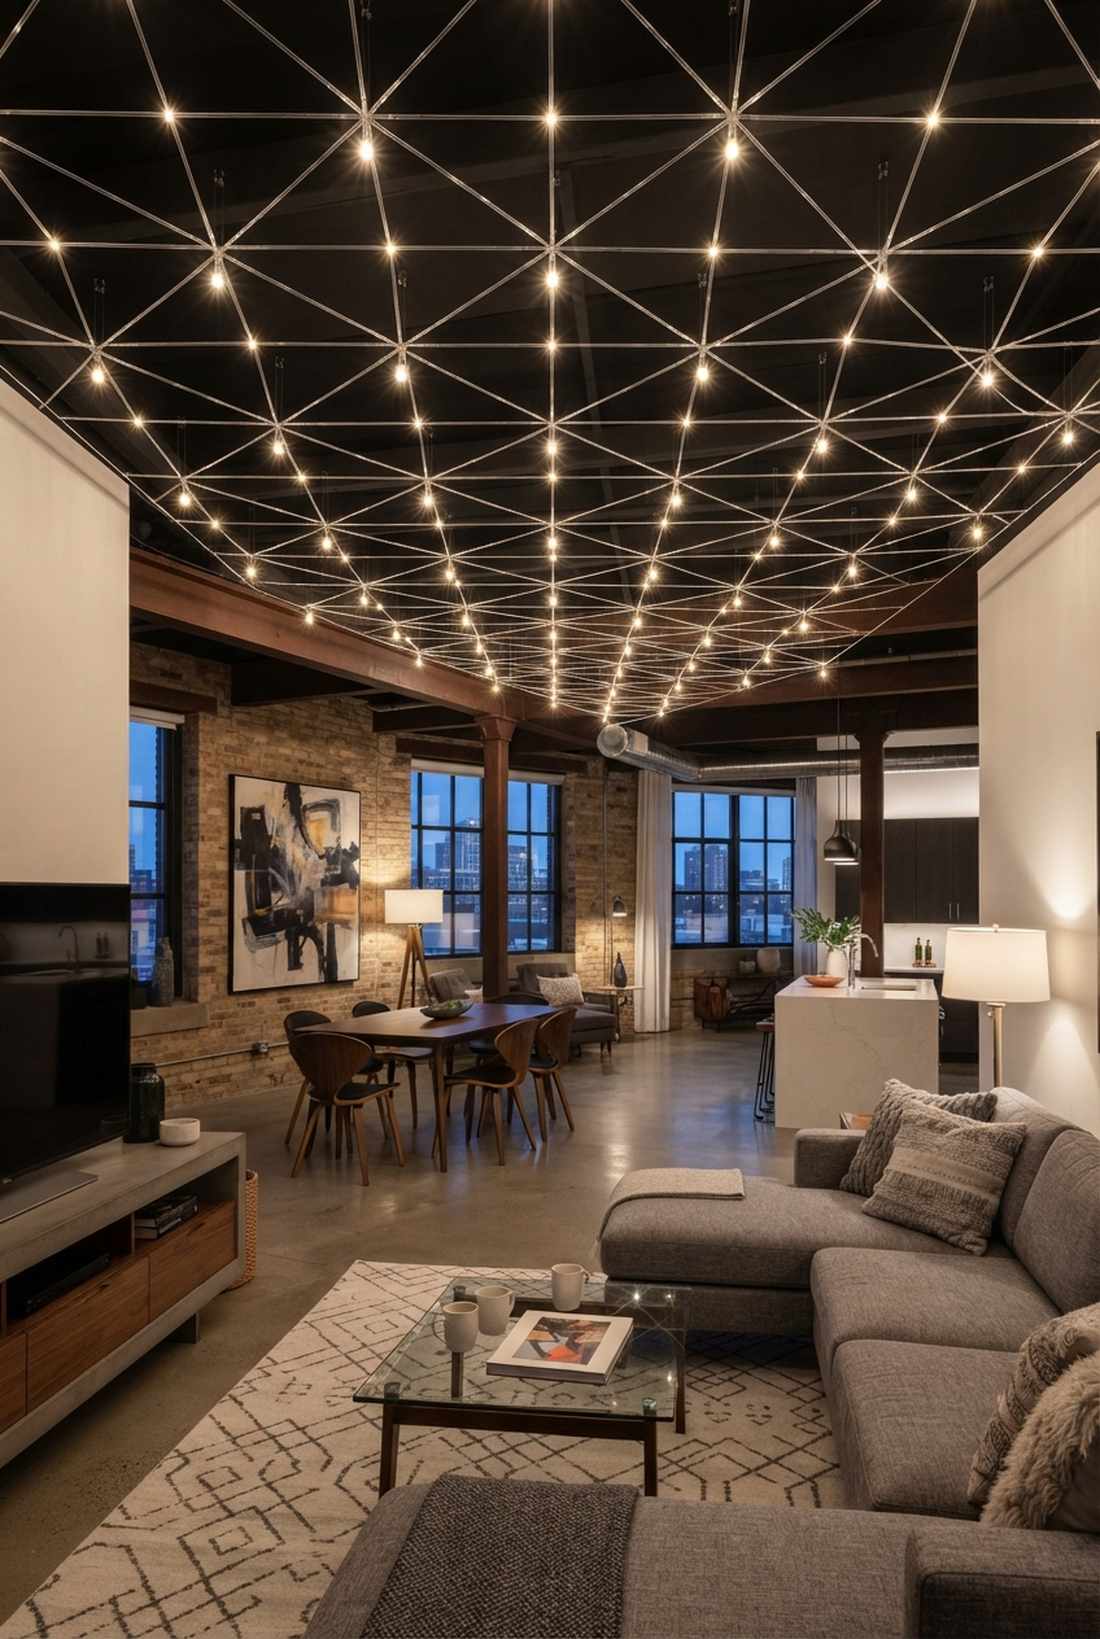
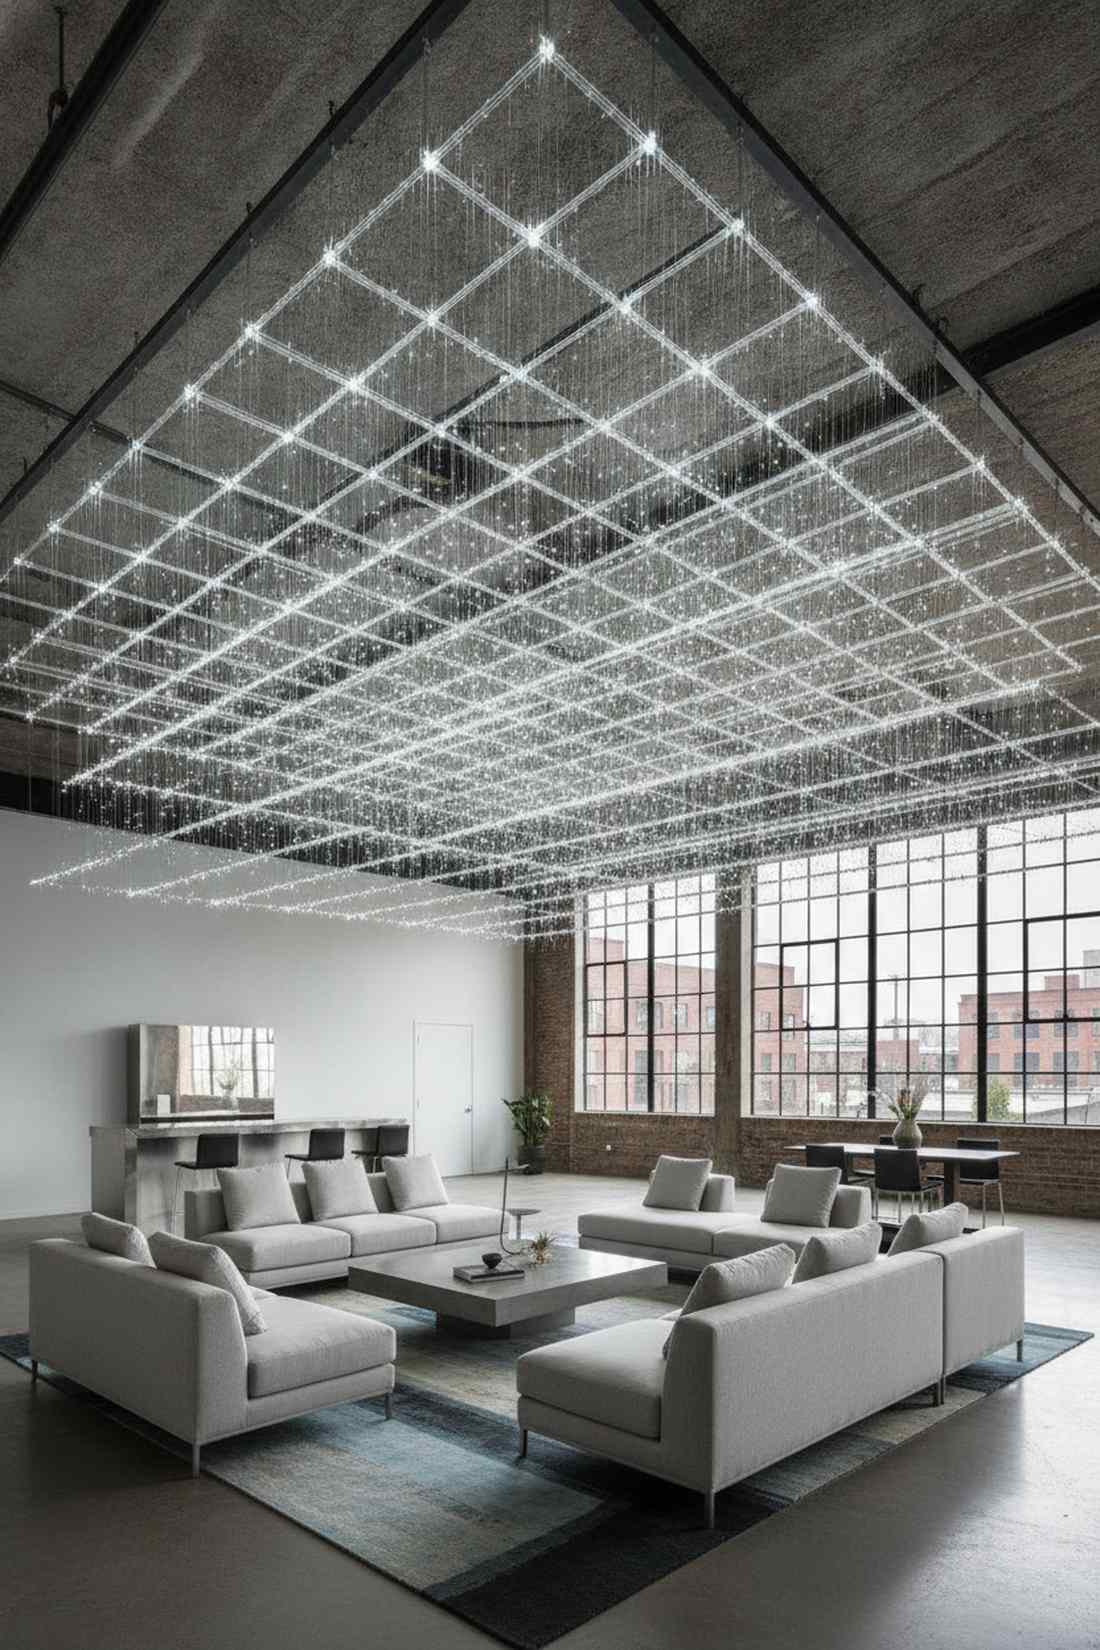
This setup creates a sharply structured modern glow that feels straight out of a contemporary art gallery. A geometric hanging light grid works exceptionally well for modern warehouse venues lacking architectural character.
While organic draping is popular, establishing a rigid grid using clear acrylic line looks far more expensive than it actually is. Securing the intersections perfectly prevents the dreaded “messy spaghetti” look that ruins wedding photos.
This sophisticated lighting architecture can be pieced together for under $120. It’s a highly satisfying weekend setup project.
- Key Materials: Clear monofilament, grid-pattern LED nets
- Vibe / Style: Clean, contemporary precision
- Difficulty: Moderate mapping required
- Budget Breakdown: Base wire: $20 | Grid Lights: $95
- Creator’s Tip: Map your 90-degree angles on the floor with masking tape before transferring the anchor points to the ceiling.
- Smart Sourcing: Invest in pre-spaced LED grid curtain kits and high-tension acrylic monofilament (jumbo roll).
3. Draped Fabric and Light Canopy
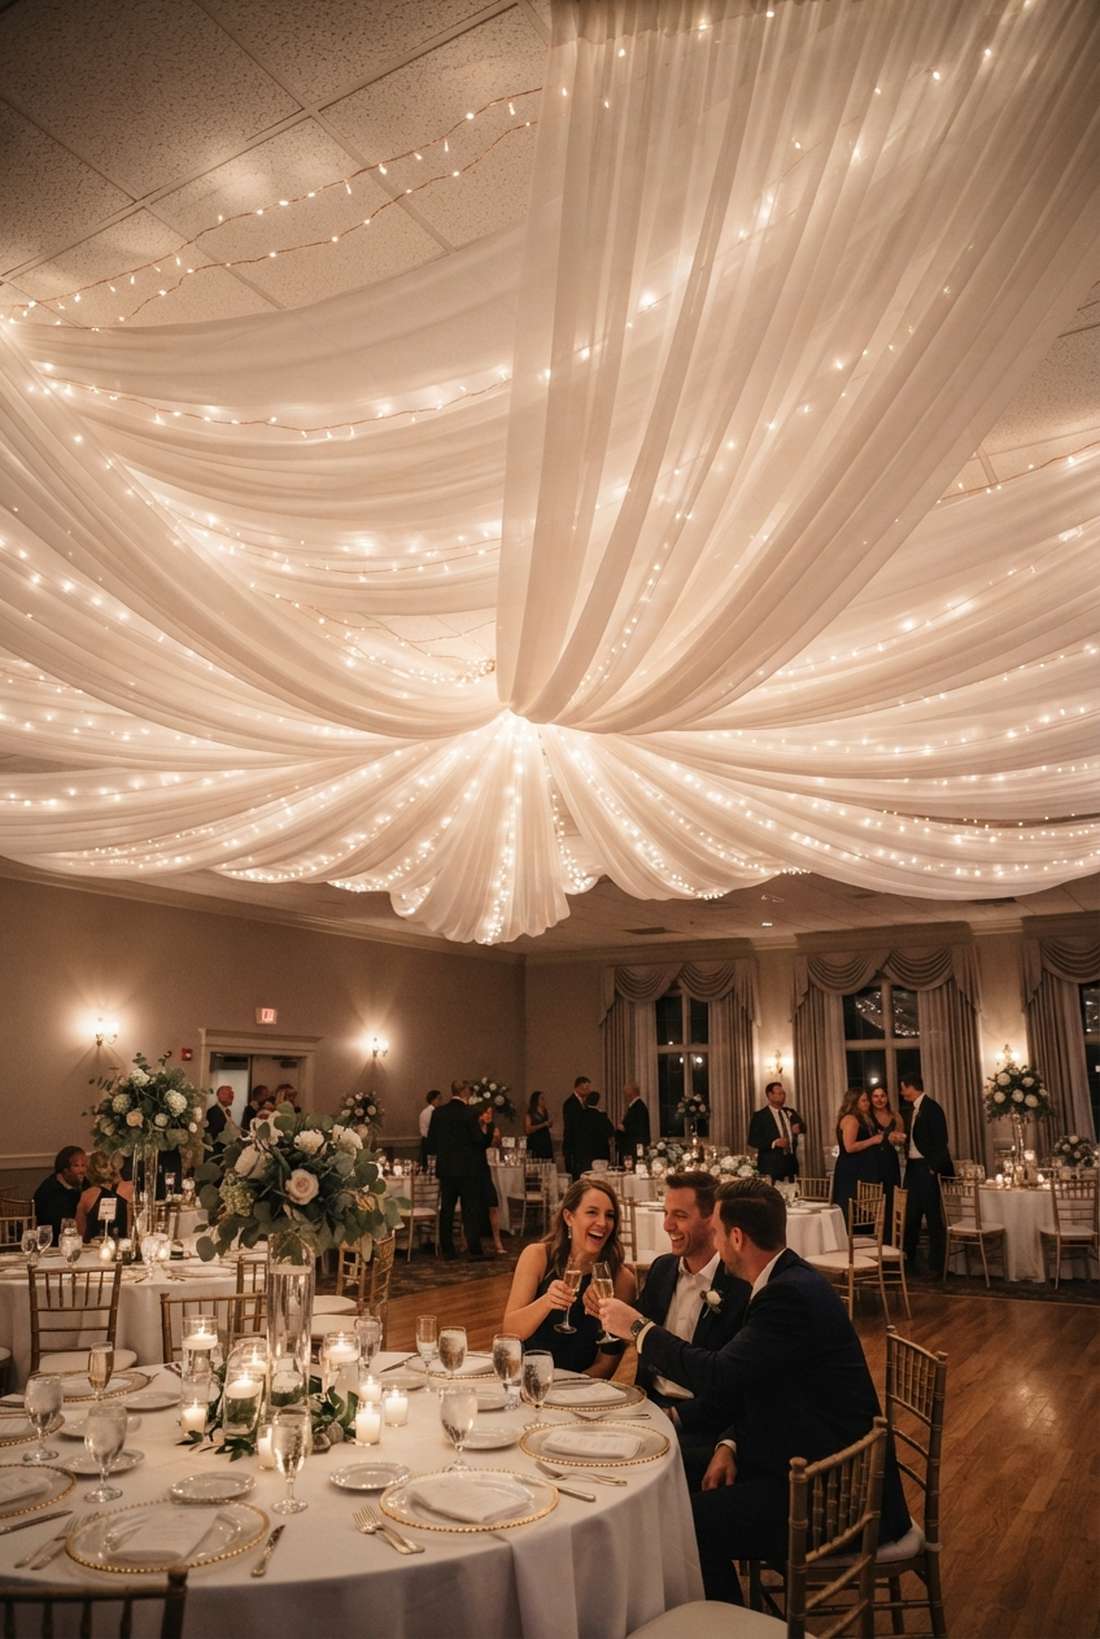
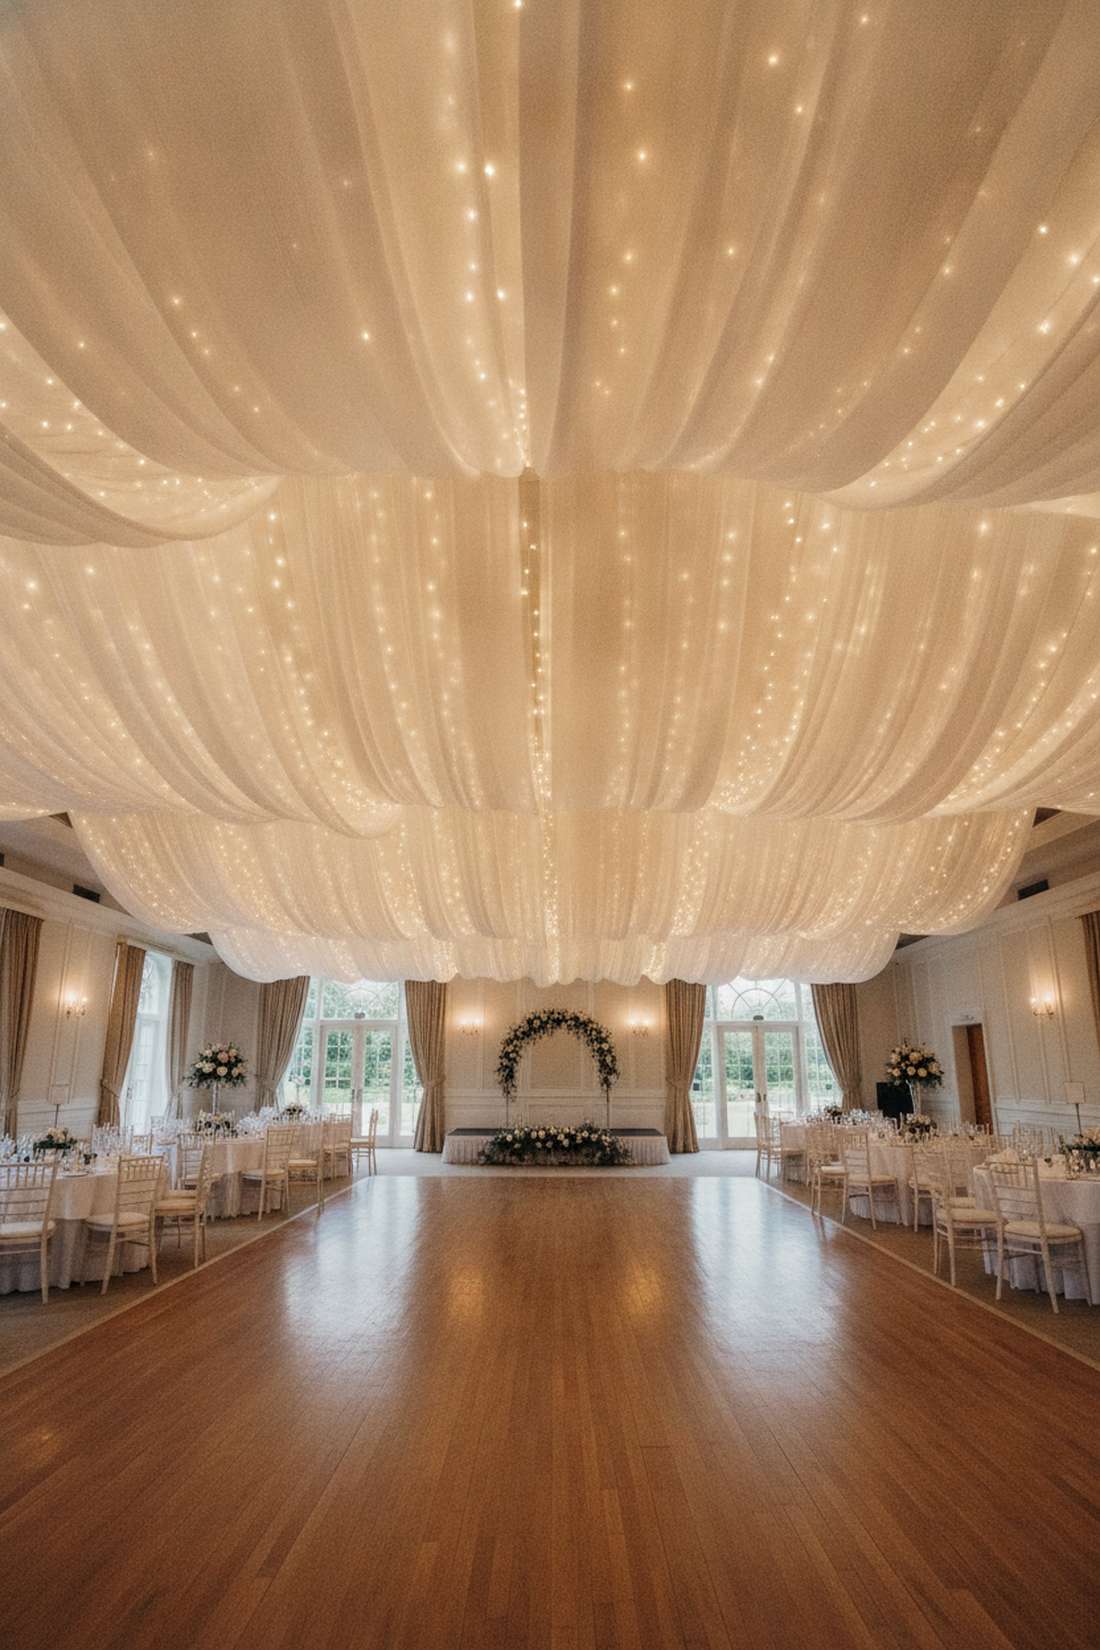
You’ll instantly feel like you’ve walked into a soft, glowing cloudscape. The fabric and string light combination is an absolute lifesaver for hiding ugly acoustic ceiling tiles in older banquet halls.
A lot of venues charge thousands for this effect, but sandwiching fairy lights wedding decor between layers of flame-retardant sheer fabric gives a designer-level finish for pennies. The fabric acts as a massive diffuser, softening the bulbs into a luxurious, even glow.
You can easily source the textiles and lights wholesale to pull this off for about $200. Save this idea if your venue has a less-than-perfect ceiling.
- Key Materials: Chiffon ceiling drapes, cool-touch copper wire lights
- Vibe / Style: Ethereal, romantic cloud
- Difficulty: Moderate (requires fabric tensioners)
- Budget Breakdown: Fabric bolts: $120 | Lights: $75
- Creator’s Tip: Never use standard incandescent bulbs under fabric; always verify your LEDs are explicitly rated cool-touch.
- Smart Sourcing: Pick up flame-retardant sheer chiffon bolts (bulk roll) and UL-certified cool-touch LED strands.
4. Spiral Vortex Light Installation
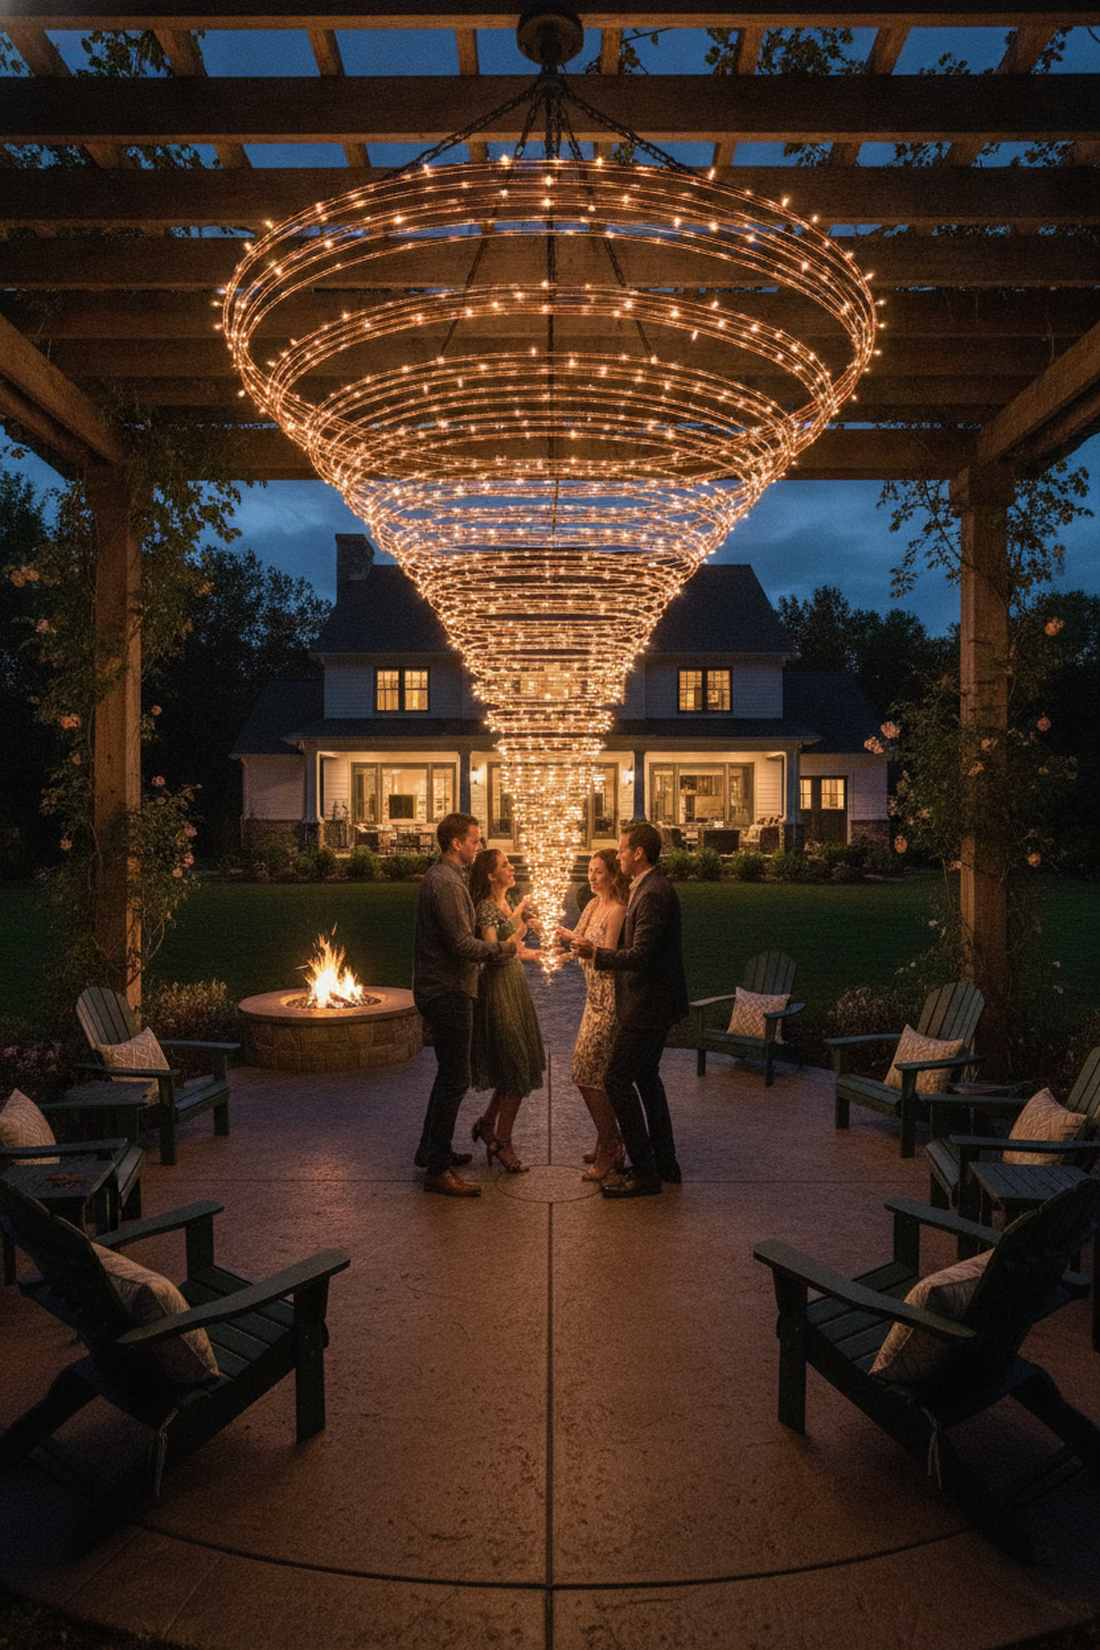
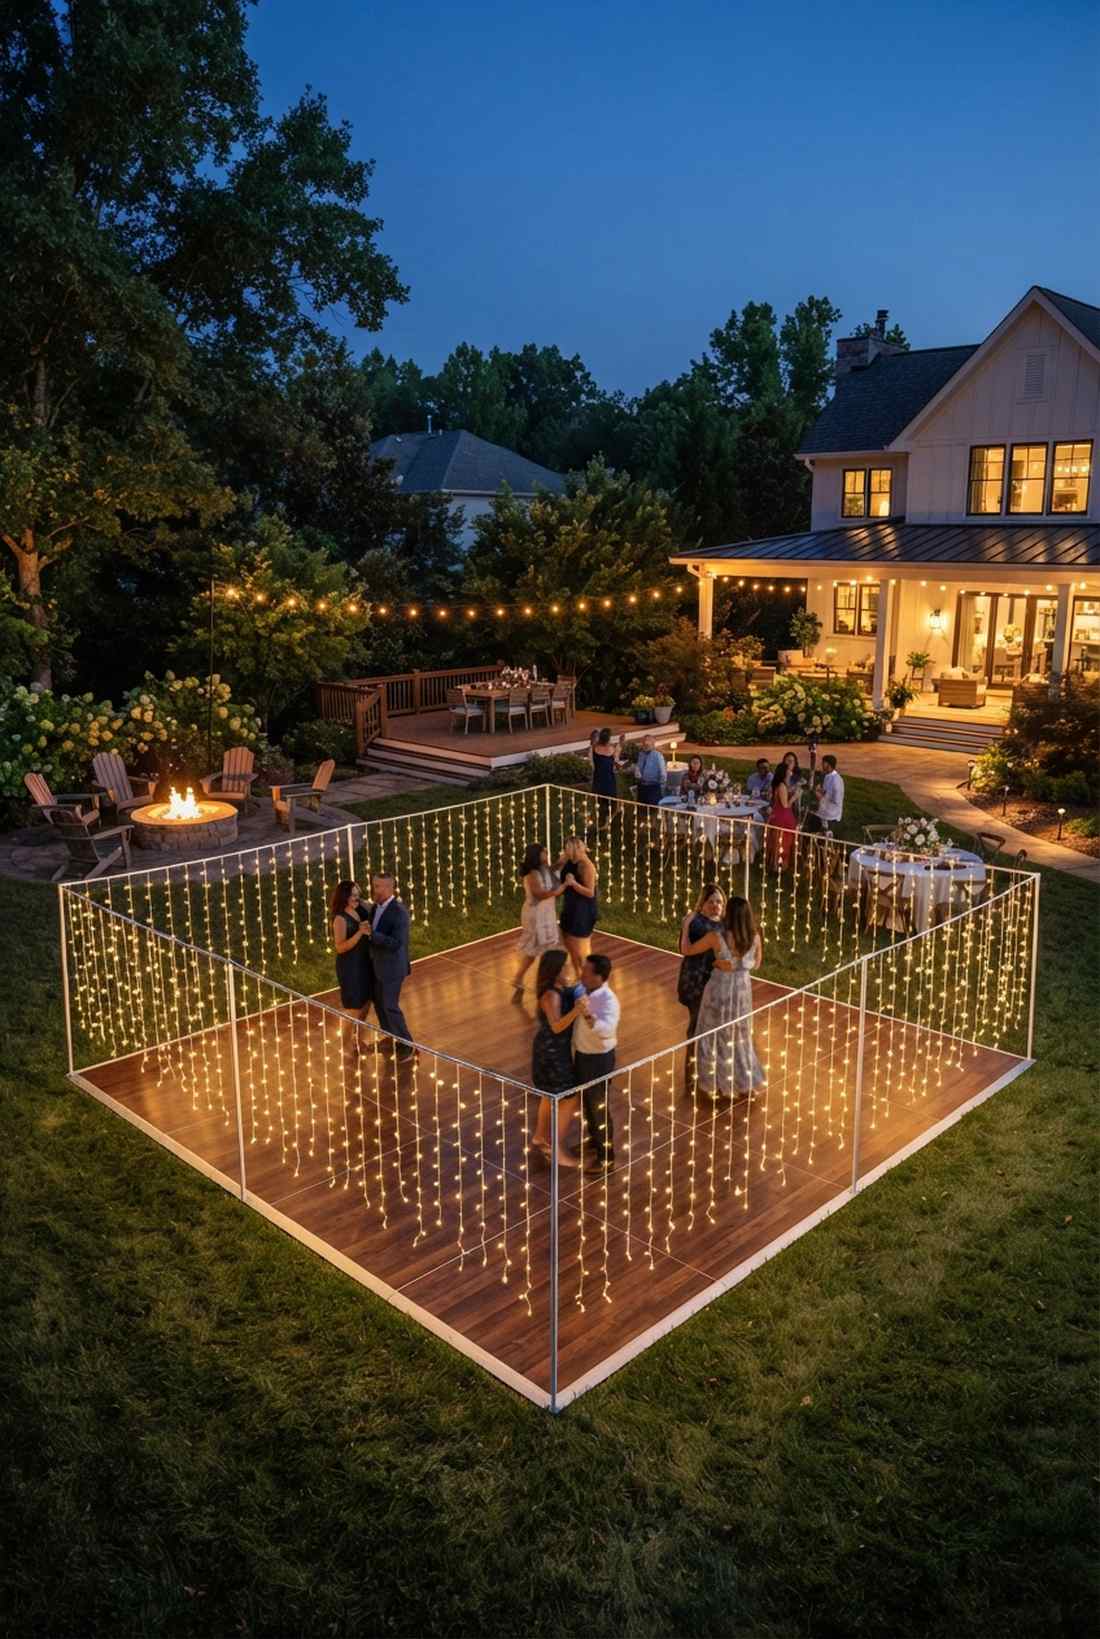
This hypnotic arrangement feels like a magical whirlpool drawing everyone straight to the center of the room. A central spiral light fixture is perfect for designating the dance floor without renting a physical floor.
Skip the basic straight lines; securing dynamic spiral arms outward from a central chandelier mount instantly elevates the space. This is where heavy-duty commercial outdoor string lights shine, as their thicker wiring naturally holds the curved shape better.
Creating this custom focal point will run you around $80 to $150. Highly recommended to anchor your main party zone.
- Key Materials: Central mounting ring, thick-gauge fairy strands
- Vibe / Style: High-energy, dynamic movement
- Difficulty: Intermediate
- Budget Breakdown: Ring mount: $25 | Heavy-gauge lights: $85
- Creator’s Tip: Use progressive spacing—start tight at the center and let the gaps widen as the spiral expands outward.
- Smart Sourcing: Look for a heavy-duty metal chandelier frame and shape-holding copper wire lights (extra-long pack).
Most people completely botch their tent lighting… until they see the ultra-efficient layout coming up next.
5. Tent Pole Radial Design
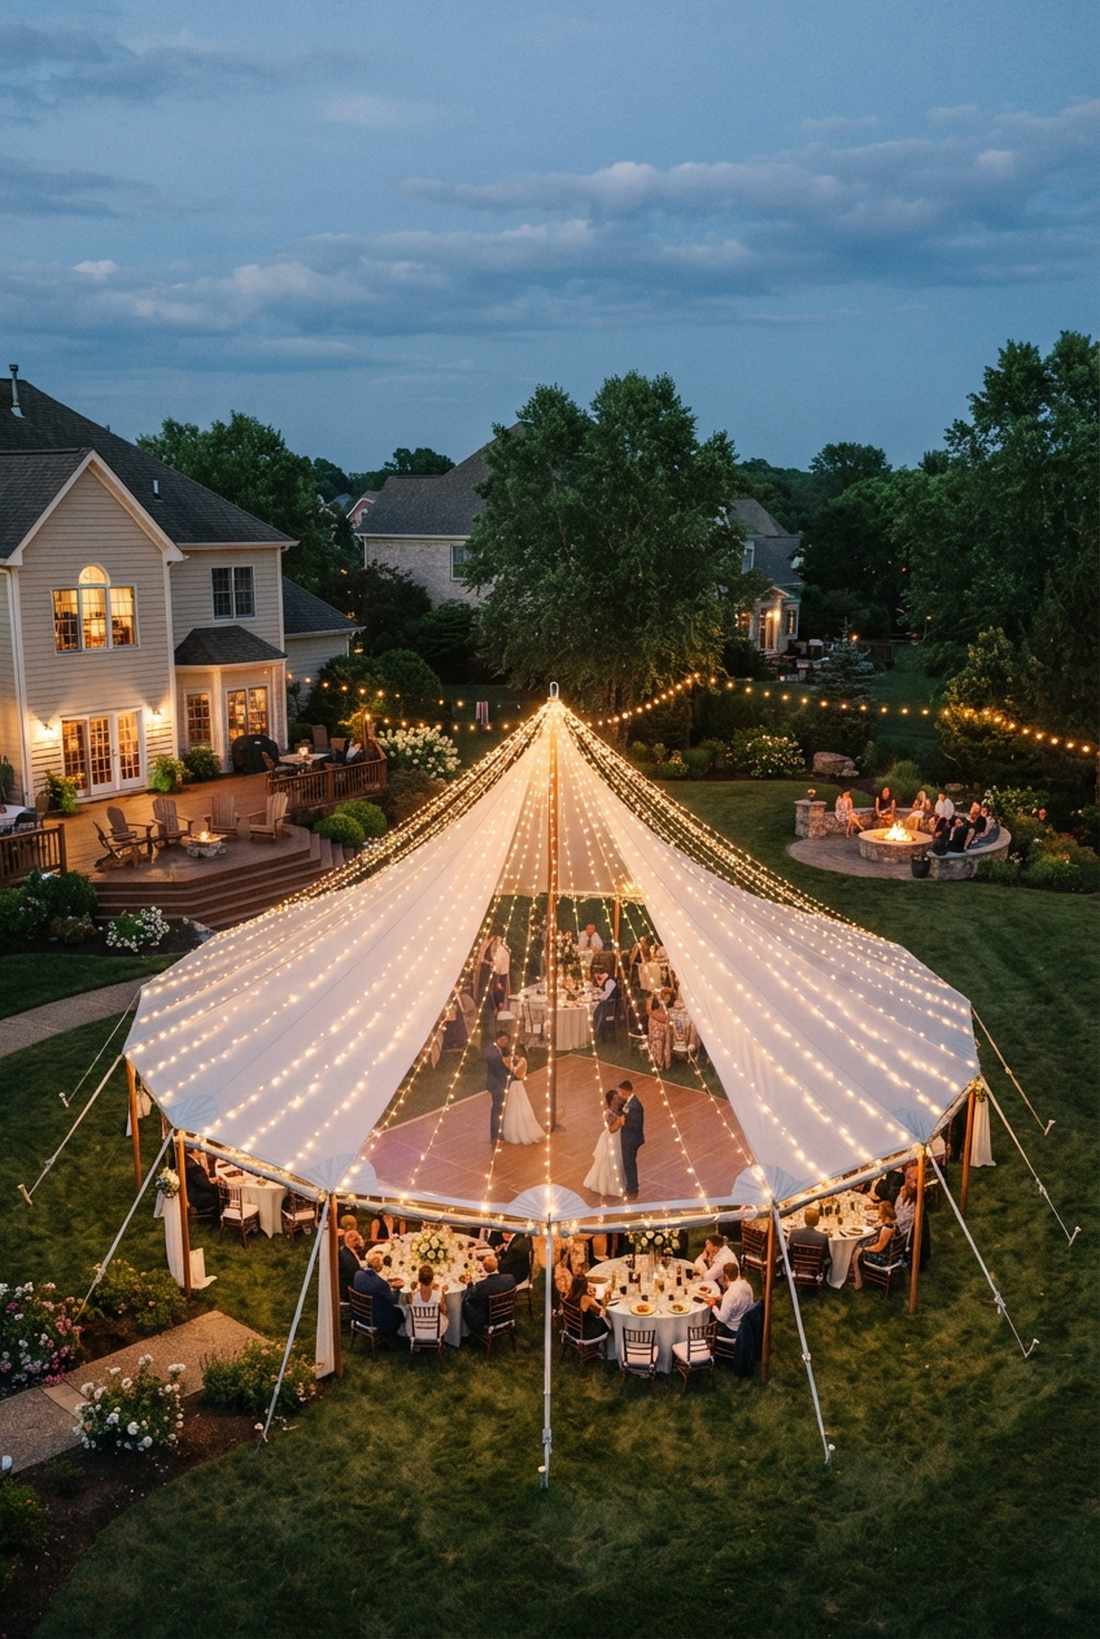
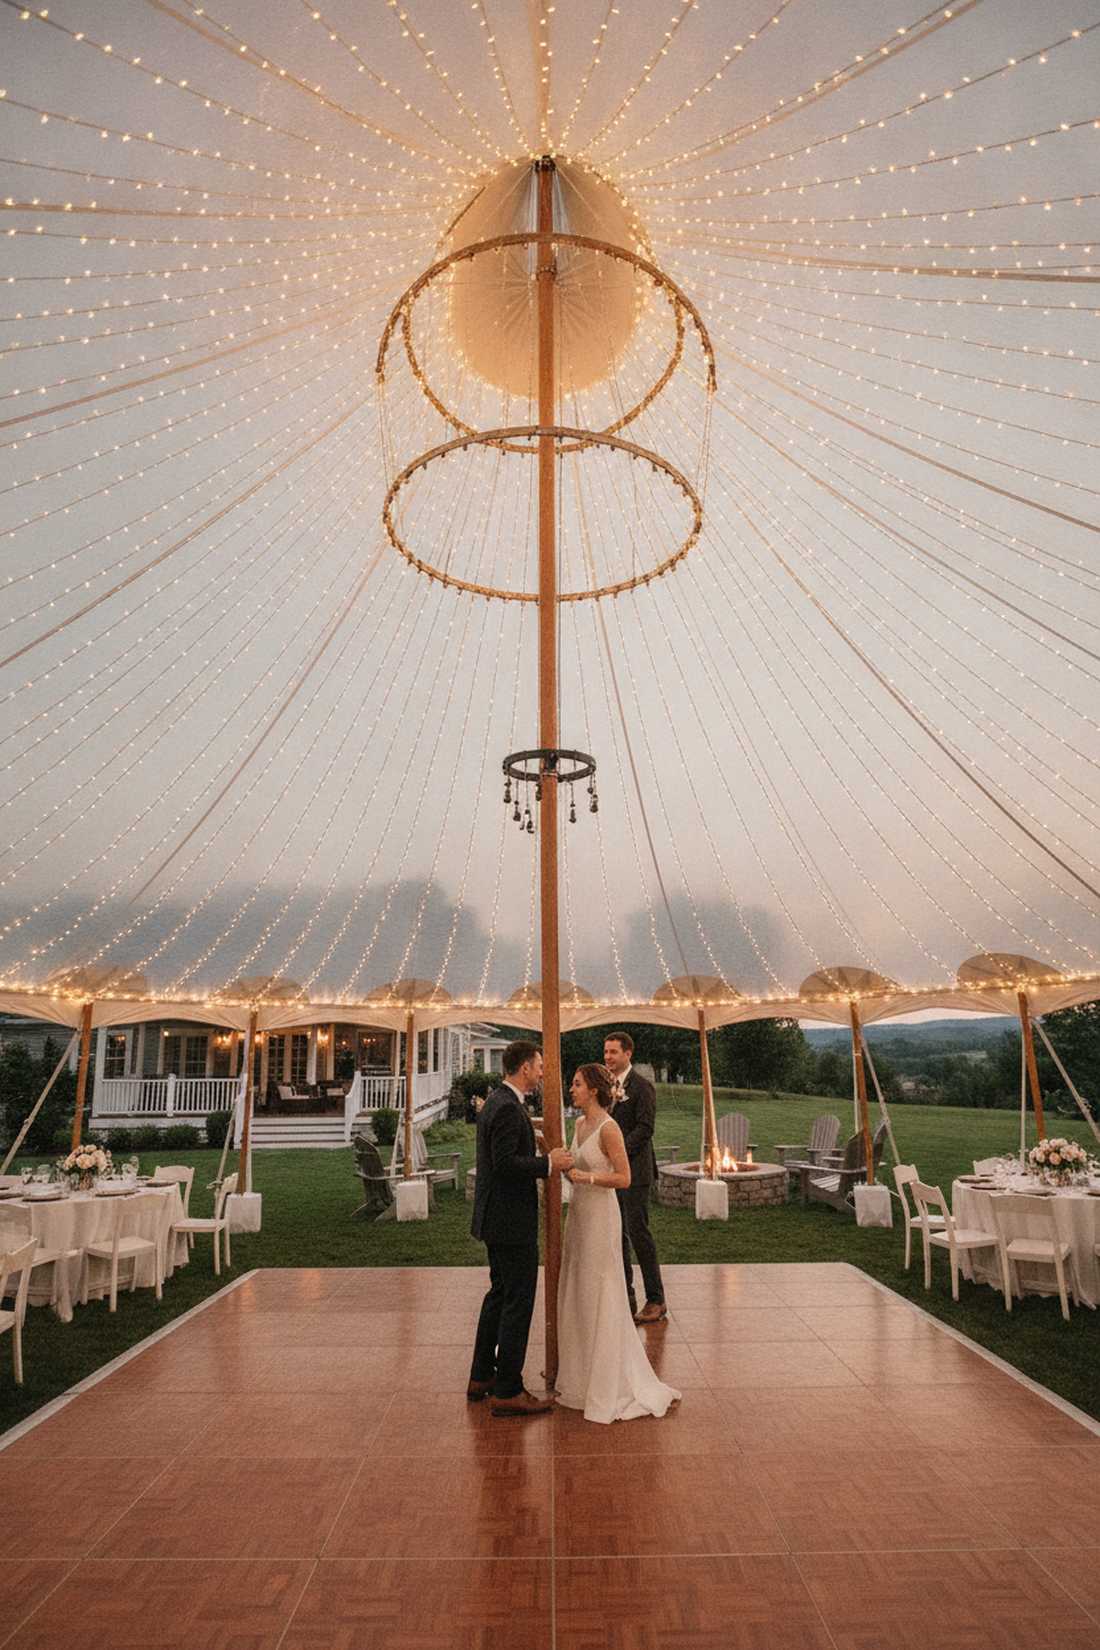
It feels like you are dancing inside a glowing, life-sized carousel. The radial tent lighting setup is the undisputed champion for large outdoor pavilion or marquee weddings.
Amateurs often try to tape lights randomly to the canvas, but anchoring tension lines directly from the center king-pole down to the perimeter creates structural perfection. Using weather-rated fairy lights wedding decor here ensures a sudden evening drizzle won’t short out your reception.
You can fully rig a standard 20×40 tent for under $250. Save this straight to your outdoor wedding master board.
- Key Materials: O-ring pole clamp, outdoor-rated string sets
- Vibe / Style: Classic, structured festivity
- Difficulty: Moderate (requires a sturdy center ladder)
- Budget Breakdown: Pole clamps: $30 | Outdoor lights: $210
- Creator’s Tip: Fasten a dedicated carabiner hub to the center pole so you can clip and unclip strands rapidly during setup.
- Smart Sourcing: Order an industrial tent pole mounting ring and IP65 waterproof fairy light spools.
6. Ombre Density Gradient Ceiling
This subtle visual trick creates an illusion of endless depth, feeling like a sunset fading into twilight. An ombre light density ceiling is ideal for subtly guiding guests’ eyes toward the sweetheart table.
While uniform lighting is standard, packing strands tightly at one end and slowly widening the gaps delivers a bespoke, expensive aesthetic. High-CPC lighting controllers allow you to dim specific zones, making the gradient effect even more dramatic in photographs.
Pulling off this designer trick costs exactly the same as a standard layout, roughly $150 in materials. It’s an effortless way to look high-end.
- Key Materials: Multi-zone LED controller, clear rigging tape
- Vibe / Style: Sophisticated, guided focus
- Difficulty: Meticulous planning needed
- Budget Breakdown: Zoned controllers: $45 | Base lights: $100
- Creator’s Tip: Sketch the density zones on a floor plan first; start with 2-inch gaps and expand to 18-inch gaps by the back wall.
- Smart Sourcing: Get a multi-channel LED zone dimmer kit and connectable transparent-wire fairy strings.
Backdrops & Photo Areas
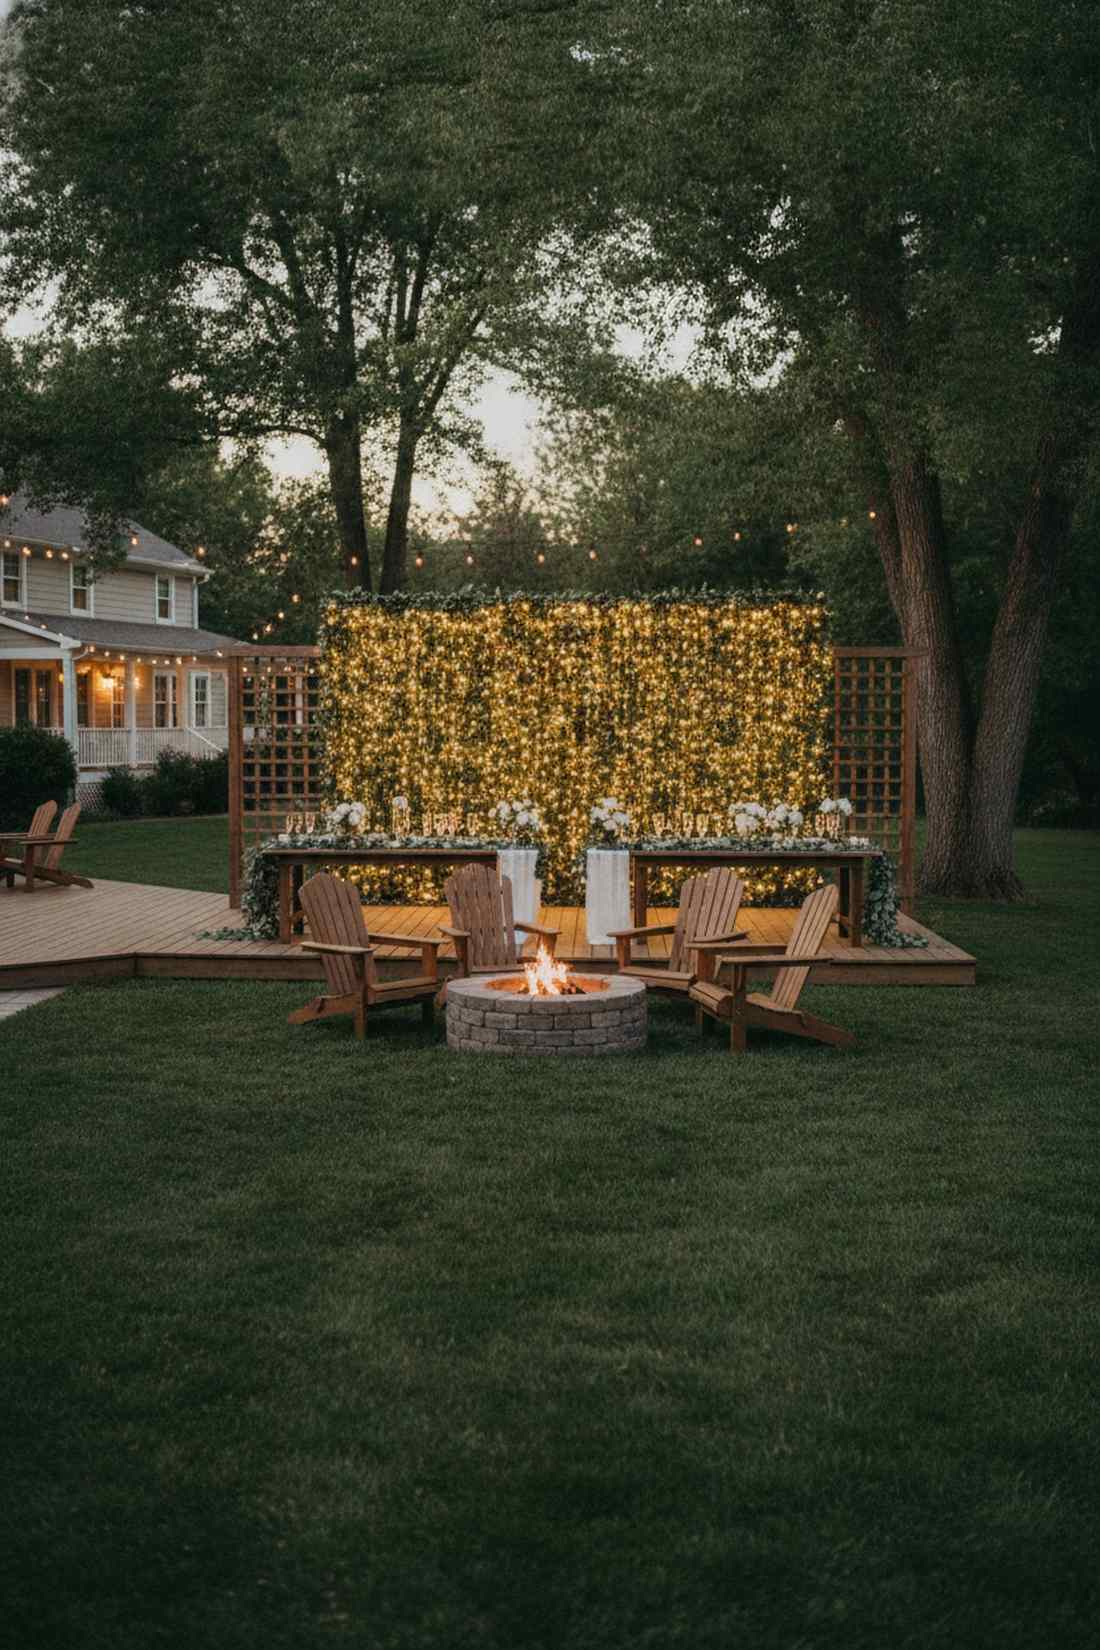
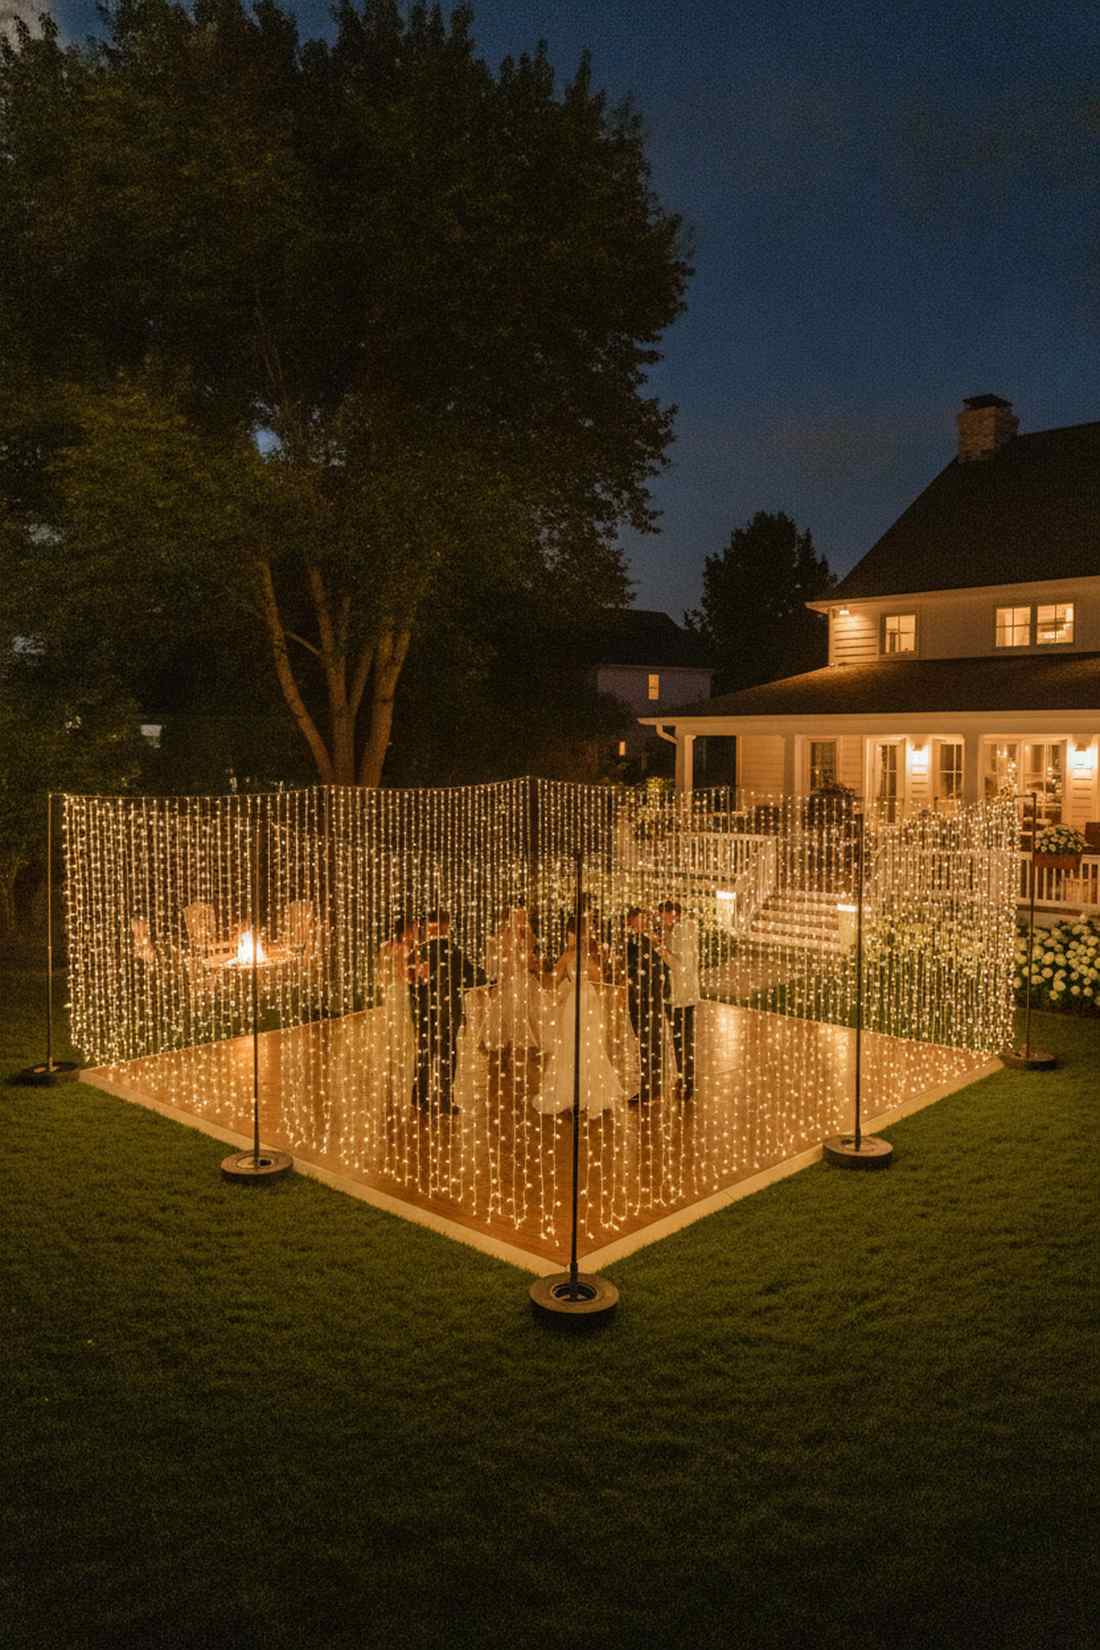
7. Vertical Light Curtain Backdrop
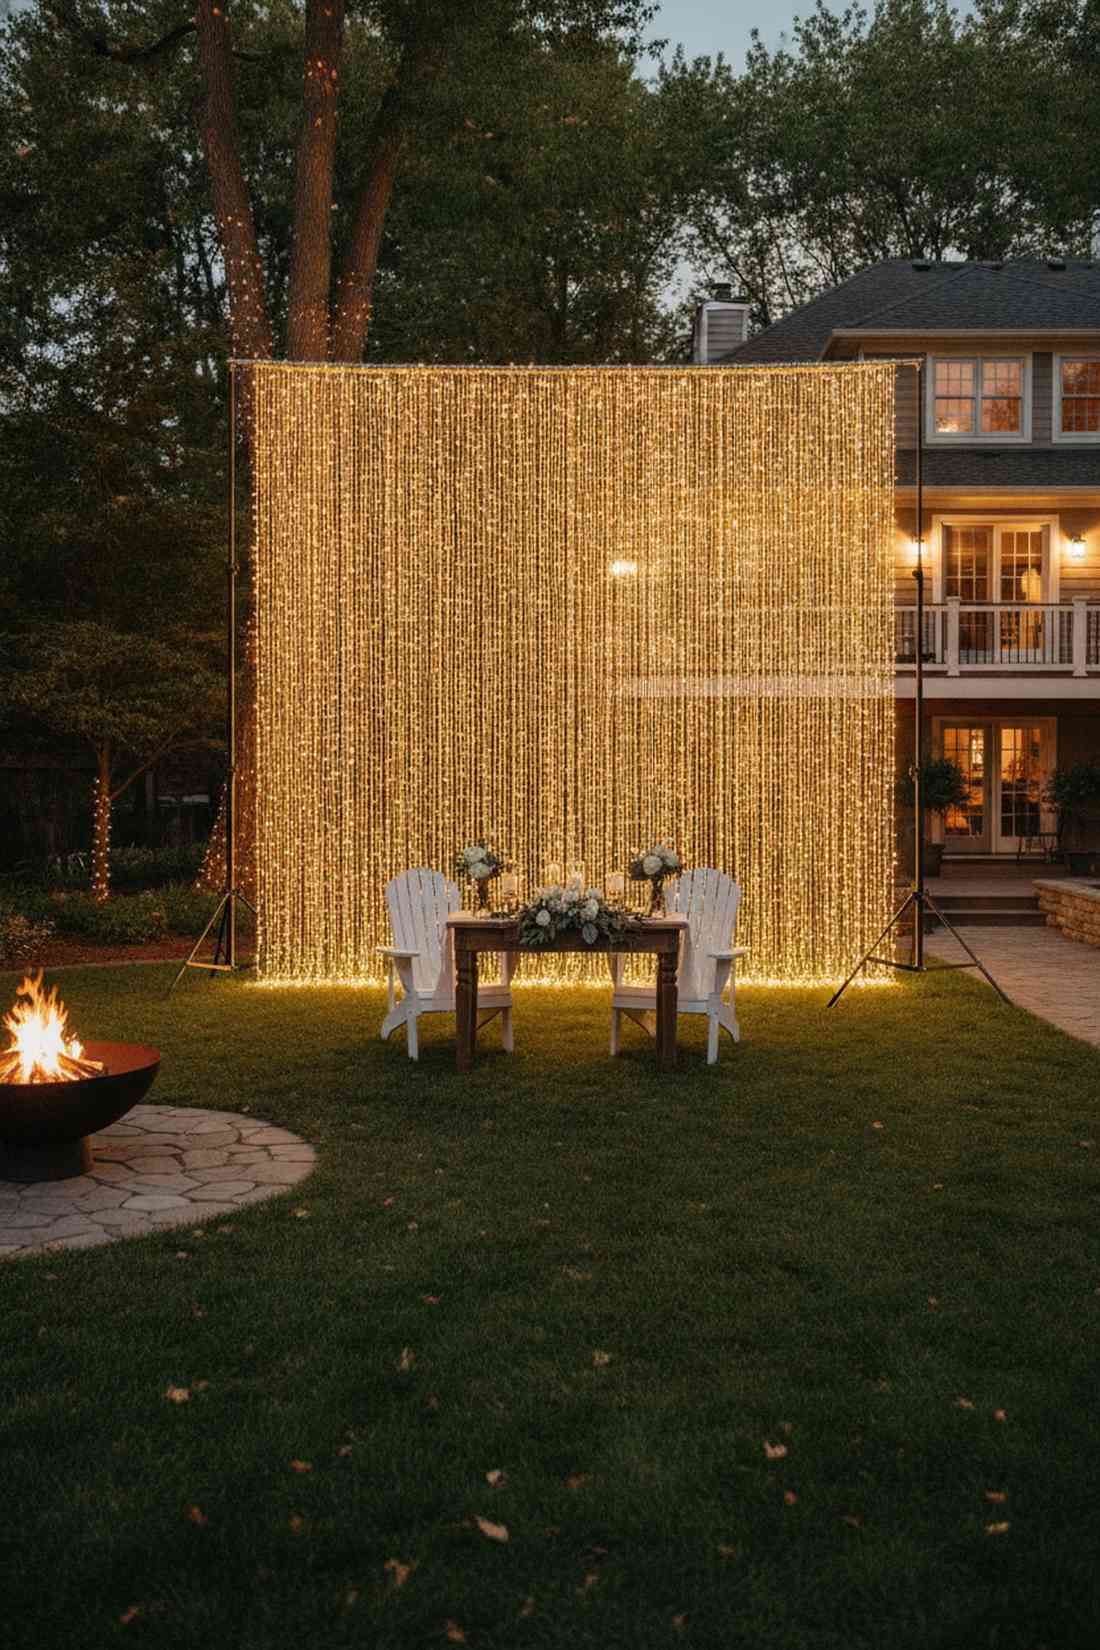
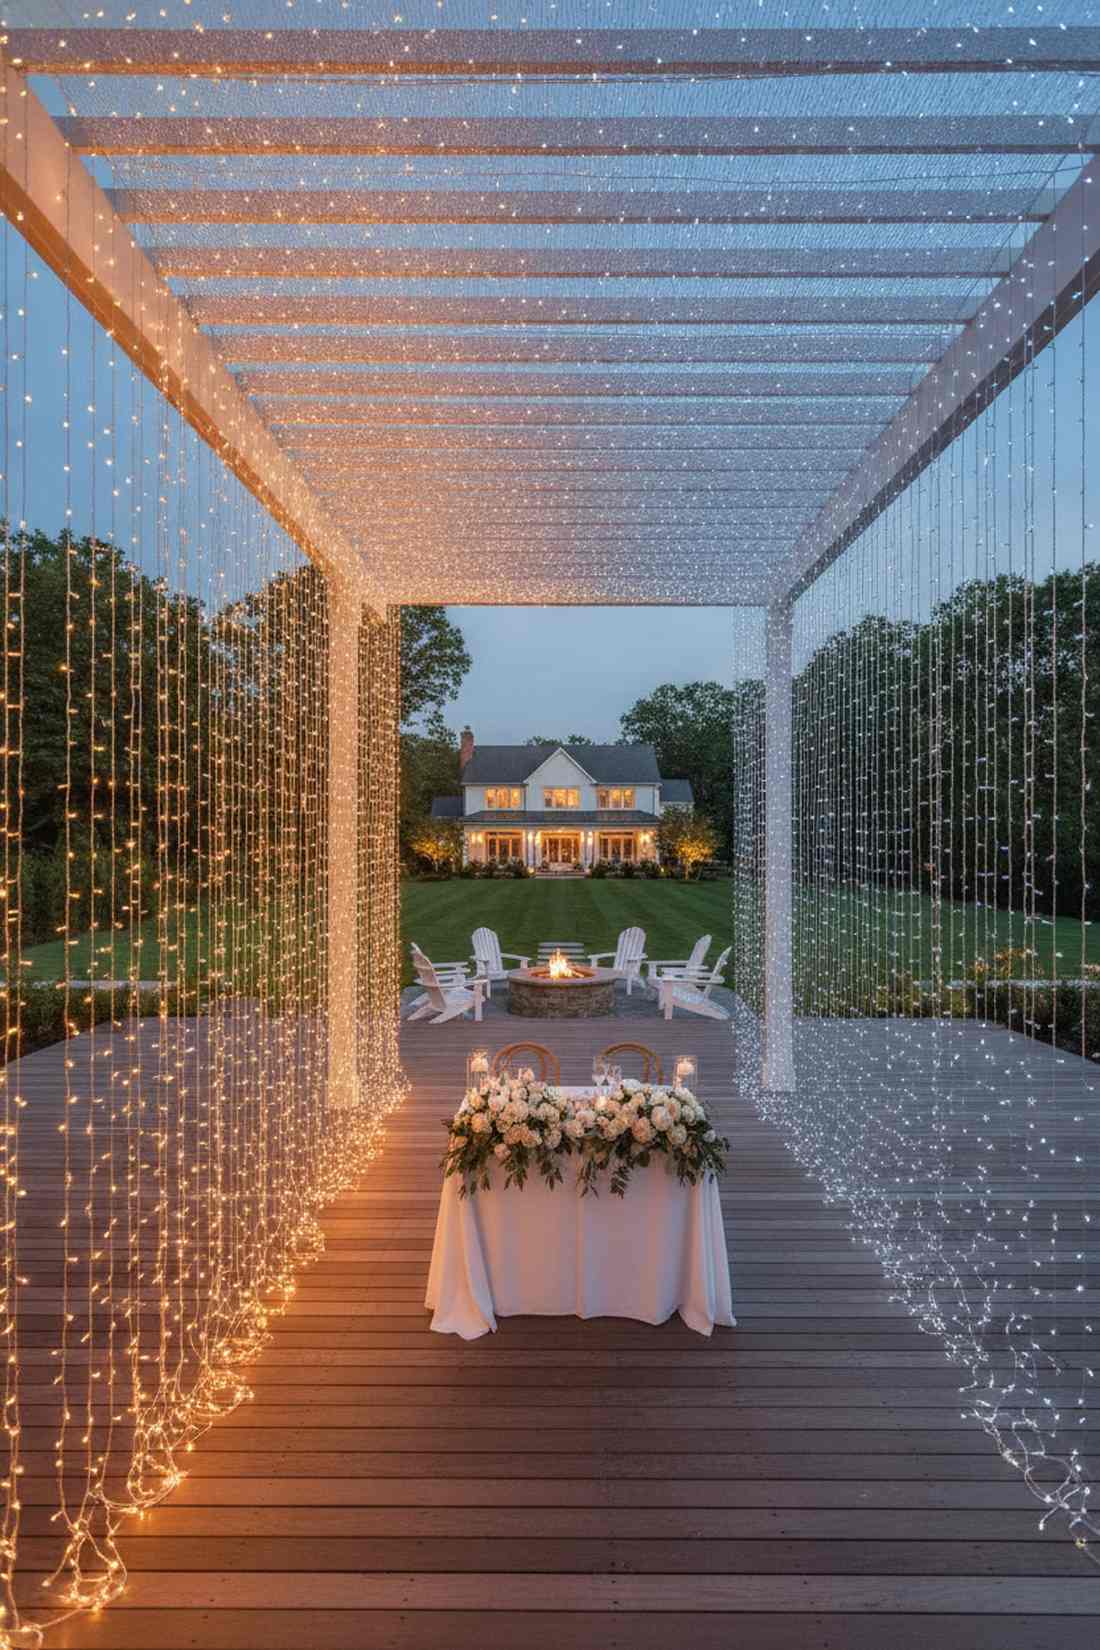
This instantly transforms a boring blank wall into a cascading waterfall of golden magic. A dense vertical light wall is the ultimate hack for creating a high-end photo booth or ceremony altar background.
Many brides waste budget on expensive floral walls, but hanging ultra-dense LED curtain panels looks far more expensive than it is. Opting for a plug-in commercial fairy lights wedding reception kit guarantees the background won’t dim halfway through your portraits.
You can set this up beautifully for under $80 using pre-made panels. Pin this if you need a quick, stunning sweetheart table backdrop.
- Key Materials: Pre-strung LED curtain, photography backdrop stand
- Vibe / Style: Glamorous, high-impact glow
- Difficulty: Beginner-friendly
- Budget Breakdown: Stand: $35 | Light Curtain: $40
- Creator’s Tip: Layer two separate curtain panels over each other to double the density for a true “wall of light” effect.
- Smart Sourcing: Pick up a heavy-duty adjustable backdrop stand and high-density plug-in LED curtain lights (2-pack).
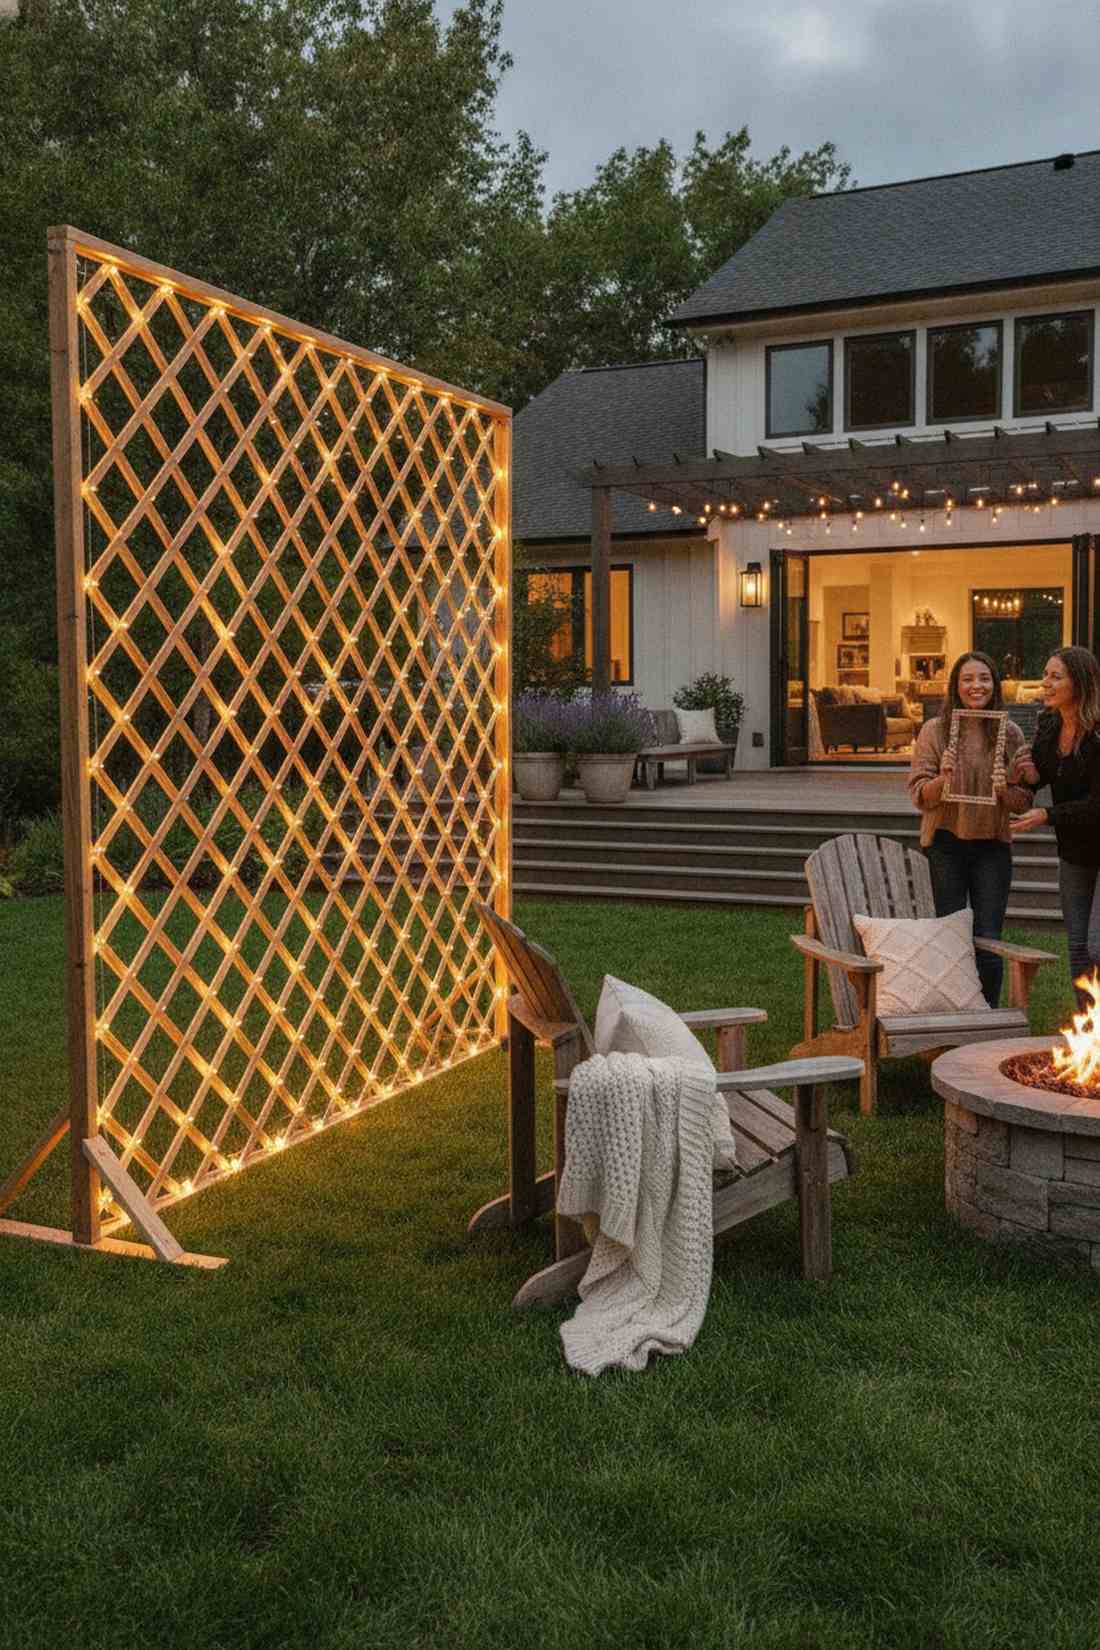
8. Framed Light Wall Installation
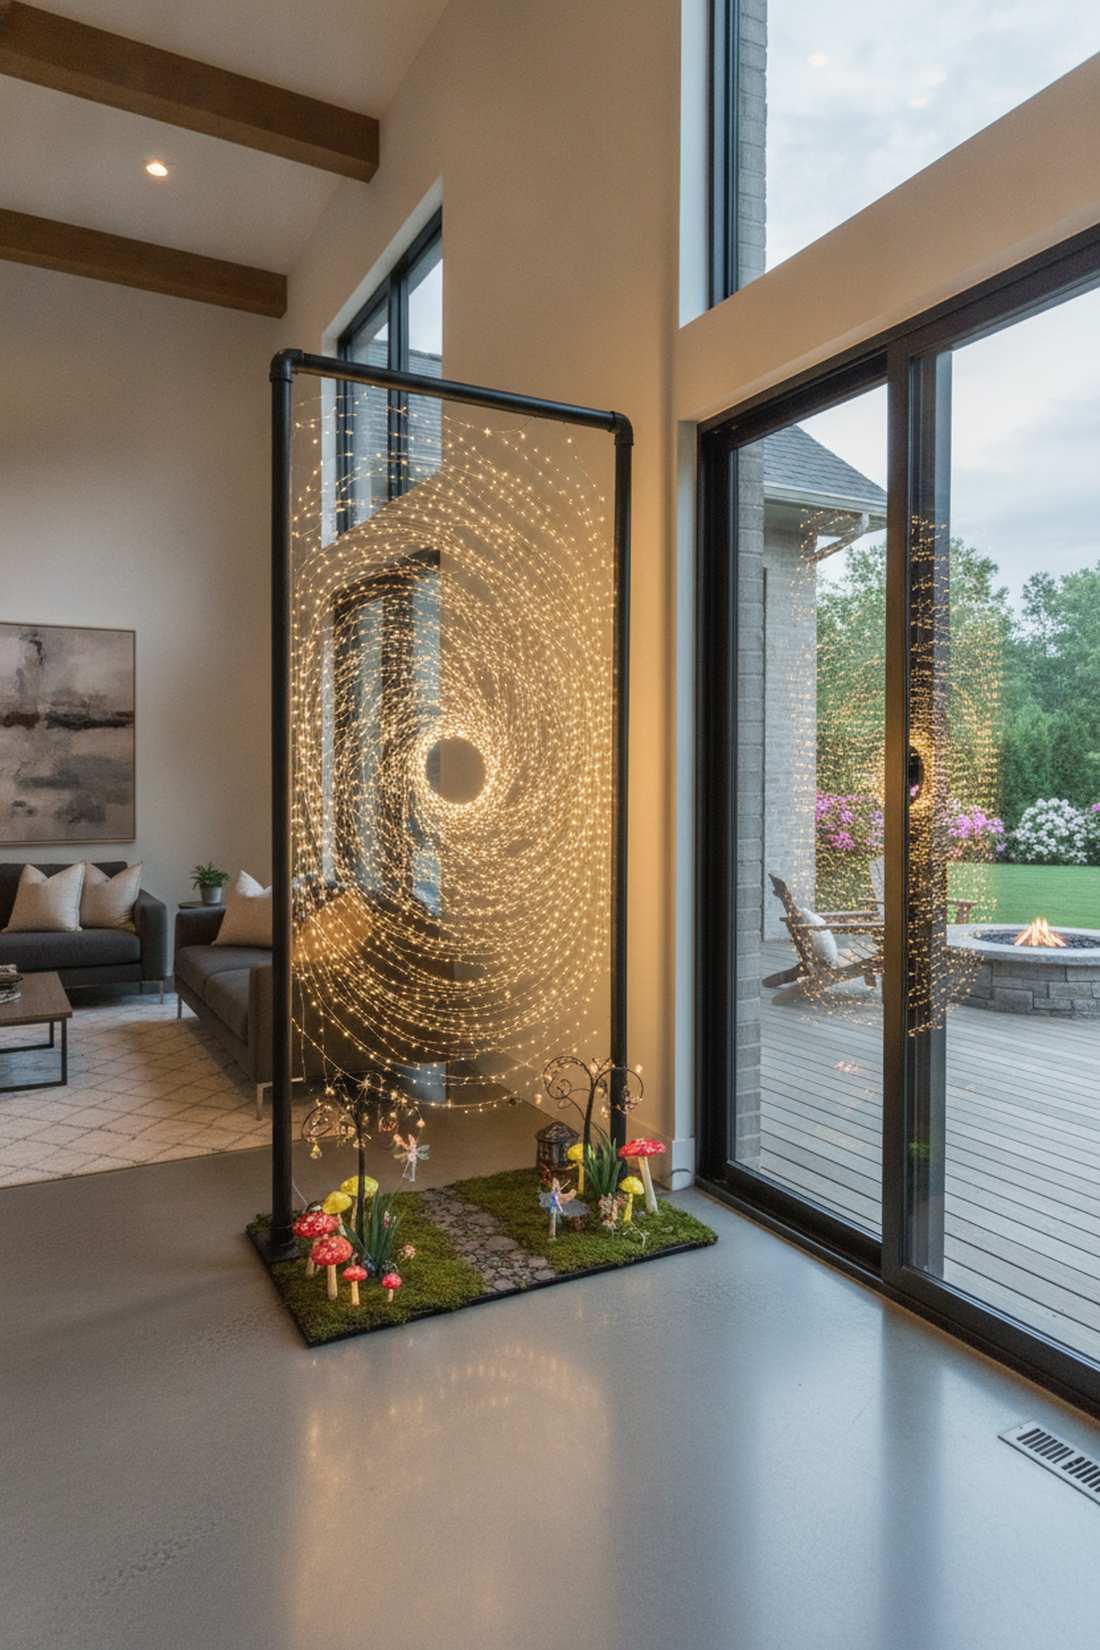
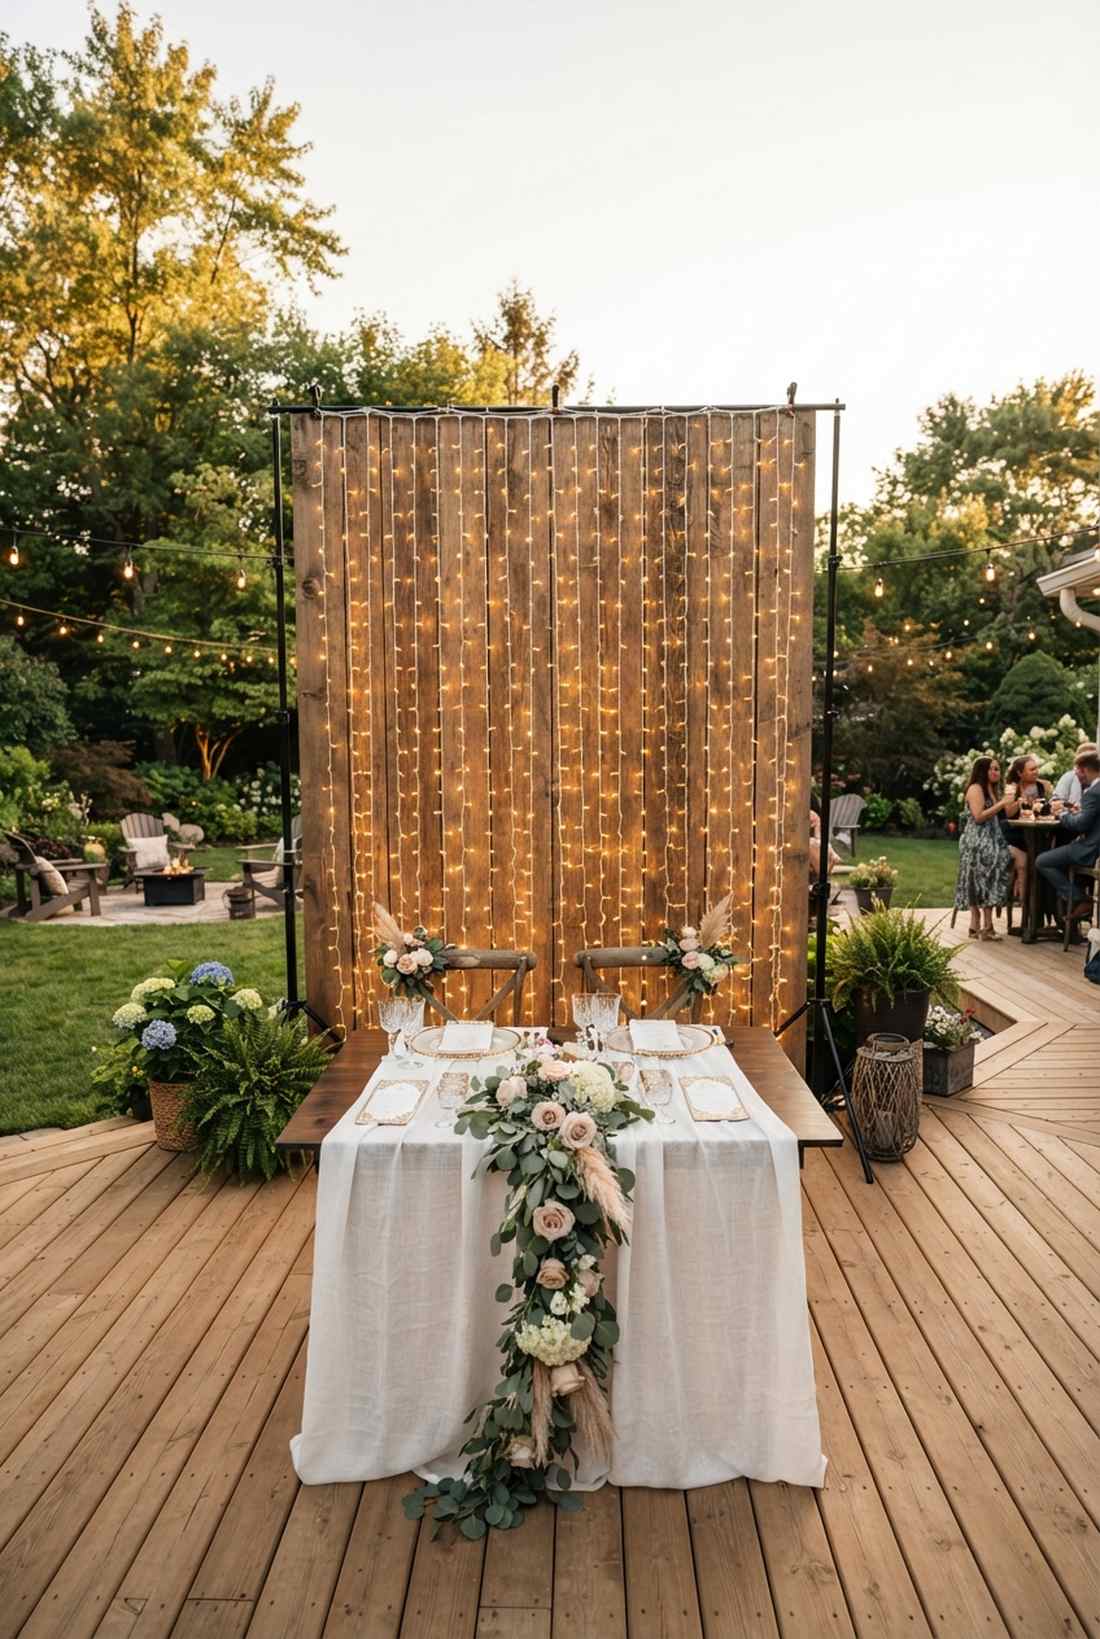
This setup feels like you’ve captured a slice of the cosmos inside a minimalist wooden frame. A freestanding illuminated box frame provides a highly architectural, portable photo zone for awkward venue corners.
Instead of relying on venue walls, wrapping raw lumber or PVC in matte black vinyl before stringing your lights gives a designer-level finish. Integrating premium fairy garden kits around the base adds incredible hidden depth to the portraits.
Building this custom piece costs around $60 in hardware store materials and lights. It is a fantastic afternoon DIY project.
- Key Materials: PVC or wood frame, micro-LED strands
- Vibe / Style: Modern, industrial chic
- Difficulty: Requires basic building skills
- Budget Breakdown: Framing materials: $25 | Lights: $35
- Creator’s Tip: Paint your frame flat black so it completely vanishes in a darkened room, leaving only the floating lights visible.
- Smart Sourcing: Use matte black PVC pipe kits and ultra-thin micro-LED wire strands.
9. Diagonal Crossing Light Pattern
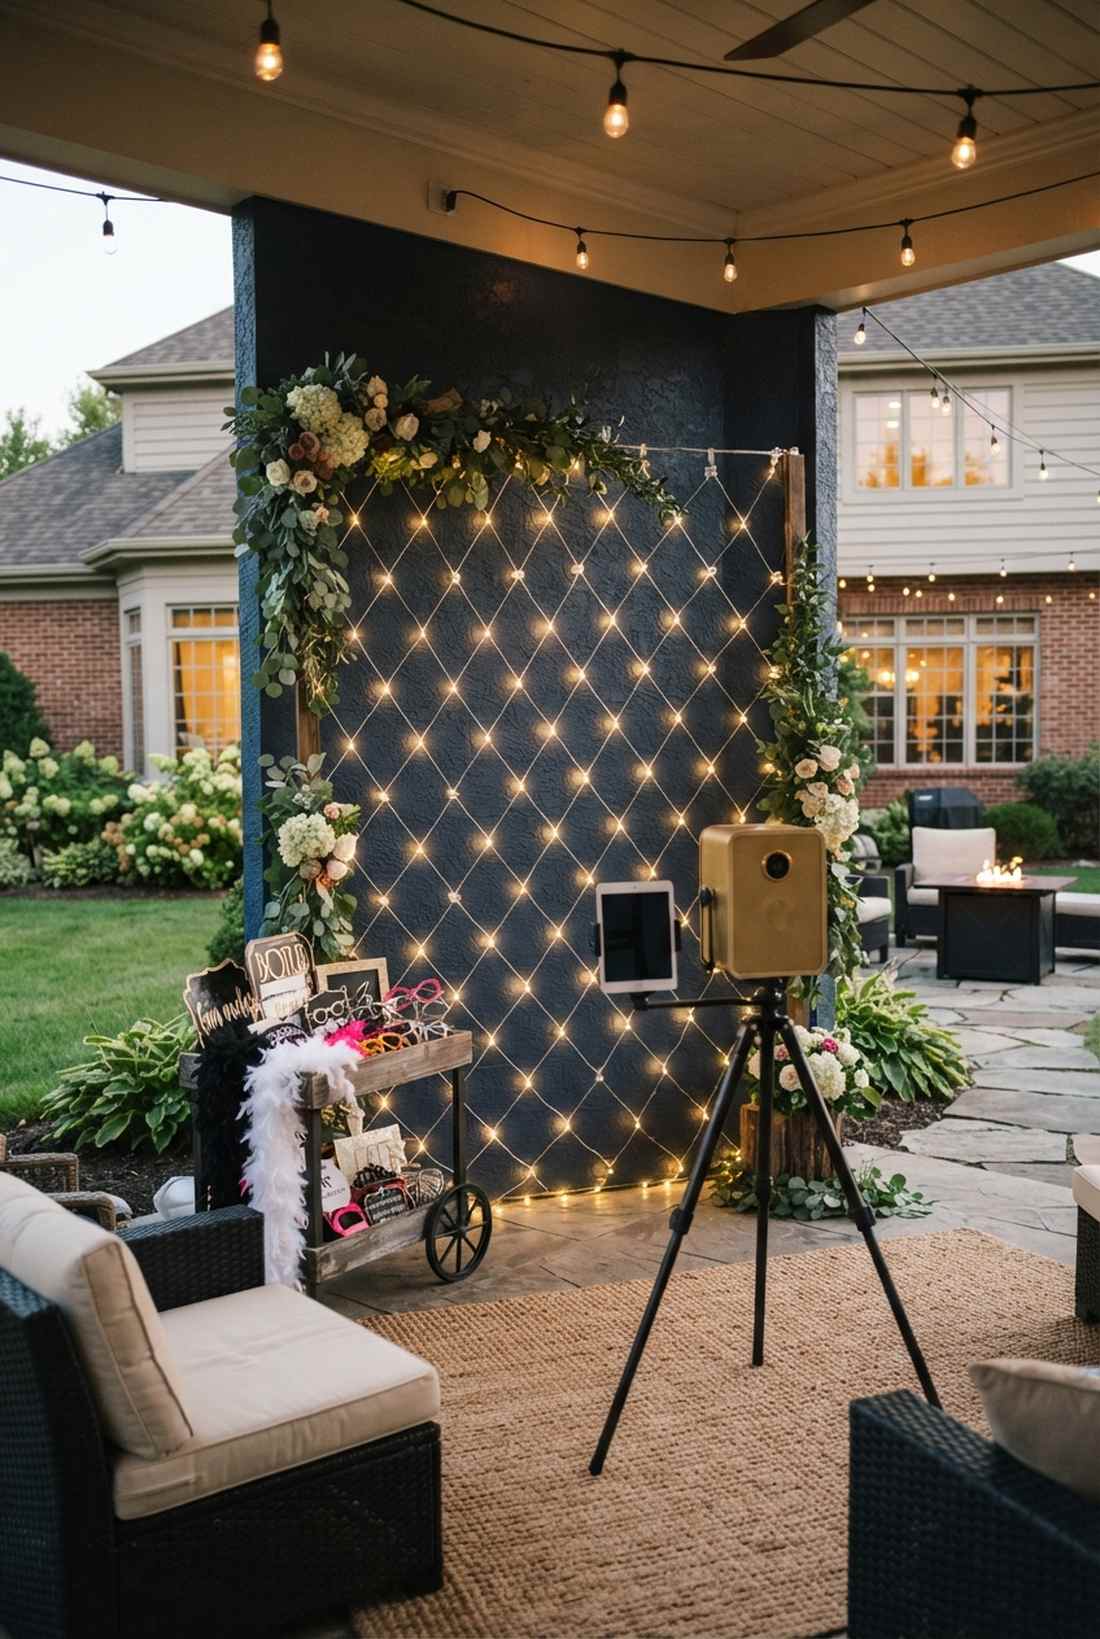
This intersecting layout adds a striking, diamond-tufted texture to the background that feels incredibly chic. The crisscross diamond light backdrop is perfect for adding edge to soft, traditional venue spaces.
While straight drops are common, anchoring lights at precise 45-degree angles delivers a surprisingly premium look that catches the camera lens beautifully. The key is pulling the strands taut, which requires durable commercial fairy lights wedding decor wiring so they don’t snap under tension.
You can achieve this textured illusion for about $40 to $60. Save this if you want your photo booth to stand out.
- Key Materials: Adhesive wall hooks, tension-rated strings
- Vibe / Style: Edgy, textured elegance
- Difficulty: Moderate mapping required
- Budget Breakdown: Hooks: $10 | Lights: $40
- Creator’s Tip: Use a laser level to mark your anchor points perfectly on the wall before attaching any hooks.
- Smart Sourcing: Snag damage-free clear adhesive wire clips (bulk pack) and braided-wire fairy light strands.
Do NOT buy expensive floral arches until you’ve seen this incredible $45 glowing halo trick…
10. Circular Halo Backdrop
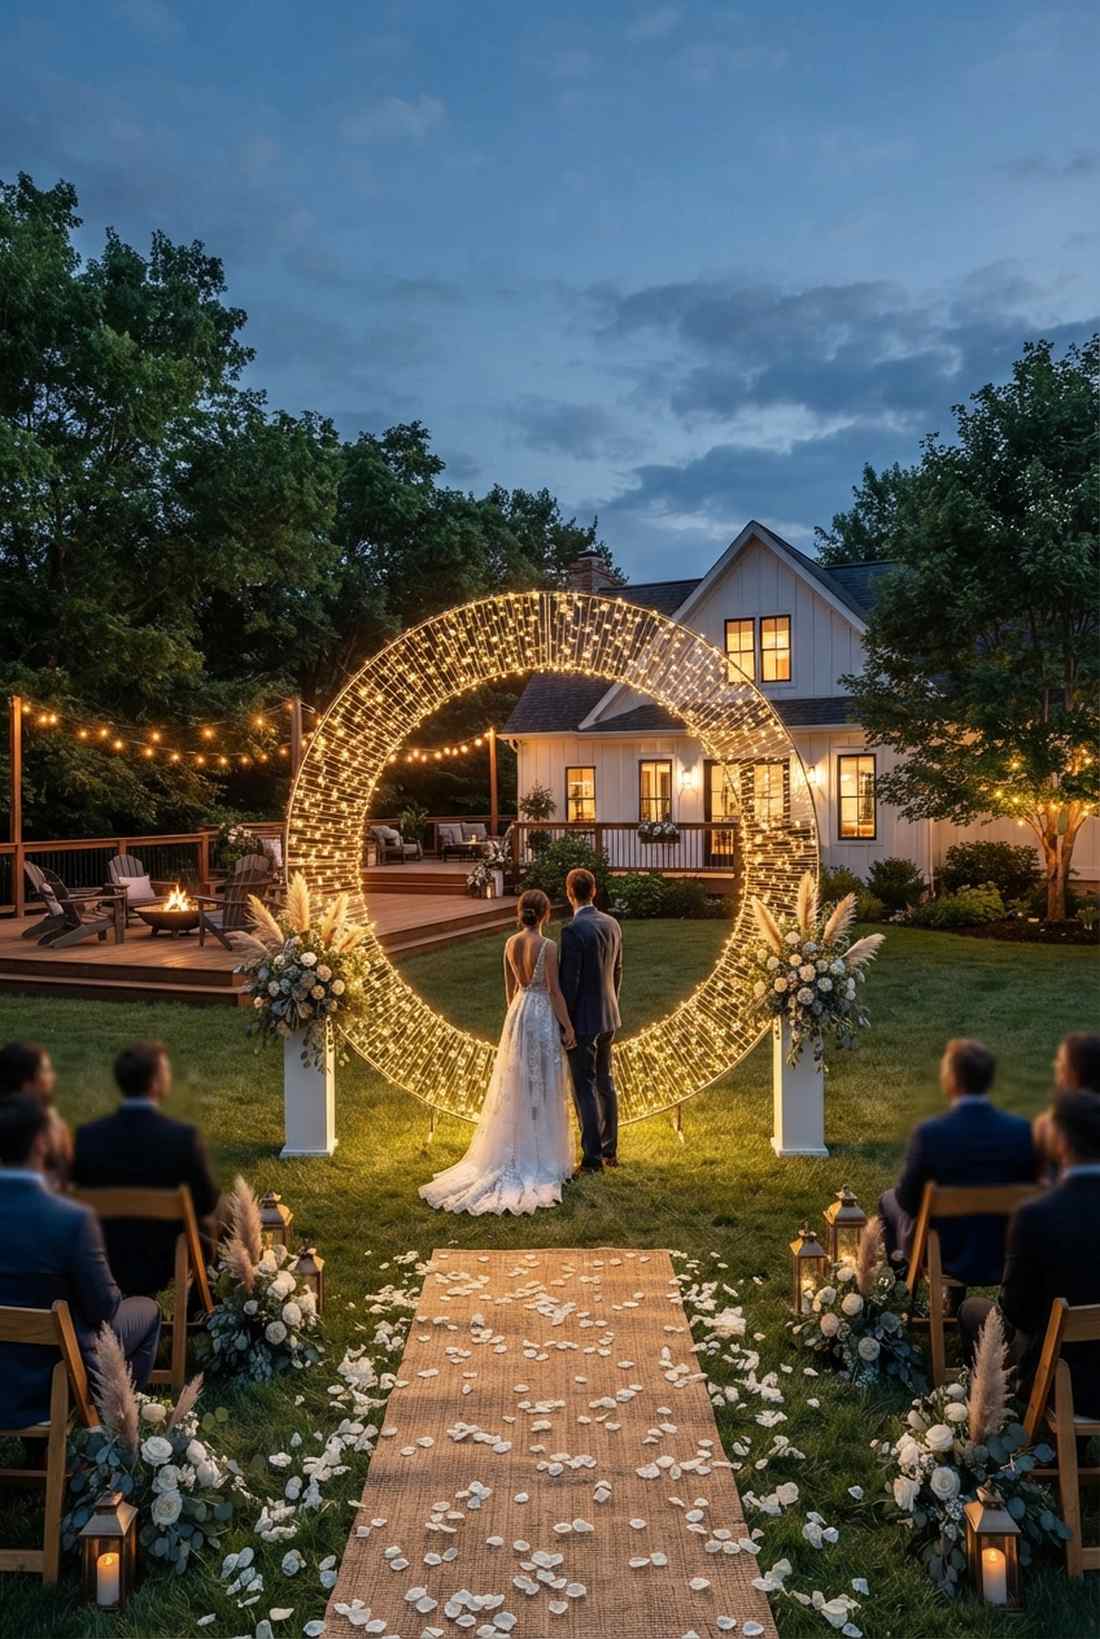
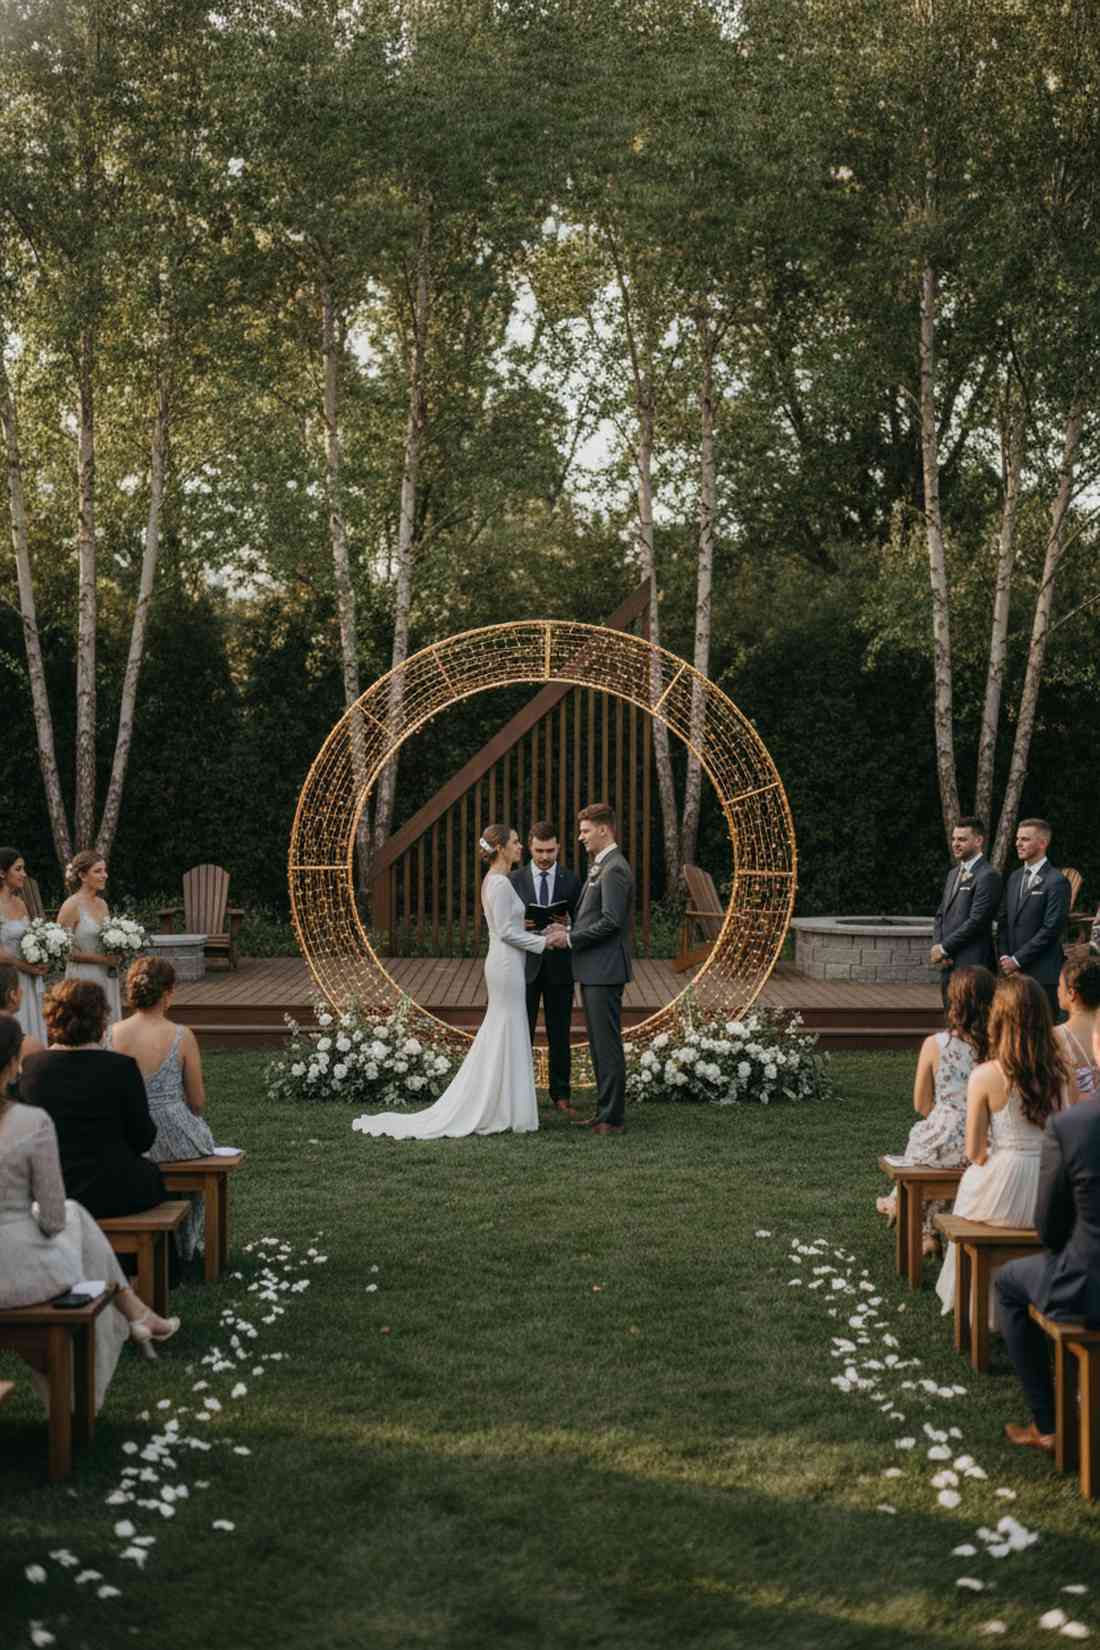
This glowing ring frames the couple like an ethereal eclipse, feeling deeply symbolic and magical. A giant illuminated halo works miracles as a focal point for minimalist or industrial ceremony spaces.
Metal arches can cost hundreds to rent, but densely wrapping a standard backdrop hoop with warm micro-LEDs looks insanely expensive for a fraction of the price. Seamlessly hiding the battery packs at the base ensures the illusion remains completely unbroken.
You can easily pull this off for around $45 to $75. A massive win for budget-conscious DIYers.
- Key Materials: Circular metal arch frame, copper wire fairy lights
- Vibe / Style: Modern, minimalist romance
- Difficulty: Easy but repetitive wrapping
- Budget Breakdown: Ring frame: $35 | Micro lights: $25
- Creator’s Tip: Wrap the frame in metallic gold floral tape first; it reflects the bulbs and makes the ring look solid even when unlit.
- Smart Sourcing: Grab a metal circular wedding arch kit and extra-long copper wire battery lights (multi-pack).
💡 Must-Have Supplies for High-End Setups
To build these stunning lighting frameworks faster and ensure they survive a 10-hour event, skip the generic craft aisles and invest in the right foundational kits.
- Base & Support: Heavy-duty telescoping backdrop stands and tension cables
- Setup Tools: Clear adhesive cable clips and UV-coated professional zip ties
- Weather/Durability Protection: IP65-rated outdoor light spools and waterproof extension cord seals
11. Light Curtain with Greenery
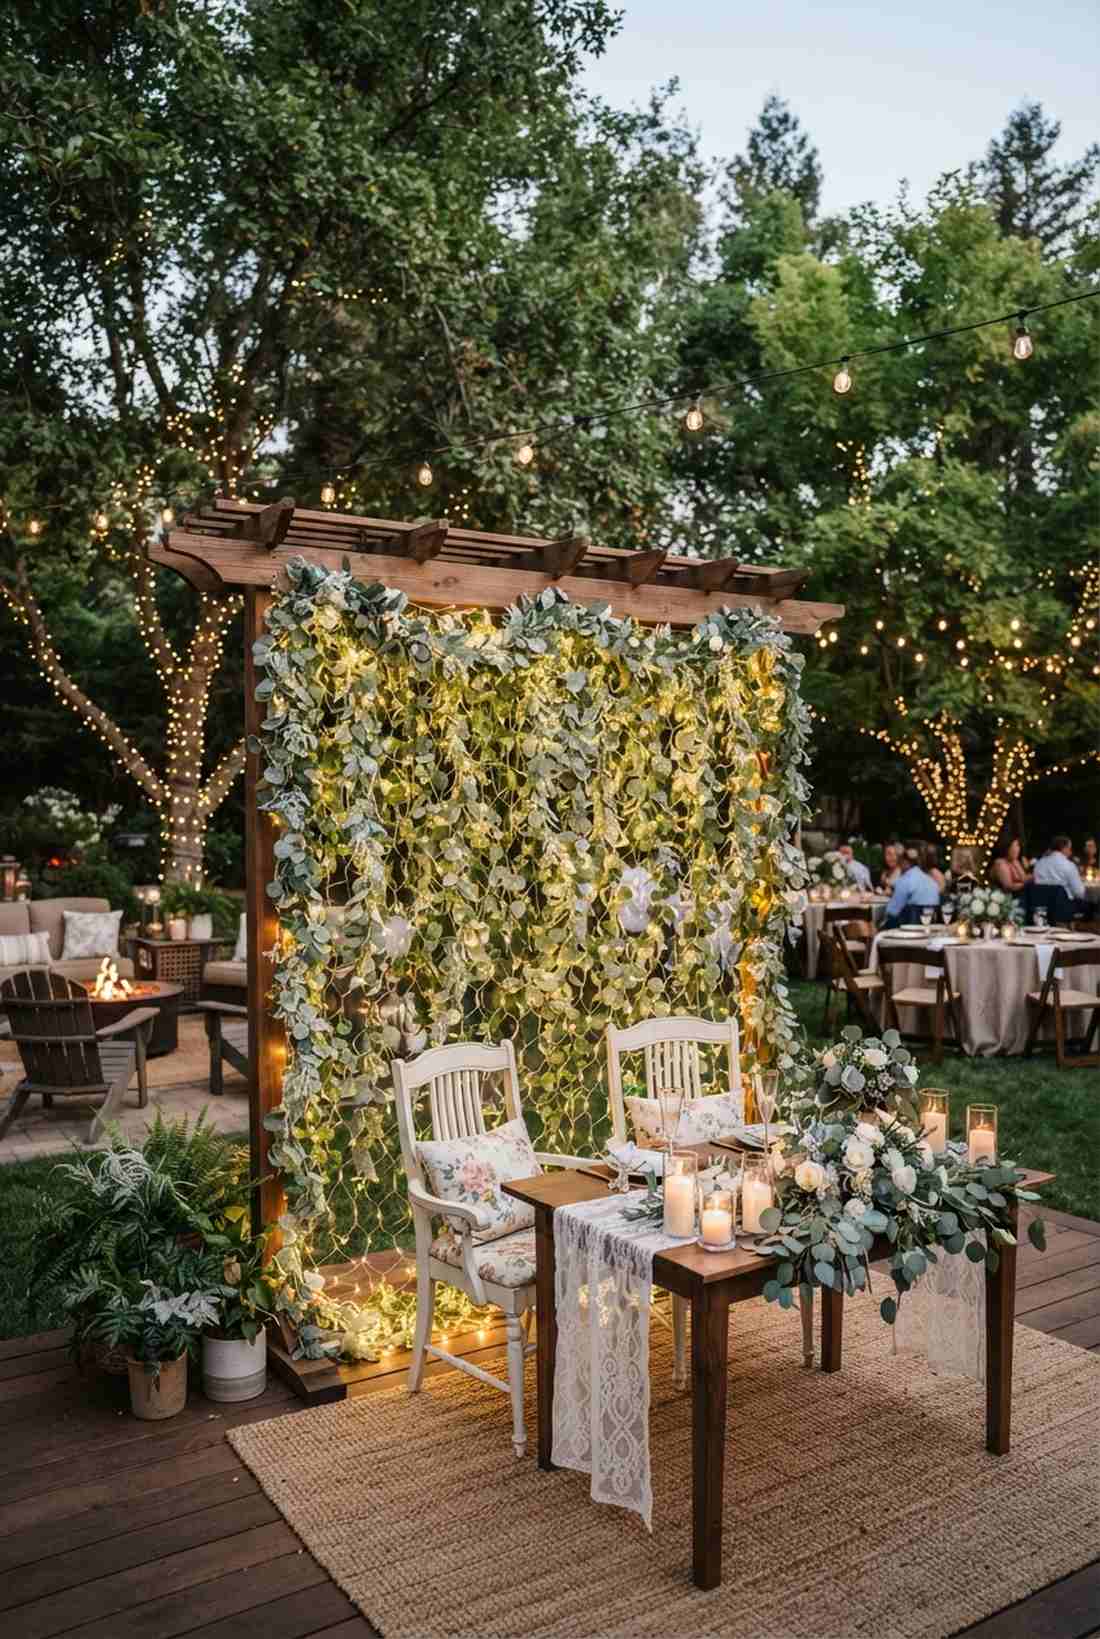
This feels exactly like a hidden enchanted forest you accidentally discovered at twilight. An illuminated ivy and greenery wall perfectly marries organic garden textures with cozy indoor reception vibes.
Most decorators charge a massive premium for living walls, but weaving high-quality faux eucalyptus with plug-in fairy lights wedding decor gives a designer-level finish that won’t wilt. The artificial foliage brilliantly masks all the ugly wires and power cords.
You can create a lush, glowing backdrop for around $80 to $120. Pin this to your woodland wedding inspiration board.
- Key Materials: Faux greenery garlands, warm white net lights
- Vibe / Style: Enchanted woodland oasis
- Difficulty: Beginner-friendly
- Budget Breakdown: Garlands: $60 | Lights: $35
- Creator’s Tip: Zip-tie a base layer of cheap LED net lights to your stand first, then weave individual greenery vines through the net holes.
- Smart Sourcing: Invest in lifelike frosted eucalyptus garlands (bulk pack) and LED net mesh lights.
12. Waterfall Cascade Backdrop
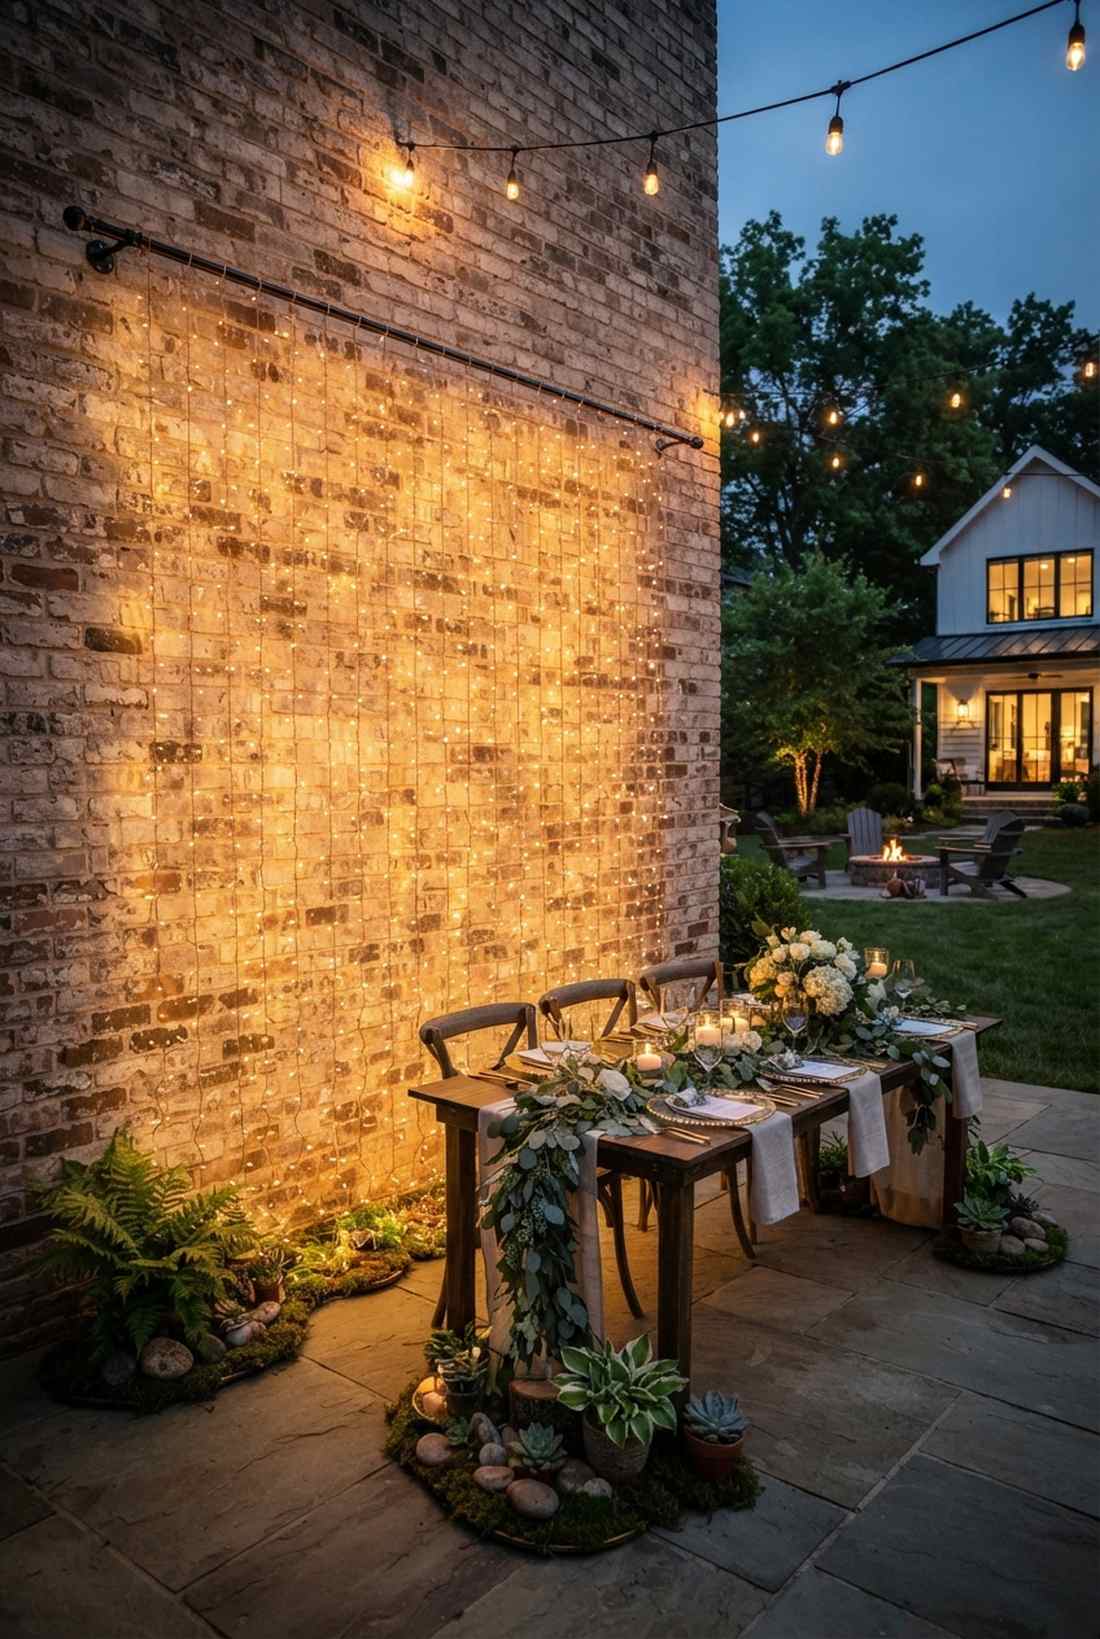
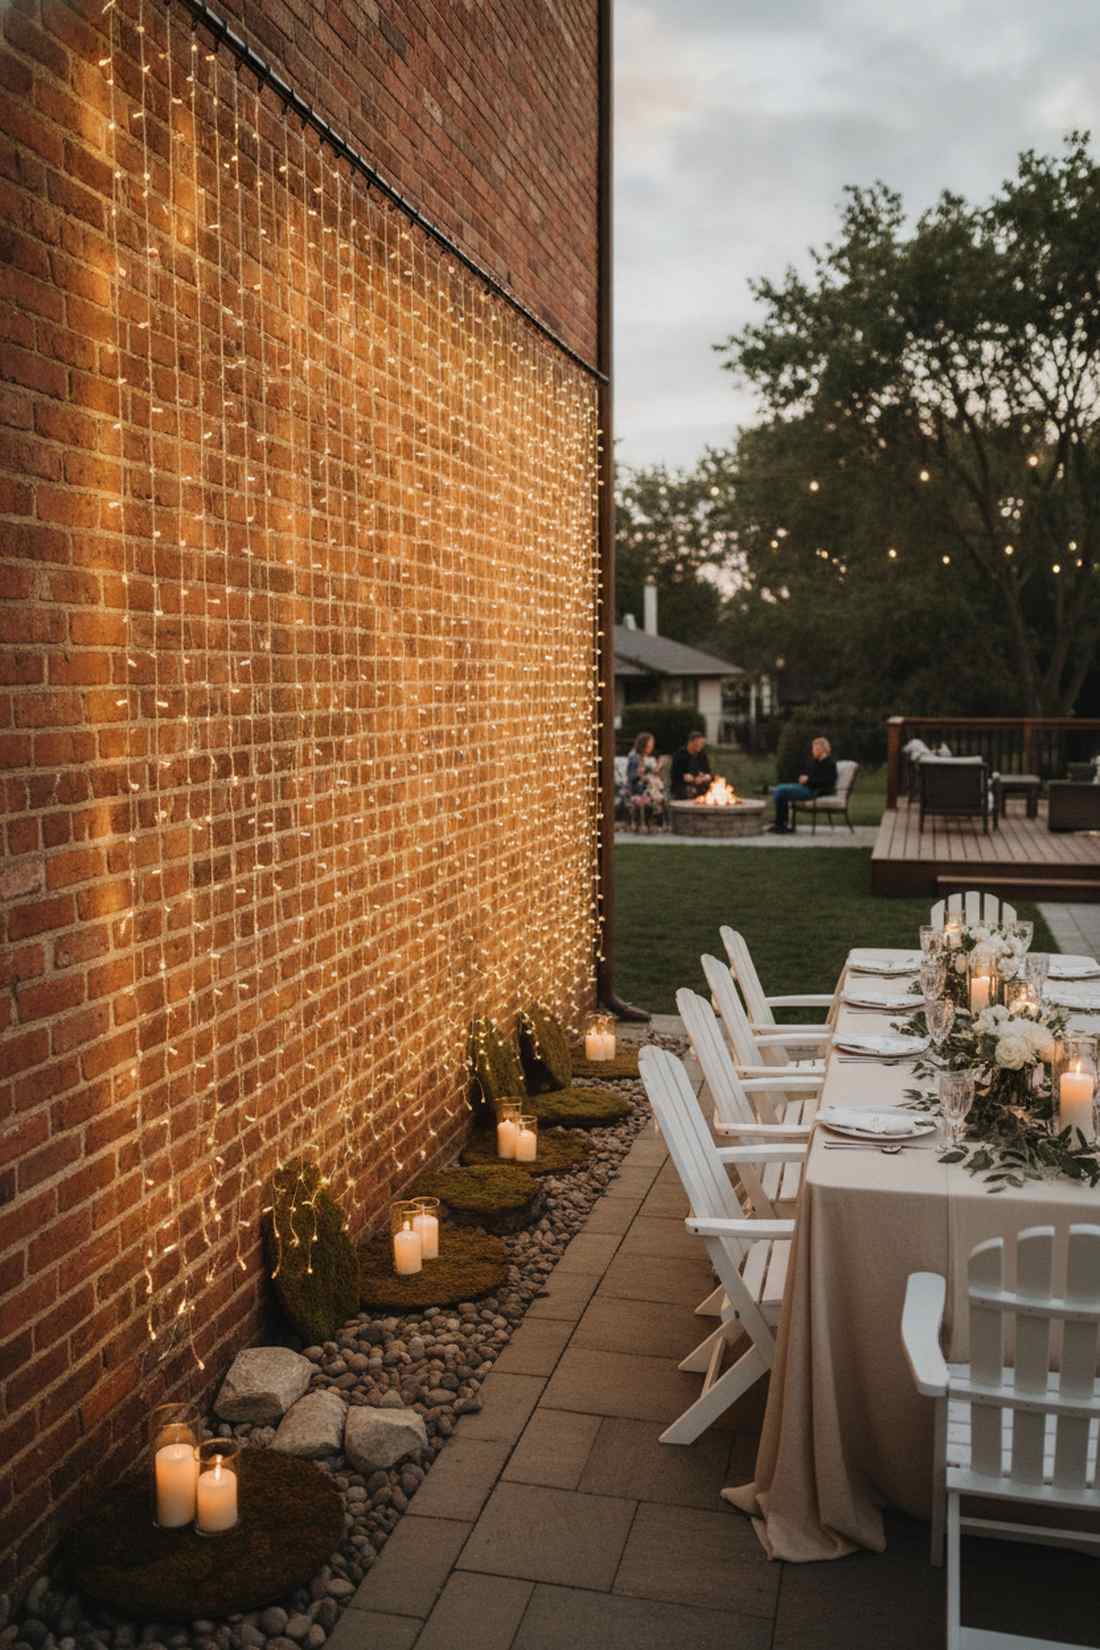
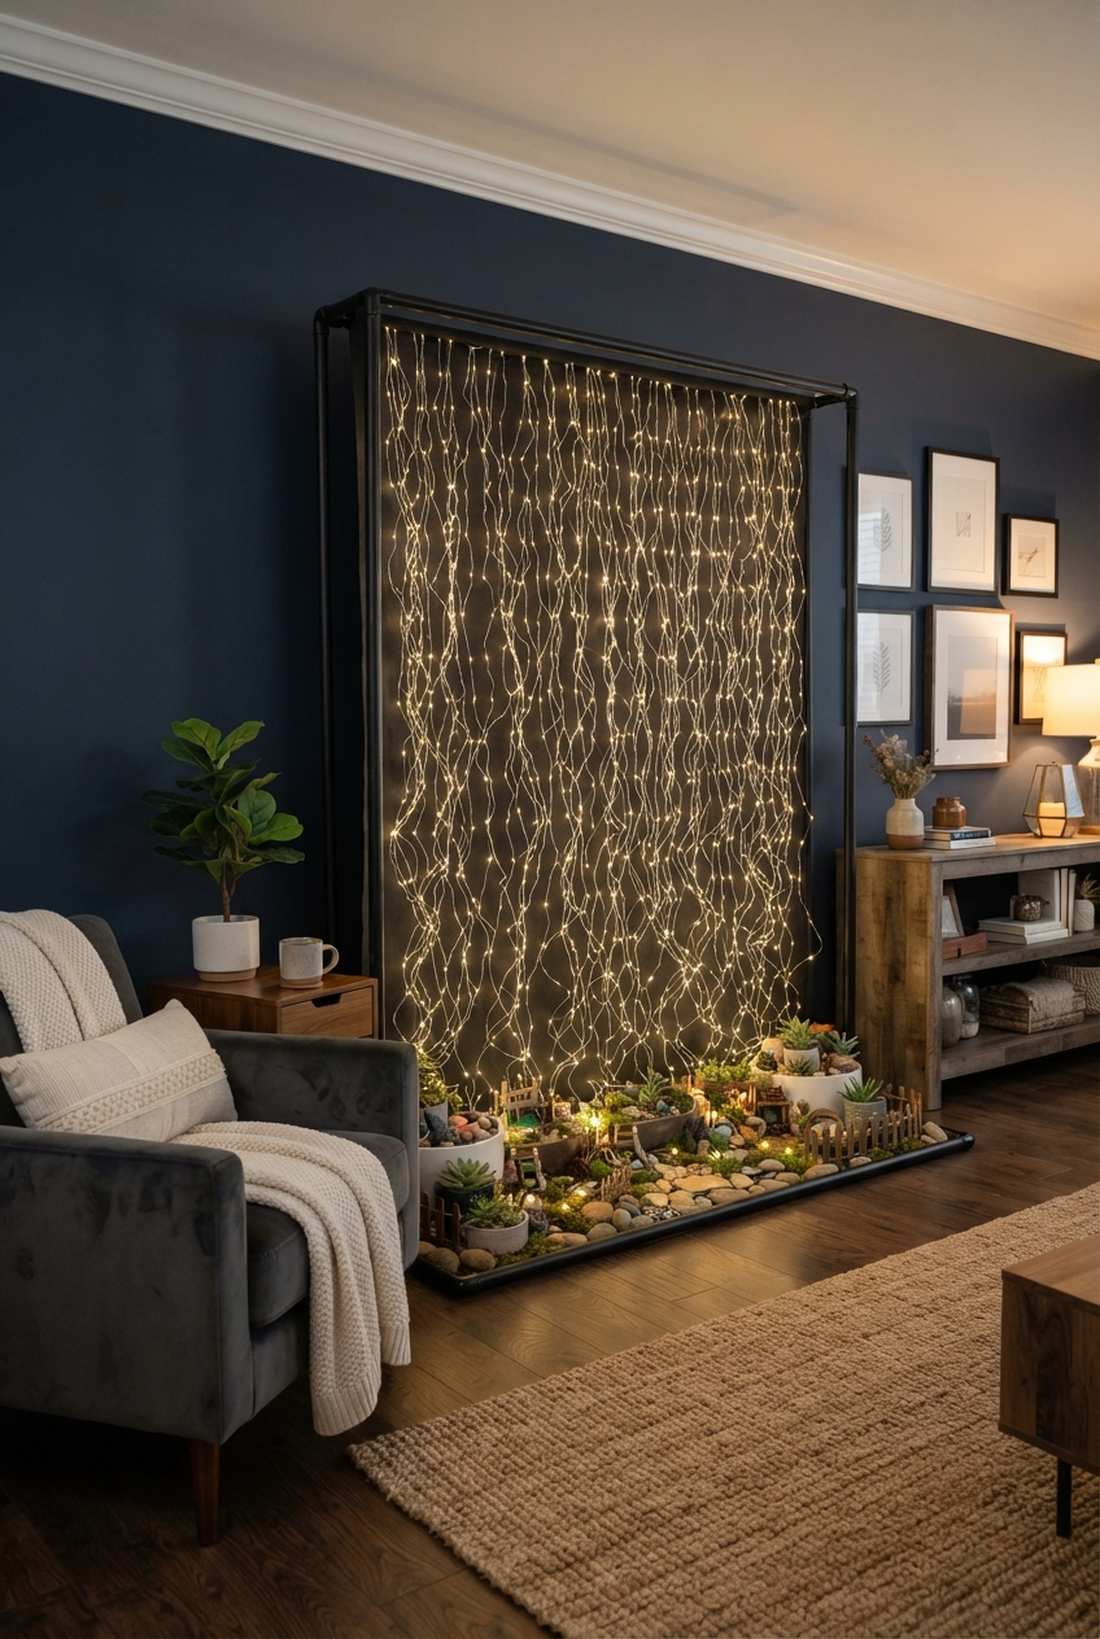
This layout mimics a delicate shower of golden rain, feeling exceptionally soft and cinematic. A staggered light cascade is ideal for softening harsh brick walls behind the head table.
While blunt-cut light curtains look a bit rigid, manually staggering the drops in varying lengths completely completely fools the eye into seeing fluid movement. You can easily integrate miniature garden supplies like mossy base plates to ground the cascading light.
This elegant illusion takes a bit of patience but costs only $40 to execute. It’s an instant upgrade for any blank wall.
- Key Materials: Individual light strands, top suspension bar
- Vibe / Style: Fluid, romantic motion
- Difficulty: Moderate (requires precise measuring)
- Budget Breakdown: Suspension bar: $15 | Lights: $25
- Creator’s Tip: Trim the ends of your fairy strands (if your specific brand allows cutting) to create an organic, jagged bottom edge.
- Smart Sourcing: Buy cuttable copper wire fairy light spools and a tension curtain rod setup.
Ceremony & Entrance Ideas
13. Illuminated Aisle Markers
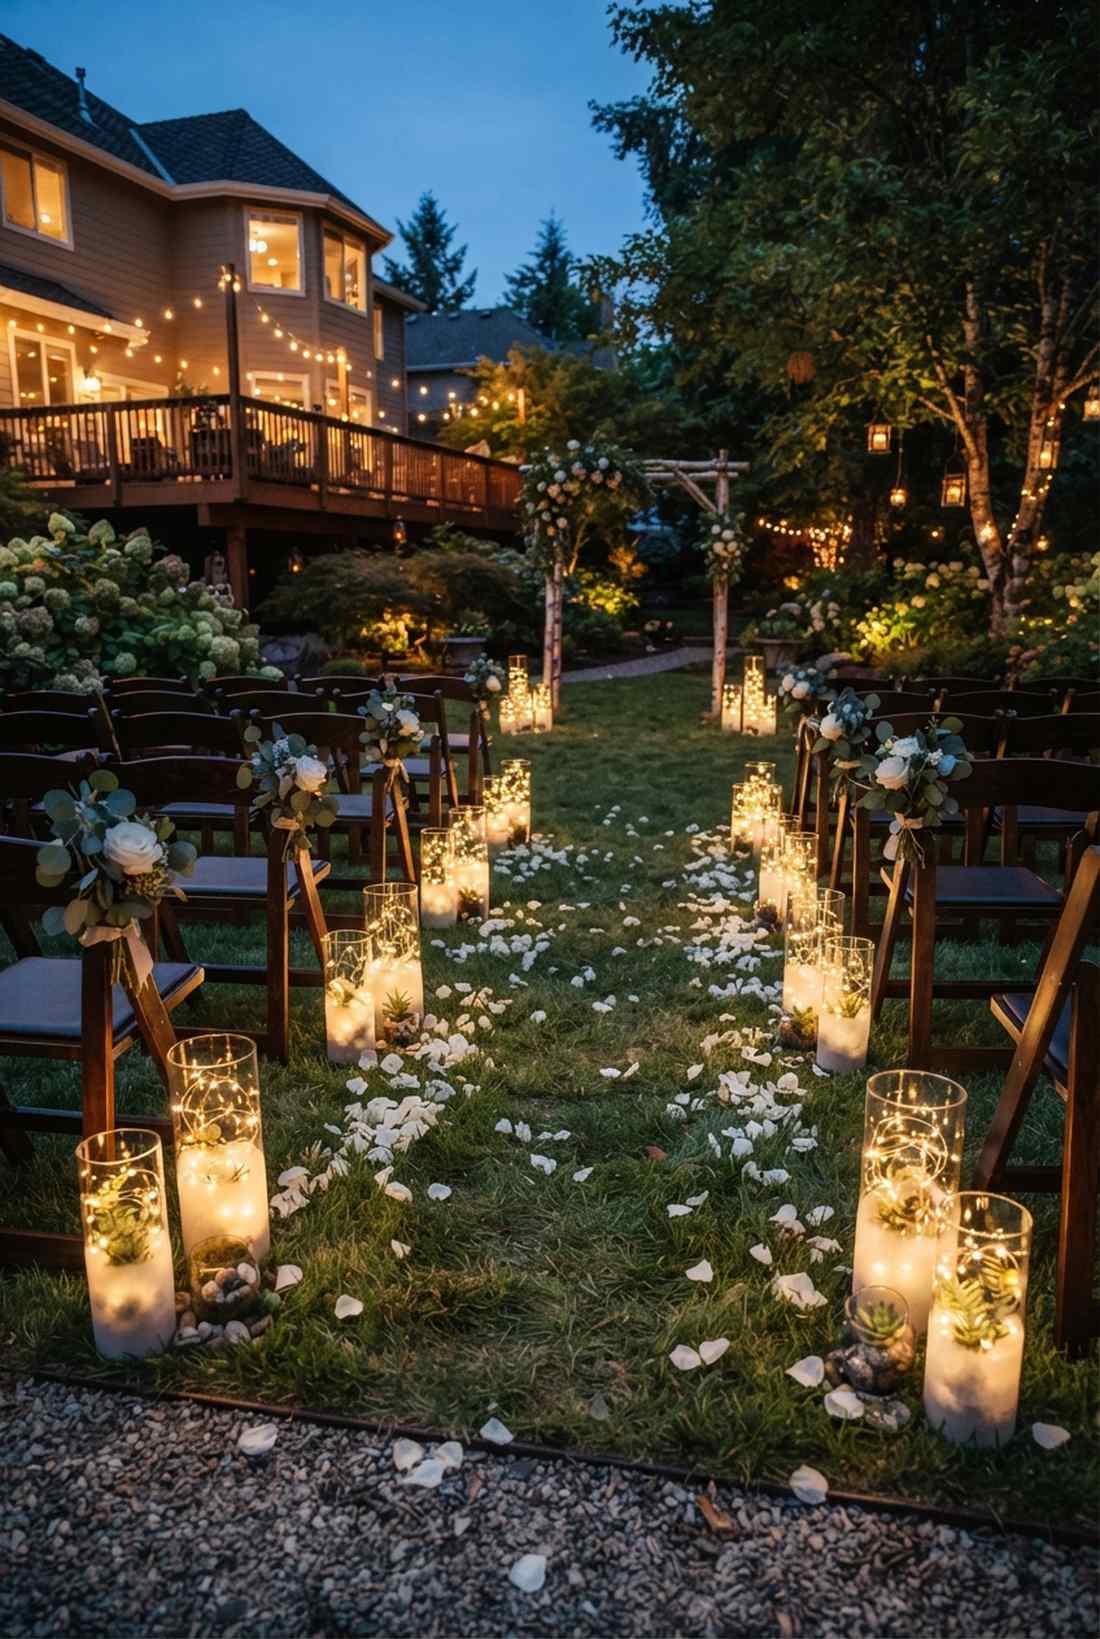
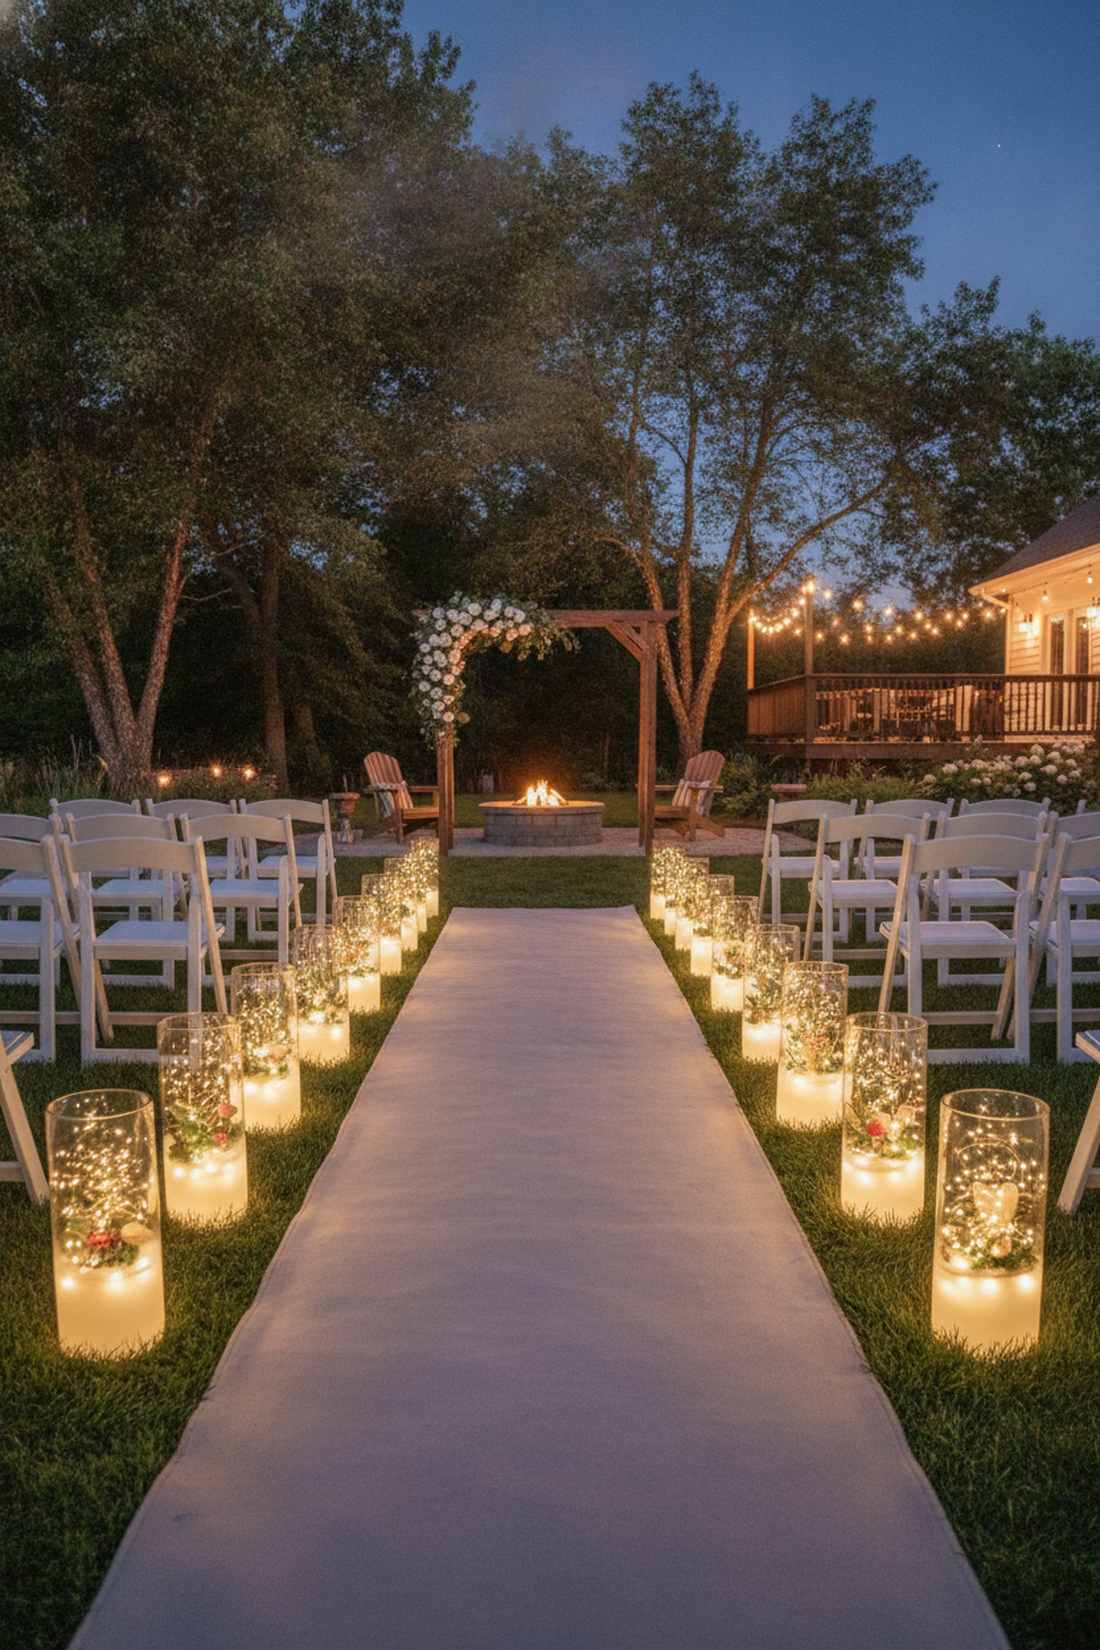
This setup feels like being guided by captured fireflies all the way to the altar. Glowing floor-level aisle markers are a brilliant safety feature and decor piece for dimly lit evening ceremonies.
Lining the floor with open candles is a massive fire hazard, but stuffing battery-operated fairy lights into heavy glass cylinders looks wildly expensive and completely venue-safe. Using premium fairy garden kits inside the glass adds a stunning botanical touch.
You can outfit an entire 10-row aisle for roughly $60. Keep this trick handy for outdoor twilight vows.
- Key Materials: Glass hurricane vases, battery micro-lights
- Vibe / Style: Safe, romantic pathway
- Difficulty: Super simple
- Budget Breakdown: Glassware: $40 | Battery lights: $20
- Creator’s Tip: Use frosted glass spray paint on the bottom half of the vases to diffuse the bulbs into a soft, glowing orb.
- Smart Sourcing: Source bulk glass cylinder vase sets and CR2032 battery fairy lights (20-pack).
14. Entrance Tunnel Archway
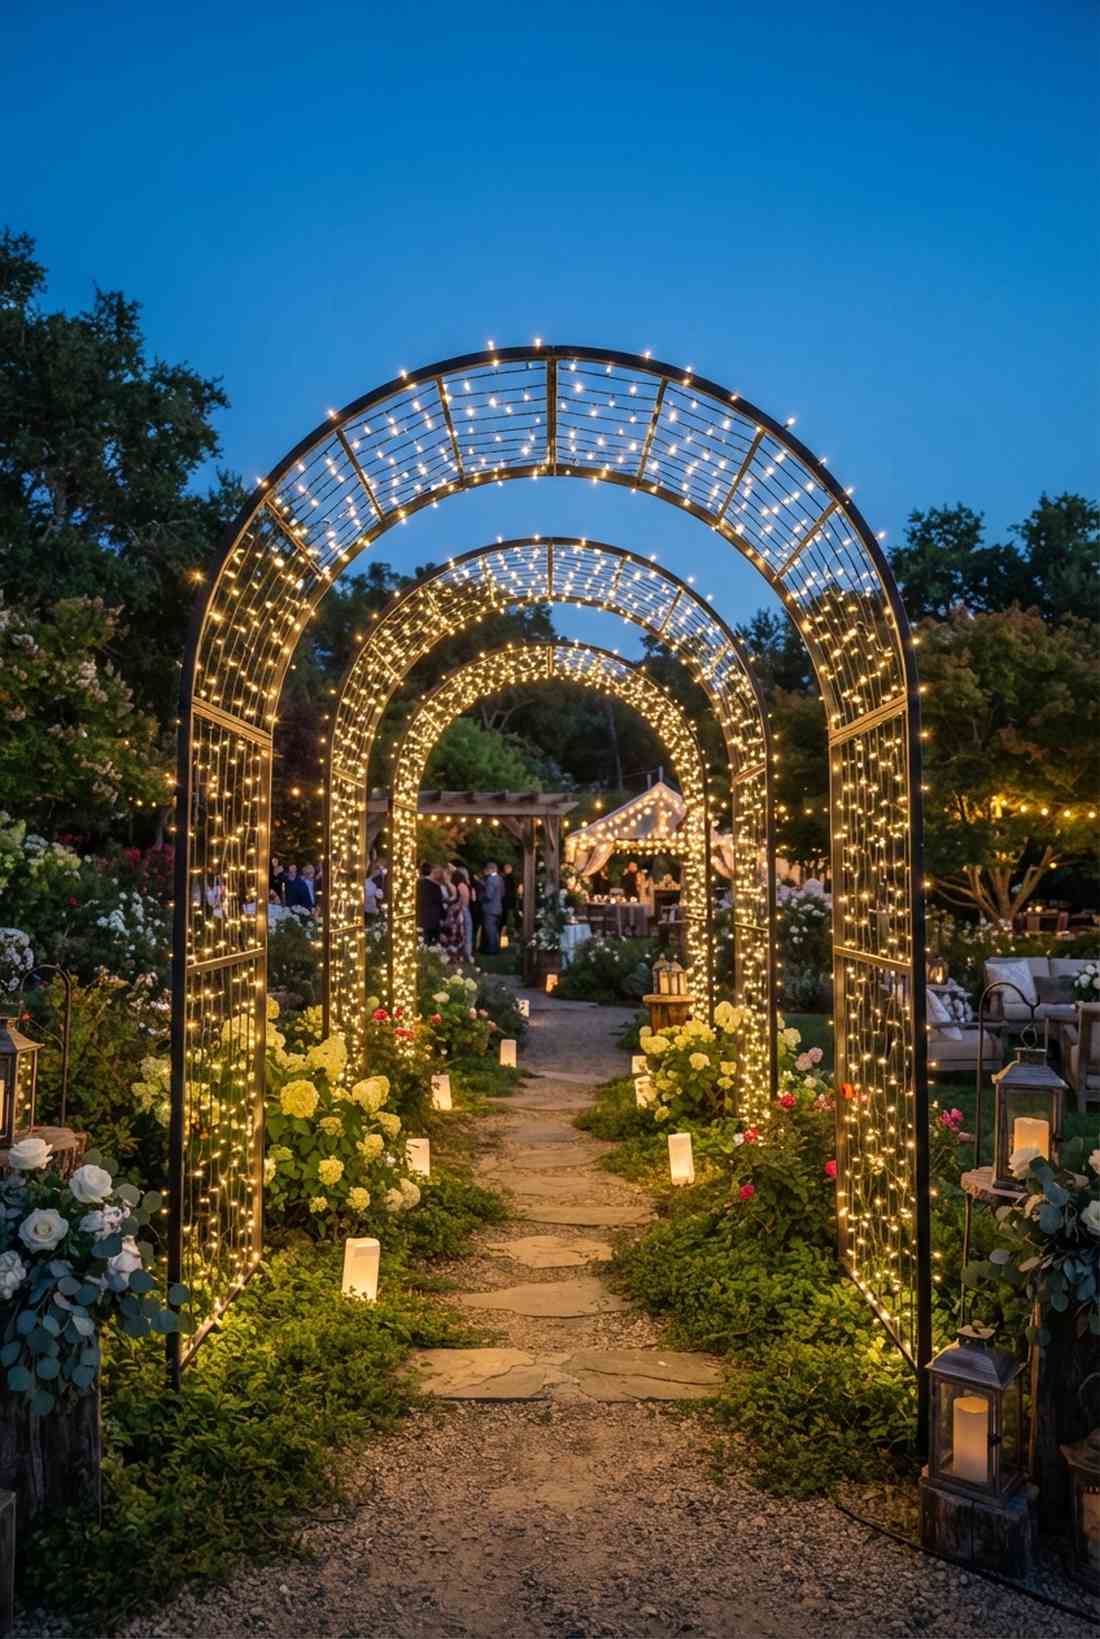
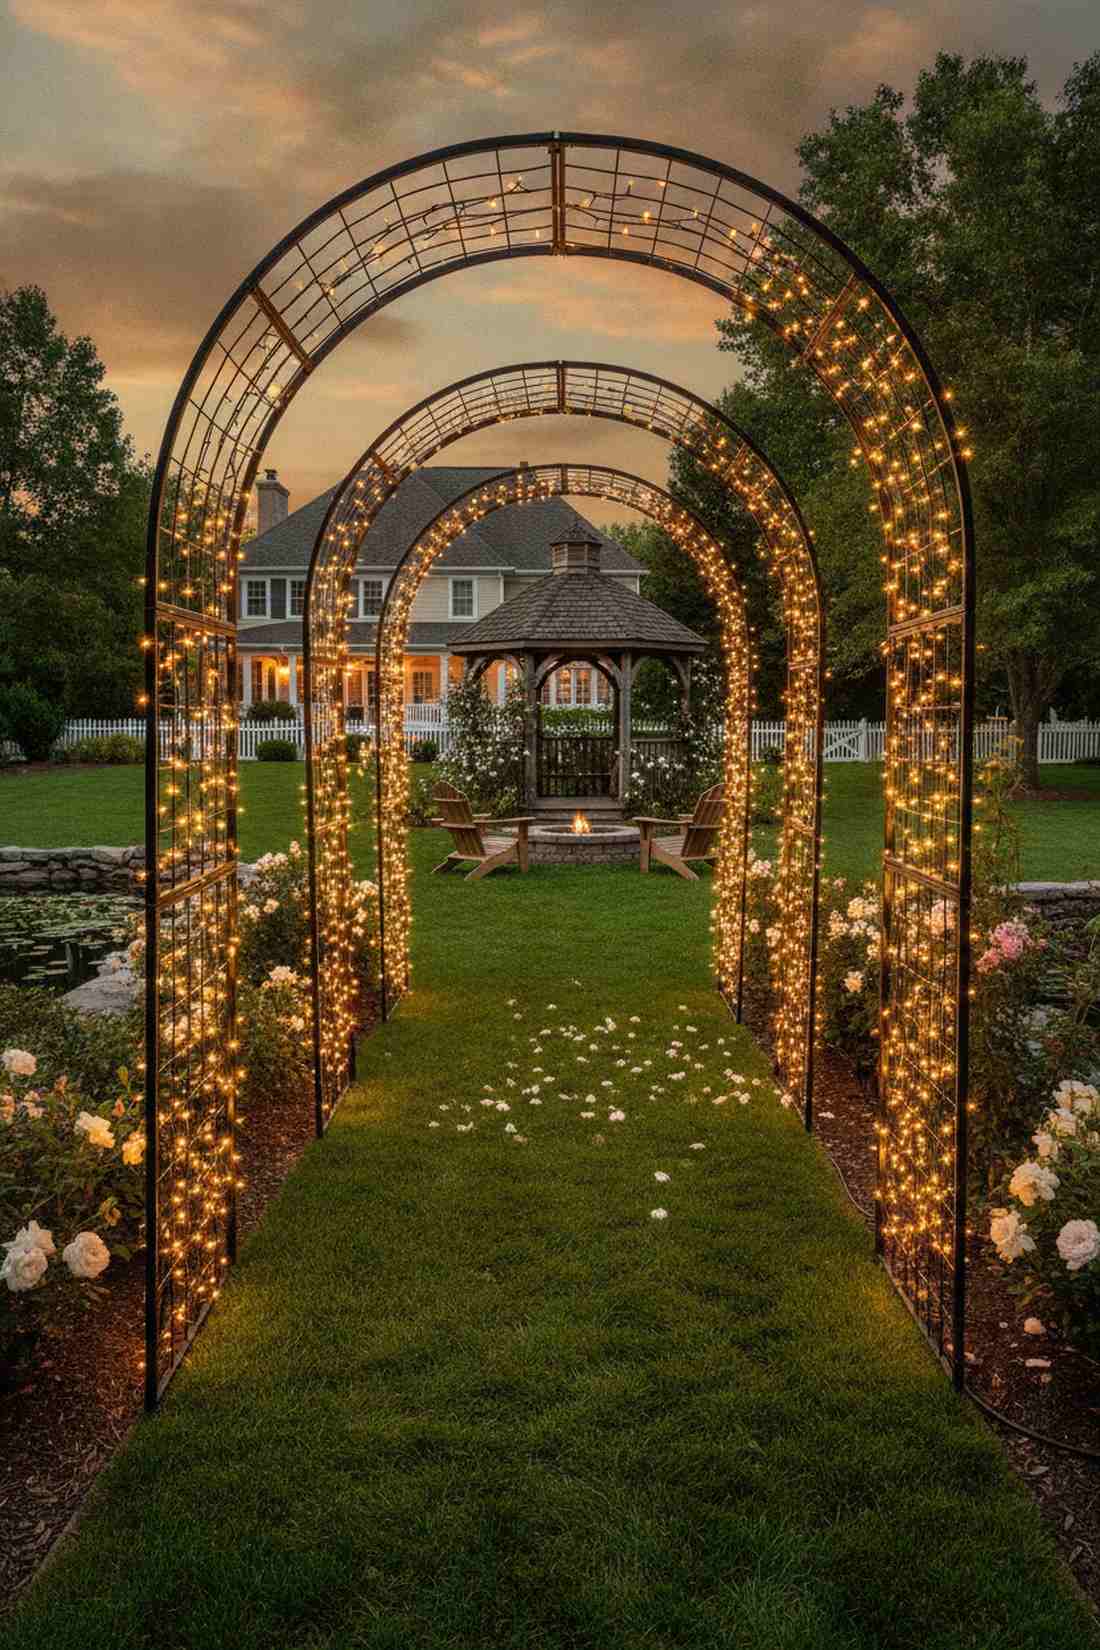
Walking through this feels like crossing a portal into an entirely different, magical universe. An enclosed fairy light tunnel delivers maximum “wow” factor the second your guests arrive at the venue.
Many couples skip entrance decor, but connecting three to four inexpensive garden arches and wrapping them densely delivers a surprisingly premium look that dominates Instagram feeds. Utilizing commercial fairy lights wedding decor ensures the arch stays brilliantly lit all night.
This massive statement piece costs around $150 to $250 to build. Highly recommended if you want a viral wedding entrance.
- Key Materials: Metal garden arches, high-density light spools
- Vibe / Style: Immersive, majestic portal
- Difficulty: Intermediate assembly
- Budget Breakdown: Arch frames: $90 | Light spools: $120
- Creator’s Tip: Wrap the arches horizontally connecting them together, which acts as a structural brace making the tunnel super sturdy.
- Smart Sourcing: Pick up interlocking metal garden arch kits and super-bright outdoor string light spools.
This next outdoor tree hack is so aggressively simple, you’ll wonder why venues charge $500 to do it for you…
15. Tree-Lined Pathway Lights
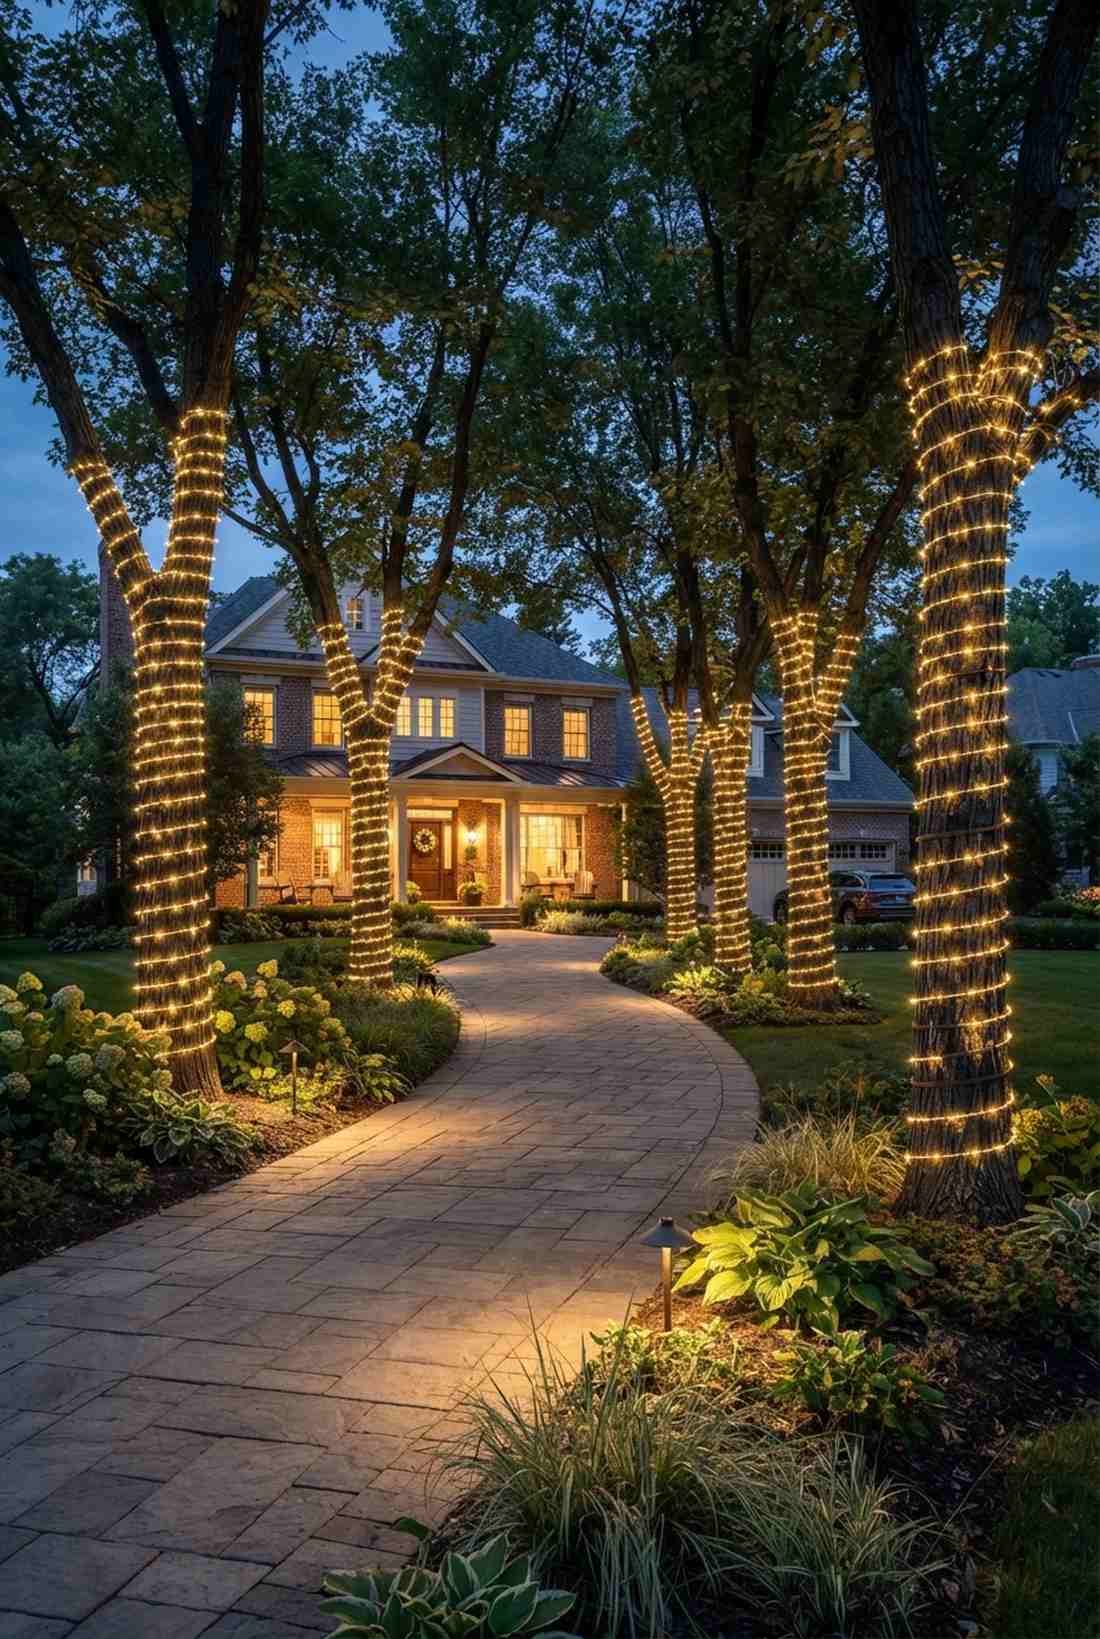
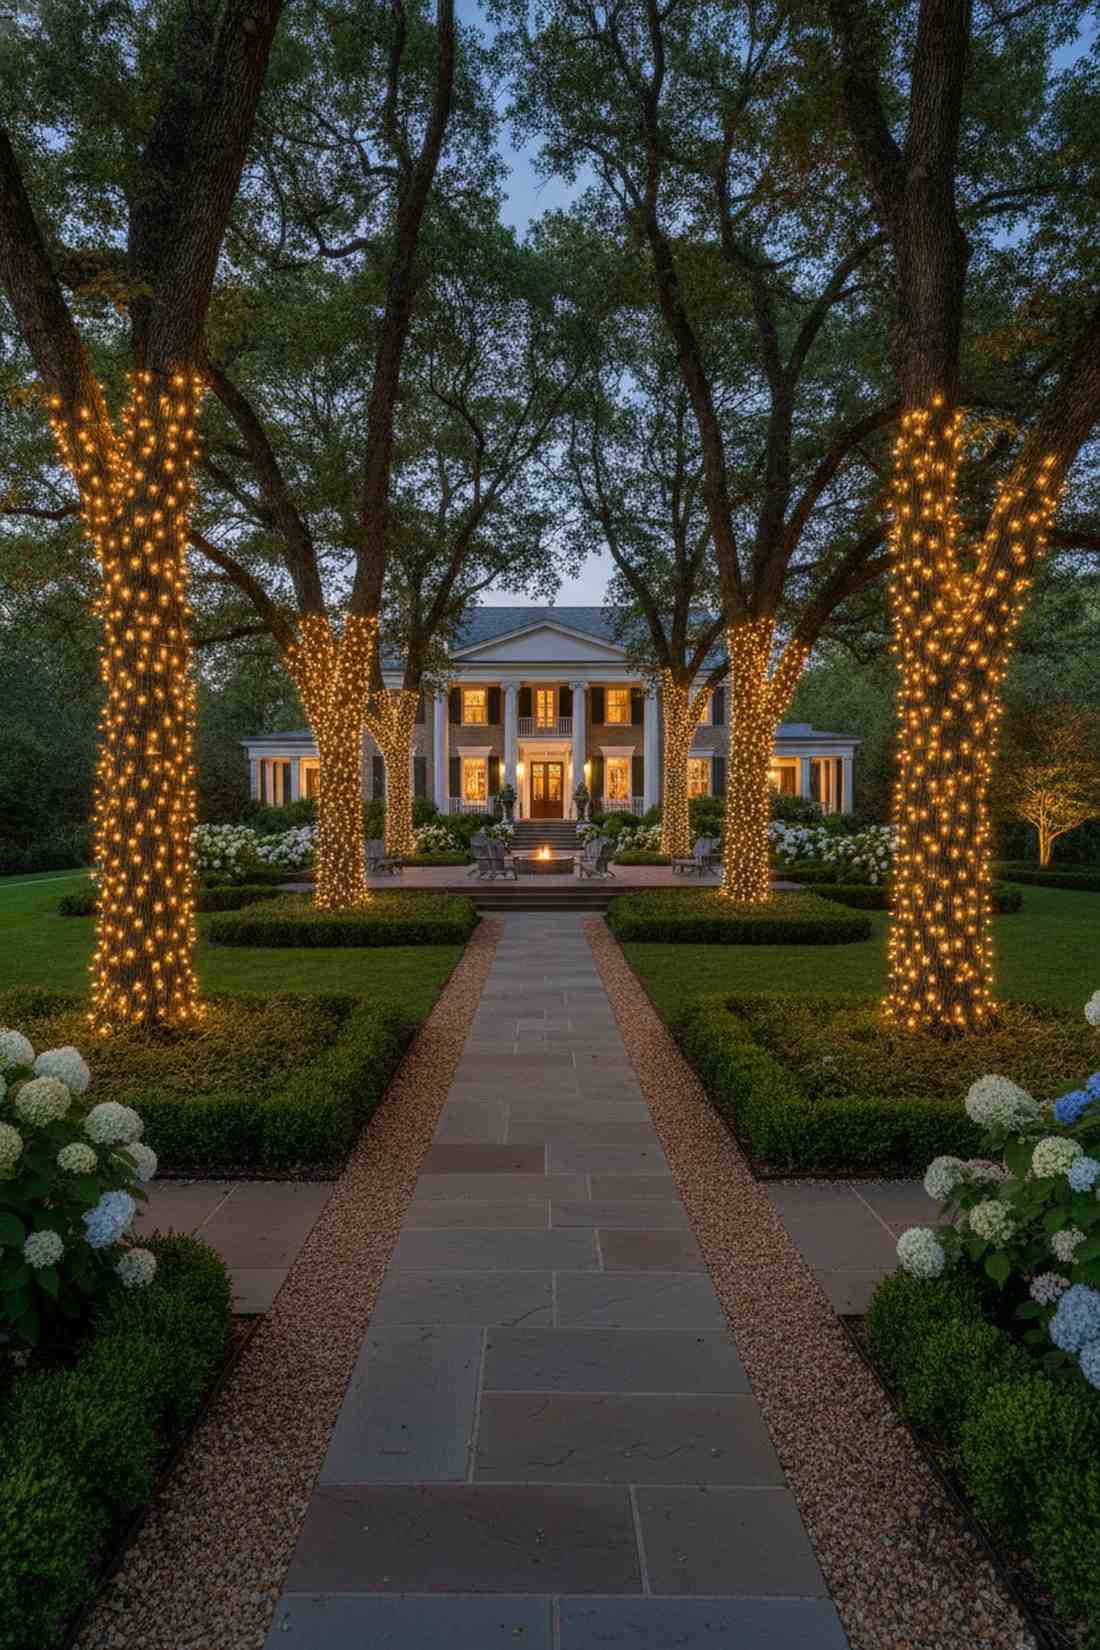
This turns standard venue landscaping into grand, glowing sentinels guarding your party. Trunk-wrapped tree lighting is the ultimate hack for utilizing the venue’s existing outdoor elements.
Landscapers charge a fortune for this, but tightly coiling flexible LED ropes directly into the bark grooves looks far more expensive than it is. Using UV-resistant outdoor materials is mandatory here so the wires don’t degrade before the sun goes down.
You can wrap four large entrance trees perfectly for under $100. Save this to your outdoor DIY layout.
- Key Materials: Outdoor LED rope lights, bark-colored zip ties
- Vibe / Style: Grand estate elegance
- Difficulty: Easy but requires reaching
- Budget Breakdown: Rope lights: $80 | Zip ties: $10
- Creator’s Tip: Buy brown or green wire lights instead of clear; they completely camouflage into the tree trunk during daylight hours.
- Smart Sourcing: Grab brown-wire outdoor mini light sets and heavy-duty camouflage zip ties.
16. Suspended Light Sphere Entrance

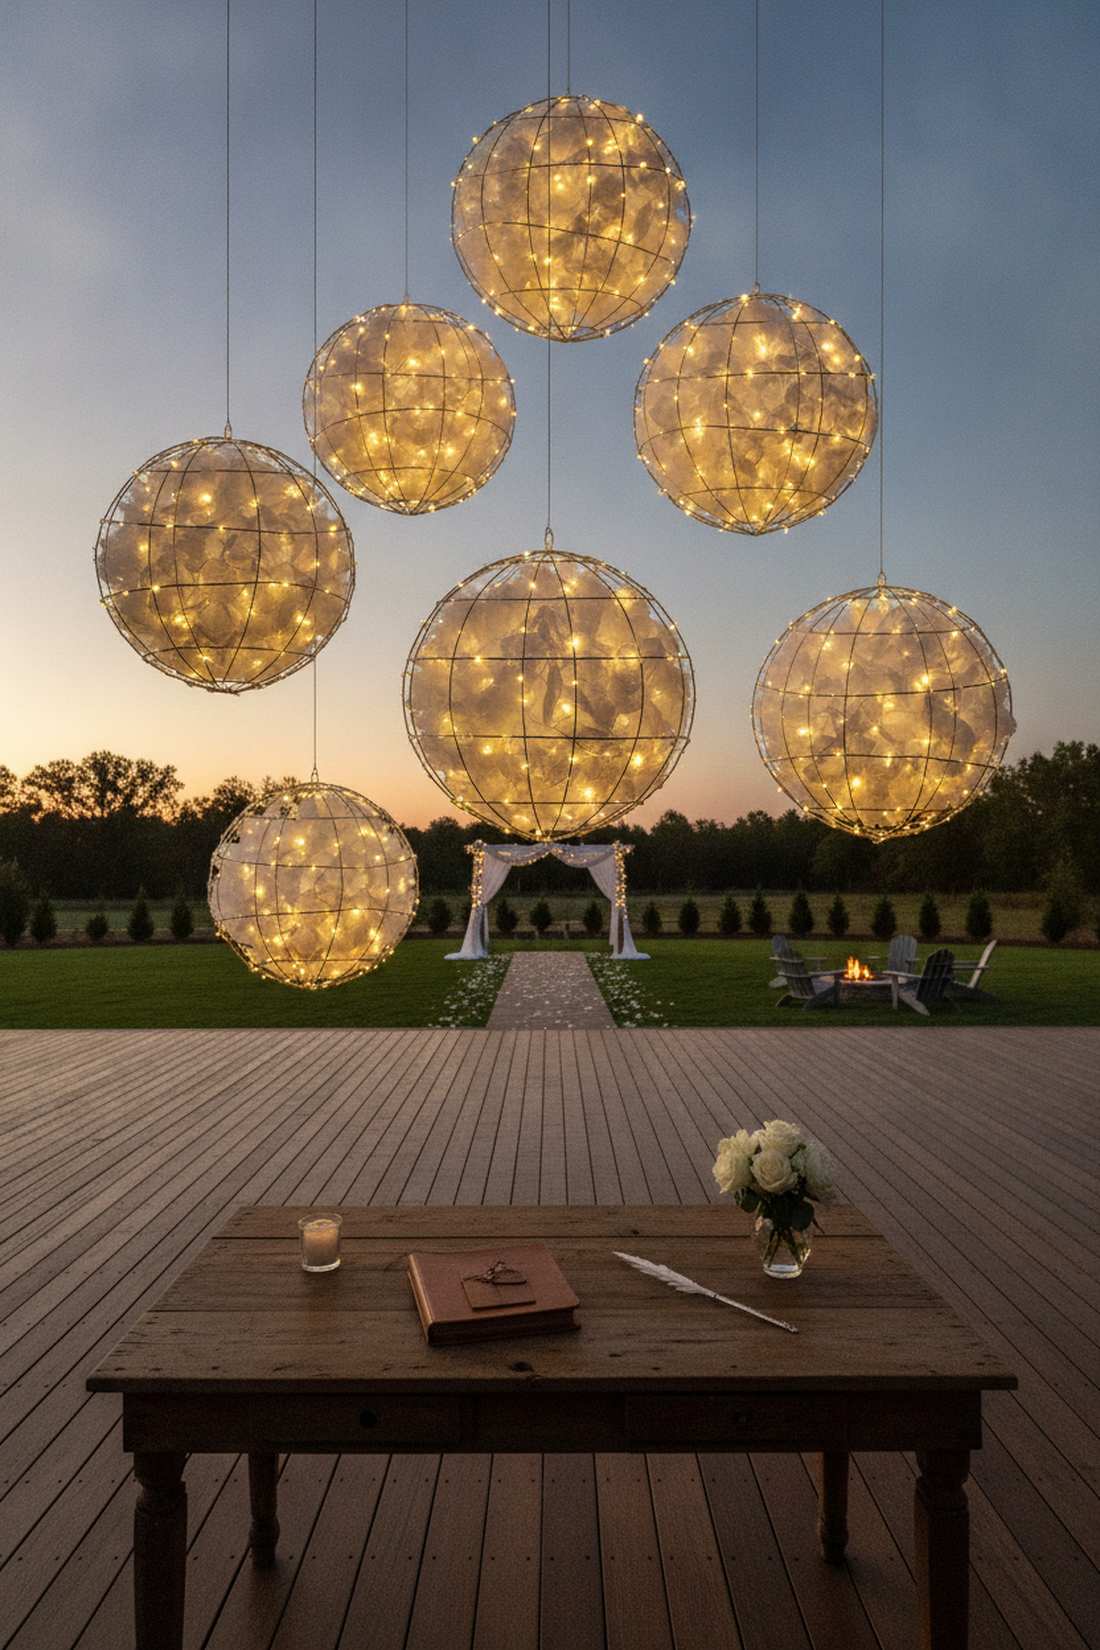
These glowing orbs look like floating, magical moons hovering right above the guest book table. Hanging illuminated spheres provide a whimsical, three-dimensional element that basic strings just can’t match.
Buying pre-made light spheres is wildly overpriced, but wrapping wire grapevine balls with basic fairy lights wedding reception strands gives a designer-level finish for a fraction of the cost. Hanging them at wildly different heights maximizes the floating illusion.
You can craft a cluster of five premium spheres for about $45. A brilliant weekend craft project.
- Key Materials: Grapevine or wire spheres, battery lights
- Vibe / Style: Whimsical, floating magic
- Difficulty: Easy crafting
- Budget Breakdown: Wire spheres: $25 | Lights: $20
- Creator’s Tip: Stuff a few pieces of sheer white tulle inside the sphere before adding the lights to create a diffused, solid glowing core.
- Smart Sourcing: Source assorted wire topiary ball frames and remote-controlled battery light packs.
17. Garden Gate Arch Illumination
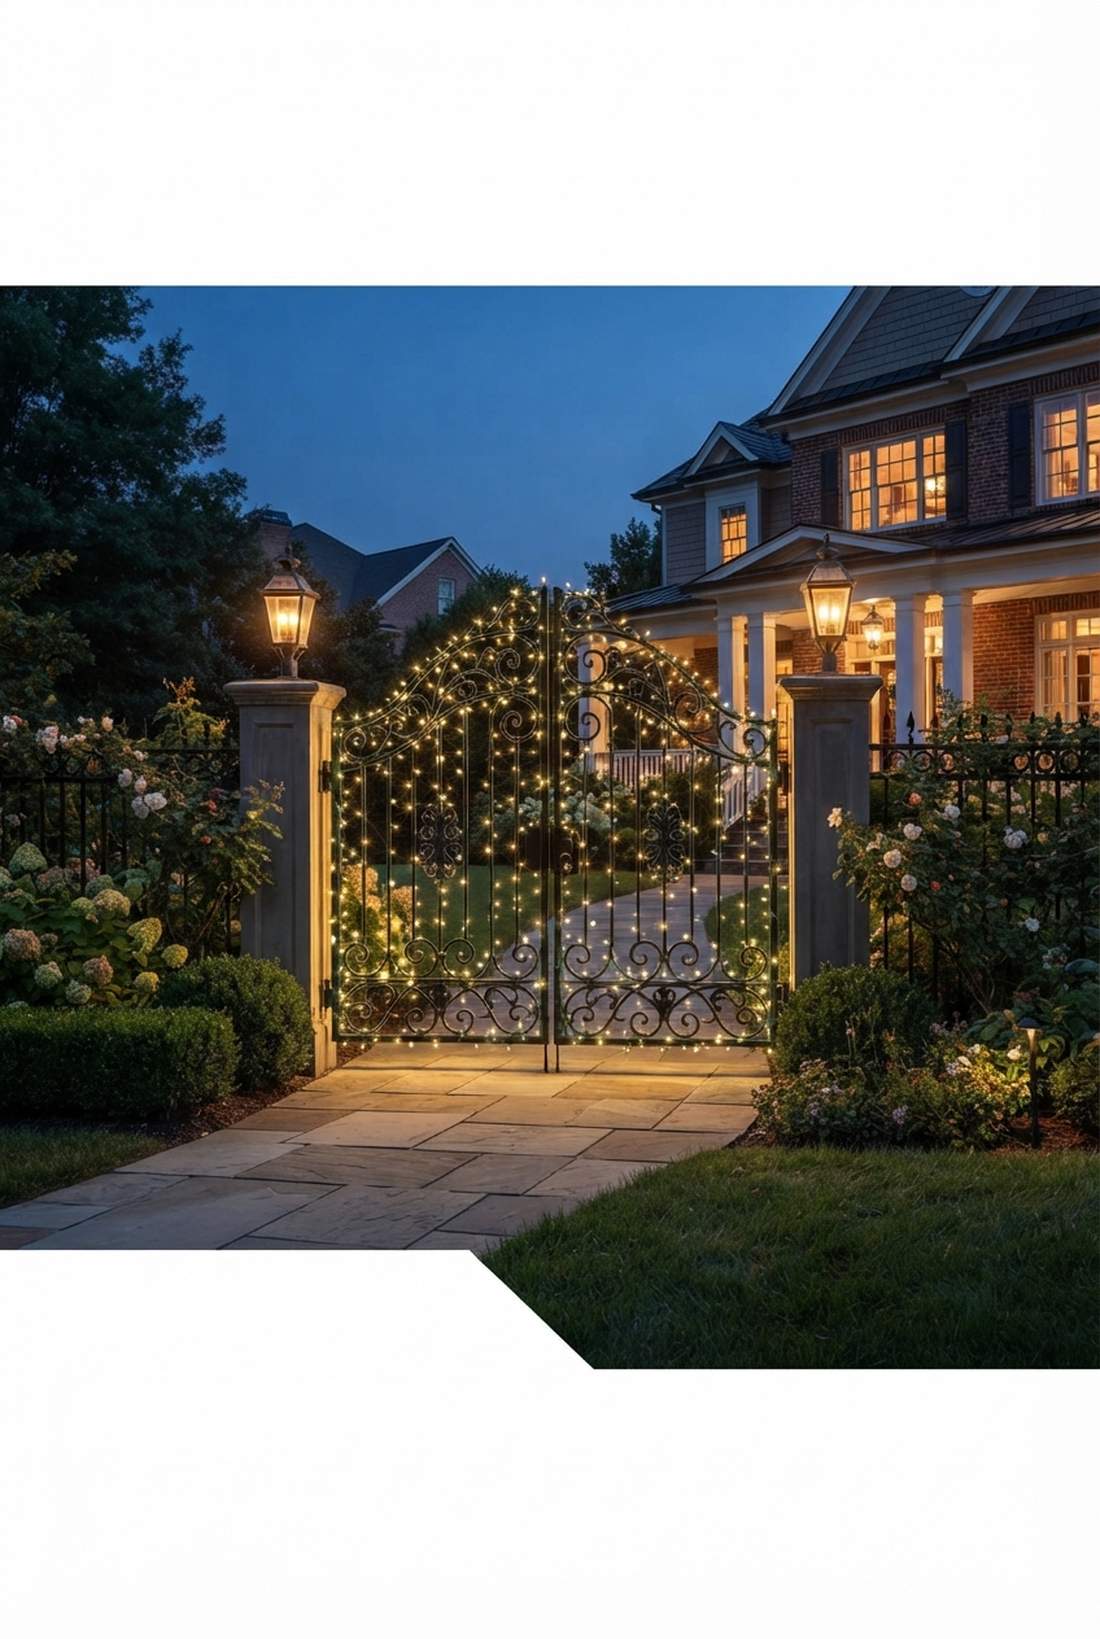
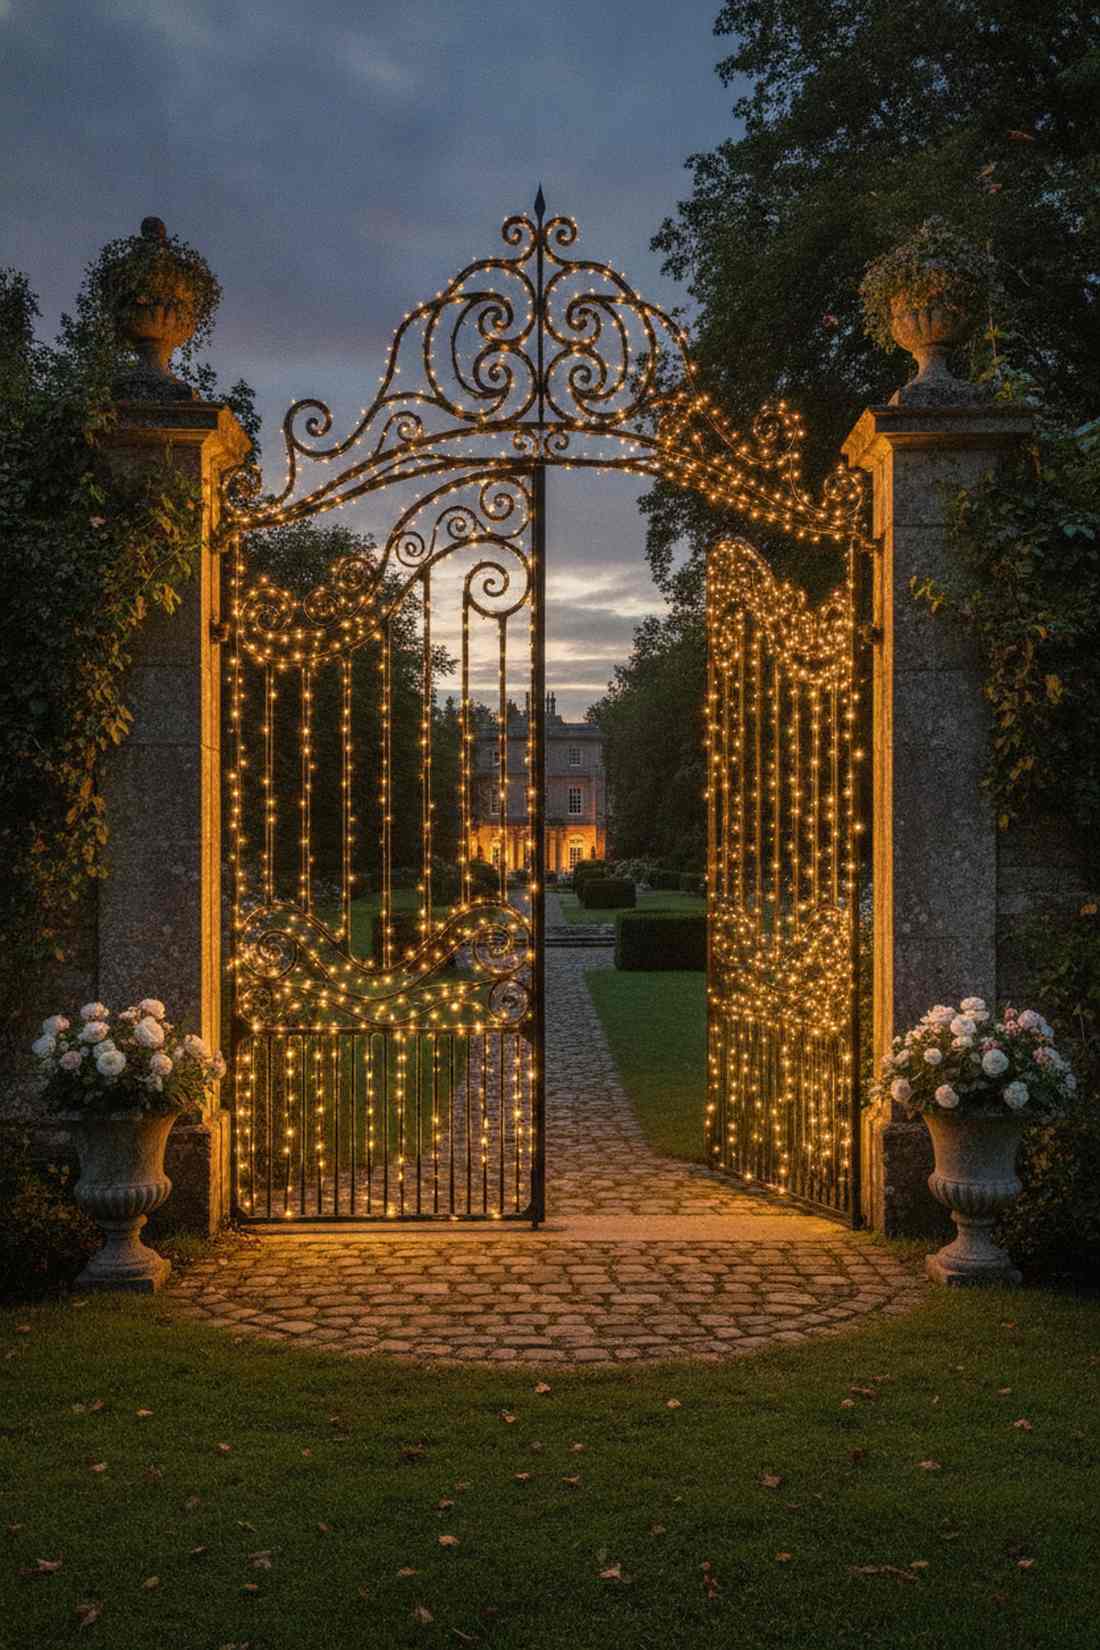
This transforms a boring wrought-iron gate into a glowing, storybook entrance. Tracing existing architectural gates with lights is the smartest way to upgrade outdoor venue boundaries.
Most people just lazily drape a single strand, but tightly outlining every single swirl and curve of the metalwork delivers a surprisingly premium look. Using high-CPC commercial grade outdoor wire ensures it handles gate swinging without snapping.
You can detail a massive double gate for about $35. Pin this if your venue has beautiful ironwork.
- Key Materials: Black-wire micro LEDs, adhesive clips
- Vibe / Style: Storybook manor entrance
- Difficulty: Meticulous wrapping required
- Budget Breakdown: Black-wire lights: $25 | Micro clips: $10
- Creator’s Tip: Use tiny black zip ties every 3 inches so the lights perfectly hug the metal framework even when the gate is slammed.
- Smart Sourcing: Pick up black-wire outdoor fairy strands and miniature UV-resistant cable ties.
18. Lantern Post Fairy Light Columns
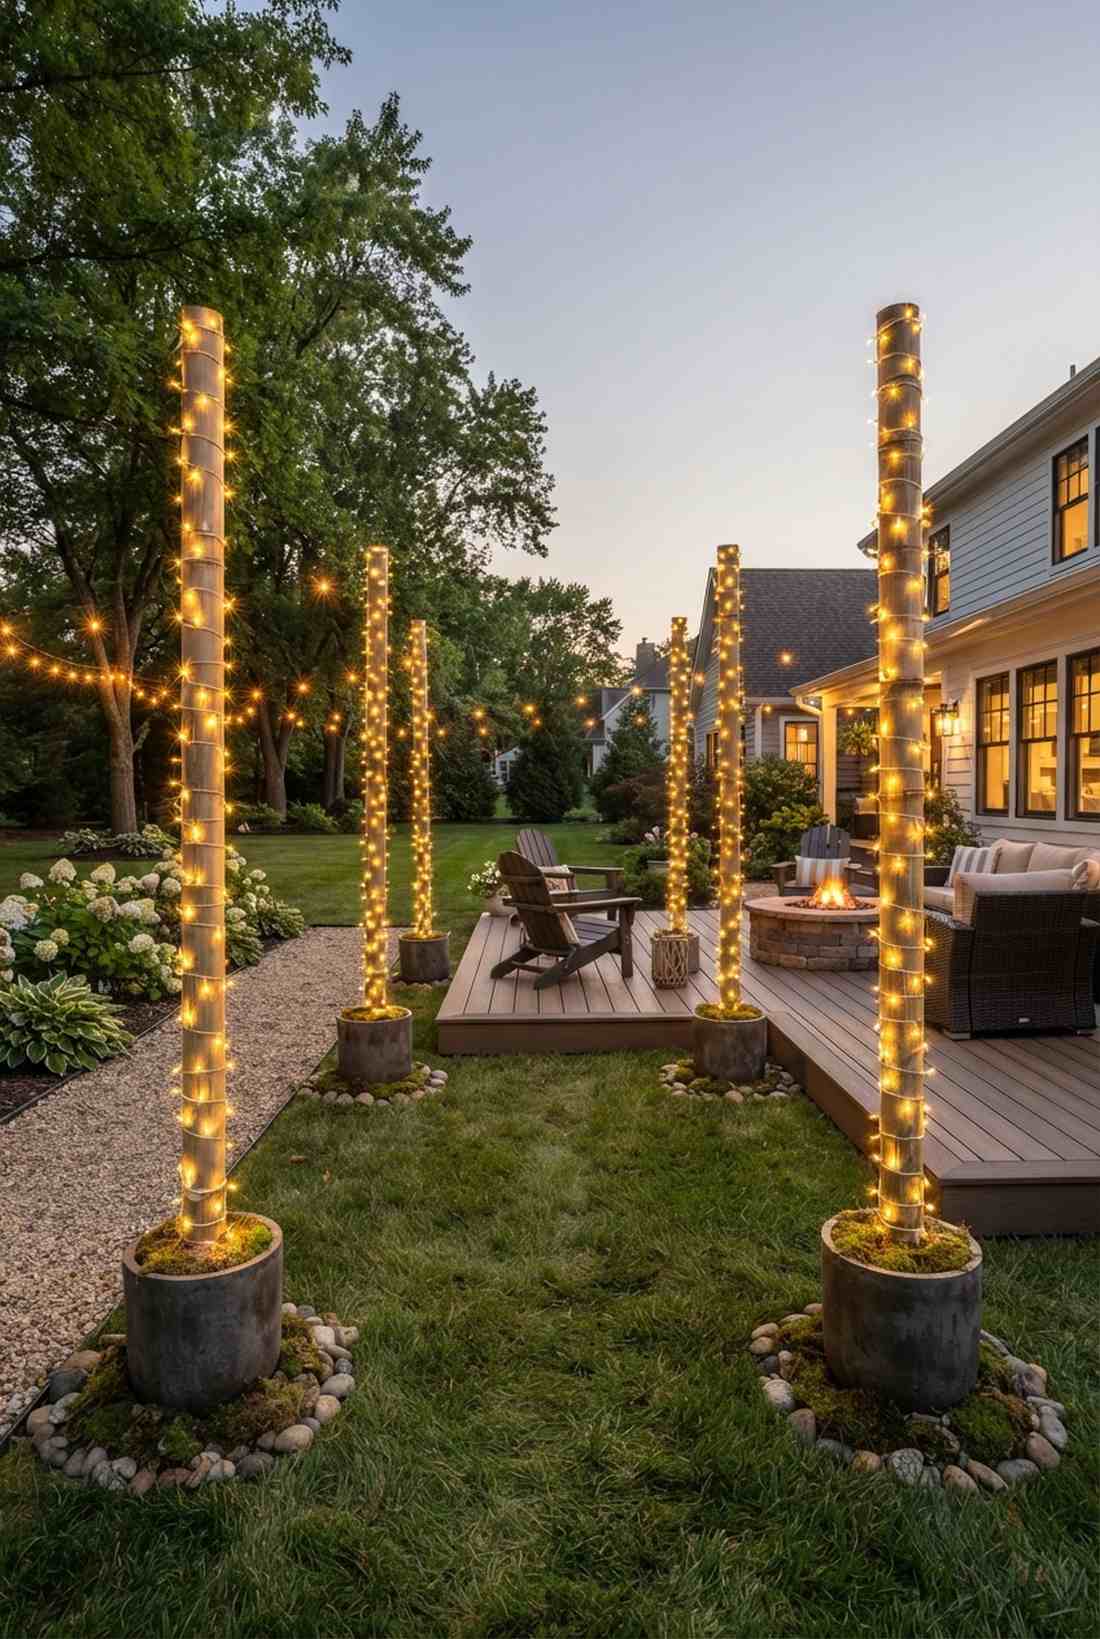
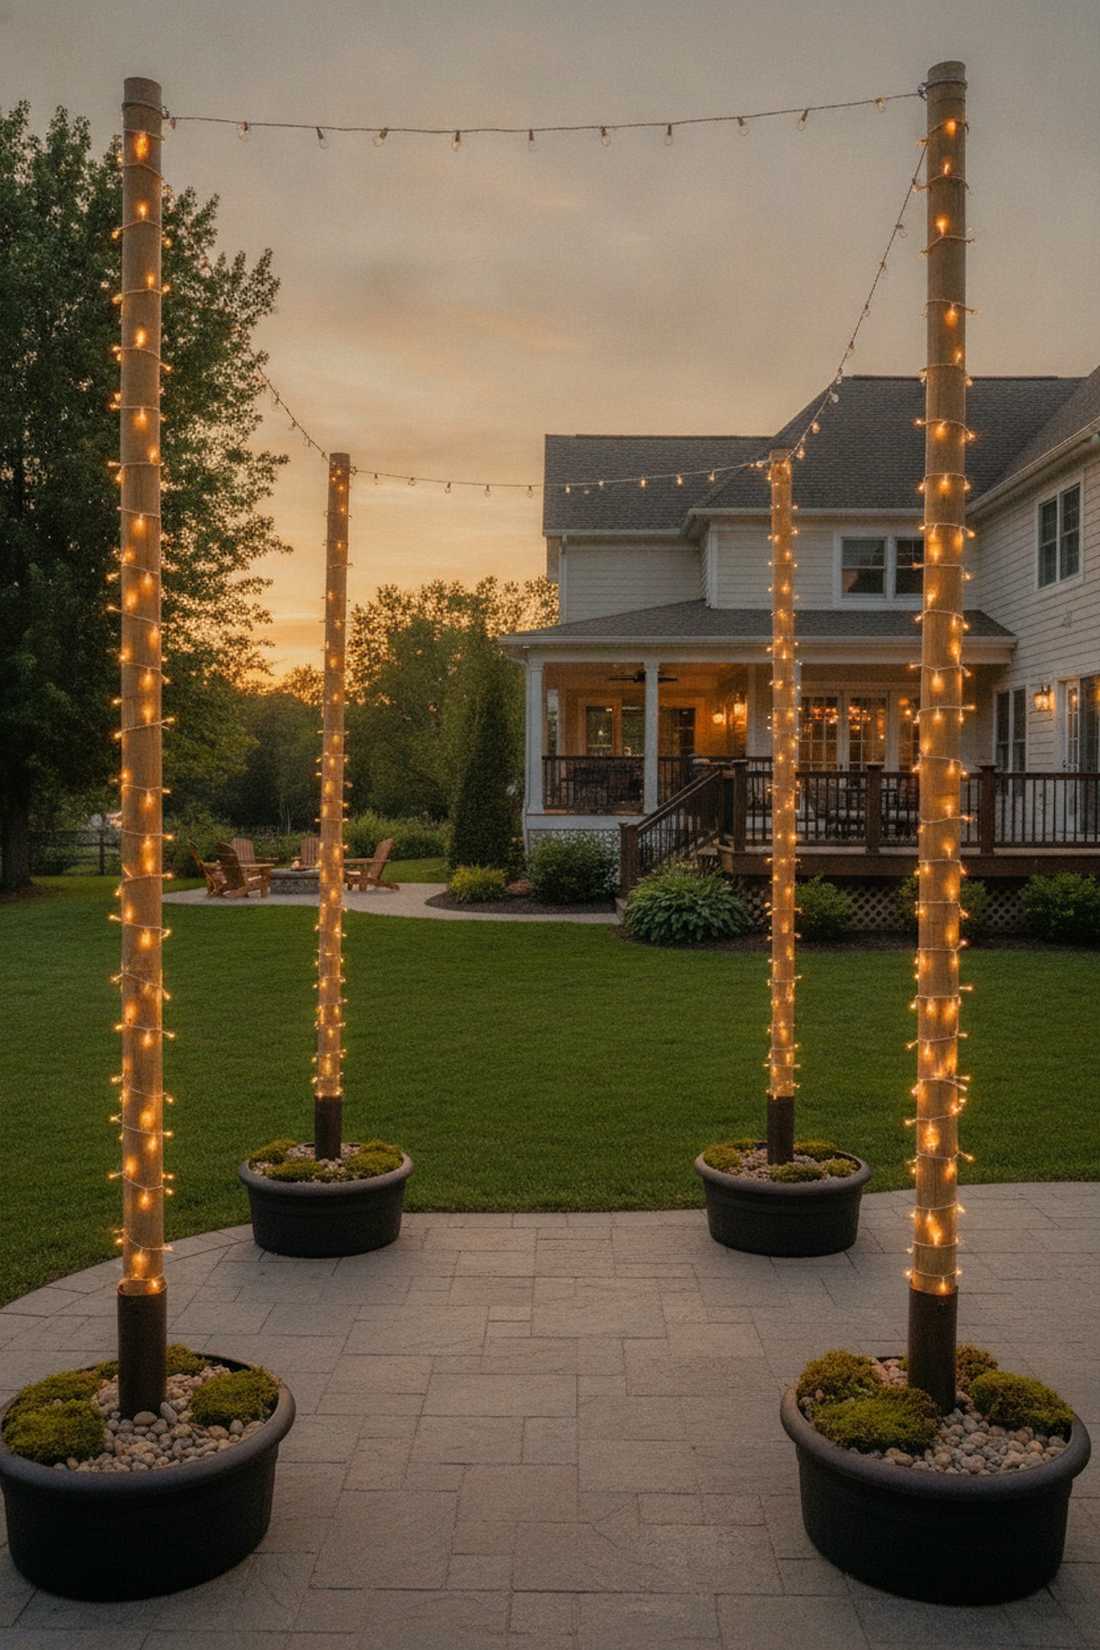
This feels like walking through a grand, illuminated colonnade in a royal garden. Freestanding lit pillar posts define large open spaces where there are no natural walls or trees to use.
Renting physical pillars eats up budget fast, but wrapping heavy bamboo poles or PVC pipes with dense lights looks insanely expensive once the sun sets. Securing them in heavy weighted bases guarantees they won’t tip over on your guests.
Building four glowing boundary columns costs roughly $80. It’s a highly structural, practical upgrade.
- Key Materials: Tall poles, weighted umbrella bases, dense lights
- Vibe / Style: Structured, grand colonnade
- Difficulty: Intermediate (requires heavy bases)
- Budget Breakdown: Poles/Bases: $50 | Lights: $30
- Creator’s Tip: Sink the poles into cheap plastic planters filled with quick-set concrete, then cover the concrete with decorative moss.
- Smart Sourcing: Get heavy-duty bamboo poles (bulk) and high-density fairy light wrapping spools.
Reception Table Lighting
19. Glass Cylinder Centerpiece Lights
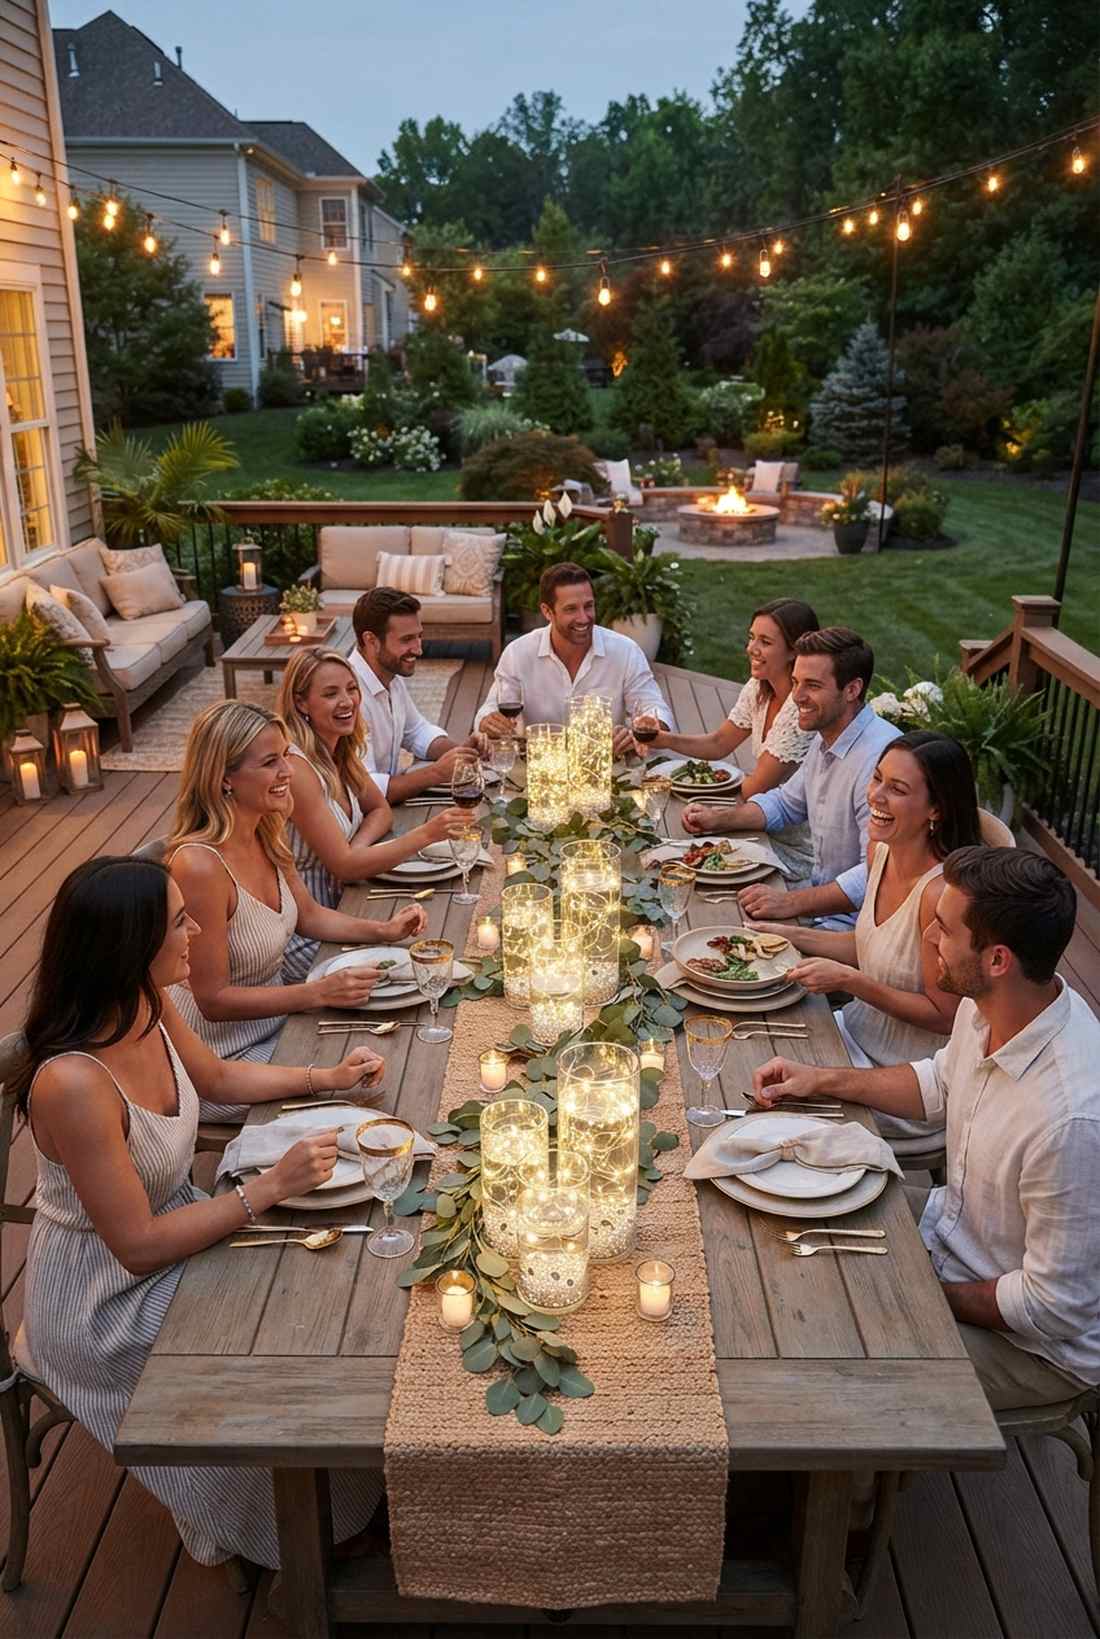
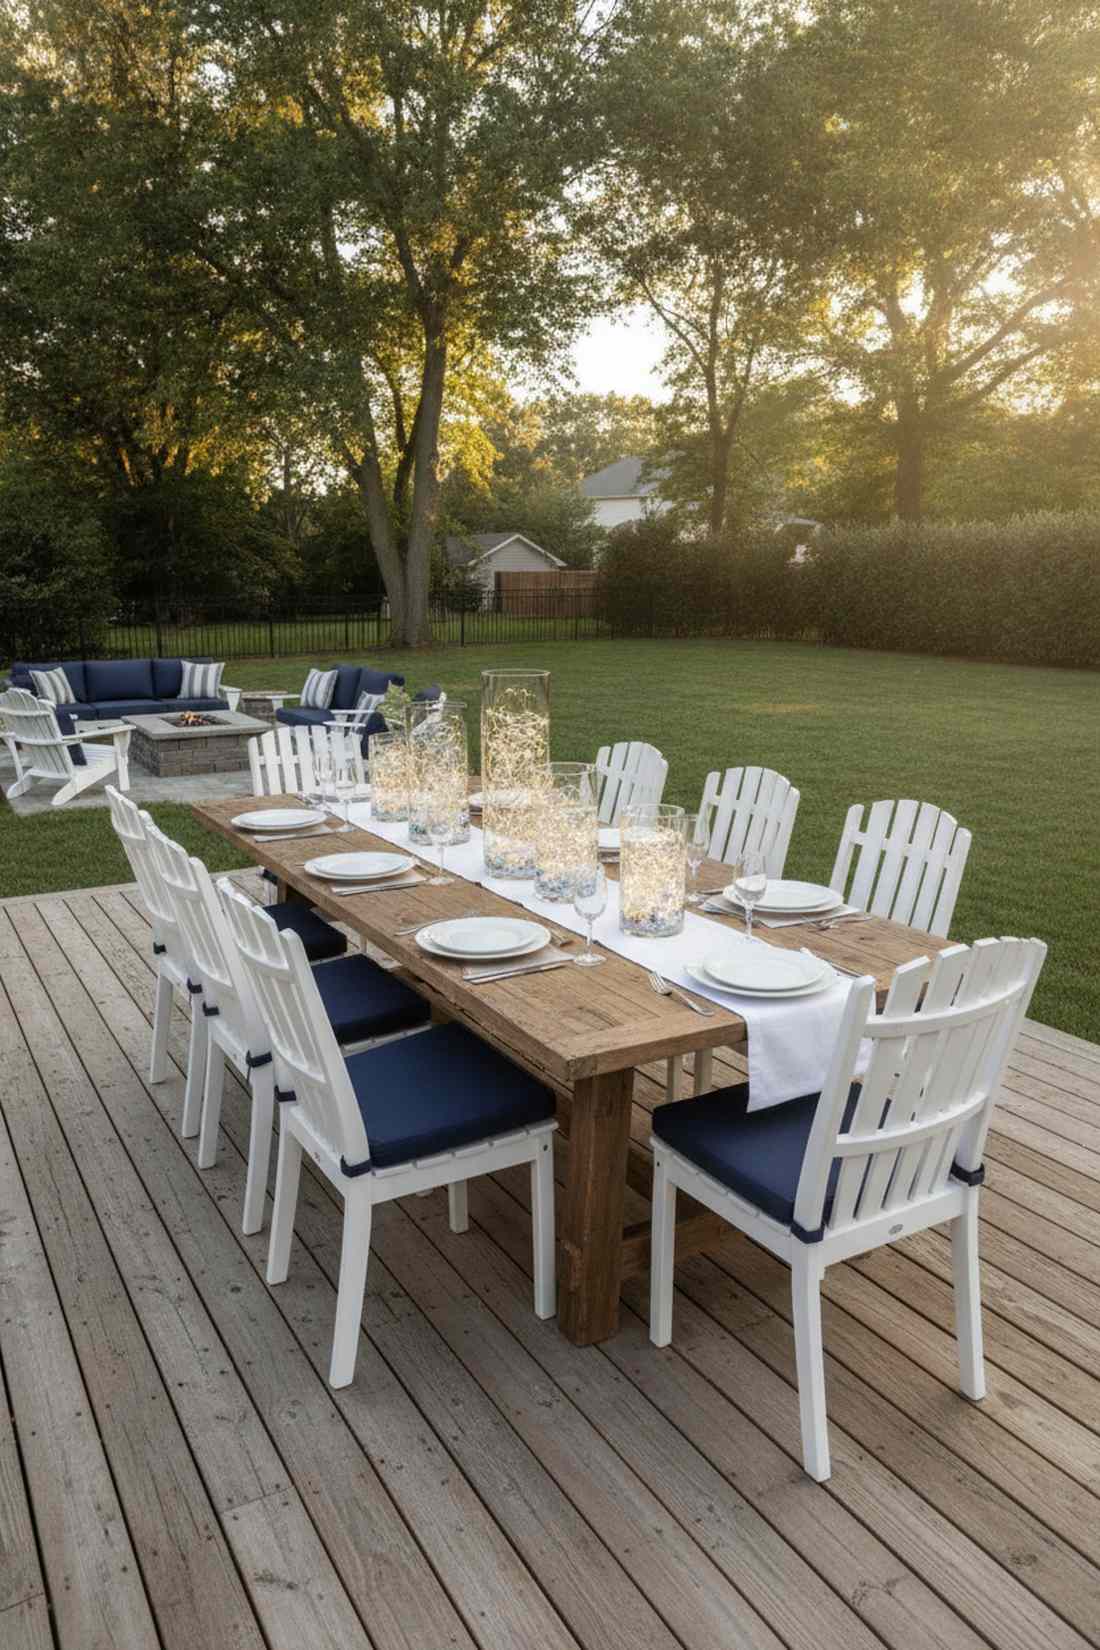
This layout creates a mesmerizing, trapped-firefly effect right at eye level for your guests. Illuminated glass cylinder centerpieces are the absolute best way to add intimate glow to a crowded dinner table.
Fresh floral centerpieces cost a fortune, but crumpling ultra-thin wire lights inside premium glassware delivers a far more expensive aesthetic on a shoestring budget. Dropping terrarium accessories or crystal beads into the base amplifies the light reflection massively.
You can light up 10 guest tables for under $75. Save this to your budget-friendly tablescape board.
- Key Materials: Trio glass cylinders, submersible fairy lights
- Vibe / Style: Clean, elegant sparkle
- Difficulty: Extremely easy
- Budget Breakdown: Glass trios: $50 | Submersible lights: $25
- Creator’s Tip: Fill the cylinders with water and use waterproof LEDs; the water magnifies the tiny bulbs making them look twice as bright.
- Smart Sourcing: Buy submersible waterproof LED string packs and multi-size glass cylinder vase sets.
Wait until you see this ridiculously cheap wine bottle trick that looks like it belongs in a luxury vineyard…
20. Wine Bottle Light Arrangements
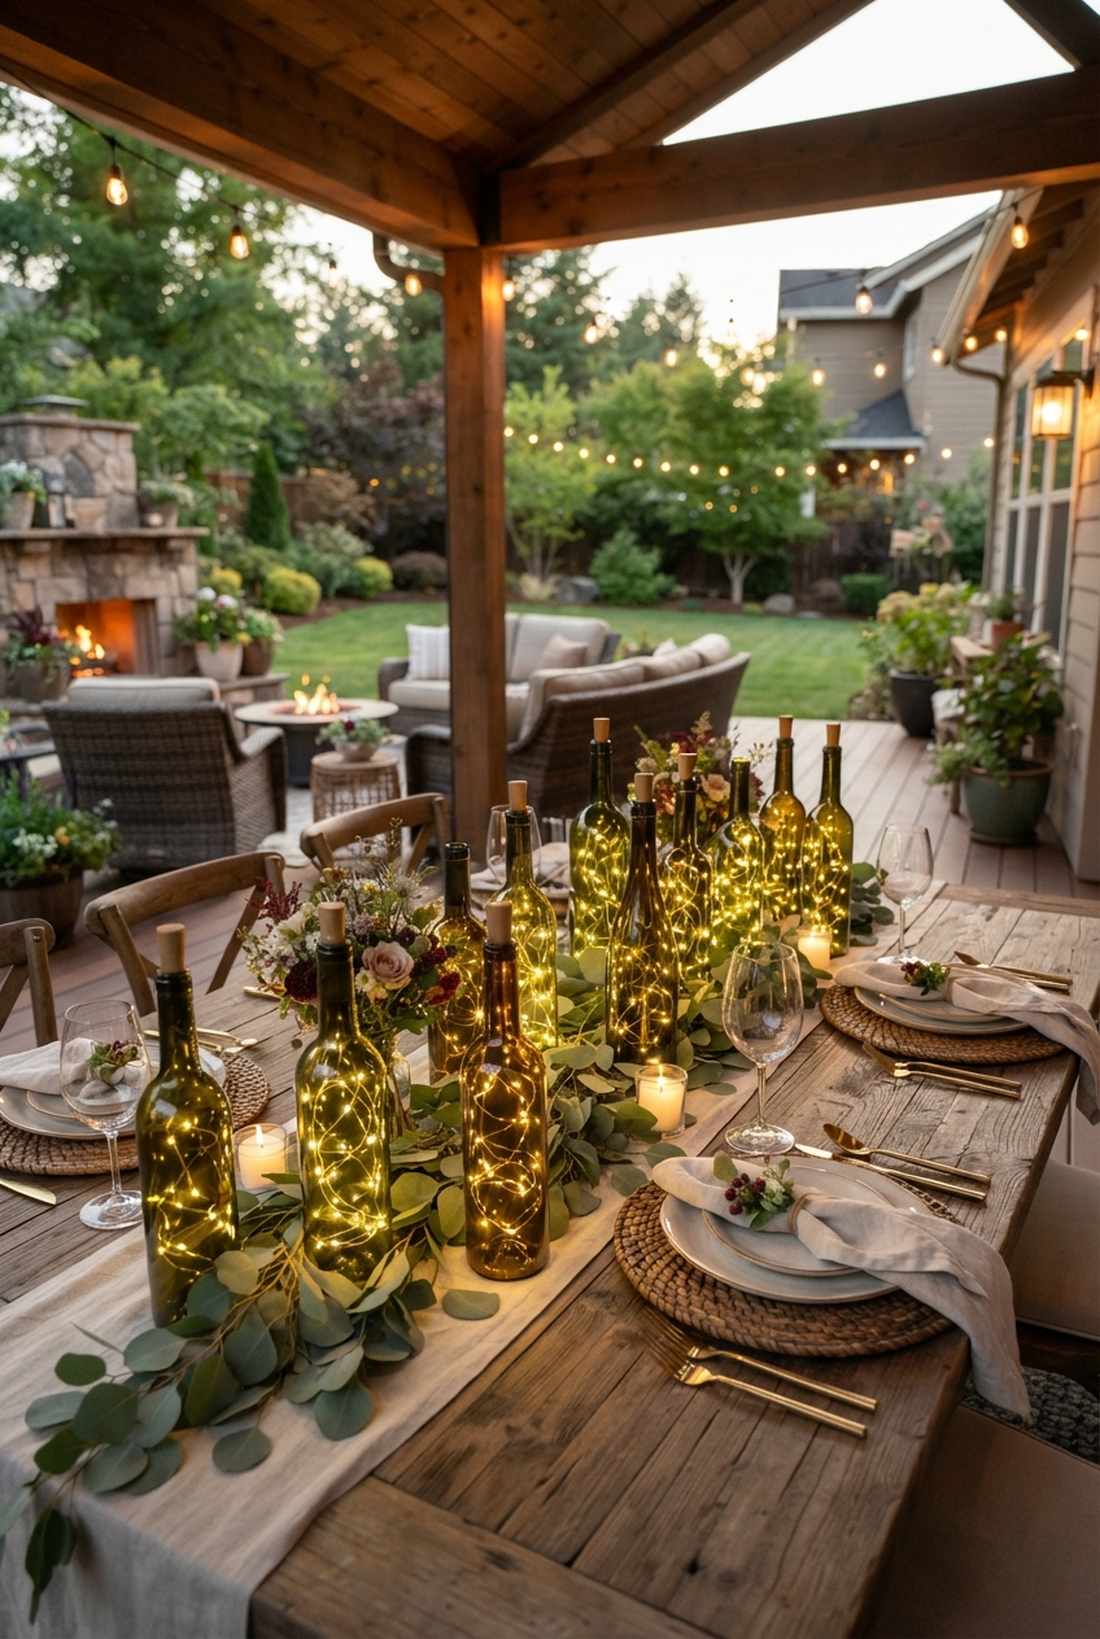
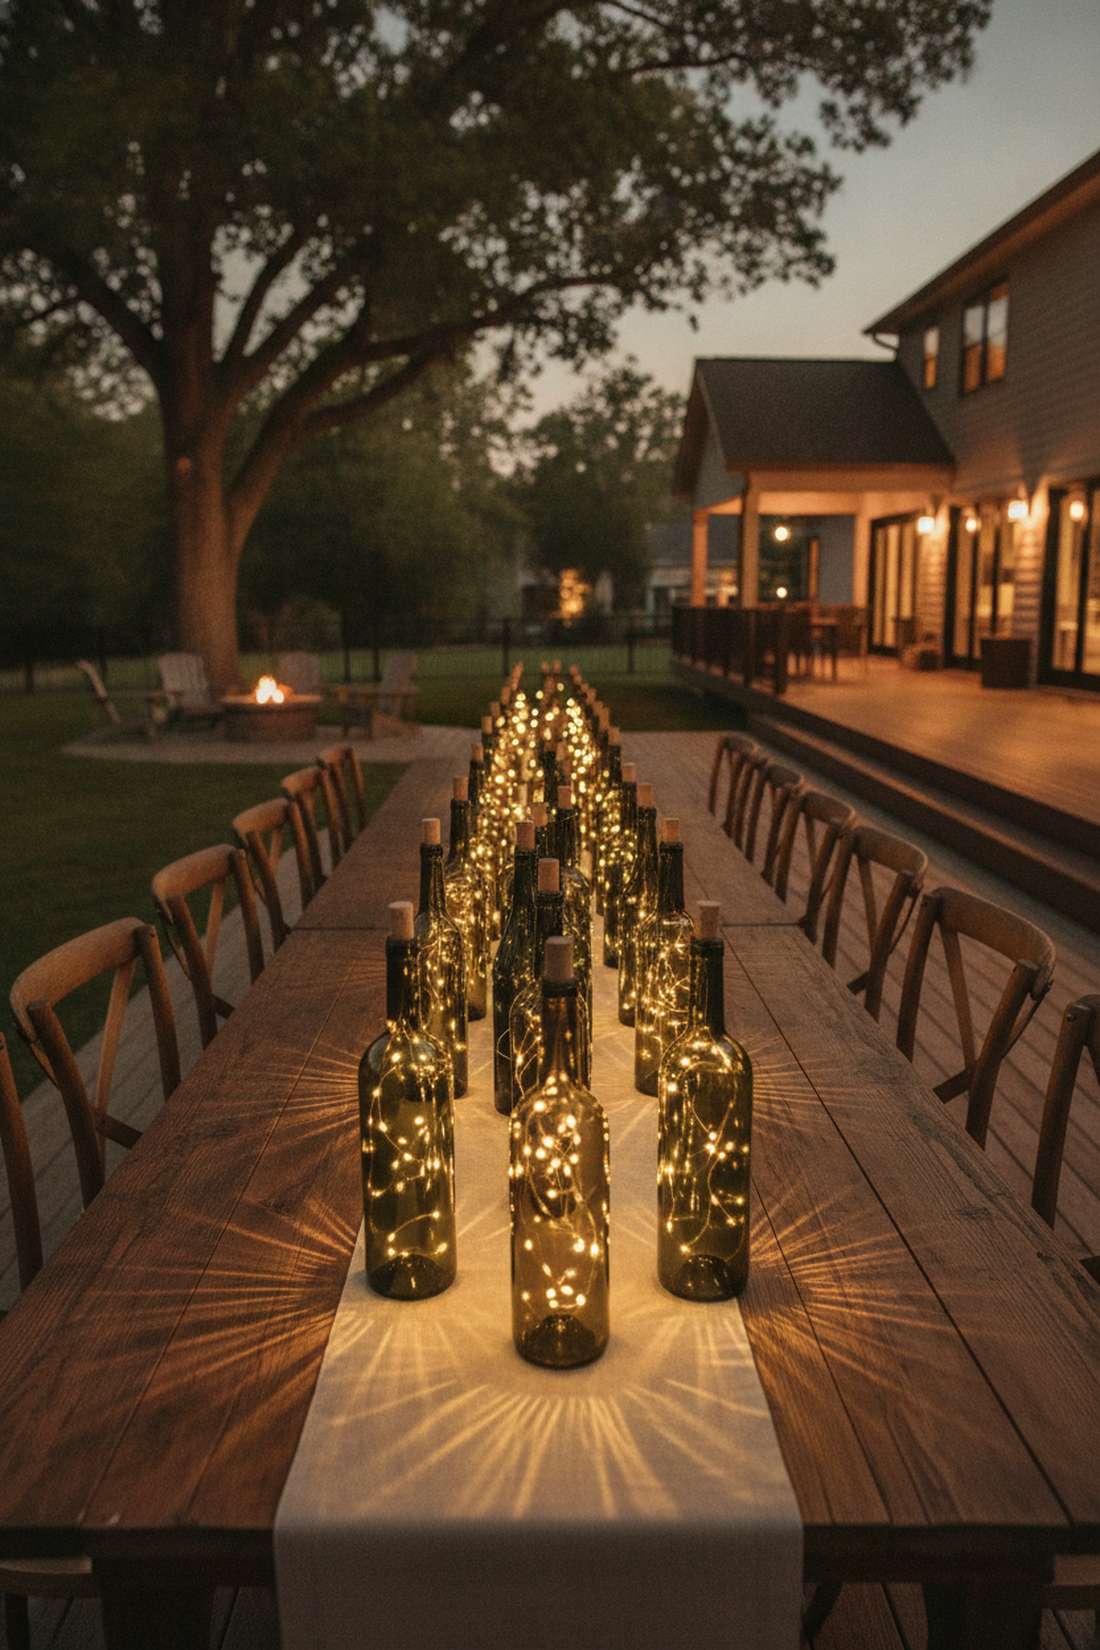
This feels like a romantic evening at a rustic Tuscan vineyard. Upcycled wine bottle fairy lights provide wonderful height variation for long farmhouse reception tables.
Throwing away empty bottles is a waste, as slipping a specialized cork-shaped battery light inside dark glass gives a designer-level finish for literal pennies. The tinted green and amber glass creates a stunning moody ambiance that standard clear lights can’t match.
This nearly free upcycling project costs about $15 for the cork lights. It’s a no-brainer for rustic weddings.
- Key Materials: Empty wine bottles, LED cork strings
- Vibe / Style: Rustic, moody vineyard
- Difficulty: Super simple
- Budget Breakdown: Bottles: Free | Cork Lights: $15
- Creator’s Tip: Soak the bottles in warm water with baking soda for 30 minutes to effortlessly slide the commercial labels off without scraping.
- Smart Sourcing: Order LED bottle cork light kits (bulk pack) and adhesive label-remover spray.
21. Floral and Light Combination Centerpieces
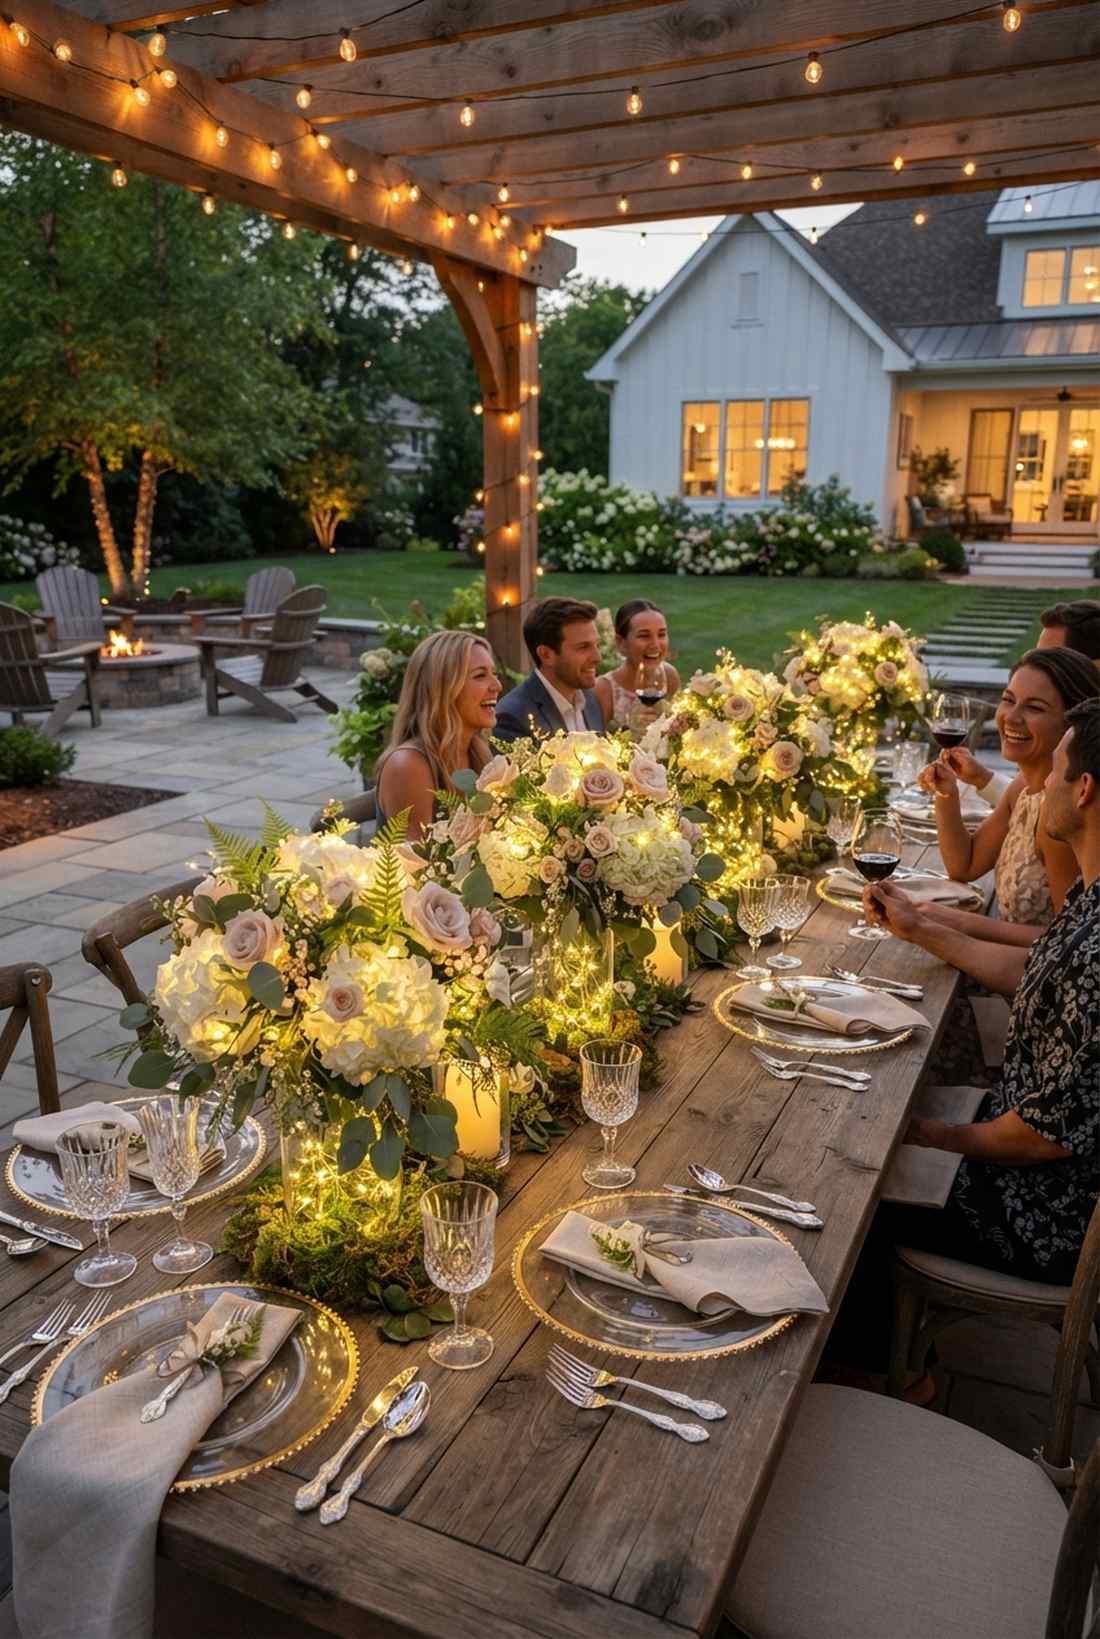
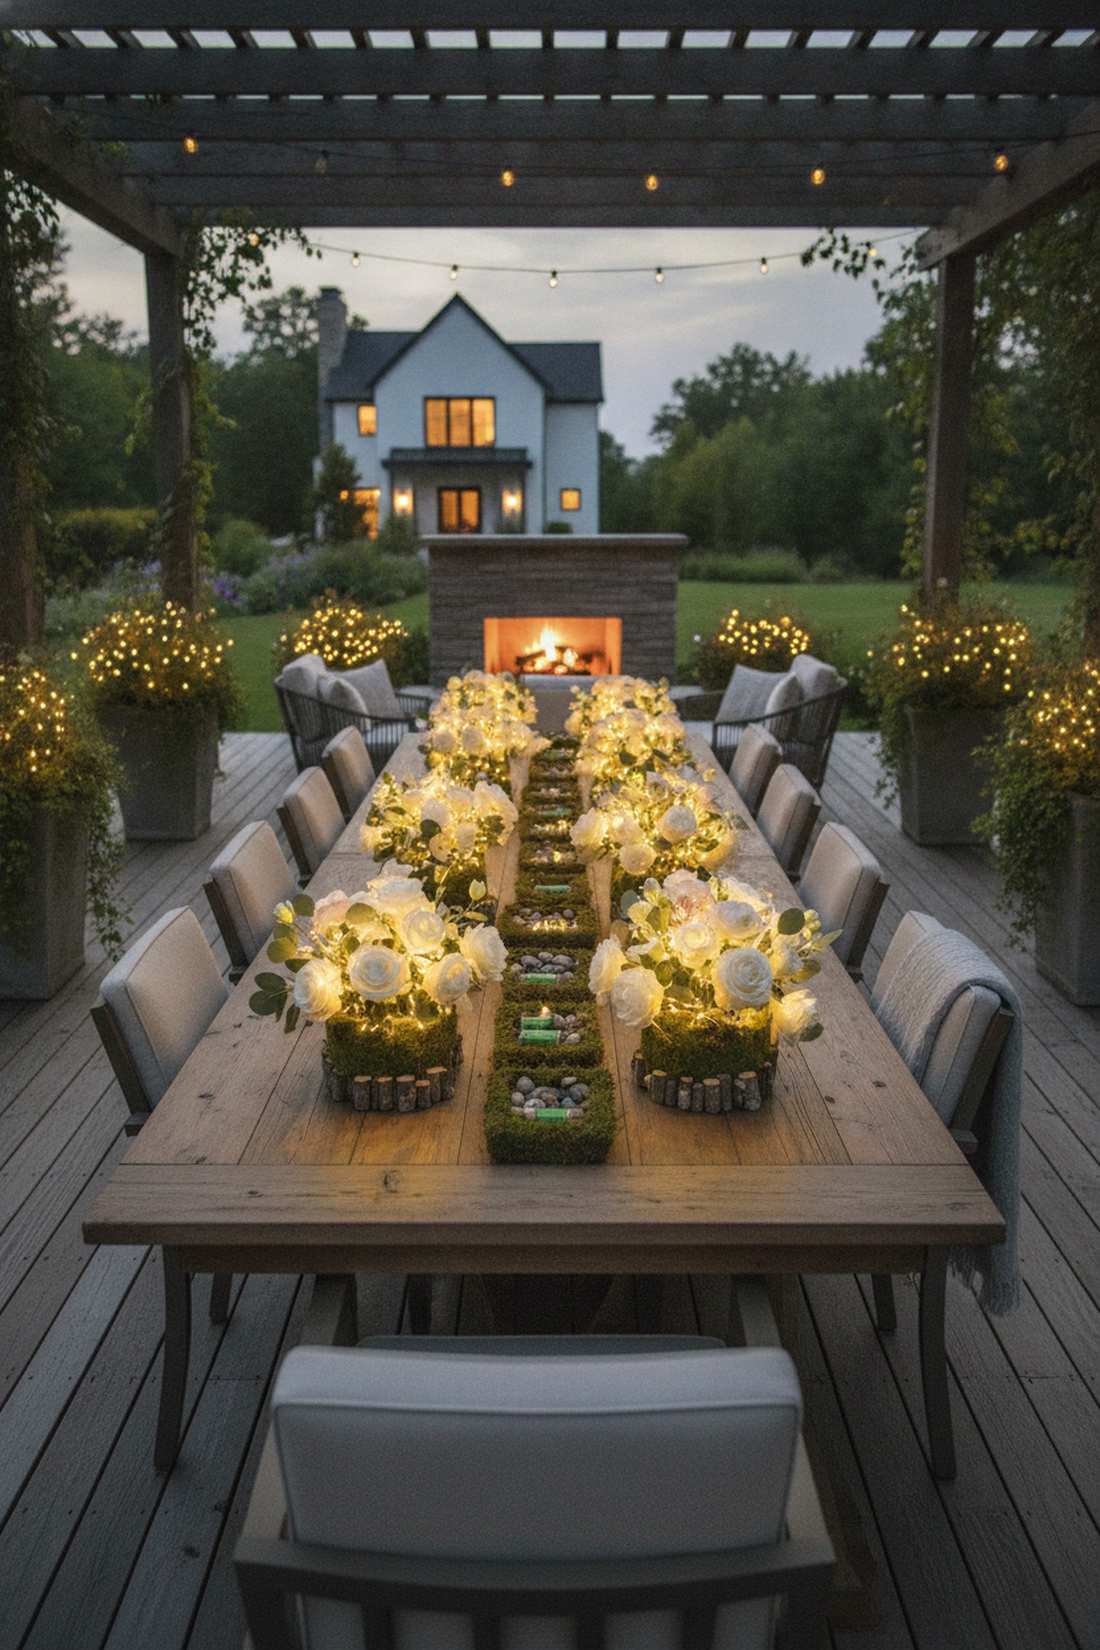
This setup brings the blooms to life, making the petals look like they are glowing from the inside out. Illuminated floral arrangements are the perfect hybrid for couples who want both traditional flowers and modern lighting.
Many florists refuse to deal with lighting, but carefully threading waterproof fairy lights wedding decor through wet floral foam looks insanely expensive and bespoke. You can incorporate high-end miniature garden supplies to disguise the tiny battery packs seamlessly.
Upgrading your standard florals with lights costs only $2 per table. Highly recommended for a high-impact dinner setting.
- Key Materials: Floral foam, waterproof micro-LEDs
- Vibe / Style: Lush, glowing garden
- Difficulty: Moderate (requires delicate handling)
- Budget Breakdown: Micro LEDs: $20 | Floral tape: $5
- Creator’s Tip: Wrap the tiny battery pack tightly in green floral tape and push it directly into the back of the foam block to hide it.
- Smart Sourcing: Grab waterproof micro-LED strands (short length) and professional green floral tape.
22. Lantern Fairy Light Clusters
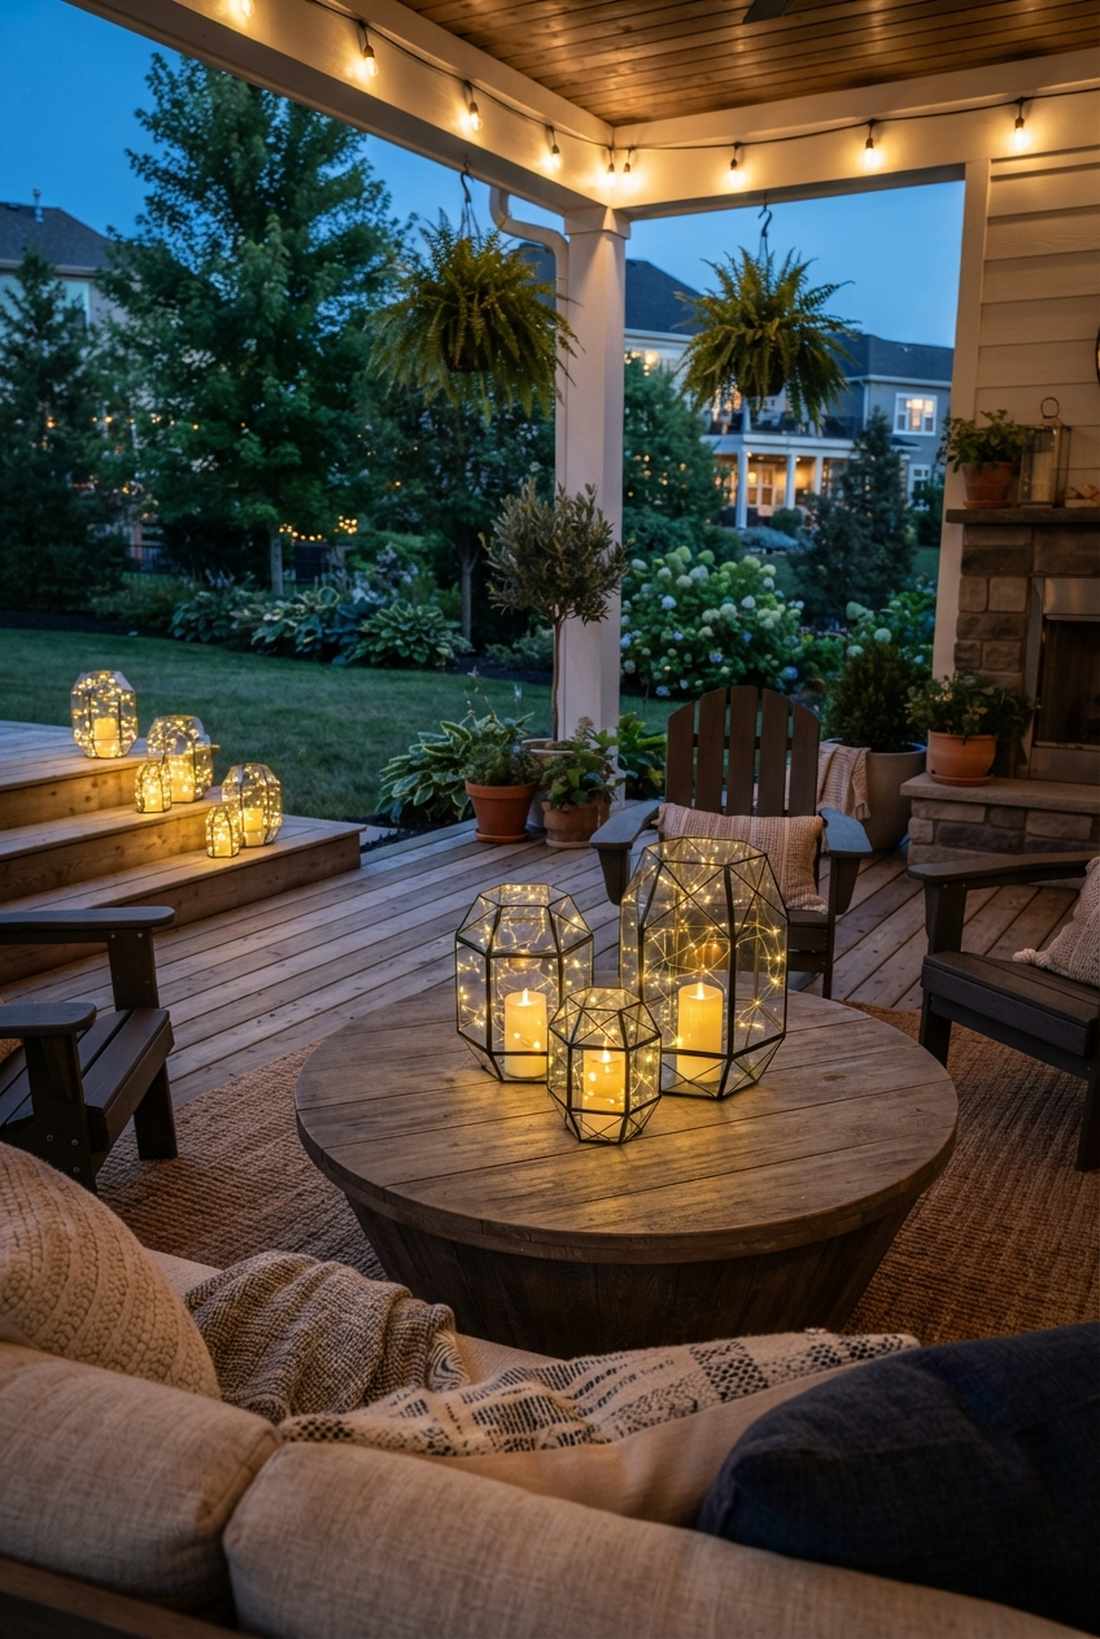
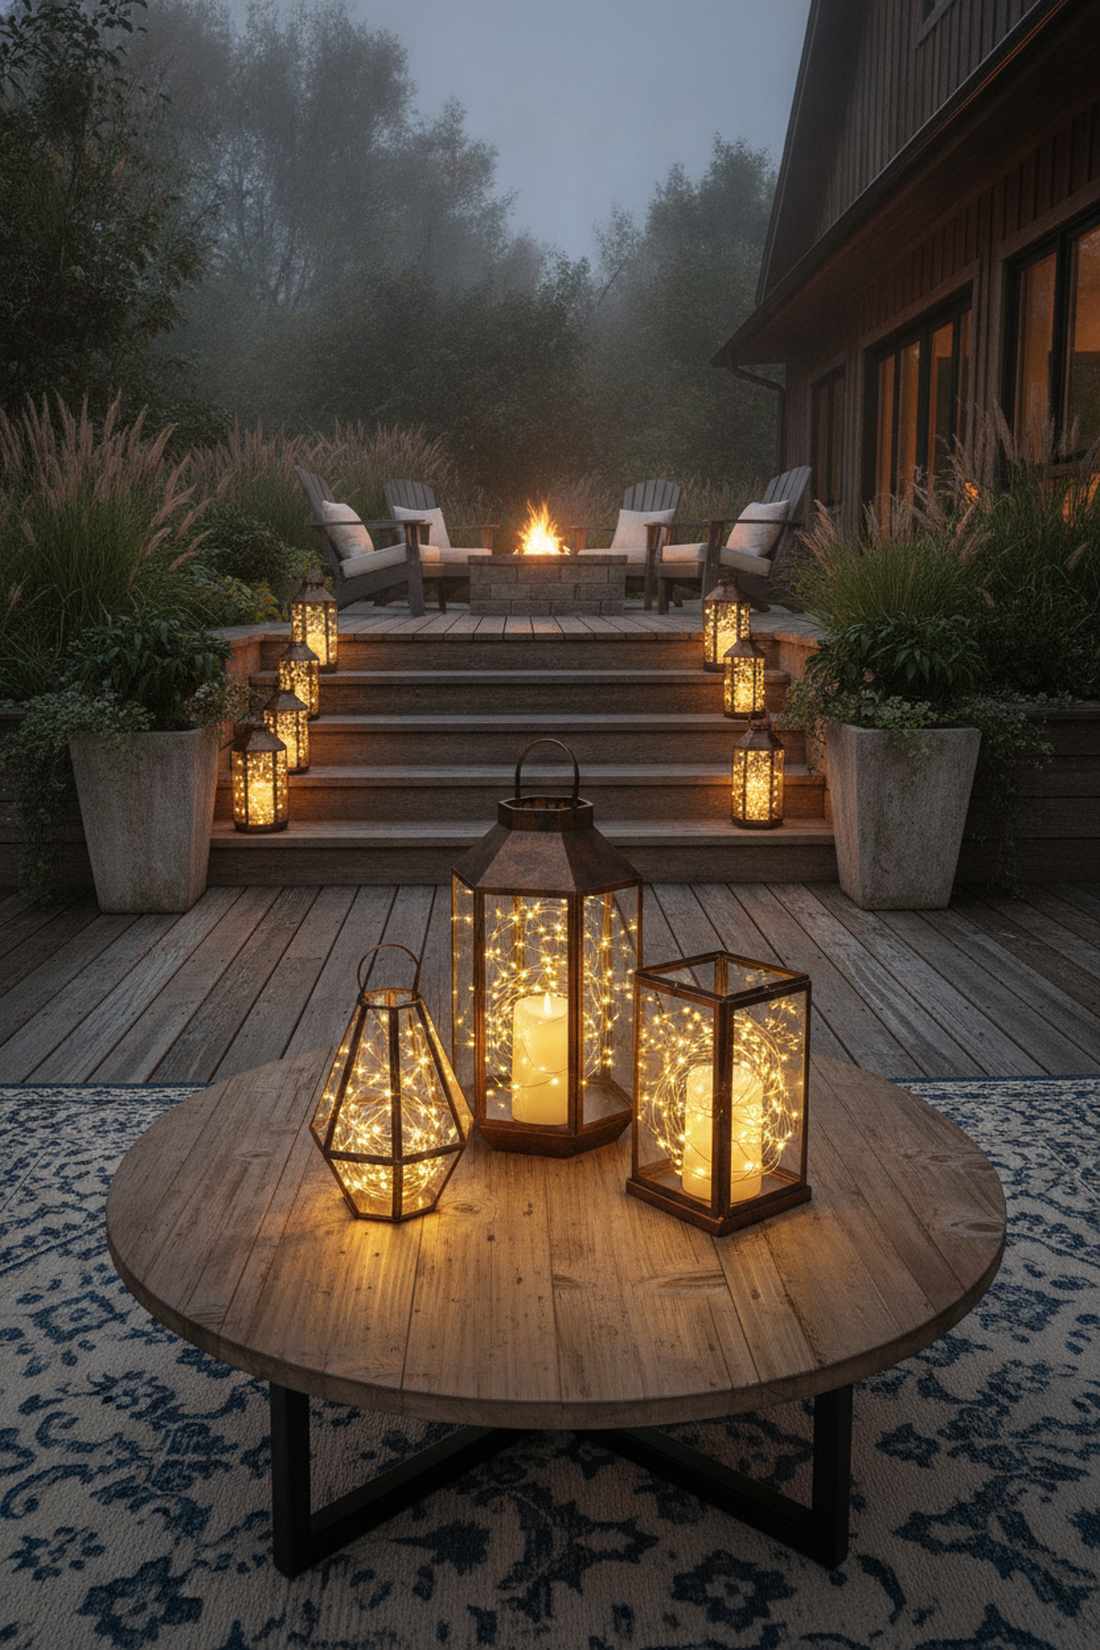
This grouping feels incredibly cozy, like a collection of vintage ship lanterns glowing on a foggy night. Clustered floor and table lanterns are the ultimate space-fillers for empty staircases and large round tables.
Real wax candles melt unevenly and blow out, but stuffing geometric metal lanterns with warm string lights delivers a surprisingly premium look that lasts all weekend. Opting for metallic or distressed housings perfectly matches boho or industrial themes.
You can build a gorgeous three-lantern cluster for about $40. Save this if your venue doesn’t allow open flames.
- Key Materials: Geometric lanterns, warm-white filler lights
- Vibe / Style: Cozy, vintage boho
- Difficulty: Beginner-friendly
- Budget Breakdown: Lanterns: $30 | Filler lights: $10
- Creator’s Tip: Mix one flameless LED pillar candle into the center of the fairy lights inside the lantern for a stunning multi-dimensional glow.
- Smart Sourcing: Invest in decorative geometric lantern sets and flickering LED pillar candle packs.
23. Under-Table Linen Lighting
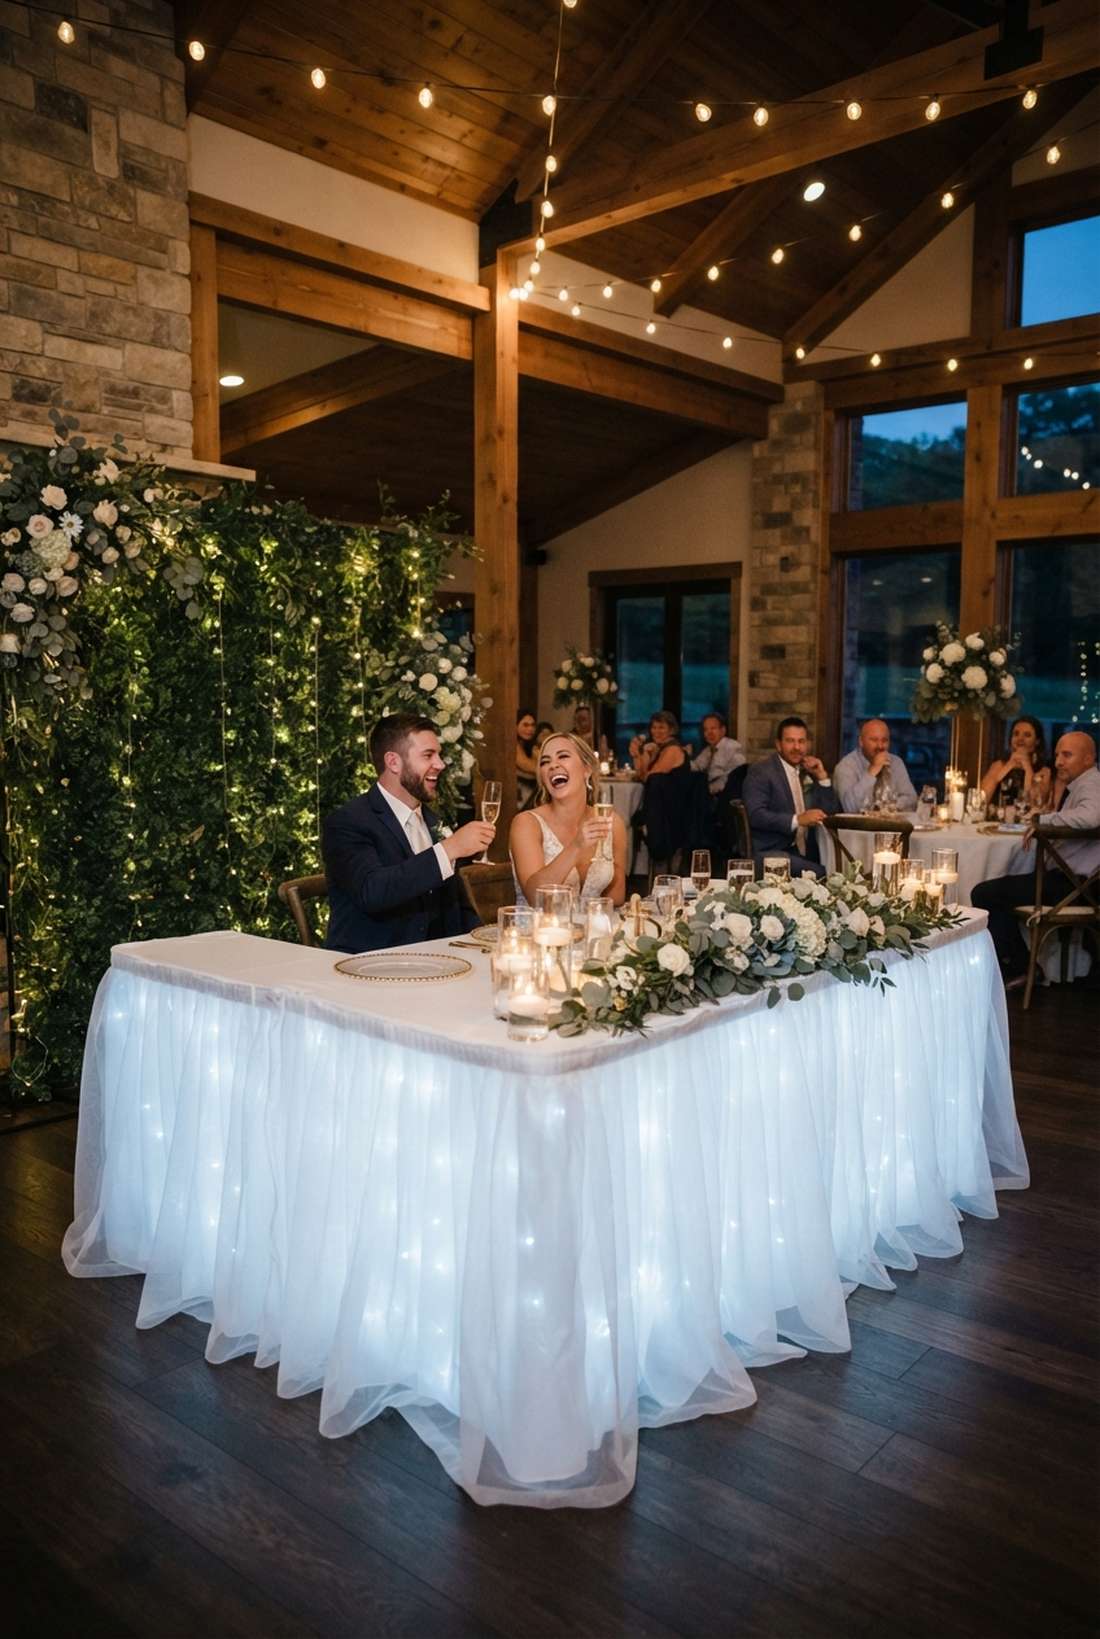
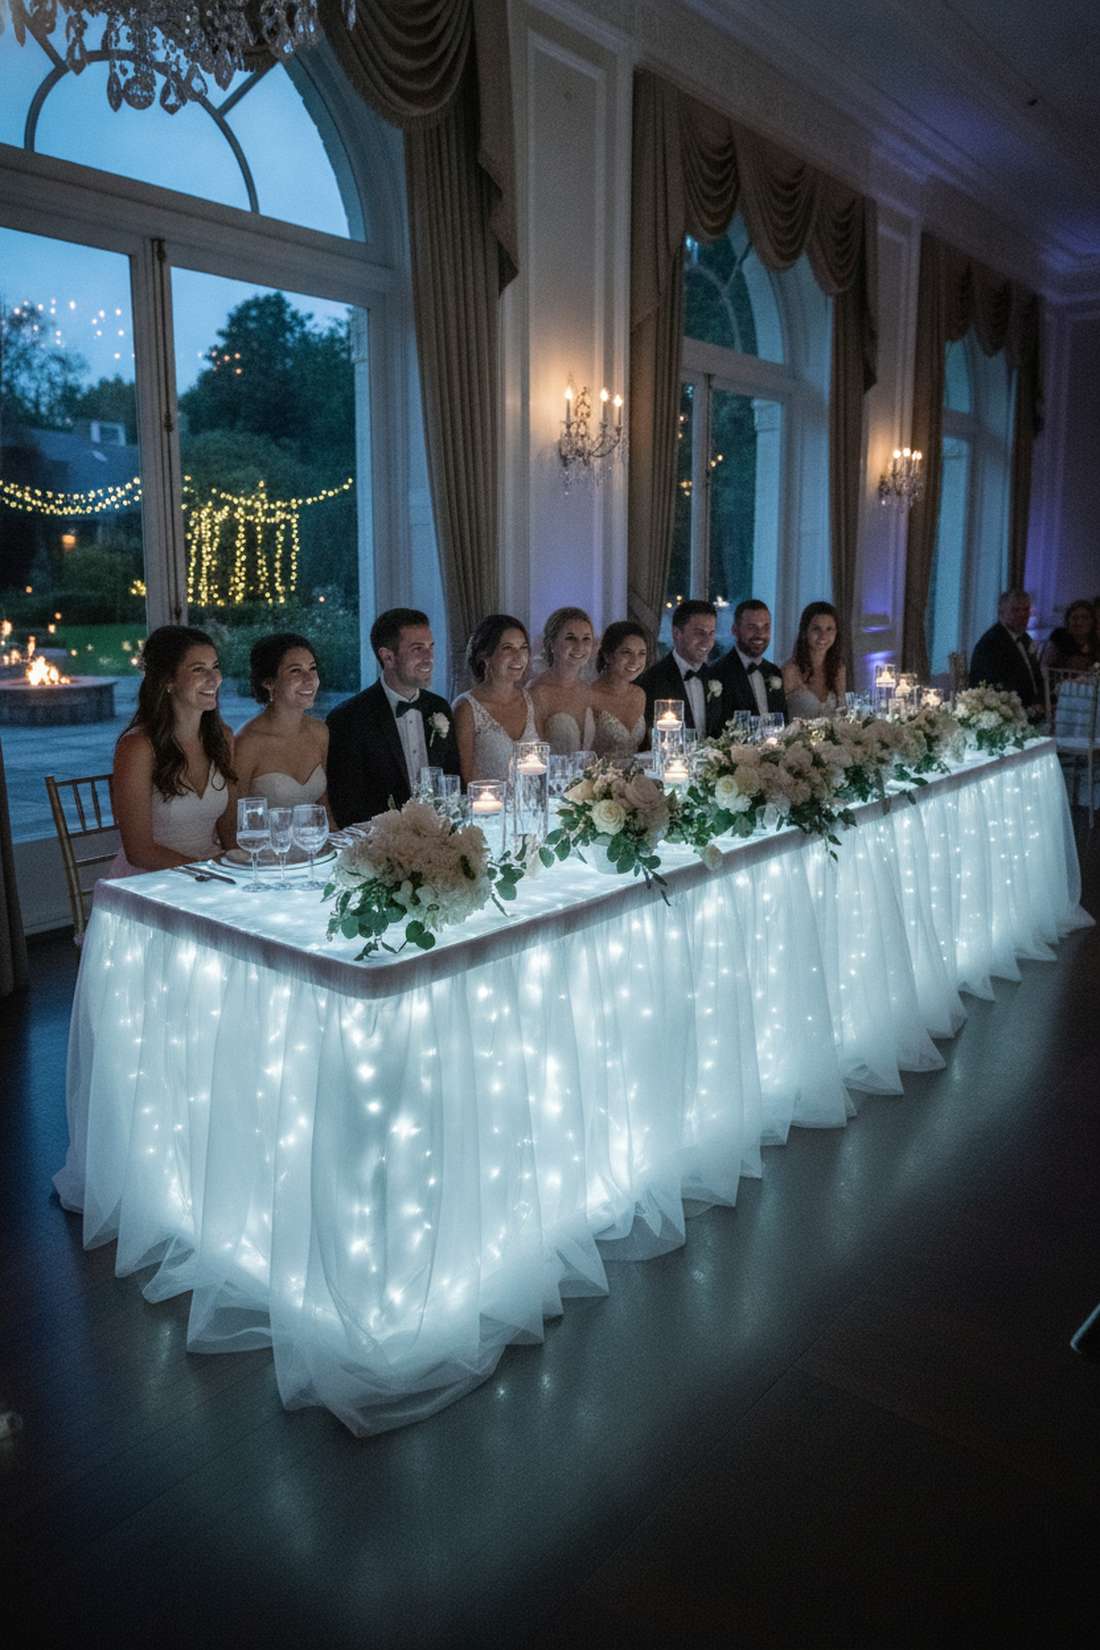
This unexpected trick makes the entire head table look like a glowing block of carved ice or magic. Illuminated under-table draping is a spectacular way to ensure the bridal party stands out from the rest of the room.
Most couples just focus on the tabletop, but taping high-power lights to the table skirt underneath sheer organza gives a designer-level finish that photographers love. You must use cool-touch fairy lights wedding reception gear to ensure absolute fire safety under the linens.
You can light up a massive 12-foot head table for under $35. A brilliant, low-cost sweetheart table upgrade.
- Key Materials: Sheer table skirting, cool-touch curtain lights
- Vibe / Style: Dramatic, glowing focal point
- Difficulty: Easy but requires lots of tape
- Budget Breakdown: Sheer skirting: $20 | Lights: $15
- Creator’s Tip: Tape the lights directly to the solid white base tablecloth, then drape the sheer tulle over it to create the perfect frosted diffusion.
- Smart Sourcing: Pick up white sheer organza table skirts and cool-to-touch LED curtain drops.
24. Crystal Bead Chandelier Centerpieces
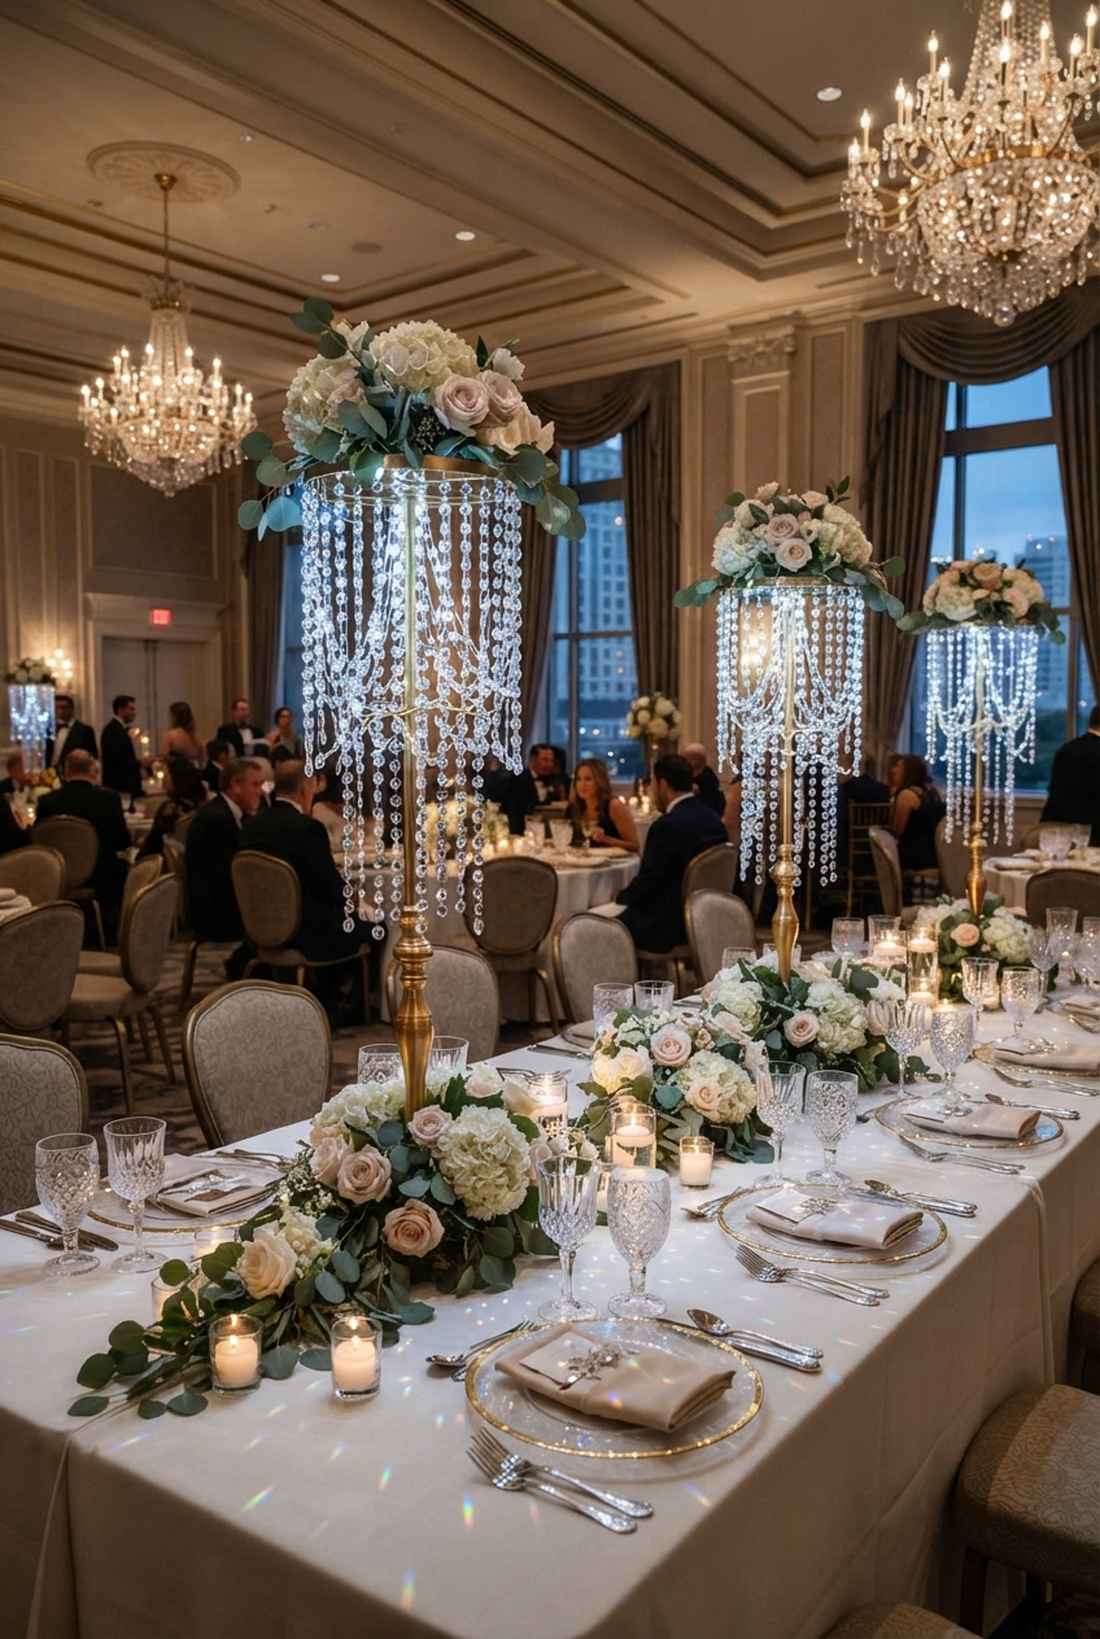
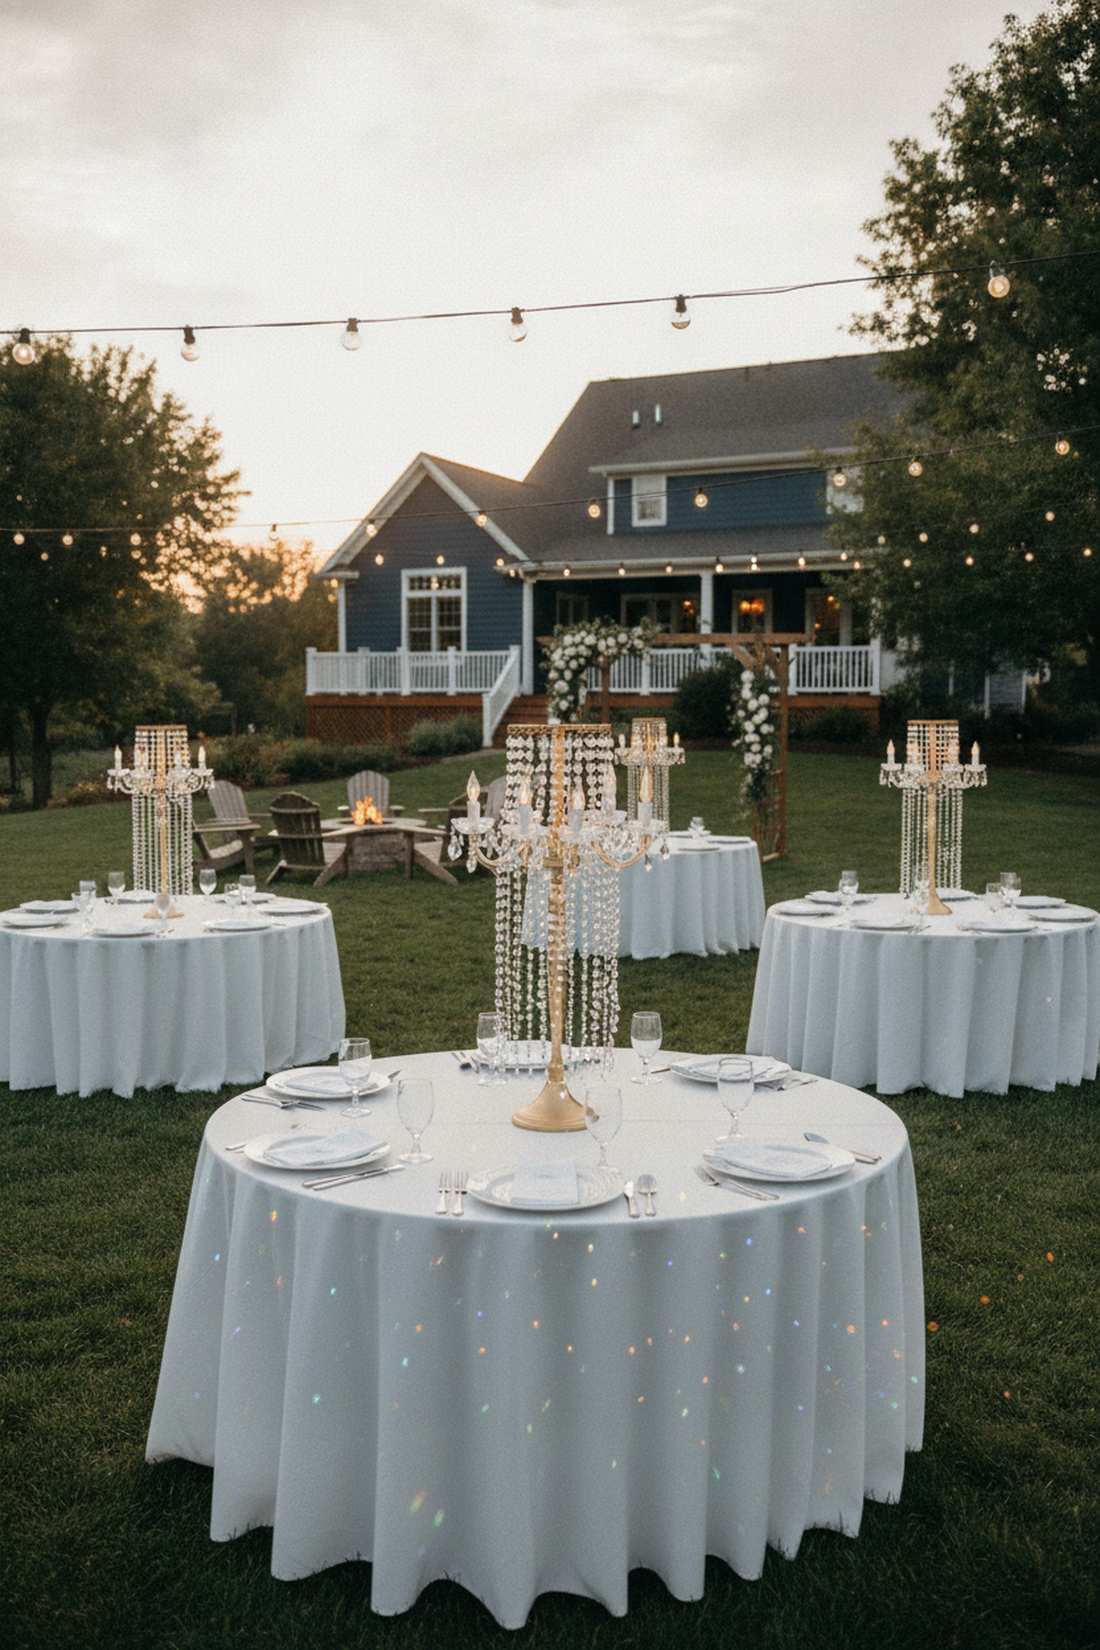
This setup oozes absolute luxury, casting tiny rainbow prisms all over the dinner plates. Miniature table-stand chandeliers bring towering, glamorous height to ballrooms without blocking guests’ sightlines.
Renting real crystal centerpieces is painfully expensive, but wiring cheap acrylic beads with bright white LEDs looks far more expensive than it is. The bulbs hit the acrylic facets, simulating the sparkle of genuine cut glass flawlessly.
You can DIY these towering luxury centerpieces for roughly $40 each. Pin this to your luxury wedding hacks board.
- Key Materials: Tall riser stands, acrylic bead rolls, micro lights
- Vibe / Style: Opulent, high-end glamour
- Difficulty: Intermediate crafting
- Budget Breakdown: Risers: $20 | Beads & Lights: $20
- Creator’s Tip: Use “cool white” (4000K) lights specifically for this project; the colder light makes the fake crystals look much sharper and more realistic.
- Smart Sourcing: Source acrylic crystal bead spool rolls and tall gold centerpiece riser stands.
Stop throwing away branches! This next natural centerpiece trick is basically free and looks like a designer installation…
25. Branch Centerpiece with Wrapped Lights
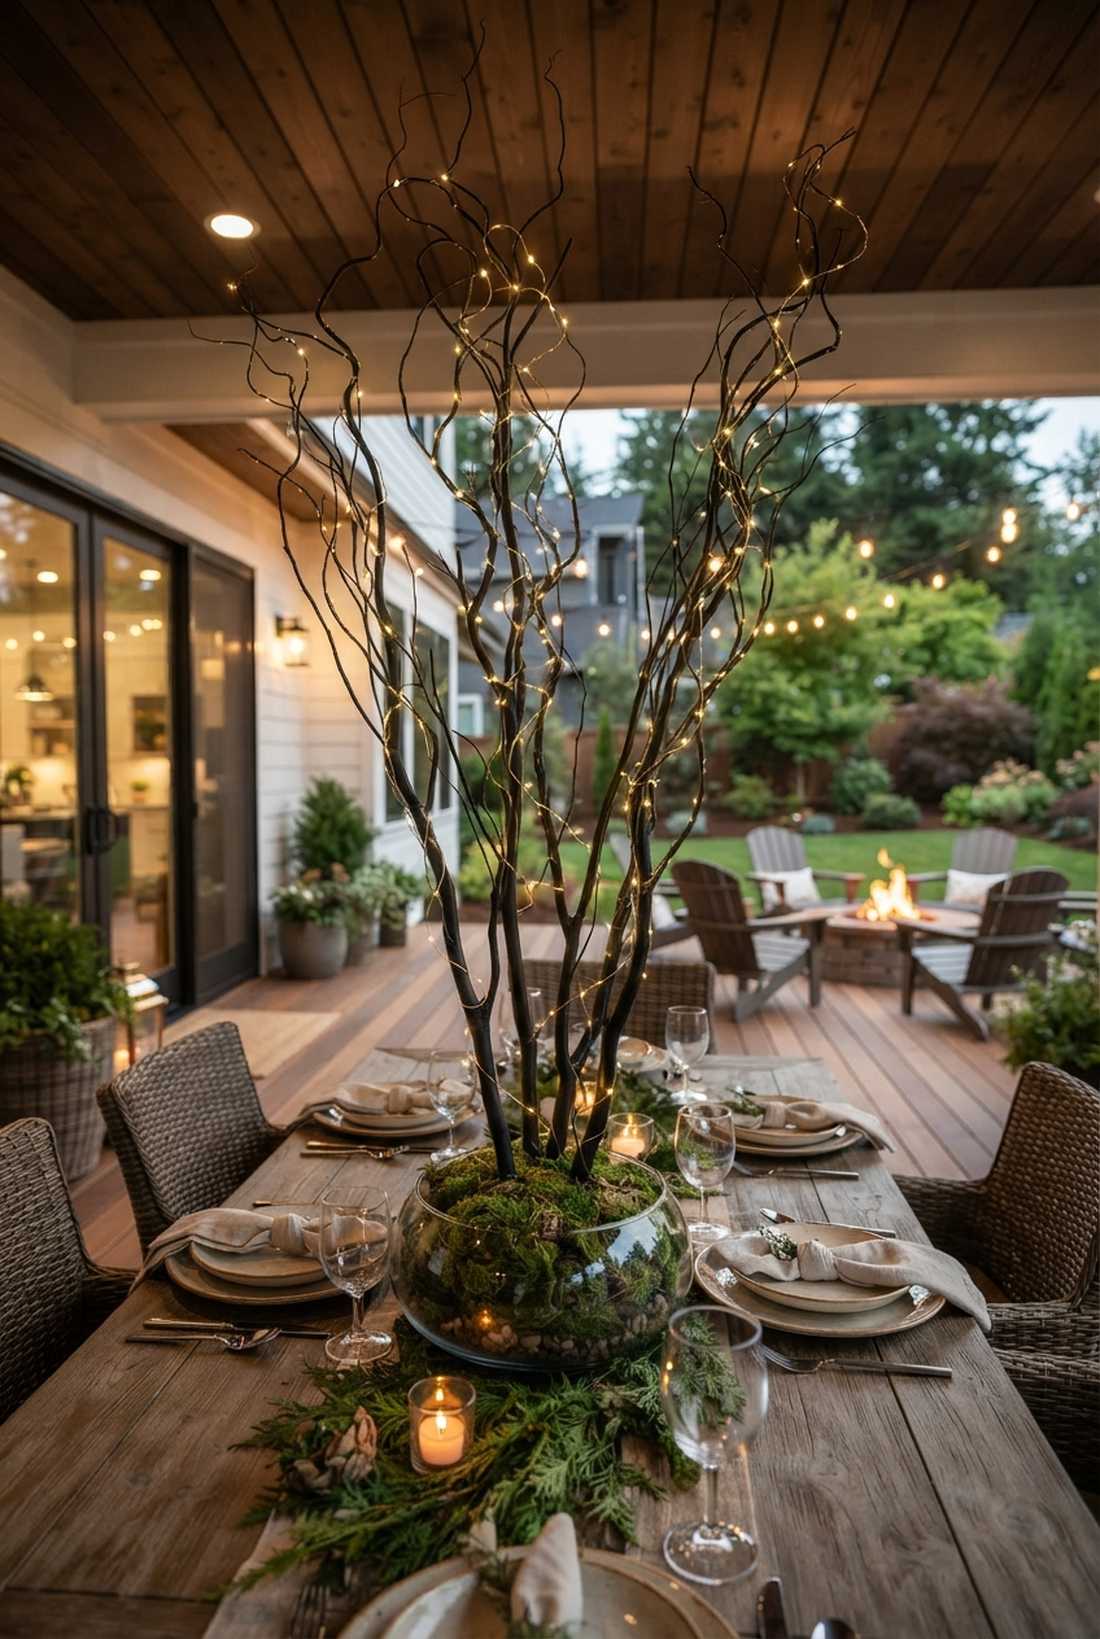
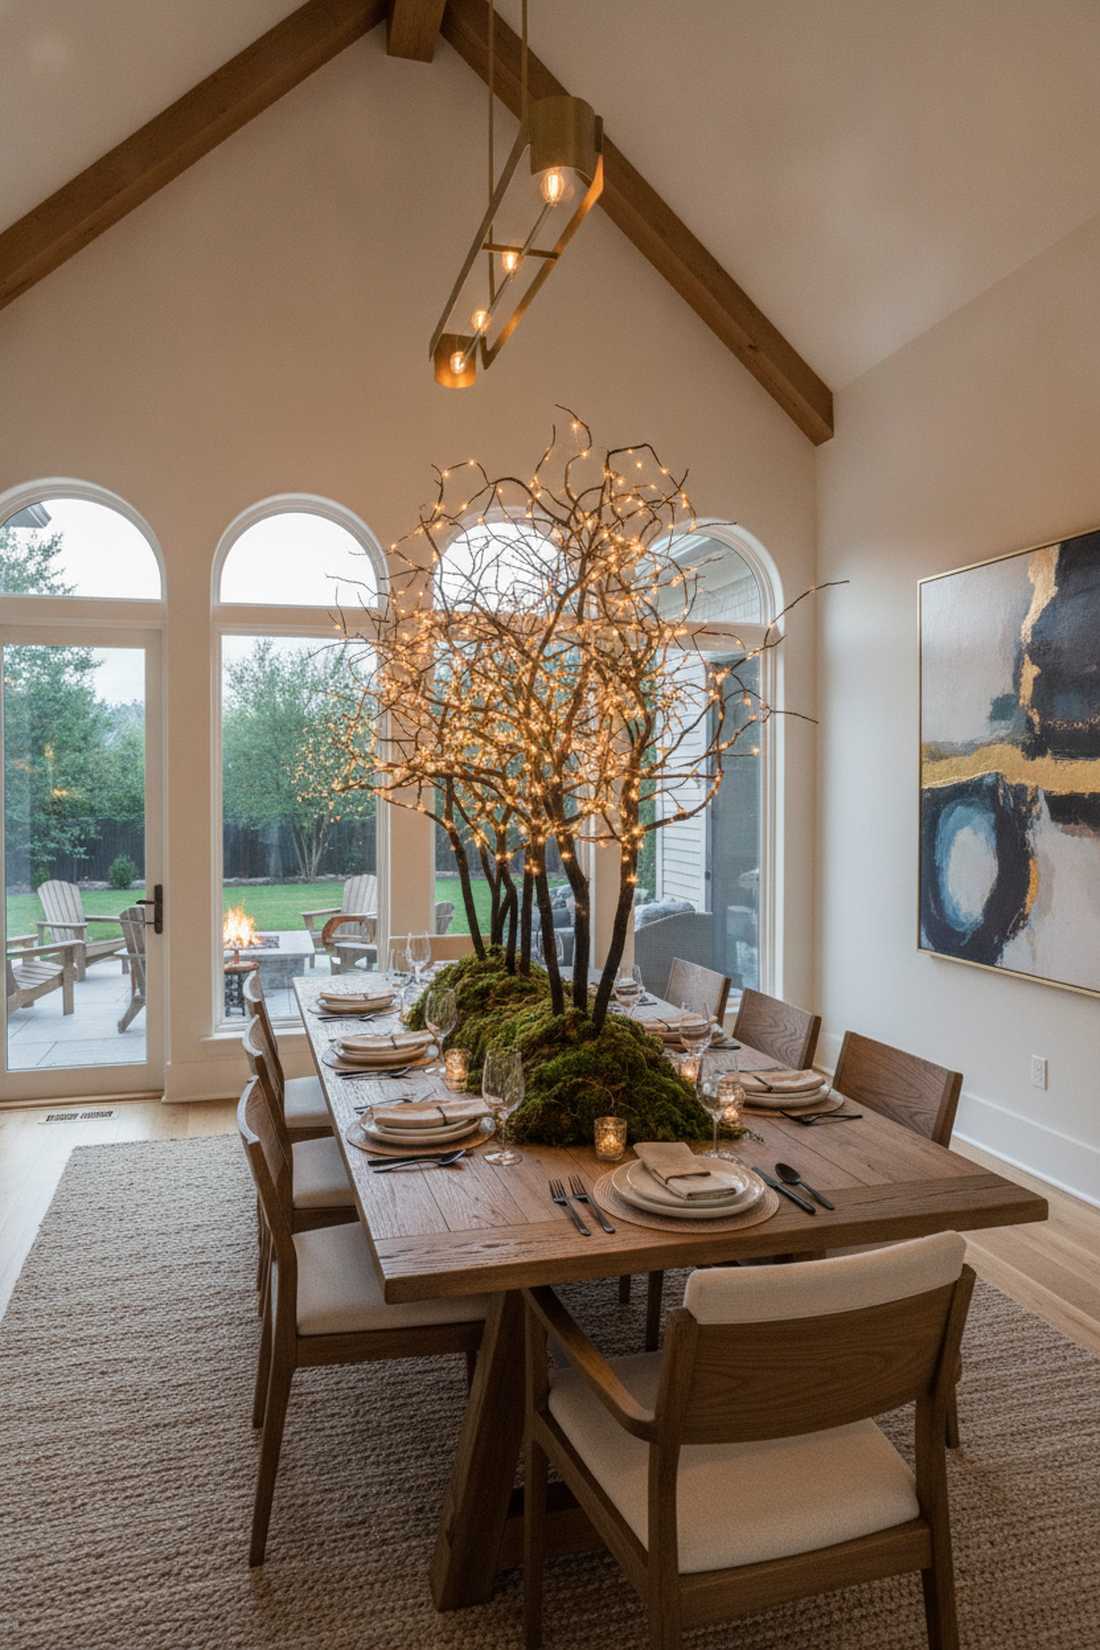
This creates a striking, structural silhouette that feels like a glowing winter forest right on the table. Illuminated curly willow branches are a massive money-saver for tall, dramatic centerpieces.
Instead of buying expensive imported exotic flowers, tightly wrapping painted forage branches with micro-wire lights delivers a surprisingly premium look. Using high-CPC terrarium accessories like preserved moss at the base hides the structural foam perfectly.
You can build these towering natural structures for literally $10 a table. It’s an incredibly smart budget pivot.
- Key Materials: Manzanita or willow branches, copper wire lights
- Vibe / Style: Organic, sculptural modernism
- Difficulty: Easy wrapping
- Budget Breakdown: Branches: Free/Foraged | Lights & Base: $10
- Creator’s Tip: Spray paint the natural branches metallic gold or matte black before wrapping them to instantly modernize the rustic texture.
- Smart Sourcing: Grab bendable copper-wire micro LED packs and bulk preserved sheet moss.
Dance Floor Installations
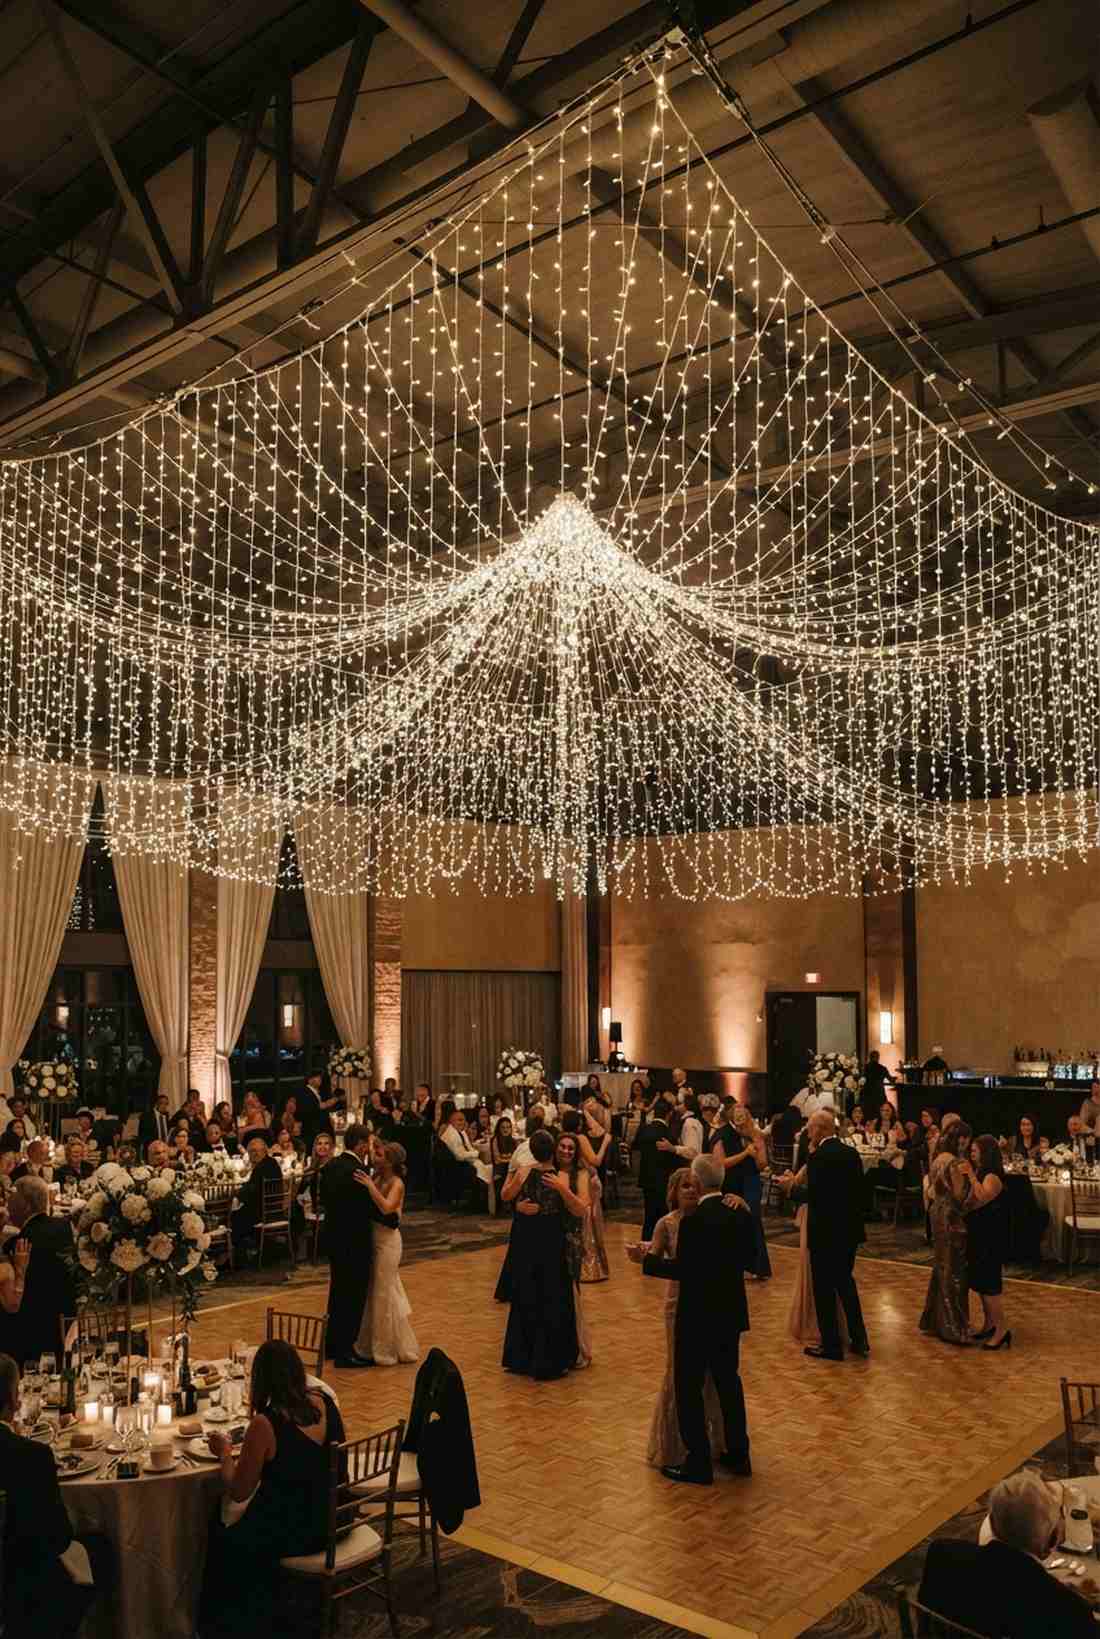
26. Dance Floor Canopy Overhead
This layout creates an undeniable magnetic pull, making it feel like the party is happening under a tight canopy of stars. A dense overhead dance floor grid visually sections off the room without needing physical walls.
Many DJs bring awful, cheesy colored lasers, but concentrating heavy warm-white commercial fairy lights wedding decor directly over the floor looks insanely expensive and elegant. This massive concentration of light guarantees pristine, flattering photography during the first dance.
You can rig this dense lighting zone for about $150. Save this to guarantee your guests actually get out of their seats.
- Key Materials: High-density LED strings, aerial rigging
- Vibe / Style: High-energy, enclosed intimacy
- Difficulty: Advanced (venue permission usually required)
- Budget Breakdown: Rigging: $50 | High-density Lights: $100
- Creator’s Tip: Put this specific canopy on a remote dimmer switch so you can blast it at 100% for the first dance, then drop it to 30% for the party.
- Smart Sourcing: Invest in a heavy-duty commercial string light kit and a wireless high-capacity dimmer plug.
27. Icicle Light Perimeter
This creates a glowing, fringed border that adds incredible motion as guests walk past. An icicle light dance floor border is a fantastic way to frame a rented vinyl or wooden floor.
Standard straight lines can feel a bit sterile, but suspending staggered icicle drops around the perimeter gives a designer-level finish that catches the motion of the dancers. Using high-quality outdoor-rated icicle kits ensures the drops hang perfectly straight instead of bunching up.
You can outline a standard 15×15 dance floor for under $70. A fantastic, easy perimeter upgrade.
- Key Materials: LED icicle light strands, pipe and drape stands
- Vibe / Style: Dynamic, fringed elegance
- Difficulty: Beginner-friendly
- Budget Breakdown: Icicle Lights: $50 | Zip ties: $10
- Creator’s Tip: Take the icicle lights out of the box 48 hours early and let them hang in a warm room so the plastic wires relax and hang perfectly straight.
- Smart Sourcing: Source warm-white LED icicle drops (long length) and heavy-duty gaffer tape.
28. Spiral Vortex Dance Focal Point
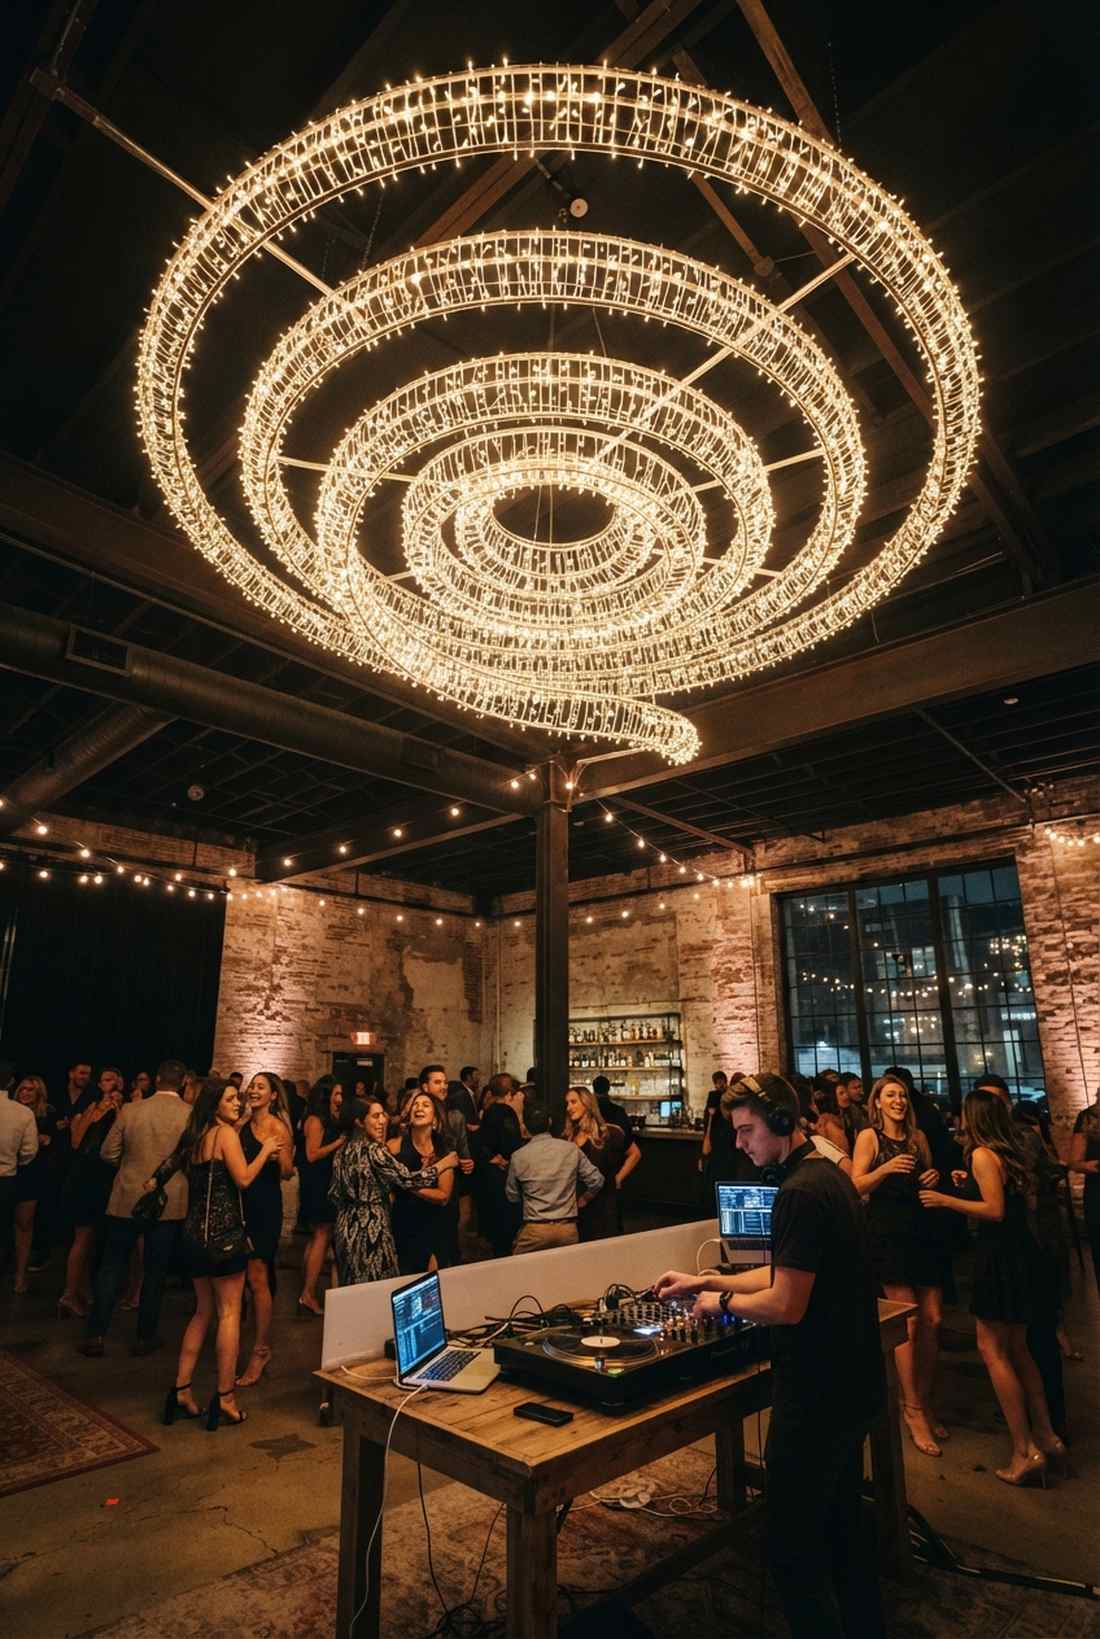
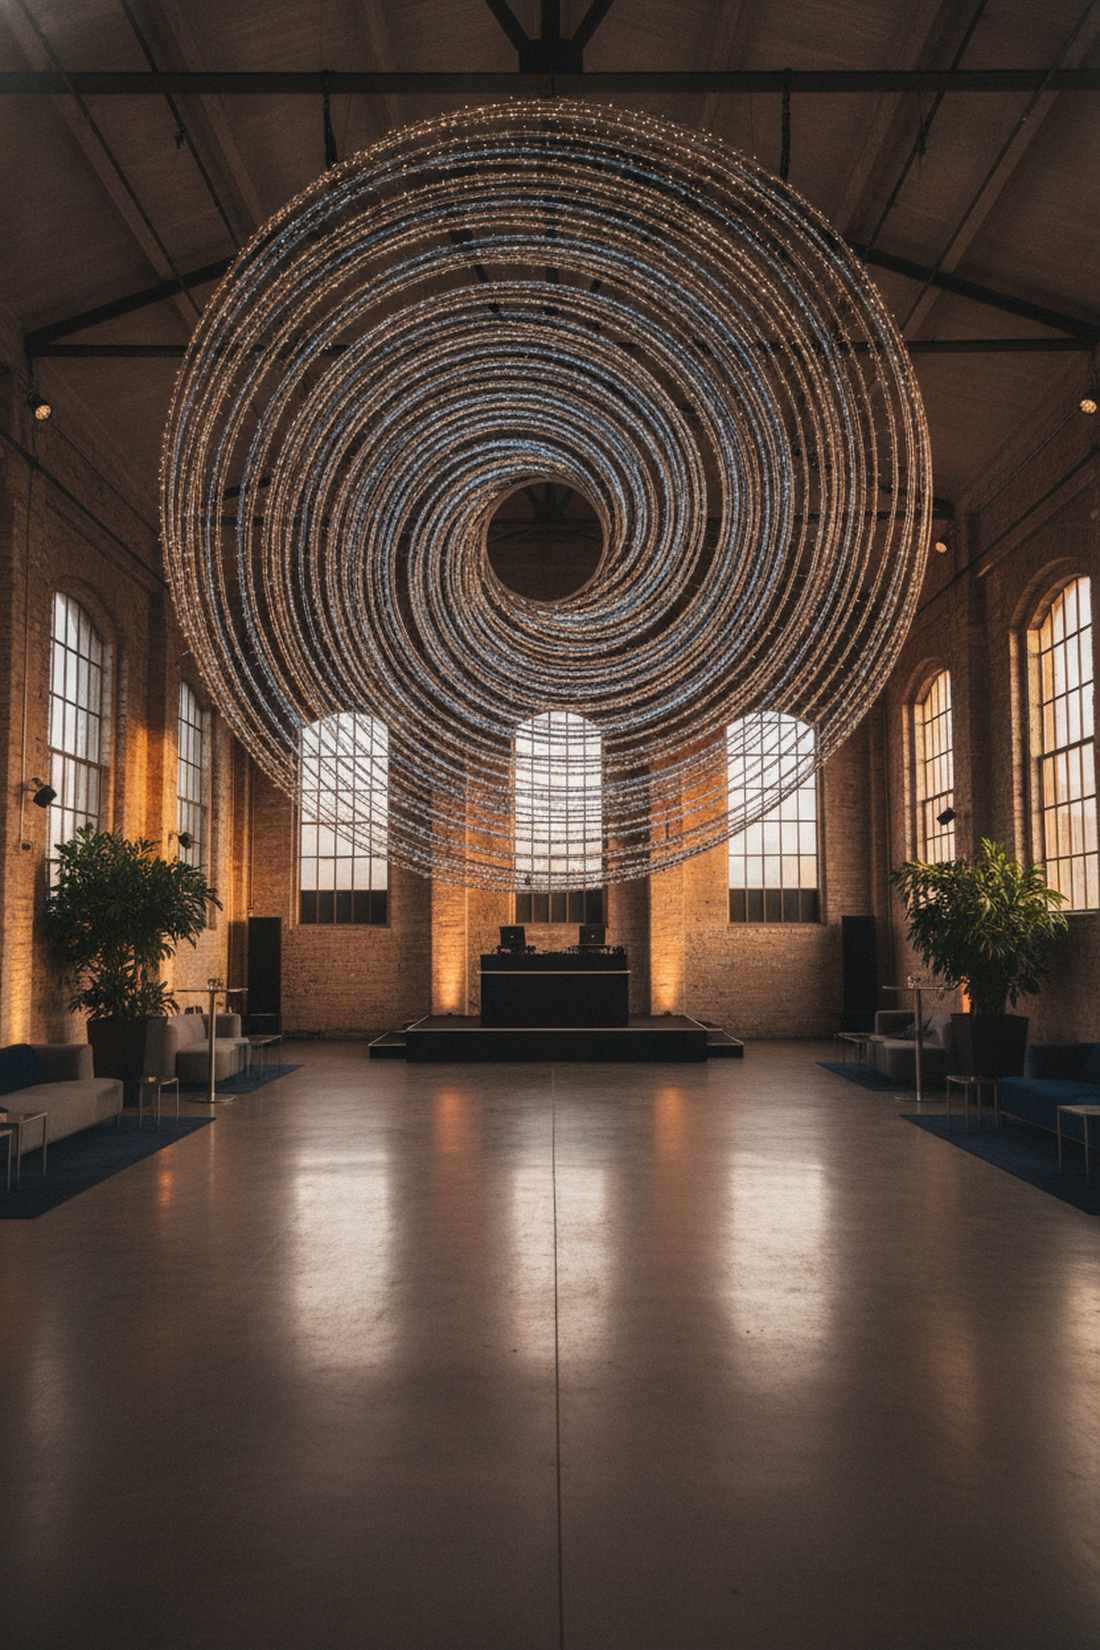
This hypnotic ceiling fixture feels like a massive glowing chandelier custom-built just for your party. A central spinning vortex light replaces the need for an expensive floral ceiling installation.
Basic cross-hatching is fine, but engineering a sweeping, curved spiral right above the DJ booth delivers a far more expensive aesthetic. Upgrading to heavy-gauge wholesale wedding lighting makes molding the rigid circular curves significantly easier.
This striking architectural centerpiece costs around $90 to map out and build. Highly recommended for blank-slate warehouses.
- Key Materials: Aluminum shaping wire, dense light spools
- Vibe / Style: Architectural, sweeping drama
- Difficulty: Intermediate mapping
- Budget Breakdown: Aluminum wire: $20 | Lights: $70
- Creator’s Tip: Bend thick aluminum armature wire into your perfect spiral on the floor, zip-tie the lights to it, and hoist the entire rigid piece up at once.
- Smart Sourcing: Buy thick aluminum armature wire rolls and high-density fairy light spools.
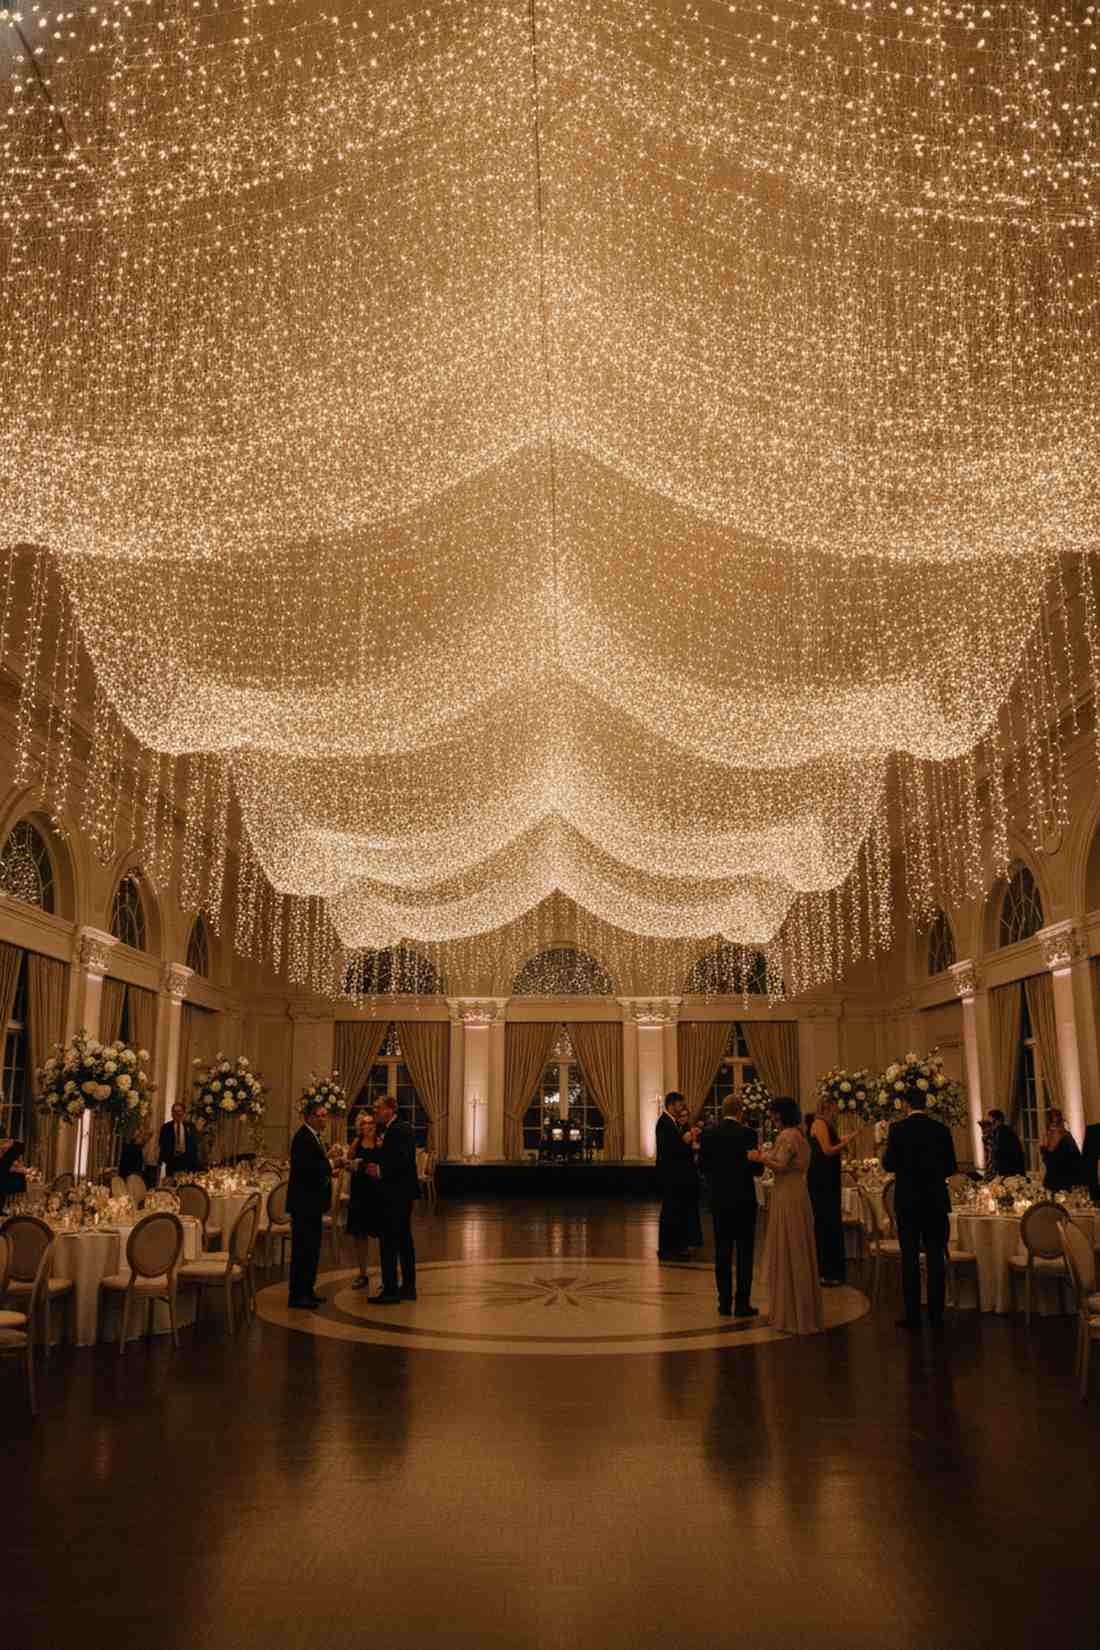
29. Low-Hanging Cloud Effect

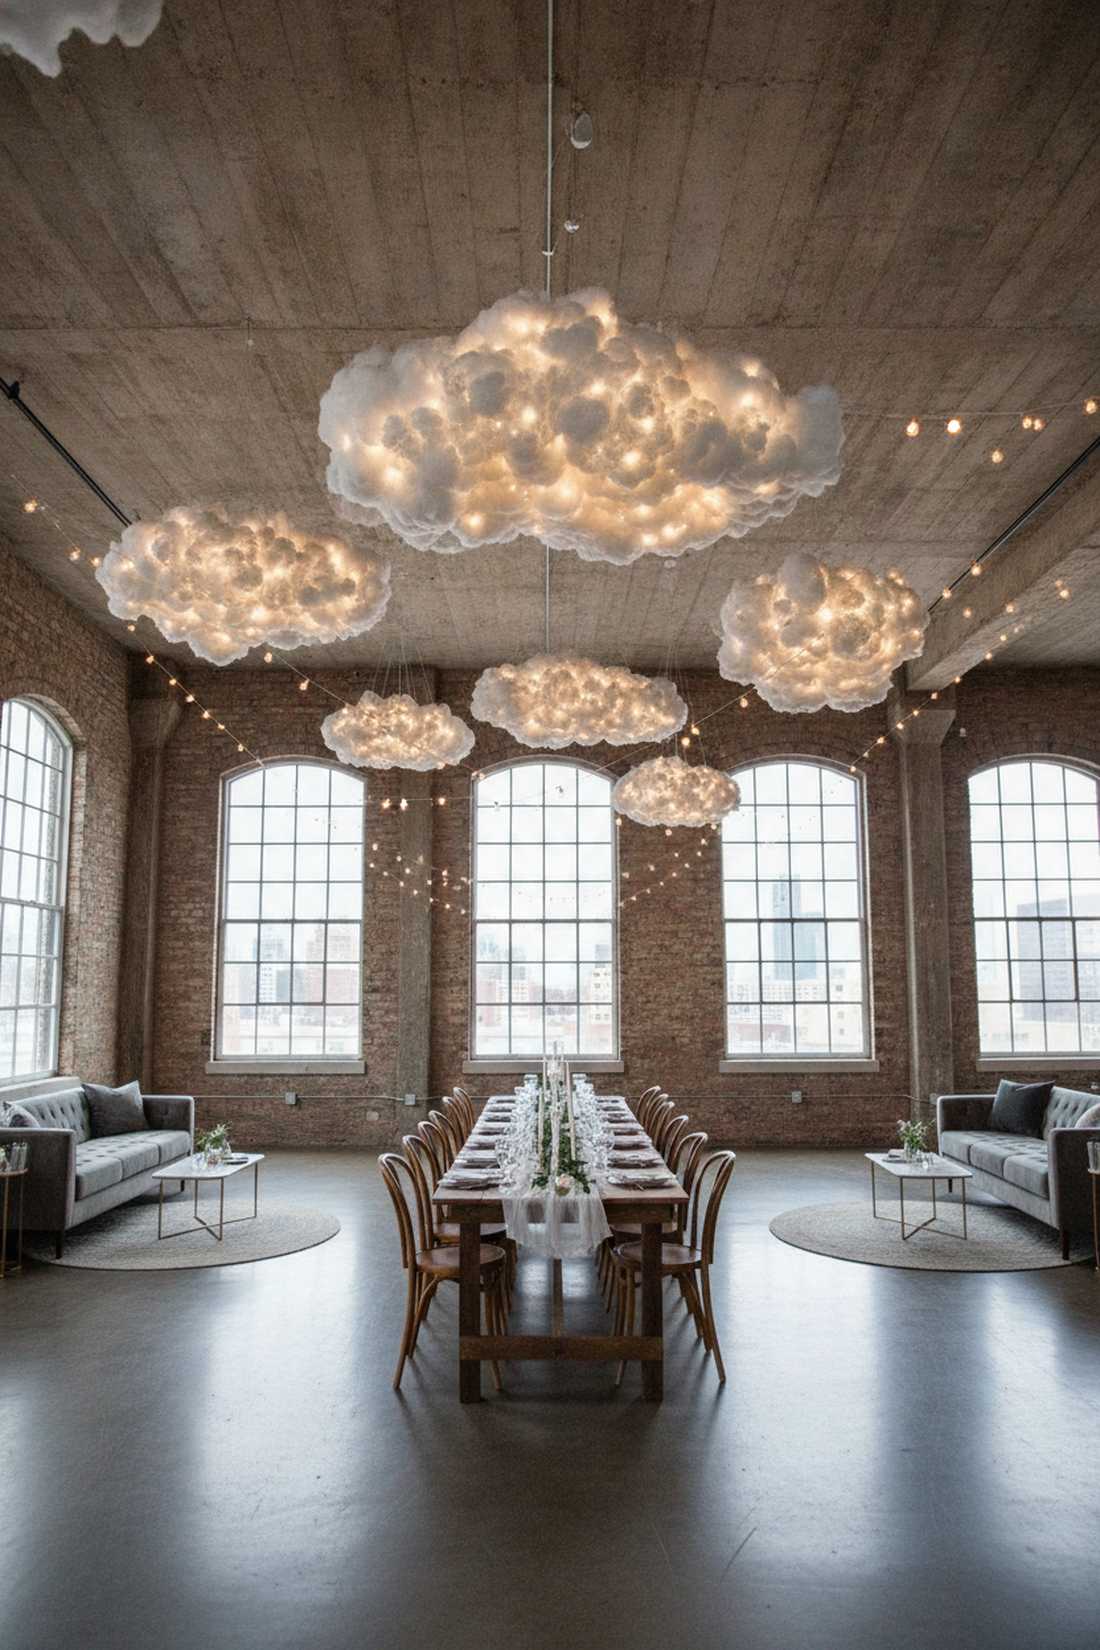
This feels like you are literally dancing in the clouds, bringing massive cavernous ceilings down to a cozy, human scale. The suspended light-cluster cloud is a genius trick for making intimidating industrial spaces feel intimate.
Instead of trying to light a 30-foot ceiling, dropping dense bundles of fairy lights wedding reception gear to just 8 feet off the floor looks ridiculously expensive and avant-garde. You can stuff the clusters with poly-fill or cotton to create literal glowing storm clouds.
You can craft these magical low-hanging fixtures for about $40 each. Pin this if you booked an oversized venue.
- Key Materials: Poly-fill batting, clear fishing line, battery lights
- Vibe / Style: Avant-garde, dreamy sky
- Difficulty: Fun crafting project
- Budget Breakdown: Poly-fill: $15 | Lights & Wire: $25
- Creator’s Tip: Spray the poly-fill clouds lightly with fire-retardant spray before hanging them to comply with strict venue safety codes.
- Smart Sourcing: Grab bulk polyester fiber fill and flame-retardant fabric spray.
Are your venue walls horribly ugly? Use this next structural pillar trick to completely hide them…
30. Perimeter Column Lighting
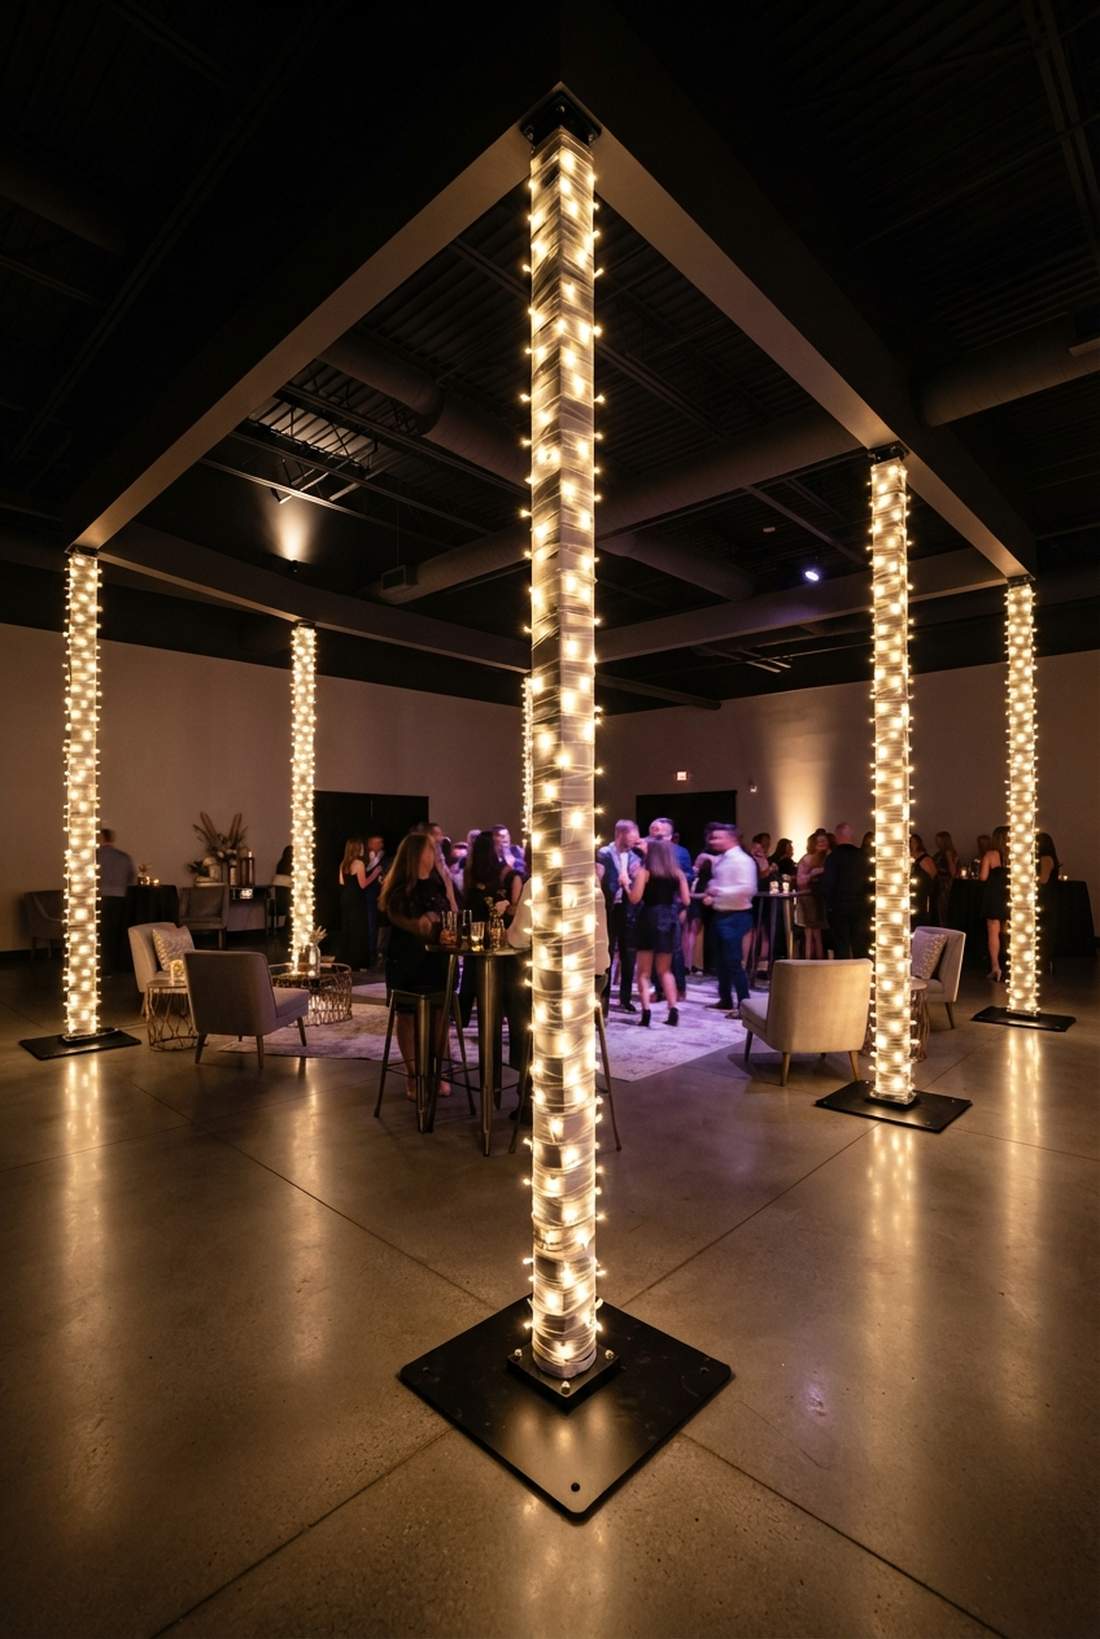
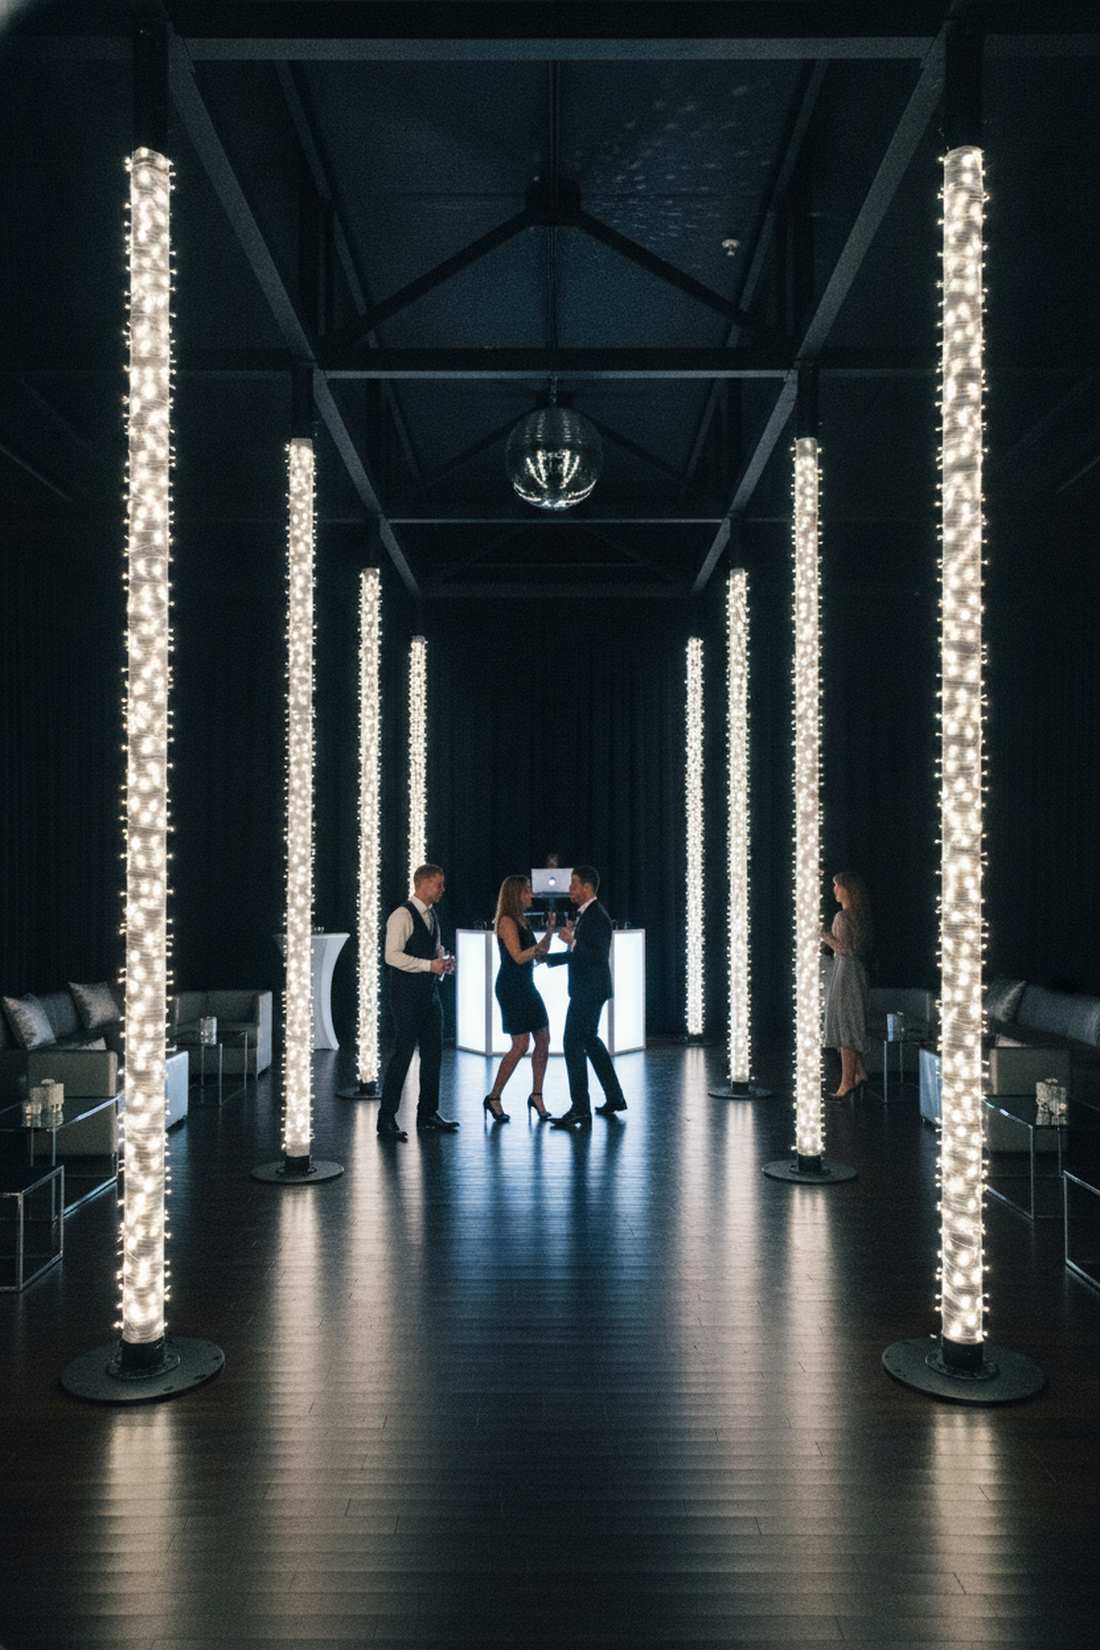
This setup builds a glowing architectural cage around your party, making the actual venue walls disappear into the dark. Illuminated vertical light columns are the ultimate hack for masking ugly wallpaper or bad venue paint.
Most couples try to cover walls with expensive pipe and drape, but erecting tall, blindingly bright LED pillars gives a designer-level finish that intentionally draws the eye inward. Sourcing heavy-duty backdrop plates ensures nobody knocks them over during the Macarena.
You can build a perimeter of six glowing pillars for about $180. A lifesaver for outdated banquet halls.
- Key Materials: Vertical pipe stands, dense string lights
- Vibe / Style: Modern nightclub chic
- Difficulty: Intermediate (requires heavy base plates)
- Budget Breakdown: Base pipes: $120 | Lights: $60
- Creator’s Tip: Wrap the steel pipes in white Gaffers tape before adding the lights so the silver metal doesn’t reflect awkwardly in the background.
- Smart Sourcing: Invest in heavy-base pipe and drape kits and white gaffer tape rolls.
31. Starlight Scatter Pattern
This asymmetric design feels incredibly organic, like you are partying under a clear night sky in the middle of nowhere. A randomized starlight scatter ceiling is perfect for couples who hate rigid, perfect symmetry.
Rigid grids can feel too corporate, but strategically clustering different sizes of bulbs in irregular patches looks wildly expensive and authentically celestial. Integrating commercial outdoor string lights mixed with tiny micro-LEDs creates that deep, multi-dimensional space illusion.
Creating this organic sky effect costs around $100 depending on density. Save this to your organic aesthetic board.
- Key Materials: Mixed-bulb light kits, clear ceiling hooks
- Vibe / Style: Authentic, wild night sky
- Difficulty: Easy but time-consuming
- Budget Breakdown: Mixed lights: $80 | Hooks: $20
- Creator’s Tip: Combine standard 5mm LED strings with larger globe bulbs (G40s) in the same canopy to force a 3D perspective trick on the eye.
- Smart Sourcing: Pick up clear G40 globe string lights and magnetic drop-ceiling hooks (bulk).
Outdoor Garden Lighting
32. Tree Canopy Overhead Stringing
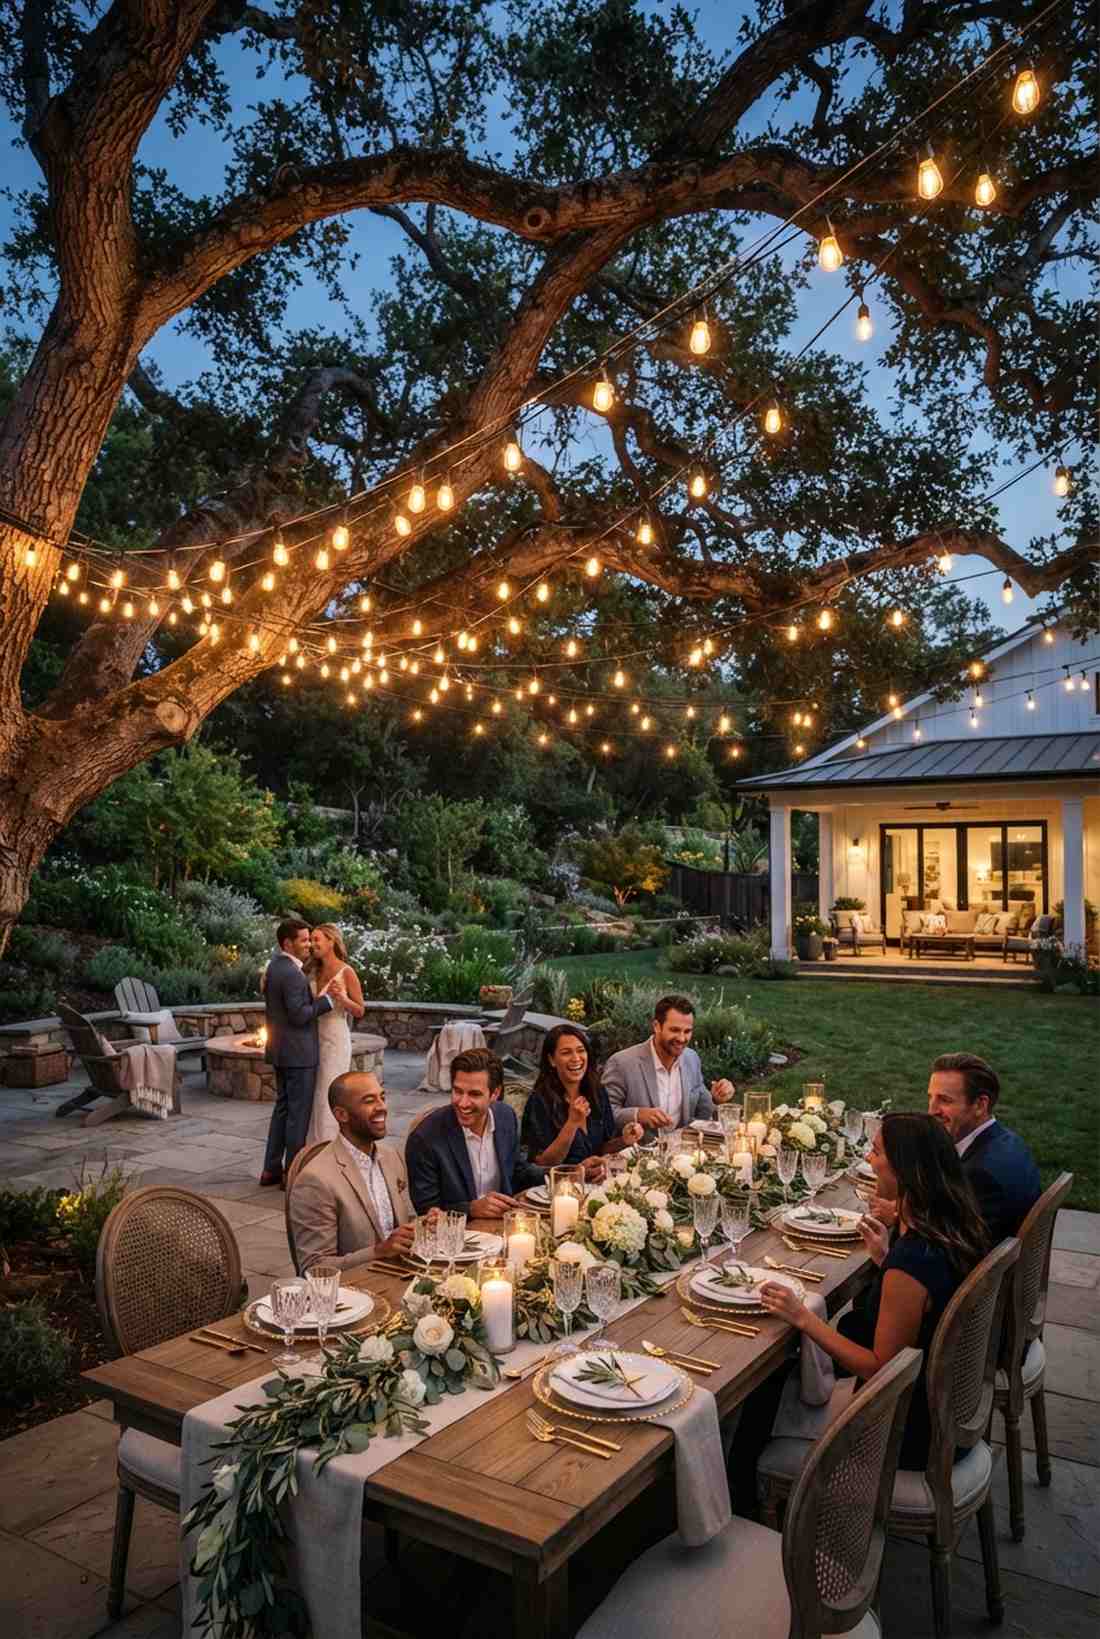
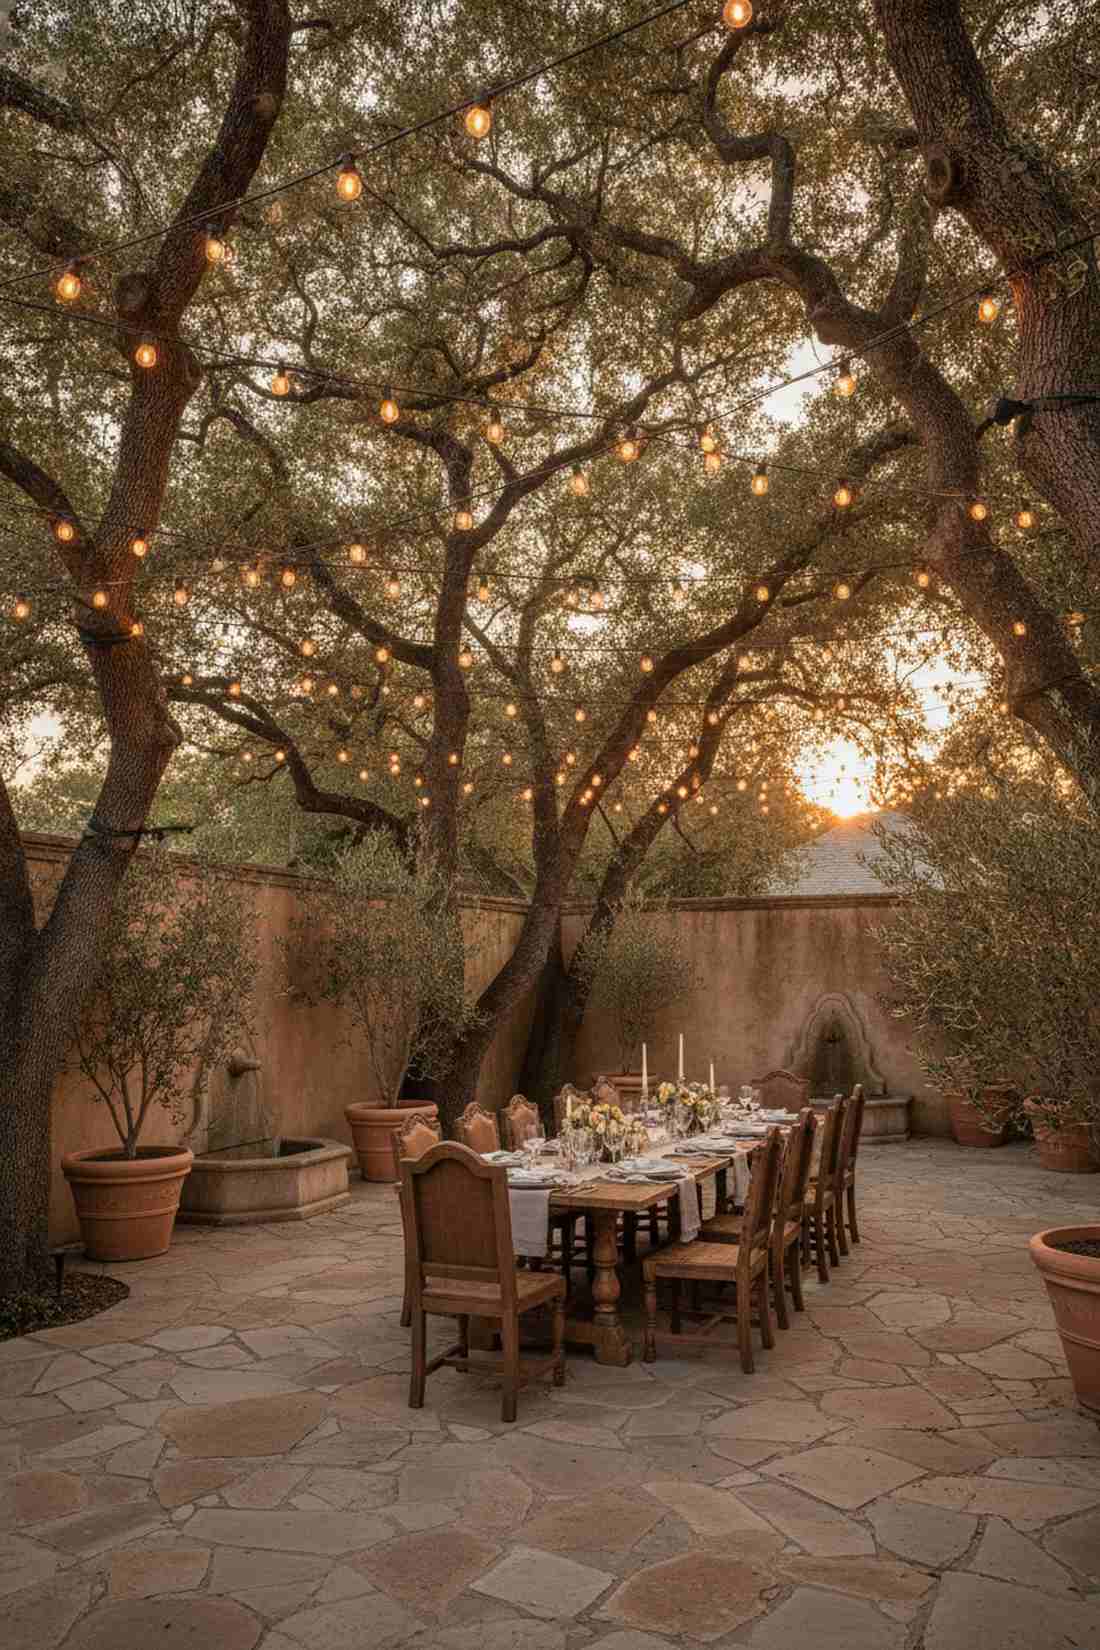
This layout feels like dining in a luxurious European courtyard under centuries-old oaks. Zig-zagging lights between mature tree branches is the absolute pinnacle of outdoor fairy lights wedding design.
Amateurs use flimsy indoor wires that snap in the wind, but running steel-cable-backed commercial lighting across wide gaps delivers a surprisingly premium look that survives rough weather. Using specialized tree-safe straps ensures the venue won’t fine you for bark damage.
You can safely rig a massive outdoor courtyard for around $200. It is the definitive look for al fresco receptions.
- Key Materials: Steel guide wire, heavy-duty outdoor bulbs
- Vibe / Style: Tuscan al fresco dining
- Difficulty: Advanced (requires tension tools)
- Budget Breakdown: Tension wire kit: $50 | Commercial lights: $150
- Creator’s Tip: Never rely on the electrical wire itself to hold the tension across a gap; always run a bare steel cable first and zip-tie the lights to it.
- Smart Sourcing: Invest in an aircraft cable suspension kit and tree-friendly bark mounting straps.
33. Garden Path Illumination
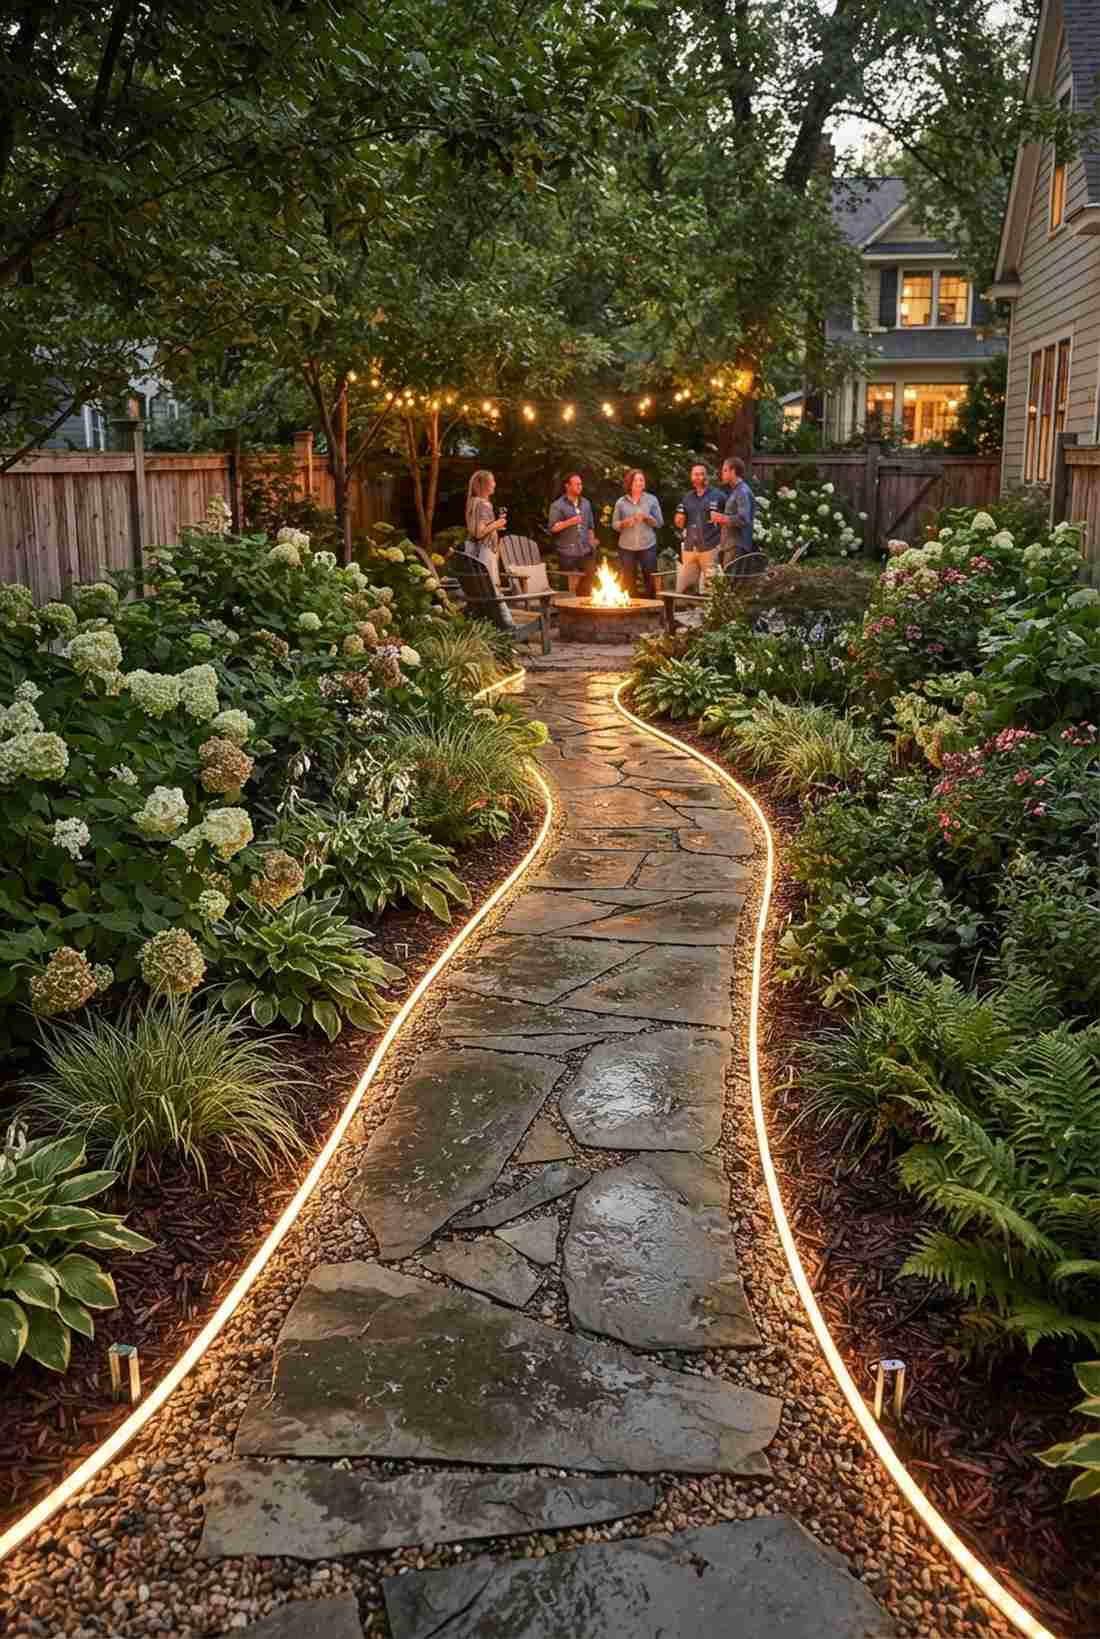

This creates a whimsical, glowing runway that safely guides your guests toward the hidden cocktail hour. Low-level glowing pathway borders are a non-negotiable safety feature that doubles as breathtaking decor.
Harsh solar stakes from the hardware store ruin the romantic vibe, but laying thick ropes of warm fairy garden kits directly into the mulch looks insanely expensive and subtle. Sourcing IP65 waterproof gear is mandatory since ground moisture will immediately short out cheap indoor sets.
You can line a beautiful 50-foot garden walkway for about $45. Save this for your outdoor logistics checklist.
- Key Materials: Waterproof rope lights, ground staples
- Vibe / Style: Secret garden runway
- Difficulty: Very easy
- Budget Breakdown: Rope lights: $35 | Staples: $10
- Creator’s Tip: Use metal landscape fabric staples every two feet to pin the light wires perfectly flush against the dirt so nobody trips.
- Smart Sourcing: Buy IP65-rated outdoor LED rope lights and galvanized landscape staples (bulk).
34. Hedge and Shrub Wrapping
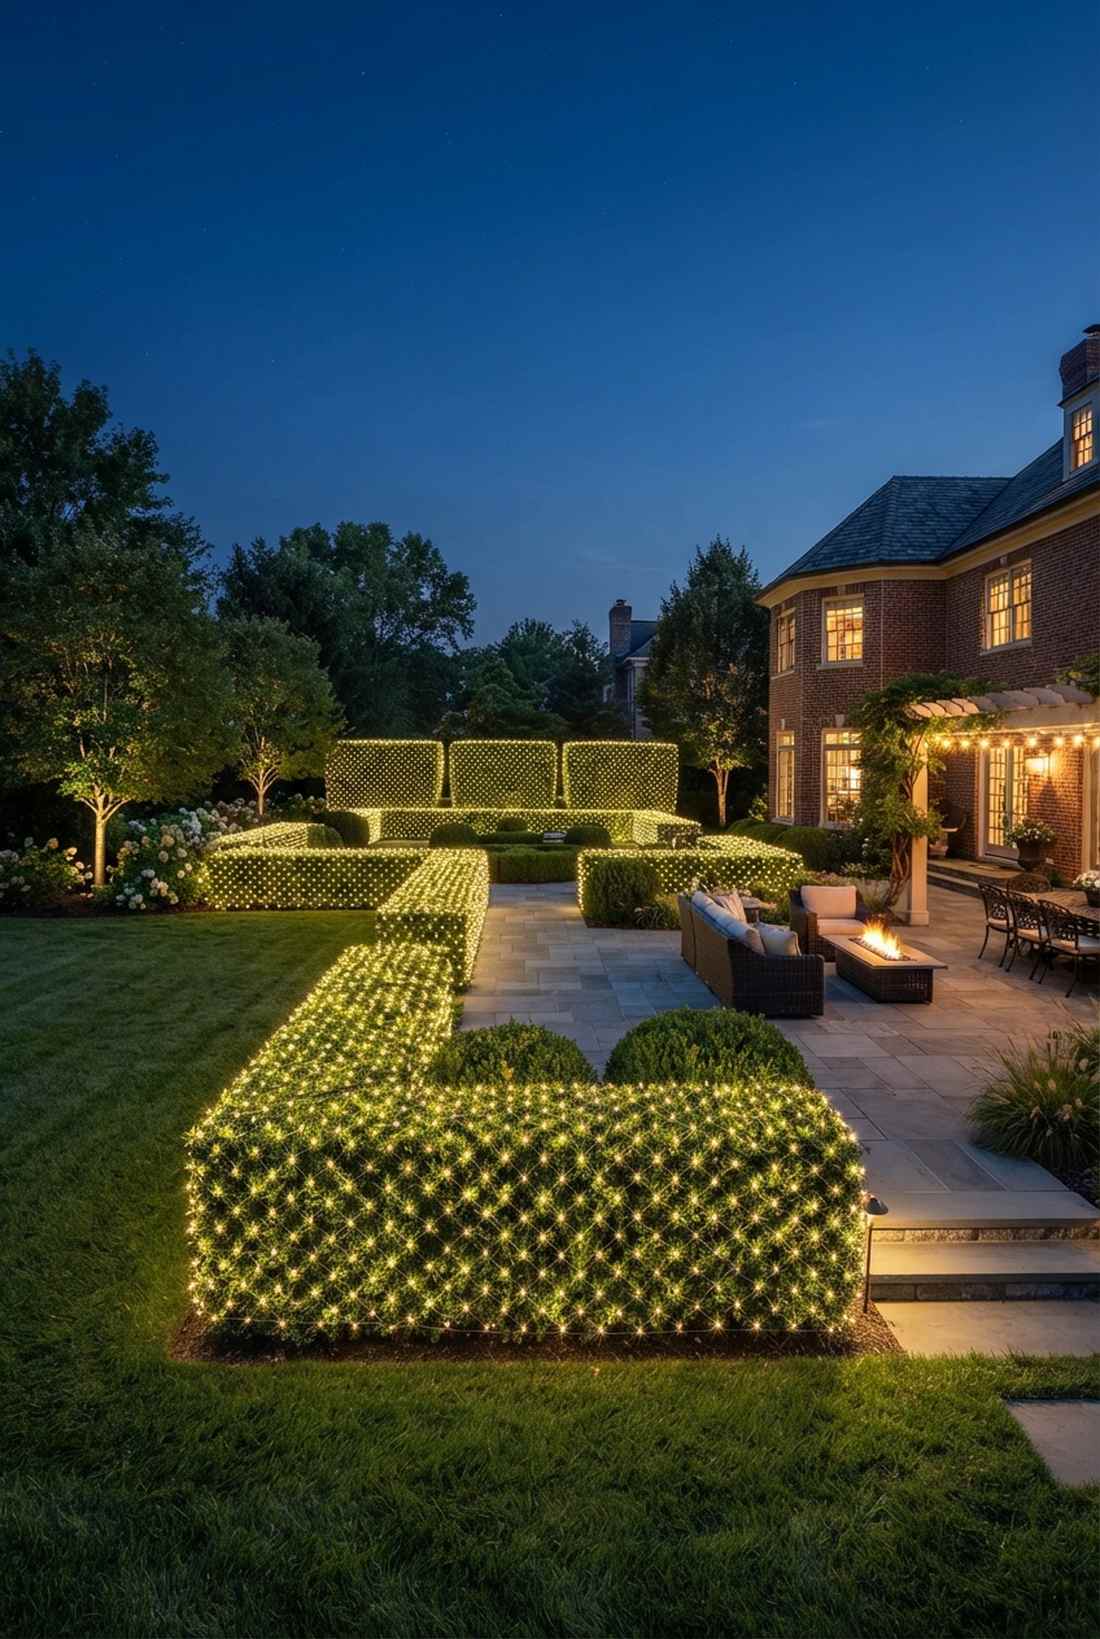
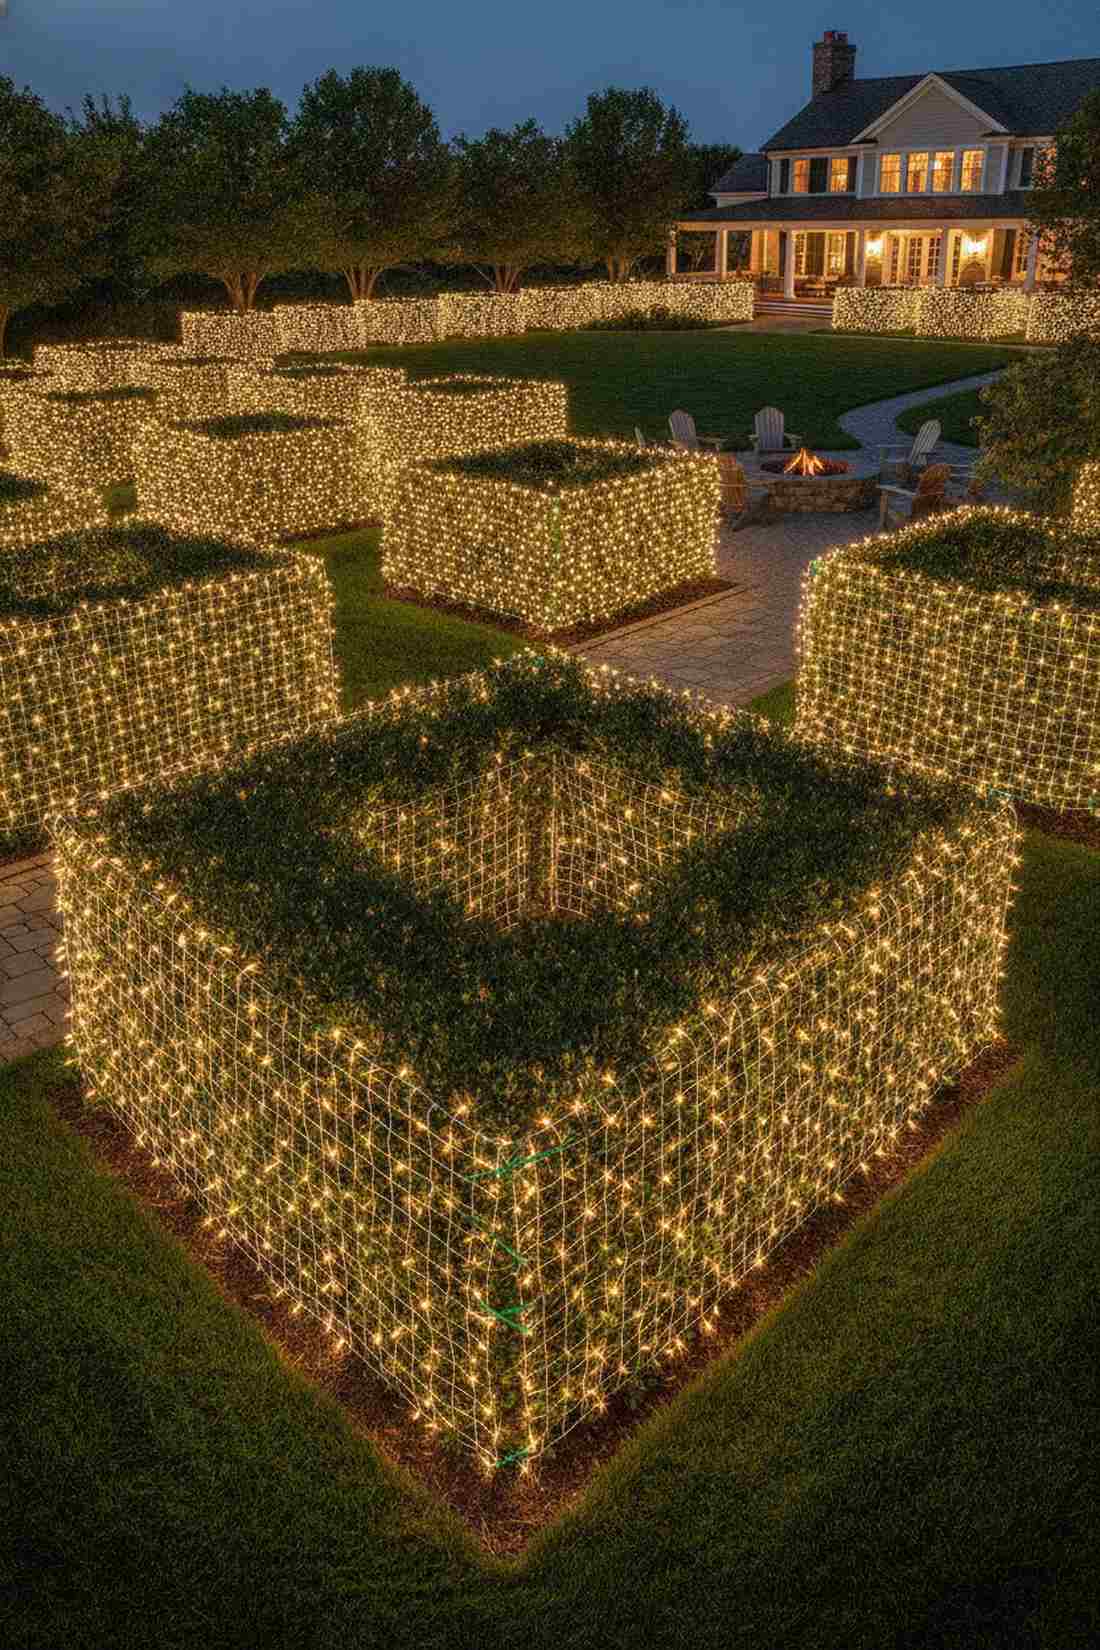
This magically transforms basic venue landscaping into glowing green architectural blocks. Wrapping existing hedges in dense net lights is the fastest way to add massive boundaries of light to an outdoor space.
Attempting to wrap individual strings around a bush takes hours and looks patchy, but throwing commercial-grade LED net lights over top gives a designer-level finish in literally three minutes. It perfectly highlights the manicured lines of the venue’s existing garden.
You can illuminate four massive garden bushes for roughly $60. The ultimate lazy-but-luxurious lighting hack.
- Key Materials: Warm white LED bush nets, green zip ties
- Vibe / Style: Manicured estate grounds
- Difficulty: Extremely fast and easy
- Budget Breakdown: Net lights: $50 | Ties: $10
- Creator’s Tip: Connect multiple net blankets together and use green zip ties at the seams so the light grid looks continuous without awkward dark patches.
- Smart Sourcing: Order connectable LED net mesh lights and UV-resistant green zip ties.
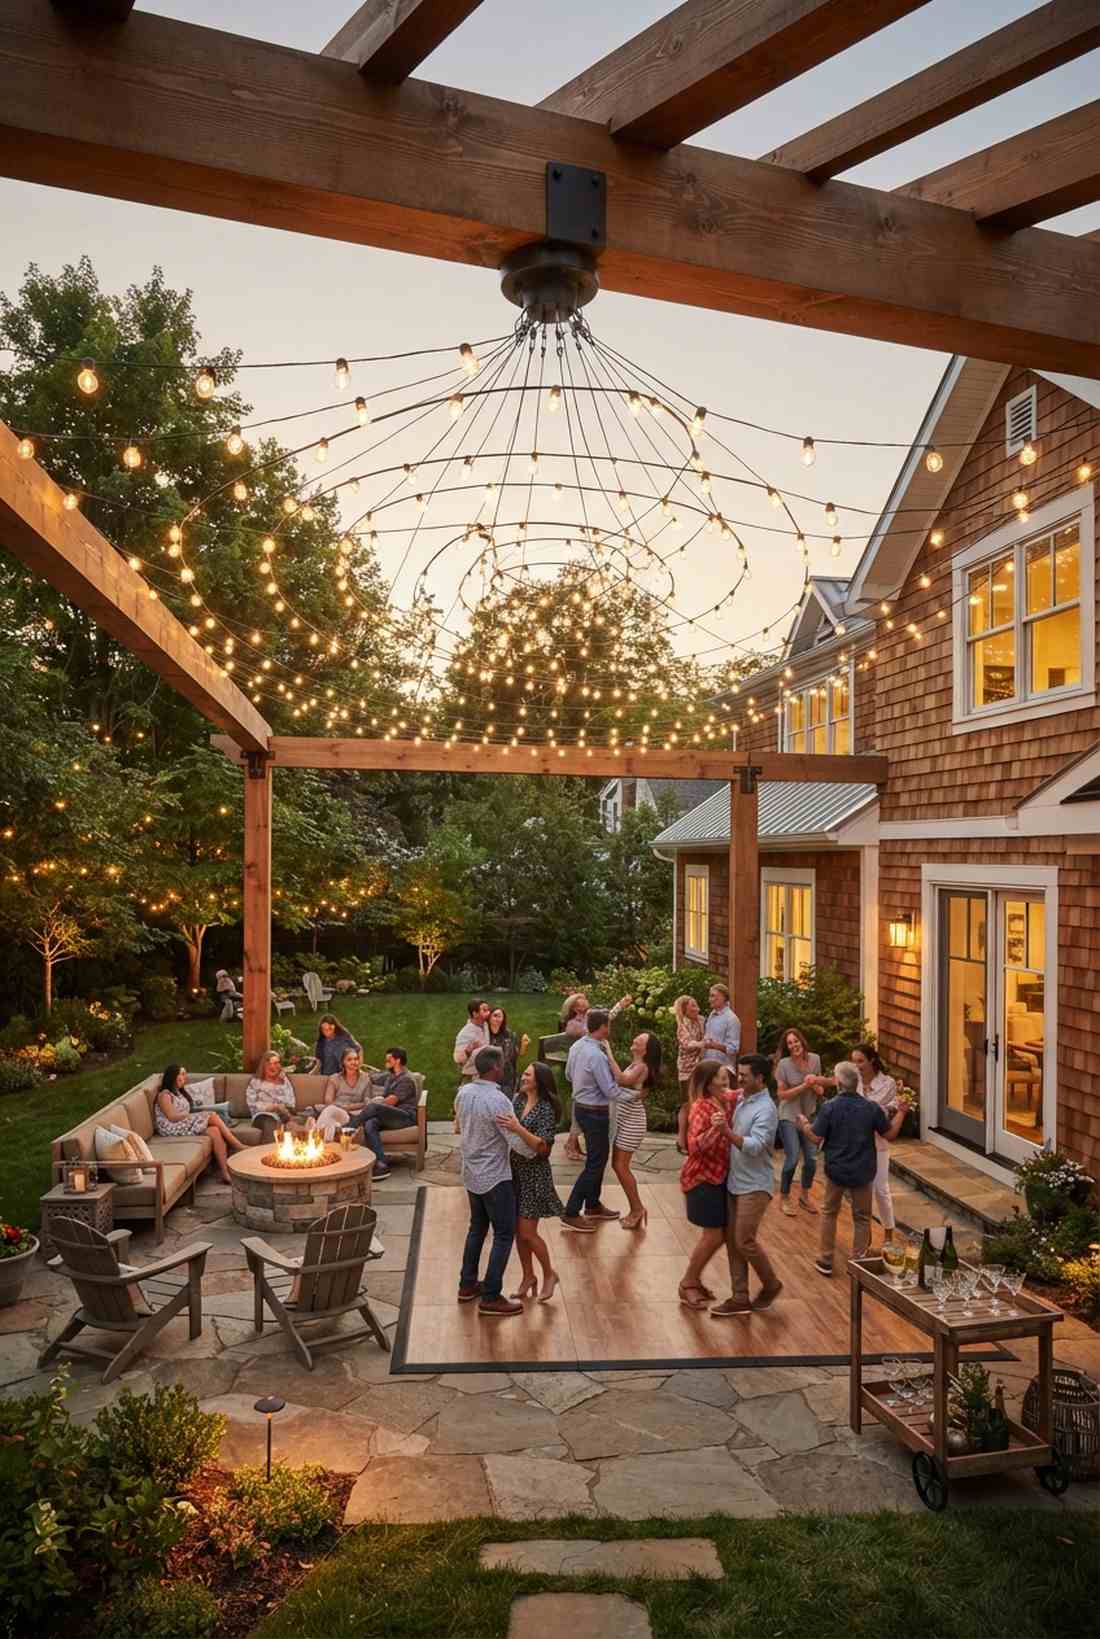
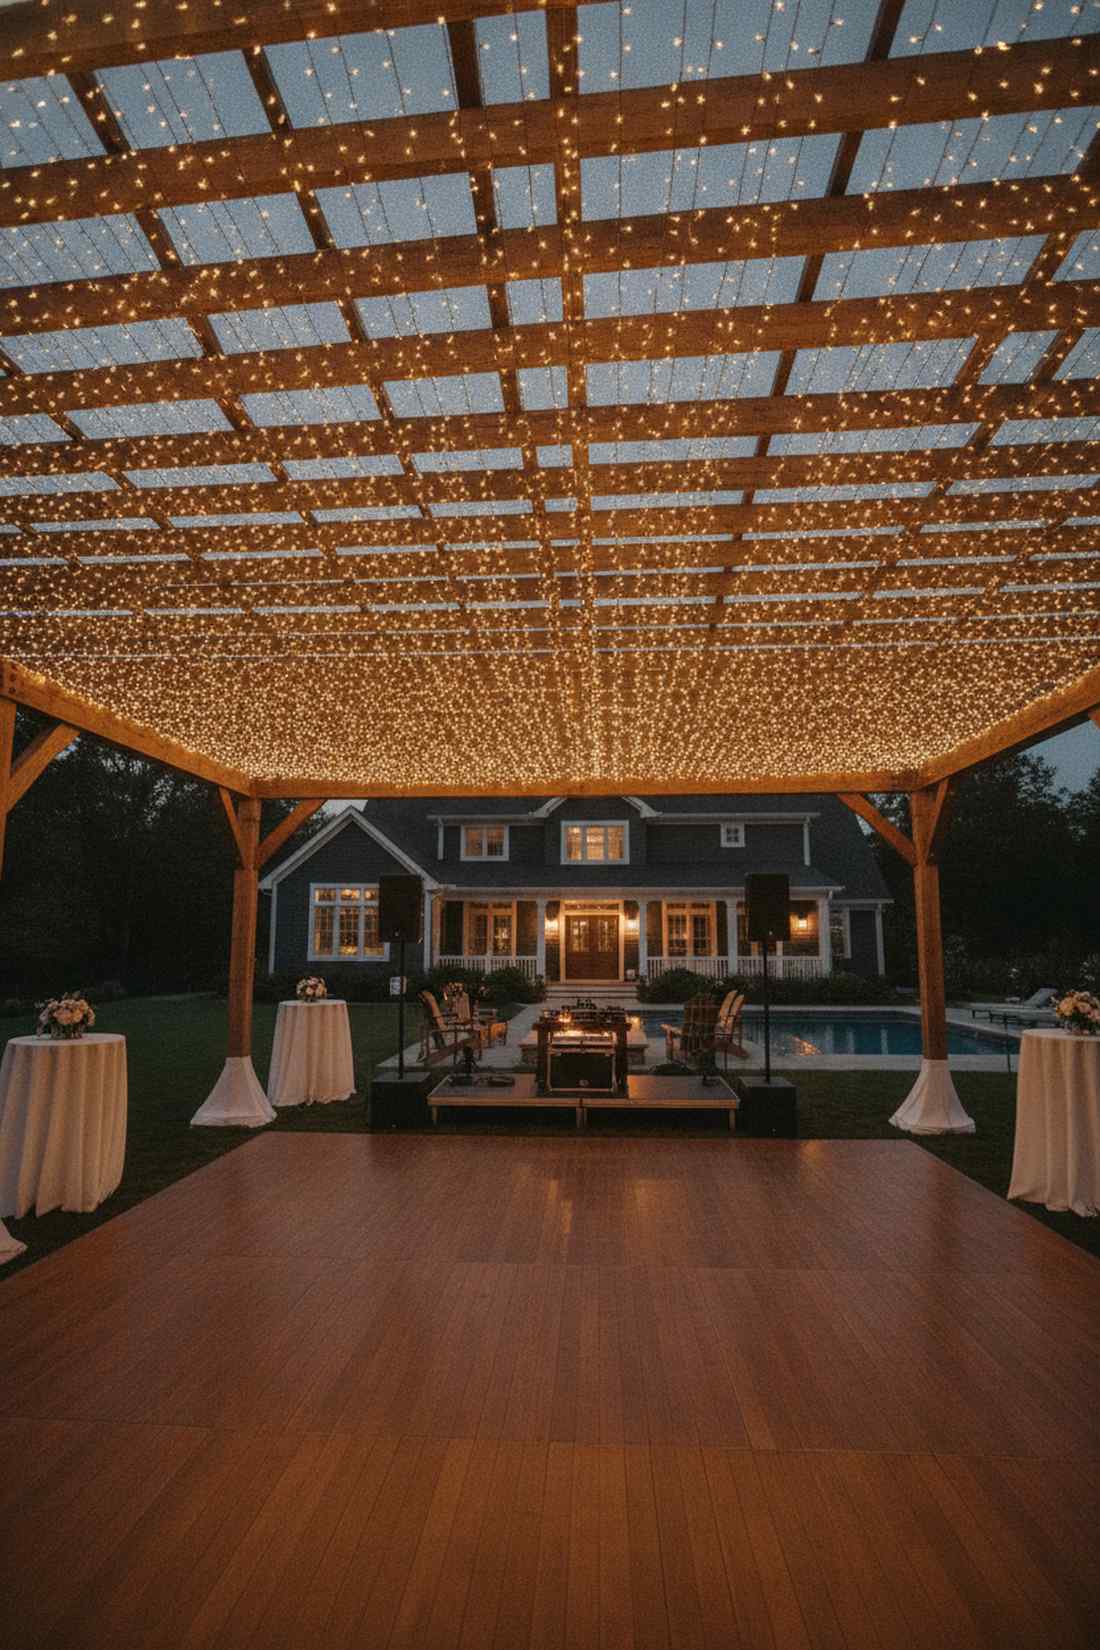
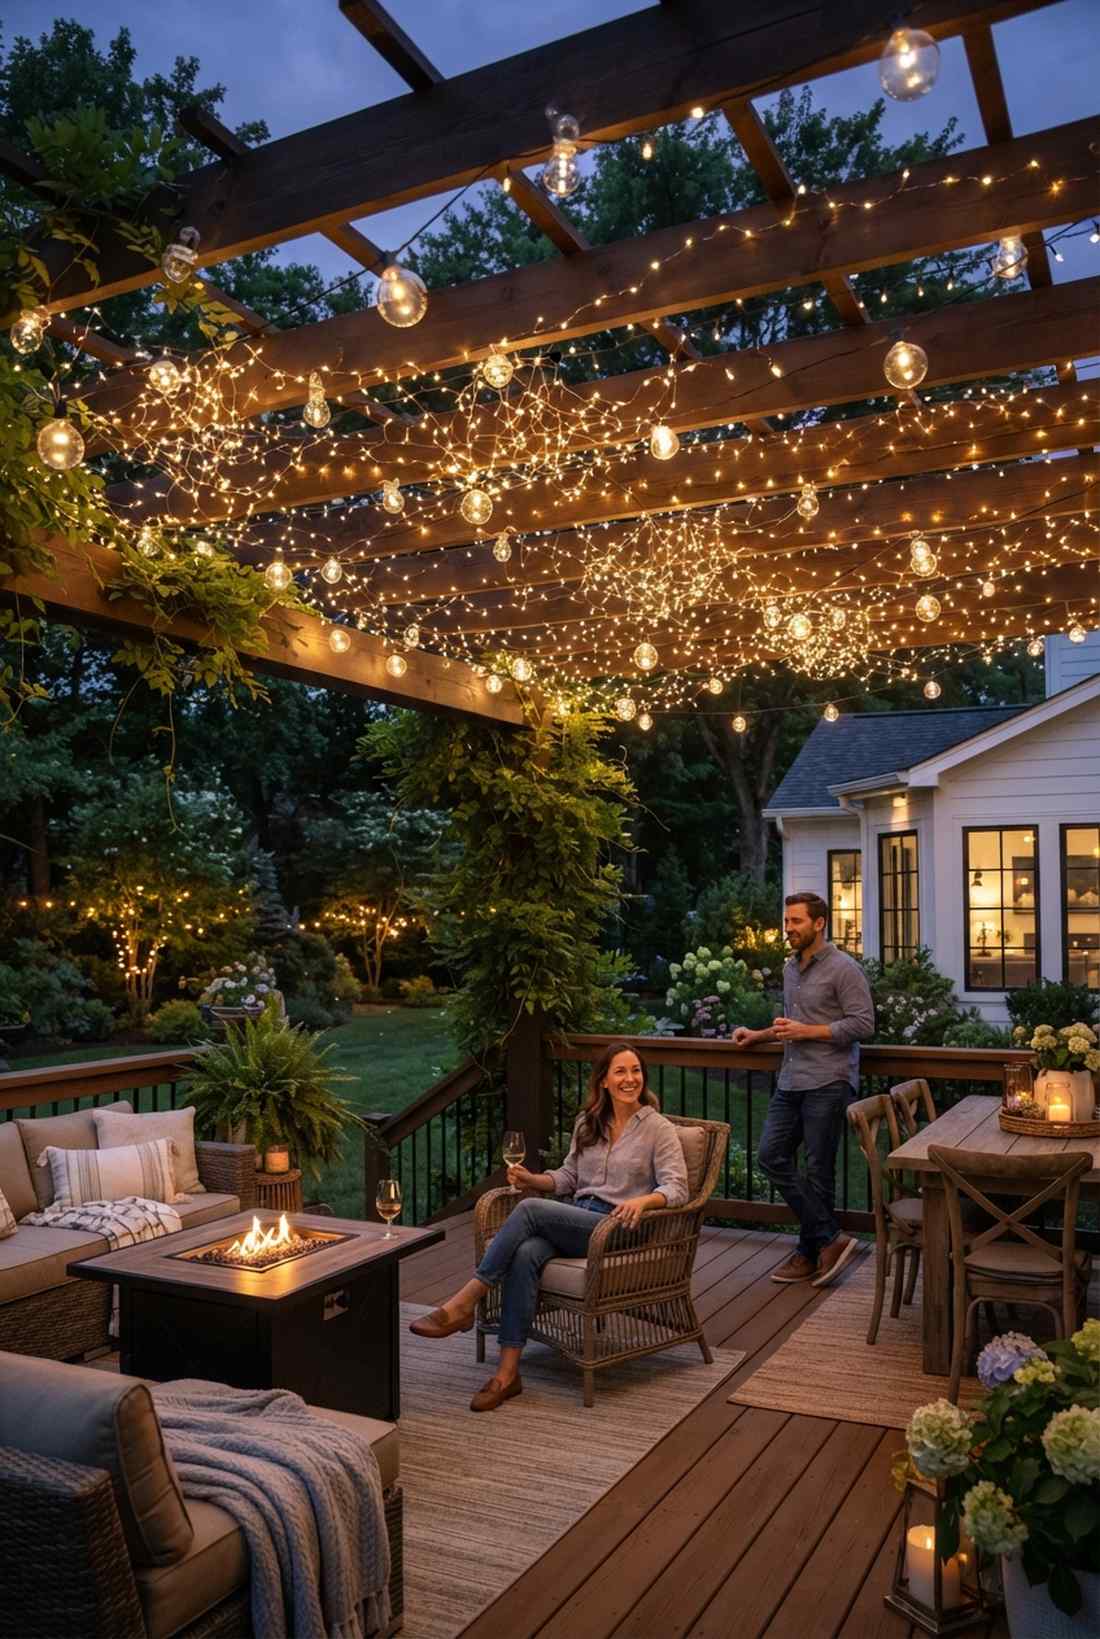
35. Pergola and Gazebo Draping
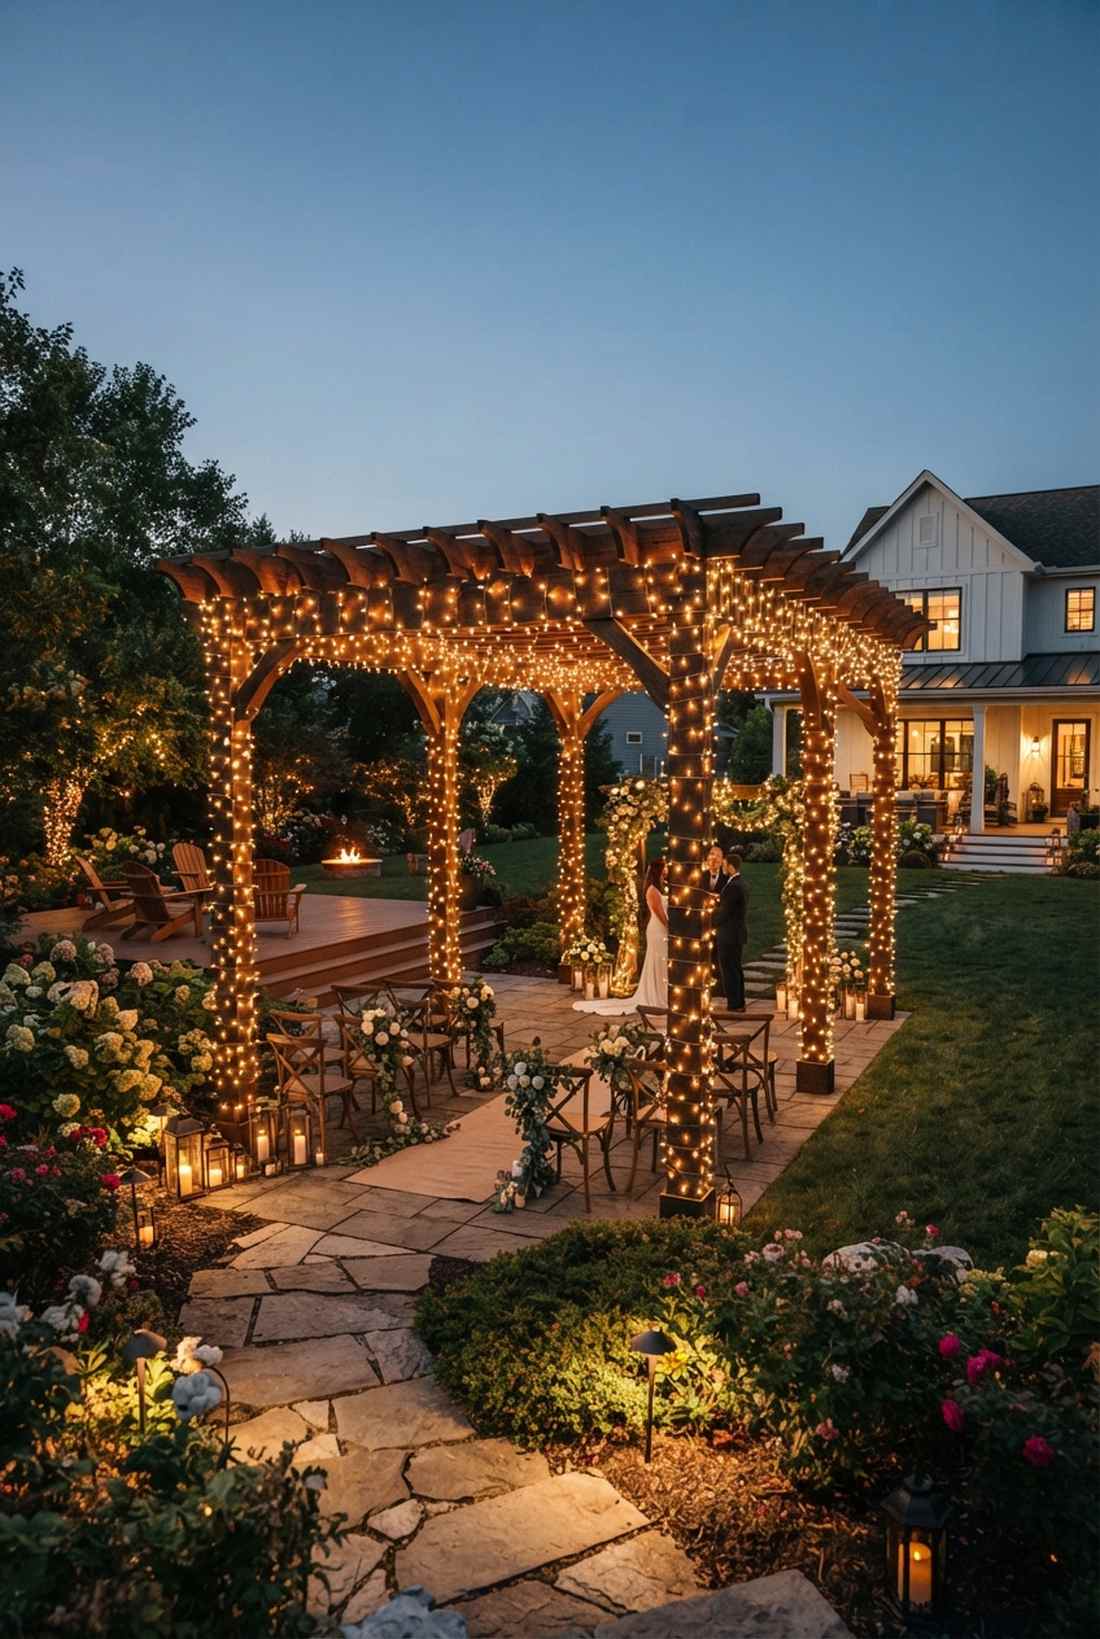

This turns a basic wooden garden structure into a blazing, romantic focal point for your vows. Tracing pergola beams with dense string lights maximizes the existing architecture of your outdoor venue.
Most couples casually string one line across the top, but densely wrapping every single vertical post and crossbeam looks far more expensive than it is. Using high-CPC wholesale wedding lighting allows you to plug up to 20 strands end-to-end without blowing a fuse.
You can completely cover a large 10×10 gazebo for about $120. Pin this if your venue has a wooden ceremony structure.
- Key Materials: End-to-end connectable fairy strings, staple gun
- Vibe / Style: Romantic, blazing focal point
- Difficulty: Moderate wrapping
- Budget Breakdown: Connectable lights: $110 | Staples: $10
- Creator’s Tip: Use a staple gun with specialized rounded cable staples; flat staples will easily pierce the wire and destroy the entire strand.
- Smart Sourcing: Grab end-to-end connectable fairy light spools and a rounded wire staple gun kit.
Material Guide: Cheap vs. Premium Aesthetic
Knowing exactly where to save and where to spend makes all the difference in achieving that “looks expensive but isn’t” vibe.
- Standard vs. UV-Resistant/Premium: Standard indoor wires turn brittle and snap outdoors within hours. Upgrading to heavy-gauge, UV-resistant wire ensures your canopy survives wind and sun exposure flawlessly.
- Pre-made Kits vs. Sourcing Locally: Buying individual retail boxes costs 4x more. Sourcing commercial-grade spools and tension starter kits directly from wholesale lighting suppliers saves hundreds while delivering brighter, longer-lasting bulbs.
36. Ground-Level Fairy Light Gardens
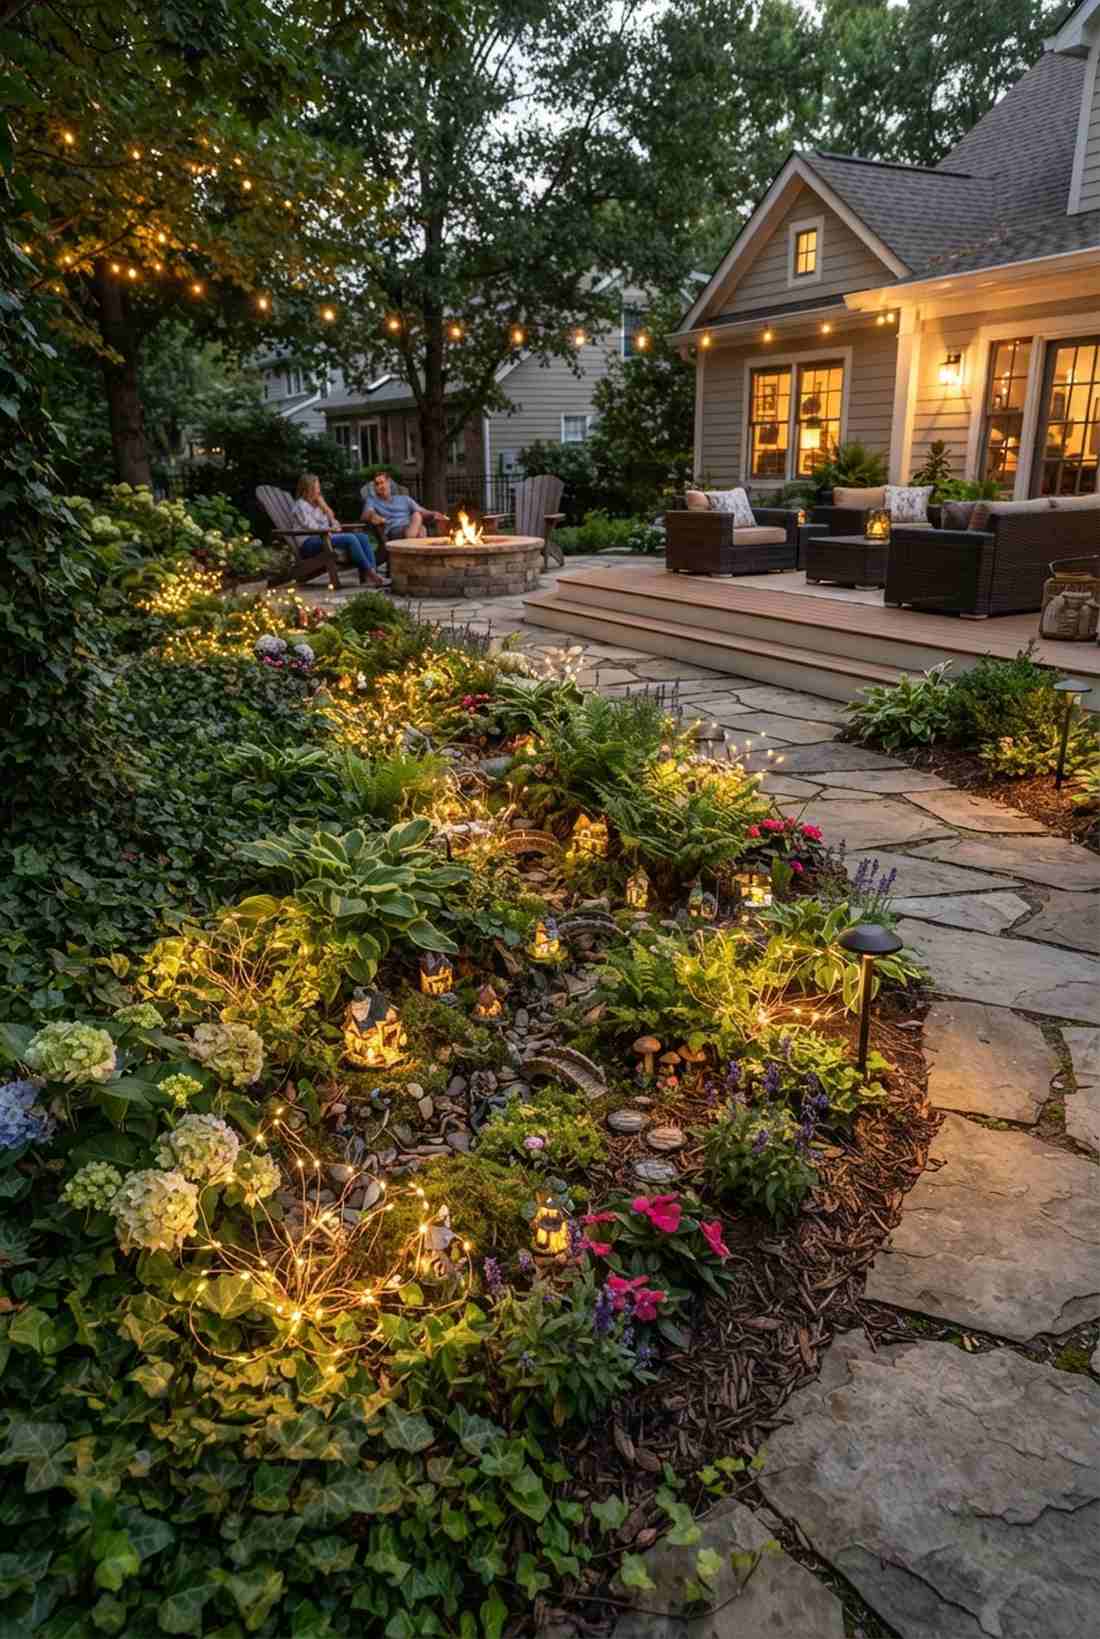
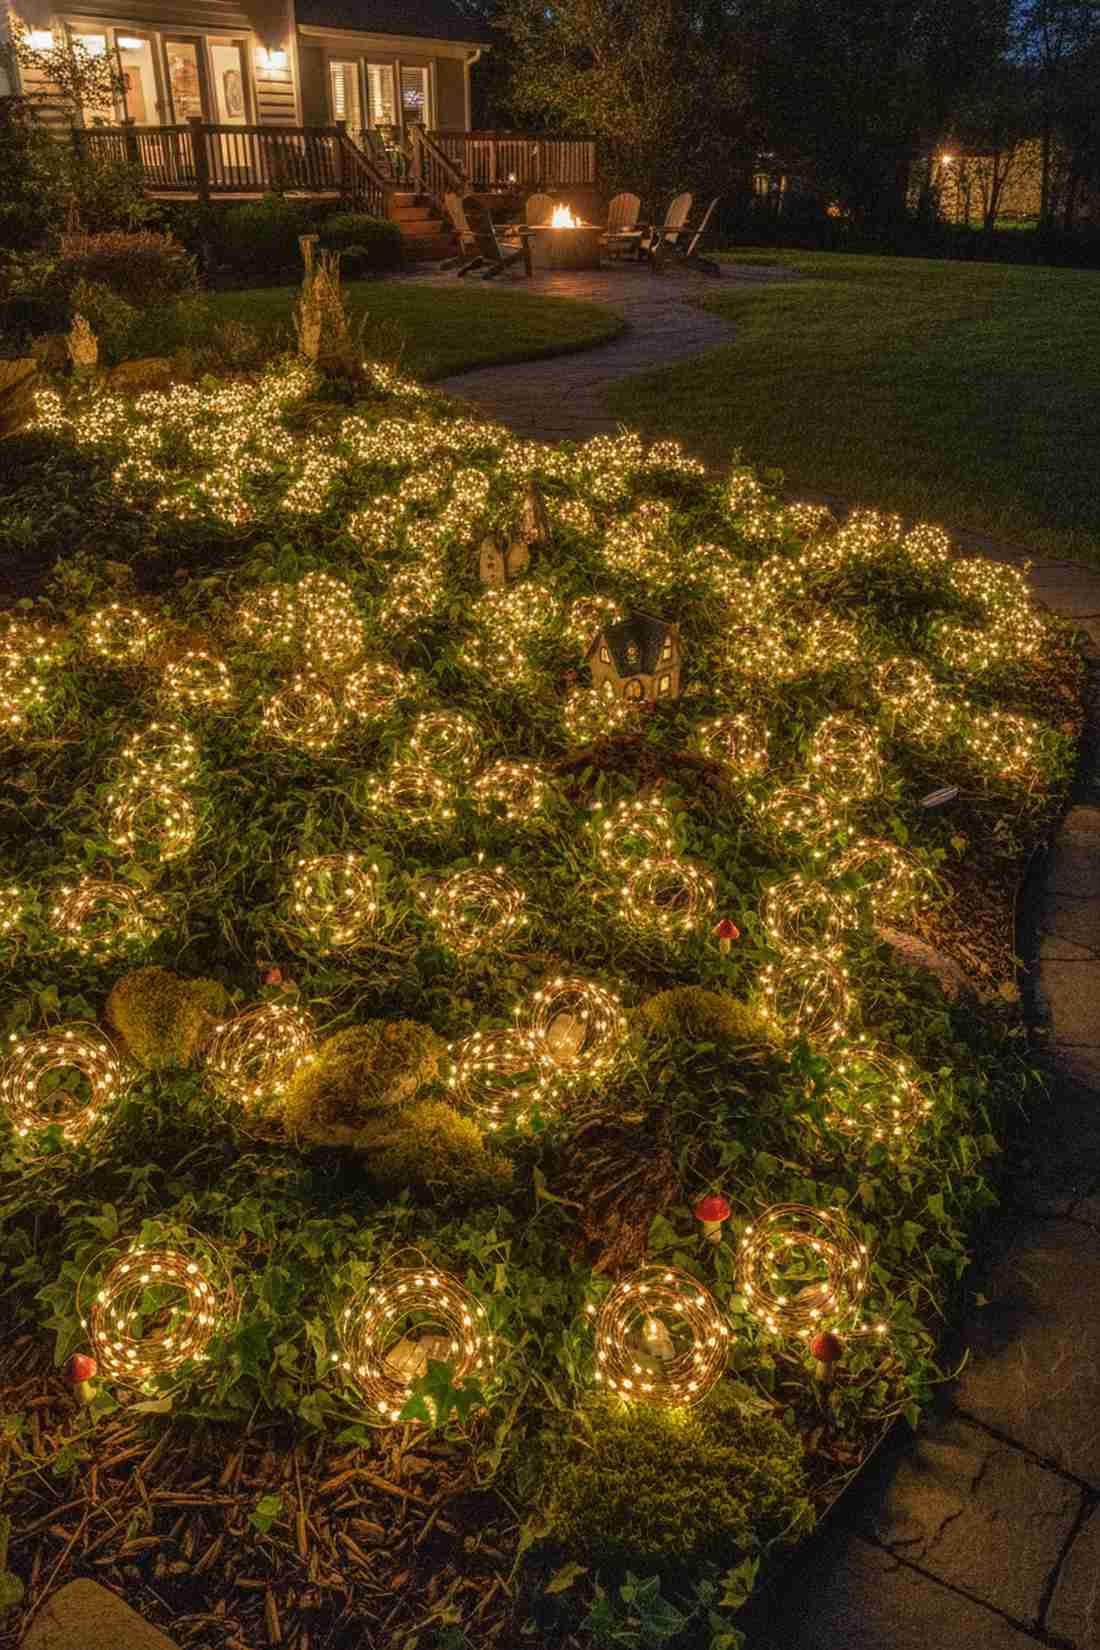
This layout creates a surreal, glowing underbrush that feels like a literal fairy tale landscape. Illuminating ground cover and low flower beds brings the magic down to ankle height, completely enveloping the guests.
Leaving the ground dark makes the venue feel small, but casually tossing waterproof micro-strands directly into the mulch and ivy delivers a surprisingly premium look. Including high-quality miniature garden supplies like glowing resin accents hides the battery packs beautifully.
You can create a magical glowing garden bed for roughly $30. It’s an incredibly cheap way to add depth to outdoor spaces.
- Key Materials: Submersible copper wire lights, faux moss
- Vibe / Style: Surreal, glowing underbrush
- Difficulty: Very easy scattering
- Budget Breakdown: Micro wires: $20 | Moss: $10
- Creator’s Tip: Don’t string them tightly; literally crumble the wire like a loose ball of yarn and drop it into the bushes for that organic, scattered firefly effect.
- Smart Sourcing: Pick up waterproof copper wire fairy strands and UV-coated resin fairy cottage kits.
37. Water Feature Illumination
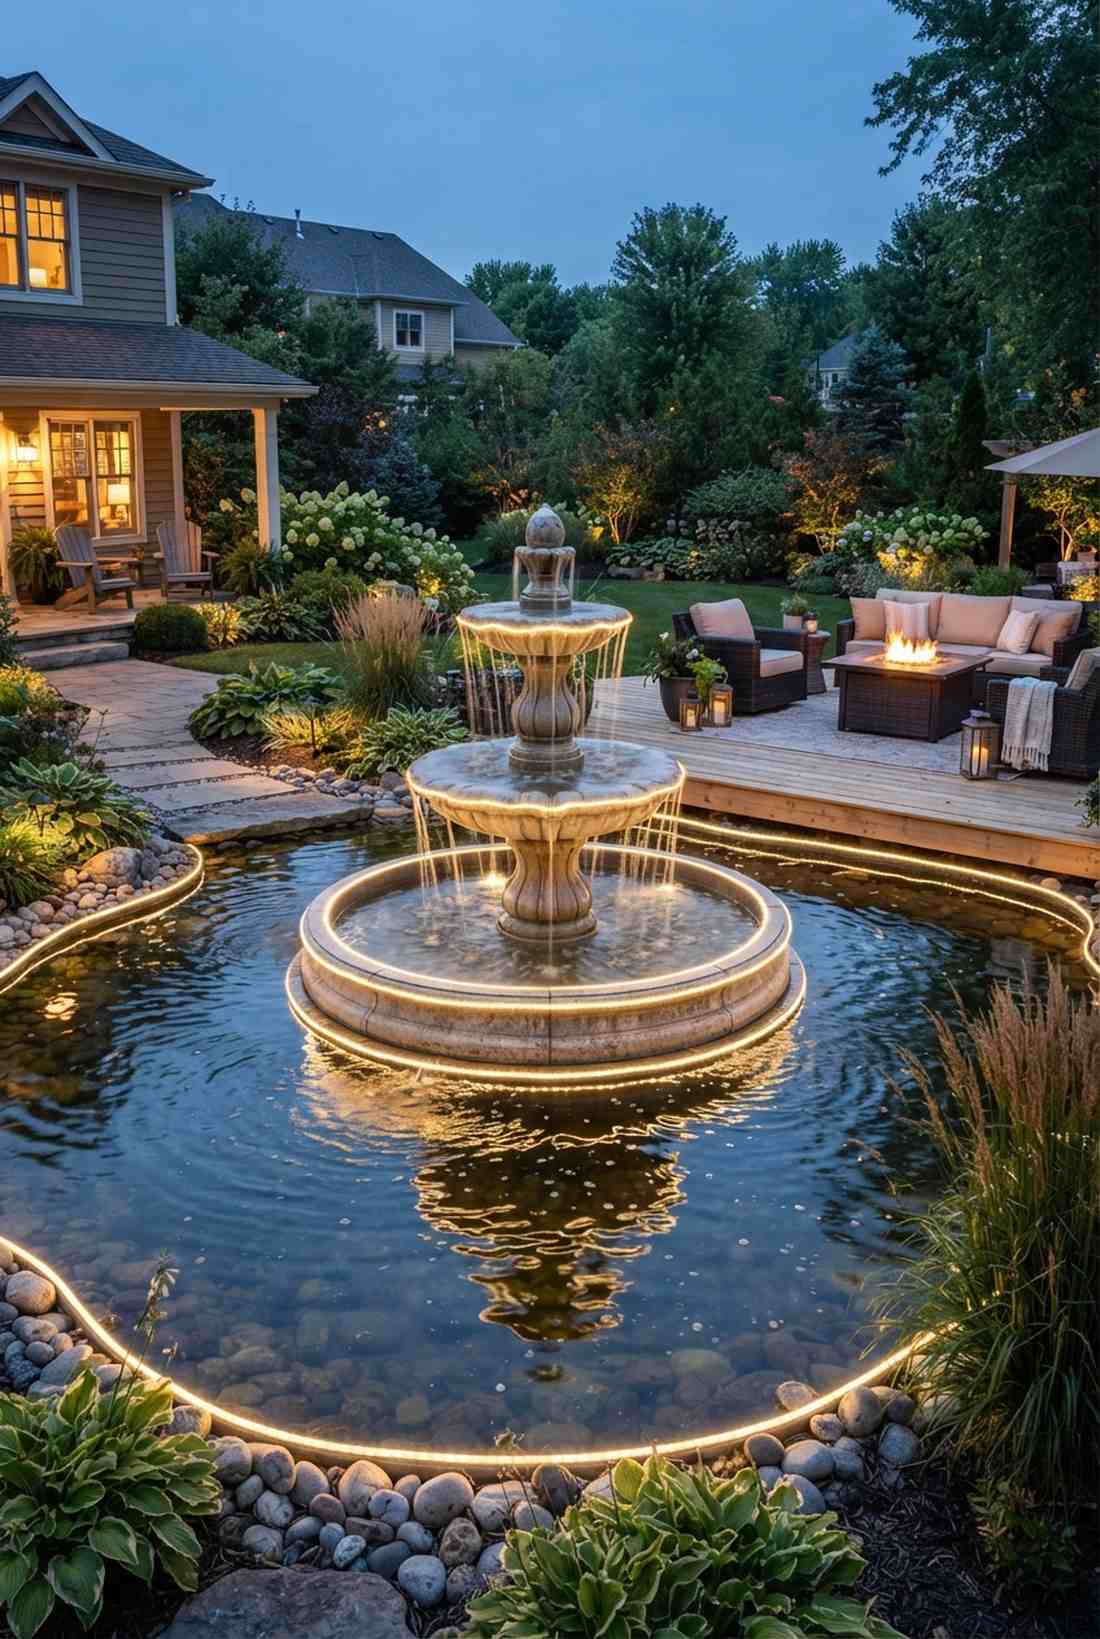
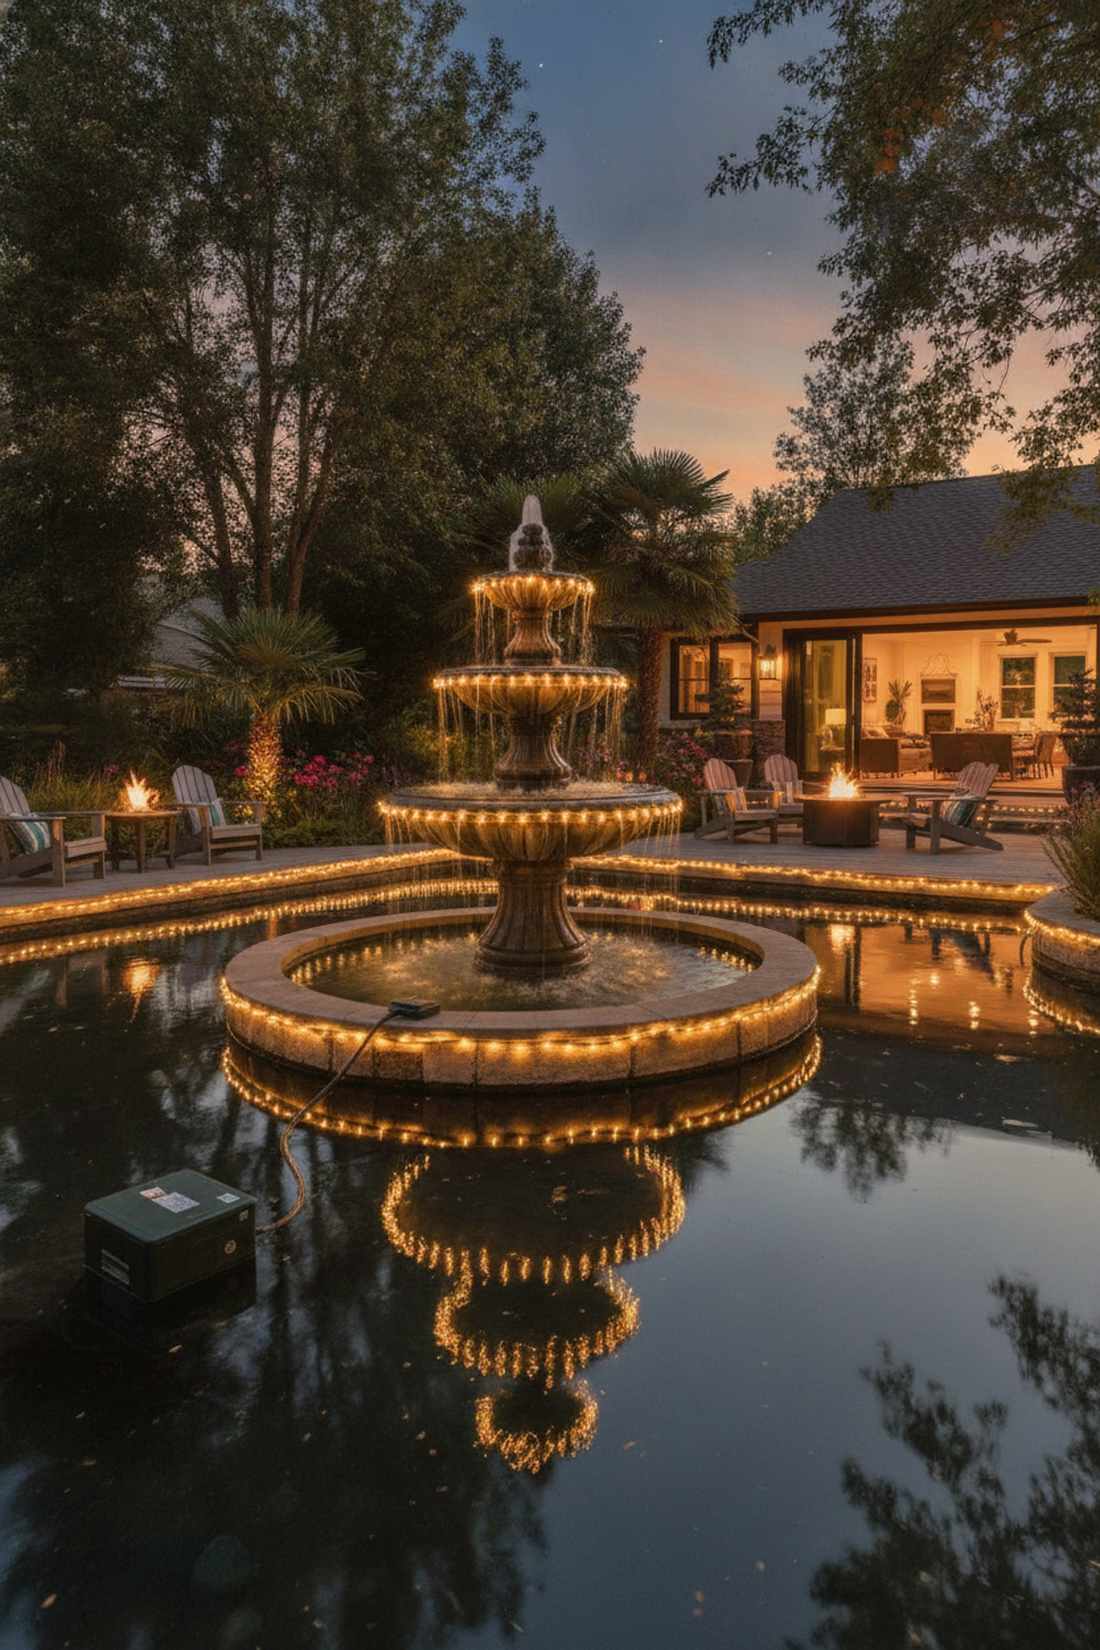
This setup doubles your lighting investment instantly by turning the water into a massive, glowing mirror. Outlining venue fountains and ponds is the smartest way to leverage outdoor water elements.
Many decorators are terrified of water and avoid it, but strictly utilizing IP68-rated submersible fairy lights wedding decor gives a designer-level finish that is 100% safe. The reflection of the bulbs on the rippling water creates an incredibly expensive-looking kinetic energy.
You can outline a large venue fountain safely for about $50. Save this if your venue has a courtyard pool or pond.
- Key Materials: IP68 submersible string lights, waterproof tape
- Vibe / Style: Luxurious, reflective resort
- Difficulty: Moderate (requires strict waterproofing)
- Budget Breakdown: IP68 lights: $40 | Waterproof tape: $10
- Creator’s Tip: Never submerge the battery pack or the plug connection; seal the transition point in a waterproof electrical junction box hidden in the landscaping.
- Smart Sourcing: Invest in IP68 fully submersible LED ropes and outdoor waterproof electrical junction boxes.
38. Fence Line Border Lighting
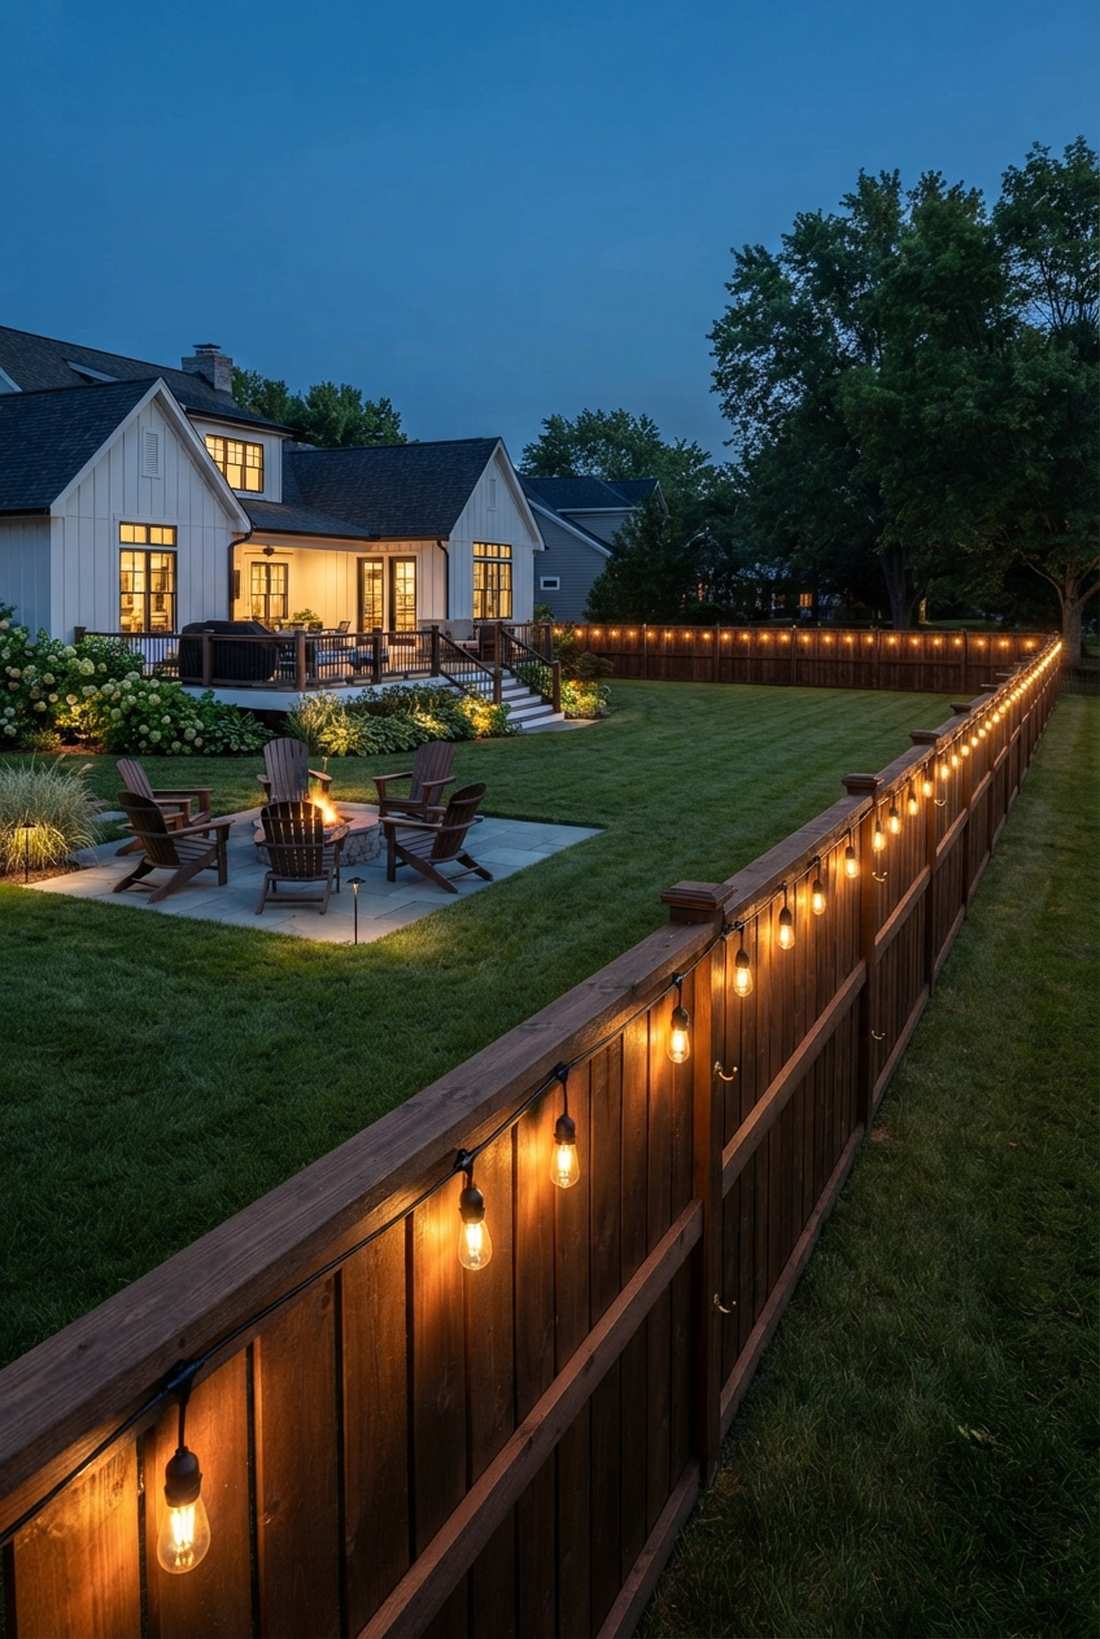
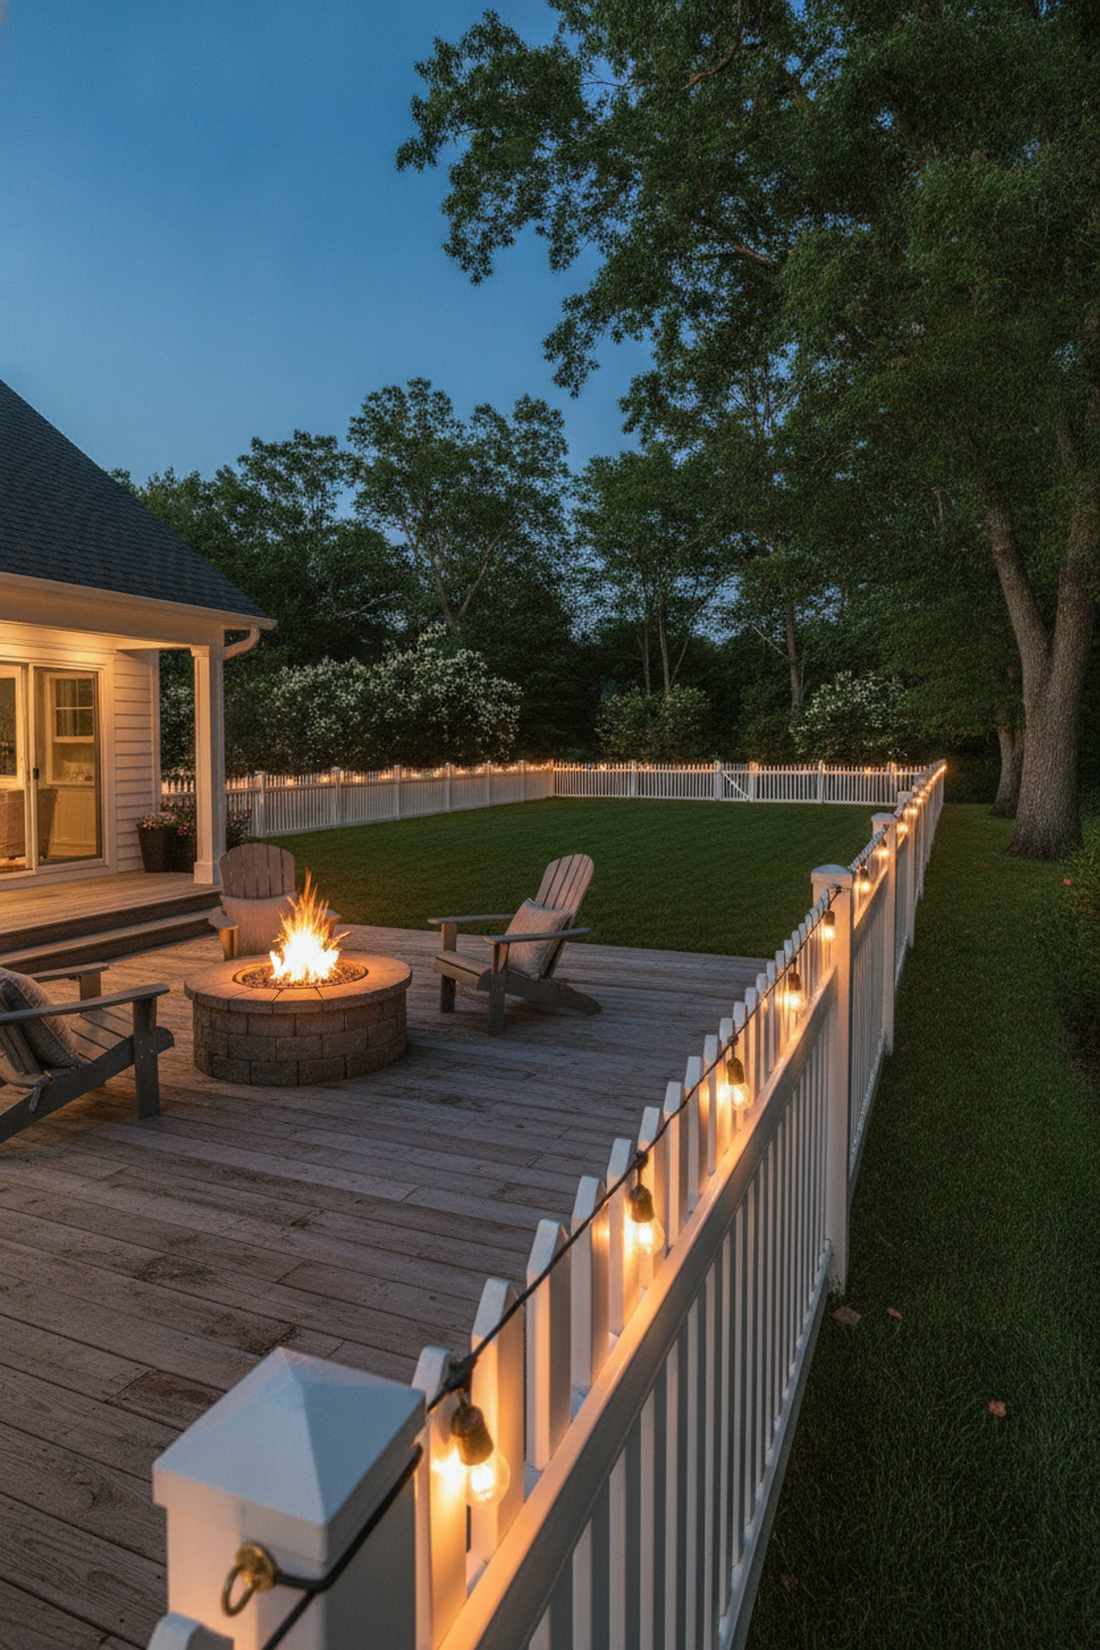
This creates a glowing, endless horizon line that makes the entire venue feel significantly larger. Tracing property fences with string lights clearly defines the perimeter while adding massive ambient glow.
Leaving wooden fences bare looks rustic and cheap, but pulling taut lines of commercial-grade bulbs perfectly along the top rail looks incredibly expensive and polished. Sourcing heavy-duty wholesale wedding lighting allows you to run hundreds of feet off a single outlet.
You can professionally outline 100 feet of fencing for about $80. A highly practical structural upgrade.
- Key Materials: Long-run commercial strings, screw-in cup hooks
- Vibe / Style: Polished estate boundary
- Difficulty: Easy but involves walking long distances
- Budget Breakdown: Long-run lights: $70 | Cup hooks: $10
- Creator’s Tip: Pre-drill tiny holes for the cup hooks every 4 feet along the wood; it makes twisting them in by hand 100x faster and saves your fingers.
- Smart Sourcing: Order commercial-grade long-run string lights and brass screw-in cup hooks (bulk).
Architectural Features
39. Column and Pillar Wrapping
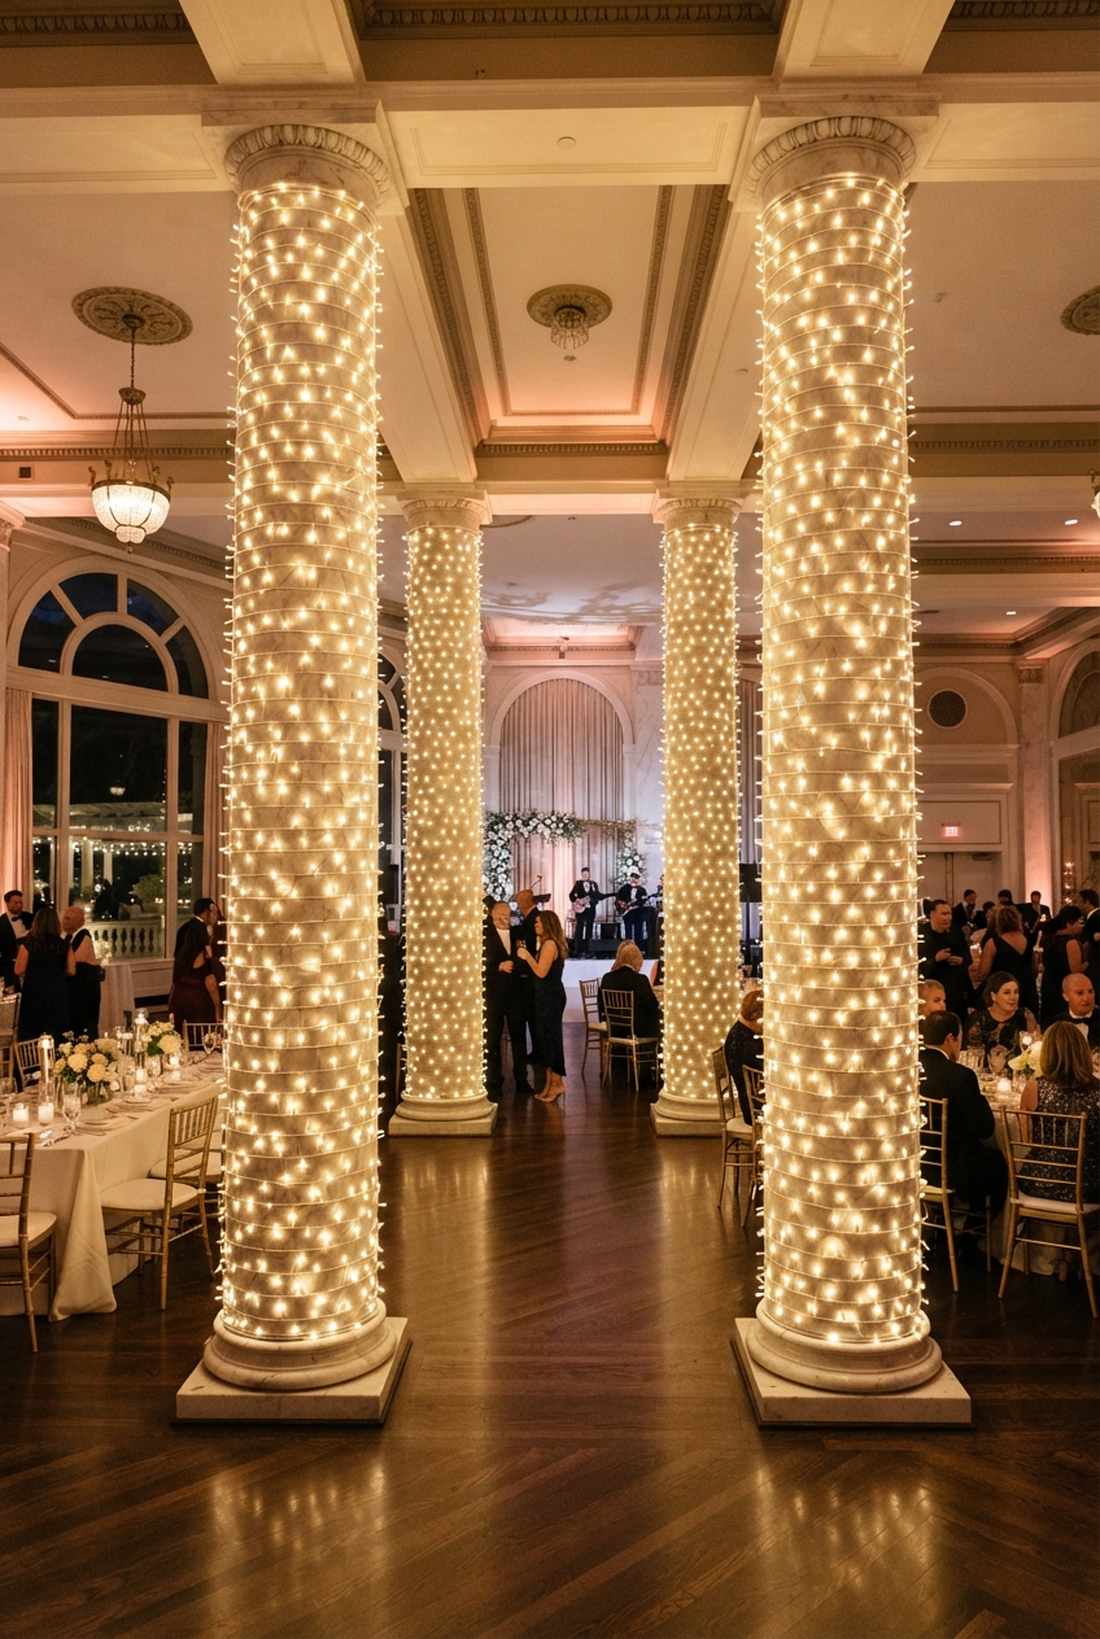
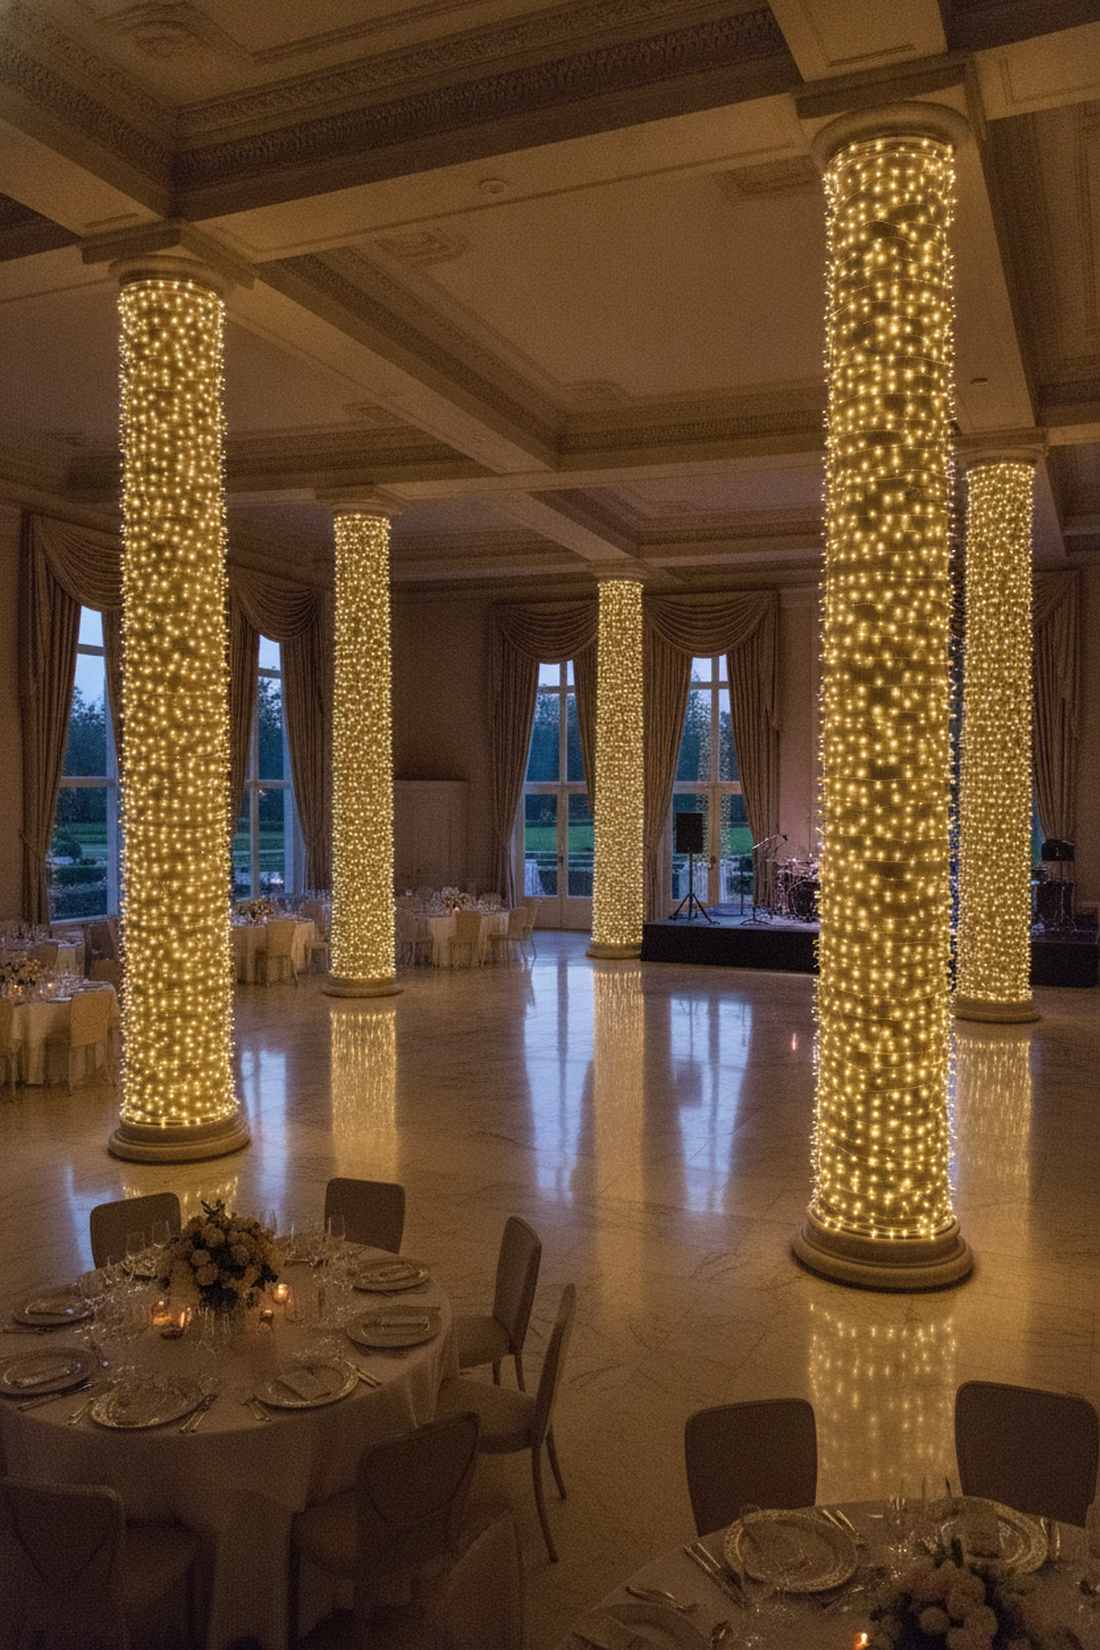
This instantly transforms cold, structural concrete into towering pillars of blazing warmth. Dense pillar light wrapping is the single most effective way to disguise ugly load-bearing columns in the middle of a ballroom.
Amateurs leave huge, messy gaps, but wrapping the lights tightly with exactly one inch of spacing delivers a far more expensive aesthetic. Using transparent adhesive tape ensures the wires stay perfectly gripped to smooth marble or concrete without sliding down.
You can wrap four massive venue columns for roughly $100. Pin this immediately if your venue is full of pillars.
- Key Materials: High-density fairy spools, clear Gorilla tape
- Vibe / Style: Grand, glowing architecture
- Difficulty: Repetitive, dizzying work
- Budget Breakdown: Dense spools: $85 | Clear tape: $15
- Creator’s Tip: Tape the battery pack at the very top of the column, not the bottom, so curious kids can’t mess with the switches during the reception.
- Smart Sourcing: Grab high-density fairy light wrapping spools and heavy-duty clear mounting tape.
This next window trick literally doubles the amount of light in your room without plugging in a single extra bulb…
40. Window Frame Outlining
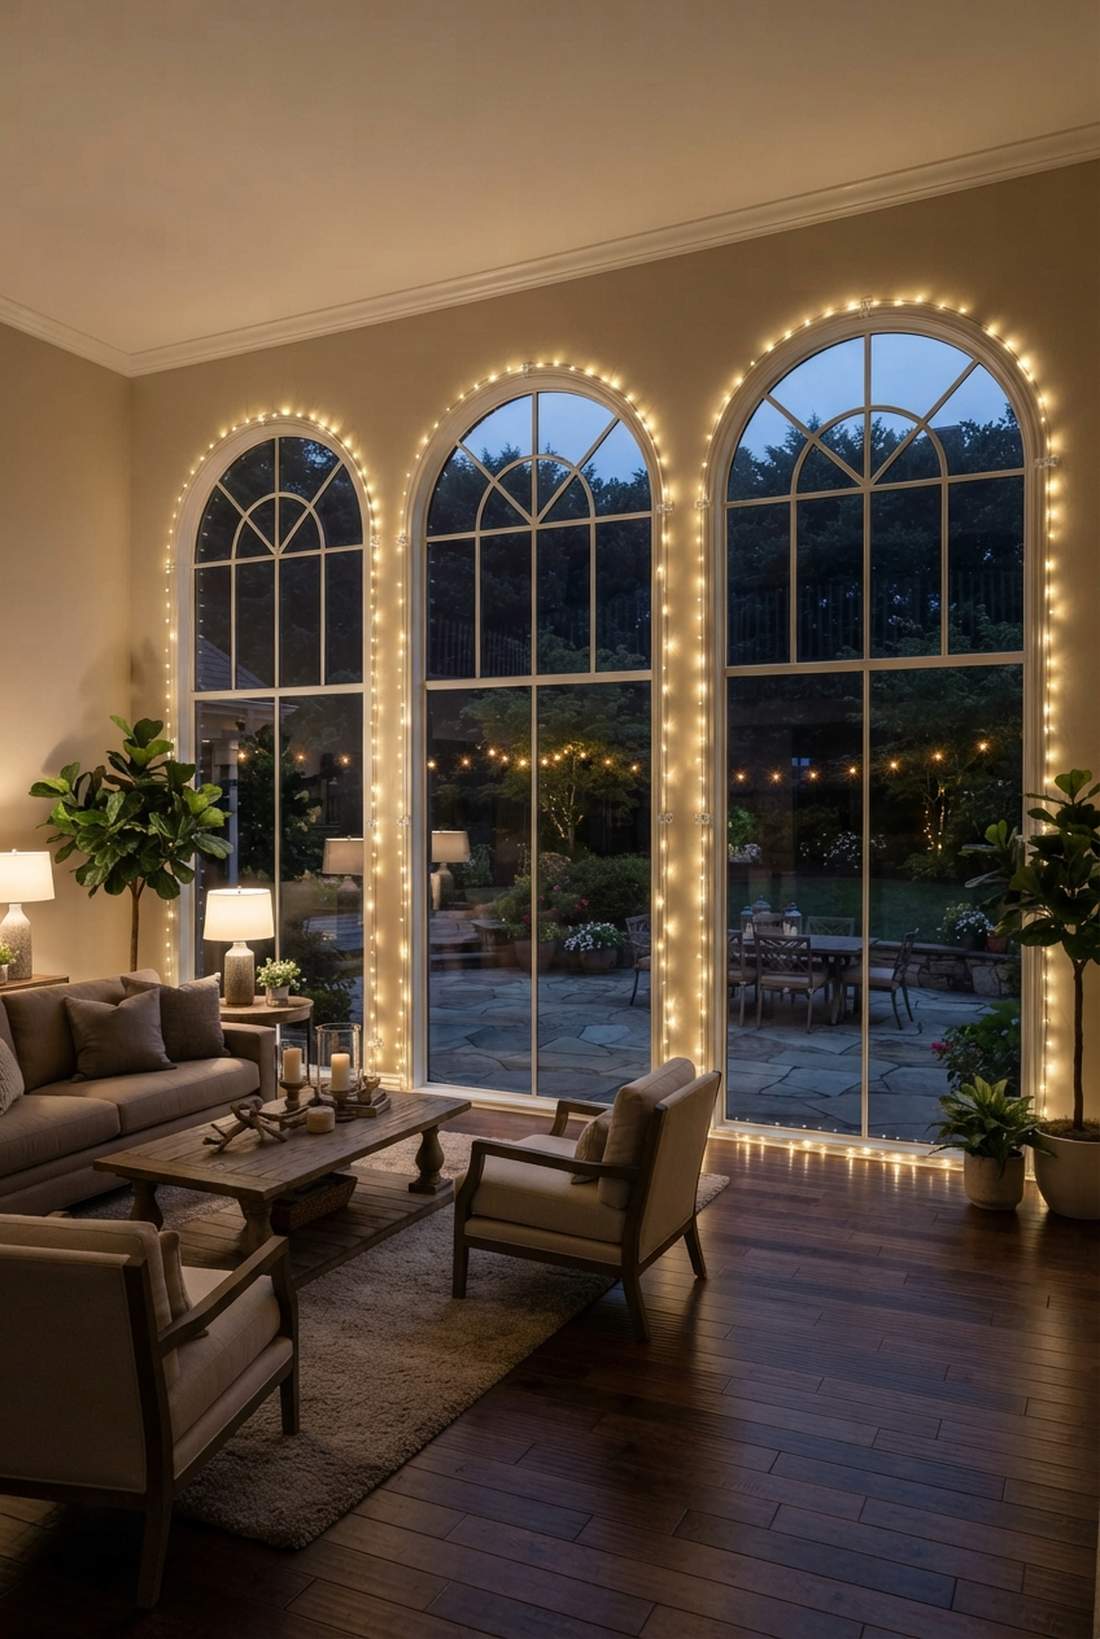
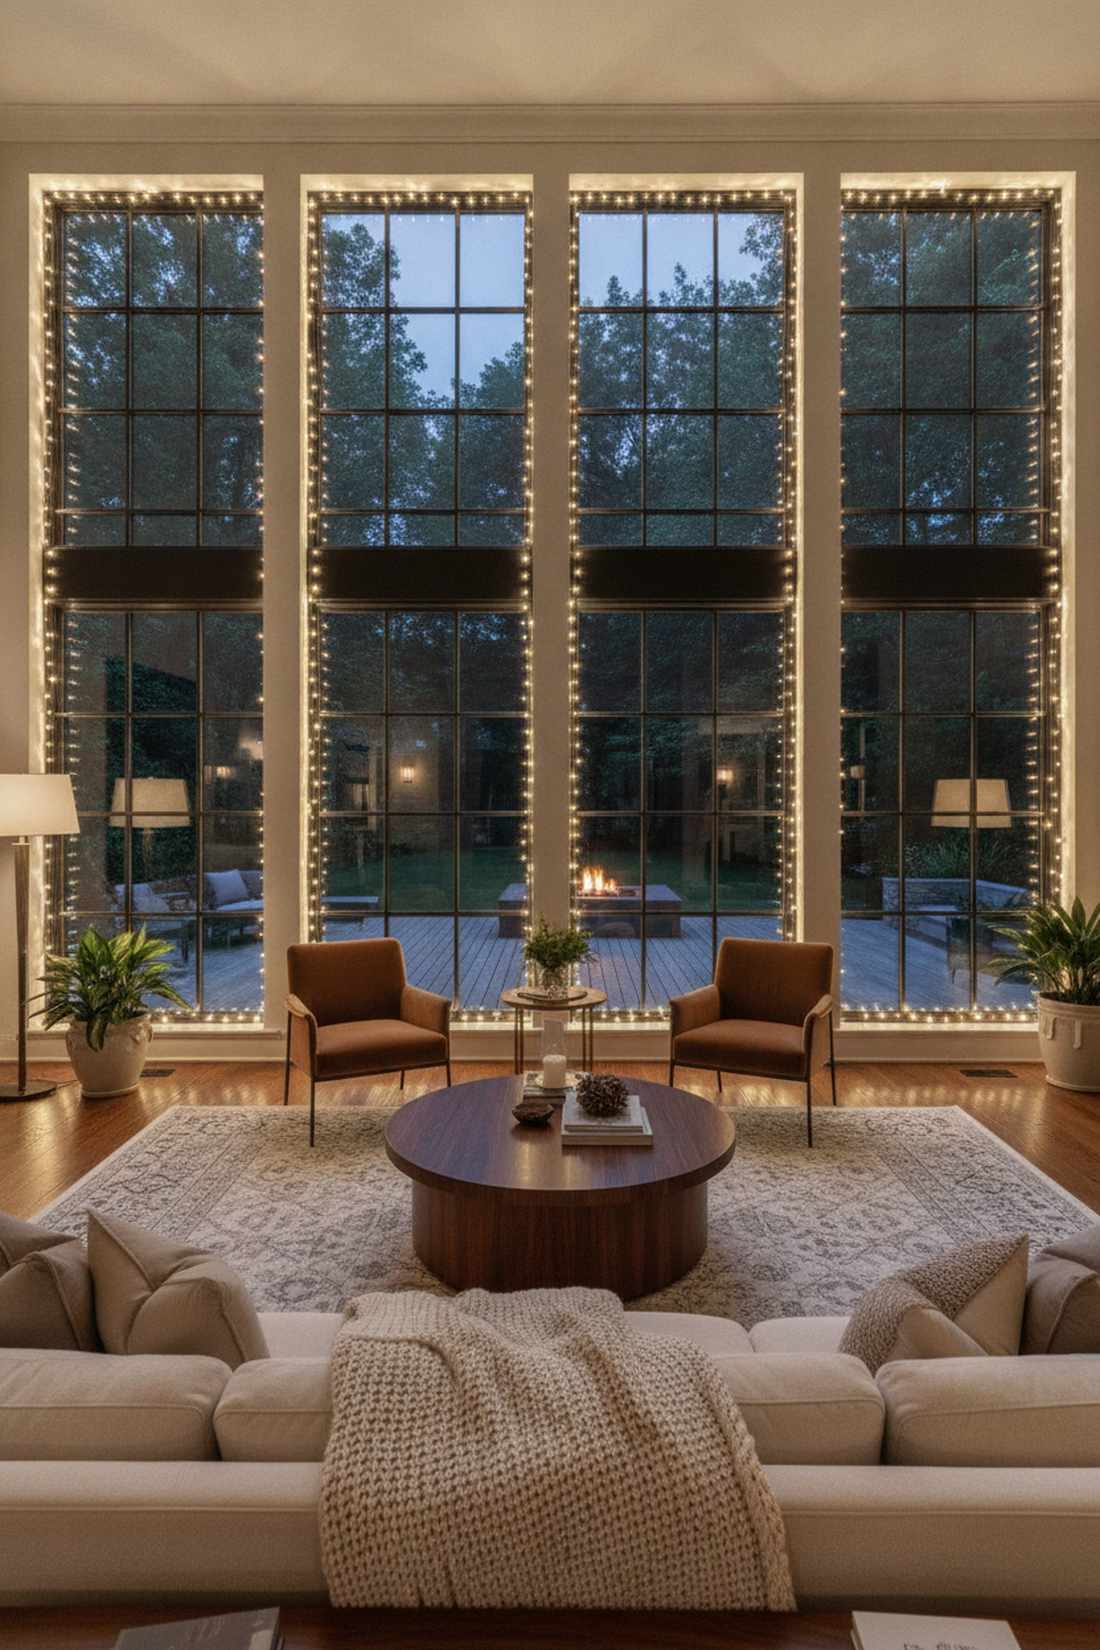
This leverages the dark glass at night to act as a massive mirror, doubling the visual impact of your decor instantly. Outlining interior venue windows frames the space beautifully and bounces the light right back into the room.
Tape ruins venue paint and costs you your deposit, but using specialized damage-free acrylic clips gives a designer-level finish that is totally safe. Highlighting the architectural mullions with fairy lights wedding decor adds incredible depth to the room’s perimeter.
You can outline six massive venue windows for about $40. It’s the smartest budget-stretching trick in the book.
- Key Materials: Damage-free light clips, thin wire LEDs
- Vibe / Style: Elegant, reflective borders
- Difficulty: Beginner-friendly
- Budget Breakdown: Clips: $15 | Lights: $25
- Creator’s Tip: Wipe the window frames with rubbing alcohol before applying the adhesive clips to ensure they don’t pop off mid-party due to humidity.
- Smart Sourcing: Source damage-free clear adhesive light clips and ultra-thin silver wire fairy strands.
41. Staircase Railing Illumination
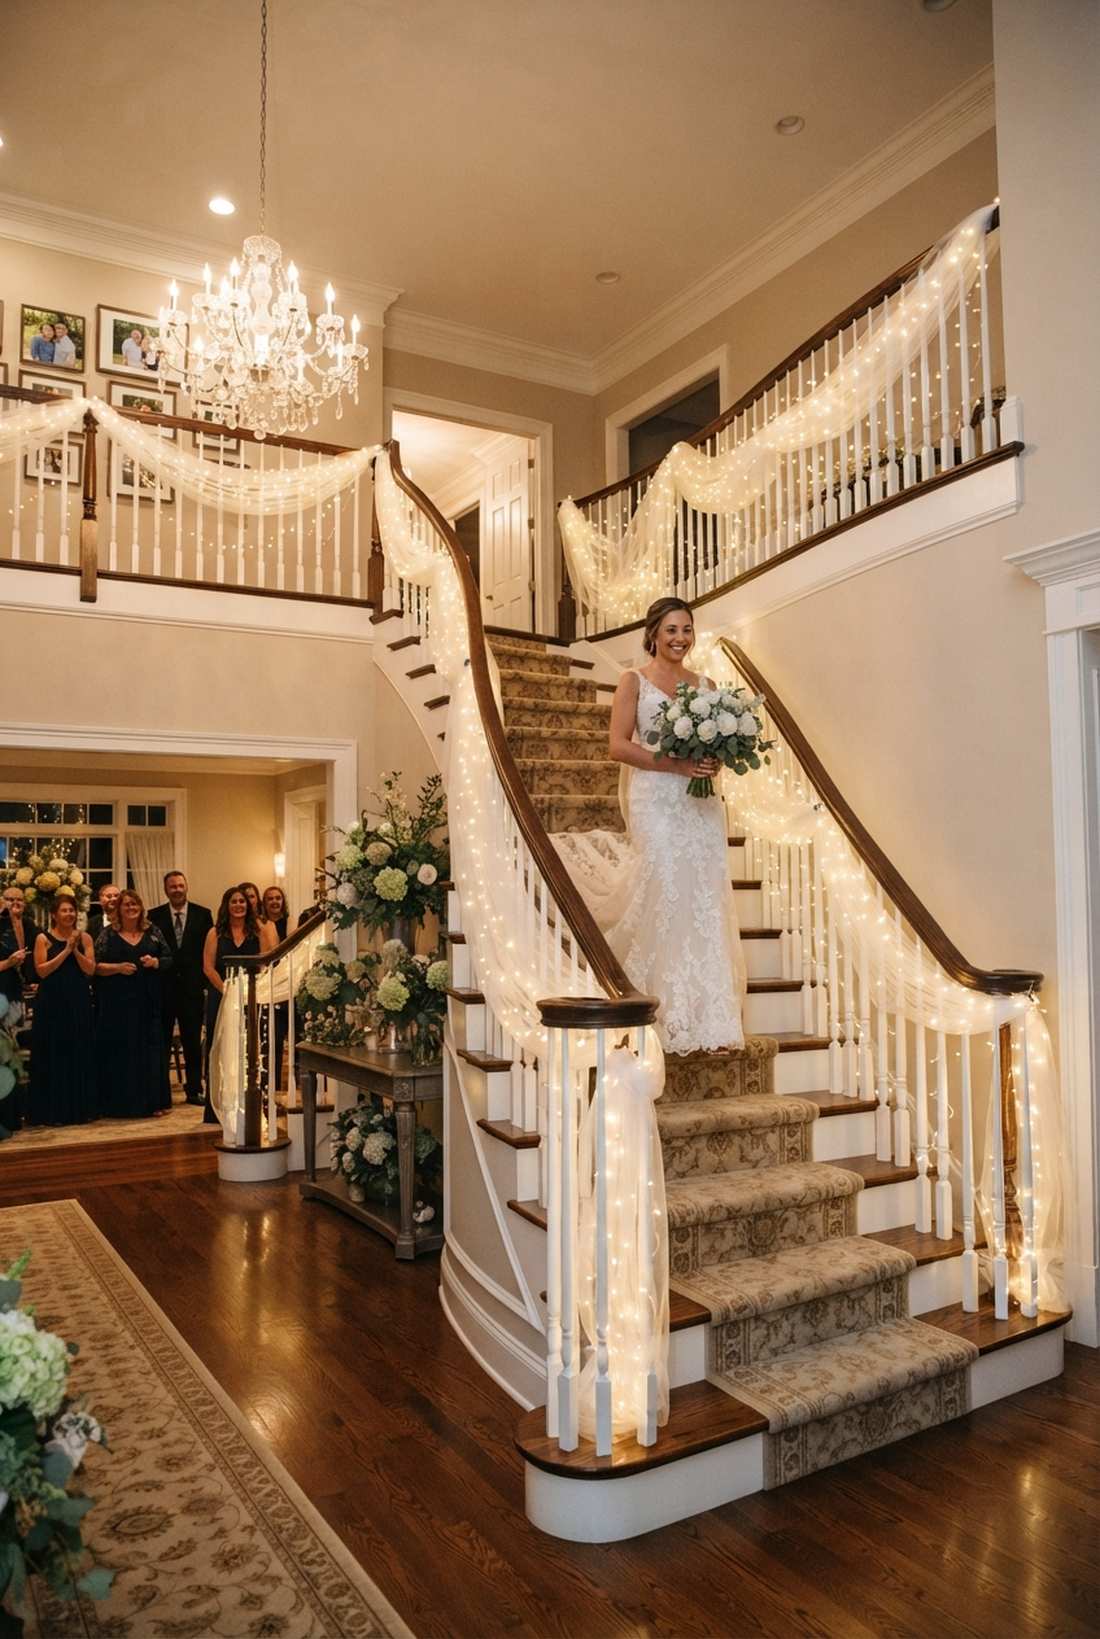
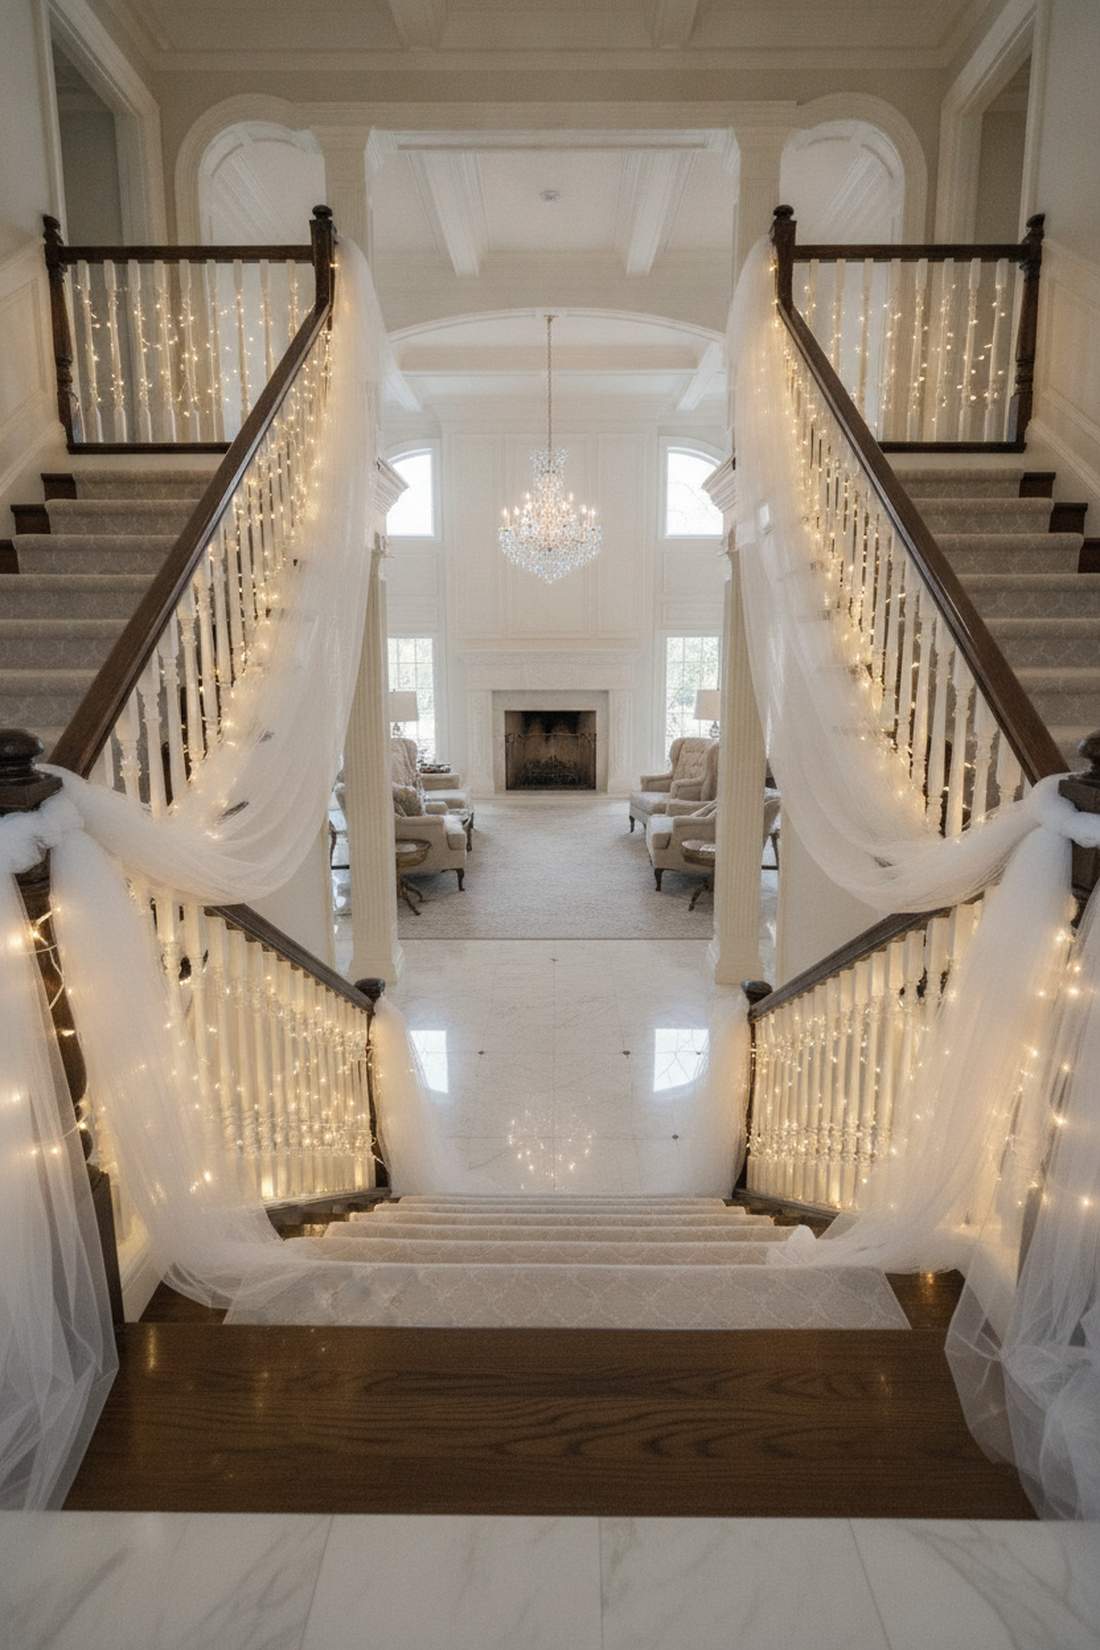
This guarantees that your grand entrance down the stairs looks like a scene cut straight out of a Disney movie. Illuminated grand staircases provide breathtaking photo opportunities while ensuring older guests can see the steps safely.
A bare banister is a missed opportunity, but tightly coiling warm lights interlaced with sheer chiffon looks insanely expensive and luxurious. Utilizing battery-operated fairy garden kits is mandatory here so nobody trips over an extension cord stretched across the stairs.
You can dress a massive double staircase for roughly $60. Save this for your grand bridal entrance planning.
- Key Materials: Battery-pack LEDs, sheer fabric tulle, zip ties
- Vibe / Style: Royal, cinematic descent
- Difficulty: Moderate wrapping
- Budget Breakdown: Lights: $30 | Fabric/Ties: $30
- Creator’s Tip: Wrap the lights strictly around the vertical balusters, leaving the top handrail completely smooth and clear so guests can actually hold on safely.
- Smart Sourcing: Invest in long-length battery-operated fairy lights and sheer white tulle fabric bolts.
42. Beam and Rafter Highlighting
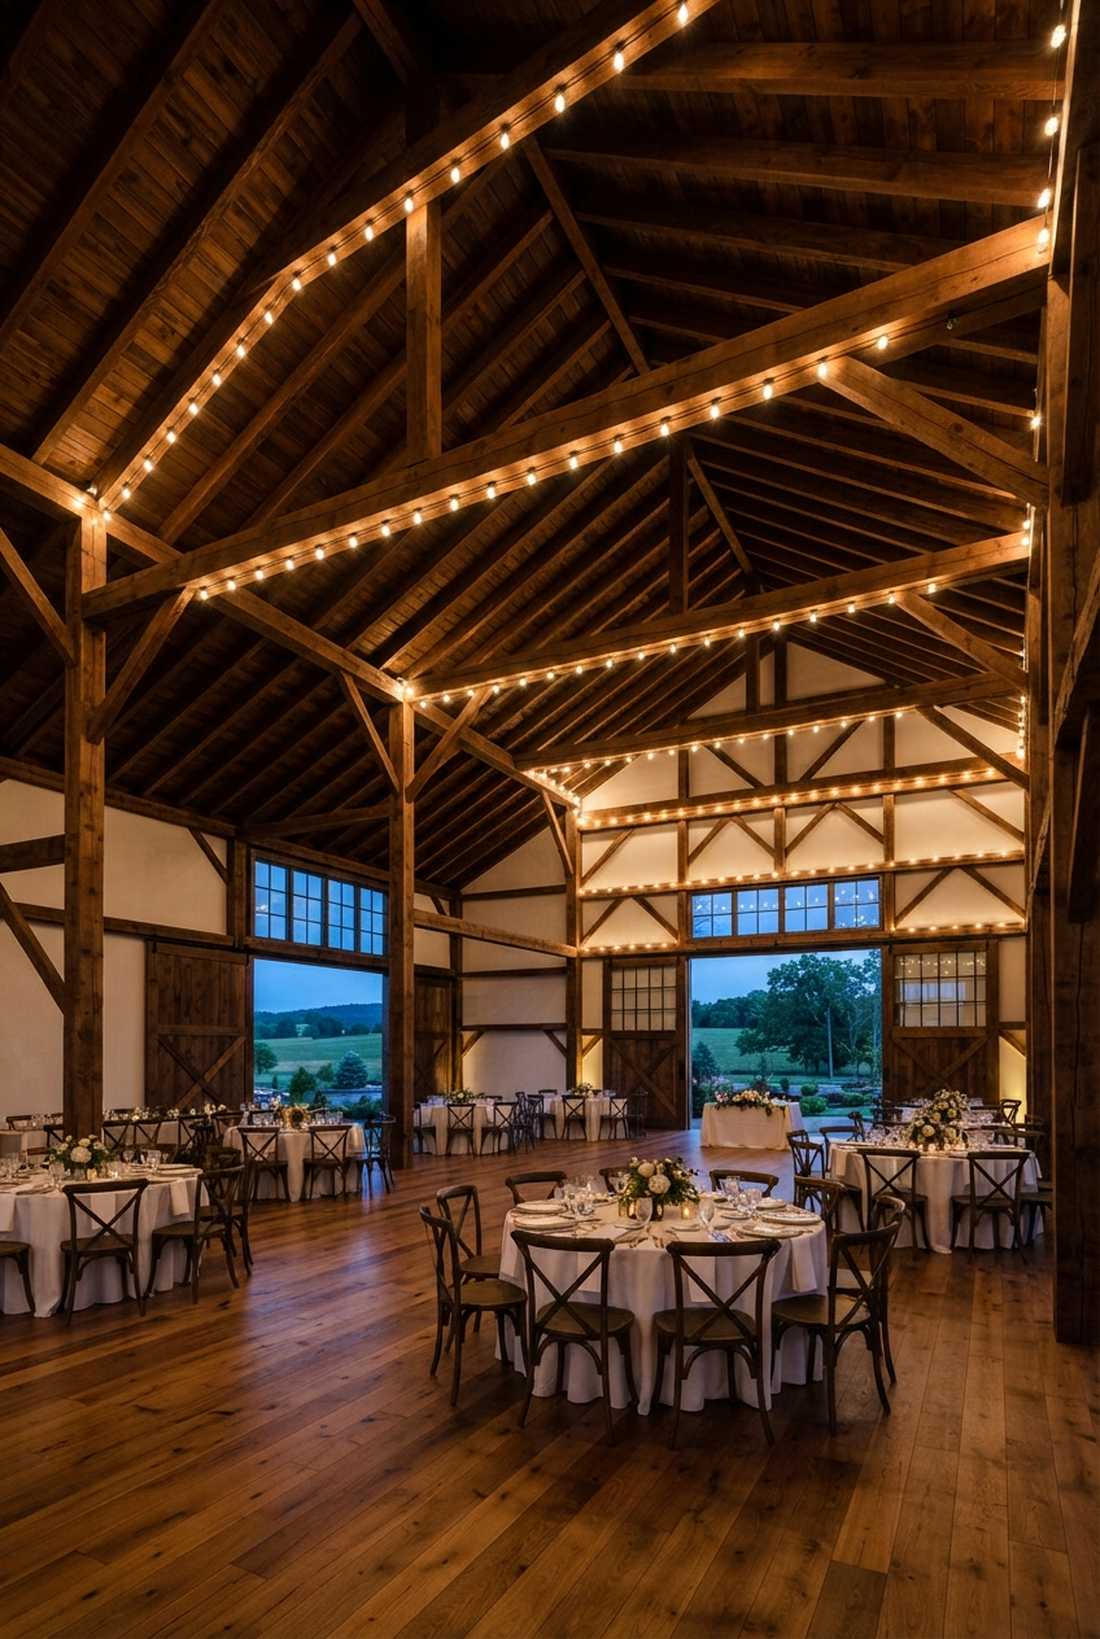
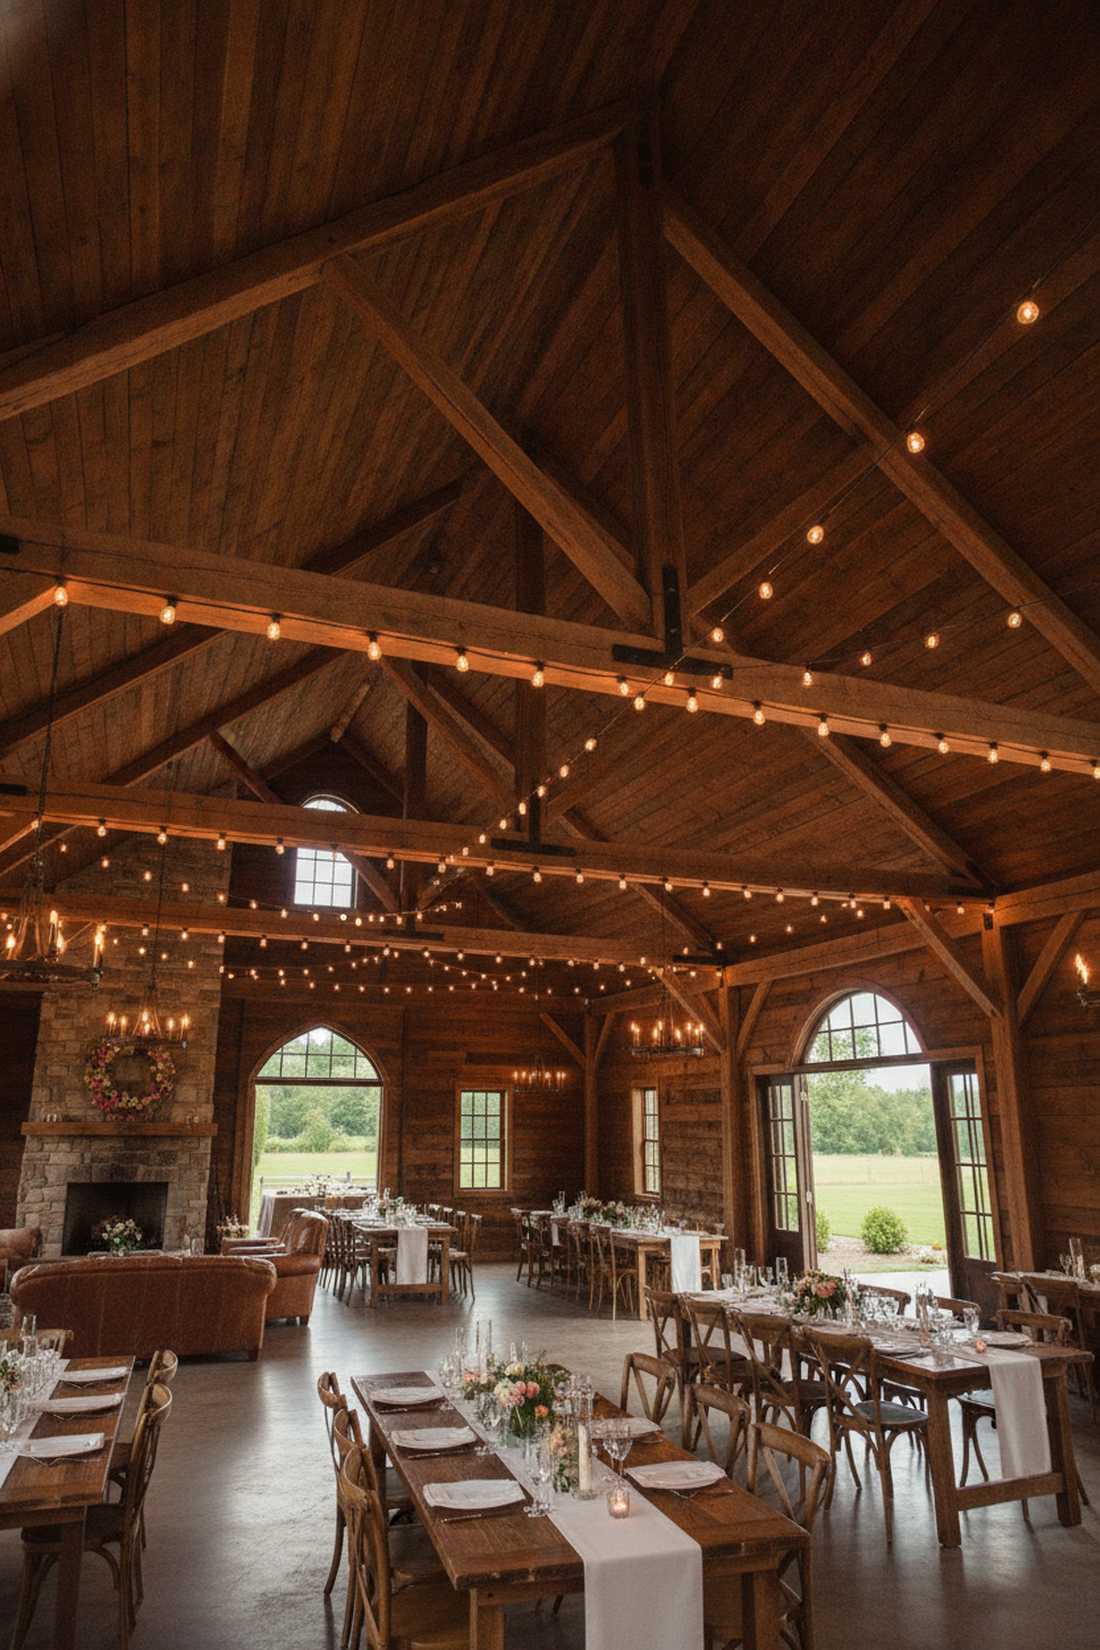
This draws the eye straight upward, making low ceilings feel infinitely taller and grander. Tracing exposed wooden rafters is the ultimate way to modernize a rustic barn or warehouse ceiling.
Most couples haphazardly zigzag cords, but pinning perfectly straight, taut lines along the bottom edge of the beams delivers a surprisingly premium look. Using high-CPC commercial outdoor string lights ensures the wiring blends perfectly against the dark, rustic wood.
You can architecturally highlight a massive barn ceiling for about $120. Highly recommended for rustic barn weddings.
- Key Materials: Commercial strings, staple gun, straight-edge
- Vibe / Style: Modernized rustic barn
- Difficulty: Advanced (requires tall ladders)
- Budget Breakdown: Lights: $100 | Hardware: $20
- Creator’s Tip: Use brown or black wire strings against rustic wood beams; white wires will stand out like a sore thumb during the daylight hours.
- Smart Sourcing: Pick up brown-wire commercial string lights and a heavy-duty wire stapler.
43. Doorway and Arch Framing
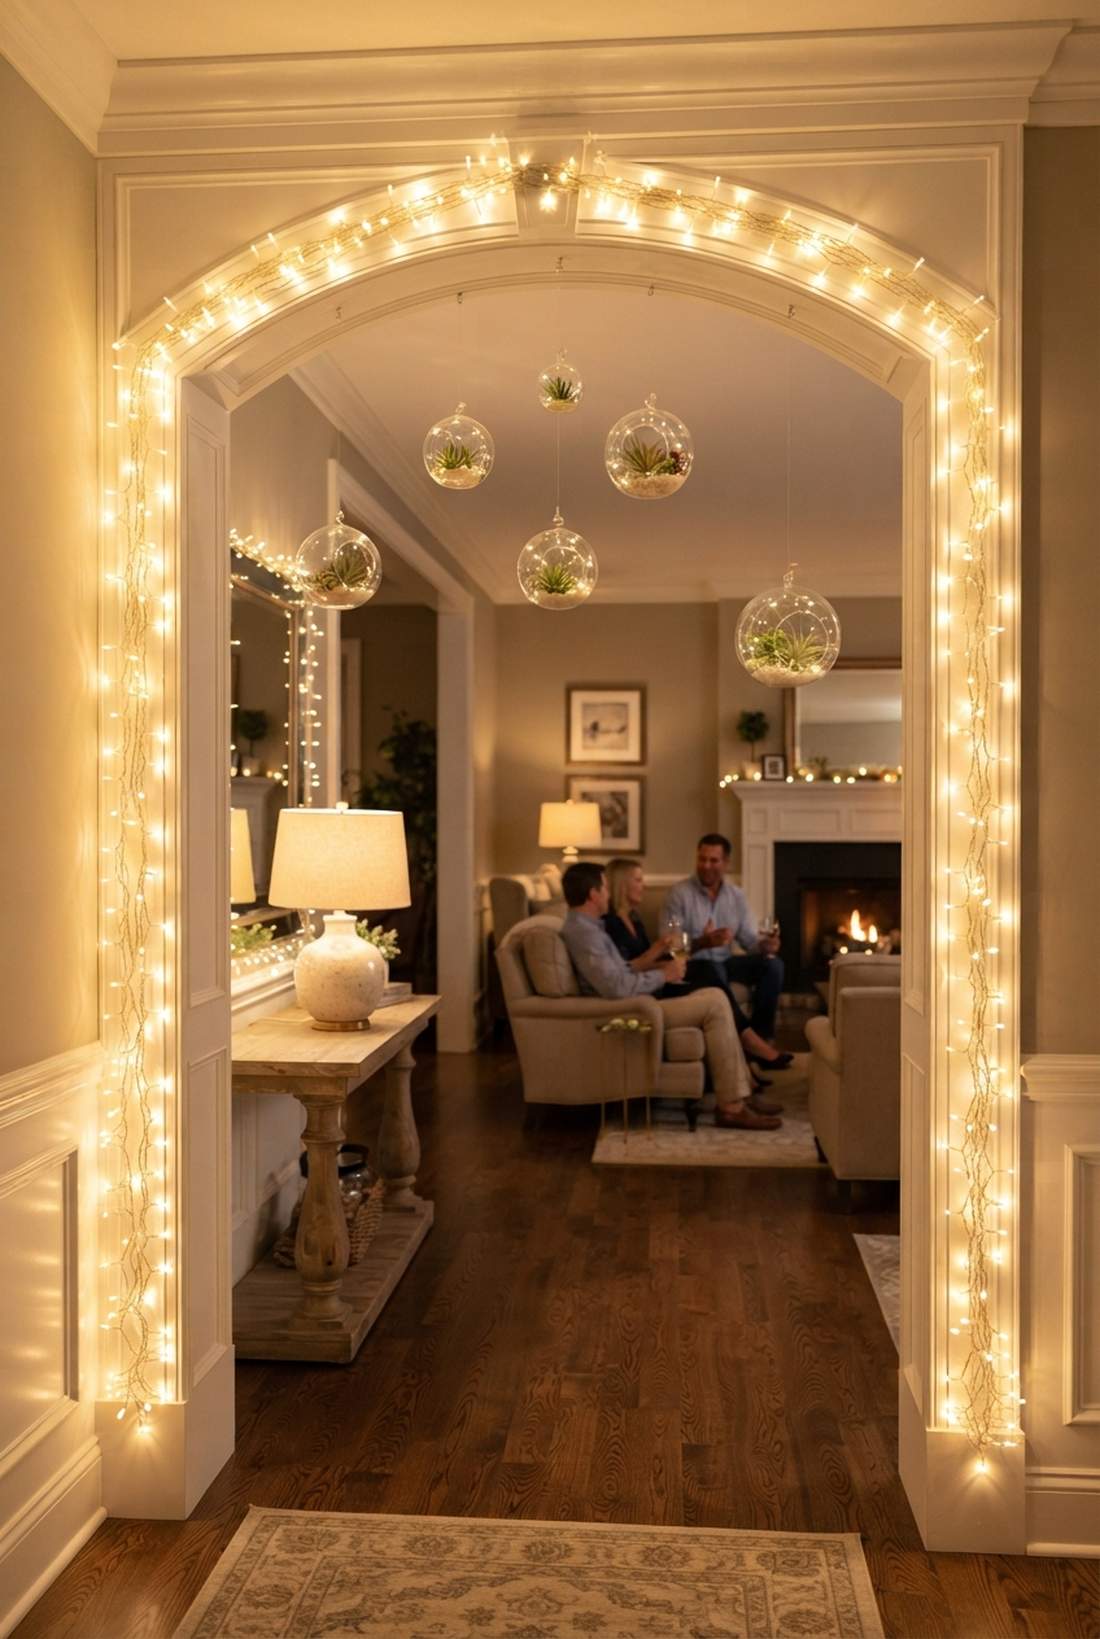
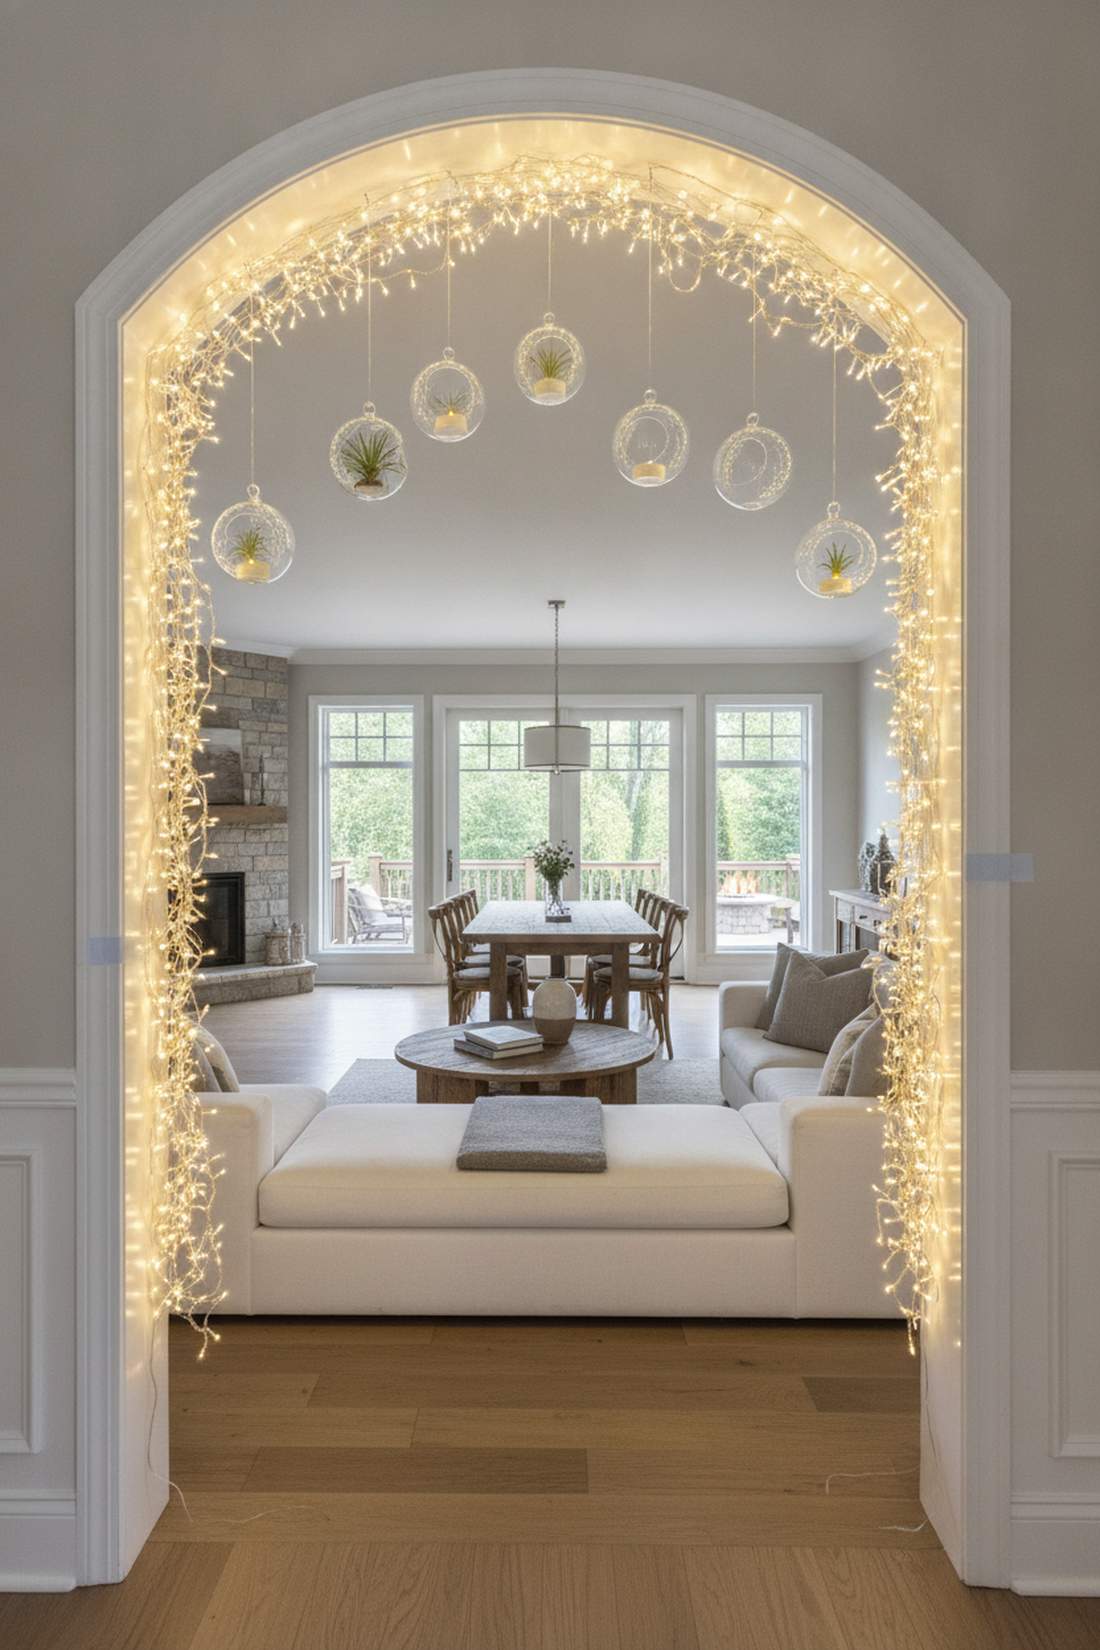
This simple touch turns every single transition between rooms into a glowing, magical portal. Framing interior venue arches subliminally guides guest flow while reinforcing the lighting theme everywhere.
Leaving transitions dark interrupts the vibe, but pinning dense clusters of fairy lights wedding reception decor around the doorframes gives a designer-level finish. It’s a fantastic place to incorporate premium terrarium accessories like hanging glass orbs for extra flair.
You can frame five main venue doorways for around $45. A brilliantly cheap continuity trick.
- Key Materials: Dense fairy strings, clear push pins
- Vibe / Style: Seamless, glowing transitions
- Difficulty: Extremely fast and easy
- Budget Breakdown: Lights: $35 | Pins: $10
- Creator’s Tip: Run the wires straight down to the floor molding and use a small strip of white gaffer tape to hide the final drop to the outlet.
- Smart Sourcing: Order high-density warm white LED strands and clear architectural push pins.
Combined Decor Elements
44. Lights with Flowing Fabric Draping
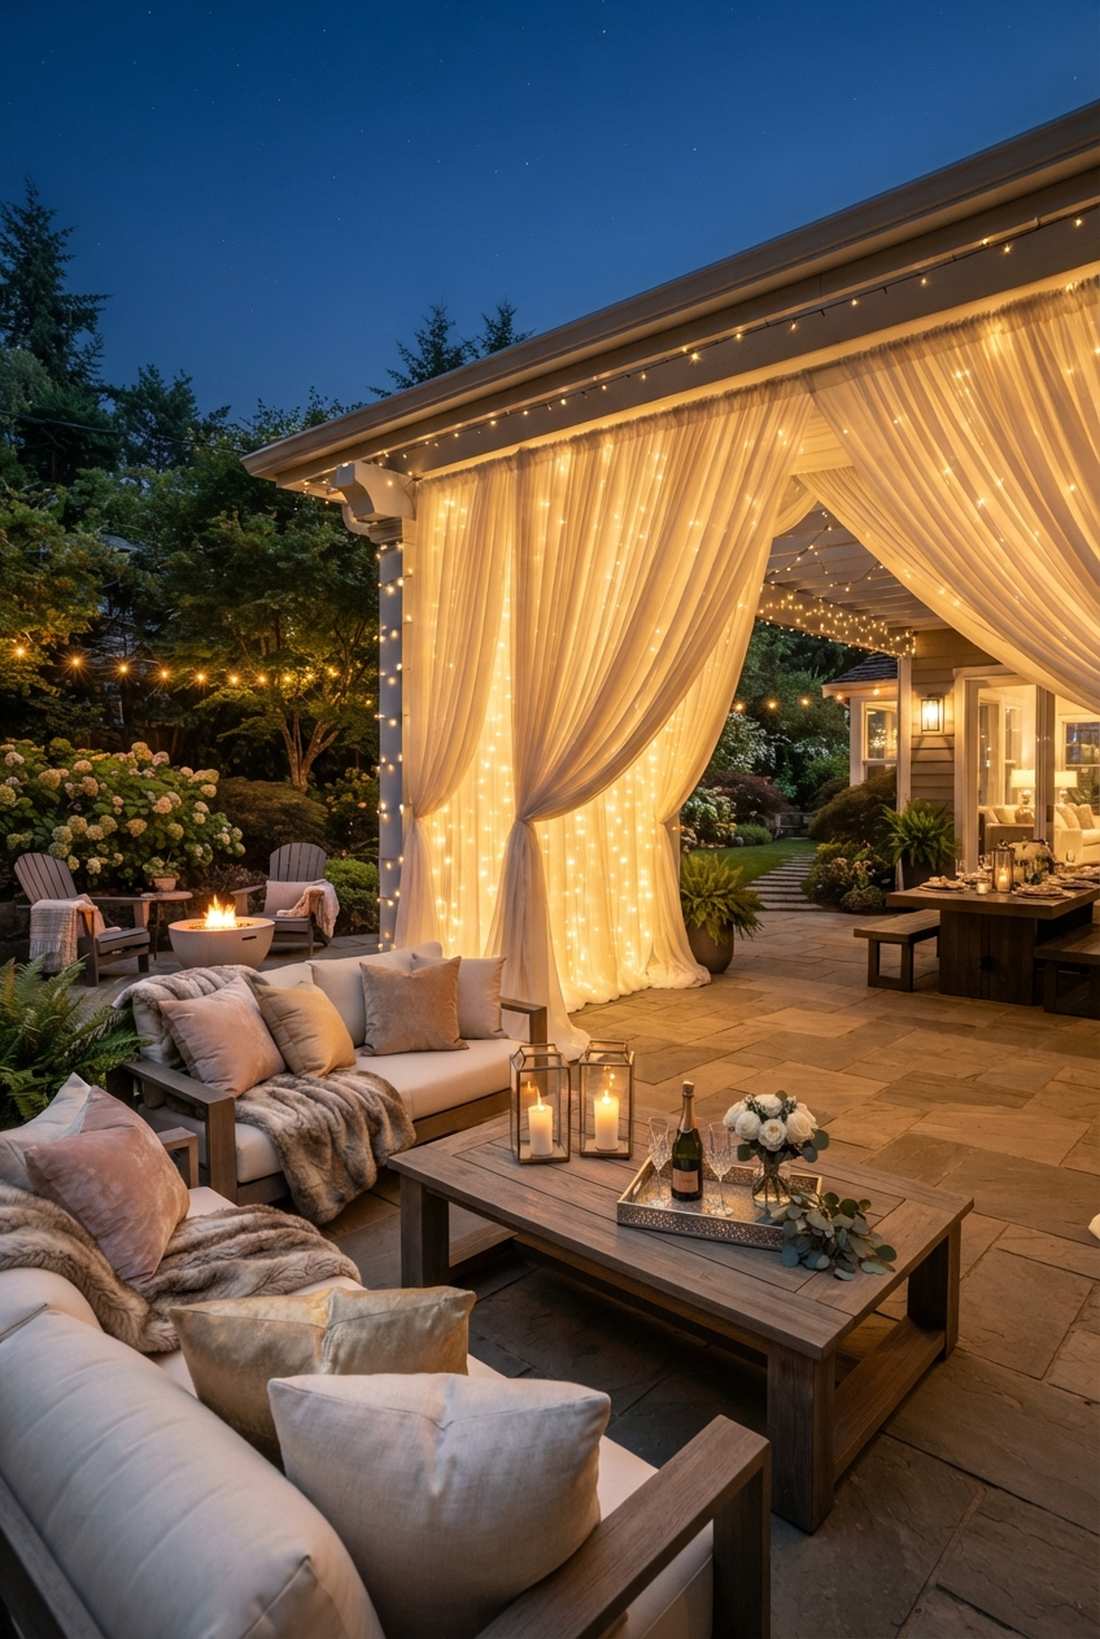
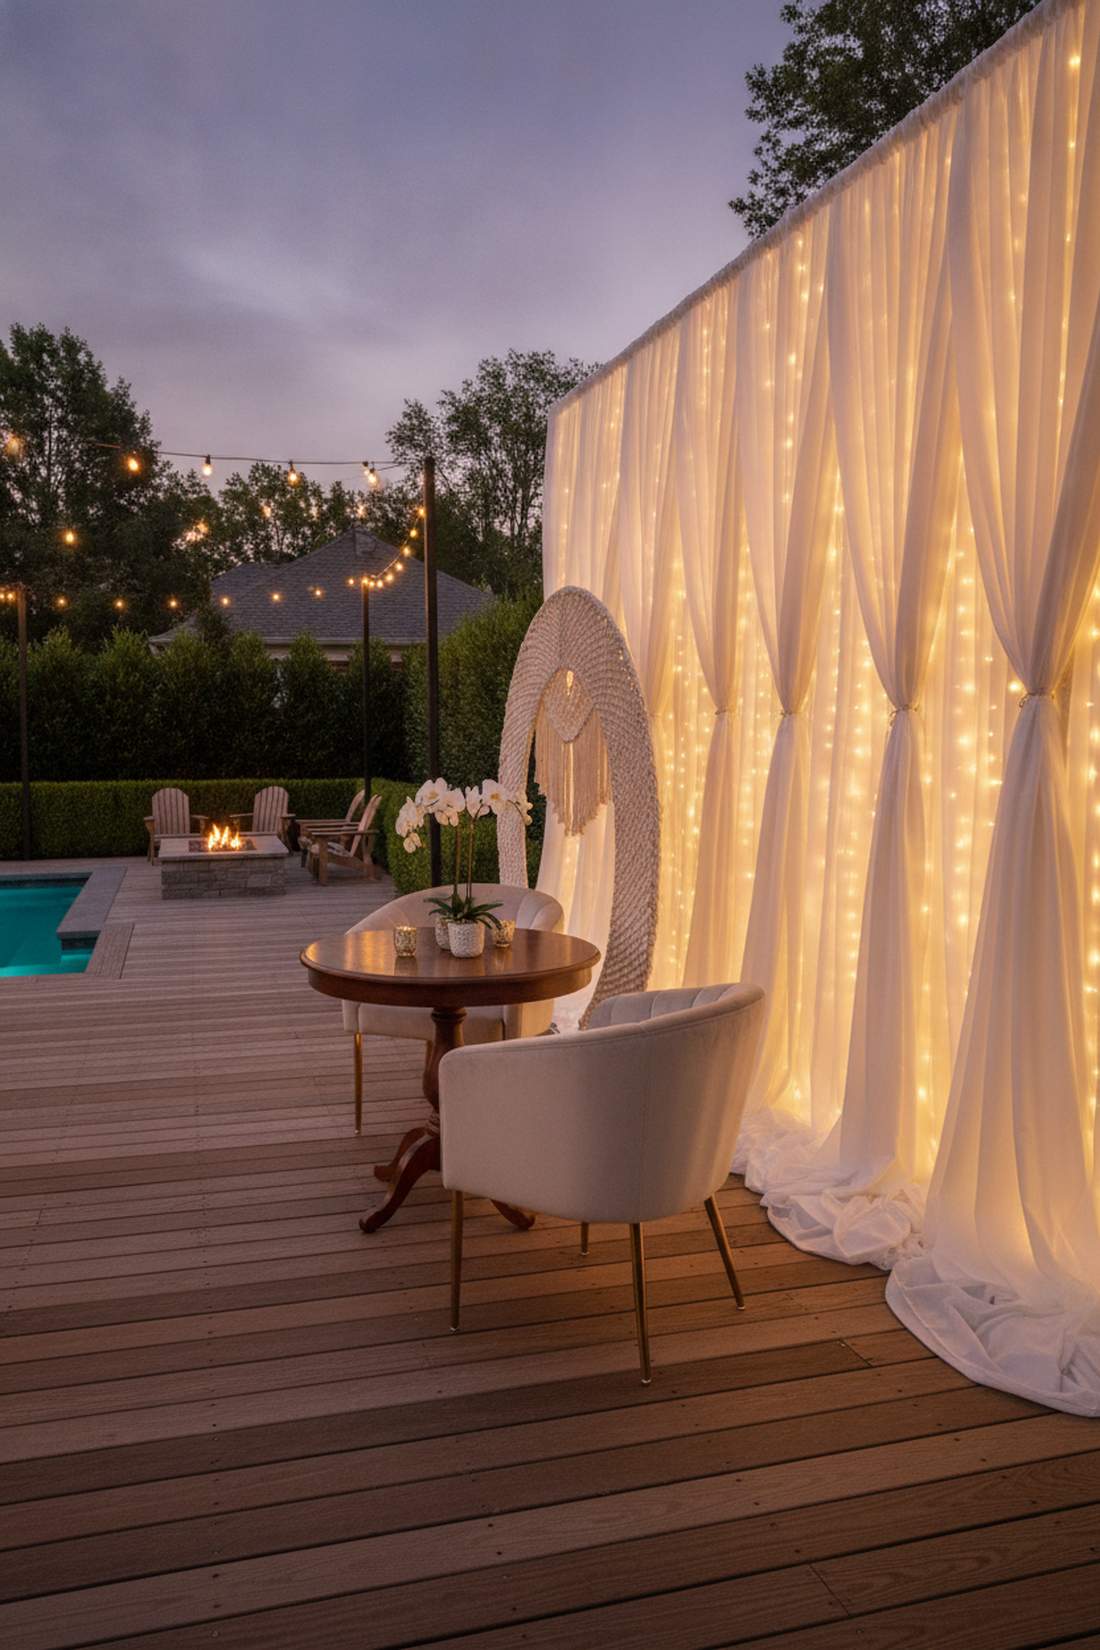
This combination softens the harsh glare of raw bulbs, creating a luxurious, glowing silk effect that screams high budget. Interwoven fabric and fairy lights are the undisputed champions for creating VIP lounging areas or sweetheart table backdrops.
Plain curtains look flat, but sandwiching bright LEDs behind premium ice-silk fabric looks far more expensive than it is. The fabric catches the light and disperses it, mimicking the look of custom-built glowing architectural walls used in high-end celebrity weddings.
You can build this luxurious textured wall for about $90. Pin this immediately if you want a premium celebrity aesthetic.
- Key Materials: Ice-silk drape panels, high-output LED strings
- Vibe / Style: Ultra-luxe celebrity glamour
- Difficulty: Moderate (requires neat fabric folding)
- Budget Breakdown: Silk drapes: $50 | Lights: $40
- Creator’s Tip: Always use heavily gathered fabric (at least 3x the width of your space) to create deep pleats; the lights shining through the folds create the expensive shadowing.
- Smart Sourcing: Grab premium ice-silk backdrop curtain panels and cool-touch high-output LED strands.
Most couples completely ignore the ceiling fixtures… until they learn this genius $20 chandelier upgrade trick…
45. Paper Lantern and Light Clusters
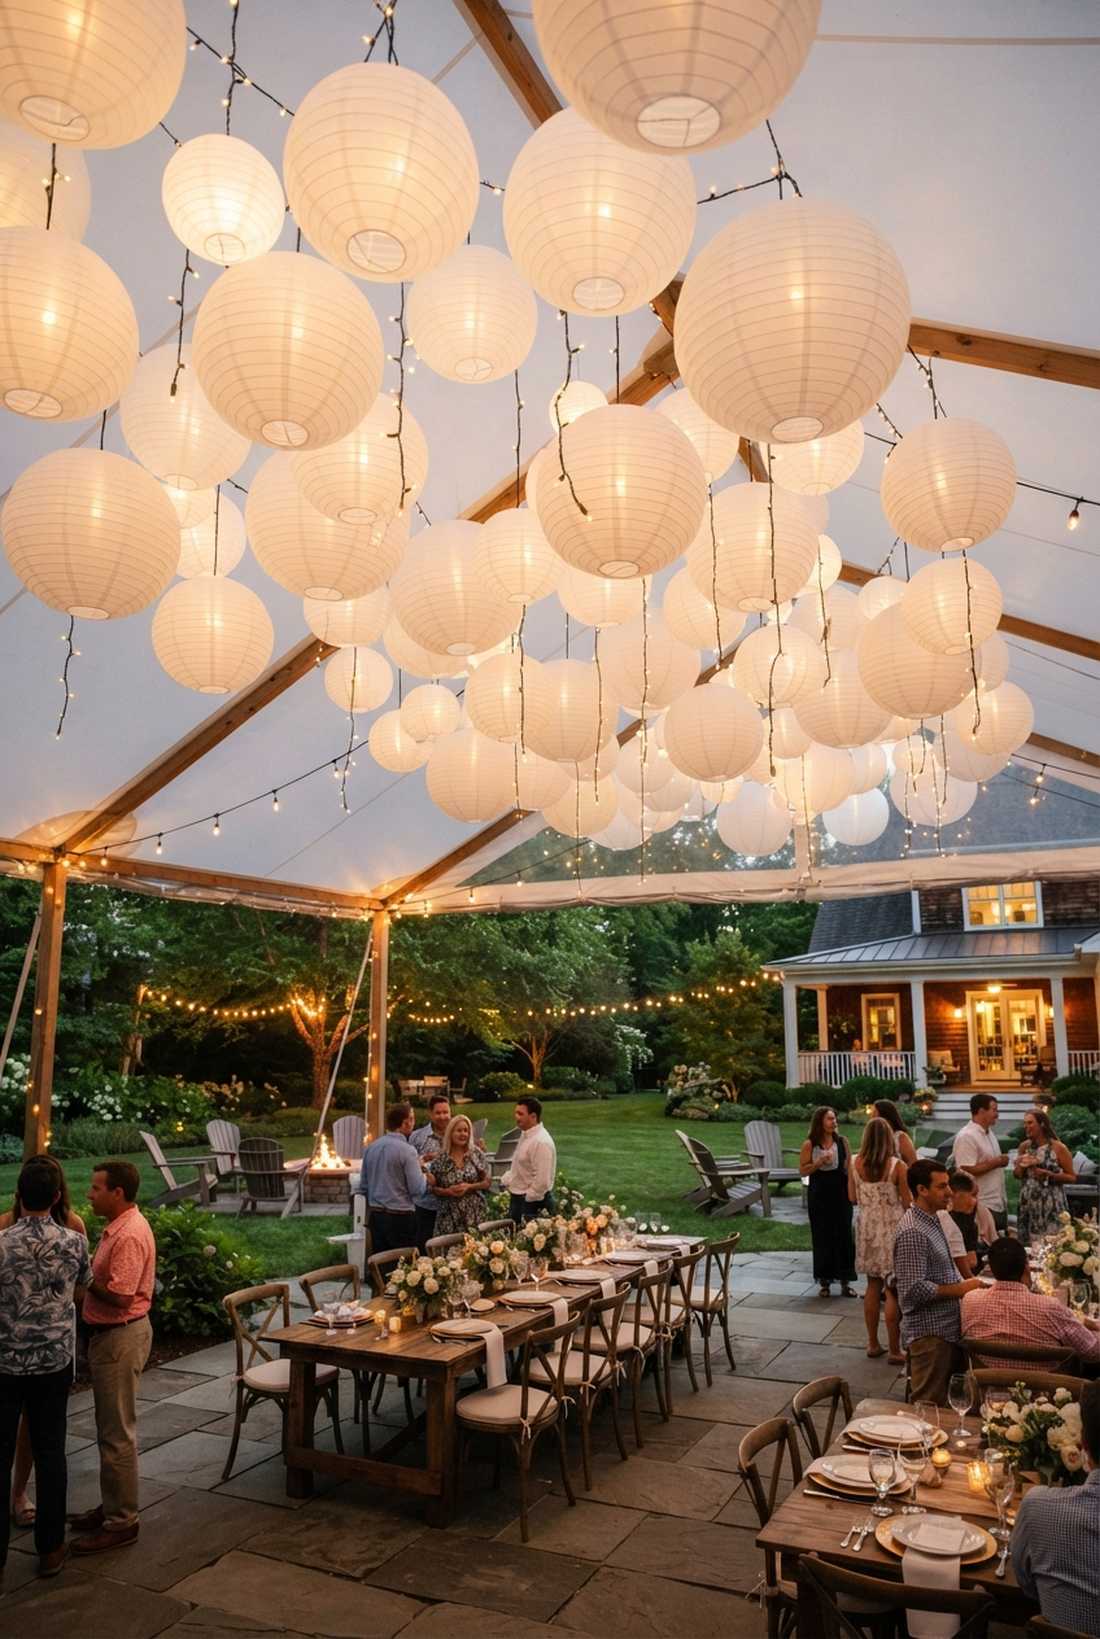
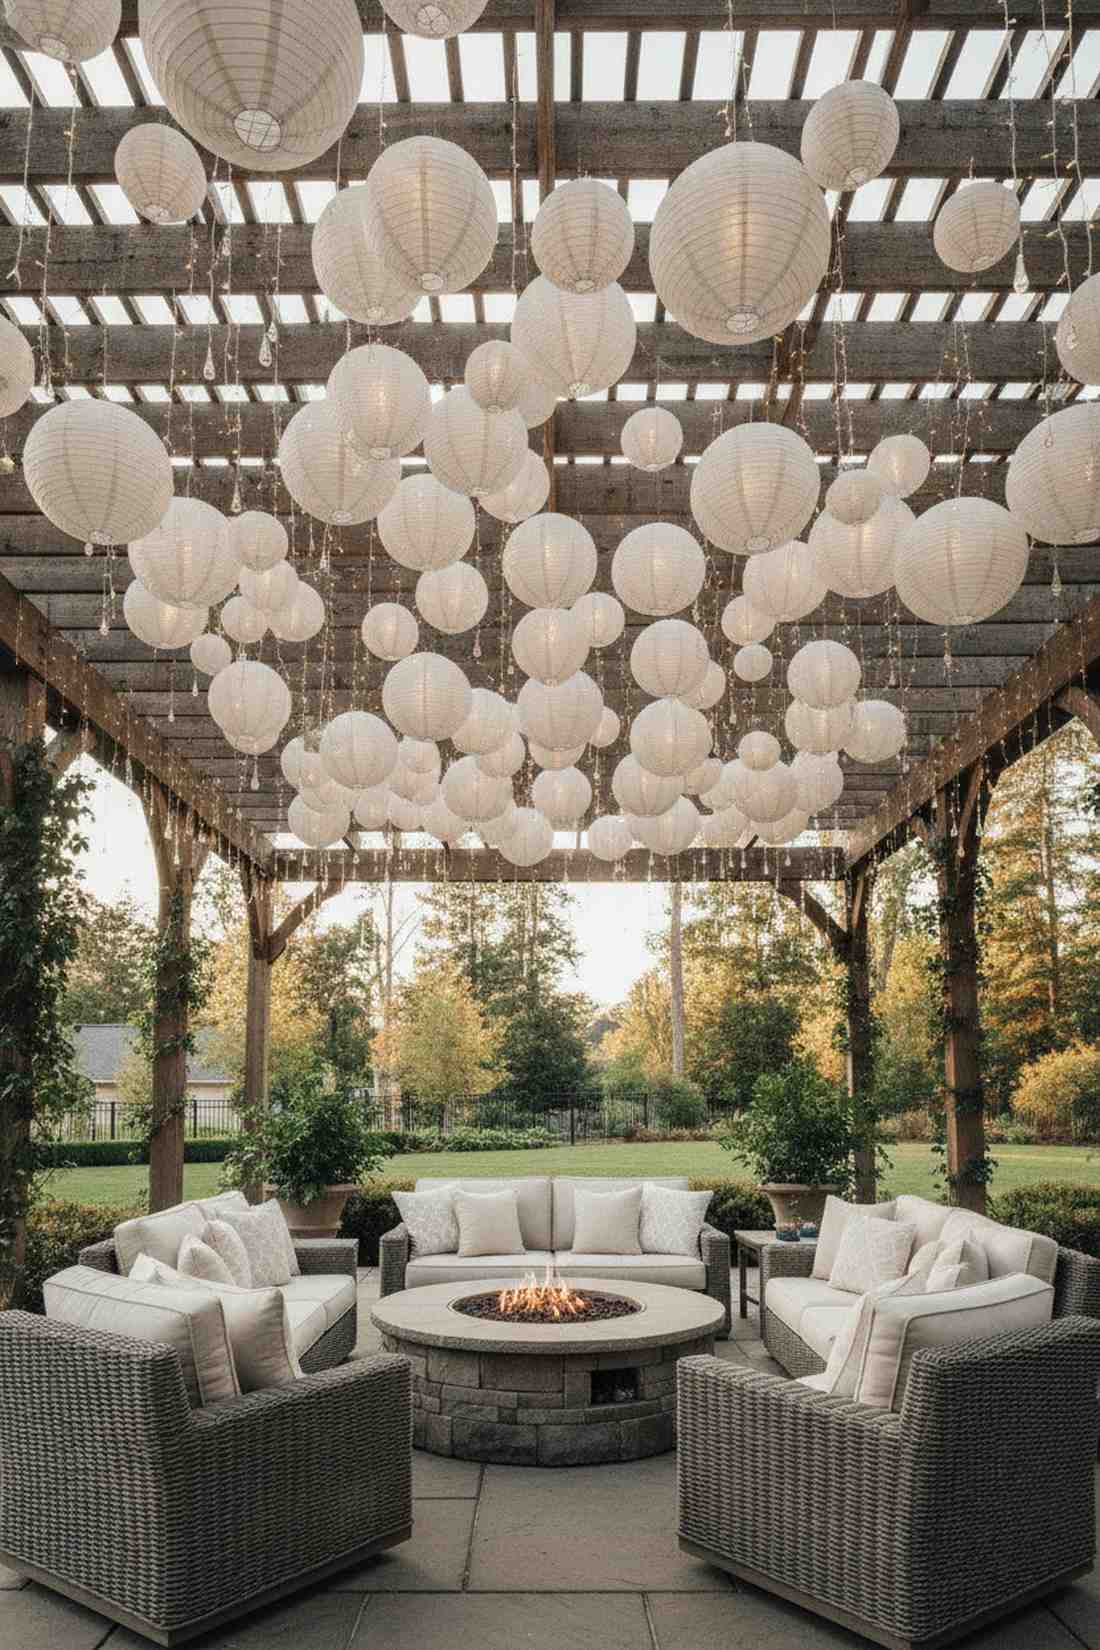
This layout adds massive three-dimensional volume to your ceiling, feeling like a glowing, whimsical festival. Mixed paper lanterns and fairy strings are the best way to fill cavernous empty airspace on a tight budget.
Hanging bare strings can feel thin, but mixing in dozens of varied-size paper spheres delivers a surprisingly premium look that photographs brilliantly. Opting for wholesale wedding lighting gear means you can drop individual micro-bulbs directly inside the lanterns effortlessly.
You can fill an entire ceiling with glowing spheres for about $80. Save this for massive, empty venue spaces.
- Key Materials: Assorted white paper lanterns, drop-string lights
- Vibe / Style: Whimsical, voluminous festival
- Difficulty: Intermediate (lots of assembly)
- Budget Breakdown: Lantern bulk pack: $40 | Drop lights: $40
- Creator’s Tip: Don’t just string them in a line; cluster them in groups of three (one large, two small) at different heights to create natural visual clouds.
- Smart Sourcing: Invest in assorted white paper lantern kits (bulk) and drop-pendant string lighting cords.
46. Chandelier and Fairy Light Pairing
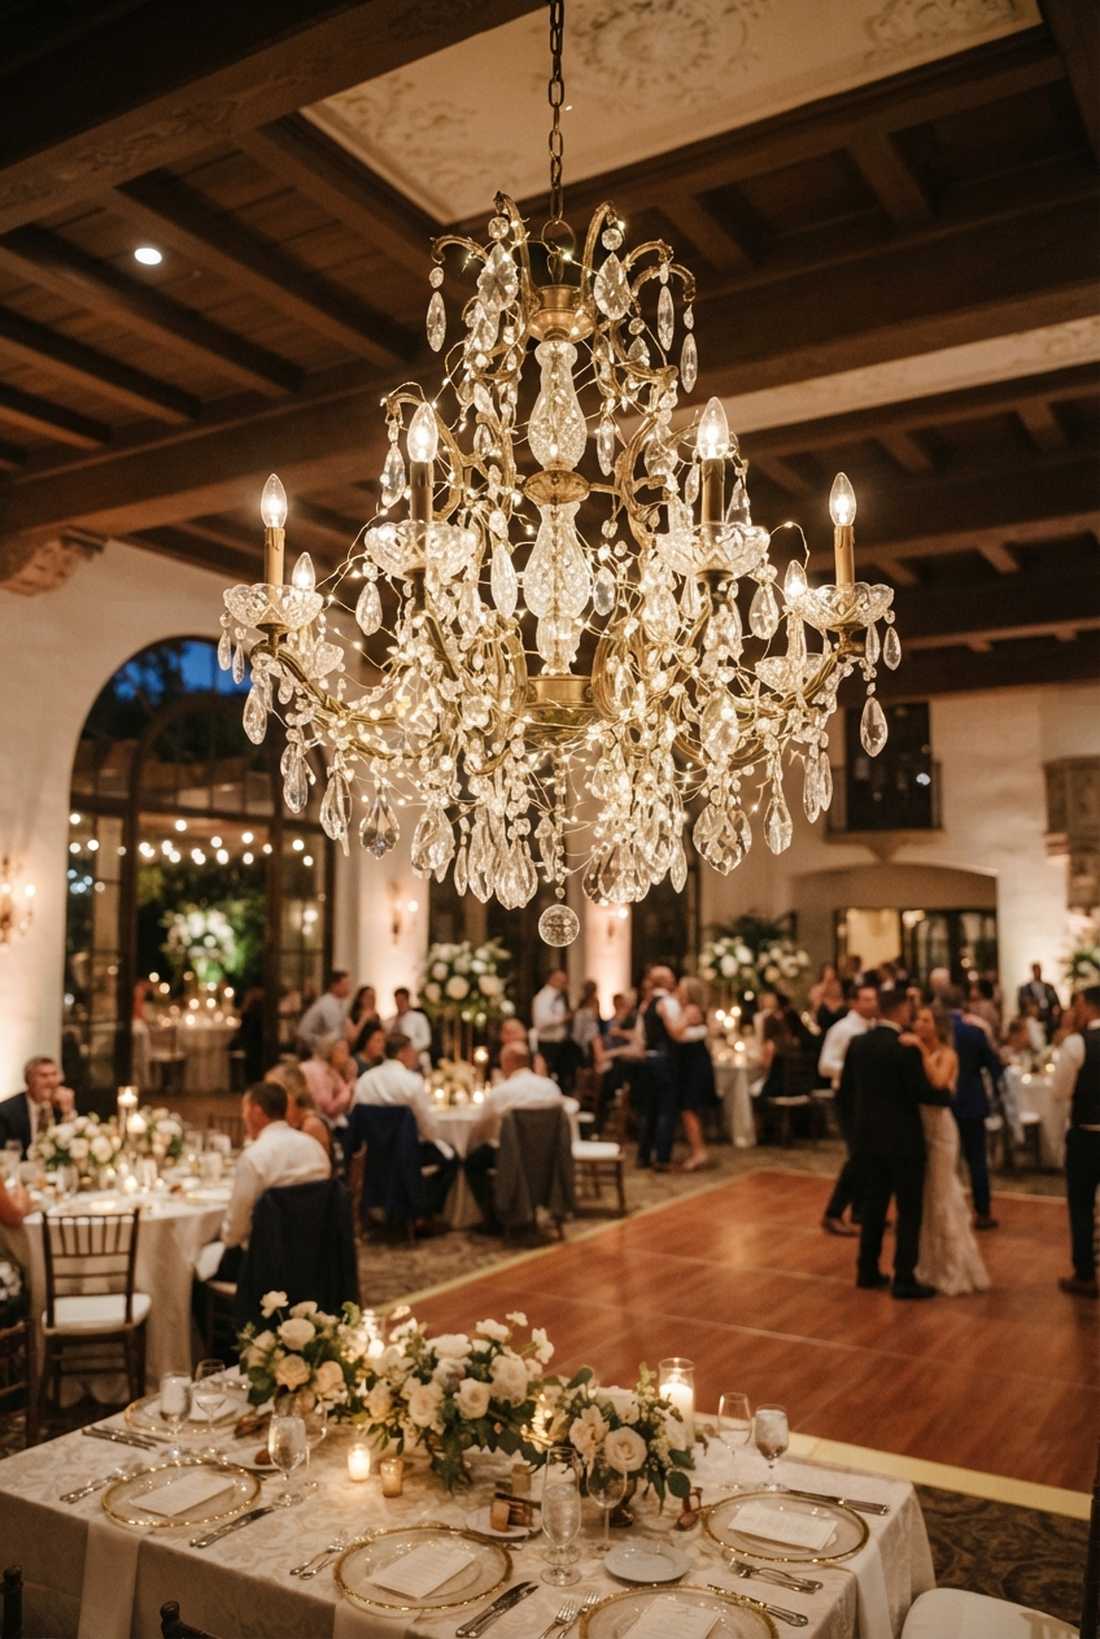
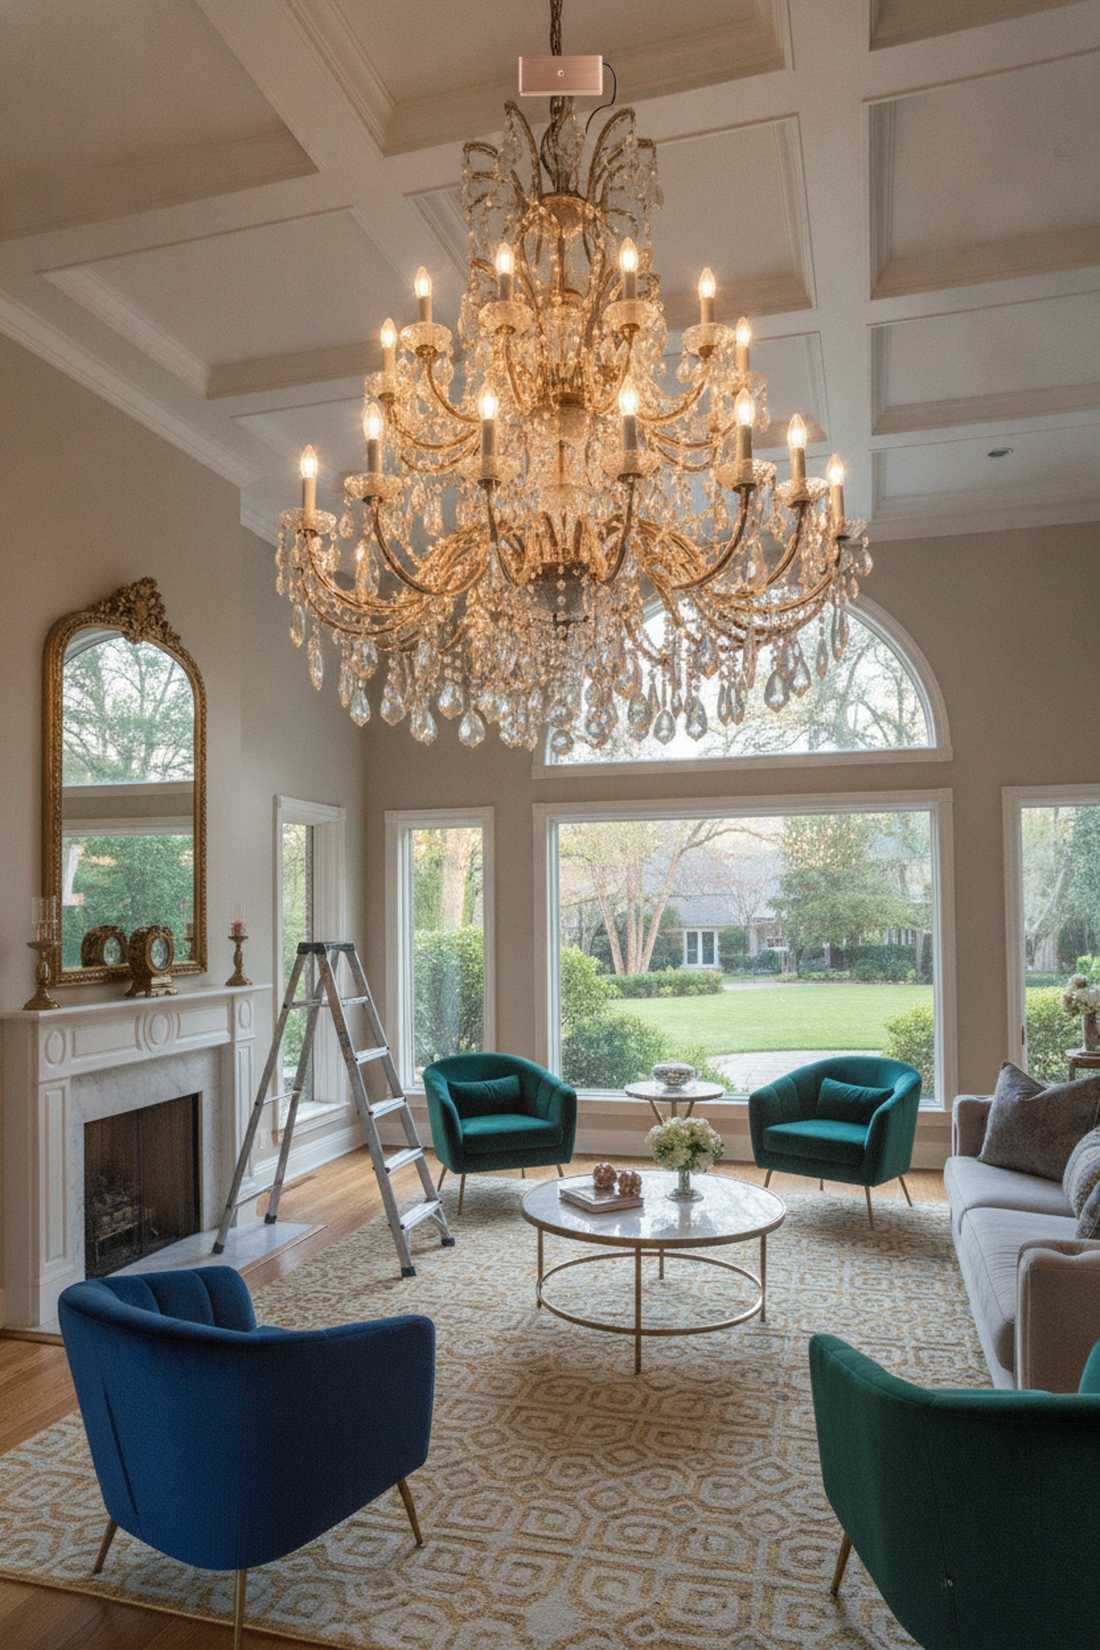
This genius hack takes the venue’s dusty, boring fixtures and turns them into bursting stars of modern light. Wiring fairy lights through existing chandeliers is the ultimate cheat code for upgrading a venue’s permanent lighting.
Instead of ignoring outdated fixtures, blasting them with hundreds of tiny warm micro-LEDs gives a designer-level finish that makes the old glass crystals sparkle like diamonds. You must use ultra-thin battery-operated copper wire so no thick green cords ruin the illusion.
You can modernize a massive crystal chandelier for literally $15. A must-do hack for older hotel ballrooms.
- Key Materials: Copper wire micro LEDs, step ladder
- Vibe / Style: Modernized vintage glamour
- Difficulty: Easy but requires reaching
- Budget Breakdown: Micro lights: $15 | Labor: Free
- Creator’s Tip: Tuck the small, flat battery packs directly onto the top metal rim of the chandelier where guests looking up from the floor can’t possibly see them.
- Smart Sourcing: Source ultra-thin copper wire micro LED packs and CR2032 replacement batteries (bulk).
47. Greenery Garland with Woven Lights

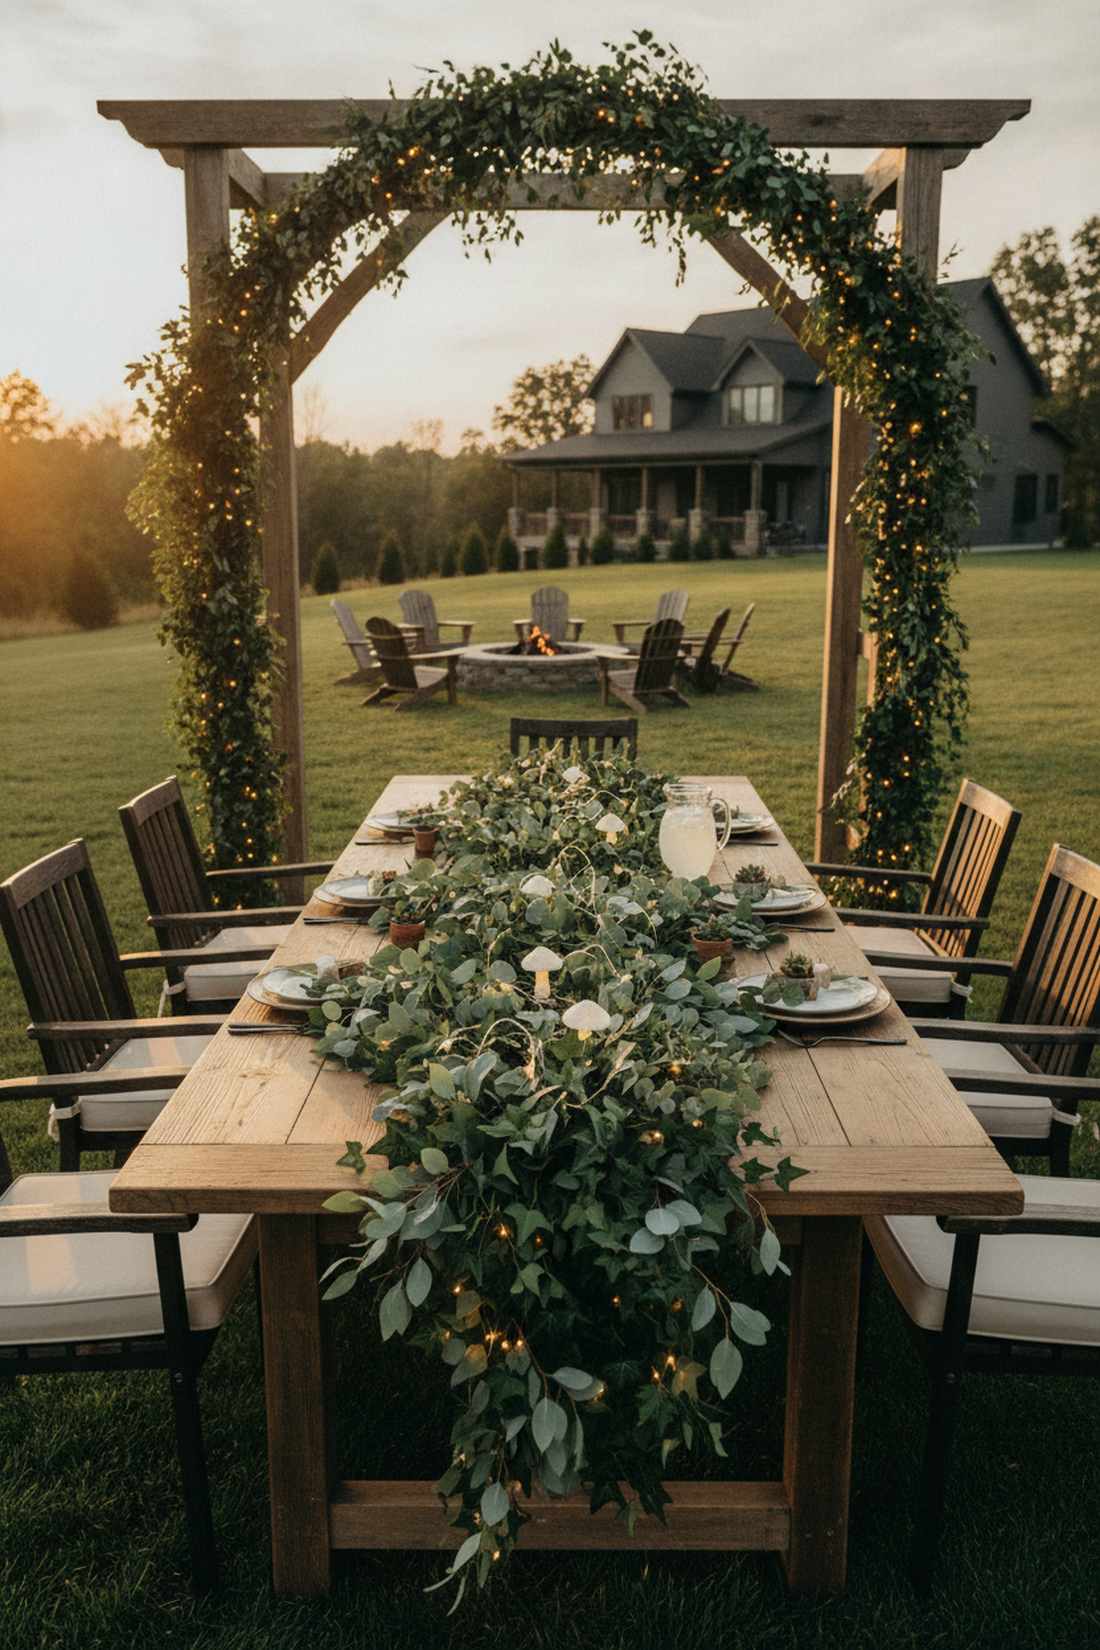
This feels like a lush, glowing vine pulled straight from an ancient magical garden. Illuminated eucalyptus and ivy garlands are the definitive staple for long farmhouse tables and wooden ceremony arches.
Buying pre-lit florals from a boutique costs hundreds, but weaving your own lights through high-quality faux greenery looks insanely expensive and lasts forever. Integrating premium fairy garden kits like miniature glowing resin accents into the leaves adds a stunning bespoke touch.
You can build 20 feet of premium lit garland for about $45. Pin this for the ultimate rustic table runner.
- Key Materials: Faux eucalyptus, warm white wire lights
- Vibe / Style: Enchanted rustic garden
- Difficulty: Easy weaving
- Budget Breakdown: Garlands: $30 | Lights: $15
- Creator’s Tip: Twist two different types of greenery together (like silver dollar eucalyptus and dark ivy) before adding the lights to create ultra-realistic, expensive-looking thickness.
- Smart Sourcing: Pick up mixed faux greenery garland bundles and warm-white wire fairy strands.
48. Candle and Fairy Light Layering
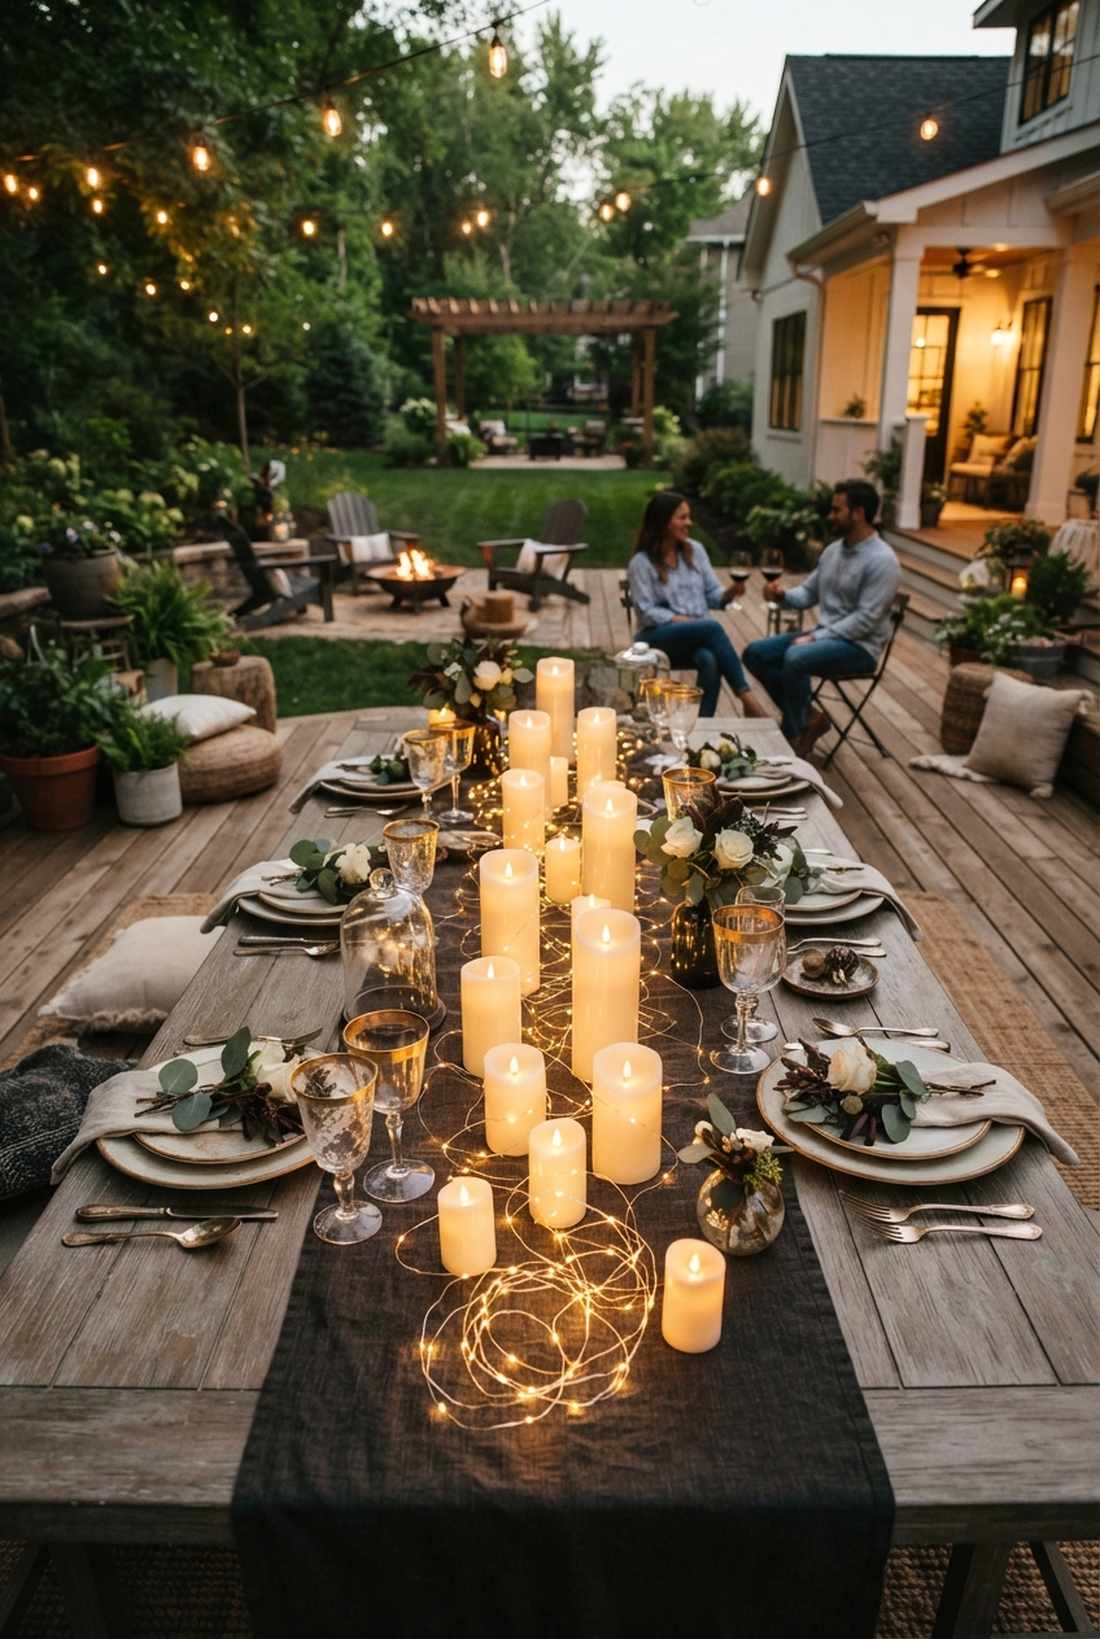
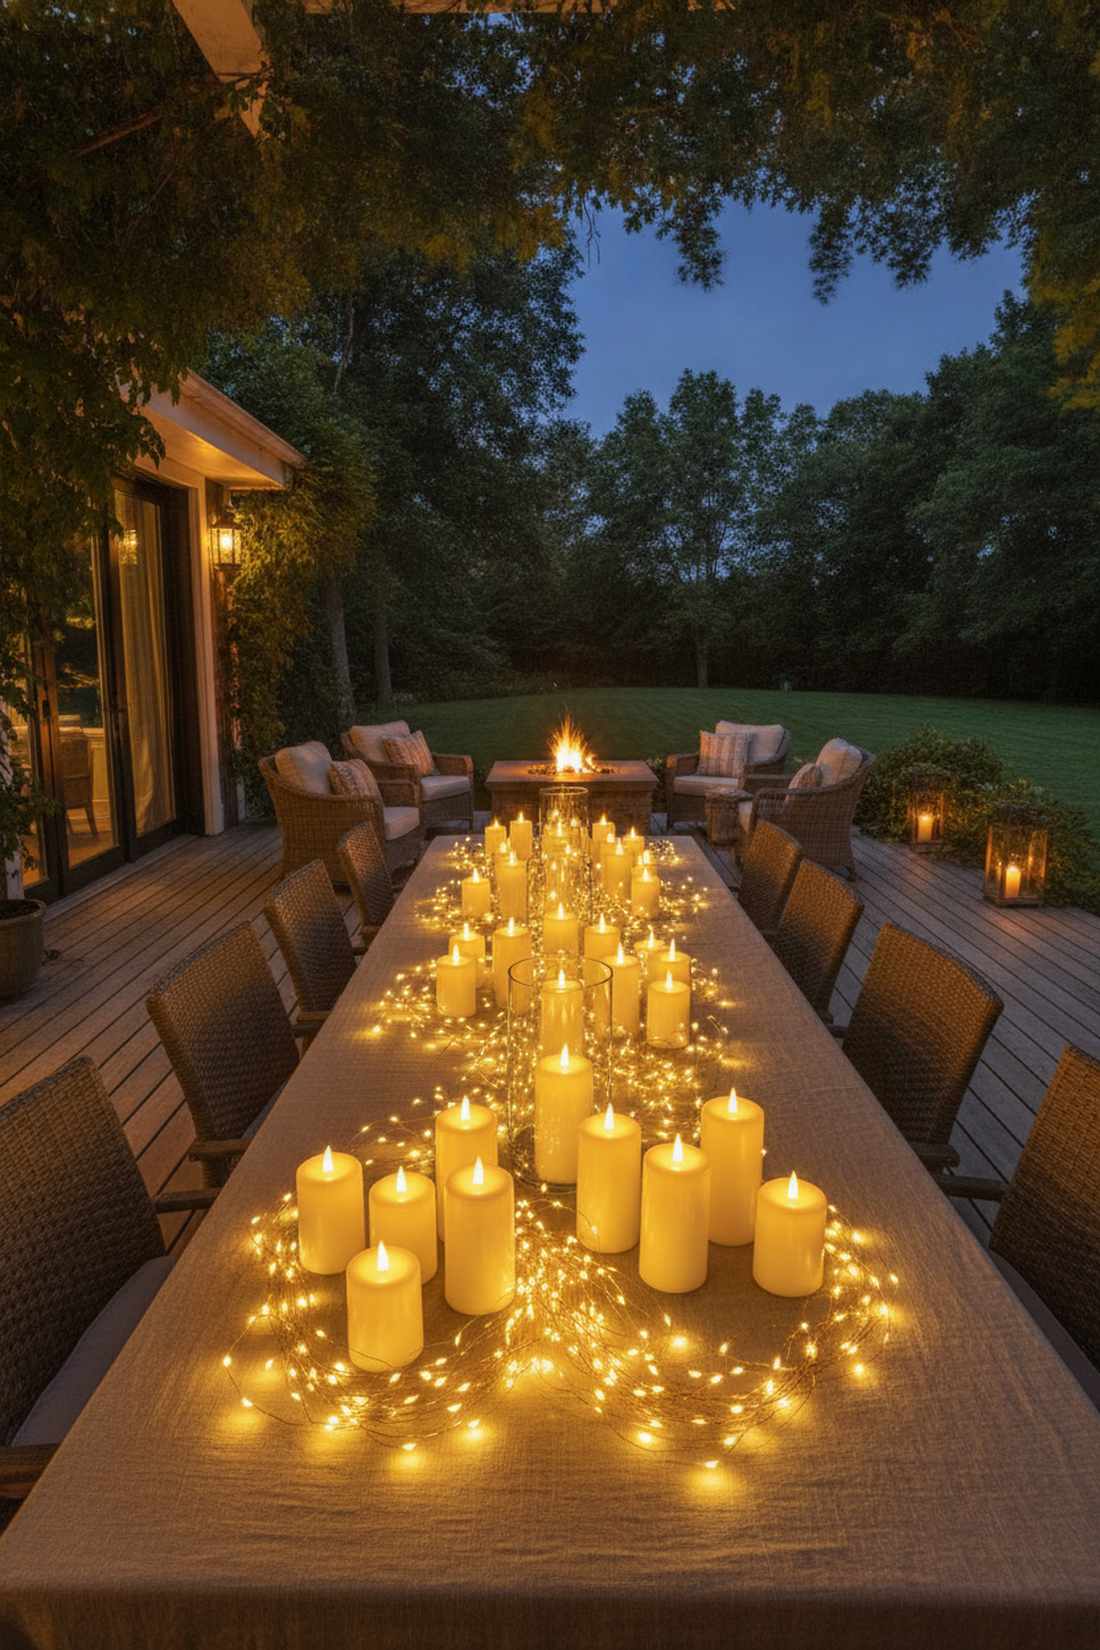
This layout creates a staggering depth of warmth, feeling like an intimate, candlelit royal banquet. Layering pillar candles over scattered fairy strings produces a multi-dimensional glow that single light sources simply cannot replicate.
Relying solely on candles leaves awkward dark spots, but pooling bright micro-LEDs around the base of the wax delivers a far more expensive aesthetic. Using high-CPC wholesale LED pillar candles ensures absolute fire safety while maintaining the flickering romance.
You can achieve this incredibly dense, layered lighting for about $35 a table. Highly recommended for moody, romantic vibes.
- Key Materials: LED pillar candles, scattered wire lights
- Vibe / Style: Intimate, moody romance
- Difficulty: Very easy styling
- Budget Breakdown: LED candles: $25 | Wire lights: $10
- Creator’s Tip: Use real wax LED candles; they look identical to real fire but won’t melt all over your expensive rental linens when placed over the fairy wires.
- Smart Sourcing: Order real-wax flameless LED pillar candle sets and scatter-ready micro wire lights.
49. Mirror Reflection Installations
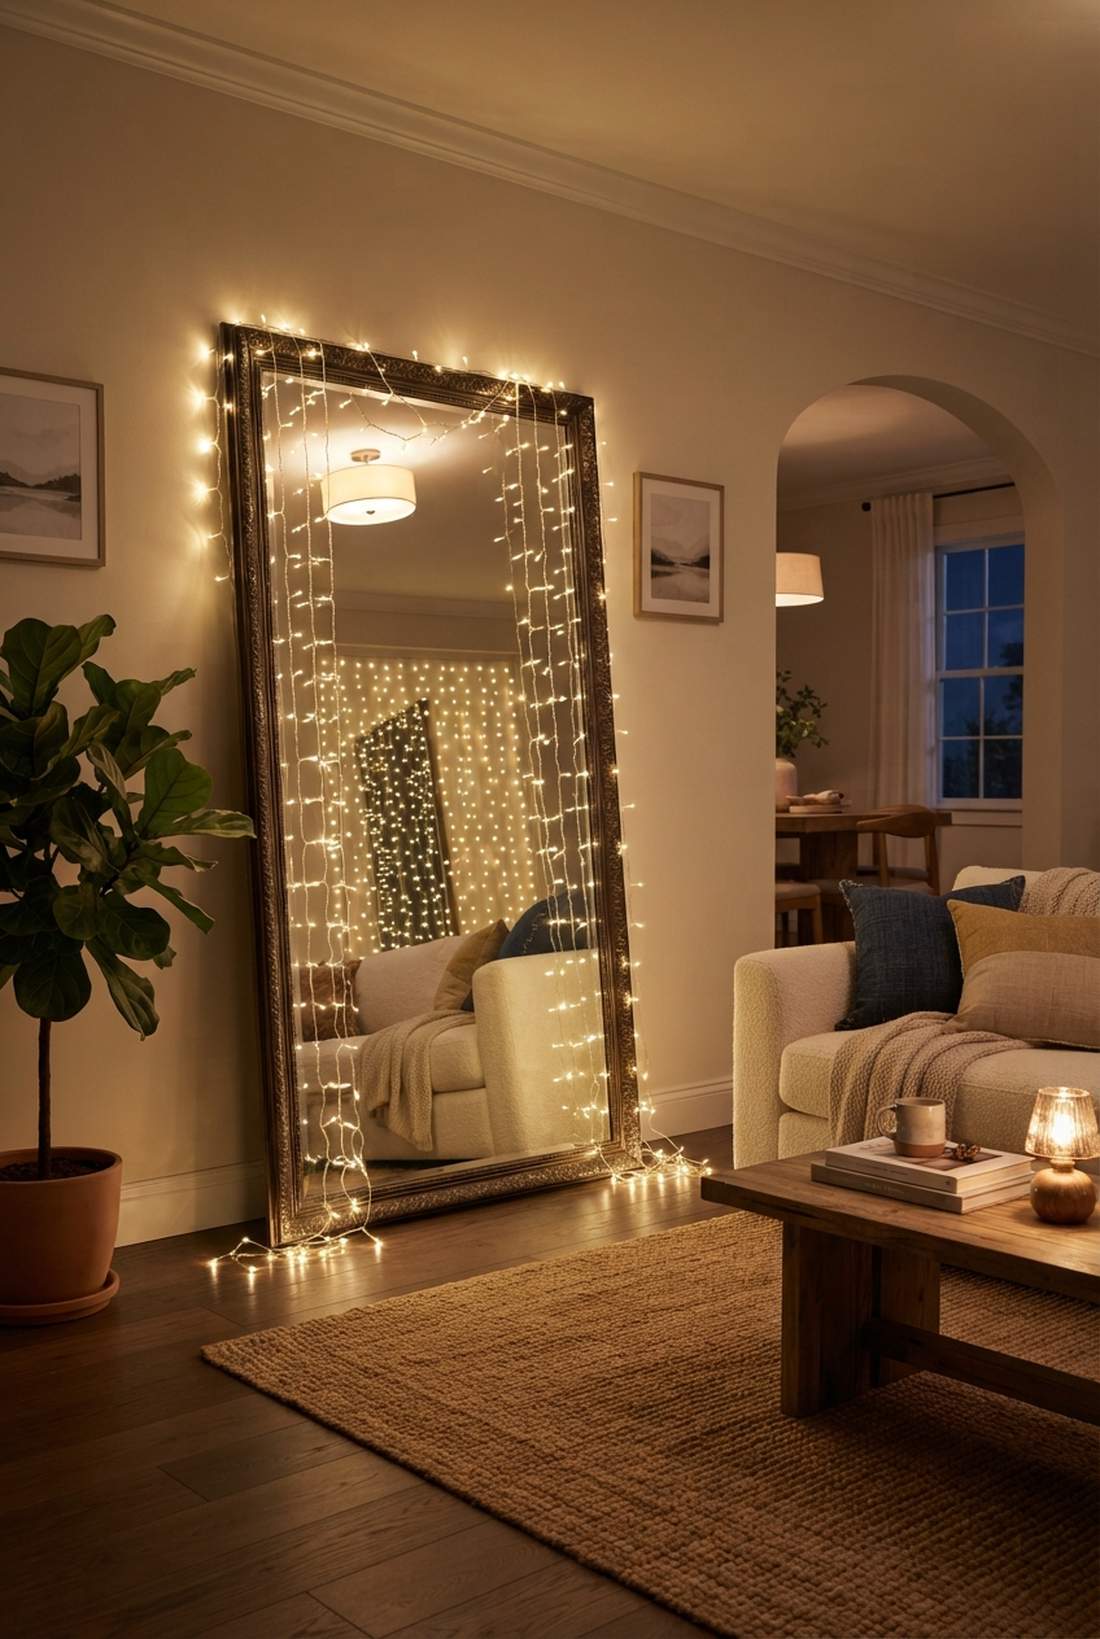
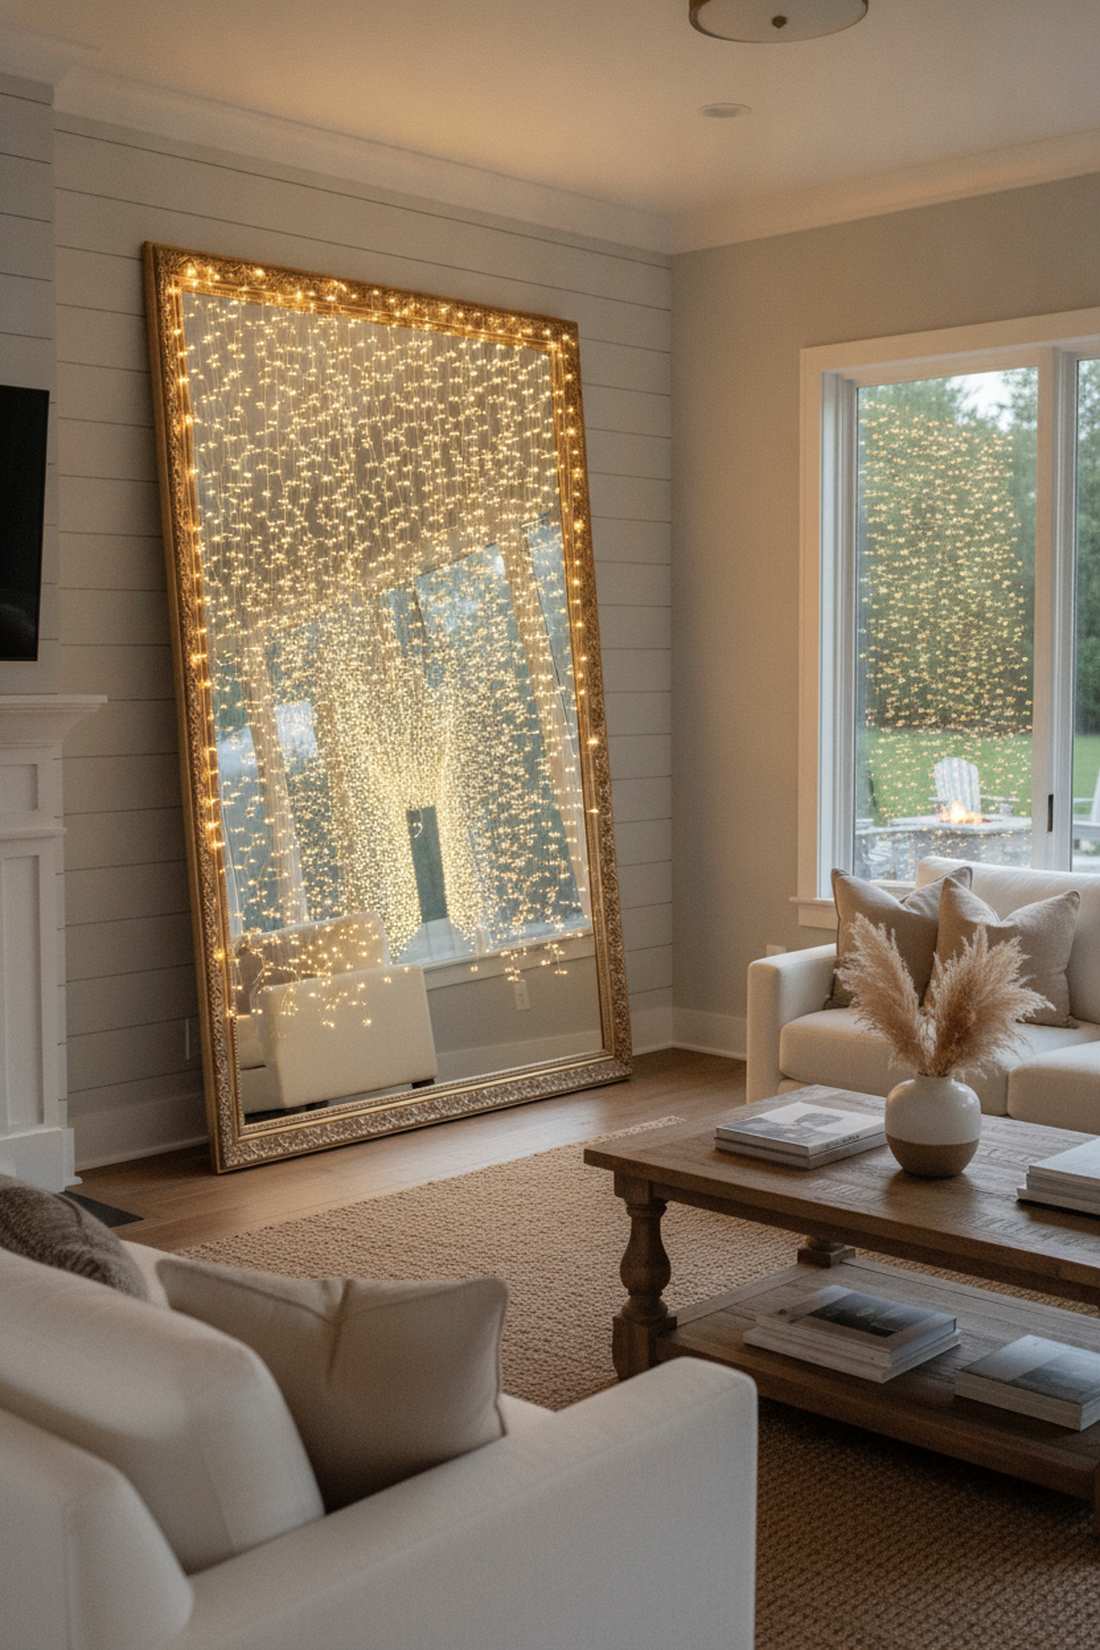
This optical illusion makes it look like you purchased thousands of dollars in extra lighting without spending a dime. Placing fairy lights directly against large mirrors literally doubles your visual impact and stretches your budget to the absolute max.
Most people waste lights in dead corners, but strategically draping fairy lights wedding decor over vintage floor mirrors gives a designer-level finish that photographers obsess over. The glass reflects the bulbs backward, creating an infinite, glowing tunnel effect in the background.
You can execute this budget-doubling trick for $20 (assuming you own or borrow a mirror). Save this genius hack immediately.
- Key Materials: Large floor mirrors, dense curtain lights
- Vibe / Style: Infinite, glamorous illusion
- Difficulty: Beginner-friendly
- Budget Breakdown: Mirror: Borrowed | Lights: $20
- Creator’s Tip: Angle the mirror slightly upward rather than perfectly flat against the wall; this reflects the ceiling lights as well, compounding the glowing illusion.
- Smart Sourcing: Grab high-density LED curtain light drops and heavy-duty glass cleaning polish.
50. Floral Chandelier Light Combination

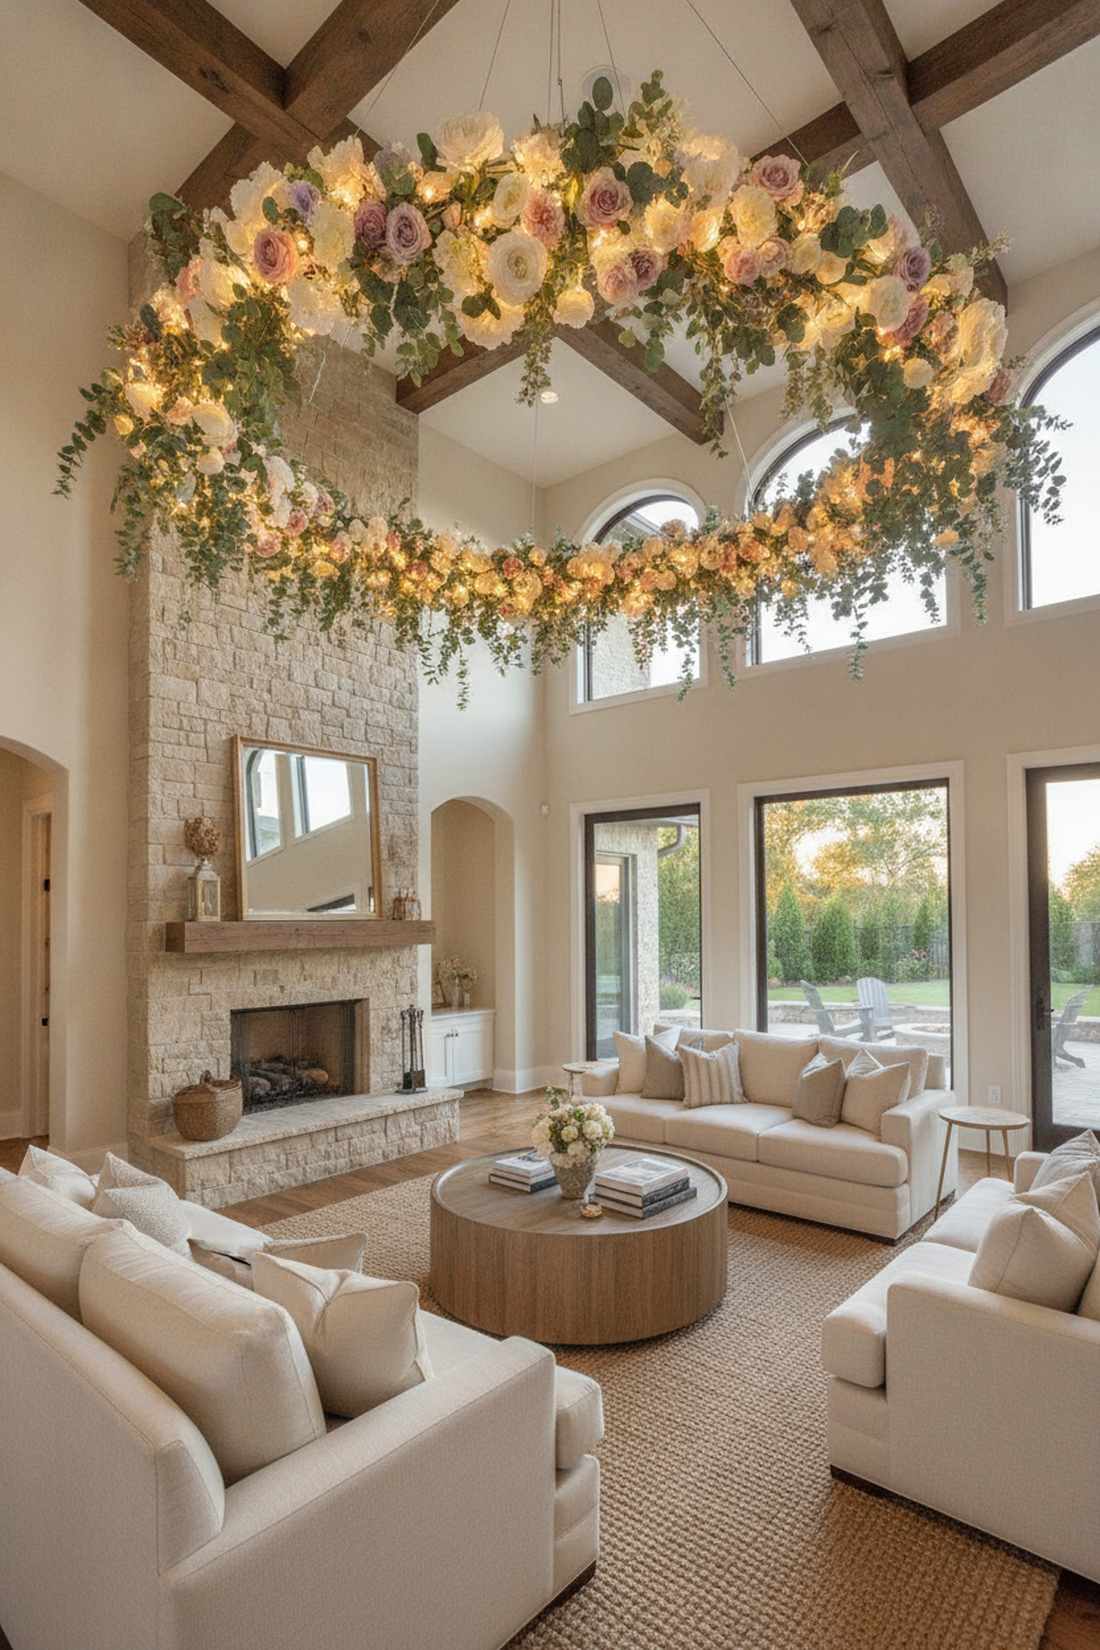
This massive ceiling installation serves as the ultimate, jaw-dropping centerpiece for the entire room. A suspended illuminated floral halo combines the two most expensive wedding aesthetics into one spectacular focal point.
Professional riggers charge thousands for this, but engineering a lightweight wire frame packed with faux florals and heavy lighting looks wildly expensive and dramatic. Dropping battery packs straight into the floral foam hides the mechanics perfectly while maintaining the floating illusion.
You can build this show-stopping luxury fixture yourself for about $150. The definitive high-end DIY project.
- Key Materials: Large wire wreath frame, faux florals, dense lights
- Vibe / Style: Show-stopping luxury
- Difficulty: Advanced (requires secure ceiling rigging)
- Budget Breakdown: Frame/Florals: $100 | Lights/Rigging: $50
- Creator’s Tip: Build and wire the entire chandelier on the ground at waist height using two chairs, then recruit three people to hoist the finished piece up simultaneously.
- Smart Sourcing: Invest in an oversized metal wreath frame kit and premium silk flower bulk boxes.
Conclusion
Executing a flawless fairy lights wedding doesn’t require a massive professional lighting budget. By smartly sourcing wholesale commercial-grade LED string lights and utilizing these 50 premium layout blueprints, you can independently craft a breathtaking, high-end atmosphere. Whether you are rigging heavy-duty outdoor tension cables across a garden canopy or engineering an elegant fabric draping system indoors, investing in the right starter kits guarantees that luxurious, cinematic glow. Save these strategies, grab the proper bulk supplies, and transform your venue into a wildly expensive-looking masterpiece without breaking the bank.
Frequently Asked Questions
How many fairy lights do I need for a wedding reception?
For a standard 150-guest reception in a 2,000 square foot space, bulk wholesale pricing allows you to easily source 400-600 feet of commercial outdoor string lights without ruining your budget. Ceiling canopies generally require one foot of lights per 3-4 square feet, while high-density starter kits for dance floors will demand 200-300 feet. Always buy bulk packs with an extra 20% to account for dense draping and overlap.
Should I choose battery-operated or plug-in fairy lights for my wedding?
Battery-operated micro-LED starter kits are mandatory for centerpieces and portable photo zones to eliminate ugly extension cords and tripping hazards. However, you must use high-CPC commercial plug-in LED strands for major architectural elements like ceiling canopies and outdoor tents to ensure the bulbs don’t dim mid-reception. Blending both—plug-in for architecture, battery for tables—is the most cost-effective premium setup.
What color temperature fairy lights look best for romantic evening weddings?
You must strictly source commercial-grade bulbs rated exactly at 2700K-3000K (Warm White) to achieve that expensive, cinematic golden glow. This specific color temperature mimics real candlelight and photographs beautifully, hiding venue flaws while flattering skin tones. Avoid cheap retail kits labeled “cool white” (4000K+) as they cast a harsh, blue-tinted fluorescent glare that makes romantic venues feel like sterile hospitals.
Can I install fairy lights myself or should I hire professionals?
You can absolutely install 80% of these layouts yourself using pre-made LED curtain kits, heavy-duty backdrop stands, and damage-free adhesive clips. Table decor, photo walls, and perimeter columns are perfect DIY weekend projects that save you hundreds in labor. However, if your design requires high-tension steel cable rigging across massive ballrooms or complex electrical breaker management, investing in a professional rigger guarantees safety and structural perfection.
How early should I arrive to set up fairy lights before my wedding?
If you are utilizing simple DIY starter kits, allocate 4-6 hours with a dedicated crew of three people to ensure proper taping, hanging, and battery testing. Always schedule your setup for the early morning so you can visually test your remote-controlled dimmer switches before the caterers crowd the floor. If you are running complex outdoor stringers, add an extra two hours to handle unexpected weather delays or structural adjustments.
Are fairy lights safe for outdoor weddings in all weather conditions?
Never use standard indoor retail lights outside; you must specifically purchase IP65 waterproof outdoor fairy light spools to survive unexpected rain and heavy humidity. Connecting these heavy-duty strands into a sealed outdoor waterproof electrical junction box and a GFCI outlet guarantees the system won’t short out and ruin the party. For absolute peace of mind in high-wind areas, anchoring everything with UV-coated professional zip ties is highly recommended.