A well-designed vertical garden trellis turns empty walls into high-yield architectural features. Build these premium setups using budget-friendly blueprints and smart material sourcing. Transform your outdoor space into a stunning, productive oasis effortlessly.
Design Snapshot: Key Principles
- Structural Load Capacity: Select materials and anchoring systems rated for mature plant weight, especially for heavy climbers like wisteria or squash vines.
- Growth Habit Matching: Align trellis mesh size and orientation with specific climbing mechanisms—twiners need vertical supports while tendril climbers require horizontal elements.
- Accessibility Planning: Position trellises to allow access from both sides when possible, simplifying pruning, harvesting, and maintenance throughout the season.
- Seasonal Adaptability: Design modular or collapsible systems for cool-season versus warm-season crops, enabling efficient garden rotation and winter storage.
Wall-Mounted & Vertical Structures for Maximum Space Efficiency
Wall-mounted trellis systems deliver vertical growing capacity without consuming ground space, making them ideal for narrow side yards, courtyard gardens, and urban patios. These permanent installations anchor securely to existing structures while supporting everything from flowering vines to productive vegetable climbers.
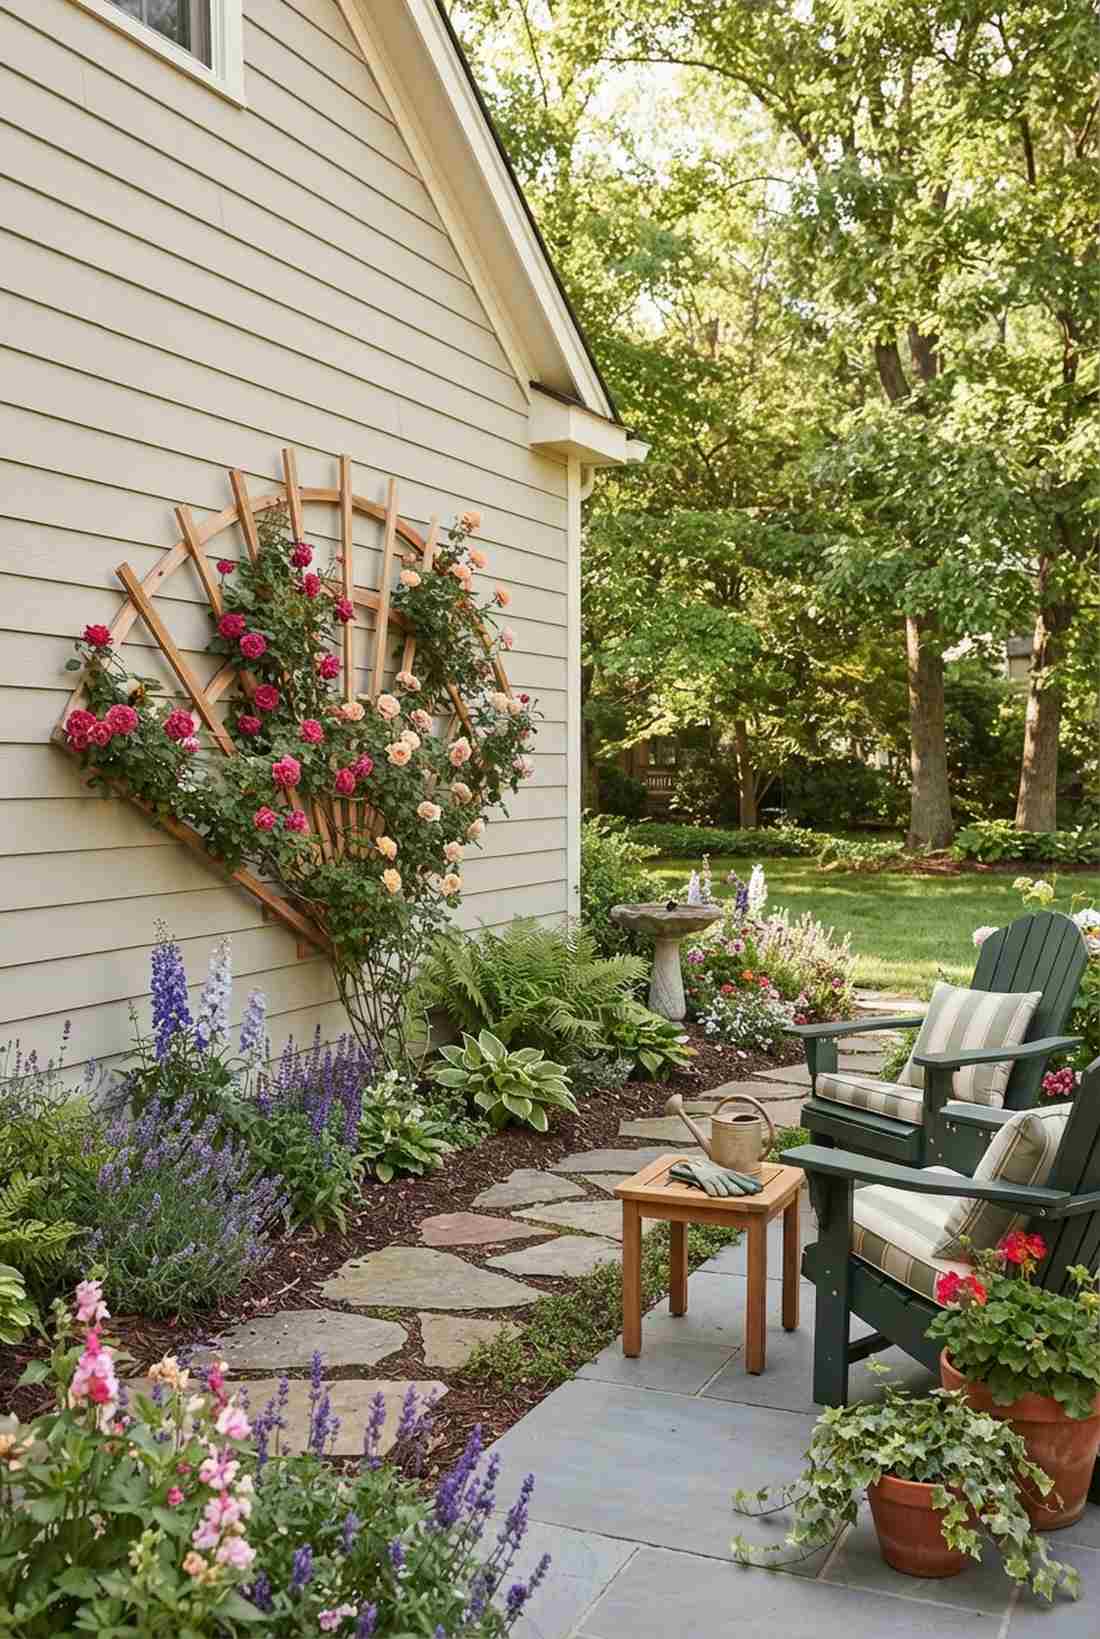
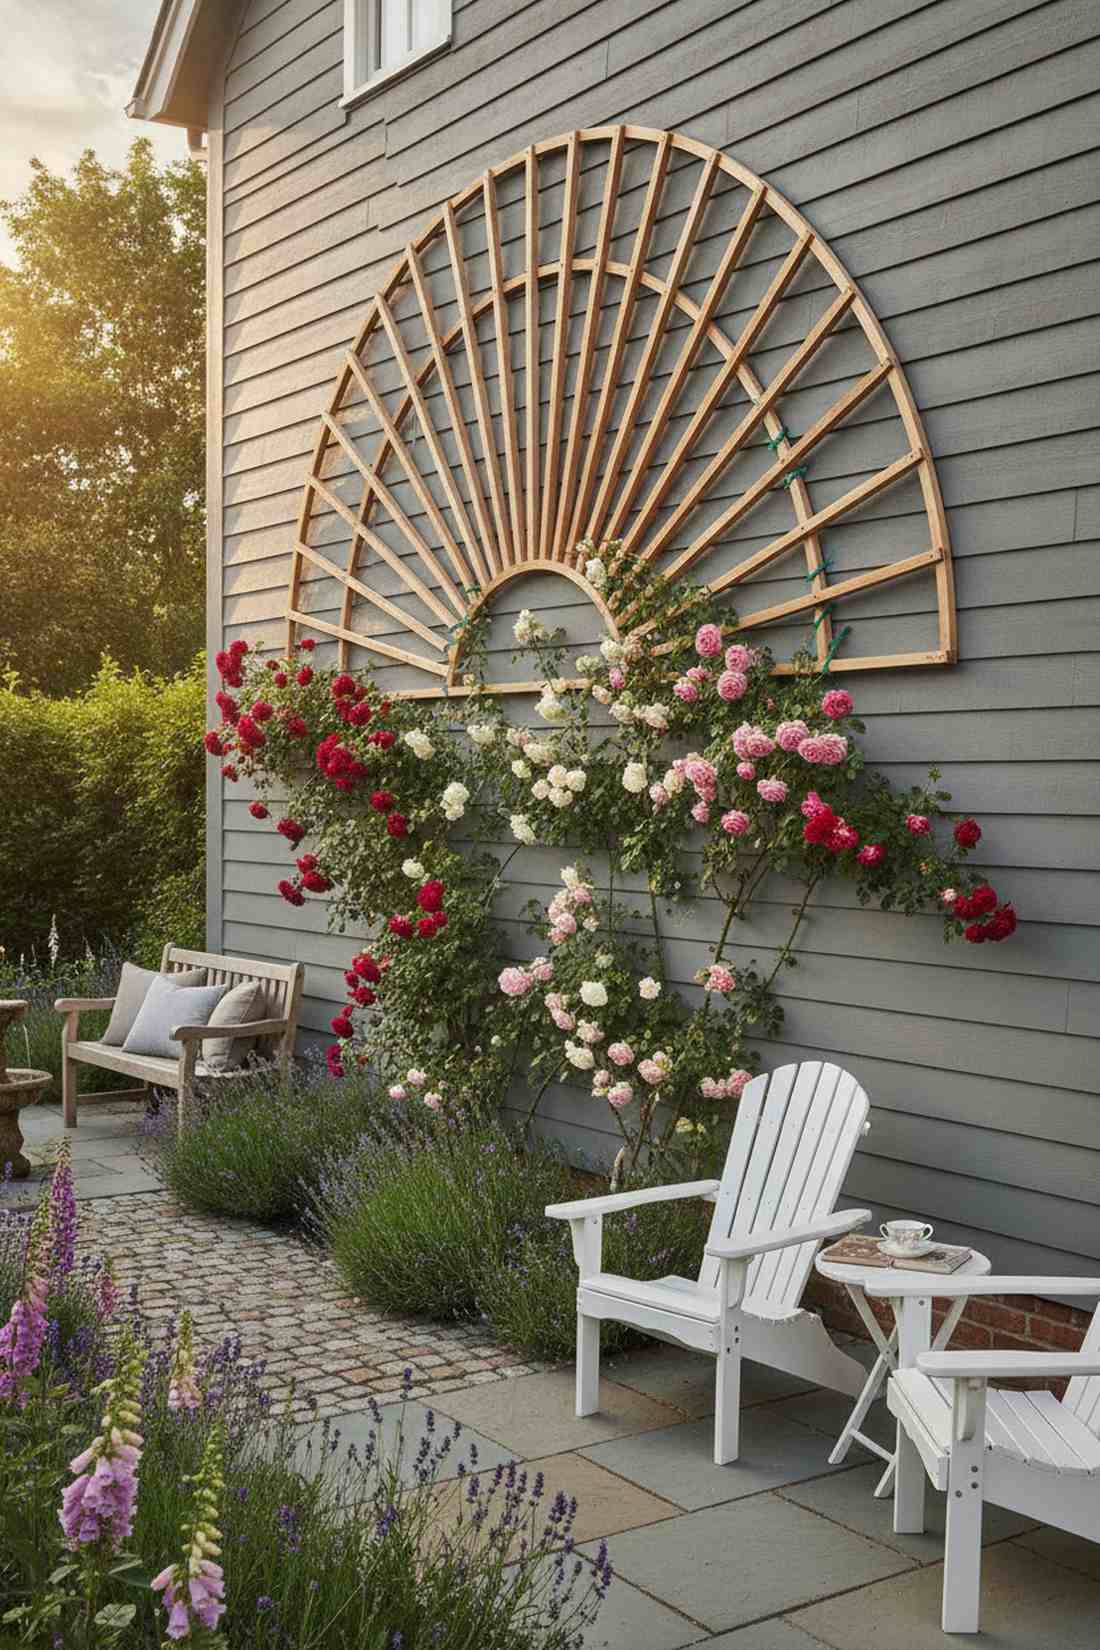
1. Fan-Shaped Wall Trellis for Roses
This romantic setup feels like a hidden English courtyard you accidentally discovered. A fan-shaped wooden wall mount creates the perfect architectural background, working exceptionally well for blank exterior siding.
Beginners often assume roses need thick pergolas, but this sleek radiating design delivers a surprisingly premium look with a minimal footprint. Grab some heavy-duty plant clips to train those heavy canes effortlessly while maintaining essential airflow.
You can easily pull this off for around $40–$65. Save this to your DIY weekend garden board!
- Key Materials: Weather-treated cedar lattice, heavy-duty masonry anchors
- Vibe / Style: Classic English cottage elegance
- Difficulty: Easy beginner setup
- Budget Breakdown: Materials: $45 | Hardware: $15
- Creator’s Tip: Mount the base 18 inches off the ground to prevent lower stem rot.
- Smart Sourcing: pre-cut cedar trellis fans (ready-to-mount) and UV-coated silicone plant ties (bulk pack).
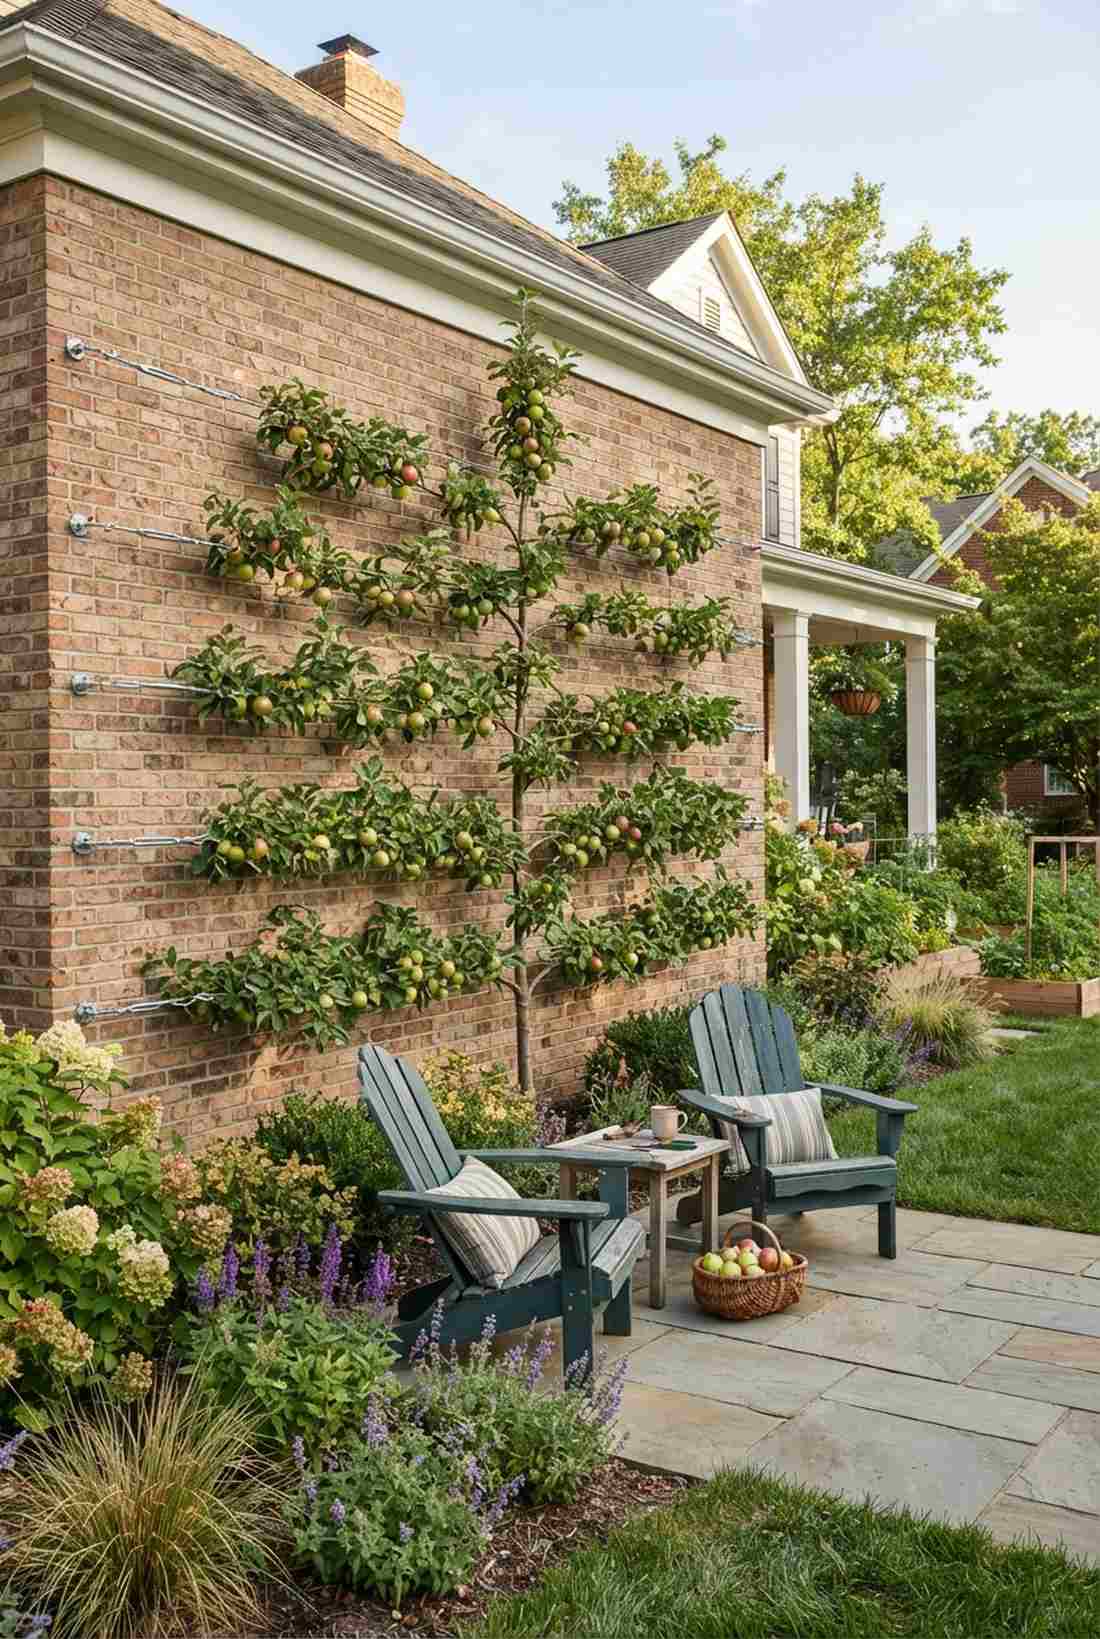
2. Espalier Grid for Fruit Trees
Transforming a boring wall into an orchard feels straight out of an elite countryside estate. The horizontal espalier wire system turns flat brick facades into high-yield fruit producers, perfect for south-facing courtyard spaces.
People waste money on expensive mature trees, yet this grid layout looks far more expensive than it is by utilizing affordable year-old whips. Secure galvanized tension grids to bounce reflected wall heat right back into your ripening fruit.
It requires roughly $30–$50 in hardware to get started. Highly recommended for an impressive front yard statement.
- Key Materials: Galvanized wire, steel turnbuckles
- Vibe / Style: Sophisticated Mediterranean orchard
- Difficulty: Intermediate structural project
- Budget Breakdown: Wire System: $30 | Anchors: $15
- Creator’s Tip: Tension your wires to at least 50 pounds to support heavy fruiting branches later.
- Smart Sourcing: galvanized steel espalier wire kits and heavy-duty masonry eye bolts (contractor pack).
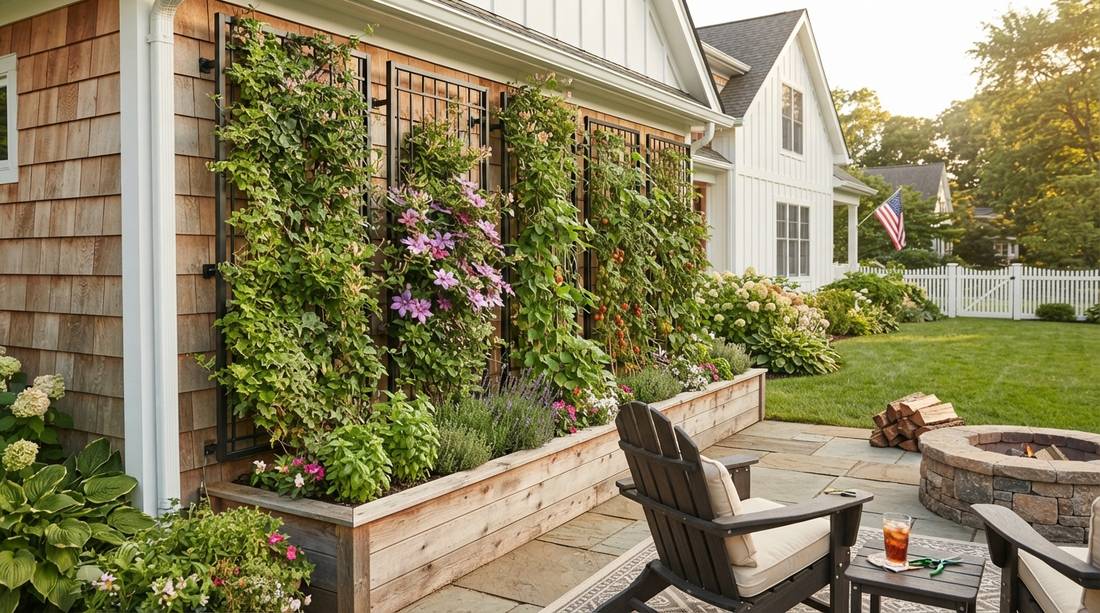
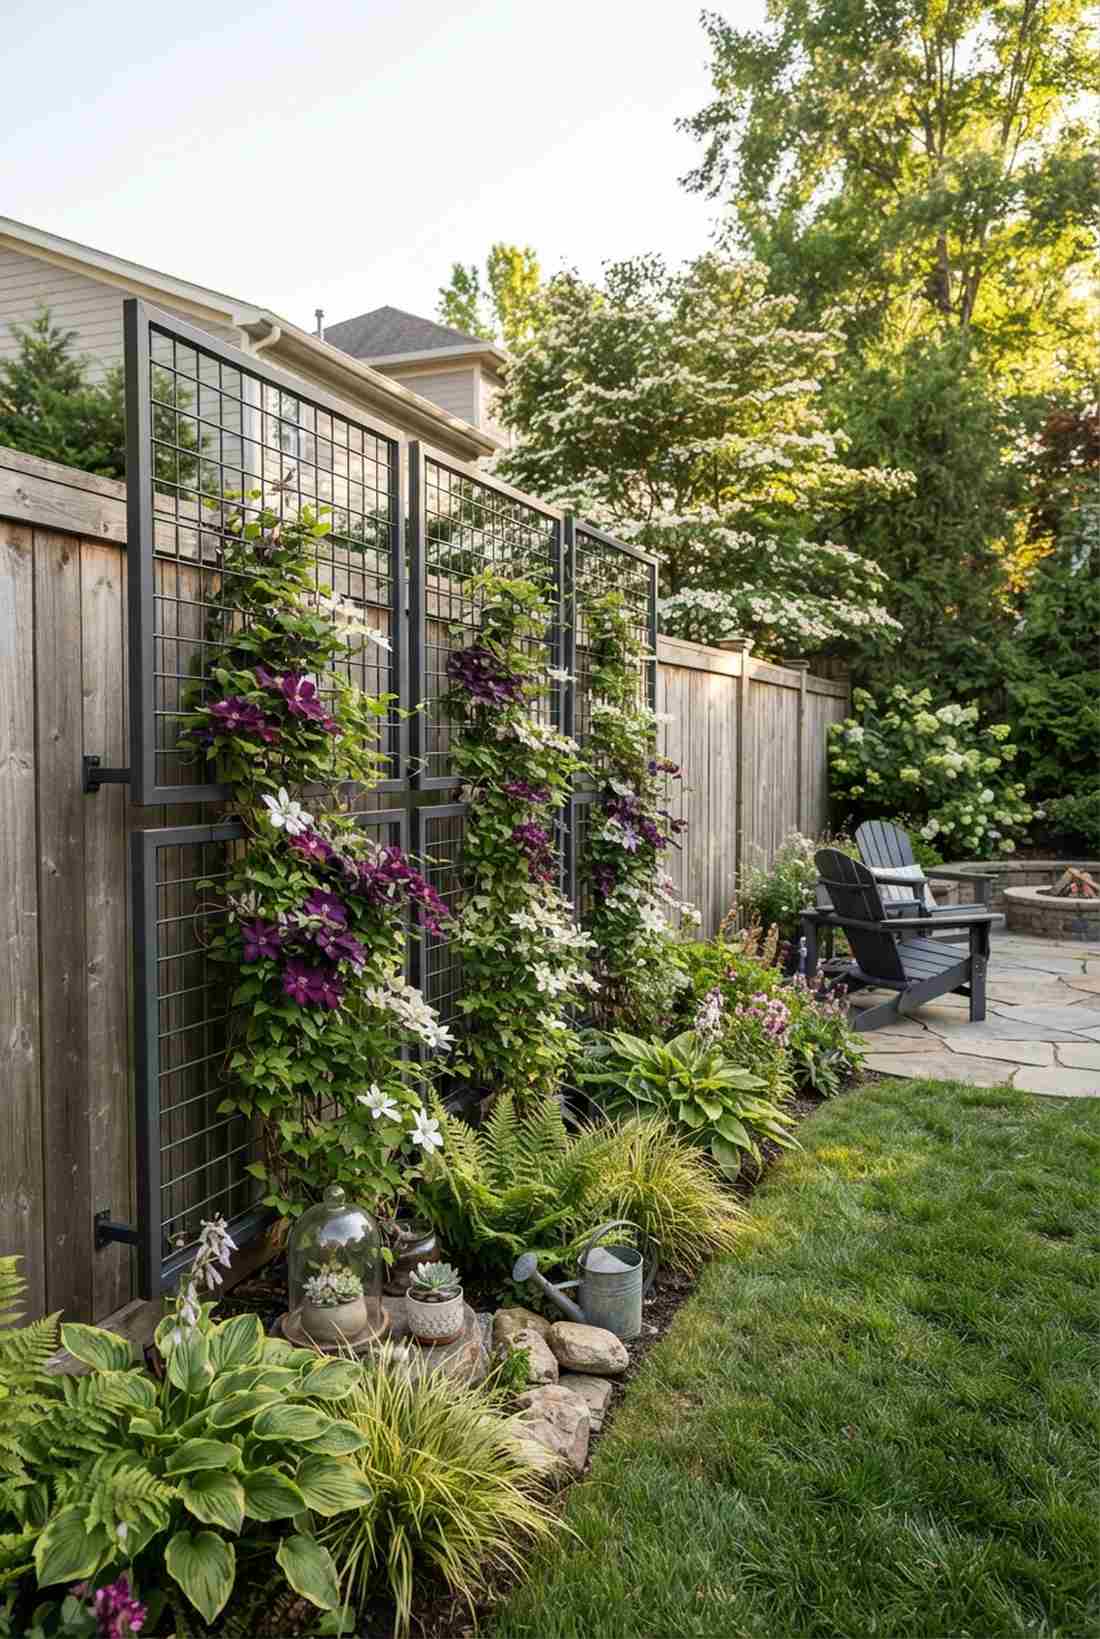
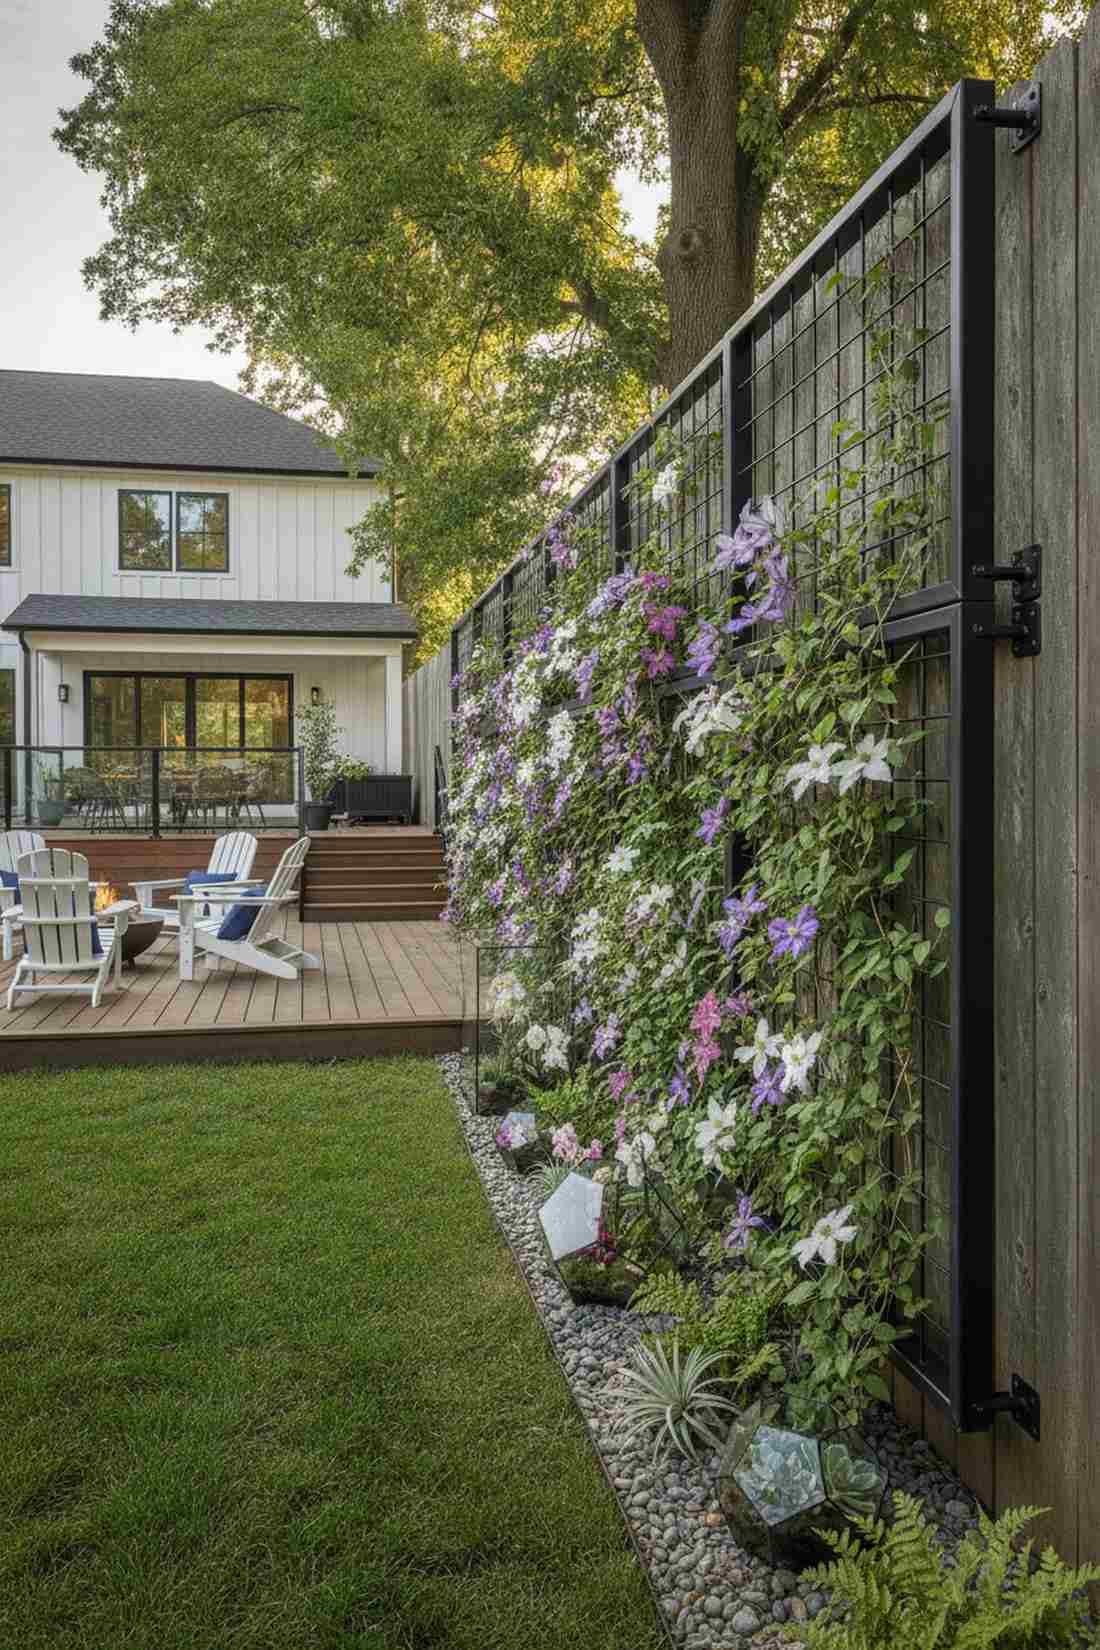
3. Modular Panel System for Clematis
Watching lush vines climb this grid feels like unrolling a living tapestry across your property. Using an interlocking modular metal grid builds a seamless flow of greenery, ideal for hiding ugly neighborhood fences.
Standard wooden lattices warp over time, but this powder-coated approach gives a designer-level finish that lasts decades. Sneak in some premium terrarium accessories at the base to tie the whole aesthetic together.
A starter configuration runs about $55–$80. Pin this if you’re planning a quick privacy screen upgrade!
- Key Materials: Interlocking steel panels, standoff brackets
- Vibe / Style: Modern botanical display
- Difficulty: Quick afternoon build
- Budget Breakdown: Panels: $60 | Brackets: $15
- Creator’s Tip: Use standoff mounts to keep a 3-inch gap from the wall for essential plant breathing room.
- Smart Sourcing: powder-coated grid panels (modular kit) and rust-proof standoff wall brackets.
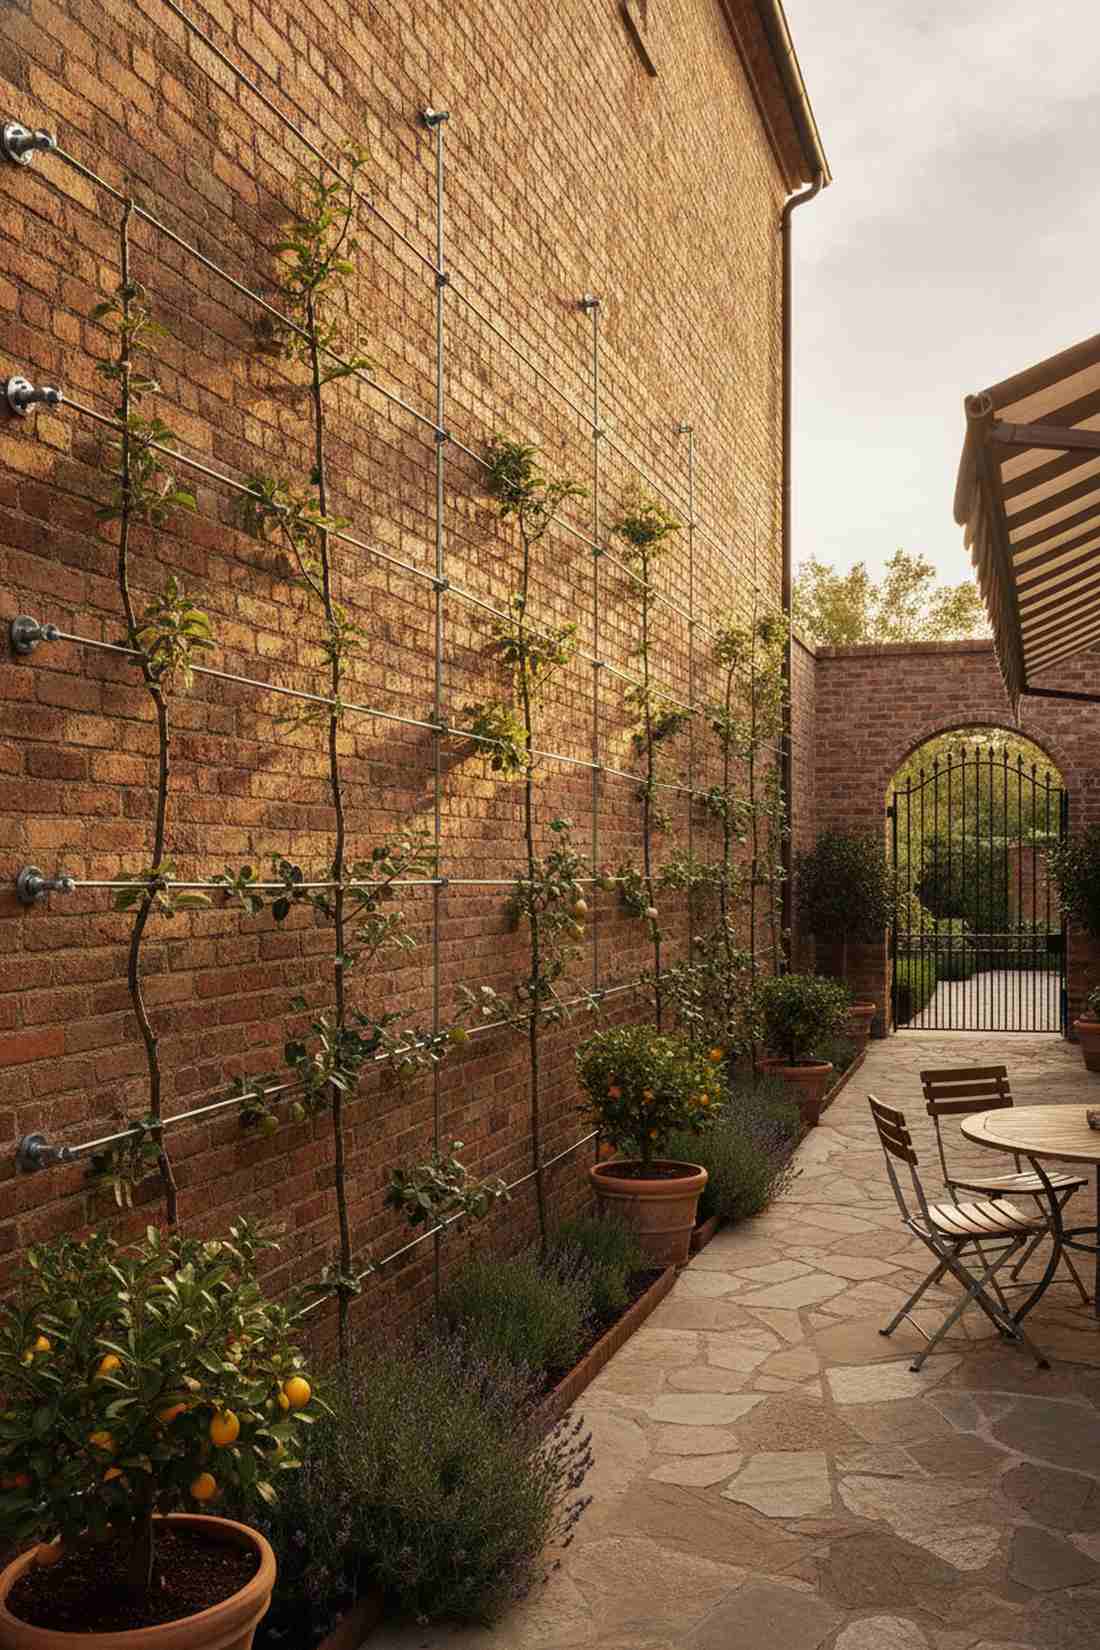
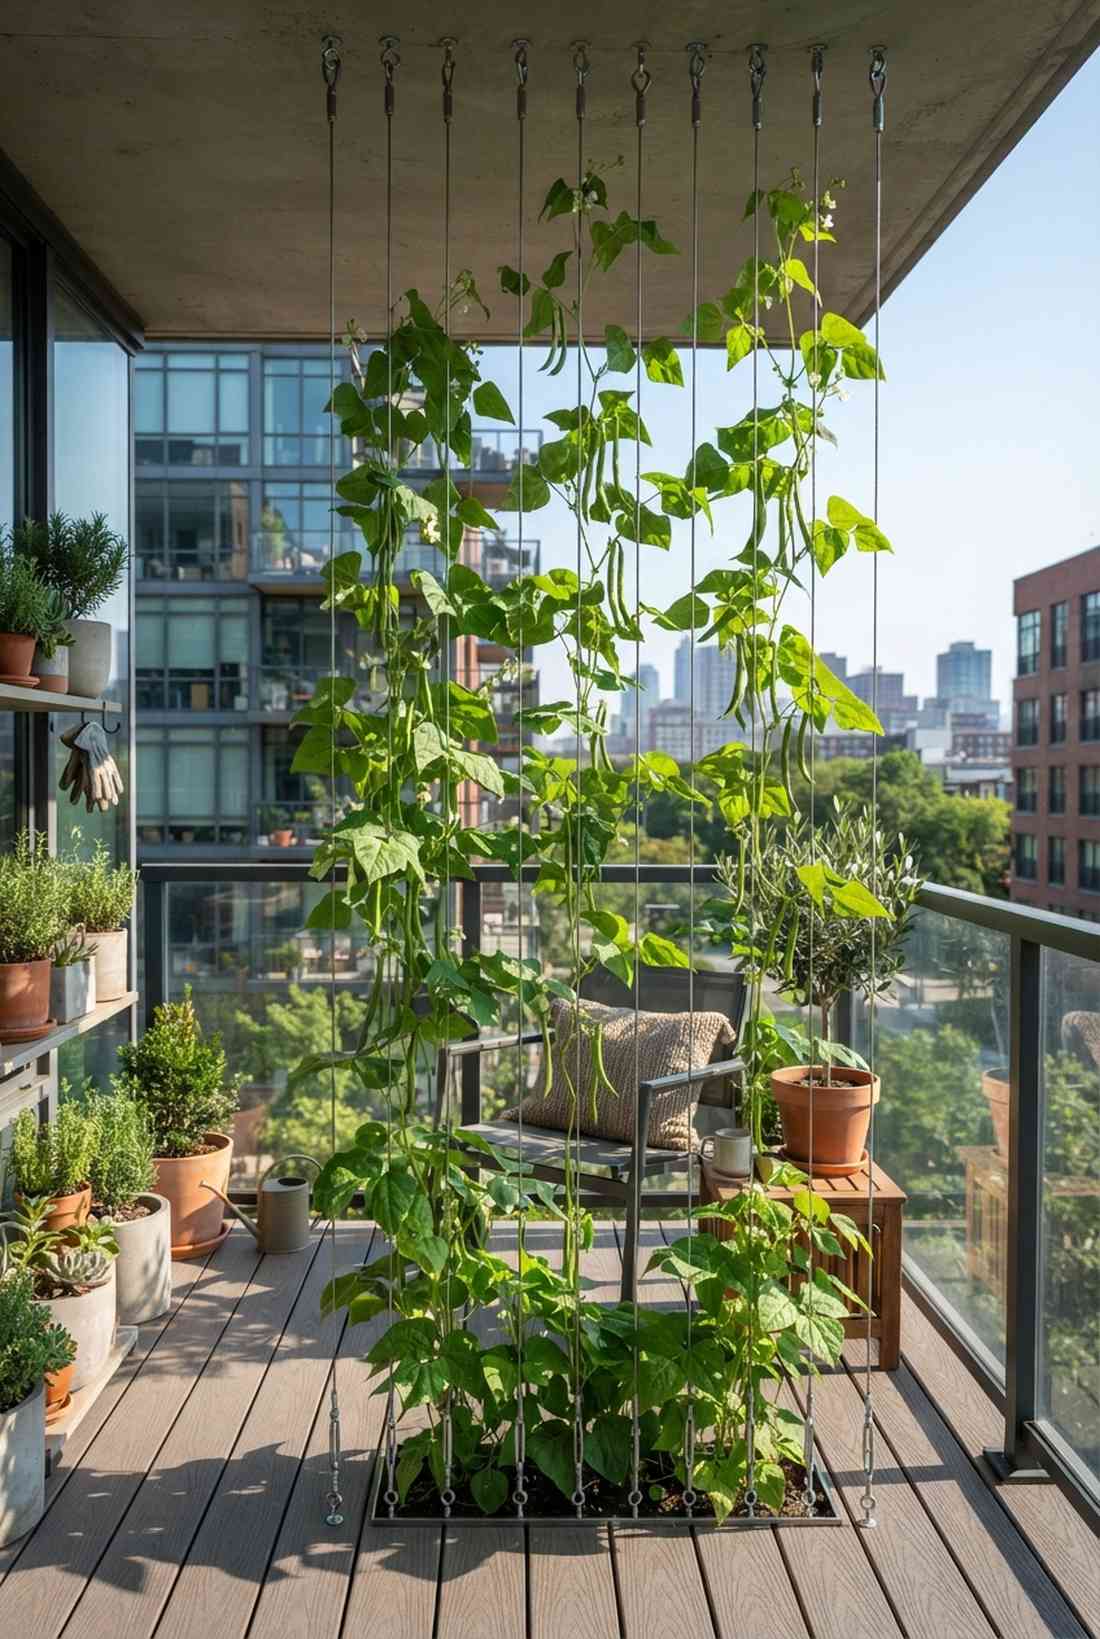
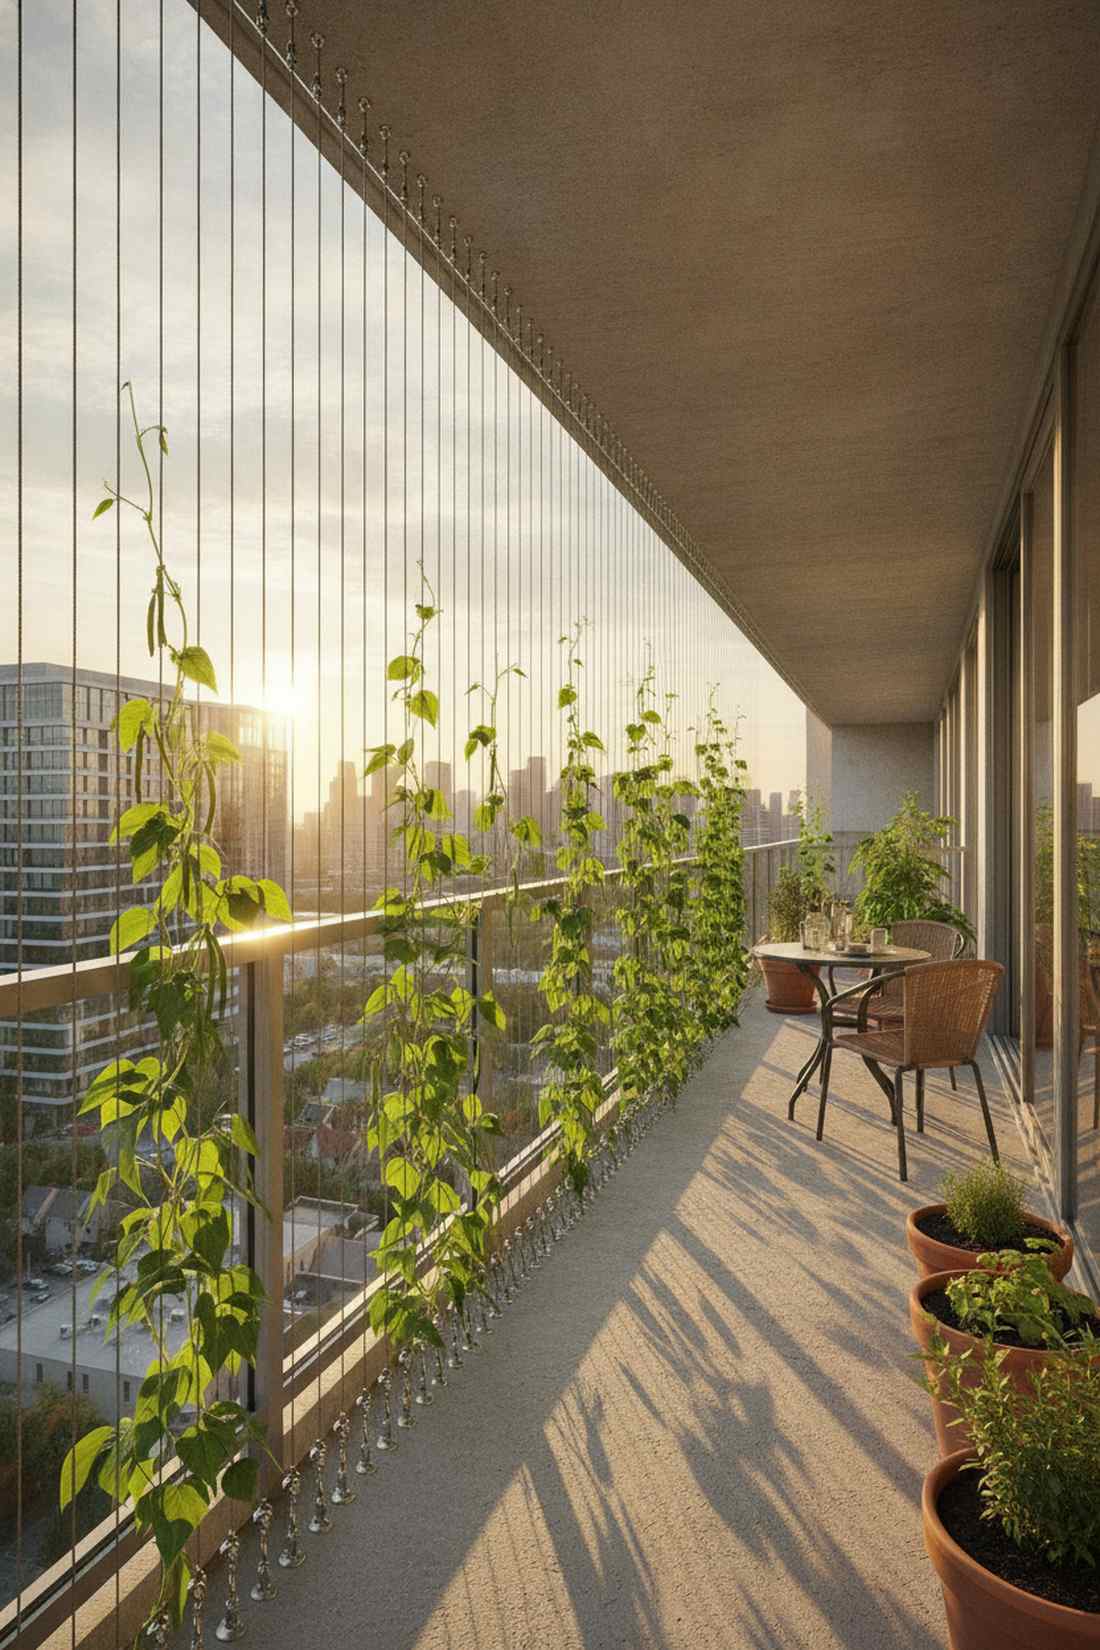
4. Vertical Cable System for Beans
This floating greenery illusion feels incredibly modern and crisp in the morning light. A stainless steel vertical cable run provides minimalist support, serving beautifully as a sleek divider on urban apartment balconies.
Chunky wooden teepees can look messy, whereas this high-tension line setup delivers an ultra-clean architectural vibe. You get zero sunlight blockage and harvesting becomes a breeze with pods hanging directly at eye level.
Expect to spend around $25–$45 depending on the height. It’s a fast upgrade that completely modernizes the garden.
- Key Materials: Stainless steel cable, overhead eye hooks
- Vibe / Style: Minimalist urban agriculture
- Difficulty: Simple drill-and-hook
- Budget Breakdown: Cable spools: $20 | Hardware: $15
- Creator’s Tip: Space lines exactly 6 inches apart to train runners perfectly without tangling.
- Smart Sourcing: stainless steel trellis cable kits (pre-spooled) and marine-grade turnbuckle sets.
Most people get their vertical layouts completely wrong… wasting money on cheap wood that rots in a season. The next setup fixes that completely while looking like a $200 custom display!
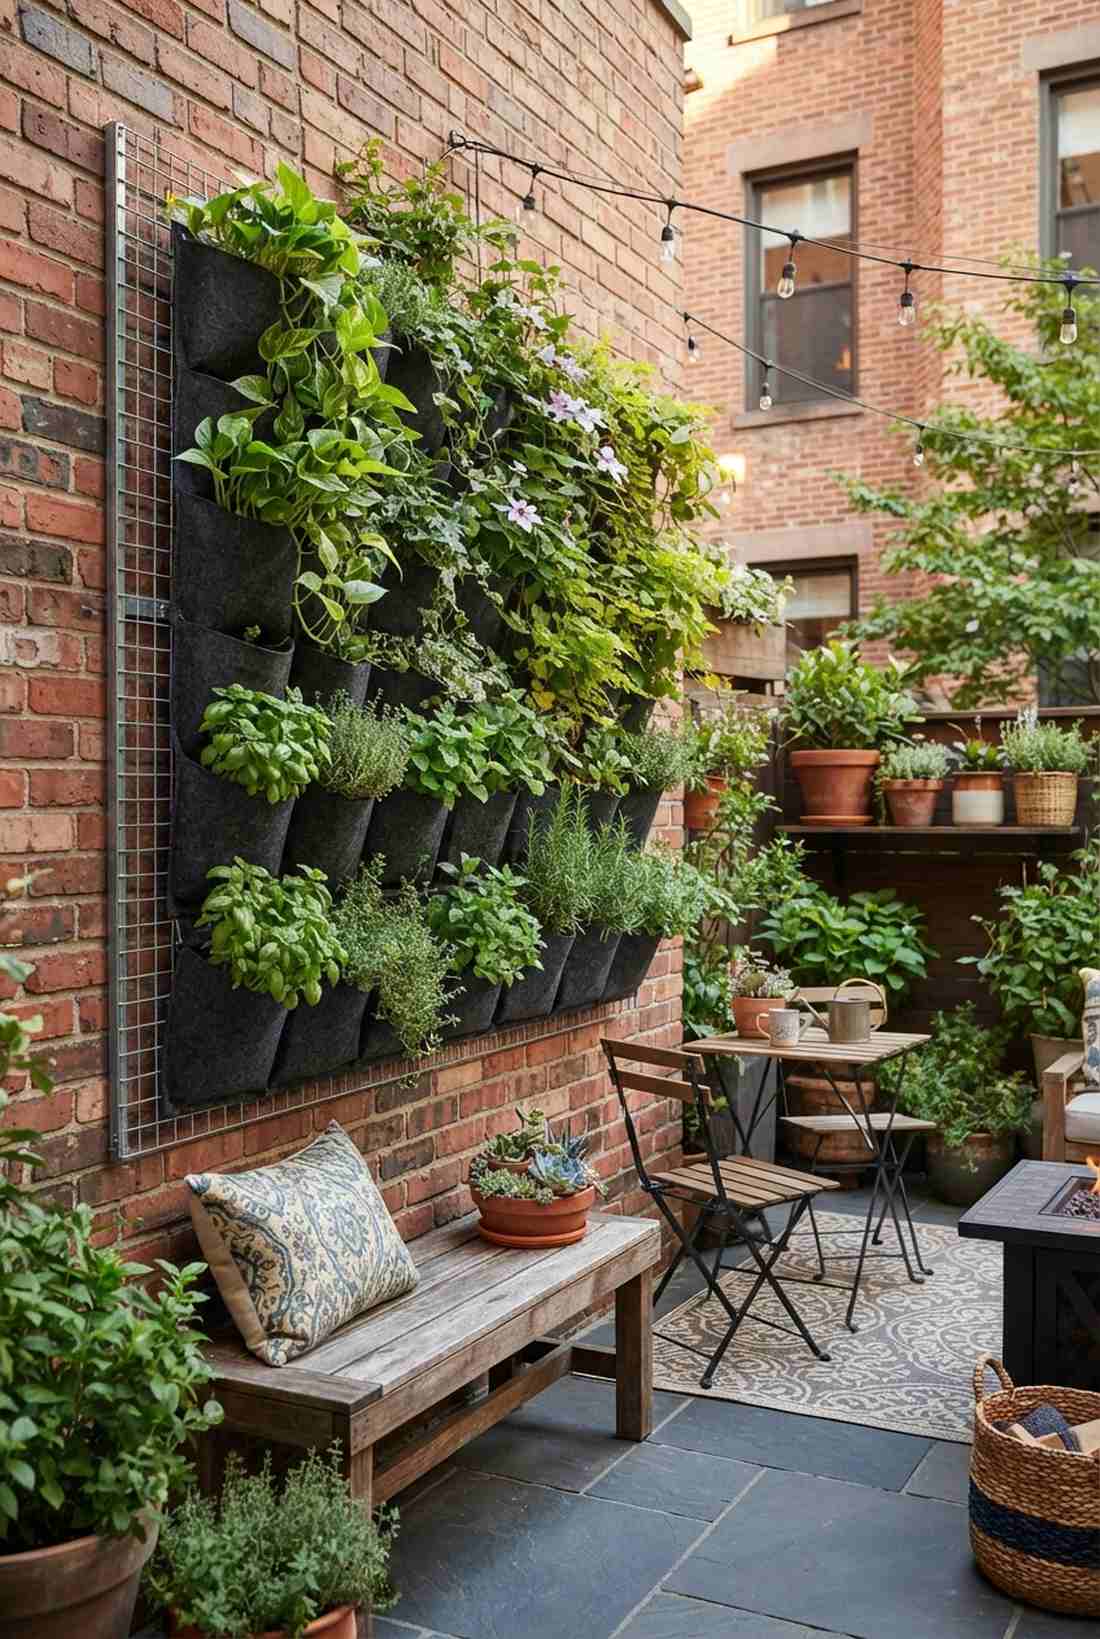
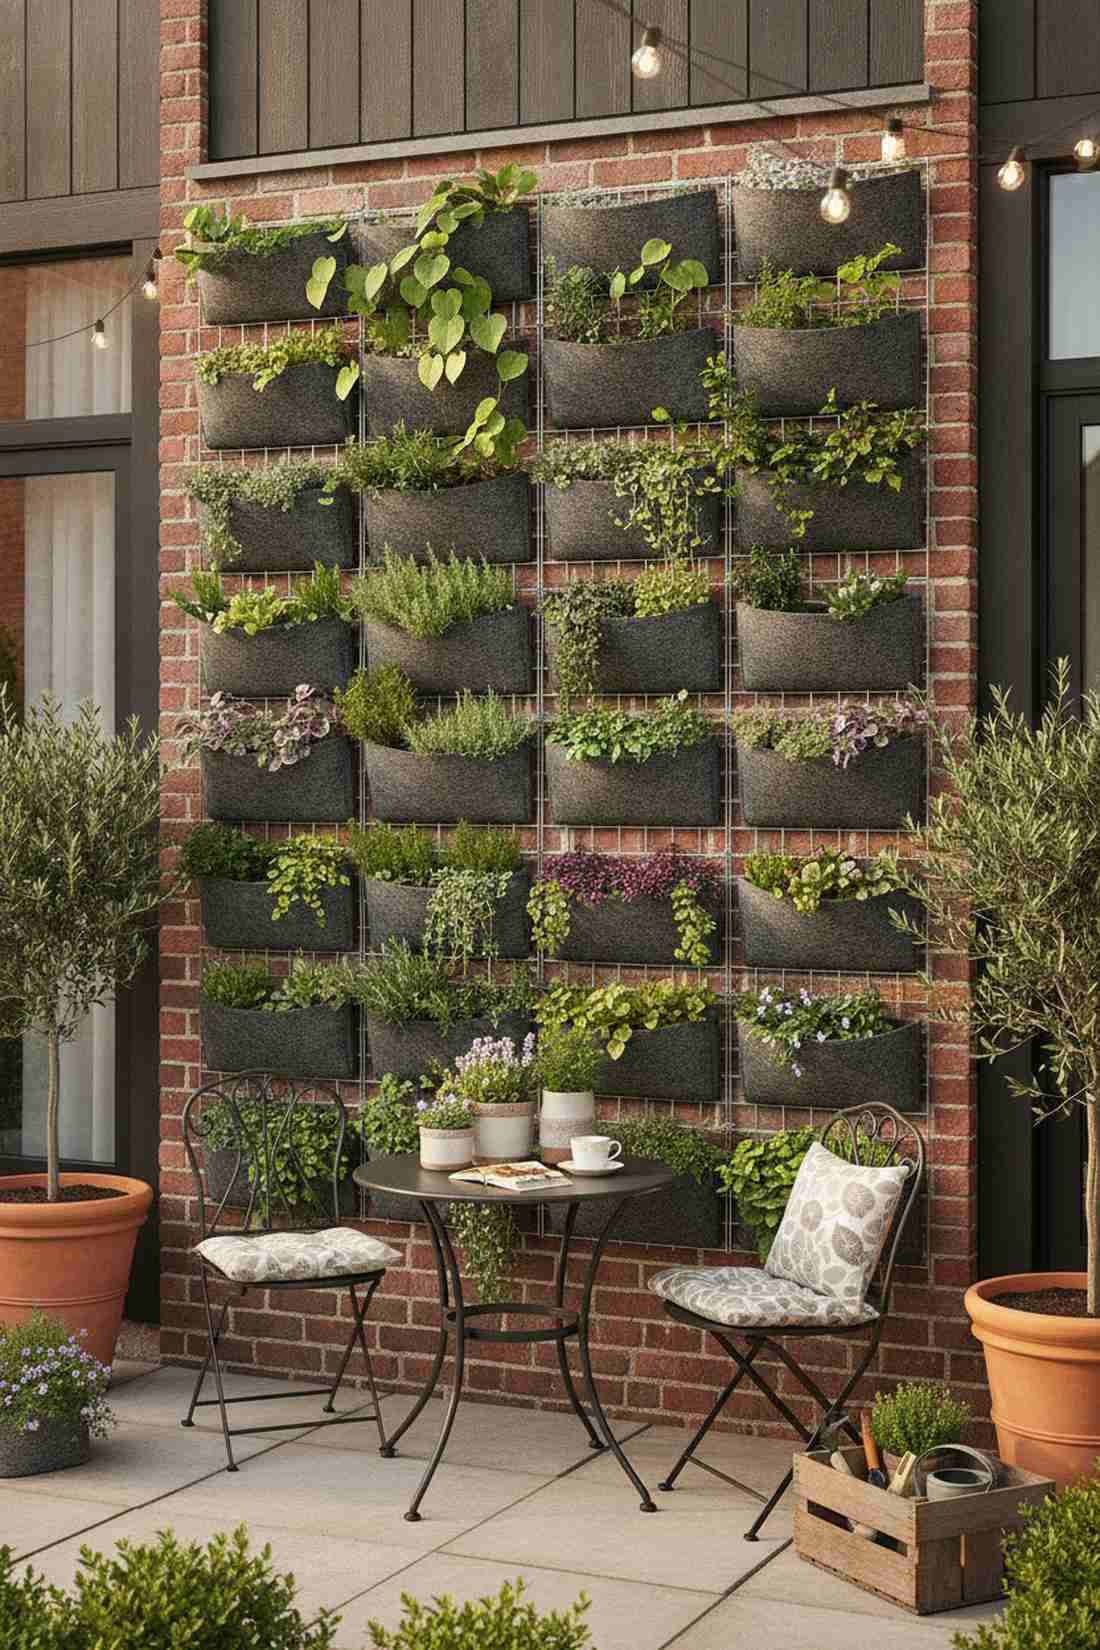
5. Living Wall Pocket Trellis
Stepping out to this setup feels like walking into a high-end botanical cafe. The hybrid felt pocket living wall stacks lush foliage directly onto structural support, perfect for transforming a drab apartment patio.
Many vertical kits fail because of poor drainage, but pairing breathable fabric pockets with a sturdy mesh backer ensures your roots thrive. This dual-action approach lets you mix heavy climbing vines with cascading pocket herbs flawlessly.
You can throw this together for around $45–$70. Save this idea for a massive small-space yield!
- Key Materials: Breathable felt planters, wire backing grid
- Vibe / Style: Lush cafe courtyard
- Difficulty: Beginner-friendly assembly
- Budget Breakdown: Pocket system: $35 | Backing: $20
- Creator’s Tip: Plant trailing species at the bottom and aggressive climbers at the top pockets.
- Smart Sourcing: heavy-duty felt pocket planters (waterproof back) and pre-cut galvanized backing mesh.
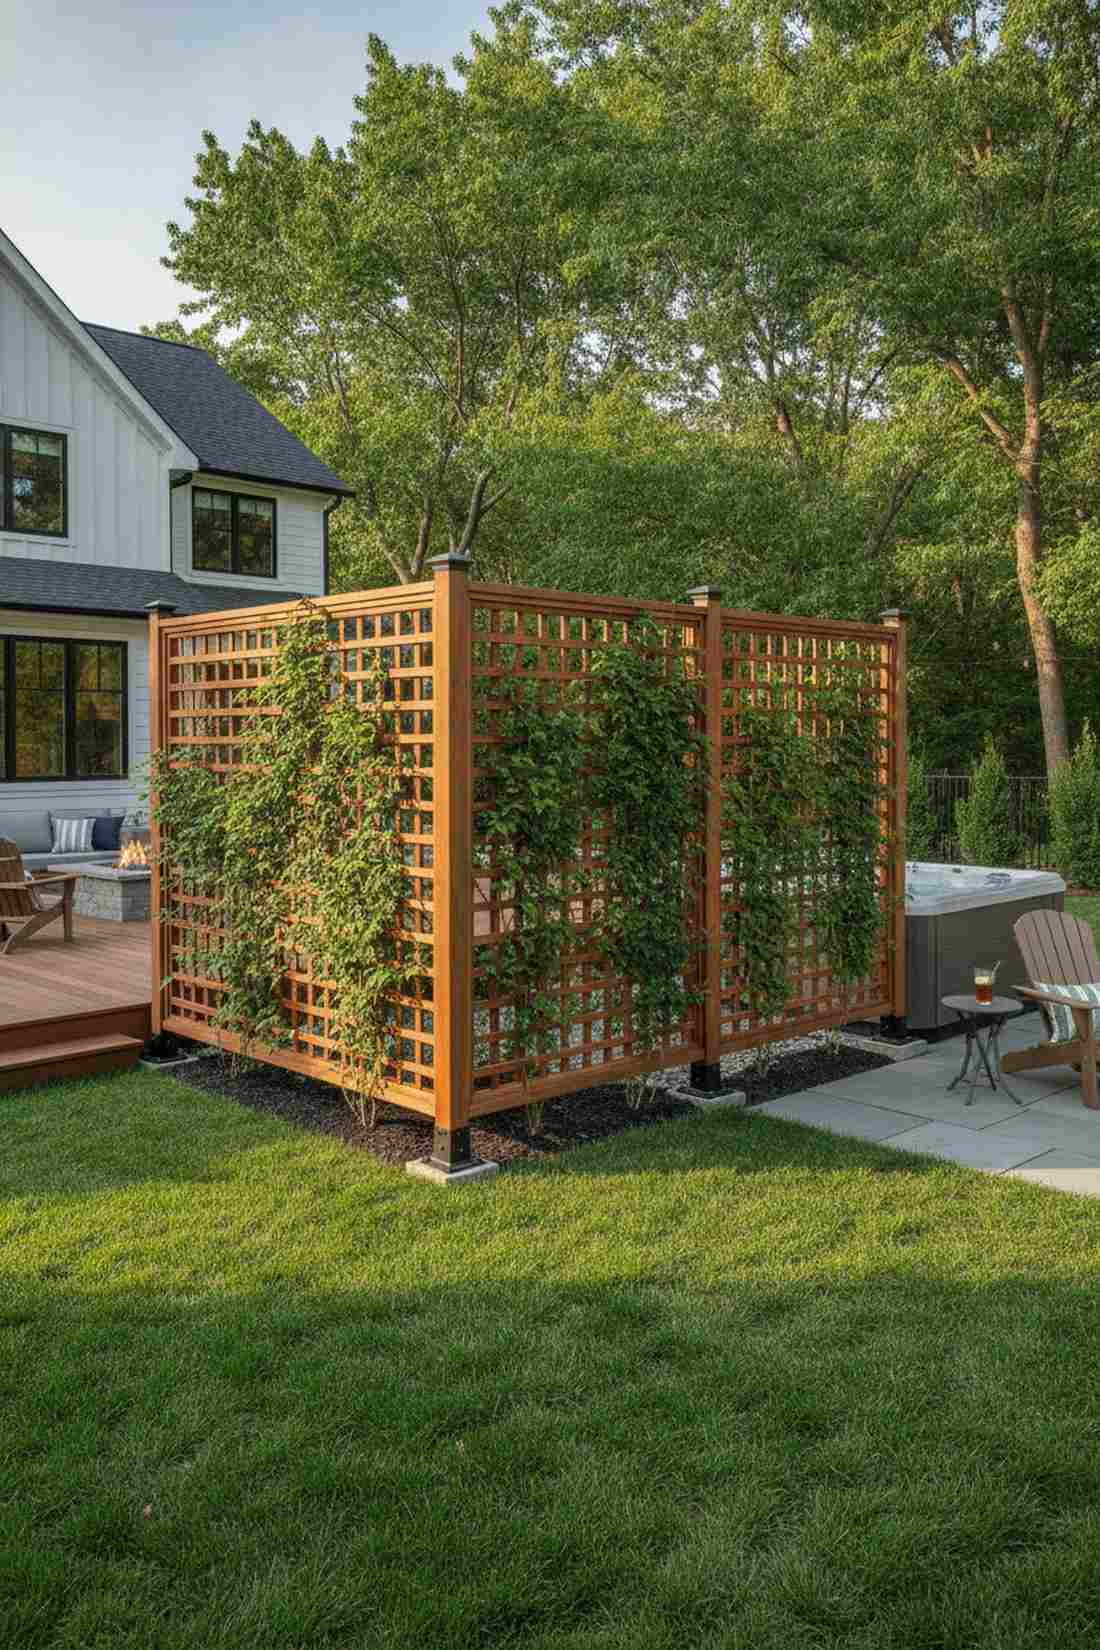
6. Corner Wrap Trellis for Privacy
Wrapping corners in greenery makes the whole house feel hugged by nature, like a hidden sanctuary. A 90-degree wrap-around lattice instantly softens harsh building lines, making it the ultimate fix for exposed outdoor showers or hot tub corners.
Leaving corners bare is a huge missed design opportunity, but an L-shaped structure completely redefines your sightlines. Fast-growing evergreens will turn this framework into a solid green wall in a single season.
A full corner wrap usually costs $80–$120. It’s an architectural secret weapon for instant yard luxury.
- Key Materials: Pre-stained cedar, corner post brackets
- Vibe / Style: Resort-style privacy
- Difficulty: Intermediate leveling required
- Budget Breakdown: Wood panels: $80 | Concrete bases: $20
- Creator’s Tip: Use smaller 2-inch mesh grids to speed up visual blockage and screening.
- Smart Sourcing: pre-stained corner lattice panels and heavy-duty post anchor brackets (powder-coated).
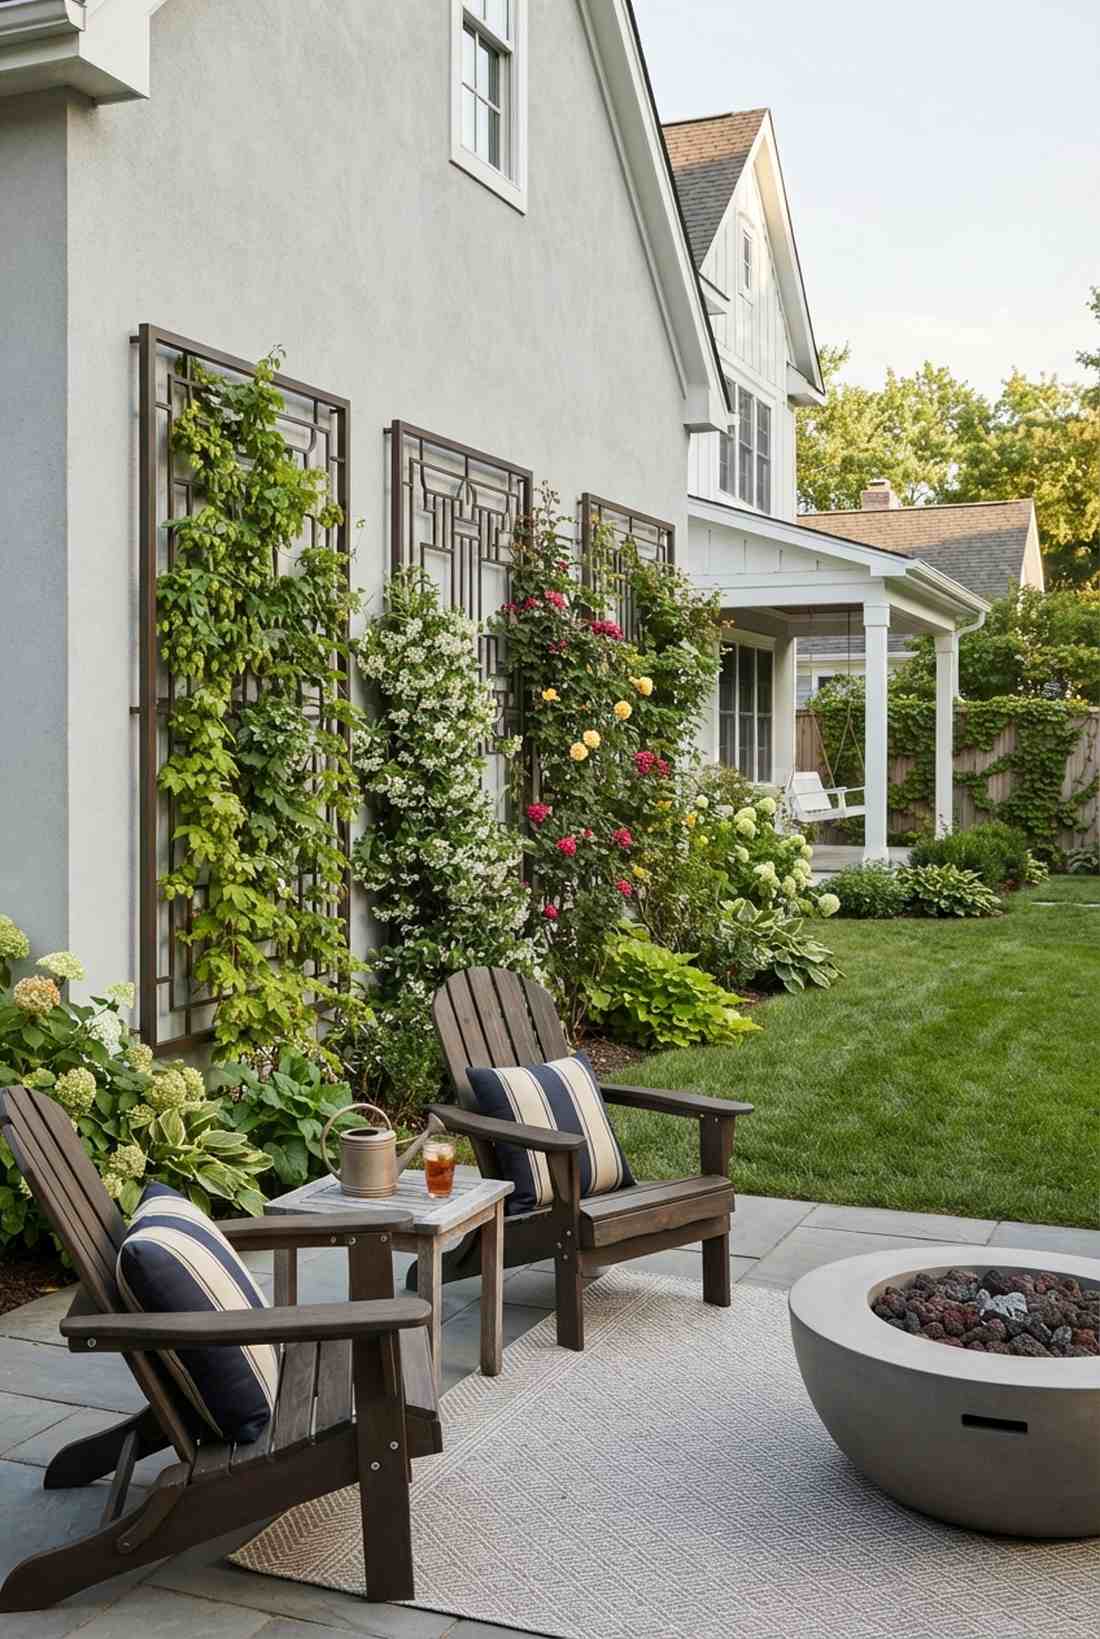
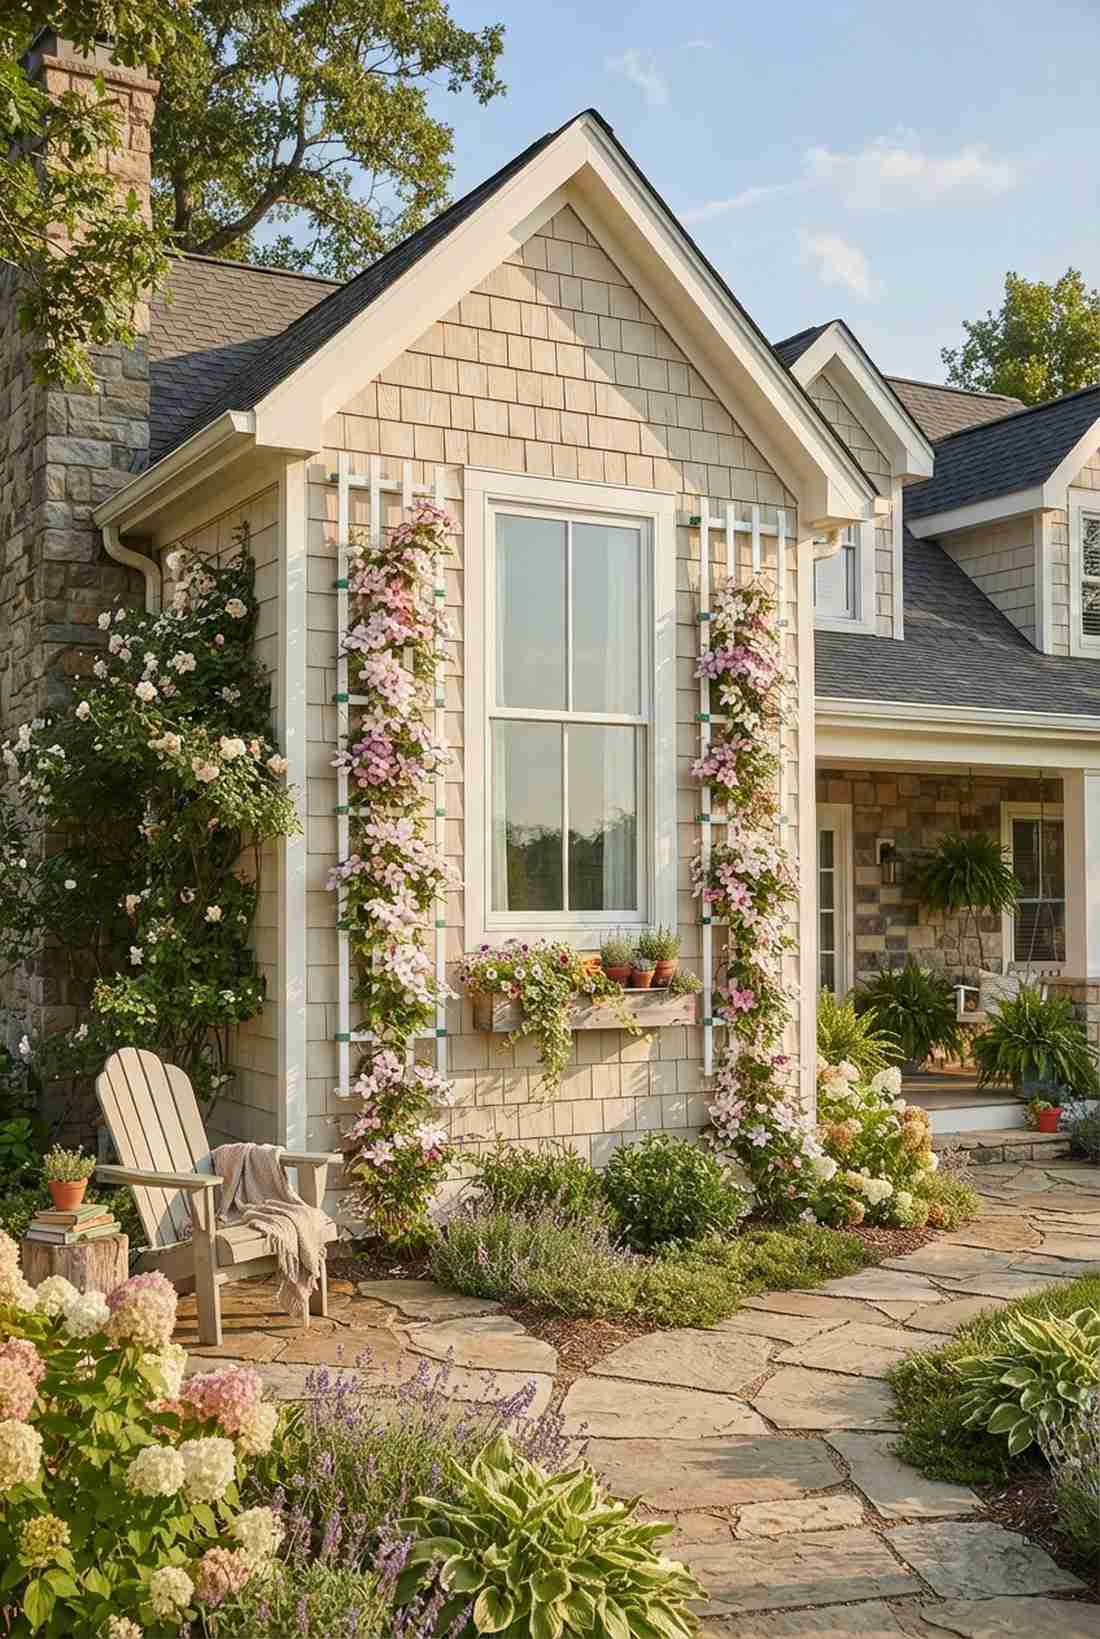
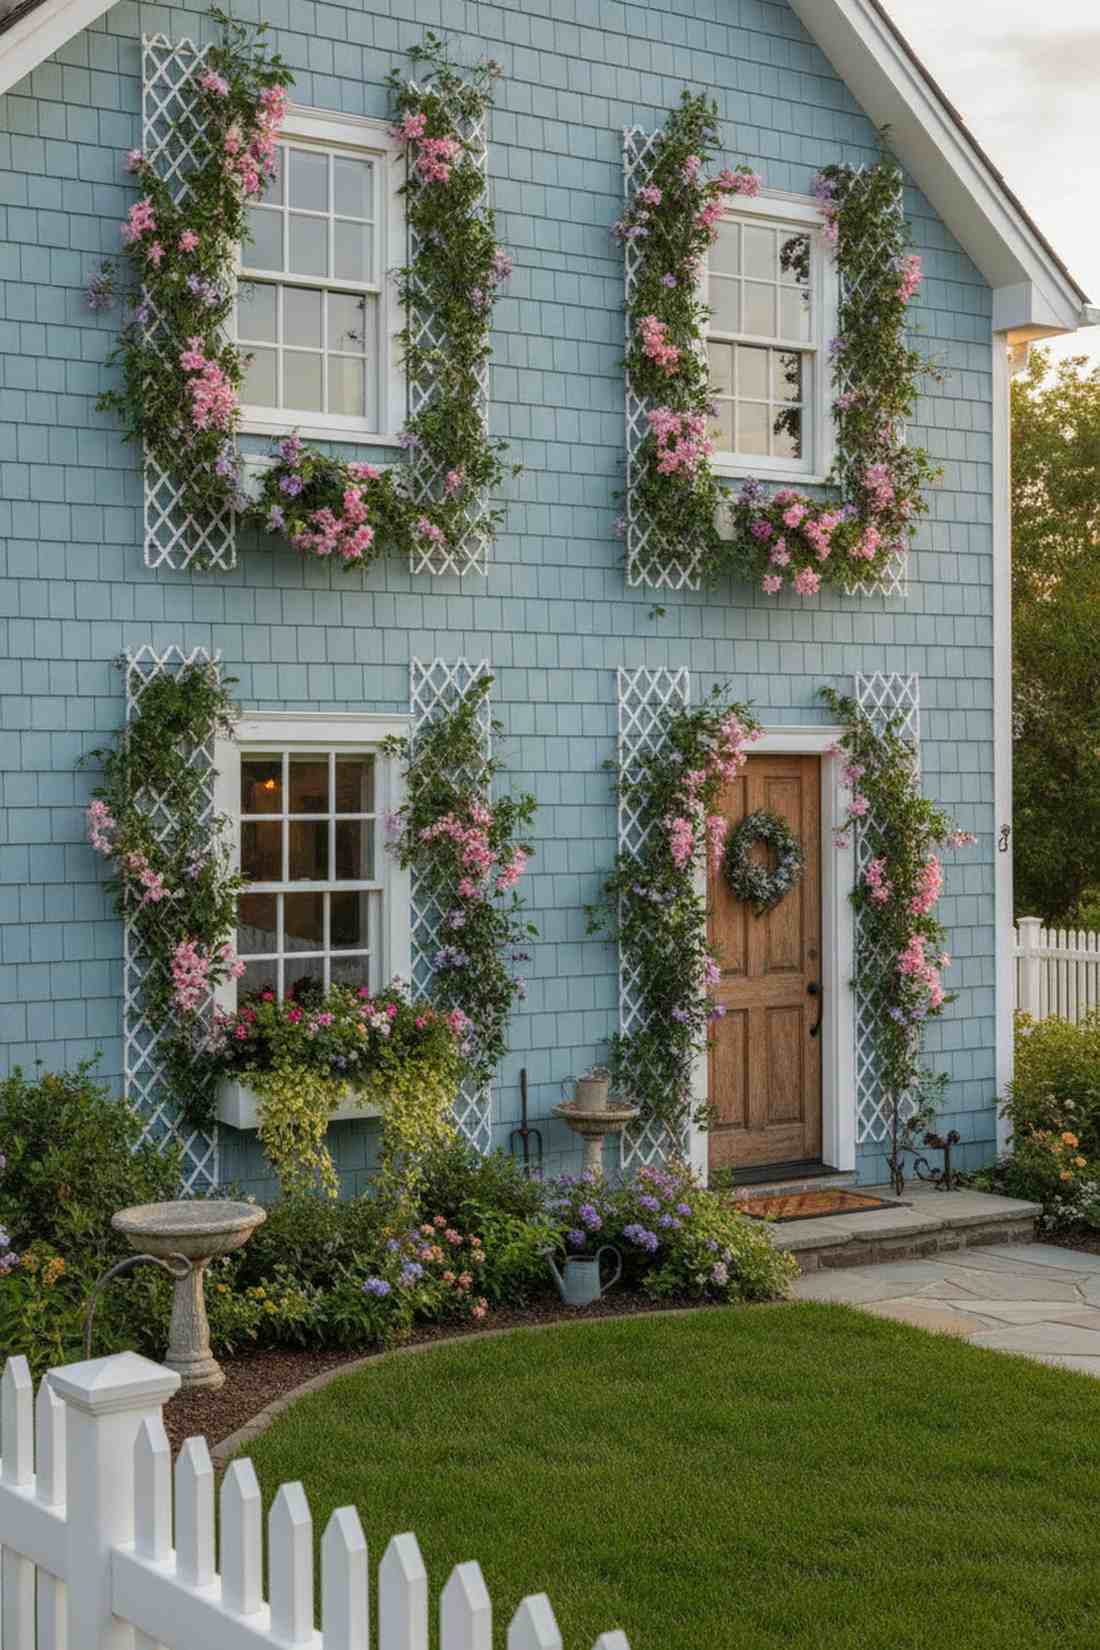
7. Window Frame Trellis Accent

Framing your windows with blooming vines feels straight out of a picturesque fairytale cottage. The flanking narrow panel trellis pulls the eye upward, beautifully accenting bedroom windows without blocking any precious natural light.
Directly attaching vines to siding causes severe moisture damage, but this standoff framing trick gives you the aesthetic safely. Integrate some high-quality miniature garden supplies nearby to enhance that whimsical cottage core energy.
You can execute this charming look for $30–$50. Pin this to your exterior home makeover board!
- Key Materials: Narrow accent lattice, vinyl framing
- Vibe / Style: Whimsical storybook cottage
- Difficulty: Easy weekend project
- Budget Breakdown: Narrow lattices: $35 | Mounting spacers: $10
- Creator’s Tip: Always pinch off any errant growth reaching toward the window glass to maintain the frame effect.
- Smart Sourcing: vinyl narrow trellis panels (weatherproof) and synthetic floral vine training clips.
Raised Beds with Trellis Integrated Growing Systems
Incorporating trellis structures directly into raised bed designs creates cohesive growing systems where vertical and horizontal plantings work in harmony. These raised beds with trellis configurations optimize sun exposure, simplify crop rotation, and establish permanent infrastructure for annual and perennial climbers.
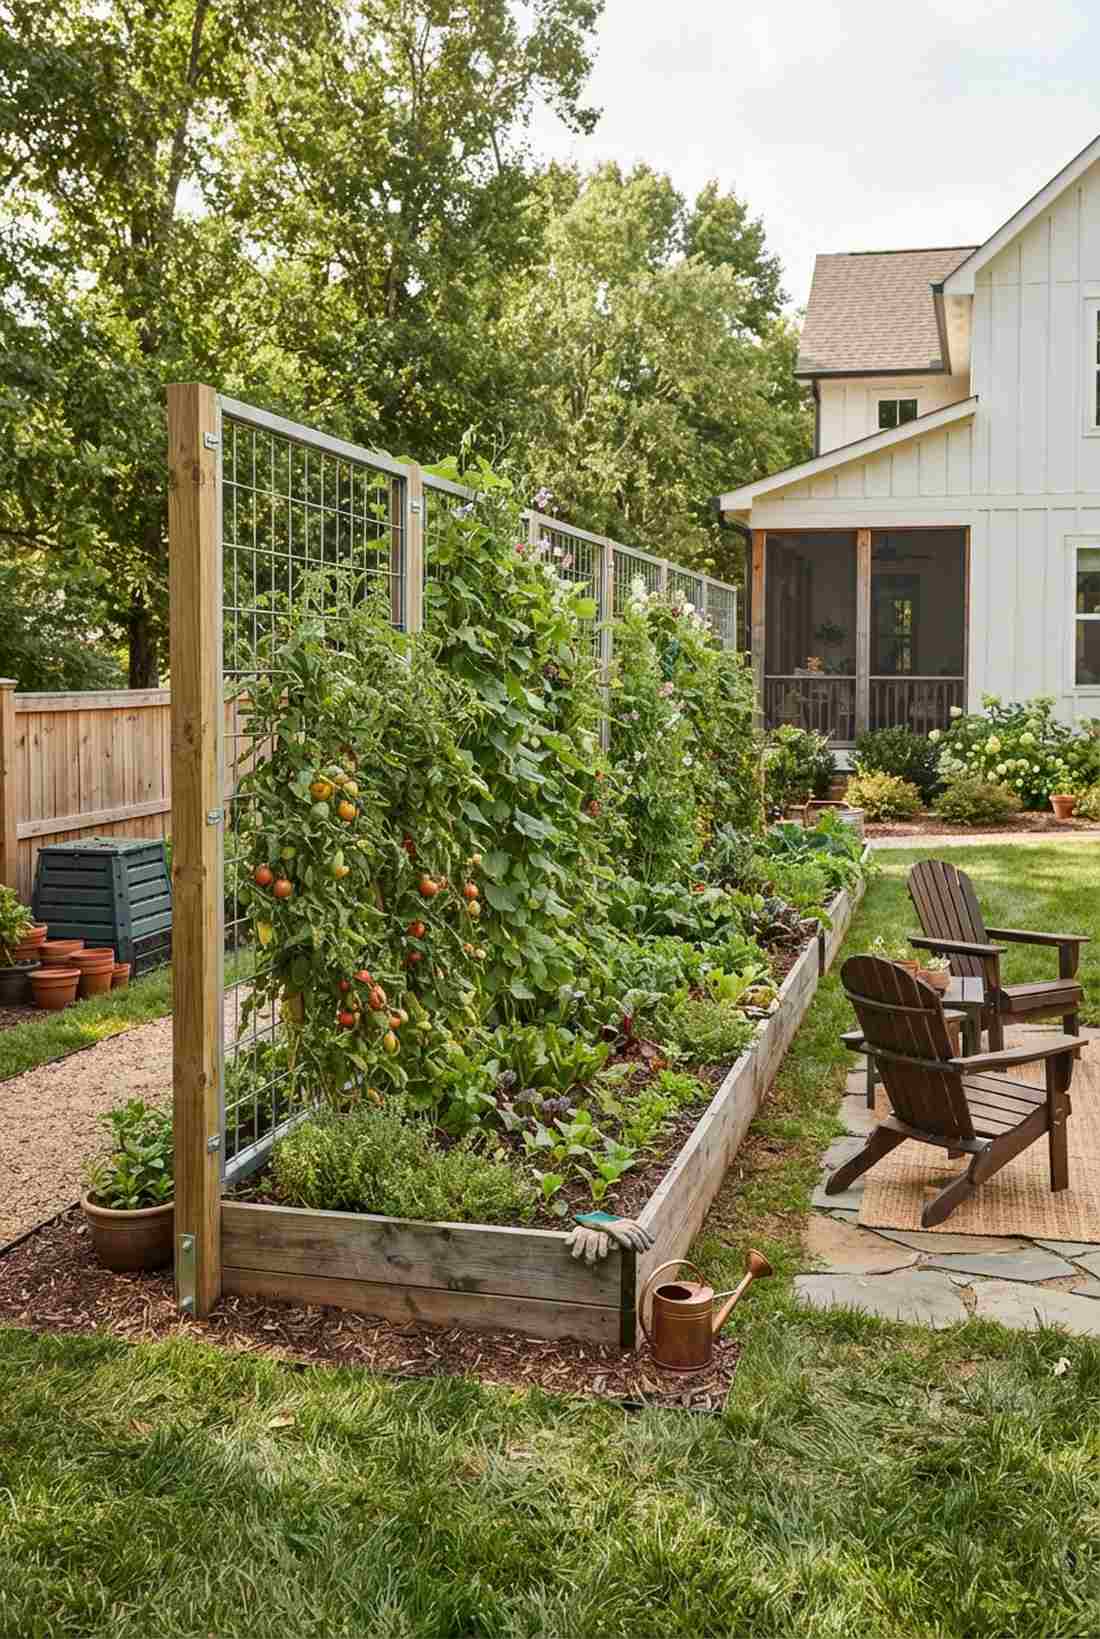
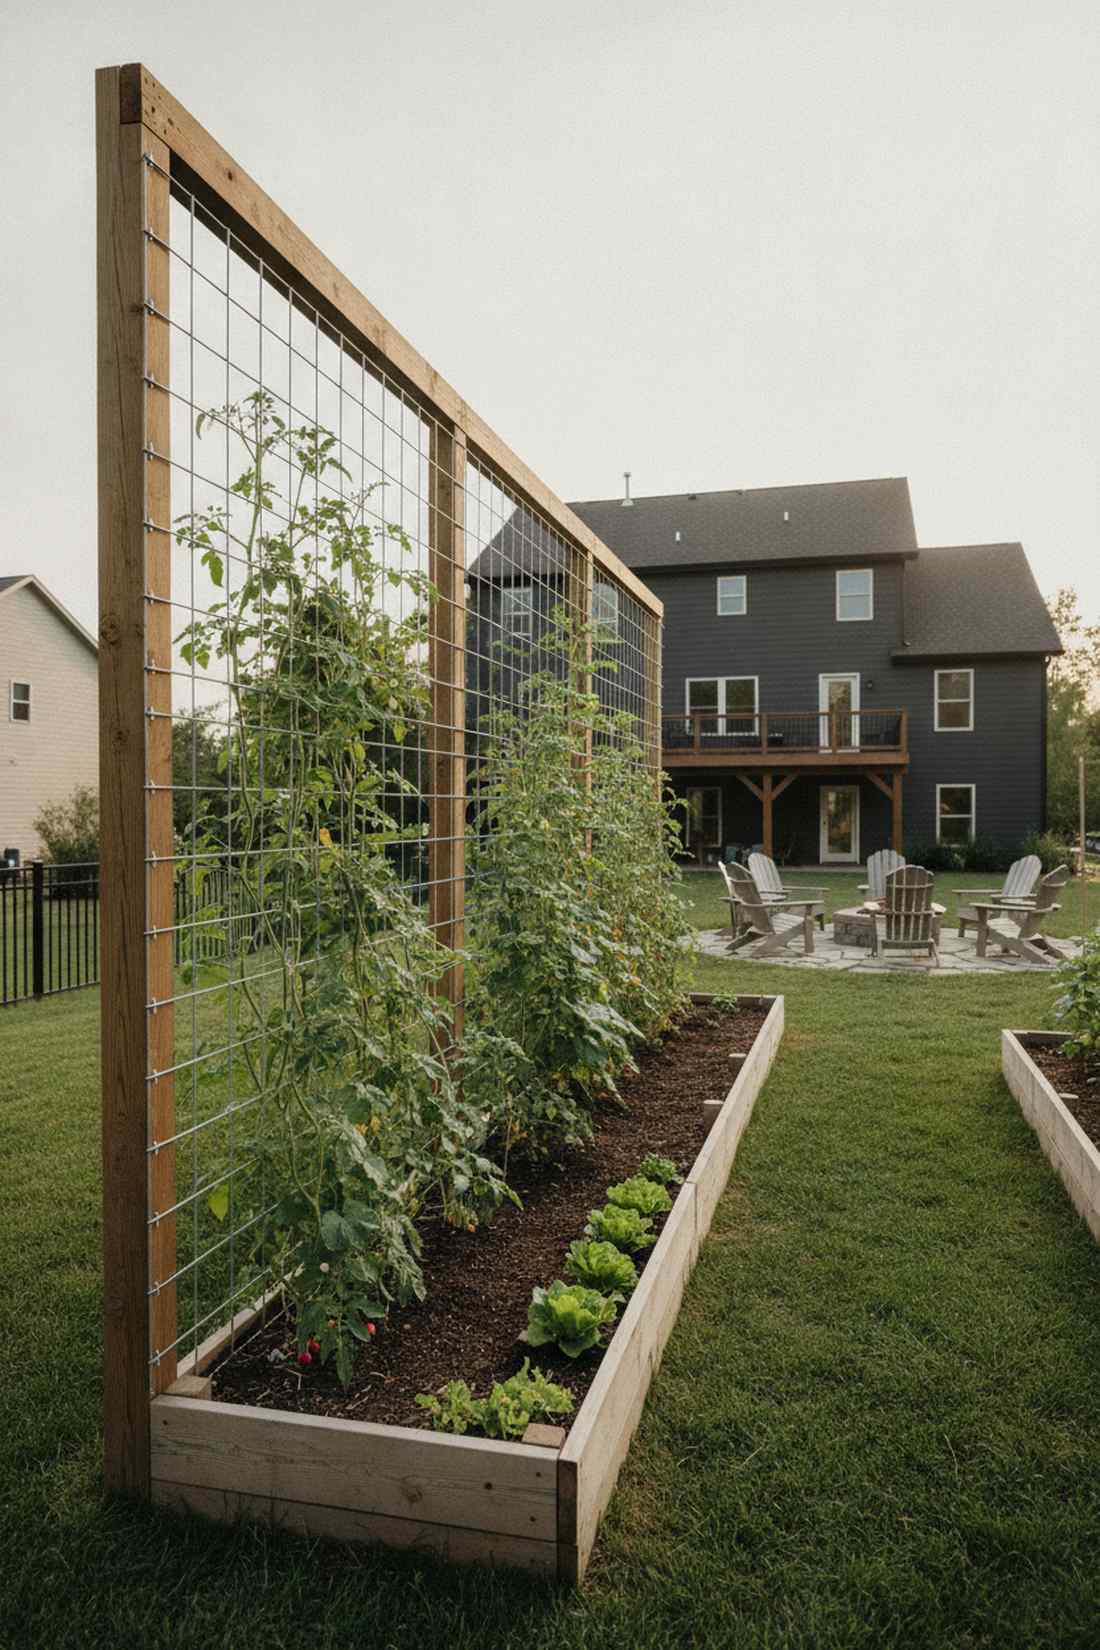
8. North-Side Vertical Panel Integration
This layout feels incredibly strategic, almost like commanding a perfectly optimized farm. A tall rear-mounted panel system acts as a massive climbing wall, working brilliantly for long, narrow backyard vegetable plots.
Amateur gardeners always shade out their own crops by mistake, but placing raised beds with trellis backing strictly on the north side solves this entirely. The structure actually doubles as a protective windbreak for fragile spring seedlings.
Building this robust wall costs around $60–$90. It’s a game-changer for serious food production.
- Key Materials: 4×4 pressure-treated posts, cattle panel grid
- Vibe / Style: High-yield homestead
- Difficulty: Moderate woodworking
- Budget Breakdown: Lumber: $45 | Metal Grid: $35
- Creator’s Tip: Secure panels with heavy-duty U-nails to ensure they don’t blow out during summer storms.
- Smart Sourcing: heavy-duty galvanized cattle panels (pre-cut) and structural lag bolts (weatherized).
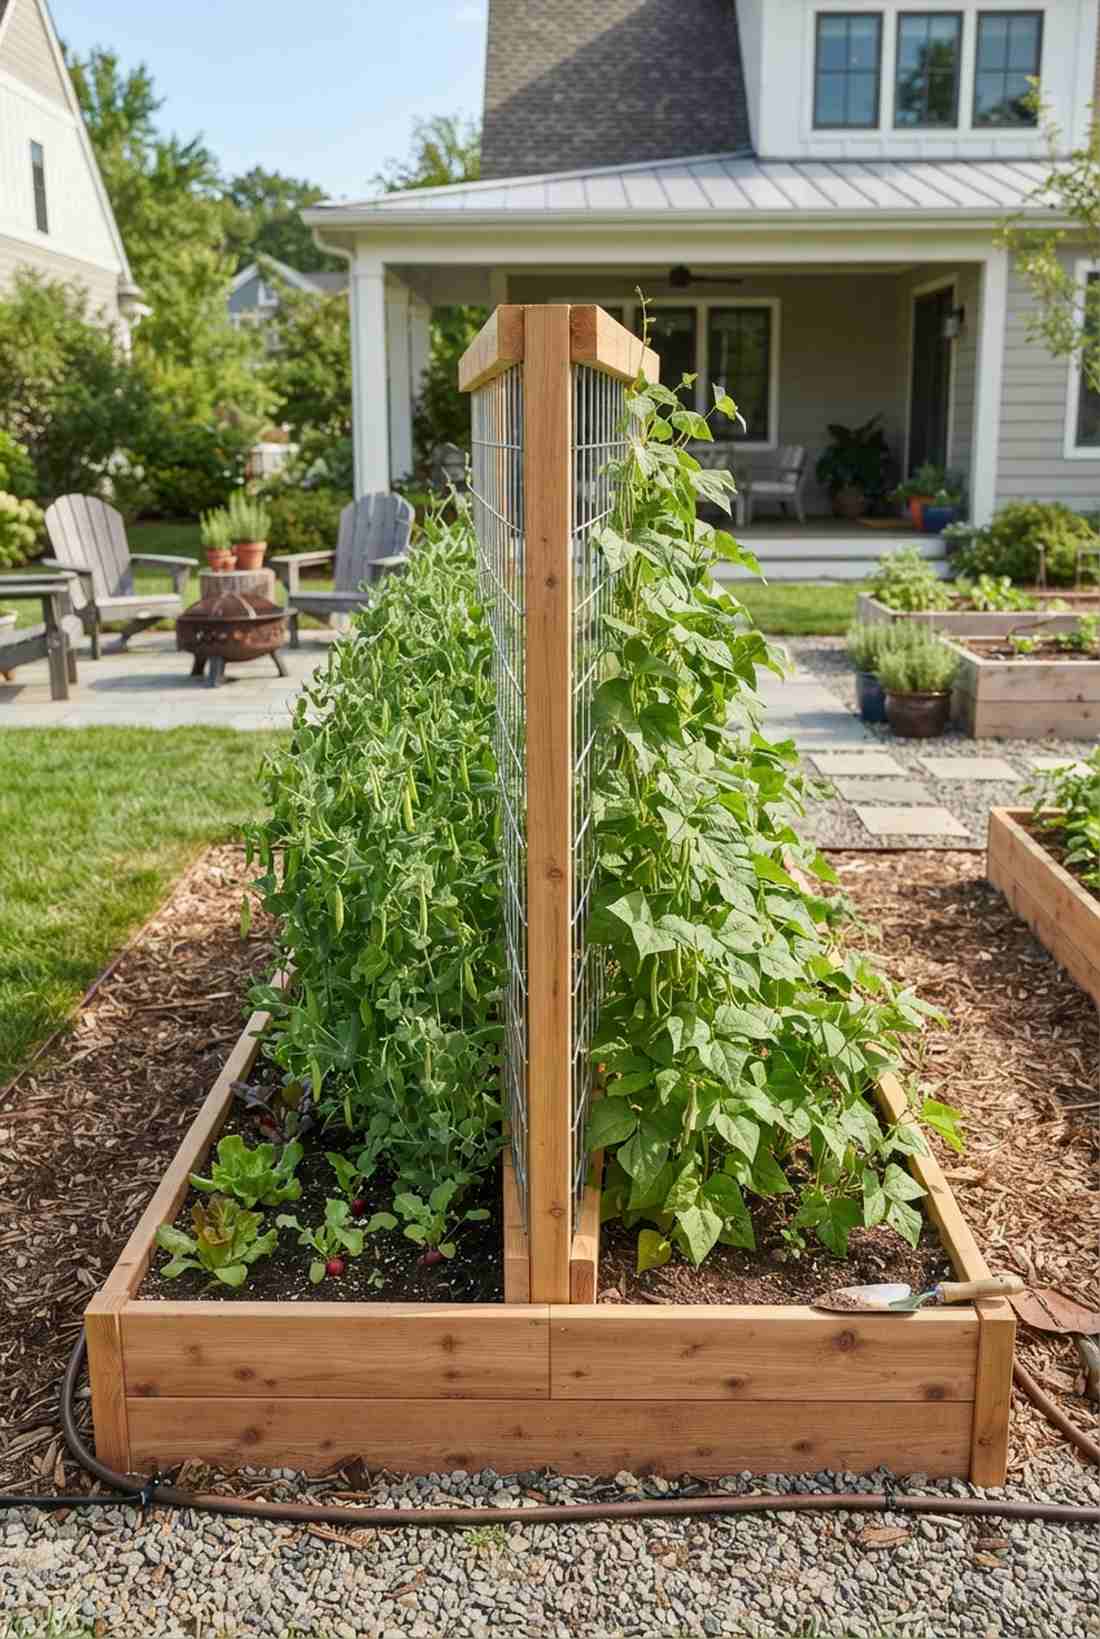
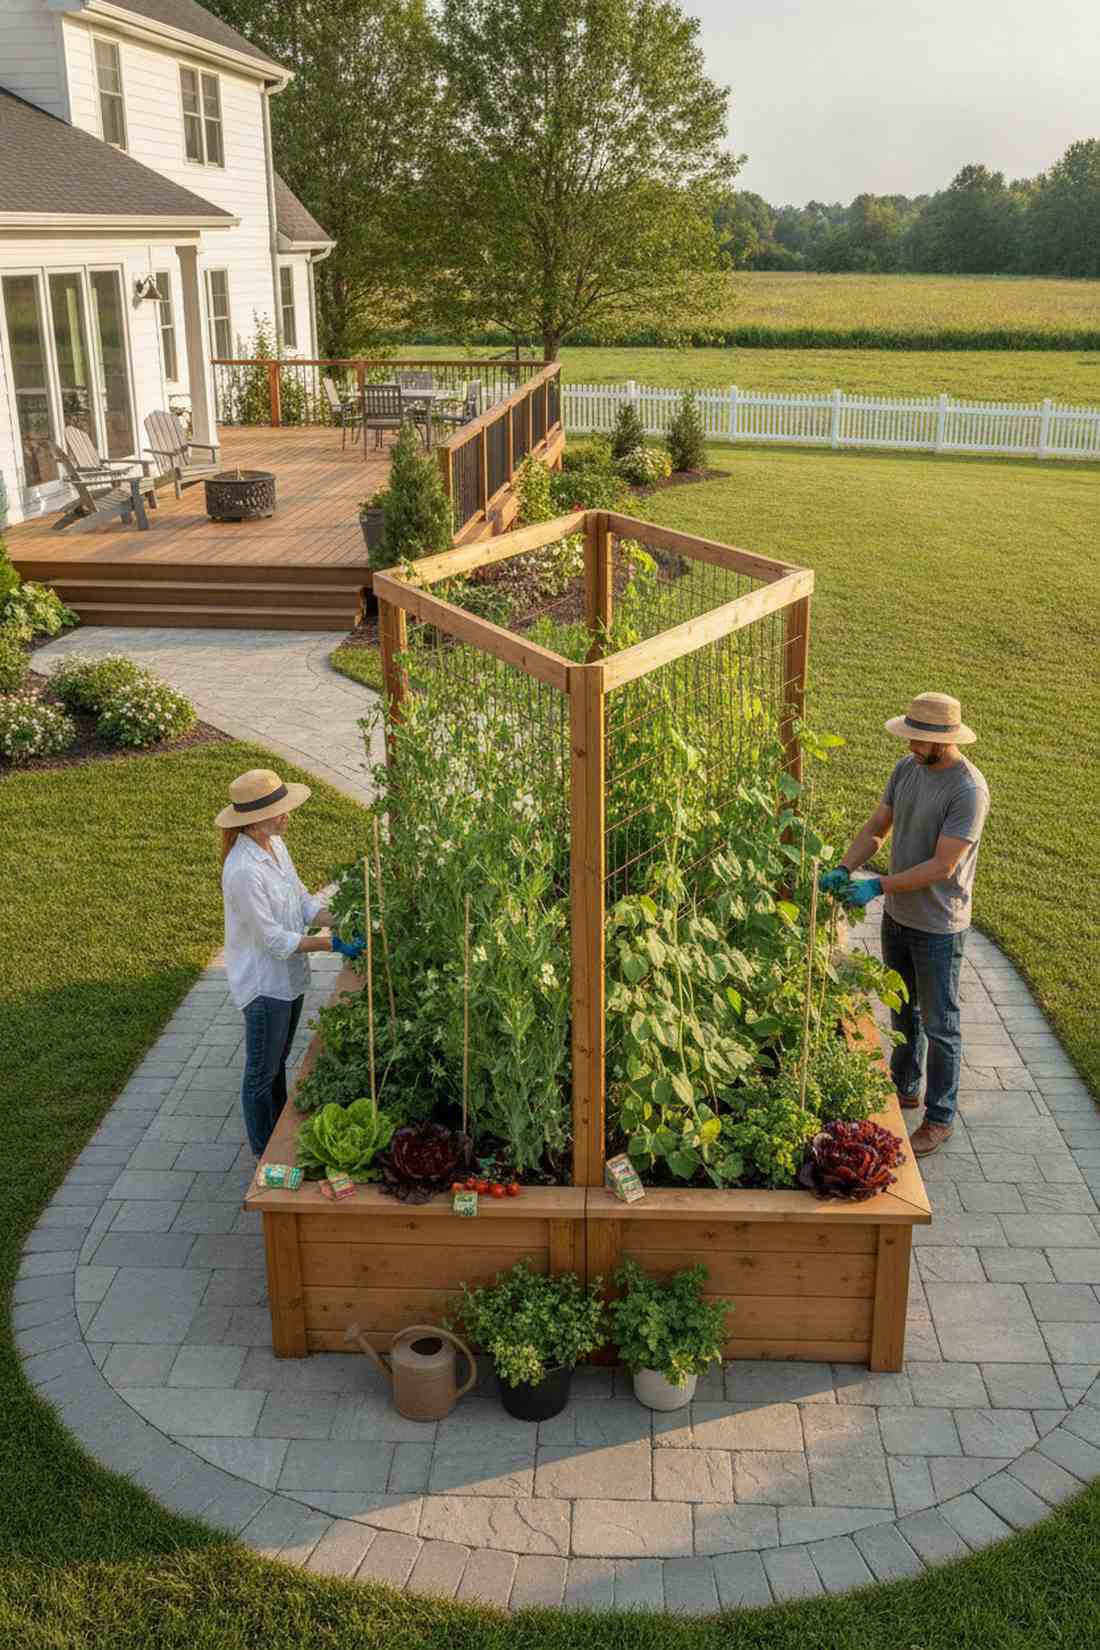
9. Dual-Sided Trellis Divider
Walking around this split garden feels like browsing aisles in a lush organic market. A central freestanding mesh divider splits wide planter boxes perfectly down the middle, making it ideal for community gardens or massive backyard planters.
Instead of struggling to reach the center of a deep bed, this dual-faced setup forces an incredibly accessible, ergonomic harvest. It essentially doubles your vertical real estate while keeping roots cool beneath the shared canopy.
Expect a budget of $50–$75 for this divider. Save this layout to maximize your mid-summer vegetable yields!
- Key Materials: Center support beams, welded wire fencing
- Vibe / Style: Ergonomic market garden
- Difficulty: Easy bed modification
- Budget Breakdown: Center posts: $30 | Wire fill: $25
- Creator’s Tip: Plant early peas on one side and late-season beans on the other for continuous seasonal production.
- Smart Sourcing: welded wire mesh rolls (rust-resistant) and heavy-duty staple guns with galvanized staples.
💡 Must-Have Supplies for High-End Setups
To build these setups faster and ensure they last, skip the generic craft aisles and invest in the right foundational kits.
- Base & Support: commercial-grade galvanized structural framing
- Setup Tools: heavy-duty modular corner bracket kits
- Weather/Durability Protection: UV-resistant clear silicone sealant spray
If you think those flat designs were cool, this next architectural hack creates a literal tunnel of food that neighbors will stop and stare at.
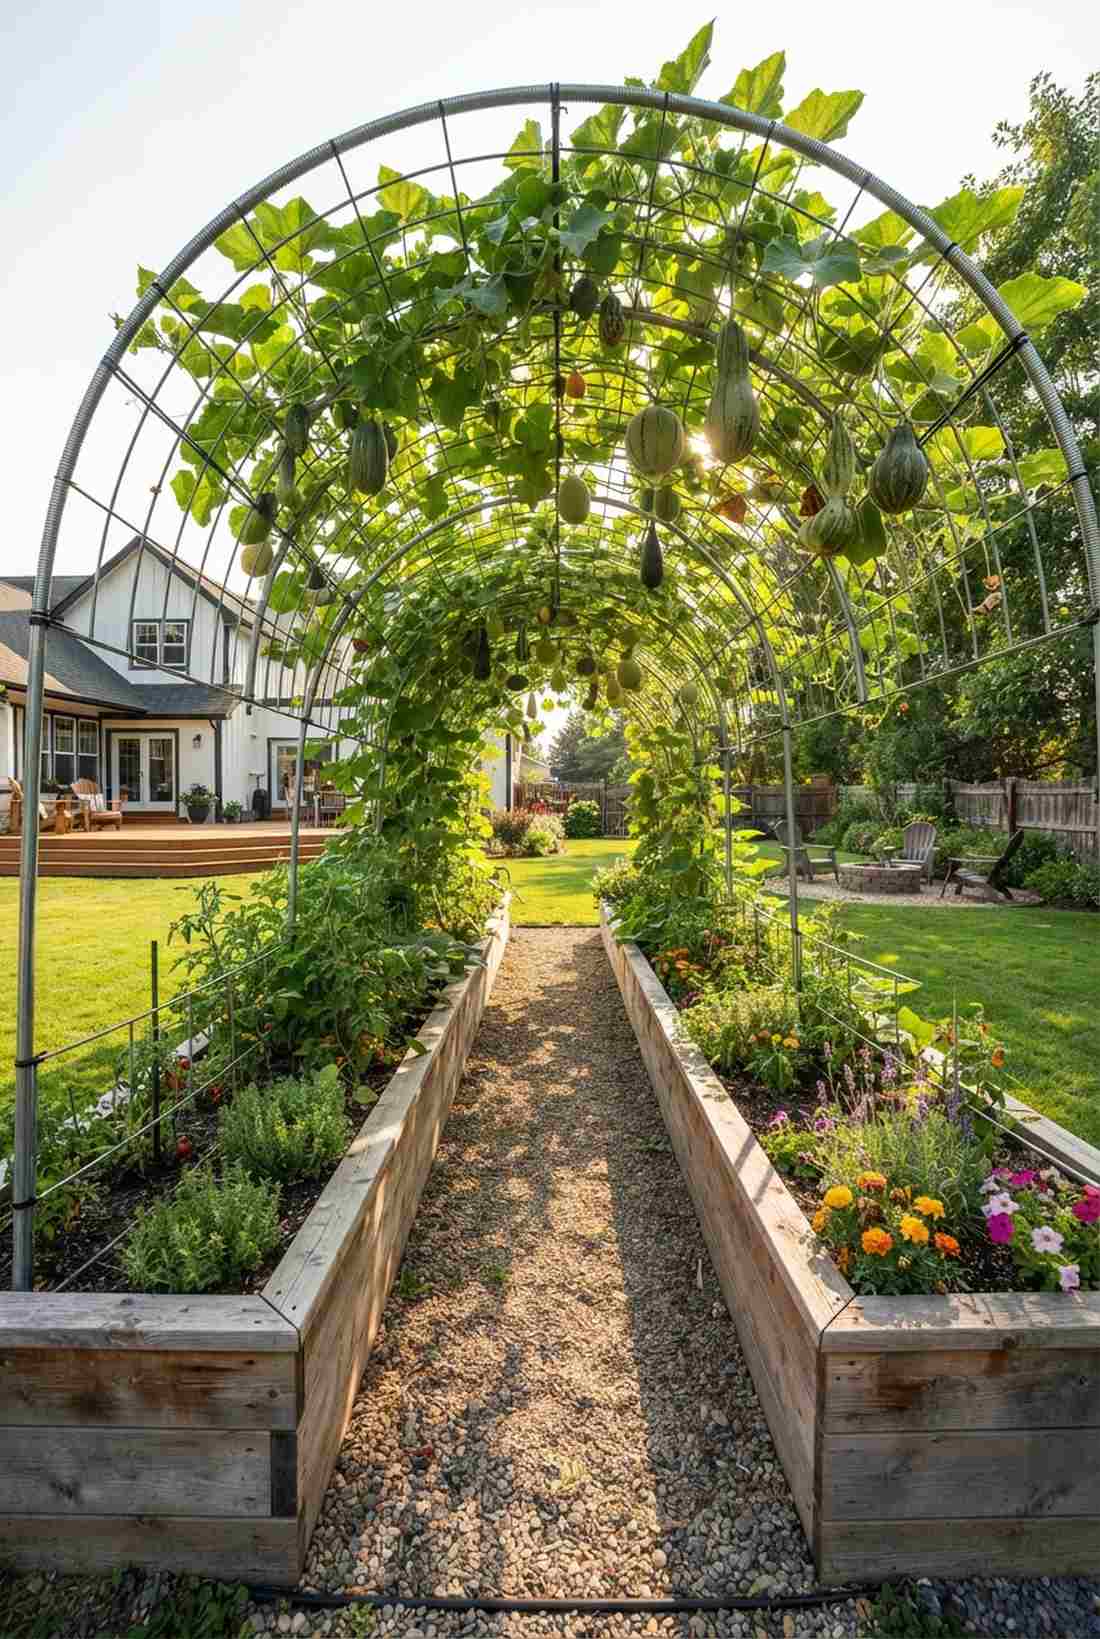
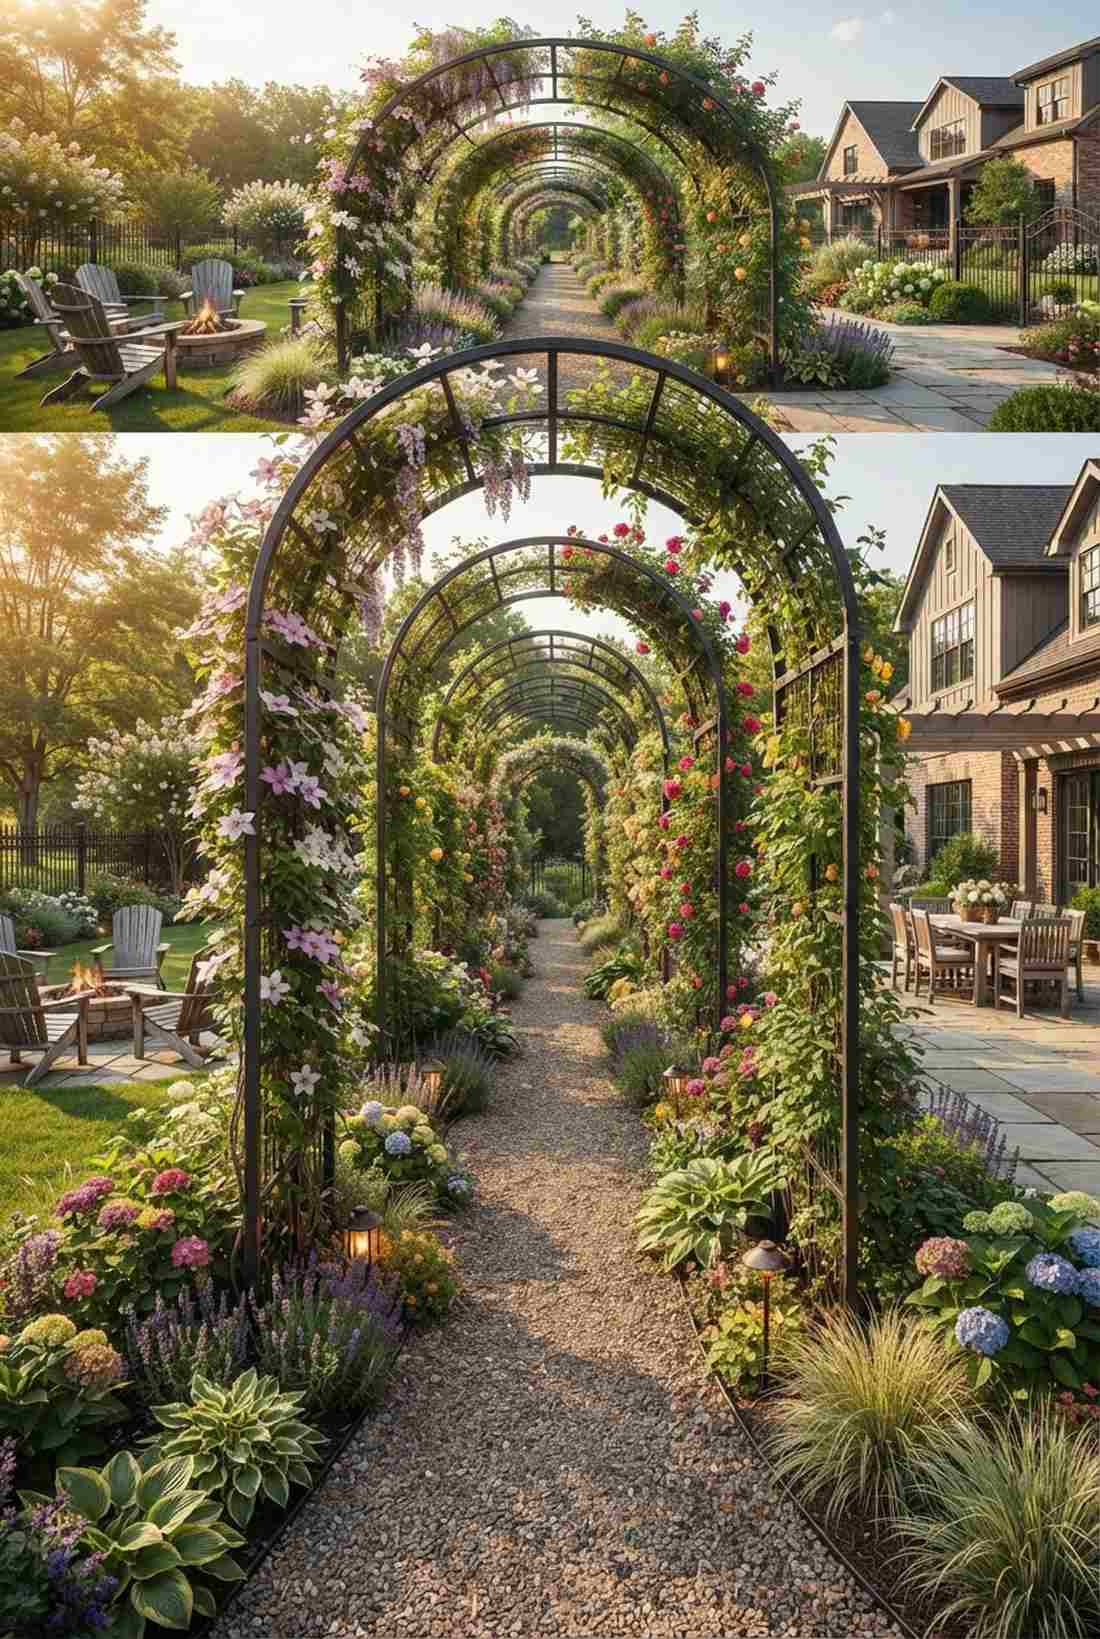
10. Arched Trellis Canopy Connector
Strolling under this arched canopy feels like walking through a magical green portal. A bent metal archway connects parallel raised beds with trellis features, creating a jaw-dropping shaded walkway for hot summer yards.
Most pathways are dead space, but bending flexible conduit or panels overhead captures sunlight that would otherwise hit the dirt. You’ll be plucking heavy melons and gourds that hang down like natural outdoor chandeliers.
This dramatic tunnel effect costs roughly $40–$60 per arch. Pin this if you want absolute garden dominance!
- Key Materials: Flexible feedlot panels, heavy zip ties
- Vibe / Style: Enchanted harvest tunnel
- Difficulty: Requires two people to bend
- Budget Breakdown: Panels: $35 | Fasteners: $10
- Creator’s Tip: Overlap the arched panels by at least two squares to prevent sagging in the middle.
- Smart Sourcing: flexible metal conduit arch kits and UV-treated industrial zip ties (bulk pack).
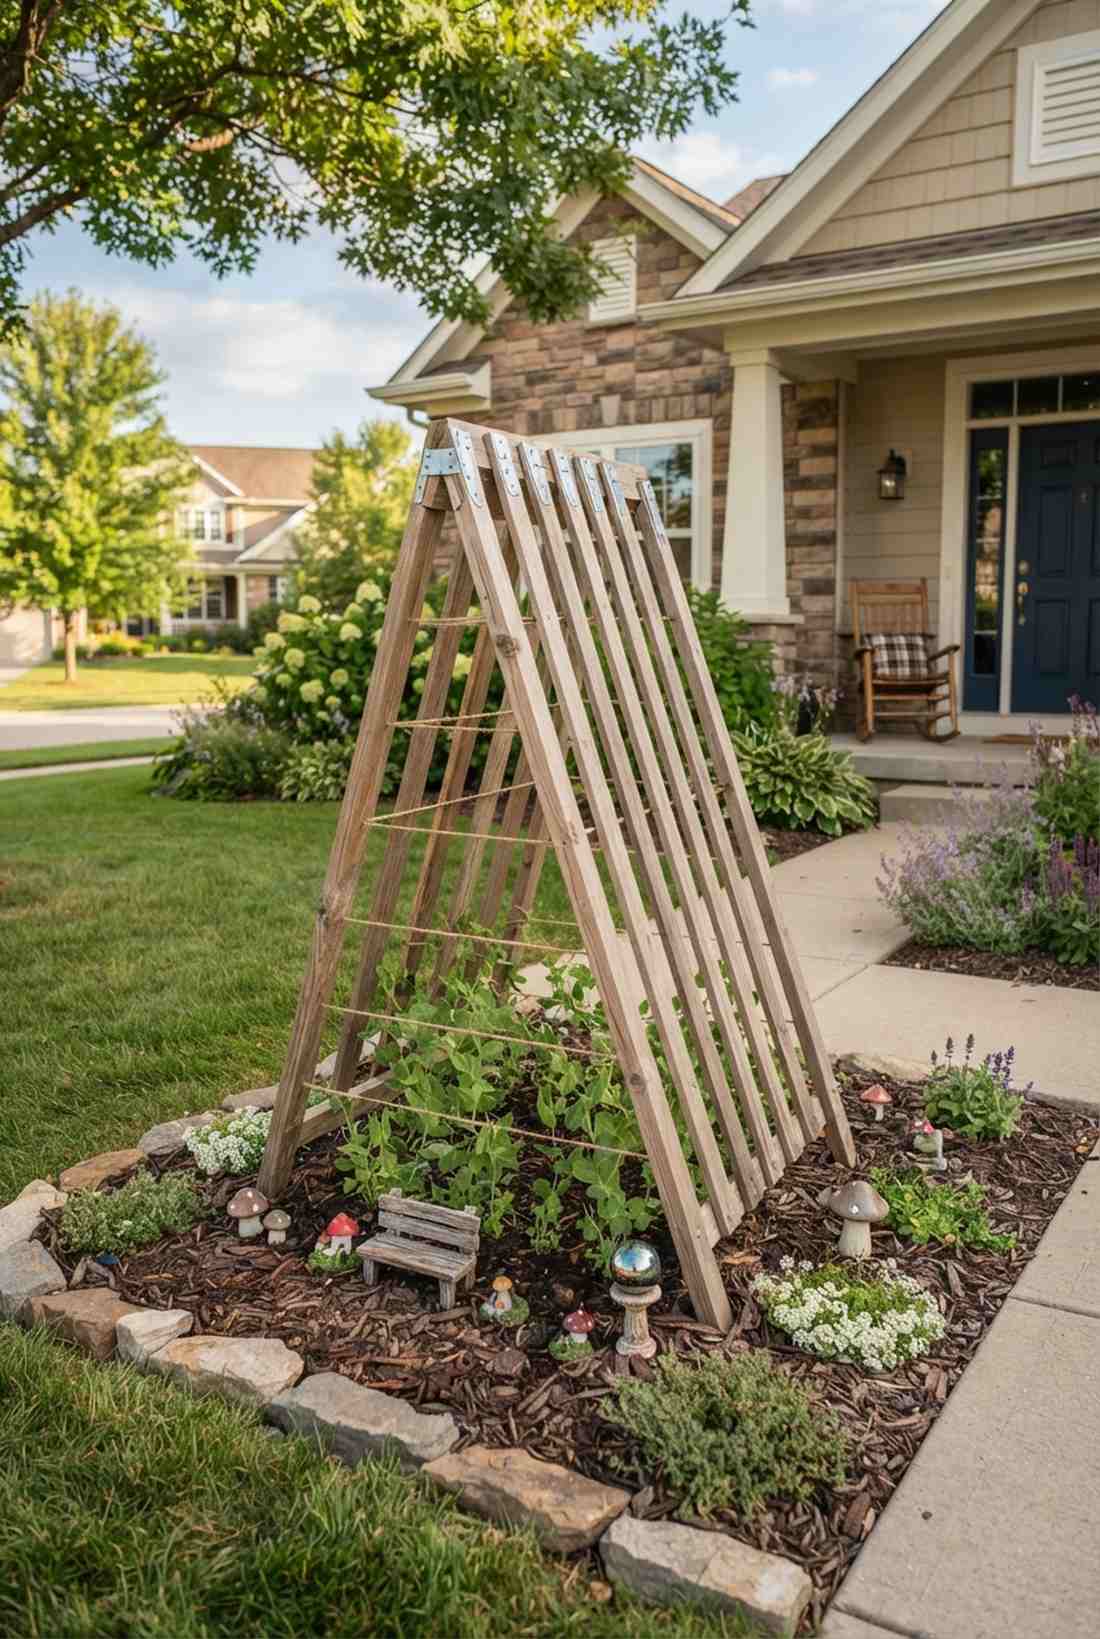
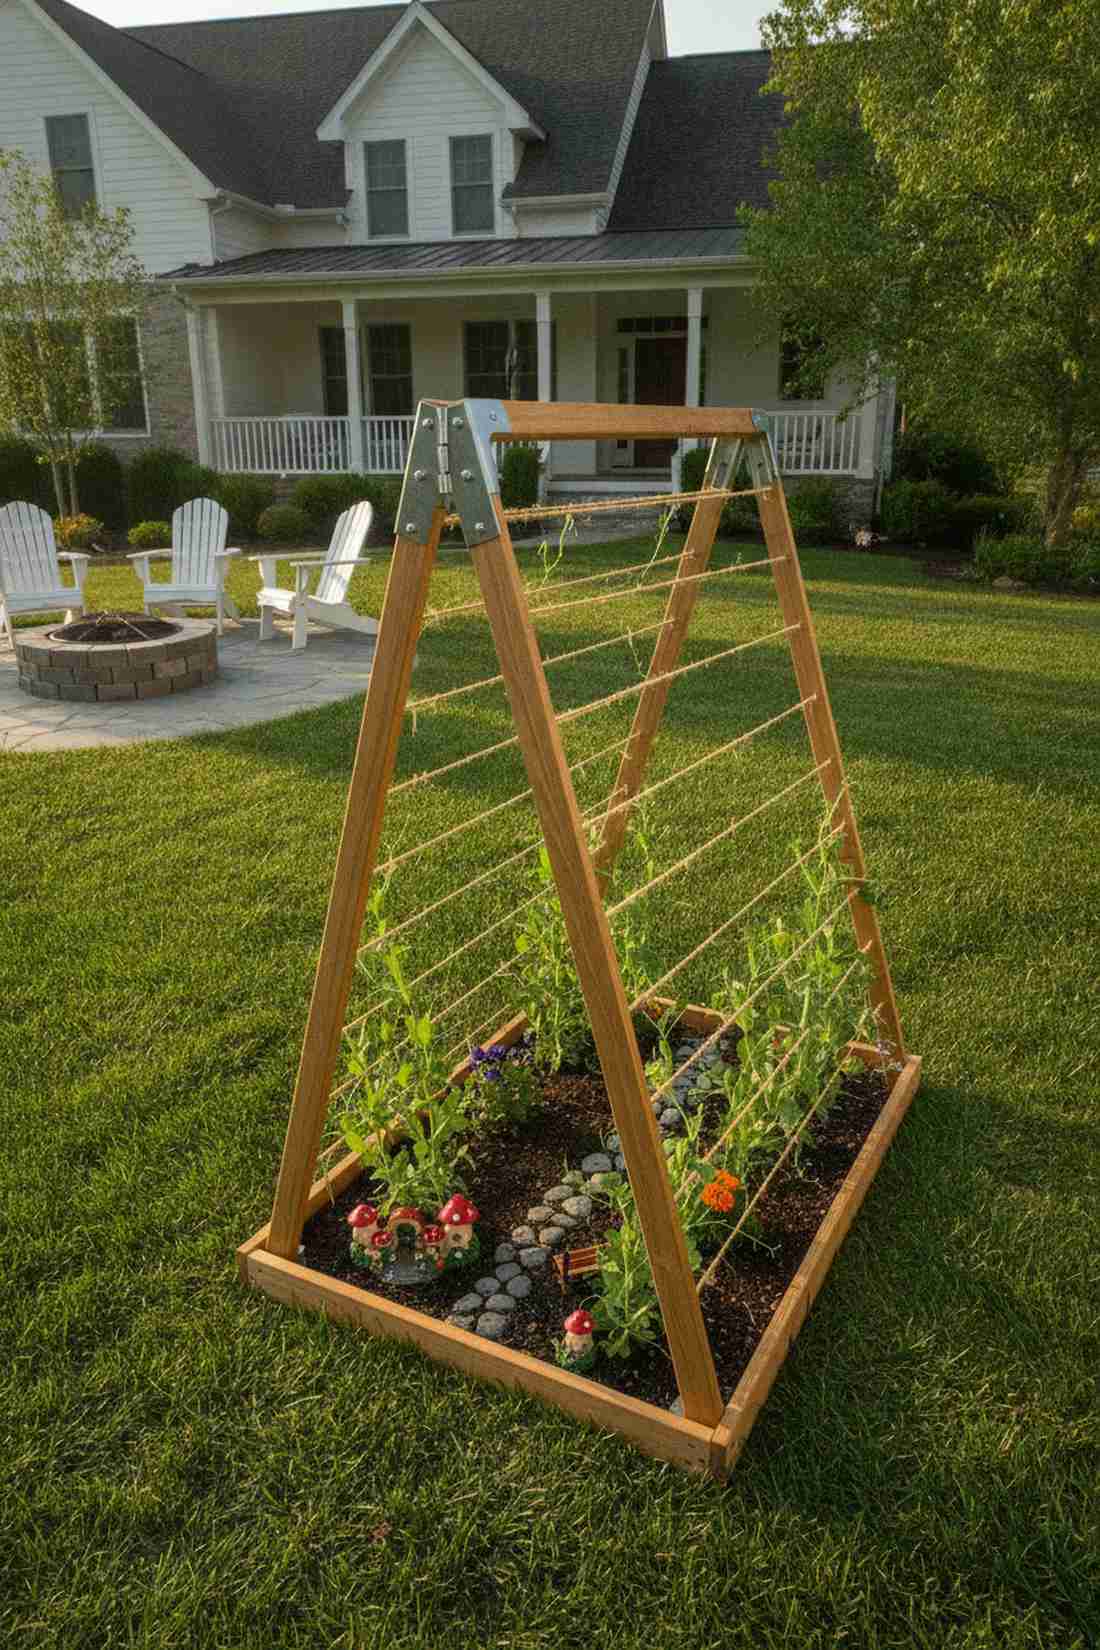
11. Removable A-Frame Trellis
Deploying this pop-up structure feels like using a clever garden Swiss Army knife. The hinged wooden A-frame straddles plants instantly, offering the perfect temporary support for seasonal front-yard garden beds.
Permanent installations can clutter small yards in winter, so this collapsible design is an absolute godsend for clean aesthetics. Add some premium fairy garden kits around the base when the vines are young to keep the bed looking styled.
You can construct this versatile frame for about $25–$40. It’s a must-have for crop rotation enthusiasts.
- Key Materials: 1×2 lumber, galvanized top hinges
- Vibe / Style: Functional rustic pop-up
- Difficulty: Easy beginner woodworking
- Budget Breakdown: Wood: $20 | Hinges/String: $15
- Creator’s Tip: Use rot-resistant cedar and outdoor-rated nylon twine so the frame lasts multiple storage seasons.
- Smart Sourcing: galvanized heavy-duty strap hinges and UV-resistant garden twine (jute alternative).
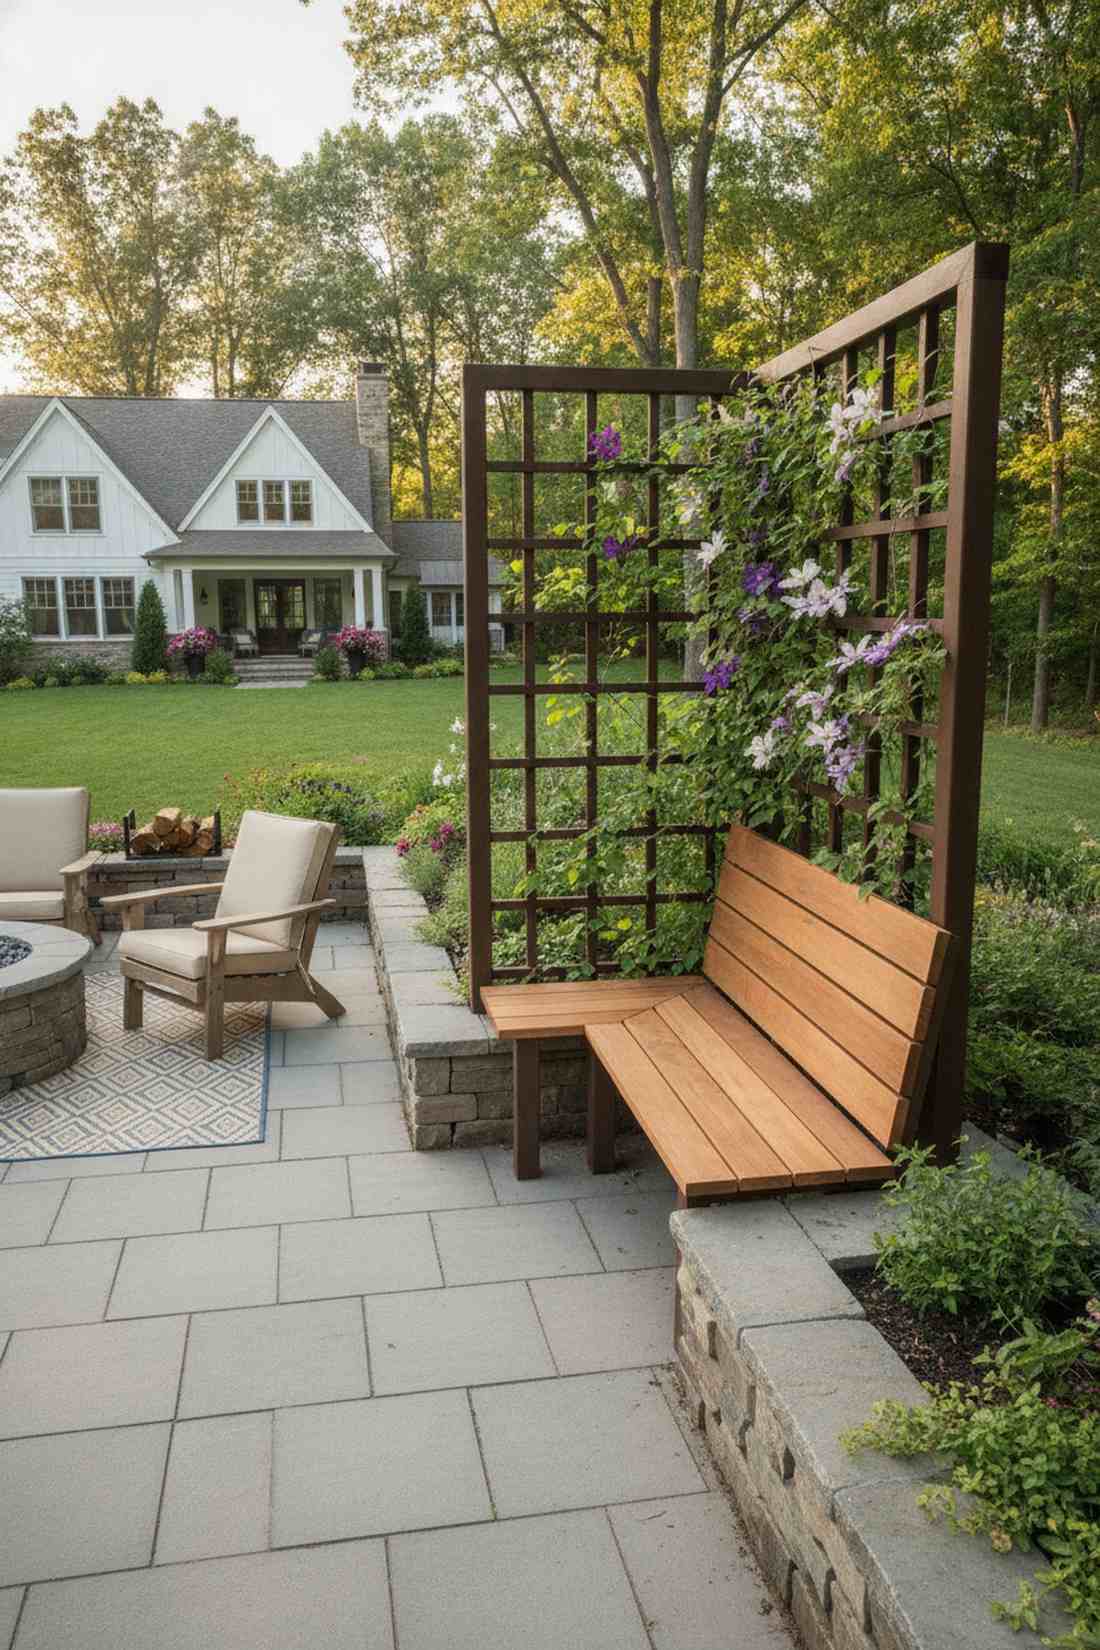
12. End-Wall Trellis with Bench
Sitting in this nook feels like having your own private, shaded garden throne. Integrating an upright trellis panel with a built-in seat caps off raised beds gorgeously, providing a cozy resting spot for large patio layouts.
Buying standalone garden furniture is expensive, but combining structural bracing with seating creates an incredibly premium look on a budget. The vines growing up the backrest naturally provide a cooling canopy during peak afternoon heat.
This dual-purpose build adds about $50–$80 to a bed’s cost. Save this idea for a multi-functional outdoor living space!
- Key Materials: Thick bench decking boards, heavy-duty brackets
- Vibe / Style: Built-in luxury patio
- Difficulty: Intermediate carpentry
- Budget Breakdown: Seating lumber: $45 | Backing grid: $30
- Creator’s Tip: Slope the seat board backward by 2 degrees so rainwater naturally rolls off the bench.
- Smart Sourcing: pre-cut cedar bench planks (sanded) and heavy-duty structural corner brackets.
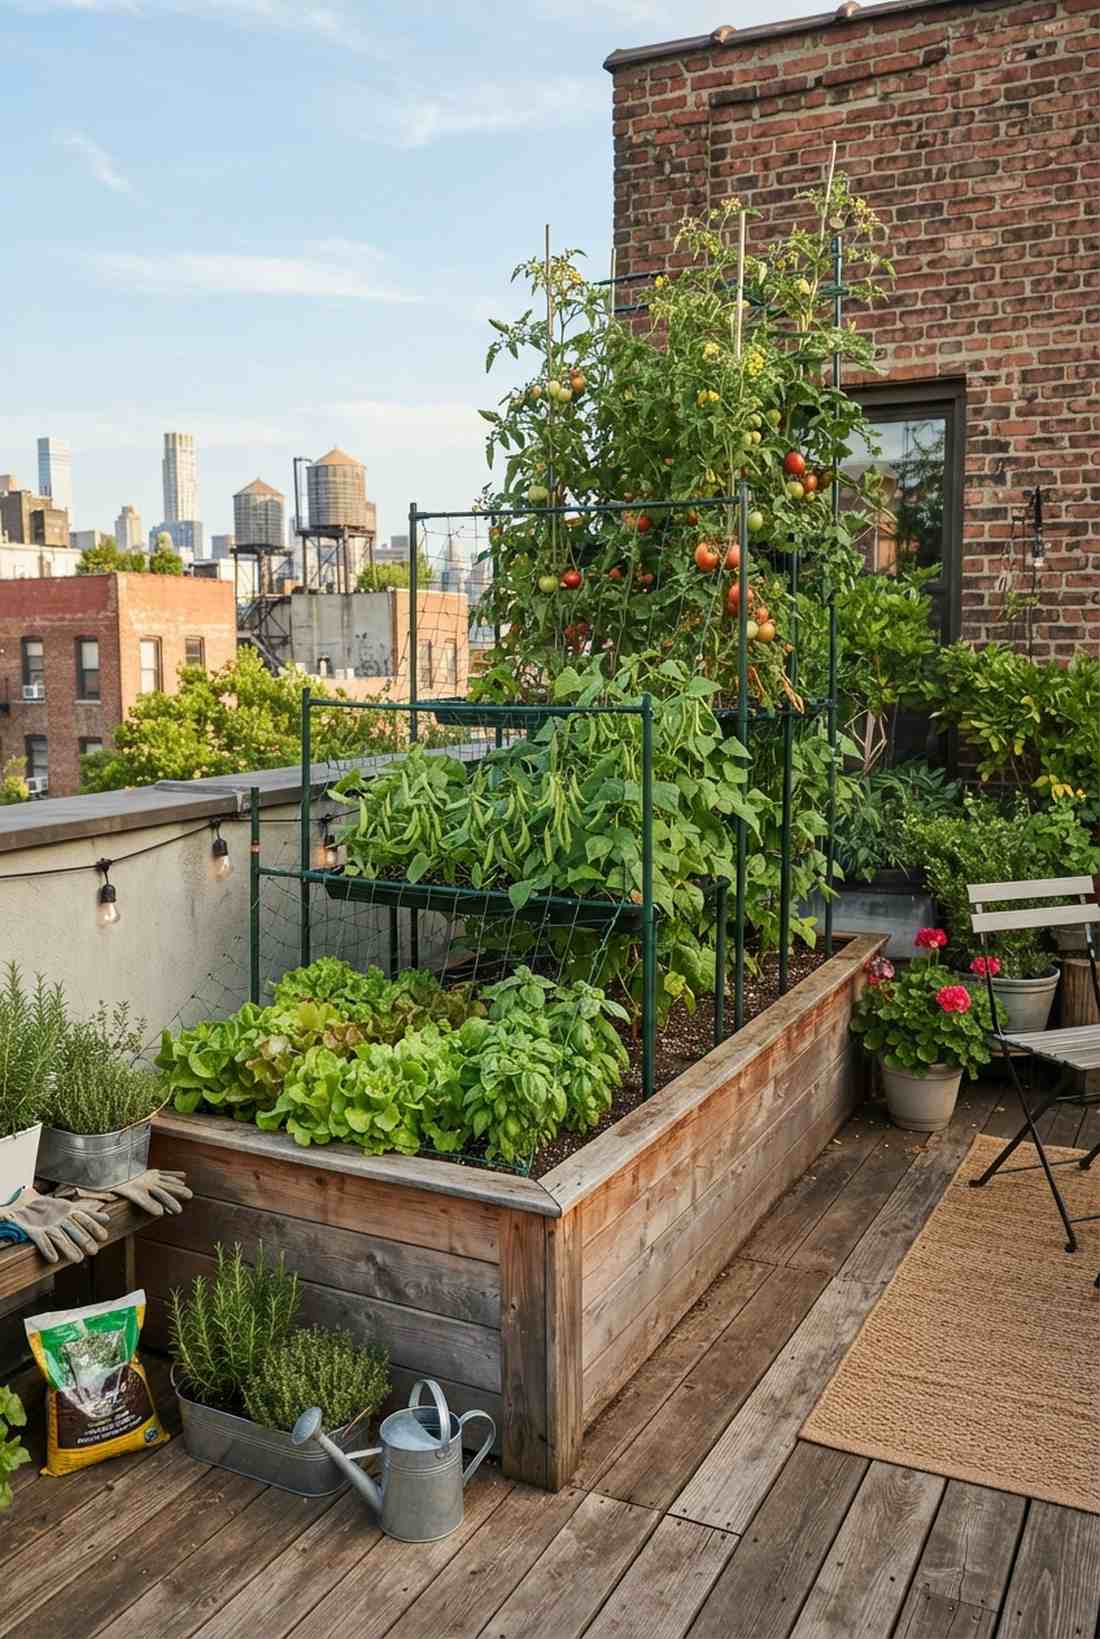
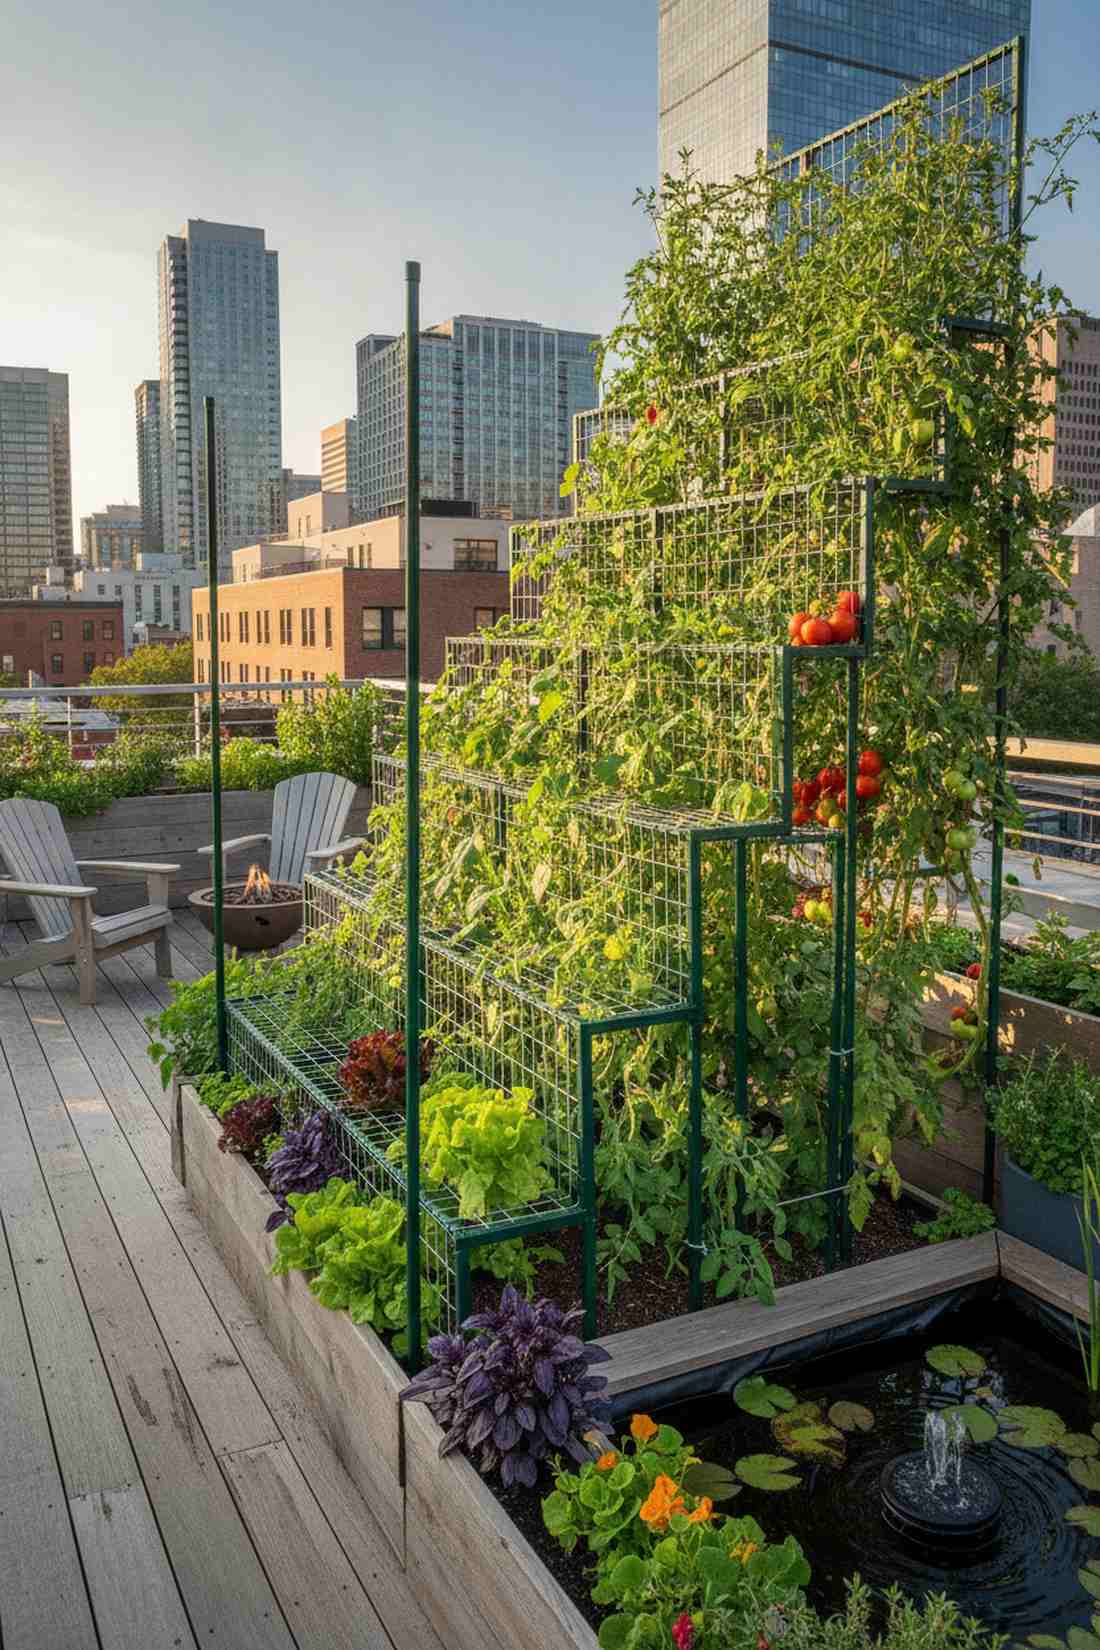
13. Tiered Trellis for Succession Planting

Looking at this multi-level setup feels like observing a perfectly engineered green staircase. A staggered height wire frame allows multiple crops to grow simultaneously, making it the smartest choice for compact urban rooftop gardens.
Throwing all your seeds on one massive net results in a tangled nightmare, whereas this tiered approach gives a designer-level finish while maximizing light. You can pull out the short early-season nets without disturbing your towering late-summer tomatoes.
A multi-tiered setup costs roughly $35–$55 to put together. Highly recommended for continuous summer harvesting.
- Key Materials: Adjustable metal stakes, tiered netting
- Vibe / Style: High-efficiency urban farm
- Difficulty: Simple modular assembly
- Budget Breakdown: Stakes: $30 | Netting: $15
- Creator’s Tip: Place the shortest tier facing south and the tallest tier facing north to avoid self-shading.
- Smart Sourcing: adjustable tiered garden stake kits and heavy-duty nylon trellis netting (bulk roll).
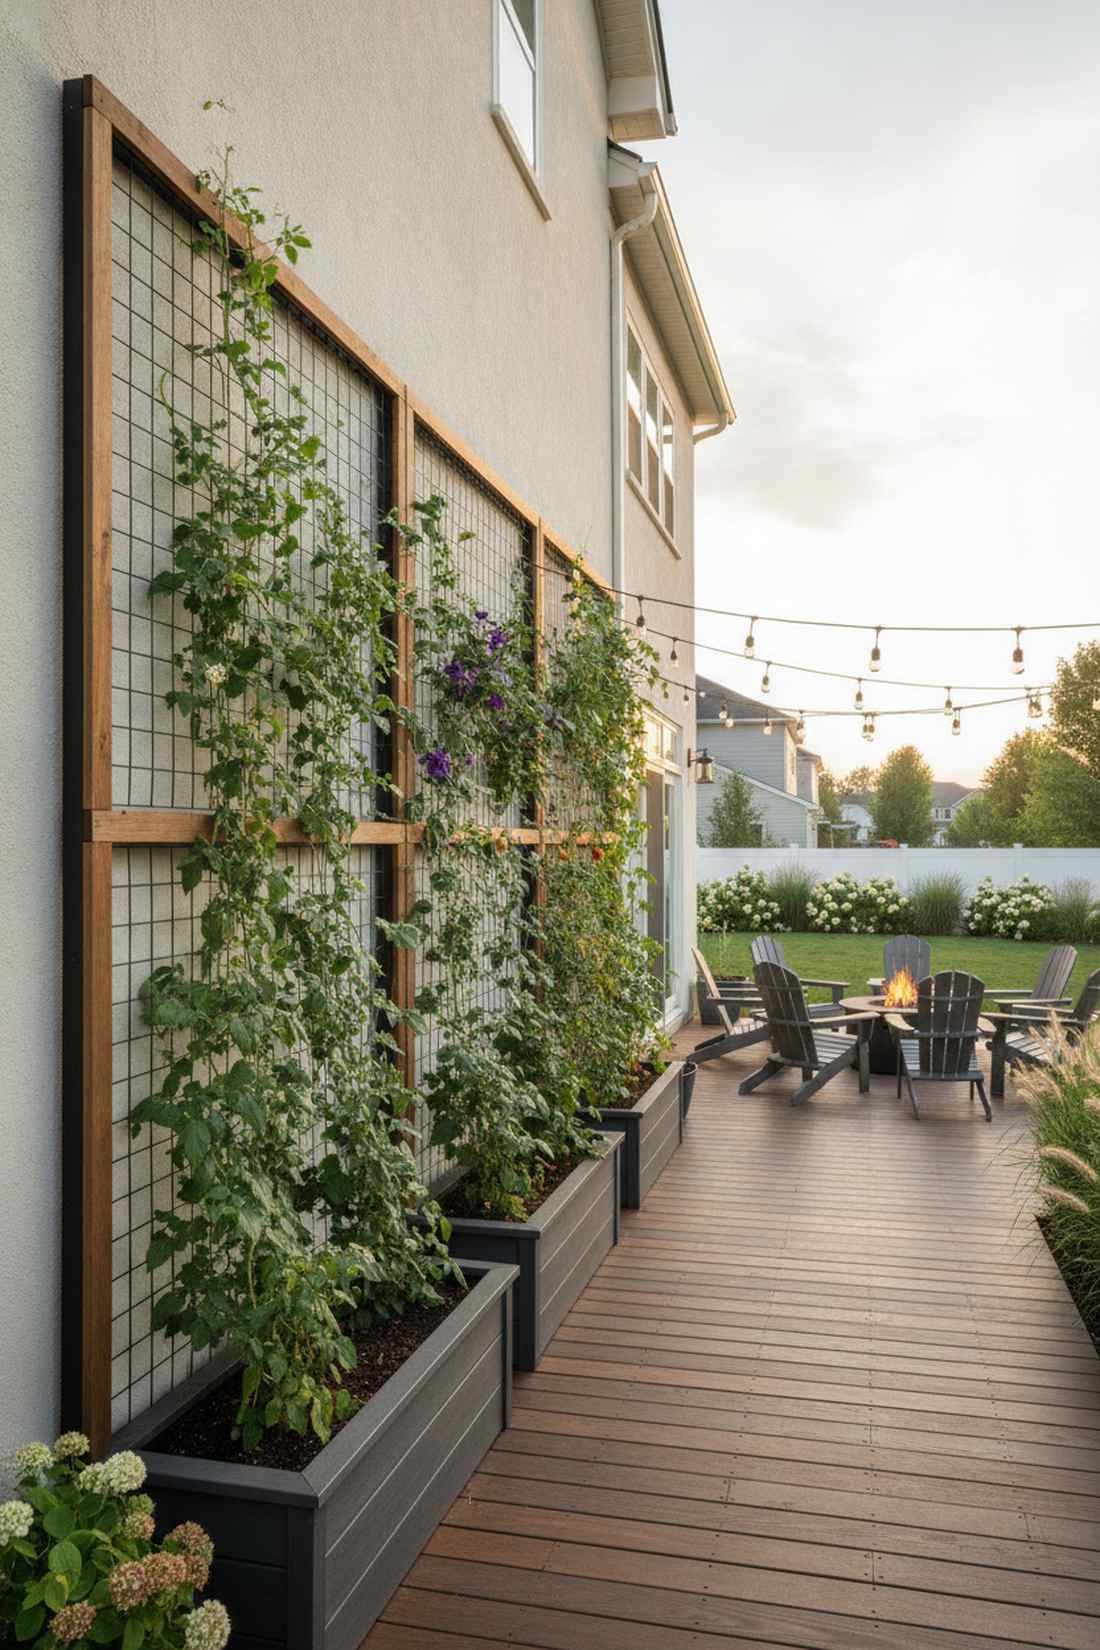
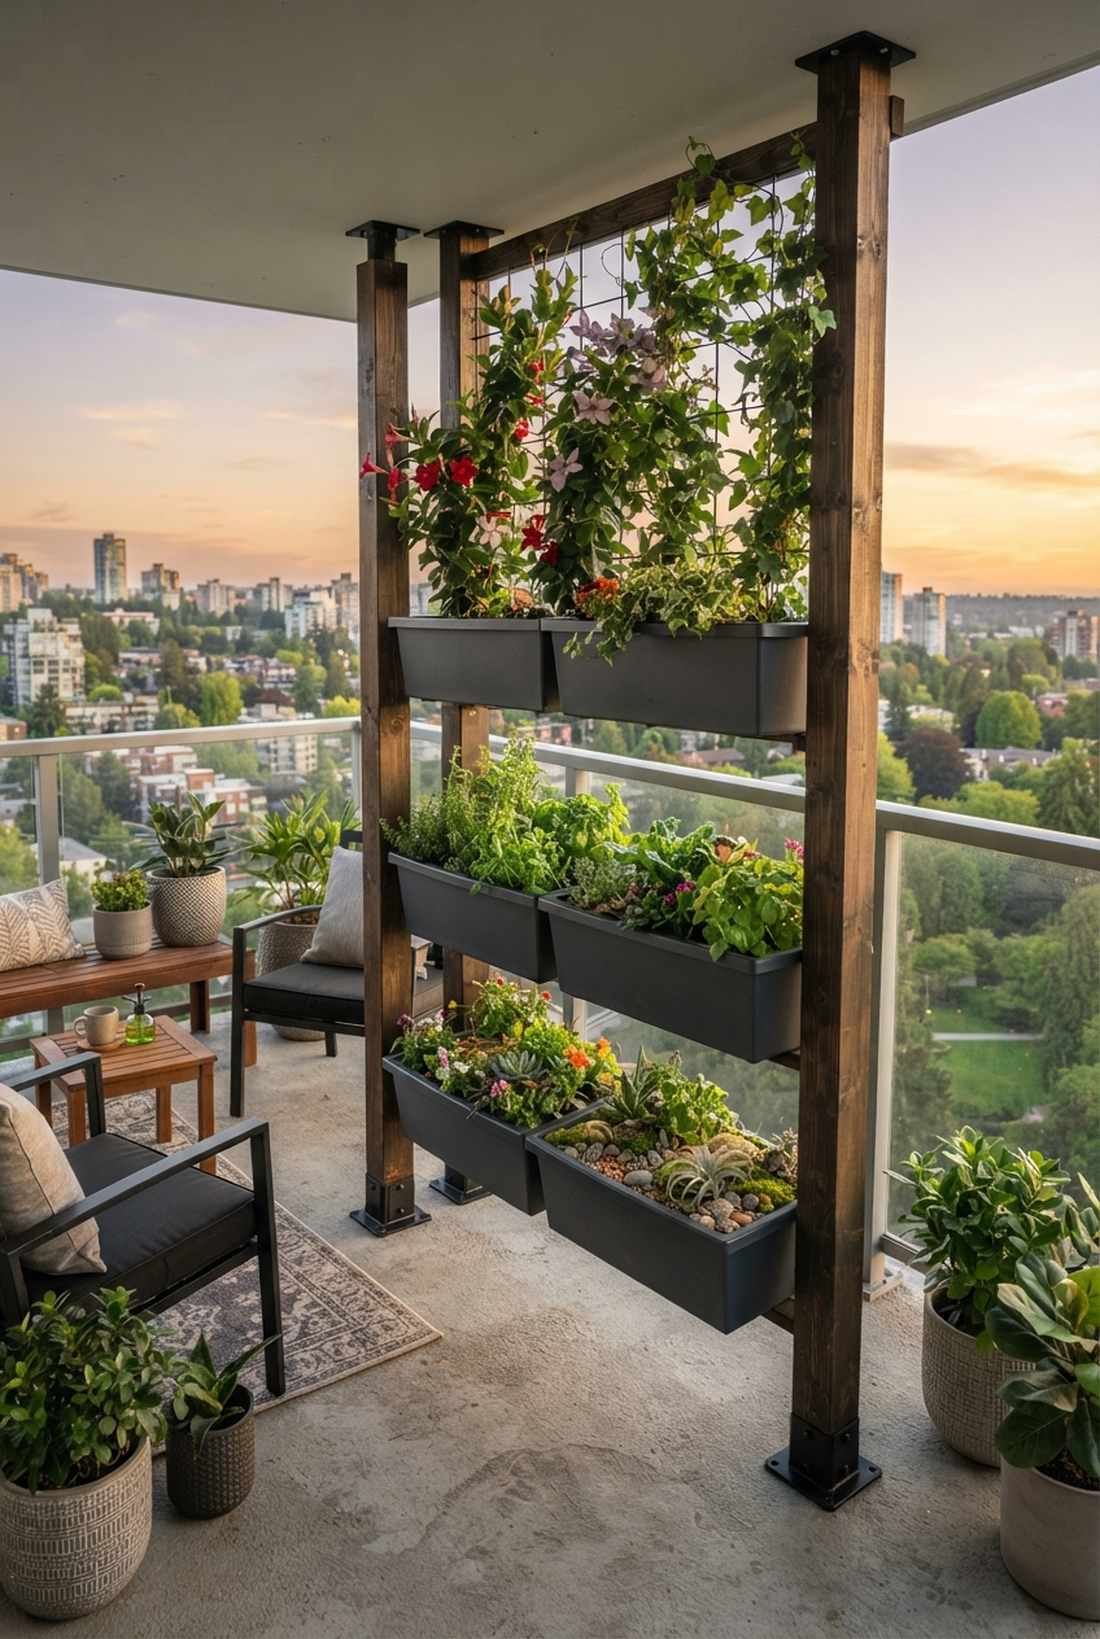
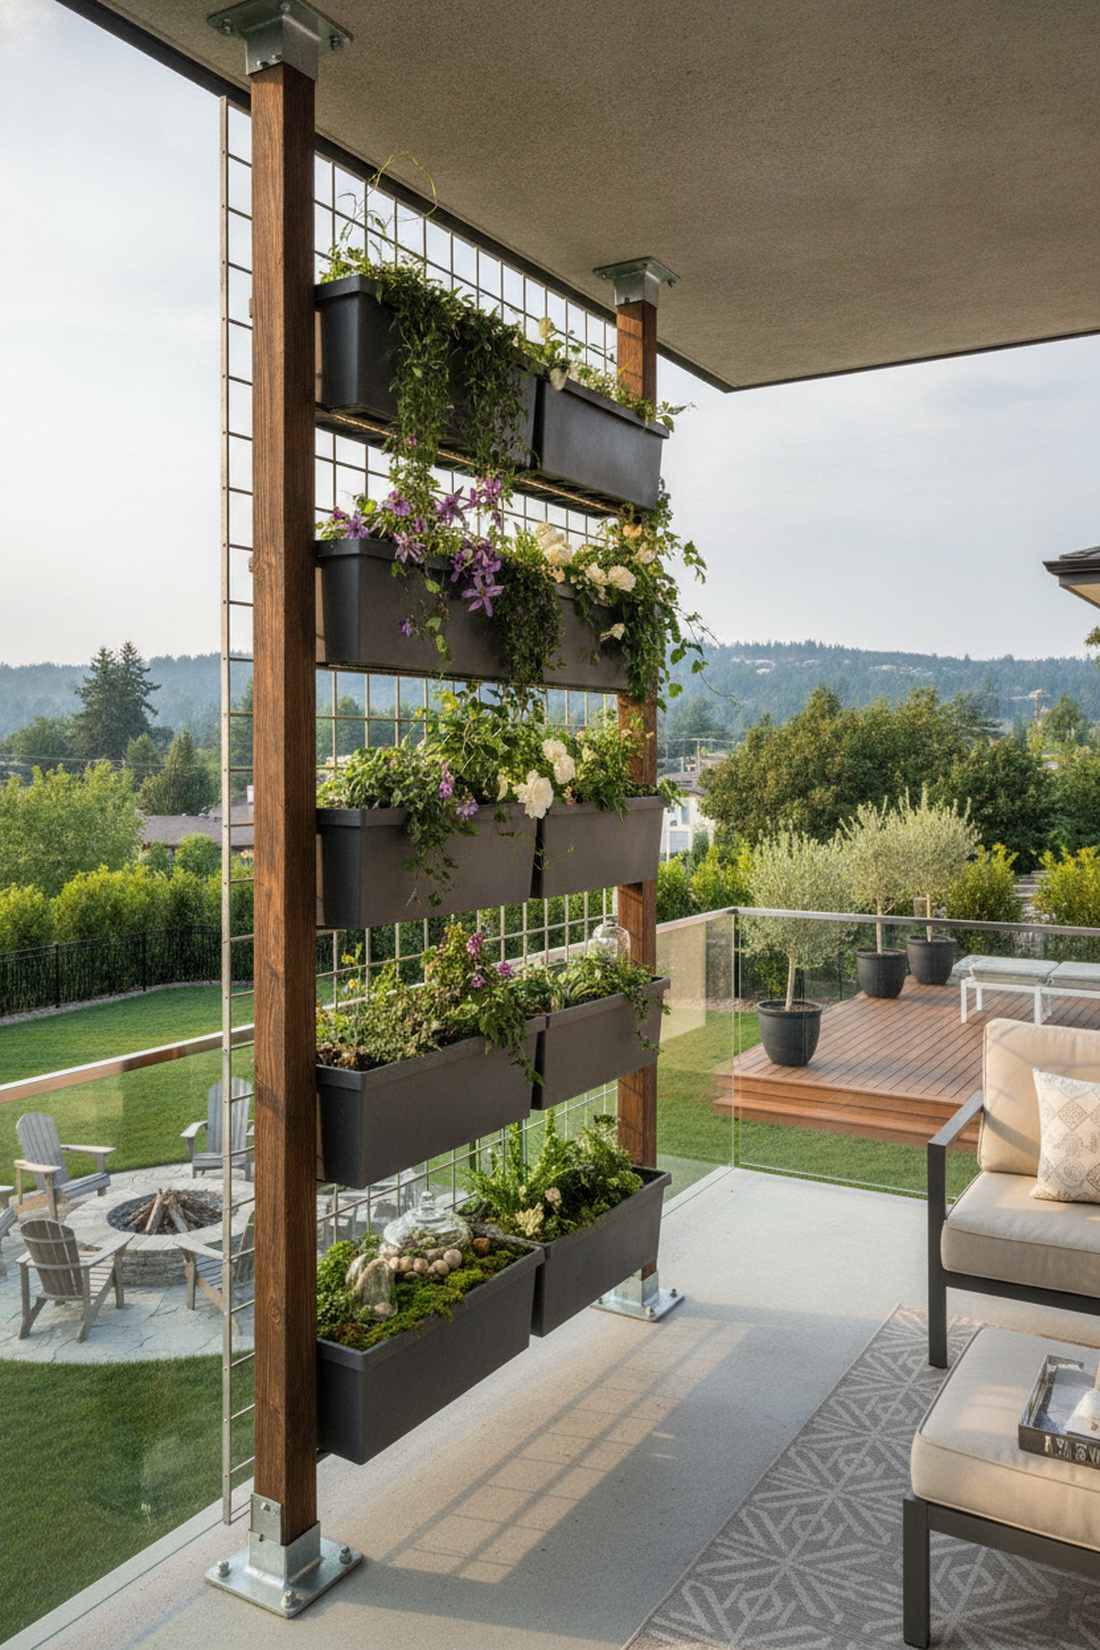
14. Container-Bed Trellis Hybrid
This stacked modular system feels like an ultra-modern living wall you’d see in a high-end hotel lobby. The vertical post container hybrid merges deep planter boxes with soaring back supports, perfect for concrete balcony flooring.
Standard pots restrict climbing potential, but elevating removable planter boxes onto a towering grid lets you bypass terrible native soil entirely. Incorporate top-tier terrarium accessories into the lower boxes for a mixed-media visual masterpiece.
You can assemble this powerhouse unit for $70–$110. Pin this if you are battling terrible backyard soil!
- Key Materials: Extended 4×4 posts, removable window boxes
- Vibe / Style: Modern architectural garden
- Difficulty: Moderate building skills
- Budget Breakdown: Tall posts: $40 | Planter inserts: $45
- Creator’s Tip: Drill massive drainage holes in the upper containers so they slowly drip-irrigate the bottom beds.
- Smart Sourcing: heavy-duty resin window box inserts and commercial-grade structural post bases.
You might think you need a massive yard for a show-stopping vertical feature, but this next standalone trick proves you can create a towering focal point almost anywhere.
Freestanding Structures and Garden Arches
Freestanding trellis installations create focal points, define garden zones, and support climbing plants without requiring attachment to buildings or beds. These versatile structures range from simple obelisks to elaborate pergola systems that anchor landscape compositions.
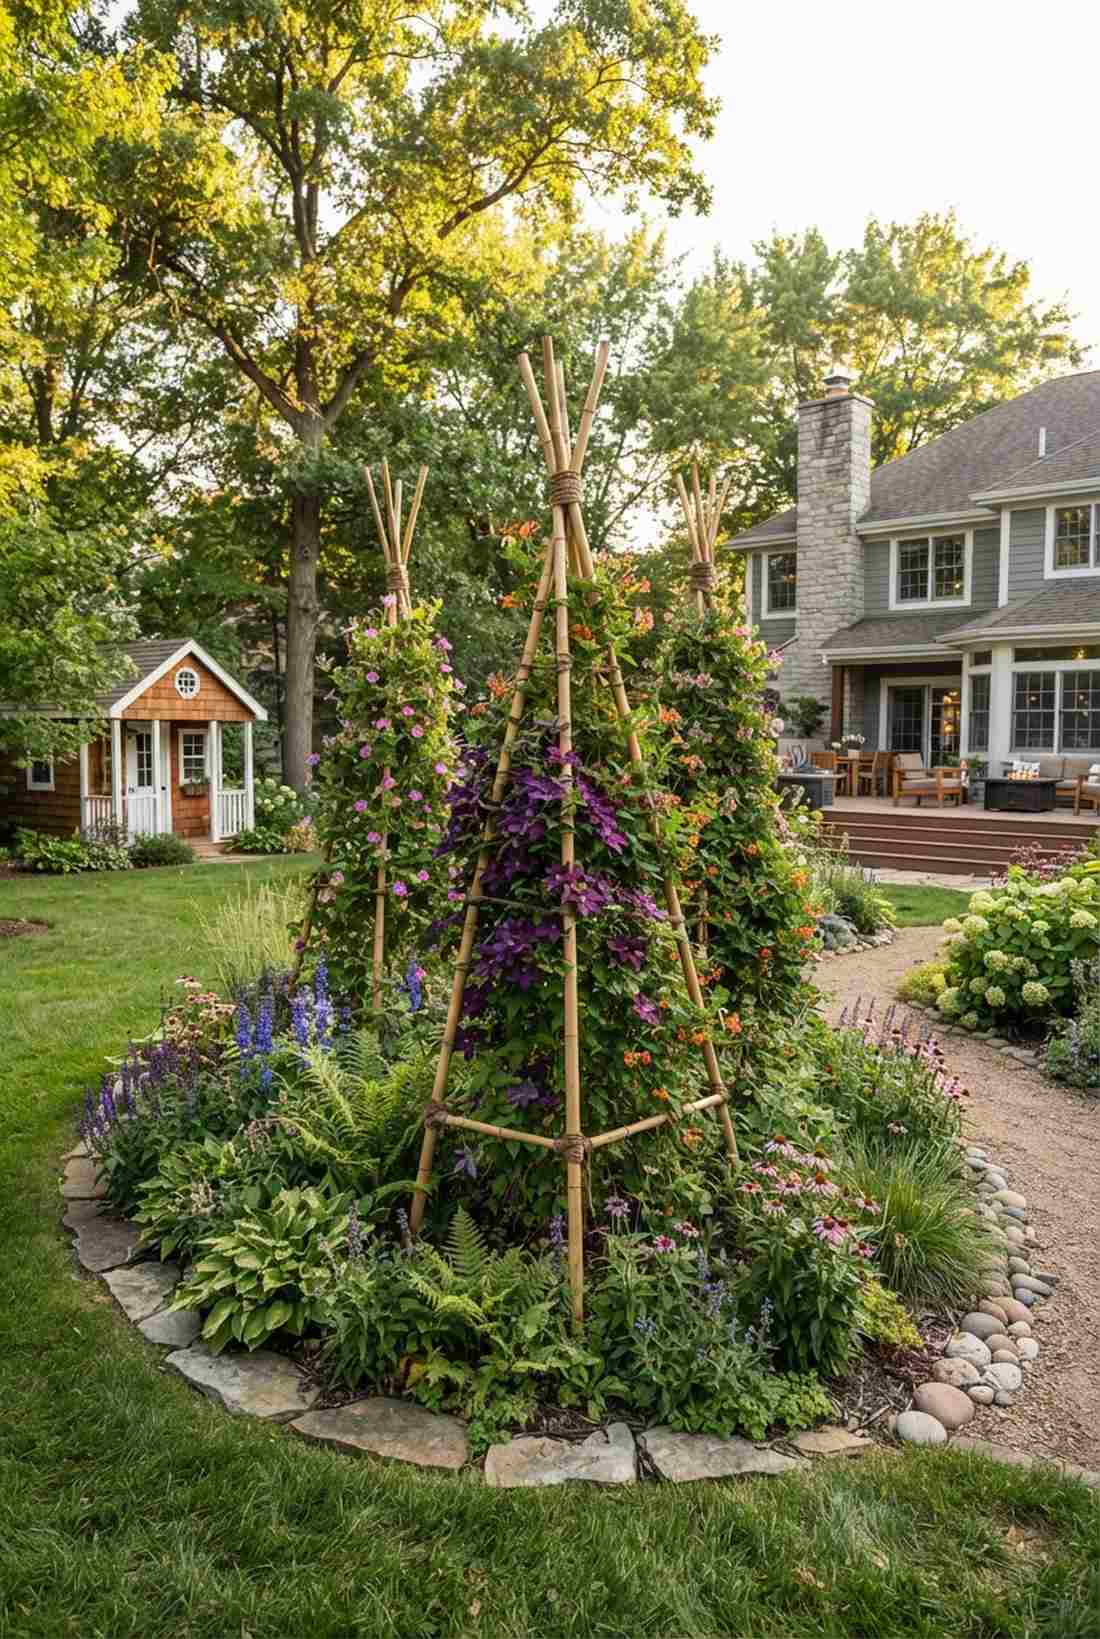
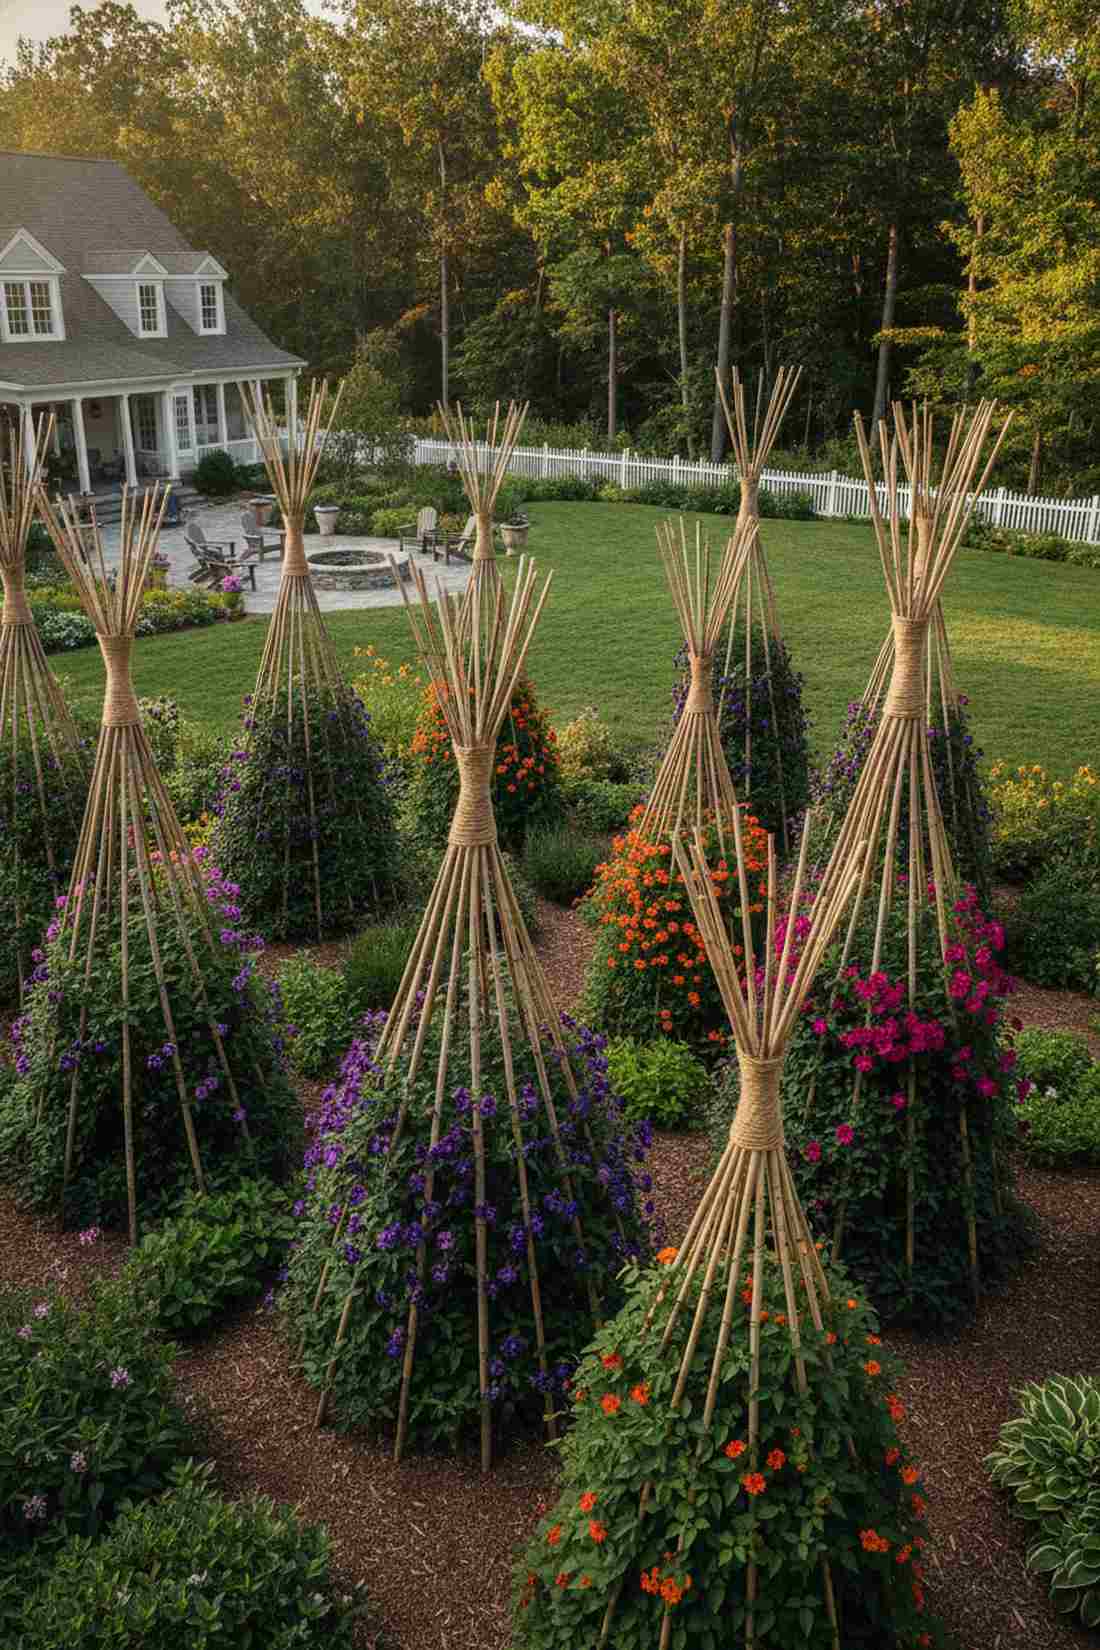
15. Teepee Trellis Clusters
Walking through these towering structures feels like discovering a mystical forest encampment. Grouping rustic bamboo tripod teepees creates dynamic visual rhythm, serving as an unbelievable centerpiece for otherwise flat perennial borders.
Rigid metal cages look totally unnatural, but this organic lashed-pole aesthetic delivers a surprisingly premium look that blends flawlessly into the landscape. Fast-growing flowering vines will swallow the poles, creating solid cones of vibrant color.
You can bundle these together for as little as $15–$30. It’s a fast weekend win that brings immediate height to the yard.
- Key Materials: 8-foot bamboo poles, heavy lashing twine
- Vibe / Style: Organic woodland garden
- Difficulty: Extremely simple lashing
- Budget Breakdown: Bamboo bundle: $20 | Twine: $5
- Creator’s Tip: Sink the poles at least 8 inches into the dirt before tying the top to prevent wind blowout.
- Smart Sourcing: thick natural bamboo poles (bulk pack) and weather-resistant garden lashing cord.
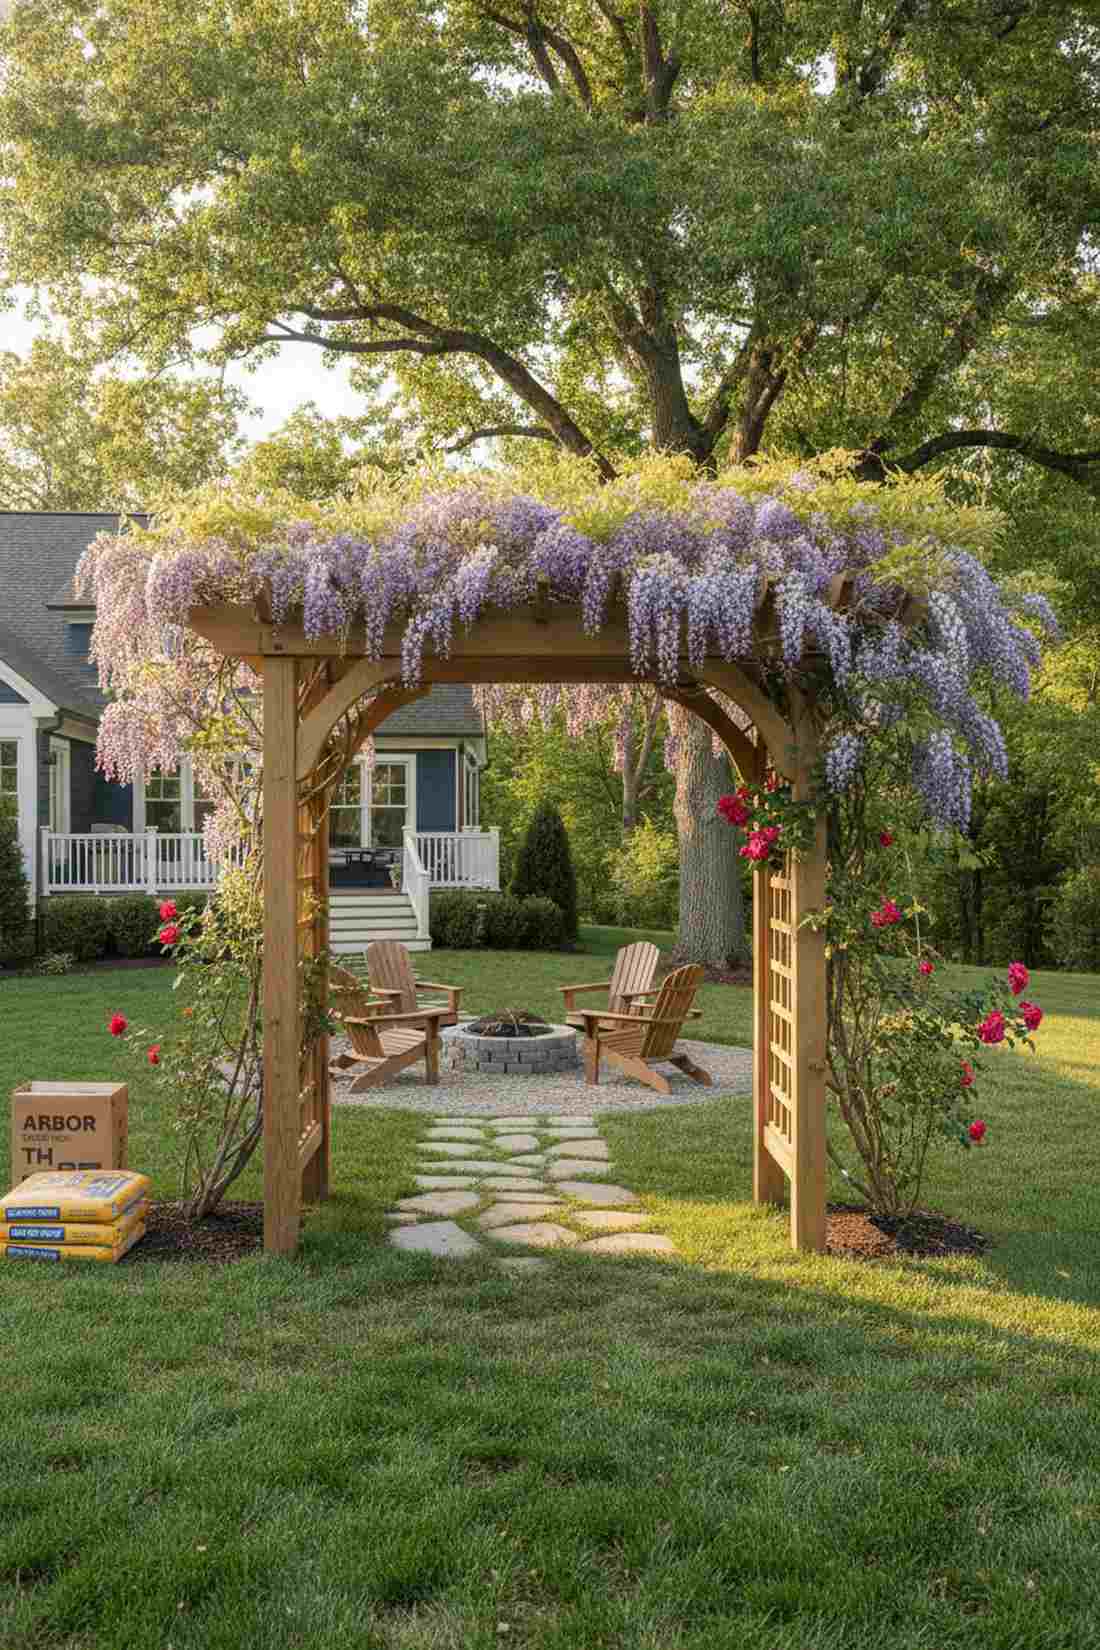
16. Garden Arbor Entryway
Passing under this lush threshold feels like entering a completely different, peaceful world. A sturdy wooden arbor arch acts as the ultimate transition piece, perfectly defining the entrance to a backyard seating area.
Flimsy plastic arches crack under the weight of winter snow, but upgrading to a chunky 4×4 timber frame looks far more expensive than it is. It’s the ultimate foundational piece for heavy, romantic climbers like wisteria or climbing roses.
A solid custom wood arbor usually runs $120–$180. Save this for your ultimate backyard entryway blueprint!
- Key Materials: 4×4 cedar posts, decorative crossbeams
- Vibe / Style: Romantic estate entrance
- Difficulty: Intermediate to advanced build
- Budget Breakdown: Heavy lumber: $120 | Hardware/Footings: $40
- Creator’s Tip: Always set the main support posts in concrete footings—mature wisteria can literally crush weak frames.
- Smart Sourcing: pre-cut wooden arbor top kits and fast-setting concrete mix bags.
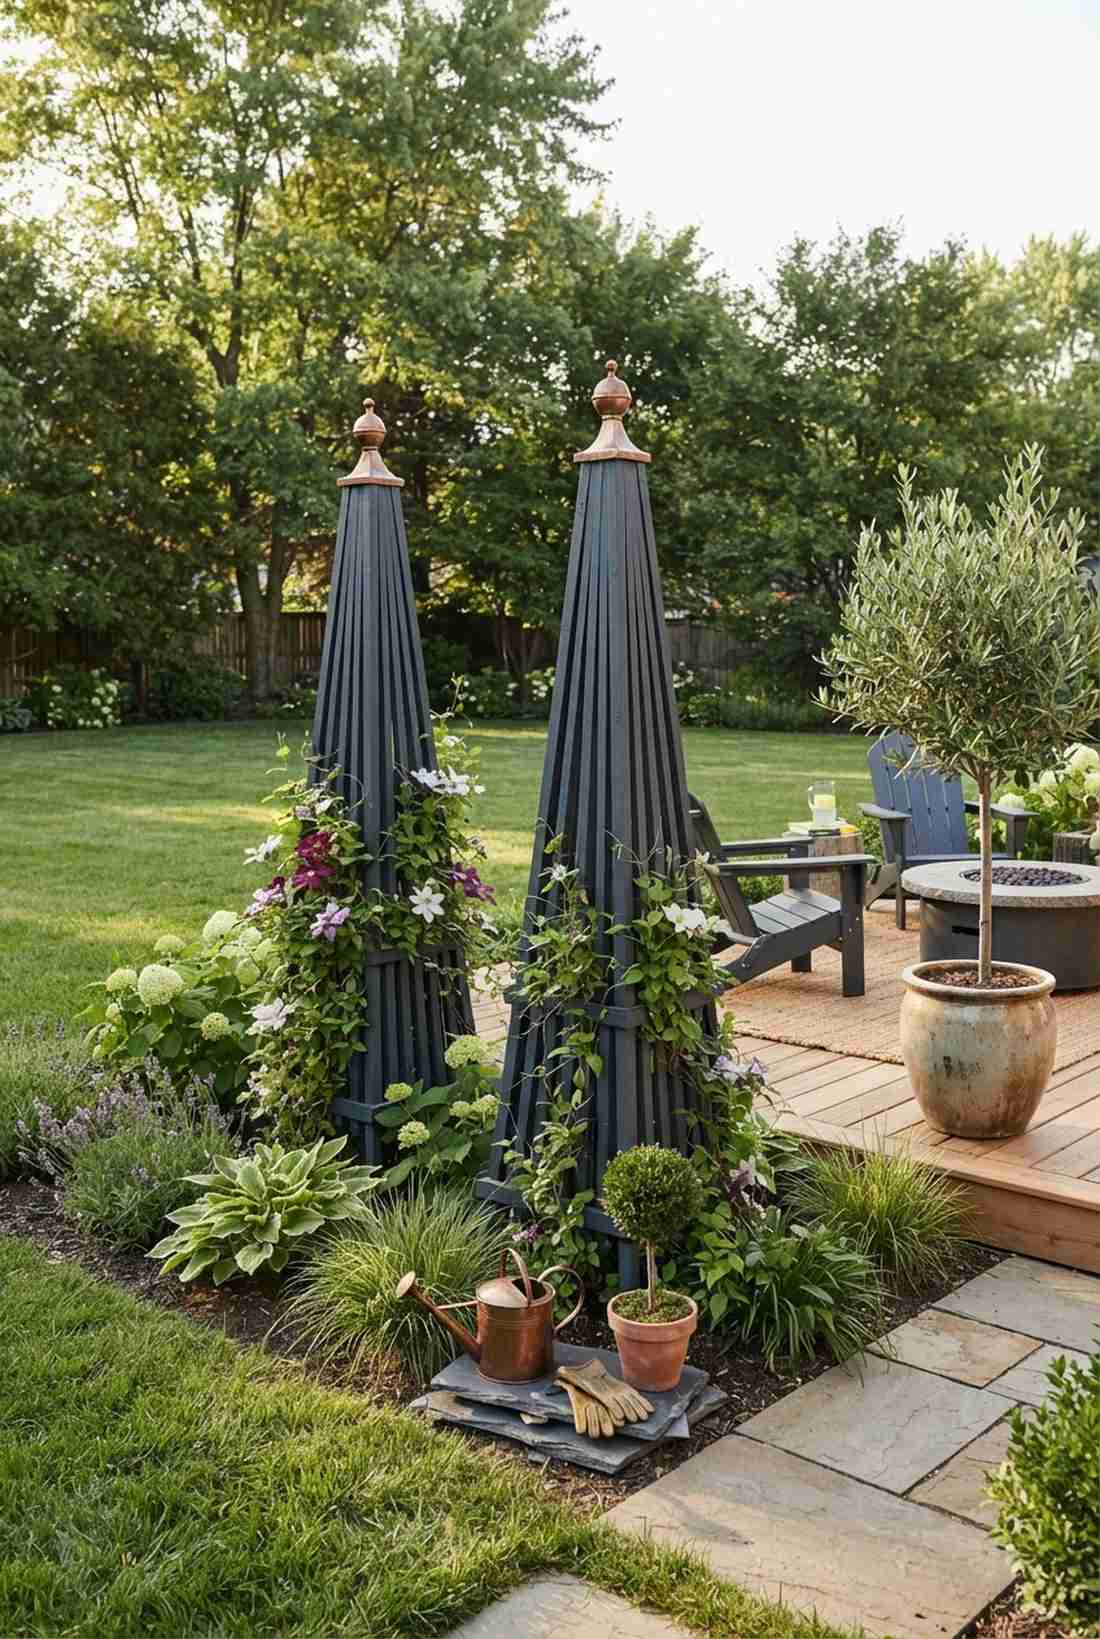
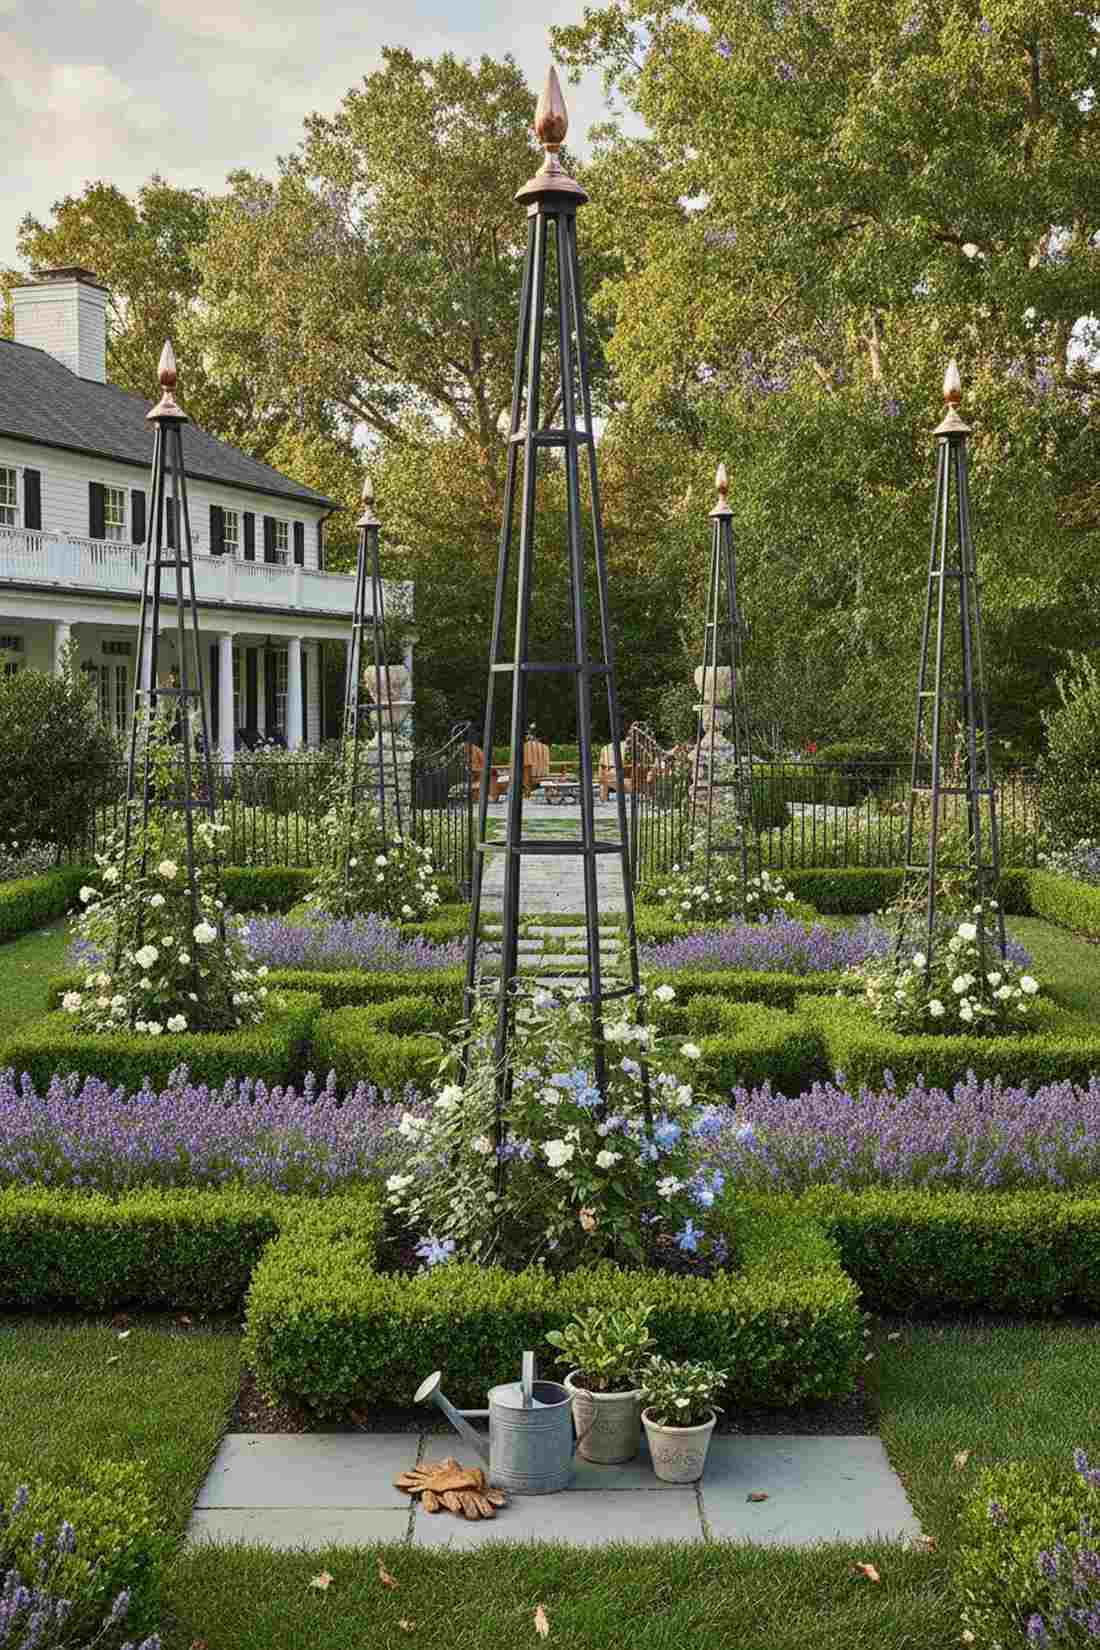
17. Obelisk Accent Structures

These striking geometric towers feel like elegant art sculptures rising from the foliage. Using a tapered metal or wood obelisk injects instant architectural drama, making them absolutely stellar for breaking up boring, flat lawn spaces.
Most gardens lack winter interest, but these rigid pyramid structures provide stunning visual anchors even when covered in snow. Drop a few high-end miniature garden supplies at the base to create a sophisticated, layered display.
Pre-fab or DIY obelisks cost around $40–$75 each. Pin this if you want an instant touch of formal elegance!
- Key Materials: Tapered wooden slats, finial top cap
- Vibe / Style: Formal French garden
- Difficulty: Easy pre-fab or moderate DIY
- Budget Breakdown: Wood/Screws: $35 | Decorative top: $15
- Creator’s Tip: Paint them a bold contrasting color like slate black or deep navy to make green vines pop.
- Smart Sourcing: powder-coated metal obelisk kits and decorative copper finial caps.
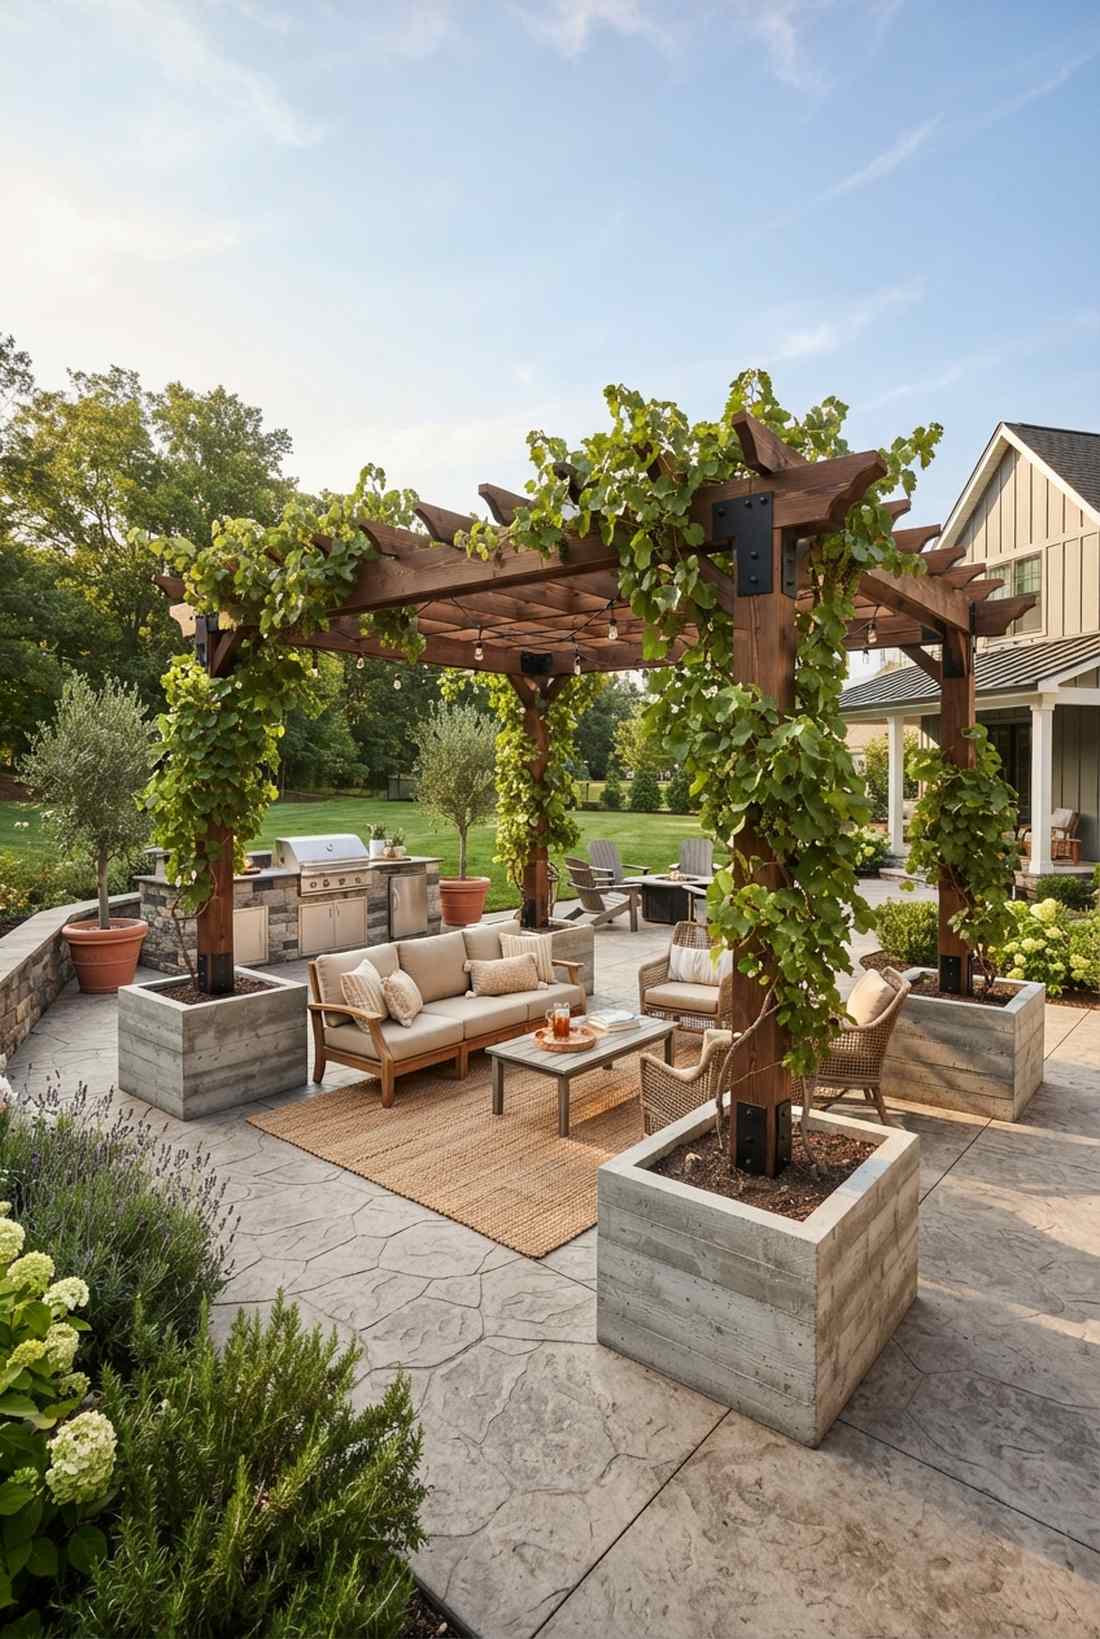
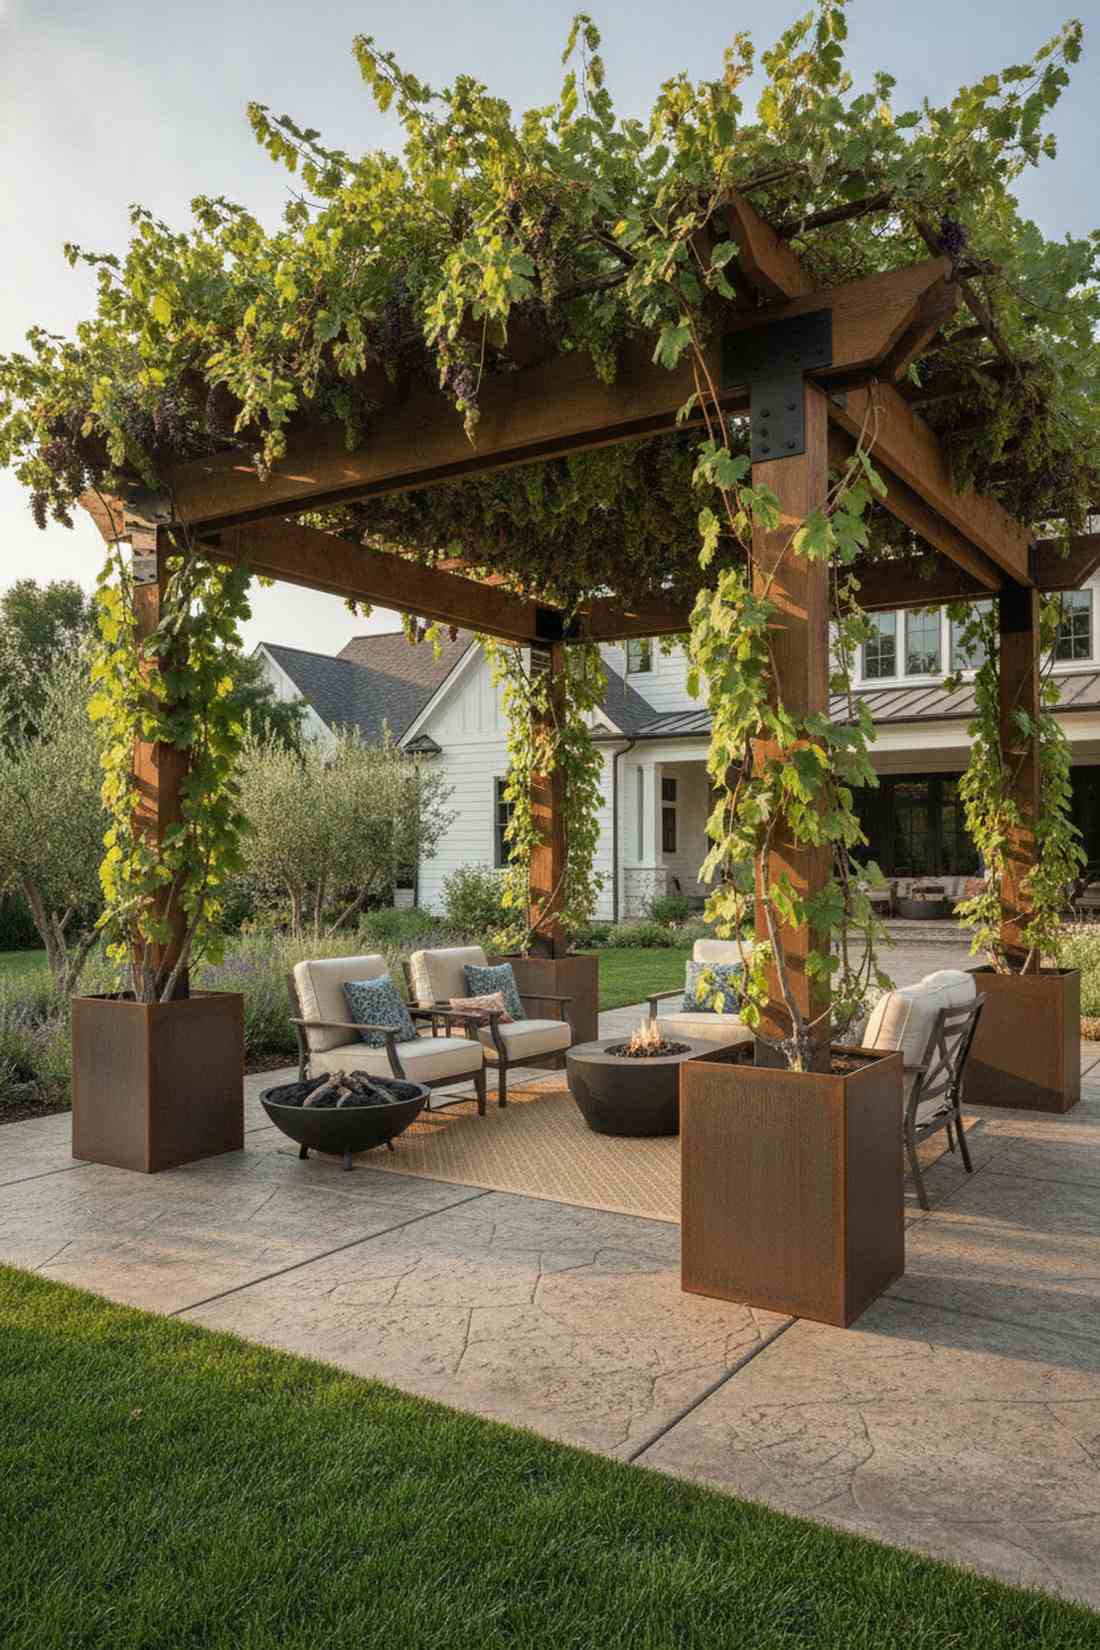
18. Pergola with Integrated Planters
Relaxing under this structure feels like chilling in a luxury Mediterranean villa. By building a pergola anchored directly into heavy planter boxes, you create a massive shaded oasis that works perfectly on concrete patios with zero soil access.
Digging footings destroys existing patios, but this ballast-box method bypasses the mess and gives a designer-level finish instantly. The massive dirt volume securely anchors the soaring overhead beams while housing your hungry grapevine roots.
This premium patio hack costs roughly $200–$350. It’s an absolute powerhouse for transforming barren decks.
- Key Materials: Pergola brackets, heavy planter boxes
- Vibe / Style: Luxury patio resort
- Difficulty: Advanced weekend project
- Budget Breakdown: Brackets: $100 | Lumber/Boxes: $200
- Creator’s Tip: Fill the bottom 20% of the planters with heavy gravel to lower the center of gravity and prevent tipping.
- Smart Sourcing: heavy-duty steel pergola bracket kits and reinforced commercial planter boxes.
Material Guide: Cheap vs. Premium Aesthetic
Knowing exactly where to save and where to spend makes all the difference in achieving that “looks expensive but isn’t” vibe.
- Standard vs. UV-Resistant/Premium: Cheap plastic zip ties snap mid-summer; upgrading to UV-coated silicone ties or stainless steel wire ensures your heavy harvests don’t crash to the ground.
- Pre-made Kits vs. Sourcing Locally: While raw lumber is cheap, buying pre-cut, powder-coated structural brackets saves you hours of frustrating math and delivers a rock-solid, contractor-level finish.
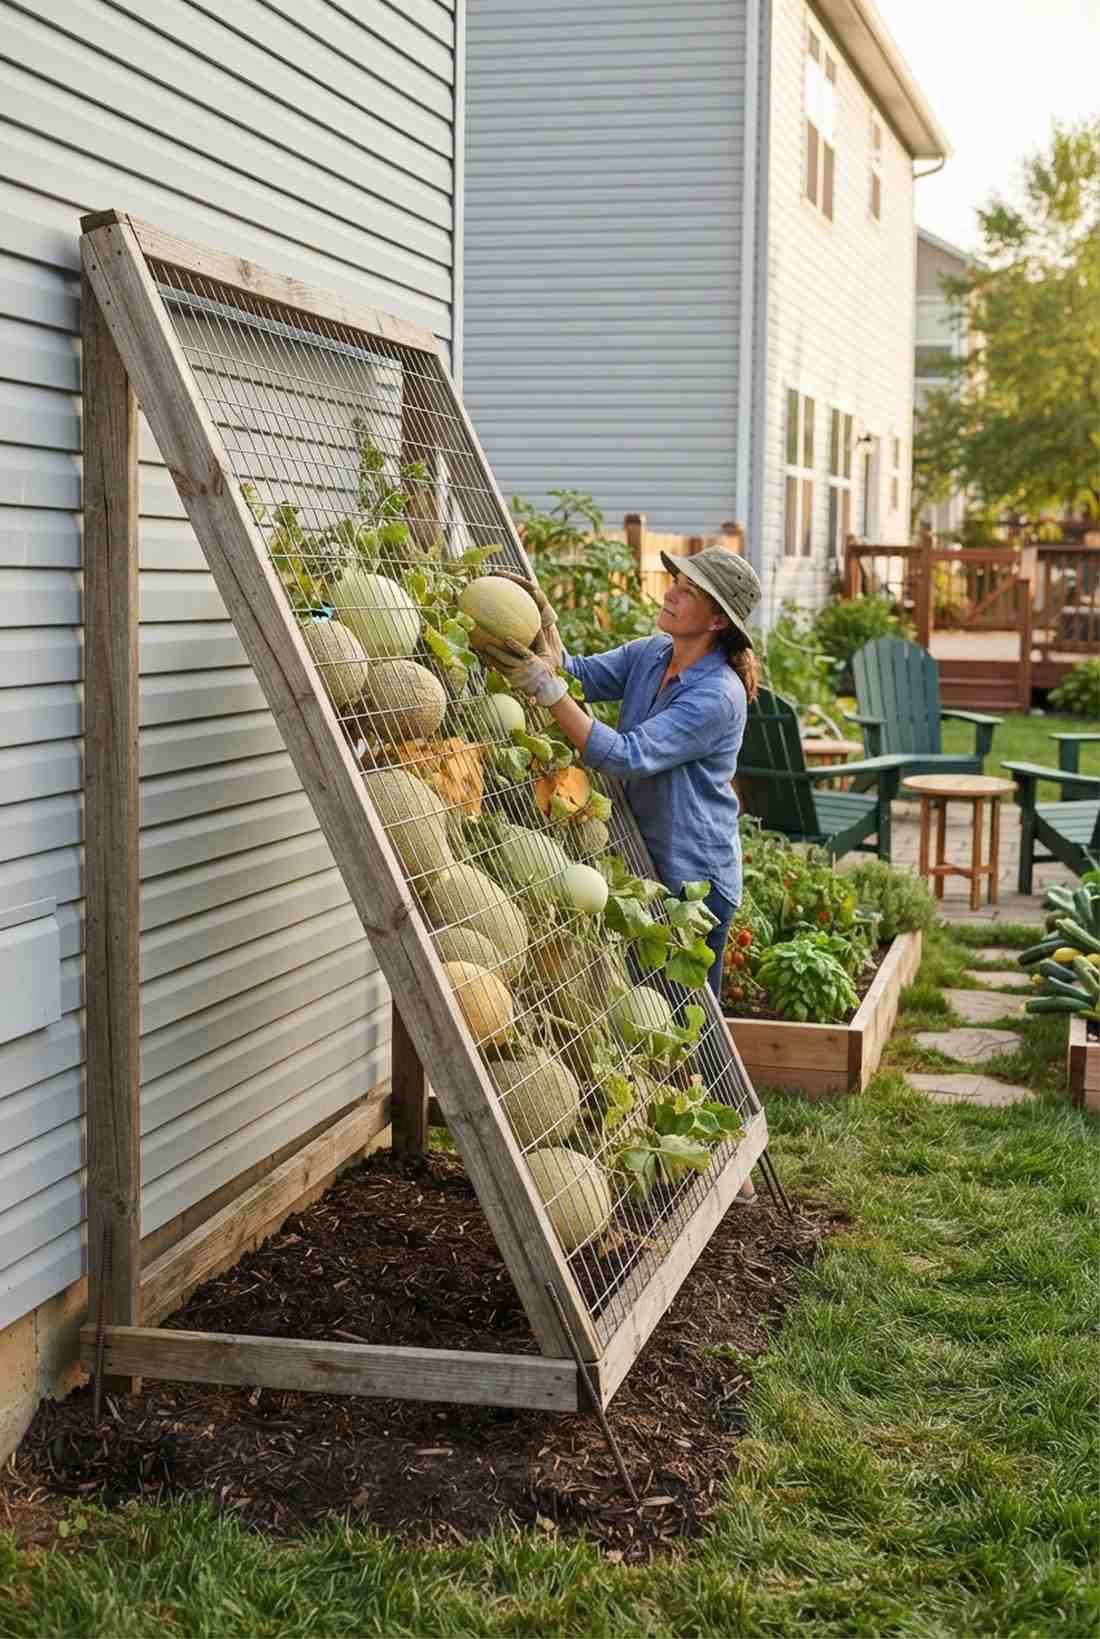
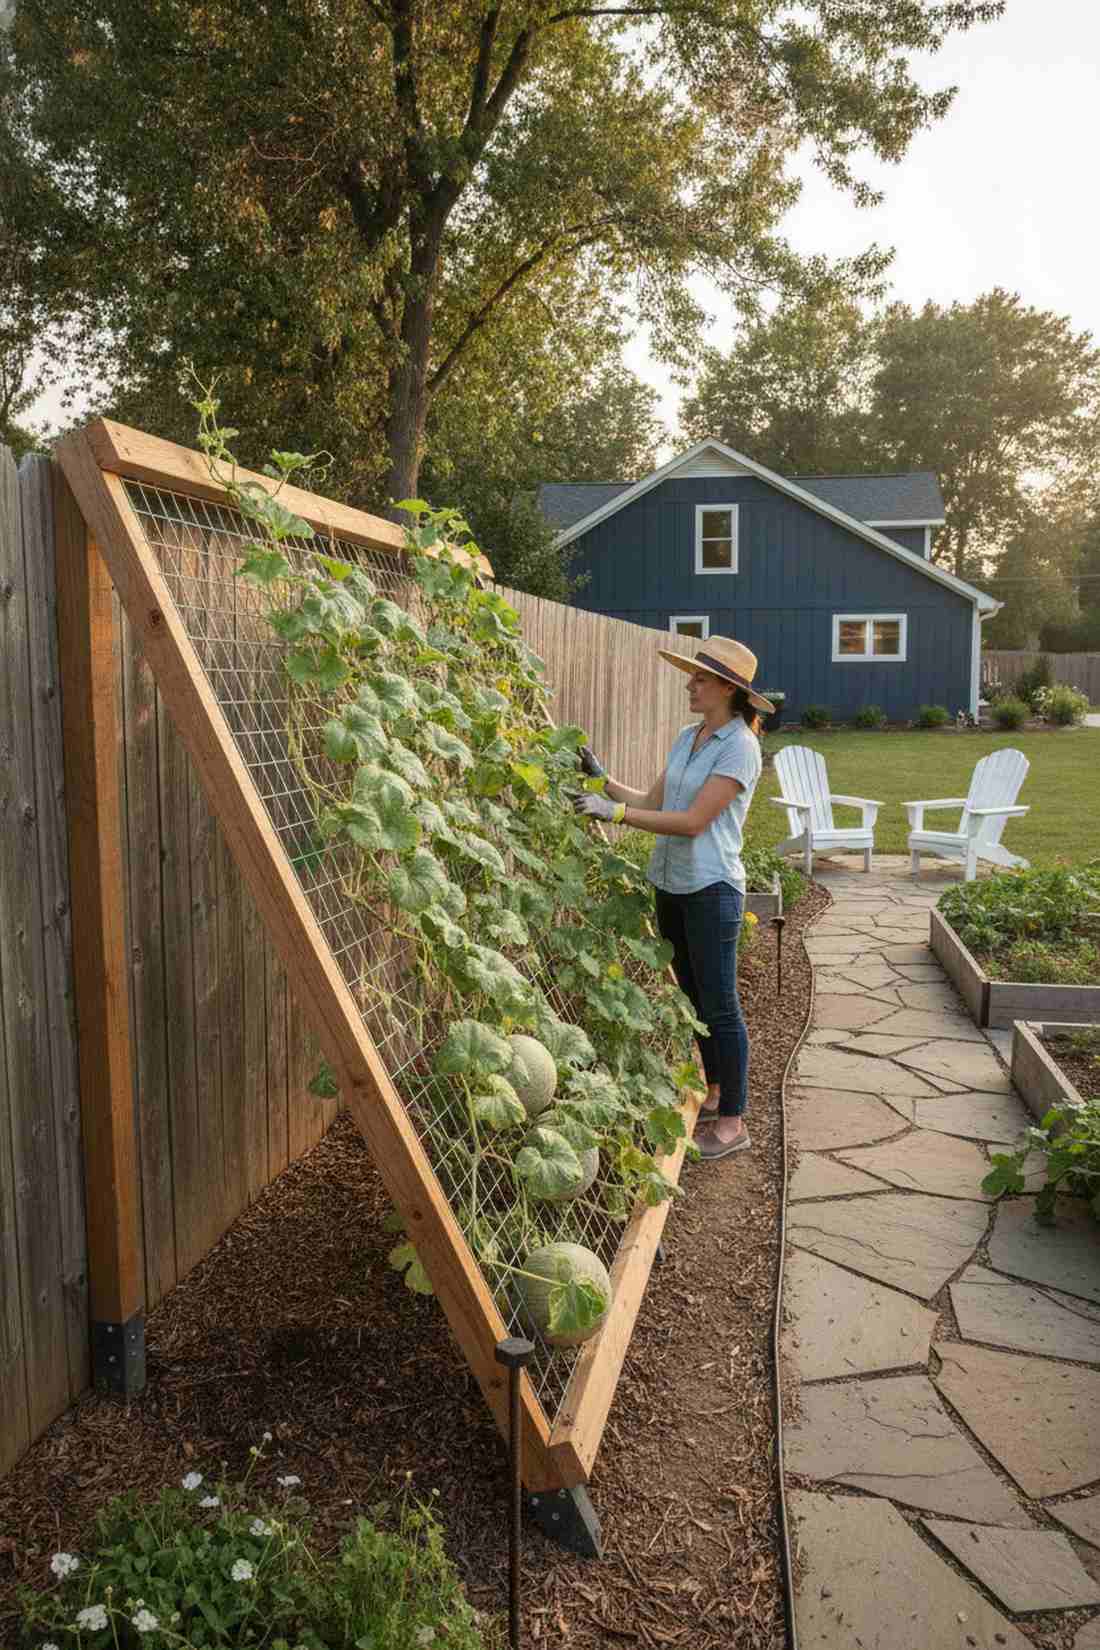
19. Lean-To Trellis Wall
Reaching for a harvest here feels like an effortless, ergonomic dream. The angled 60-degree lean-to frame props against existing fences, serving as an amazing space-saver for tight suburban side yards.
Straight vertical walls force heavy melons to snap their vines, whereas this sloped orientation naturally cradles heavy fruit and brings them right to eye level. It completely eliminates bending over while maximizing the sun’s angle.
You can build this slanted wonder for $30–$45. Save this brilliant hack if you hate straining your back!
- Key Materials: 2×4 framing, rigid wire mesh
- Vibe / Style: Ergonomic suburban farm
- Difficulty: Easy measuring and leaning
- Budget Breakdown: Framing: $20 | Wire/Stakes: $20
- Creator’s Tip: Drive heavy rebar stakes at the base so the bottom of the lean-to doesn’t slip out during heavy rain.
- Smart Sourcing: rigid galvanized mesh panels and heavy-duty steel rebar ground stakes.
If you rent your home or hate committing to permanent yard fixtures, this next genius mobile setup will totally change how you design your patio.
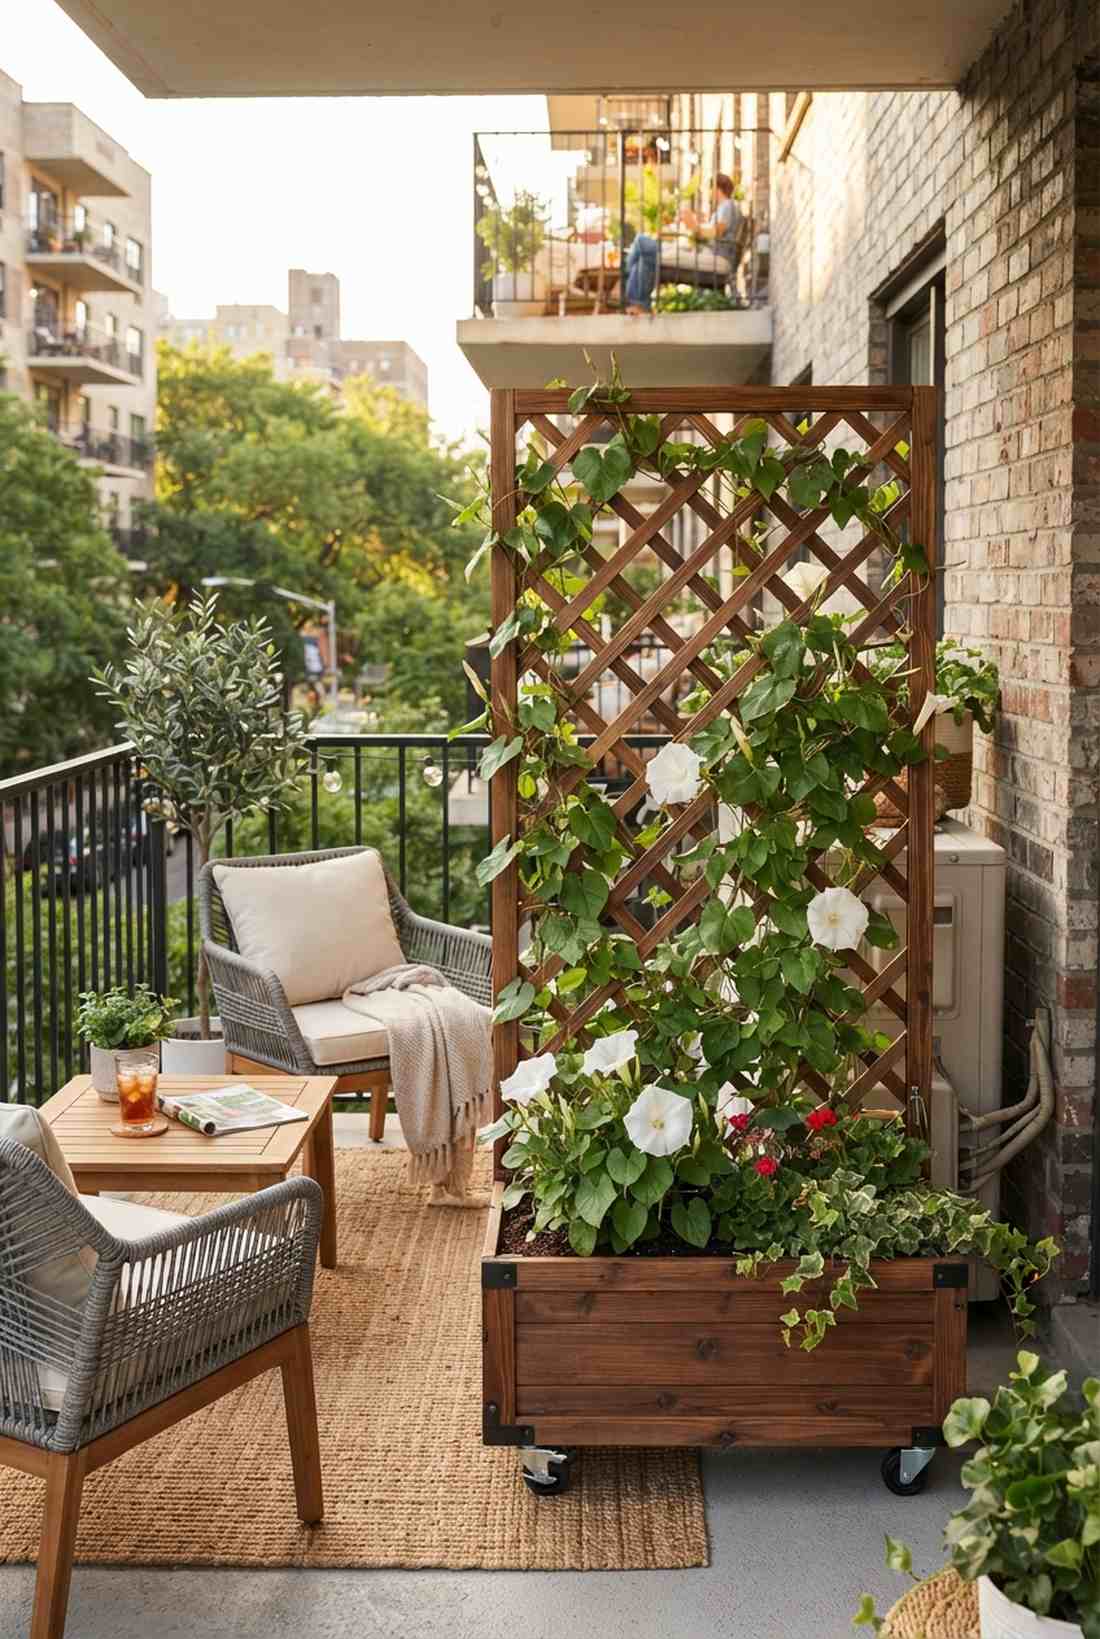
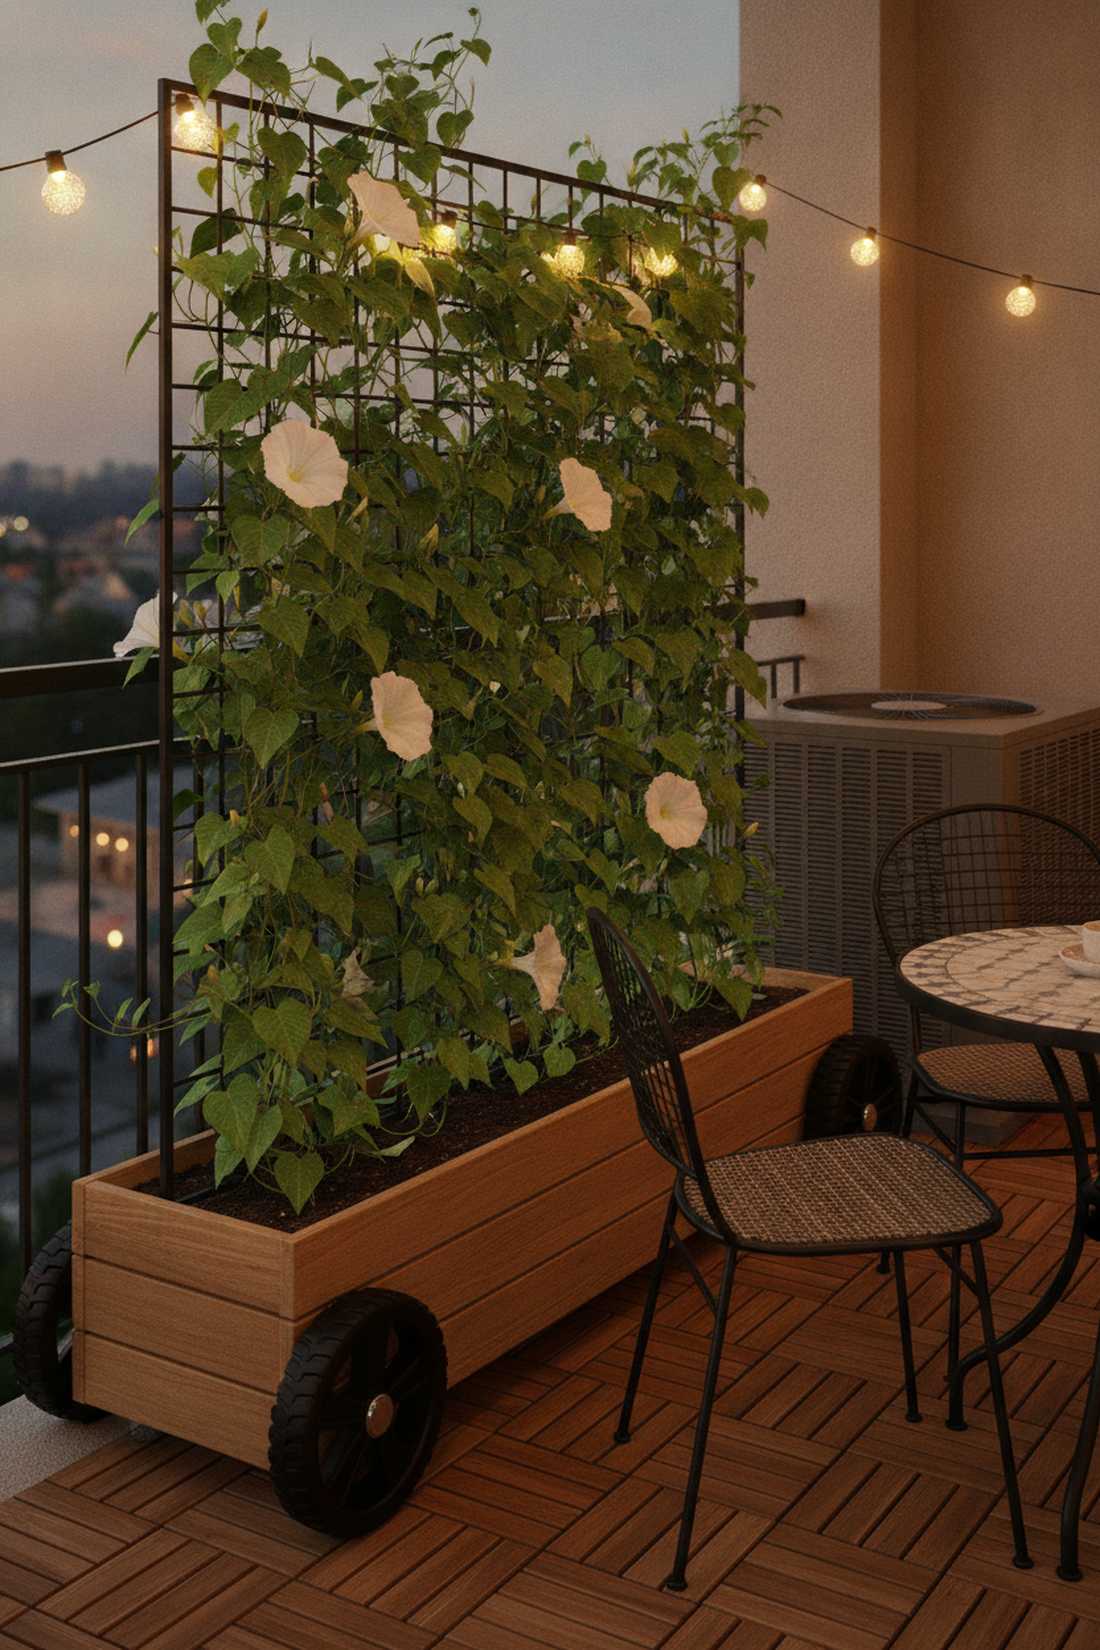
20. Trellis Screen Partition
Rolling this into place feels like directing your own dynamic outdoor movie set. Using a freestanding caster-wheeled screen creates an instant, movable privacy wall that is absolutely brilliant for shared apartment balconies.
Staring at your neighbor’s ugly AC unit ruins the vibe, but this portable green wall solves the problem and looks far more expensive than it is. Load it up with fast-growing moonflowers for a stunning evening fragrance display.
This rolling privacy hack sets you back about $65–$90. Pin this to your renter-friendly balcony board!
- Key Materials: Wheeled planter base, privacy lattice
- Vibe / Style: Dynamic cafe patio
- Difficulty: Moderate assembly
- Budget Breakdown: Caster base: $45 | Lattice/Soil: $35
- Creator’s Tip: Use locking casters so the screen doesn’t accidentally roll away during a heavy windstorm.
- Smart Sourcing: heavy-duty locking caster wheels (outdoor rated) and pre-assembled rolling planter boxes.
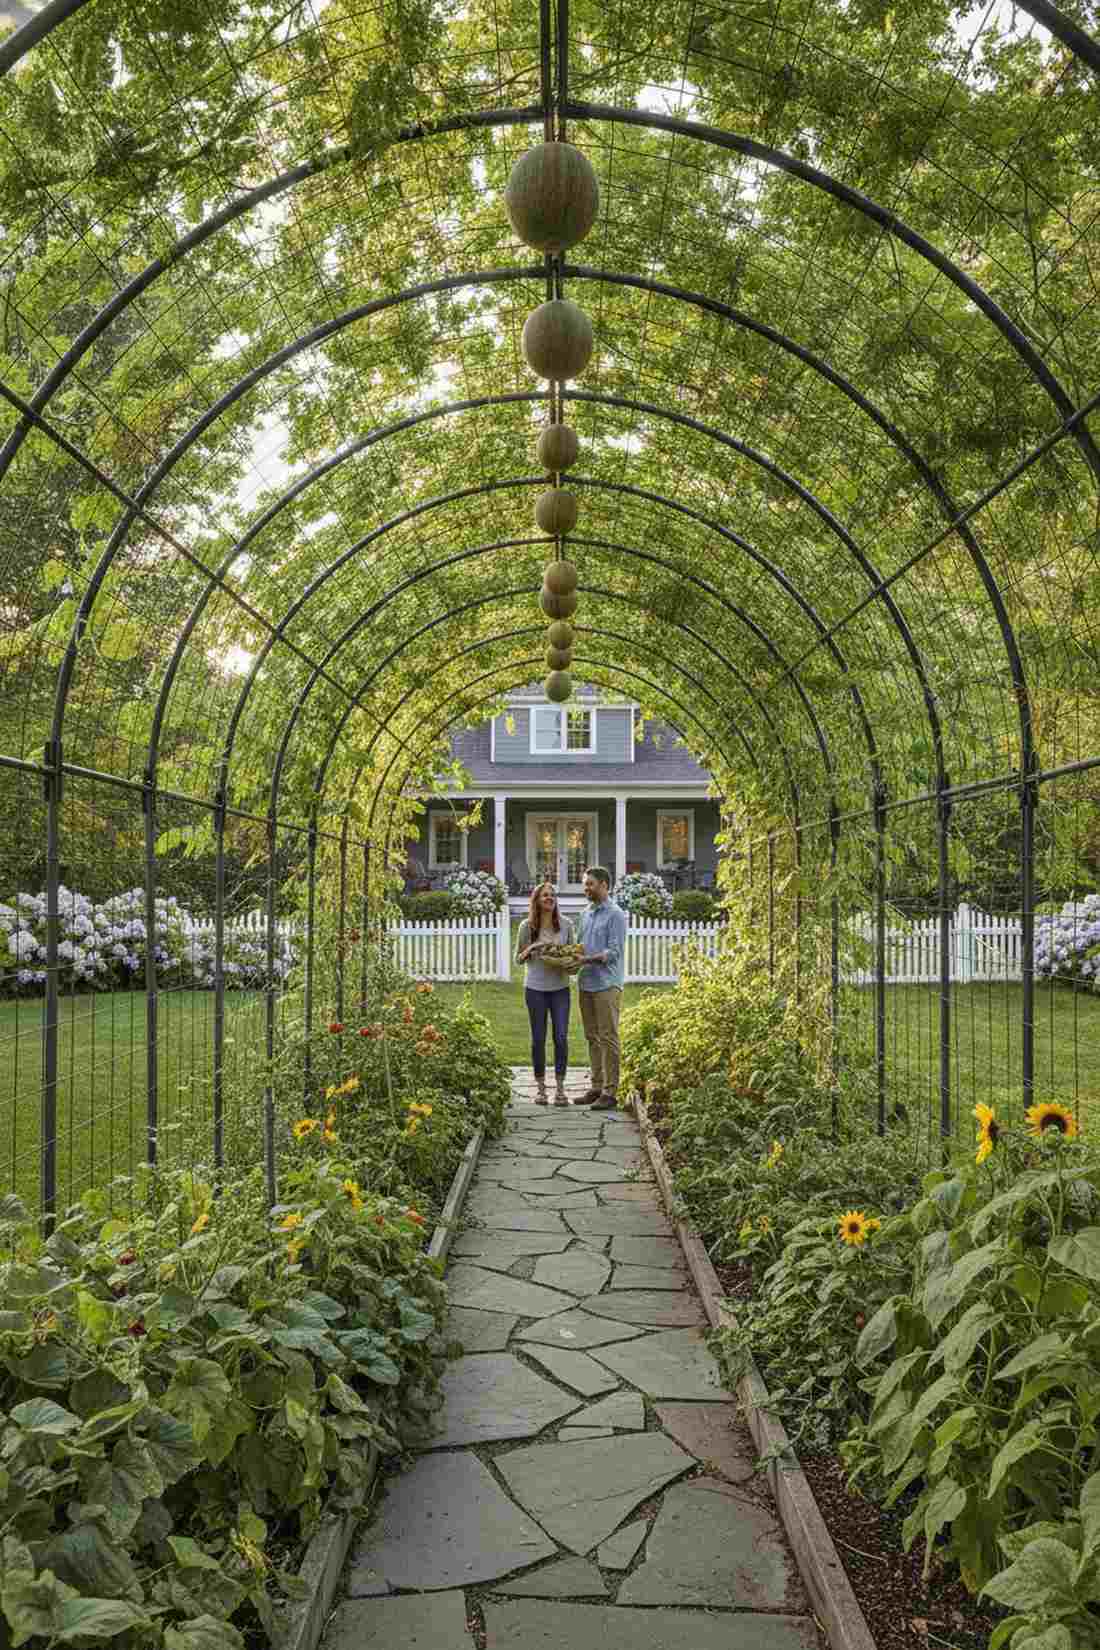
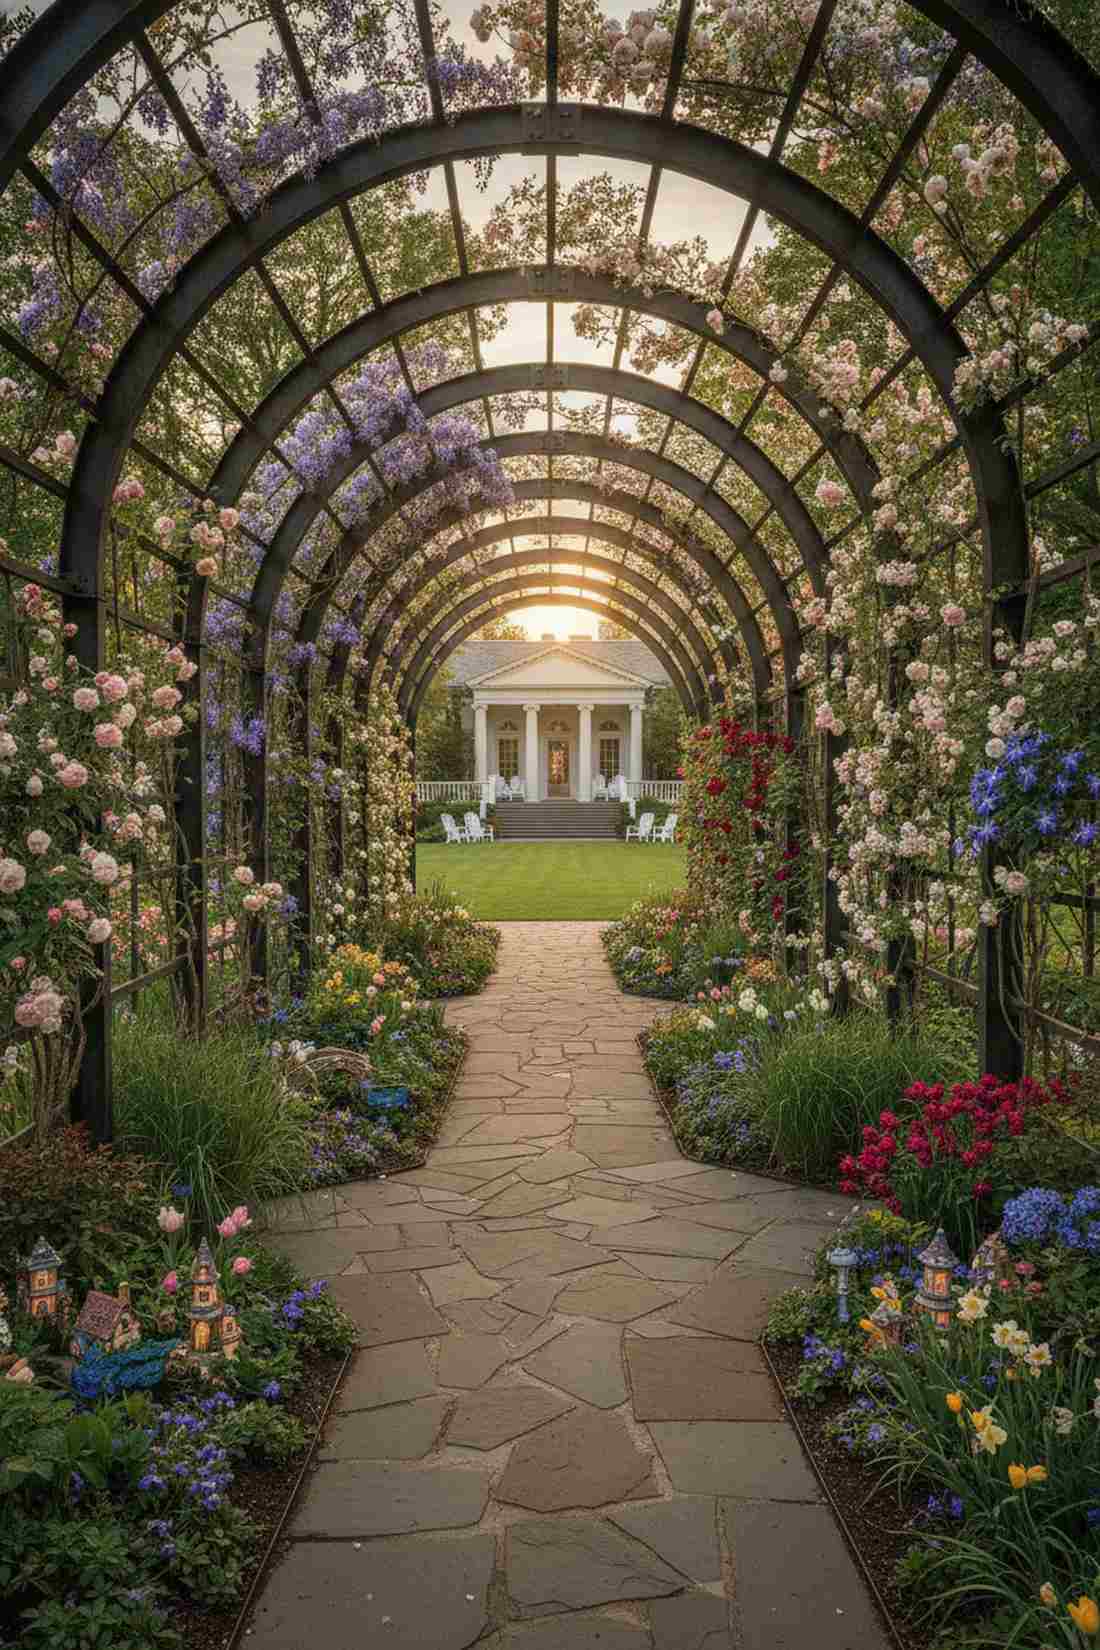
21. Double-Arch Pergola Tunnel
Wandering down this path feels like an escape into a massive botanical conservatory. A series of connected deep arches spans the main walking path, creating the ultimate dramatic tunnel effect for expansive estate gardens.
Standard flat pergolas can look bulky, but this repeated rounded rhythm creates an optical illusion of incredible depth and luxury. You can easily mix high-CPC fairy garden kits along the borders to elevate the magical aesthetic further.
Setting up multiple arches costs around $150–$250 depending on length. It’s a breathtaking project that redefines a property.
- Key Materials: Pre-fab metal arches, horizontal connecters
- Vibe / Style: Grand botanical estate
- Difficulty: Advanced alignment project
- Budget Breakdown: Arch kits: $180 | Connectors: $40
- Creator’s Tip: Plant early bloomers on the first arch and late bloomers on the second to keep the tunnel constantly colorful.
- Smart Sourcing: interlocking metal garden arch kits and heavy-duty cross-bracing hardware.
Creative Materials and DIY Trellis Approaches
Innovative trellis designs using repurposed materials and unconventional construction methods deliver functional support structures while adding distinctive character to garden spaces. These approaches prioritize resourcefulness and creative problem-solving alongside plant support.
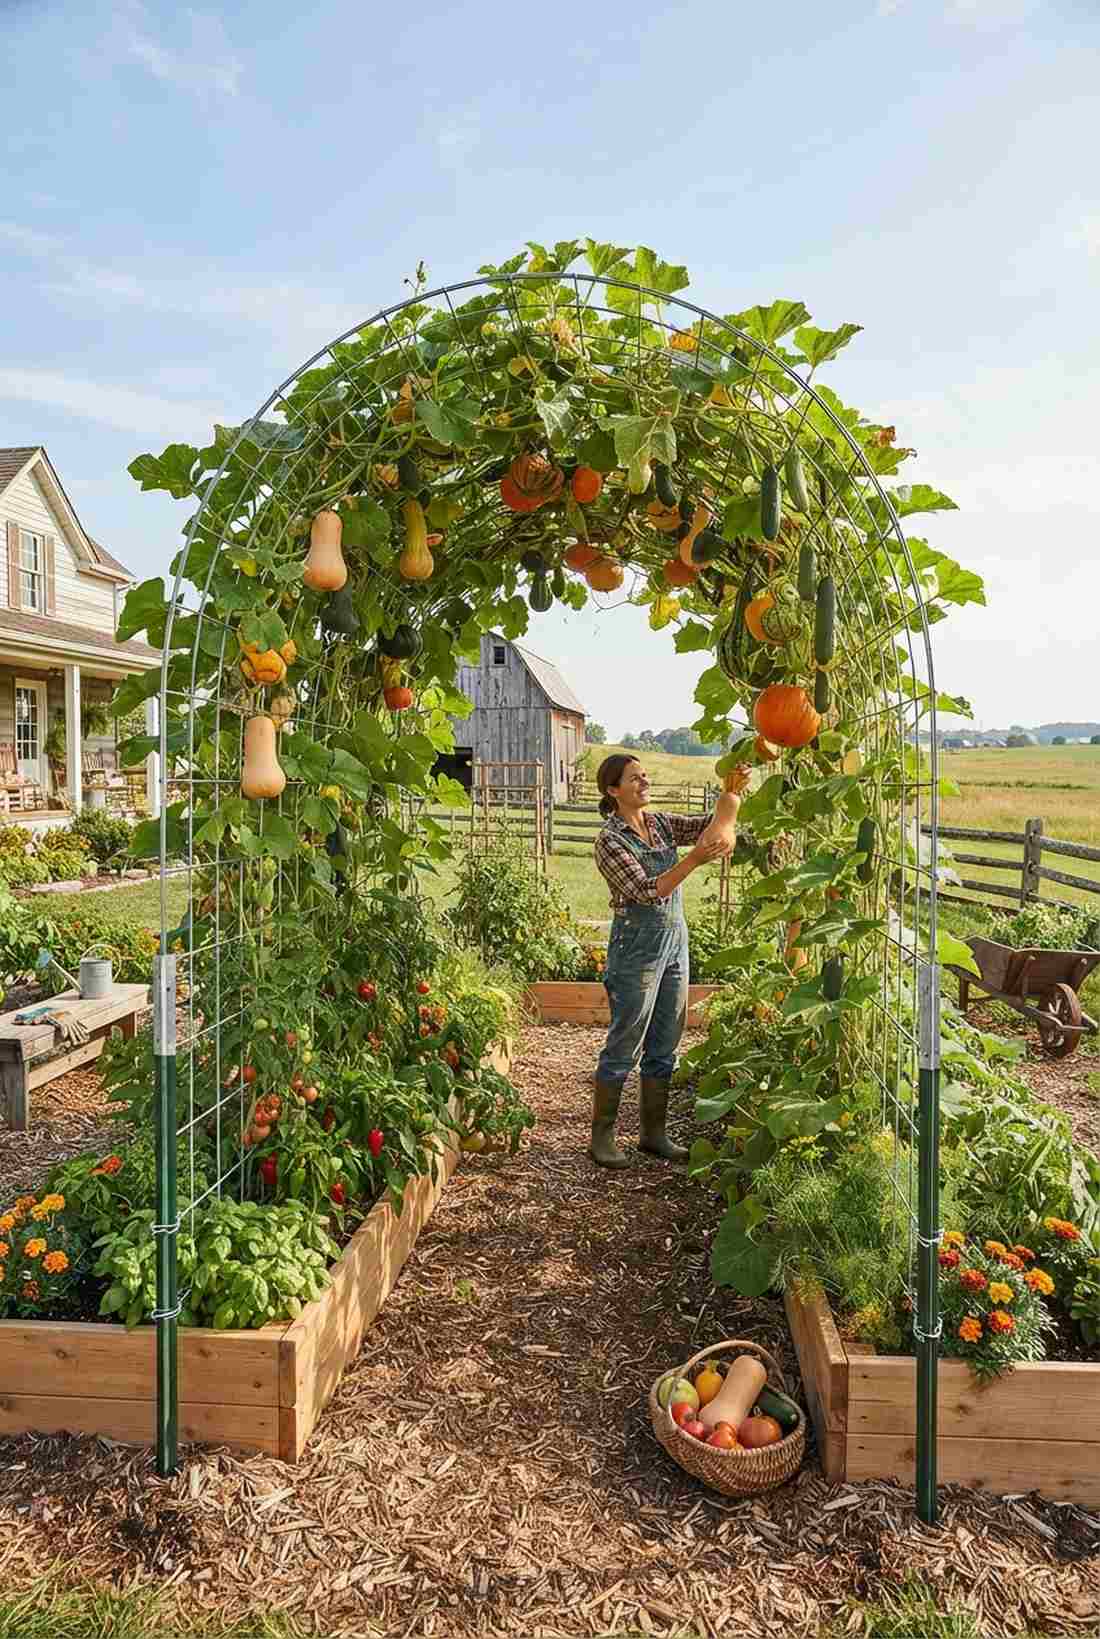
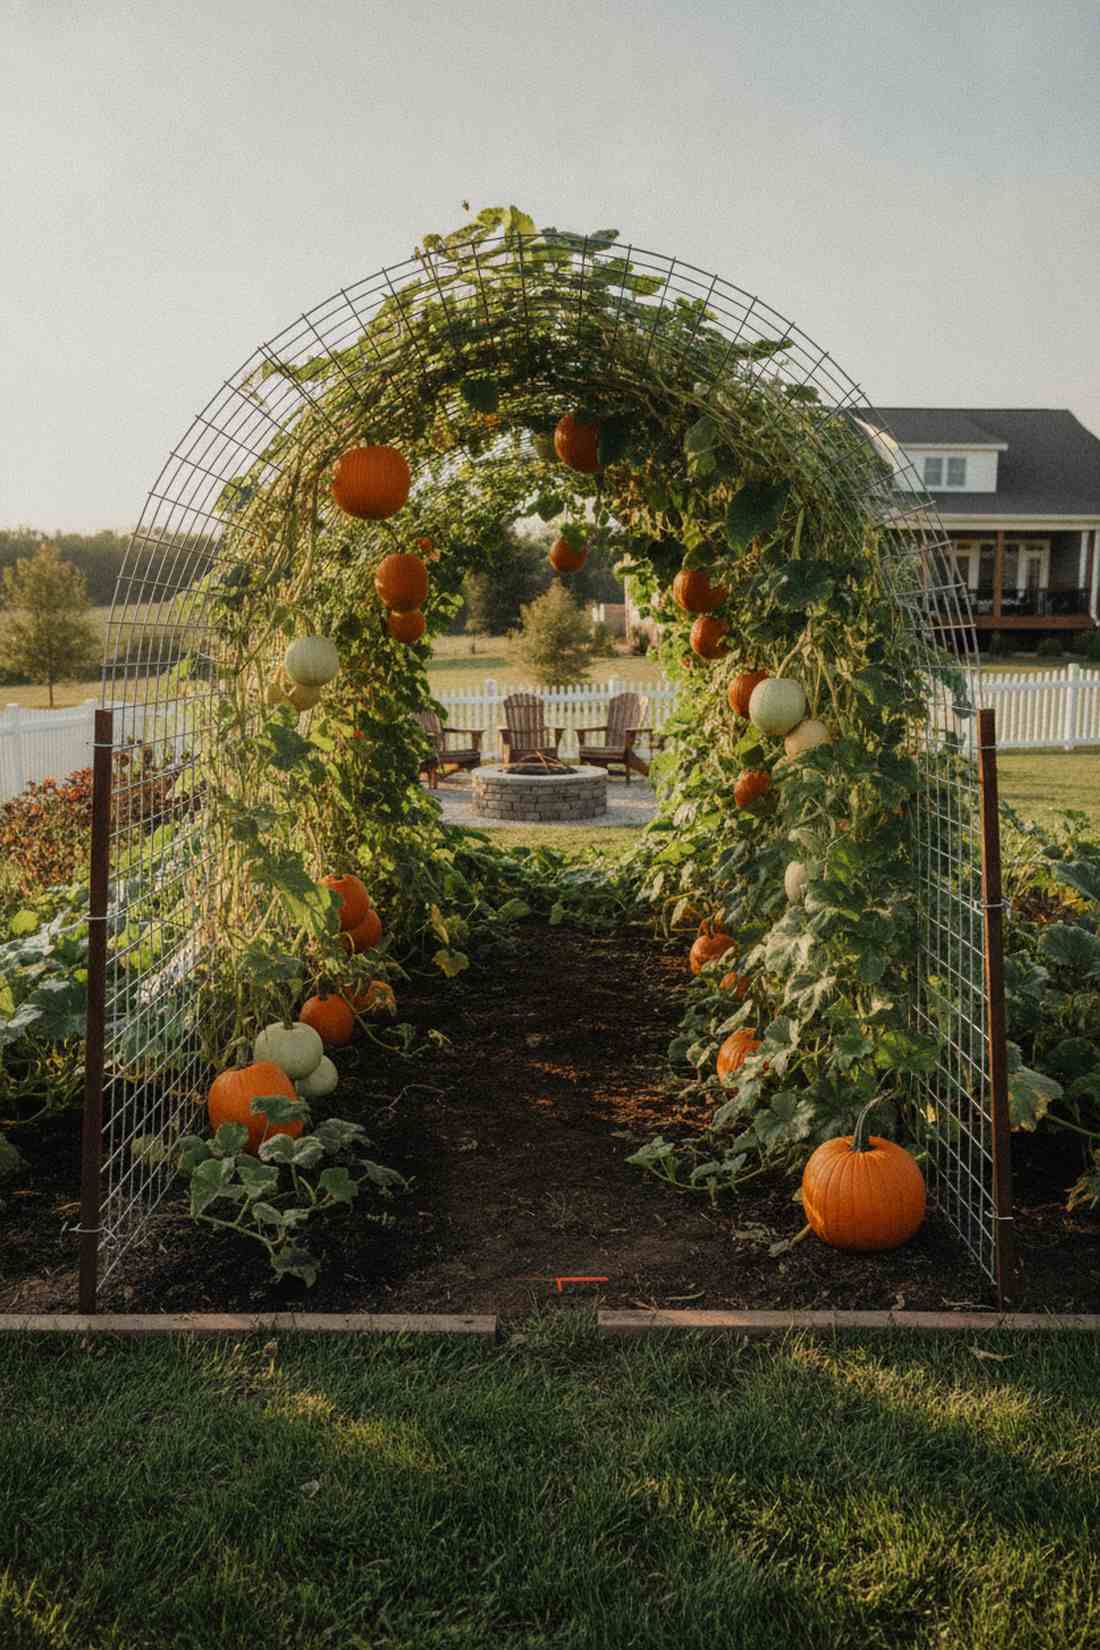
22. Cattle Panel Arch Trellis
Harvesting from inside this dome feels like plucking jewels in a green cave. A bent galvanized livestock panel creates immense structural tension, acting as a legendary budget hack for heavy pumpkin or squash patches.
Flimsy garden center netting rips instantly under pressure, but this bulletproof farm-grade wire delivers a surprisingly premium look with unmatched durability. It supports massive weight without buckling, keeping your veggies rot-free off the damp soil.
A single massive arch costs an unbelievable $25–$40. Pin this right now for the ultimate cheap garden hack!
- Key Materials: 16-foot cattle panel, T-posts
- Vibe / Style: Bulletproof homestead
- Difficulty: Requires some muscle to bend
- Budget Breakdown: Panel: $30 | T-posts: $10
- Creator’s Tip: Use a bolt cutter to snip the bottom wire rung—this creates instant 6-inch ground spikes for extra stability.
- Smart Sourcing: heavy-duty steel T-posts (rust proof) and galvanized wire fastening clips.
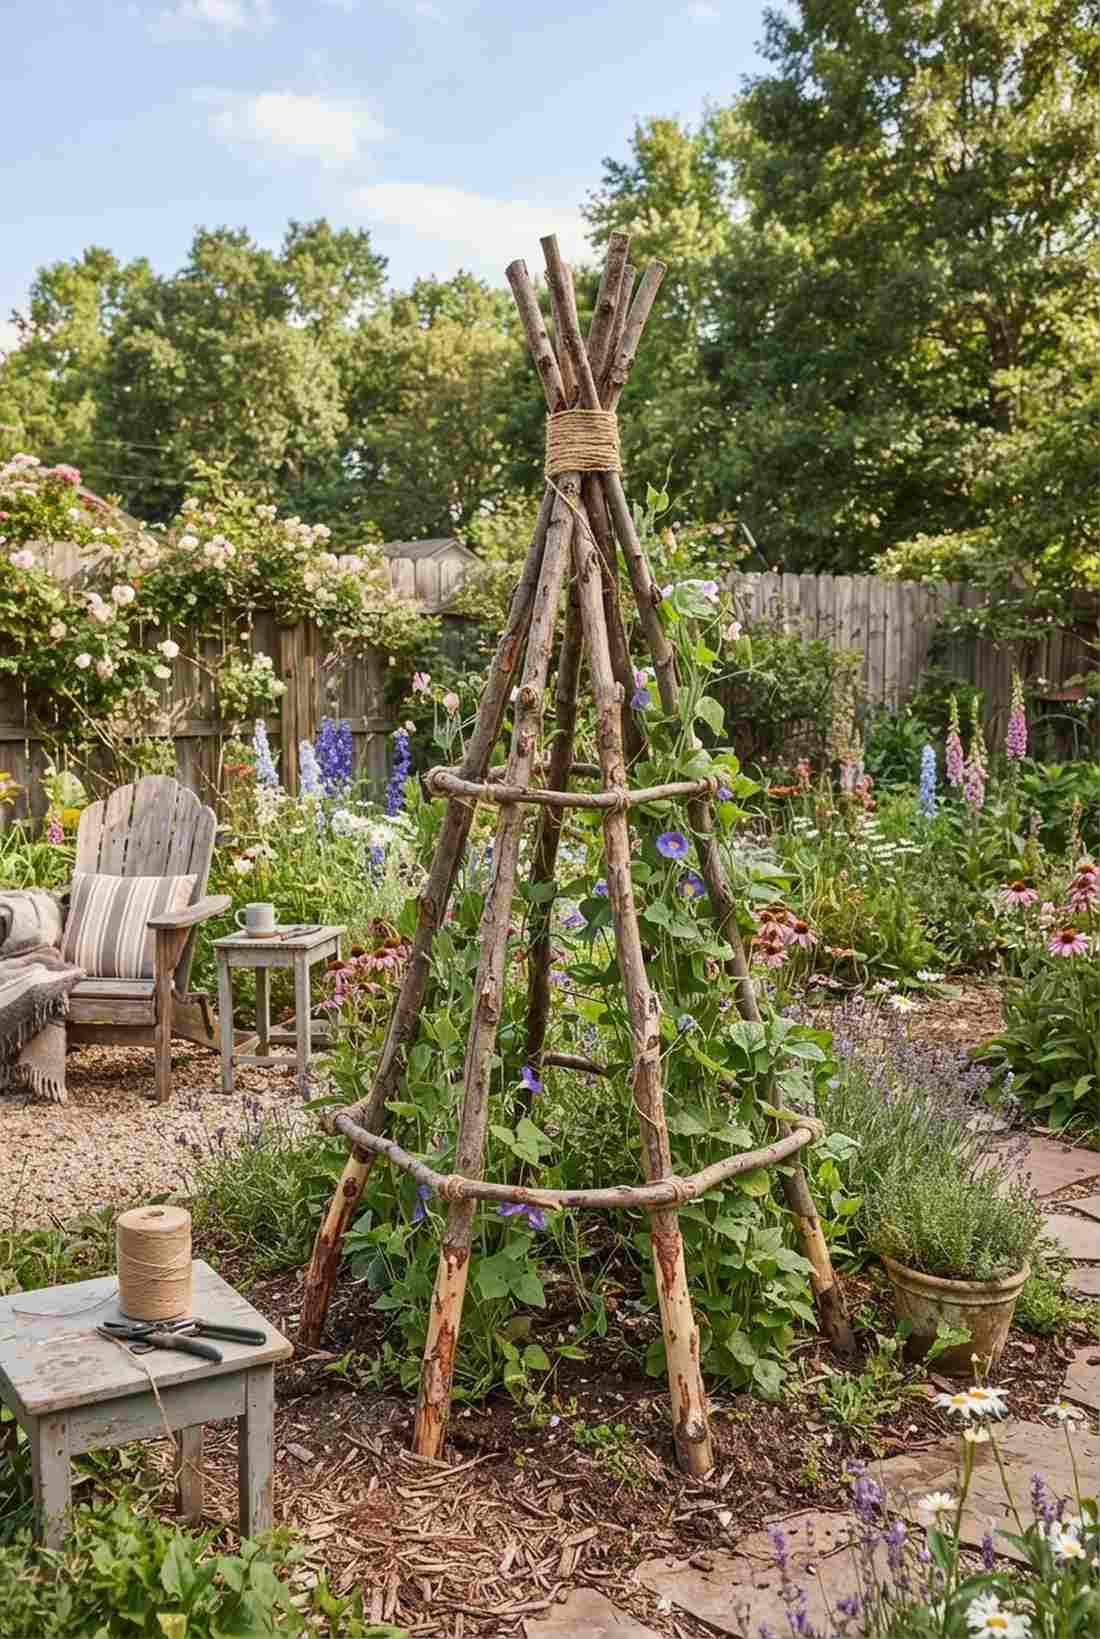
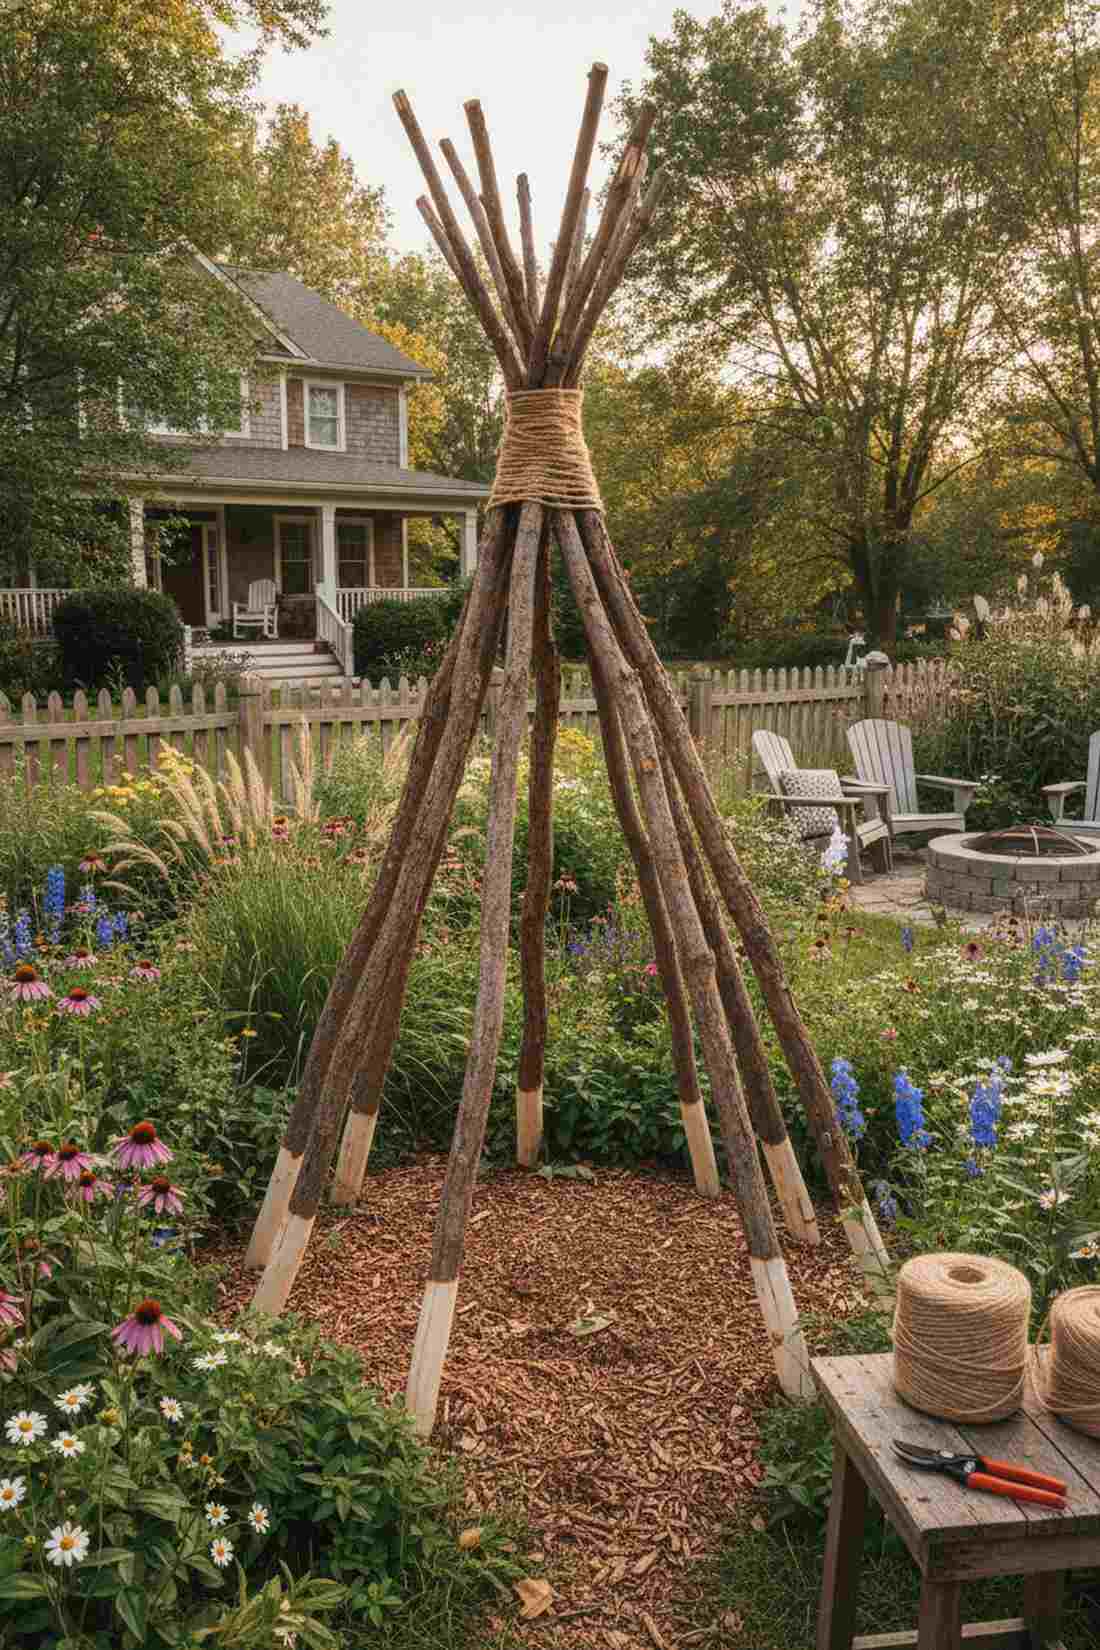
23. Branch Rustic Teepee
This natural foraging project feels like an homage to a serene, ancient woodland. Lashing together foraged hardwood tree branches builds a striking organic teepee, blending perfectly into informal cottage or wildflower gardens.
Store-bought plastic stakes look incredibly cheap, but using thick natural timber gives off high-end boutique nursery vibes for literally zero dollars. It’s an incredibly sustainable way to upcycle your winter pruning yard waste.
This is a completely free project if you have the branches. Save this eco-friendly tip for your spring cleanup!
- Key Materials: Pruned hardwood branches, natural jute
- Vibe / Style: Foraged woodland rustic
- Difficulty: Very simple crafting
- Budget Breakdown: Branches: $0 | Jute: $5
- Creator’s Tip: Strip the bark off the bottom 12 inches of the branches to drastically slow down soil rot.
- Smart Sourcing: natural thick jute twine (bulk spool) and heavy-duty bypass pruning shears.
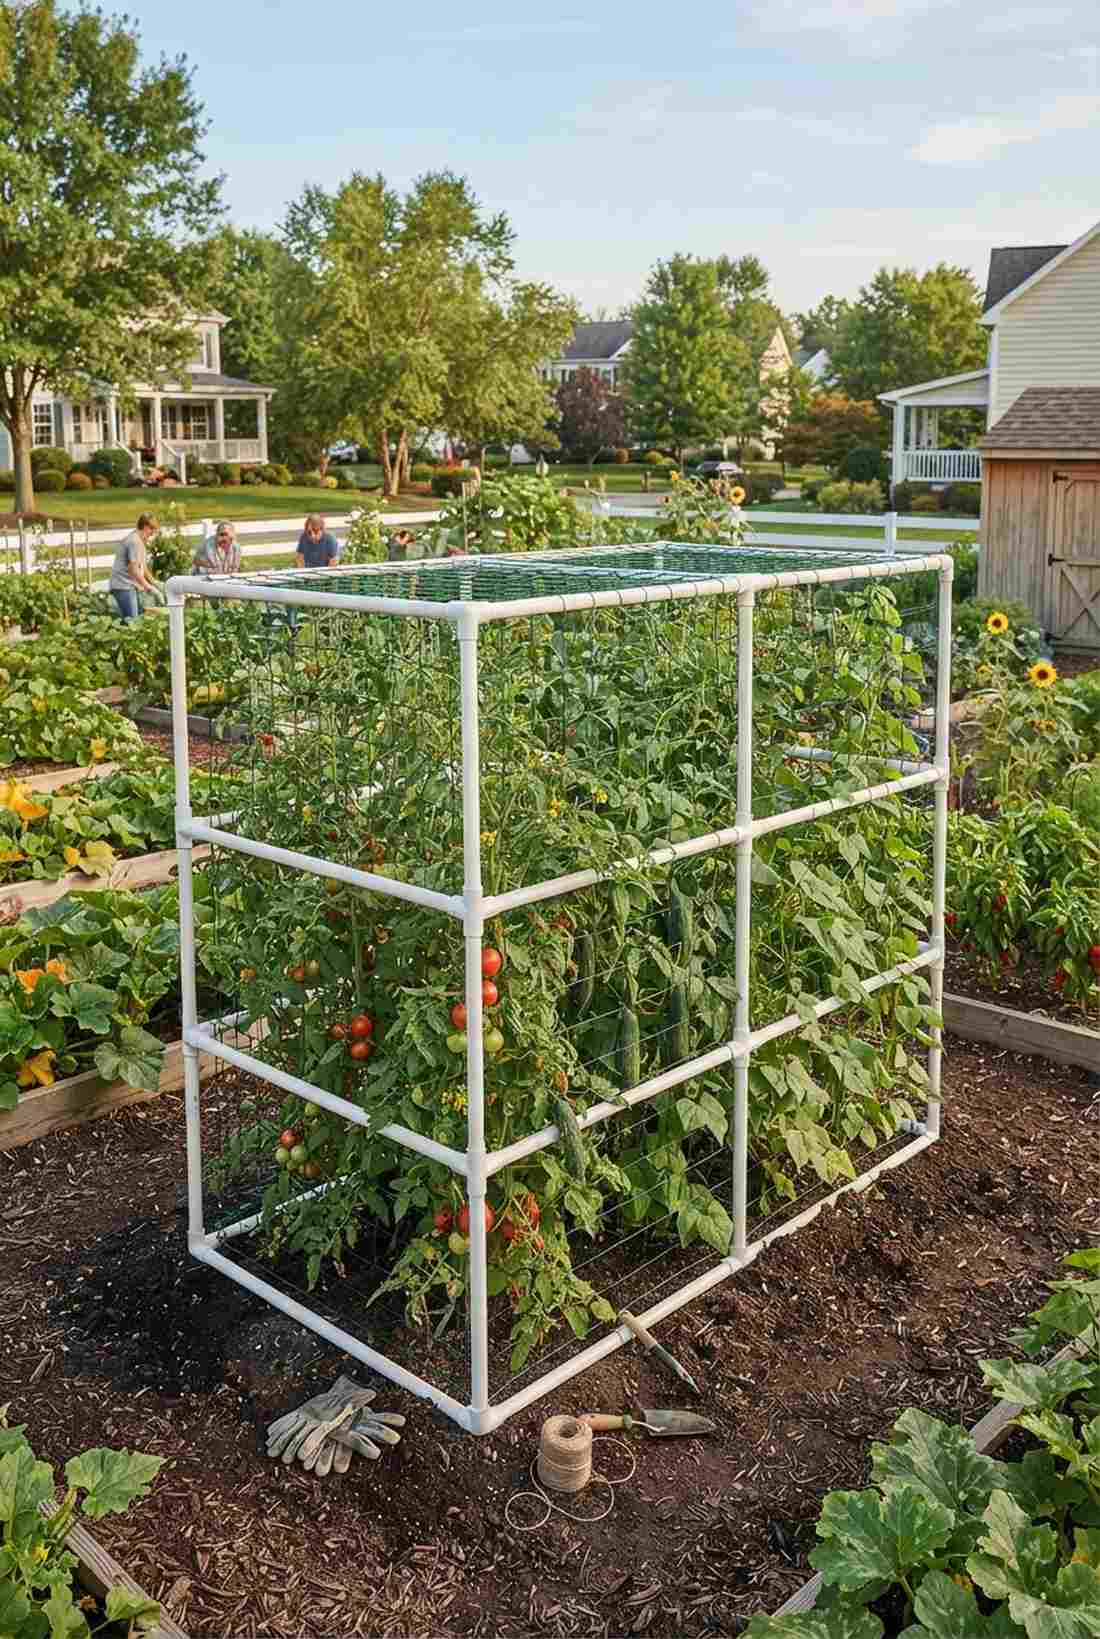
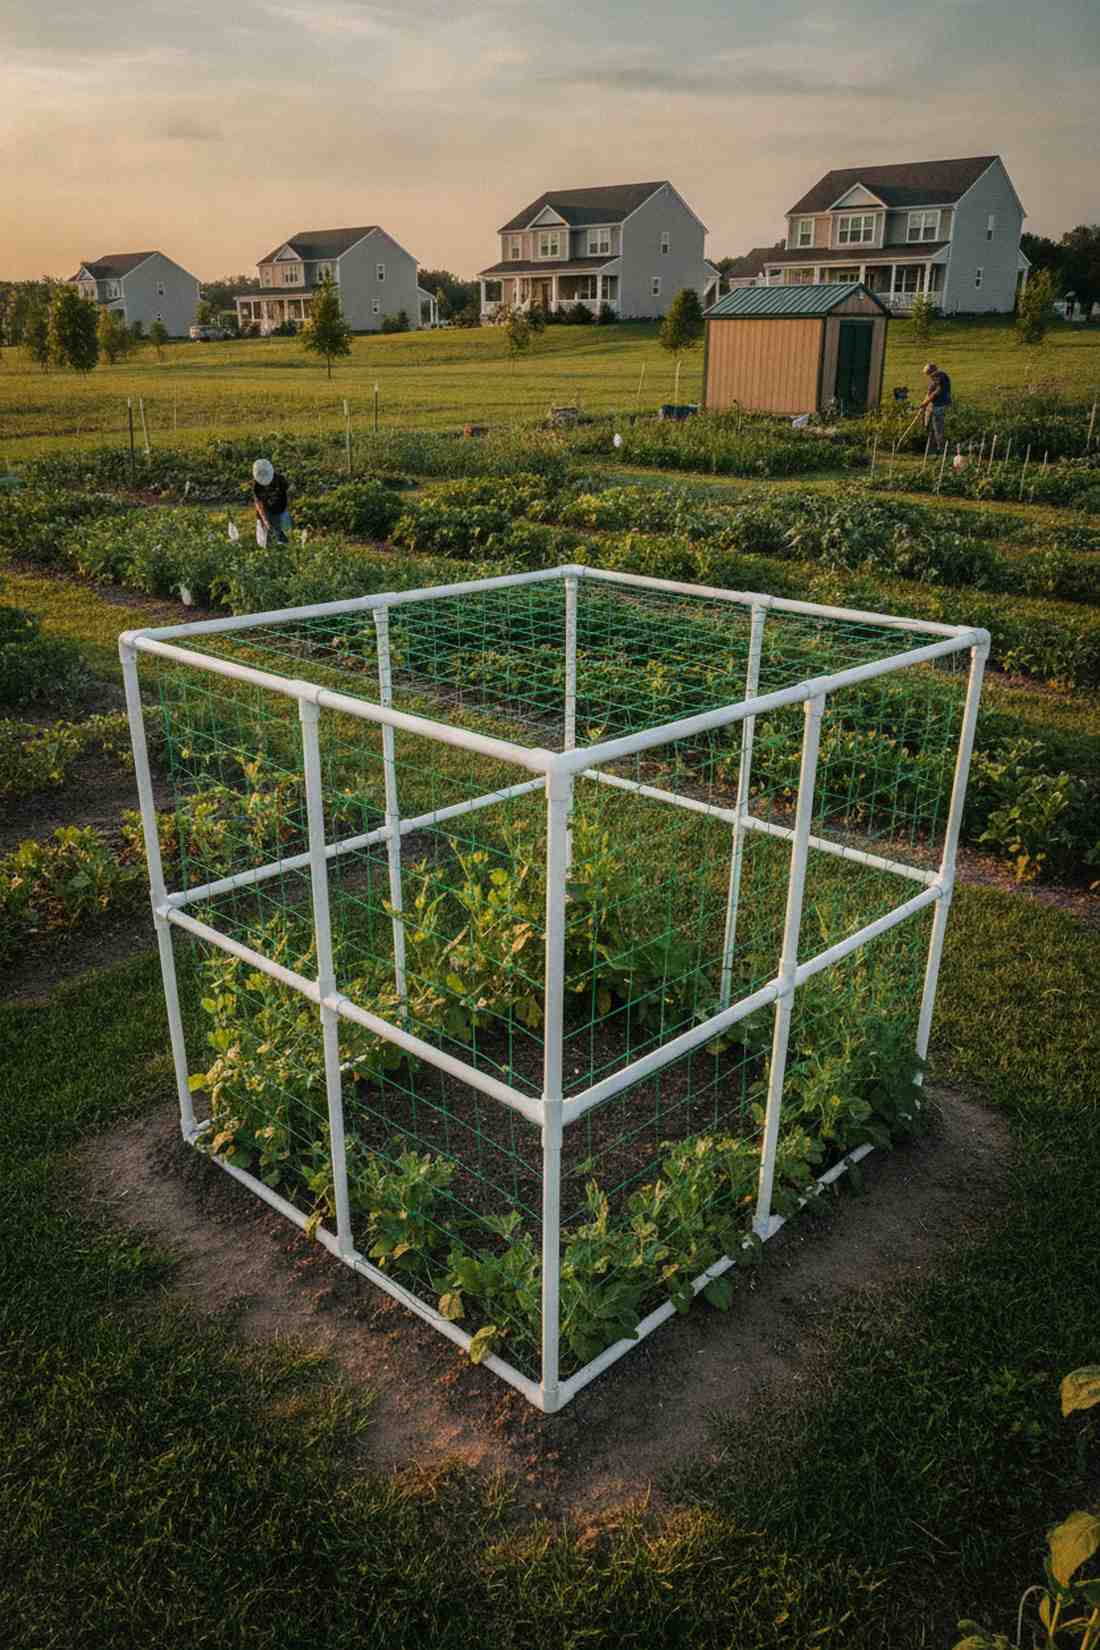
24. PVC Pipe Trellis Frame
Clicking this lightweight grid together feels like building adult garden legos. A modular Schedule 40 PVC frame provides endless customization, serving as the ultimate budget-friendly framework for massive community garden plots.
Wood rots and metal rusts, but this crisp white synthetic frame looks surprisingly clean and modern while lasting virtually forever. You can easily break it down in the winter to store it flat in a small shed.
You can build a huge frame for just $15–$30. It’s an ultra-practical weekend hack that saves serious cash.
- Key Materials: Schedule 40 PVC, nylon netting
- Vibe / Style: Clean modern utility
- Difficulty: Easy cut-and-fit assembly
- Budget Breakdown: Pipe/Fittings: $20 | Netting: $10
- Creator’s Tip: Don’t glue the joints! Leave them dry-fit so you can disassemble the entire thing when the snow falls.
- Smart Sourcing: PVC 3-way corner fittings (contractor pack) and heavy-duty nylon trellis netting.
You’ve seen all the structural builds, but this final repurposed idea is guaranteed to be the conversation starter at your next backyard barbecue.
25. Ladder Trellis Repurpose
Leaning this vintage piece against a wall feels beautifully nostalgic and uniquely yours. Using an old weathered wooden stepladder as a climbing frame creates instant shabby-chic charm, perfect for an eclectic patio corner.
Most upcycling projects look like trash, but sealing a genuinely distressed ladder gives a designer-level finish that antique lovers go crazy for. The built-in rungs serve as perfect natural tie-off points for wandering clematis or sweet peas.
Assuming you find a cheap thrift ladder, this costs maybe $10–$20 to seal and set up. Pin this for a gorgeous vintage focal point!
- Key Materials: Vintage wooden ladder, clear sealant
- Vibe / Style: Shabby-chic vintage patio
- Difficulty: Very easy upcycle
- Budget Breakdown: Thrift ladder: $15 | Sealant: $10
- Creator’s Tip: Dig the ladder legs slightly into the ground and secure the top to a fence to prevent it from blowing over.
- Smart Sourcing: matte finish outdoor wood sealant (spray) and vintage-style garden decor accents.
Conclusion
Successful vertical garden trellis integration balances massive structural potential with breathtaking, high-end aesthetics. From wall-mounted grids and raised beds with trellis incorporations to freestanding arches and smart DIY blueprints, these 25 unique setups maximize your outdoor yields without breaking the bank. Start by assessing your sunlight and picking the right commercial-grade kits or materials to ensure your heavy harvests don’t collapse. Transform your blank vertical space into an expensive-looking, highly productive sanctuary that dominates the neighborhood landscape season after season.
Frequently Asked Questions
What is the best trellis material for heavy climbing vegetables?
For massive yields, skip the cheap woven string and invest in galvanized welded wire mesh (4×4 or 6×6 inch openings) paired with pressure-treated structural posts. Premium hardware distributes extreme weight far better, ensuring your heavy squash, melons, and indeterminate tomatoes don’t crash down. If you want a contractor-level finish that resists rust, always look for bulk packs of UV-coated ties and pre-cut galvanized panels to save time.
How far should trellis netting be spaced from a wall or fence?
To avoid severe moisture rot on your siding, maintain a strict 3-6 inch clearance using heavy-duty standoff brackets. This premium structural gap ensures essential airflow, drastically reducing fungal diseases on your plants while allowing you easy access for clipping and harvesting. Investing in rust-proof spacer kits is cheaper than replacing water-damaged brick or wood down the road.
Can I use the same trellis for different crops each season?
Absolutely, provided you use a smart sanitation routine to avoid devastating disease carryover. After tearing down dead vines, treat the structure with a quick 10% bleach or hydrogen peroxide spray. By combining a clean frame with high-quality raised beds with trellis layouts, you can aggressively rotate plant families—like swapping heavy-feeding tomatoes for nitrogen-fixing pole beans—to maximize your soil health.
What is the minimum height for a productive vegetable trellis?
For a truly high-yield setup, aim for an overhead reach of 5-8 feet. While compact varieties survive on cheap 4-foot stakes, indeterminate tomatoes and vigorous beans require a towering 7-8 foot canopy to hit their maximum production potential. Remember, taller frames demand premium base anchoring, so secure your posts properly to prevent catastrophic wind blowout mid-summer.
Should raised beds with trellis be oriented north-south or east-west?
To maximize your sun exposure and prevent self-shading, orient raised beds with north-side trellis systems strictly east-west. This exact layout guarantees your vertical climbers thrive while your low-lying bed crops still soak in full southern light. If you opt for central dual-sided frames, a north-south alignment is best so both faces of the massive green wall get even morning and afternoon sun.