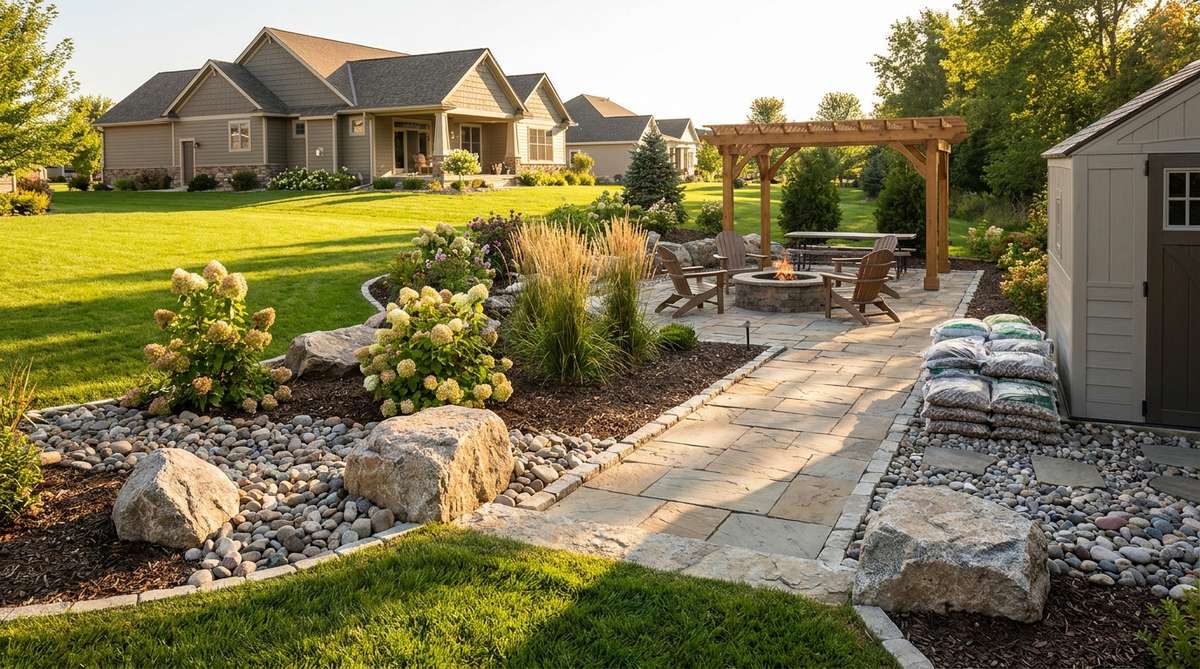
Strategic outdoor decor rocks instantly upgrade any basic yard into a premium landscape. Sourcing bulk materials and pre-cut edging saves hundreds on expensive masonry work. This exact blueprint creates a flawless high-end aesthetic on a weekend budget.
Design Snapshot Key Principles
- Scale Balance: Mix rock sizes to create depth—use larger boulders as anchors and smaller stones for transitions
- Natural Flow: Arrange stones to mimic organic formations rather than rigid, uniform patterns
- Color Harmony: Select rock tones that complement existing hardscape and plant palette
- Functional Beauty: Position rocks to solve drainage issues, prevent erosion, and reduce weed growth while enhancing aesthetics
Border and Edging Solutions With Decorative Stone
Defining garden boundaries with rock creates clean transitions between lawn and planted areas. These features prevent grass encroachment while establishing professional-looking perimeters that frame your landscape design.
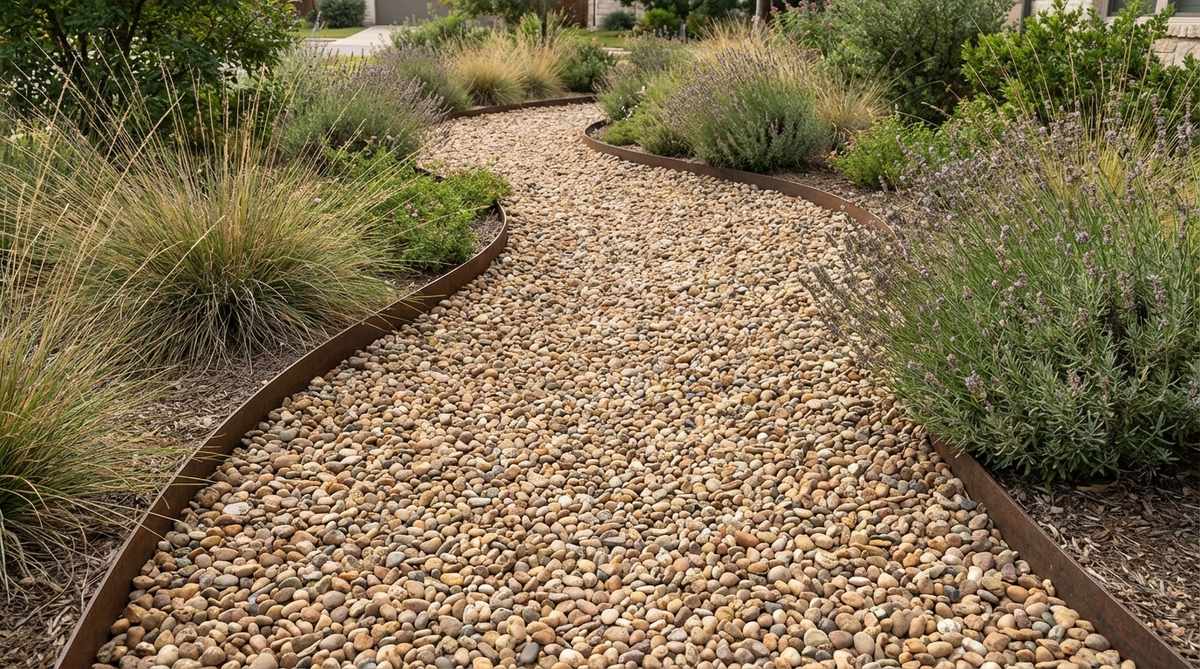
1. River Rock Garden Bed Edging
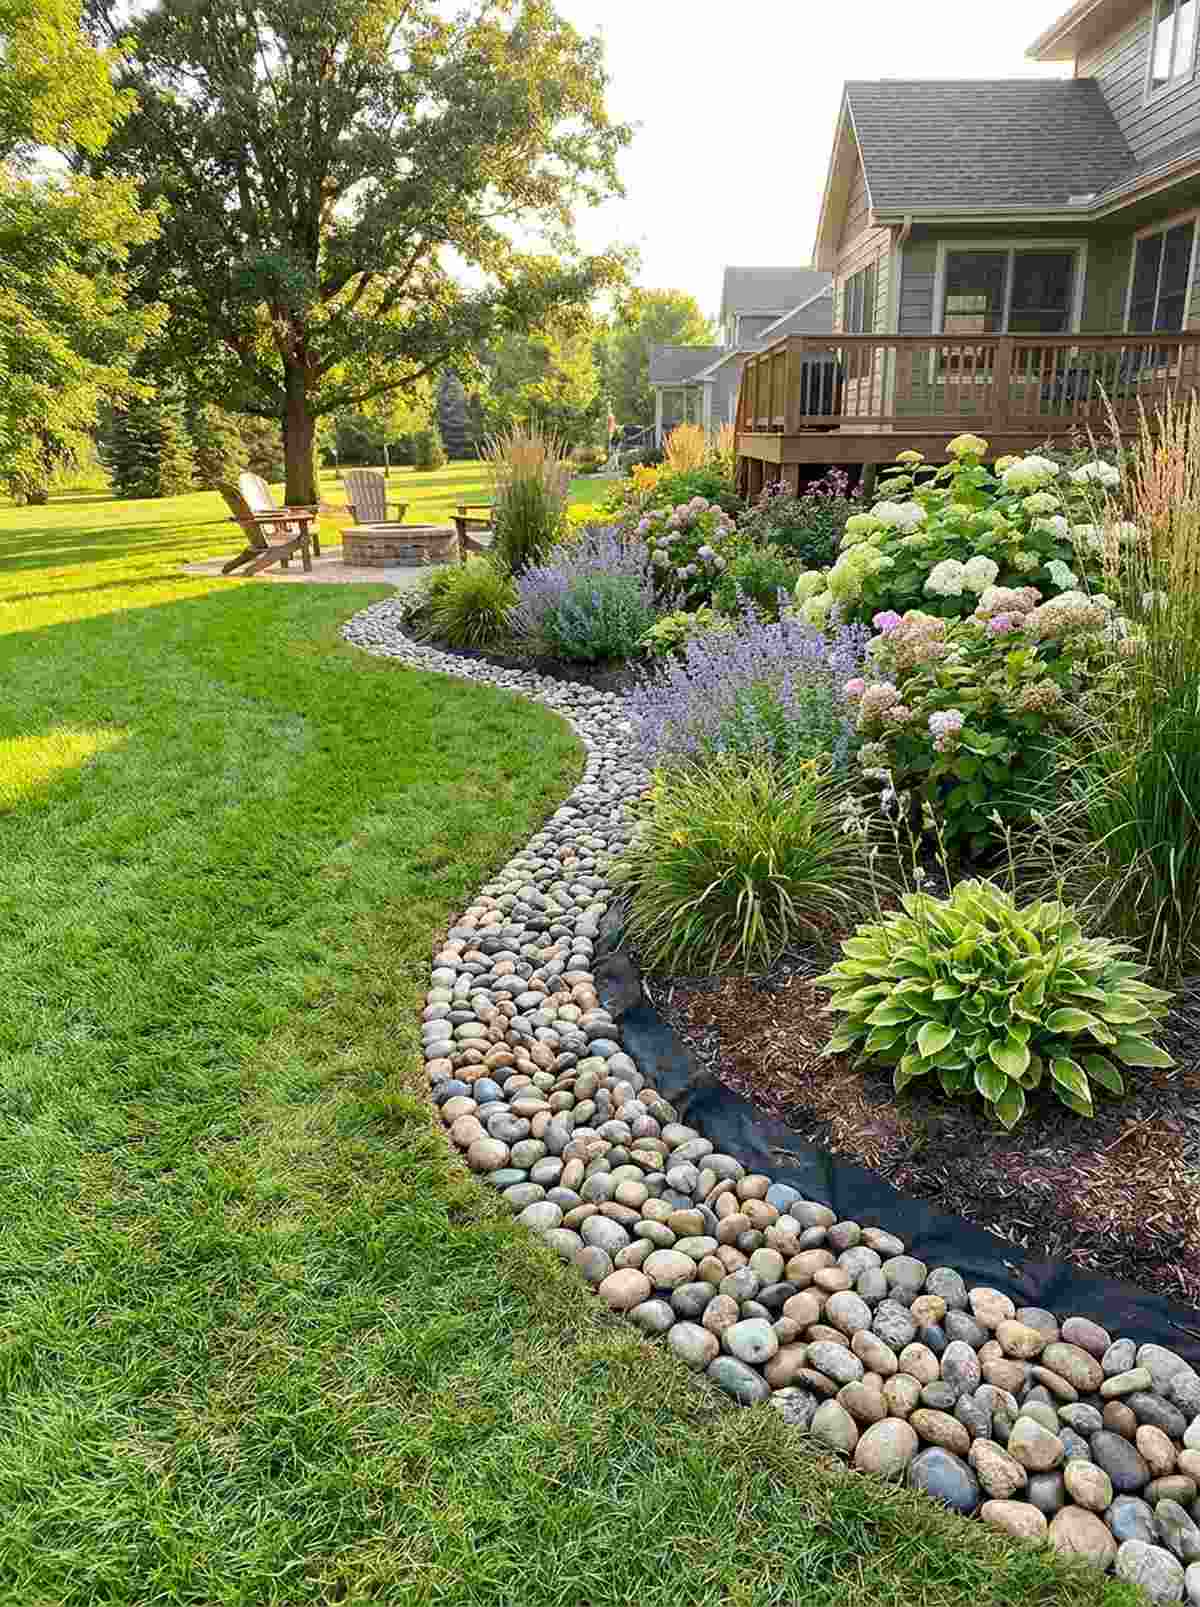
This layout feels like a tiny hidden forest you accidentally discovered on a morning walk. Using smooth river stones works exceptionally well for framing front yard flower beds or softening harsh driveway transitions.
Skipping expensive masonry entirely delivers a surprisingly premium look that requires zero cement mixing. If you incorporate professional landscape edging kits, the stones stay perfectly locked in place through heavy rain seasons without migrating into the grass.
You can easily pull this off for around $25–$45 depending on the perimeter size. Pin this brilliant layout to your spring yard makeover board!
- Key Materials: Smooth river rocks, heavy-duty landscape fabric
- Vibe / Style: Organic cottage garden charm
- Difficulty: Beginner-friendly afternoon project
- Budget Breakdown: Stone: $30 | Barrier: $15
- Creator’s Tip: Dig a shallow two-inch trench first so the bottom layer of rocks sits slightly below the grass line for easy mowing.
- Smart Sourcing: Grab a pre-cut heavy-duty weed barrier roll and polished river pebbles (bulk pack) for the best value.
2. Flagstone Border Strips

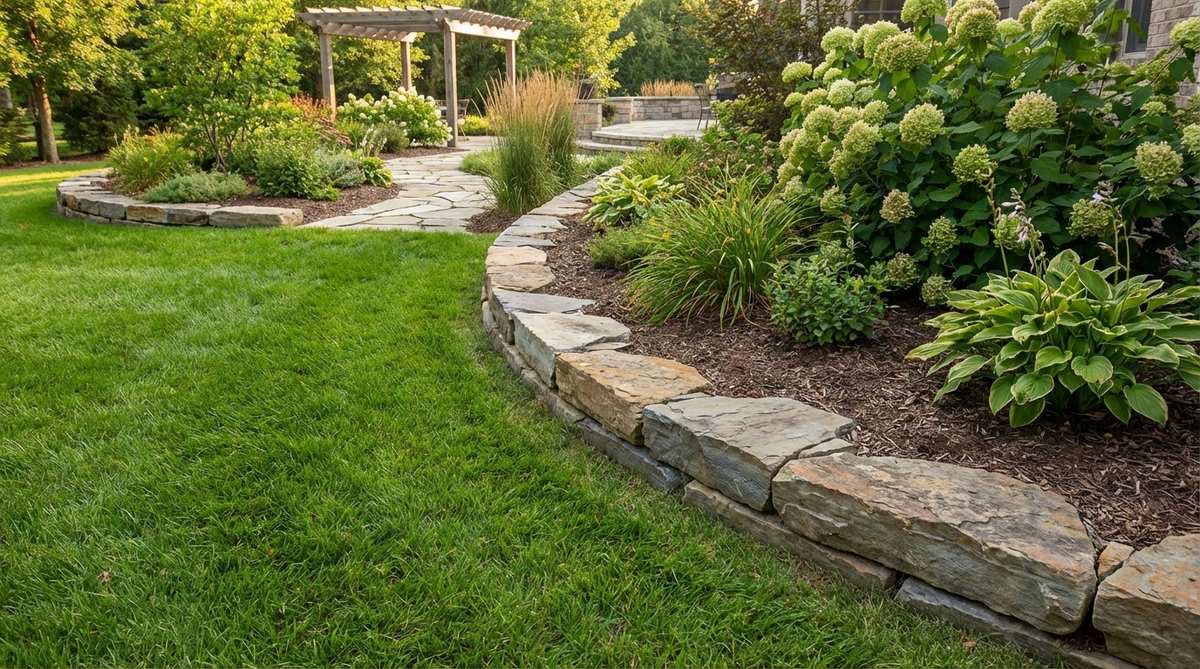
Adding these rugged edges feels straight out of an English countryside manor. A sequence of irregular flagstone borders is absolutely perfect for dividing lush turf from delicate ornamental planting zones.
Ditching standard plastic borders for natural cleft stone gives a designer-level finish that instantly boosts curb appeal. Upgrading with premium garden stone supplies ensures your borders won’t crack or fade under harsh summer UV rays.
Expect to spend roughly $40–$60 for a highly durable, custom-cut appearance. It’s a fast upgrade that completely changes the vibe of your exterior.
- Key Materials: Medium flagstone pieces, leveling sand
- Vibe / Style: Rustic estate elegance
- Difficulty: Moderate lifting required
- Budget Breakdown: Flagstone: $45 | Sand base: $10
- Creator’s Tip: Alternate varying thicknesses and stand them vertically in the trench for a thicker, more commanding visual boundary.
- Smart Sourcing: Use a commercial-grade leveling sand starter bag and pre-sorted natural flagstone edging strips.
3. Crushed Granite Edging
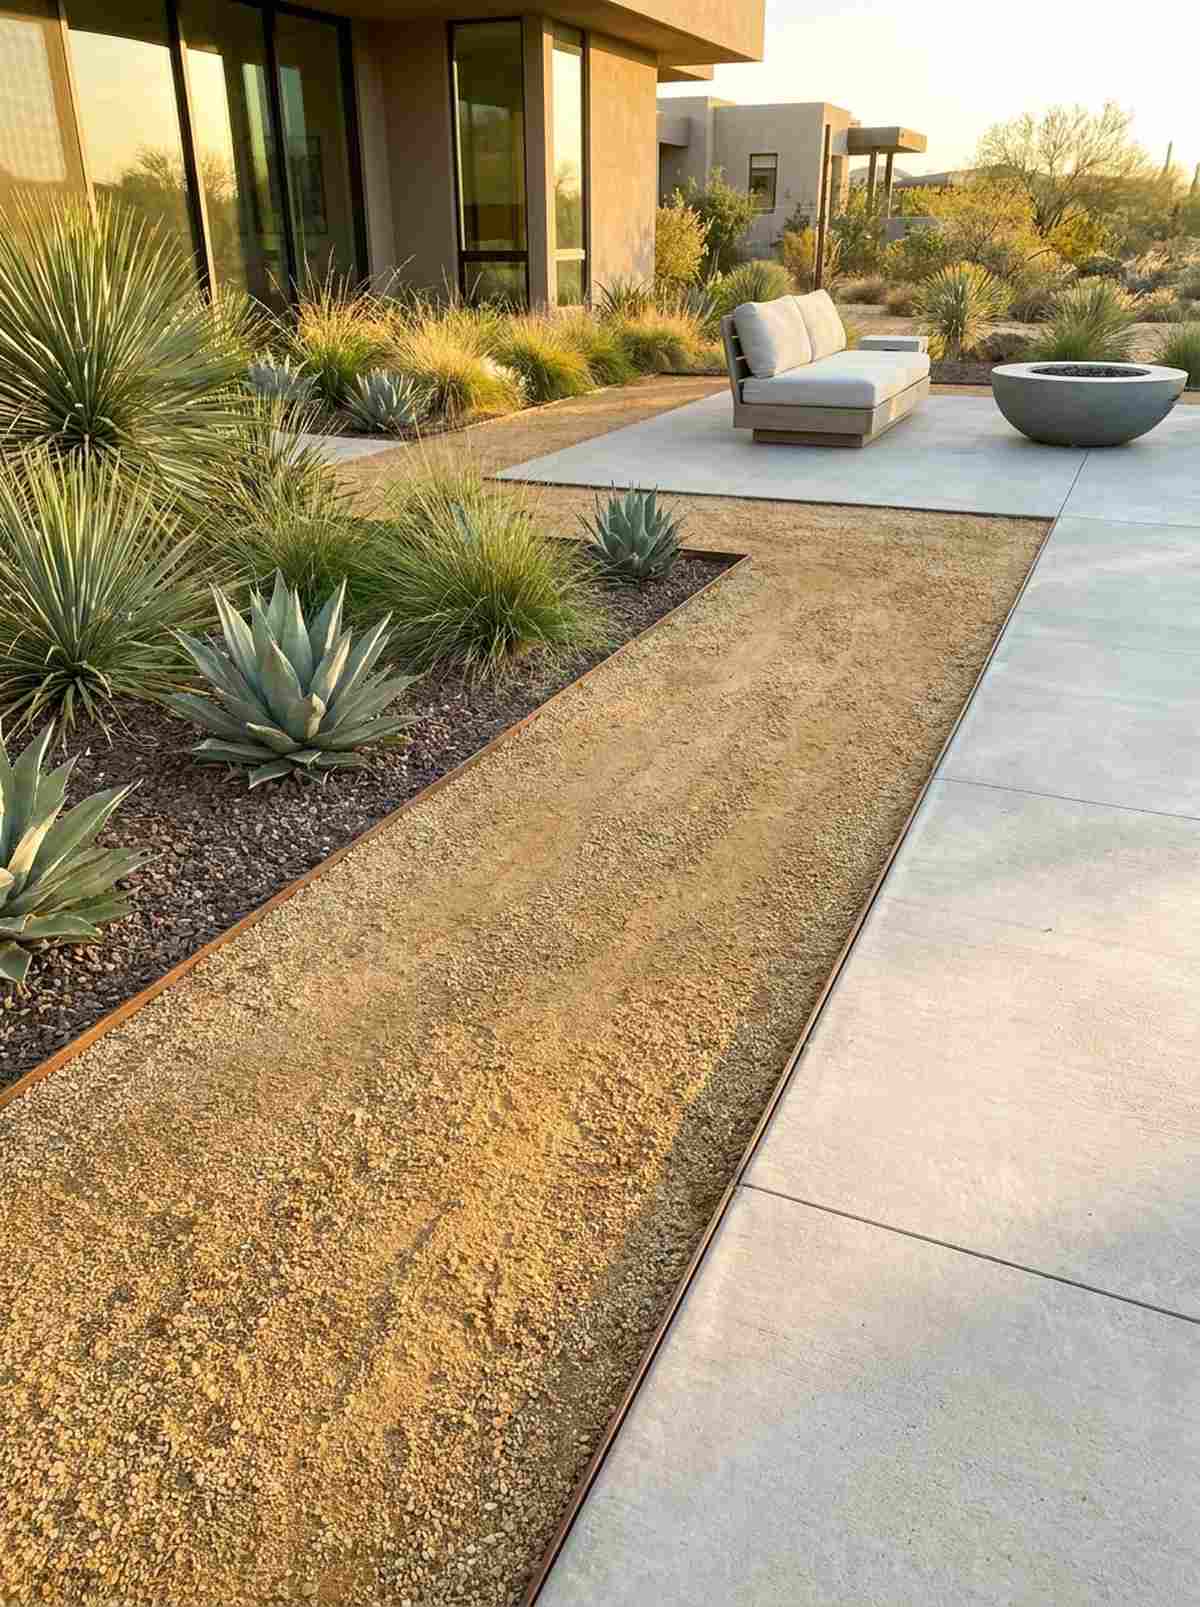
This minimalist approach brings a sleek, desert-spa energy to your outdoor space. Pouring compacted granite strips is the ultimate use-case for separating modern geometric garden beds from concrete patios.
Applying this raw material instead of mulch looks far more expensive than it is while offering unmatched weed control. Sneaking in a high-quality binder spray prevents tracking and gives that highly coveted architectural finish.
You can execute this ultra-clean border for about $20–$35 per section. Save this to your DIY modern landscaping board for weekend inspiration!
- Key Materials: Decomposed granite, steel border edging
- Vibe / Style: Sleek contemporary minimalism
- Difficulty: Very simple spreading
- Budget Breakdown: Granite: $15 | Steel edging: $20
- Creator’s Tip: Tamp the granite down when slightly wet to lock the particles together into a firm, walkable crust.
- Smart Sourcing: Invest in flexible steel landscape edging (rust-proof) and pre-mixed decomposed granite bags.
4. Stacked Stone Retaining Borders
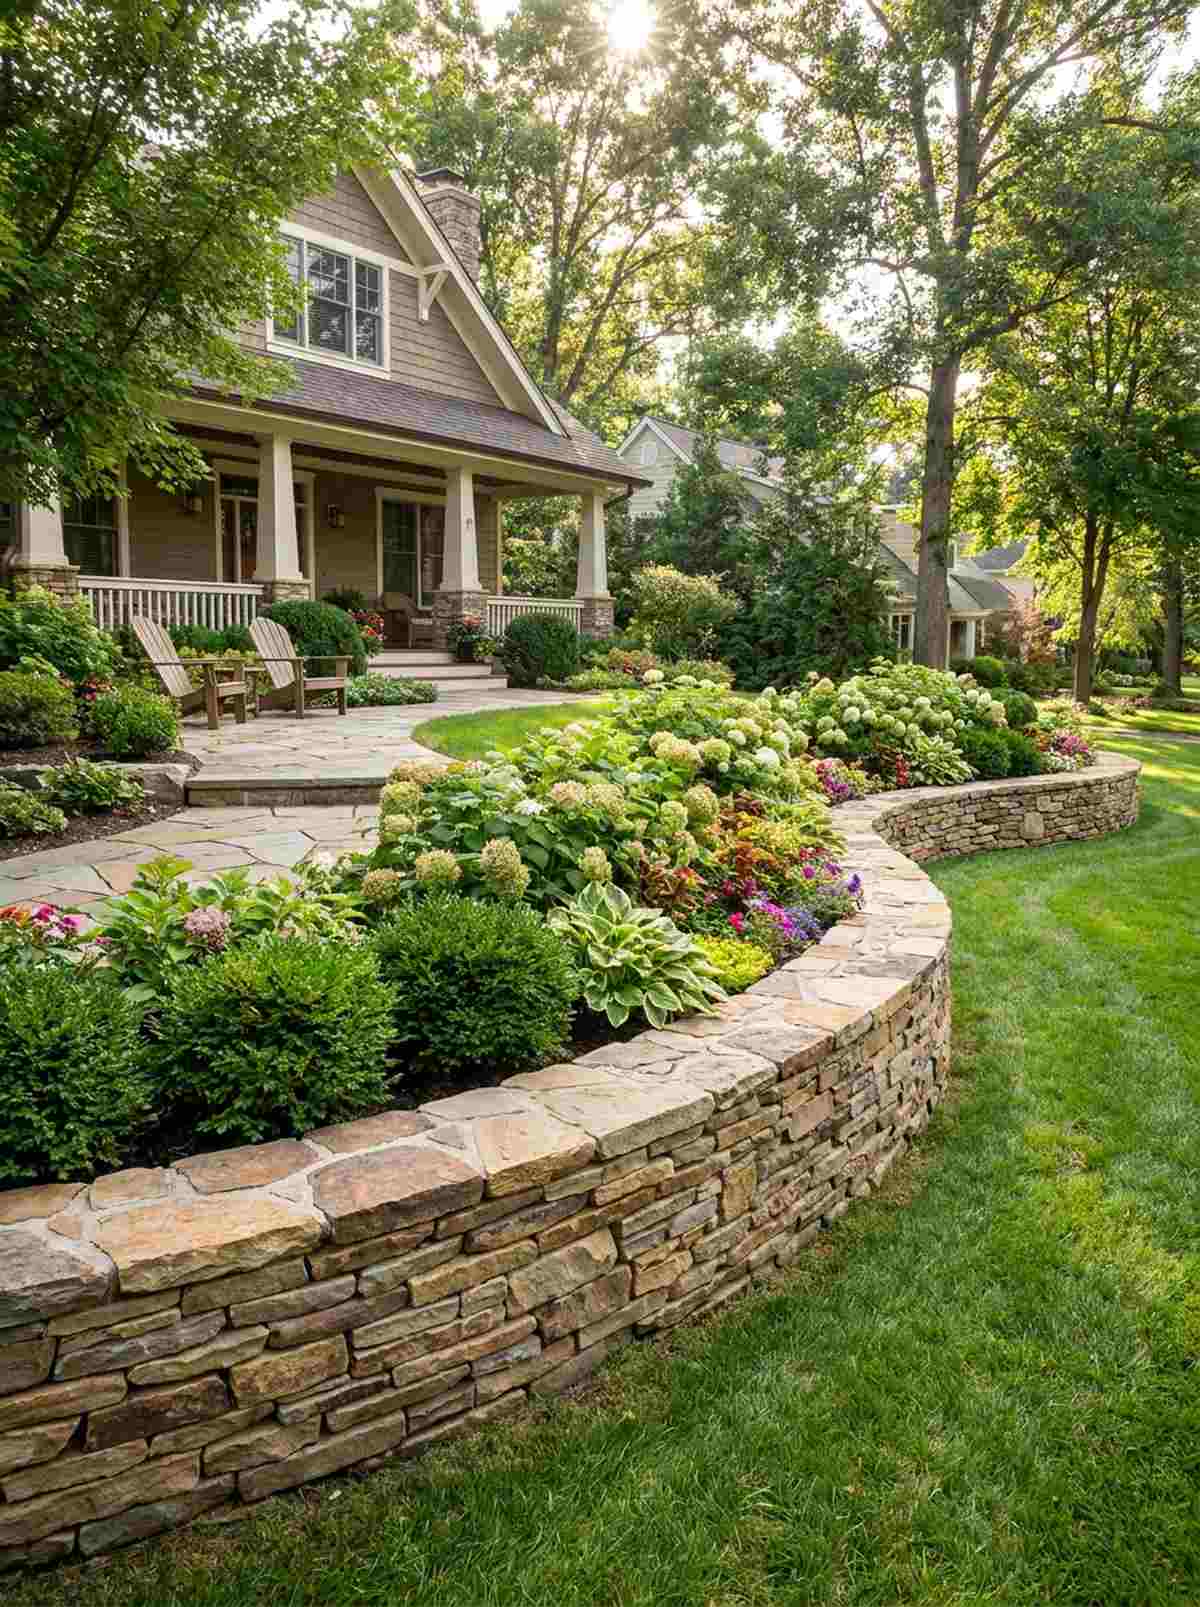
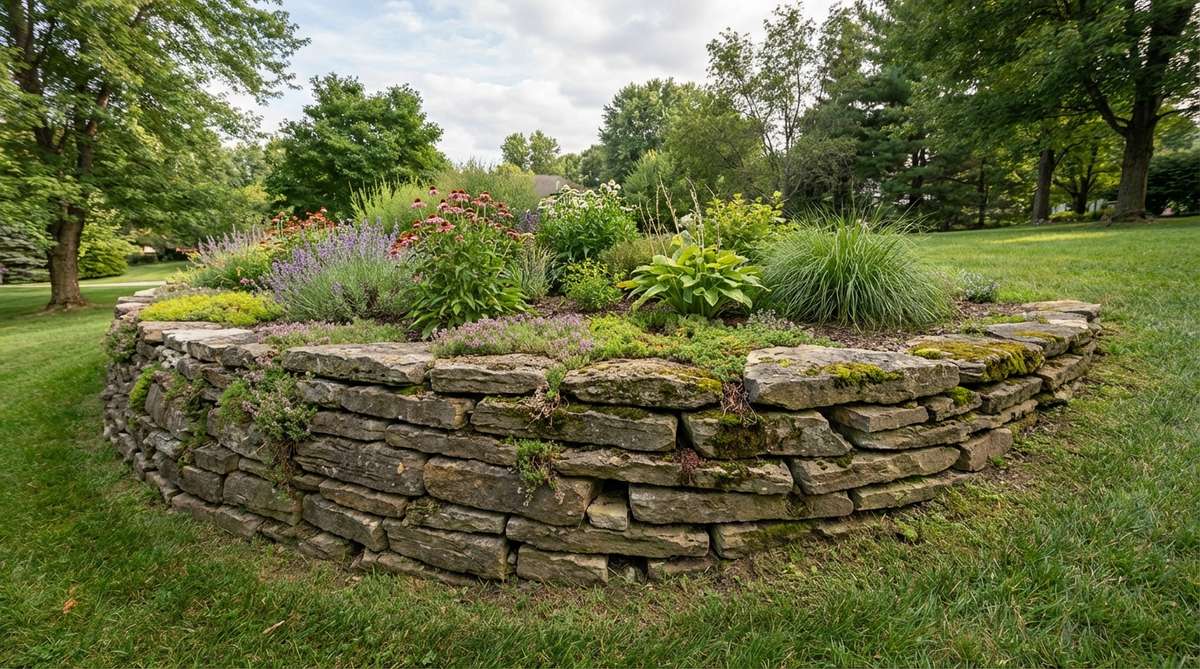
Walking past this setup feels like exploring the grounds of a historic stone castle. Building a low retaining rock wall works flawlessly for leveling out sloped front yards or elevating a standout garden bed.
Using dry-stack techniques completely eliminates mortar mess while mimicking a high-end contractor installation. Utilizing professional retaining wall kits or uniform fieldstones guarantees the structure remains safe and visually striking for decades.
This robust architectural feature usually costs around $80–$120. Highly recommended for adding serious three-dimensional depth to flat yards.
- Key Materials: Flat fieldstone, crushed gravel base
- Vibe / Style: Classic architectural structure
- Difficulty: Weekend project requiring patience
- Budget Breakdown: Stones: $90 | Base gravel: $20
- Creator’s Tip: Always tilt the stones slightly backward toward the soil to naturally resist the pressure of wet dirt.
- Smart Sourcing: Pick up a heavy-duty deadblow mallet and palletized flat fieldstones (bulk delivery).
This next setup is ridiculously cheap but looks like a $1,000 custom masonry display. Most people ignore it…
Pathway and Ground Features Using Outdoor Decor Rocks
Rock pathways guide foot traffic while reducing lawn maintenance in high-use corridors. Designers layer different stone types to achieve texture, color variation, and proper drainage that prevents muddy walkways.
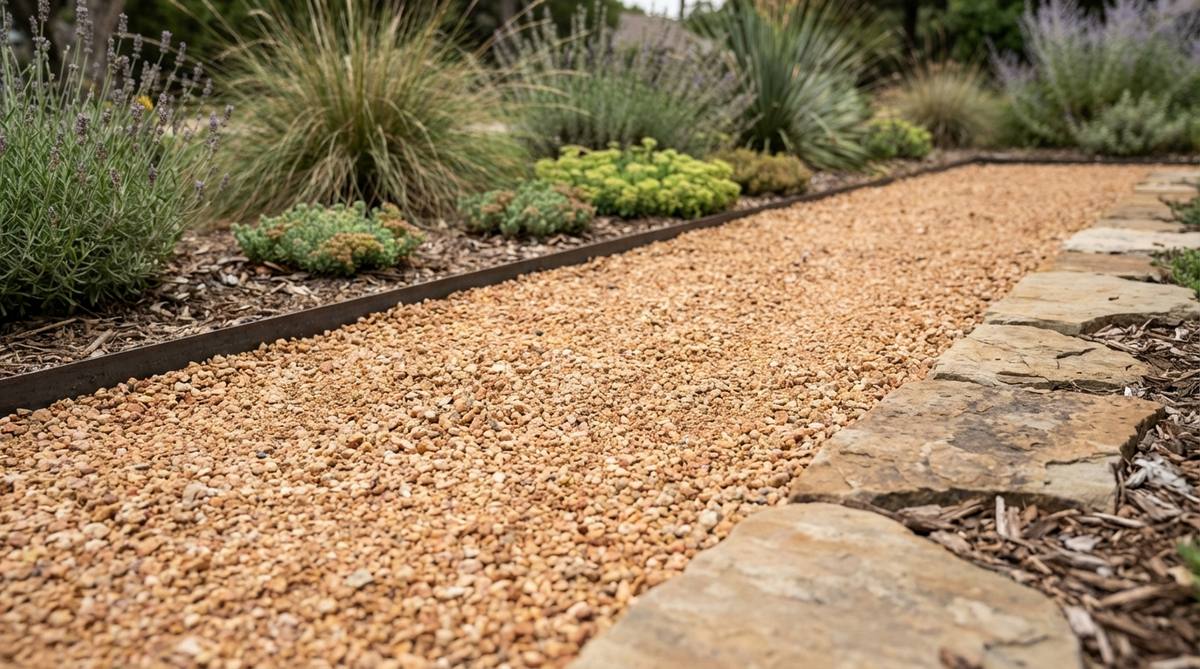
5. Pea Gravel Pathways
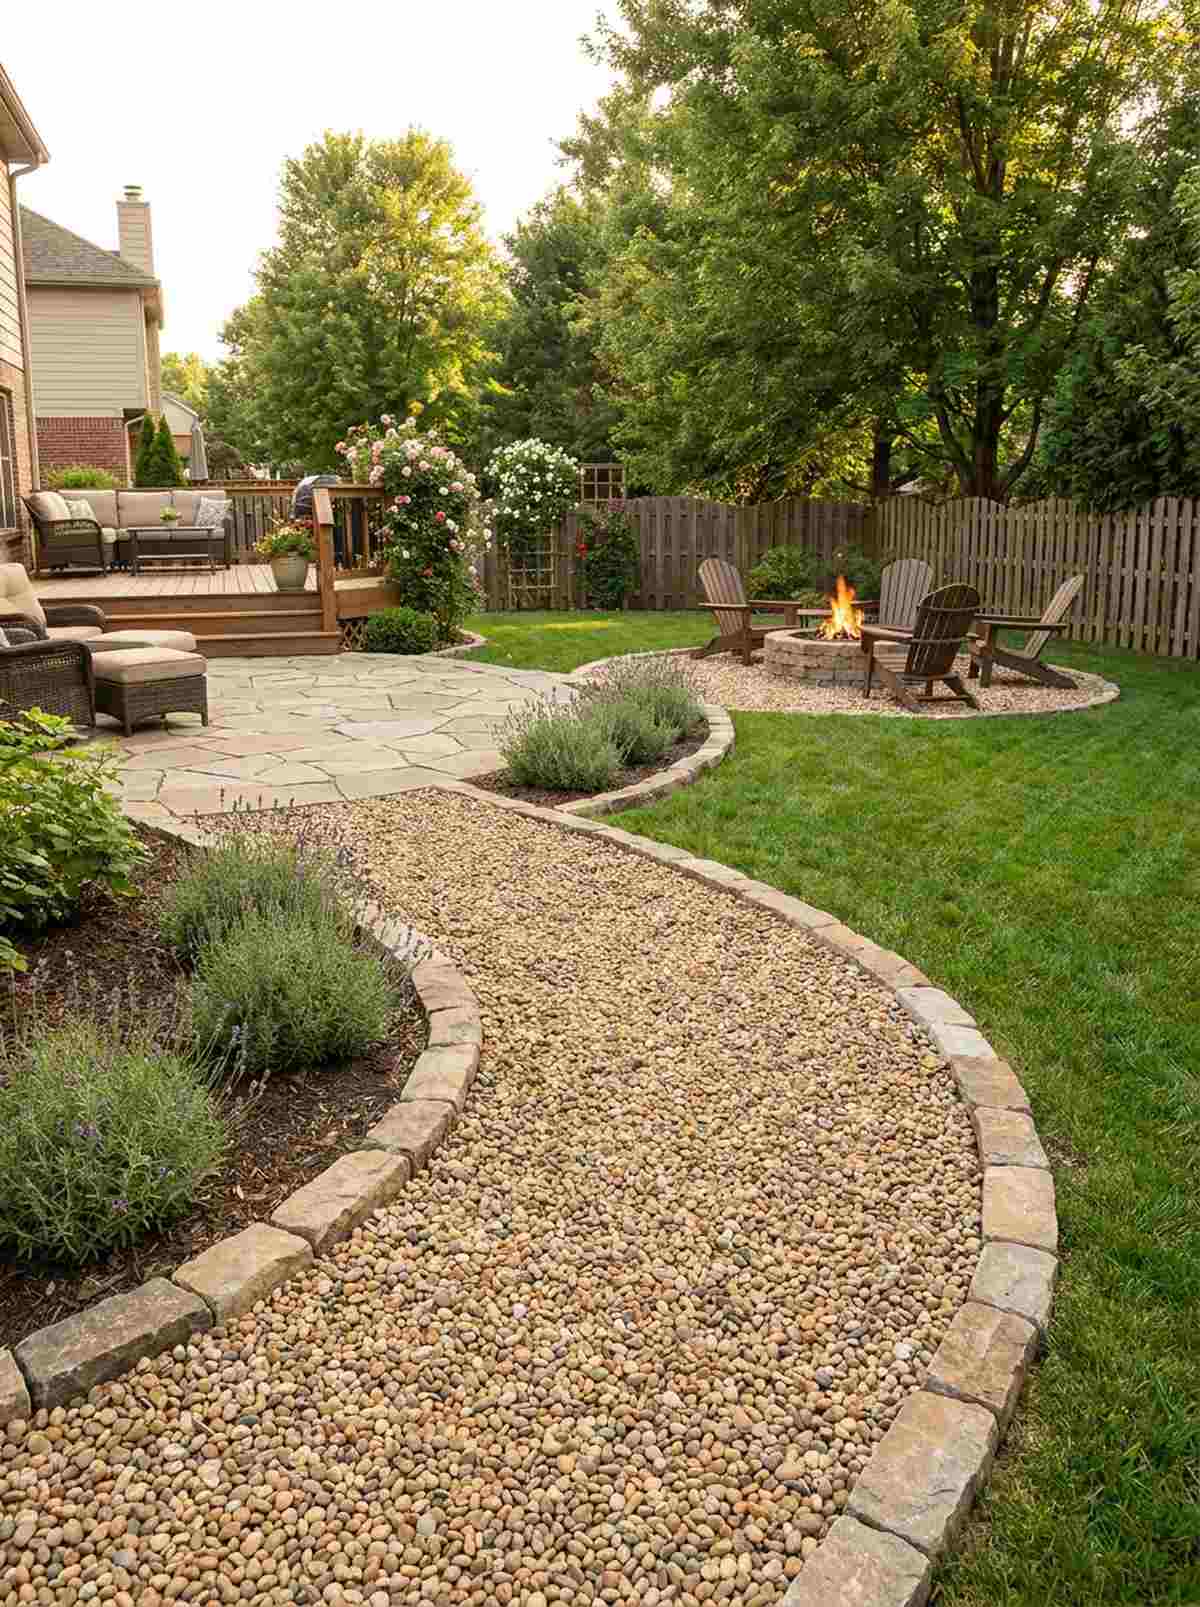
Listening to the crunch underfoot feels deeply relaxing, like strolling through a European botanical garden. Installing a curved pea gravel walkway is the perfect use-case for connecting a back patio to a hidden fire pit zone.
Avoiding poured concrete in favor of loose stone delivers a highly sought-after French countryside aesthetic for pennies. Taking advantage of bulk pathway gravel delivery slashes material costs and ensures you have enough depth to prevent bare spots.
You can construct a gorgeous 10-foot path for around $40–$60. Pin this layout if you need a quick backyard walkway upgrade!
- Key Materials: Pea gravel, robust border material
- Vibe / Style: French country courtyard
- Difficulty: Easy but labor-intensive
- Budget Breakdown: Gravel: $35 | Underlayment: $15
- Creator’s Tip: Keep the gravel depth strictly to 2-3 inches; anything deeper makes walking feel like trudging through deep sand.
- Smart Sourcing: Grab commercial-grade landscape pins (bulk pack) and a honeycomb gravel grid starter kit.
6. Bluestone Stepping Stone Paths
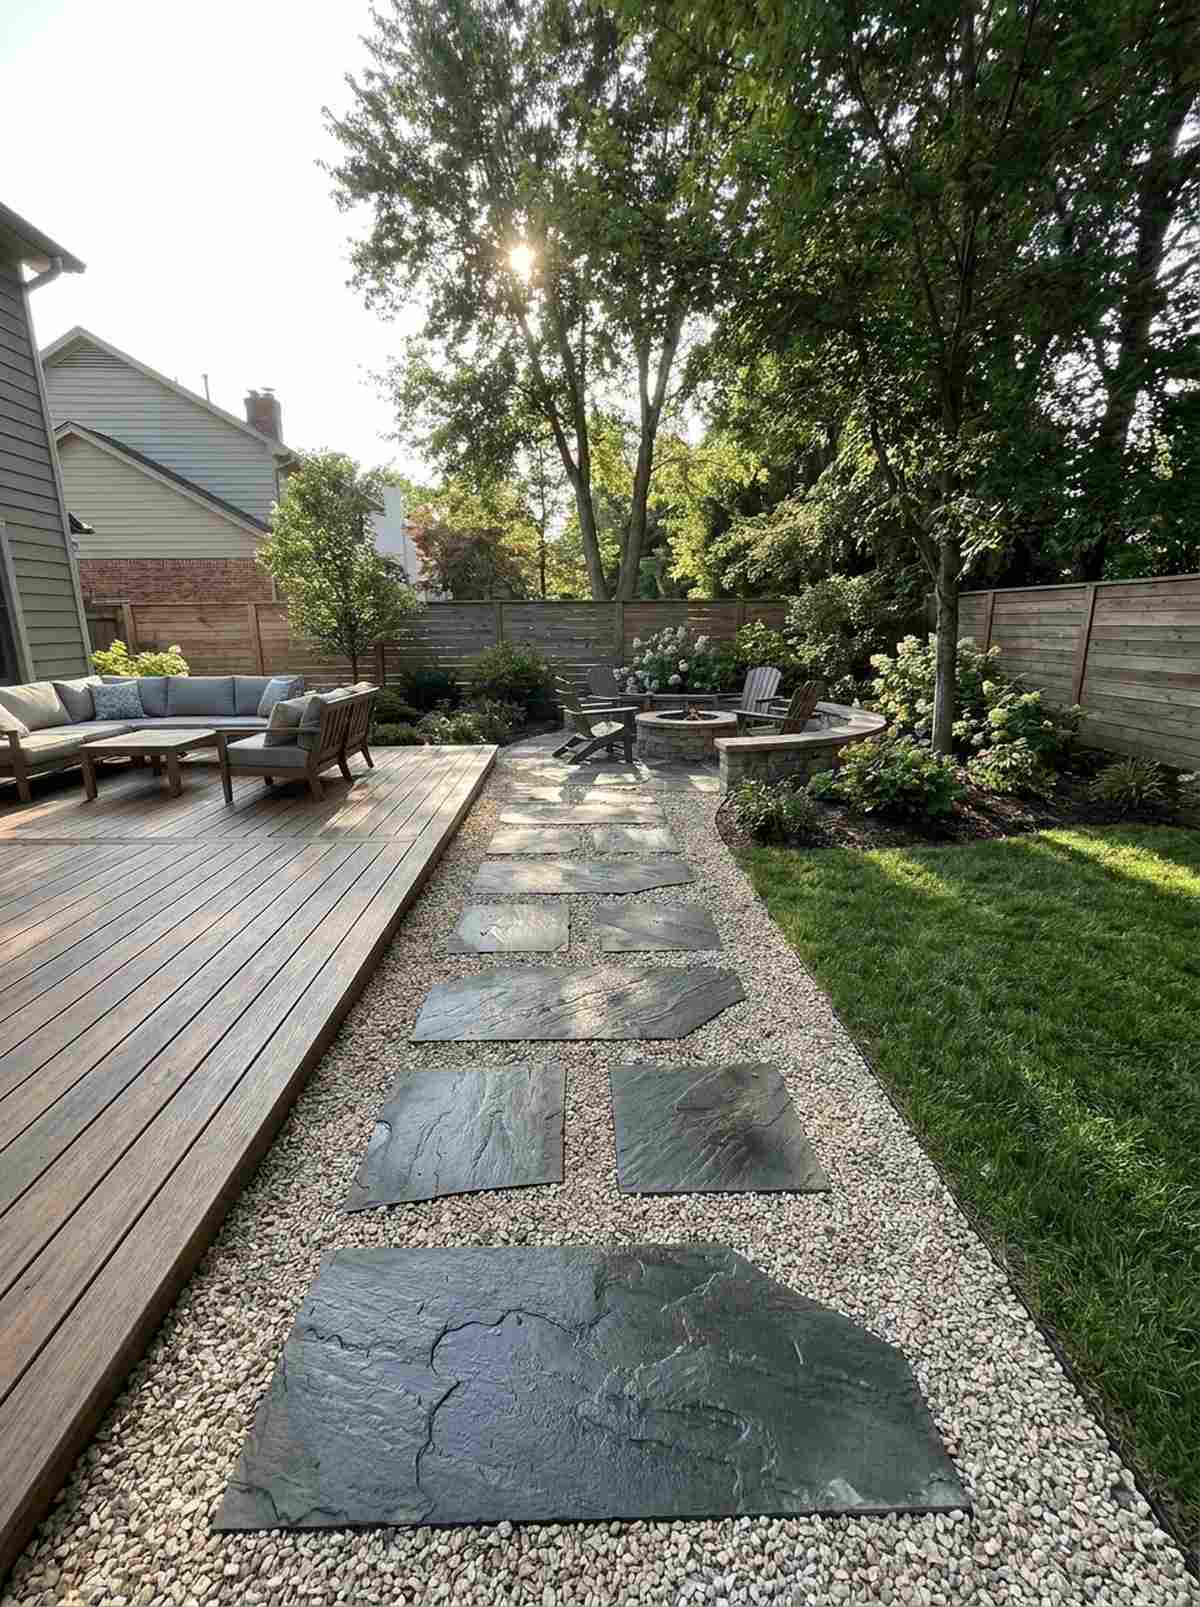
This moody, elegant layout creates a vibe that feels both ancient and perfectly modern. Dropping large bluestone pavers into crushed rock works beautifully for side yard access paths where grass refuses to grow.
Contrasting dark stone against lighter gravel creates a stunning visual geometry that tricks the eye into seeing a larger space. Sneaking in specialized leveling sand underneath ensures the heavy slabs never wobble or sink unevenly after a rainstorm.
Expect this premium pathway to run about $75–$110. It’s a permanent aesthetic upgrade that instantly elevates property value.
- Key Materials: Bluestone slabs, contrasting gravel
- Vibe / Style: Modern woodland retreat
- Difficulty: Moderate, requires leveling
- Budget Breakdown: Pavers: $80 | Base rock: $20
- Creator’s Tip: Space the center of each stone exactly 24 inches apart to perfectly match a natural human walking stride.
- Smart Sourcing: Look for pre-cut thermal bluestone pavers and UV-resistant joint stabilizing sand.
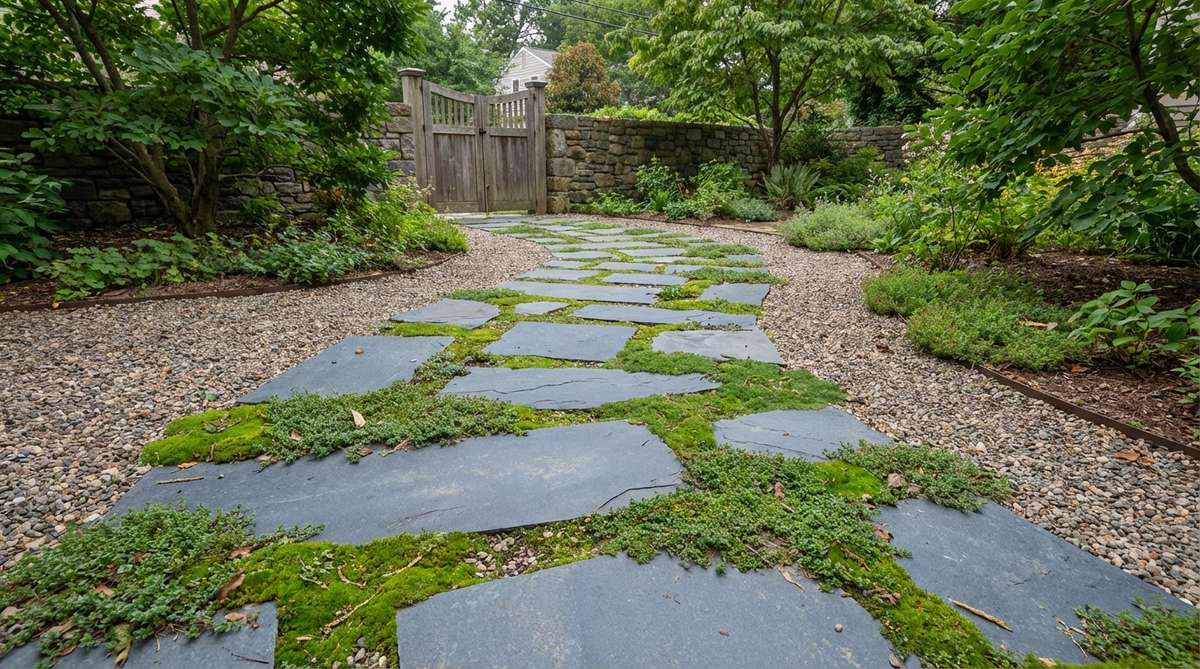
7. Mixed Stone Mosaic Walkways
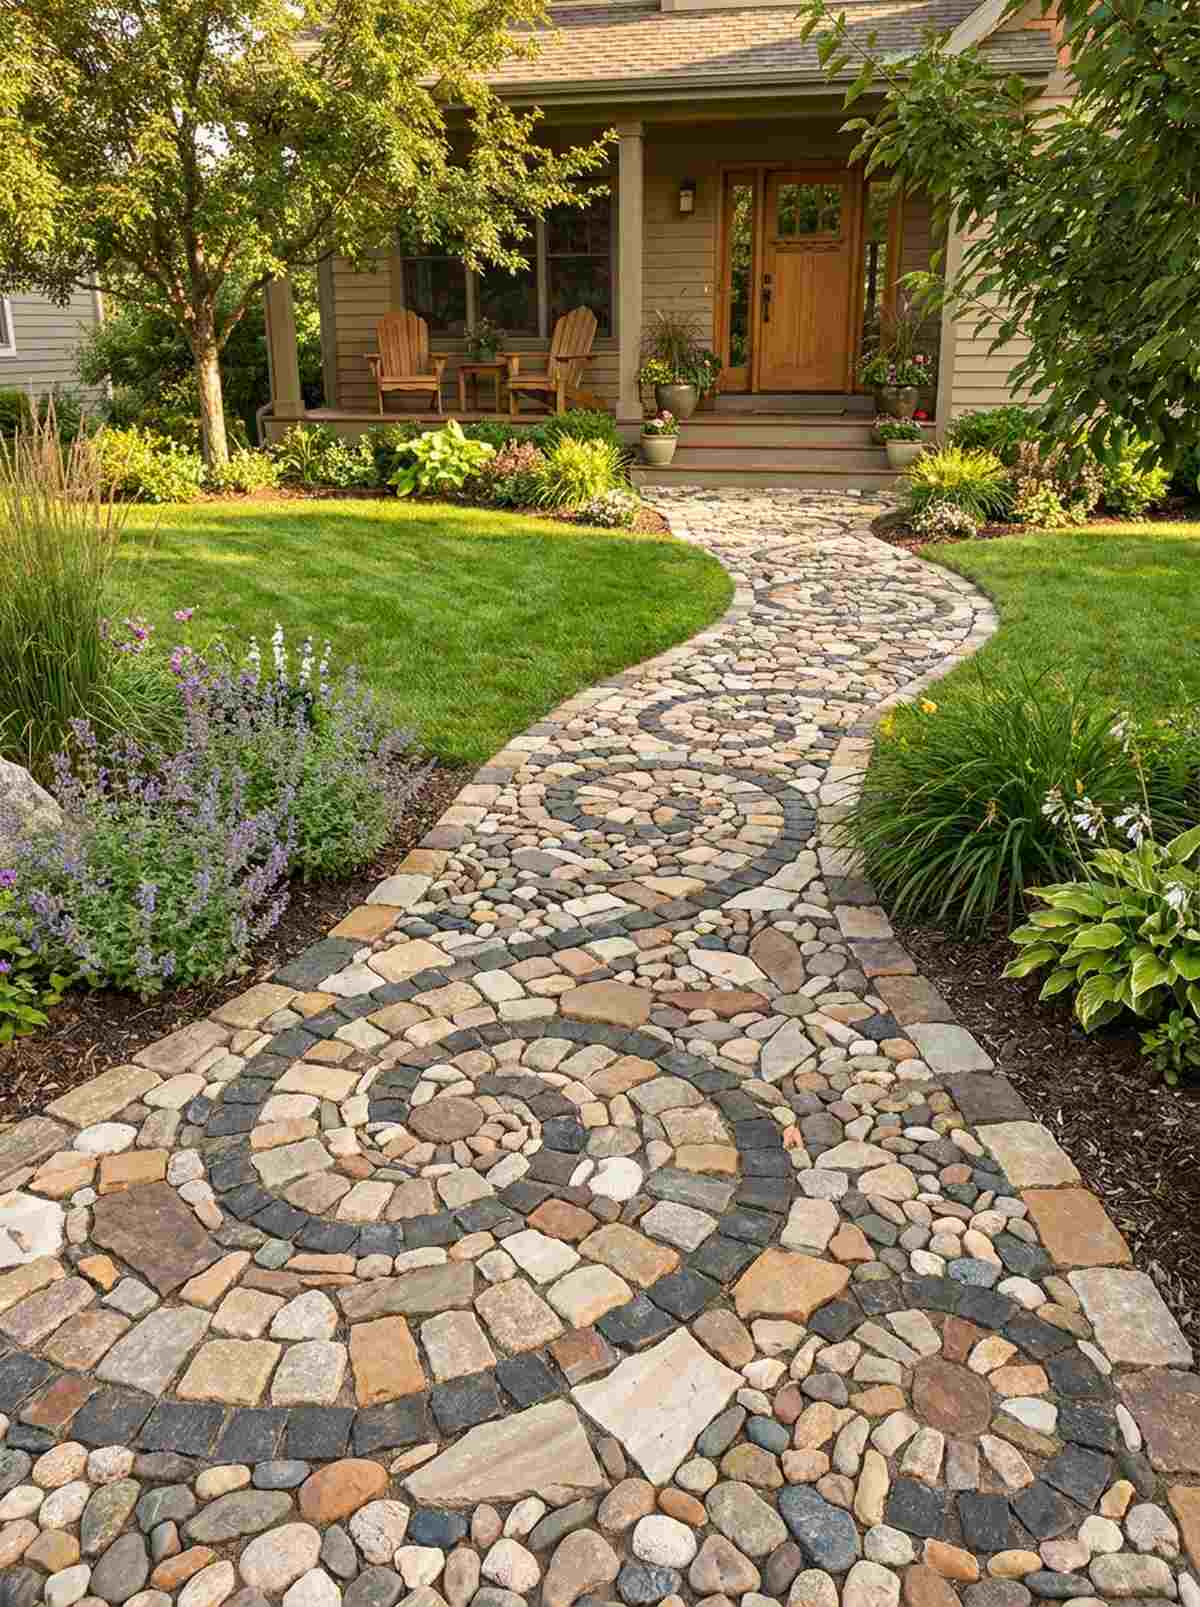
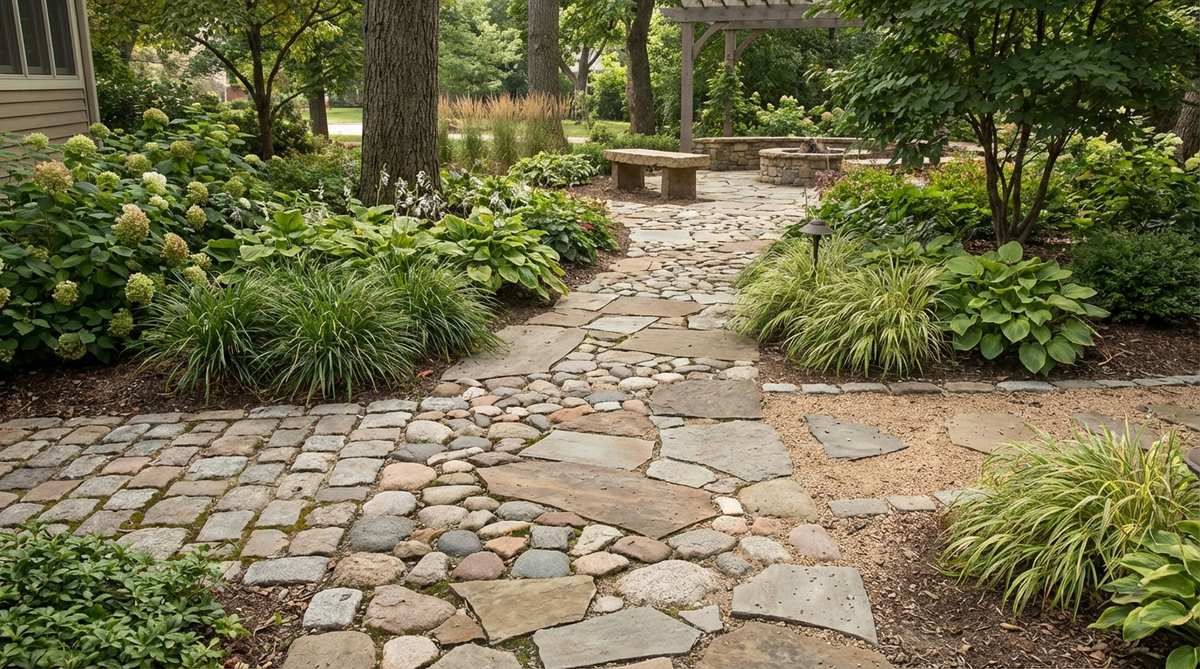
Looking at this intricate design feels like admiring a piece of walkable street art. Crafting a mixed stone mosaic path is spectacular for creating an unforgettable entrance leading to a front door.
Blending different textures and sizes creates a bespoke, artisan-crafted look that neighbors will assume took weeks to build. Using weatherproof outdoor adhesives or locking sand keeps the smaller intricate pieces from kicking loose over time.
This highly custom look can be achieved for about $60–$90 depending on material scavenging. Save this to your creative DIY garden board!
- Key Materials: Assorted cobbles, flagstone scraps, polymeric sand
- Vibe / Style: Artisan crafted bohemian
- Difficulty: High creativity, moderate labor
- Budget Breakdown: Mixed stones: $50 | Polymeric sand: $30
- Creator’s Tip: Lay out the entire mosaic pattern on the grass first, take a picture, and then transfer it to the path base.
- Smart Sourcing: Use rapid-setting polymeric sand (weather-resistant) and tumbled mosaic cobbles (bulk box).
8. Granite Flagging With Irregular Edging
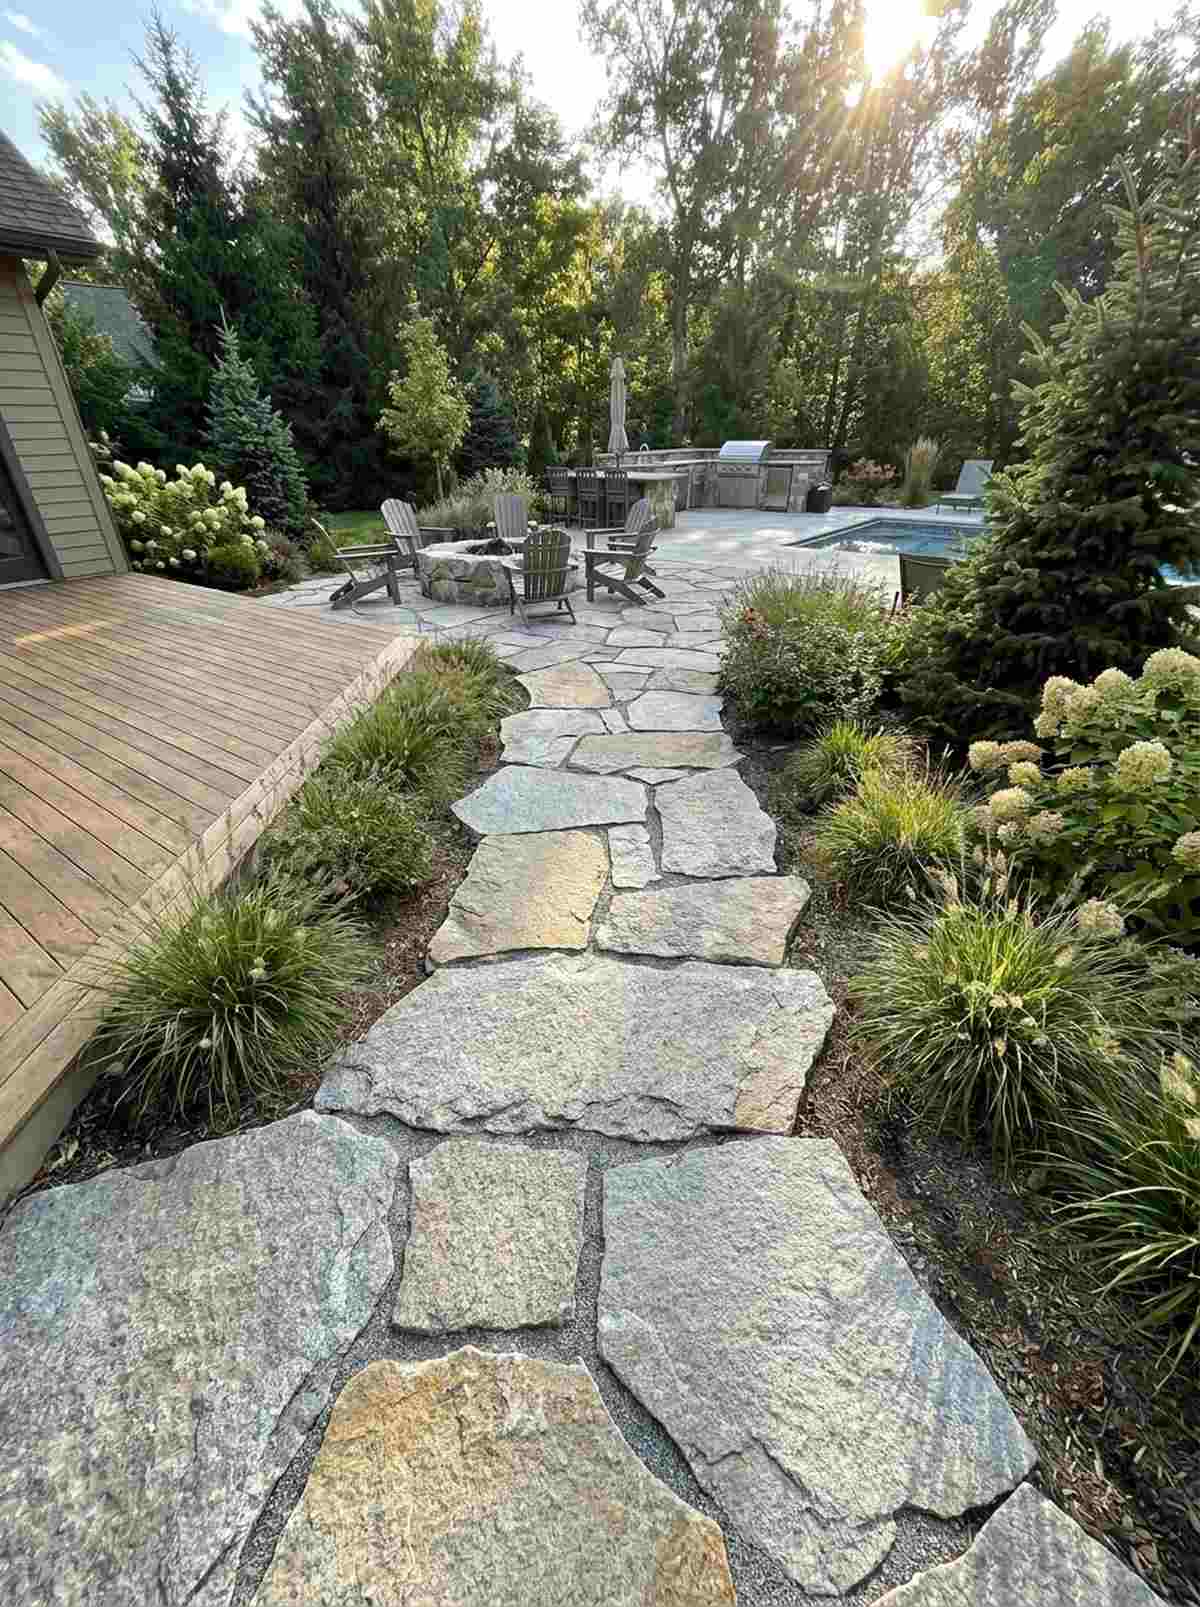
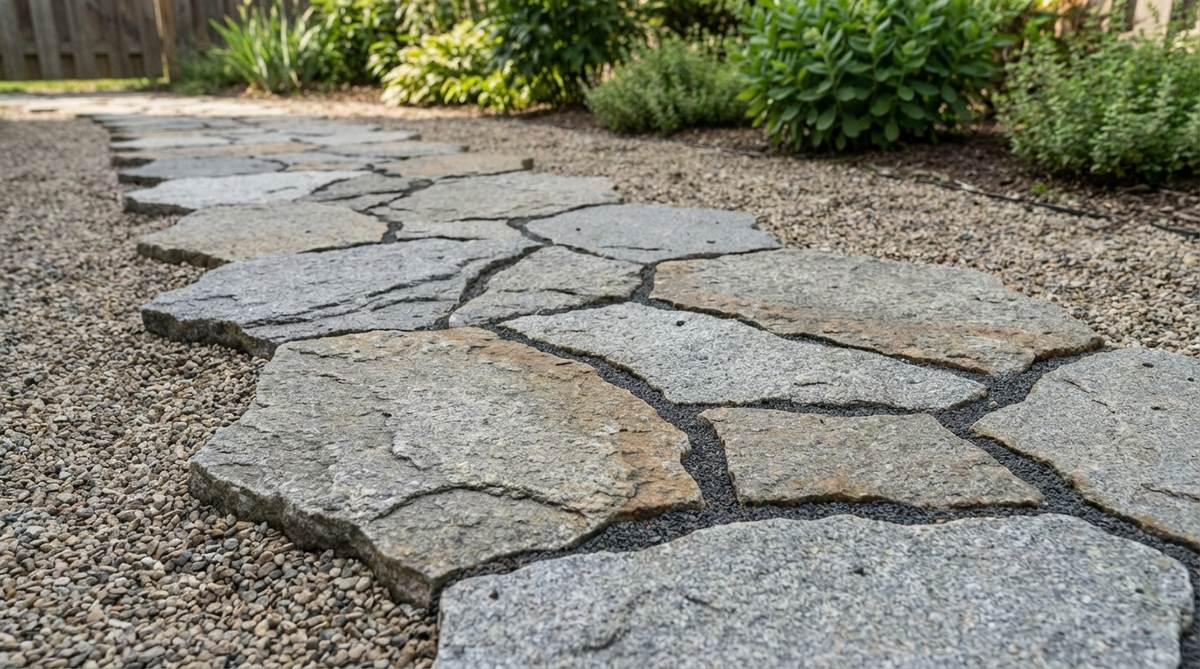
This rugged setup evokes the feeling of hiking a luxury mountain resort trail. Laying down irregular granite slabs is an incredible use-case for high-traffic zones leading to outdoor kitchens or pool decks.
Embracing jagged, natural edges rather than perfect squares delivers a wildly organic yet sophisticated presentation. Installing proper base layers ensures this heavy-duty feature easily withstands extreme weather without cracking or shifting.
You can set up a sturdy granite section for around $100–$150. It’s virtually indestructible and looks better as it ages.
- Key Materials: Rough-cut granite, compacted aggregate
- Vibe / Style: Alpine luxury lodge
- Difficulty: Heavy lifting required
- Budget Breakdown: Granite: $120 | Base prep: $30
- Creator’s Tip: Sweep fine granite dust into the joints and mist with water; it hardens like cement but remains naturally permeable.
- Smart Sourcing: Source crushed stone paver base (bulk bag) and heavy-duty lifting straps for safe handling.
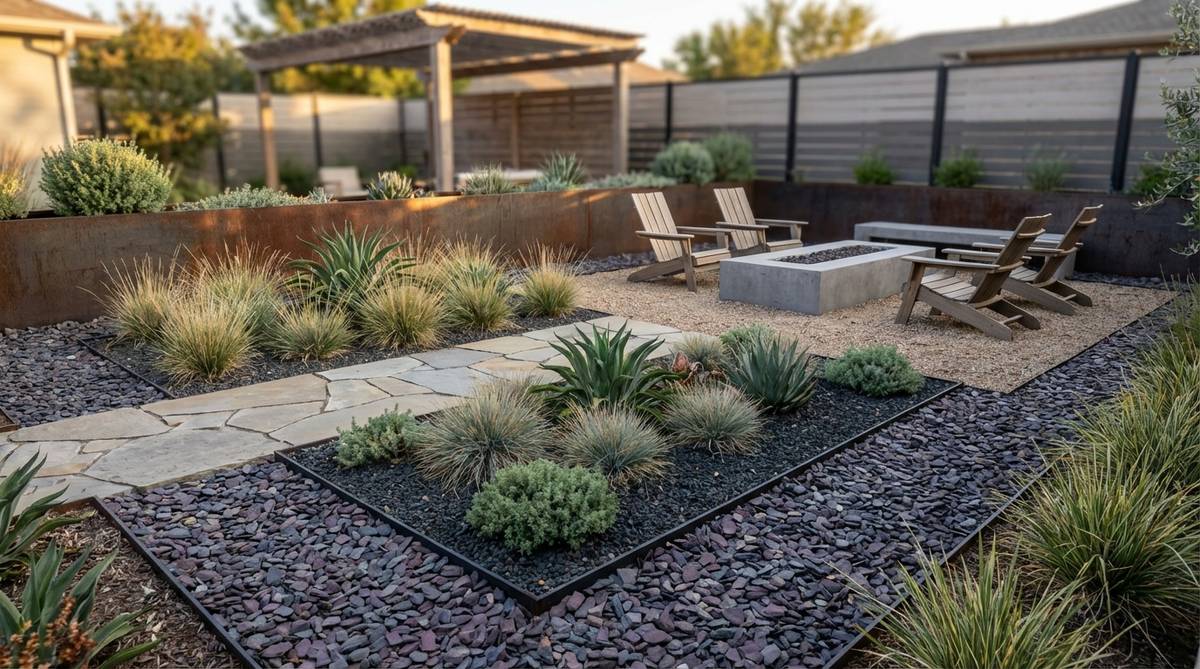
9. Mexican Beach Pebble Ground Cover
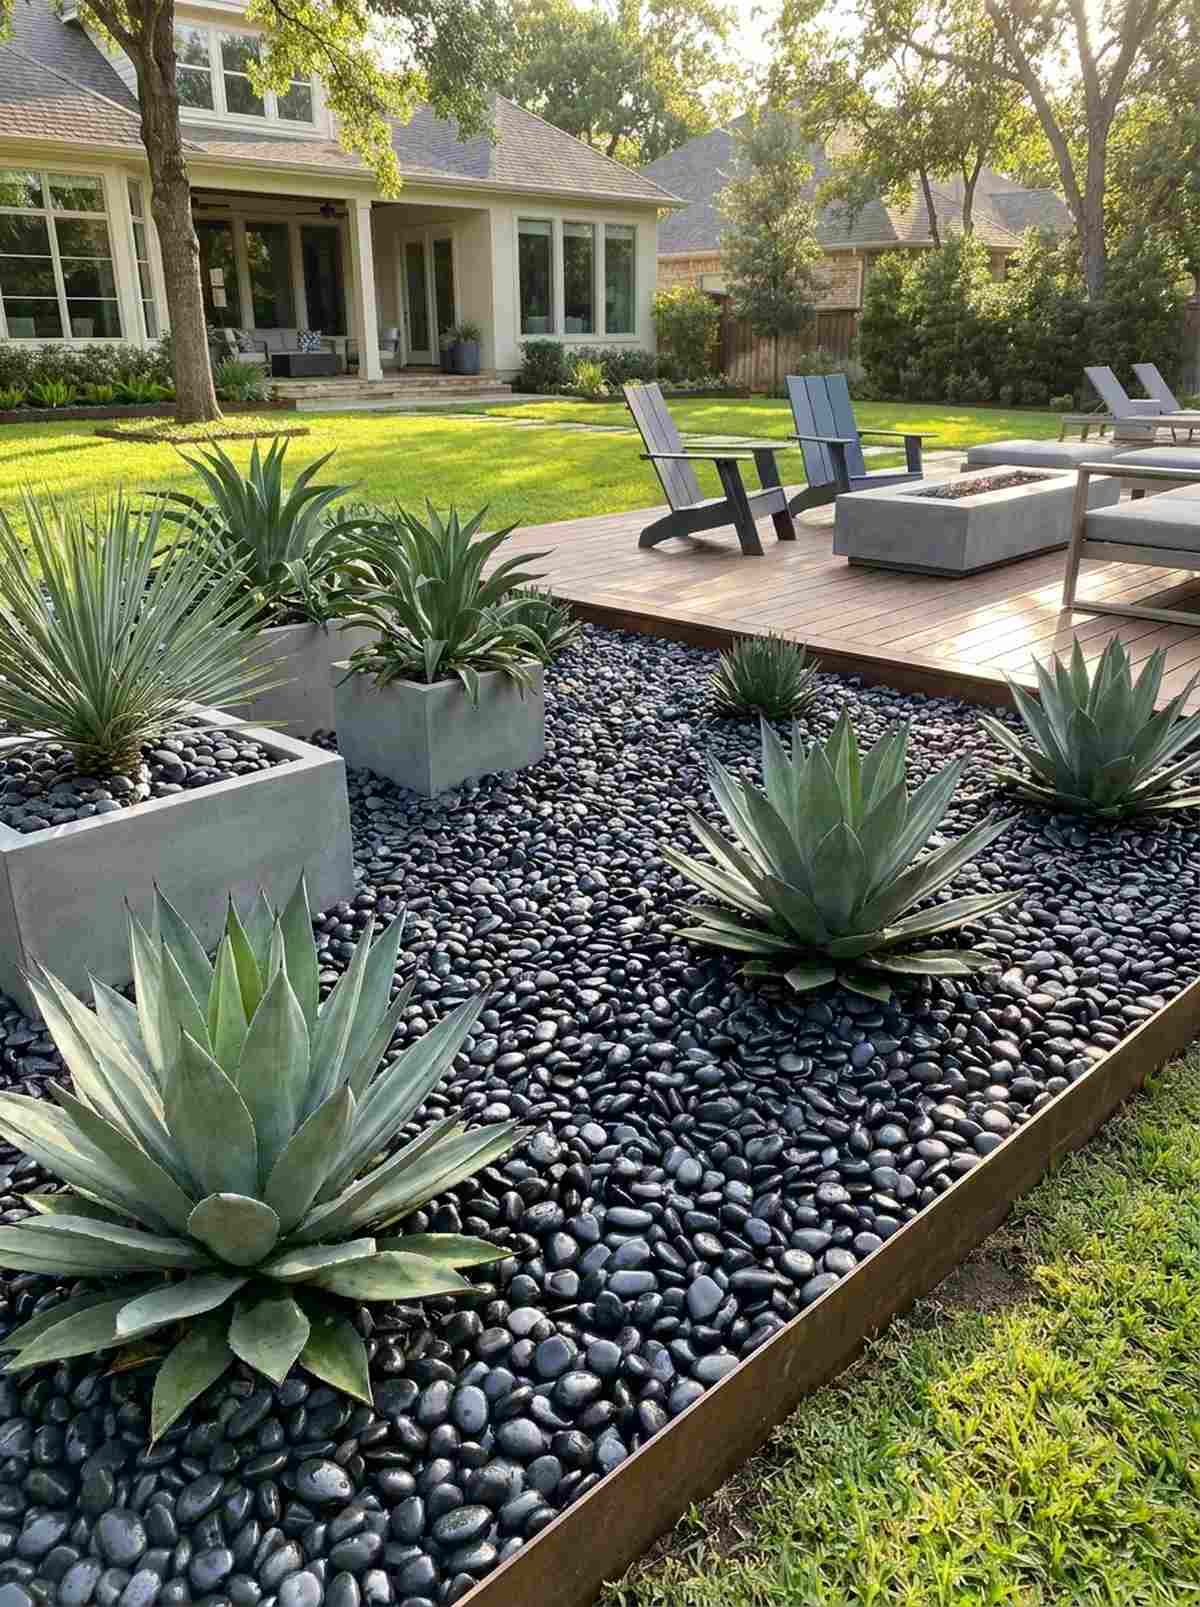
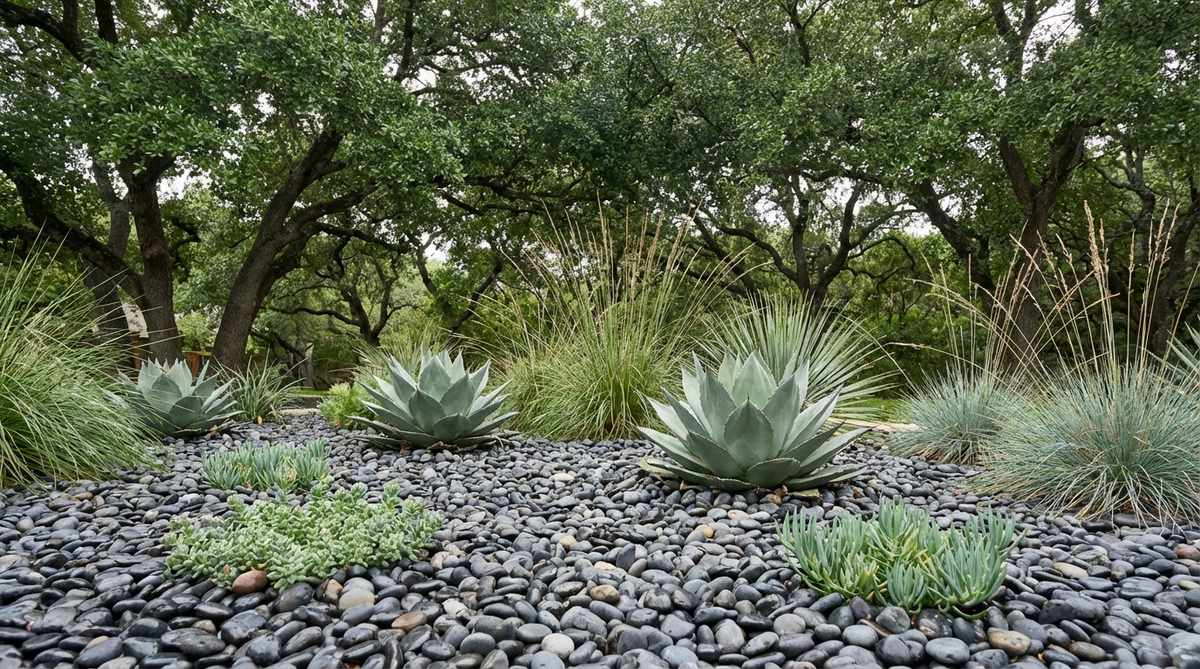
This ultra-smooth rock bed feels like stepping into a high-end minimalist art gallery. Using black Mexican beach pebbles is visually striking when placed under architectural plants like agaves or modern planters.
Trading messy wood mulch for polished dark stone instantly creates a jaw-dropping, magazine-worthy contrast against green foliage. Investing in premium garden stone supplies means the rocks keep their deep, rich color without fading to a dusty gray.
This chic ground cover typically costs $45–$75 per small zone. Pin this if you love low-maintenance, high-impact modern design!
- Key Materials: Polished black pebbles, thick weed fabric
- Vibe / Style: Ultra-modern chic
- Difficulty: Extremely easy
- Budget Breakdown: Pebbles: $60 | Underlayment: $10
- Creator’s Tip: Spray the dry stones lightly with a specialized stone enhancer to keep that glossy, wet look year-round.
- Smart Sourcing: Pick up UV-coated black river pebbles (bulk pack) and a wet-look stone sealer spray.
Most landscapers charge thousands for what you’re about to see next, but you can build it in a single afternoon for under $50.
💡 Must-Have Supplies for High-End Setups
To build these setups faster and ensure they last, skip the generic craft aisles and invest in the right foundational kits.
- Base & Support: Commercial-grade geotextile weed barrier grids
- Setup Tools: Heavy-duty paver leveling starter kits
- Weather/Durability Protection: UV-resistant clear stone binding sealants
Water-Inspired Elements and Features
Rock features that mimic or incorporate water movement add auditory and visual interest to gardens. These installations range from functional drainage solutions to purely decorative focal points that evoke natural stream environments.
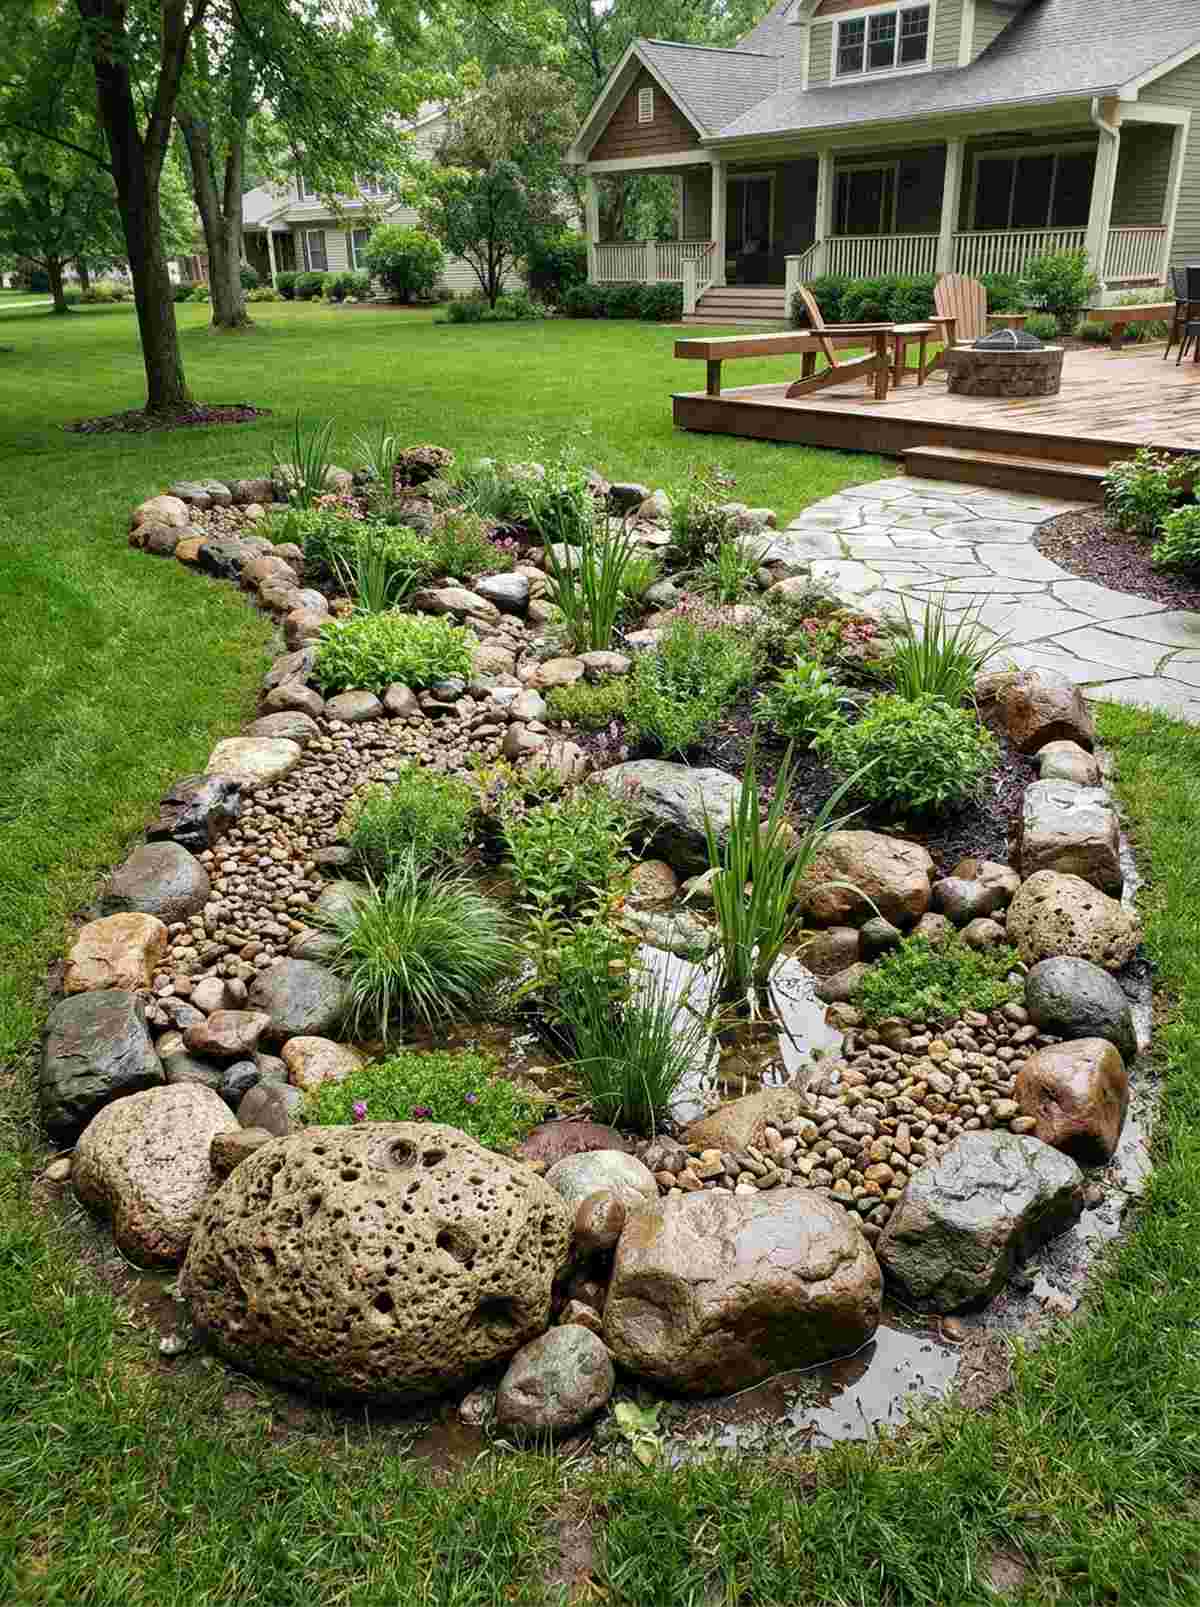
10. Dry Creek Bed
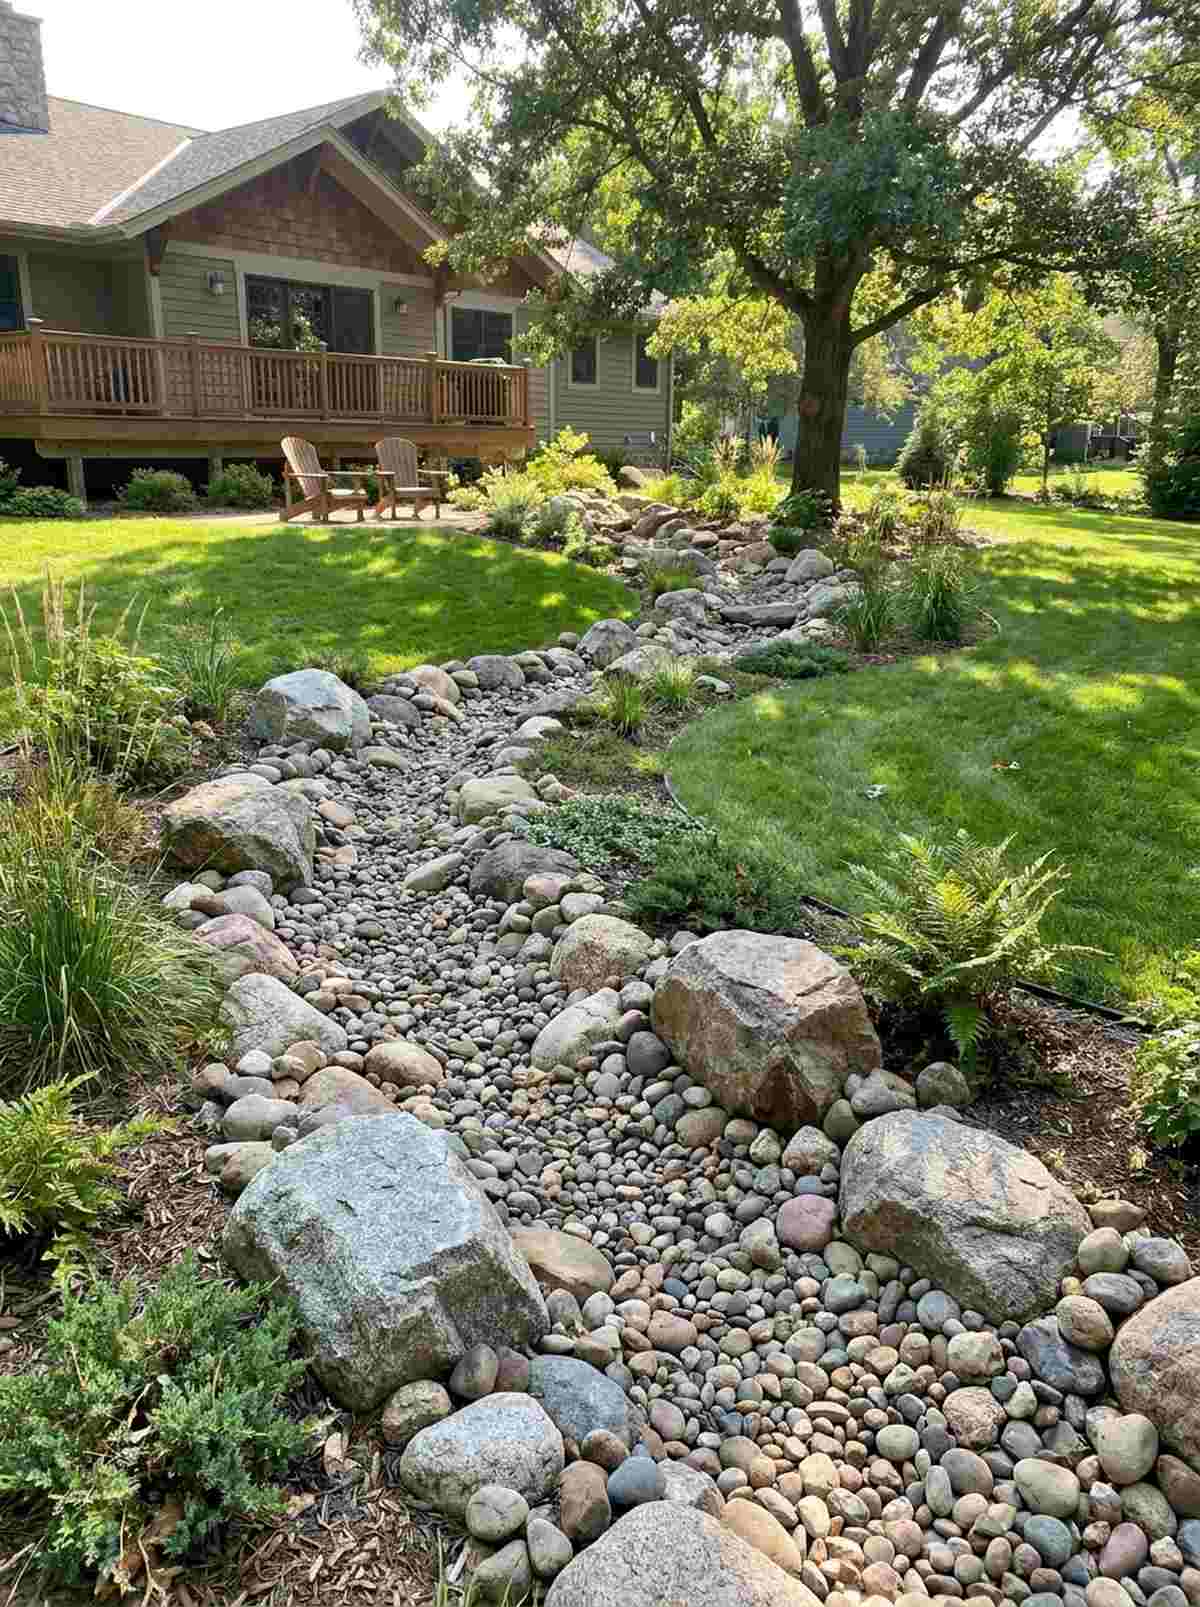
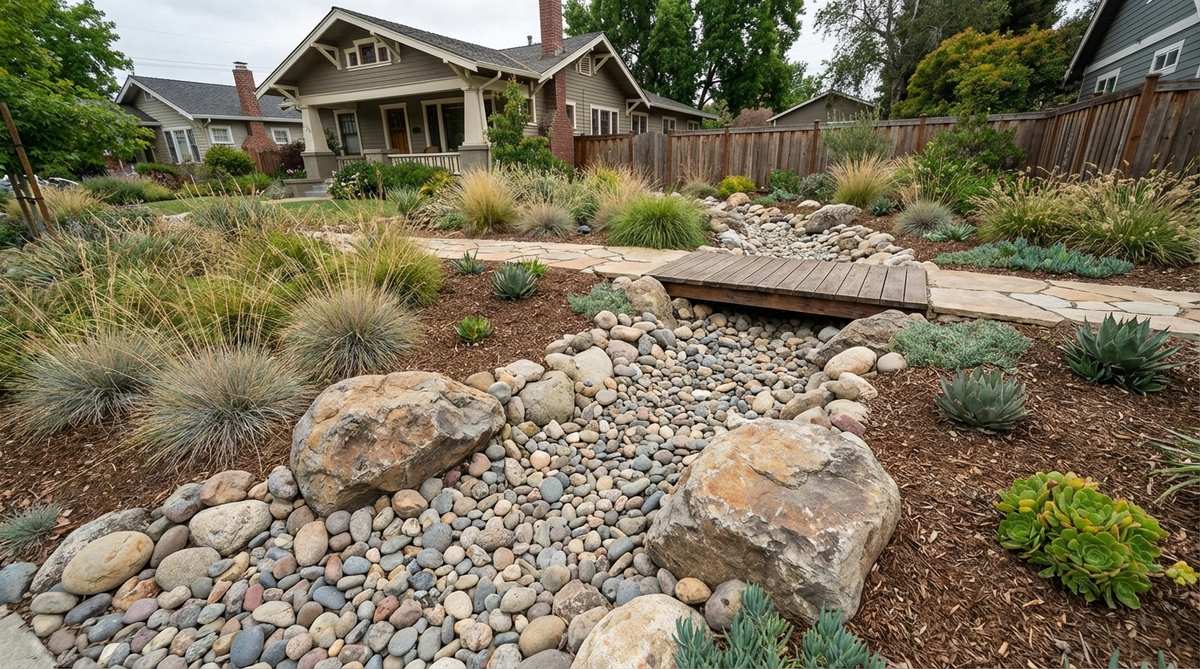
This dynamic layout brings the relaxing energy of a meandering riverbed straight to your lawn. Sculpting a decorative dry creek bed is the ultimate use-case for disguising ugly drainage ditches or sloping front yards.
Mixing oversized boulders with tiny pebbles produces an incredibly authentic natural water-flow illusion. Integrating heavy-duty landscape edging kits beneath the surface ensures rushing rainwater won’t wash your beautiful design into the street.
You can construct a realistic 15-foot dry creek for roughly $80–$130. Save this genius drainage hack to your yard solutions board!
- Key Materials: Mixed river rock, accent boulders, permeable fabric
- Vibe / Style: Naturalistic woodland stream
- Difficulty: Moderate digging required
- Budget Breakdown: Mixed stones: $90 | Fabric/Pins: $25
- Creator’s Tip: Place larger boulders on the outside curves of your path where water would naturally hit the hardest during a storm.
- Smart Sourcing: Use pre-mixed dry creek river stones (bulk pack) and non-woven geotextile drainage fabric.
11. Bubbling Rock Fountain
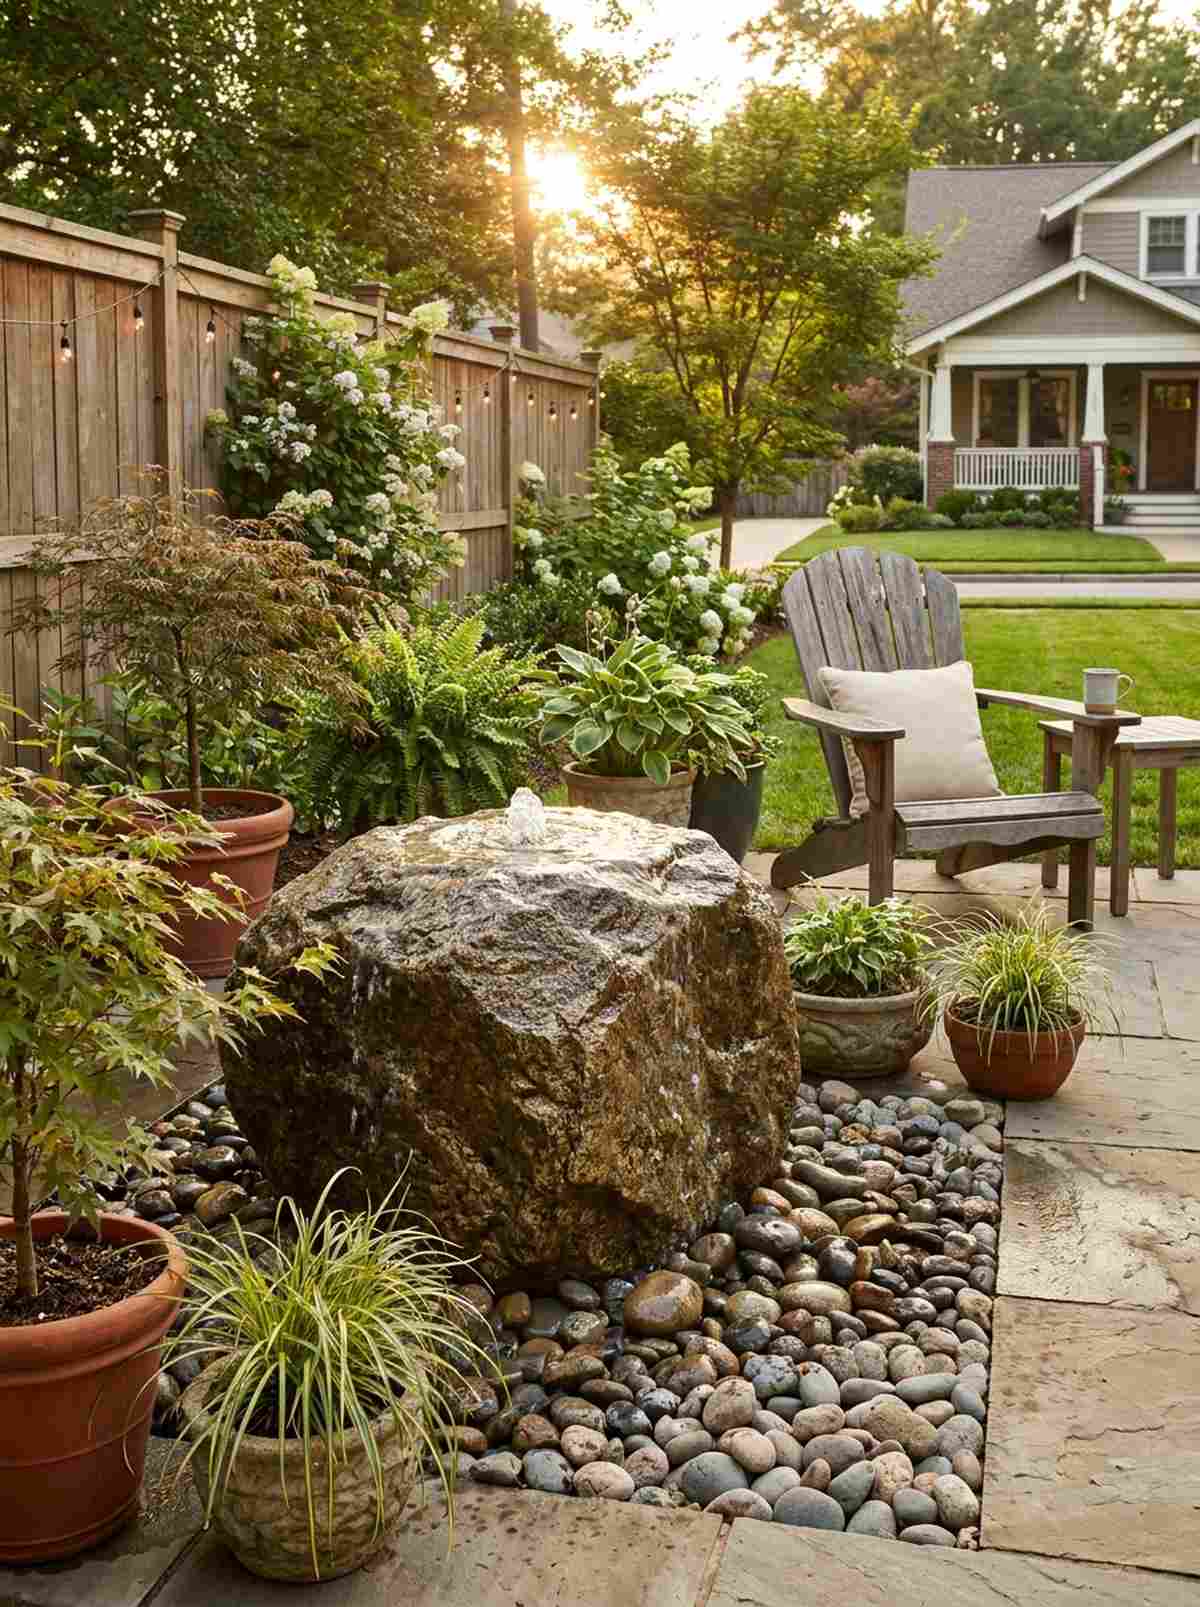
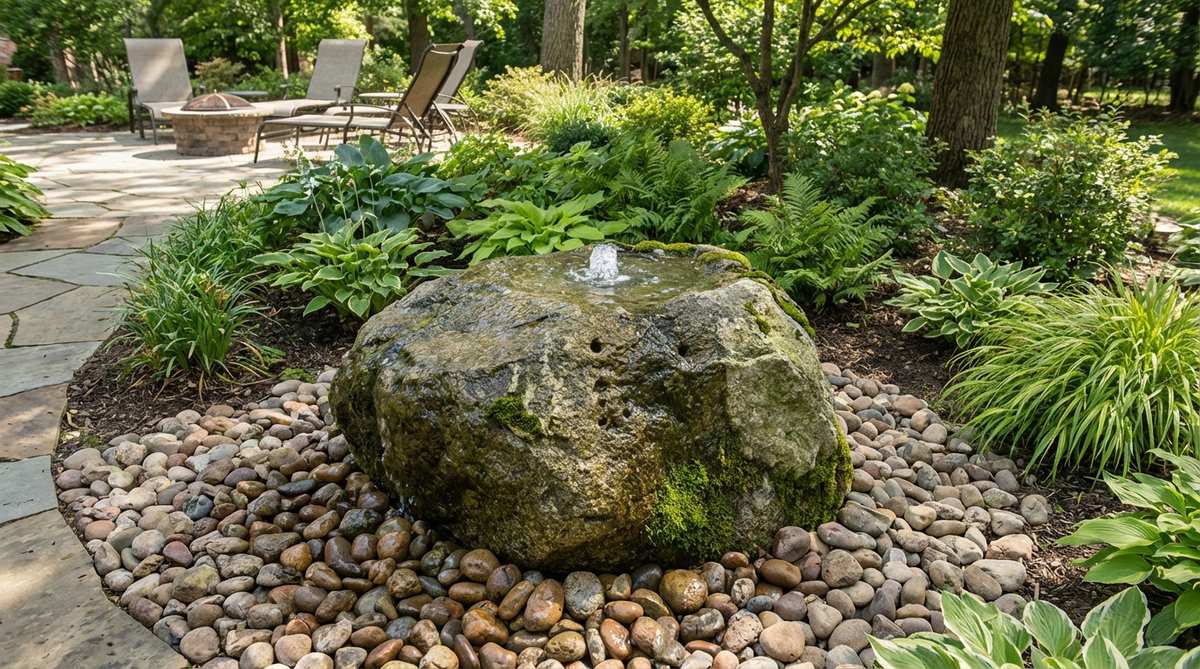
The gentle water sounds from this setup make the patio feel like an exclusive meditation retreat. Installing a drilled bubbling boulder is absolutely perfect for adding a focal point to a tight courtyard or apartment balcony.
Concealing a simple pump beneath a bed of stones gives a designer-level finish that looks magically self-sustaining. Grabbing water feature starter kits makes the plumbing side completely foolproof, even if you have zero DIY experience.
Expect to spend around $150–$250 for a complete, soothing water feature. It’s an auditory upgrade that transforms your entire outdoor experience.
- Key Materials: Drilled boulder, basin, water pump
- Vibe / Style: Zen meditation sanctuary
- Difficulty: Moderate, involves simple plumbing
- Budget Breakdown: Fountain kit: $180 | Base rock: $20
- Creator’s Tip: Add a hidden auto-fill valve connected to your drip irrigation line so you never have to manually refill the reservoir.
- Smart Sourcing: Invest in a solar-powered fountain pump starter kit and an underground water catch basin.
12. Stone Waterfall Cascade
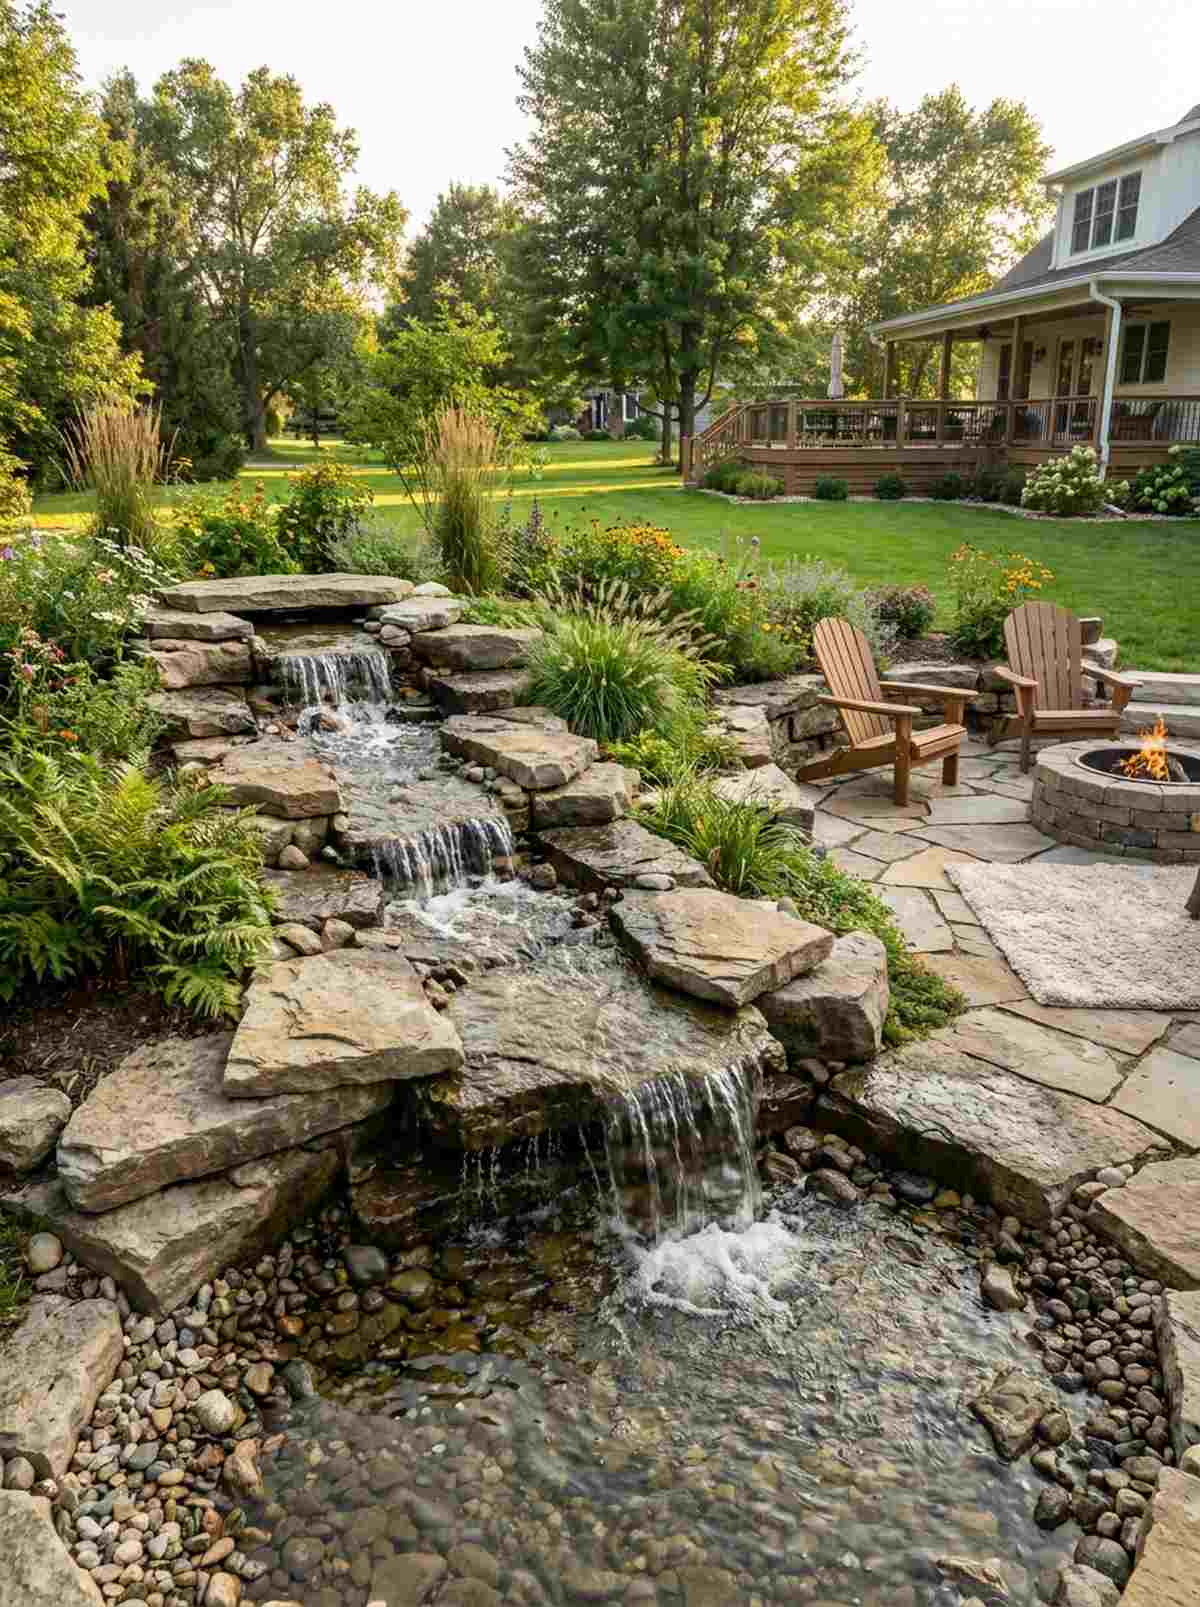
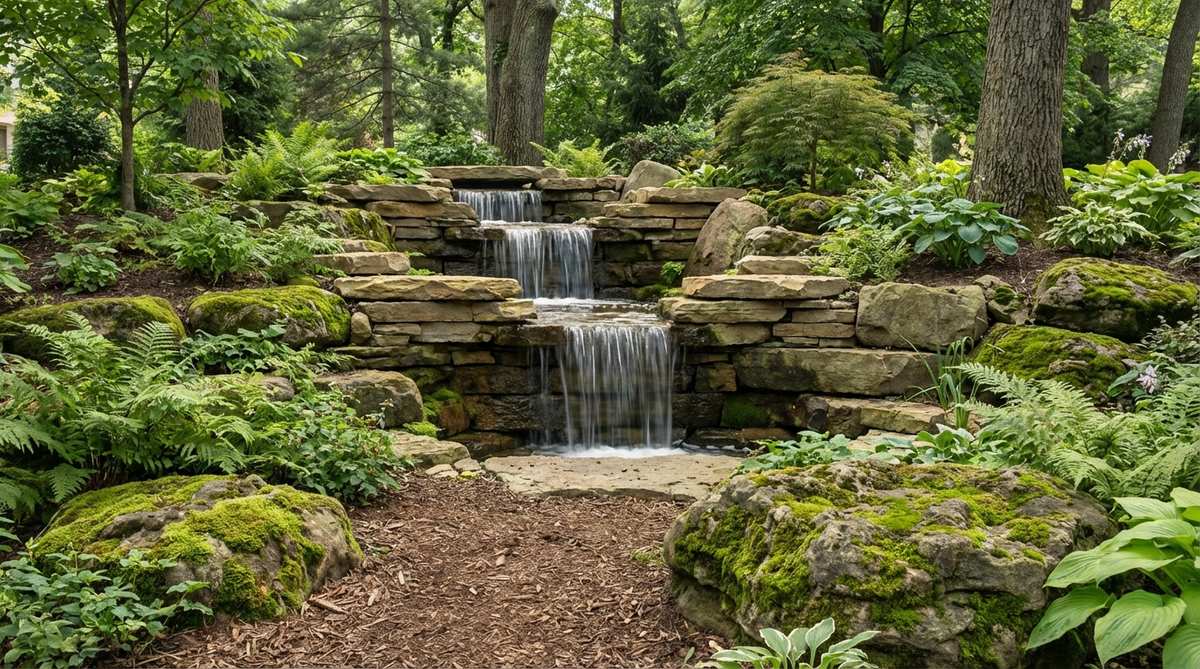
This tiered masterpiece feels like a piece of a national park right in your backyard. Stacking flat rocks to create a miniature waterfall cascade works wonders for utilizing awkward slopes near a patio seating area.
Carefully overlapping the spillway stones creates dramatic, professional-grade water acoustics that drown out neighborhood noise. Using proper pond liners and sealant ensures every drop of water flows directly over the rock face instead of leaking into the soil.
This breathtaking landscape anchor usually costs $200–$350 to set up properly. Save this epic project to your ultimate backyard goals board!
- Key Materials: Flat spillway stones, pond liner, high-flow pump
- Vibe / Style: Majestic mountain spring
- Difficulty: Advanced weekend project
- Budget Breakdown: Pump/Liner: $150 | Premium rocks: $120
- Creator’s Tip: Use black expanding waterfall foam between the rocks to force water over the top rather than letting it sneak through the cracks.
- Smart Sourcing: Buy weatherproof waterfall foam sealant and a heavy-duty EPDM pond liner (pre-cut).
13. Pebble Pond Border
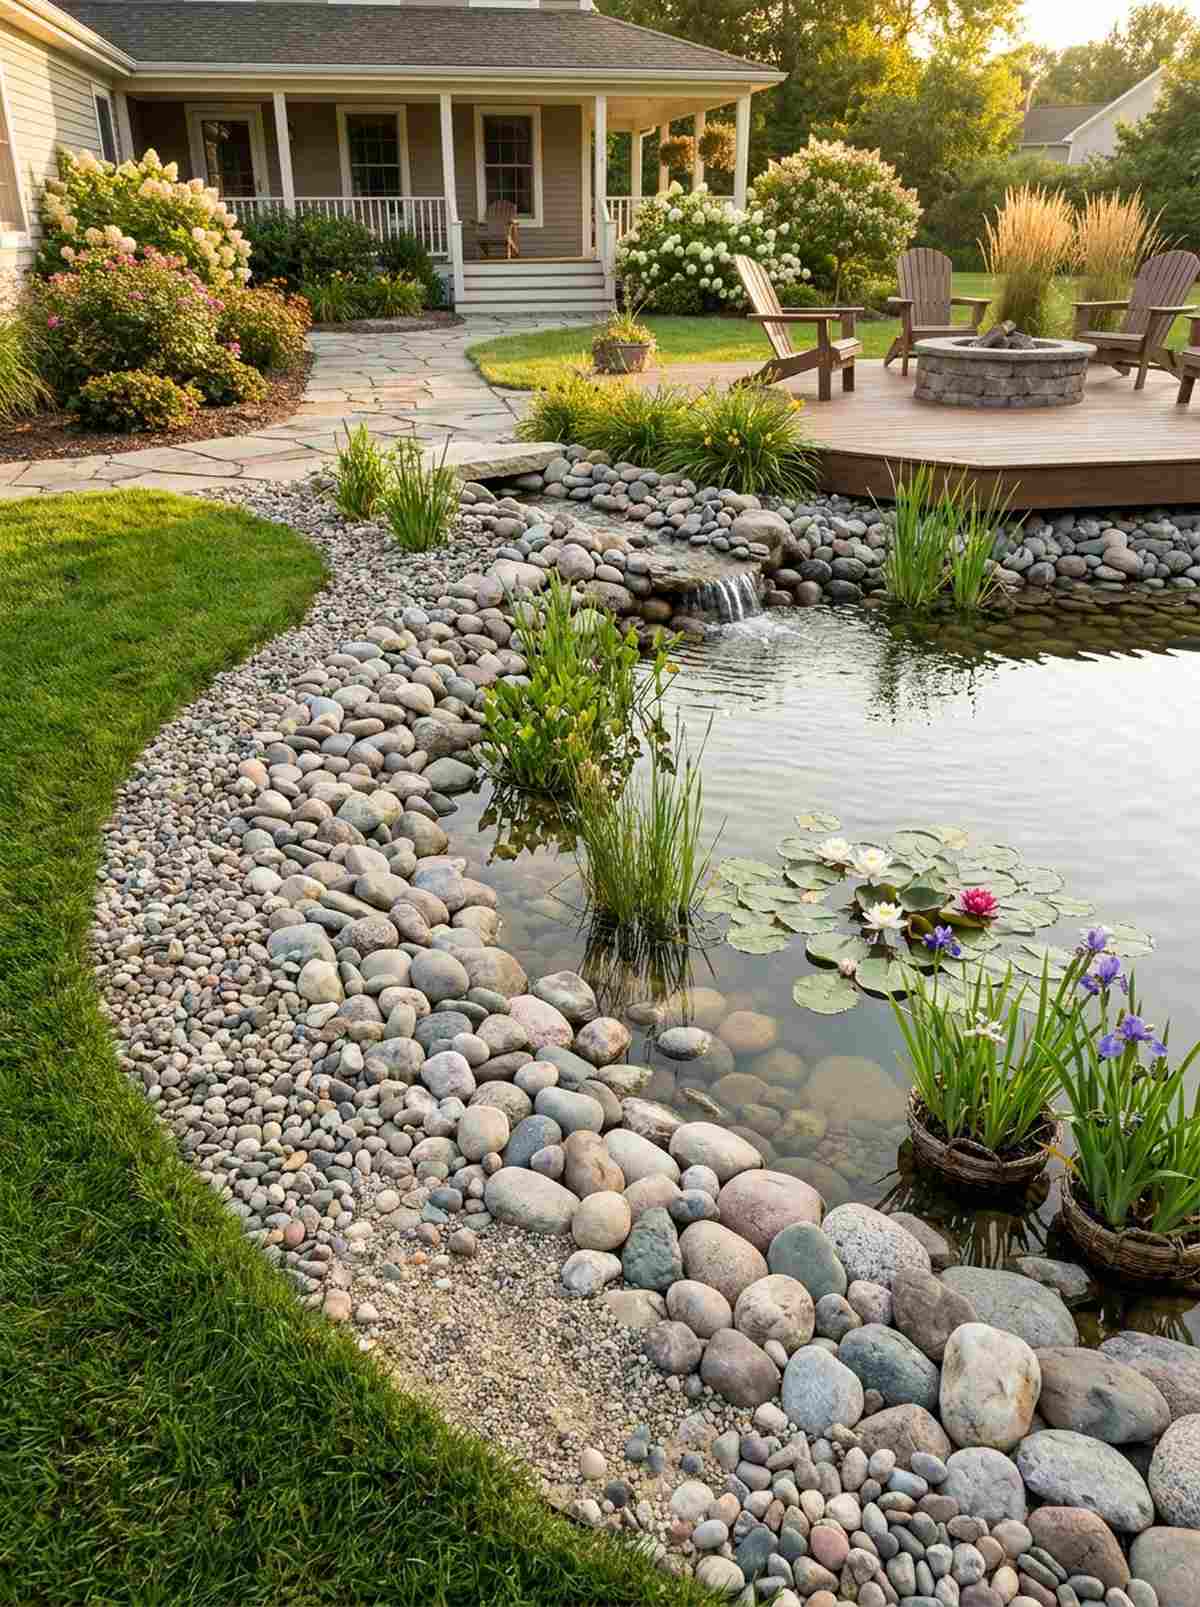
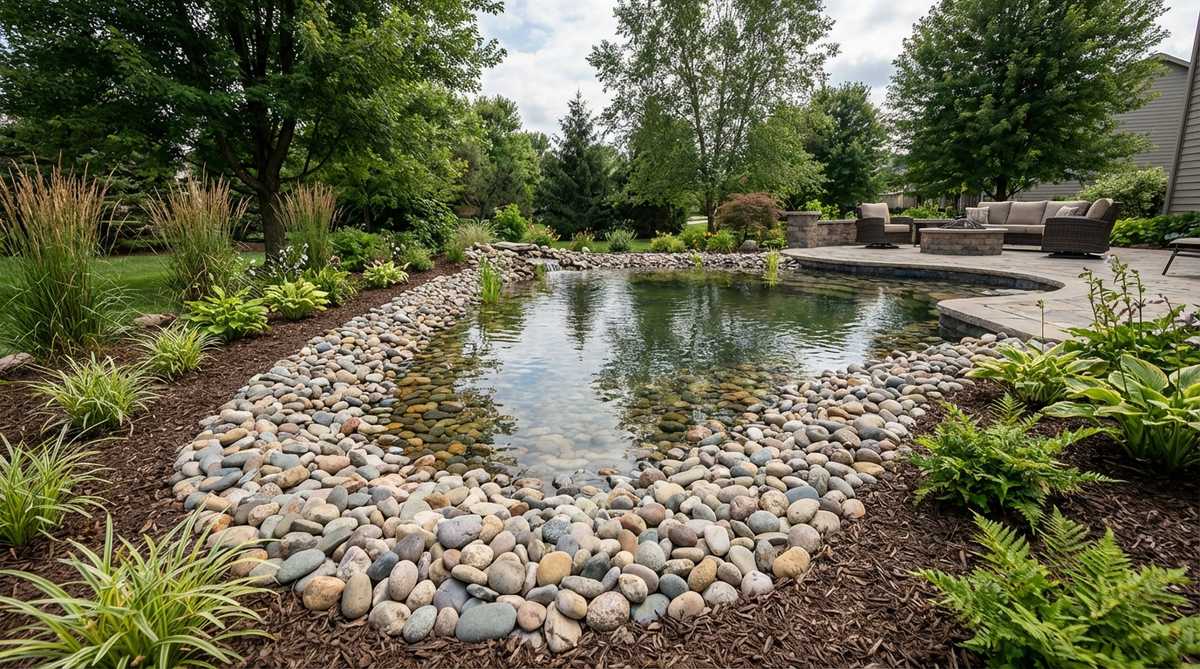
This clever edging idea flawlessly bridges the gap between wild nature and manicured garden. Softening a water feature with a graduated pebble border is the best use-case for hiding ugly black plastic pond edges.
Gradually decreasing the stone size as it moves away from the water creates an incredibly authentic shoreline effect. Incorporating premium garden stone supplies guarantees the rocks won’t alter the pH of the water or harm any fish.
You can line an average pond beautifully for about $40–$70. It’s a subtle touch that instantly professionalizes a DIY pond.
- Key Materials: Varied size smooth pebbles, aquatic planting
- Vibe / Style: Organic natural shoreline
- Difficulty: Very easy
- Budget Breakdown: Pebbles: $50 | Accent plants: $20
- Creator’s Tip: Let the water level rise slightly over the first row of stones to create a seamless, infinity-edge illusion.
- Smart Sourcing: Purchase fish-safe natural river stones (bulk pack) and aquatic plant starter baskets.
14. Rain Garden Rock Basin

This eco-friendly basin feels like a lush, hidden oasis that thrives after every storm. Digging a rock-lined rain garden works exceptionally well for the low points in your yard where water naturally pools and drowns the grass.
Turning a frustrating mud pit into a gorgeous stone feature delivers a surprisingly premium look that actually solves property issues. Pairing deep-rooted native plants with heavy cobbles ensures the soil stays locked in place during torrential downpours.
This practical and beautiful upgrade costs around $60–$100. Pin this to your eco-friendly landscaping ideas board!
- Key Materials: Porous rock, organic compost, native sedges
- Vibe / Style: Sustainable wild garden
- Difficulty: Moderate digging
- Budget Breakdown: Rocks: $50 | Soil amendments: $30
- Creator’s Tip: Dig the center at least 18 inches deep and fill the bottom half with large gravel to maximize water absorption capacity.
- Smart Sourcing: Use porous drainage rock (bulk delivery) and pre-cut permeable weed barrier fabric.
Wait until you see this next brilliant layout. It completely tricks the eye into thinking your yard is twice as large.
Accent and Focal Points With Boulder Features
Large boulders serve as landscape anchors that draw attention and provide vertical interest. Proper placement transforms ordinary yards into composed outdoor rooms with clear hierarchy and visual flow.
15. Specimen Boulder Placement
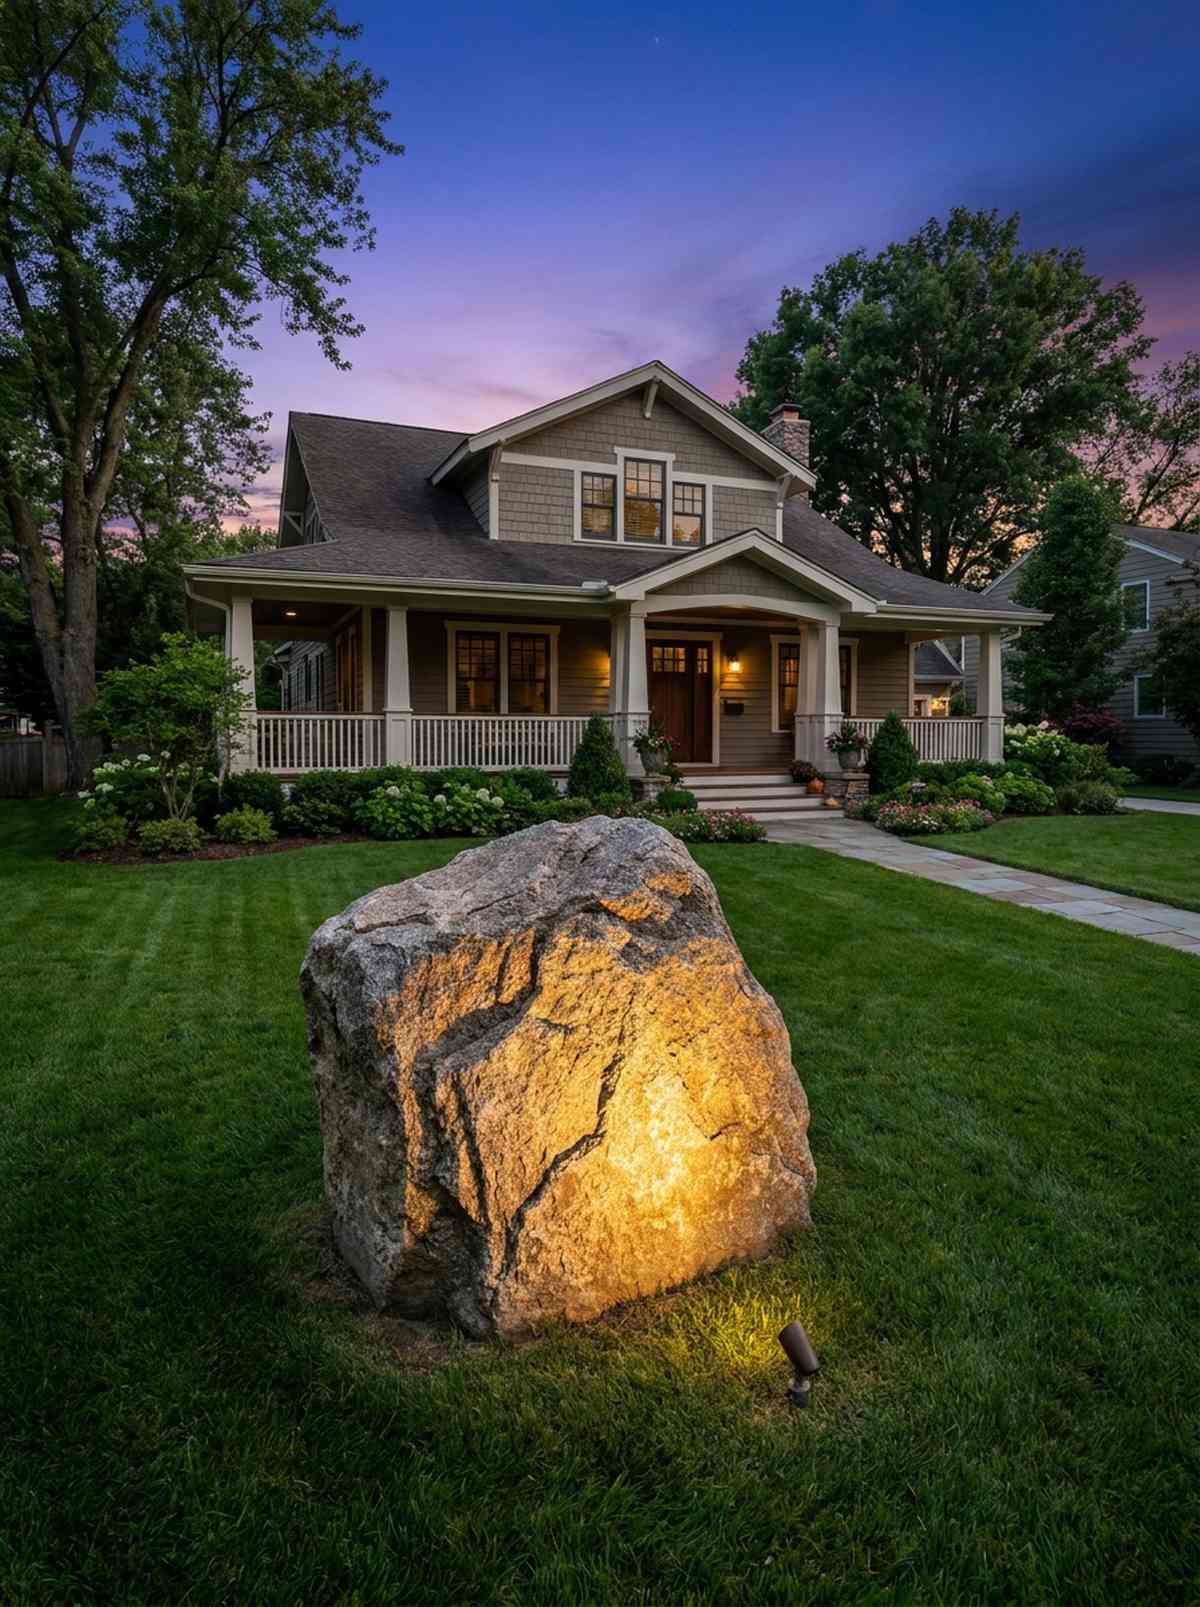
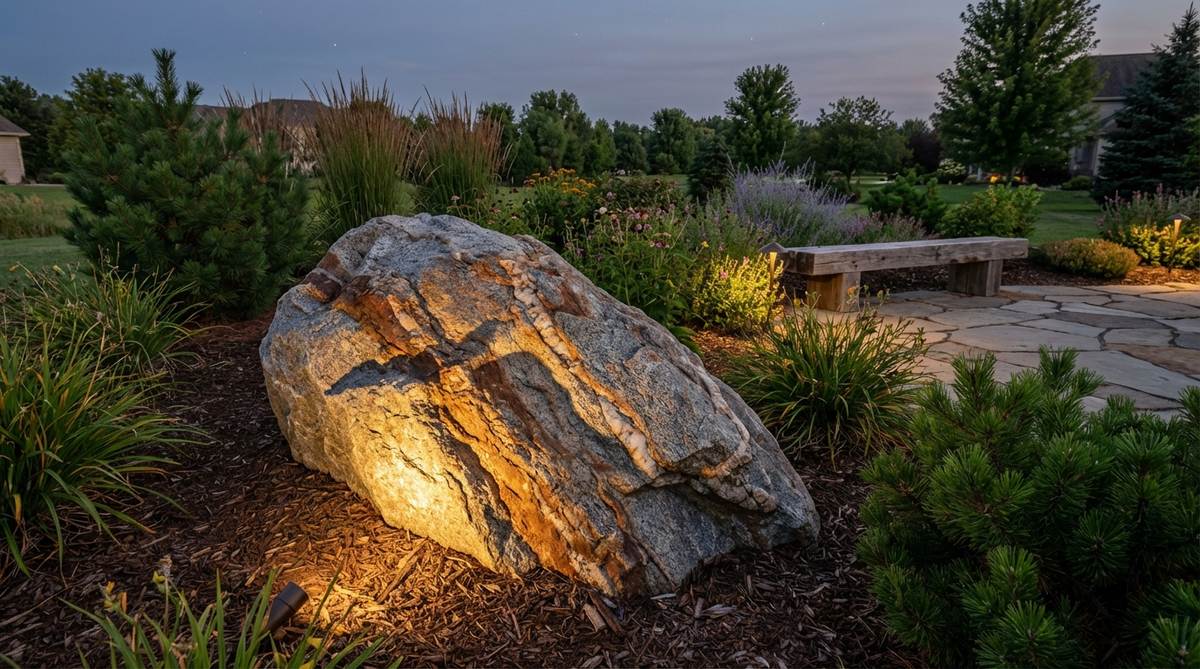
This bold statement piece exudes a commanding, museum-like architectural presence. Positioning a massive stand-alone specimen boulder is the perfect use-case for anchoring a vast, empty front lawn or breaking up a boring fence line.
Burying a third of the rock underground creates a bespoke aesthetic that looks like ancient bedrock exposed over centuries. Adding subtle uplighting transforms it into a jaw-dropping silhouette at night, significantly boosting your home’s premium evening appeal.
Depending on delivery, a striking boulder runs about $100–$250. Highly recommended for establishing instant landscape maturity.
- Key Materials: Single large character boulder, accent lighting
- Vibe / Style: Bold architectural anchor
- Difficulty: Requires machinery or helpers
- Budget Breakdown: Boulder: $150 | Spotlight: $40
- Creator’s Tip: Always identify the boulder’s “face” (its most textured, interesting side) and orient it toward the main viewing window of your home.
- Smart Sourcing: Invest in an outdoor solar landscape spotlight (high lumen) and heavy-duty landscaping crowbars.
Material Guide: Cheap vs. Premium Aesthetic
Knowing exactly where to save and where to spend makes all the difference in achieving that “looks expensive but isn’t” vibe.
- Standard vs. UV-Resistant/Premium: Investing in UV-coated stones and high-grade sealants stops dark rocks from turning dusty gray and prevents weed barriers from shredding after one season.
- Pre-made Kits vs. Sourcing Locally: While scavenging sounds fun, utilizing pre-cut starter kits and bulk pack deliveries often saves both time and money by eliminating multiple hardware store trips.
16. Boulder Grouping Clusters
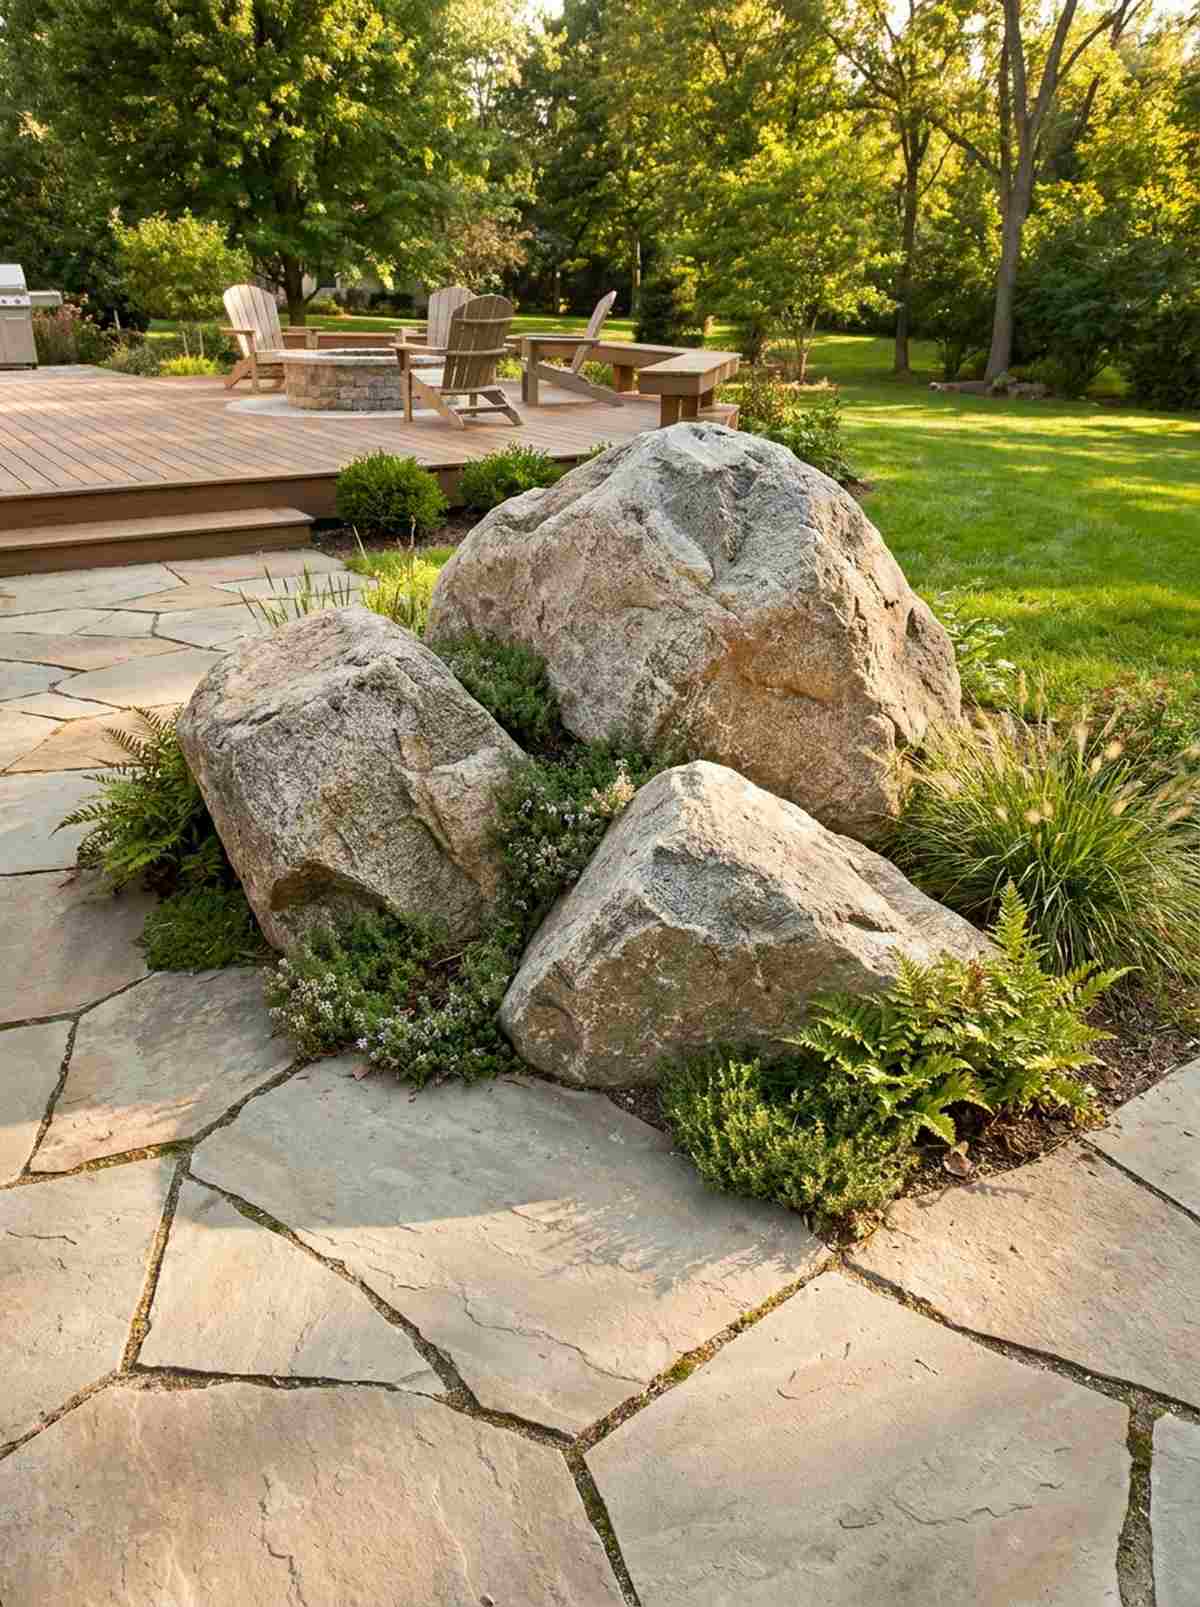
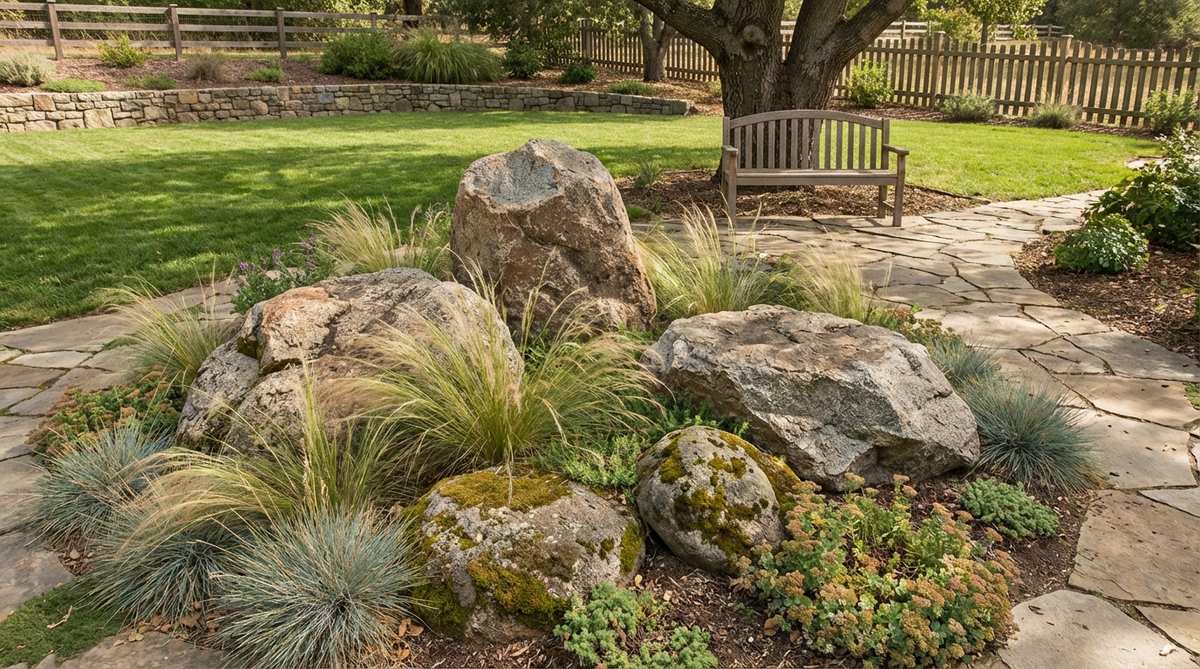
This layout creates an energy that feels like a rugged alpine meadow right in your subdivision. Arranging a trio of asymmetrical boulders works flawlessly for grounding the corners of a large driveway or patio.
Skipping symmetry for odd-numbered groupings gives a designer-level finish that perfectly mimics natural geological formations. Tucking ferns or ornamental grasses into the crevices makes the heavy stones look like they’ve been sitting there for decades.
A cluster like this generally costs $150–$300 to source and set up. Pin this arrangement trick if you want to master professional landscape design!
- Key Materials: 3 varied boulders, creeping groundcover
- Vibe / Style: Natural mountain outcropping
- Difficulty: Heavy lifting involved
- Budget Breakdown: Rocks: $200 | Plants: $40
- Creator’s Tip: Place the largest rock first as the “parent,” then position the smaller “child” rocks leaning slightly toward it for visual harmony.
- Smart Sourcing: Utilize a heavy-duty rock moving dolly and creeping thyme groundcover starter pods.
17. Driveway Entrance Boulders
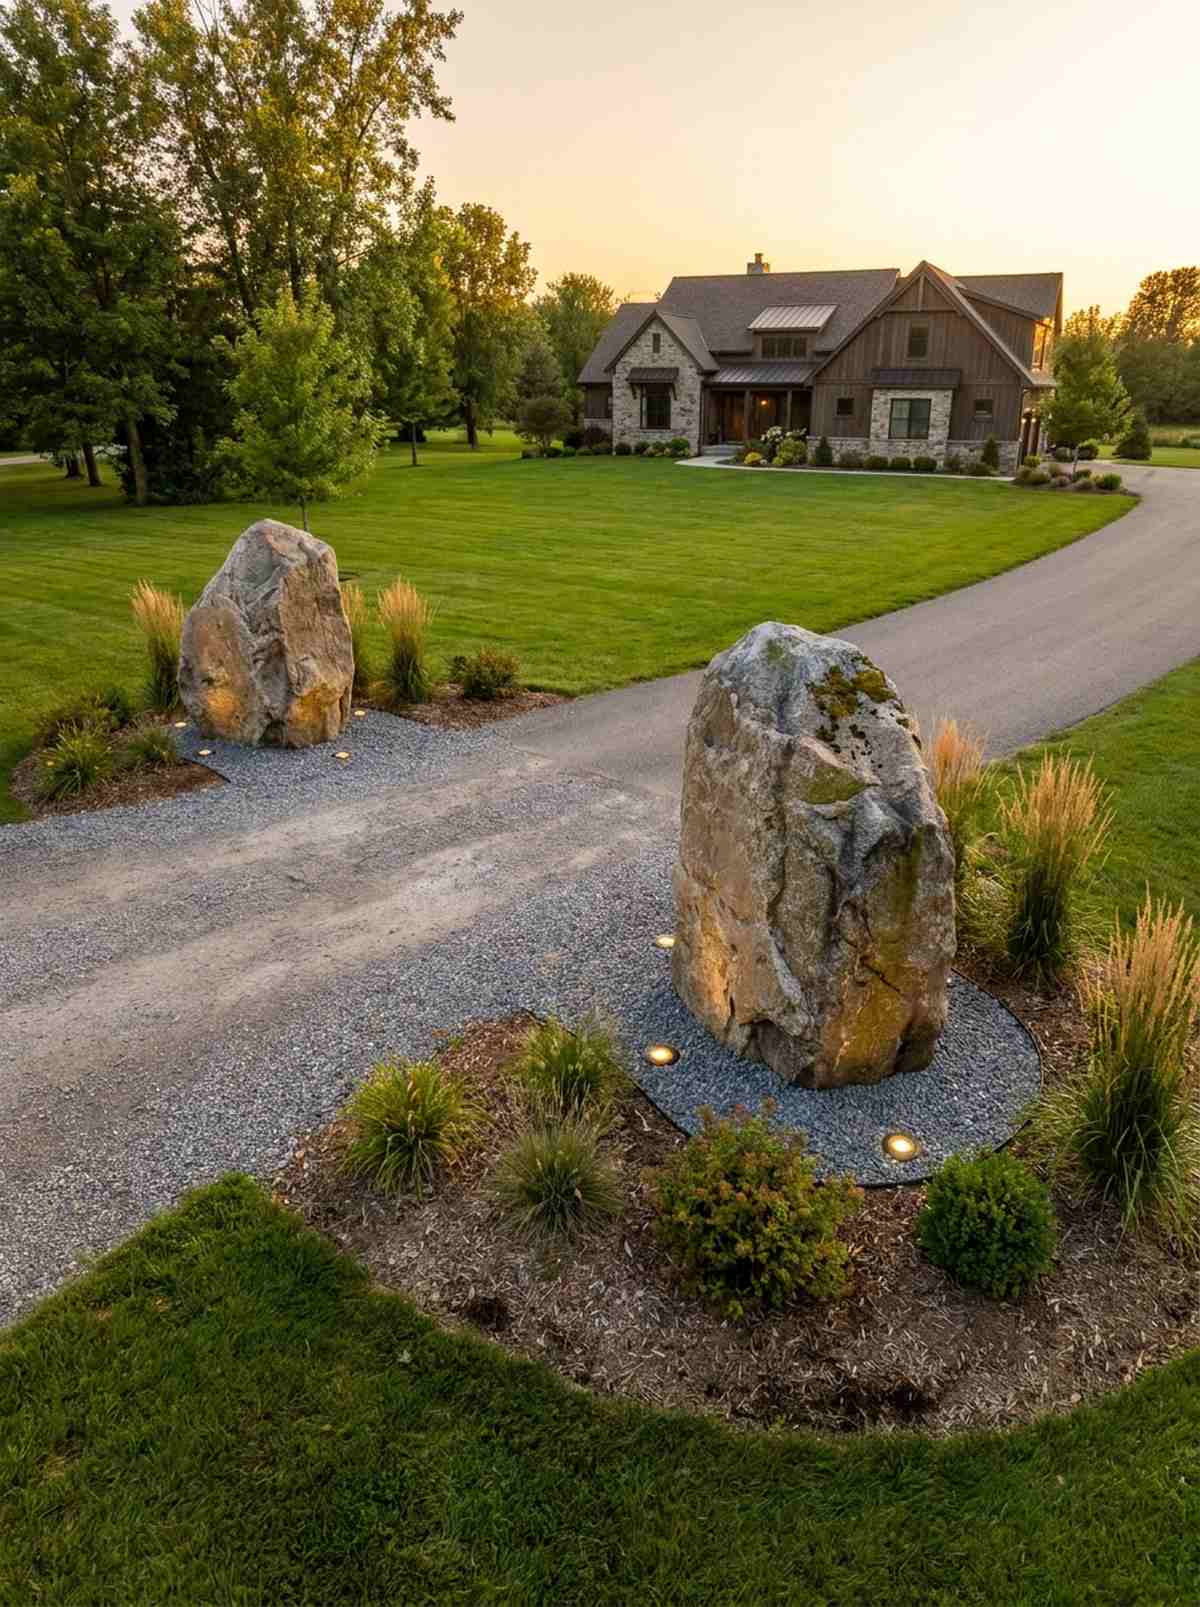
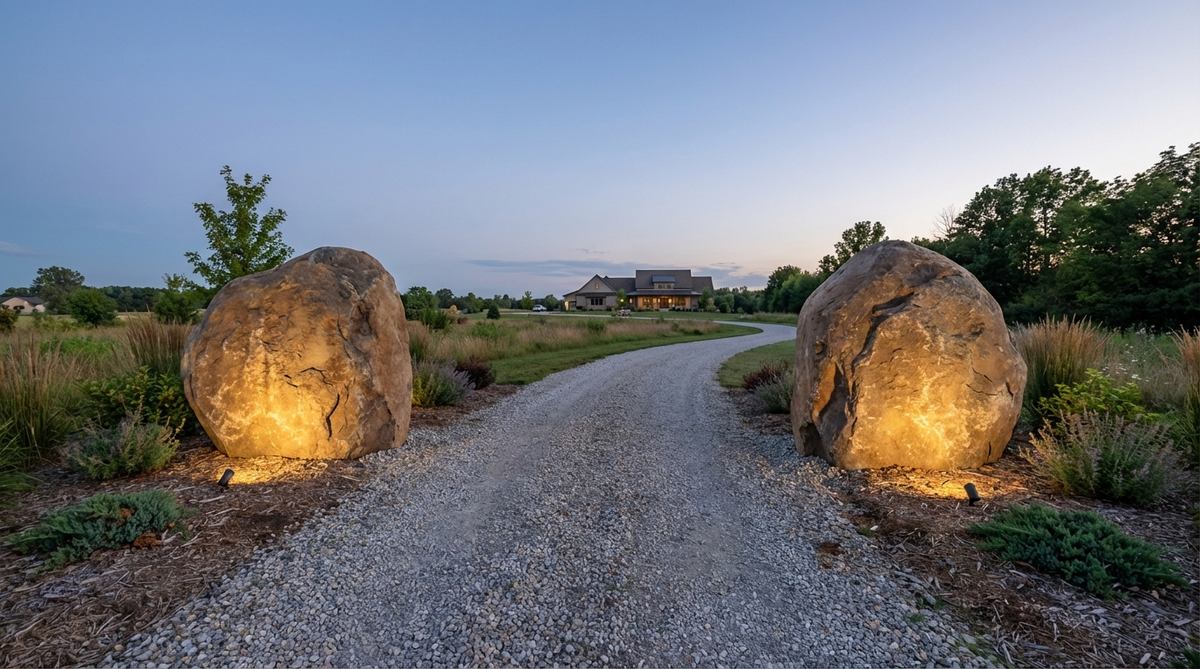
Flanking your entrance with this setup feels like rolling up to a private, gated luxury estate. Placing matched driveway entrance boulders is an incredible use-case for establishing clear property boundaries without building a harsh wall.
Using massive stones instead of traditional brick pillars looks far more expensive than it is while surviving accidental car bumps perfectly. Integrating professional retaining wall kits or reflective markers ensures they stand out clearly during dark winter nights.
You can achieve this grand entrance for about $200–$400 total. It’s an incredibly striking way to boost your home’s curb appeal.
- Key Materials: Two large complementary boulders, gravel base
- Vibe / Style: Rustic estate entrance
- Difficulty: Machinery recommended
- Budget Breakdown: Boulders: $250 | Base prep: $50
- Creator’s Tip: Set them back at least three feet from the road edge to prevent snowplow damage and allow clear sightlines for pulling out.
- Smart Sourcing: Grab solar-powered driveway marker lights (bulk pack) and a high-visibility reflective paint spray.
18. Rock Fire Pit Surround
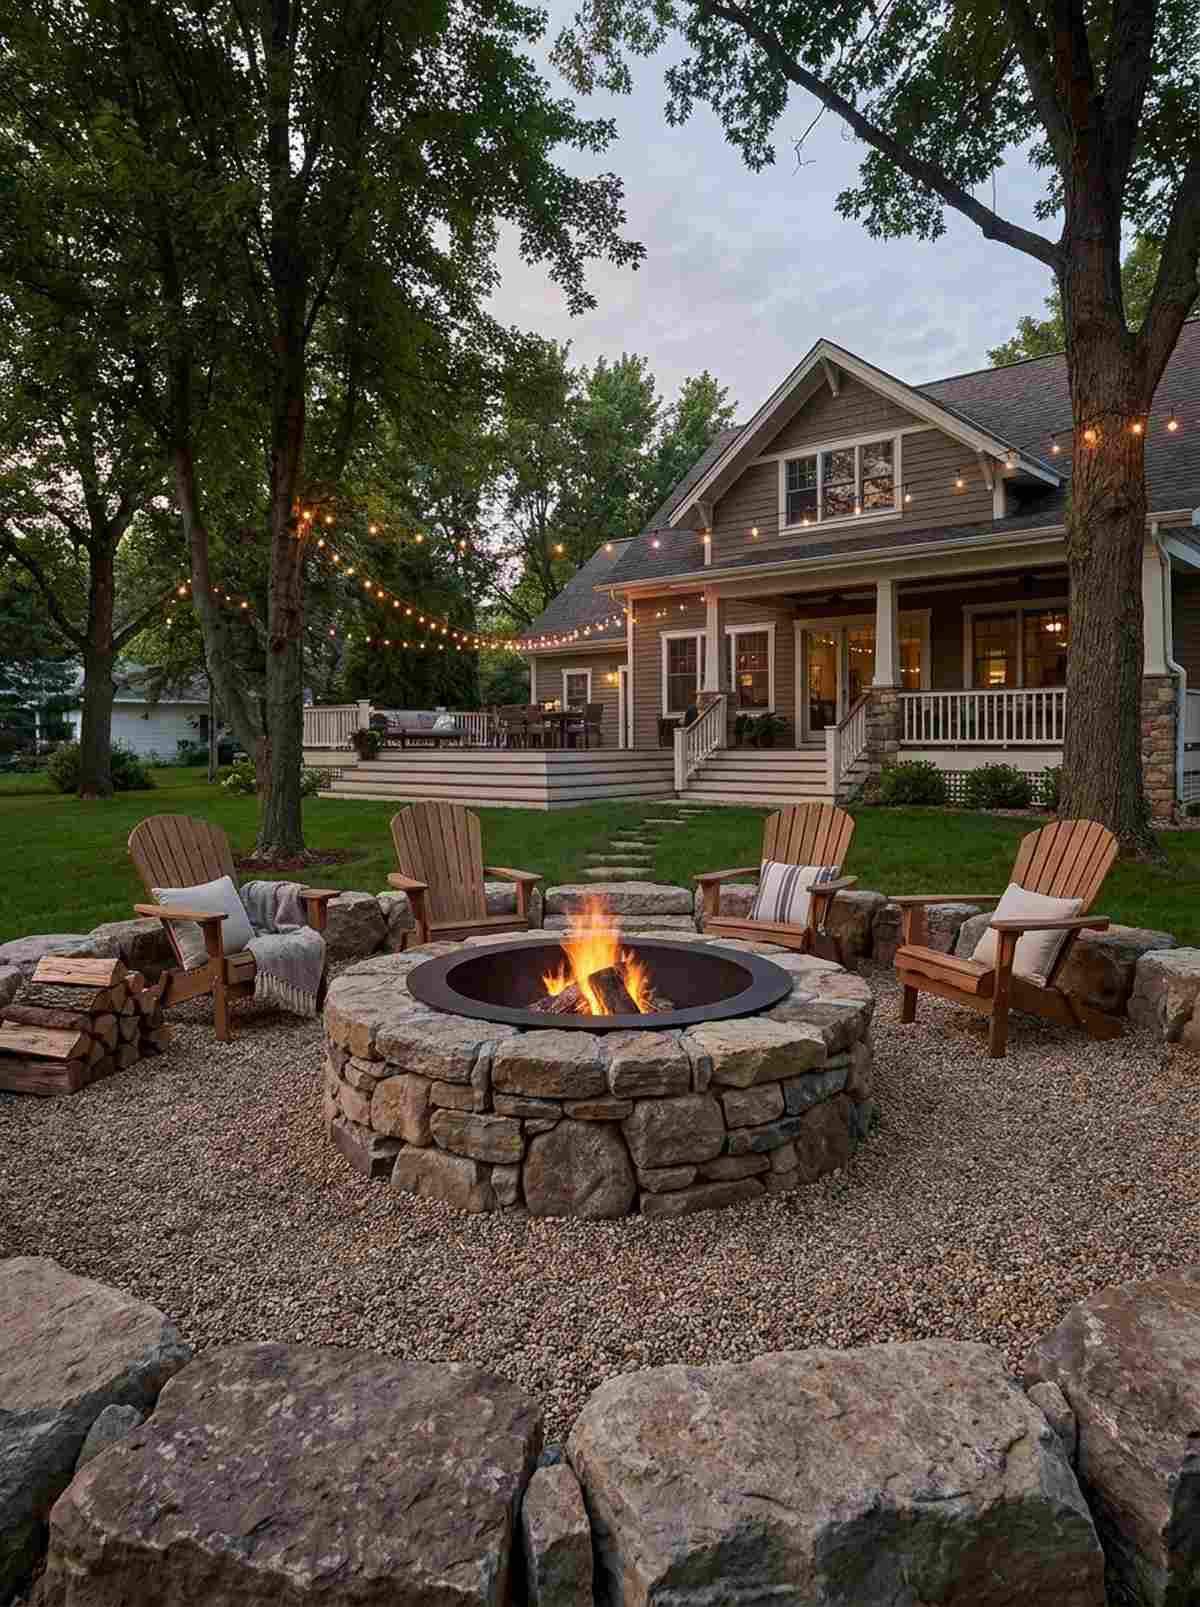
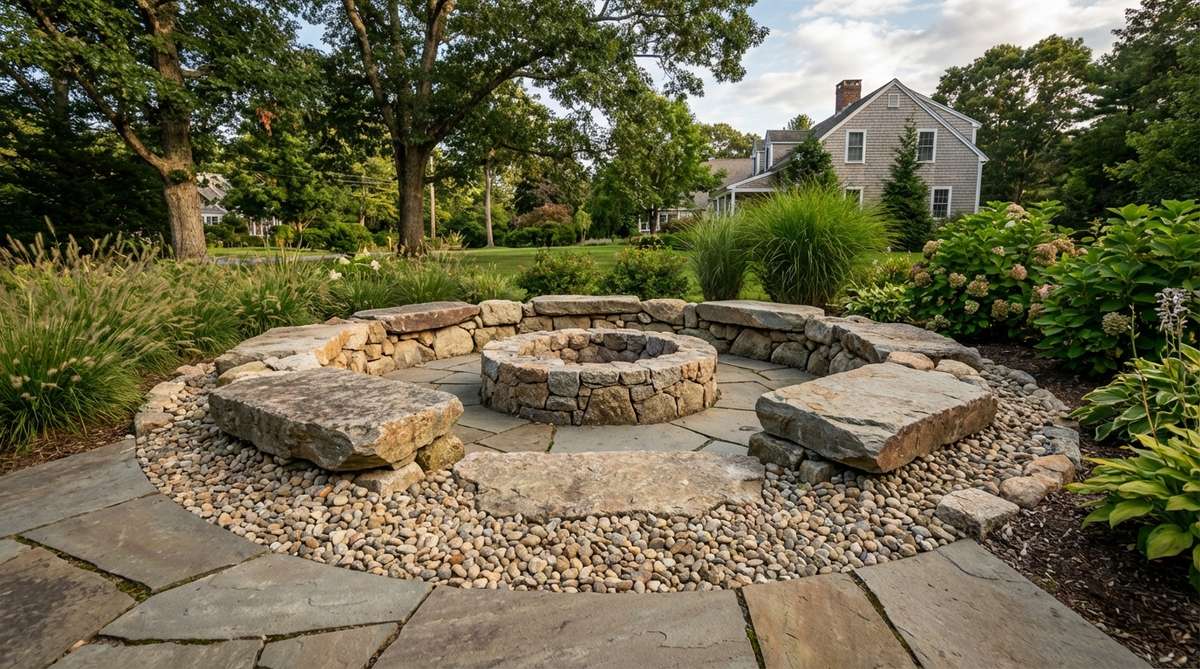
This cozy, robust gathering space feels like a high-end wilderness campsite. Constructing a stone fire pit surround works wonderfully for transforming an unused backyard corner into a late-night entertainment zone.
Building with heat-resistant natural fieldstone delivers a surprisingly premium look that makes generic metal fire bowls look cheap. Sourcing commercial landscape fabric and crushed stone for the floor prevents the seating area from turning into a muddy mess.
This entire entertaining area can be built for around $150–$300. Save this to your ultimate outdoor living board!
- Key Materials: Heat-resistant boulders, pea gravel, fire ring
- Vibe / Style: Cozy woodland campfire
- Difficulty: Moderate weekend build
- Budget Breakdown: Stone ring: $100 | Gravel floor: $80
- Creator’s Tip: Always install a heavy steel insert ring inside the stones to protect the rocks from cracking under extreme, direct heat.
- Smart Sourcing: Use a heavy-duty steel fire pit rim insert and heat-resistant landscape adhesive.
19. Vertical Stone Monolith
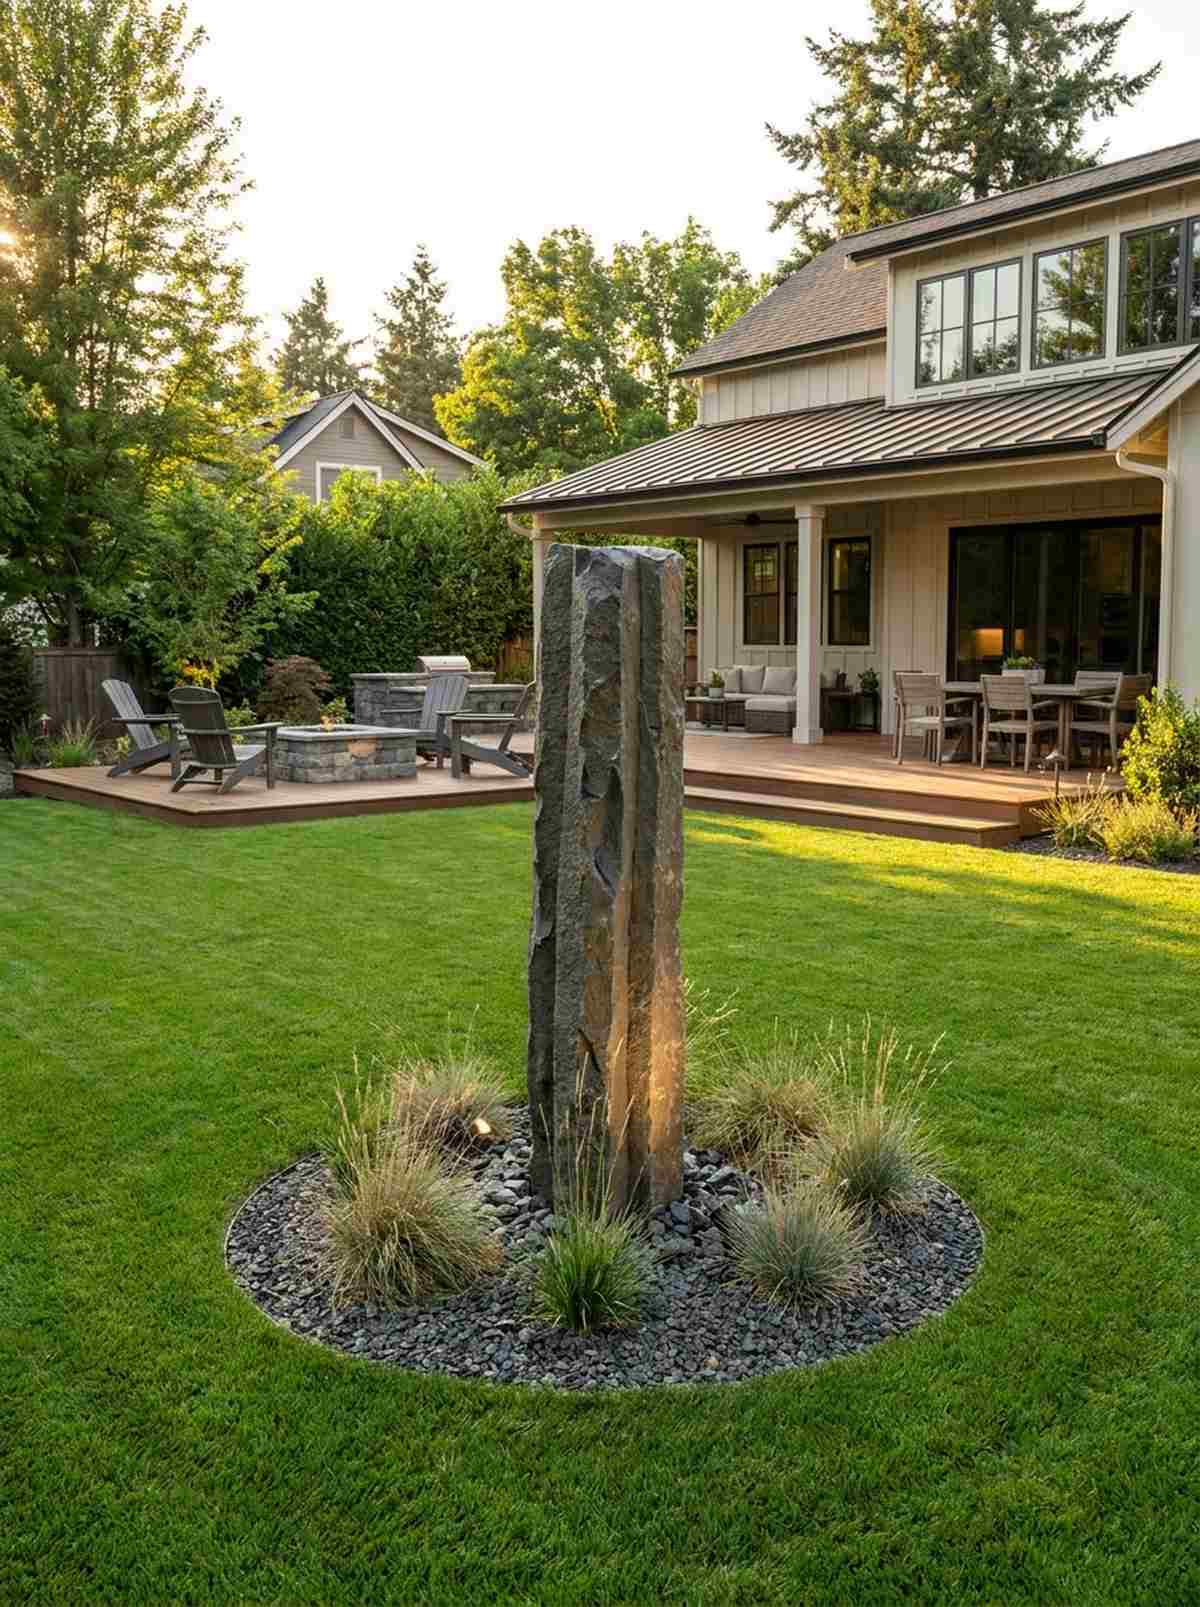
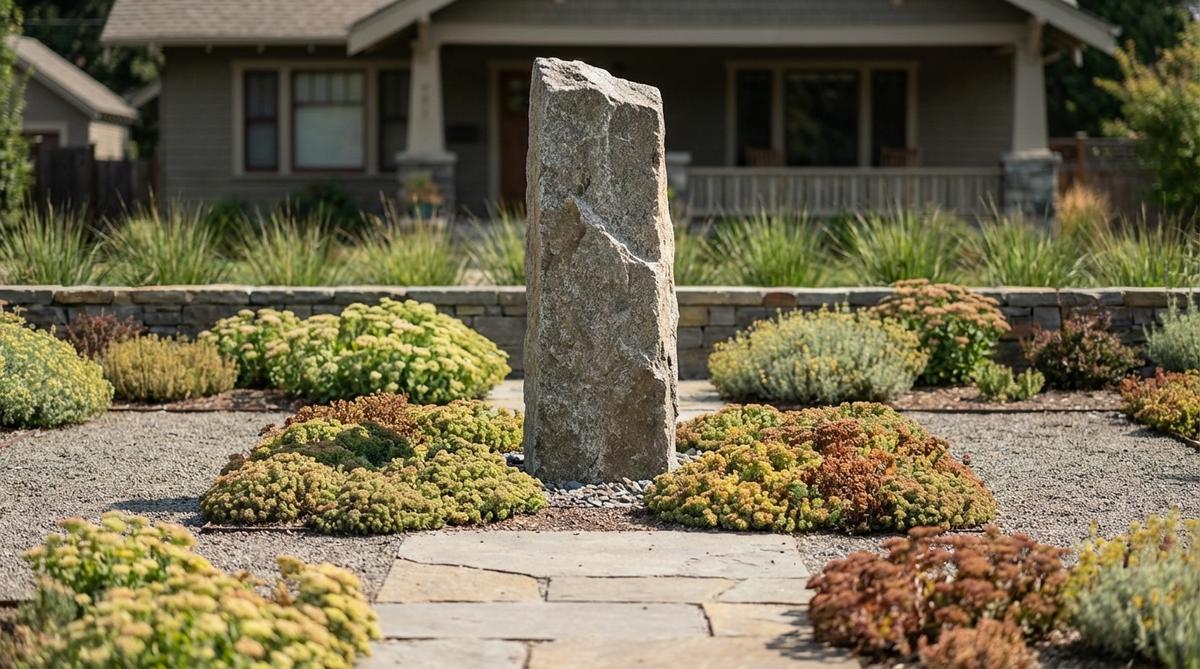
Standing near this feature feels like admiring an ancient monument in a modern art garden. Securing a tall vertical stone monolith is a jaw-dropping use-case for adding height to perfectly flat, boring backyards.
Using one dramatic upright rock rather than a pile of small ones creates a bespoke aesthetic that commands immediate attention. Setting the base deeply in concrete ensures this top-heavy feature is perfectly safe around running children or high winds.
This striking focal point costs roughly $150–$250 to install securely. It’s a minimalist hack that changes the entire dimension of your yard.
- Key Materials: Narrow columnar basalt or slate, concrete footing
- Vibe / Style: Modern sculptural art
- Difficulty: Requires deep digging and bracing
- Budget Breakdown: Monolith: $180 | Concrete: $20
- Creator’s Tip: Bury at least one-third of the total height in a concrete-filled hole to prevent it from eventually leaning.
- Smart Sourcing: Pick up fast-setting concrete mix bags and heavy-duty leveling stakes.
If you hate pulling weeds, this next exact material swap is going to save you dozens of hours every single summer.
Specialty Applications for Decorative Landscape Rocks
Beyond traditional borders and pathways, outdoor decor rocks solve specific landscape challenges while adding character. These applications demonstrate the versatility of stone in both problem-solving and ornamental roles.
20. Lava Rock Mulch Alternative
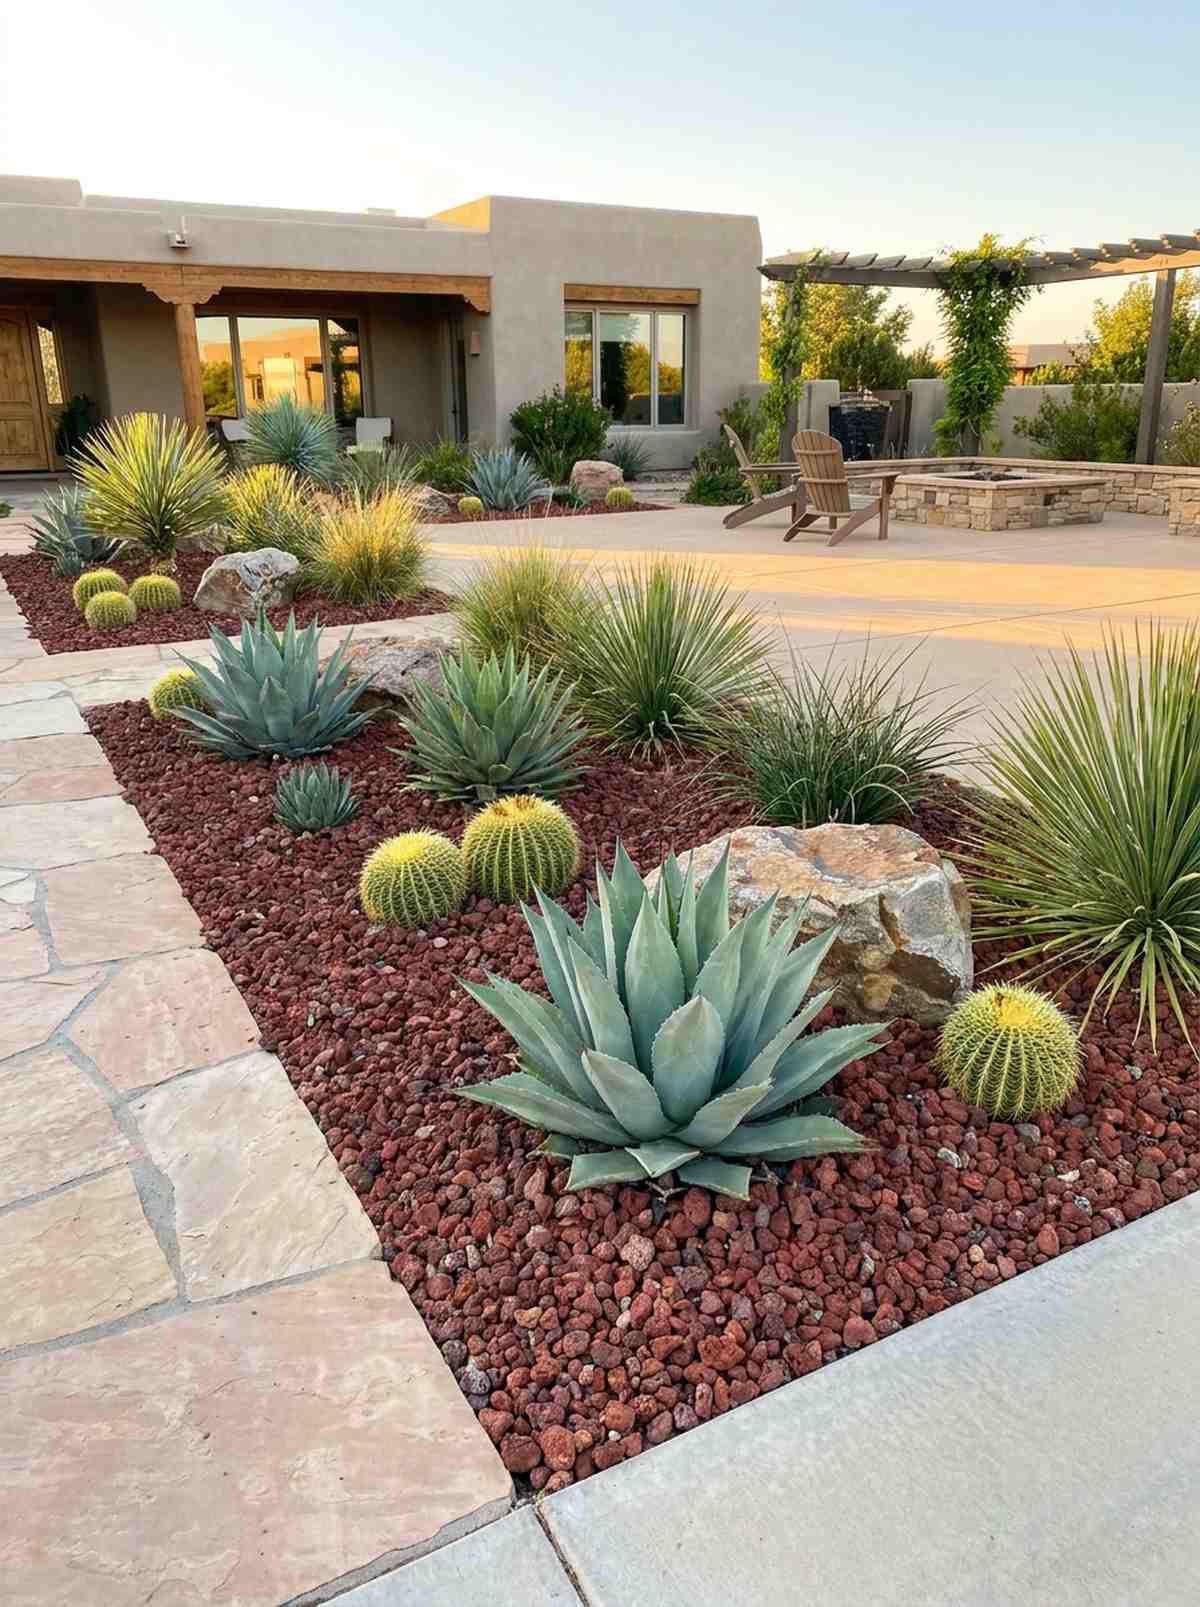
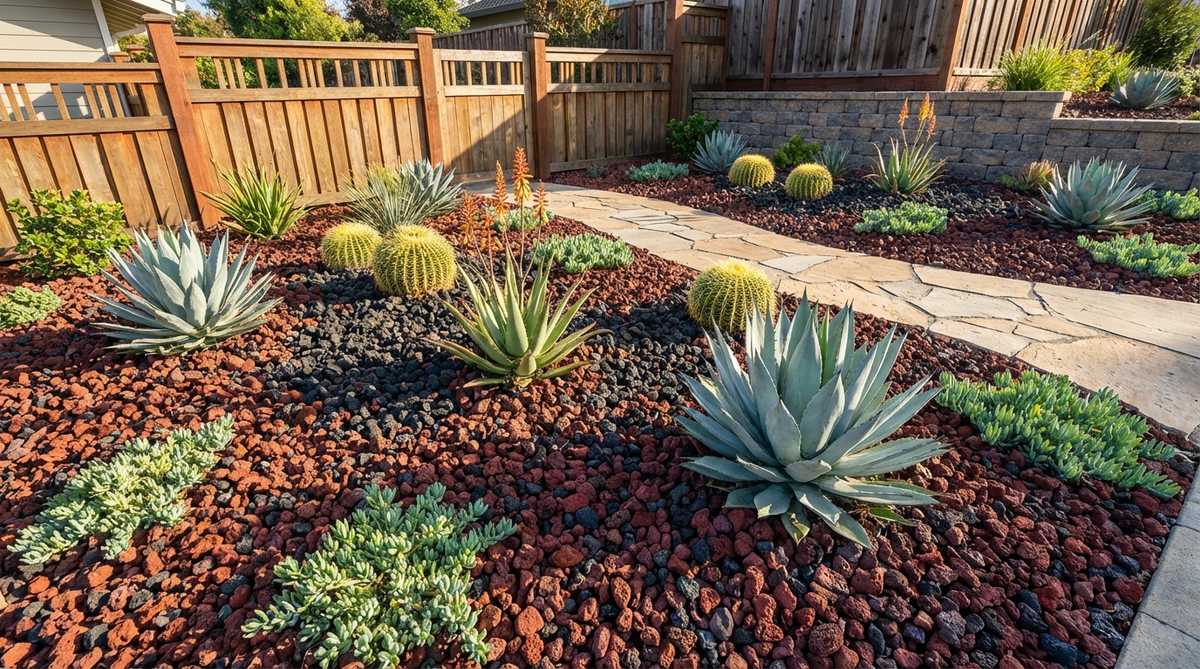
This high-contrast foundation feels like a sleek, drought-proof botanical garden. Spreading red or black lava rock is a phenomenal use-case for surrounding succulents, cacti, or modern foundation plantings.
Skipping traditional wood mulch completely eliminates the need to top-dress every spring, saving massive amounts of money over time. Relying on bulk pathway gravel delivery or volcanic stone prevents the wind from blowing your garden beds into the yard.
You can make this permanent switch for roughly $50–$80 per bed. Pin this incredible low-maintenance landscaping secret!
- Key Materials: Crushed lava rock, premium weed barrier
- Vibe / Style: Southwestern desert chic
- Difficulty: Very simple spreading
- Budget Breakdown: Lava rock: $50 | Fabric: $20
- Creator’s Tip: Wash the lava rock down with a hose immediately after spreading to reveal its true, vibrant color hidden under the rock dust.
- Smart Sourcing: Buy pre-bagged volcanic lava rock (bulk pack) and a commercial-grade geotextile weed barrier.
21. Slate Chip Modern Borders
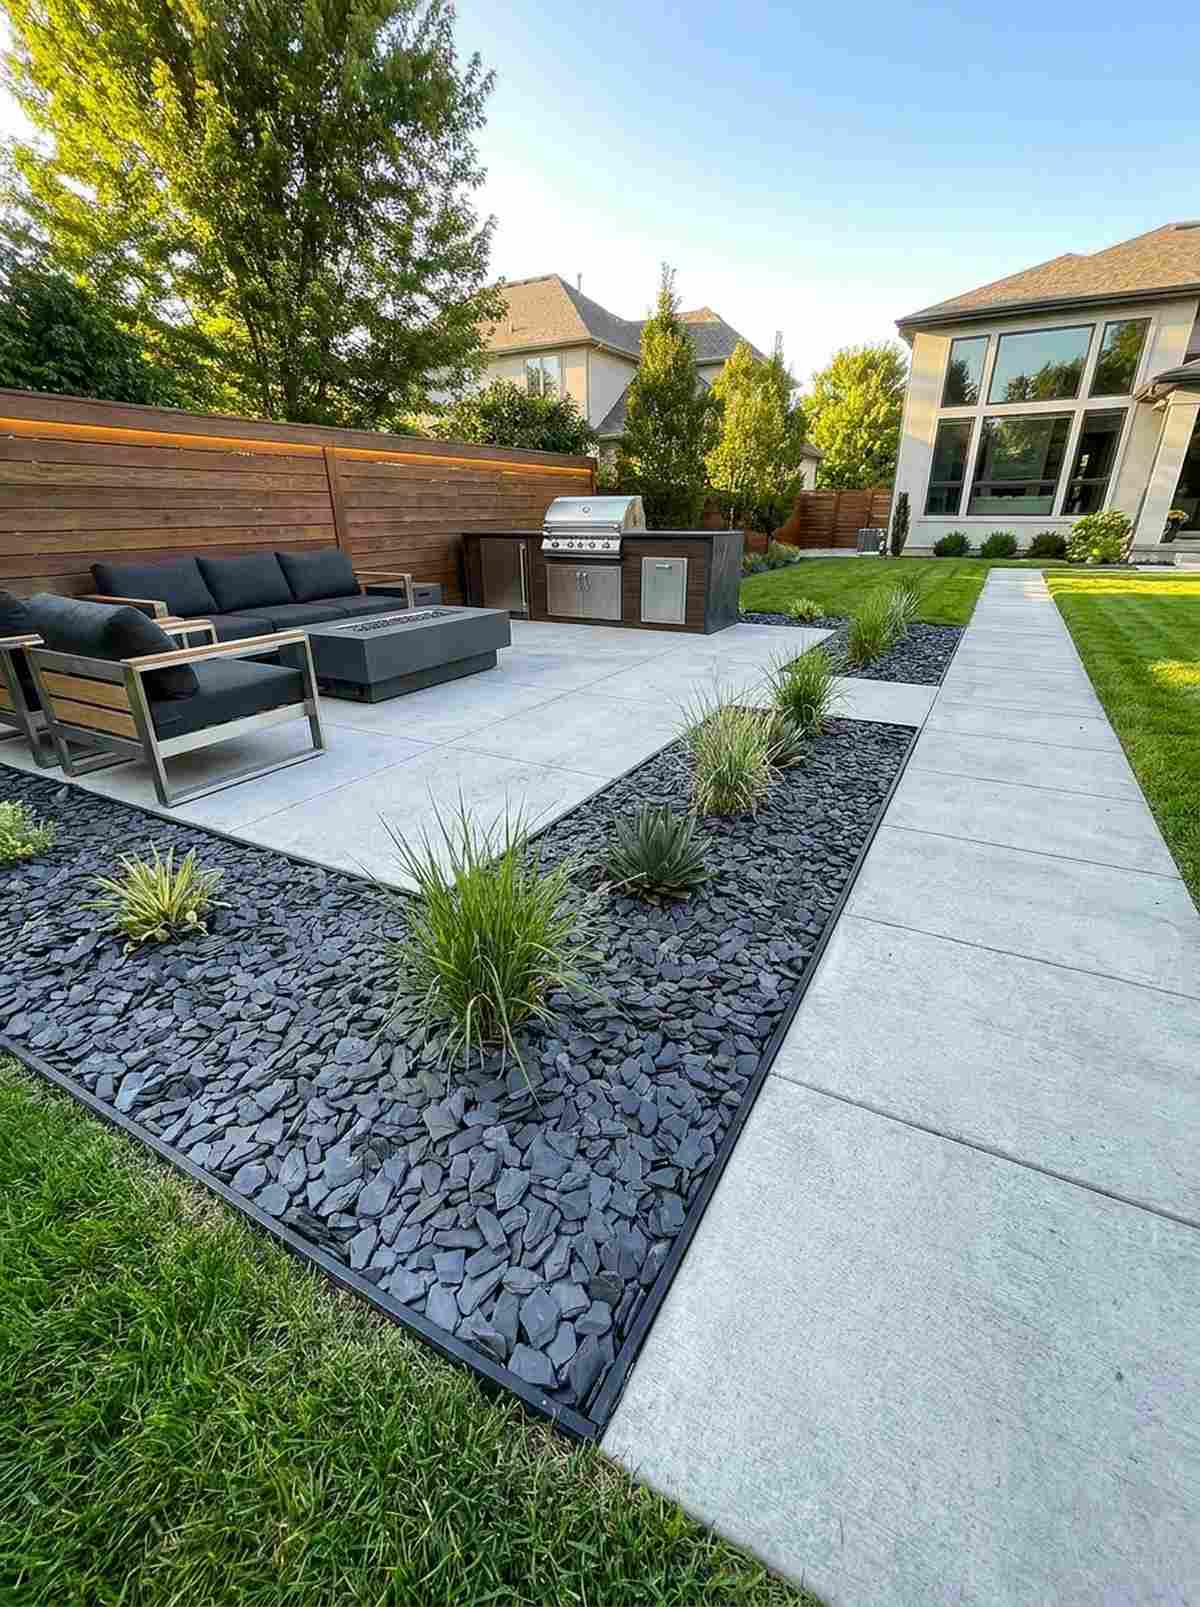
This sharp, flat texture creates a vibe that feels impeccably neat and highly tailored. Laying down charcoal slate chips works brilliantly for filling narrow side-yards or bordering ultra-modern concrete paver patios.
Using angular slate instead of round pebbles gives a designer-level finish because the flat pieces interlock and never roll away. Upgrading with commercial landscape fabric underneath keeps the chic dark stones from sinking into the mud.
Expect to spend around $60–$90 for a beautifully textured modern border. It’s a fast upgrade that completely changes the vibe.
- Key Materials: Mini slate chips, rigid plastic edging
- Vibe / Style: Crisp urban contemporary
- Difficulty: Beginner-friendly
- Budget Breakdown: Slate: $65 | Edging: $15
- Creator’s Tip: Keep leaf blowers on their lowest setting near slate chips; their flat surface makes them easy to accidentally blow into the grass.
- Smart Sourcing: Use natural dark slate chips (bulk bag) and no-dig heavy-duty border edging.
22. Cobblestone Tree Ring
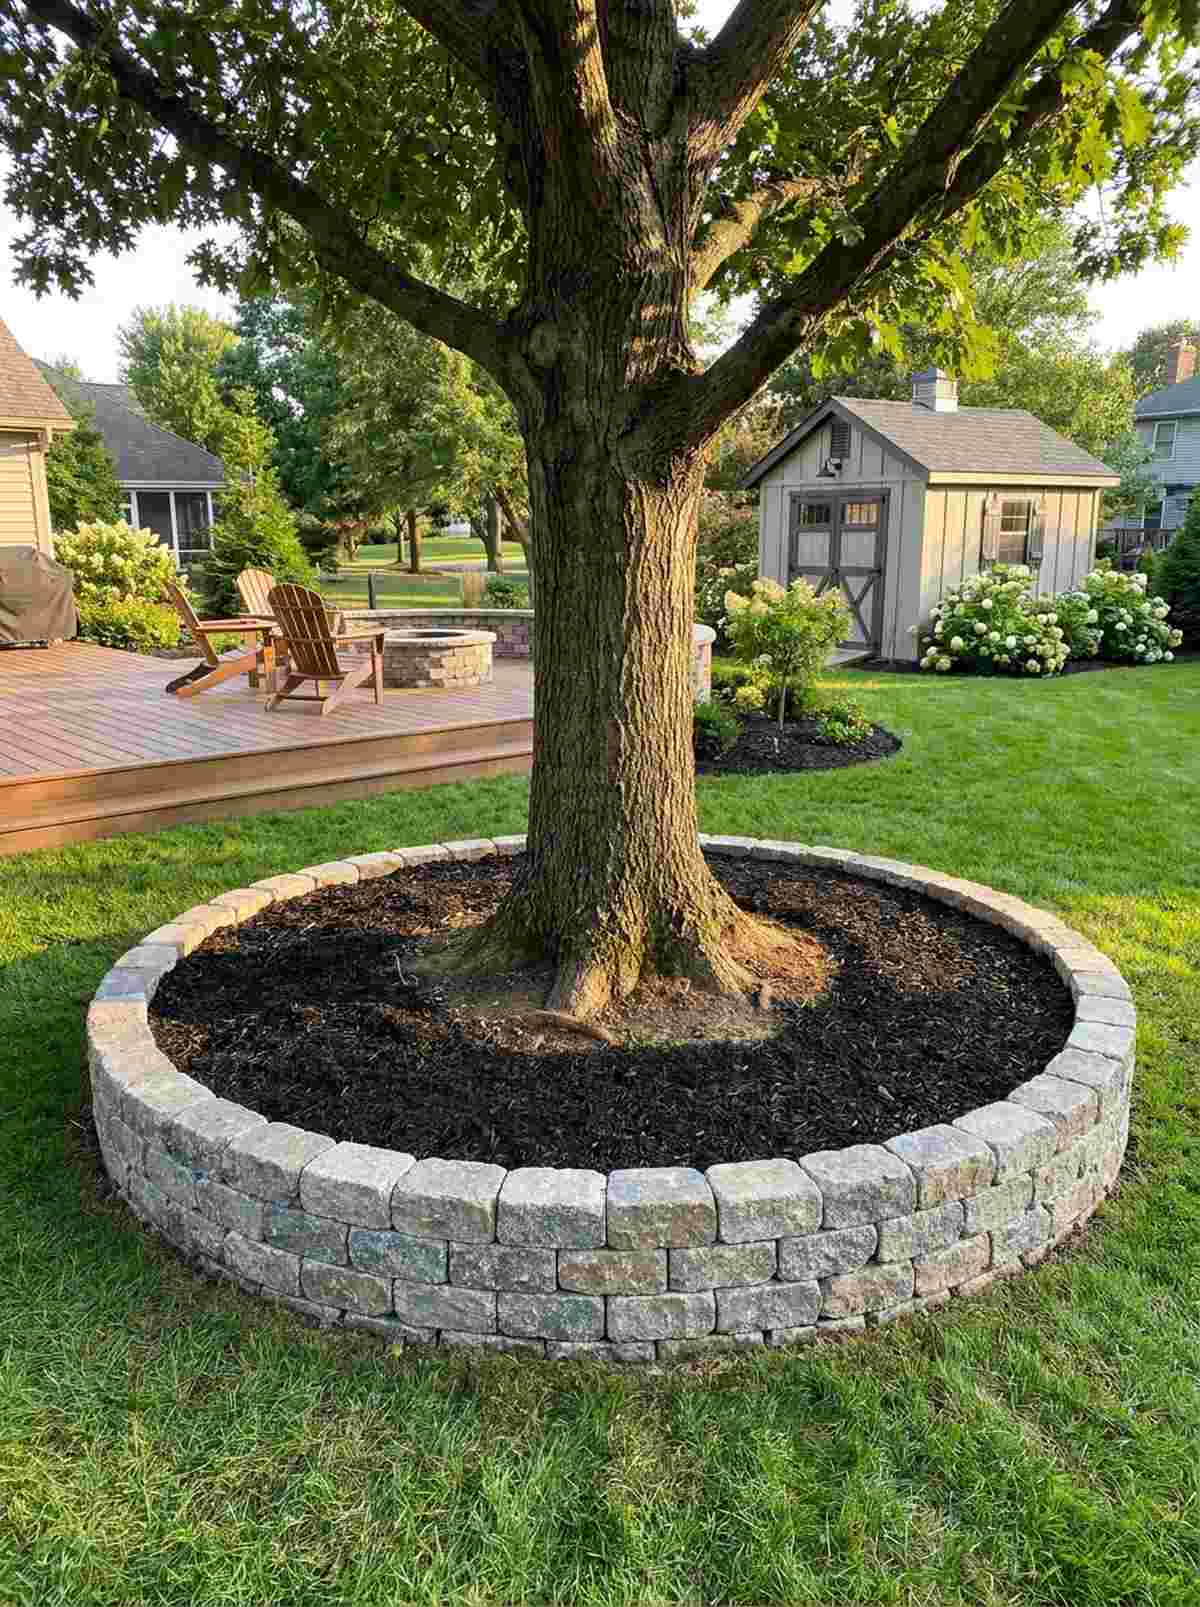
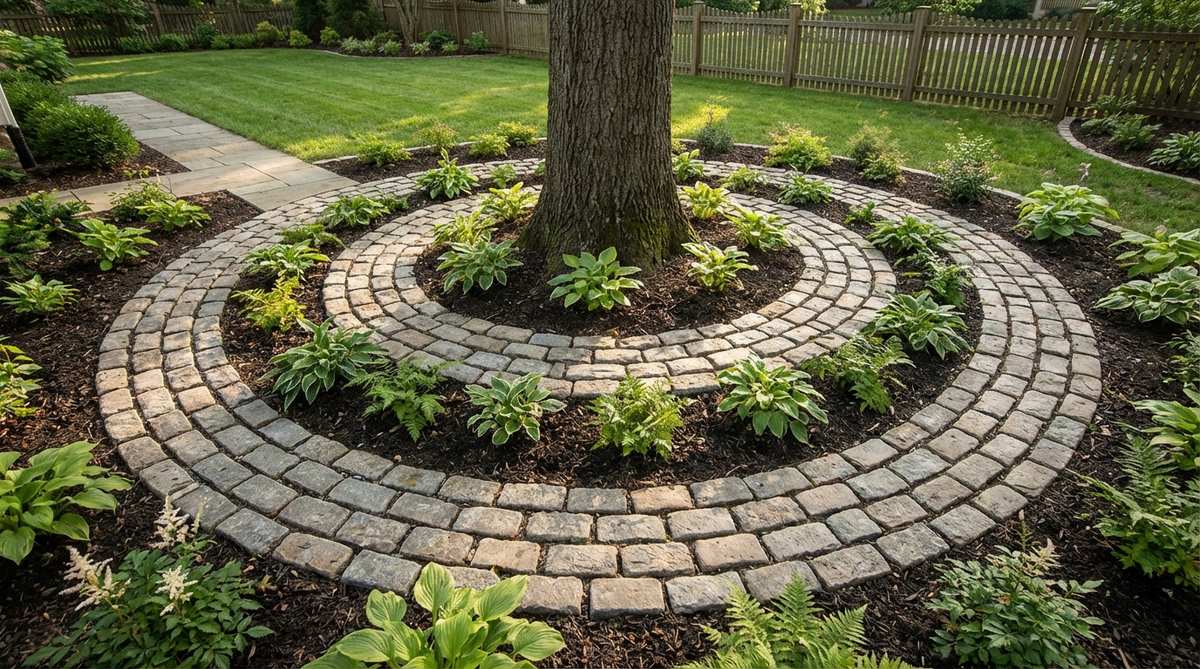
This classic, circular border makes your lawn feel like a manicured historical park. Stacking a neat cobblestone tree ring is the absolute perfect use-case for protecting exposed tree roots from aggressive weed whackers.
Replacing flimsy plastic tree rings with heavy, authentic granite blocks delivers a surprisingly premium look that adds instant character. Sourcing uniform premium garden stone supplies ensures the ring forms a perfect circle without awkward gaps.
You can create this protective, charming feature for about $30–$50 per tree. Save this brilliant yard protection hack!
- Key Materials: Granite cobbles, leveling sand
- Vibe / Style: Traditional European courtyard
- Difficulty: Quick and easy geometry
- Budget Breakdown: Cobbles: $35 | Sand: $5
- Creator’s Tip: Never pile mulch or soil up against the actual tree trunk inside the ring; leave the root flare exposed to prevent tree rot.
- Smart Sourcing: Grab tumbled granite cobblestones (bulk pack) and a pre-cut circular weed barrier mat.
23. Crevice Garden Stone Arrangement
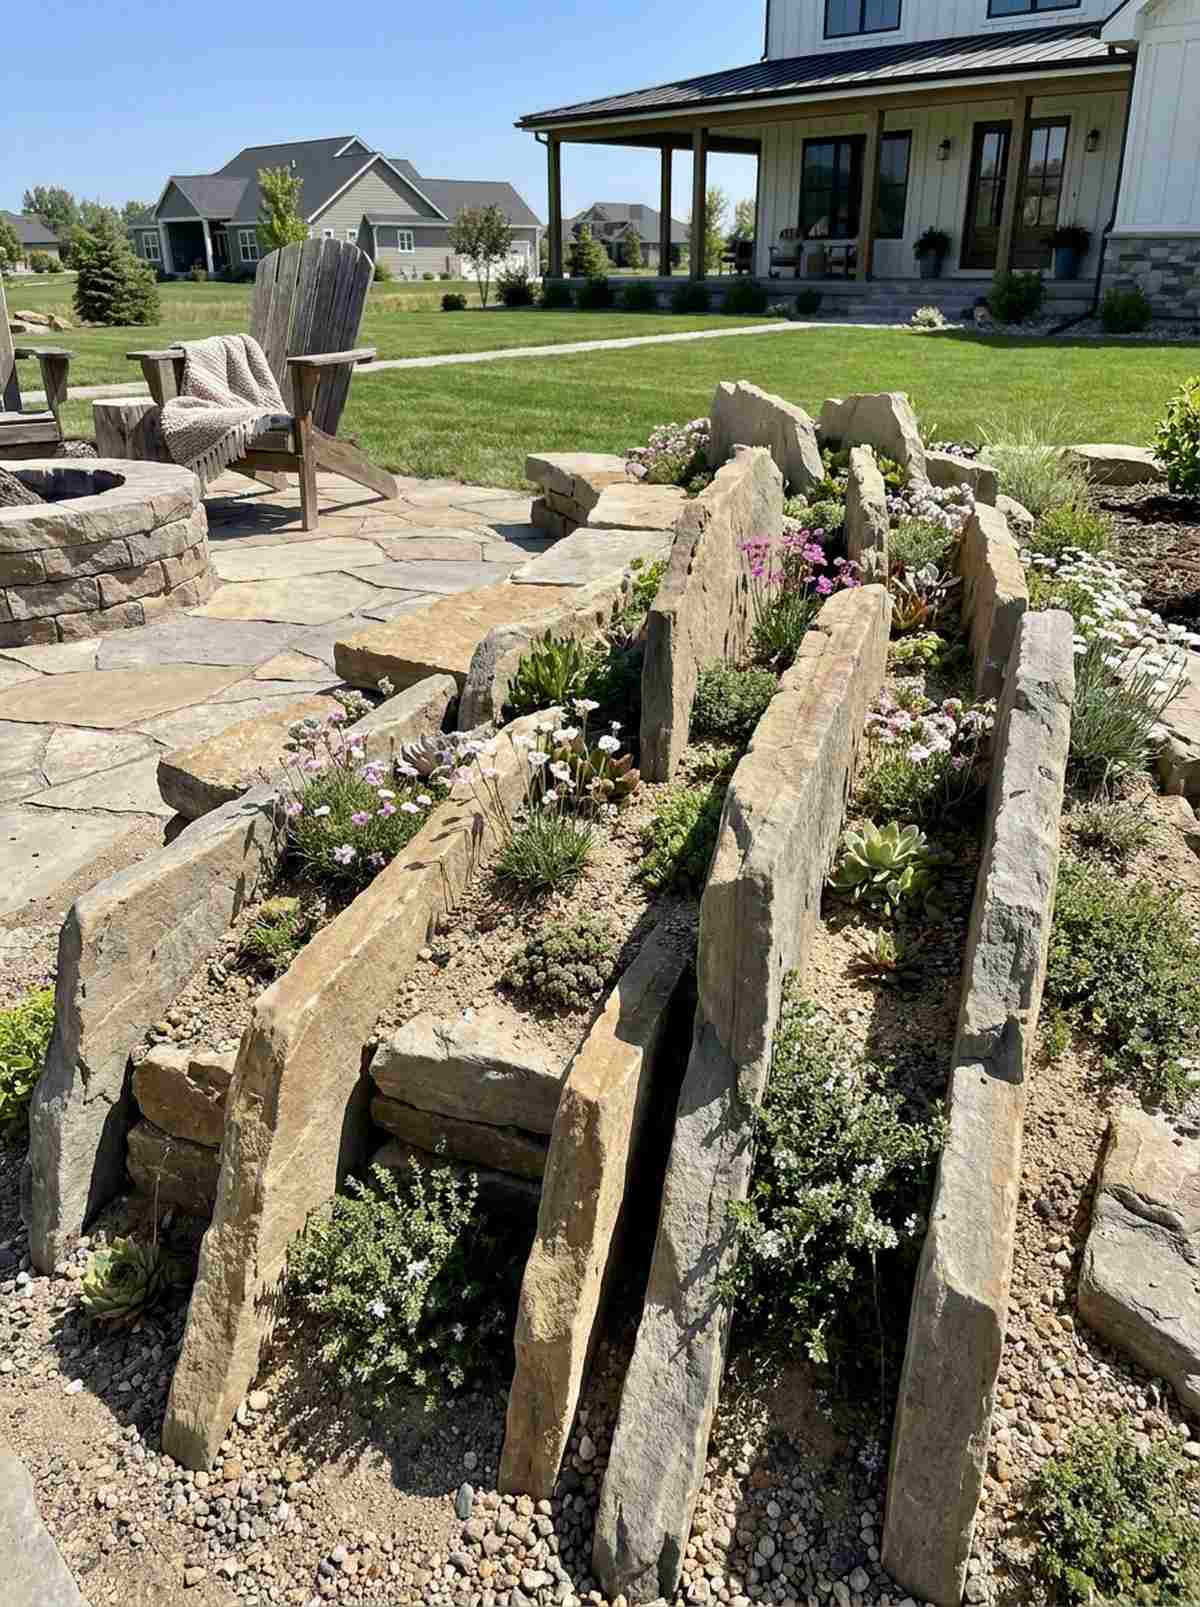
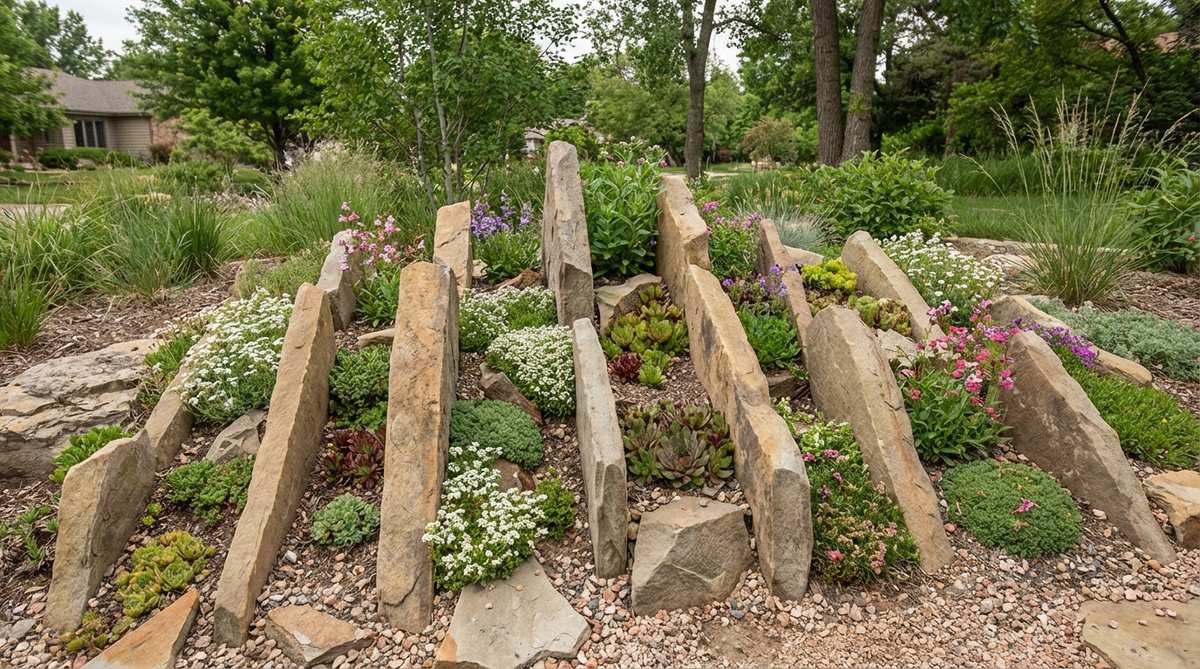
This vertical planting style feels like a magical slice of an alpine mountain ridge. Building a tight crevice stone garden is an incredible use-case for showcasing miniature succulents, rare alpines, or tiny creeping flowers.
Setting flat stones tightly on edge rather than laying them flat creates a bespoke aesthetic that expert horticulturists rave about. This specialized technique pushes roots deep down, keeping delicate plants alive even during brutal heat waves.
This highly specialized mini-garden costs around $40–$70 to set up. Pin this if you love collecting unique miniature plants!
- Key Materials: Flat sedimentary rock slabs, coarse sand mix
- Vibe / Style: Alpine rock enthusiast
- Difficulty: Detail-oriented placing
- Budget Breakdown: Slabs: $45 | Specialized soil: $15
- Creator’s Tip: Pack the narrow gaps with a mix of 70% coarse sand and 30% compost to give alpine roots the rapid drainage they require.
- Smart Sourcing: Source flat sandstone stacking rocks (pre-cut) and horticultural coarse drainage sand.
24. Zen Garden Raked Gravel


The flowing patterns of this layout create an atmosphere of profound stillness and focus. Installing a fine raked gravel bed is the ultimate use-case for creating a dedicated meditation corner in a shaded backyard.
Using specialized crushed granite instead of regular sand looks far more expensive than it is and holds rake lines beautifully after a breeze. Incorporating professional retaining wall kits around the perimeter ensures your serene gravel ocean doesn’t spill into the lawn.
You can establish this deeply relaxing space for about $70–$120. Highly recommended for a quiet, contemplative weekend win.
- Key Materials: Decomposed granite or fine gravel, wooden rake
- Vibe / Style: Minimalist Japanese sanctuary
- Difficulty: Moderate base preparation
- Budget Breakdown: Fine gravel: $80 | Wooden rake: $20
- Creator’s Tip: Avoid perfectly round sand. You need slightly angular crushed stone so the grains lock together and hold the raked ripples.
- Smart Sourcing: Invest in fine crushed granite (bulk delivery) and a traditional wooden Zen garden rake.
Transforming Yards With Strategic Stone Placement
Incorporating outdoor decor rocks into your landscape design delivers a high-end, premium result with minimal maintenance demands. From executing exactly 24 brilliant features—including functional pathway solutions and dramatic boulder focal points—stone layouts adapt to any style while solving drainage, erosion, and weed control challenges. Start with bulk materials or starter kits that address your property’s specific needs, then expand your rock features utilizing smart sourcing to create a cohesive, professionally designed outdoor environment on a DIY budget.
Frequently Asked Questions
What size rocks work best for garden borders?
Rocks ranging from 3 to 8 inches in diameter create effective garden borders that prevent grass encroachment while delivering a highly desirable premium aesthetic. Smaller pebbles tend to scatter without heavy-duty landscape edging kits, while oversized boulders overwhelm compact spaces. For stacked borders, utilizing pre-cut flat fieldstones 6-12 inches across provides stable, professional-looking courses without the need for expensive mortar.
How do I prevent weeds from growing through decorative rock?
Always install a commercial-grade weed barrier fabric beneath all rock features, overlapping seams by 6 inches and securing with heavy-duty landscape staples. Apply rocks at least 2-3 inches deep to completely block sunlight and stop weed germination. Avoid using cheap plastic sheeting, which destroys underlying soil biology. For high-weed areas, a seasonal application of pre-emergent over your bulk decorative gravel delivery provides ultimate protection.
Can I mix different types of decorative rocks in one landscape?
Mixing stone types successfully requires limiting your palette to two or three varieties to maintain that looks-expensive-but-isn’t cohesive vibe. For example, use budget-friendly pea gravel for pathways, UV-resistant landscape borders for edges, and a single specimen boulder as a focal point. Combining too many competing textures or colors ruins the designer-level finish and creates visual chaos instead of flow.
How much rock do I need for a pathway project?
Calculate the square footage of your pathway by multiplying length times width, then multiply by the desired depth in feet. One cubic yard of premium garden stone supplies covers approximately 100 square feet at 3 inches deep. Order an additional 10-15% through a bulk pathway gravel delivery to account for settling and uneven bases, ensuring a thick, luxurious coverage that won’t show bare spots.
What rocks work best in hot climates?
Light-colored stones like limestone, white marble chips, or buff sandstone reflect rather than absorb solar radiation, staying cooler underfoot and acting as a budget-friendly cooling mechanism for your yard. Avoid dark lava rock or black river stones in full sun, as they absorb extreme heat. In desert climates, utilizing pre-mixed decomposed granite bags provides a permeable, heat-moderating surface that pairs perfectly with drought-tolerant setups.