
Transform your basic backyard into a wildly romantic sanctuary that feels like a forgotten English countryside estate. This comprehensive setup guide proves that achieving breathtaking garden design cottage aesthetics doesn’t require a millionaire’s landscaping budget. By strategically blending affordable bulk wildflower seeds with high-quality structural accents, you can easily pull off a premium, designer-level outdoor space that thrives year-round.
Design Snapshot: Key Principles
- Layered Planting Structure: Establish bones with hedges and paths, add flesh through main plantings, then dress with self-seeding annuals.
- Organic Flow: Replace rigid lines with soft curves and meandering routes that guide movement naturally through garden zones.
- Repetition with Variety: Group plants in generous clumps while varying heights and textures to create rhythm without formality.
- Material Authenticity: Select gravel, brick, stone, and bark mulch for pathways that age gracefully and complement rustic aesthetics.
Foundation Layouts for Garden Design English Style
1. Serpentine Border With Central Lawn Panel
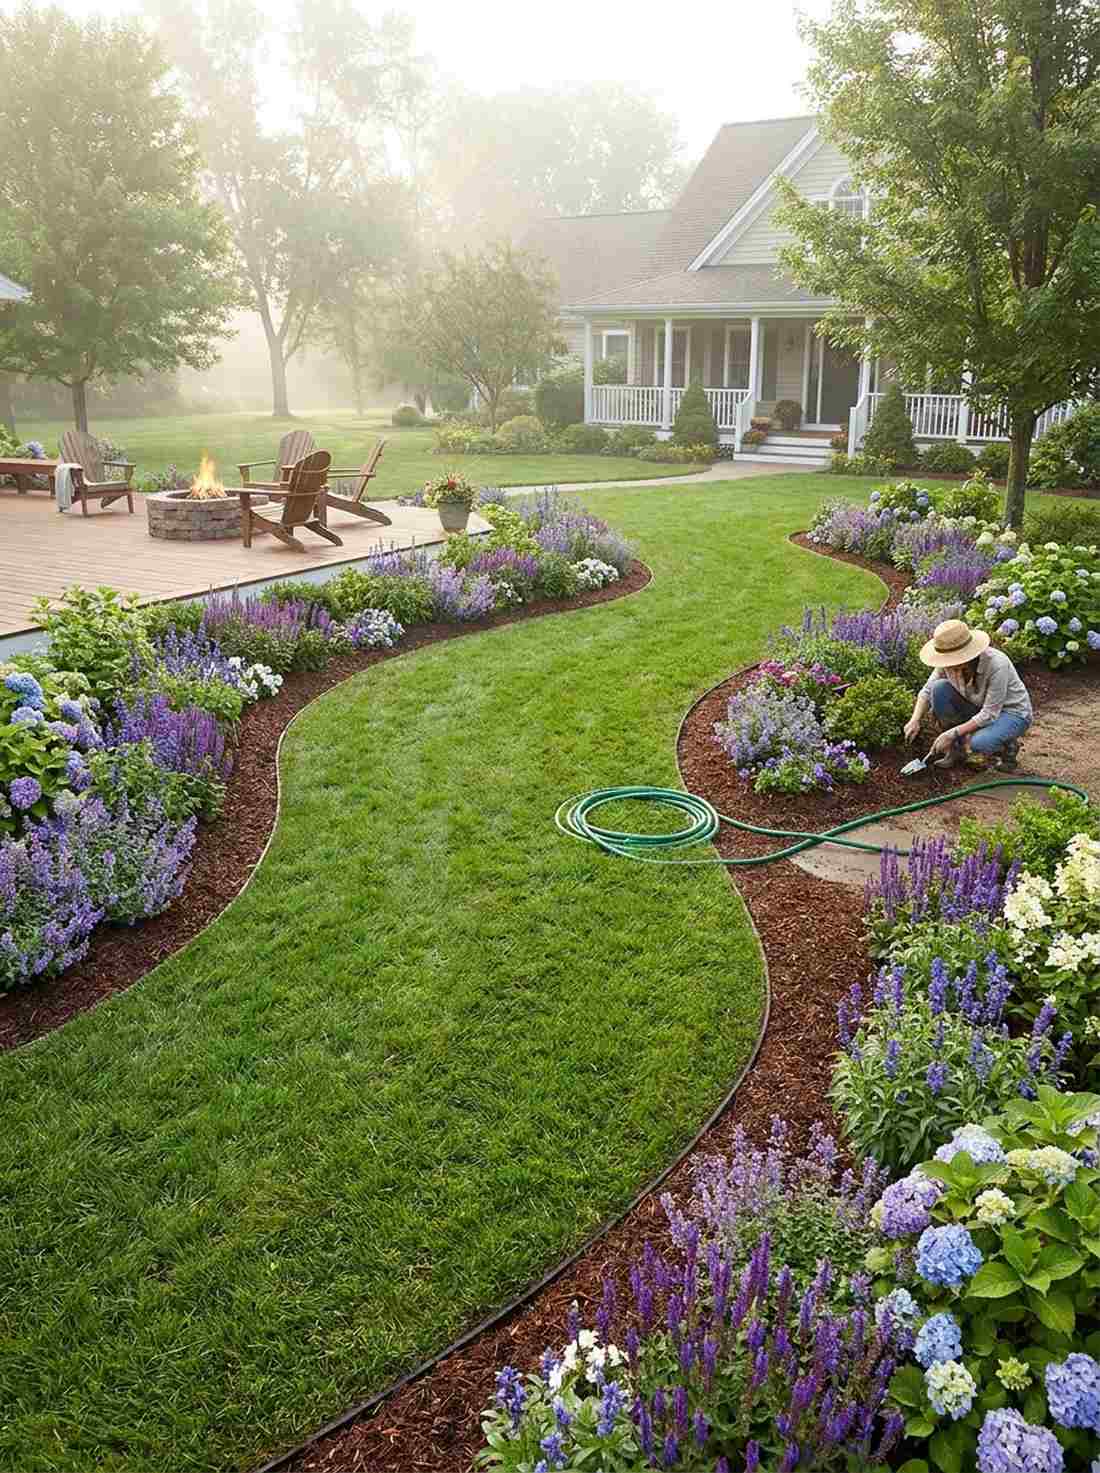
This sweeping aesthetic feels like a hidden manor ground you accidentally discovered on a misty morning walk. A serpentine garden border design works exceptionally well for long, narrow backyards that desperately need a touch of classic romance.
Curved borders naturally guide visitors through the space, making your yard feel twice as large. This layout looks far more expensive than it is, especially when you edge the curves using heavy-duty, UV-resistant commercial landscape edging hidden beneath the soil.
You can easily pull this off for around $50–$120 depending on the size of your space. Save this to your DIY weekend garden board for your next big layout project!
- Key Materials: Flexible landscape edging, premium turf seed, bulk perennial plugs
- Vibe / Style: Sweeping English countryside
- Difficulty: Moderate weekend DIY
- Budget Breakdown: Edging: $40 | Seed/Plants: $60.
- Creator’s Tip: Use a garden hose to lay out the curves before digging to ensure perfectly smooth S-shapes.
- Smart Sourcing: Heavy-duty flexible no-dig edging kits and bulk shade-tolerant grass seed bags.
2. Picket Fence Perimeter Planting
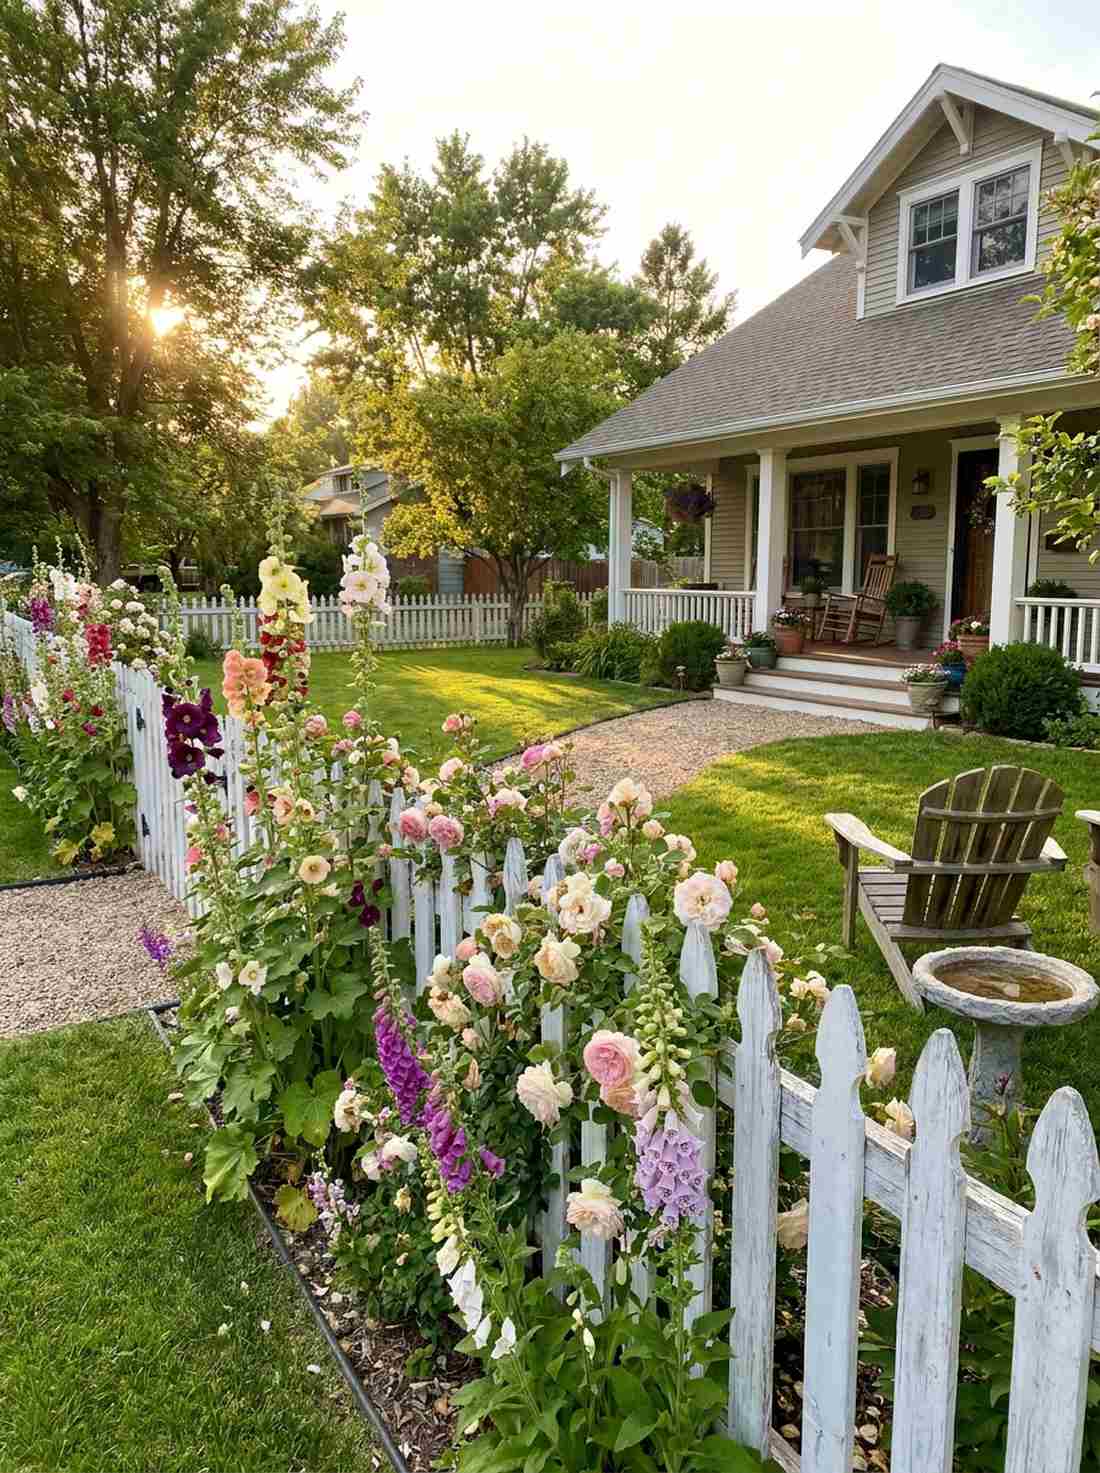

Stepping into this setup feels like opening the pages of a vintage storybook. Utilizing a picket fence perimeter layout is the absolute perfect use-case for defining front yards or small cottage property lines.
Layering tall hollyhocks against natural wood entirely softens rigid boundaries while establishing an instant cottage core aesthetic. It delivers a surprisingly premium look when you pair basic lumber with high-CPC cottage garden starter plants like climbing roses.
Expect to spend around $150–$300 if you’re installing the fencing yourself.
- Key Materials: Wooden picket panels, climbing rose roots, foxglove seeds
- Vibe / Style: Classic heritage farmhouse
- Difficulty: Intermediate build
- Budget Breakdown: Fence panels: $200 | Starter plants: $80.
- Creator’s Tip: Paint the fence white but let it naturally distress over a season for that authentic weathered charm.
- Smart Sourcing: Pre-cut cedar fence pickets and bare-root heritage rose collections.
3. Four-Square Symmetrical Raised Beds
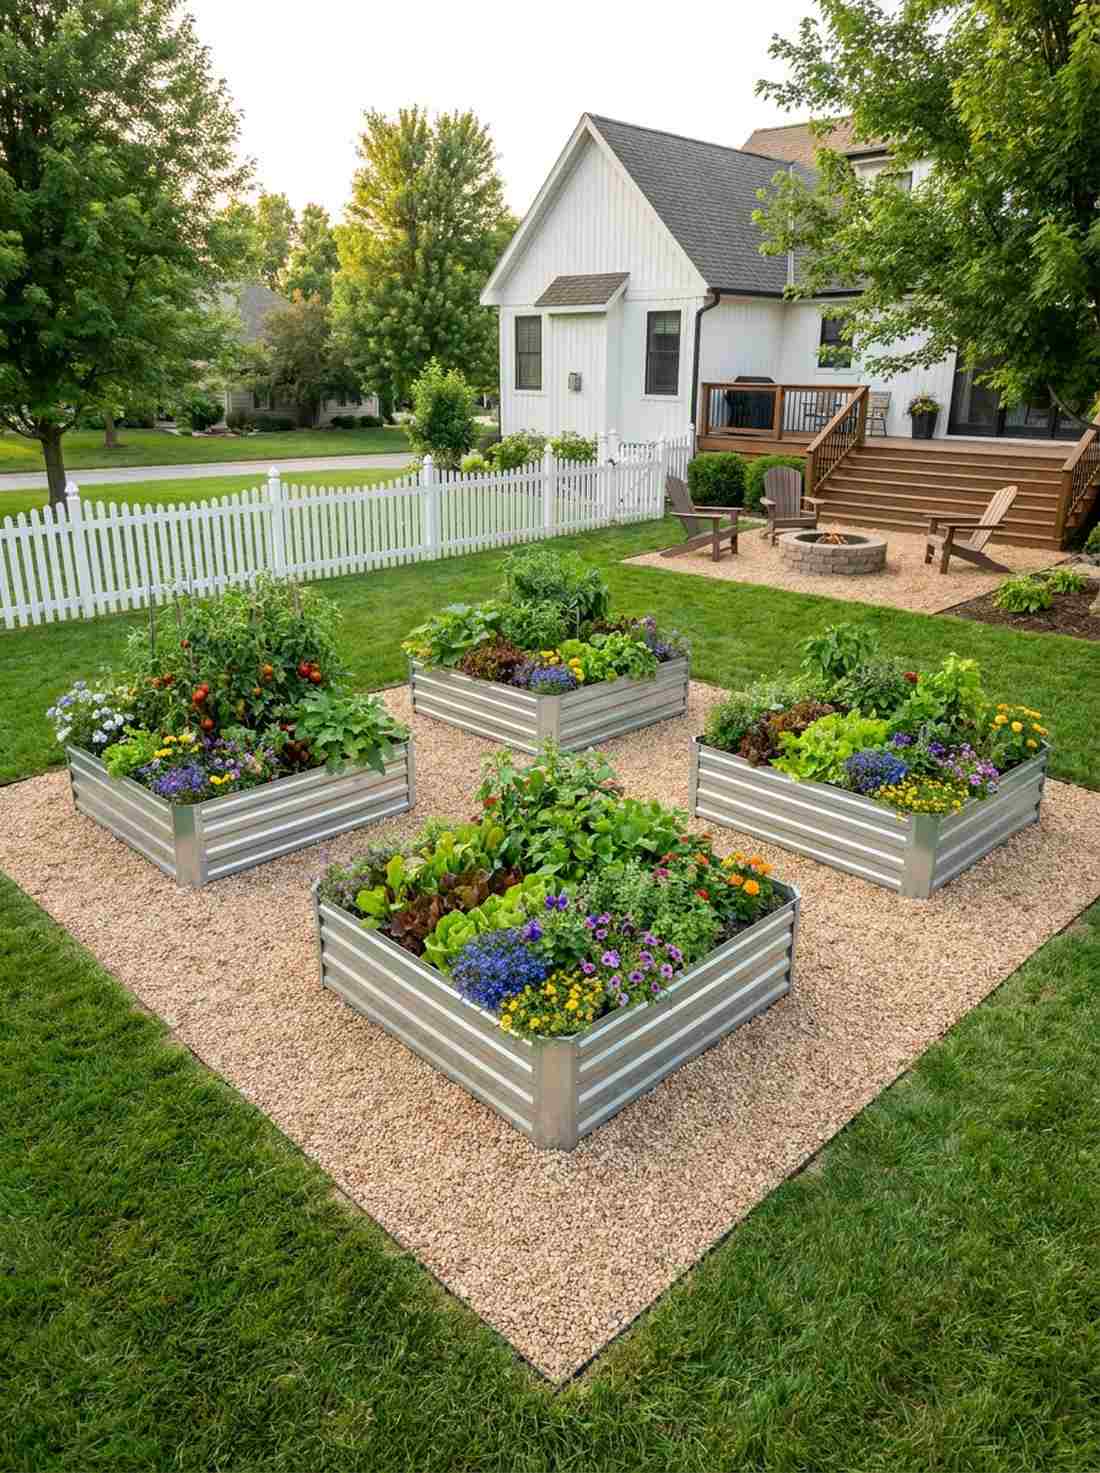
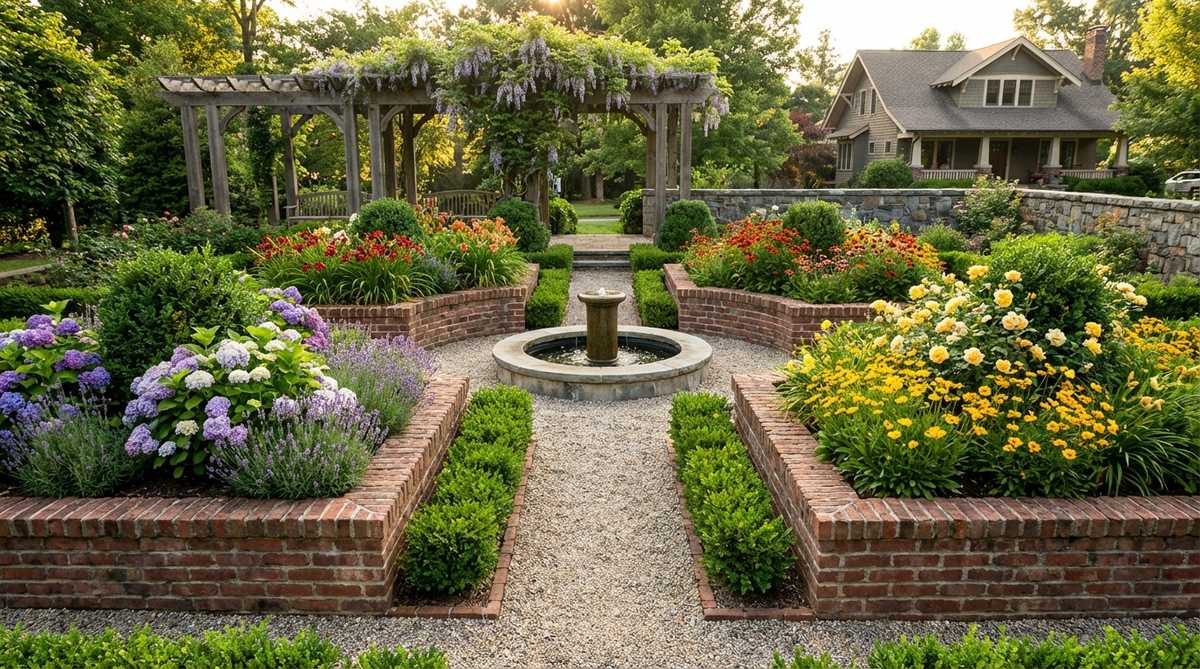
This layout gives off a satisfyingly organized, royal apothecary garden vibe. Implementing symmetrical raised garden beds is brilliant for level spaces where you want to seamlessly mix edible vegetables with blooming ornamentals.
The structured grid completely eliminates garden chaos while maintaining the lush, overflowing cottage feel. Using pre-fabricated modular beds gives a designer-level finish without the massive cost of custom masonry.
You can set up this four-square grid for around $200–$400. Pin this if you’re planning an aesthetic vegetable garden!
- Key Materials: 4 raised bed frames, pea gravel, organic soil blends
- Vibe / Style: Structured English potager
- Difficulty: Easy assembly
- Budget Breakdown: Beds: $250 | Soil & Gravel: $100.
- Creator’s Tip: Leave exactly 36 inches between beds to comfortably fit a standard wheelbarrow.
- Smart Sourcing: Galvanized steel raised bed kits and bulk organic potting mix bags.
4. Crescent Border Encircling Focal Point
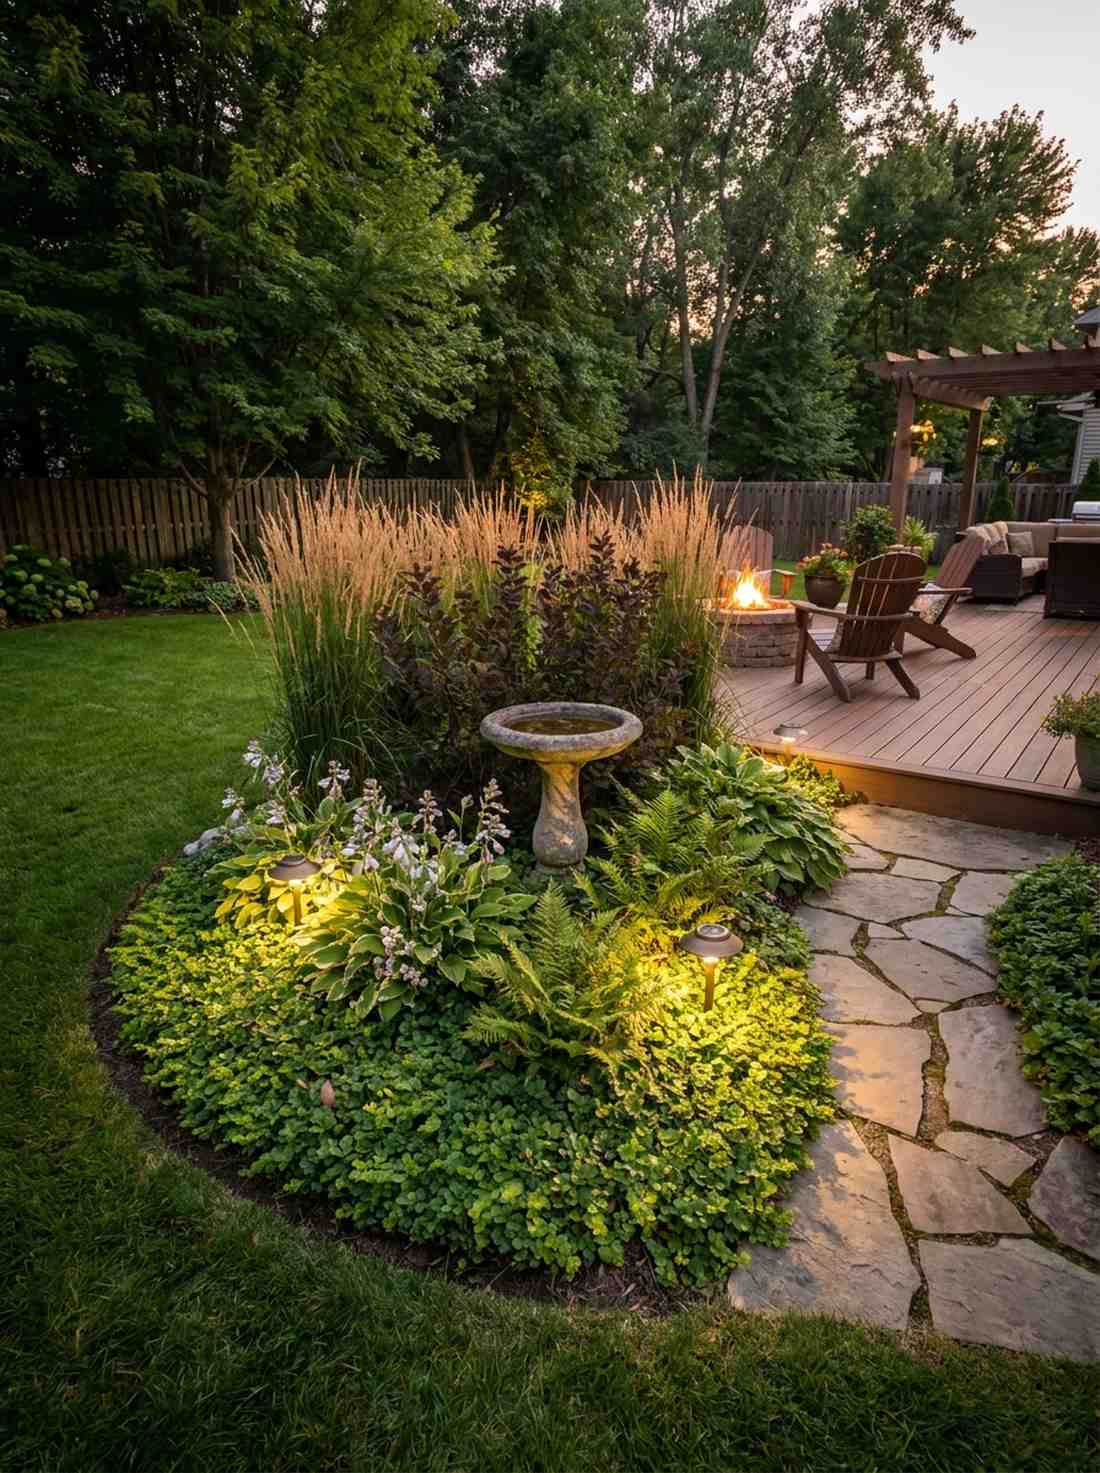
This gorgeous arrangement feels like a magical woodland altar nestled in your own backyard. A crescent garden focal border is the ultimate solution for transforming a dead lawn corner into a spectacular viewing area.
Wrapping dense plantings around a stone birdbath creates an immediate theatrical anchor for the eye. This technique instantly upgrades cheap yard features into premium focal points by surrounding them with professional landscape lighting kits.
You can execute this corner transformation for roughly $80–$150.
- Key Materials: Stone birdbath, creeping groundcover, solar spotlights
- Vibe / Style: Theatrical romantic corner
- Difficulty: Quick afternoon project
- Budget Breakdown: Focal piece: $60 | Plants: $50.
- Creator’s Tip: Plant the tallest specimens strictly in the back curve to force perspective and make the bed look deeper.
- Smart Sourcing: Weatherproof resin garden statues and warm-white solar landscape spotlights.
This next setup is ridiculously cheap but looks like a $1,500 custom landscape display…
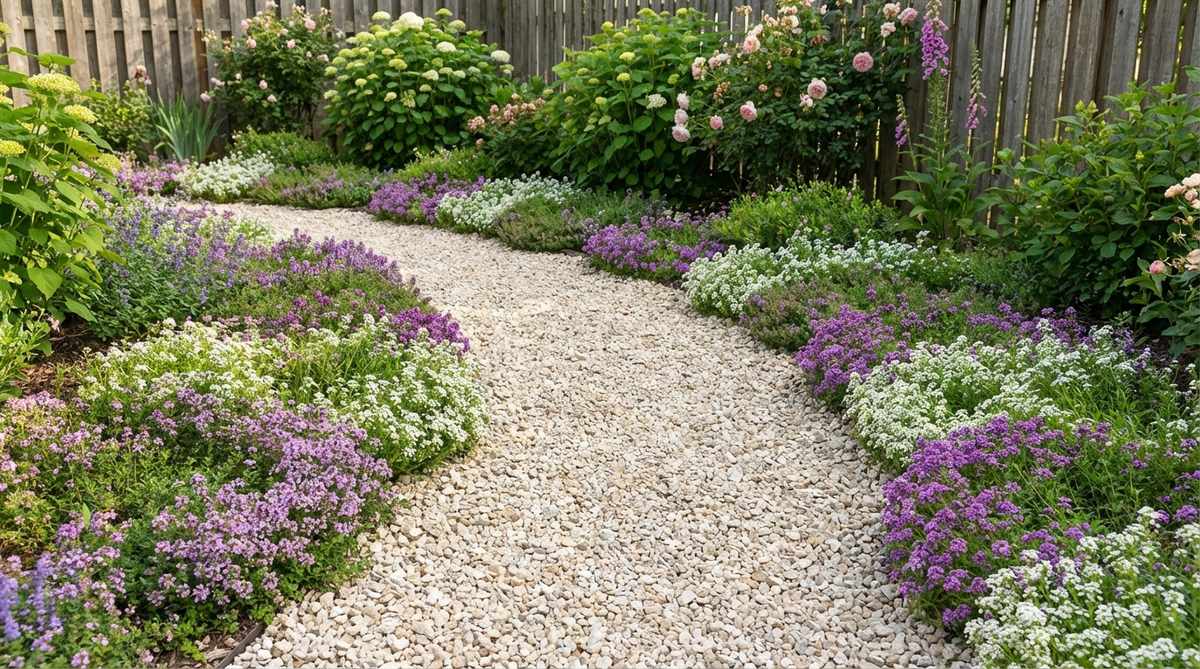
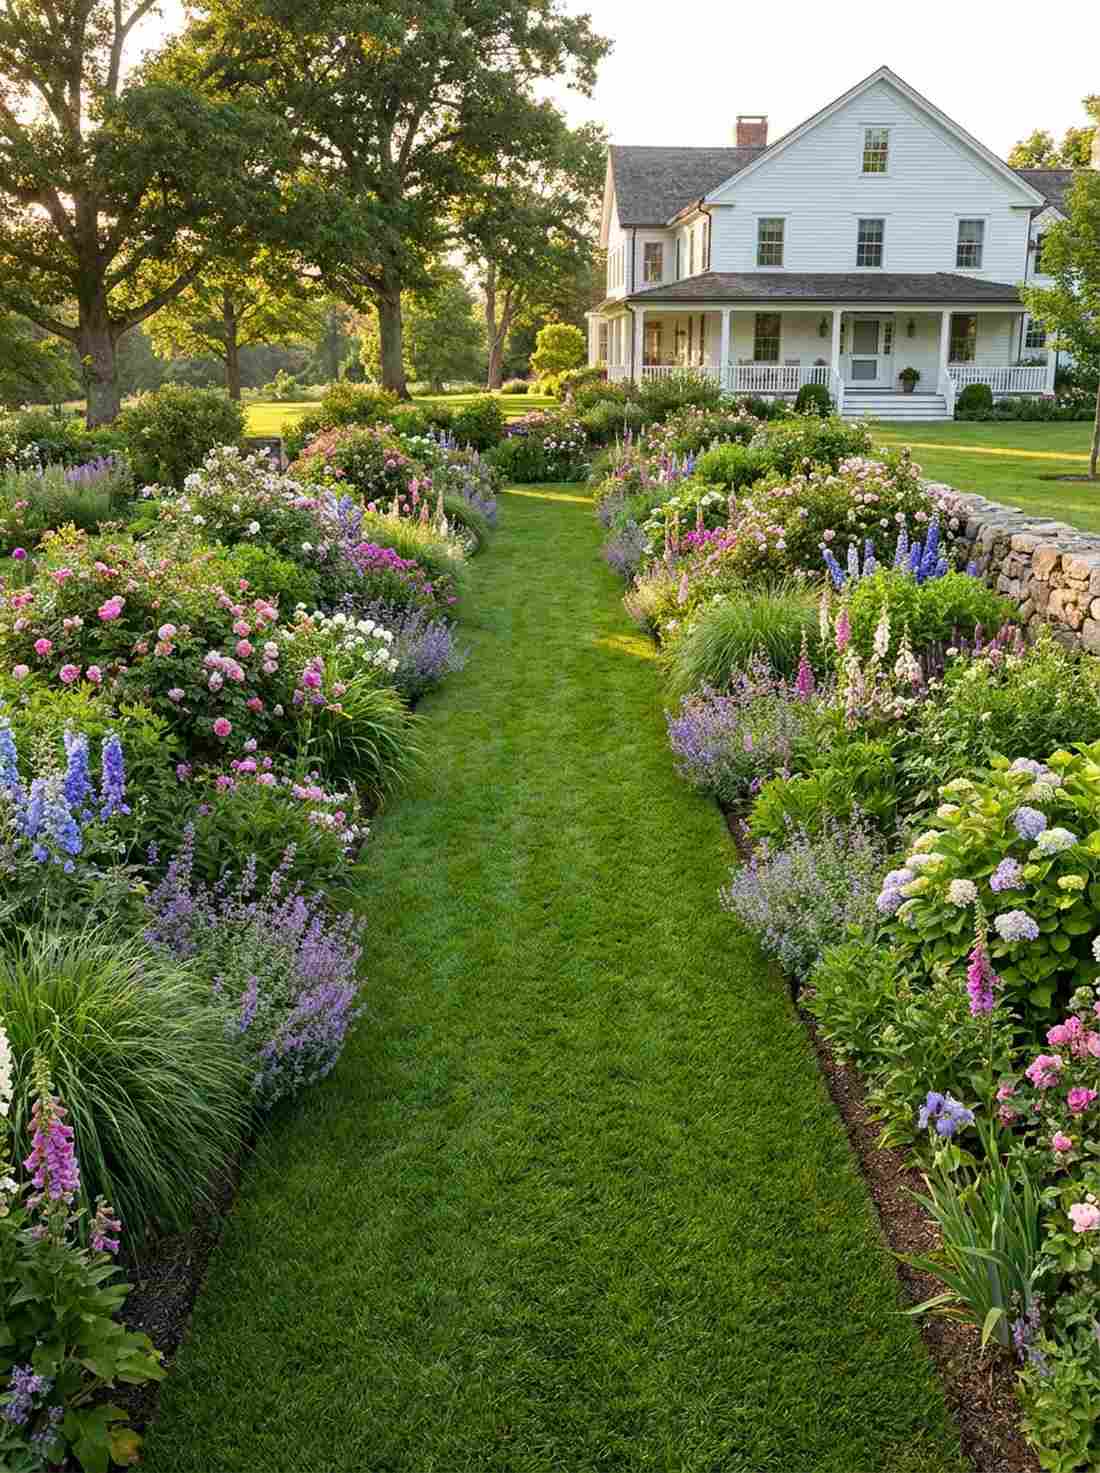
5. Parallel Borders Flanking Straight Path
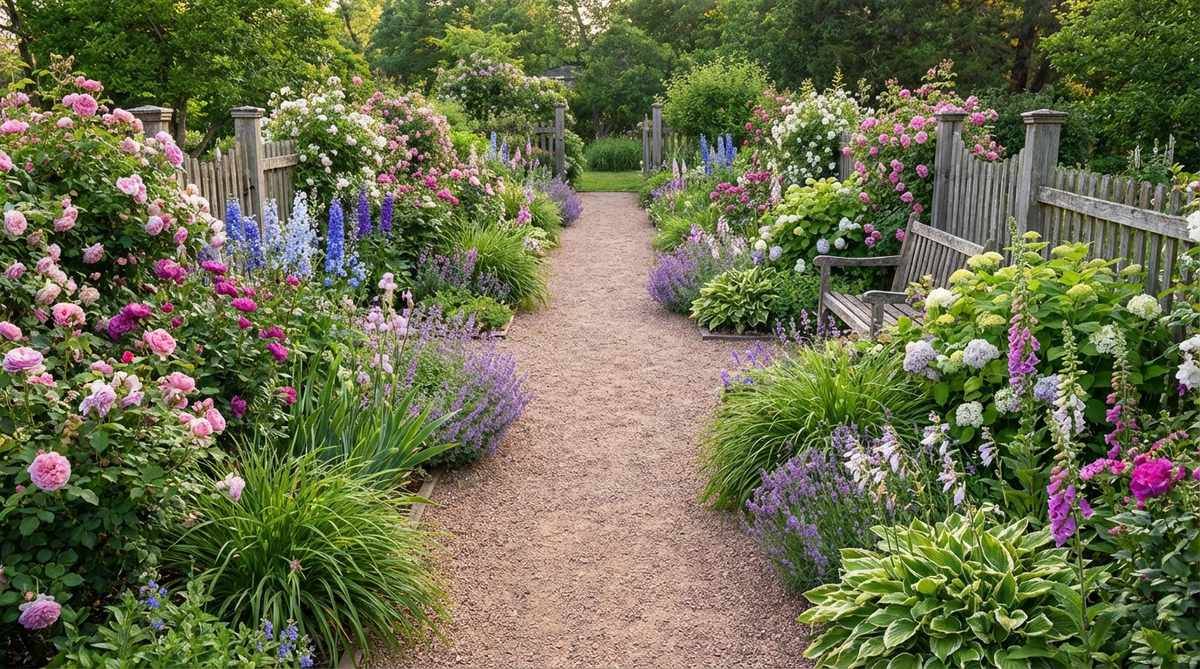
Walking through this feels like a triumphant stroll down a grand botanical aisle. Parallel pathway borders work exceptionally well for connecting a back porch directly to a detached garage or garden shed.
By forcing plants to spill over a rigid straight line, you create an incredibly immersive, sensory experience. It yields a lush, high-end professional nursery look when you densely pack the edges using bulk perennial border seeds.
Depending on the path material, this costs around $100–$250. Save this idea for upgrading boring straight walkways!
- Key Materials: Stepping stones, sprawling perennials (like catmint)
- Vibe / Style: Lush immersive corridor
- Difficulty: Moderate planting effort
- Budget Breakdown: Pathway stones: $120 | Border seeds/starts: $80.
- Creator’s Tip: Deliberately let low-growing plants creep over the path edges to soften the harsh straight lines.
- Smart Sourcing: Non-slip garden stepping stones and bulk creeping thyme seed packets.
6. Island Bed in Lawn Setting
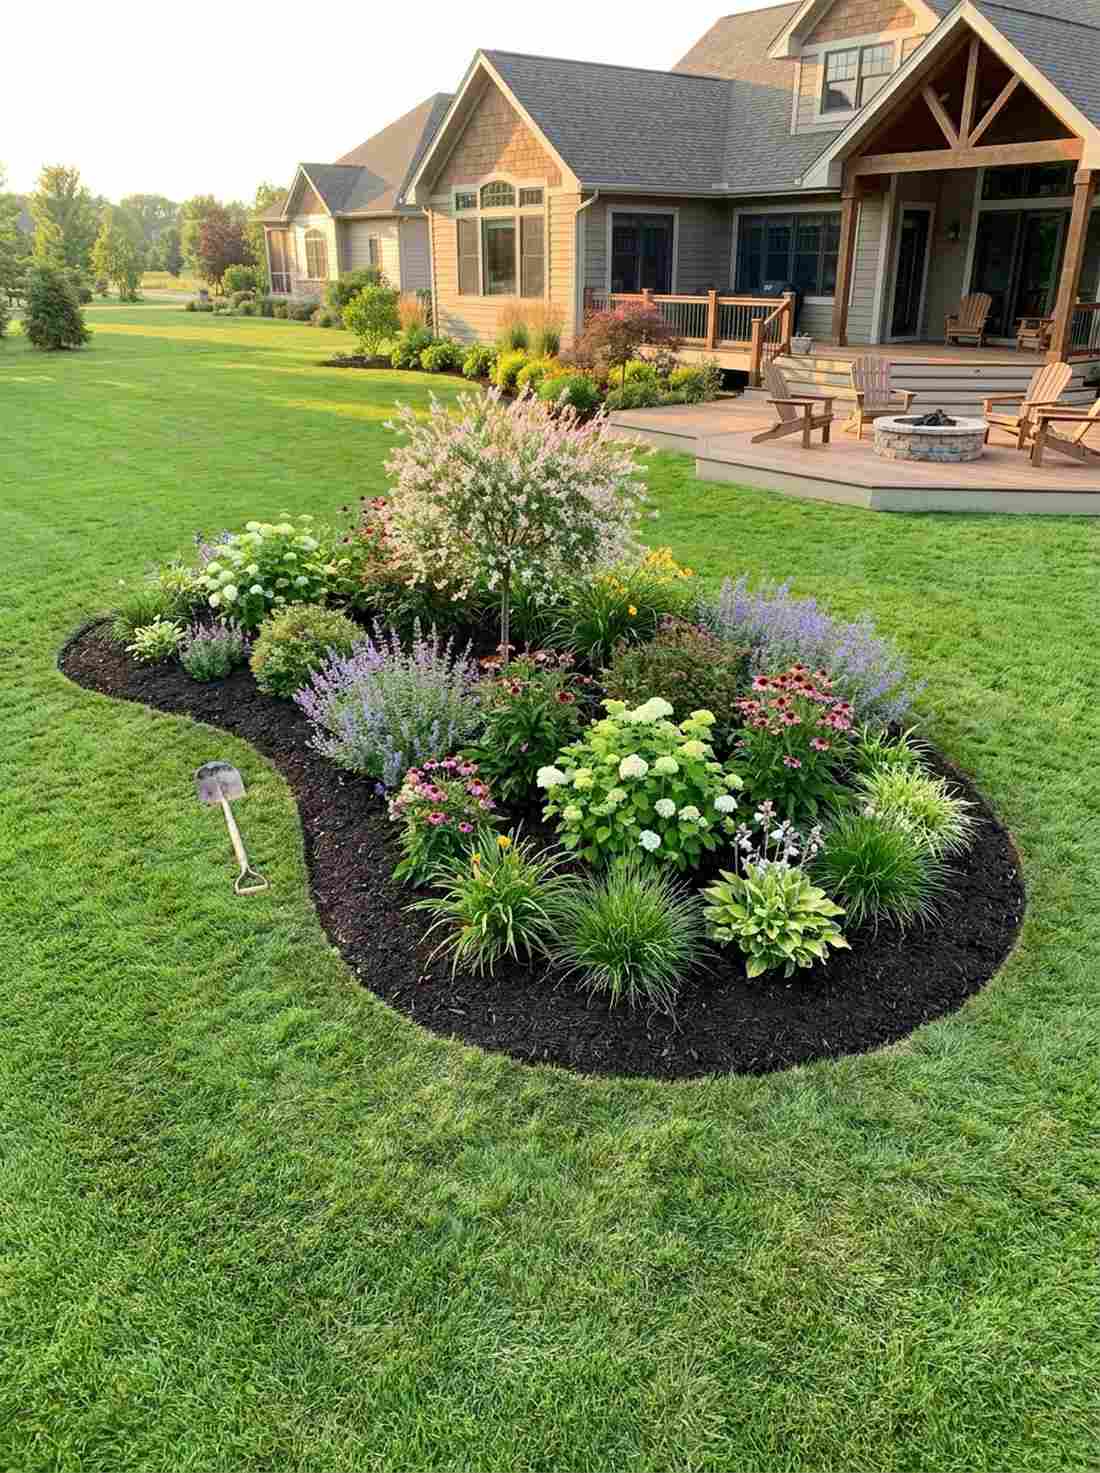

This layout gives the illusion of a floating floral oasis in the middle of a green sea. The freestanding garden island bed is the perfect use-case for breaking up massive, boring expanses of flat grass.
Placing an asymmetrical bed directly in the lawn creates a dramatic 360-degree viewing experience. It completely transforms standard suburban yards into estate-like grounds, especially if you use heavy-duty weed barriers to keep the edges pristine.
This high-impact island can be built for $60–$120.
- Key Materials: Spade for edging, compost, centerpiece shrub
- Vibe / Style: Sculptural standalone oasis
- Difficulty: Easy weekend dig
- Budget Breakdown: Compost/Soil: $50 | Centerpiece plant: $40.
- Creator’s Tip: Always use a kidney or teardrop shape; perfect circles look too formal for a cottage vibe.
- Smart Sourcing: Professional-grade landscape fabric rolls and premium organic compost mixes.
7. Porch Foundation Layered Planting
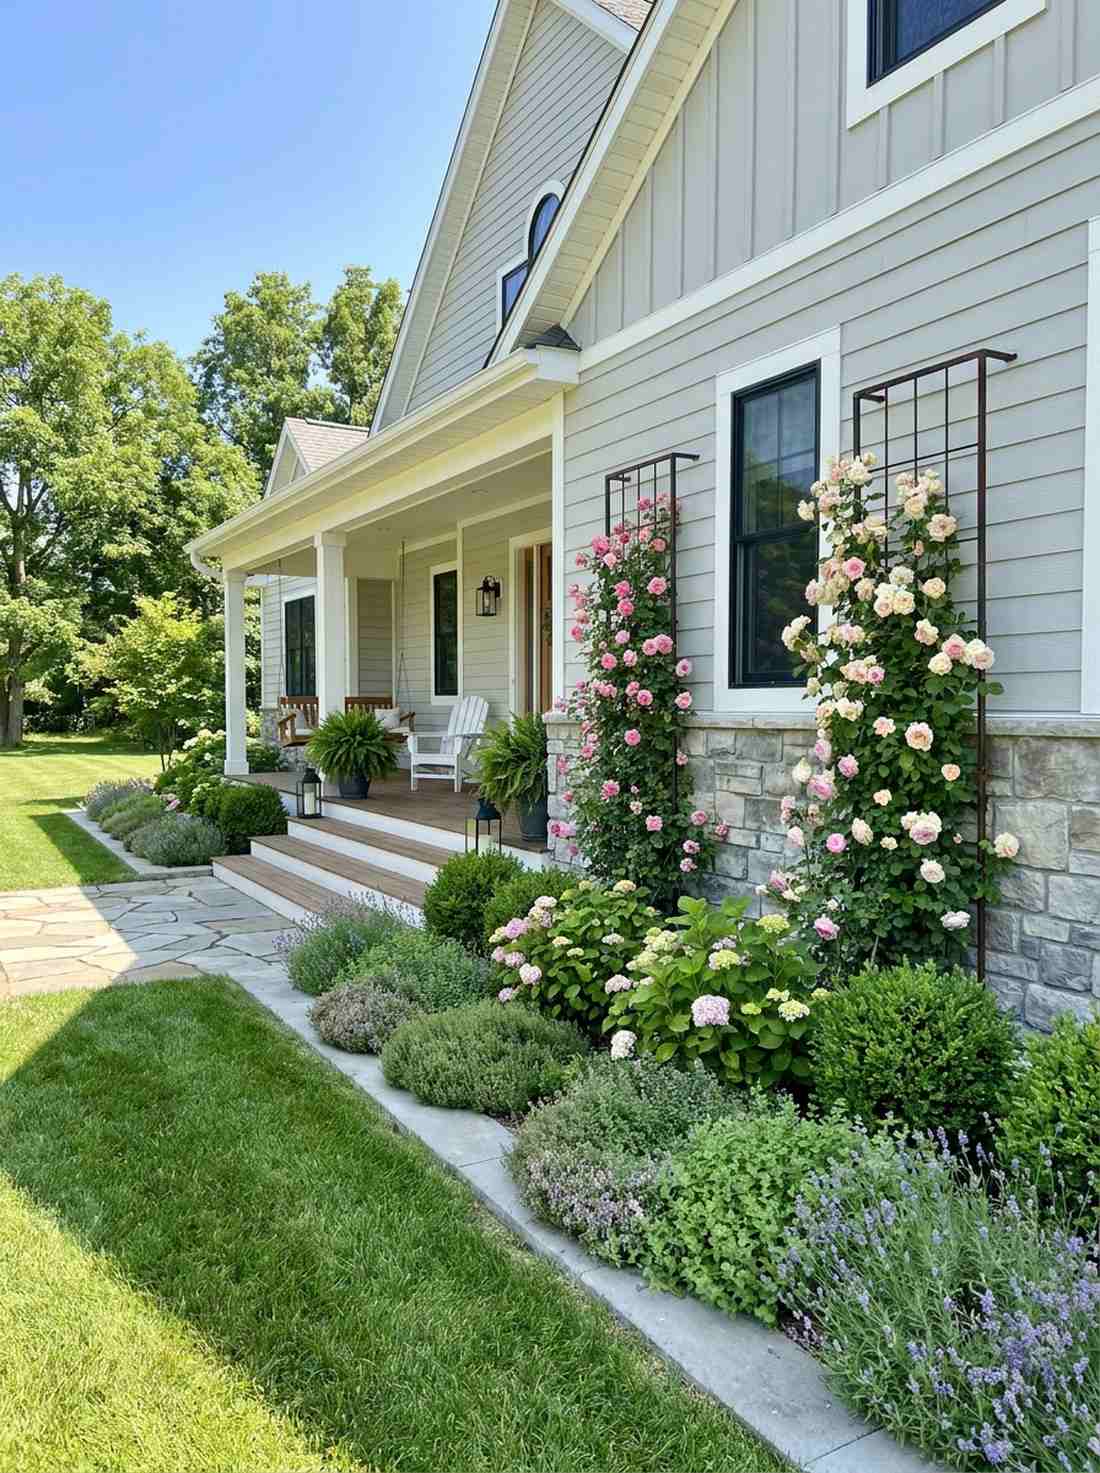
This tiered approach feels like the home is naturally growing right out of the earth. Layered foundation plantings are absolutely vital for softening the harsh concrete edges around front porches and patios.
By stepping down from tall climbing roses to low trailing herbs, you mask ugly foundations entirely. This strategy hides cheap architectural flaws and provides a designer-level finish by utilizing rapid-growth premium climbing vine starters.
You can easily pull this off for $150–$250. Highly recommended for instantly boosting curb appeal!
- Key Materials: Trellis netting, climbing shrubs, groundcover herbs
- Vibe / Style: Integrated storybook facade
- Difficulty: Intermediate spacing
- Budget Breakdown: Trellises: $70 | Layered plants: $130.
- Creator’s Tip: Keep the tallest plants at least 18 inches away from the actual house wall to prevent moisture damage.
- Smart Sourcing: Rust-proof wall trellis grids and fast-growing flowering vine starter kits.
Wildflower Combinations for Cottage Garden Inspiration
8. Meadow Mix With Native Grasses
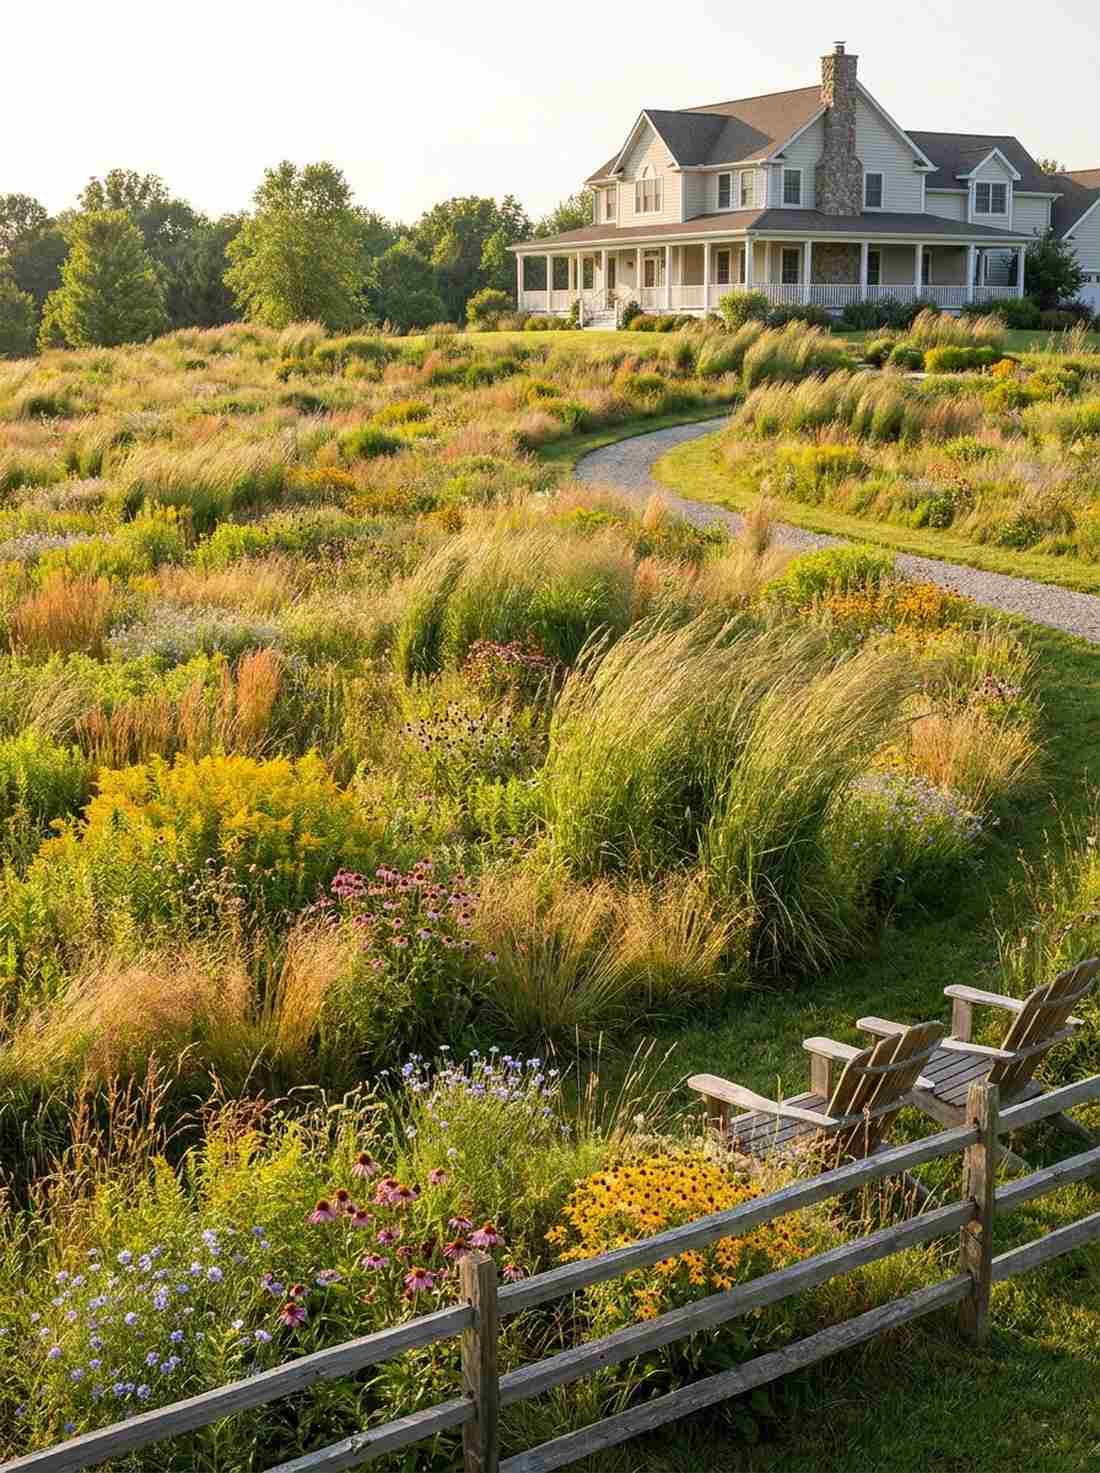
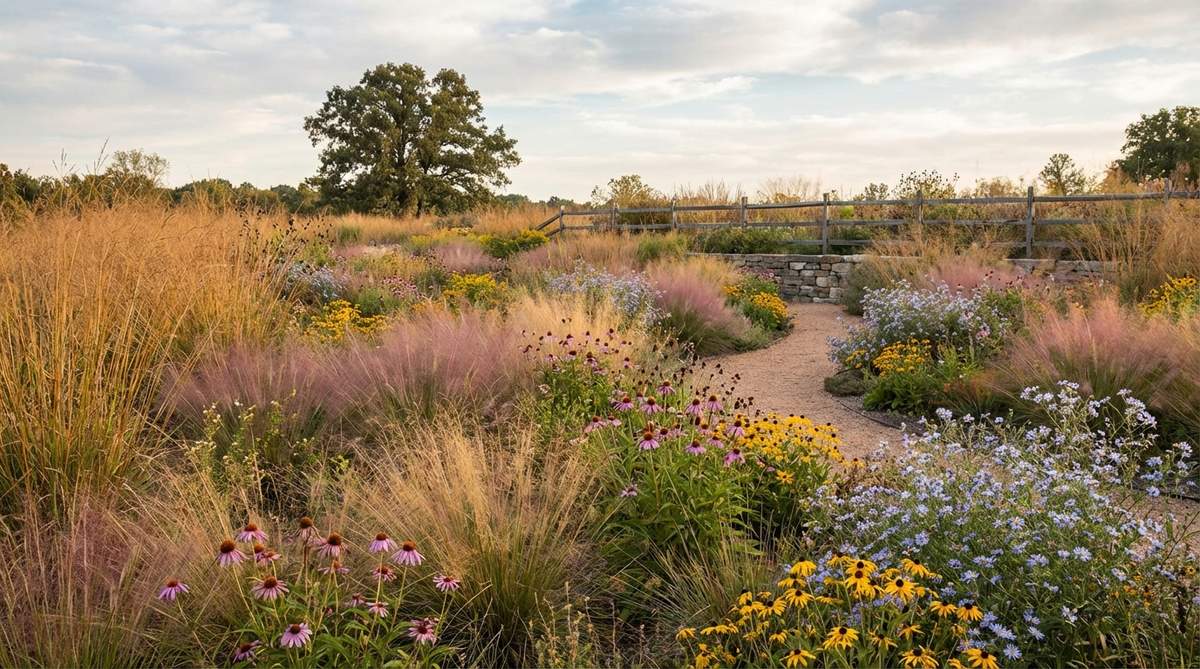
This wispy combination feels like a windswept, sun-drenched prairie scene. A native grass and wildflower meadow mix is perfectly placed on steep banks or large sunny zones where you want to completely ditch the lawnmower.
Mixing structural ornamental grasses with delicate blooms introduces captivating movement every time the wind blows. It acts as a massive money-saver, looking like a $1,000 professional installation while only utilizing bulk native prairie seed blends.
You can seed a massive area for just $40–$80. Pin this if you want a low-maintenance, high-impact yard!
- Key Materials: Native grass seeds, wildflower mixes, sand (for spreading)
- Vibe / Style: Ethereal naturalistic prairie
- Difficulty: Very easy broadcasting
- Budget Breakdown: Seed mixes: $50 | Peat/Sand spreader: $15.
- Creator’s Tip: Mix your tiny seeds with dry sand before broadcasting to ensure perfectly even distribution.
- Smart Sourcing: Bulk regional wildflower seed bags and premium ornamental grass seed blends.
9. Black-Eyed Susan and Purple Coneflower Drift
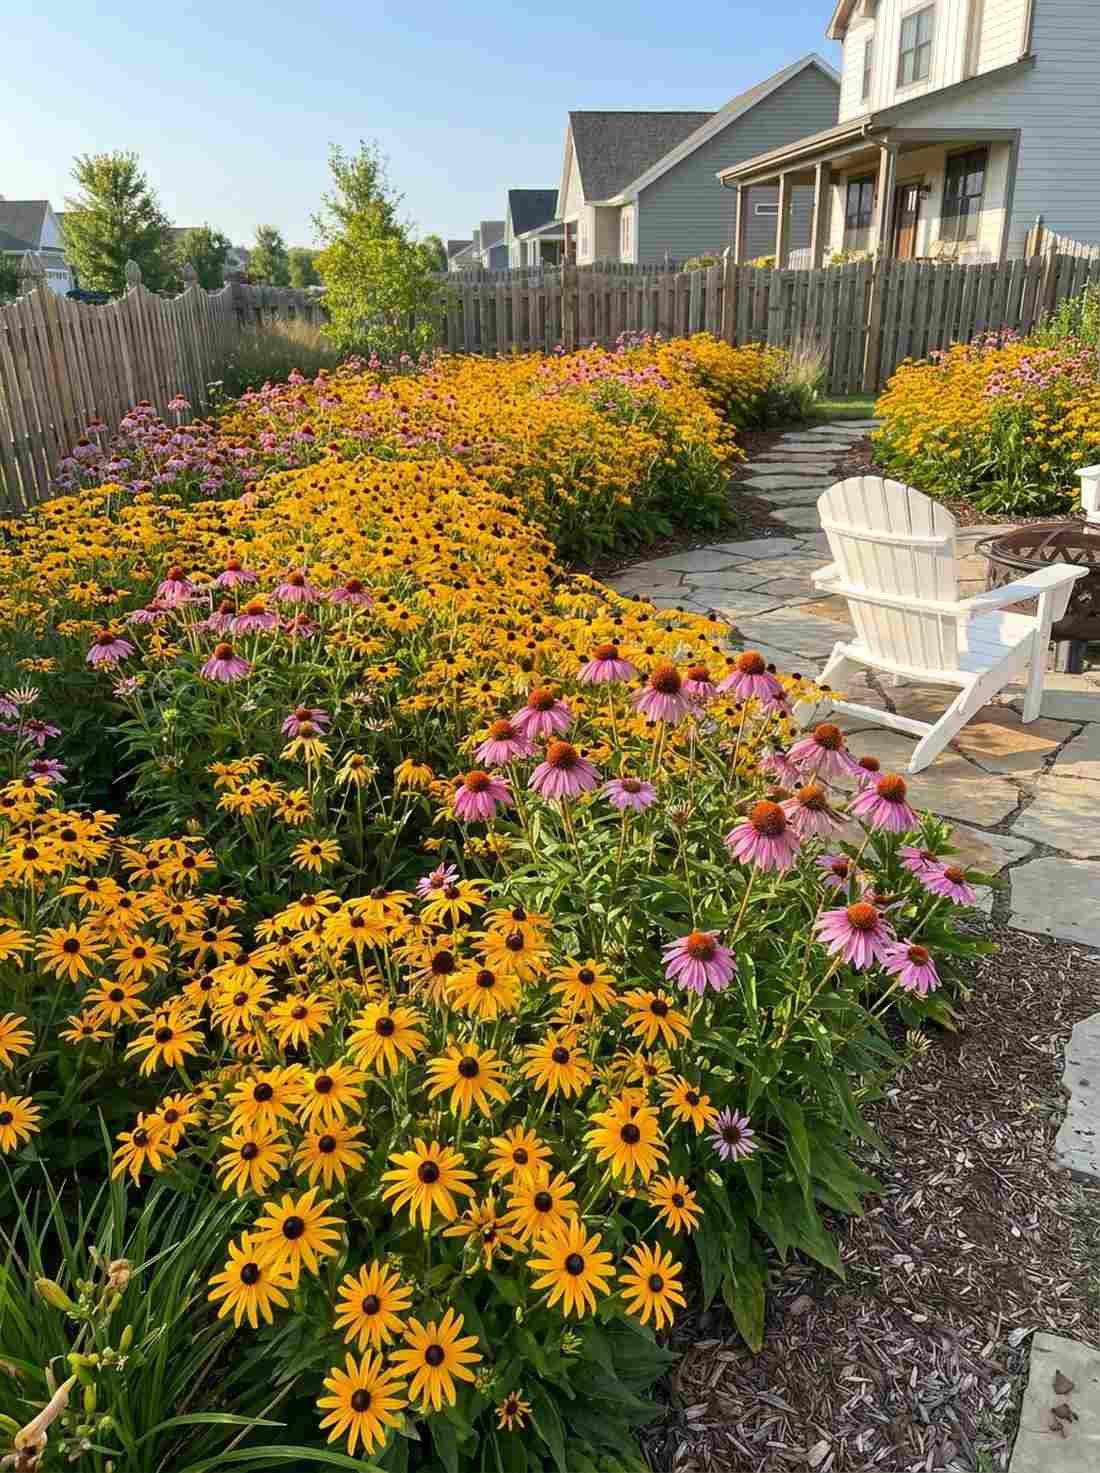
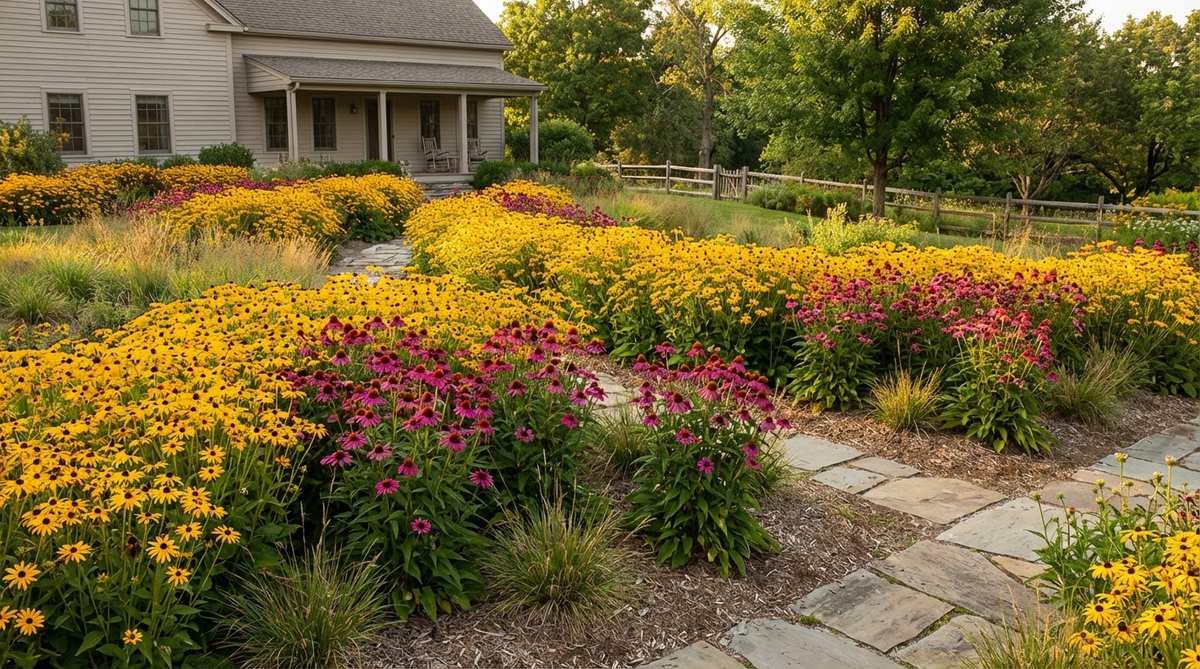
This striking color contrast feels like a vibrant, late-summer festival bursting with life. A coneflower and rudbeckia drift is the ultimate foolproof combination for blistering hot, full-sun garden zones.
These two drought-tolerant powerhouses completely dominate weeds while requiring zero babying. They deliver a spectacularly expensive botanical garden aesthetic, especially when planted densely using affordable bare-root perennial packs.
You can fill a huge border for about $60–$100.
- Key Materials: Echinacea starts, Black-Eyed Susan seeds, mulch
- Vibe / Style: Vibrant summer farmhouse
- Difficulty: Beginner-friendly
- Budget Breakdown: Bare roots: $60 | Mulch: $20.
- Creator’s Tip: Do not deadhead them in the fall! The black seed heads look stunning poking through winter snow.
- Smart Sourcing: Bare-root Echinacea multipacks and moisture-retaining cedar mulch.
💡 Must-Have Supplies for High-End Setups
To build these stunning garden design cottage setups faster and ensure they actually survive the seasons, skip the generic craft aisles and invest in the right foundational kits.
- Base & Support: Commercial-grade weed barrier fabric rolls
- Setup Tools: Ergonomic garden border edging kits
- Weather/Durability Protection: UV-resistant clear wood sealants for trellises
Most people get their plant spacing completely wrong… until they try the exact layering technique coming up next.
10. Yarrow and Tansy Horizontal Layers
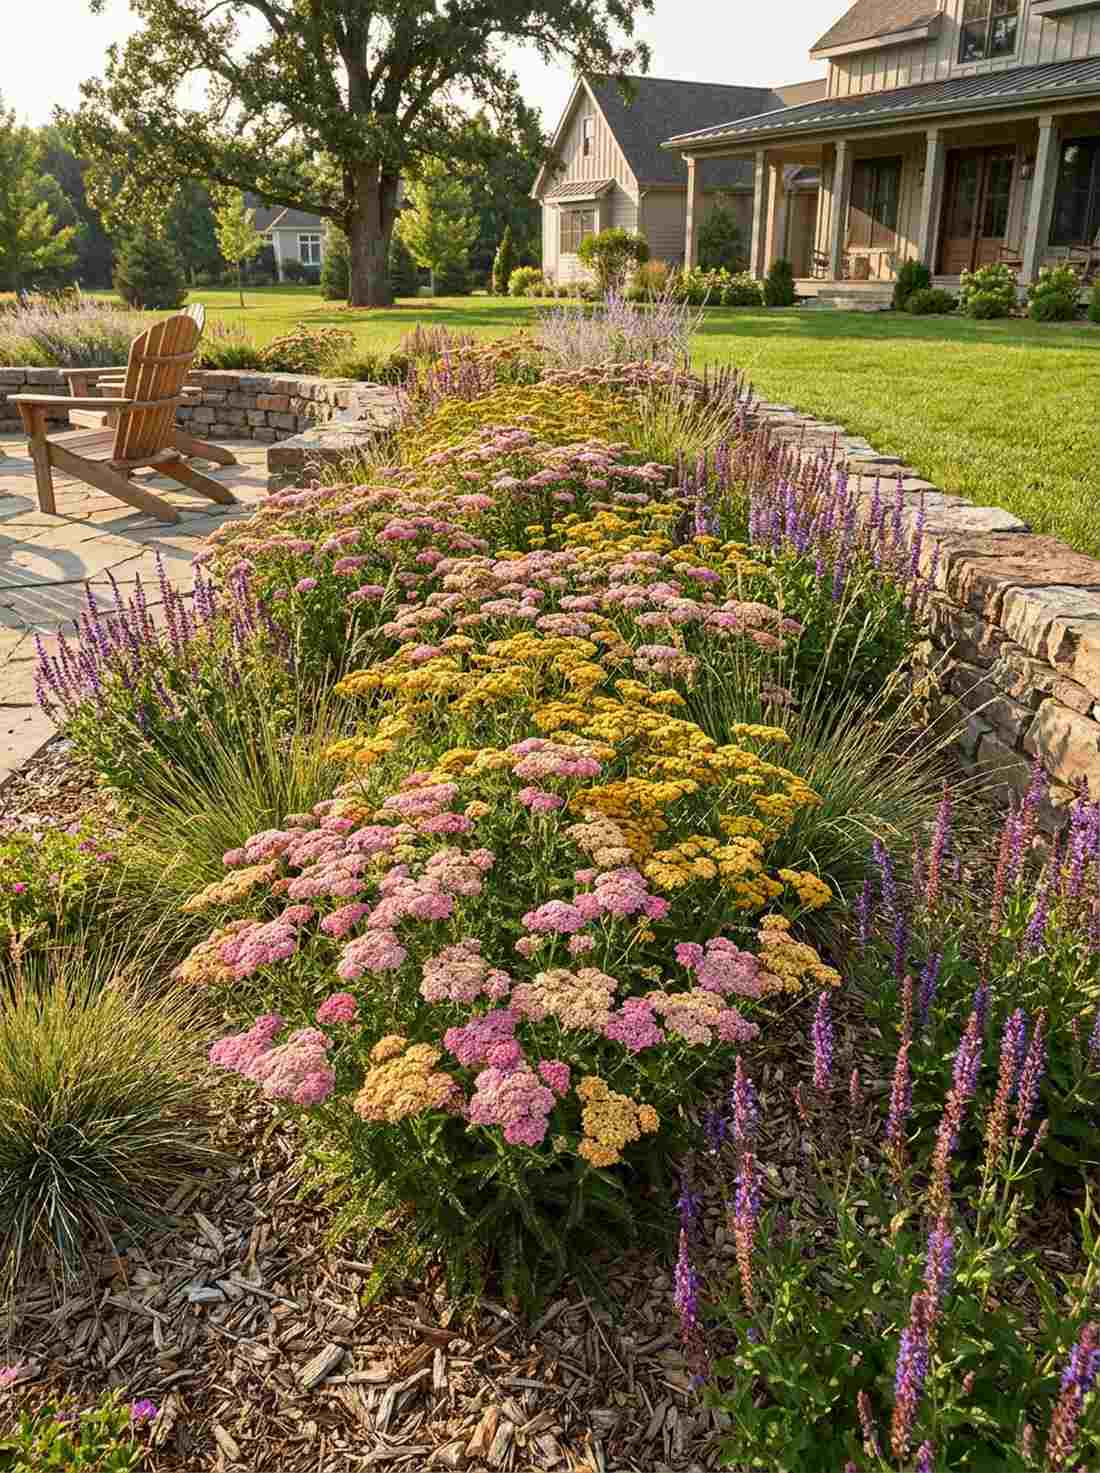
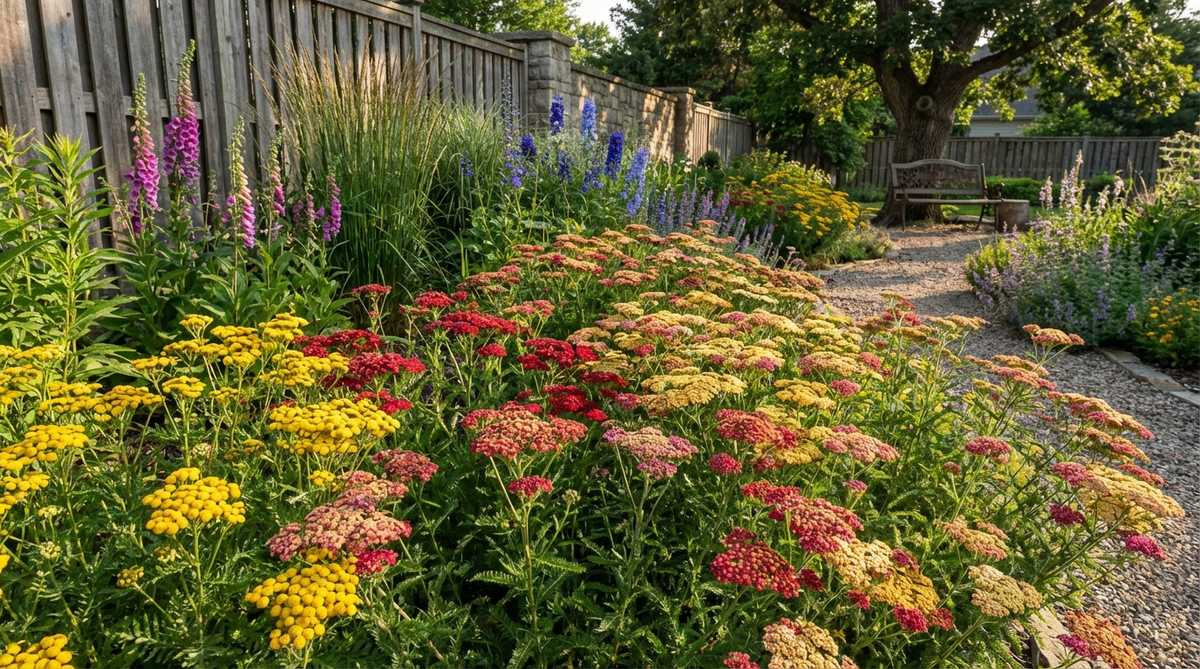
This flat-topped floral arrangement feels like tiny hovering clouds of gold and pink. Utilizing yarrow and tansy horizontal layers is a brilliant use-case for the middle section of a border where you need to break up spiky, vertical plants.
Their dense, flat flower heads provide a stunning visual resting place for the eyes among taller spires. It gives a wildly sophisticated designer-level finish while being essentially indestructible, surviving perfectly well in poor soils.
You can establish this textured layer for $30–$50. Save this trick for upgrading flat garden beds!
- Key Materials: Achillea (Yarrow) plugs, Tansy seeds
- Vibe / Style: Sophisticated textural contrast
- Difficulty: Easy planting
- Budget Breakdown: Plugs/Seeds: $35.
- Creator’s Tip: Yarrow spreads quickly; divide the clumps every two years to get free plants for other garden areas.
- Smart Sourcing: Drought-tolerant perennial starter plugs and organic slow-release flower fertilizer.
11. Poppy Self-Seeding Colony
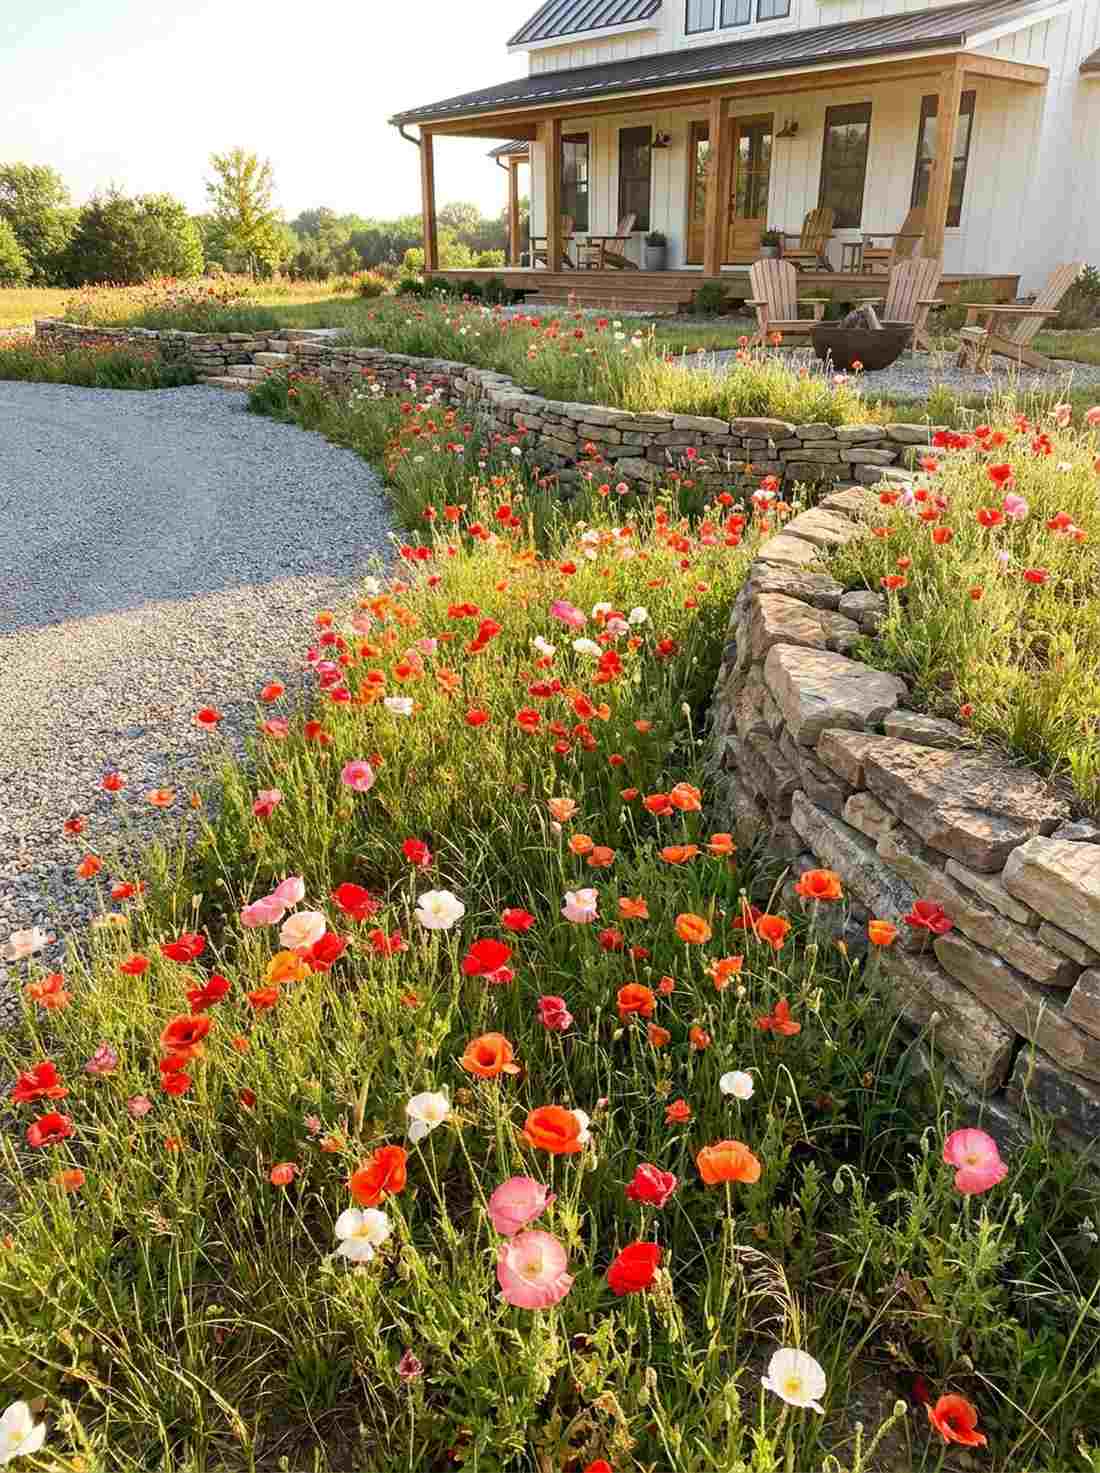
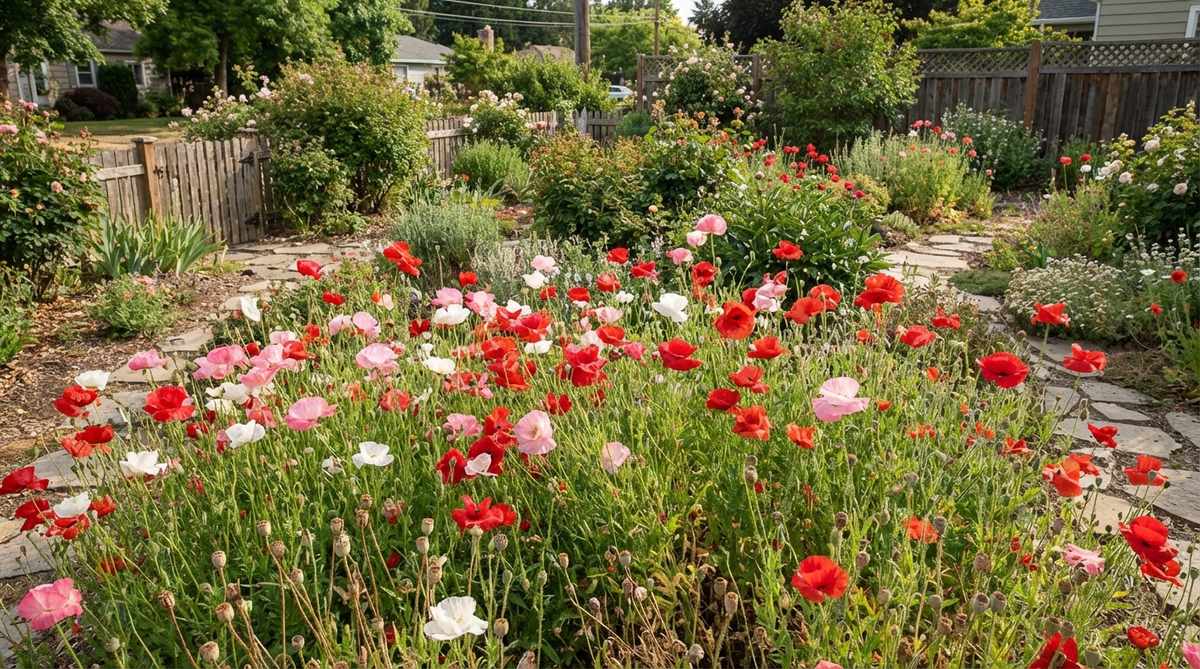
These tissue-paper blooms feel like a delicate, fleeting watercolor painting come to life. Setting up a self-seeding poppy colony works gorgeously along rustic gravel driveways or nestled in dry rock garden crevices.
By letting them freely drop seed, your garden layout completely changes and surprises you every single spring. This is the ultimate budget hack—buy seeds once and enjoy a premium, ever-changing floral display for a lifetime.
You can start this eternal colony for literally $10–$20.
- Key Materials: Shirley or California poppy seeds, rake
- Vibe / Style: Spontaneous romantic cottage
- Difficulty: Effortless
- Budget Breakdown: Seed packets: $15.
- Creator’s Tip: Never bury poppy seeds. They need sunlight to germinate, so just press them firmly into the surface of the soil.
- Smart Sourcing: Bulk heirloom poppy seed collections and lightweight seed starting soil mix.
12. Wild Lupine Vertical Accents
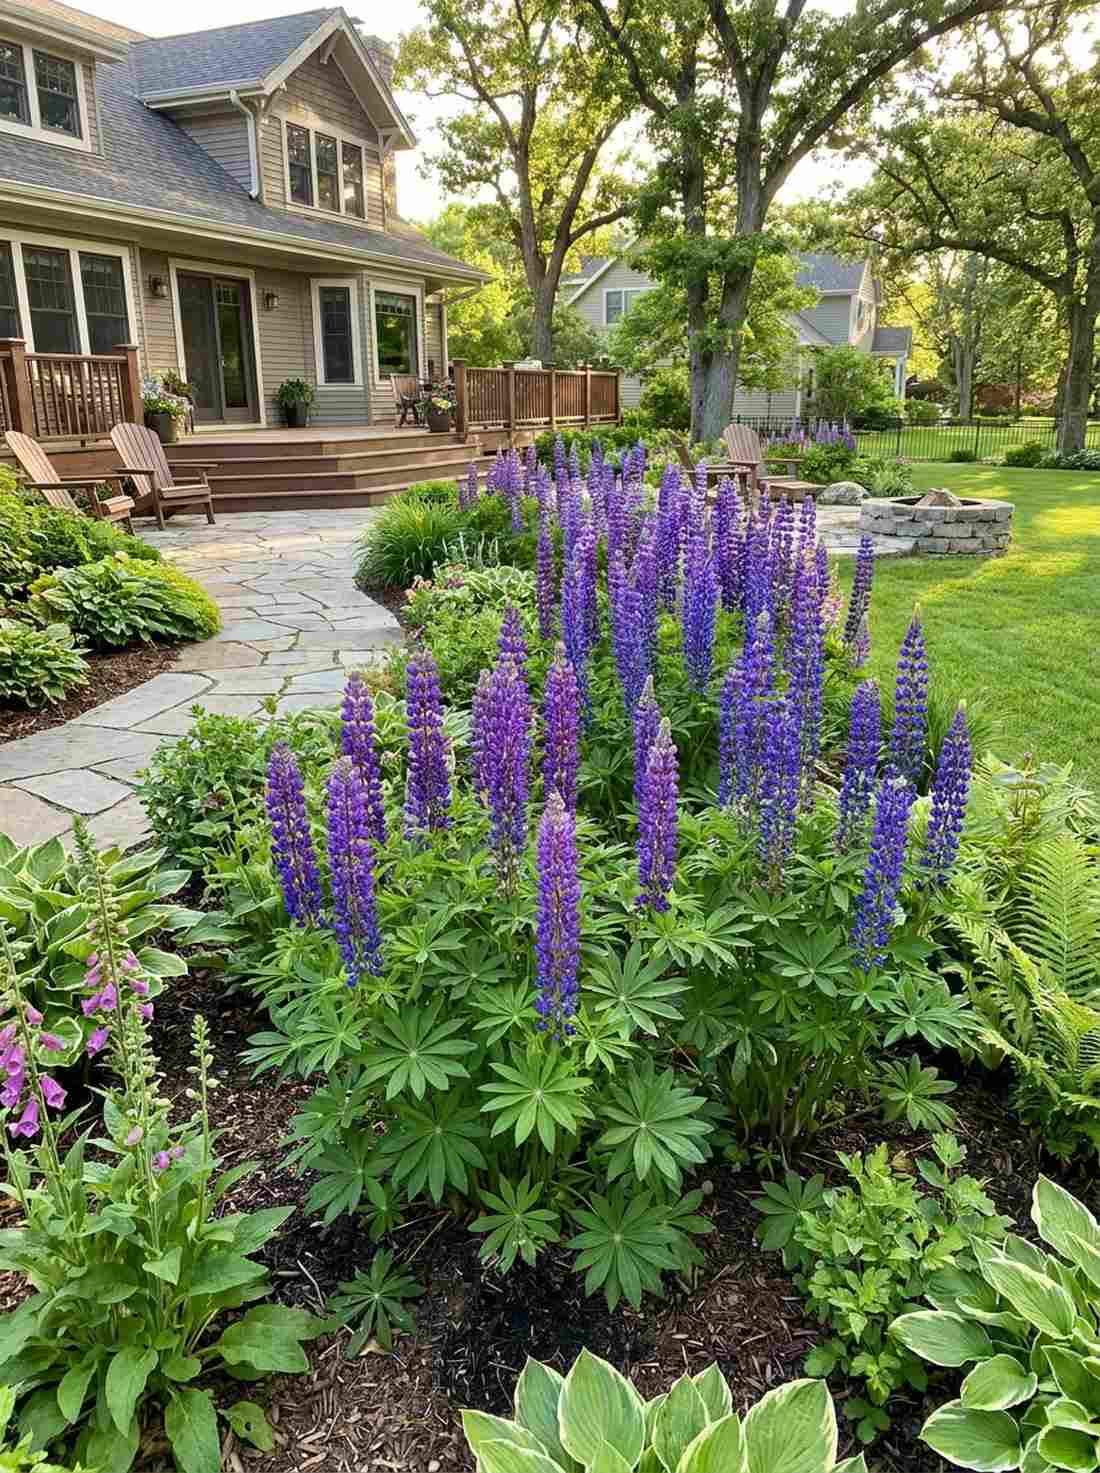
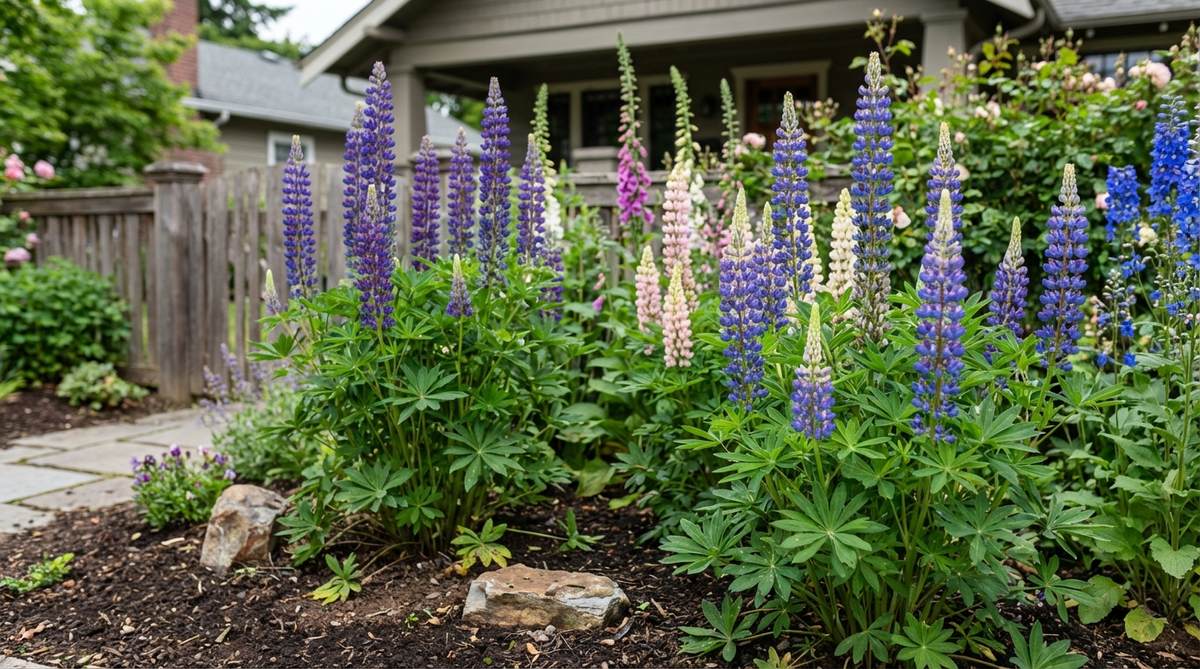
These towering spires feel like majestic botanical castles rising from the foliage. Adding wild lupine vertical accents is strictly for the middle-to-back rows of your garden where dramatic height is required.
Their stunning compound leaves look incredibly aesthetic even when the plant isn’t actively flowering. This delivers an instant high-end English estate vibe, especially if you treat the soil right using premium acidic soil amendments.
Establish these striking towers for $40–$75. Pin this if you love dramatic purple and blue garden hues!
- Key Materials: Lupine root stocks, acidic soil modifier
- Vibe / Style: Majestic vertical drama
- Difficulty: Intermediate (requires specific soil)
- Budget Breakdown: Root stocks: $50 | Soil prep: $15.
- Creator’s Tip: Lupines absolutely despise being moved. Plant them exactly where you want them to stay forever.
- Smart Sourcing: Dormant bare-root lupine kits and fast-acting soil acidifier granules.
13. Oxeye Daisy and Cornflower Meadow
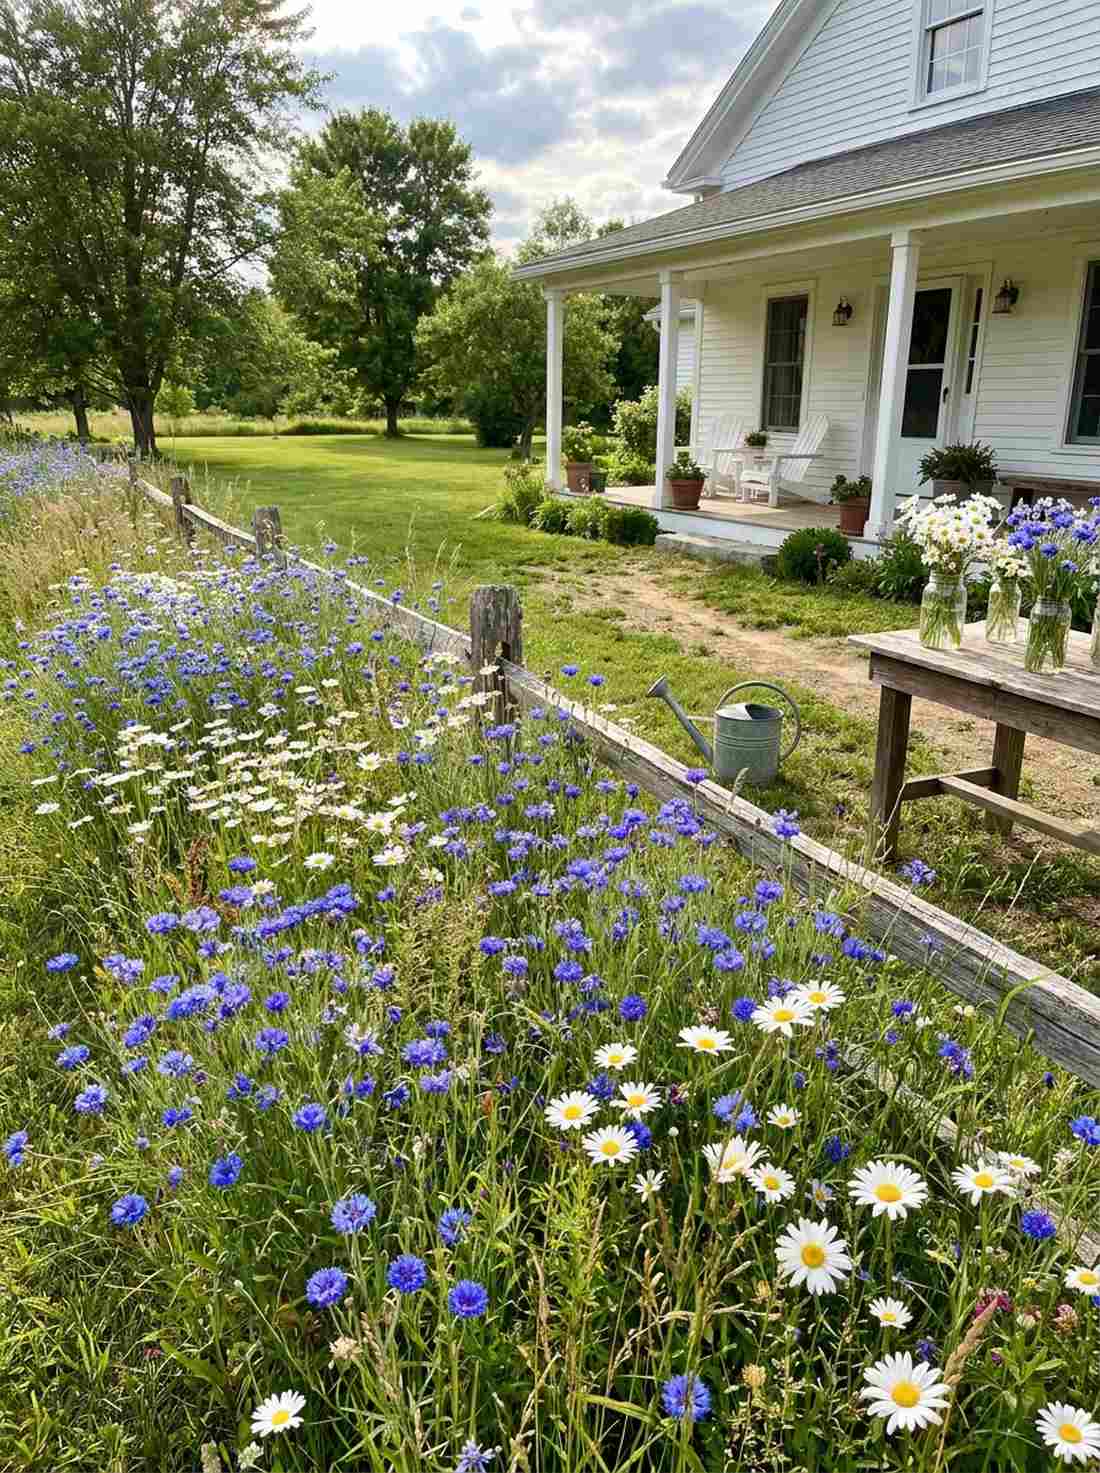
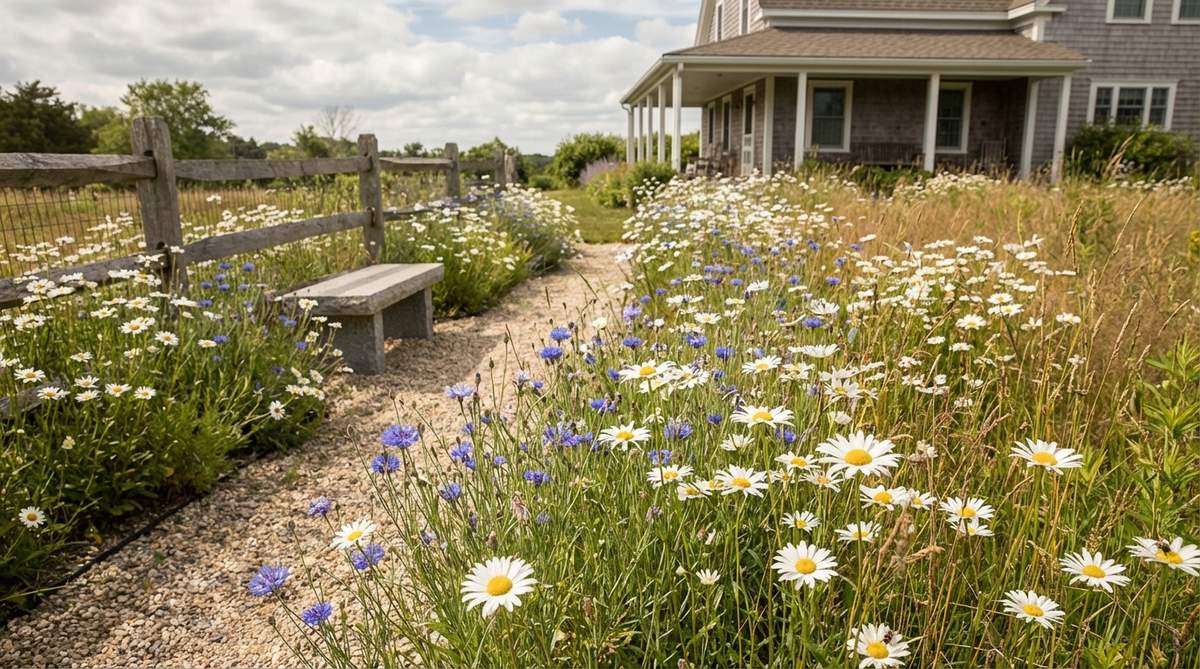
This crisp blue and white combo feels like a breezy summer afternoon in a vintage postcard. An oxeye daisy and cornflower spread is the quintessential choice for filling large, informal borders flanking a country home.
The bright white daisies make the true-blue cornflowers pop aggressively in the sunlight. This simple pairing looks far more expensive than it is, providing an endless supply of fresh-cut flowers for your kitchen vases all summer long.
You can easily pull this off for around $25–$45.
- Key Materials: Daisy seeds, Cornflower (Bachelor’s Button) seeds
- Vibe / Style: Crisp, nostalgic country
- Difficulty: Very easy
- Budget Breakdown: Bulk seed mix: $30.
- Creator’s Tip: Sow these seeds in successive batches, two weeks apart, to guarantee non-stop blooming until the first frost.
- Smart Sourcing: Cut-flower garden seed bundles and vintage-style galvanized metal watering cans.
14. California Poppy Golden Carpet
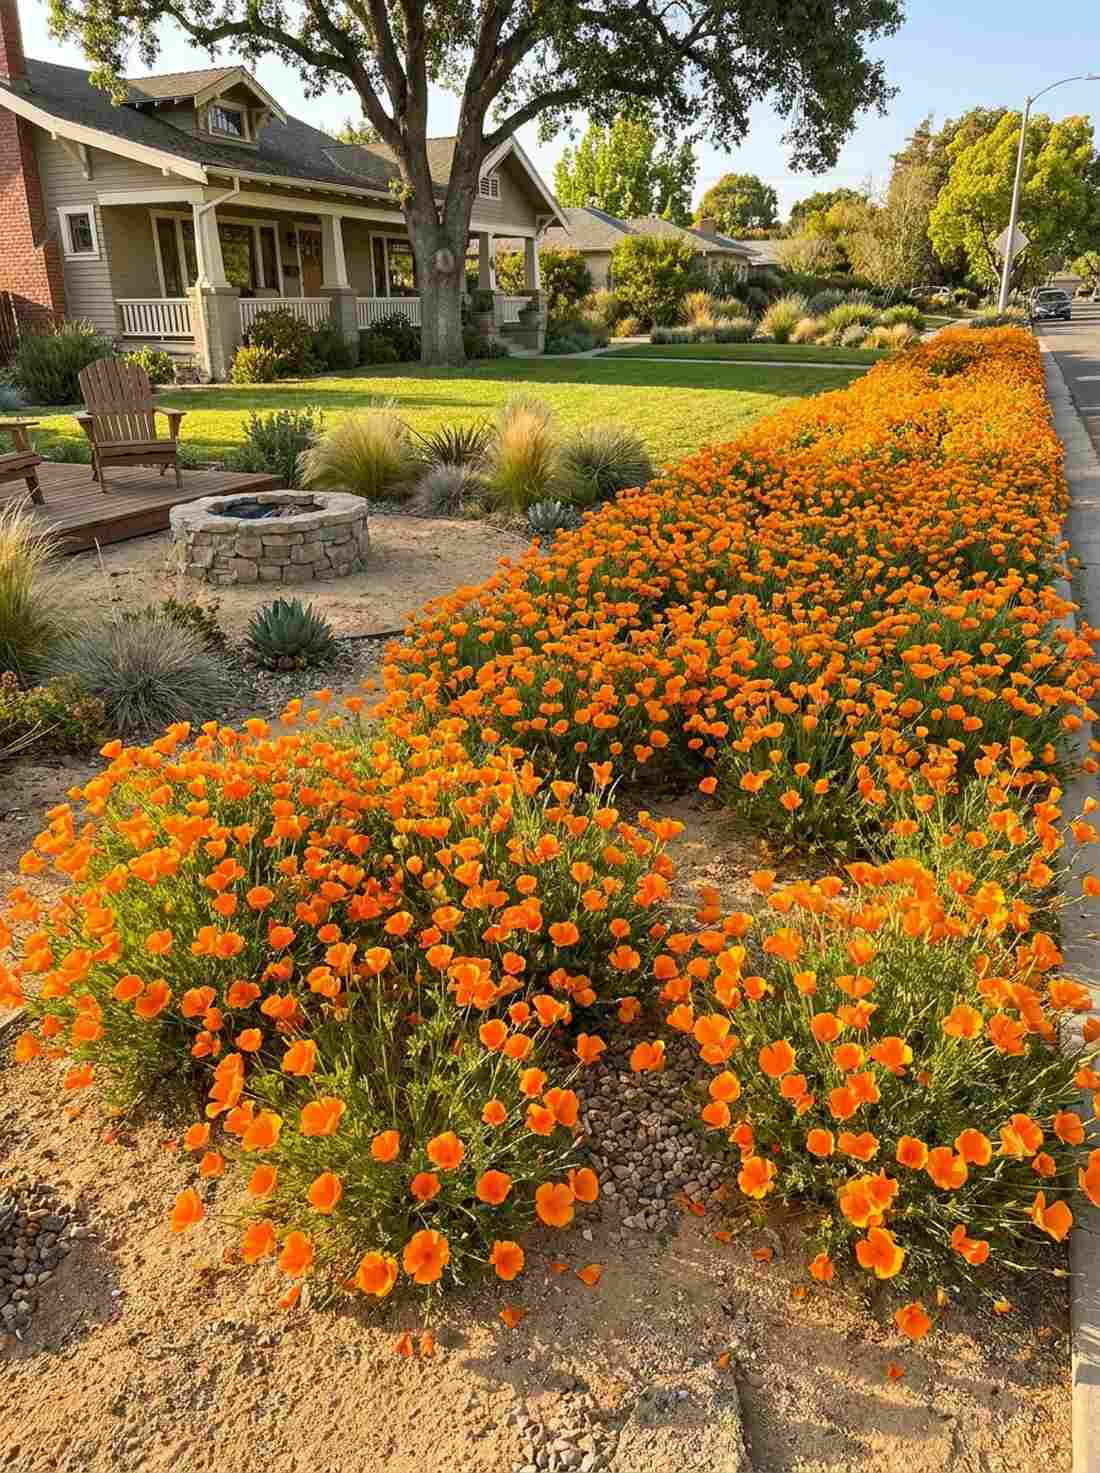
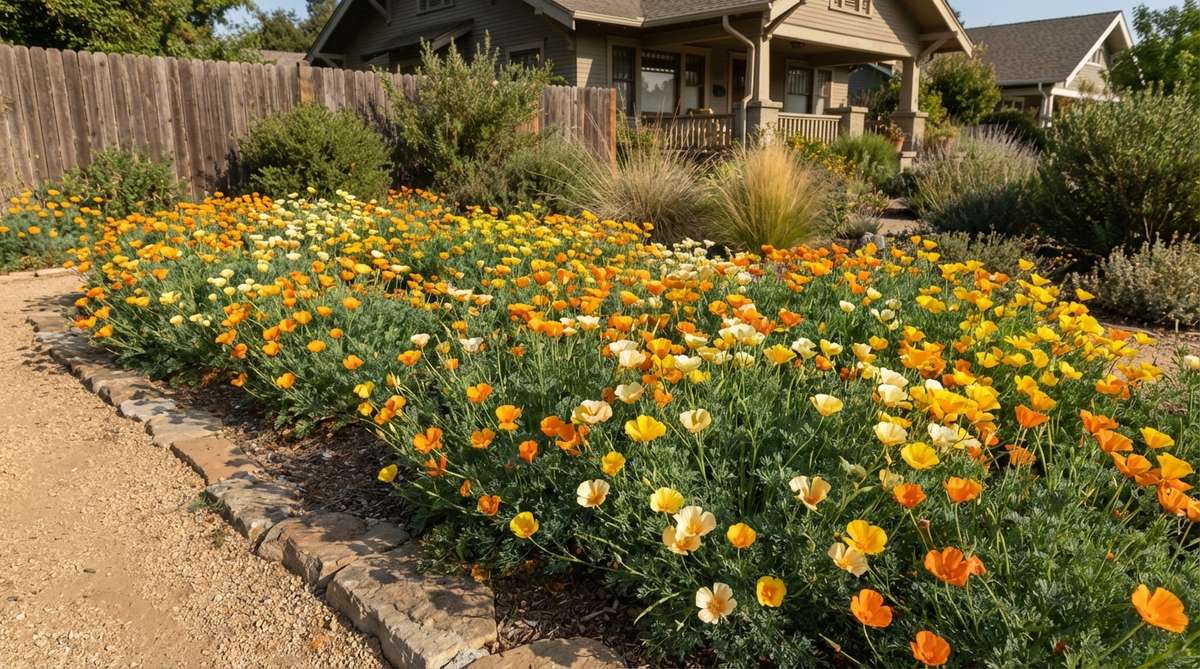
This glowing groundcover feels like someone spilled liquid sunshine across your yard. A golden poppy ground carpet is the absolute perfect use-case for hell-strips, dry curbsides, or awful, sandy soil patches.
They thrive on neglect, turning the worst soil in your yard into a dazzling neon orange display. This resilient setup provides a breathtaking, professional landscape color block without requiring expensive irrigation systems or rich compost.
Cover a massive ugly dirt patch for just $15–$30. Save this for your drought-tolerant garden ideas board!
- Key Materials: Eschscholzia californica seeds, coarse sand
- Vibe / Style: Sun-drenched neon cottage
- Difficulty: Zero maintenance
- Budget Breakdown: Seeds: $20.
- Creator’s Tip: Do not fertilize them! Rich soil actually makes them produce floppy green leaves instead of those iconic orange flowers.
- Smart Sourcing: Bulk drought-tolerant seed packs and decorative landscape gravel accents.
Wait until you see this next trick—it completely shifts the entire vibe of a boring yard into something out of a magazine…
15. Wild Geranium Woodland Edge
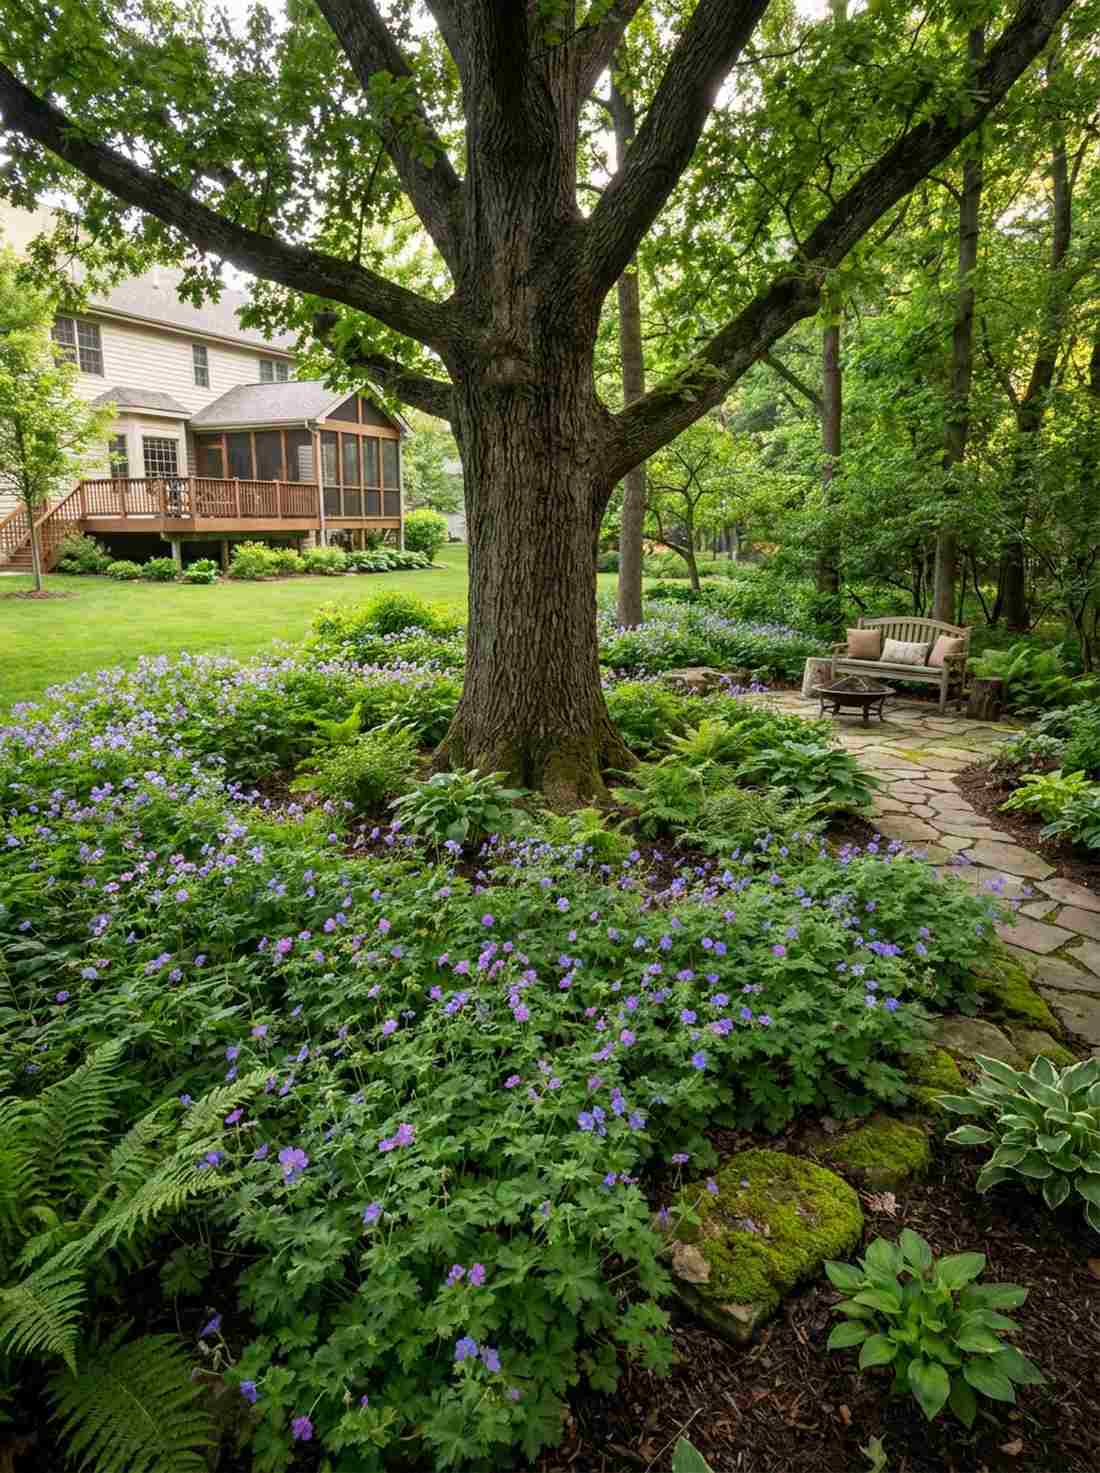

This delicate underplanting feels like a magical fairy ring surrounding your favorite old tree. Utilizing a wild geranium woodland edge is exceptionally clever for those frustrating, partially shaded zones under large oaks or maples.
They form a dense, weed-suppressing mat that completely cleans up the messy look of bare dirt under trees. This technique instantly upgrades your shaded areas to a premium park-like aesthetic using shade-loving bare root perennials.
You can carpet a shaded zone for $40–$70.
- Key Materials: Hardy geranium roots, leaf mold compost
- Vibe / Style: Enchanted shady woodland
- Difficulty: Easy planting
- Budget Breakdown: Bare roots: $50 | Compost: $15.
- Creator’s Tip: After their first bloom fades, aggressively chop the foliage back by half to trigger a fresh flush of perfect green leaves.
- Smart Sourcing: Shade-tolerant bare root perennial kits and organic leaf mold soil conditioner.
Rustic Pathway Designs and Materials
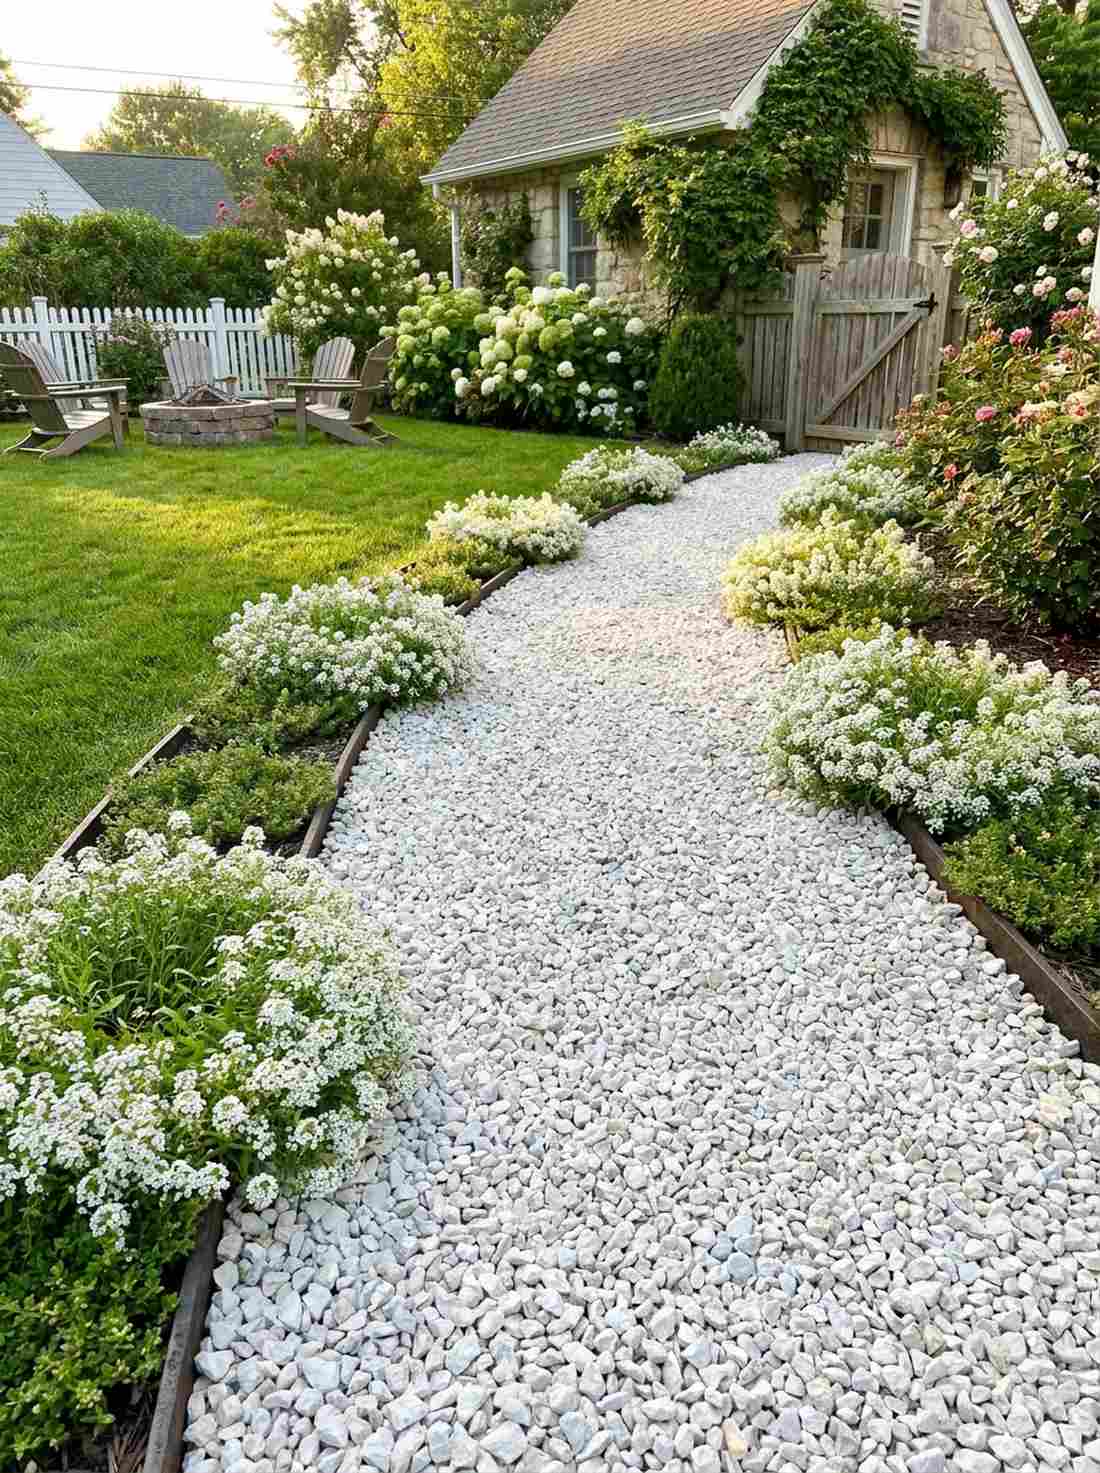
16. Pea Gravel Meandering Route
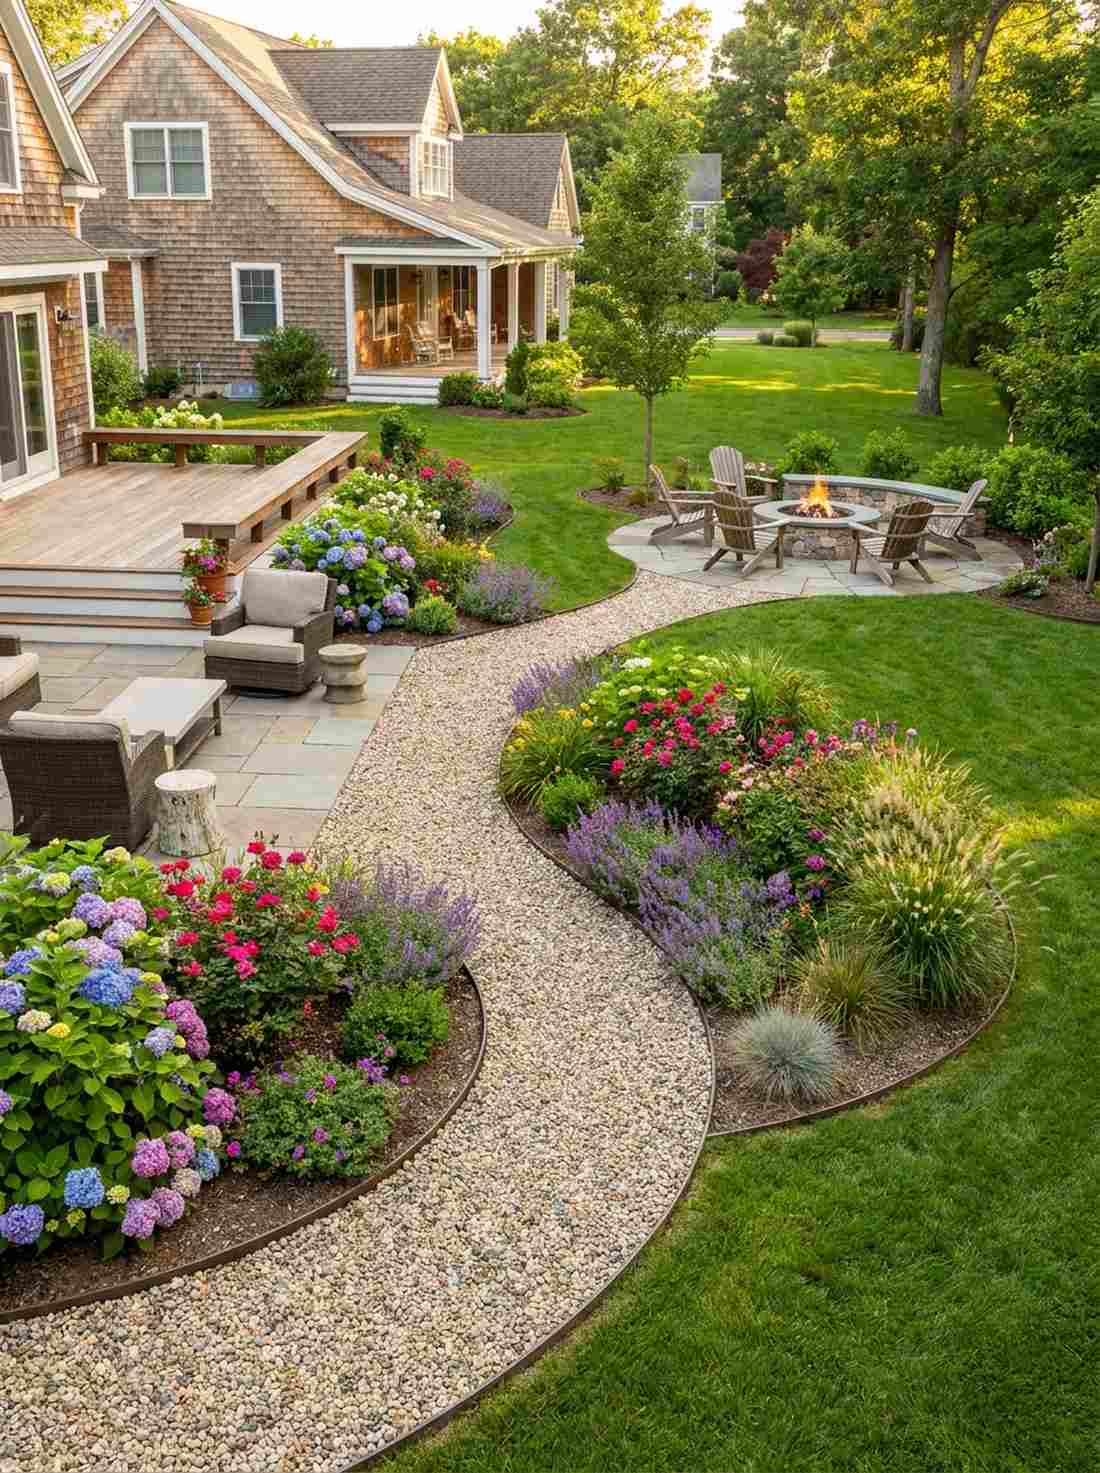
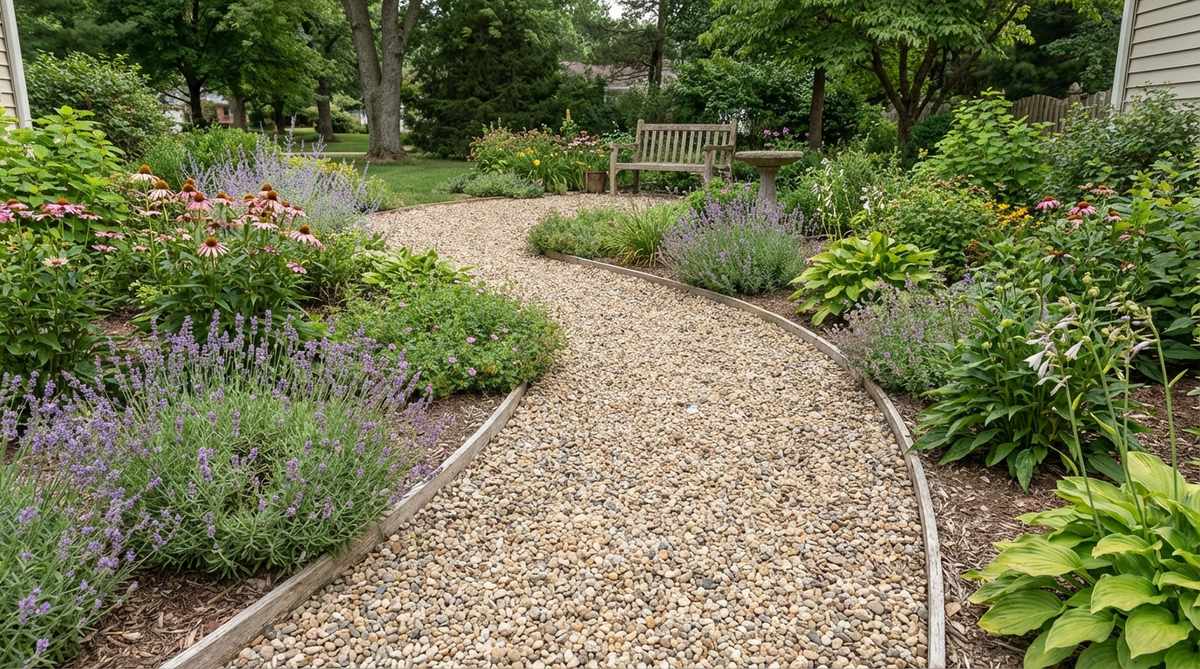
The satisfying crunch underfoot feels like you’re strolling through an expensive French chateau garden. Laying a meandering pea gravel pathway works beautifully as a primary walkway connecting your patio to a hidden fire pit.
The soft, neutral tones of the stone make your bright floral borders stand out intensely by contrast. This foundational upgrade completely changes the yard’s framework, delivering a designer-level finish when installed correctly with heavy-duty weed barriers.
You can easily install a 20-foot path for around $100–$200. Save this to your DIY hardscaping board!
- Key Materials: Pea gravel, landscape fabric, metal edging
- Vibe / Style: Classic European estate
- Difficulty: Moderate manual labor
- Budget Breakdown: Gravel: $80 | Fabric/Edging: $60.
- Creator’s Tip: Never skip the edging! Without a solid border, your beautiful gravel will disappear into your lawn within a month.
- Smart Sourcing: Heavy-duty steel landscape edging strips and commercial weed barrier fabric.
17. Reclaimed Brick Herringbone Pattern
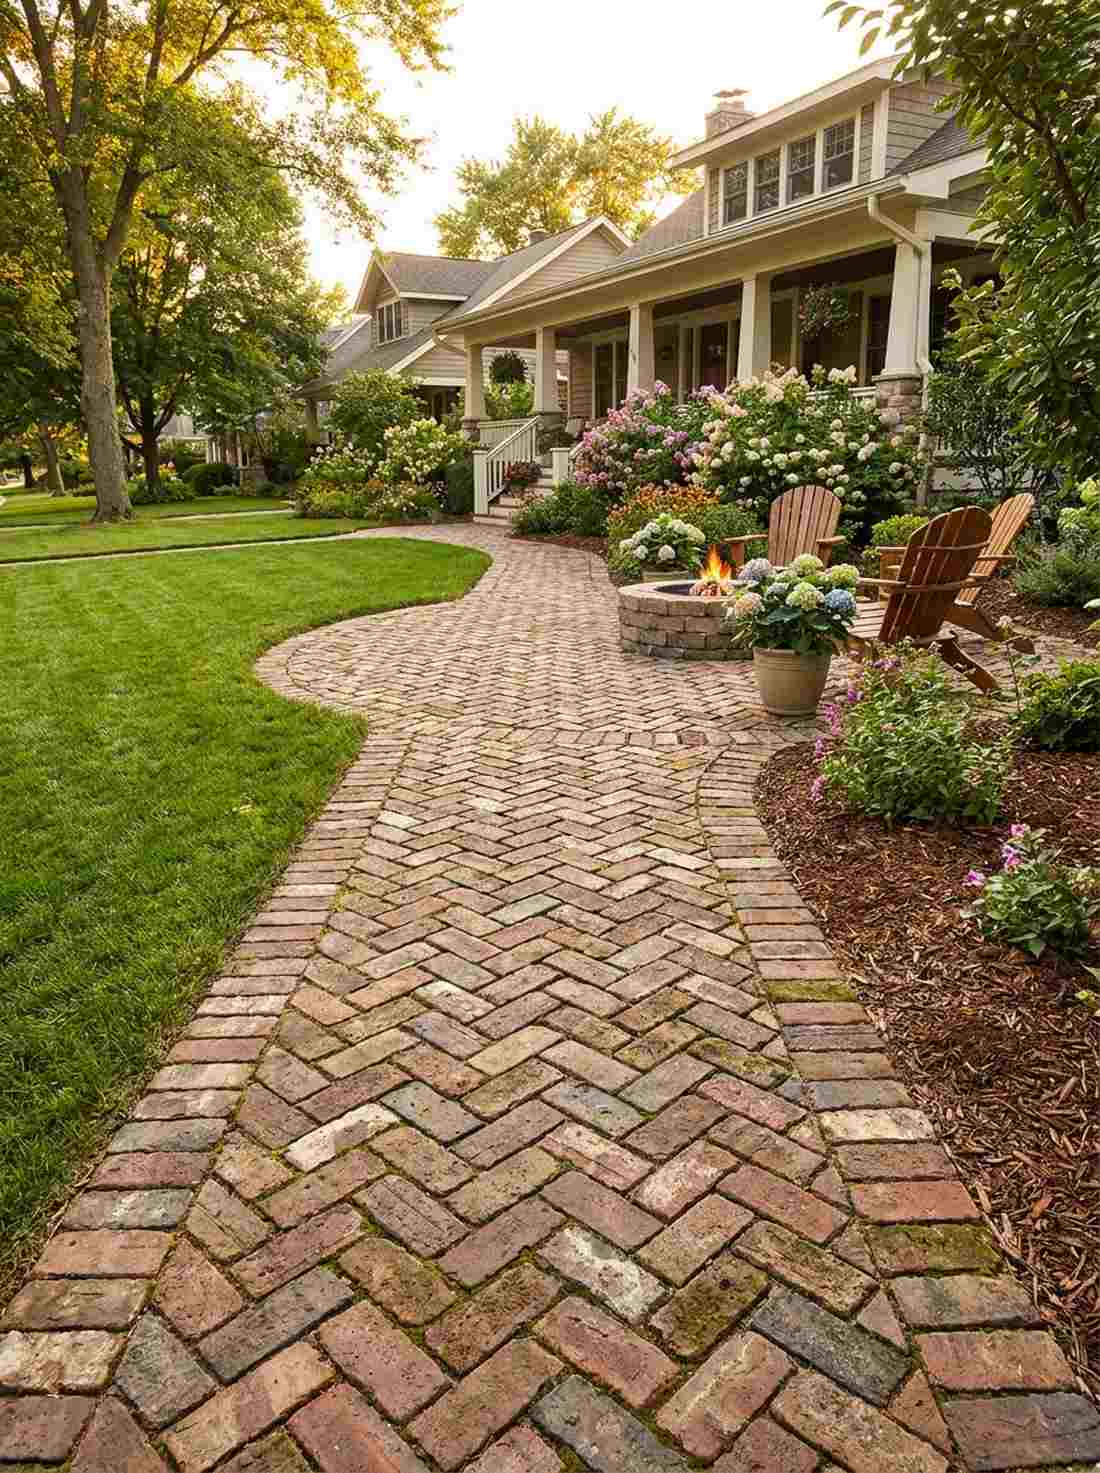
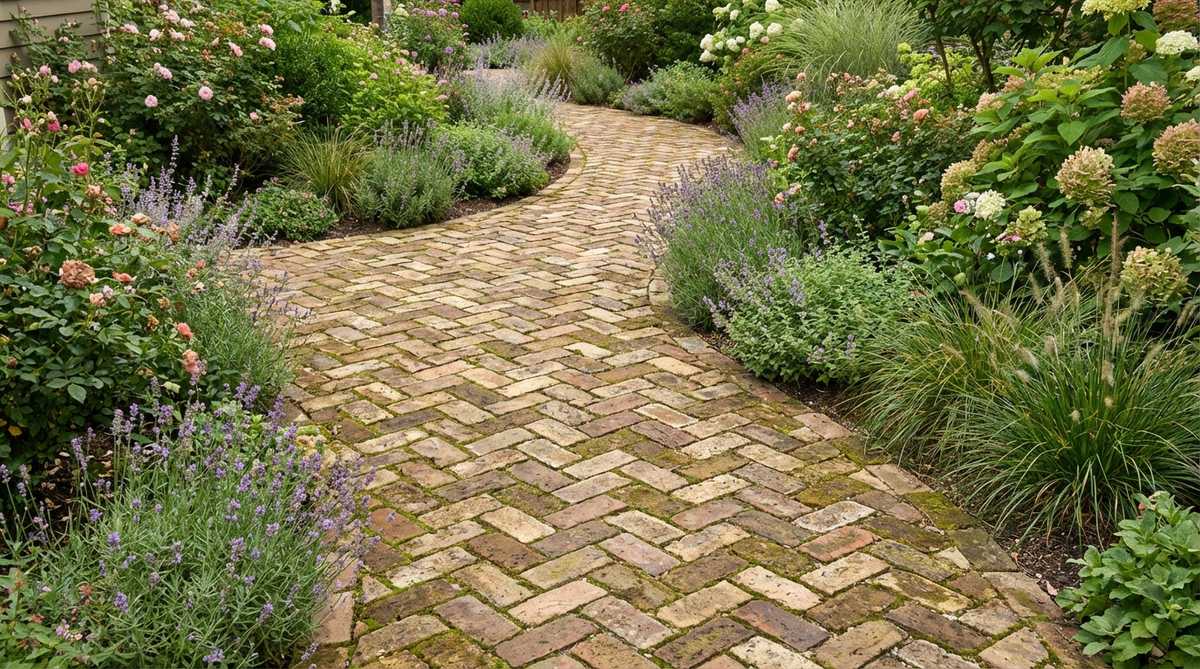
This stunning brickwork feels like a historic courtyard that has existed for centuries. A herringbone brick pathway is the ultimate use-case for a high-traffic entrance or a quaint garden seating area.
The varied, weathered tones of old brick blend naturally, giving an incredibly rich, old-world texture. It looks astoundingly expensive, but you can slash costs by sourcing salvaged bricks and setting them in premium polymeric leveling sand rather than wet mortar.
Expect to spend around $150–$350 depending on your brick source.
- Key Materials: Reclaimed bricks, leveling sand, rubber mallet
- Vibe / Style: Historic weathered charm
- Difficulty: Advanced DIY
- Budget Breakdown: Bricks: $200 | Sand/Base: $80.
- Creator’s Tip: Sweep fine polymeric sand into the finished joints and mist with water; it locks the bricks tight and stops weeds dead.
- Smart Sourcing: Polymeric jointing sand bags and heavy-duty rubber paving mallets.
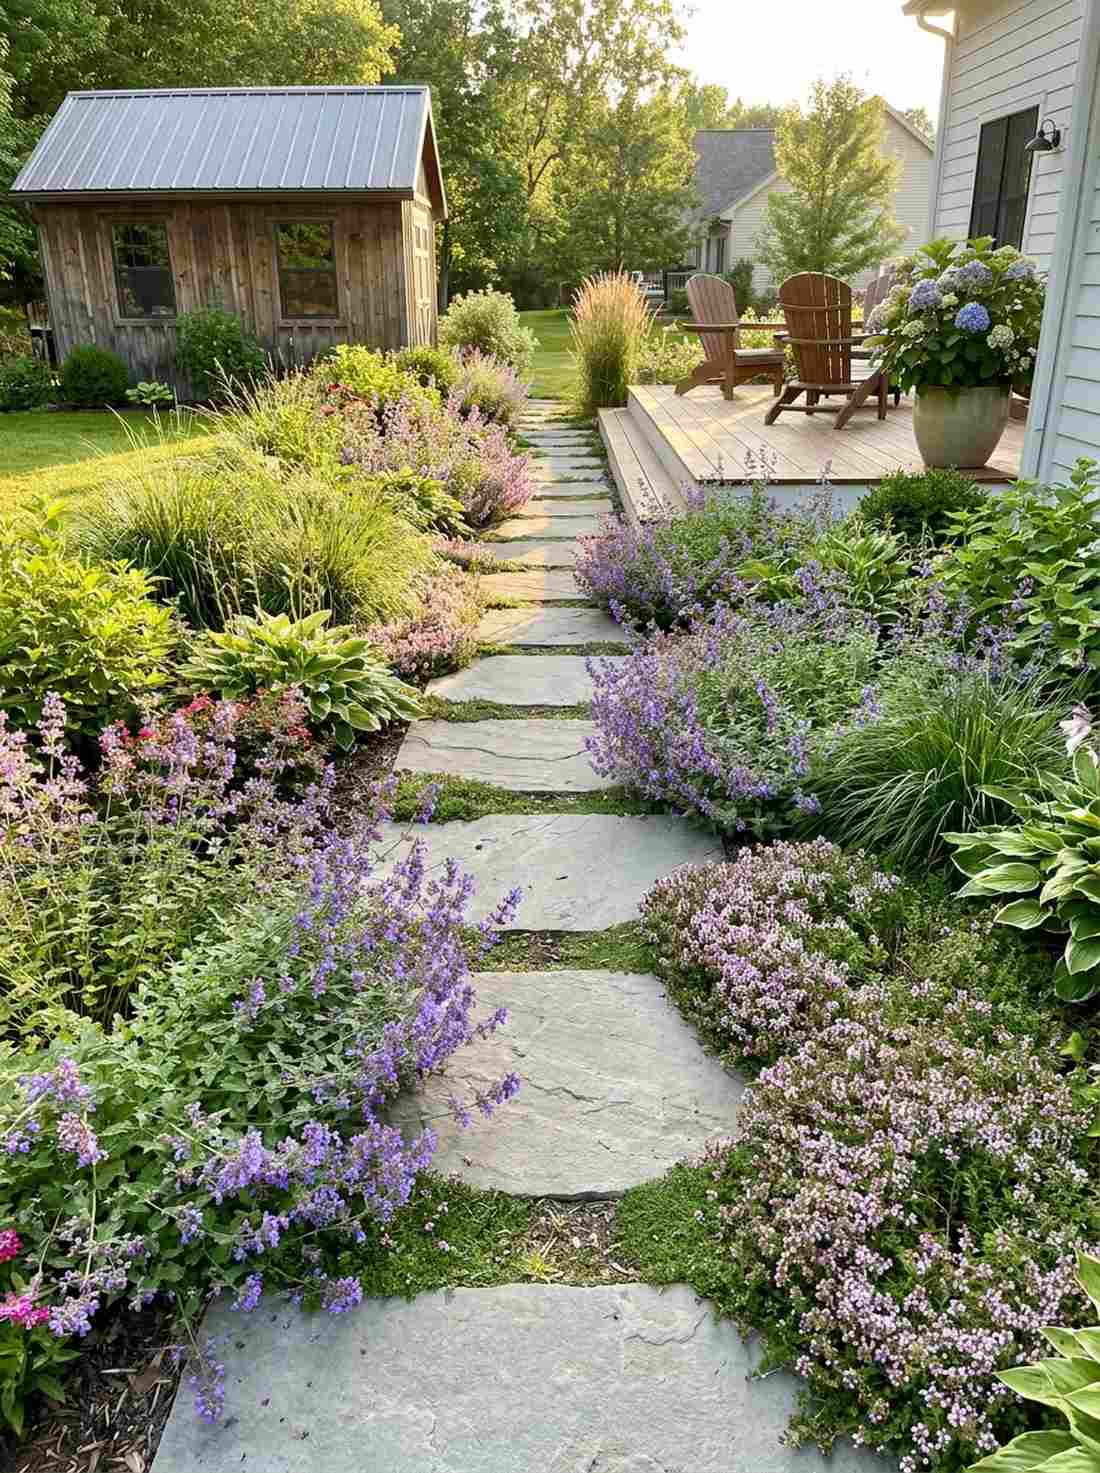
18. Flagstone Irregular Stepping Path
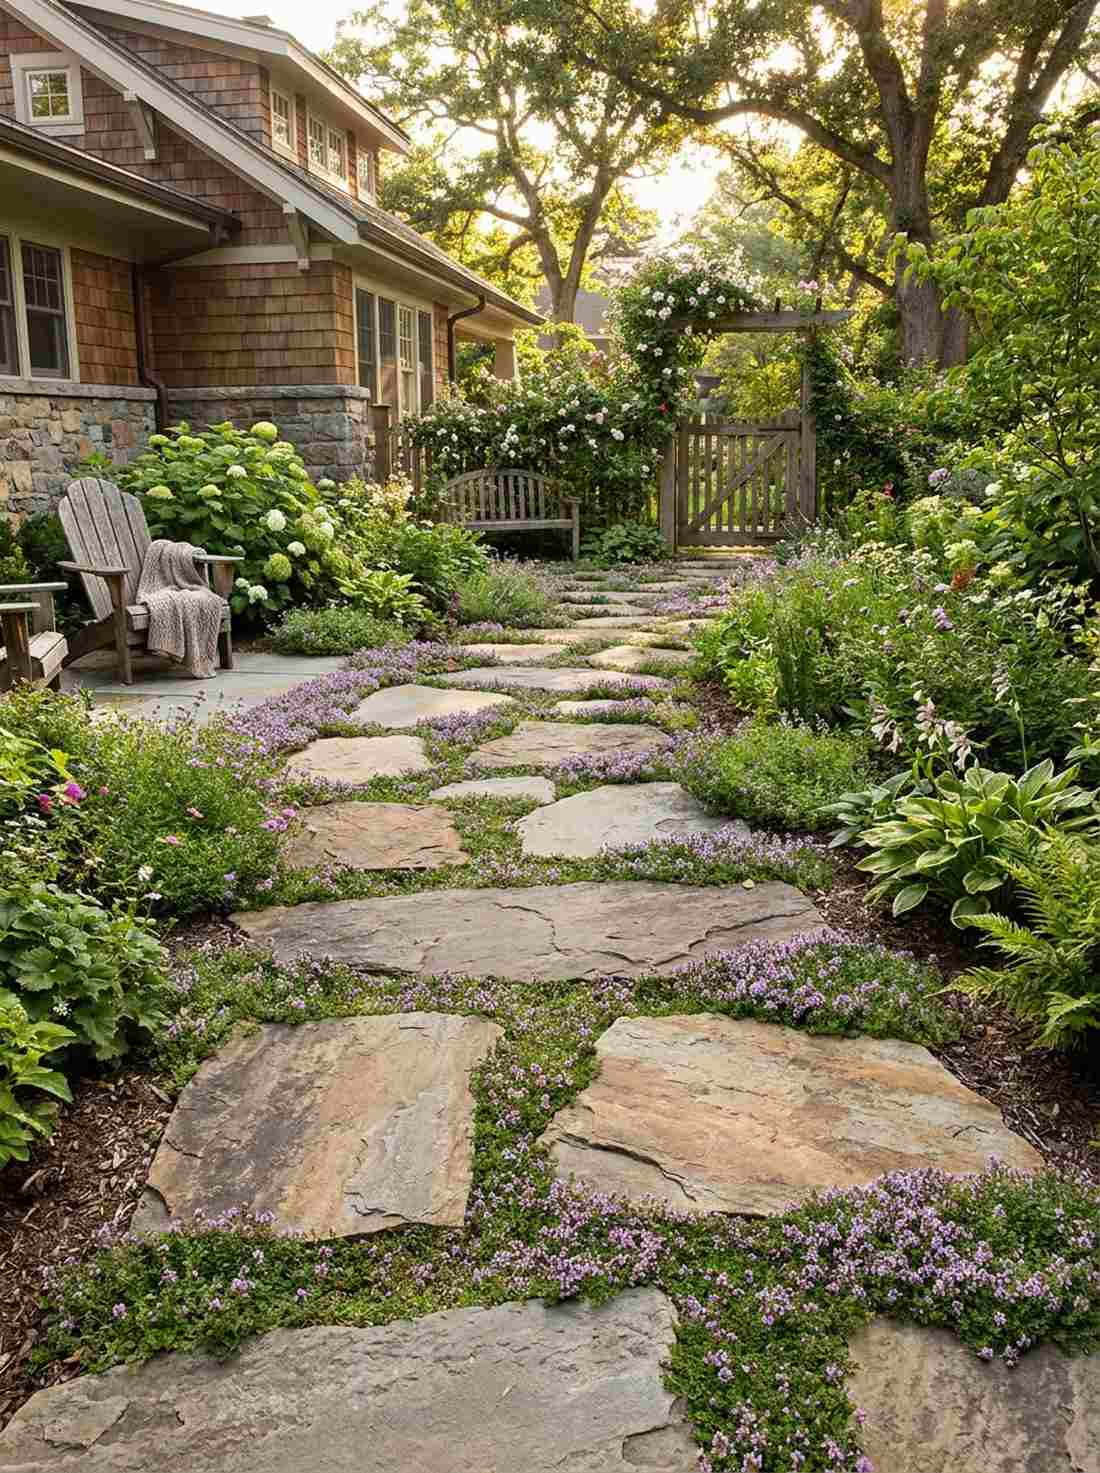
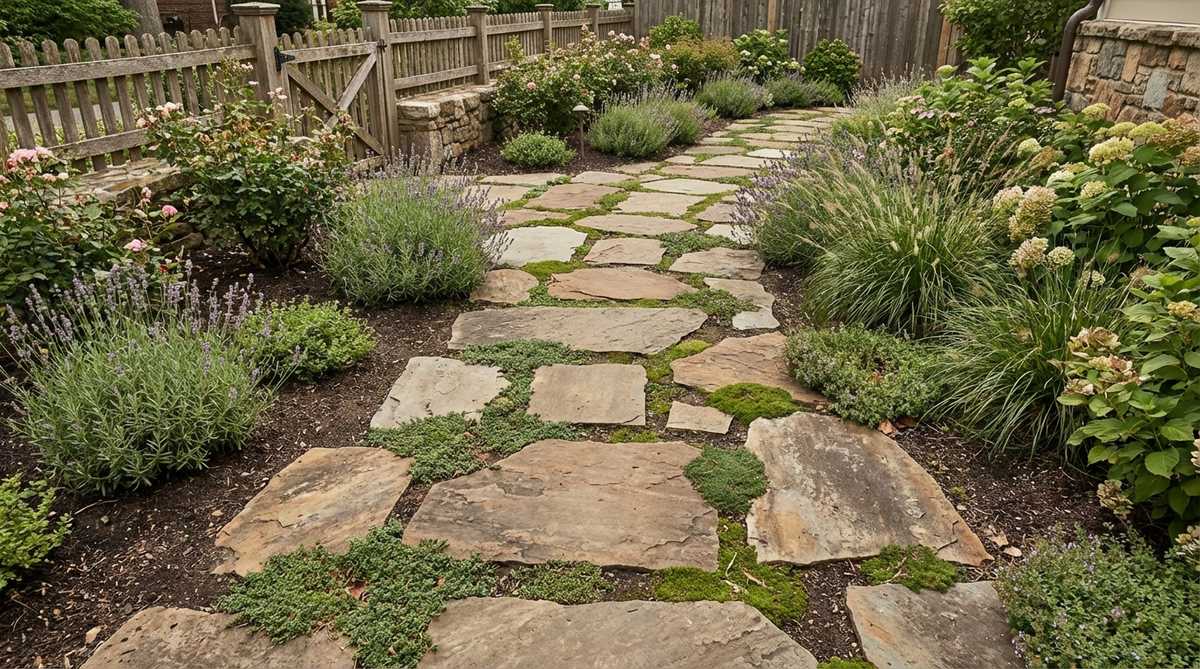
These massive stone slabs feel like a magical pathway leading to a secret garden room. An irregular flagstone stepping path is perfectly suited for meandering side-yard routes where grass refuses to grow well.
Spacing the stones apart and letting creeping thyme fill the gaps creates an incredibly organic, fused-with-nature aesthetic. This layout easily passes as a professional $2,000 installation, especially when using thick, premium natural stone slabs.
You can build a gorgeous stepping path for $200–$400. Pin this if you love the cottage-core stone aesthetic!
- Key Materials: Large flagstones, coarse sand, creeping thyme plugs
- Vibe / Style: Whimsical secret garden
- Difficulty: Heavy lifting required
- Budget Breakdown: Stone slabs: $250 | Thyme plugs: $50.
- Creator’s Tip: Dig the stones down so they sit perfectly flush with the soil surface to ensure you can safely run a lawnmower right over them.
- Smart Sourcing: Live creeping thyme groundcover trays and ergonomic stone-lifting shovels.
19. Chipped Bark Mulch Woodland Trail
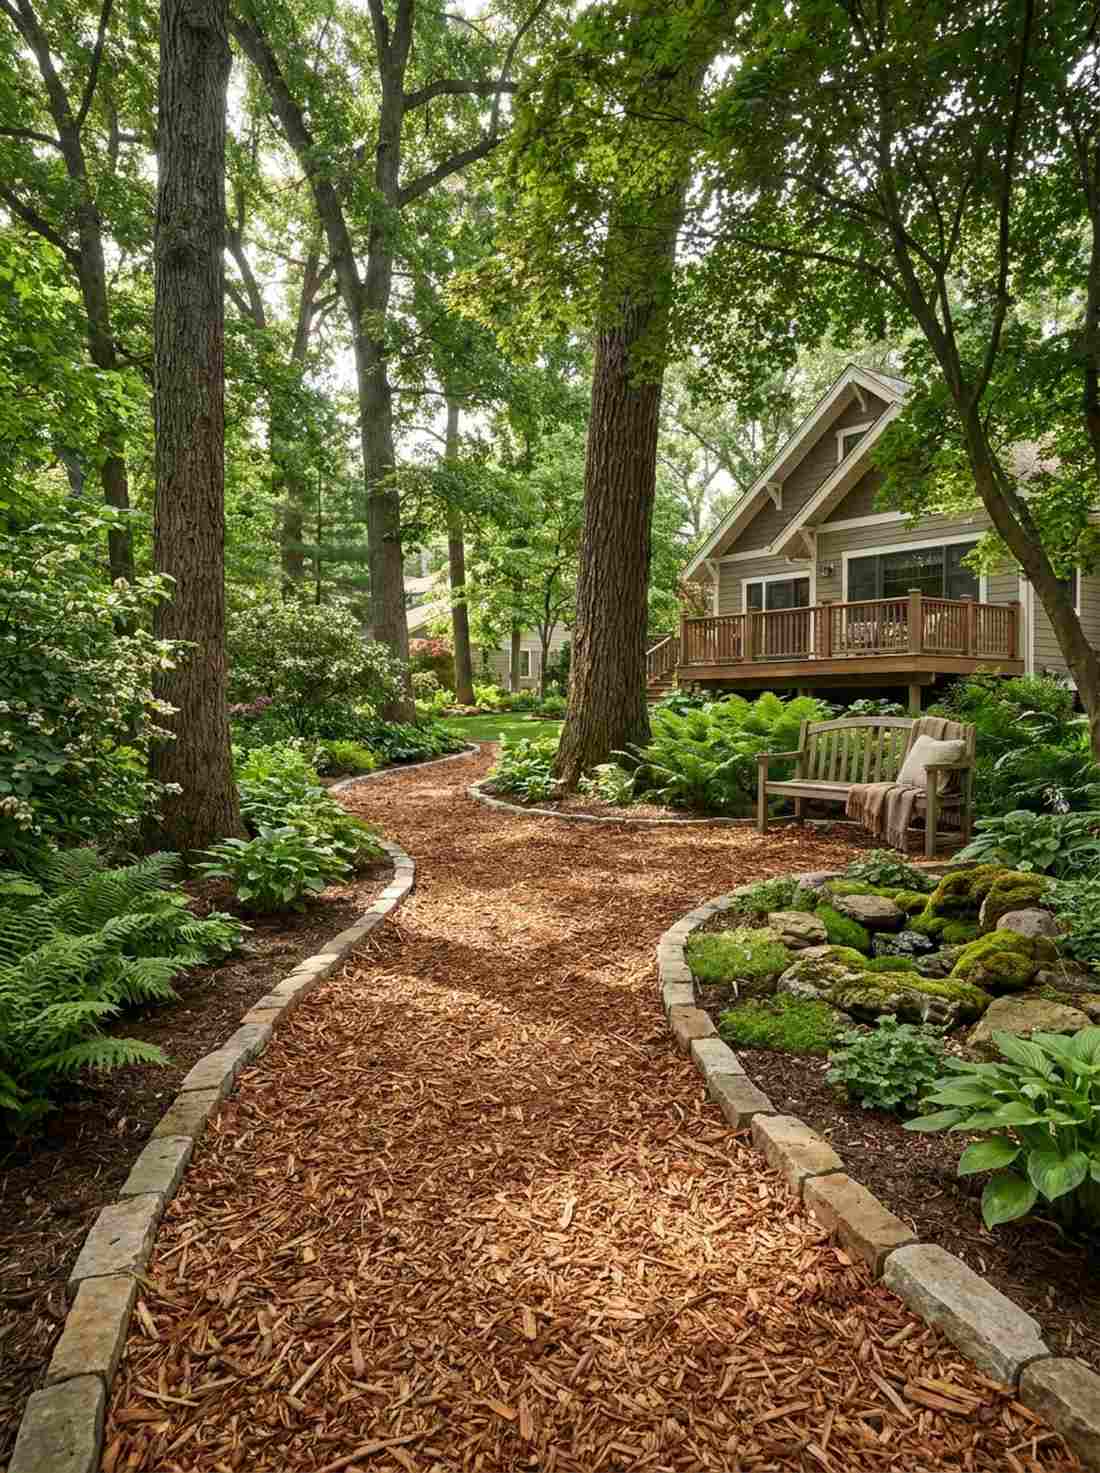
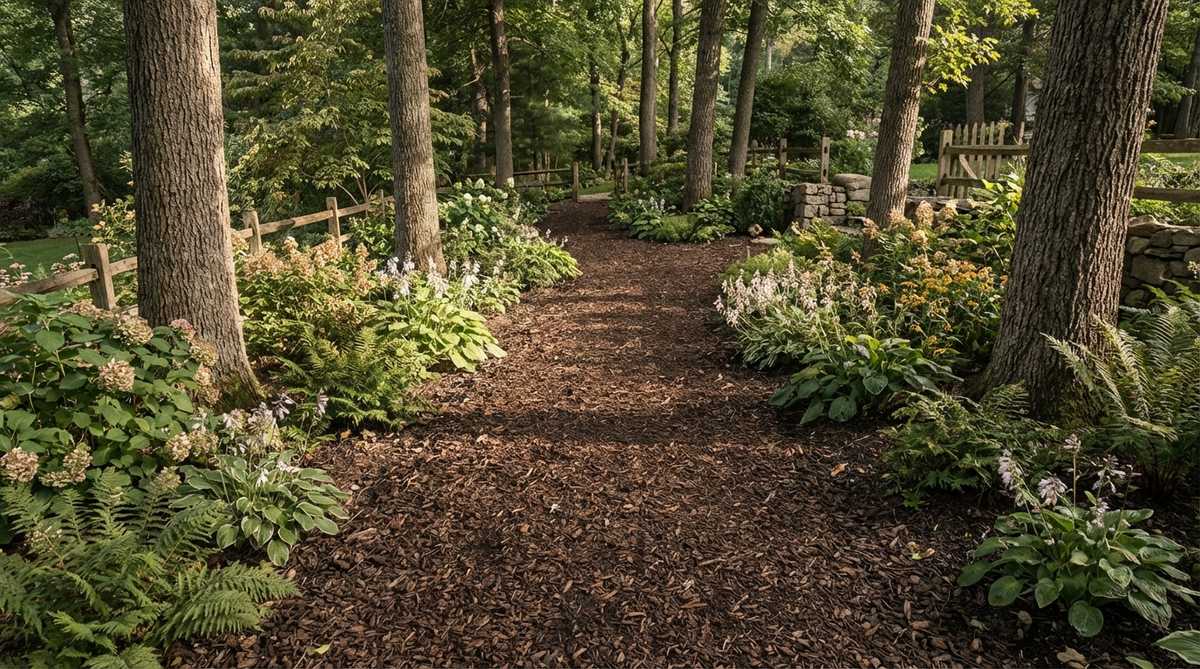
The spongy, earthy feel of this path brings a deep, relaxing forest atmosphere right to your yard. A chipped bark woodland trail is strictly the best use-case for heavy shade gardens or naturalistic boundaries near property lines.
It flawlessly suppresses weeds while quietly decomposing to feed your adjacent border plants. This is the absolute cheapest way to lay down a path, yet it delivers a rustic, highly curated park aesthetic when cleanly edged.
You can lay a massive bark trail for just $50–$100.
- Key Materials: Shredded cedar bark, trenching spade
- Vibe / Style: Naturalistic forest retreat
- Difficulty: Very easy
- Budget Breakdown: Bulk mulch: $60 | Trenching tool: $30.
- Creator’s Tip: Avoid cheap dyed wood chips. Natural cedar or shredded pine bark smells amazing and repels certain pests naturally.
- Smart Sourcing: 100% natural shredded cedar bark mulch and sharp steel trenching spades.
If you’ve been struggling with empty, boring yard spaces, this upcoming layout is the ultimate cheat code.
20. Crushed Shell Coastal Pathway
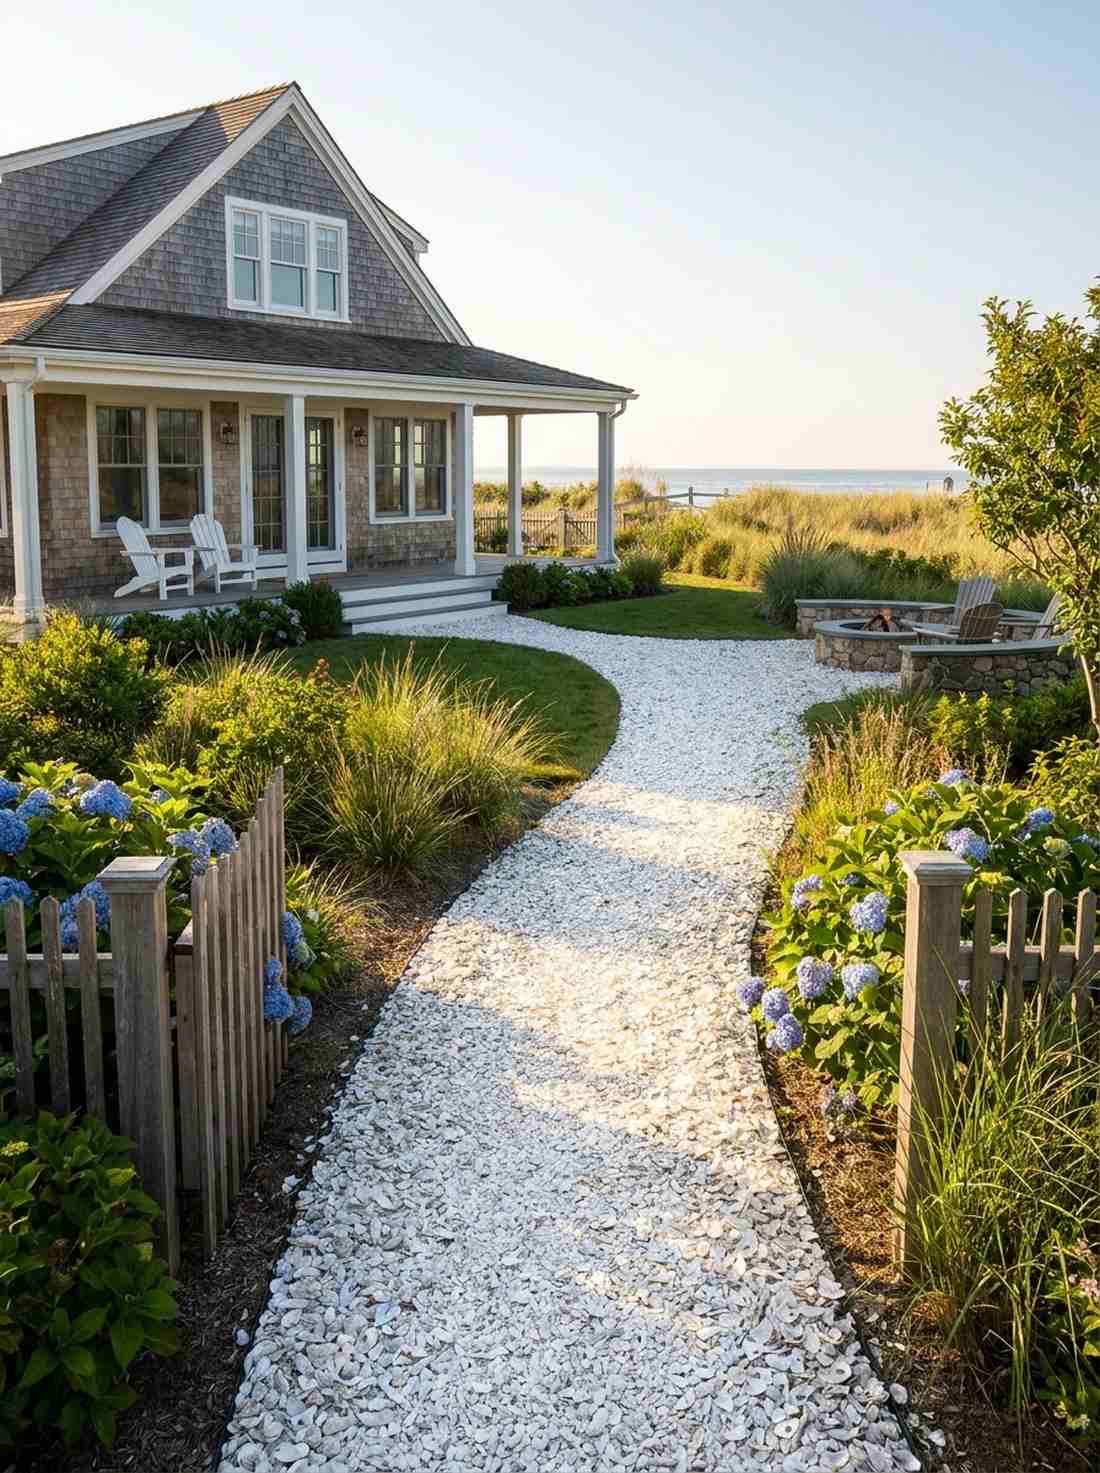
This glowing white walkway feels like a breezy pathway leading directly to a private beach. Installing a crushed oyster shell pathway is an absolute game-changer for coastal-style cottages or deeply shaded yards that need brightening.
The bright white shells violently reflect ambient light, illuminating dark garden corners beautifully. This gives an incredibly bespoke, luxury resort vibe while naturally enriching the surrounding soil with slow-release calcium.
You can execute this bright walkway for $120–$200. Save this for unique coastal landscaping ideas!
- Key Materials: Crushed oyster shells, landscape fabric
- Vibe / Style: Breezy coastal cottage
- Difficulty: Easy spreading
- Budget Breakdown: Bulk shells: $150 | Base fabric: $30.
- Creator’s Tip: Walk over it frequently. The shells lock together and crush into a beautifully stable, solid surface over time.
- Smart Sourcing: Bulk crushed oyster shell bags and heavy-duty landscaping fabric pins.
21. Log Round Stepping Stones

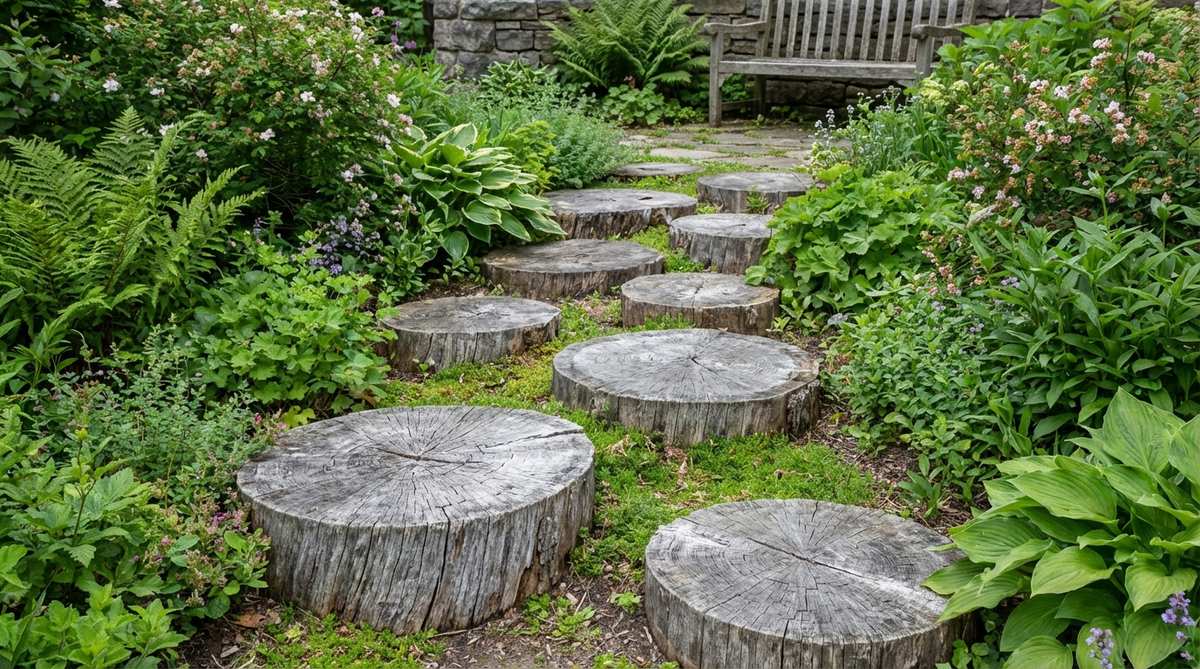
These rustic wooden circles feel like a cozy lumberjack’s trail through a wild thicket. Using tree slice log stepping stones is brilliant for informal back paths leading to a vegetable patch or compost bin.
The concentric tree rings offer stunning natural geometry that weathers to a beautiful, ghostly silver over time. It’s an insanely cheap hack that looks wonderfully premium if you seal the wood using heavy-duty outdoor wood preservatives.
You can create this woodland path for $0–$50 if you have access to fallen trees.
- Key Materials: Thick hardwood log slices, wood preservative
- Vibe / Style: Deep rustic woodland
- Difficulty: Moderate (requires chainsawing)
- Budget Breakdown: Wood sealer: $30 | Logs: Free/$20.
- Creator’s Tip: Dig out a shallow bowl of sand for each log round to sit in; it prevents them from rotting quickly in the wet dirt.
- Smart Sourcing: Clear waterproof wood preservative sealants and pre-cut cedar log slices.
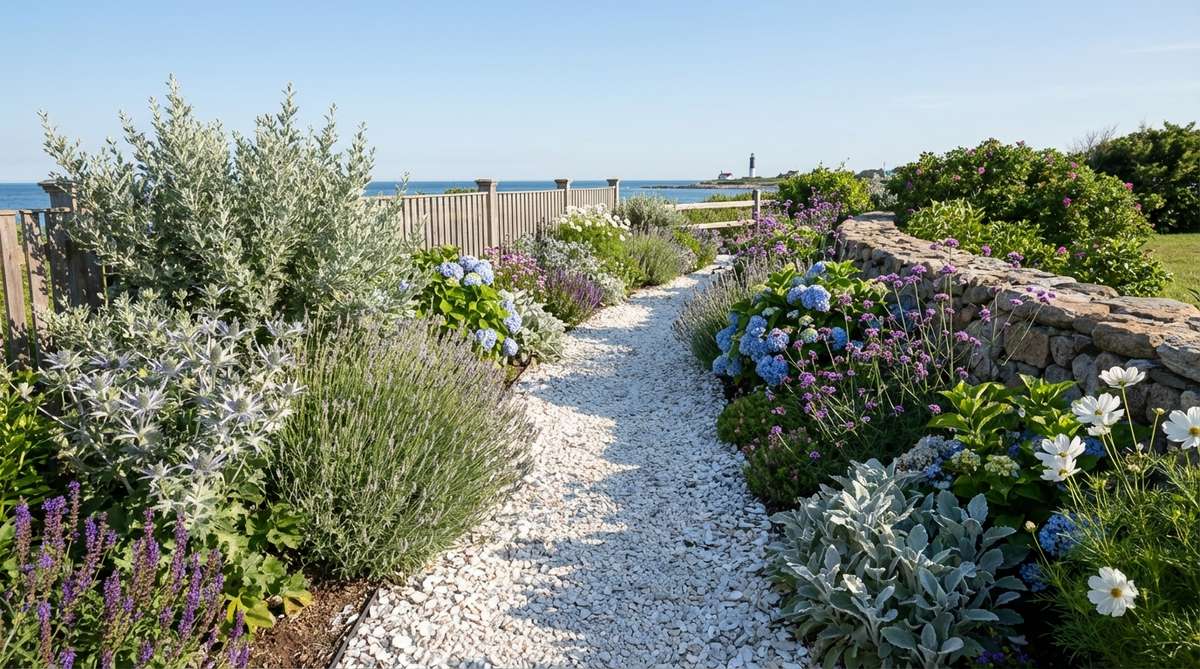
22. Limestone Gravel With Planted Edges
This pale, crunchy walkway feels incredibly clean and organized amidst the garden chaos. A limestone gravel path with soft edges is the perfect use-case for highly structured English cottage zones.
The angular nature of crushed limestone locks tightly together, creating a firm surface that won’t roll underfoot like round pea gravel. It delivers a seriously sharp, high-end architectural finish when you let sweet alyssum spill over the stark white stones.
You can easily pull this off for $100–$180.
- Key Materials: Crushed limestone, steel edging, alyssum seeds
- Vibe / Style: Crisp architectural English
- Difficulty: Moderate manual labor
- Budget Breakdown: Limestone: $90 | Edging: $50.
- Creator’s Tip: Tamp the limestone down while it’s slightly wet. It will set almost as hard as concrete, making wheelbarrow access a breeze.
- Smart Sourcing: Heavy-duty cast iron landscape edging and bulk sweet alyssum flower seeds.
23. Grass Path Through Borders
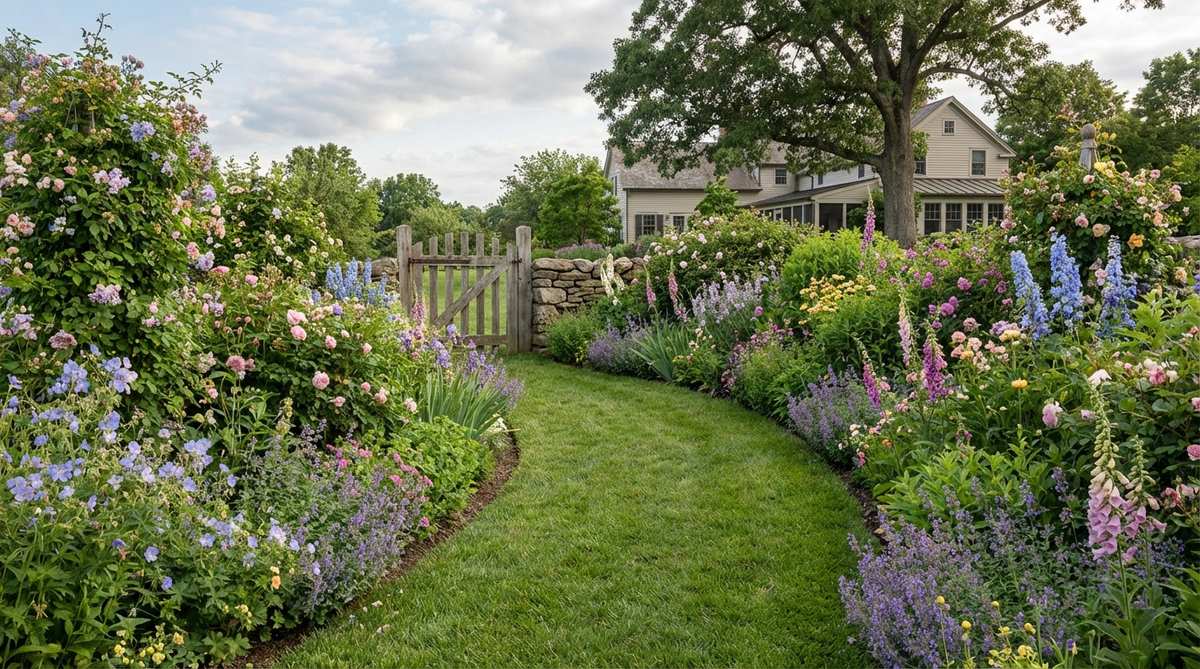
This lush green carpet feels like a plush velvet runner laid out through a botanical exhibition. Maintaining a mown grass pathway between borders works gorgeously on larger properties where hardscaping would be too expensive.
The stark contrast between a sharply cut green path and wildly untamed floral borders is the epitome of garden design cottage style. It costs almost nothing to establish, relying entirely on your commitment to crisp edging tools and premium lawn fertilizers.
You can establish this for just the cost of grass seed, around $30–$60. Pin this to your large-scale landscaping board!
- Key Materials: Turf grass seed, sharp half-moon edger
- Vibe / Style: Grand estate strolling garden
- Difficulty: Ongoing maintenance required
- Budget Breakdown: Premium seed: $40 | Edging tool: $30.
- Creator’s Tip: Make sure the grass path is exactly as wide as your lawnmower blade so you only have to make one single pass to cut it.
- Smart Sourcing: Heavy-duty half-moon step edgers and premium high-traffic grass seed blends.
Landscapers charge thousands for what you’re about to see in this next section…
Vertical Structures and Climbing Elements
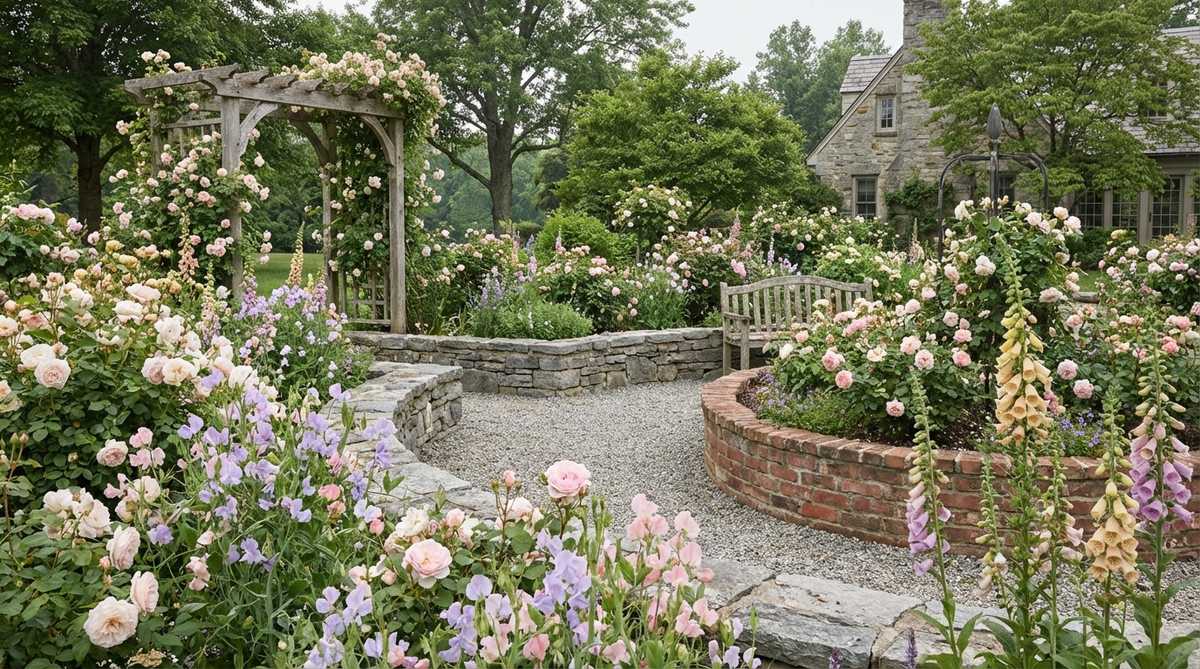
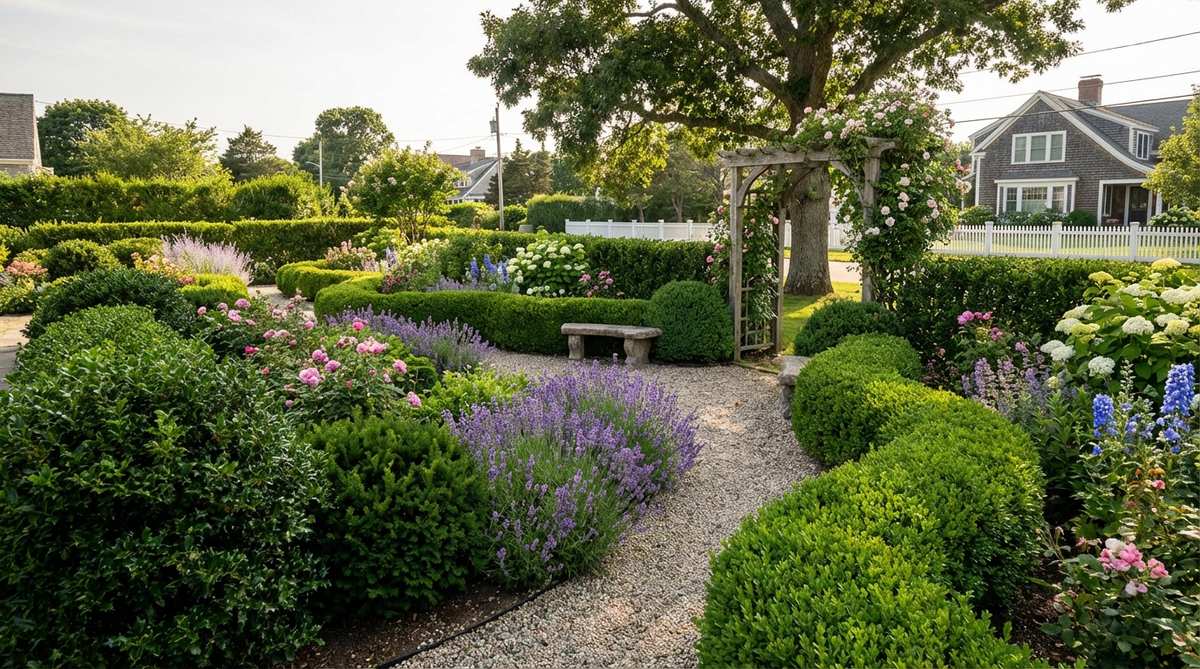
24. Rose Arch Over Main Path
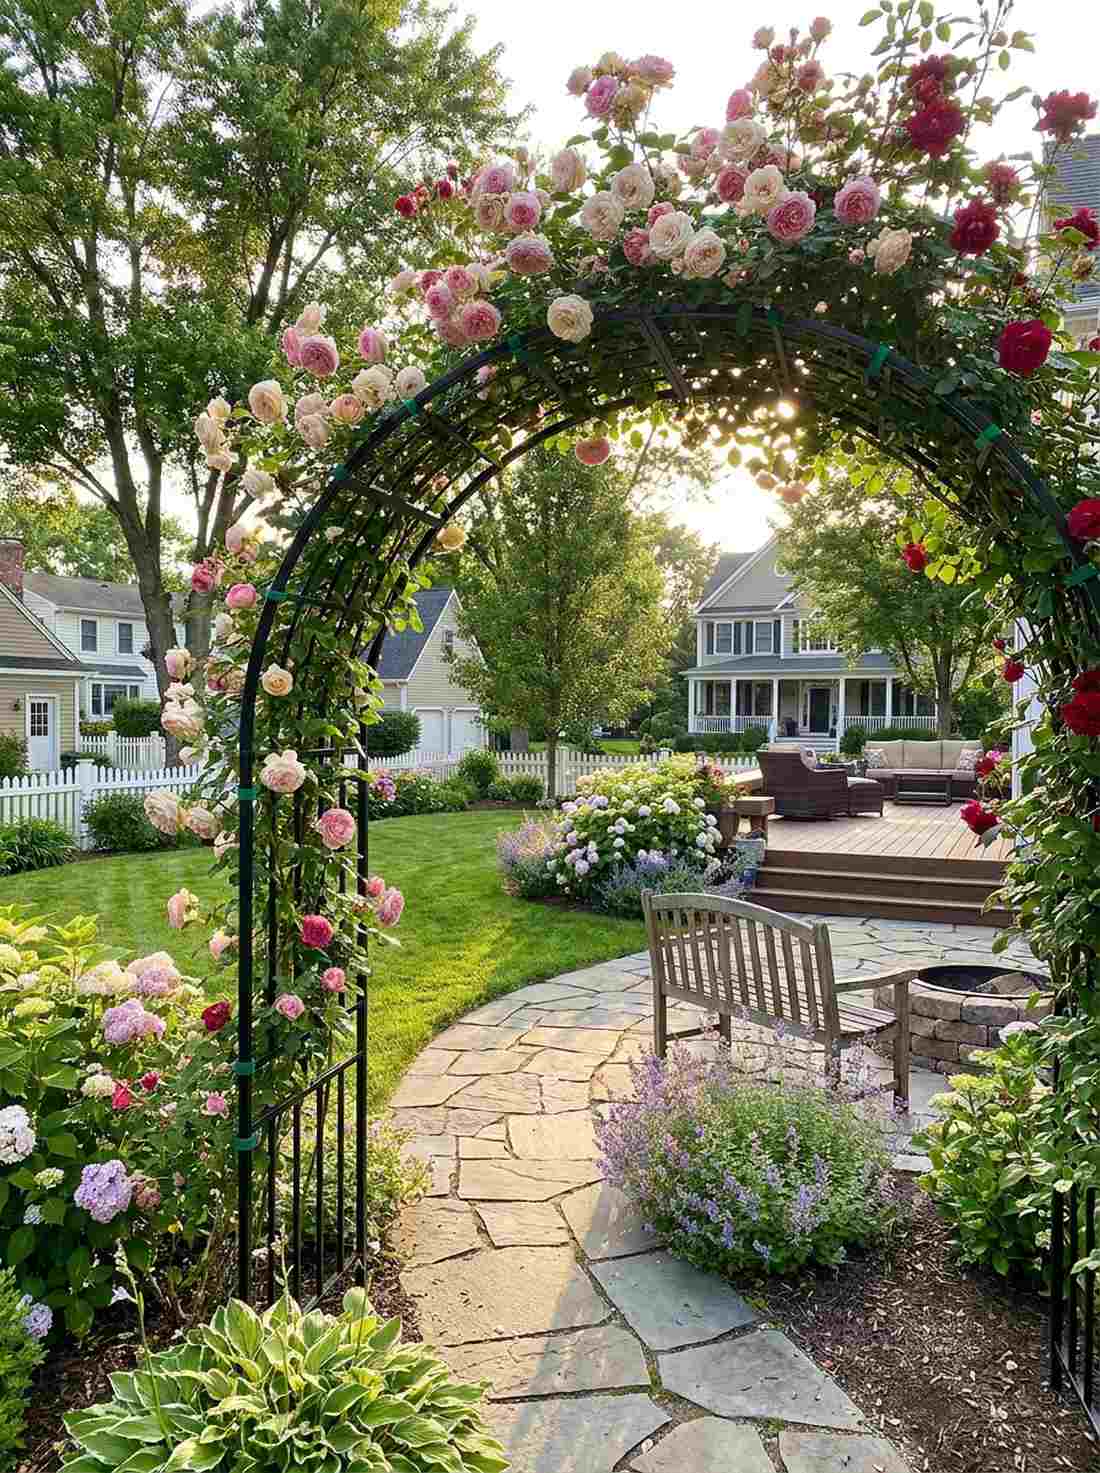
Walking under this blooming canopy feels like stepping through a portal into a romantic fairytale. A climbing rose archway is the ultimate absolute must-have for transitioning between different “rooms” in your yard.
Training heavy, fragrant blooms overhead completely immerses visitors in the garden experience. This layout delivers an instantly recognizable, highly expensive cottage look, especially when using premium rust-proof steel garden arbors as the base.
You can install this breathtaking feature for $150–$350.
- Key Materials: Metal arbor trellis, climbing roses, flexible plant ties
- Vibe / Style: Ultimate romantic fairytale
- Difficulty: Intermediate training required
- Budget Breakdown: Arbor: $180 | Roses: $80.
- Creator’s Tip: Wrap the rose canes horizontally around the arbor posts. Bending the canes forces them to produce flowers all the way up, not just at the top.
- Smart Sourcing: Heavy-duty powder-coated steel garden arbors and soft flexible garden tie wire.
25. Clematis Obelisk Vertical Accent
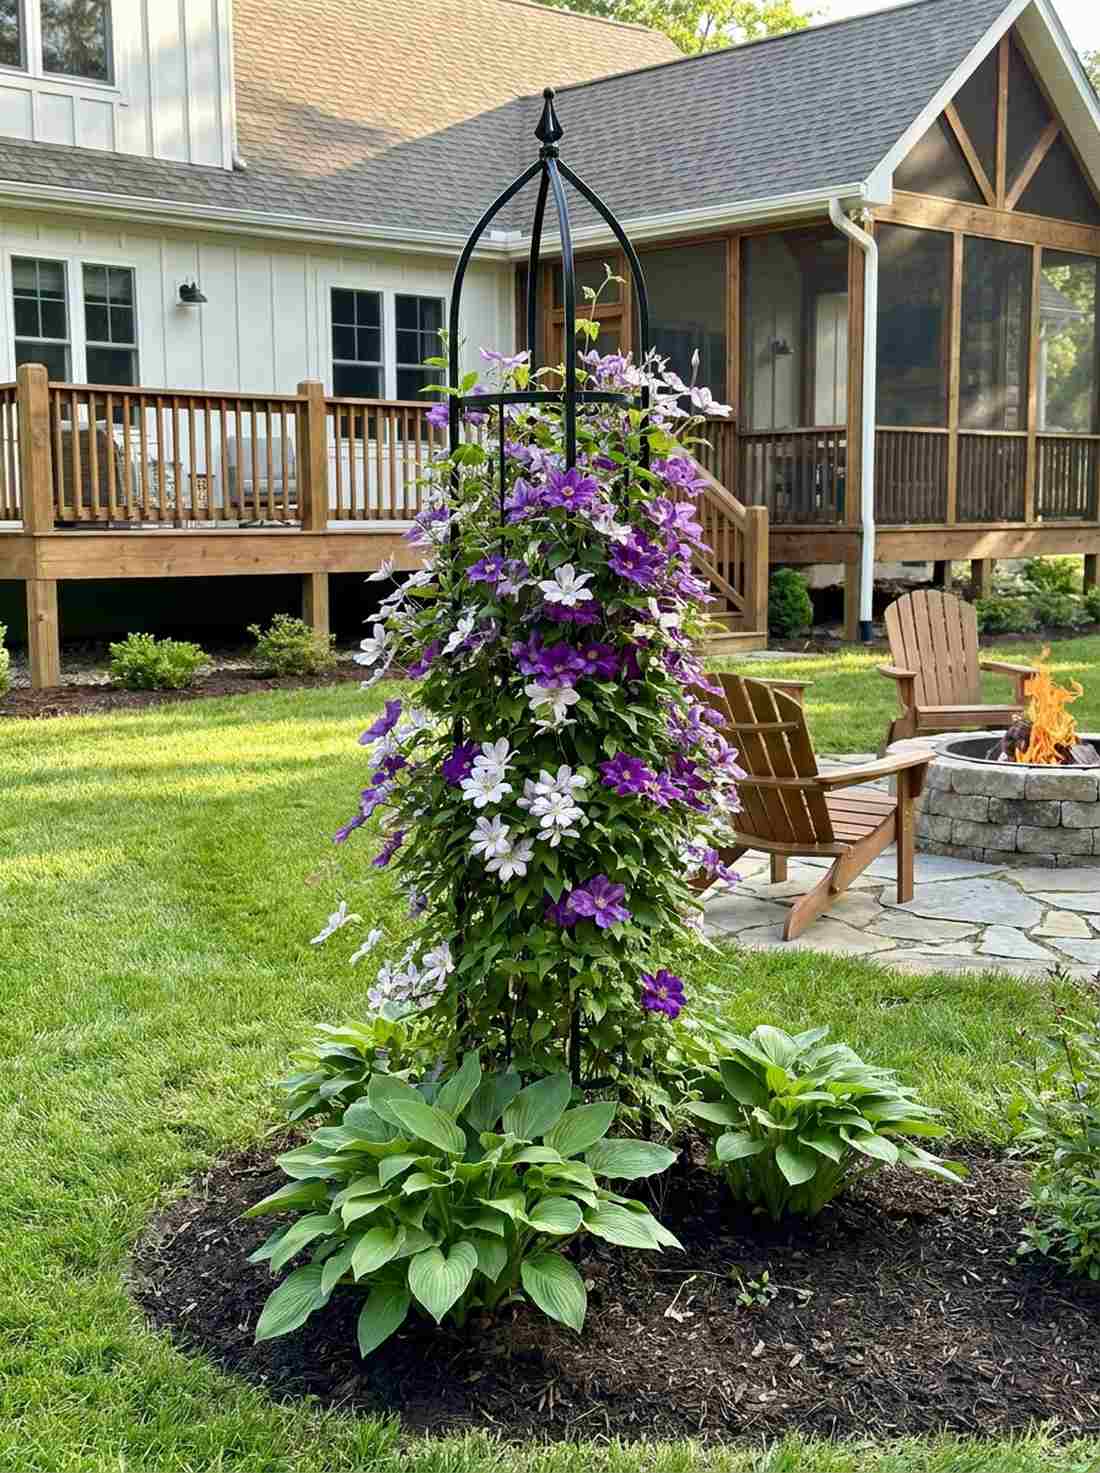
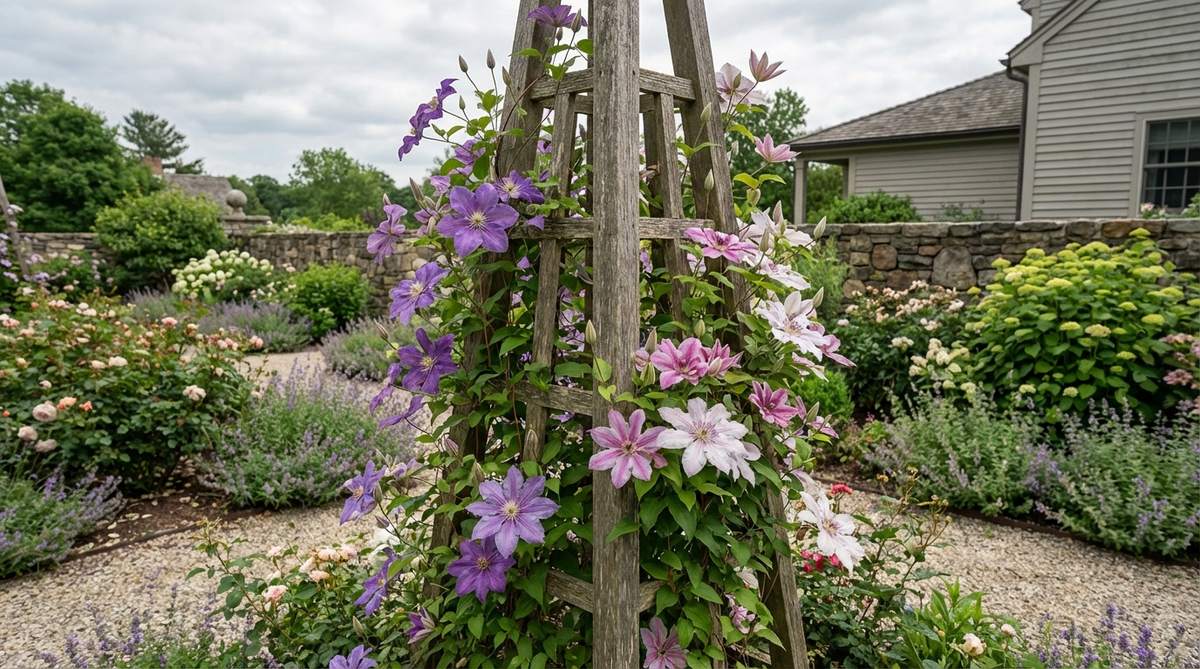
This striking floral tower feels like a delicate botanical sculpture bursting from the soil. Placing a freestanding clematis obelisk is an incredibly smart use-case for adding instant height to completely flat, new garden beds.
The rigid, formal structure of the tower contrasts beautifully with the wild, sprawling vines of the clematis. It gives a designer-level finish that draws the eye upward, easily achieved by upgrading to sturdy wrought-iron obelisk kits.
You can set up this blooming focal point for roughly $80–$140. Save this idea for adding height to flat yards!
- Key Materials: Metal or wooden obelisk, Clematis vine starter
- Vibe / Style: Sculptural focal drama
- Difficulty: Easy setup
- Budget Breakdown: Obelisk: $70 | Clematis: $30.
- Creator’s Tip: Clematis love their heads in the sun but their roots in the shade. Plant a low-growing hosta at the base to keep the roots cool.
- Smart Sourcing: Tall rust-resistant garden obelisk trellises and premium organic bone meal fertilizer.
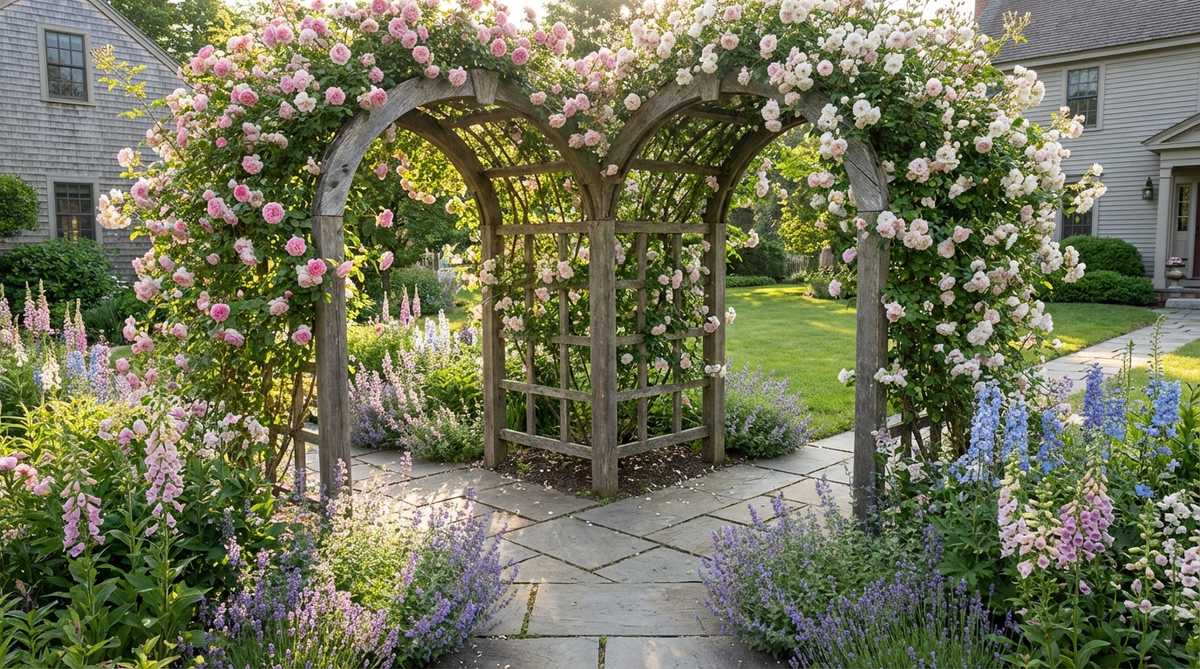
26. Woven Willow Trellis Panel

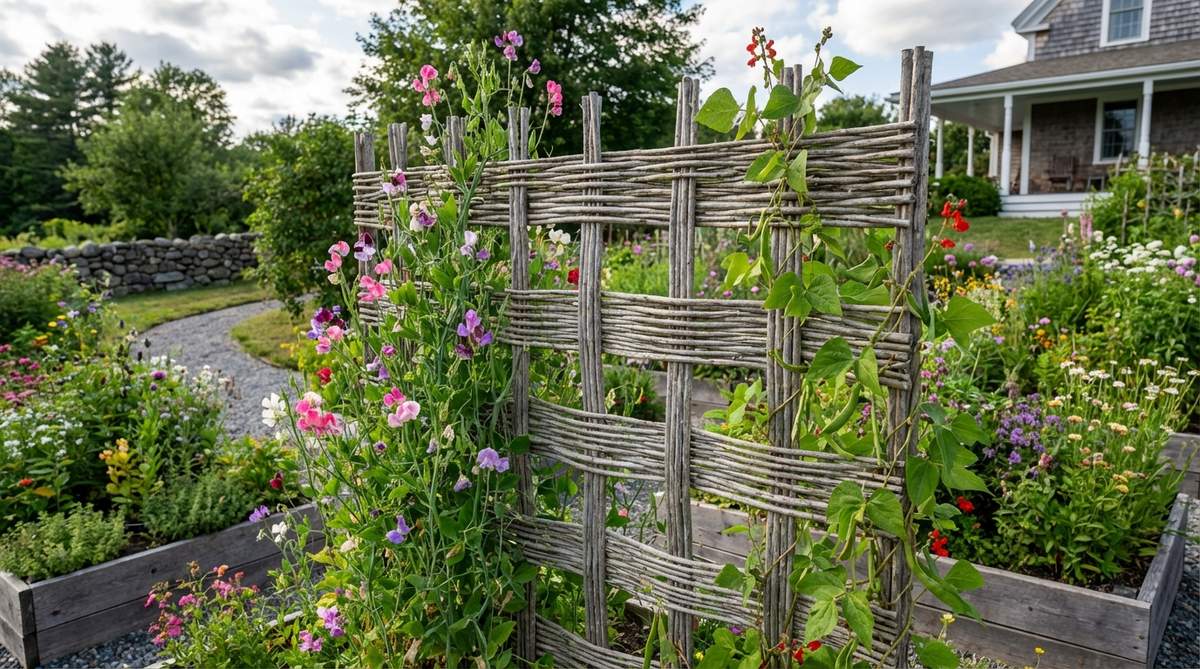
This naturalistic woven screen feels like it was crafted by woodland elves. Utilizing a woven willow branch trellis is the perfect rustic privacy screen for masking ugly AC units or trash bins.
The earthy, hand-woven texture blends so flawlessly into the background that it feels entirely organic. It completely circumvents the ugly look of cheap plastic lattice, providing a bespoke, artisanal aesthetic using natural sustainable garden screening materials.
You can install these rustic panels for about $60–$100.
- Key Materials: Woven willow hurdle panels, sturdy wooden stakes
- Vibe / Style: Hand-crafted rustic charm
- Difficulty: Quick installation
- Budget Breakdown: Willow panels: $70 | Stakes/Zip ties: $15.
- Creator’s Tip: Plant sweet peas at the base; the delicate tendrils will easily grip the rough willow bark without needing any extra ties.
- Smart Sourcing: Pre-woven natural willow trellis panels and heavy-duty outdoor zip ties.
27. Honeysuckle-Covered Pergola
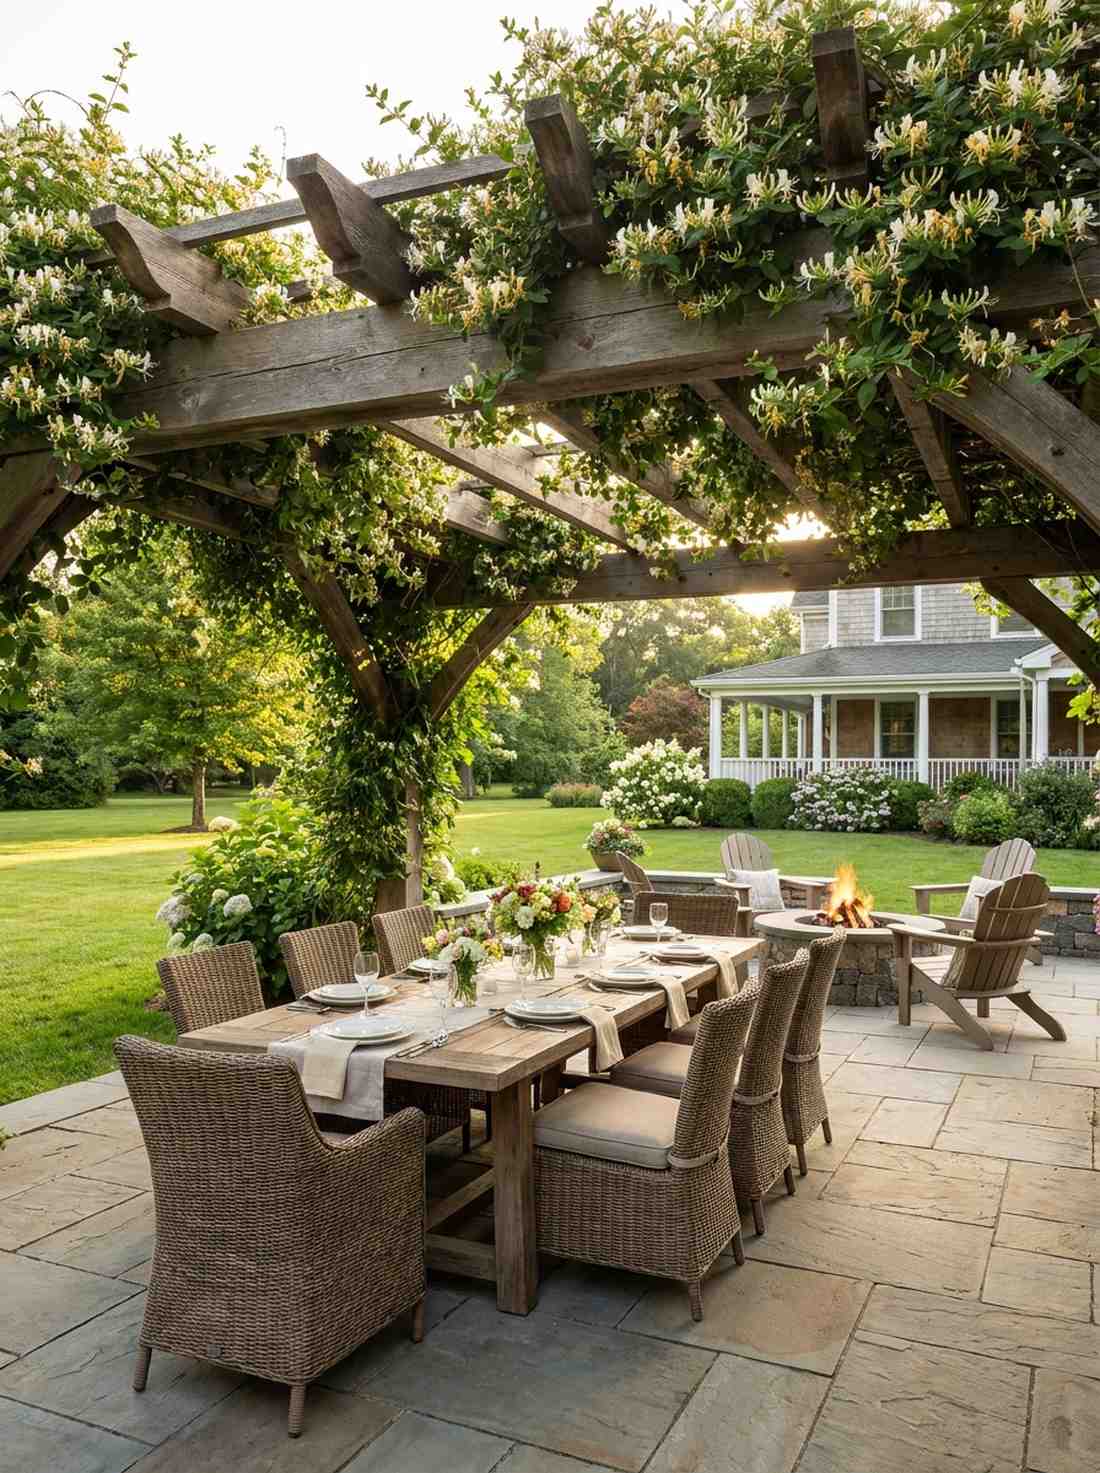
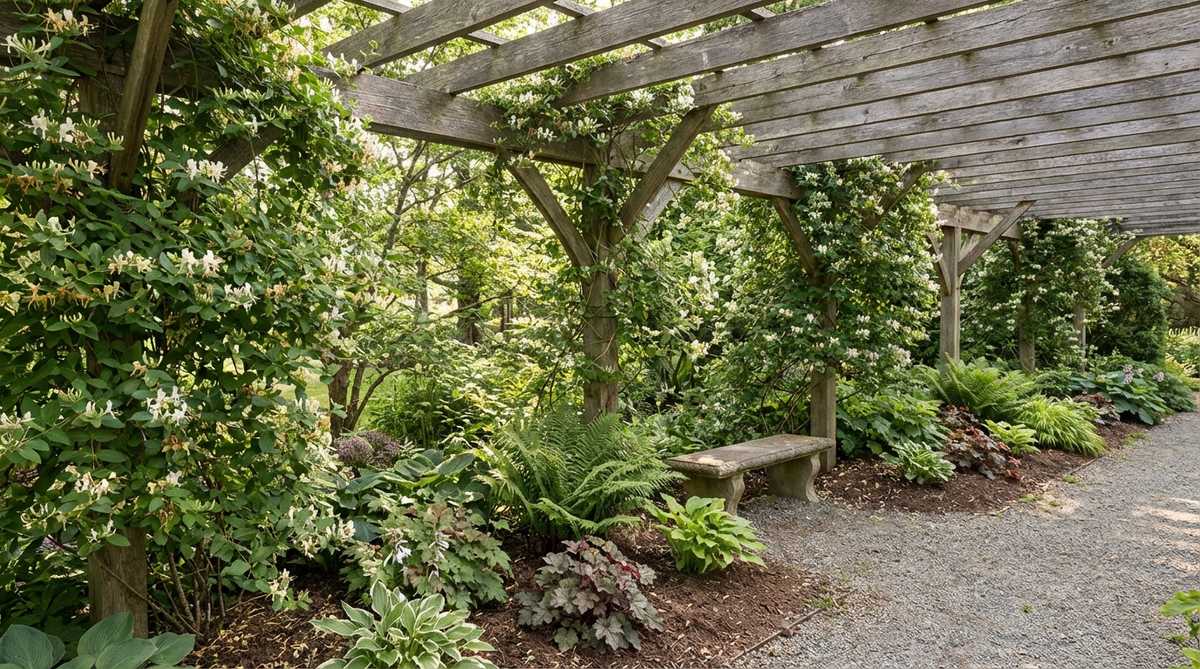
Sitting underneath this fragrant ceiling feels like resting in a shaded, heavenly oasis. A honeysuckle-draped outdoor pergola is strictly the best use-case for creating a dedicated, shaded outdoor dining room.
The aggressively fast-growing vines quickly cover the heavy timber, dropping sweet scents down onto your seating area. This setup yields a massively premium, luxury patio look, especially when constructed with pre-cut outdoor lumber kits.
Depending on size, this structural project ranges from $400–$1,000. Pin this for your ultimate backyard makeover!
- Key Materials: Wooden pergola frame, honeysuckle vines, concrete footings
- Vibe / Style: Fragrant shaded dining sanctuary
- Difficulty: Advanced structural build
- Budget Breakdown: Lumber/Hardware: $600 | Vines: $80.
- Creator’s Tip: Prune the underside aggressively every spring to prevent the vines from turning into a thick, spider-filled ceiling.
- Smart Sourcing: Pre-cut DIY wooden pergola kits and heavy-duty structural wood screws.
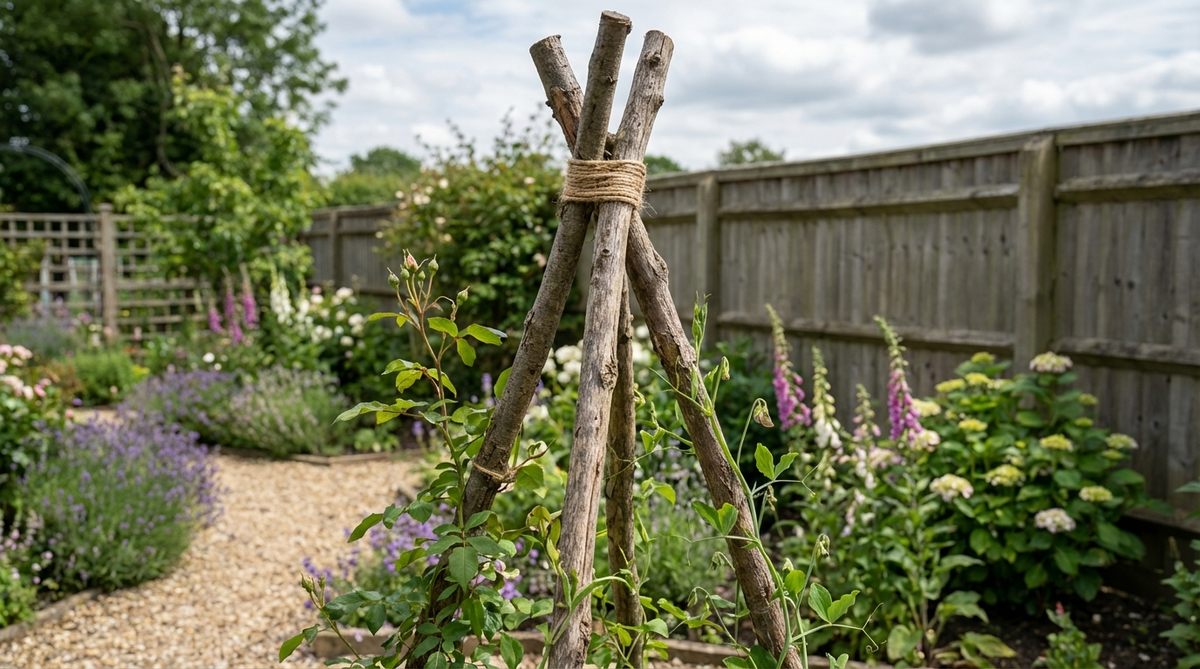
28. Bean Teepee Vegetable Garden Feature
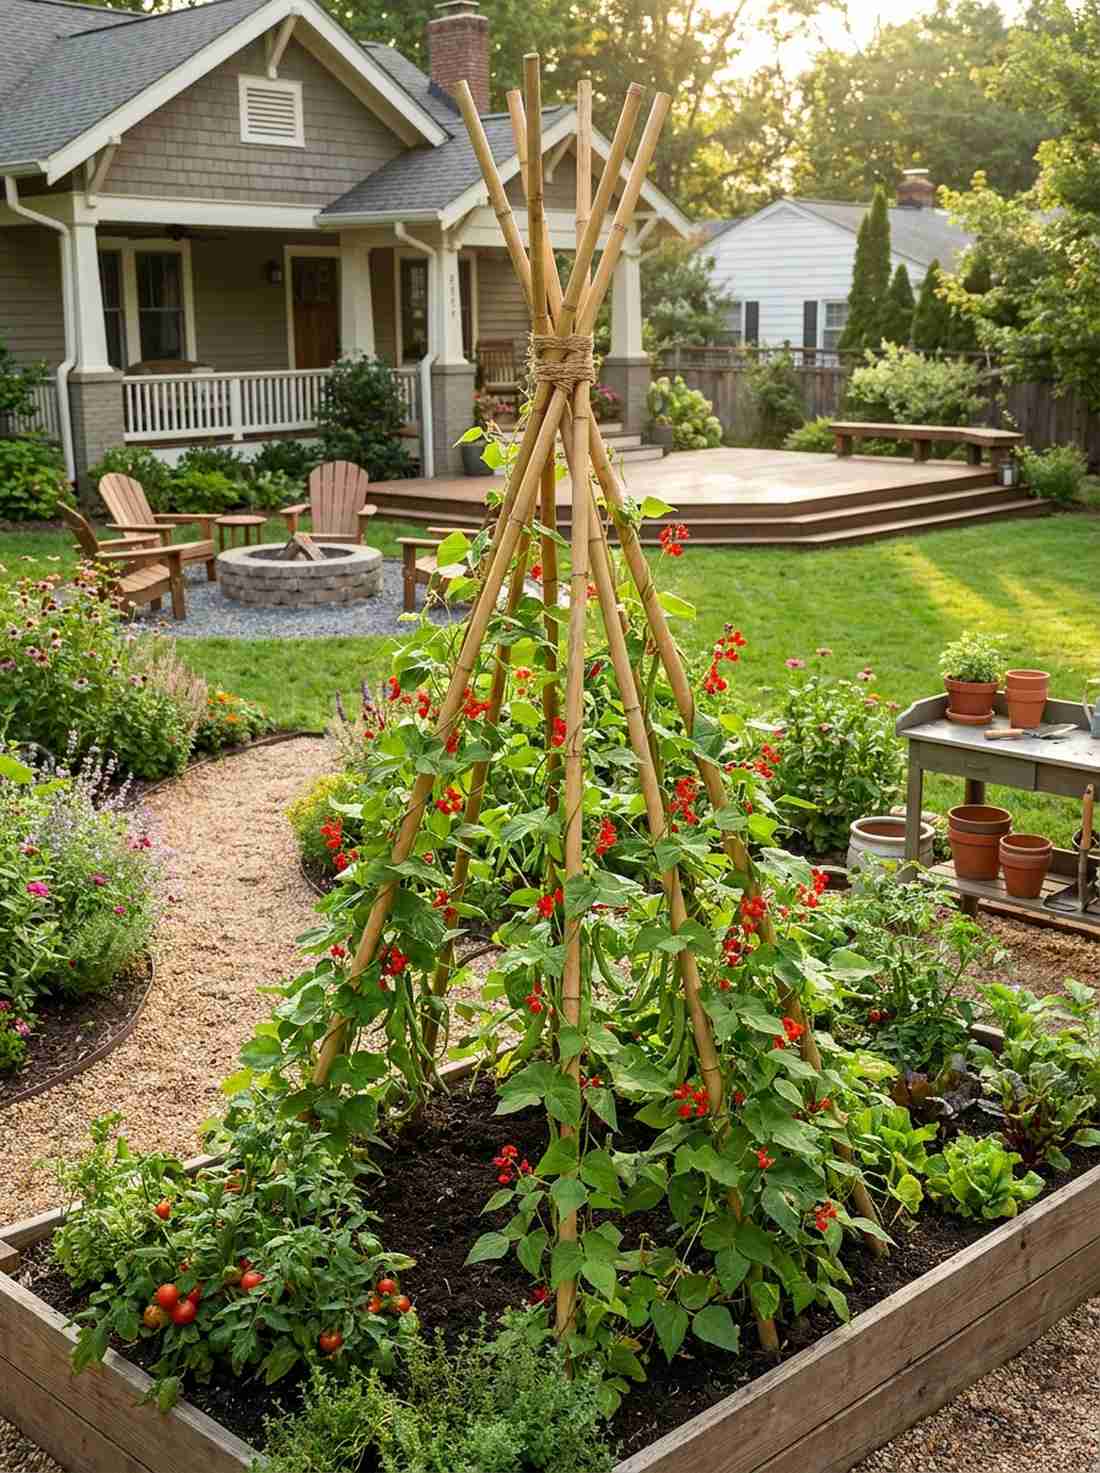
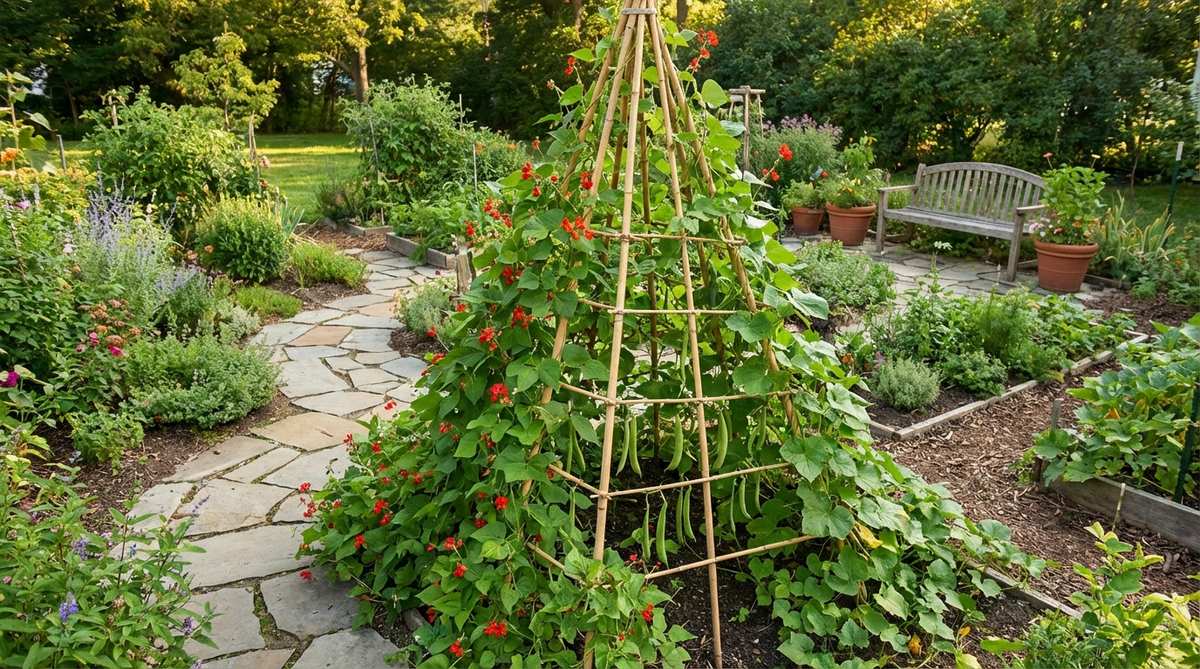
This towering green pyramid feels like a whimsical, edible playhouse right in your vegetable patch. Building a bamboo pole bean teepee is the absolute most fun use-case for gardening with kids or maximizing tight vertical spaces.
The height instantly adds architectural interest to flat vegetable beds while keeping your beans off the dirt. It looks astoundingly charming and costs next to nothing, requiring only simple lashing techniques and sturdy natural bamboo poles.
You can easily pull this off for just $20–$40.
- Key Materials: 6-8 foot bamboo poles, natural twine, runner bean seeds
- Vibe / Style: Whimsical productive potager
- Difficulty: Easy and fun
- Budget Breakdown: Bamboo poles: $25 | Twine/Seeds: $10.
- Creator’s Tip: Use Scarlet Runner Beans; they produce dazzling bright red flowers that attract hummingbirds before turning into delicious pods.
- Smart Sourcing: Heavy-duty 6-foot natural bamboo garden poles and weather-resistant garden jute twine.
Here’s a secret technique that instantly makes cheap materials look ultra-premium…
29. Wall-Mounted Trellis Grid
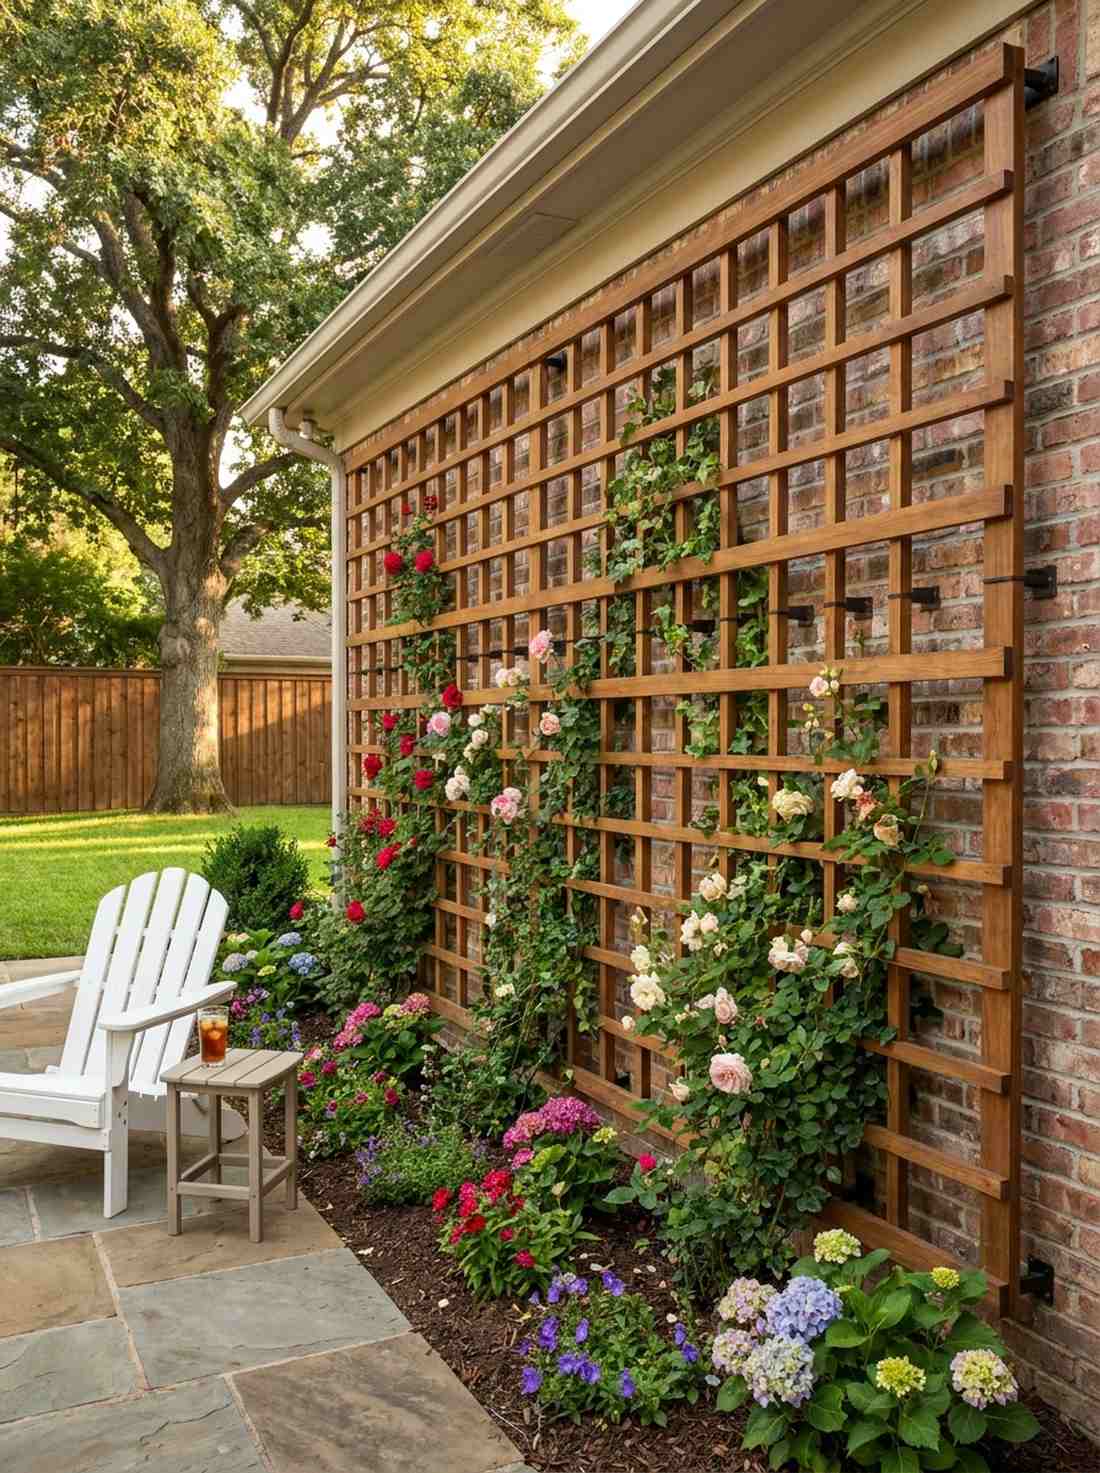
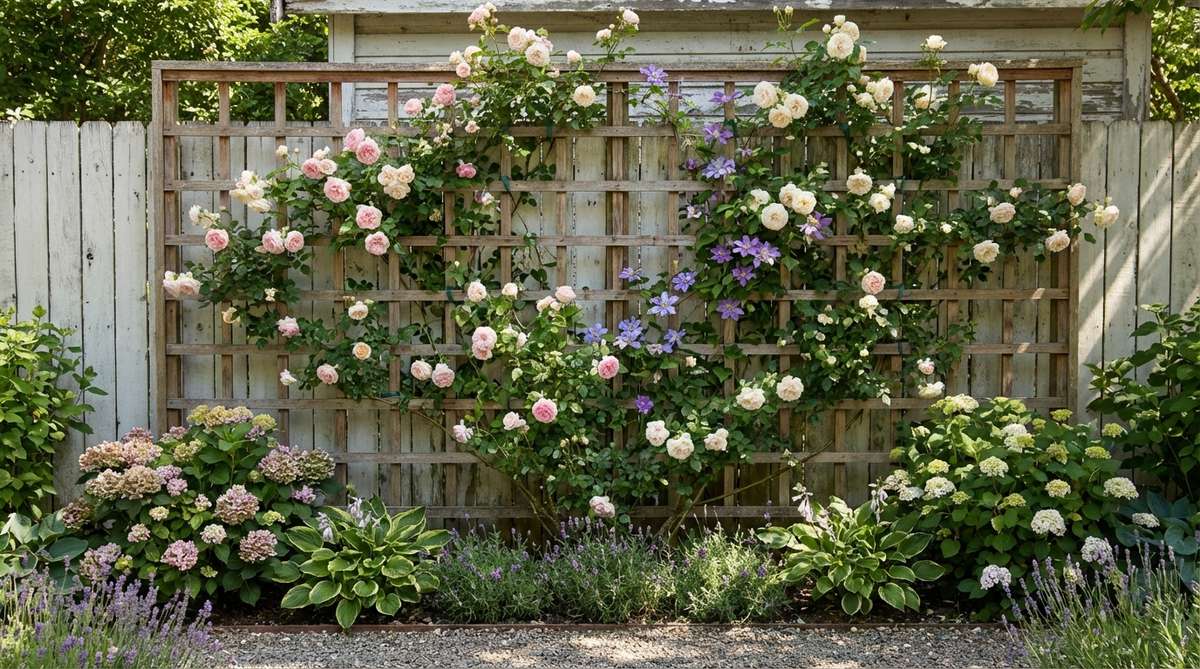
This living wall feels like the side of an ancient, vine-covered European bakery. A wall-mounted wooden grid trellis is perfectly utilized on boring, blank garage walls or ugly brick siding.
By lifting colorful blooms right to eye level, you completely transform the vertical visual plane of your property. This technique delivers a high-end architectural designer finish when you use stand-off mounting brackets to give the vines breathing room.
You can upgrade a blank wall for $60–$120. Save this to your exterior home upgrade board!
- Key Materials: Wooden lattice, stand-off spacers, masonry screws
- Vibe / Style: Historic estate facade
- Difficulty: Intermediate drilling required
- Budget Breakdown: Trellis: $50 | Hardware: $25.
- Creator’s Tip: Never mount the wood directly against the siding! Always use a 2-inch spacer block so air can circulate and prevent house rot.
- Smart Sourcing: Heavy-duty wall-mount trellis brackets and premium cedar lattice panels.
30. Natural Branch Tripod
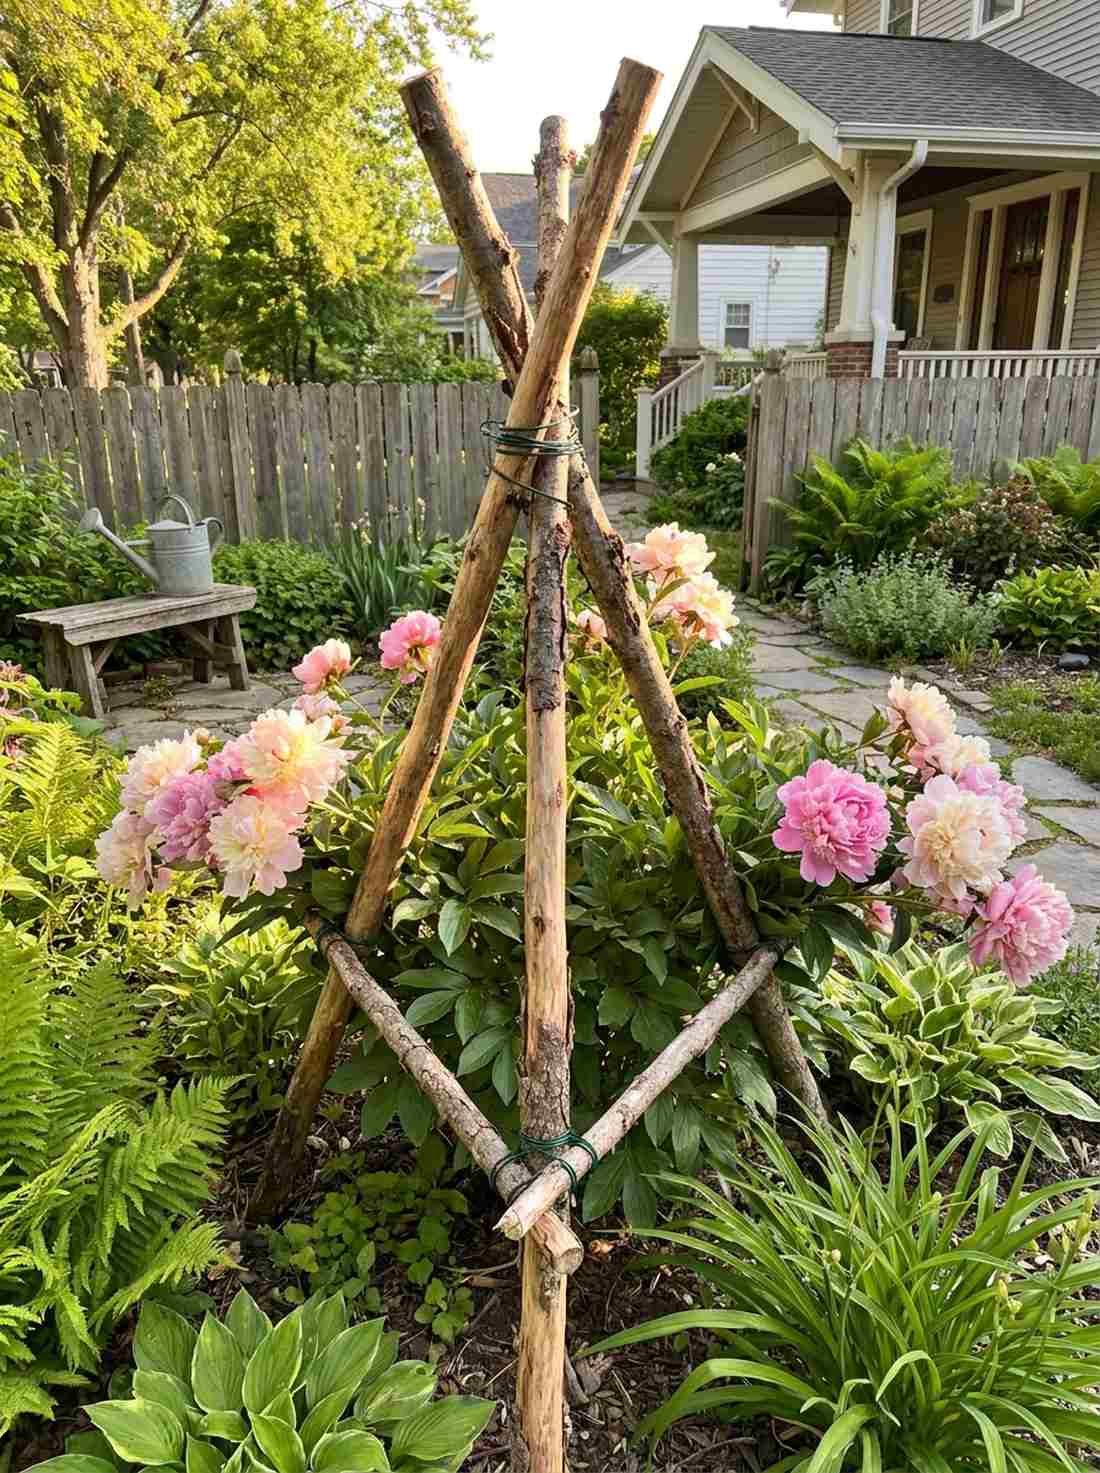
This earthy structural support feels incredibly grounded, like it sprouted straight from the forest floor. Crafting a foraged branch plant tripod is an exceptionally clever use-case for supporting heavy, floppy plants like peonies or dahlias.
Instead of ugly bright green plastic cages, these raw branches blend seamlessly into the cottage aesthetic. This is a brilliant zero-cost hack that looks surprisingly premium, proving that high-end garden design english styles can be totally free.
You can assemble this for literally $0 if you have trees to prune.
- Key Materials: Thick fallen branches, dark lashing wire
- Vibe / Style: Authentic foraged rustic
- Difficulty: Very easy
- Budget Breakdown: Wire: $5 | Branches: Free.
- Creator’s Tip: Leave the side twigs on the branches! They act as perfect natural hooks for delicate plant stems to grab onto.
- Smart Sourcing: Discreet dark green garden lashing wire and heavy-duty branch pruning shears.
Layered Planting Schemes by Height
31. Hollyhock Back Row Statement
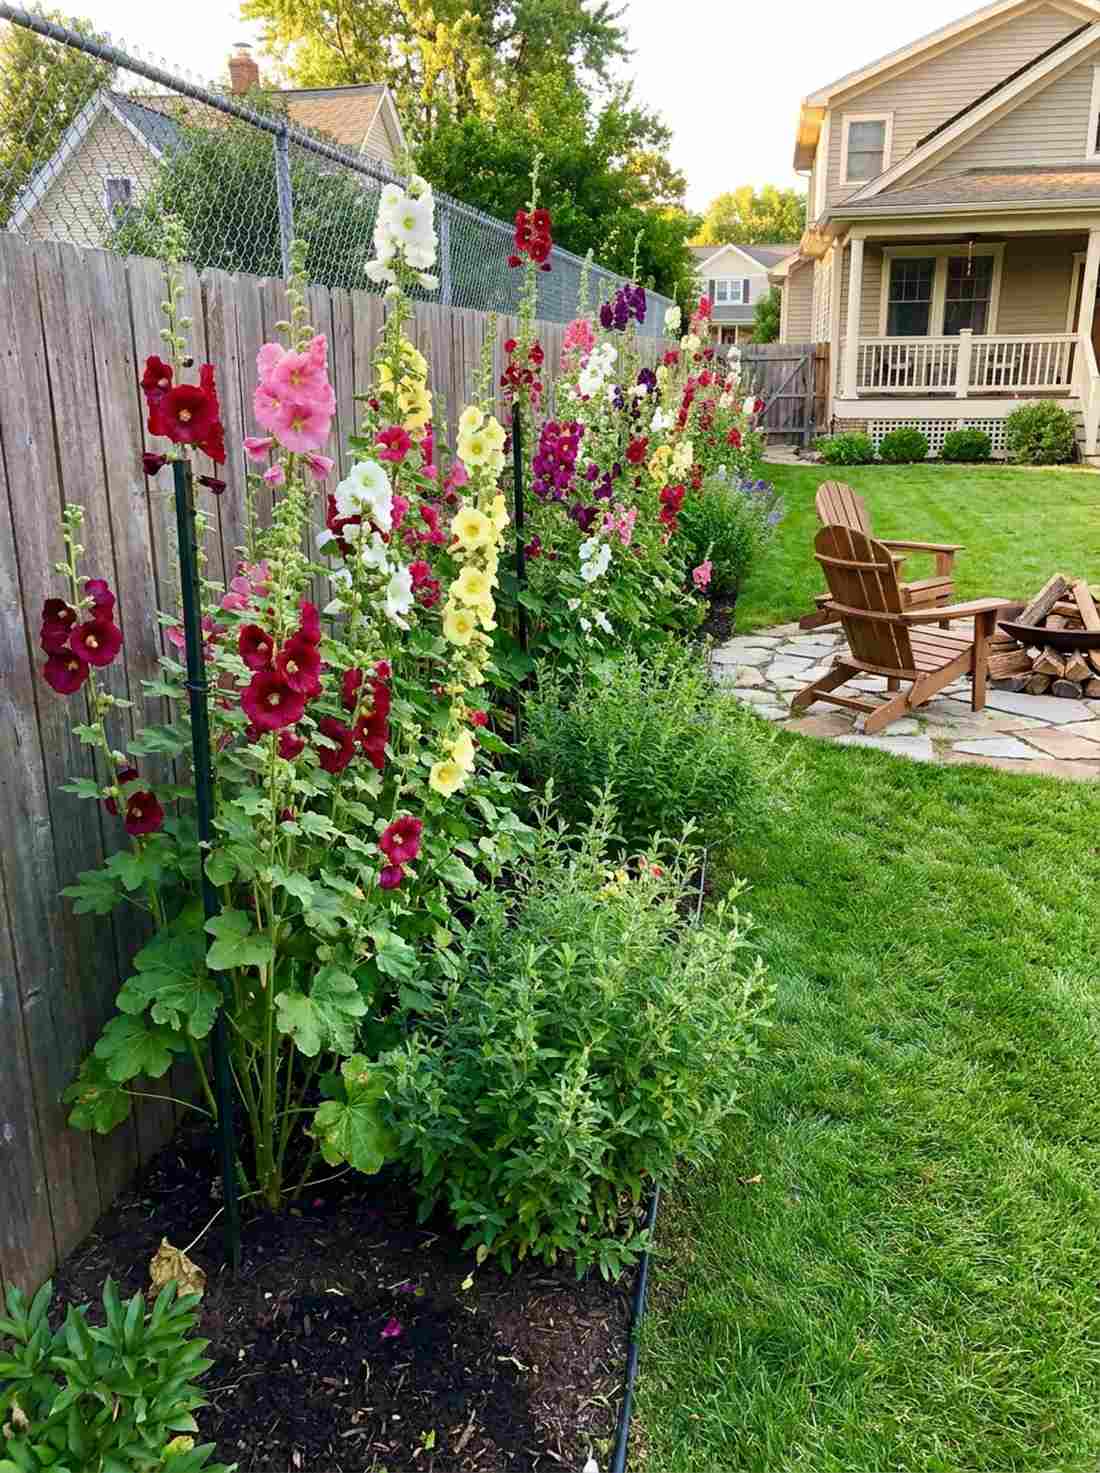
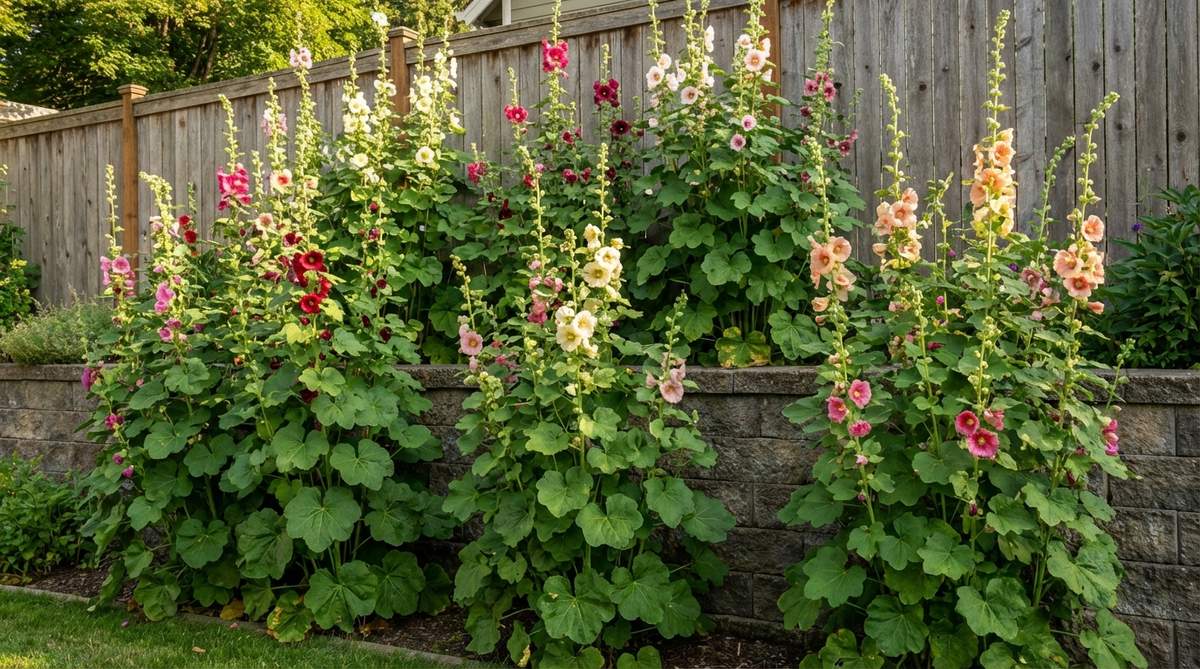
These towering giants feel like floral sentinels guarding the walls of your storybook sanctuary. A tall hollyhock back border is the absolute perfect use-case for disguising ugly chain-link fences or plain wooden boundaries.
Their massive, 8-foot height provides the crucial backdrop required to make lower plants pop in front of them. This classic layer delivers an instantly authentic cottage garden inspiration look, especially when sourced via diverse heirloom seed packets.
You can establish this massive back row for around $15–$30. Pin this if you need to hide an ugly fence!
- Key Materials: Hollyhock seeds, compost, garden stakes
- Vibe / Style: Dramatic heritage backdrop
- Difficulty: Easy but requires patience (biennial)
- Budget Breakdown: Seed packets: $15 | Stakes: $10.
- Creator’s Tip: Hollyhocks are prone to rust disease on their lower leaves. Plant bushy, mid-height perennials directly in front to hide their ugly bare ankles!
- Smart Sourcing: Bulk heirloom hollyhock seed varieties and tall heavy-duty steel plant stakes.
32. Delphinium Mid-Border Spires
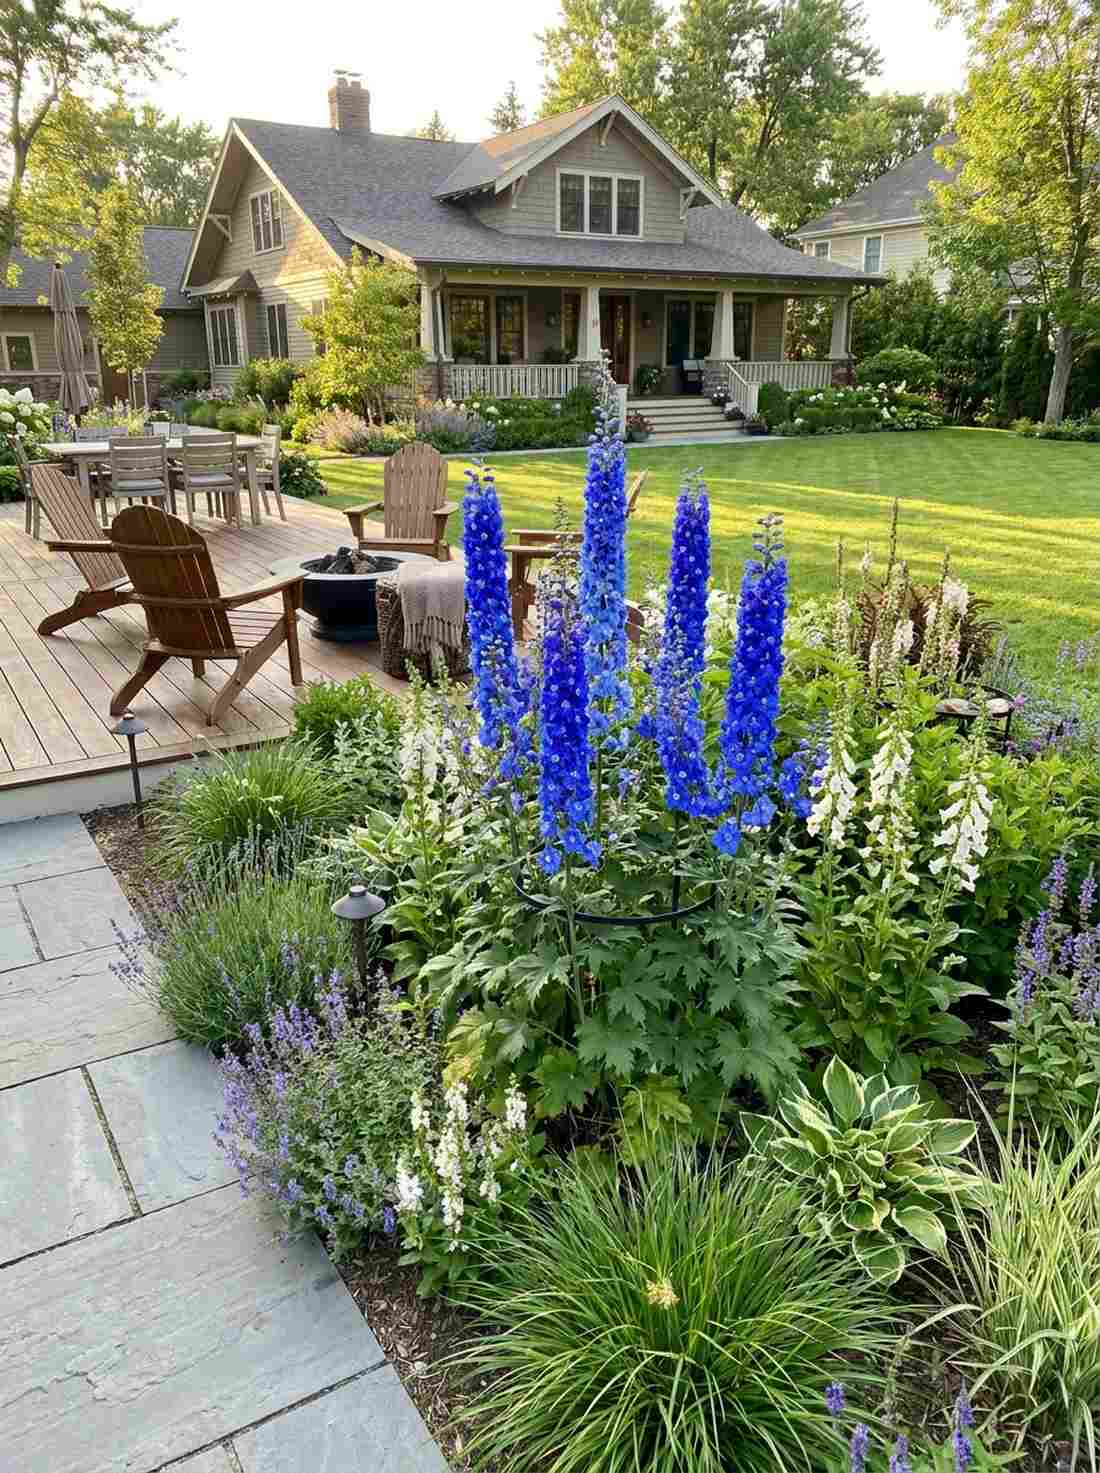
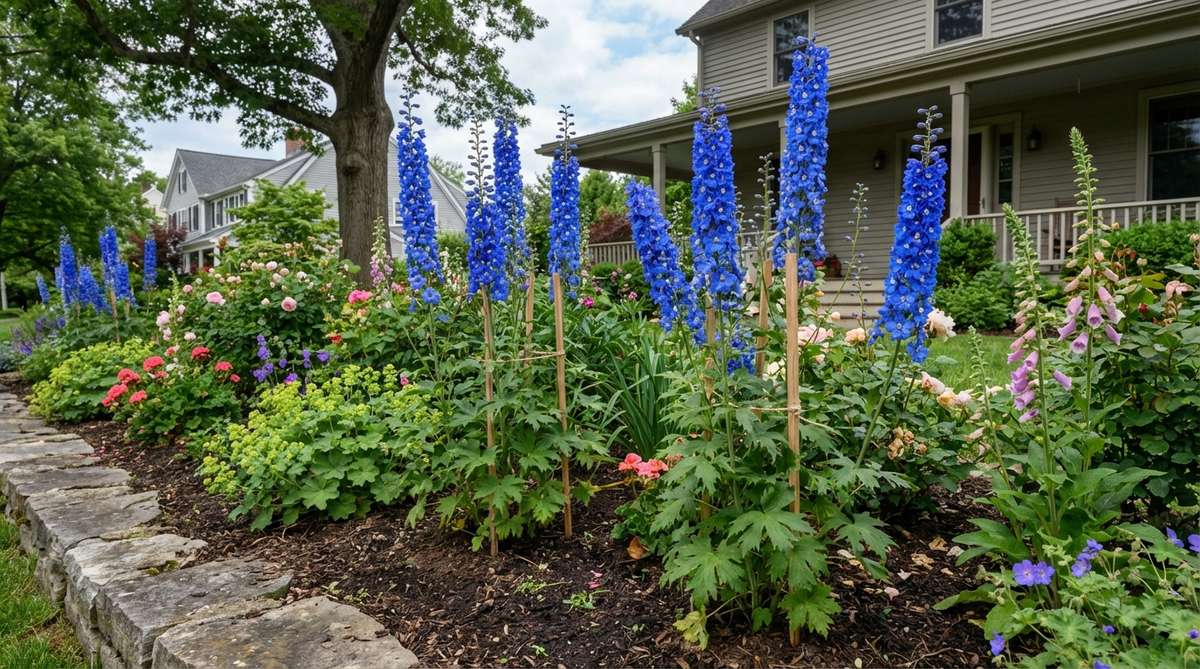
These shocking blue pillars feel like majestic lightning bolts of color striking the garden bed. Utilizing tall delphinium floral spires is critical for the mid-to-back border where you need intense, saturated cool colors to draw the eye.
Their true-blue hue is incredibly rare in nature and immediately commands attention over flat-growing plants. While they require staking, they deliver a wildly expensive, professional botanical garden aesthetic when supported by hidden metal plant support rings.
You can add these premium spires for $50–$90.
- Key Materials: Delphinium starts, hidden metal grow-through rings
- Vibe / Style: Show-stopping regal elegance
- Difficulty: Intermediate maintenance
- Budget Breakdown: Premium starts: $60 | Support rings: $30.
- Creator’s Tip: Cut the main flower spike completely off down to the foliage as soon as it fades; this forces a second, slightly smaller bloom in late summer.
- Smart Sourcing: Heavy-duty metal grow-through plant supports and premium liquid bloom-boosting fertilizer.
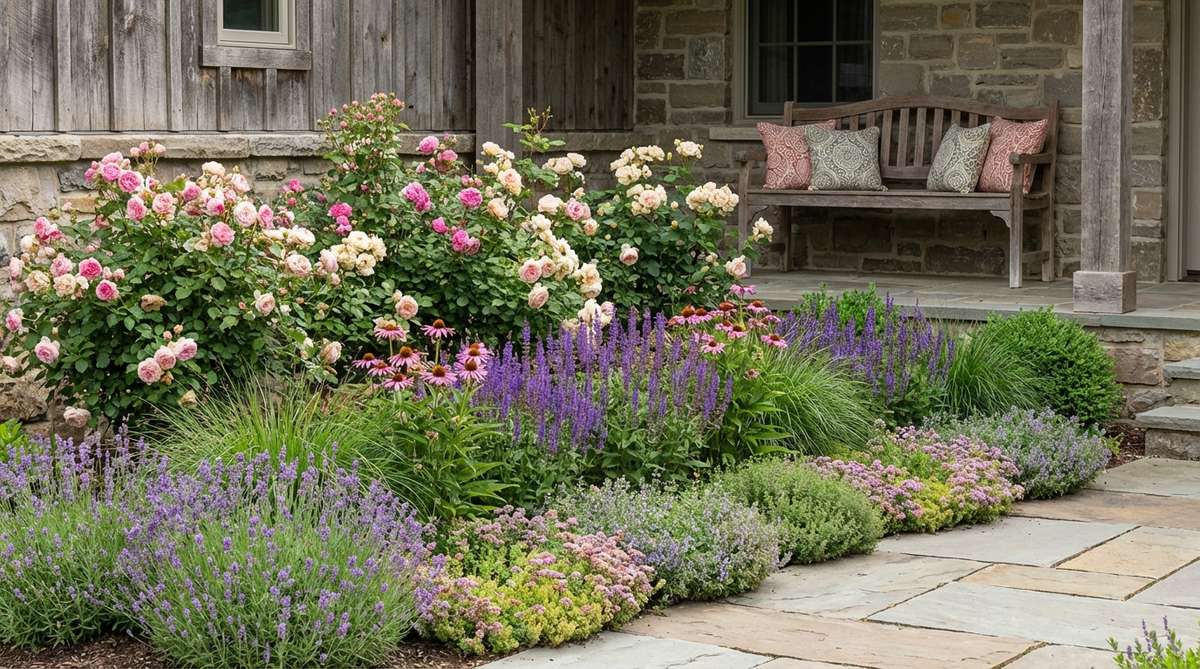
33. Peony Shrub Layer Foundation
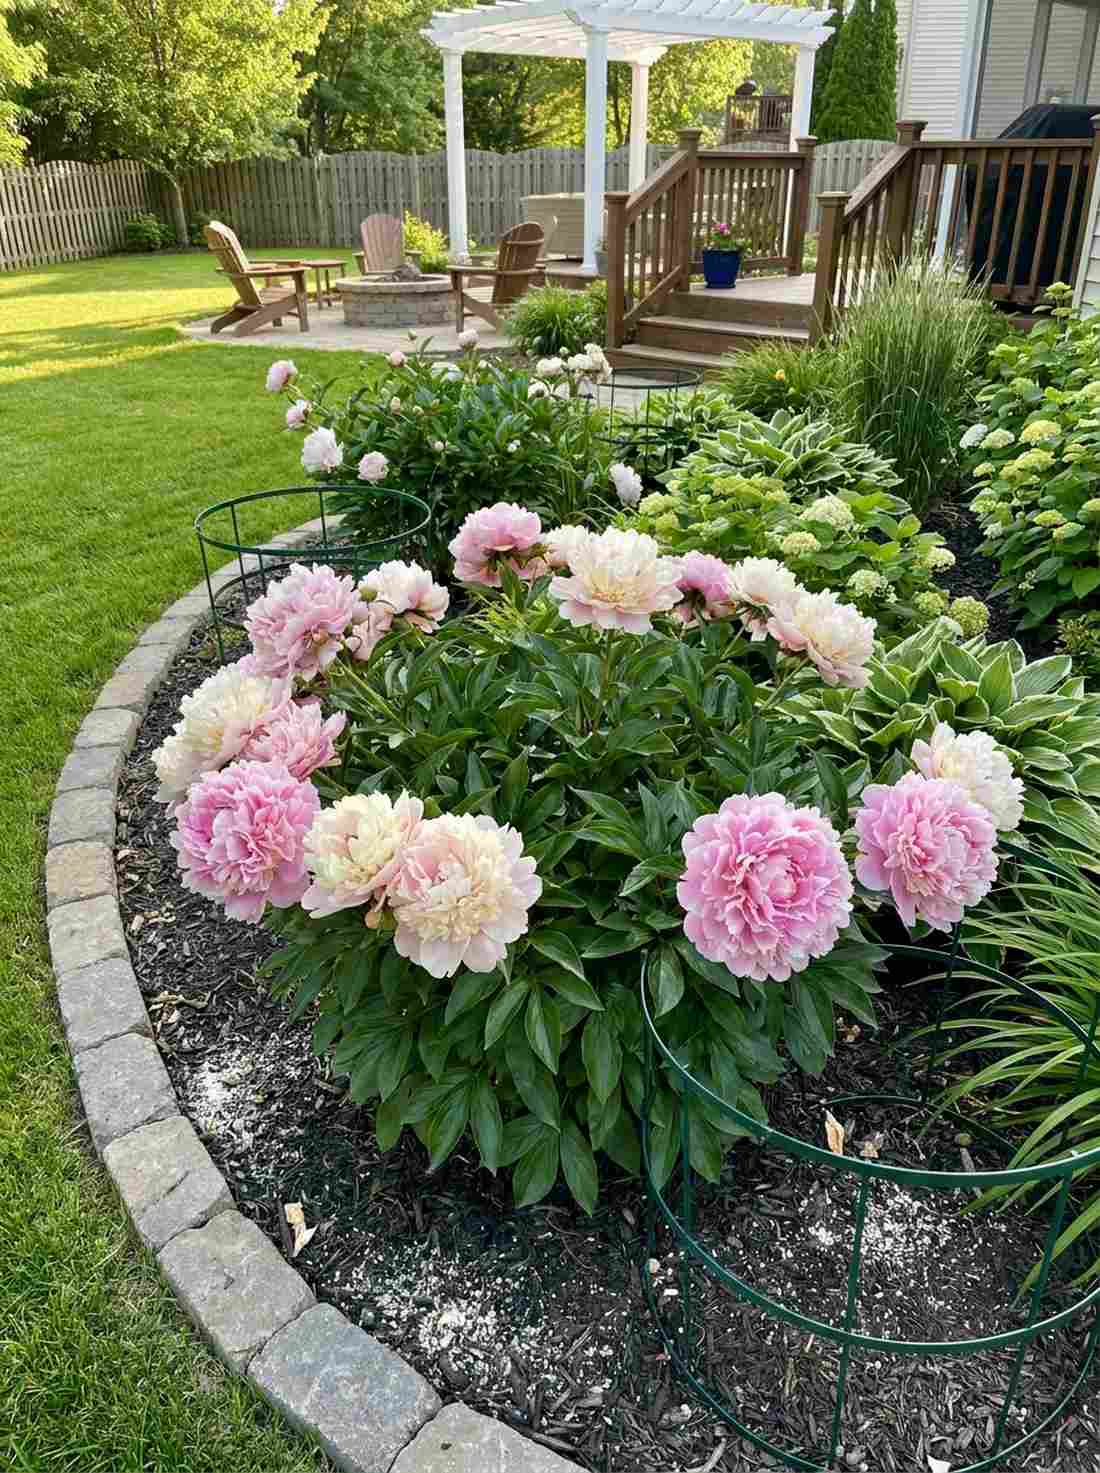
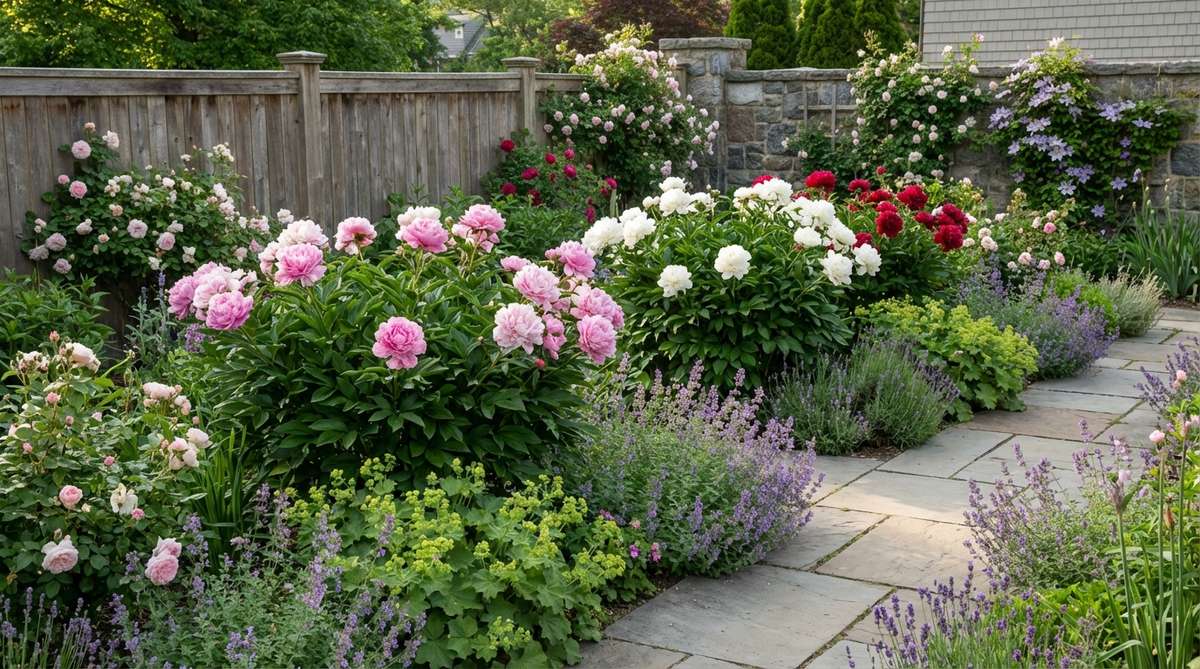
These massive, ruffled blooms feel like an extravagant, decadent luxury straight out of a royal garden. Anchoring with a bushy peony foundation layer is an exceptional use-case for the absolute front-center of your most prominent flower beds.
Even after the spectacular blooms drop, the dark green, glossy foliage acts as a handsome structural shrub until frost. This is a brilliant lifetime investment; peonies outlive most humans and deliver a high-end designer-level finish year after year.
Expect to invest $60–$120 for premium mature roots. Save this for your perennial favorites board!
- Key Materials: Bare-root peonies, bone meal, peony cages
- Vibe / Style: Decadent vintage luxury
- Difficulty: Easy but specific planting depth
- Budget Breakdown: Bare roots: $80 | Cages/Fertilizer: $30.
- Creator’s Tip: The “eyes” (red buds) of the root MUST be exactly 1.5 inches below the soil. Plant them any deeper, and they will grow beautiful leaves but literally never flower.
- Smart Sourcing: Heavy-duty steel peony support cages and organic bone meal root fertilizer.
34. Catmint Repeat Element
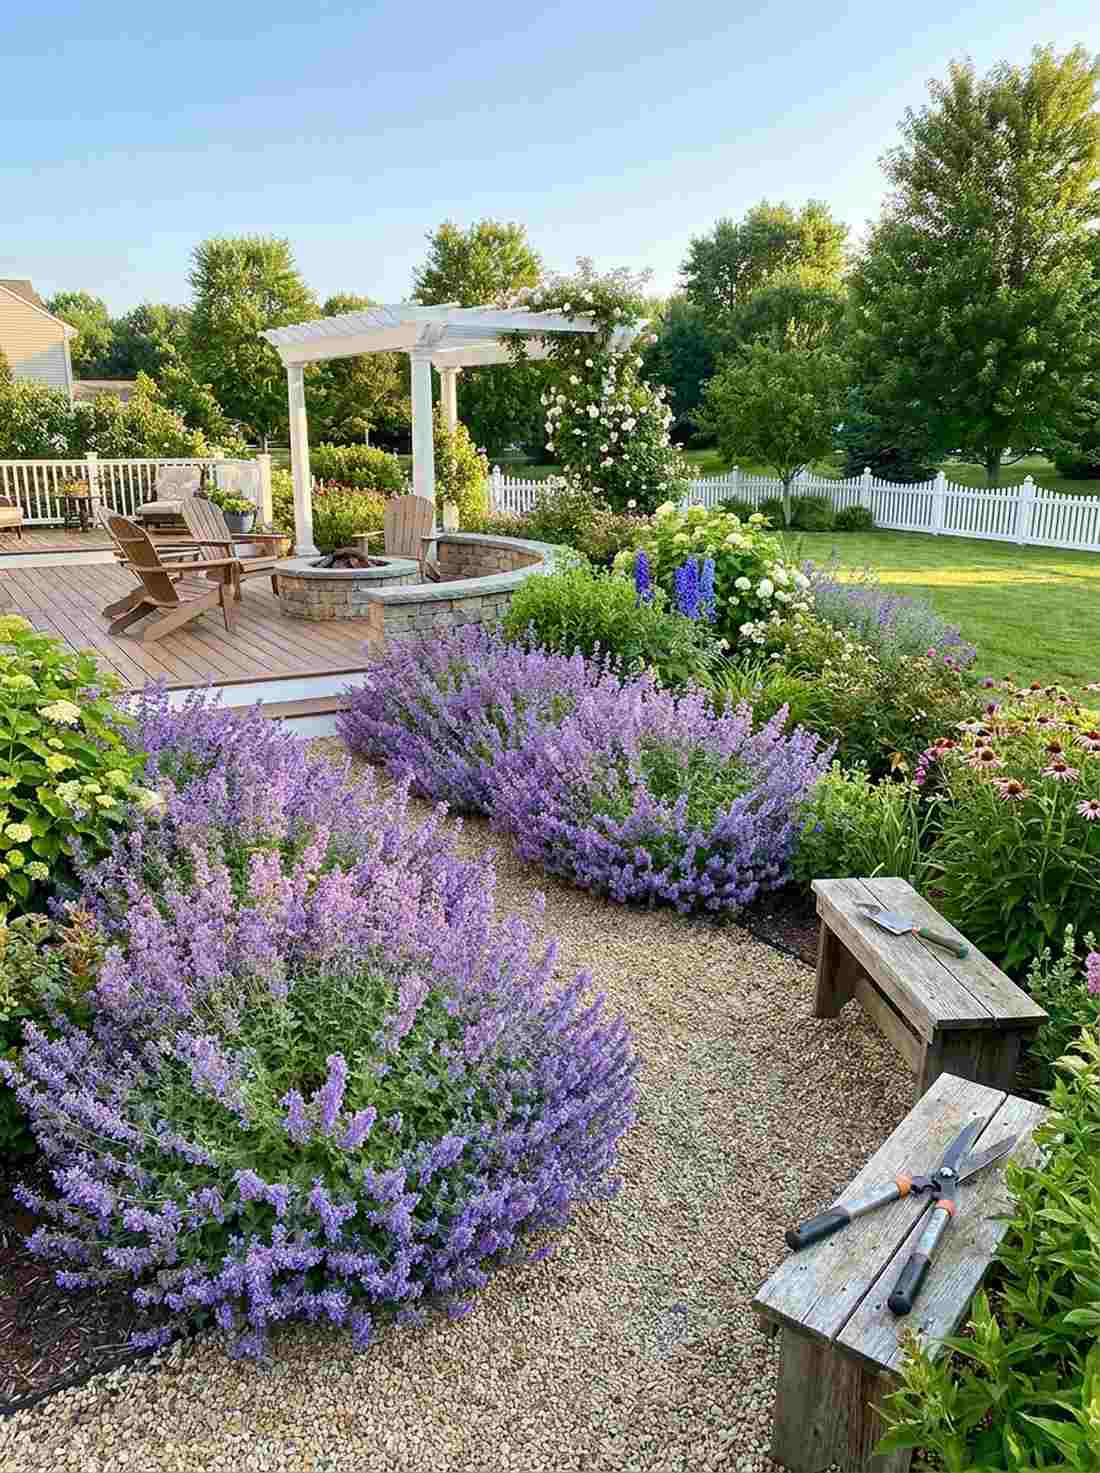
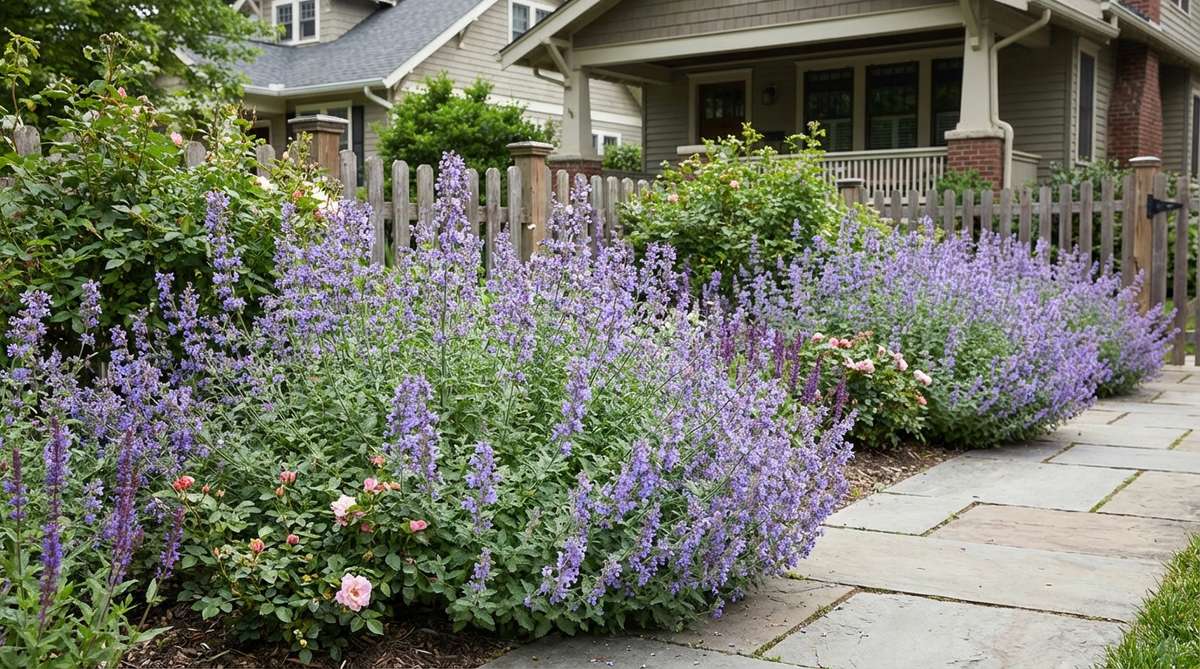
This billowing purple haze feels like soft lavender clouds floating just above the soil. Using a catmint repeating border element is the ultimate hack for tying a chaotic, messy cottage garden into one cohesive, professional layout.
By planting the exact same purple mound every 5 feet, you create a rhythmic visual heartbeat that calms the eye. It completely mimics the look of expensive English lavender fields but uses bulletproof, drought-tolerant perennial starter plugs that never die.
You can establish this cohesive rhythm for $40–$80.
- Key Materials: Nepeta (Catmint) plugs, garden trowel
- Vibe / Style: Billowing lavender rhythm
- Difficulty: Very easy
- Budget Breakdown: Plugs: $50.
- Creator’s Tip: When it looks messy in mid-summer, literally grab it like a ponytail and shear it in half with scissors. It will bounce back into a perfect, blooming mound in 10 days.
- Smart Sourcing: Drought-tolerant perennial starter plug trays and sharp heavy-duty garden shears.
Don’t skip this next idea; it’s the exact reason why some cottage gardens go viral on Pinterest.
35. Lady’s Mantle Front Edge Softener
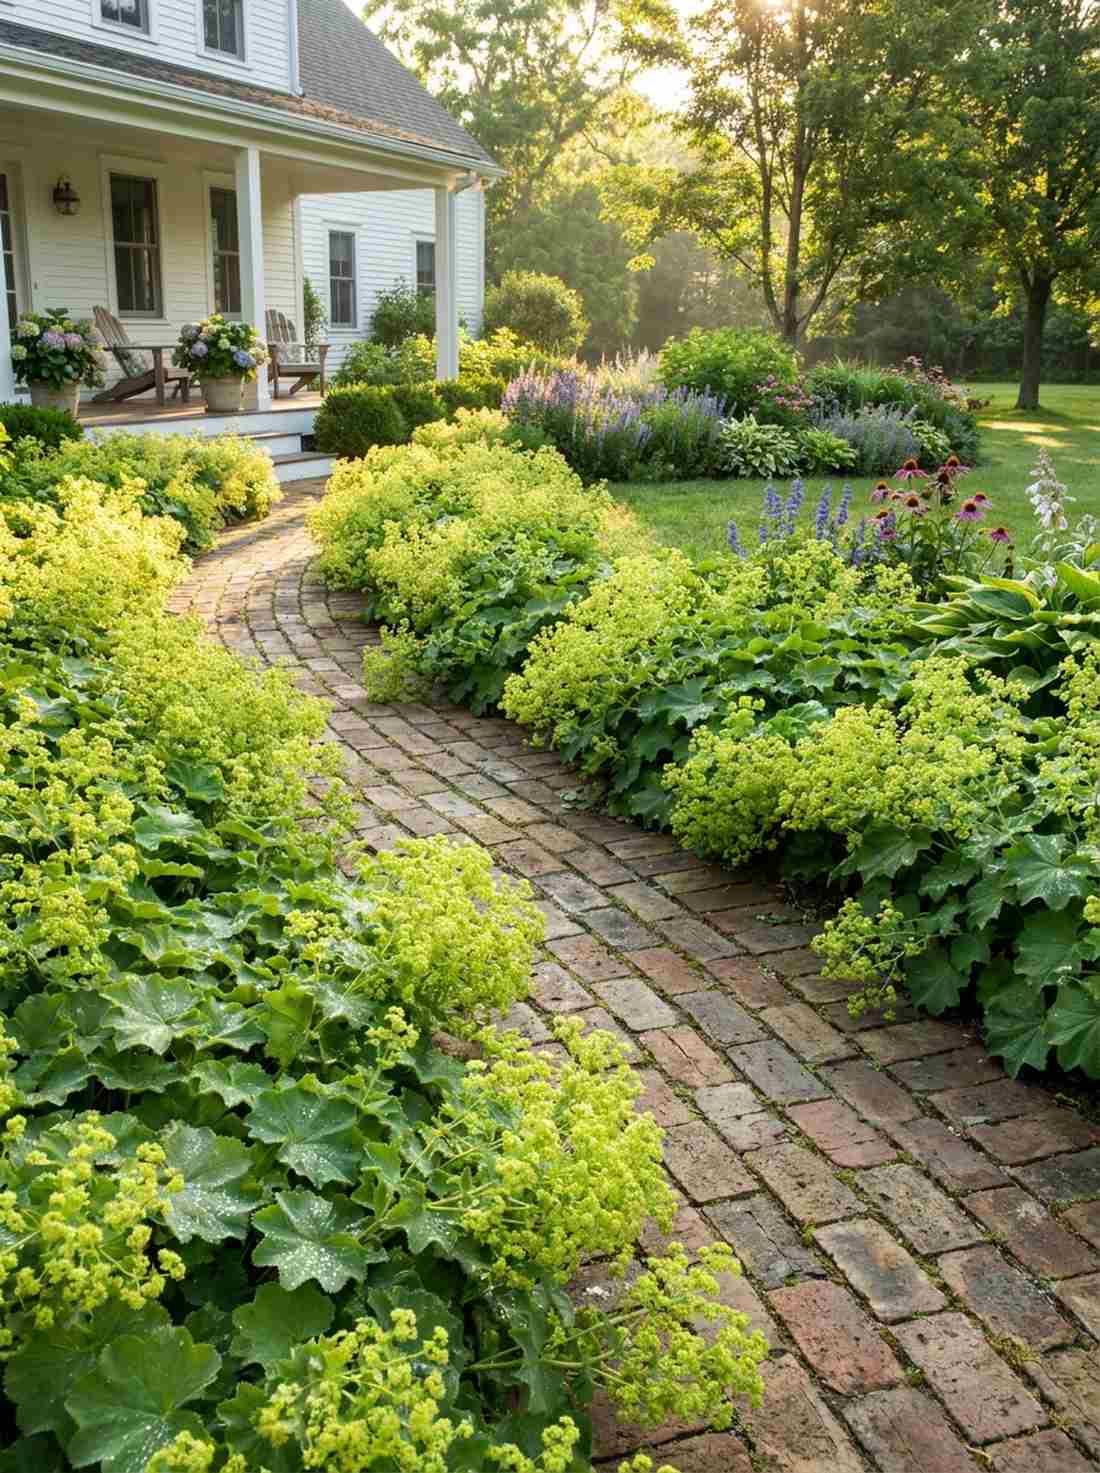
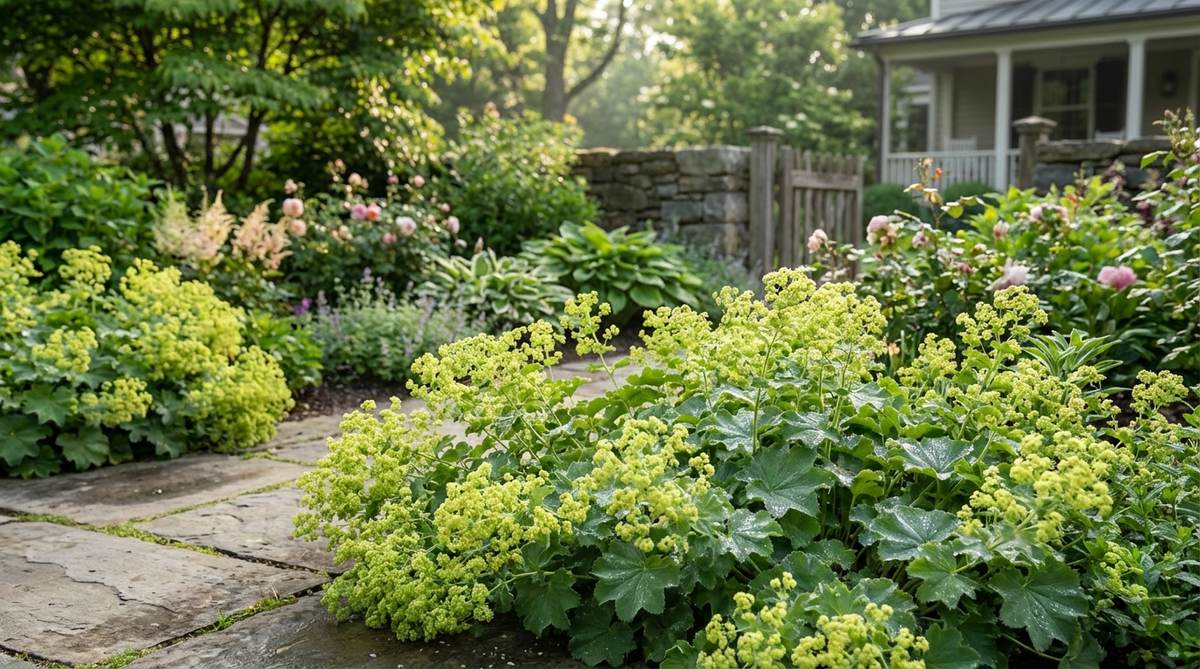
These scalloped, chartreuse leaves feel like sparkling green jewels holding perfect drops of morning dew. Lady’s Mantle as a path edger is the absolute best use-case for softening harsh brick or stone walkway lines.
The frothy, acidic-green flowers perfectly bridge the gap between hot and cool colored plants behind them. This technique instantly turns a rigid walkway into a lush, overflowing romantic path, giving a remarkably premium aesthetic for very little cost.
You can soften a long pathway edge for roughly $40–$75. Pin this trick for professional-looking borders!
- Key Materials: Alchemilla mollis starts, compost
- Vibe / Style: Frothy romantic edging
- Difficulty: Easy planting
- Budget Breakdown: Plant starts: $60.
- Creator’s Tip: Plant them close enough to the path so that exactly one-third of the mature plant physically spills over onto the walking surface.
- Smart Sourcing: Bulk perennial front-border plant packs and organic moisture-retaining compost.
36. Hardy Geranium Groundcover Layer
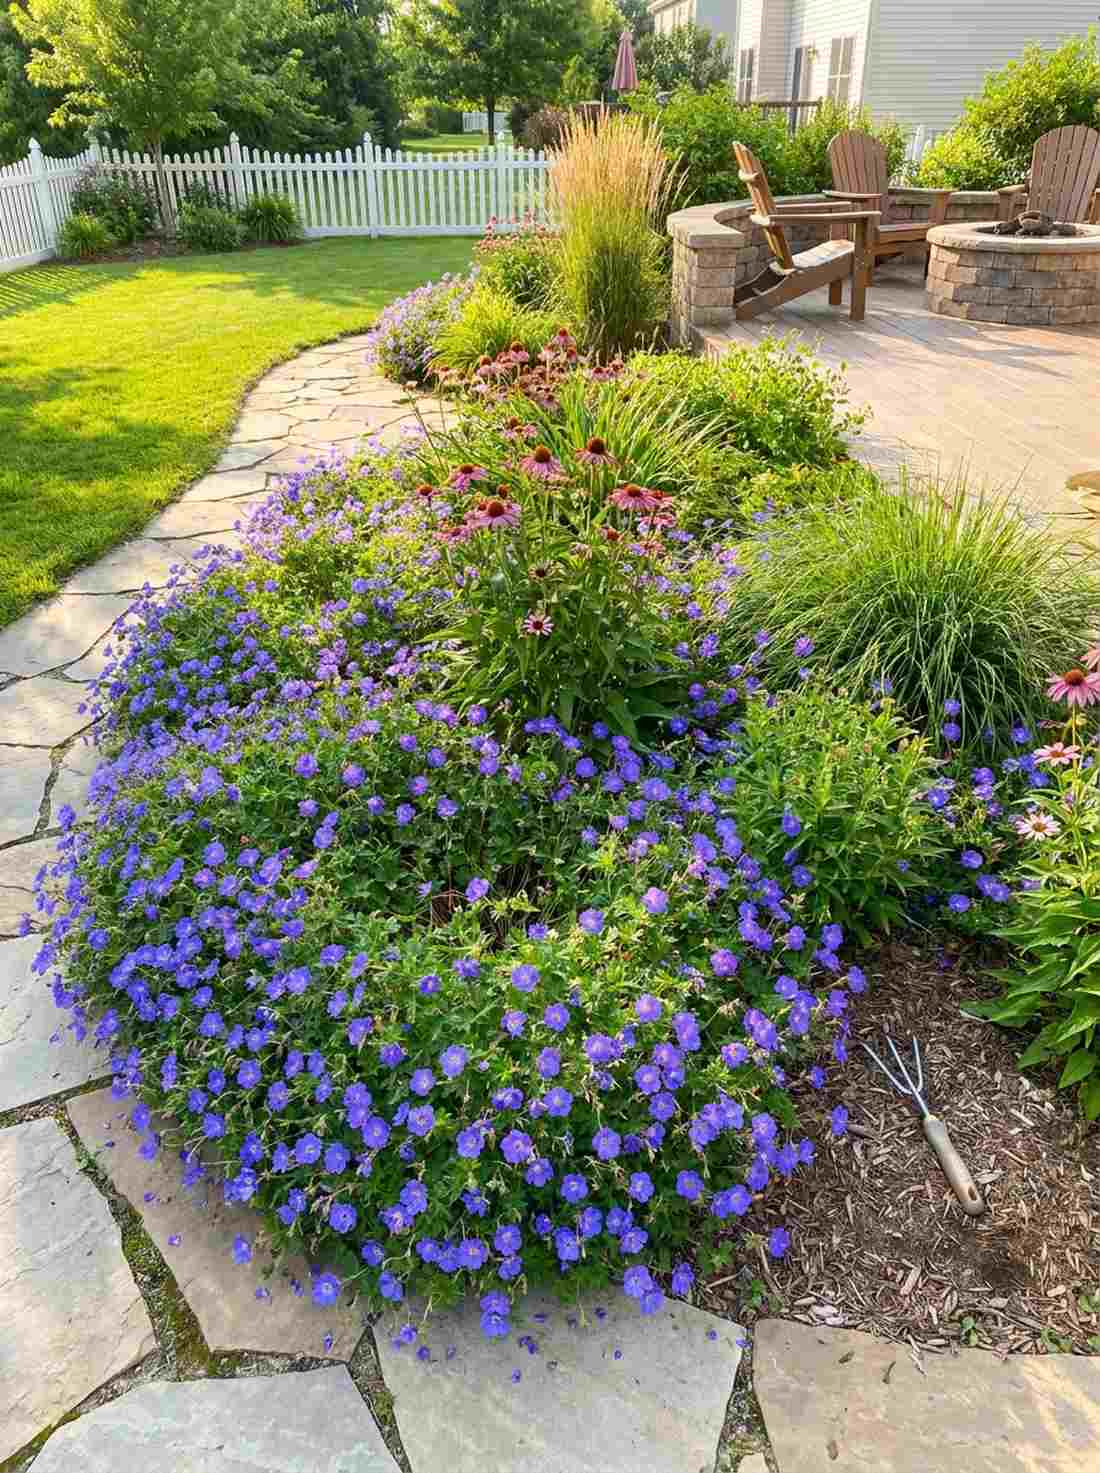
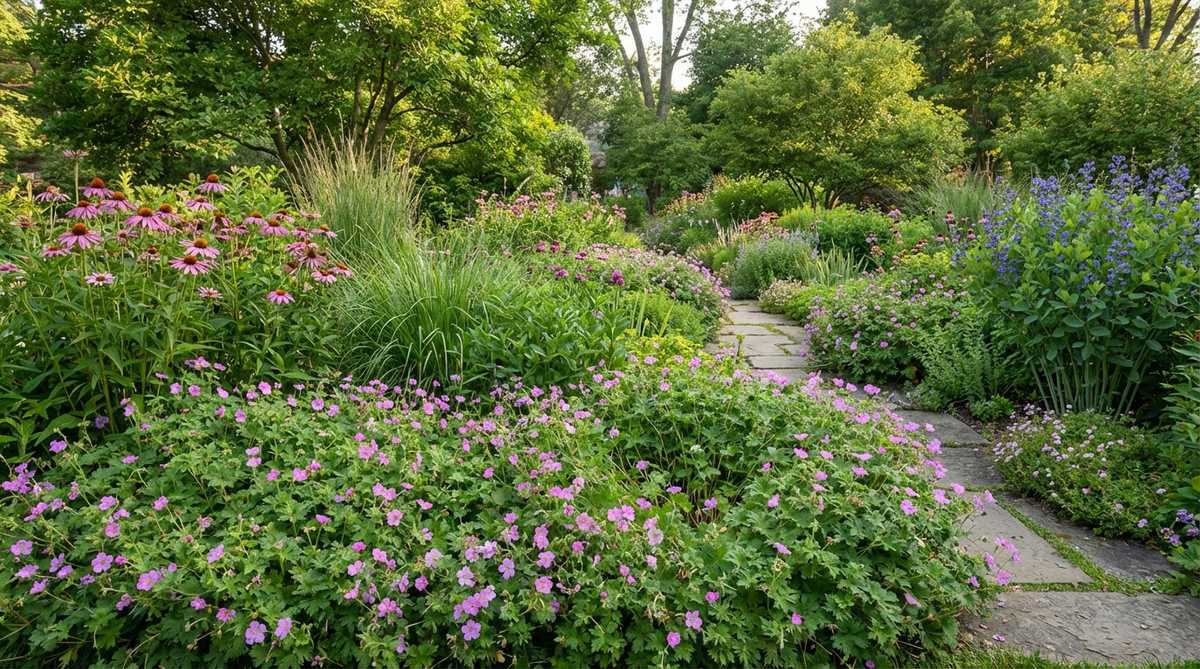
This dense floral carpet feels like a vibrant, woven tapestry protecting the soil underneath. A hardy cranesbill geranium groundcover is the ultimate solution for choking out weeds at the very front of your flower beds.
They weave their delicate vines right through the stems of taller plants, leaving absolutely no bare dirt exposed. This strategy saves you hundreds of dollars in bark mulch and looks wildly expensive, delivering a true zero-weed cottage garden inspiration.
You can carpet a large front border for $50–$90.
- Key Materials: Hardy geranium roots, hand cultivator
- Vibe / Style: Seamless tapestry carpet
- Difficulty: Very easy
- Budget Breakdown: Bare roots: $65.
- Creator’s Tip: Buy the “Rozanne” variety. It is sterile, meaning it puts 100% of its energy into blooming non-stop from June to November instead of making seeds.
- Smart Sourcing: Bare root hardy geranium bundles and ergonomic hand cultivator tools.
37. Foxglove Biennial Tower
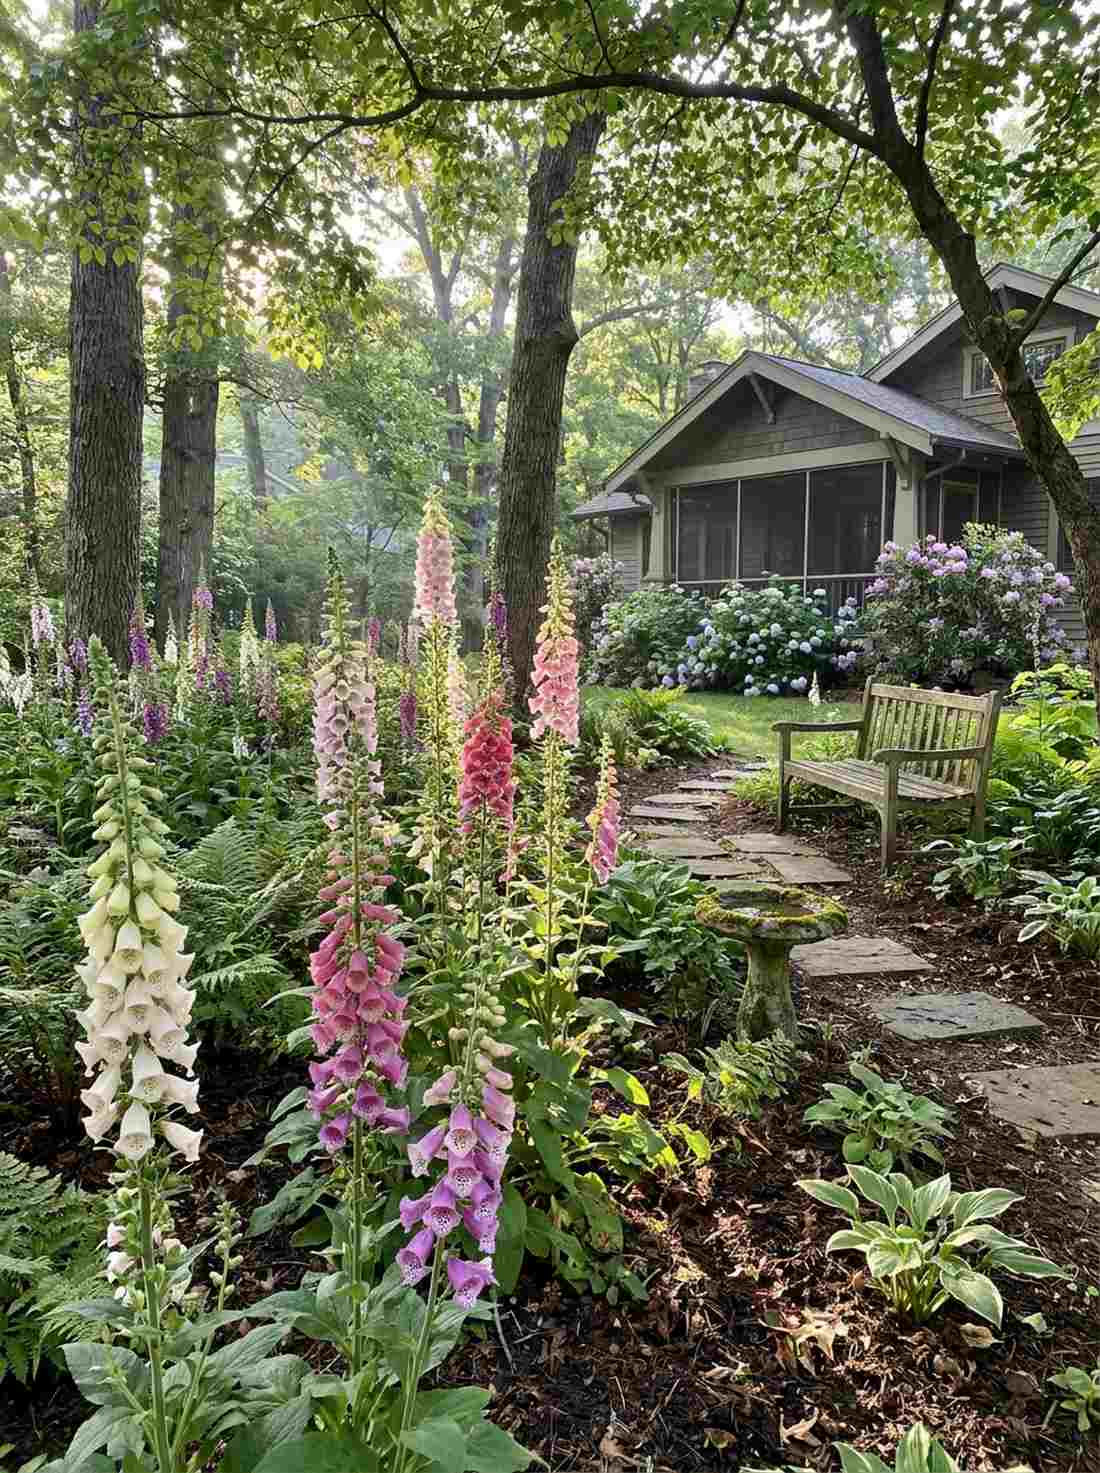
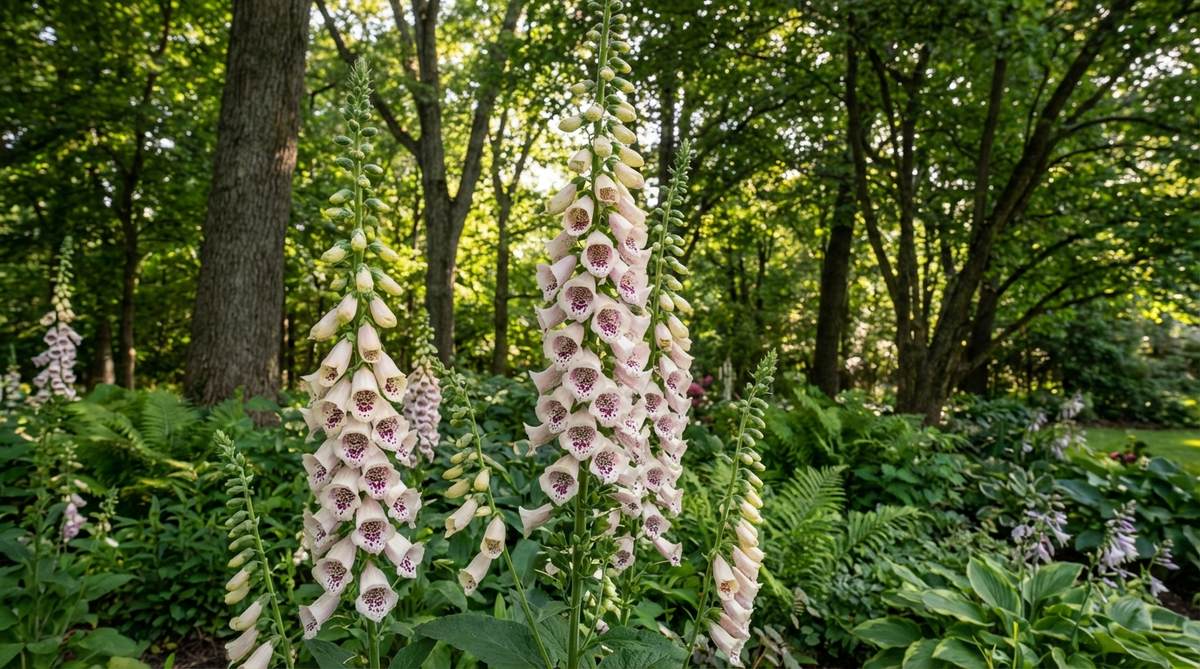
These spotted, tubular bells feel like a mystical woodland gathering place for garden fairies. Slipping foxglove biennial towers into dappled shade borders is perfectly placed beneath the canopy of large deciduous yard trees.
Their speckled throats pull pollinators deep into the shadows, adding brilliant vertical light to dark garden corners. This gives a highly curated, deeply authentic English woodland look, effortlessly achieved by utilizing affordable bulk wildflower seed packets.
You can add these magical towers for just $15–$30. Save this if you love fairy-core aesthetics!
- Key Materials: Digitalis seeds, leaf mold
- Vibe / Style: Mystical woodland fairy-core
- Difficulty: Easy but requires a 2-year timeline
- Budget Breakdown: Seeds/Soil: $20.
- Creator’s Tip: Because they only bloom in their second year, you must plant seeds two years in a row to establish a patch that flowers every single summer.
- Smart Sourcing: Bulk heirloom foxglove seed collections and premium woodland soil conditioners.
Color-Themed Garden Sections
38. Hot Border Reds and Oranges
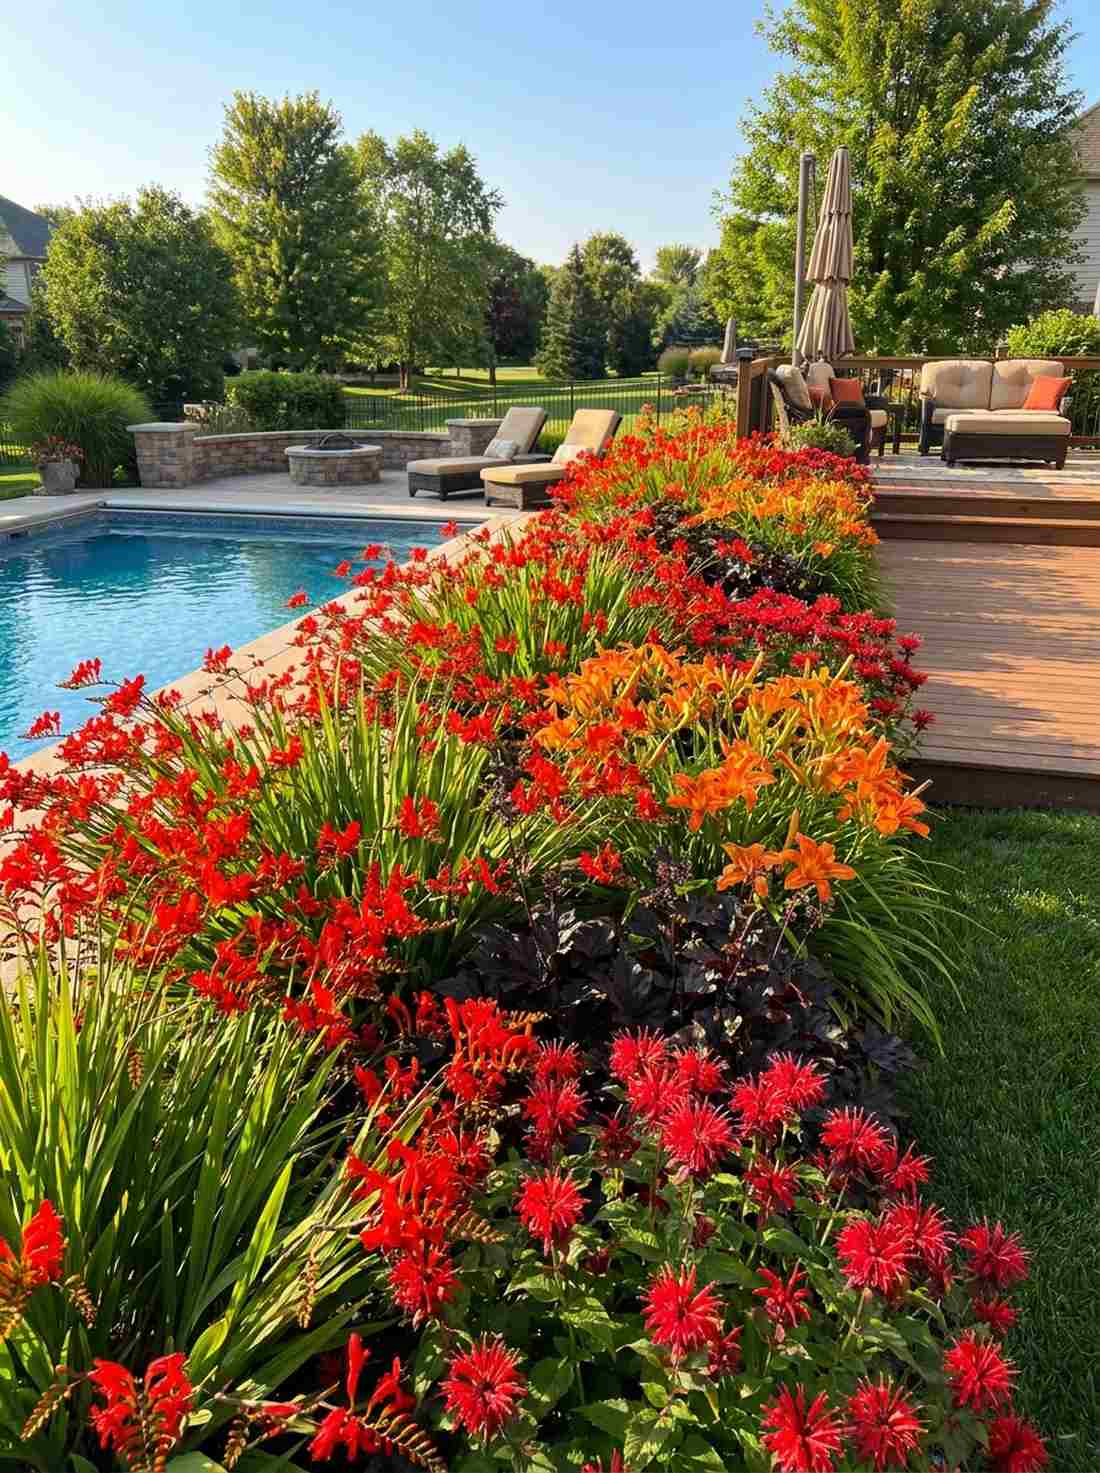
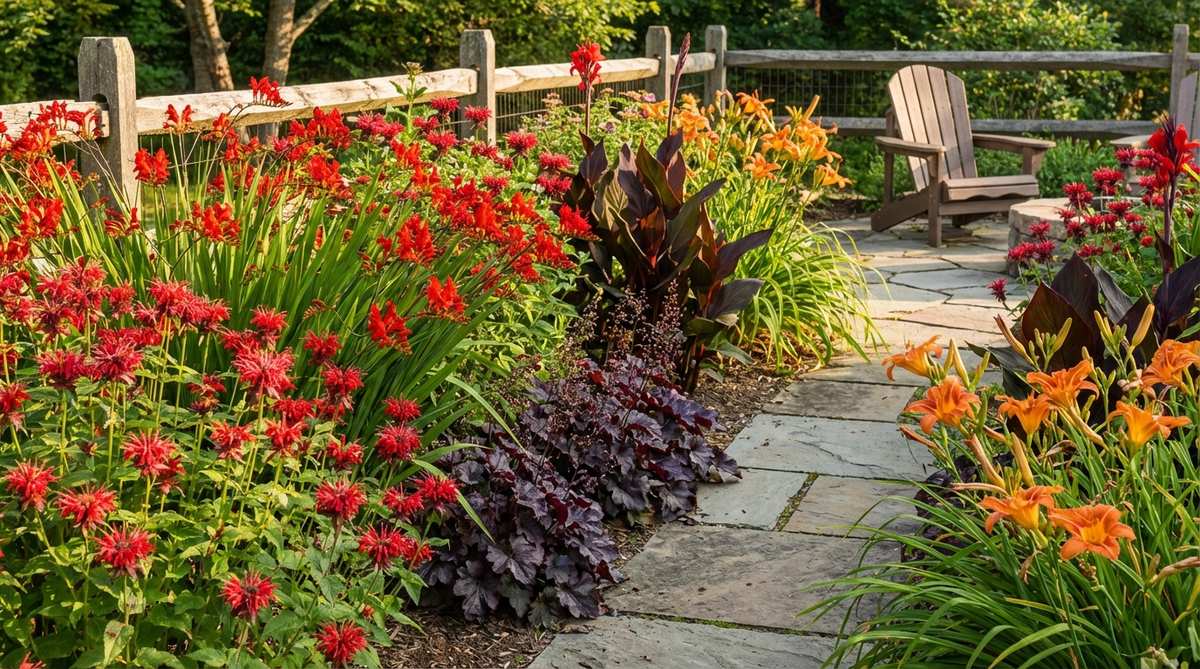
This blazing palette feels like an intense, fiery sunset burning right in your backyard. Creating a warm-colored hot border is the ultimate use-case for a garden space located next to a swimming pool or a vibrant outdoor entertainment deck.
Bright reds and oranges physically advance toward the eye, making massive, overly large yards feel cozy and intimate. It delivers a surprisingly premium, energetic look when you pack the bed with high-CPC cottage garden starter bulbs like bold Crocosmia and Cannas.
You can ignite a sunny border for $80–$150.
- Key Materials: Crocosmia bulbs, Red Monarda starts, Orange Daylilies
- Vibe / Style: Energetic tropical heat
- Difficulty: Moderate planting
- Budget Breakdown: Bulbs/Starts: $120 | Compost: $20.
- Creator’s Tip: Throw in a splash of dark, nearly-black foliage (like a dark Heuchera) to make the neon oranges look even more explosive by contrast.
- Smart Sourcing: Premium summer-blooming bulb mixes and high-phosphorus bloom booster fertilizers.
39. Cool Zone Blues and Purples
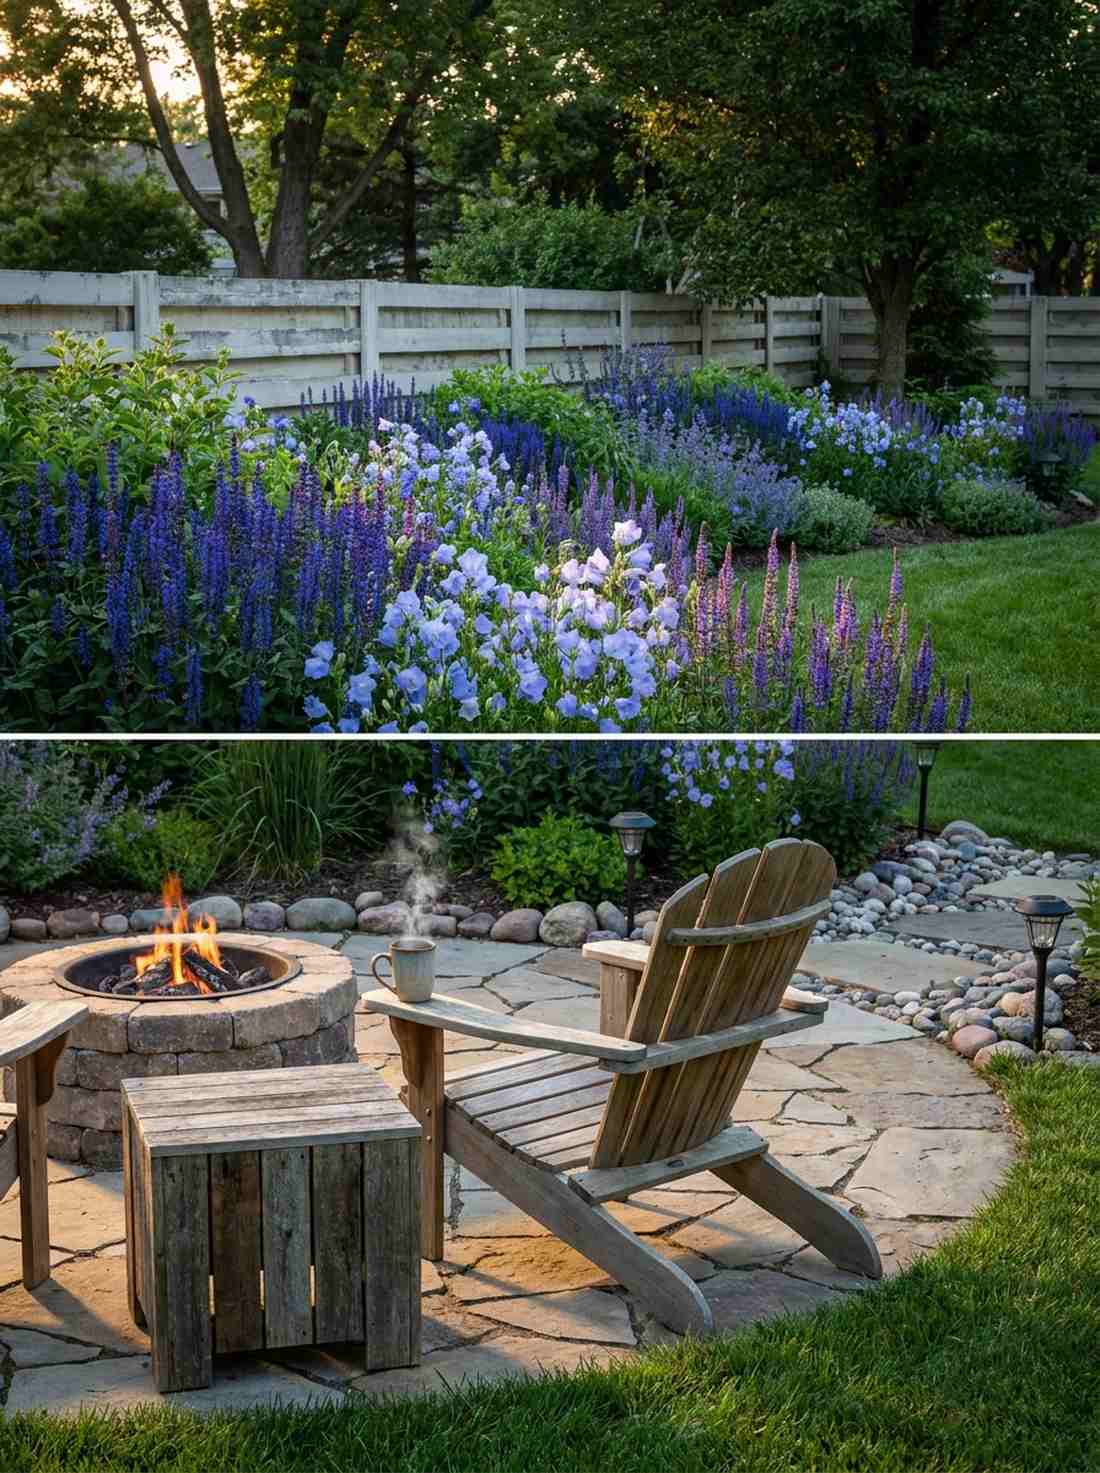

This soothing arrangement feels like a cool, tranquil ocean breeze washing over you. A cool-toned blue and purple zone is strictly best placed around a meditation bench or a quiet morning coffee patio.
Receding blue colors visually push away from the viewer, executing a brilliant optical illusion that makes tiny, cramped city yards look twice as deep. This layout instantly upgrades tight spaces into serene luxury retreats using affordable perennial starter kits.
You can create this relaxing optical illusion for $60–$110. Pin this trick for small yard expansions!
- Key Materials: Blue Salvias, Campanula, Purple Veronicas
- Vibe / Style: Serene expansive retreat
- Difficulty: Easy setup
- Budget Breakdown: Perennial starts: $80.
- Creator’s Tip: These colors look incredibly dull at noon. Plant them where they will be hit by the soft, golden light of dawn or dusk for maximum glowing impact.
- Smart Sourcing: Cool-tone perennial garden starter kits and organic slow-release plant food.
You’ll want to save this next layout—it’s the absolute best way to transition awkward garden zones seamlessly.
40. Silver Foliage Moonlight Garden

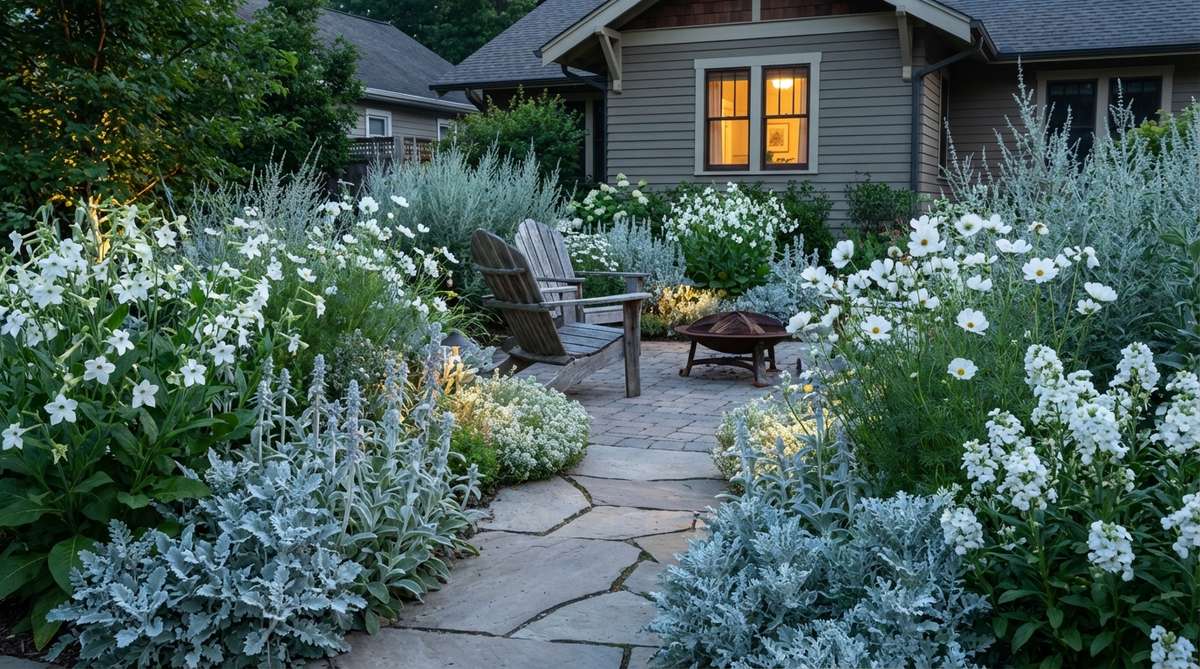
This glowing, fuzzy texture feels like stepping out onto a softly lit lunar landscape. Designing a silver and white moonlight garden is the absolute perfect use-case for homes where you only get to enjoy the yard after dark.
White petals and silver leaves violently reflect moonlight and ambient house lights, glowing brightly when the rest of the garden goes pitch black. This highly curated aesthetic looks incredibly expensive and sophisticated, relying solely on drought-resistant, furry-leafed perennials.
You can pull off this night-glowing magic for $50–$90.
- Key Materials: Artemisia, Lamb’s Ear, White Nicotiana seeds
- Vibe / Style: Sophisticated nocturnal glow
- Difficulty: Very easy (highly drought tolerant)
- Budget Breakdown: Plants/Seeds: $65.
- Creator’s Tip: Silver plants usually have furry leaves that hate wet feet. Plant them in gravelly, poor soil where drainage is incredibly fast to prevent rot.
- Smart Sourcing: Drought-tolerant silver foliage plant bundles and fast-draining horticultural pumice.
Material Guide: Cheap vs. Premium Aesthetic
Knowing exactly where to save and where to spend makes all the difference in achieving that “looks expensive but isn’t” garden design cottage vibe.
- Standard Plastic vs. UV-Resistant/Premium Resins: Always upgrade your borders and planters to UV-coated materials; cheap plastic cracks in one winter, while premium resin mimics real stone perfectly for a decade.
- Individual Plants vs. Pre-made Starter Kits: Buying bulk bare-root starter kits saves you up to 60% compared to buying individual potted plants at a local nursery, giving you the dense, lush look instantly.
41. Pastel Cottage Romance
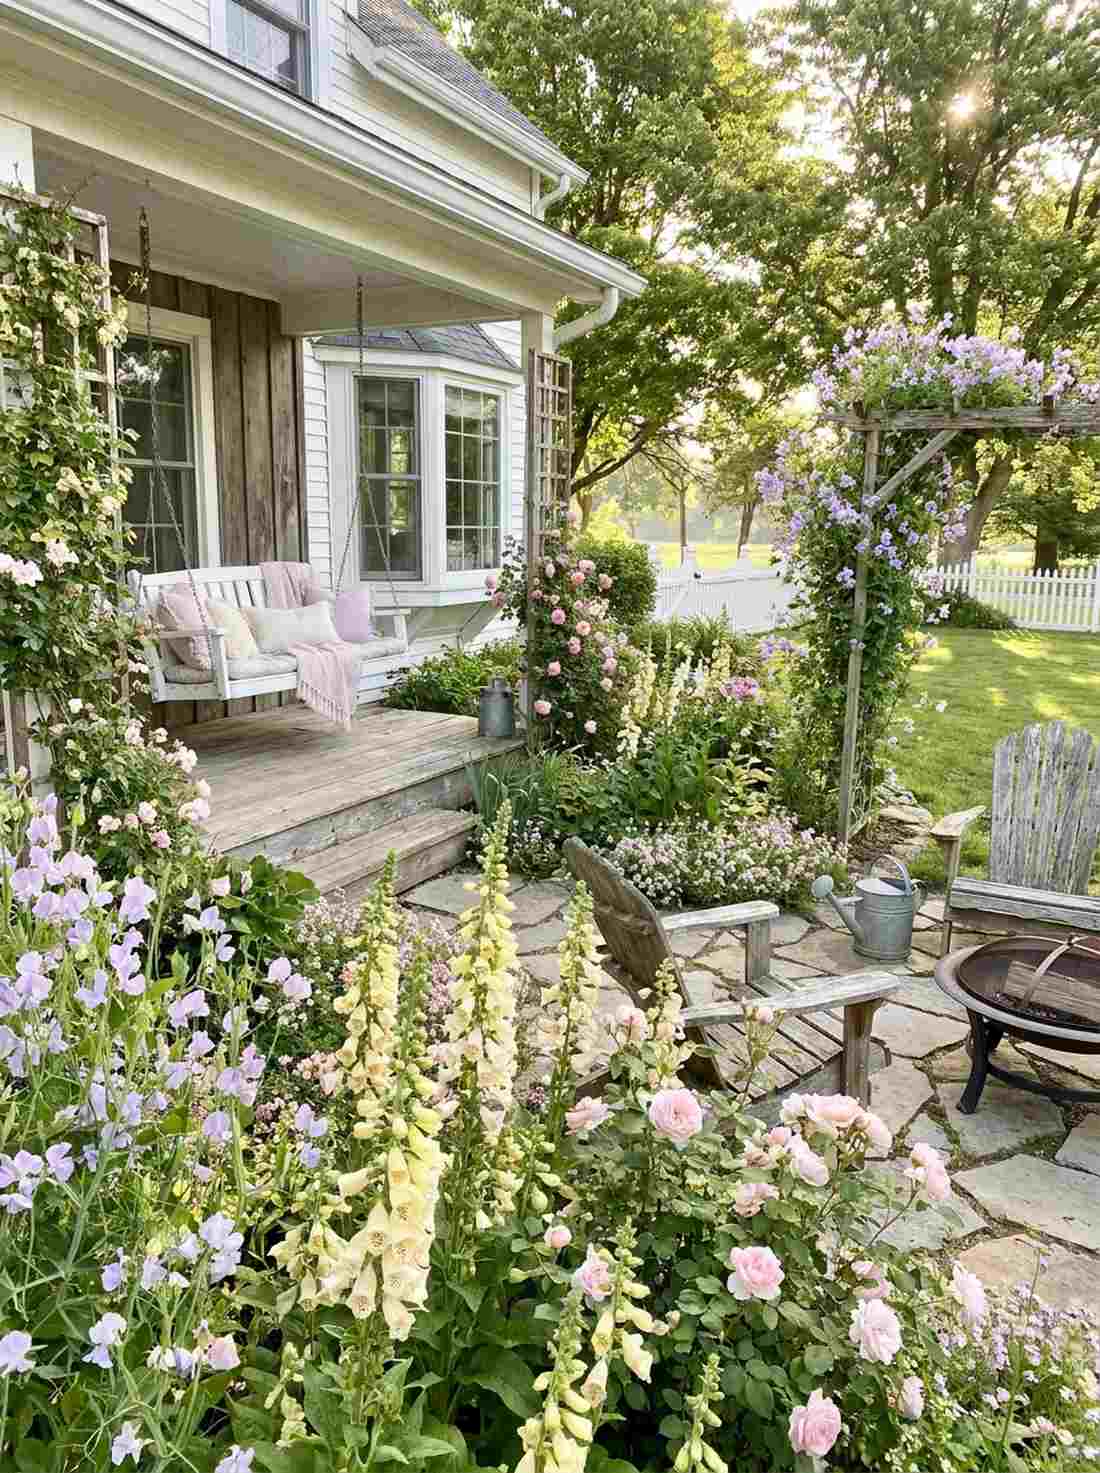
This faded, soft palette feels like a vintage lace dress dancing in a spring breeze. The soft pastel floral harmony is the quintessential choice for wrapping around a classic front-porch swing or an old bay window.
By strictly eliminating harsh primary colors, you force the eye to appreciate the delicate textures and shapes of the blooms. This is the exact layout that gives a designer-level finish straight out of an English heritage magazine, easily achieved with specific seed mixes.
You can soften a full border for around $40–$75. Save this to your vintage cottage boards!
- Key Materials: Pale yellow foxgloves, soft pink roses, lavender sweet peas
- Vibe / Style: Nostalgic vintage romance
- Difficulty: Moderate color-matching
- Budget Breakdown: Seed/Root mixes: $55.
- Creator’s Tip: Pastels wash out completely in glaring afternoon sun. Plant this palette on the east side of your house where it only gets gentle morning light.
- Smart Sourcing: Curated pastel cottage garden seed collections and gentle slow-release rose fertilizers.
42. Chartreuse Accent Strategy
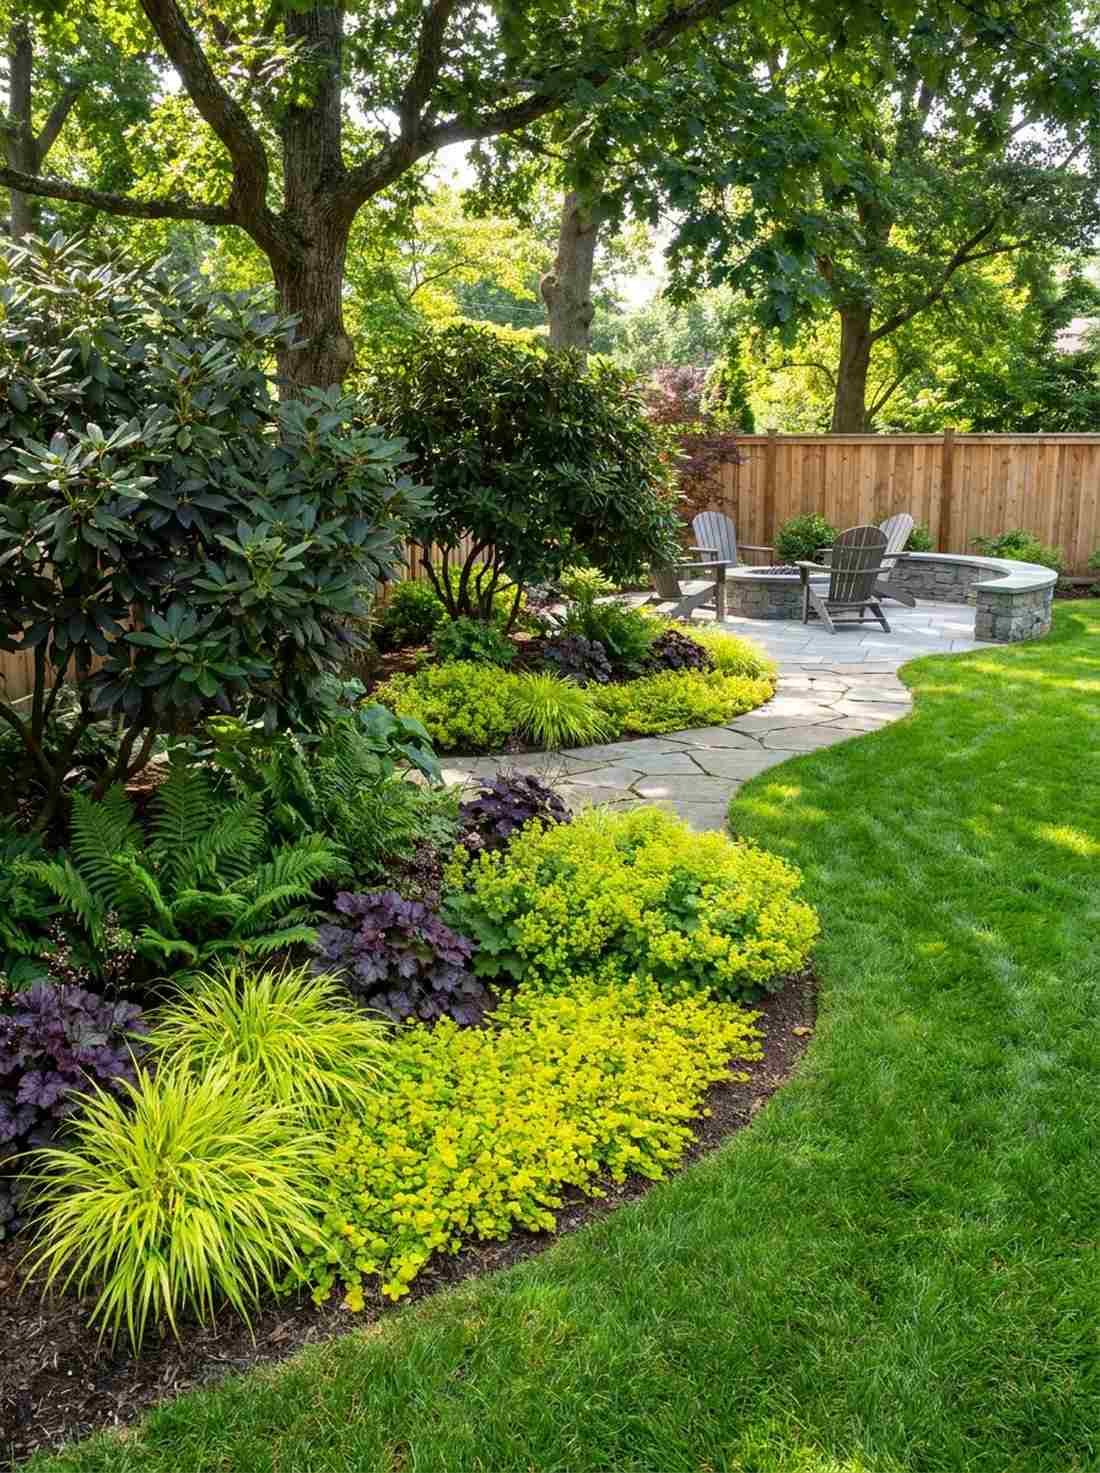
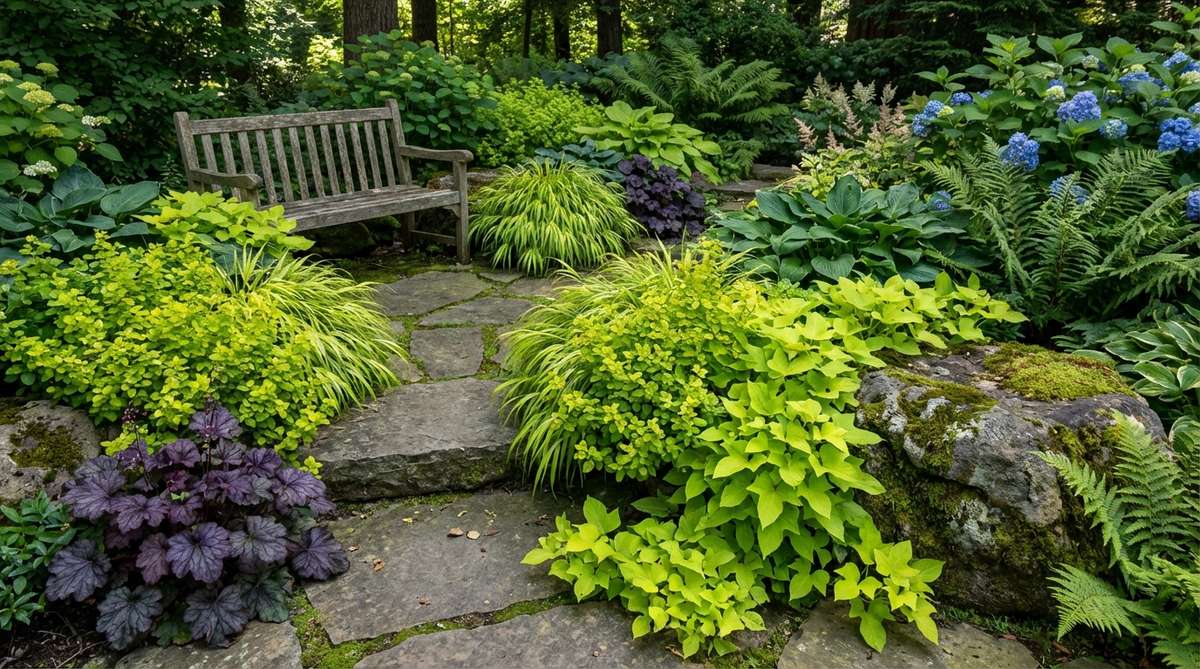
These shocking lime-green pops feel like a jolt of electricity running through a tired, boring flower bed. Using a chartreuse foliage accent strategy is a brilliant use-case for waking up dark, gloomy areas under large shrubs.
This acidic yellow-green acts as a master neutral—it strangely makes purple look richer and red look brighter. It delivers a highly contemporary, premium landscape edge while utilizing incredibly cheap, aggressive groundcovers like golden creeping jenny.
You can wake up a dark border for just $20–$40.
- Key Materials: Golden oregano, Bowles golden sedge
- Vibe / Style: Electric contemporary accent
- Difficulty: Very easy
- Budget Breakdown: Accent plants: $30.
- Creator’s Tip: Use chartreuse very sparingly, like throw pillows on a couch. If you use too much, the garden will just look sickly and yellow.
- Smart Sourcing: Chartreuse foliage perennial starter packs and premium organic compost blends.
43. Monochrome White Garden
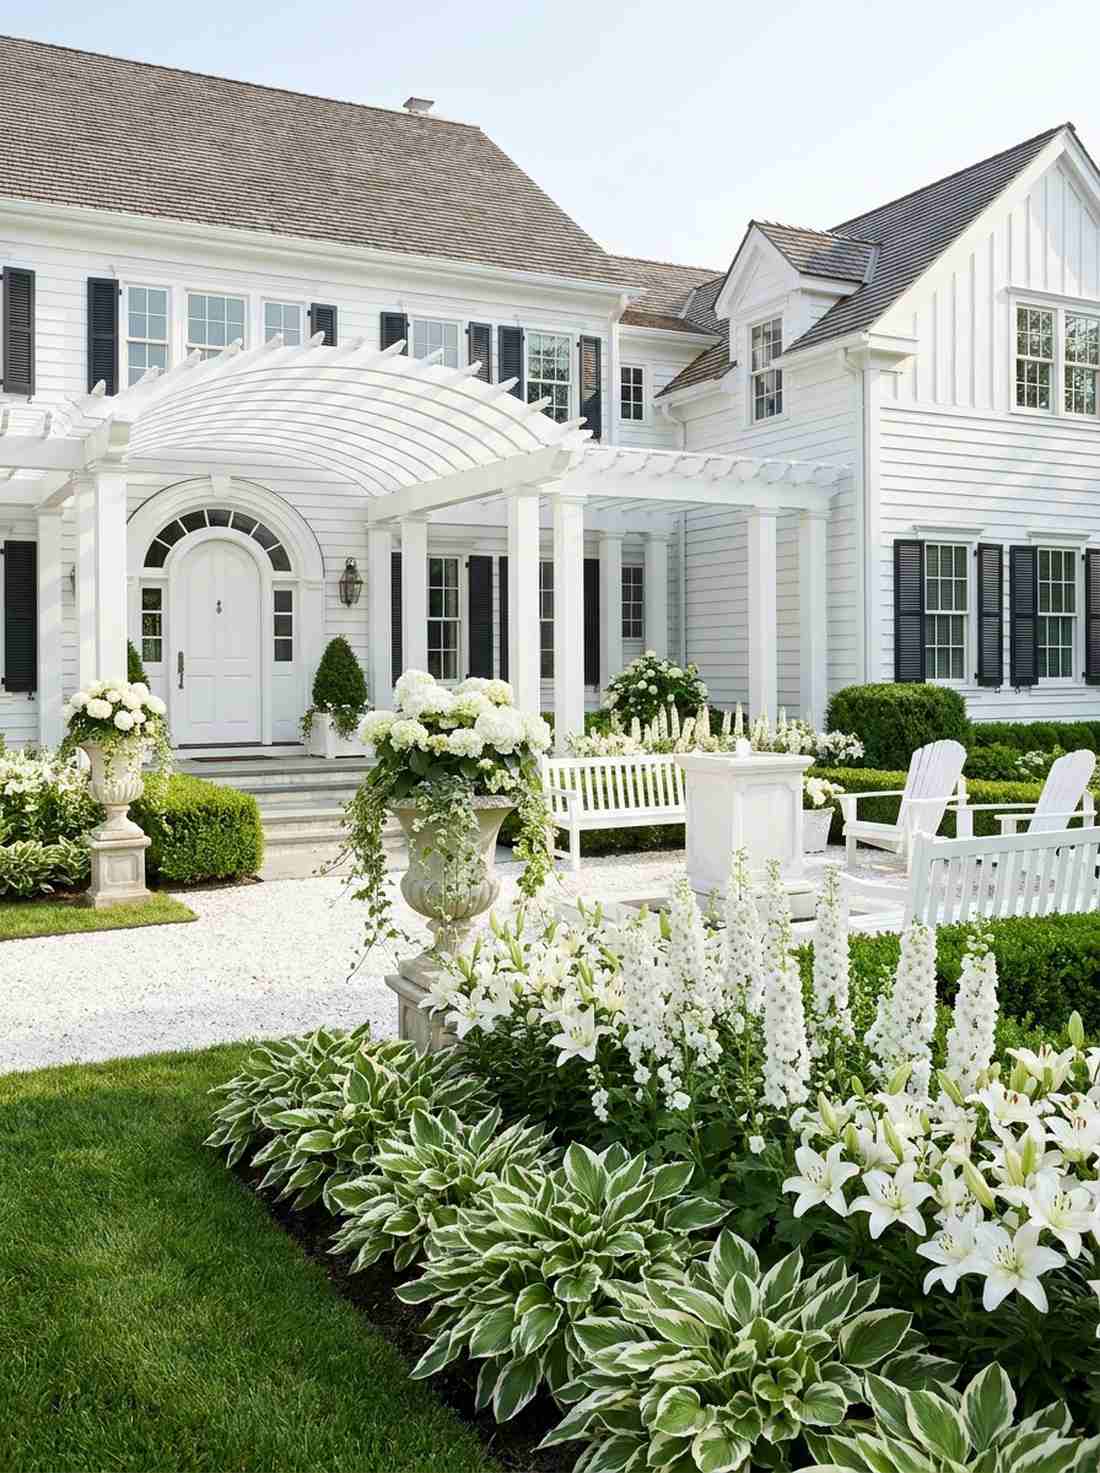

This strict, colorless design feels like a highly exclusive, luxurious outdoor wedding venue. A pure monochrome white garden is perfectly suited for formal entryway courtyards where you want to impress guests instantly.
By completely eliminating color, you force the brain to focus entirely on striking plant architecture and leaf textures. This restriction looks astoundingly expensive and refined, especially when you stagger white blooming bulbs to ensure constant flowers.
You can plant a luxury white garden for $100–$200.
- Key Materials: White lilies, white delphiniums, variegated hostas
- Vibe / Style: High-society elegant purity
- Difficulty: Intermediate planning required
- Budget Breakdown: White bulbs/plants: $140.
- Creator’s Tip: Introduce variegated foliage (leaves with white edges) so the garden still looks “white” even during the weeks when nothing is blooming.
- Smart Sourcing: Premium white-flowering perennial kits and variegated shade plant bundles.
44. Sunset Gradient Planting
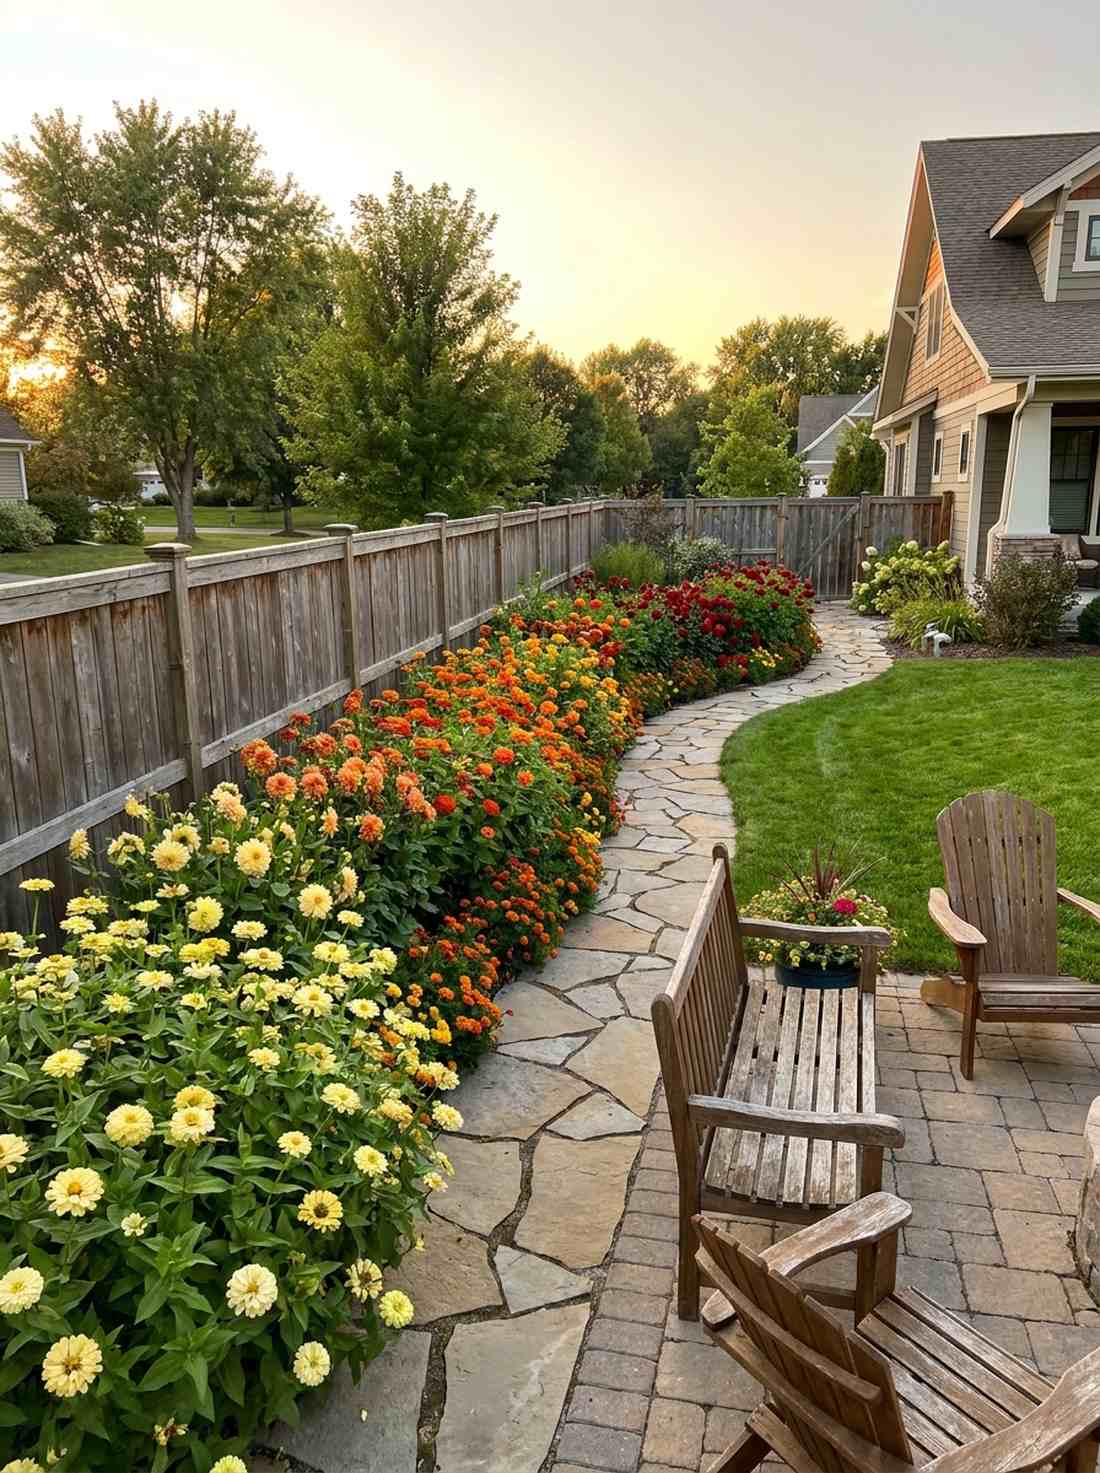
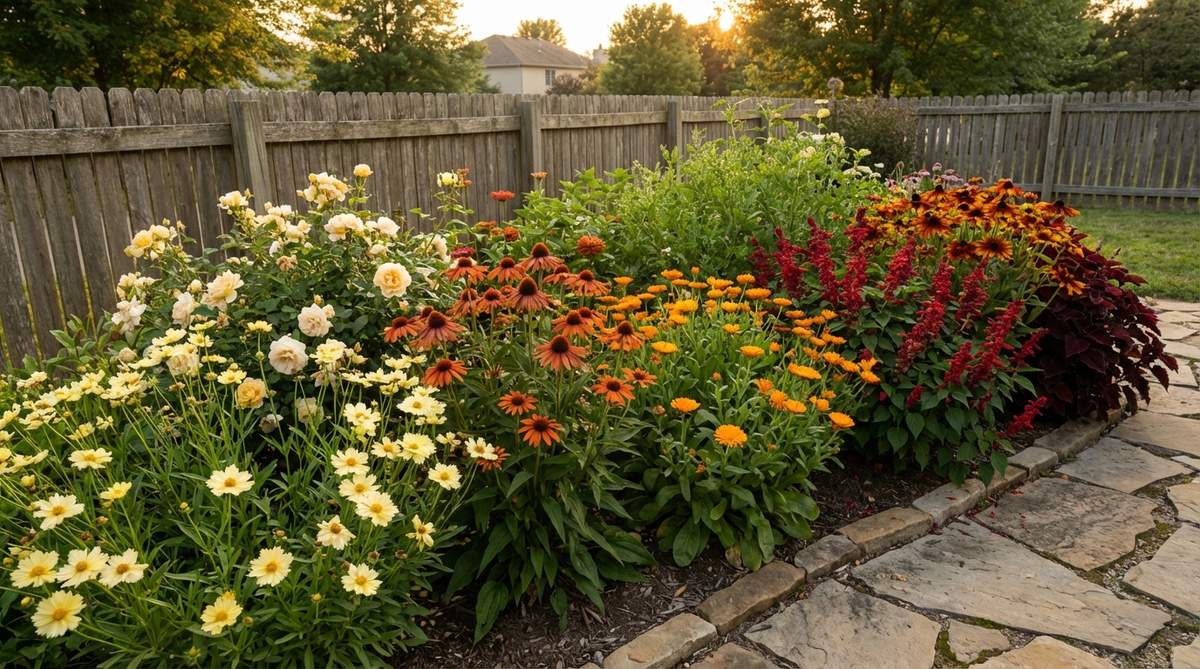
Walking the length of this bed feels like watching a slow, spectacular summer sunset unfold. A chromatic sunset gradient border is the absolute most stunning use-case for a very long fence line that spans the entire backyard.
By blending pale yellows into fiery oranges, and finally into deep reds, you create a sweeping visual movement that forces people to walk the path. This delivers a jaw-dropping, professional landscape design trick using standard, affordable bulk flower seeds.
You can paint this gradient for roughly $60–$100. Pin this layout to completely blow your neighbors away!
- Key Materials: Assorted colored Zinnias, Dahlias, garden markers
- Vibe / Style: Sweeping chromatic drama
- Difficulty: Advanced layout mapping
- Budget Breakdown: Gradient seeds/tubers: $70 | String line: $10.
- Creator’s Tip: Map it out on paper first, and physically blend the edges of the colors together so there aren’t harsh, unnatural lines between the yellow and orange zones.
- Smart Sourcing: Color-sorted premium dahlia tuber kits and heavy-duty garden bed layout twine.
Ready for a controversial take? This next setup breaks all the standard landscaping rules but works flawlessly.
Structural Features and Focal Points
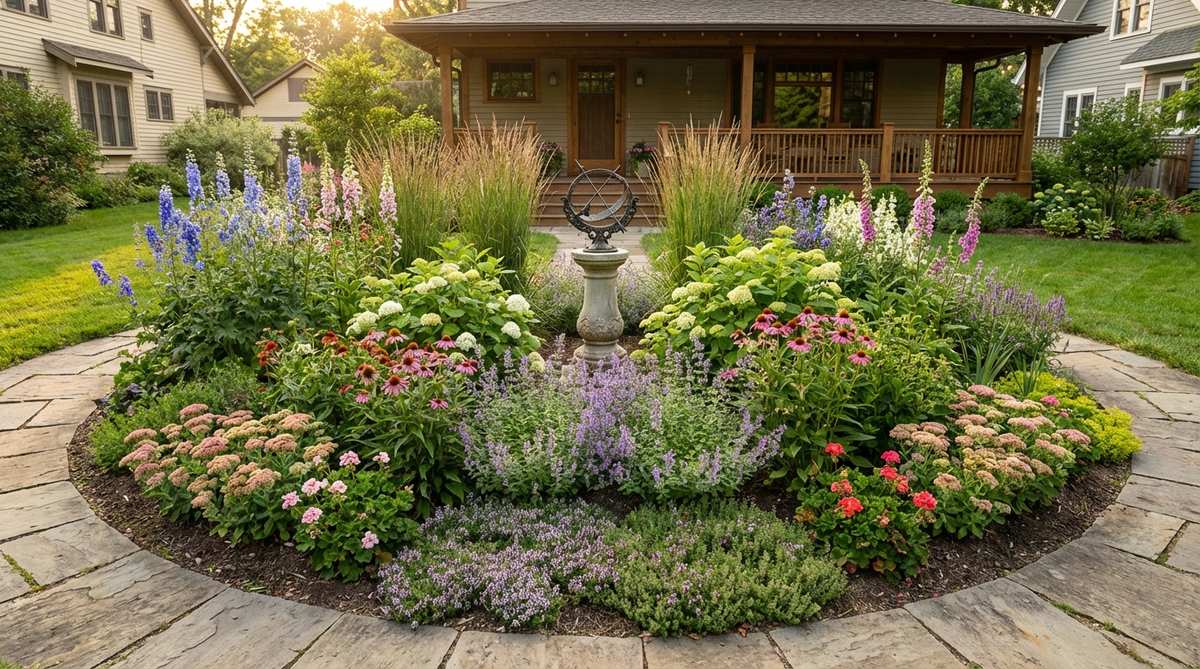
45. Central Sundial on Pedestal
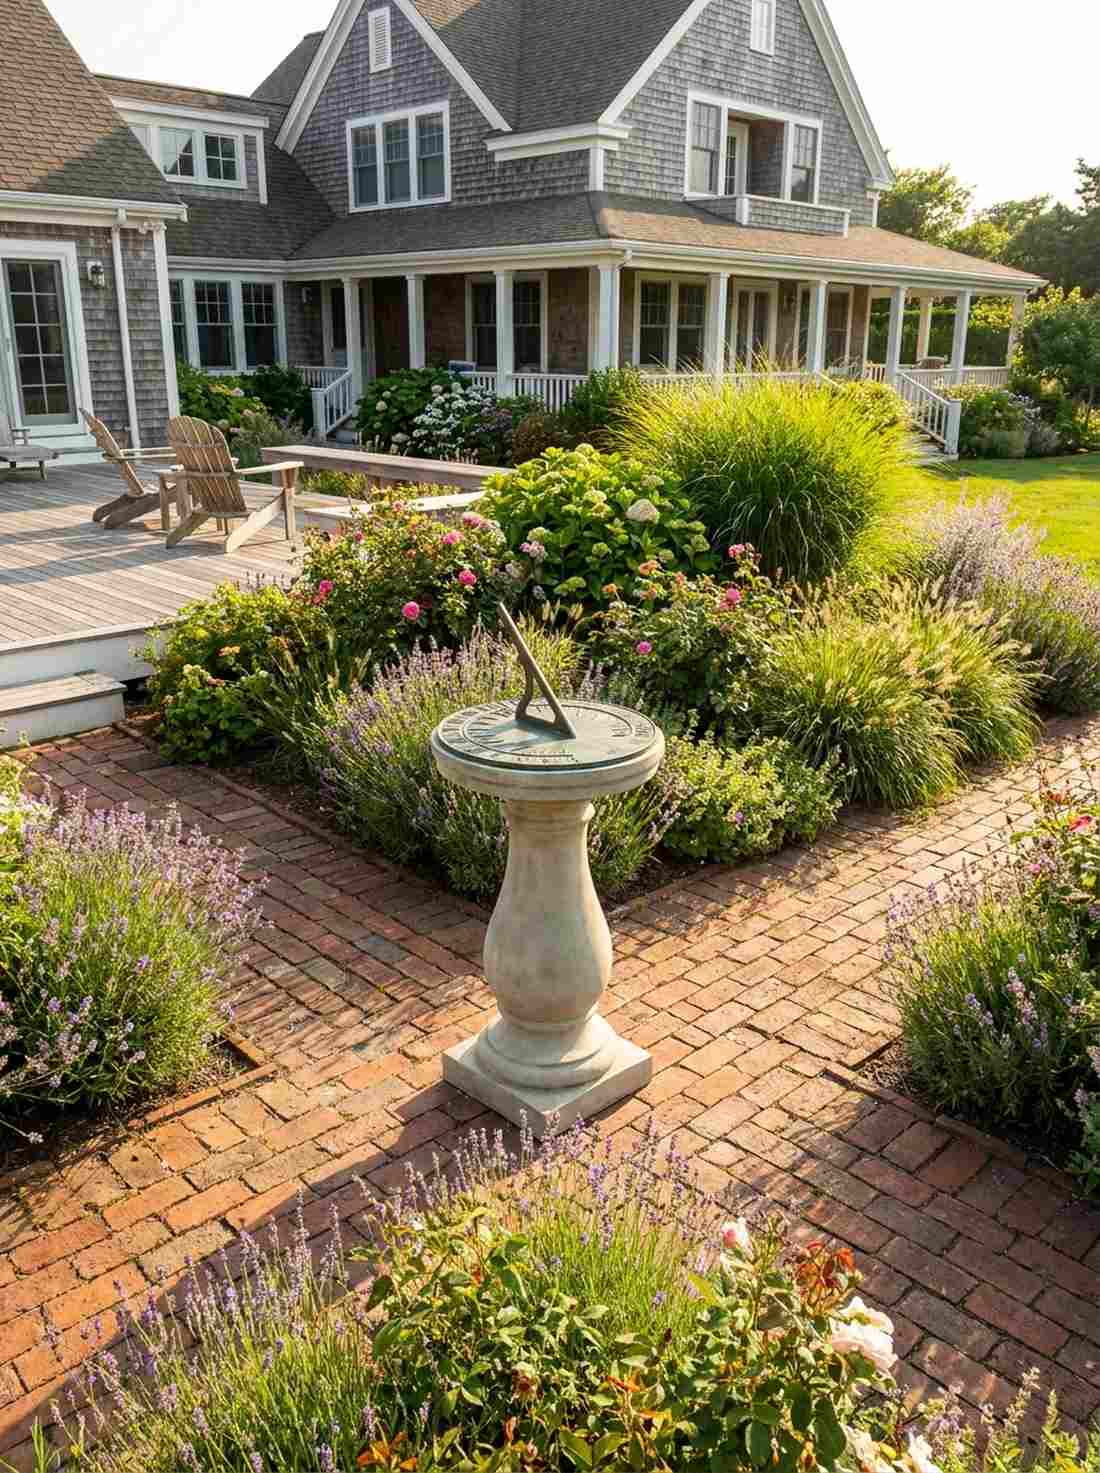
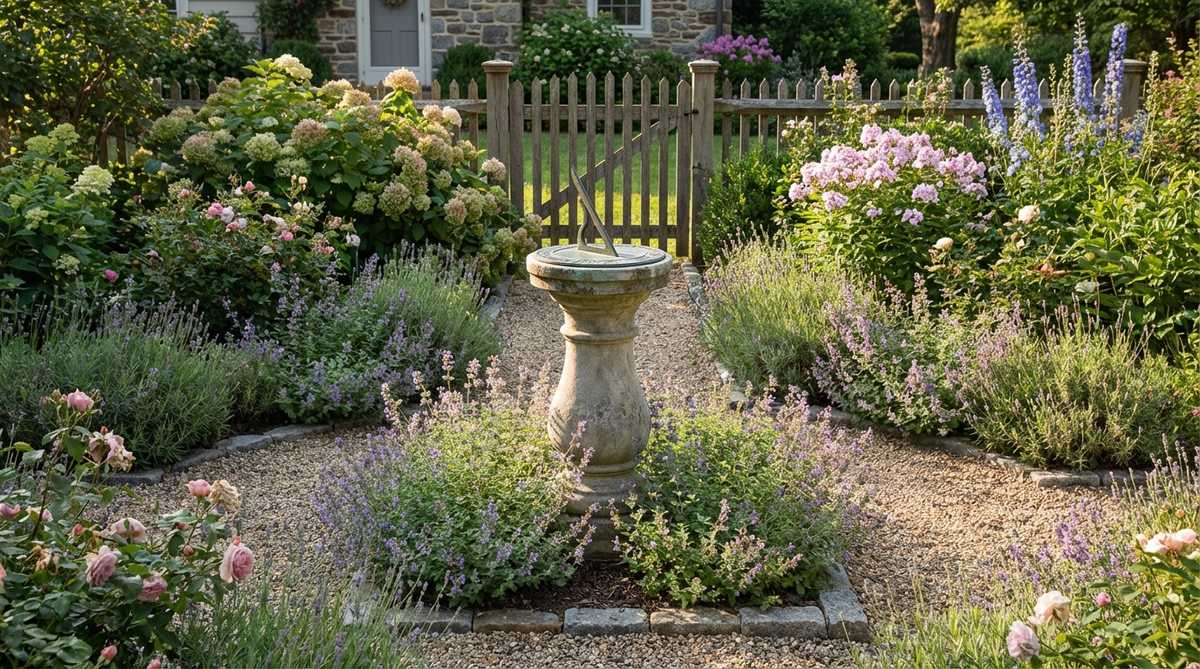
This classic anchor piece feels like a timeless relic anchoring the chaos of the garden to history. A stone pedestal sundial is the perfect, authoritative use-case for the exact center intersection of your main garden pathways.
It acts as a rigid, formal counter-weight to the wild, floppy cottage plantings surrounding it. This instantly gives a designer-level finish and historical weight to a brand new garden, especially when you utilize cast-stone resin alternatives that look heavy but are cheap to ship.
You can set up this classic focal point for $80–$150.
- Key Materials: Pedestal base, bronze sundial top, leveling sand
- Vibe / Style: Historic classical anchor
- Difficulty: Easy leveling required
- Budget Breakdown: Sundial/Pedestal: $120.
- Creator’s Tip: You actually have to point the “gnomon” (the shadow-casting part) perfectly True North for it to accurately tell time. Use your phone’s compass!
- Smart Sourcing: Weatherproof cast-stone resin sundial pedestals and heavy-duty brass sundial faces.
46. Weathered Wooden Bench
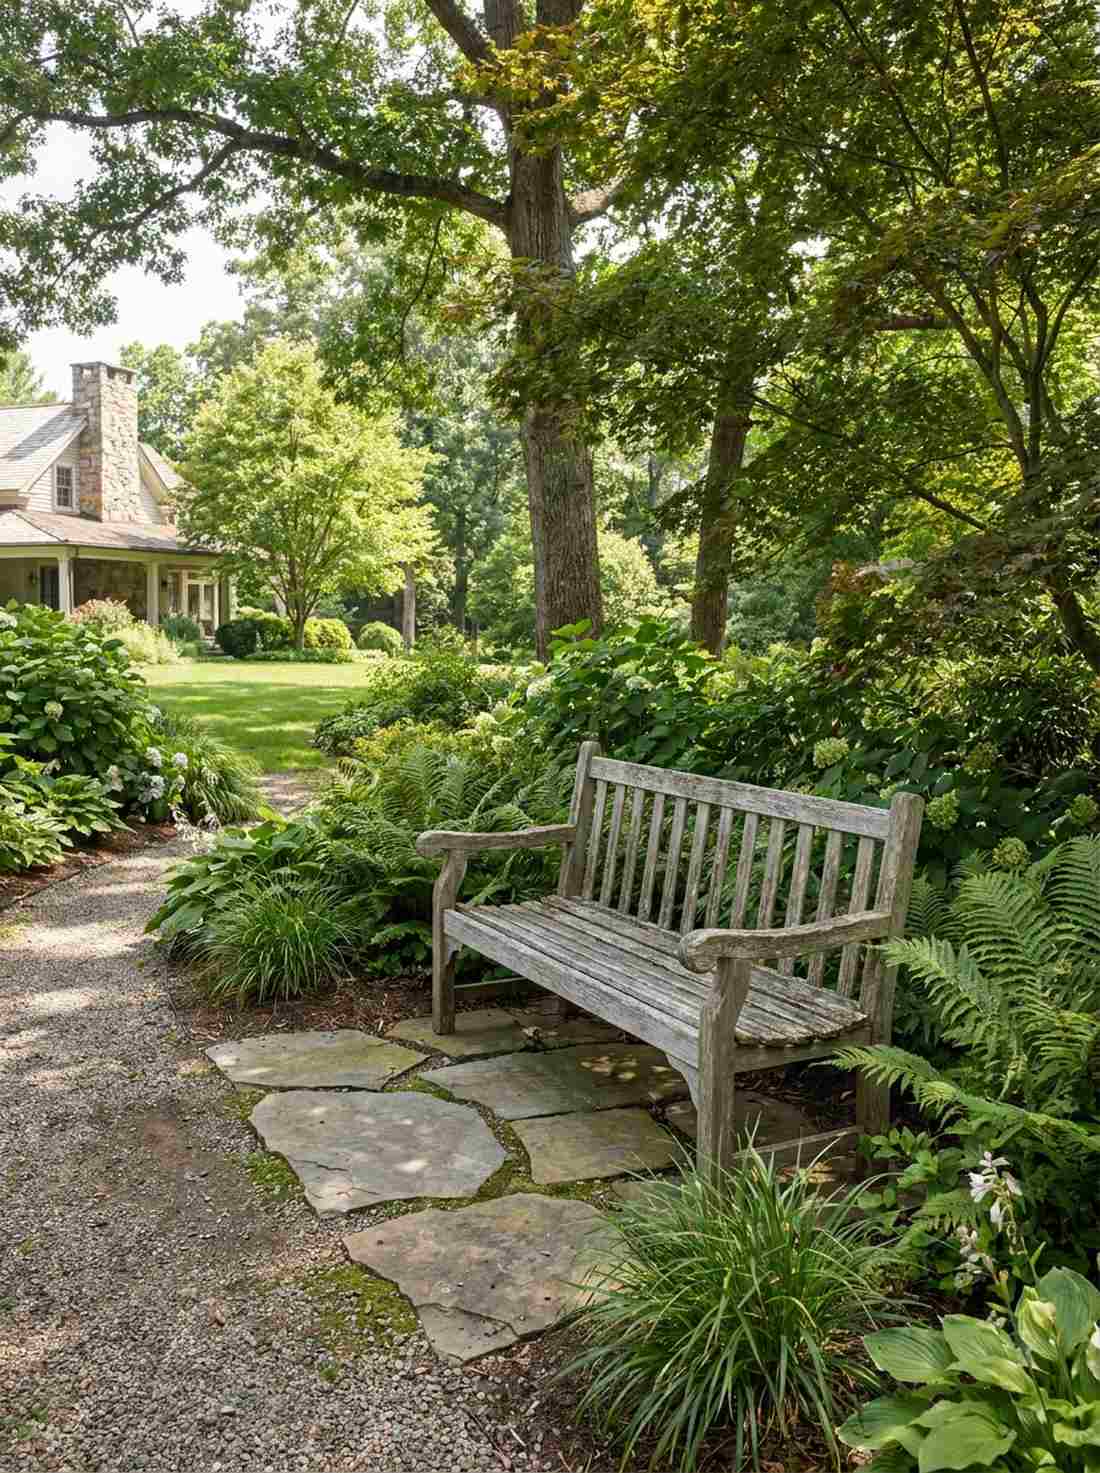
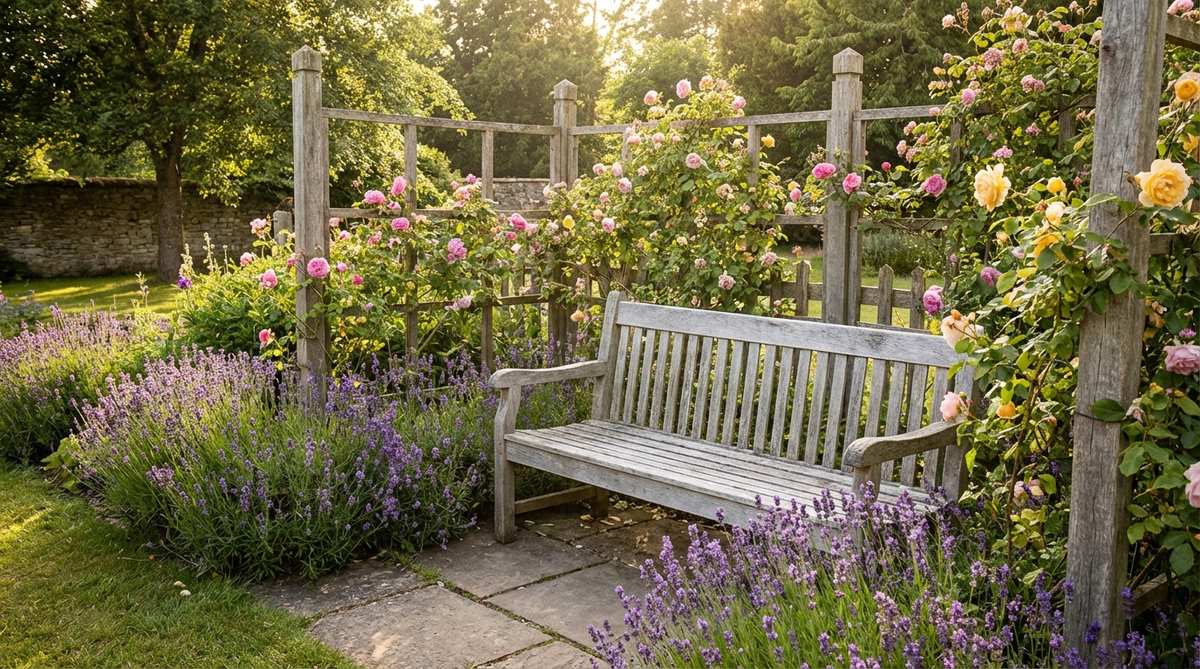
This secluded resting spot feels like a quiet invitation to sit, breathe, and escape the world. Tucking a weathered wooden garden bench into a deep border is exceptionally brilliant for creating a destination point that forces visitors to walk into the yard.
Allowing the wood to bleach out to a ghostly silver completely integrates the furniture into the rustic landscape. It looks remarkably expensive when framed by heavy greenery, completely elevating a basic teak or cedar bench into a premium cottage feature.
You can create this seating nook for $150–$300. Save this if you want a cozy garden retreat!
- Key Materials: Unfinished cedar/teak bench, flagstone base
- Vibe / Style: Contemplative rustic retreat
- Difficulty: Easy assembly
- Budget Breakdown: Bench kit: $200 | Base stones: $30.
- Creator’s Tip: Never set wooden bench legs directly on dirt; they will rot in two years. Always place a flat paving stone under each leg.
- Smart Sourcing: Unfinished DIY cedar garden bench kits and protective clear outdoor wood sealants.
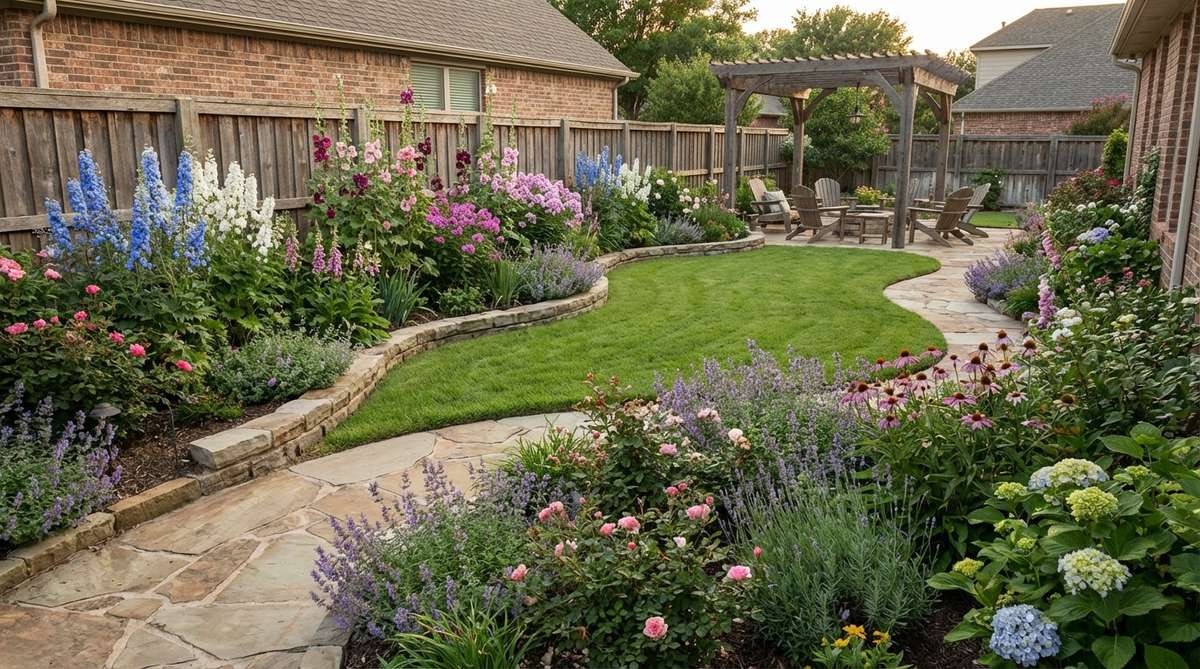
47. Dry-Stacked Stone Wall
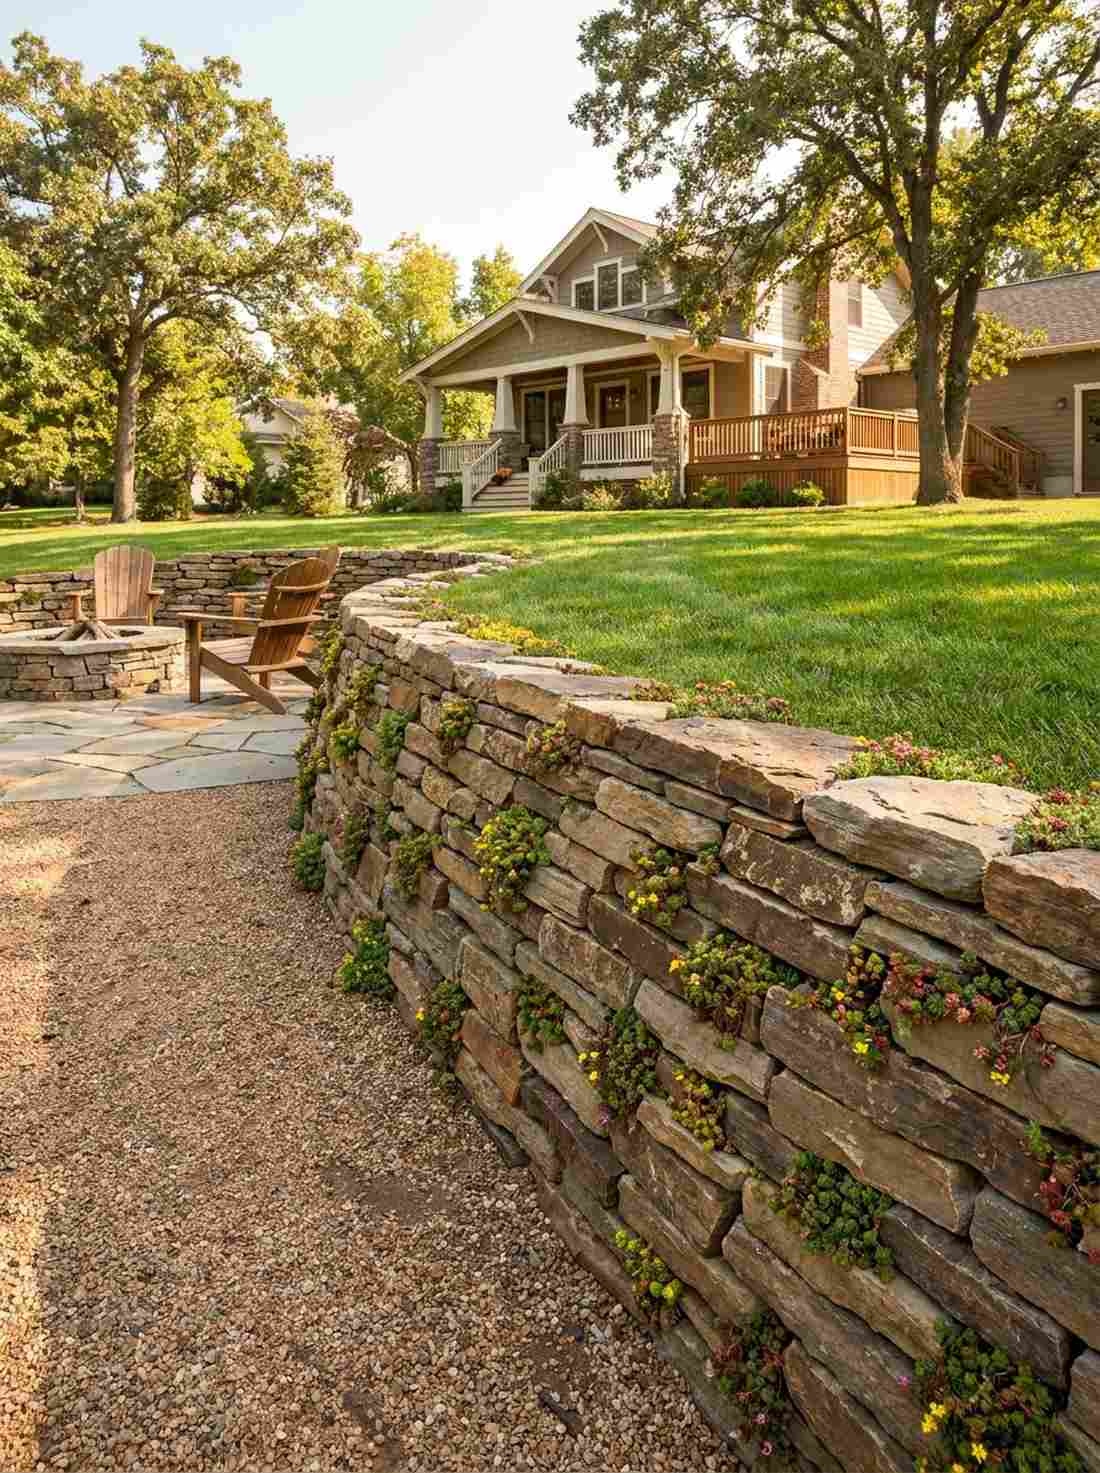
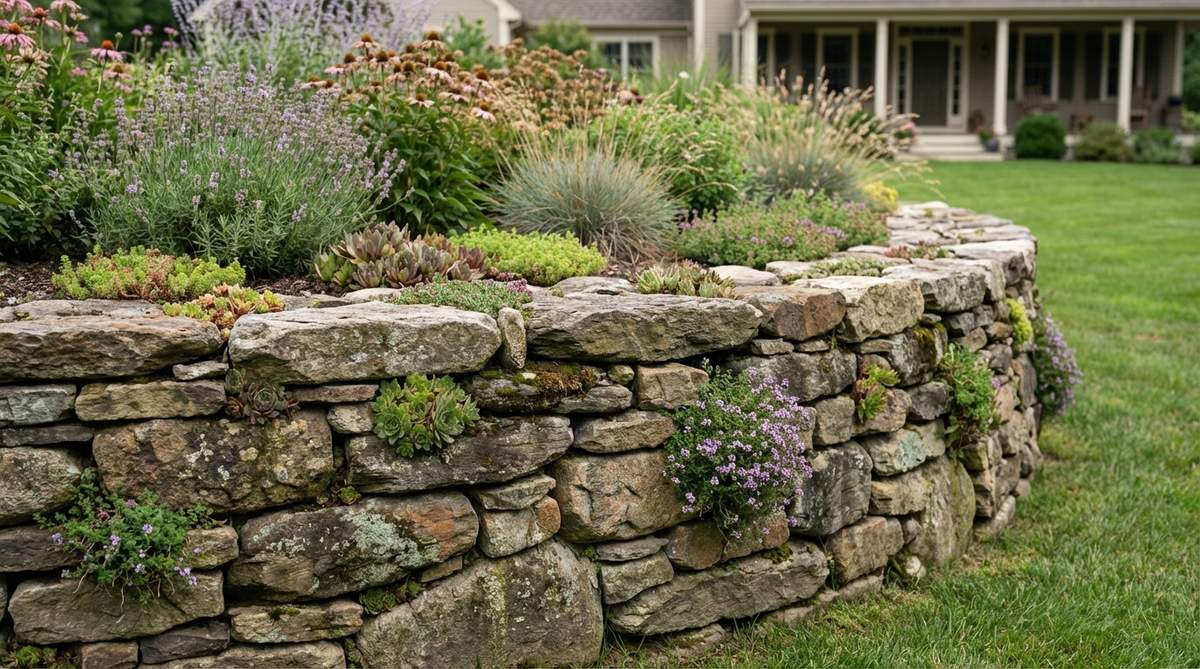
These rugged, interlocking rocks feel like ancient ruins slowly being reclaimed by the earth. Building a low dry-stacked stone retaining wall is the ultimate solution for dealing with slightly sloped yards that wash out during heavy rain.
By skipping the ugly mortar, you create hundreds of tiny crevices perfect for stuffing with trailing alpine plants. This layout looks wildly expensive, delivering a $3,000 professional masonry aesthetic for a fraction of the cost if you source local native stones.
Depending on the stone, expect to spend $200–$500.
- Key Materials: Native flat stones, crushed gravel base, creeping sedums
- Vibe / Style: Ancient reclaimed ruins
- Difficulty: Back-breaking labor
- Budget Breakdown: Stone delivery: $300 | Sedum plugs: $50.
- Creator’s Tip: Lean the wall slightly backward into the hill (called the ‘batter’). Gravity will naturally lock the stones tighter together over the decades.
- Smart Sourcing: Live creeping sedum alpine starter trays and heavy-duty landscape construction gloves.
48. Terra-Cotta Pot Collection
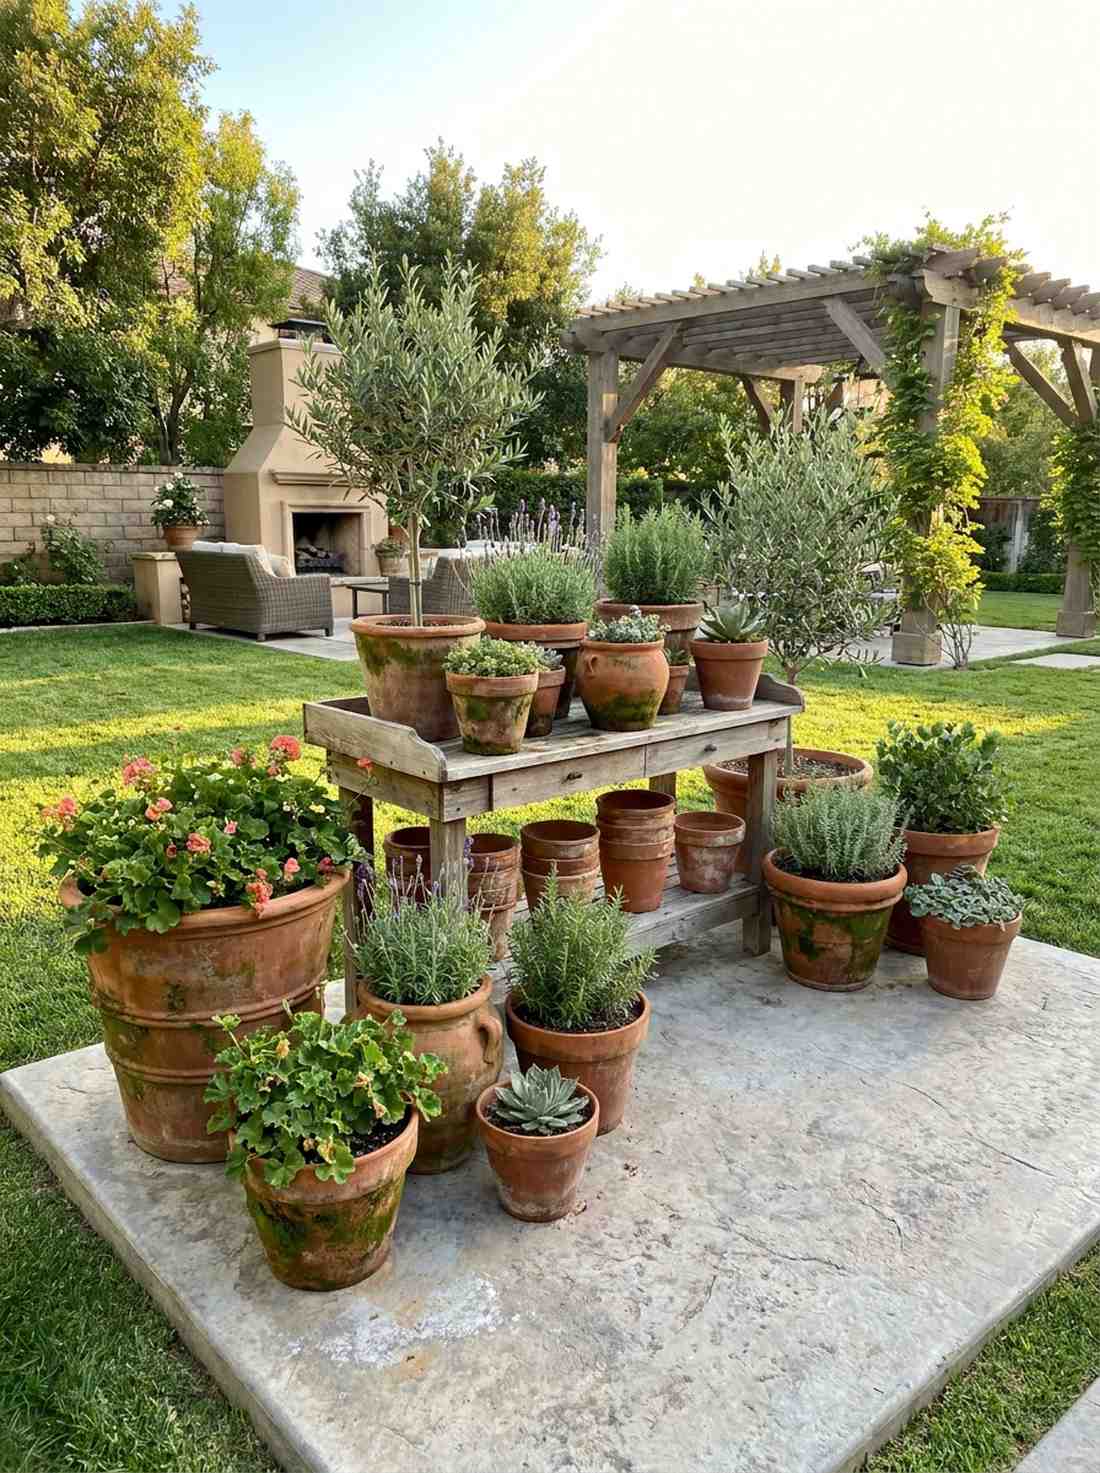
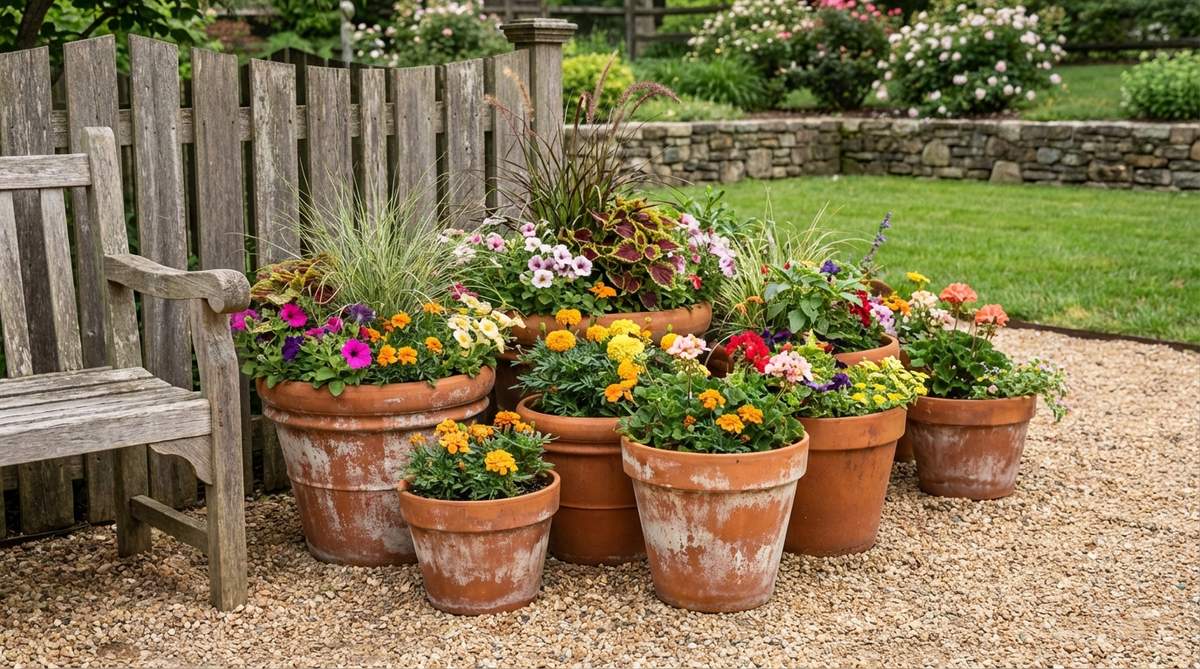
This clustered arrangement feels like an authentic, bustling Italian courtyard potter’s bench. An asymmetrical terra-cotta pot collection is strictly the best use-case for softening large, harsh concrete patio slabs.
The earthy, burnt-orange clay creates instant warmth, while the varied heights provide structural interest without digging a single hole. It gives a beautifully curated, designer-level finish when you deliberately speed-age the pots to look 50 years old.
You can build a stunning collection for $60–$120. Pin this to your patio upgrade board!
- Key Materials: Assorted clay pots, premium potting soil, yogurt (for aging)
- Vibe / Style: Warm Mediterranean courtyard
- Difficulty: Extremely easy
- Budget Breakdown: Pots: $70 | Soil/Plants: $40.
- Creator’s Tip: To instantly age brand new pots, paint them with plain yogurt and set them in a shady spot. They will grow beautiful, authentic green moss in just weeks.
- Smart Sourcing: Bulk terra-cotta garden pot bundles and premium moisture-control potting mix bags.
49. Vintage Watering Can Display
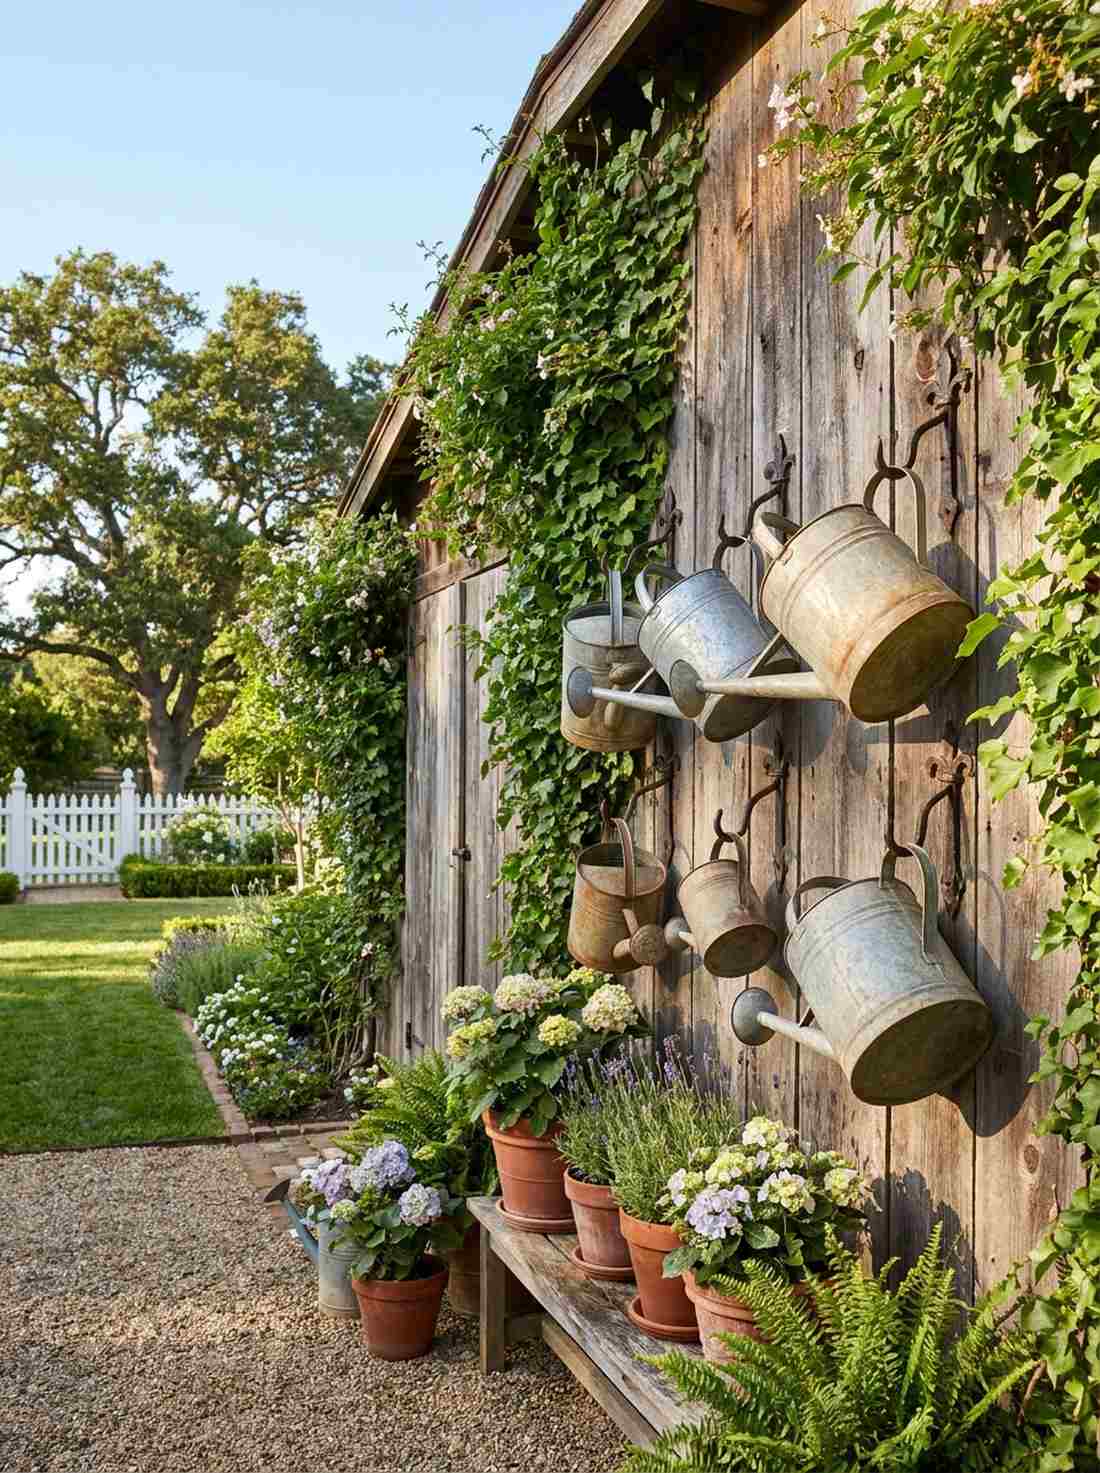
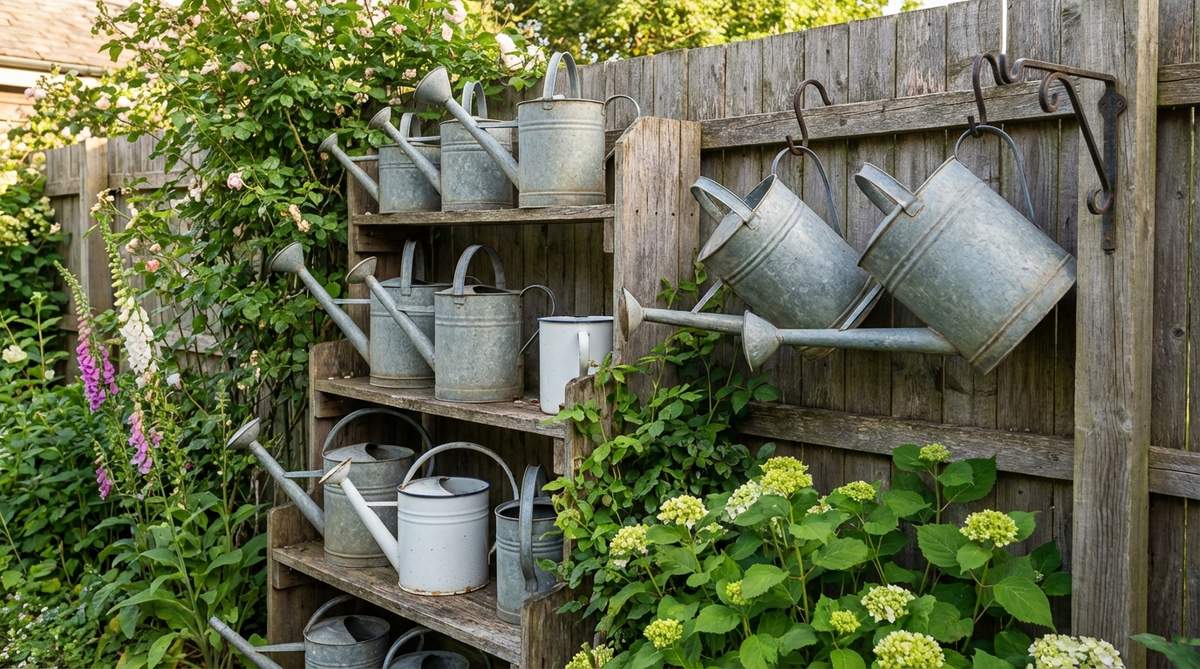
This rusted, nostalgic touch feels like walking through your great-grandmother’s beloved potting shed. Hanging a vintage galvanized watering can display is perfectly utilized to decorate the ugly, blank side of a wooden tool shed.
The bright, silvery-gray metal violently contrasts with lush green vines, turning functional tools into literal garden art. This technique is an insanely cheap hack that looks wonderfully premium and enforces that highly sought-after cottage core aesthetic.
You can pull this off for just $20–$50 by thrifting the cans.
- Key Materials: Galvanized metal cans, heavy-duty fence hooks
- Vibe / Style: Nostalgic functional art
- Difficulty: Quick 10-minute hang
- Budget Breakdown: Vintage cans: $30 | Hooks: $10.
- Creator’s Tip: Drill a small hole in the very bottom of the cans so they don’t fill up with rainwater and breed hundreds of mosquitoes.
- Smart Sourcing: Vintage-style galvanized metal watering cans and heavy-duty decorative fence hooks.
This upcoming addition looks so magical, your neighbors will think you hired a high-end designer…
50. Split-Rail Fence Boundary
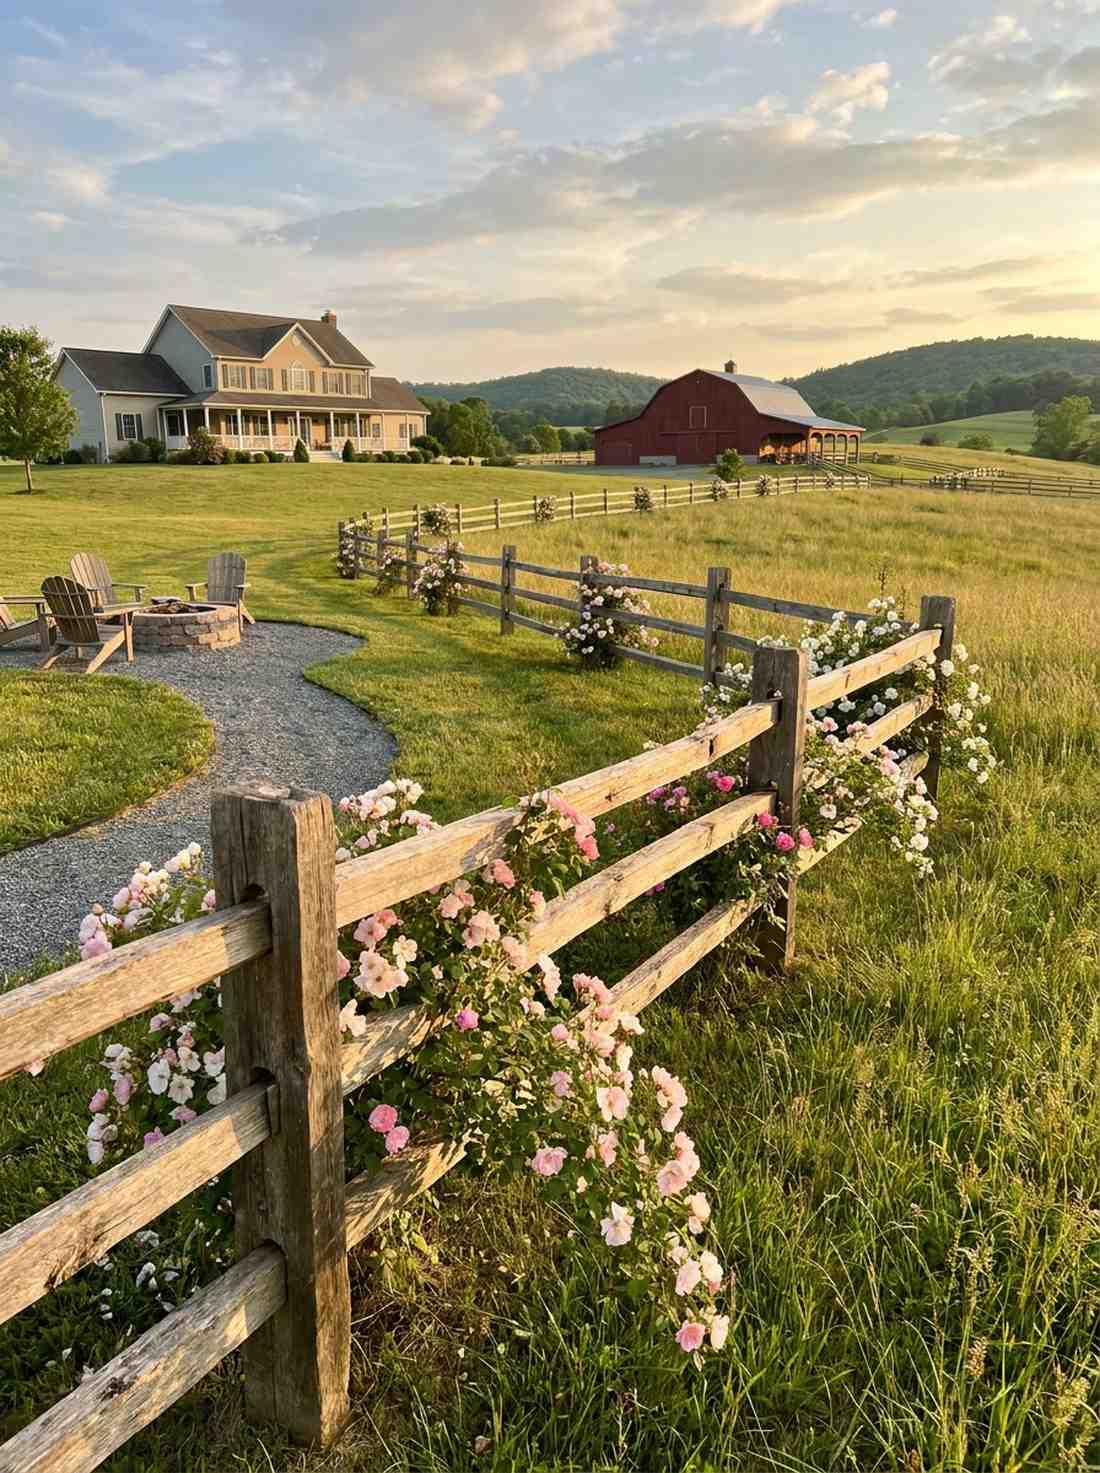
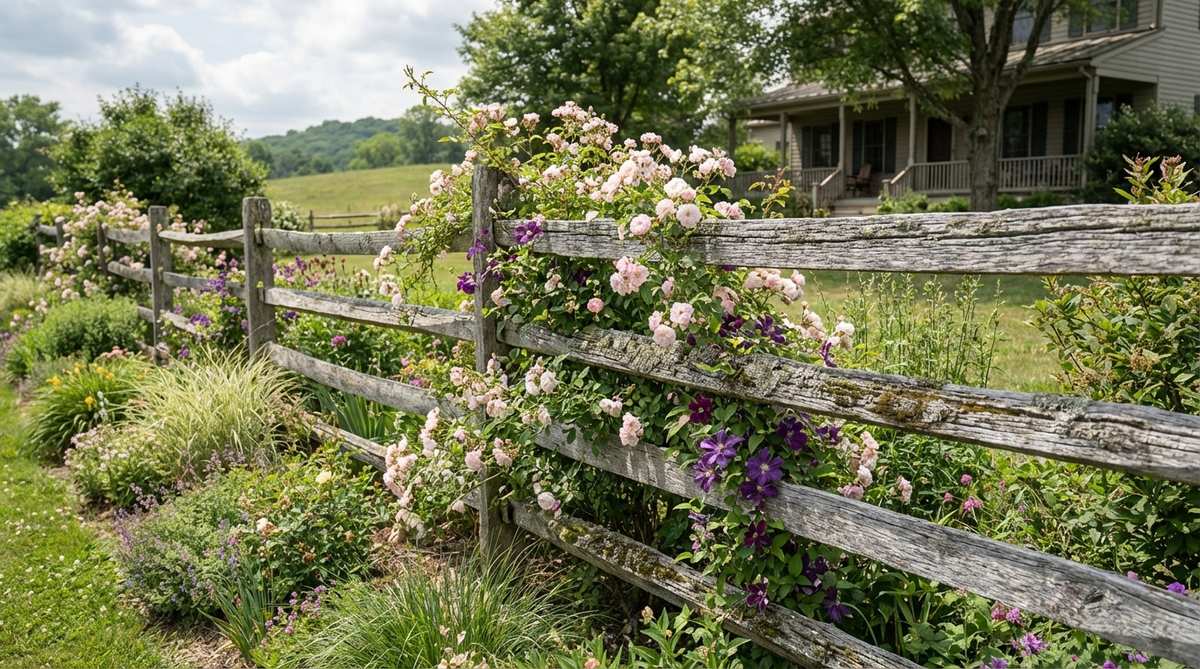
This open, airy woodwork feels like a gentle embrace around the edge of a vast country meadow. Installing a rustic split-rail wooden fence is the absolute perfect use-case for defining property lines without entirely blocking your beautiful landscape views.
Because there are no solid panels, it acts as the ultimate heavy-duty trellis for massive rambling roses to weave through. This delivers an incredibly expansive, premium farm-estate look using relatively cheap, rough-sawn lumber pieces.
You can fence a large boundary for $200–$400.
- Key Materials: Cedar split rails, wooden posts, post-hole digger
- Vibe / Style: Expansive country estate
- Difficulty: Hard manual labor
- Budget Breakdown: Lumber: $300 | Tools: $50.
- Creator’s Tip: You don’t need concrete for these posts. Tamp crushed gravel tightly around the posts in the hole; it allows water to drain away so the posts never rot.
- Smart Sourcing: Heavy-duty steel post-hole diggers and weather-resistant climbing rose starter kits.
51. Copper Tuteur Plant Support
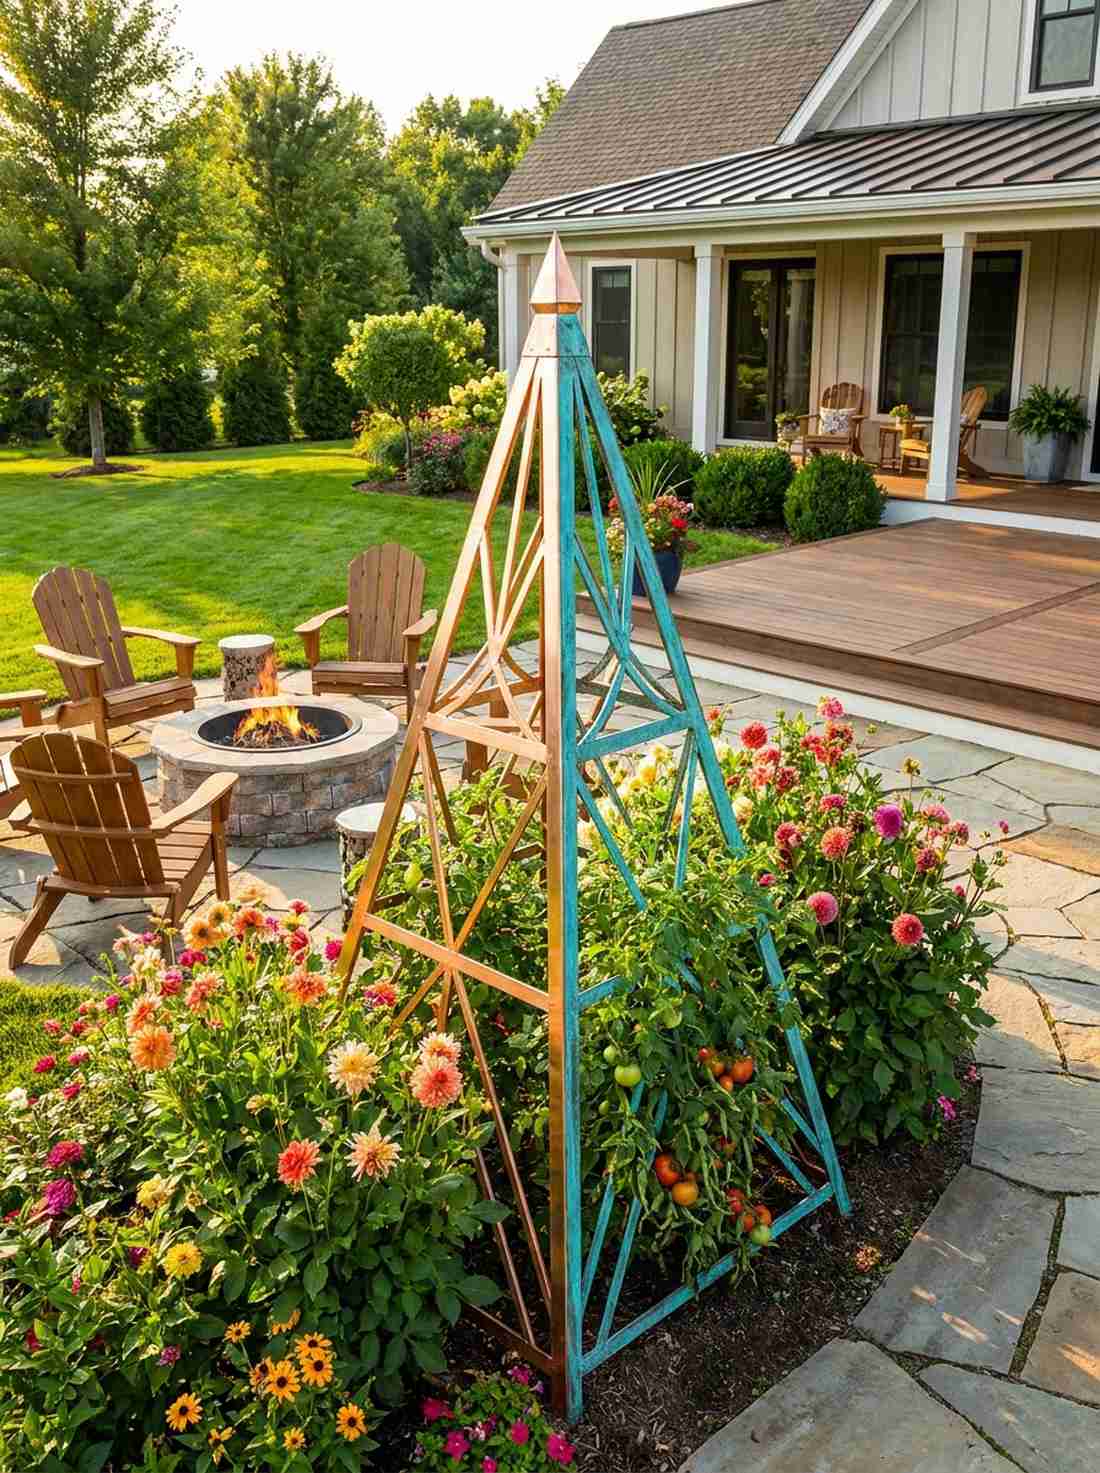
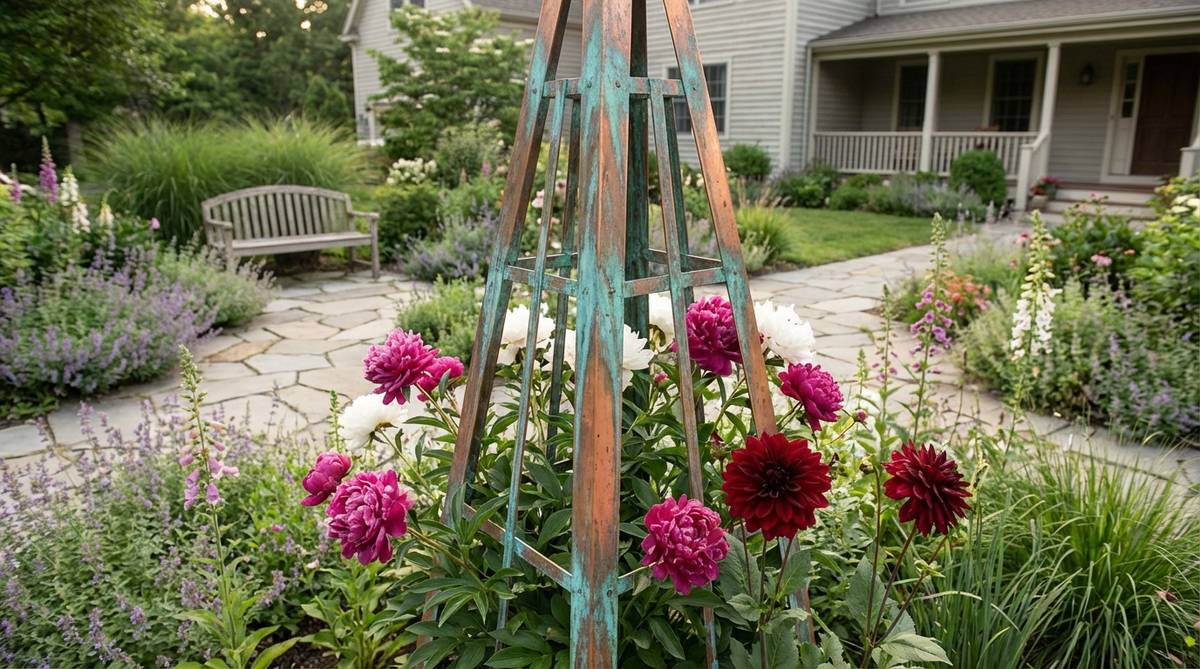
This glowing metal pyramid feels like a piece of high-end jewelry dropped directly into your flower bed. Slipping a copper obelisk tuteur support into your borders is brilliantly used to wrangle violently floppy plants like Dahlias or heavy Tomatoes.
As the bright copper naturally oxidizes into a stunning turquoise patina, it becomes a structural piece of art that looks gorgeous even under winter snow. It completely avoids the cheap look of wire cages, delivering a premium architectural landscape upgrade.
You can add these premium accents for $80–$150. Save this for elegant garden art ideas!
- Key Materials: Copper tubing or pre-made copper tuteur, metal epoxy
- Vibe / Style: Elegant architectural jewelry
- Difficulty: Easy placement
- Budget Breakdown: Copper obelisk: $120.
- Creator’s Tip: If you want the beautiful green patina instantly, spray the raw copper with a mix of white vinegar and salt, then leave it in the sun.
- Smart Sourcing: Solid copper garden obelisk trellises and premium dahlia tuber multi-packs.
Seasonal Transitions and Year-Round Interest
52. Spring Bulb Underplanting
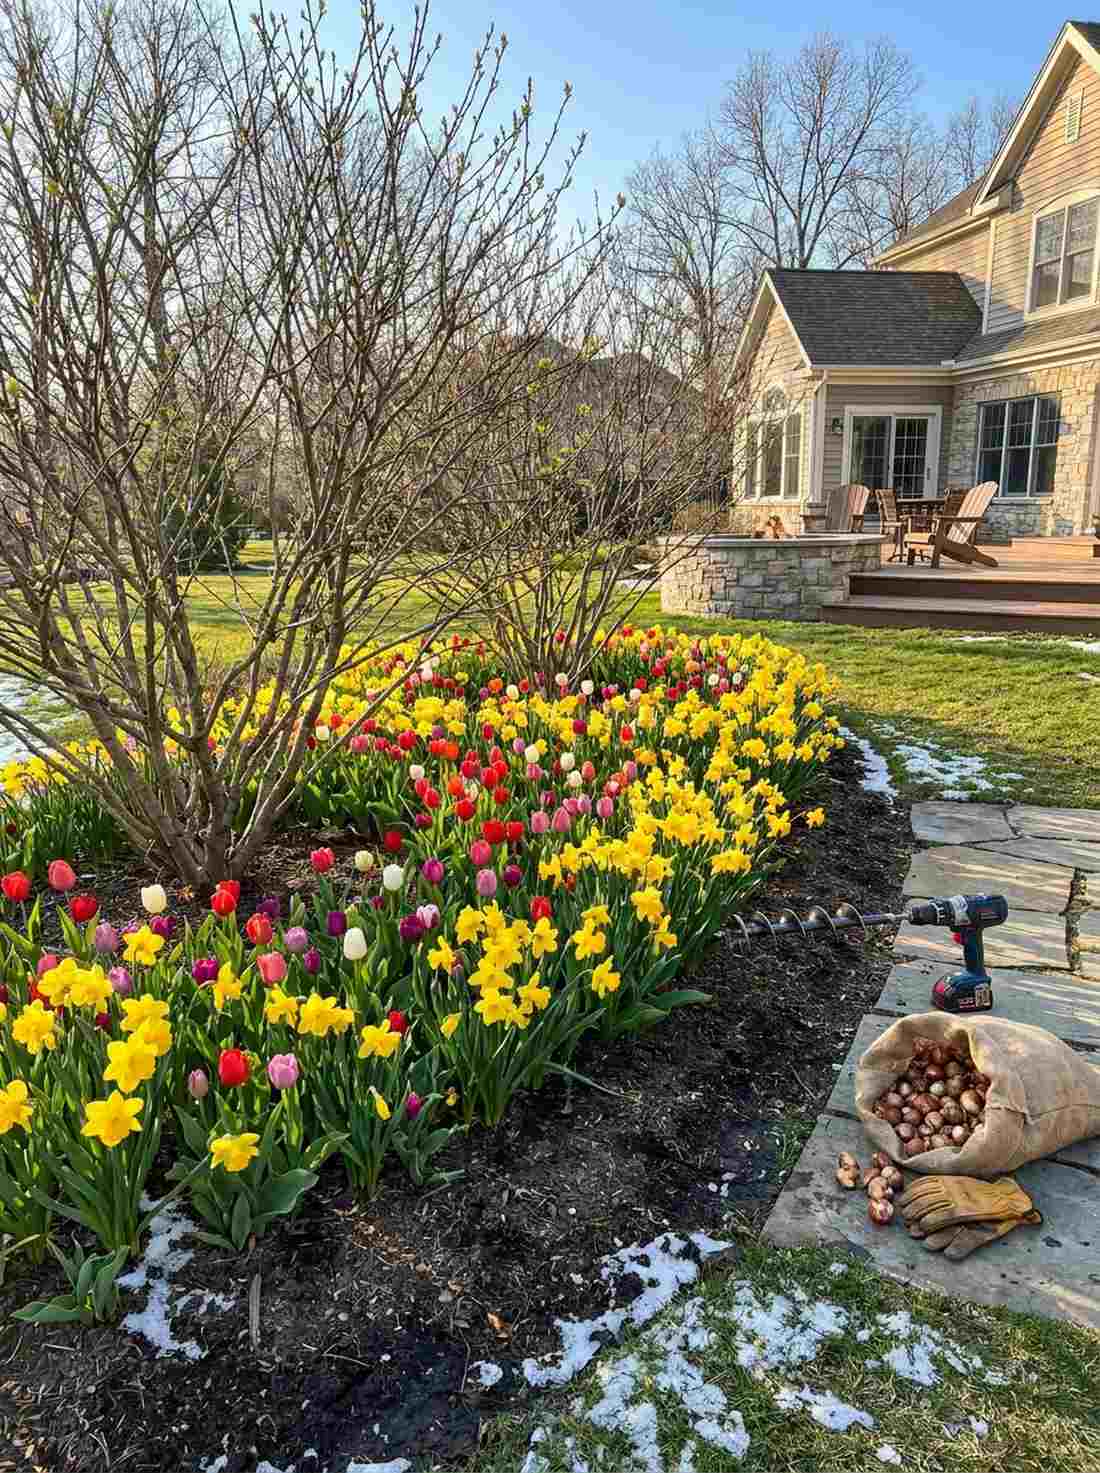
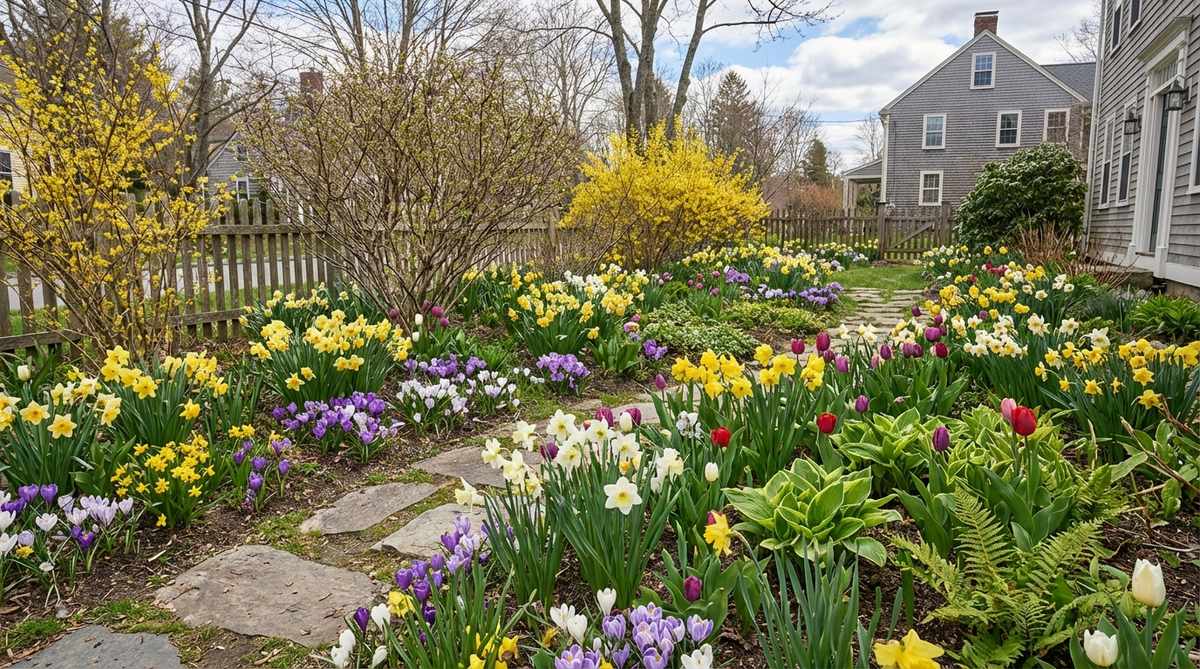
This sudden explosion of color feels like a joyous celebration waking up the frozen earth. Executing a spring bulb underplanting strategy is absolutely vital for making bare, ugly dirt patches look spectacular in early March before perennials wake up.
By burying hundreds of bulbs directly beneath your summer-blooming shrubs, the dying bulb leaves are perfectly hidden by the shrub’s fresh spring foliage. This lazy-genius trick looks astoundingly expensive, delivering layered, professional botanical garden waves using cheap bulk bulbs.
You can execute this spring explosion for $40–$80.
- Key Materials: Bulk Daffodil/Tulip bulbs, bulb auger drill attachment
- Vibe / Style: Joyous early awakening
- Difficulty: Requires fall planning/planting
- Budget Breakdown: Bulk bulbs: $50 | Auger bit: $15.
- Creator’s Tip: Save your back by using a steel bulb auger attached to a power drill; you can perfectly plant 100 bulbs in less than 20 minutes.
- Smart Sourcing: Bulk mixed spring-flowering bulb sacks and heavy-duty steel drill bulb augers.
53. Late-Season Aster Revival
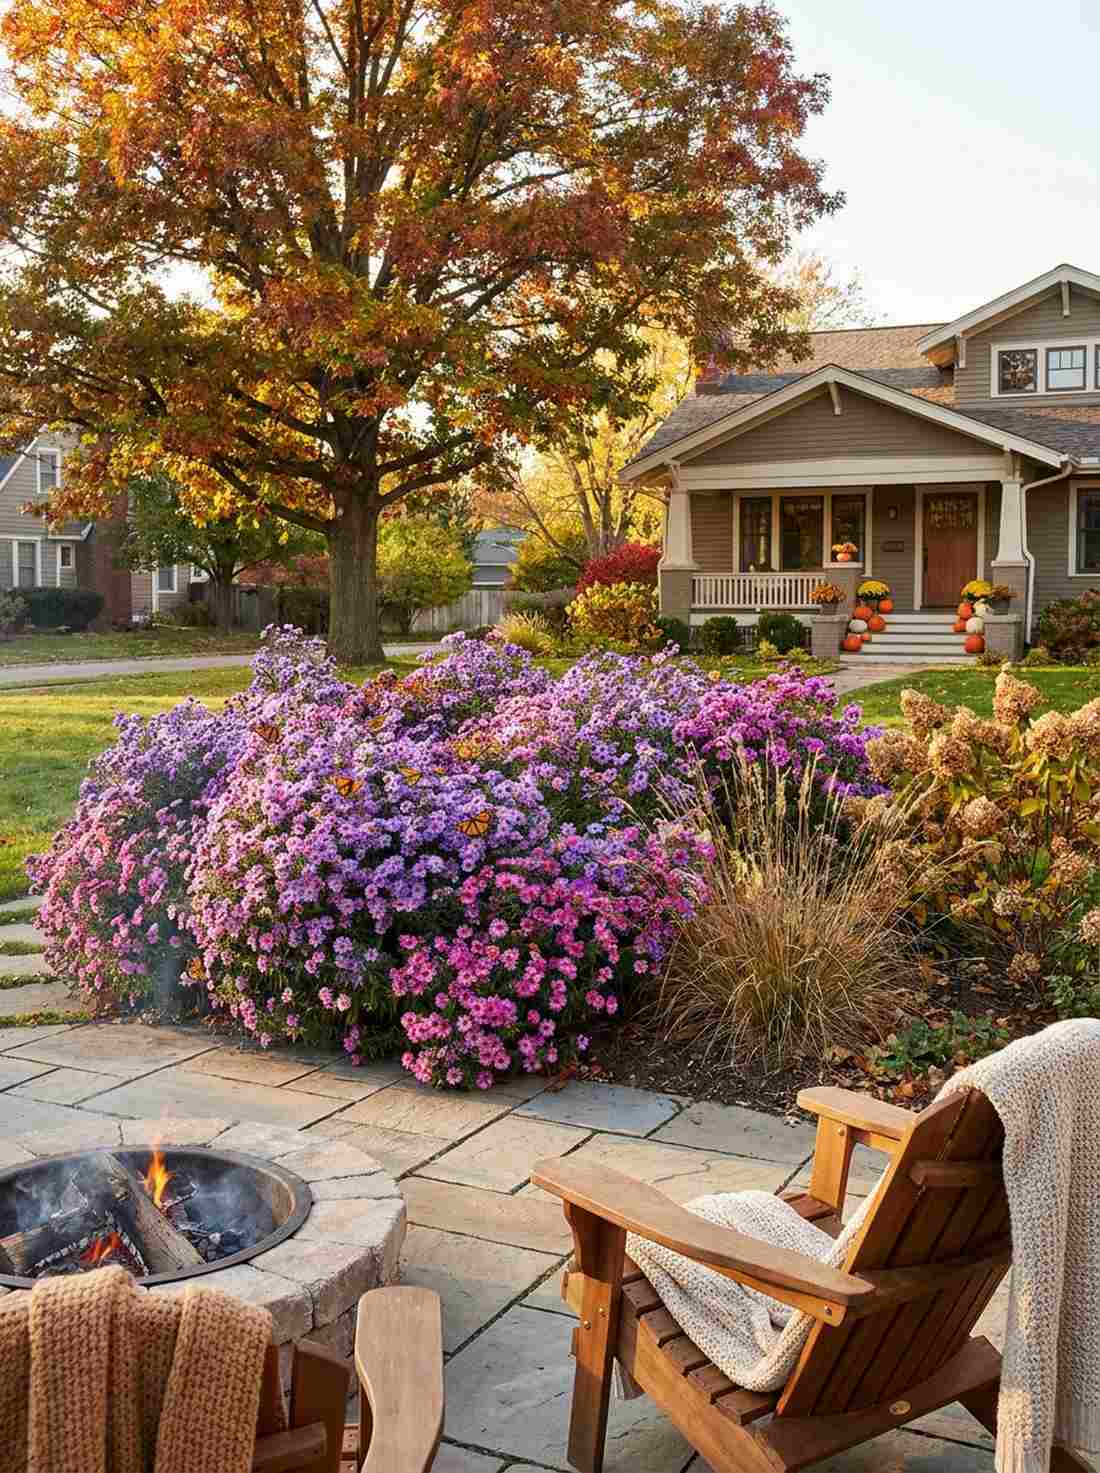
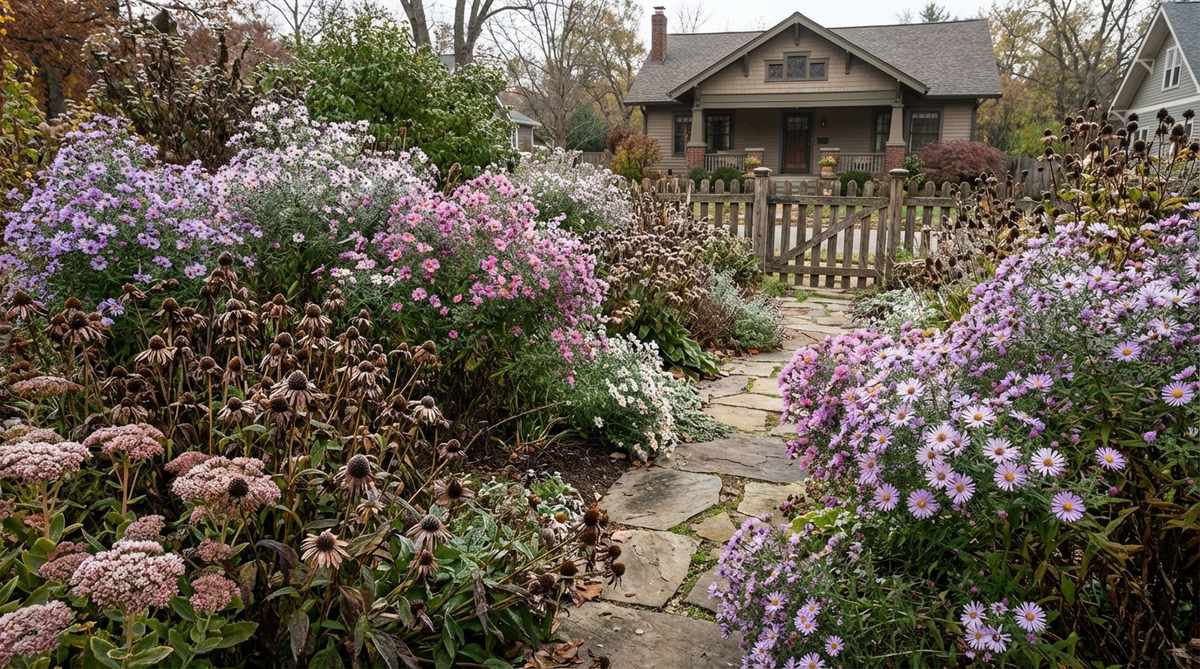
This late burst of purple feels like the garden taking one final, spectacular bow before winter sets in. Relying on a late-season aster flower revival is strictly the best use-case for gardens that look dead, brown, and depressing in late September.
When everything else is dying, these aggressive bloomers erupt into solid clouds of purple and pink, feeding desperate migrating butterflies. This gives a highly curated, full-season landscape design finish that keeps your yard looking premium well into autumn.
You can extend your garden’s life for $30–$60. Pin this to keep your garden alive in Fall!
- Key Materials: Native Aster starts, sharp pruning snips
- Vibe / Style: Spectacular autumn finale
- Difficulty: Easy
- Budget Breakdown: Aster starts: $40.
- Creator’s Tip: Chop the asters entirely in half on July 4th. This “Chelsea Chop” forces them to grow into dense, sturdy mounds that won’t flop over when they finally bloom in October.
- Smart Sourcing: Fall-blooming perennial starter packs and precision garden pruning snips.
54. Ornamental Seed Heads
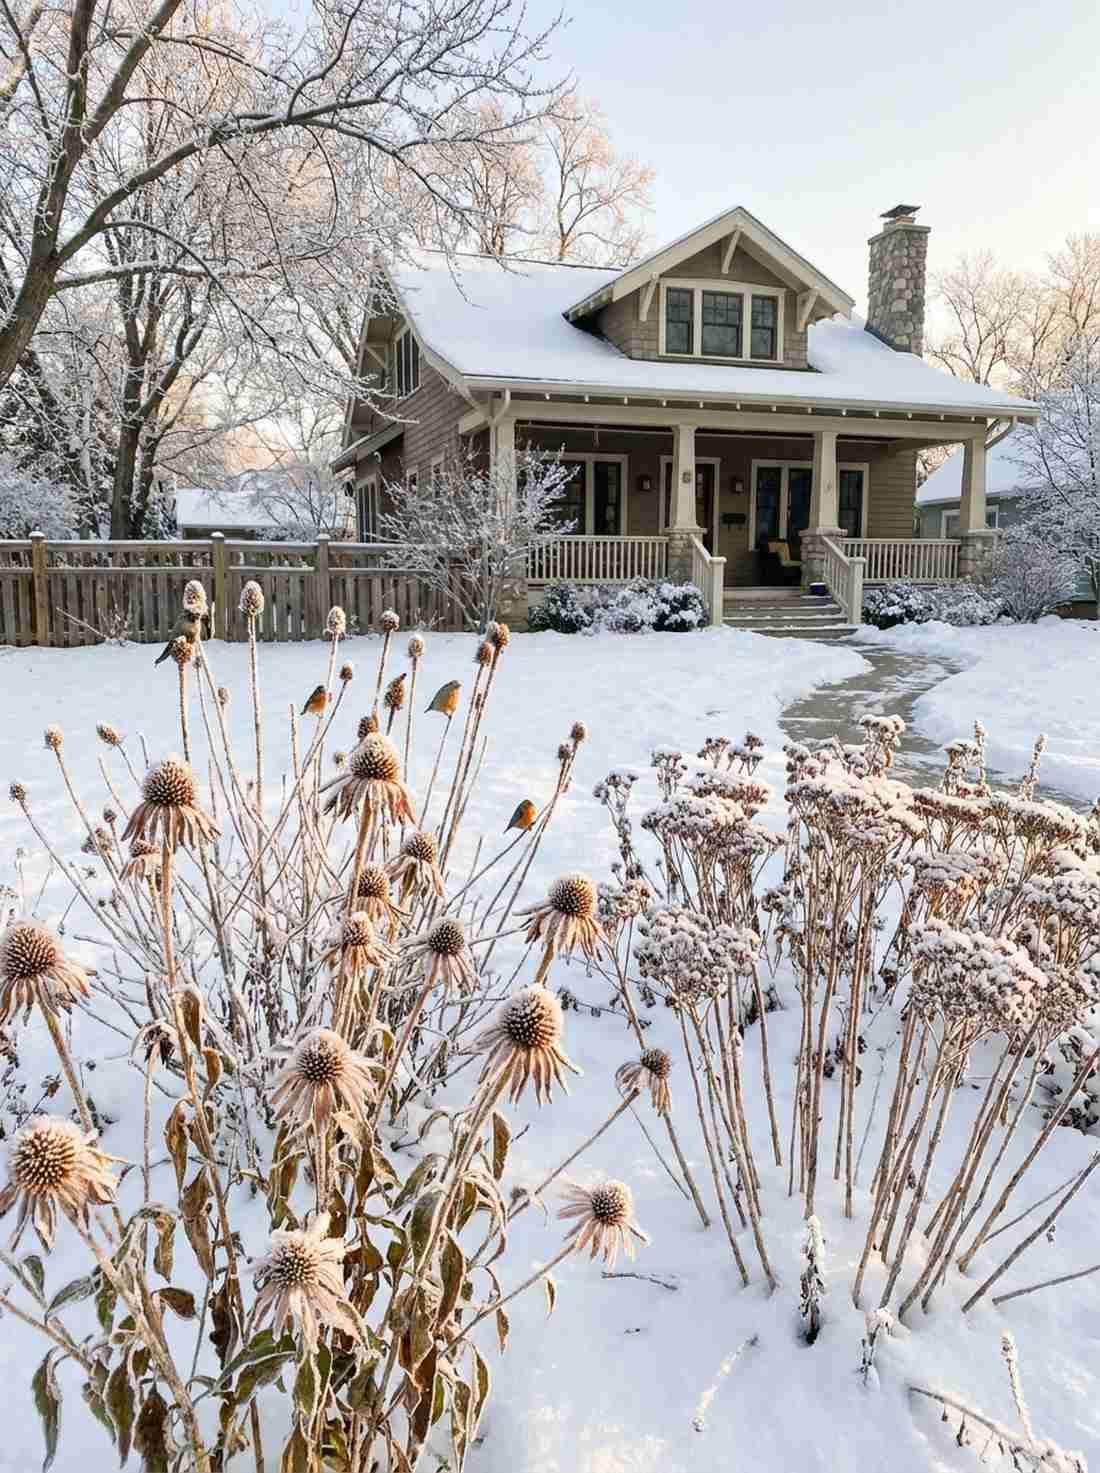
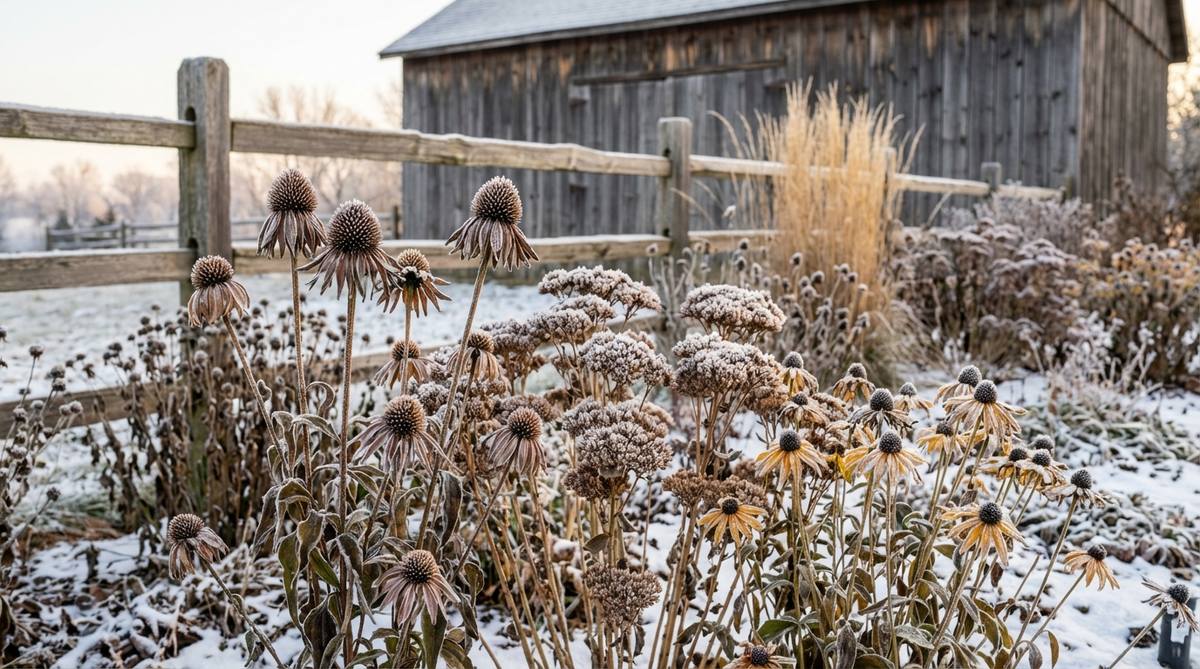
These frozen silhouettes feel like delicate, crystallized sculptures sparkling in the morning frost. Leaving your ornamental winter seed heads standing is a brilliant use-case for low-maintenance front yards where you want architectural interest in the dead of winter.
Instead of doing back-breaking fall cleanup, you deliberately leave the sturdy black cones of coneflowers and sedums to catch the snow. It completely breaks the rules of traditional landscaping, delivering a high-end naturalistic aesthetic while providing free food for winter birds.
This technique costs absolutely $0.
- Key Materials: Established Echinacea/Sedum, self-control to not cut them!
- Vibe / Style: Sculptural winter wonderland
- Difficulty: Zero effort required
- Budget Breakdown: Cost: $0.
- Creator’s Tip: Only leave the plants with thick, rigid stems (like Sedum Autumn Joy). Soft, floppy plants just turn to ugly mush under the snow and must be cut back.
- Smart Sourcing: Rigid-stemmed winter interest perennial packs and premium bird-attracting suet blocks.
The final few layouts are the ultimate foundational touches that pull the whole look together beautifully…
55. Evergreen Structure Plants
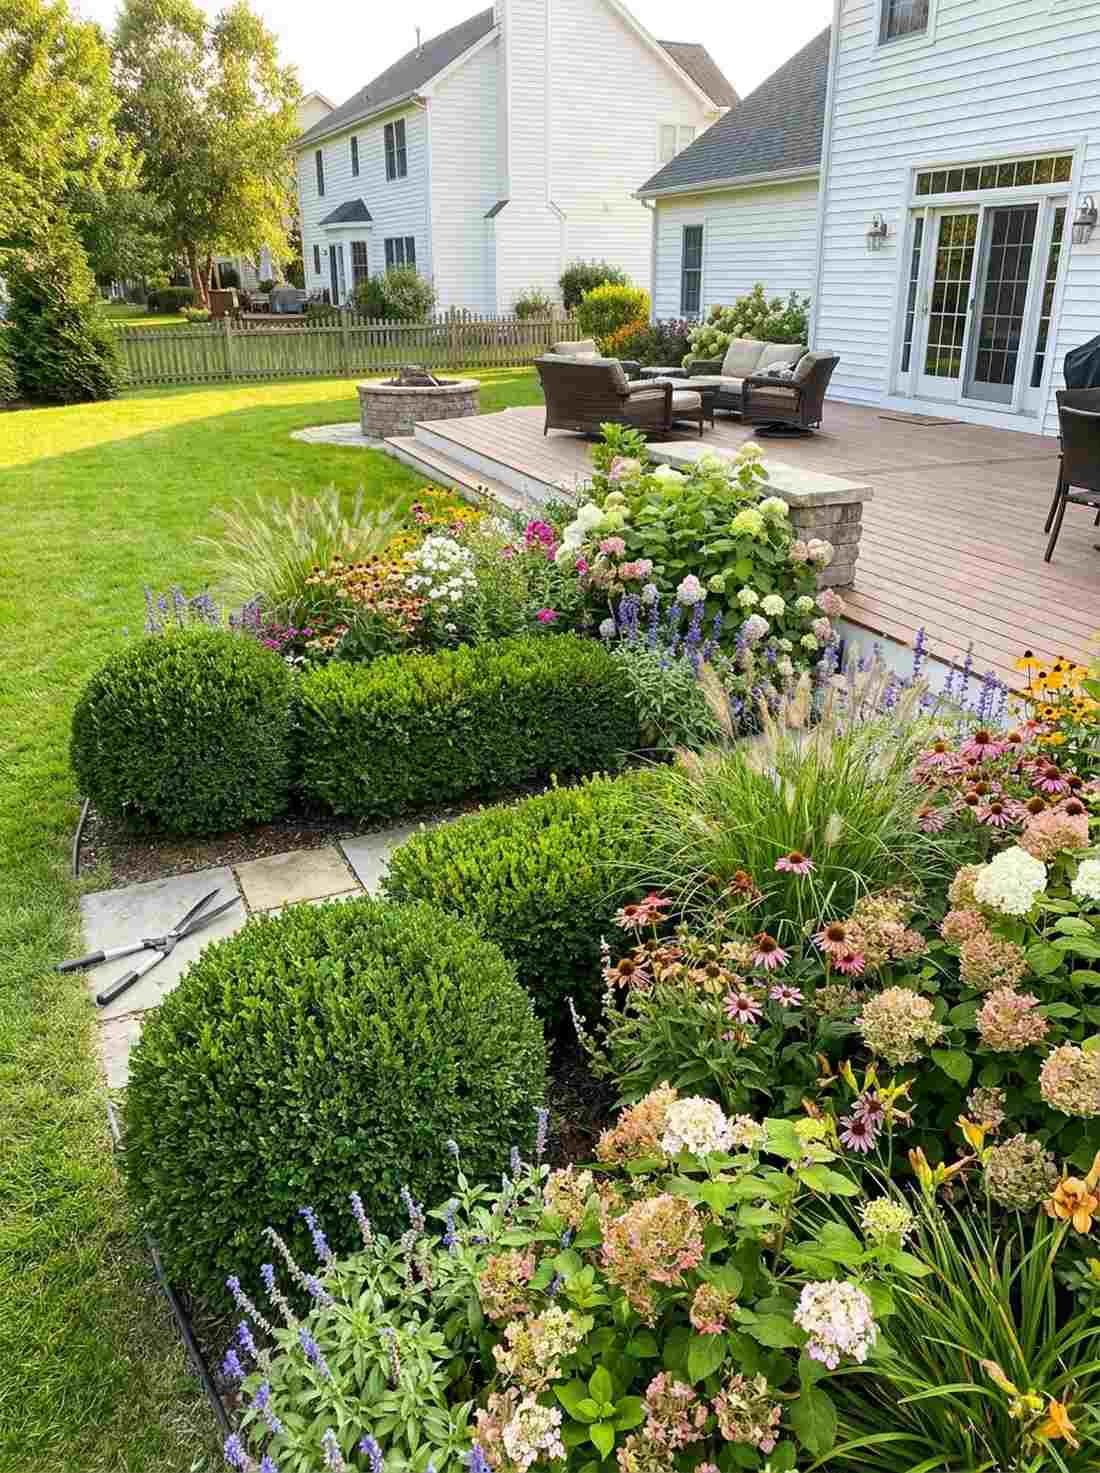
These deep green anchors feel like the solid, reliable bones holding the entire garden’s wildness together. Integrating formal evergreen structure shrubs is absolutely critical for grounding a chaotic, wildly overflowing summer border.
When the messy flowers die back, the neat green geometry of boxwoods or yews remains, keeping the yard from looking like an abandoned empty lot. This contrast gives a massively premium, designer-level finish using standard, affordable nursery shrubs.
You can add these vital green bones for $100–$200. Save this for your winter landscaping board!
- Key Materials: Boxwood/Yew shrubs, shaping shears
- Vibe / Style: Grounded formal geometry
- Difficulty: Requires semi-annual shearing
- Budget Breakdown: Evergreen shrubs: $140 | Shears: $30.
- Creator’s Tip: Always shear evergreens so the base is slightly wider than the top. If the top is wider, it blocks the sun, and the bottom branches will completely die off.
- Smart Sourcing: Cold-hardy evergreen foundation shrub kits and long-bladed professional hedge shears.
56. Winter Bark Interest
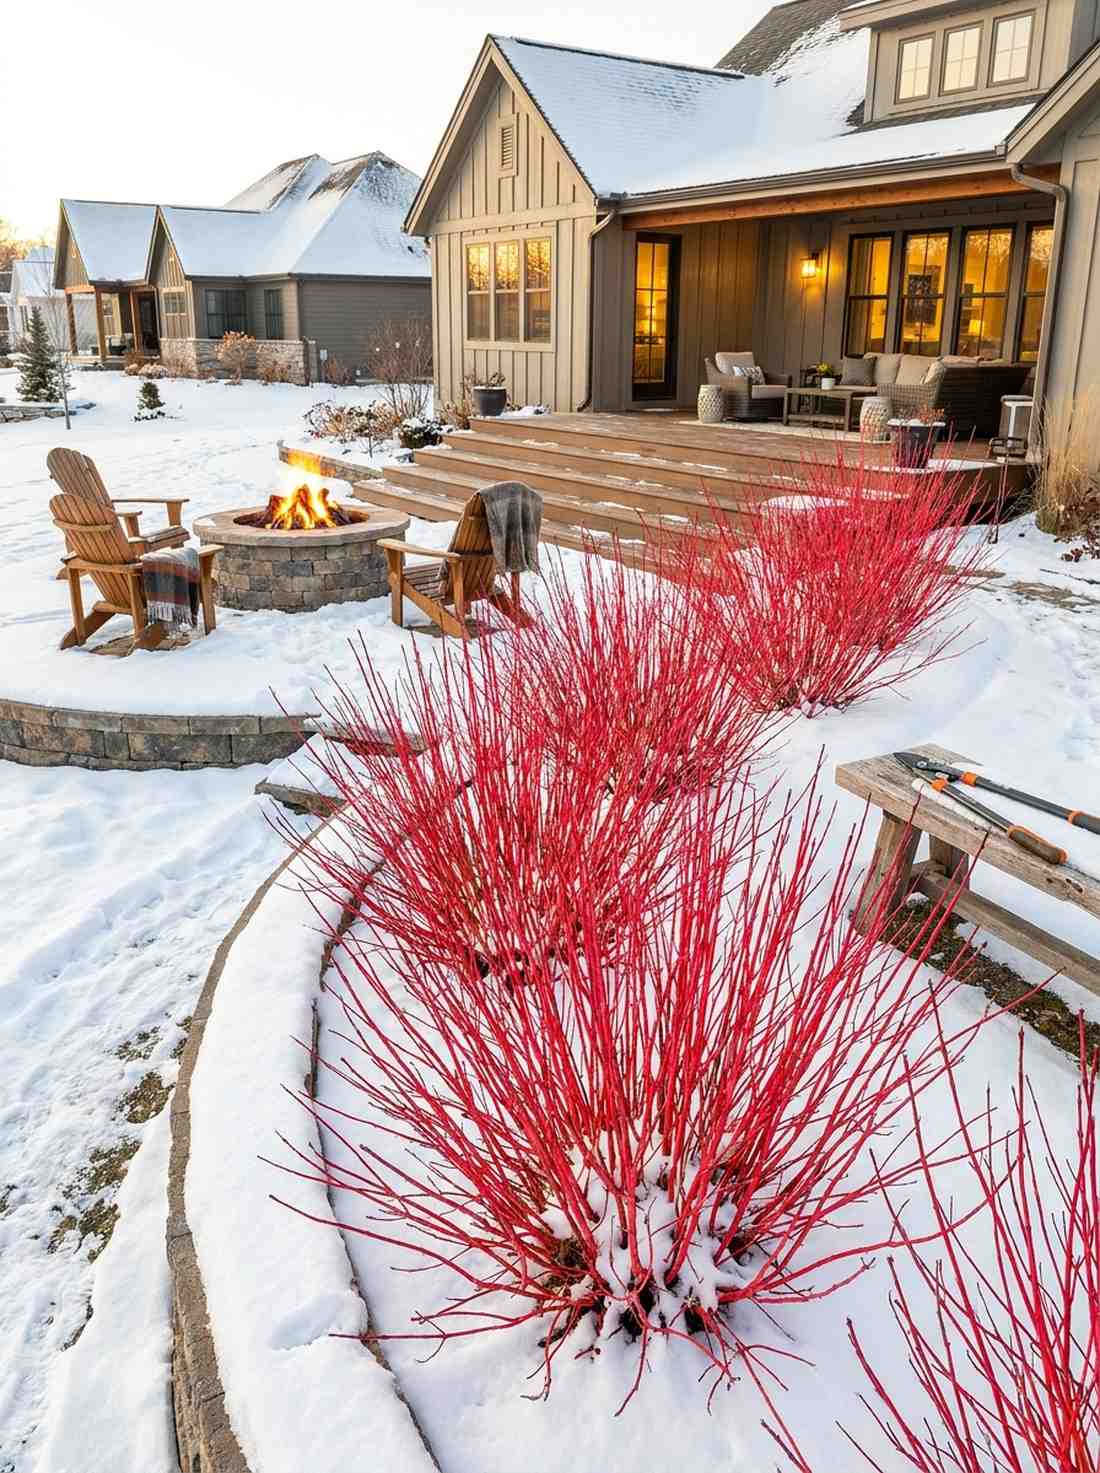
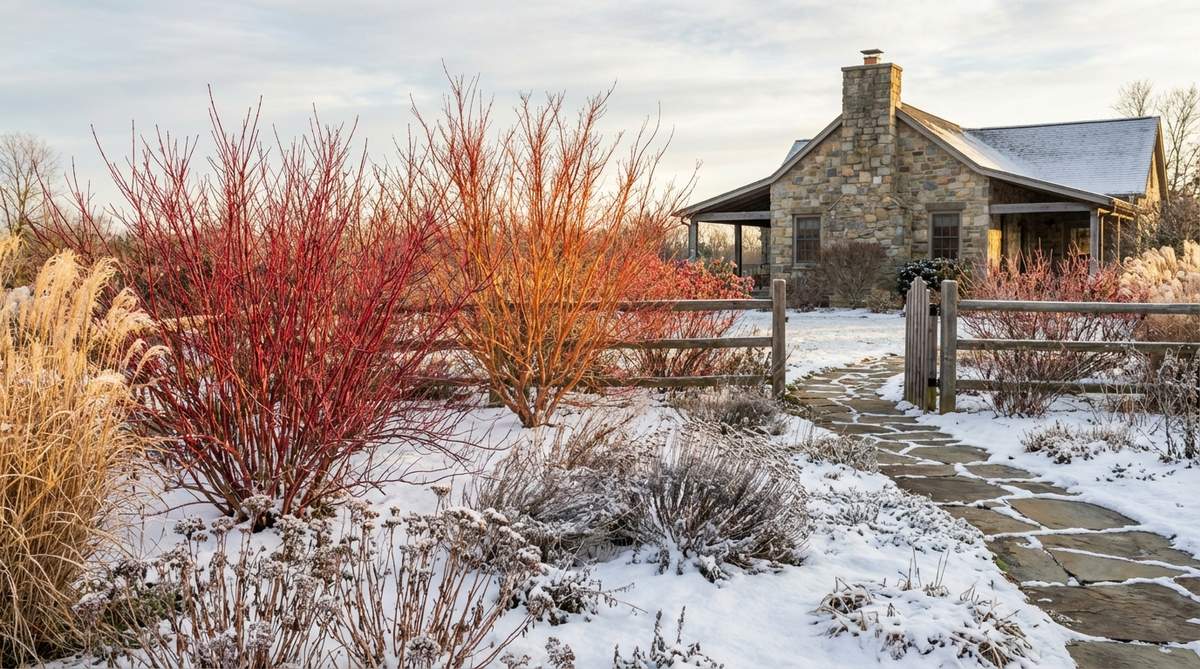
These blazing red stems feel like a roaring fire piercing through a bleak, white, snowy landscape. Planting a red-twig dogwood for winter bark interest is the ultimate use-case for a yard that looks deeply depressing from January through March.
When they drop their boring green leaves in fall, their neon-red bark is aggressively exposed, violently contrasting against the snow. It delivers a highly sophisticated, professional botanical garden aesthetic using incredibly cheap, fast-growing bare root shrubs.
You can light up your winter yard for just $30–$60.
- Key Materials: Red-Twig Dogwood shrubs, loppers
- Vibe / Style: Blazing winter contrast
- Difficulty: Easy planting
- Budget Breakdown: Bare root shrubs: $45.
- Creator’s Tip: Only the newest branches turn bright red. Every spring, you must mercilessly chop out the oldest, thickest branches right to the ground to force new neon-red growth.
- Smart Sourcing: Fast-growing bare root shrub bundles and heavy-duty bypass lopper tools.
Bringing Your Cottage Garden Vision to Life
These exactly 56 layouts prove that successful garden design cottage styling is about seamlessly blending raw, untamed floral beauty with highly intentional, money-saving structural planning. The absolute secret to that “looks expensive but isn’t” aesthetic lies in smart sourcing—investing heavily in premium commercial-grade edging, bulk perennial seed kits, and UV-resistant hardscaping, while letting affordable, fast-growing native plants fill in the massive gaps. By implementing these 56 specific arrangements, you ensure your space doesn’t just look spectacular in the peak of summer, but maintains a striking, high-end architectural presence straight through the dead of winter.
Frequently Asked Questions
What distinguishes cottage garden style from formal garden design?
While formal designs rely on rigid geometry and hyper-expensive hardscaping, the absolute core of cottage gardening is organized chaos framed by subtle boundaries. You achieve this by utilizing premium garden arbors and heavy-duty landscape edging to set the “bones”, and then letting affordable bulk wildflower seed packets organically spill over those lines. It’s the ultimate hack for getting a high-CPC landscape look without the massive maintenance budget of a formal estate.
How wide should rustic pathways be in cottage garden layouts?
For primary circulation connecting your main areas, aim for 36 to 48 inches wide to easily accommodate a wheelbarrow or lawnmower without crushing your border plants. For deeper, intimate spaces, narrow the paths down to 24 inches. To make these paths look expensive and ensure they actually last, always lay down commercial-grade weed barrier fabric rolls underneath premium crushed limestone or heavy gravel.
Which wildflowers naturalize most reliably in cottage gardens?
Black-eyed Susans, purple coneflowers, yarrow, and poppies are bulletproof options that will aggressively self-seed and expand your garden for free every year. To ensure the highest success rate and save massive amounts of money, skip individual potted plants and buy bulk regional wildflower seed bags or dormant bare-root perennial starter kits. They adapt to varying soil conditions quickly and require almost zero maintenance once established.
How long before a new cottage garden develops mature character?
If you start with bare roots and seeds, it generally takes three full growing seasons for the garden to reach that lush, overflowing Pinterest aesthetic. However, you can instantly cheat this timeline and mask the ugly “new dirt” look by heavily scattering fast-growing annual cottage garden starter kits like sweet alyssum, cosmos, and zinnias to fill the gaps while your expensive perennials establish their deep root systems beneath the surface.
Can cottage garden design work in small urban spaces?
Absolutely, and it often looks even better in tight quarters! The trick to small urban spaces is aggressively pushing the garden upward using rust-proof wall trellis grids and tall garden obelisks. By pulling the vibrant colors up to eye level and utilizing compact, premium shade-tolerant perennial bundles in your containers, you can transform a tiny 10×10 concrete patio into a wildly lush, immersive botanical sanctuary.