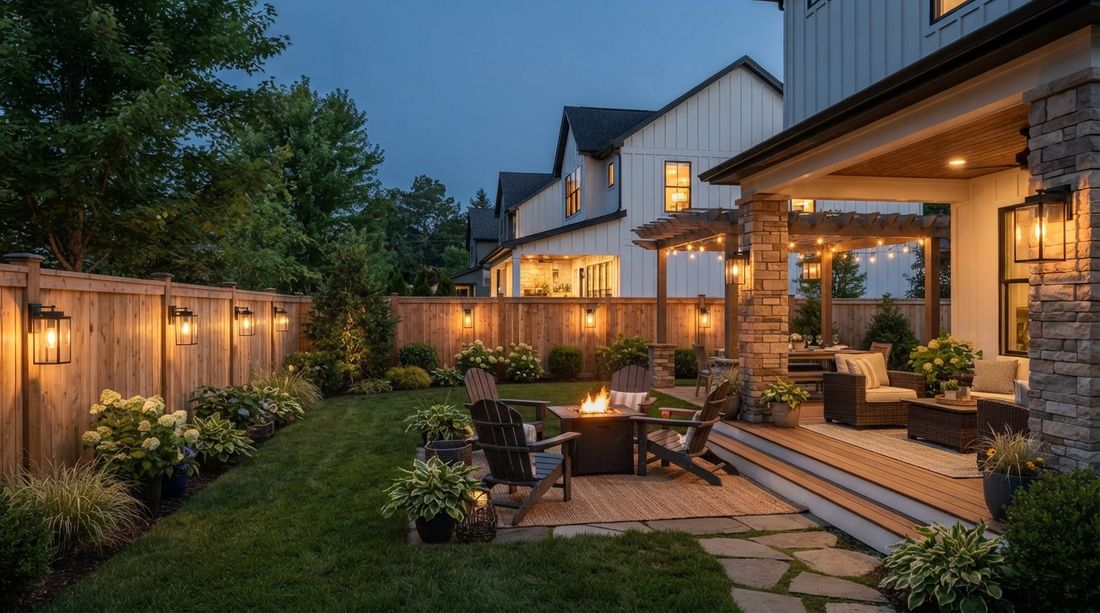
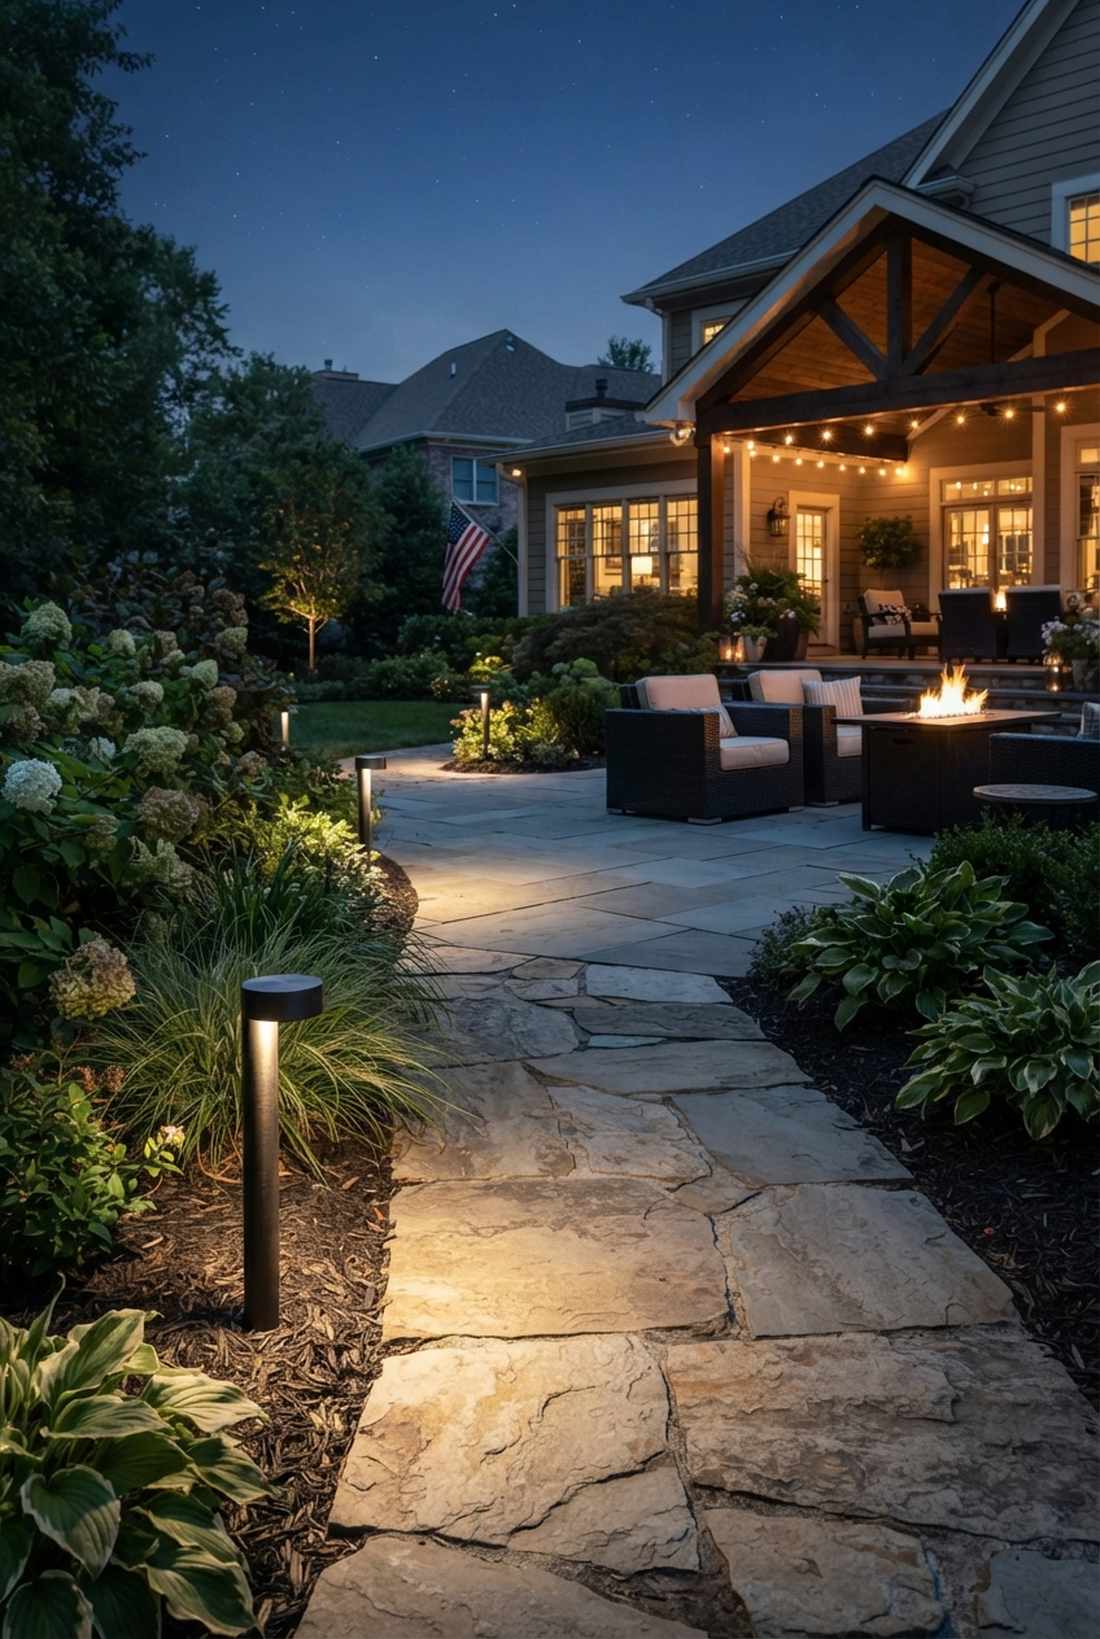
Upgrading your exterior instantly requires precise garden lights wall placement. Smart homeowners combine budget-friendly fixtures with architectural spacing for designer-level ambiance. Skip the overpriced contractors and steal these proven layout tricks.
Design Snapshot: Key Principles
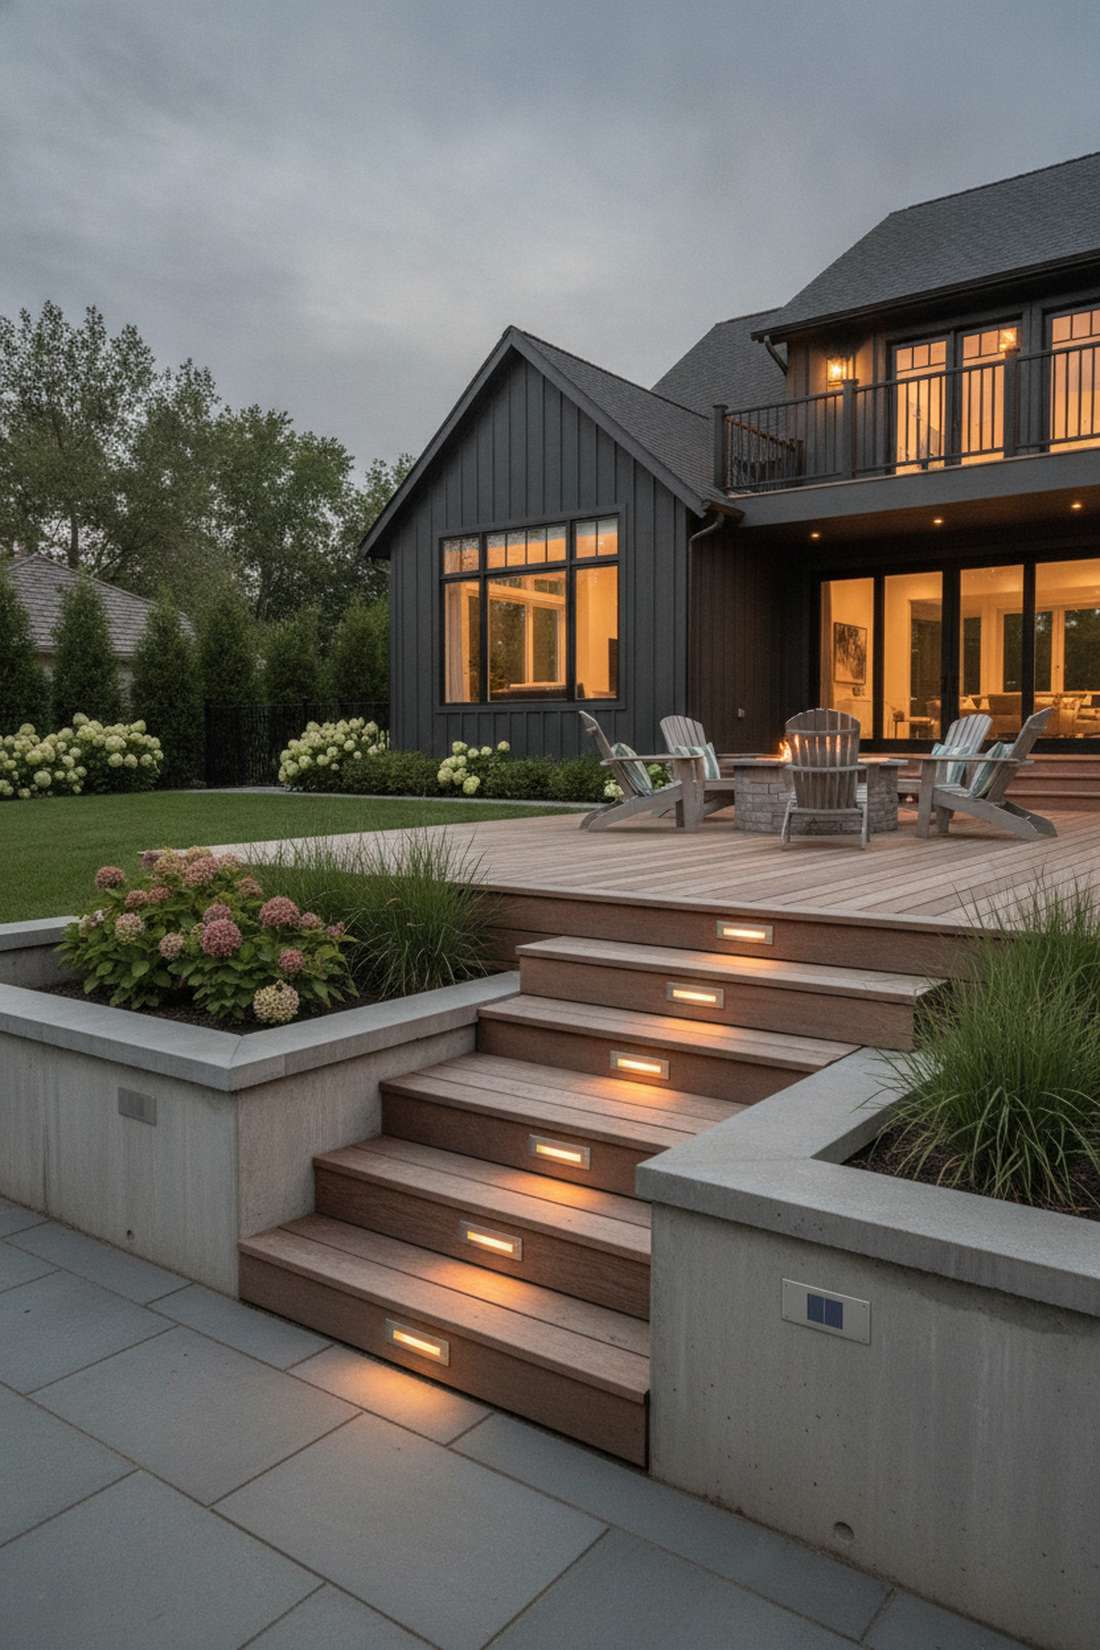
- Layered Illumination: Combine wall-mounted sconces with ground-level and overhead fixtures for balanced coverage
- Weather-Resistant Materials: Select IP65-rated fixtures with corrosion-resistant finishes for durability
- Appropriate Wattage: Use 40-60 watt equivalents for accent lighting, 75-100 watt for security zones
- Consistent Spacing: Position wall sconces 8-10 feet apart for uniform light distribution along pathways
Traditional Wall Sconces for Classic Gardens
Traditional lantern-style sconces provide timeless elegance that complements colonial, farmhouse, and cottage garden designs. These fixtures typically feature glass panels, scrolled metalwork, and warm finishes that create inviting entryways.
1. Coach Lantern with Brass Finish
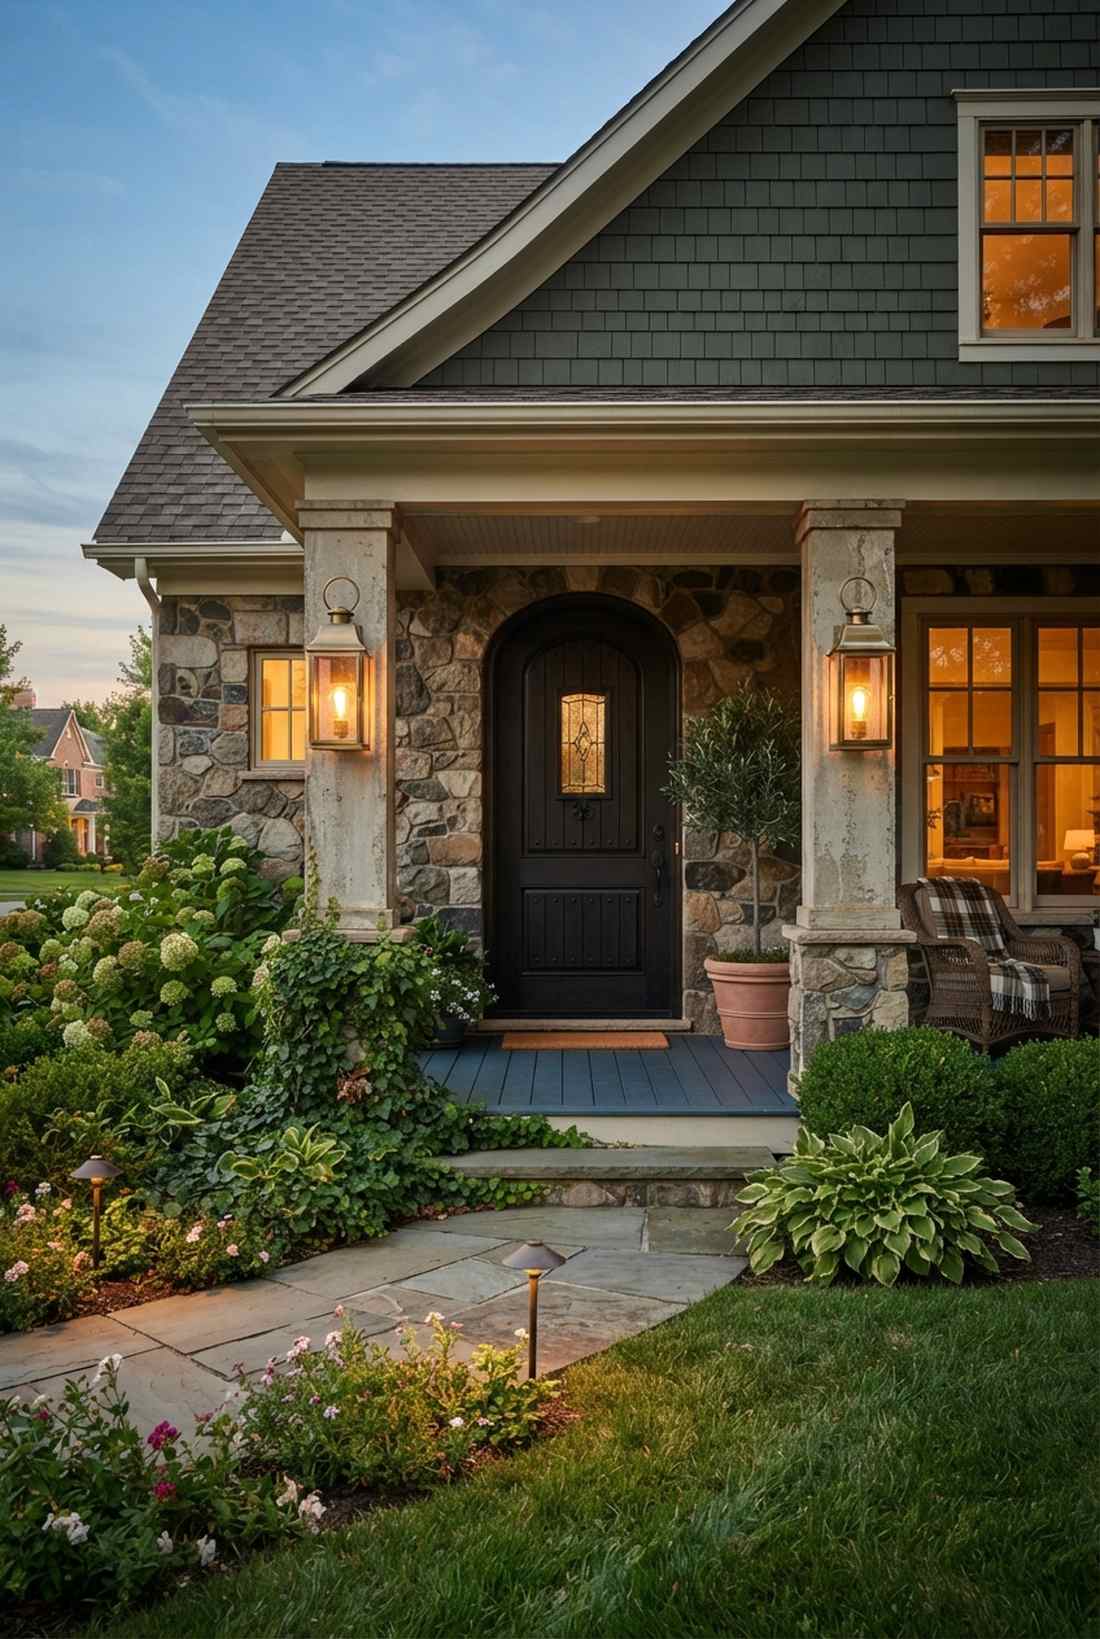
This layout feels like stepping into a historic European courtyard after dusk. Utilizing classic brass entry lighting works exceptionally well for framing a grand front doorway or formal patio entrance.
Most neighbors default to cheap plastic, but authentic metal instantly delivers a designer-level finish. Snagging UV-coated exterior sconce kits ensures the brass patinas naturally without corroding.
You can easily pull this off for around $45 to $60 per fixture. Save this to your exterior renovation board!
- Key Materials: Solid brass coach housing, Edison LED bulbs
- Vibe / Style: Historic European elegance
- Difficulty: Easy beginner setup
- Budget Breakdown: Fixture: $45 | Bulbs: $10.
- Creator’s Tip: Mount exactly 66 inches high to keep the glare out of eye level.
- Smart Sourcing: Grab pre-drilled mounting kits and shatterproof amber bulbs (bulk pack).
2. Carriage House Black Iron Sconce


There is a moody, sophisticated coastal vibe to this heavy-duty installation. The wrought iron exterior sconce concept is perfect for flanking a garage or lighting up a thick brick retaining wall.
Skip the flimsy alternatives because heavyweight powder-coated metals look far more expensive than they actually are. Integrating commercial-grade backyard lighting hardware sets your property apart from the standard subdivision look.
Expect to spend around $35 to $50 per unit. It is a fast upgrade that completely changes the curb appeal.
- Key Materials: Powder-coated black iron, glass panes
- Vibe / Style: Modern modern-farmhouse exterior
- Difficulty: Moderate hardwiring required
- Budget Breakdown: Iron Sconce: $40 | Hardware: $10.
- Creator’s Tip: Use stainless steel screws to prevent rust streaks on your siding.
- Smart Sourcing: Use corrosion-resistant iron sconce kits and a weatherproof sealant tube.
3. Colonial Post Lantern Wall Mount
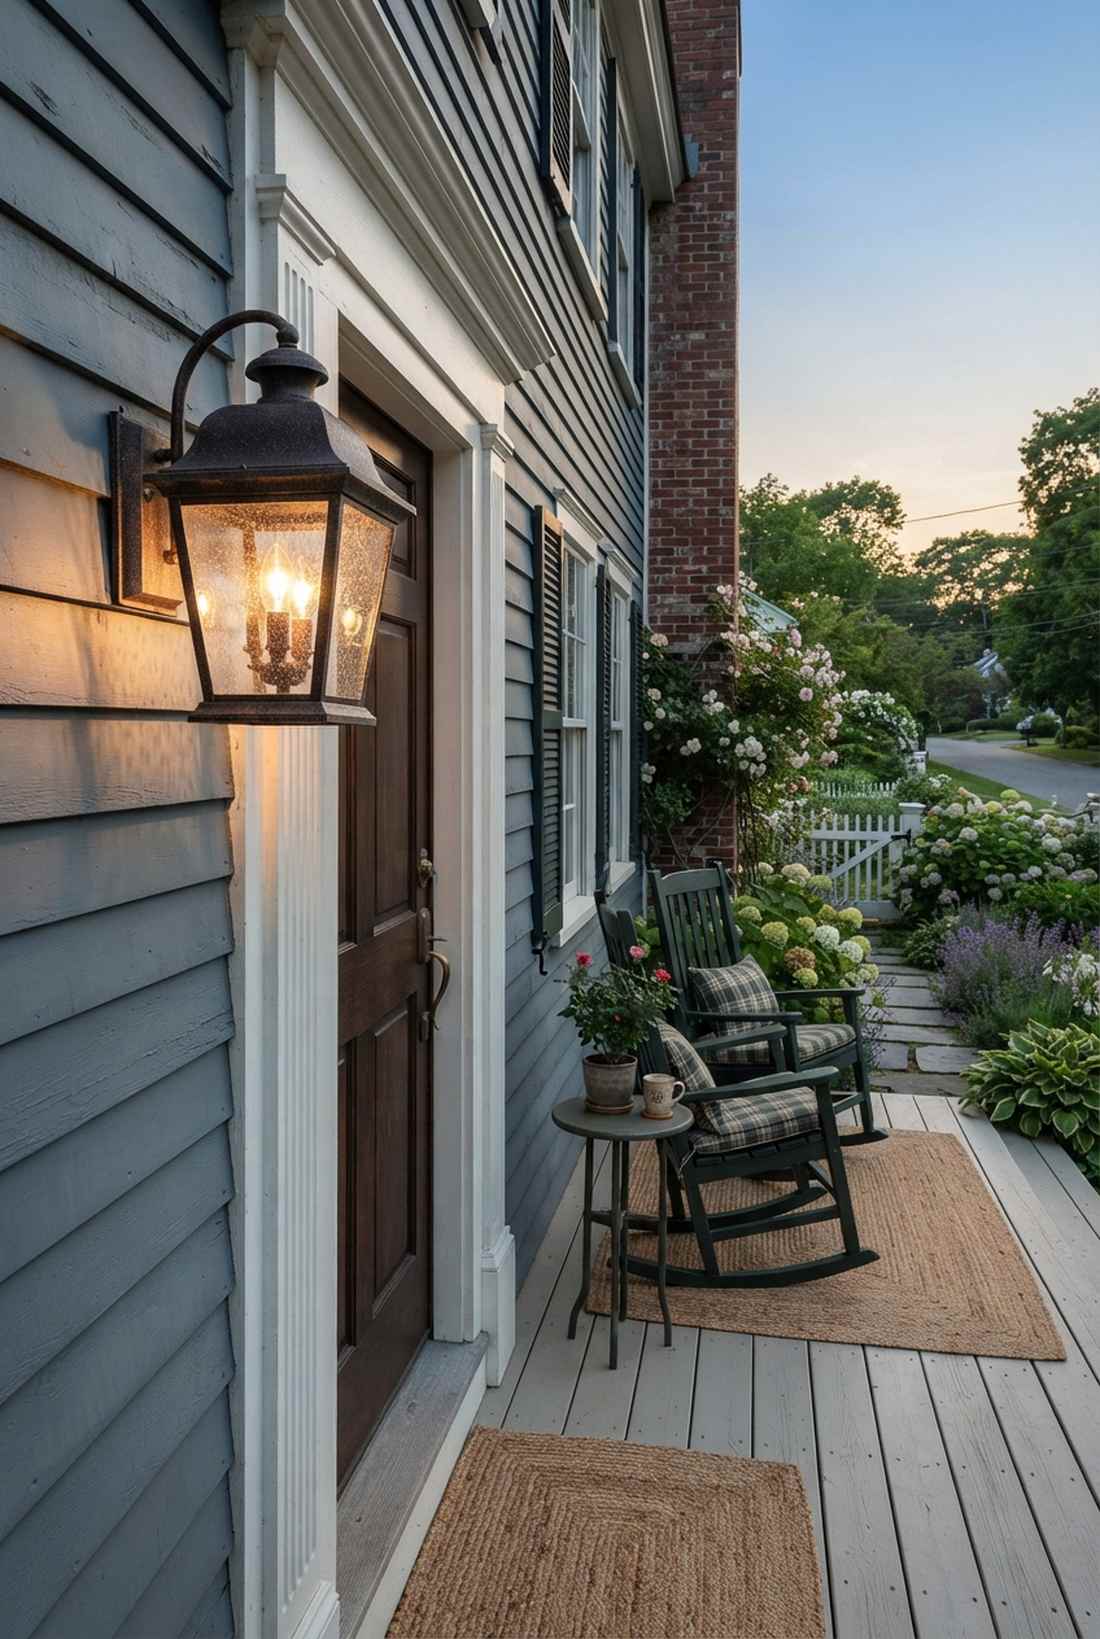
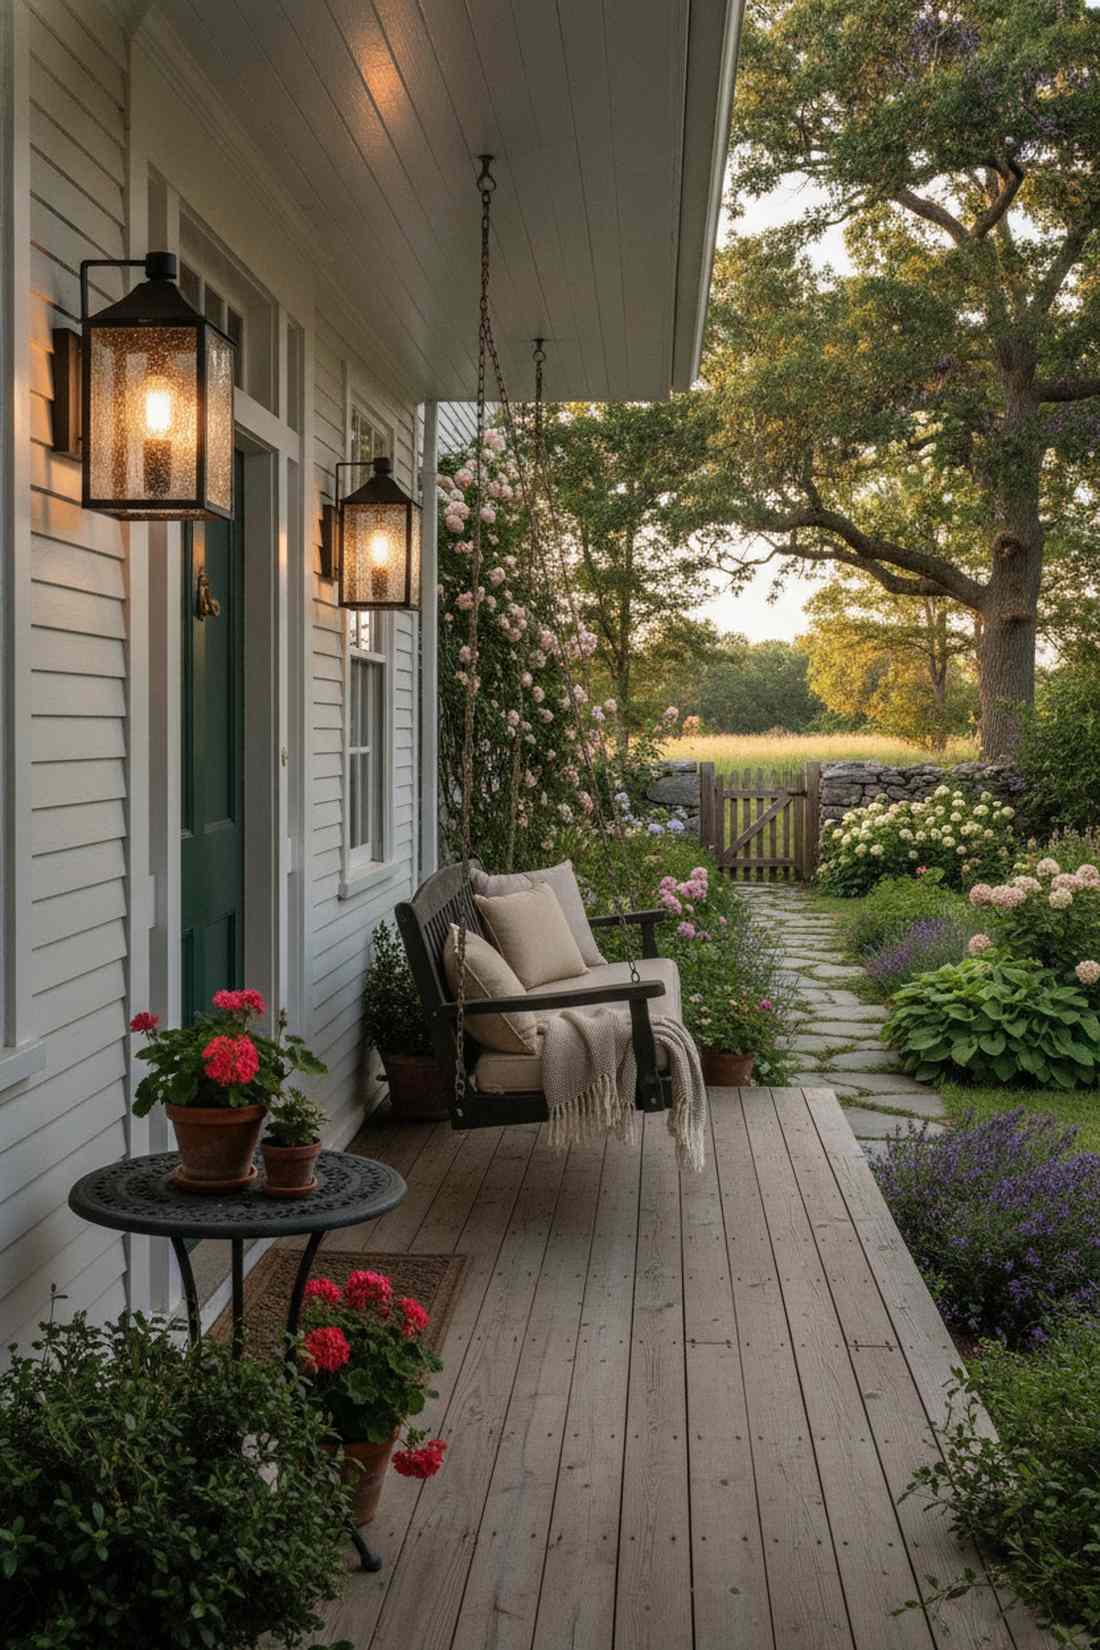
This aesthetic feels straight out of a cozy New England storybook. Incorporating colonial seeded glass lanterns works beautifully when illuminating wide wooden porches or historic home facades.
Achieving a high-end historic glow relies completely on the glass texture rather than the bulb brightness. Swapping standard panes for heavy outdoor lighting supplies transforms a basic porch into a premium gathering spot.
This charming layout costs roughly $30 to $45. Pin this if you love that timeless cottage garden aesthetic.
- Key Materials: Reproduction colonial housing, seeded glass
- Vibe / Style: Cozy historic charm
- Difficulty: Quick weekend project
- Budget Breakdown: Fixture: $30 | LED Candelabra: $8.
- Creator’s Tip: Seeded glass hides dust, meaning less maintenance throughout the seasons.
- Smart Sourcing: Look for shatterproof seeded glass panels (pre-cut) and outdoor candelabra LEDs (starter pack).
4. Mission-Style Amber Glass Sconce
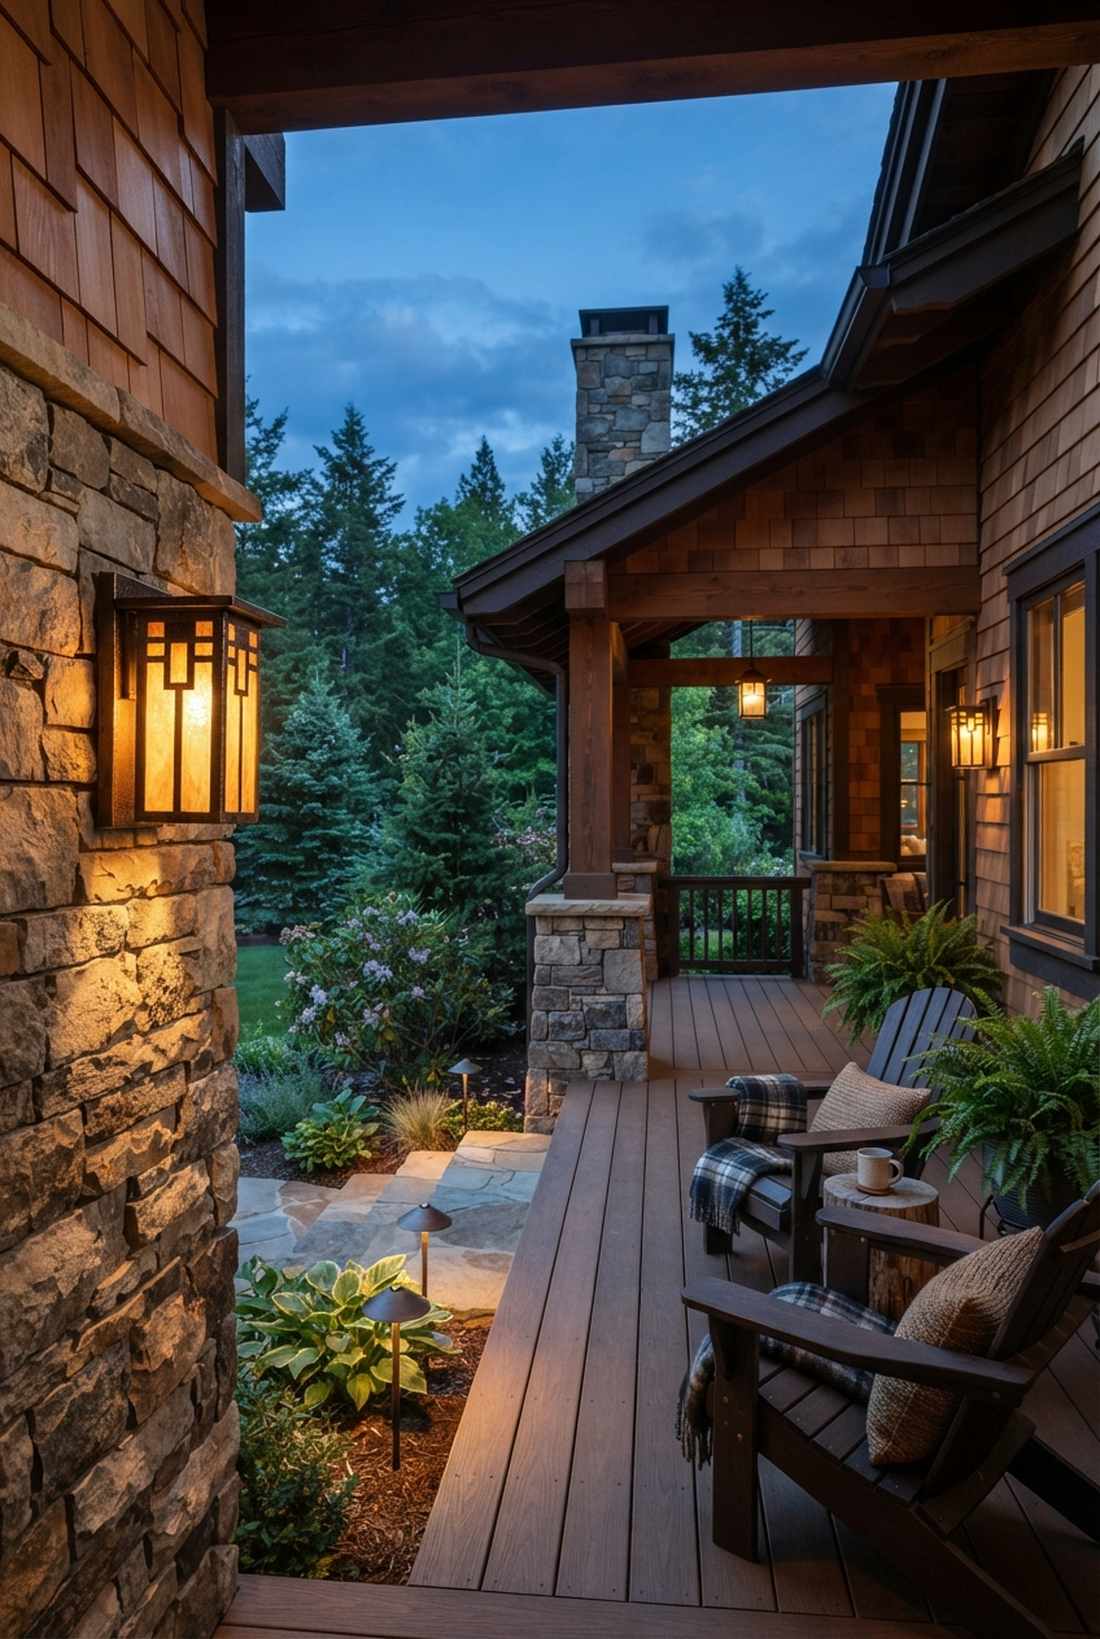
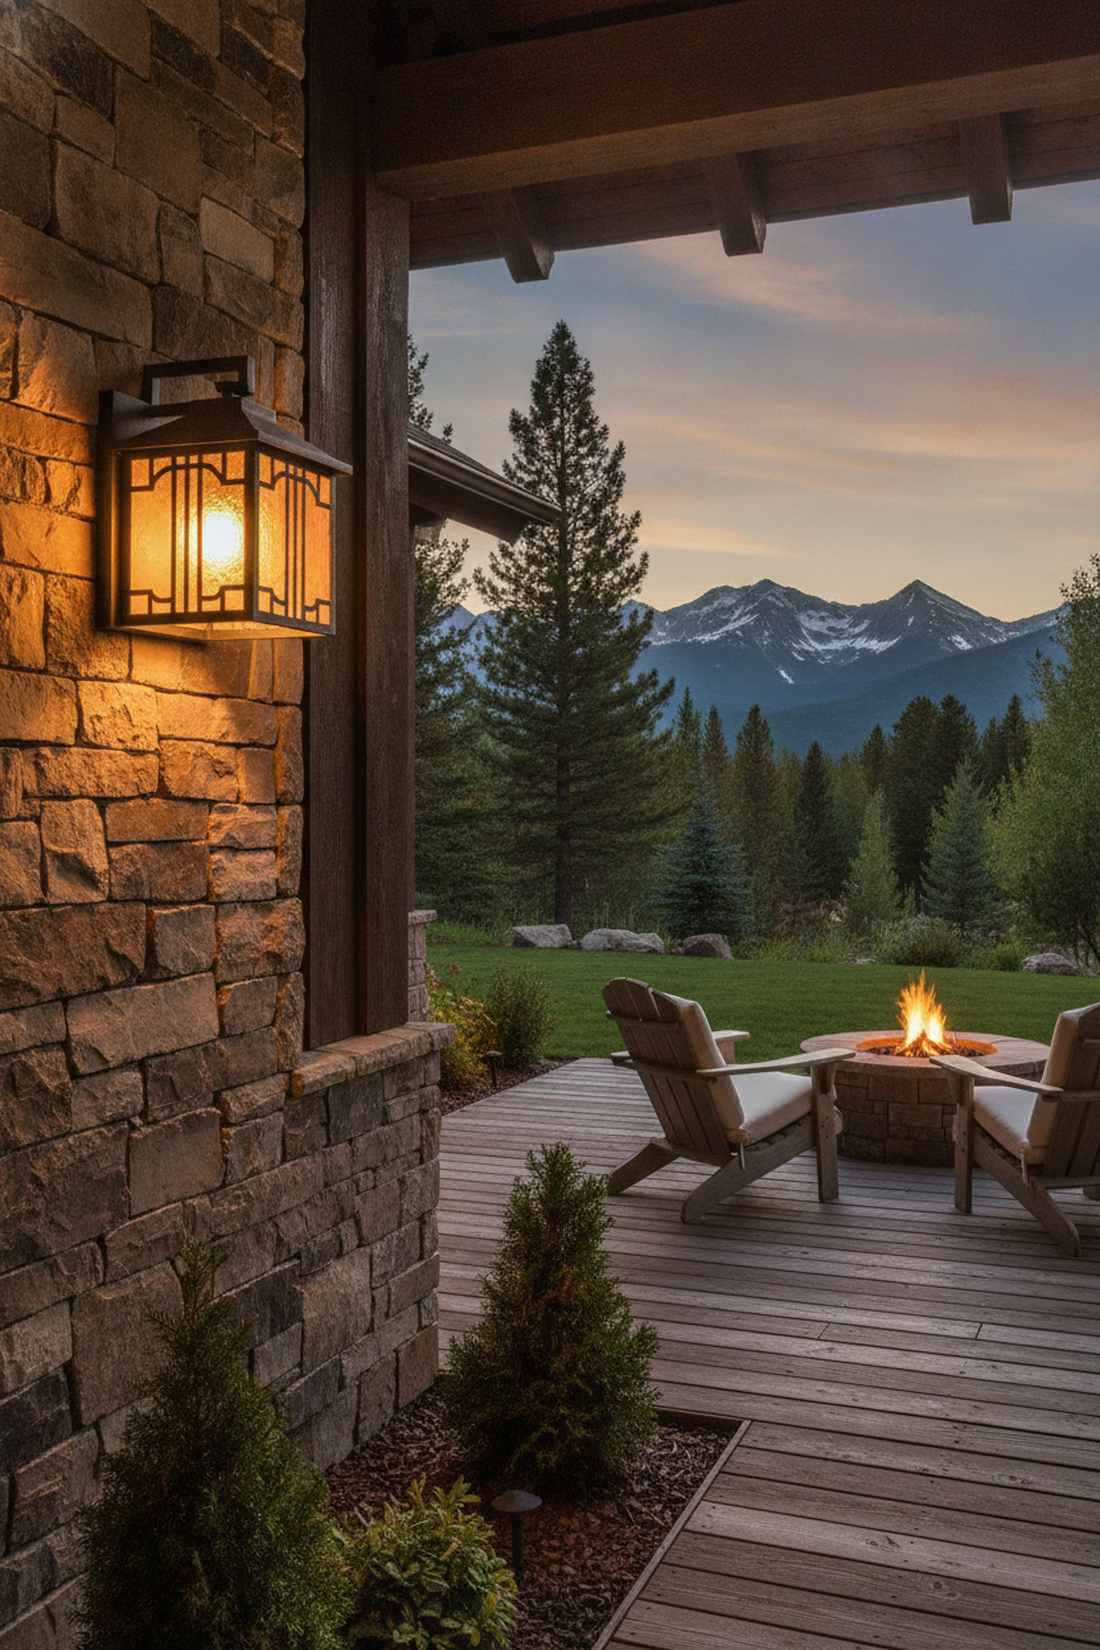
Warm, inviting, and wonderfully architectural, this casts shadows that feel like a luxury mountain lodge. A craftsman amber glass fixture is an absolute game-changer for wood-paneled siding and natural stone walls.
Builders often ignore warm-toned glass, but amber filters deliver a surprisingly premium look that cuts through harsh winter nights. Pairing this with high-end landscape illumination kits maximizes the organic feel of the architecture.
Set this up for a budget-friendly $40 to $55. Highly recommended for a quick weekend win.
- Key Materials: Bronze geometric frame, amber-tinted glass
- Vibe / Style: Rustic craftsman luxury
- Difficulty: Easy intermediate swap
- Budget Breakdown: Housing: $45 | Wiring kit: $5.
- Creator’s Tip: Orient horizontally to wash a wider area of your stone facade.
- Smart Sourcing: Invest in pre-wired artisan glass fixtures and weather-sealed junction boxes.
This next setup is ridiculously cheap but looks like a $200 custom architectural display…
5. French Country Scroll Arm Fixture
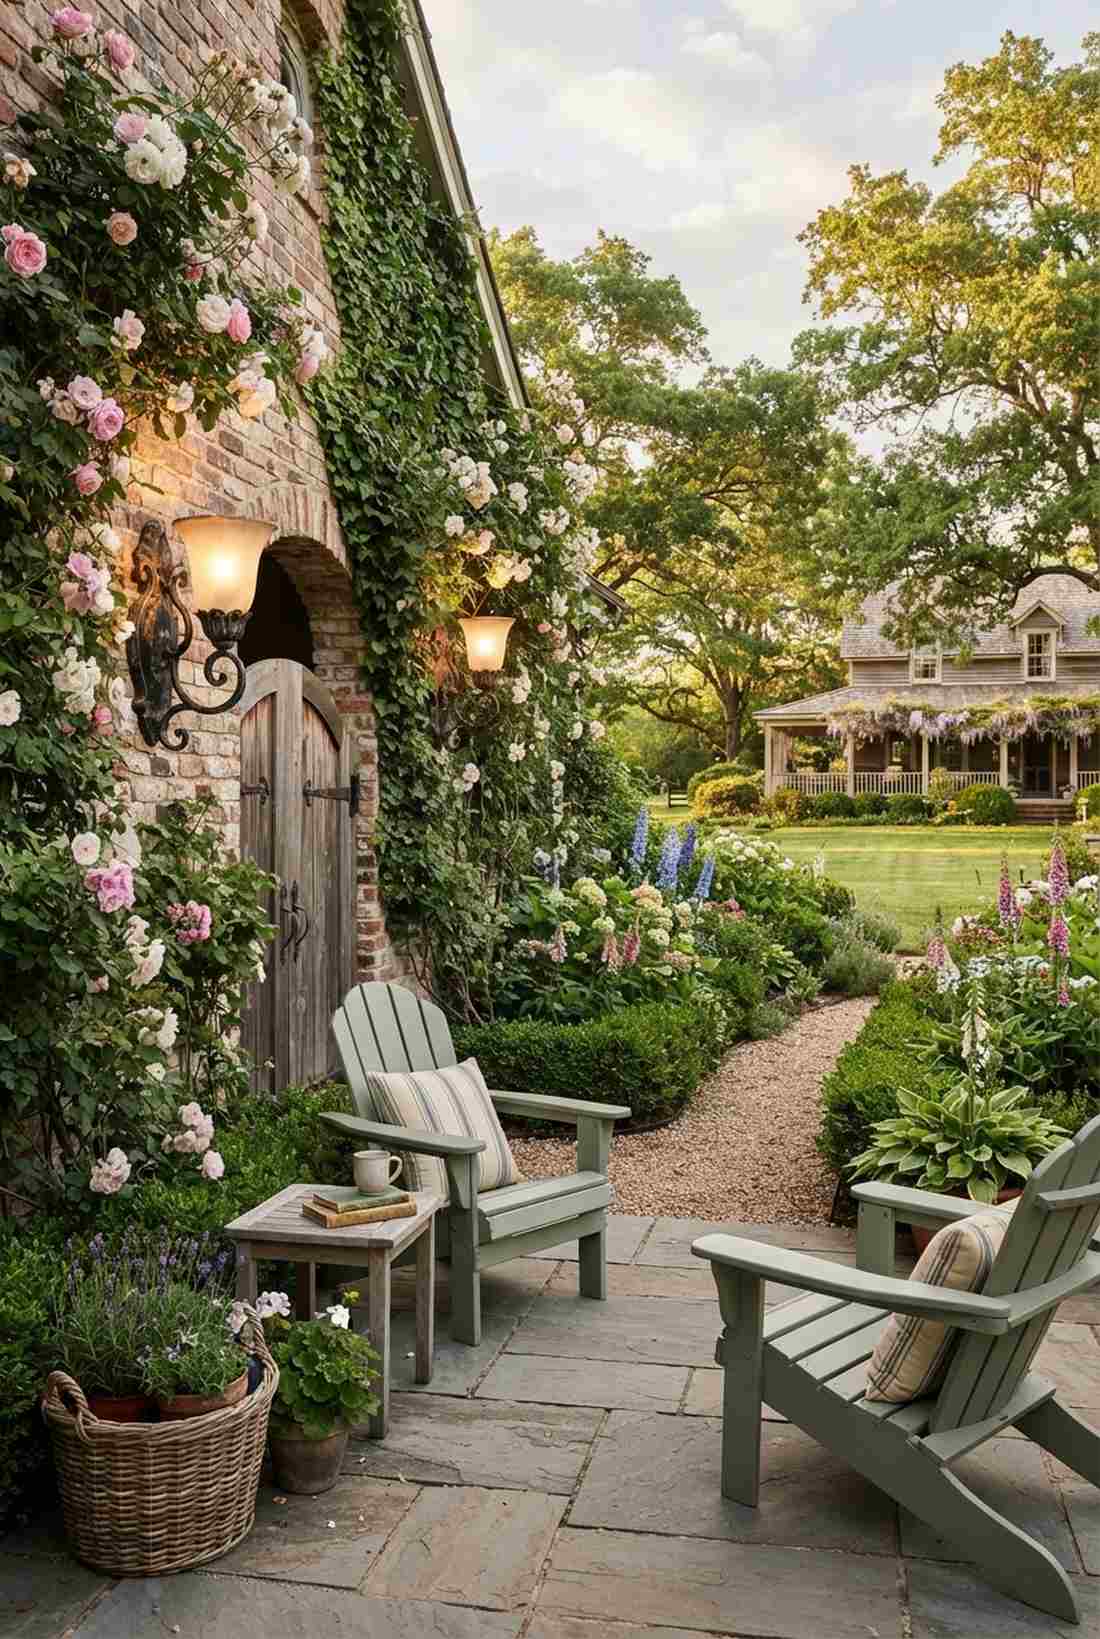
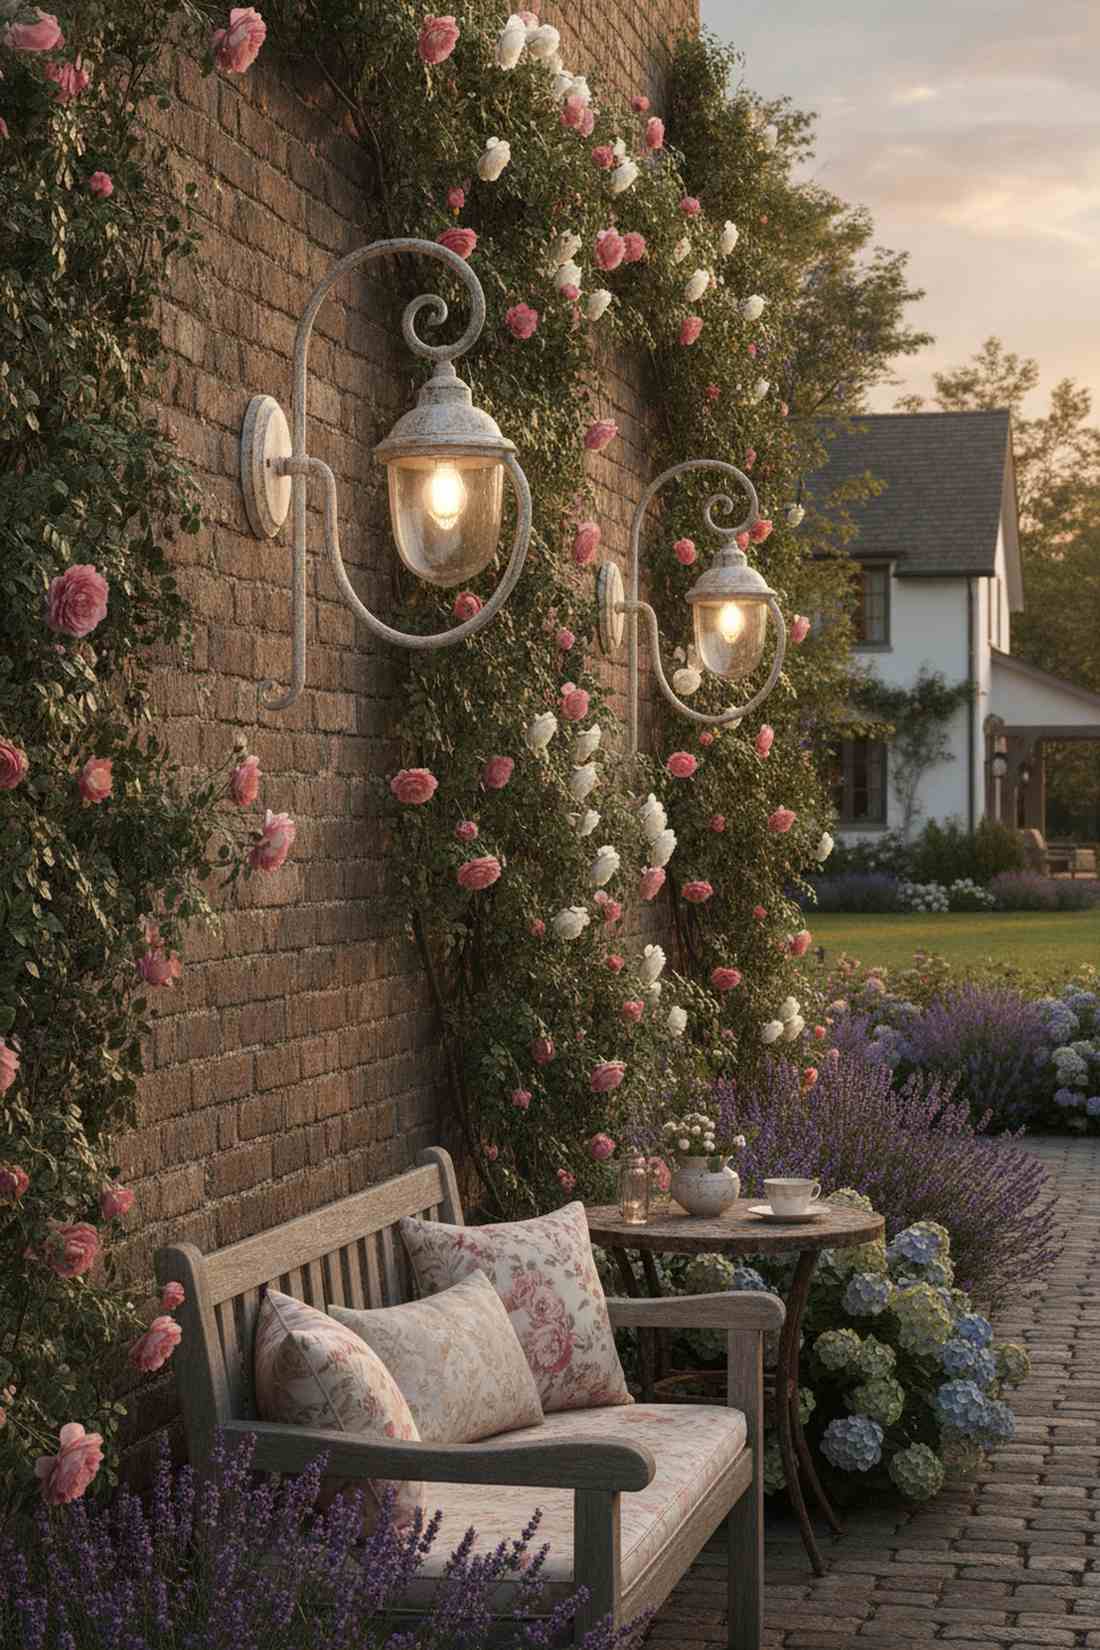
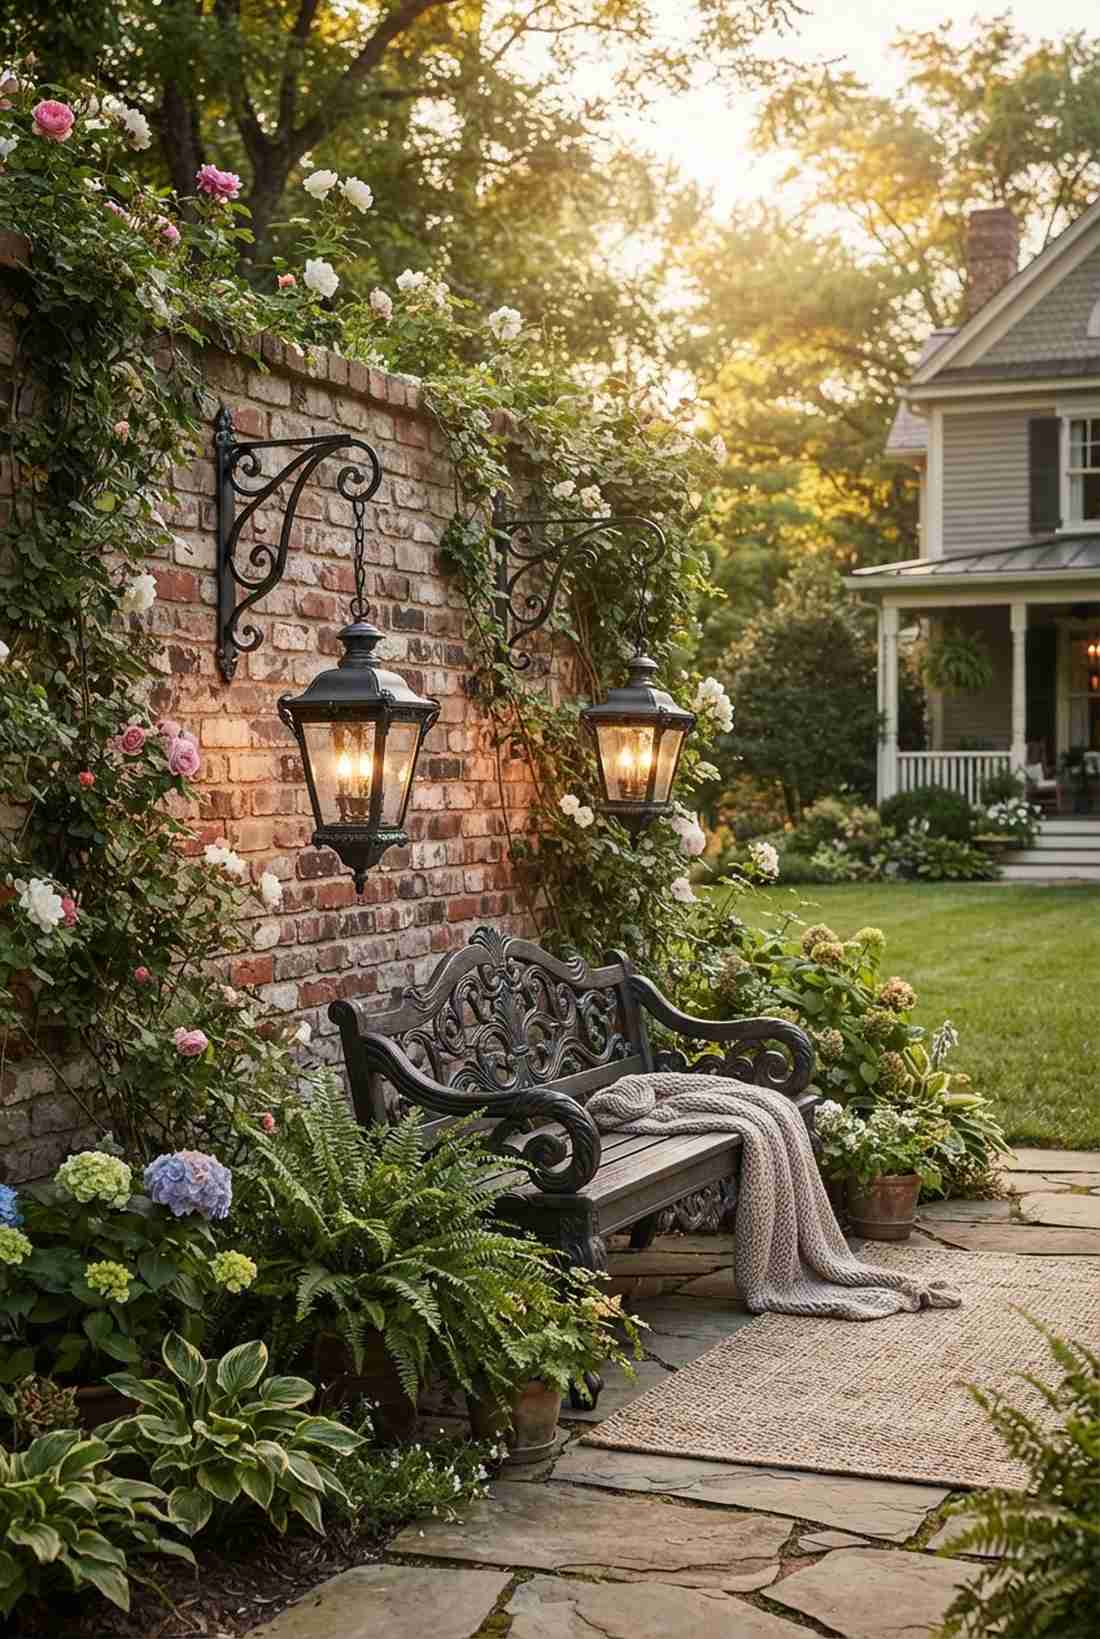
This romantic profile feels exactly like a hidden Parisian courtyard you accidentally discovered. Utilizing distressed scroll arm sconces shines brilliantly when placed near climbing roses or ivy-covered brick.
The extended arm isn’t just pretty; keeping the bulb heat away from the wall protects your expensive vines and siding. Incorporating specialized patio lighting components ensures the delicate metalwork survives heavy rain.
You can recreate this magical look for just $25 to $40. Save this for your romantic garden mood board!
- Key Materials: Distressed painted steel, curved mounting arm
- Vibe / Style: Romantic cottage garden
- Difficulty: Easy 20-minute install
- Budget Breakdown: Scroll Fixture: $30 | Anchors: $5.
- Creator’s Tip: Use an upward-facing orientation to wash the wall without blinding guests.
- Smart Sourcing: Buy weatherproof distressed metal hardware and heavy-duty masonry anchors (bulk pack).
Modern LED Wall Fixtures
Contemporary designs emphasize clean lines, integrated LED technology, and architectural minimalism. These fixtures deliver high-efficiency lighting with sleek profiles that suit modern construction.
6. Cube Bidirectional LED Wall Light
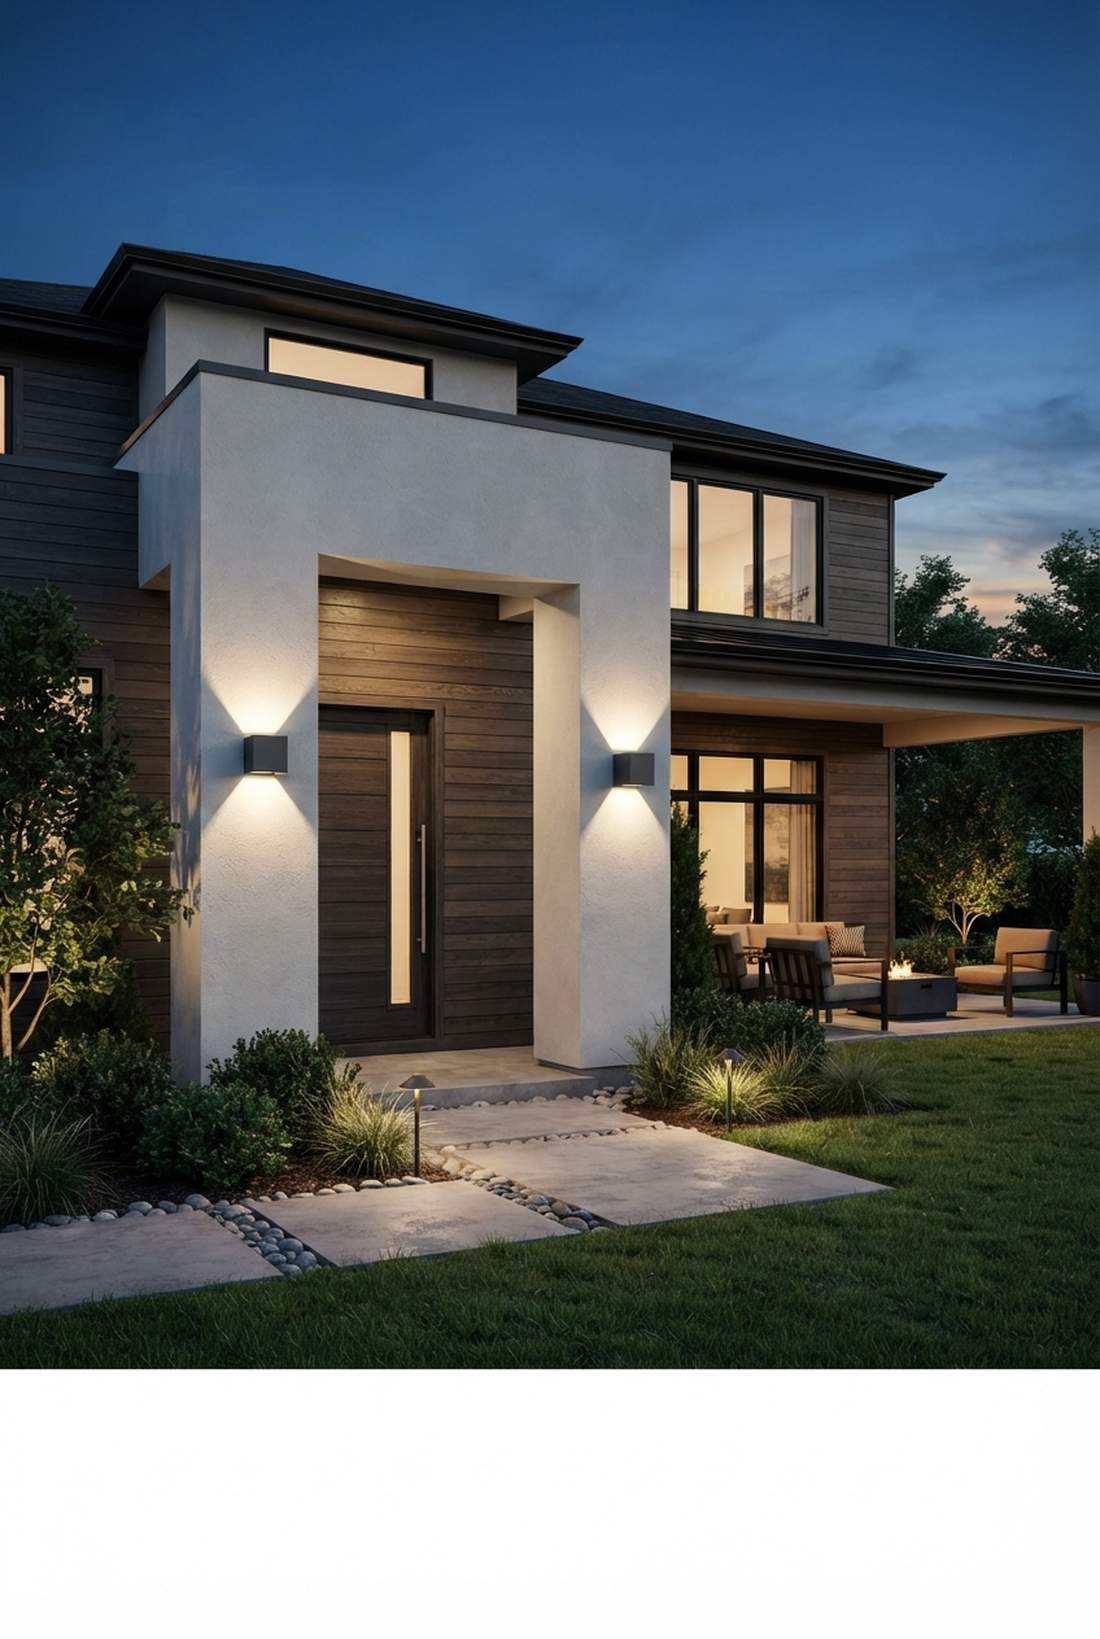

Sharp, sleek, and incredibly dramatic, this casts a beam that feels like a modern art gallery exterior. The bidirectional LED cube mount is perfect for flanking contemporary front doors or smooth stucco columns.
Standard floodlights ruin modern aesthetics, whereas precise up-and-down beams trick the eye into seeing a taller, grander wall. Integrating commercial patio ambiance gear gives a high-end hotel finish to residential properties.
Achieve this ultra-modern facade for roughly $35 to $60 per cube. It completely modernizes older brick exteriors.
- Key Materials: IP65 aluminum housing, integrated dual LEDs
- Vibe / Style: Ultra-modern minimalist
- Difficulty: Intermediate hardwiring
- Budget Breakdown: LED Cube: $40 | Dimmable Driver: $15.
- Creator’s Tip: Install these exactly midway up your pillars to maximize the dramatic light cone effect.
- Smart Sourcing: Order commercial-grade bidirectional LED starter kits and waterproof wire nuts (bulk pack).
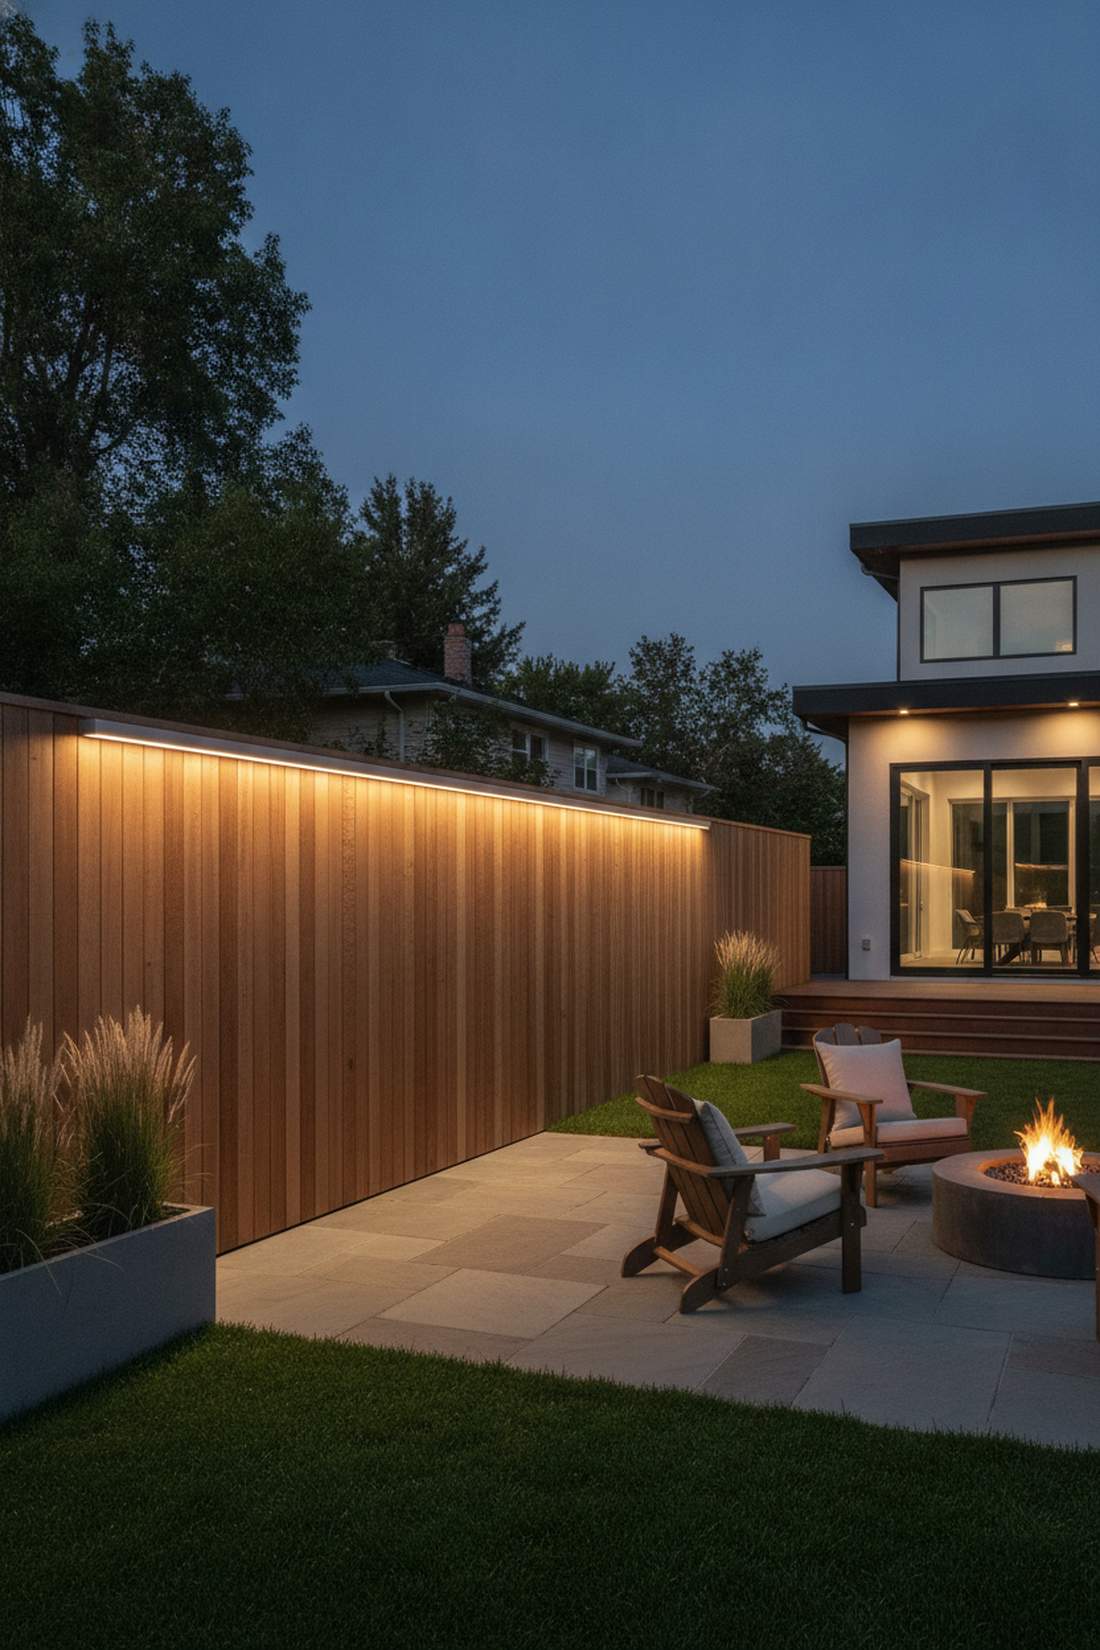
7. Linear Strip Wall Grazer
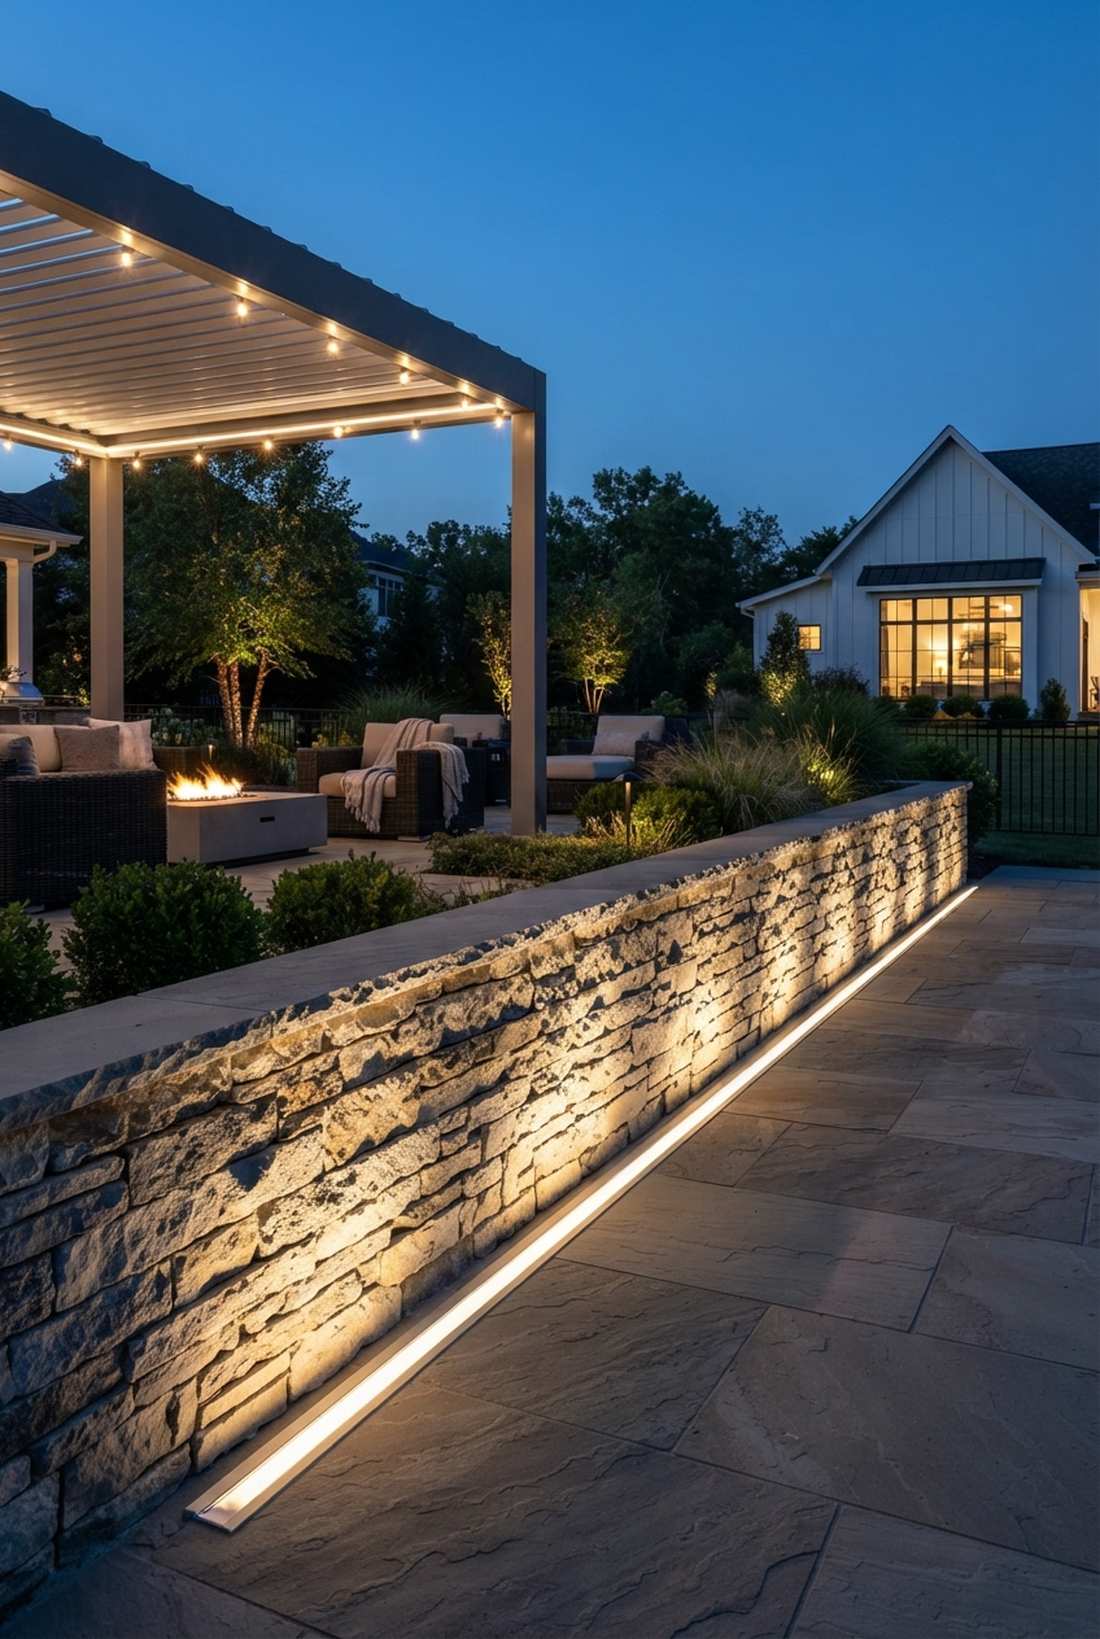
This sleek layout feels like walking up to a multi-million dollar architectural estate. A flush linear grazing light is the ultimate secret weapon for highlighting highly textured stone retaining walls or modern wood slats.
Placing lights far away flattens textures, but tight grazing immediately creates intense, expensive-looking shadows. Utilizing premium low-voltage garden kits keeps the wiring completely invisible during daylight hours.
This layout runs about $40 to $70 depending on the run length. Pin this if you love sharp architectural details.
- Key Materials: Extruded aluminum channels, narrow-beam LED strips
- Vibe / Style: High-end architectural
- Difficulty: Moderate channel mounting
- Budget Breakdown: Channel housing: $20 | LED Strip: $30.
- Creator’s Tip: Mount within 3 inches of the wall surface to get that razor-sharp shadow line.
- Smart Sourcing: Snag UV-coated exterior LED strip rolls and pre-cut aluminum diffuser tracks.
8. Circular Halo Wall Mount
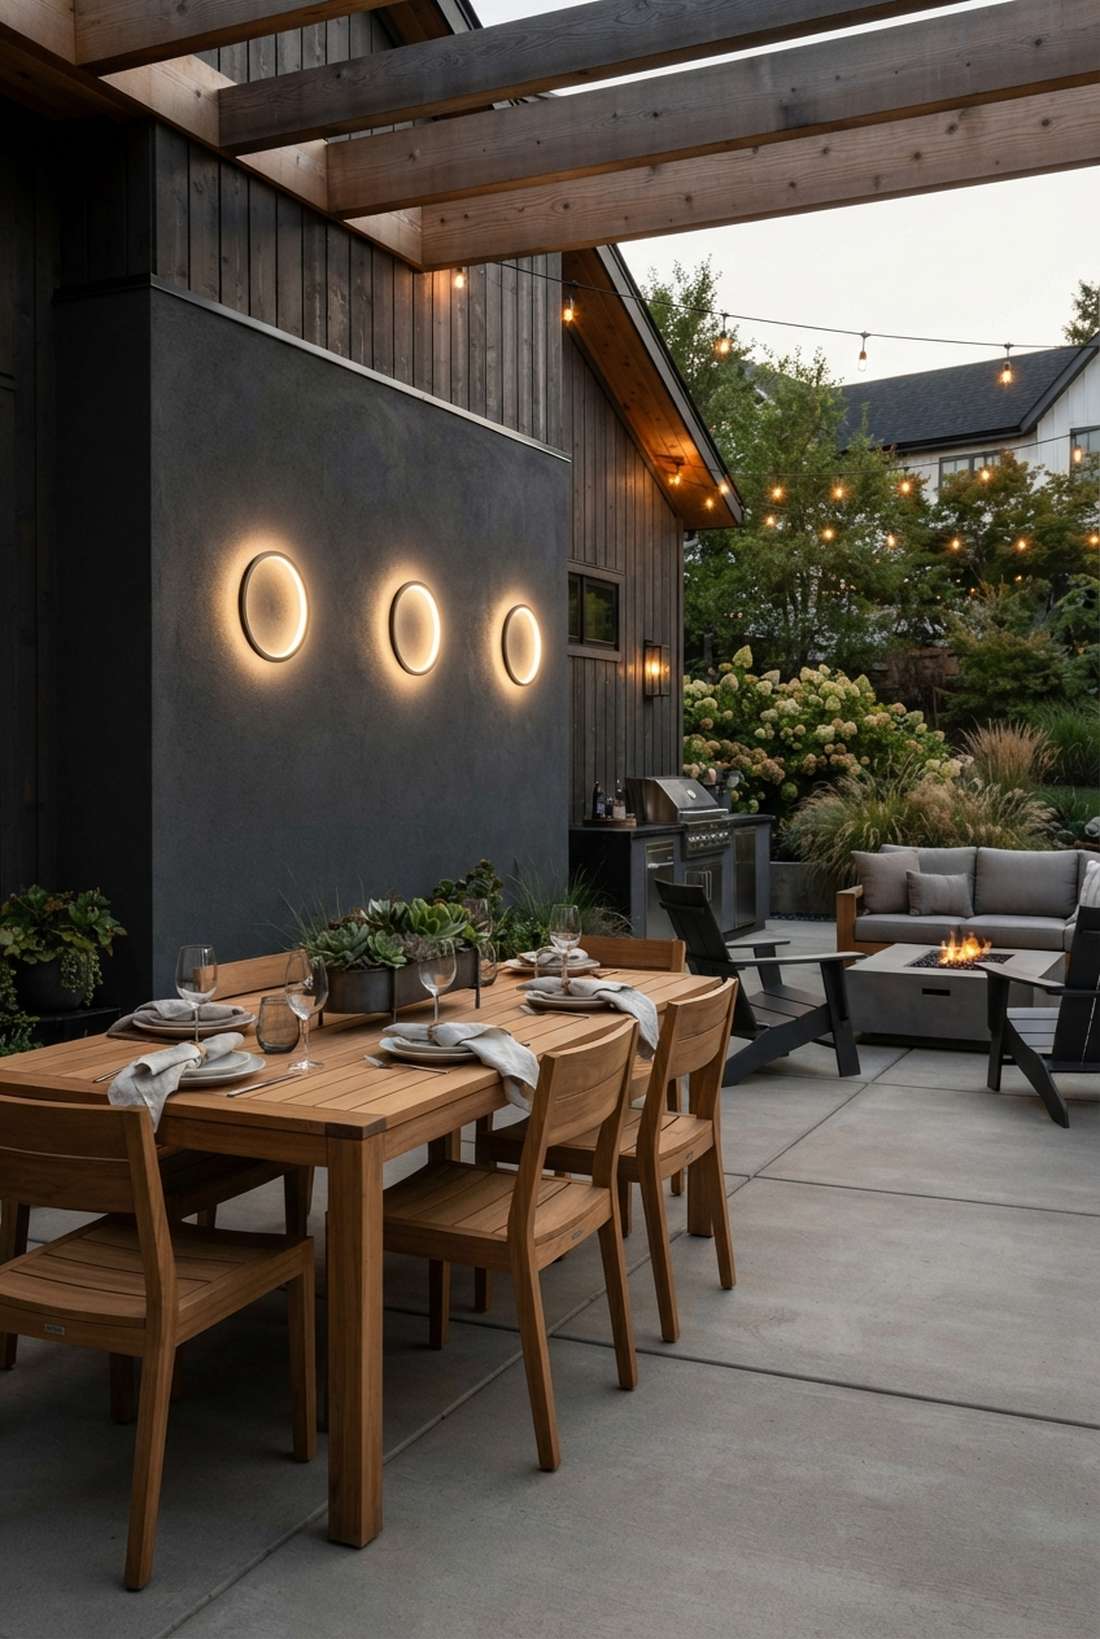
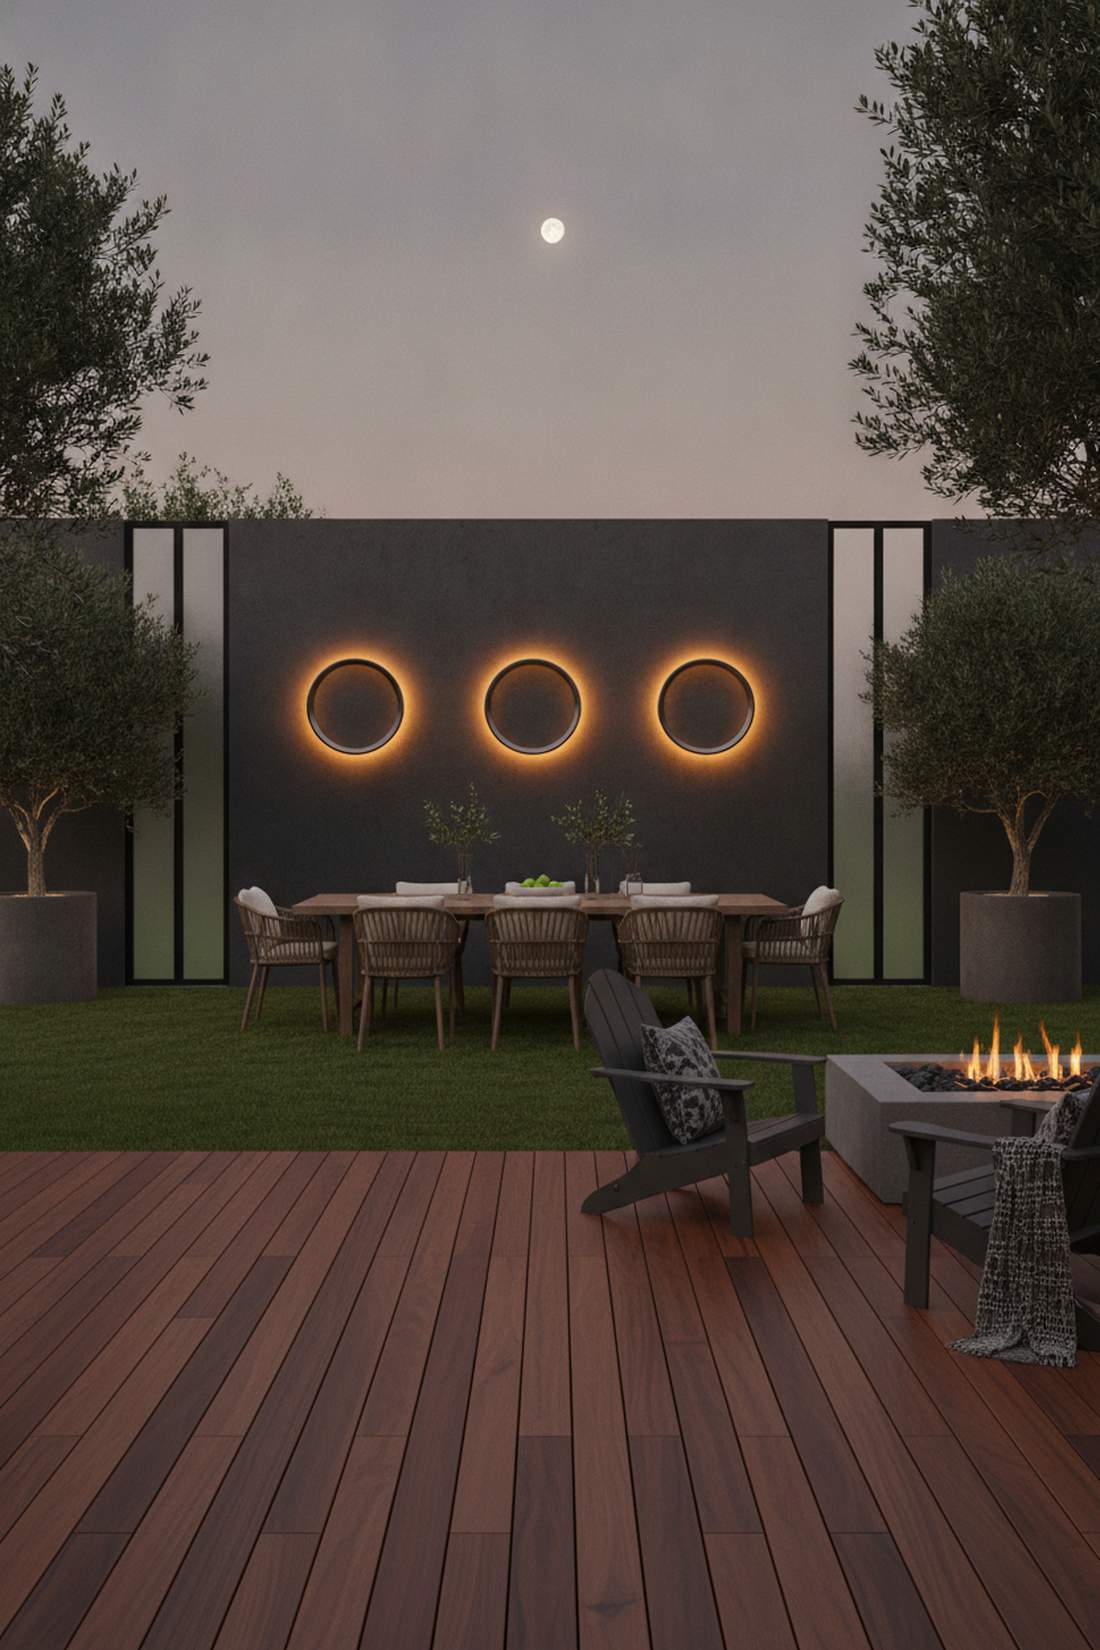
Soft, glowing, and distinctly futuristic, this setup feels like a lunar eclipse captured on your wall. The backlit circular halo sconce shines best against smooth, painted concrete or dark minimalist siding.
Direct bulbs often cause uncomfortable glare on patios, making indirect backlighting the smart choice for outdoor dining zones. Sourcing specific backyard terrace accessories turns a plain wall into a floating piece of modern art.
Install these statement pieces for around $50 to $80 each. Highly recommended for modern backyard renovations.
- Key Materials: Ring housing, integrated warm LEDs
- Vibe / Style: Ambient futuristic glow
- Difficulty: Easy surface mount
- Budget Breakdown: Halo Fixture: $60 | Hardware: $5.
- Creator’s Tip: Paint the wall directly behind the fixture a darker shade to make the halo pop intensely.
- Smart Sourcing: Look for low-voltage halo wall mounts (starter kit) and silicone weather seals (bulk pack).
9. Angular Geometric Sconce
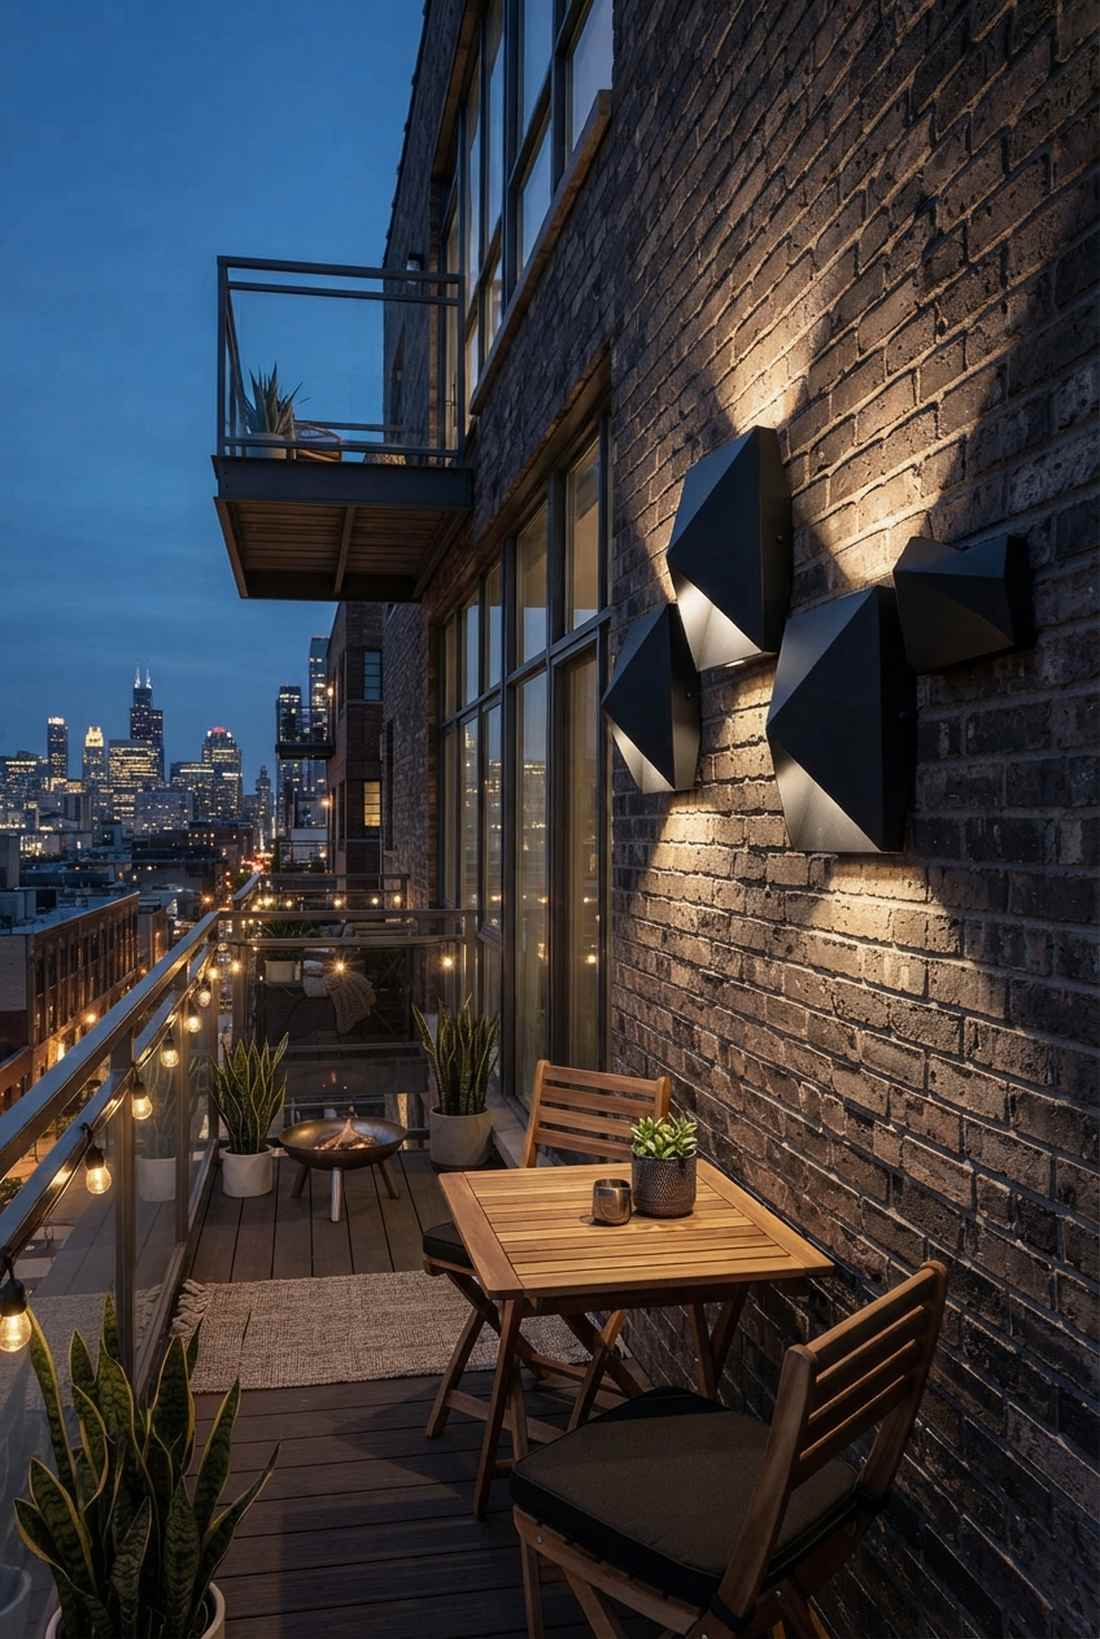
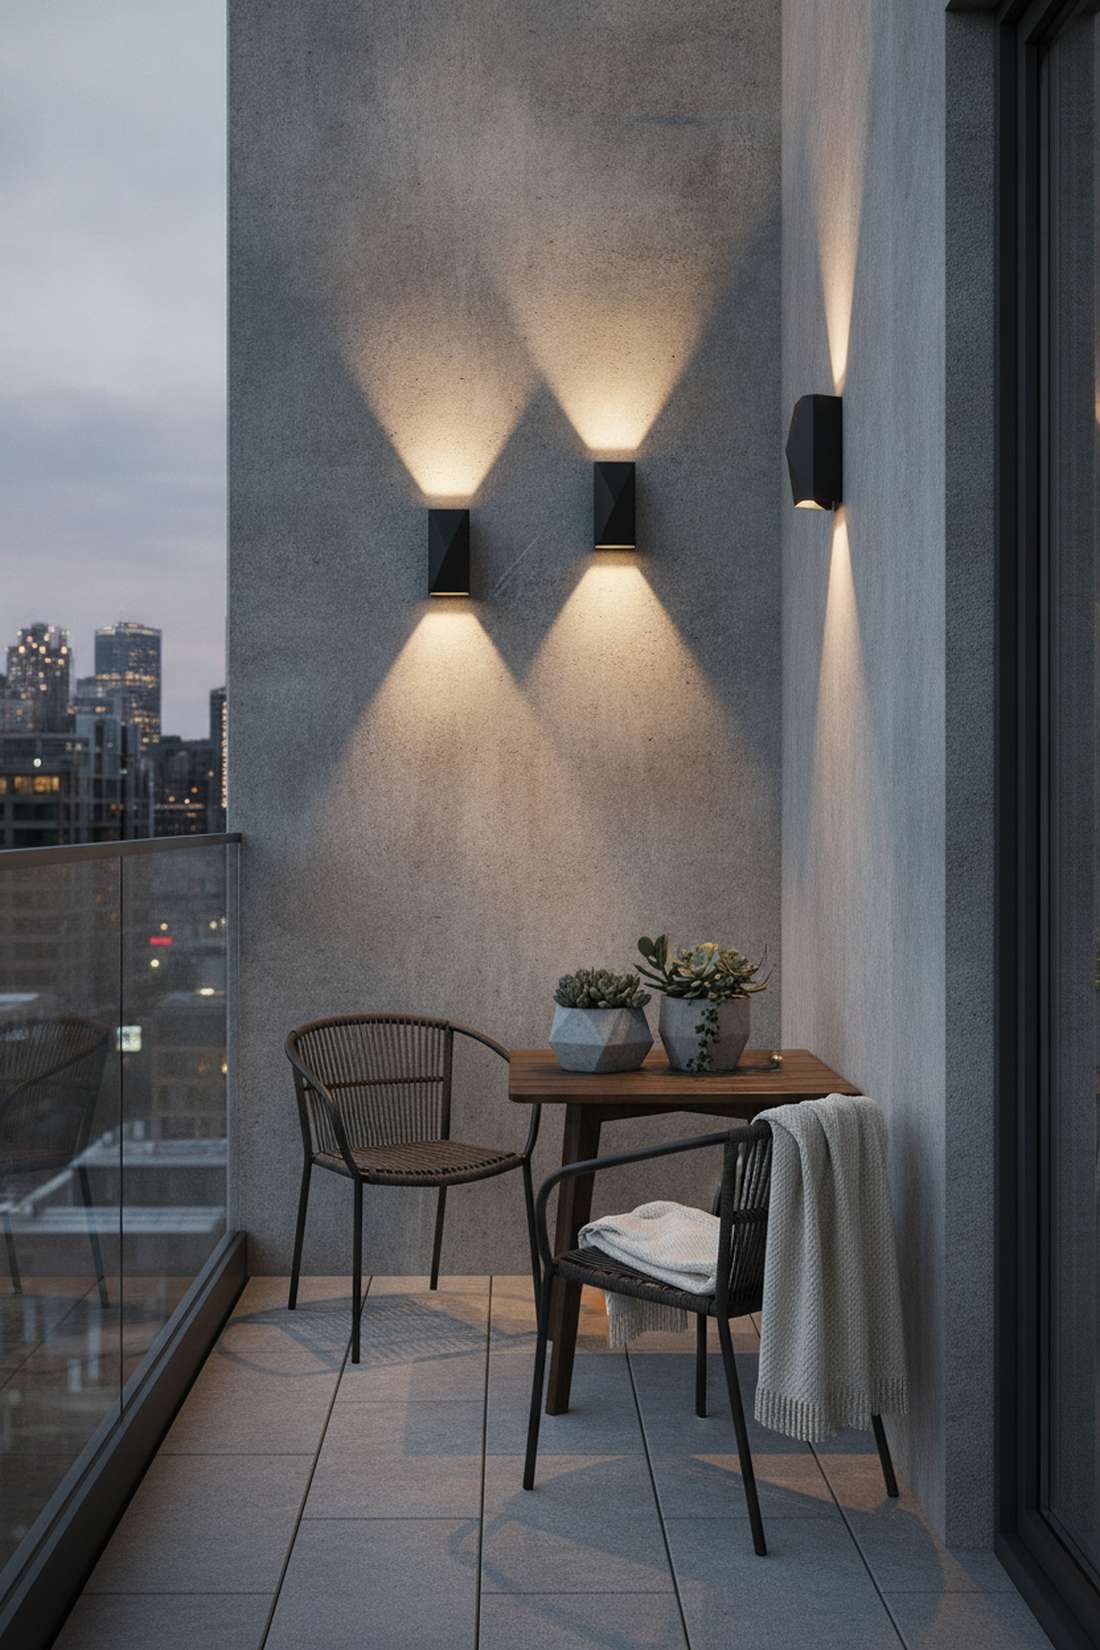
This edgy design casts asymmetrical shadows that feel like an exclusive downtown loft terrace. Placing an angular faceted wall sconce creates instant visual intrigue on otherwise narrow, boring townhouse balconies.
Boring round globes do nothing for tight spaces, while sharp faceted housings deliberately bounce light into interesting architectural shapes. Upgrading to matte black exterior hardware instantly delivers a designer-level finish.
You can grab these fixtures for $30 to $50. Save this idea for your small patio upgrade board!
- Key Materials: Faceted metal housing, matte black finish
- Vibe / Style: Edgy contemporary loft
- Difficulty: Simple retrofit
- Budget Breakdown: Fixture: $35 | Base plate: $5.
- Creator’s Tip: Group three of these in a staggered diagonal line to create a massive wall art effect.
- Smart Sourcing: Pick up matte black geometric sconce covers and tamper-proof mounting screws.
💡 Must-Have Supplies for High-End Setups
To build these setups faster and ensure they last, skip the generic craft aisles and invest in the right foundational kits.
- Base & Support: Heavy-duty weatherproof masonry anchor kits
- Setup Tools: Low-voltage architectural wiring starter kits
- Weather/Durability Protection: UV-resistant clear silicone sealant tubes (bulk pack)
Most people get this completely wrong… until they try the exact layout coming up next.
10. Slim Profile Cylinder Light
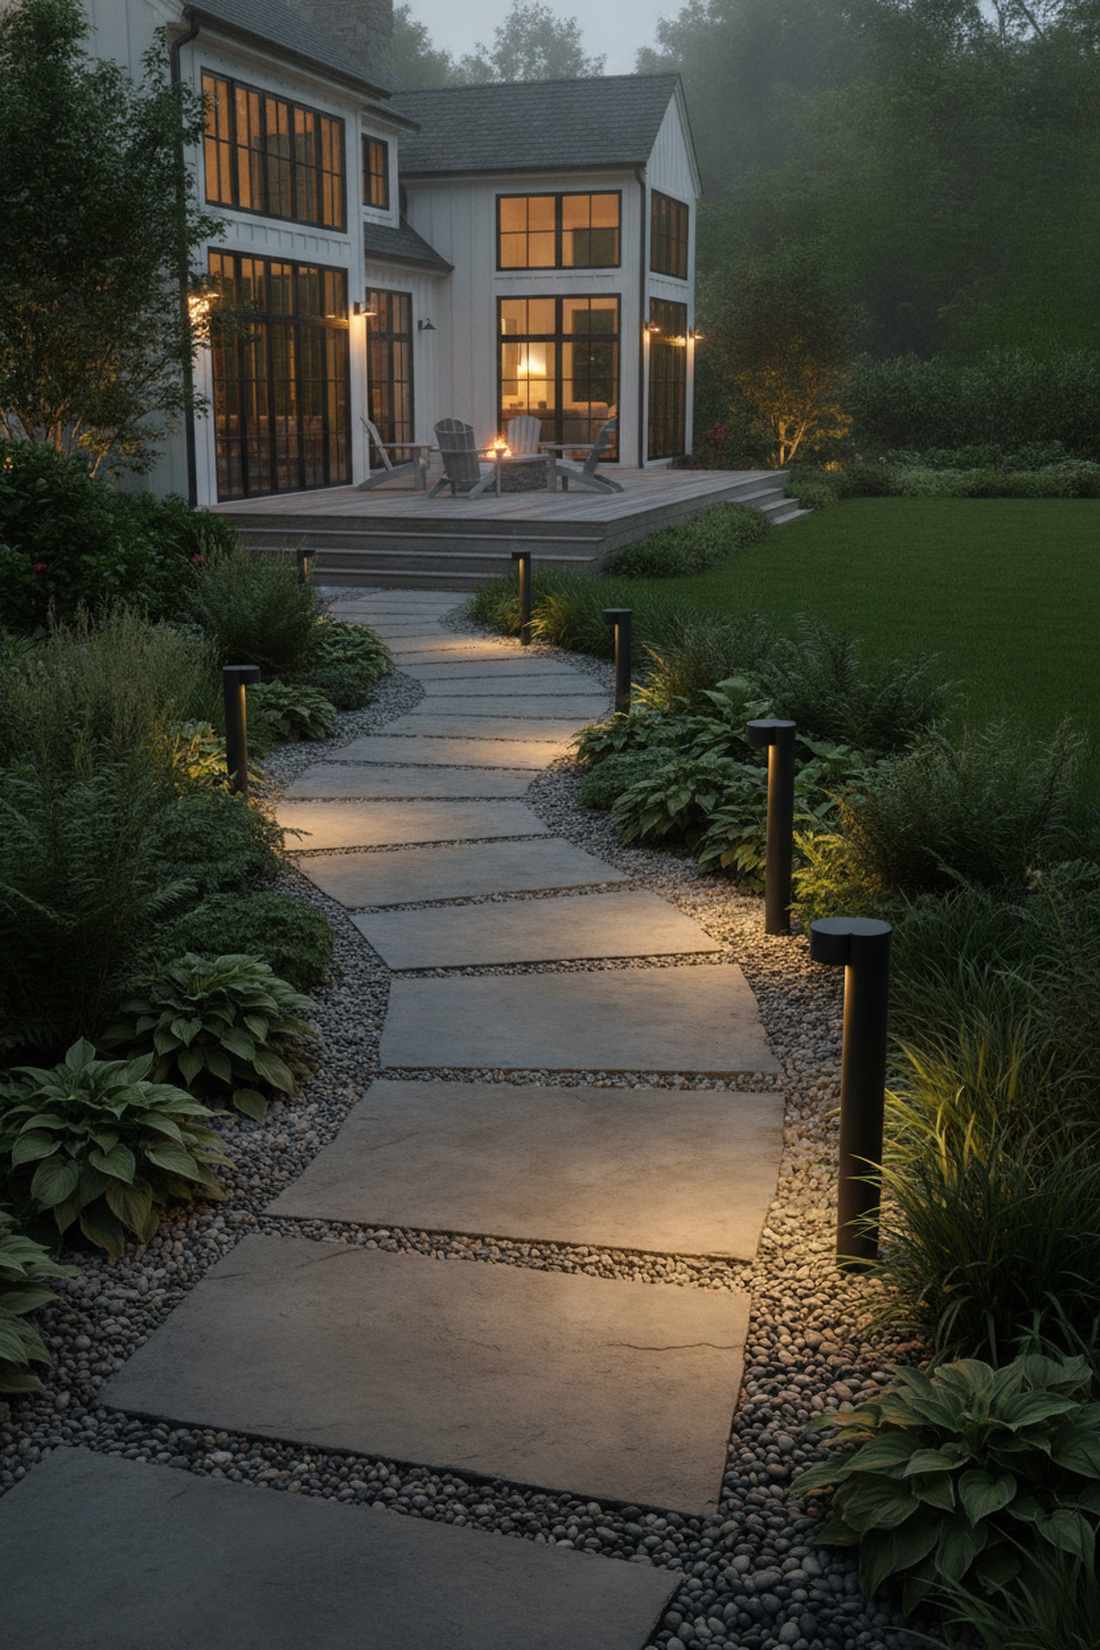
Discreet and razor-sharp, this setup feels like the stealthy lighting used in luxury boutique hotels. The minimalist cylinder pathway light is practically invisible during the day but incredibly effective along tight garden walkways.
Bulky fixtures clutter up narrow passages, but a two-inch profile completely disappears while still delivering high-lumen safety beams. Utilizing commercial slim-line exterior fixtures gives your pathways a perfectly clean architectural edge.
This minimalist hack costs roughly $25 to $45. A brilliant solution for zero-clutter outdoor spaces.
- Key Materials: 2-inch diameter aluminum tube, rotatable head
- Vibe / Style: Stealthy architectural
- Difficulty: Moderate alignment required
- Budget Breakdown: Cylinder unit: $30 | Anchors: $5.
- Creator’s Tip: Rotate the head slightly downward to wash the pathway without hitting plants.
- Smart Sourcing: Use tamper-proof cylinder light packs and pre-cut waterproof gaskets.
11. Color-Changing Smart Wall Light
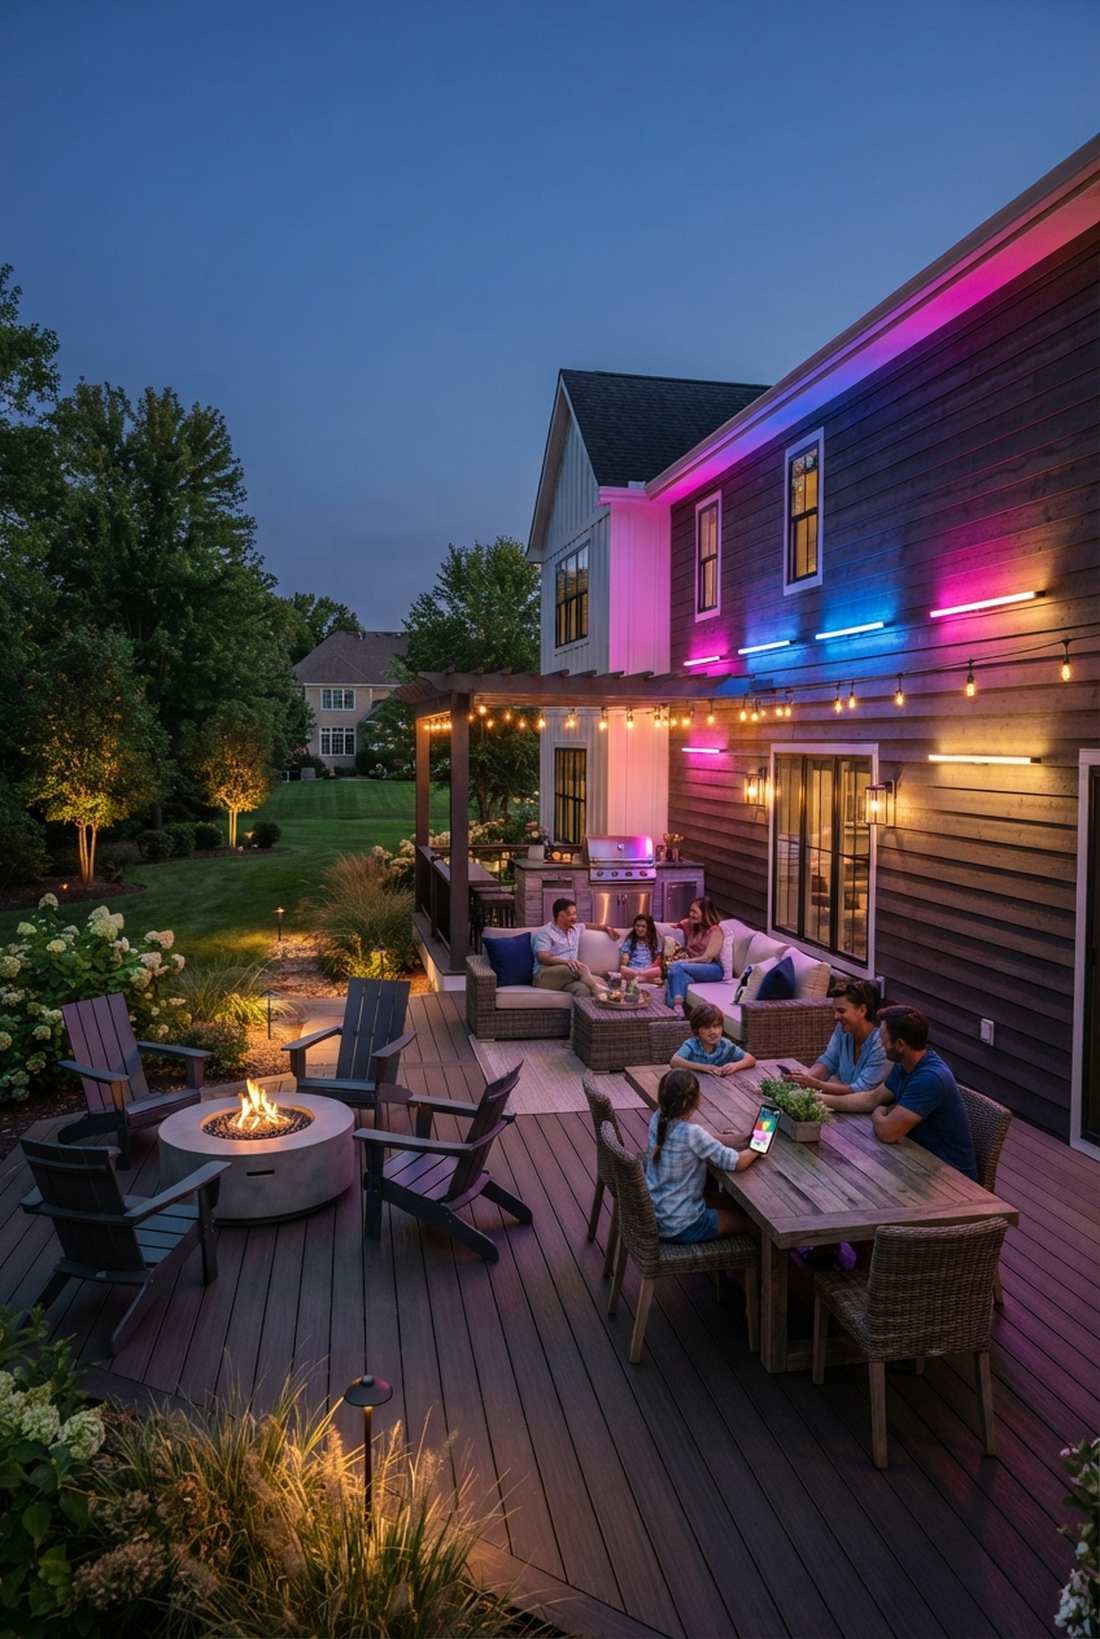
Vibrant and fully customizable, this layout feels like you have a professional event lighting crew on speed dial. A smart RGB exterior wall wash changes the entire mood of your backyard deck with a single tap on your phone.
Static lighting is boring for parties, but programmable smart nodes let you swap from warm white to vibrant party colors instantly. Investing in high-grade wifi-enabled backyard illumination ensures your setup doesn’t disconnect during a storm.
Expect to spend $40 to $70 for reliable smart units. Pin this for your ultimate summer party setup!
- Key Materials: RGB+CCT LED array, weatherproof smart receiver
- Vibe / Style: Dynamic entertainment zone
- Difficulty: Easy app integration
- Budget Breakdown: Smart Fixture: $50 | Hub (optional): $20.
- Creator’s Tip: Sync the lights to a dusk-to-dawn routine so you never have to hit a switch manually.
- Smart Sourcing: Grab weather-sealed RGB smart bulb bundles and high-range outdoor WiFi extenders.
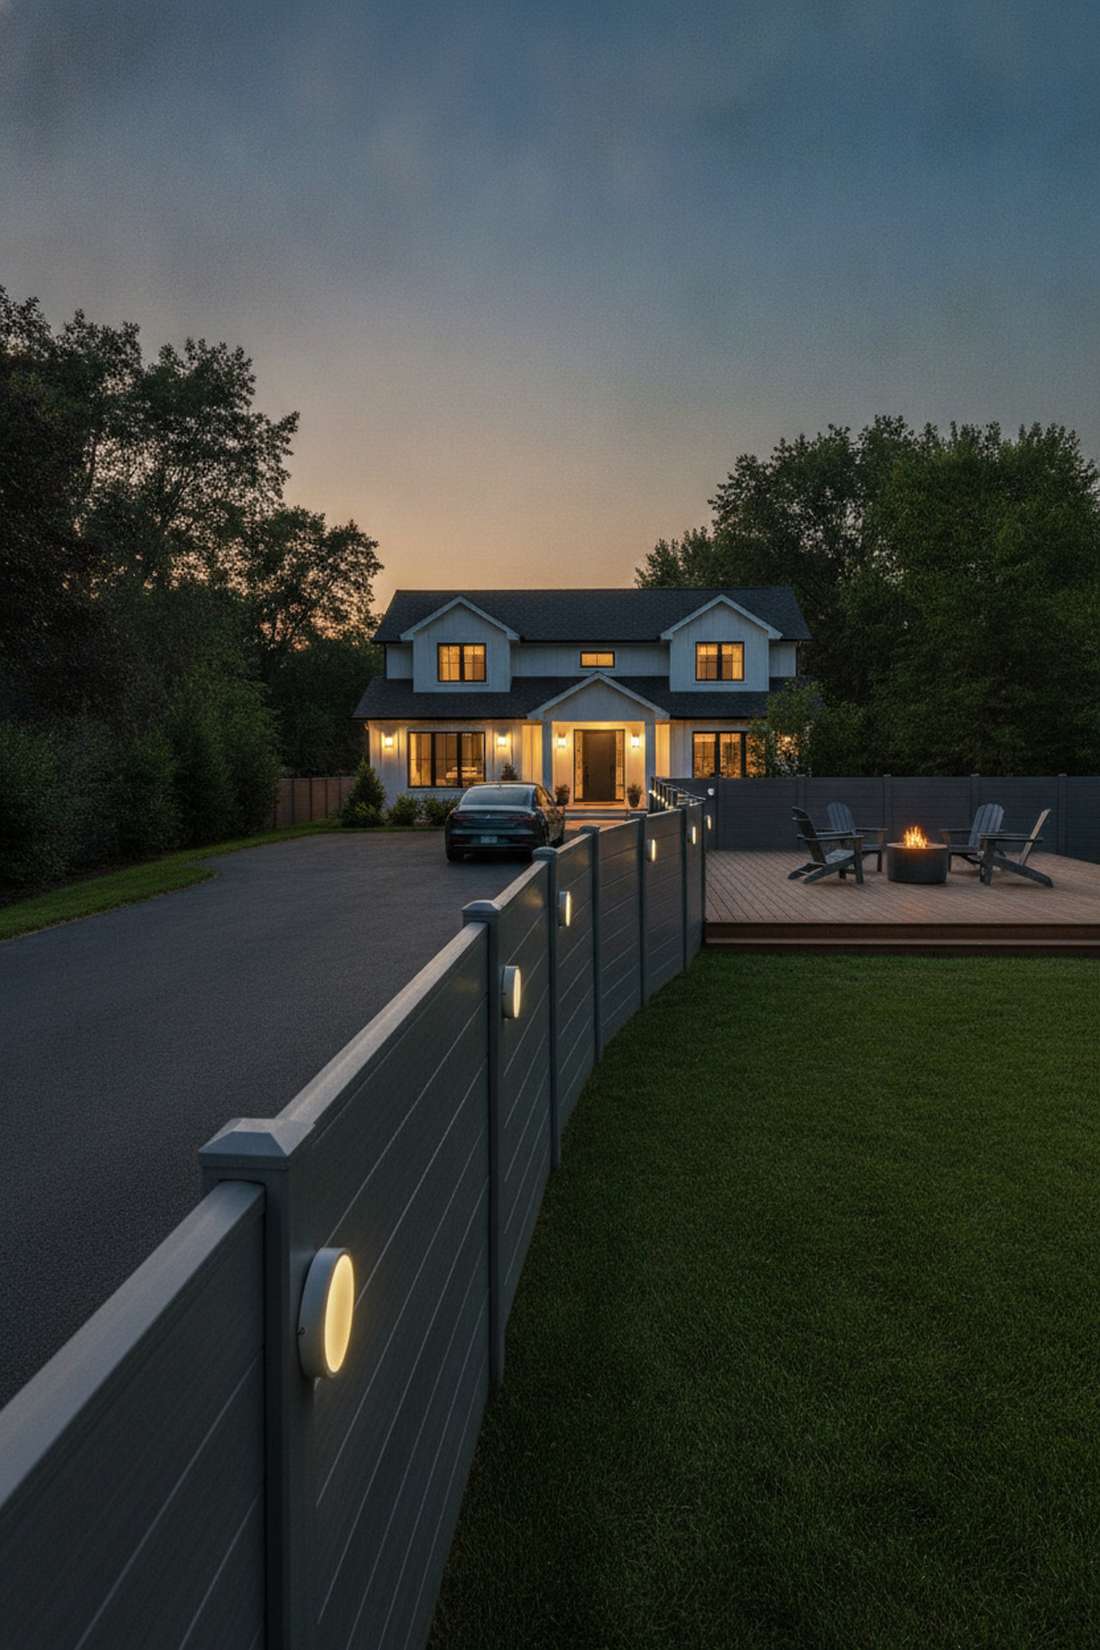
Garden Lights Fence: Integrated Solutions
Fence-mounted lighting provides security coverage while defining property boundaries after dark. Strategic placement transforms utilitarian fencing into illuminated design features.
12. Post Cap Solar Lights
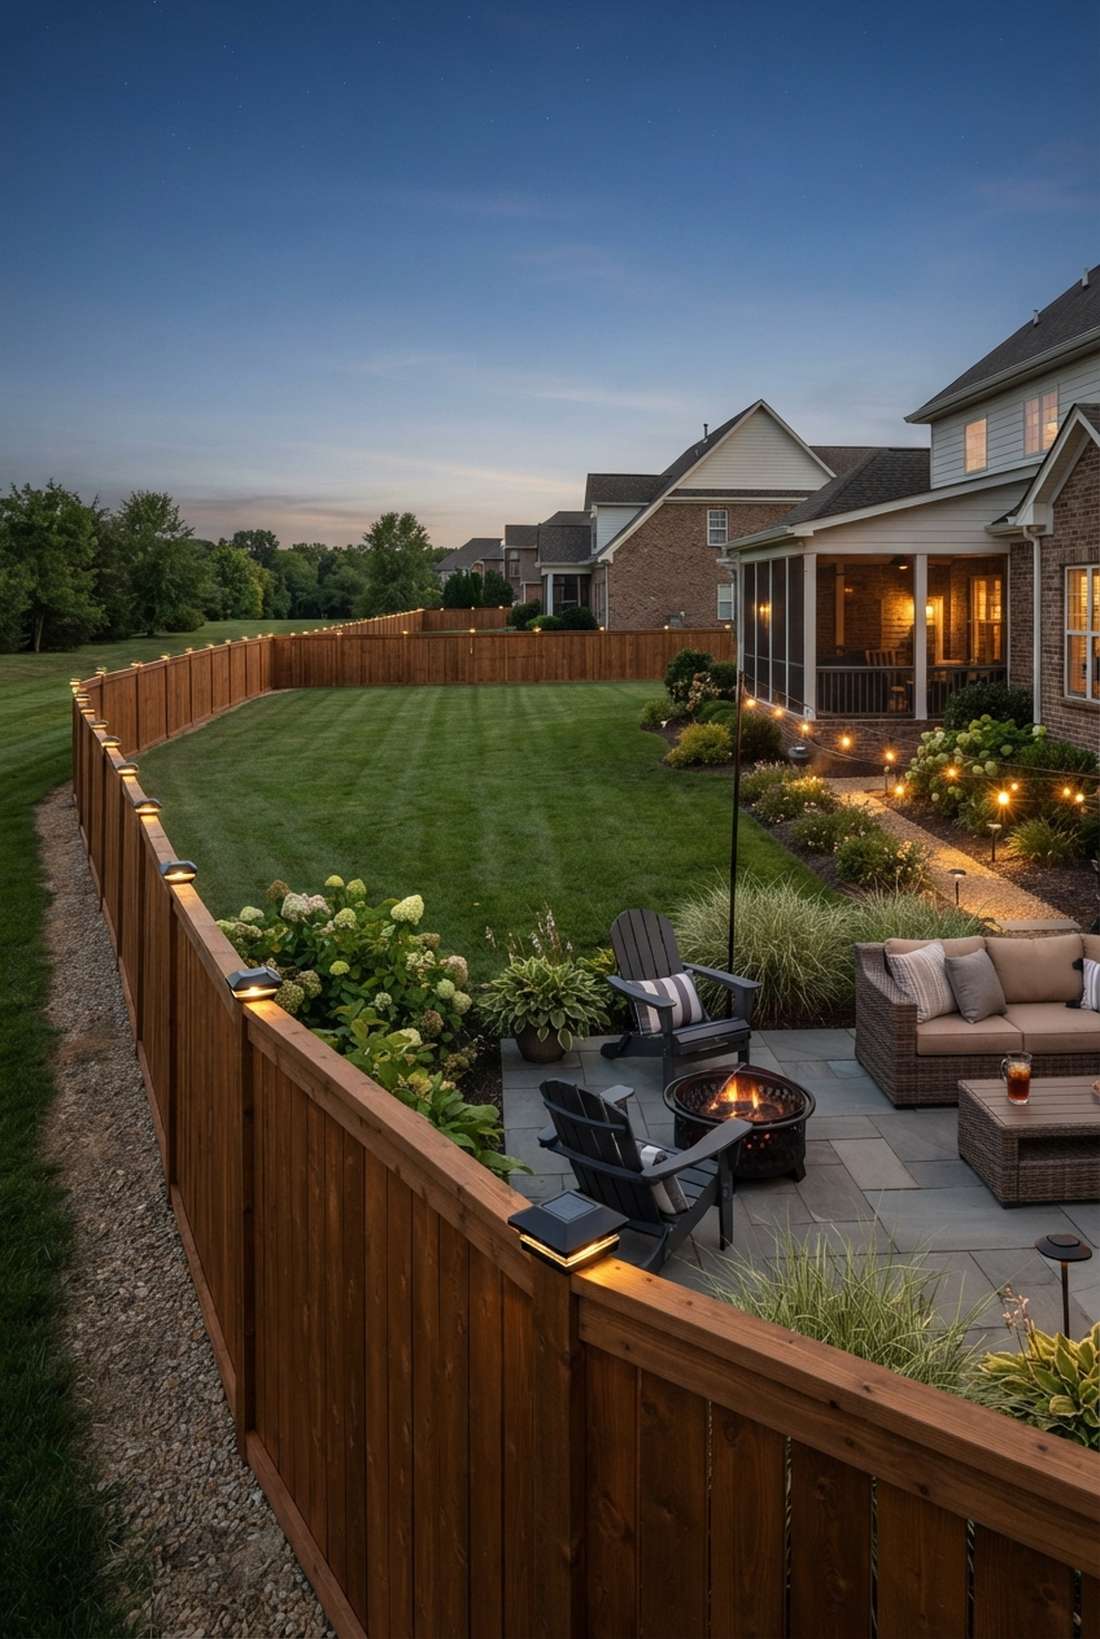
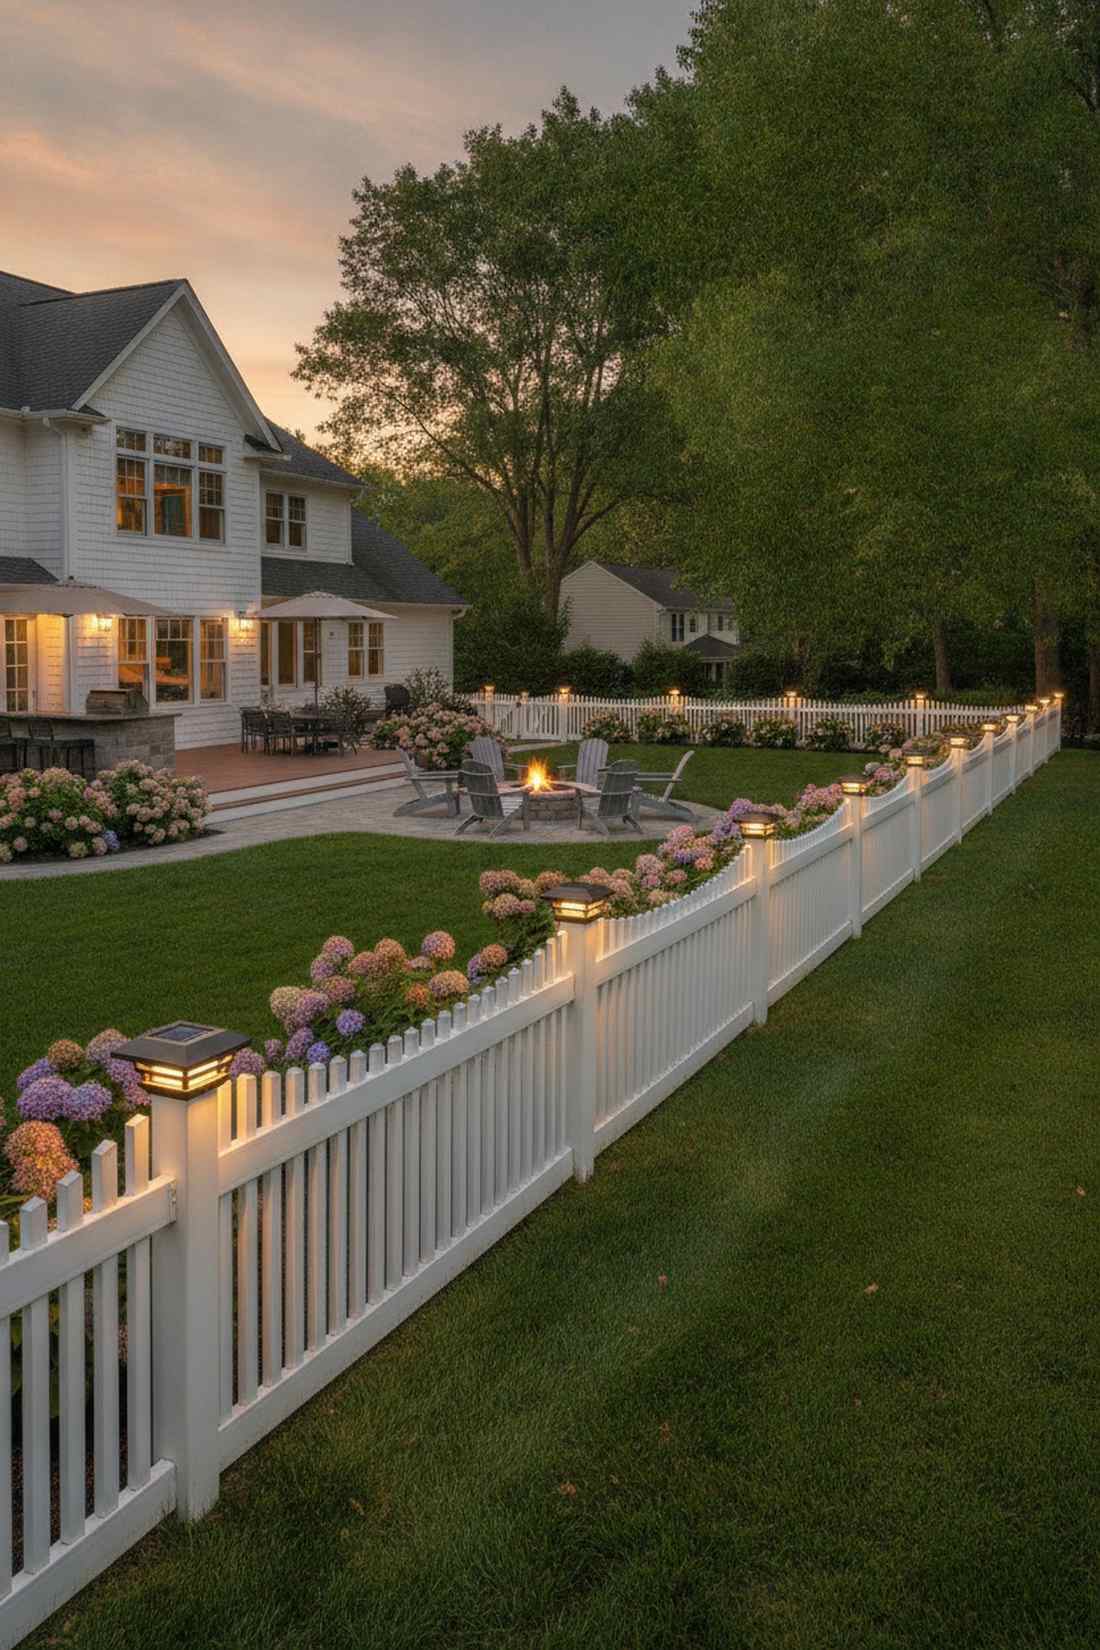
This brilliantly simple upgrade makes your perimeter feel like an expensive gated community. Integrating a garden lights fence strategy via solar post caps outlines your entire property without running a single wire.
Drilling through thick wooden posts is a nightmare, but pop-on solar caps deliver a surprisingly premium look with zero electrical work. Sourcing universal high-efficiency boundary lights ensures they glow brightly until sunrise.
You can easily pull this off for around $15 to $25 per post. Save this to your weekend backyard DIY board.
- Key Materials: Integrated solar cap, adapter rings
- Vibe / Style: Clean perimeter definition
- Difficulty: Extremely easy slide-on
- Budget Breakdown: Solar Cap: $18 | Screws: $2.
- Creator’s Tip: Wipe the mini solar panels monthly; pollen buildup kills the battery charging speed.
- Smart Sourcing: Invest in universal fit solar post caps (bulk pack) and UV-coated plastic adapter rings.
13. Low-Voltage Fence Rail Strips

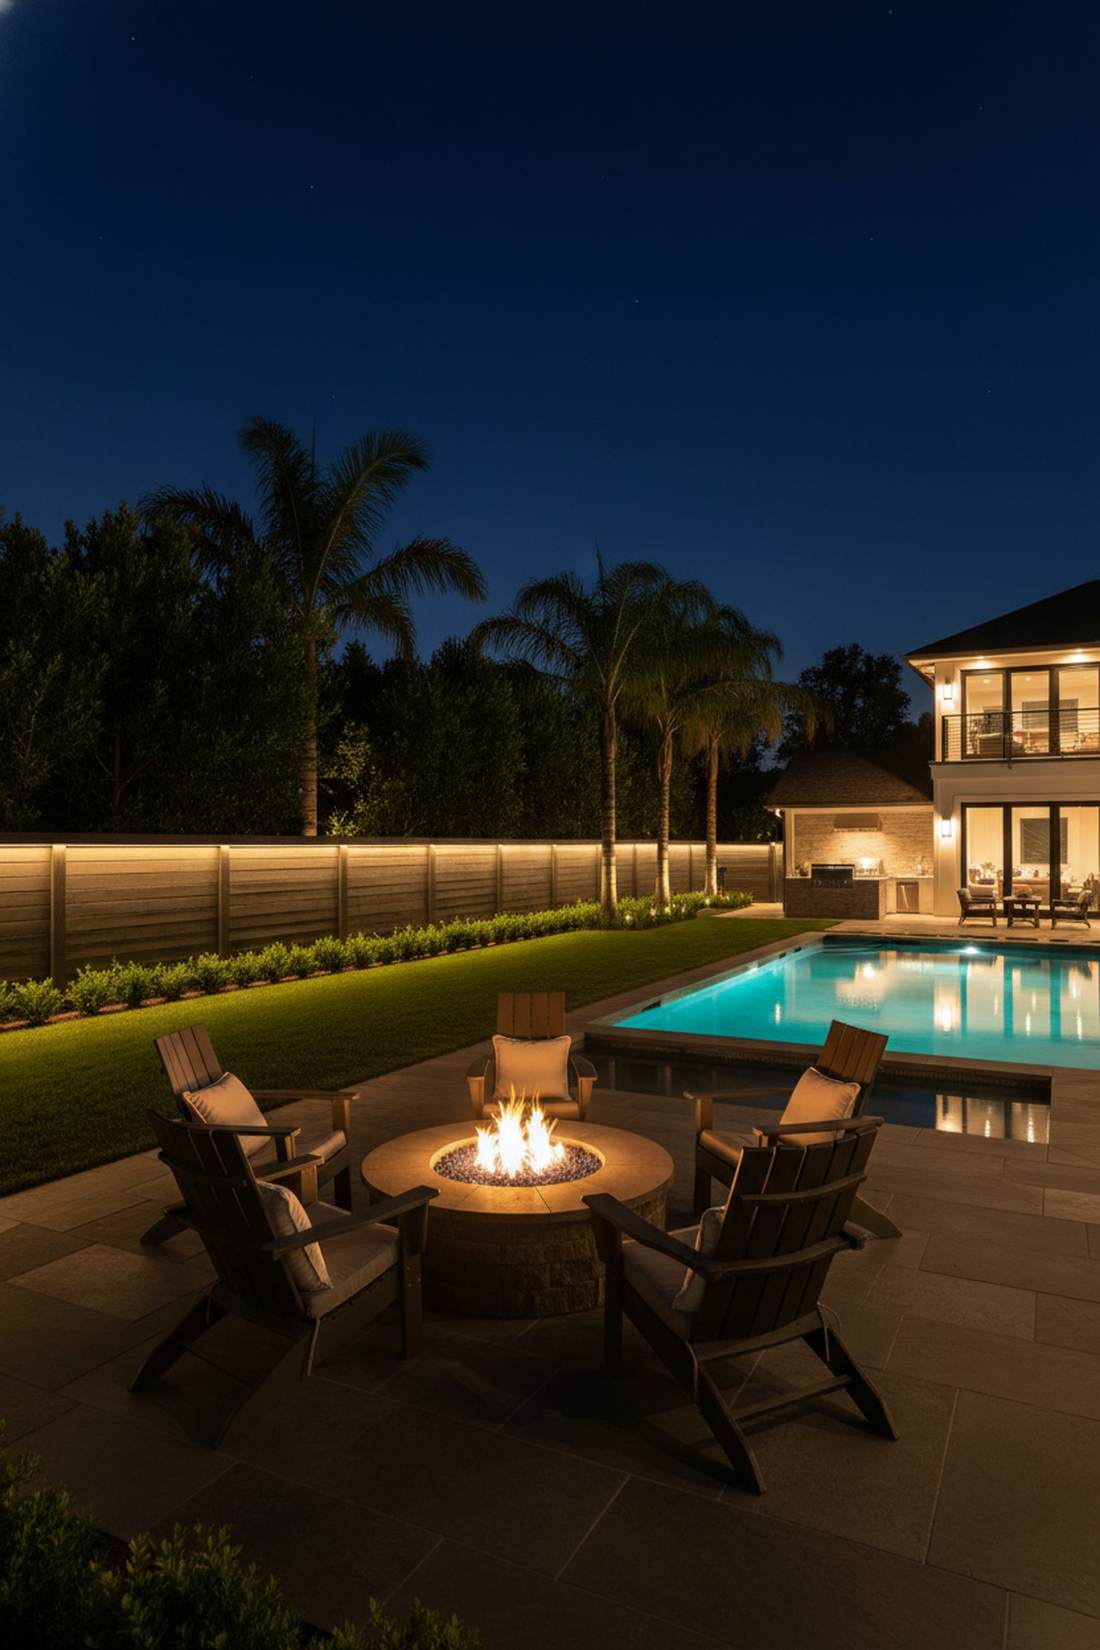
This continuous floating glow feels like an upscale resort boardwalk at midnight. Tucking waterproof LED rail strips under your top fence rail casts a seamless ribbon of light that makes small yards look massive.
Individual spotlights create harsh bright and dark zones, but a continuous hidden strip gives a designer-level finish that washes the entire fence evenly. Using silicone-coated landscape barrier lighting ensures the LEDs survive harsh humidity.
This stunning perimeter hack runs about $30 to $50 per fence section. Highly recommended for narrow backyards.
- Key Materials: IP67 silicone LED strips, 12V transformer
- Vibe / Style: Seamless resort ambiance
- Difficulty: Moderate wire routing
- Budget Breakdown: Strip roll: $25 | Transformer: $20.
- Creator’s Tip: Always mount the strip facing downwards under the rail to hide the physical diodes from view.
- Smart Sourcing: Snag heavy-duty adhesive outdoor lighting strips and low-voltage outdoor transformer kits.
14. Motion-Activated Fence Floods
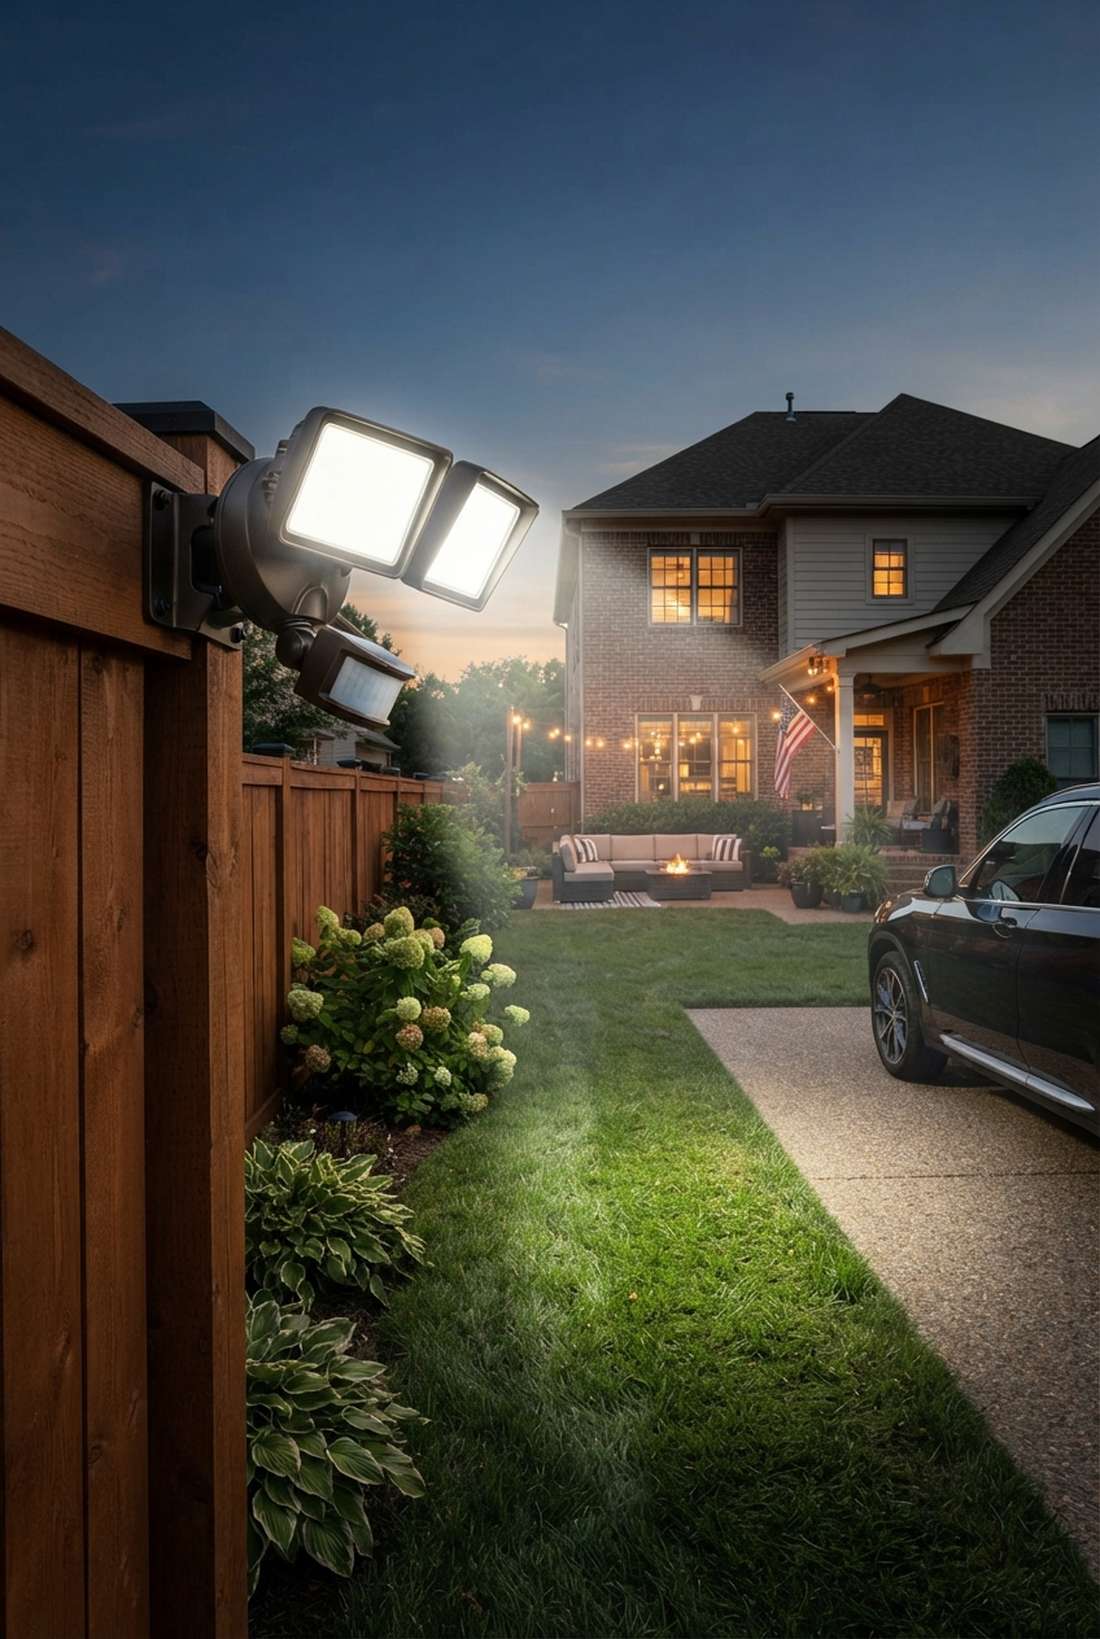
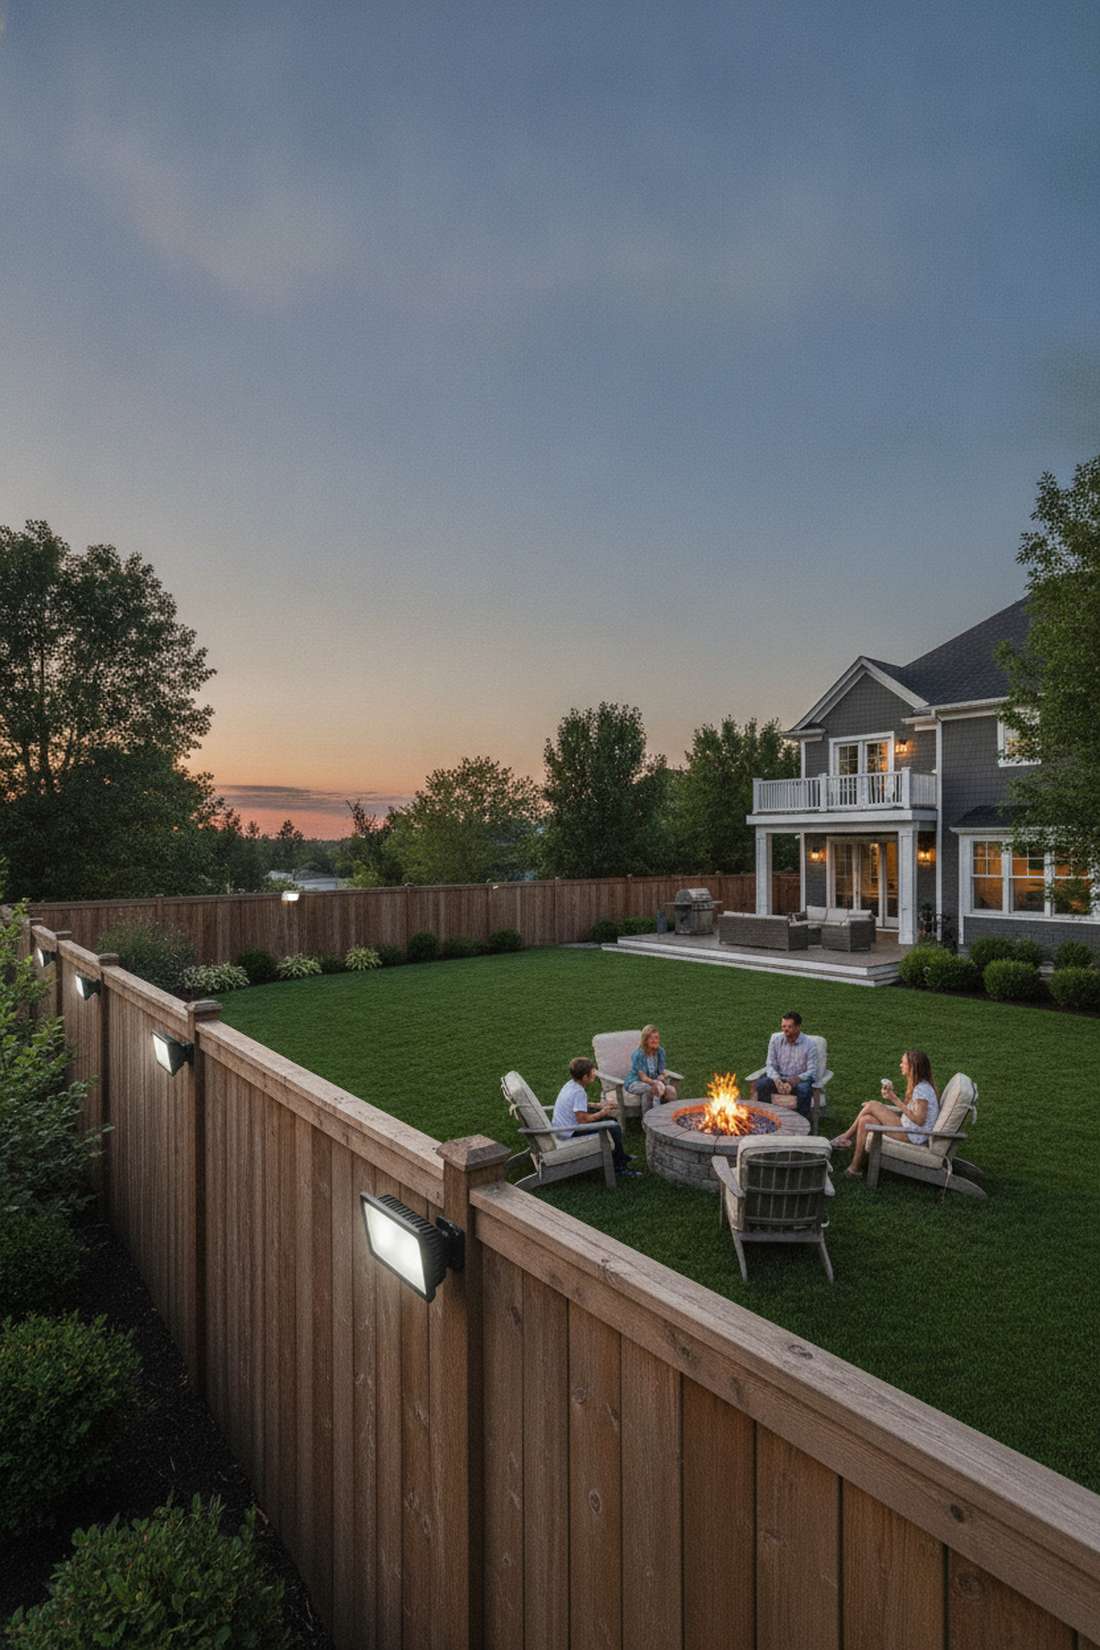
Fiercely bright and highly protective, this layout feels like an invisible security fortress. Adding adjustable motion fence floods along dark property corners instantly deters wildlife and secures your blind spots.
Relying on weak decorative lights for security is a mistake, but tuning high-lumen PIR arrays looks far more expensive than it is while keeping your family safe. Grabbing commercial-grade perimeter security kits stops false triggers from blowing leaves.
Secure your yard for about $35 to $60 a unit. Pin this if you’re upgrading your home safety!
- Key Materials: Dual LED heads, adjustable PIR sensor
- Vibe / Style: High-security functional
- Difficulty: Easy battery/solar mount
- Budget Breakdown: Floodlight: $45 | Batteries: $10.
- Creator’s Tip: Angle the sensor downward slightly so it catches human movement but ignores tall trees swaying.
- Smart Sourcing: Look for high-lumen PIR sensor arrays (starter kit) and heavy-duty fence brackets.
If you think your backyard is too small for professional lighting, the next idea will completely change your mind…
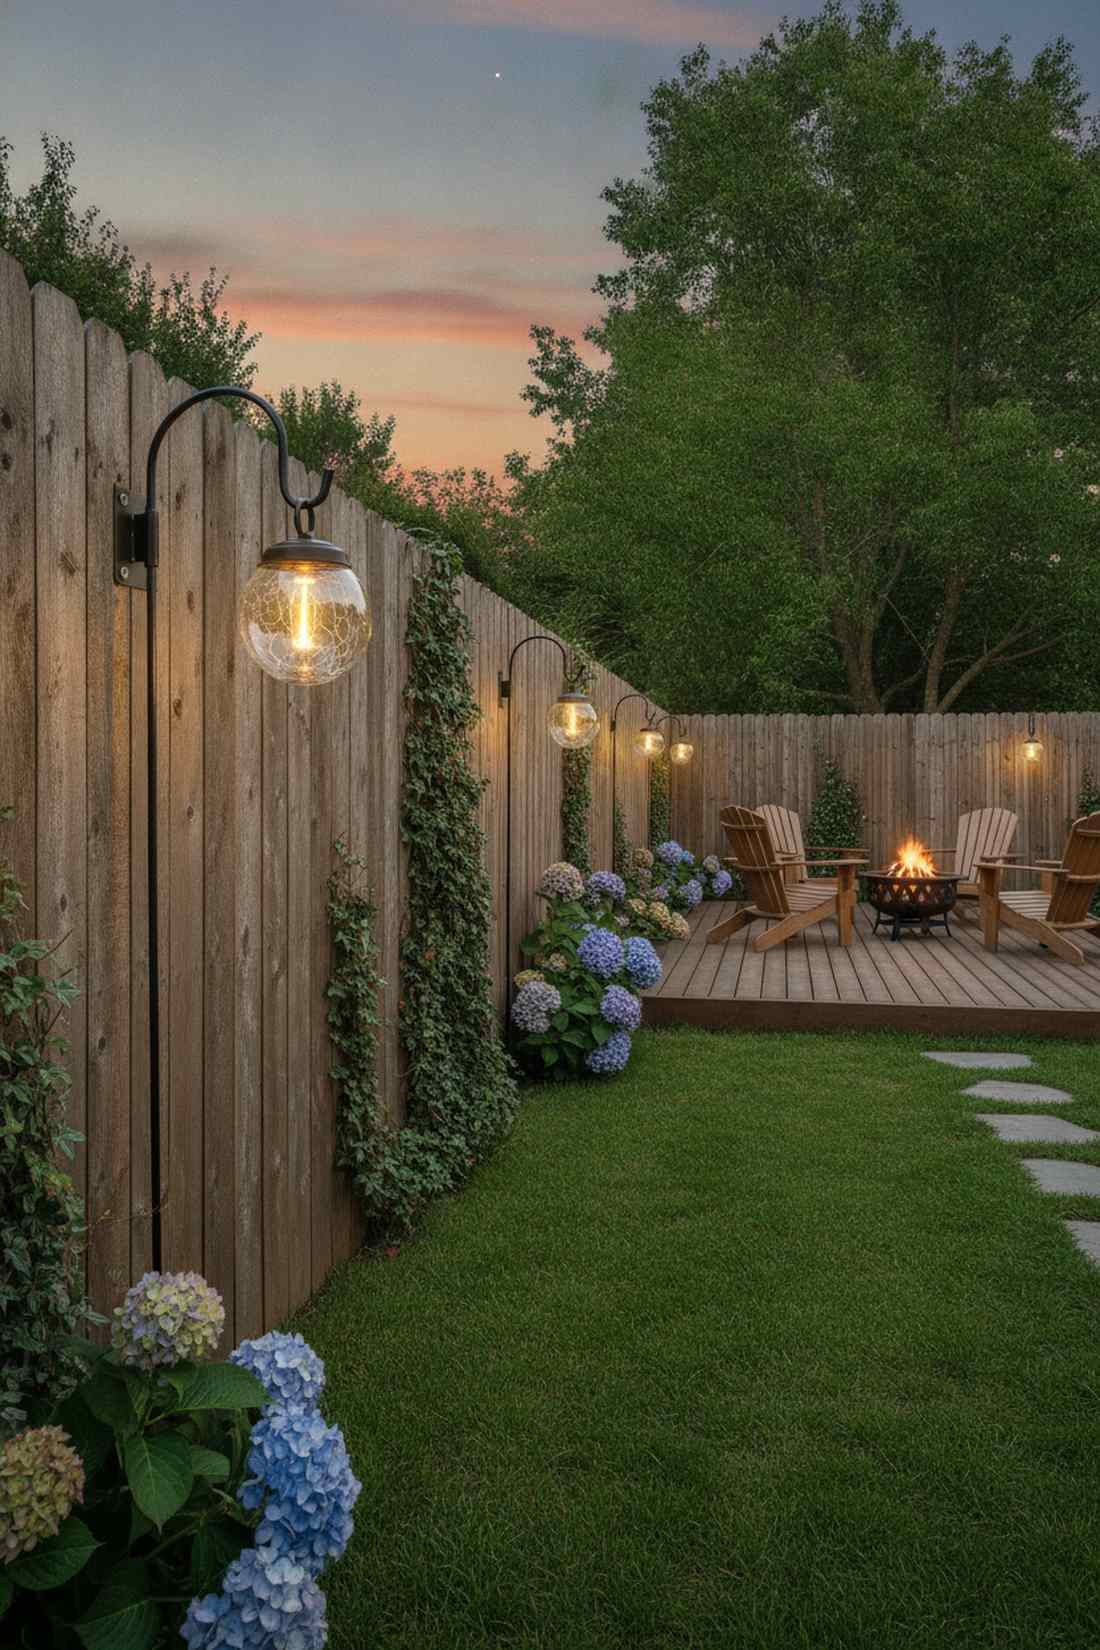
15. Downlight Fence Post Fixtures
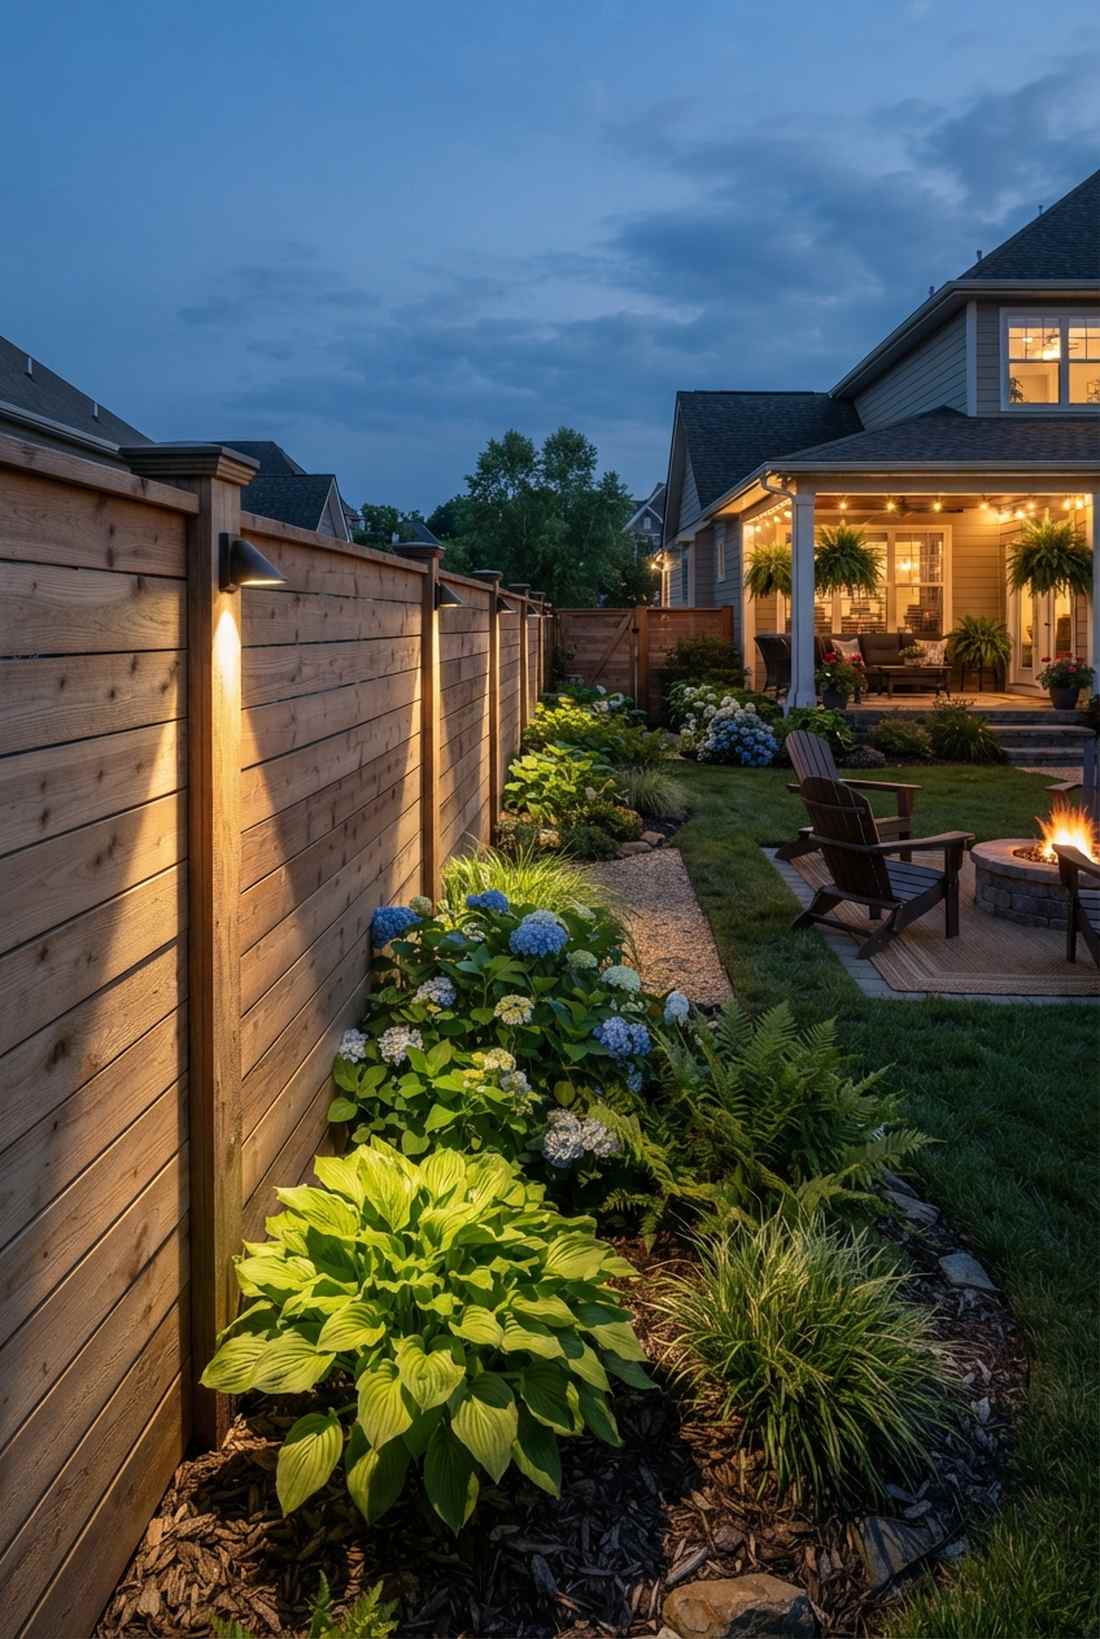
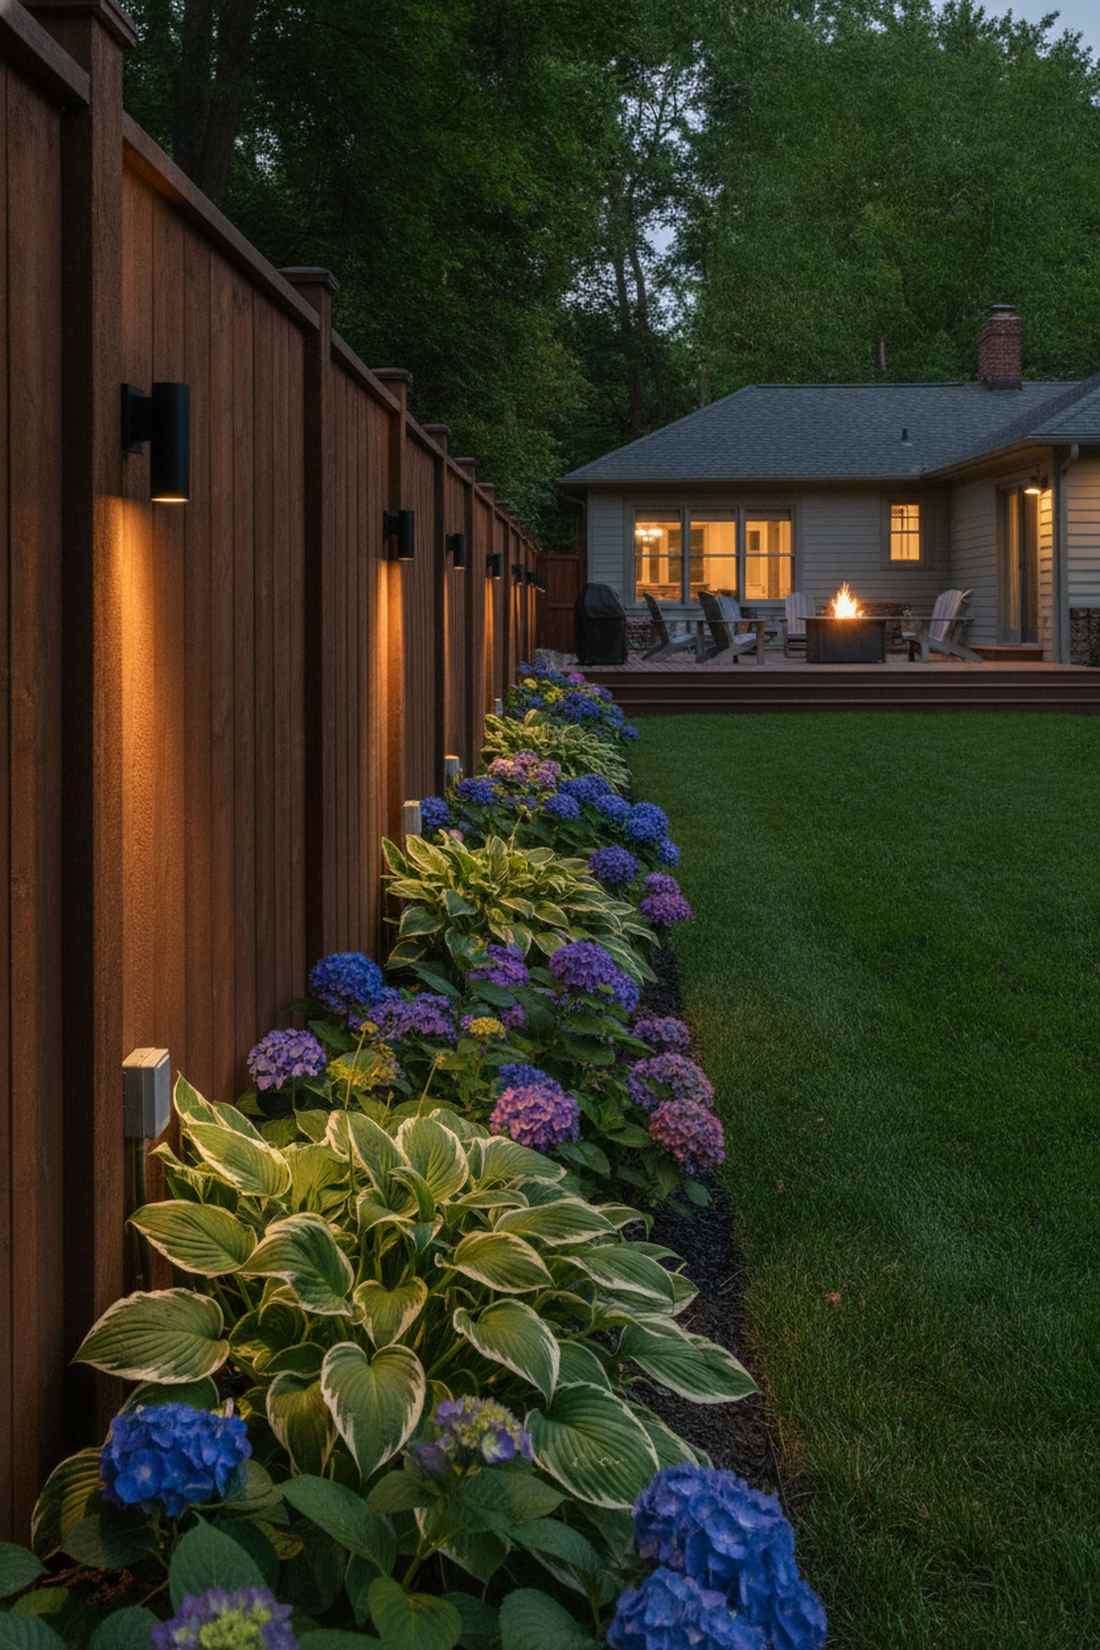
Focused and incredibly elegant, this setup feels like walking through a professionally curated botanical garden. A focused fence downlight is brilliant for highlighting the prize-winning hostas or hydrangeas planted right at your boundary line.
Uplighting often blinds your neighbors, but precision downward cones trick the eye into focusing purely on the beautiful landscape textures below. Utilizing bronze low-voltage architectural supplies allows the fixture housing to vanish against wooden fences.
You can execute this tailored look for $25 to $40 per post. A fast upgrade that completely changes the vibe.
- Key Materials: Bronze directional hood, narrow-beam LED
- Vibe / Style: Tailored landscape highlight
- Difficulty: Intermediate wiring
- Budget Breakdown: Fixture: $30 | Connectors: $5.
- Creator’s Tip: Space them every alternating post rather than every single one to create dramatic pools of light.
- Smart Sourcing: Use powder-coated fence downlight kits and weatherproof quick-connect wire terminals (bulk pack).
16. Embedded Fence Panel Lights
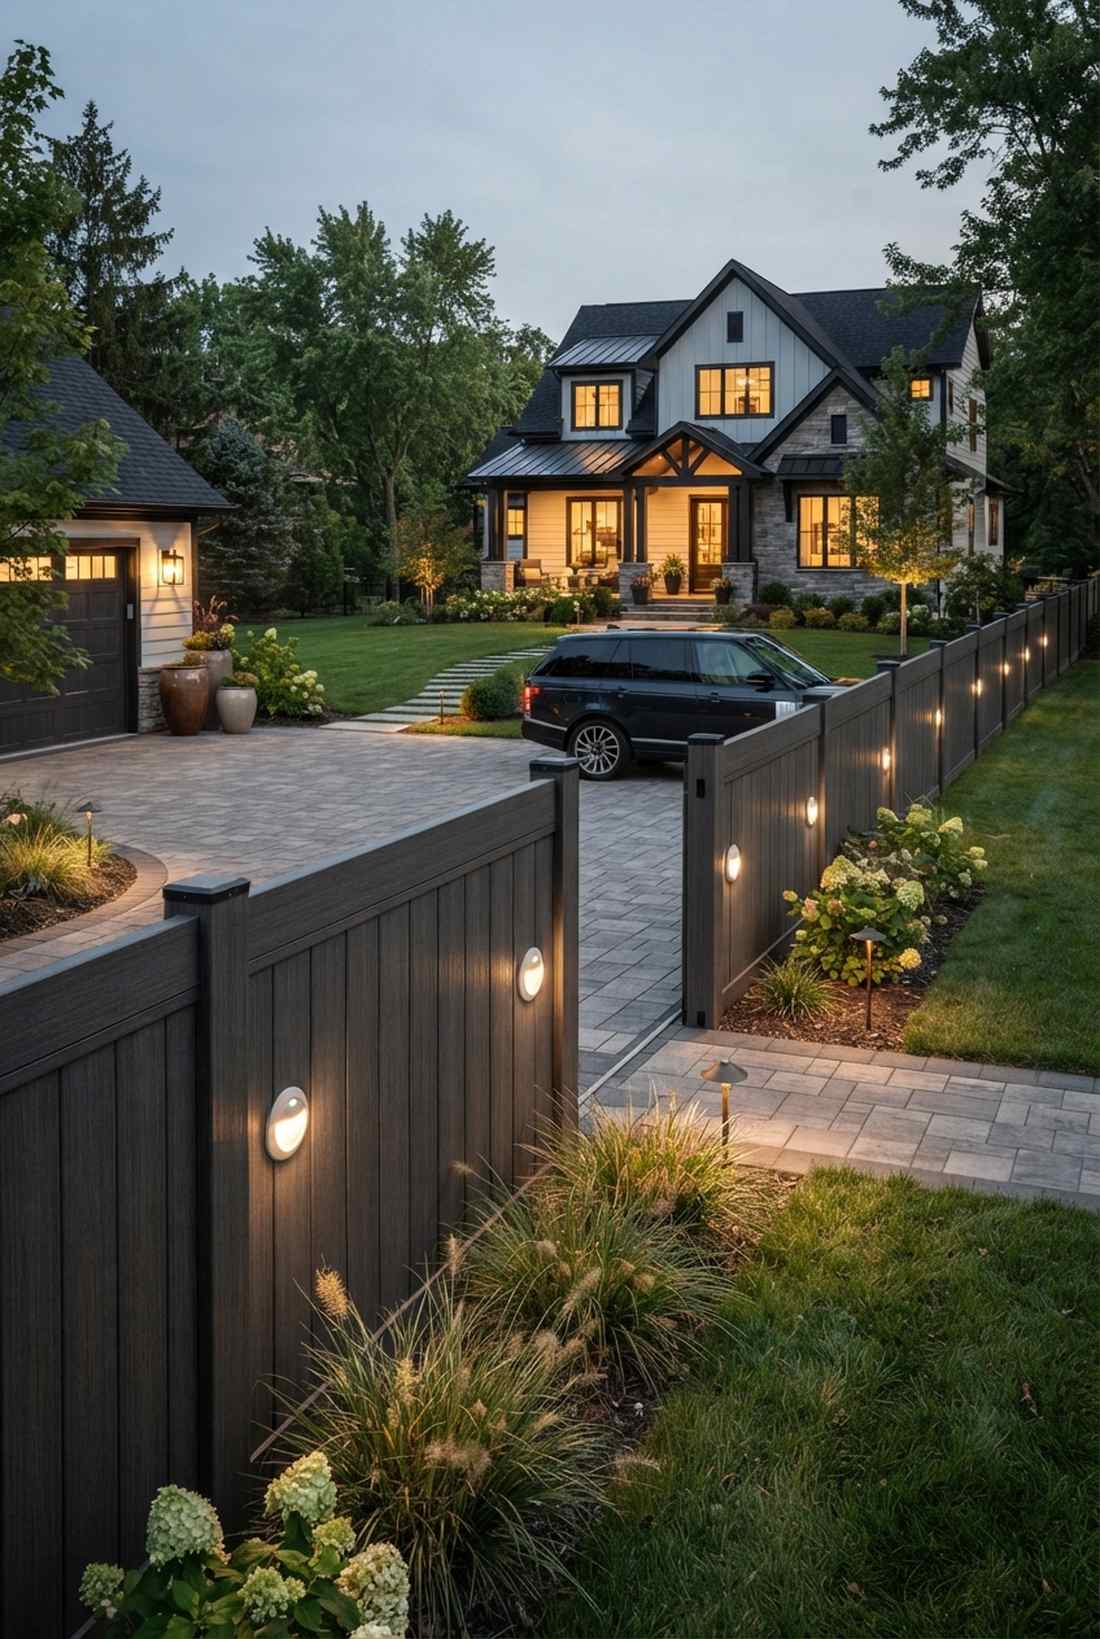
Flush, modern, and absolutely seamless, this design feels like it was custom-poured at a high-end factory. Utilizing recessed fence panel discs creates a zero-clutter boundary perfect for tight driveways where cars might clip protruding fixtures.
Hanging heavy lanterns on vinyl fences often causes sagging, but lightweight recessed cutouts deliver a surprisingly premium look without any structural strain. Sourcing low-profile boundary illumination kits gives a flawless, integrated aesthetic.
This customized look costs about $20 to $35 per light. Save this for your minimalist driveway board!
- Key Materials: Frosted lens housing, hole saw bit
- Vibe / Style: Ultra-sleek integrated
- Difficulty: Advanced cutting required
- Budget Breakdown: Recessed light: $25 | Wiring: $5.
- Creator’s Tip: Use a brand new, ultra-sharp hole saw to prevent chipping your expensive composite fence boards.
- Smart Sourcing: Buy flush-mount composite light housings and pre-cut frosted diffusion lenses.
17. Shepherd Hook Fence Brackets
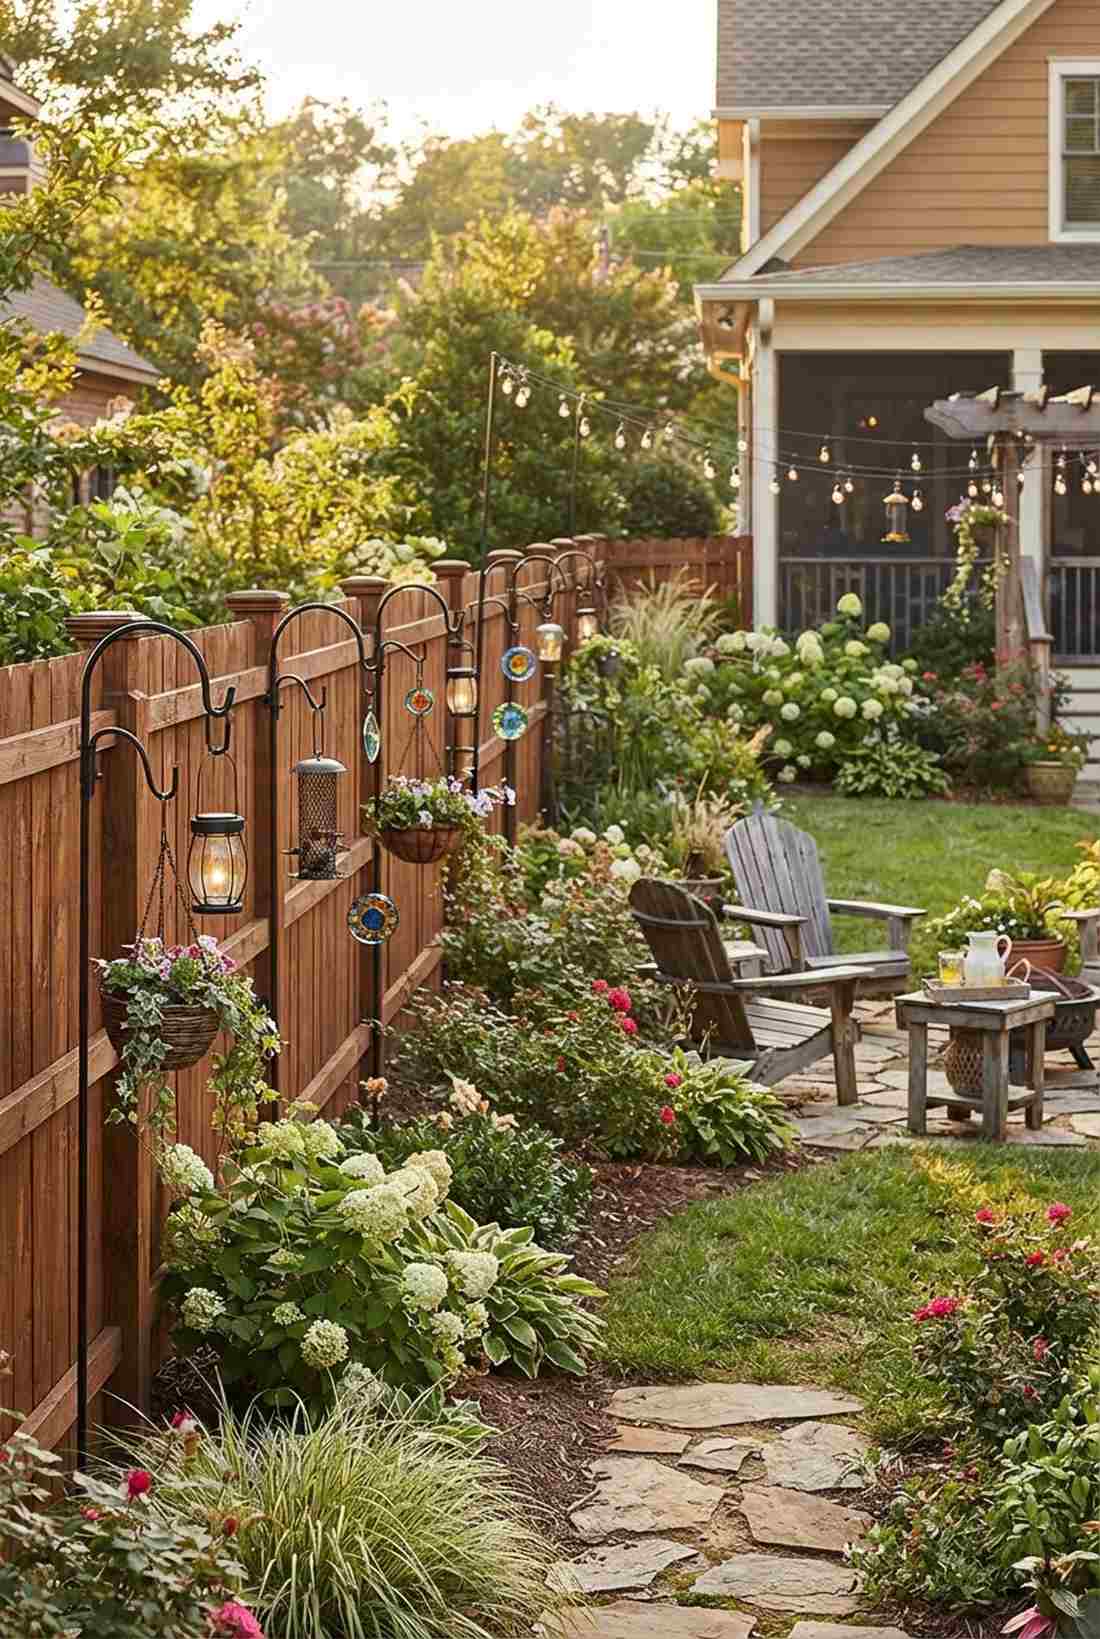
Charming, whimsical, and incredibly flexible, this layout feels like a magical rustic festival. Hanging lanterns from arched fence rail hooks adds instant vertical height to boring, flat privacy fences.
Flat wall mounts can look rigid, but a gentle swinging lantern gives a designer-level finish filled with dynamic movement on breezy nights. Incorporating heavy-duty hanging garden accessories ensures the metal won’t snap under heavy glass globes.
Pull this whimsical look off for just $15 to $30. Pin this if you love easily changeable seasonal decor!
- Key Materials: Powder-coated steel hook, hanging lantern
- Vibe / Style: Whimsical rustic charm
- Difficulty: Extremely easy screw-in
- Budget Breakdown: Bracket: $15 | Lantern: $15.
- Creator’s Tip: Swap out the hanging elements seasonally—use glass suncatchers by day and solar bulbs by night.
- Smart Sourcing: Grab rust-proof steel fence hooks (multi-pack) and shatter-resistant hanging solar globes.
Solar-Powered Wall Mounts
Solar technology eliminates wiring requirements while providing sustainable lighting solutions. Modern photovoltaic panels charge efficiently even in partial shade conditions.
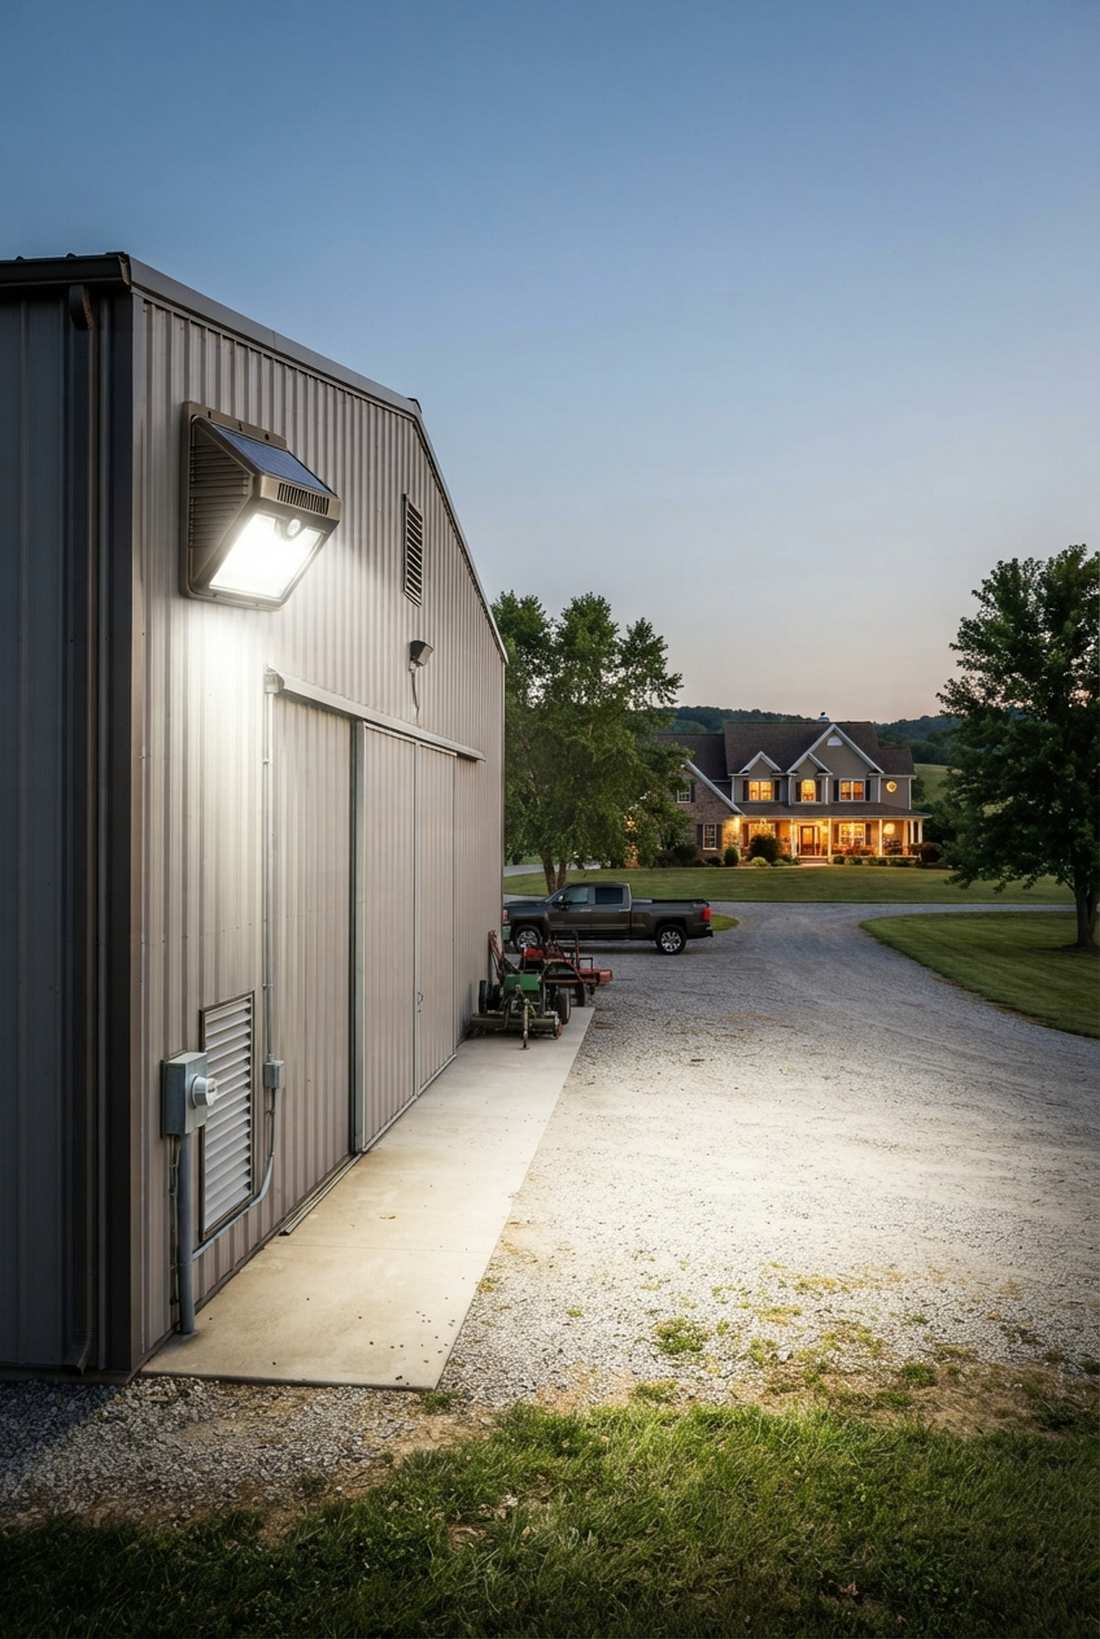
18. Dual-Head Solar Security Light
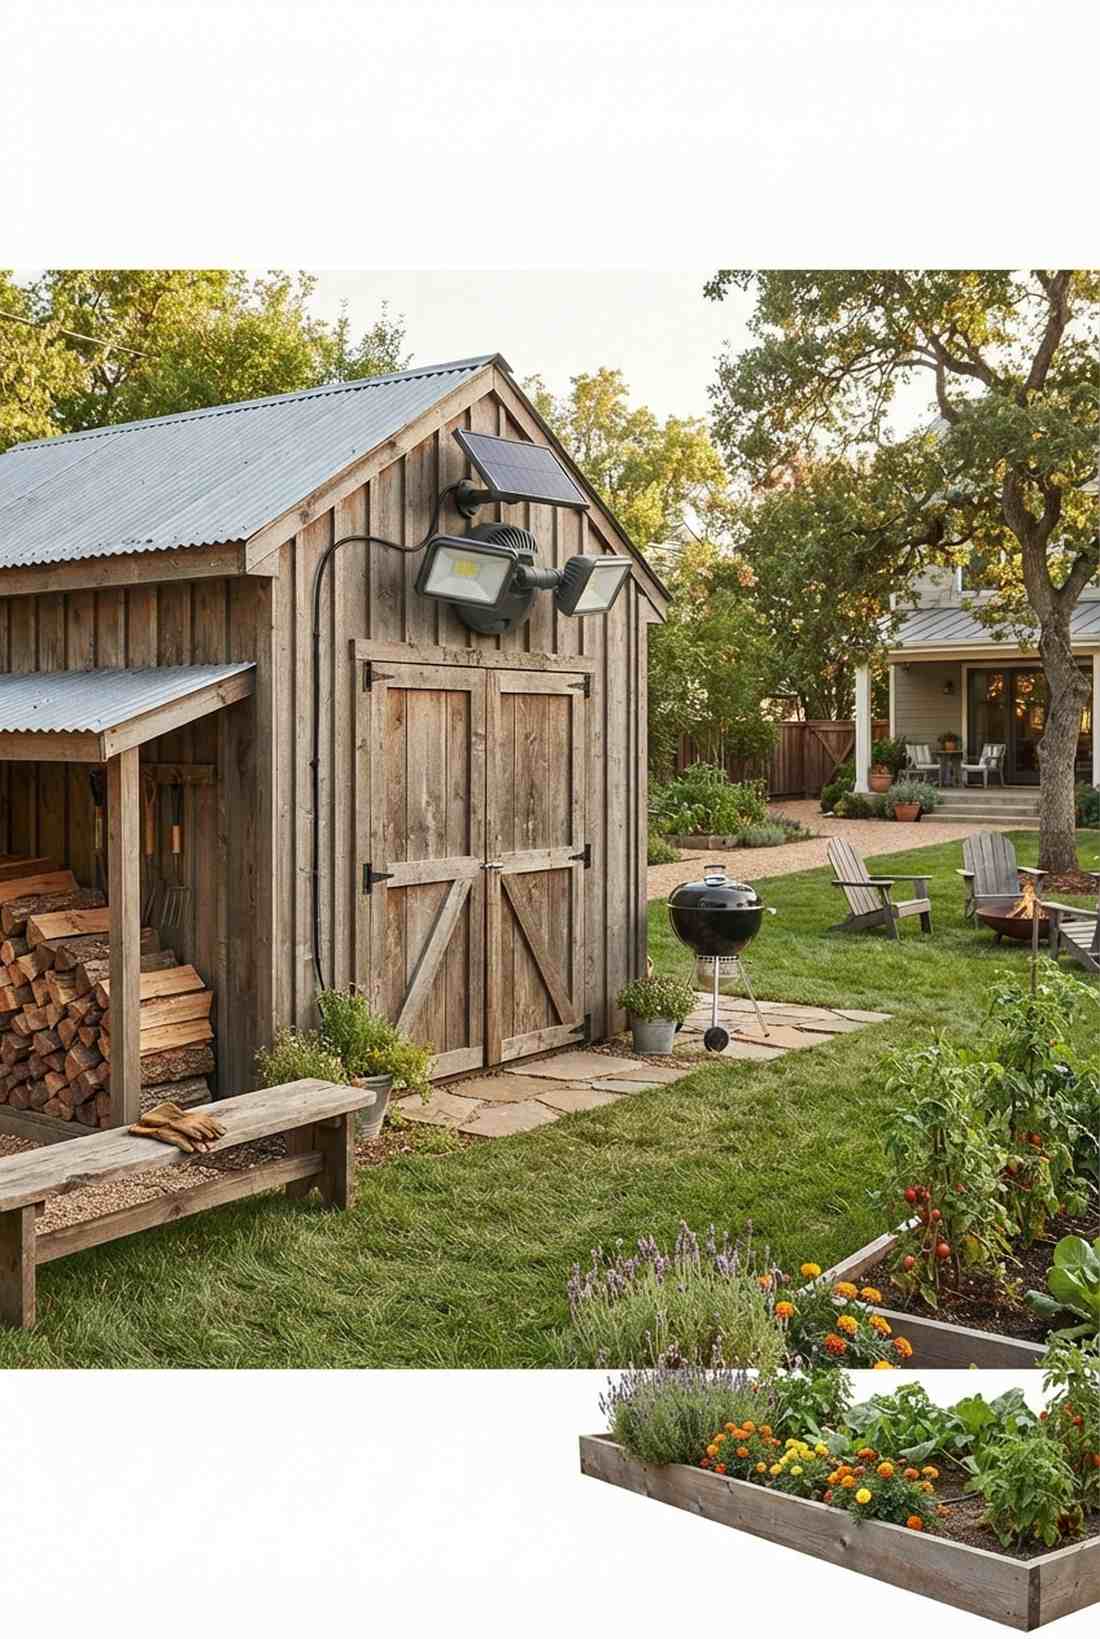
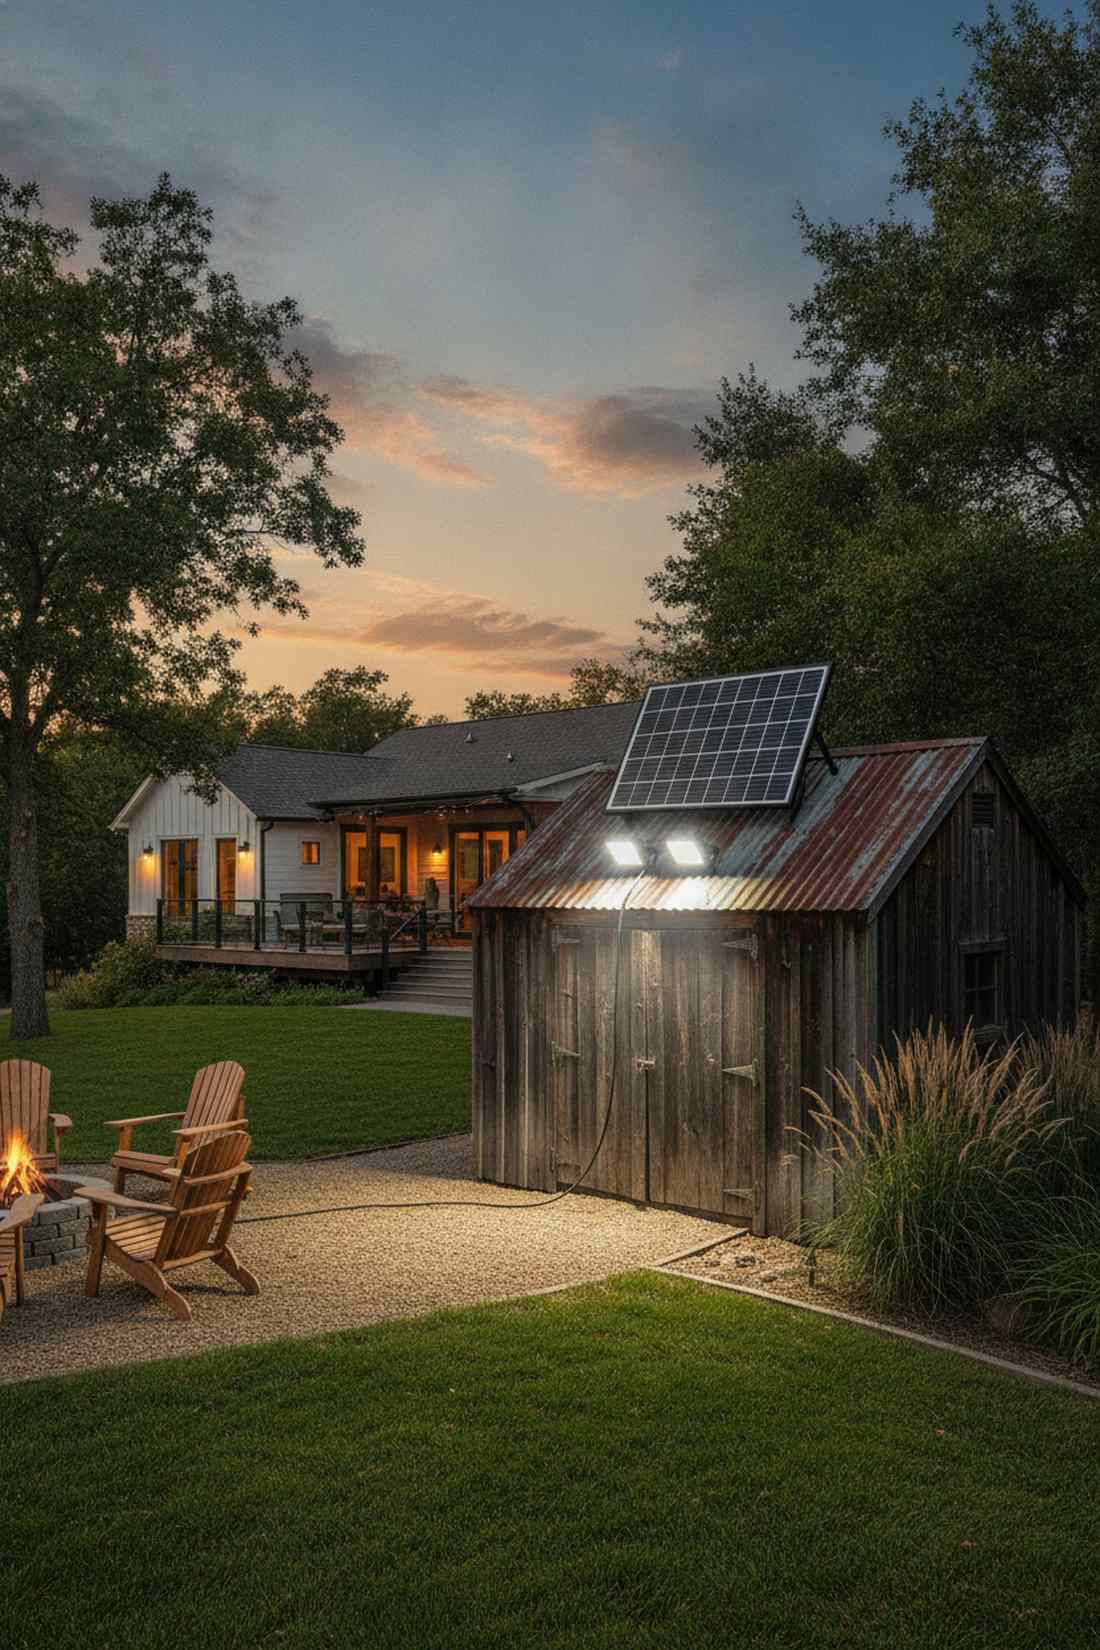
Intensely bright and completely self-sufficient, this setup feels like an off-grid compound’s defense system. Slapping a polycrystalline solar floodlight above your isolated shed doors ensures total visibility without paying an electrician to run trench wires.
Most cheap solar lights fade by 9 PM, but high-capacity lithium battery rigs look far more expensive than they are and last till dawn. Tapping into premium off-grid property lighting kits guarantees performance even during cloudy winter weeks.
Expect to invest $40 to $65 for a reliable unit. Highly recommended for detached garages and dark alleys.
- Key Materials: Solar panel array, dual adjustable LED heads
- Vibe / Style: Rugged off-grid utility
- Difficulty: Simple drill-and-mount
- Budget Breakdown: Solar array unit: $55 | Fasteners: $5.
- Creator’s Tip: Mount the solar panel separately on the actual roof using the extension cord to get maximum southern exposure.
- Smart Sourcing: Invest in high-capacity polycrystalline solar spots and weatherproof panel extension cables.
19. Decorative Solar Coach Light
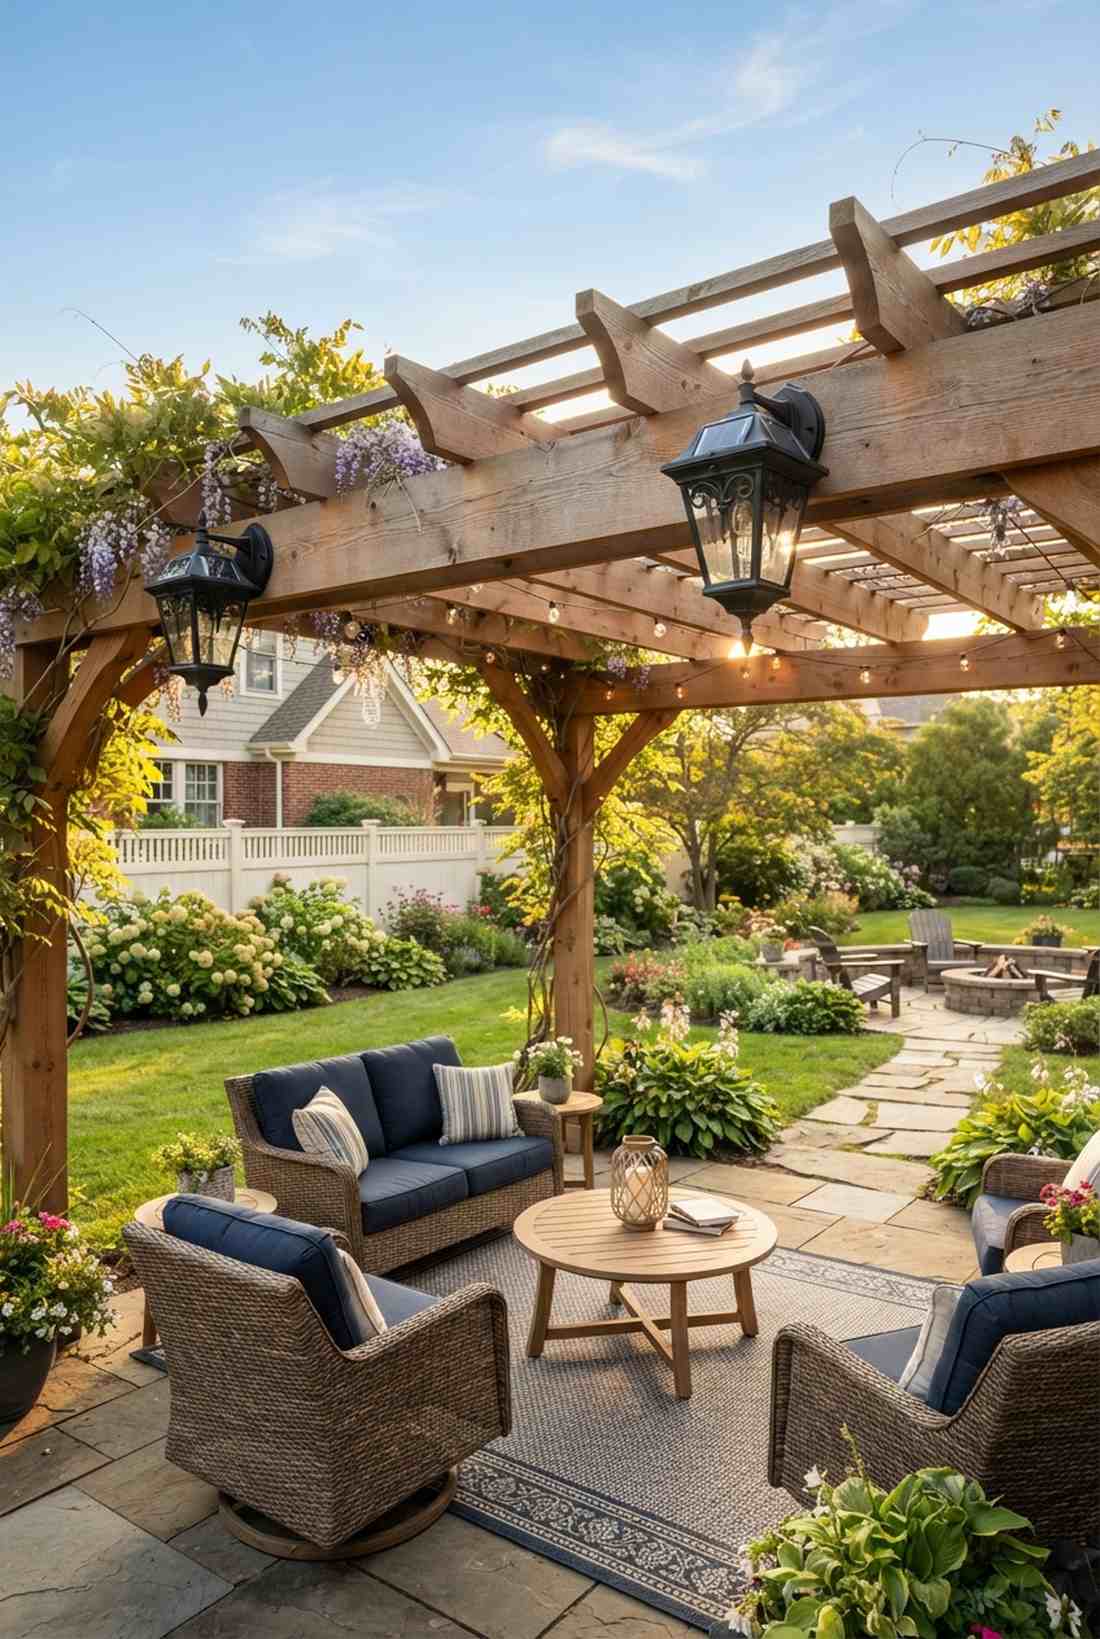
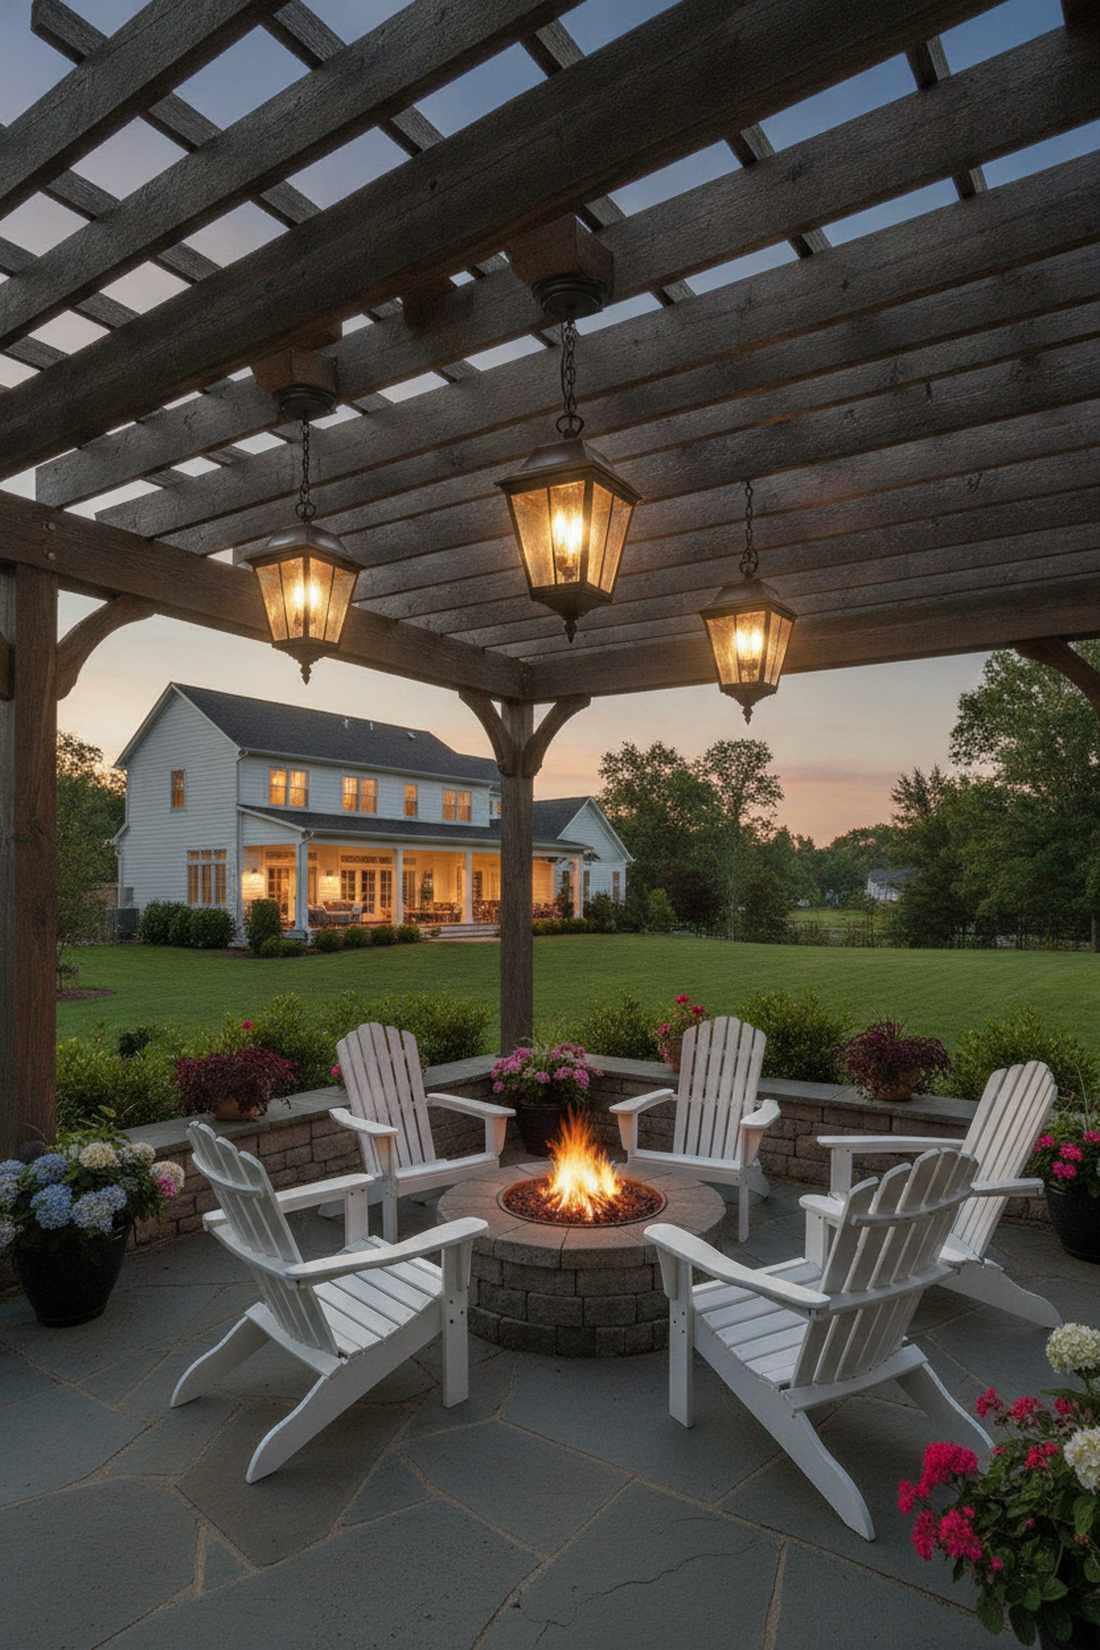
Classic styling meets modern technology in a layout that feels like a historic home powered by magic. The integrated solar traditional lantern is perfect for outfitting a beautiful garden pergola that sits way too far from a wall outlet.
People assume solar means ugly plastic discs, but concealed top-panel lanterns deliver a surprisingly premium look that fools everyone into thinking it’s hardwired. Snagging UV-coated decorative outdoor kits stops the housing from chalking in the sun.
This zero-wire aesthetic runs about $30 to $50. Save this idea if you hate dealing with electrical wiring!
- Key Materials: Faux-metal housing, hidden top solar panel
- Vibe / Style: Classic cordless elegance
- Difficulty: Beginner-friendly
- Budget Breakdown: Solar Coach: $40 | Mounts: $5.
- Creator’s Tip: Make sure there are no overhanging tree branches; even a little shade on the top panel drastically reduces runtime.
- Smart Sourcing: Use all-weather solar coach light bundles and pre-cut heavy-duty mounting tape.
Contractors hate when homeowners discover this next brilliantly simple solar hack…
20. Solar Wall Washer Uplight
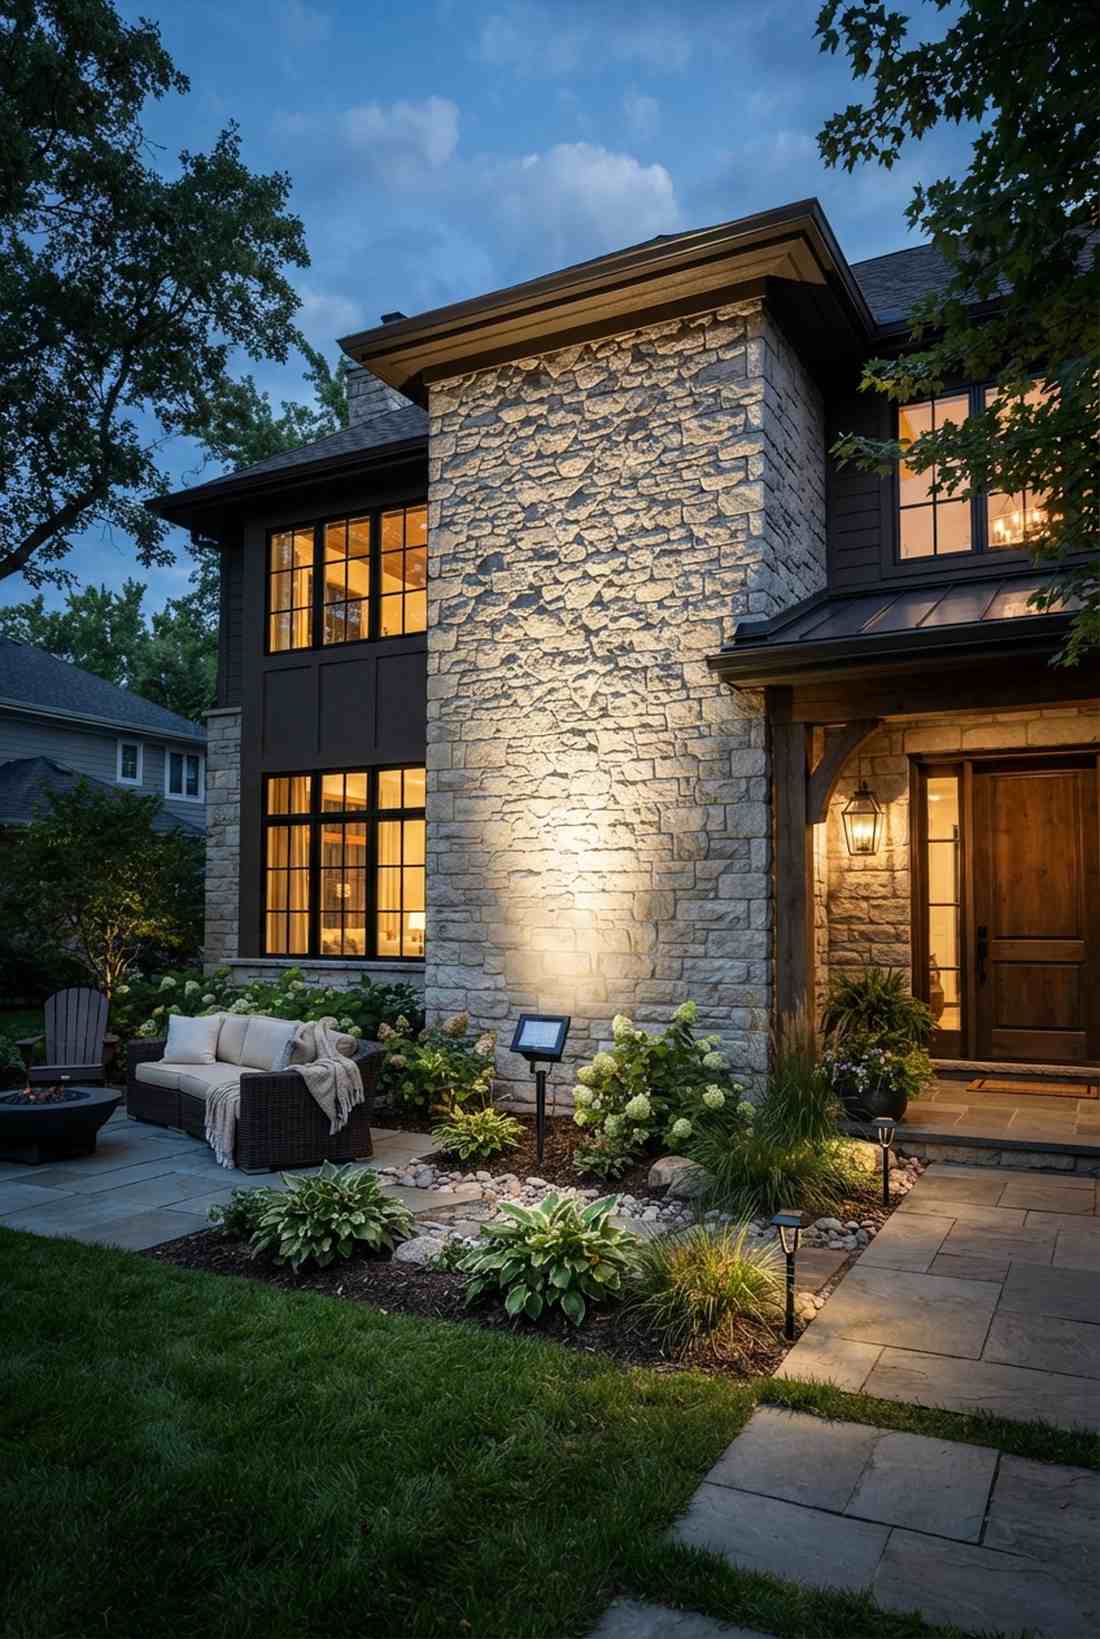
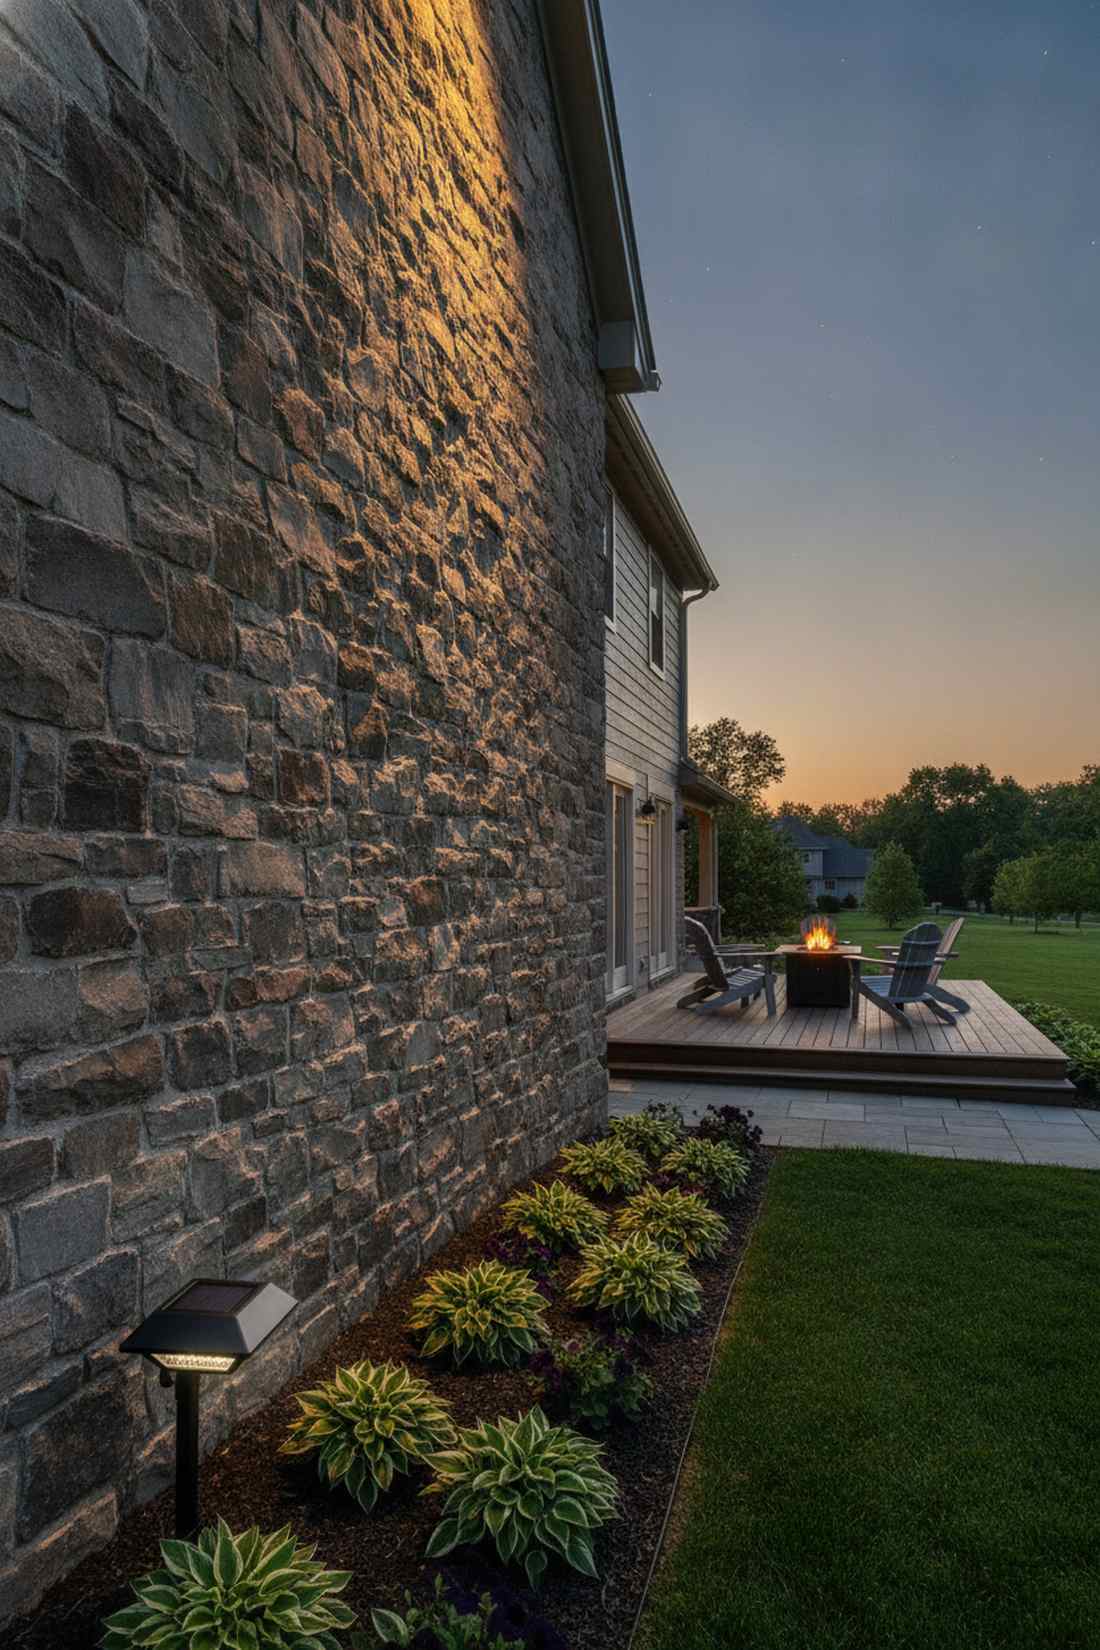
Dramatic and highly architectural, this angle feels like the exterior of an upscale art museum. Positioning an adjustable solar wall uplight at the base of your stonework creates massive, sweeping shadows that highlight every texture.
Digging trenches for ground lights ruins your flower beds, but stake-and-aim solar washers give a designer-level finish without touching a single shovel. Sourcing high-intensity landscape illumination supplies ensures the beam reaches the top of a two-story wall.
You can create this massive visual impact for just $25 to $45. A brilliantly fast weekend upgrade.
- Key Materials: High-output LED array, pivoting ground stake/bracket
- Vibe / Style: Grand architectural drama
- Difficulty: Extremely easy setup
- Budget Breakdown: Solar Washer: $30 | Positioning tools: $0.
- Creator’s Tip: Place the light exactly 12 inches away from the wall base for the perfect balance of shadow and light wash.
- Smart Sourcing: Order adjustable angle solar wall washers (starter pack) and shatterproof acrylic lens covers.
21. Solar Wall Pack Commercial-Grade
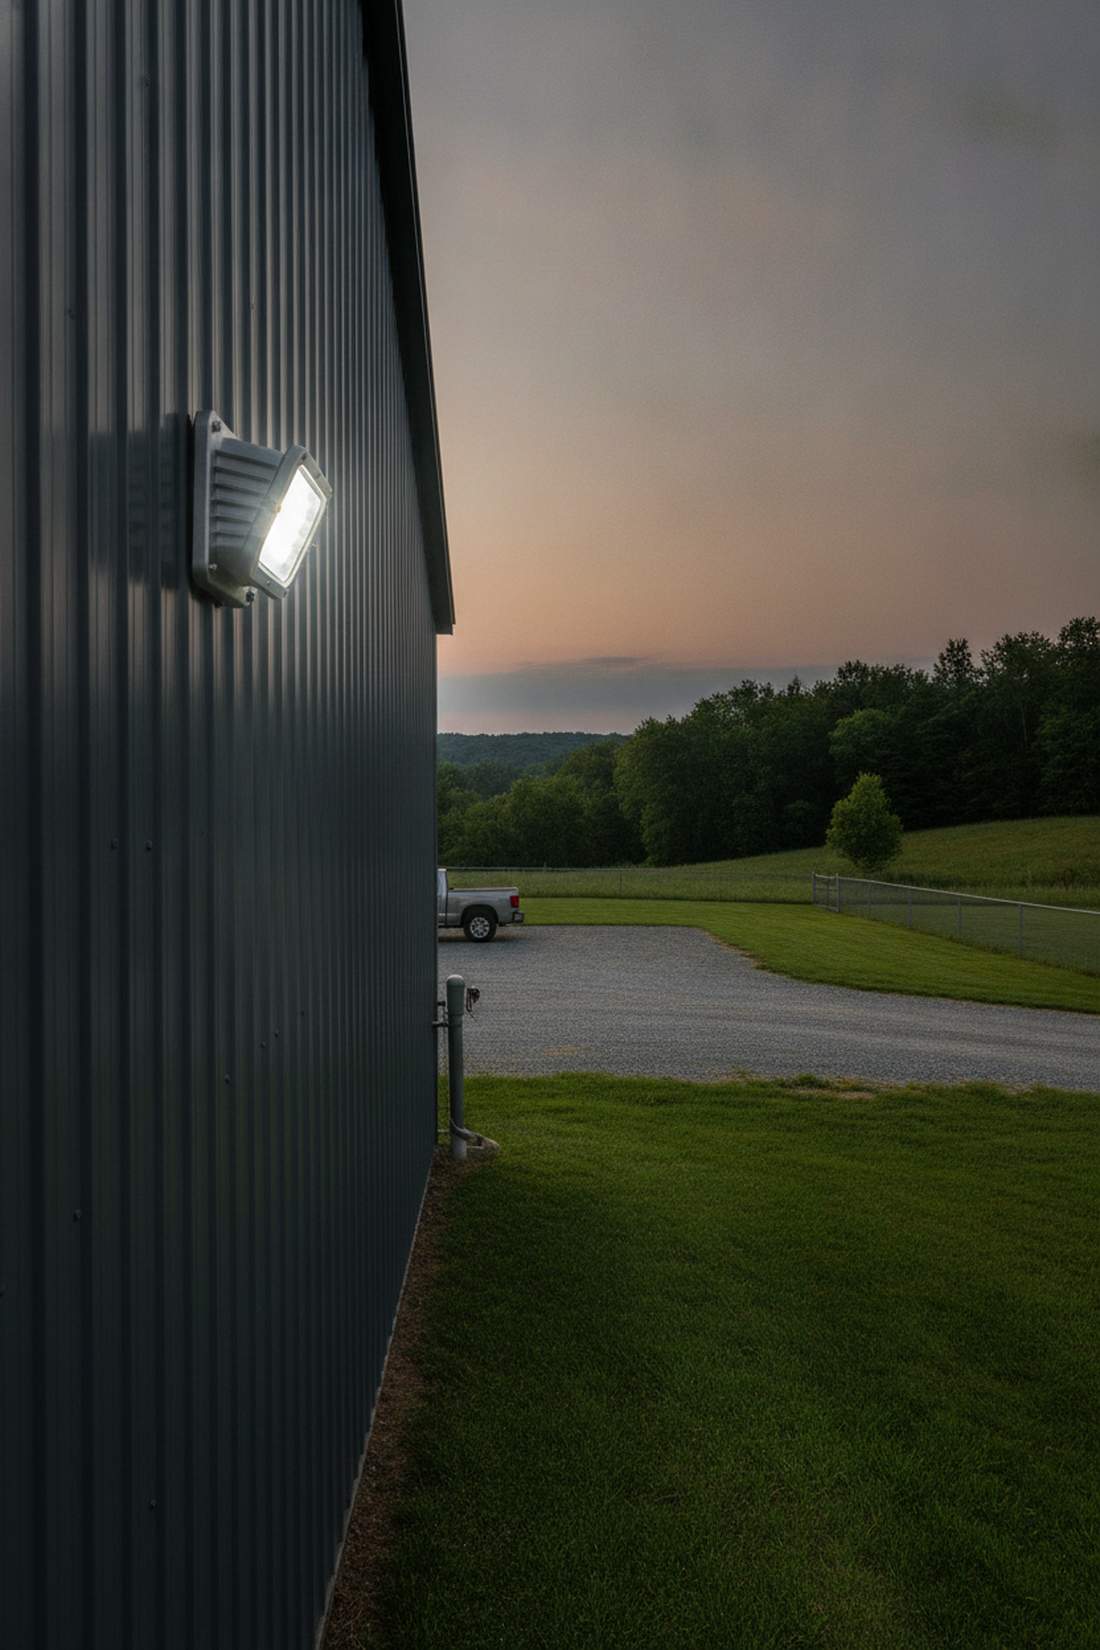
Built like a tank and aggressively bright, this layout feels like industrial warehouse security. Slapping a die-cast aluminum solar pack on the side of a massive metal barn or commercial driveway guarantees zero dark spots.
Flimsy plastic housings shatter in a hailstorm, but heavy-duty commercial metal fixtures look far more expensive than they are and survive decades of abuse. Investing in heavy-grade exterior infrastructure lighting pays off immediately in peace of mind.
Expect to spend $70 to $120 for true commercial quality. Pin this if you need serious acreage illumination!
- Key Materials: Die-cast aluminum housing, tempered glass lens
- Vibe / Style: Heavy-duty industrial safety
- Difficulty: Heavy lifting required
- Budget Breakdown: Commercial Unit: $95 | Lag bolts: $10.
- Creator’s Tip: These units are heavy; absolutely ensure you are mounting directly into a wall stud or solid masonry.
- Smart Sourcing: Buy die-cast aluminum solar wall packs and heavy-duty masonry lag bolts (bulk pack).
22. Solar Step Light Wall Mount
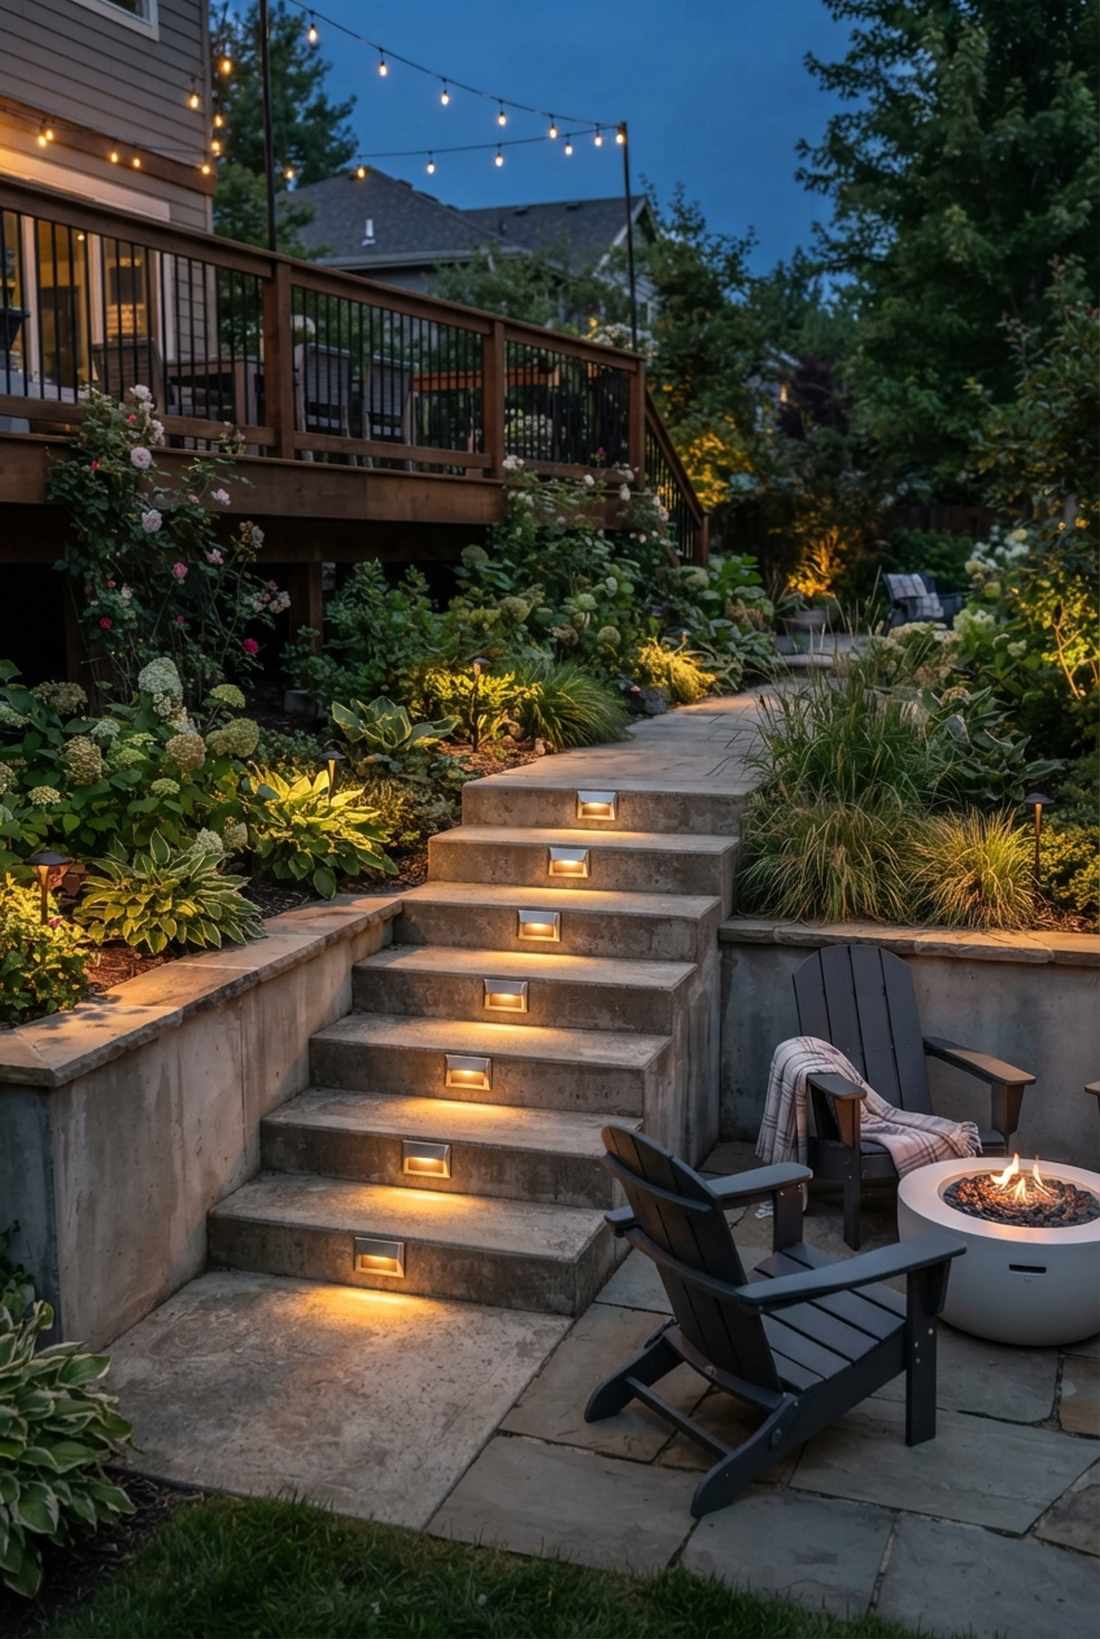
Subtle, safe, and beautifully integrated, this glow feels like navigating a luxury yacht at night. Embedding compact solar step lights along low concrete retaining walls or wooden stair risers prevents nasty trips in the dark.
Standard path lights get kicked and broken easily, but recessed step hugs deliver a surprisingly premium look that stays completely out of the foot traffic zone. Utilizing stainless steel patio safety kits stops rust dead in its tracks.
Grab a multi-pack of these for roughly $25 to $40. A must-have fix for tiered garden layouts.
- Key Materials: Stainless steel faceplate, compact solar cell
- Vibe / Style: Sleek patio safety
- Difficulty: Simple surface screw
- Budget Breakdown: 6-pack lights: $35 | Screws: $2.
- Creator’s Tip: Use the amber LED option for stairs; bright white light reflects off concrete and temporarily blinds people walking up.
- Smart Sourcing: Snag stainless steel recessed step lights (bulk pack) and anti-rust exterior screws.
Industrial & Cage-Style Sconces
Wire cage fixtures and gooseneck arms deliver urban-industrial character to modern gardens. Exposed bulbs and raw metal finishes create intentional contrast with natural plantings.
23. Gooseneck Barn Light
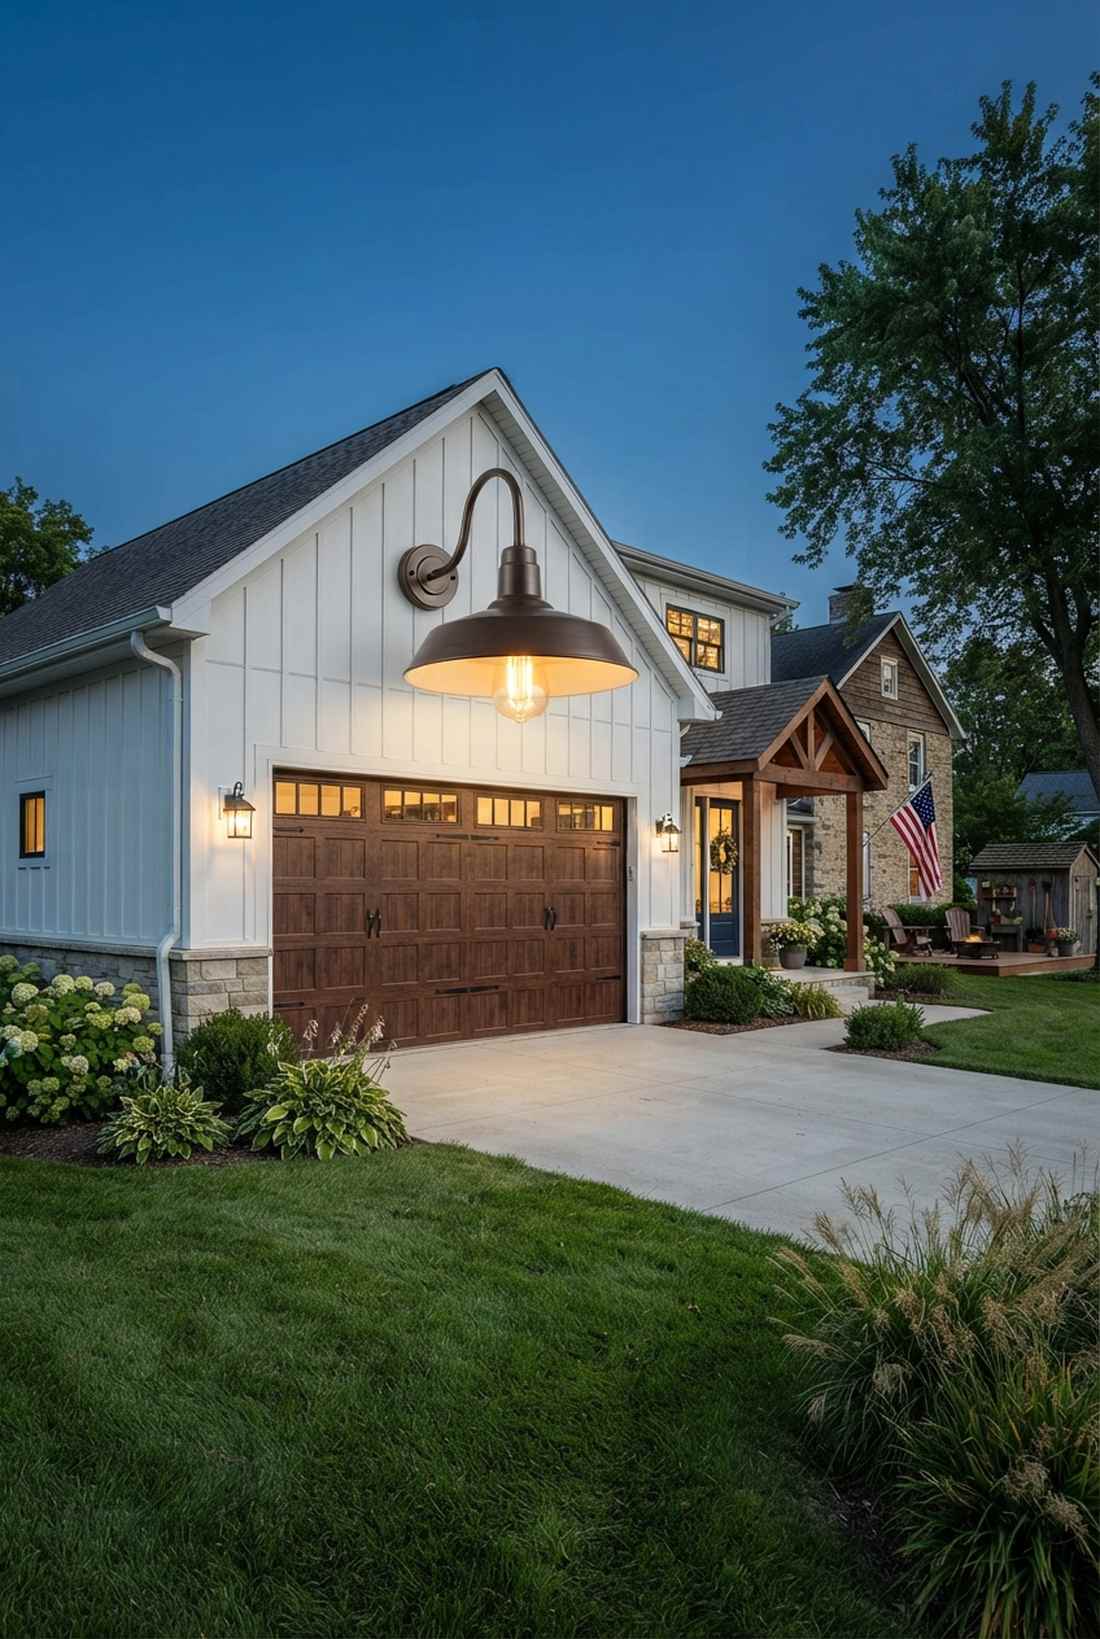
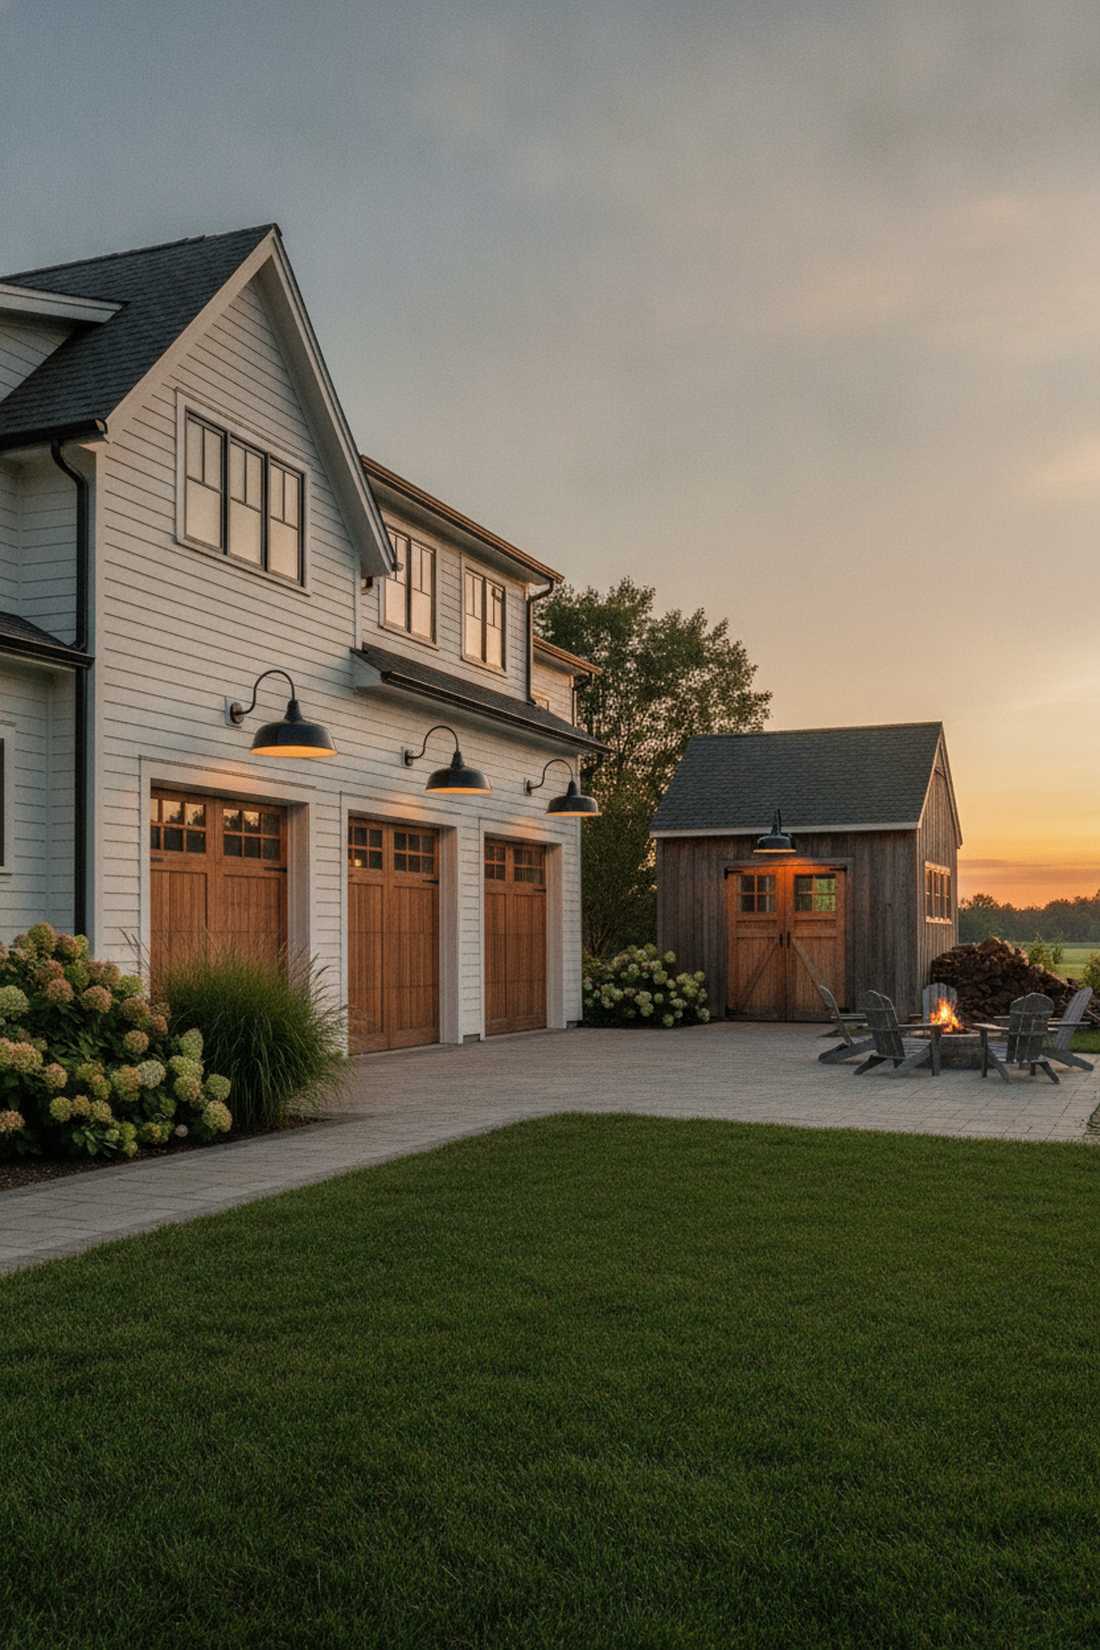
Bold, nostalgic, and incredibly charming, this profile feels like an upscale modern farmhouse renovation. Mounting a porcelain enamel gooseneck above wide garage doors or a rustic potting shed creates a massive focal point.
Tiny lights look ridiculous on large siding, but oversized barn hoods trick the eye into seeing a perfectly balanced, custom-built exterior. Incorporating authentic galvanized architectural supplies ensures that classic, heavy-duty farm aesthetic.
Achieve this bold farmhouse look for $45 to $75. Save this to your modern farmhouse mood board!
- Key Materials: Spun metal shade, curved gooseneck arm
- Vibe / Style: Premium modern farmhouse
- Difficulty: Standard hardwiring
- Budget Breakdown: Barn light: $60 | Base plate: $10.
- Creator’s Tip: Go big. An 18-inch diameter shade looks significantly better and more proportionate than a timid 10-inch one.
- Smart Sourcing: Pick up porcelain enamel gooseneck kits and oversized LED filament bulbs.
24. Wire Cage Wall Guard Light
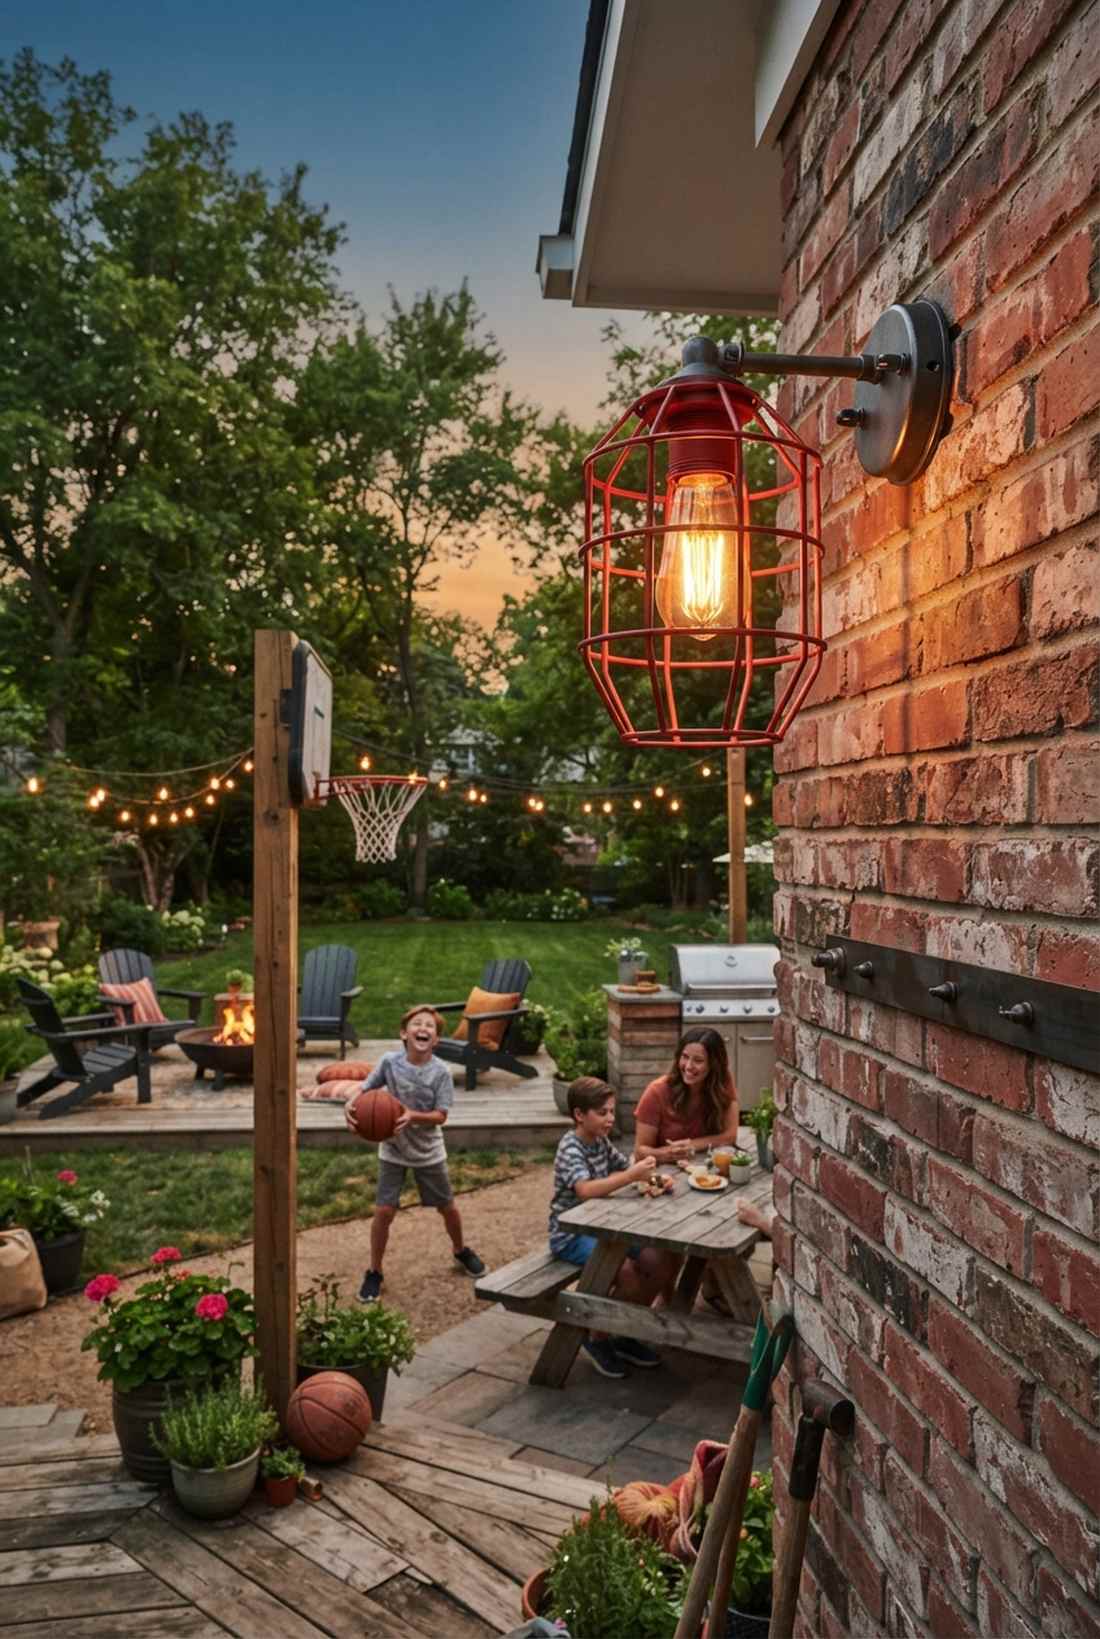
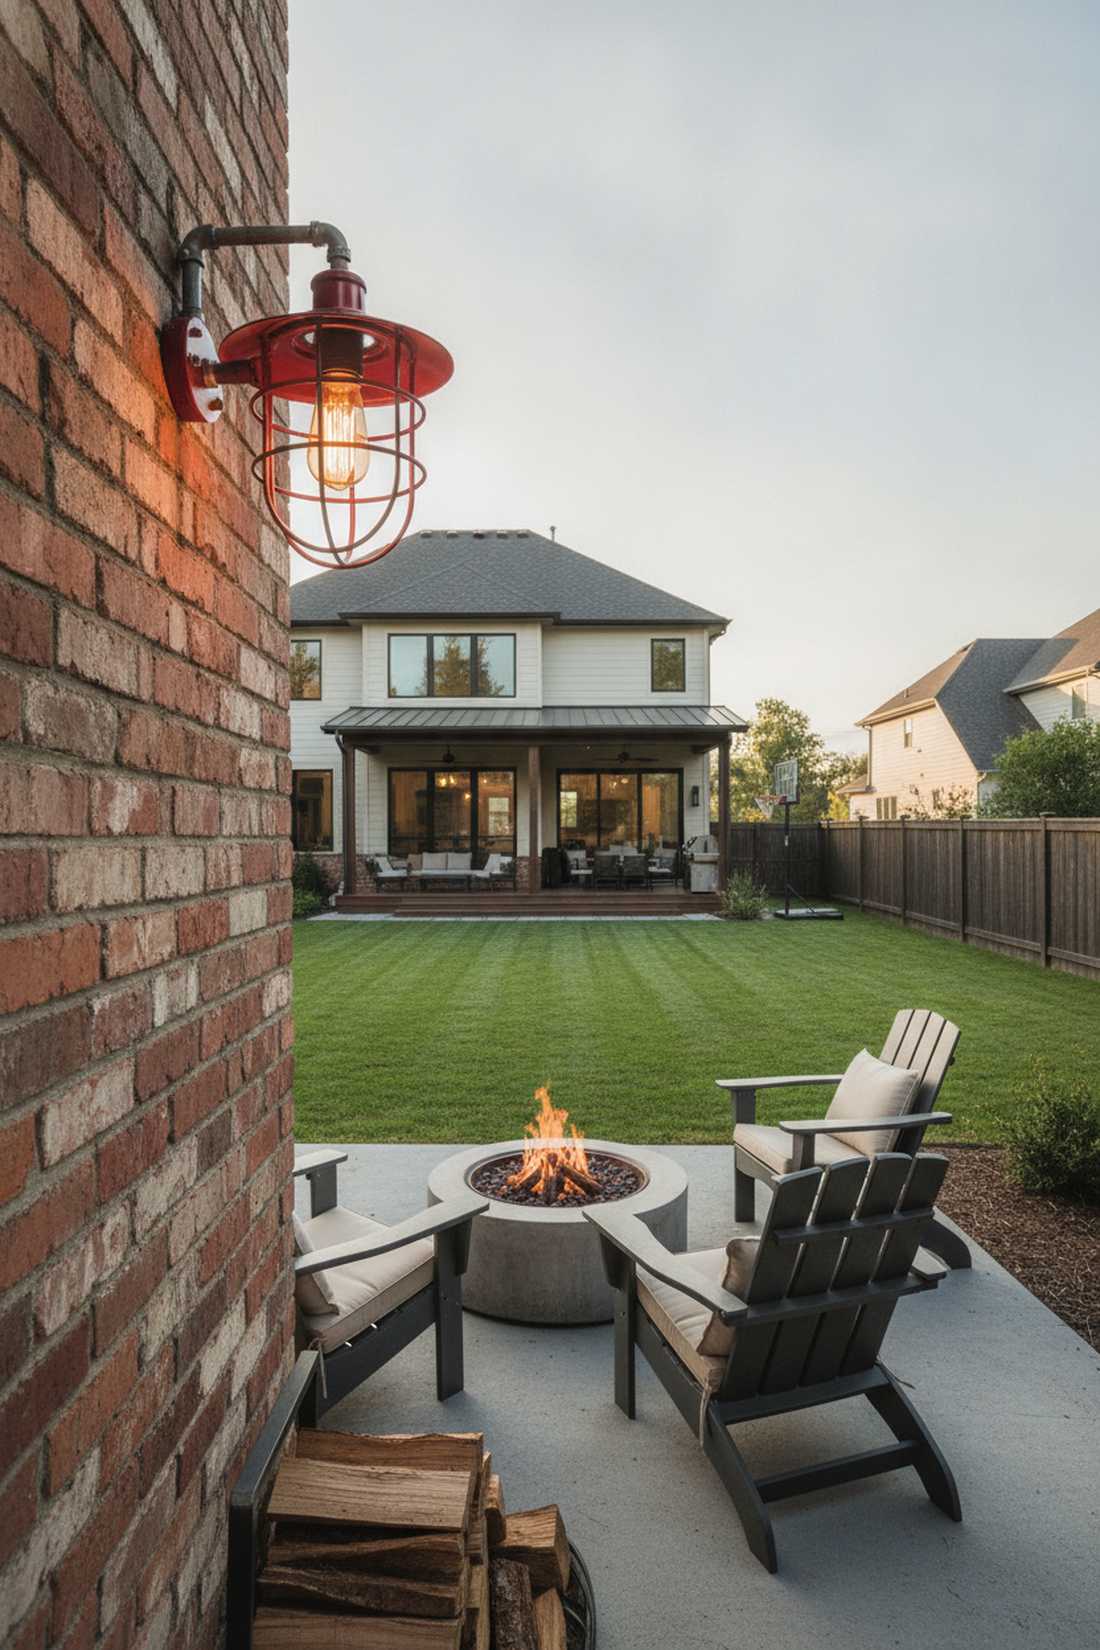
Raw, utilitarian, and super edgy, this design feels straight out of a trendy Brooklyn warehouse conversion. A heavy-gauge wire guard sconce is the ultimate choice for workshop exteriors or exposed brick patio walls.
Frail glass globes shatter easily from stray basketballs, but thick steel cages look far more expensive than they are while providing bulletproof bulb protection. Sourcing raw industrial lighting supplies adds serious gritty character to your home.
You can mount these tough fixtures for $30 to $50. Highly recommended for active family backyards.
- Key Materials: Heavy-gauge steel wire cage, exposed socket
- Vibe / Style: Gritty urban industrial
- Difficulty: Easy intermediate install
- Budget Breakdown: Cage fixture: $35 | Vintage bulb: $10.
- Creator’s Tip: Spray paint the cage a vibrant pop color like cherry red or mustard yellow for a cool custom look.
- Smart Sourcing: Look for heavy-gauge wire guard bulk packs and shatterproof Edison LEDs.
Stop scrolling for a second—this upcoming cage light trick is the highest-converting look on Pinterest right now.
25. Warehouse Shade Wall Sconce
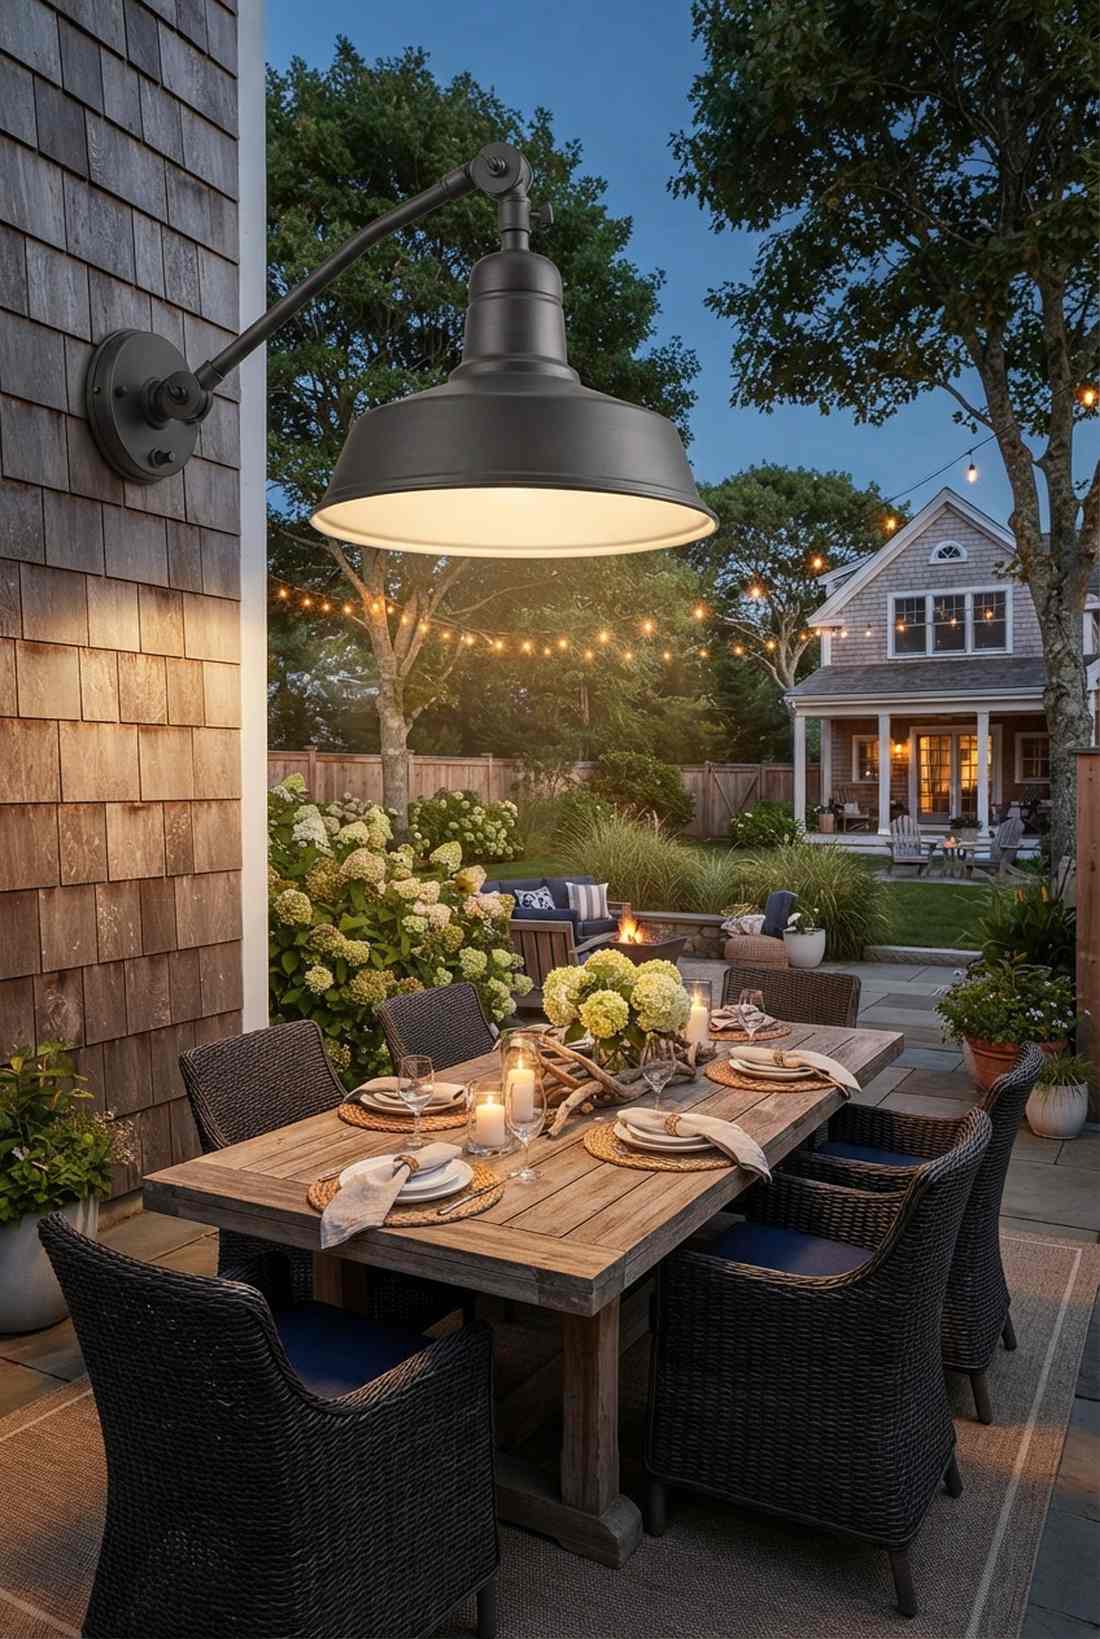
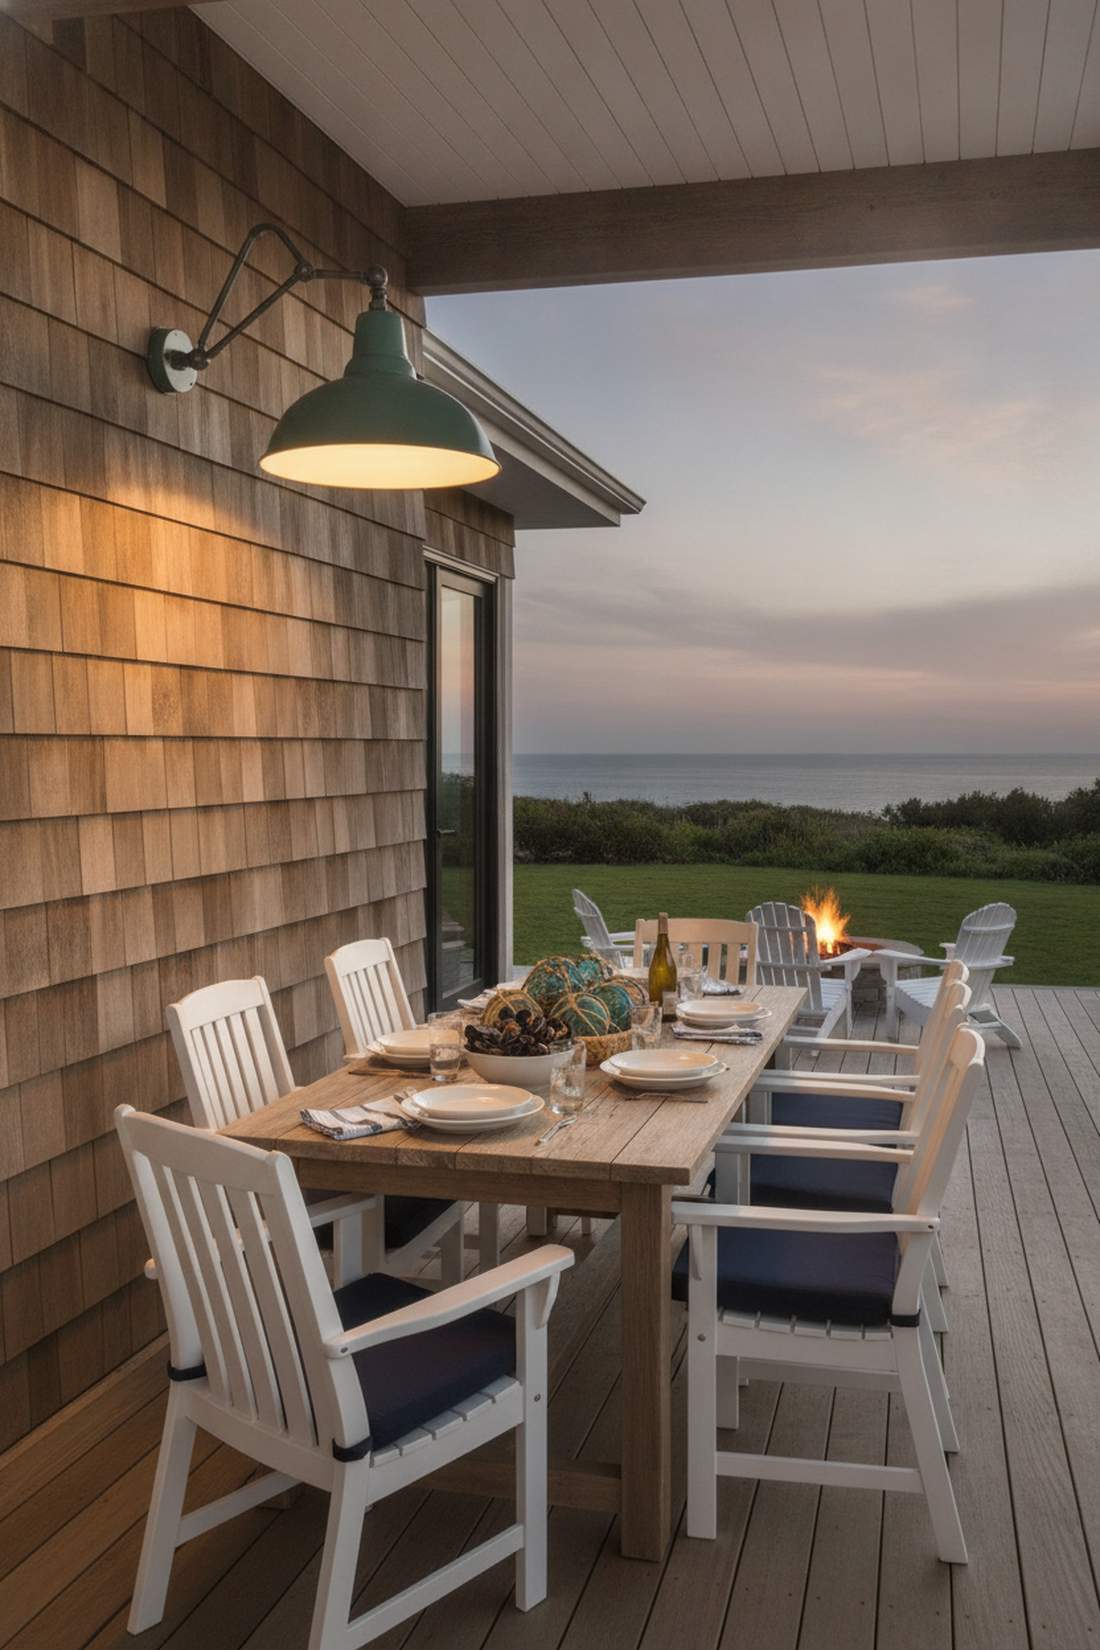
Massive and wonderfully retro, this wide-brimmed setup feels like stepping into an old-school coastal fishery. The stamped warehouse shade sconce excels at casting a massive pool of downward light over an entire outdoor dining table.
Skinny lights fail to illuminate wide areas, but an ultra-wide rolled edge shade gives a designer-level finish that dominates the space beautifully. Upgrading to powder-coated patio utility gear guarantees the color won’t chip in the salty air.
Set up this massive retro look for $50 to $85. Pin this if you have a huge blank wall to fill!
- Key Materials: 16-inch stamped metal shade, adjustable arm joint
- Vibe / Style: Retro coastal utility
- Difficulty: Moderate heavy mounting
- Budget Breakdown: Warehouse shade: $65 | Hardware: $5.
- Creator’s Tip: Use an articulating joint bracket so you can tilt the shade outward to cover more of the patio floor.
- Smart Sourcing: Invest in stamped metal warehouse shades and UV-coated weather gaskets.
Material Guide: Cheap vs. Premium Aesthetic
Knowing exactly where to save and where to spend makes all the difference in achieving that “looks expensive but isn’t” vibe.
- Standard vs. UV-Resistant/Premium: Cheap plastic housings turn white and brittle in one summer. Spending an extra $10 on UV-coated polycarbonate or powder-coated aluminum stops fading and cracking entirely.
- Pre-made Kits vs. Sourcing Locally: Running to the hardware store for individual screws and wires adds up fast. Pre-wired starter kits often save both time and money while ensuring all components are properly waterproof-rated.
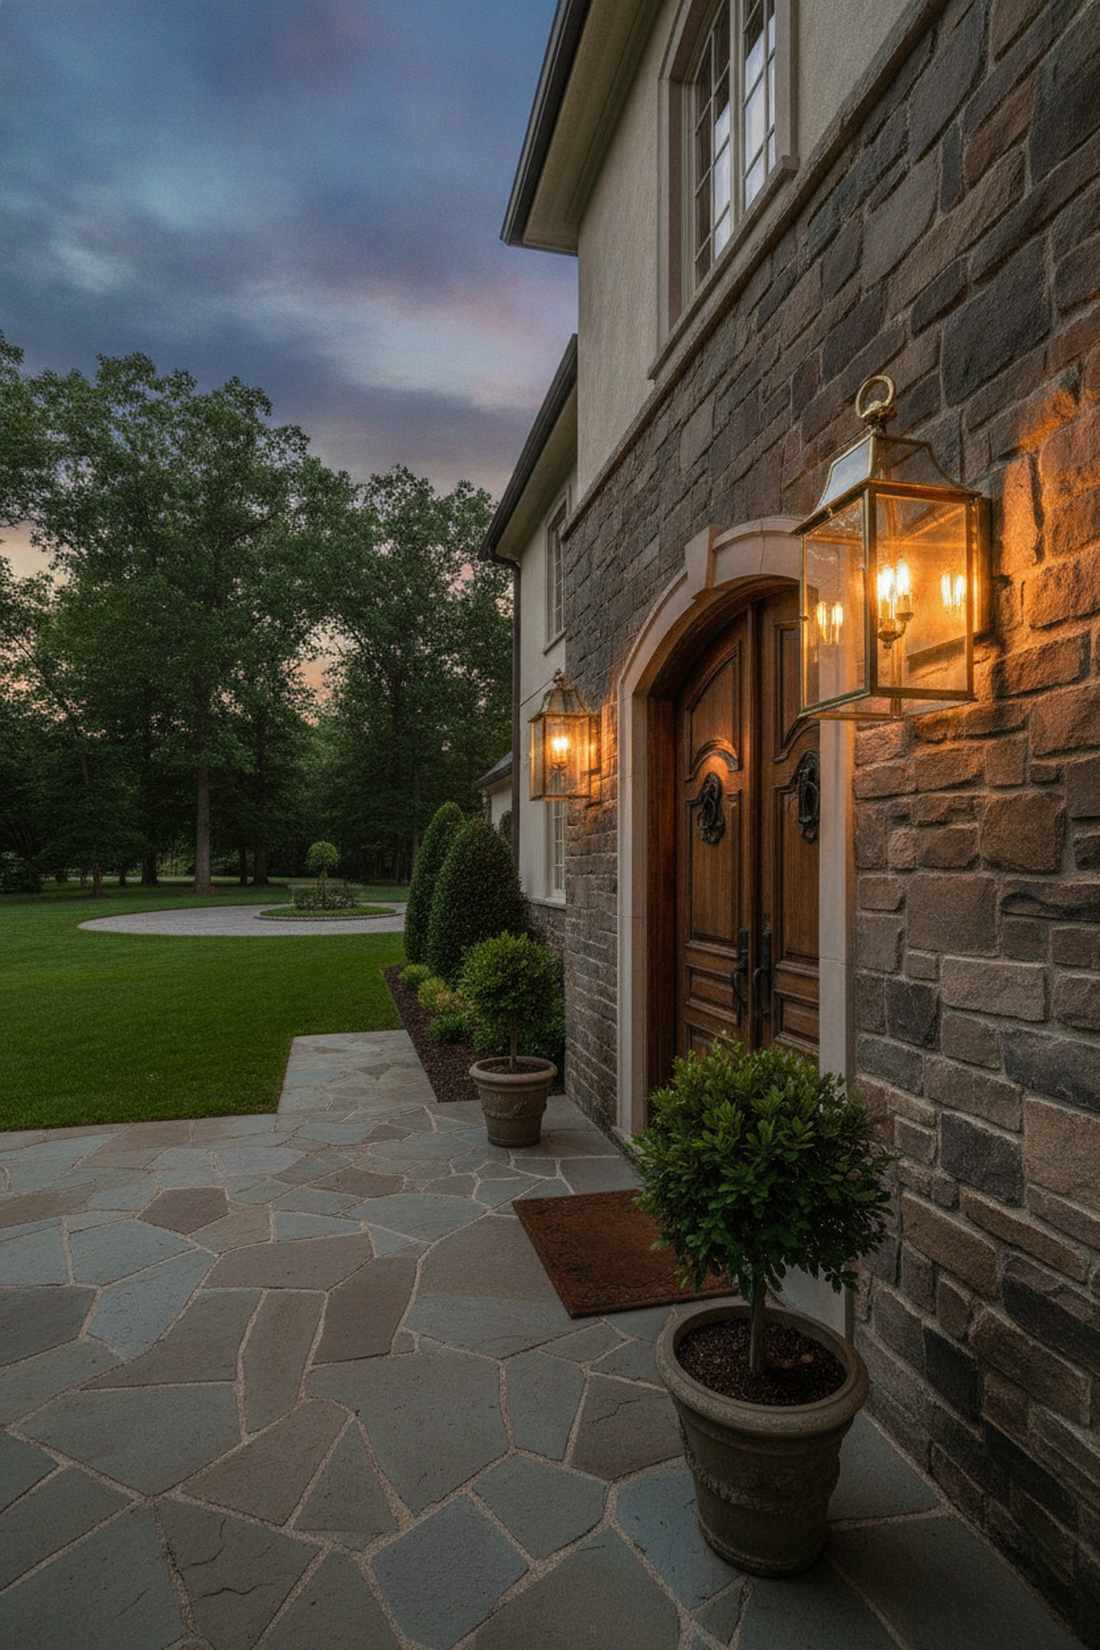
26. Nautical Bulkhead Light
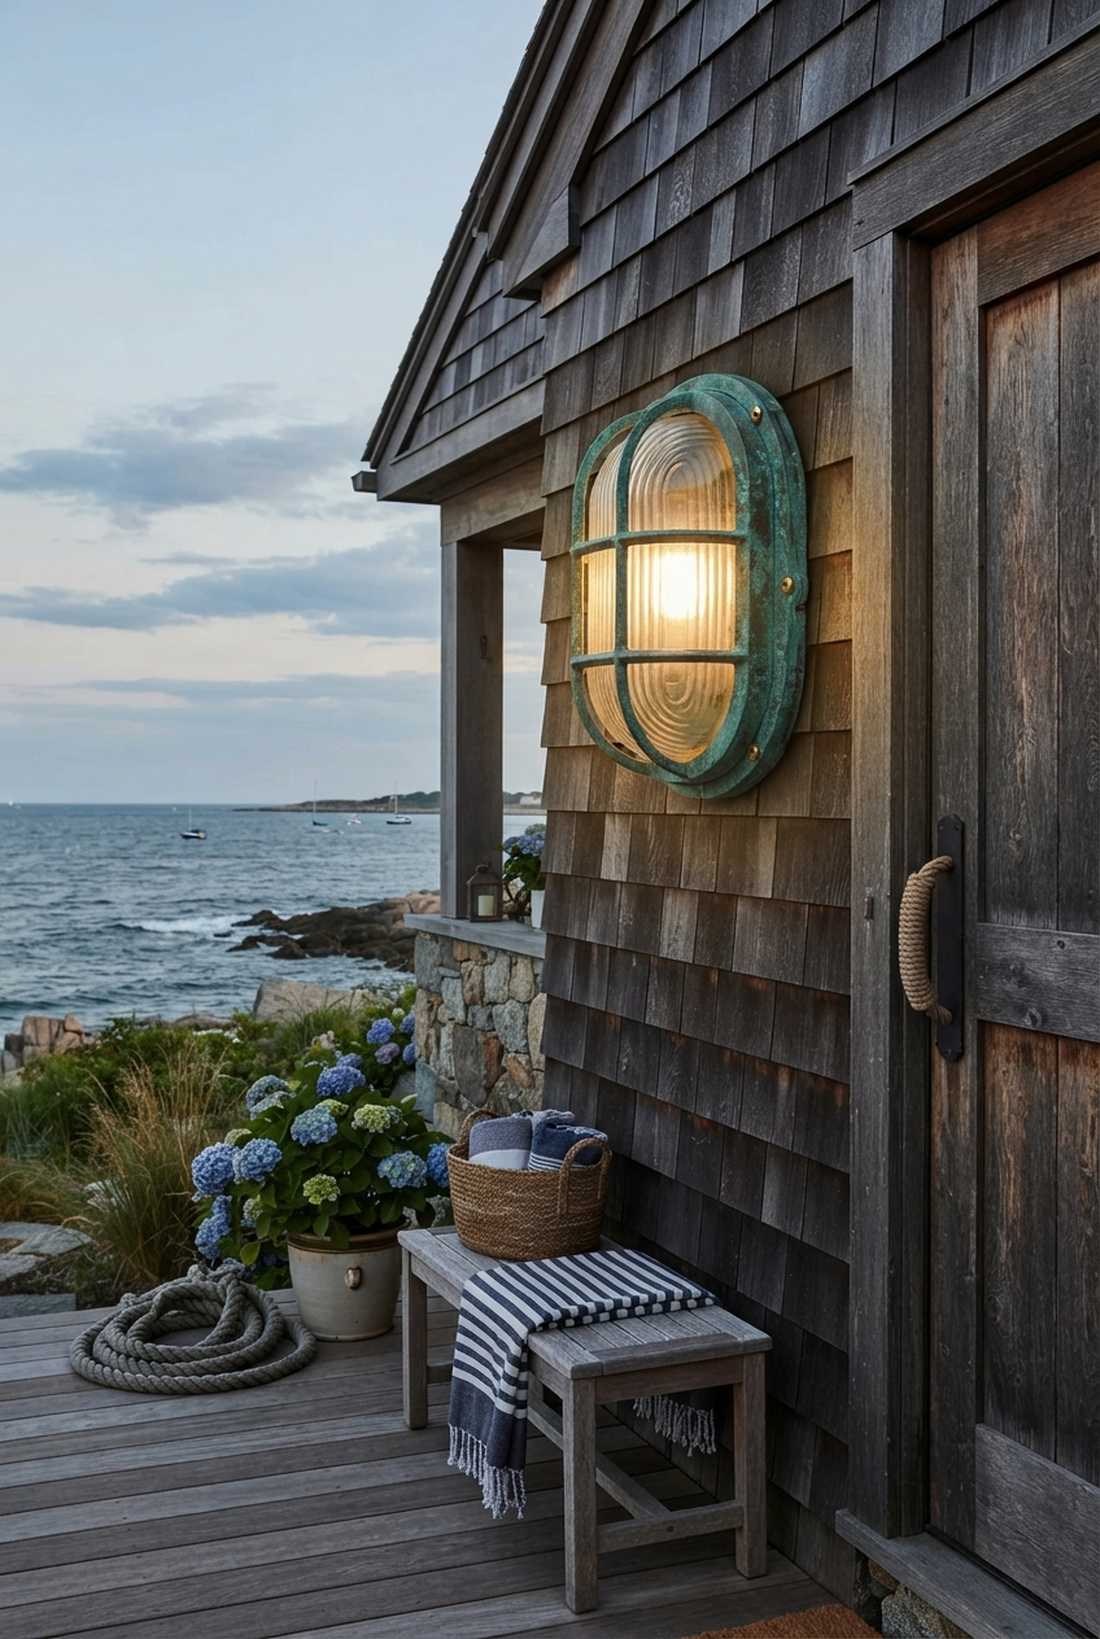
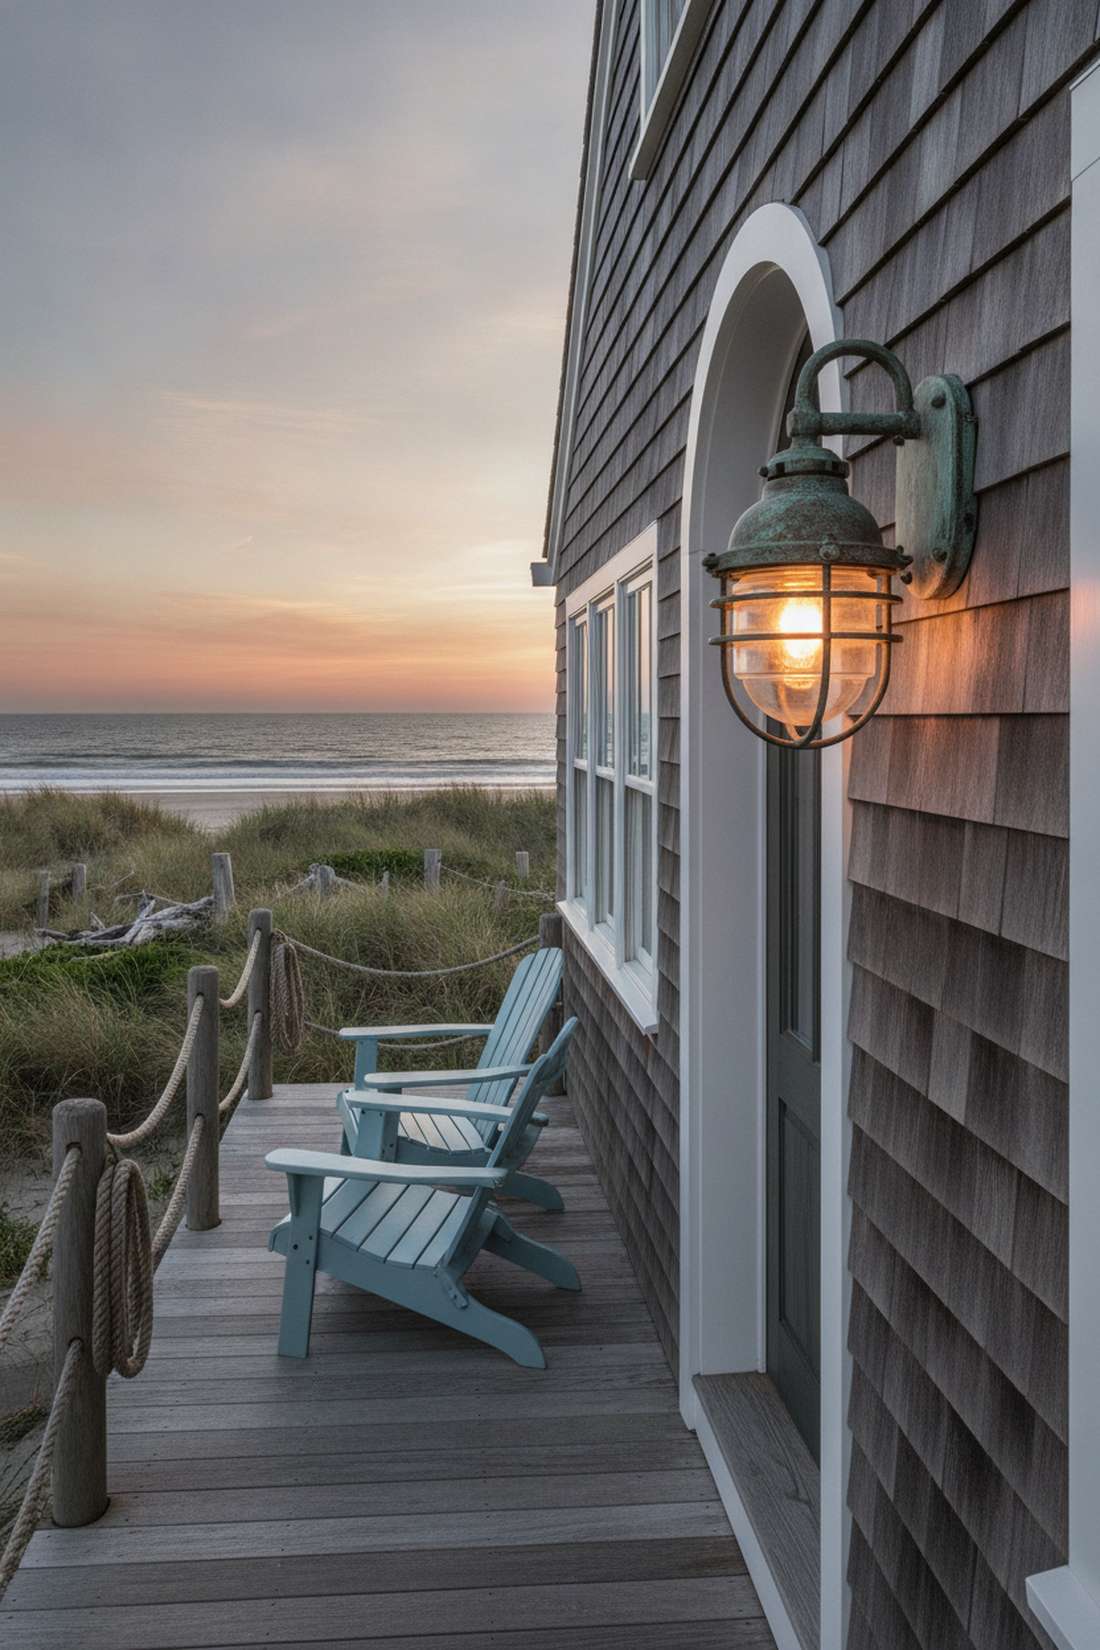
Thick, rugged, and completely weather-sealed, this aesthetic feels exactly like the hull of an old ship. A marine-grade brass bulkhead fixture is absolutely essential for homes sitting directly on the harsh, salty coastline.
Standard metals disintegrate near the ocean, but thick ribbed glass and solid brass trick the eye into seeing a luxury yacht while completely ignoring the corrosive salt spray. Utilizing genuine nautical dockside supplies means you only have to install it once.
These bulletproof fixtures run about $45 to $80. A total game-changer for beach house exteriors.
- Key Materials: Solid brass/bronze frame, thick ribbed glass
- Vibe / Style: Authentic maritime coastal
- Difficulty: Standard surface wiring
- Budget Breakdown: Brass Bulkhead: $70 | Sealant: $5.
- Creator’s Tip: Never polish the brass! Let it oxidize over the first year to develop that stunning, authentic sea-green patina.
- Smart Sourcing: Grab marine-grade brass bulkhead fixtures and marine-grade silicone caulk (bulk tube).
27. Edison Cage Pendant Wall Mount
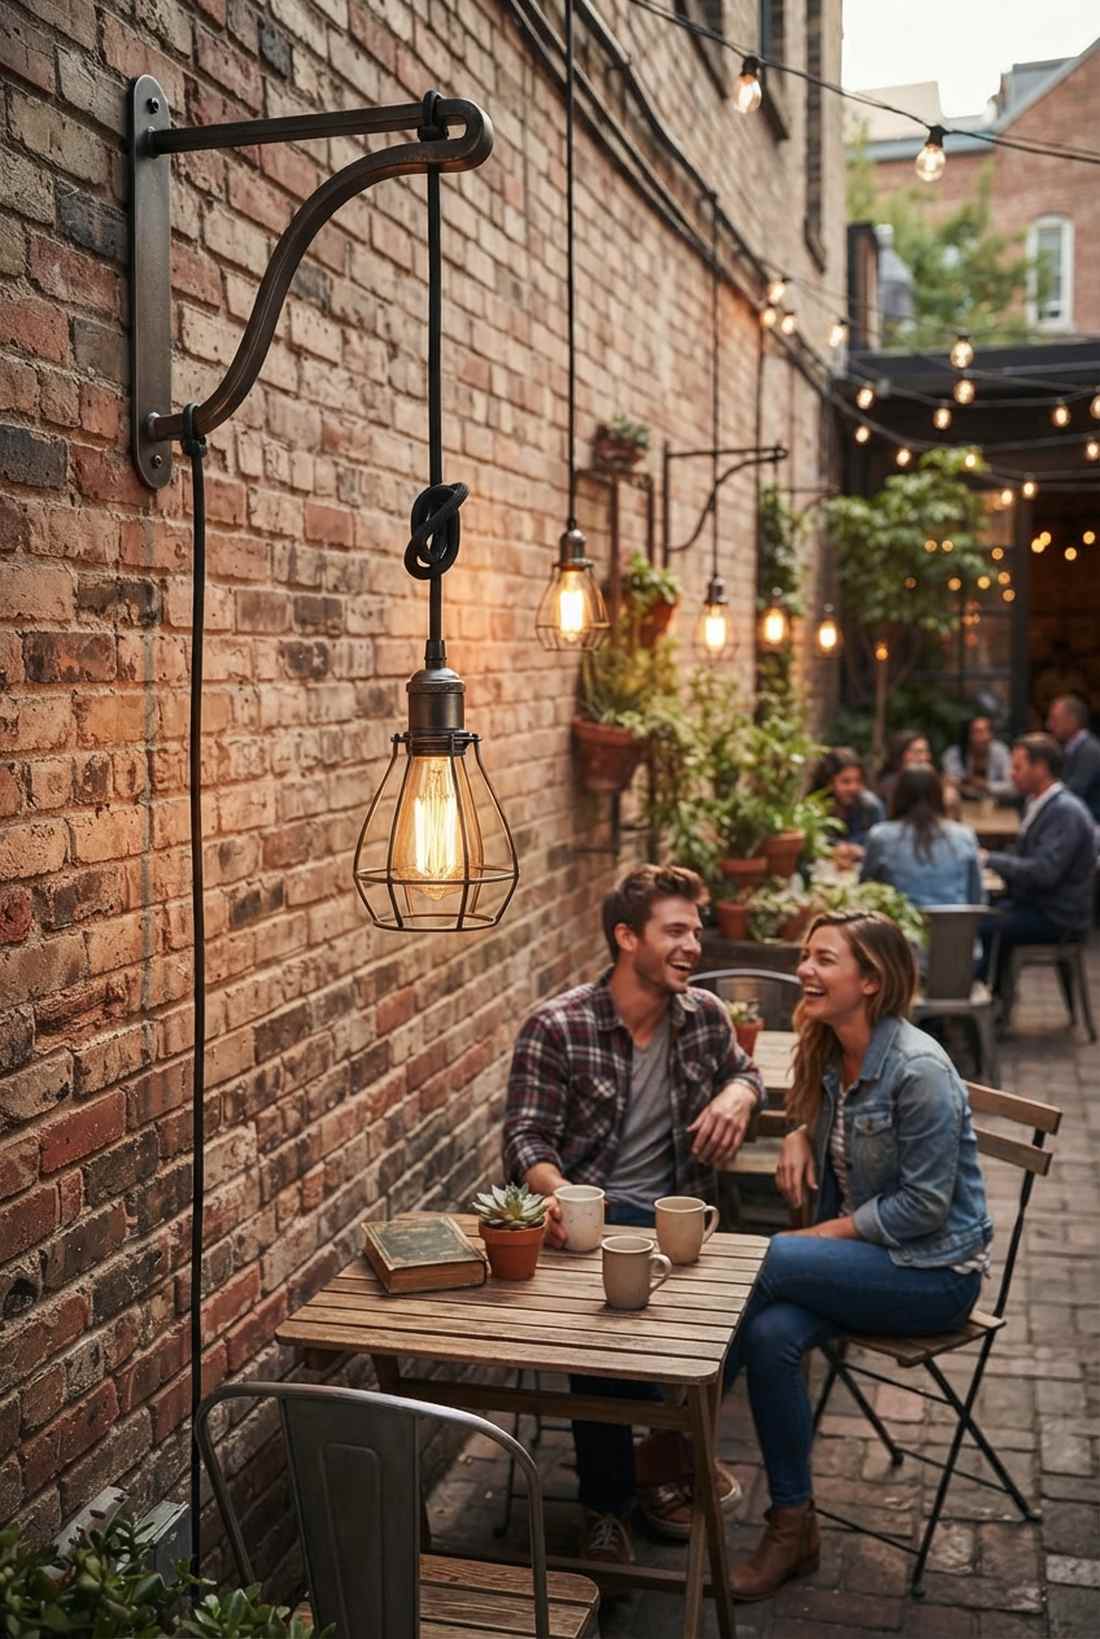
Warm, intricate, and totally hipster, this hanging bracket layout feels like a trendy coffee shop patio. Suspending an exposed Edison cage pendant from a rigid wall arm adds brilliant vertical movement to a static brick wall.
Flush mounts can feel extremely flat, but a dangling wire cage delivers a surprisingly premium look by bringing the light source closer to eye level. Tapping into weatherproof vintage lighting accessories ensures the delicate filaments survive the outdoors.
You can create this trendy coffee shop vibe for $35 to $55. Save this for your aesthetic balcony board!
- Key Materials: Wall bracket hook, weatherproof pendant cord, wire cage
- Vibe / Style: Trendy urban cafe
- Difficulty: Easy hook and drape
- Budget Breakdown: Wall bracket: $15 | Pendant cord/cage: $25.
- Creator’s Tip: Tie a loose, decorative knot in the pendant cord to shorten the hang length and add a cool, messy industrial detail.
- Smart Sourcing: Use weatherproof pendant cord sets and amber-tinted Edison LEDs (starter pack).
Garden Lights Hanging: String & Suspended Options
Overhead lighting creates ambient coverage across patios, pergolas, and outdoor living spaces. String lights and suspended fixtures provide flexibility in positioning and aesthetic styling.
28. Cafe String Lights with Wall-Mounted Hooks
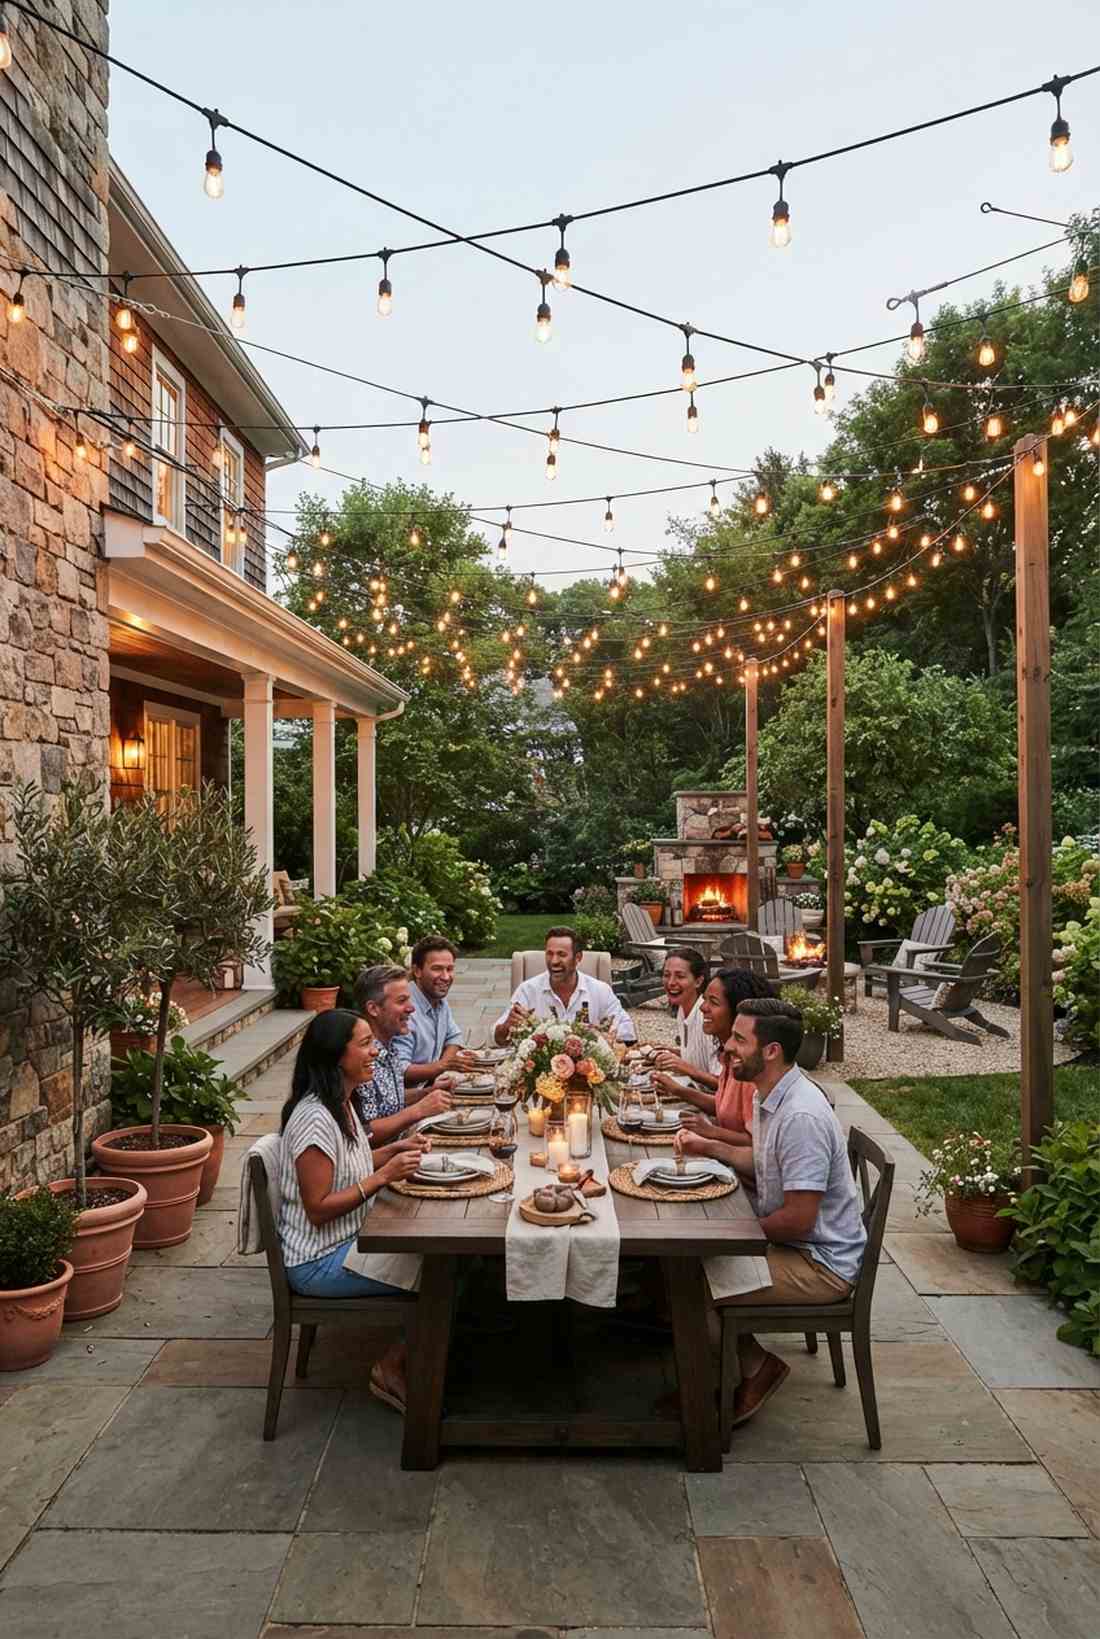
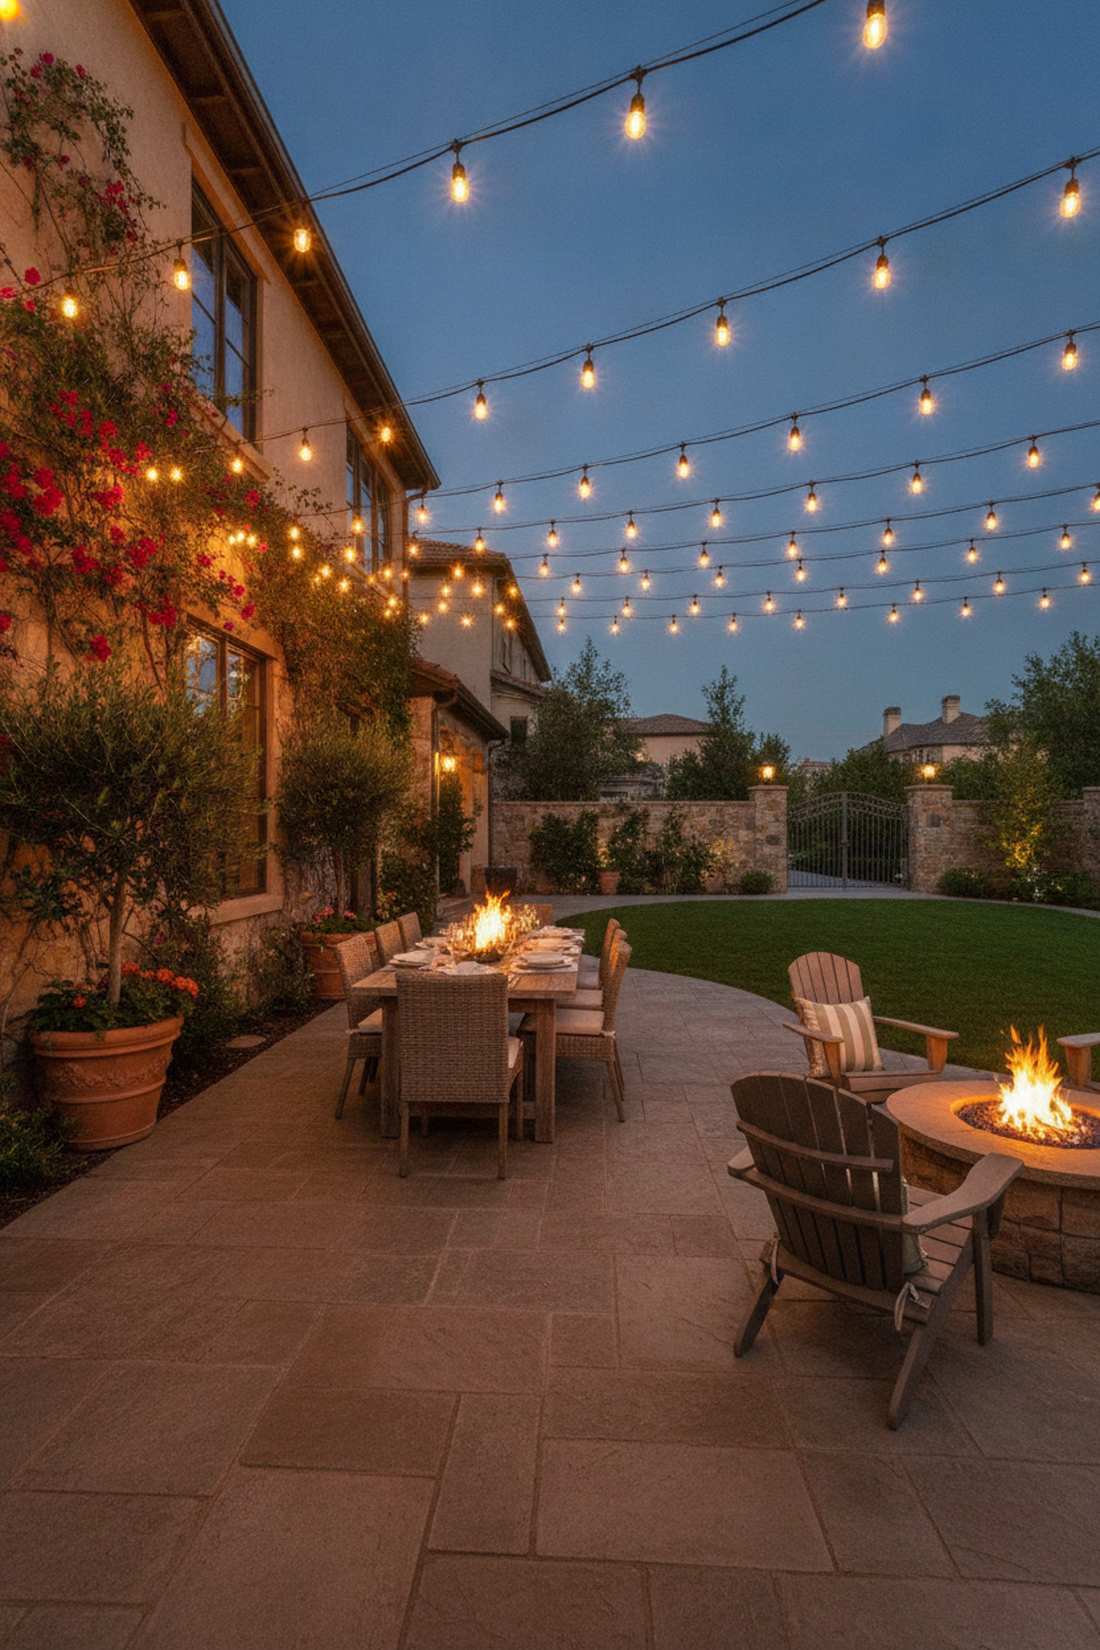
This sweeping overhead canopy feels exactly like an Italian villa celebrating a summer festival. Nailing the garden lights hanging strategy with heavy-duty cafe strings zig-zagged between walls creates the ultimate outdoor dining room.
Flimsy Christmas lights look incredibly cheap, but commercial-grade thick cables look far more expensive than they are and won’t snap in heavy winds. Sourcing pro-level suspension wire kits stops the dreaded “middle droop” over large patios.
Expect to spend $40 to $70 for a high-quality 50-foot run. Pin this to your ultimate outdoor dining board!
- Key Materials: Commercial-grade 14-gauge string wire, steel eye hooks
- Vibe / Style: Festive Italian courtyard
- Difficulty: Moderate tension mounting
- Budget Breakdown: 50ft String: $45 | Tension Wire Kit: $20.
- Creator’s Tip: Always run a bare steel guide wire first, then zip-tie the light string to it. This takes all the tension off the electrical cord.
- Smart Sourcing: Buy commercial-grade string lights (100ft roll) and stainless steel cable tension kits.
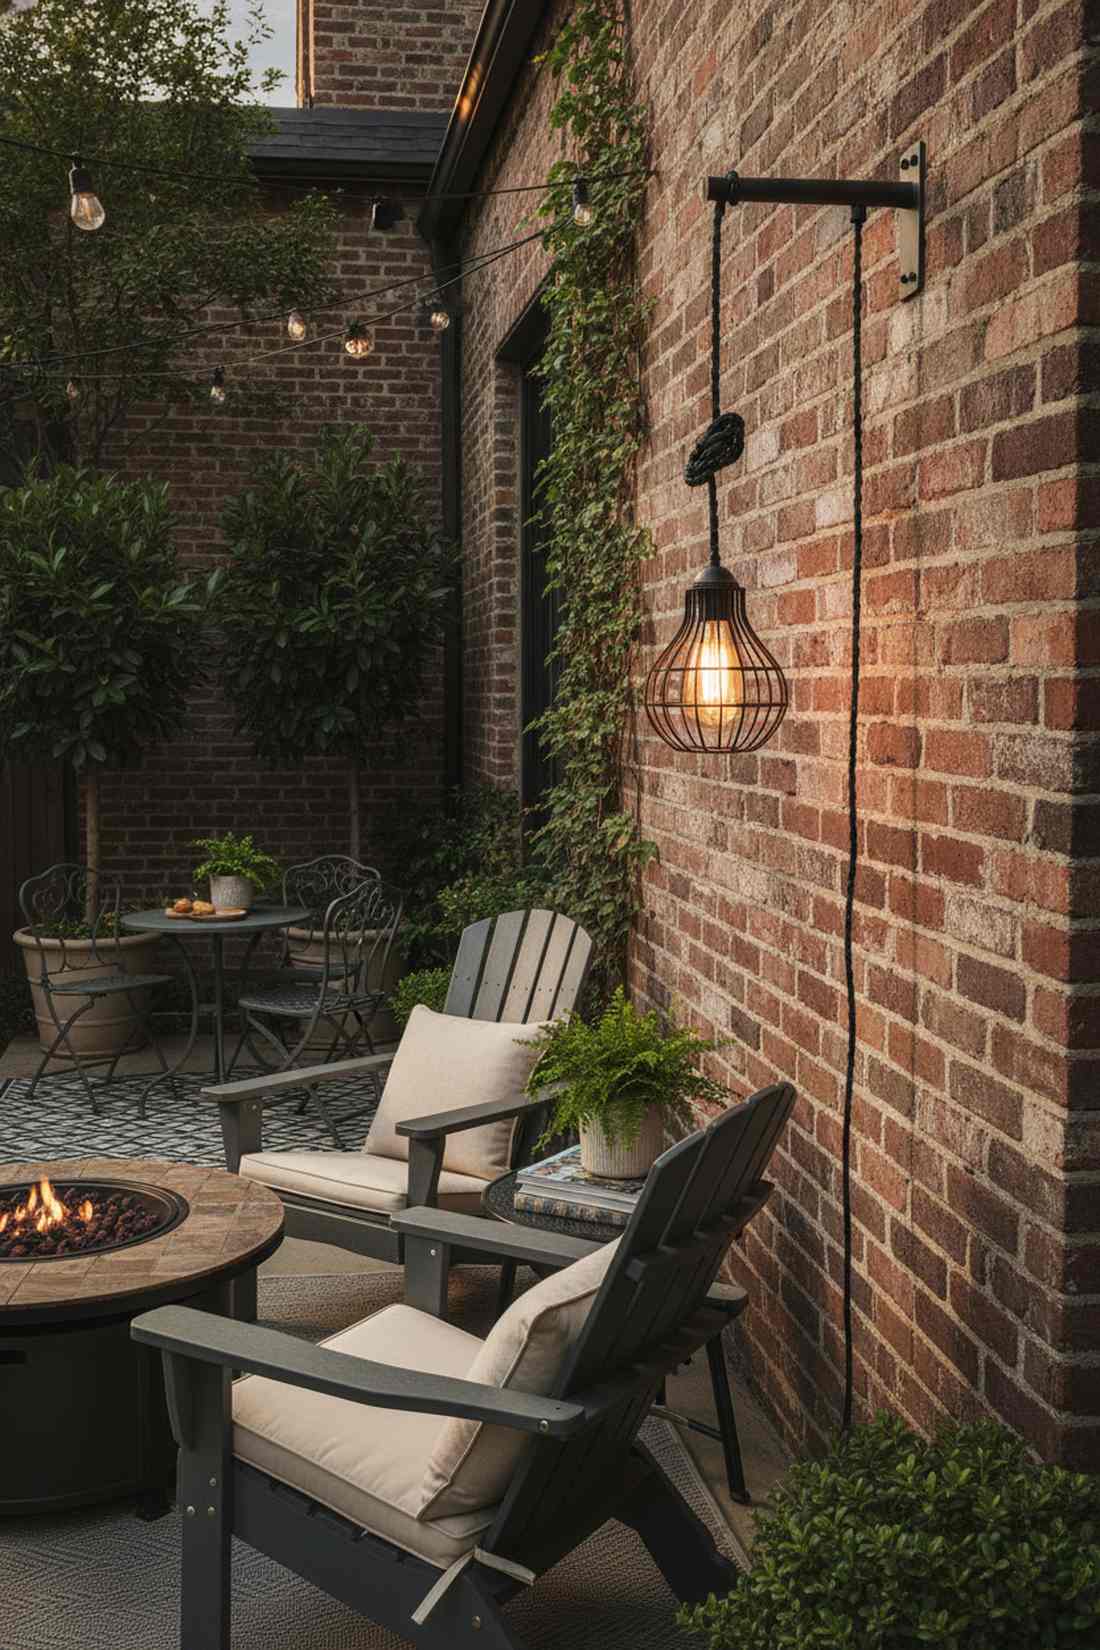
29. Hanging Lantern Wall Bracket
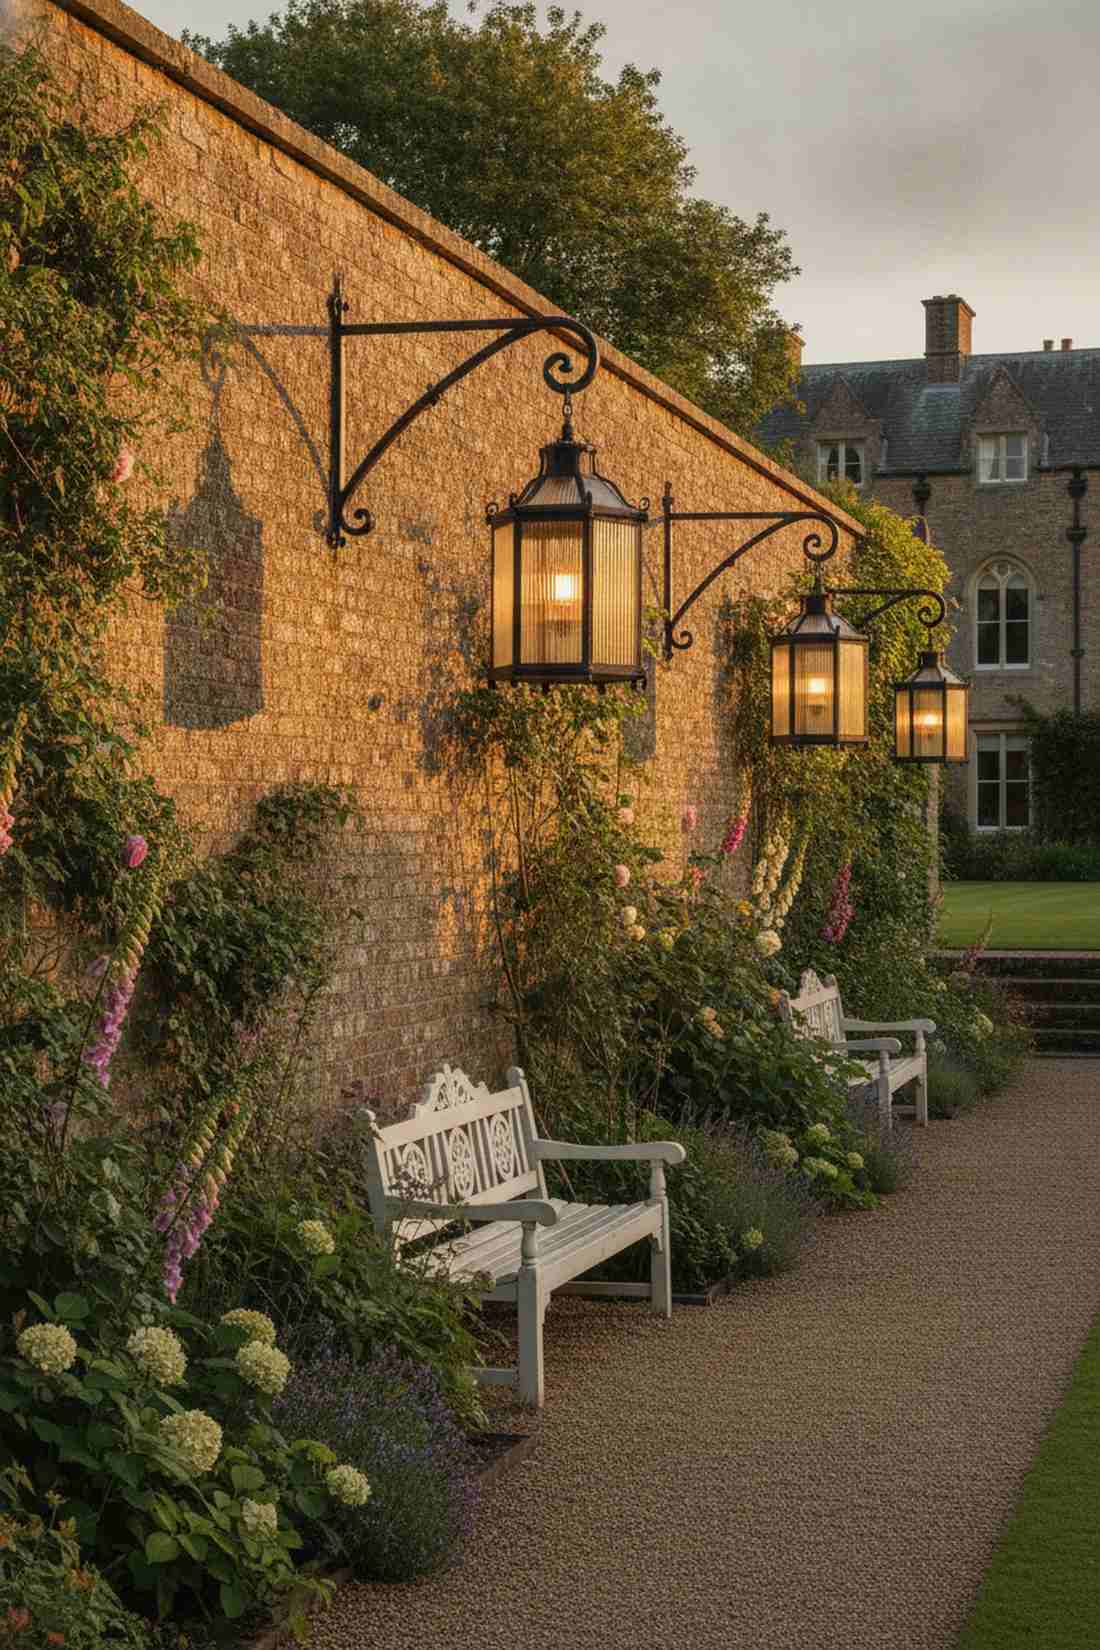
Elegant, sweeping, and beautifully structured, this layout feels like a Victorian garden stroll. Extending a suspended lantern wall bracket 18 inches away from the wall casts incredible 360-degree shadows through the surrounding foliage.
Mounting flush against the wall ruins the shadow play, whereas an extended hook gives a designer-level finish by creating a floating light source. Incorporating heavy iron architectural brackets ensures the arm doesn’t bend under the weight of thick glass.
Execute this floating lantern look for $35 to $60. Highly recommended for flanking a large garden bench.
- Key Materials: 18-inch scroll bracket, swinging lantern housing
- Vibe / Style: Classic Victorian estate
- Difficulty: Simple drill and hang
- Budget Breakdown: Bracket: $20 | Lantern: $25.
- Creator’s Tip: Allow the lantern chain at least two inches of slack so it can safely sway in high winds without snapping.
- Smart Sourcing: Snag extended wall bracket multi-packs and shatter-resistant hanging lanterns.
This next suspended layout actually looks better when you use budget-friendly materials instead of the pricey ones…
30. Suspended Globe Pendant from Wall Mount
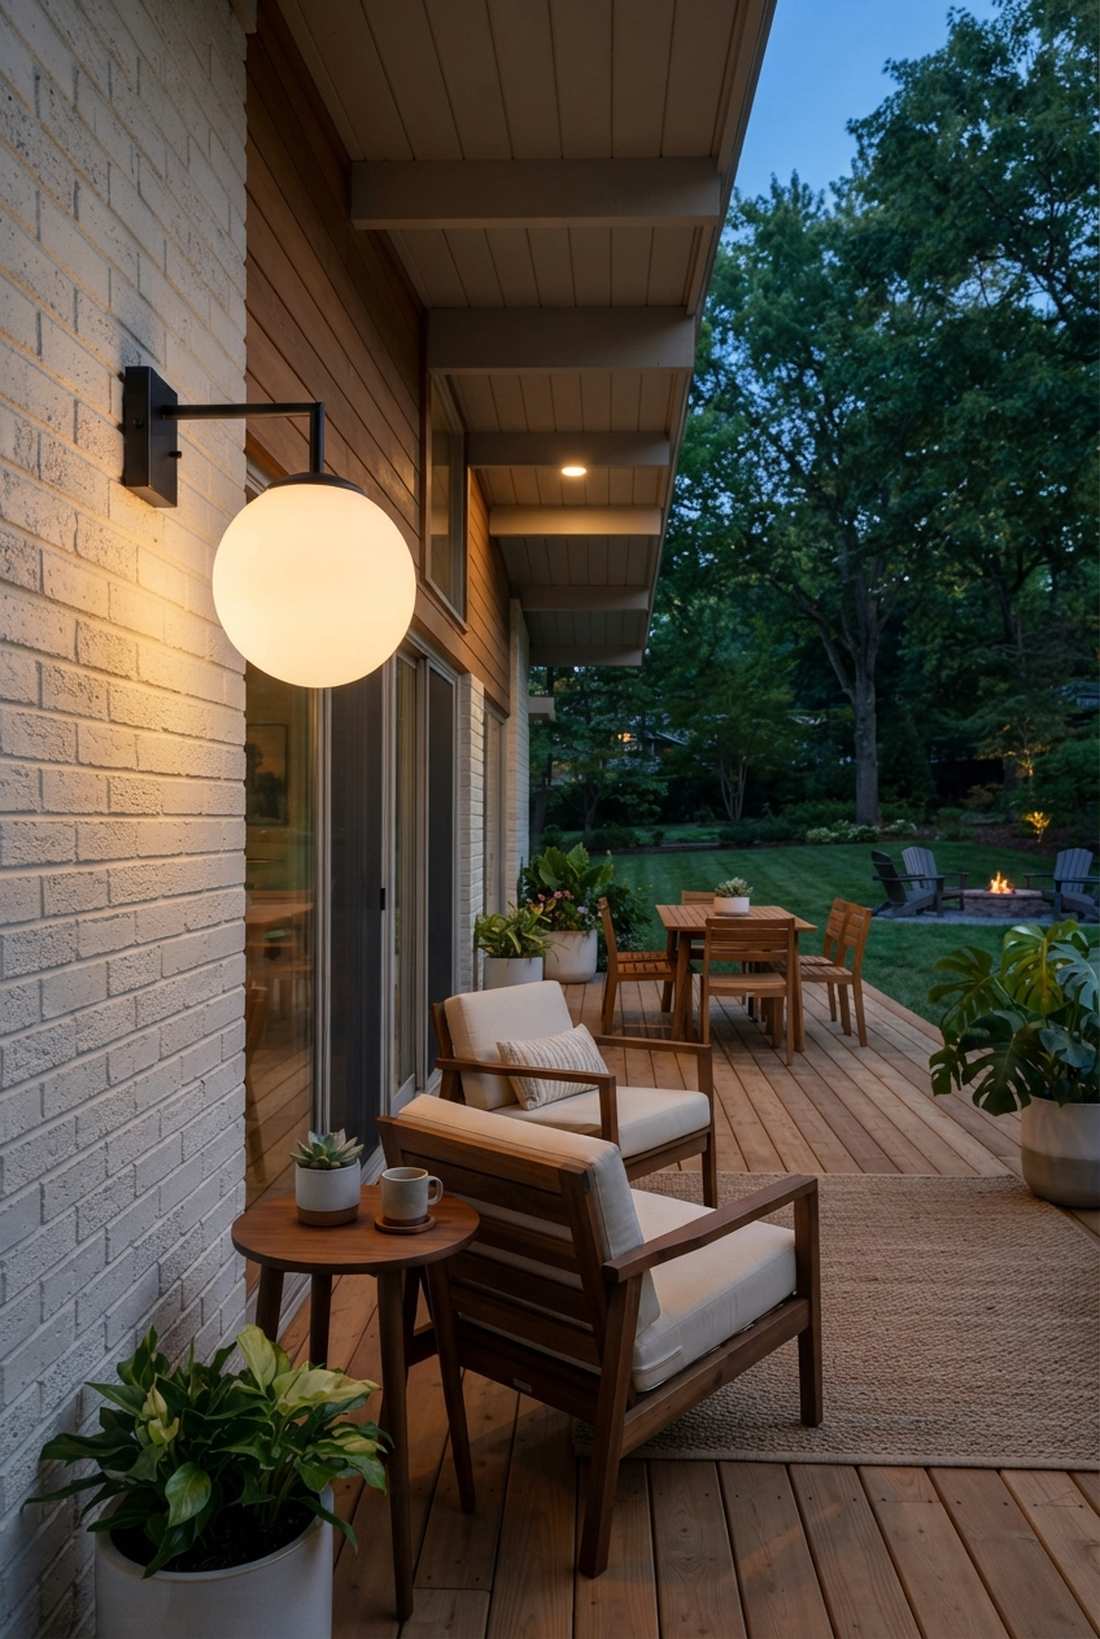
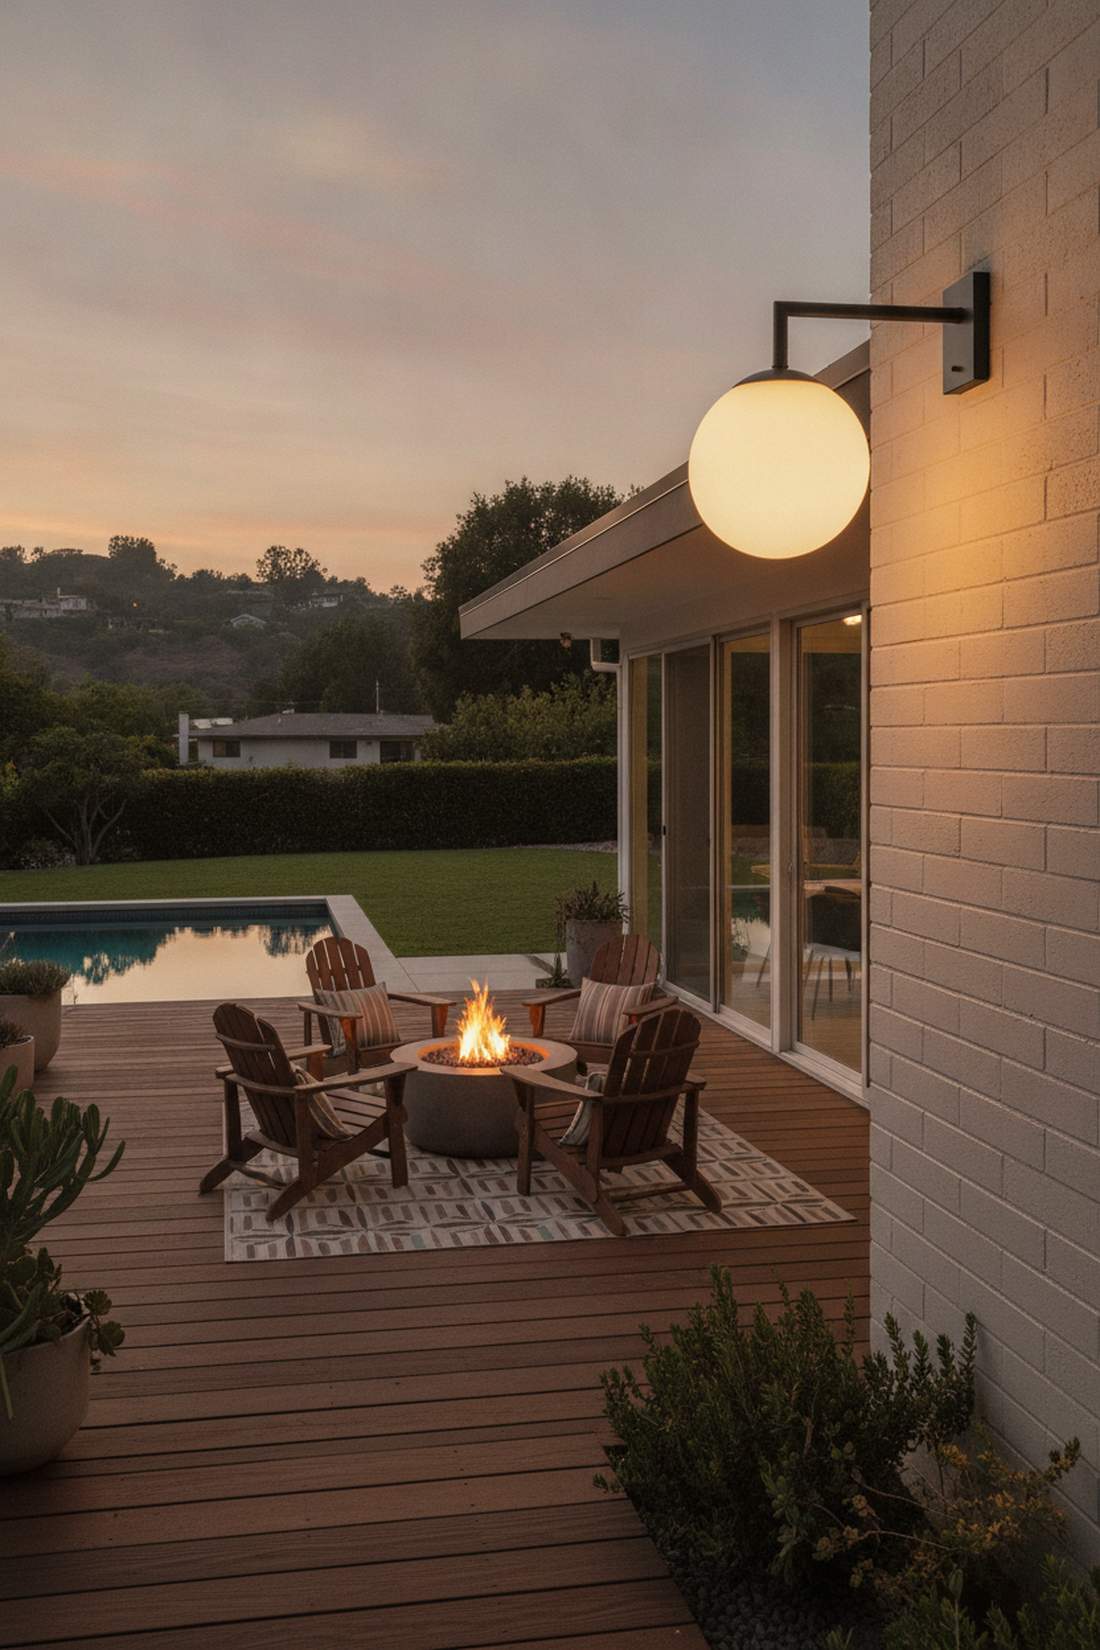
Smooth, flawless, and wonderfully mid-century, this glowing orb feels like a chic 1960s patio party. Suspending a frosted globe pendant bracket adds an incredibly soft, diffused wash of light that makes everyone look amazing.
Clear glass highlights dust and dead bugs, but frosted acrylic spheres trick the eye into seeing an expensive glass fixture with zero maintenance. Tapping into shatter-proof exterior globe supplies gives you high style without the hazard of broken glass on the patio.
Grab these chic retro globes for around $40 to $65. Save this for your mid-century modern exterior board!
- Key Materials: Frosted acrylic sphere, rigid right-angle wall arm
- Vibe / Style: Mid-century modern chic
- Difficulty: Standard hardwiring
- Budget Breakdown: Bracket arm: $25 | Acrylic Globe: $20.
- Creator’s Tip: Use a warm 2700K LED bulb inside the frosted globe to mimic the glow of an expensive paper lantern.
- Smart Sourcing: Order shatter-resistant globe pendant kits and matte black rigid bracket arms.
31. Draped Fairy Light Curtain on Wall Grid
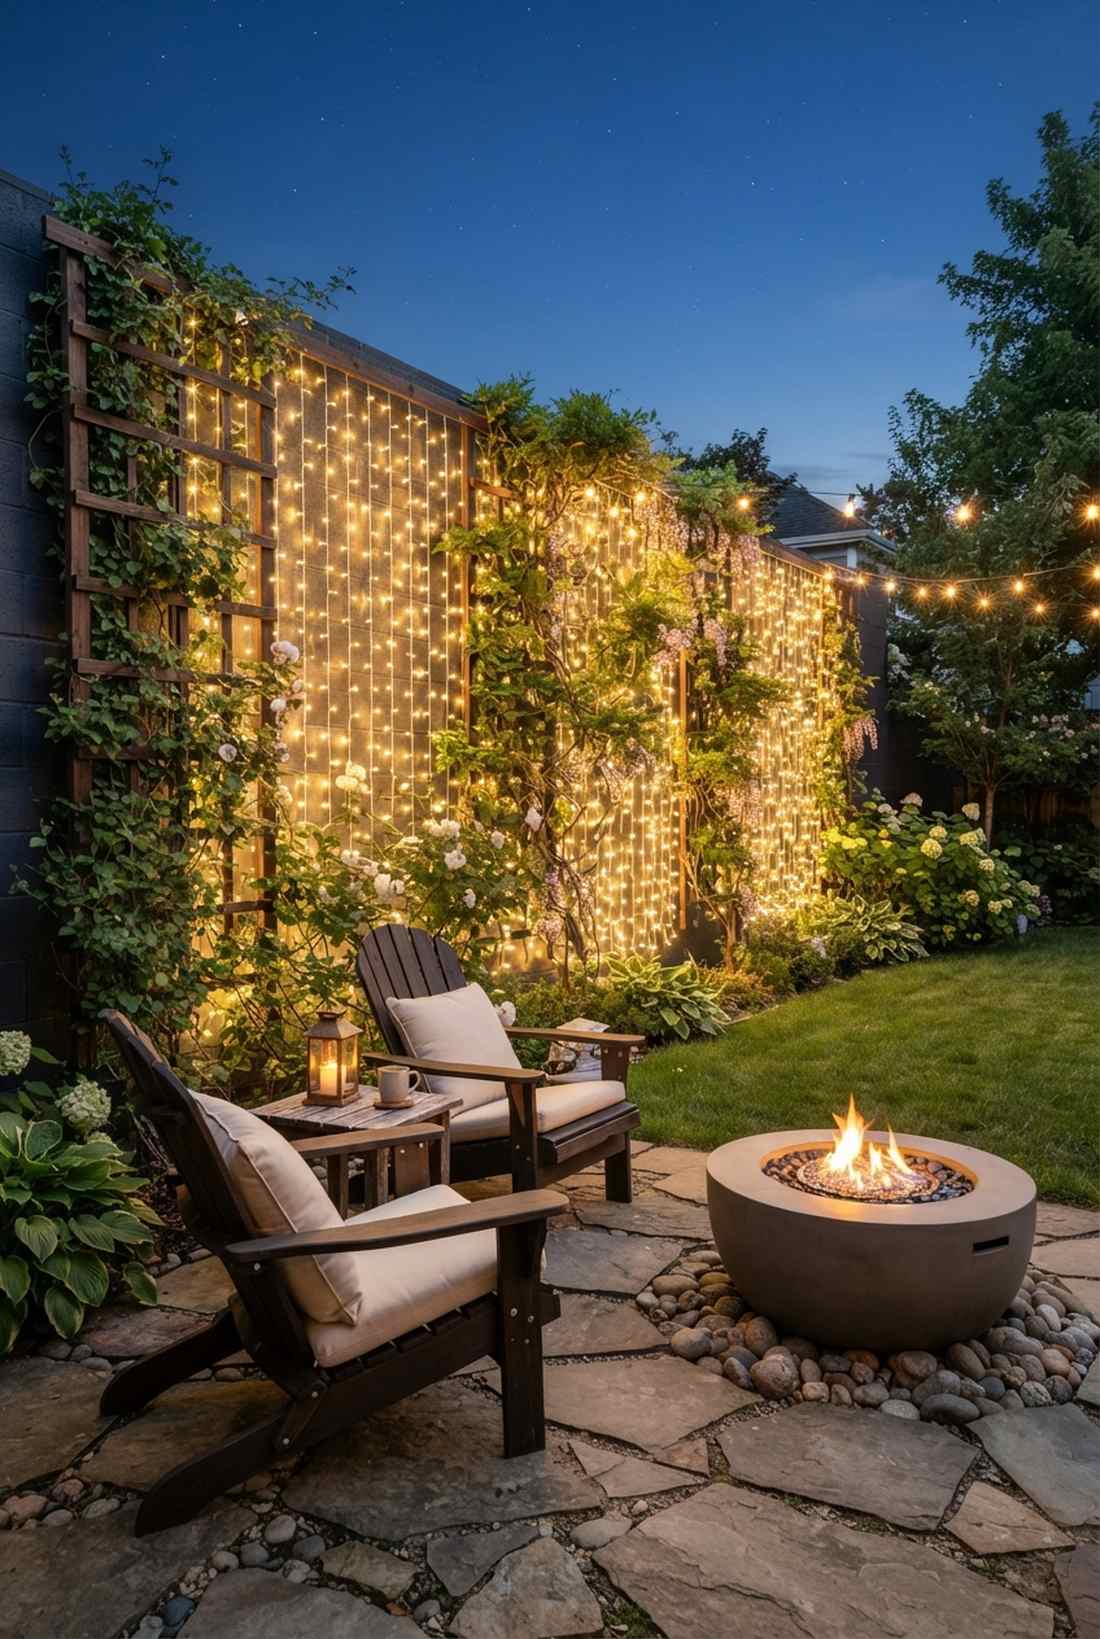
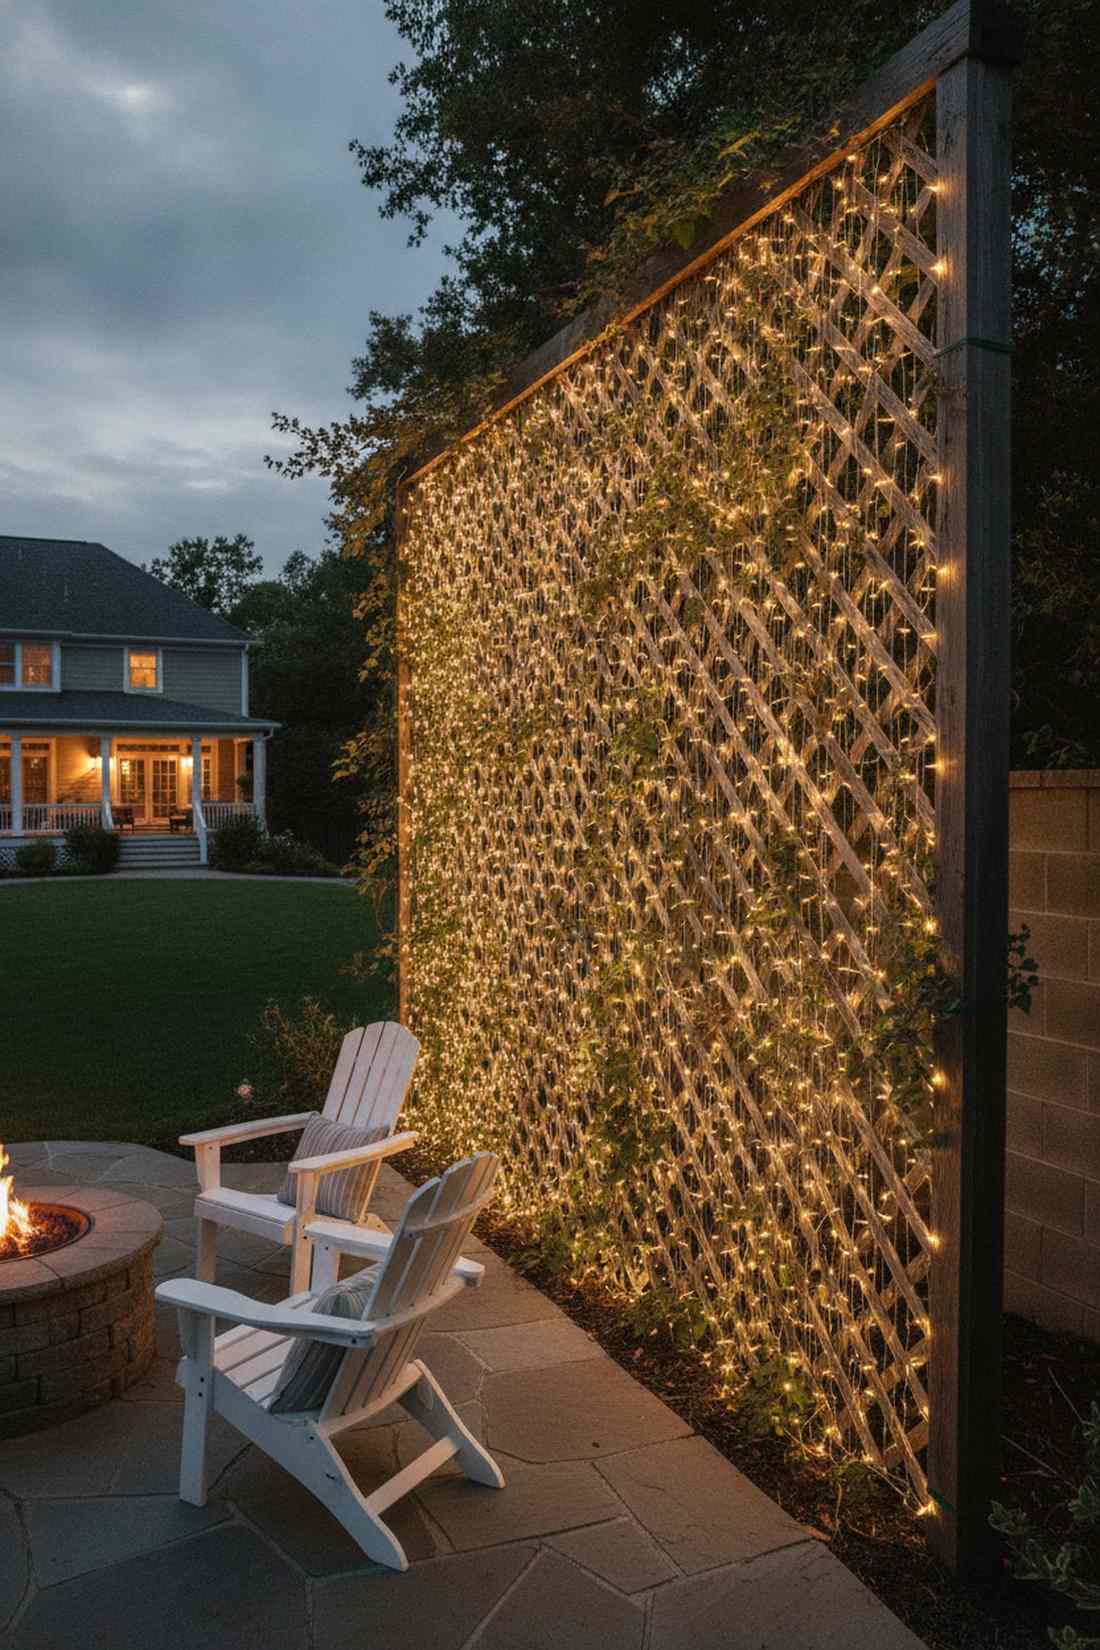
Ethereal, dense, and dripping with magic, this stunning backdrop feels like a secret enchanted garden. Tying a waterproof fairy light curtain to an existing wooden trellis completely hides an ugly cinderblock boundary wall.
Trying to string individual strands takes days, but buying pre-spaced curtain grids delivers a surprisingly premium look in ten minutes. Sourcing low-voltage micro-LED bundles ensures safe, vibrant backlighting behind your climbing vines.
Create this massive wall of magic for just $20 to $40. Pin this if you have an ugly concrete wall to hide!
- Key Materials: 10×10 micro-LED curtain, zip ties
- Vibe / Style: Enchanted fairy garden
- Difficulty: Extremely easy draping
- Budget Breakdown: Light Curtain: $25 | Zip ties: $5.
- Creator’s Tip: Drape the lights *behind* an open trellis so the climbing ivy grows through and diffuses the glowing bulbs.
- Smart Sourcing: Look for low-voltage micro-LED curtains (starter set) and UV-resistant green zip ties (bulk pack).
32. Mason Jar Sconce with Hanging Wire
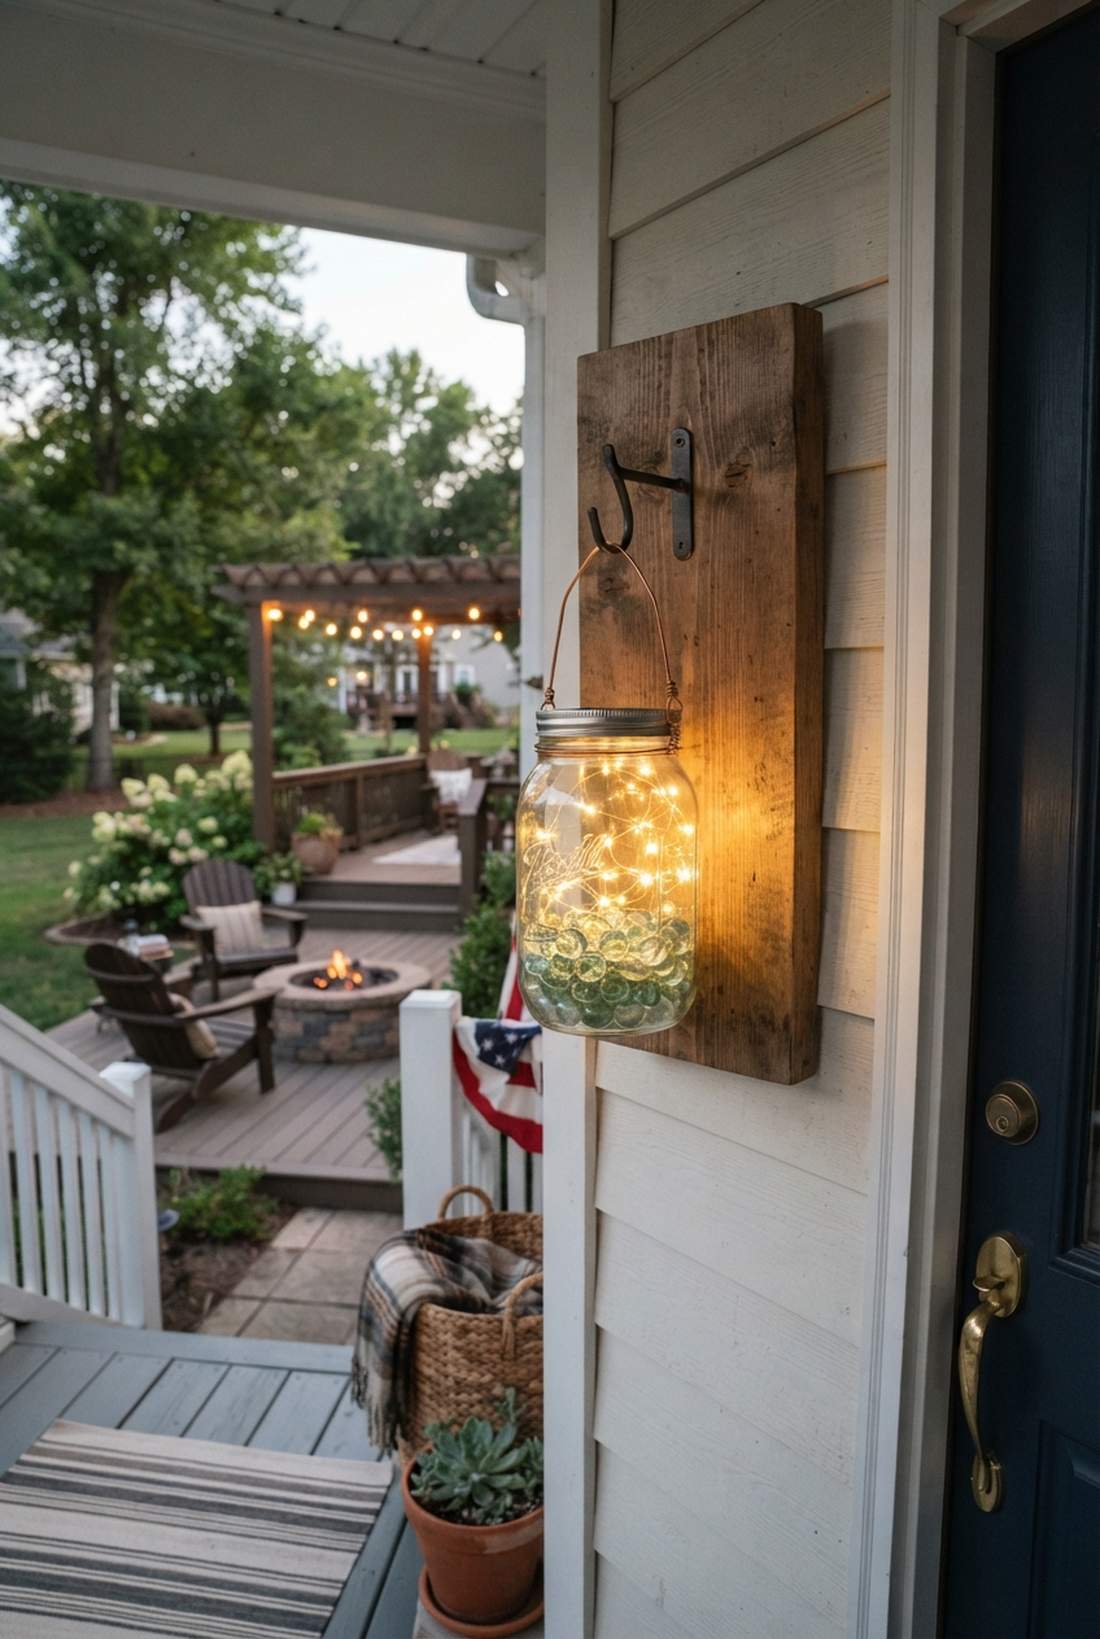
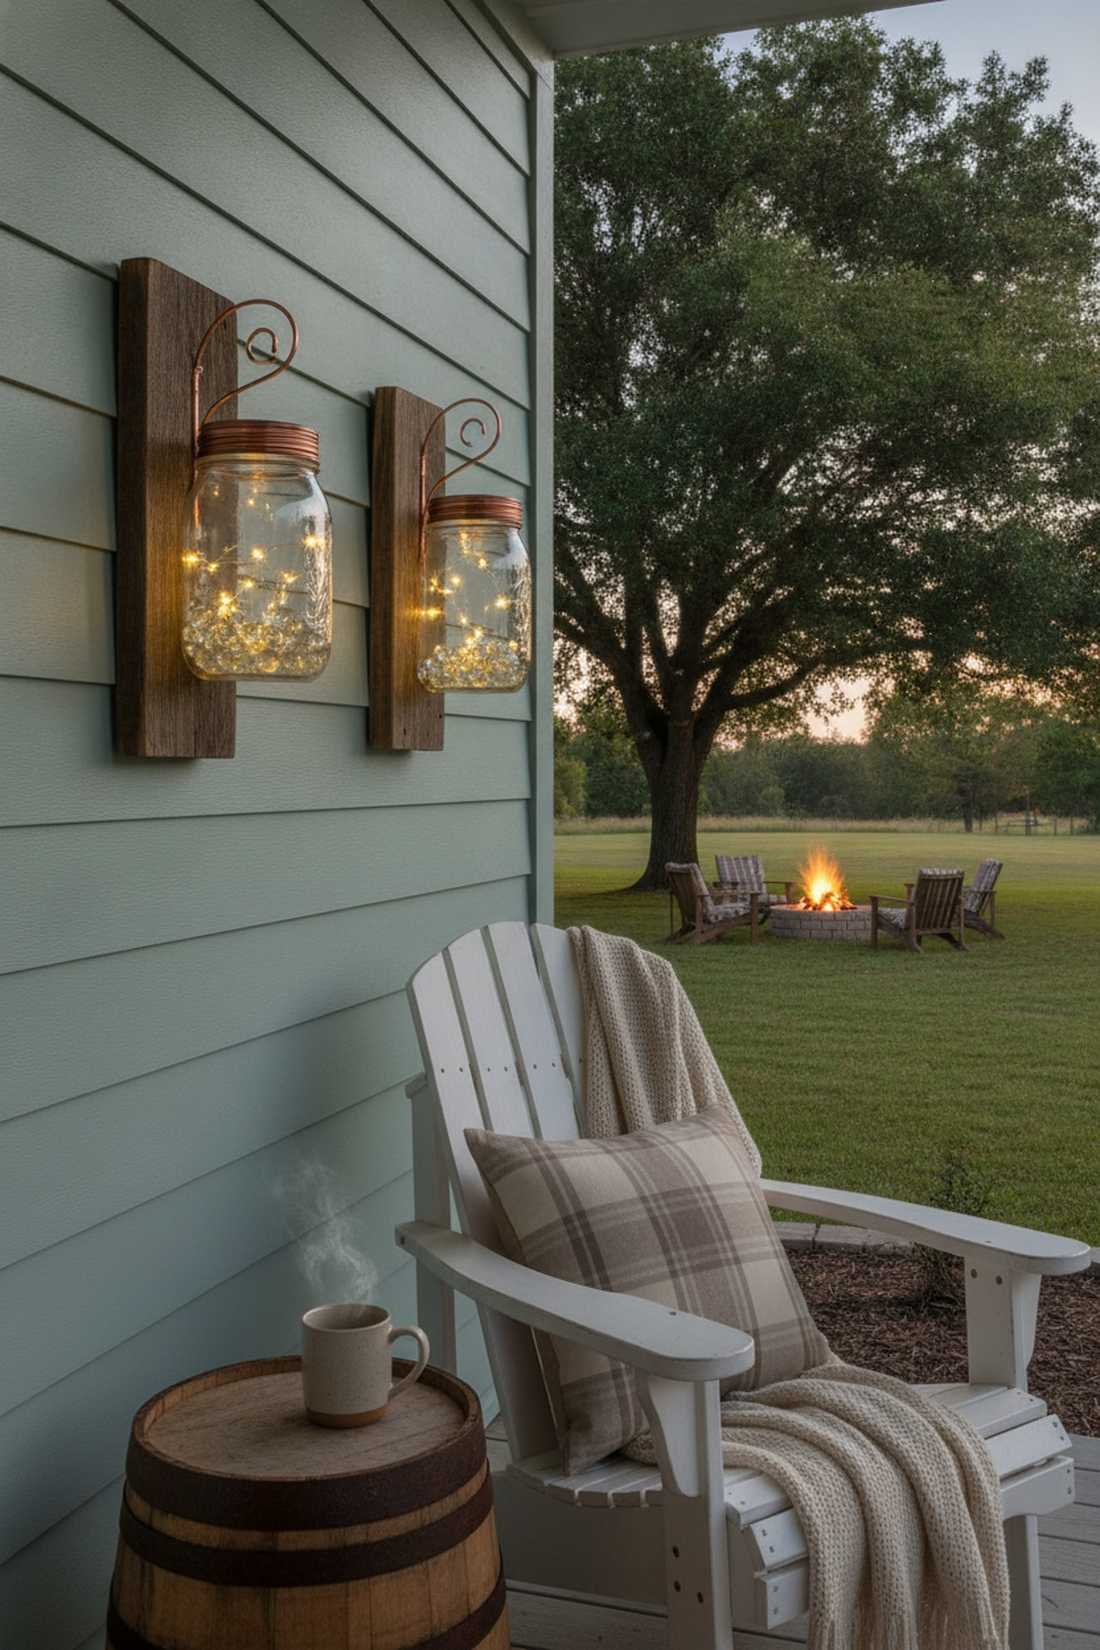
Quirky, resourceful, and dripping with southern charm, this easy DIY feels like a sweet country porch evening. Crafting a mason jar hanging sconce onto a rustic piece of reclaimed wood creates instant eclectic wall art.
Buying pre-made jar lights is a rip-off, but building them yourself looks far more expensive than it is and lets you customize the wood stain. Utilizing battery-operated fairy puck lights eliminates wiring completely for an instant porch upgrade.
You can build a pair of these for under $20. A brilliantly fast and cheap weekend craft project.
- Key Materials: Wide-mouth mason jar, copper wire, reclaimed wood block
- Vibe / Style: Rustic southern DIY
- Difficulty: Fun beginner craft
- Budget Breakdown: Jars: $5 | Wood/Hooks: $5 | Fairy lights: $8.
- Creator’s Tip: Fill the bottom two inches of the jar with clear glass marbles to refract the tiny LEDs into a brighter glow.
- Smart Sourcing: Buy threaded mason jar pendant adapters and battery-operated fairy light strings (multi-pack).
Architectural Wash Lighting
Specialized fixtures emphasize building materials and structural features through controlled light distribution. Wall-washing techniques create uniform illumination across vertical surfaces.
33. Recessed Wall Washer LED
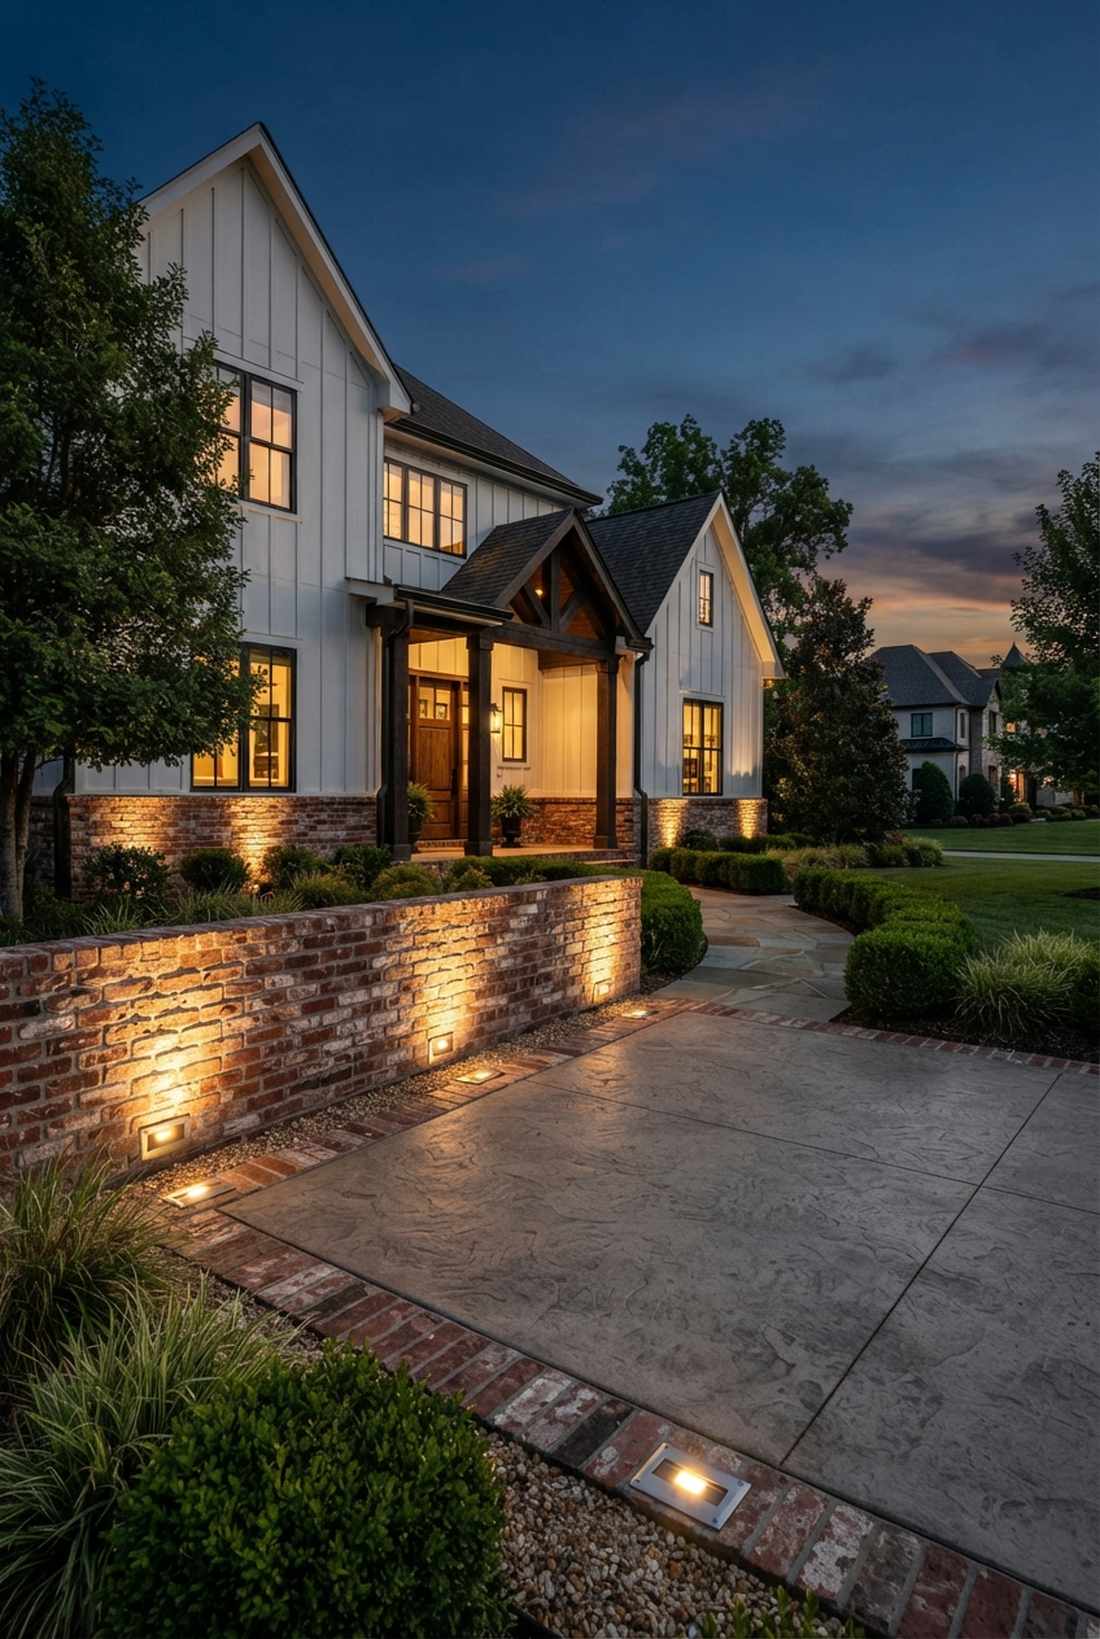
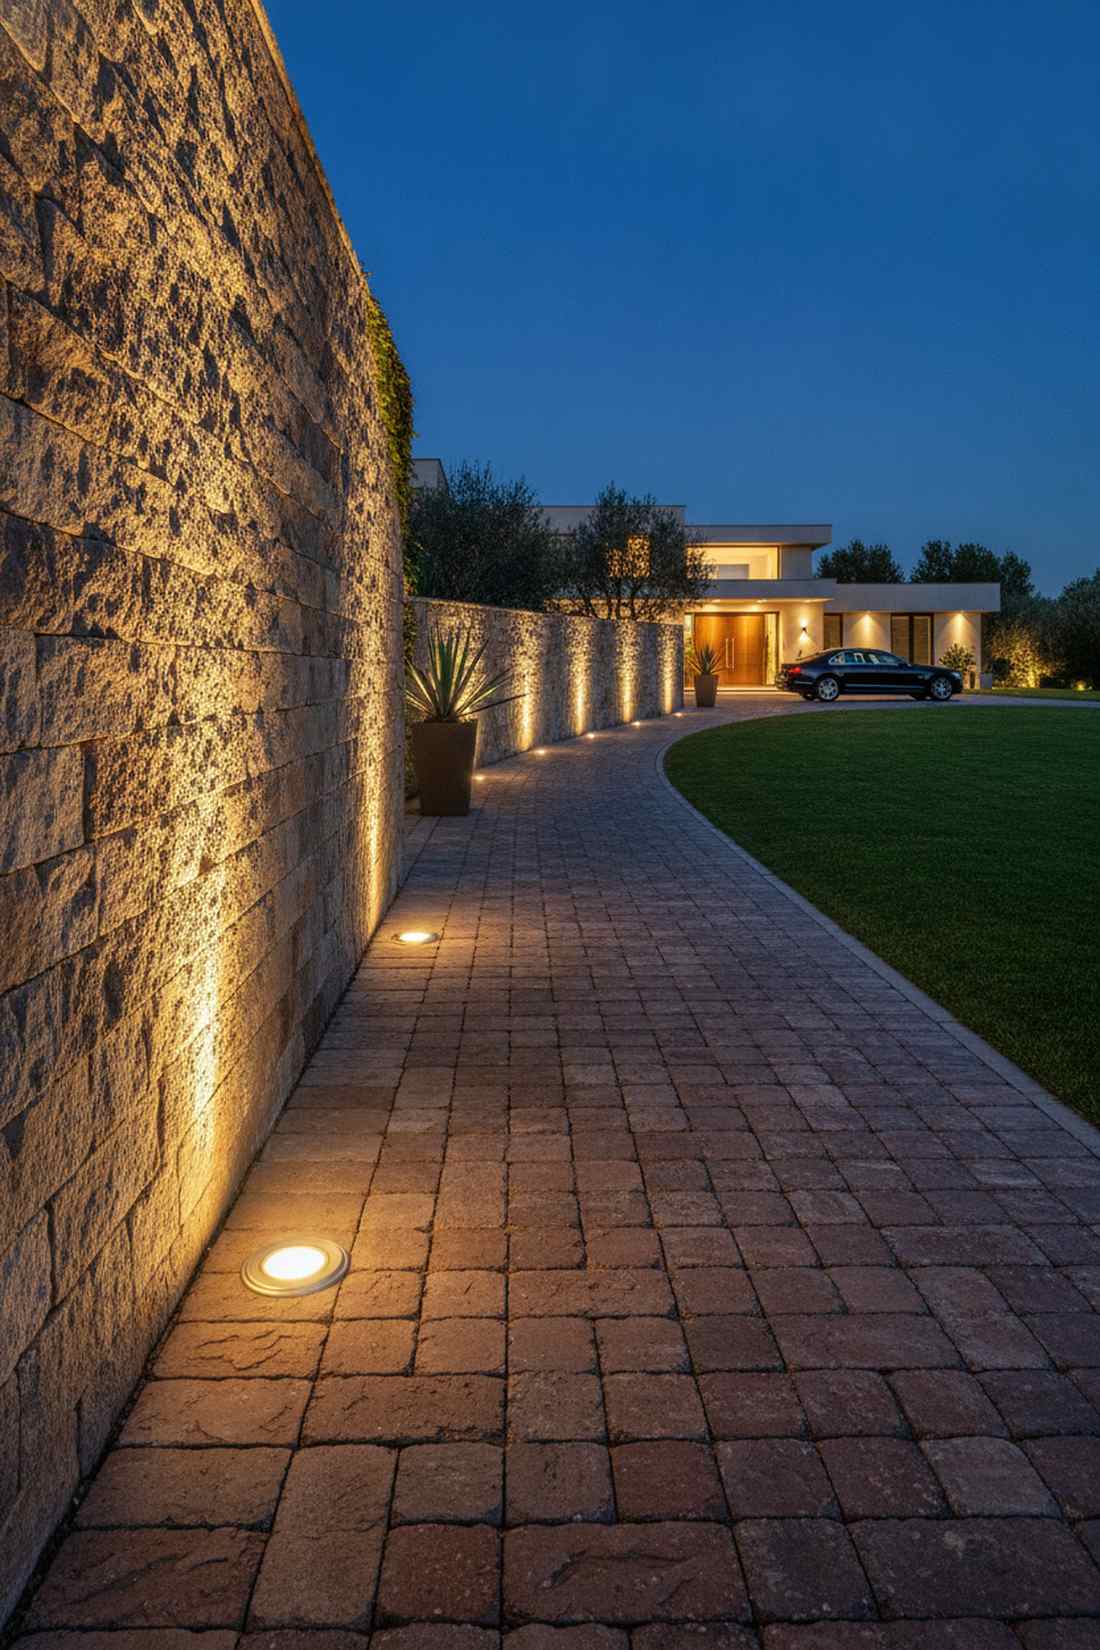
Invisible by day and fiercely dramatic by night, this layout feels like a luxury resort’s grand entrance. Burying an in-ground asymmetric wall washer a few inches from the base creates an intense, upward-grazing beam that highlights every brick imperfection beautifully.
Standard spot lights stick out and get kicked, but flush-mounted steel rims trick the eye into seeing a pristine, custom-built landscape floor. Upgrading to heavy-duty drive-over well lights ensures lawnmowers and tires won’t crush the lens.
You can achieve this high-end flush look for $40 to $70 a light. Save this for your ultimate driveway upgrade board!
- Key Materials: Stainless steel bezel, PVC pour sleeve, asymmetric reflector
- Vibe / Style: Invisible luxury resort
- Difficulty: Advanced trenching/burying
- Budget Breakdown: Well Light: $50 | Gravel base: $5.
- Creator’s Tip: Always dig the hole 3 inches deeper than needed and fill the bottom with pea gravel for vital water drainage.
- Smart Sourcing: Pick up in-ground asymmetric reflector kits and waterproof direct-bury wire connectors.
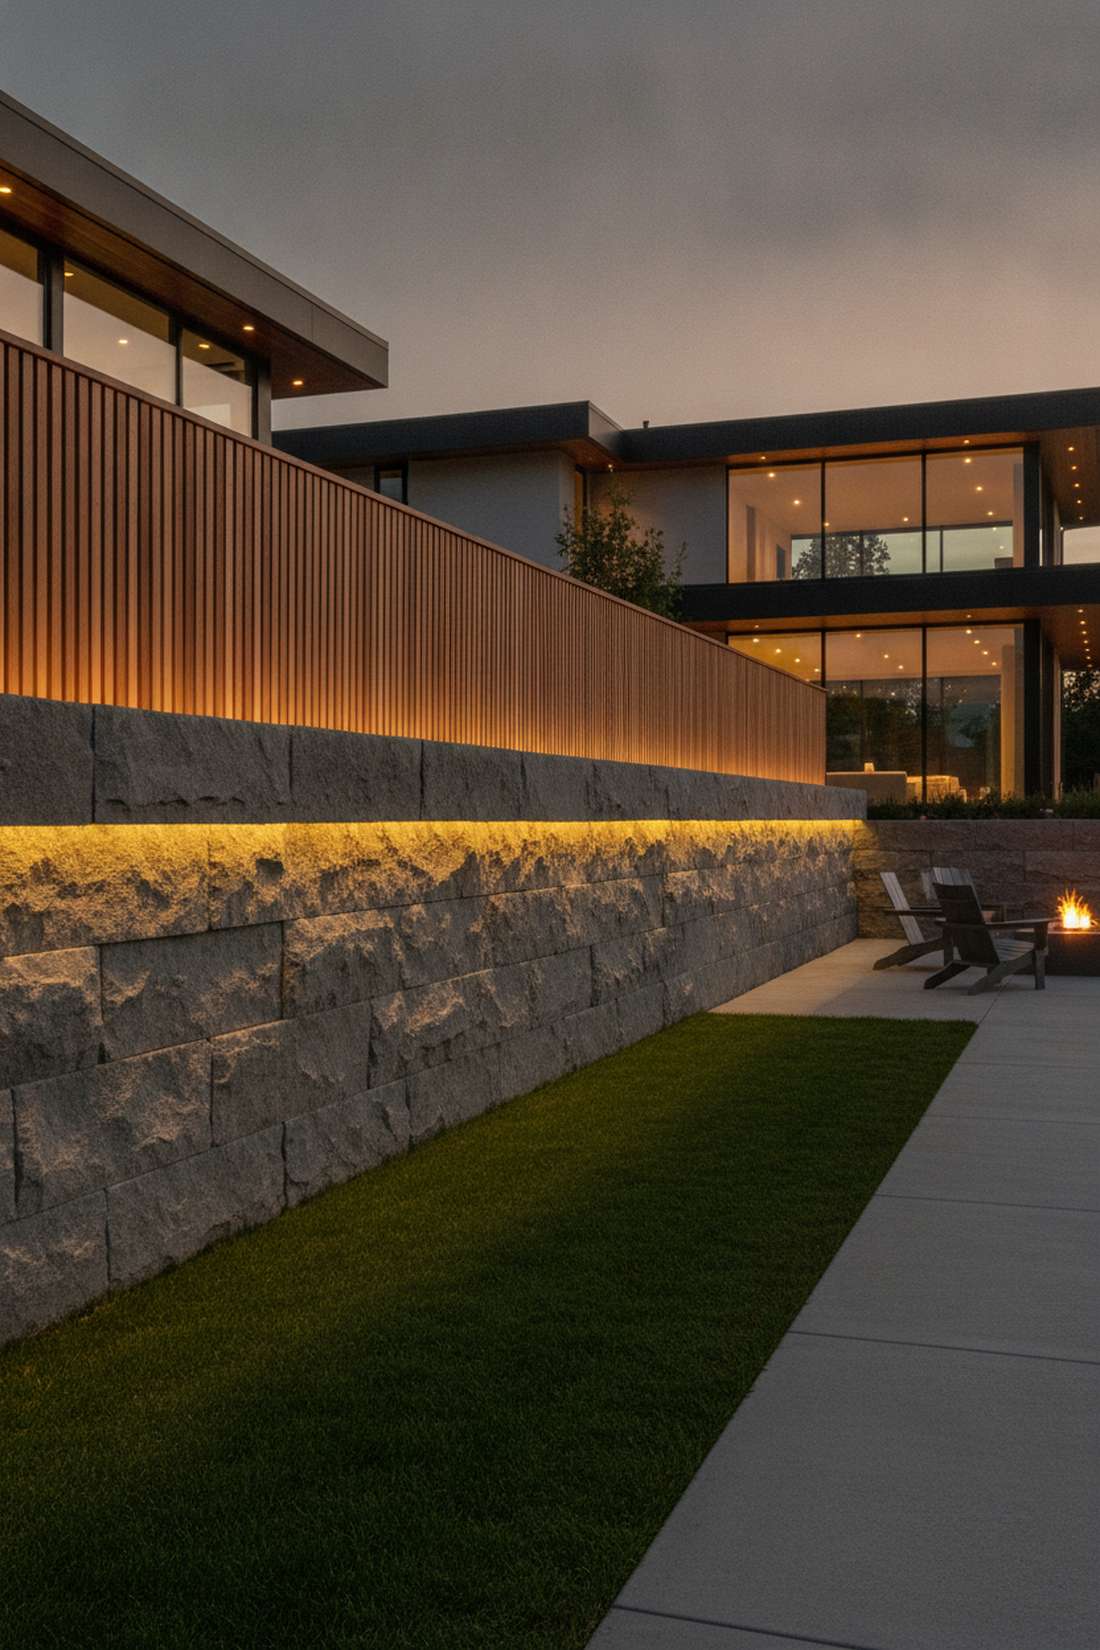
34. Linear Wall Grazing LED Bar
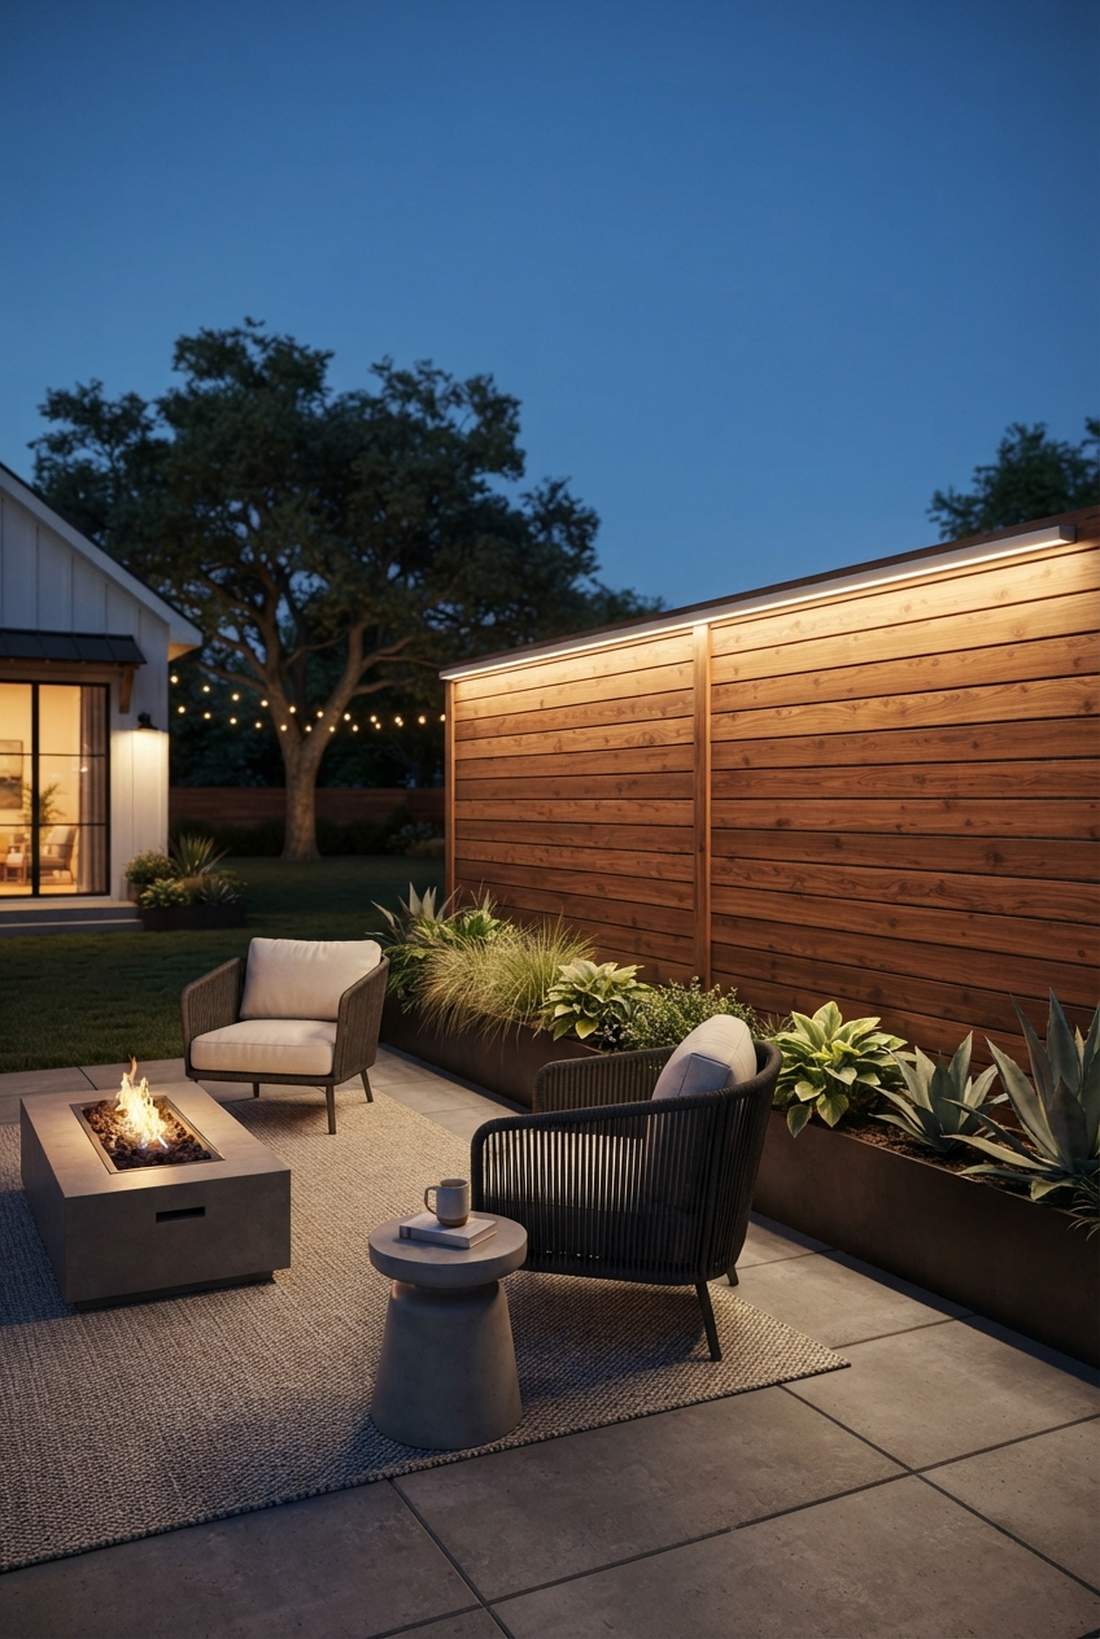
Continuous, flawless, and ultra-modern, this ribbon of light feels like a high-tech corporate campus exterior. Mounting a continuous extruded LED grazing bar at the top of a modern slat wall washes the entire surface with zero dark spots.
Bulbs create cheap-looking “scalloped” shadow arcs, but a rigid linear bar gives a designer-level finish by blasting an even sheet of light downwards. Sourcing commercial architectural channel supplies guarantees the LED strips won’t overheat inside the casing.
Expect to spend about $50 to $90 per four-foot section. Highly recommended for modern privacy fences.
- Key Materials: 4-foot aluminum channel, high-density LED strip, frosted cover
- Vibe / Style: Flawless contemporary
- Difficulty: Moderate linking/mounting
- Budget Breakdown: Aluminum track: $25 | LED Bar: $40.
- Creator’s Tip: Angle the bar precisely 15 degrees inward toward the wall to catch the texture of the wood grain perfectly.
- Smart Sourcing: Use extruded aluminum LED channels (bulk pack) and high-density waterproof LED ribbons.
Wait until you see how this final batch of architectural lighting completely tricks the eye…
35. Adjustable Spotlight Wall Mount

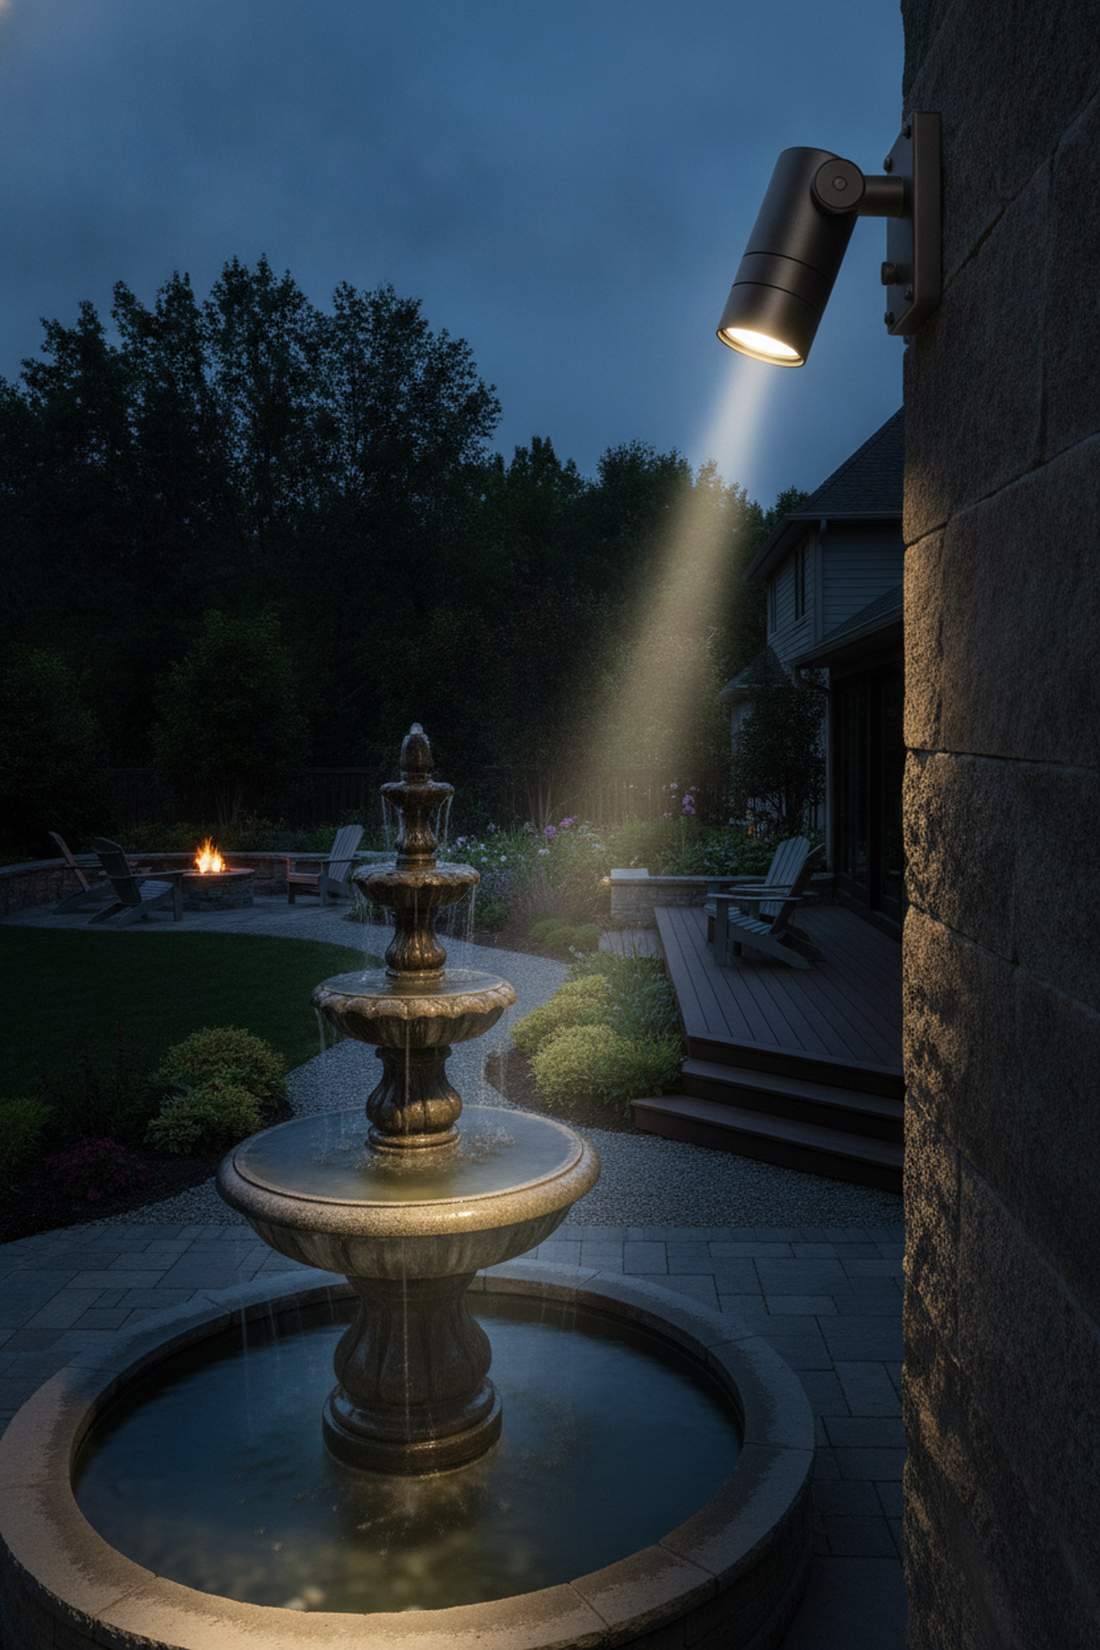
Piercing, precise, and highly intentional, this narrow beam feels like a gallery spotlight on a masterpiece. Bolting an adjustable architectural spotlight bracket high on a wall allows you to shoot a tight beam down onto a specific garden sculpture or fountain.
Wide floodlights wash out the entire yard, but a tight 15-degree cone looks far more expensive than it is by creating extreme contrast between the subject and the dark background. Investing in locking landscape directional kits ensures winter winds don’t knock your perfect aim off center.
Secure this precision aiming tool for $30 to $55. Pin this if you have a beautiful garden fountain to highlight!
- Key Materials: Directional cylinder, locking swivel joint
- Vibe / Style: Curated gallery precision
- Difficulty: Easy aim-and-lock
- Budget Breakdown: Spotlight mount: $40 | LED Bulb: $10.
- Creator’s Tip: Turn the light on at night *before* you tighten the locking joint to get the exact strike point perfect.
- Smart Sourcing: Buy directional landscape spotlight packs and narrow-beam MR16 outdoor bulbs.
36. Picture Light Style Wall Sconce
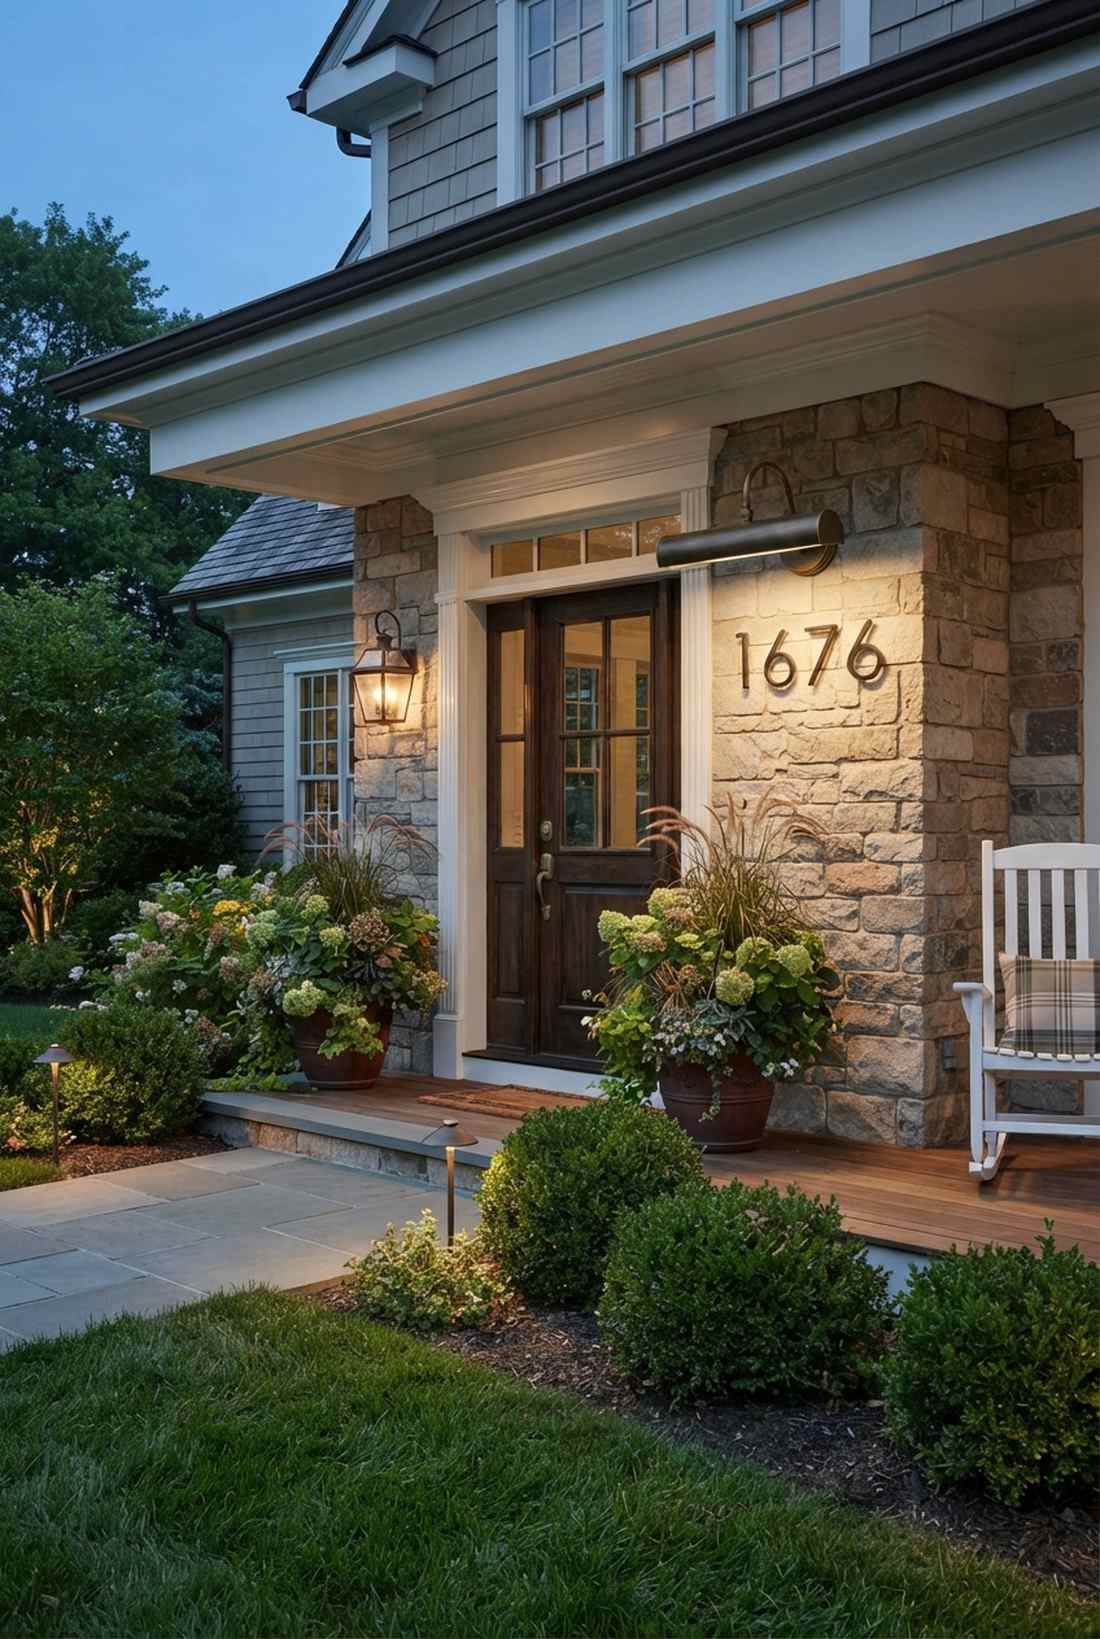

Sleek, refined, and distinctly high-class, this thin hood feels like it belongs over a priceless oil painting. The low-profile exterior picture light is the ultimate flex for illuminating custom house numbers, metal monograms, or outdoor family crests.
Blasting numbers with a harsh spotlight is tacky, but a delicate shielded hood delivers a surprisingly premium look that softly washes the text without blinding visitors. Sourcing brass address illumination supplies creates a stunning focal point right at your front gate.
You can execute this tailored look for $40 to $65. A fast upgrade that completely changes your curb appeal.
- Key Materials: 12-inch tubular hood, extended mounting bracket
- Vibe / Style: Refined estate entry
- Difficulty: Standard junction box install
- Budget Breakdown: Picture light: $45 | Base bracket: $10.
- Creator’s Tip: Mount it exactly 4 inches above the top of your address plaque for the perfect, shadow-free light wash.
- Smart Sourcing: Order weatherproof exterior picture lights and clear exterior silicone tubes.
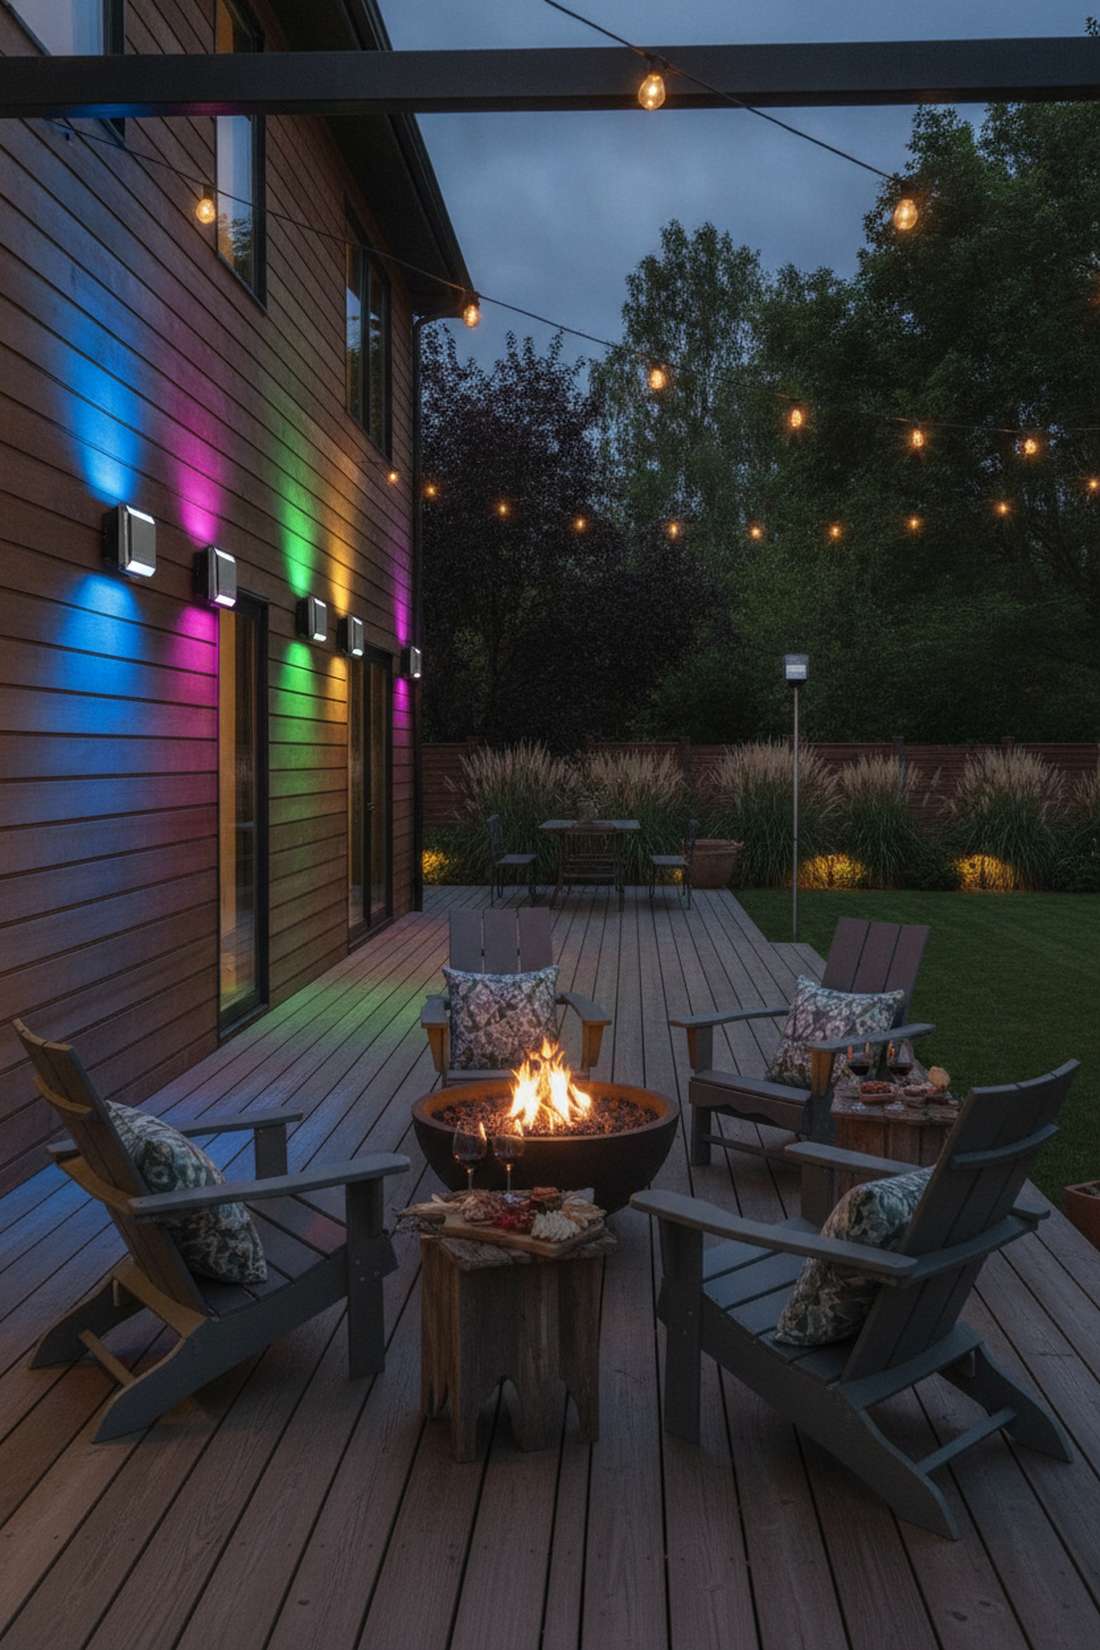
37. Color Wash RGB Fixture
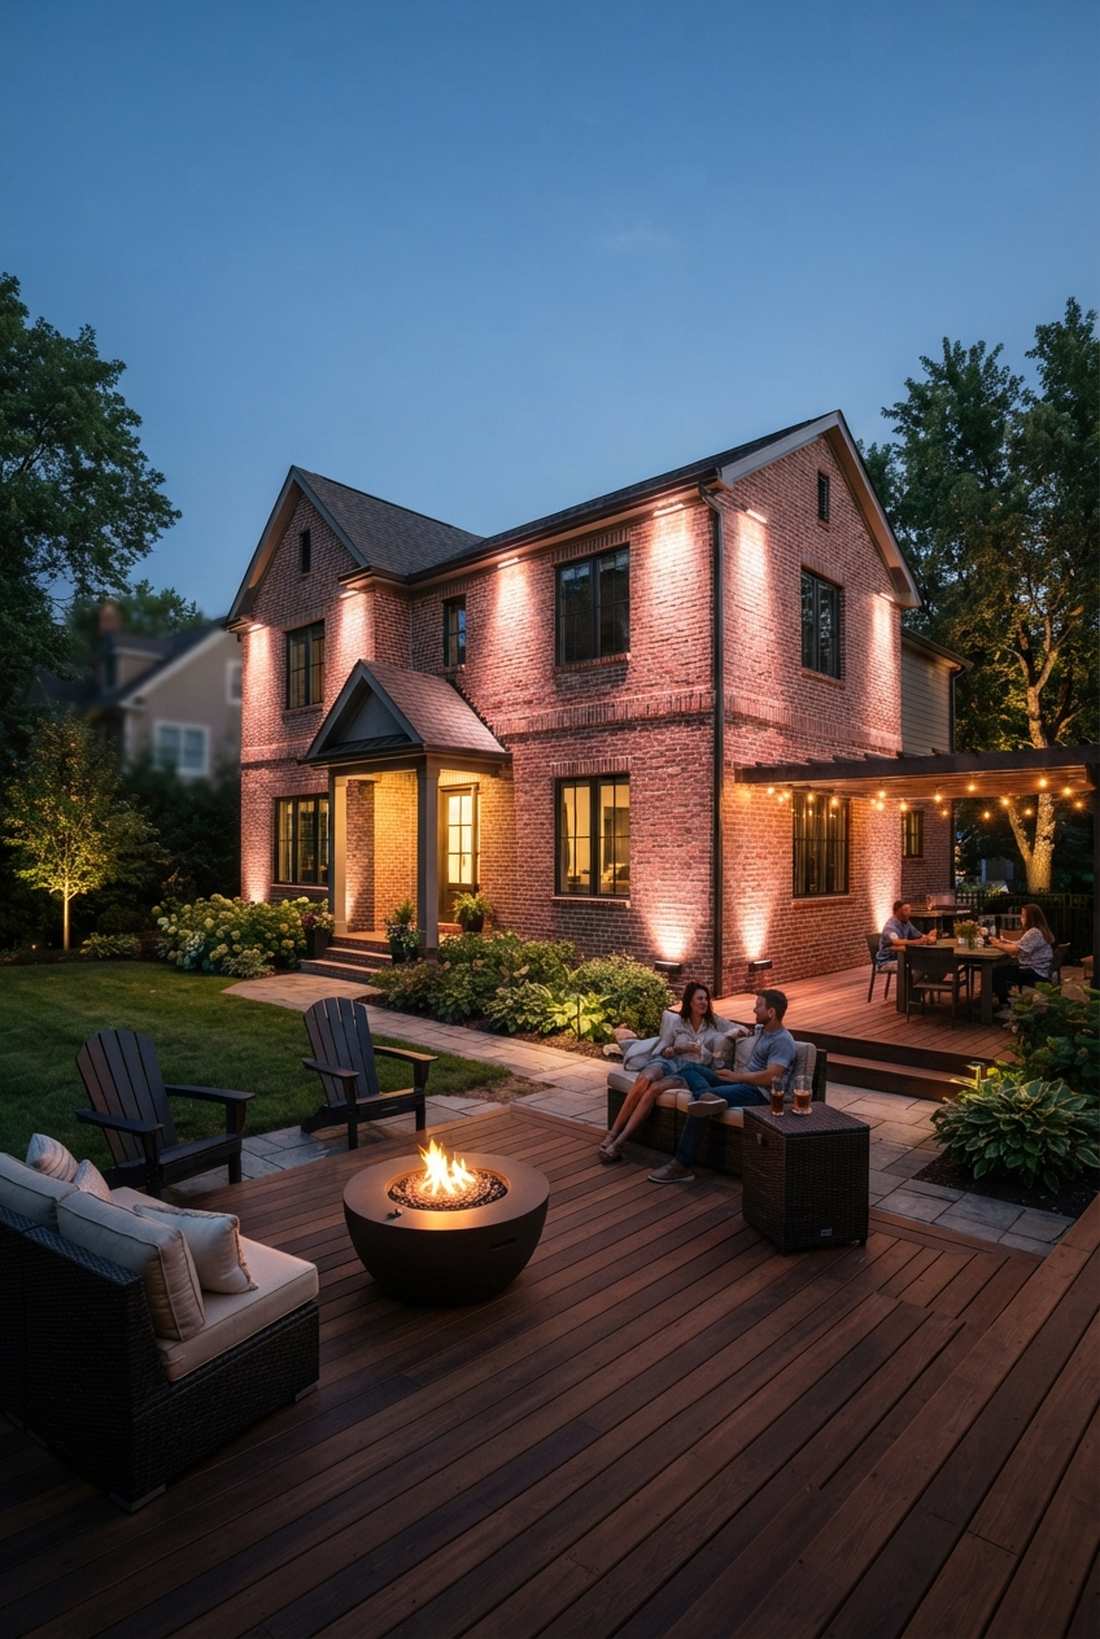
Massive, dynamic, and totally transformative, this wall wash feels like an exclusive nightclub’s VIP patio. Installing a DMX-compatible RGB wall washer lets you bathe your entire two-story brick exterior in vibrant holiday colors or a cool, moody blue.
Tiny smart bulbs lack the punch to hit a second story, but heavy-duty rectangular wash arrays trick the eye into seeing a massive, professionally produced event space. Tapping into commercial event lighting gear gives you insane output that basic hardware store lights simply can’t match.
Invest in this massive wall-washing power for $80 to $150. Save this for your ultimate holiday decorating board!
- Key Materials: Heavy-duty aluminum heat sink, high-wattage RGB array
- Vibe / Style: Professional event styling
- Difficulty: Intermediate bracket mounting
- Budget Breakdown: RGB Washer: $100 | Smart Controller: $30.
- Creator’s Tip: Set it to a very warm, slightly pinkish-white (around 2400K) during normal nights to make brick look incredibly rich and expensive.
- Smart Sourcing: Look for DMX-compatible RGB wash fixtures (commercial pack) and outdoor-rated smart plugs.
Conclusion
Strategic placement of garden lights wall fixtures transforms outdoor spaces into high-end, secure, and visually compelling environments after dark. The 35+ premium layouts presented span from smart-sourcing traditional lanterns and UV-resistant modern LED designs to integrated boundary fencing and architectural accent lighting that tricks the eye into seeing a million-dollar property. Always prioritize durable, weather-coated starter kits and proper spacing over cheap quick-fixes. Begin by upgrading high-priority areas like entryways with bulk-pack materials, then expand your lighting coverage to secondary zones for a flawlessly balanced, expensive-looking exterior.
Frequently Asked Questions
What is the recommended height for mounting wall sconces in gardens?
Standard mounting height ranges from 60-72 inches from ground level to avoid creating harsh glare zones. Position your premium fixtures at 60-66 inches near doorways to provide soft facial illumination without blinding guests. If you are grabbing a bulk pack of pathway or boundary lights, mounting them at 66-72 inches casts the beam perfectly across larger patio areas. Always test the height before drilling your heavy-duty anchors!
How do I choose between solar and hardwired garden wall lights?
Solar kits are incredible for distant boundary lines, especially if you pick up high-capacity polycrystalline starter packs that require zero expensive trenching. Hardwired systems, however, deliver consistent, high-lumen security regardless of winter cloud cover. A smart budget strategy is to use hardwired fixtures for the main house exterior and UV-coated solar multi-packs to cheaply illuminate deep garden boundaries and detached pergolas.
What IP rating should outdoor wall lights have?
You absolutely must look for a minimum IP65 rating on any exterior starter kits to ensure total protection against dust and sprinkler jets. If you are mounting lights in totally exposed zones without a roof overhang, upgrading to IP66 or IP67 waterproof gear stops rain from destroying the circuitry. For coastal homes, always bypass standard metals and invest in marine-grade brass bulkheads to fight aggressive salt corrosion.
How far apart should fence-mounted lights be spaced?
Space standard solar post cap kits roughly 6-8 feet apart to create a seamless, continuous ribbon of light without dark patches. If you are installing high-lumen PIR motion arrays, you can stretch that spacing to 15-20 feet to avoid overlap. Always grab a bulk pack of temporary battery-operated pucks to test the spacing on your actual fence before committing to permanent drilled brackets.
Can I install garden wall lights myself or should I hire an electrician?
Solar and 12V low-voltage systems are brilliant DIY weekend projects; grabbing a low-voltage landscape transformer kit requires zero electrical license and is incredibly safe to bury. However, hardwired 120V exterior sconces carry serious voltage. Always hire a licensed professional for 120V connections, especially when drilling through exterior siding, to ensure weatherproof code compliance and avoid voiding your home insurance.