Upgrading your exterior with stepping stones modern installations instantly commands architectural authority. Unlock exact budget blueprints and premium material sourcing for flawless pathways. Achieve a bespoke designer finish without exorbitant contractor markups.
Design Snapshot Key Principles
- Material Integrity: Select materials that age gracefully and maintain their structural clarity—concrete, natural stone, and composite options that resist weathering while developing character
- Spatial Rhythm: Position stones to create deliberate pacing through the landscape, using negative space as intentionally as the stones themselves
- Tonal Restraint: Limit color palettes to 2-3 complementary tones that anchor the design without competing with surrounding plantings
- Geometric Precision: Employ crisp edges and calculated placement to establish visual order that guides movement and frames garden elements
Monochrome Minimalism Clean Lines & Geometric Forms
1. Smooth Concrete Rectangles
This layout feels like walking through an upscale modern art museum gallery. Focusing on sleek urban patio decor creates a high-contrast visual anchor. Works exceptionally well for transitioning between an outdoor kitchen and a shaded lounge area.
Spacing pre-cast blocks precisely apart delivers a surprisingly premium look instantly. Incorporating heavy-duty paver base panels ensures the heavy elements never sink or shift. Snagging geometric molds allows you to pour these exactly to your required specs.
You can easily pull this off for around $40–$85 per section. Save this to your DIY weekend garden board!
- Key Materials: High-strength concrete mix, precision forms
- Vibe / Style: Industrial minimalist chic
- Difficulty: Intermediate pouring required
- Budget Breakdown: Concrete: $30 | Molds: $25 | Base: $20
- Creator’s Tip: Vibrate the molds heavily to release trapped air for a glass-like finish.
- Smart Sourcing: Reusable geometric concrete molds (bulk pack) and commercial-grade clear acrylic stone sealer.
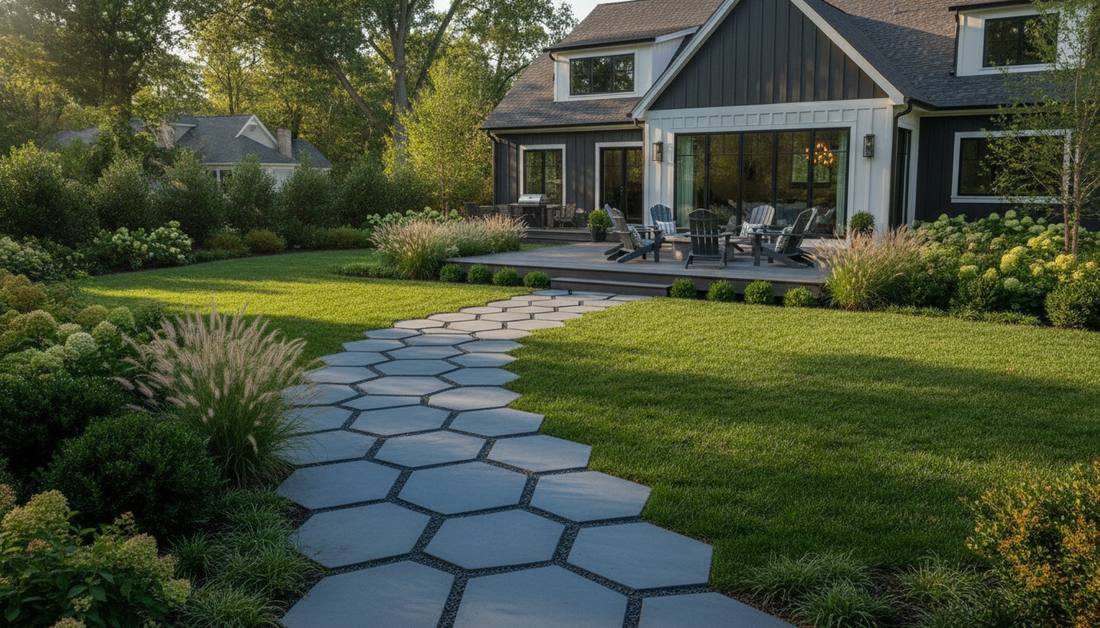
2. Hexagonal Porcelain Pavers
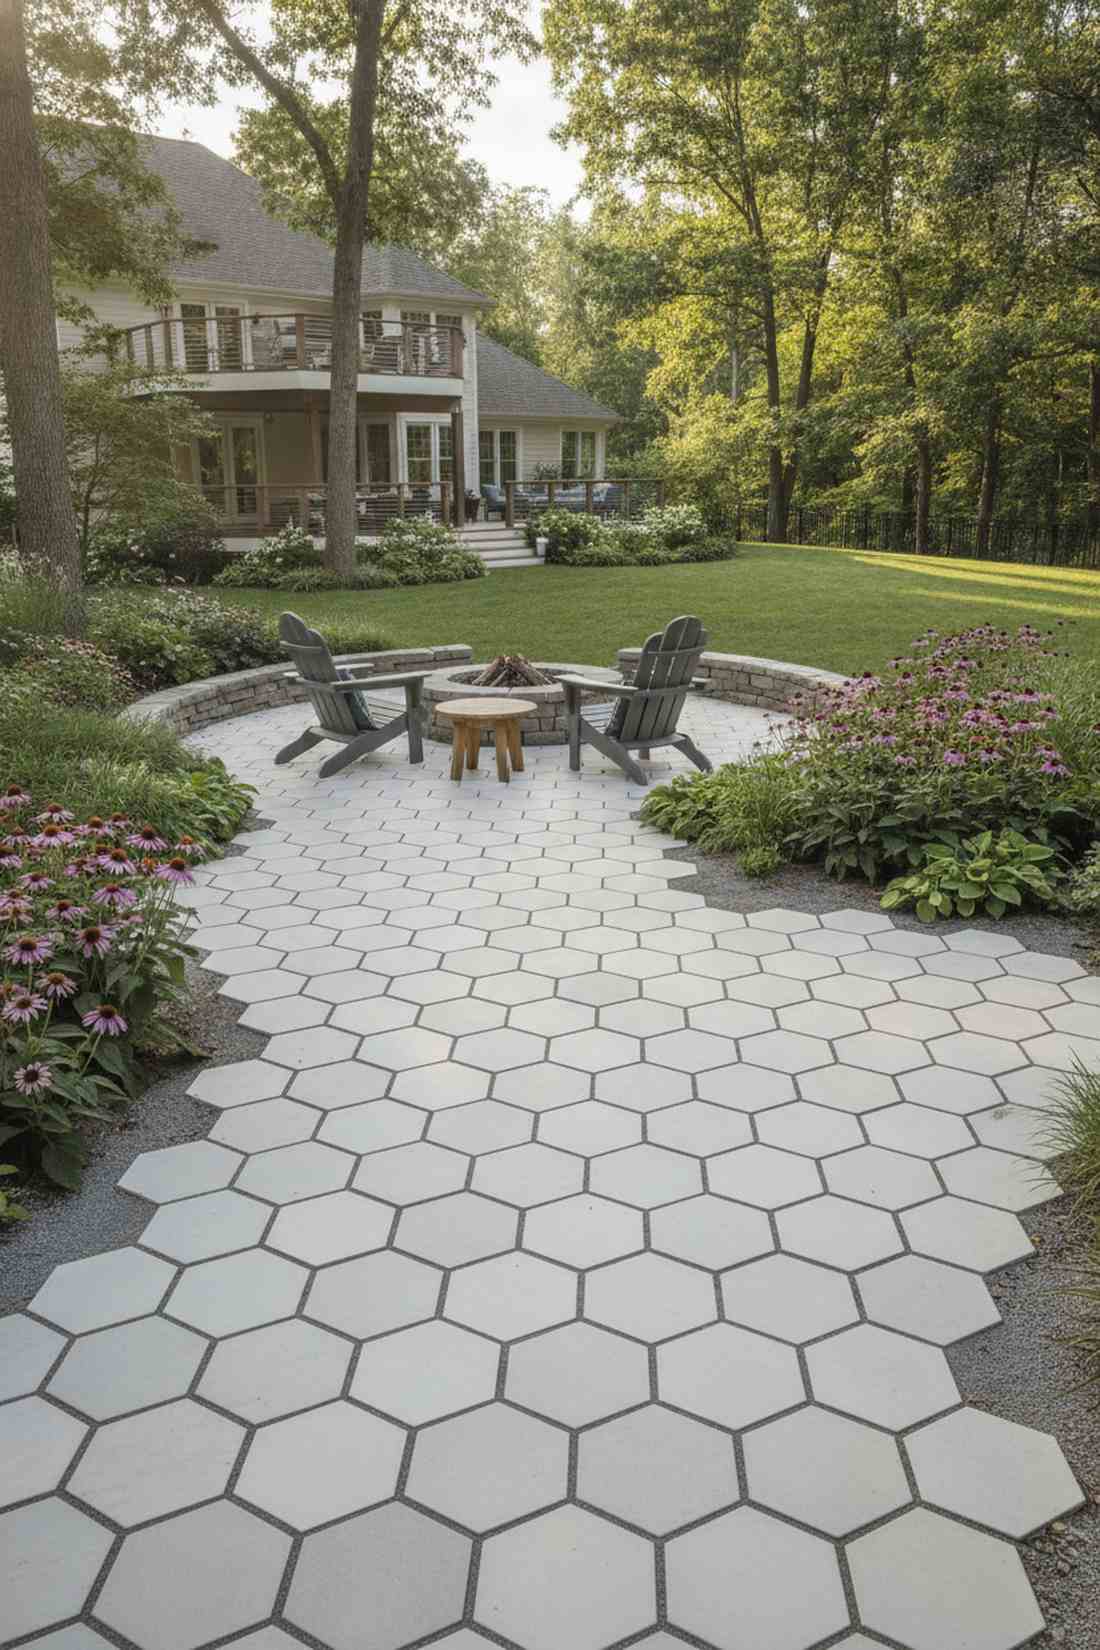
Stepping onto this path feels like entering a high-end luxury spa retreat. Utilizing geometric garden accents breaks up boring straight lines flawlessly. Highly recommended for framing perennial plant beds or highlighting a backyard fire pit zone.
Ditching standard squares for six-sided slabs completely fools the eye into thinking you hired a pro. Using a premium polymeric jointing sand kit locks out weeds while maintaining the sleek honeycomb profile. The matte finish hides dirt remarkably well.
Expect to invest around $60–$120 depending on your surface area. It’s a fast upgrade that completely changes the vibe.
- Key Materials: Large-format porcelain hexagons
- Vibe / Style: Architectural honeycomb
- Difficulty: Beginner-friendly drop-in
- Budget Breakdown: Pavers: $80 | Jointing Sand: $25
- Creator’s Tip: Group them organically rather than in strict rows for a modern scatter effect.
- Smart Sourcing: Pre-mixed polymeric jointing sand (bulk bag) and UV-coated porcelain tile packs.
3. Square Granite Grid
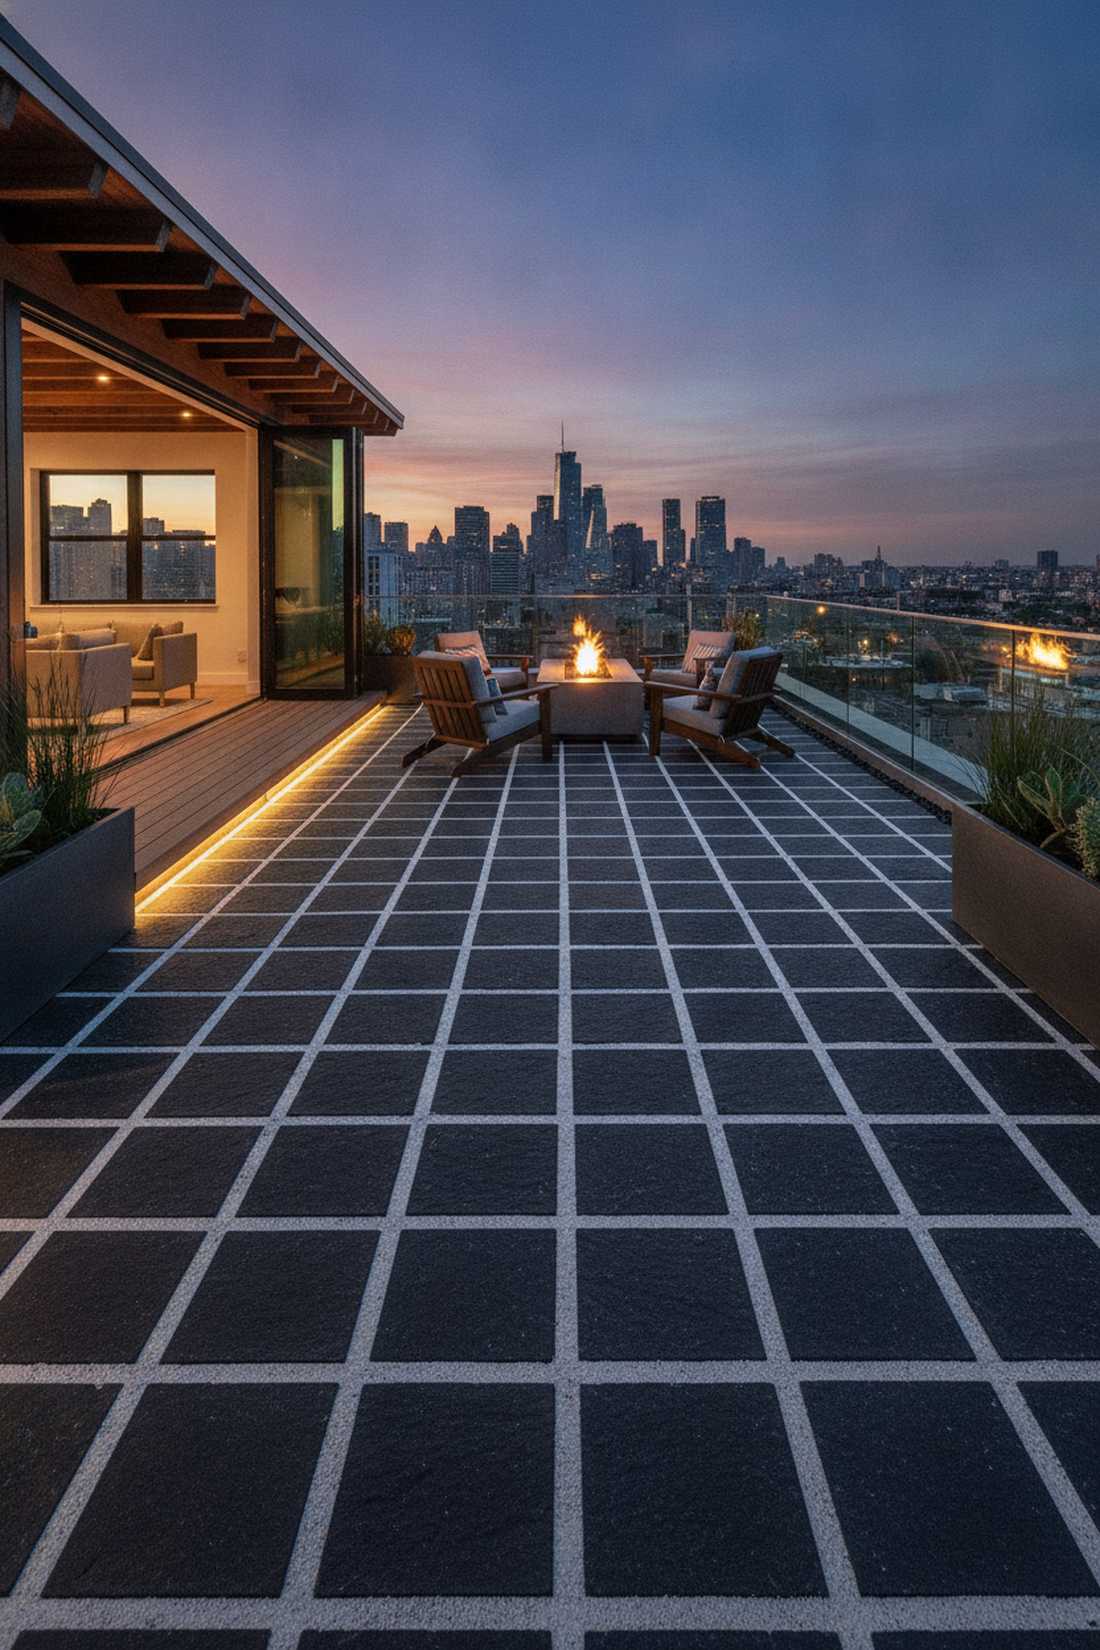
Gazing down at this grid feels like staring at a perfectly organized architectural blueprint. Anchoring your space with formal terrace hardscaping adds massive curb appeal. Perfect for rooftop terraces or tight hillside transitions where precision is everything.
Creating exact half-inch gaps gives a designer-level finish that demands attention. Utilizing commercial-grade weed barrier rolls underneath is non-negotiable to keep the negative space pristine. The contrast between dark stone and light filler acts as a massive visual hook.
This layout usually costs about $90–$150 to execute properly. Pin this if you’re planning a small space upgrade!
- Key Materials: Flamed granite squares, black sand
- Vibe / Style: Corporate plaza precision
- Difficulty: Requires meticulous measuring
- Budget Breakdown: Granite: $100 | Barrier: $15 | Sand: $20
- Creator’s Tip: Use wooden spacers during installation to keep the grid mathematically perfect.
- Smart Sourcing: Heavy-duty weed barrier landscape fabric and pre-cut flamed granite tiles.
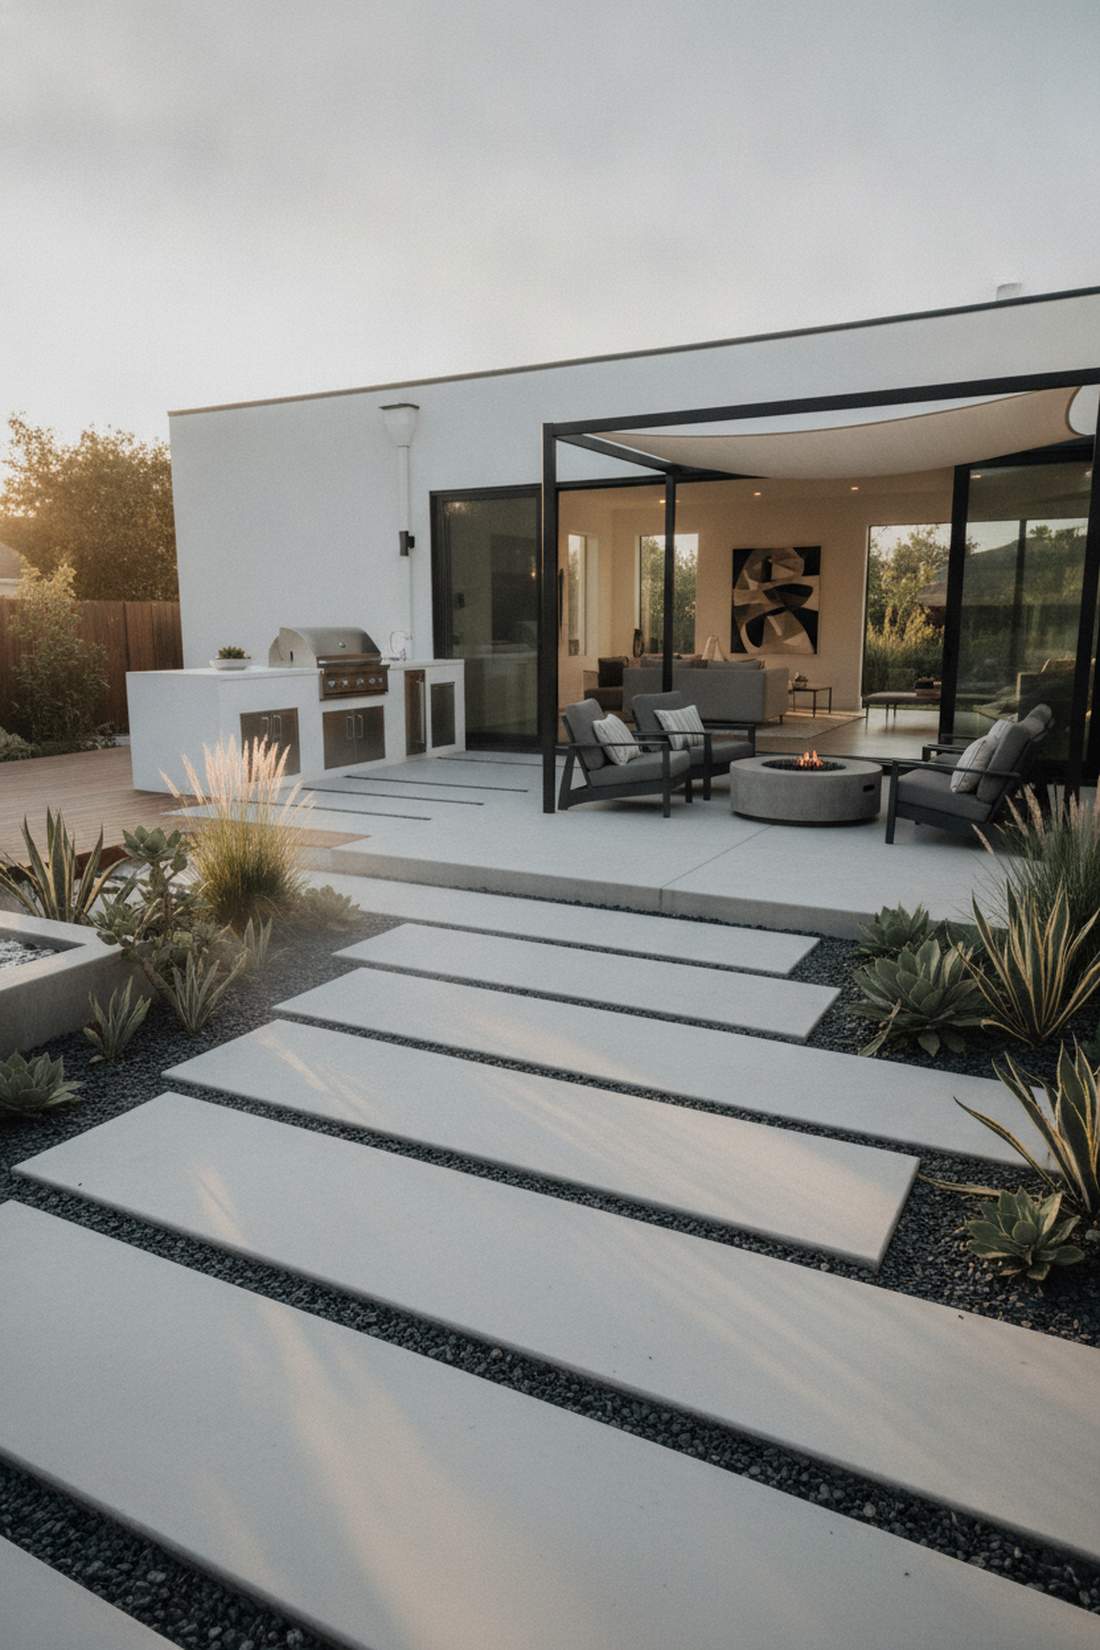
4. Linear Limestone Planks
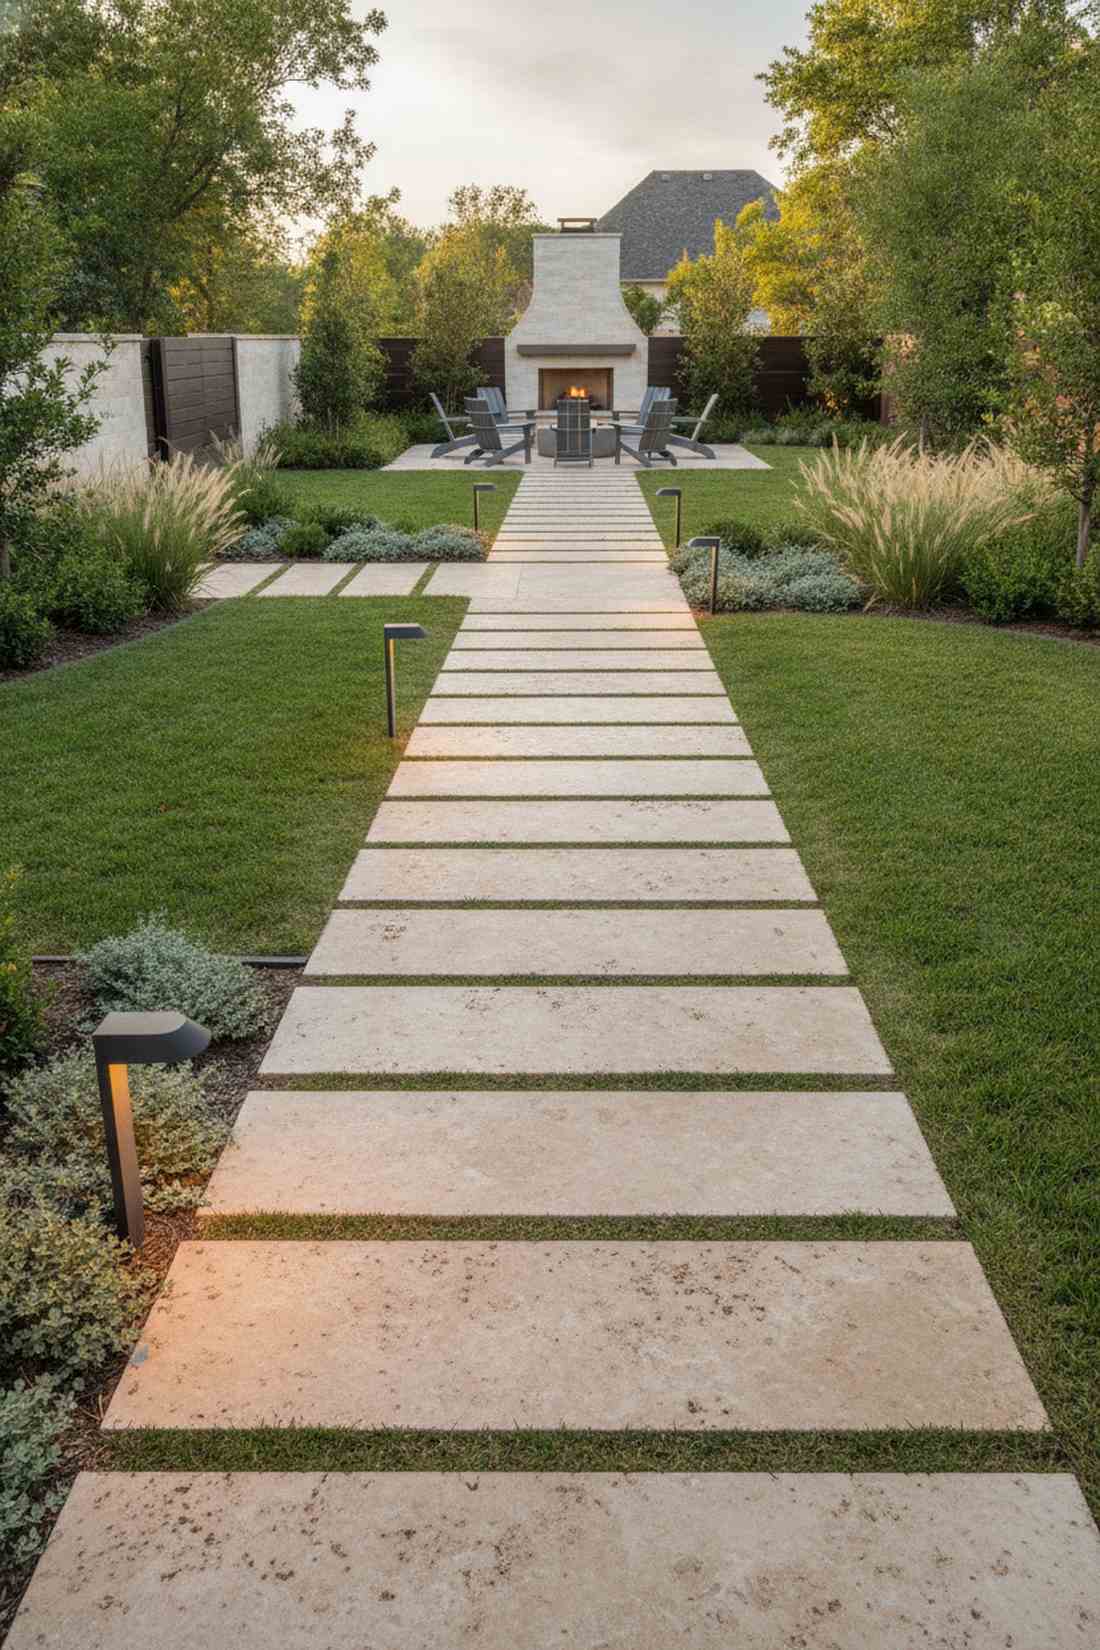
This streamlined walkway feels like an optical illusion that stretches your yard into infinity. Implementing elongated modern pathways makes cramped spaces feel massive. Flawless for narrow side yards connecting the front driveway to the back patio.
Stretching the stones parallel to your sightline looks far more expensive than it actually is. Securing them with a high-performance landscape adhesive ensures these slender planks remain completely stable. The beige undertones soften the sharp geometry beautifully.
You can set up a short pathway section for roughly $75–$130. Definitely worth the weekend effort.
- Key Materials: 36×12-inch limestone planks
- Vibe / Style: Elongated resort style
- Difficulty: Intermediate leveling
- Budget Breakdown: Limestone: $90 | Adhesive/Base: $30
- Creator’s Tip: Seal the limestone annually to stop the porous surface from absorbing dark mud.
- Smart Sourcing: Penetrating natural stone sealer (UV-resistant) and pre-cut limestone slab kits.
This next setup is ridiculously cheap but looks like a $1000 custom estate display…
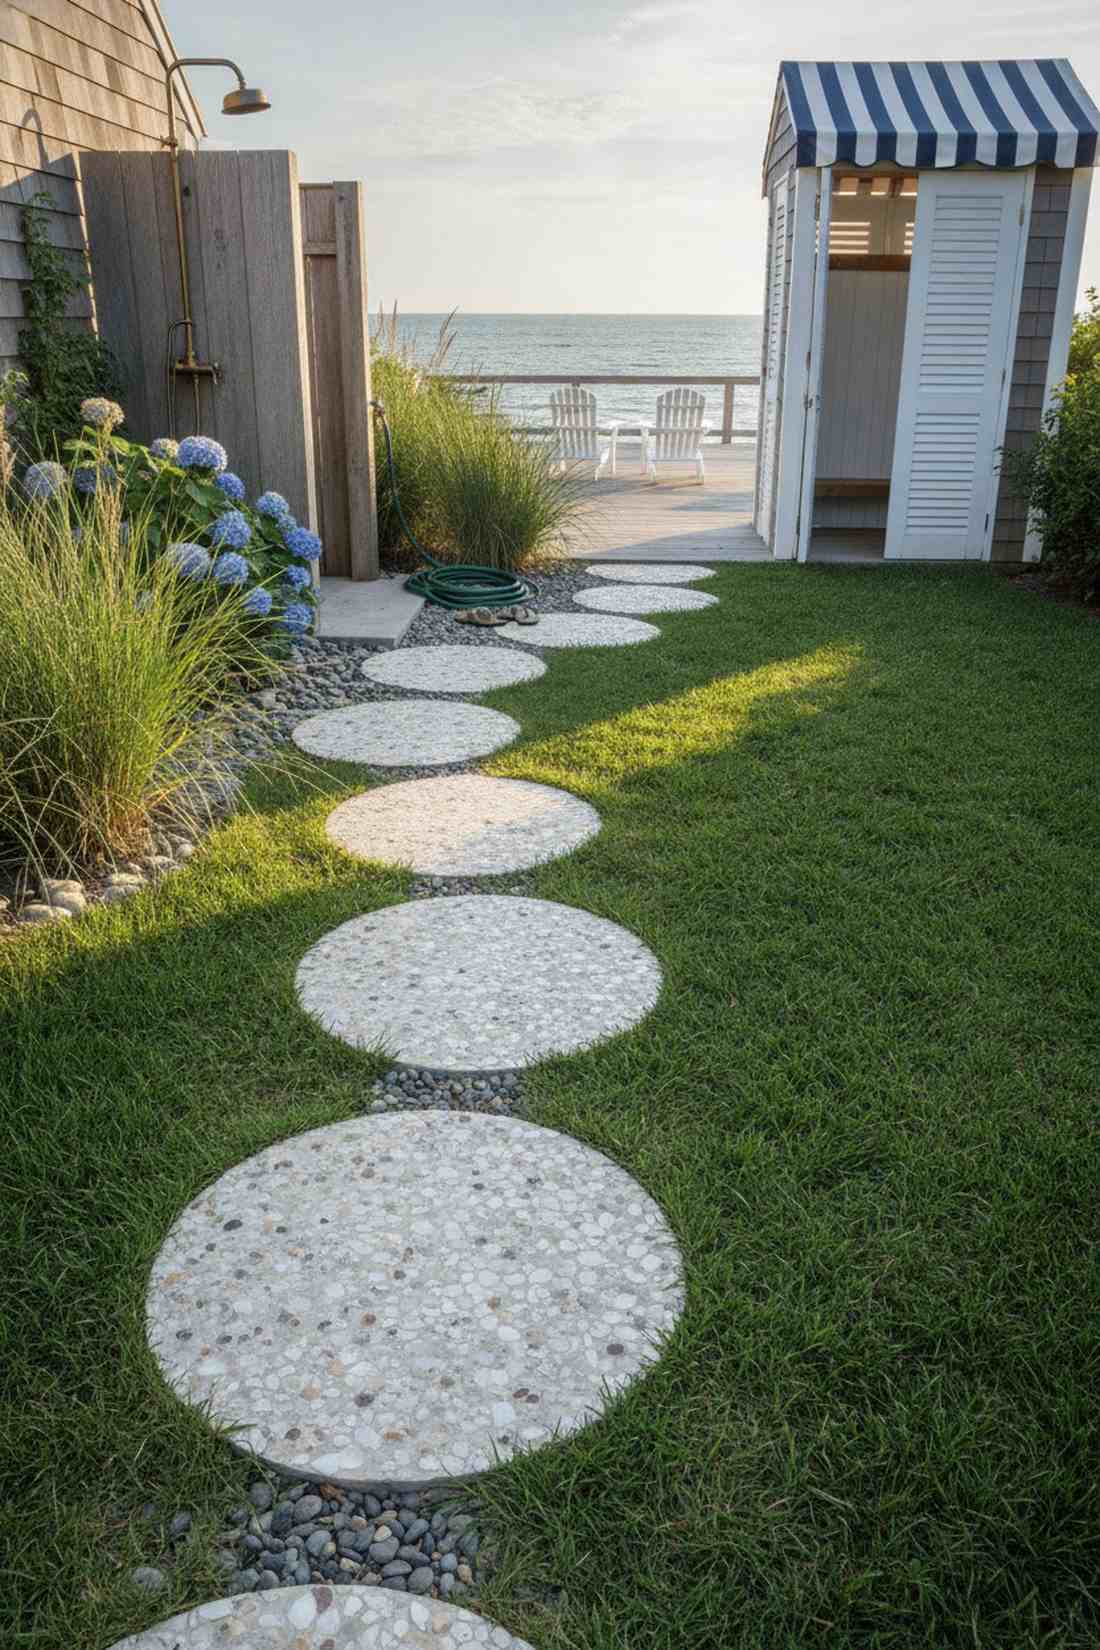
5. Circular Concrete Discs
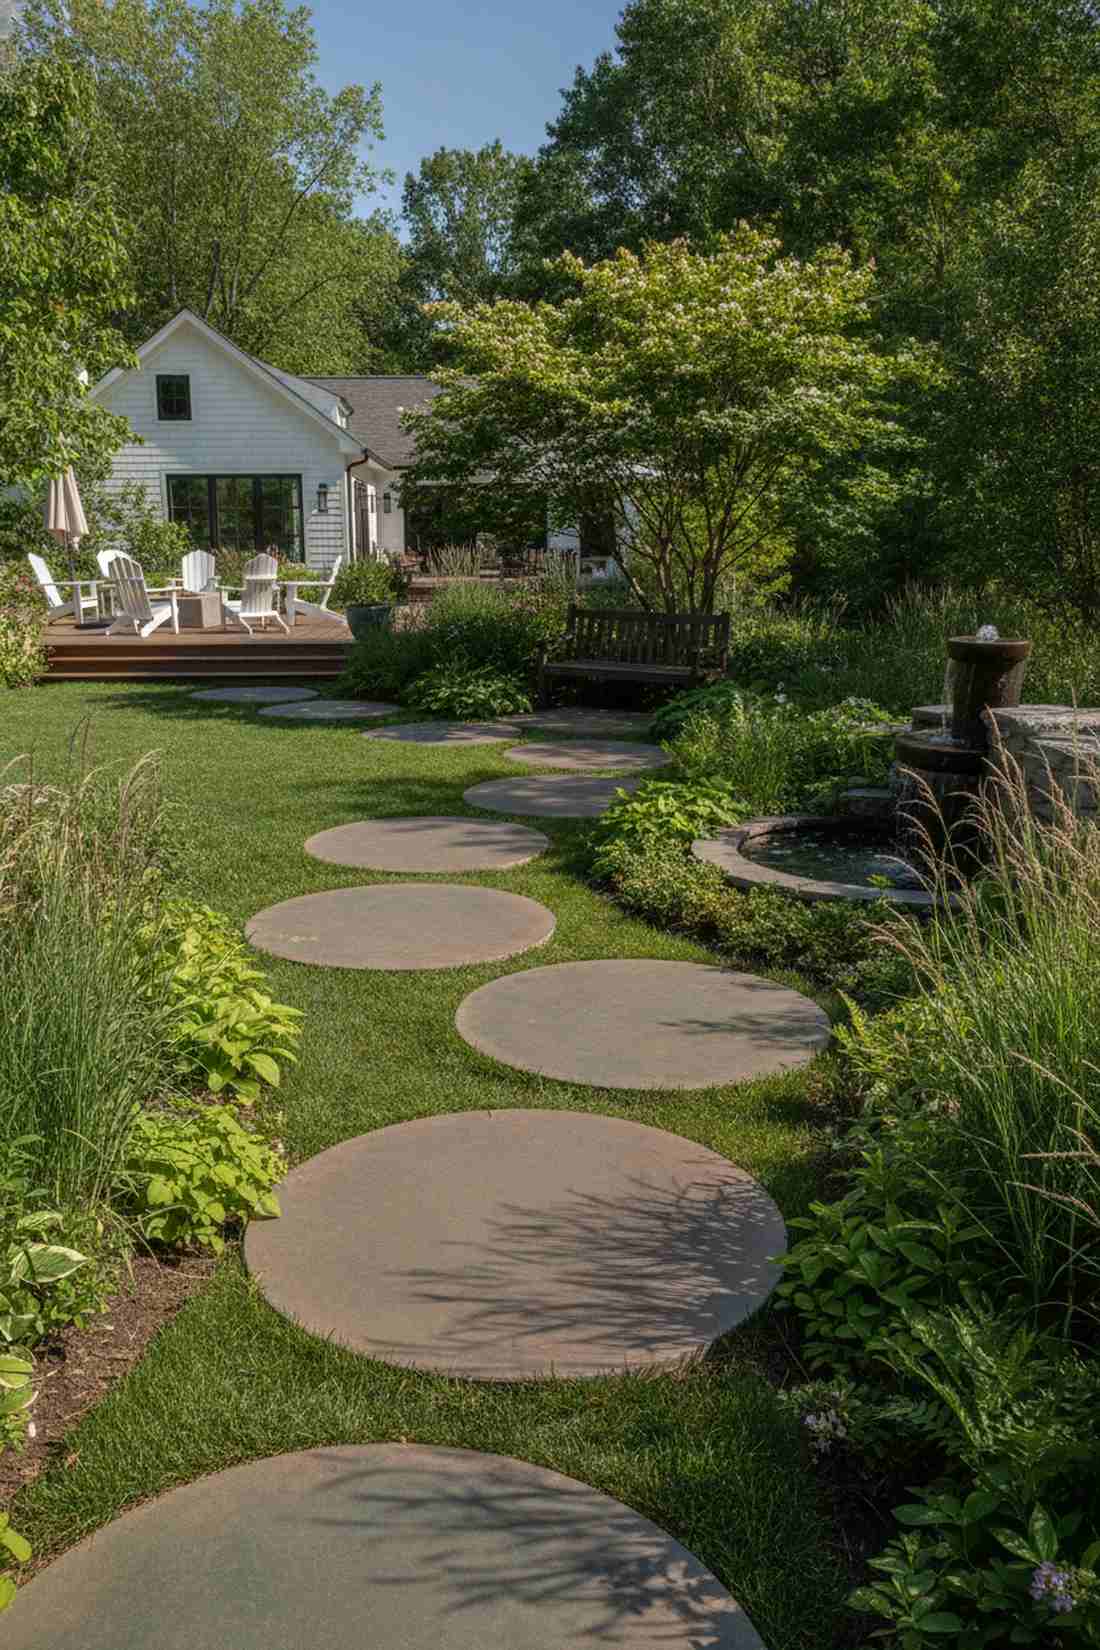
Hopping across these oversized rounds feels like navigating lily pads in a zen garden. Integrating oversized circular hardscape provides a massive statement against wild organic foliage. Ideal for leading guests toward a hidden garden bench or water feature.
Casting pure circles contradicts the usual square grid, resulting in a striking focal point. Mixing in premium iron oxide concrete pigments allows you to tint the stepping surfaces permanently. Spacing them asymmetrically encourages visitors to slow down.
Creating your own rounds drops the cost to just $25–$50 for the batch. Save this idea for a budget-friendly garden hack!
- Key Materials: Concrete mix, circular casting forms
- Vibe / Style: Meditative sculptural pathway
- Difficulty: Easy but heavy lifting
- Budget Breakdown: Concrete: $20 | Pigment: $15 | Molds: $10
- Creator’s Tip: Use heavy-duty plastic plant saucers as cheap, reusable casting forms.
- Smart Sourcing: Iron oxide cement pigment powder and heavy-duty concrete casting circles.
6. Brushed Bluestone Squares
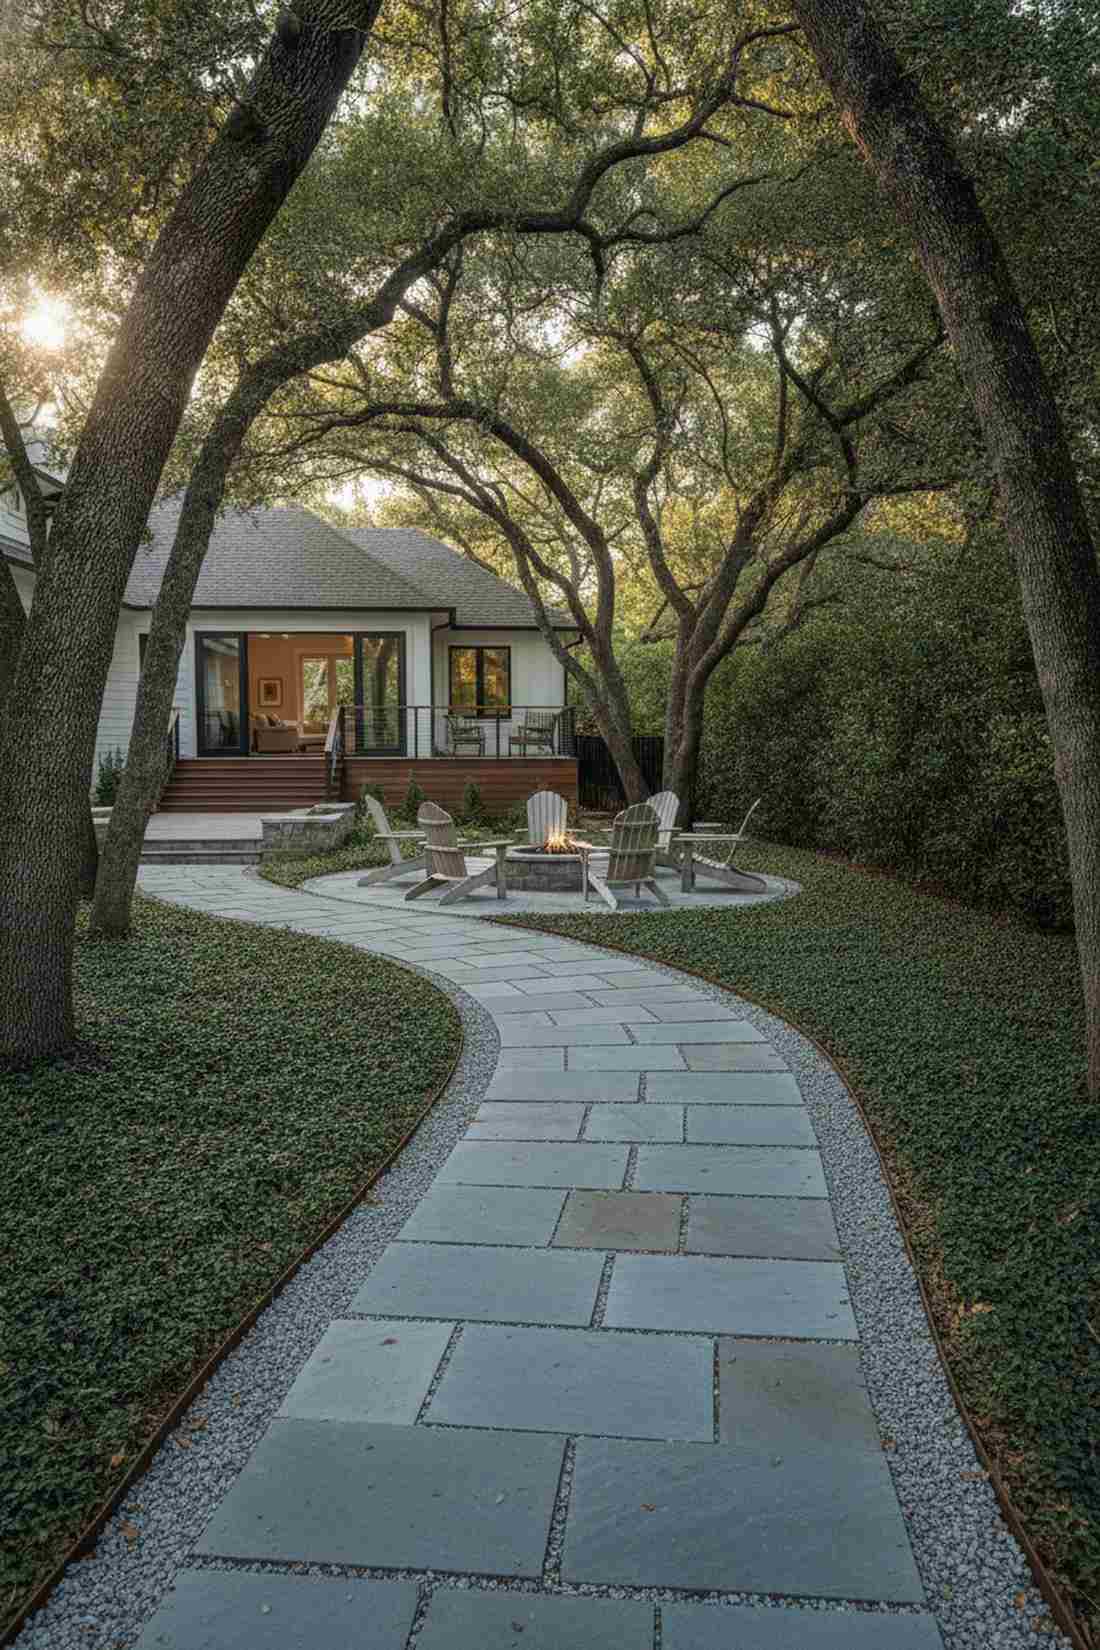
Walking barefoot on these slabs feels cool, calm, and utterly luxurious. Introducing silver-blue pathway stones instantly brightens dim or deeply shaded outdoor areas. An absolute game-changer for pathways winding beneath heavy oak trees or tall privacy hedges.
Opting for a brushed finish avoids slippery surfaces while upgrading standard gray palettes. Installing rust-proof steel landscape edging around the border locks the surrounding gravel in tight. The uniform dimensions make expanding the path later effortlessly simple.
Sourcing quality bluestone will run about $80–$140 for a standard walkway. Highly recommended for a quick weekend win.
- Key Materials: 18×18 thermal bluestone, steel edging
- Vibe / Style: Sophisticated woodland contrast
- Difficulty: Moderate base preparation
- Budget Breakdown: Bluestone: $90 | Edging: $35 | Base: $15
- Creator’s Tip: Ensure a slight gradient in the base sand to prevent rainwater from pooling on the stone.
- Smart Sourcing: Pre-cut rust-proof steel edging (starter kit) and high-traction stone finish sealer.
Vibrant Accents Stepping Stones Red & Bold Statements
7. Terracotta Clay Pavers

This layout feels like a sun-drenched afternoon in a private Mediterranean courtyard. Highlighting your path with stepping stones red hues completely warms up cold minimalist aesthetics. Works wonderfully when bordered by drought-tolerant succulents or agave plants.
Placing earthy fired clay across crushed granite delivers an incredibly high-end contrasting texture. Tossing down a premium decomposed granite base allows the terracotta to breathe and drain naturally. The weathered salt patina these develop over time is impossible to fake.
You can gather these materials for roughly $45–$80. Pin this to your drought-friendly landscaping board!
- Key Materials: Handmade terracotta squares, decomposed granite
- Vibe / Style: Warm Mediterranean minimalism
- Difficulty: Simple drop-and-level
- Budget Breakdown: Terracotta: $50 | Granite Base: $25
- Creator’s Tip: Do not over-seal these; they look best when allowing natural efflorescence to show.
- Smart Sourcing: Weather-resistant terracotta tile packs and breathable stone base grids (bulk pack).
8. Red Granite Stepping Blocks
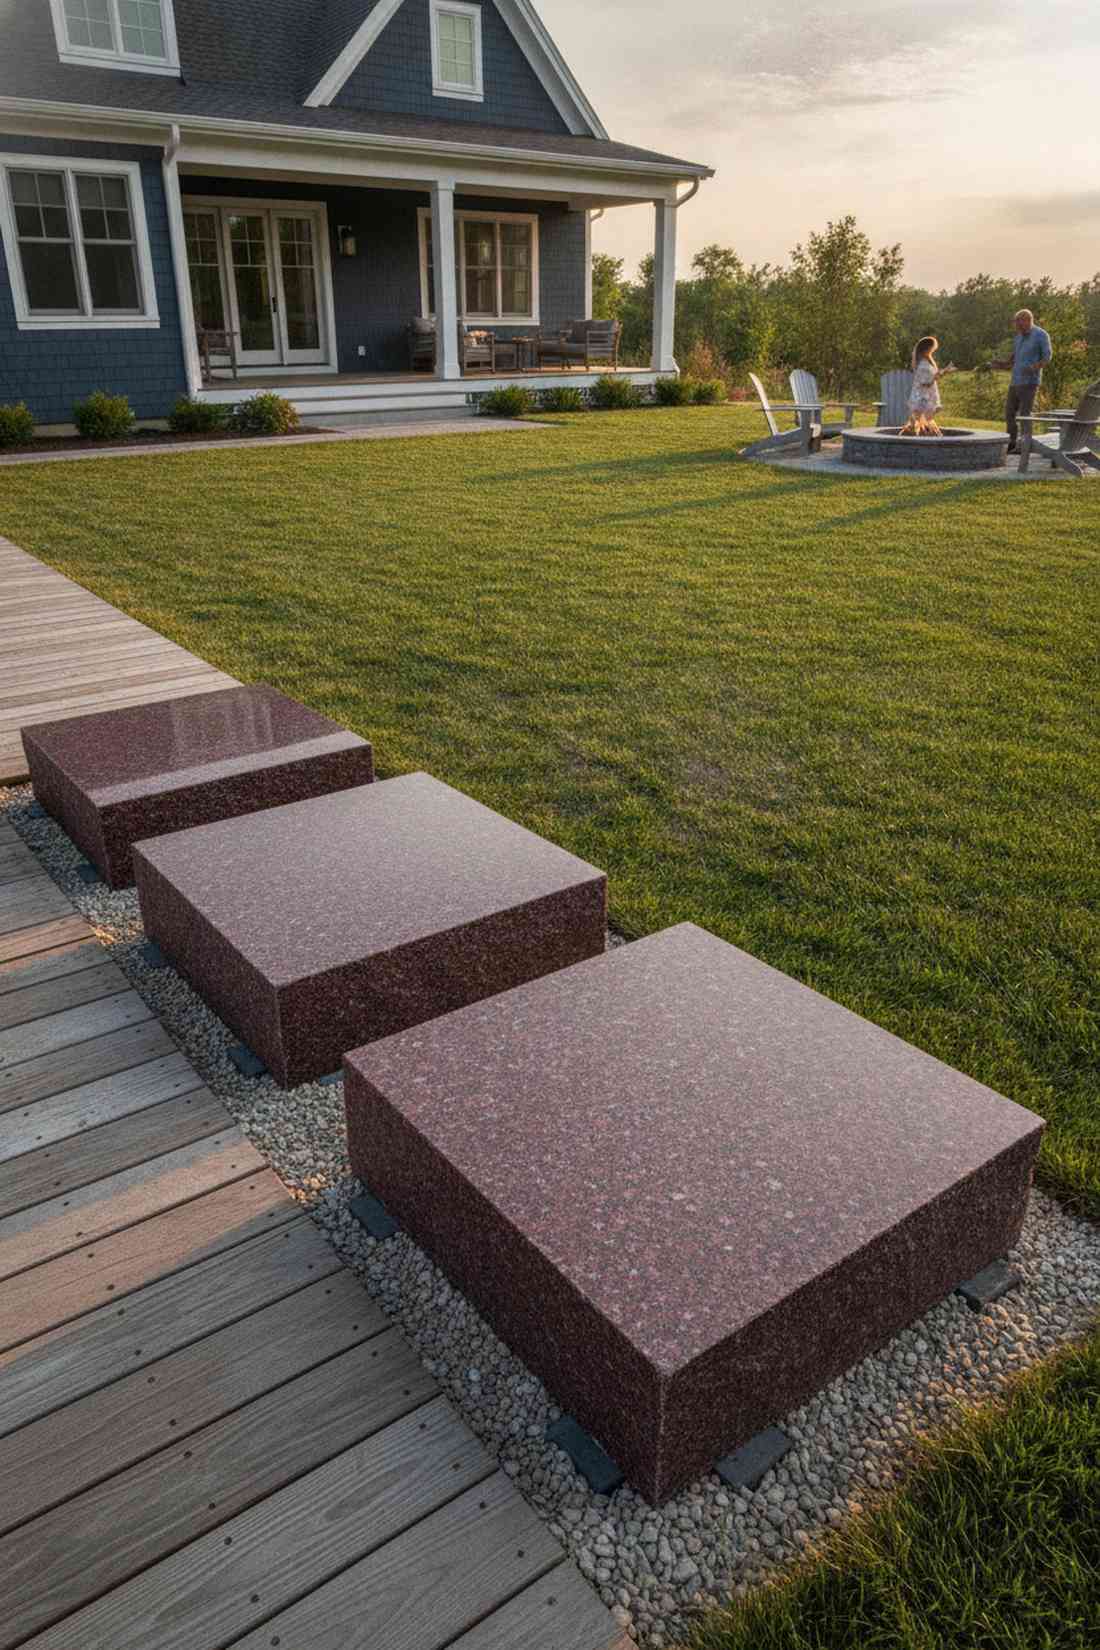
Stepping onto these massive burgundy blocks feels like entering a high-end corporate plaza. Utilizing bold stepping stones red textures anchors intersections perfectly. Unbeatable for marking the exact transition point between a wooden deck and a lawn.
Dropping an oversized saturated stone into a neutral sea of gray commands immediate attention. Using an industrial paver leveling system guarantees these heavy behemoths sit flush with the surrounding aggregate. The crystalline sparkle catches the evening sun brilliantly.
Premium granite blocks cost about $60–$110 each. It’s a statement piece that demands zero maintenance.
- Key Materials: 24×24 burgundy granite blocks
- Vibe / Style: High-impact visual anchor
- Difficulty: Heavy equipment/buddy required
- Budget Breakdown: Granite Block: $80 | Leveling Sand: $15
- Creator’s Tip: Set them slightly higher than surrounding gravel to prevent the red faces from getting buried.
- Smart Sourcing: Heavy-duty paver lifter tools and high-impact colored granite slabs.
Most people get their walkway color completely wrong… until they try the exact chemical layout coming up next.
💡 Must-Have Supplies for High-End Setups
To build these setups faster and ensure they last, skip the generic craft aisles and invest in the right foundational kits.
- Base & Support: Interlocking permeable paver base grids (bulk box)
- Setup Tools: Professional heavy-duty stone lifting tongs
- Weather/Durability Protection: Commercial-grade UV-resistant wet-look sealant
9. Stained Concrete with Iron Oxide
This chemical reaction feels like discovering aged leather embedded right into the earth. Incorporating rich stepping stones red tones via acid staining completely disguises cheap materials. Brilliant for reviving an old, boring poured concrete path without breaking a sweat.
Swapping paint for chemical iron oxide achieves a translucent depth that paint simply cannot match. Applying a satin finish concrete topcoat locks the variegated burnt sienna tones down permanently. It’s the ultimate trick for faking high-end natural stone.
An entire staining kit will only set you back $35–$65. Save this to your extreme patio makeover board!
- Key Materials: Existing concrete, acid stain, neutralizer
- Vibe / Style: Organic rusted industrial
- Difficulty: Requires safety gear and care
- Budget Breakdown: Acid Stain Kit: $40 | Sealer: $20
- Creator’s Tip: Always test the stain on an inconspicuous corner because every concrete batch reacts differently.
- Smart Sourcing: Iron oxide concrete stain (starter kit) and UV-resistant satin concrete sealer.
10. Recycled Brick Fragments
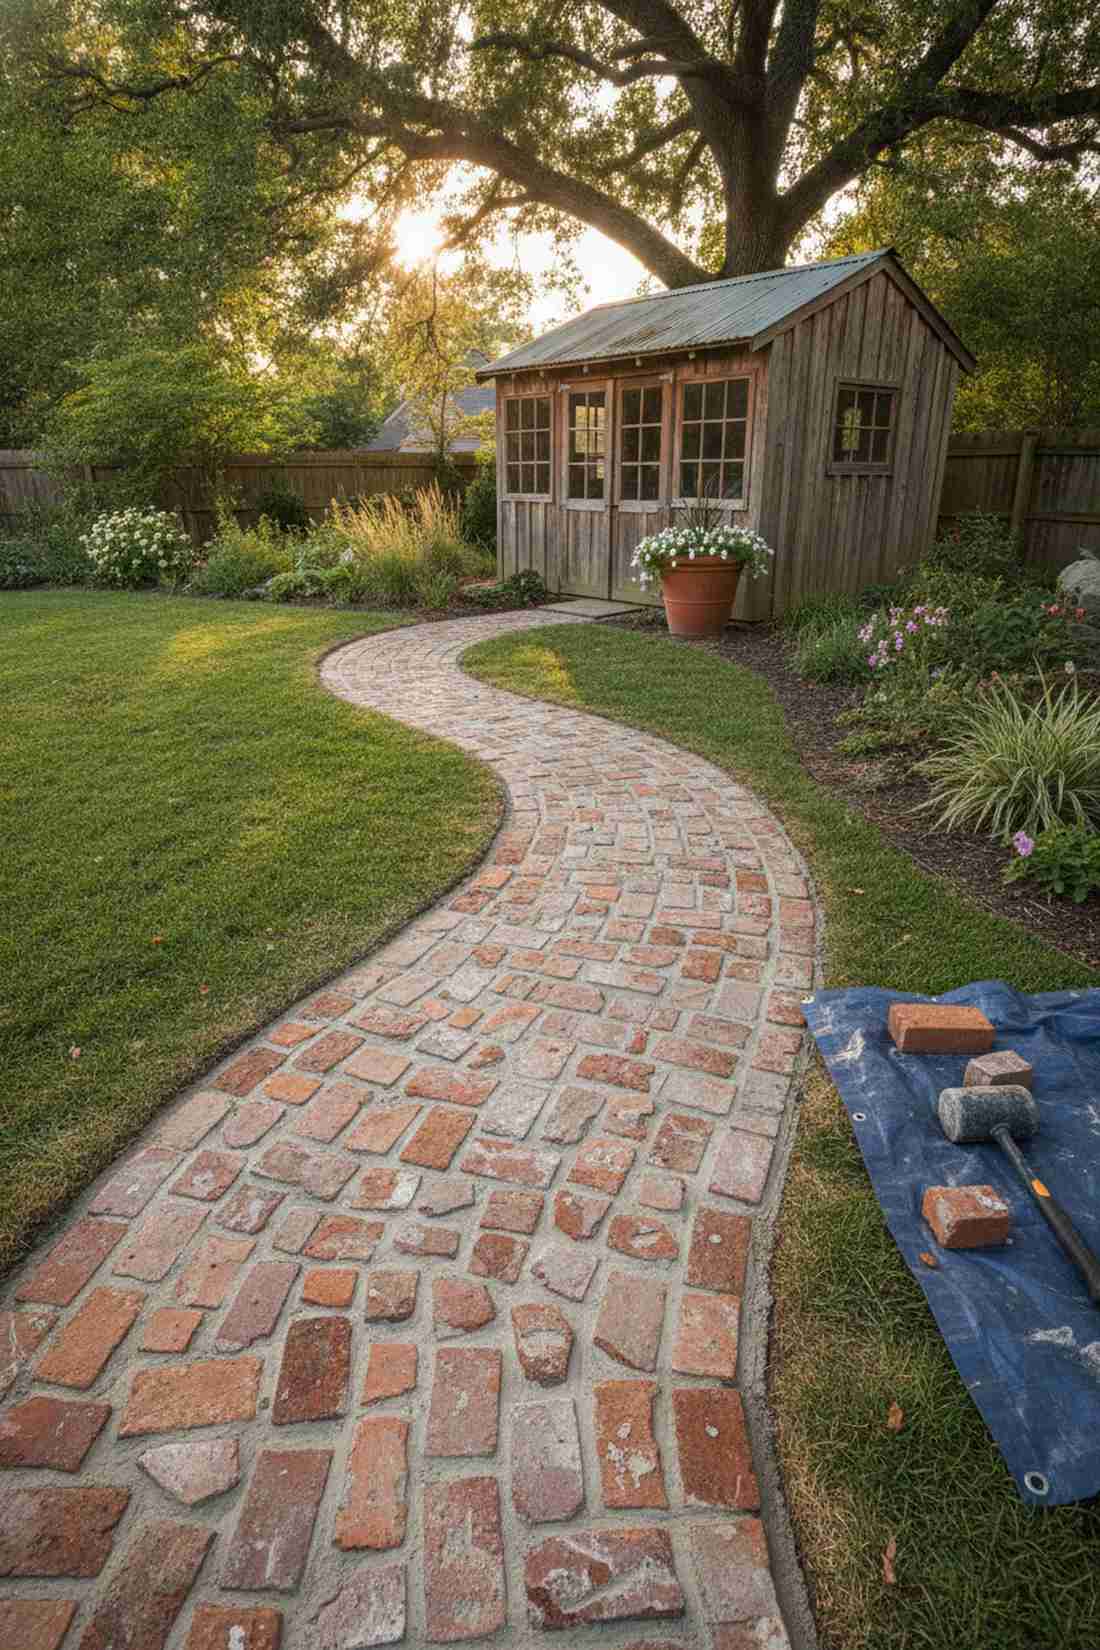
Crunching over these fragments feels like walking through a revitalized historic urban loft district. Utilizing stepping stones red fragments pushes a sustainable, wabi-sabi aesthetic effortlessly. Extremely effective for winding paths leading toward a backyard potting shed.
Smashing salvaged bricks into a mortar bed creates a bespoke mosaic nobody else can replicate. Blending in rapid-setting high-strength mortar ensures the fractured pieces stay locked tight through winter. The sharp contrast between the red faces and gray interiors is stunning.
Since the brick is upcycled, this whole project usually costs under $30. Highly satisfying weekend destruction project.
- Key Materials: Salvaged brick, mortar mix
- Vibe / Style: Urban archaeology chic
- Difficulty: Fun, messy, and creative
- Budget Breakdown: Scrape Brick: $0 | Mortar: $25
- Creator’s Tip: Break the bricks with a heavy mallet over a tarp to safely contain the flying dust and shards.
- Smart Sourcing: Rapid-setting outdoor mortar mix and heavy-duty rubber masonry mallets.
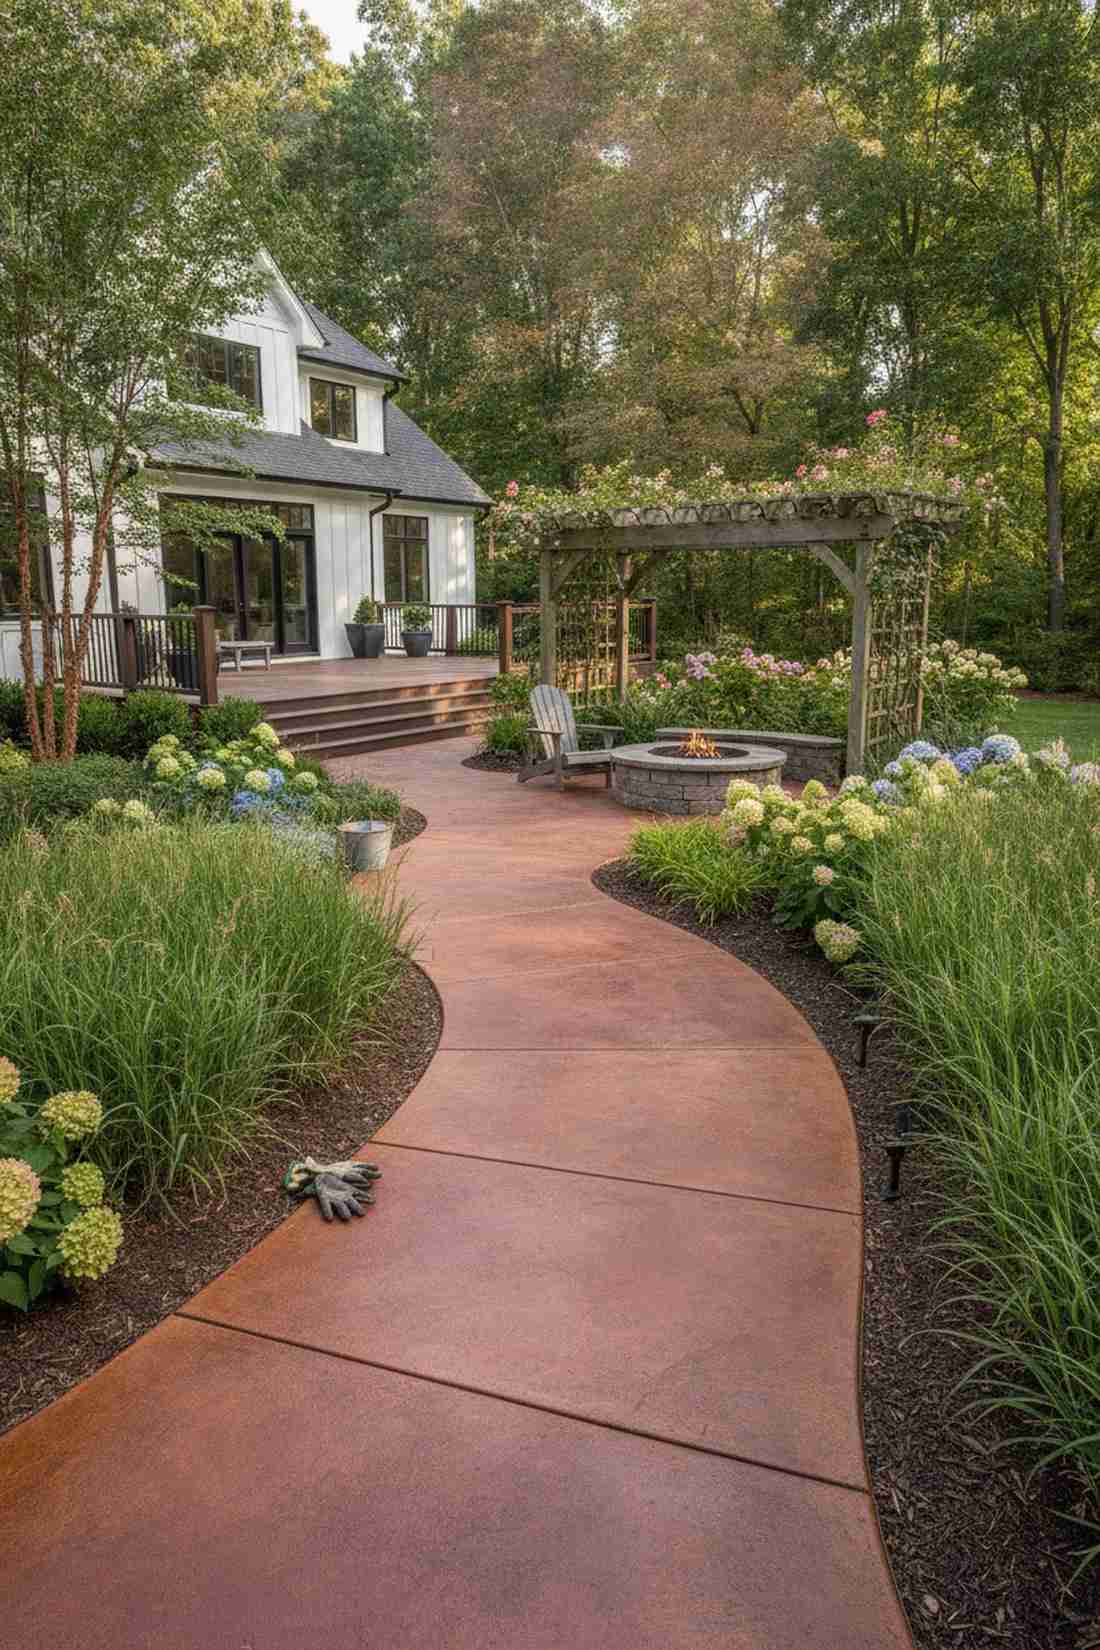
11. Sandstone with Rust Striations
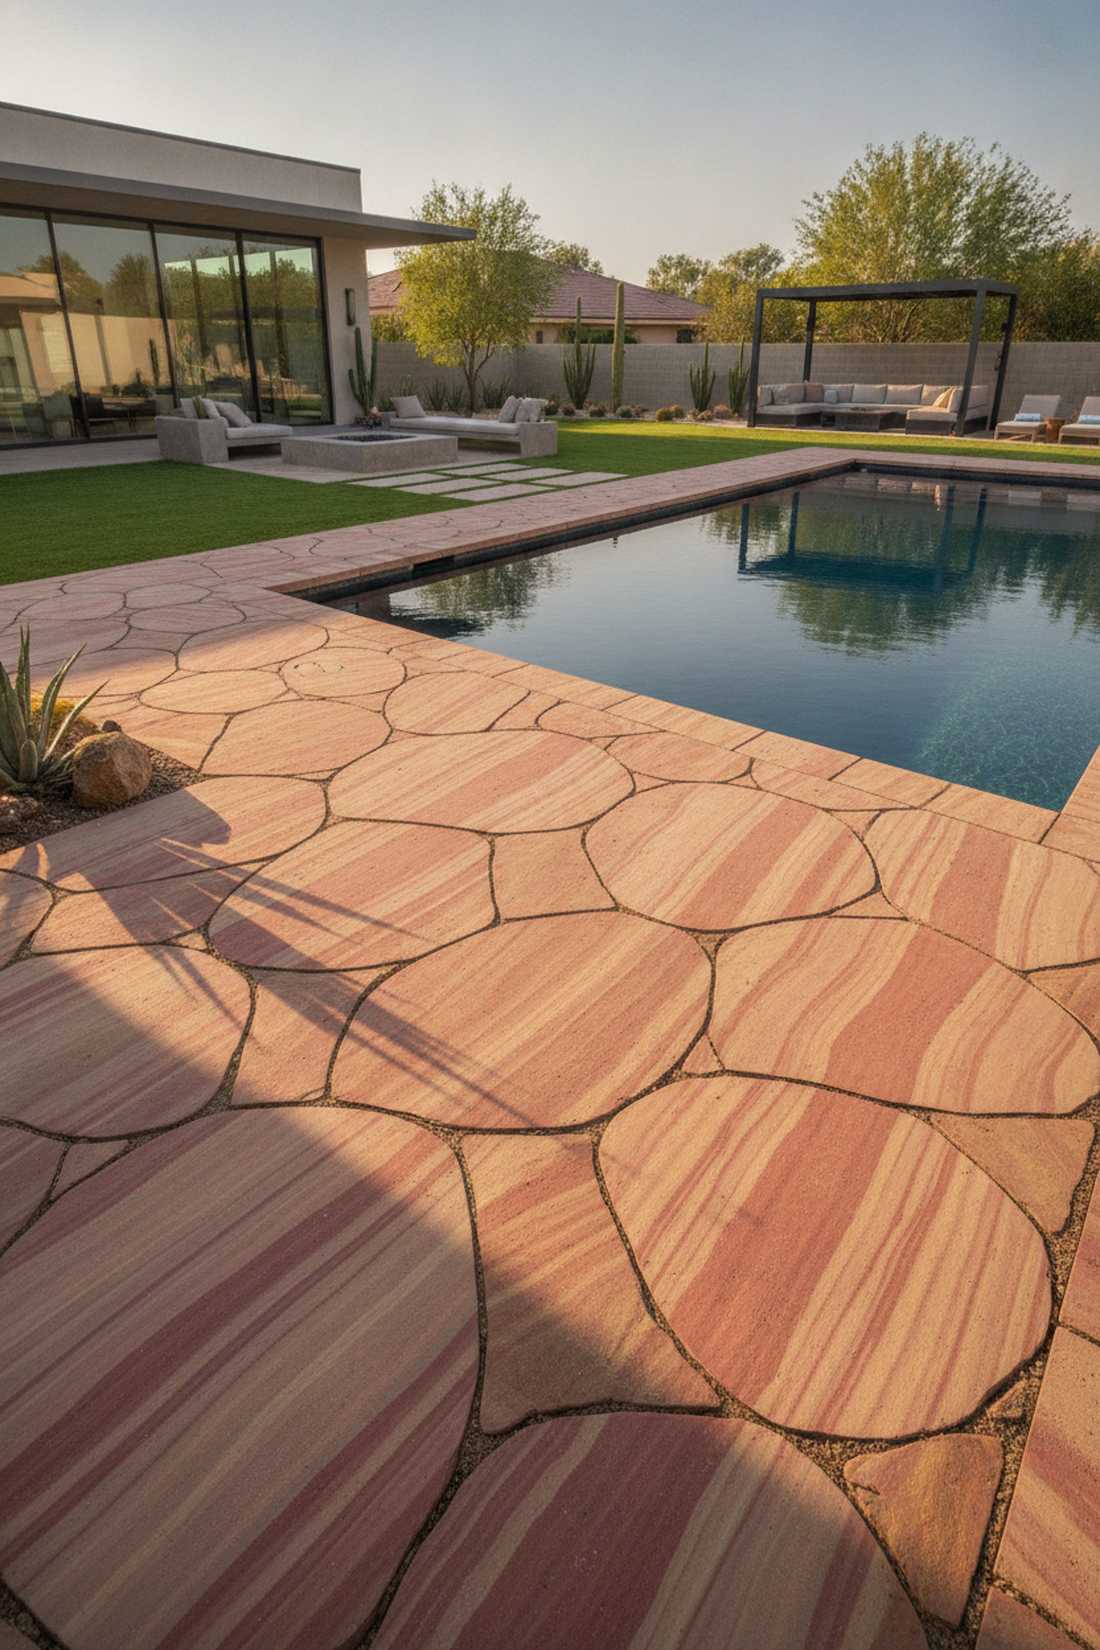
Following these natural lines feels like walking across a miniature canyon floor. Showcasing organic stepping stones red banding adds geological movement to your yard. Perfect for surrounding a sleek, modern swimming pool where slip-resistance is mandatory.
Orienting the rust veins parallel to your walkway visually propels visitors forward. Coating them with a breathable penetrating rock sealer stops chlorine and saltwater from degrading the sedimentary layers. Mother Nature does all the artistic heavy lifting here.
Natural rainbow sandstone runs about $90–$160 for a small patio section. Pin this for your luxury pool deck planning!
- Key Materials: Rainbow sandstone slabs
- Vibe / Style: Earthy desert modernism
- Difficulty: Moderate base leveling
- Budget Breakdown: Sandstone: $120 | Base: $25 | Sealer: $15
- Creator’s Tip: Hand-pick the stones at the yard so you can intentionally match up the directional bands.
- Smart Sourcing: Breathable natural stone sealer (UV-coated) and commercial anti-slip grip additives.
Coastal Calm Stepping Stones Beach Inspired Designs
12. Smooth River Rock Clusters
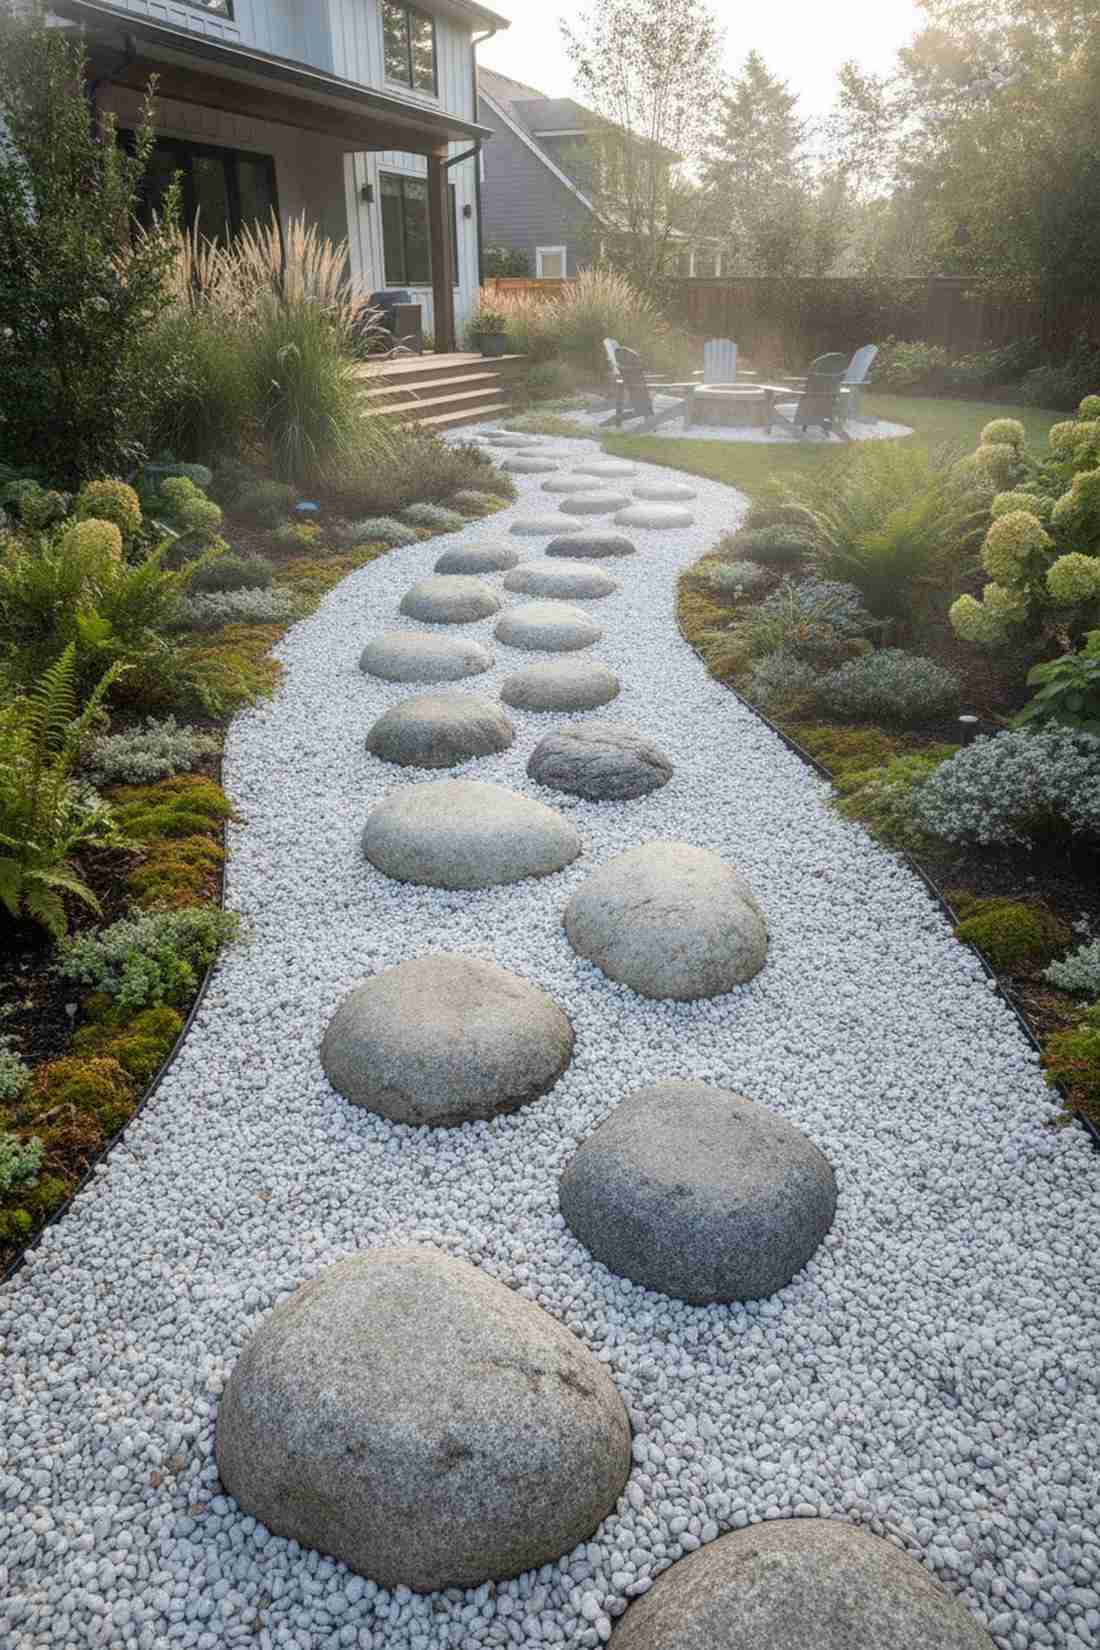
This layout feels exactly like finding a secret pathway along a misty northern coastline. Using rounded stepping stones beach features brings instant vacation-home serenity to urban backyards. Exceptionally beautiful when set across a bed of stark white quartz pebbles.
Grouping oversized river rocks mimics natural tidal deposits flawlessly. Locking them down with an invisible landscape binding resin keeps the stones from kicking around under foot traffic. The thermal mass prevents the pathway from burning your feet in July.
You can gather or buy these stones for about $40–$75. It’s a fast upgrade that completely changes the vibe.
- Key Materials: 12-18 inch river stones, white pebbles
- Vibe / Style: Relaxed tidal organic
- Difficulty: Easy placement
- Budget Breakdown: River Rocks: $40 | White Pebbles: $30
- Creator’s Tip: Bury the bottom third of the river rocks into the base to simulate natural settling.
- Smart Sourcing: Clear pour-on landscape rock binder and bulk pack polished river stones.
13. Shell Aggregate Concrete
Stepping on these pavers feels like strolling across a sunlit tidal flat at low tide. Creating custom stepping stones beach surfaces injects undeniable maritime character into standard concrete. The perfect transition piece leading to an outdoor shower or cabana.
Mixing crushed oyster shells directly into the concrete paste yields an incredibly high-end sparkle. Treating the surface with a concrete surface retarder spray exposes the shells beautifully before the cement fully cures. It brightens the walkway naturally while boosting traction.
A few bags of aggregate and cement cost roughly $35–$60. Save this idea to your coastal DIY board!
- Key Materials: Concrete mix, crushed oyster shells
- Vibe / Style: Sparking maritime aesthetic
- Difficulty: Intermediate wet-mix handling
- Budget Breakdown: Concrete: $25 | Crushed Shells: $20
- Creator’s Tip: Wash the surface with a hose right before it fully sets to reveal the hidden shell layers.
- Smart Sourcing: Crushed oyster shell aggregate (bulk bag) and concrete surface retarder spray.
Wait until you see the next concept—it looks incredibly complex but takes less than two hours to build.
14. Weathered Driftwood Planks
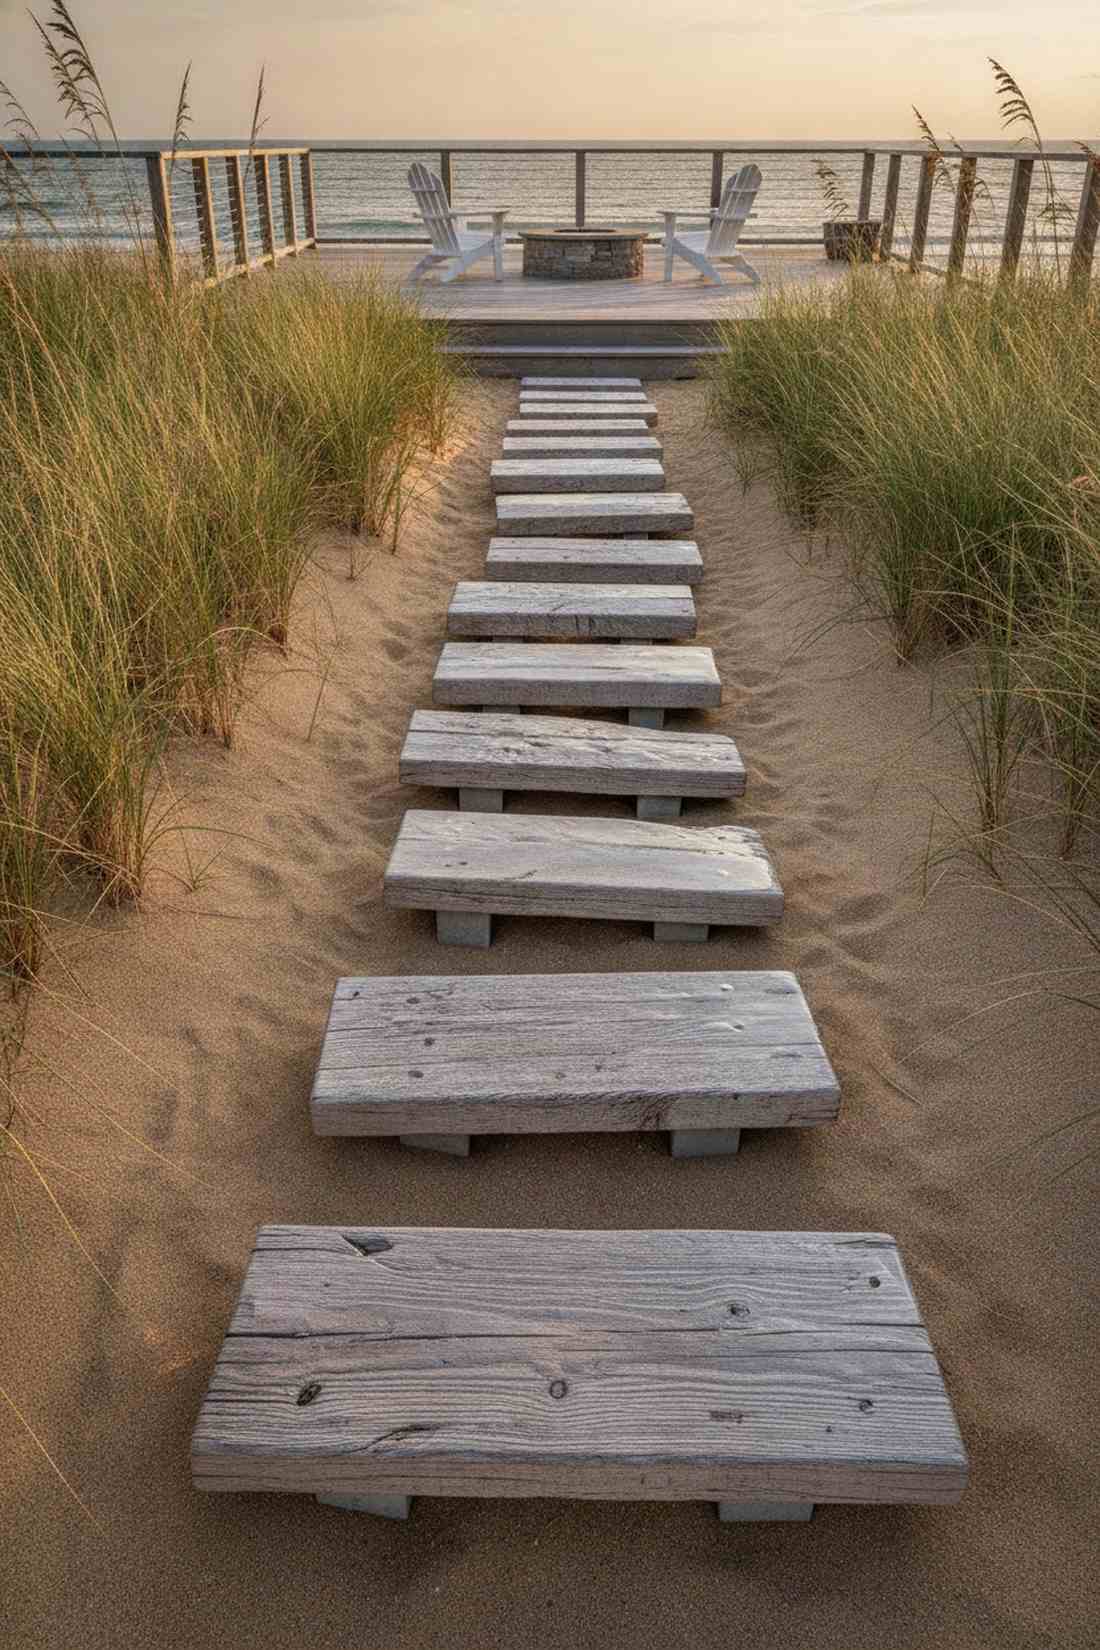
Walking over these silvered boards feels like crossing a forgotten dune fence by the sea. Embracing a stepping stones beach vibe through reclaimed timber adds incredible natural warmth. Stunning when framed by tall, swaying ornamental beach grasses.
Mounting weathered planks onto hidden concrete footers gives a designer-level finish that floats above the sand. Slapping on a coat of clear marine-grade timber sealant prevents rot while preserving that gorgeous silver patina. The organic imperfections of the wood are the main attraction.
If you source the wood yourself, the hardware is only $20–$40. Pin this if you love rustic beach house decor!
- Key Materials: Reclaimed driftwood, concrete anchors
- Vibe / Style: Ephemeral shoreline rustic
- Difficulty: Requires basic drilling
- Budget Breakdown: Hardware: $25 | Sealant: $15 | Wood: Free
- Creator’s Tip: Drill counter-sunk holes for the screws so bare feet never catch a sharp metal edge.
- Smart Sourcing: Marine-grade clear wood sealer and heavy-duty galvanized concrete anchors.
15. Sea Glass Embedded Pavers

This colorful path feels like discovering a hidden treasure trove washed up on the shore. Utilizing sparkling stepping stones beach accents transforms boring gray slabs into jewelry for your garden. Beautiful when illuminated by low-voltage path lighting at night.
Pressing tumbled glass into fresh cement creates a bespoke mosaic that catches the afternoon light perfectly. Investing in a pre-mixed tumbled sea glass pack ensures there are absolutely no sharp edges to cut feet. It completely revitalizes cheap stepping stones into custom art.
You can craft a set of these for $25–$50 easily. Highly recommended for a fun family weekend project.
- Key Materials: Basic wet concrete, tumbled sea glass
- Vibe / Style: Coastal artisanal mosaic
- Difficulty: Beginner-friendly crafting
- Budget Breakdown: Glass Packs: $30 | Concrete: $15
- Creator’s Tip: Cluster the glass pieces heavily in the center and let them fade out toward the edges.
- Smart Sourcing: Tumbled sea glass mix (bulk pack) and quick-setting concrete starter kits.
16. Sand-Colored Porcelain Tiles
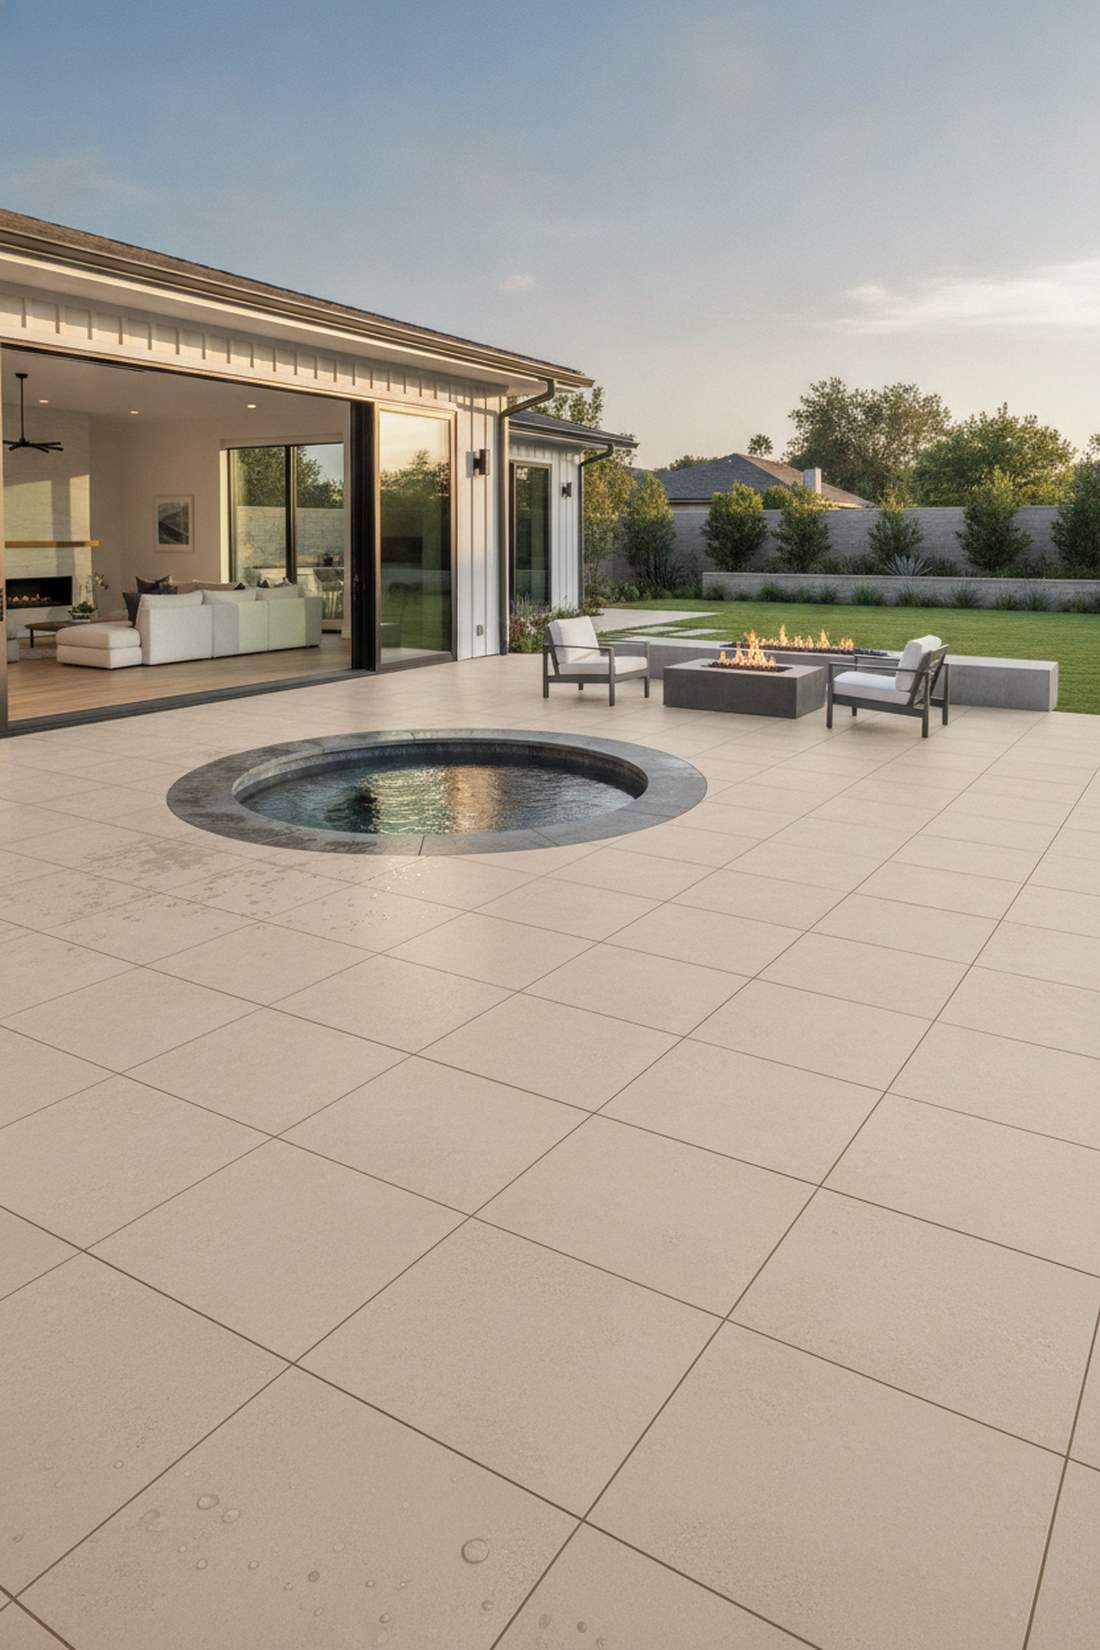
Stepping onto these massive tiles feels like walking on a perfectly flattened stretch of wet sand. Adopting seamless large format patio slabs brings ultra-modern resort luxury right to your back door. Fantastic for surrounding an outdoor hot tub where water pooling is an issue.
Pushing the tiles tightly together with minimal grout lines looks far more expensive than it is. Utilizing a waterproofing tile membrane underlayment guarantees the tiles never crack during winter freezes. The non-porous surface rejects sunscreen, wine spills, and salt easily.
Premium porcelain runs about $90–$180 depending on the square footage. Save this to your modern luxury patio board!
- Key Materials: 24×24 sand-textured porcelain tiles
- Vibe / Style: Pristine modern resort
- Difficulty: Advanced leveling required
- Budget Breakdown: Tiles: $140 | Base/Membrane: $40
- Creator’s Tip: Use a self-leveling base compound first; large tiles will crack instantly on uneven ground.
- Smart Sourcing: Waterproof crack-isolation membrane and textured outdoor porcelain tile packs.
17. Coral Stone Pavers
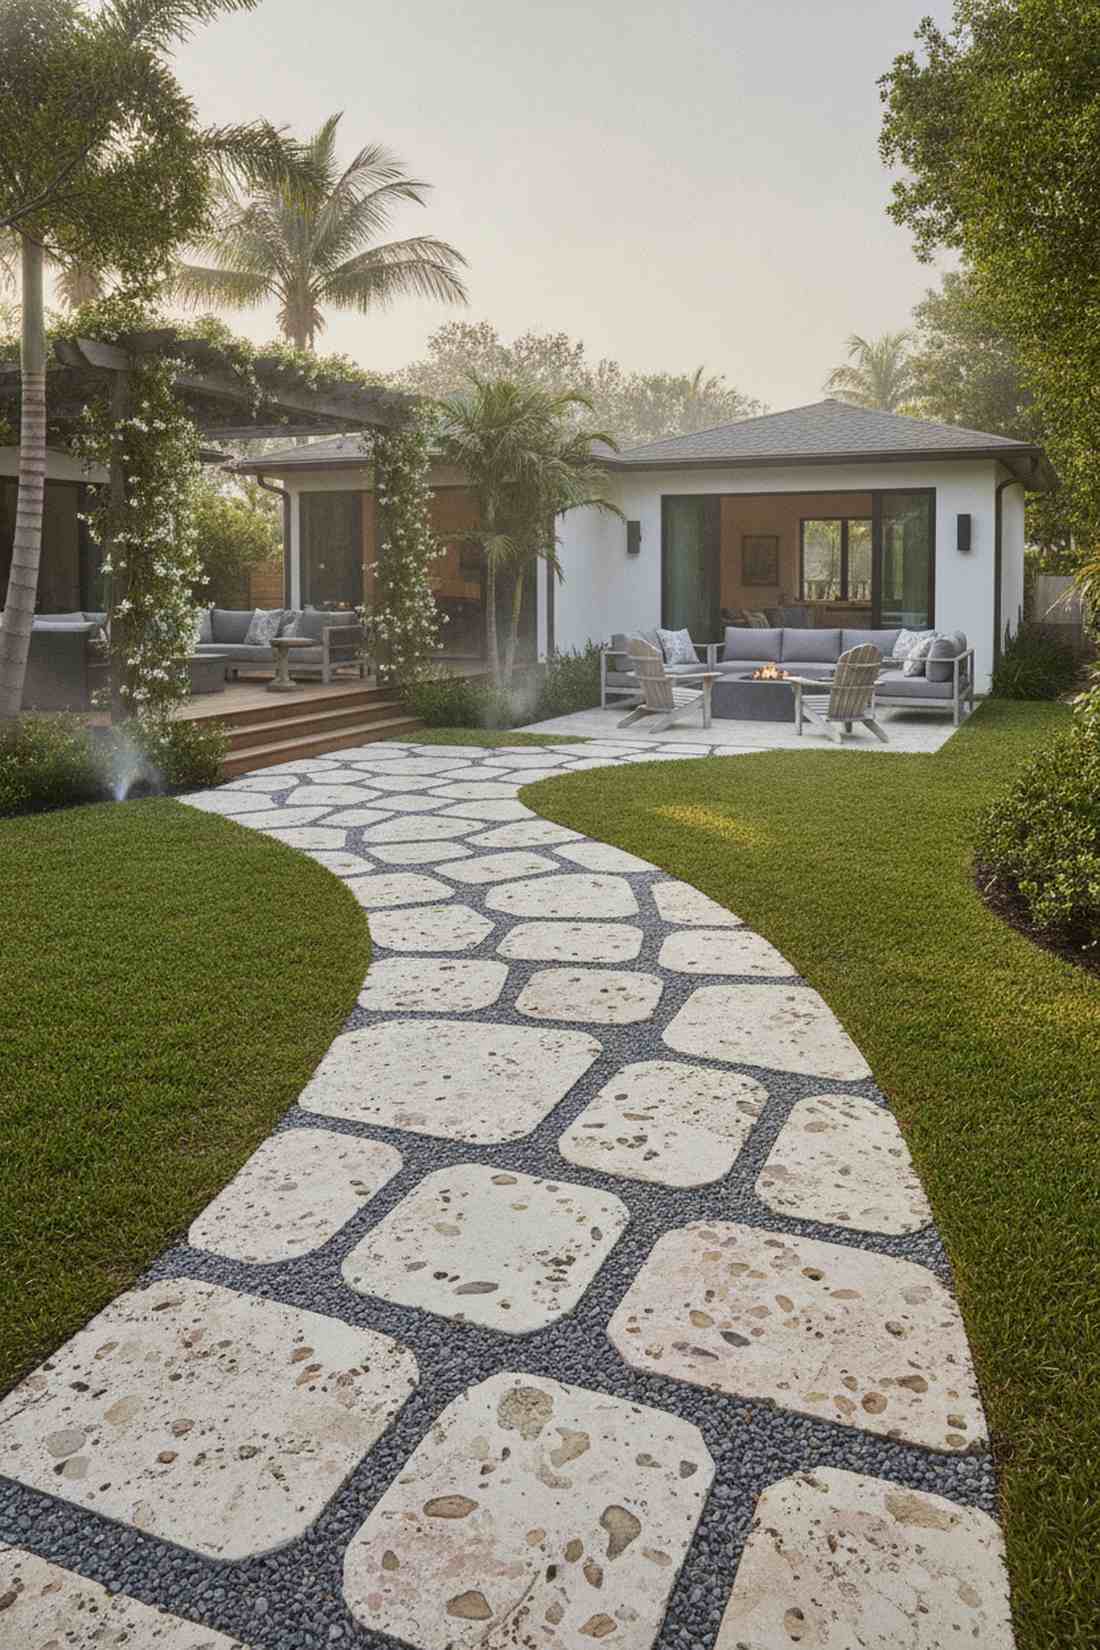
Examining these stones closely feels like looking at ancient fossils trapped in time. Applying genuine stepping stones beach aesthetics connects your modern landscaping directly to the ocean floor. Excellent for humid, frost-free climates where standard concrete gets dangerously slick.
Sourcing fossilized coral delivers an authentic, porous texture that naturally absorbs heavy rain. Laying them over a drainage-optimized gravel grid prevents any standing water from accumulating. The natural cream and pink tones warm up stark white architectural walls beautifully.
Ethically sourced coral stone costs about $100–$150 per pathway section. It’s an exotic upgrade that sparks immediate conversations.
- Key Materials: Irregular fossilized coral stone
- Vibe / Style: Ancient maritime luxury
- Difficulty: Moderate puzzle-piecing
- Budget Breakdown: Coral Stone: $120 | Gravel Base: $25
- Creator’s Tip: Never pressure wash coral stone on high; the blast will destroy the delicate fossil imprints.
- Smart Sourcing: Permeable gravel stabilizer grids (bulk pack) and gentle stone cleaning solution kits.
Organic Modernism Natural Textures Meet Contemporary Form
18. Flagstone with Moss Joints
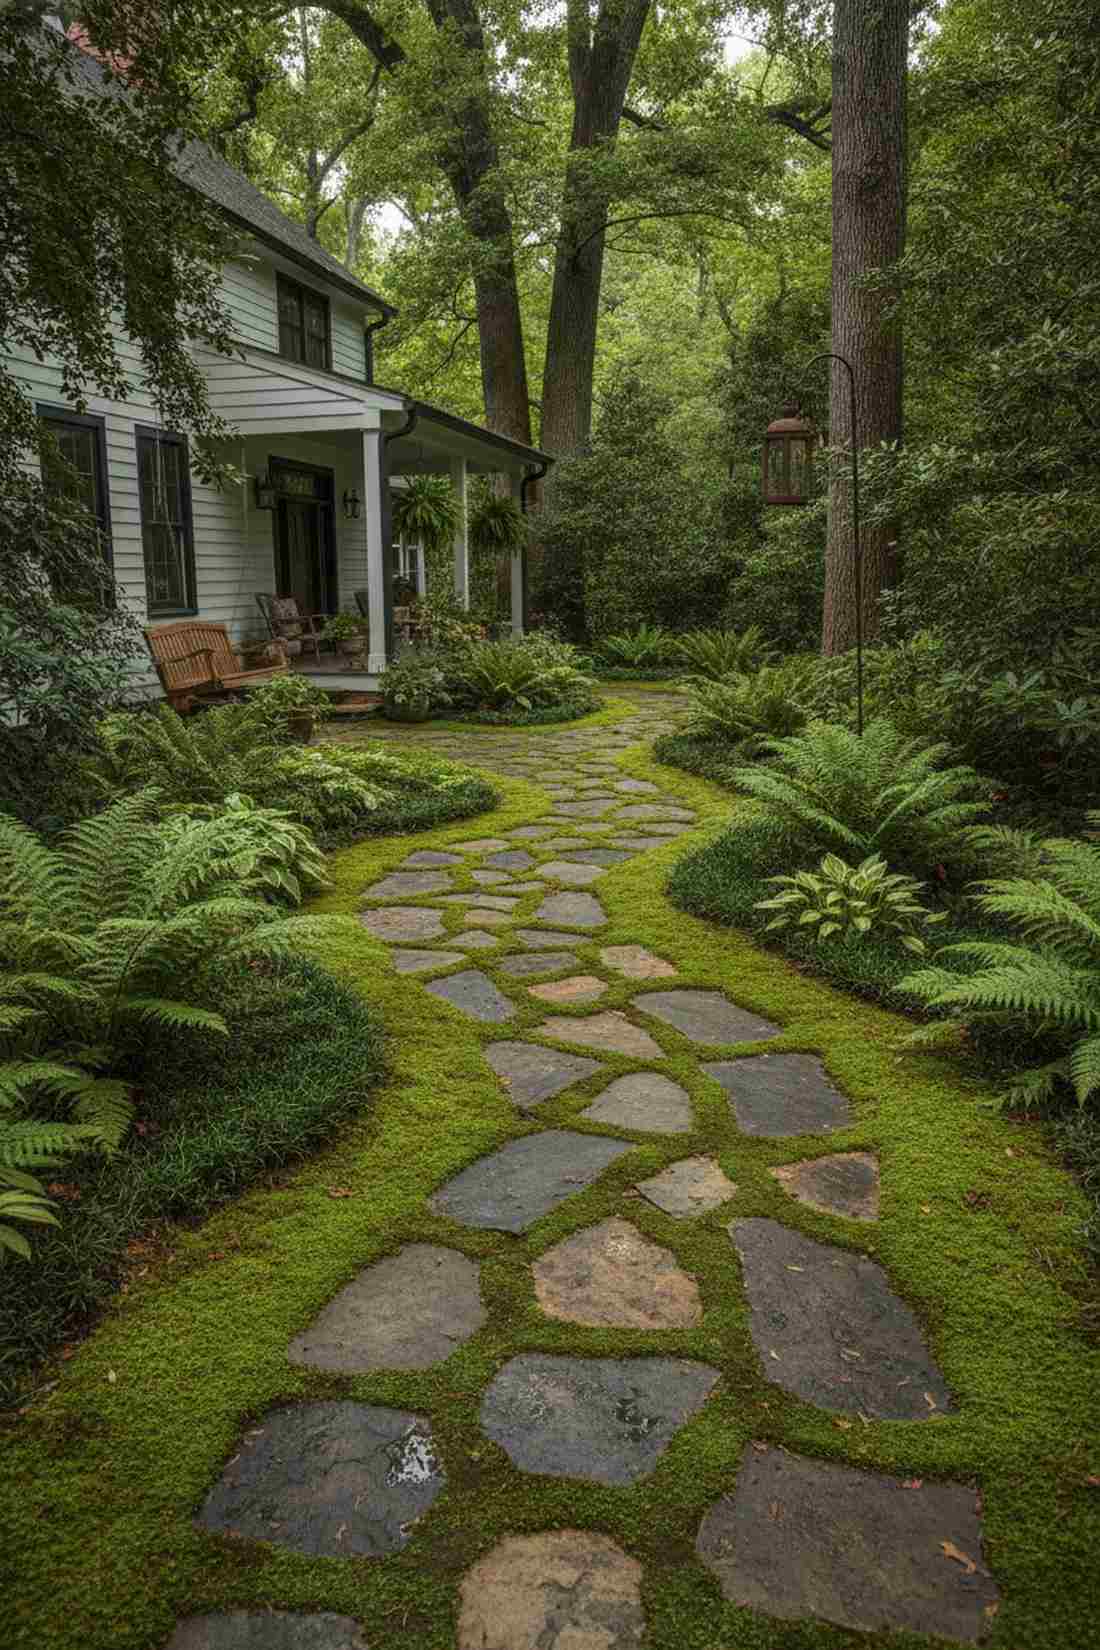
This living pathway feels like a hidden forest trail you accidentally discovered in a fairytale. Integrating living botanical joints softens harsh architectural lines effortlessly. Works exceptionally well in heavily shaded side yards where traditional grass refuses to grow.
Swapping dead mortar for vibrant green moss delivers a surprisingly premium look that evolves with the seasons. Whipping up a liquid moss propagation slurry jumpstarts the green growth in just a few weeks. The contrast between solid cold stone and plush green life is hypnotic.
Stone and moss starter materials run around $50–$90. Pin this if you love organic woodland garden designs!
- Key Materials: Natural cleft flagstone, moss slurry
- Vibe / Style: Lush fairytale modernism
- Difficulty: Requires botanical patience
- Budget Breakdown: Flagstone: $60 | Moss Spores: $25
- Creator’s Tip: Mist the joints daily for the first month to ensure the moss attaches to the dirt.
- Smart Sourcing: Pre-cut preserved moss sheets (bulk pack) and shade-loving moss spore kits.
Most beginners ruin their garden walkways instantly… because they ignore the critical base layer secret coming up next.
19. Slate Stepping Stones in Gravel
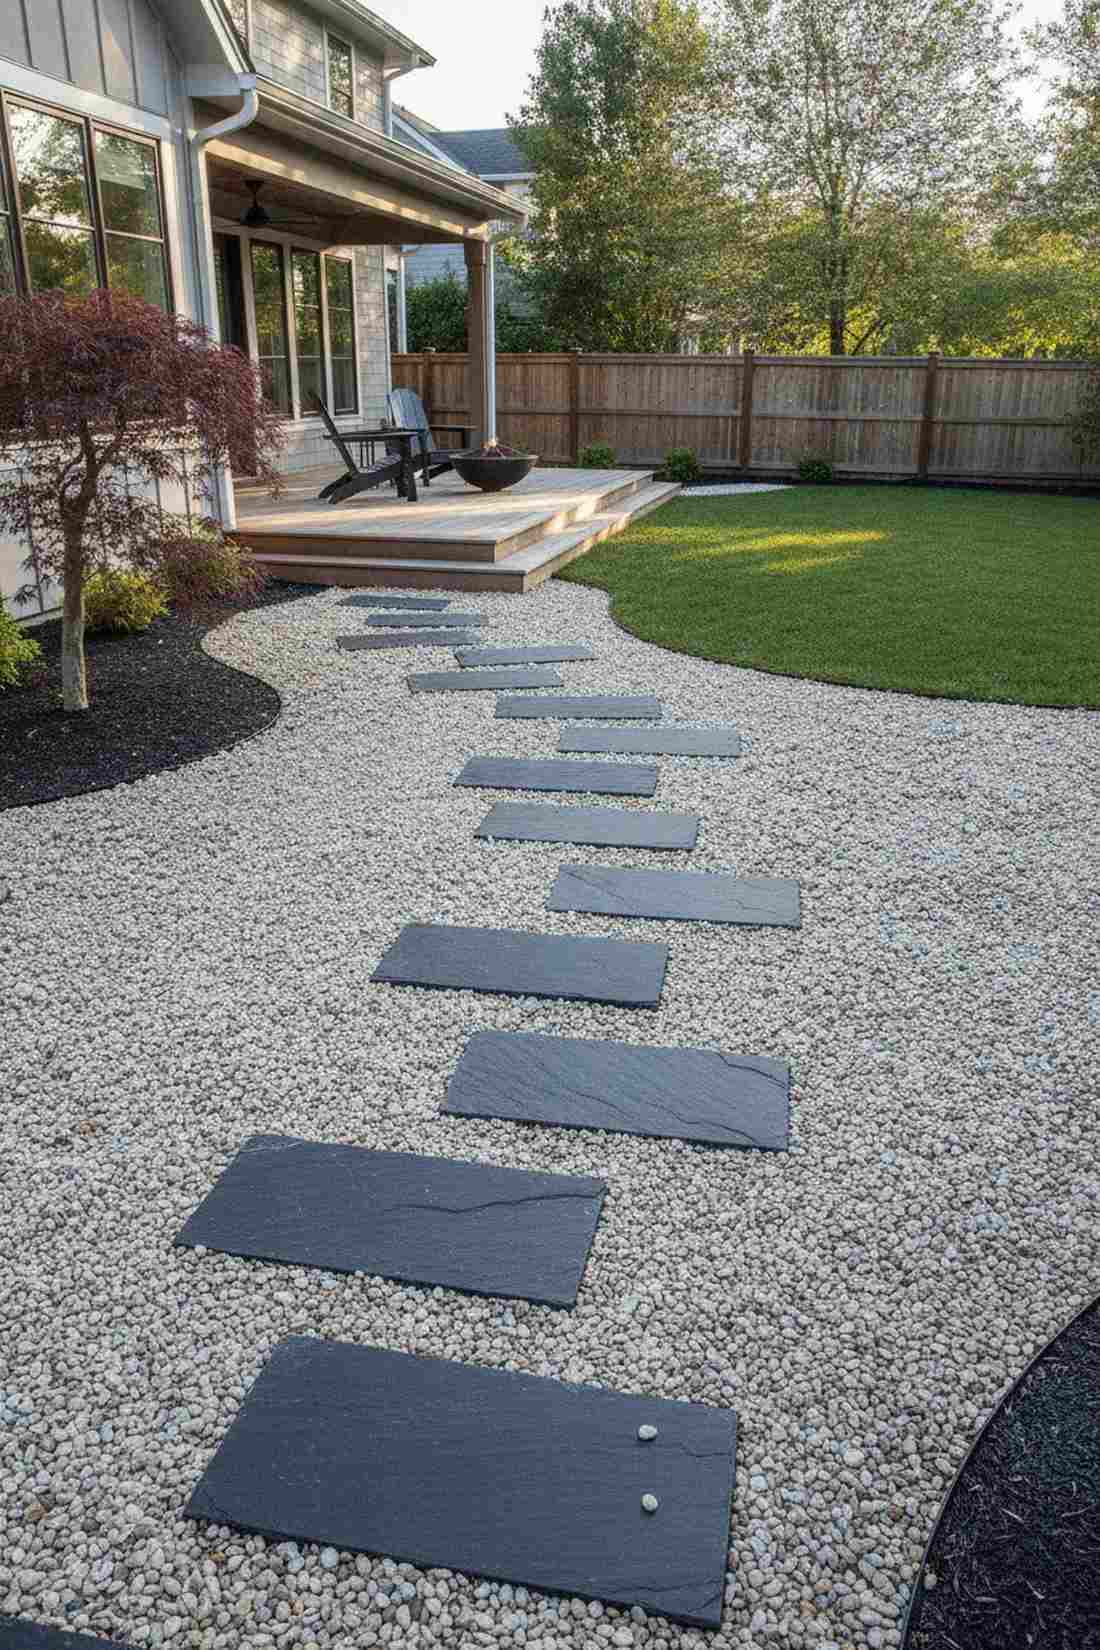
Looking at this high-contrast layout feels like standing in a masterfully curated Kyoto zen garden. Pairing stark dark landscape slate against pale gravel provides a visually striking geometric pop. The ultimate solution for a low-maintenance, water-wise minimalist backyard.
Sinking dense black rectangles into loose aggregate gives a designer-level finish without pouring a drop of cement. Installing a commercial-grade gravel binder keeps the loose pebbles from scattering onto your lawn. The layered natural texture of the slate prevents the design from feeling too clinical.
You can execute this sleek path for roughly $70–$120. Definitely a massive visual return on a small budget.
- Key Materials: Black slate rectangles, pea gravel
- Vibe / Style: Crisp Japanese minimalism
- Difficulty: Beginner-friendly leveling
- Budget Breakdown: Slate: $65 | Gravel: $35 | Barrier: $15
- Creator’s Tip: Wash the pea gravel thoroughly before laying it down to remove the dusty gray residue.
- Smart Sourcing: Clear liquid gravel binder spray and heavy-duty weed barrier fabric rolls.
Material Guide: Cheap vs. Premium Aesthetic
Knowing exactly where to save and where to spend makes all the difference in achieving that “looks expensive but isn’t” vibe.
- Standard vs. UV-Resistant Sealants: Skipping the sealant causes concrete and stone to fade into a dull gray in months. A premium UV coat locks the color in for years.
- Pre-made Kits vs. Sourcing Locally: While finding rocks in the yard is free, utilizing starter kits (like pre-cut moss or leveler grids) saves you days of frustrating trial and error.
20. Wood Rounds with Steel Edging
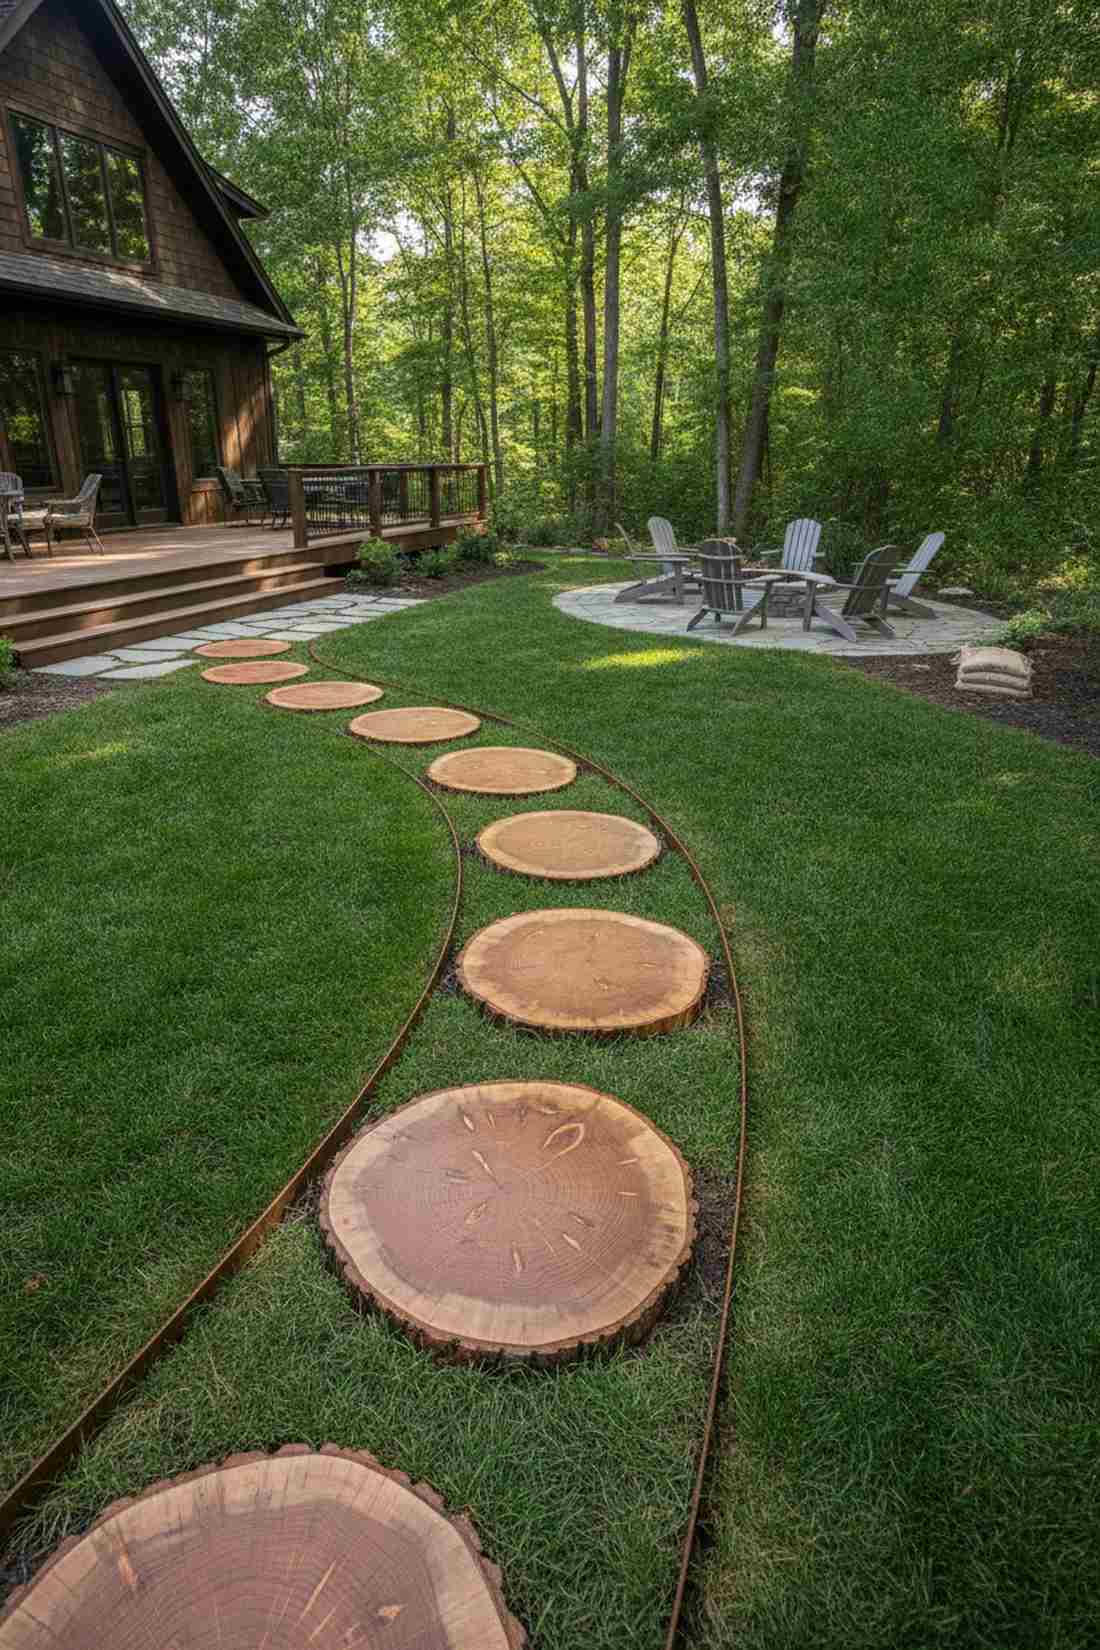
Stepping across these timber slices feels like hiking a well-maintained trail in a national park. Combining rustic timber garden paths with industrial metal boundaries creates a brilliant juxtaposition. Flawless for connecting a manicured lawn to a wilder, wooded fire pit area.
Locking cross-cut tree rounds inside rusting steel borders looks far more expensive than it is. Soaking the wood in a heavy-duty copper timber preservative ensures the slices don’t rot away into mush after one rainy season. It’s the perfect marriage of factory steel and forest timber.
This hybrid setup generally costs about $60–$100 depending on steel prices. Save this for your cabin-core backyard makeover!
- Key Materials: Hardwood rounds, weathering steel edging
- Vibe / Style: Industrial woodland hybrid
- Difficulty: Moderate edging installation
- Budget Breakdown: Steel Edging: $50 | Wood: $30 | Sand: $15
- Creator’s Tip: Dig out the base deeply so the wood sits flush with the lawn mower height.
- Smart Sourcing: Pre-cut Corten steel landscape edging and copper-based wood preservative clear coat.
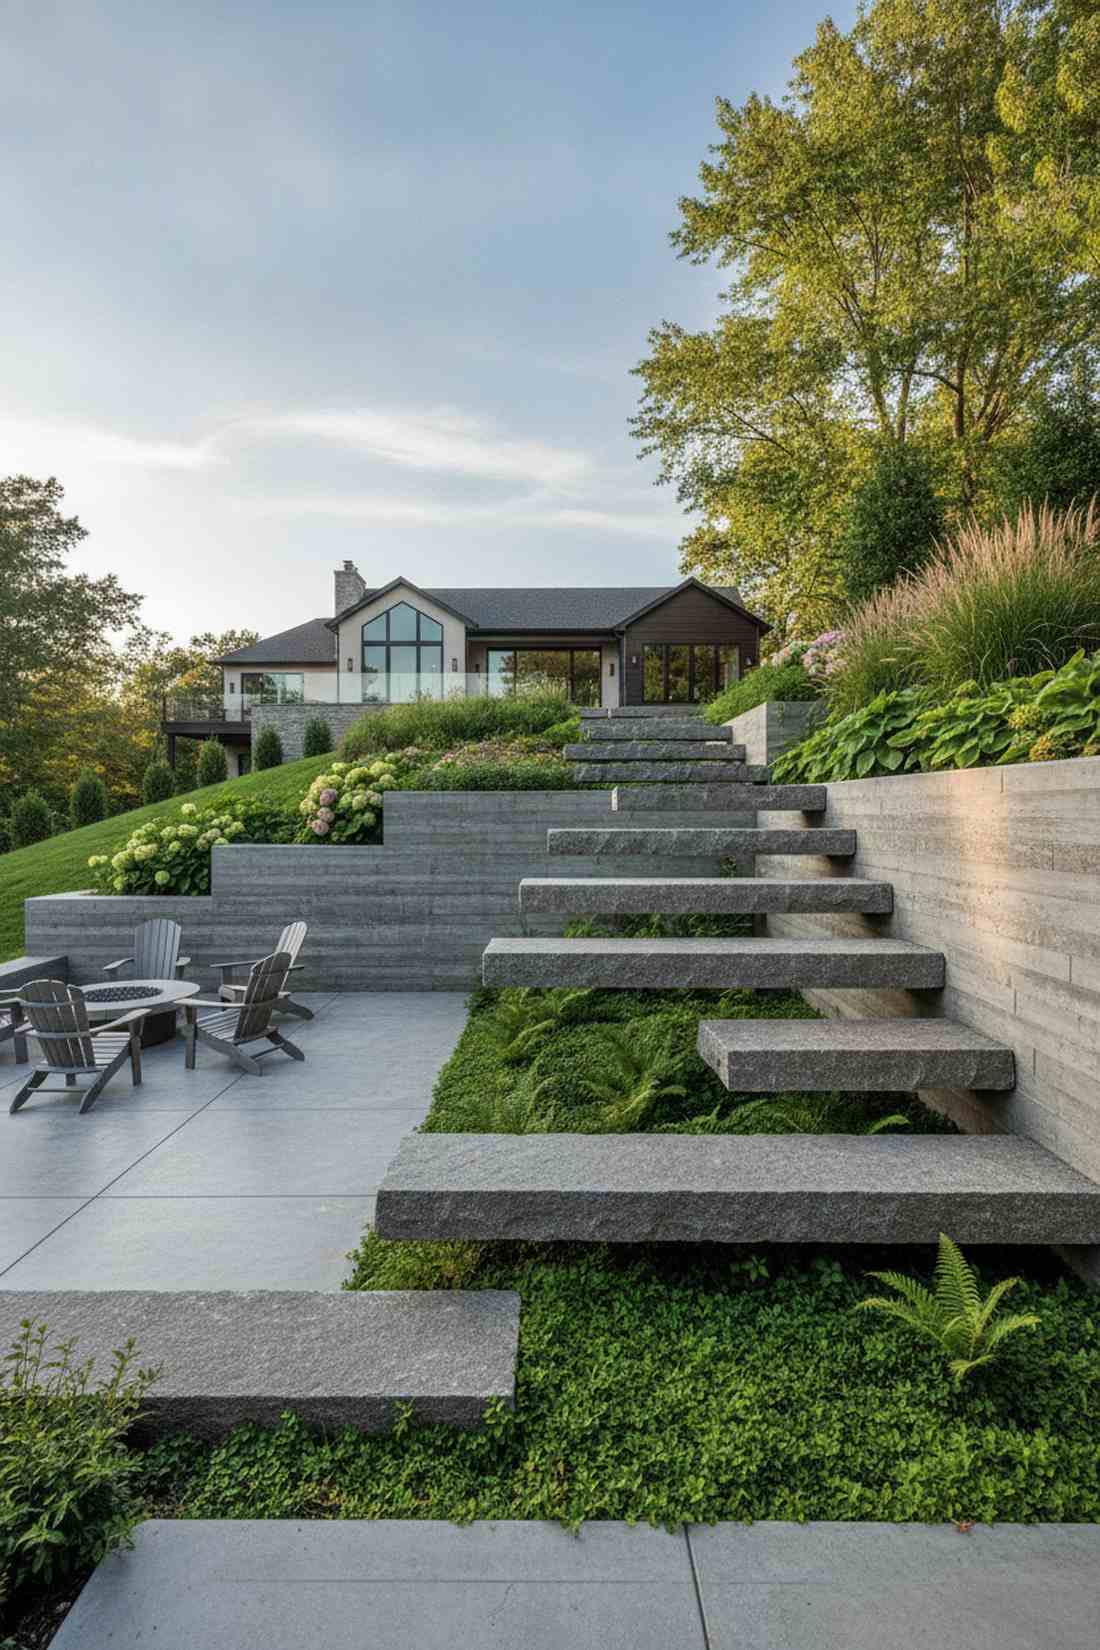
21. Stacked Stone Platforms
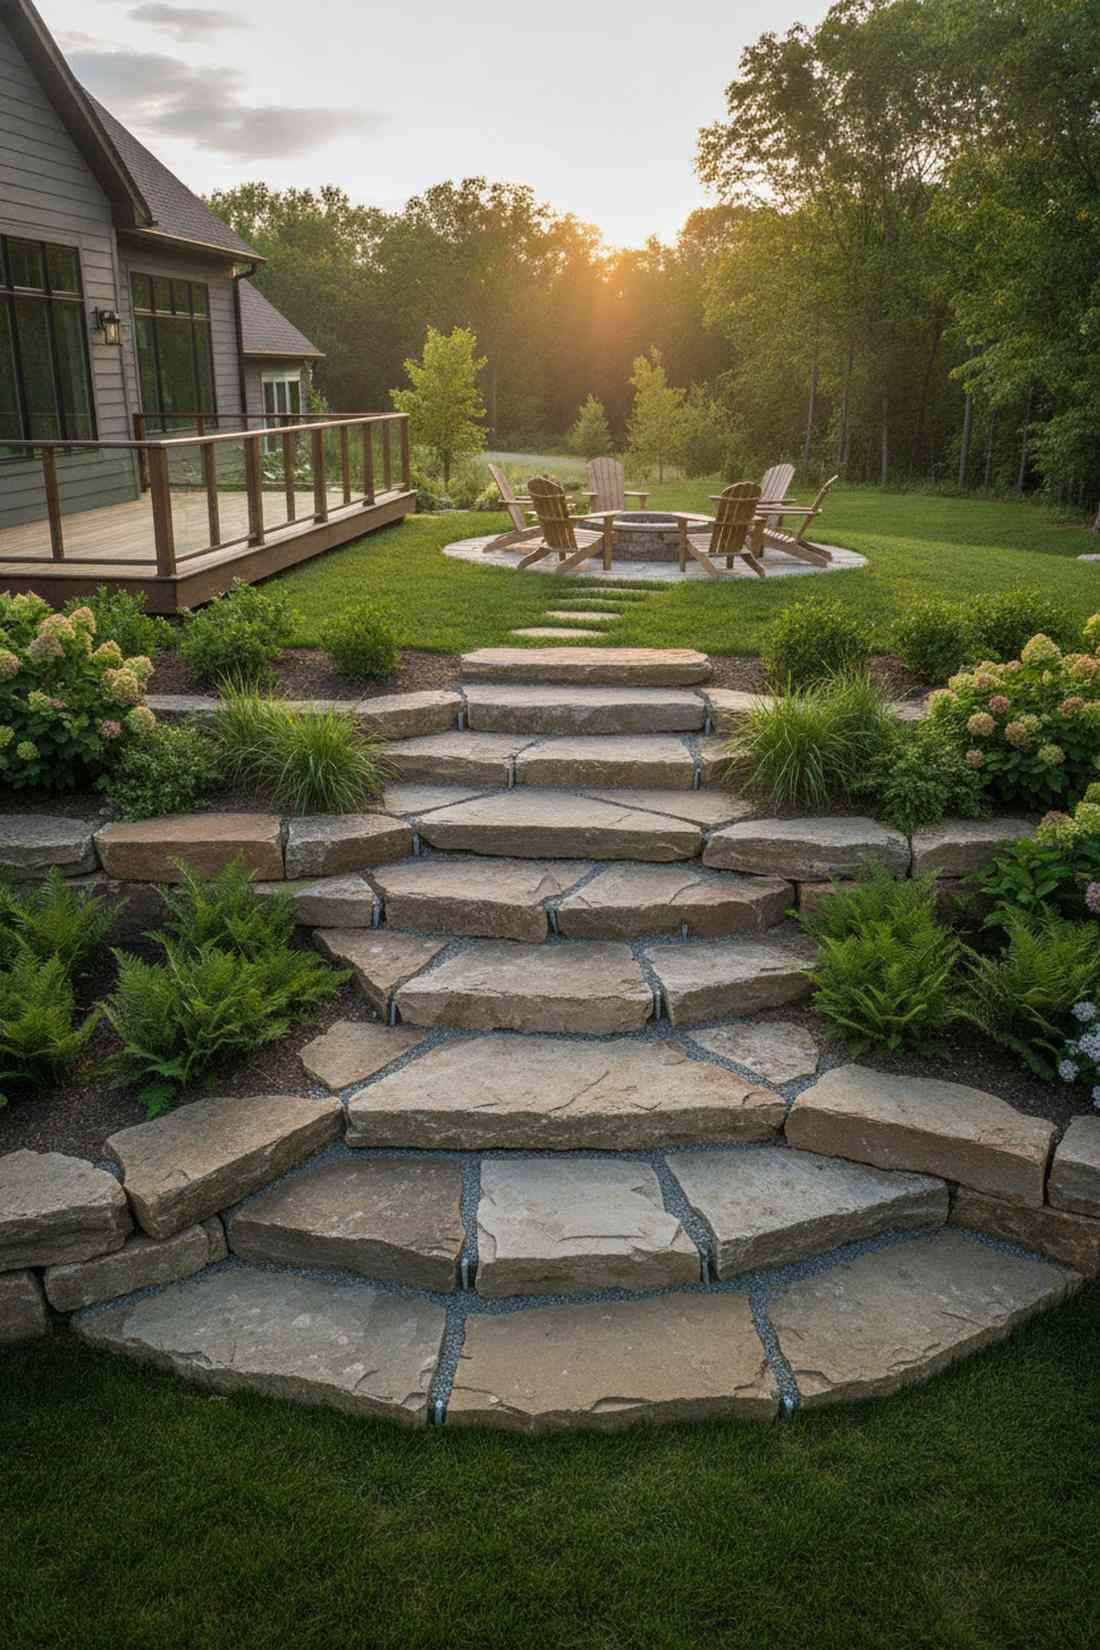
Ascending these mini-platforms feels like climbing an ancient mountain staircase. Introducing elevated landscape features forces you to look at your garden from brand new angles. Perfect for gently sloping yards where a solid concrete stair would look too harsh.
Dry-stacking heavy stones with zero mortar creates a breathtaking, gravity-held sculpture that drains perfectly. Slipping industrial construction adhesive drops hidden between the layers guarantees the stairs won’t wobble. The layered geological time aspect makes standard pavers look incredibly boring.
High-quality quarried stone will cost about $120–$200 for a few platforms. Pin this if you have an annoying sloped yard!
- Key Materials: Quarried stacking stone slabs
- Vibe / Style: Rugged elevated monument
- Difficulty: Heavy lifting, careful balancing
- Budget Breakdown: Stone Slabs: $160 | Adhesive: $15
- Creator’s Tip: Always place the widest, heaviest stones at the bottom and step them slightly backward for stability.
- Smart Sourcing: Heavy-duty exterior stone adhesive and professional hardscape lifting straps.
22. Pebble Mosaic Stepping Stones
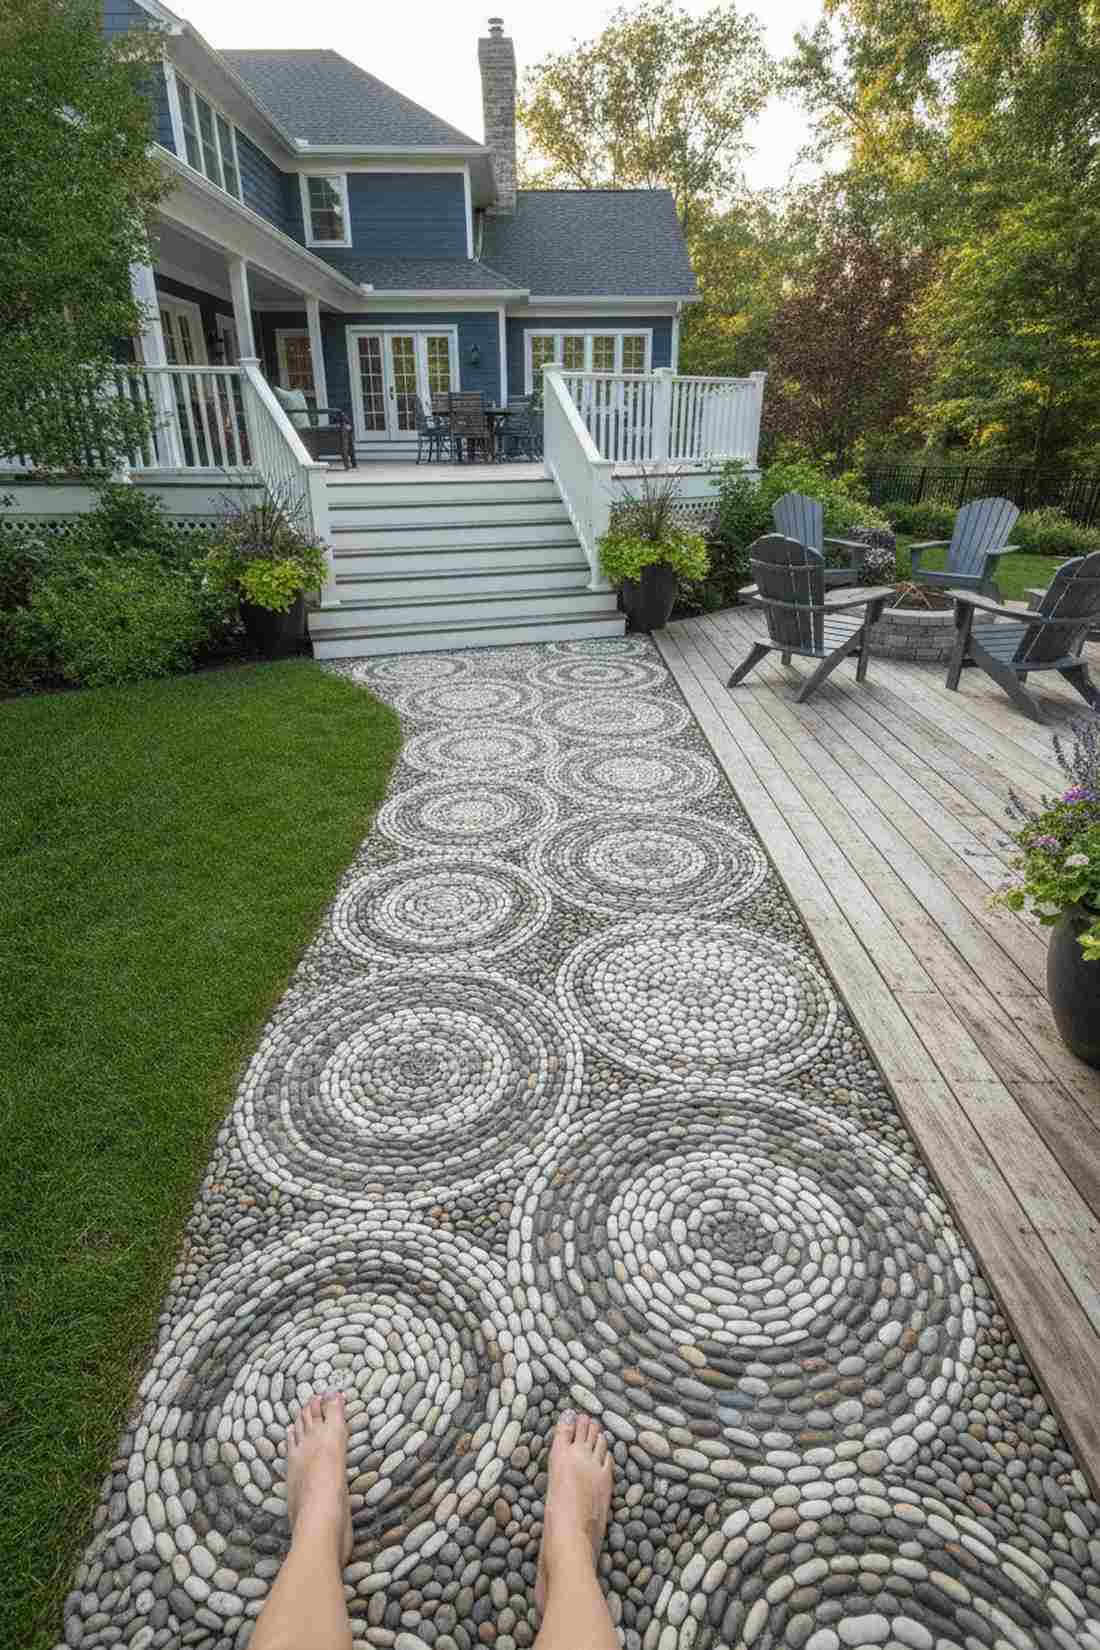
Walking barefoot on this texture feels like a gentle, therapeutic foot massage. Designing custom intricate garden mosaics transforms a boring walk into an artisanal experience. Ideal as a beautiful decorative landing pad right at the base of your patio stairs.
Hand-laying tiny pebbles in spiraling patterns delivers a surprisingly premium look that demands attention. Utilizing a high-adhesion mosaic mortar base ensures the little stones never pop out under pressure. It connects your modern space to ancient cobblestone traditions instantly.
The materials are dirt cheap at around $30–$50, but the labor is heavy. It’s a fantastic creative outlet that lasts decades.
- Key Materials: Sorted river pebbles, mosaic mortar
- Vibe / Style: Artisanal therapeutic pathway
- Difficulty: High patience required
- Budget Breakdown: Pebbles: $25 | Mortar Base: $20
- Creator’s Tip: Draw your pattern into the wet mortar with a stick before you start pushing stones in.
- Smart Sourcing: Polished mixed mosaic pebbles (bulk bag) and slow-setting outdoor mosaic mortar kits.
You won’t believe the engineering trick behind this next optical illusion. It literally defies gravity…
Elevated Installations Floating & Layered Concepts
23. Cantilevered Stone Slabs
Staring at this pathway feels like stepping into a sci-fi billionaire’s mansion. Deploying floating landscape steps creates jaw-dropping drama that totally defies gravity. Absolutely brilliant for navigating steep retaining walls without blocking the view of the garden below.
Hiding steel brackets behind the stone looks far more expensive than it is. Bolting heavy-duty structural steel angles into a hidden concrete wall allows pure stone form to dominate. The preserved ground space underneath allows groundcover plants to grow completely undisturbed.
This structural masterpiece costs roughly $200–$400 in steel and stone. Save this to your extreme architectural dream board!
- Key Materials: 3-inch stone slabs, steel brackets
- Vibe / Style: Gravity-defying ultra-modern
- Difficulty: Advanced structural engineering
- Budget Breakdown: Stone: $150 | Steel Brackets: $120 | Anchors: $40
- Creator’s Tip: Never skimp on the masonry anchors; use epoxy-set bolts for maximum cantilever strength.
- Smart Sourcing: Heavy-duty hidden steel cantilever brackets and epoxy masonry anchor kits.
24. Glass Block Stepping Stones
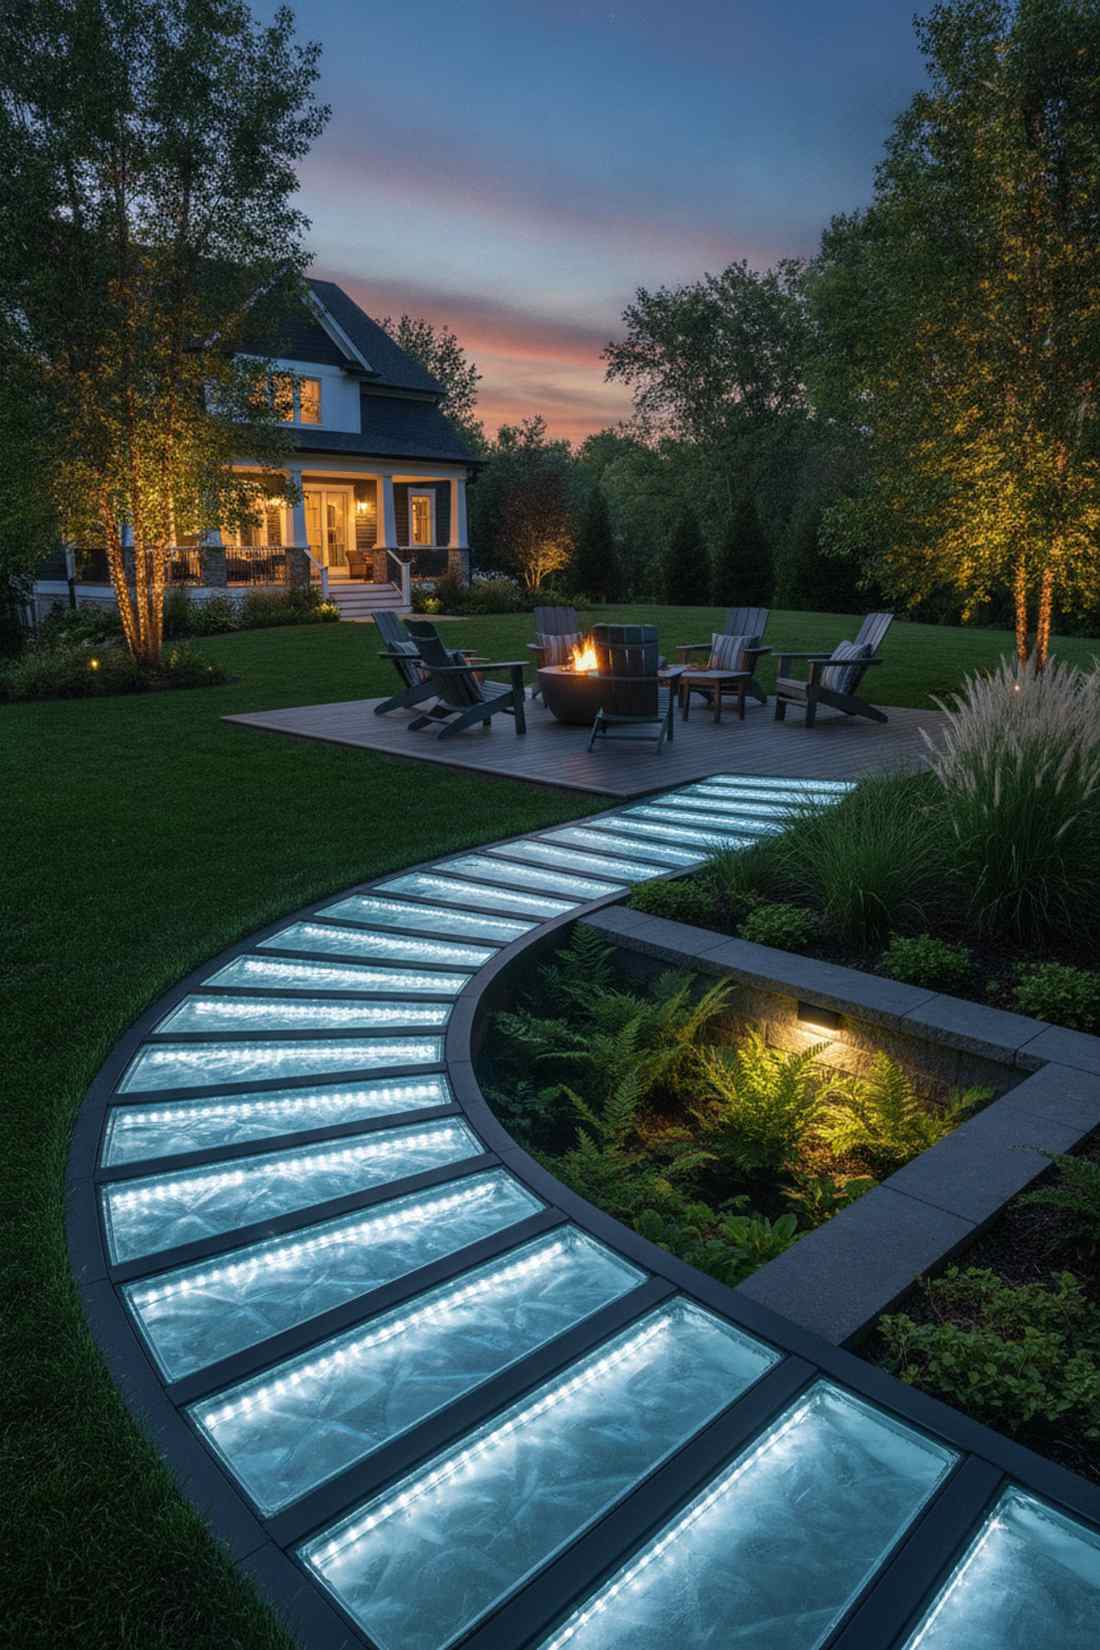
Walking over these blocks feels like hovering on illuminated squares of solid ice. Introducing translucent pathway materials brings an unexpected, delicate, high-tech vibe to the yard. The absolute best choice for a walkway placed over a sunken basement window well.
Framing structural glass in steel grids gives a designer-level finish that practically glows at dusk. Integrating waterproof LED strip lighting underneath the blocks turns the pathway into a nighttime spectacle. It transmits gorgeous natural sunlight down to shaded plants below during the day.
Expect to invest $150–$250 to frame out a small section safely. Pin this for a mind-blowing lighting upgrade!
- Key Materials: Load-rated glass blocks, steel framing
- Vibe / Style: Illuminated high-tech delicate
- Difficulty: Advanced fabrication
- Budget Breakdown: Glass Blocks: $100 | Steel Frame: $80 | LEDs: $30
- Creator’s Tip: Only use load-bearing architectural glass blocks; regular decorative blocks will shatter instantly.
- Smart Sourcing: Solid load-rated glass paver blocks and waterproof outdoor LED strip kits.
25. Stainless Steel Platforms
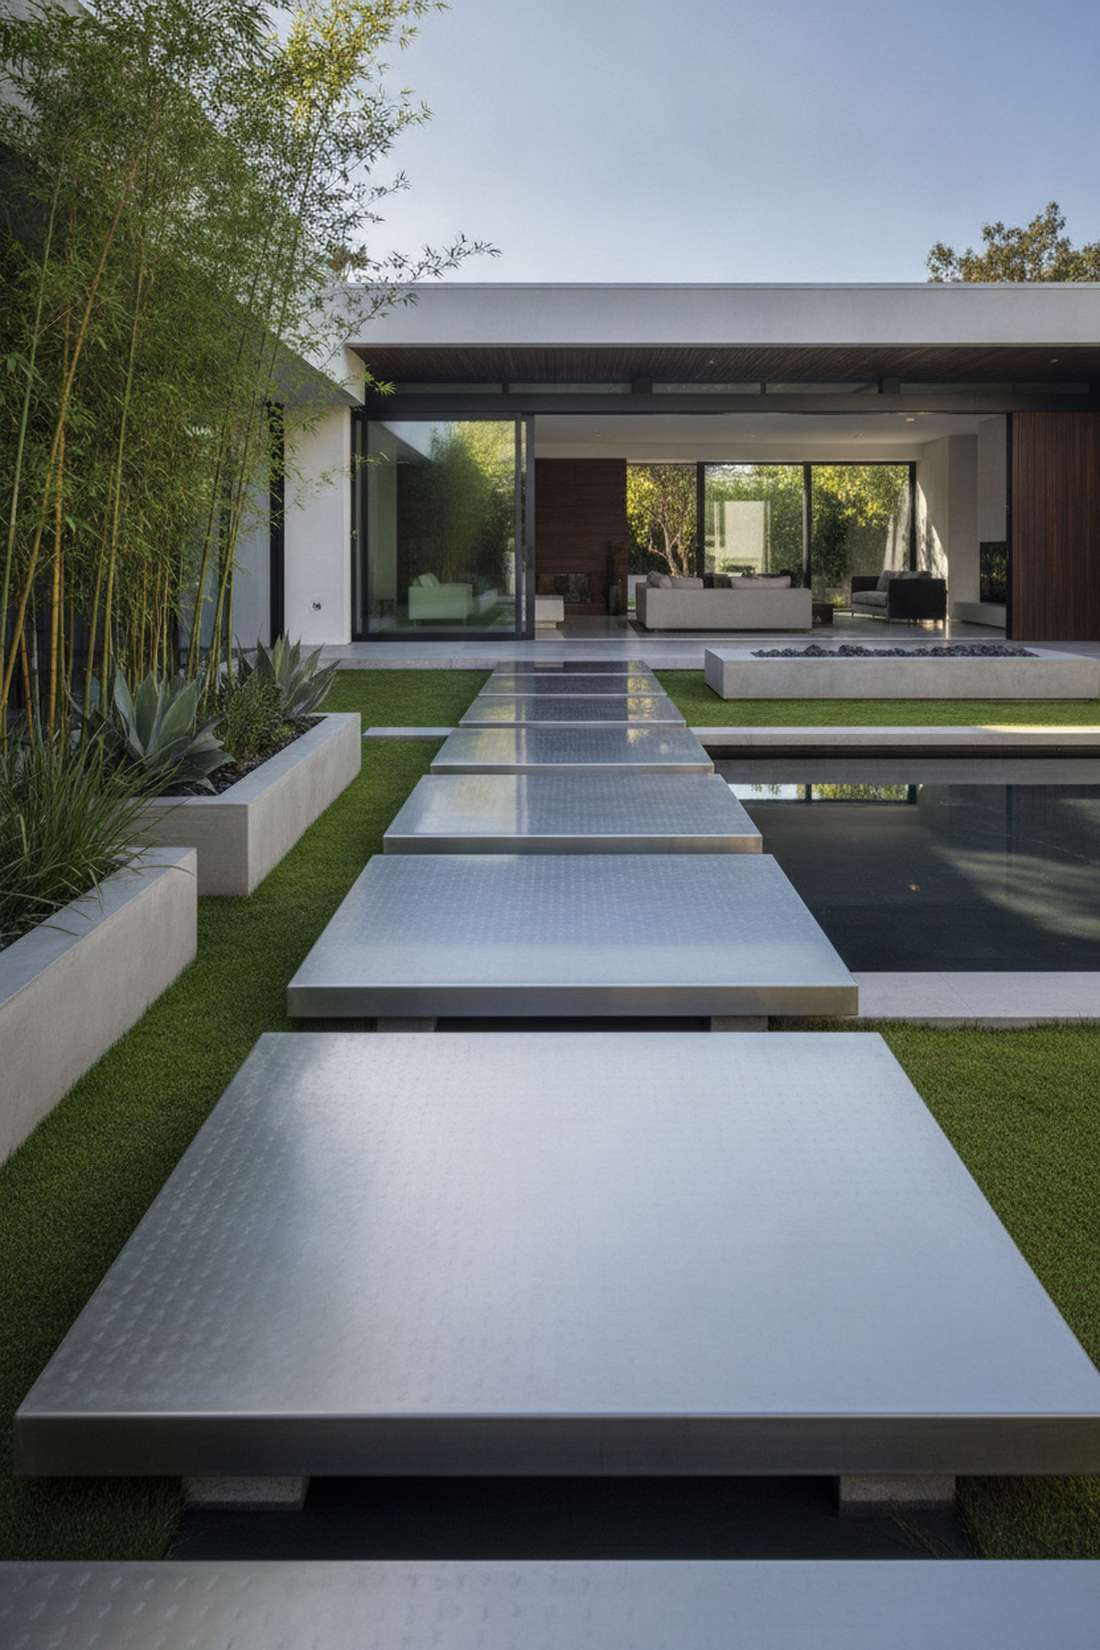
Stepping on these metal plates feels like boarding a luxury super-yacht. Leveraging reflective metal hardscaping captures the sky and surrounding foliage dynamically. A stunning, zero-maintenance addition to an ultra-modern minimalist courtyard.
Elevating brushed marine-grade steel above the grass delivers a surprisingly premium look that never rusts. Applying a clear anti-slip abrasive coating ensures the metal doesn’t become a slipping hazard in the rain. It shifts color and mood constantly depending on the time of day.
Fabricating steel plates is pricey, usually running $200–$350. But it’s an investment that outlasts your house.
- Key Materials: ¼-inch stainless steel plates, concrete footers
- Vibe / Style: Pristine industrial yacht-chic
- Difficulty: Requires metal fabrication
- Budget Breakdown: Steel Plates: $250 | Footings: $40
- Creator’s Tip: Have the metal shop grind a cross-hatch pattern into the surface to permanently increase foot traction.
- Smart Sourcing: Clear anti-slip metal floor coating and stainless steel cleaning polish kits.
26. Layered Corten Steel Steps
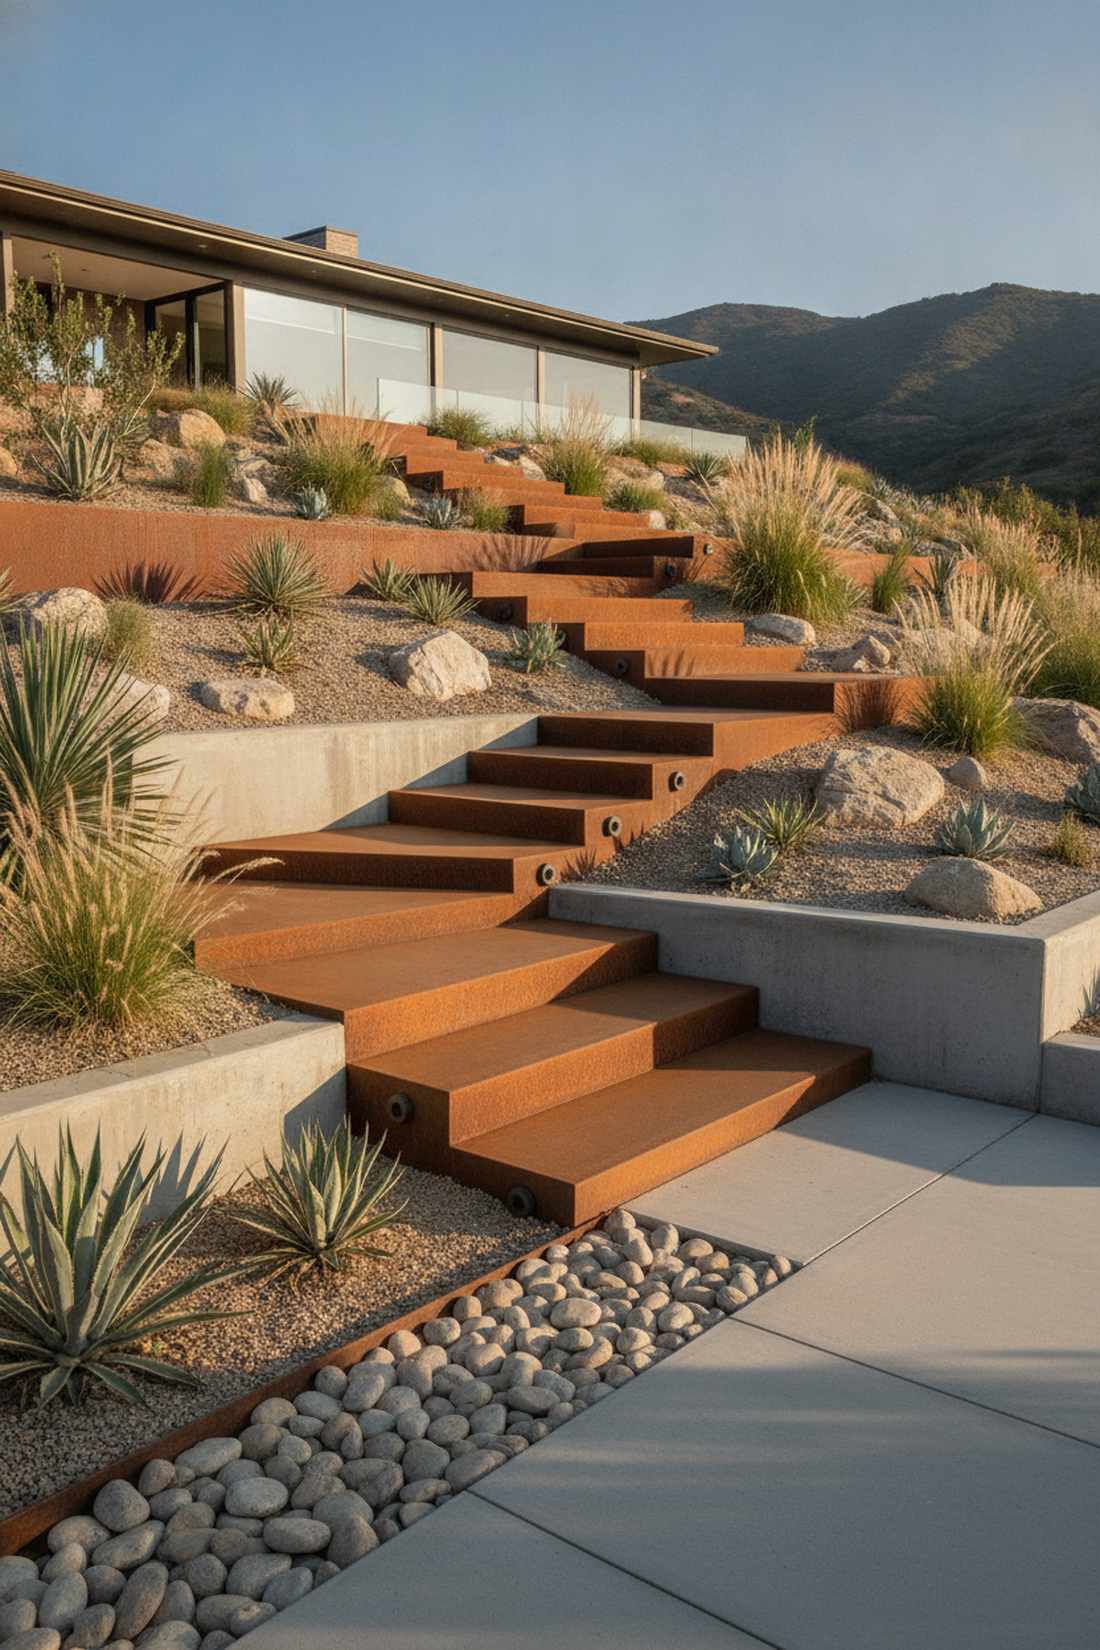
Climbing these rusted boxes feels like exploring a modern desert art installation. Showcasing weathered steel landscaping injects a blazing orange warmth into otherwise cold concrete spaces. Perfect for terracing a dry, drought-tolerant hillside garden.
Stacking these industrial plates looks far more expensive than it is once the patina develops. Spraying the fresh steel with a rapid rust accelerator spray forces the gorgeous orange-brown tones to appear in hours instead of months. The organic rusting process perfectly balances the sharp manufactured edges.
Corten steps cost roughly $150–$250 depending on thickness. Save this for your industrial outdoor planning board!
- Key Materials: ½-inch Corten steel plates, heavy bolts
- Vibe / Style: Rusted architectural monument
- Difficulty: Heavy metal bolting/welding
- Budget Breakdown: Corten Plates: $180 | Hardware: $30
- Creator’s Tip: Ensure the rust runoff won’t drip onto white concrete below, as it will stain permanently.
- Smart Sourcing: Pre-cut Corten steel landscape plates and rapid steel rust accelerator spray.
27. Suspended Wood Deck Sections
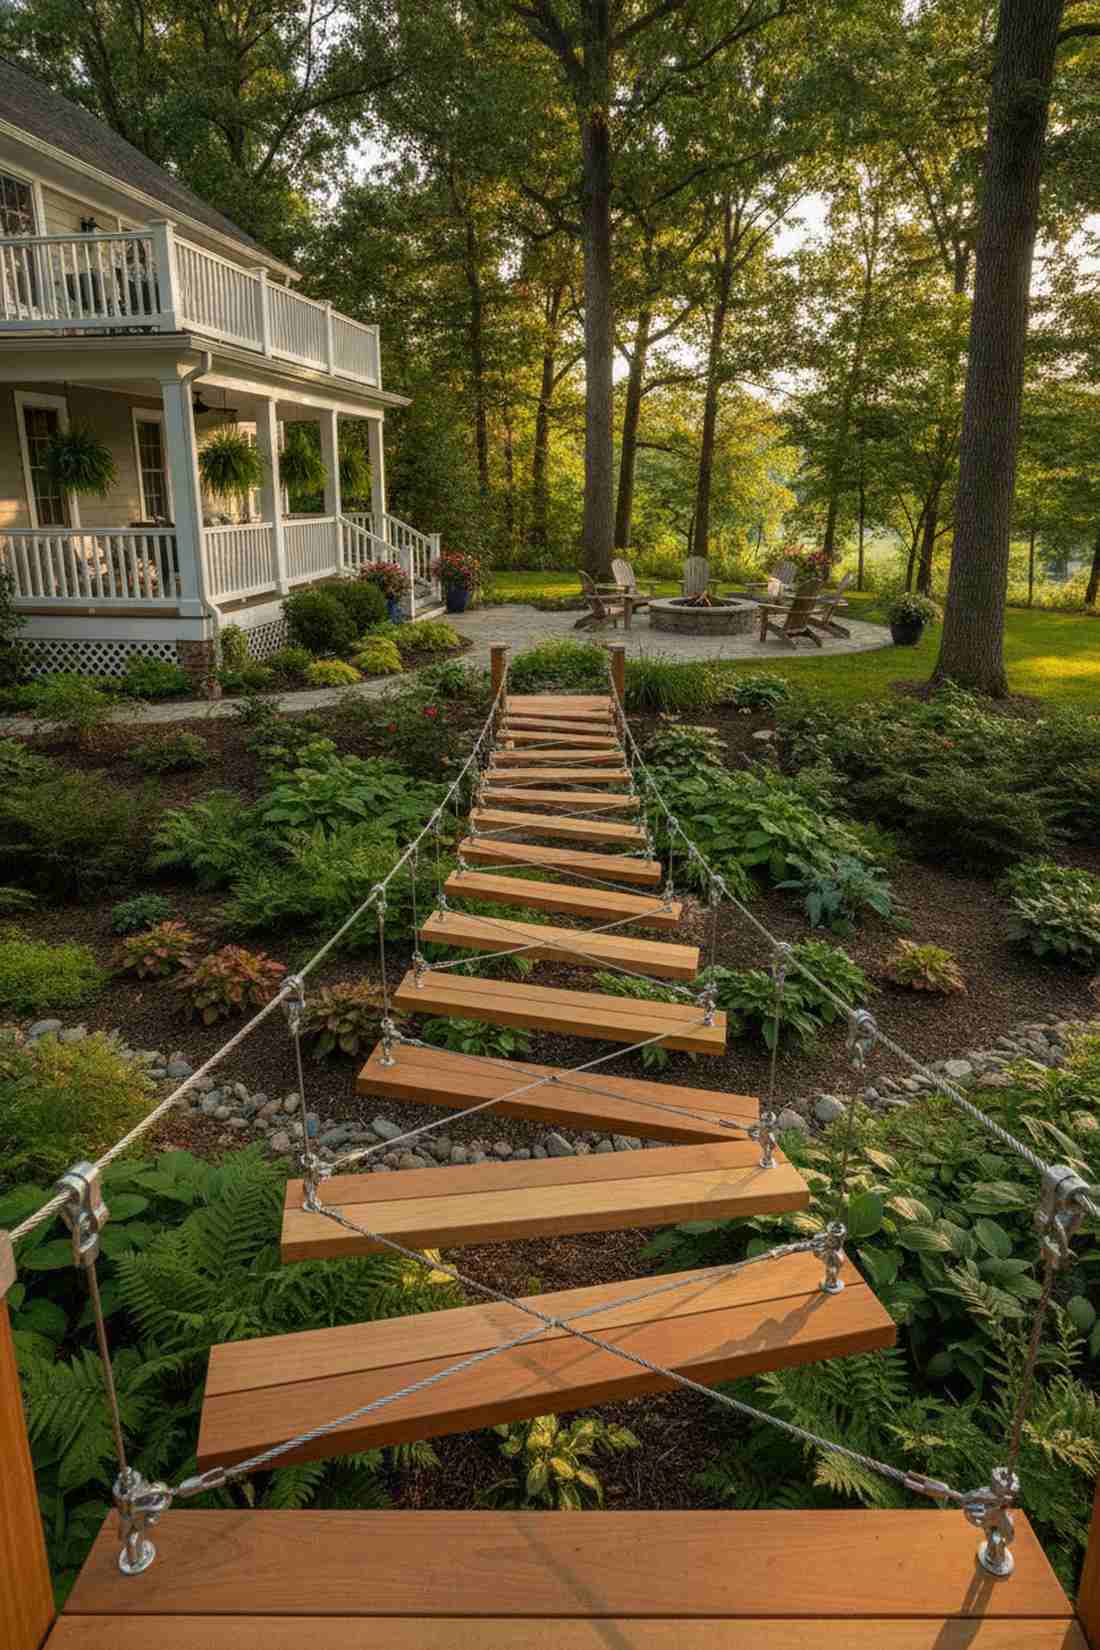
Walking this path feels like traversing a thrilling rope bridge deep in the jungle canopy. Utilizing floating cable pathways introduces a subtle, kinetic sway that static stone completely lacks. Highly recommended for crossing over fragile plant roots or sensitive garden drainage swales.
Hanging warm hardwood sections from tensioned steel lines completely fools the eye. Installing marine-grade stainless steel turnbuckles keeps the cables tight and prevents the path from sagging over time. It makes heavy wood feel impossibly light and temporary.
You can engineer this floating magic for about $130–$220. It’s an unforgettable physical experience that guests will rave about.
- Key Materials: Ipe hardwood decking, stainless cables
- Vibe / Style: Kinetic suspended adventure
- Difficulty: Complex tension engineering
- Budget Breakdown: Wood: $80 | Cables/Hardware: $90
- Creator’s Tip: Keep the suspension height very low (2-3 inches off the ground) for safety in case a cable snaps.
- Smart Sourcing: Marine-grade stainless steel cable kits and heavy-duty suspension turnbuckles.
Bringing Your Vision to Life
These 27 premium setups demonstrate how modern landscaping completely transforms an average yard into a high-end estate. Whether you opt for sleek geometric concrete or gravity-defying steel platforms, success lies in smart purchasing and proper execution. By sourcing professional starter kits, bulk UV-sealants, and commercial weed barriers, you lock in that expensive designer aesthetic for a fraction of the cost. Start with a small budget-friendly section to master the foundational techniques, then aggressively expand your blueprint to elevate your entire property’s value.
Frequently Asked Questions
What spacing works best for modern stepping stones in minimalist gardens?
For a natural walking rhythm, space your stones 18-24 inches apart center-to-center. To get the layout perfectly precise without constant remeasuring, we highly recommend using a pre-marked landscape spacing tape. If you are creating a slow, contemplative zen path, pushing the distance to 30 inches works beautifully, especially when the negative space is filled with premium white marble landscape pebbles.
How do I prevent weeds between modern stepping stones without using chemicals?
The secret to a maintenance-free pathway is blocking sunlight before the gravel even goes down. Always install a layer of commercial-grade heavy-duty weed barrier rolls beneath your base. For tight joints between pavers, sweeping in a polymeric jointing sand kit creates a concrete-like seal when activated by water. It completely chokes out weed seeds while remaining flexible enough to prevent winter cracking.
Which stepping stone materials perform best in freeze-thaw climates?
Dense materials with low water absorption, like thermal bluestone and porcelain, are your best defense against winter cracking. To prevent frost heave from dislodging your work, always lay down interlocking permeable base grids filled with crushed gravel. Applying a penetrating weatherproofing stone sealer before the first freeze stops moisture from penetrating the pores, saving you hundreds in replacement costs.
Can I install modern stepping stones over existing lawn without excavation?
While you can technically drop stones directly on grass, it creates an unstable, sinking mess that ruins the premium aesthetic quickly. To save time on digging, utilize low-profile paver base panel kits. These lightweight foam grids replace inches of heavy gravel, locking the stones in place while requiring minimal turf removal. It’s the smartest way to fake a professional excavation job on a tight schedule.
How do I maintain the minimalist aesthetic as stepping stone pathways age?
Maintaining that crisp, high-end look requires a proactive defense against the elements. Pressure wash the surfaces annually and reapply a UV-resistant wet-look stone sealant every two years to stop the color from fading to dull gray. To keep the borders mathematically straight against encroaching grass, hammer in pre-cut rust-proof steel landscape edging—it creates an invisible, permanent barrier that stops organic debris dead in its tracks.