A properly installed stepping stones landscape instantly upgrades your yard’s curb appeal. These practical blueprints turn muddy garden routes into stunning, functional pathways. Discover exact material lists and budget breakdowns for professional-level outdoor aesthetics.
Design Snapshot Key Principles
- Proper Spacing: Position stones 20-24 inches apart (center to center) for comfortable stride patterns and natural flow
- Ground Cover Selection: Choose walkable plants like creeping thyme, moss, or sedum that tolerate light foot traffic and fill gaps between stones
- Installation Depth: Set stones 2-3 inches below lawn level to allow mower clearance and prevent tripping hazards
- Base Preparation: Use sand or gravel foundation layers to ensure stability, proper drainage, and prevent stone shifting over time
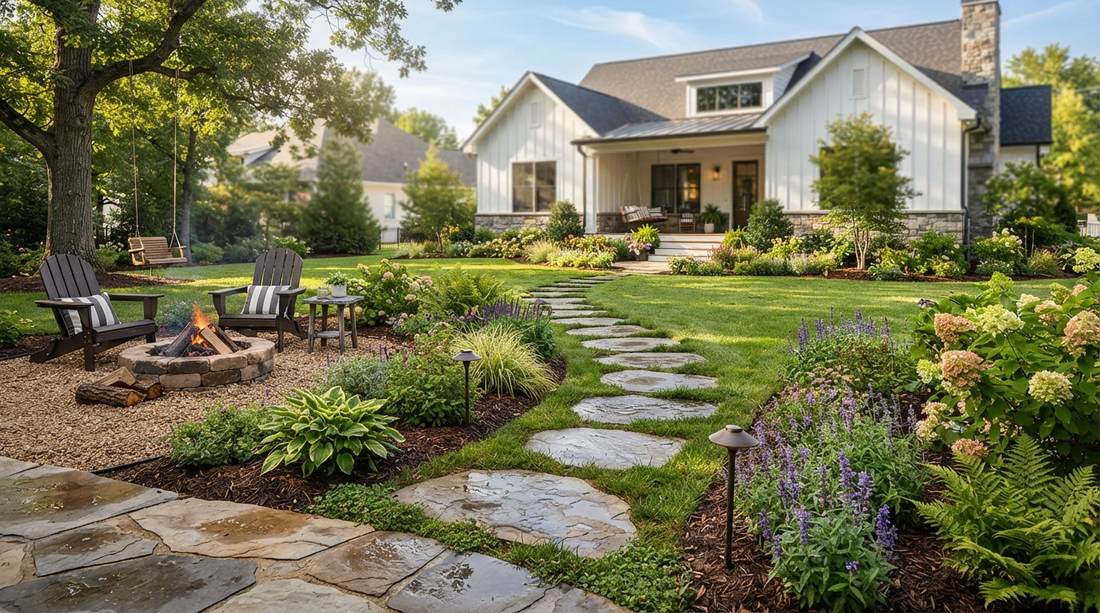
Stepping Stones with Grass in Between
Grass-integrated pathways offer a classic, cottage-garden aesthetic while protecting lawn areas from foot traffic damage. These designs work best in informal garden settings where the soft green backdrop contrasts beautifully with natural stone textures.
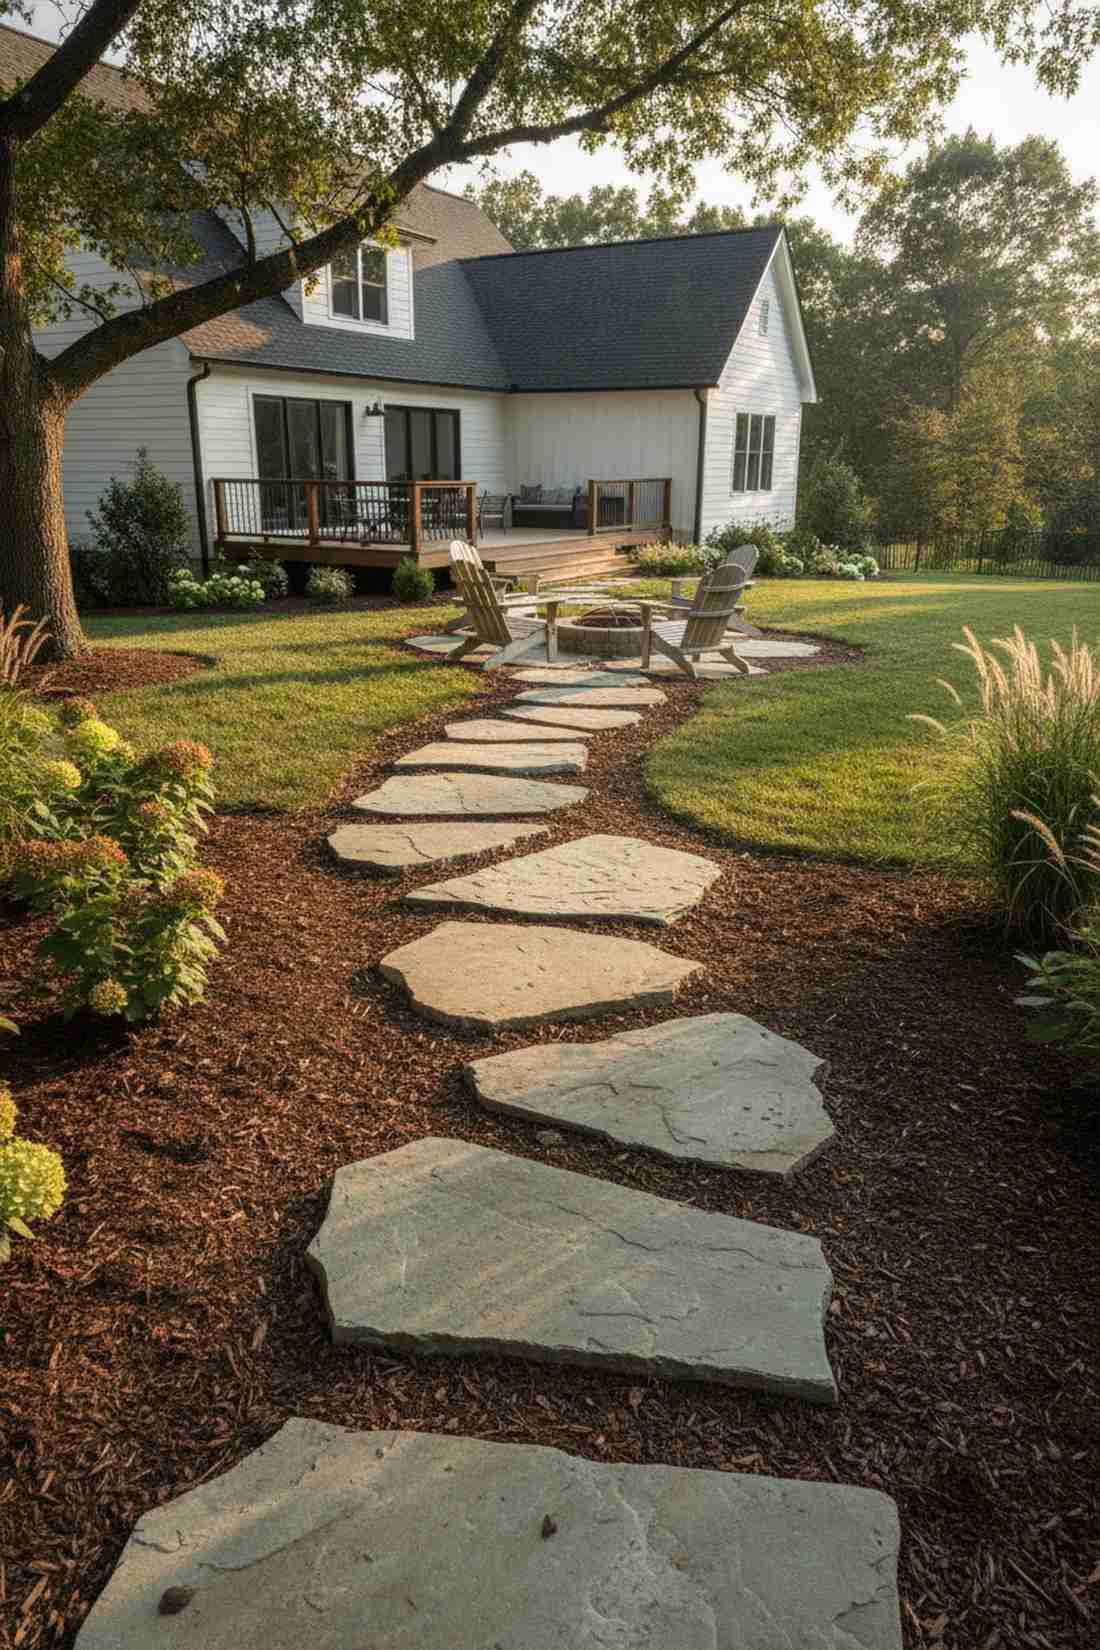
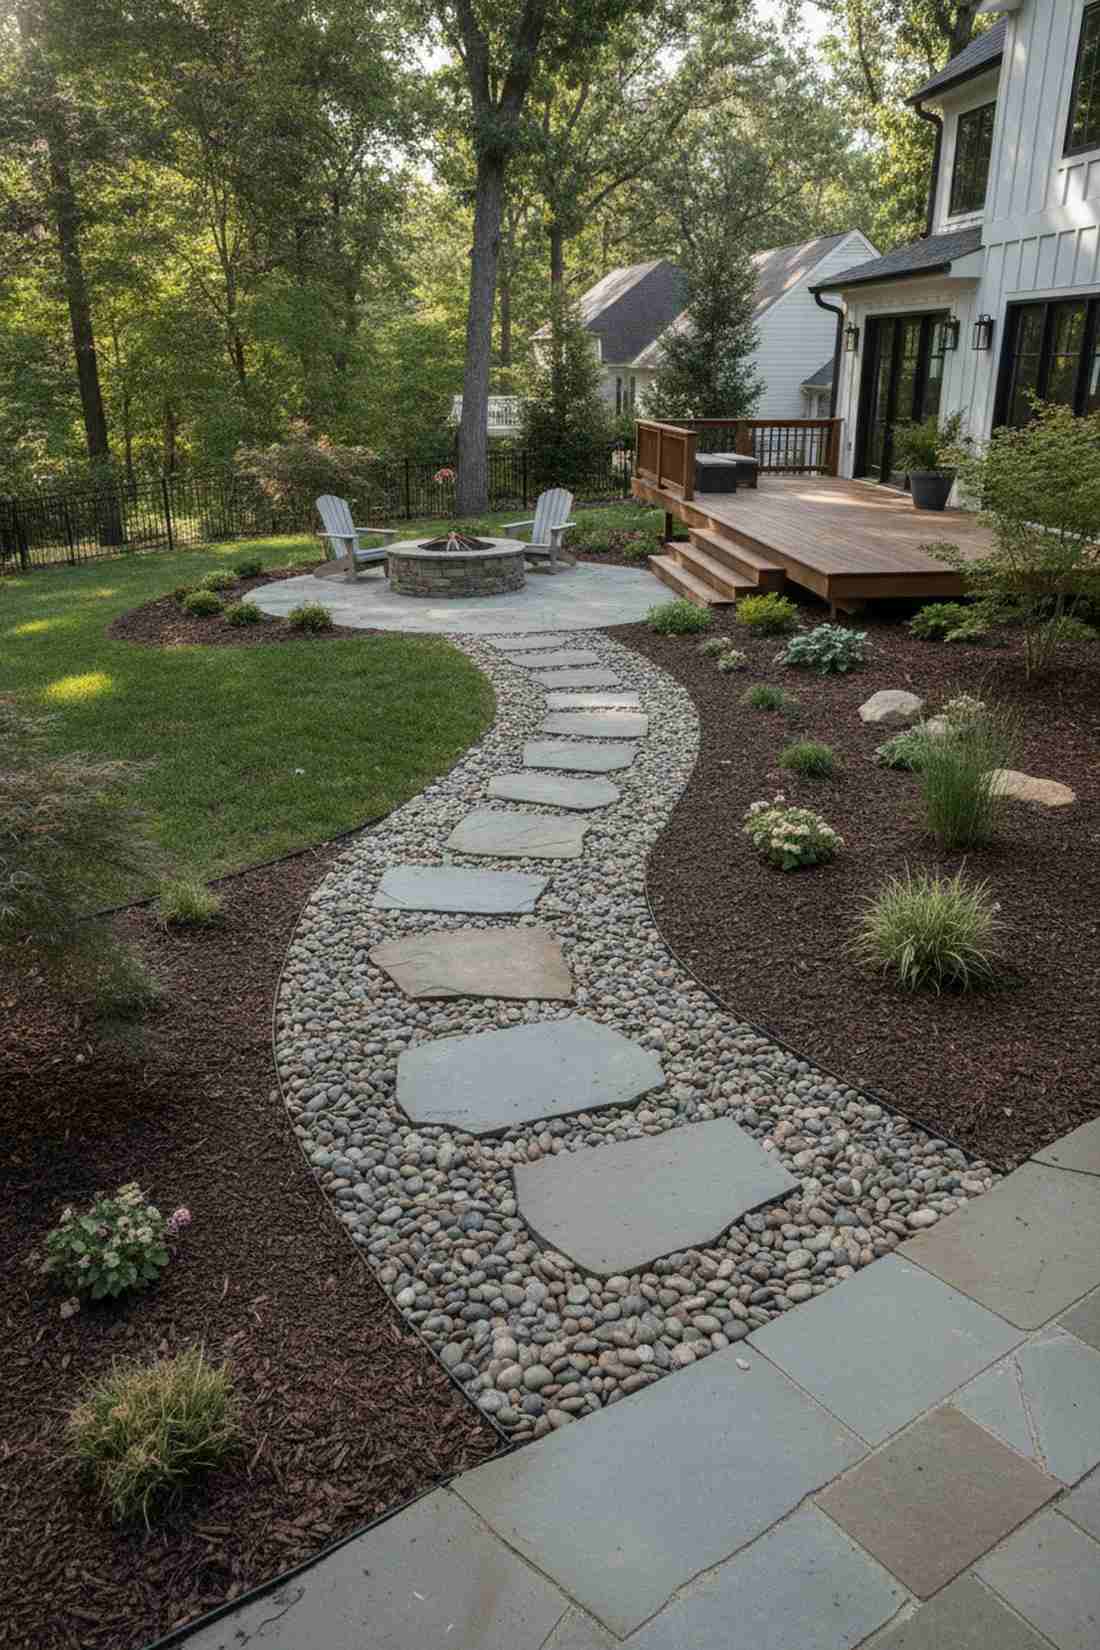
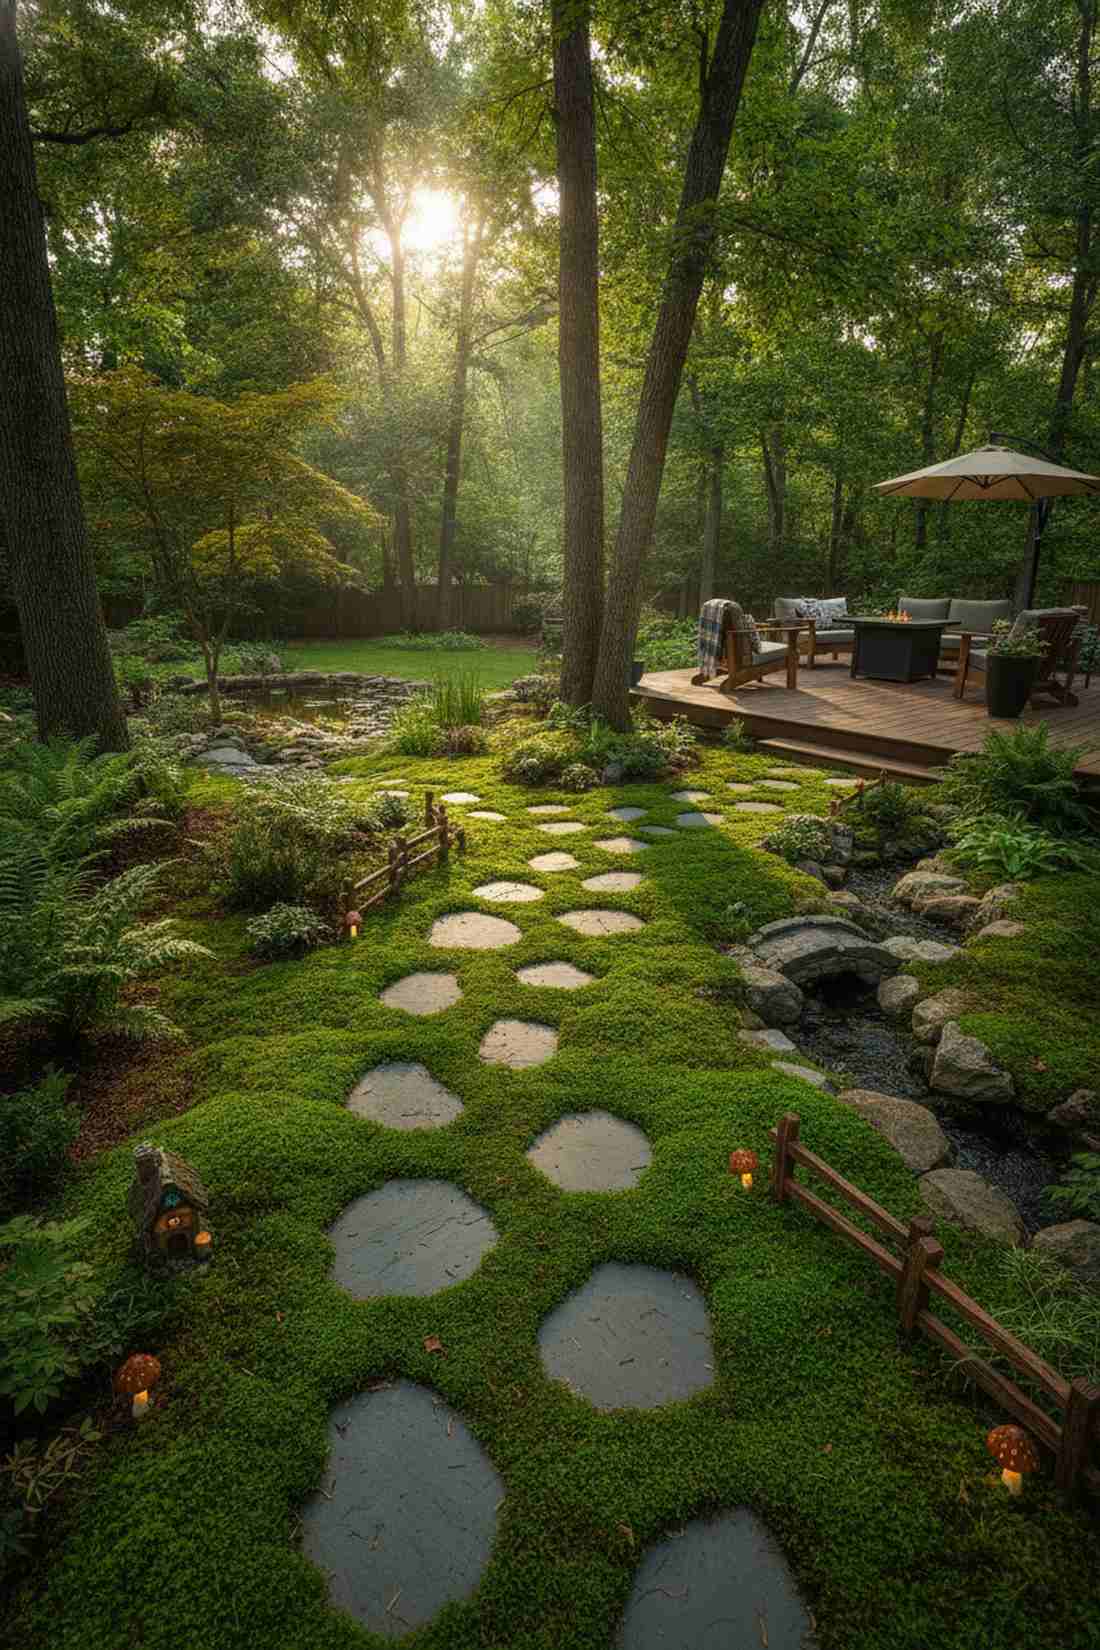
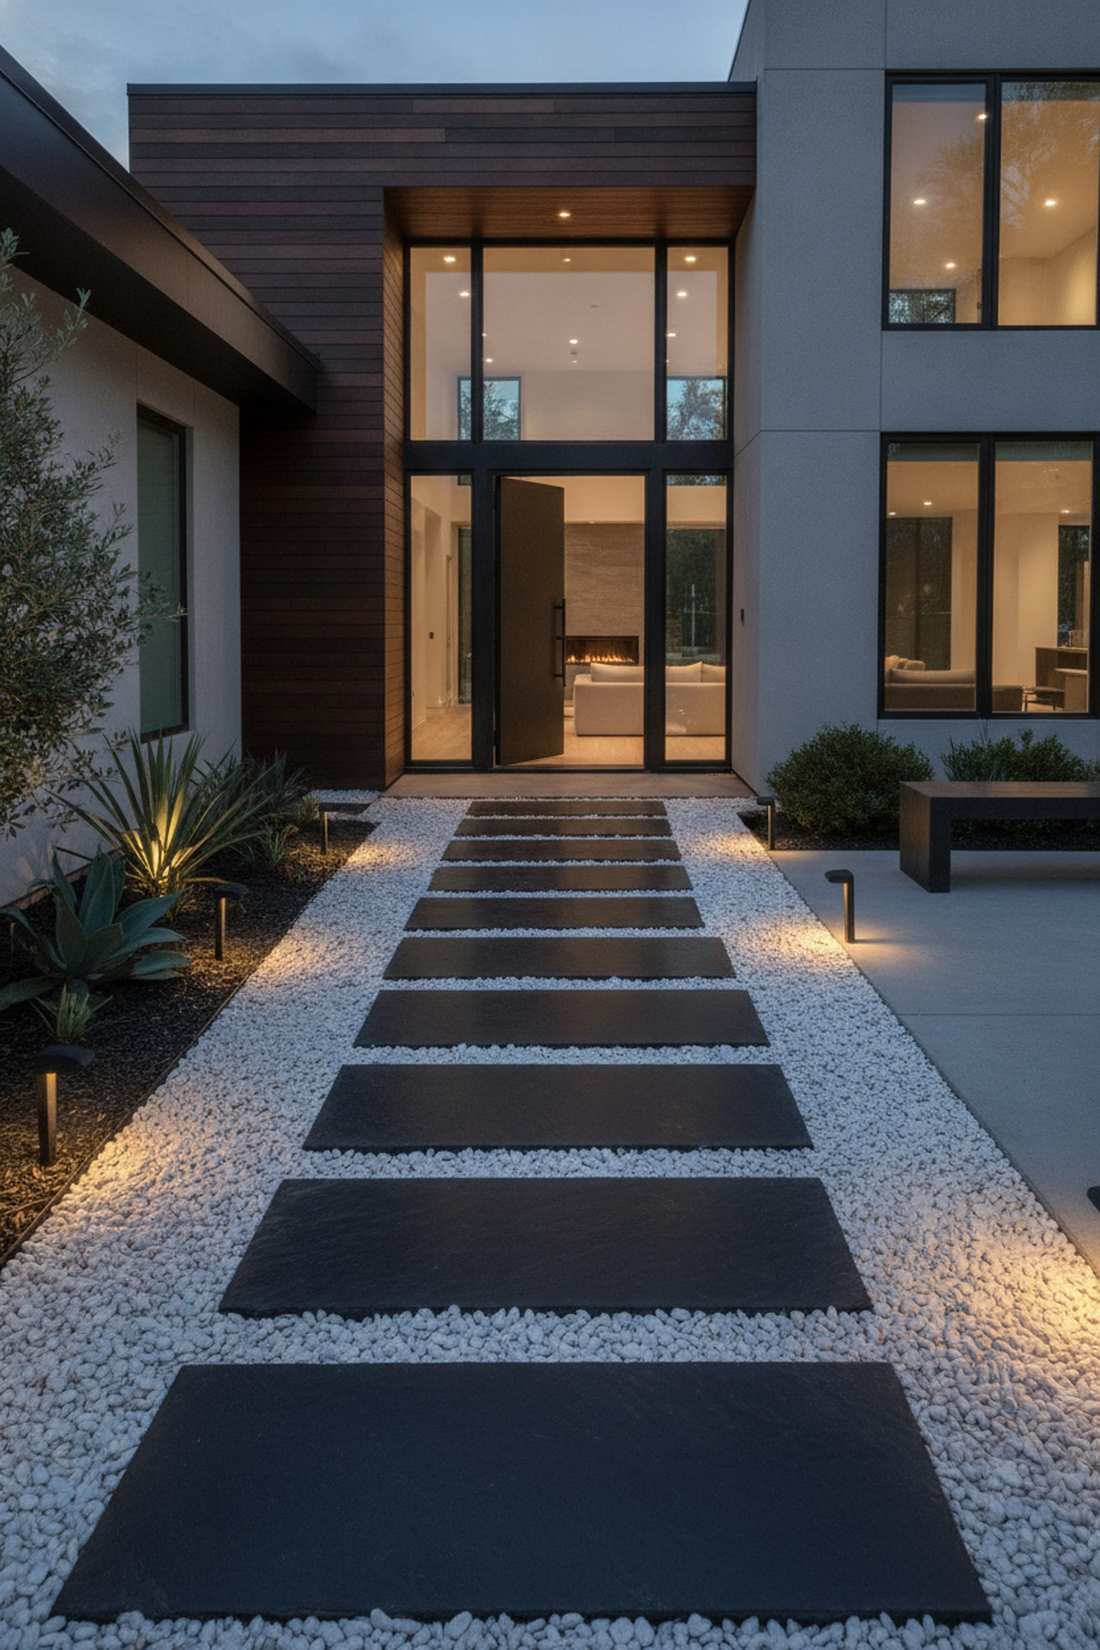
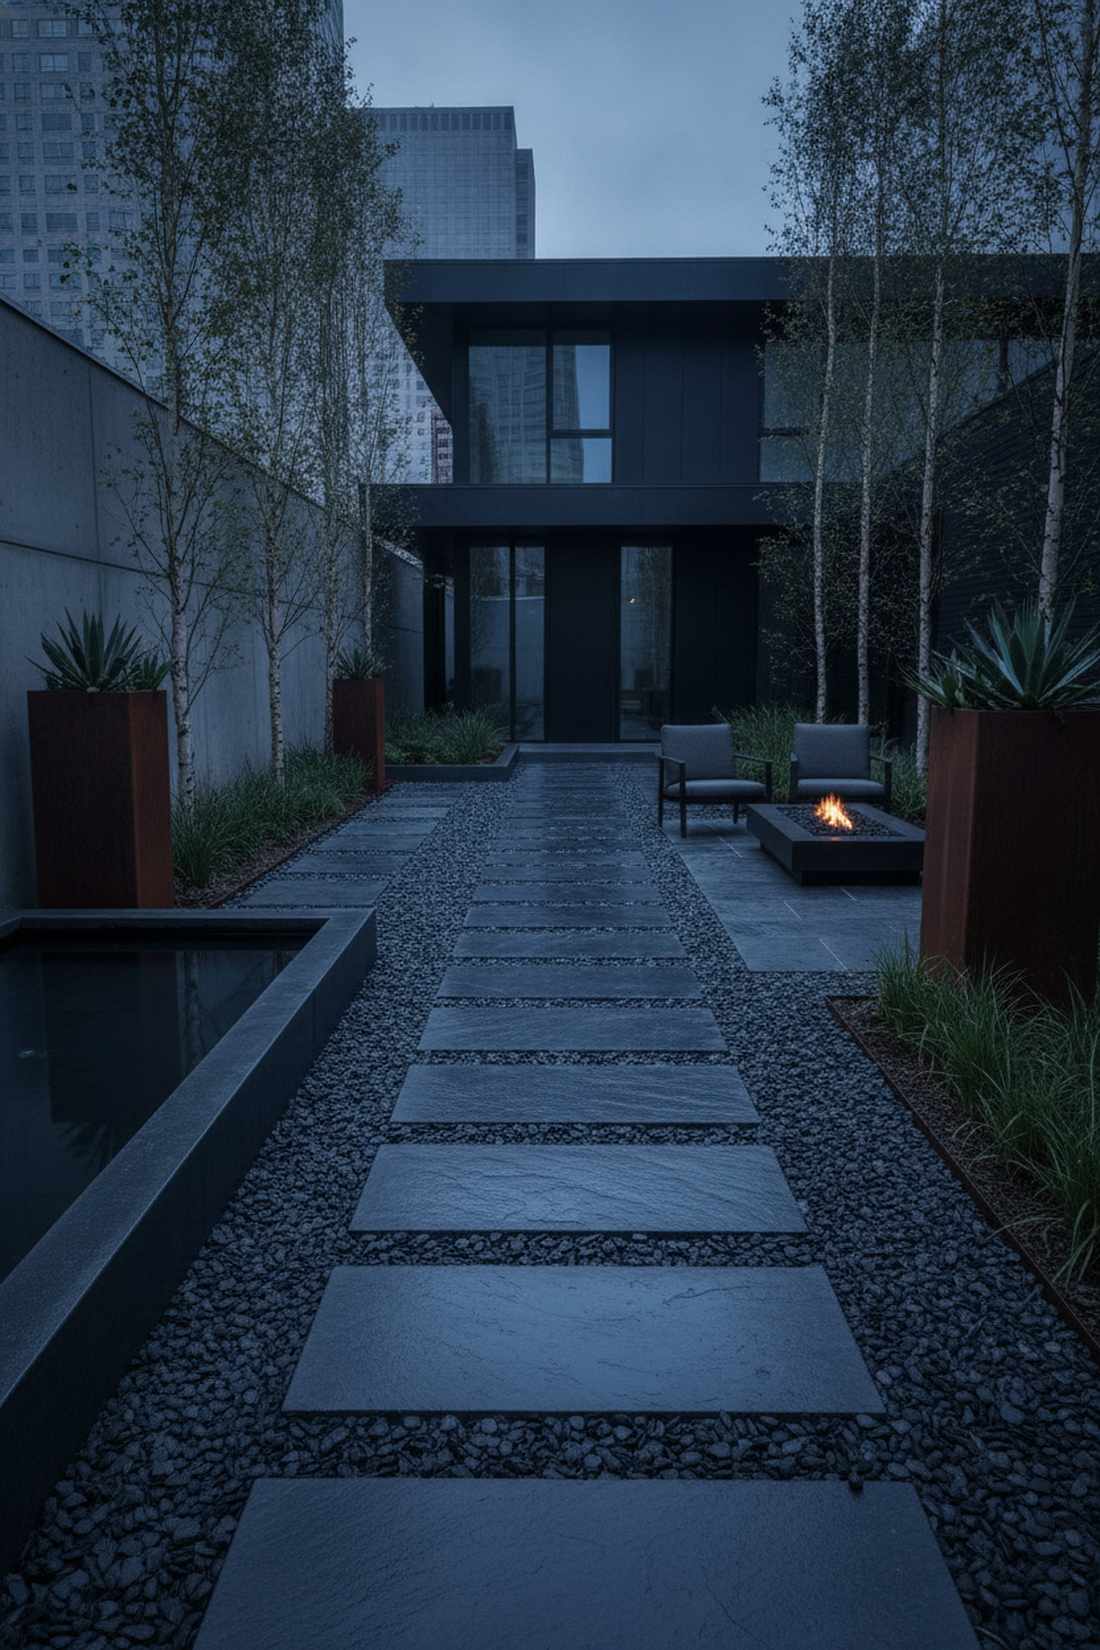
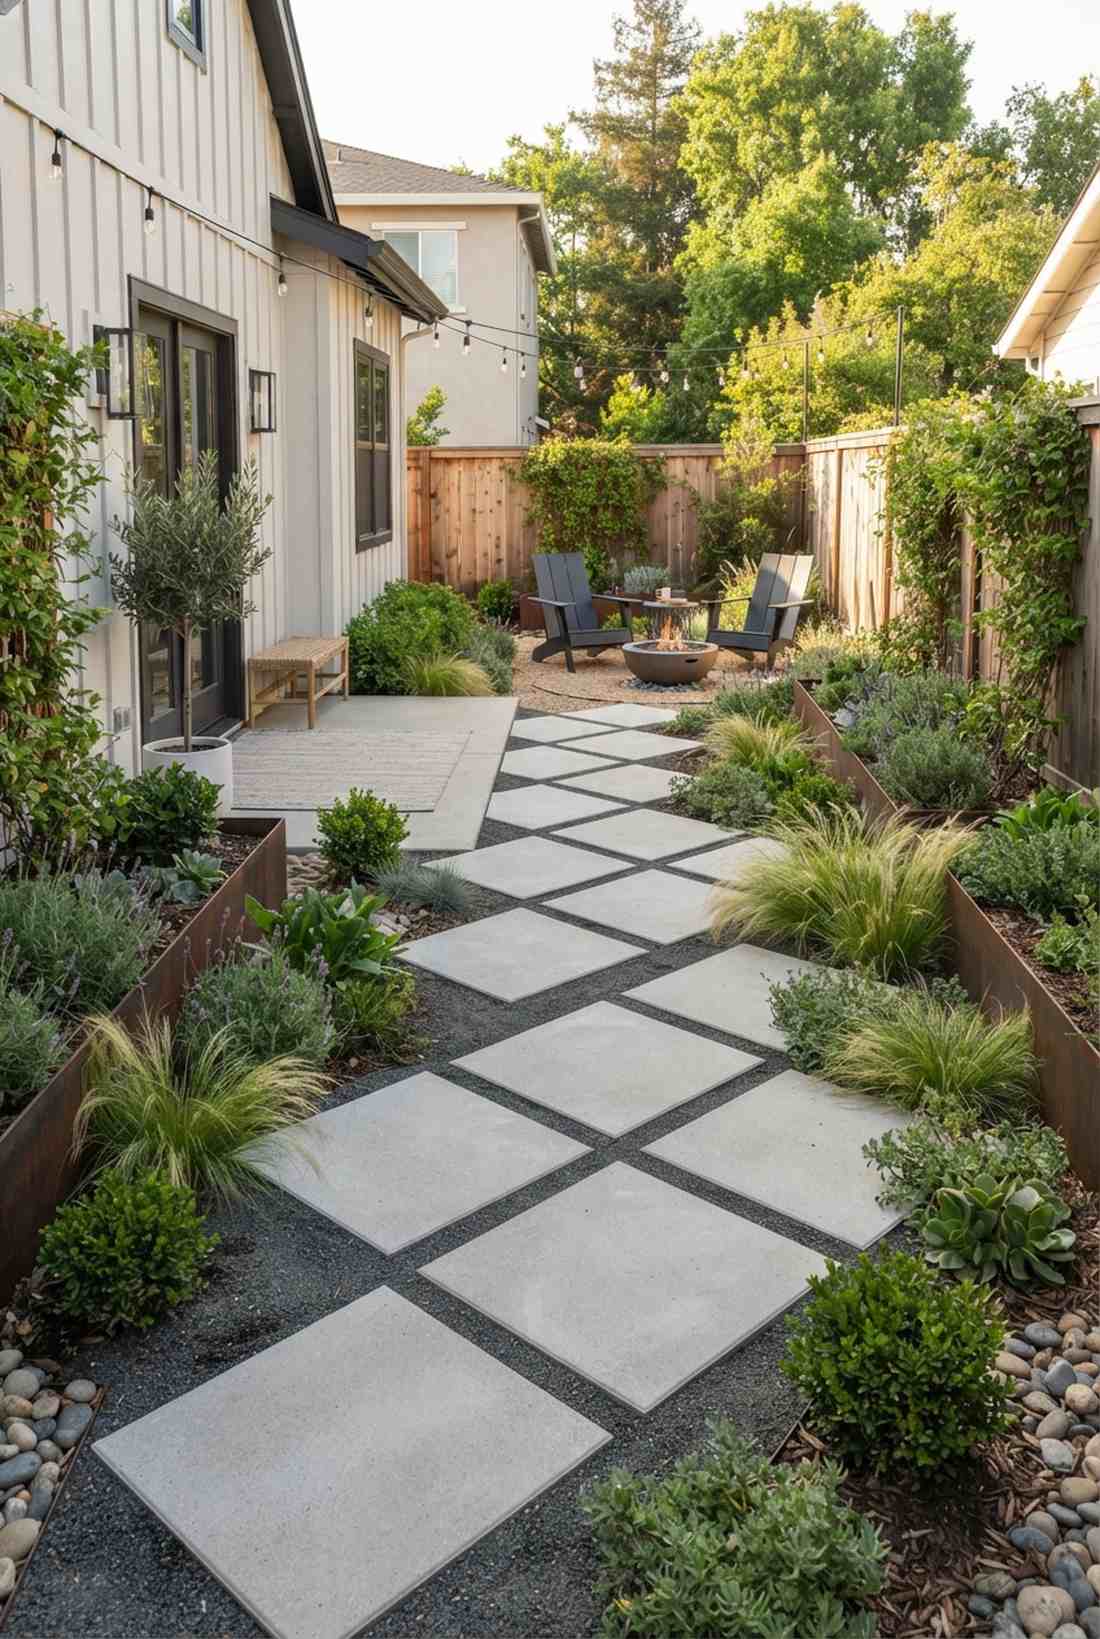
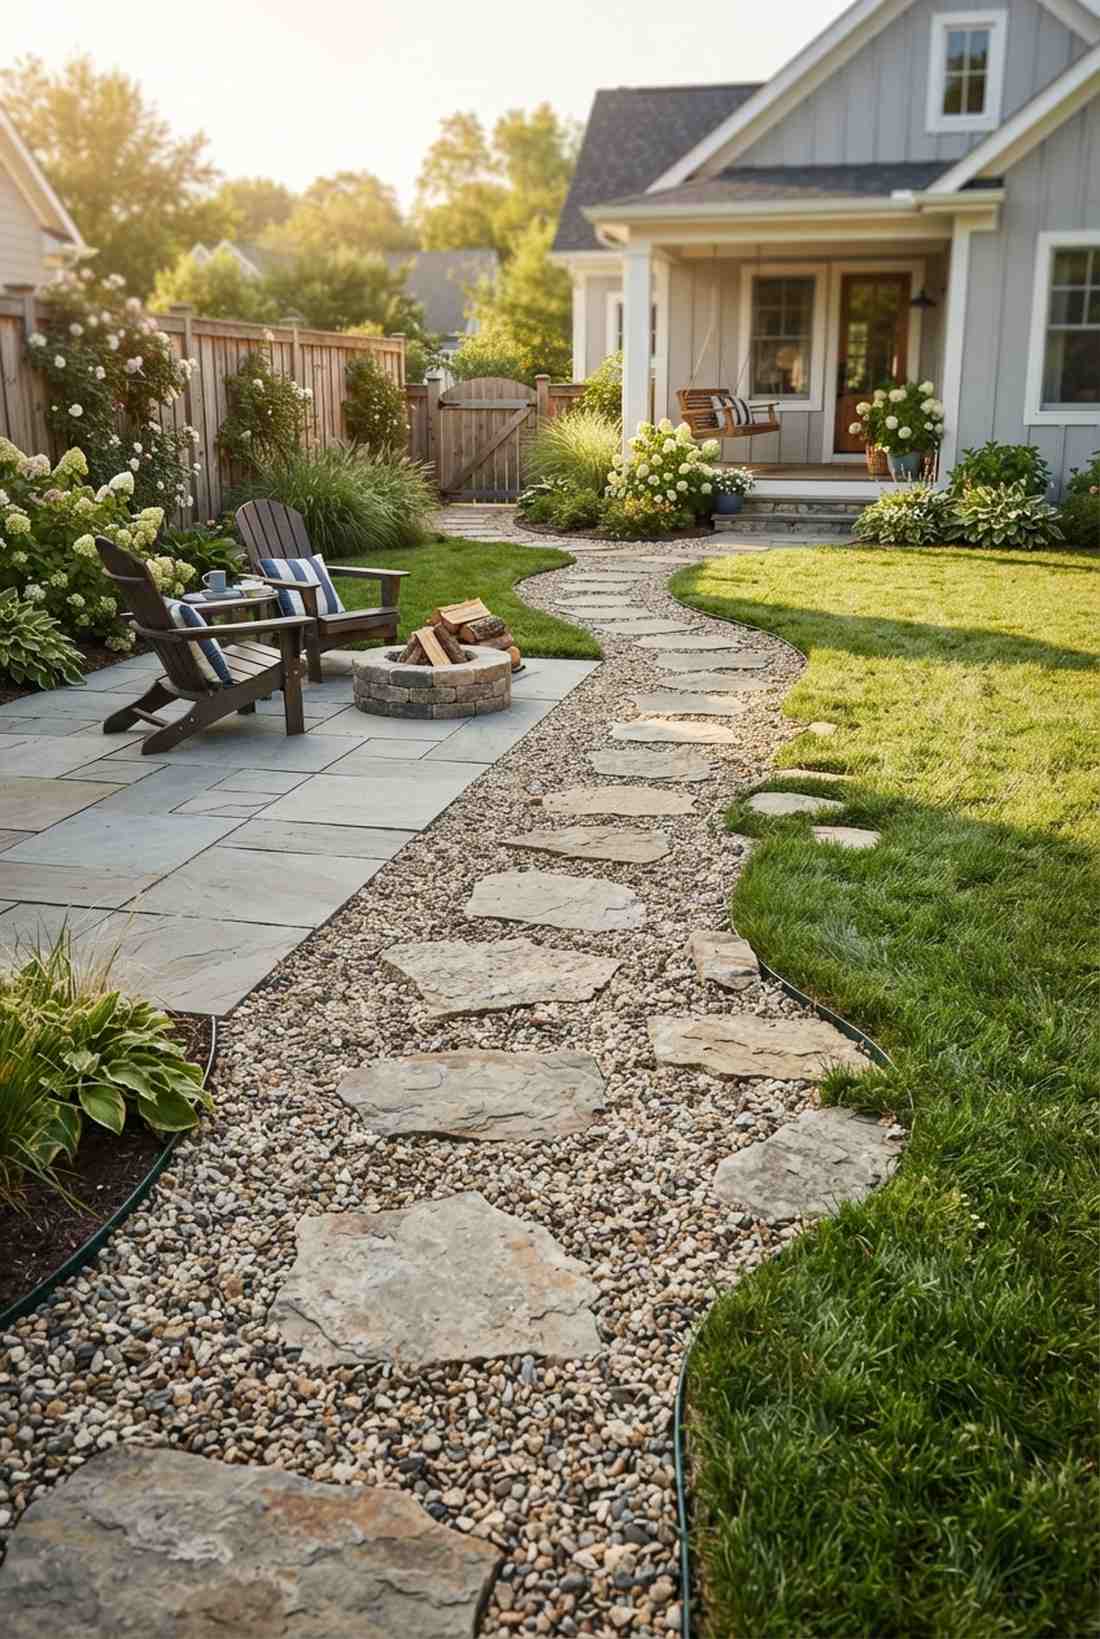
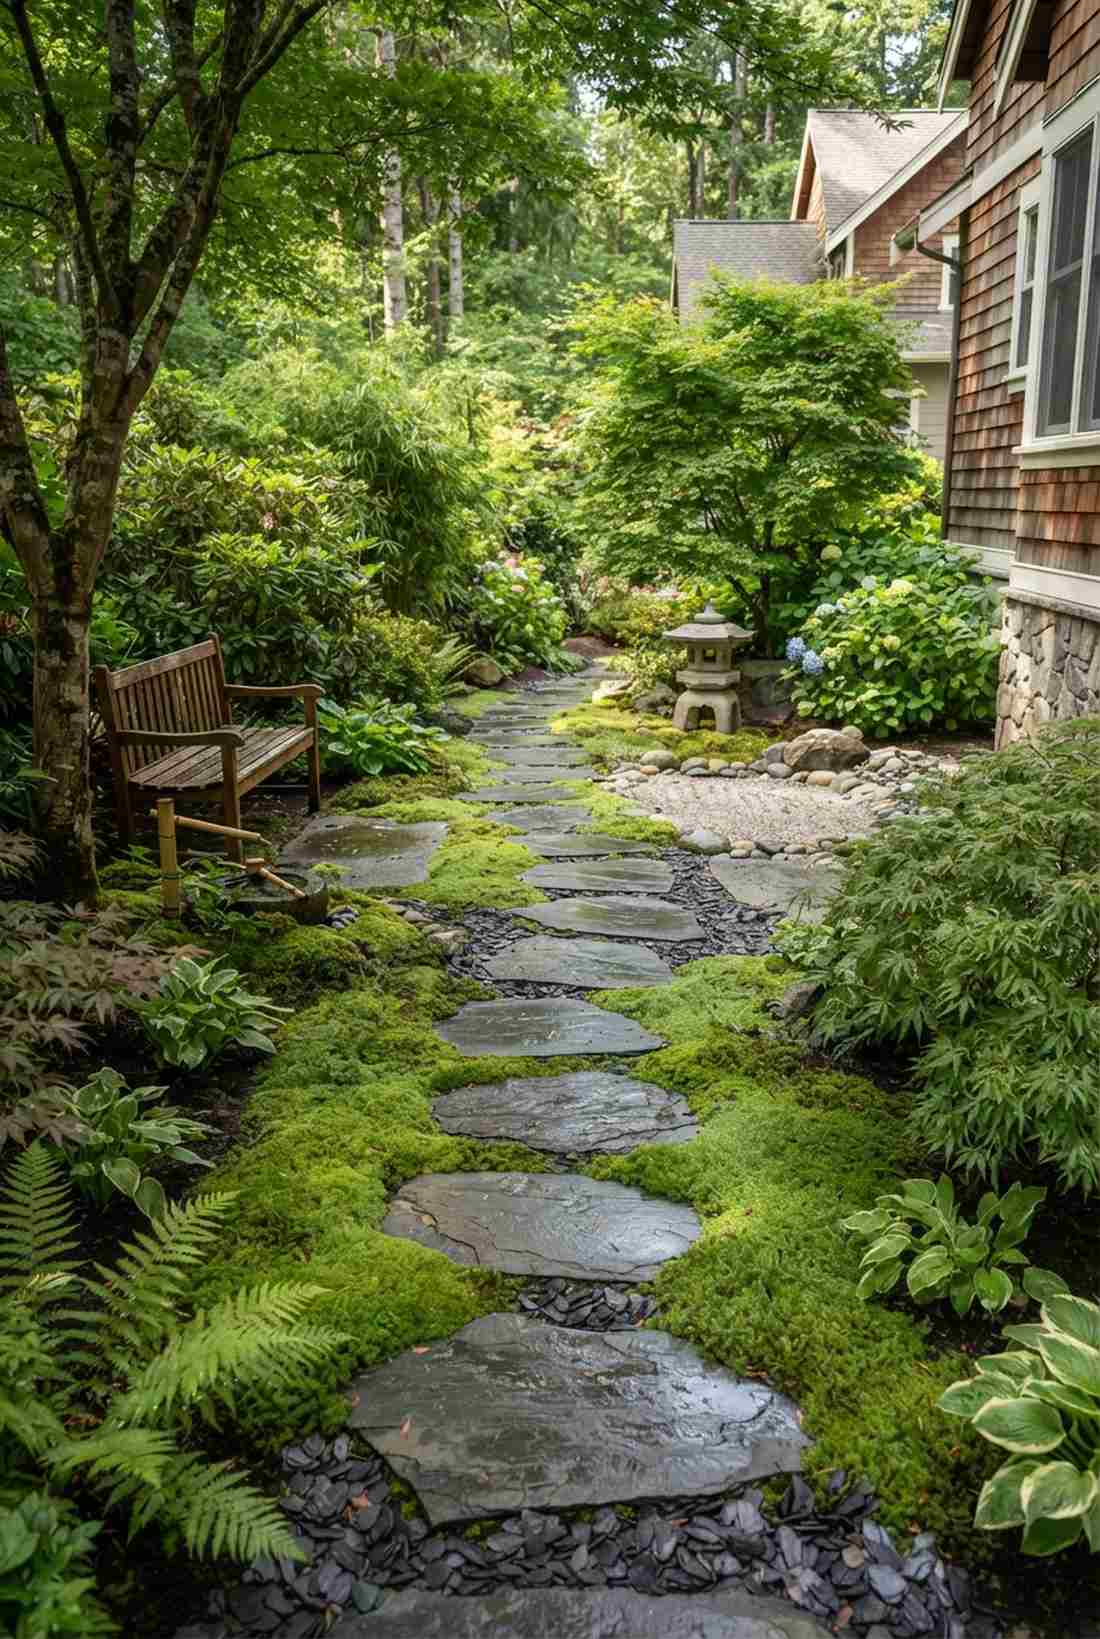
1. Floating Flagstone Pathway
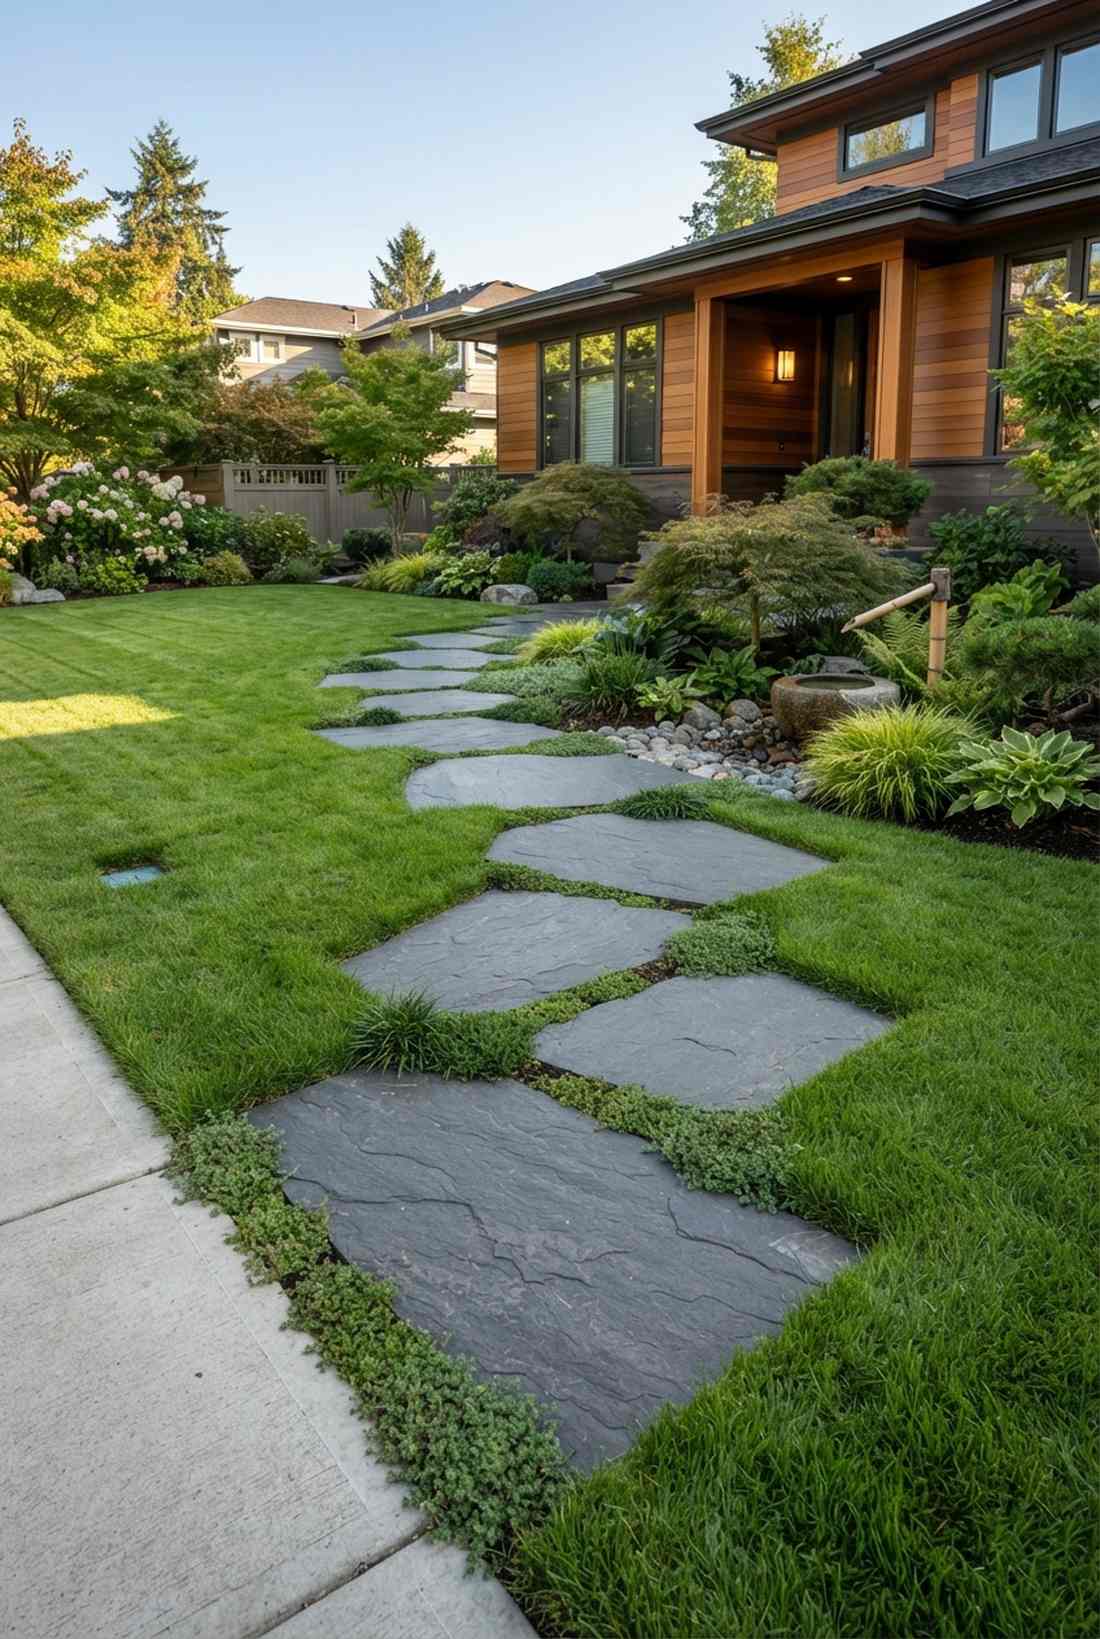
Feels like a modern zen sanctuary you accidentally discovered. Works exceptionally well for minimalist front yard transitions, creating a stunning floating garden walkway.
Most homeowners settle for basic concrete, but this layout delivers a surprisingly premium look. Using stepping stones with grass in between protects your lawn while embedding commercial-grade garden pathway supplies ensures the stones won’t shift.
You can easily pull this off for around $40–$75 depending on stone quality. Save this to your DIY weekend garden board for future inspiration.
- Key Materials: 24-inch natural slate flagstones
- Vibe / Style: Modern Japanese garden elegance
- Difficulty: Intermediate lawn modification
- Budget Breakdown: Stones: $50 | Base Sand: $15
- Creator’s Tip: Recess the stones half an inch below the grass line so your lawnmower glides right over them.
- Smart Sourcing: pre-cut heavy-duty paver bases (bulk pack)
2. Curved Grass Pathway
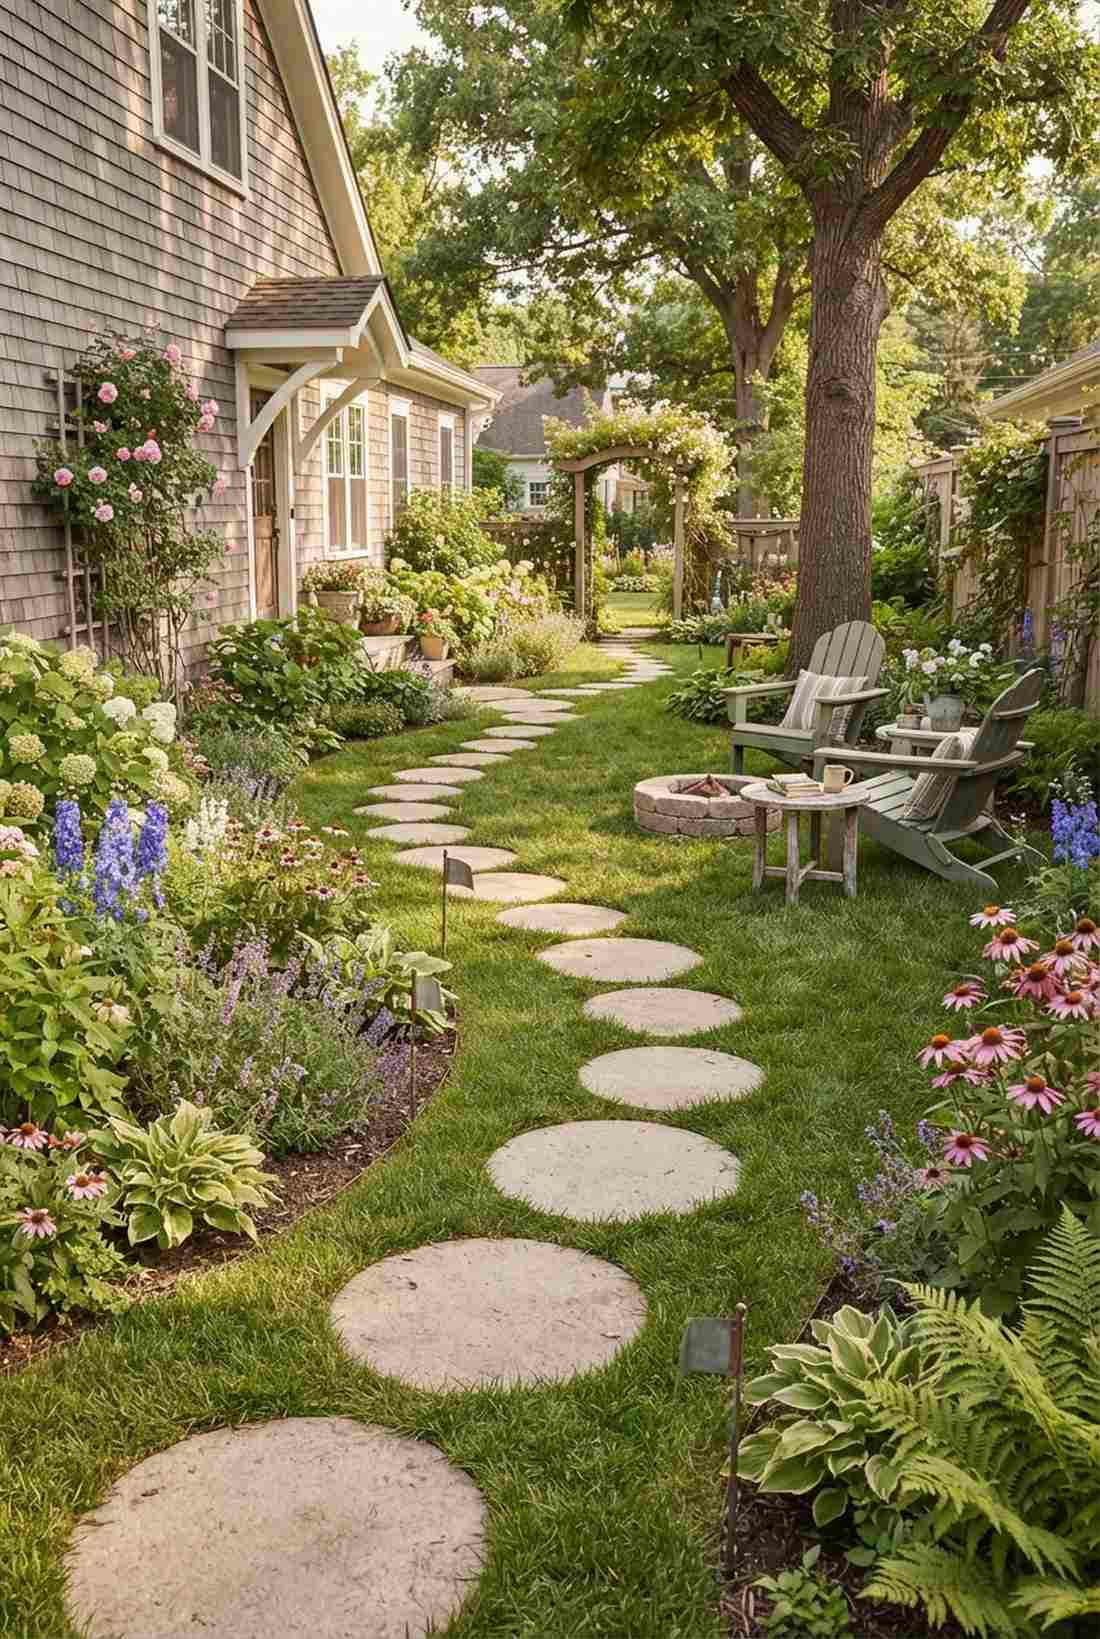
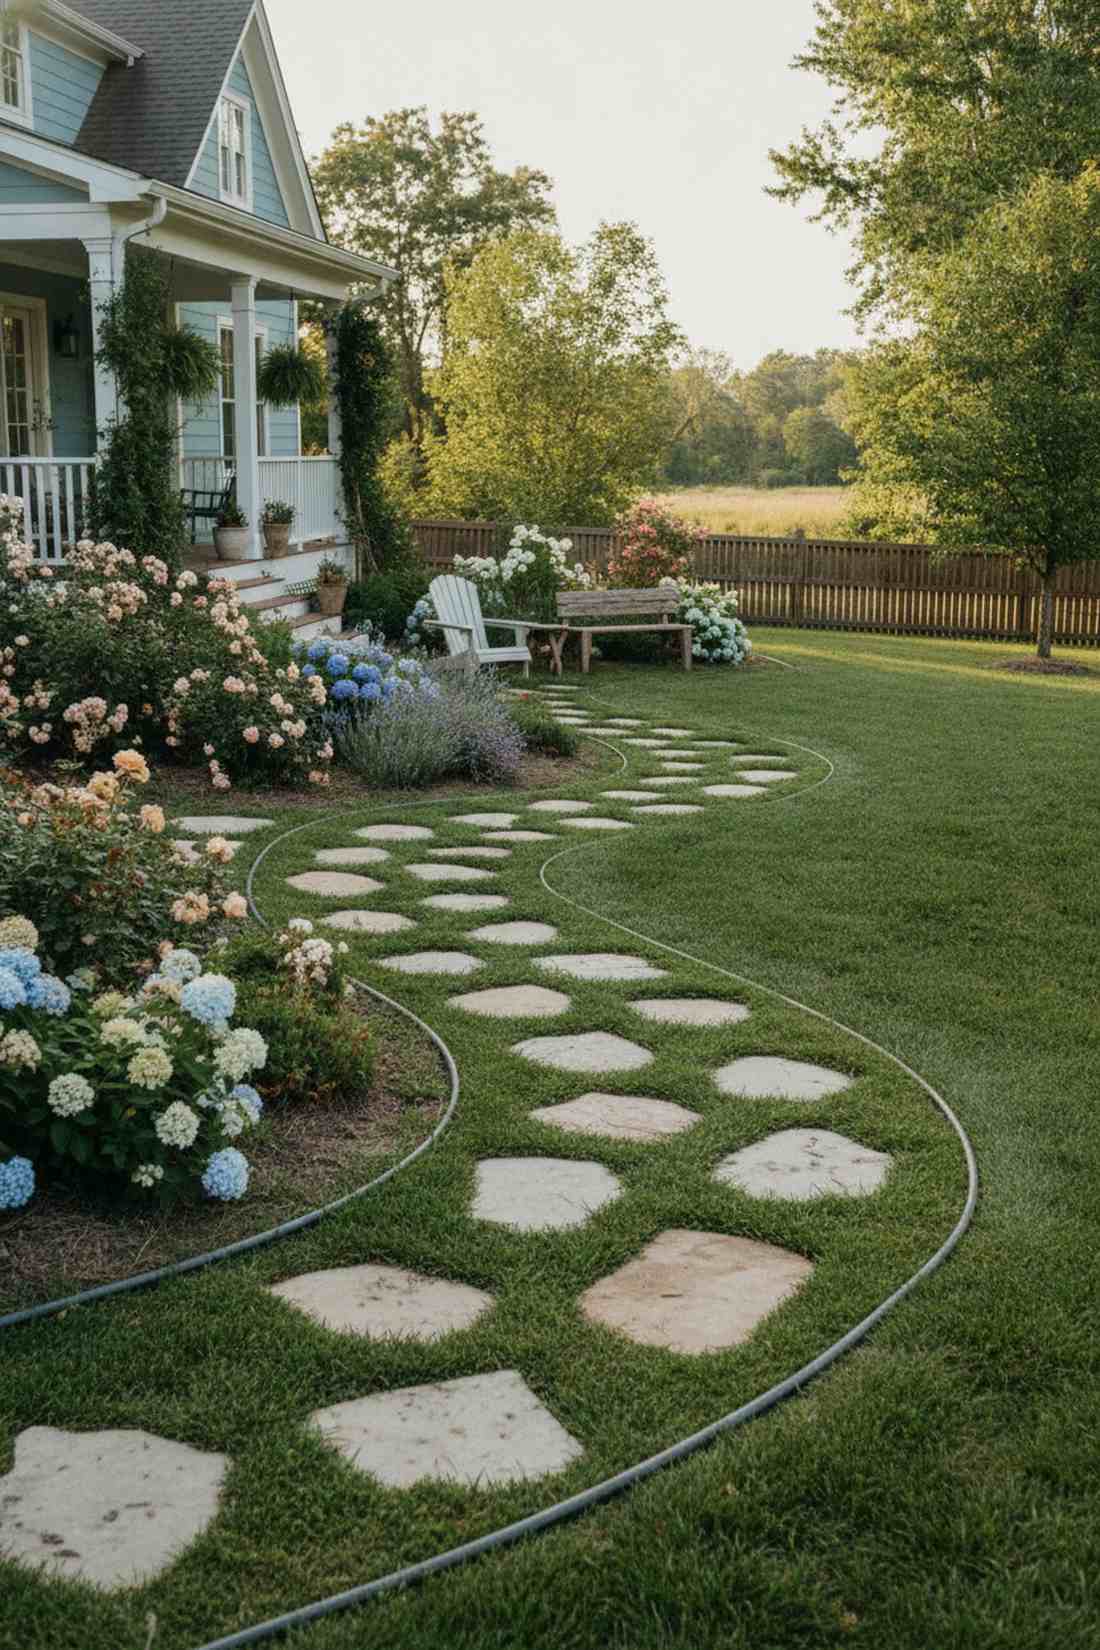
Straight out of a storybook with its gentle, meandering flow. Perfect for backyard side-entrances where you want to highlight a curved organic stepping path.
Many people overcomplicate their walkways, yet this straightforward pattern looks far more expensive than it is. Utilizing flexible landscape edging kits helps map out the perfect curve before making a single cut into the turf.
Expect to spend roughly $30–$50 on base materials. It’s a fast upgrade that completely changes the vibe.
- Key Materials: Round concrete or limestone stepping stones
- Vibe / Style: Whimsical cottage core
- Difficulty: Easy beginner weekend project
- Budget Breakdown: Stepping Stones: $30 | Turf Edging: $15
- Creator’s Tip: Lay out a garden hose first to visualize the natural walking curve before digging.
- Smart Sourcing: commercial-grade flexible garden hose markers
3. Mixed-Size Grass Integration
Gives off an effortless, natural estate energy that draws the eye. Highly recommended for long courtyard paths to build a textured dynamic lawn walkway.
Skip the flimsy plastic pavers; this approach gives a designer-level finish. Mixing large anchor stones with miniature garden supplies creates an asymmetric rhythm that feels highly curated and custom-built.
This layout costs around $60–$90 due to varying stone sizes. Pin this if you’re planning a small space upgrade.
- Key Materials: Assorted flagstones (12-inch and 24-inch)
- Vibe / Style: High-end rustic estate
- Difficulty: Moderate spatial planning
- Budget Breakdown: Mixed Stones: $70 | Sand: $10
- Creator’s Tip: Place the largest stones at turning points or doorways to anchor the visual weight.
- Smart Sourcing: pre-sorted natural stone bundles (multi-size pack)
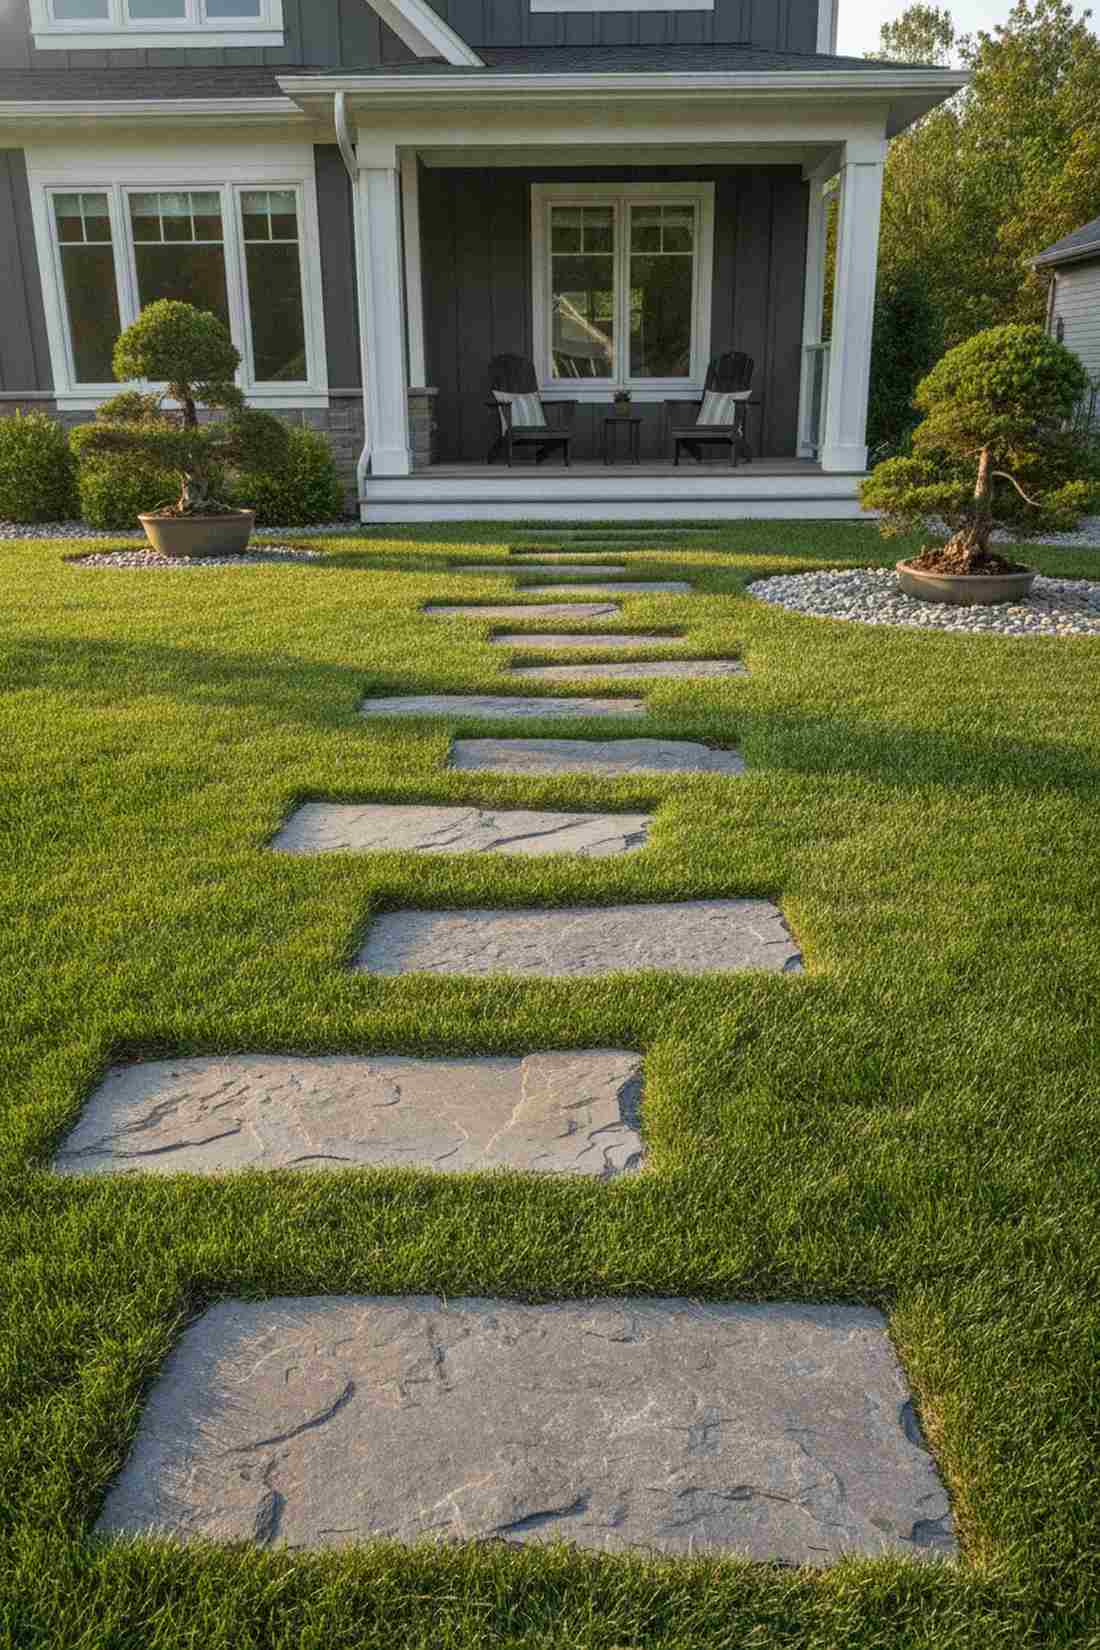
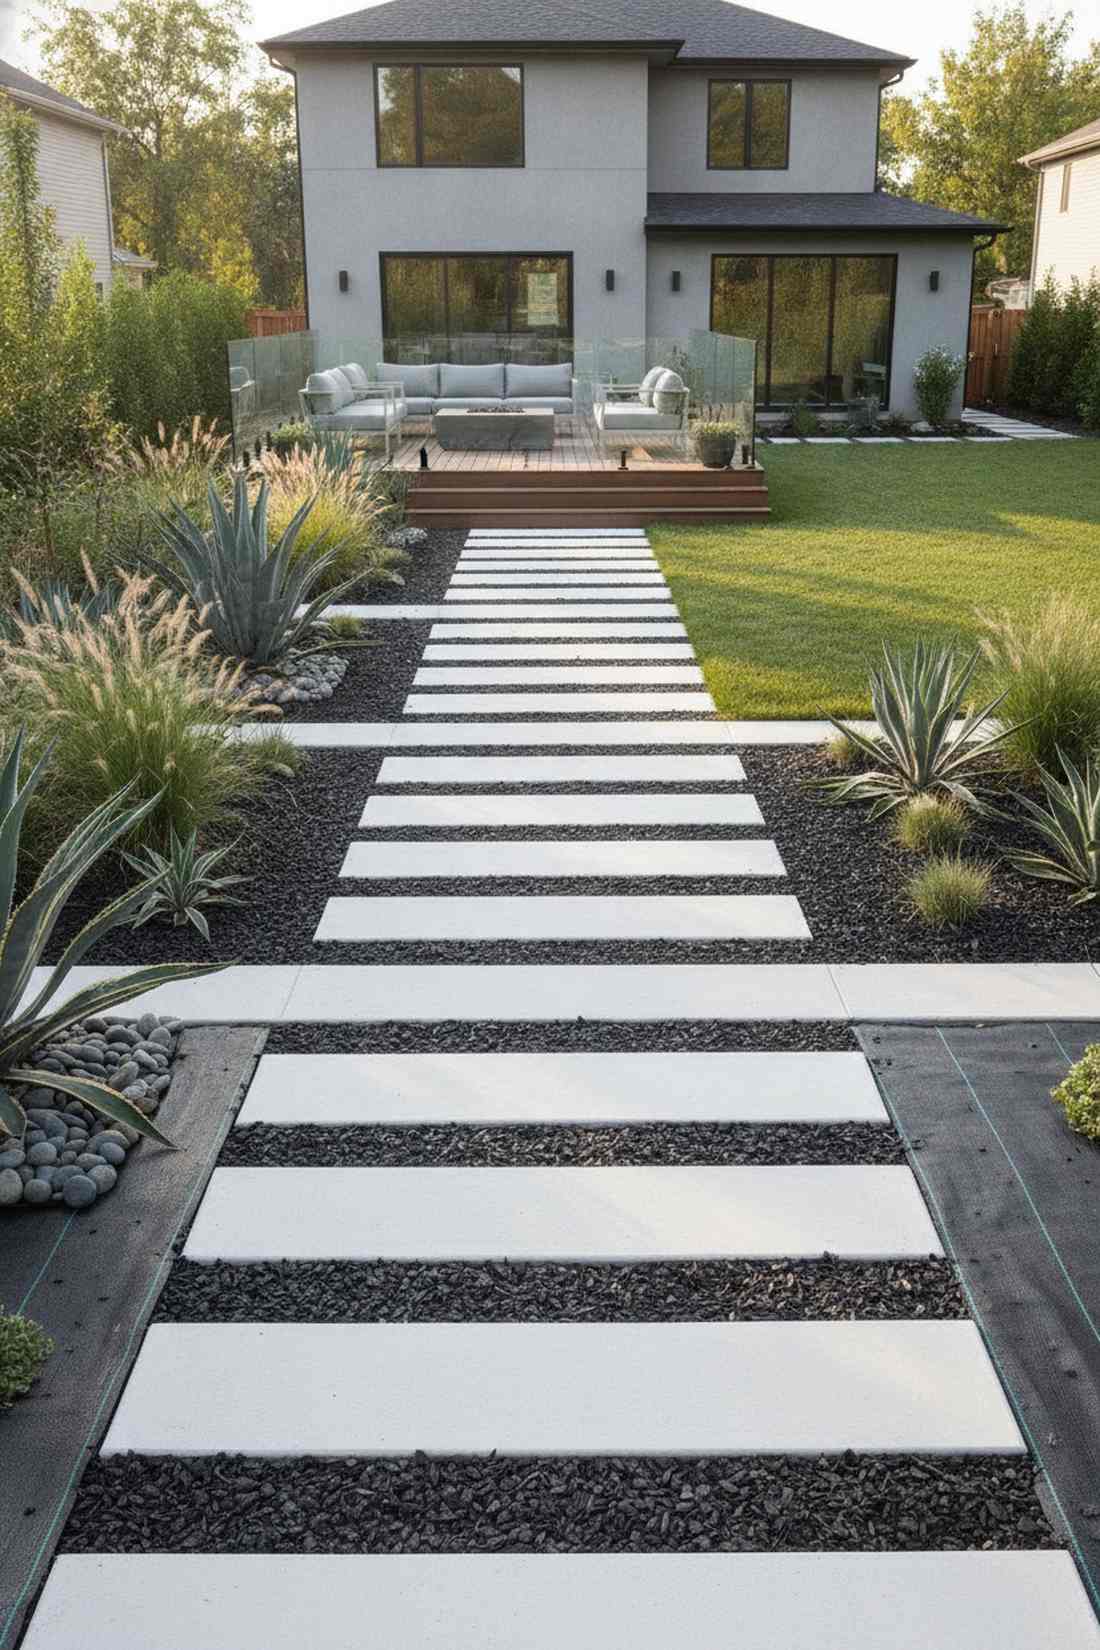
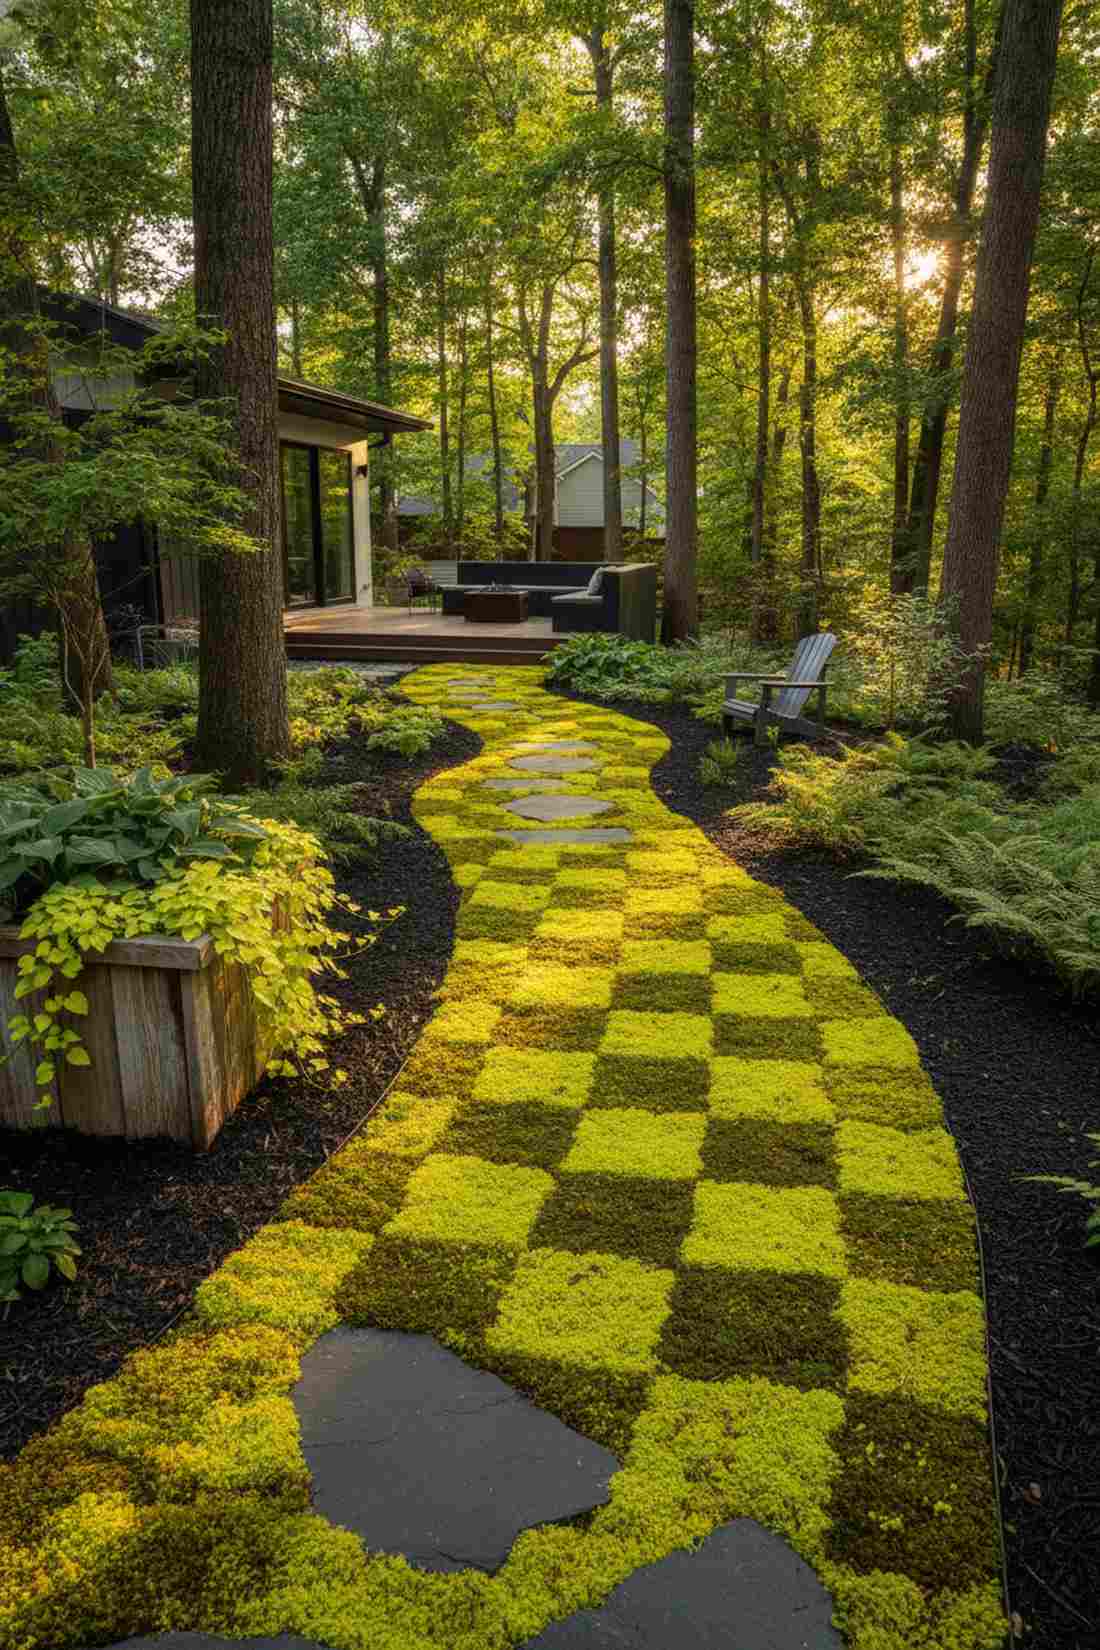
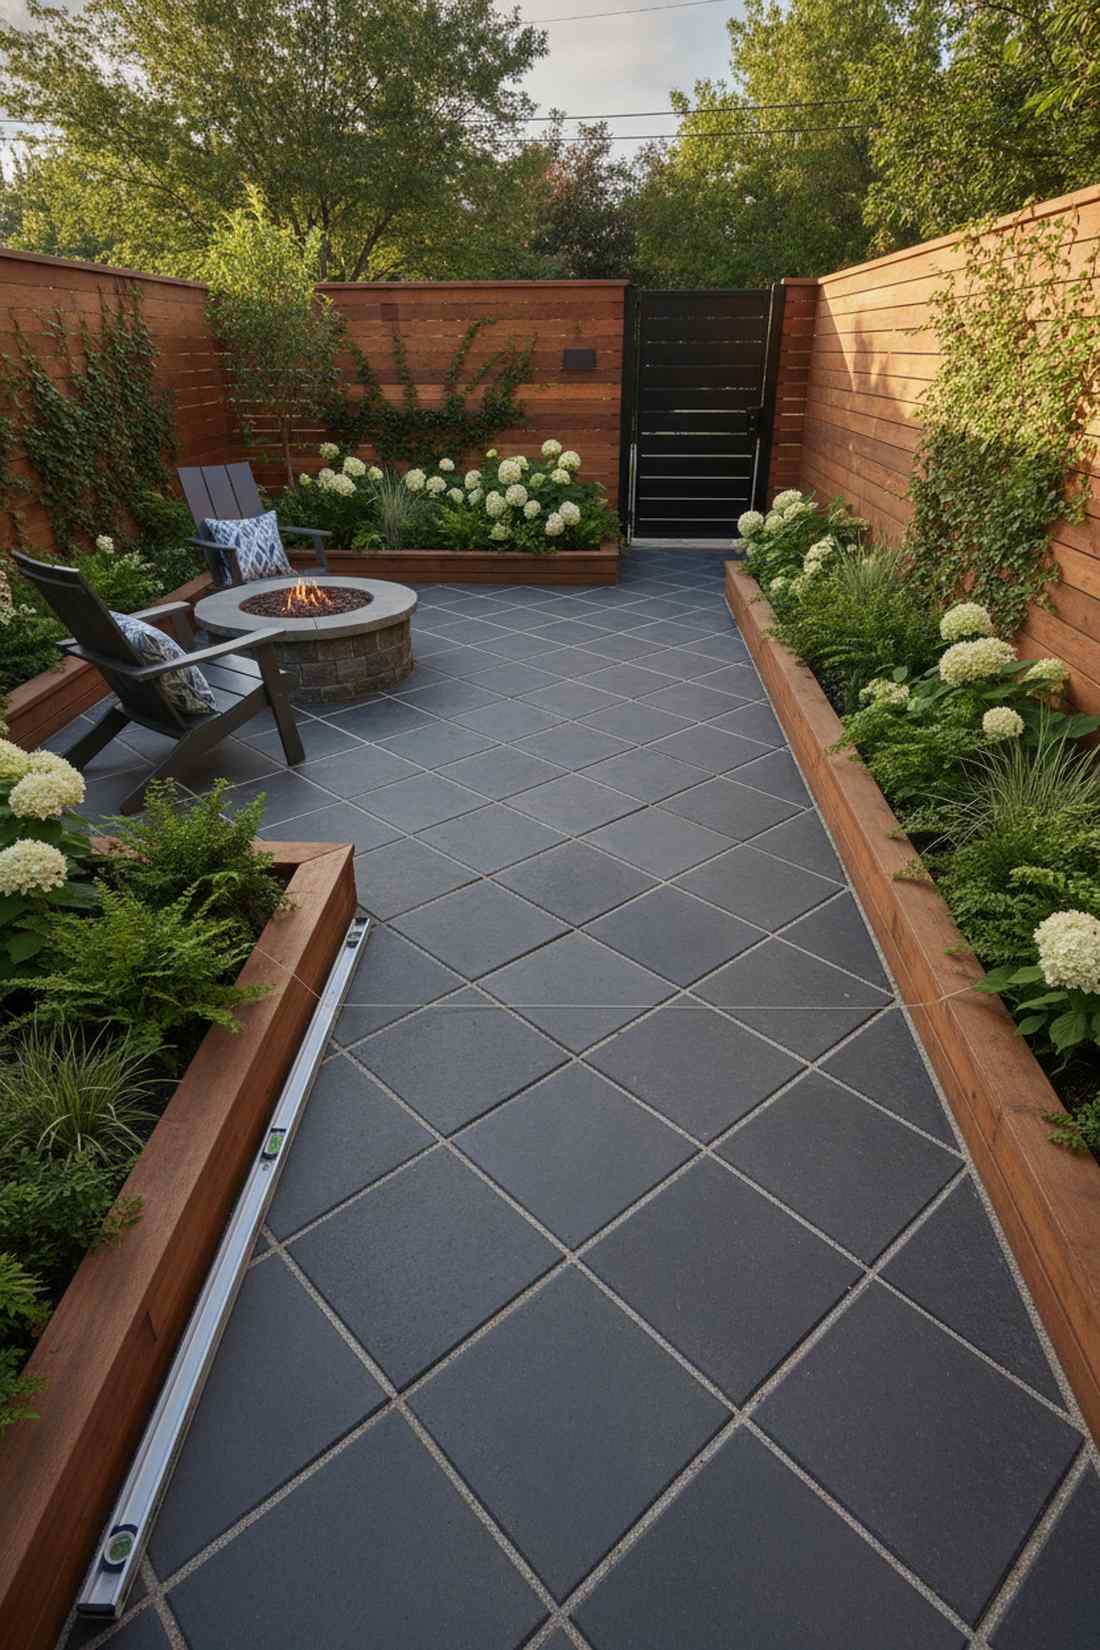
4. Lawn Checkerboard Pattern
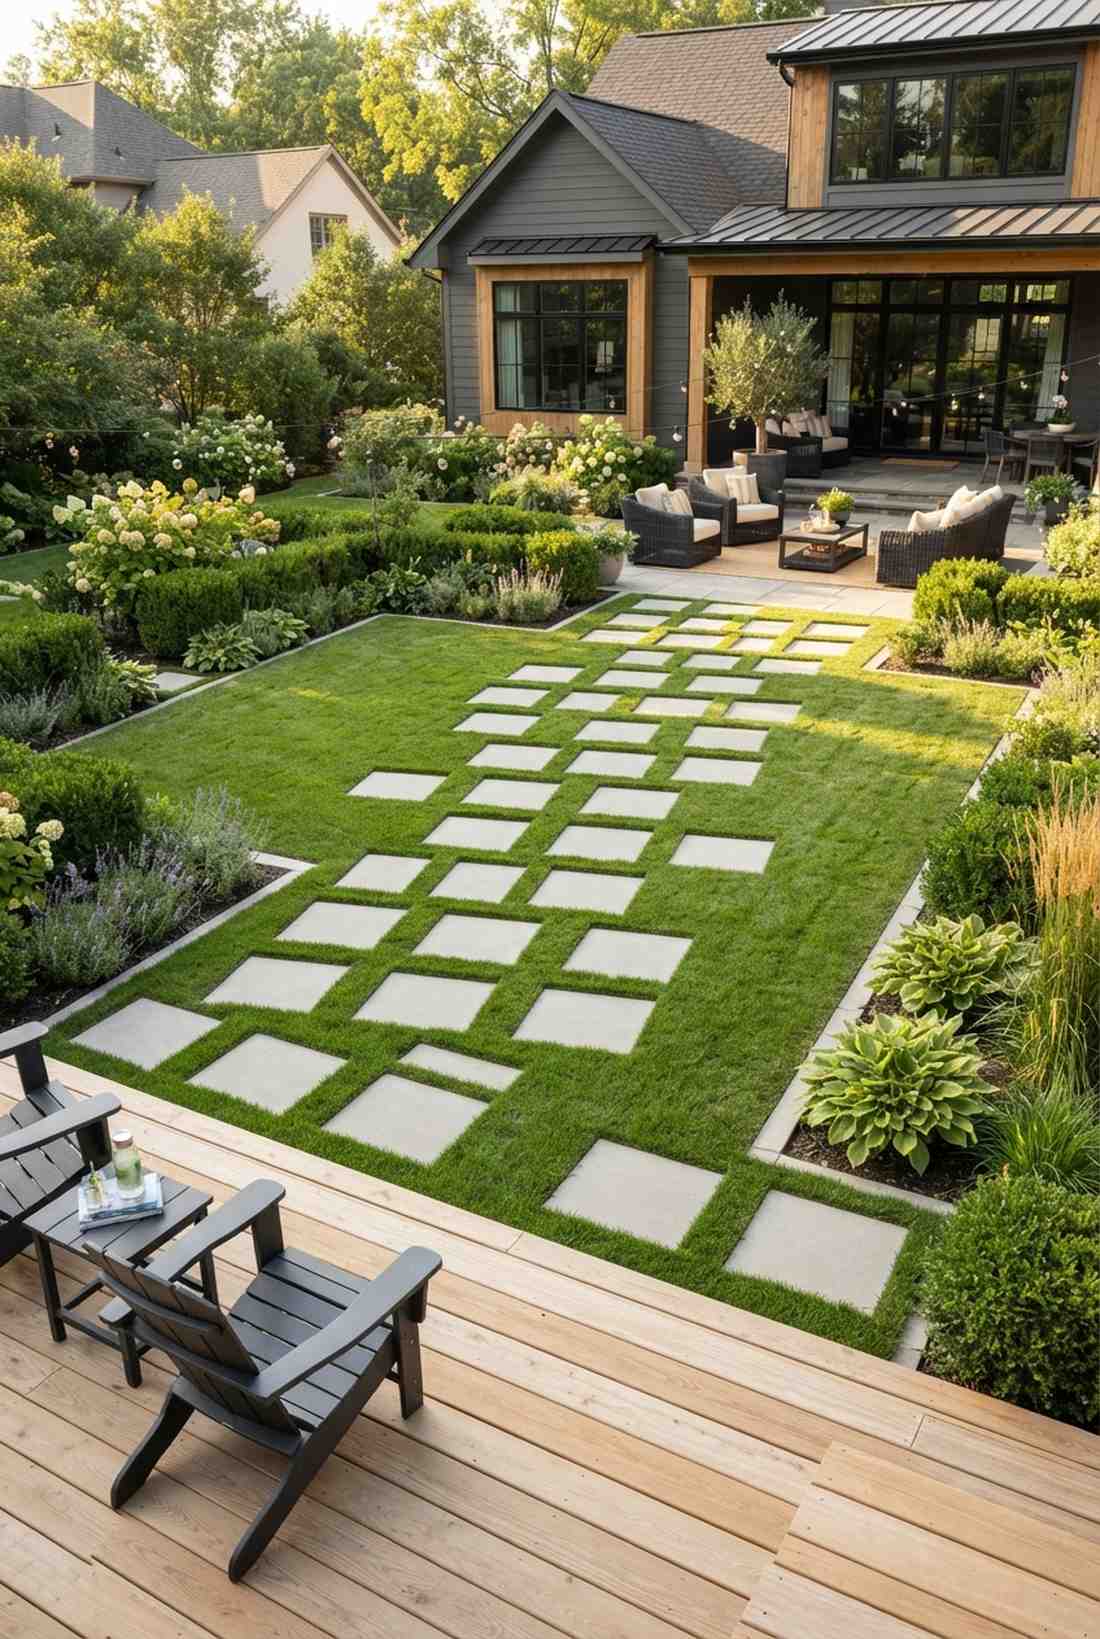
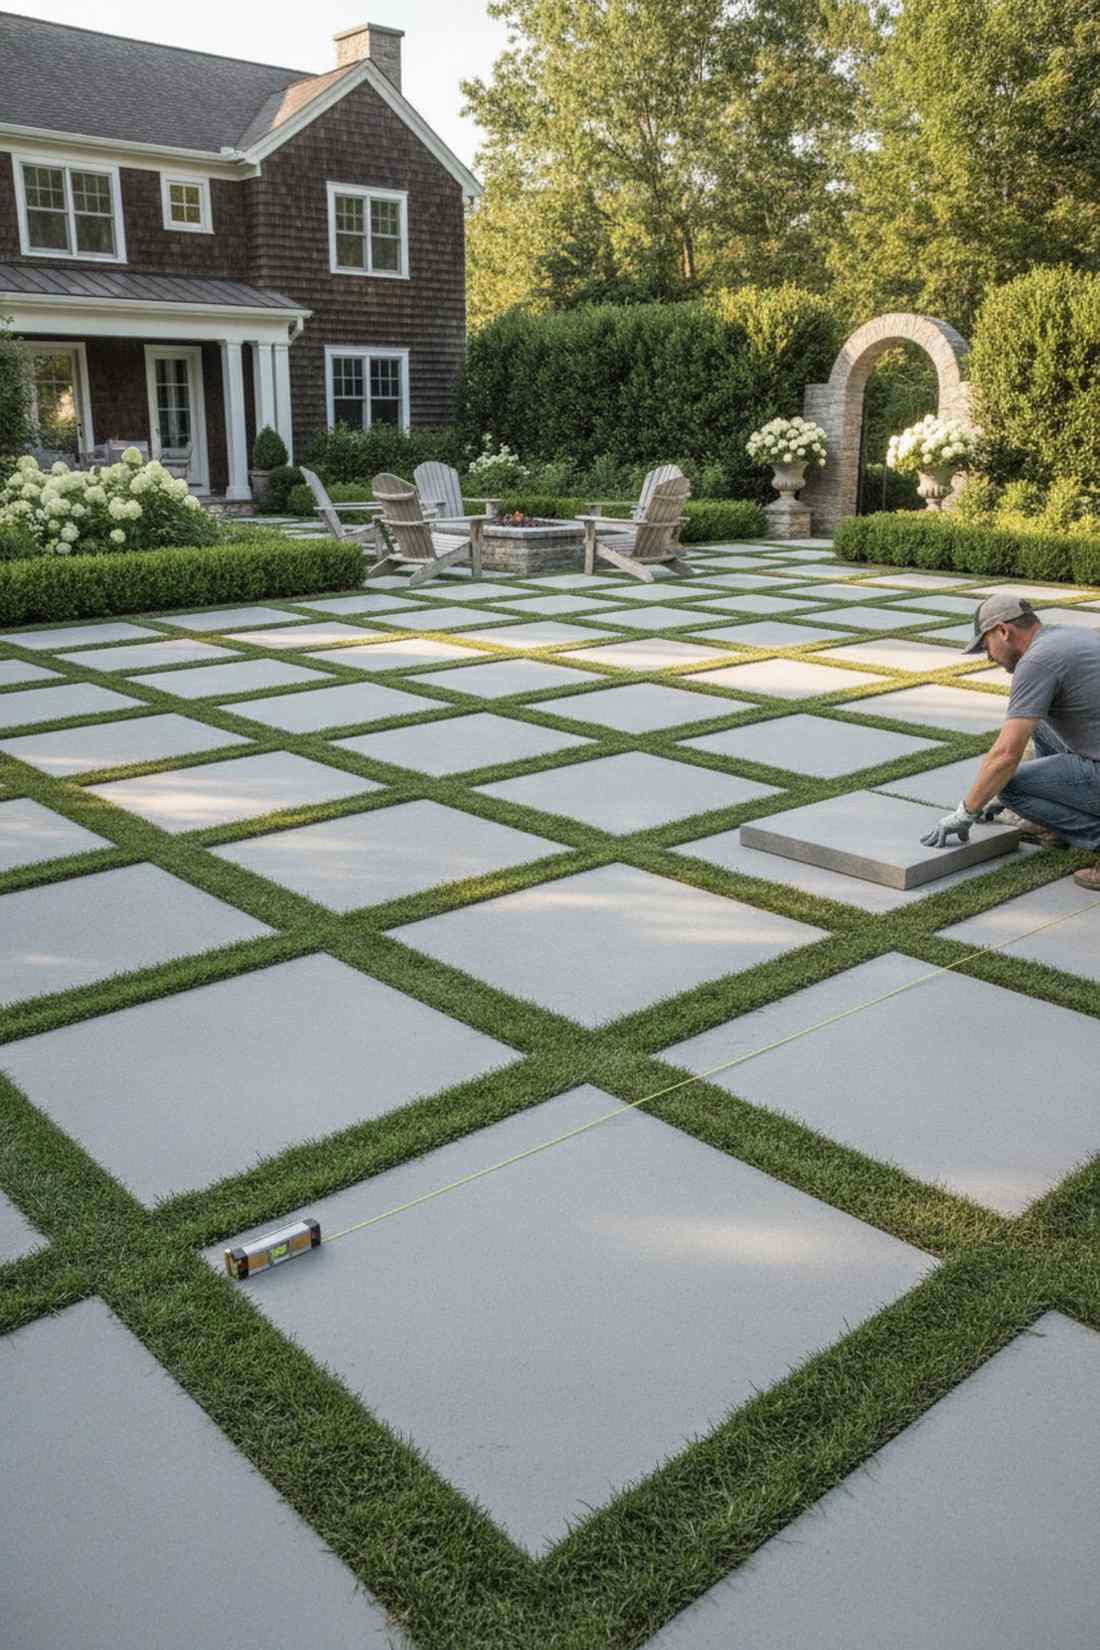
Feels like stepping into a regal botanical garden courtyard. Best suited for formal transitional spaces, serving as a striking geometric turf paver design.
You might think this requires a contractor, but DIYing this gives a high-end estate vibe. Precision is everything here, so using premium garden pathway tools ensures your squares remain perfectly flush.
You can execute this look for about $80–$120. Save this idea if you love clean, contemporary lines.
- Key Materials: 18×18-inch square concrete pavers
- Vibe / Style: Formal contemporary garden
- Difficulty: Advanced measuring required
- Budget Breakdown: Square Pavers: $90 | Leveling Sand: $20
- Creator’s Tip: Use a string line level to ensure every single paver aligns perfectly before filling with soil.
- Smart Sourcing: heavy-duty aluminum string line levels
This next setup is ridiculously cheap but looks like a $150 custom landscape display…
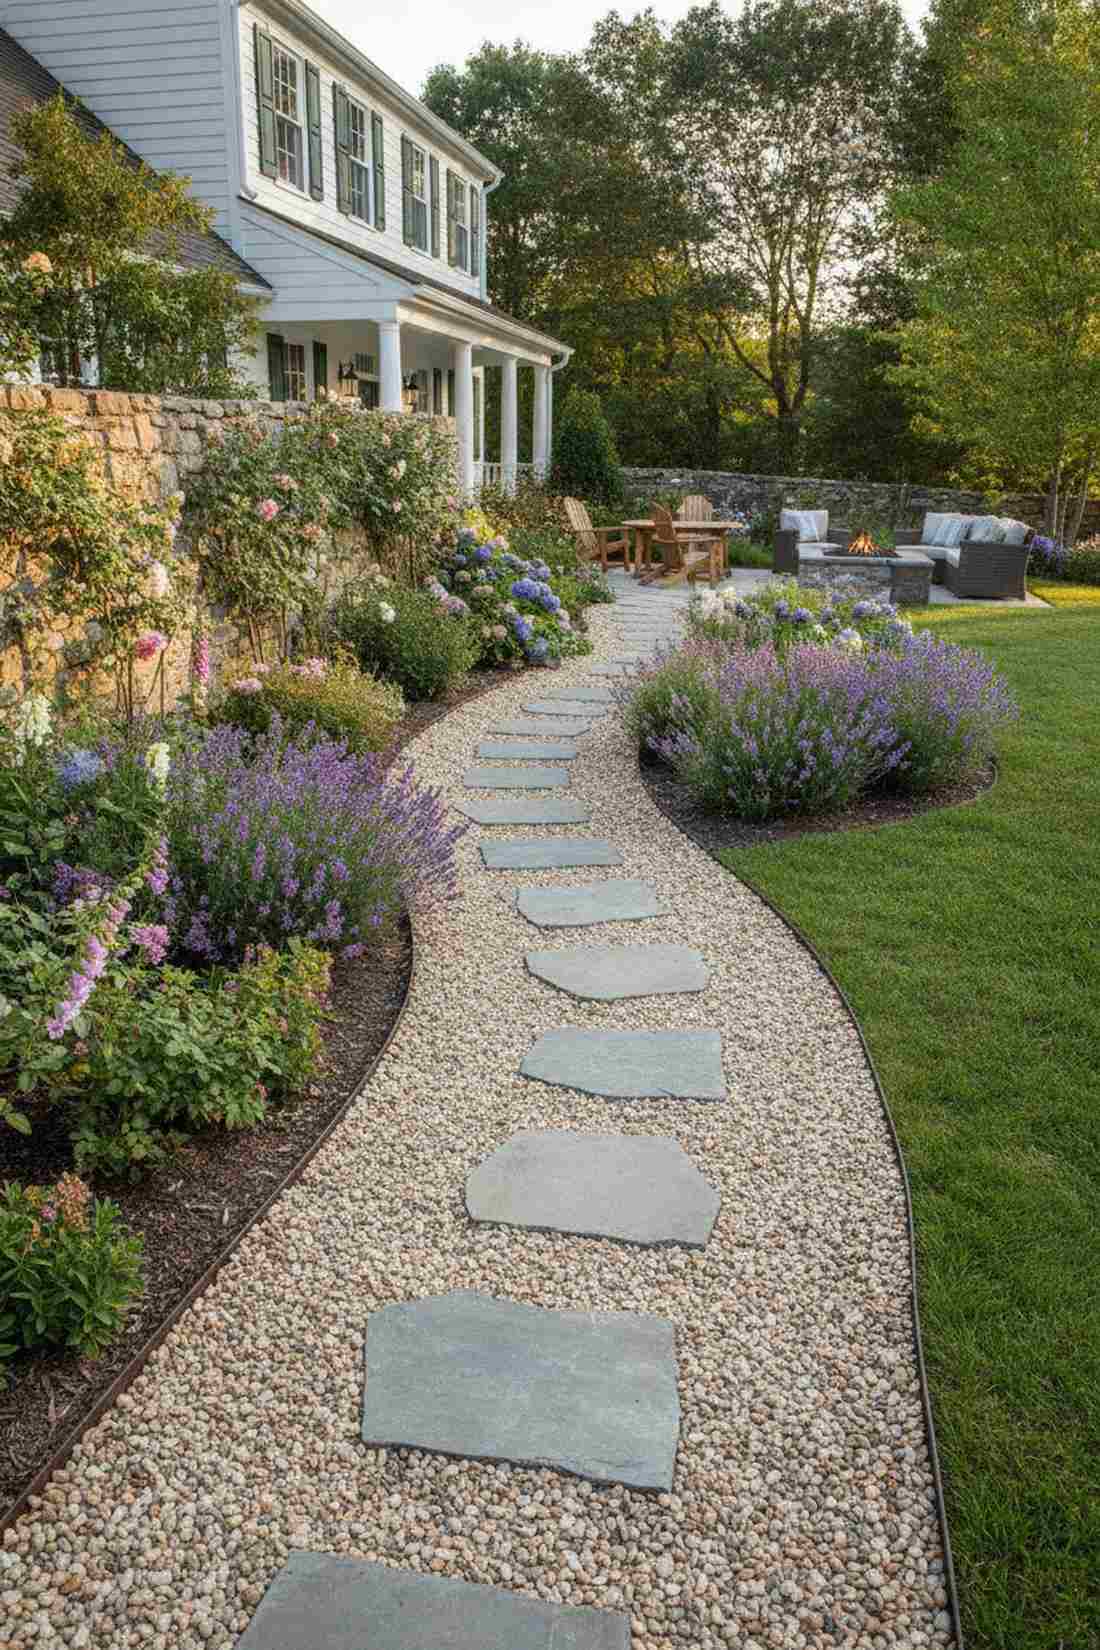
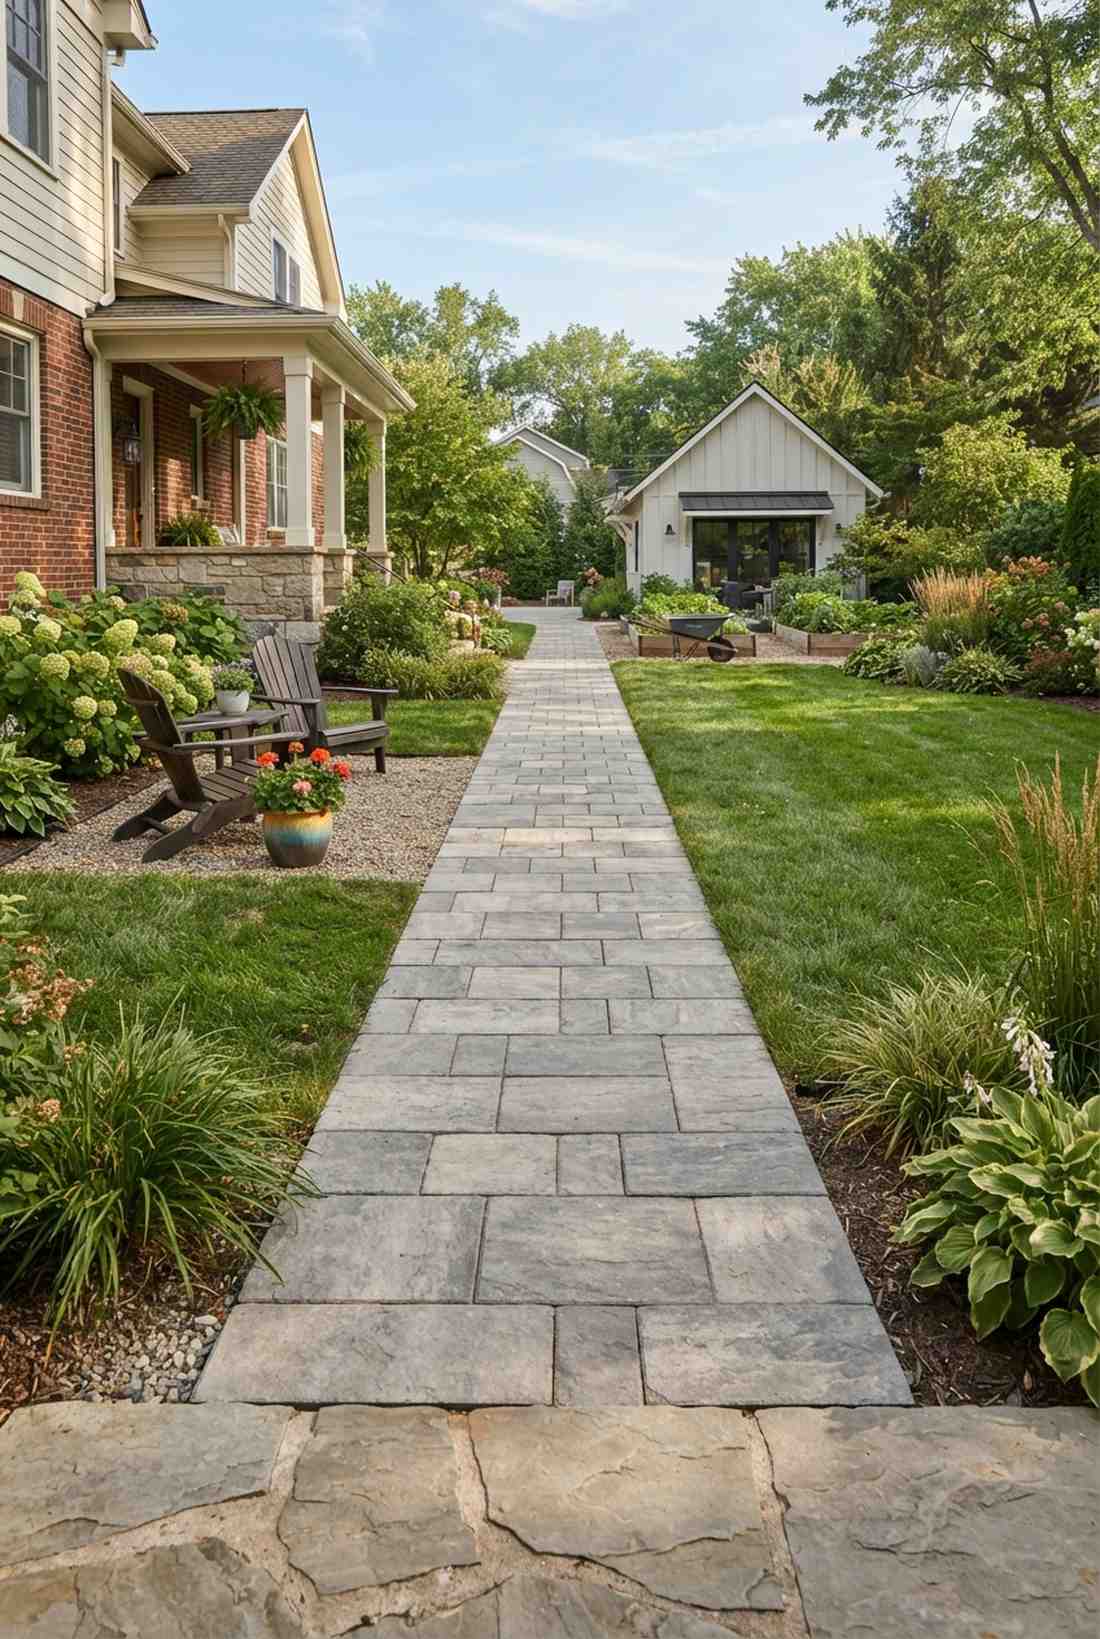
5. Grass-Bordered Stone Slabs
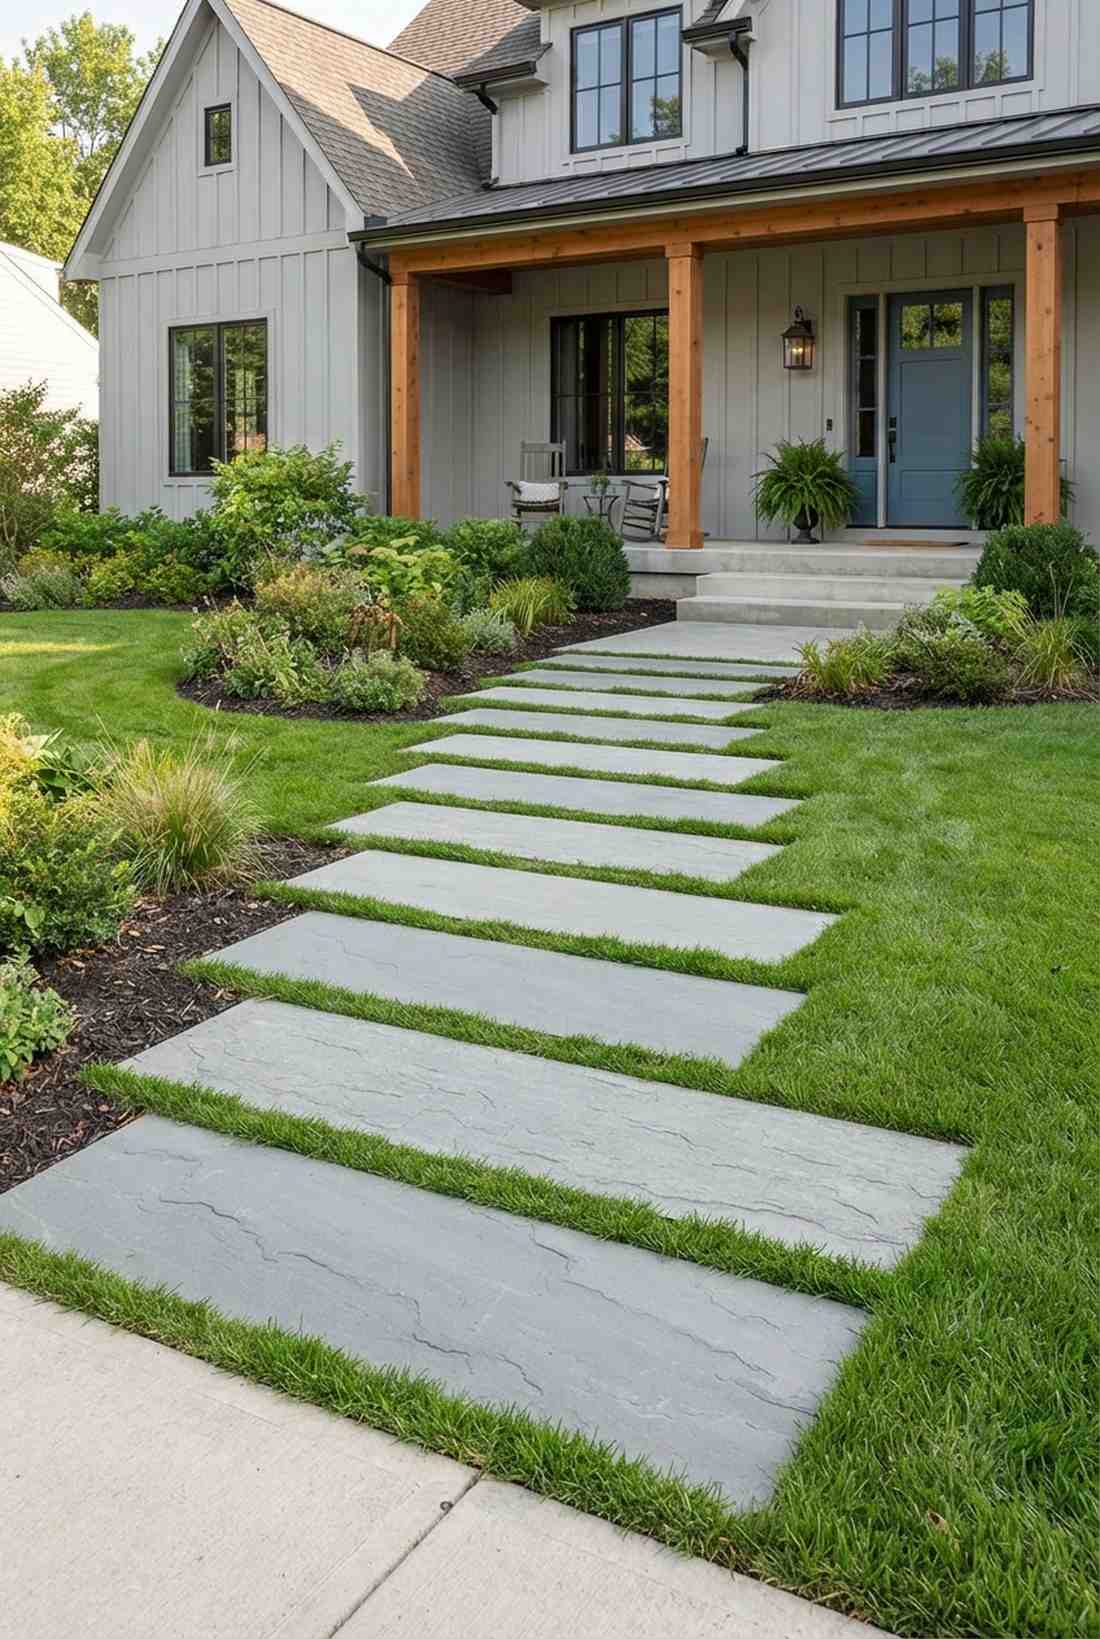
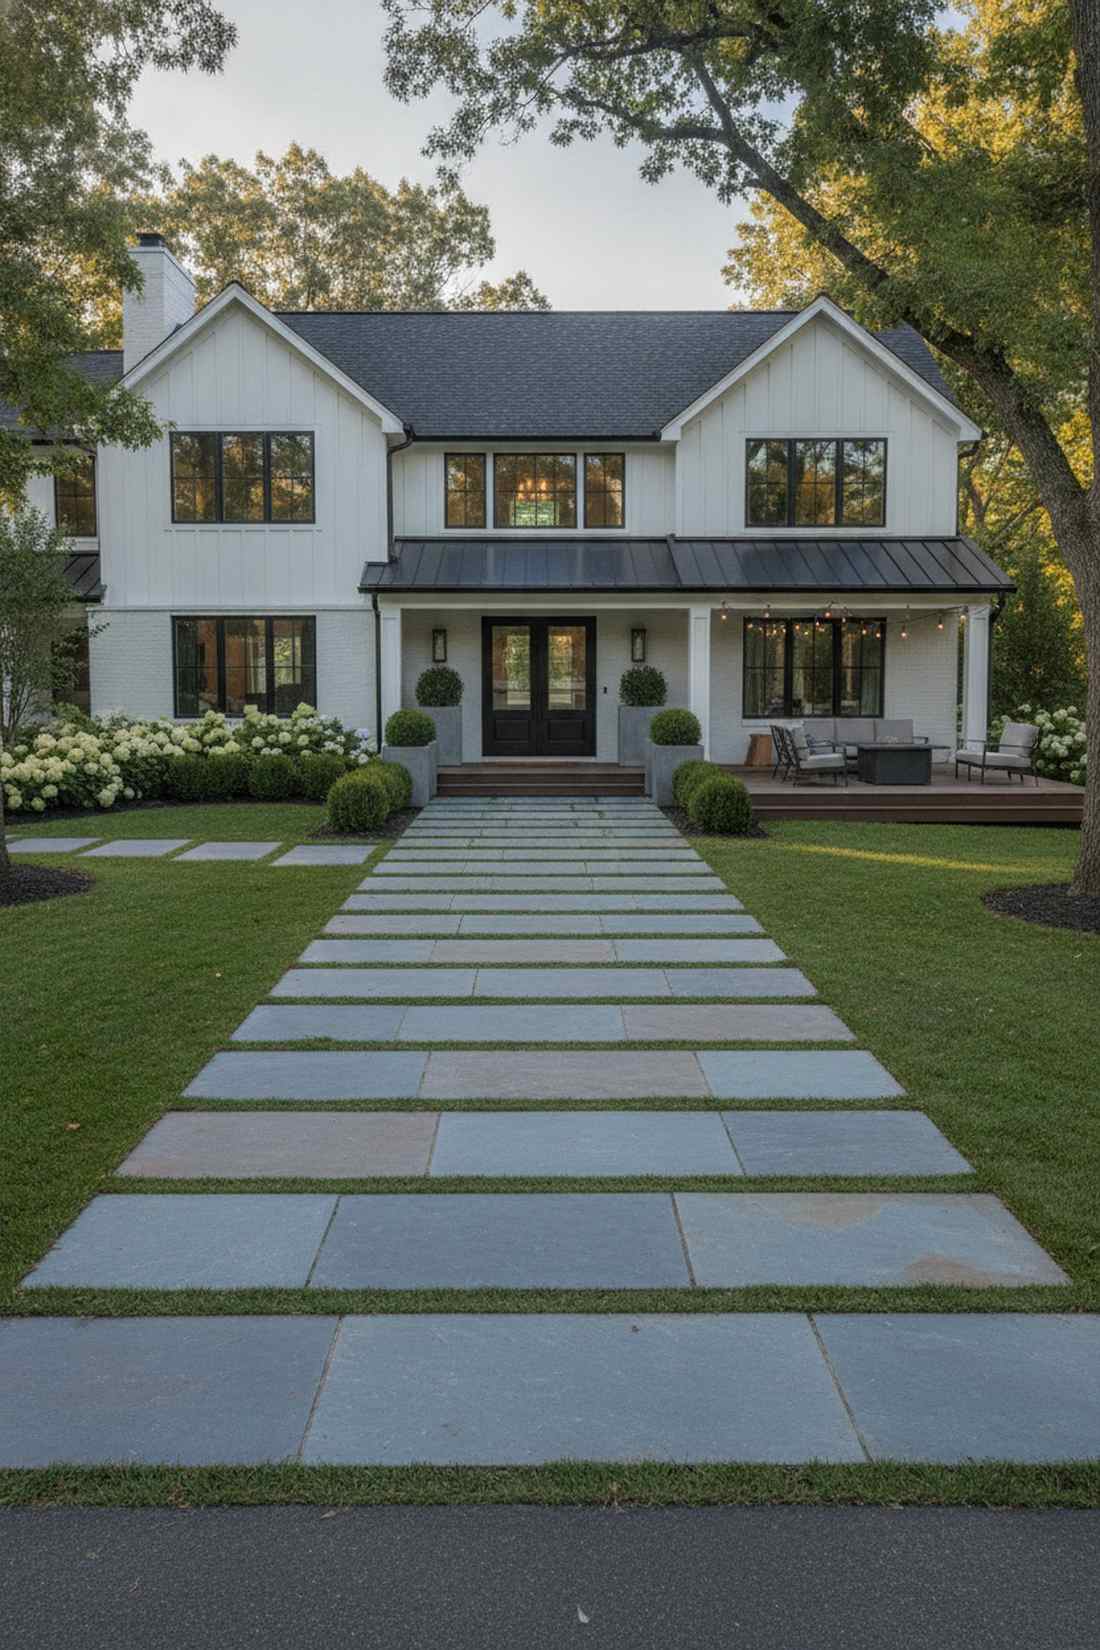
Emits a bold, architectural energy that anchors the entire yard. Exceptionally beautiful for wide front entrances, forming a wide slab border pathway.
While traditional brick paths fail over time, this method ensures long-lasting stability. Utilizing oversized slabs completely skips the generic look, offering a wide, wheelbarrow-friendly path.
Budget around $100–$150 for thick, premium slabs. Highly recommended for a high-traffic weekend win.
- Key Materials: Large rectangular bluestone slabs
- Vibe / Style: Modern architectural luxury
- Difficulty: Heavy lifting involved
- Budget Breakdown: Slabs: $120 | Bedding Material: $30
- Creator’s Tip: Leave a tight 2-inch gap between slabs to keep the grass manageable with a standard trimmer.
- Smart Sourcing: UV-coated concrete paver sealer kits
6. Stepping Stone Clusters
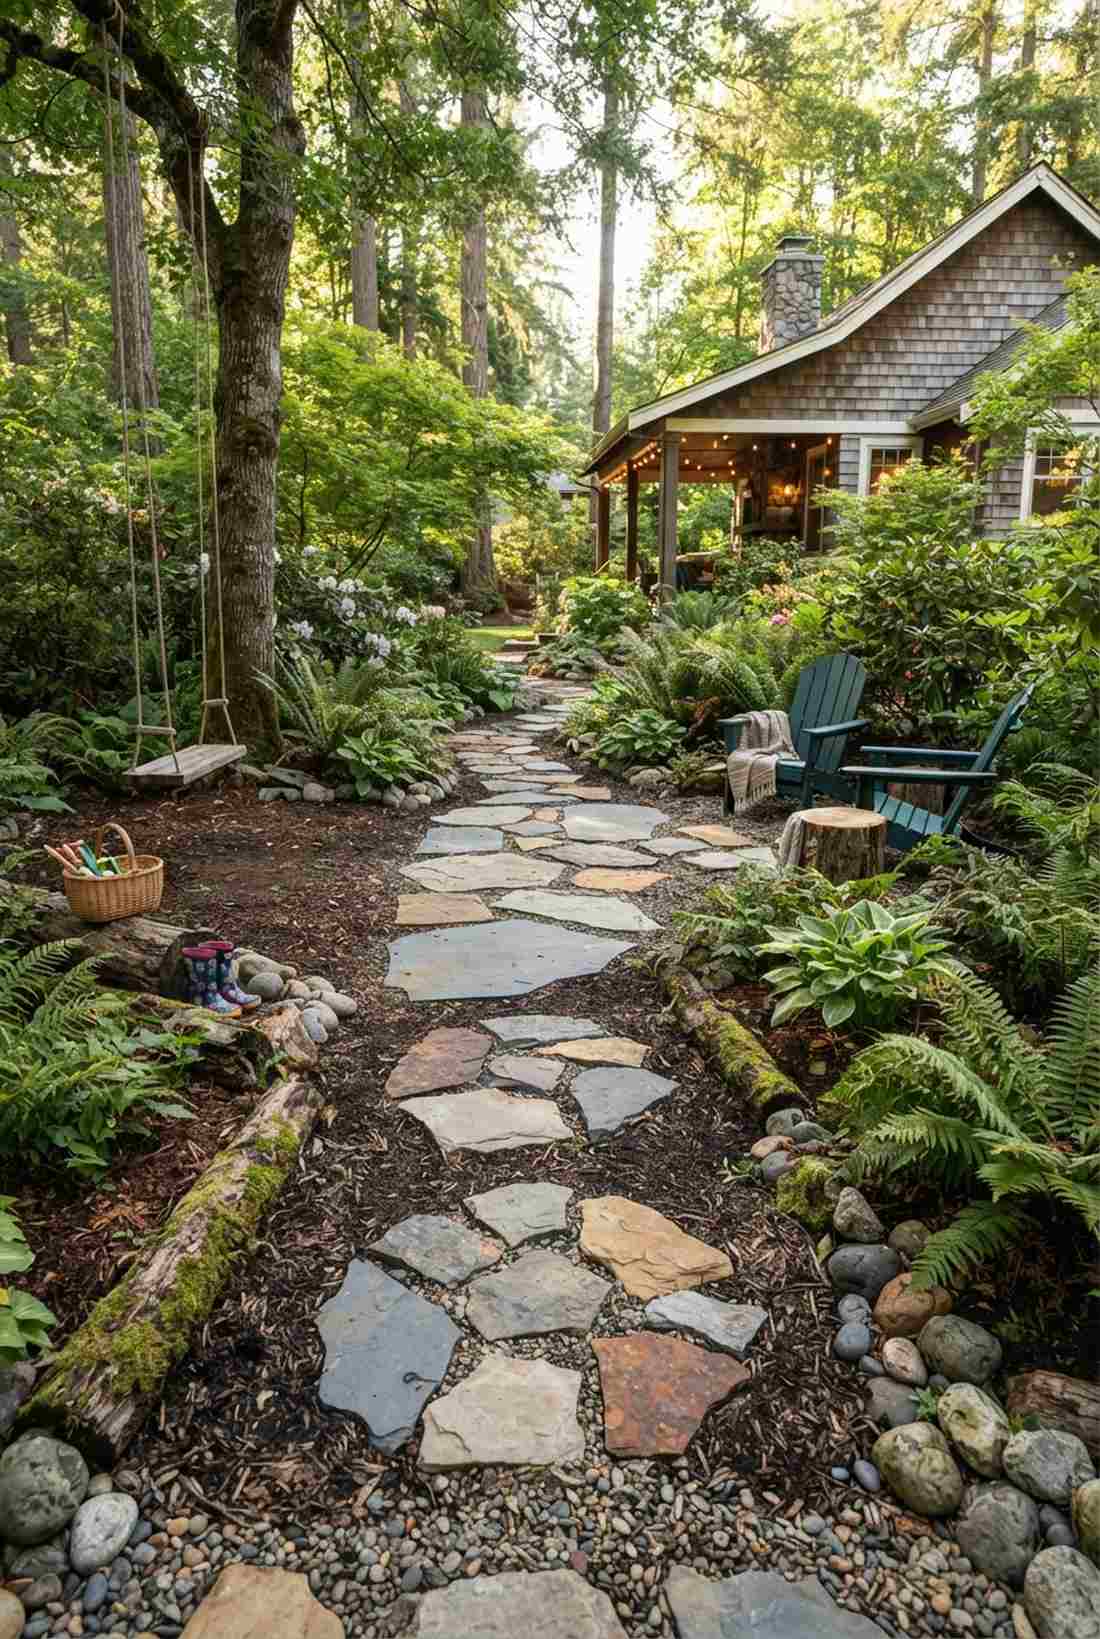
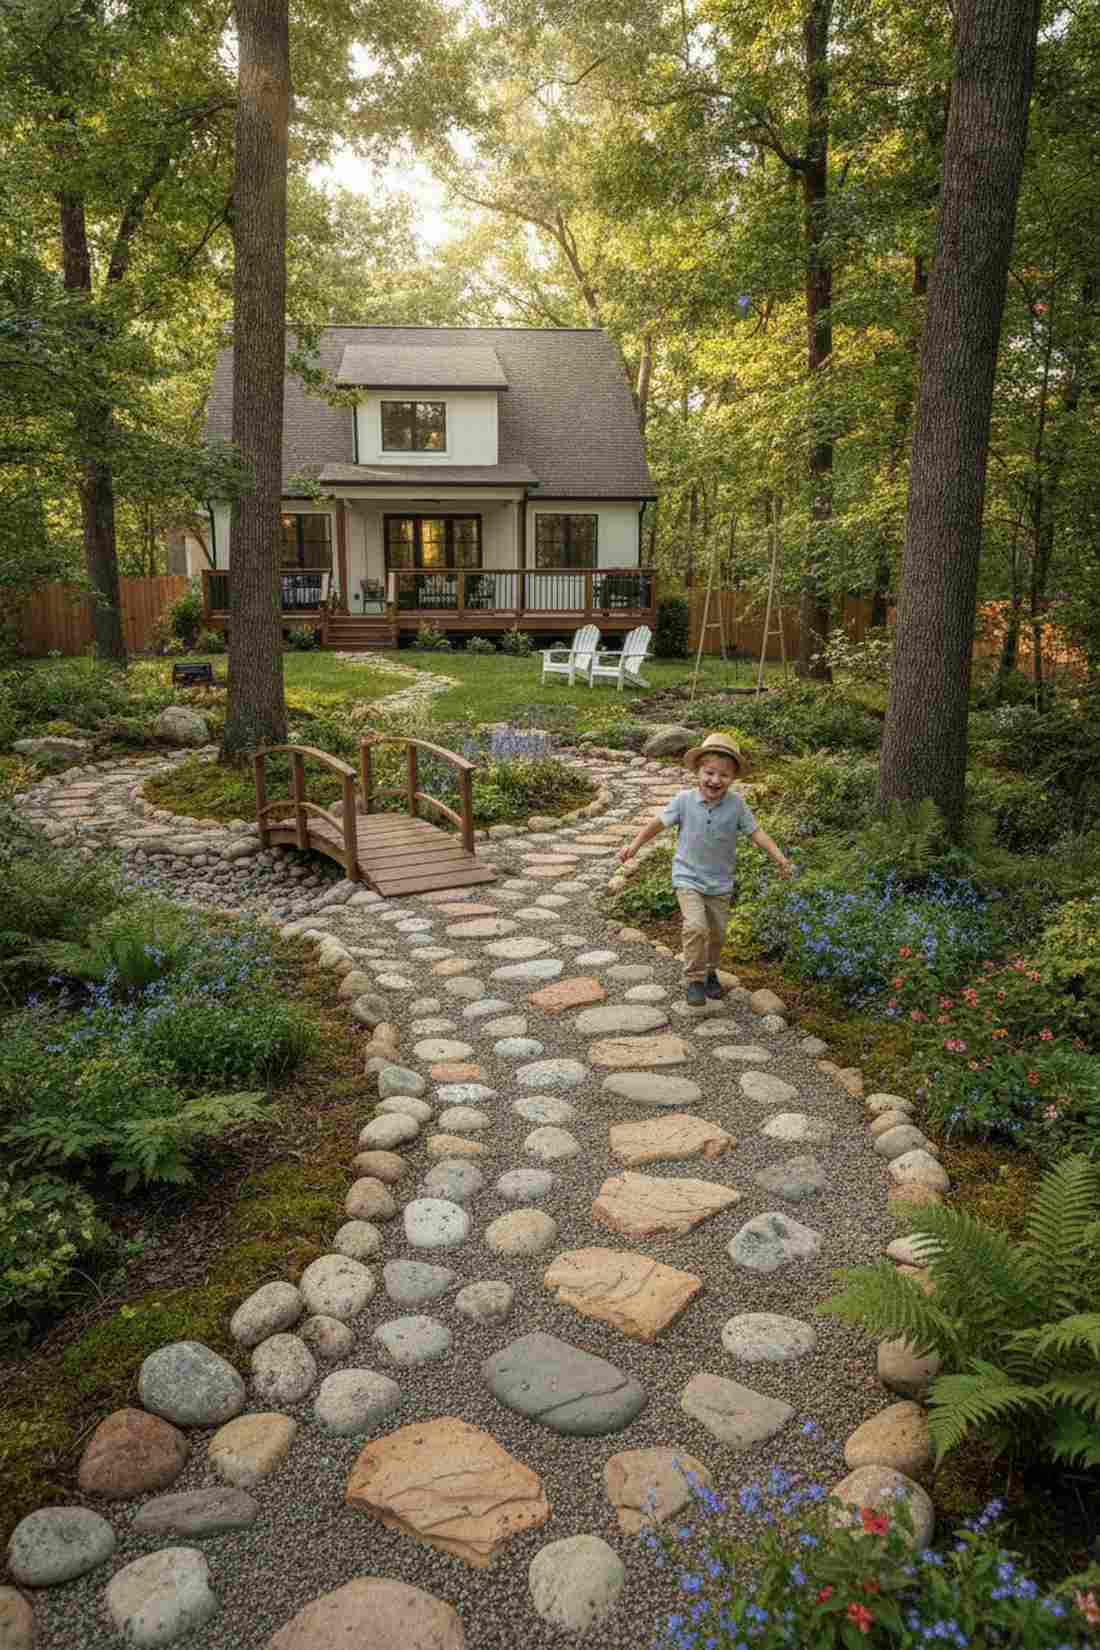
Feels like a playful riverbed crossing in a secluded forest. Ideal for children’s play zones or garden nooks to create an informal cluster walkway.
Don’t fall for cheap imitation stone when genuine cuts deliver a surprisingly premium look. Grouping smaller irregular stones together mimics natural rock formations and requires less excavation.
This budget-friendly option runs about $25–$45. Pin this to your backyard makeover board!
- Key Materials: Small river stones or broken flagstone pieces
- Vibe / Style: Playful woodland path
- Difficulty: Very easy DIY
- Budget Breakdown: Stone Pieces: $25 | Base Gravel: $10
- Creator’s Tip: Group stones in odd numbers (3 or 5) for the most organic, visually appealing clusters.
- Smart Sourcing: premium assorted stepping stones (bulk pack)
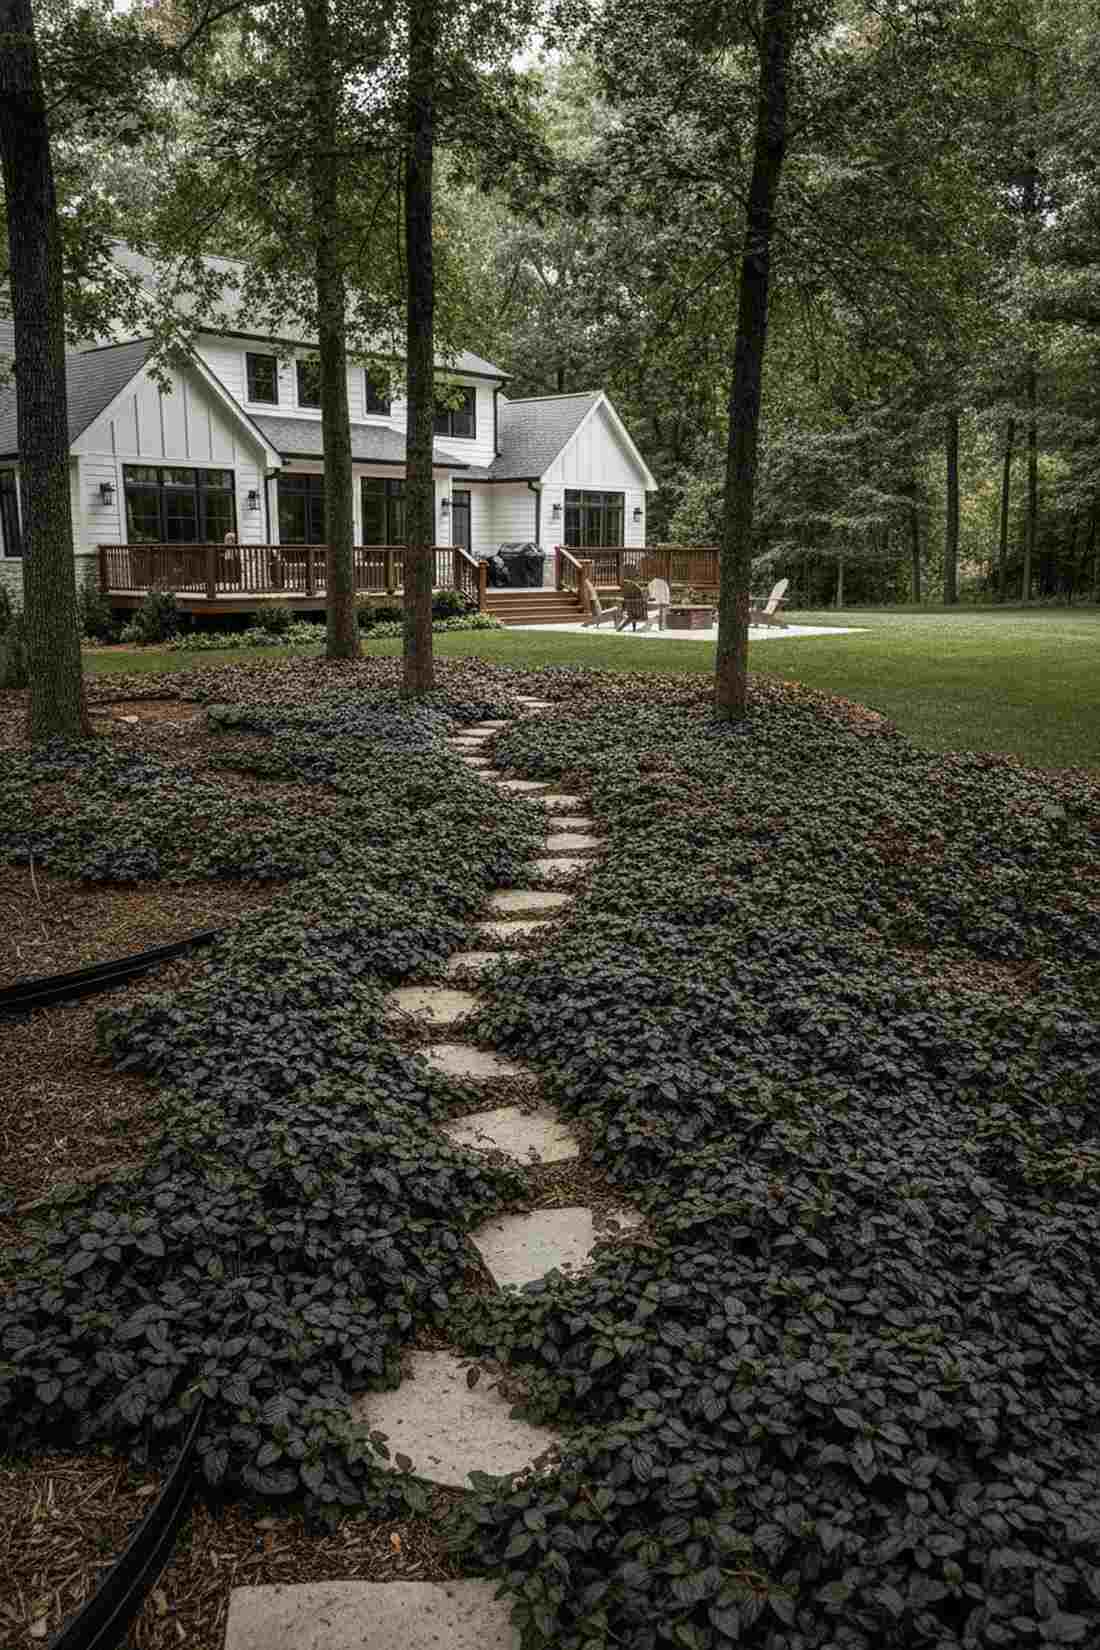
Stepping Stones in Mulch
Mulched pathways provide superior weed suppression and moisture retention while creating warm, earthy tones that complement natural stone. Fresh Garden Ideas recommends these combinations for woodland gardens and shade plantings where grass struggles to thrive.
7. Dark Mulch Contrast
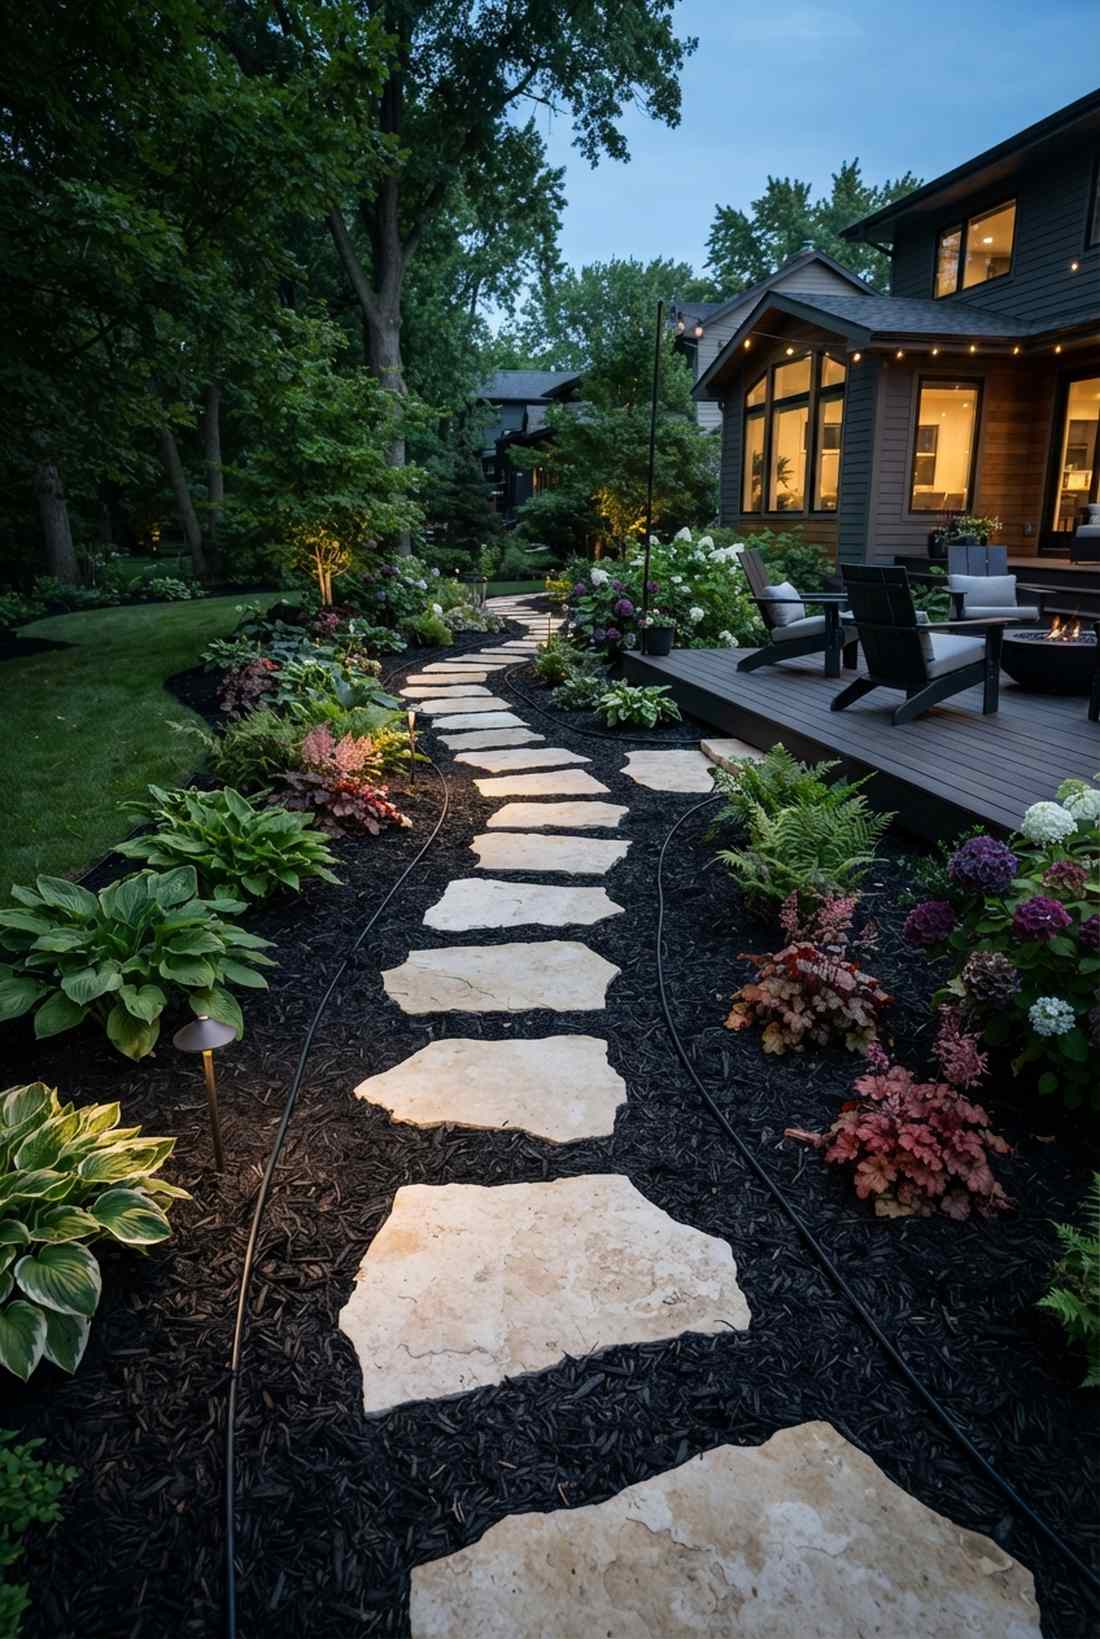
Radiates a moody, sophisticated gallery vibe under the moonlight. Perfect for shaded garden beds to establish a high-contrast pathway layout.
Most basic gardens look washed out, but placing stepping stones in mulch with dark dyes delivers a surprisingly premium look. Make sure to lay commercial-grade weed barrier underneath to keep the dark mulch looking pristine.
This stunning aesthetic is highly affordable, costing around $30–$50. Pin this if you love dark aesthetic garden designs.
- Key Materials: Light sandstone and black dyed mulch
- Vibe / Style: Moody contemporary chic
- Difficulty: Beginner-friendly
- Budget Breakdown: Mulch Bags: $20 | Stones: $30
- Creator’s Tip: Mist the dark mulch lightly with water after installation to settle the color and prevent wind scatter.
- Smart Sourcing: heavy-duty woven weed barrier fabric rolls
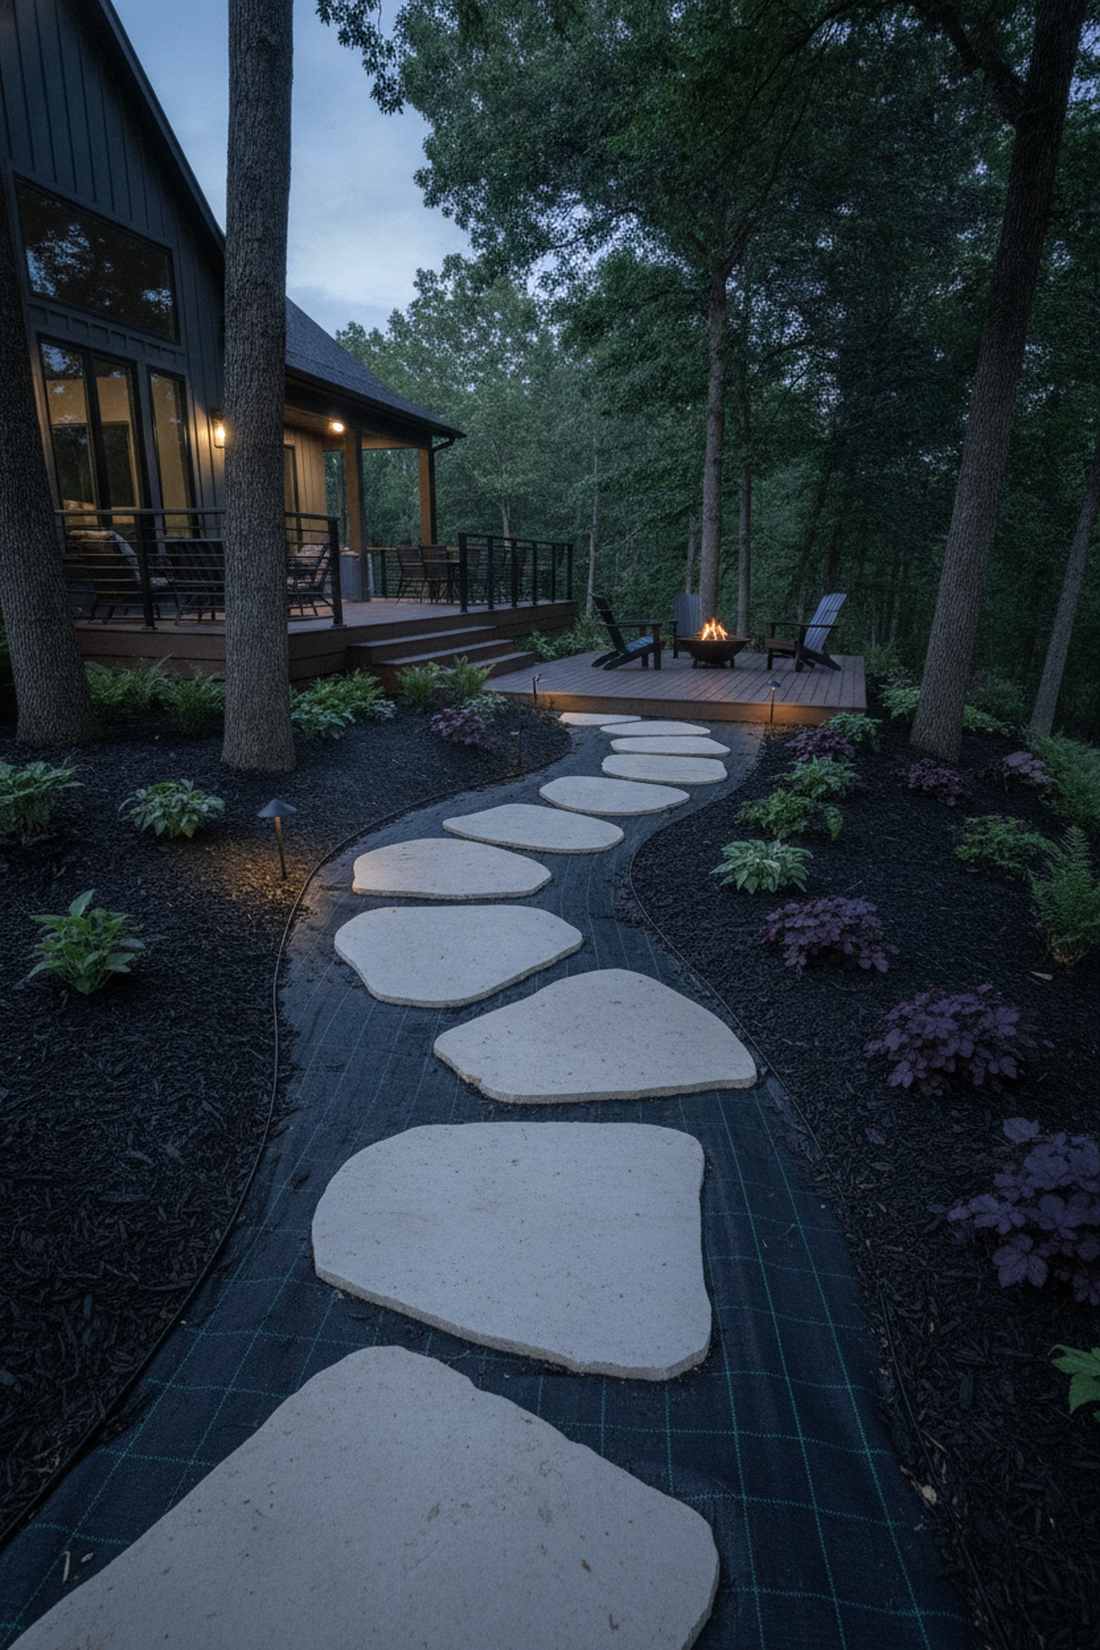
8. Elevated Stone Surface
Feels like a temporary, floating art installation in your backyard. Works brilliantly for renter-friendly upgrades as a surface-level stone walkway.
People often overcomplicate path digging, yet this straightforward layout looks far more expensive than it is. By resting thick stones directly on packed mulch, you avoid damaging underlying root systems.
You can set this up in an hour for about $35–$55. It’s a fast upgrade that completely changes the vibe.
- Key Materials: 2-inch thick heavy pavers
- Vibe / Style: Casual rustic temporary
- Difficulty: No-dig effortless
- Budget Breakdown: Heavy Pavers: $40 | Base Mulch: $15
- Creator’s Tip: Only use pavers that are at least 2 inches thick, otherwise they will shift when stepped on.
- Smart Sourcing: pre-cut thick stone paver slabs
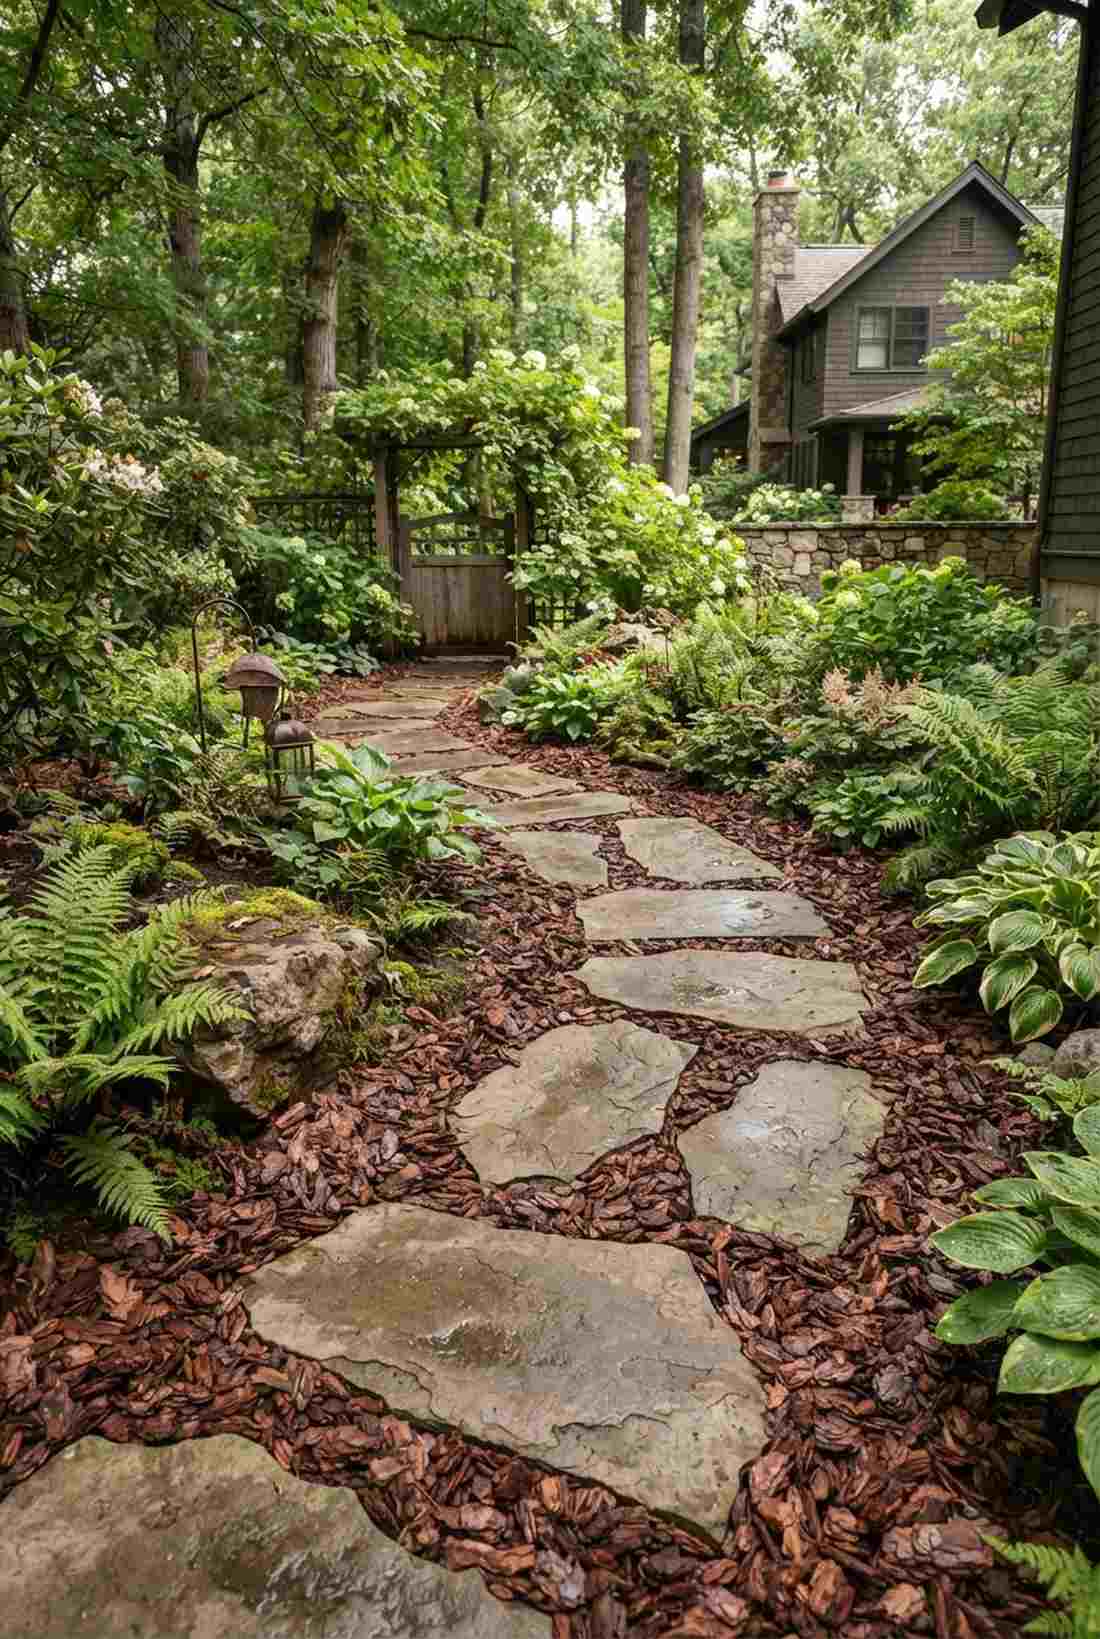
9. Cedar Mulch Pathway
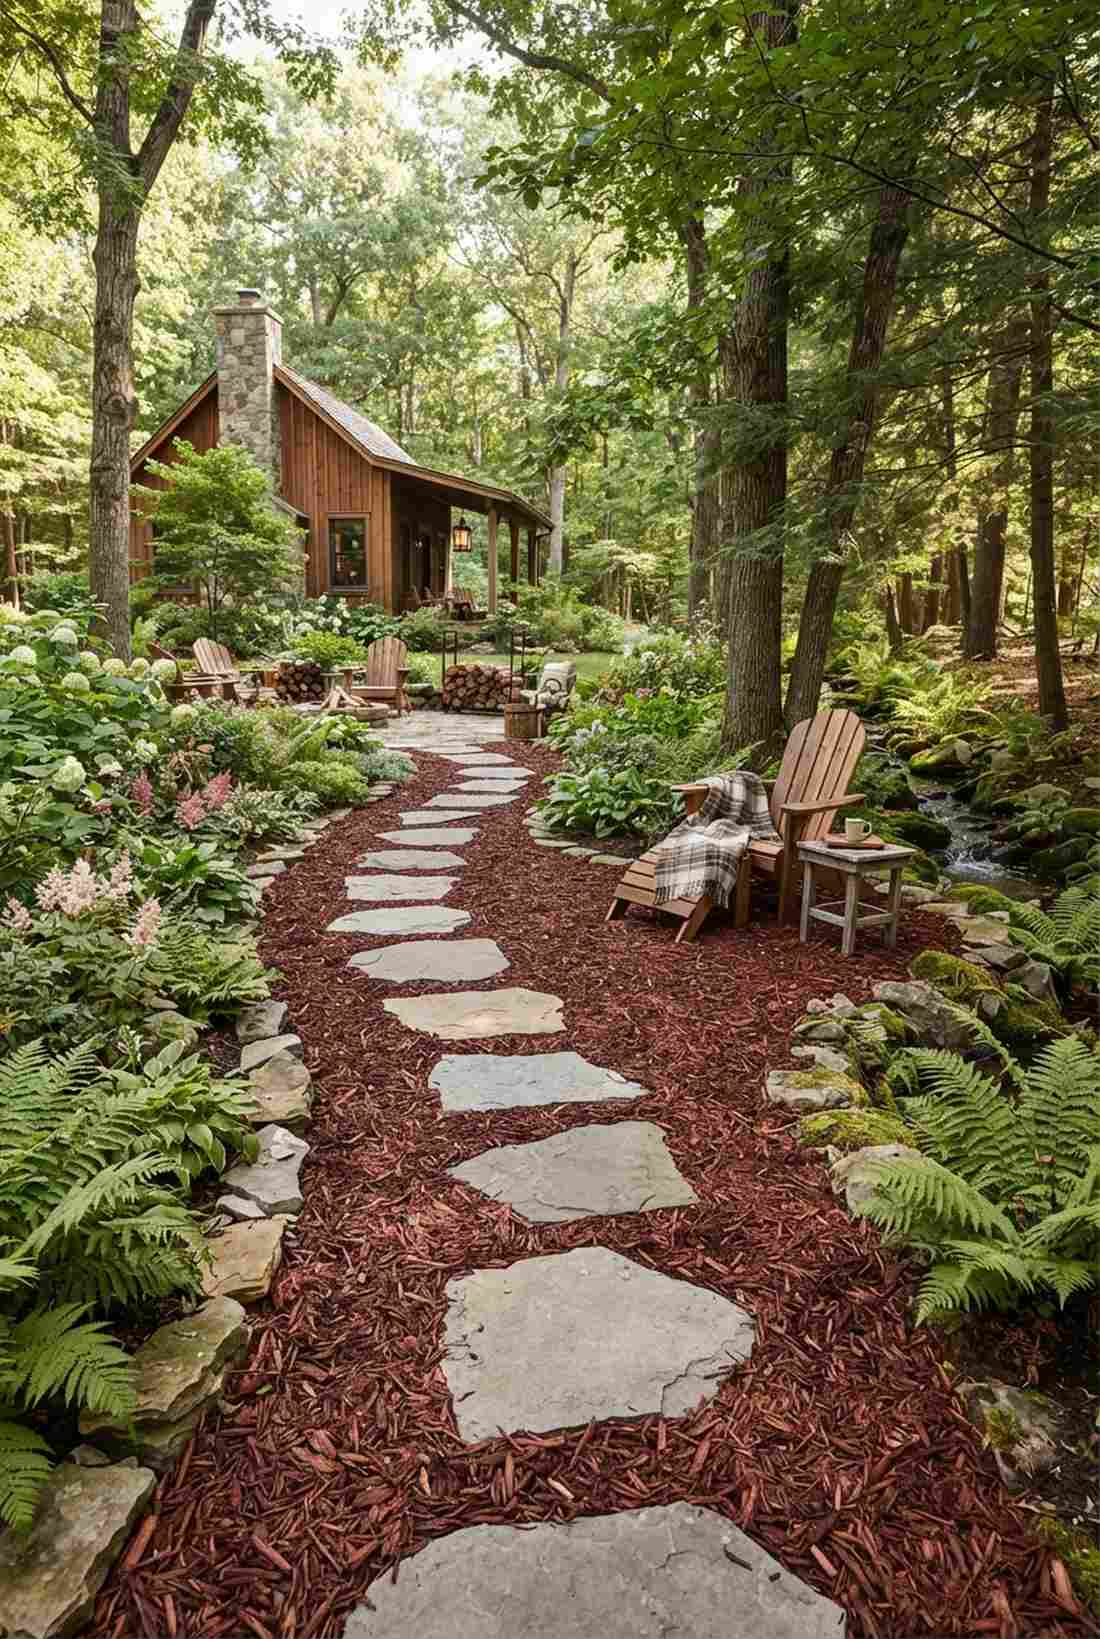
Smells exactly like a secluded luxury cabin retreat. An incredible choice for damp, buggy yard sections to build an aromatic woodland path.
Skip standard brown dirt; this approach gives a designer-level finish while naturally repelling pests. The rich red tones of cedar bark create an instant high-end contrast against neutral gray stones.
Expect to invest around $45–$65 for quality cedar. Save this to your practical garden hacks board.
- Key Materials: Aromatic cedar mulch and limestone
- Vibe / Style: Rustic forest cabin
- Difficulty: Easy spreading
- Budget Breakdown: Cedar Mulch: $35 | Stepping Stones: $25
- Creator’s Tip: Refresh the top layer of cedar every spring to reactivate the natural bug-repelling scent.
- Smart Sourcing: premium aromatic cedar mulch (bulk bags)
💡 Must-Have Supplies for High-End Setups
To build these setups faster and ensure they last, skip the generic craft aisles and invest in the right foundational kits.
- Base & Support: commercial-grade woven weed barrier rolls
- Setup Tools: heavy-duty landscaping paver leveling kits
- Weather/Durability Protection: UV-resistant clear stone sealing spray
Most people get their pathway borders completely wrong… until they try the exact layout coming up next.
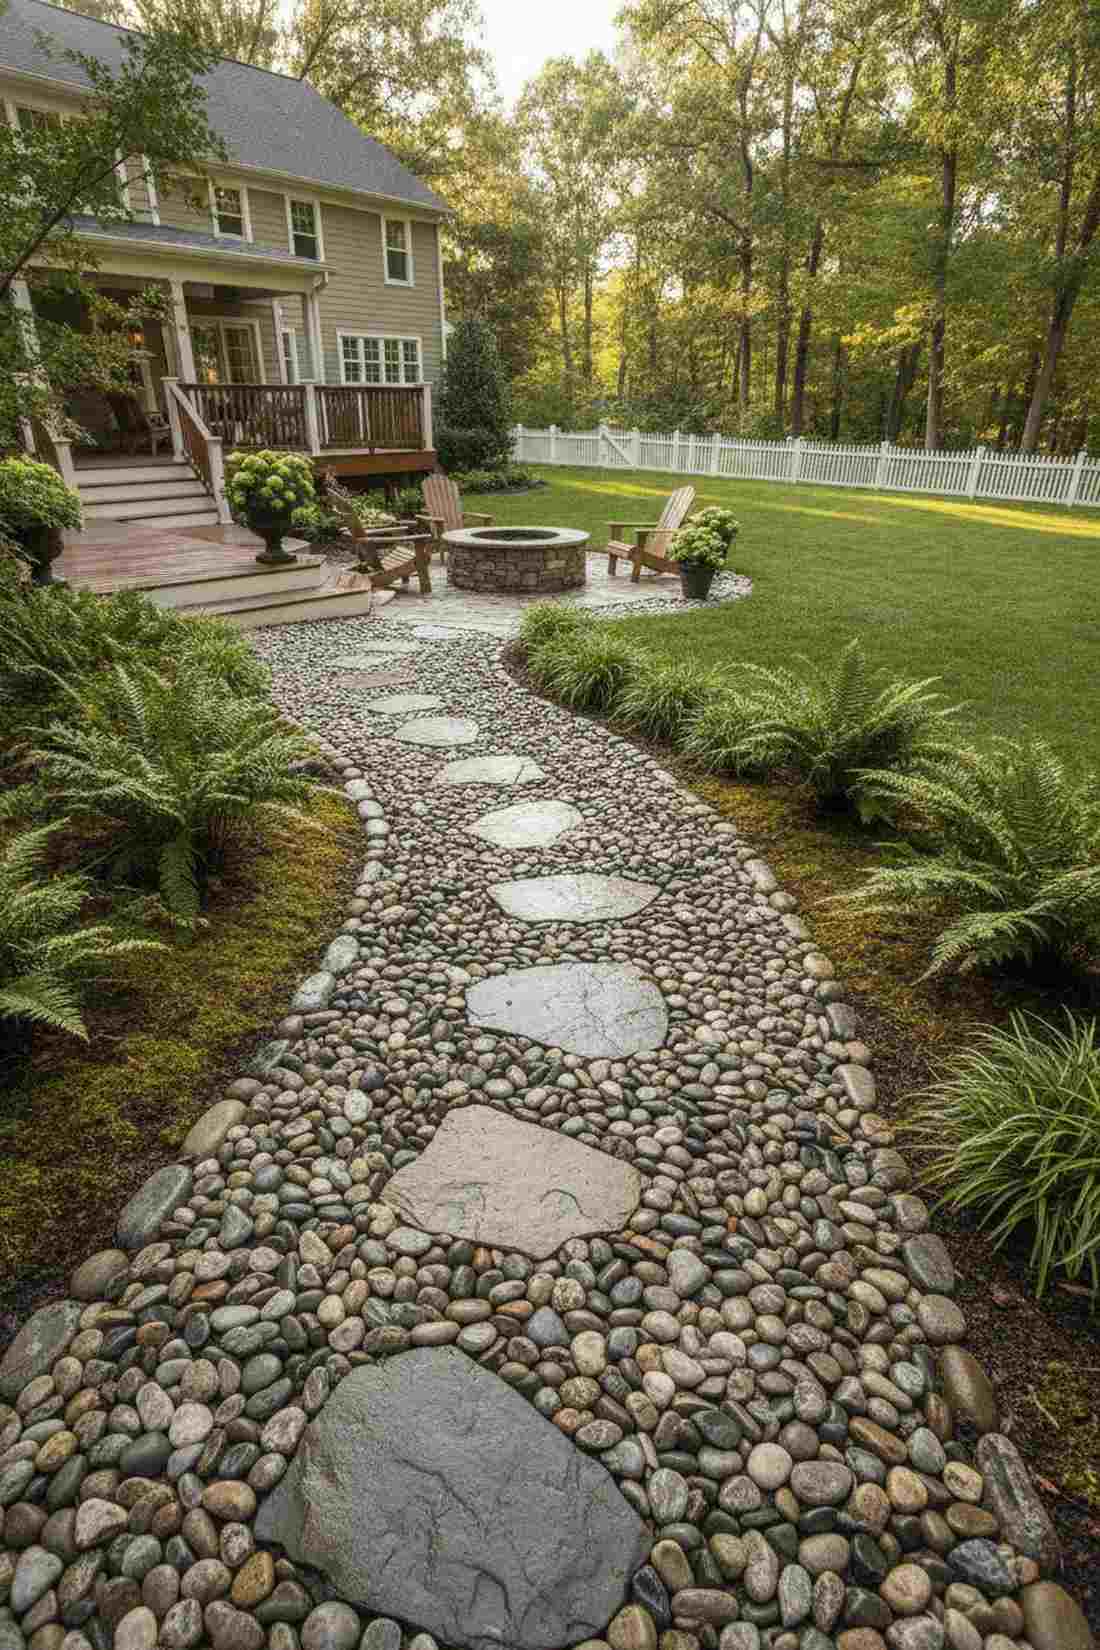
10. River Rock Mulch Transition
Captures the essence of a tranquil, dried-up streambed. Highly effective for sloped yards looking for a textural gradient garden walk.
Many homeowners struggle with mulch runoff, but this method ensures long-lasting stability. Using river rocks as a buffer ring around the stones traps the mulch and stops messy tracking entirely.
This hybrid material setup costs around $50–$80. Pin this if you’re tired of sweeping mulch off your patio.
- Key Materials: Wood mulch, small river rocks, flat stones
- Vibe / Style: Textural Zen garden
- Difficulty: Moderate detailing
- Budget Breakdown: River Rock: $30 | Mulch: $20 | Stones: $30
- Creator’s Tip: Dig a slight trench around each stone to recess the river rocks, creating a secure lock for the mulch.
- Smart Sourcing: polished river rock aggregates (bulk pack)
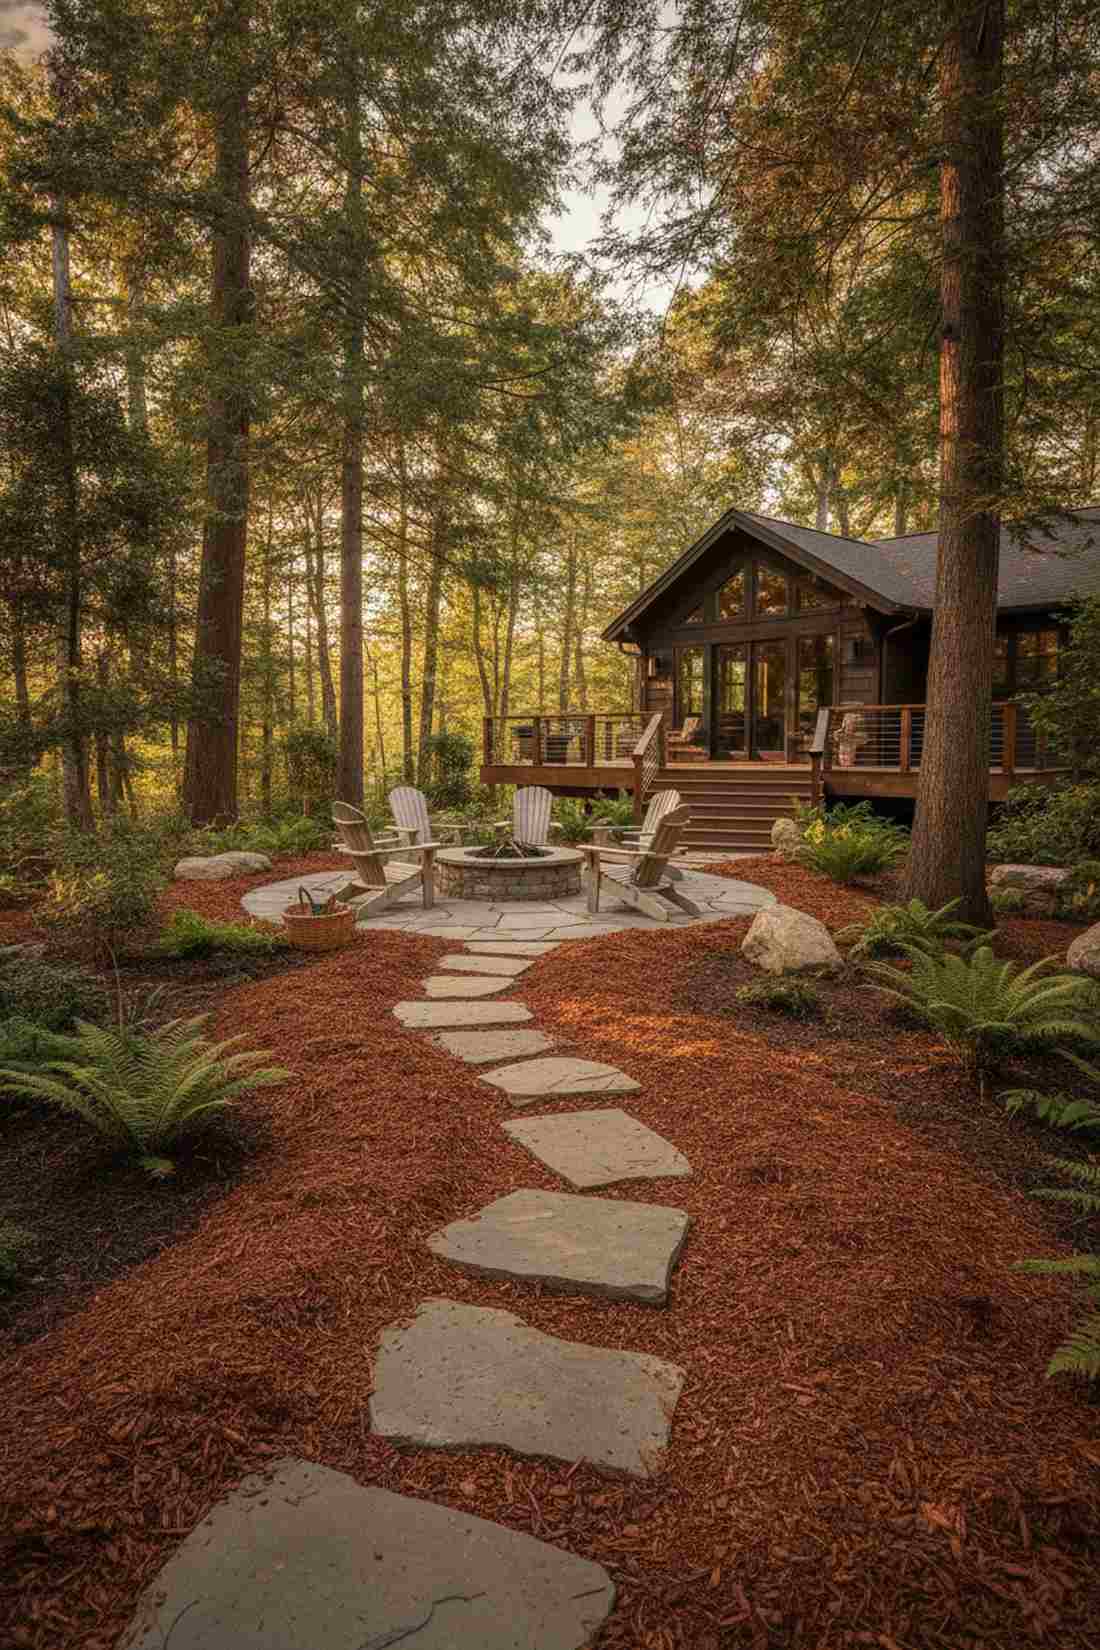
11. Bark Nugget Fill
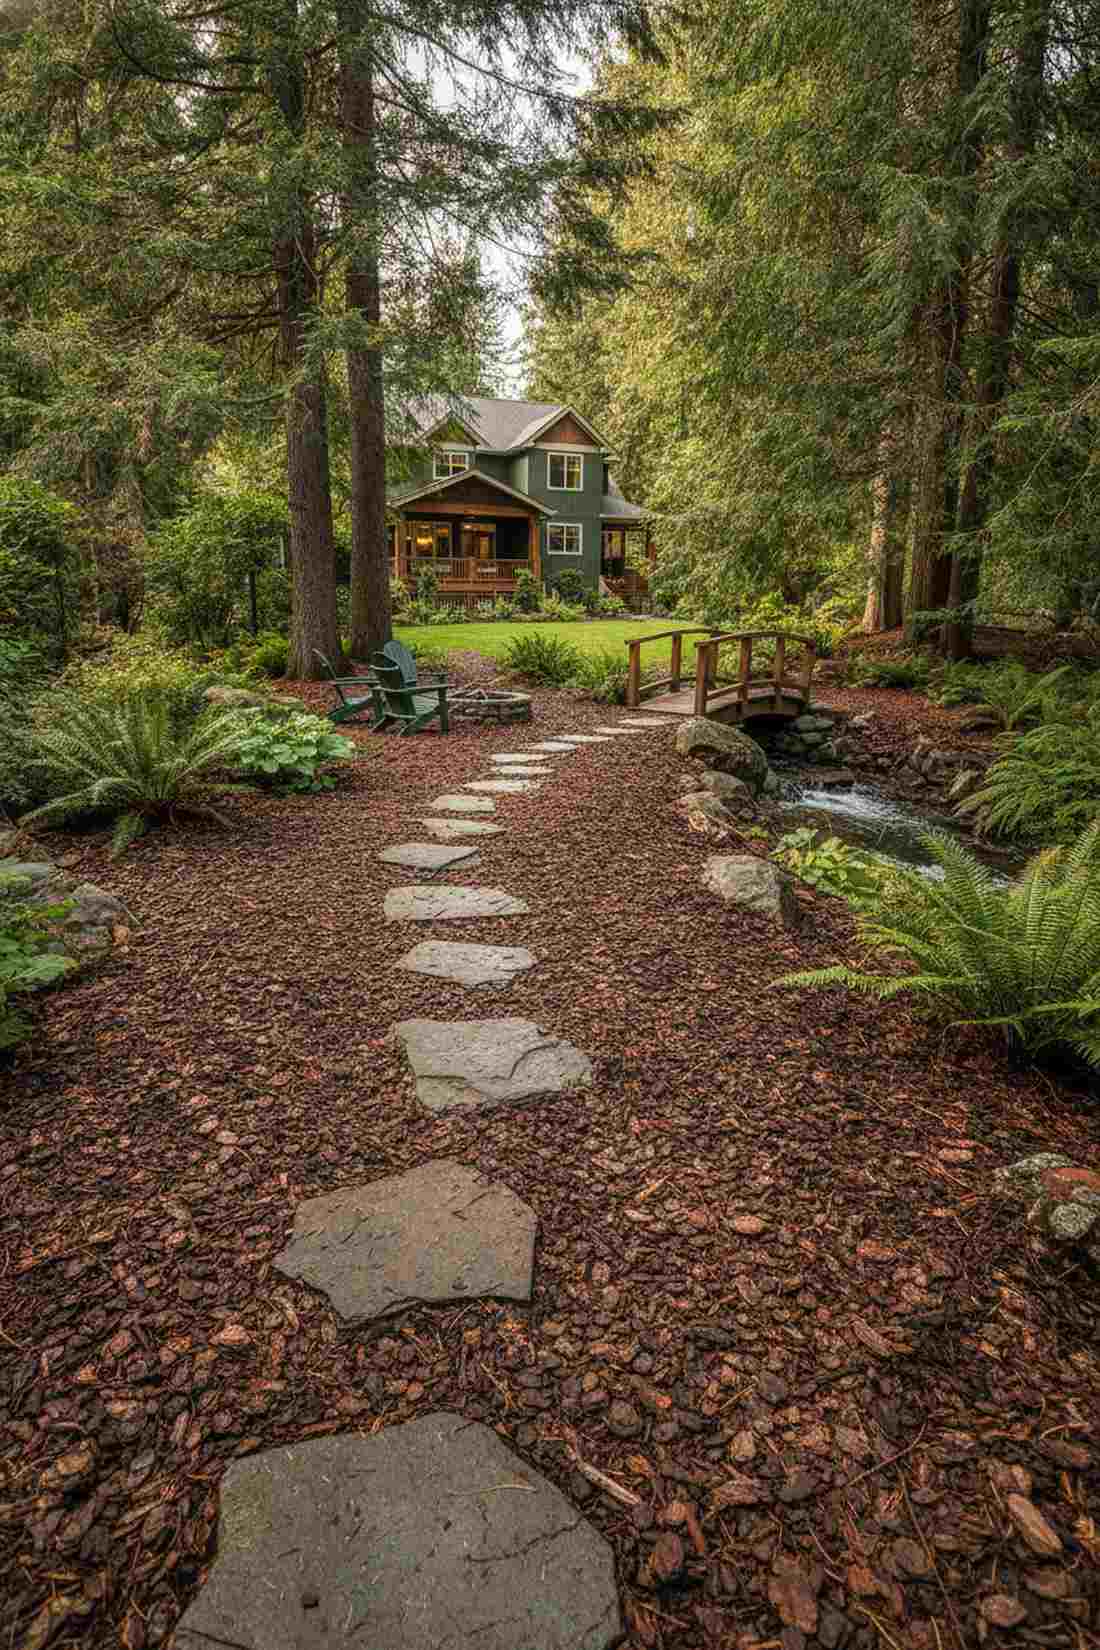
Gives the yard a chunky, deeply organic mountain-trail feel. Works exceptionally well for heavily shaded areas creating a chunky bark pathway.
Standard shredded mulch breaks down too fast, but this straightforward layout looks far more expensive than it is. Large bark nuggets resist compaction, meaning your path drains perfectly even after heavy rainstorms.
You can easily pull this off for around $40–$60. It’s a highly recommended solution for flood-prone walkways.
- Key Materials: 3-inch pine bark nuggets and large flagstones
- Vibe / Style: Rugged mountain trail
- Difficulty: Very easy
- Budget Breakdown: Bark Nuggets: $30 | Stepping Stones: $30
- Creator’s Tip: Avoid using nuggets on steep inclines, as their large surface area makes them float and slide during heavy rain.
- Smart Sourcing: premium oversized pine bark nuggets
12. Rubber Mulch Modern
Sleek, bouncy, and feels like a modern eco-resort pathway. The ultimate low-maintenance solution for high-traffic zones needing a durable modern pathway.
Traditional organic materials fade, yet this approach gives a designer-level finish that practically lasts forever. Rubber mulch provides a highly cushioned step while resisting mold, bugs, and weed germination completely.
Rubber mulch is pricier upfront at roughly $70–$100, but saves money long-term. Save this if you hate weeding your pathways.
- Key Materials: Recycled black rubber mulch and white concrete pavers
- Vibe / Style: Ultra-modern low-maintenance
- Difficulty: Easy installation
- Budget Breakdown: Rubber Mulch: $60 | Pavers: $40
- Creator’s Tip: Always install a thick commercial weed barrier beneath rubber mulch to prevent it from slowly sinking into the mud.
- Smart Sourcing: UV-coated recycled rubber landscape mulch
Ground Cover Plant Integration
Living ground covers transform stepping stone pathways into fragrant, textured garden features that attract pollinators and release scent underfoot. These walkable plants tolerate light foot traffic while filling gaps with soft, organic beauty.
13. Creeping Thyme Carpet
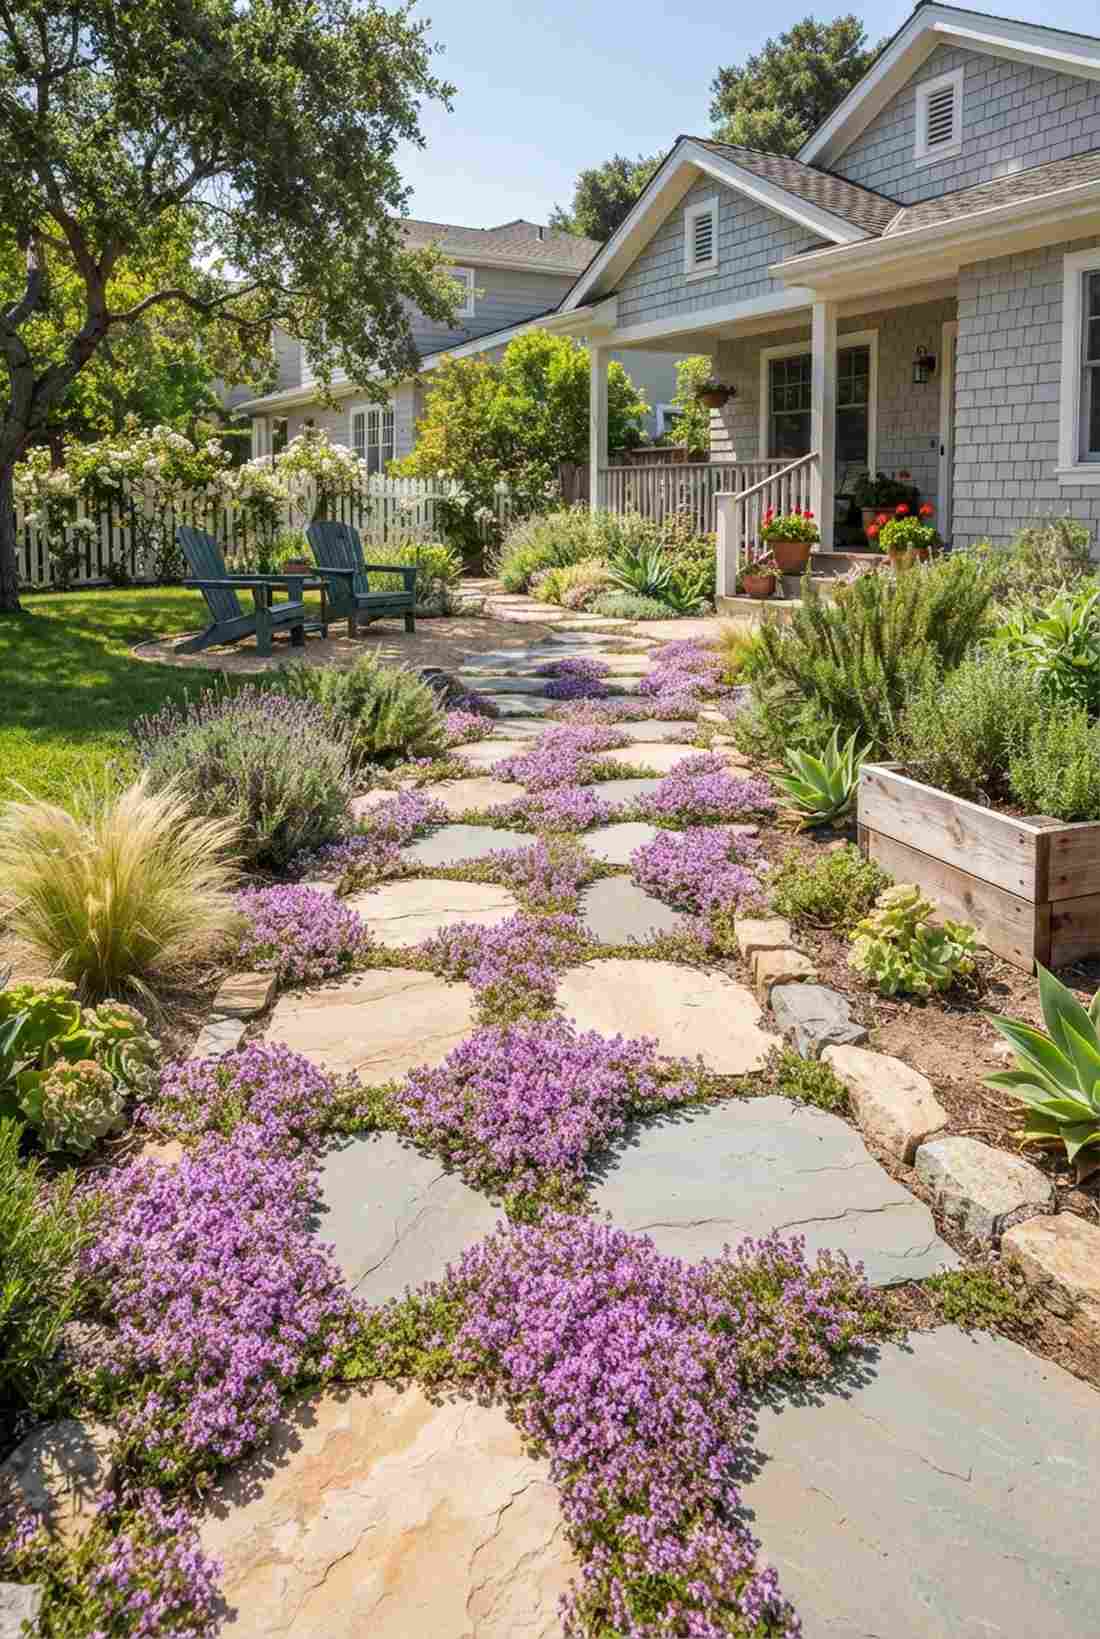
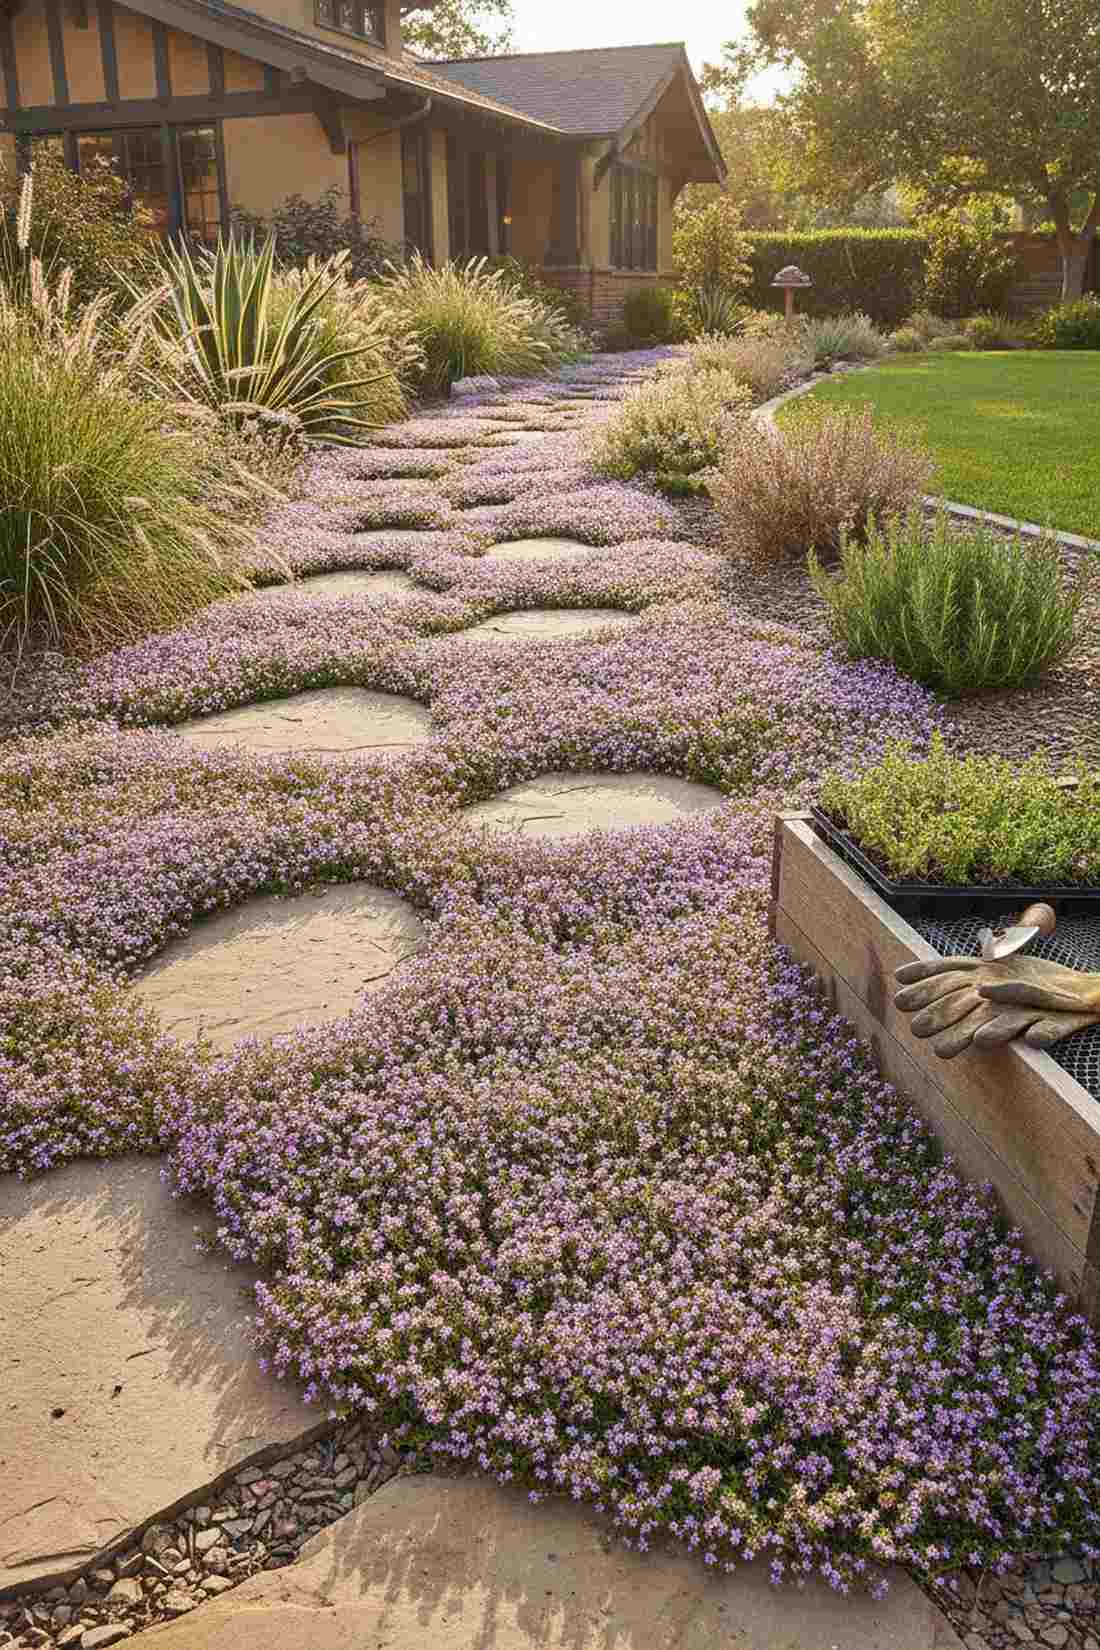
Breathes life into your yard with a burst of fragrant purple blooms. Ideal for hot, sunny side-yards to form a living floral walkway.
Most people rely on boring gravel, but this layout delivers a surprisingly premium look. Planting creeping thyme between gaps turns an ordinary walk into a sensory experience that thrives in brutal summer heat.
A tray of starter plugs costs about $30–$45. Pin this to your drought-tolerant landscaping board.
- Key Materials: Creeping thyme starter plugs and natural stone
- Vibe / Style: Fragrant Mediterranean
- Difficulty: Requires initial watering/care
- Budget Breakdown: Thyme Plugs: $35 | Stones: $40
- Creator’s Tip: Trim the thyme aggressively after its first bloom to force it to spread horizontally rather than growing tall.
- Smart Sourcing: pre-rooted creeping thyme starter kits
14. Irish Moss Softness
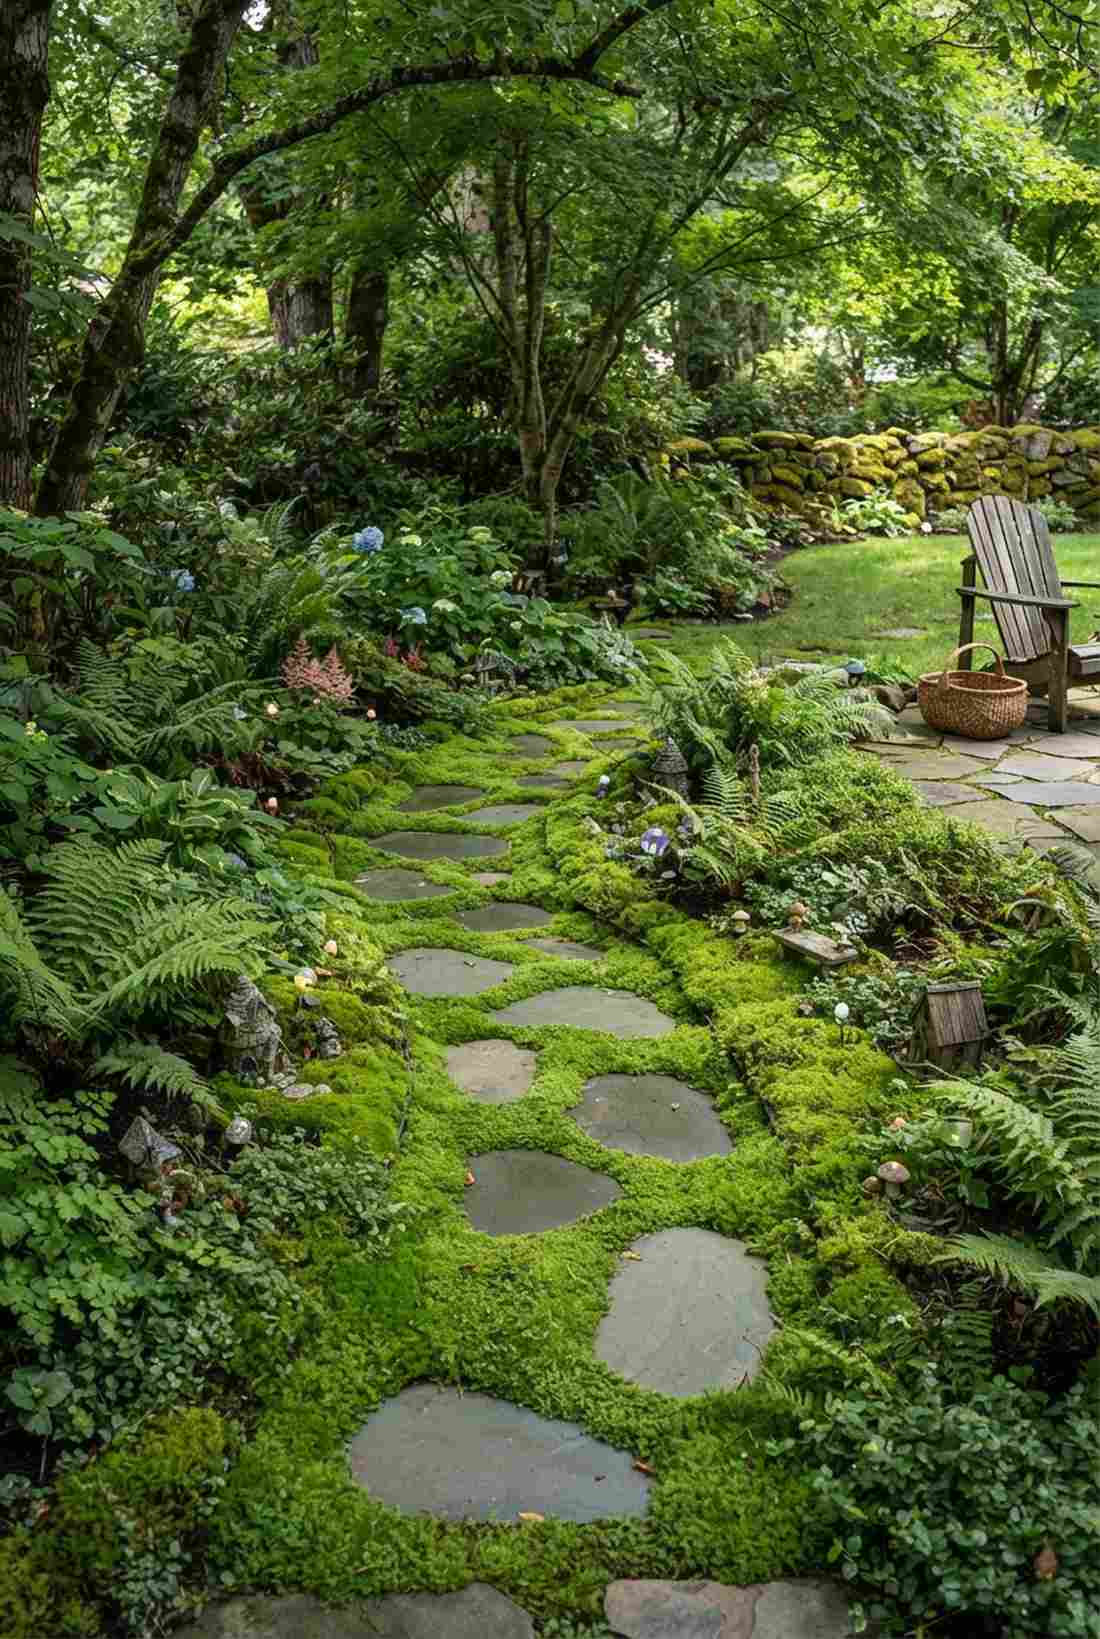
Feels like a velvety fairy garden straight out of a fantasy novel. Perfectly suited for damp, shaded corners creating an emerald moss pathway.
Don’t fall for cheap imitation turf when genuine moss delivers a surprisingly premium look. Utilizing fairy garden kits alongside lush Irish moss creates a barefoot-friendly texture that craves moisture.
You can execute this lush aesthetic for roughly $40–$60. It’s a fast upgrade that completely changes the vibe.
- Key Materials: Irish moss flats and smooth bluestone
- Vibe / Style: Lush woodland fairy tale
- Difficulty: Needs consistent moisture
- Budget Breakdown: Moss Flats: $40 | Stones: $20
- Creator’s Tip: Step on the moss lightly after planting; it actually prefers slight compression to establish strong roots.
- Smart Sourcing: live Irish moss flats (bulk pack)
Wait until you see this next material hack—it completely changes how you’ll look at cheap garden supplies.
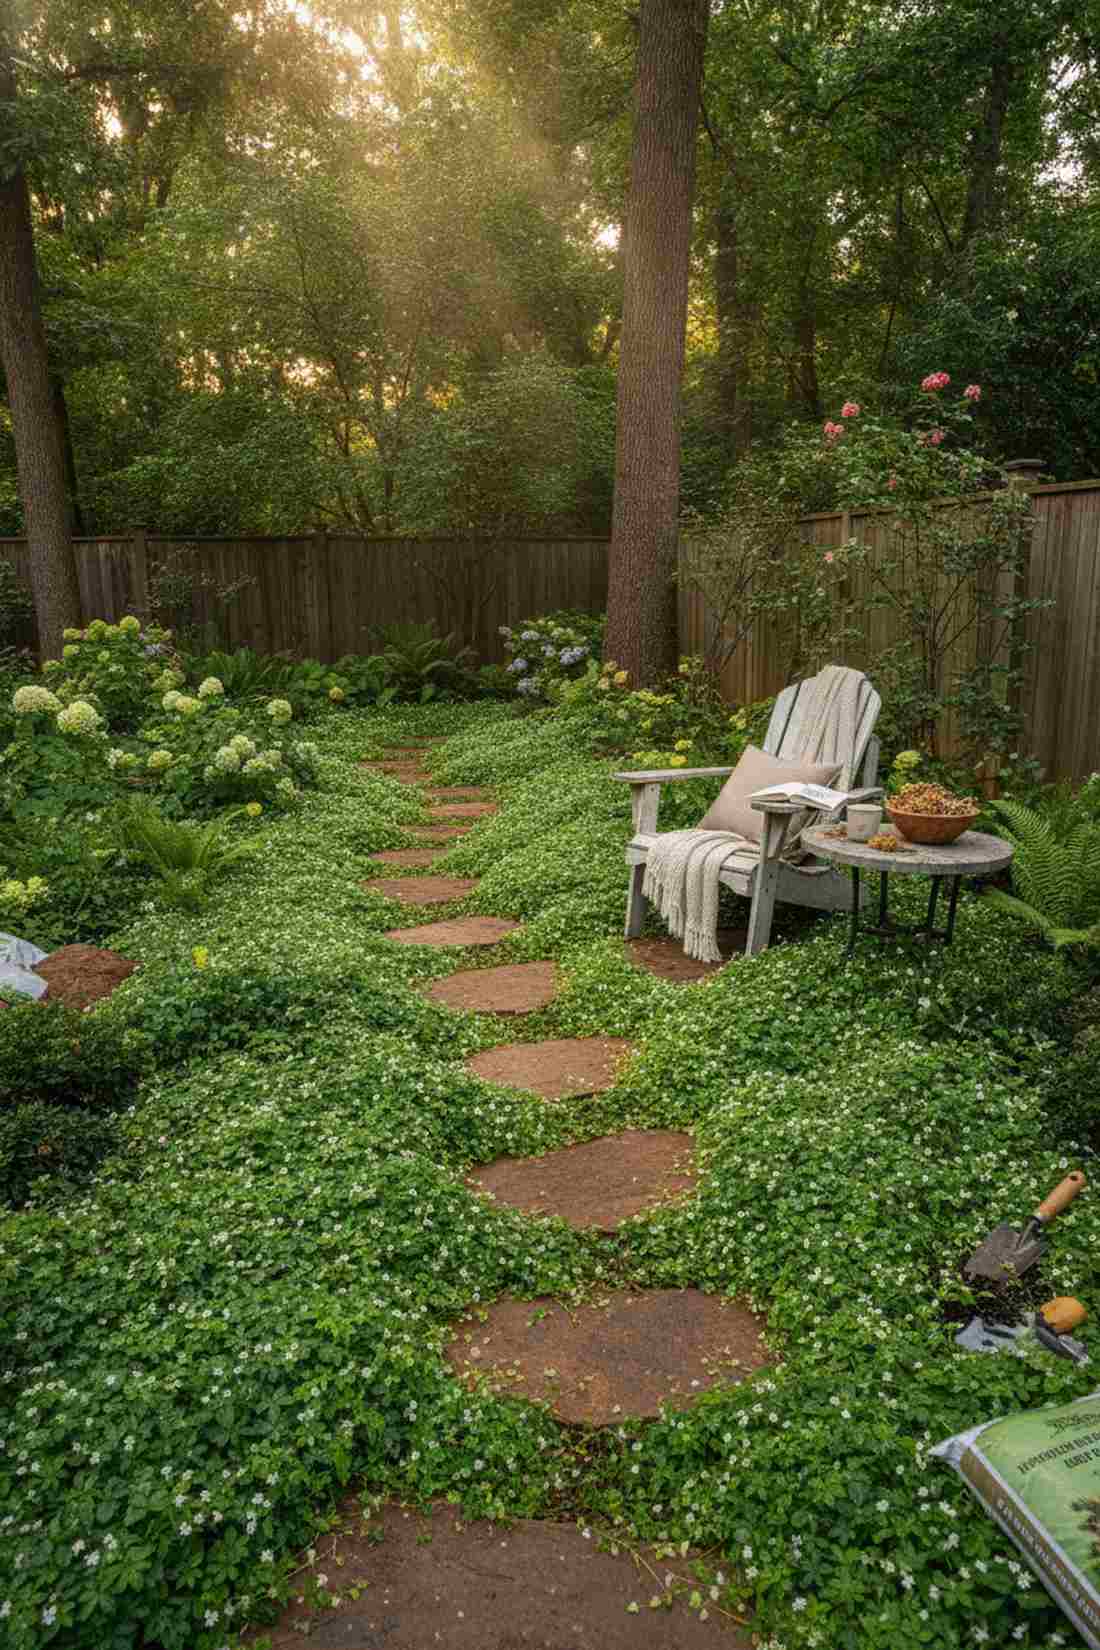
15. Blue Star Creeper
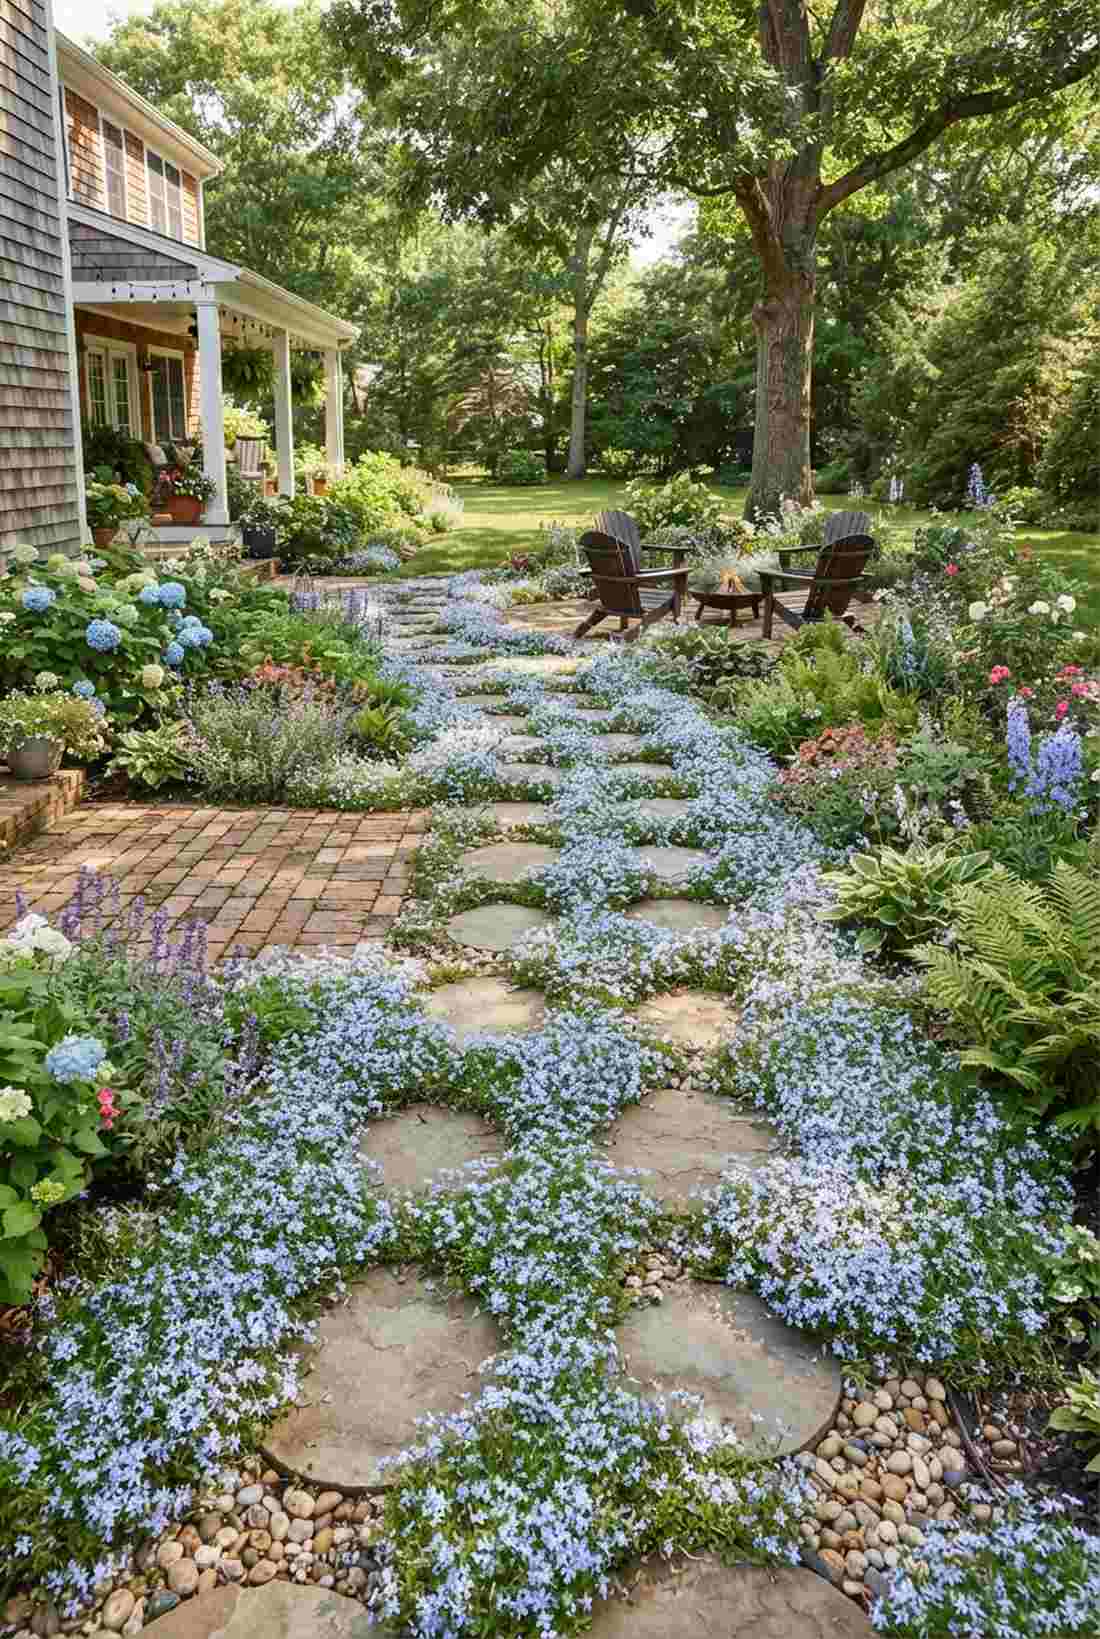
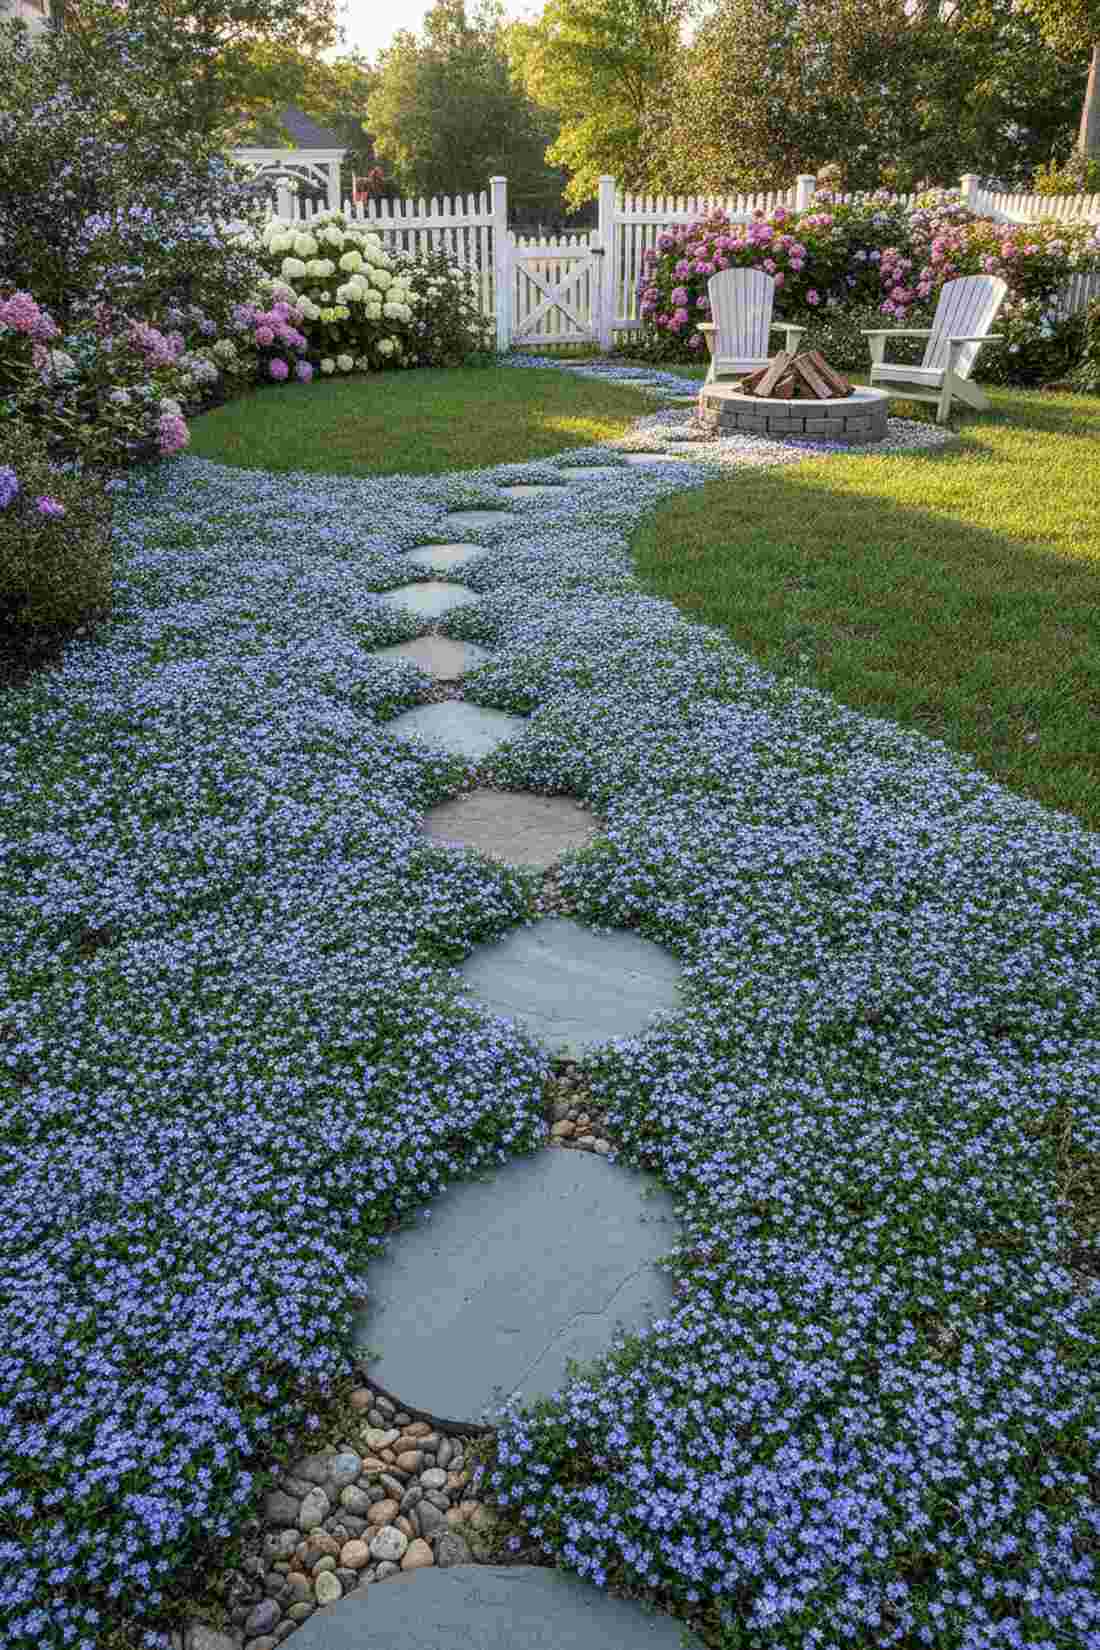
Sprinkles your pathway with a magical constellation of tiny blue flowers. Stunning for whimsical backyard transitions, building a blooming starry walkway.
While traditional grass requires constant edging, this method ensures long-lasting stability with zero mowing. The Blue Star Creeper aggressively chokes out weeds while handling heavy foot traffic like a champ.
This living pathway costs about $35–$55 to establish. Save this to your low-maintenance gardening board.
- Key Materials: Blue Star Creeper plugs and round stepping stones
- Vibe / Style: Whimsical cottage blooming
- Difficulty: Easy to spread
- Budget Breakdown: Creeper Plugs: $30 | Stones: $25
- Terrarium Accessories Hack: Mix in small decorative pebbles around the roots to retain moisture while it spreads.
- Smart Sourcing: fast-spreading ground cover seed kits
16. Scotch Moss Texture
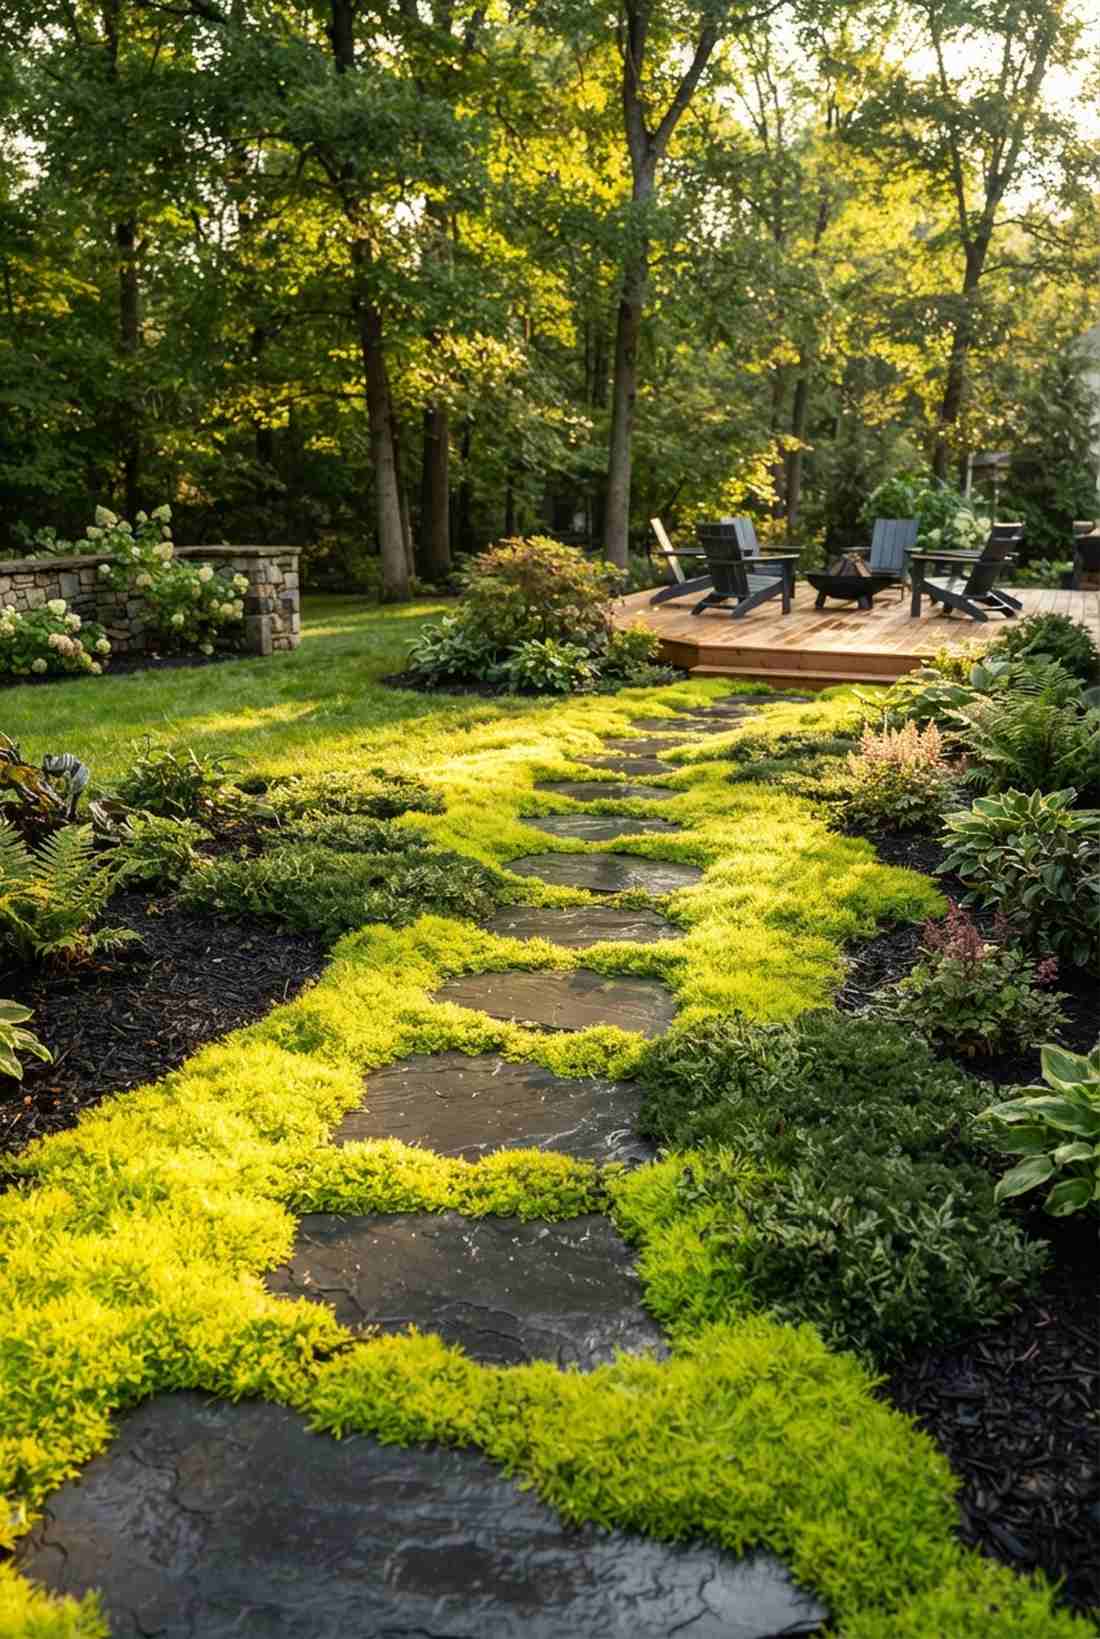
Glows like spun gold when the late afternoon sun hits it. An incredible trick for brightening up dark garden pathways with a neon chartreuse moss layout.
People often overcomplicate shade planting, yet this straightforward layout looks far more expensive than it is. The electric yellow-green of Scotch moss pops aggressively against dark slate or black mulch.
Invest about $40–$65 for high-quality moss flats. Highly recommended for a quick weekend win.
- Key Materials: Scotch moss flats and dark slate stones
- Vibe / Style: High-contrast modern woodland
- Difficulty: Moderate watering needs
- Budget Breakdown: Scotch Moss: $45 | Slate Stones: $20
- Creator’s Tip: Mix Irish (dark green) and Scotch (neon green) mosses together for a stunning, variegated checkerboard effect.
- Smart Sourcing: pre-cut preserved moss sheets (bulk pack)
17. Sedum Drought Tolerance
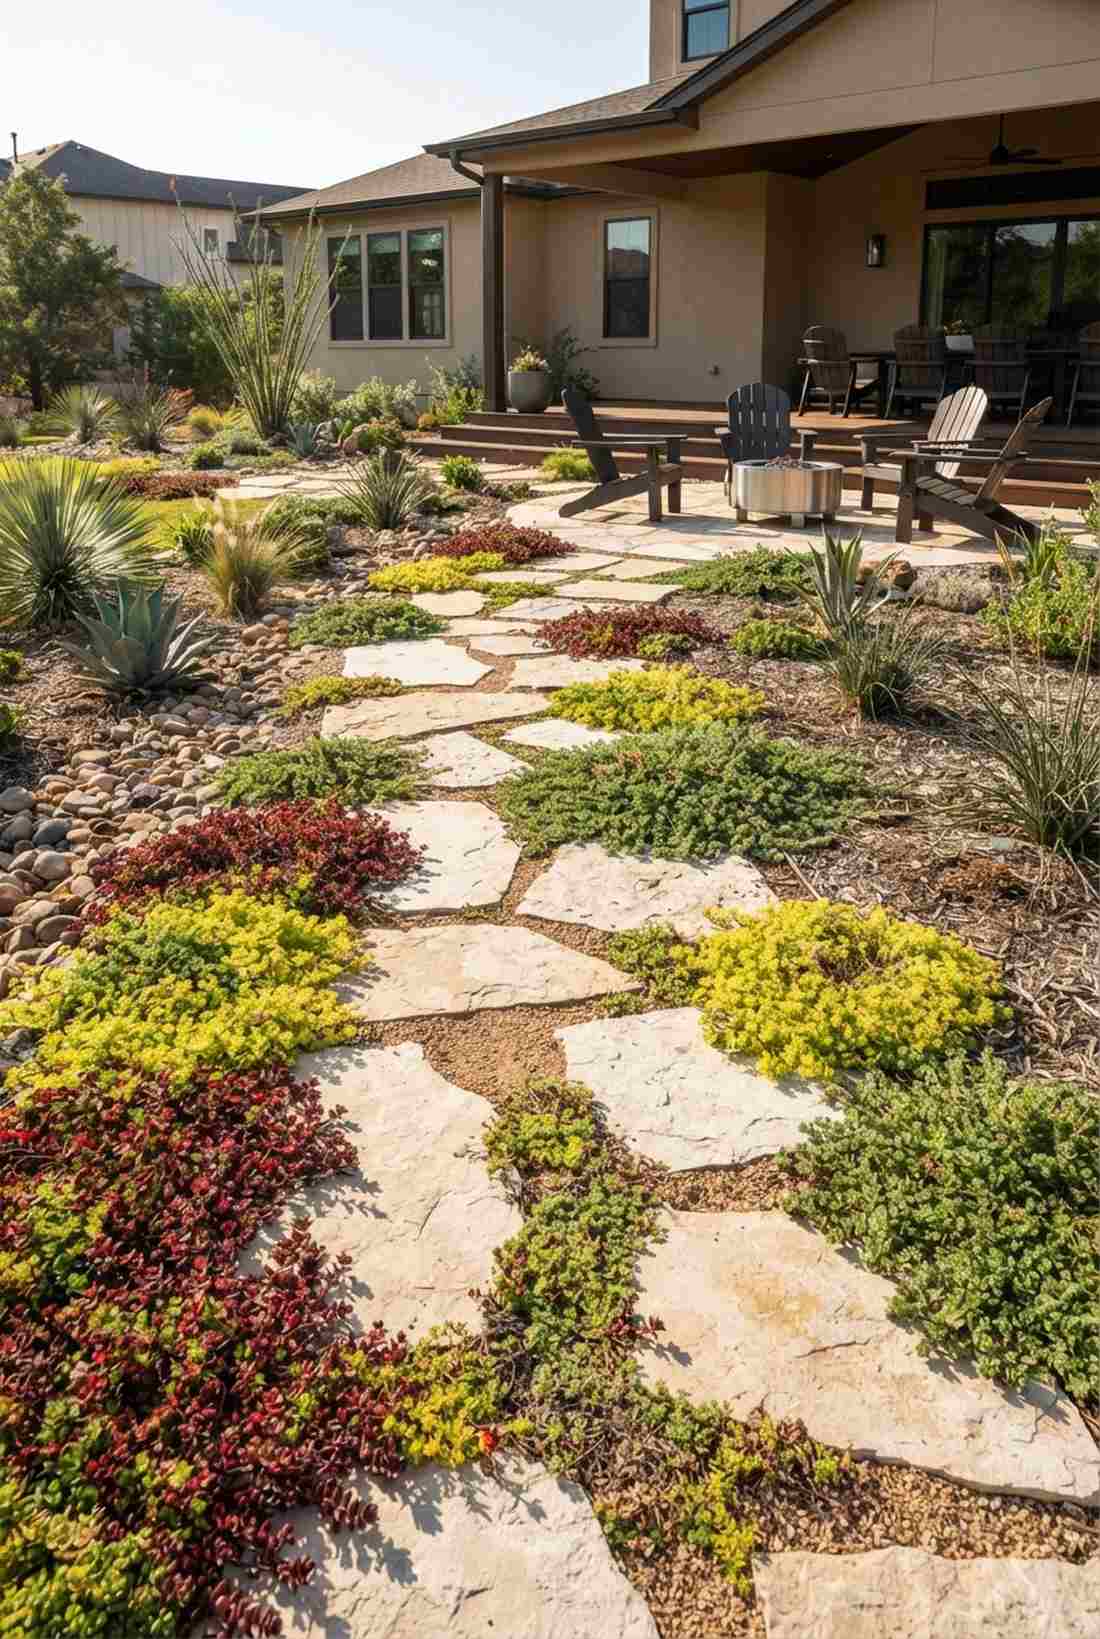
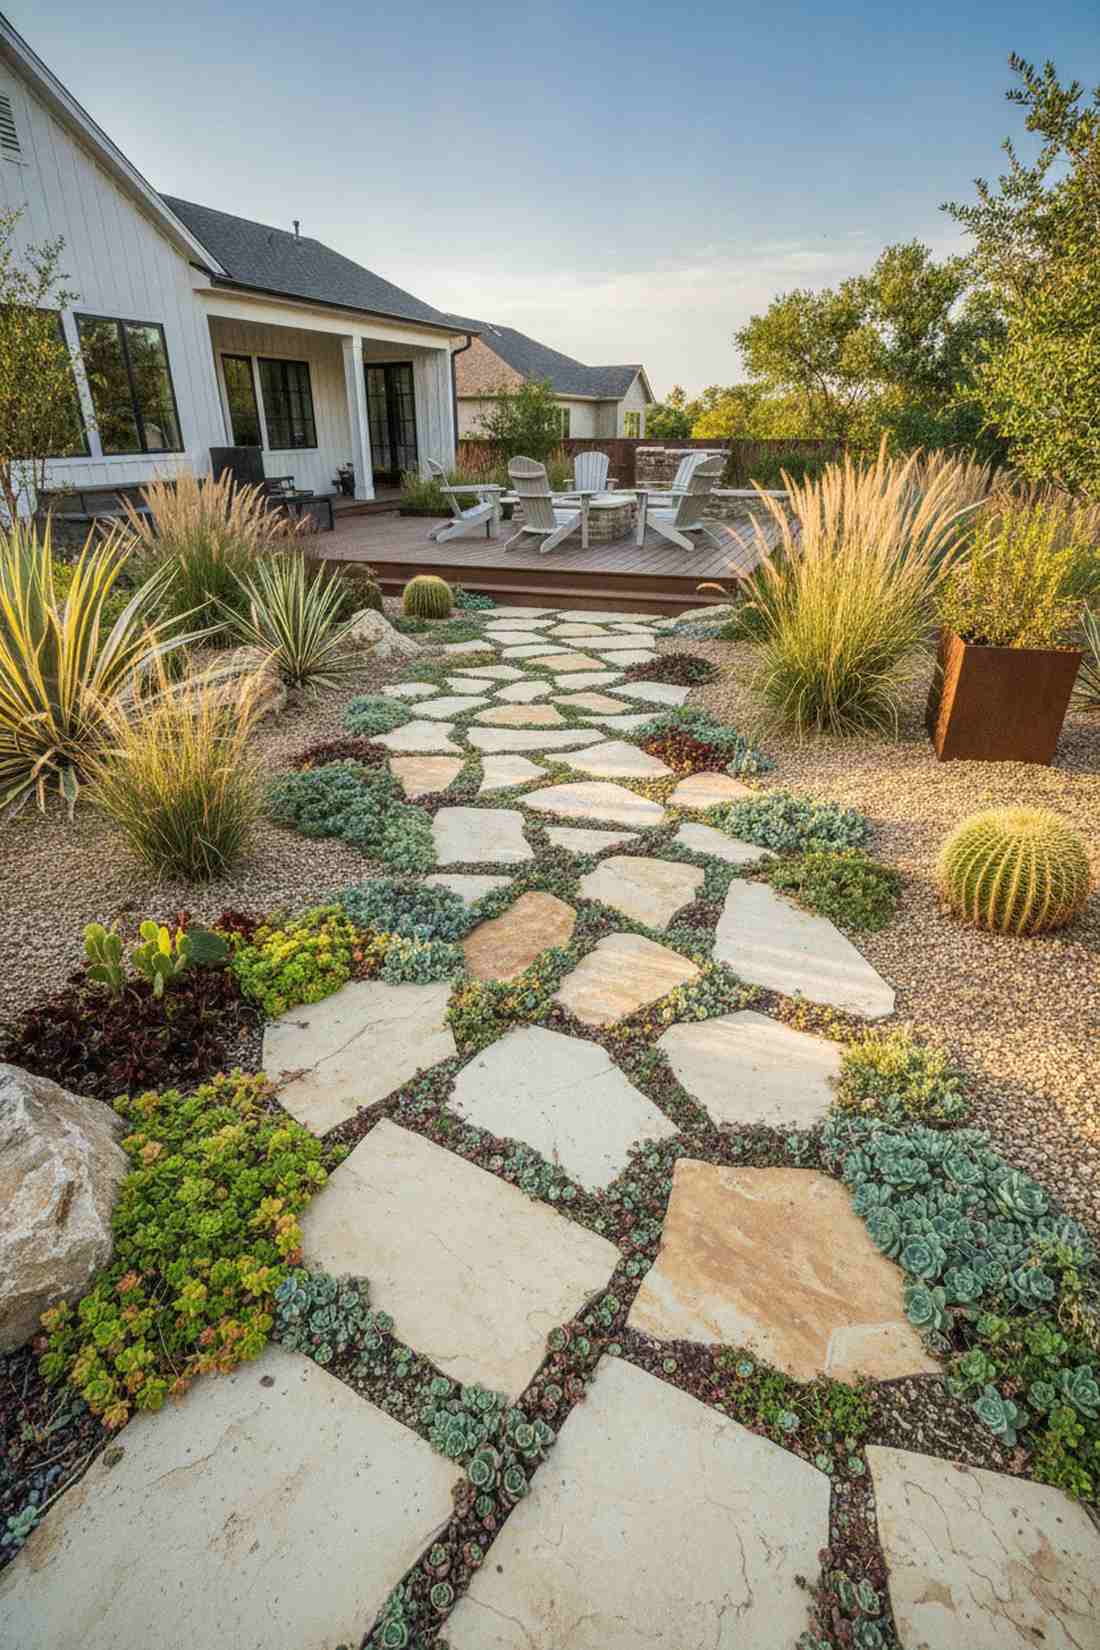
Radiates a rugged, desert-chic aesthetic that refuses to die. The absolute best choice for xeriscaping or brutal climates to make a succulent stone path.
Skip the thirsty grass lawns; this approach gives a designer-level finish while slashing your water bill. Sedum literally thrives on neglect, creeping over stones to soften hard edges beautifully.
You can set this up for around $30–$50. Pin this if you live in a hot, dry climate!
- Key Materials: Mixed sedum cuttings and limestone
- Vibe / Style: Desert modern xeriscape
- Difficulty: Extremely low maintenance
- Budget Breakdown: Sedum Trays: $25 | Stones: $25
- Creator’s Tip: Just break off pieces of grown sedum and push them into the dirt—they will root themselves almost instantly.
- Smart Sourcing: live sedum ground cover starter kits
18. Ajuga Shade Solution
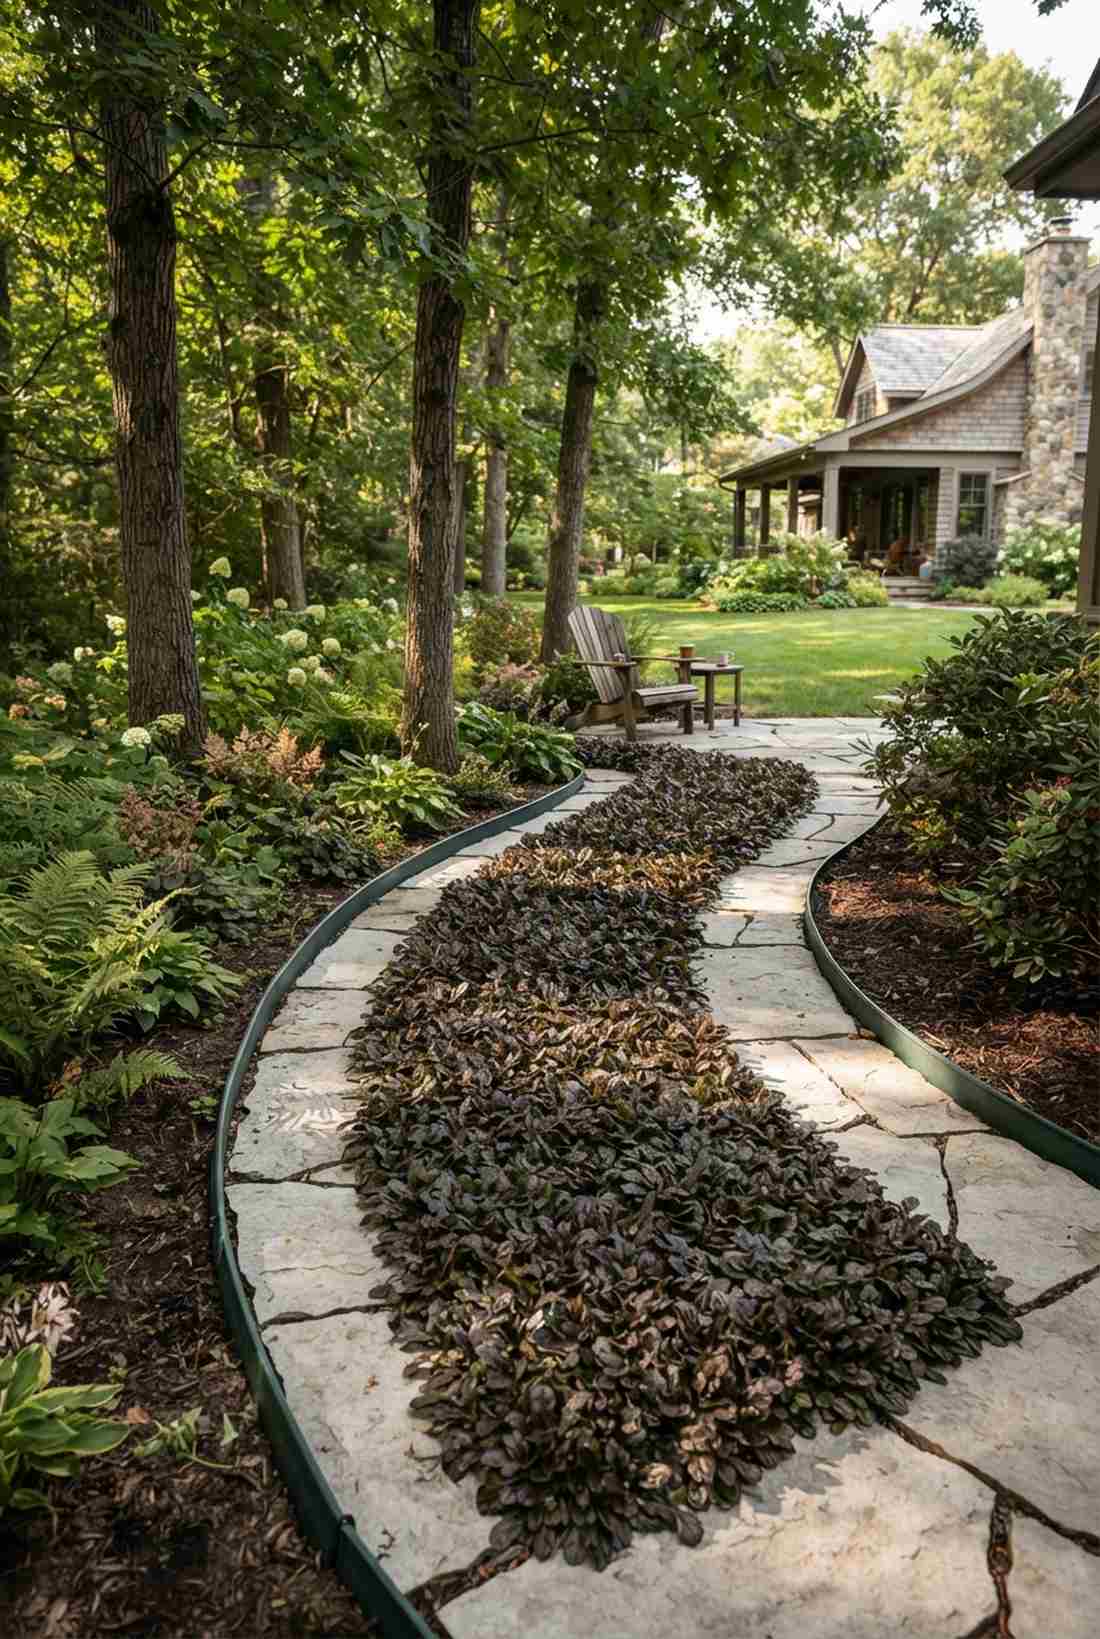
Feels like a rich, bronze-colored carpet rolling through your yard. Unbeatable for deep shade where absolutely nothing else grows, creating a dark foliage path.
Most homeowners settle for bare dirt under trees, but this layout delivers a surprisingly premium look. Ajuga spreads furiously, forming a dense mat that completely eliminates the need for chemical weed killers.
This aggressive spreader costs about $25–$45 to start. It’s a fast upgrade that completely changes the vibe.
- Key Materials: Bronze beauty ajuga and light paver stones
- Vibe / Style: Deep woodland shadow
- Difficulty: Needs heavy edging control
- Budget Breakdown: Ajuga Plugs: $20 | Pavers: $25
- Creator’s Tip: Install a deep physical border beside the pathway, or the ajuga will aggressively invade your flower beds.
- Smart Sourcing: heavy-duty plastic landscape edging strips
19. Sweet Woodruff Fragrance
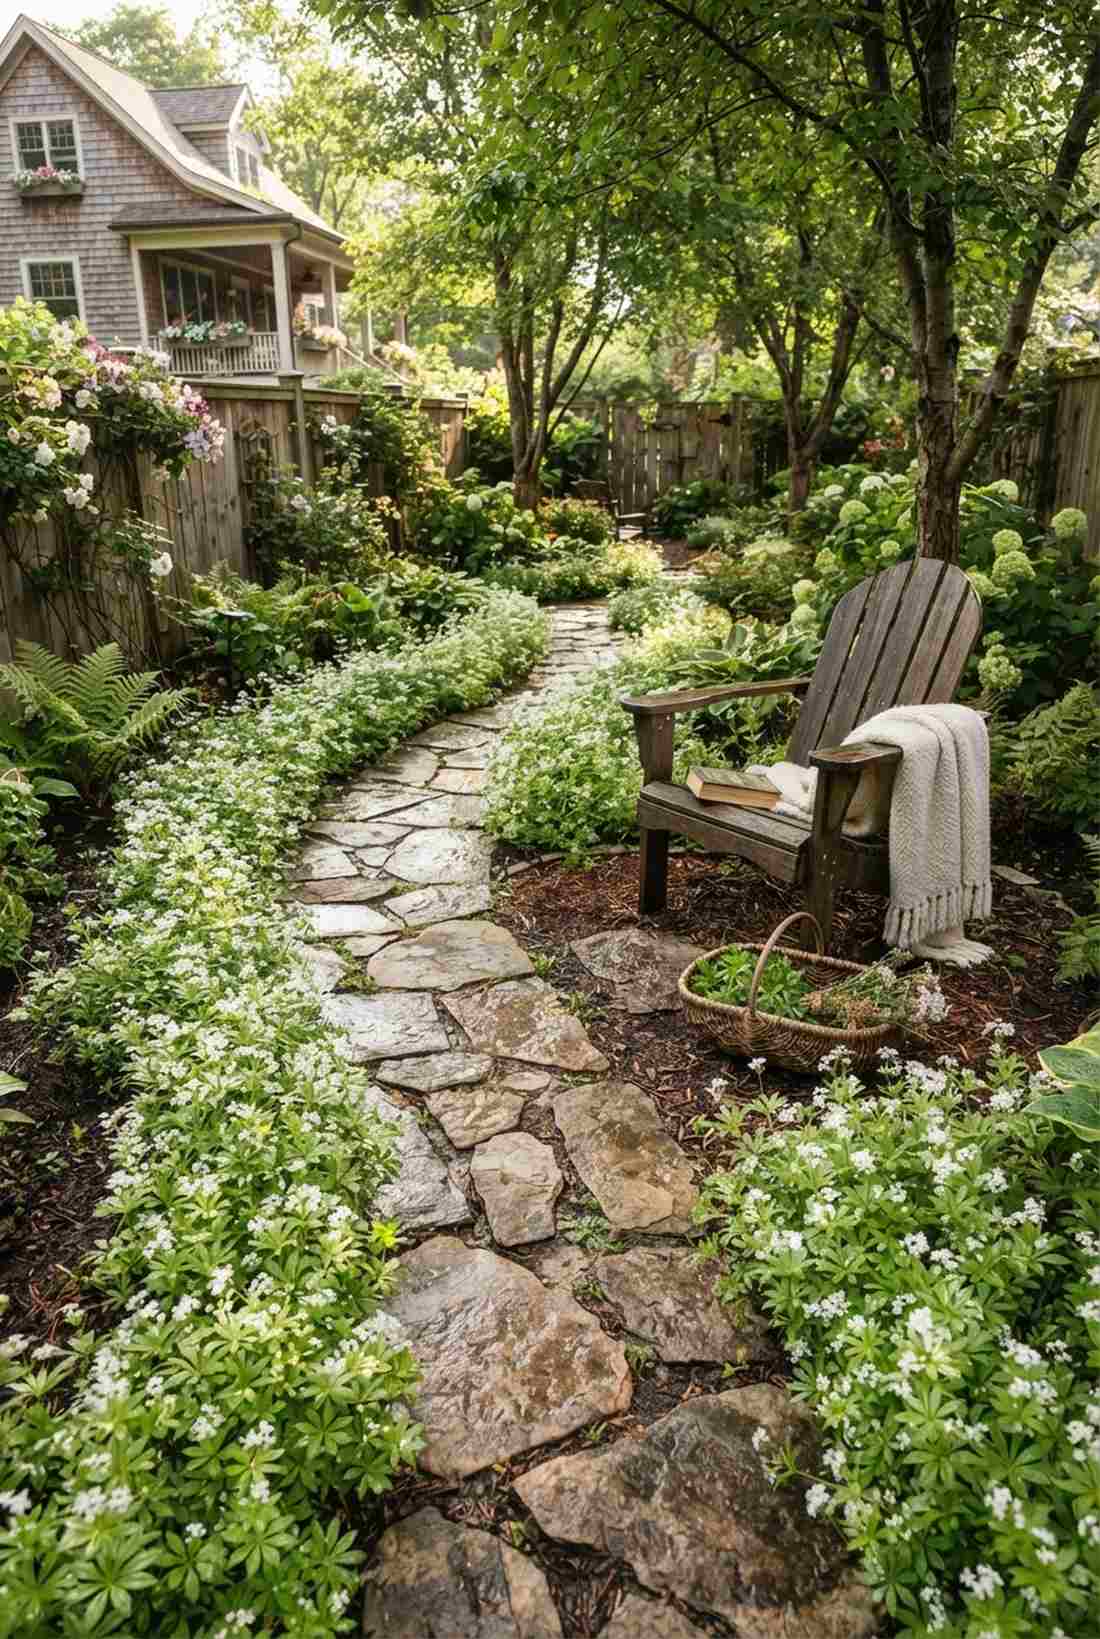
Smells exactly like fresh vanilla and cut hay after a light rain. A magical addition to a quiet reading nook or a fragrant garden walkway.
You might think this requires a botanical expert, but DIYing this gives a high-end estate vibe. Sweet Woodruff creates a delicate, star-patterned canopy over the soil that looks incredibly delicate but is surprisingly tough.
You can easily pull this off for around $30–$50. Save this to your sensory garden inspiration board.
- Key Materials: Sweet woodruff plants and natural fieldstone
- Vibe / Style: Romantic sensory garden
- Difficulty: Easy in moist shade
- Budget Breakdown: Plants: $30 | Fieldstone: $20
- Creator’s Tip: Harvest and dry the leaves in late summer to make natural, vanilla-scented potpourri for your home.
- Smart Sourcing: organic garden soil enrichment blends
If you have a shaded side yard, the upcoming layout will literally save you hundreds of dollars.
Decorative Aggregate Combinations
Gravel, pebbles, and crushed stone offer excellent drainage and low-maintenance pathway fills that complement stepping stones with varied textures and colors. These materials create clean, contemporary looks or rustic cottage charm depending on aggregate selection.
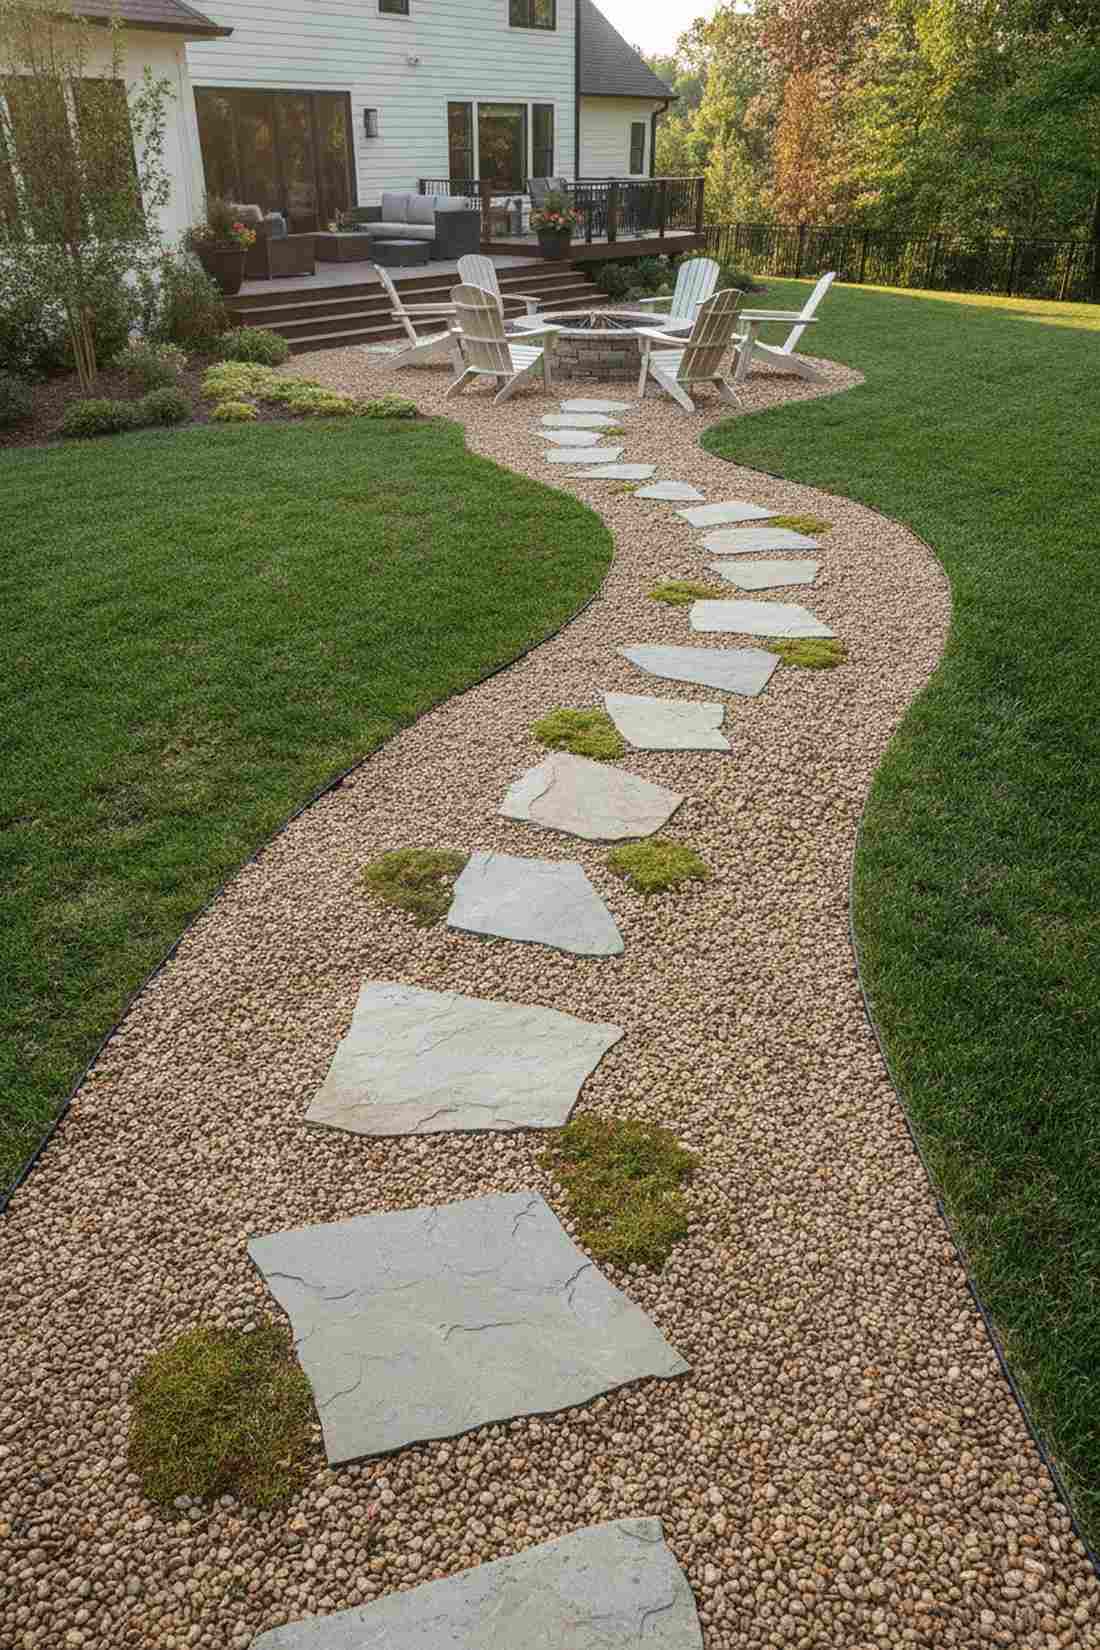
20. Pea Gravel Classic
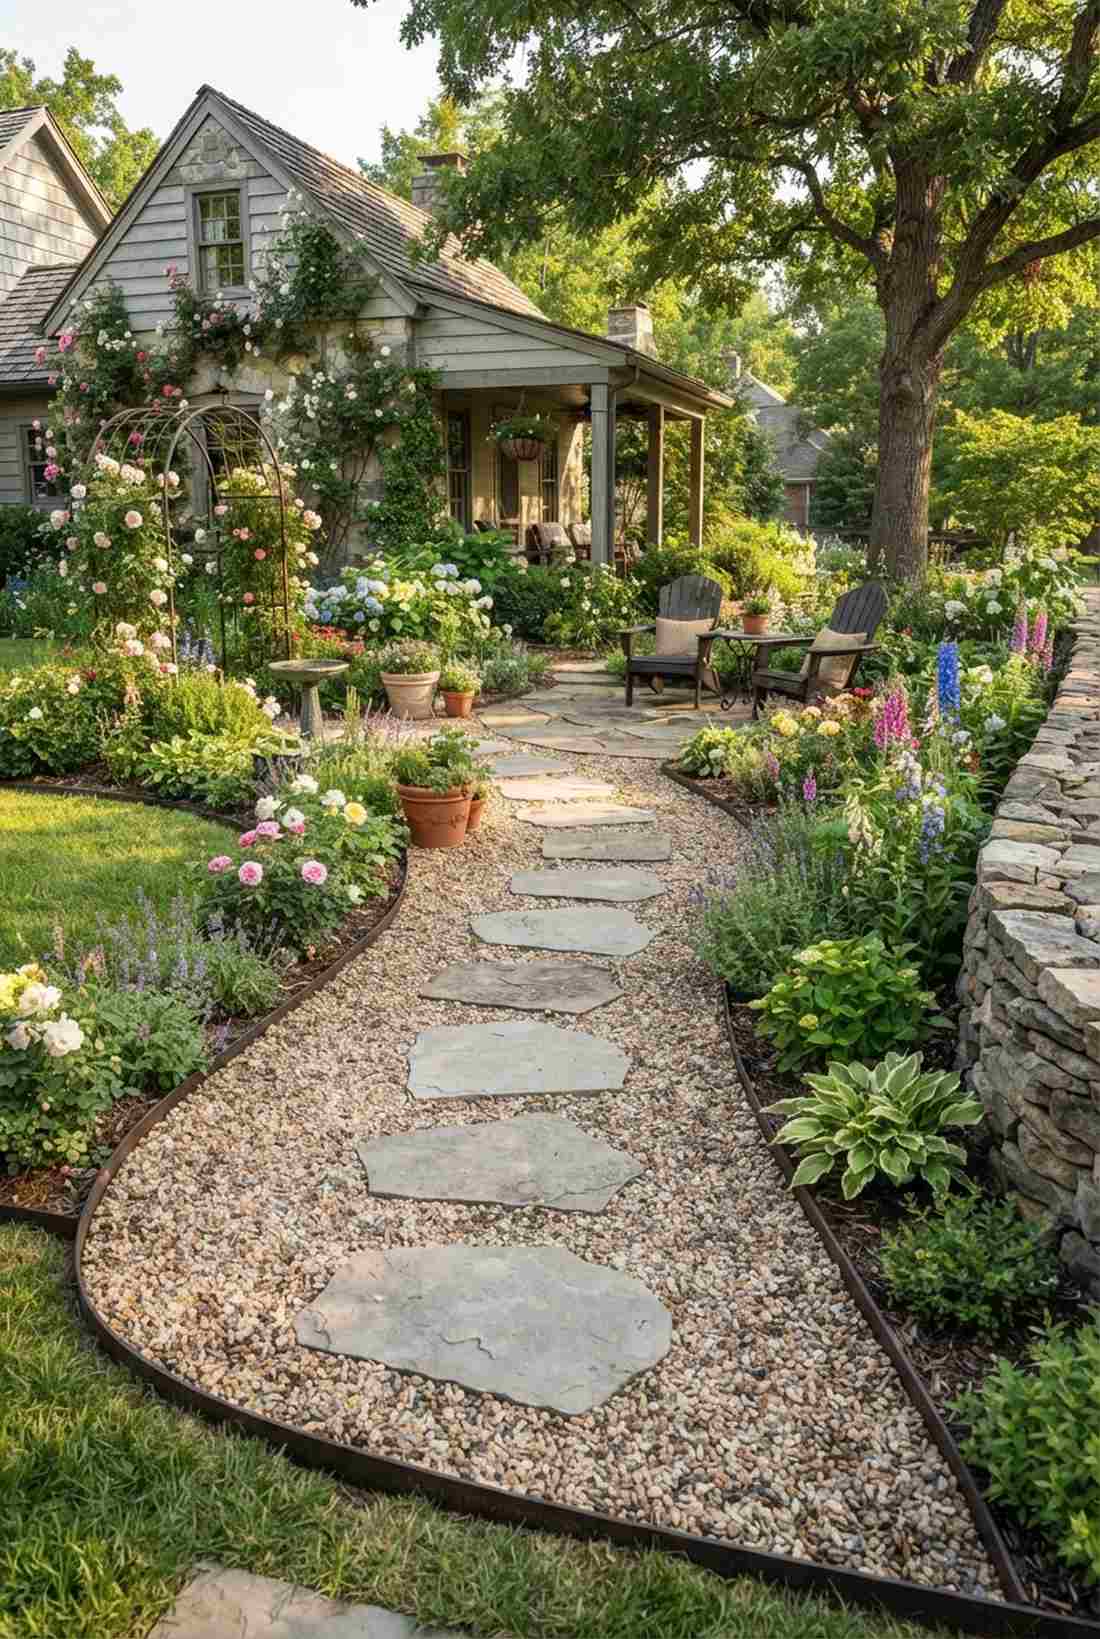
Evokes the charm of an old English countryside estate. Perfect for high-traffic courtyard areas wanting a classic gravel stepping path.
Many people overcomplicate their walkways, yet this straightforward pattern looks far more expensive than it is. The satisfying crunch of pea gravel combined with heavy stone completely skips the generic look.
This timeless aesthetic runs around $50–$80 depending on the size of the area. Pin this if you love traditional garden layouts.
- Key Materials: 3/8-inch pea gravel and concrete pavers
- Vibe / Style: English cottage traditional
- Difficulty: Easy manual labor
- Budget Breakdown: Pea Gravel: $40 | Pavers: $30
- Creator’s Tip: Always install rigid metal edging before pouring pea gravel; otherwise, the tiny stones will migrate into your lawn instantly.
- Smart Sourcing: commercial-grade steel landscape edging
21. Crushed Granite Decomposed
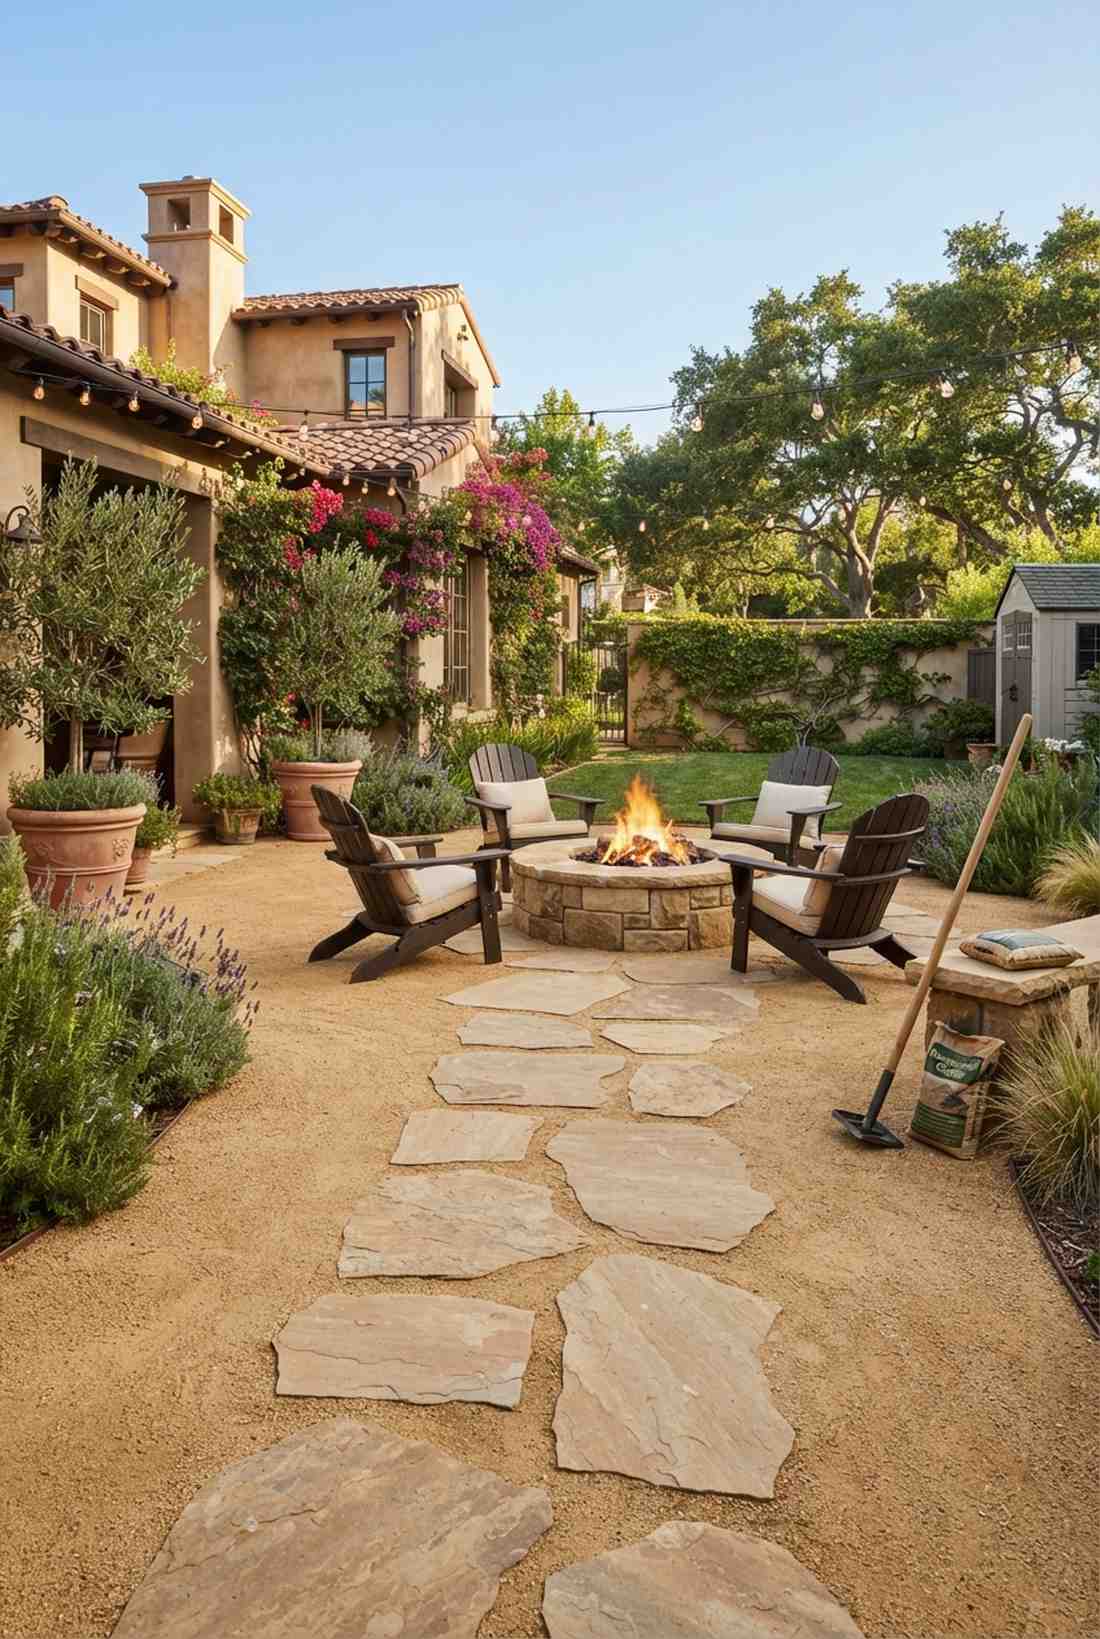
Looks like a high-end Tuscan villa courtyard. The absolute best choice for fire pit areas to establish a firm granite stone path.
While traditional gravel kicks around, this method ensures long-lasting stability. Decomposed granite (DG) compacts into a solid, concrete-like surface that still allows rainwater to drain perfectly.
You can execute this premium look for roughly $60–$90. It’s a fast upgrade that completely changes the vibe.
- Key Materials: Decomposed granite and natural sandstone
- Vibe / Style: Mediterranean villa
- Difficulty: Requires a heavy tamper
- Budget Breakdown: DG Base: $50 | Sandstone: $40
- Creator’s Tip: Rent or borrow a heavy hand-tamper to pack the granite down while slightly wet for a rock-hard finish.
- Smart Sourcing: heavy-duty steel hand tampers
22. White Marble Chips
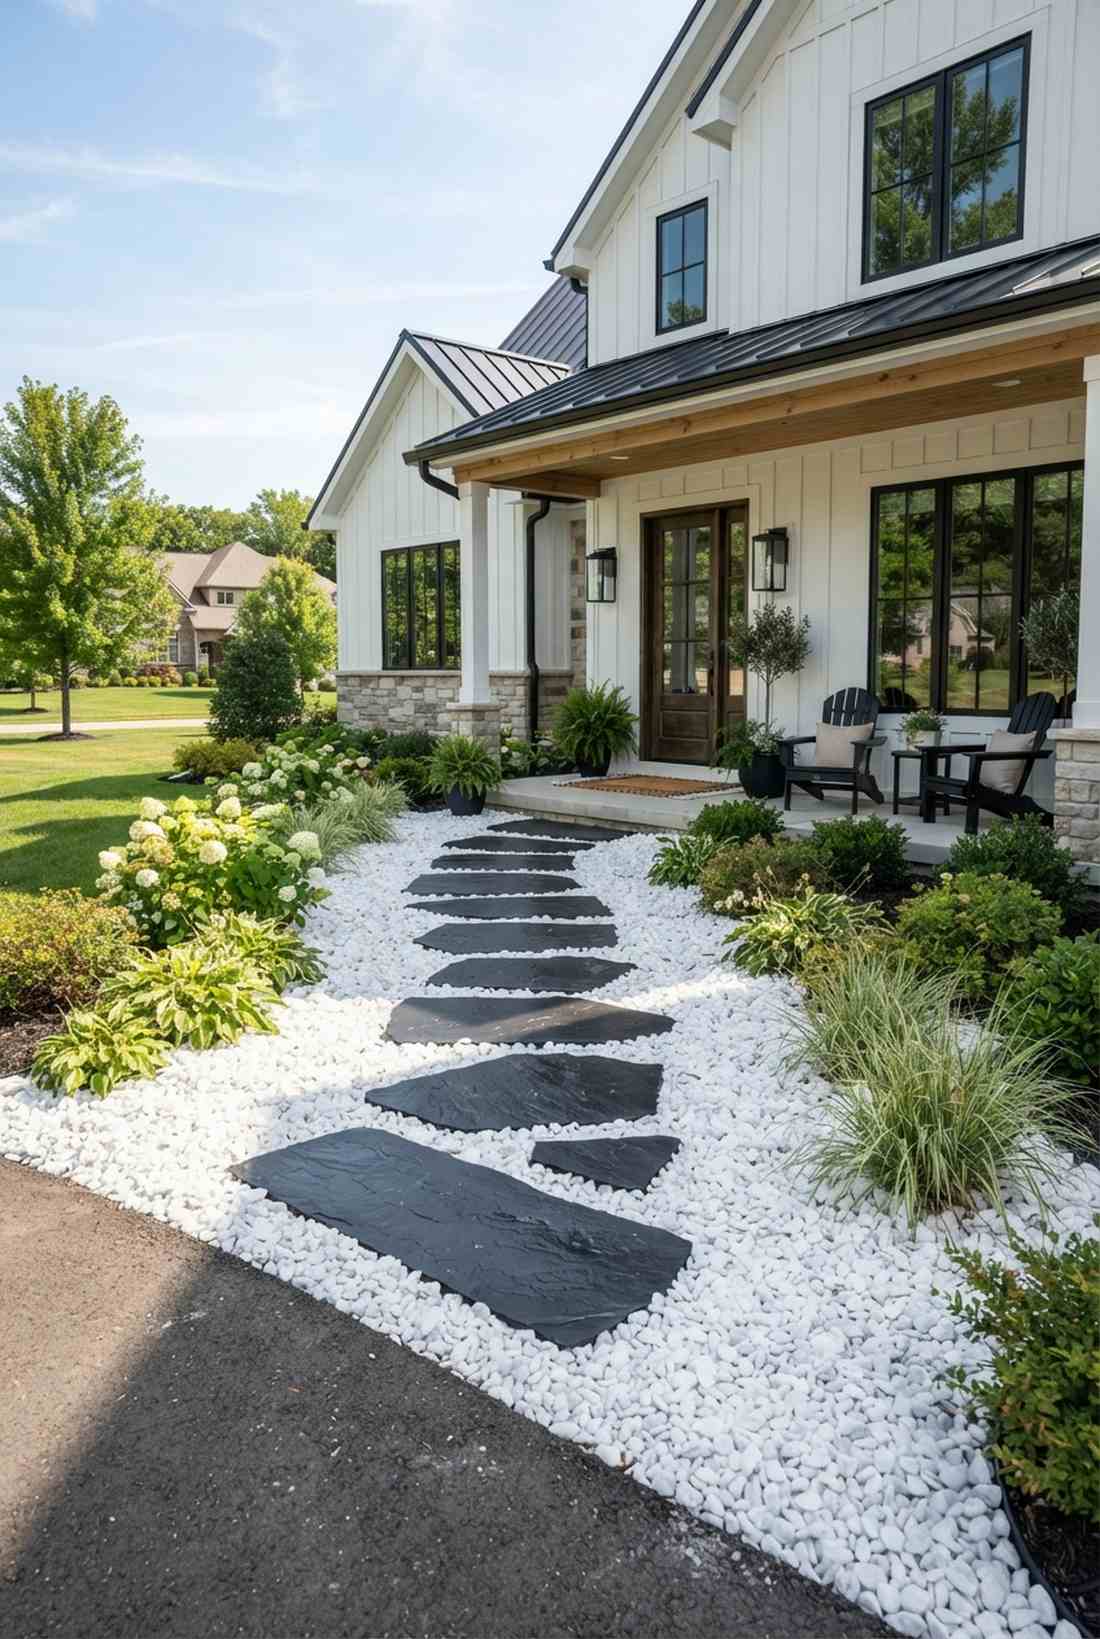
Blinds with its bright, luxurious resort-style elegance. Breathtaking for illuminating dark pathways at night with a reflective marble walkway.
Most homeowners settle for basic concrete, but this layout delivers a surprisingly premium look. The extreme contrast between dark slate stones and pure white marble chips gives a designer-level finish instantly.
Expect to spend around $70–$110 for premium marble. Save this idea for a striking front entryway remodel.
- Key Materials: White marble chips and black slate stepping stones
- Vibe / Style: Ultra-luxe contemporary
- Difficulty: Easy pouring
- Budget Breakdown: Marble Bags: $60 | Slate Stones: $40
- Creator’s Tip: Keep a leaf blower handy; white marble shows organic debris very quickly and needs regular air-sweeping.
- Smart Sourcing: pure white marble landscaping chips (bulk pack)
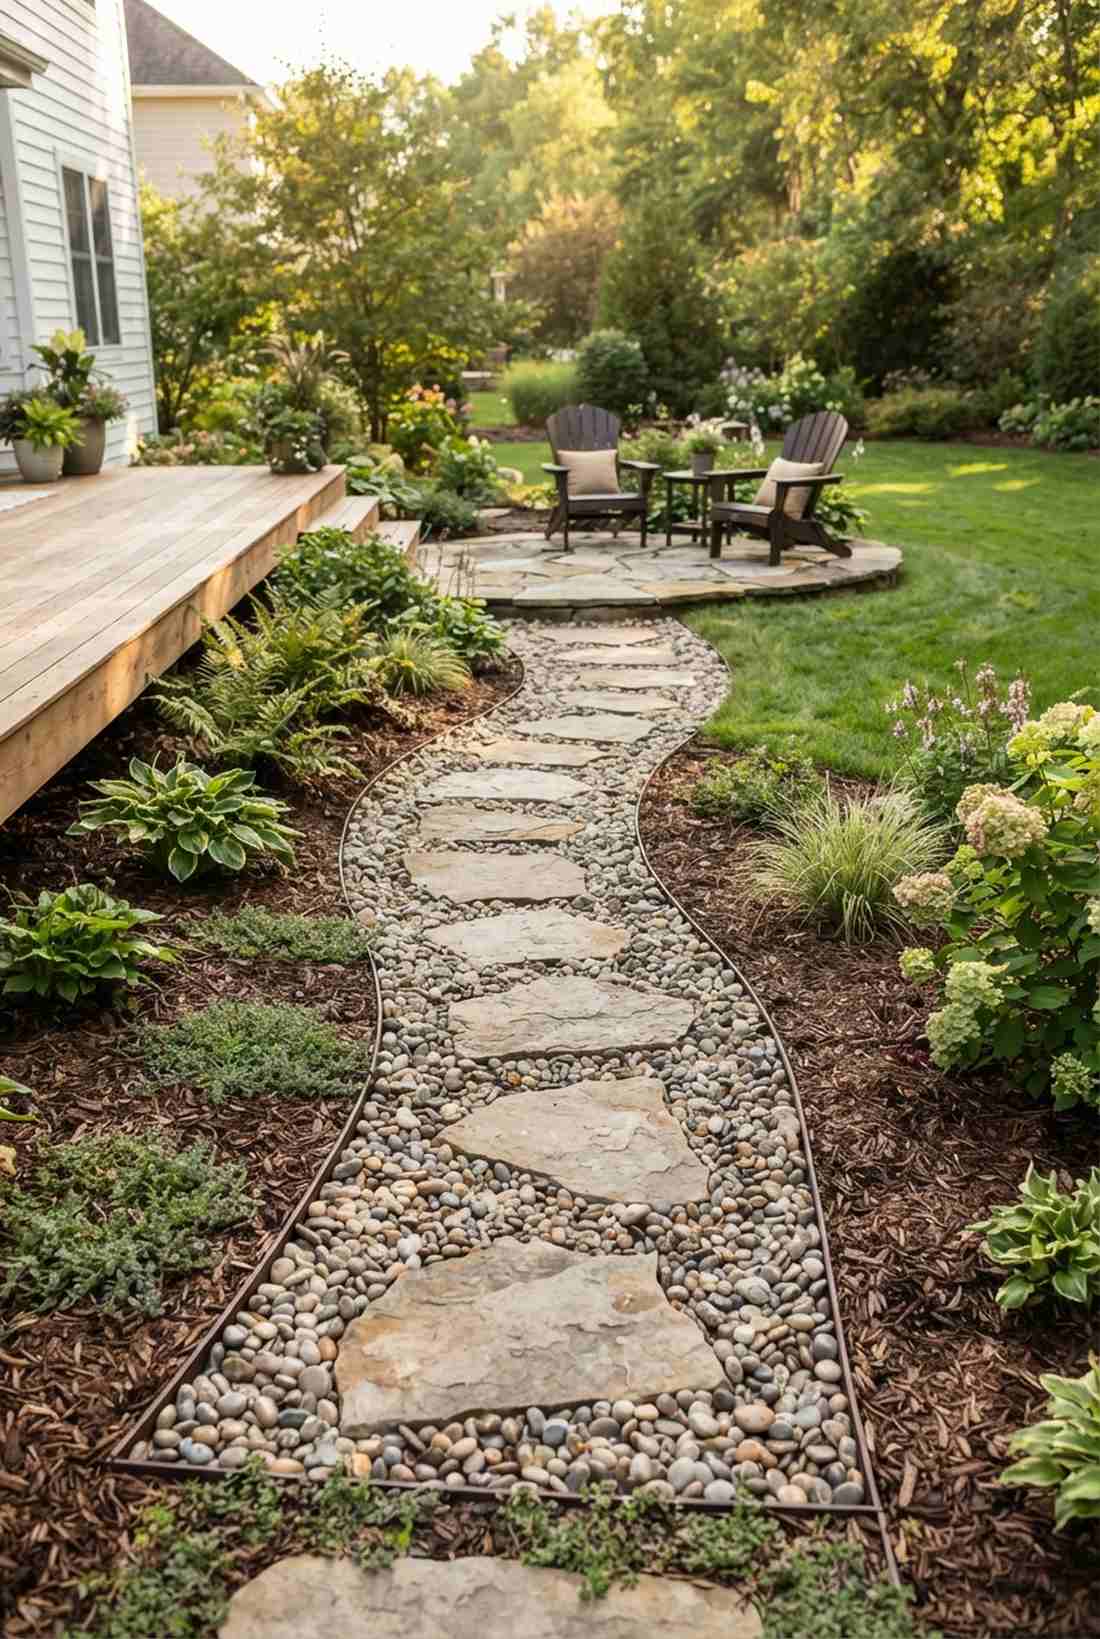
23. River Rock Natural
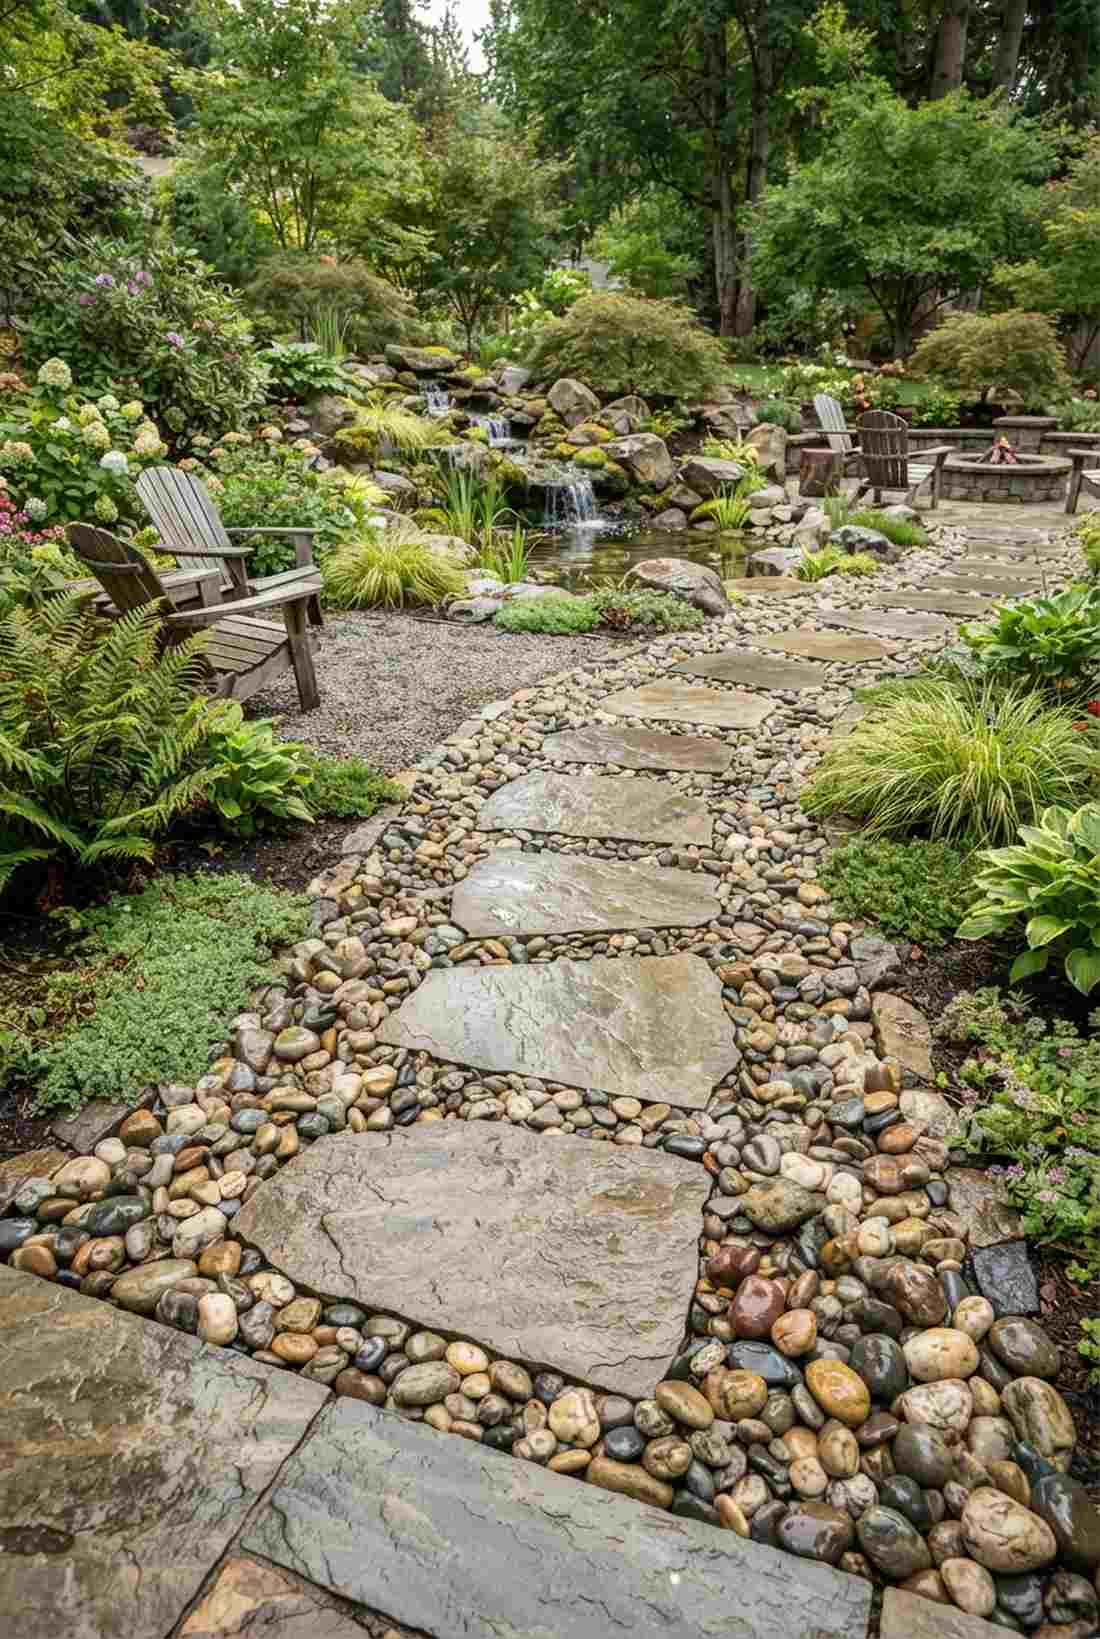
Radiates the calming energy of a secluded mountain stream. Flawless for backyard water features or establishing a natural pebble stepping path.
Don’t fall for cheap imitation stone when genuine cuts deliver a surprisingly premium look. Large, smooth river rocks lock together better than pea gravel, making them ideal for sloped terrain where washouts happen.
This rugged setup costs around $55–$85. Highly recommended for a high-traffic weekend win.
- Key Materials: 1-2 inch smooth river stones and irregular flagstone
- Vibe / Style: Natural mountain stream
- Difficulty: Heavy manual lifting
- Budget Breakdown: River Rocks: $45 | Flagstone: $35
- Creator’s Tip: Wash the river rocks with a hose immediately after laying them to reveal their true, vibrant natural colors.
- Smart Sourcing: mixed polished river rock pebbles
24. Slate Chips Contemporary
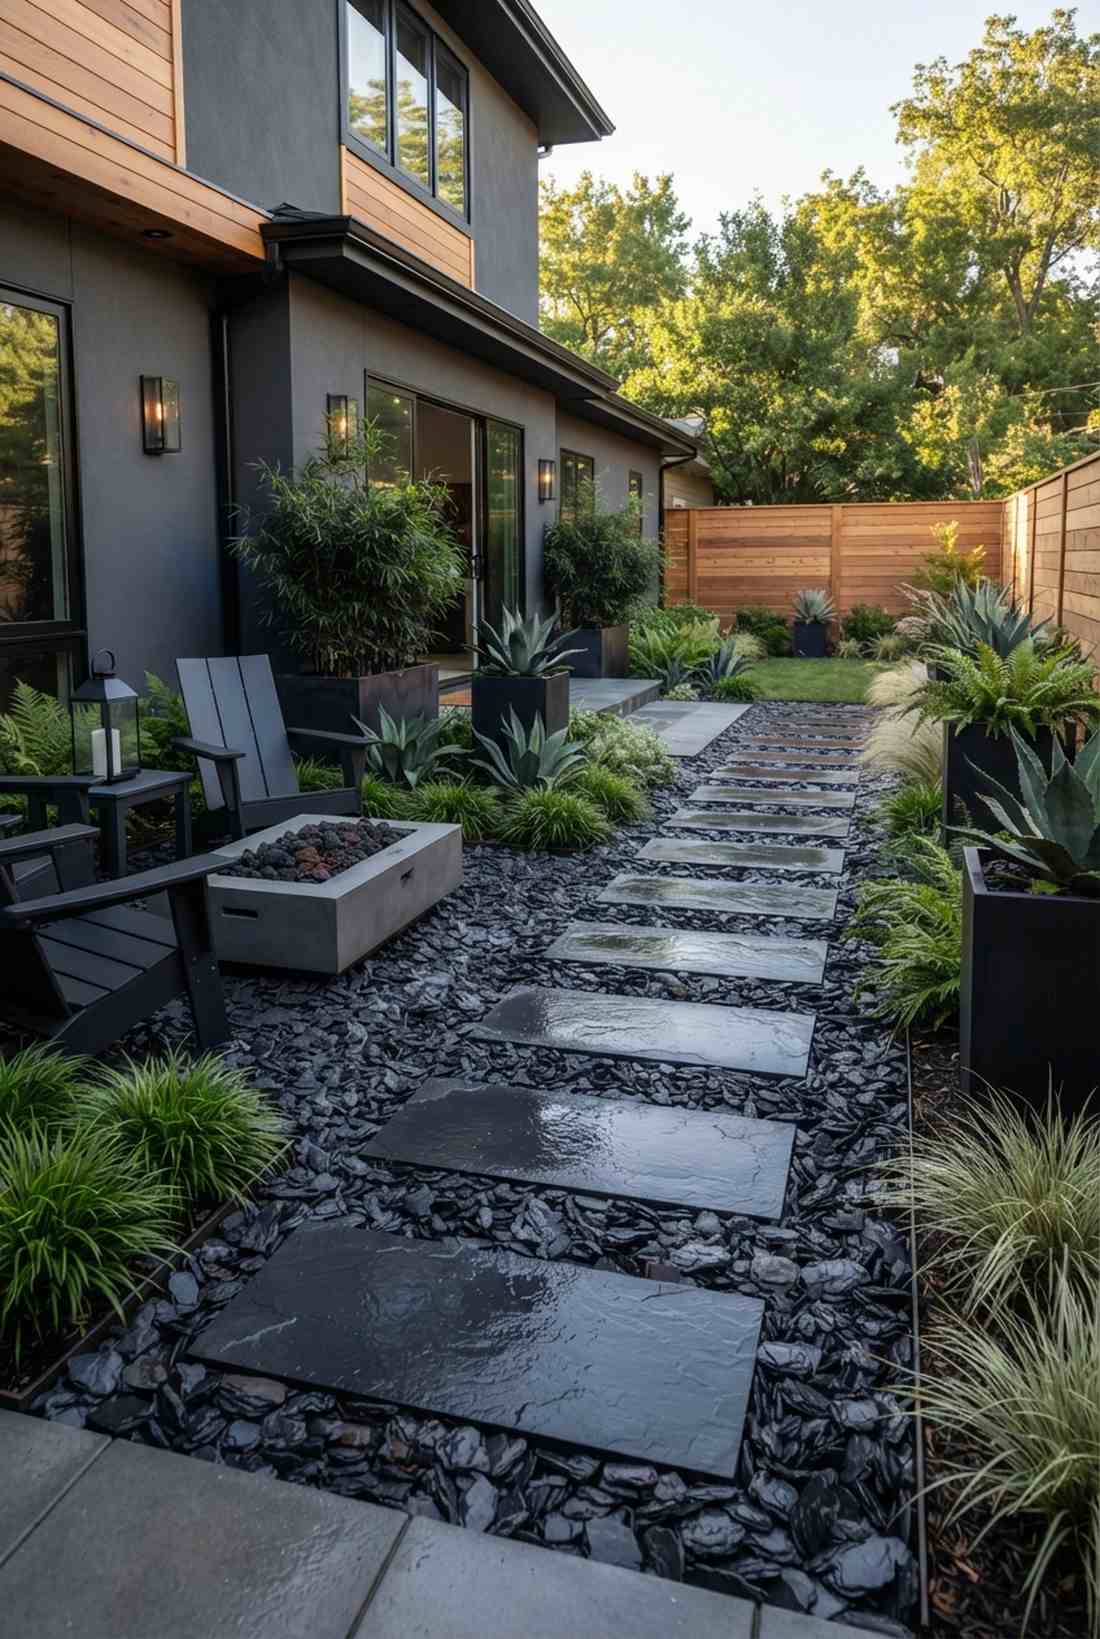
Emits an aggressively modern, moody architectural vibe. An incredible choice for coordinating with dark exterior house paint via a dark slate fragment walkway.
Skip the flimsy plastic pavers; this approach gives a designer-level finish. Because slate chips are flat and angular, they interlock like puzzle pieces underfoot, providing a much more stable walking surface than round gravel.
You can set this up for about $60–$95. Pin this if you’re upgrading a modern urban courtyard.
- Key Materials: Crushed dark slate chips and matching large slate slabs
- Vibe / Style: Moody urban modern
- Difficulty: Moderate
- Budget Breakdown: Slate Chips: $50 | Large Slabs: $45
- Creator’s Tip: Spray the slate chips with a stone enhancer sealant to give them a permanent “wet look” that deepens the color.
- Smart Sourcing: UV-resistant clear stone sealing spray
Material Guide: Cheap vs. Premium Aesthetic
Knowing exactly where to save and where to spend makes all the difference in achieving that “looks expensive but isn’t” vibe.
- Standard vs. UV-Resistant/Premium: Upgrading to commercial-grade weed fabric stops aggressive weeds from ruining your perfect layout and prevents expensive rocks from sinking into the mud.
- Pre-made Kits vs. Sourcing Locally: Bulk purchasing specific ground cover seeds or starter kits often saves both time and money compared to buying individual garden center pots.
Most people get their backyard layouts completely wrong… until they try the exact visual trick coming up next.
25. Lava Rock Texture
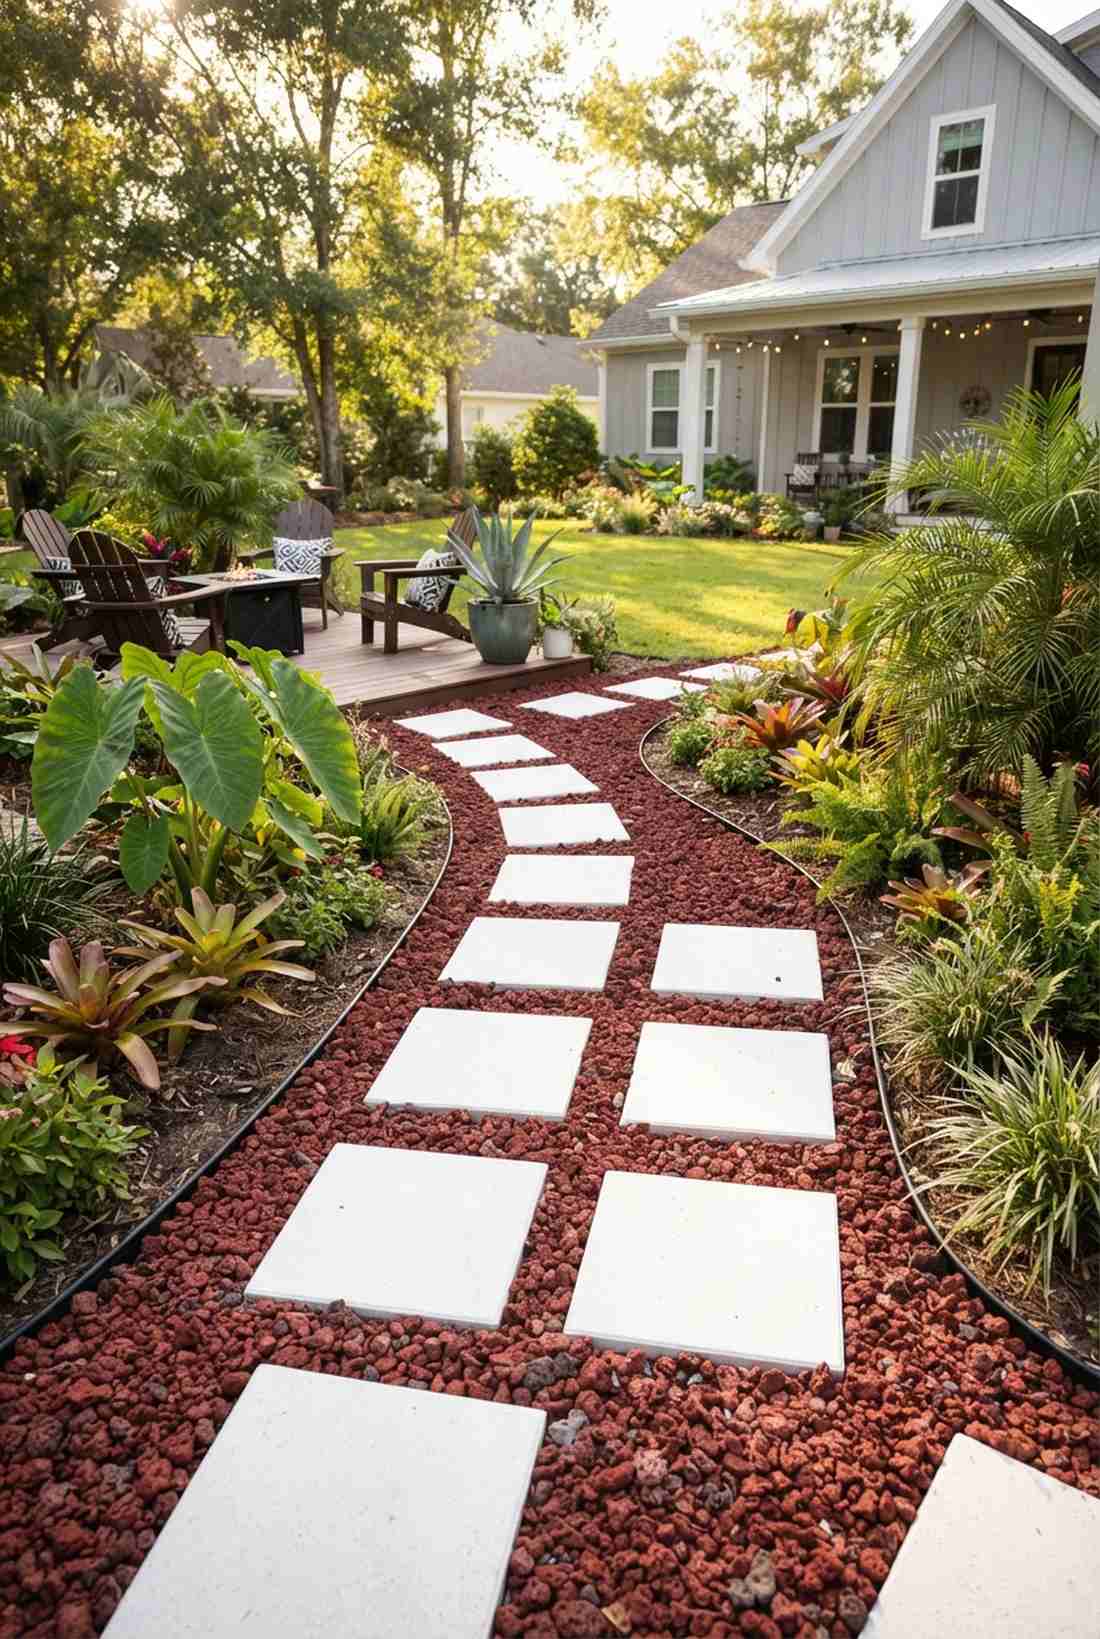

Brings a striking, volcanic pop of crimson to boring backyards. Excellent for high-drainage areas needing a porous red stone path.
Many people overcomplicate their walkways, yet this straightforward pattern looks far more expensive than it is. Lava rock is incredibly lightweight, making it the easiest aggregate to carry and pour while offering superior soil aeration.
You can easily pull this off for around $35–$60. Save this to your low-budget garden makeover board.
- Key Materials: Red lava rock bags and bright white pavers
- Vibe / Style: Bold tropical contrast
- Difficulty: Very easy manual labor
- Budget Breakdown: Lava Rock: $25 | White Pavers: $30
- Creator’s Tip: Wear thick gloves when spreading lava rock; the porous edges are sharp and can easily scrape bare hands.
- Smart Sourcing: heavy-duty landscaping work gloves
Pattern and Layout Designs
Strategic stone placement creates rhythm, visual interest, and functional pathways that guide movement through garden spaces. These layout techniques work with any ground cover material to enhance overall design impact.
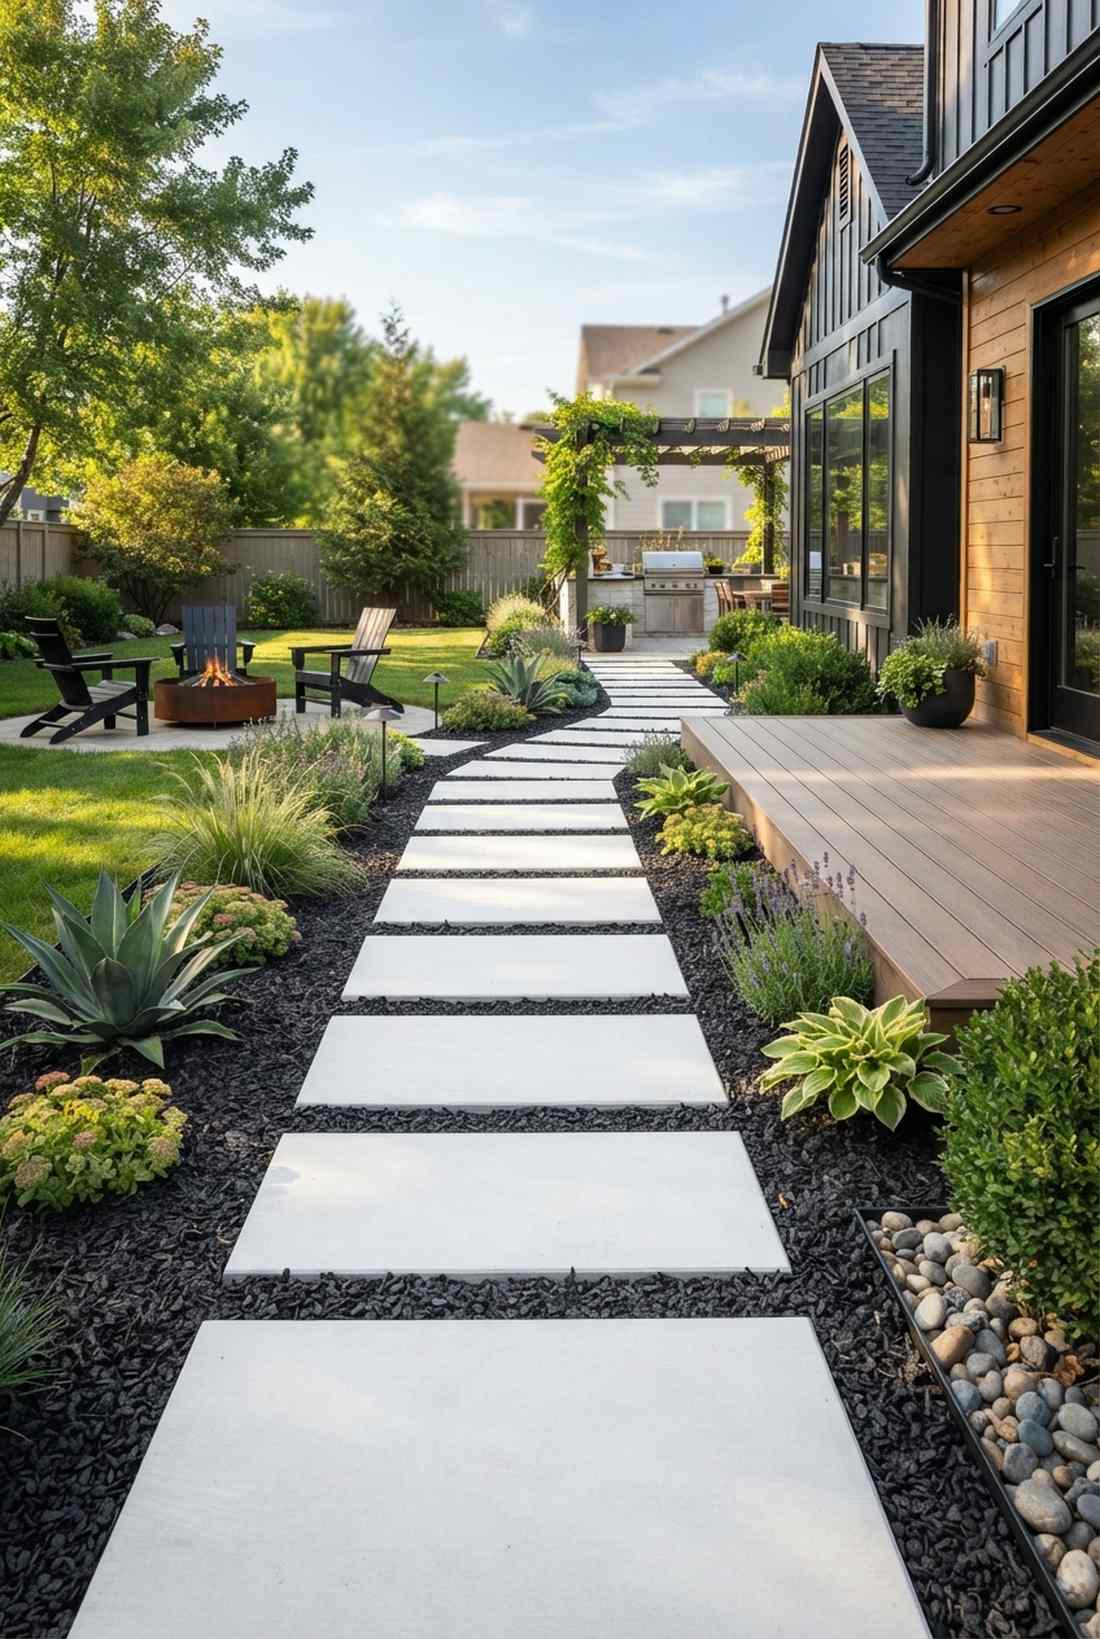
26. Straight Formal Alignment
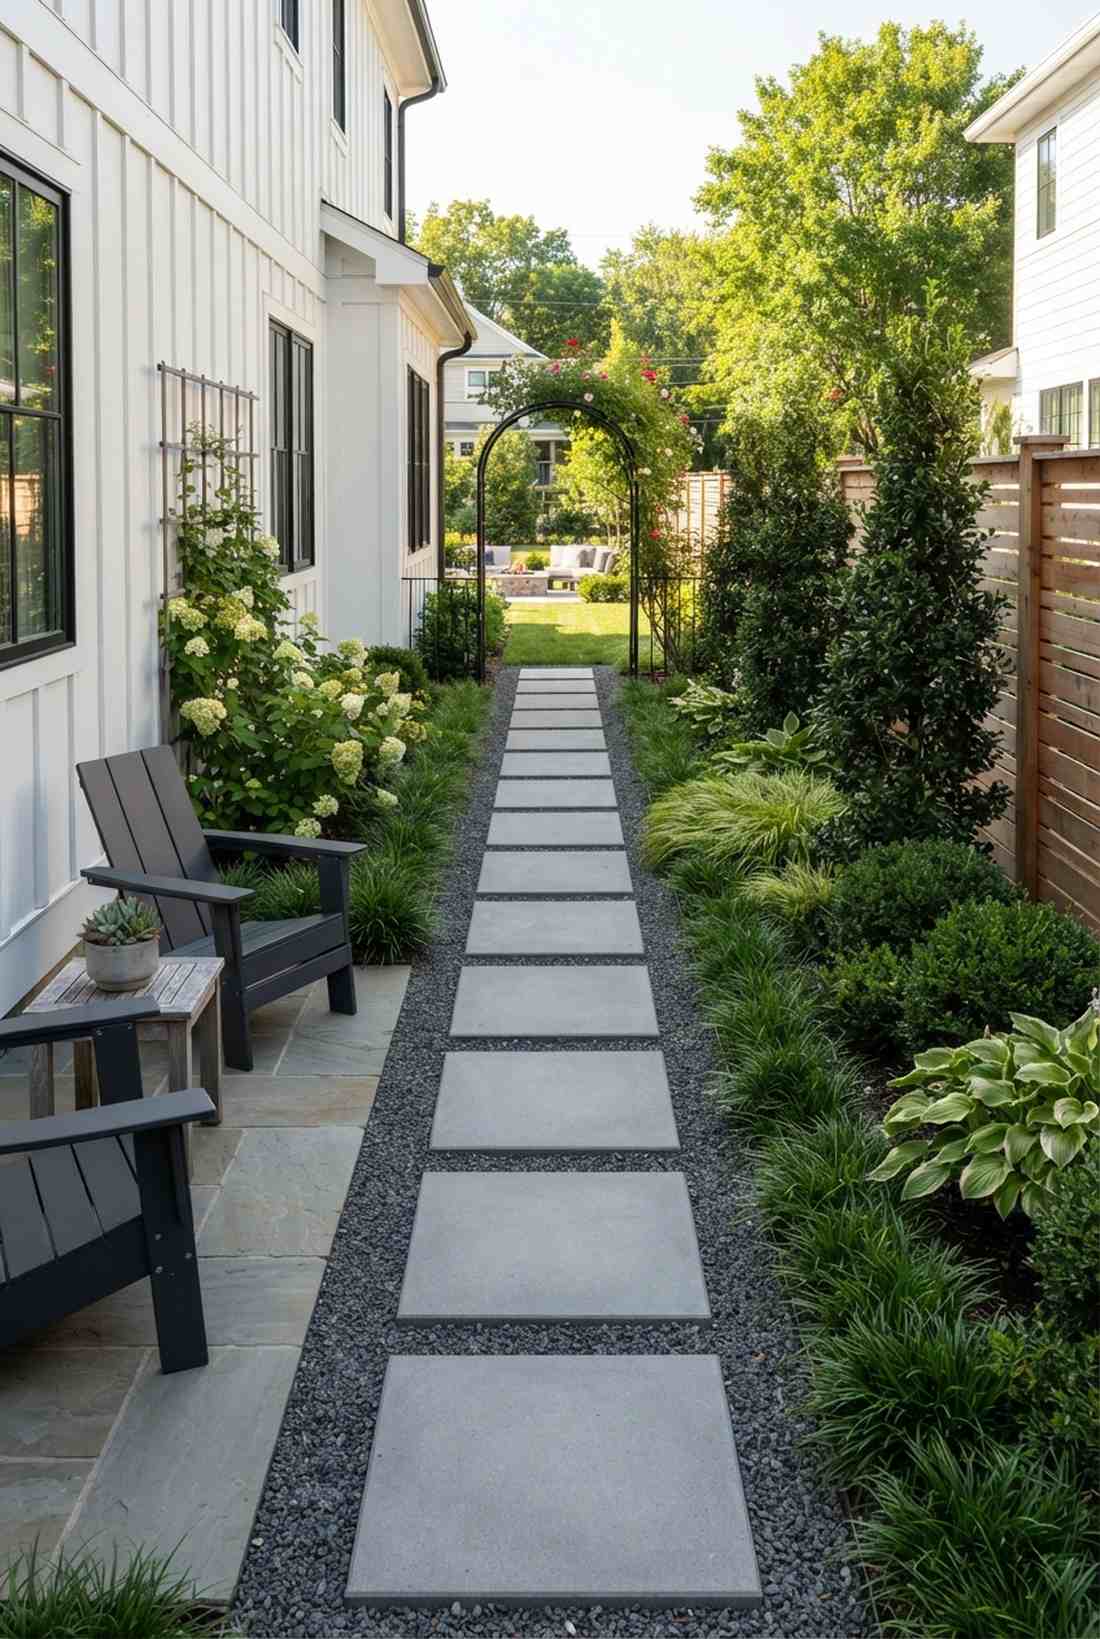
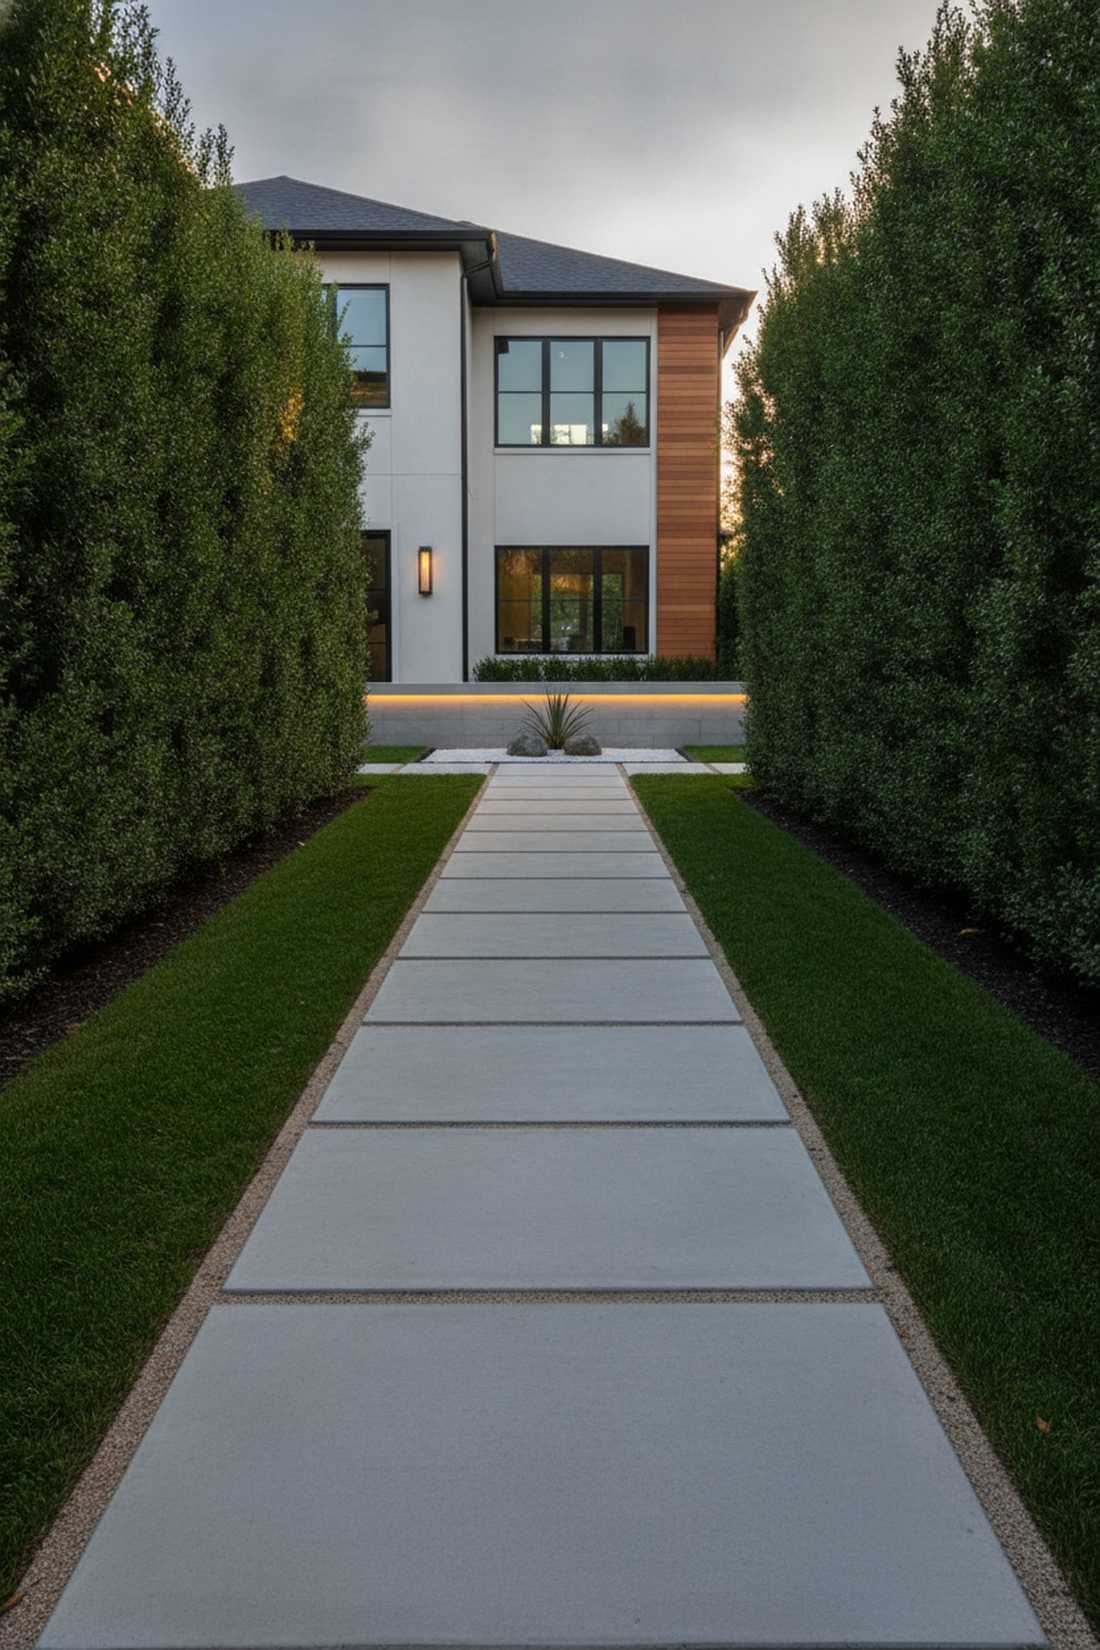
Projects absolute order, symmetry, and luxurious minimalism. Best utilized in narrow side yards to craft a clean modern stone walkway.
You might think this requires a contractor, but DIYing this gives a high-end estate vibe. Using perfectly aligned commercial-grade stepping pavers makes a small, chaotic yard feel organized and intentional instantly.
This precise layout runs roughly $50–$80. Pin this if you thrive on clean lines and symmetry.
- Key Materials: Identical square concrete pavers
- Vibe / Style: Crisp modern minimalist
- Difficulty: Requires meticulous measuring
- Budget Breakdown: Square Pavers: $60 | Leveling Sand: $15
- Creator’s Tip: Use a simple wooden spacer block between every stone to ensure the gap remains mathematically identical down the whole line.
- Smart Sourcing: premium concrete step stones (bulk pack)
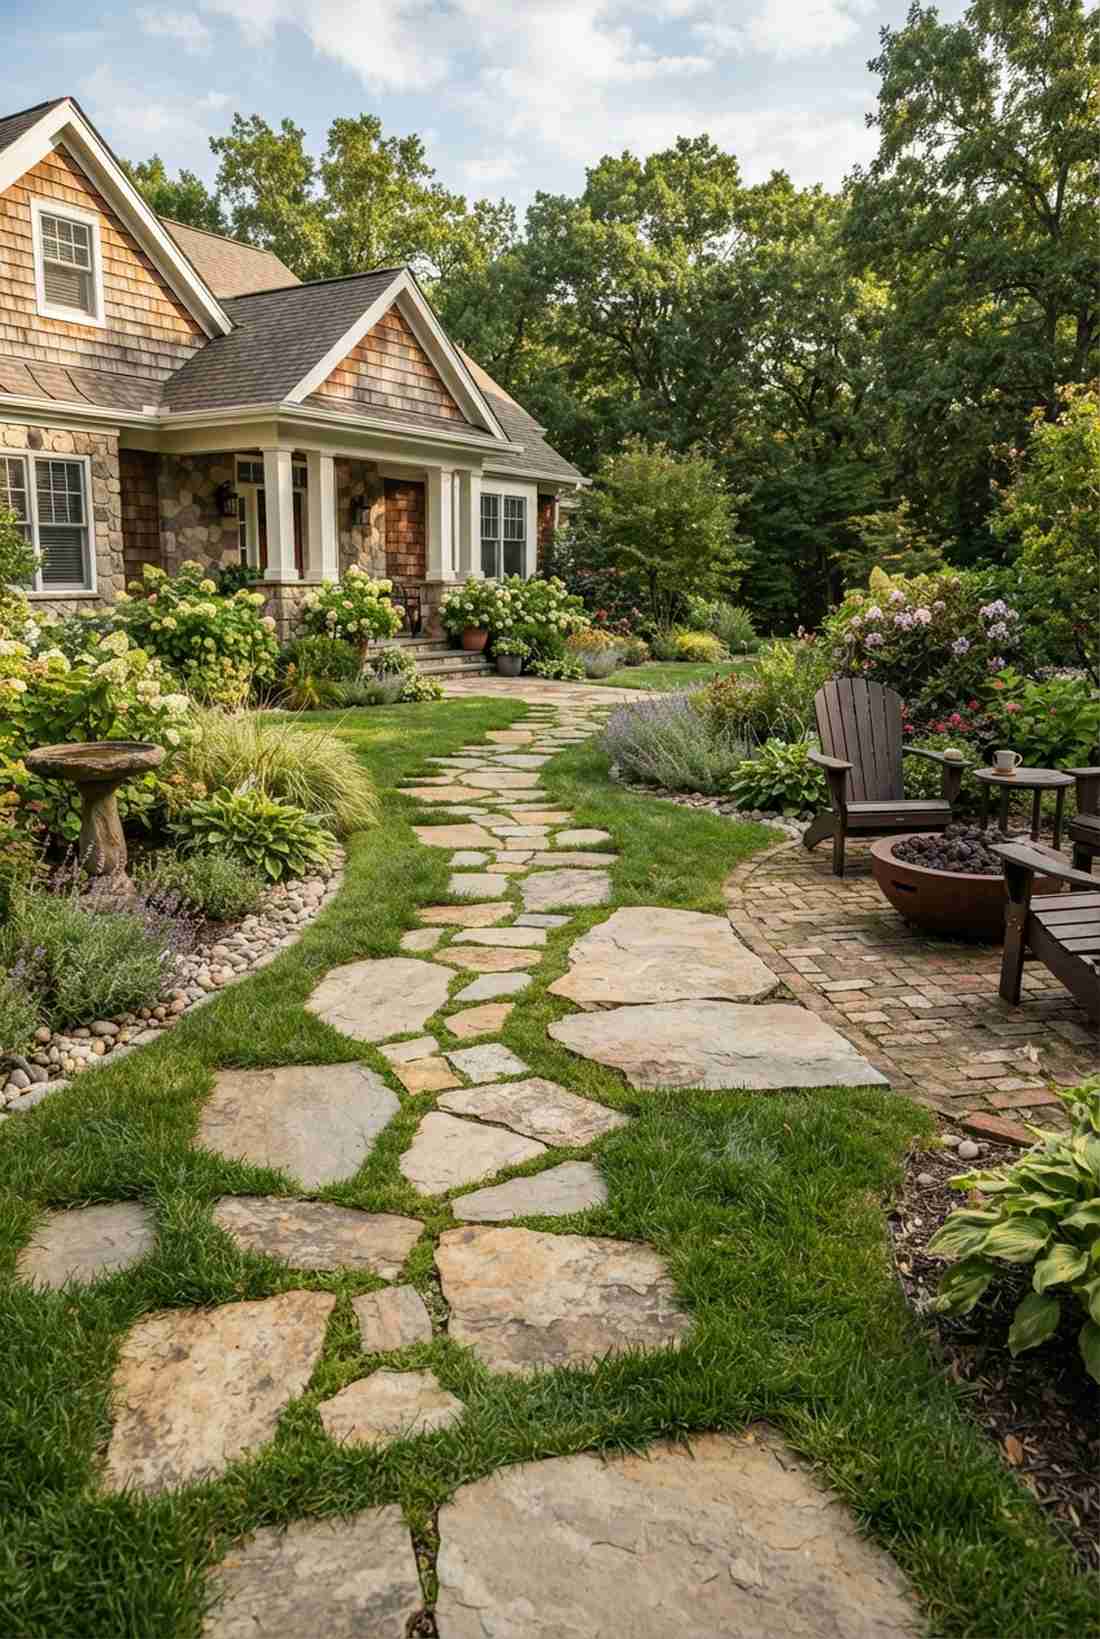
27. Organic Irregular Spacing
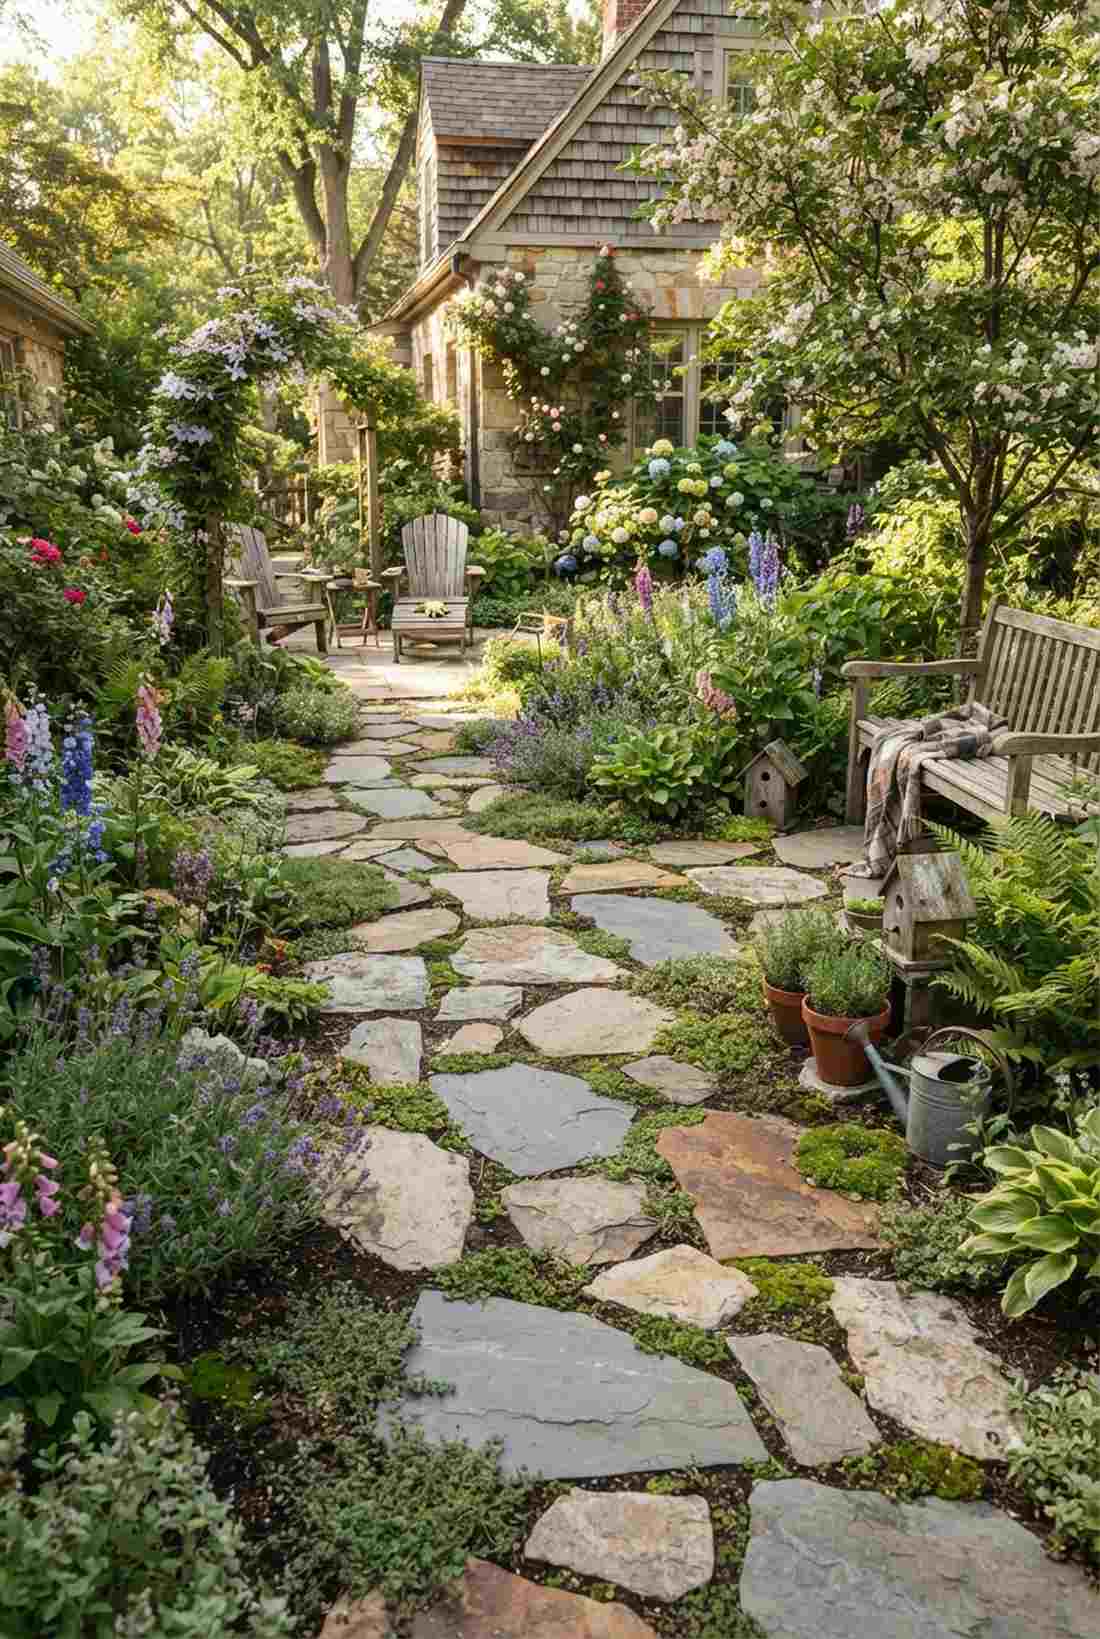
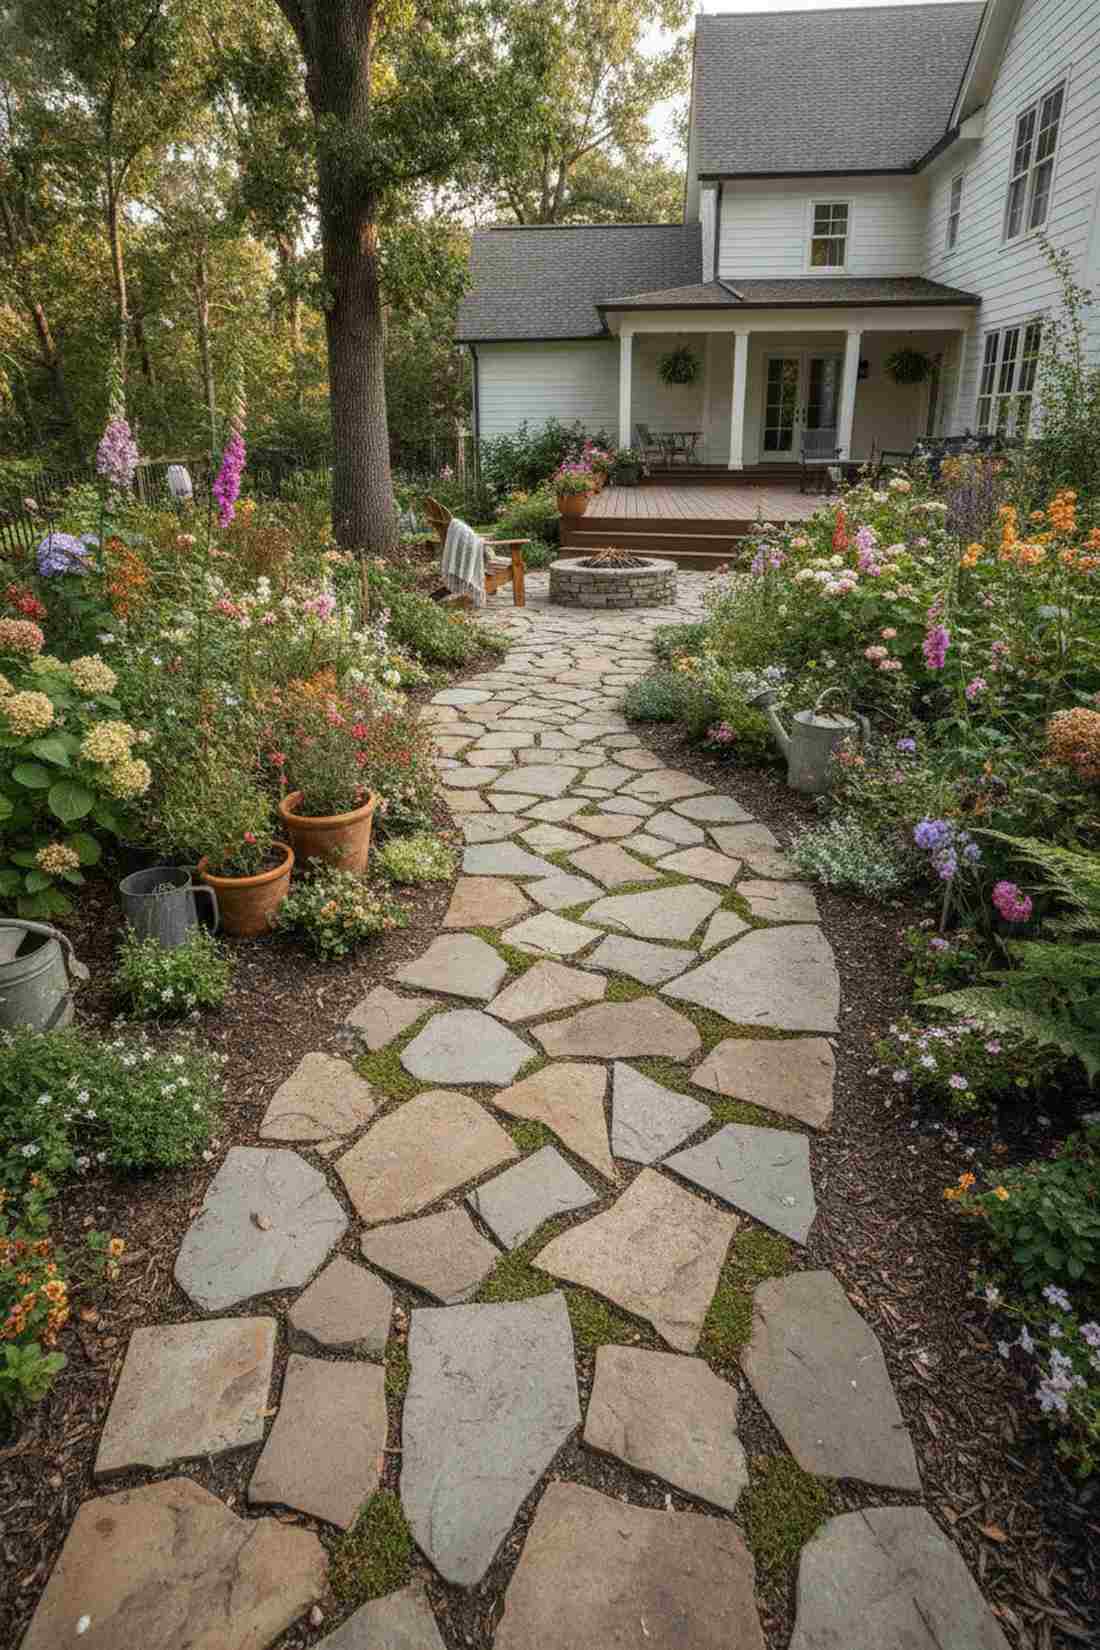
Feels like an ancient path forged organically by nature over centuries. Flawless for lush, overgrown gardens to create a relaxed rustic path.
Most homeowners settle for basic concrete, but this layout delivers a surprisingly premium look. By varying the distance between stones, you trick the brain into slowing down and enjoying the miniature garden supplies hiding in the foliage.
You can execute this look for about $40–$70. It’s a fast upgrade that completely changes the vibe.
- Key Materials: Mixed shape natural flagstones
- Vibe / Style: Unstructured cottage core
- Difficulty: Easy intuitive placement
- Budget Breakdown: Mixed Stones: $55 | Dirt Fill: $10
- Creator’s Tip: Literally walk the path naturally, and place the stones exactly where your footsteps naturally fall.
- Smart Sourcing: natural irregular flagstone bundles
28. Diagonal Dynamic Flow
Creates an optical illusion that makes cramped spaces feel massive. Highly effective for tight urban patios looking for a geometric angled walkway.
While traditional straight paths look rigid, this method ensures an energetic, dynamic visual flow. Placing square pavers at a harsh 45-degree angle completely skips the generic look and forces the eye outward.
This layout costs around $50–$80 for pavers. Save this idea if you have a tiny, narrow backyard.
- Key Materials: Square architectural pavers
- Vibe / Style: Energetic contemporary
- Difficulty: Moderate angling
- Budget Breakdown: Square Pavers: $60 | Sand Base: $15
- Creator’s Tip: Establish a rigid 45-degree string line before placing the first stone so the entire pattern doesn’t slowly drift off-center.
- Smart Sourcing: heavy-duty aluminum string line levels
29. Staggered Brick Pattern
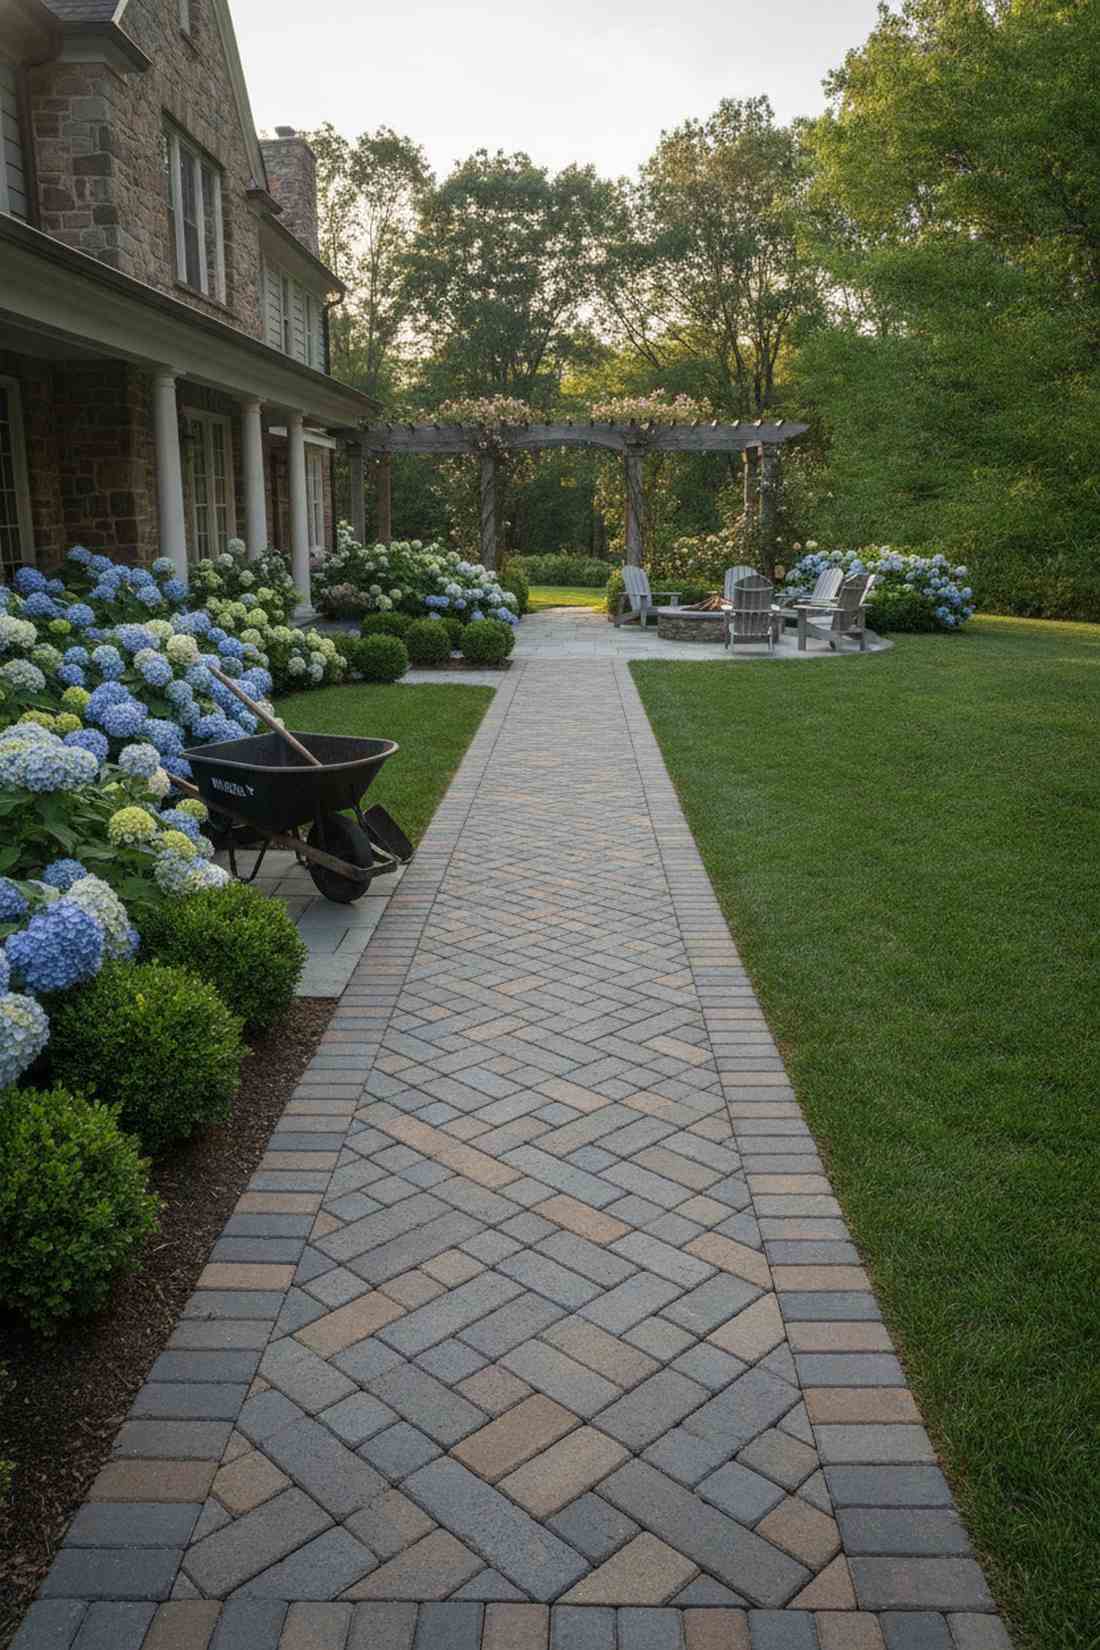
Brings a familiar, comforting cobblestone street energy to your home. Ideal for high-traffic utility paths to build a running bond stone walkway.
People often overcomplicate their walkways, yet this straightforward pattern looks far more expensive than it is. Staggering the joints spreads out foot traffic weight, making it incredibly stable for wheelbarrows and heavy use.
Expect to spend about $60–$90 for durable rectangular stones. Pin this to your practical home improvement board!
- Key Materials: Rectangular concrete or stone pavers
- Vibe / Style: Classic traditional estate
- Difficulty: Moderate spacing
- Budget Breakdown: Rectangular Pavers: $70 | Base Material: $20
- Creator’s Tip: Start laying stones from the center of the path and work outward to ensure your pattern stays perfectly balanced on the edges.
- Smart Sourcing: pre-cut rectangular concrete blocks (bulk pack)
This next setup is ridiculously cheap but looks like a $200 custom center-piece display…
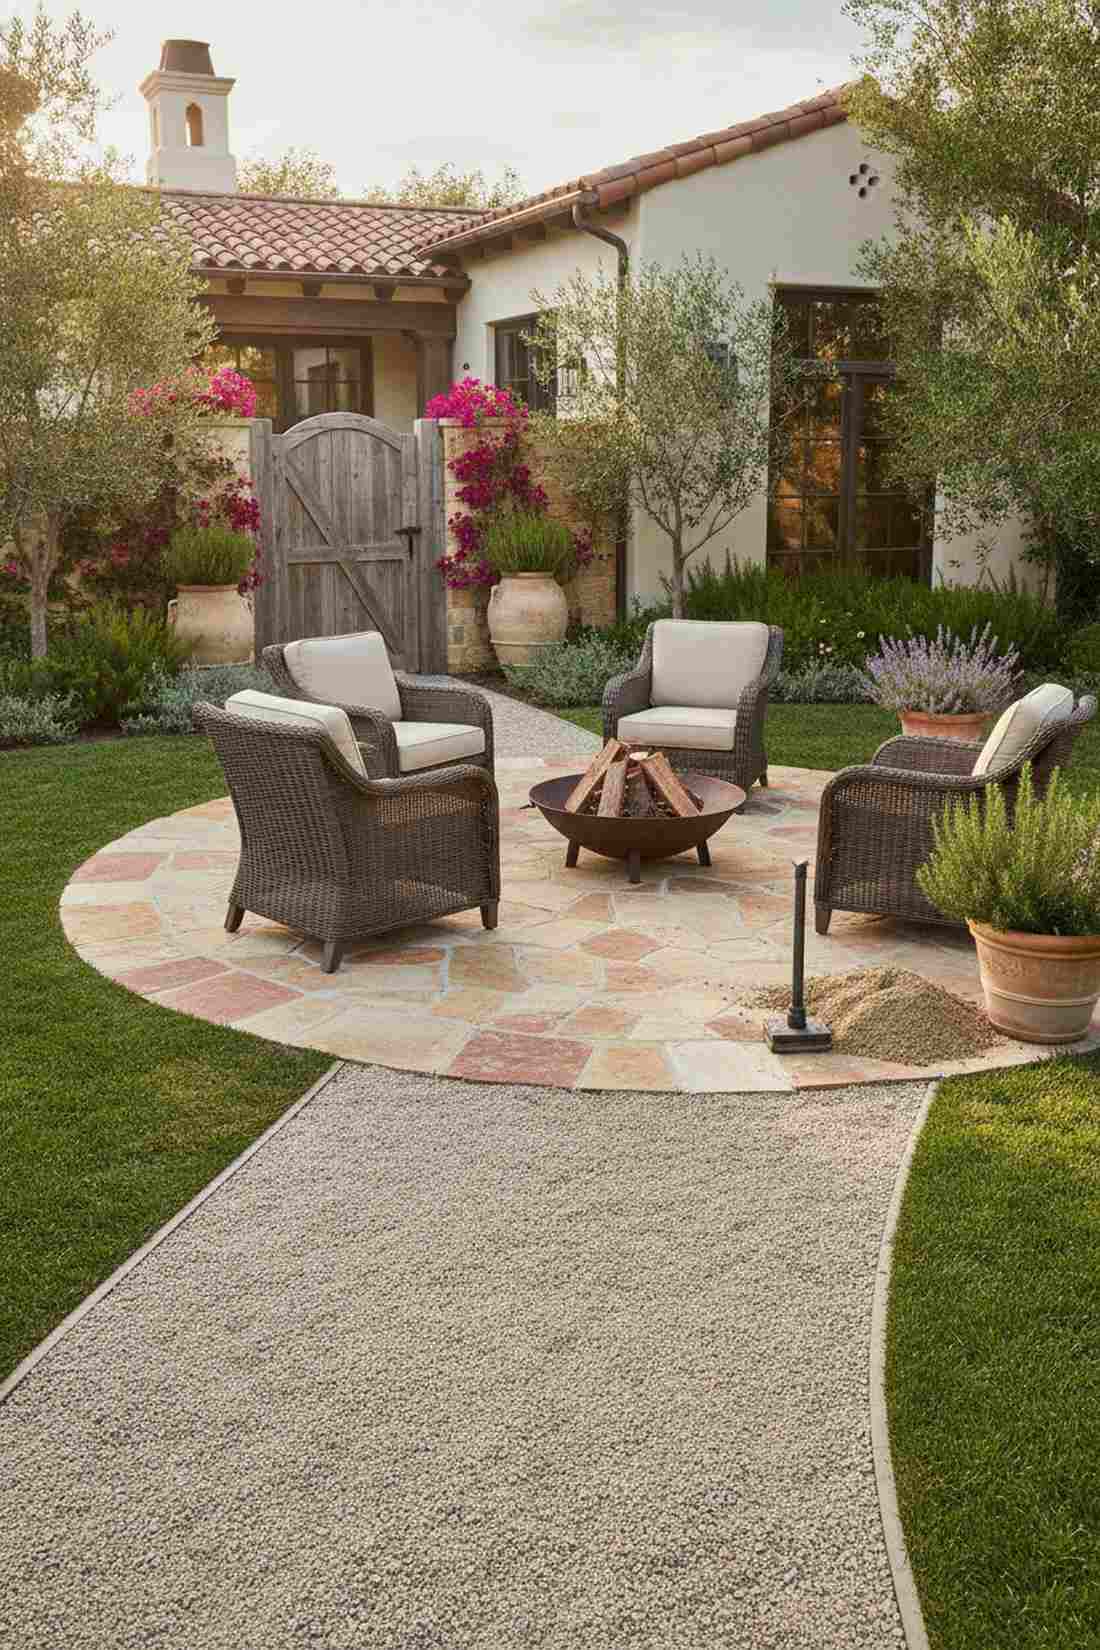
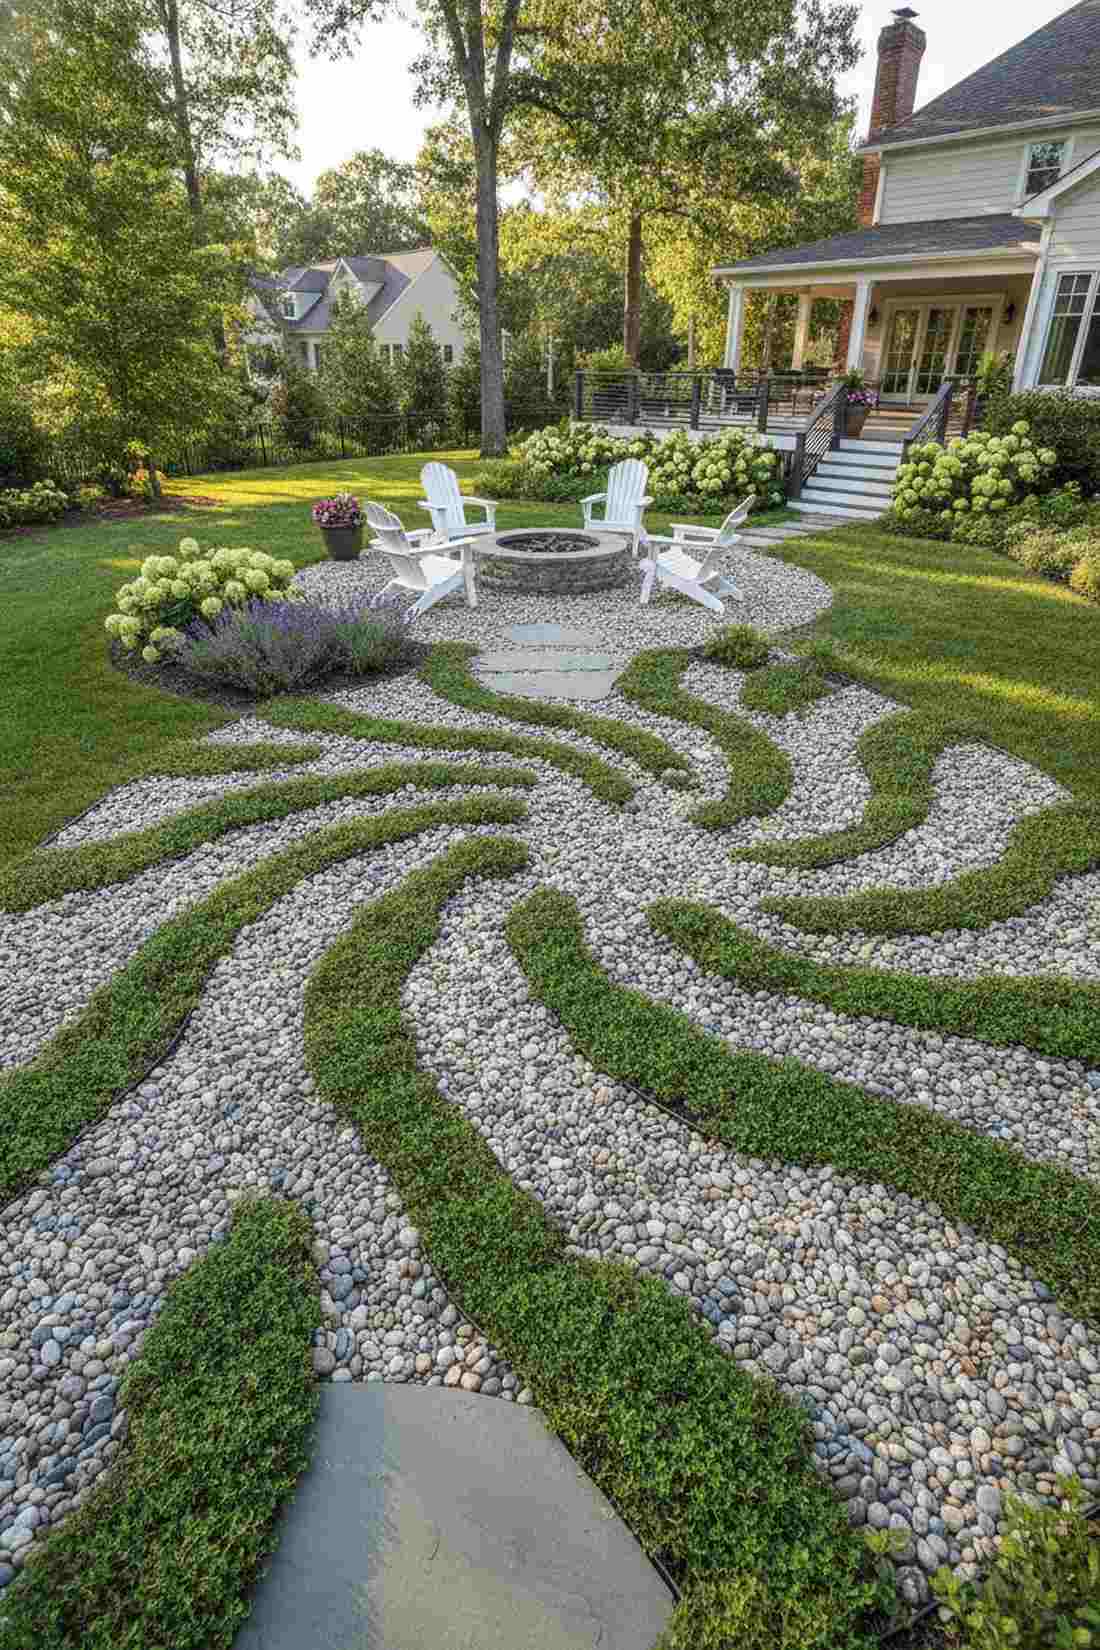
30. Concentric Circle Focal
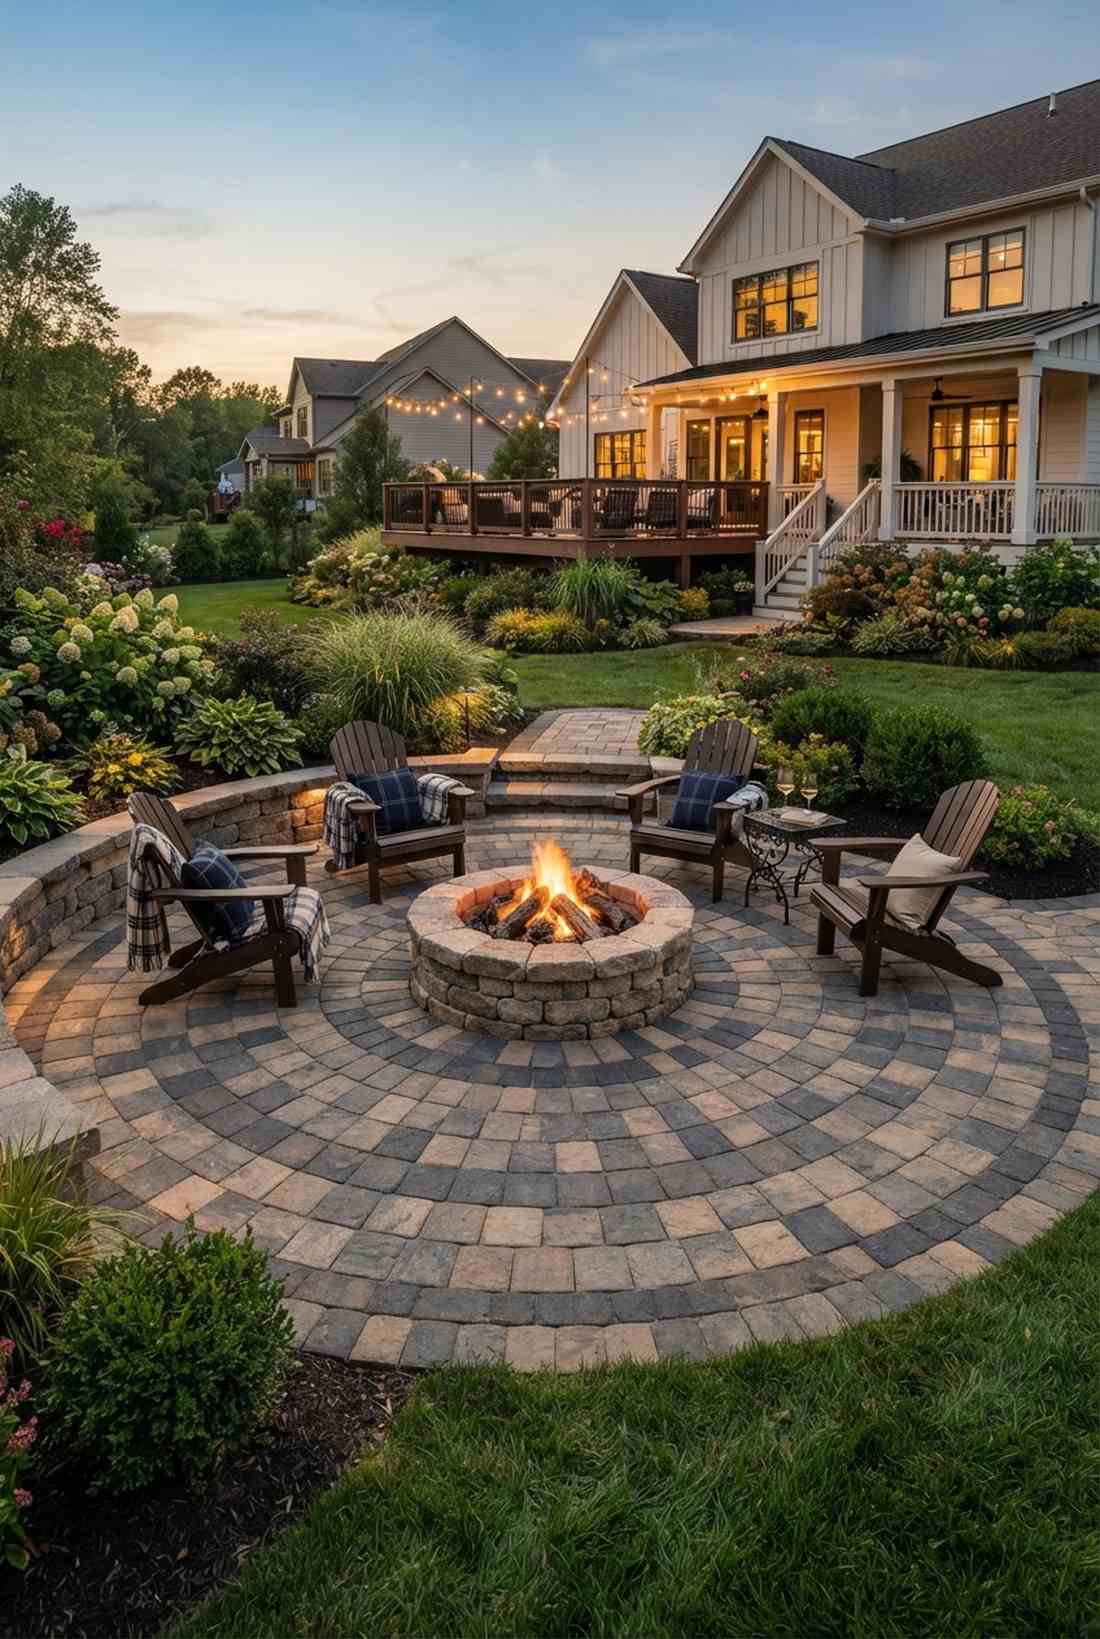
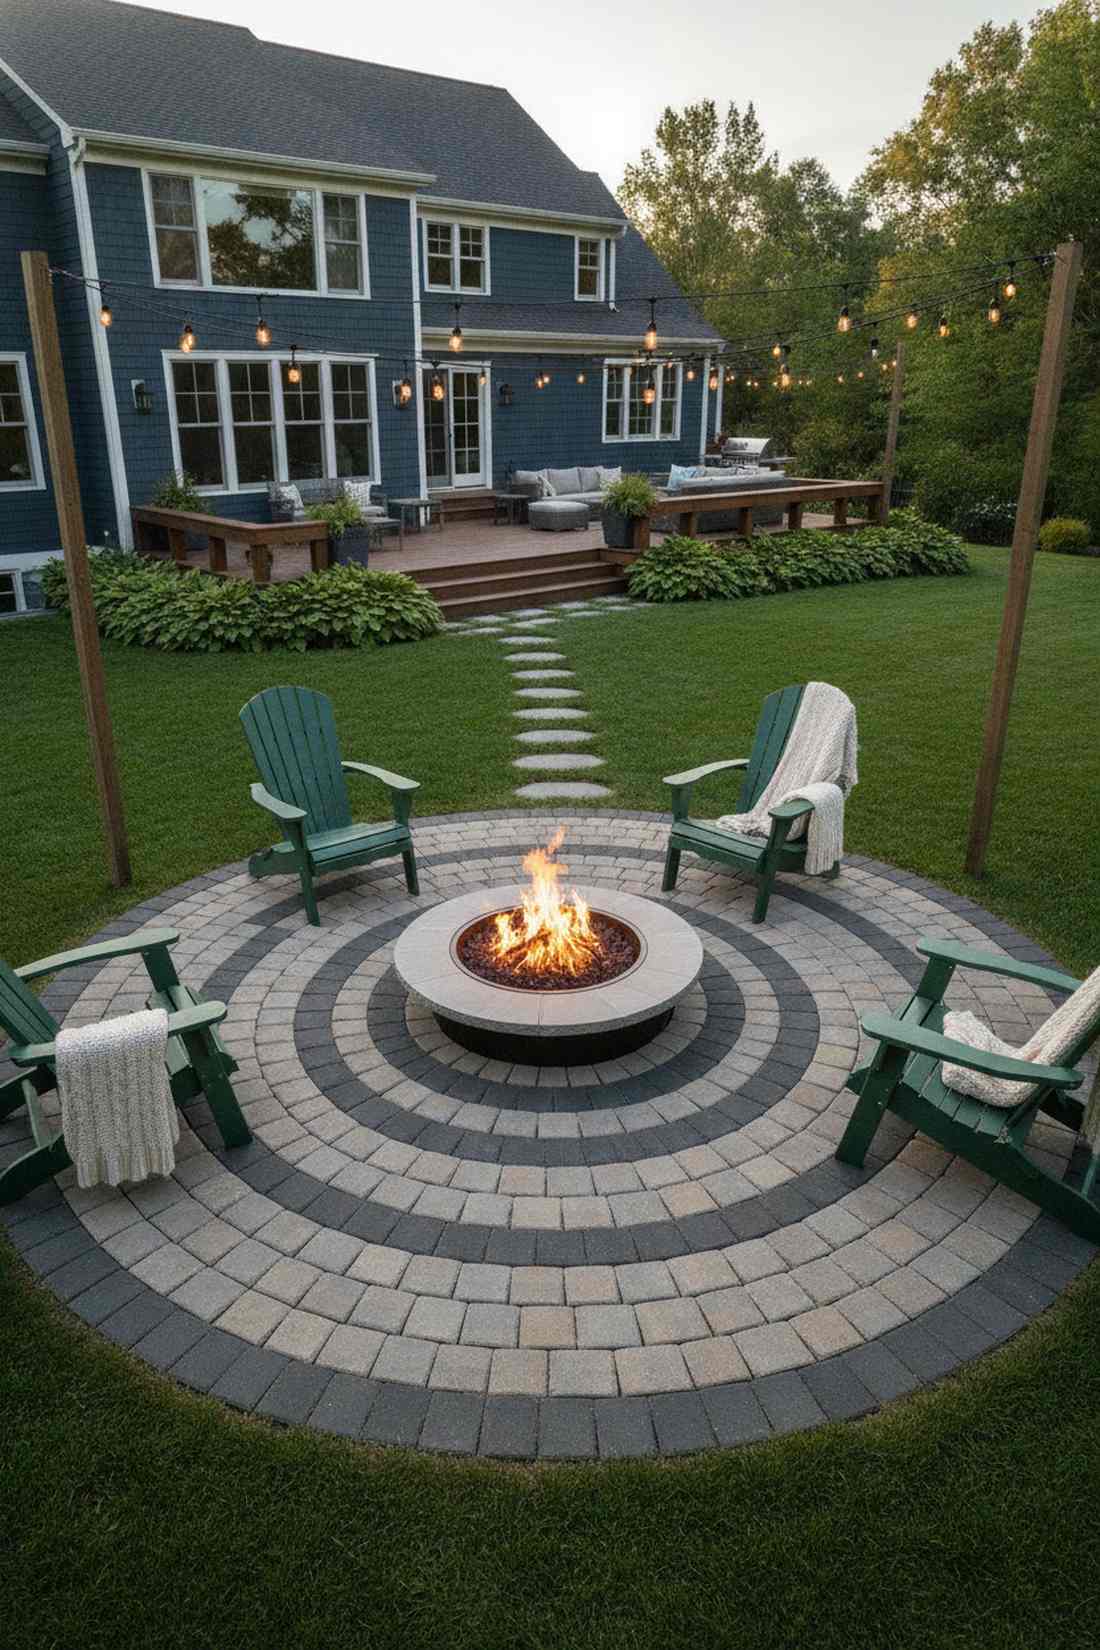
Feels like a mystical courtyard circling an ancient fountain. Perfect for drawing the eye to a backyard firepit to create a radiating stone centerpiece.
Skip the flimsy plastic pavers; this approach gives a designer-level finish. Using wedges or circular stones to radiate outward from a central point creates a magnetic destination zone in your yard.
This bold statement piece runs around $80–$120. Highly recommended for a stunning backyard focal point.
- Key Materials: Wedge-shaped pavers and a central focal stone
- Vibe / Style: Dramatic courtyard focal
- Difficulty: Advanced mathematical layout
- Budget Breakdown: Wedge Pavers: $90 | Center Piece: $30
- Creator’s Tip: Drive a stake in the center and use a string as a compass to ensure your circles remain perfectly round.
- Smart Sourcing: circular fire pit paver kits
Material Mixing Techniques
Combining multiple ground cover materials adds depth, texture, and functional benefits to stepping stone pathways. These hybrid approaches allow you to optimize different materials for specific pathway zones or aesthetic effects.
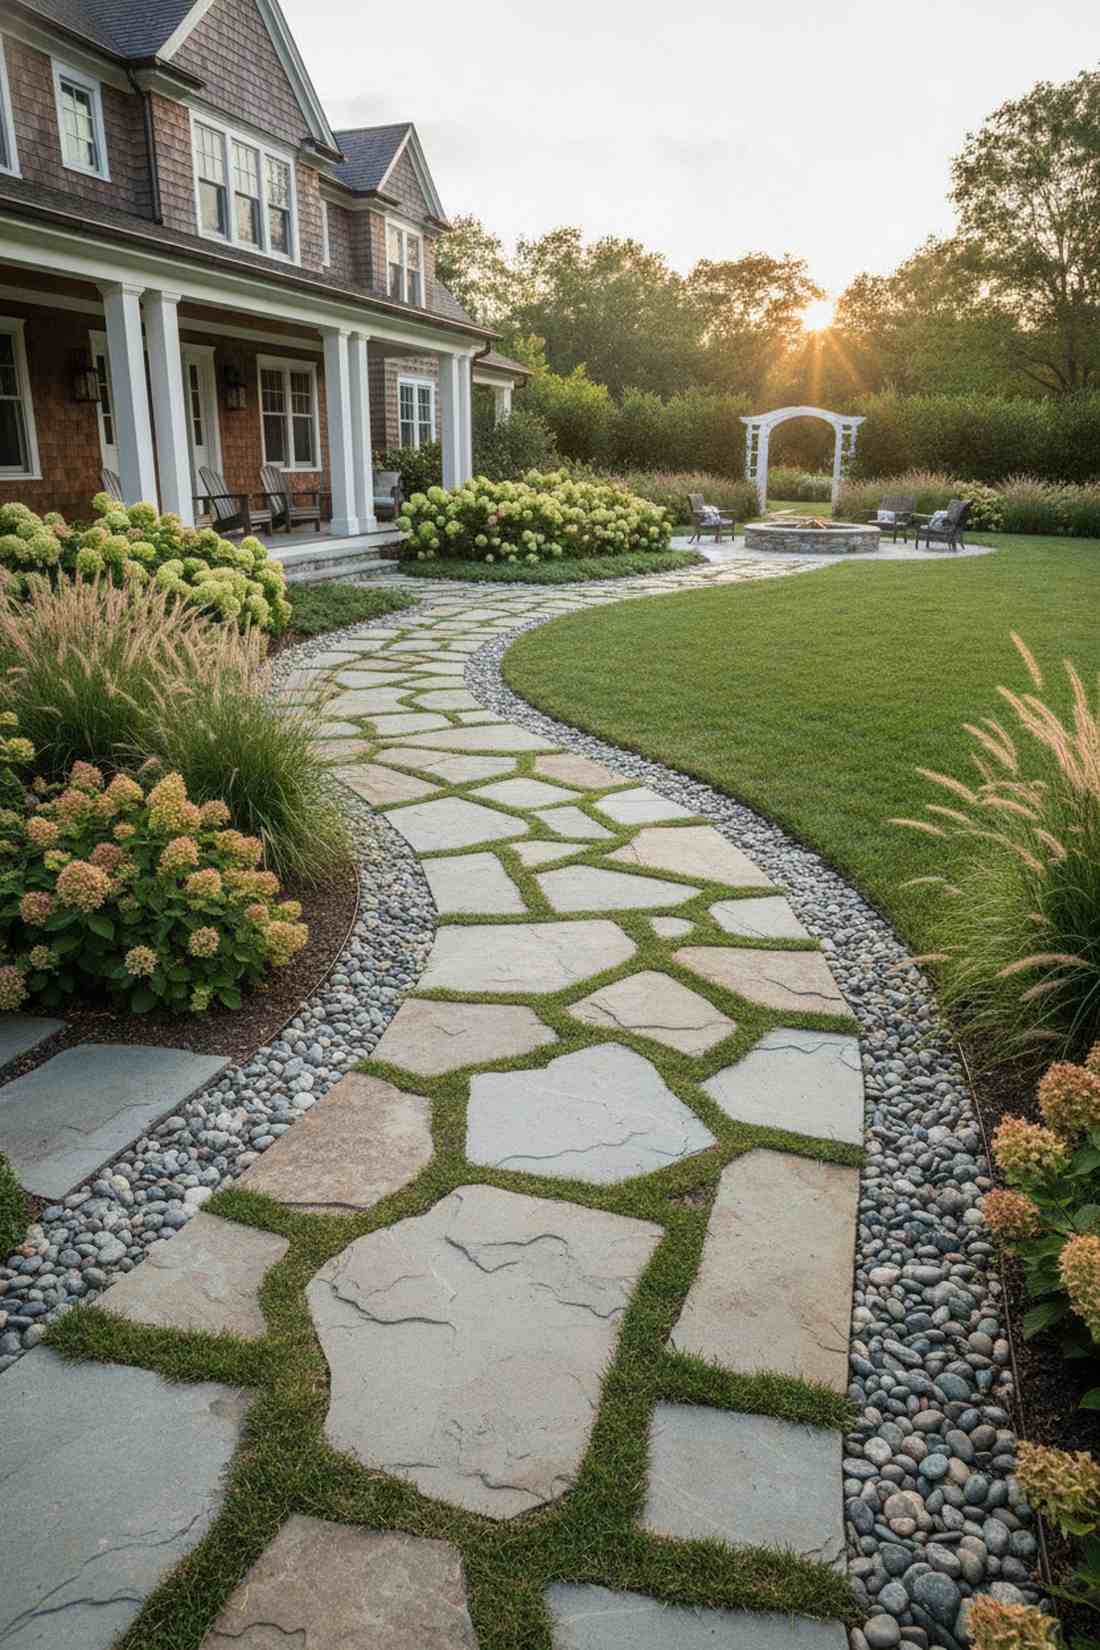
31. Gravel-to-Grass Transition
Offers the perfect blend of structural integrity and lush organic softness. Works brilliantly where the patio meets the lawn to form a fading border pathway.
Most homeowners settle for harsh borders, but this layout delivers a surprisingly premium look. Encasing the stones in gravel while letting the edges bleed into grass completely skips the generic look.
You can execute this seamless fade for roughly $40–$70. Save this if you love blended, natural landscaping.
- Key Materials: Pea gravel, grass seed, stepping stones
- Vibe / Style: Seamless organic transition
- Difficulty: Moderate edging work
- Budget Breakdown: Gravel: $25 | Stones: $35 | Seed: $10
- Creator’s Tip: Install a hidden sub-surface barrier to stop the gravel from slowly migrating fully into the grass over time.
- Smart Sourcing: hidden plastic lawn edging strips
32. Thyme and Pebble Mosaic
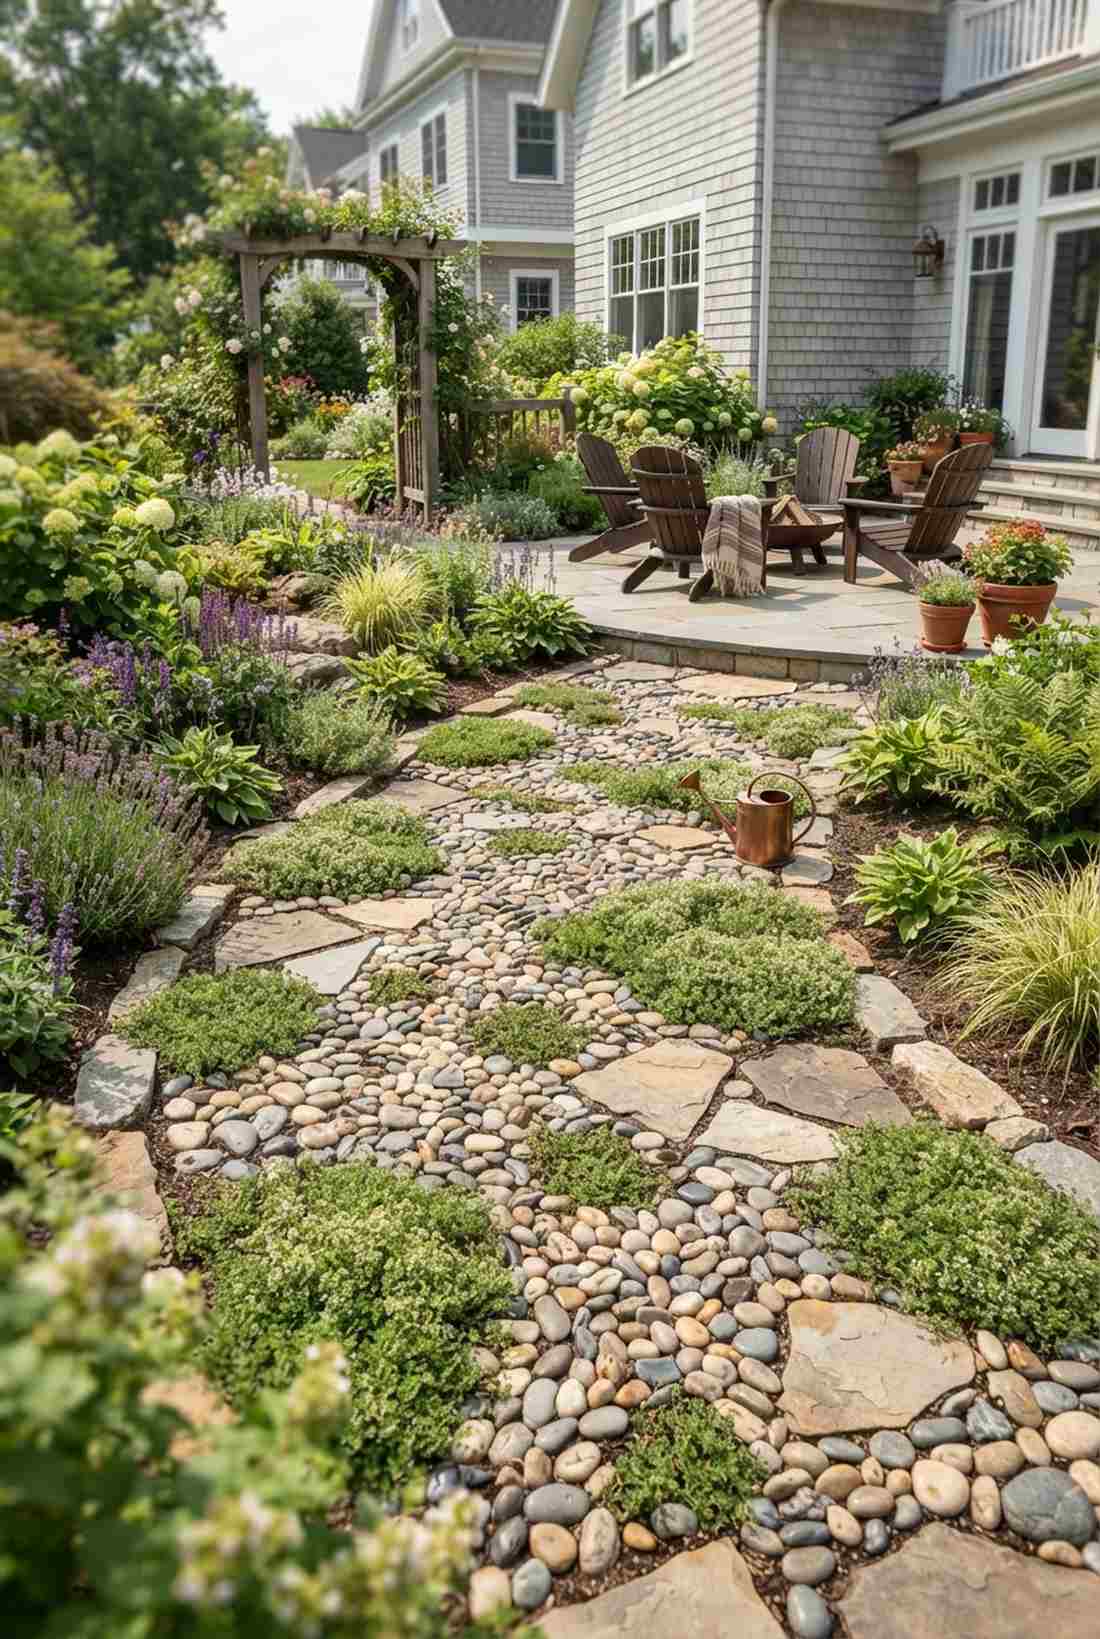
Looks like a wildly expensive handcrafted piece of living floor art. Exceptional for sunny garden centerpieces looking for a mixed textural mosaic walk.
You might think this requires a botanical expert, but DIYing this gives a high-end estate vibe. Mixing fragrant thyme patches with polished pebbles brings fairy garden kits to life on a life-sized scale.
This textural masterpiece costs about $50–$85. It’s a fast upgrade that completely changes the vibe.
- Key Materials: Polished pebbles, thyme plugs, flat stones
- Vibe / Style: Handcrafted botanical mosaic
- Difficulty: Detailed hand placement
- Budget Breakdown: Pebbles: $30 | Thyme: $25 | Stones: $30
- Creator’s Tip: Use the pebbles in the lowest draining spots and plant the thyme on the slightly elevated bumps for perfect moisture control.
- Smart Sourcing: mixed polished river rock pebbles
33. Moss and Slate Zen
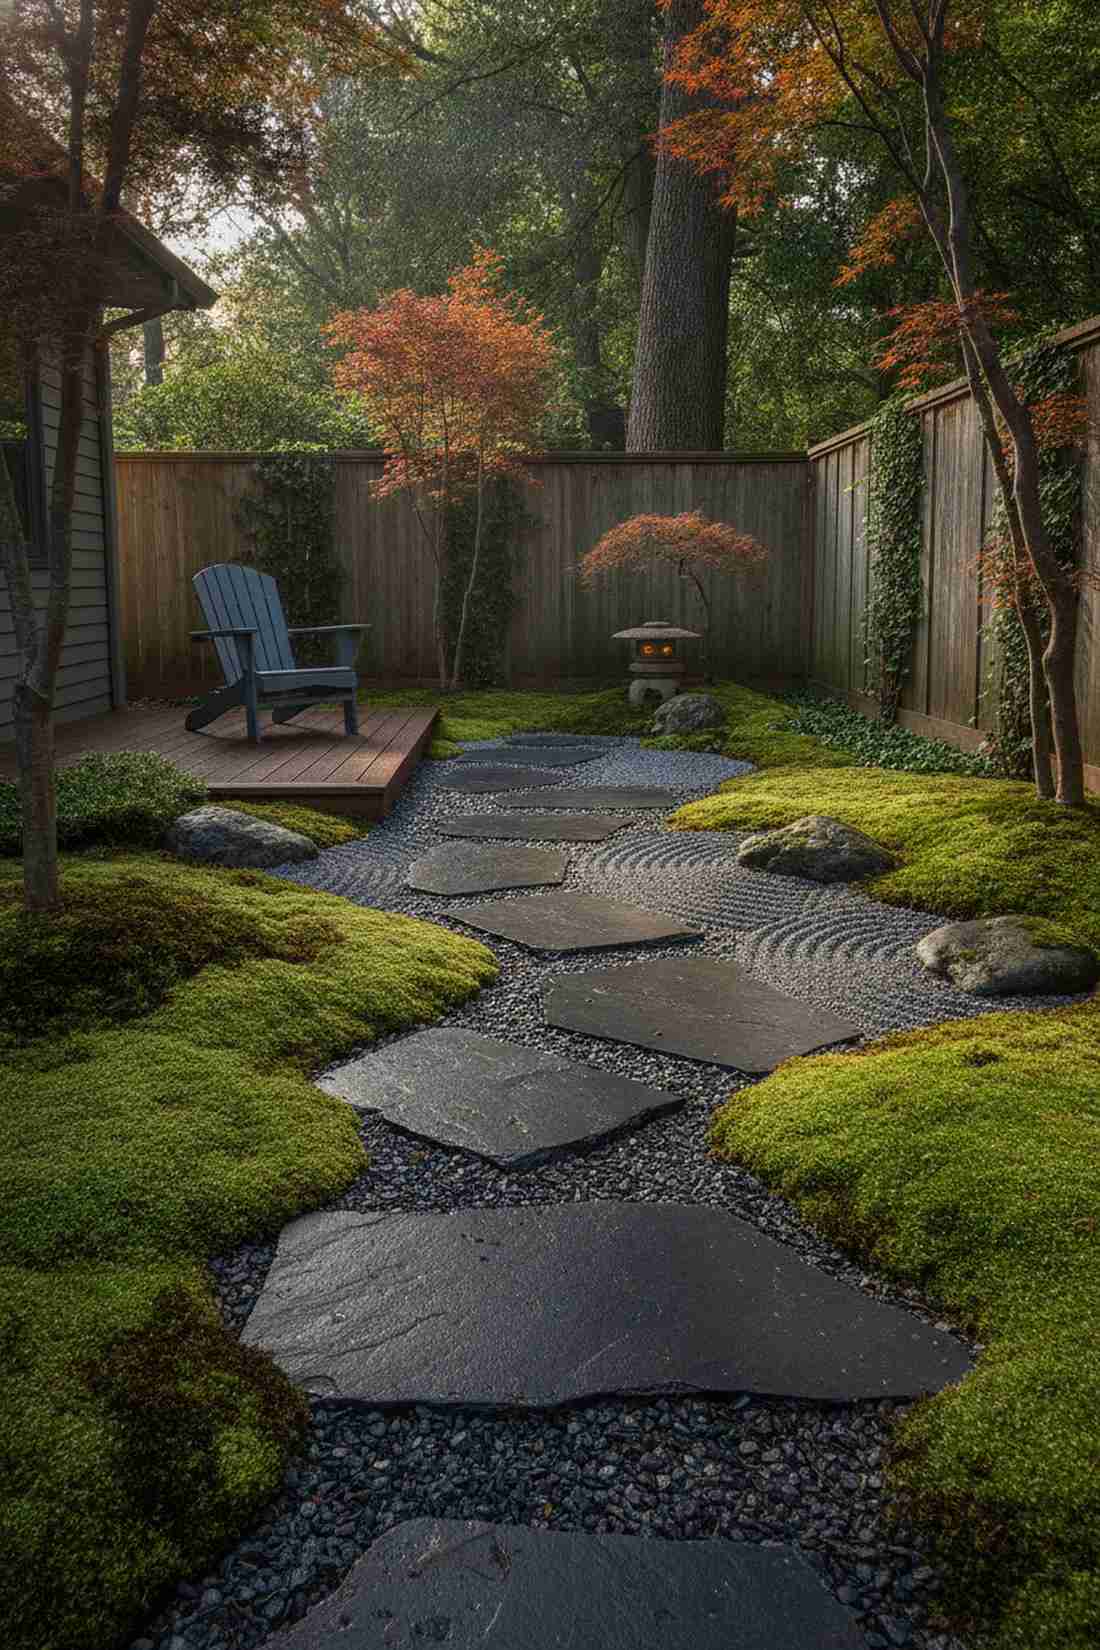
Radiates absolute stillness and deep meditation energy. The ultimate choice for transforming a damp, dark side yard into a Japanese zen garden path.
Don’t fall for cheap imitation stone when genuine cuts deliver a surprisingly premium look. The aggressive angularity of the dark slate fragments contrasting with the pillowy soft moss is pure designer magic.
You can easily pull this off for around $60–$90. Pin this to your ultimate relaxation garden board.
- Key Materials: Slate chips, live moss, large slate pavers
- Vibe / Style: Meditative Japanese Zen
- Difficulty: Requires delicate moss handling
- Budget Breakdown: Slate Materials: $55 | Moss: $30
- Creator’s Tip: Mist the moss twice a day during the first two weeks until the root system securely grabs the underlying soil.
- Smart Sourcing: live Irish moss flats (bulk pack)
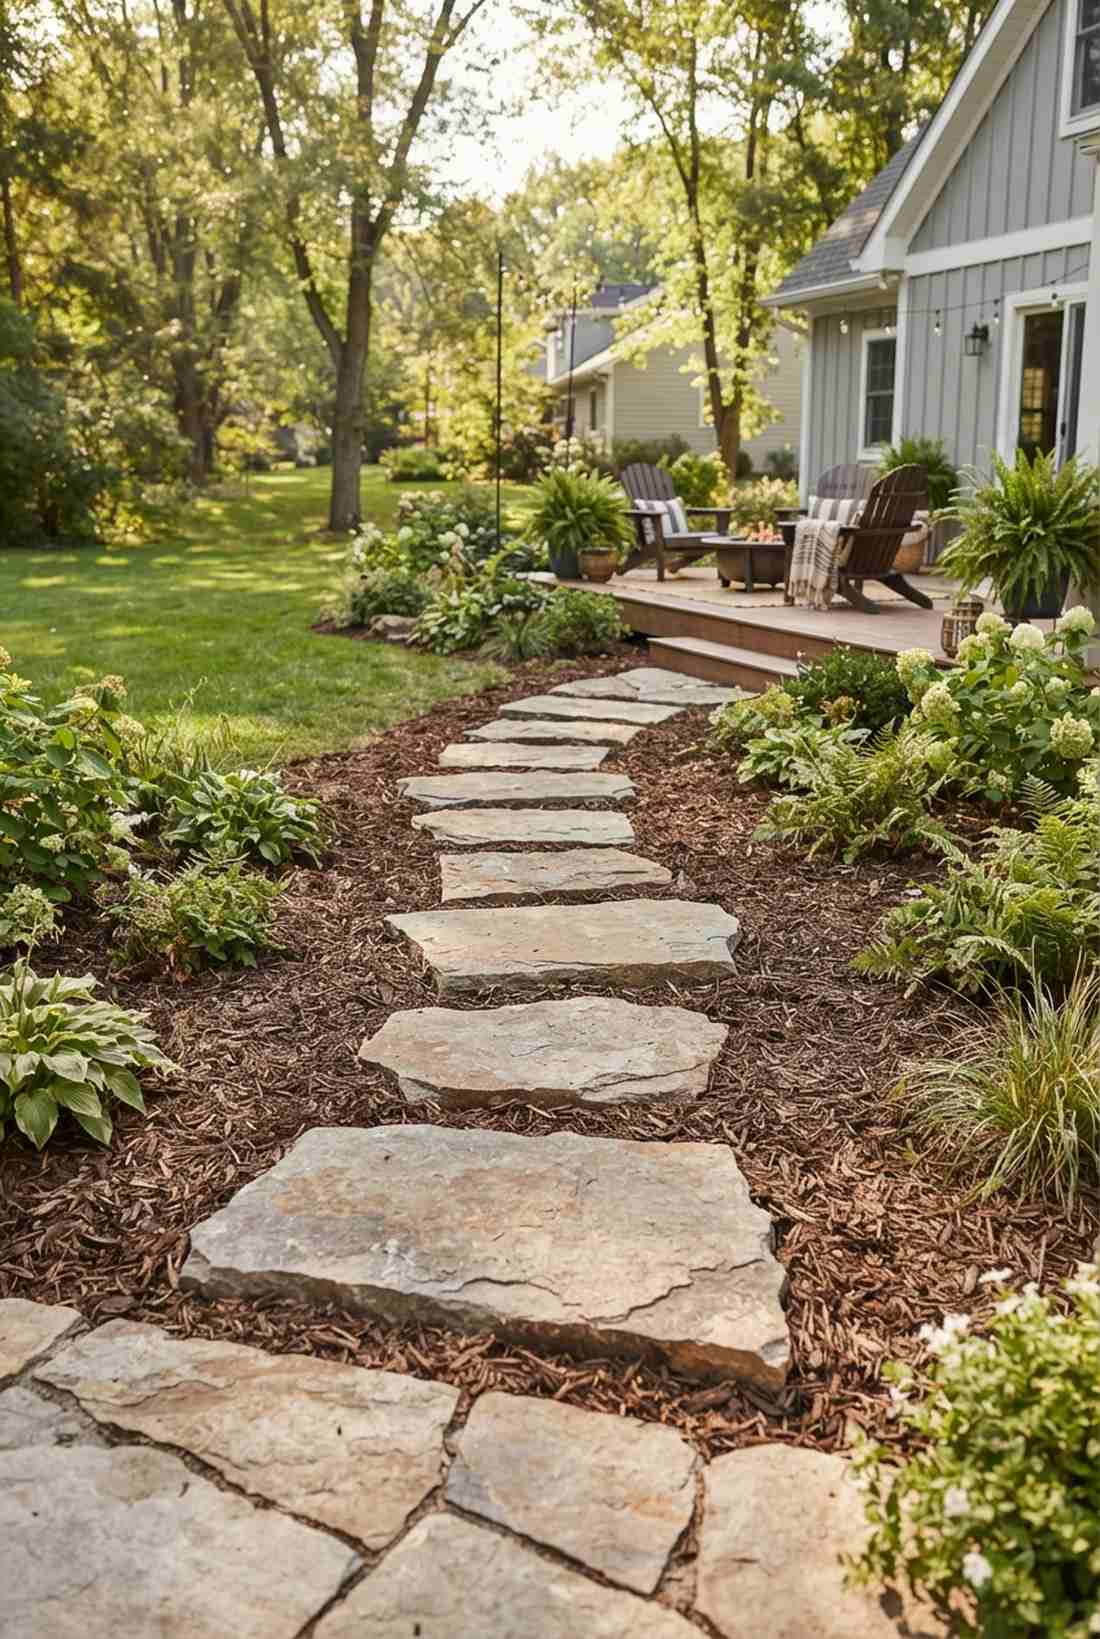
34. Mulch Edged with Stone
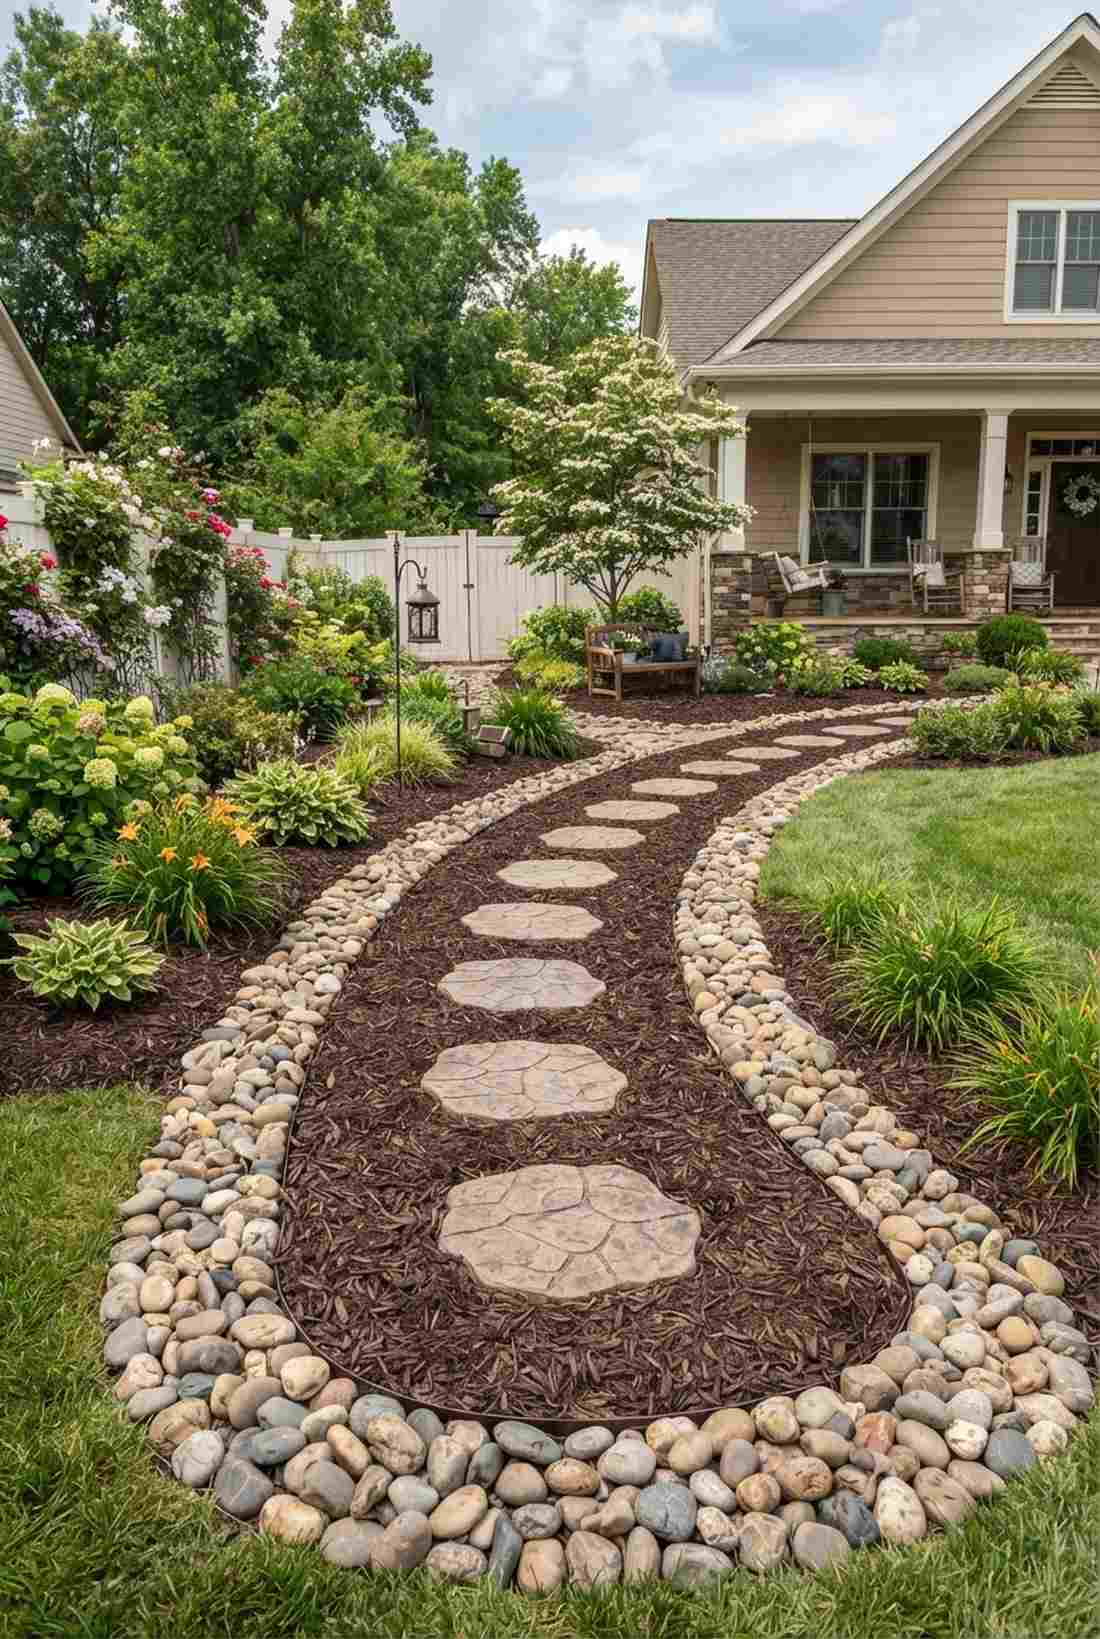
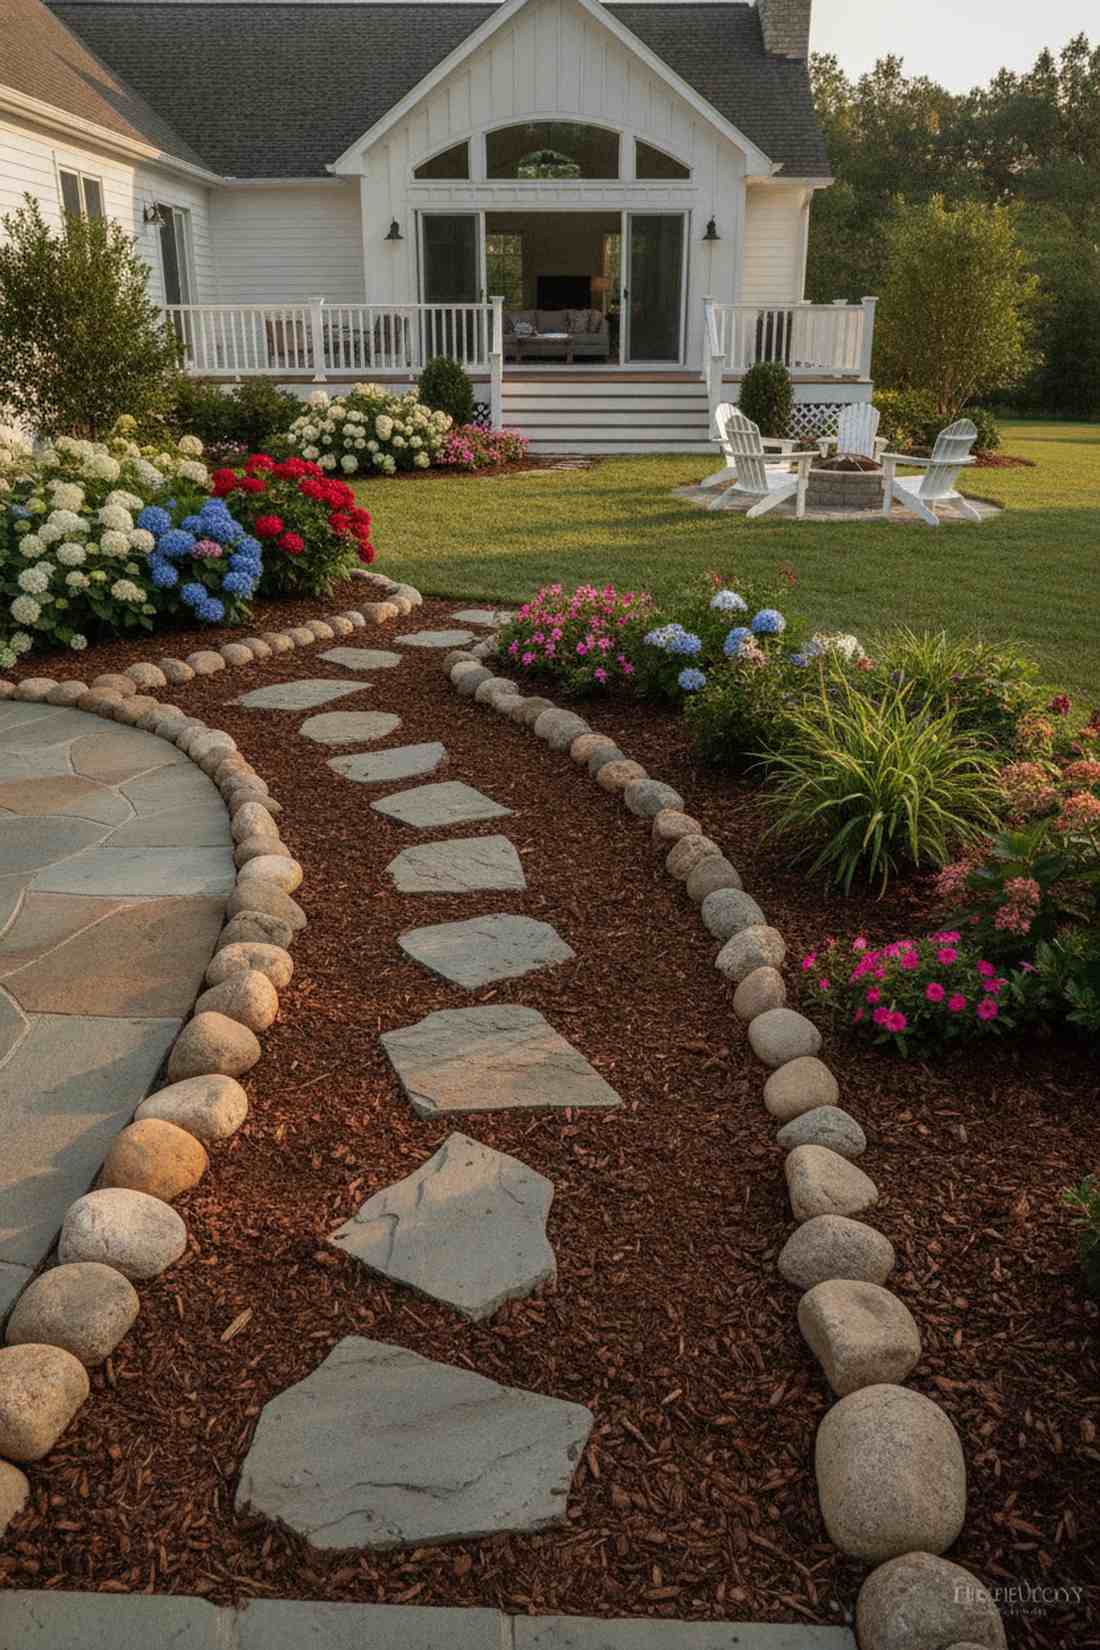
Provides an incredibly neat, well-kept appearance that stops messes entirely. Superb for bordering flower beds while maintaining a clean rock-bordered mulch walkway.
Many homeowners struggle with mulch runoff, but this method ensures long-lasting stability. Locking stepping stones in mulch via a heavy river rock border gives a designer-level finish that practically maintains itself.
This highly practical setup costs around $45–$75. Highly recommended for a high-traffic weekend win.
- Key Materials: Wood mulch, large river cobbles, stepping pavers
- Vibe / Style: Neatly manicured traditional
- Difficulty: Easy beginner project
- Budget Breakdown: Mulch: $15 | Cobbles: $30 | Pavers: $30
- Creator’s Tip: Make the rock border at least two stones wide to ensure heavy rains don’t breach the barrier and wash your mulch away.
- Smart Sourcing: oversized river rock cobbles (bulk pack)
Conclusion
Executing any of these 34 stepping stones landscape blueprints instantly transforms generic mud paths into high-end, functional outdoor features. Whether you leverage stepping stones in mulch for cheap, low-maintenance coverage or build luxurious layouts using stepping stones with grass in between, the right materials guarantee a designer-level finish. Stop settling for bare dirt and invest in commercial-grade bases, UV-coated sealants, and premium kits. Try out one of these budget-friendly blueprints this weekend, apply our exact material sourcing tips, and watch your yard’s curb appeal skyrocket instantly.
Frequently Asked Questions
How far apart should stepping stones be placed in a landscape?
Stepping stones should be precisely measured 20-24 inches apart from center to center to match a comfortable adult stride. If you are using premium miniature garden supplies or creating a relaxed cottage vibe, slightly varying this to 18-26 inches forces a slower, more deliberate walking pace. Using heavy-duty landscaping paver leveling kits ensures that once you set the distance, the stones won’t drift.
What is the best ground cover to plant between stepping stones?
Creeping thyme and Blue Star Creeper are the elite choices for sun-drenched yards, offering fast-spreading coverage and incredible resilience. For heavily shaded areas, investing in live Irish moss flats creates a stunning, velvet-like texture. If you want a zero-maintenance, high-end look, bypass plants entirely and use UV-coated recycled rubber landscape mulch or crushed granite.
Should stepping stones be level with the ground?
Yes, sinking them slightly below the surface is the secret to a professional installation. When installing stepping stones with grass in between, recessing them 1/2 inch below the turf allows your mower to glide right over without blade damage. Always use pre-cut heavy-duty paver bases to prevent the stones from slowly sinking deeper into the mud over the years.
How do you keep mulch from washing away around stepping stones?
The smartest DIY trick is to install commercial-grade woven weed barrier rolls underneath to prevent the mulch from turning into a slippery mud trap. Create a physical lock by edging the path with oversized river rock cobbles or heavy-duty plastic landscape edging strips. Additionally, upgrading to premium oversized pine bark nuggets prevents floating compared to cheap, lightweight shredded mulch.
Can you put stepping stones directly on grass?
Tossing pavers directly onto grass is the biggest beginner mistake and guarantees a wobbly, dangerous walkway. You must excavate 2-3 inches of turf, lay down a stabilizing layer using commercial-grade leveling sand, and then set the stone. This premium foundation approach stops the stones from cracking under pressure and gives you a permanent, high-end aesthetic.