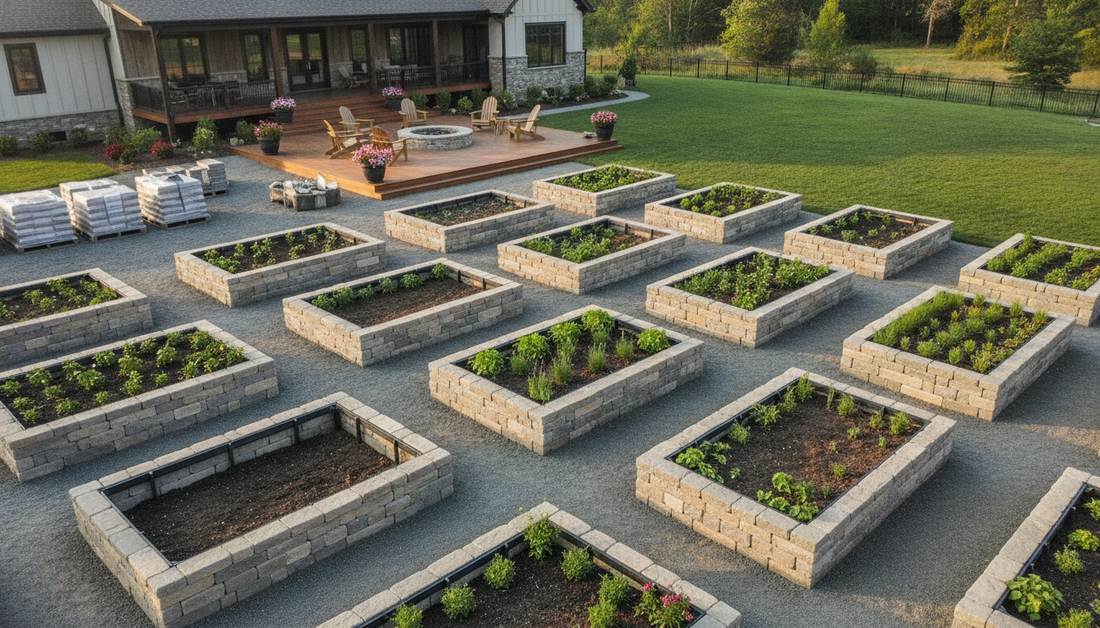
Upgrading to raised beds stone layouts instantly delivers a premium, lifelong landscape foundation. Skip cheap rotting wood by sourcing bulk masonry materials and heavy-duty structural kits. These exact blueprints guarantee a high-end designer finish on a realistic budget.
Design Snapshot: Key Principles
- Foundation Depth: Excavate 6–10 inches below grade and install 3–4 inches of crushed gravel for drainage and stability.
- Joint Staggering: Offset seams between courses to prevent vertical cracks and distribute soil pressure evenly across the wall.
- Backward Pitch: Angle walls 1–2 degrees toward the bed interior to counteract outward soil thrust and improve long-term stability.
- Cap Integration: Use thick, wide capstones or blocks that span the full wall width to lock layers together and resist shifting.
Dry-Stack Fieldstone Foundations
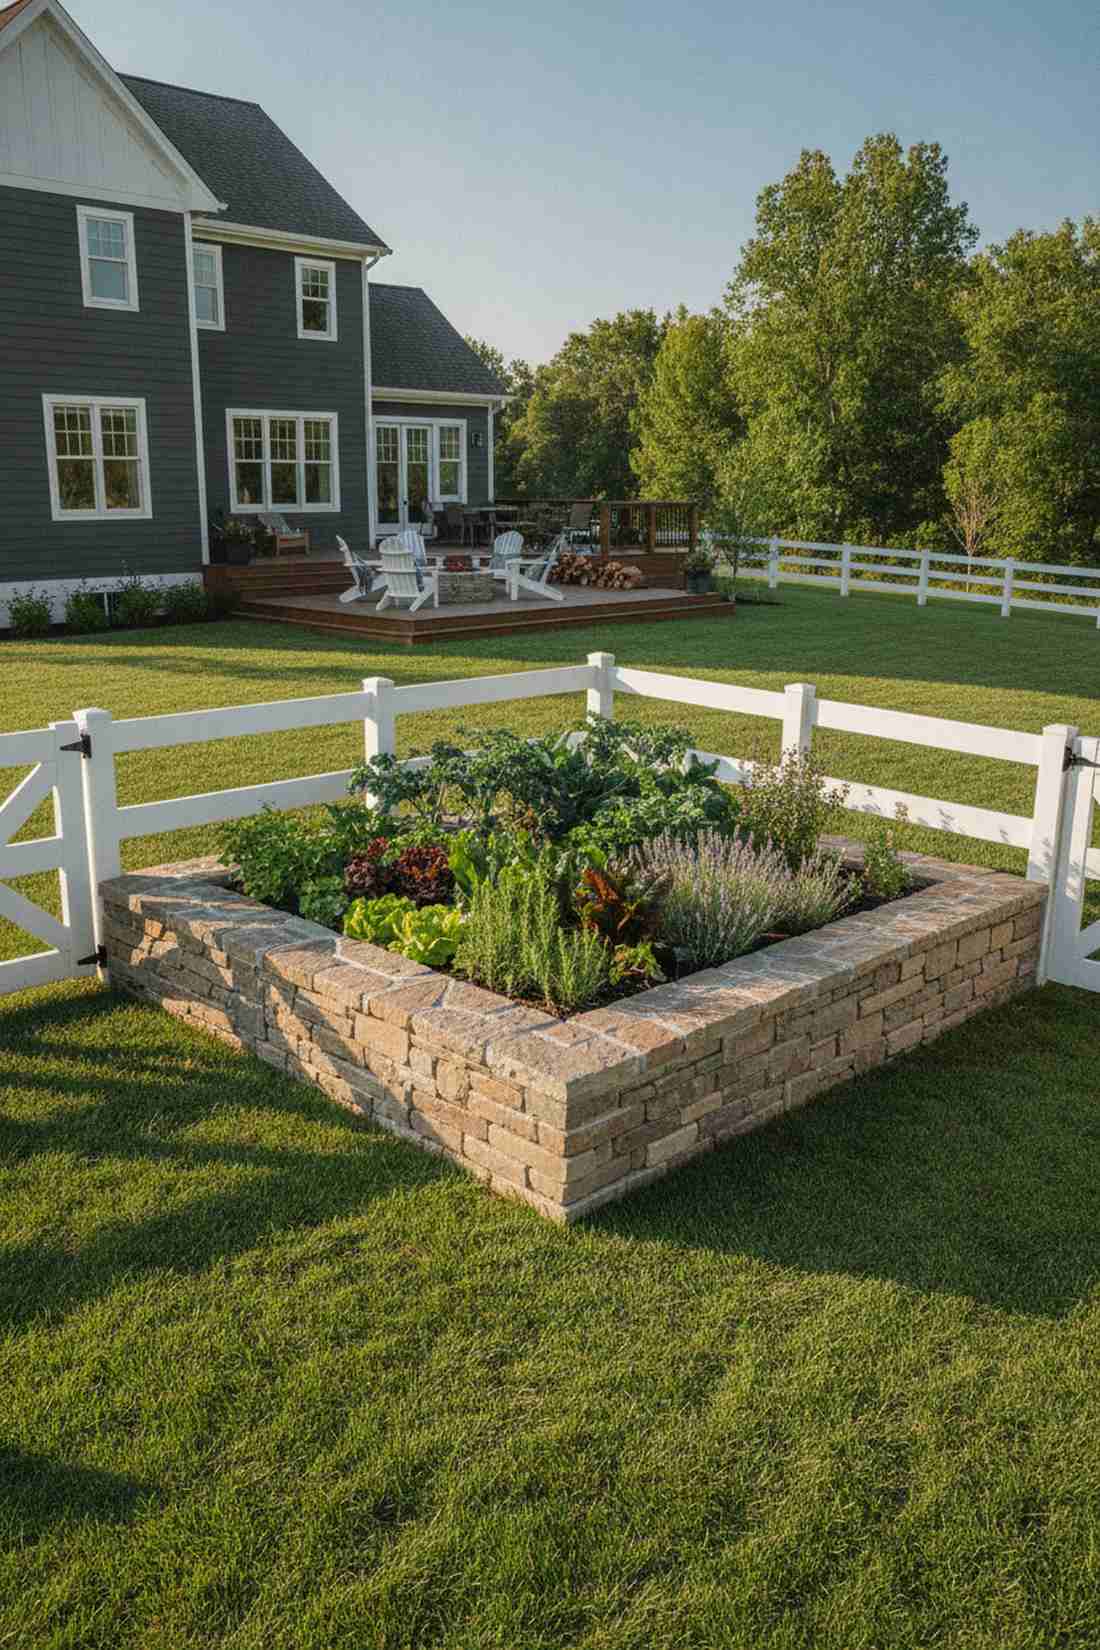
1. Low-Profile Vegetable Perimeter
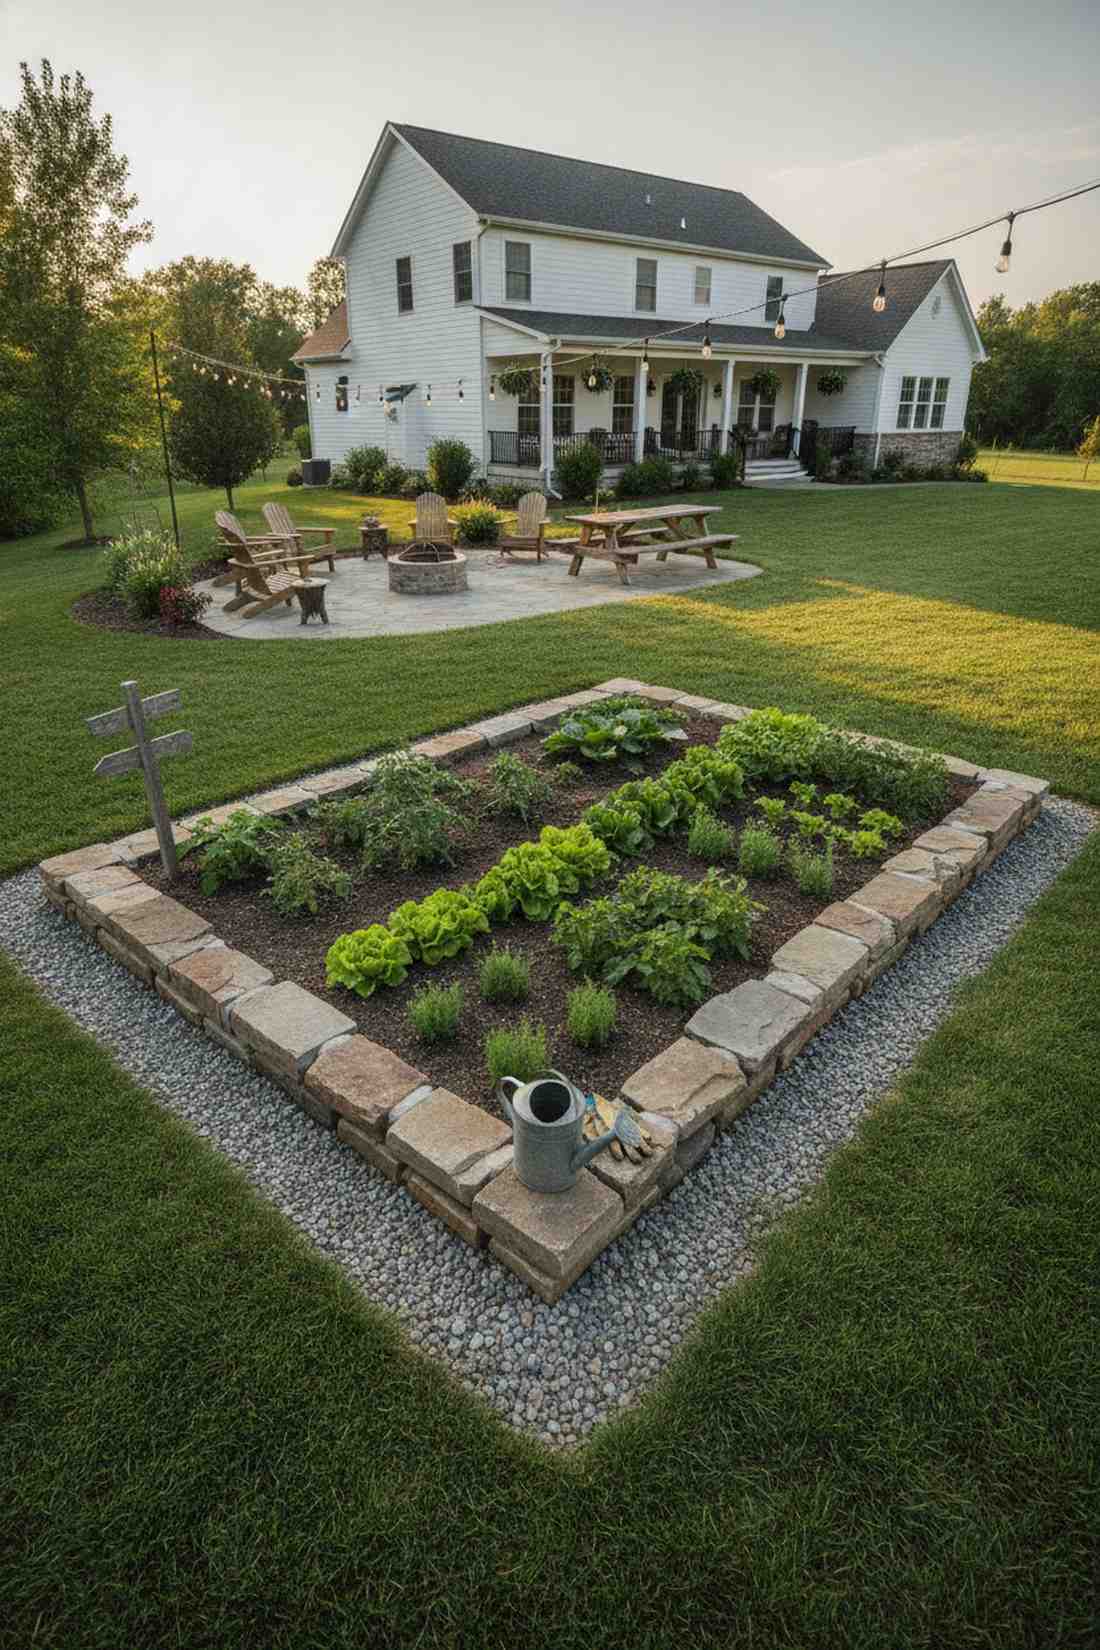
Feels like a rustic farm-to-table retreat. This natural fieldstone garden border is exceptionally well-suited for defining flat suburban vegetable plots without requiring towering walls.
Many homeowners overcomplicate yard zoning, but keeping it low-profile delivers a surprisingly premium look. Using flat-faced stones with a commercial crushed stone base locks everything tightly without complex mortar mixing.
You can realistically complete a standard border for roughly $40–$75. Save this to your DIY weekend garden board for easy reference!
- Key Materials: Flat-faced fieldstone, drainage gravel
- Vibe / Style: Cozy cottage harvest
- Difficulty: Easy beginner setup
- Budget Breakdown: Materials: $35 | Base: $15
- Creator’s Tip: Sink the first layer halfway into the dirt to naturally block turfgrass runners.
- Smart Sourcing: bulk palleted flat fieldstone and commercial-grade crushed stone bags.
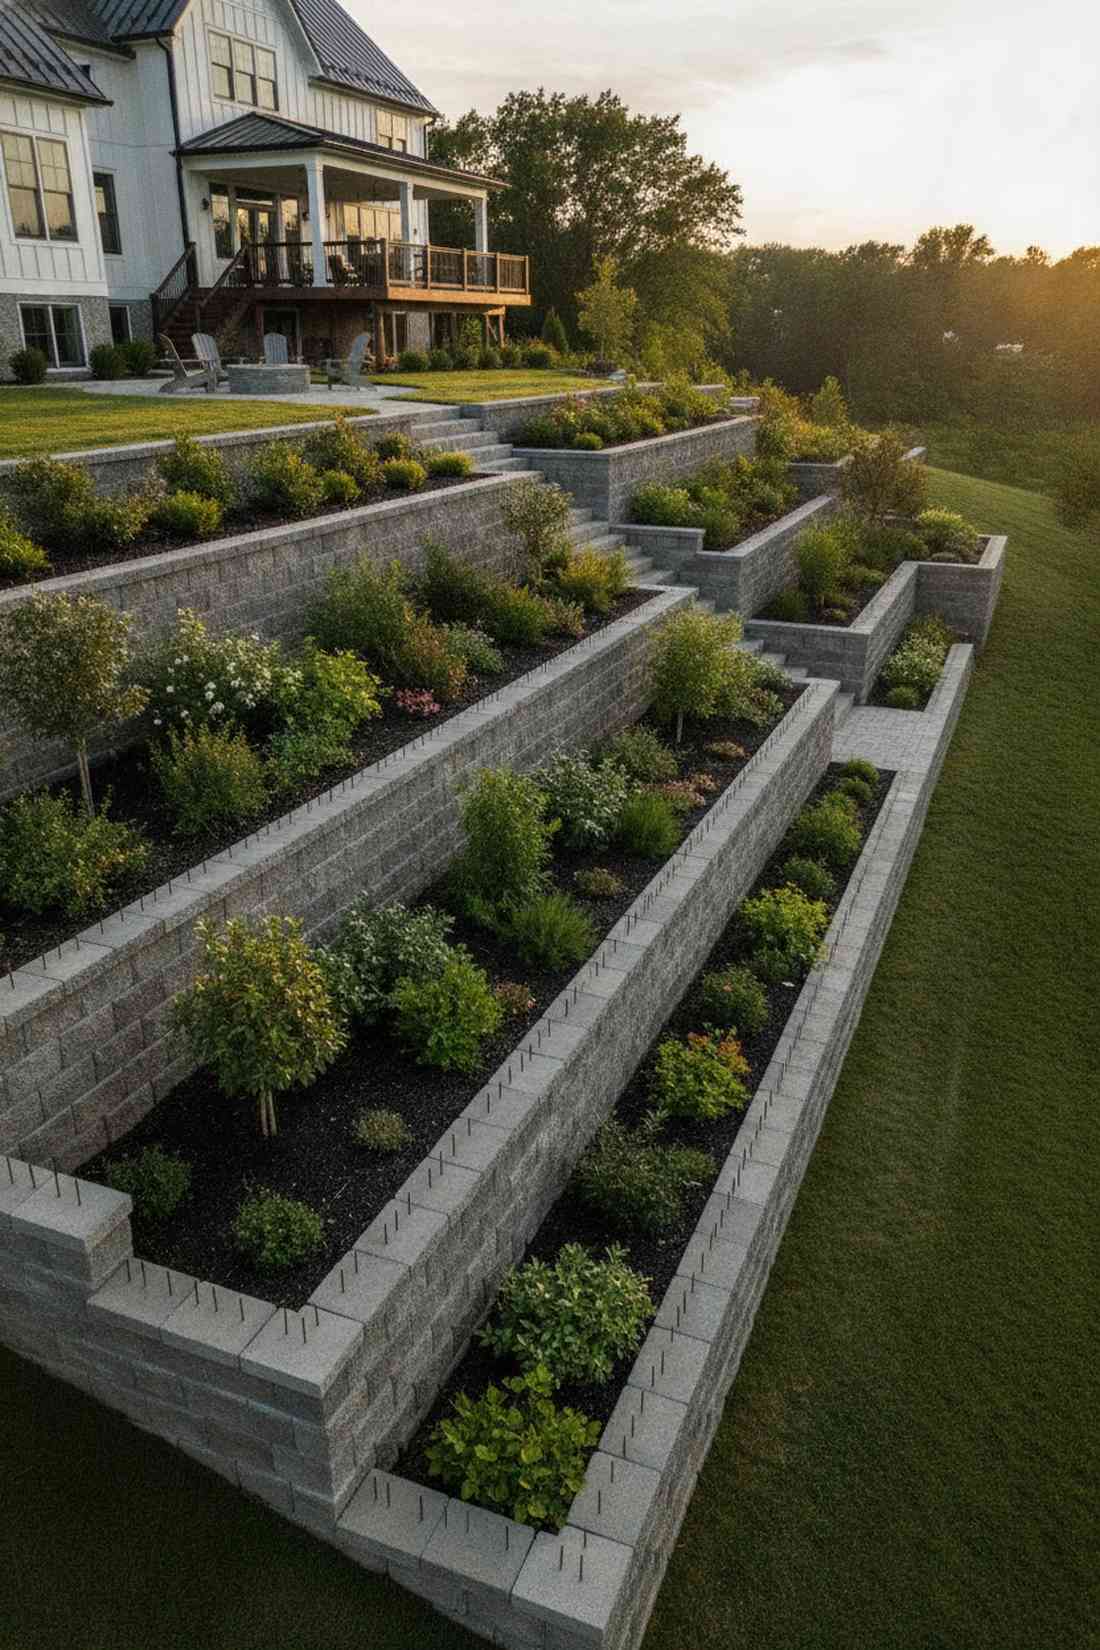
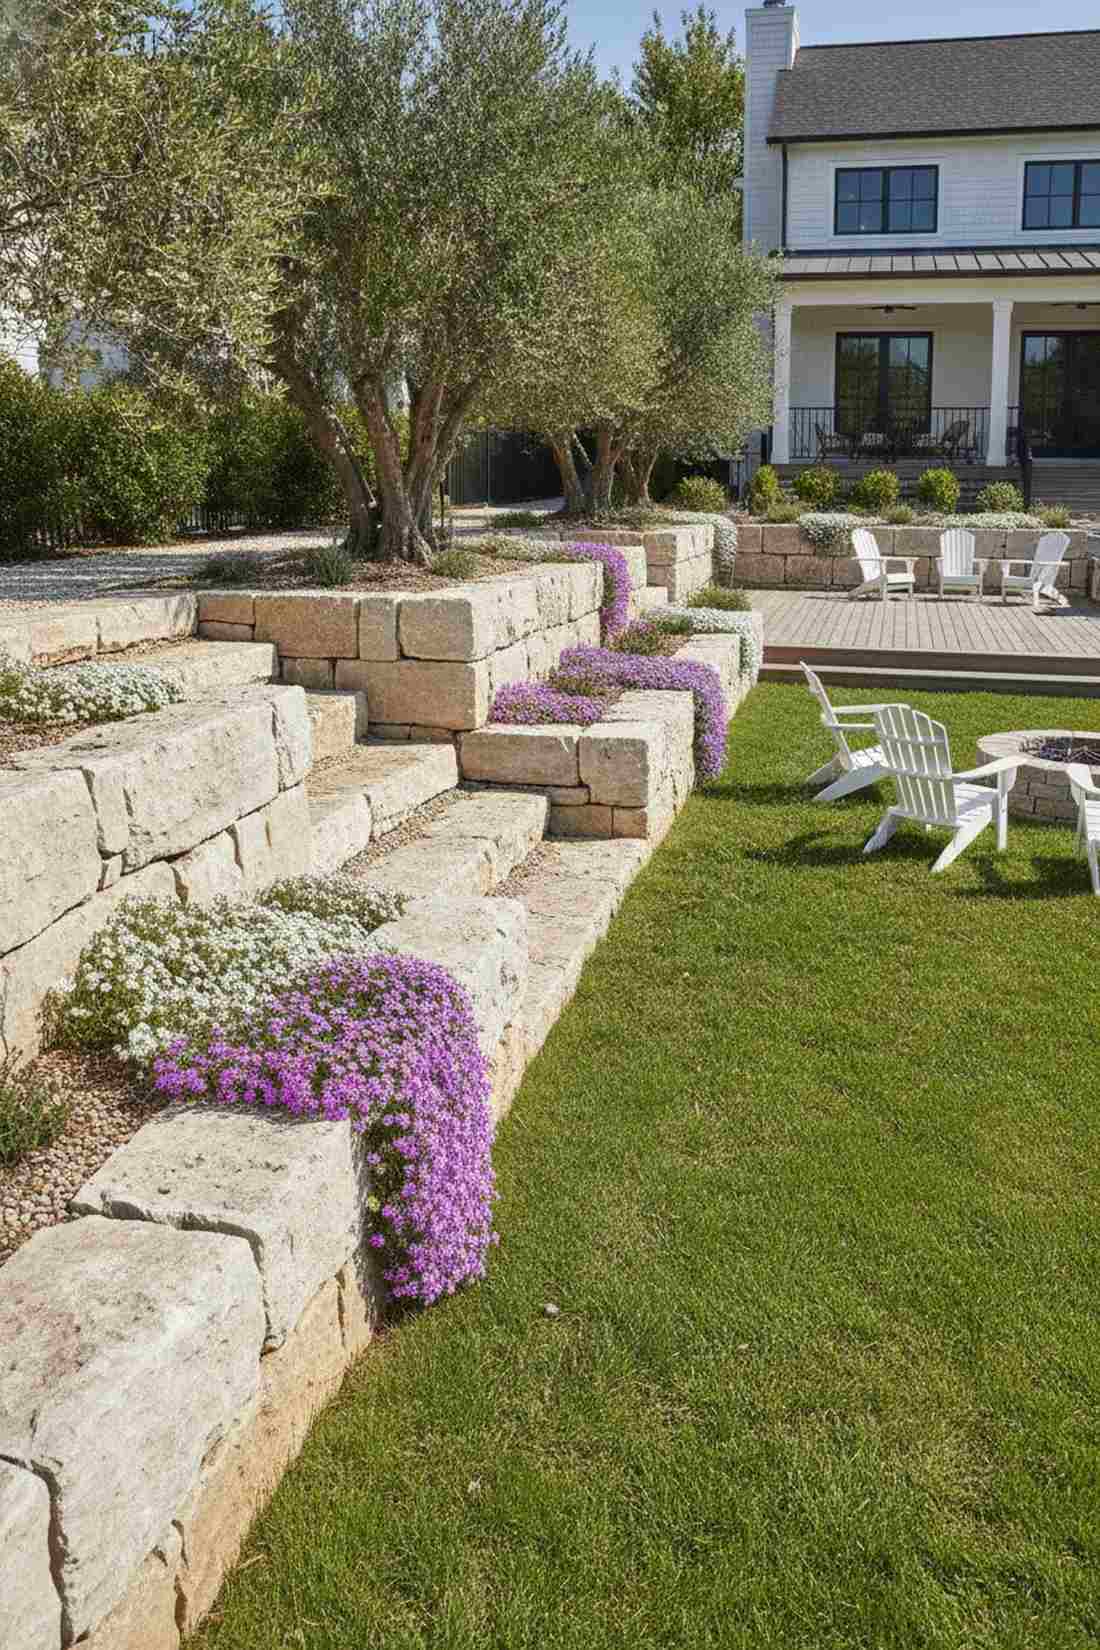
2. Tiered Hillside Terrace Walls
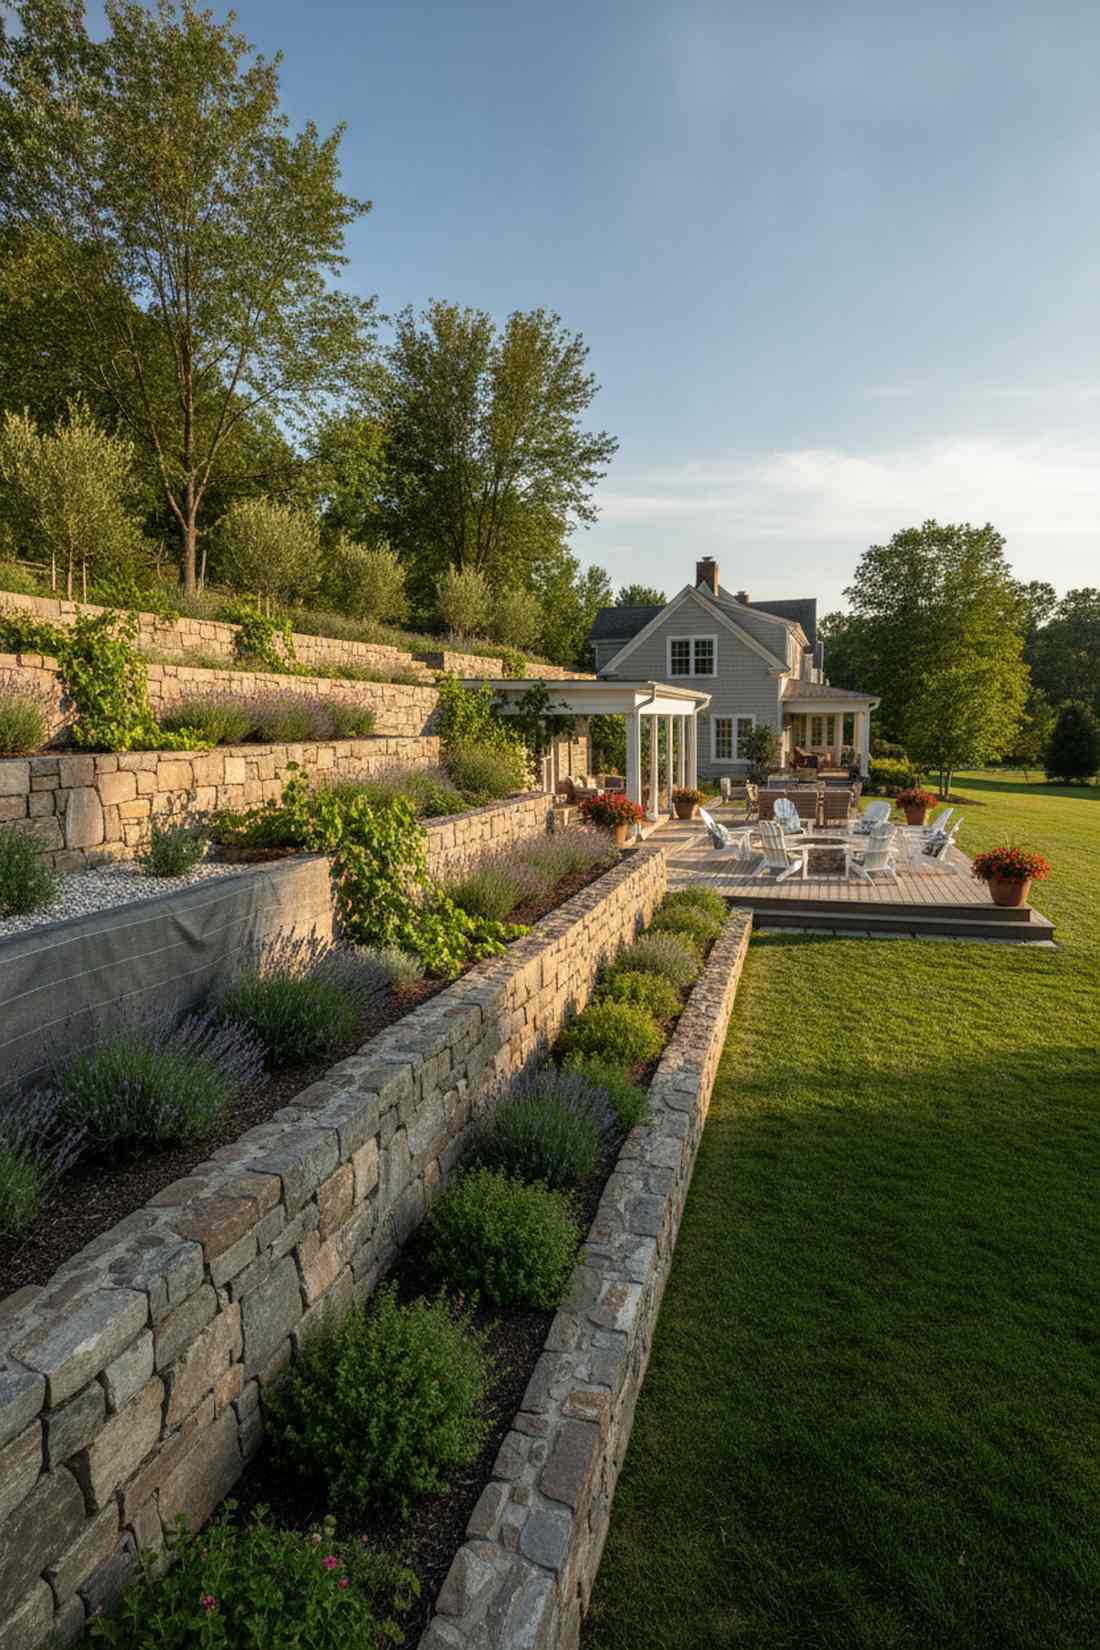
Straight out of a Mediterranean vineyard. A stepped stone terrace layout transforms steep, unusable hillsides into highly productive planting zones.
Contractors charge thousands for retaining walls, but stair-stepping your layout gives a designer-level finish for a fraction of the cost. Integrate heavy-duty landscape fabric behind the tiers to prevent soil washout during heavy rains.
Expect to spend around $150–$300 depending on elevation. It’s a fast upgrade that completely changes your backyard’s usability.
- Key Materials: Heavy angular fieldstone, backfill soil
- Vibe / Style: Multi-level European estate
- Difficulty: Moderate weekend effort
- Budget Breakdown: Stone: $200 | Drainage: $50
- Creator’s Tip: Lean each wall back by 2 degrees to let gravity fight the soil pressure.
- Smart Sourcing: heavy-duty woven landscape fabric (bulk roll) and pre-washed drainage gravel kits.
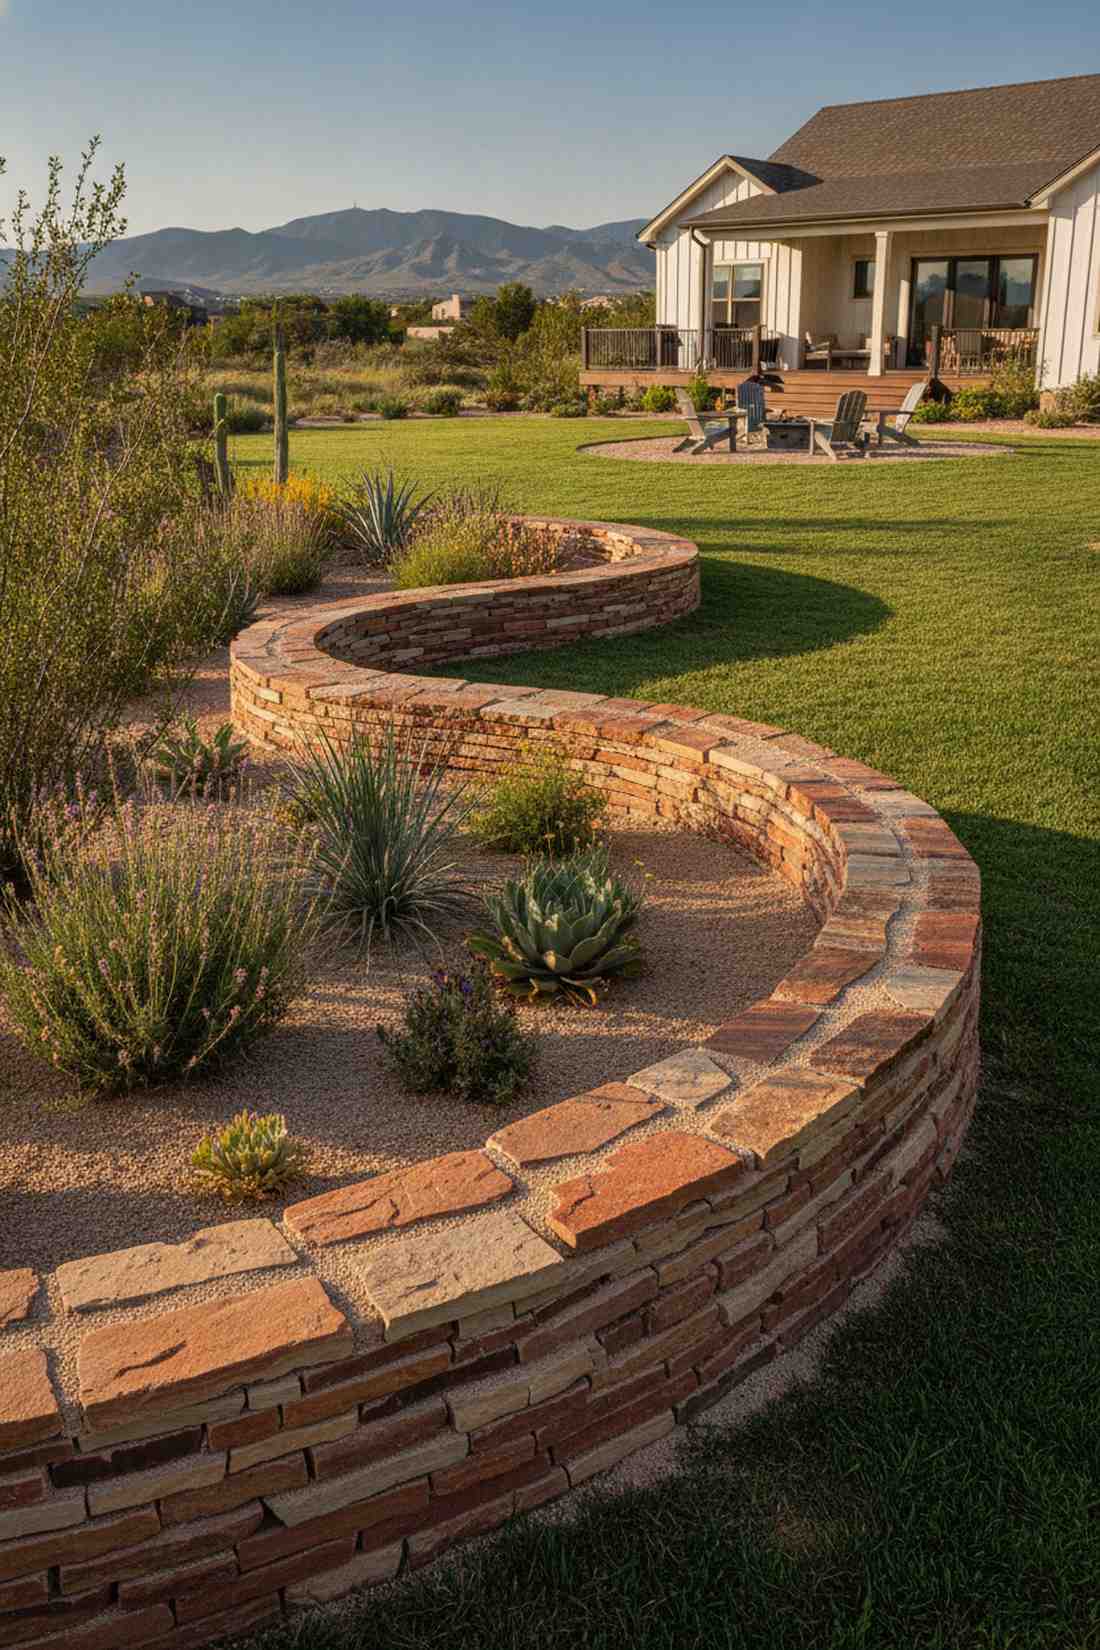
3. Circular Focal-Point Island
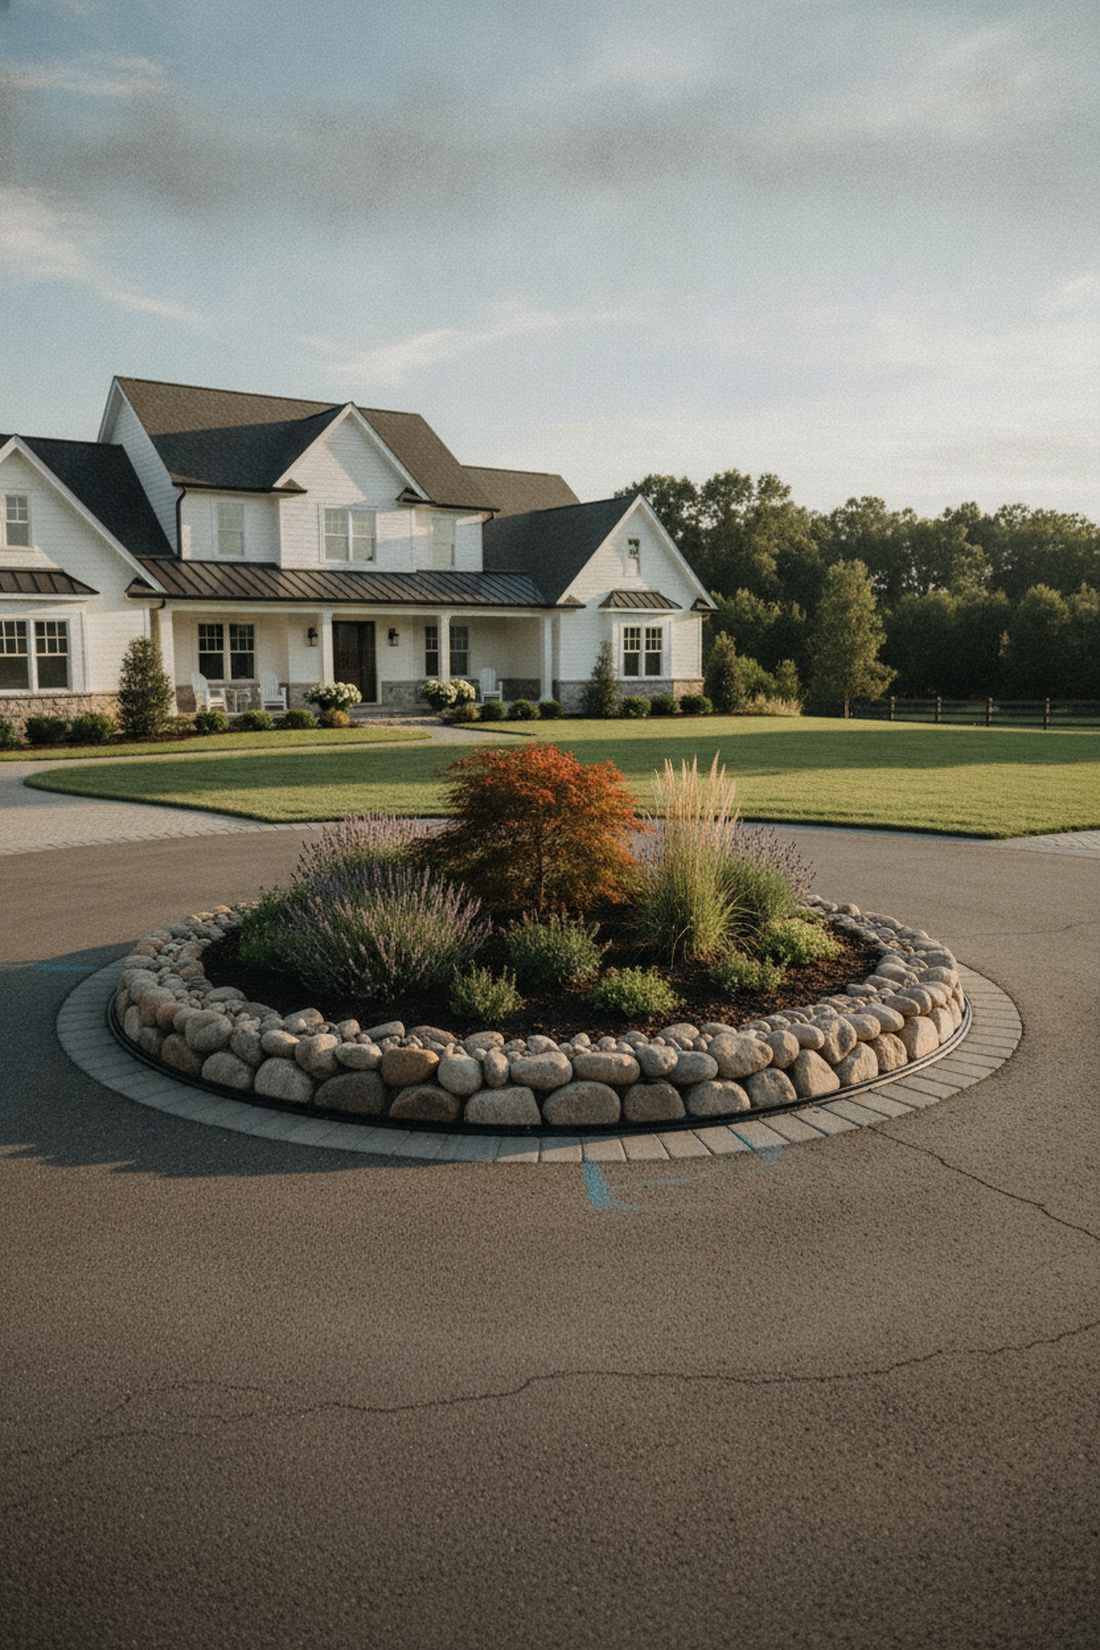
Feels like a hidden botanical garden you accidentally discovered. This curved stone island bed acts as a brilliant centerpiece for dead driveway turnarounds or bare lawn spaces.
People assume squares are easier, but circular geometry naturally draws the eye and looks far more expensive than it is. Leverage flexible border edging tools to perfectly map out your radius before laying the first stone.
A 5-foot diameter build usually runs between $80–$120. Pin this if you’re planning a front yard statement piece!
- Key Materials: Small to medium cobbles, marking spray
- Vibe / Style: Organic landscape focal point
- Difficulty: Intermediate geometry
- Budget Breakdown: Stone: $90 | Marking Tools: $15
- Creator’s Tip: Use a center stake and a string to trace a flawless circle before digging.
- Smart Sourcing: flexible professional garden edging kits and high-visibility yard marking spray.
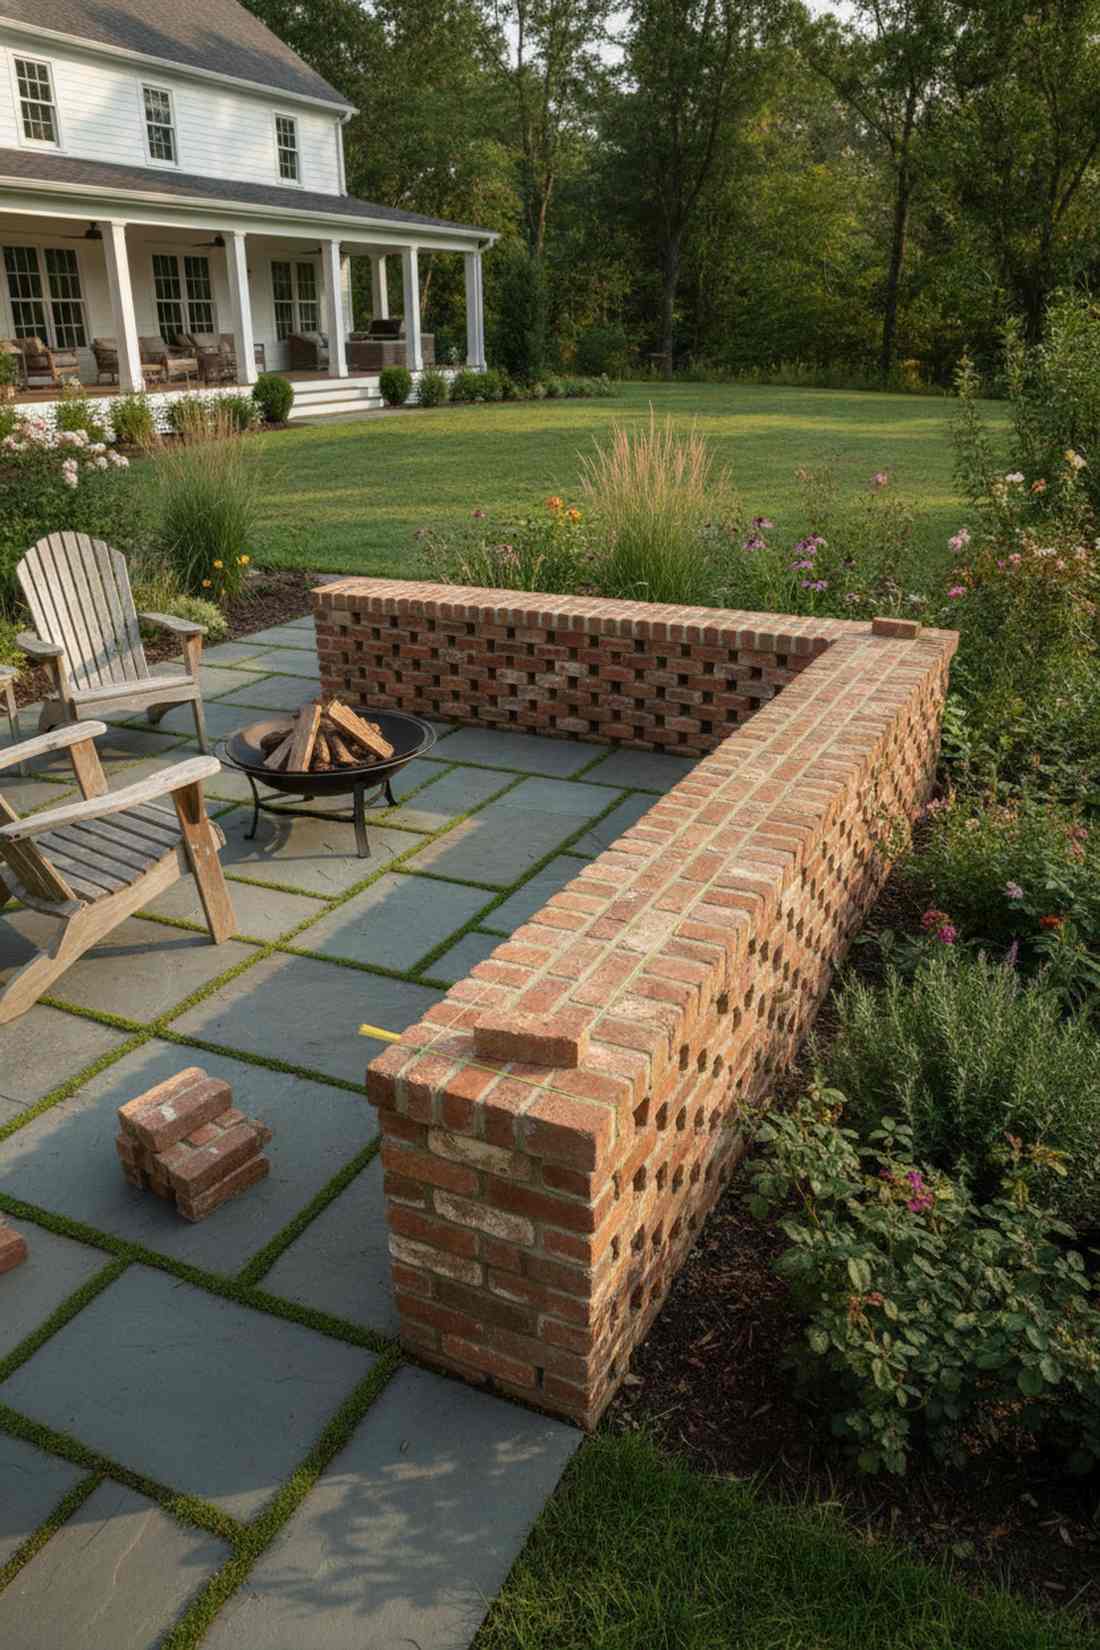
4. Dry-Stack Corner Anchor Beds
Gives off serious modern farmhouse vibes. The L-shaped masonry corner garden perfectly utilizes dead fence intersections to maximize growing real estate.
Leaving corners empty is a massive missed opportunity; tying stonework directly into existing boundary lines creates a high-end built-in aesthetic. Opt for UV-resistant stone adhesives if you want extra stability without full mortar.
You can easily pull this off for around $60–$100. Highly recommended for a quick space-saving win.
- Key Materials: Interlocking fieldstone, structural adhesive
- Vibe / Style: Efficient architectural boundary
- Difficulty: Easy layout
- Budget Breakdown: Stone: $75 | Adhesive: $15
- Creator’s Tip: Alternate corner stone directions on every layer to lock the right-angle perfectly.
- Smart Sourcing: exterior-grade landscape block adhesive and weatherproof masonry caulk.
Most people get this completely wrong… until they try the exact layout coming up next.
5. Serpentine Pathway Borders
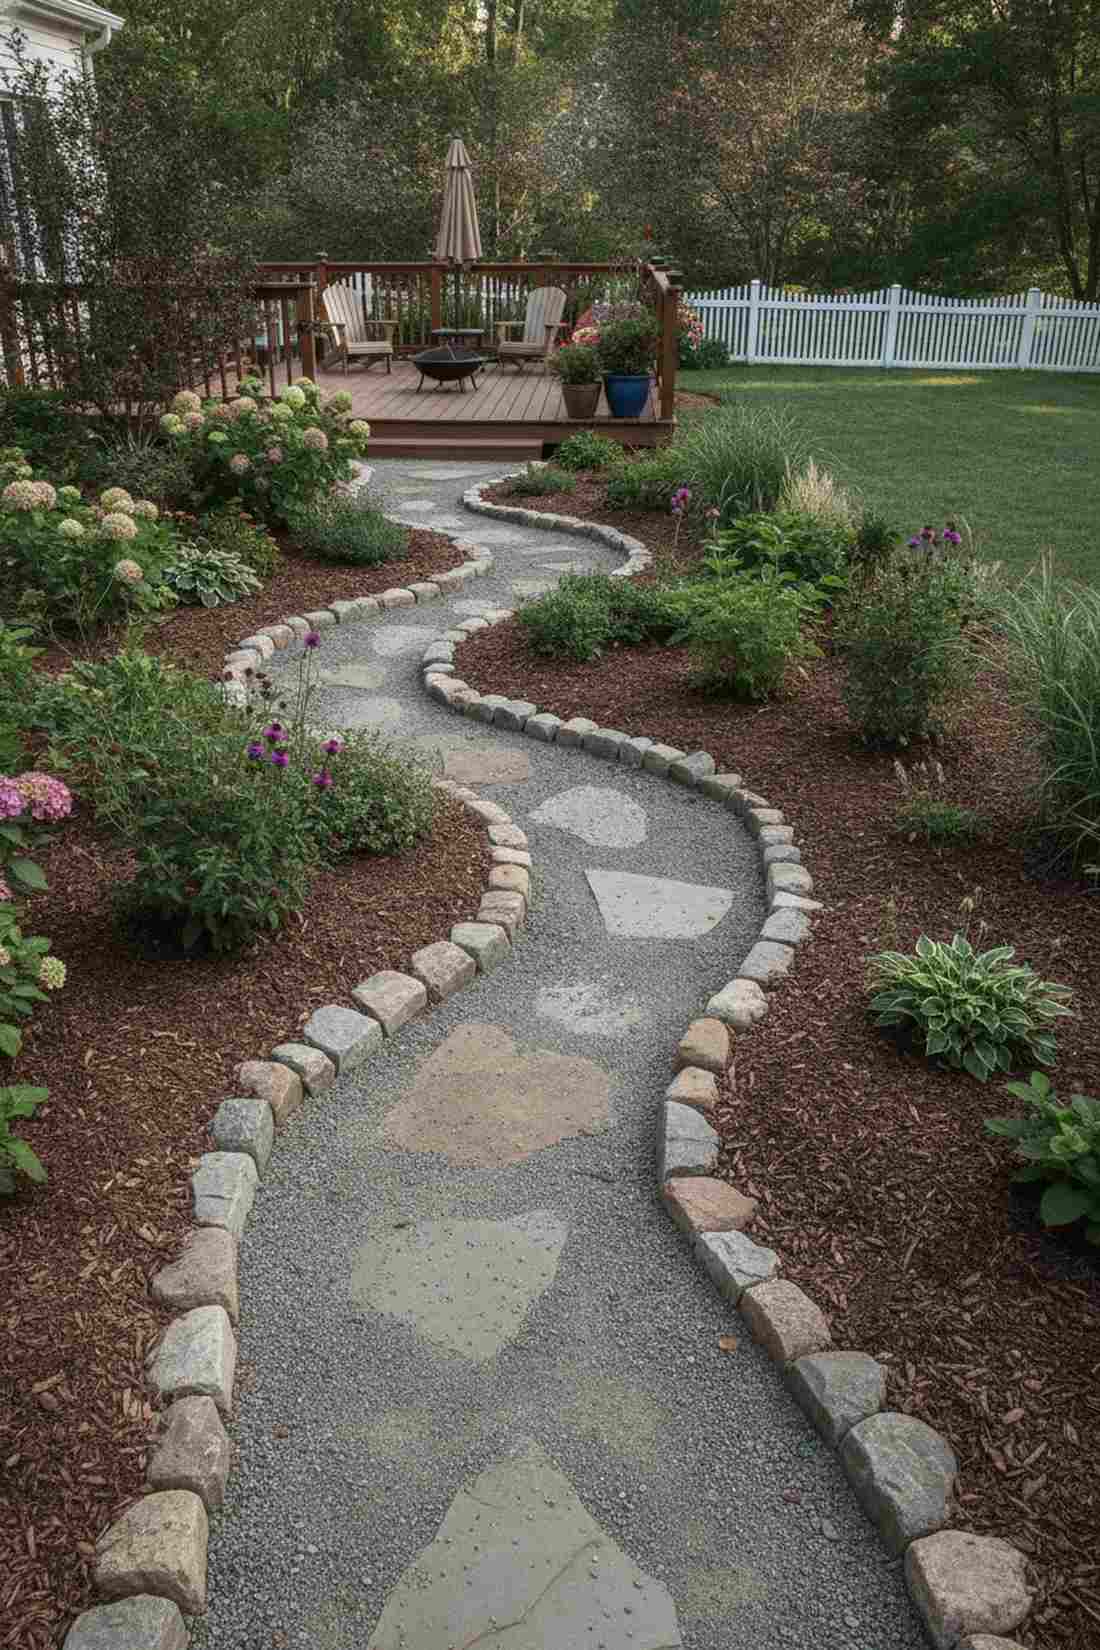
Feels straight out of a storybook landscape. A wavy stone pathway border guides foot traffic elegantly while containing aggressive mulch spread.
Straight lines can make a garden feel rigid, but this sweeping installation elevates utilitarian walkways into an immersive experience. To ensure the curves hold up under foot traffic, use a commercial polymer stone dust kit to lock the base.
Budget around $2 per linear foot for this setup. Save this to your outdoor pathway inspiration board!
- Key Materials: Varied fieldstone, polymer locking sand
- Vibe / Style: Whimsical guided walkway
- Difficulty: Easy visual alignment
- Budget Breakdown: Stone: $40 | Locking Sand: $20
- Creator’s Tip: Lay out a standard garden hose to visualize your curves before breaking ground.
- Smart Sourcing: polymeric stone dust binder (bulk bucket) and pre-cut stone wedge kits.
Mortared Brick Precision Layouts
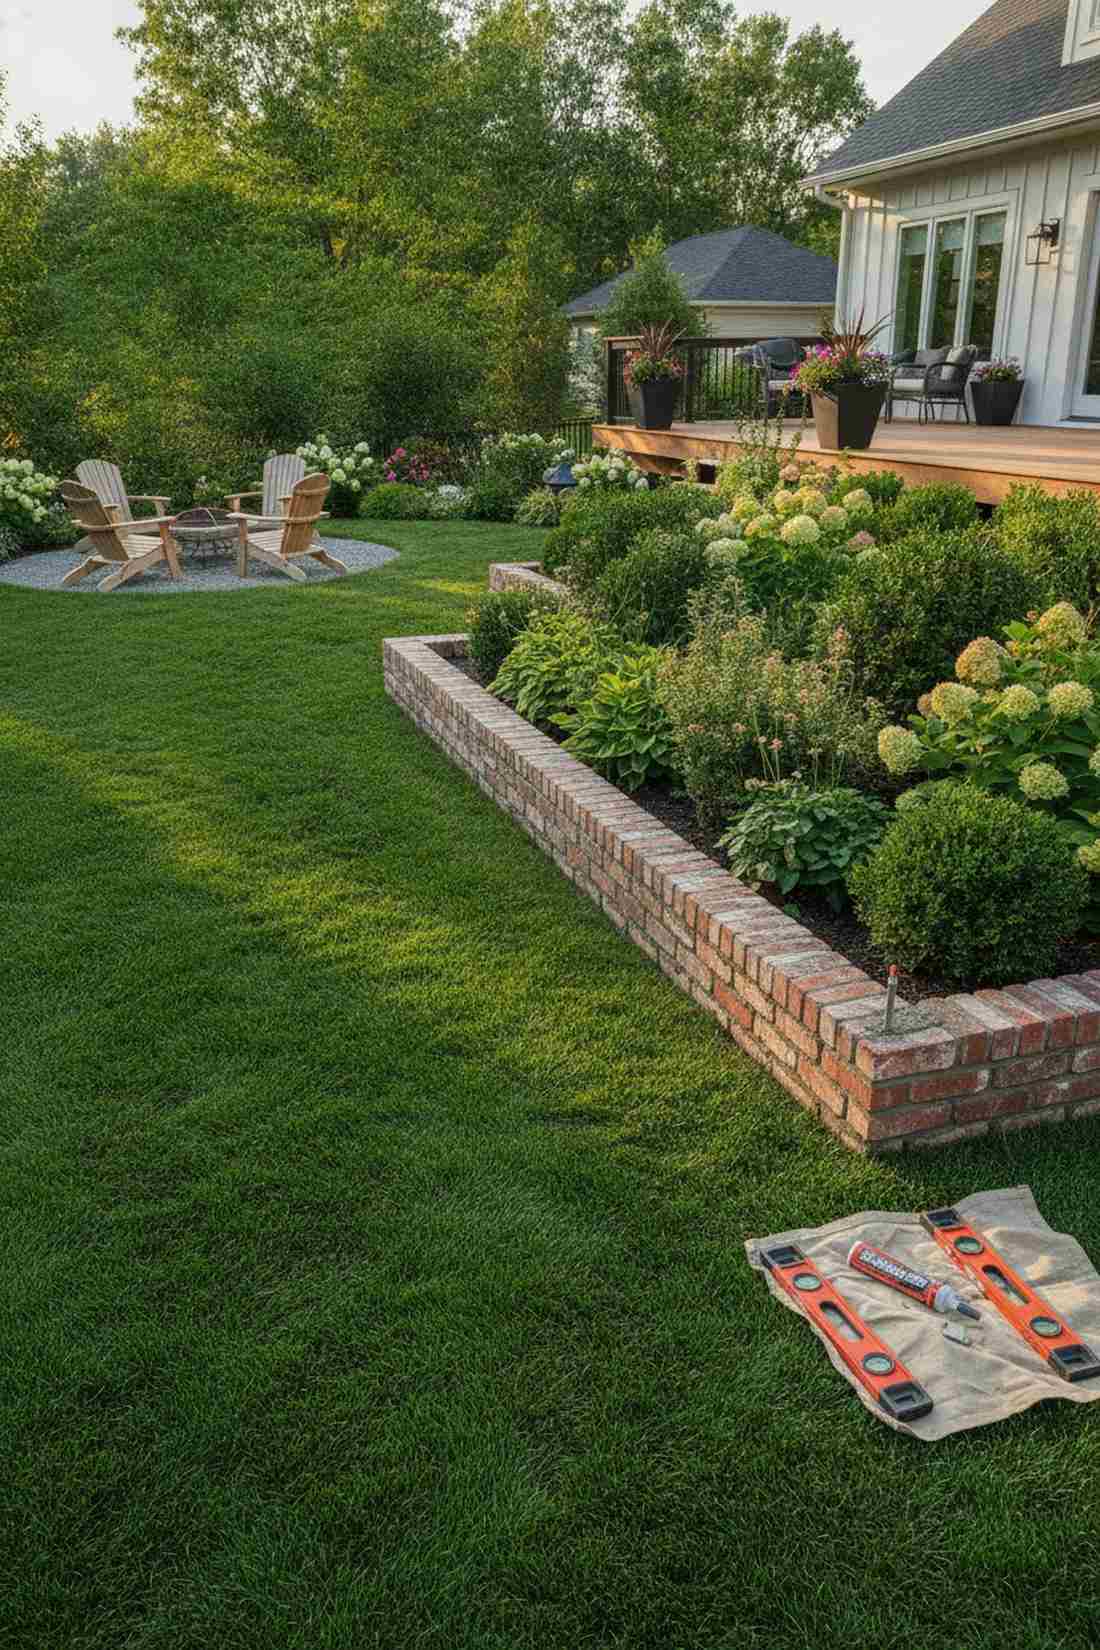
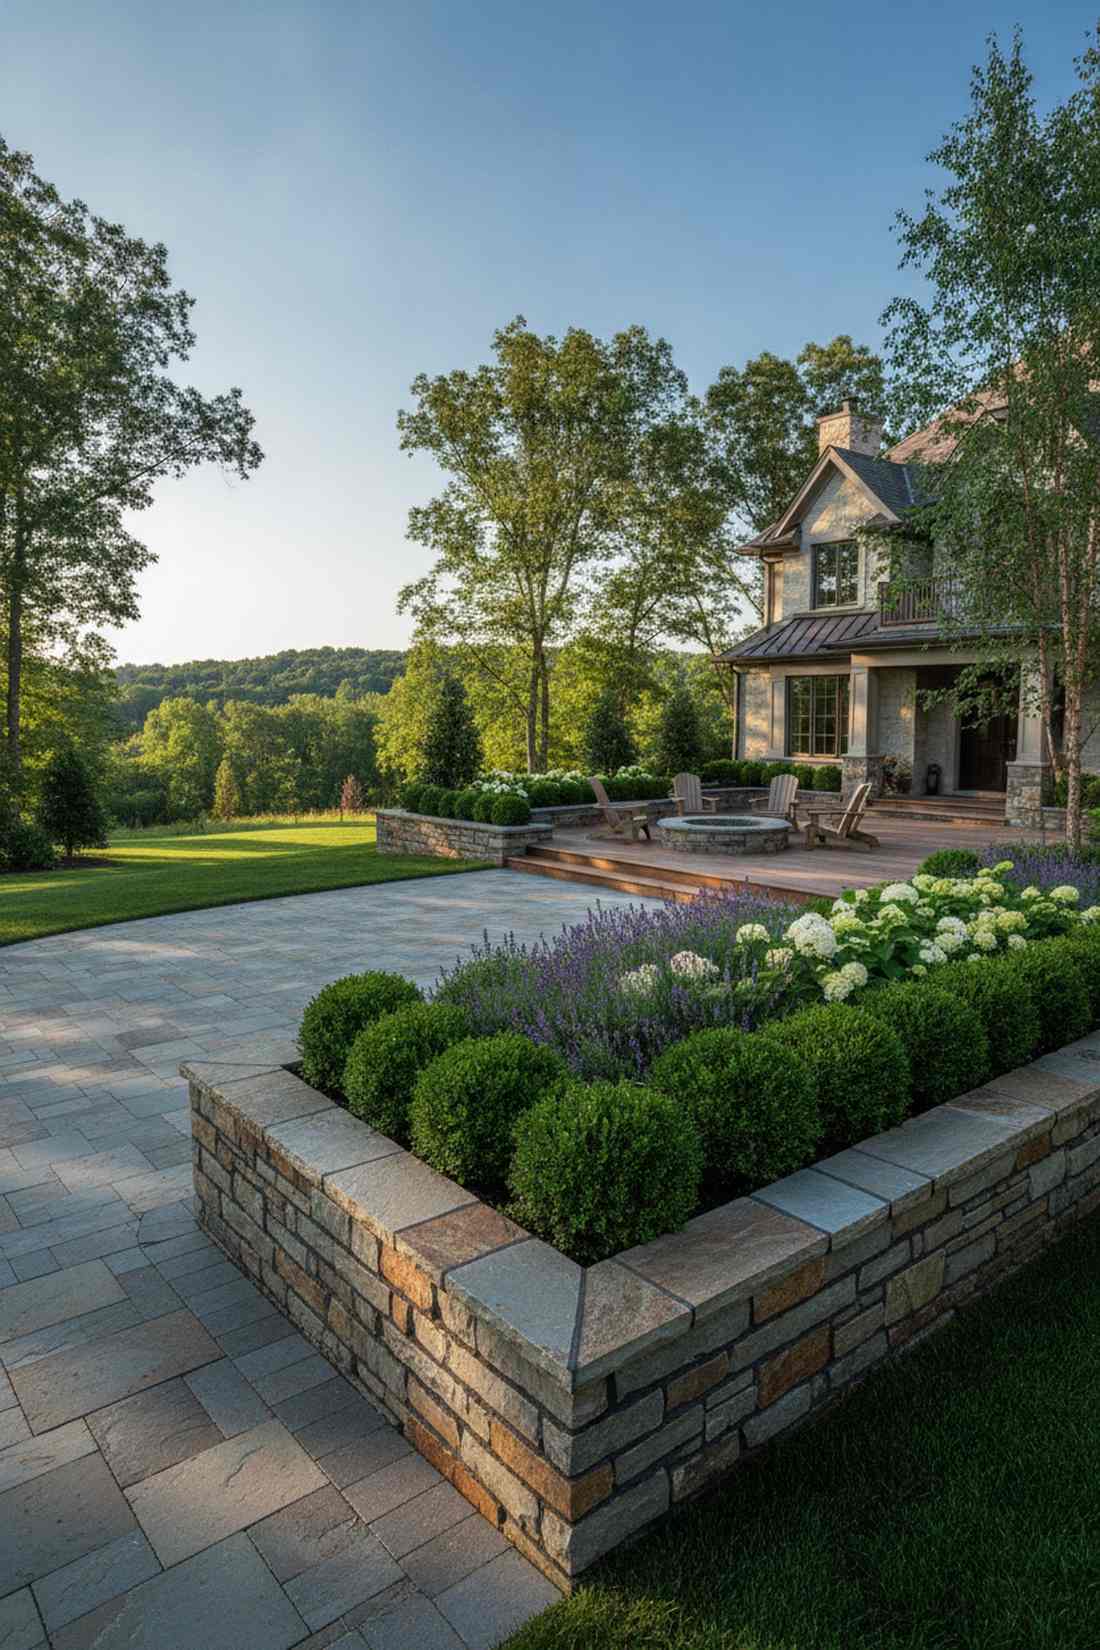
6. Traditional Running-Bond Rectangle
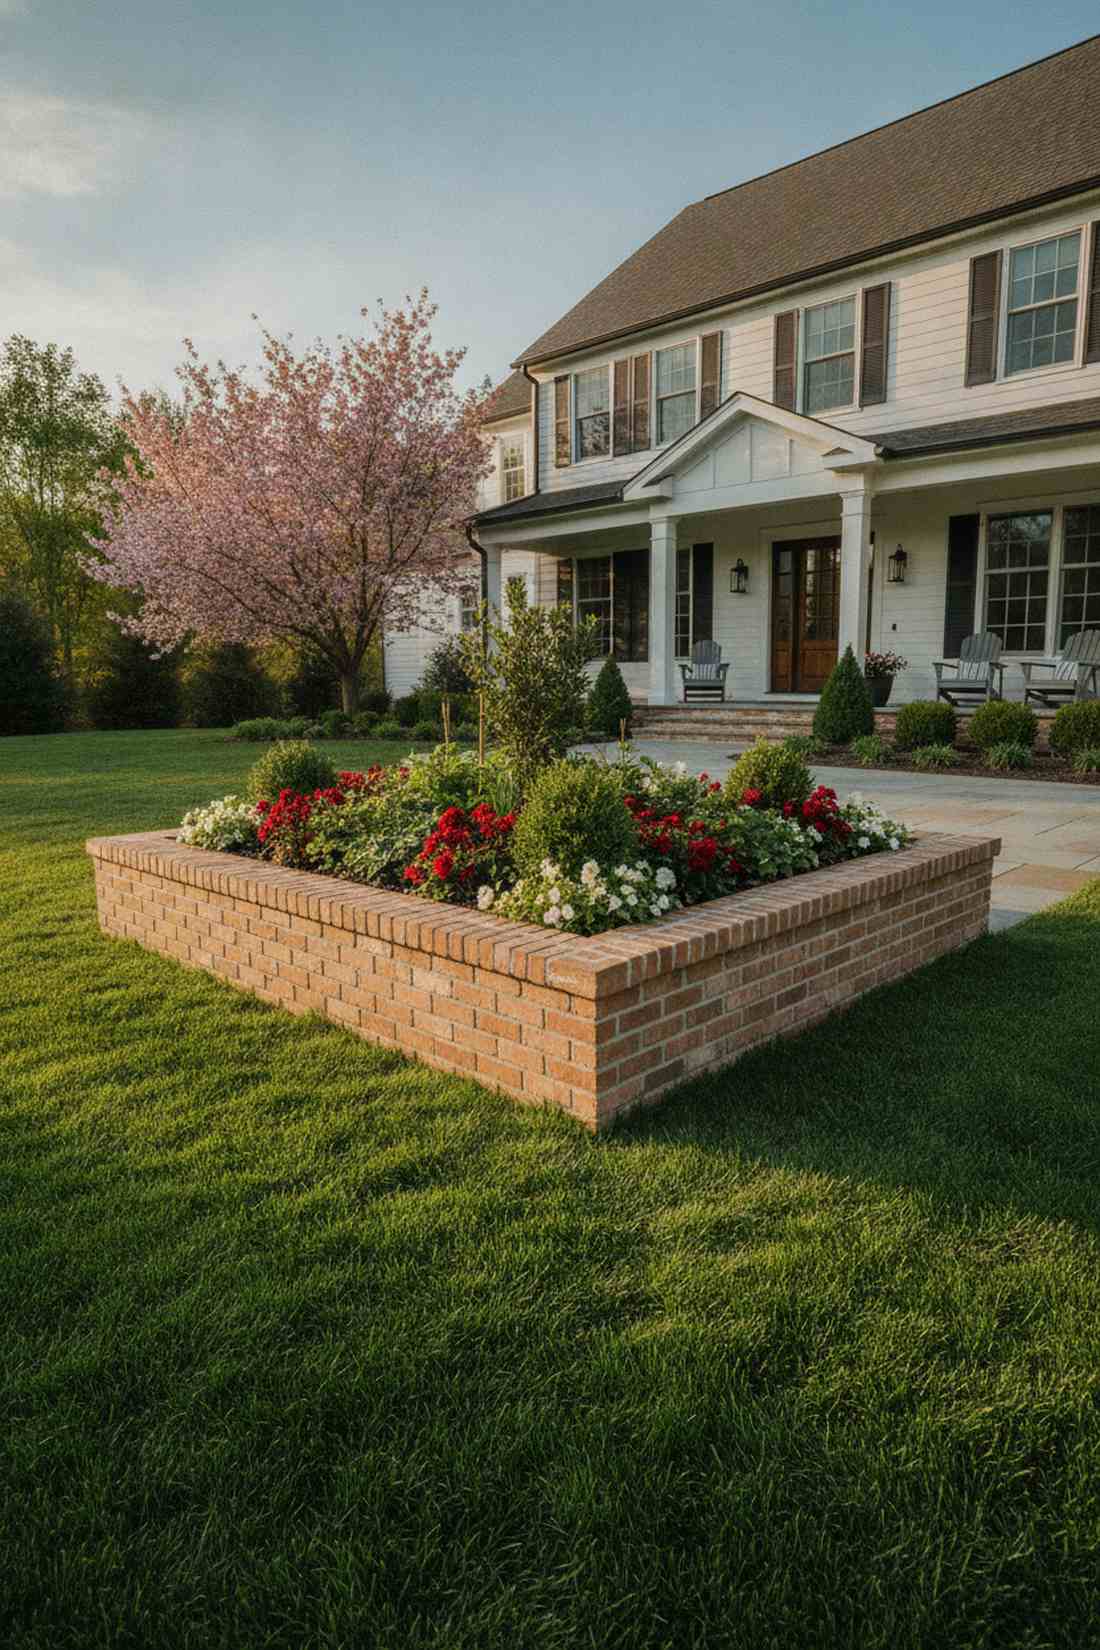
Radiates the timeless charm of an old English manor. This classic brick planter layout serves as the perfect foundational centerpiece for highly visible front yard layouts.
Most DIYers avoid wet mixes, but dedicating a weekend to these raised beds brick configurations delivers an architectural permanence wood simply cannot match. Grab high-strength Type N mortar and waterproof trowel kits to ensure joints never crumble under freeze-thaw cycles.
Expect to invest about $150–$250 depending on local clay brick sourcing. Pin this to your front yard curb appeal board!
- Key Materials: Fired clay bricks, Type N mortar
- Vibe / Style: Timeless formal elegance
- Difficulty: Intermediate masonry skills
- Budget Breakdown: Bricks: $160 | Mortar/Tools: $45
- Creator’s Tip: Pour a minor 4-inch concrete footer to completely eliminate winter frost heave.
- Smart Sourcing: pre-mixed high-strength Type N mortar and professional masonry trowel starter kits.
7. English-Bond Checkerboard Accent
Feels like a bespoke custom landscape feature. Incorporating an alternating brick pattern wall is absolutely ideal for dividing formal patio spaces from wilder garden zones.
Standard stacking is fine, but weaving headers and stretchers together delivers a remarkably sturdy build that looks far more expensive than standard setups. Utilizing specialized masonry corner guides ensures every single line stays laser-straight.
Your material cost sits firmly around $200 for a medium bed. It’s a phenomenal way to inject serious architectural depth.
- Key Materials: Standard bricks, precision line blocks
- Vibe / Style: High-end historic hardscape
- Difficulty: Advanced layout patience
- Budget Breakdown: Bricks: $180 | String Lines: $20
- Creator’s Tip: Double the wall thickness to seamlessly combat outward heavy wet soil thrust.
- Smart Sourcing: heavy-duty masonry string line guides and pre-cut brick header bundles.
8. Reclaimed-Brick Cottage Boxes
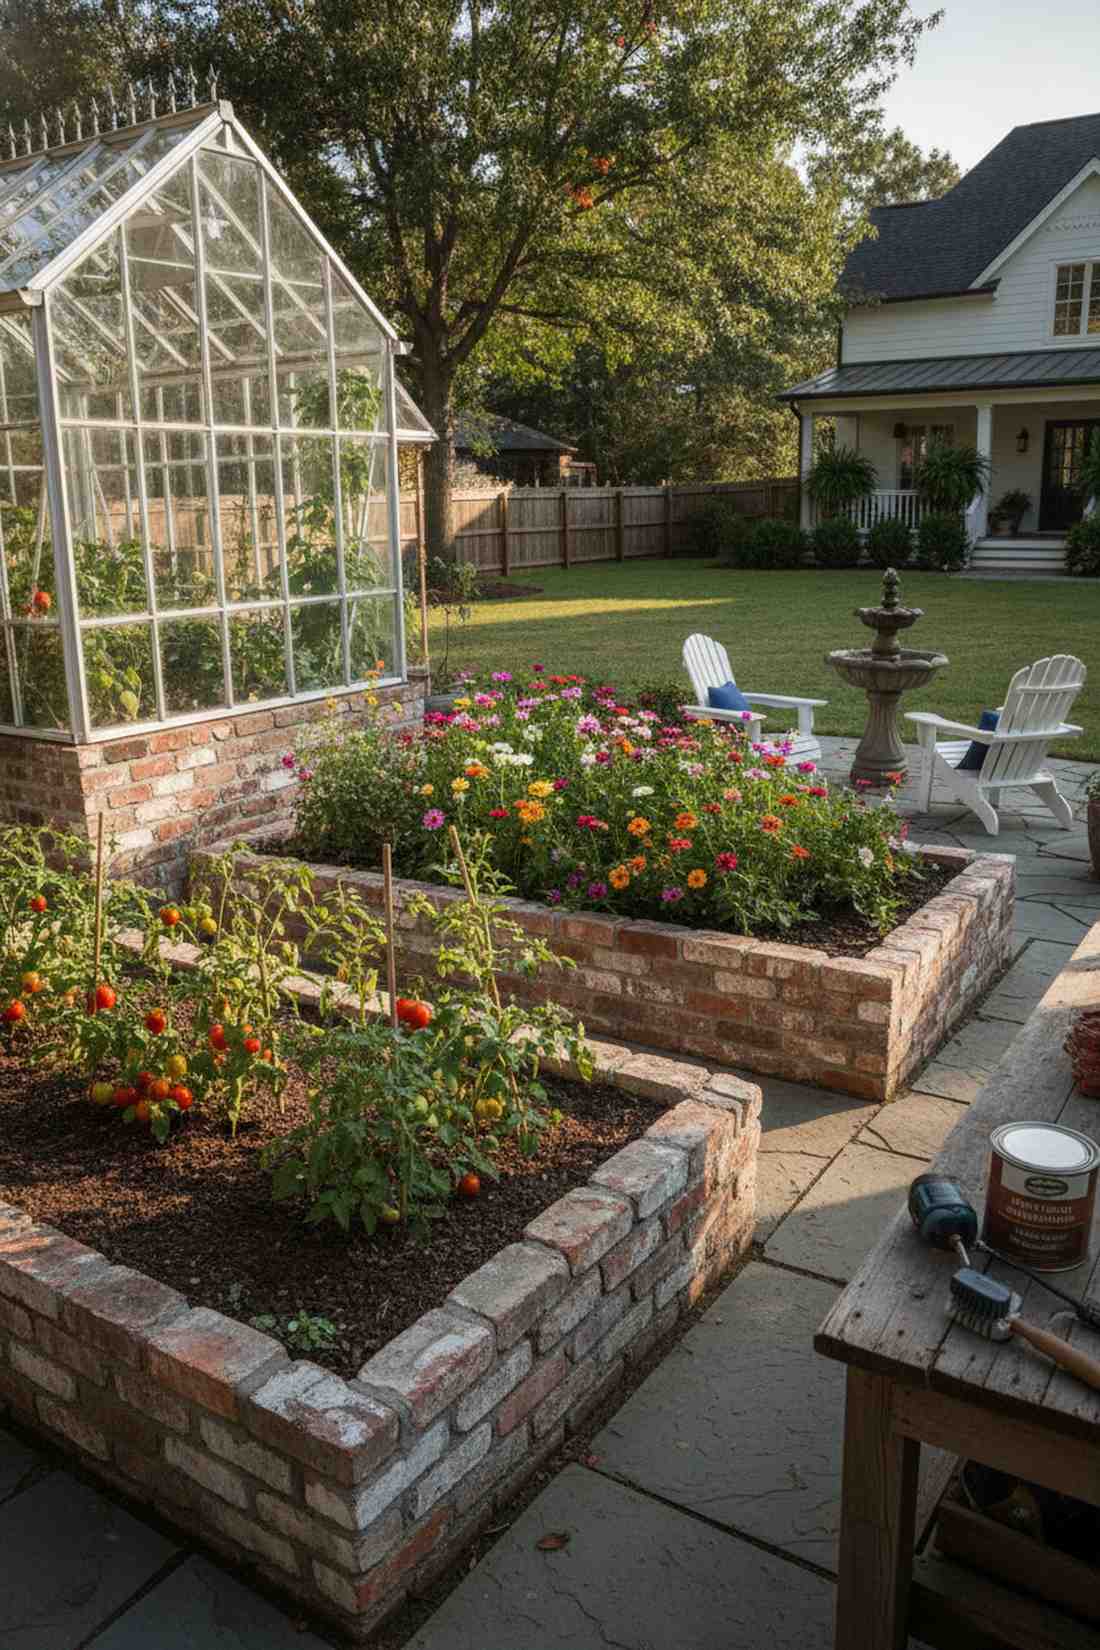
Brings a heavy dose of instant heritage charm. Using a weathered salvage brick enclosure works exceptionally well for heirloom tomato plots or cutting-flower gardens.
Brand new bricks can look sterile, but upcycling chipped historical materials instantly adds deep visual character to the yard. Pair these imperfect edges with a flexible acrylic masonry sealant to stop further degradation.
Reclaimed materials usually drop the cost to a mere $40–$80. Save this if you love sustainable, vintage-style DIYs.
- Key Materials: Salvaged bricks, thick mortar mix
- Vibe / Style: Eclectic vintage greenhouse
- Difficulty: Forgiving beginner masonry
- Budget Breakdown: Salvage Bricks: $40 | Sealant: $25
- Creator’s Tip: Use wider mortar joints to intentionally hide the awkward sizing differences of old bricks.
- Smart Sourcing: wire brush cleaning kits (power drill attachment) and matte finish breathable masonry sealer.
9. Soldier-Course Edging Detail
Gives off an incredibly crisp, tailored garden aesthetic. A vertical brick top cap acts as the ultimate clean edge, ideal for beds bordering manicured turf.
Finishing a wall flat is a missed opportunity; turning the top bricks vertical instantly boosts the perceived height and gives a designer-level finish. Lock these top pieces down fast with a rapid-set anchoring adhesive.
Adding this detail barely costs an extra $20 in materials. Highly recommended for a fast visual upgrade.
- Key Materials: Soldier bricks, rapid-set mortar
- Vibe / Style: Polished estate border
- Difficulty: Moderate leveling
- Budget Breakdown: Edging Bricks: $30 | Adhesive: $15
- Creator’s Tip: Keep a torpedo level handy—the narrow footprint makes these top caps prone to tipping while drying.
- Smart Sourcing: rapid-setting masonry anchor adhesive and magnetic torpedo leveling tools.
This next setup is ridiculously cheap but looks like a custom $1,000 contractor installation…
10. Stepped-Brick Terrace Clusters
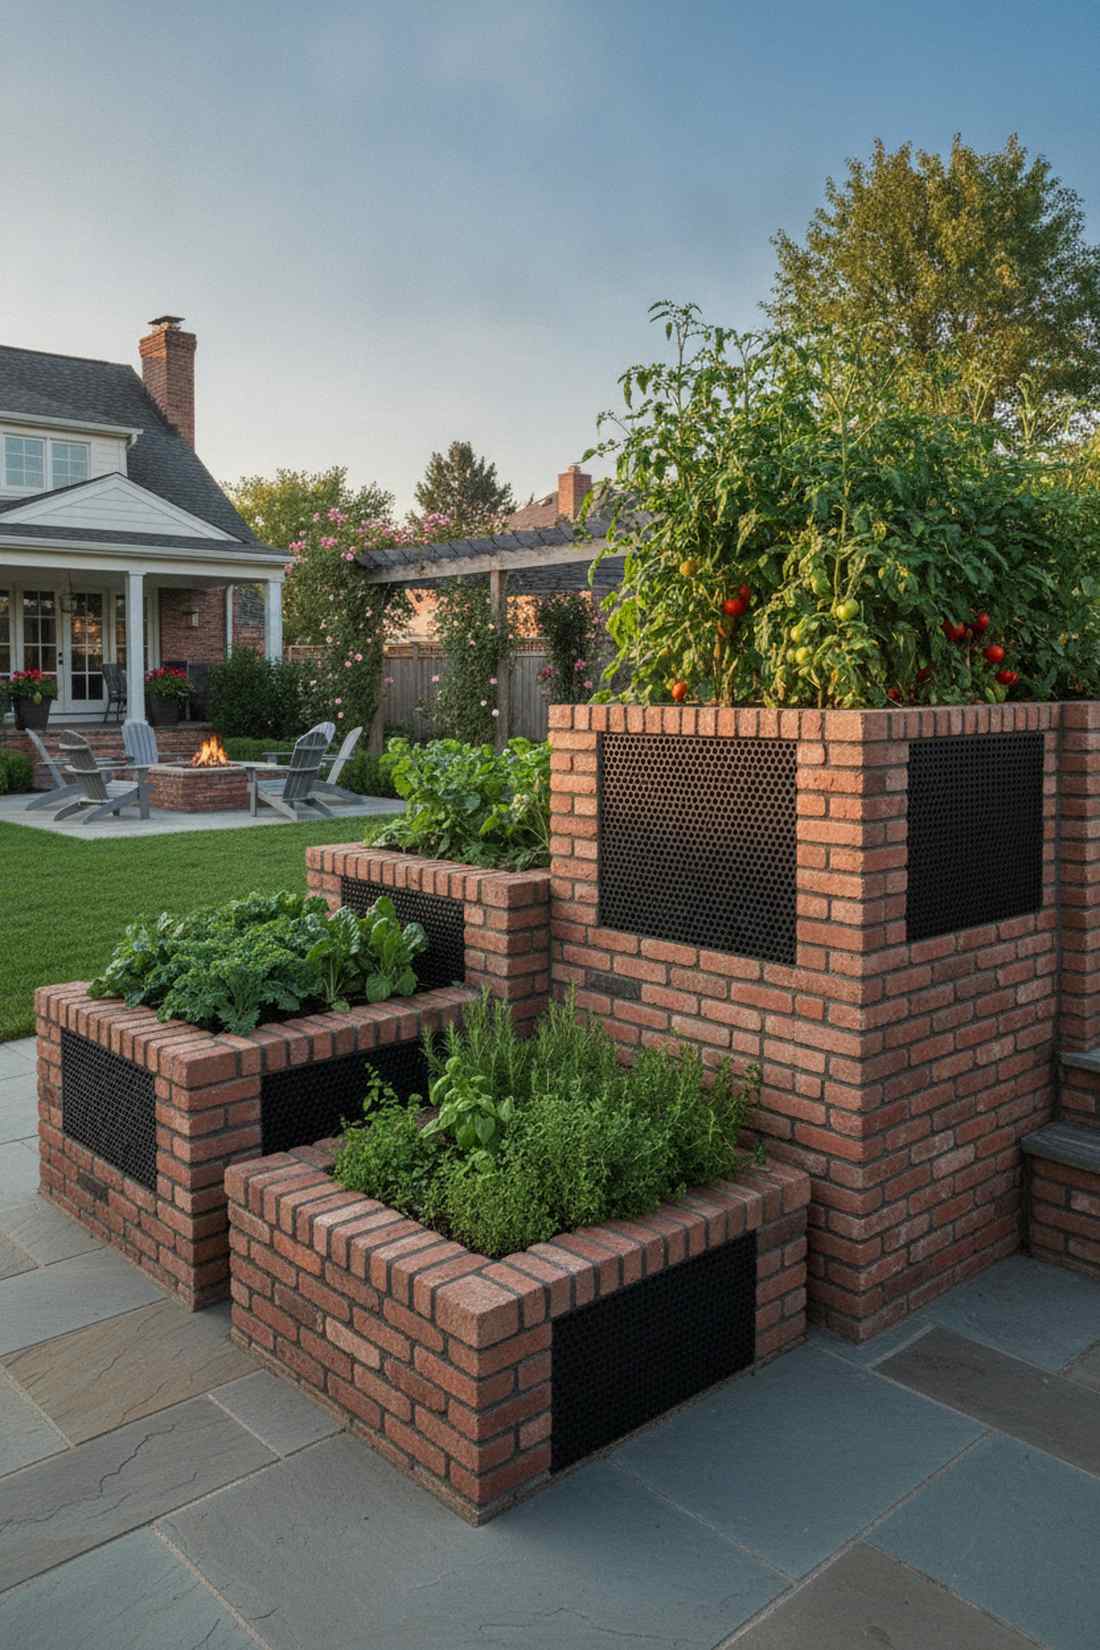
Feels like a highly curated urban rooftop oasis. Creating multi-height brick garden pods is perfectly suited for flat yards that desperately need three-dimensional interest.
Building one giant box is boring, but clustering varying heights automatically zones your roots and looks spectacularly custom. Line the interior walls with a heavy-duty dimple drainage board to stop moisture from weeping through the masonry over time.
This modular cluster setup generally costs $250–$400 total. Pin this to your ultimate dream backyard board!
- Key Materials: Uniform bricks, drainage board
- Vibe / Style: Layered contemporary courtyard
- Difficulty: Time-intensive intermediate
- Budget Breakdown: Brick Pallets: $250 | Drainage: $60
- Creator’s Tip: Match your deep root veggies (tomatoes) to the tallest beds, and herbs to the shortest.
- Smart Sourcing: waterproof masonry dimple board rolls and pre-mixed dark contrast mortar.
💡 Must-Have Supplies for High-End Setups
To build these setups faster and ensure they last, skip the generic craft aisles and invest in the right foundational kits.
- Base & Support: commercial-grade structural leveling sand
- Setup Tools: heavy-duty masonry tool starter kits
- Weather/Durability Protection: UV-resistant breathable stone sealants
Concrete Block Modular Systems
11. Single-Course Cinder-Block Grid
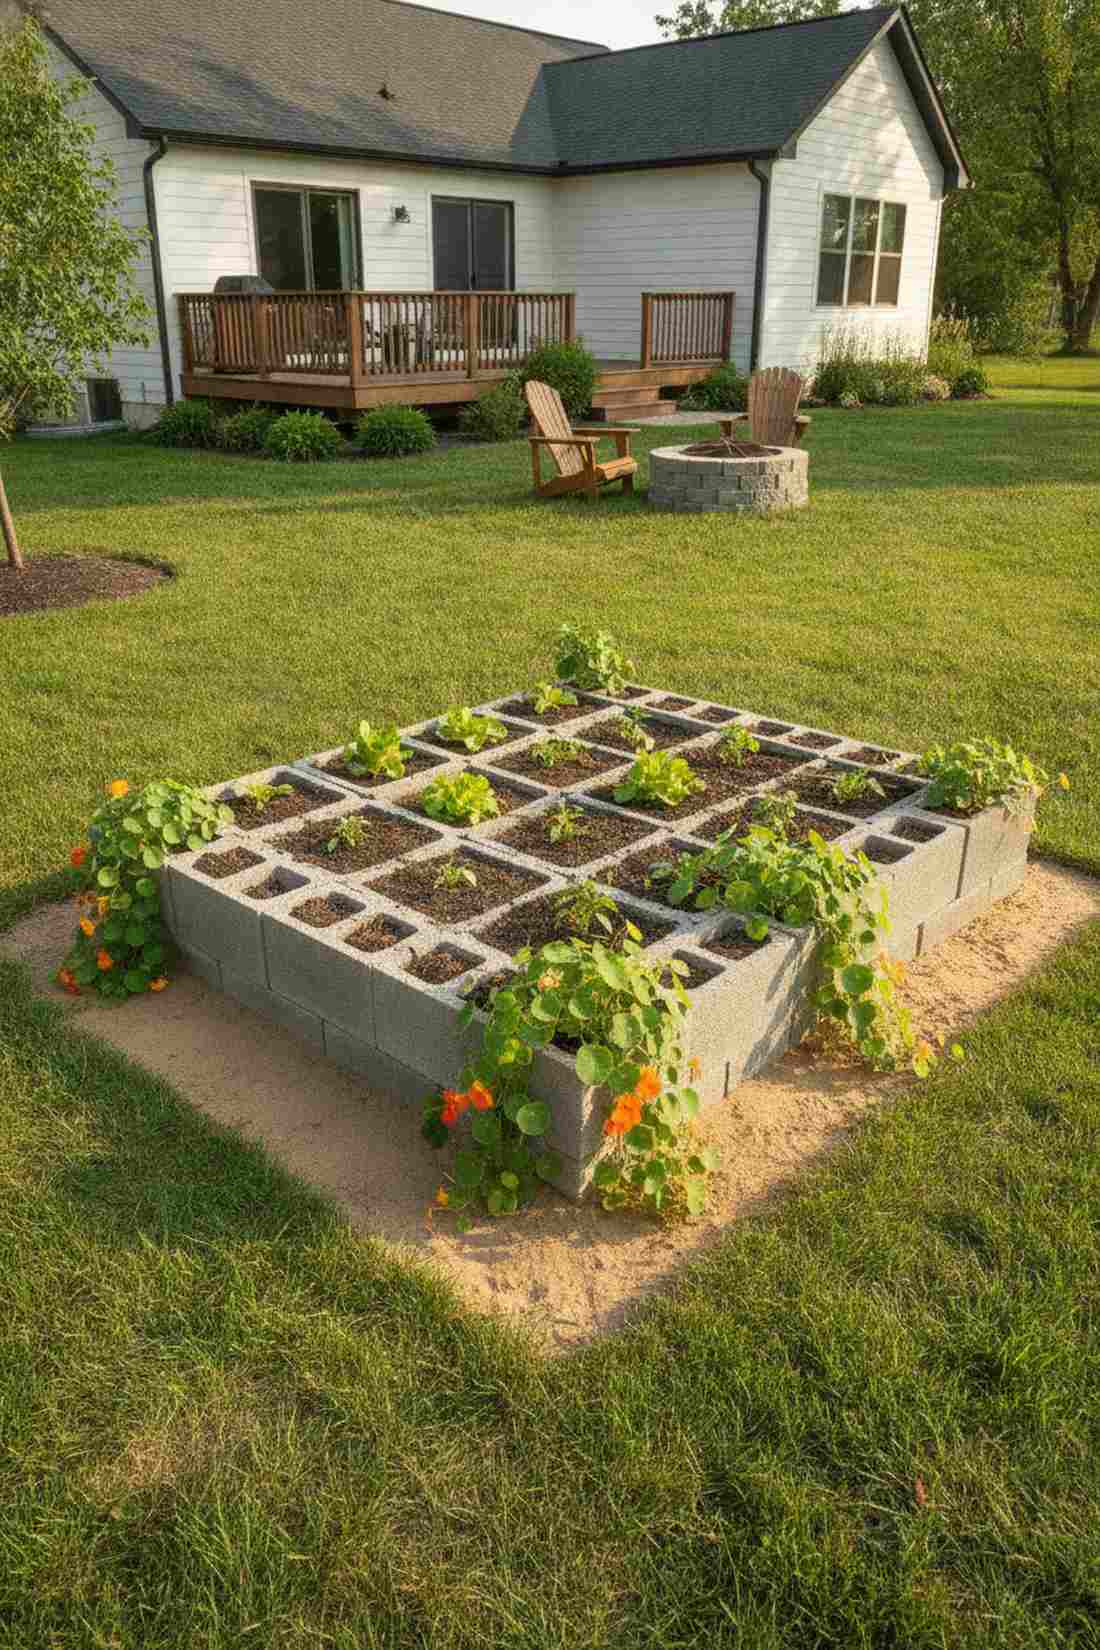
Emits a sleek, utilitarian industrial charm. A low-profile cinder block planter is exceptionally perfect for ultra-budget backyard veggie setups and rapid deployments.
Wood rots fast in wet climates, but raised beds concrete blocks deliver a wildly cheap, permanent grid that requires zero tools. Maximize the space by filling the hollow exterior cores with compact potting soil blends for built-in herb pockets.
You can easily piece this together for under $30. Save this if you need a garden up and running by tomorrow!
- Key Materials: Standard 8x8x16 blocks, core soil
- Vibe / Style: Utilitarian urban homestead
- Difficulty: Extremely easy
- Budget Breakdown: Blocks: $25 | Base Sand: $5
- Creator’s Tip: Plant trailing nasturtiums in the open block cores to cascade down and soften the gray concrete.
- Smart Sourcing: moisture-control raised bed soil mix and bulk pack standard cinder blocks.
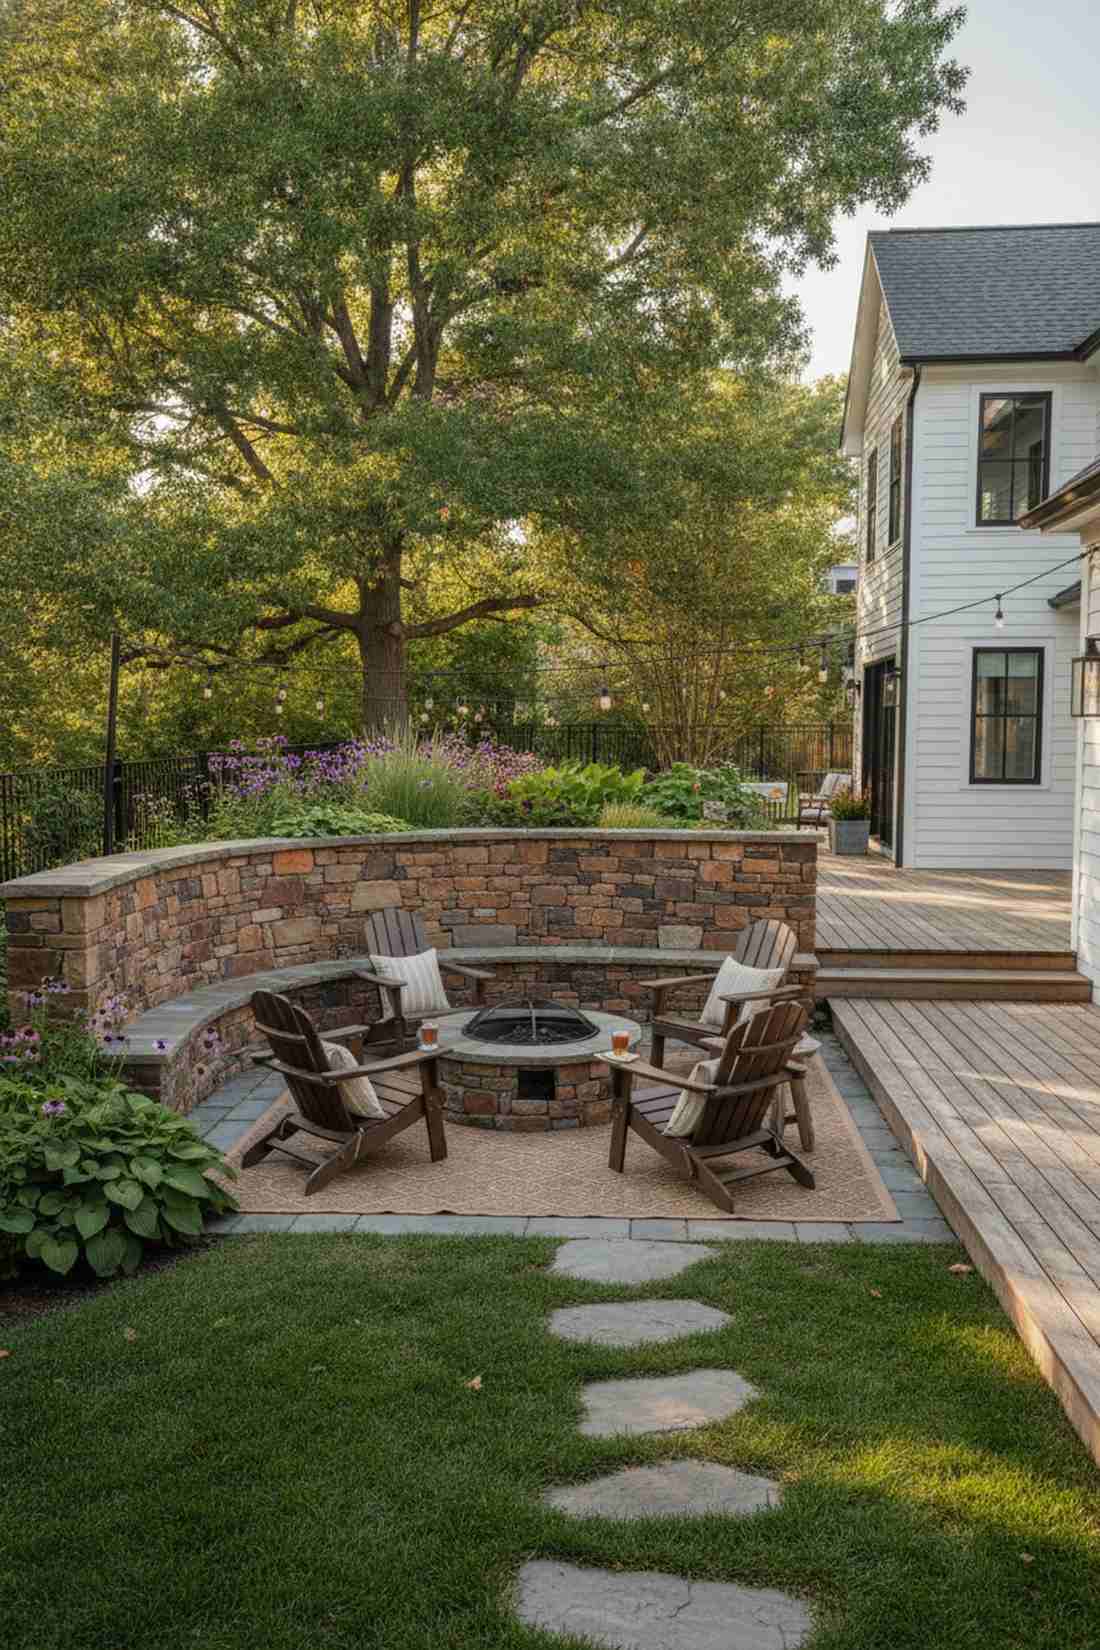
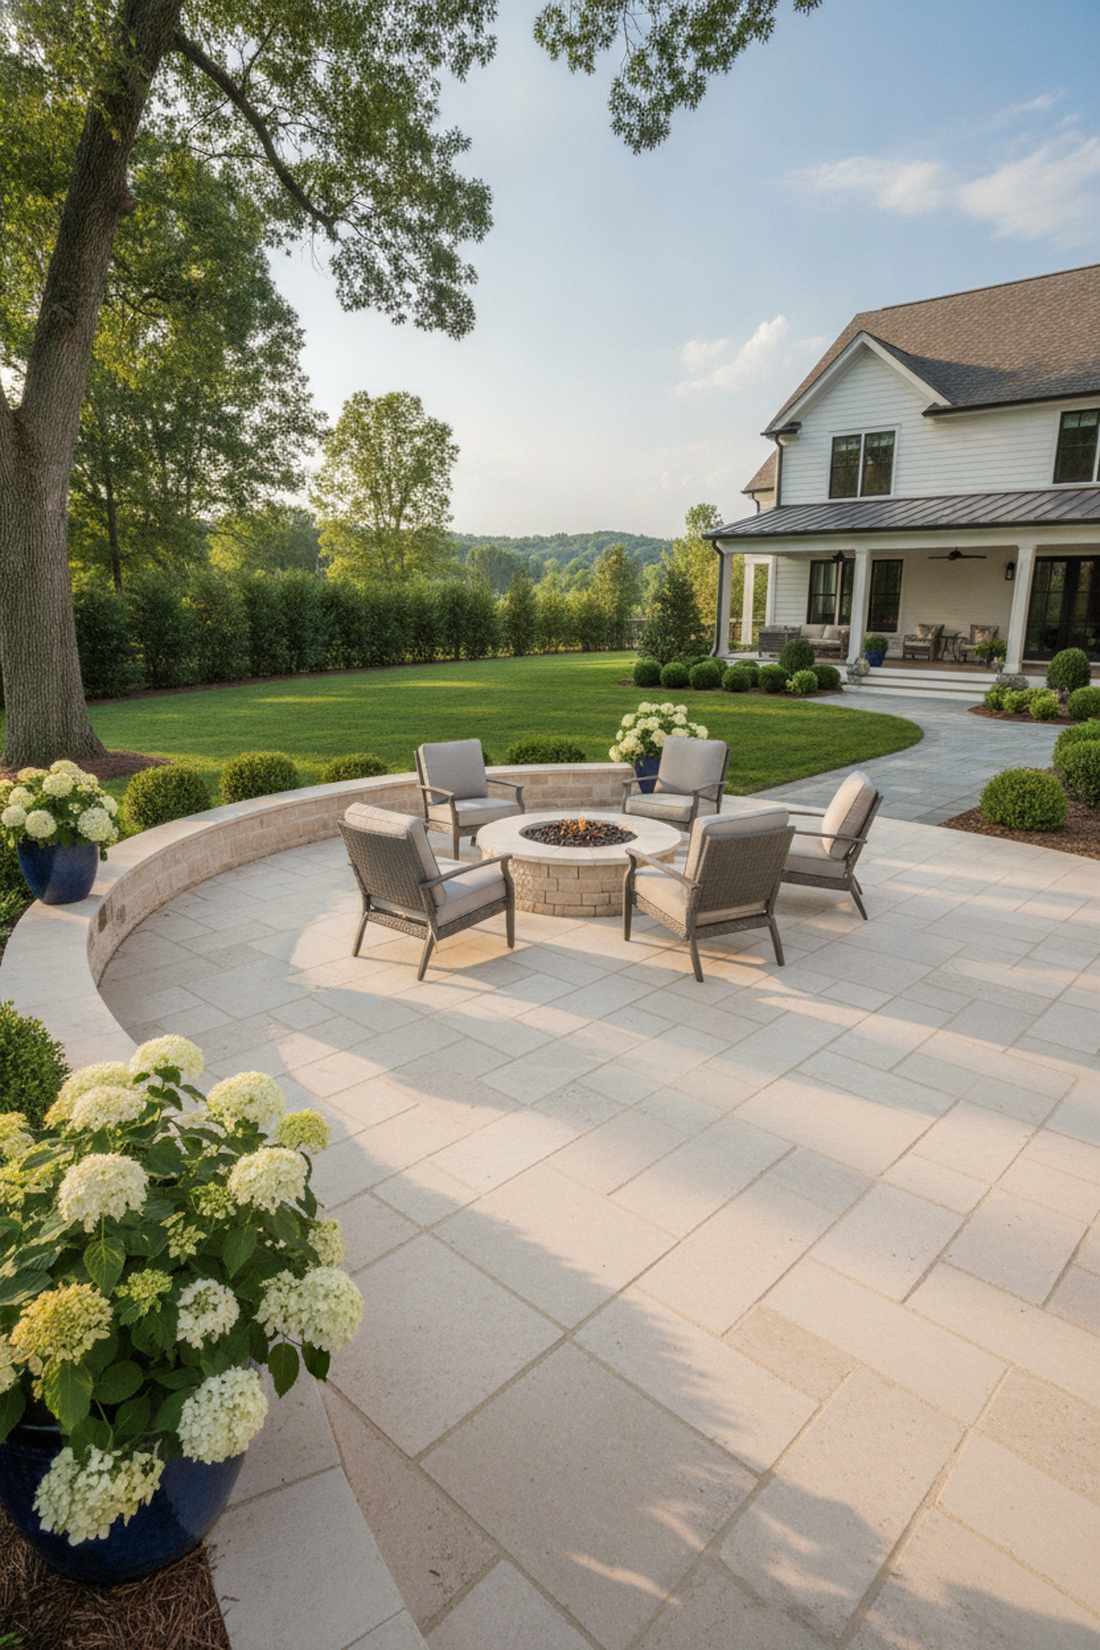
12. Stacked-Block with Timber Cap
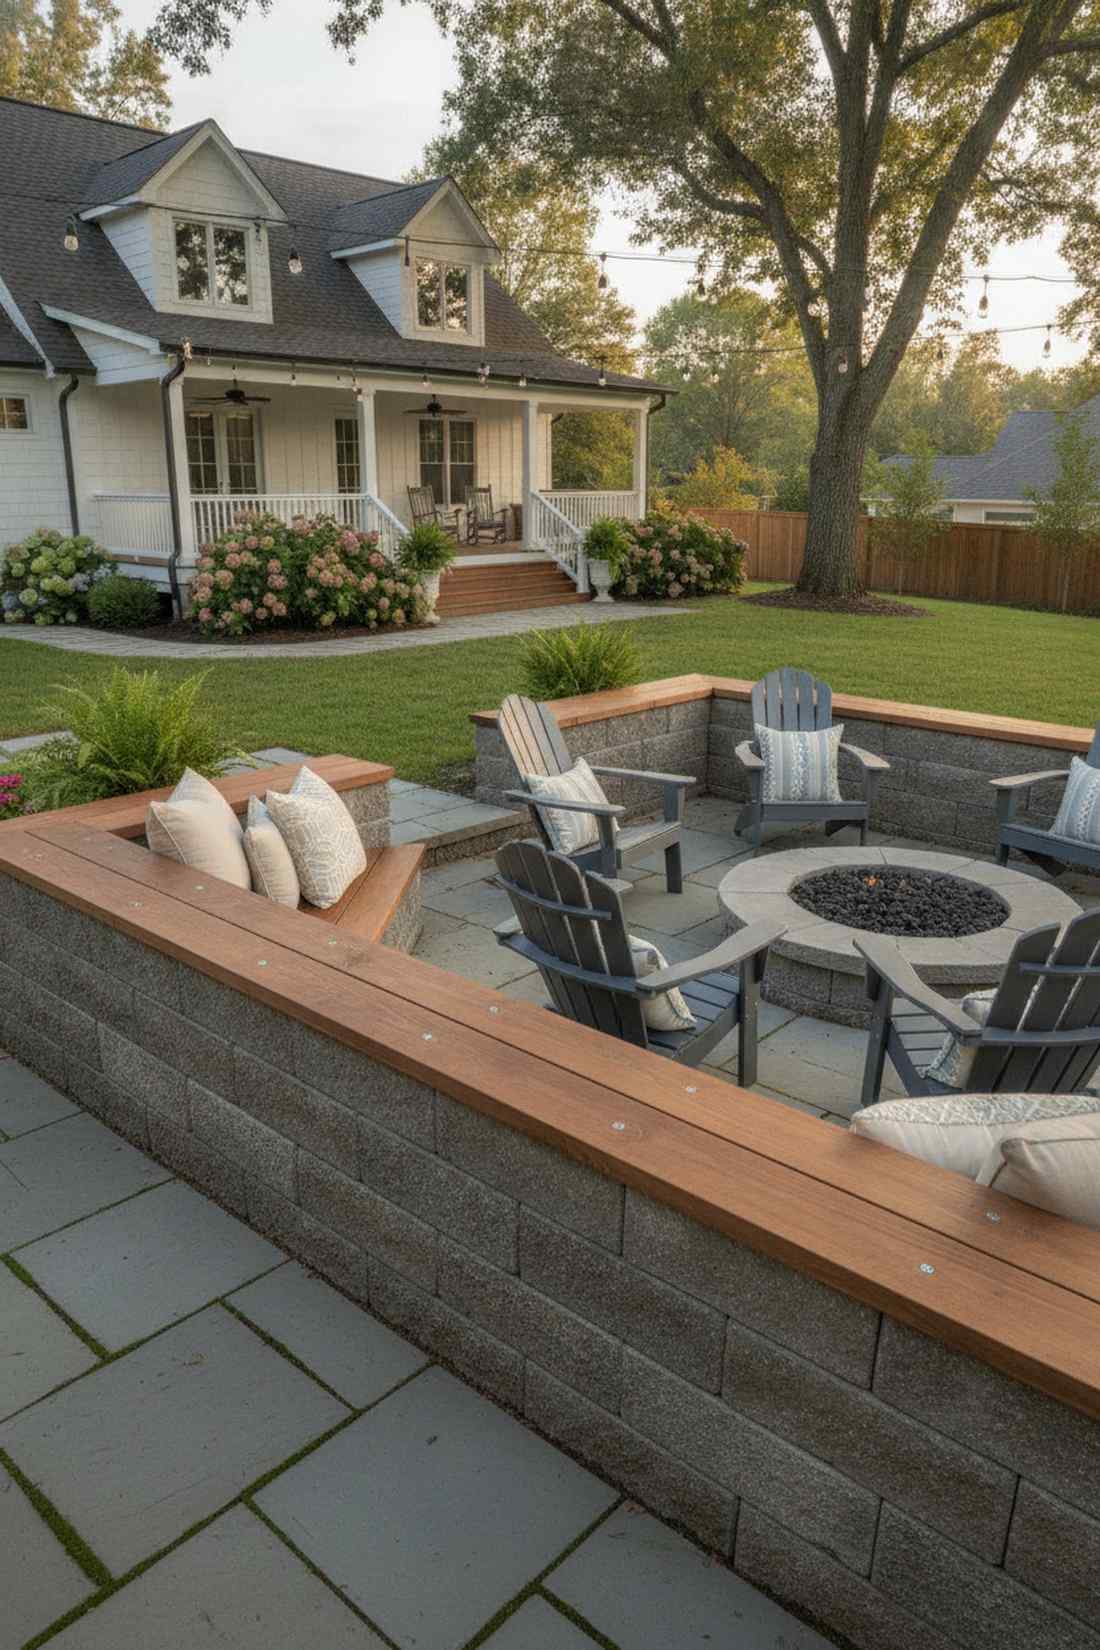
Looks like a premium custom-built seating wall. Integrating a wood-capped concrete perimeter works beautifully for dual-purpose patio borders where guests need a place to sit.
Raw block can feel too cold, but bolting a warm, stained timber cap seamlessly bridges the gap between industrial and cozy. Utilize galvanized masonry anchors to ensure the wood never warps or detaches during hot summers.
Pulling off this hybrid look costs about $80–$120. It completely transforms basic blocks into a high-end feature.
- Key Materials: Concrete blocks, treated lumber, masonry anchors
- Vibe / Style: Transitional patio lounge
- Difficulty: Beginner power tool usage
- Budget Breakdown: Blocks: $50 | Lumber/Hardware: $60
- Creator’s Tip: Counter-sink your anchor bolts so the wooden seating surface remains perfectly smooth and safe.
- Smart Sourcing: galvanized masonry expansion anchors and UV-blocking exterior timber stain.
13. Mortared Concrete-Block Fortress
Feels like an indestructible institutional landscape. The reinforced masonry mega-bed is strictly for properties requiring serious, multi-generational soil retention.
Stacking dry blocks is fine for small plants, but deep saturated soil demands a fortress-level build that completely stops lateral blowouts. Dropping steel rebar pins down the cores and filling them with high-yield concrete mix guarantees maximum survival.
This heavy-duty setup generally demands $150–$300. Pin this if you’re building a massive slope-retaining garden.
- Key Materials: Block, rebar, structural concrete
- Vibe / Style: Commercial-grade permanence
- Difficulty: Heavy physical labor
- Budget Breakdown: Blocks/Mortar: $120 | Rebar/Concrete: $80
- Creator’s Tip: Tie your vertical rebar directly into the wet concrete footer for unbreakable tensile strength.
- Smart Sourcing: pre-cut #4 steel rebar bundles and high-yield structural concrete mix.
14. Decorative Split-Face Block Bed
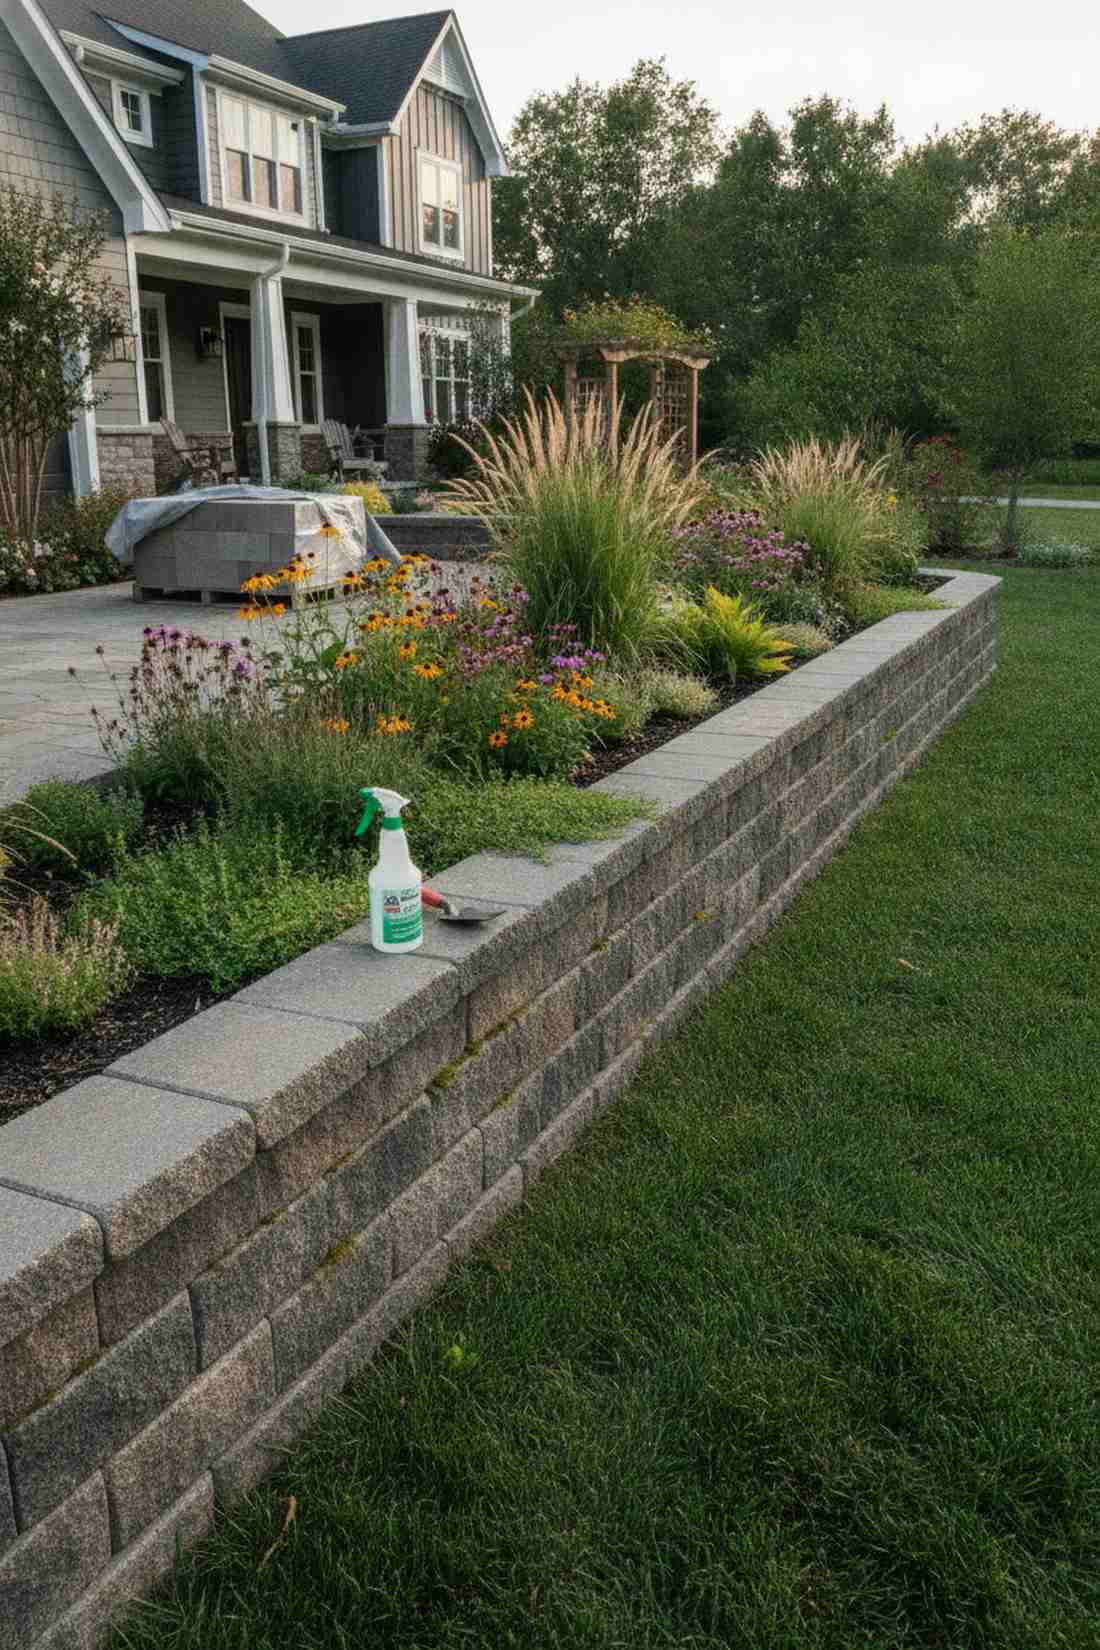
Brings a heavy, rugged mountain lodge aesthetic. A textured architectural block planter is perfect for front-facing property lines where raw cinderblock would look too cheap.
True carved stone is outrageously priced, but split-face blocks mimic natural rock fractures flawlessly while maintaining easy-to-stack modularity. Pair these rough textures with specialized moss-encouraging sprays to instantly age the wall.
You can upgrade to this premium texture for around $100–$180. Highly recommended for a fast aesthetic bump.
- Key Materials: Split-face concrete units, leveling sand
- Vibe / Style: Prairie-modern architectural
- Difficulty: Easy stacking
- Budget Breakdown: Blocks: $140 | Base: $20
- Creator’s Tip: Keep the textured side facing strictly outward and use the smooth back edge to align your courses.
- Smart Sourcing: architectural split-face block pallets and liquid moss growth accelerator spray.
If you think stone is always expensive, this upcoming trick will completely change your mind.
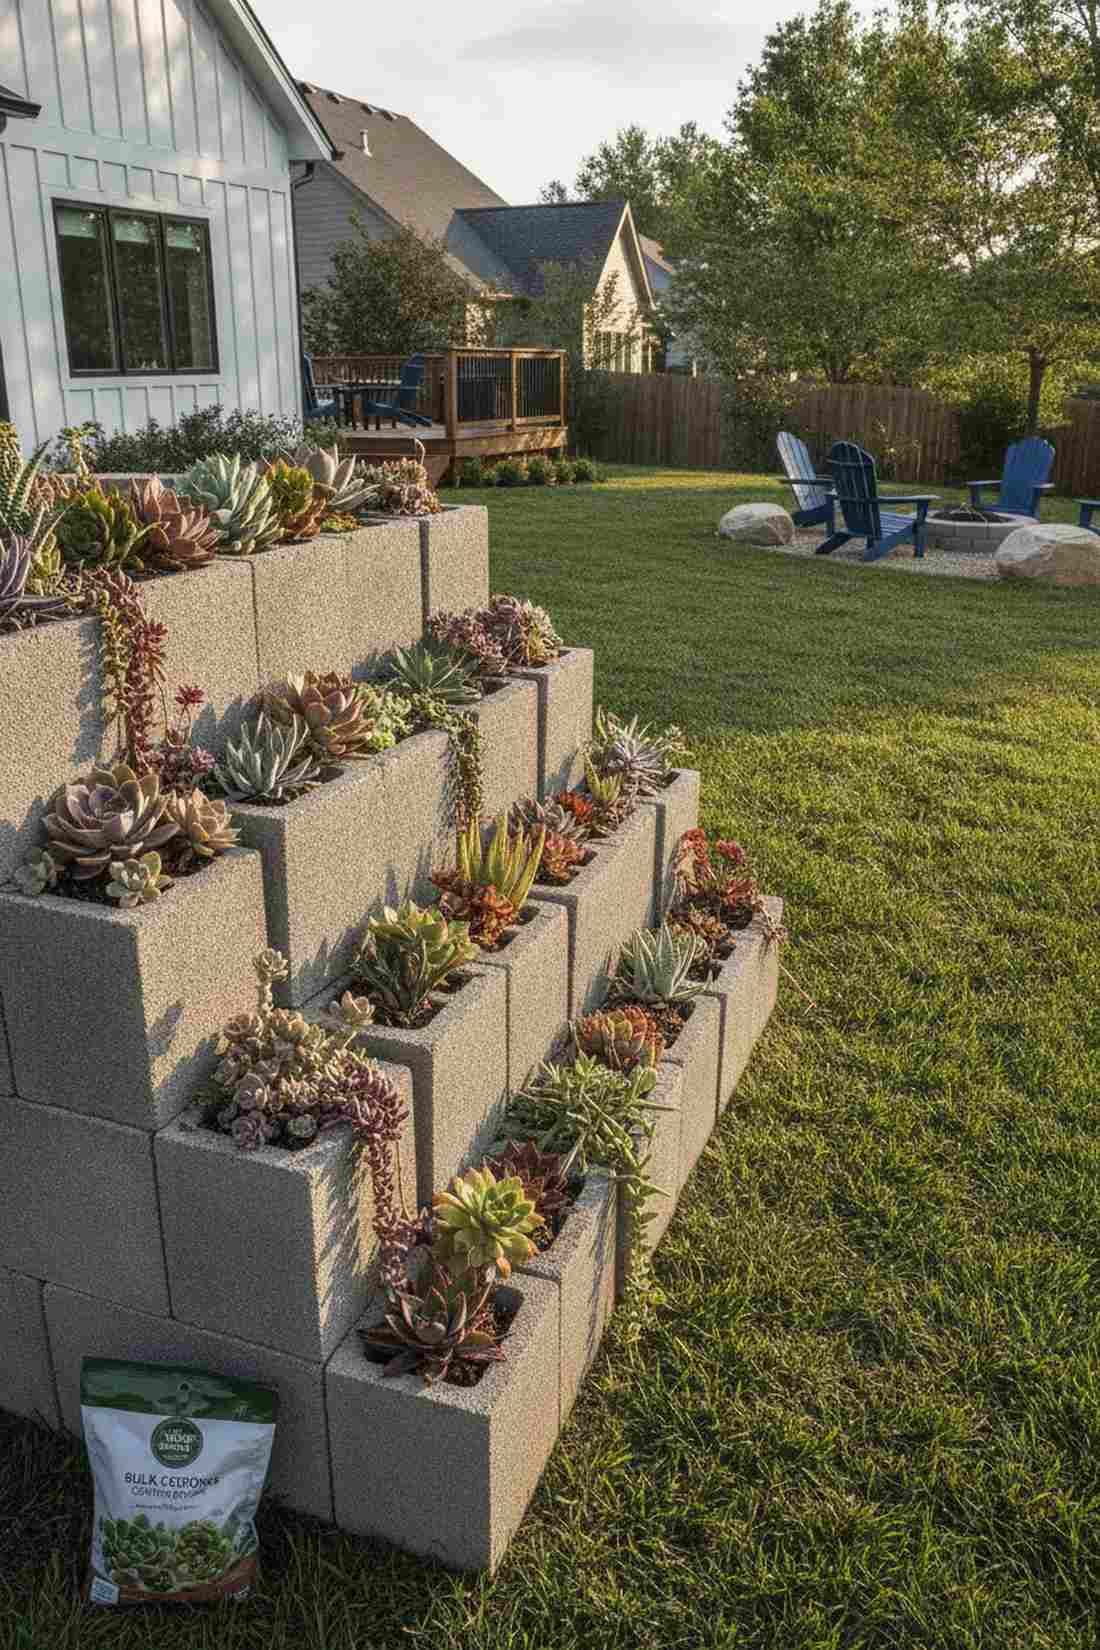
15. Planter-Block Vertical Garden Wall

Feels like a lush living tapestry. A cascading vertical block tower is an absolute game-changer for tiny urban balconies or space-starved concrete patios.
Spreading out horizontally eats up premium yard space, but stacking specialized open-face planter blocks delivers extreme yield in a one-foot footprint. Weaving micro-drip irrigation tubing through the back cavities guarantees your vertical crops never dry out.
A 4-foot tall living wall runs roughly $120. Save this immediately to your small-space garden hacks board!
- Key Materials: Stackable planter blocks, drip line kit
- Vibe / Style: High-density urban jungle
- Difficulty: Moderate plumbing/stacking
- Budget Breakdown: Blocks: $80 | Irrigation: $40
- Creator’s Tip: Lean the entire tower backwards by about 5 degrees so water drips naturally into the lower pockets.
- Smart Sourcing: interlocking vertical garden block kits and micro-drip balcony irrigation starter kits.
Flagstone Artisan Assemblies
16. Dry-Stacked Flagstone Ribbon Bed
Straight out of a high-desert botanical sanctuary. A layered thin stone ribbon border looks breathtakingly organic wrapping around native pollinator plants or succulents.
Using thick boulders can look clunky, but stacking incredibly thin stratified stones horizontally delivers a surprisingly premium look full of natural banding. Pack the tiny crevices with fine polymeric stone dust to prevent shifting without using messy wet mortar.
This artisan look will cost roughly $150–$250 in raw stone. It completely redefines the geometry of your yard.
- Key Materials: 1-inch flagstone strips, locking dust
- Vibe / Style: Organic Southwestern oasis
- Difficulty: Time-intensive puzzle fitting
- Budget Breakdown: Flagstone: $200 | Dust: $30
- Creator’s Tip: Overlap the joints heavily—never let a vertical seam travel through more than two layers of stone.
- Smart Sourcing: premium thin-cut flagstone pallets and commercial joint stabilizing sand.
17. Mortared Flagstone Formal Rectangle
Feels like a custom estate courtyard. The precision-cut flagstone planter provides intense permanence perfectly suited for framing expensive driveway entrances or luxury patios.
Wild, loose stones can look messy, but squaring off thick mortared flagstone gives a designer-level finish that screams high-end masonry. Apply a deep-penetrating color-enhancing sealer to make the natural rock veins pop intensely after rain.
Expect a heavier investment of $300–$500 here. Pin this to your ultimate luxury landscaping board!
- Key Materials: Thick dimensional flagstone, mortar, sealer
- Vibe / Style: Refined luxury hardscape
- Difficulty: Advanced mortaring
- Budget Breakdown: Stone: $350 | Mortar/Sealer: $80
- Creator’s Tip: Tool the mortar joints deeply to create a shadow line that makes each stone look individually carved.
- Smart Sourcing: wet-look color enhancing stone sealer and pre-cut dimensional flagstone packs.
18. Multi-Tone Flagstone Mosaic Bed
Resembles a striking piece of earth-art. The color-blended stone mosaic wall works phenomenally well as a standalone focal piece near outdoor fire pits or seating areas.
Monochromatic walls can get visually heavy, but mixing rust, buff, and gray tones breaks up the mass and looks far more expensive than bulk gray rock. Contrast the bright stones with a dark charcoal masonry tint to make the colors explode.
Mixing pallets usually pushes the budget to $250–$400. Highly recommended if you want a bold aesthetic statement.
- Key Materials: Mixed-color flagstone, tinted mortar
- Vibe / Style: Artistic earthy mosaic
- Difficulty: Moderate color balancing
- Budget Breakdown: Mixed Stone: $300 | Tint: $25
- Creator’s Tip: Dry-fit a massive section on your lawn first to ensure you don’t accidentally create ugly color blobs.
- Smart Sourcing: premium liquid mortar color tint and multi-color natural stone veneer kits.
19. Flagstone-Capped Hybrid Wall
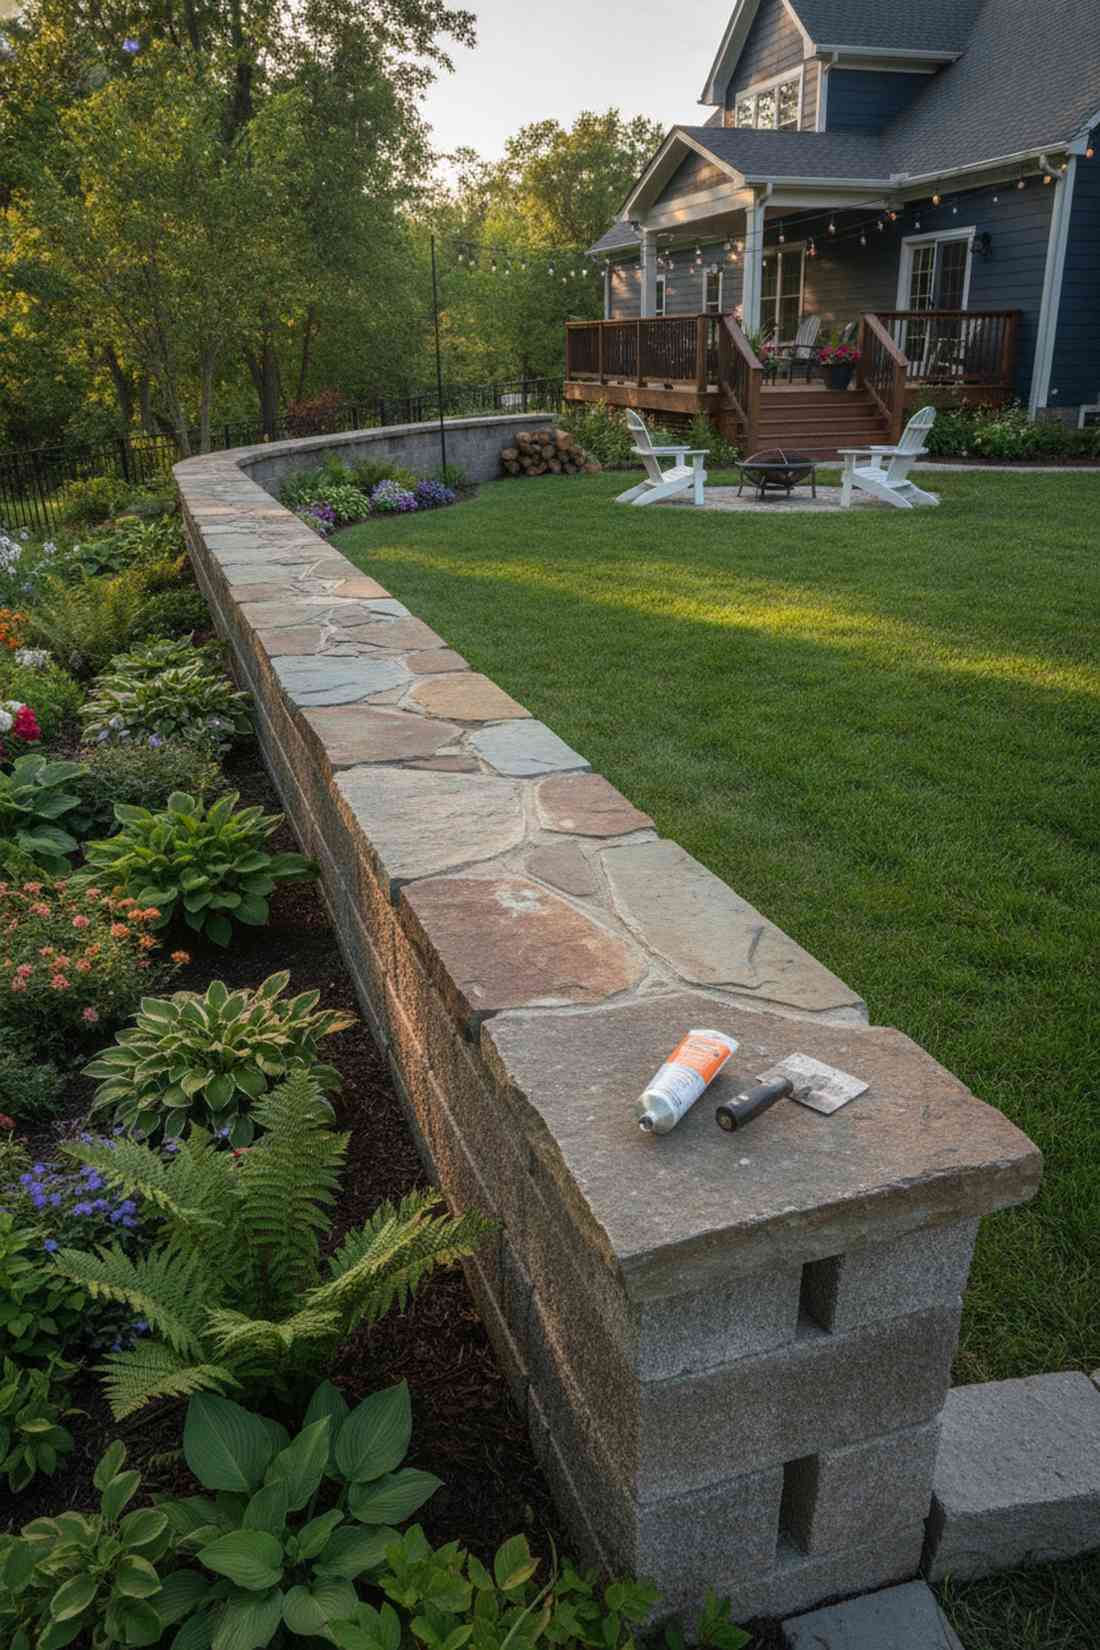
Gives off an incredibly smart, budget-conscious premium vibe. This stone-capped structural wall is the ultimate hack for long boundary beds where full flagstone would bankrupt you.
Most people waste money building the unseen base with expensive rock; building the core with cheap blocks and adding a premium capstone gives a designer-level finish for half the price. Secure the heavy top caps with heavy-duty construction adhesive to prevent wobble.
This hybrid cheat code easily slashes your bill down to $150–$250. Save this brilliant budget trick right now!
- Key Materials: Concrete base blocks, large flagstone caps
- Vibe / Style: Smart luxury hybrid
- Difficulty: Intermediate dual-material build
- Budget Breakdown: Base Blocks: $50 | Capstones: $150
- Creator’s Tip: Overhang the flagstone cap by 2 inches to cast a beautiful shadow that hides the cheaper base materials.
- Smart Sourcing: heavy-duty polyurethane block adhesive and extra-wide flagstone cap pieces.
Stop scrolling for a second—this next layout is the exact secret high-end landscapers use to charge double.
Limestone Terrace Solutions
20. Limestone-Ledge Retaining Tiers
Feels exactly like an ancient Mediterranean olive grove. A stepped limestone retaining wall perfectly tames steep backyard slopes while reflecting gorgeous natural sunlight.
Dark stones can make shaded yards feel gloomy, but bright limestone instantly brightens the space and delivers a surprisingly premium look as it weathers. Ensure you backfill heavily with proper drainage aggregates to stop hydrostatic pressure from blowing out the bottom tier.
Expect to spend $300–$500 for a multi-level build. Pin this if you’re battling a severe backyard hill!
- Key Materials: Limestone ledge rock, drainage gravel
- Vibe / Style: Bright coastal terrace
- Difficulty: Heavy lifting involved
- Budget Breakdown: Limestone: $350 | Gravel: $75
- Creator’s Tip: Stagger native cascading plants like creeping phlox along the ledges to dramatically soften the white stone.
- Smart Sourcing: bulk drainage aggregate packs and heavy-duty geotechnical filter fabric.
21. Mortared Limestone-Block System
Exudes the polished grace of a historic civic building. Precision-cut limestone block beds are the ultimate choice for matching existing high-end home exteriors or bluestone patios.
Working with irregular boulders takes forever, but utilizing pre-cut ashlar blocks accelerates the build and looks far more expensive than its actual cost. Seal the porous faces immediately with a breathable siloxane waterproofer to stop algae stains from ruining the buff colors.
This premium cut-stone approach runs about $400–$600. It’s an investment piece that elevates the entire property.
- Key Materials: Sawn limestone blocks, waterproof sealer
- Vibe / Style: Flawless architectural formal
- Difficulty: Intermediate leveling
- Budget Breakdown: Cut Blocks: $450 | Sealer: $45
- Creator’s Tip: Use a specialized buff-tinted mortar so the joints blend invisibly into the limestone faces.
- Smart Sourcing: breathable siloxane masonry waterproofer and buff-colored premium mortar mix.
22. Rough-Hewn Limestone Country Beds
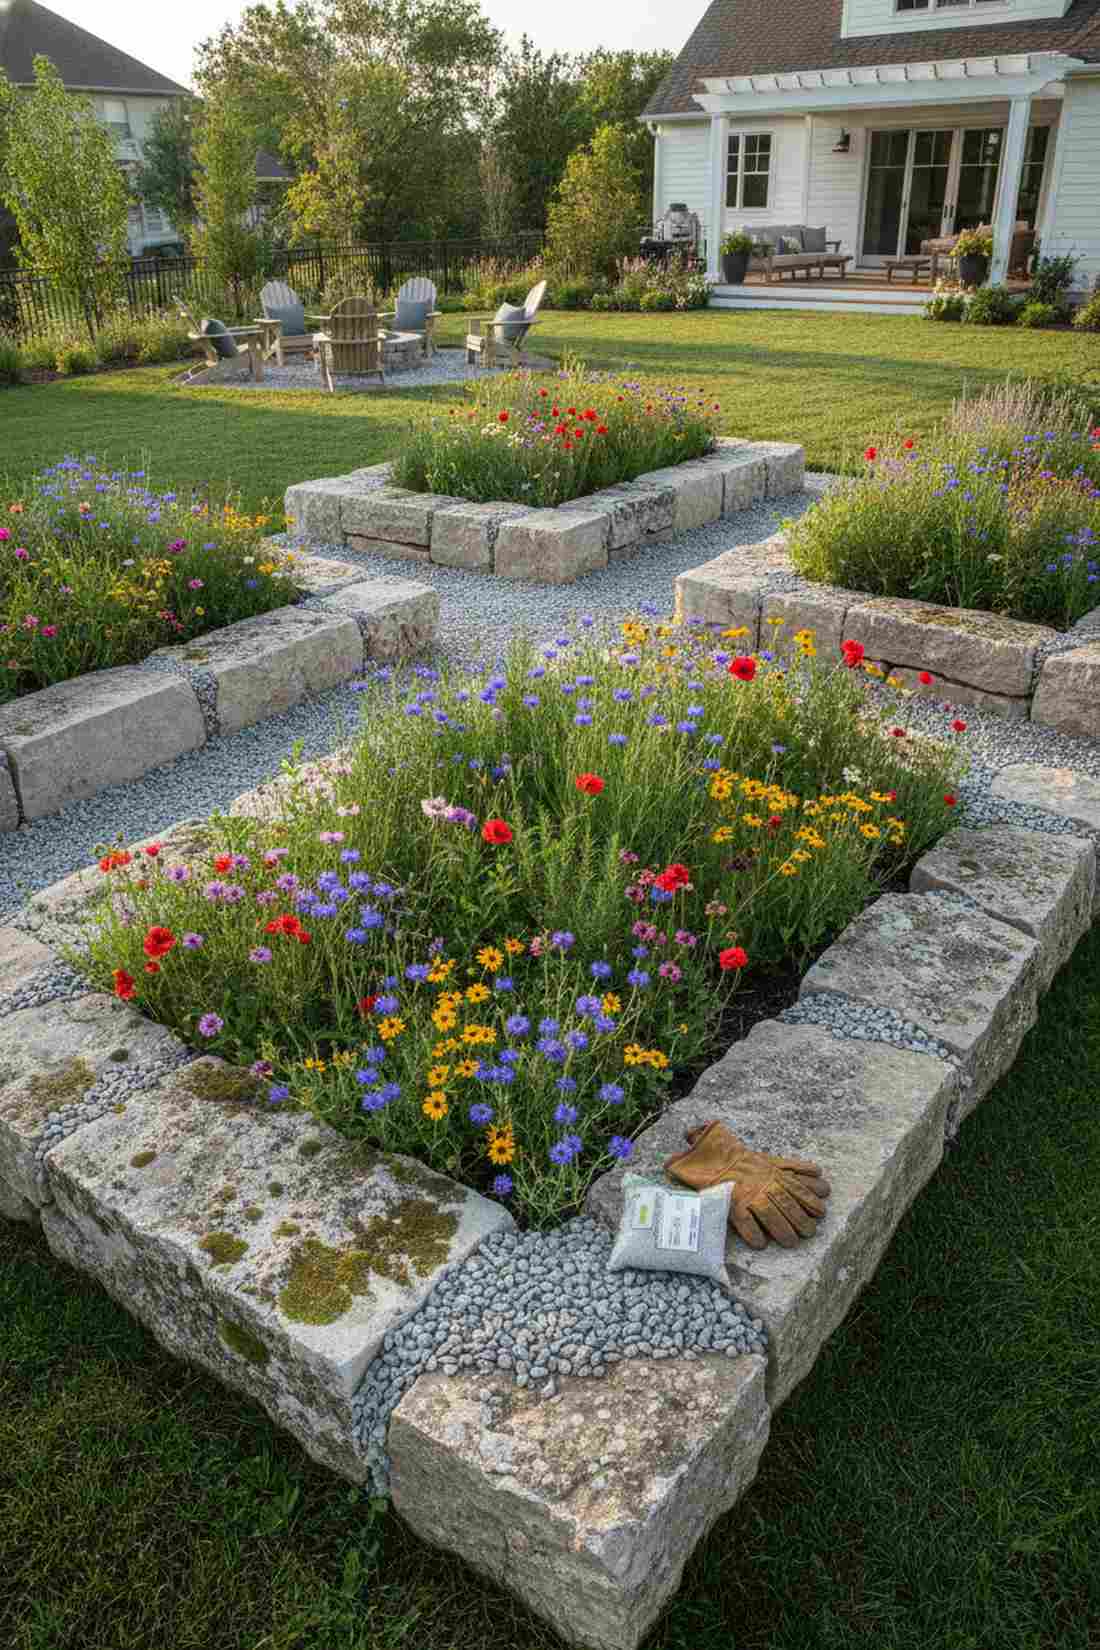
Looks like a beautiful relic from an old countryside farm. The salvaged limestone chunk border adds immediate rustic warmth to wildflower meadows or casual backyard gardens.
Perfectly cut stone lacks soul, but utilizing raw quarry scraps or farm clearings gives a designer-level finish through pure authenticity. You can easily fill the awkward gaps with smaller stone fragments for massive structural lock-in without mixing concrete.
Sourcing raw chunks keeps costs shockingly low at $50–$100. Save this to your rustic homesteading board!
- Key Materials: Raw limestone chunks, filler stone
- Vibe / Style: Authentic country relic
- Difficulty: Easy rustic stacking
- Budget Breakdown: Raw Stone: $60 | Filler: $20
- Creator’s Tip: Hunt for pieces that already have lichen or moss growing on them to achieve that instant 100-year-old look.
- Smart Sourcing: crushed limestone locking gravel and heavy-duty landscaping work gloves.
Material Guide: Cheap vs. Premium Aesthetic
Knowing exactly where to save and where to spend makes all the difference in achieving that “looks expensive but isn’t” vibe.
- Standard vs. UV-Resistant/Premium: Standard sealers flake off in one summer. Upgrading to penetrating siloxane sealers stops water from cracking the stone from the inside out.
- Pre-made Kits vs. Sourcing Locally: While local stone is cheap, using pre-cut corner kits and specialized adhesives saves hours of frustrating labor and guarantees a professional-looking joint.
23. Limestone-and-Steel Modern Fusion
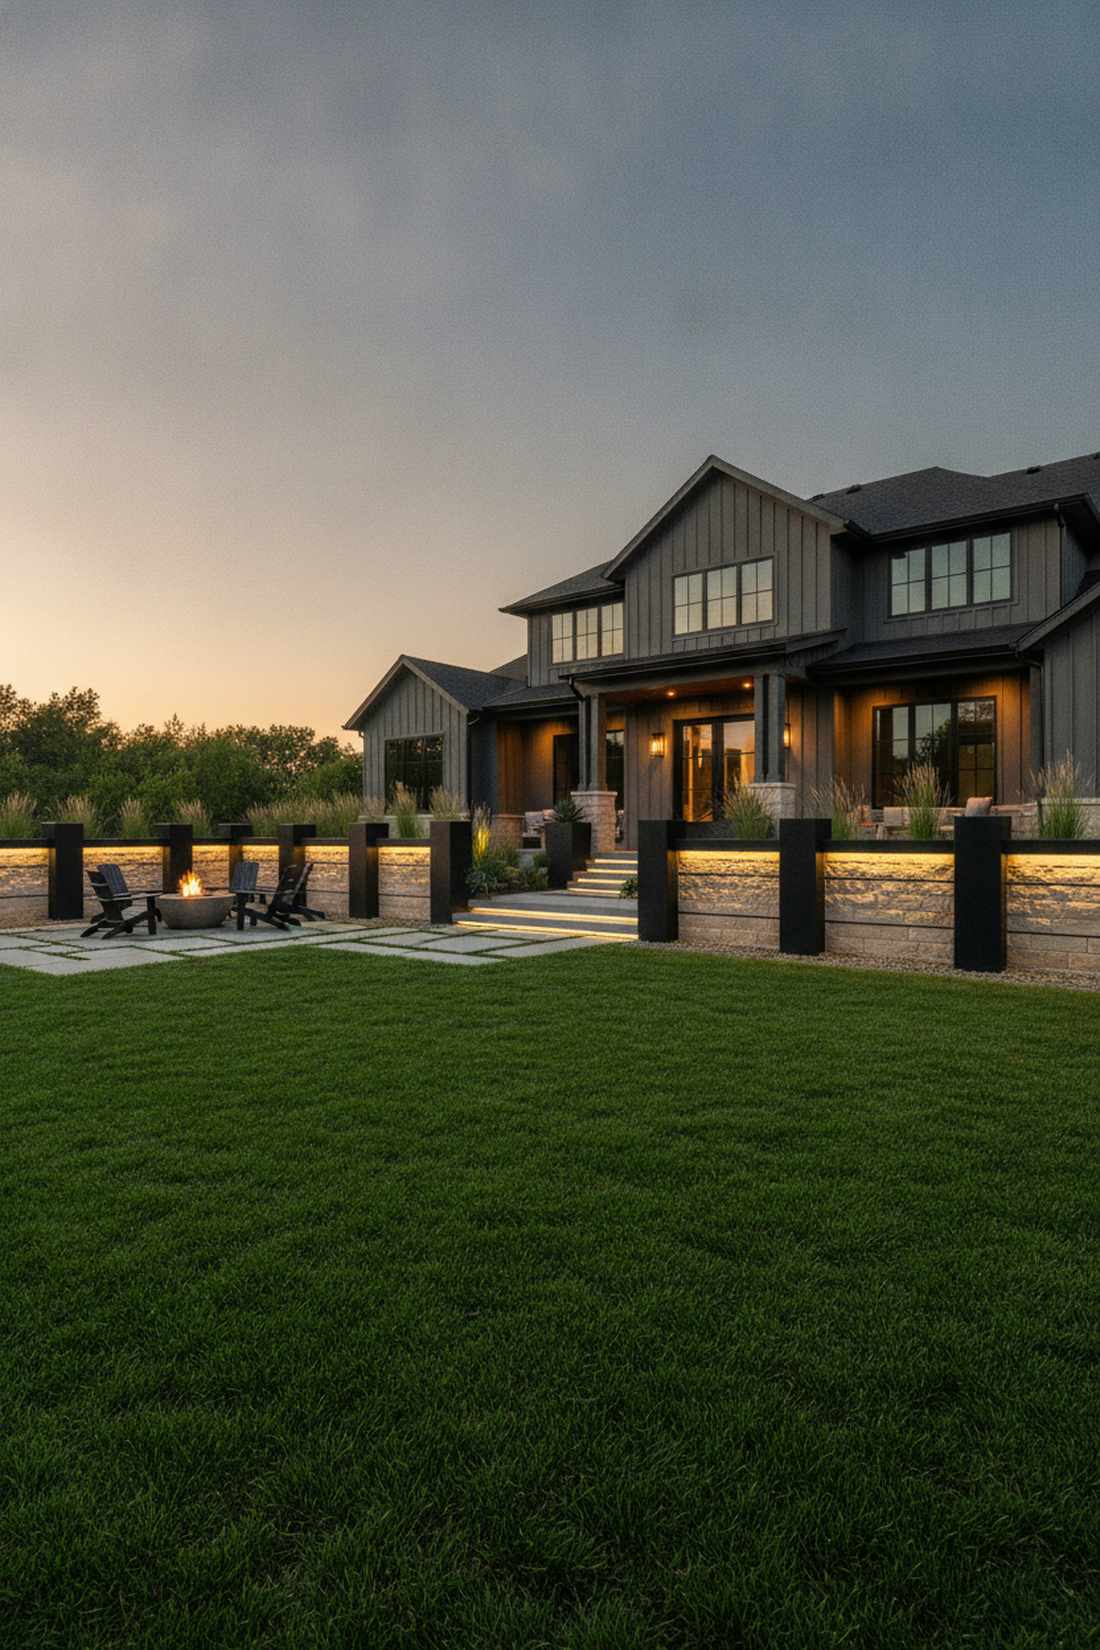
Emits an incredibly sharp, industrial-chic energy. Blending warm stone with black steel frames creates a spectacular contrast perfect for modern minimalist front yards.
Solid masonry can look too traditional, but bolting powder-coated steel posts to hold the rock delivers a surprisingly premium look that designers charge fortunes for. Adding waterproof LED strip channels under the steel rails turns it into a glowing nighttime masterpiece.
This high-end fusion build will cost $300–$500 depending on metal pricing. Highly recommended for a contemporary showstopper.
- Key Materials: Limestone infill, powder-coated steel posts, LED strips
- Vibe / Style: High-contrast modern industrial
- Difficulty: Advanced metal/stone hybrid
- Budget Breakdown: Stone: $200 | Metal/Lighting: $150
- Creator’s Tip: Set the steel posts deeply into concrete footings; the metal handles all the pressure, letting you use much thinner, cheaper stone.
- Smart Sourcing: powder-coated metal landscape posts and outdoor waterproof LED channel kits.
Gabion Basket Innovations
24. Standard Gabion Retaining Bed
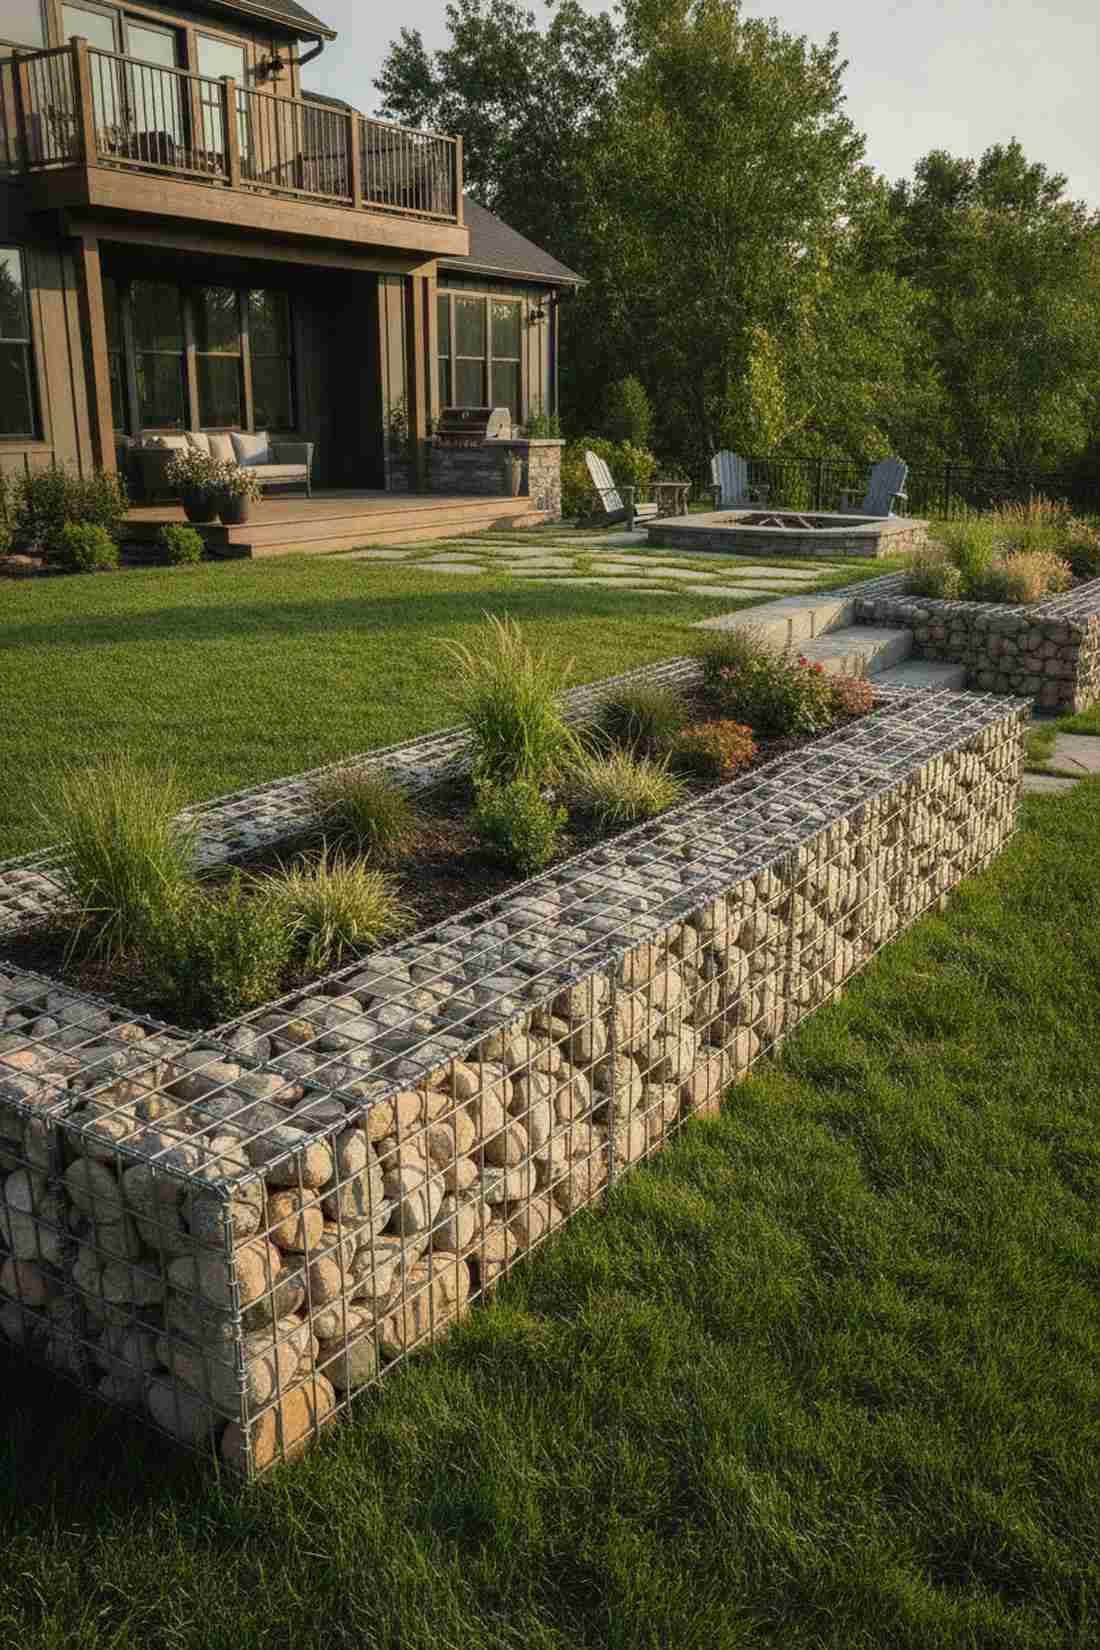
Looks like a modern eco-resort architectural feature. The wire-caged stone basket is absolutely brilliant for areas suffering from severe water runoff or poor soil drainage.
Solid concrete traps water, but gabions allow maximum drainage while giving a designer-level finish that requires zero mortar. Lock the cages tight with helical wire connectors to prevent the heavy river rock from bowing the sides outward.
A standard 6-foot run costs roughly $120–$180. Save this if you love no-mess, high-impact DIY builds!
- Key Materials: Galvanized wire cages, 4-inch river rock
- Vibe / Style: Modern utilitarian eco-design
- Difficulty: Easy assembly, heavy filling
- Budget Breakdown: Cages: $60 | Rock Fill: $90
- Creator’s Tip: Pause halfway through filling to snap in horizontal cross-wires—this is the secret to perfectly flat, non-bulging walls.
- Smart Sourcing: rust-proof galvanized gabion basket kits and helical wire corner connectors.
Before you run to the hardware store, check out this wildly underpriced hybrid method below…
25. Gabion-and-Timber Hybrid Beds
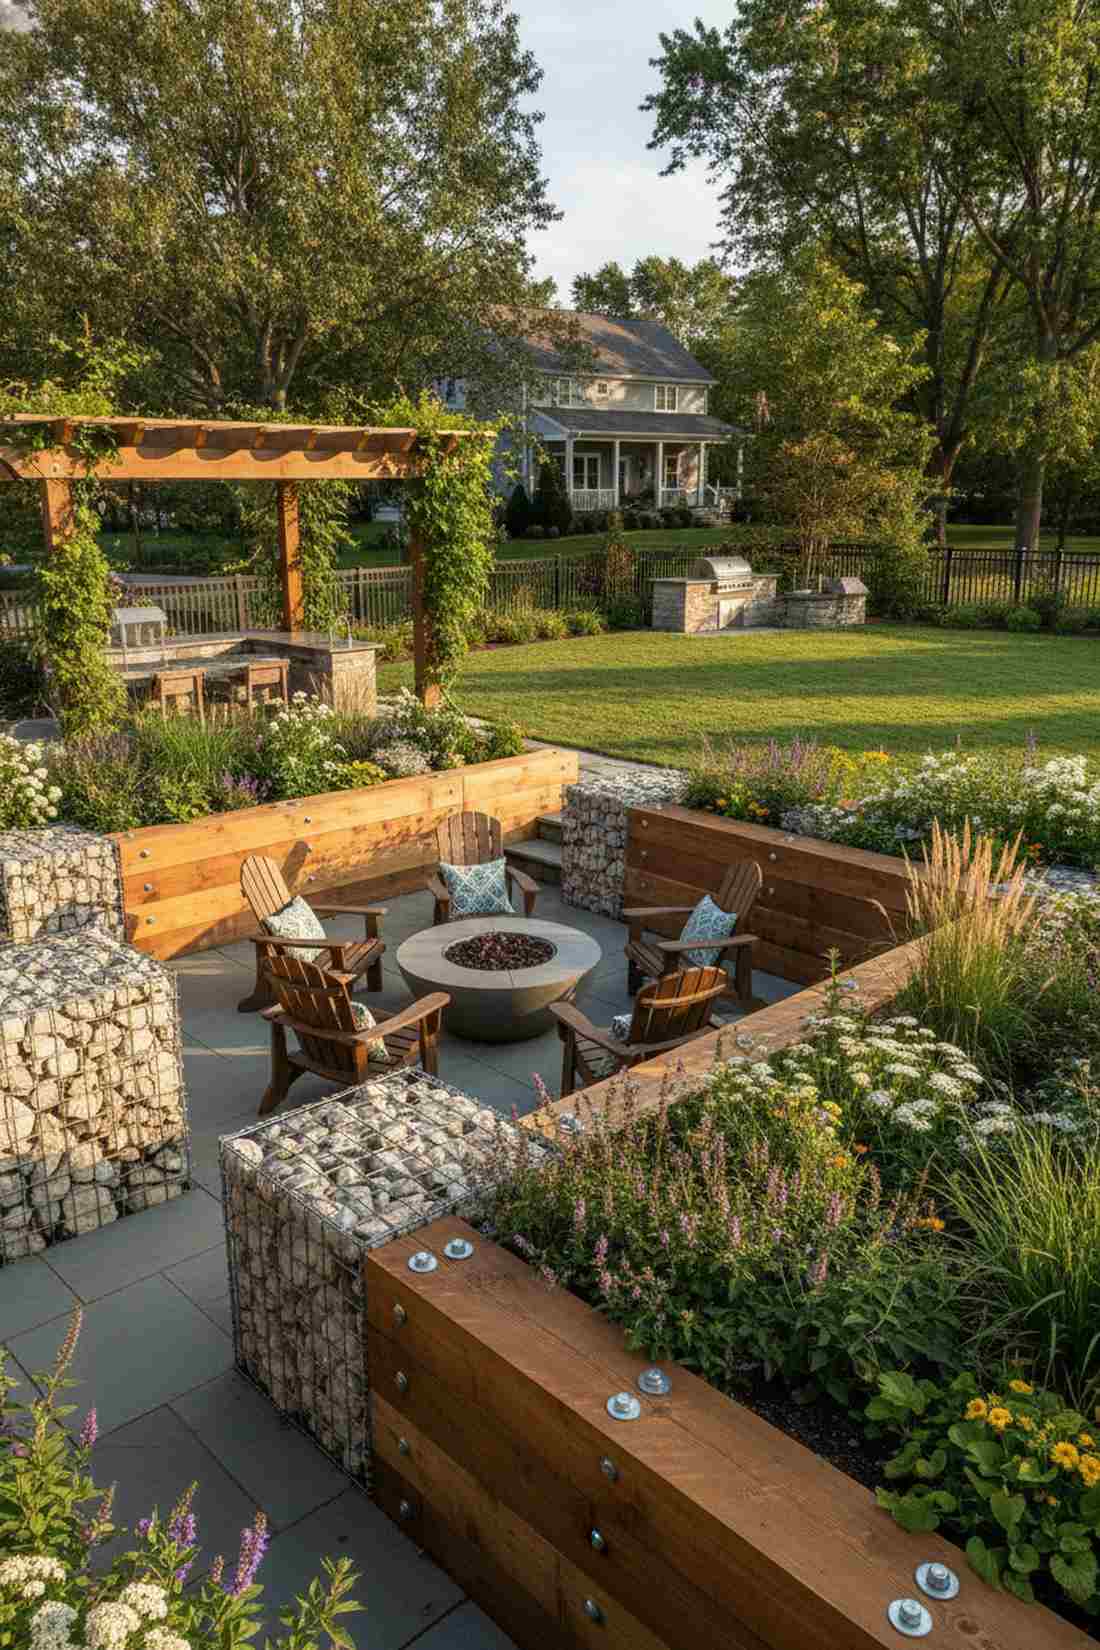
Feels like a custom architectural park installation. Mixing stone cages with warm wood panels dramatically softens the industrial edge, perfect for cozy backyard entertaining spaces.
Using 100% wire baskets gets expensive fast, but alternating stone corners with thick cedar planks drops the budget and looks far more expensive than an all-wood bed. Treat the timber with a marine-grade wood sealant to match the lifetime durability of the rocks.
This hybrid approach usually lands around $150–$250. It’s an insanely clever way to stretch your stone budget.
- Key Materials: Gabion ends, cedar planks, heavy bolts
- Vibe / Style: Contemporary park-style hybrid
- Difficulty: Moderate carpentry integration
- Budget Breakdown: Cages/Rock: $100 | Cedar: $80
- Creator’s Tip: Anchor the wood posts inside the gravel base of the gabion to hide the structural support entirely.
- Smart Sourcing: premium marine-grade timber sealant and heavy-duty galvanized structural lag bolts.
26. Colored-Stone Gabion Art Walls
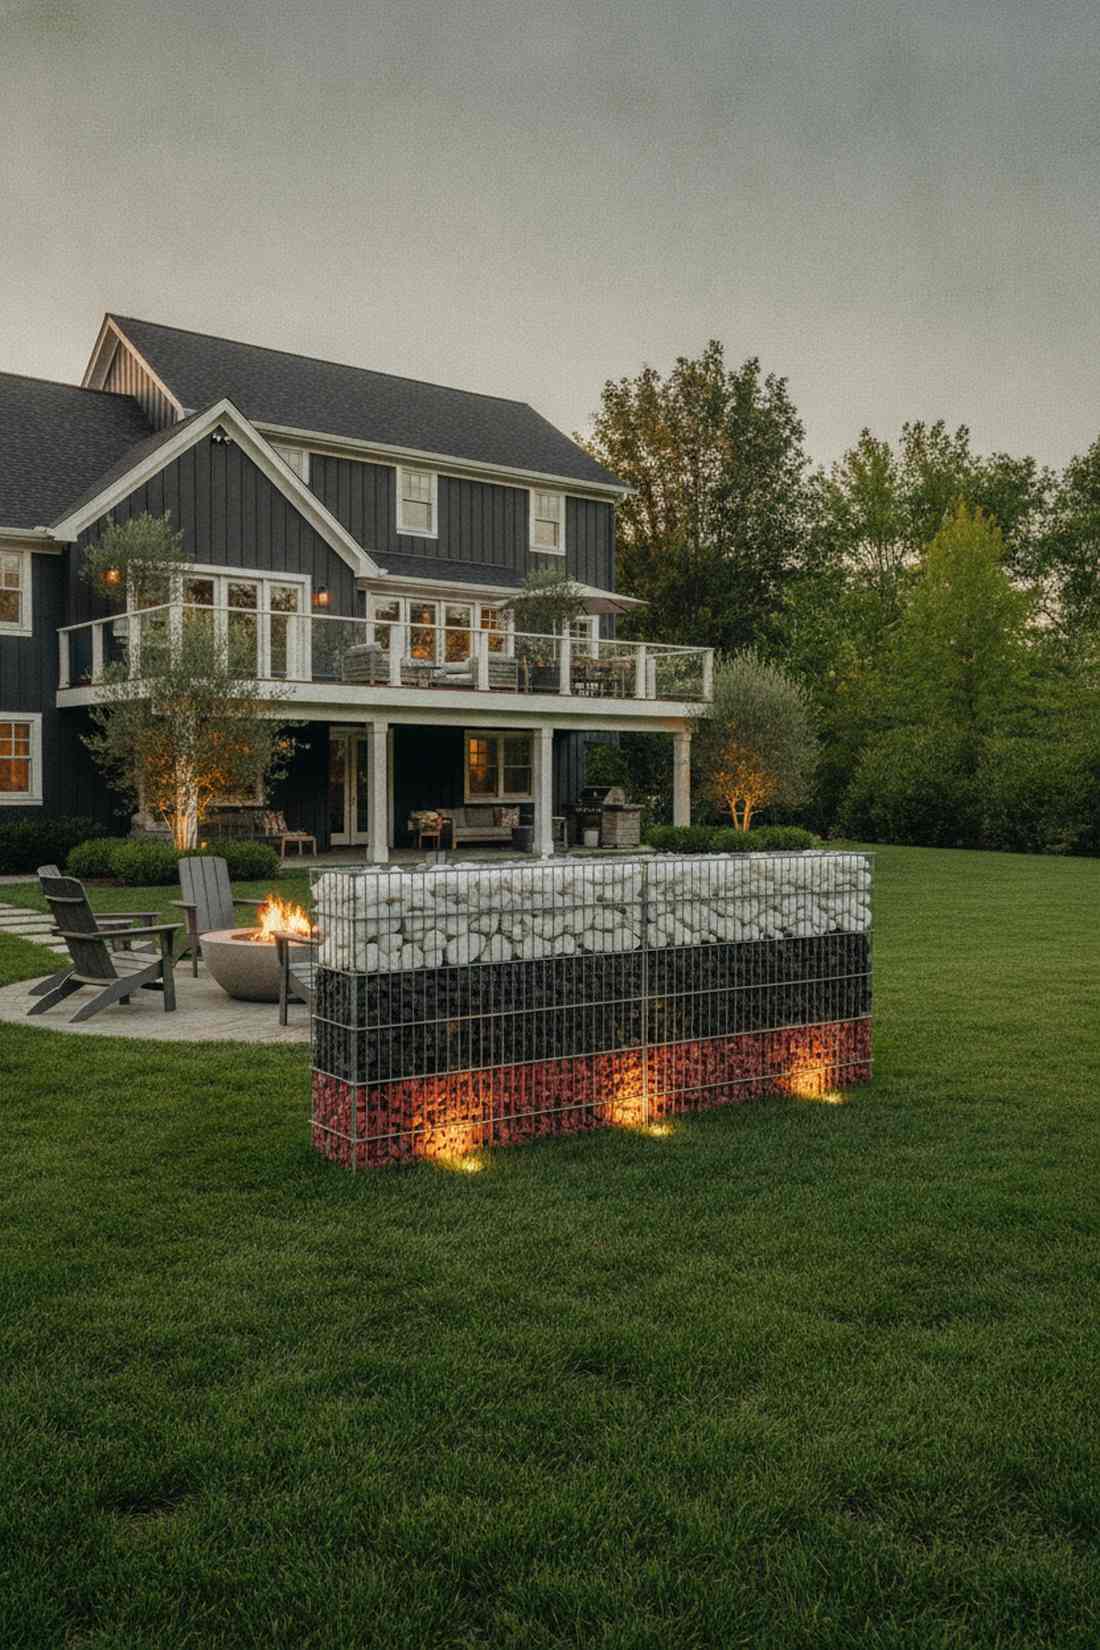
Acts as an unbelievable, jaw-dropping yard sculpture. Packing contrasting colored rock layers inside the mesh transforms a basic planter into literal modern art.
Most people just dump gray gravel in, but intentionally stacking black lava rock next to white marble delivers a surprisingly premium look that guests will obsess over. Backlight these color shifts with low-voltage landscape uplighting to make the cage glow at night.
Specialty colored stone pushes the cost to $200–$300. Pin this to your boldest landscape ideas board!
- Key Materials: Gabion cages, high-contrast specialty stones, uplights
- Vibe / Style: Expressive high-end sculpture
- Difficulty: Meticulous hand-packing
- Budget Breakdown: Cages: $60 | Specialty Rock: $180
- Creator’s Tip: Use a piece of cardboard inside the cage as a temporary divider while packing to keep the color lines razor-sharp.
- Smart Sourcing: bulk white marble landscaping chunks and low-voltage outdoor LED uplight kits.
27. Stepped Gabion Terrace System
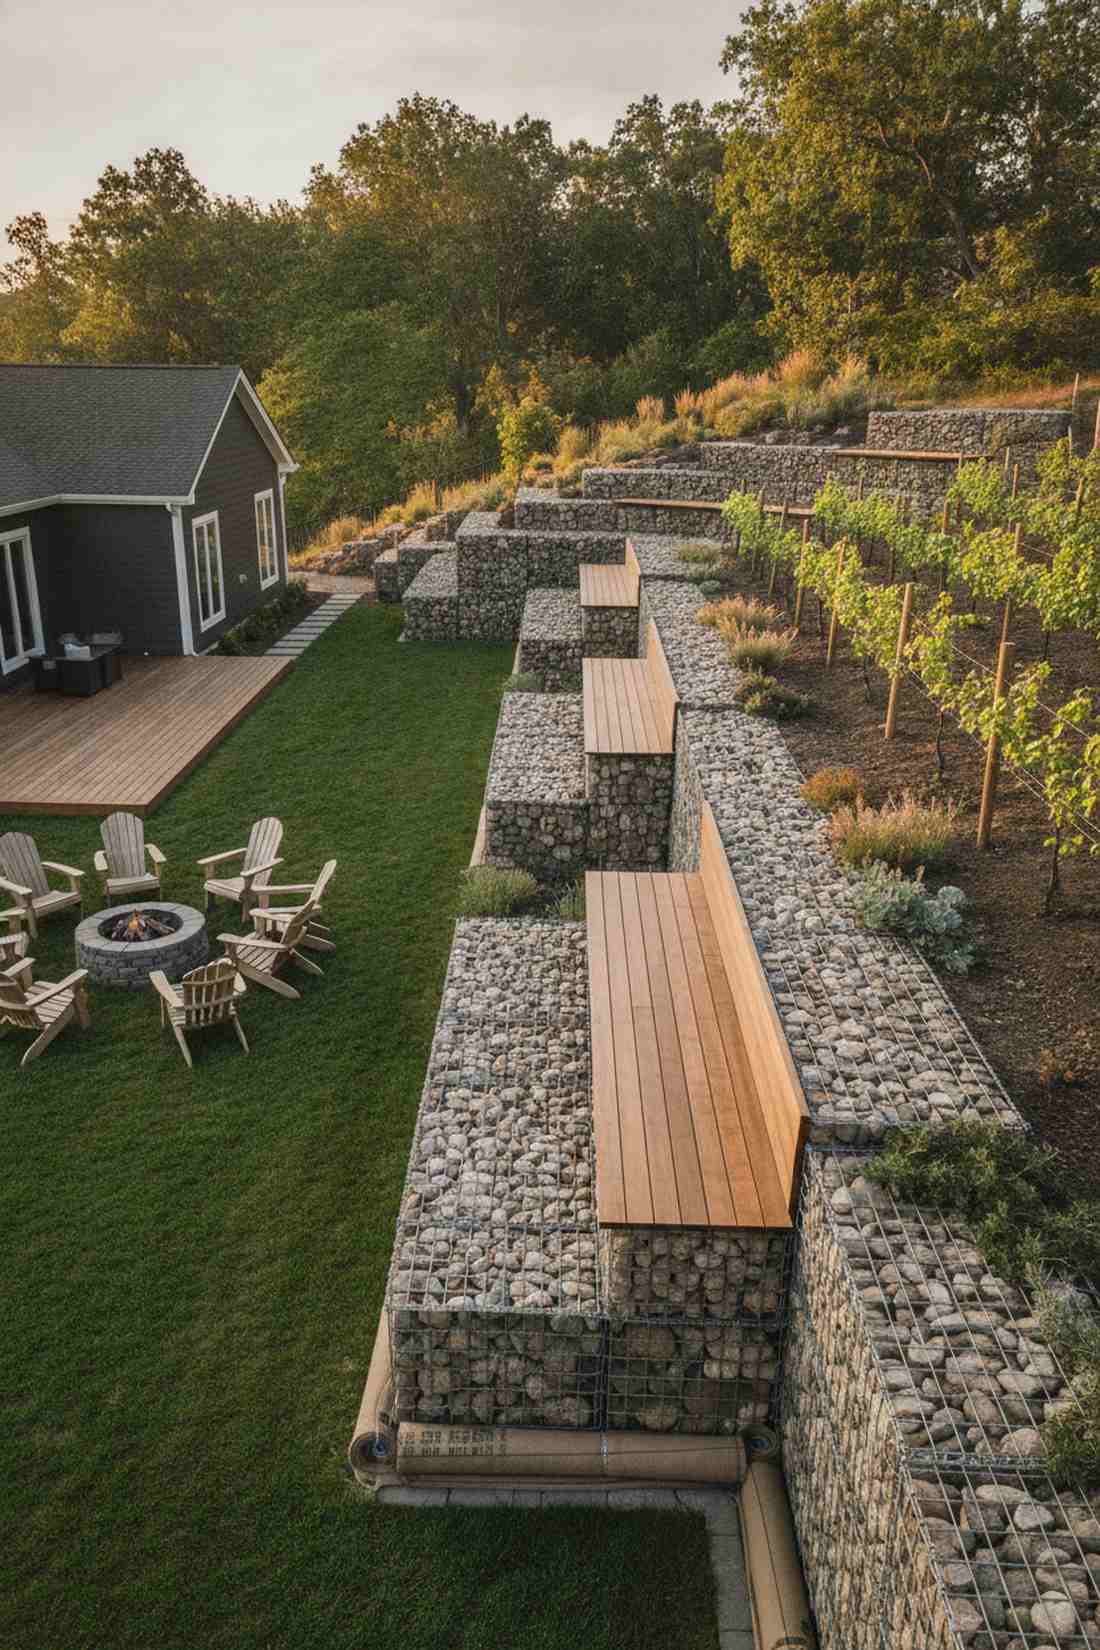
Feels like a hyper-modern vineyard estate. Using stair-stepped wire stone cages provides unbeatable erosion control on the absolute steepest, most difficult property grades.
Standard retaining blocks often fail on steep hills, but this aggressive setback system gives a designer-level finish while handling massive groundwater flow effortlessly. Cap the tops with smooth wooden seating planks so the wire doesn’t snag clothing.
This heavy-duty slope rescue runs $300–$600 depending on height. It’s the ultimate zero-maintenance hillside fix.
- Key Materials: Varying height gabions, heavy backfill, top caps
- Vibe / Style: Unbreakable modern terracing
- Difficulty: Labor-intensive hillside work
- Budget Breakdown: Multiple Cages: $200 | Bulk Rock: $250
- Creator’s Tip: Start your tallest baskets at the very bottom toe of the slope to anchor the entire hillside weight securely.
- Smart Sourcing: multi-tier gabion retaining kits and heavy-duty woven geotextile fabric rolls.
Conclusion
Investing in any of these 27 premium raised beds stone layouts permanently elevates your landscape from basic to breathtaking while drastically cutting down yearly maintenance. Whether you lock in the rustic appeal of fieldstone or deploy high-efficiency masonry kits, skipping the rotting wood for structural stone is always the ultimate long-term play. Grab your bulk materials, map your space, and build a lasting foundation that looks incredibly expensive without actually breaking the bank.
Frequently Asked Questions
Do stone raised beds need a concrete footer?
For small, dry-stacked profiles under 24 inches, a deep layer of commercial-grade crushed leveling sand provides excellent stability. However, if you are building taller mortared walls, pouring a proper 4-inch concrete footer using a high-yield concrete mix prevents expensive freeze-thaw cracking down the line.
How long do mortared brick raised beds last?
When properly sealed, a brick installation easily survives 40 to 60 years. To hit that lifespan, always use high-strength Type N mortar and immediately apply a breathable siloxane masonry waterproofer to prevent moisture from eroding the joints during brutal winter freezes.
Can you build raised beds with cinder blocks without mortar?
Absolutely. A single-layer setup holds perfectly fine relying on just soil weight. If you push it to two tiers, simply apply a thick bead of heavy-duty exterior landscape block adhesive between layers to stop lateral shifting without the mess of mixing wet mortar.
What is the best stone for raised garden beds?
If you’re on a tight budget, sourcing bulk palleted flat fieldstone offers maximum organic charm for the lowest price. For faster, perfectly level builds, pre-cut limestone kits or galvanized gabion baskets filled with river rock offer supreme drainage and speed.
How do you prevent stone raised bed walls from leaning out?
Always pitch the wall backward slightly and use heavy-duty geotechnical filter fabric paired with drainage gravel behind the wall. This stops wet, heavy clay soil from building hydrostatic pressure and blowing out your beautiful masonry work after a heavy storm.