Building a stunning vertical garden tower instantly turns wasted vertical space into a high-yield growing zone. Smart material sourcing makes these multi-tiered setups highly affordable without sacrificing a premium landscaping aesthetic. Let’s break down the exact costs, essential kits, and visual blueprints to maximize your harvest.
Design SnapshotKey Principles
- Vertical Efficiency: Stack plants upward to multiply growing capacity within a compact footprint
- Sunlight Access: Tier structures so upper levels don’t shade lower plants, ensuring even light distribution
- Root Depth Zoning: Match plant placement to tier depth—shallow-rooted greens above, deep-rooted crops below
- Irrigation Flow: Design water paths that cascade naturally from top to bottom, reducing maintenance effort
DIY Tower Garden Systems for Cost-Effective Vertical Growing
Building your own vertical garden tower offers complete control over size, materials, and configuration while keeping costs manageable. These structures work equally well for edibles and ornamentals, adapting to both soil-based and soilless growing methods.
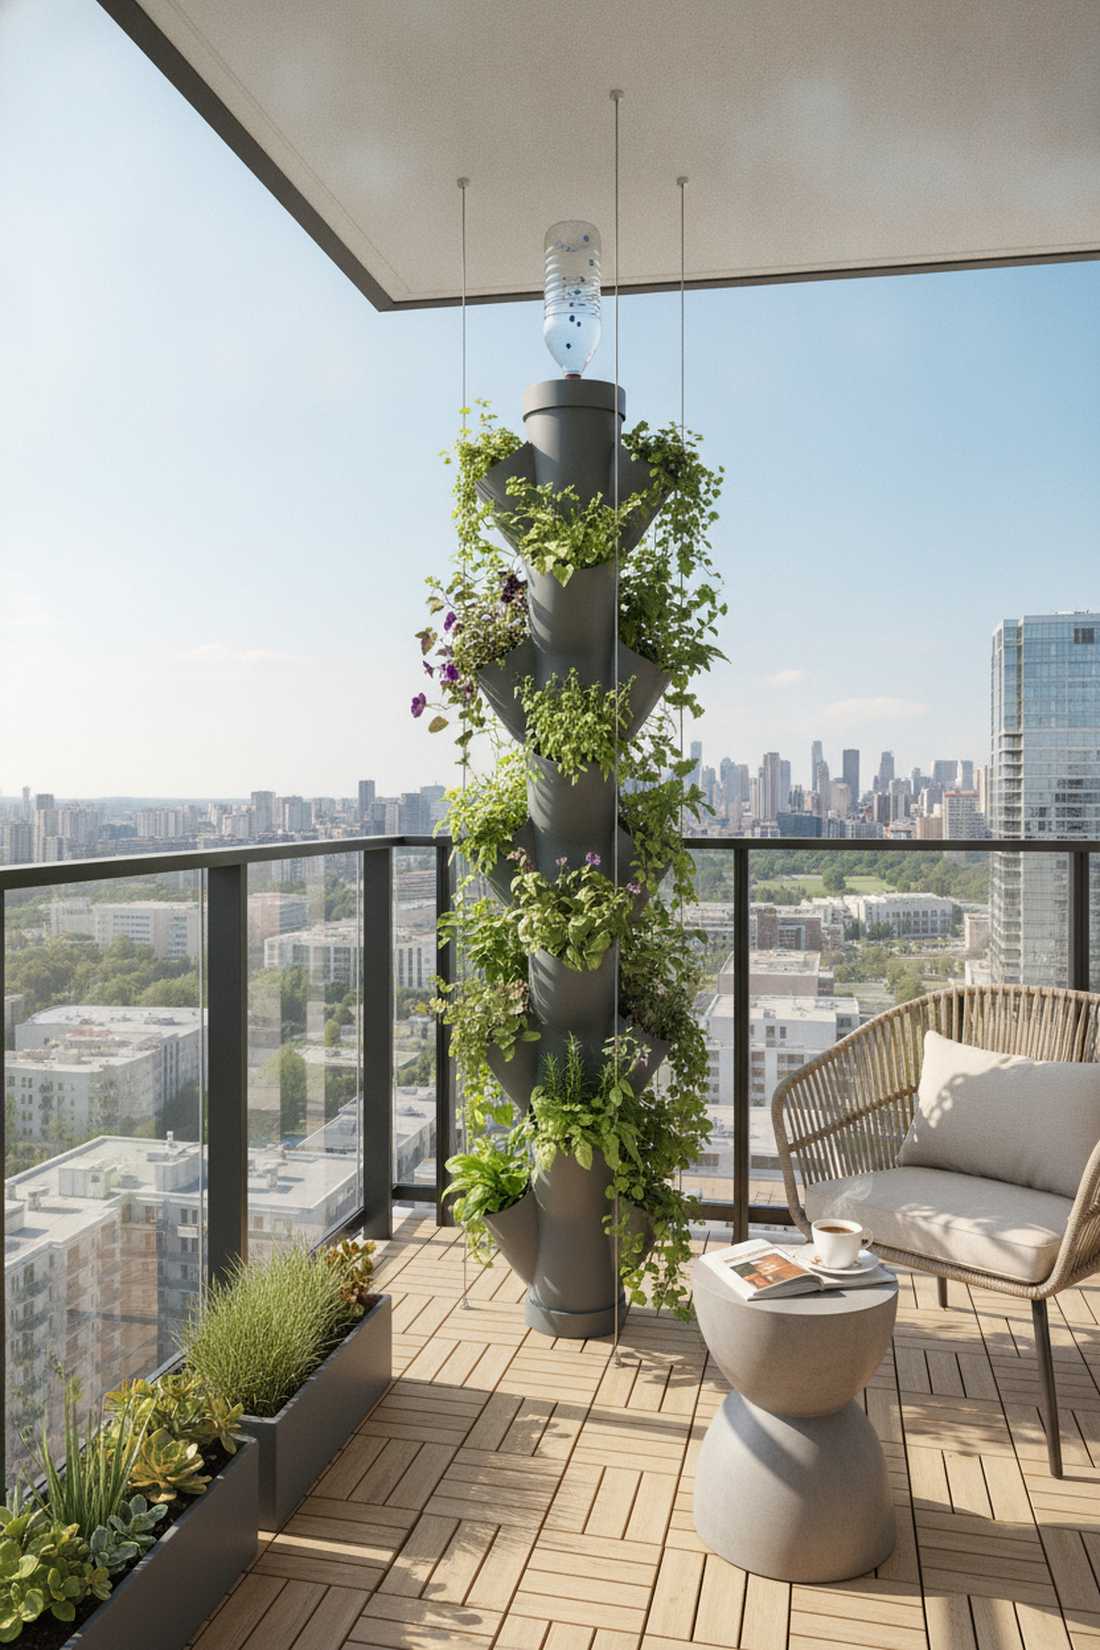
1. PVC Pipe Pocket Tower
Feeling like a floating green pillar, this small patio garden layout is completely hypnotic to look at. It works perfectly for a sun-drenched apartment balcony where floor space is virtually nonexistent.
This setup looks far more expensive than it is once the foliage completely fills in the gaps. Instead of just drilling random holes, using a heat gun to mold the pockets delivers a surprisingly premium, designer-level finish.
You can easily pull this off for around $20–$35. Pin this idea if you’re planning an urban balcony upgrade this spring!
- Key Materials: Heavy-duty PVC pipe, heat gun, premium potting mix
- Vibe / Style: Modern minimalist greenery
- Difficulty: Moderate DIY setup
- Budget Breakdown: Materials: $25 | Base structure: $10.
- Creator’s Tip: Cap the top with an inverted water bottle to create an automatic slow-drip reservoir.
- Smart Sourcing: heavy-duty 4-inch PVC pipe (pre-cut) and bulk pack organic potting coir.
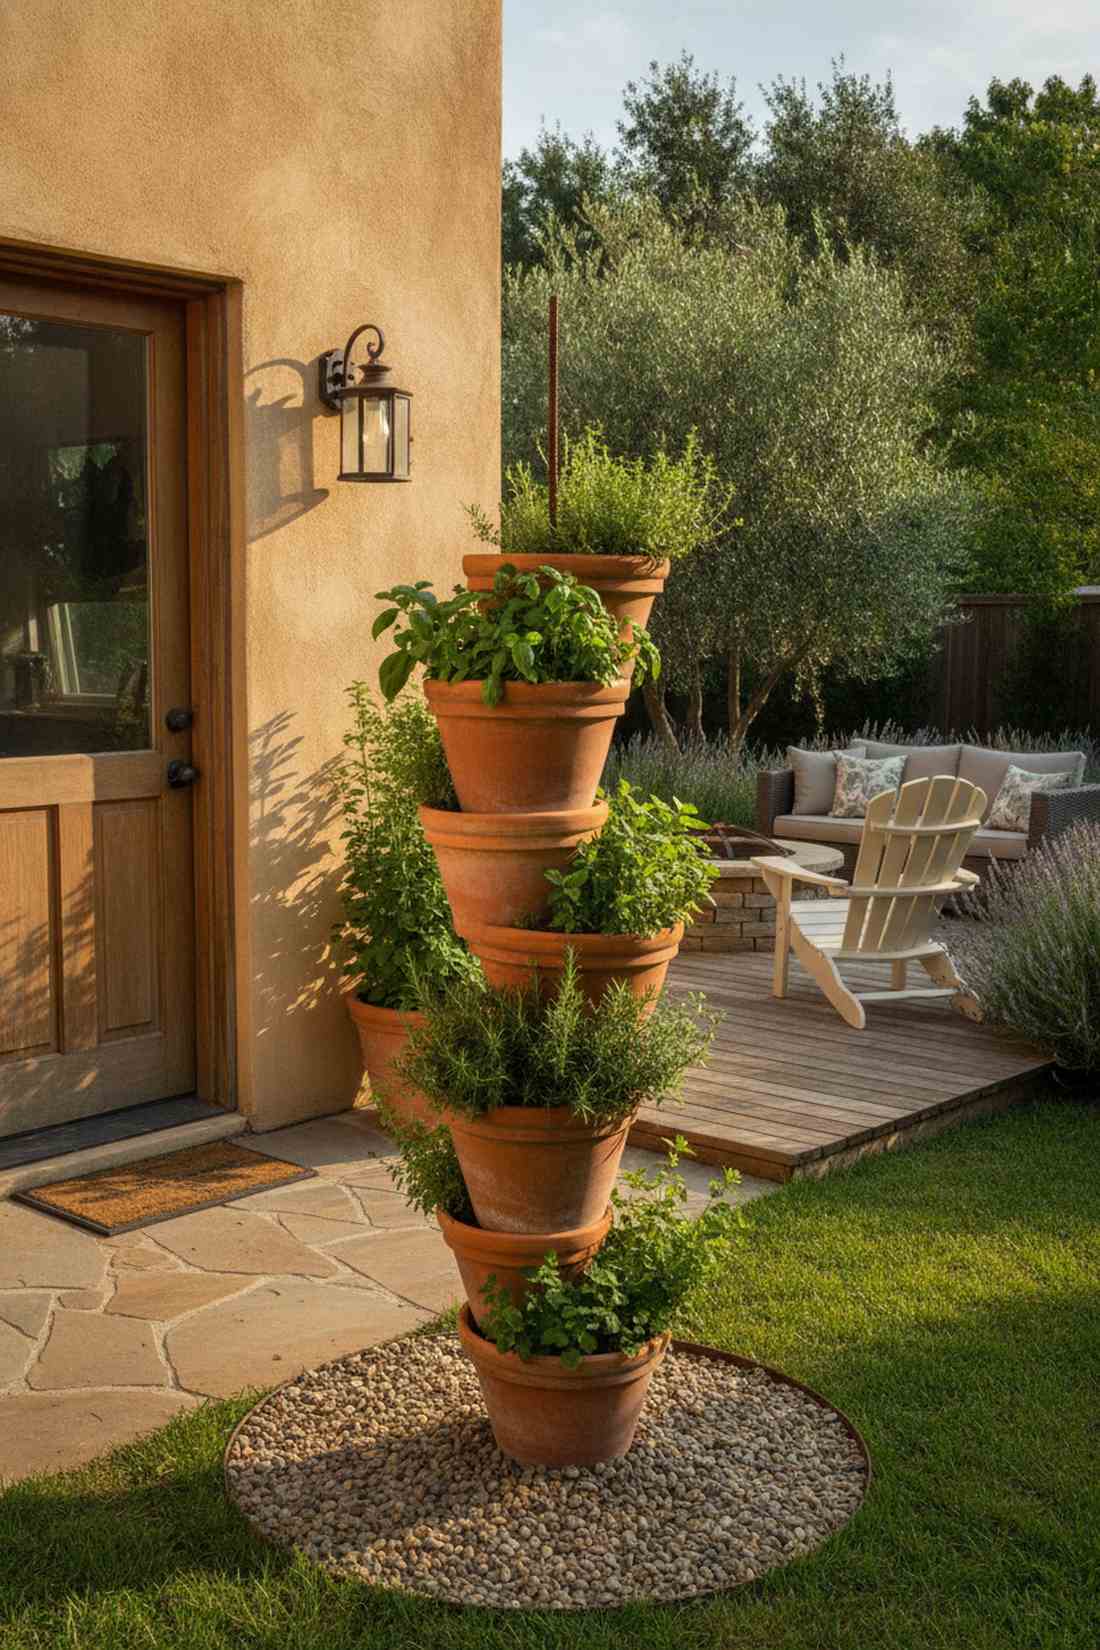
2. Stacked Terracotta Herb Spiral
Straight out of a Mediterranean villa, this vertical herb garden display brings serious old-world charm to your yard. It’s a brilliant use-case for that awkward empty corner right near your kitchen door.
Many amateur setups look wobbly and cheap, but threading these pots onto a central rebar pole creates a stunning, secure focal point. It completely redefines standard patio planting while keeping high-yield culinary herbs right at your fingertips.
Expect to spend roughly $30–$50 depending on pot sizes. It’s a fast afternoon project that completely transforms a dull patio space.
- Key Materials: Graduated terracotta pots, steel rebar, perlite mix
- Vibe / Style: Tuscan courtyard classic
- Difficulty: Easy beginner assembly
- Budget Breakdown: Pots: $30 | Hardware: $10.
- Creator’s Tip: Offset each pot exactly 90 degrees to ensure every single plant gets direct sunlight.
- Smart Sourcing: UV-resistant heavy terracotta pots (bulk set) and rust-proof steel rebar poles.
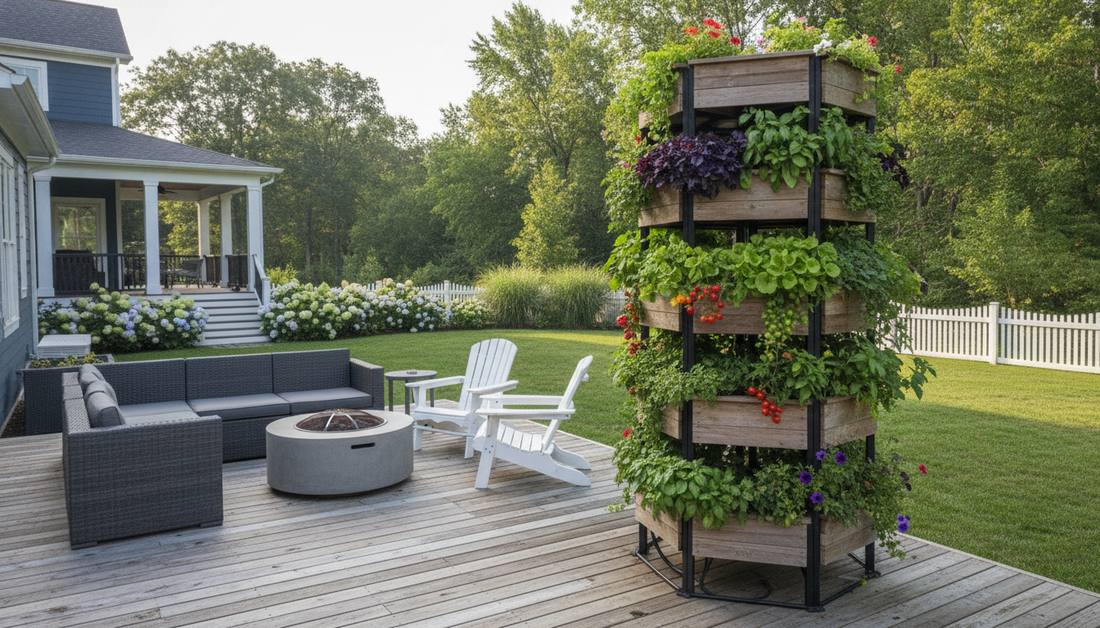
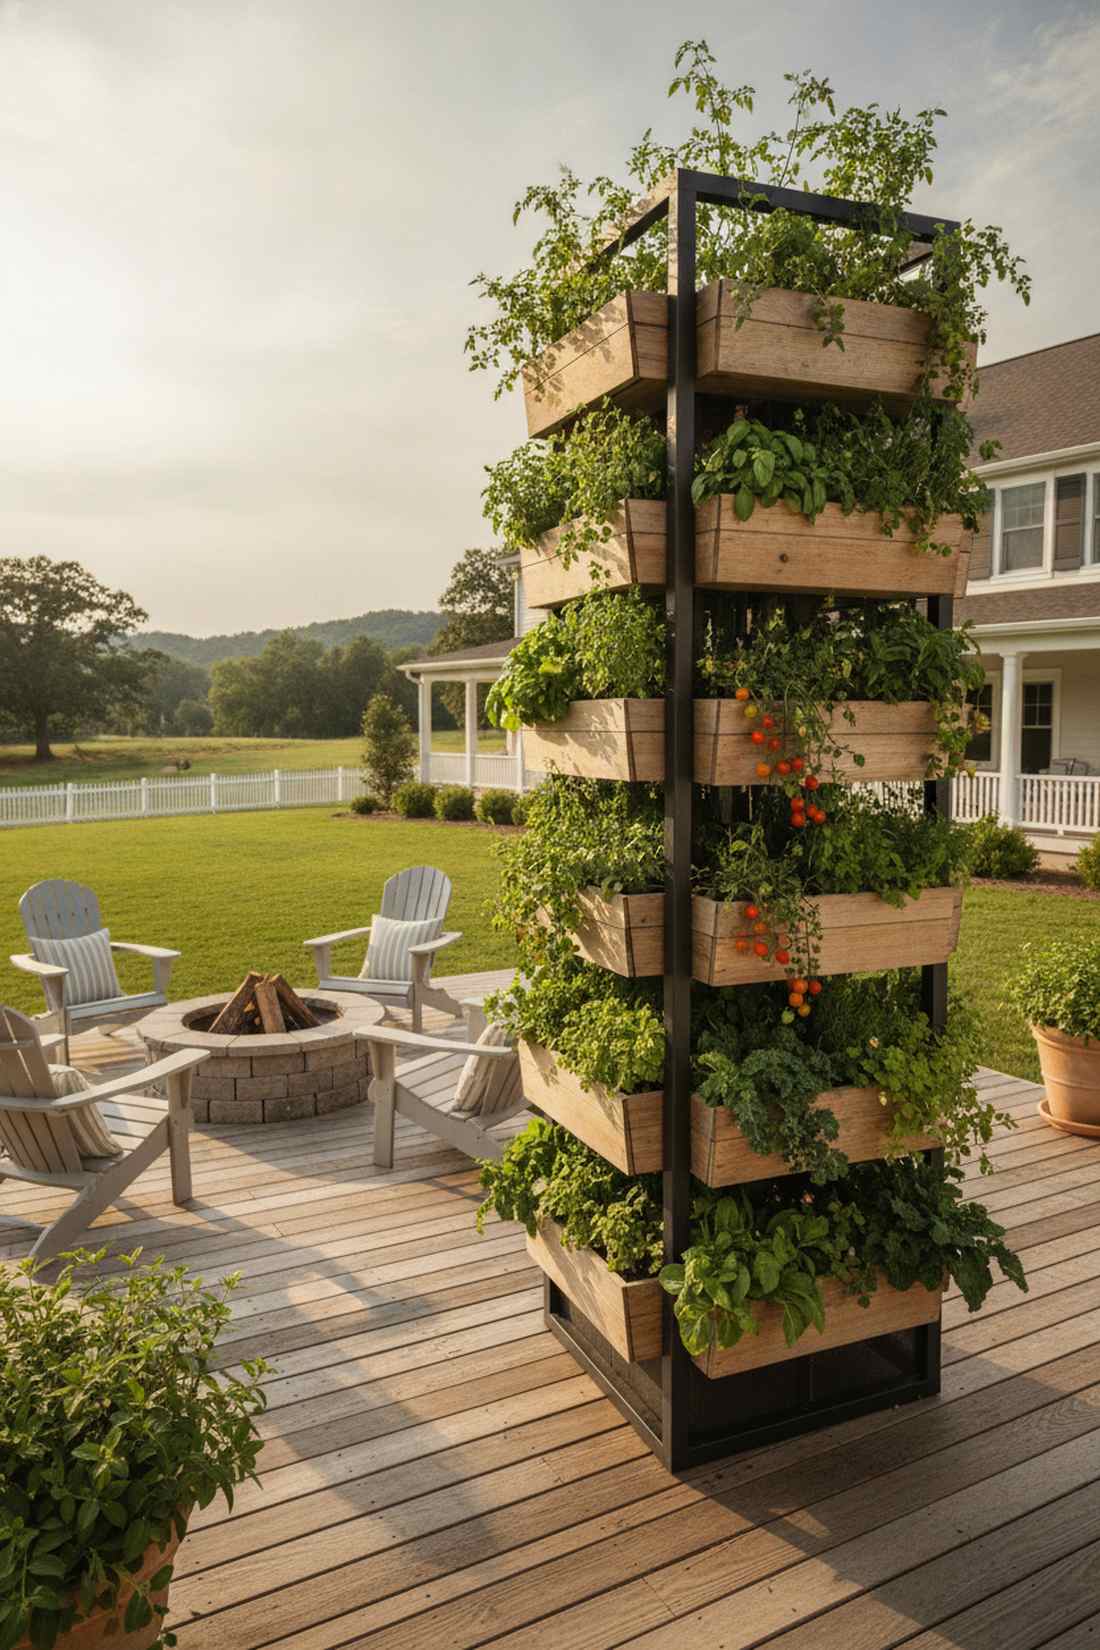
3. Fence Post Vertical Garden Tower
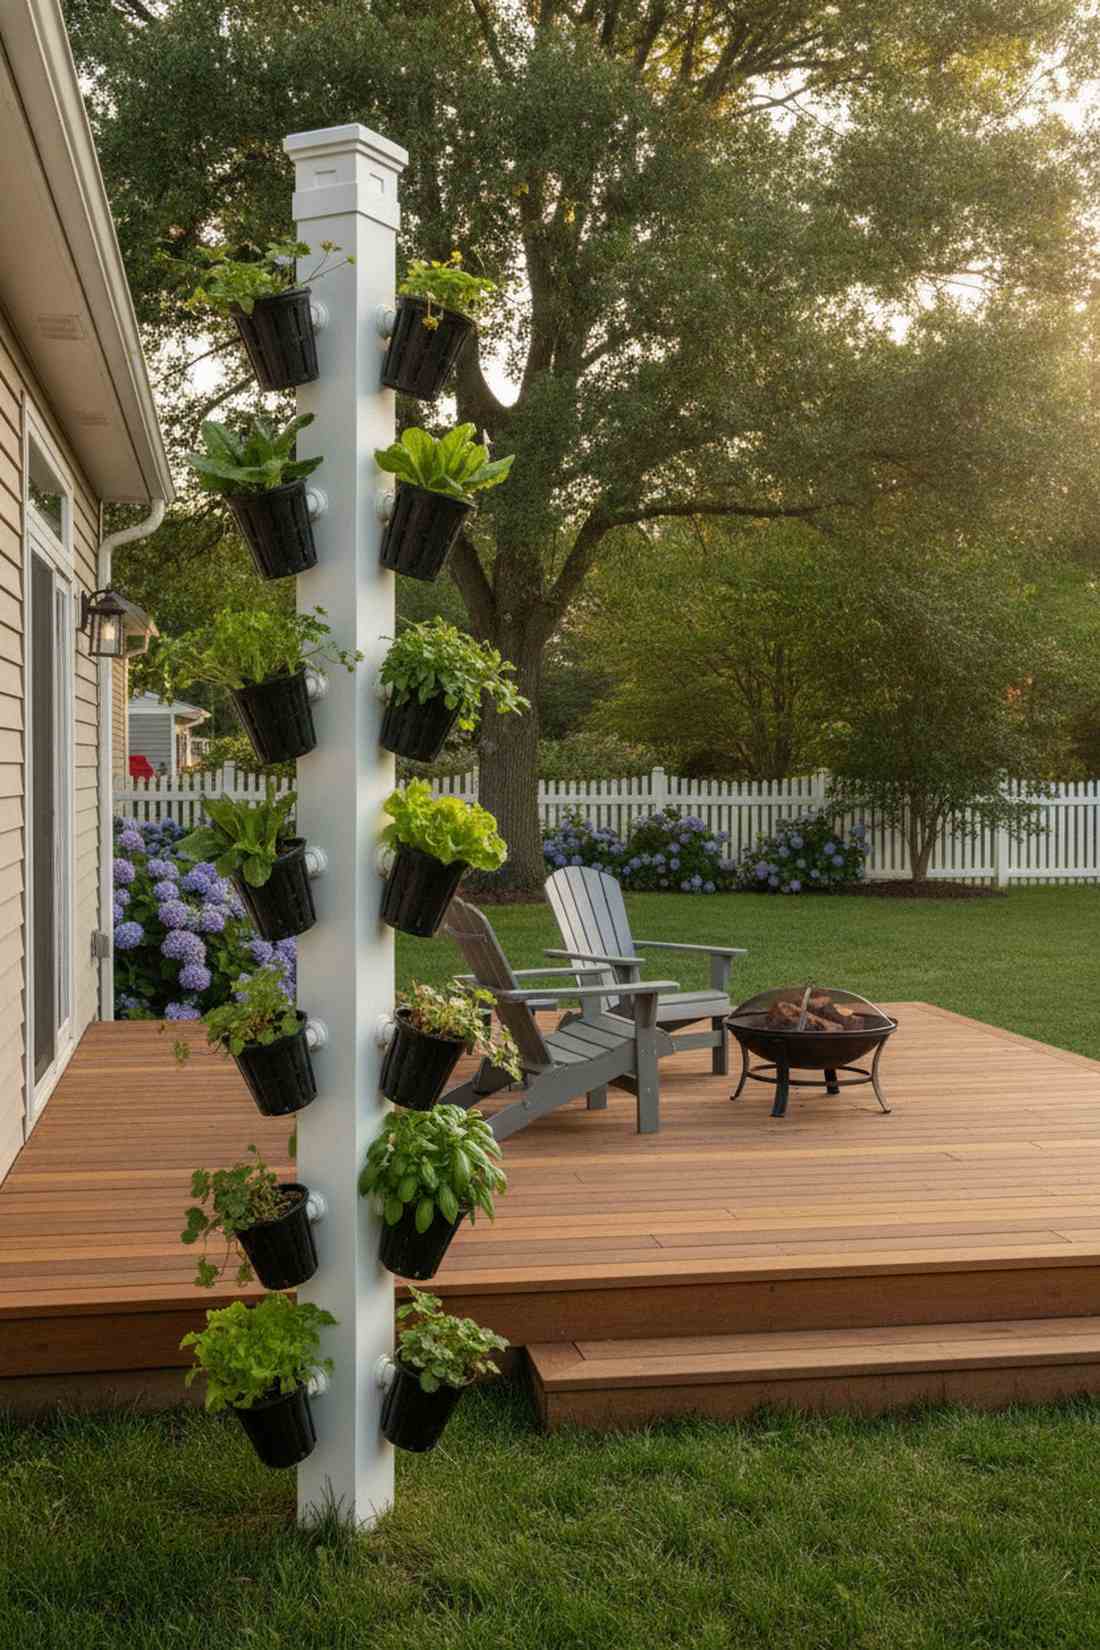
Feeling like a modern architectural installation, this freestanding vertical planter maximizes every square inch of available sunlight. It is perfectly suited for narrow side yards or bordering a tight wooden deck.
Swapping standard untreated wood for weather-resistant vinyl posts guarantees this structure won’t rot out after just one season. Adding commercial-grade net pots elevates a basic DIY project into a sleek, professional-looking food factory.
Materials usually run between $45–$60. Save this to your DIY weekend garden board for future reference!
- Key Materials: 5×5 vinyl fence post, PVC elbows, net pots
- Vibe / Style: Clean structural modernism
- Difficulty: Intermediate drilling required
- Budget Breakdown: Vinyl Post: $35 | Net Pots: $15.
- Creator’s Tip: Angle the pot holders at exactly 45 degrees to prevent top plants from dripping muddy water onto the lower leaves.
- Smart Sourcing: commercial-grade hydroponic net pots (bulk pack) and heavy-duty vinyl post caps.
4. Wooden A-Frame Tower Trellis
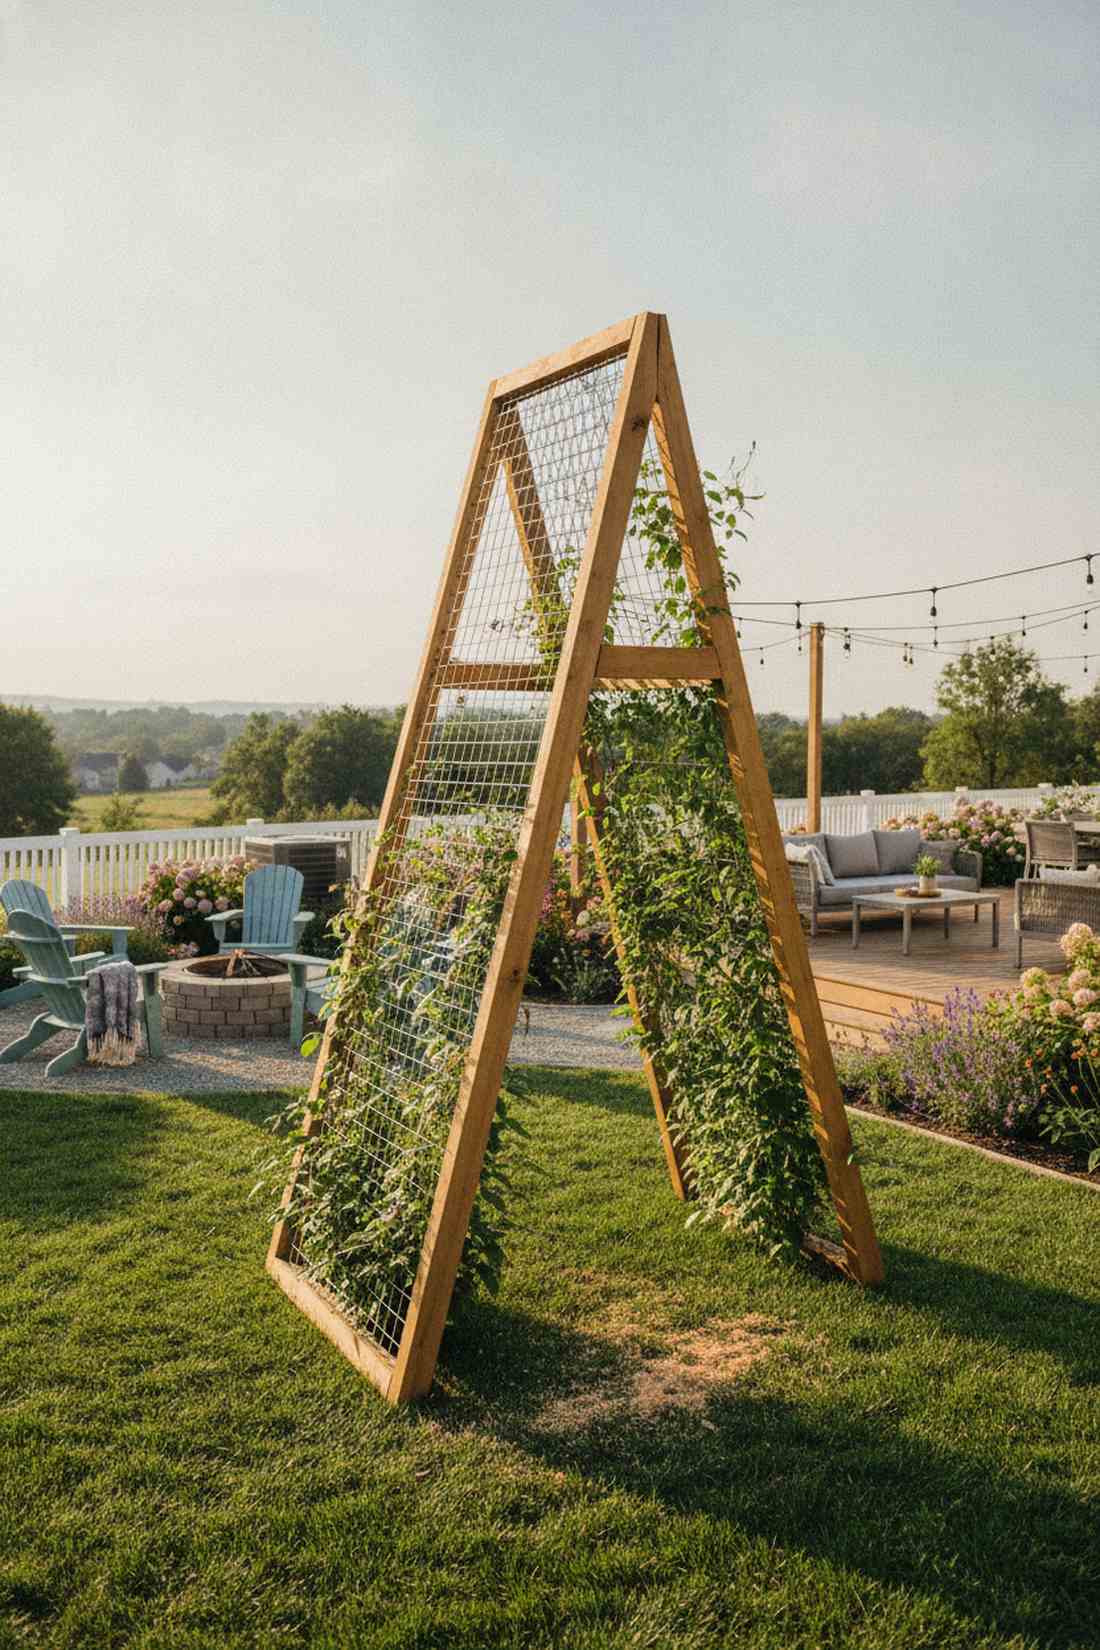
A literal green tent that feels like a hidden garden nook, this freestanding wood trellis system is an absolute showstopper. It is highly effective for dividing outdoor living spaces or screening an unsightly HVAC unit.
Standard flat trellises are notoriously boring, but this self-supporting A-frame layout delivers double the growing surface while looking incredibly structural. Incorporating premium cedar instantly gives it that expensive, custom-built landscape vibe.
You can build the frame for under $40 using basic lumber. Highly recommended for a quick weekend win that yields massive climbing crops.
- Key Materials: 2×4 cedar lumber, galvanized wire mesh, outdoor screws
- Vibe / Style: Rustic farmhouse utility
- Difficulty: Beginner woodworking
- Budget Breakdown: Lumber: $25 | Mesh/Hardware: $15.
- Creator’s Tip: Position the A-frame facing east-to-west so both angled sides receive heavy sunlight all day long.
- Smart Sourcing: weather-resistant cedar 2x4s (pre-cut) and galvanized welded wire mesh rolls.
This next setup is ridiculously cheap but looks like a $100 custom landscape display once the plants mature…
5. Rain Gutter Grow Tower
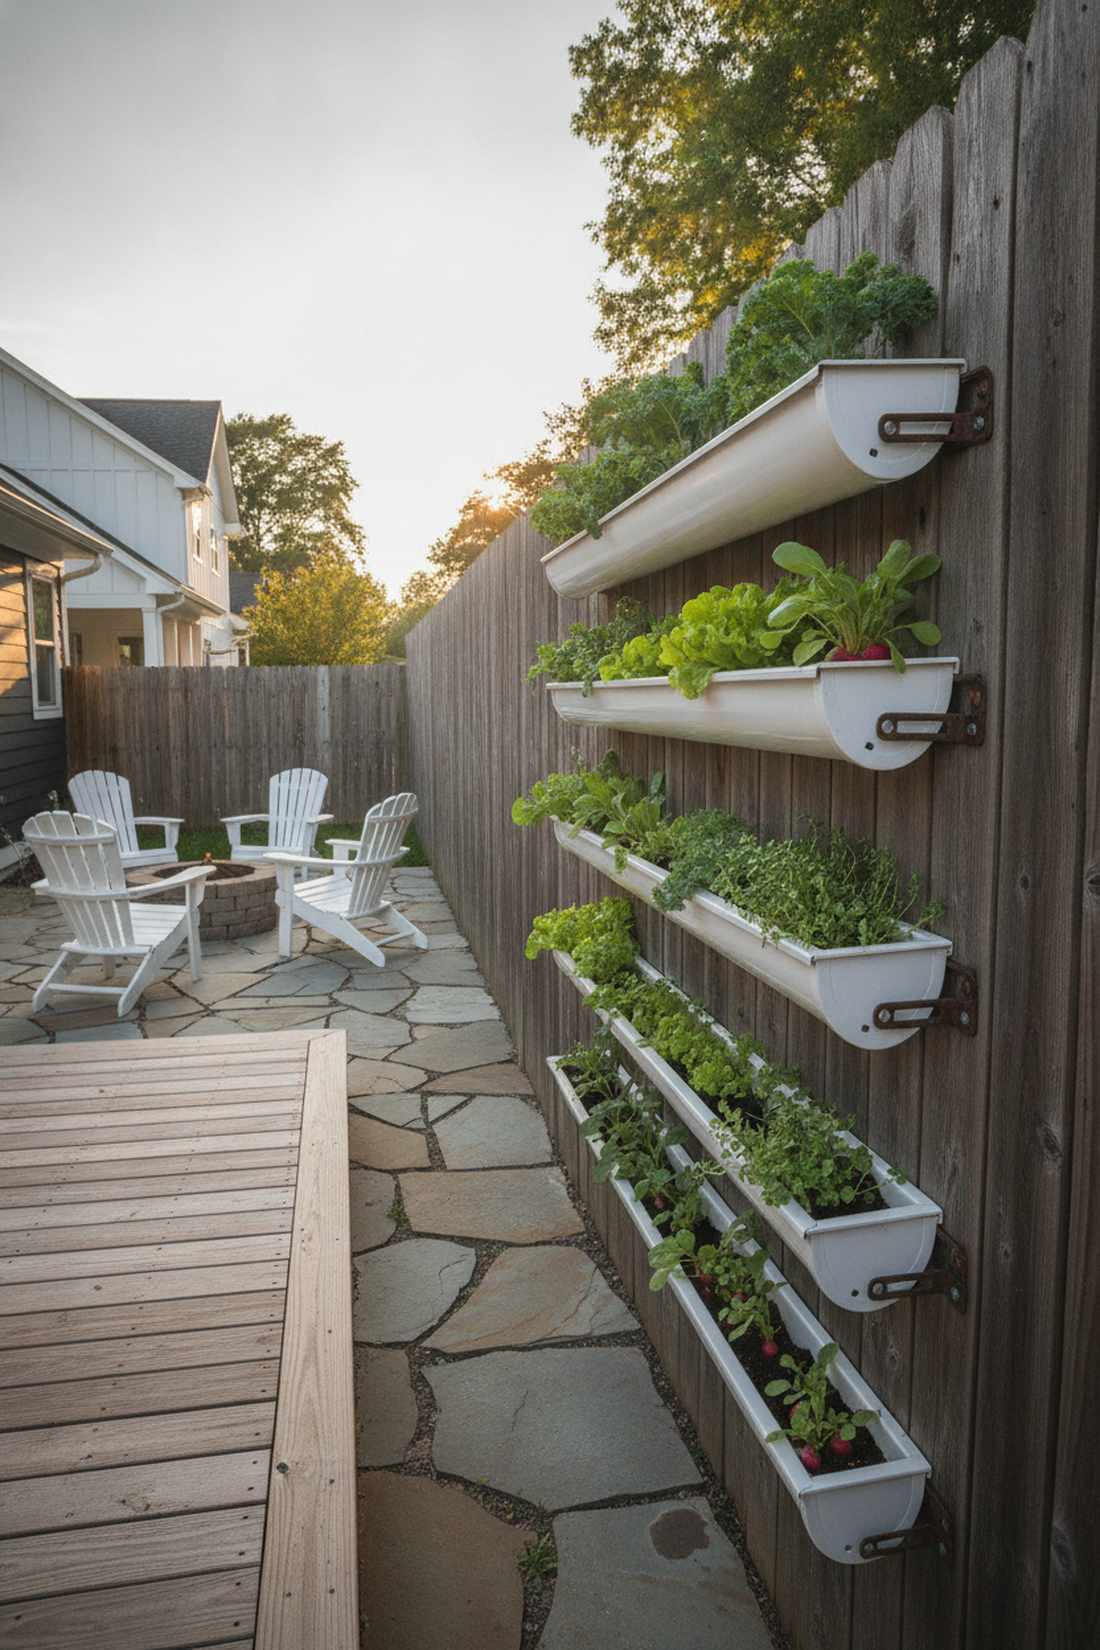
Giving off serious modern farmhouse energy, this horizontal tiered planter wall turns dead fencing into a lush, vibrant focal point. Ideal for a shaded side alley or covering up an ugly chain-link fence line.
Repurposing vinyl rain gutters is a controversial hack that actually yields incredible results for shallow-rooted greens. The bright white finish reflects light perfectly, giving you a clean, modular aesthetic that competes with high-end garden center systems.
The entire wall can be rigged up for $25–$40. Pin this to your backyard makeover board before your next hardware store run!
- Key Materials: Vinyl rain gutters, mounting brackets, lightweight soil
- Vibe / Style: Upcycled urban chic
- Difficulty: Easy wall mounting
- Budget Breakdown: Gutters: $20 | Brackets: $15.
- Creator’s Tip: Drill drainage holes every 6 inches to ensure the shallow soil doesn’t turn into a swamp after heavy rain.
- Smart Sourcing: heavy-duty vinyl gutter sections (pack of 4) and rust-resistant mounting brackets.
6. Bamboo Pocket Planter Column
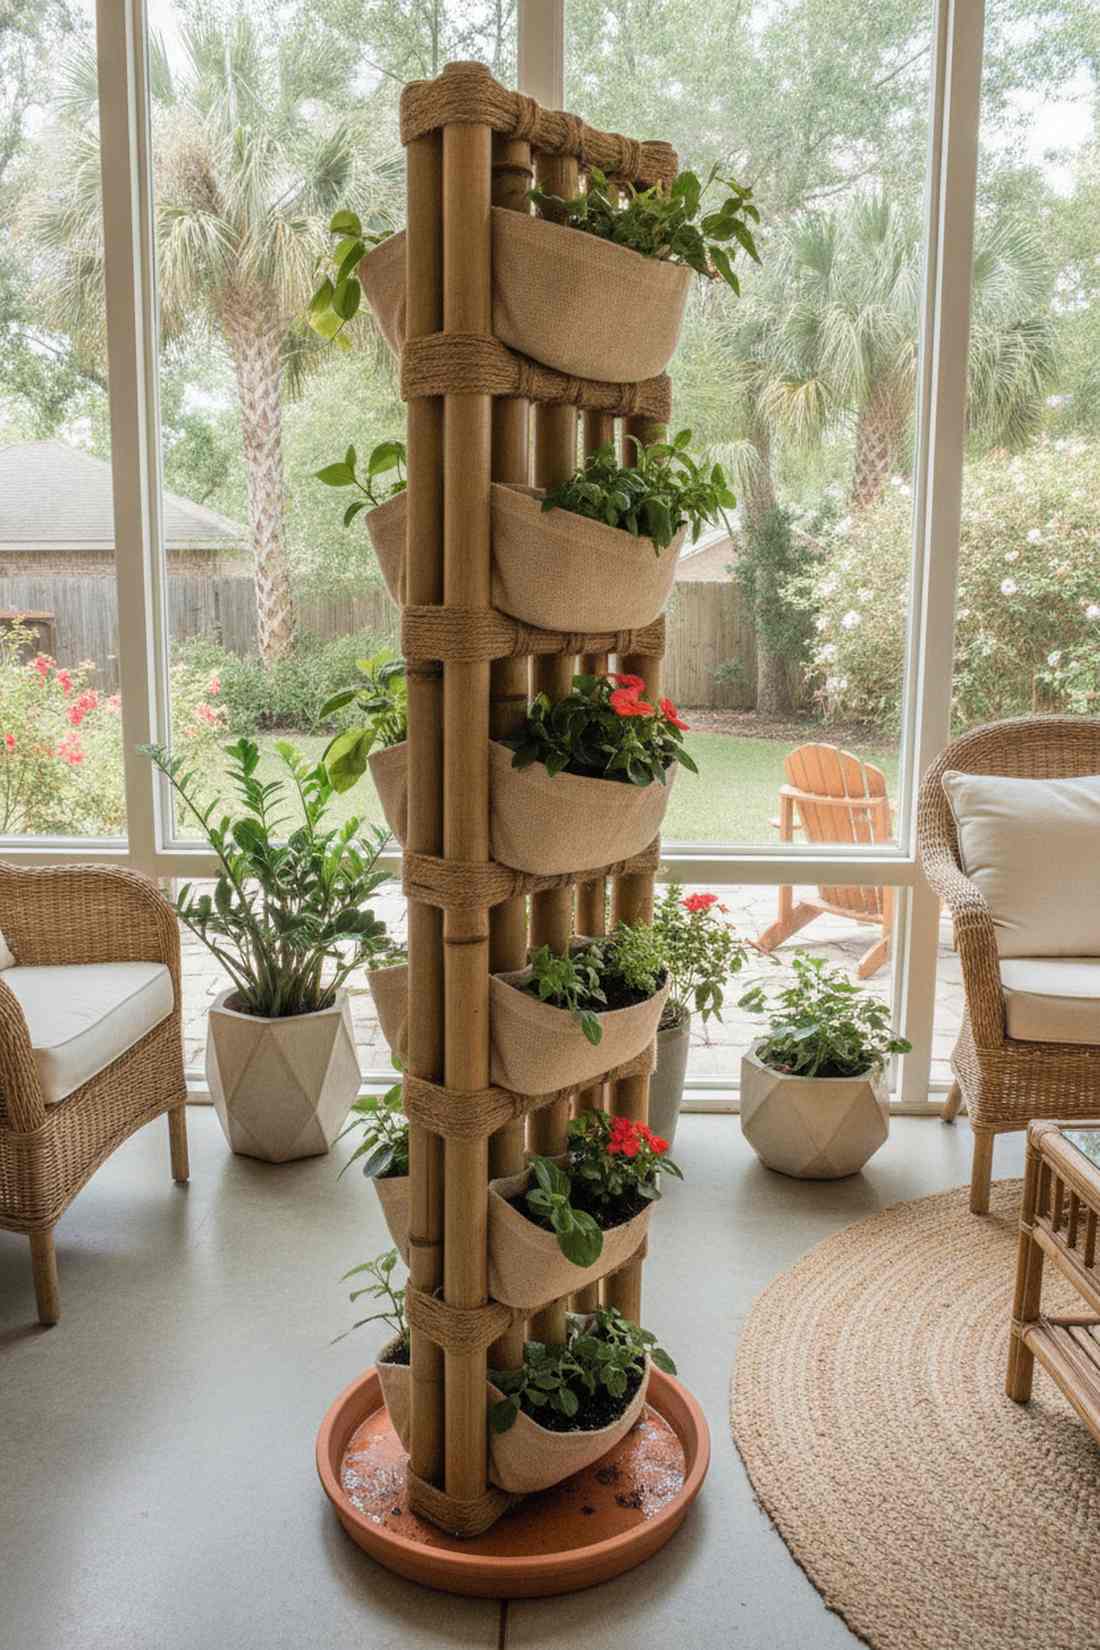
Radiating an earthy, tropical vibe, this natural bamboo vertical garden blends flawlessly into bohemian outdoor setups. It’s a fantastic placement option for a sunny sunroom or an organic outdoor living space.
Most metal tomato cages rust out and look incredibly cheap, but lashing together natural poles provides unmatched organic elegance. Tucking breathable fabric pockets between the joints ensures an oxygen-rich root zone that acts like a professional aeroponic system without the electricity.
Sourcing materials locally keeps this strictly under $15. It naturally decomposes over the years, leaving zero microplastics behind in your soil.
- Key Materials: Thick bamboo poles, jute twine, landscape fabric
- Vibe / Style: Bohemian tropical zen
- Difficulty: Beginner craft assembly
- Budget Breakdown: Bamboo: $10 | Twine/Fabric: $5.
- Creator’s Tip: Soak your jute twine in water before tying the knots; as it dries, it shrinks and locks the bamboo tightly in place.
- Smart Sourcing: premium treated bamboo poles (bulk pack) and heavy-duty landscape fabric rolls.
Multi-Tiered Raised Bed Designs for Stair-Step Garden Layouts
Tiered raised beds create microclimates at different elevations while improving drainage and soil warming. The stair-step profile ensures each level receives full sun exposure, critical for fruiting vegetables and sun-demanding ornamentals.
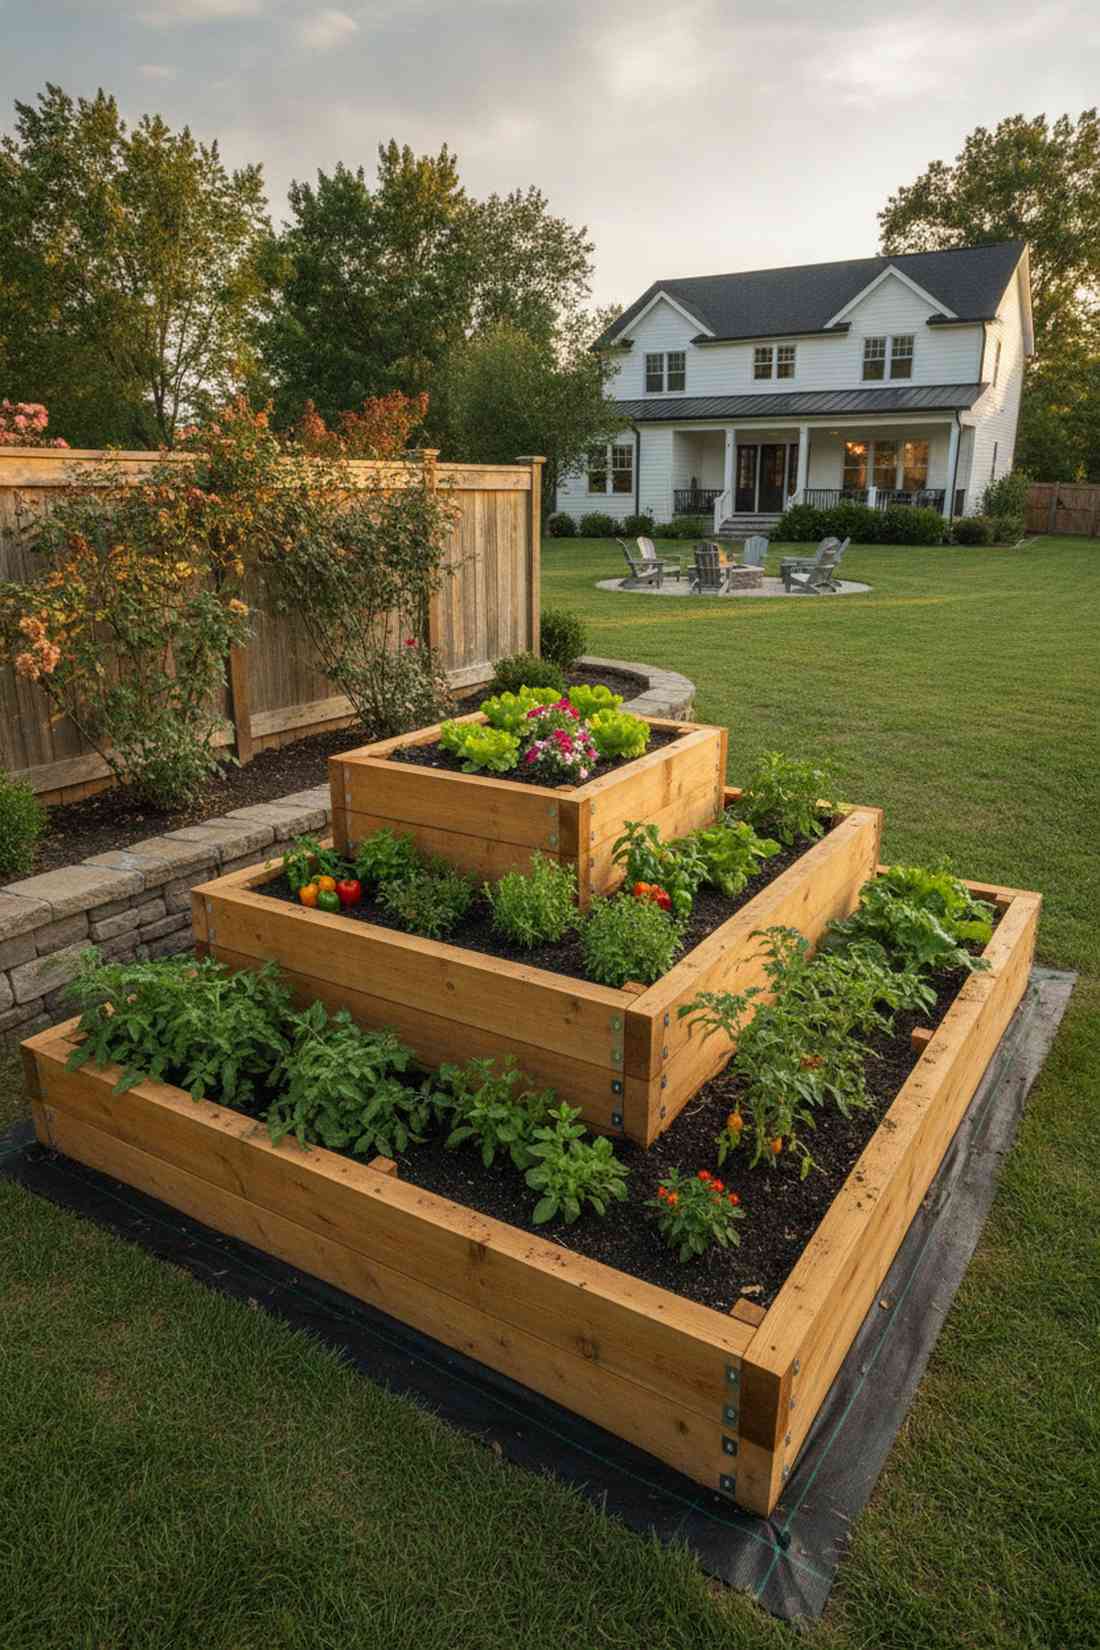
7. Three-Tier Corner Cascade
Reminiscent of ancient terraced farming, this 3 tier raised garden beds layout feels incredibly substantial and permanent. It is perfectly scaled for anchoring a prominent backyard corner that currently looks barren.
A flat garden bed often lacks visual drama, but elevating the tiers adds striking depth and completely fixes poor yard drainage. Stacking rot-resistant timbers provides a thick, muscular border that mimics expensive masonry work without the insane labor costs.
Lumber and soil will cost around $75–$120. Definitely save this to Pinterest if you want to upgrade your primary vegetable plot this spring.
- Key Materials: Cedar lumber, exterior decking screws, landscape barrier
- Vibe / Style: Classic estate landscaping
- Difficulty: Intermediate carpentry
- Budget Breakdown: Wood: $80 | Hardware: $20.
- Creator’s Tip: Put your deepest-rooting vegetables on the bottom tier where the soil volume is massively compounded.
- Smart Sourcing: pre-cut cedar raised bed kits and heavy-duty weed barrier fabric.
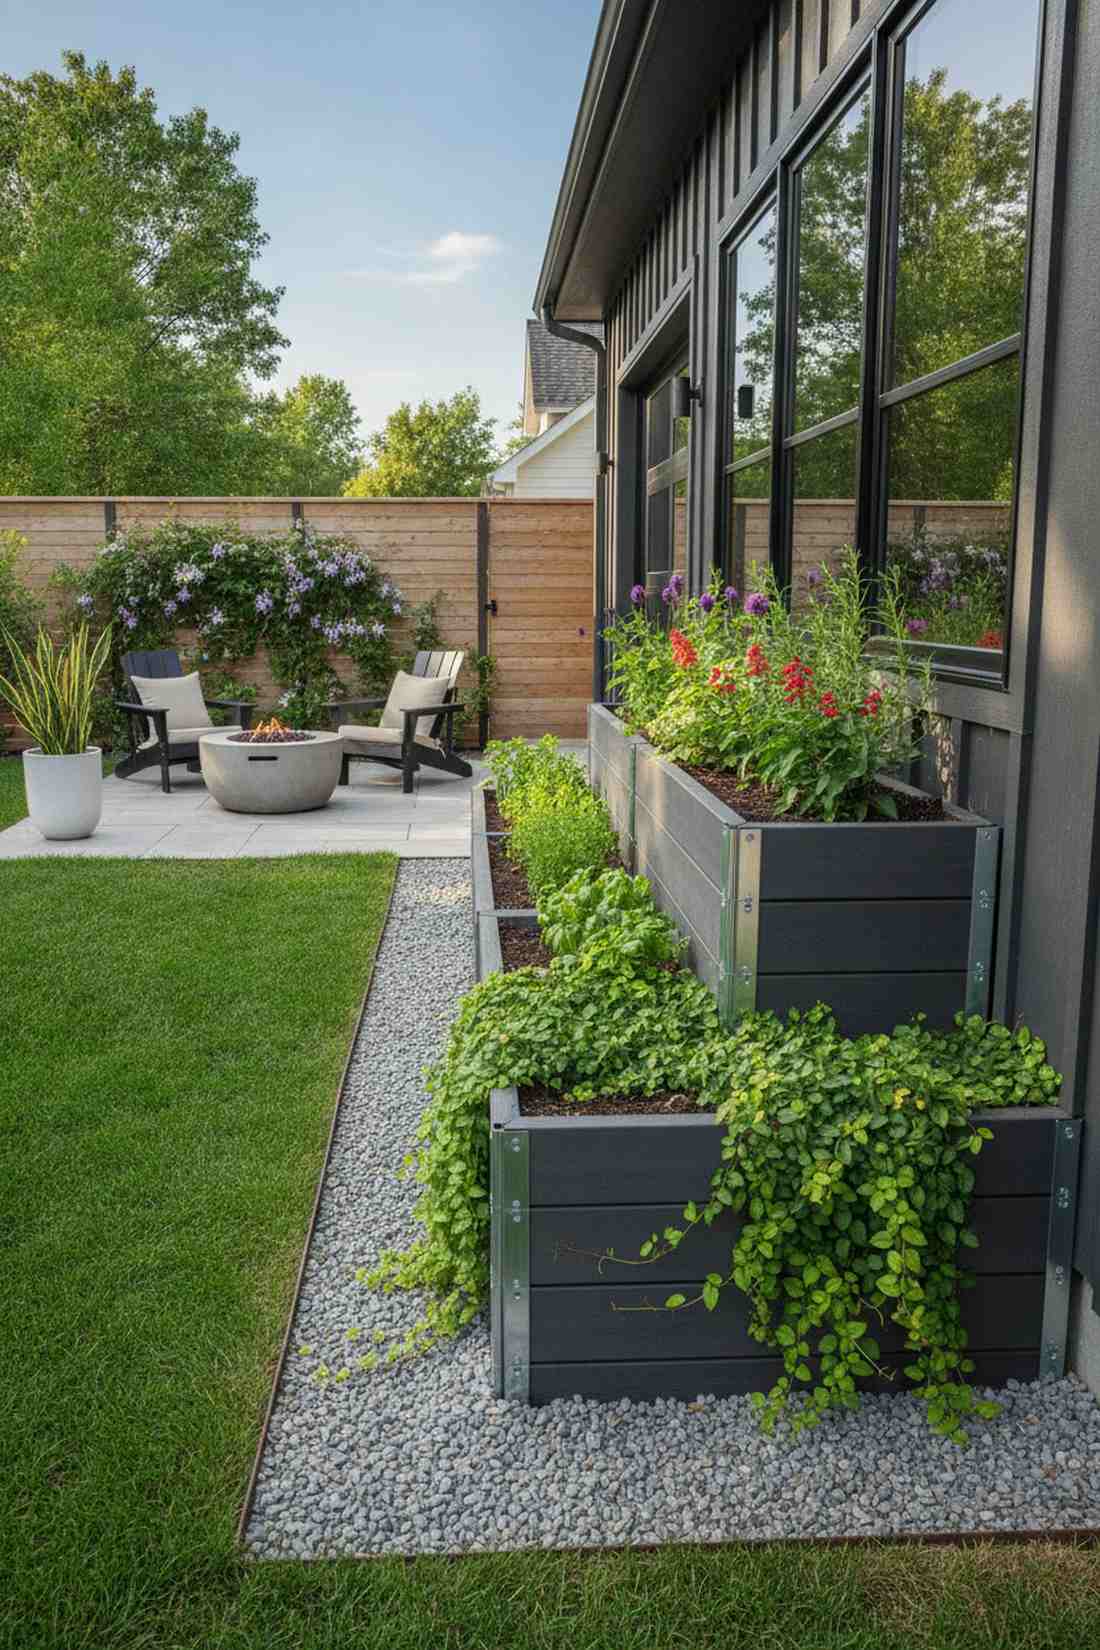
8. Staggered Modular Bed System
Giving you total geometric control, this multi-level raised bed layout feels incredibly organized and razor-sharp modern. Best utilized when placed flush against a south-facing garage wall or property boundary.
Designing with distinct stair-step heights creates specialized microclimates for different root depths, a strategy most beginners completely overlook. This modular approach allows you to expand the miniature garden supplies dynamically without tearing up previous landscaping work.
Expect a total material cost of about $90–$150. An absolute game-changer for gardeners dealing with compact, perfectly flat yards.
- Key Materials: Modular composite boards, corner brackets, topsoil
- Vibe / Style: Ultra-modern geometric
- Difficulty: Easy kit assembly
- Budget Breakdown: Modular Kits: $120 | Soil: $30.
- Creator’s Tip: Plant trailing vines on the front edges to soften the hard wooden lines and create a living waterfall effect.
- Smart Sourcing: composite modular garden bed kits and rust-proof corner bracket sets.
Most people get their space-saving patio gardens completely wrong… until they try the exact high-yield layout coming up next.
💡 Must-Have Supplies for High-End Setups
To build these setups faster and ensure they last, skip the generic craft aisles and invest in the right foundational kits.
- Base & Support: UV-coated composite raised bed starter kits
- Setup Tools: heavy-duty automatic drip irrigation kits
- Weather/Durability Protection: clear non-toxic wood waterproofing sealants
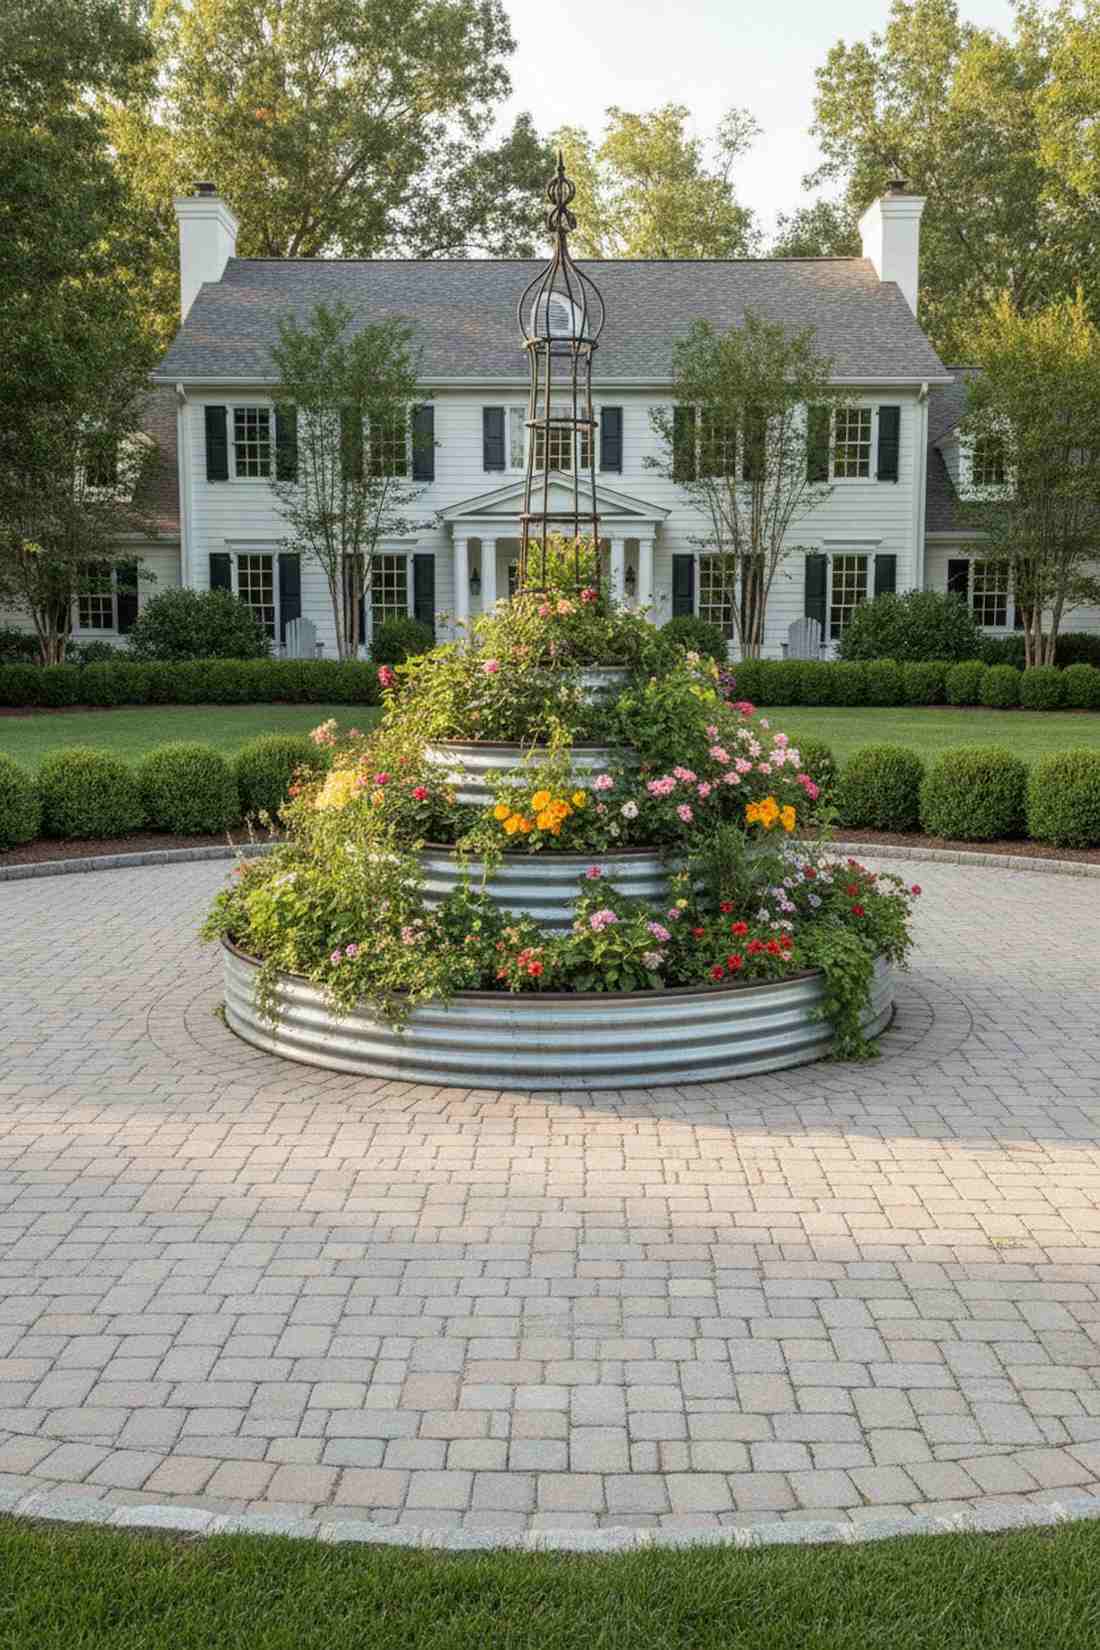
9. Circular Tiered Garden Bed
Looking exactly like a stunning living fountain, this round terraced planter creates an immediate centerpiece that forcefully draws the eye. Breathtaking when placed dead-center in a circular driveway or formal lawn.
Square beds are literally everywhere, but executing a perfect circular cone layout feels entirely bespoke and high-end. Utilizing flexible steel edging or composite rings eliminates the cheap look of raw plastic, securing a gorgeous 360-degree harvest zone.
The base structure costs roughly $60–$100. Pin this to your front yard landscaping board for maximum curb appeal!
- Key Materials: Corrugated metal rings, center obelisk, rich compost
- Vibe / Style: English formal garden
- Difficulty: Moderate ground leveling
- Budget Breakdown: Steel Rings: $80 | Trellis: $20.
- Creator’s Tip: Place a decorative metal obelisk right in the top crown to give the structure striking height even in winter.
- Smart Sourcing: galvanized circular garden bed kits and rust-resistant metal garden obelisks.
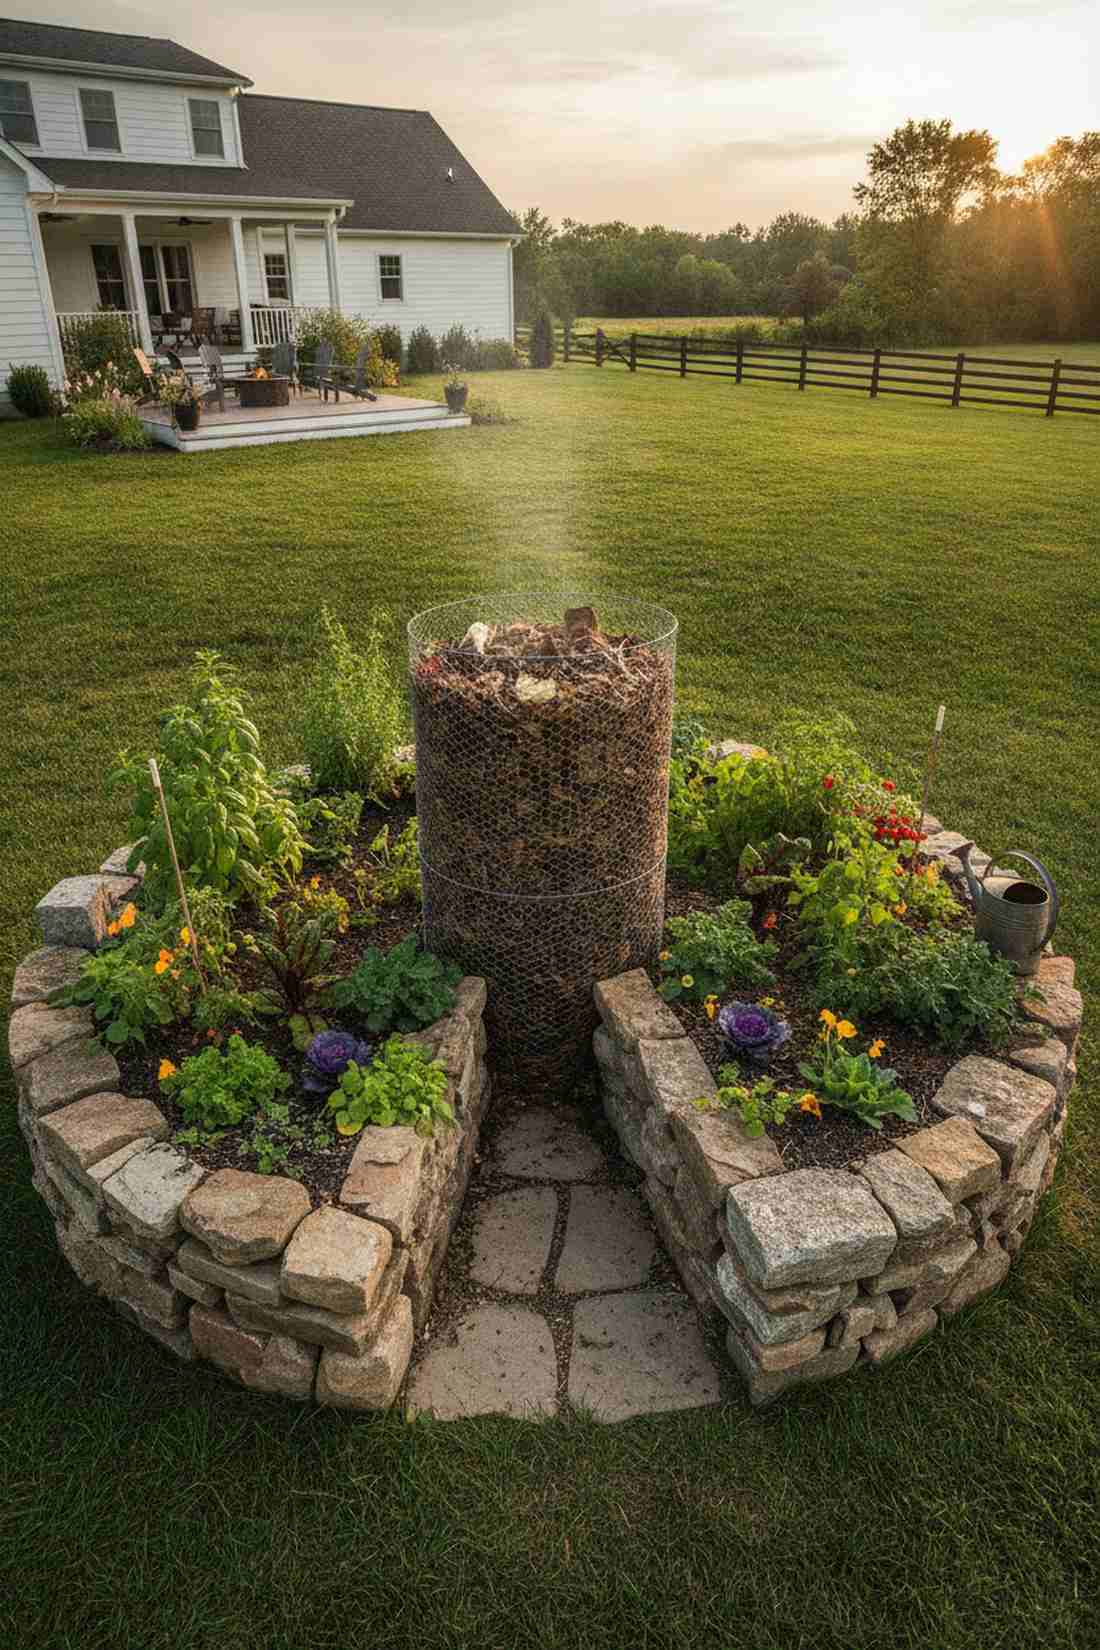
10. Keyhole Raised Bed Tower
A brilliant fusion of form and function, this permaculture keyhole garden feels like a magical, self-sustaining ecosystem straight out of a textbook. Highly effective for off-grid homesteaders or large open acreage spots.
Why break your back hauling fertilizer when your garden bed can literally compost itself? Integrating a central nutrient basket forces the surrounding soil to stay hyper-fertile, outperforming standard raised beds by a massive margin.
Usually built from salvaged rock or brick, making it virtually free or under $40 for the central mesh wire. It is an incredible way to slash your seasonal maintenance time.
- Key Materials: Salvaged stone, chicken wire basket, organic waste
- Vibe / Style: Rugged homestead utility
- Difficulty: Labor-intensive stone stacking
- Budget Breakdown: Stone: $0 (Foraged) | Mesh Basket: $25.
- Creator’s Tip: Slope the dirt slightly down and away from the center compost basket so nutrient-heavy water naturally drains to the outer roots.
- Smart Sourcing: heavy-duty galvanized poultry netting and bulk organic compost starters.
11. Hillside Terrace Beds
Transforming an unusable, frustrating slope into a majestic green staircase, this sloped terrain garden setup feels incredibly grand. The ultimate fix for a heavily graded backyard or a rapidly eroding hill.
Massive retaining walls are notoriously expensive, but cutting simple level terraces directly into the earth stabilizes the soil while tripling your grow space. Reinforcing the steps with natural stacked stone delivers a rugged, timeless aesthetic that looks professionally installed.
Depending on the stone used, costs range from $50 to $200+. Save this if you are finally ready to conquer that steep, unusable yard!
- Key Materials: Landscape timbers or flat stone, gravel backfill, leveling sand
- Vibe / Style: Majestic mountain terracing
- Difficulty: Heavy physical labor
- Budget Breakdown: Stone/Wood: $150 | Drainage Gravel: $30.
- Creator’s Tip: Always backfill the rear of each terrace wall with coarse gravel to stop hydrostatic pressure from blowing out your hard work.
- Smart Sourcing: premium treated landscape timbers and heavy-duty ground grid pavers.
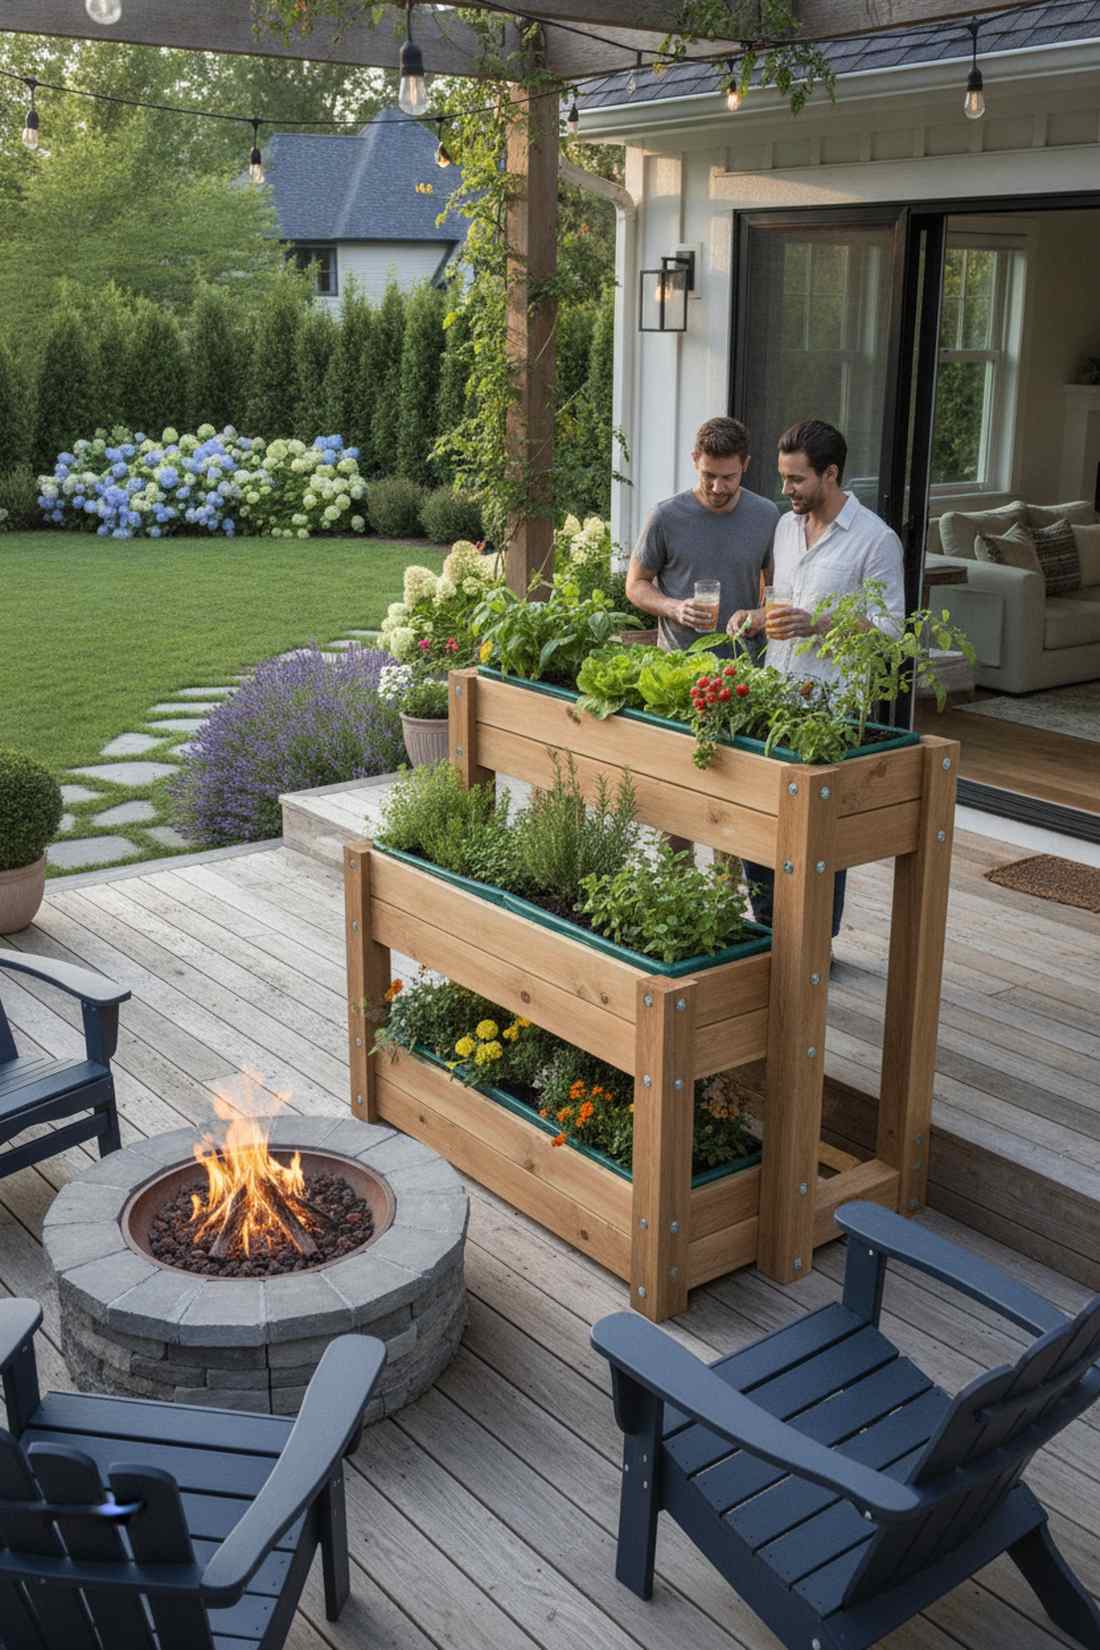
12. Waist-High Tiered Planter

Ergonomic, elegant, and insanely practical, this elevated garden table design feels like a premium piece of outdoor furniture. The absolute best placement is right on a back deck where you entertain guests.
Constantly bending over is exhausting, so raising the entire multi-tier system to standing height changes everything about daily harvesting. Lining the premium wood interior with heavy-duty moisture barriers ensures this setup lasts a decade without rotting out at the seams.
Lumber and structural hardware run about $80–$130. A highly worthwhile investment that completely protects your greens from hungry ground pests.
- Key Materials: Thick cedar planks, lag bolts, food-grade plastic liner
- Vibe / Style: Premium patio furniture
- Difficulty: Intermediate woodworking
- Budget Breakdown: Cedar: $90 | Hardware/Liner: $30.
- Creator’s Tip: Use sturdy 4×4 posts for the legs, anything smaller will bow under the massive weight of wet soil.
- Smart Sourcing: food-safe raised bed waterproof liners and heavy-duty structural lag screws.
If you think soil is the only way to grow, the next automated setup is going to completely blow your mind and double your harvest speed…
Hydroponic Vertical Towers for Soilless Growing Systems
Hydroponic towers circulate nutrient-rich water to plant roots without soil, achieving faster growth rates and higher yields in minimal space. These systems require electricity for pumps but deliver precise control over growing conditions.
13. Drip Irrigation PVC Tower
Looking exactly like a prop from a high-tech sci-fi movie, this automated vertical hydroponics setup feels incredibly futuristic. A stellar choice for a covered patio or a bright sunroom corner where dirt is prohibited.
Relying on messy dirt is outdated when a simple water pump can accelerate plant growth by an insane 30%. Sourcing UV-coated PVC and silent submersible water pumps transforms a basic plumbing pipe into a high-yield, premium-looking indoor farm.
The pump, pipe, and reservoir will set you back around $45–$65. Pin this if you want a garden that practically waters itself while you are on vacation!
- Key Materials: 5-inch PVC tower, submersible pump, clay pebbles
- Vibe / Style: High-tech indoor farming
- Difficulty: Intermediate plumbing
- Budget Breakdown: PVC/Pots: $35 | Pump: $20.
- Creator’s Tip: Keep the bottom reservoir completely blacked out to prevent nasty algae blooms from clogging your water lines.
- Smart Sourcing: silent submersible hydroponic water pumps and expanded clay pebbles (bulk bag).
14. Aeroponic Mist Tower
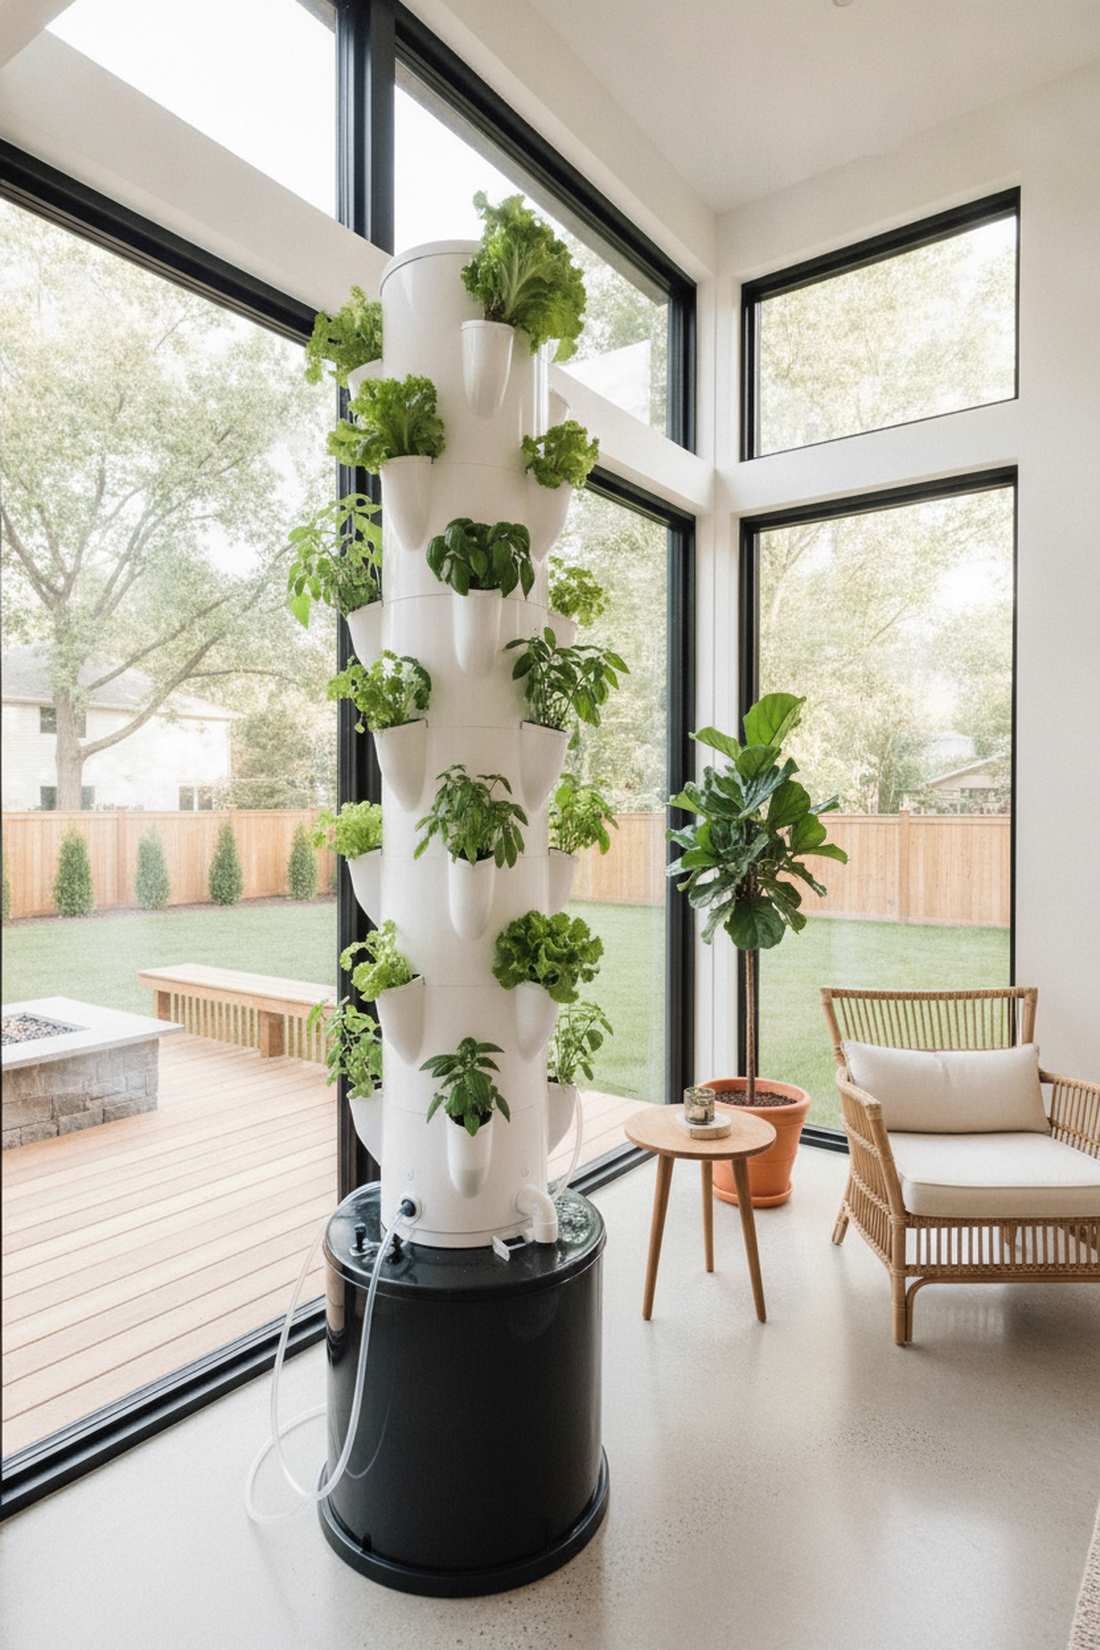
Sleek, clinical, and aggressively efficient, this indoor aeroponic misting tower gives off serious commercial greenhouse vibes. Perfect for a clean kitchen corner or a fully enclosed apartment balcony.
Suspending bare roots in an oxygen-rich mist sounds intimidating, but it’s the ultimate secret to explosive, disease-free leaf growth. Using precise interval timers and high-pressure nozzles completely eliminates the stagnant water issues found in cheap DIY bucket systems.
The specialized misting hardware pushes the cost to $80–$120. A massive step up that yields crispy, perfect greens in half the normal time.
- Key Materials: High-pressure mist nozzles, cycle timer, opaque housing
- Vibe / Style: NASA-level plant tech
- Difficulty: Advanced electronic setup
- Budget Breakdown: Misting Kit: $60 | Timer/Tower: $40.
- Creator’s Tip: Set the timer to burst mist for 5 seconds every 5 minutes to prevent roots from drying out in the air.
- Smart Sourcing: high-pressure aeroponic misting nozzles and digital hydroponic cycle timers.
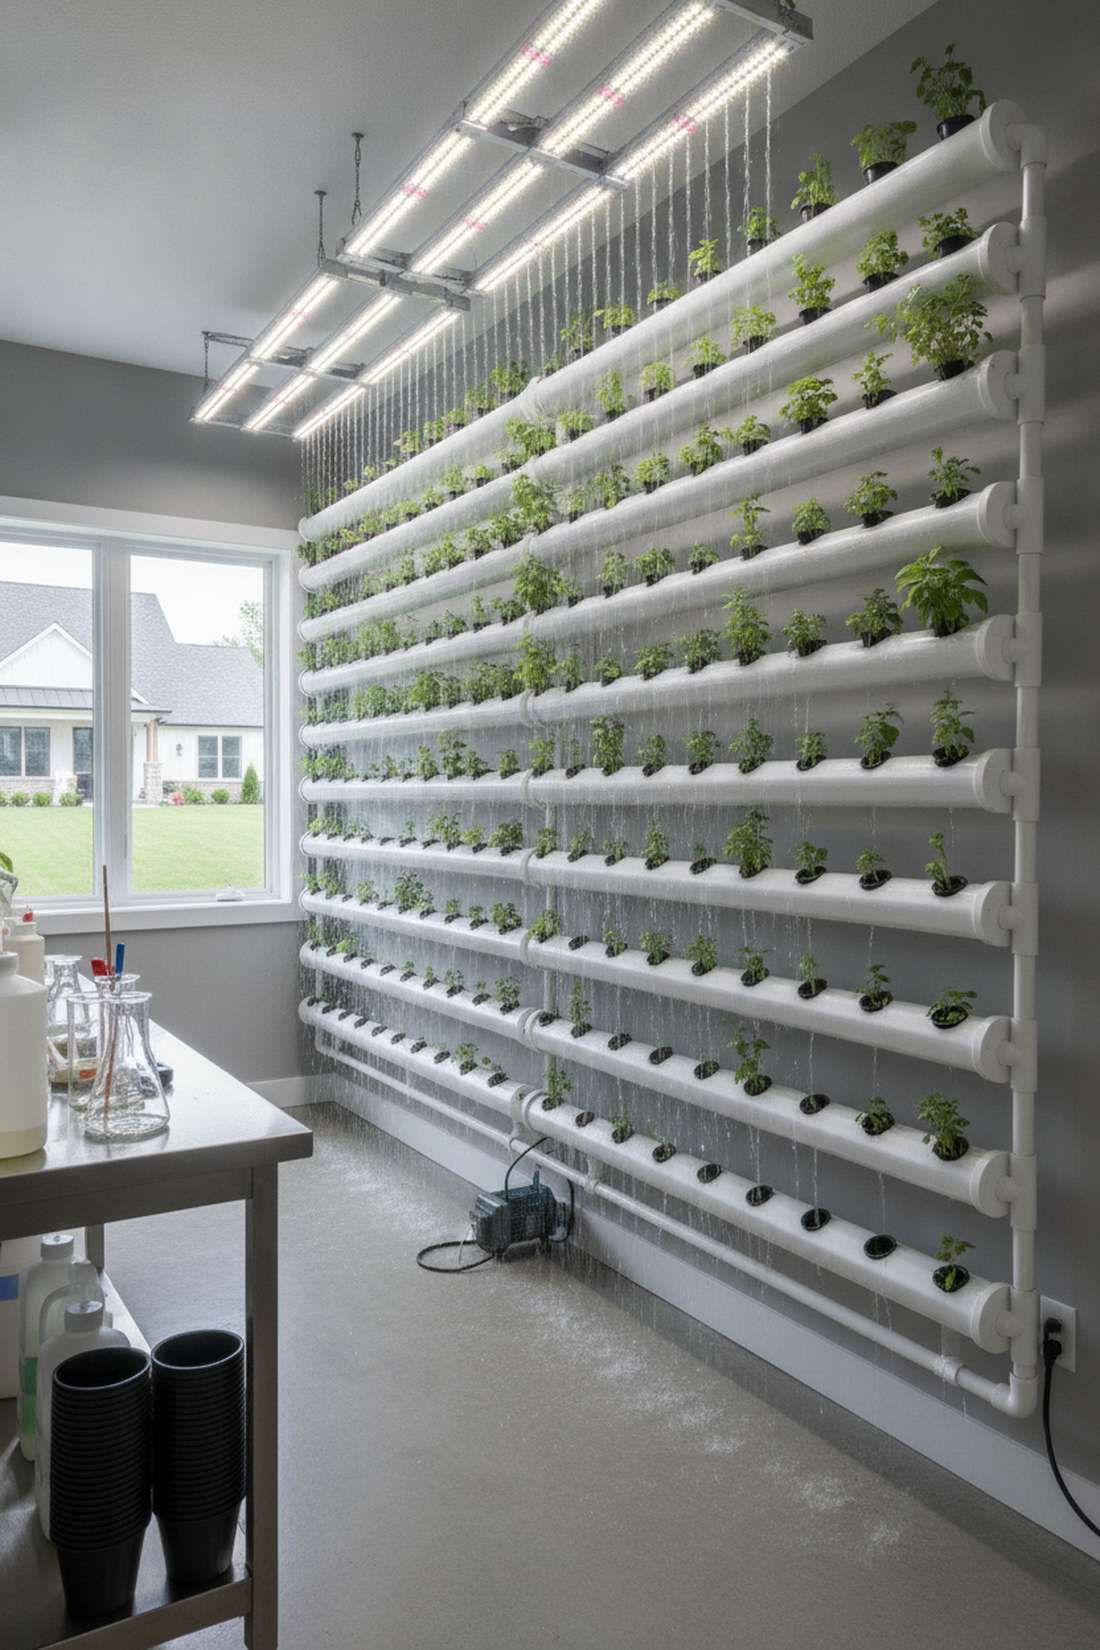
15. Nutrient Film Technique Column
Acting like a cascading waterfall of fresh food, this continuous flow hydroponic wall feels incredibly peaceful to watch. Fantastic for a sunny, temperature-controlled garage or a dedicated basement grow room.
Leaving roots partially exposed to oxygen via a thin, flowing nutrient film delivers insanely fast maturity rates for kitchen herbs. Upgrading to opaque, food-grade channels ensures absolutely zero algae growth, maintaining a pristine, clinical aesthetic that commands attention.
Channeling and low-voltage pumps average about $70–$90. Save this highly technical layout to your advanced indoor gardening board.
- Key Materials: Shallow PVC channels, micro-pump, net pots
- Vibe / Style: Commercial indoor sleek
- Difficulty: Intermediate water balancing
- Budget Breakdown: Channels: $50 | Pump: $25.
- Creator’s Tip: Slope the channels exactly 1 inch per every 40 inches of length to ensure the perfect film speed over the roots.
- Smart Sourcing: food-grade PVC hydroponic channels and complete hydroponic nutrient starter kits.
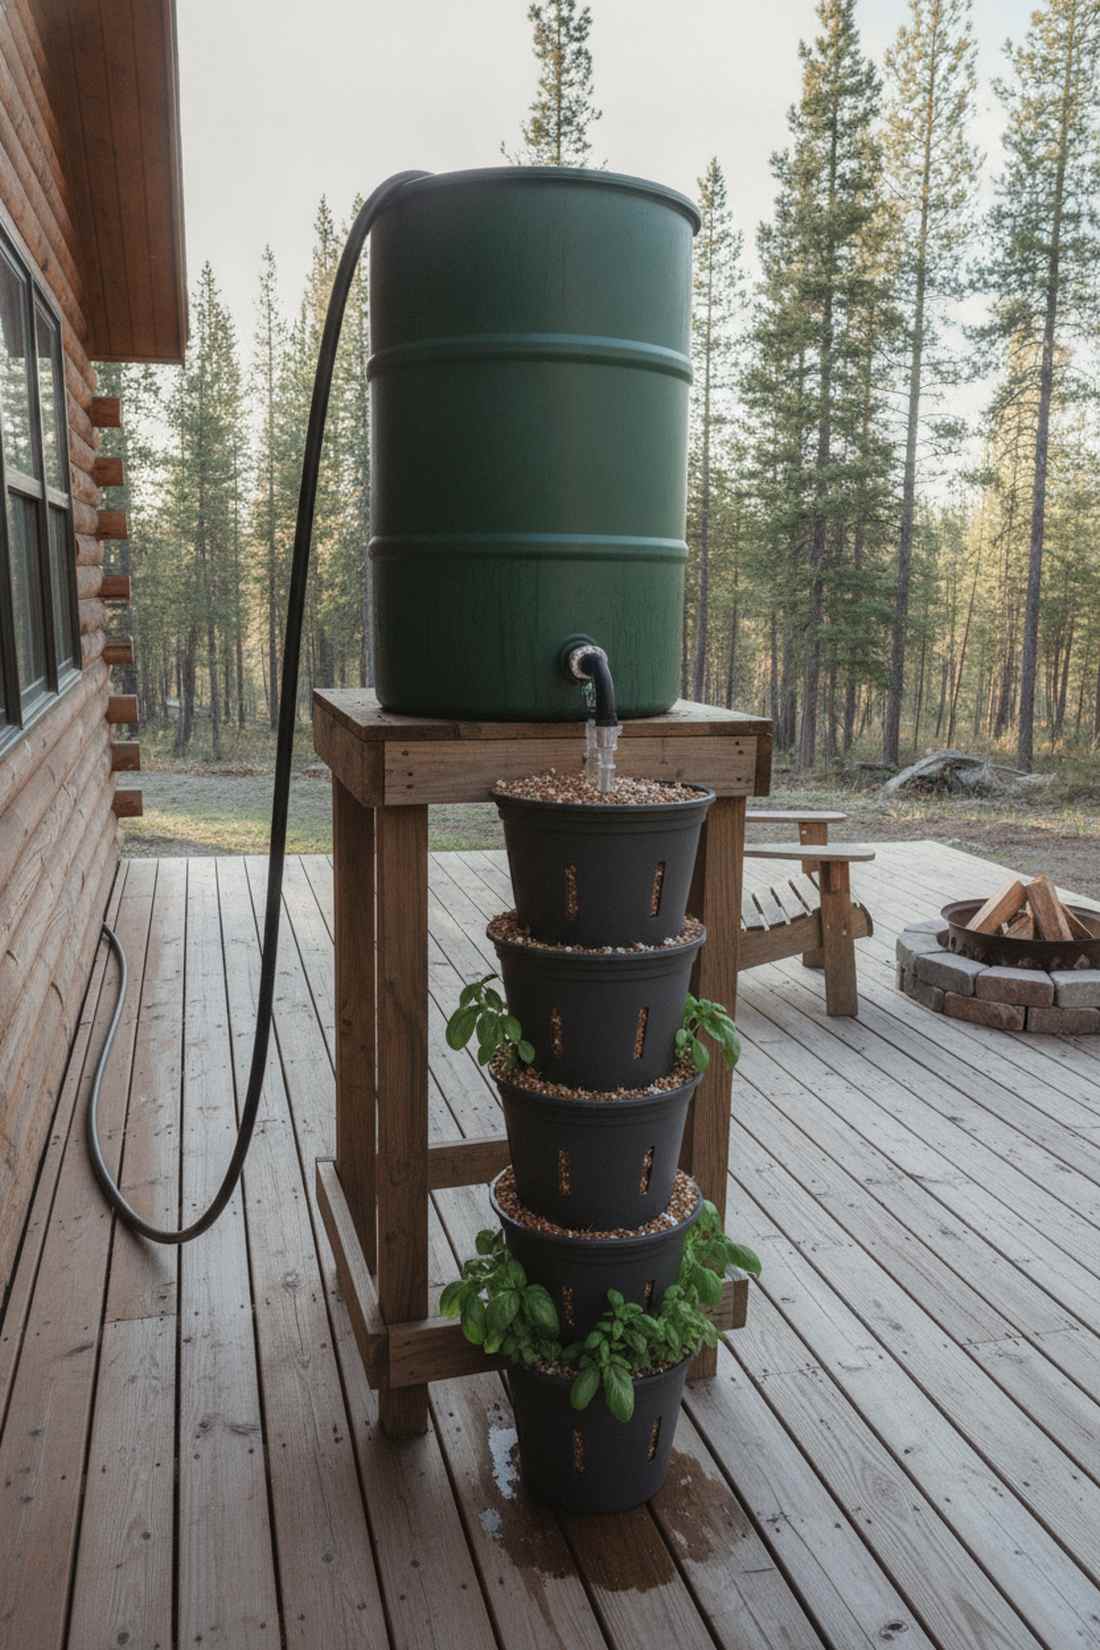
16. Rain Tower Gravity System
Brilliantly disconnected from the power grid, this passive gravity-fed tower feels like an off-grid survivalist’s dream setup. The absolute ideal placement is directly under a rain barrel or on a remote cabin deck.
Ditching the electrical water pumps makes this completely silent and fail-proof during intense summer power outages. Relying on a slow-drip header tank ensures a perfectly timed nutrient percolation that totally outsmarts complex, failure-prone electronic setups.
Minimal hardware keeps this strictly under $30. It’s an incredibly clever way to guarantee your crops survive a long weekend away.
- Key Materials: Top header tank, drip valve, stacked media pots
- Vibe / Style: Off-grid survivalist smart
- Difficulty: Easy gravity plumbing
- Budget Breakdown: Tank: $15 | Valves/Pipe: $15.
- Creator’s Tip: Use a mix of 70% coconut coir and 30% perlite to ensure the water wicks evenly through every single vertical layer.
- Smart Sourcing: adjustable irrigation drip valves and premium coconut coir bricks (bulk pack).
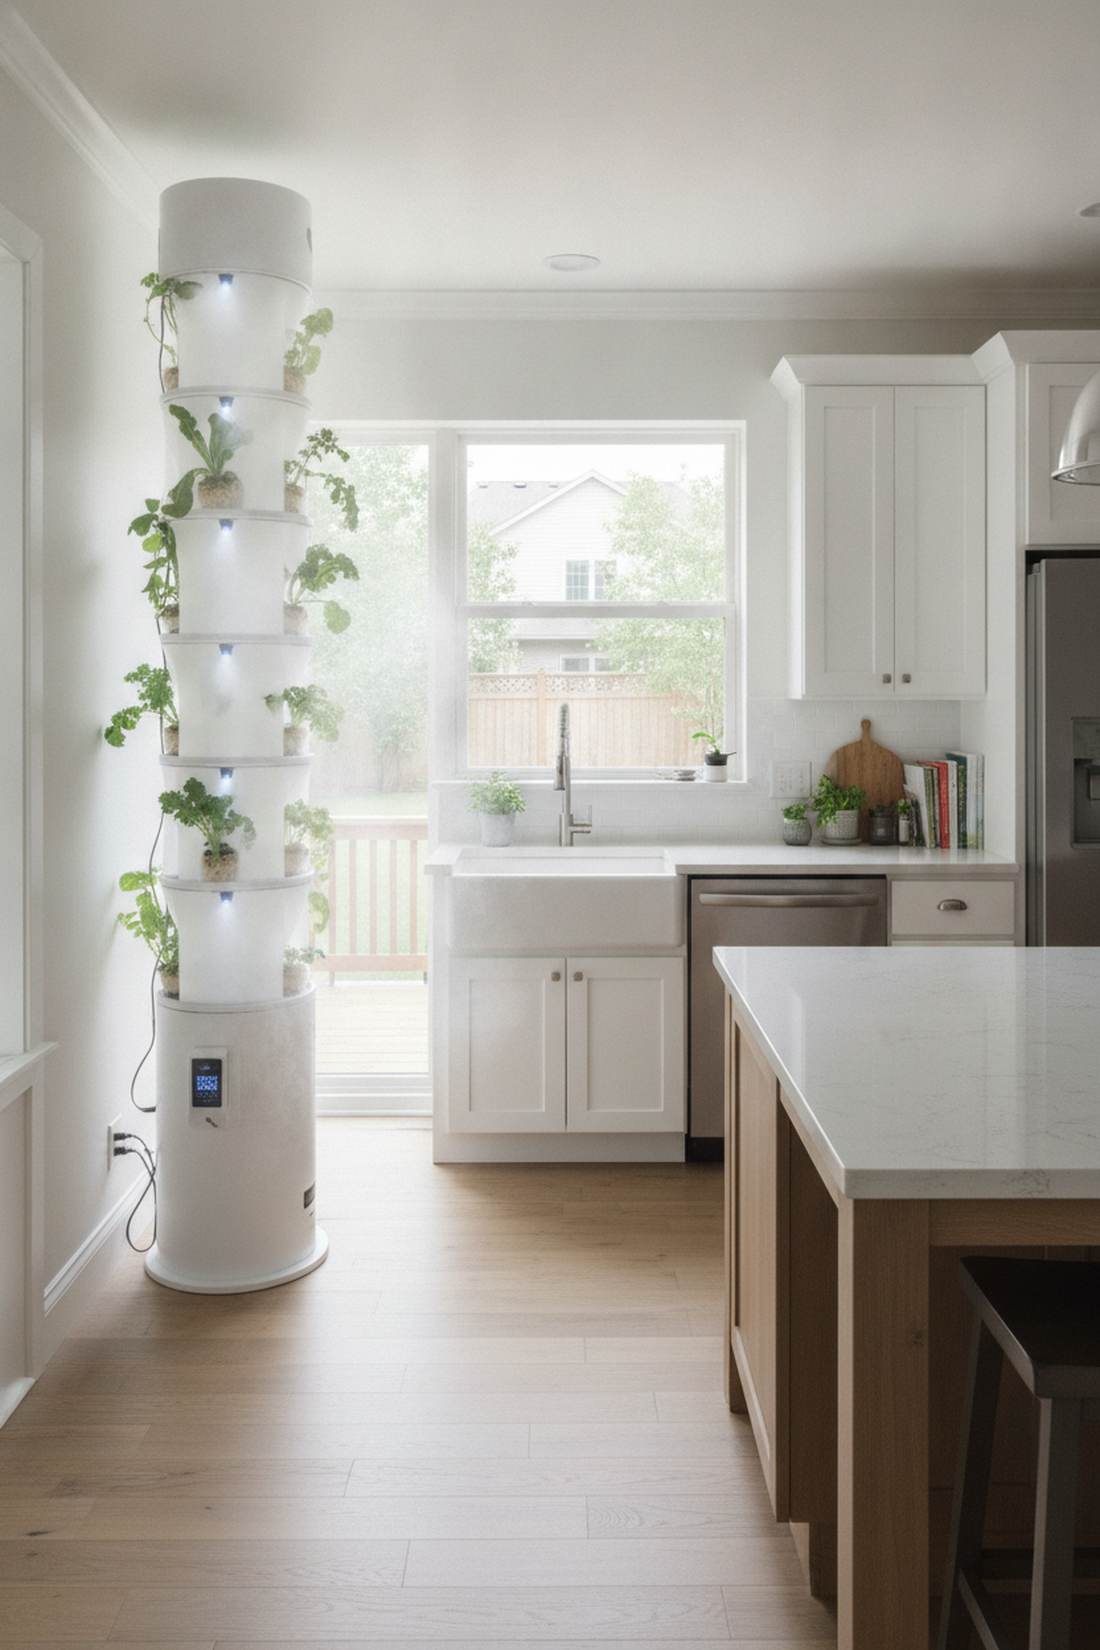
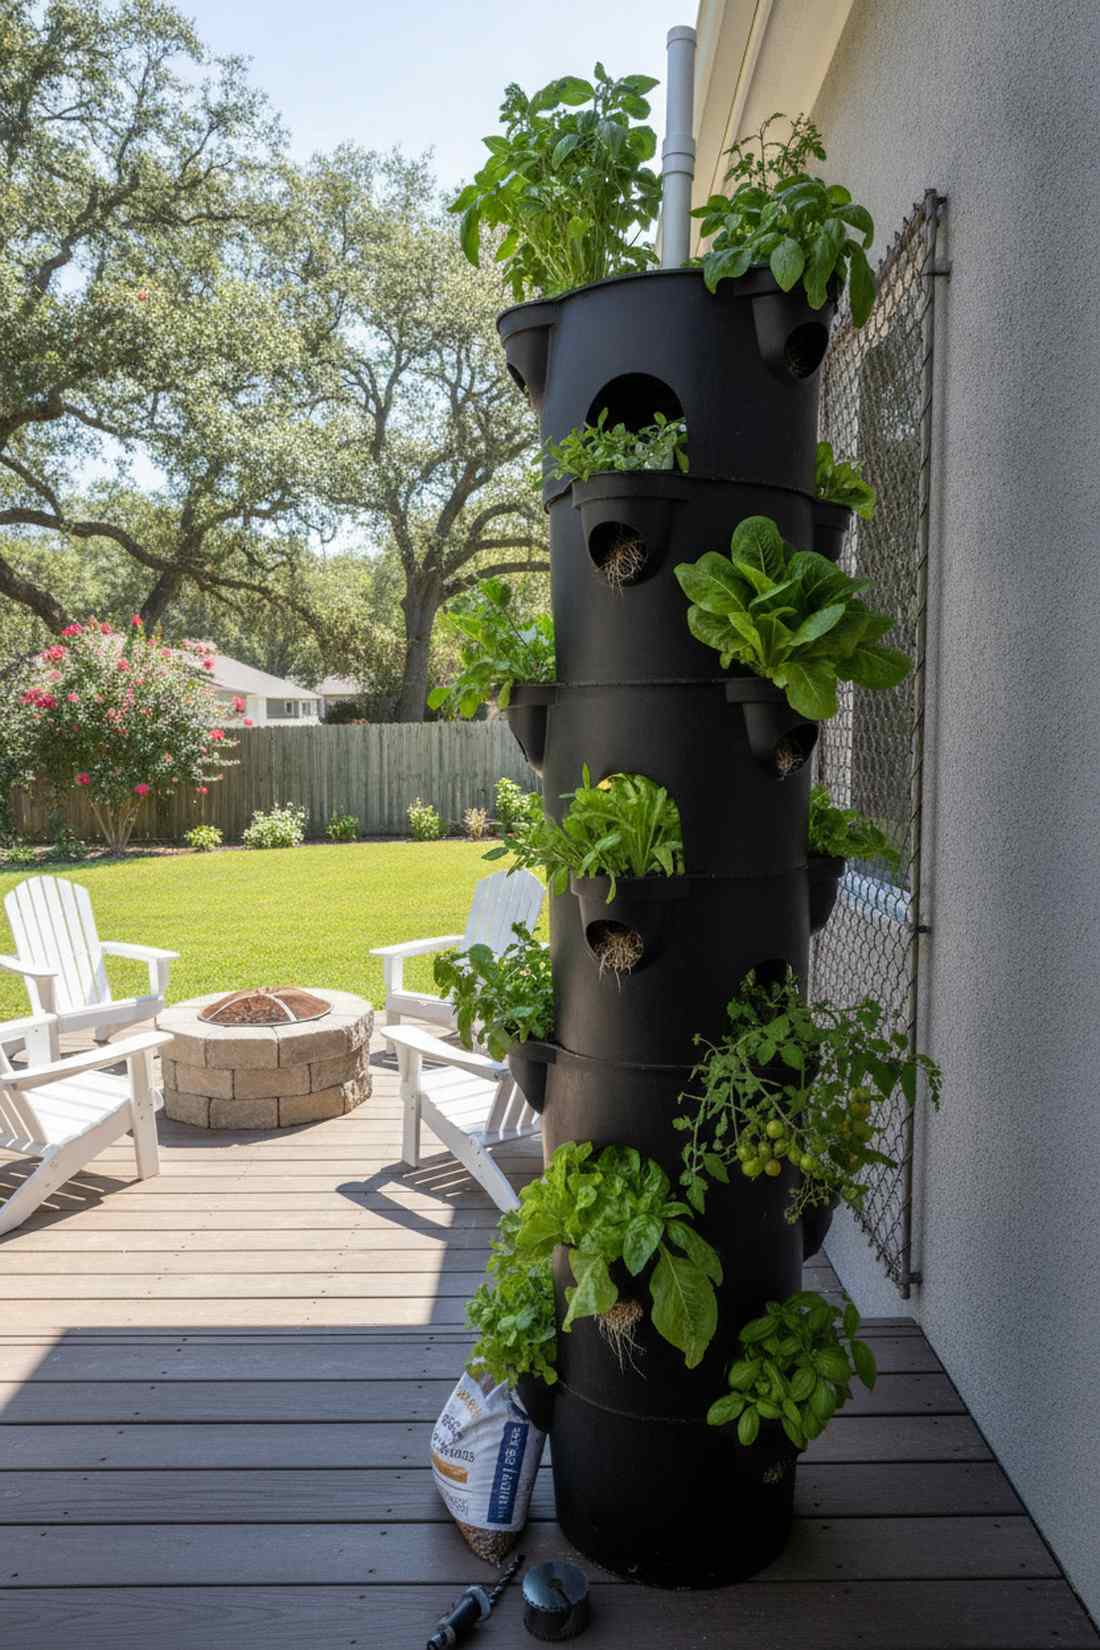
17. Bucket Hydroponic Tower
Chunky, modular, and rugged, this stacked bucket hydroponic system feels like an absolute powerhouse of food production. Works exceptionally well against a bright exterior wall or masking a chain-link fence.
Stacking basic hardware store buckets usually looks trashy, but painting them matte black or using commercial food-grade pails gives it a sleek, stealthy look. This modular interlocking design means you can easily unstack the massive tower if a brutal storm rolls in.
You can easily pull this off for around $35–$50. Pin this to your prepper or high-yield urban farming board!
- Key Materials: 5-gallon food-safe buckets, hole saw, center PVC feed
- Vibe / Style: Industrial urban farming
- Difficulty: Easy drill-and-stack
- Budget Breakdown: Buckets: $20 | Hardware: $20.
- Creator’s Tip: Throw a handful of heavy clay pellets in the bottom bucket to anchor the tower against high wind gusts.
- Smart Sourcing: BPA-free 5-gallon food grade buckets and heavy-duty hole saw drill bit sets.
Stop throwing away your old junk—the next section reveals exactly how trash is being flipped into premium landscape centerpieces…
Repurposed Vertical Planters Using Recycled Materials
Transform salvaged items into functional growing towers that reduce waste while adding unique character to garden spaces. These budget-friendly options prove that effective vertical gardening doesn’t require specialty products.
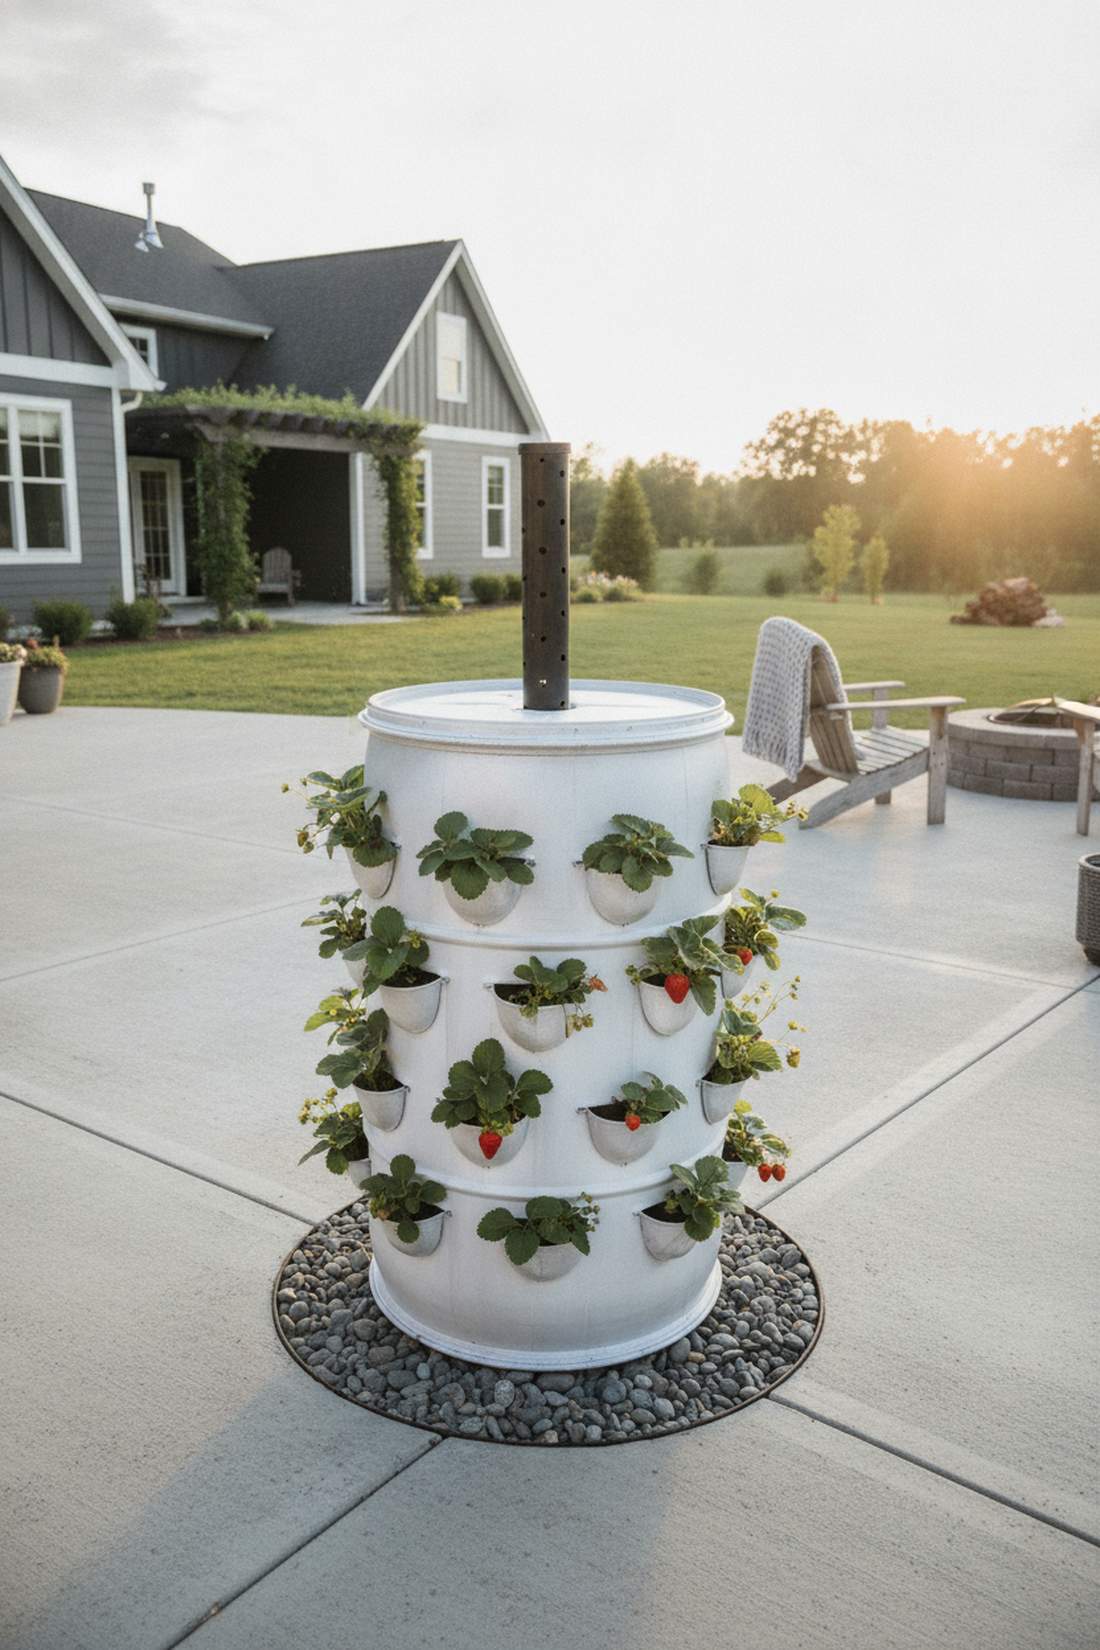
18. Fifty-Five Gallon Drum Tower
A true upcycling masterpiece, this large capacity barrel planter feels like a rustic industrial centerpiece. A phenomenal addition to a wide concrete patio or a gravel-lined courtyard.
Many DIYers just lazily slice a barrel in half, but cutting intricate heat-molded pockets turns a single drum into a 50-plant strawberry factory. Integrating a worm-composting tube straight down the center creates a self-feeding loop that is downright genius and highly productive.
Sourcing a used food-safe barrel keeps costs at $20–$40. A brilliant, low-maintenance upgrade that produces a staggering amount of food.
- Key Materials: 55-gallon plastic drum, heat gun, center PVC compost tube
- Vibe / Style: Rugged upcycled industrial
- Difficulty: Advanced cutting/melting
- Budget Breakdown: Barrel: $20 | PVC/Soil: $20.
- Creator’s Tip: Paint the exterior with a bright, heat-reflective spray paint so the roots don’t literally cook during the July heat.
- Smart Sourcing: live composting red wiggler worms and exterior-grade UV resistant spray paint.
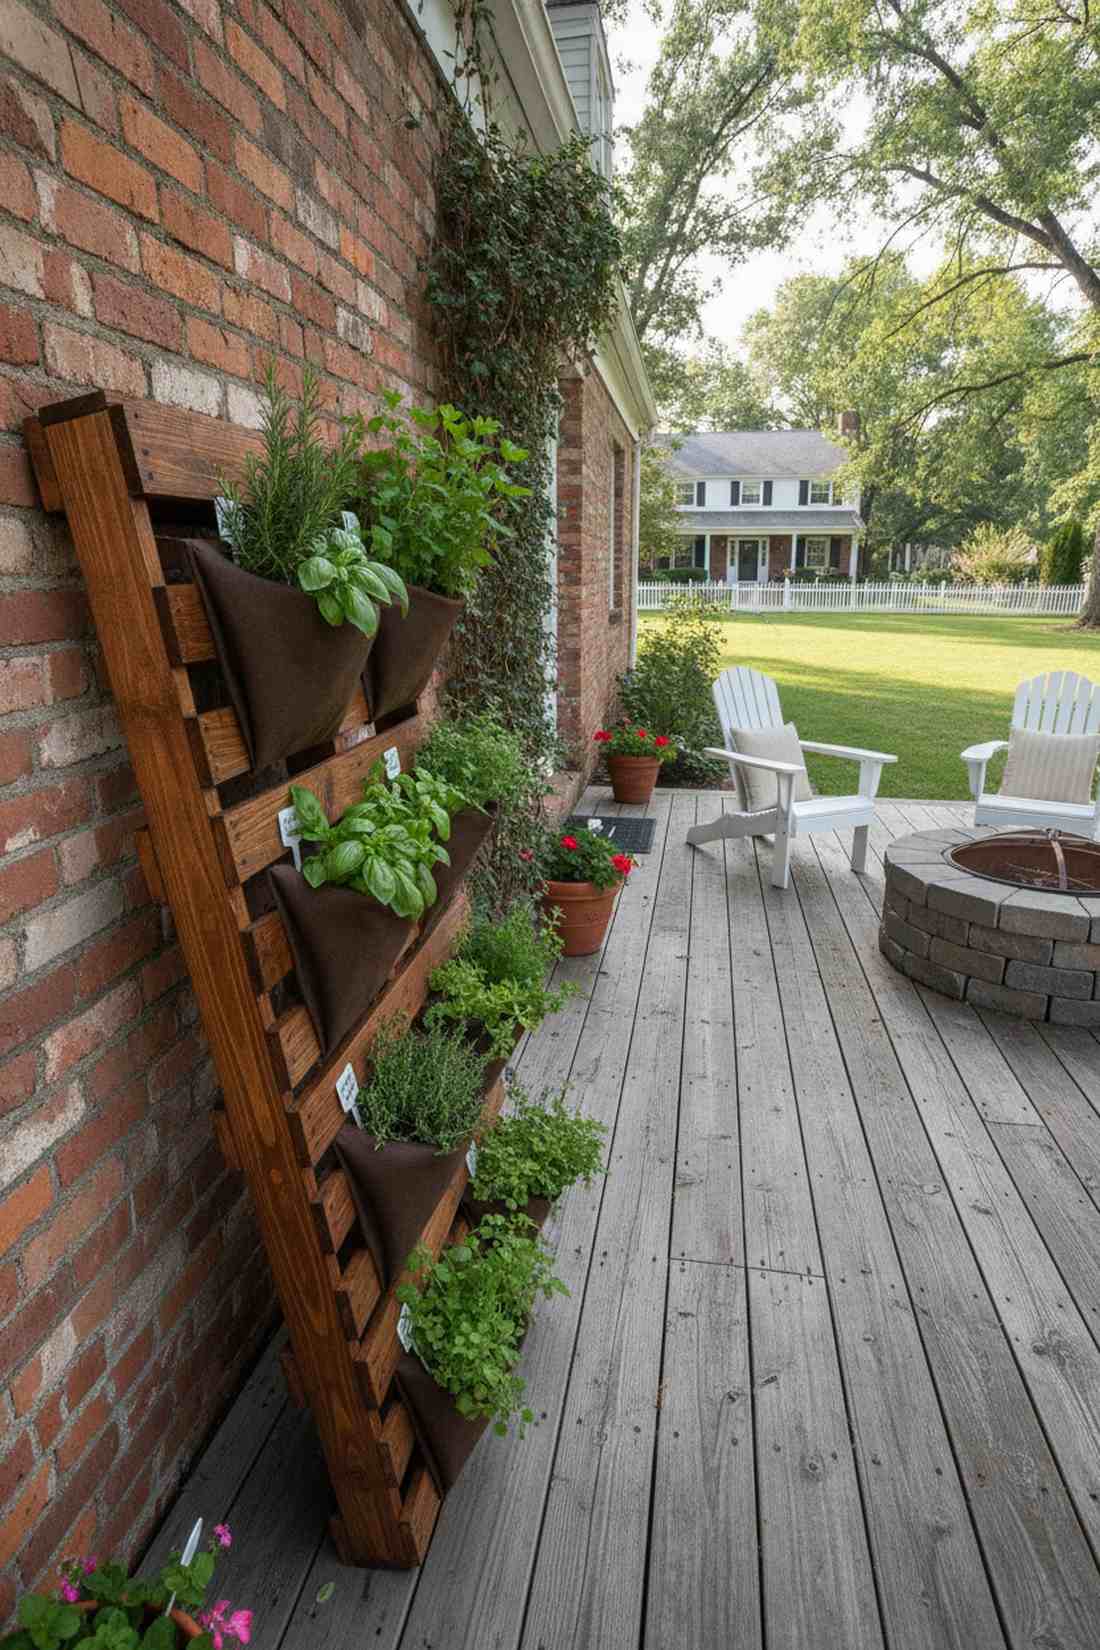
19. Wooden Pallet Herb Tower
Oozing with shabby-chic farmhouse appeal, this repurposed pallet vertical garden feels wonderfully cozy and grounded. Perfectly styled leaning against a weathered brick wall or a rustic garden fence.
Stapling messy plastic bags to the back always fails, but using heavy-duty landscaping fabric guarantees long-term soil retention. Sanding the wood and applying a dark walnut stain instantly shifts the vibe from “salvaged trash” to a premium boutique garden display.
If you snag a free pallet, materials are just $10–$15. Pin this for a near-free weekend DIY that drastically improves your patio!
- Key Materials: Heat-treated pallet, heavy staple gun, landscape fabric
- Vibe / Style: Rustic shabby-chic
- Difficulty: Fast beginner craft
- Budget Breakdown: Pallet: $0 | Fabric/Staples: $15.
- Creator’s Tip: Lean the pallet back at a strict 70-degree angle so water actually hits the lower plants instead of completely missing them.
- Smart Sourcing: heavy-duty staple gun starter kits and premium weed barrier fabric (bulk roll).
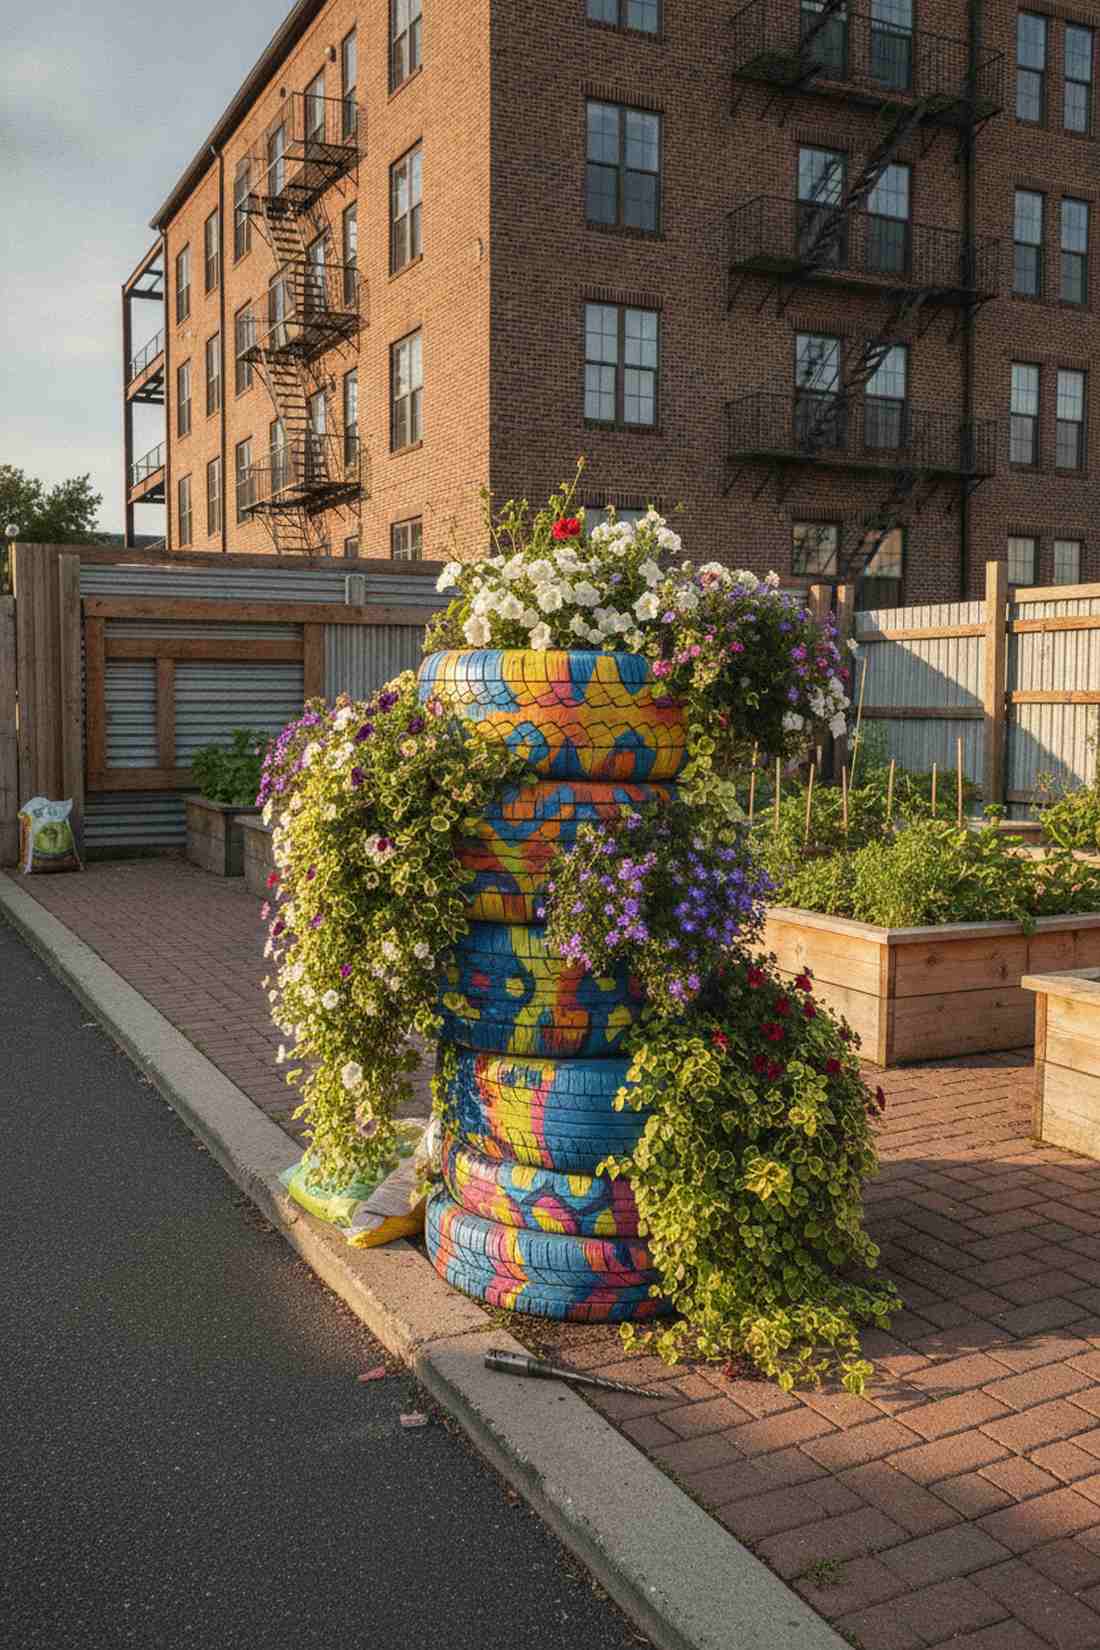
20. Stacked Tire Planter Tower
Edgy and unexpectedly cool, this upcycled tire garden bed gives off a bold, modern-industrial aura. Ideal for an asphalt driveway edge or an urban community garden plot.
While raw black tires absorb incredible heat for early spring planting, painting them in vibrant outdoor acrylics creates a stunning geometric art installation. Staggering the edges properly ensures an eye-catching cascade of trailing florals that completely masks the rubber base.
Tires are typically free, making soil your only real expense at around $15–$25. Highly recommended for a high-impact, zero-budget weekend project.
- Key Materials: 4-6 used tires, bright outdoor paint, trailing flowers
- Vibe / Style: Funky urban art
- Difficulty: Easy stacking
- Budget Breakdown: Tires: $0 | Paint/Soil: $25.
- Creator’s Tip: Heavily drill the bottom sidewall of every tire to ensure massive rainstorms don’t turn them into mosquito breeding swamps.
- Smart Sourcing: vibrant exterior acrylic paint sets and heavy-duty titanium drill bits.
Material Guide: Cheap vs. Premium Aesthetic
Knowing exactly where to save and where to spend makes all the difference in achieving that “looks expensive but isn’t” vibe for your setup.
- Standard vs. UV-Resistant/Premium: Standard plastics crack and fade within 12 months under direct sun. Spending 10% more on UV-resistant PVC or resin guarantees your tower looks brand new for over a decade.
- Pre-made Kits vs. Sourcing Locally: Scavenging parts from five different stores wastes gas and time. Grabbing premium hydroponic starter kits ensures all fittings match perfectly and prevents disastrous water leaks.
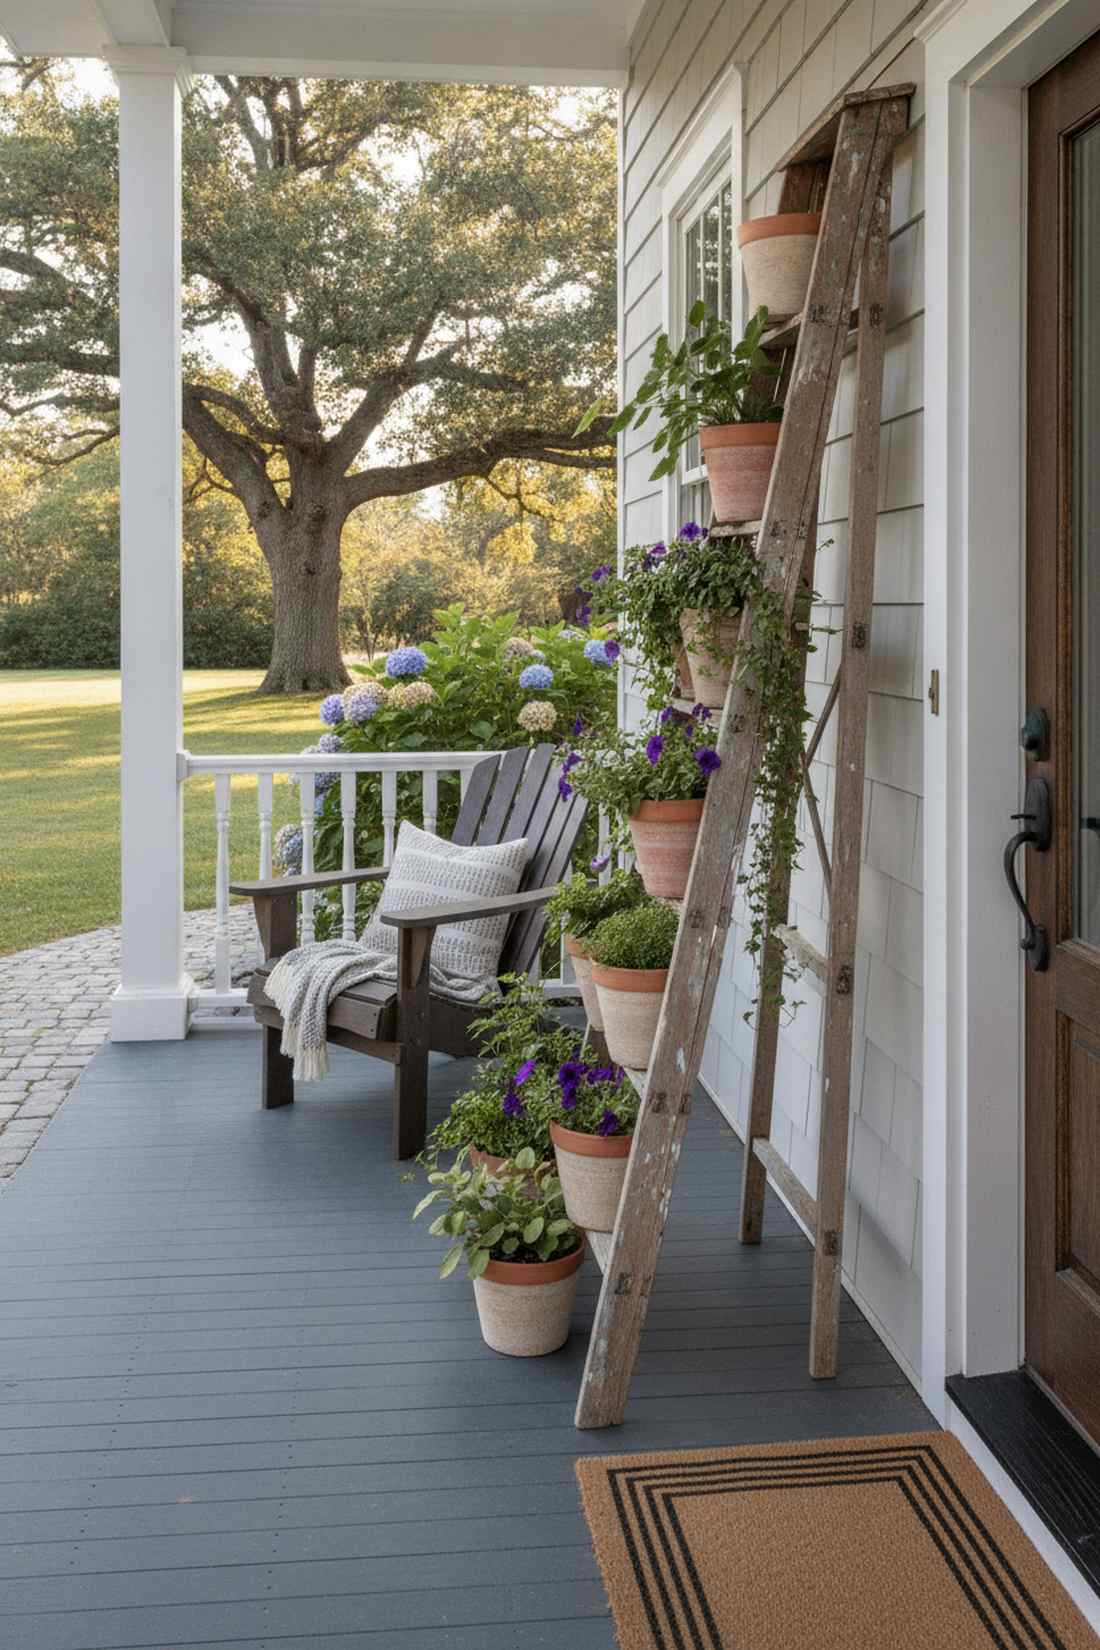
21. Ladder Style Pot Display
Utterly charming and effortlessly vintage, this leaning ladder plant stand feels like a hidden treasure from a French flea market. A gorgeous focal point for a covered front porch or an apartment entryway.
Don’t settle for a boring plastic plant rack when an old painter’s ladder delivers immediate architectural height and character. Upgrading to matching ceramic or sleek fiberglass pots unifies the chaotic display into a curated, designer-level visual arrangement.
Utilizing an old ladder means you only pay for pots, running $20–$40. Save this idea if you need a zero-tools-required balcony upgrade!
- Key Materials: Vintage wooden ladder, matching pots, secure wall anchor
- Vibe / Style: French country vintage
- Difficulty: Zero-tool styling
- Budget Breakdown: Ladder: $15 (Thrifted) | Pots: $25.
- Creator’s Tip: Secure the top rungs to your siding with an invisible wire tie so a heavy gust of wind doesn’t smash your terracotta.
- Smart Sourcing: lightweight faux-ceramic resin pots (bulk set) and heavy-duty invisible wall anchors.
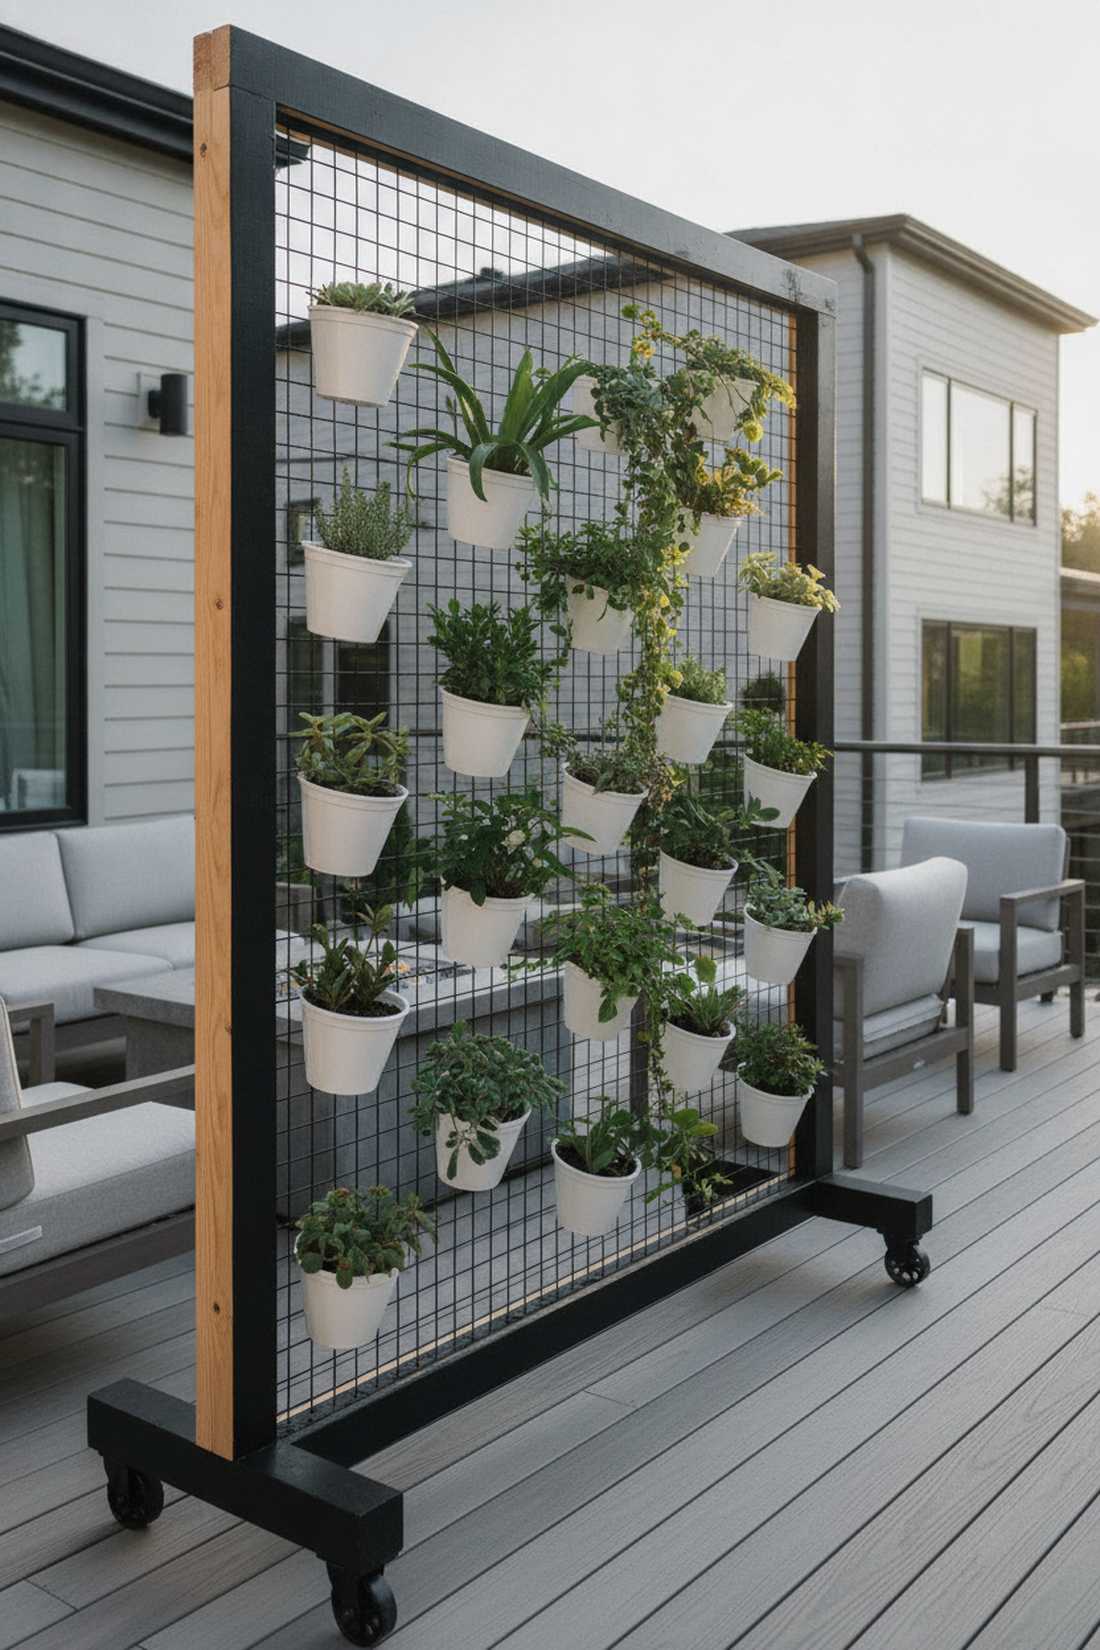
22. Wire Mesh Living Wall Frame
Sleek, minimalist, and highly textural, this modular wire mesh living wall feels exactly like an upscale hotel patio installation. Exceedingly practical as a mobile privacy screen on a shared townhouse deck.
Nailing pots directly to a fence ruins the wood, but suspending them on heavy-duty welded wire ensures pristine airflow and prevents rot entirely. Adding caster wheels to the base frame transforms a static wall into a dynamic, sun-chasing room divider.
The frame and mesh combo costs roughly $45–$70. Pin this if you want an expensive-looking privacy shield on a strict budget.
- Key Materials: 2×4 lumber frame, heavy welded wire mesh, hanging pots
- Vibe / Style: Upscale modern hotel
- Difficulty: Intermediate carpentry
- Budget Breakdown: Lumber: $25 | Mesh/Pots: $40.
- Creator’s Tip: Paint the wire mesh flat black before hanging the plants; it visually disappears and makes the pots look like they are floating.
- Smart Sourcing: vertical wall hanging planter pots (bulk pack) and heavy-duty lockable caster wheels.
Living in a tiny apartment? The next layouts prove you don’t need a backyard to pull massive harvests from thin air…
Compact Space Solutions for Balconies and Patios
Small outdoor spaces benefit most from vertical growing methods that deliver garden yields without sacrificing living area. These designs prioritize portability and weight management for elevated locations.
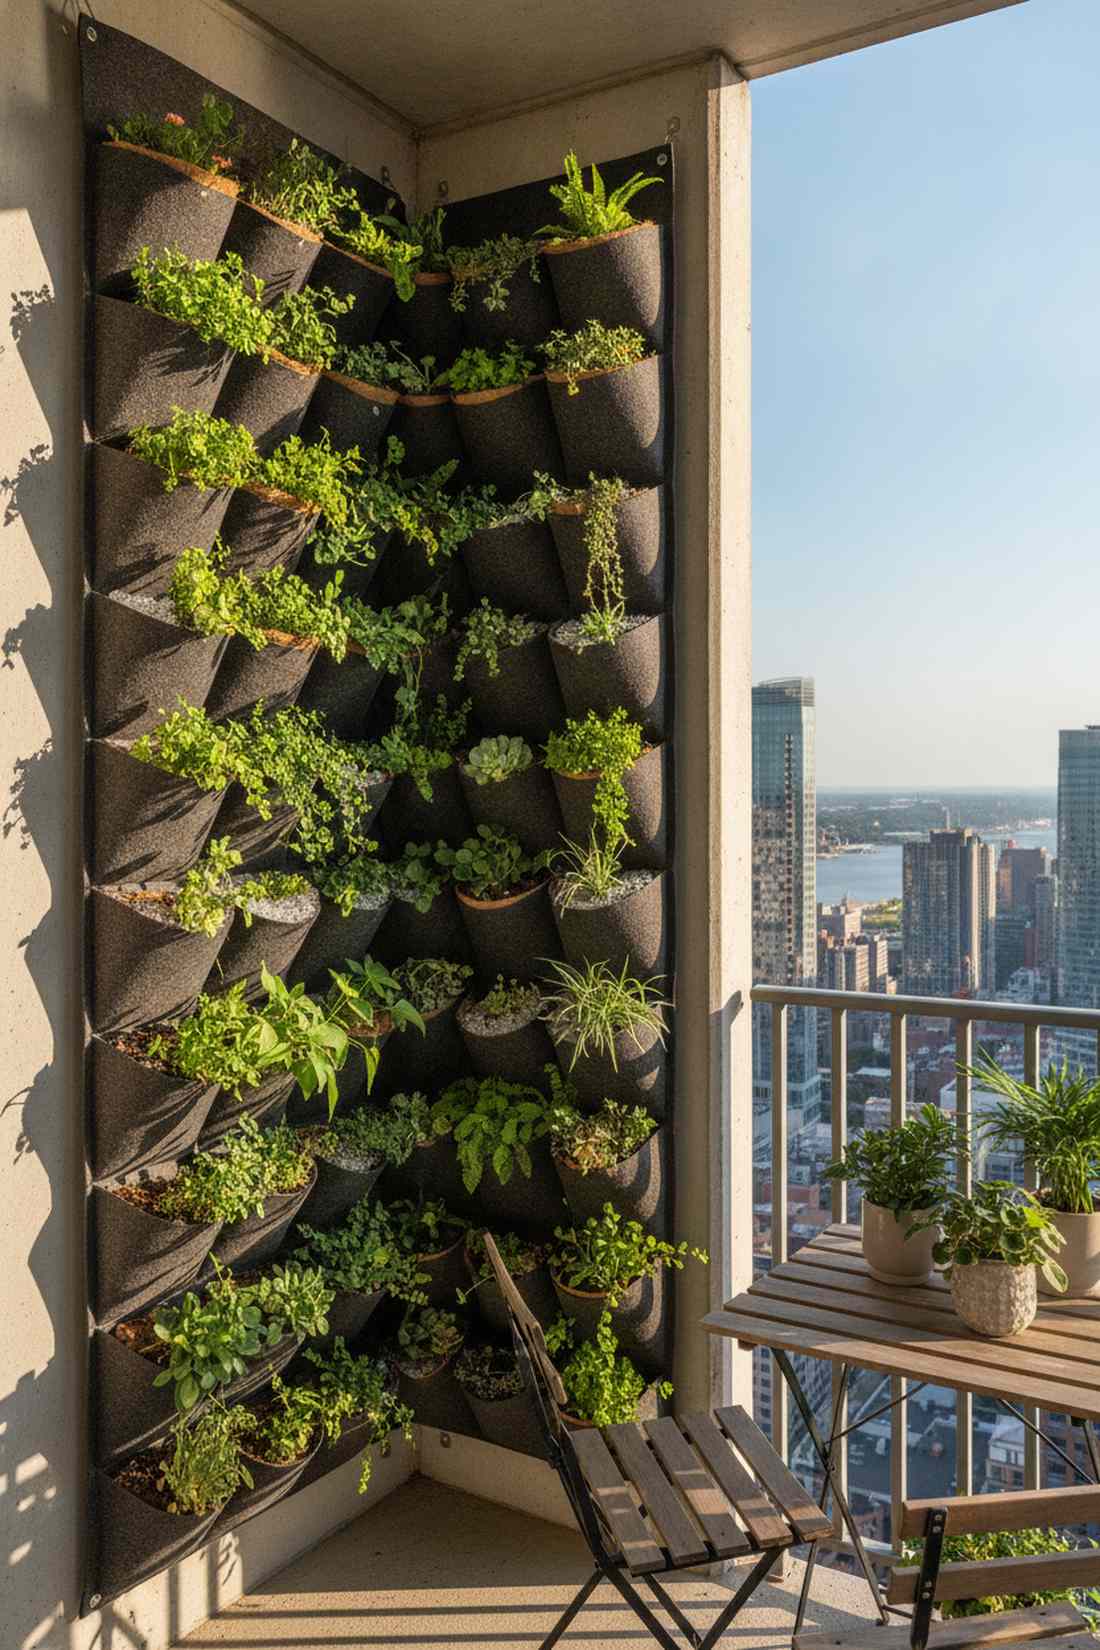
23. Corner Hanging Pocket Tower
Feeling like a lush, floating tapestry, this fabric wall pocket planter creates an instant urban jungle vibe. The ultimate space-hack for an ultra-tiny high-rise balcony corner.
Standard plastic hanging pots swing wildly in the wind, but a corner-anchored felt organizer provides supreme stability and a brilliant microclimate. The breathable fabric actually air-prunes the roots, preventing root-bound stress and ensuring massive foliage growth in a tiny footprint.
These pocket organizers are an absolute steal at $15–$25. A fast, drill-free upgrade that completely changes the vibe of a bare outdoor wall.
- Key Materials: Multi-pocket felt organizer, wall hooks, lightweight coir
- Vibe / Style: Dense urban jungle
- Difficulty: Easy 5-minute hang
- Budget Breakdown: Pocket Wall: $15 | Hooks/Soil: $10.
- Creator’s Tip: Add water-retaining gel crystals into the bottom pockets since they dry out the fastest from wind exposure.
- Smart Sourcing: heavy-duty vertical hanging grow bags and water retaining soil crystals (bulk pack).
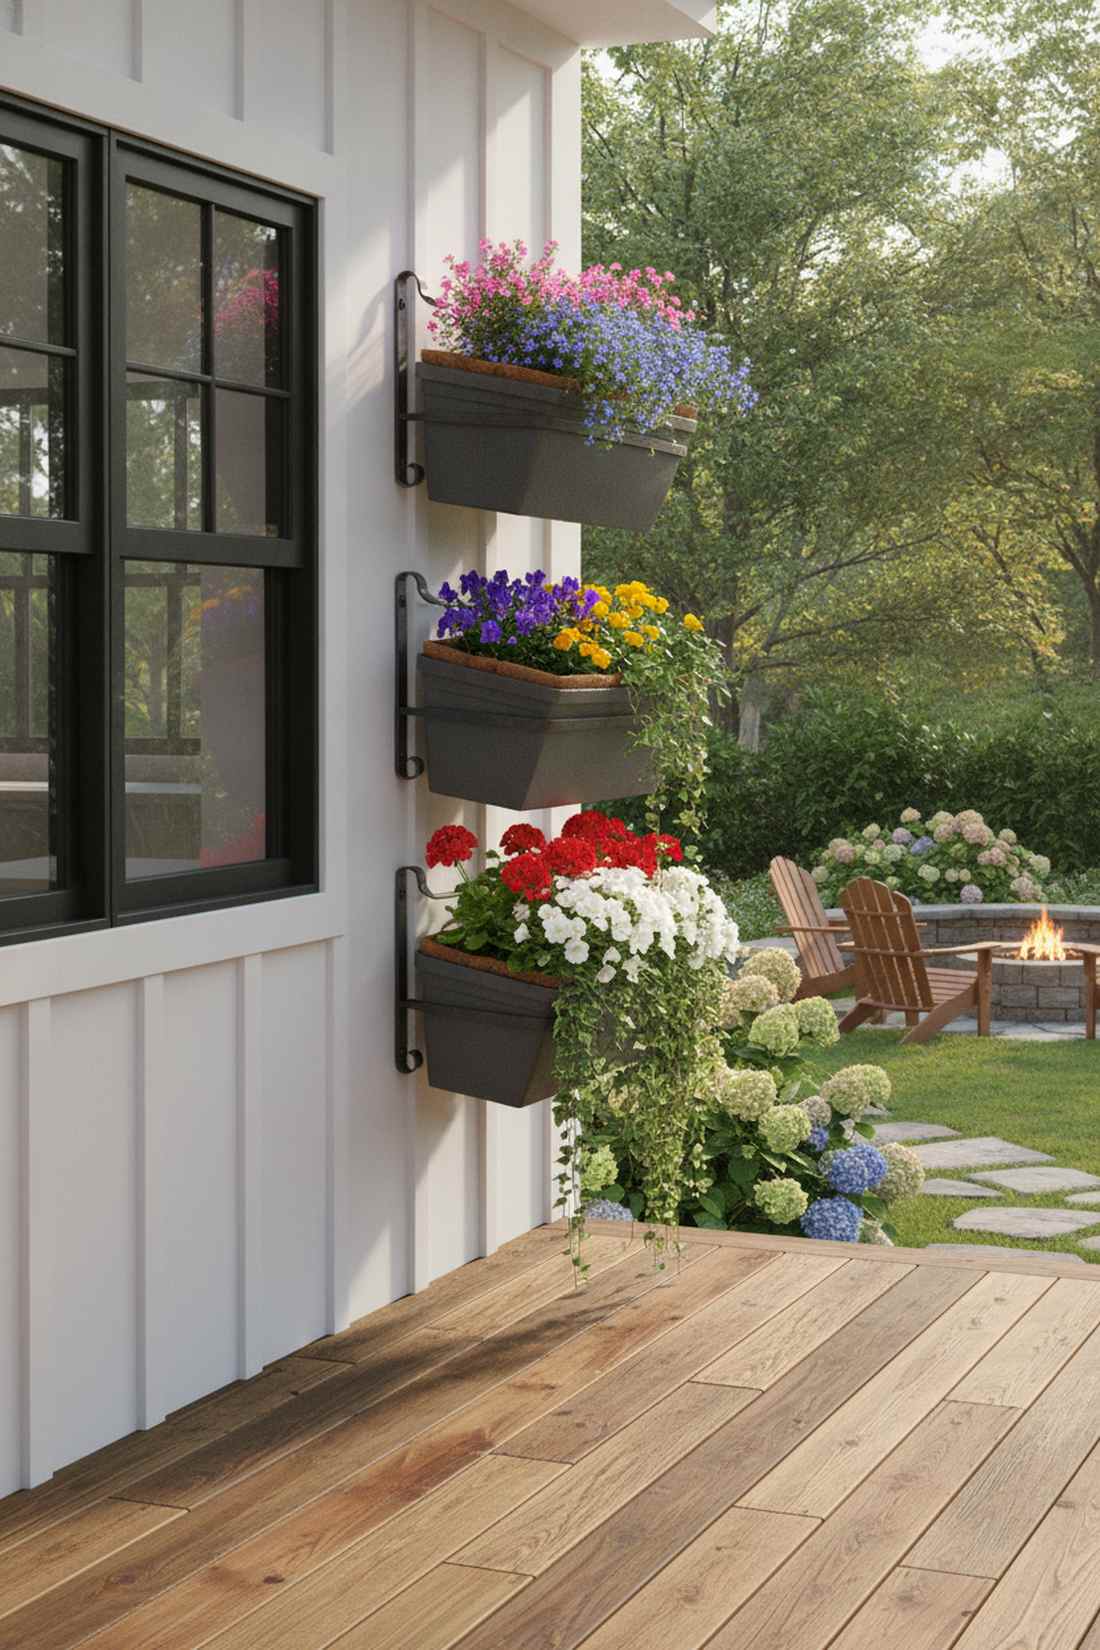
24. Window Box Tower Stack
Neat, symmetrical, and beautifully layered, this tiered window box layout feels exactly like a manicured European facade. Strikingly perfect for a bare exterior kitchen wall or a sturdy wooden railing.
Hanging one box looks lonely, but bolting three vertically creates a dense, multi-level living wall that draws immediate attention. Upgrading to UV-coated resin boxes prevents that ugly sun-faded cracking, keeping the display looking brand-new for years.
Bracket hardware and premium boxes total around $50–$80. Pin this to your urban gardening board for an instant curb-appeal boost!
- Key Materials: 3 window boxes, heavy vertical brackets, coco liners
- Vibe / Style: Classic European balcony
- Difficulty: Moderate drilling
- Budget Breakdown: Boxes: $45 | Brackets: $20.
- Creator’s Tip: Stagger the box depths slightly—put the widest box on the bottom to catch all the water dripping from the top tiers.
- Smart Sourcing: UV-resistant resin window planter boxes and heavy-duty adjustable wall brackets.
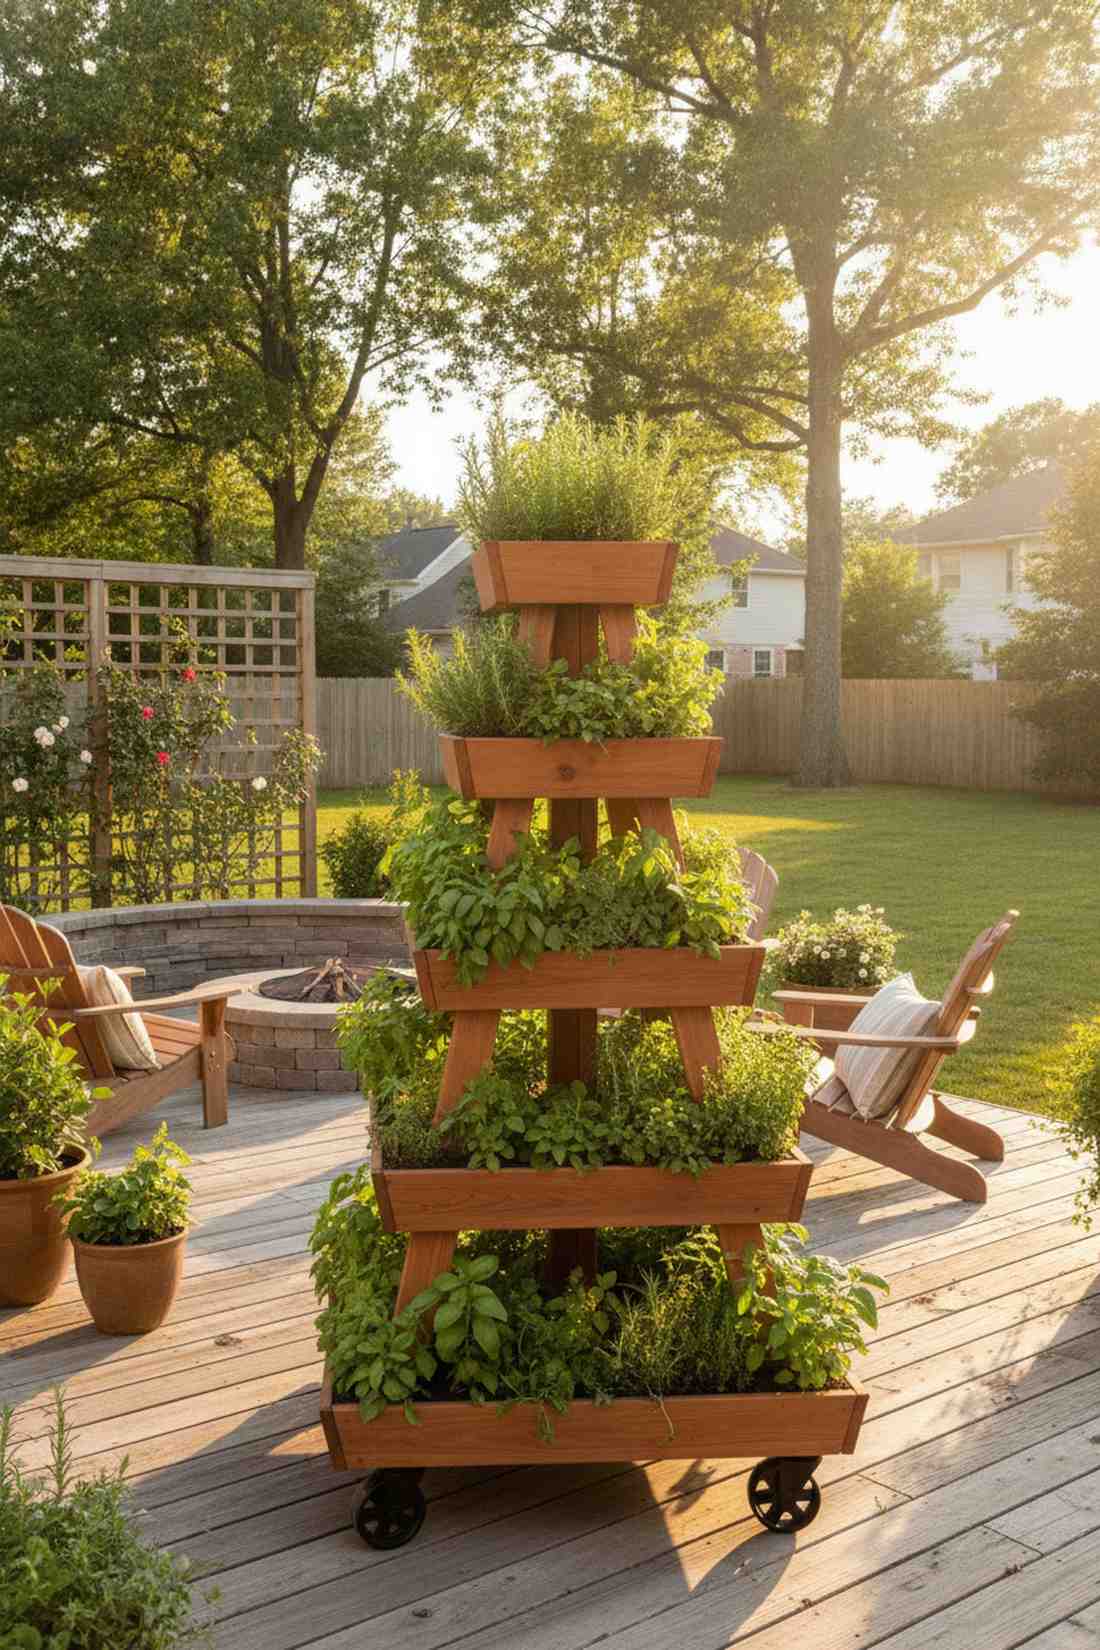
25. Rolling Pyramid Planter
Architectural and highly interactive, this mobile pyramid raised bed feels like a specialized exhibit from a botanical garden. Exceptionally smart for a patio that only gets shifting, temporary patches of sunlight.
A static tower inevitably suffers from a shaded, stunted back side, but a wheeled pyramid solves this with an effortless weekly rotation. Building this geometry with rich cedar creates a striking 3D centerpiece that produces an unbelievable volume of herbs per square foot.
Caster wheels and lumber run about $75–$110. It’s an incredibly smart build for maximizing every single drop of available sunlight.
- Key Materials: Decreasing wood square frames, caster wheels, center post
- Vibe / Style: Interactive botanical exhibit
- Difficulty: Advanced angle cuts
- Budget Breakdown: Wood: $60 | Casters/Hardware: $30.
- Creator’s Tip: Pre-drill every single screw hole near the edges; cedar splits incredibly easily and will ruin the sharp pyramid angles.
- Smart Sourcing: pre-cut tiered pyramid planter kits and heavy-duty swivel caster wheels.
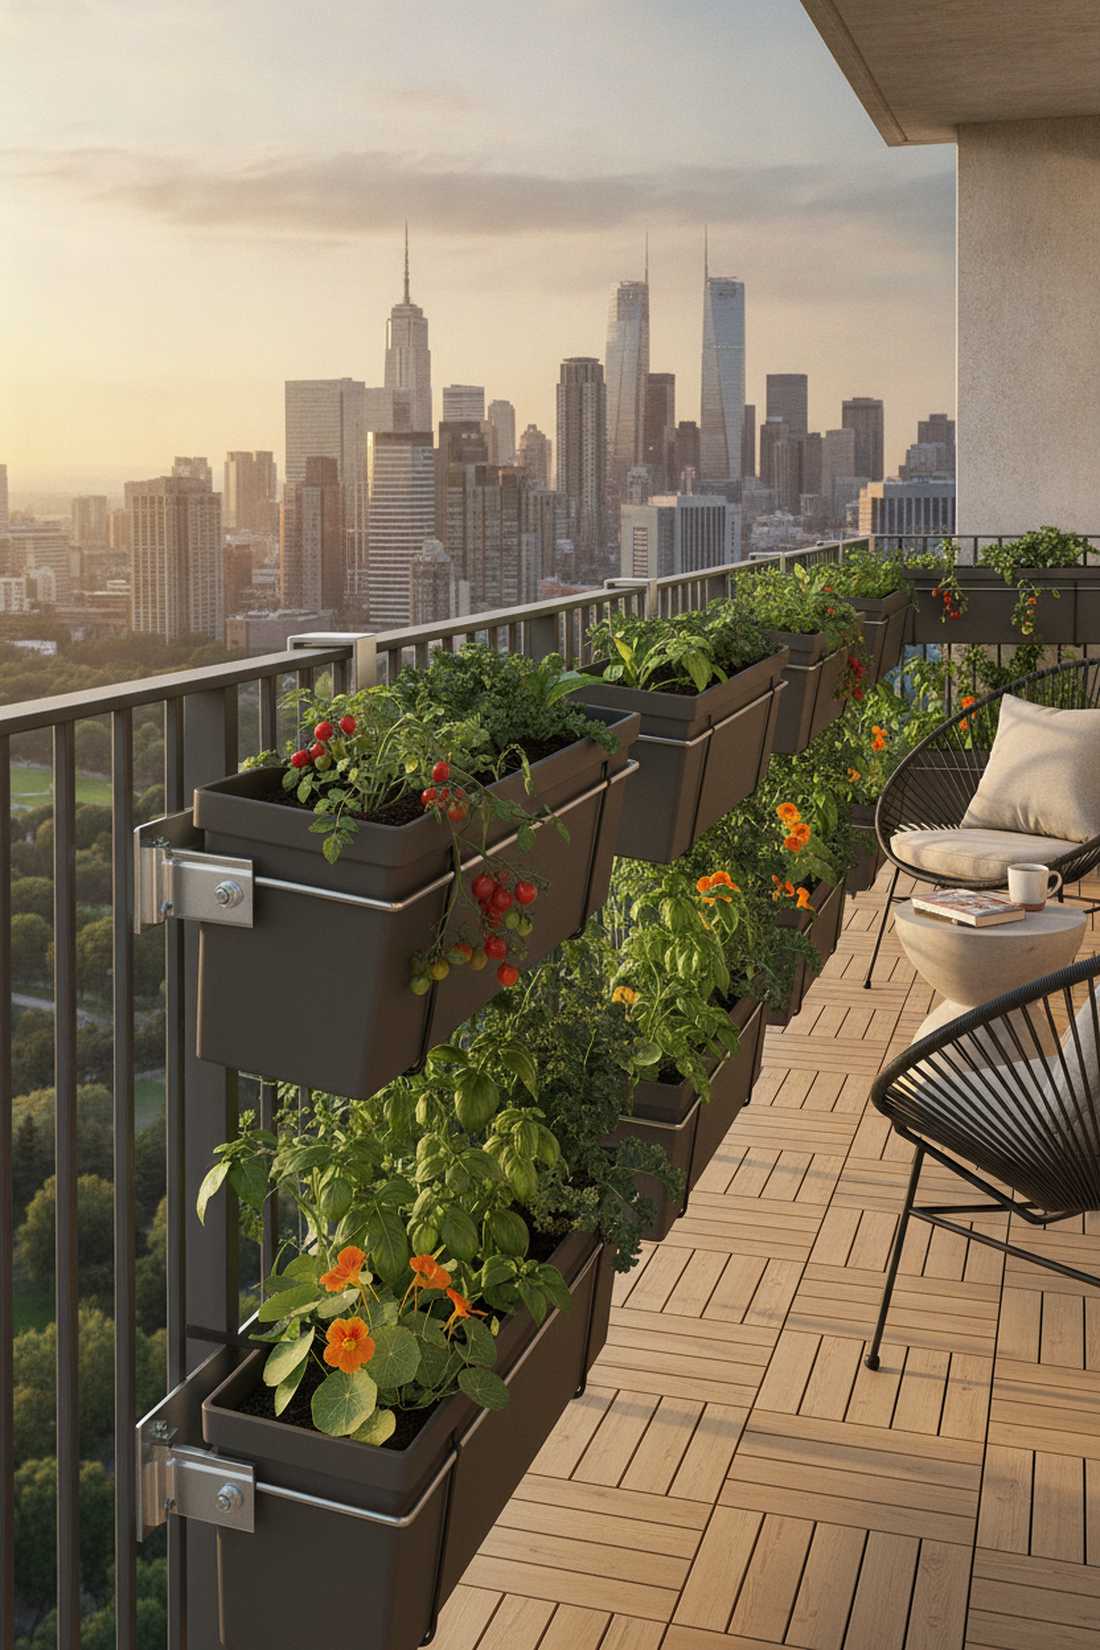
26. Balcony Rail Vertical Garden Bed
Seamlessly hugging the architecture, this railing-mounted vertical planter feels like a natural, vibrant extension of your living space. The most efficient use-case for strict HOA apartments that allow absolutely zero floor space modifications.
Flimsy over-the-rail plastic saddles always look incredibly cheap, but using heavy-duty adjustable steel brackets allows you to suspend deep, premium troughs securely. This elevated barrier not only produces massive edible yields but actively blocks wind and nosy neighbors.
High-quality brackets and troughs cost roughly $40–$65. Save this idea if you are desperate to garden but banned from patio building!
- Key Materials: Steel rail brackets, deep trough planters, zip ties
- Vibe / Style: High-rise modern living
- Difficulty: Easy bracket clamping
- Budget Breakdown: Brackets: $25 | Troughs: $30.
- Creator’s Tip: Secure the bottom of the planters to the railing balusters with hidden black zip-ties so they don’t tip forward when filled with heavy, wet soil.
- Smart Sourcing: adjustable heavy-duty balcony railing brackets and self-watering rectangular balcony planters.
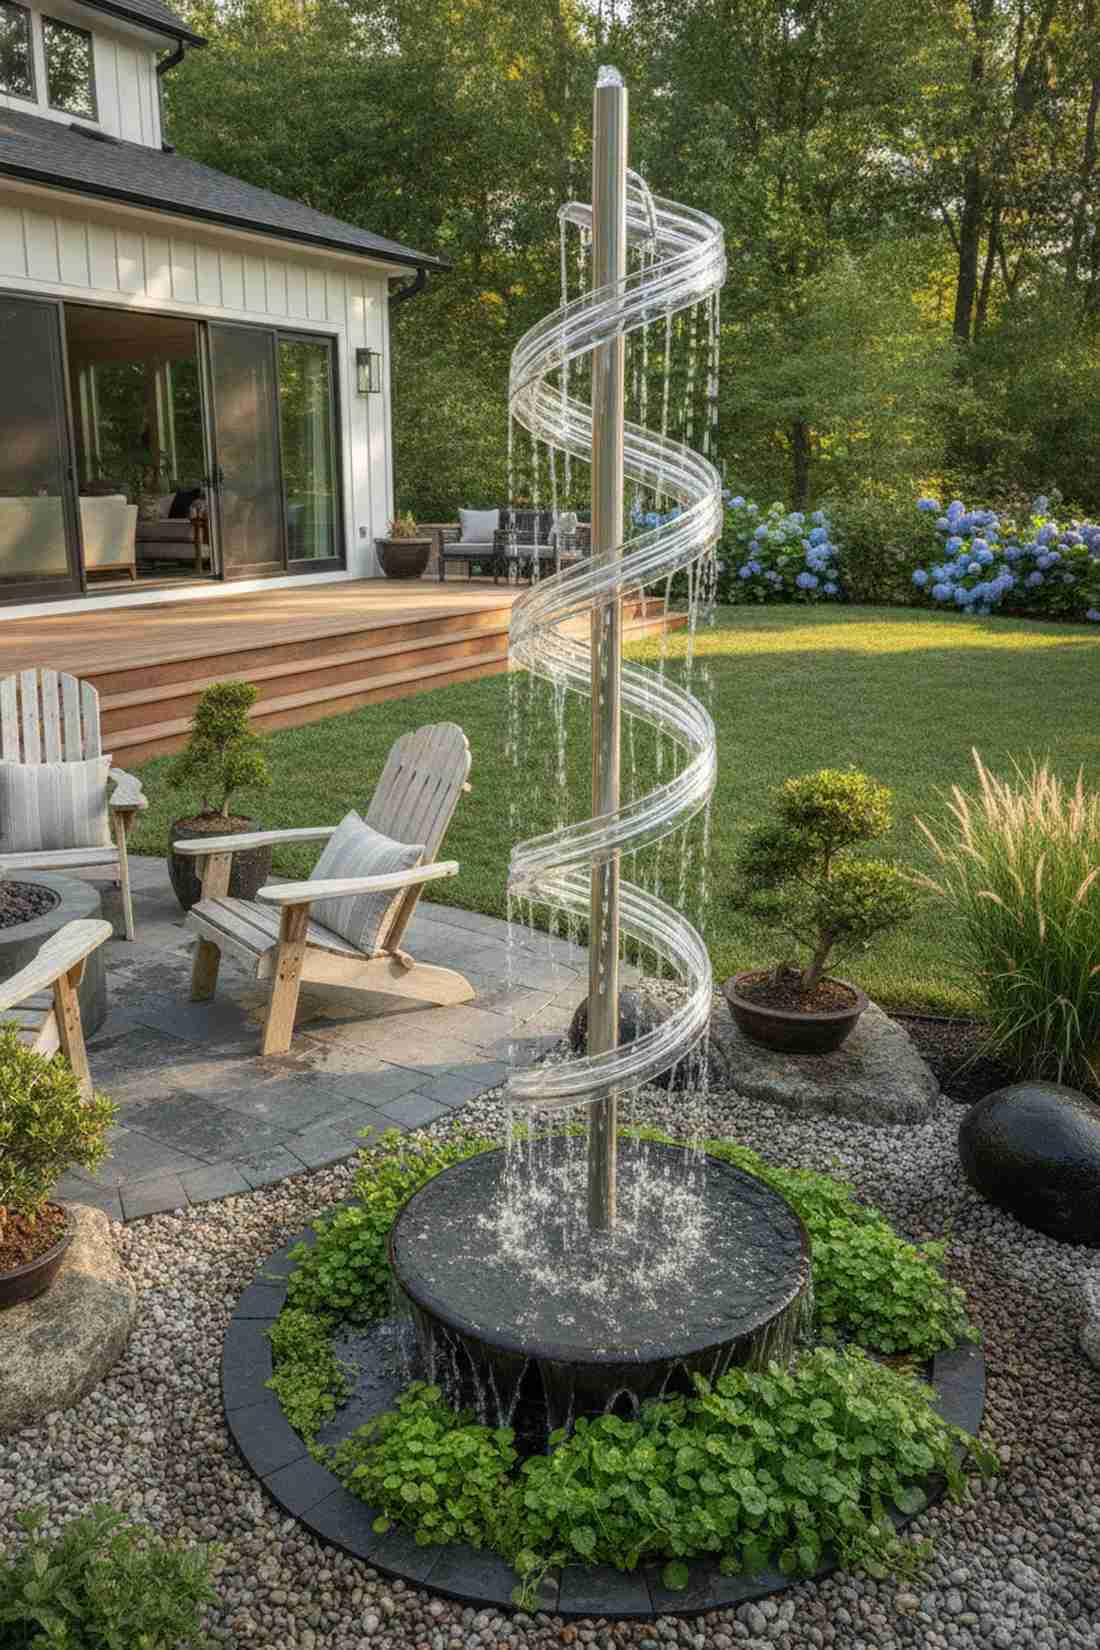
27. Spiral Tube Fountain Garden
Mesmerizing and deeply relaxing, this water feature garden setup feels like a private zen meditation corner. An absolute showstopper when placed right near outdoor seating or a sunny dining patio.
Blending hydroponic efficiency with landscape architecture, this setup cascades water visibly through clear tubing for a stunning kinetic visual effect. It totally eliminates the dry, dusty look of standard pots while providing the soothing, ambient sound of a babbling brook.
The pump and flexible tubing usually cost $50–$85. A highly rewarding weekend project that doubles as a premium piece of living yard art.
- Key Materials: Clear vinyl tubing, central pole, submersible pump
- Vibe / Style: Kinetic zen water feature
- Difficulty: Intermediate water balancing
- Budget Breakdown: Tubing: $25 | Pump/Pole: $35.
- Creator’s Tip: Plant moisture-loving mint and watercress at the bottom of the spiral where the water splashes the most.
- Smart Sourcing: clear food-grade vinyl tubing (bulk roll) and adjustable flow submersible fountain pumps.
28. Log Roll Spiral Tower
Whimsical and deeply enchanting, this rustic wooden spiral planter feels exactly like a hidden fairy garden pathway. Exquisite when nestled into a cottage-style courtyard or a massive whiskey barrel planter.
Standard flat container planting is incredibly boring, but coiling flexible log edging creates a magical, multi-elevation hillside inside a single pot. This terraced soil approach guarantees excellent drainage at the peak while keeping moisture-loving miniature garden supplies perfectly hydrated at the base.
Sourcing the log roll and soil will run $25–$40. Pin this gorgeous layout if you want to add instant fairytale charm to your deck!
- Key Materials: Flexible wood log edging, large base pot, terracing soil
- Vibe / Style: Enchanted fairytale cottage
- Difficulty: Easy soil shaping
- Budget Breakdown: Log Edging: $20 | Pot: $15.
- Creator’s Tip: Bury the bottom third of the log roll deep into the soil to prevent the terraced dirt from avalanching after a heavy rain.
- Smart Sourcing: flexible wooden landscape edging rolls and UV-coated resin fairy cottage kits.
Conclusion
Implementing any of these 28 vertical garden tower or multi-tiered planting layouts multiplies your growing capacity while transforming underutilized space into a stunning, premium landscape feature. Whether you choose a highly productive 3 tier raised garden beds setup, an advanced indoor hydroponic tower, or a repurposed upcycled planter, vertical growing always delivers higher yields per square foot than traditional flat gardening. Start with one blueprint that matches your budget, invest in high-quality UV-resistant kits to ensure longevity, and expand as you gain confidence. The secret to an expensive-looking setup lies in matching plant selections to your structure’s depth—shallow-rooted greens thrive in compact vertical towers while deep-rooted crops demand the heavy soil volume of tiered beds. Begin sourcing your premium DIY materials today to enjoy massive harvests and breathtaking garden architecture all season long.
Frequently Asked Questions
What plants grow best in a vertical garden tower?
Leafy greens like lettuce, spinach, and kale excel in a vertical garden tower due to their incredibly shallow root systems and compact growth habits. Herbs including basil, cilantro, parsley, and thyme also thrive with limited root depth, especially when using premium organic potting mixes. Strawberries adapt perfectly to tower growing, producing massive fruit in hanging or side-mounted positions. For larger 3 tier raised garden beds with deeper soil volume, consider compact tomato varieties, peppers, and bush beans. Avoid deep-rooted vegetables like carrots or sprawling plants like winter squash unless you are using extra-deep commercial-grade net pots.
How do I water a multi-tiered garden bed efficiently?
Install heavy-duty automatic drip irrigation kits along the top tier, allowing the water to cascade naturally to the lower levels through slow soil percolation. Watering deeply but less frequently encourages roots to grow downward rather than staying dangerously shallow. For budget DIY towers without expensive irrigation systems, insert a pre-drilled PVC pipe vertically through the center as a fast water delivery column—pour water directly into the pipe to saturate all levels instantly. Apply 2-3 inches of bulk organic mulch on each tier to massively reduce evaporation and save money on your water bill.
What is the ideal spacing between tiers in a raised bed design?
Space your tiers exactly 8-12 inches apart vertically to accommodate most vegetable root systems while ensuring the upper plants don’t completely shadow the lower ones. The 8-inch minimum works flawlessly for shallow-rooted crops like lettuce, while a full 12 inches is highly recommended for moderate root depths like peppers. To achieve that premium aesthetic, consider the mature height of plants on each tier—place tall trellised beans on the highest level, and let low-growing cascading greens spill over the bottom tier for a lush, expensive look.
How much does a vertical garden tower increase growing space?
A typical 6-foot tall vertical garden tower occupies a footprint of just 4 square feet while providing 20-30 individual planting positions—the equivalent of 12-15 square feet of flat dirt. This represents a staggering 300-400% increase in usable growing area, which is why urban apartment gardeners rely on them. Premium 3 tier raised garden beds similarly triple the planting surface within the exact same footprint. The space multiplication depends entirely on your tower height, but upgrading to specialized tier kits ensures you pack more food into a smaller, better-looking area.
Can I use a vertical garden tower indoors?
Yes, any vertical garden tower adapts perfectly to indoor growing when paired with high-quality full-spectrum LED grow lights. Choose compact, leak-proof hydroponic starter kits that minimize water spillage and eliminate the need for messy indoor soil. Position the tower within 12 inches of the lights, providing 14-16 hours of daily illumination. Ensure you add a small oscillating fan for proper ventilation to prevent humidity buildup. Indoor towers are an incredible, budget-friendly way to grow expensive microgreens and culinary herbs year-round right in your kitchen.