
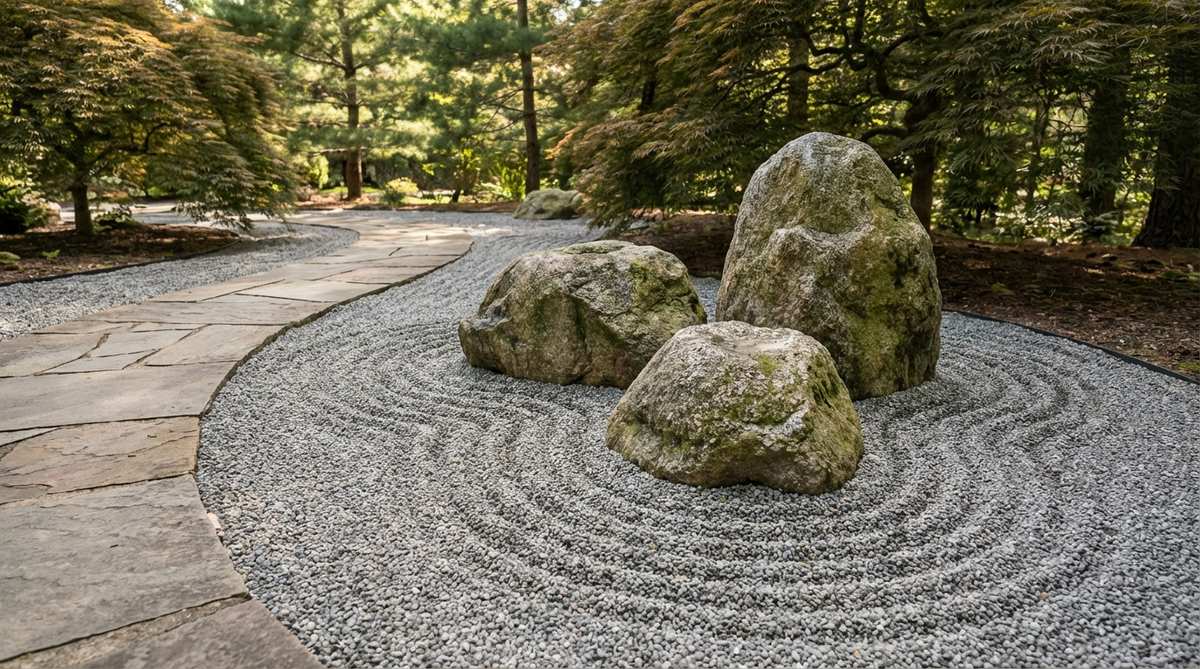
Sourcing premium zen garden rocks transforms standard backyards into luxurious meditation retreats instantly. Professional stone placement creates high-end aesthetic impact without expensive landscaping crews. Build these authentic Japanese arrangements using smart budget strategies.
Design Snapshot Key Principles
- Odd Number Rule: Arrange rocks in groups of 3, 5, or 7 to create natural asymmetry and visual balance
- Partial Burial: Bury boulders 50-80% deep to simulate natural mountain formations emerging from the earth
- Symbolic Placement: Position stones to represent mountains, islands, or flowing water using angular shapes and varied heights
- Focal Anchoring: Establish one dominant boulder as the visual centerpiece, allowing secondary stones to create supporting rhythm
Traditional Mountain Formations Using Angular Boulders
Mountain-inspired rock arrangements form the spiritual backbone of authentic zen gardens. These vertical compositions use angular boulders to evoke the majesty of distant peaks. Designers favor stones with sharp edges and weathered surfaces that capture the rugged character of natural mountain ranges.
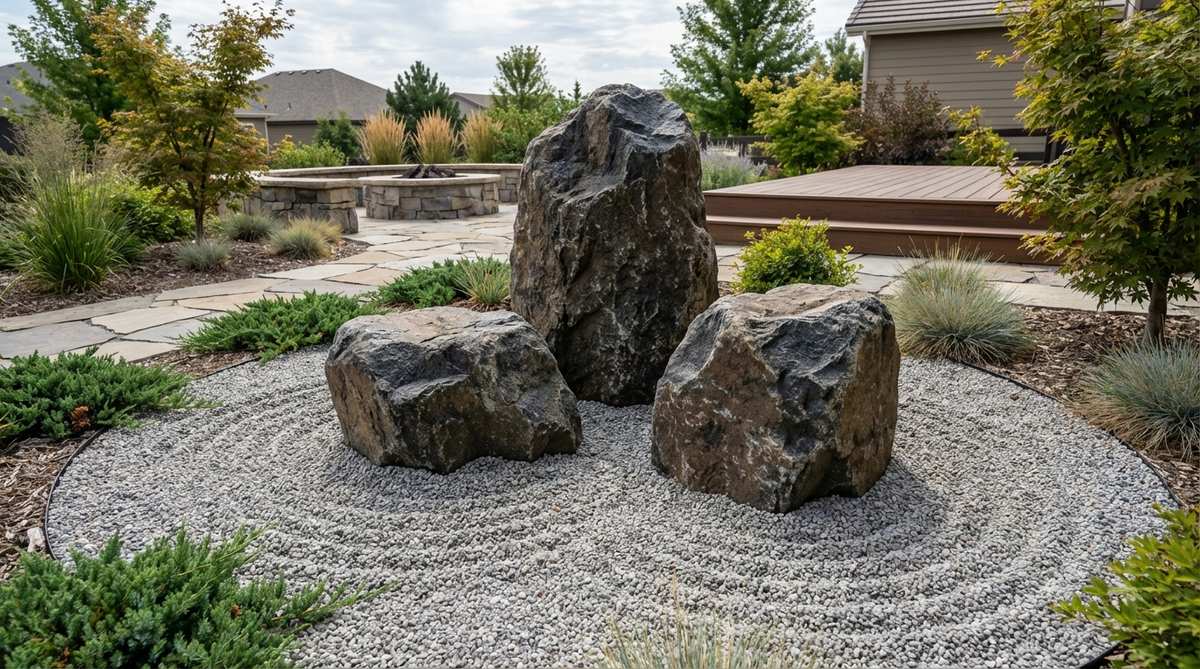
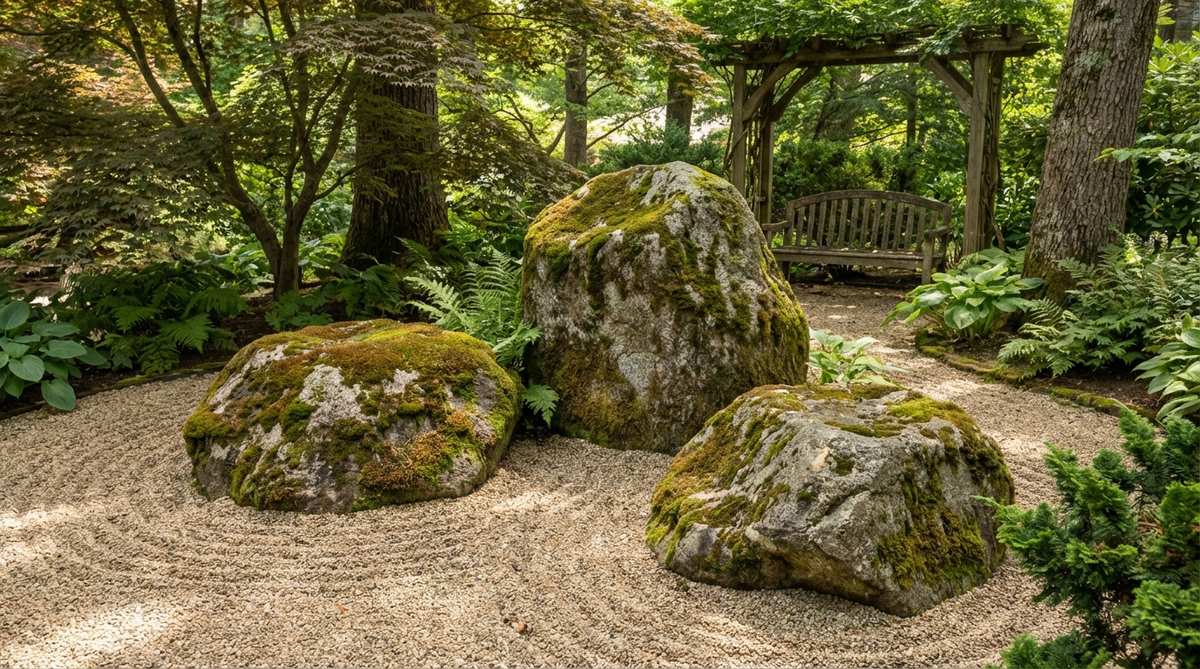
1. Three-Peak Mountain Triad
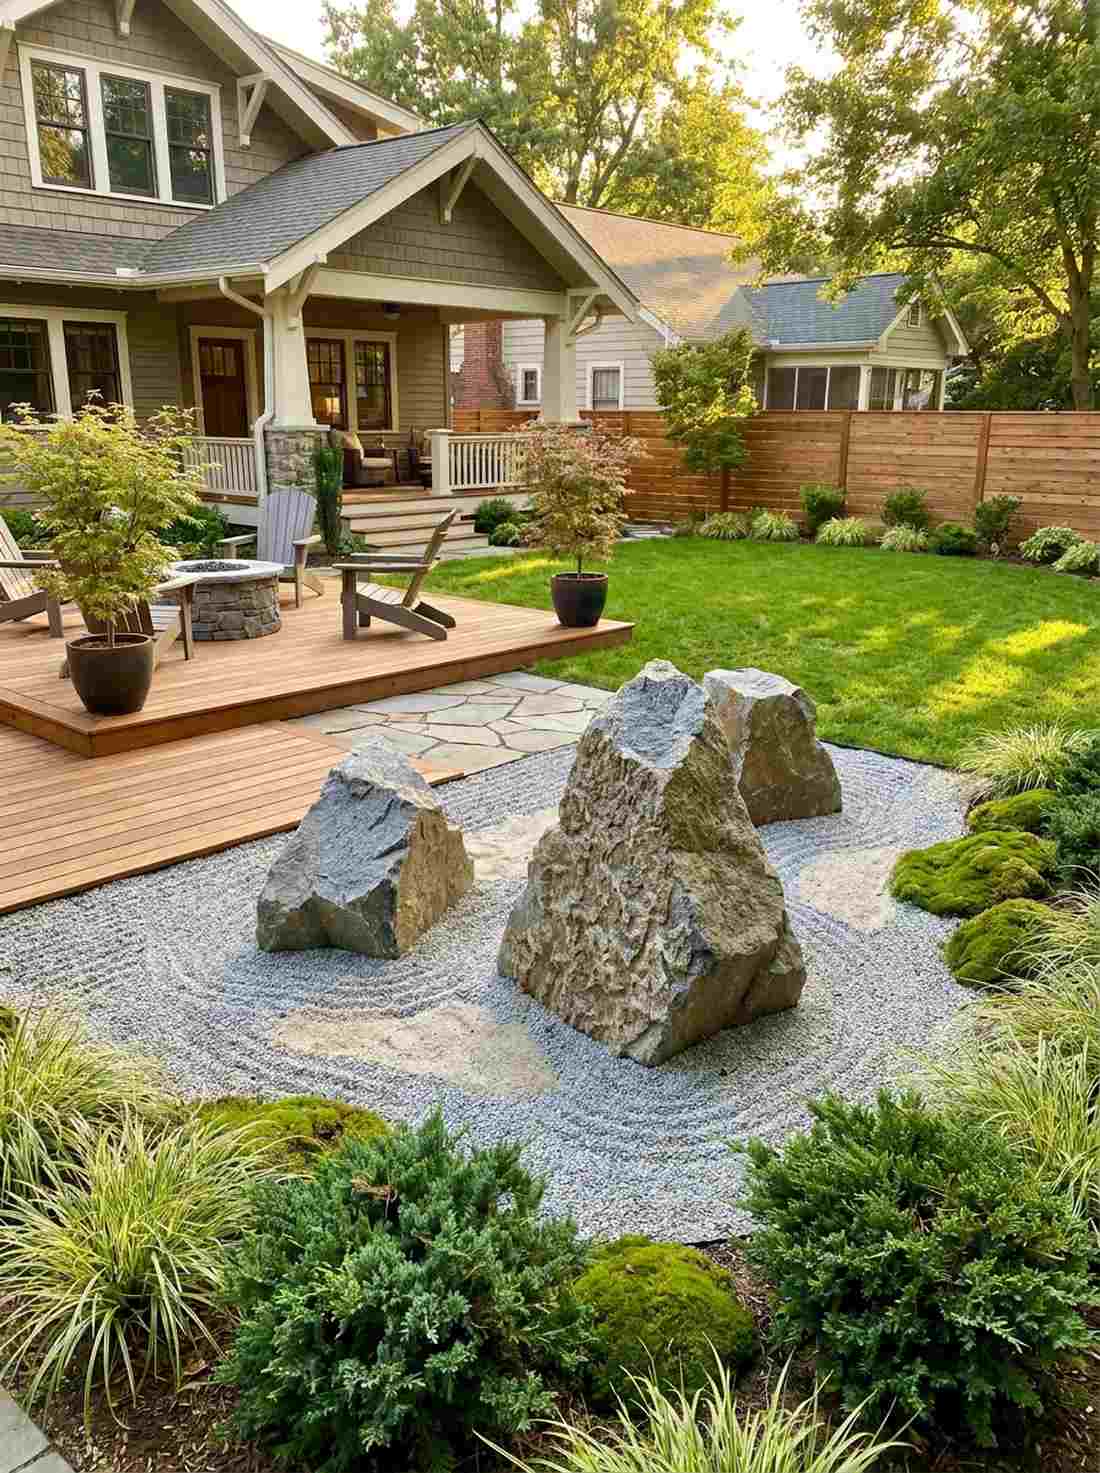
Feels like a serene ancient temple courtyard. This classic mountain triad layout works exceptionally well for open, flat backyard spaces needing a focal point.
Amateurs just place rocks on the dirt, but burying them 80% deep delivers a surprisingly premium look. Arrange three angular pieces asynchronously to create professional-grade zen garden stone features without massive effort.
You can easily pull this off for around $40–$60. Pin this to your weekend backyard upgrade board!
- Key Materials: Heavy angular granite boulders
- Vibe / Style: Authentic Buddhist monastery
- Difficulty: Moderate heavy lifting required
- Budget Breakdown: Boulders: $45 | Base sand: $15
- Creator’s Tip: Orient the most textured rock face toward your main seating area.
- Smart Sourcing: Pre-sorted raw granite sets and heavy-duty landscaping fabric.
2. Distant Range Horizon Line
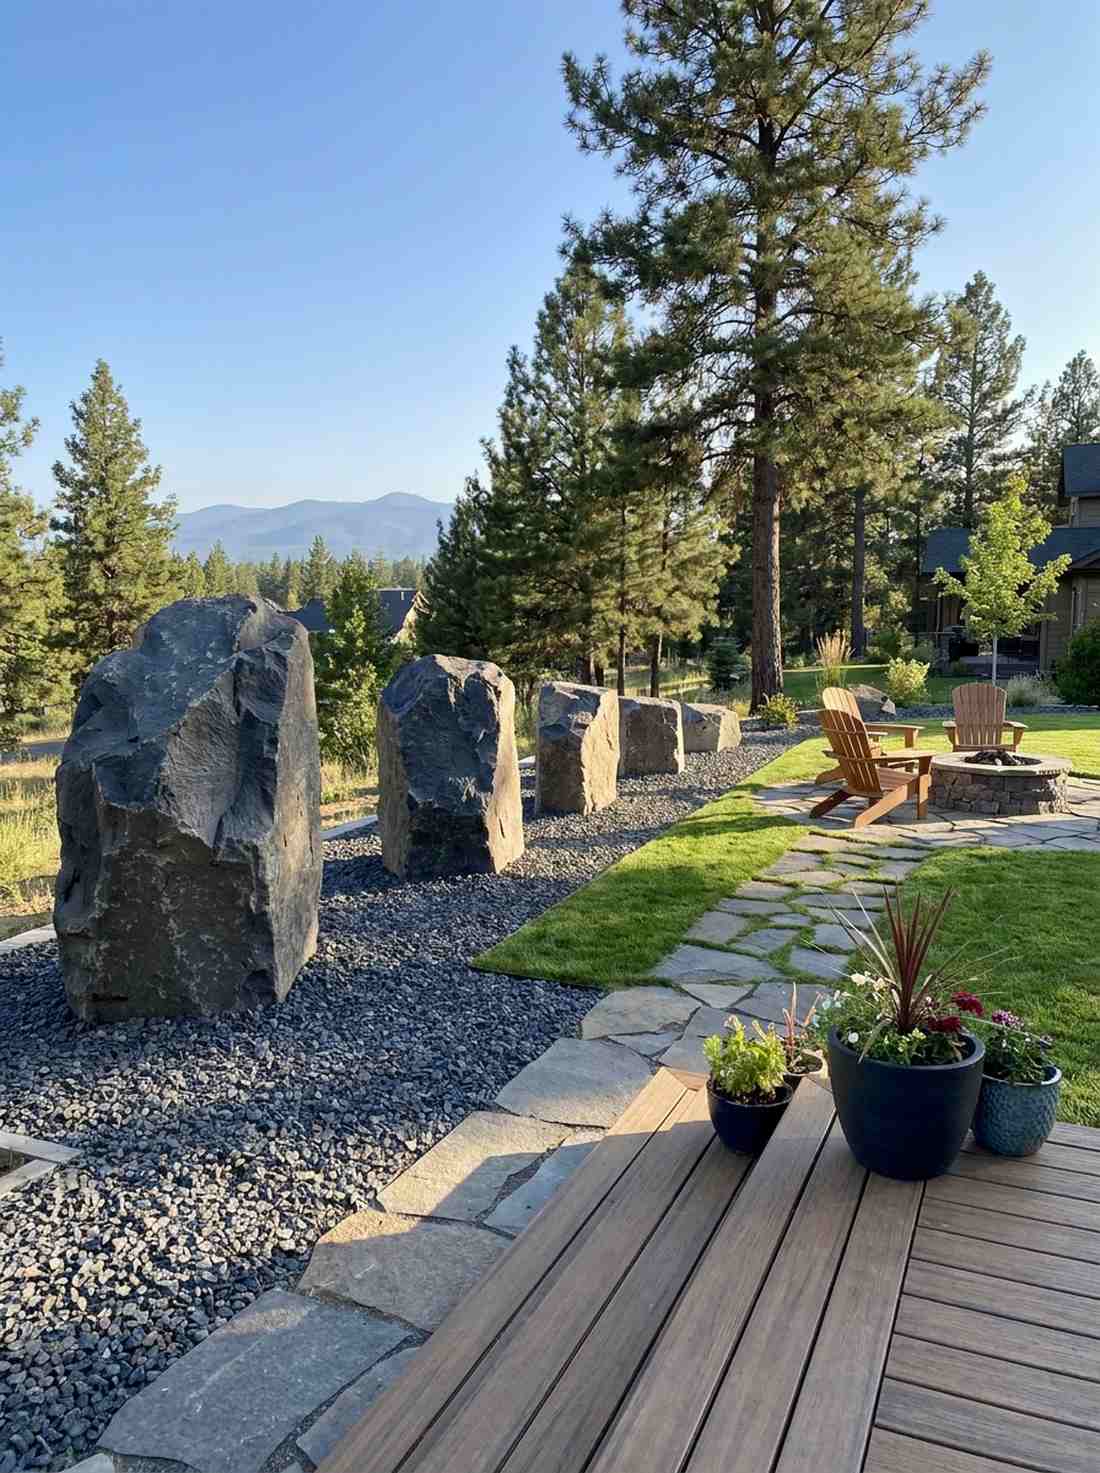
Straight out of a luxury mountain resort. A receding boulder horizon is perfect for adding depth to narrow or shallow property lines.
Skip the overpriced garden centers and stagger five progressively shorter stones for a layout that looks far more expensive than it is. Using dark charcoal granite visually pushes the boundary back, simulating a vast landscape.
Expect to spend about $80 on stone delivery. It’s a fast upgrade that completely changes the spatial vibe.
- Key Materials: Charcoal or blue-gray landscape stones
- Vibe / Style: Expansive mountain vista
- Difficulty: Easy placement logic
- Budget Breakdown: Stones: $65 | Weed barrier: $15
- Creator’s Tip: Leave wider gravel gaps between the smallest stones to force perspective.
- Smart Sourcing: Bulk crushed granite bags and UV-coated weed barriers.
3. Guardian Mountain Gateway

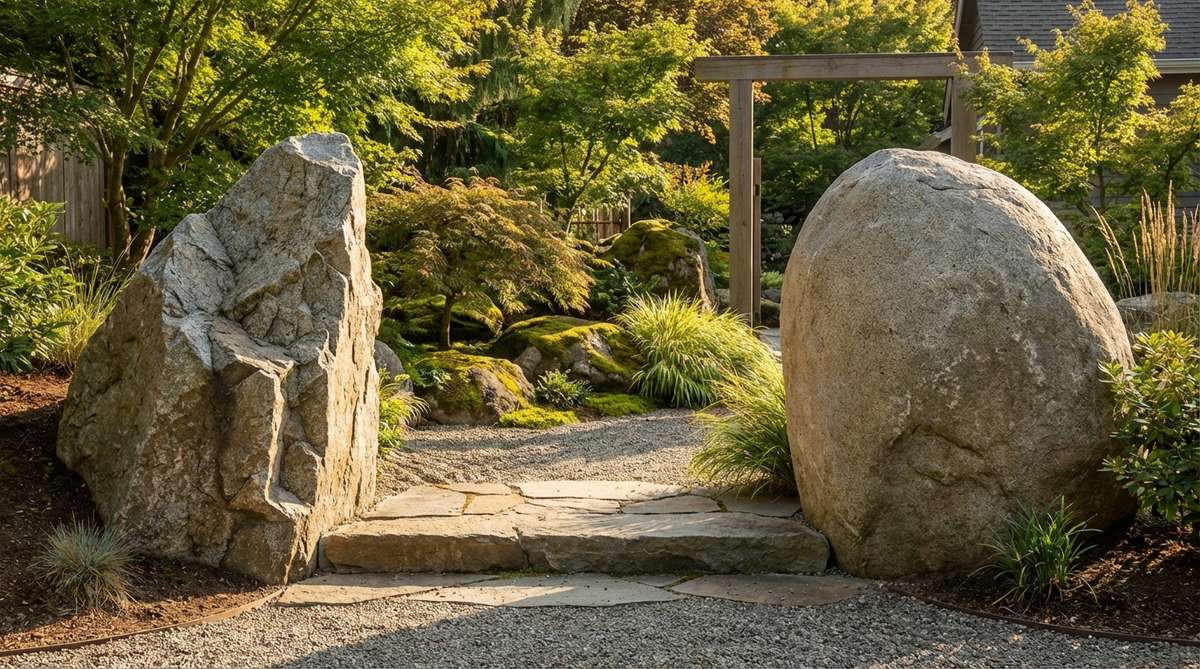
Brings instant grounded energy to your entryway. A stone sentry entrance works brilliantly to frame a garden gate or transition zone.
Most people ignore transition spaces, but flanking a path with massive boulders gives a designer-level finish. Pair one sharp stone with a softer, rounded one to balance visual energy effortlessly.
This structural addition costs around $100 depending on boulder weight. Save this if you are redesigning your side yard!
- Key Materials: Two contrasting 4-foot standing stones
- Vibe / Style: Dramatic threshold
- Difficulty: Heavy equipment may be needed
- Budget Breakdown: Accent boulders: $90 | Stabilizing gravel: $10
- Creator’s Tip: Bury at least 1/3 of the base so they don’t tip or look artificial.
- Smart Sourcing: Pre-drilled anchor stones and commercial-grade tampers.
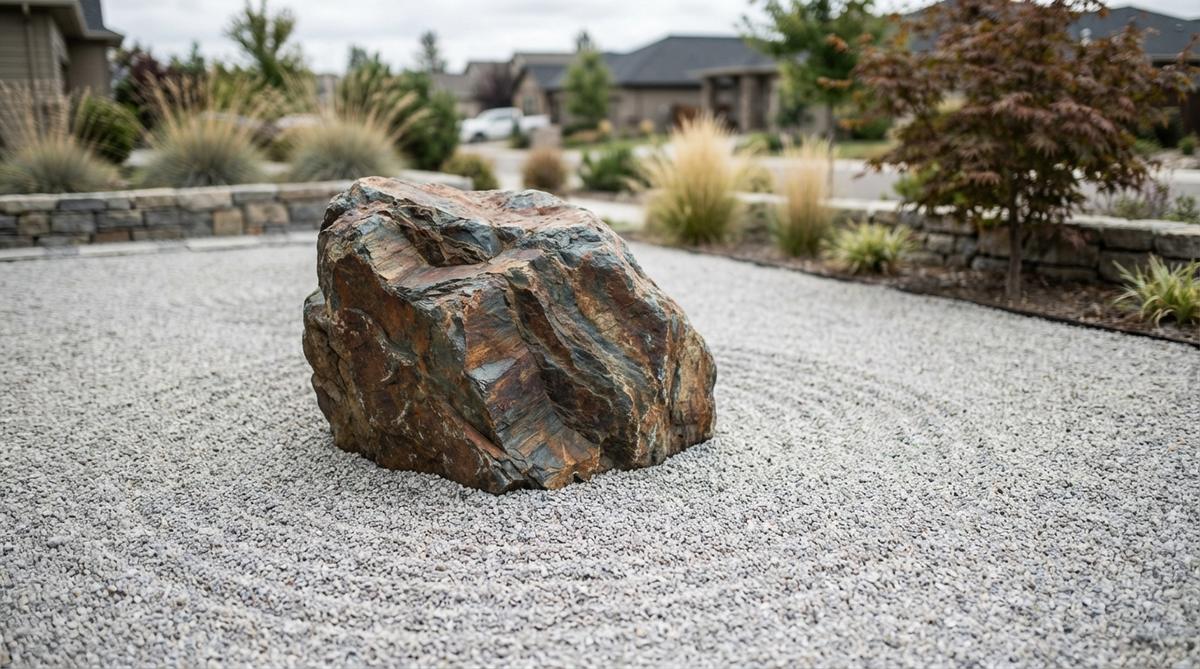
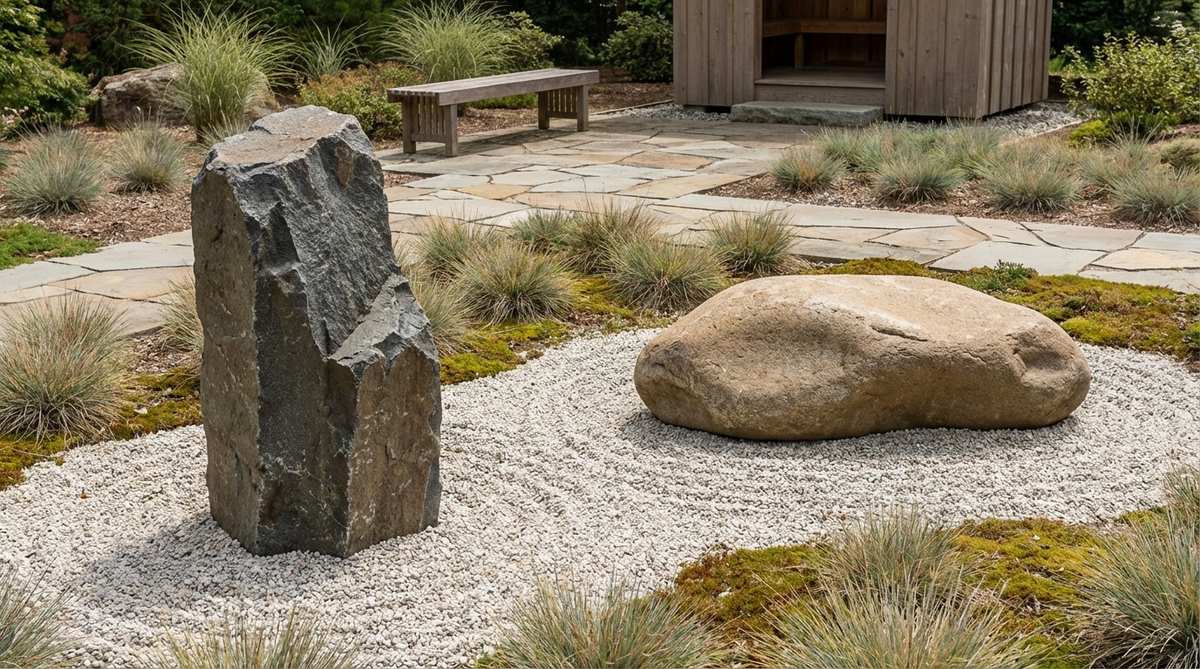
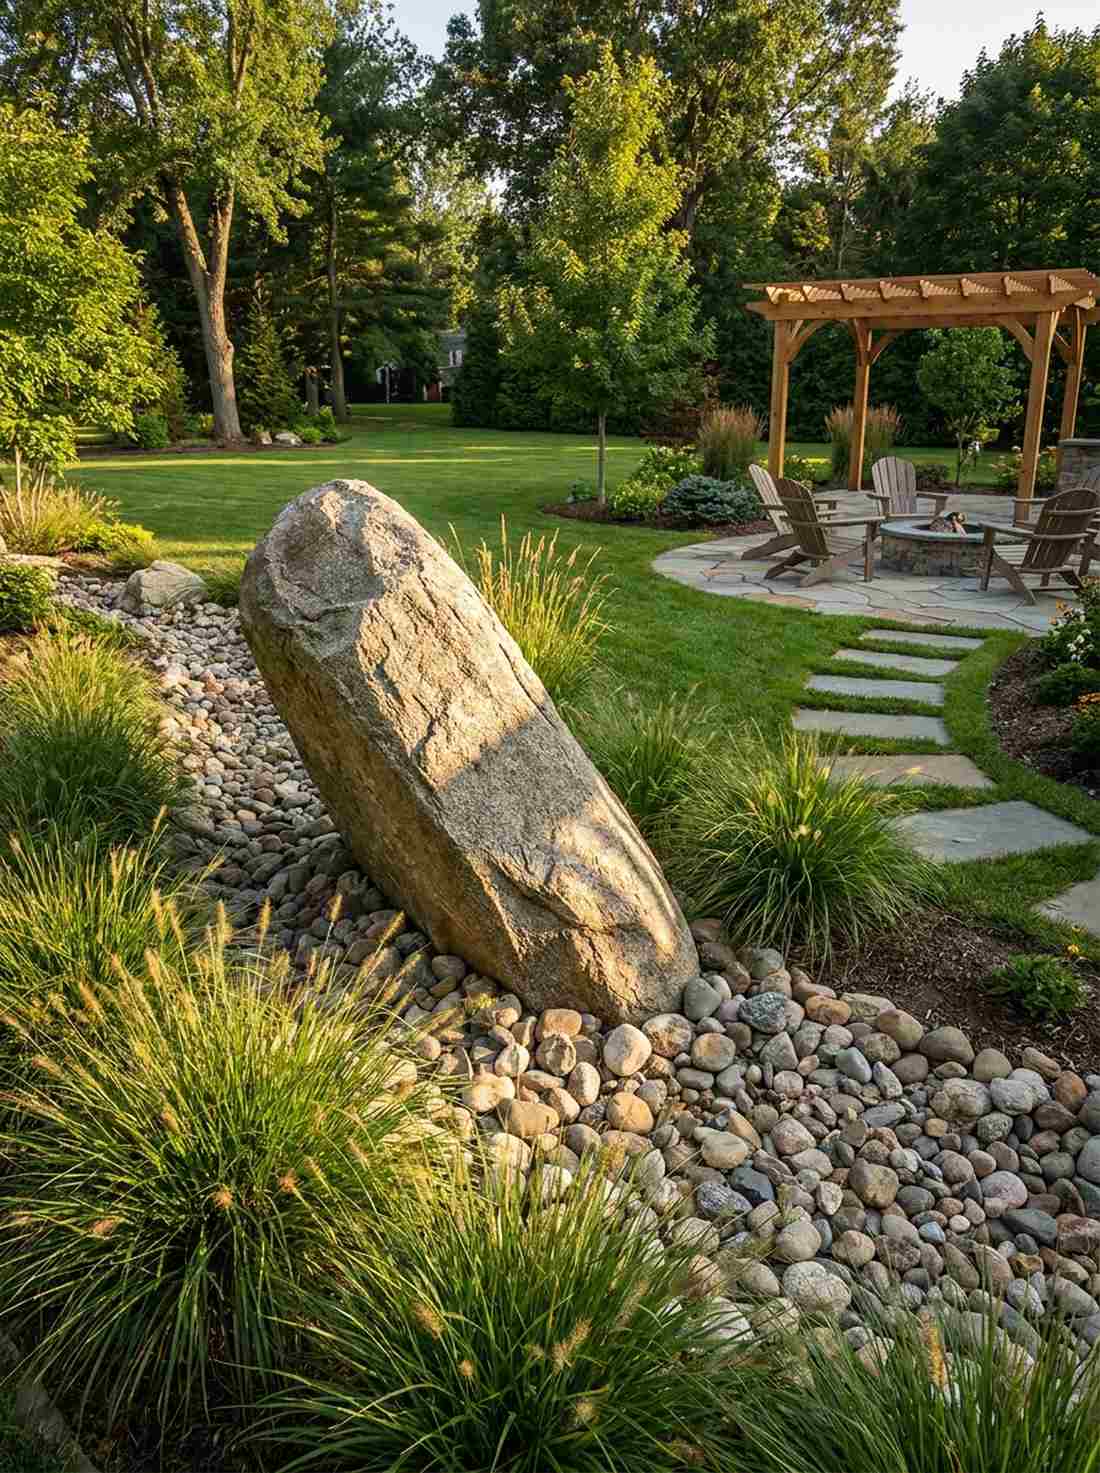
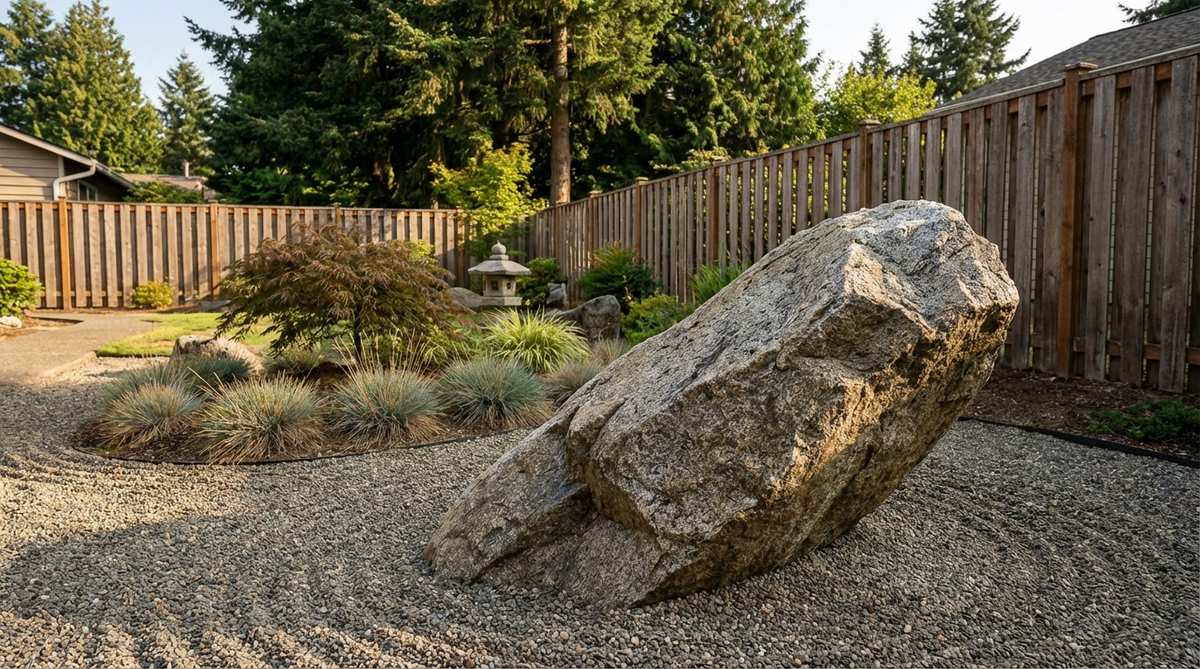
4. Sleeping Dragon Mountain

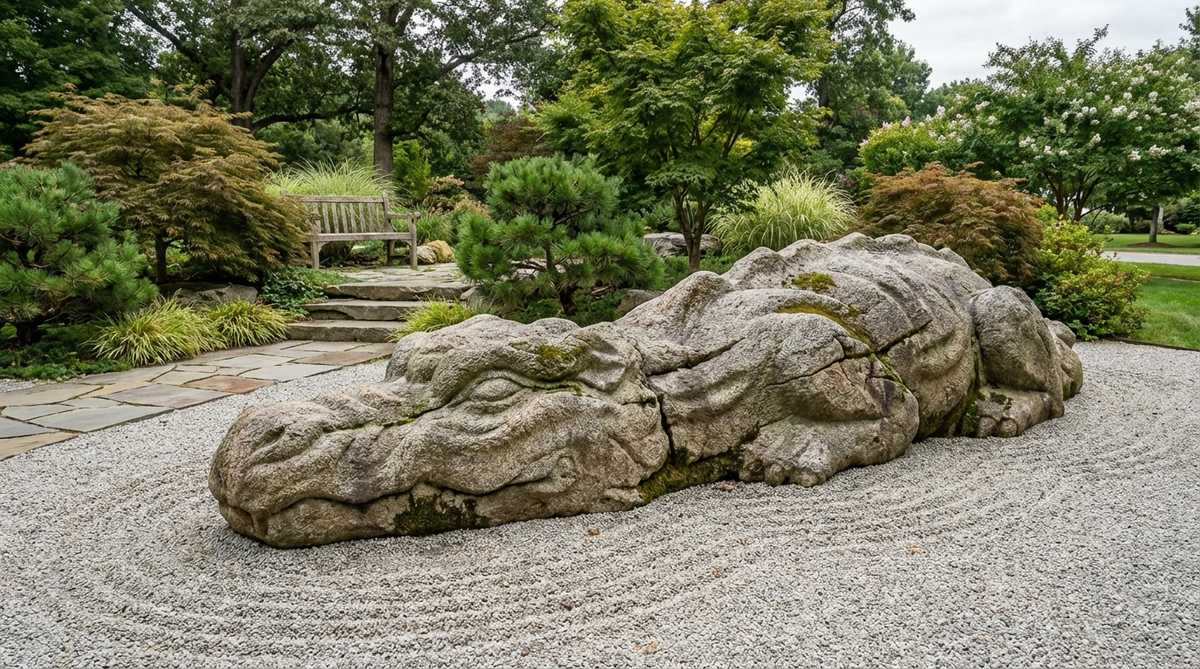
Feels like a mythical creature resting in your yard. A low-profile horizontal monolith is perfect as a central meditation anchor.
You don’t need a massive budget for multiple rocks when one undulating boulder creates stunning visual tension. Sourcing a single, highly textured stone creates an expensive aesthetic without cluttering the space.
You can achieve this minimalist look for $50–$75. Highly recommended for a quick weekend win.
- Key Materials: One massive horizontally textured boulder
- Vibe / Style: Grounded and mysterious
- Difficulty: Simple placement
- Budget Breakdown: Specimen rock: $60 | Leveling sand: $15
- Creator’s Tip: Align the longest edge parallel to your primary viewing window.
- Smart Sourcing: Weathered limestone slabs and leveling base sand kits.
This next setup is ridiculously cheap but looks like a $1000 custom display you’d see at a botanical garden…
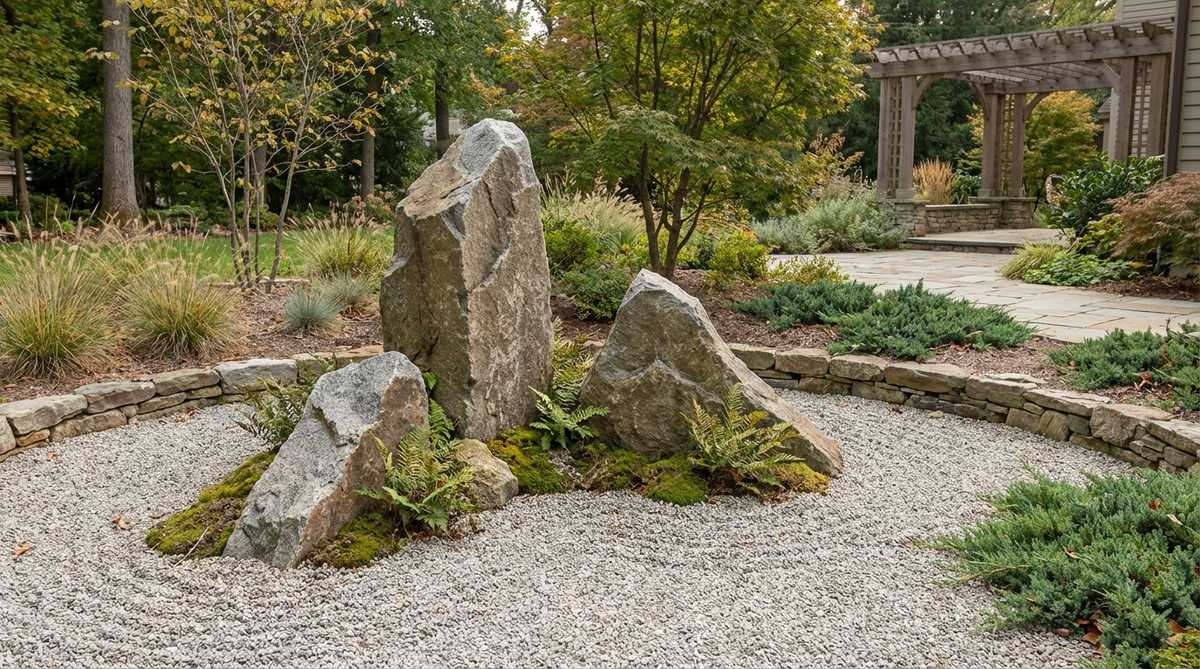
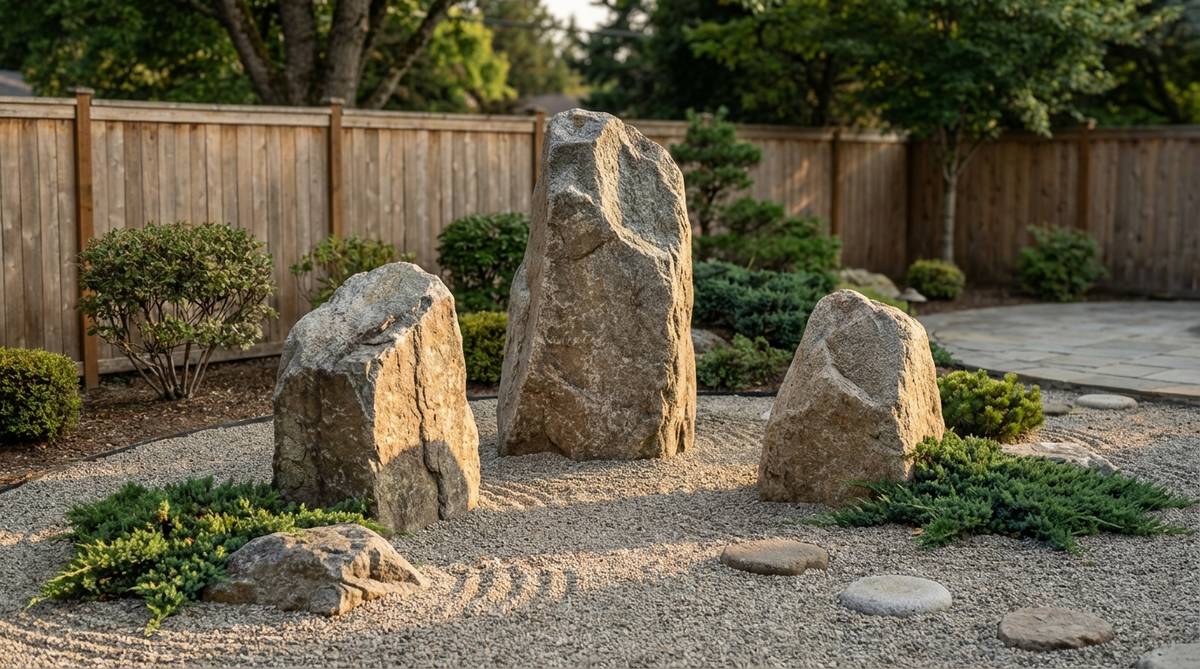
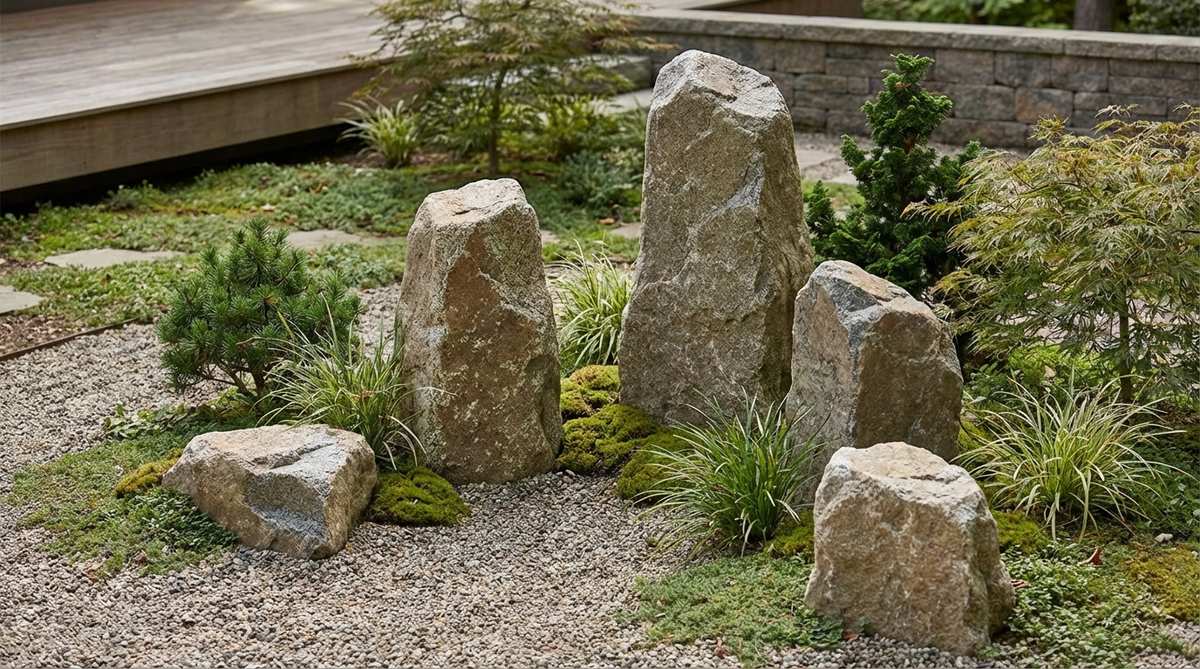
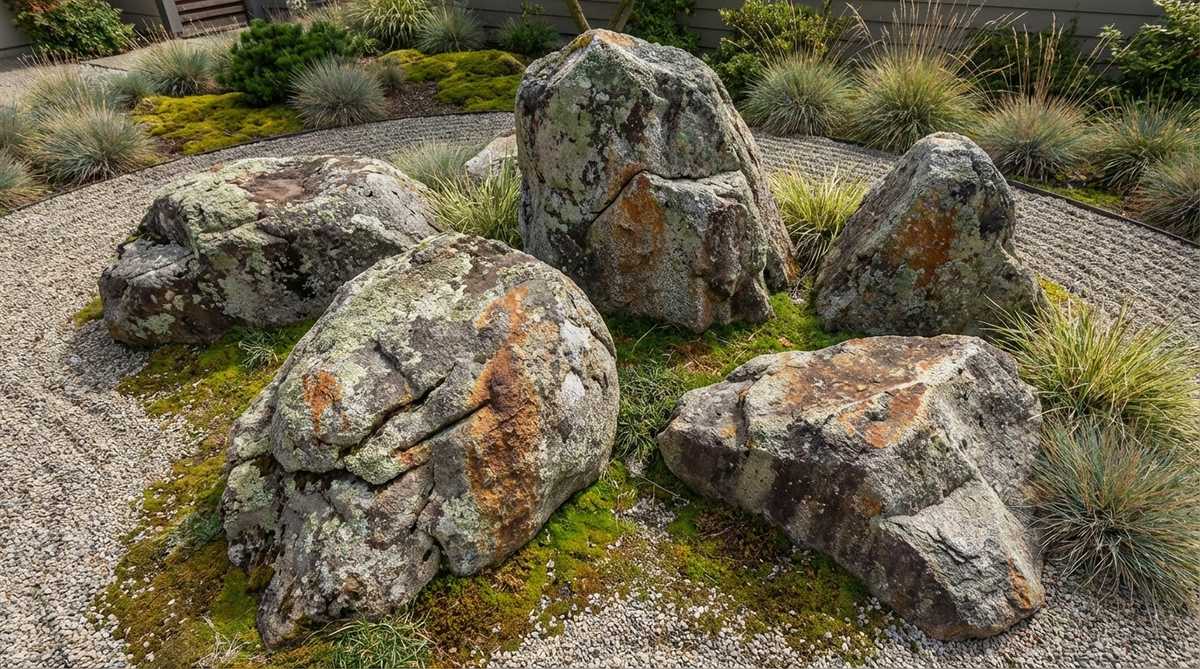
5. Five-Element Mountain Cluster
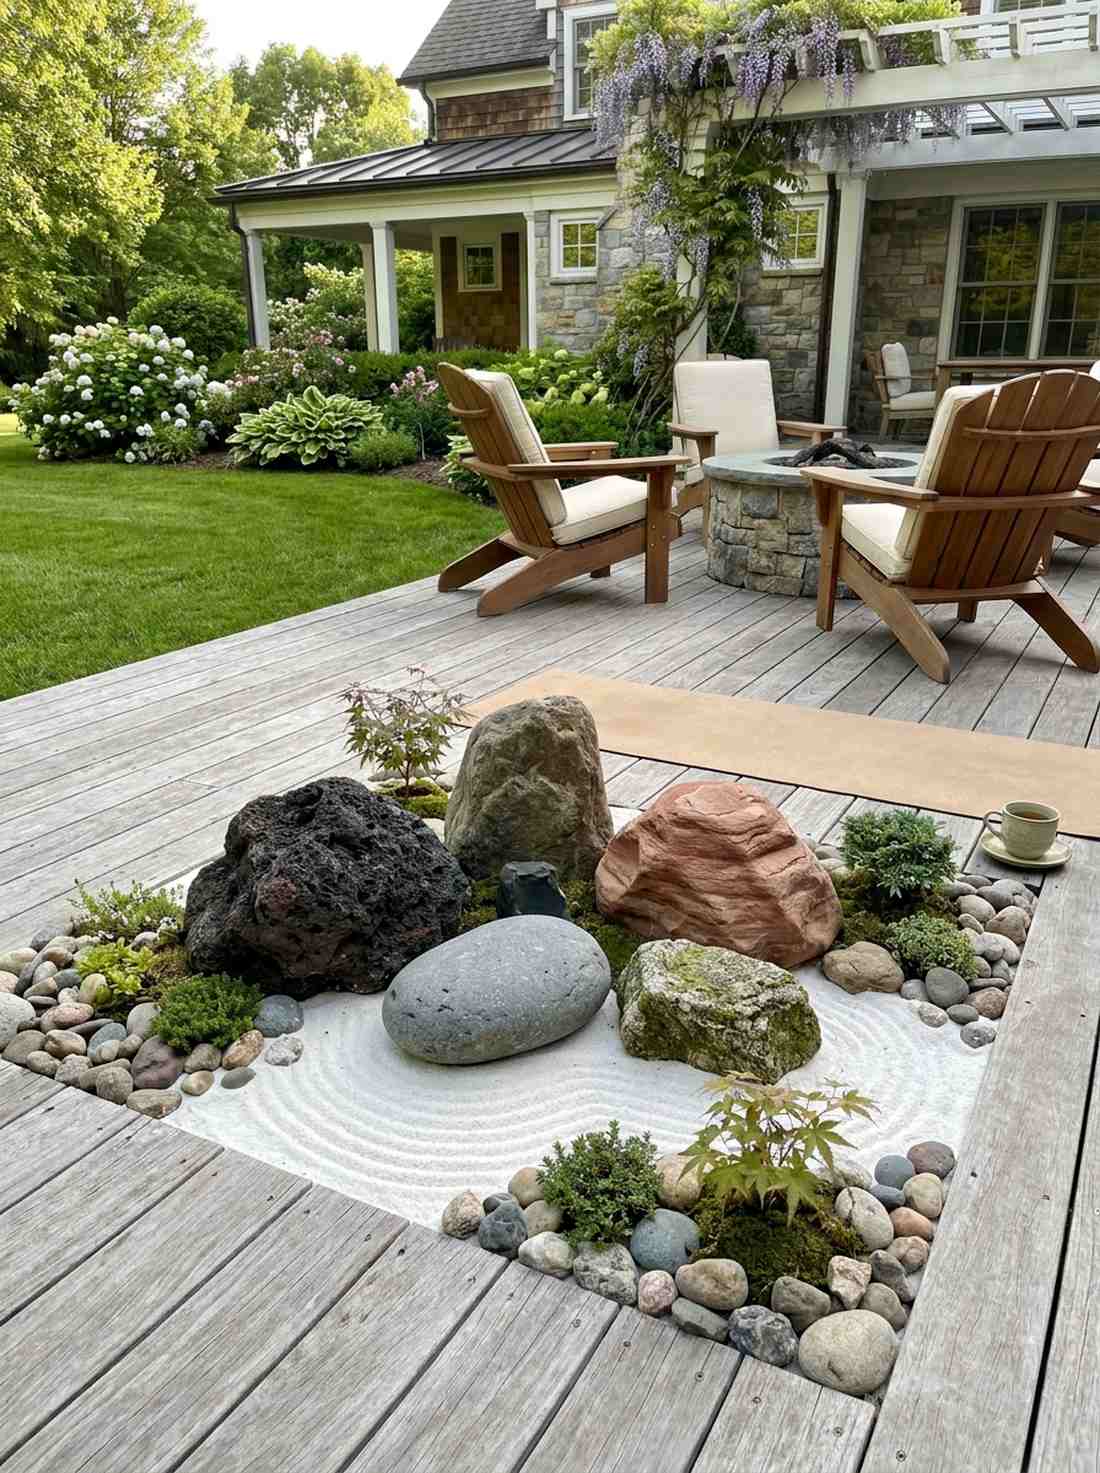
Captures the essence of raw natural harmony. This five-stone philosophical cluster is perfect for a dedicated corner meditation space.
Instead of matching every piece, deliberately mixing textures delivers a surprisingly premium look. Using high-quality miniature garden supplies around the base can elevate the earthly vibe significantly.
Gathering diverse stones runs about $40–$80. Pin this to your spiritual decor board!
- Key Materials: Five geologically diverse boulders
- Vibe / Style: Earthy and philosophical
- Difficulty: Tricky visual balancing
- Budget Breakdown: Mixed stones: $60 | Base prep: $20
- Creator’s Tip: The “void” stone should be the smallest and tucked slightly out of direct sight.
- Smart Sourcing: Assorted river rock bulk packs and premium white raking sand.
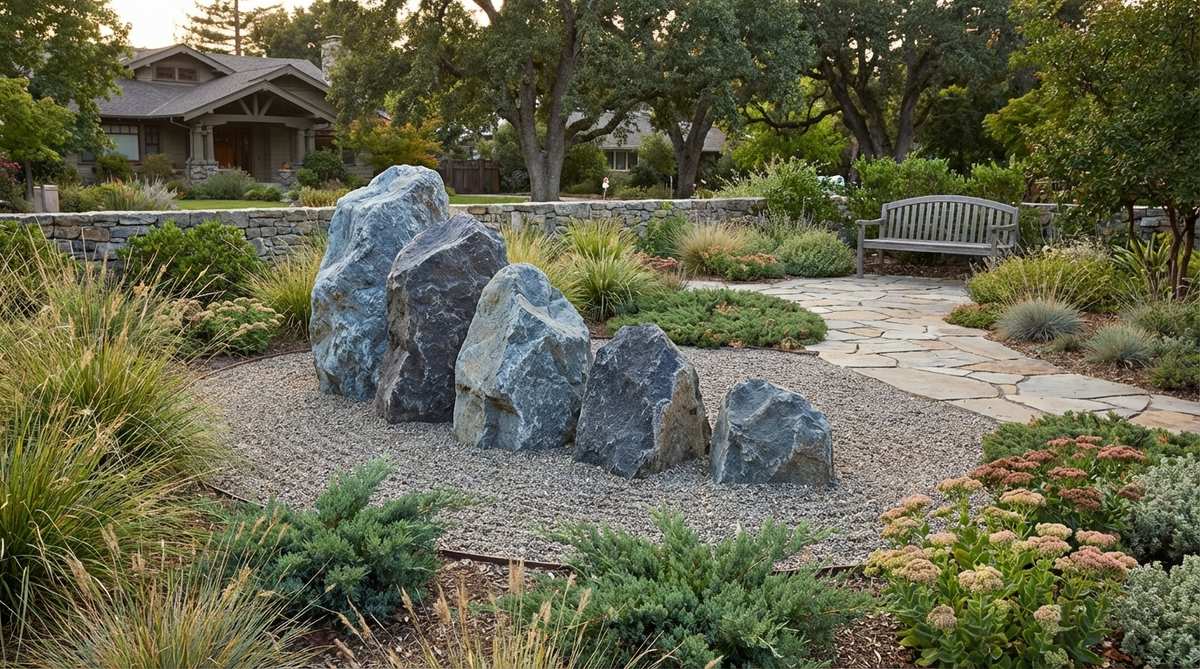
6. Cascading Foothill Formation
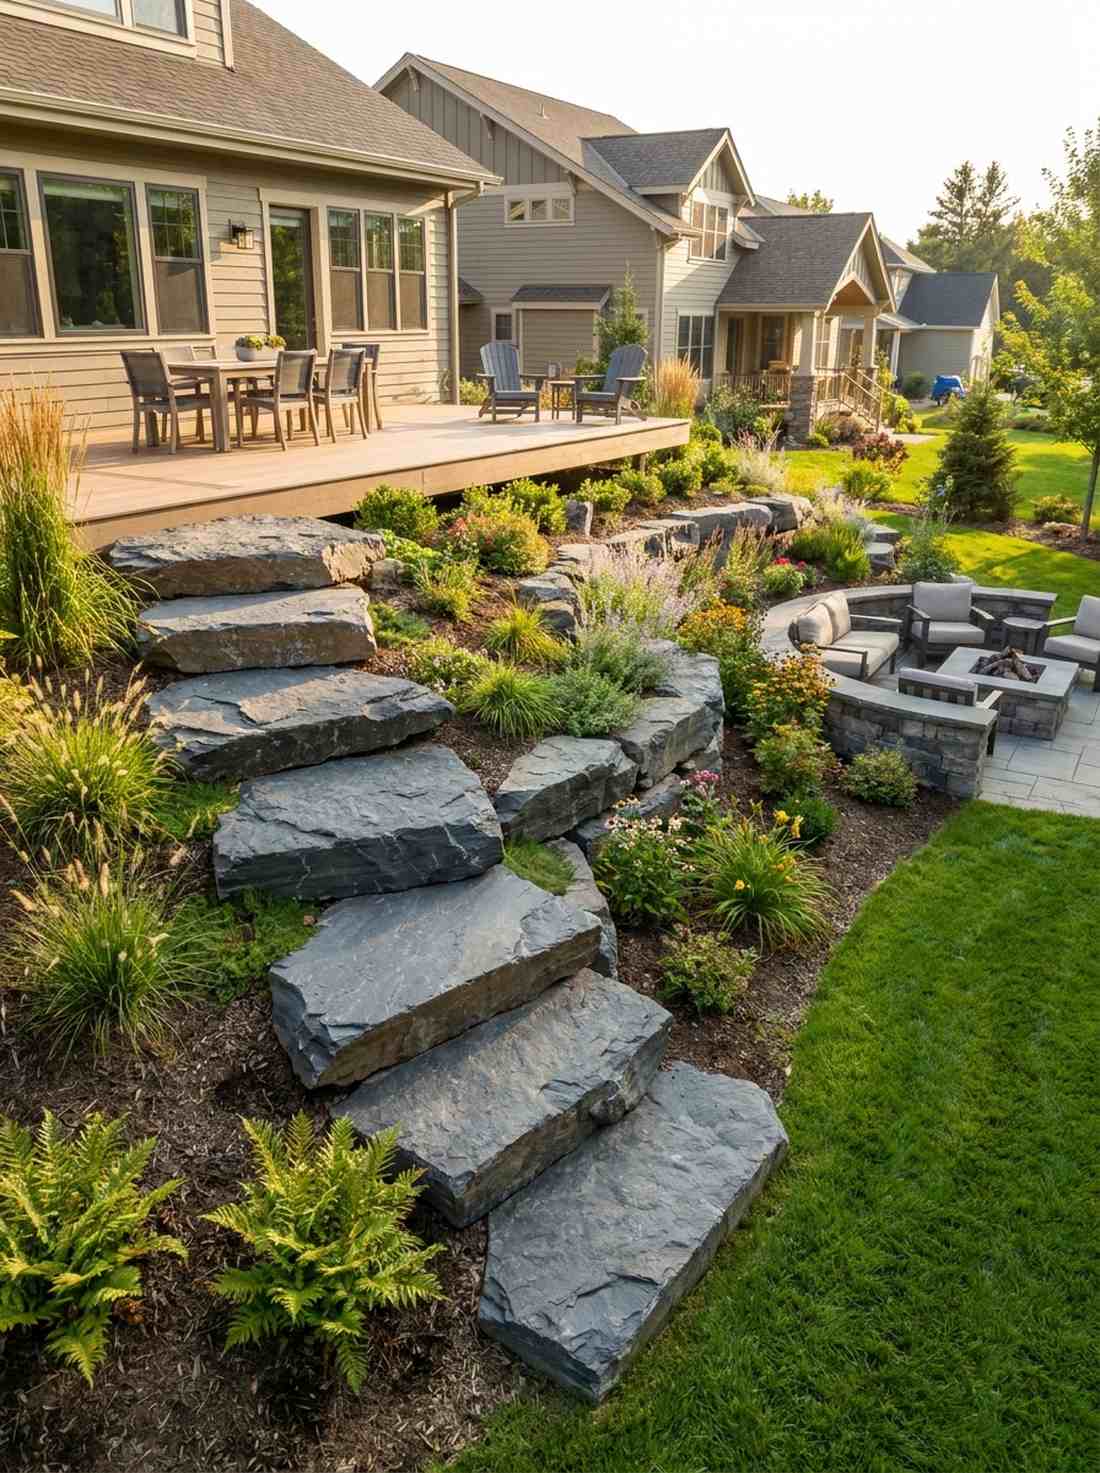
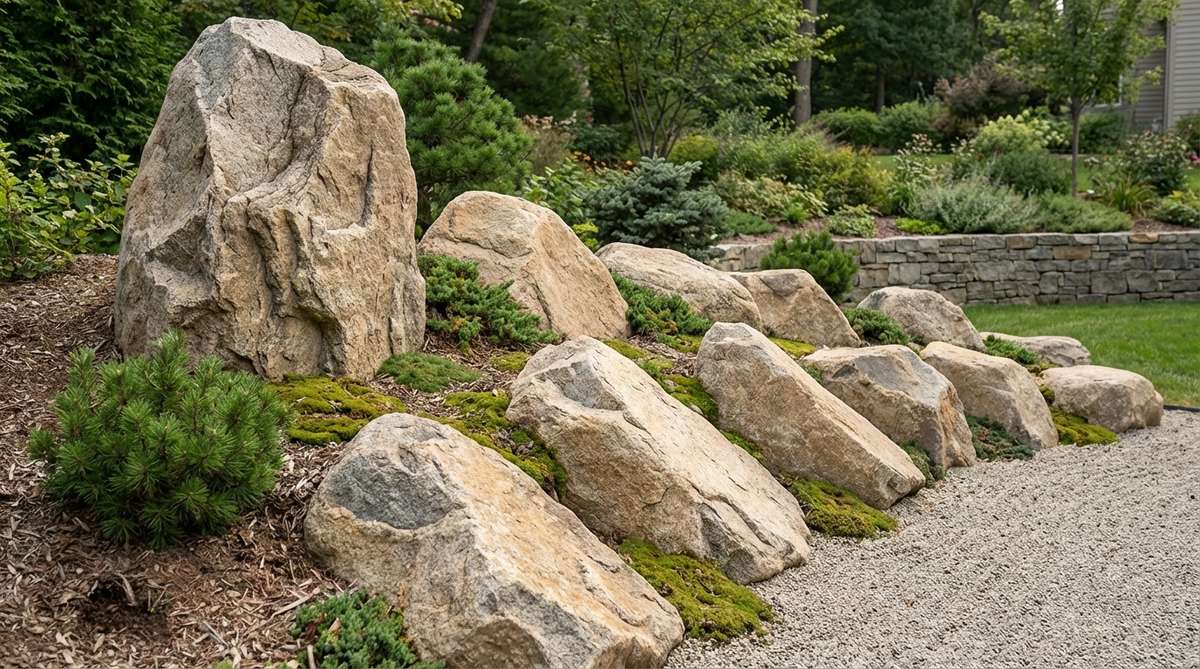
Looks like a natural landslide frozen in time. The sloped boulder cascade works flawlessly on properties with uneven or hilly terrain.
People struggle with yard slopes, but angling rocks forward intentionally gives a designer-level finish that controls erosion. Progressively sizing them downward creates incredible dynamic movement.
This functional art costs roughly $70–$100. Save this if you have a frustrating sloped yard!
- Key Materials: Seven descending-sized stones of the same color
- Vibe / Style: Dynamic geological flow
- Difficulty: Moderate slope stabilization
- Budget Breakdown: Graded stones: $80 | Retention mesh: $20
- Creator’s Tip: Dig terraced steps into the dirt before placing stones to prevent sliding.
- Smart Sourcing: Erosion control mesh grids and bulk matching slate pieces.
Island Cluster Arrangements in Gravel Seas
Island formations represent one of the most iconic zen garden stone arrangements, where boulders emerge from raked gravel like archipelagos from ocean waters. These groupings create contemplative scenes that invite mental journeys across imagined seascapes.
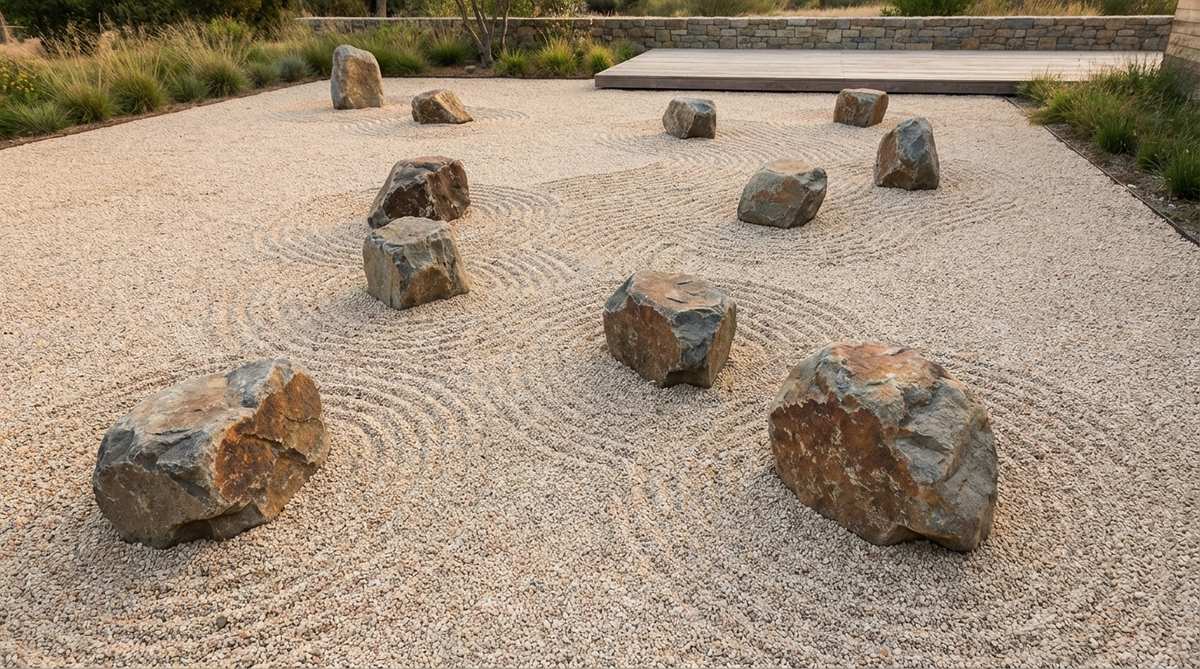
7. Seven-Island Archipelago
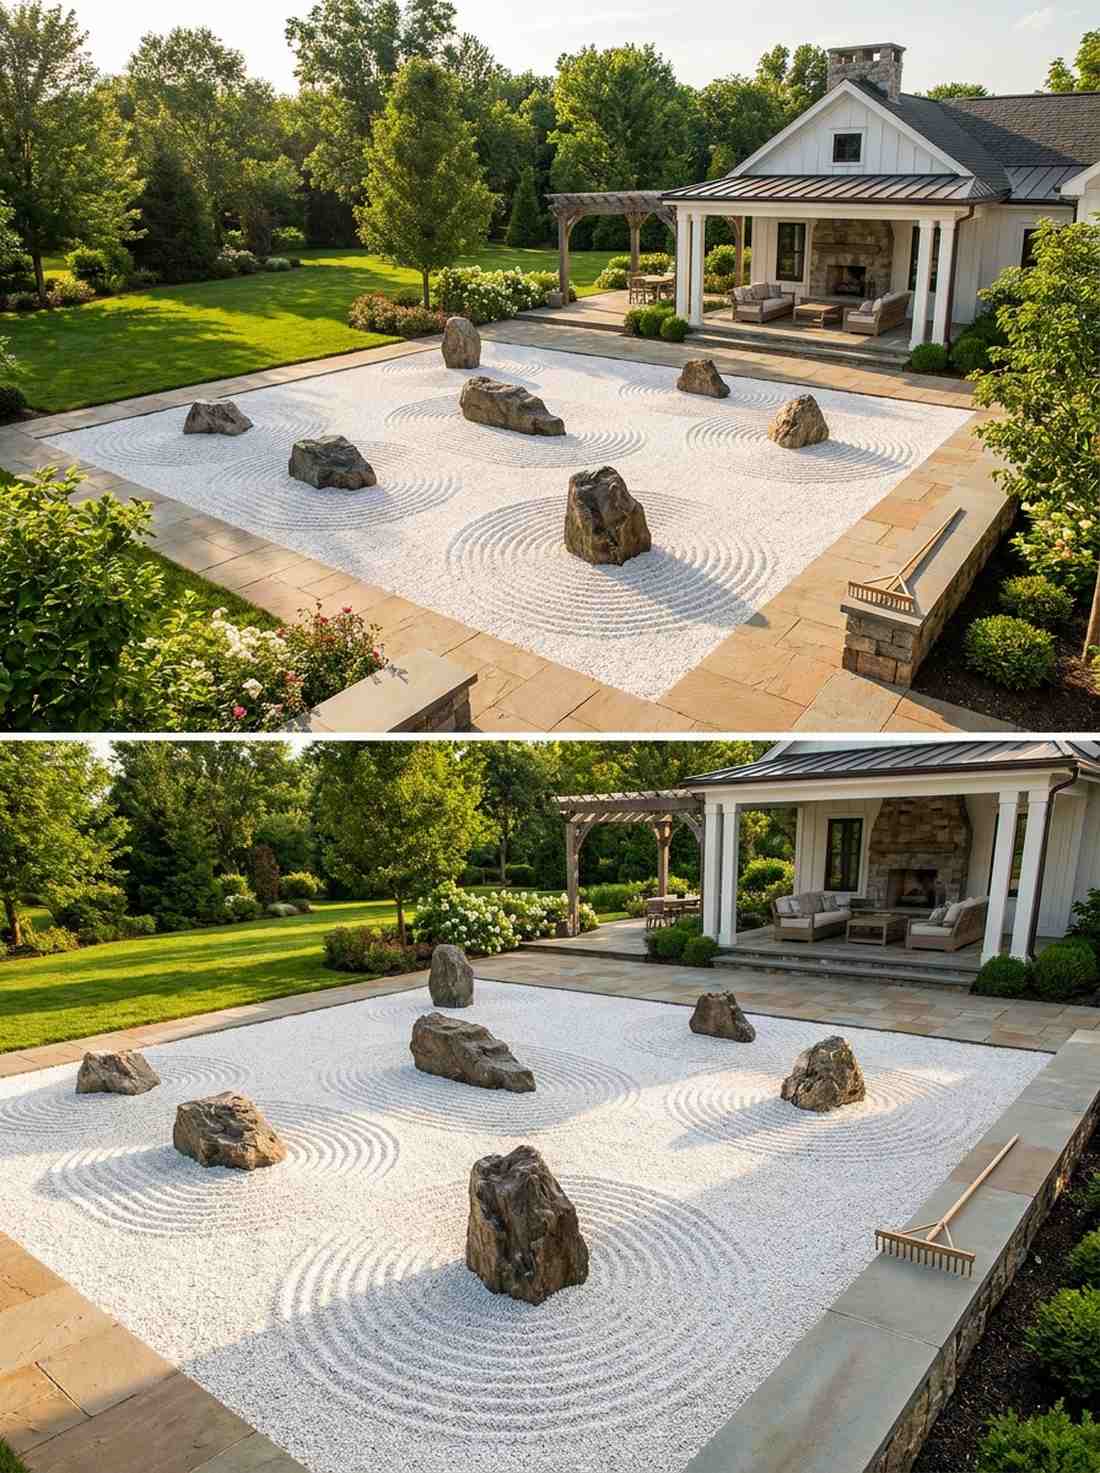
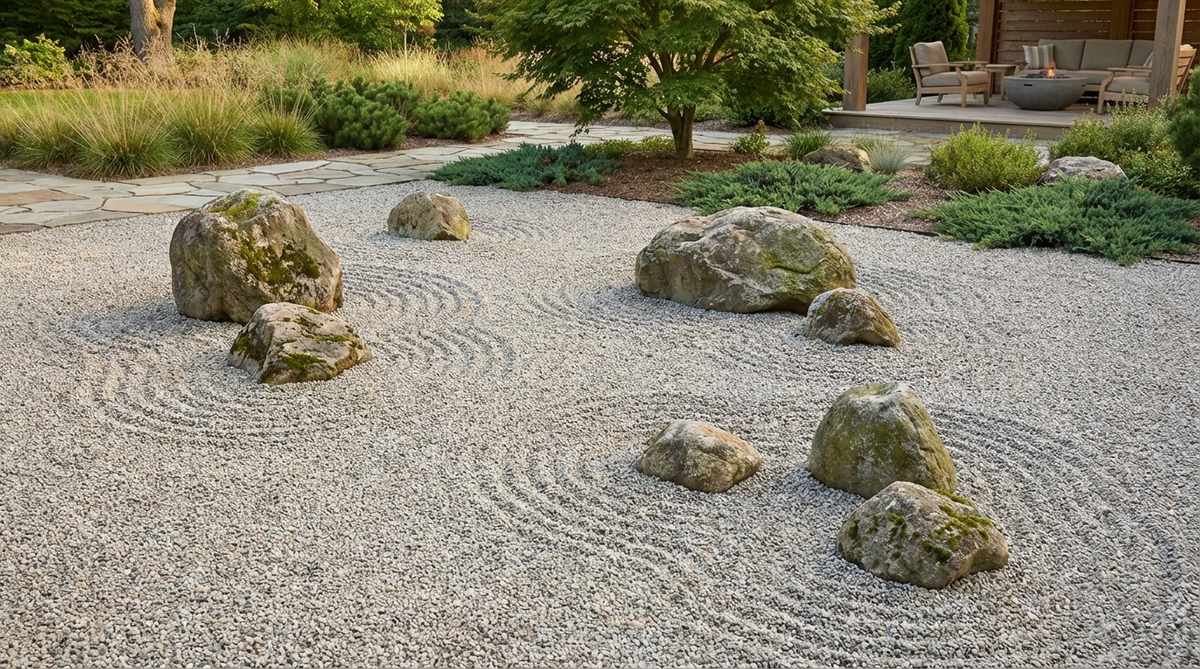
Feels like looking down from an airplane over the ocean. An expansive gravel island layout is stunning for large, flat courtyards.
Creating this illusion is easier than it looks; scattering stones loosely rather than clumping them looks far more expensive than it is. Using authentic zen garden stone ensures the islands contrast sharply against white sand.
Expect to invest about $120 for the rocks and sand. Pin this for ultimate backyard luxury inspiration!
- Key Materials: White crushed gravel and seven dark stones
- Vibe / Style: Expansive oceanic calm
- Difficulty: Time-consuming raking
- Budget Breakdown: Sand/Gravel: $80 | Rocks: $40
- Creator’s Tip: Rake concentric ripples tightly around each stone to mimic tide lines.
- Smart Sourcing: Premium fine white zen sand (bulk pack) and traditional wooden rakes.
8. Turtle Island Formation
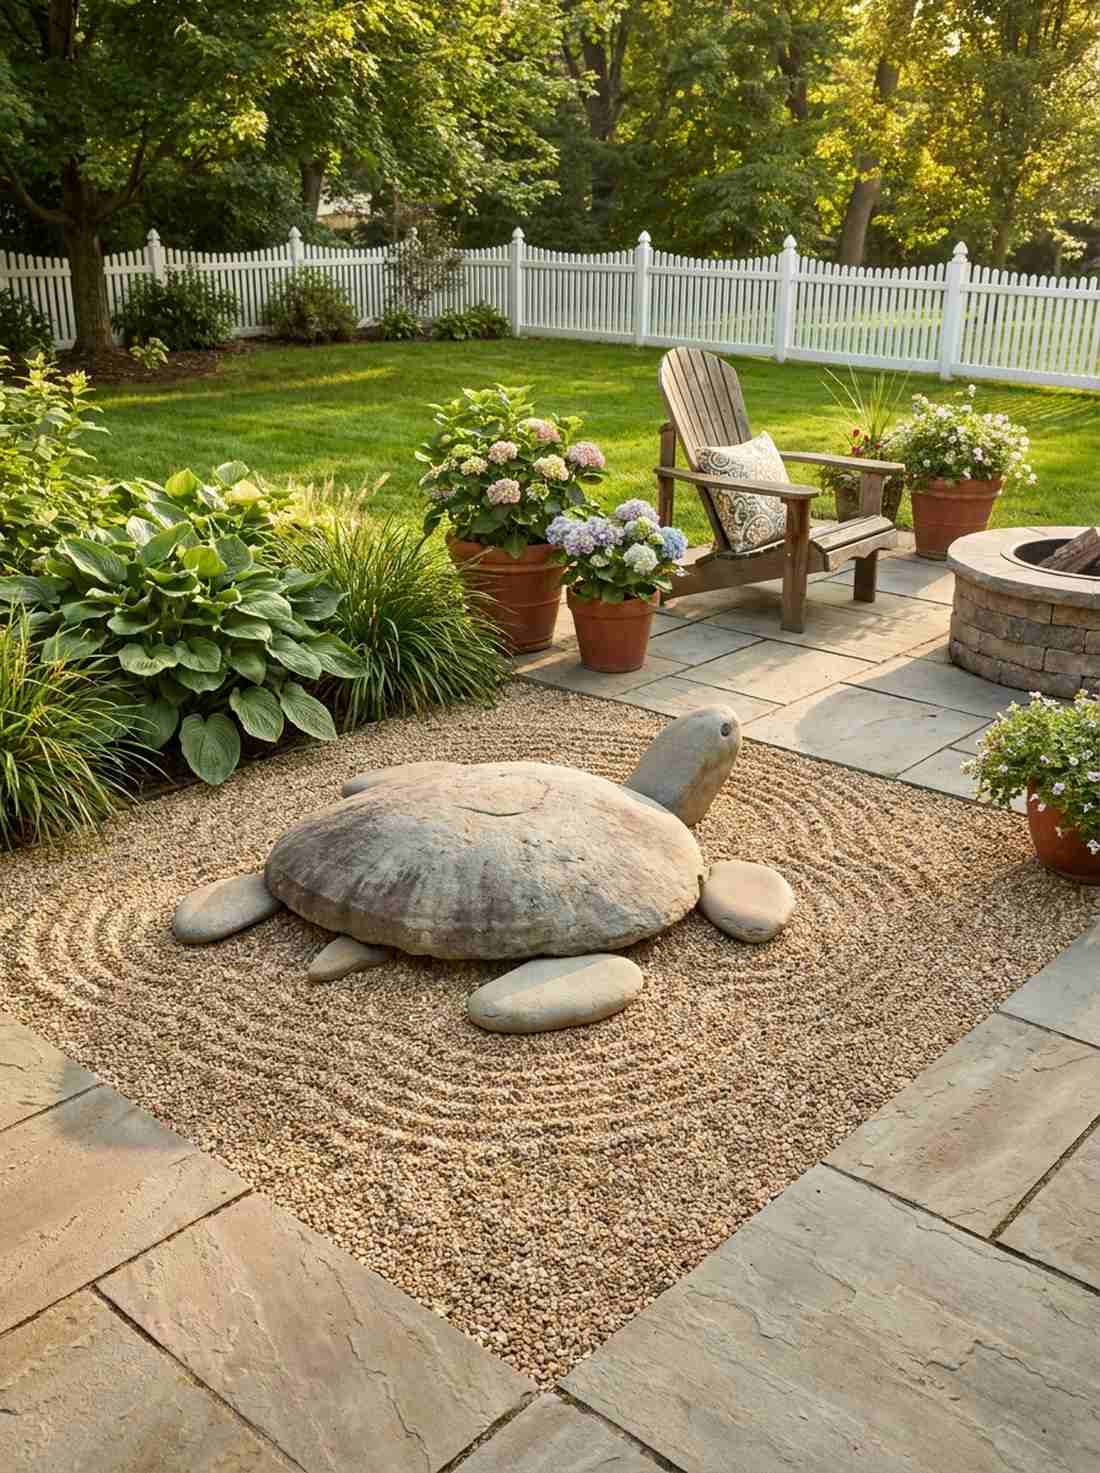
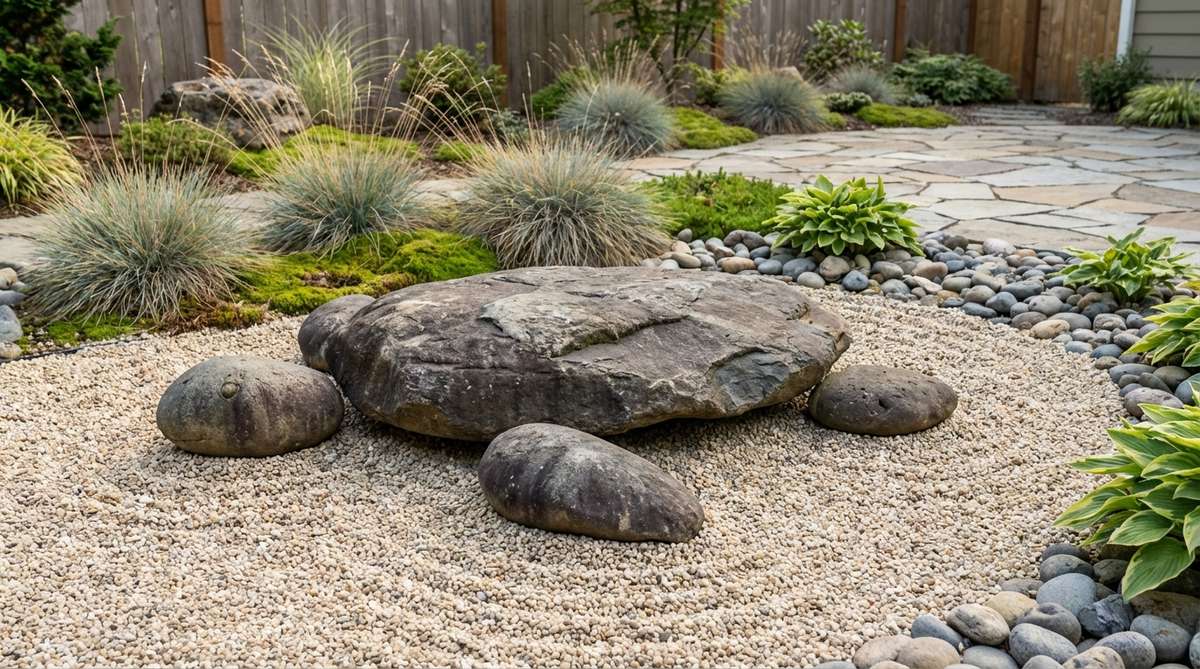
Adds a touch of wise, playful energy to the space. The stone turtle mosaic is a fantastic focal point for a small patio corner.
Amateurs overcomplicate animal shapes, but four simple stones deliver a surprisingly premium look. Using a broad, low-profile rock for the shell guarantees it remains a subtle nod rather than a tacky lawn ornament.
You can build this symbolic feature for under $30. It’s a fast upgrade that completely changes the vibe.
- Key Materials: One flat dome stone and three small appendage stones
- Vibe / Style: Whimsical yet traditional
- Difficulty: Very easy beginner project
- Budget Breakdown: Stones: $25 | Raking gravel: $5
- Creator’s Tip: Angle the “head” stone slightly upward as if it’s breaching the water.
- Smart Sourcing: Smooth flat skipping stones and miniature terrarium accessories.
Most people get this completely wrong… until they try the exact elegant layout coming up next to save hundreds of dollars.
9. Crane Island Sanctuary
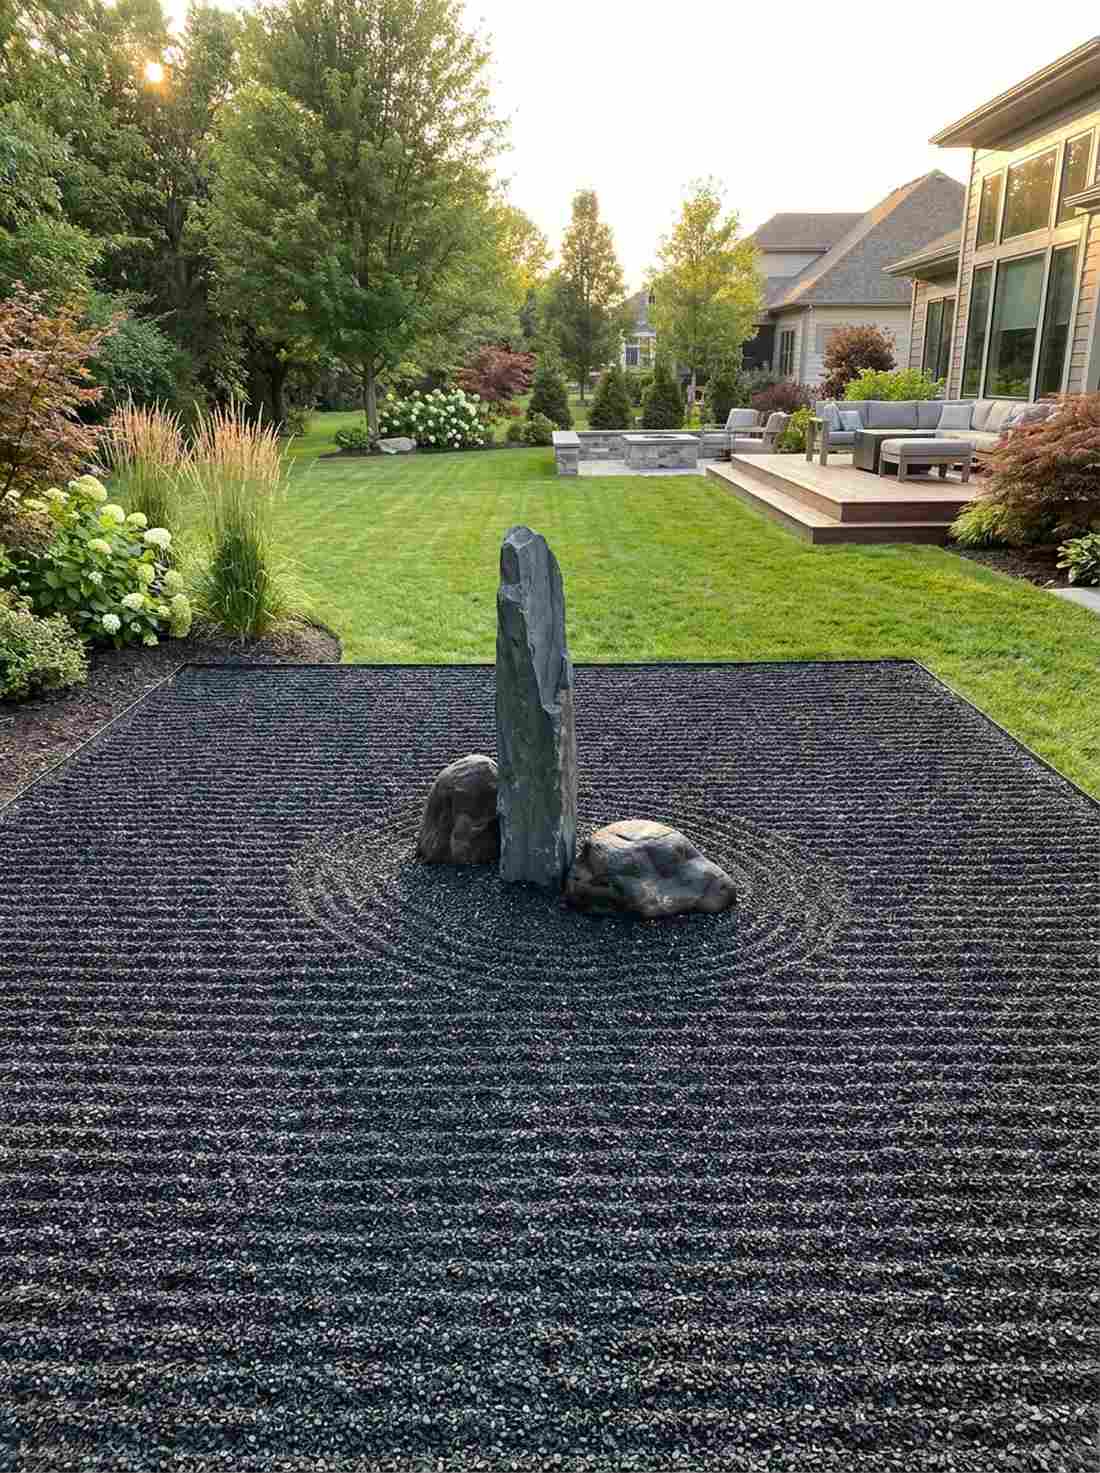
Straight out of a poetic Japanese painting. A crane-inspired vertical cluster serves beautifully as an isolated centerpiece.
The secret designers hide is using extreme negative space; surrounding a single tall stone with vast empty gravel gives a designer-level finish. This minimalist approach requires fewer rocks, saving you serious cash.
You can set up this elegant piece for around $40. Save this to your minimalist landscaping board!
- Key Materials: One tall neck stone and two base body stones
- Vibe / Style: Elegant and transcendent
- Difficulty: Easy placement
- Budget Breakdown: Vertical rock: $30 | Base stones: $10
- Creator’s Tip: Rake only in straight horizontal lines around this island to emphasize isolation.
- Smart Sourcing: Pre-cut vertical slate shards and high-contrast black gravel.
💡 Must-Have Supplies for High-End Setups
To build these setups faster and ensure they last, skip the generic craft aisles and invest in the right foundational kits.
- Base & Support: Heavy-duty commercial weed barrier fabric (bulk roll)
- Setup Tools: Professional bamboo zen raking kit (4-piece)
- Weather/Durability Protection: UV-resistant clear stone sealant sprays
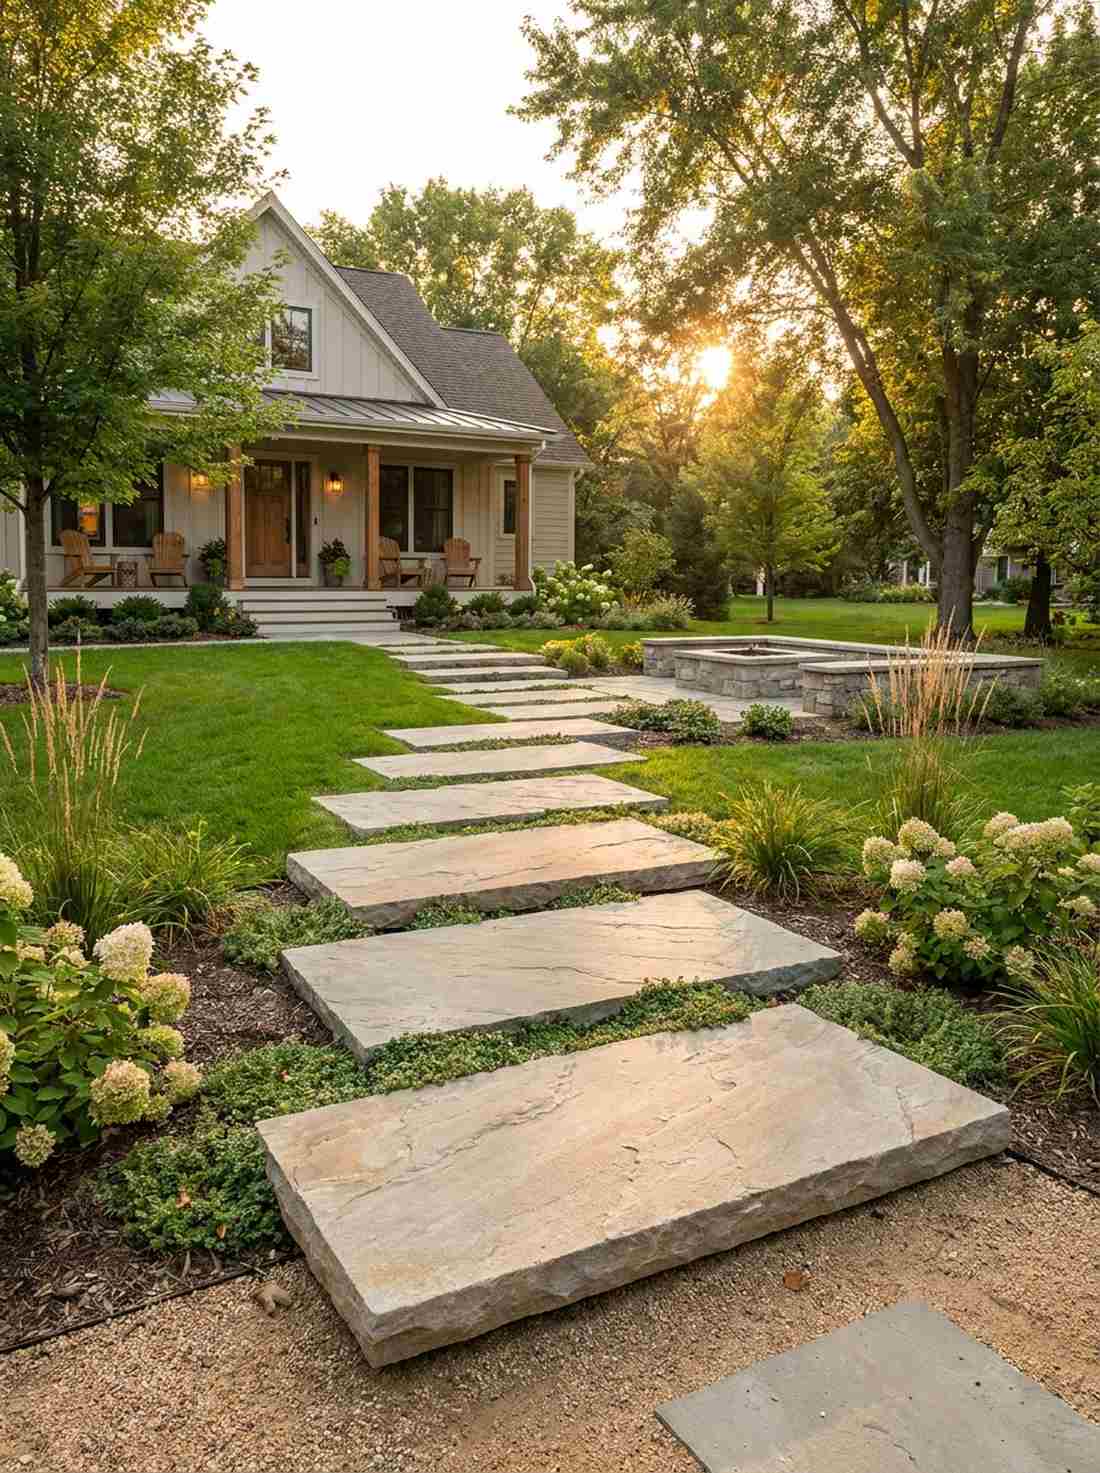
10. Stepping Stone Islands
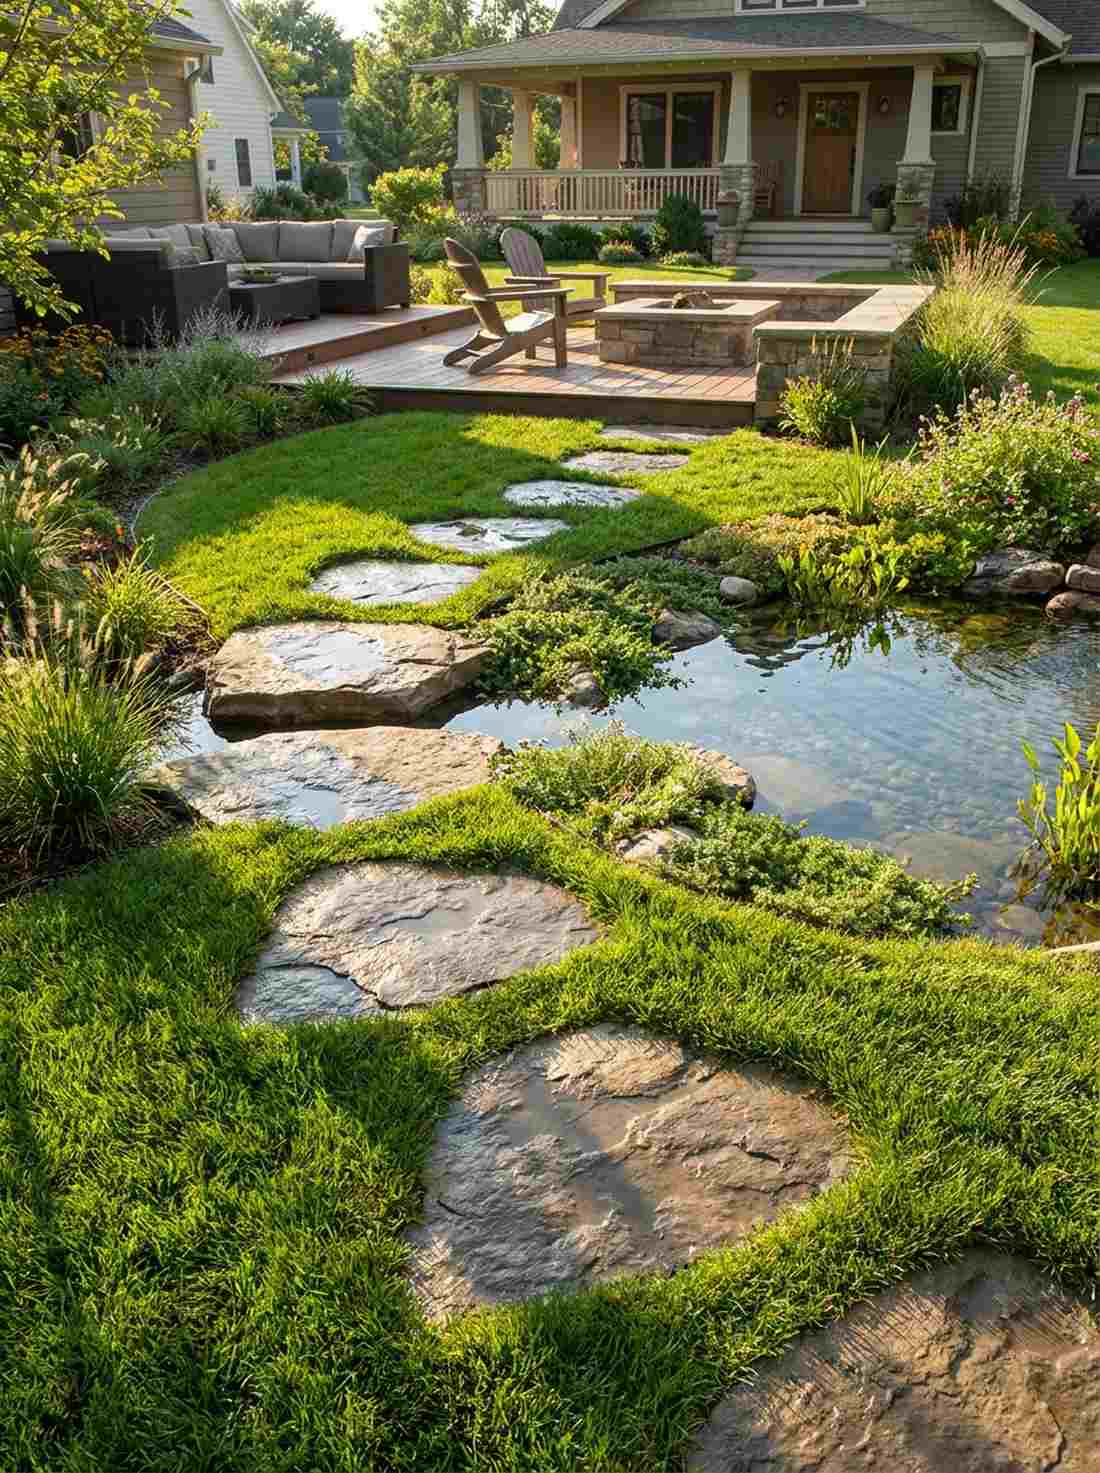
Feels like walking over a shallow, magical pond. Submerged flat path stones are highly practical for interactive garden routes.
Instead of cheap concrete pavers, burying raw flat boulders 80% deep looks far more expensive than it is. This functional design allows you to physically engage with the space without ruining the aesthetic.
A short path will cost roughly $80–$120. Pin this if you need a durable side-yard walkway!
- Key Materials: Flat-topped natural boulders (2-3ft wide)
- Vibe / Style: Interactive and grounded
- Difficulty: Labor-intensive digging
- Budget Breakdown: Paver stones: $90 | Leveling base: $30
- Creator’s Tip: Space them exactly 18-24 inches apart from center to center for a natural stride.
- Smart Sourcing: Pre-cut flagstone steppers and tamper leveling tools.
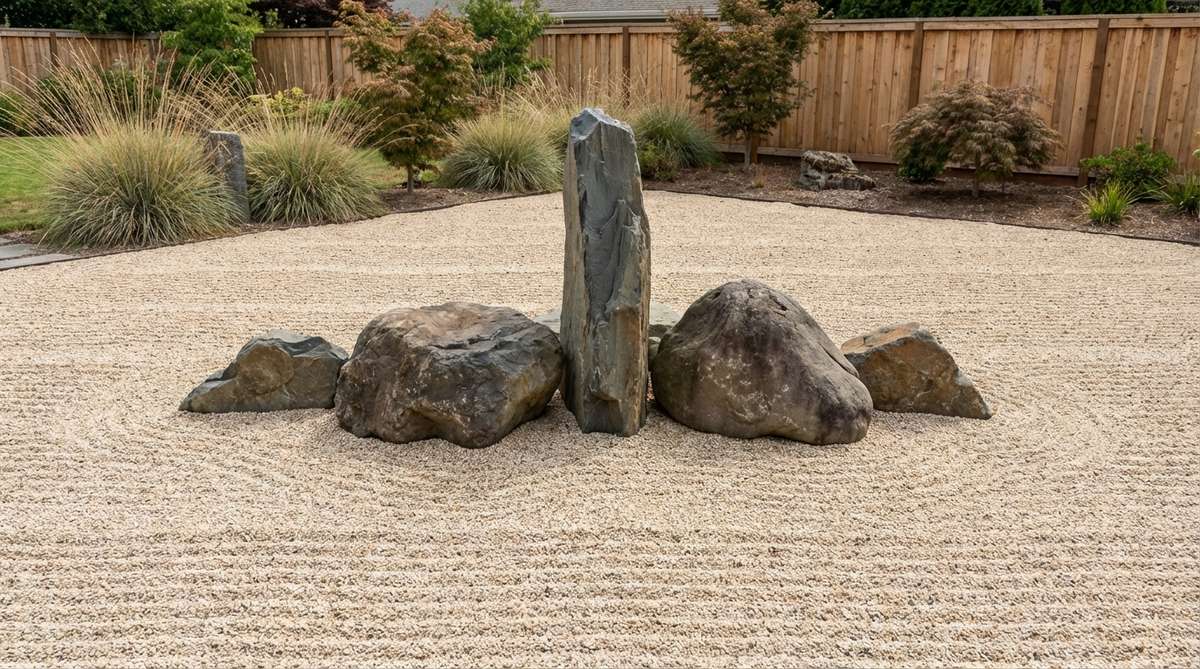
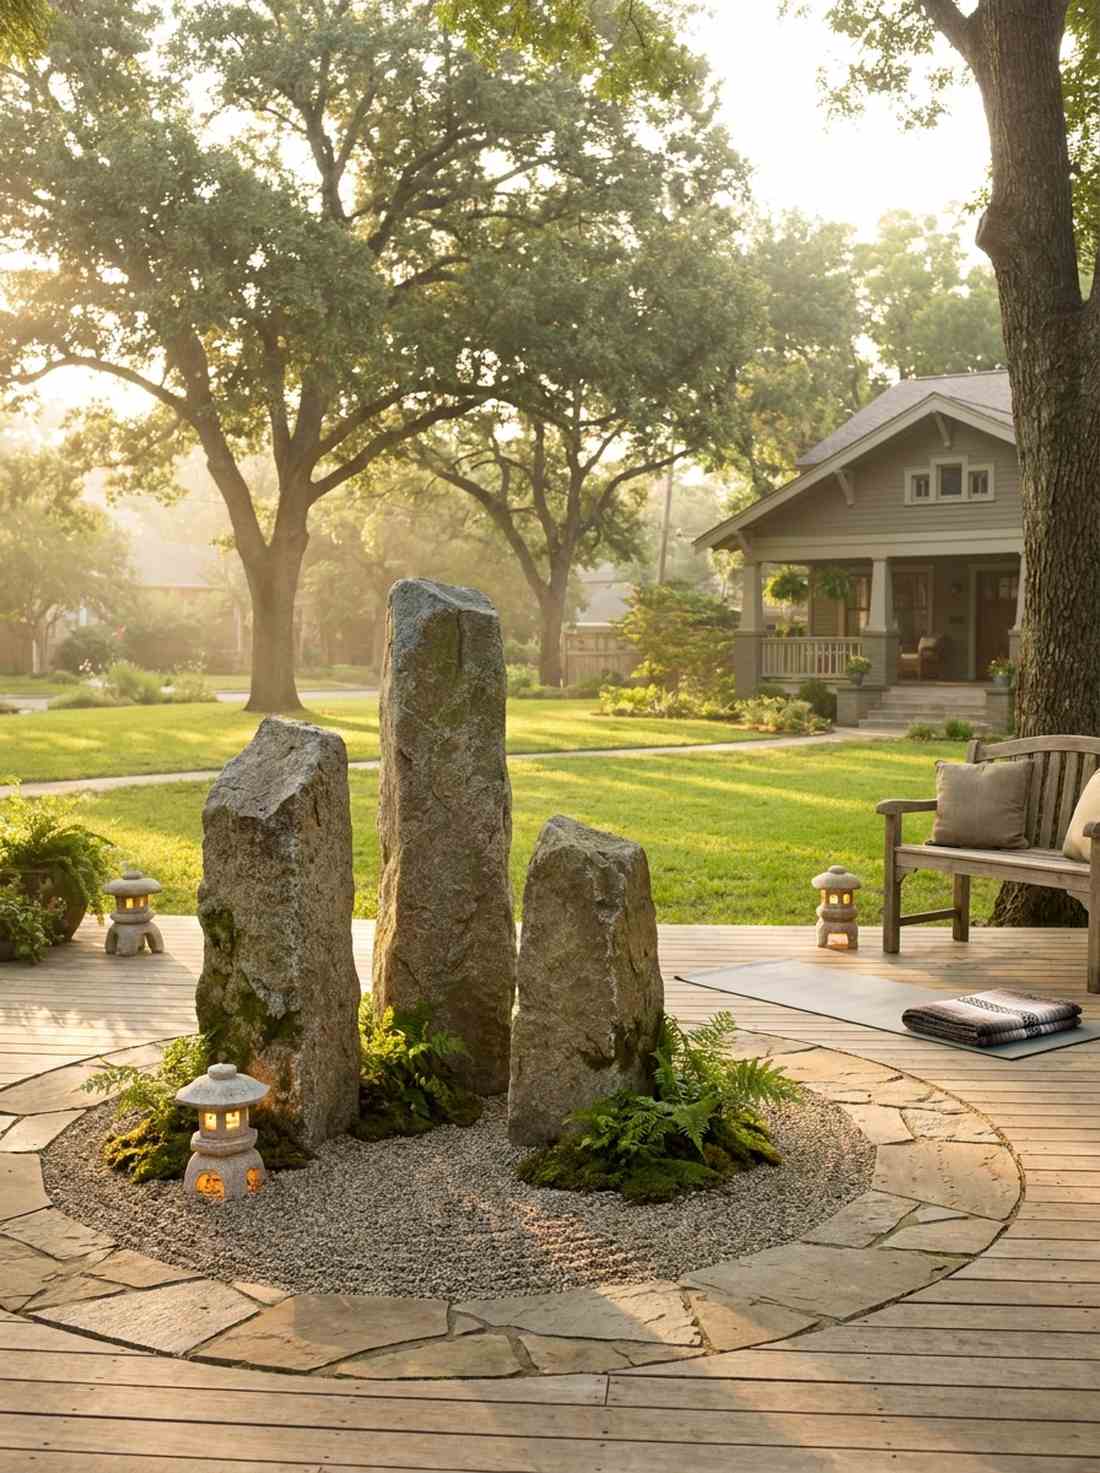
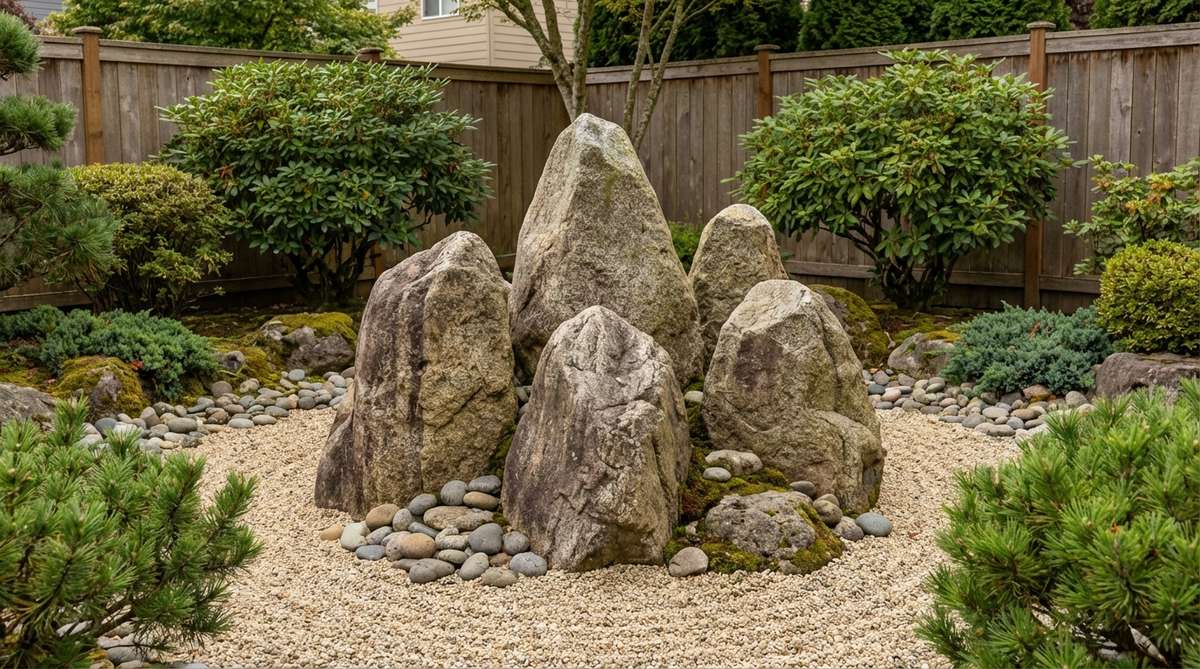
11. Three Sacred Peaks
Brings heavy, immortal energy to your outdoor sanctuary. A tight unified island mass is the ultimate centerpiece for a dedicated zen box.
Scattering rocks haphazardly looks messy, but clumping three uprights tightly together delivers a surprisingly premium look. This represents legendary mountains and creates a powerful visual anchor in a sea of raked sand.
This layout runs about $60 in materials. Highly recommended for a quiet patio corner.
- Key Materials: Three substantial upright boulders
- Vibe / Style: Dense and powerful
- Difficulty: Moderate balancing
- Budget Breakdown: Boulders: $50 | Base sand: $10
- Creator’s Tip: Lean the two front stones slightly inward toward the tallest rear stone.
- Smart Sourcing: Pre-washed landscape boulders and deep-tine rakes.
12. Scattered Reef Fragments
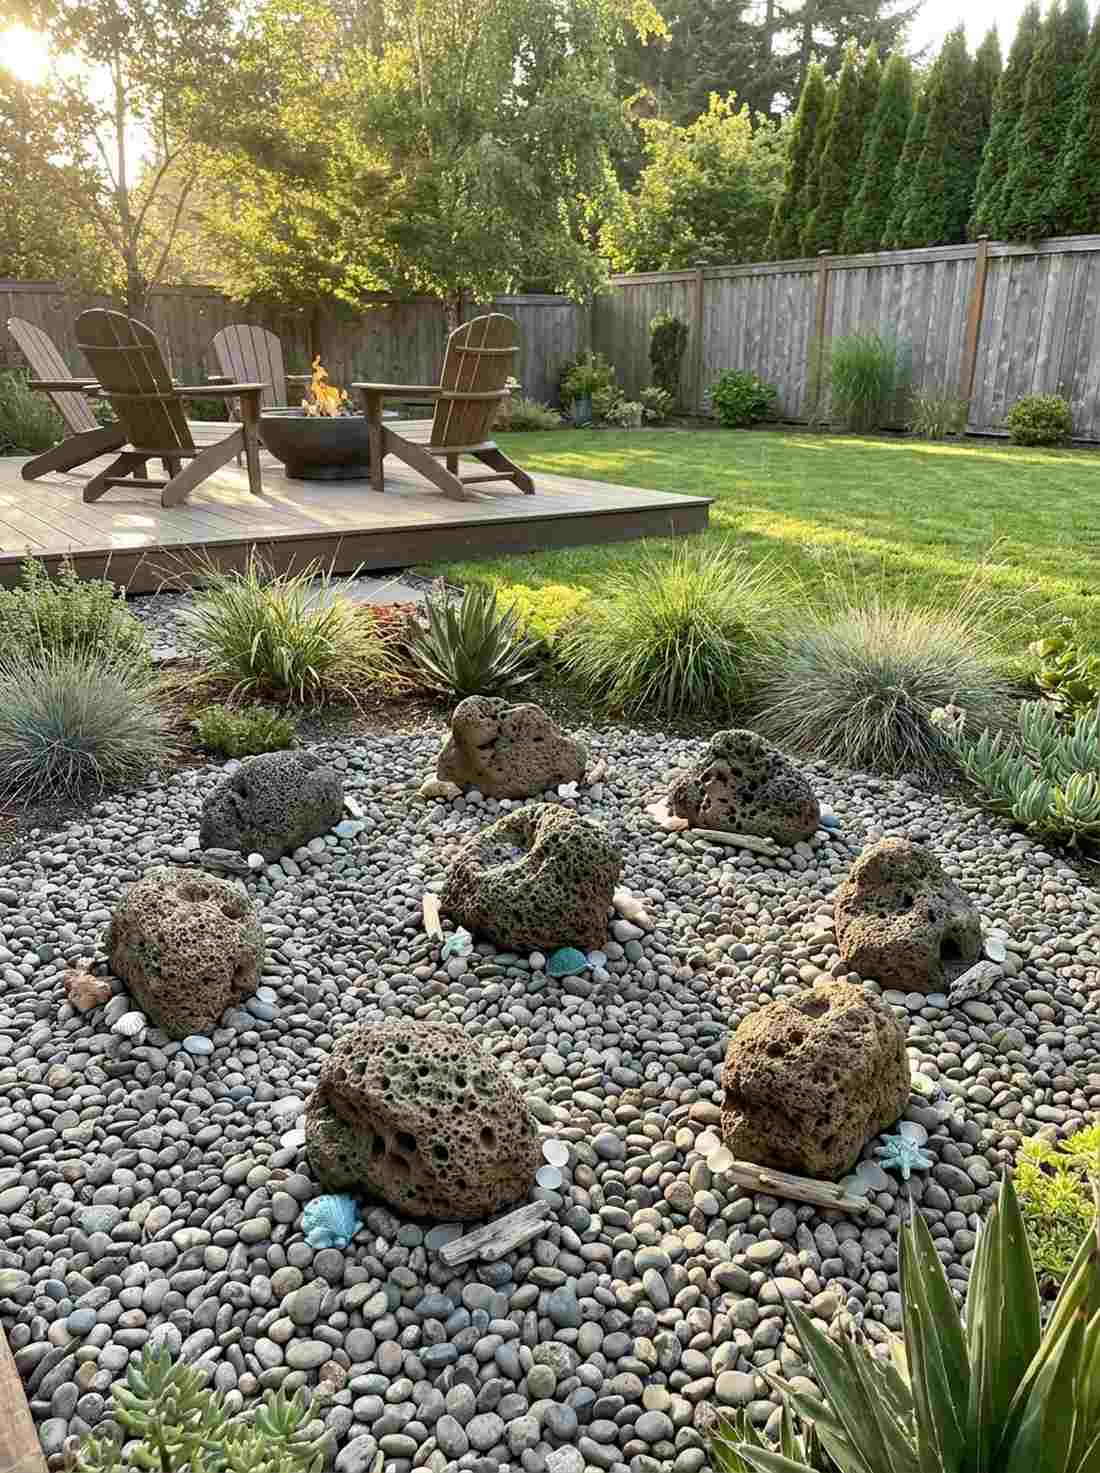
Feels like discovering a coastal tide pool at dawn. A low-profile scattered rock layout works exceptionally well for contemporary, relaxed spaces.
You don’t need massive monoliths; using smaller, highly textured stones scattered organically gives a designer-level finish. Integrating high-quality fairy garden kits around the edges can add subtle charm without overwhelming the zen vibe.
You can easily pull this off for around $20–$40. Pin this to your budget DIY garden board!
- Key Materials: 9 small, textured, low-profile rocks
- Vibe / Style: Organic and coastal
- Difficulty: Very easy
- Budget Breakdown: Small stones: $20 | Gravel base: $15
- Creator’s Tip: Only let 6 inches of the rock protrude above the gravel line.
- Smart Sourcing: Porous lava rock assortments and acrylic fairy garden kit accents.
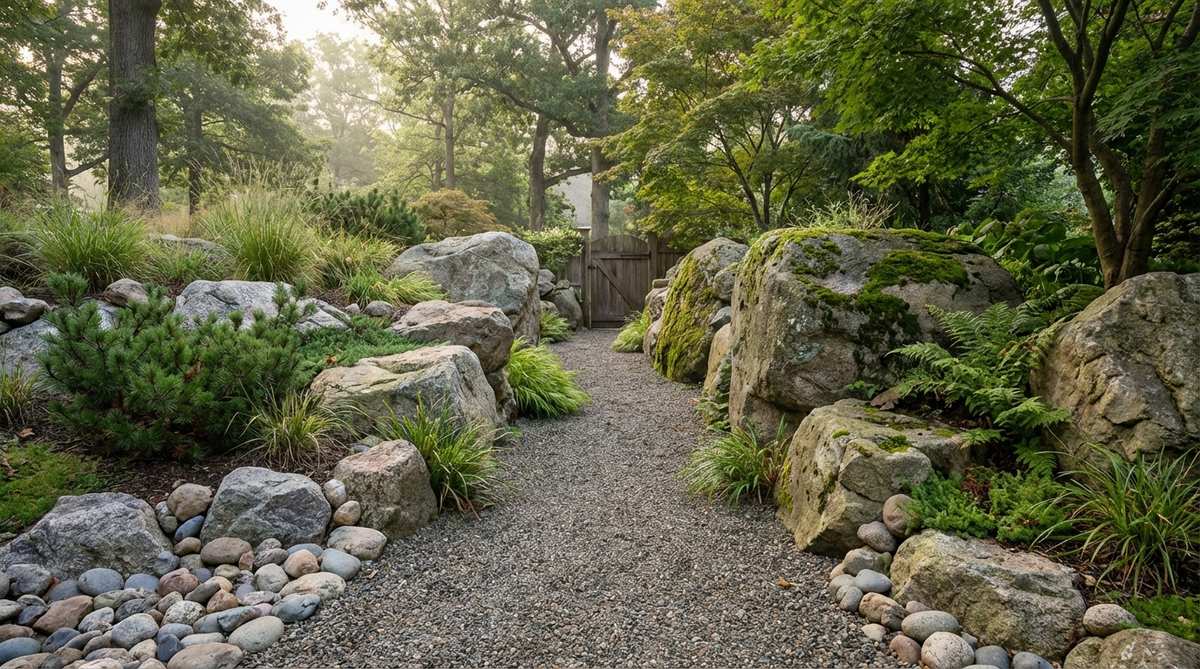
Zen Garden Stone Pathways and Walking Meditation Routes
Stone pathways in zen gardens serve dual purposes—guiding physical movement through space while directing spiritual contemplation. Boulder placement along these routes creates rhythm and pacing that encourages mindful walking.
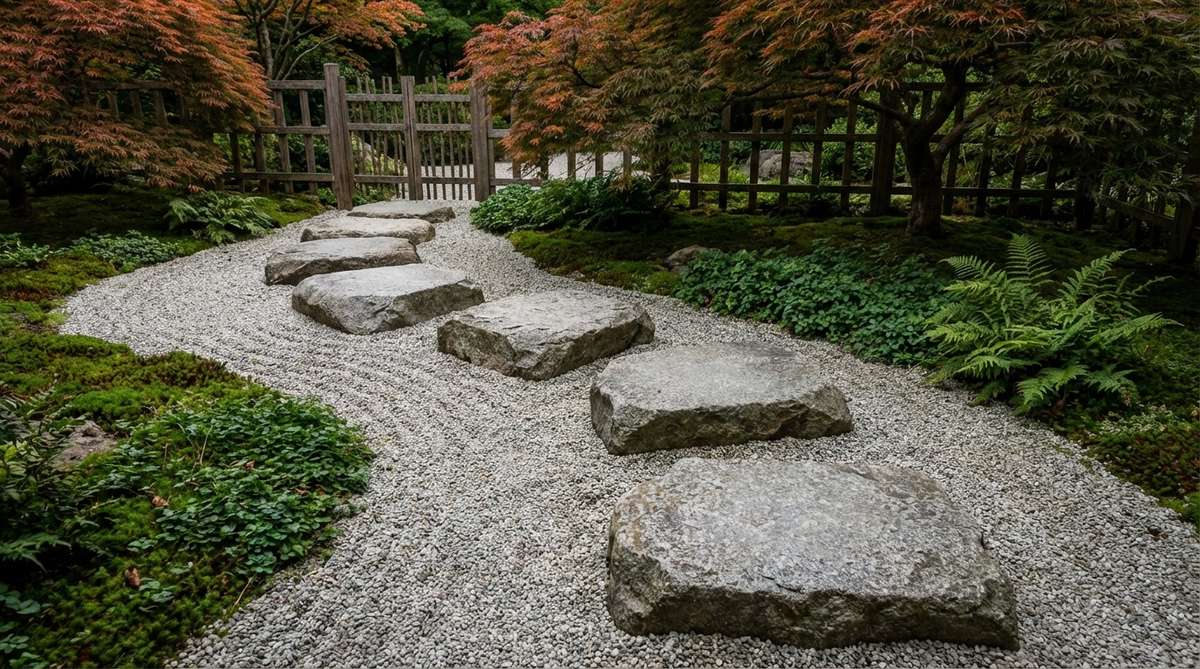
13. River Stone Meandering Path
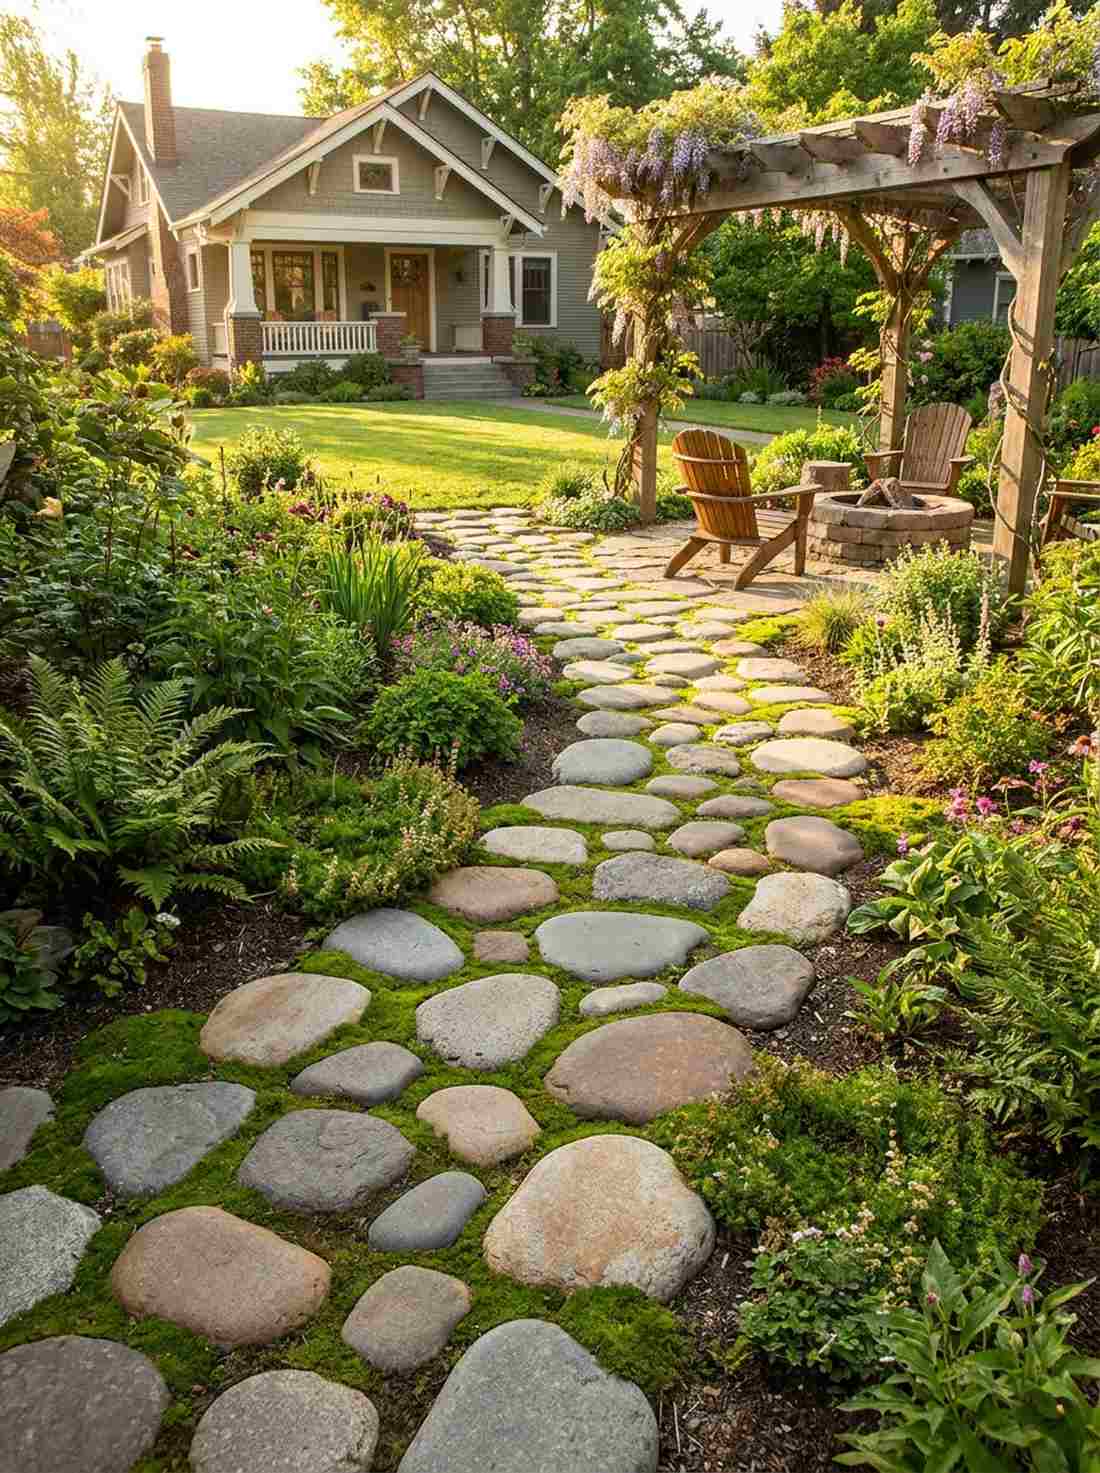
Feels like wandering along a quiet woodland creek. A smooth river rock trail is perfect for weaving through garden beds or mossy areas.
Most DIY paths look rigid, but gently curving smooth stones delivers a surprisingly premium look. The irregular spacing forces you to slow down, instantly inducing a state of walking meditation.
Creating a 10-foot path costs about $50. Save this for your weekend backyard makeover!
- Key Materials: Smooth, flat-topped river stones
- Vibe / Style: Flowing and organic
- Difficulty: Easy placement
- Budget Breakdown: River rocks: $40 | Moss filler: $10
- Creator’s Tip: Alternate between single stones and tight pairs to break up visual monotony.
- Smart Sourcing: Bulk polished river rocks and live moss starter patches.
If you think landscaping has to be flat and boring, this next canyon-style hack will completely blow your mind…
14. Mountain Pass Boulder Trail
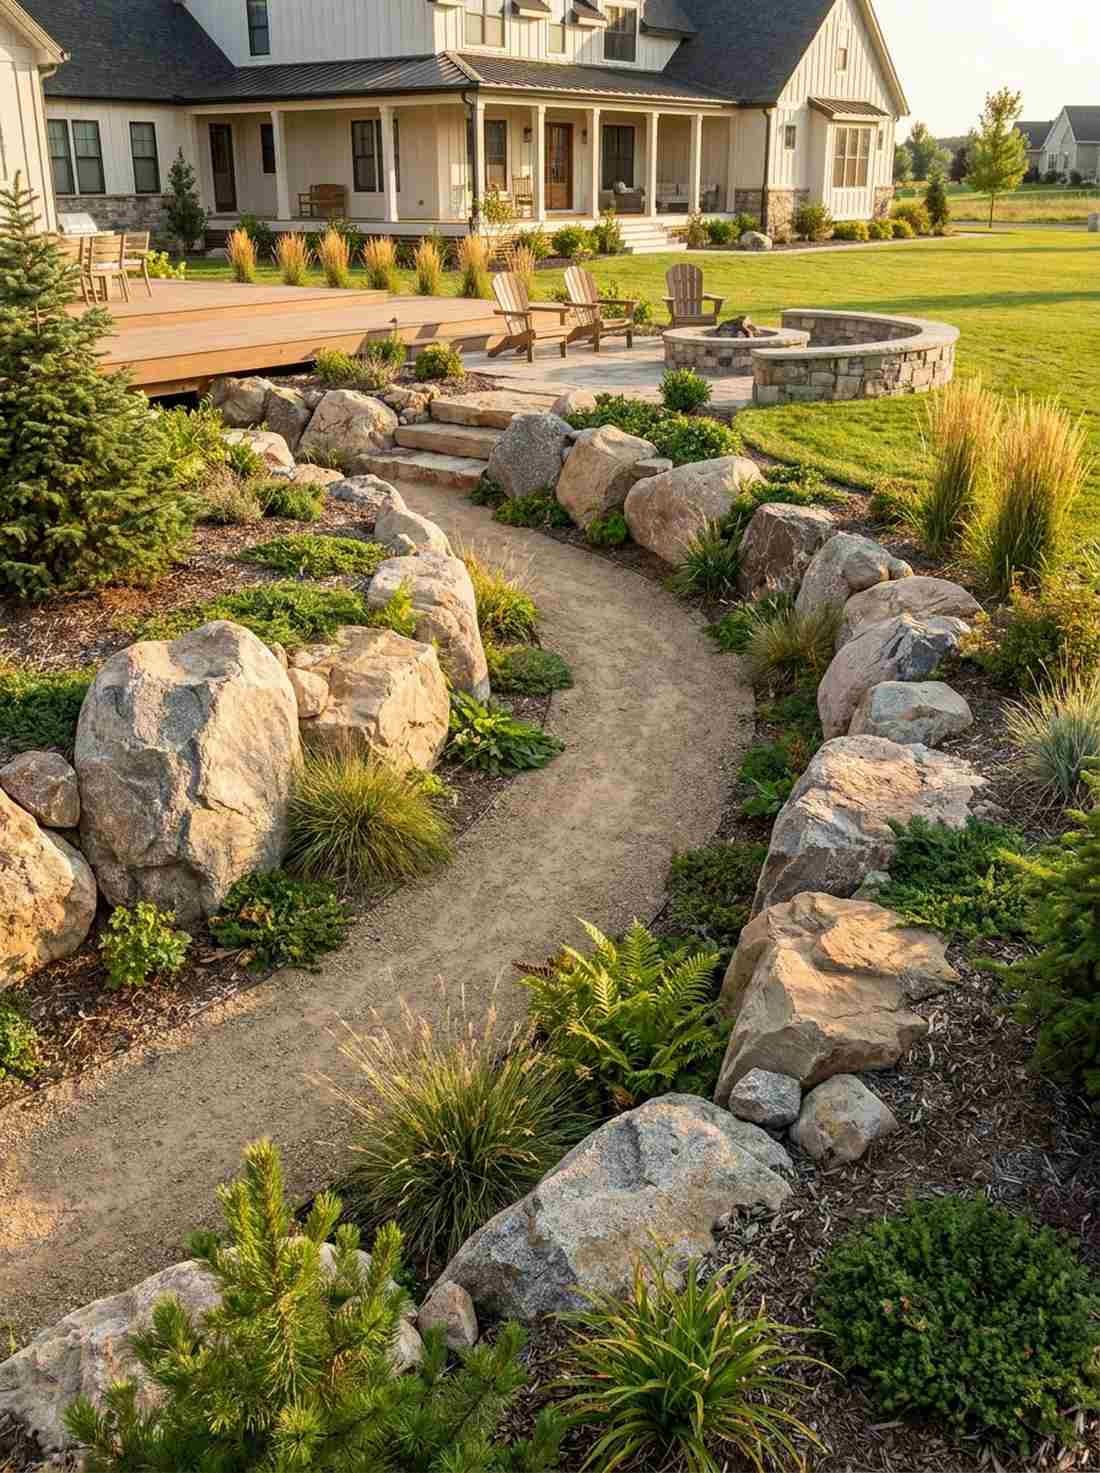
Instantly transports you into a rugged mountain gorge. A boulder-lined canyon path is an incredible way to transition between front and back yards.
Lining paths with cheap plastic edging ruins the aesthetic, but using progressively larger boulders gives a designer-level finish. Starting small and building to massive 3-foot rocks creates a dramatic sense of enclosure.
This immersive upgrade costs around $150–$300 for the stone weight. Pin this for major landscape renovations!
- Key Materials: Graded boulders from small to extra-large
- Vibe / Style: Rugged and immersive
- Difficulty: Heavy machinery likely required
- Budget Breakdown: Bulk boulders: $200 | Path gravel: $50
- Creator’s Tip: Stagger the distance of the boulders from the path edge so it doesn’t look like a straight runway.
- Smart Sourcing: Heavy-duty wheelbarrows and crushed pathway limestone.
15. Lantern Lighting Stone Route
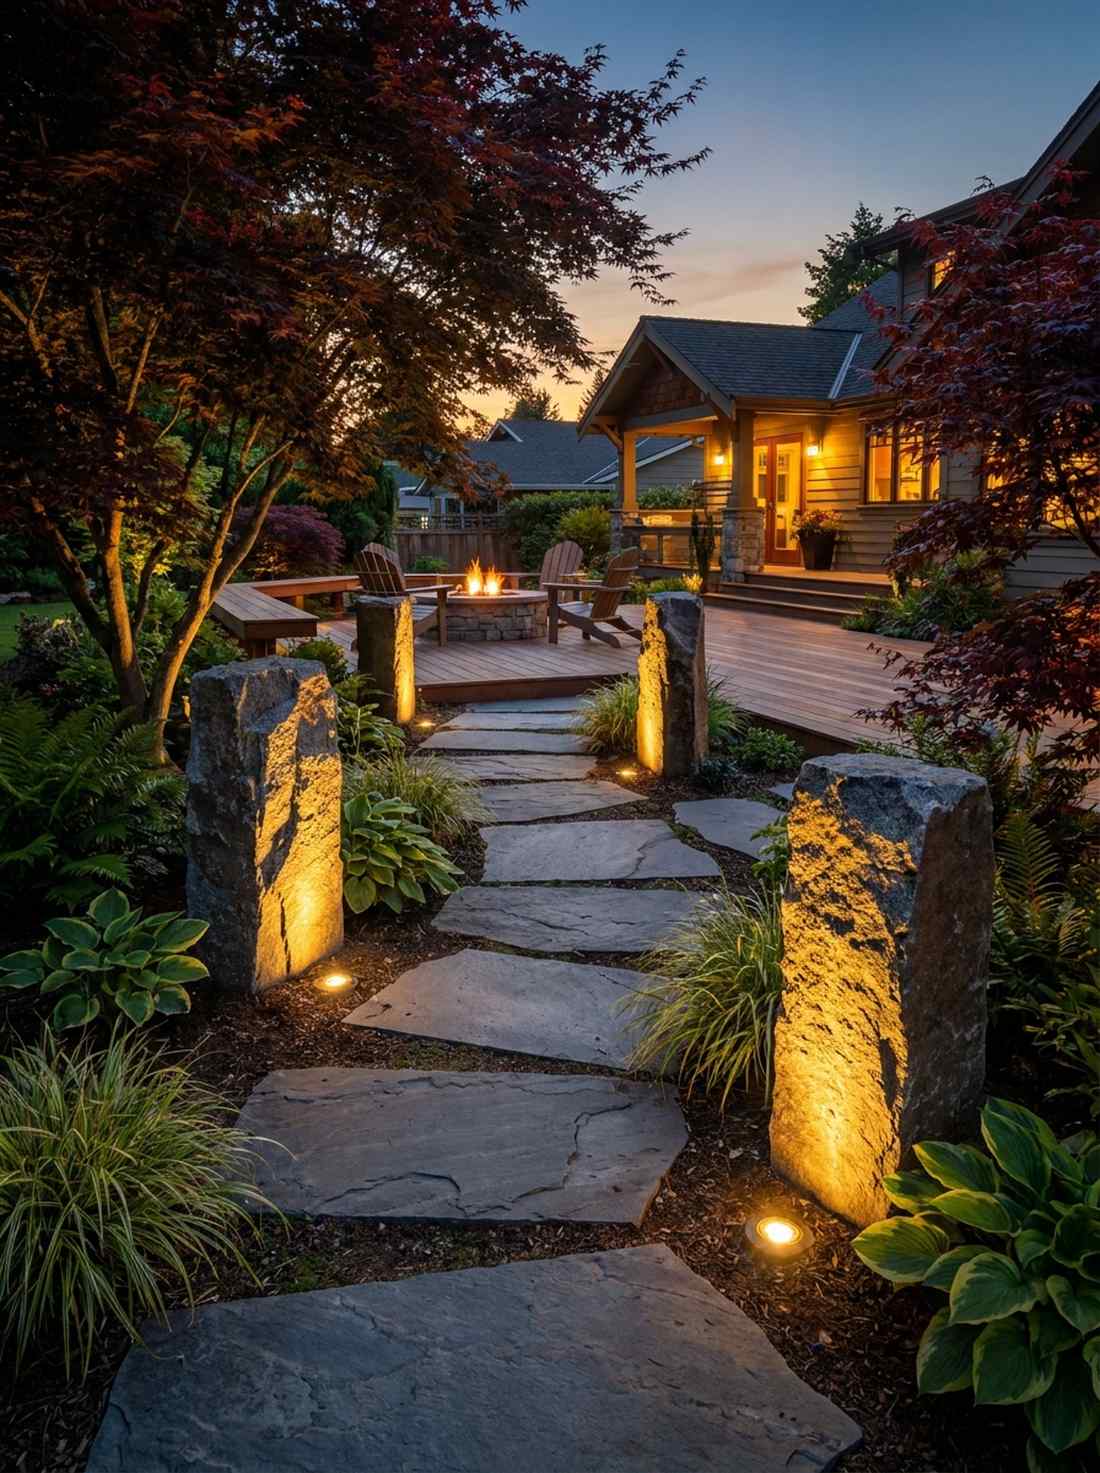
Straight out of a twilight Kyoto stroll. Siting vertical lantern accent stones works brilliantly to illuminate dark garden walkways.
Buying expensive pre-wired fixtures isn’t necessary; placing flat path slabs next to 3-foot vertical rocks looks far more expensive than it is. These vertical pillars act as natural pedestals for ambient lighting.
You can execute this path style for about $100. It’s a fast upgrade that completely changes the evening vibe.
- Key Materials: Flat slabs and upright pedestal rocks
- Vibe / Style: Traditional evening elegance
- Difficulty: Moderate digging
- Budget Breakdown: Slabs: $60 | Uprights: $40
- Creator’s Tip: Place solar lights directly at the base of the upright stones to cast dramatic shadows.
- Smart Sourcing: Solar-powered LED uplights and flat slate stepping stones.
16. Bridge Crossing Boulder Markers
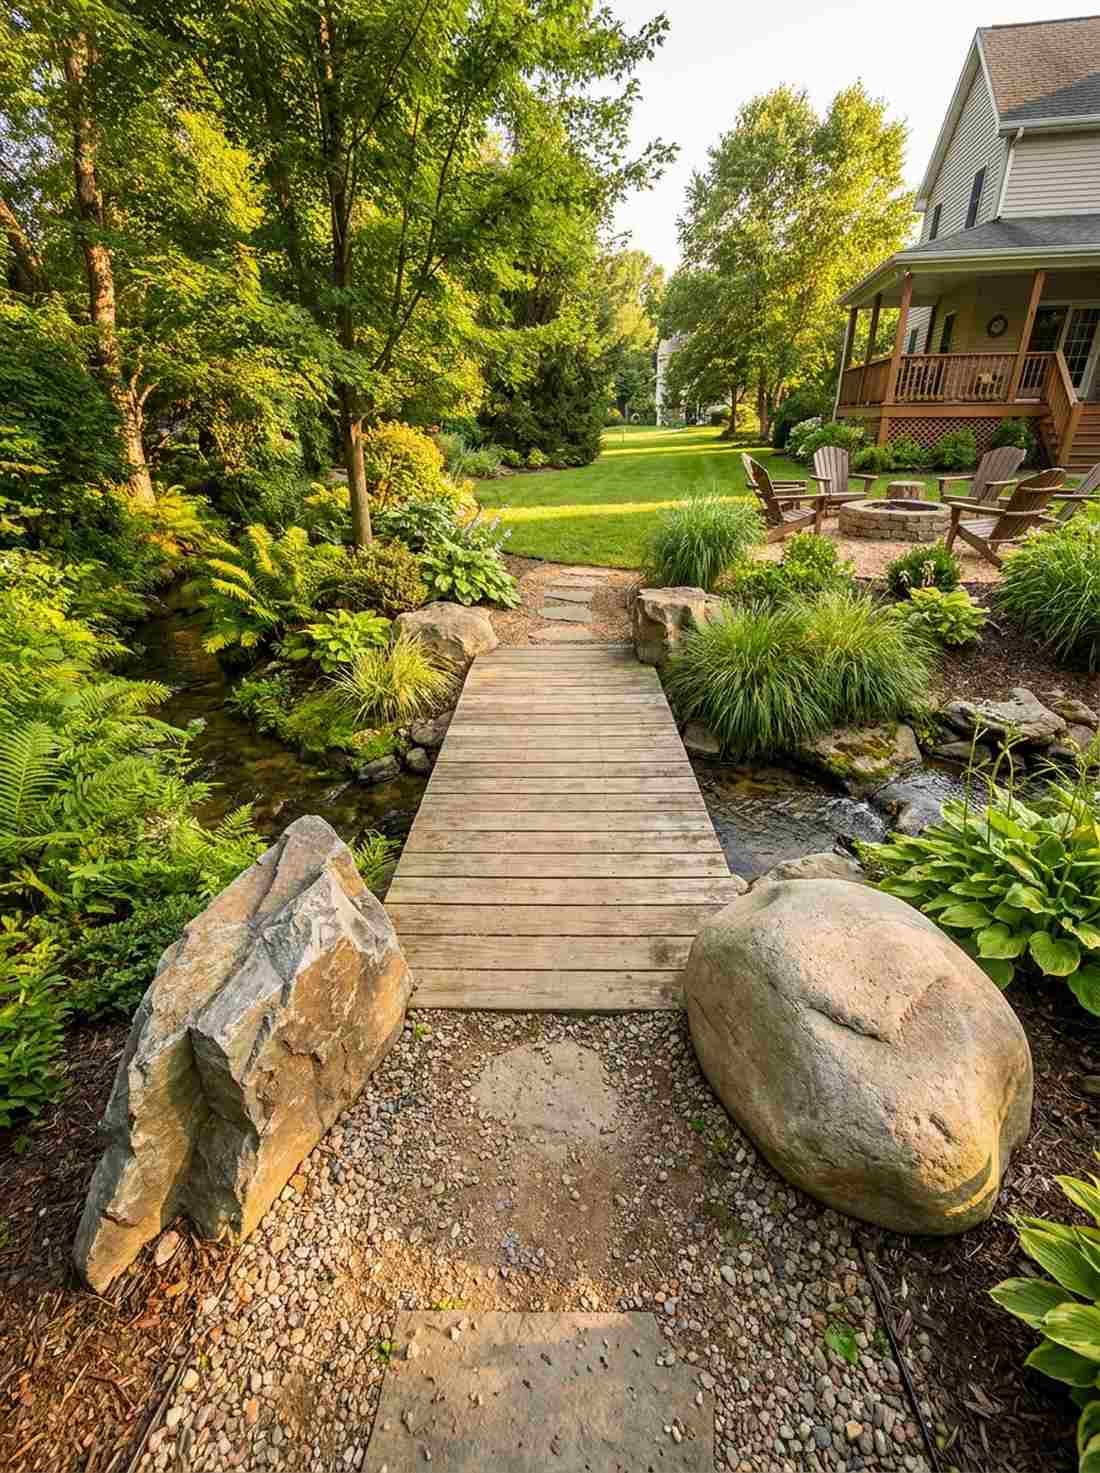
Feels like crossing a sacred threshold into a hidden world. Paired pathway gateway rocks are perfect for marking intersections or deck entrances.
A plain path can feel endless, but flanking a transition point with matched stones delivers a surprisingly premium look. Using two contrasting shapes—one sharp, one soft—creates a psychological gateway effect.
This simple addition costs around $40. Pin this if you have a wooden footbridge in your yard!
- Key Materials: Two similarly sized but differently shaped boulders
- Vibe / Style: Symbolic and structured
- Difficulty: Very easy
- Budget Breakdown: Marker stones: $40 | Base prep: $0
- Creator’s Tip: Orient the stones slightly facing each other to create a visual “hug” as you walk through.
- Smart Sourcing: Symmetrical garden marker kits and weatherproof stone adhesives.
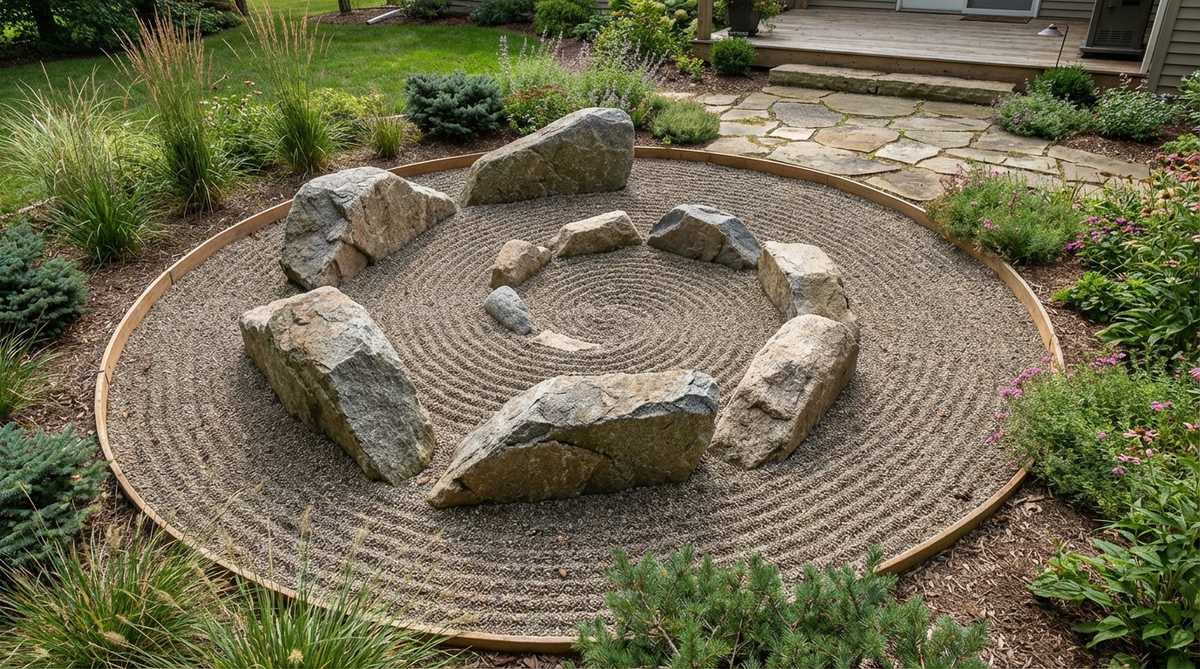
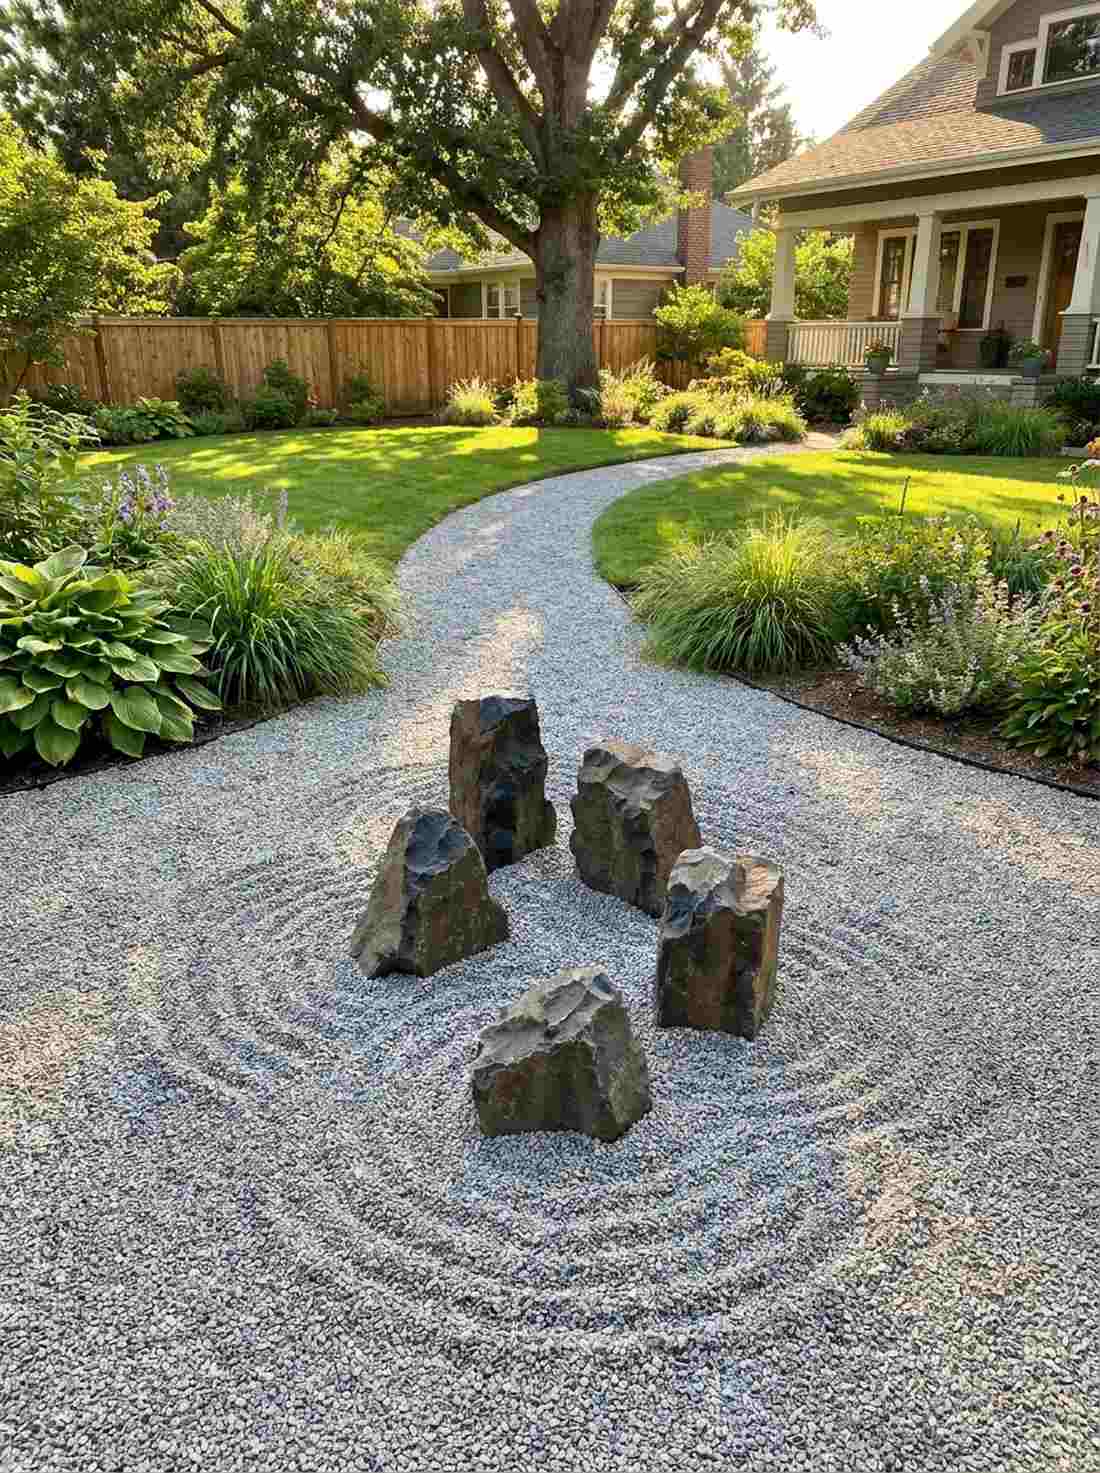
17. Spiral Meditation Boulder Path
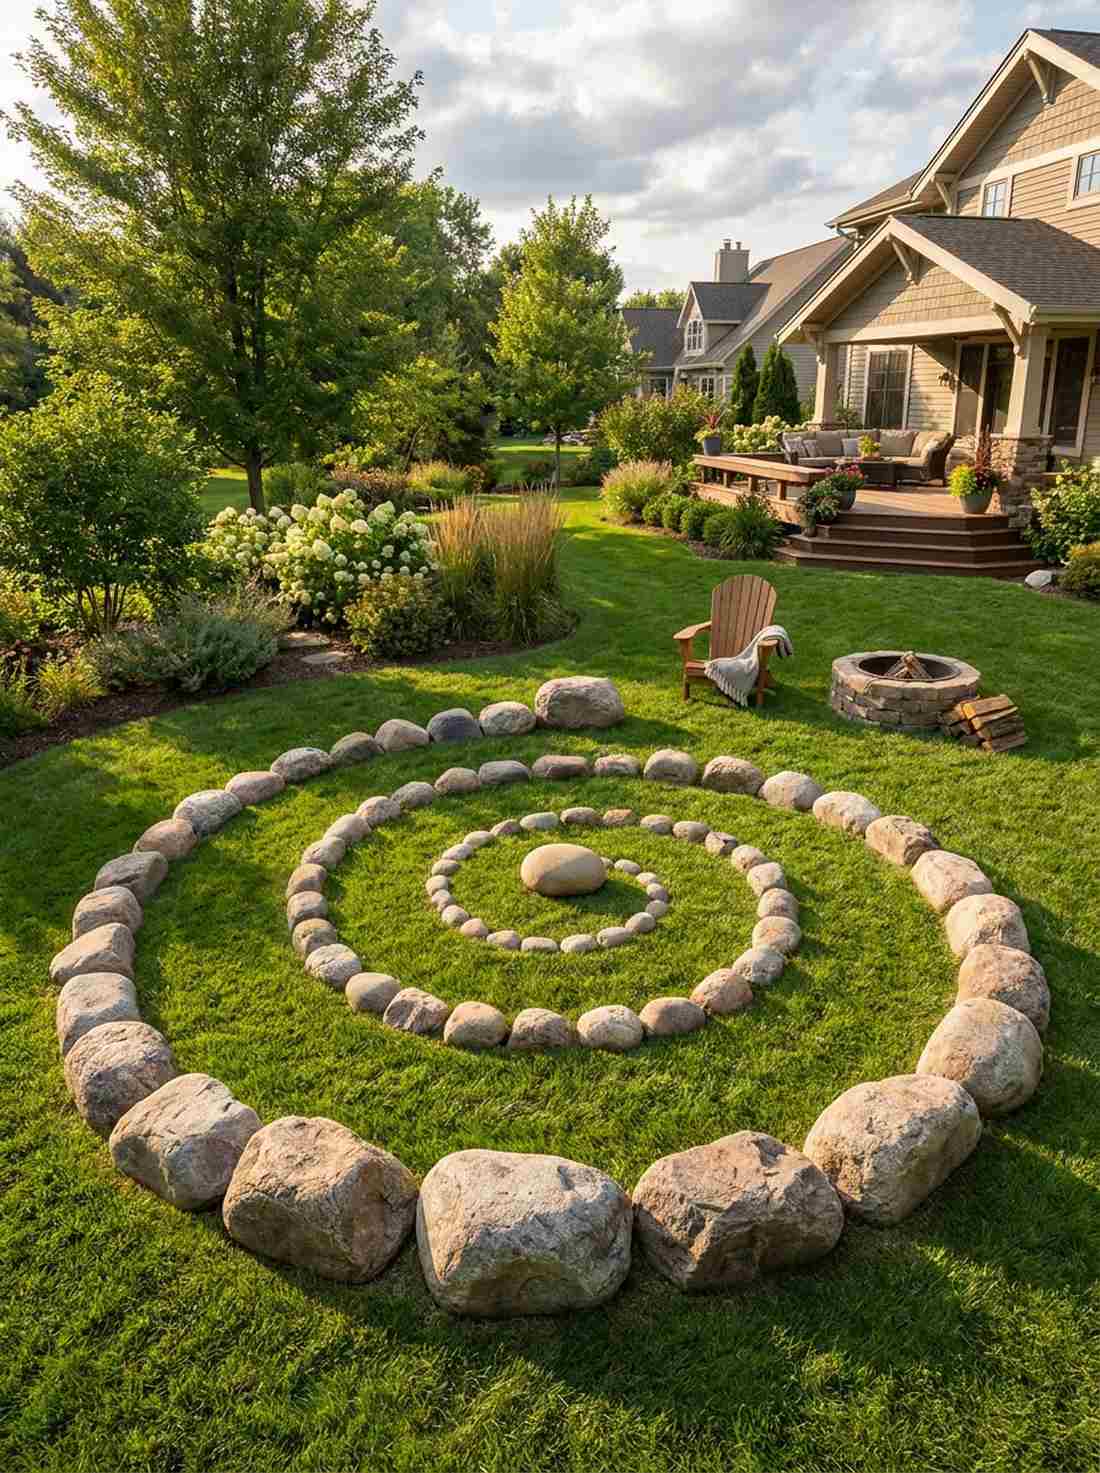
Brings a mesmerizing, labyrinth-like energy to your grass. A spiraling meditation stone layout works exceptionally well for large, circular lawn clearings.
Straight lines are boring; arranging stones in a tightening spiral gives a designer-level finish that encourages deep walking meditation. Using decreasing stone sizes toward the center perfectly symbolizes shedding worldly stress.
Building this labyrinth runs about $80–$120. Save this to your spiritual outdoor DIY board!
- Key Materials: 30+ rocks grading from large to small
- Vibe / Style: Introspective labyrinth
- Difficulty: Requires careful measuring
- Budget Breakdown: Bulk rocks: $90 | Marking paint: $10
- Creator’s Tip: Use a central stake and a string to spray paint a perfect spiral before laying stones.
- Smart Sourcing: Landscaping spray paint chalk and bulk mixed cobble packs.
Most basic DIY pathways wash away in the rain. This next elevated trick solves that problem instantly while looking incredibly chic…
18. Cloud-Stepping Platform Path

Feels like walking on floating clouds above the earth. Elevated flat platform rocks are highly practical for flat gardens that flood easily.
Sinking stones too deep can cause them to vanish in mud; letting broad stones rise 6 inches above the gravel looks far more expensive than it is. This subtle elevation change makes the walk feel ceremonial.
You can easily pull this off for around $70. Highly recommended for a quick weekend win.
- Key Materials: Broad, thick horizontal slabs
- Vibe / Style: Elevated and sacred
- Difficulty: Moderate base leveling
- Budget Breakdown: Platform slabs: $60 | Tamp sand: $10
- Creator’s Tip: Pack heavy gravel tightly under the center of each slab to prevent rocking.
- Smart Sourcing: Thick-cut quartzite slabs and polymeric binding sand.
Water Element Representations Through Stone and Boulder
Boulder arrangements can evoke flowing water, waterfalls, and streams without using actual water elements. Strategic placement and stone selection create powerful aquatic illusions.
19. Dry Cascade Waterfall
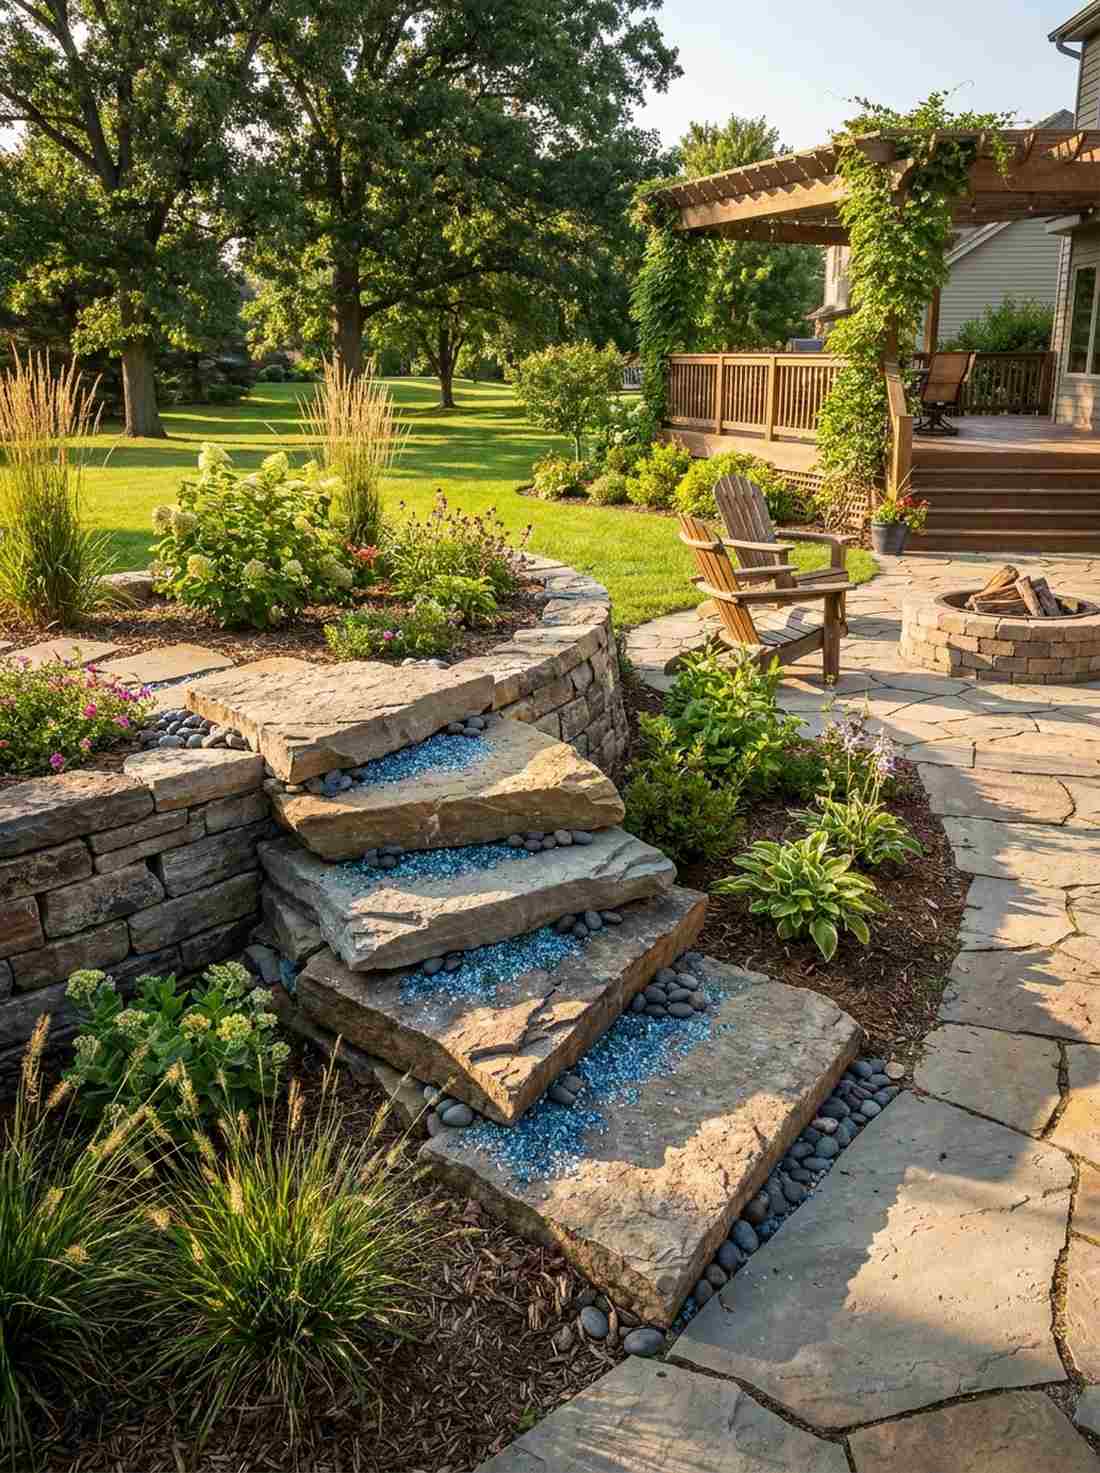
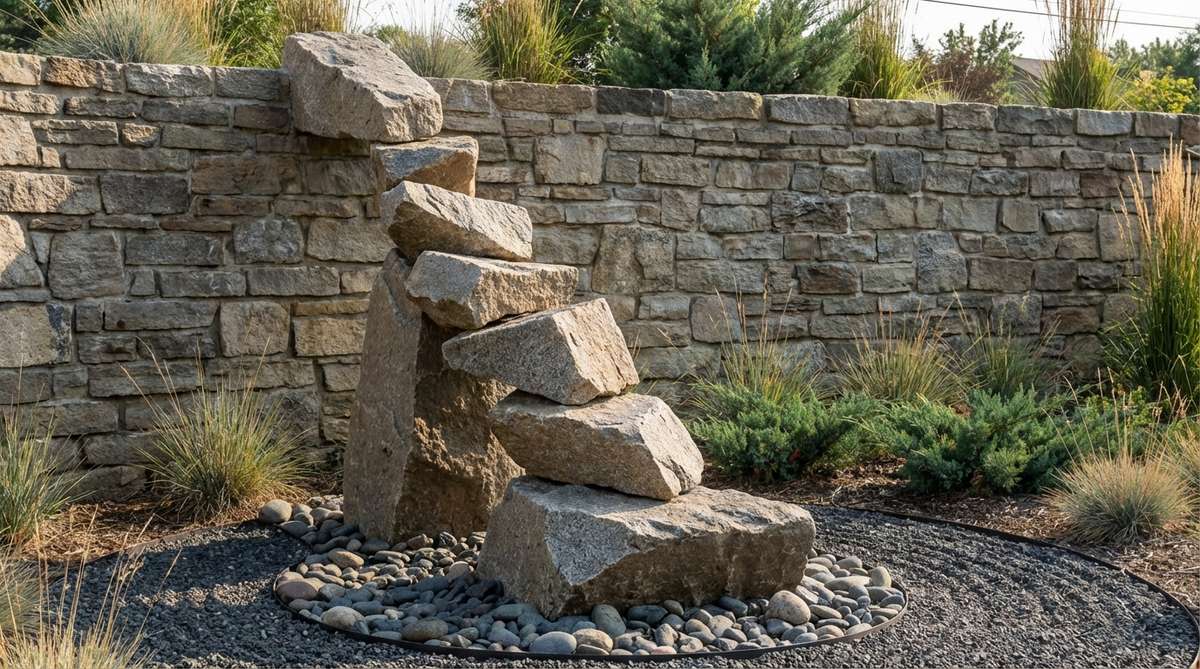
Captures the dramatic energy of a crashing waterfall without the plumbing. A vertical dry stone cascade works flawlessly against retaining walls or fences.
Real water features break constantly, but stacking angular boulders vertically delivers a surprisingly premium look with zero maintenance. Tilting them slightly forward creates the optical illusion of rushing water.
This dry feature costs roughly $60–$90. Pin this for a low-maintenance backyard hack!
- Key Materials: 5-7 flat, angular stones stacked vertically
- Vibe / Style: High-energy visual flow
- Difficulty: Tricky vertical stacking
- Budget Breakdown: Stacking rocks: $70 | Construction adhesive: $15
- Creator’s Tip: Use small handfuls of fine blue gravel wedged between the rocks to enhance the water illusion.
- Smart Sourcing: Heavy-duty landscape block adhesive and blue-tinted glass gravel bags.
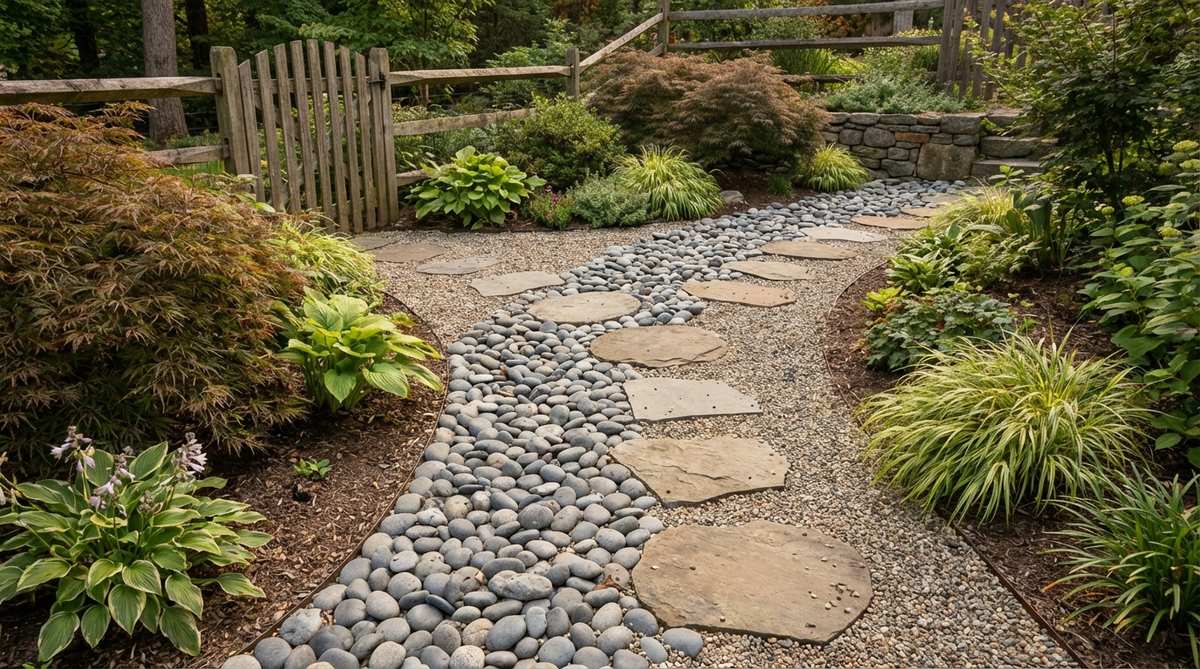
20. Stream Bed Boulder Course
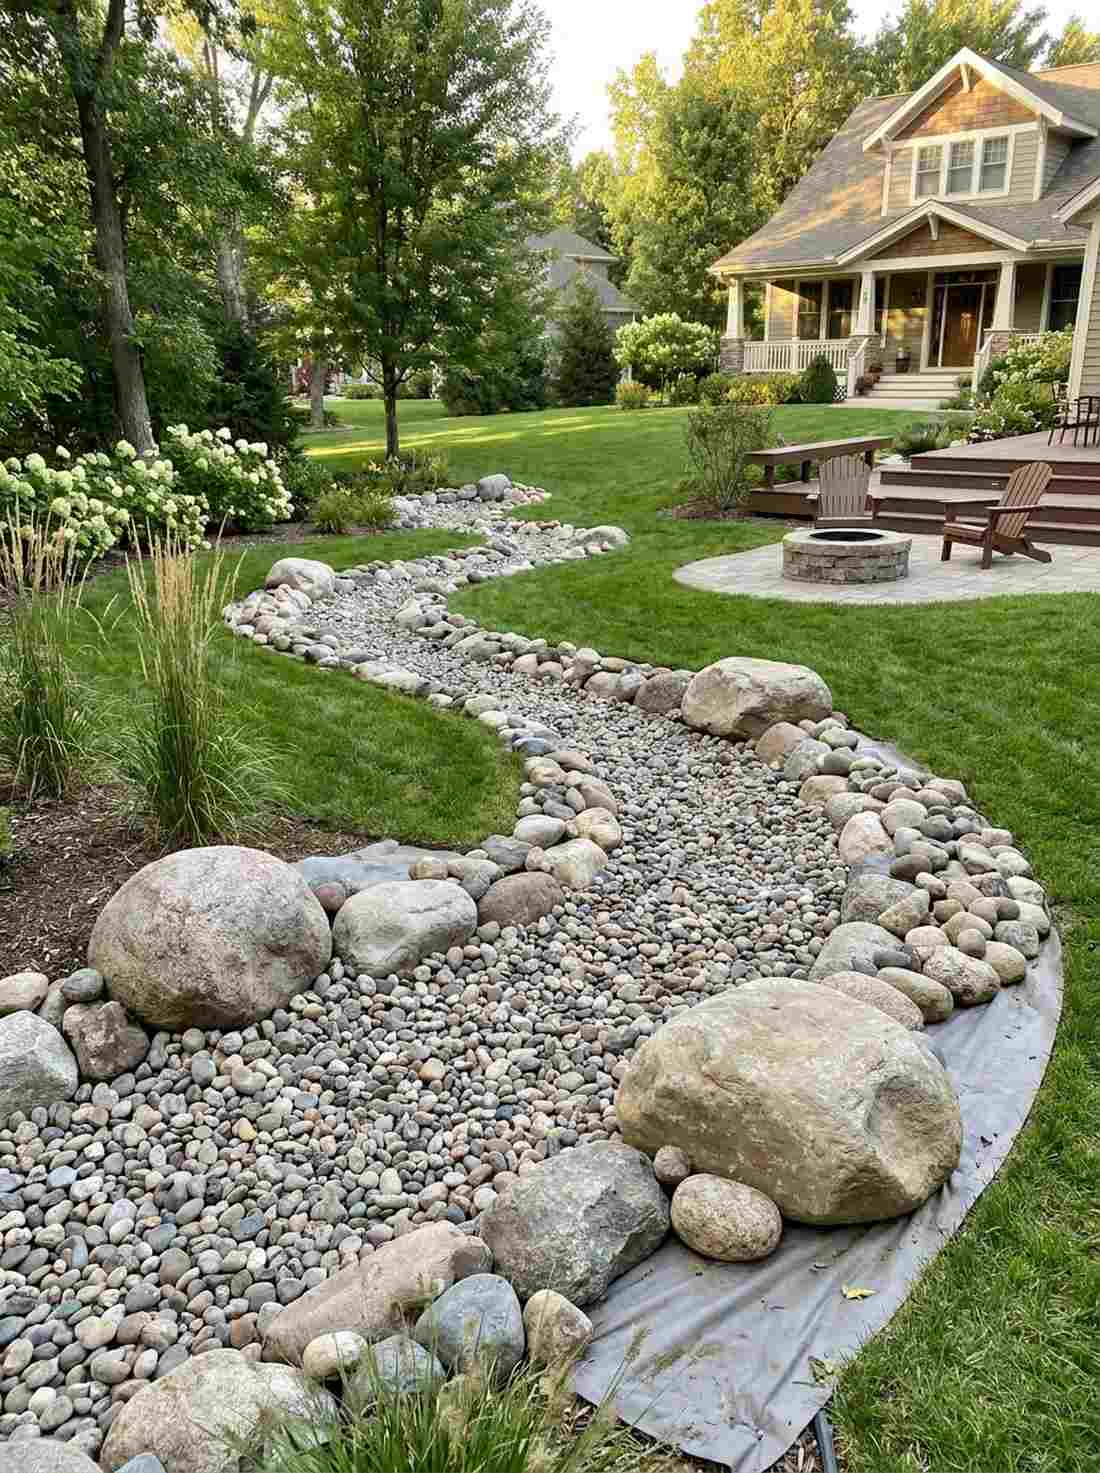
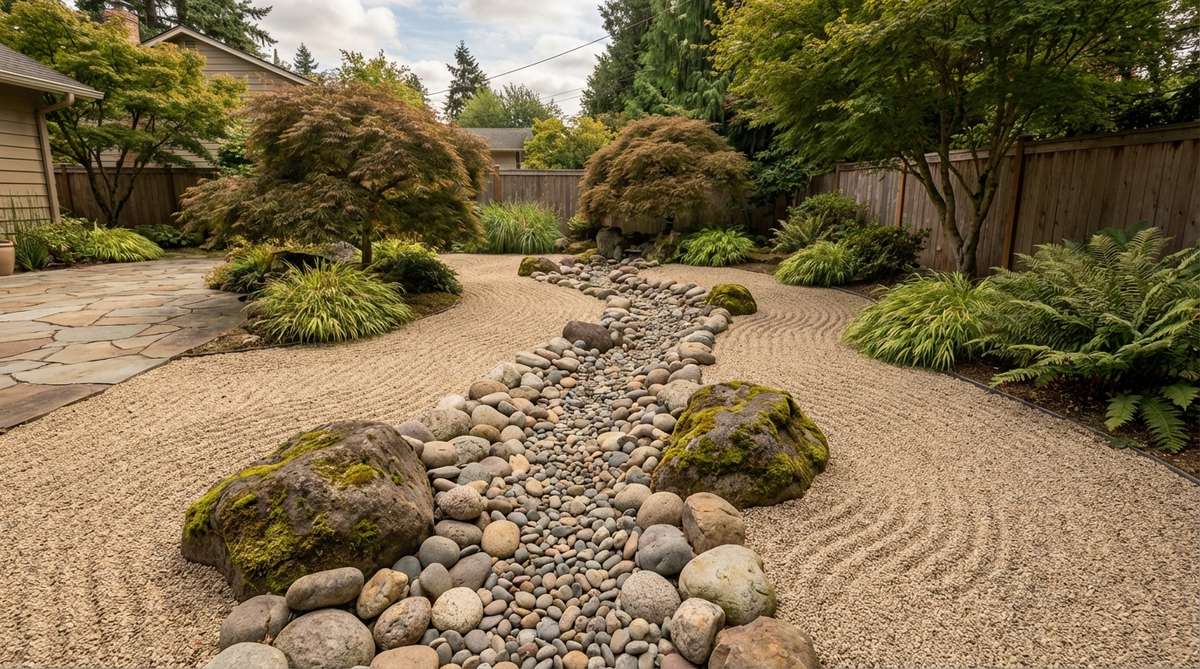
Looks like a babbling brook that just dried up for the summer. A meandering dry stream bed is perfect for fixing natural drainage ditches in your yard.
Leaving a muddy trench is an eyesore, but lining it with river-worn boulders gives a designer-level finish. Placing the largest rocks on the outer curves perfectly mimics real water erosion dynamics.
You can build this functional drainage art for $100–$150. Save this if your yard gets soggy after rain!
- Key Materials: Mixed sizes of smooth river rock
- Vibe / Style: Natural woodland stream
- Difficulty: Moderate trench digging
- Budget Breakdown: Bulk river rock: $120 | Filter fabric: $25
- Creator’s Tip: Lay down landscape fabric first, or weeds will destroy the illusion in weeks.
- Smart Sourcing: Commercial non-woven weed barriers and bulk sorted river pebbles.
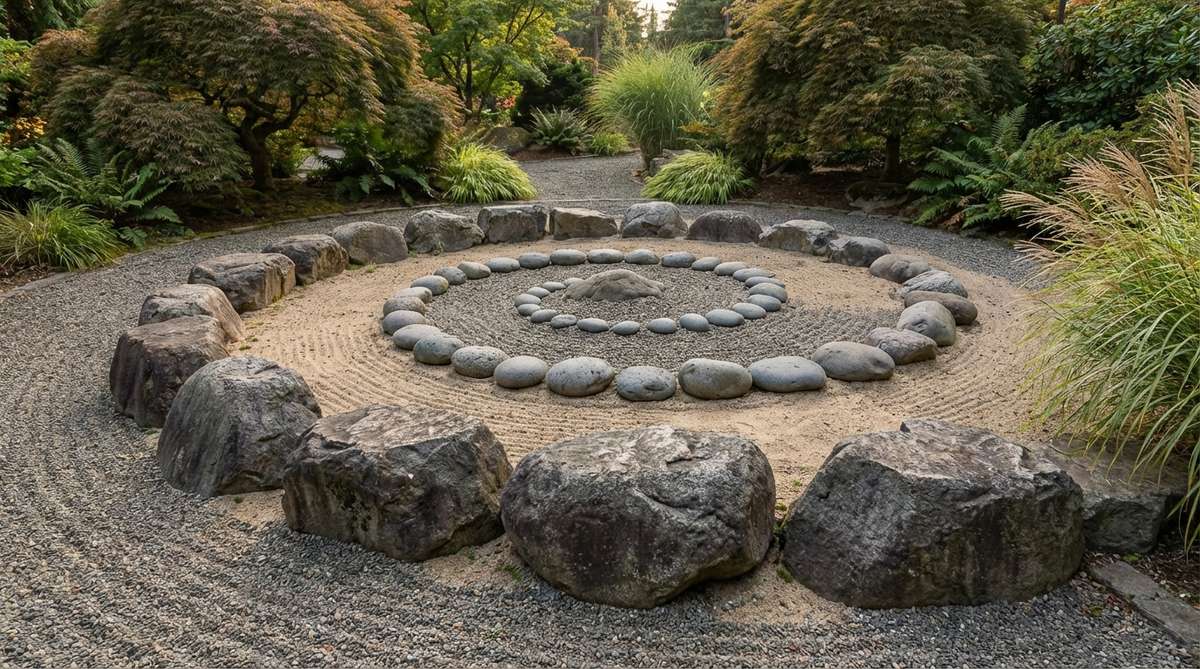
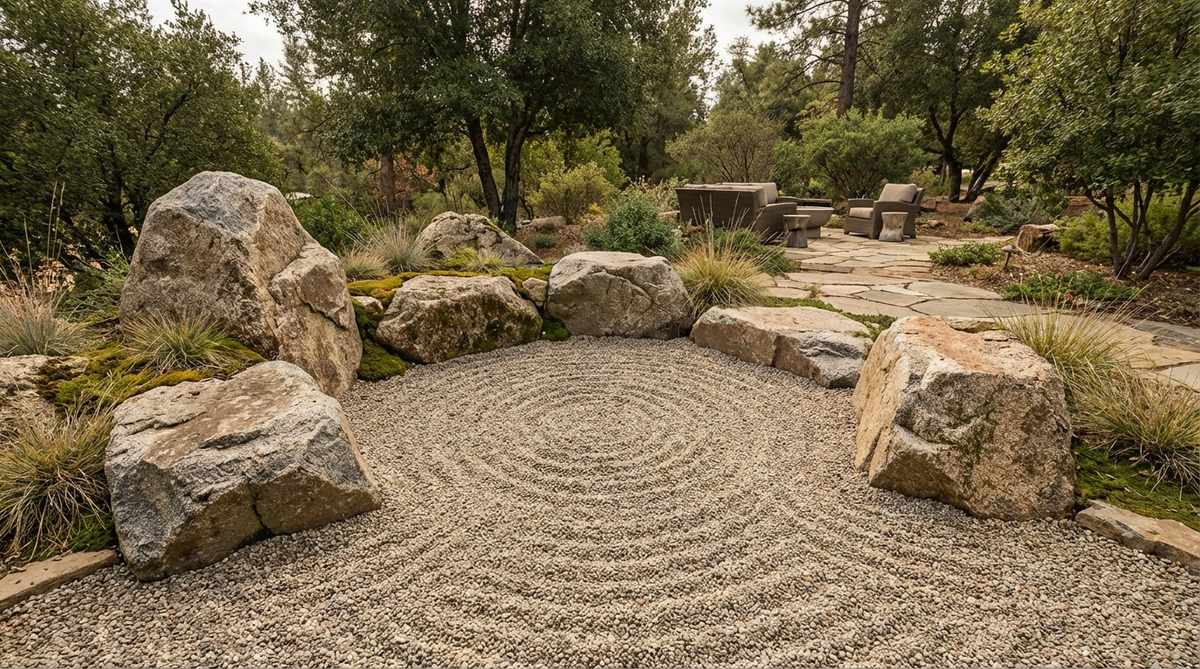
21. Whirlpool Boulder Spiral
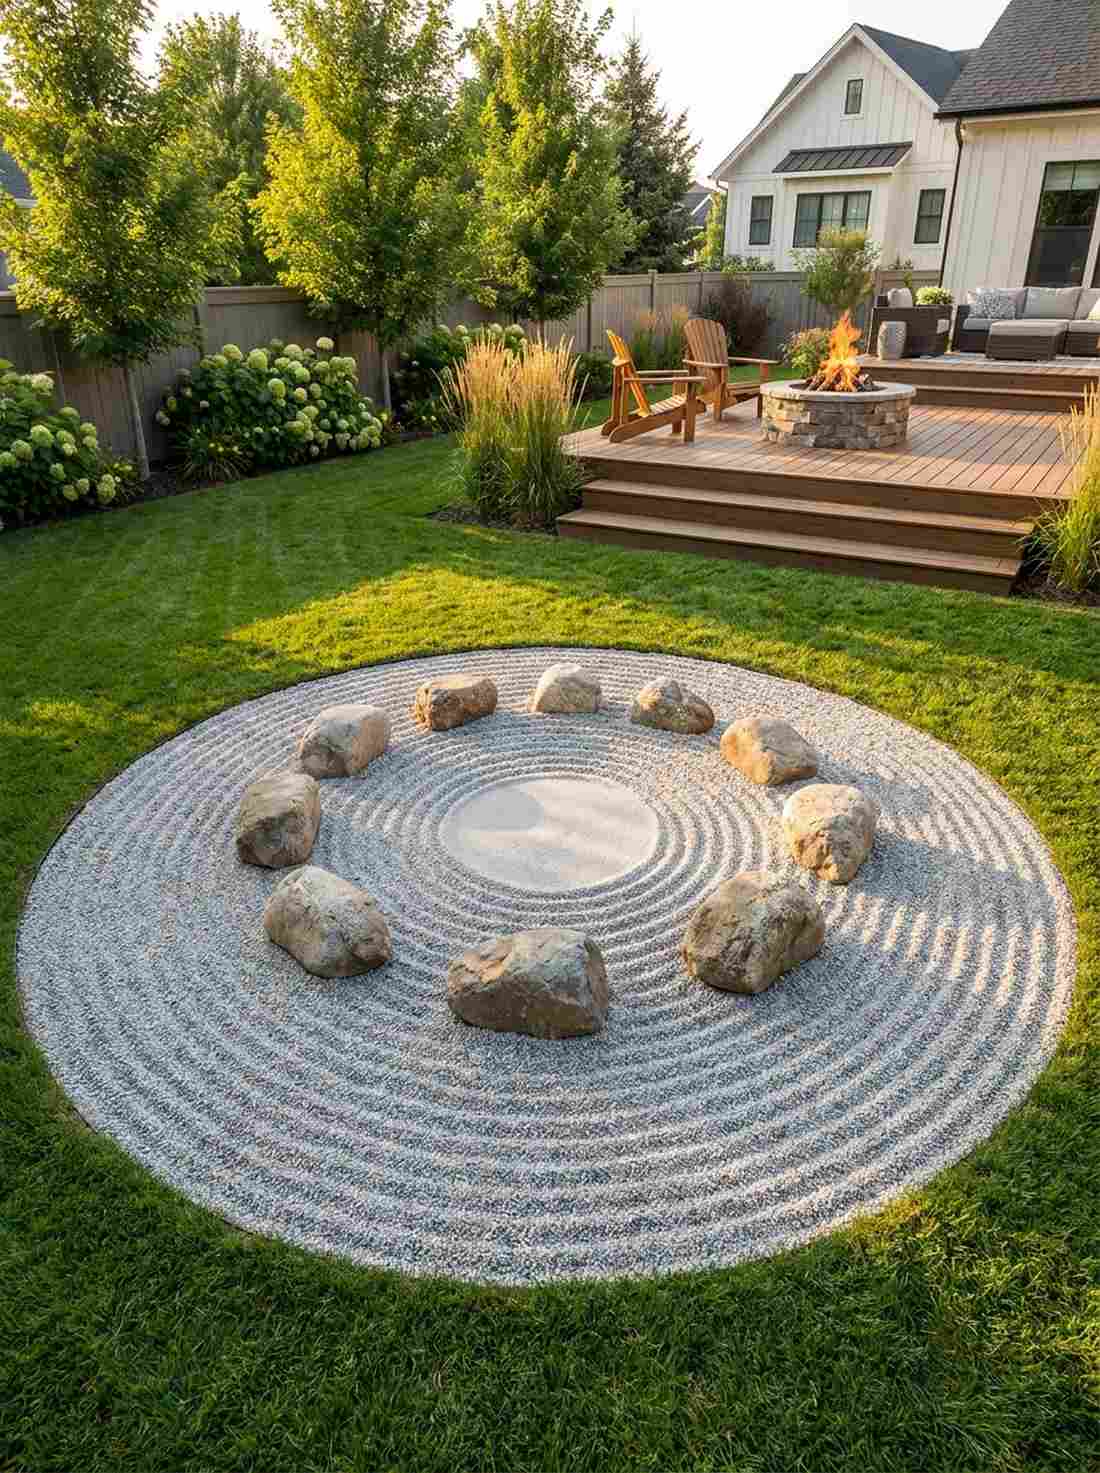
Creates a mesmerizing vortex of energy in the center of your garden. A gravel and stone whirlpool serves beautifully as a central focal point.
Static layouts can feel dull, but angling stones inward toward a central depression looks far more expensive than it is. Raking tight spiral patterns around these rocks captures the rotational energy of deep water.
This hypnotic layout costs around $30. It’s a fast upgrade that completely changes the vibe.
- Key Materials: 5-9 medium boulders and fine gravel
- Vibe / Style: Dynamic and hypnotic
- Difficulty: Requires precise raking
- Budget Breakdown: Boulders: $20 | Fine sand: $10
- Creator’s Tip: Keep the central void completely empty and raked smooth to simulate the eye of a vortex.
- Smart Sourcing: Specialty zen garden raking tools and crushed granite fines.
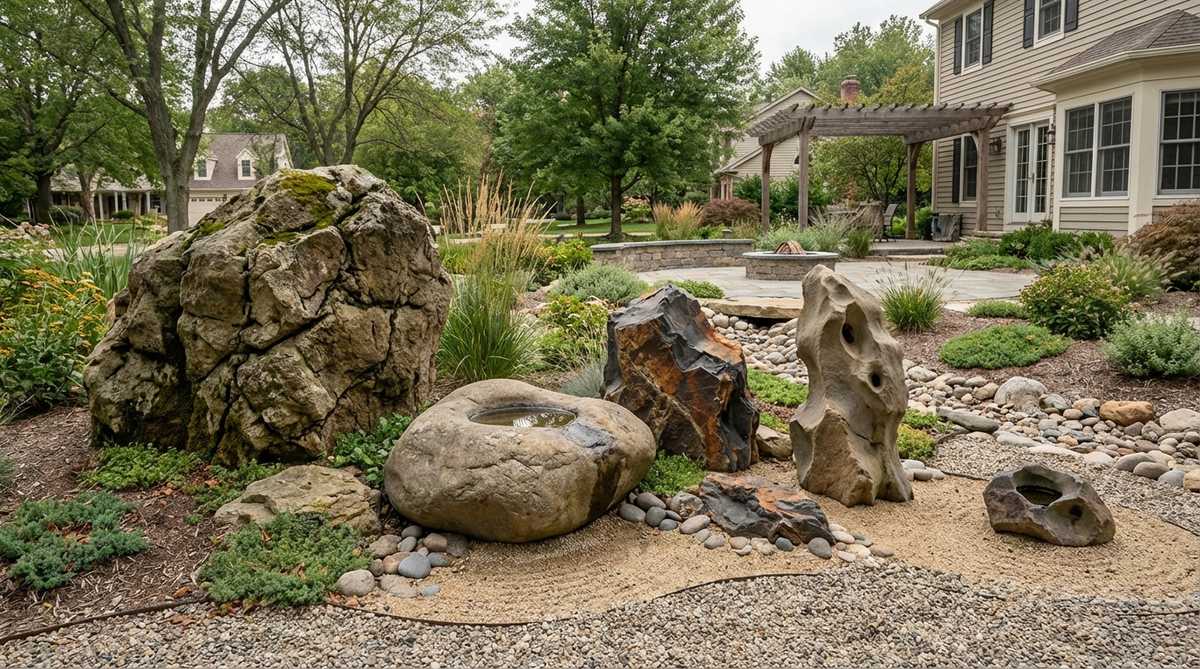
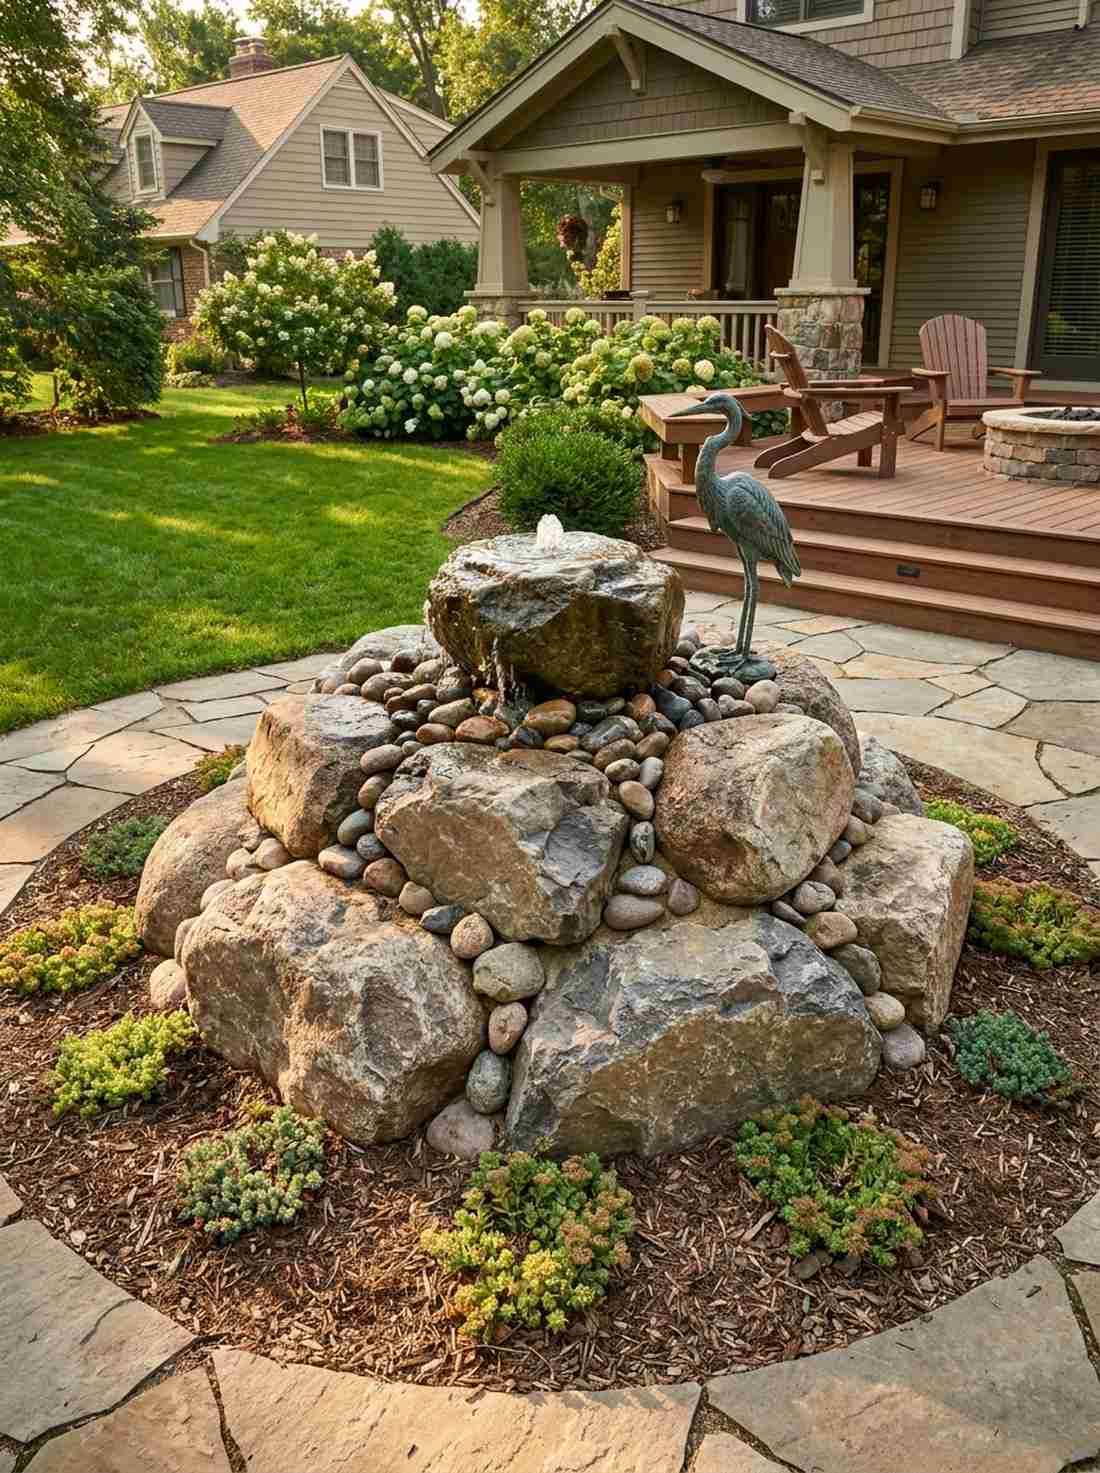
22. Spring Source Boulder Fountain
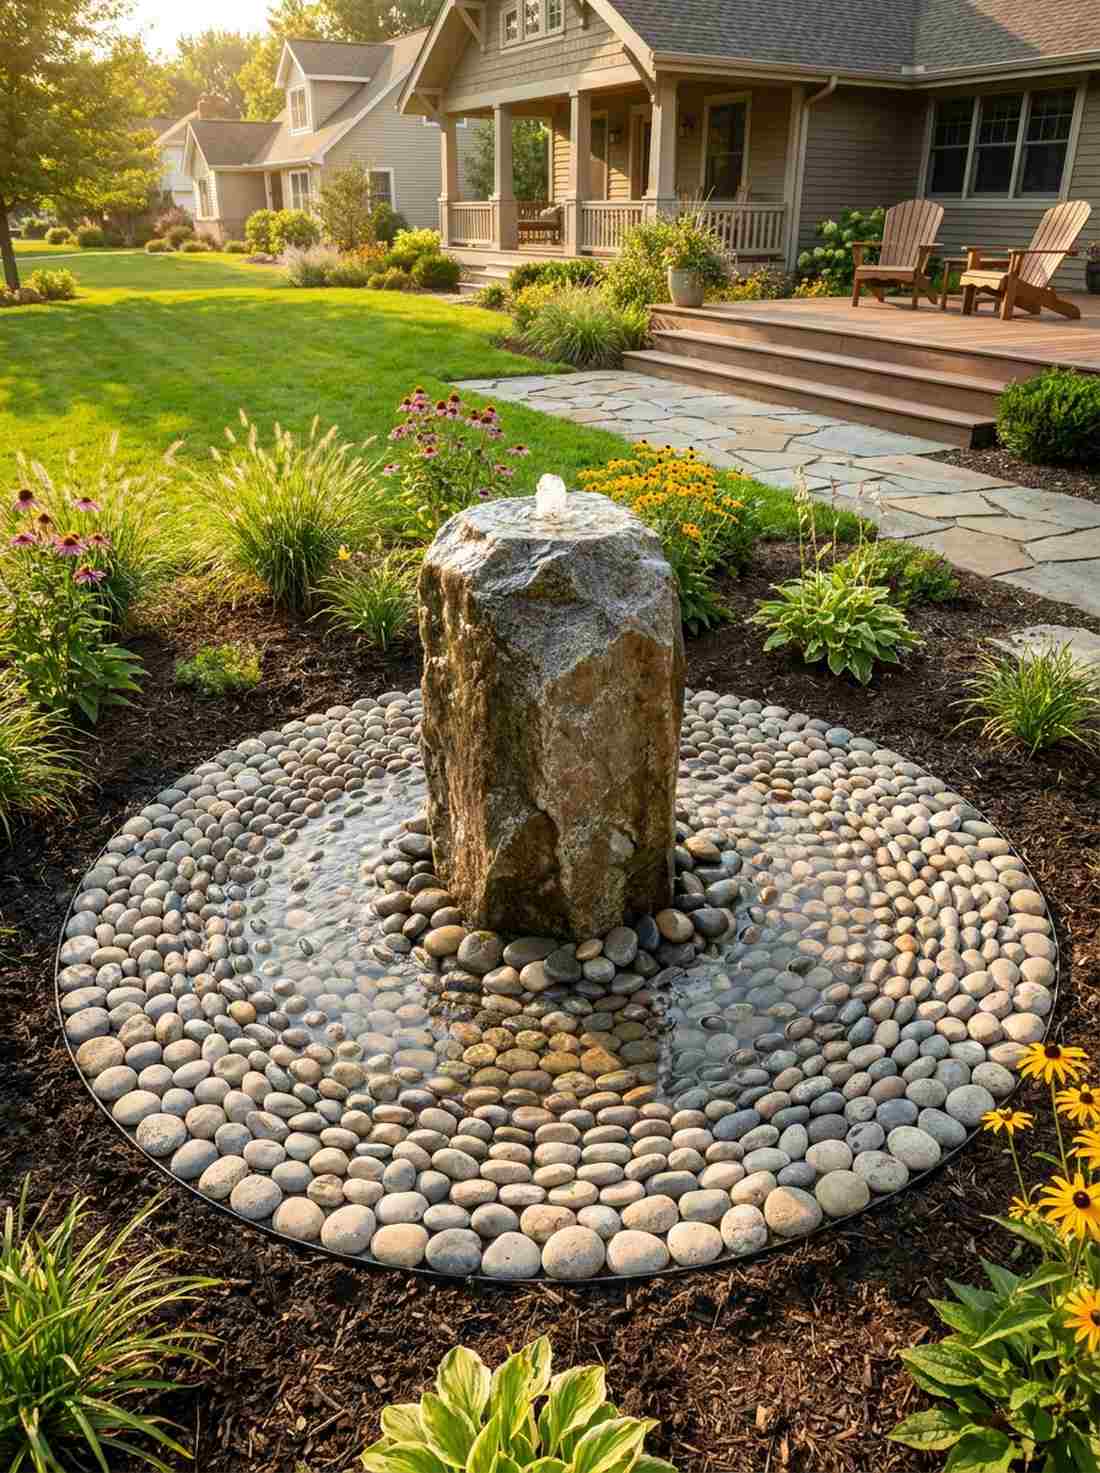
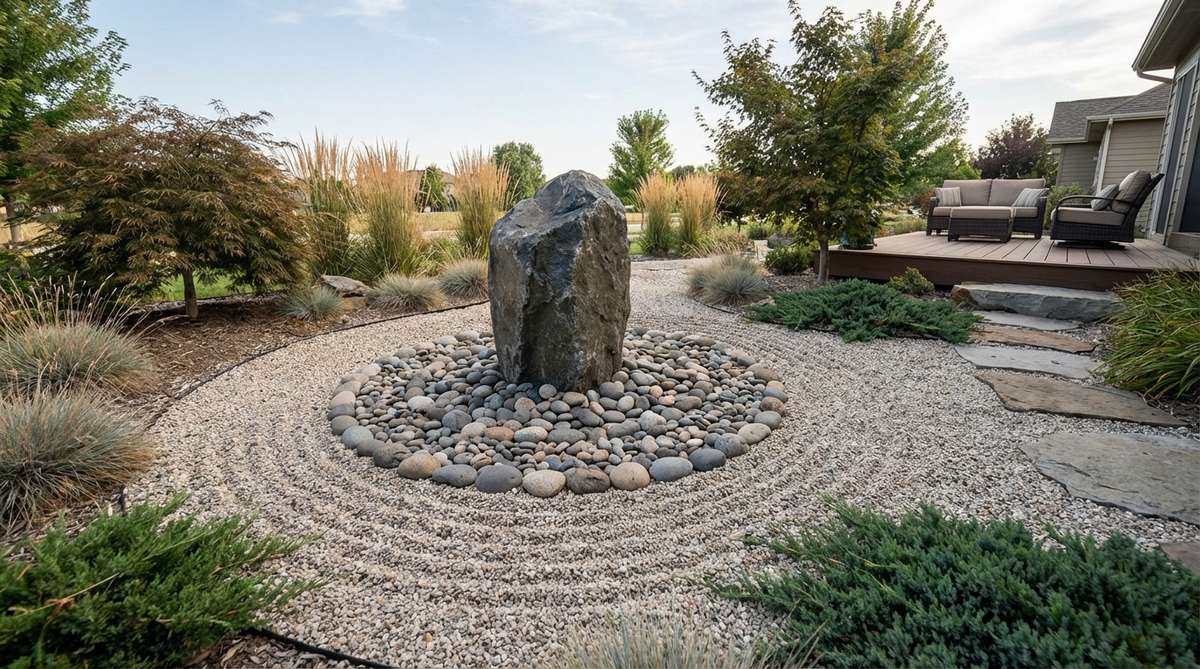
Feels like life-giving water bubbling up from the earth. A concentric stone spring layout is highly practical for covering unsightly tree stumps or yard drains.
Amateurs struggle to hide yard flaws, but radiating small stones outward from a central monolith gives a designer-level finish. This setup brilliantly uses authentic zen garden stone to mimic ripples expanding from a dropped pebble.
You can execute this clever cover-up for $40–$60. Pin this to your clever landscaping hacks board!
- Key Materials: One central upright rock, multiple small pebbles
- Vibe / Style: Renewing and vibrant
- Difficulty: Very easy
- Budget Breakdown: Centerpiece rock: $30 | Pebble bags: $20
- Creator’s Tip: Bury the surrounding stones so they barely peek above the dirt, maximizing the ripple effect.
- Smart Sourcing: Uniform Mexican beach pebbles and pre-cut weed barrier rings.
23. Tidal Pool Boulder Basin
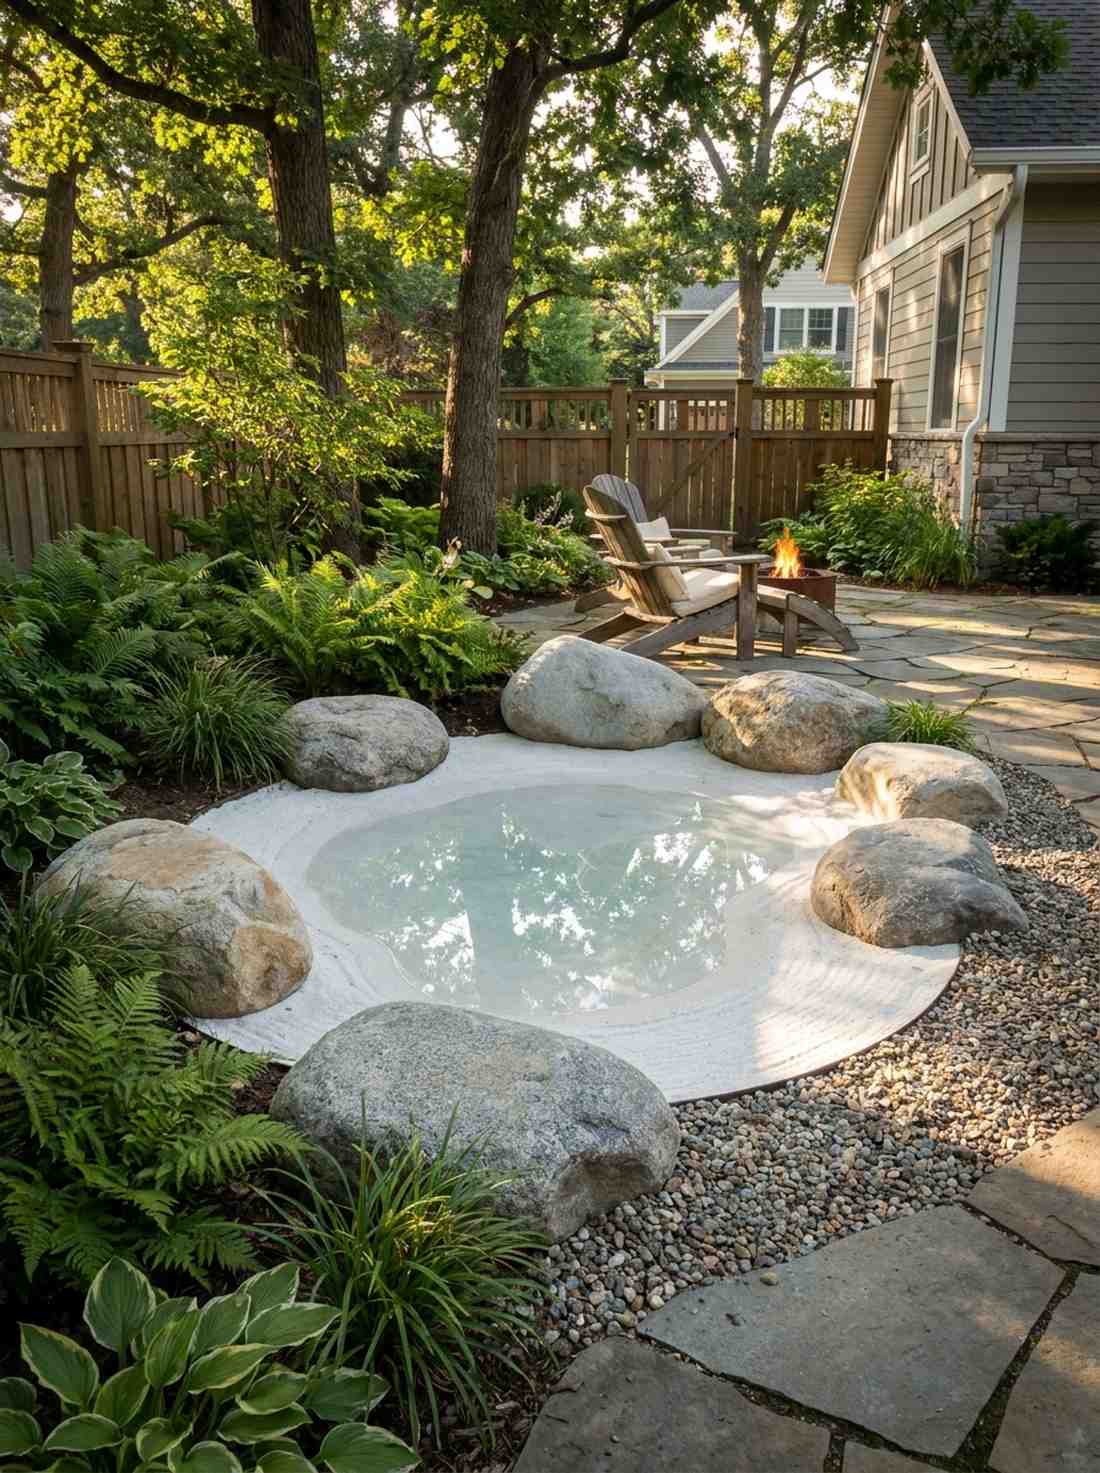
Brings a quiet, intimate slice of the coast to your backyard. A concave stone tidal pool is an incredible addition for a small, shaded corner.
Flat gravel areas get boring, but creating a slight depression surrounded by weathered rocks delivers a surprisingly premium look. The trick is to use water-worn stones rather than jagged ones to sell the oceanic illusion.
This intimate piece costs about $35. Highly recommended for a quick weekend win.
- Key Materials: 6-8 smooth, water-worn boulders
- Vibe / Style: Contained and reflective
- Difficulty: Easy shallow digging
- Budget Breakdown: Boulders: $25 | Smooth sand: $10
- Creator’s Tip: Rake the inside depression perfectly flat to simulate glass-like standing water.
- Smart Sourcing: Smooth ocean-tumbled stones and ultra-fine white play sand.
Most garden paths feel incredibly rigid and lifeless. This next placement trick adds instant kinetic energy and movement to dead corners…
24. River Bend Eddy Cluster
Looks exactly like water rushing around a natural obstacle. The corner stone eddy trick works flawlessly to soften sharp 90-degree pathway turns.
Leaving path corners empty looks unfinished, but clumping 3 boulders right at the bend looks far more expensive than it is. Raking the gravel to “flow” around the rocks adds immense kinetic energy to a static space.
You can achieve this effect for just $20. Pin this to your pathway design board!
- Key Materials: 3-5 medium jagged rocks
- Vibe / Style: Turbulent and energetic
- Difficulty: Quick and easy
- Budget Breakdown: Assorted rocks: $15 | Gravel: $5
- Creator’s Tip: Orient the sharpest edge of the lead stone directly into the flow of the pathway.
- Smart Sourcing: Jagged basalt chunks and wave-patterned garden rakes.
Modern Minimalist Placements for Contemporary Spaces
Contemporary zen garden design embraces extreme simplicity, often using single boulders or pairs to create powerful statements. These minimalist arrangements focus attention intensely on stone quality and placement precision.
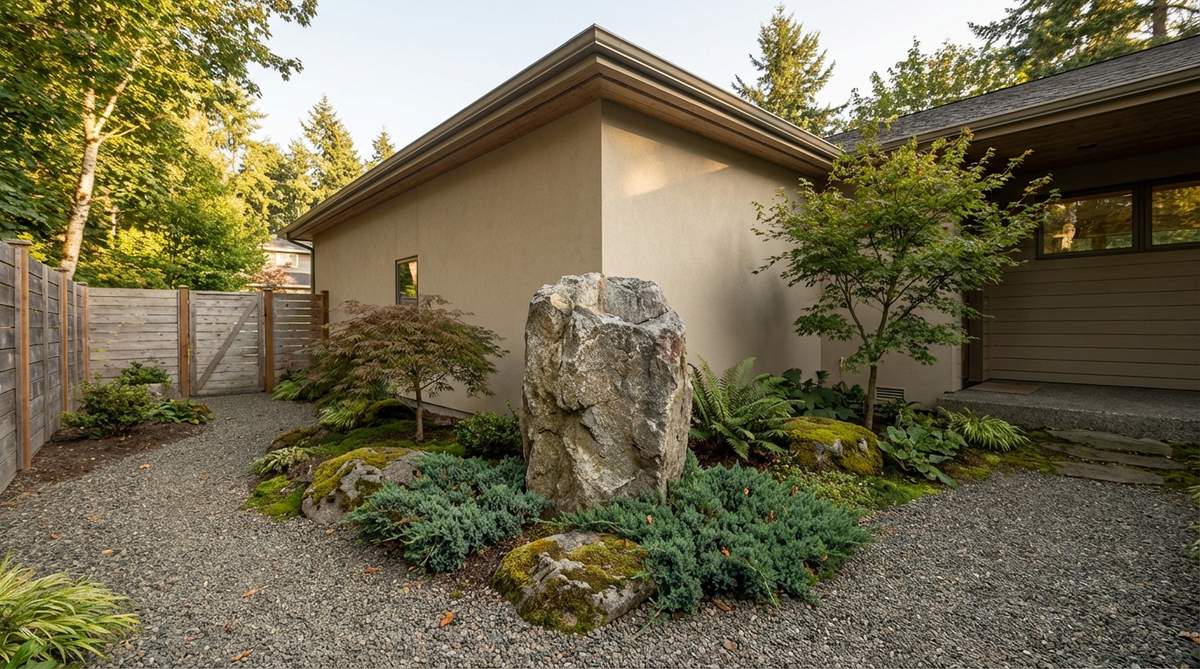
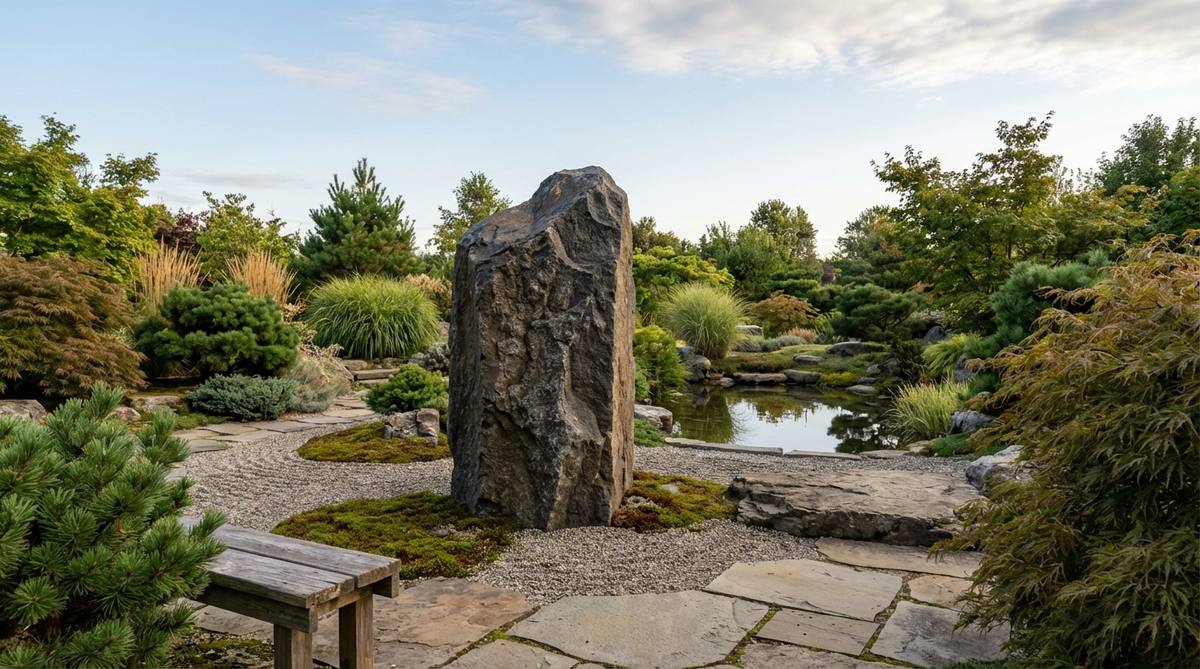
25. Single Meditation Monolith
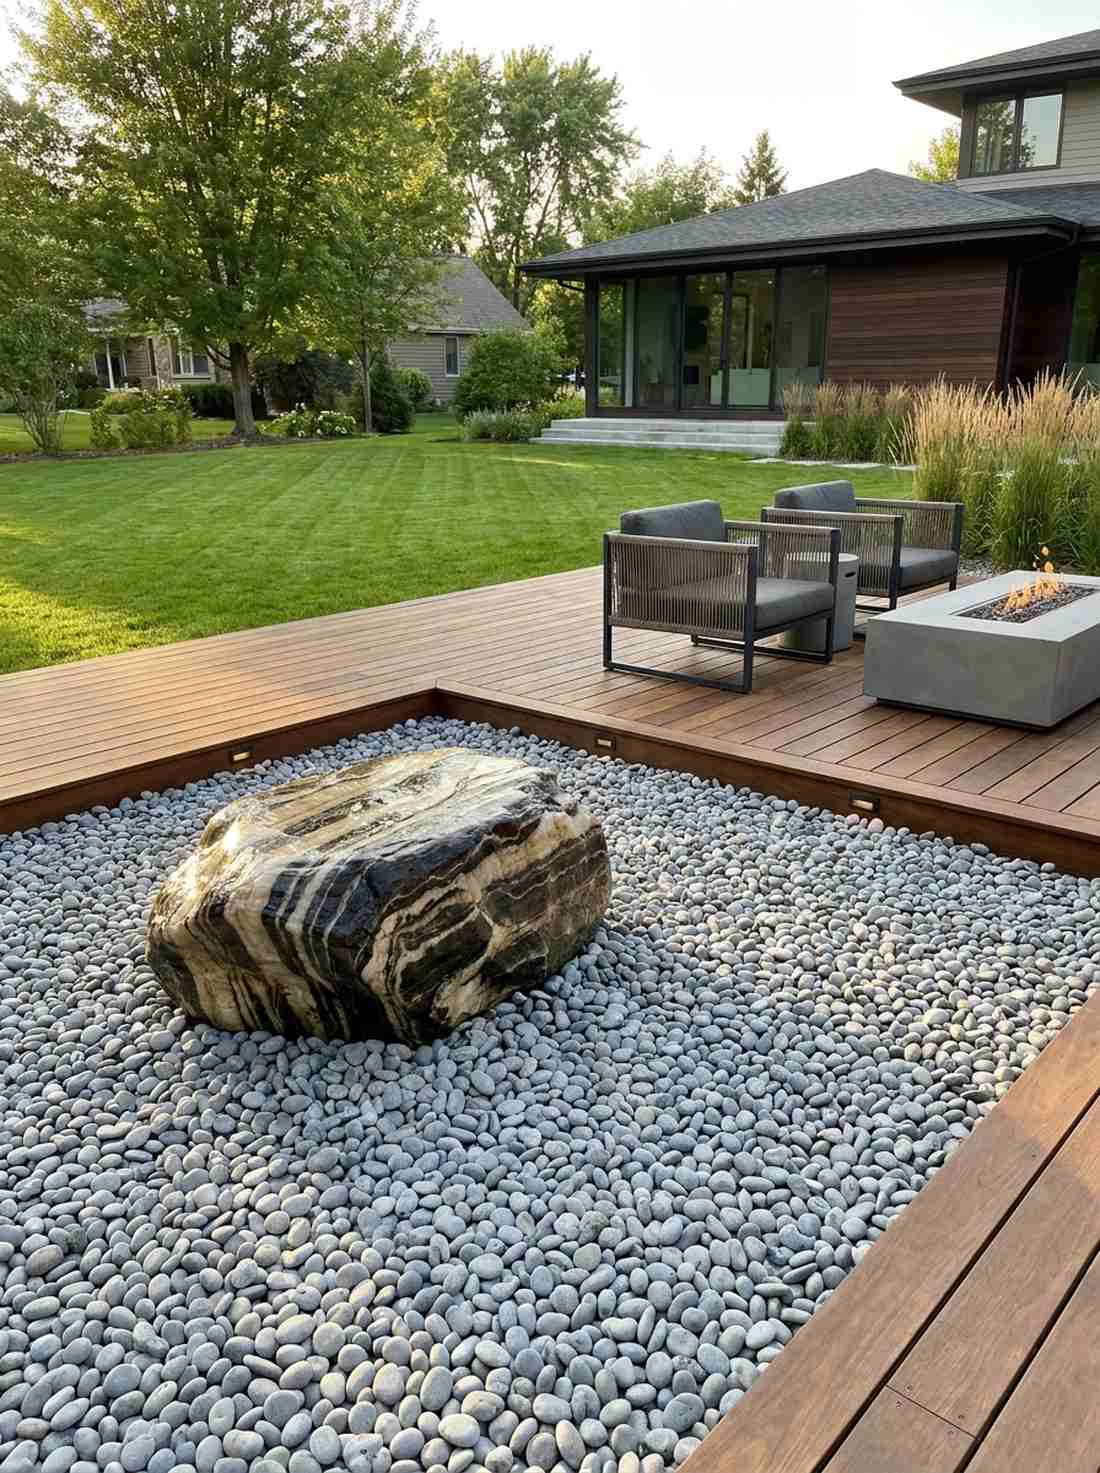
Radiates intense, undistracted focus. A single isolated monolith setup is perfect for modern, ultra-clean patio spaces.
Overcrowding small spaces looks terrible; choosing one exceptional specimen stone gives a designer-level finish. Placing it off-center using the golden ratio rule turns a plain gravel patch into modern art.
Because you only need one rock, this costs around $50–$100. Save this for your minimalist architecture board!
- Key Materials: One flawless specimen boulder
- Vibe / Style: Museum-quality modernism
- Difficulty: Requires an eye for proportion
- Budget Breakdown: Premium boulder: $80 | Vast gravel base: $20
- Creator’s Tip: Wash the stone thoroughly to reveal its natural veining before placing it.
- Smart Sourcing: Premium striped onyx boulders and stone color-enhancing sealers.
Material Guide: Cheap vs. Premium Aesthetic
Knowing exactly where to save and where to spend makes all the difference in achieving that “looks expensive but isn’t” vibe.
- Standard vs. UV-Resistant/Premium: Unsealed rocks fade and grow algae fast. Using UV-resistant sealants stops fading and keeps the wet-stone look permanently.
- Pre-made Kits vs. Sourcing Locally: While local quarries are cheap for bulk rocks, pre-cut moss kits and miniature accessories often save hours of frustrating DIY time while delivering a cleaner finish.
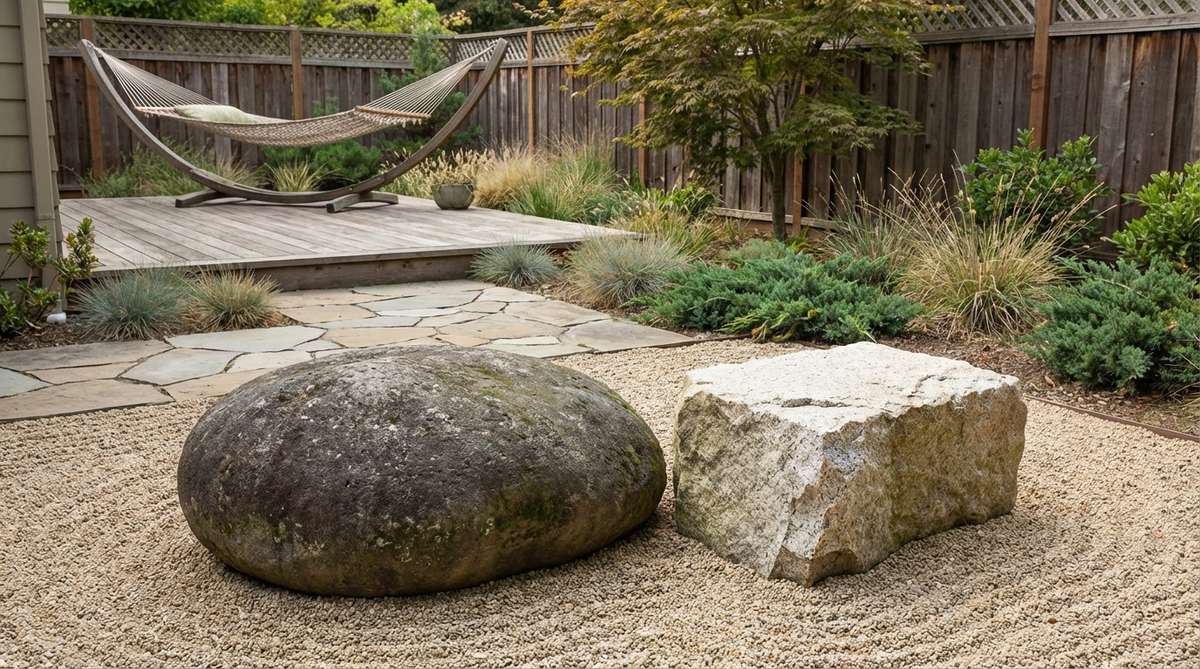
26. Yin-Yang Boulder Pair
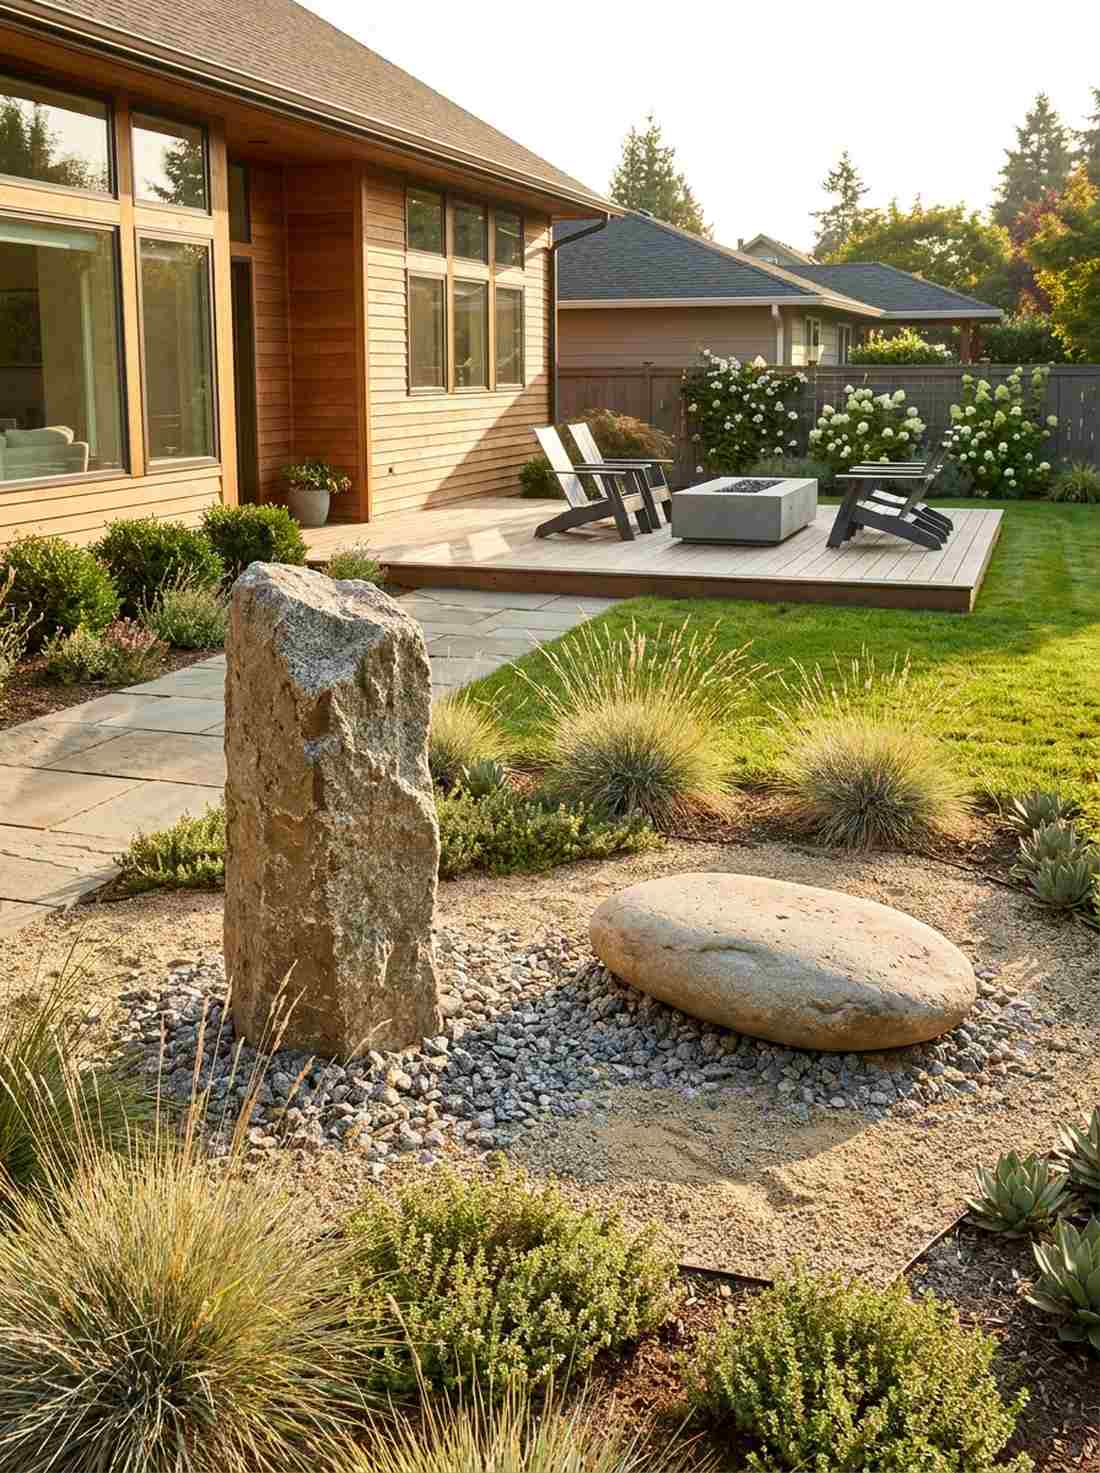
Feels perfectly balanced and spiritually harmonious. A contrasting stone pair works beautifully in symmetrical, modern garden layouts.
Matching everything is boring, but pairing one jagged upright stone with a smooth horizontal one delivers a surprisingly premium look. This push-and-pull dynamic keeps the eye moving without cluttering the yard.
This dual-stone concept costs roughly $60. It’s a fast upgrade that completely changes the vibe.
- Key Materials: One tall rough stone, one flat smooth stone
- Vibe / Style: Philosophical and balanced
- Difficulty: Easy spacing
- Budget Breakdown: Contrasting stones: $50 | Base sand: $10
- Creator’s Tip: Space them exactly 6 to 10 feet apart so they communicate without crowding.
- Smart Sourcing: Contrasting polished and raw stone bundles and precision measuring tapes.
27. Geometric Grid Boulder Array
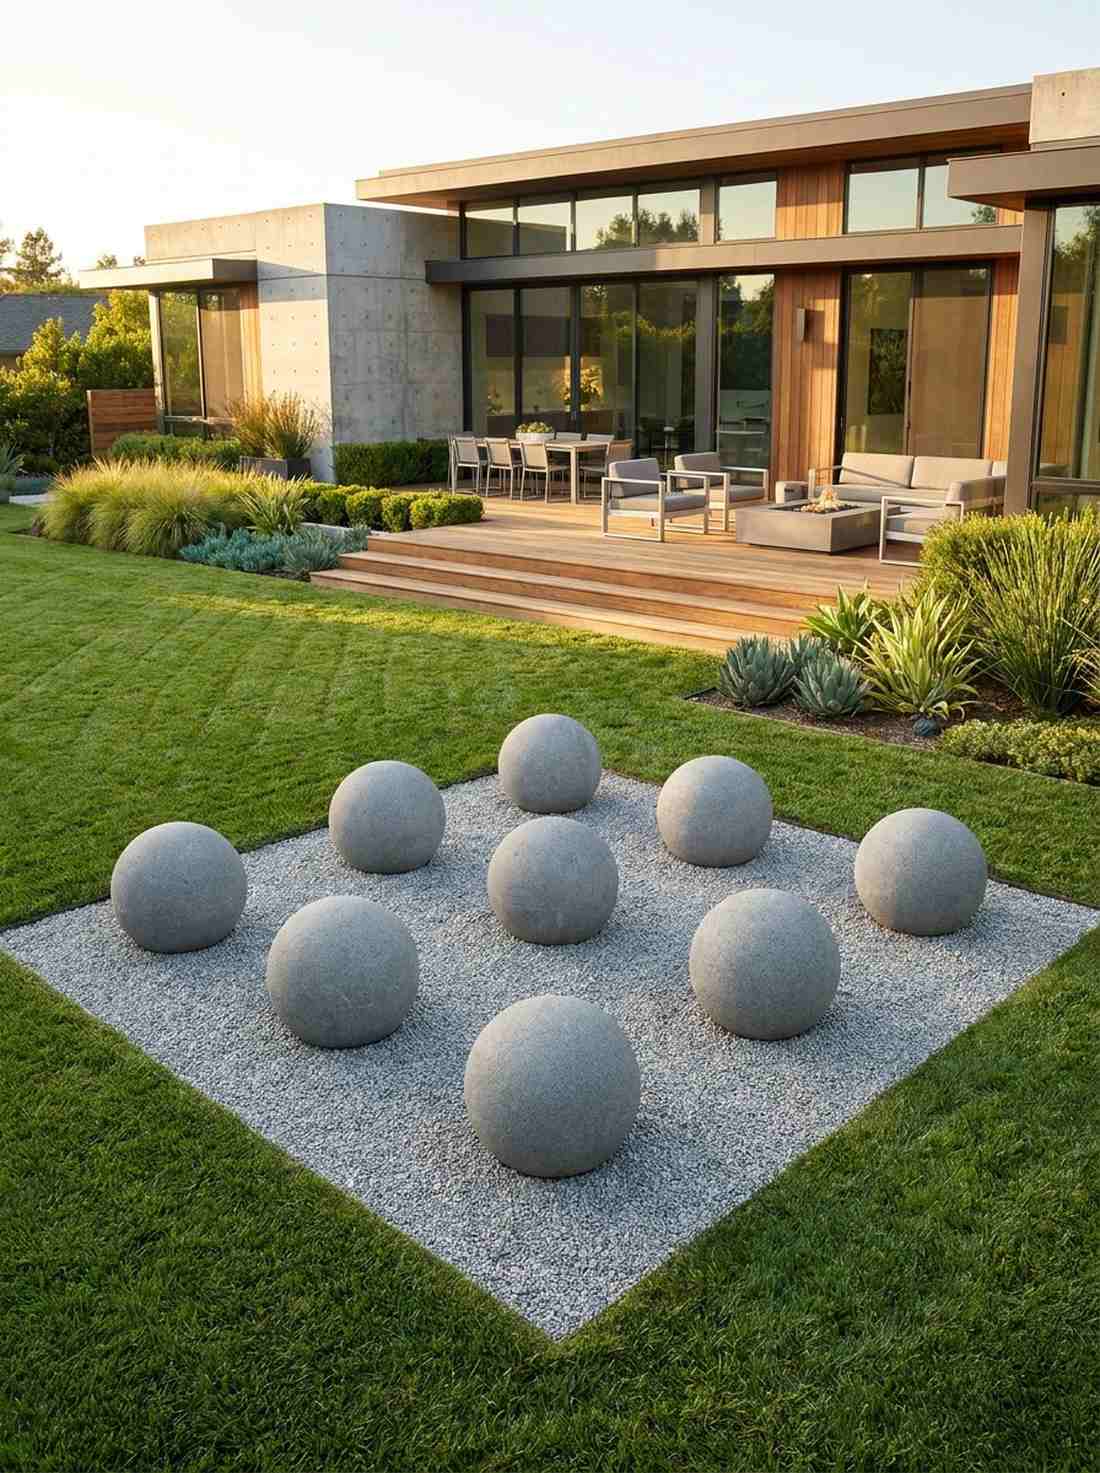

Straight out of a high-end corporate atrium. A structured 3×3 rock grid is highly practical for ultra-modern, rigid architectural homes.
Traditionalists hate symmetry, but breaking the rules with a precise grid looks far more expensive than it is. Using identically sized stones creates a stark, satisfying order that modernists adore.
Sourcing identical stones costs about $150. Pin this to your modern outdoor architecture board!
- Key Materials: 9 uniformly sized and shaped boulders
- Vibe / Style: Architectural and ordered
- Difficulty: Extreme precision required
- Budget Breakdown: Uniform stones: $120 | Grid markers: $30
- Creator’s Tip: Use laser levels to ensure every stone sits at the exact same height above the gravel.
- Smart Sourcing: Pre-machined spherical garden stones and outdoor laser levels.
28. Floating Platform Boulder
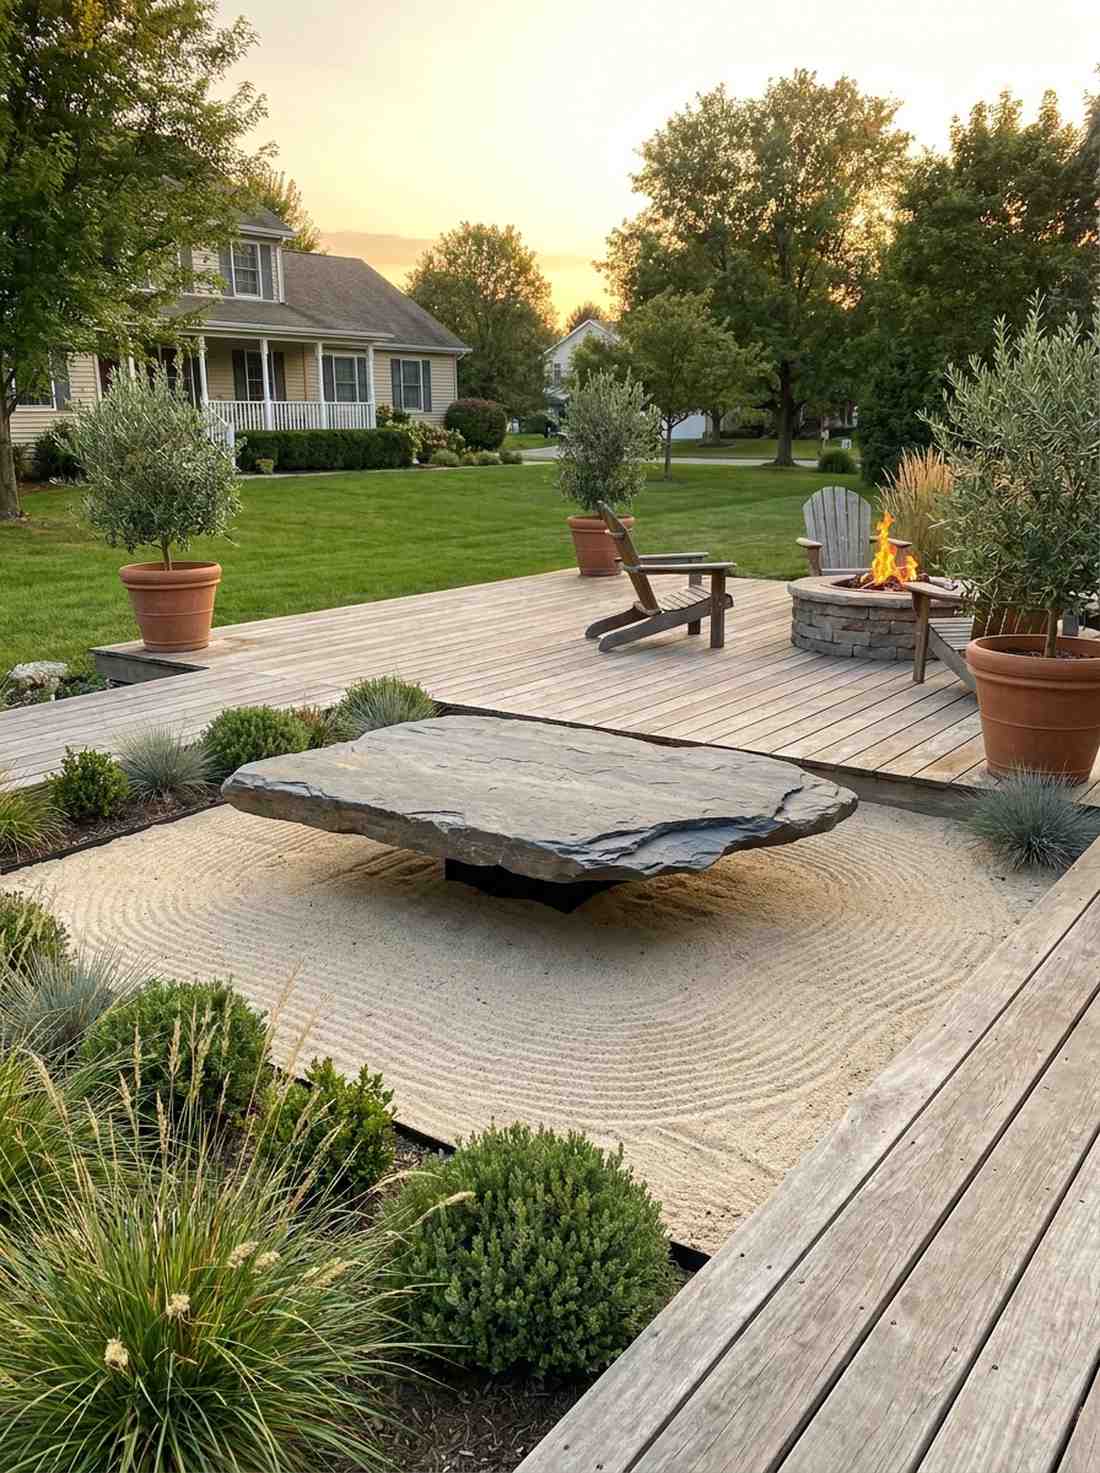

Creates a mind-bending optical illusion. A levitating flat slab is an incredible conversation piece for a deck-side display.
Most rocks look heavy and sunk, but burying just the very bottom of a flat slab gives a designer-level finish that makes it appear weightless. Raking perfectly straight lines beneath it sells the hovering effect.
This optical trick costs around $50. Highly recommended for a quick weekend win.
- Key Materials: One broad, thin horizontal rock
- Vibe / Style: Ethereal and weightless
- Difficulty: Delicate leveling
- Budget Breakdown: Flat slab: $40 | Raking sand: $10
- Creator’s Tip: Hide a smaller, sturdy cinder block underneath to prop the main slab up invisibly.
- Smart Sourcing: Large slate flagstone pieces and concealed heavy-duty risers.
You are probably wasting the best real estate in your yard right now. This next corner hack turns dead space into pure luxury…
29. Corner Accent Statement Stone
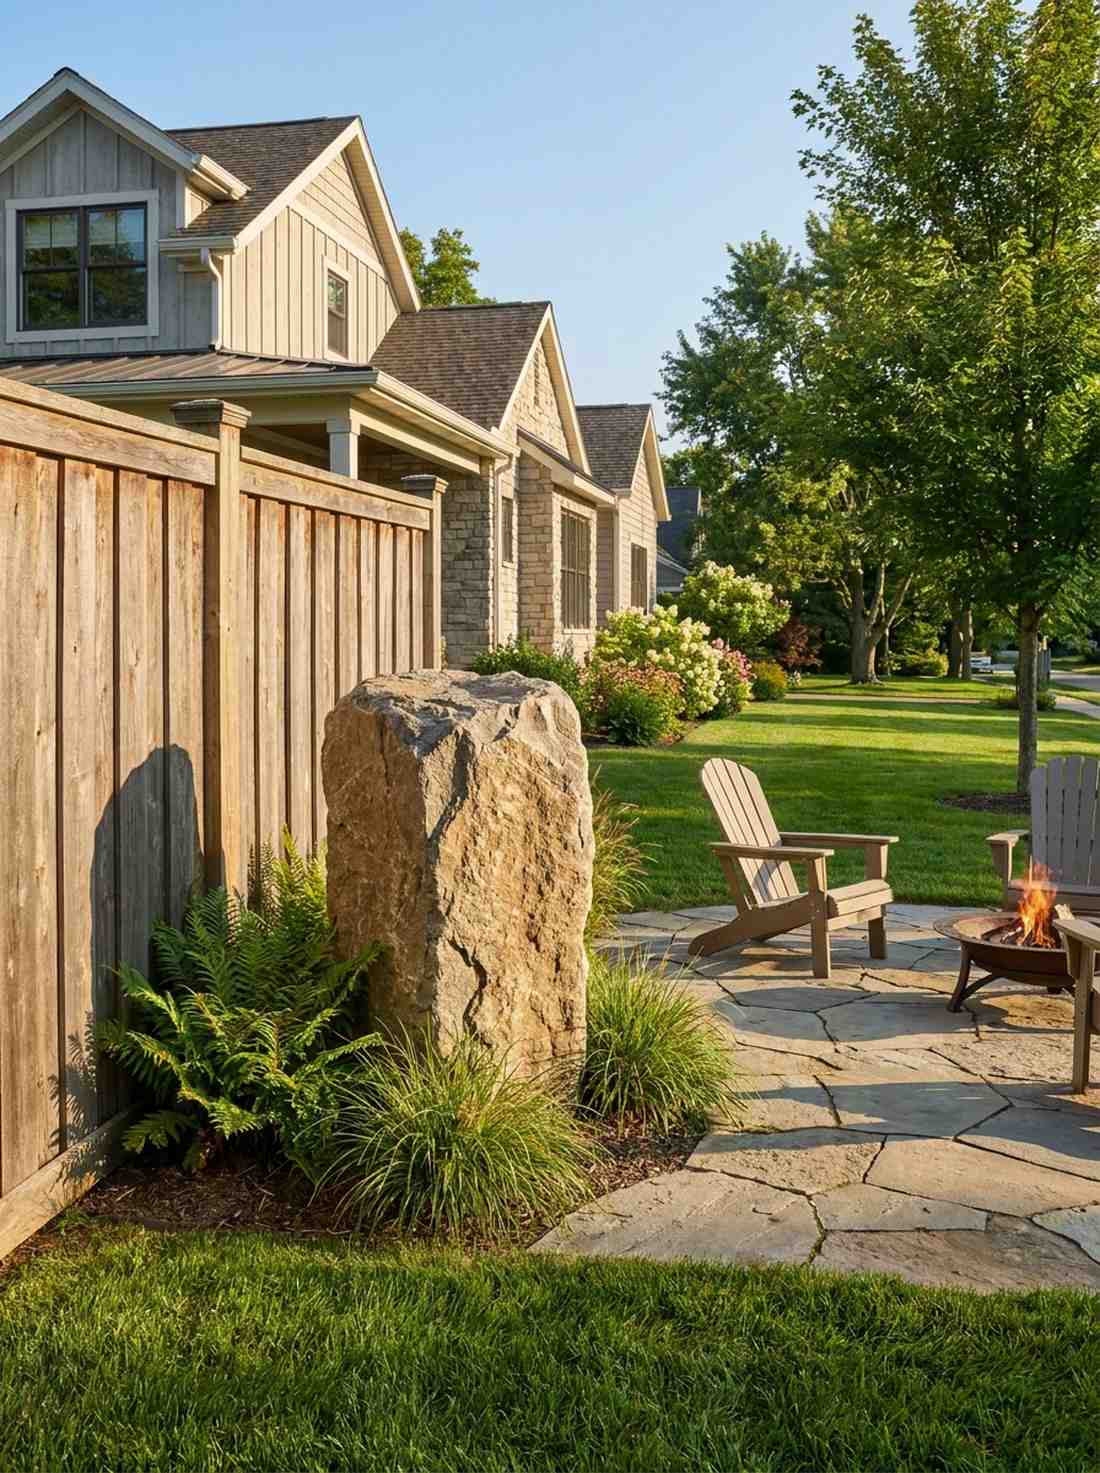
Instantly softens harsh architectural lines. A massive corner statement rock works flawlessly to anchor awkward fence intersections or patio edges.
People leave corners empty, but dropping a 4-foot vertical boulder there delivers a surprisingly premium look. It acts as a visual hinge that seamlessly connects your house’s architecture to the wild garden.
A statement rock this size costs $150–$250. Save this if you have boring empty yard corners!
- Key Materials: One heavy 4-foot vertical boulder
- Vibe / Style: Bold and anchoring
- Difficulty: Professional delivery usually needed
- Budget Breakdown: Massive rock: $200 | Delivery: $50
- Creator’s Tip: Plant a small fern or grass directly behind it to soften the transition to the wall.
- Smart Sourcing: Locally sourced quarry boulders and heavy-duty landscaping dollys.
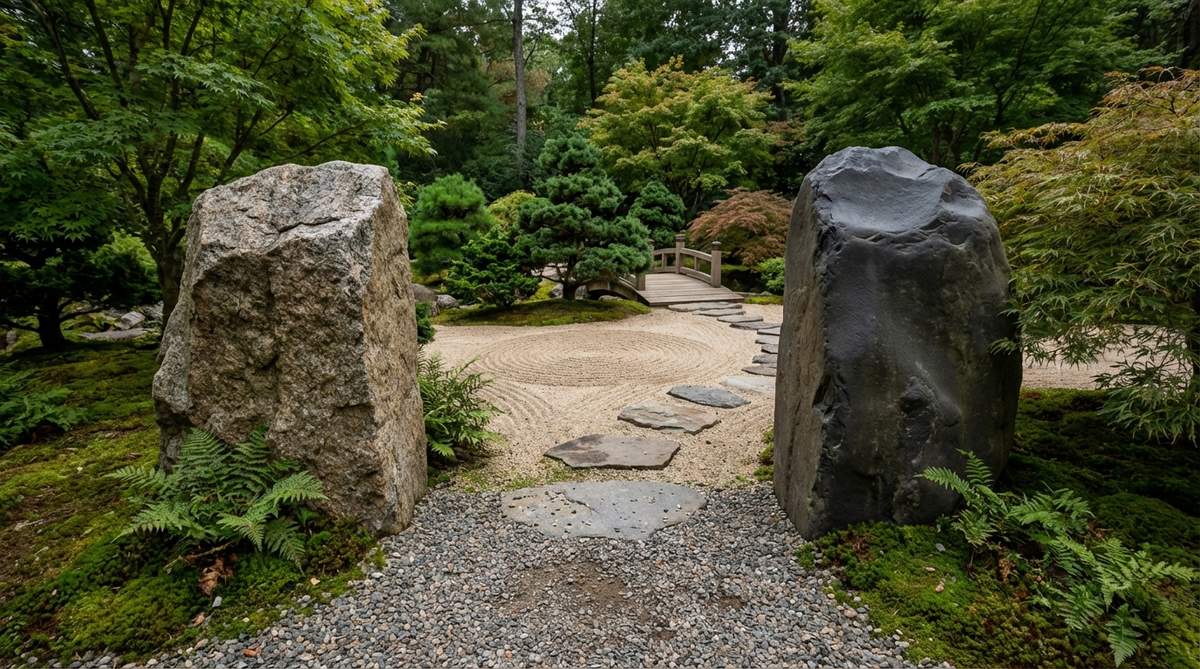
30. Threshold Boulder Portal

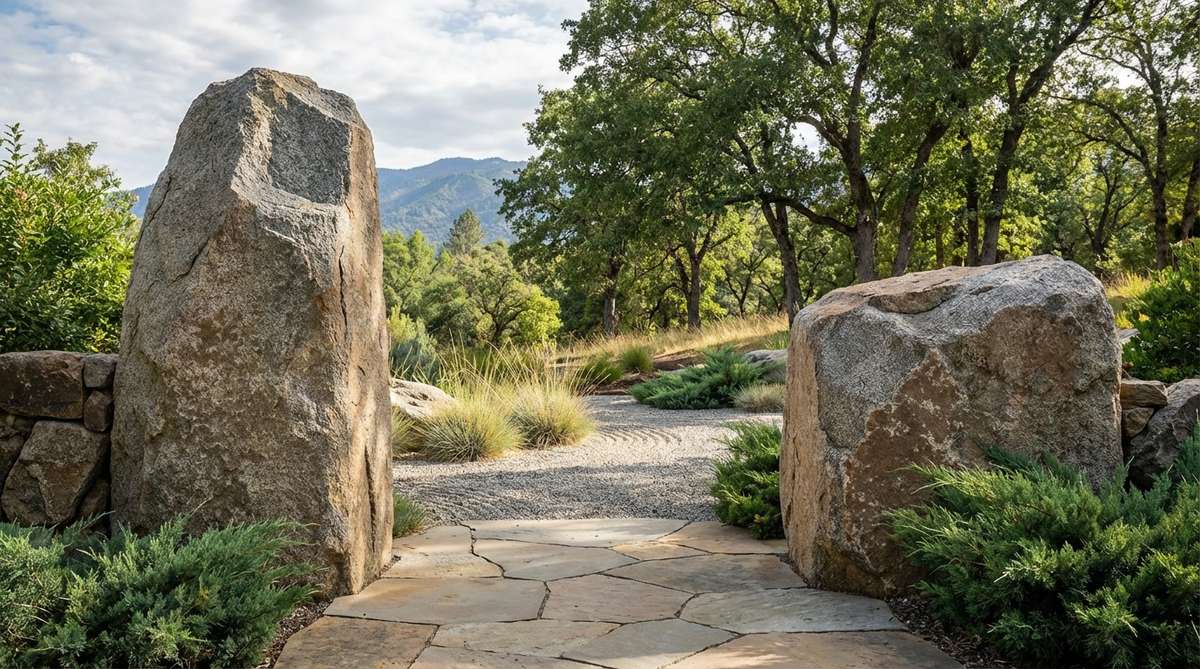
Frames your backyard view like a living photograph. A stone window framing layout is highly practical for highlighting a specific tree or water feature in the distance.
Blocking the view is a rookie mistake, but placing asymmetric stones in the foreground looks far more expensive than it is. Borrowing scenery from the background makes a tiny yard feel massive.
This framing technique costs about $80. Pin this to your landscape design secrets board!
- Key Materials: Two medium stones of unequal height
- Vibe / Style: Focused and cinematic
- Difficulty: Easy placement
- Budget Breakdown: Framing rocks: $70 | Base gravel: $10
- Creator’s Tip: Kneel at your primary window inside the house to dictate the exact placement of these stones.
- Smart Sourcing: Contrasting column rocks and sightline marking string.
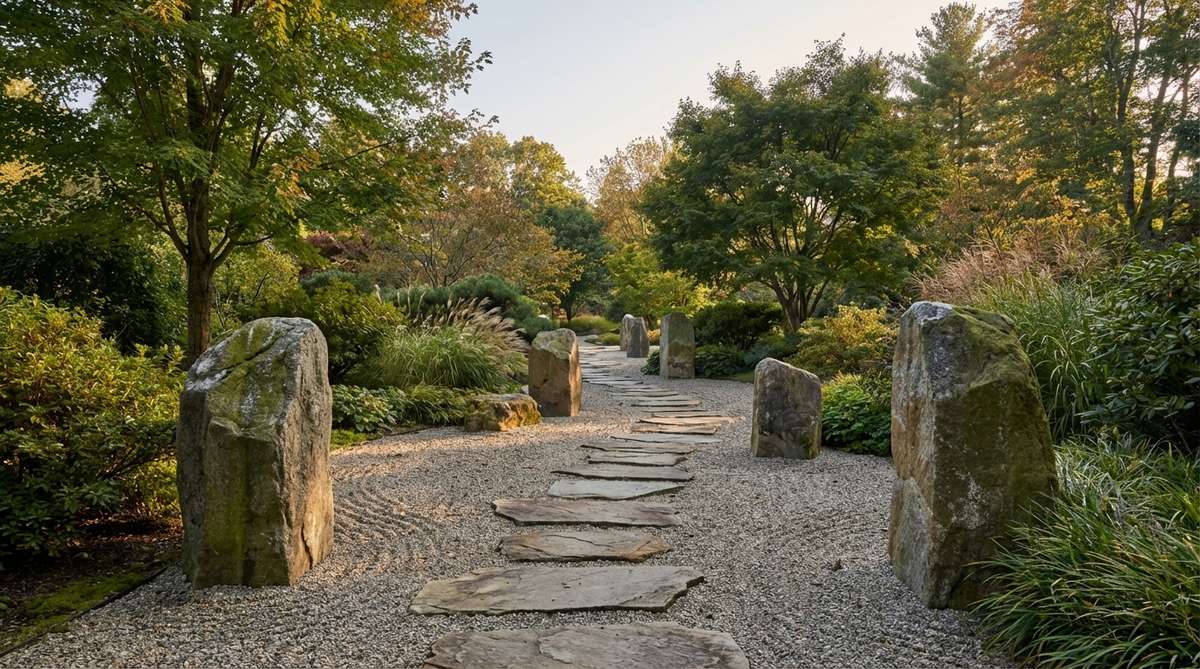
Vertical Stone Compositions and Upright Boulder Placements
Vertical stone arrangements create dramatic focal points and establish hierarchy within zen garden compositions. Upright boulders command attention and provide structural anchors for horizontal elements.
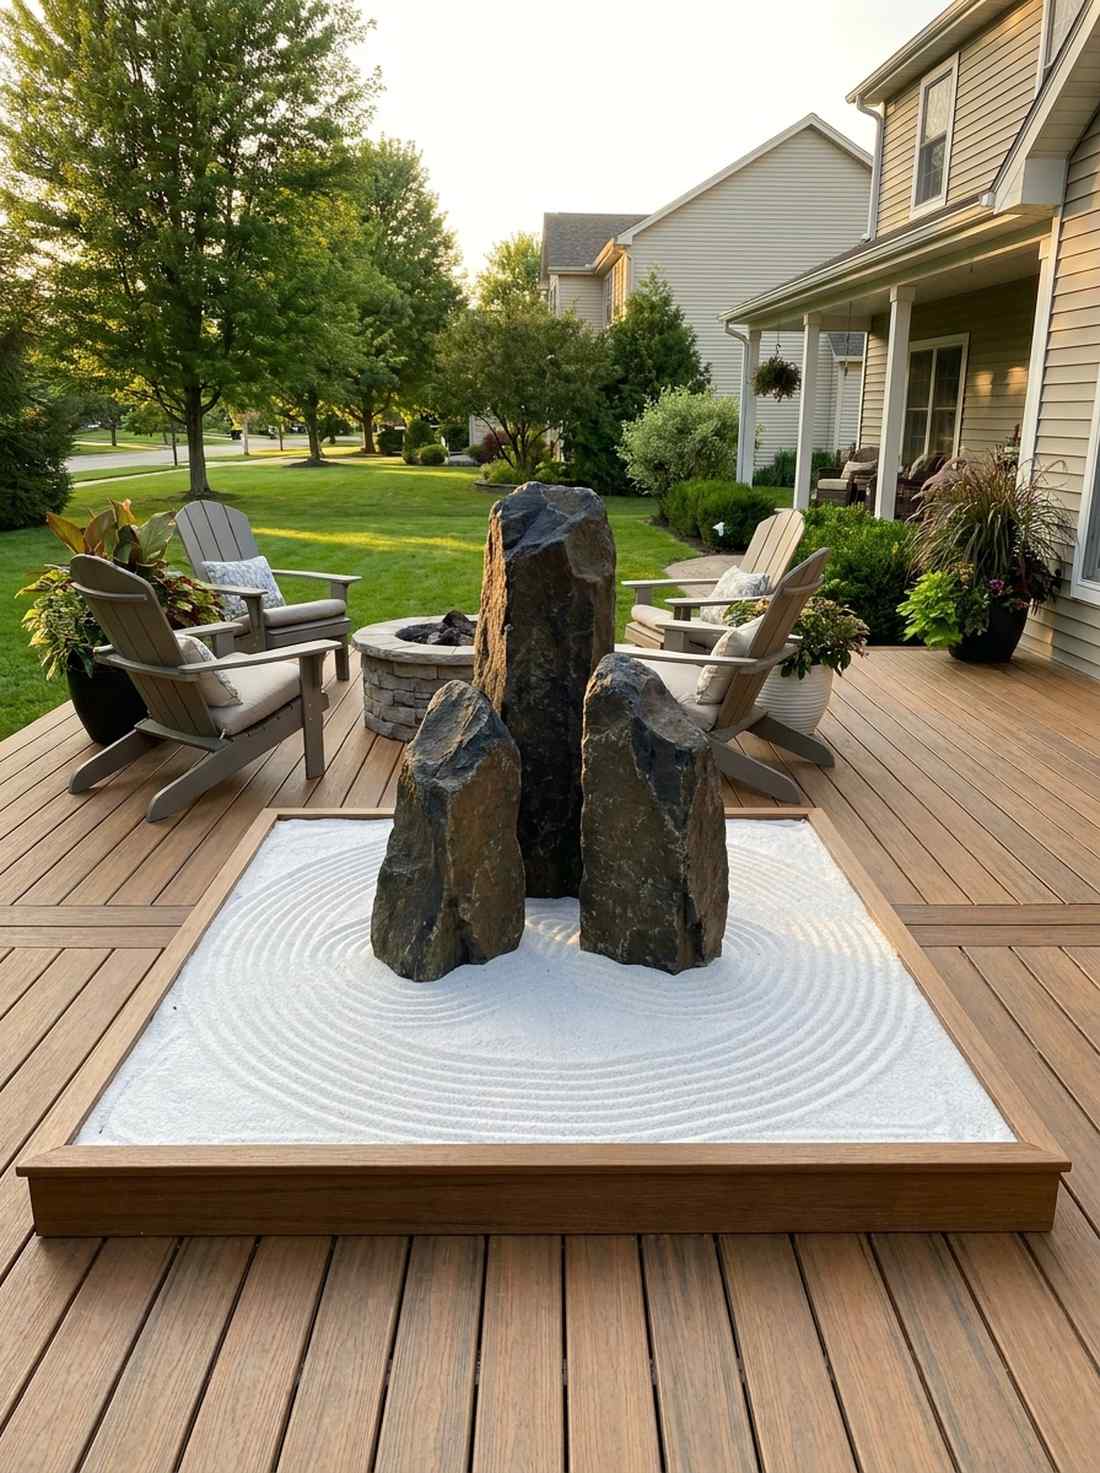
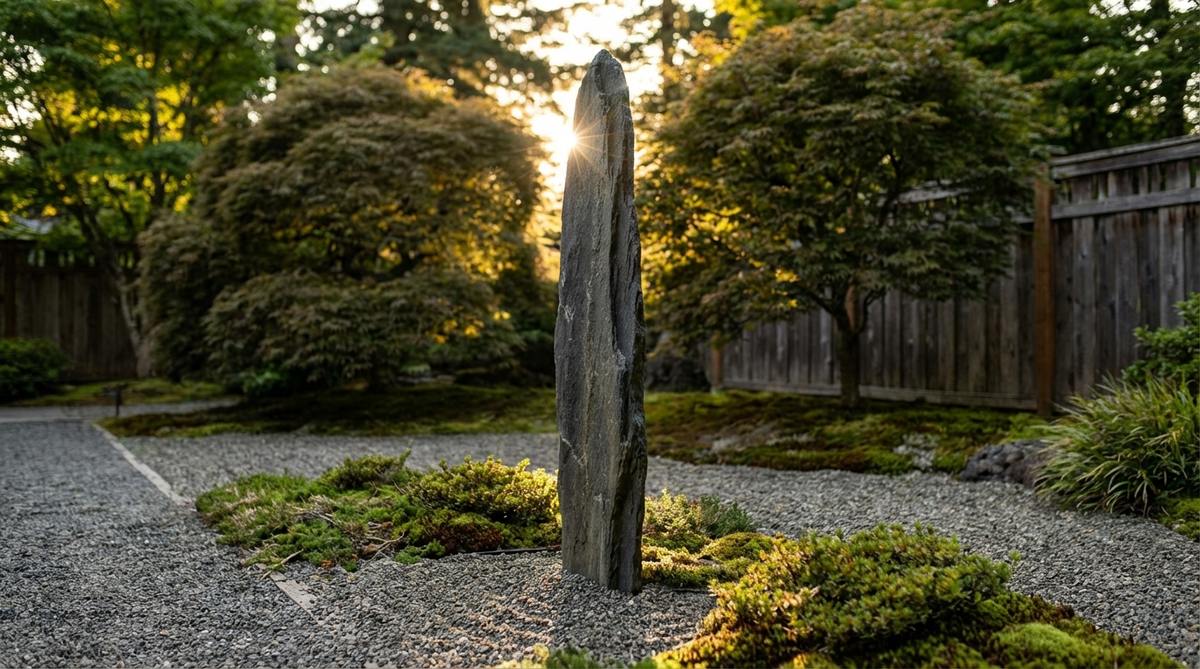
31. Standing Stone Sentinel
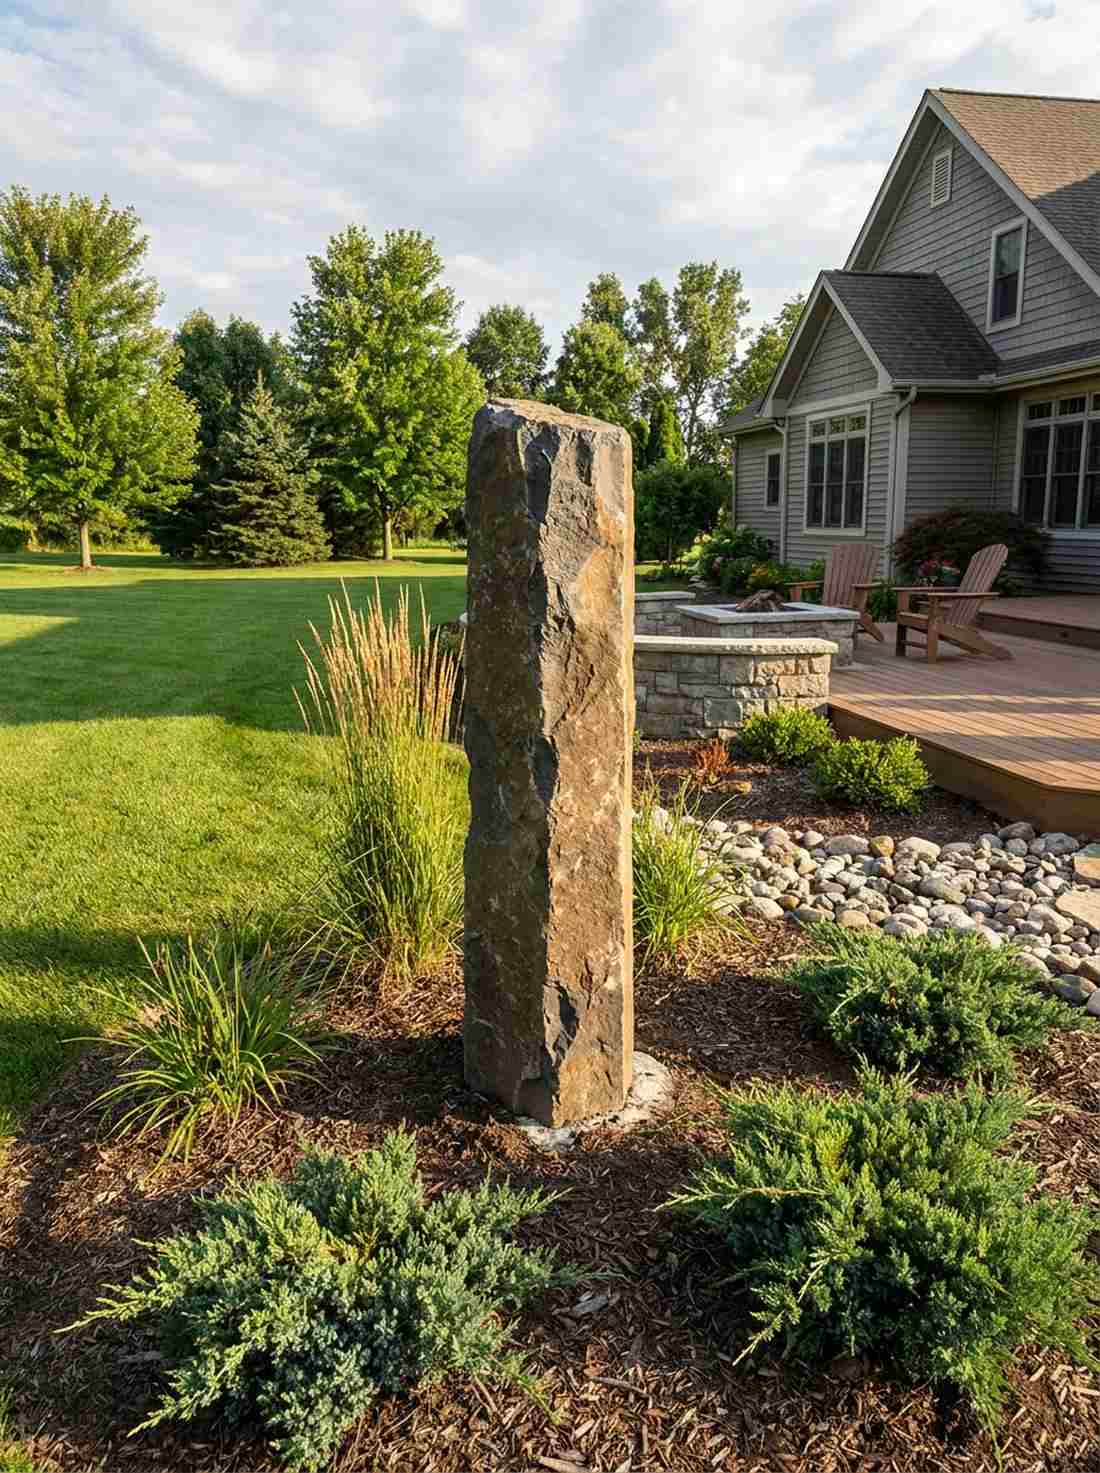
Radiates towering, protective energy. A single towering obelisk rock serves beautifully to break up monotonously flat garden beds.
Flat yards are boring, but sinking a 5-foot narrow rock deep into the ground gives a designer-level finish. This aggressive verticality forces the viewer’s eyes upward toward the sky and surrounding trees.
Expect to invest $150+ for a stone this tall. It’s a structural upgrade that completely changes the vibe.
- Key Materials: One 5-foot tall narrow rock
- Vibe / Style: Commanding and monumental
- Difficulty: Deep hole digging required
- Budget Breakdown: Tall stone: $130 | Concrete base: $20
- Creator’s Tip: Bury 40% of the stone in a concrete footer so high winds won’t knock it over.
- Smart Sourcing: Quick-set post hole concrete and tall columnar basalt.
32. Three Buddha Stones
Feels like discovering a forgotten roadside shrine. The sacred triad rock formation is an incredible focal point for a dedicated outdoor yoga space.
Sourcing generic rocks feels cheap, but arranging three distinct uprights representing the Buddha bodies delivers a surprisingly premium look. Using high-quality terrarium accessories or miniature lanterns nearby elevates the sacred aesthetic immediately.
This spiritual layout costs around $90. Save this to your meditation patio board!
- Key Materials: Three upright stones (tallest in center)
- Vibe / Style: Sacred and historical
- Difficulty: Moderate spacing
- Budget Breakdown: Three stones: $75 | Decor: $15
- Creator’s Tip: Leave a clear visual gap between each stone so they don’t look like one giant lump.
- Smart Sourcing: Authentic granite stone lantern replicas and trio stone bundles.
33. Vertical Stone Forest
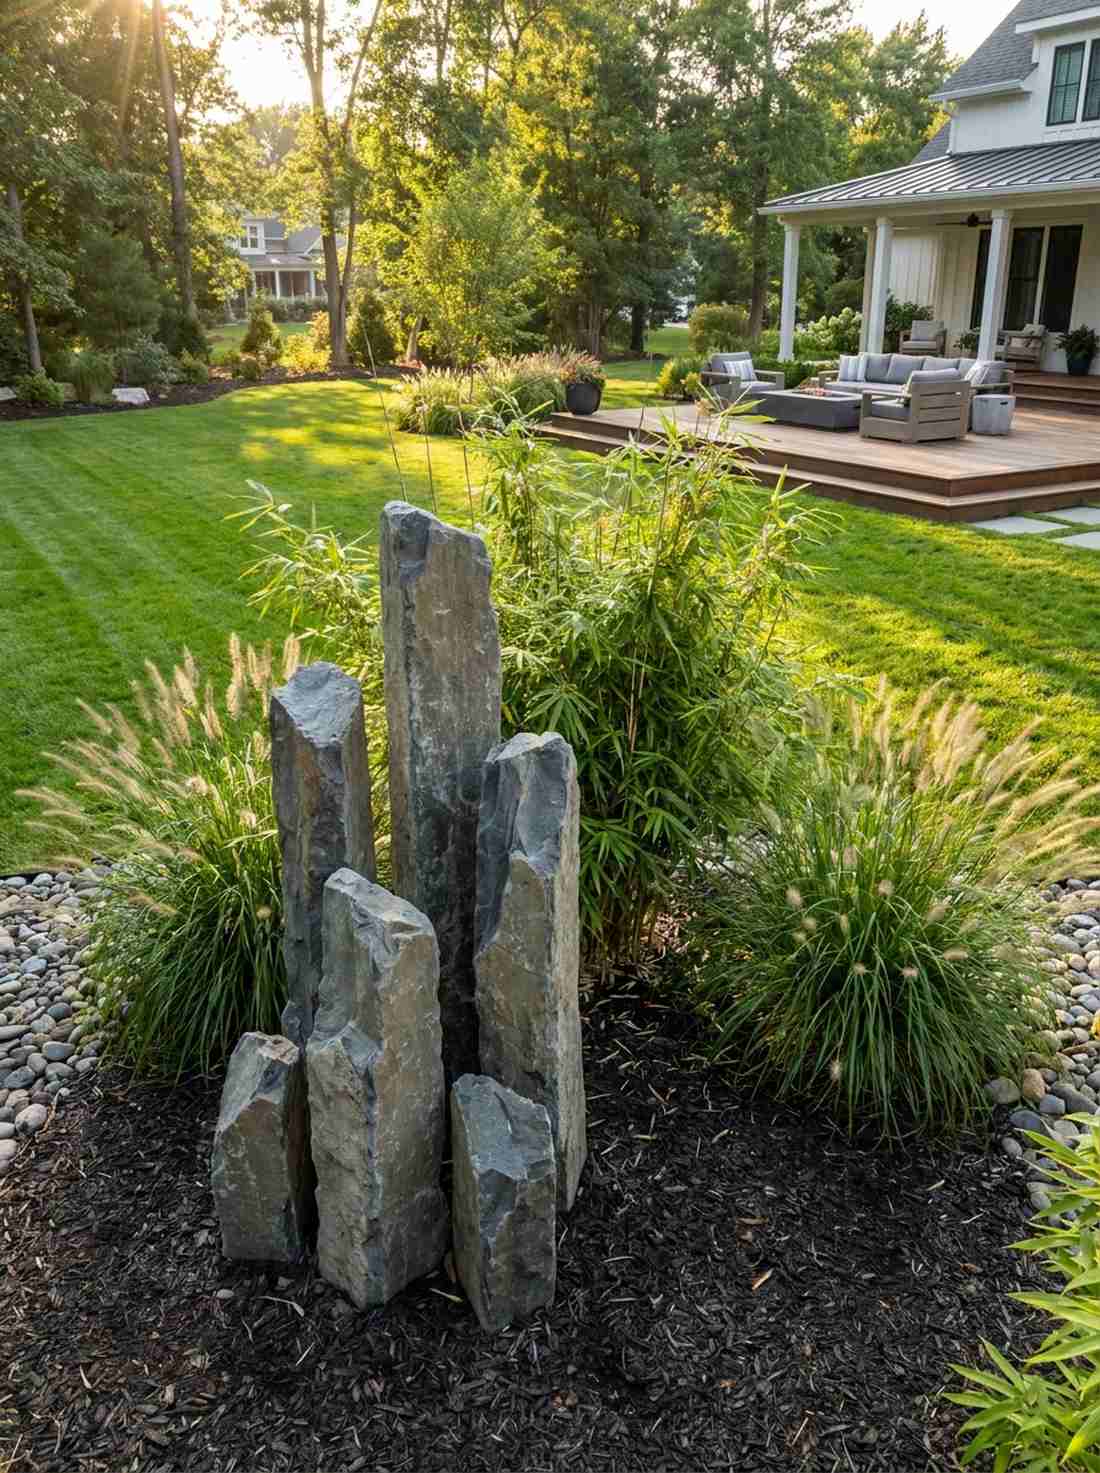
Looks like a petrified bamboo grove. A multi-pillar rock cluster works flawlessly to create a privacy screen or distinct zone divider.
Wooden fences rot quickly, but clustering 7 upright rocks of varying heights looks far more expensive than it is. This rhythmic repetition mimics nature perfectly while adding a highly structural element to soft landscaping.
This dense cluster runs about $200. Pin this for unique garden fencing alternatives!
- Key Materials: 5-7 upright rocks ranging from 2ft to 5ft
- Vibe / Style: Dense and rhythmic
- Difficulty: Heavy labor involved
- Budget Breakdown: Multiple rocks: $170 | Stabilizing soil: $30
- Creator’s Tip: Plant real bamboo or tall ornamental grass behind the stones to blend hard and soft textures.
- Smart Sourcing: Bulk vertical slate strips and clumping bamboo root starters.
Safe, vertical placements are great, but if you want to create show-stopping visual tension, this next angled technique is a game-changer…
34. Leaning Tower Stone
Creates heart-pounding visual tension. A precariously angled boulder is highly practical for directing a visitor’s gaze exactly where you want it.
Standing rocks straight up is safe, but locking a massive stone at a 20-degree tilt gives a designer-level finish. It implies dynamic motion and creates a sense of frozen gravity that captivates guests.
You can achieve this daring look for around $80. Highly recommended for a quick weekend win.
- Key Materials: One heavy oblong boulder
- Vibe / Style: Tense and dynamic
- Difficulty: Crucial underground stabilization
- Budget Breakdown: Boulder: $60 | Concrete anchor: $20
- Creator’s Tip: Bury the bottom half completely in cement to ensure the lean doesn’t become a dangerous fall.
- Smart Sourcing: Heavy-duty steel support brackets (hidden) and high-strength cement bags.
35. Sword Stone Blade
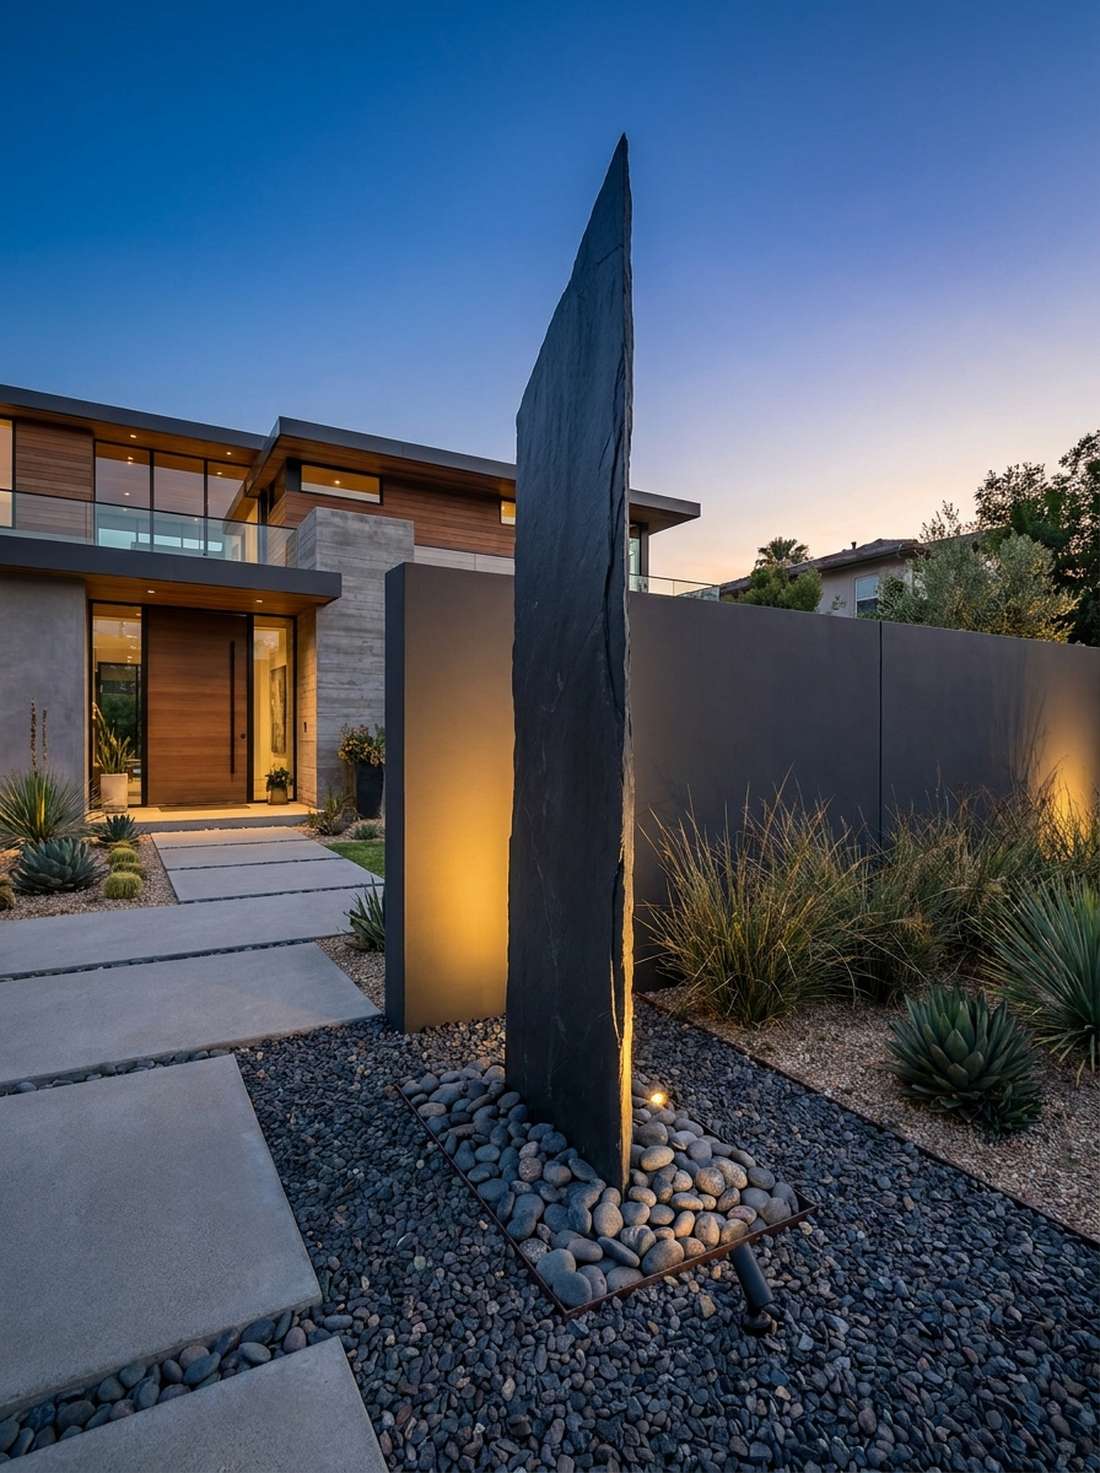
Slices through the landscape with aggressive energy. A razor-thin vertical rock is an incredible addition for modern, edgy front yard designs.
Bulky rocks can look clumsy, but standing a thin slate piece on its edge delivers a surprisingly premium look. Backlighting this blade shape at night creates a striking silhouette that deters trespassers.
This sleek addition costs about $45. Save this for your modern front yard upgrade board!
- Key Materials: One thin, sharp-edged slate or quartzite slab
- Vibe / Style: Sharp and masculine
- Difficulty: Easy to snap if mishandled
- Budget Breakdown: Slate blade: $35 | Base rock: $10
- Creator’s Tip: Dig a narrow, deep trench and pack it tightly with crushed gravel to hold the thin rock upright.
- Smart Sourcing: Pre-cut architectural slate slabs and compacting tampers.
36. Pyramid Peak Cluster
Radiates absolute permanence and grounded strength. A pyramid-shaped rock pile serves beautifully as a sturdy base for a water feature or statue.
Scattering rocks haphazardly feels weak, but packing smaller stones tightly around a tall central peak looks far more expensive than it is. This mimics a true mountain summit and resists shifting over time.
Building this solid base costs around $60. It’s a fast upgrade that completely changes the vibe.
- Key Materials: 5-7 varied stones packed tightly
- Vibe / Style: Solid and eternal
- Difficulty: Like a 3D puzzle
- Budget Breakdown: Mixed stones: $50 | Gap filler sand: $10
- Creator’s Tip: Use a rubber mallet to wedge smaller stones into the gaps, locking the pyramid together.
- Smart Sourcing: Assorted landscaping riprap and heavy rubber mallets.
Textural Boulder Combinations and Surface Contrasts
Combining boulders with contrasting textures creates tactile interest and visual complexity. Surface characteristics—smooth versus rough, weathered versus fresh—add depth to compositions.
37. Smooth-Rough Dialogue
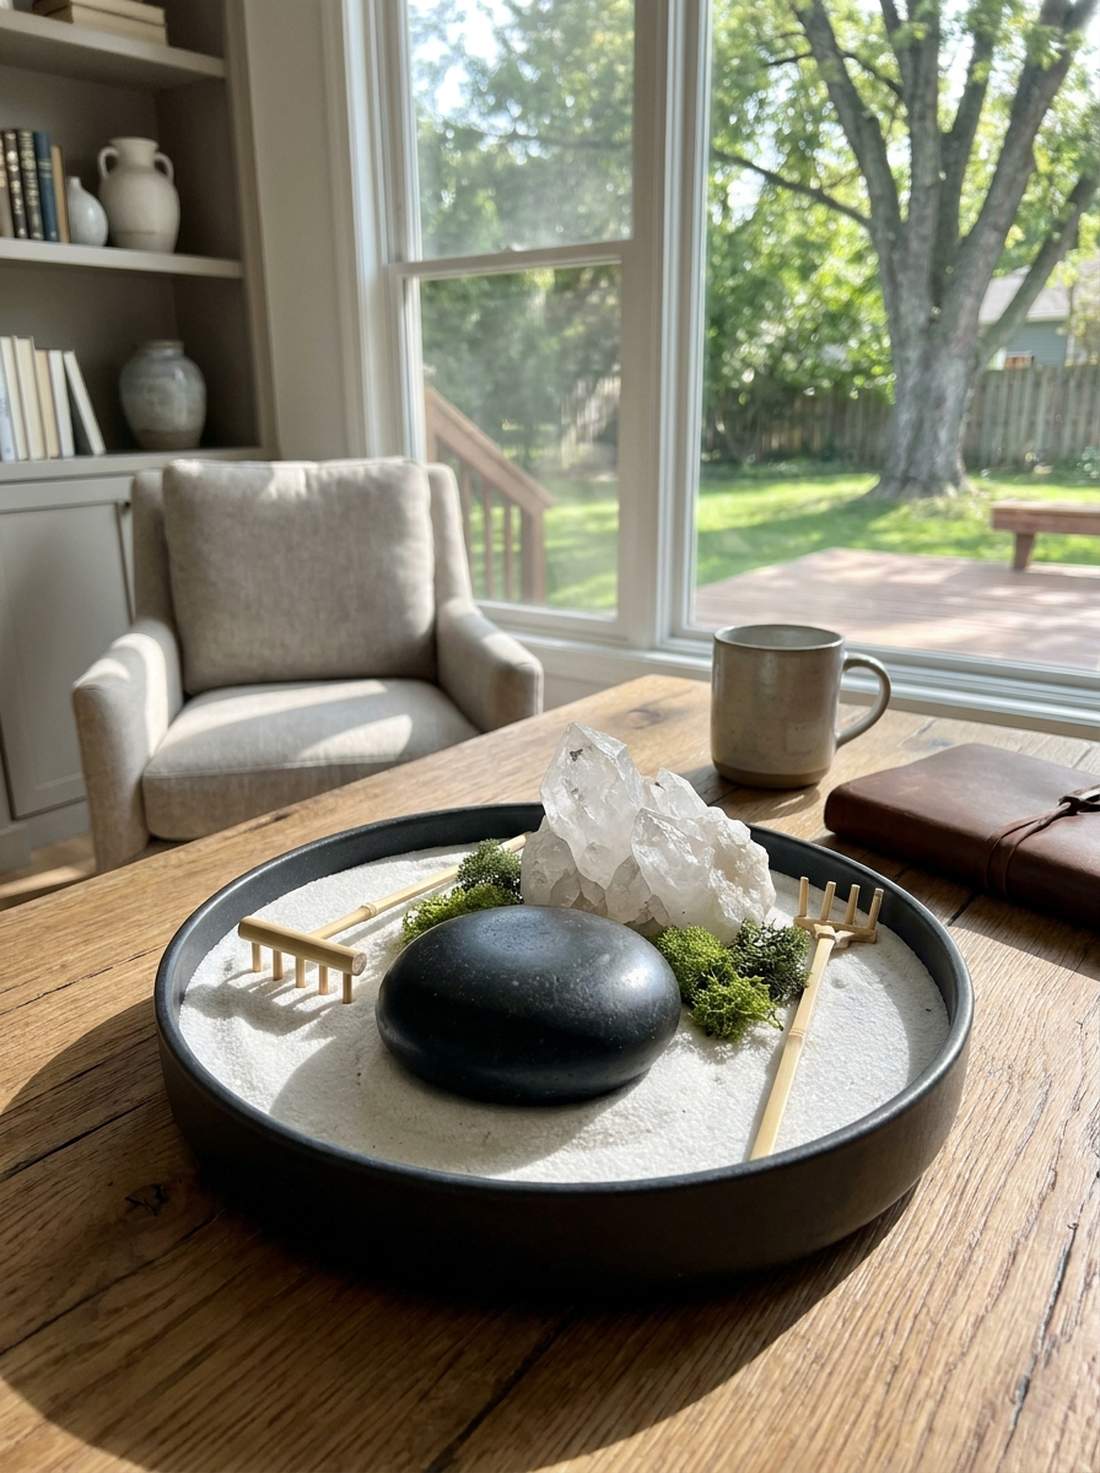
Creates a brilliant conversation between nature and time. Pairing polished and jagged rocks together works perfectly on a desktop or indoor zen tray.
Using uniformly textured rocks is boring, but intentionally contrasting a river-polished stone with raw granite gives a designer-level finish. Including miniature garden supplies around them highlights the textural extremes.
This desktop-sized layout costs $15–$30. Pin this for DIY indoor office decor ideas!
- Key Materials: One tumbled stone, one raw quarried chunk
- Vibe / Style: Tactile and engaging
- Difficulty: Super easy
- Budget Breakdown: Small stones: $15 | Tray base: $15
- Creator’s Tip: Place the smooth stone slightly in front and lower than the rough one to establish hierarchy.
- Smart Sourcing: Polished black basalt sets and raw quartz crystal chunks.
38. Weathered Patina Grouping
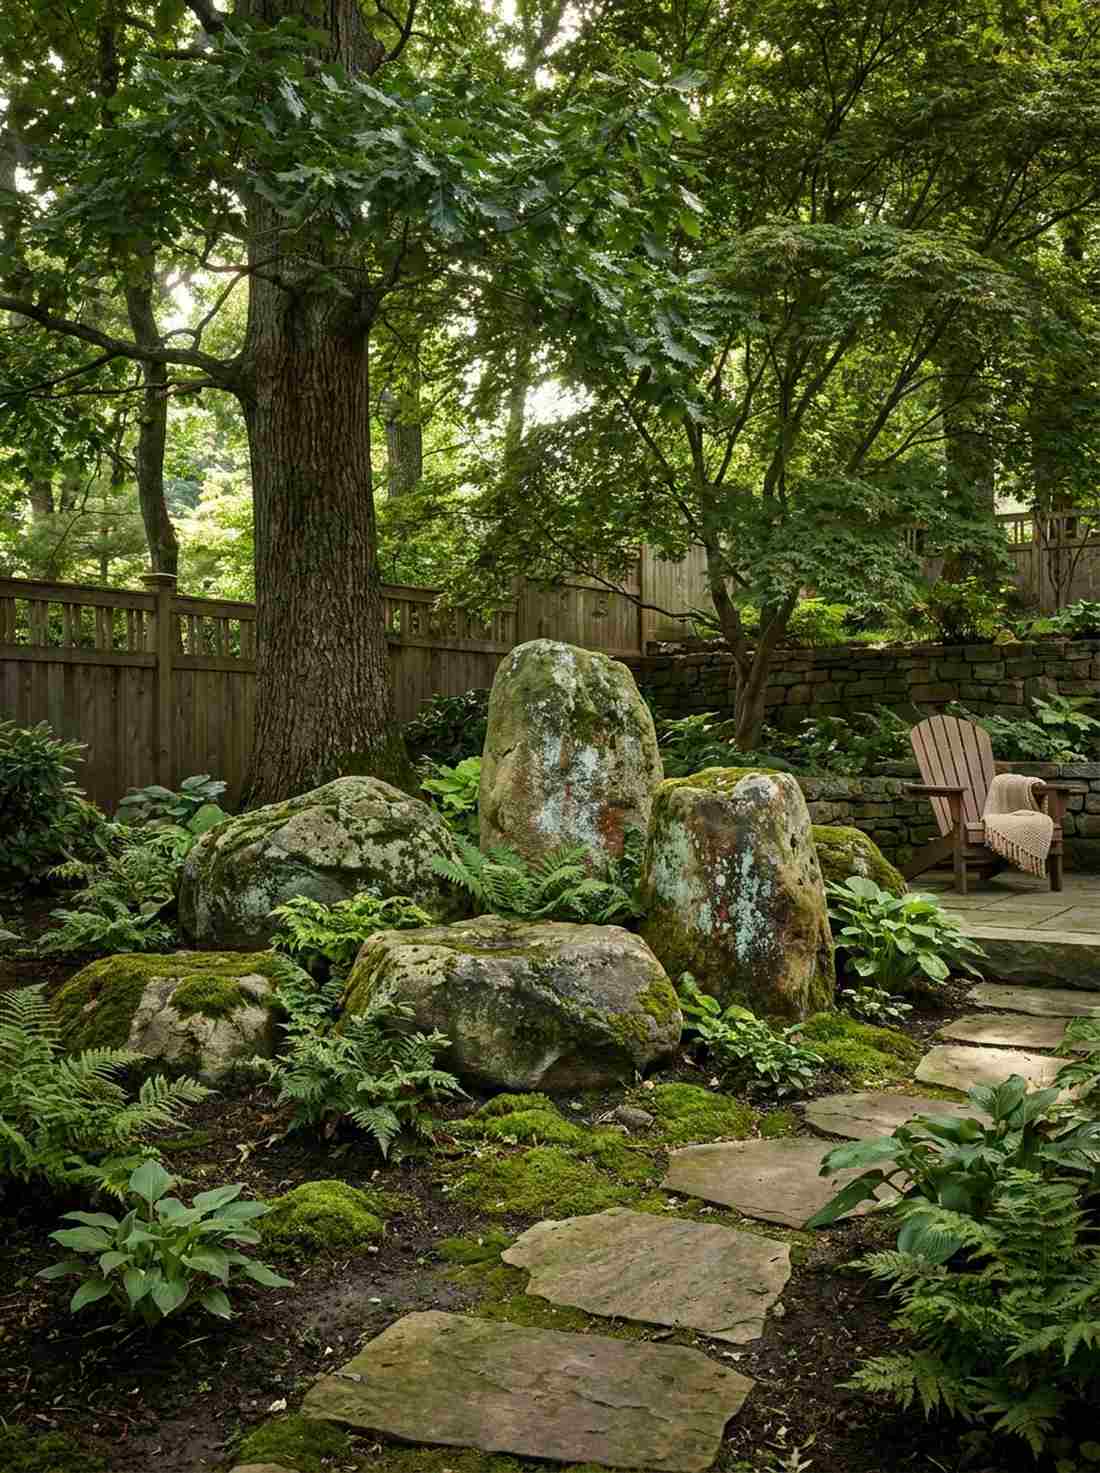
Feels like an ancient ruin reclaimed by the earth. A lichen-covered rock cluster is highly practical for deeply shaded, damp areas of your yard.
Scrubbing rocks clean destroys their character; showcasing natural mineral stains and moss delivers a surprisingly premium look. The patina proves the stones have endured seasons, adding instant authenticity to new gardens.
Sourcing aged stones can cost $80–$120. Save this if you have a shady, damp backyard!
- Key Materials: 3-5 naturally aged, lichen-spotted stones
- Vibe / Style: Ancient and enduring
- Difficulty: Requires careful transport to preserve moss
- Budget Breakdown: Patina stones: $100 | Shade plants: $20
- Creator’s Tip: Never power-wash these stones; handle them with soft gloves to protect the delicate lichen.
- Smart Sourcing: Pre-weathered fieldstones and shade-loving fern starter kits.
Don’t settle for boring gray gravel. This next textural trick introduces brilliant colors and light reflections without looking artificial…
39. Crystalline Structure Showcase
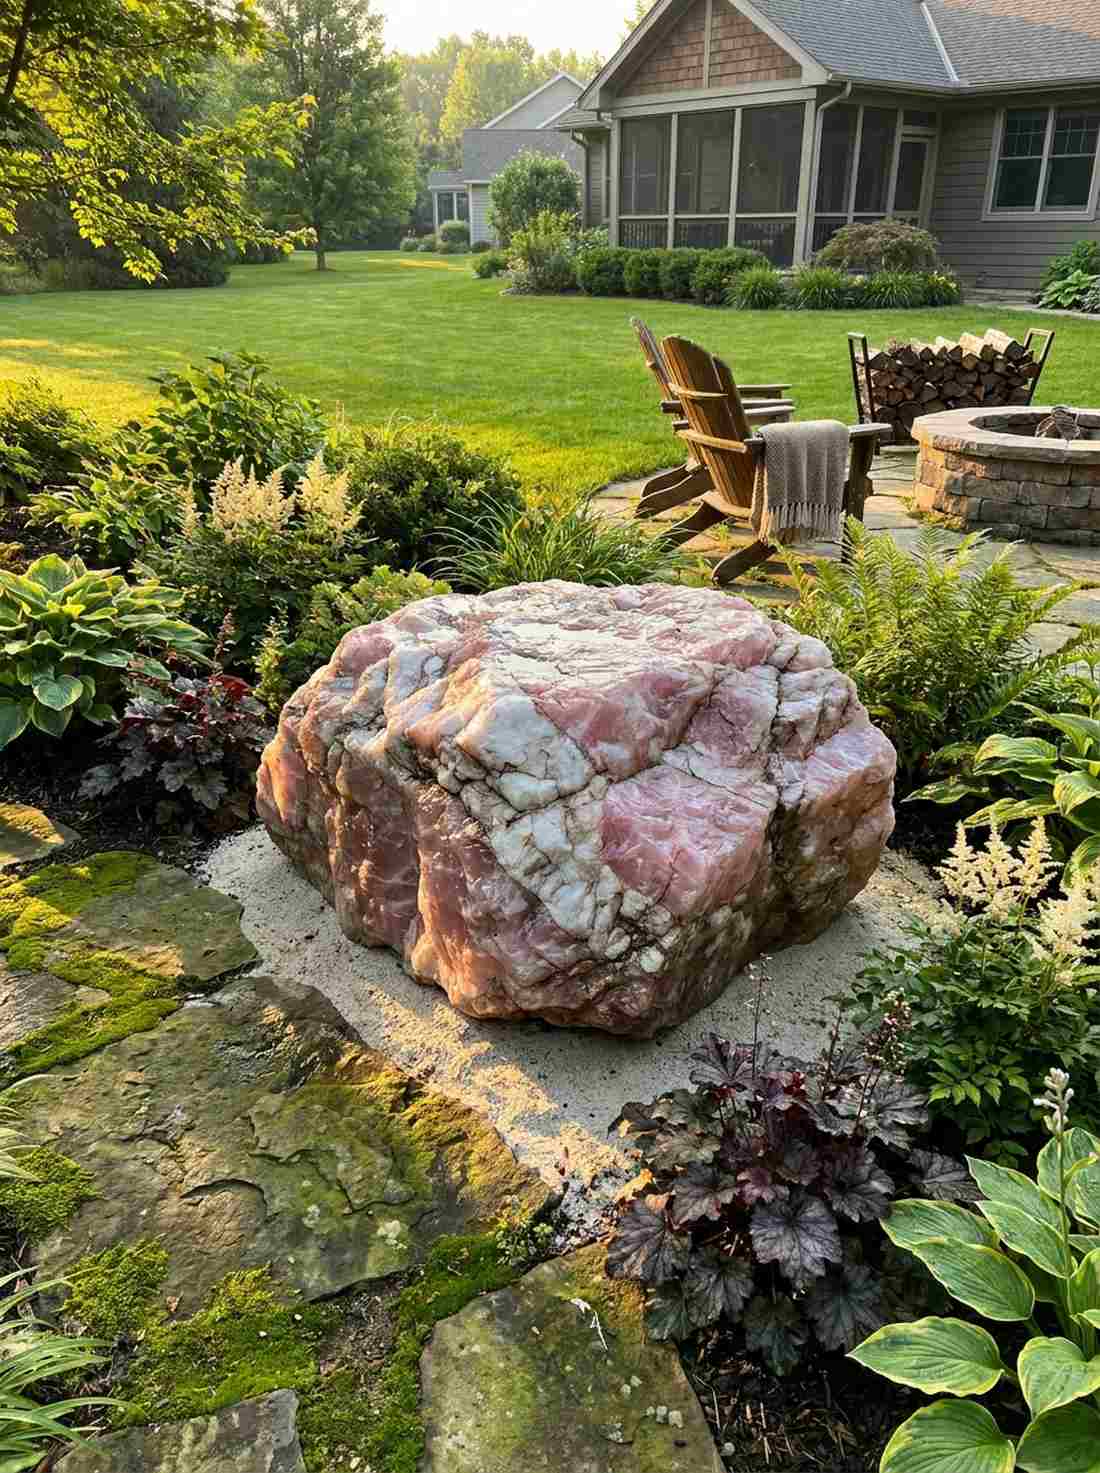
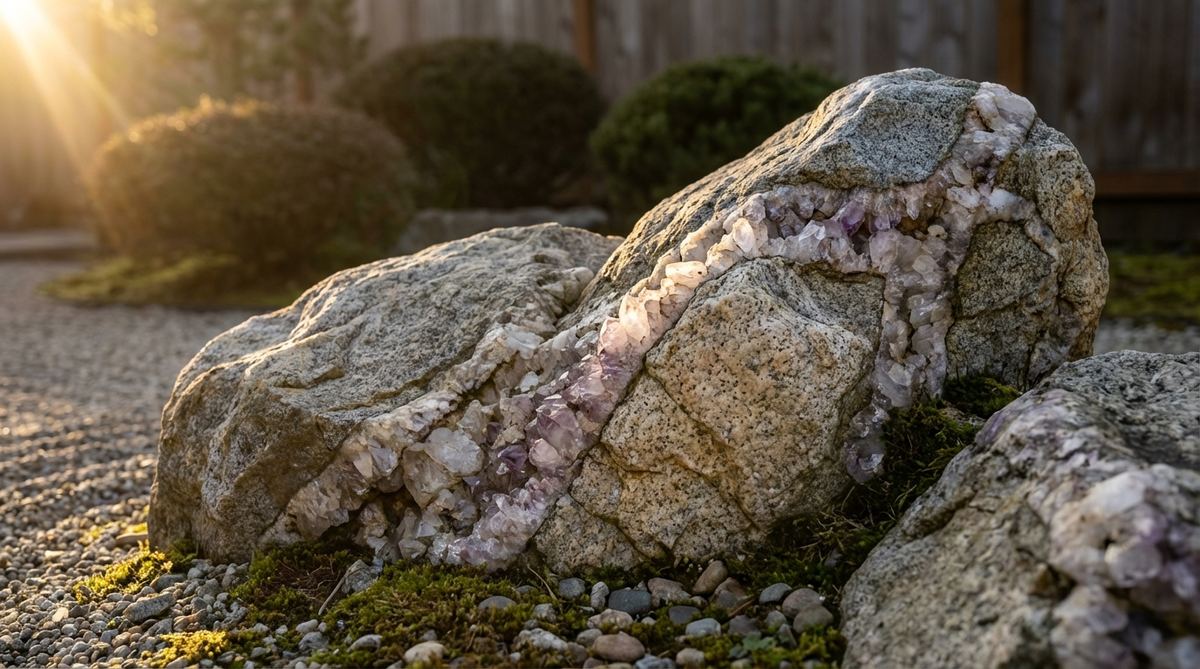
Catches the morning sunlight like a massive jewel. Siting quartz-veined specimen rocks is an incredible way to brighten up a dark garden corner.
Flat matte stones get lost in the shadows, but placing a boulder with visible crystal striations looks far more expensive than it is. Aligning it to catch the golden hour sun makes the entire rock sparkle naturally.
These specialty rocks cost about $100. Pin this to your luxury garden accents board!
- Key Materials: Boulder with heavy quartz or mica veins
- Vibe / Style: Luminous and rare
- Difficulty: Finding the right stone
- Budget Breakdown: Specimen rock: $90 | Display sand: $10
- Creator’s Tip: Hose the rock down frequently; the crystal structures pop vibrantly when wet.
- Smart Sourcing: Raw rose quartz boulders and clear high-gloss stone sealants.
40. Moss-Covered Boulder Trio
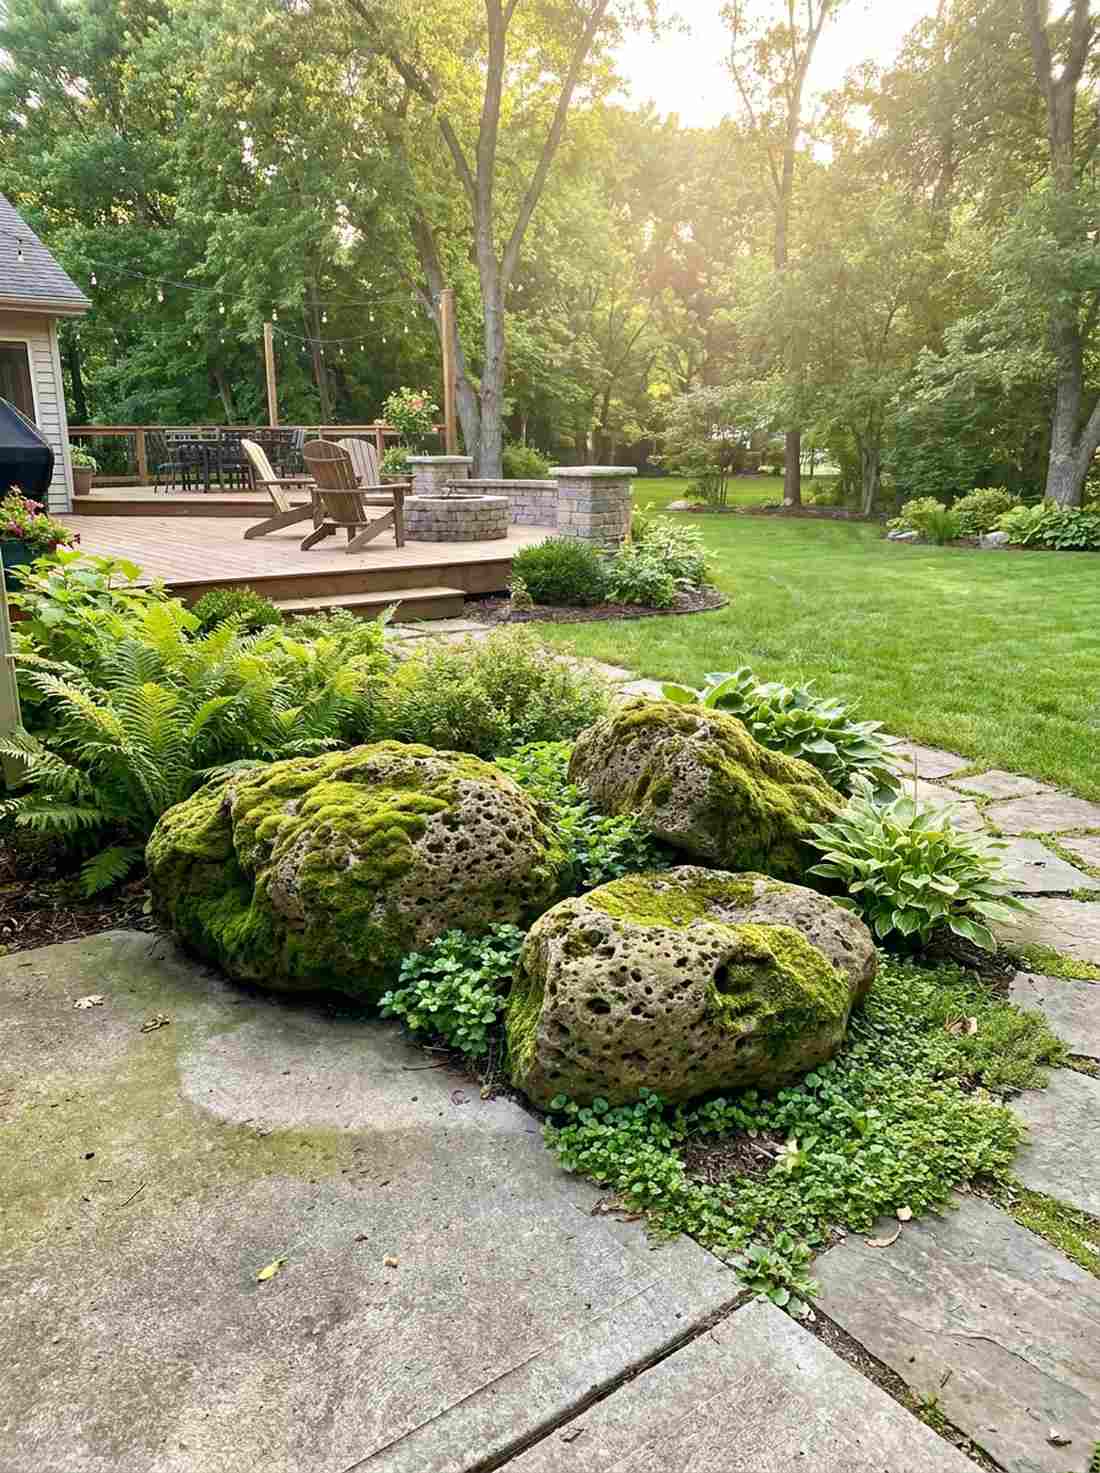
Looks like a lush, living fairy tale landscape. A moss-draped rock trio serves beautifully to soften the hard edges of concrete patios.
Waiting years for moss to grow is frustrating, but buying pre-cut preserved moss sheets delivers a surprisingly premium look instantly. Adhering live moss to porous stones bridges the gap between hardscaping and soft planting perfectly.
You can create this lush look for around $40. Highly recommended for a quick weekend win.
- Key Materials: Three porous rocks and live moss slurry
- Vibe / Style: Soft and magical
- Difficulty: Requires ongoing watering
- Budget Breakdown: Rocks: $20 | Moss kit: $20
- Creator’s Tip: Blend buttermilk and moss in a blender, then paint it onto the rocks to jumpstart growth.
- Smart Sourcing: Pre-cut preserved moss sheets (bulk pack) and live terrarium moss slurry mixes.
41. Split Stone Revelation

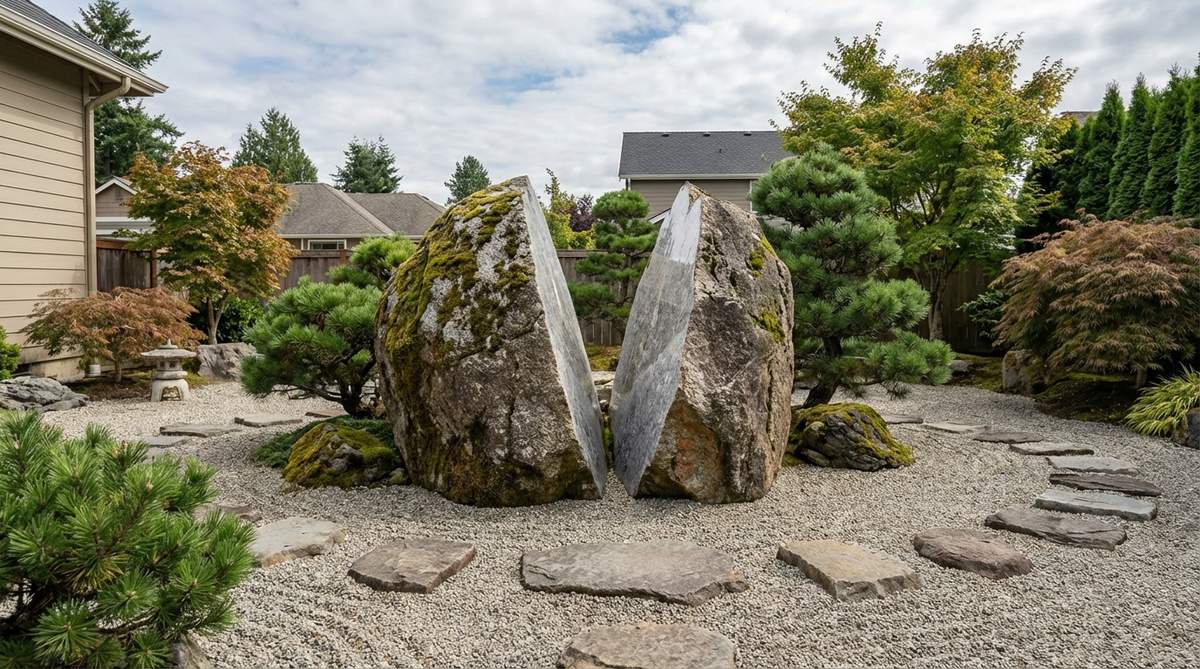
Exposes the hidden, raw beauty inside a weathered shell. The fractured rock display works perfectly to add a rugged edge to manicured spaces.
Perfectly intact rocks are predictable, but intentionally cracking a boulder to reveal its fresh core gives a designer-level finish. Placing the two halves inches apart creates an irresistible urge to look inside the crack.
This dramatic feature costs roughly $50. Save this for a truly unique patio conversation piece!
- Key Materials: One cleanly split boulder (two pieces)
- Vibe / Style: Raw and revealing
- Difficulty: Requires a masonry chisel and sledgehammer
- Budget Breakdown: Large rock: $30 | Tools: $20
- Creator’s Tip: Score the rock in a straight line with an angle grinder before using a chisel to split it perfectly.
- Smart Sourcing: Heavy-duty masonry chisels and protective safety goggles.
42. Striped Sedimentary Layers
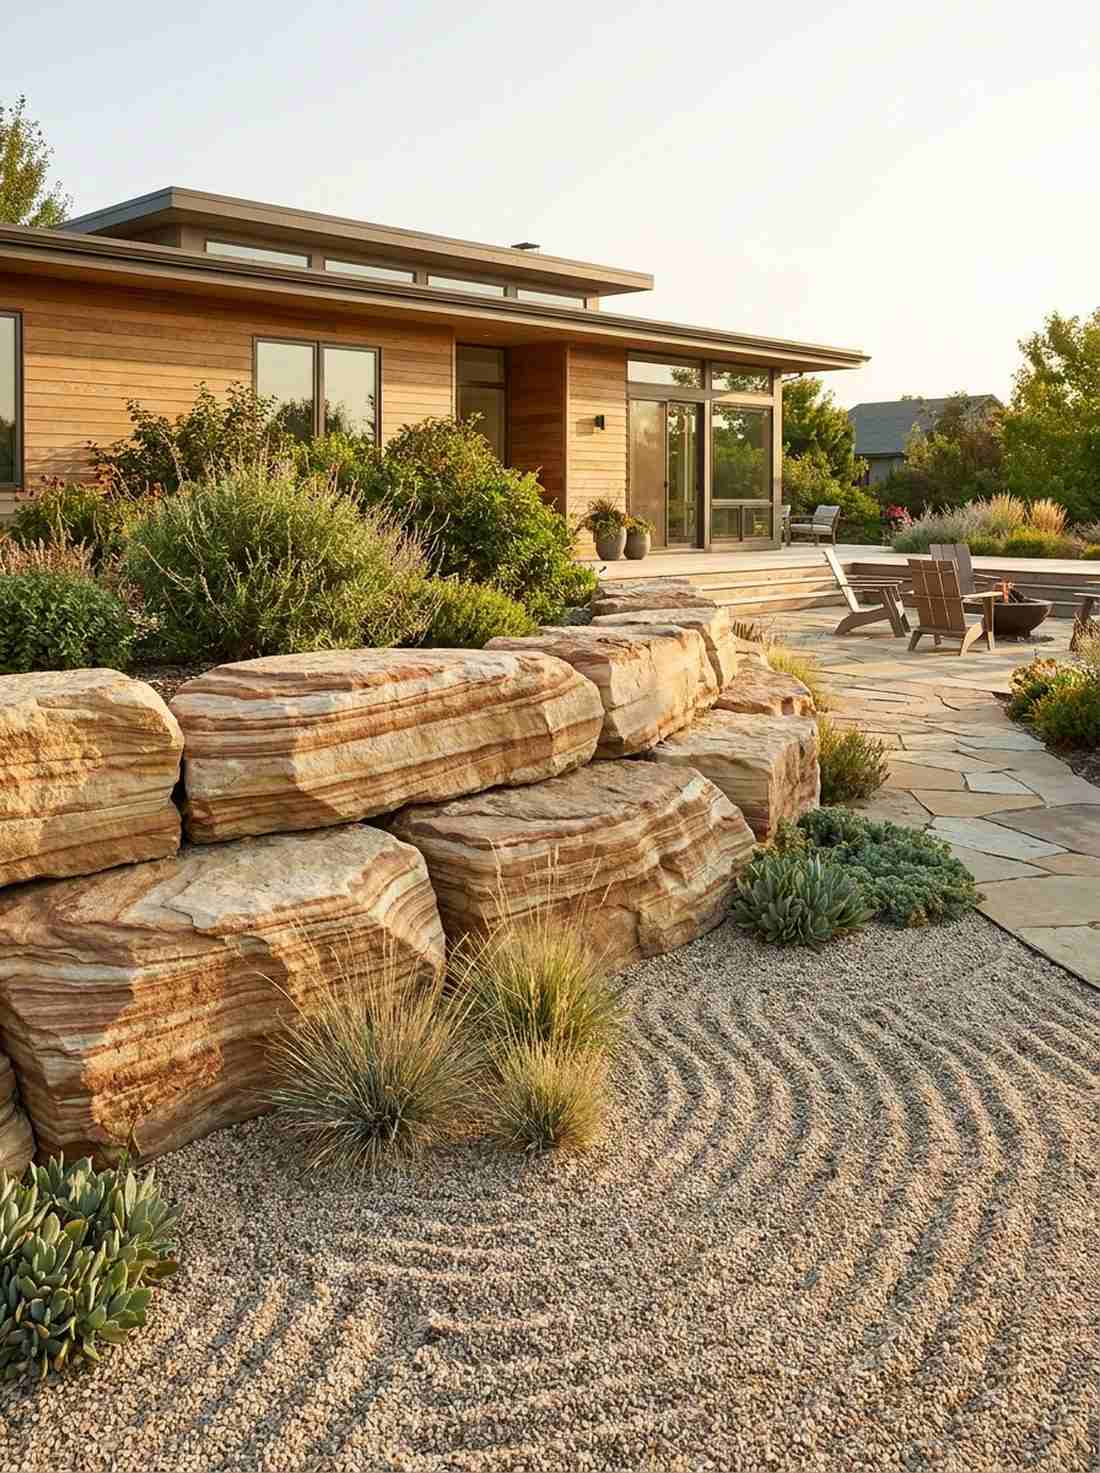
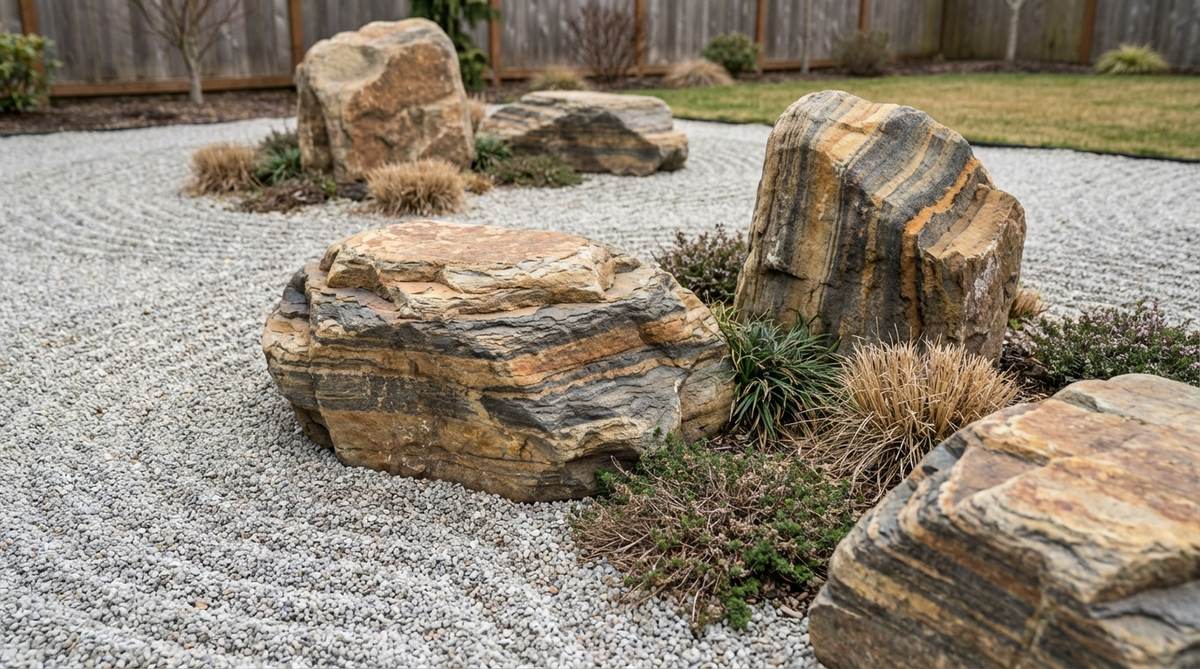
Tells a million-year-old geological story in your yard. Setting layered sandstone boulders is highly practical for complementing modern, horizontal home architecture.
Vertical stripes look unnatural, but laying sedimentary rocks perfectly flat looks far more expensive than it is. The natural horizontal lines harmonize beautifully with neatly raked gravel ripples.
Sourcing layered rock costs about $70. Pin this to your mid-century modern landscaping board!
- Key Materials: Heavily banded sedimentary stones
- Vibe / Style: Structured and ancient
- Difficulty: Heavy lifting
- Budget Breakdown: Banded rocks: $60 | Leveling gravel: $10
- Creator’s Tip: Ensure the rock is perfectly level so the stripes run parallel to the ground.
- Smart Sourcing: Layered flagstone chunks and bubble levels.
43. Honeycomb Weathering Patterns
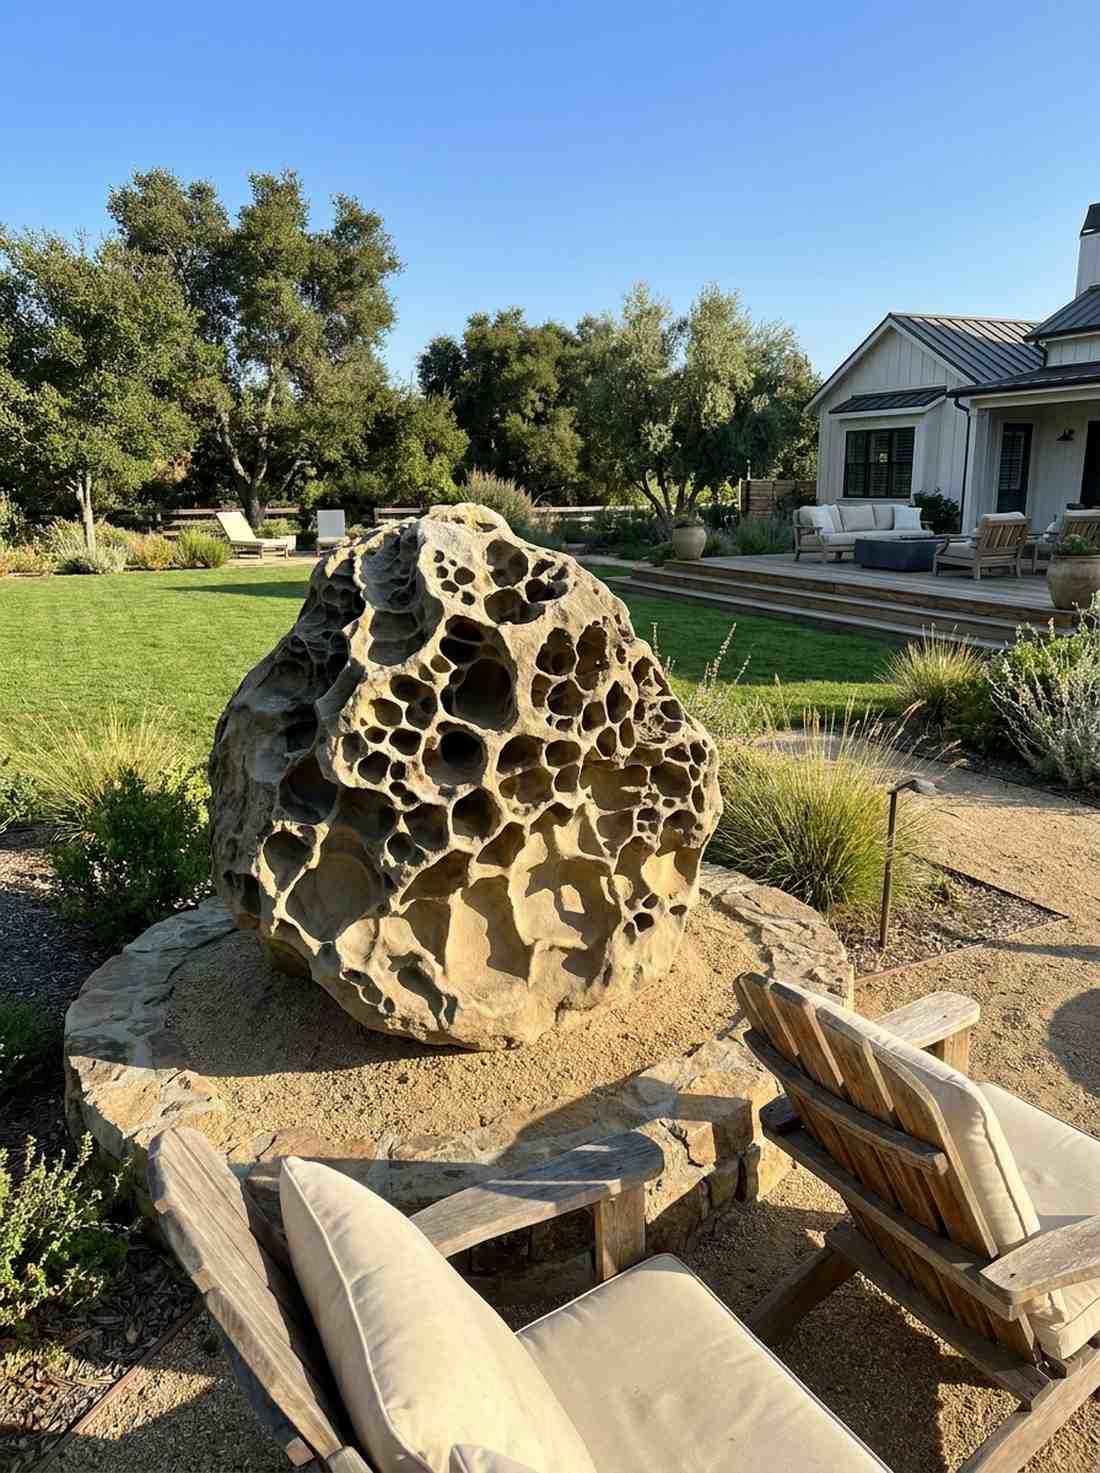
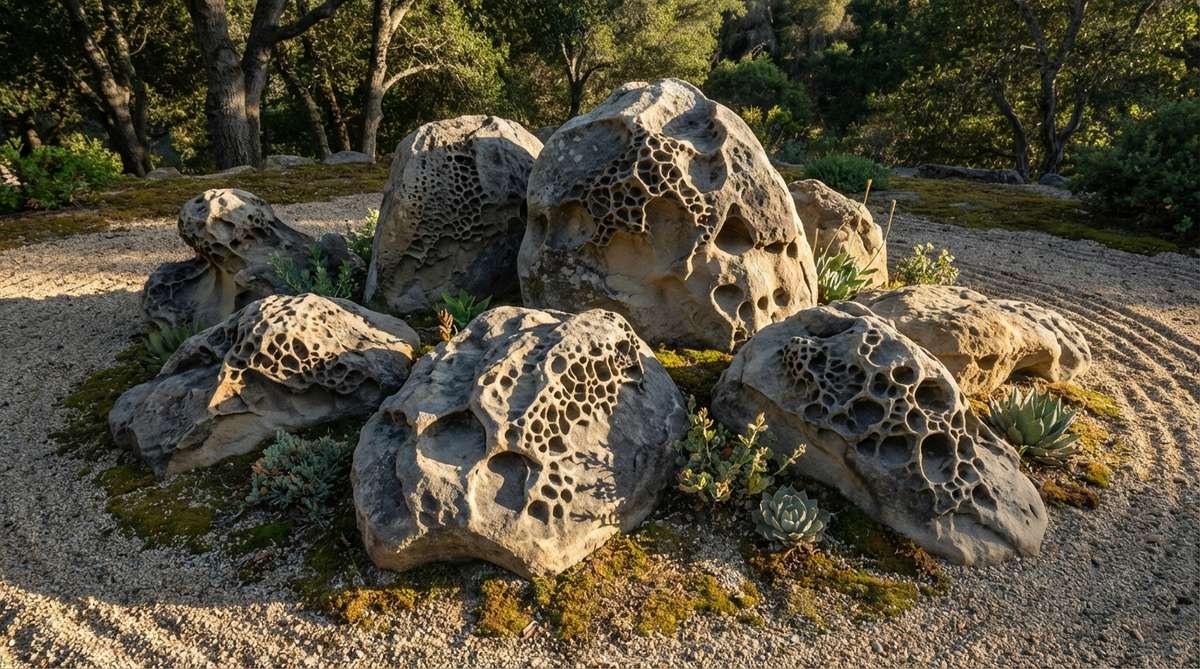
Feels like an alien artifact or deep-sea coral. Showcasing pitted tafoni rocks is an incredible centerpiece for close-up viewing benches.
Smooth rocks offer nothing to look at closely, but sourcing deeply pocketed stones delivers a surprisingly premium look. The intricate cavities cast intense, complex shadows that change constantly as the sun moves.
These rare specimens run about $80–$150. It’s a premium upgrade that completely changes the vibe.
- Key Materials: One heavily eroded honeycomb boulder
- Vibe / Style: Intricate and organic
- Difficulty: Hard to source locally
- Budget Breakdown: Specimen rock: $120 | Display pedestal sand: $10
- Creator’s Tip: Place this stone right next to a seating area; it rewards close, detailed inspection.
- Smart Sourcing: Specialty holey limestone (Texas lace rock) and soft bristle cleaning brushes.
Creating Your Personal Zen Garden Stone Sanctuary
Sourcing and arranging these 43 stunning zen garden rocks layouts requires mixing high-end aesthetics with smart material budgets. Whether you’re building a massive dry waterfall or picking up a starter kit for a simple indoor sand tray, using premium sealants and pre-cut mats elevates the final look. Start by mastering one of the 43 blueprints above, invest in quality bulk landscaping materials, and watch your outdoor space transform into a luxurious, high-value retreat.
Frequently Asked Questions
How many rocks should be in a zen garden arrangement?
Traditional setups use odd numbers—typically 3, 5, 7, or 9 stones—to break symmetry and force visual movement. However, if you want a premium look without spending a fortune, focus on a high-quality 3-stone starter kit. Sourcing an odd-numbered bundle online often saves you from buying overpriced single rocks at local centers.
Should zen garden boulders be partially buried?
Absolutely. Leaving rocks sitting on top of the dirt looks cheap and artificial. You must bury them 50-80% deep to make them look like ancient geological formations. If digging is too hard, use a bulk pack of white raking sand to build the base up around the stone instead, sealing it with a UV-resistant landscape border.
What type of stone works best for zen garden rocks?
Angular granite, dark basalt, and weathered limestone deliver the highest return on aesthetic investment. To save money while getting that luxury spa look, buy bulk bags of crushed blue-gray gravel for the base and spend your budget on 2-3 premium statement boulders. Avoid shiny, cheap plastic faux-rocks at all costs.
Can I create a zen rock garden in a small space?
Yes, and small spaces actually look much more expensive when executed correctly. For a 6×8 foot patio, a single high-quality monolithic rock surrounded by miniature garden supplies or a pre-cut moss kit is perfect. Keep the scale tight and use fine-grain premium white sand to make the small footprint feel deliberate and chic.
How do I arrange rocks to represent water in a zen garden?
You mimic water by creating flowing, directional lines using bulk river pebbles or by raking white sand in tight ripples. For a high-end dry waterfall, stack angular slate pieces and use a clear, wet-look stone sealant to make the rocks permanently look like they’ve just been splashed by crashing water.