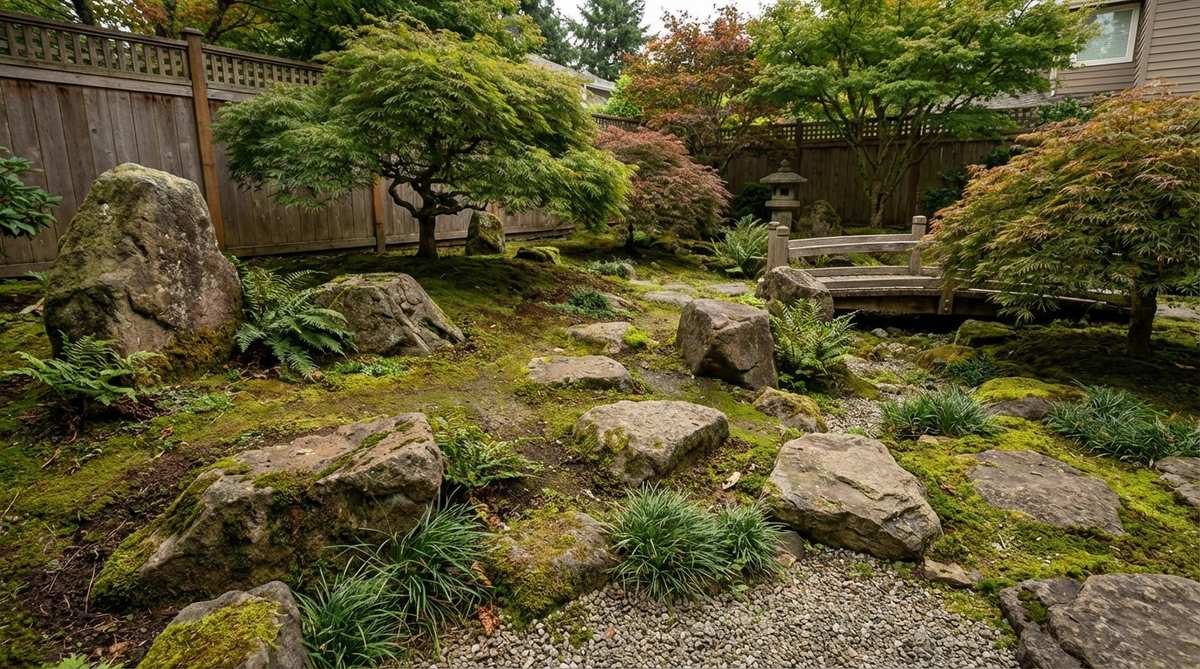
Positioning japanese garden stones perfectly creates that elite, tranquil aesthetic instantly. Master these exact placement blueprints to achieve a high-end designer look on a tight budget. Skip the expensive contractors completely.
Design Snapshot Key Principles
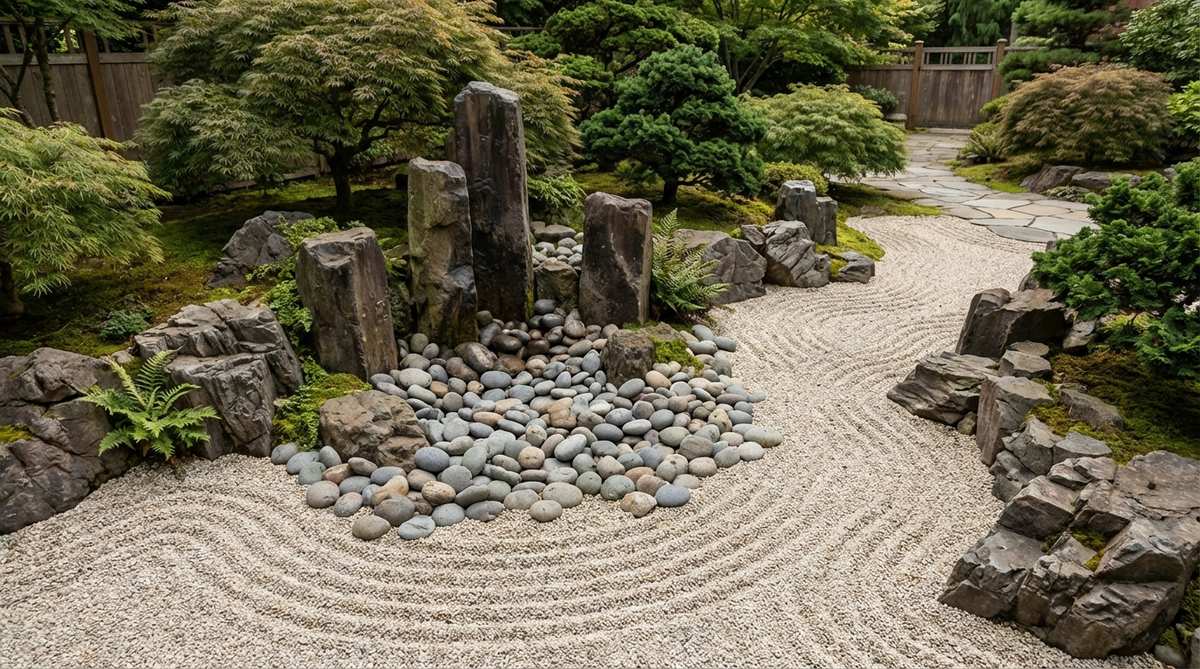
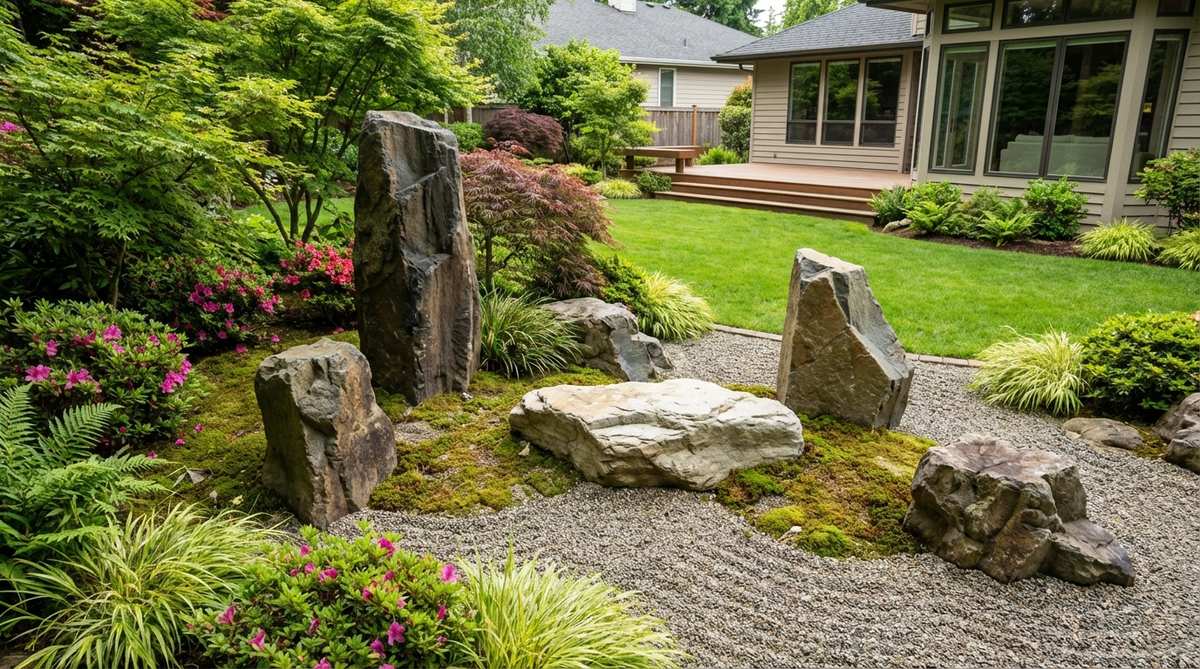
- Asymmetry Over Symmetry: Japanese garden design avoids geometric patterns and straight lines, instead embracing natural irregularity and odd-numbered groupings (3, 5, or 7 stones)
- Grounding Through Burial: Stones should appear to emerge from the earth rather than sit on top of it, with approximately one-third of each stone buried for authentic appearance
- Material Selection: Traditional gardens use granite, basalt, limestone, and weathered fieldstones for rocks, paired with crushed granite or fine gravel sized 3-8mm for pathways
- Purposeful Spacing: The space between stones holds equal importance to the stones themselves, allowing room for moss, plants, and the eye to rest
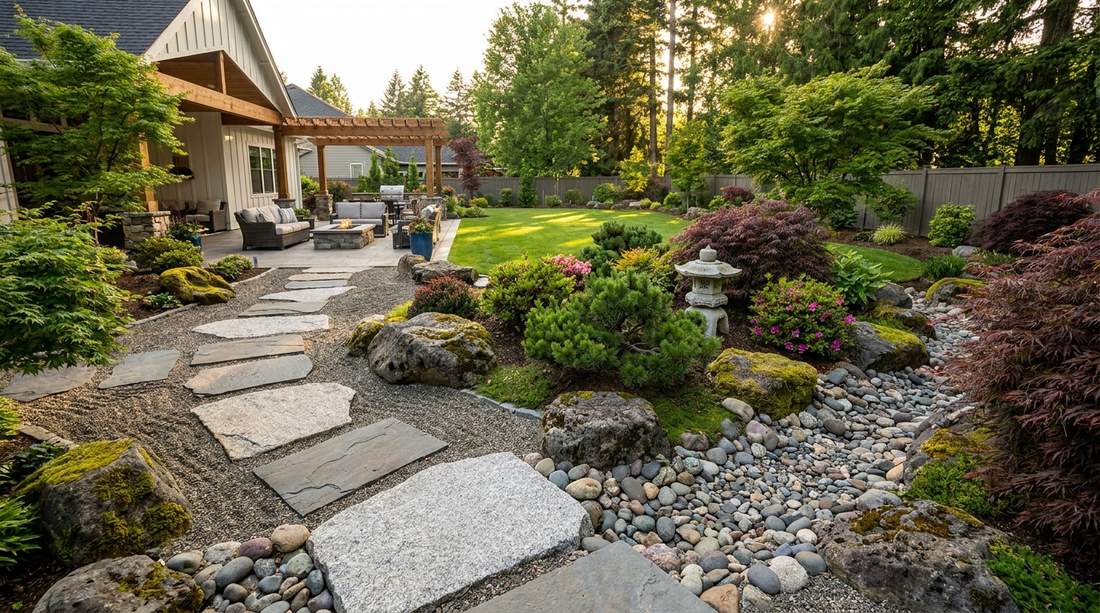
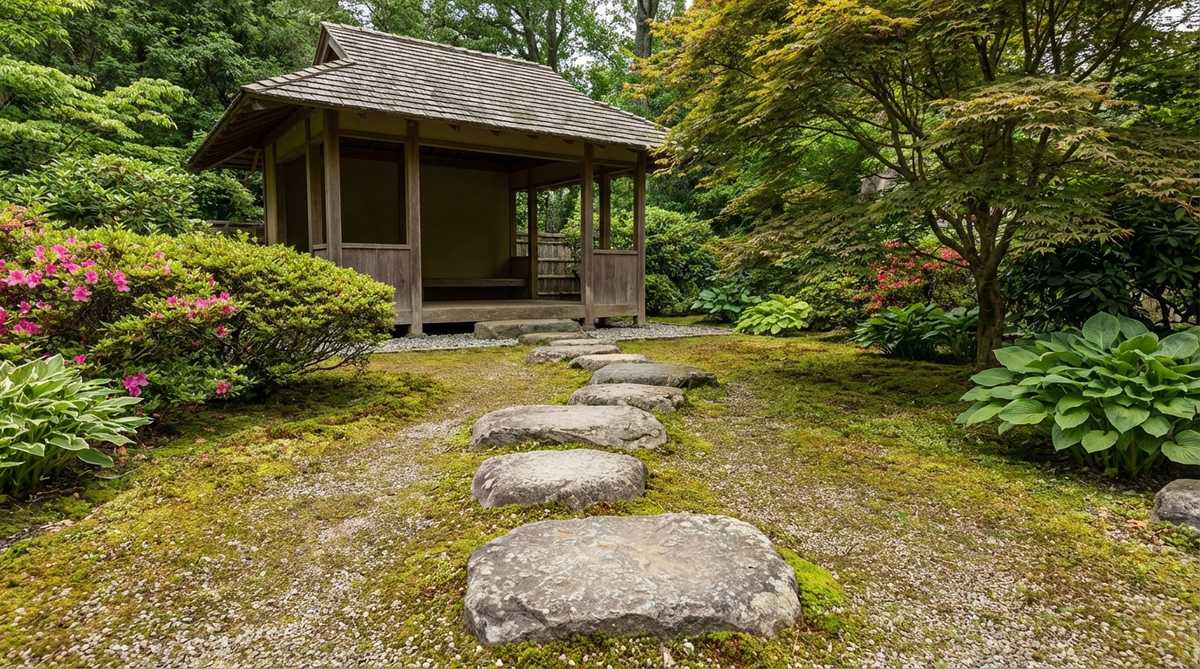
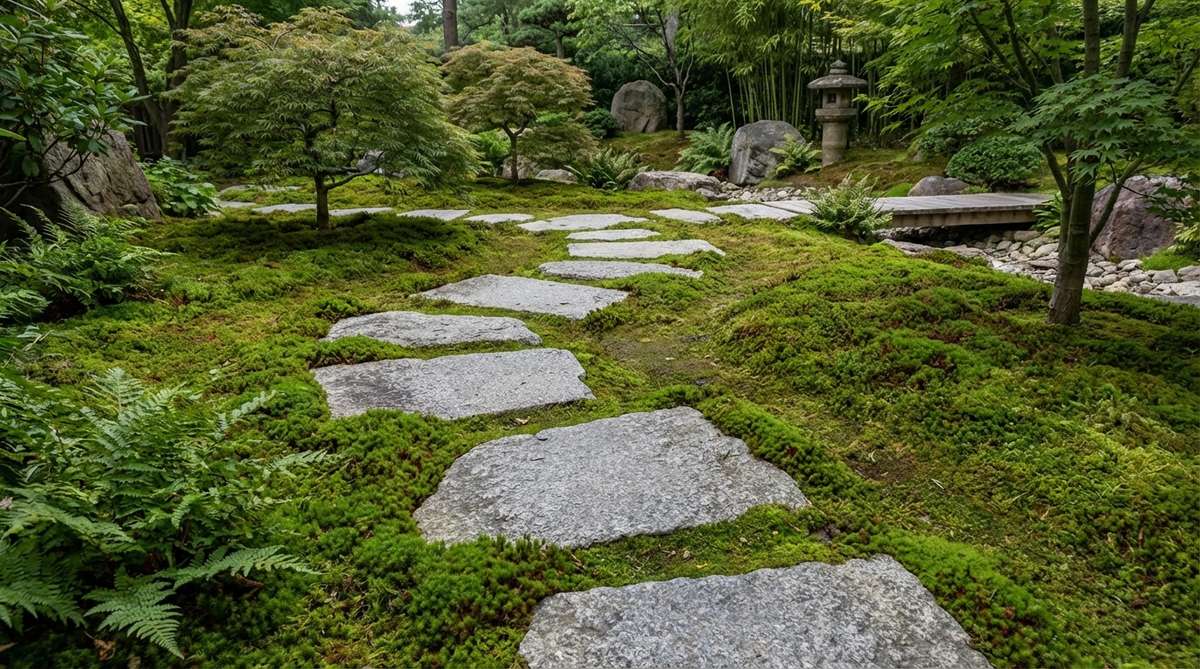
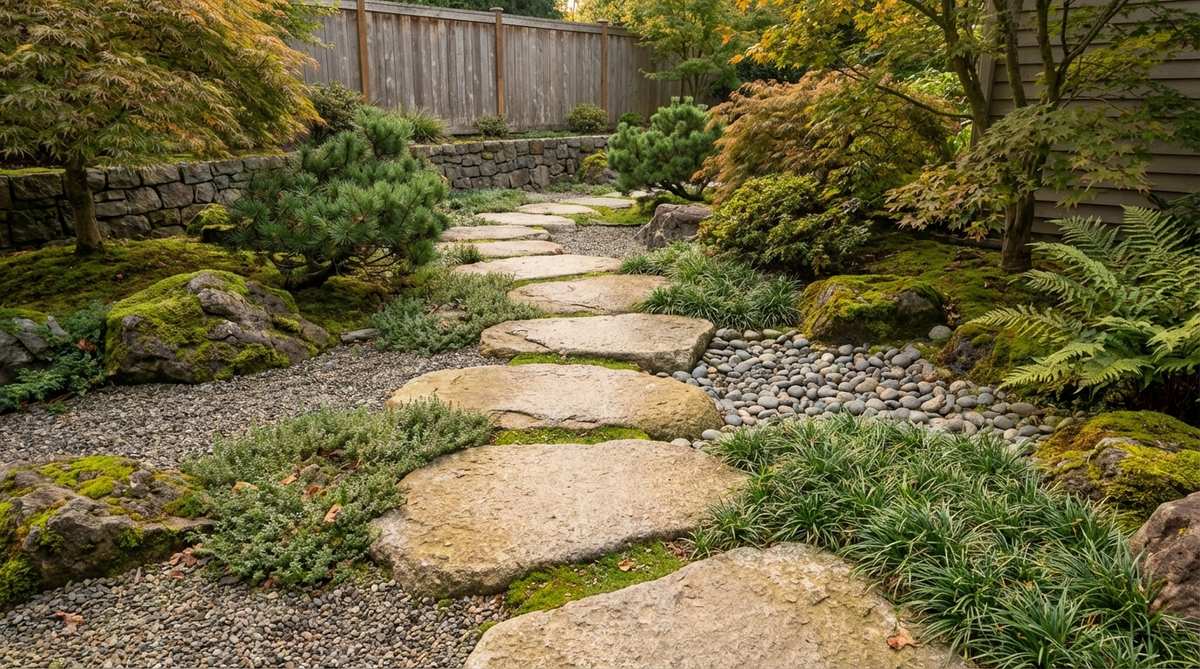
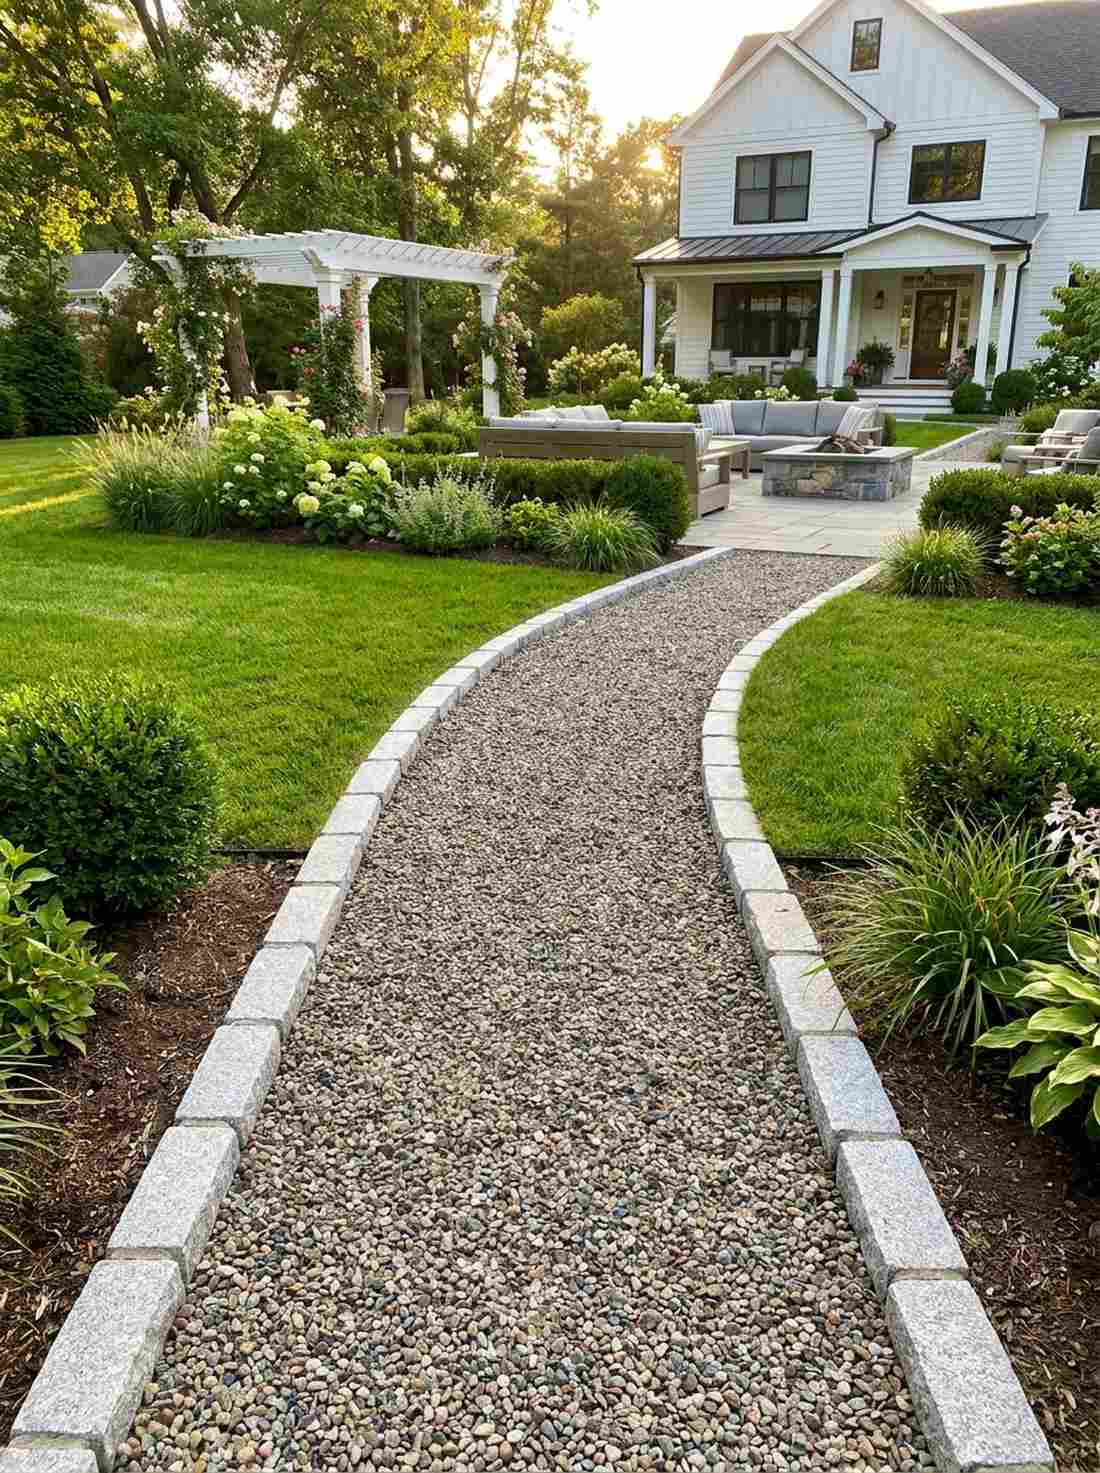
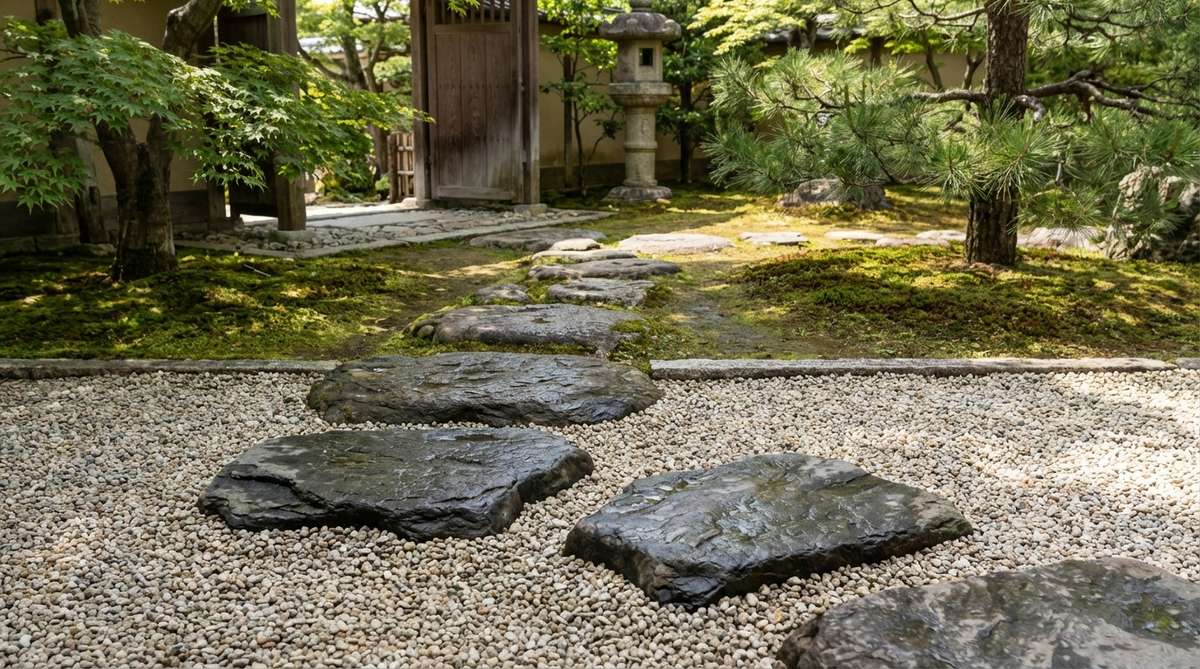
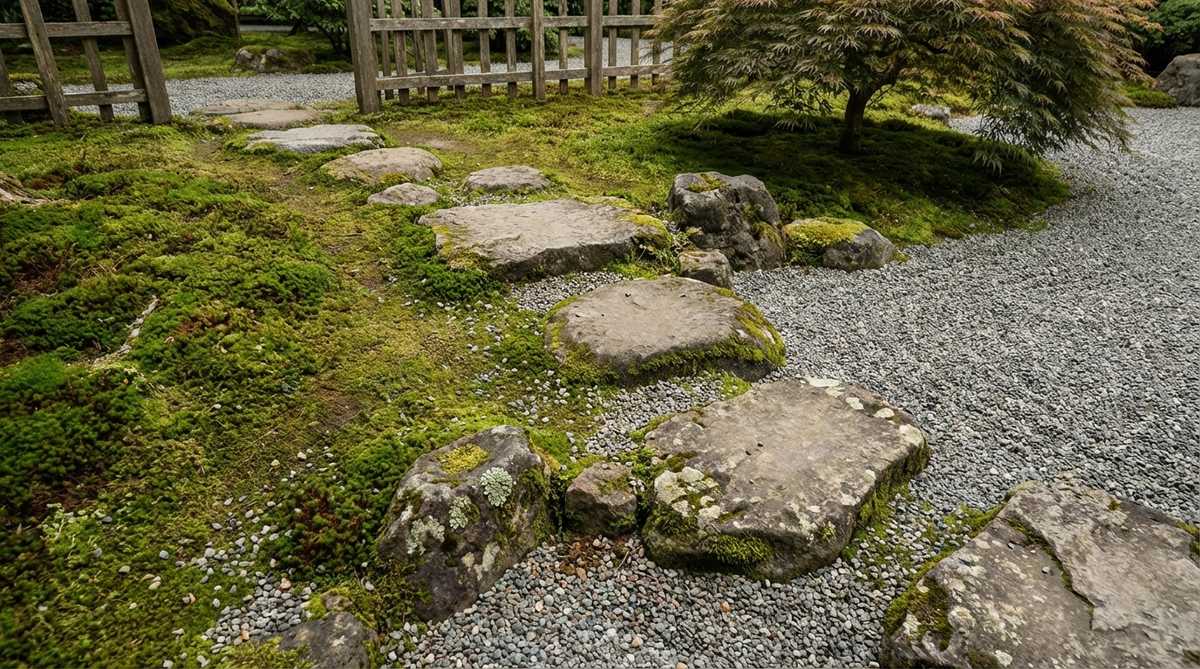
Stepping Stone Pathways That Guide and Inspire

Stepping stone paths (tobi-ishi) represent the most iconic element of Japanese garden design. These irregular stone placements guide visitors through the garden while encouraging a slower, more mindful pace of movement.
1. Offset Diagonal Stepping Pattern
Feels like a hidden path you accidentally discovered in Kyoto. This diagonal zen pathway concept is absolutely perfect for a contemplative tea garden entrance.
Most beginners align their stones in boring straight lines, but staggering them at a 30-degree angle delivers a surprisingly premium look. Burying one-third of each commercial-grade granite slab anchors the design and completely bypasses the cheap amateur look.
You can easily pull this off for around $40–$75 depending on stone thickness. Pin this to your outdoor walkway inspiration board!
- Key Materials: Thick cut granite slabs
- Vibe / Style: Mindful, slow-paced transition
- Difficulty: Moderate DIY
- Budget Breakdown: Stones: $60 | Base Sand: $15.
- Creator’s Tip: Rotate each stone 10 degrees to break parallel lines.
- Smart Sourcing: Pre-cut non-slip granite slabs (bulk pack) and high-drainage leveling sand.
2. Two-Three Rhythm Stepping Sequence
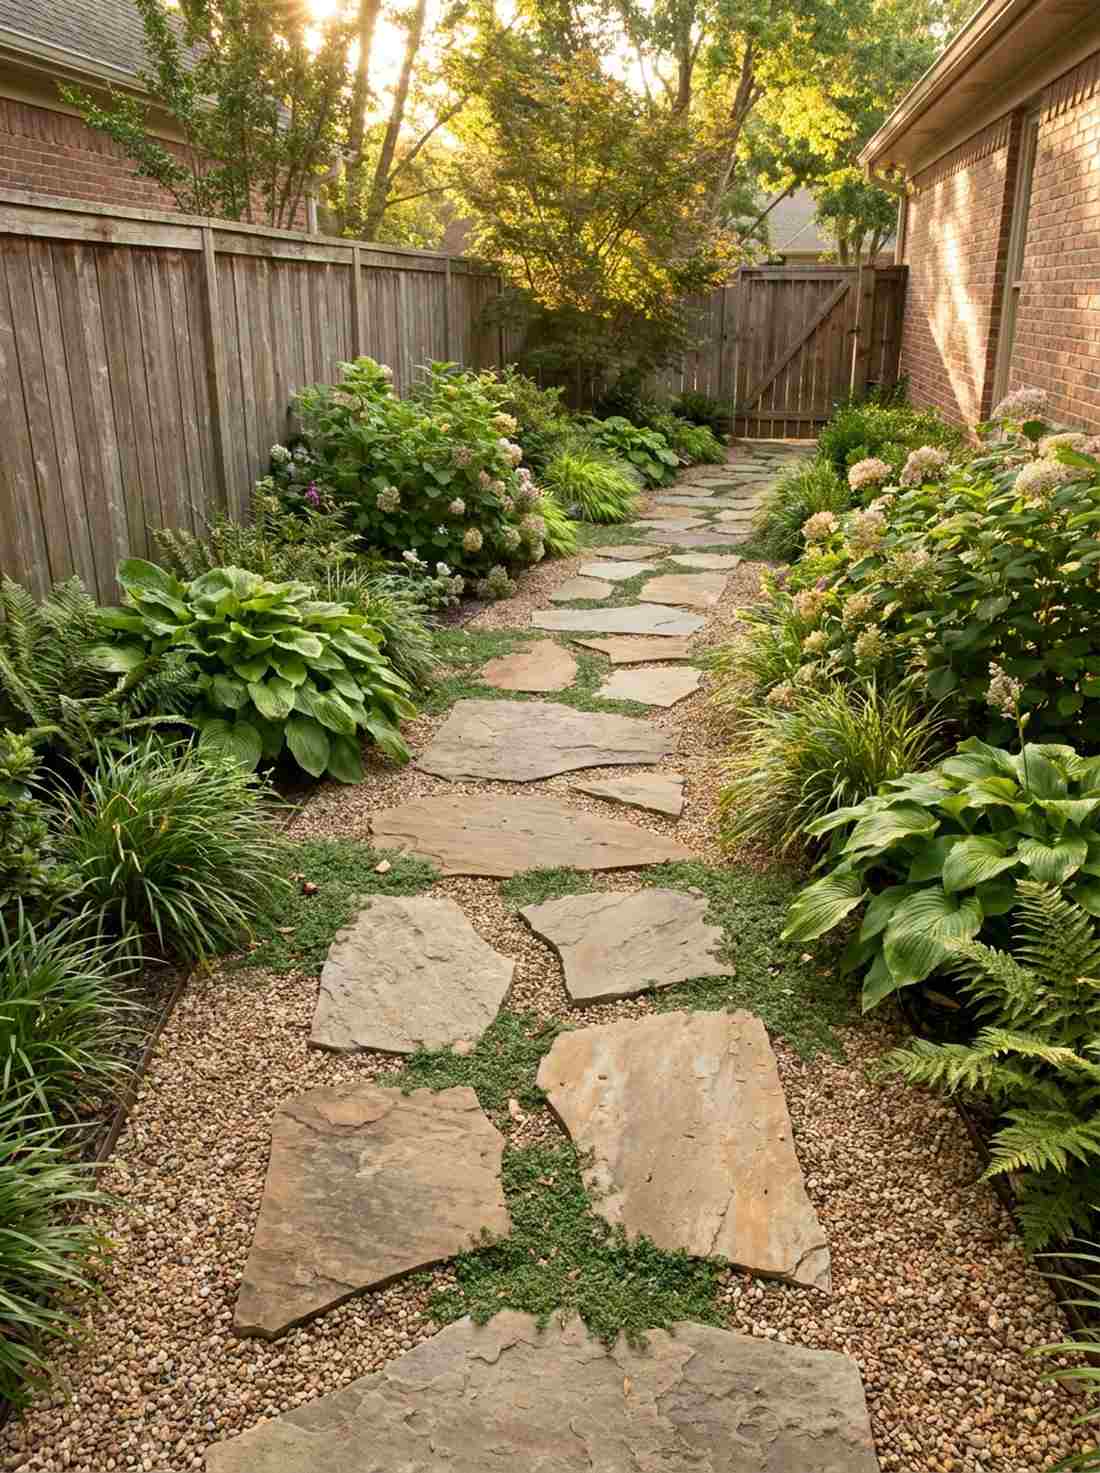
Breathes a quiet, poetic rhythm into your yard. This clustered stone stepping guide works exceptionally well for long, narrow side-yard corridors.
Many landscapers ignore pacing entirely, yet grouping stones in alternating twos and threes gives a designer-level finish that naturally slows the walker. Mixing large anchor stones with smaller companions creates an authentic miniature garden supplies aesthetic without the premium price tag.
Expect to spend about $30–$50 for the stones. It’s a fast upgrade that completely changes the vibe.
- Key Materials: Varied medium and large flat stones
- Vibe / Style: Traditional tea house approach
- Difficulty: Easy beginner setup
- Budget Breakdown: Mixed stones: $35 | Ground cover: $15.
- Creator’s Tip: Keep the spacing tight within the clusters but wider between them.
- Smart Sourcing: Assorted landscaping flagstone kits and weed-barrier landscape fabric.
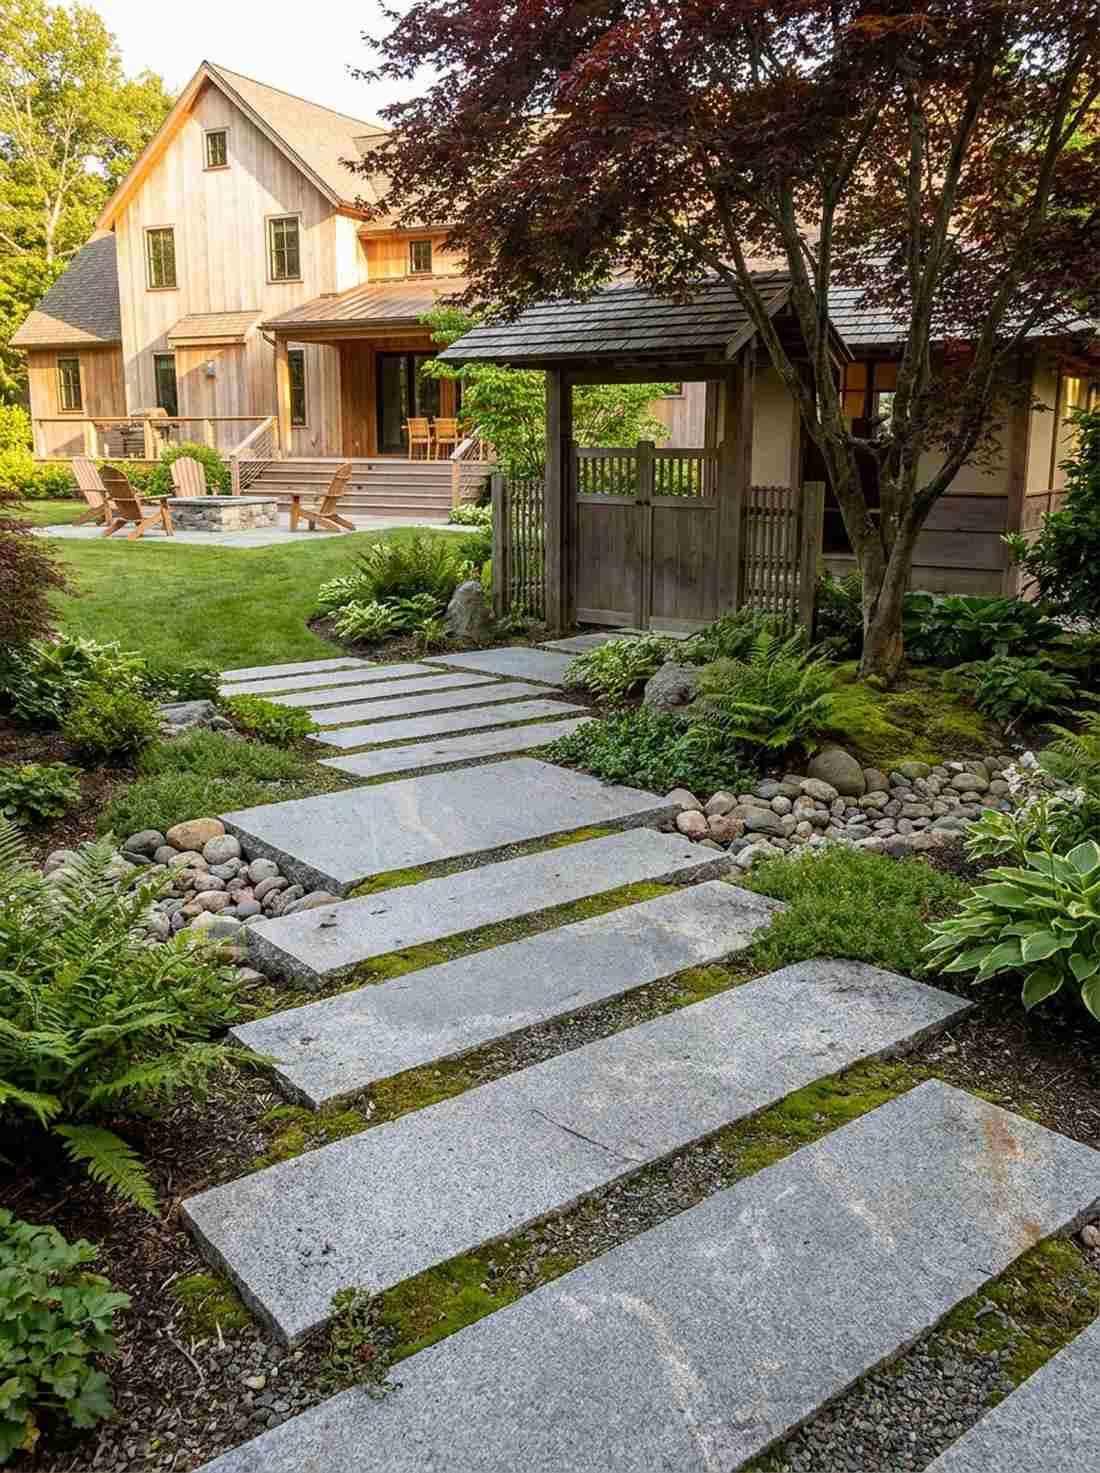
3. Straight-Line Tobi-Ishi
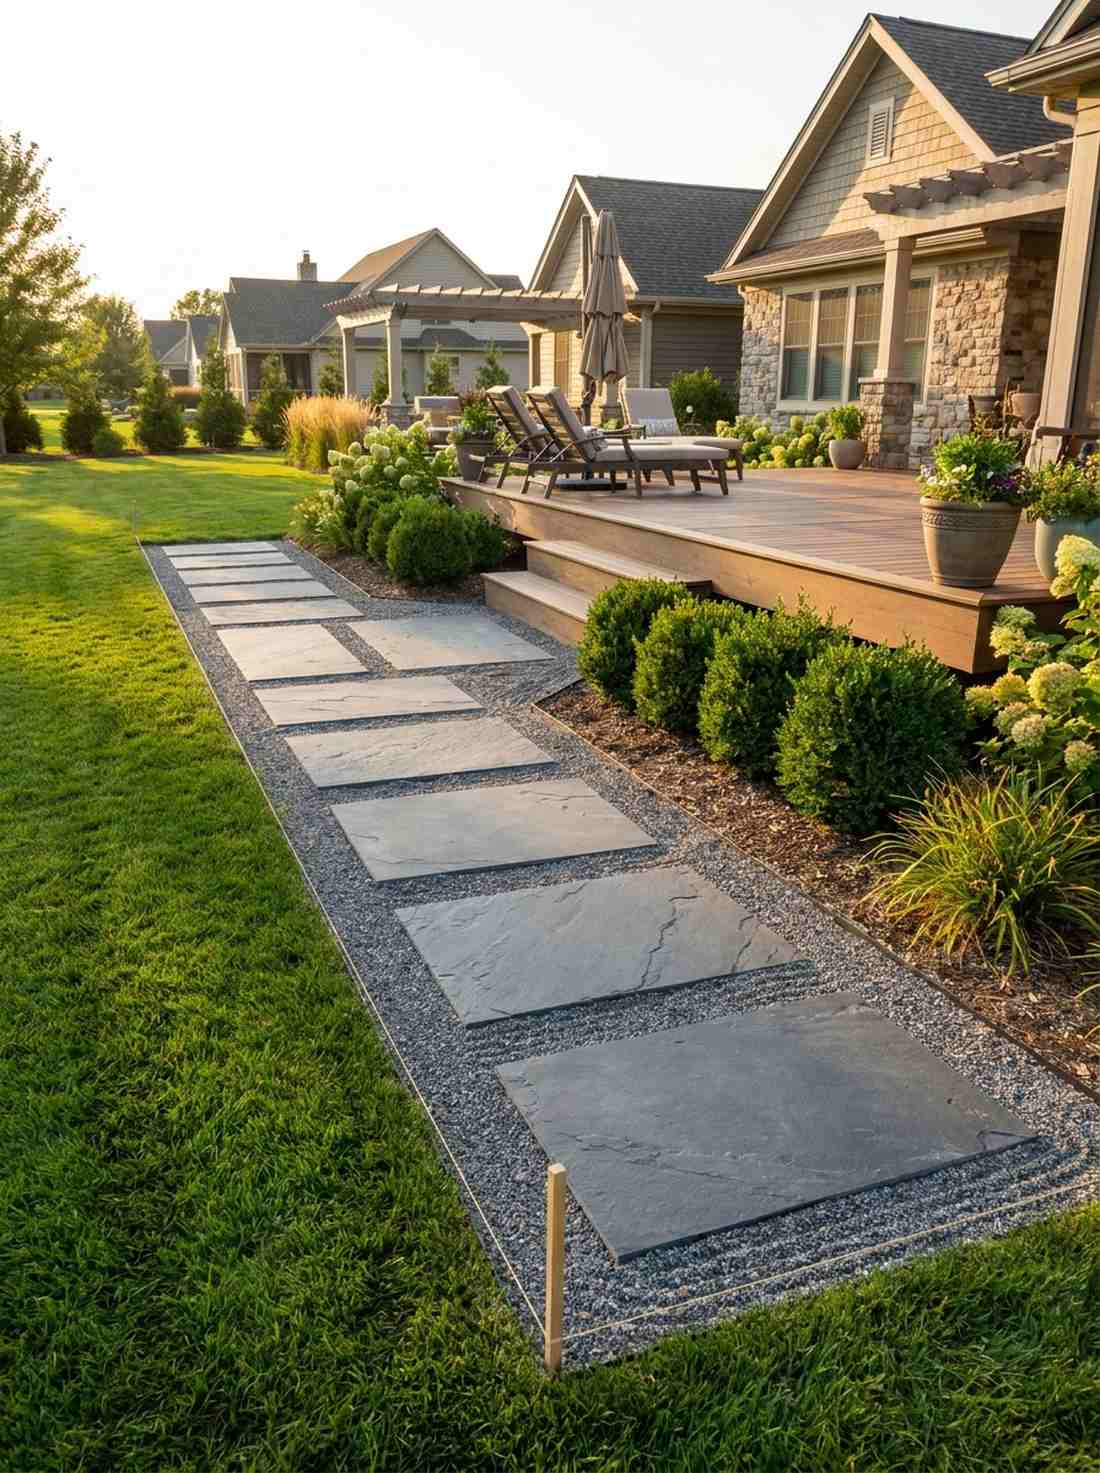
Exudes commanding elegance straight out of a royal pavilion. This formal approach pathway is highly recommended for leading up to a viewing deck or main entrance.
While strict lines usually look rigid, progressively increasing the stone size as you near the destination makes this setup look far more expensive than it is. Rotating the individual slabs slightly preserves the organic tension essential to traditional design.
This layout usually costs around $60–$90 for proper grading materials.
- Key Materials: Seven graded stepping stones
- Vibe / Style: Formal, structured arrival
- Difficulty: Moderate precision required
- Budget Breakdown: Stones: $70 | Edge defining tools: $20.
- Creator’s Tip: Use a taut string line to ensure the center axis is flawless.
- Smart Sourcing: Progressive-sized slate pavers and heavy-duty marking twine kits.
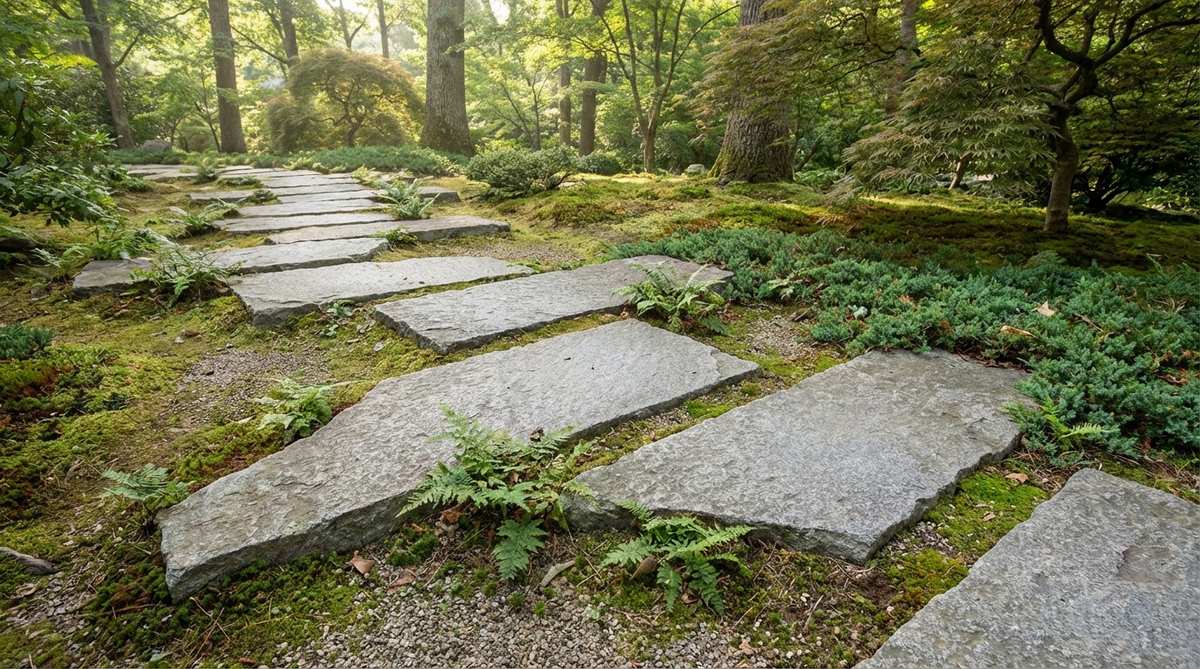
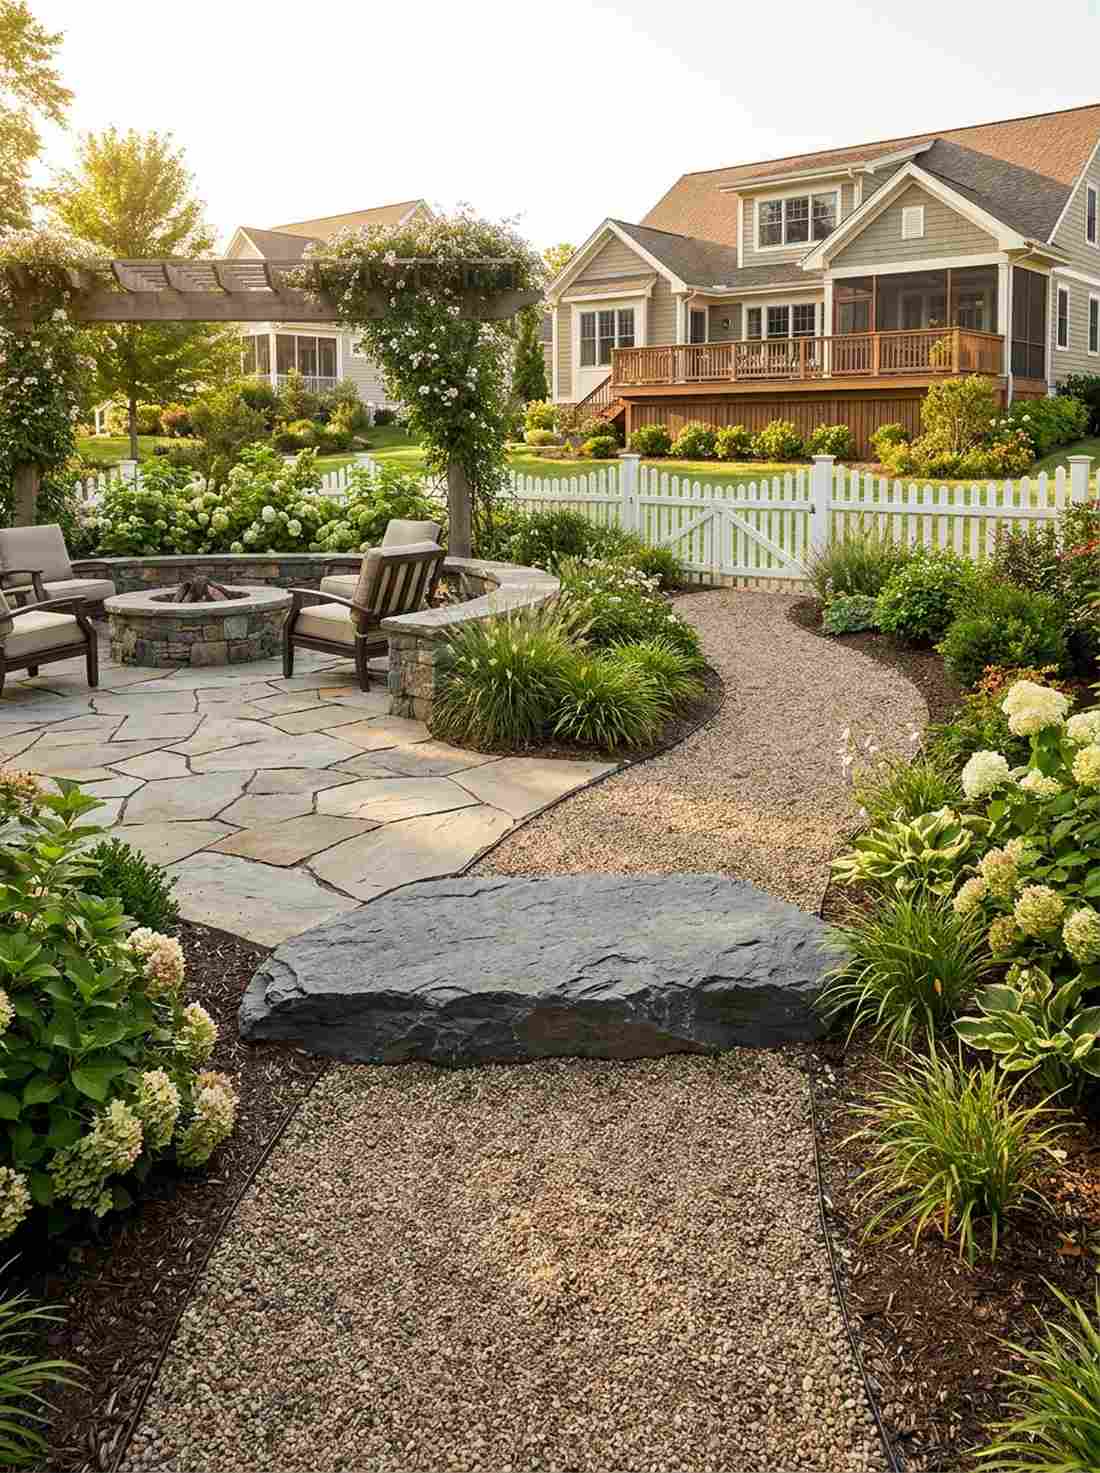
4. Curved Moss Pathway
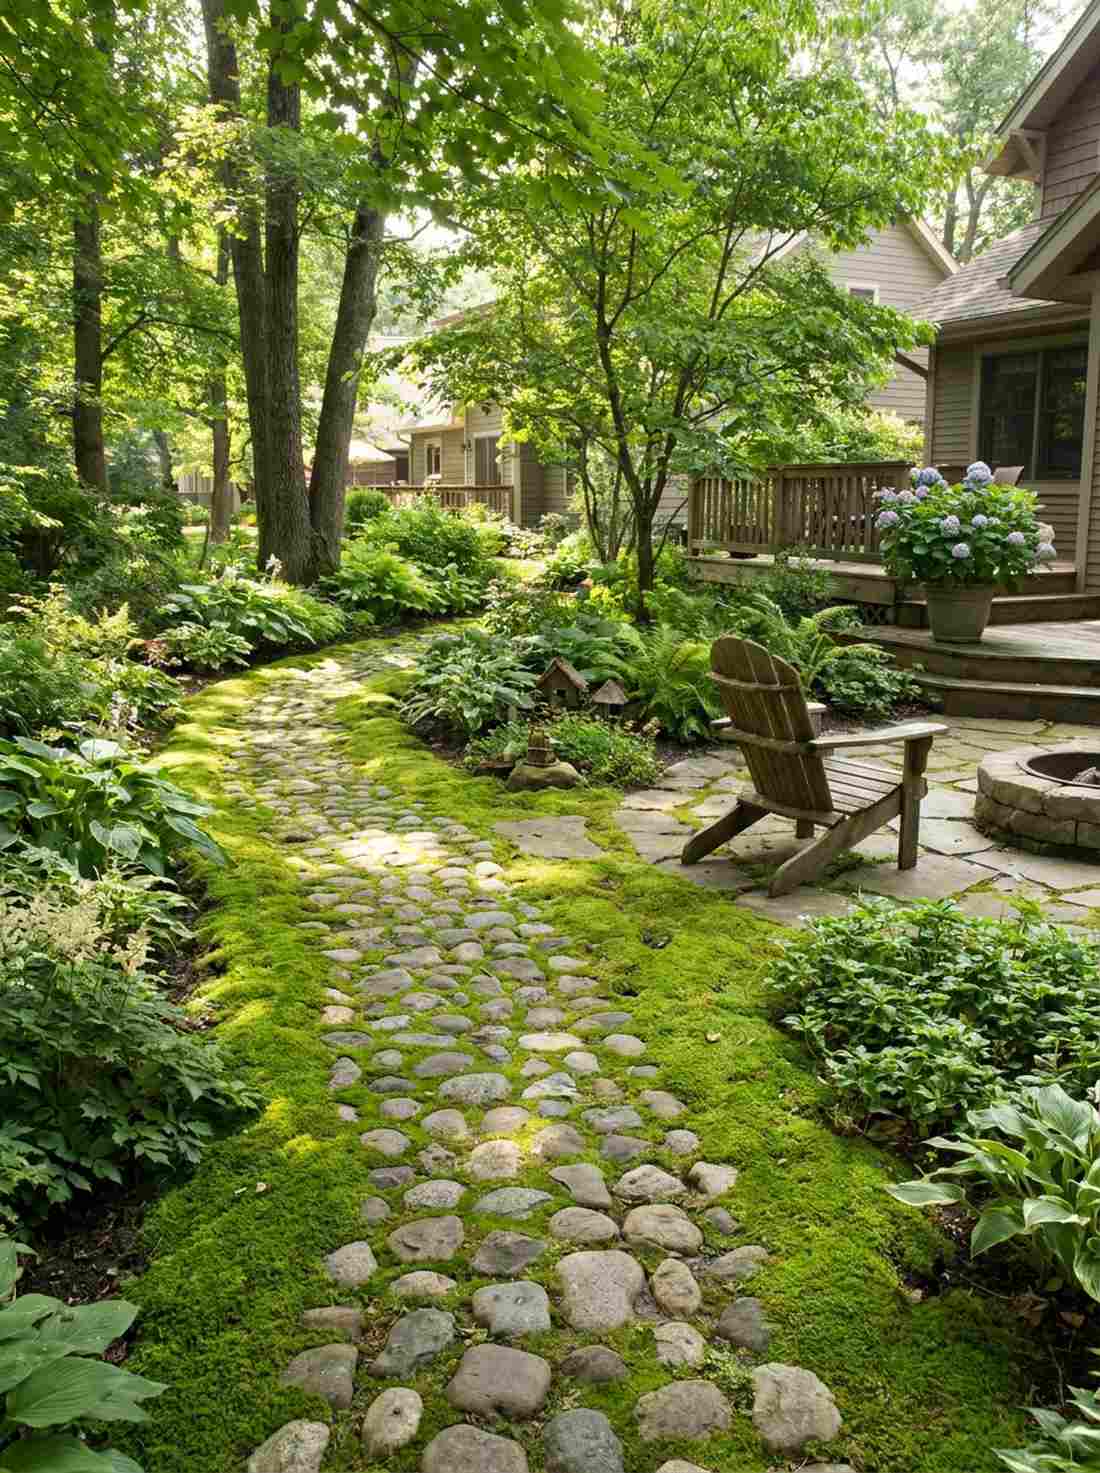
Feels like stepping into an ancient, enchanted woodland. This soft moss garden walk creates the ultimate soothing vibe for shaded backyard corners.
Standard gravel borders look incredibly harsh here, but allowing live moss to creep over weathered stone edges creates a wildly lush, premium alternative. Pairing smooth surfaces with fairy garden kits or shade-loving perennials forces an expensive, naturalized look.
You can execute this stunning visual for roughly $50–$85. Save this to your weekend garden board!
- Key Materials: Live moss flats, smooth river stones
- Vibe / Style: Soft, organic, ancient
- Difficulty: Requires ongoing moisture care
- Budget Breakdown: Stones: $40 | Live Moss: $45.
- Creator’s Tip: Mist the moss twice daily during the first three weeks of establishment.
- Smart Sourcing: Pre-grown sheet moss flats and UV-resistant terrarium accessories.
Most people get this completely wrong… until they try the exact layout coming up next.
5. Triple Stone Clusters
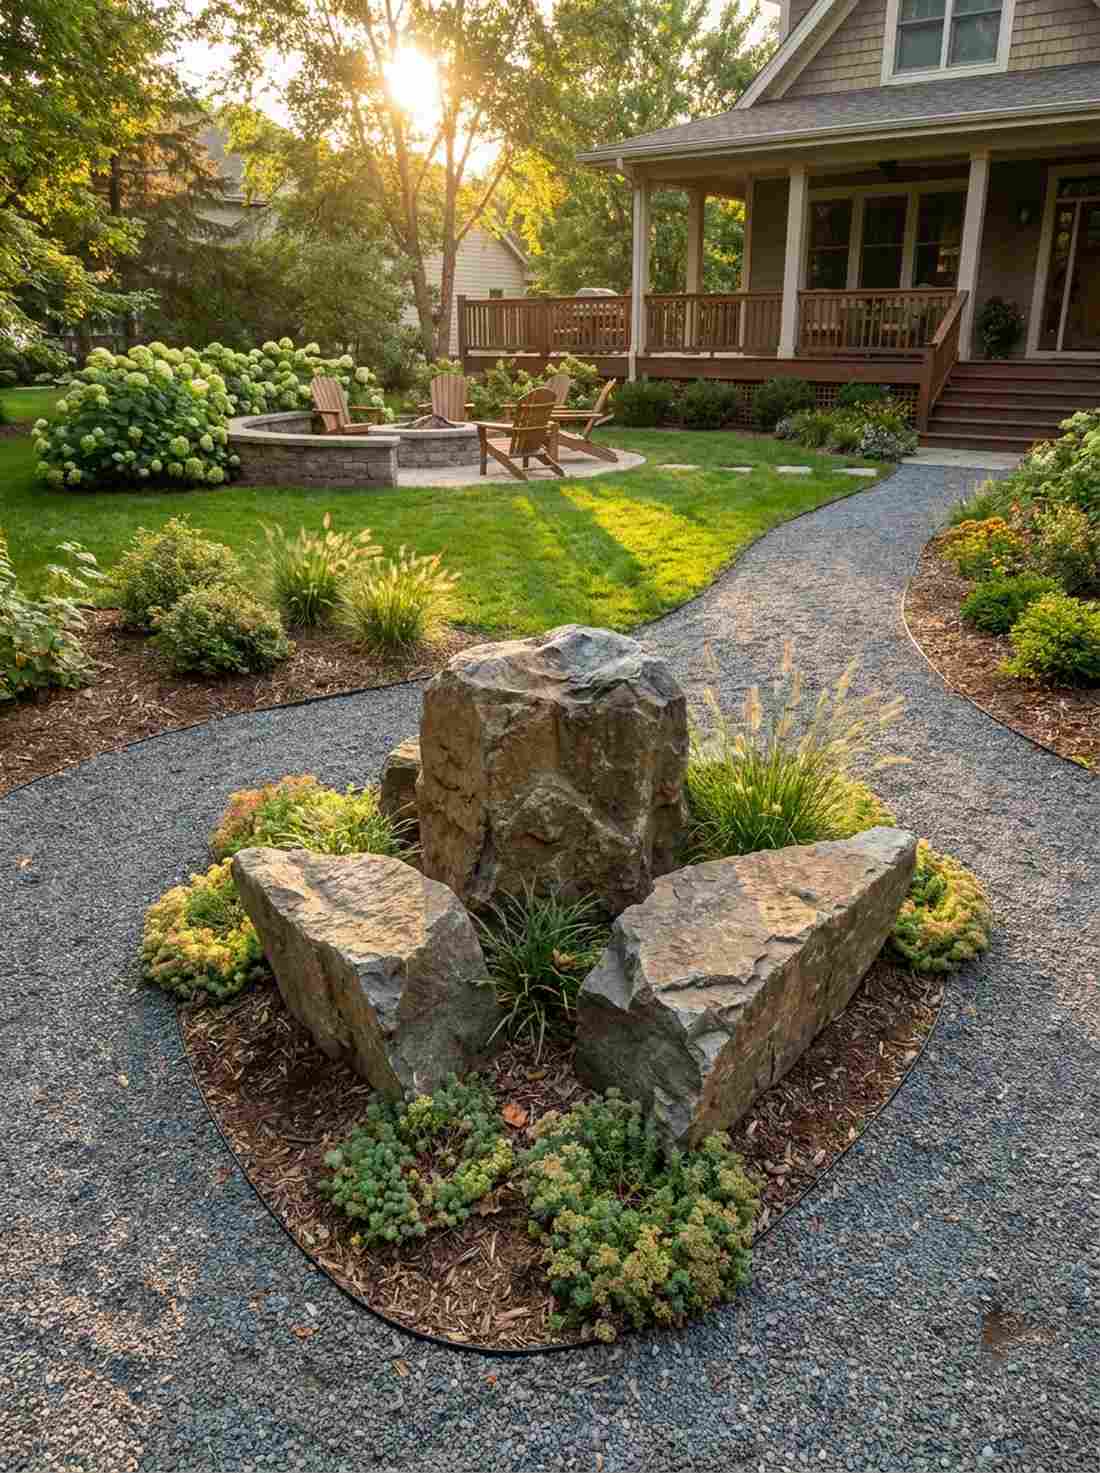
Acts as a subtle, brilliant anchor point for the wandering eye. This decision point stone arrangement is brilliant for pathway forks or intersecting garden zones.
Amateurs often plop down one massive, ugly boulder at intersections, but framing a large stone with two smaller flanking pieces immediately elevates the space into luxury territory. This triangular footprint grounds the path and offers a psychological pausing moment.
Grabbing three complimentary stones usually runs about $20–$40.
- Key Materials: One dominant stone, two accent stones
- Vibe / Style: Thoughtful, deliberate pausing
- Difficulty: Very easy
- Budget Breakdown: Main stone: $25 | Accent stones: $15.
- Creator’s Tip: Angle the smaller stones outward to hint at the diverging paths.
- Smart Sourcing: Hand-picked natural basalt boulders and outdoor stone adhesive.
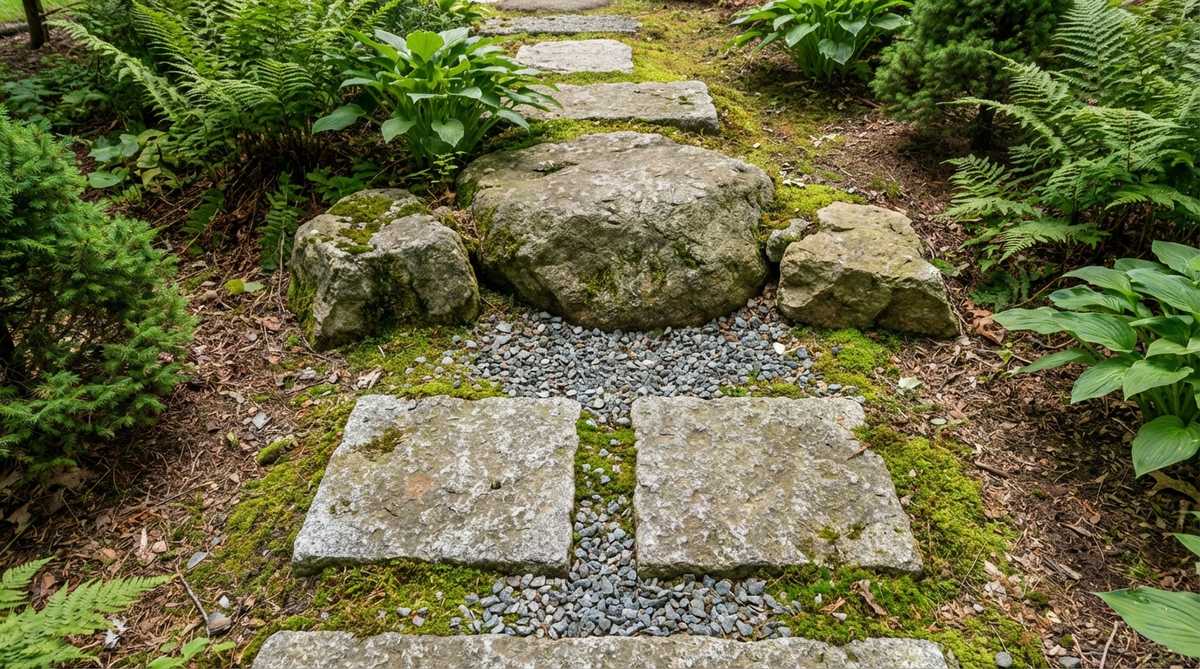
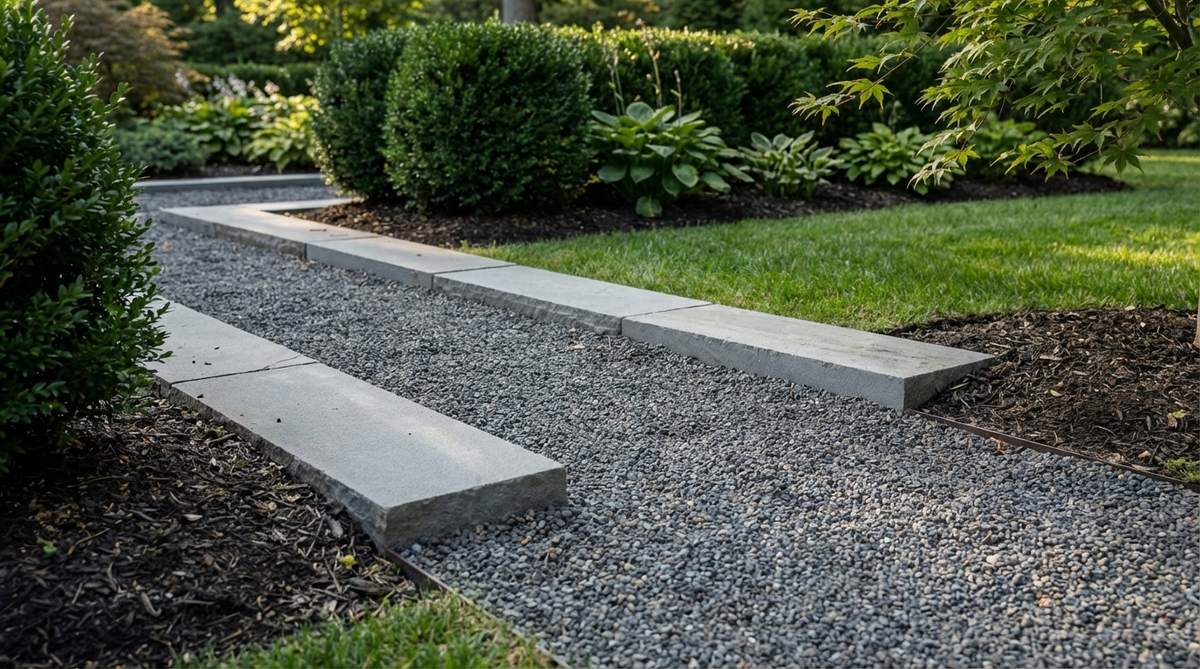
6. Gravel-Embedded Stepping Path
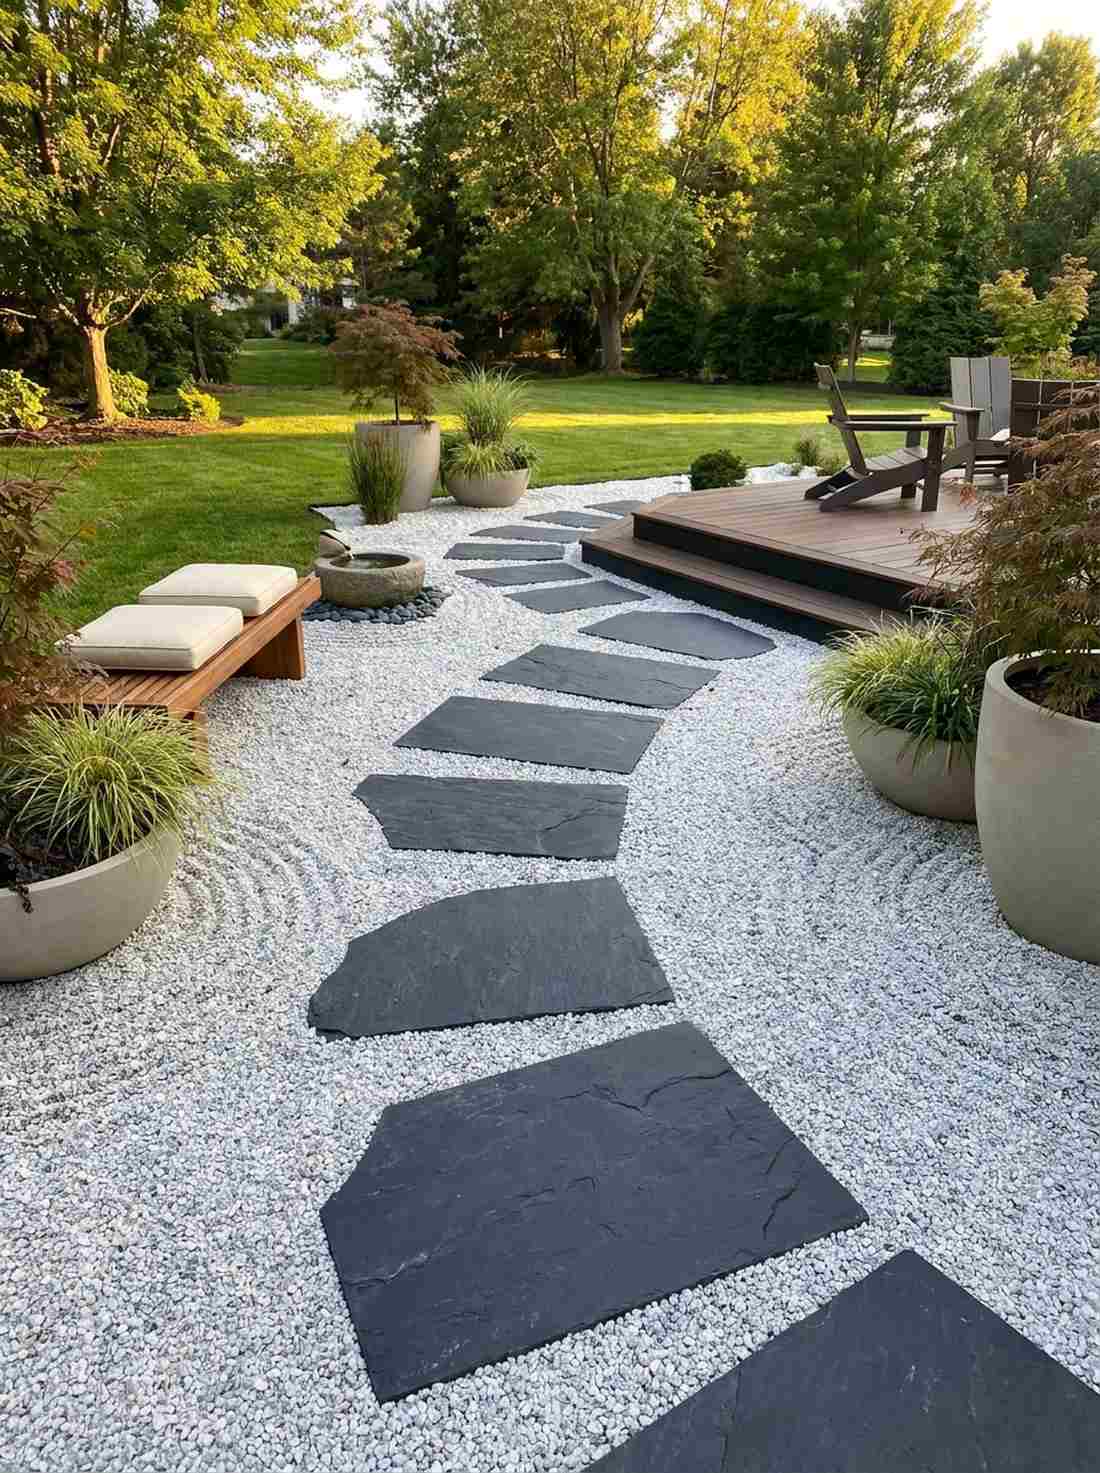
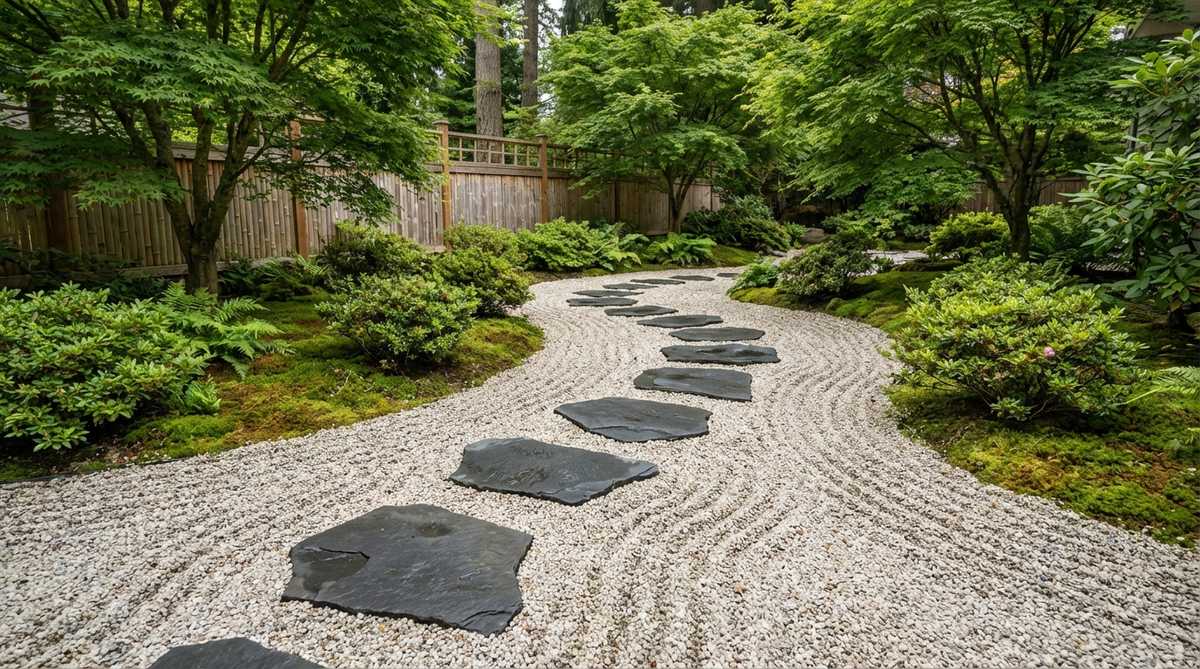
Projects crisp, pristine minimalism that calms the mind instantly. This high-contrast gravel walkway is perfect for modern zen courtyard restorations.
Leaving stepping stones loose on dirt is a recipe for disaster, but sinking dark slate flush into a bed of crushed japanese garden gravel secures a high-end architectural aesthetic. This contrast practically demands attention while allowing for therapeutic raking maintenance around the edges.
Budget around $70–$110 to cover proper base layers and premium top-fill.
- Key Materials: Dark slate, crushed white granite
- Vibe / Style: Crisp, high-contrast modern
- Difficulty: Moderate excavation needed
- Budget Breakdown: Slate: $50 | Gravel: $60.
- Creator’s Tip: Set stones 1/4 inch above the gravel so your rake doesn’t hit them.
- Smart Sourcing: Bulk crushed white granite (3-8mm) and commercial grade steel garden rakes.
7. Millstone Feature Placement
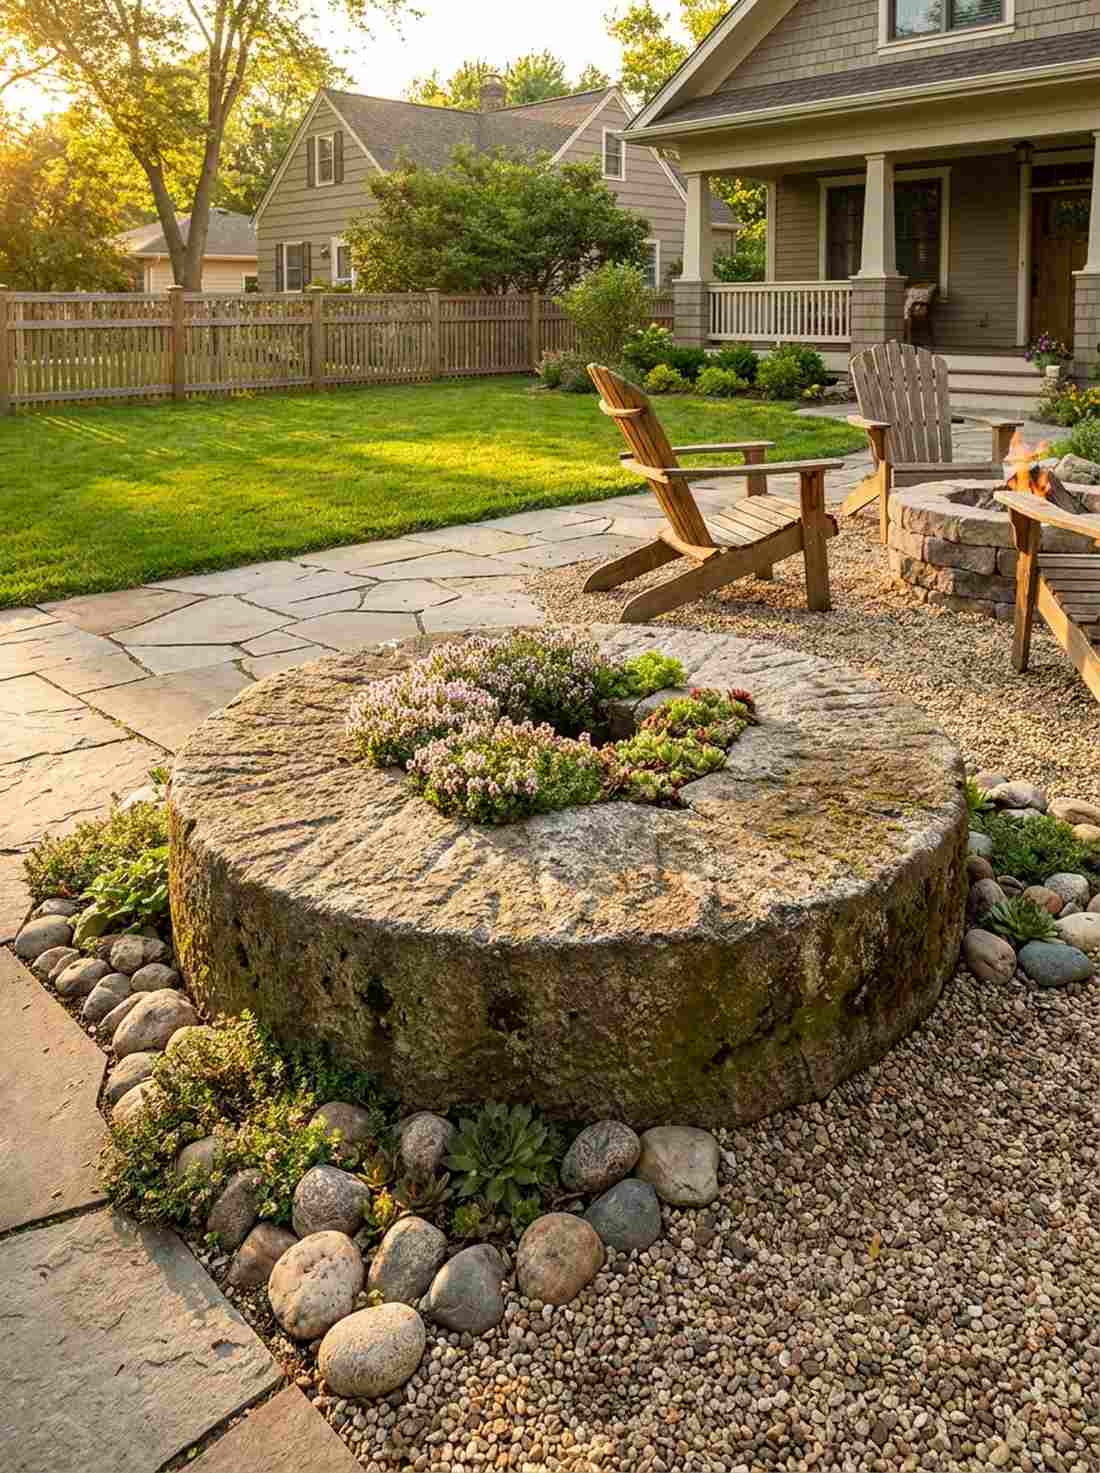
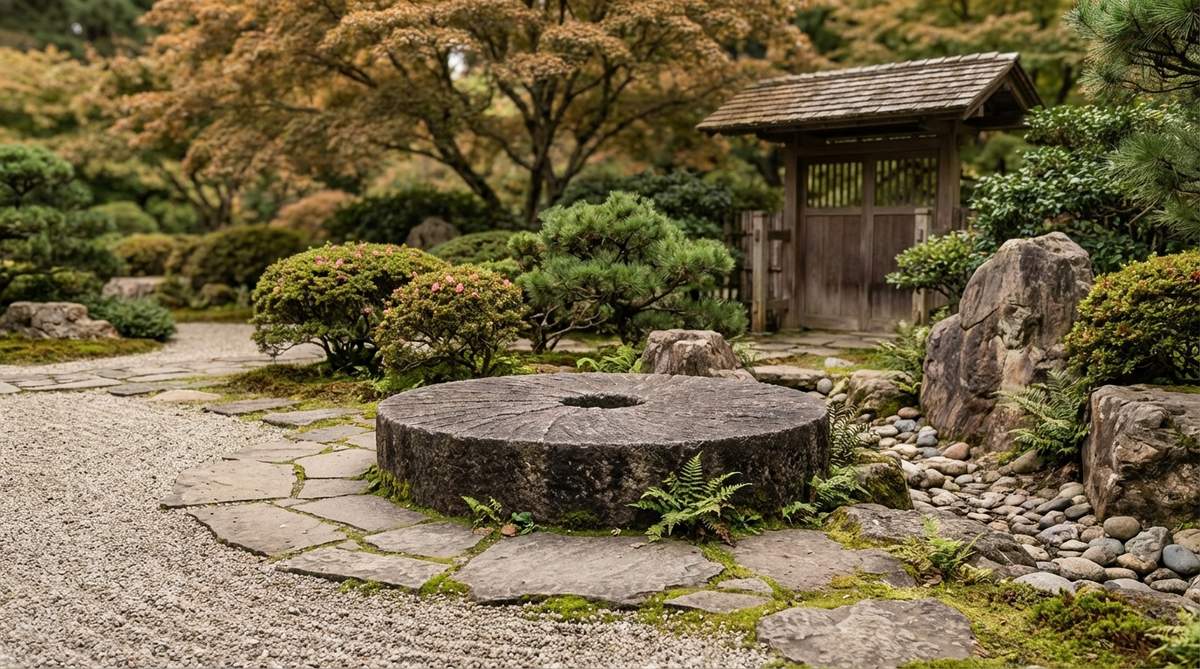
Adds an instant hit of rich, rustic heritage. This circular anchor stone feature provides an incredible focal point for patio transitions.
Using standard square pavers for junctions feels incredibly cheap, whereas dropping a genuine or cast millstone signals a thoughtful, custom-designed space. The central hole offers brilliant opportunities for planting tiny succulents or embedding miniature garden supplies.
A quality replica millstone will run you $80–$150. Pin this if you love historic garden vibes!
- Key Materials: Stone or concrete cast millstone
- Vibe / Style: Rustic, historical focal point
- Difficulty: Heavy lifting required
- Budget Breakdown: Millstone: $120 | Base prep: $15.
- Creator’s Tip: Plant creeping thyme in the center hole for a brilliant pop of green.
- Smart Sourcing: Weather-proof cast stone millstones and creeping groundcover seed mats.
8. Irregular Flagstone Alternative
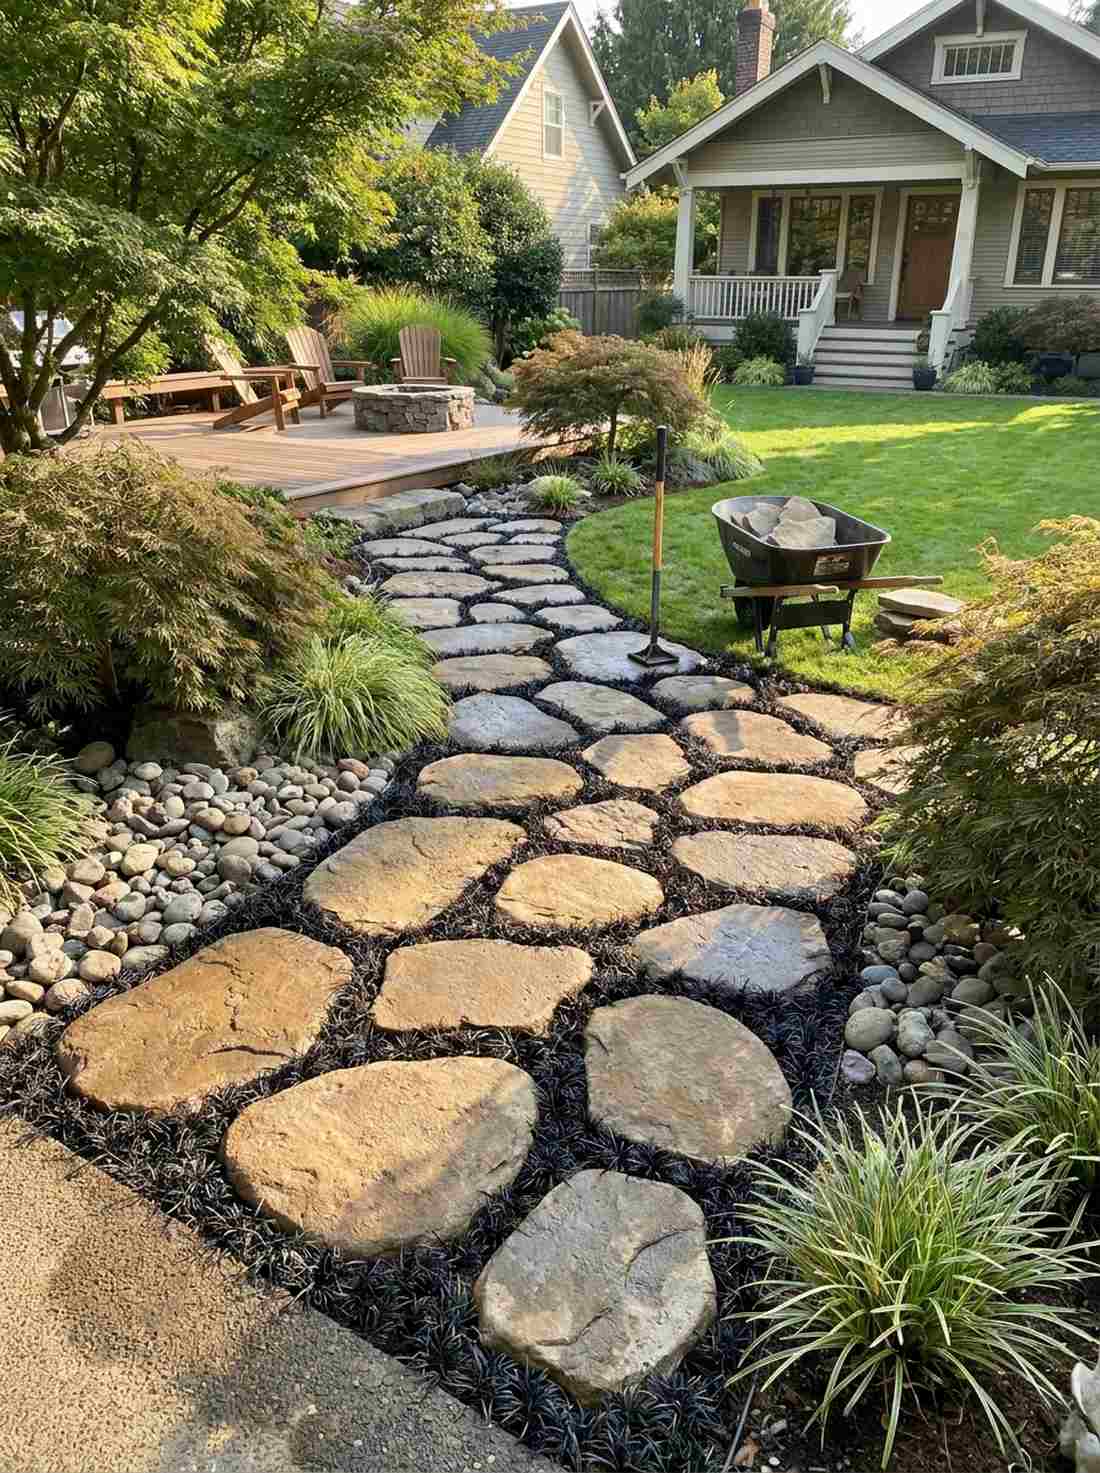
Creates a deeply satisfying, robust walkway that begs to be explored. This spaced flagstone layout beautifully adapts thick contemporary materials to Japanese aesthetics.
Tight patio joints ruin the zen illusion completely, but spacing thick, rounded flagstones generously apart guarantees that coveted “looks expensive but isn’t” result. Ensuring the stones are at least 3 inches thick provides the necessary visual weight and prevents cracking.
You can knock this out for around $60–$100. Highly recommended for a quick weekend win.
- Key Materials: 3-inch thick rounded flagstones
- Vibe / Style: Sturdy, contemporary fusion
- Difficulty: Heavy manual labor
- Budget Breakdown: Flagstone: $80 | Tamp tools: $20.
- Creator’s Tip: Fill the wide gaps with black dwarf mondo grass for dramatic contrast.
- Smart Sourcing: Heavy-duty tumbled flagstone pallets and premium tamper hand tools.
9. Bamboo Grove Pathway
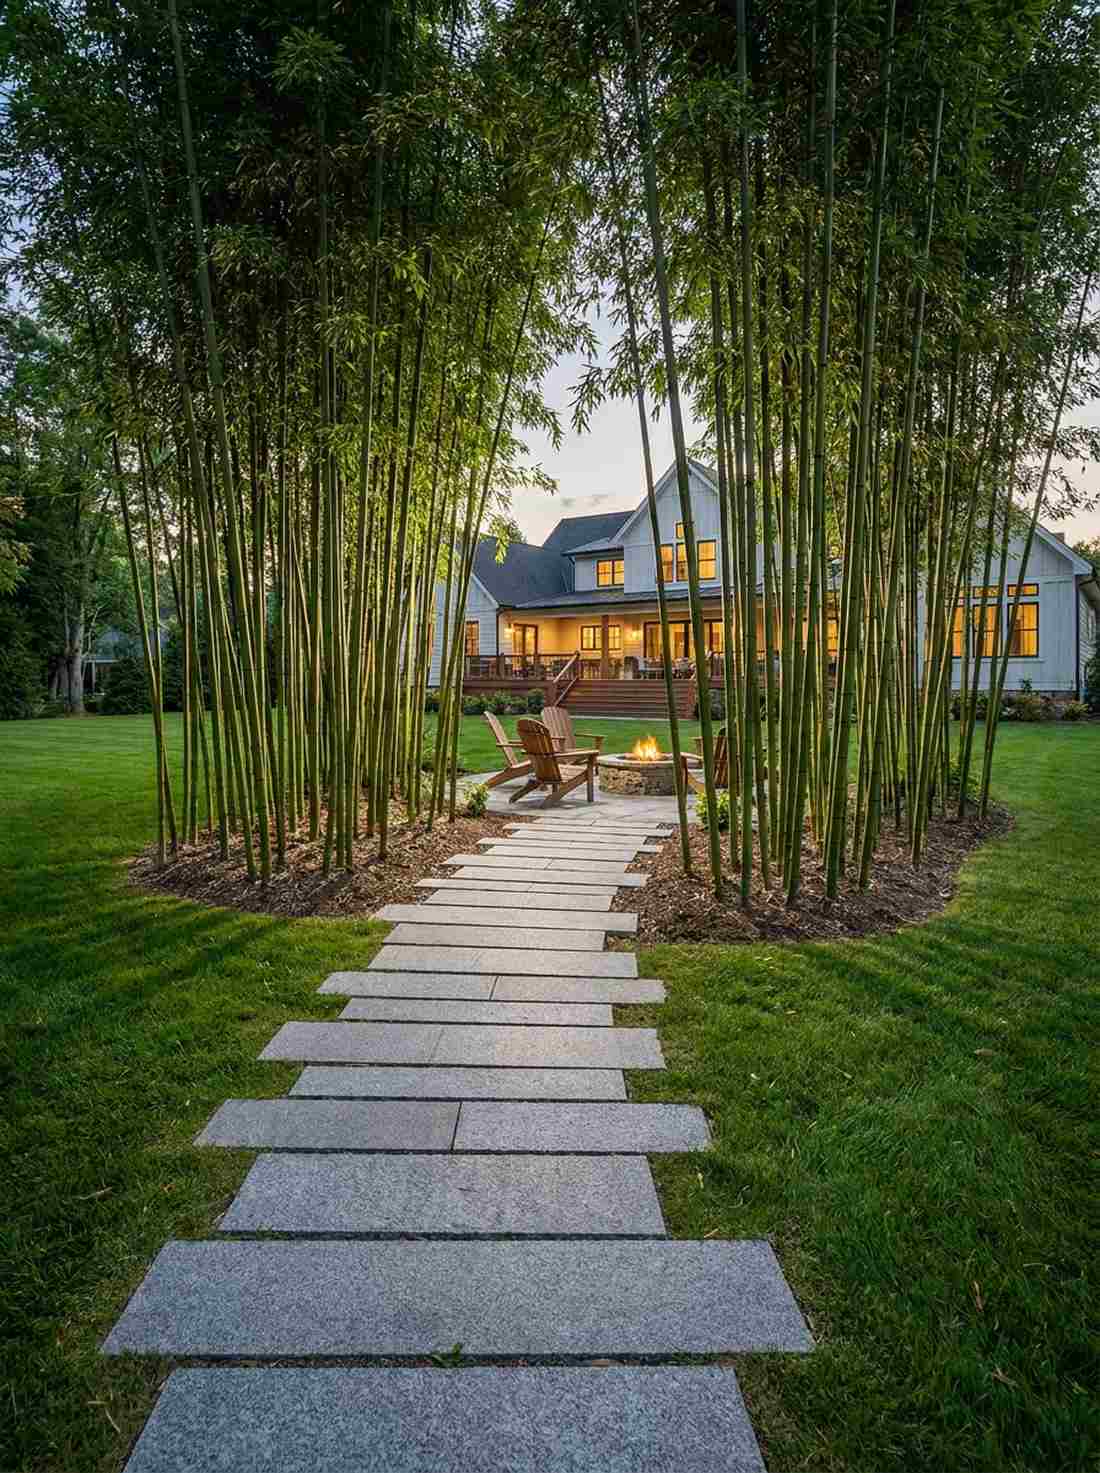
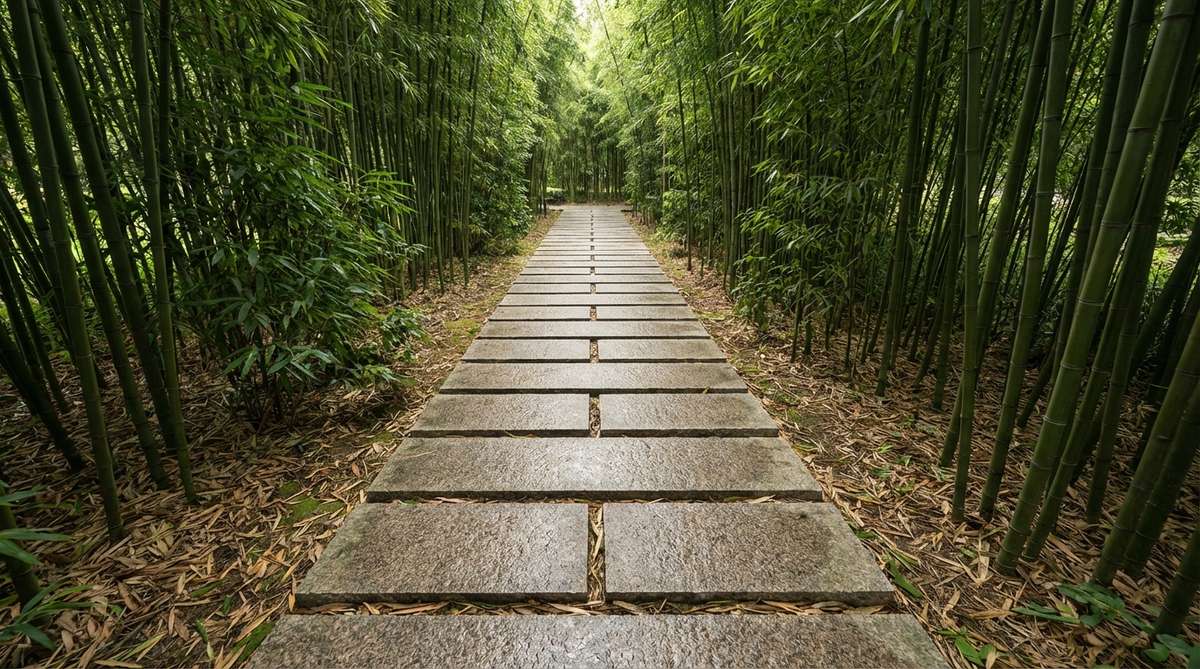
Feels like a secret, towering hallway of green life. This linear corridor stone path perfectly balances the wild, vertical energy of a bamboo grove.
Winding paths actually look messy inside bamboo, but laying uniform, rectangular granite slabs end-to-end strikes a stunning, disciplined contrast against organic stalks. Varying the length of each stone prevents it from looking like a cheap municipal sidewalk.
Expect to spend $90–$140 for premium cut rectangular slabs.
- Key Materials: Rectangular granite blocks, bamboo barriers
- Vibe / Style: Linear, disciplined, serene
- Difficulty: Requires deep root barriers
- Budget Breakdown: Granite slabs: $100 | Rhizome barrier: $40.
- Creator’s Tip: Install heavy-duty plastic barriers 24 inches deep to stop bamboo spread.
- Smart Sourcing: High-density bamboo rhizome barriers and rectangular granite steppers.
💡 Must-Have Supplies for High-End Setups
To build these setups faster and ensure they last, skip the generic craft aisles and invest in the right foundational kits.
- Base & Support: Heavy-duty commercial weed barrier rolls
- Setup Tools: Traditional Japanese wooden gravel rakes (starter kits)
- Weather/Durability Protection: UV-resistant clear stone sealant sprays
This next setup is ridiculously cheap but looks like a $100 custom display…
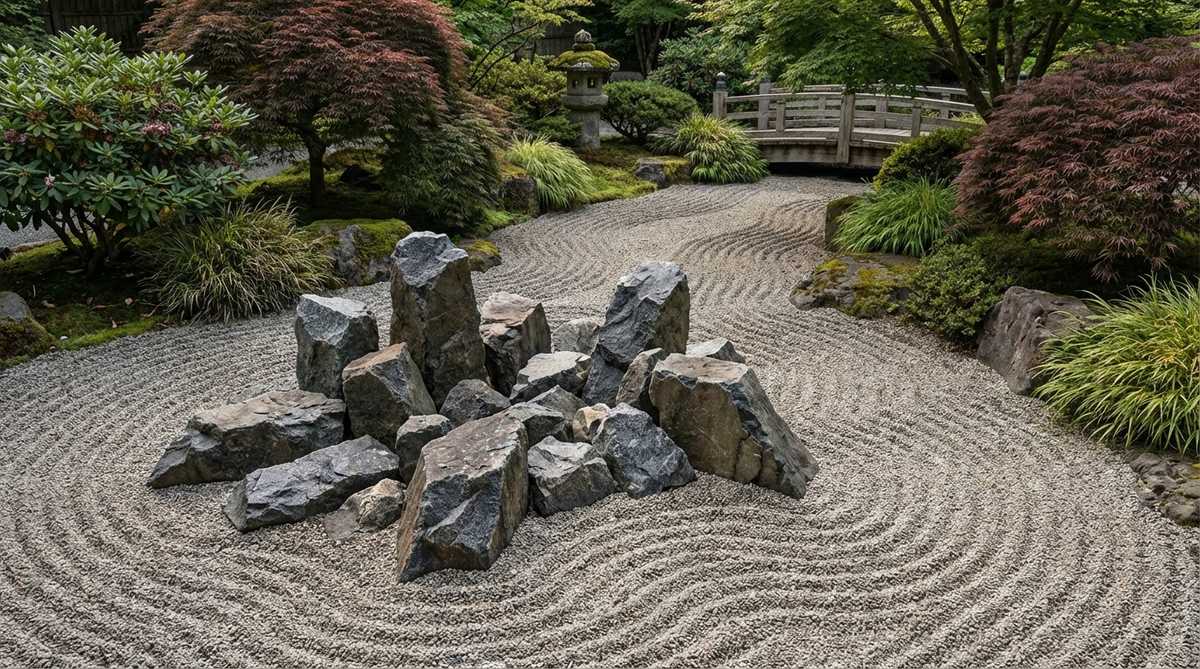
Japanese Garden Gravel Foundations and Raked Patterns
Japanese garden gravel serves as more than ground cover—it represents water, emptiness, or flowing energy depending on how it’s raked. Crushed granite in the 3-8mm range holds patterns best while remaining comfortable for walking.
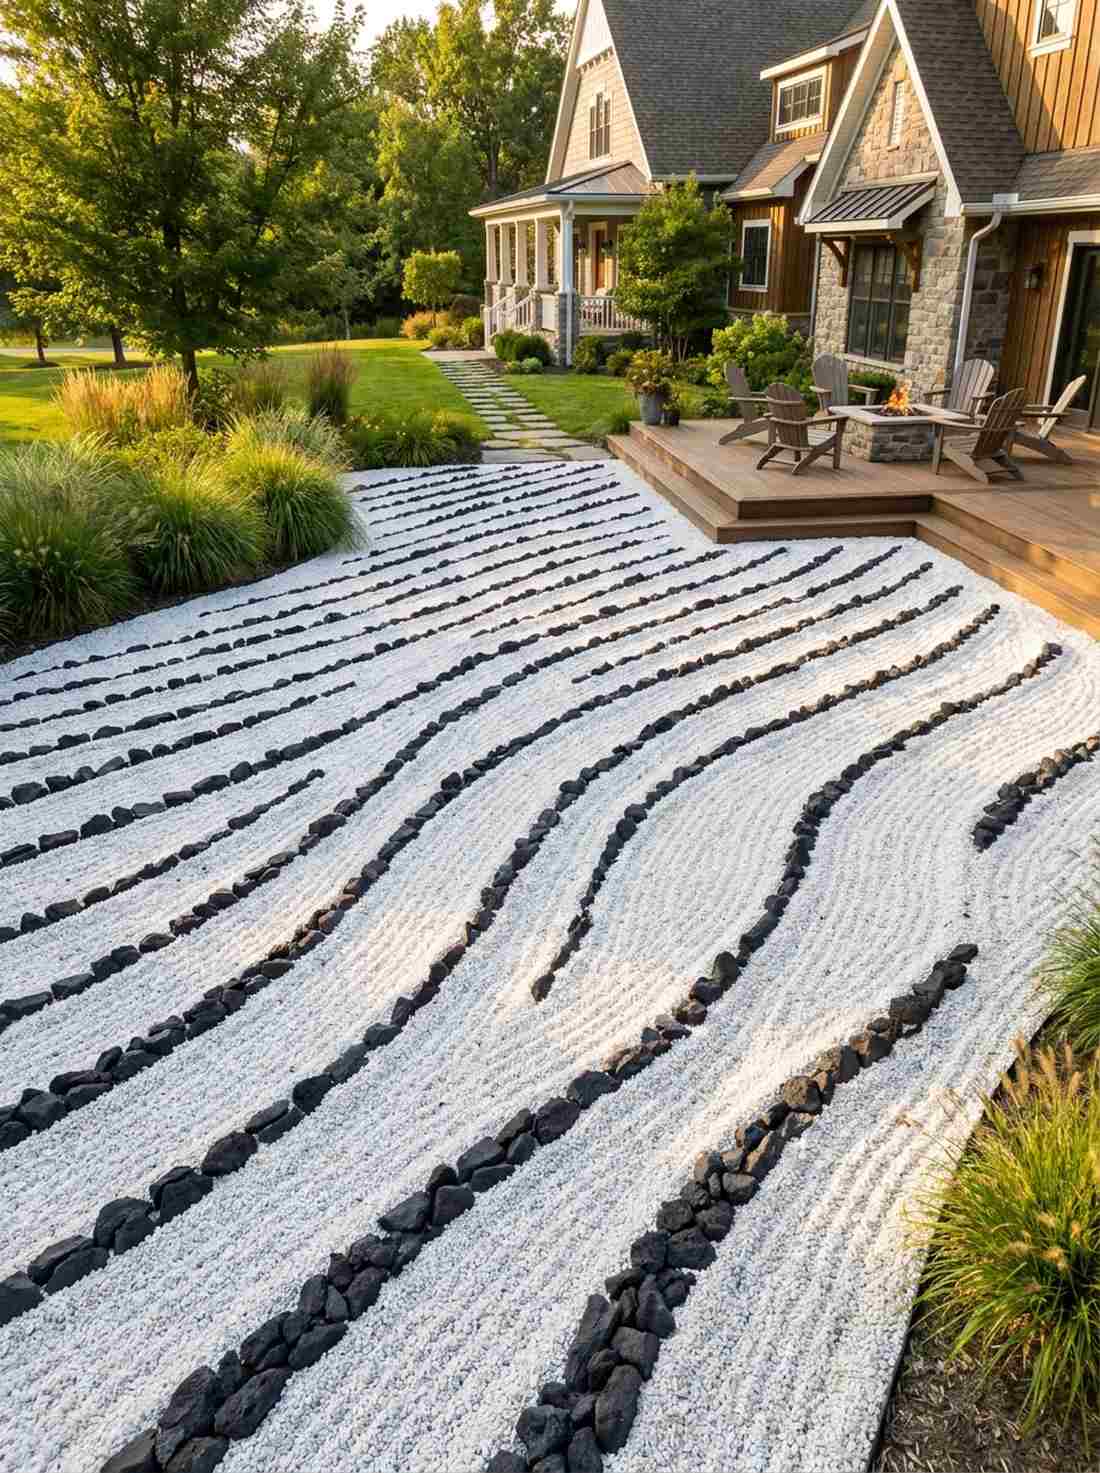
10. Aranamimon Rough Wave Pattern
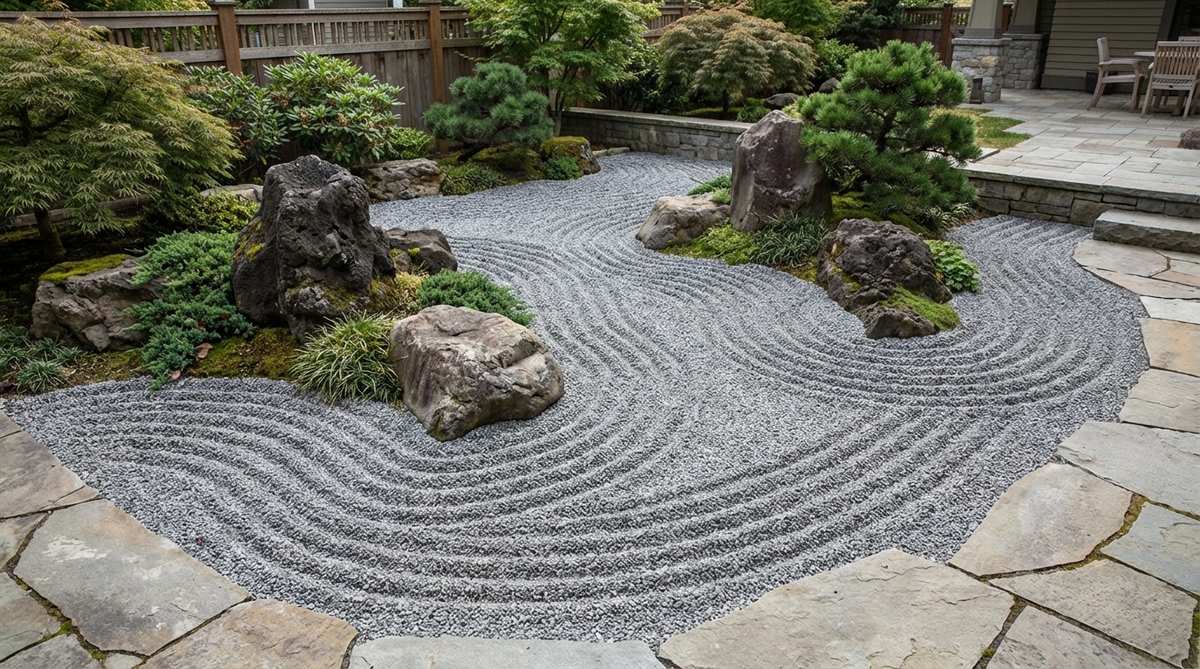
Channels the raw, powerful energy of a storm-tossed sea. This turbulent gravel raking technique breathes dynamic life into large, empty courtyard spaces.
Many people default to boring straight lines, but raking deep, irregular wave patterns around your japanese garden rocks delivers a breathtaking, highly emotional landscape. Using angular crushed granite rather than round pebbles ensures the crests of the waves hold their sharp shape for weeks.
The specialized rake and gravel will cost roughly $50–$80. Pin this to your zen mindfulness board!
- Key Materials: 3-8mm crushed granite, wave rake
- Vibe / Style: Dramatic, energetic, oceanic
- Difficulty: Requires weekly maintenance
- Budget Breakdown: Gravel: $45 | Custom Rake: $35.
- Creator’s Tip: Rake after a light rain; the damp dust binds the ridges tighter.
- Smart Sourcing: Angular crushed granite bags (bulk pack) and deep-tine zen garden rakes.
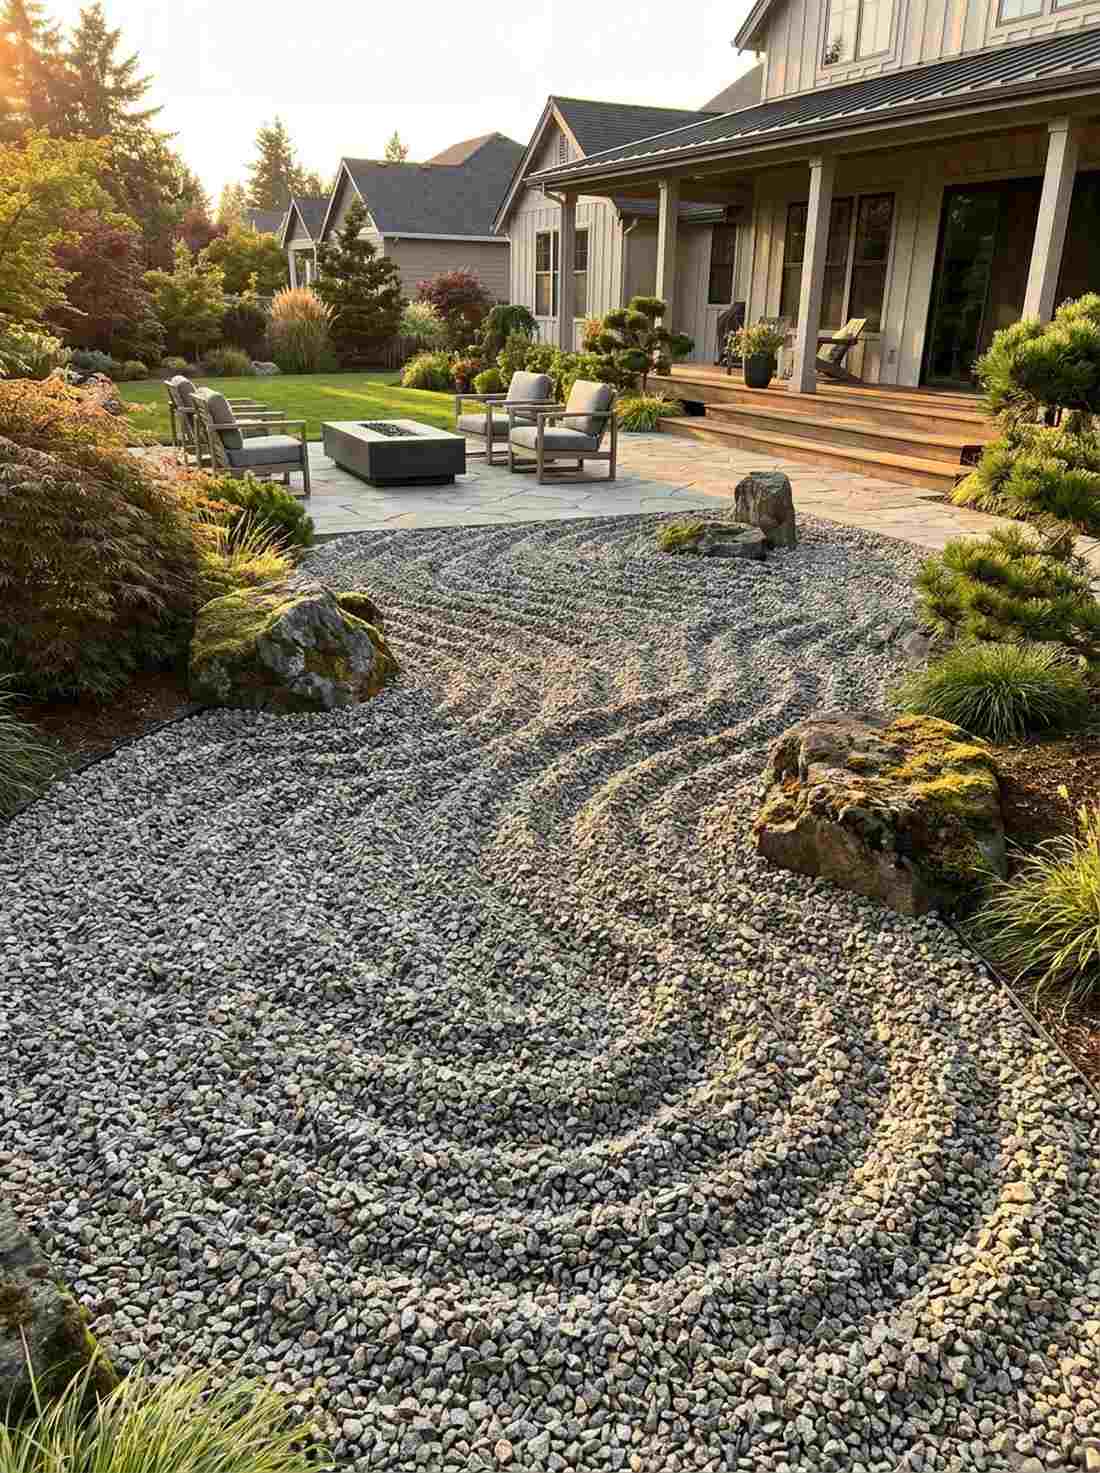
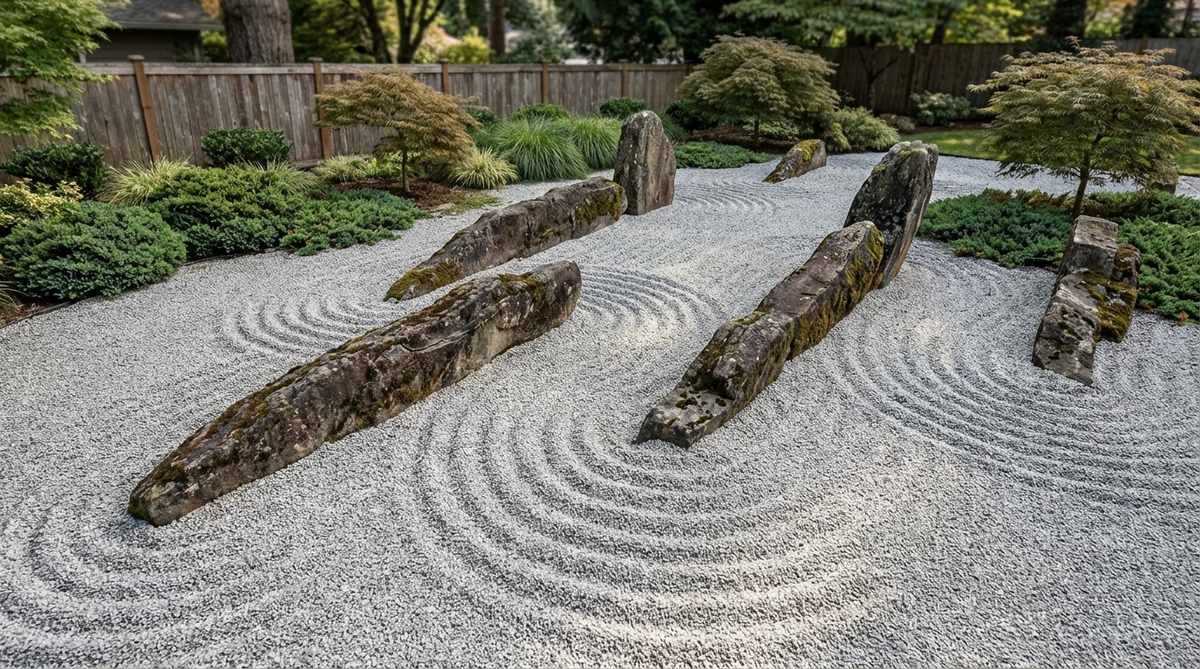
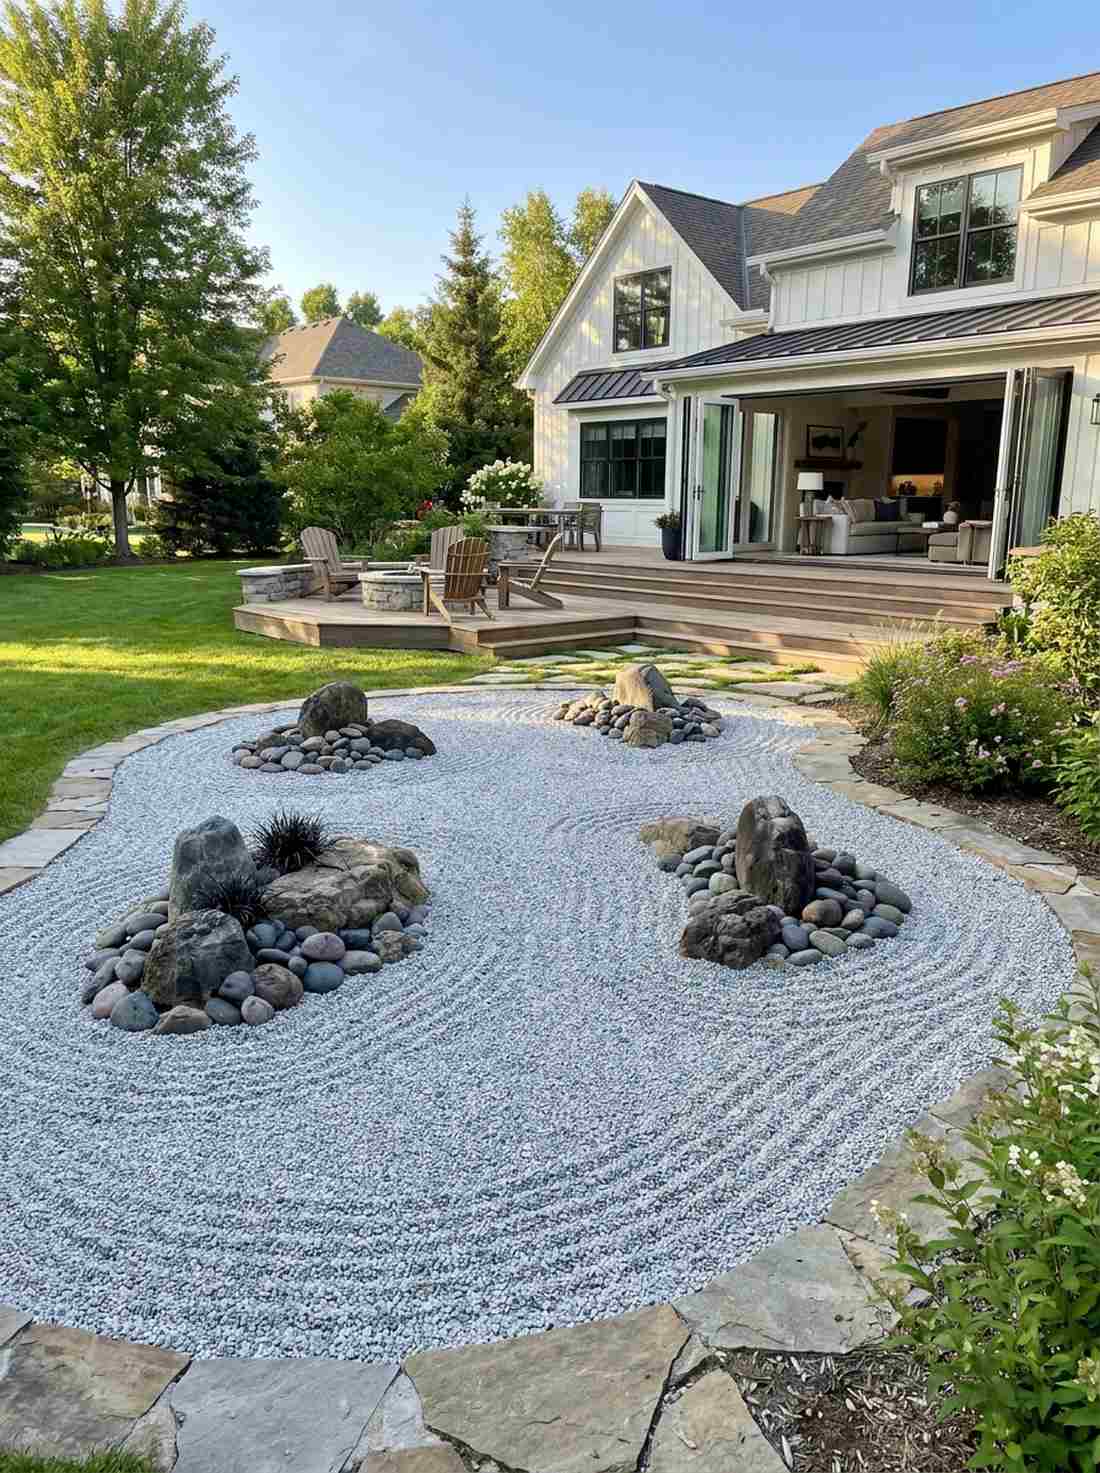
11. Sazanamimon Ripple Circles
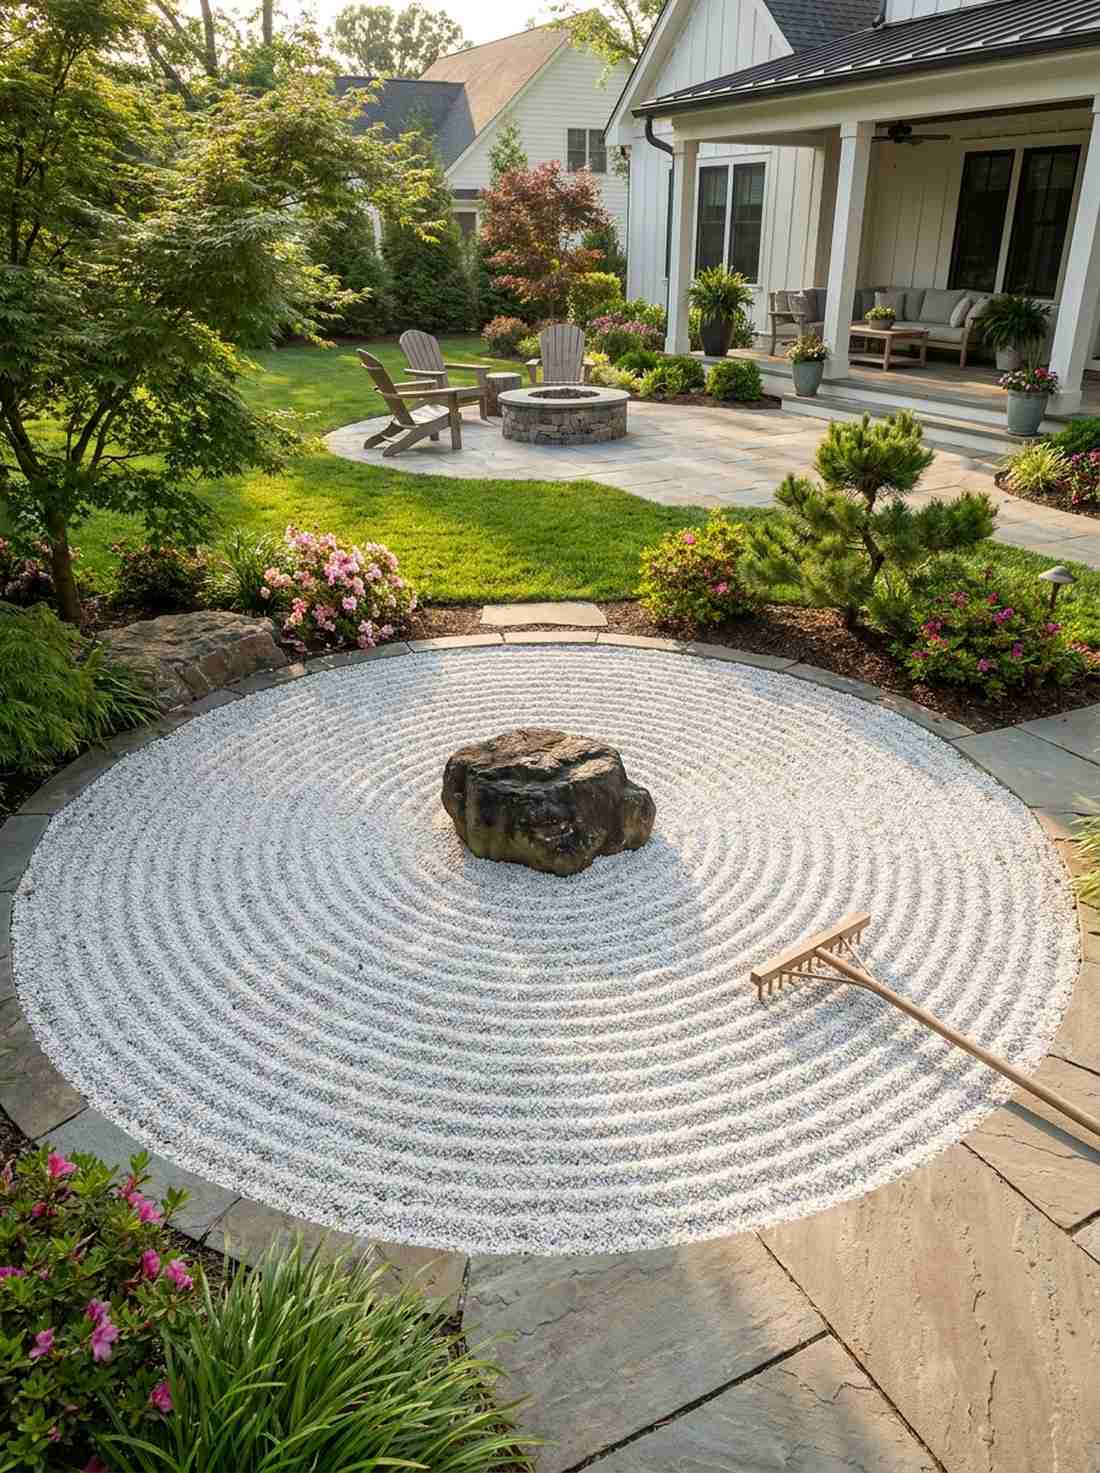
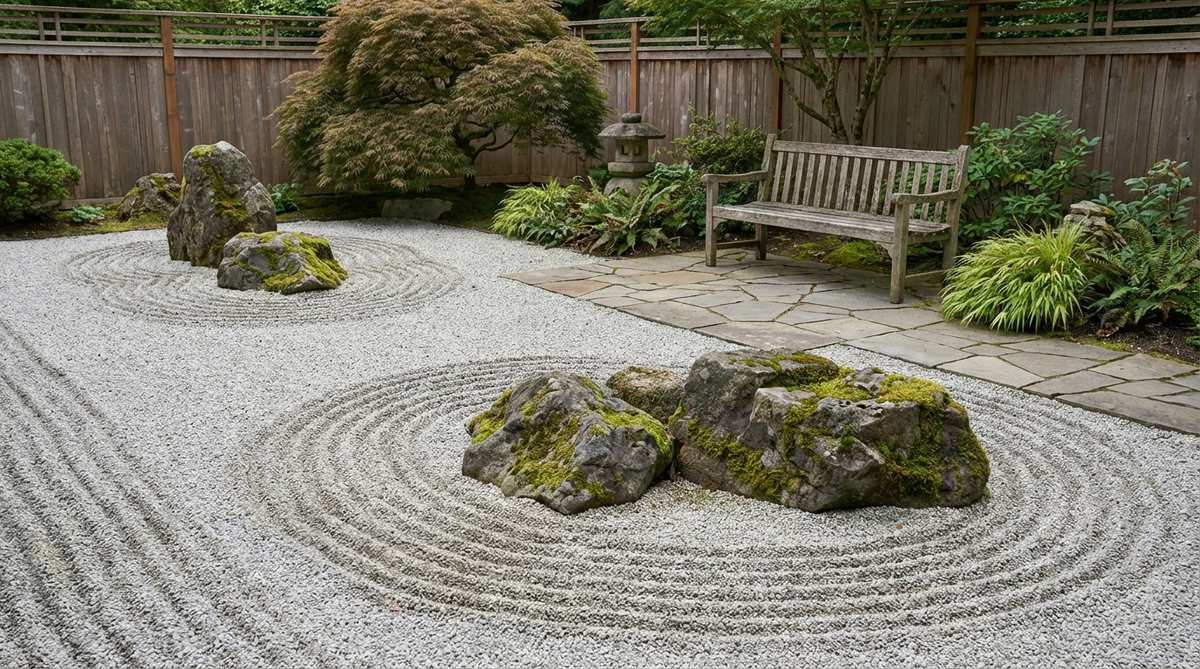
Emanates pure, undisturbed tranquility. This concentric water ripple design is the absolute perfect frame for your most prized garden boulder.
A flat gravel bed often looks abandoned, but pulling tight, expanding circles outward from a central stone gives an incredibly sophisticated, intentional vibe. Using a fixed-tine tool ensures mathematically perfect spacing that looks like it took hours of professional labor.
You can achieve this therapeutic look for $30–$50. It’s a fast upgrade that completely changes the vibe.
- Key Materials: Fine white gravel, fixed-tine rake
- Vibe / Style: Meditative, perfectly balanced
- Difficulty: Easy but requires steady hands
- Budget Breakdown: Fine gravel: $25 | Rake: $25.
- Creator’s Tip: Walk backwards while raking the circles to easily cover your footprints.
- Smart Sourcing: Pre-washed white quartz gravel and adjustable width zen rakes.
12. Straight-Line Raking

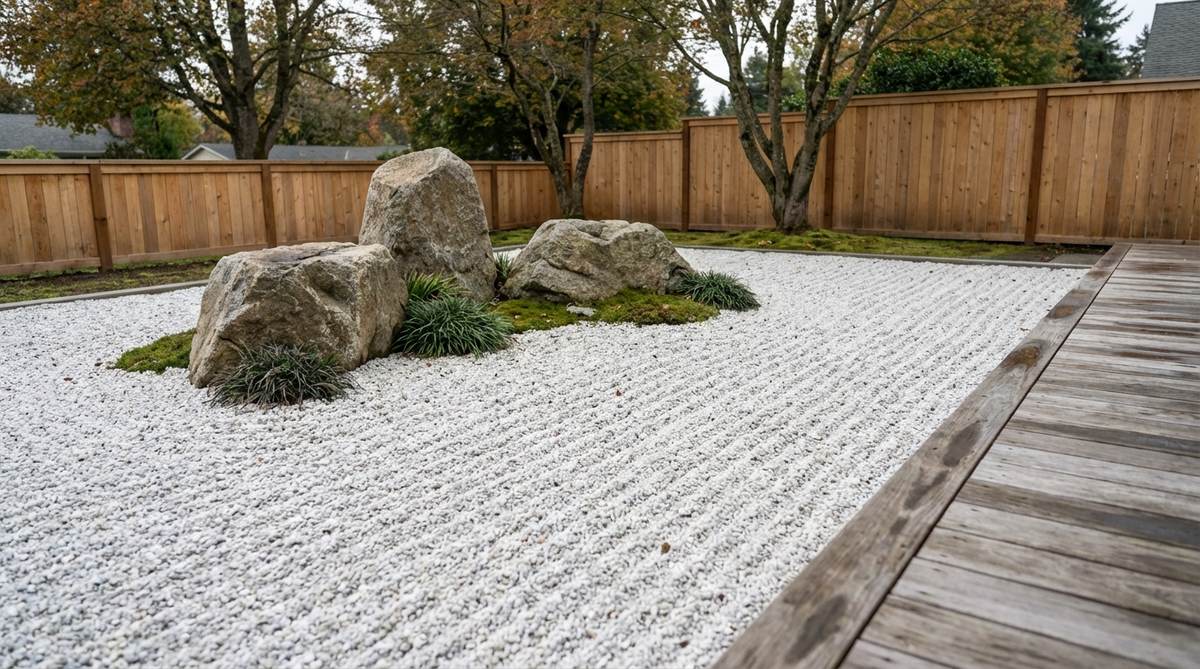
Embodies the sharp, unapologetic beauty of pure emptiness. This linear karesansui pattern works flawlessly for narrow balconies or minimalist meditation corners.
Curved patterns can overwhelm small areas, but dragging perfectly parallel lines perpendicular to your viewing angle creates a jaw-dropping illusion of expansive space. Securing high-end miniature garden supplies around the borders keeps the crisp lines from feeling too sterile.
This layout requires only about $20–$40 in materials.
- Key Materials: White crushed granite, string guide
- Vibe / Style: Stark, minimalist, expansive
- Difficulty: Precision focused
- Budget Breakdown: Granite: $30 | String level: $10.
- Creator’s Tip: Set up a brightly colored string line just above the gravel to keep your rake perfectly straight.
- Smart Sourcing: Ultra-white marble chips (fine grade) and laser level alignment tools.
13. Mixed Gravel Textures
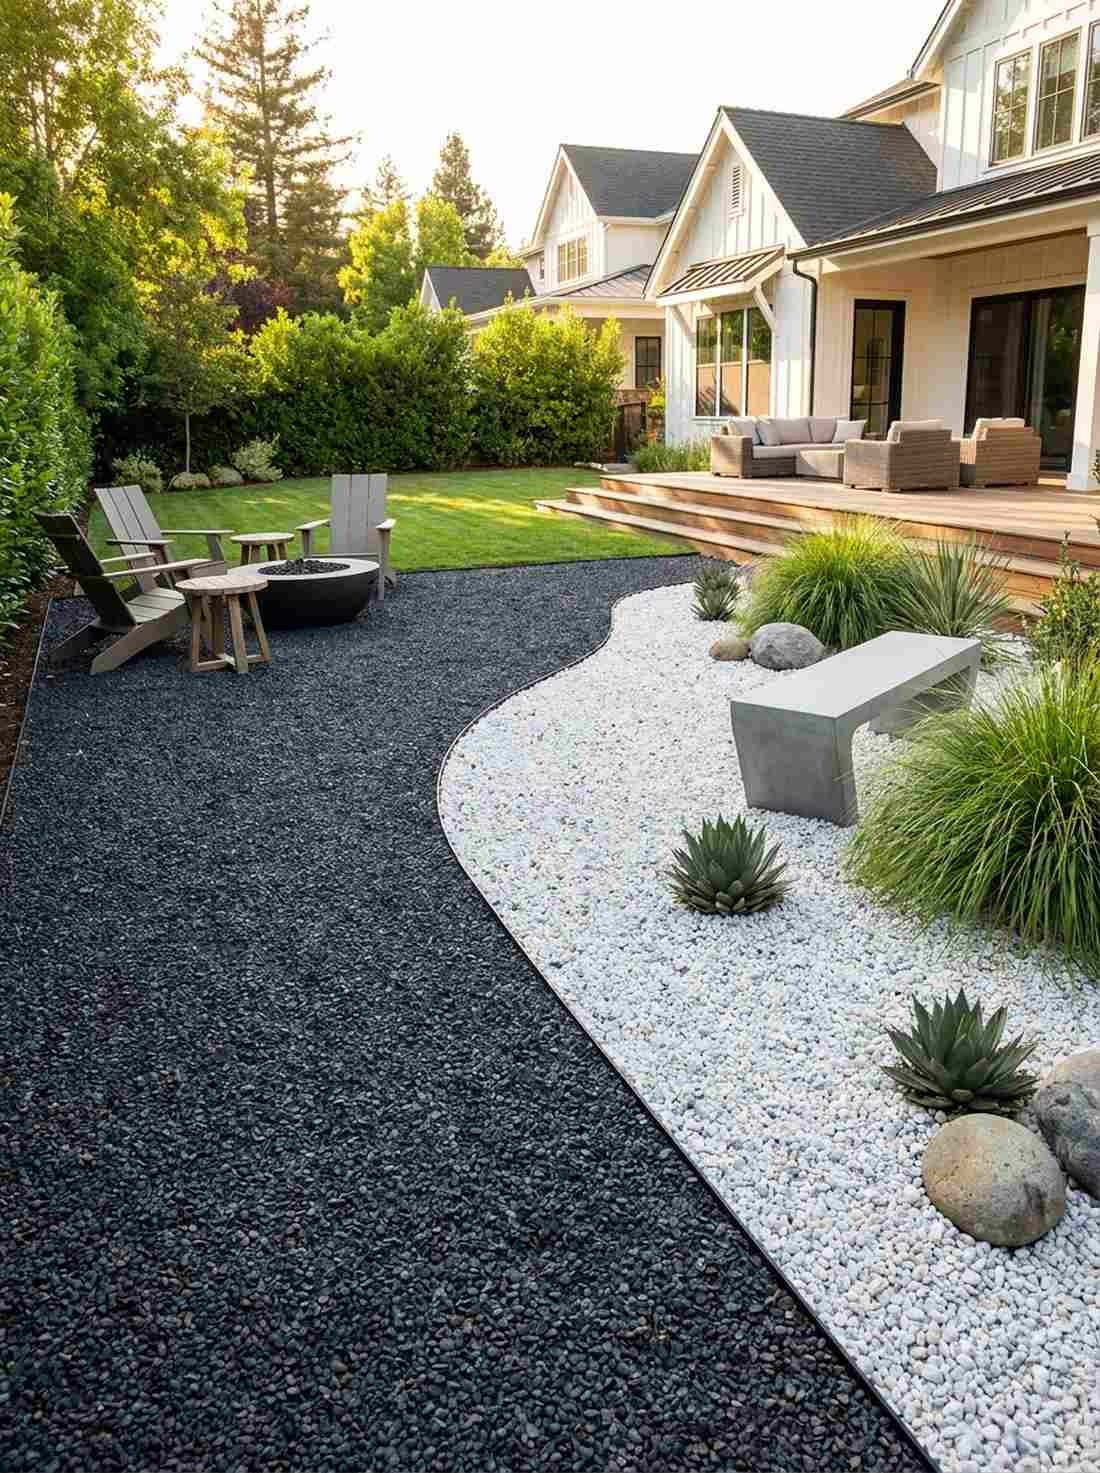
Acts like a tailored, high-fashion suit for your backyard. This dual-tone gravel zoning brilliantly separates walkways from visual contemplation areas.
Using one uniform rock size makes yards look like generic driveways, but burying hidden metal edging to slice dark flint against bright white granite delivers an ultra-premium aesthetic. This sharp color contrast instantly delineates “rooms” within your outdoor space without building walls.
You can easily pull this off for around $80–$120. Save this if you love organized outdoor spaces!
- Key Materials: Light and dark gravel, invisible edging
- Vibe / Style: Architectural, segmented, modern
- Difficulty: Moderate base preparation
- Budget Breakdown: Dual gravel: $80 | Edging: $40.
- Creator’s Tip: Dig the edging 1 inch below the gravel surface so the line appears magically seamless.
- Smart Sourcing: Flexible aluminum landscape edging kits and matte black basalt gravel.
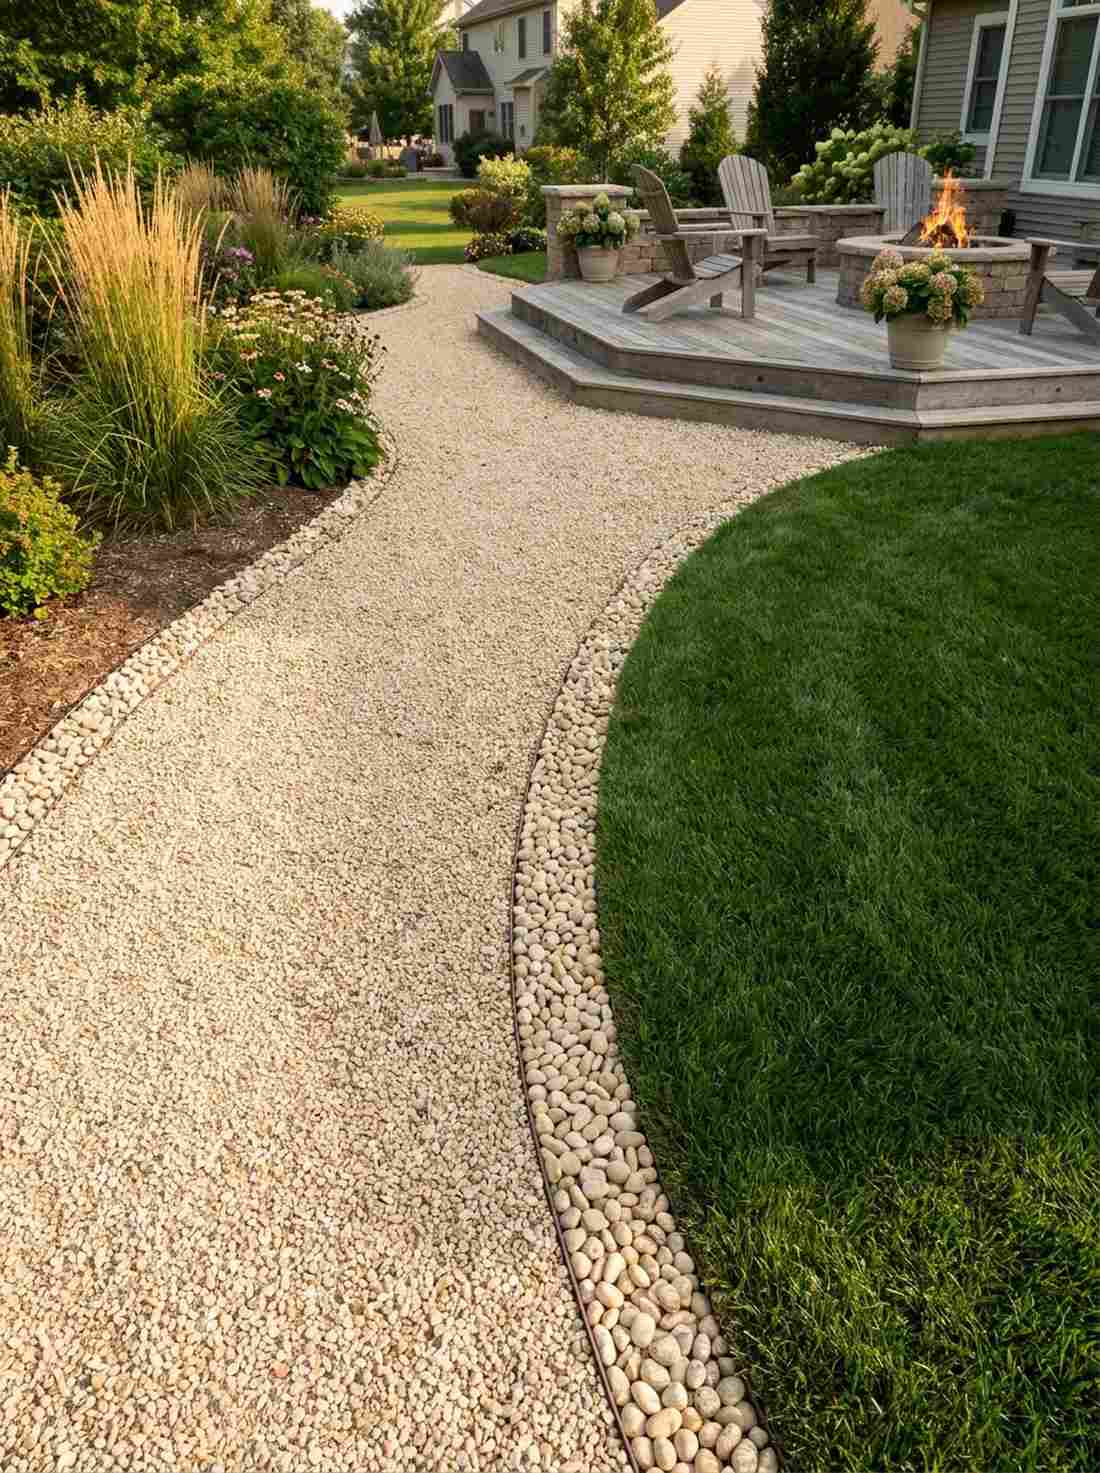
14. Gravel Pathways with Moss Borders
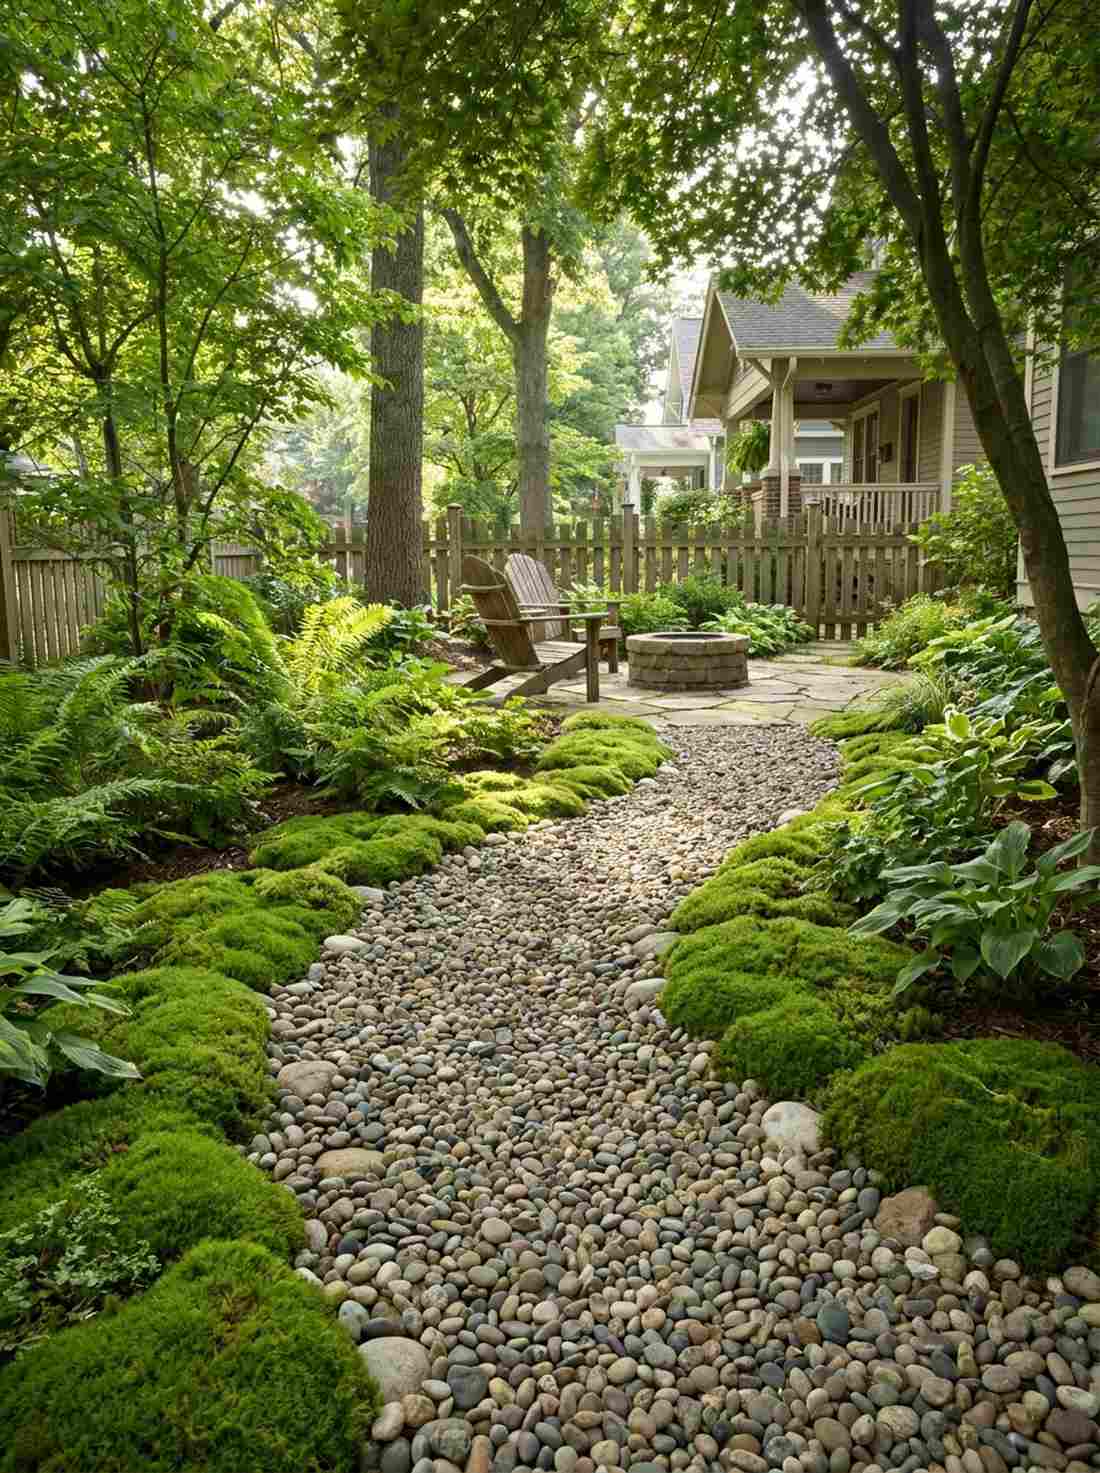
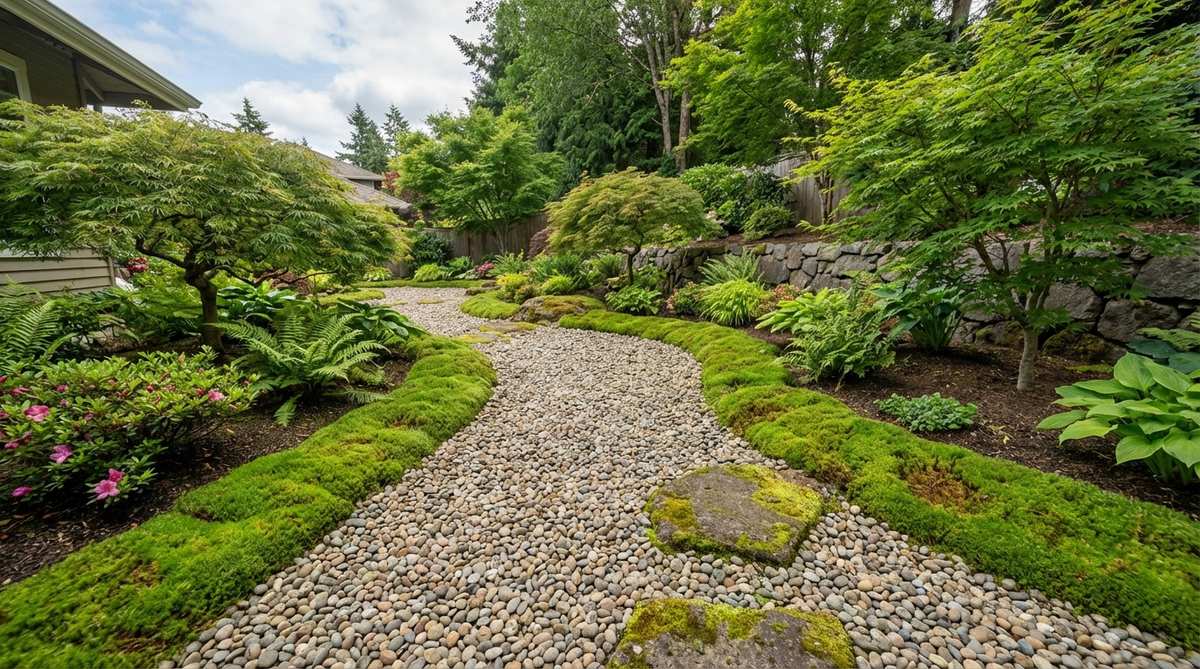
Feels vividly alive and wildly luxurious underfoot. This softly bordered pebble walkway is the ultimate aesthetic hack for humid, shaded side yards.
Rigid plastic borders look incredibly tacky, but letting cultivated moss spill directly into 14mm pea gravel completely bypasses the cheap amateur look. The larger quartz pebbles comfortably support foot traffic while preventing tiny stones from choking out the delicate moss bed.
Budget around $50–$90 for this setup.
- Key Materials: 14mm pea gravel, cushion moss
- Vibe / Style: Lush, integrated, high-texture
- Difficulty: Requires diligent weeding
- Budget Breakdown: Pea gravel: $40 | Moss spores/flats: $50.
- Creator’s Tip: Spray the moss edges with a buttermilk mixture to speed up the bonding to the stone.
- Smart Sourcing: Smooth river pea gravel bags and live cushion moss starter kits.
Wait until you see how this next stone layout completely transforms boring flat ground…
15. Dry Waterfall Gravel Collection

Captures the dramatic climax of rushing mountain water. This base collection basin design transforms vertical rock walls into stunning visual stories.
Leaving the base of a rock wall bare ruins the illusion, but pooling smooth, water-worn river stones against jagged vertical boulders creates an overwhelmingly authentic karesansui masterpiece. Raking the surrounding angular gravel outward from these smooth stones simulates the splash and flow of imaginary water.
You can create this focal point for $40–$75. Pin this layout for your next major yard overhaul!
- Key Materials: Polished river stones, raked granite
- Vibe / Style: Evocative, story-driven, dynamic
- Difficulty: Creative placement required
- Budget Breakdown: River stones: $30 | Granite: $45.
- Creator’s Tip: Use stones that are slightly darker in color at the very base to simulate permanent wetness.
- Smart Sourcing: High-gloss polished river pebbles and color-enhancing stone sealers.
16. Courtyard Gravel Field
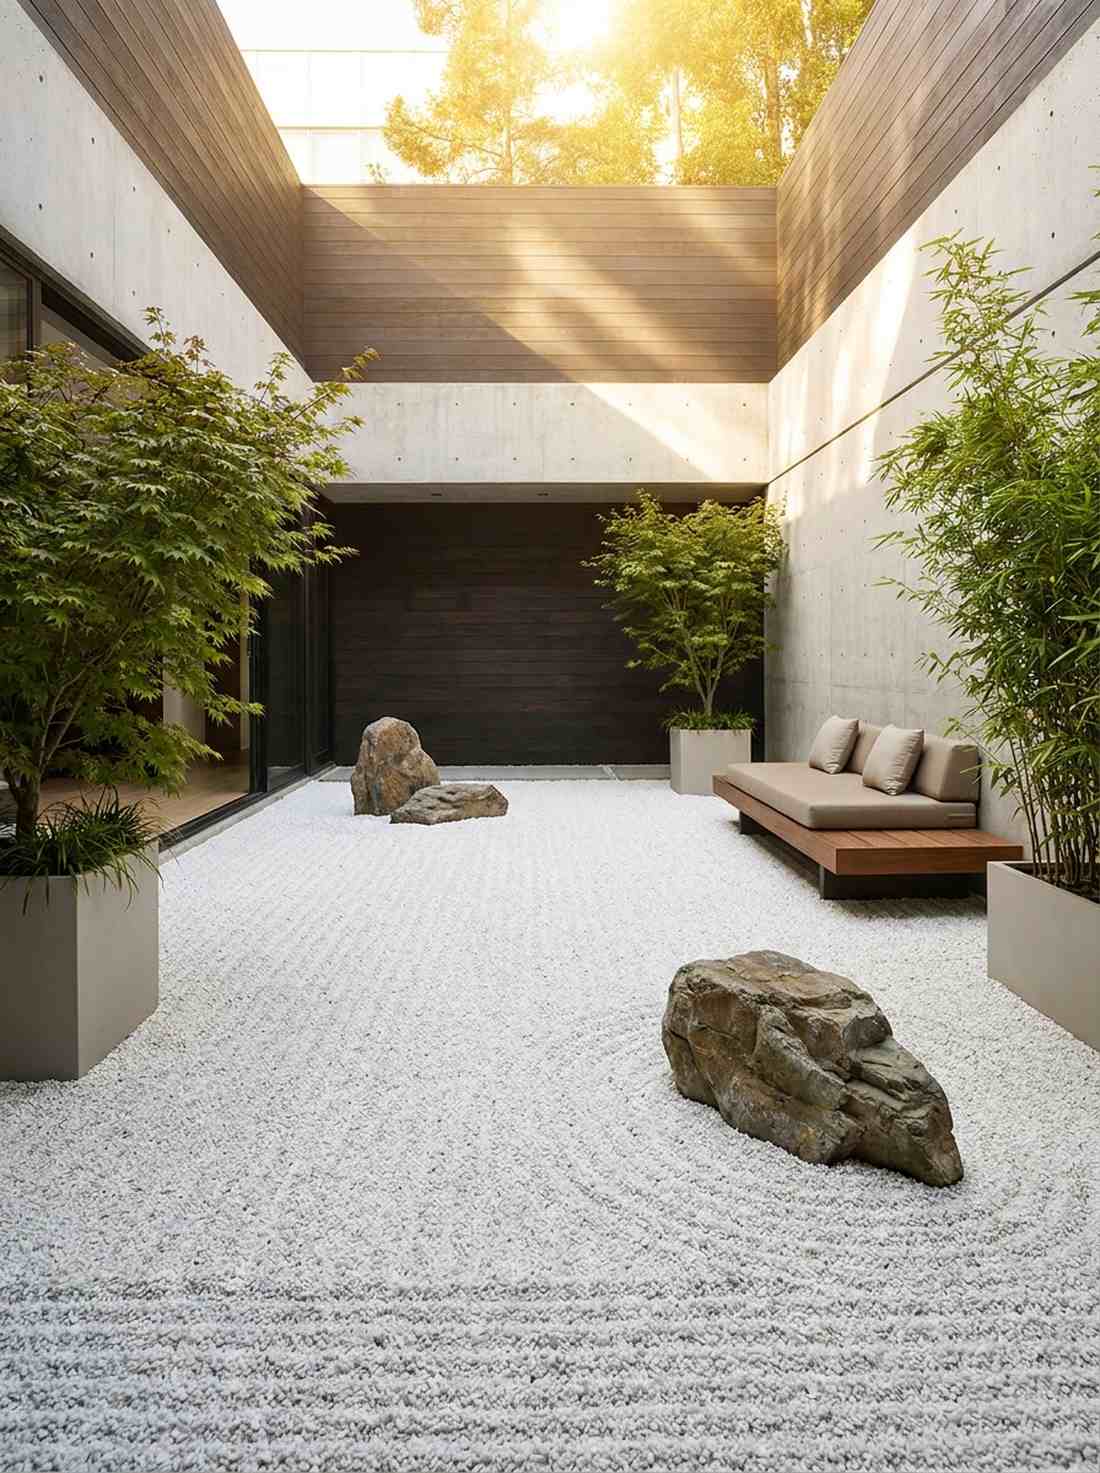
Drowns out urban chaos with a vast, blindingly peaceful sea. This minimalist enclosed gravel field is an absolute lifesaver for tiny, claustrophobic city patios.
Cramming plants into small spaces makes them feel suffocating, but filling the entire footprint with fine white gravel makes the area look far more expansive and expensive than it is. Dropping just one or two premium japanese garden rocks into the space turns it into an elite art gallery installation.
Expect to spend $100–$150 for a thick, weed-free layer.
- Key Materials: High-grade white gravel, minimal feature stones
- Vibe / Style: Open, bright, elite gallery
- Difficulty: Heavy material hauling
- Budget Breakdown: Gravel delivery: $120 | Weed fabric: $30.
- Creator’s Tip: Rake parallel lines across the shortest width of the yard to optically push the walls outward.
- Smart Sourcing: Heavy-duty non-woven weed barriers and premium bright-white quartz gravel (bulk pack).
Strategic Japanese Garden Rocks Arrangements
Rock groupings form the structural foundation of Japanese gardens. Designers arrange stones in odd numbers with careful attention to size, orientation, and implied relationships between individual rocks.
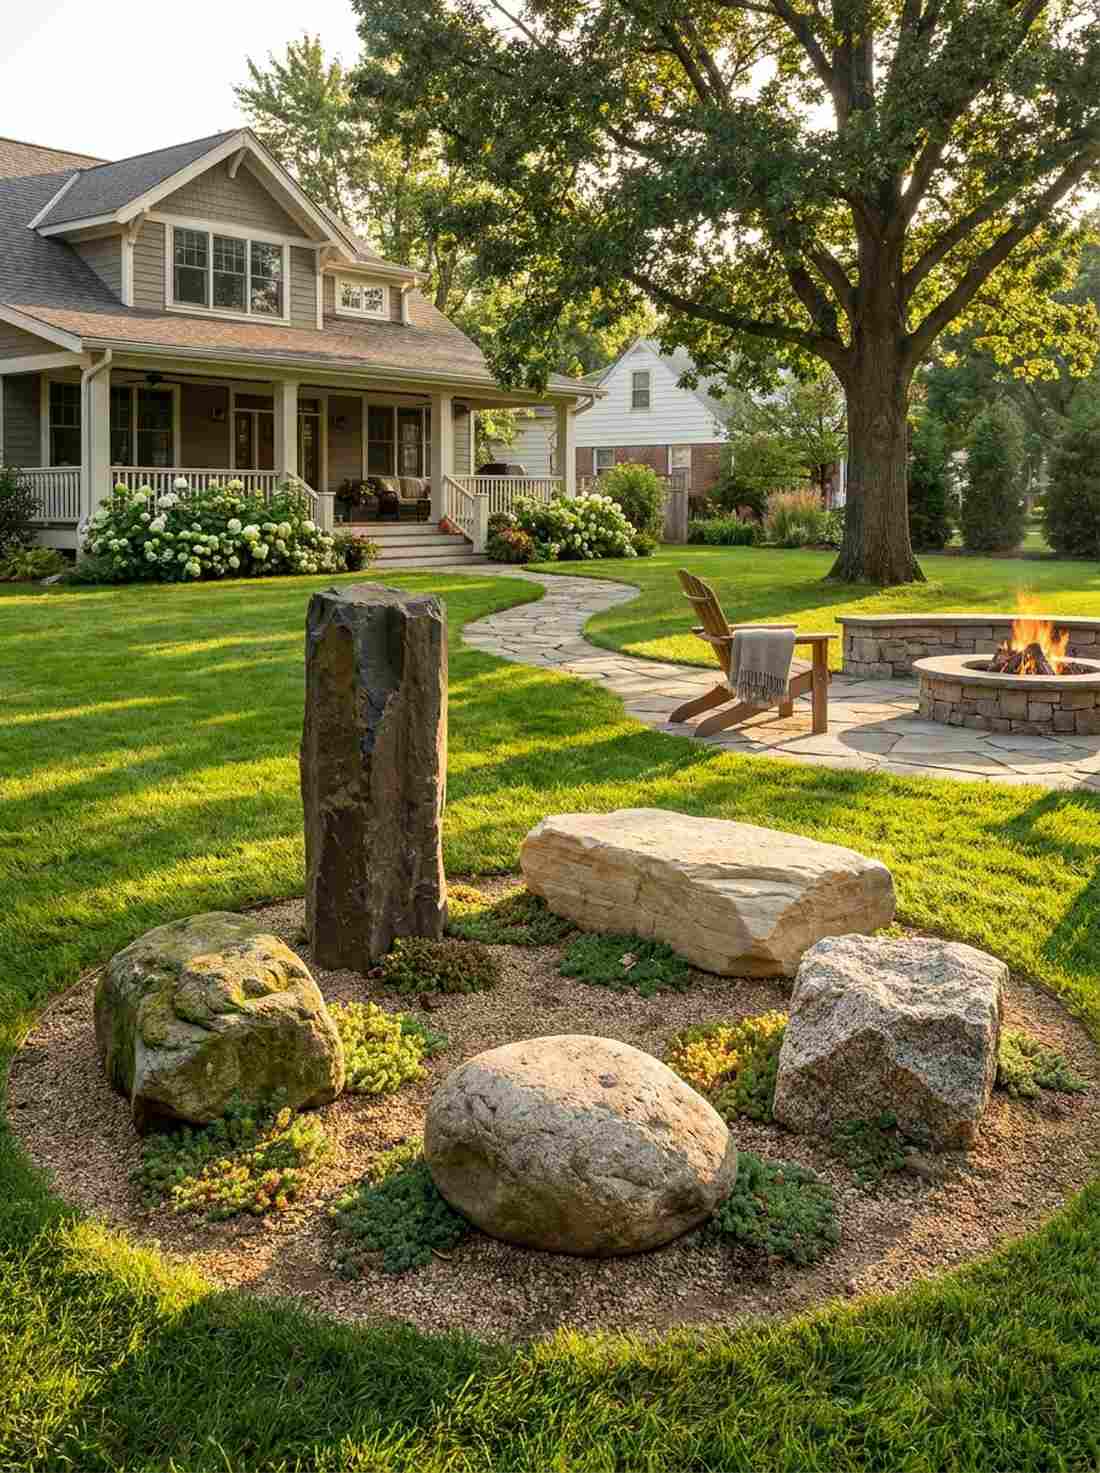
17. Sanzon Stone Triad
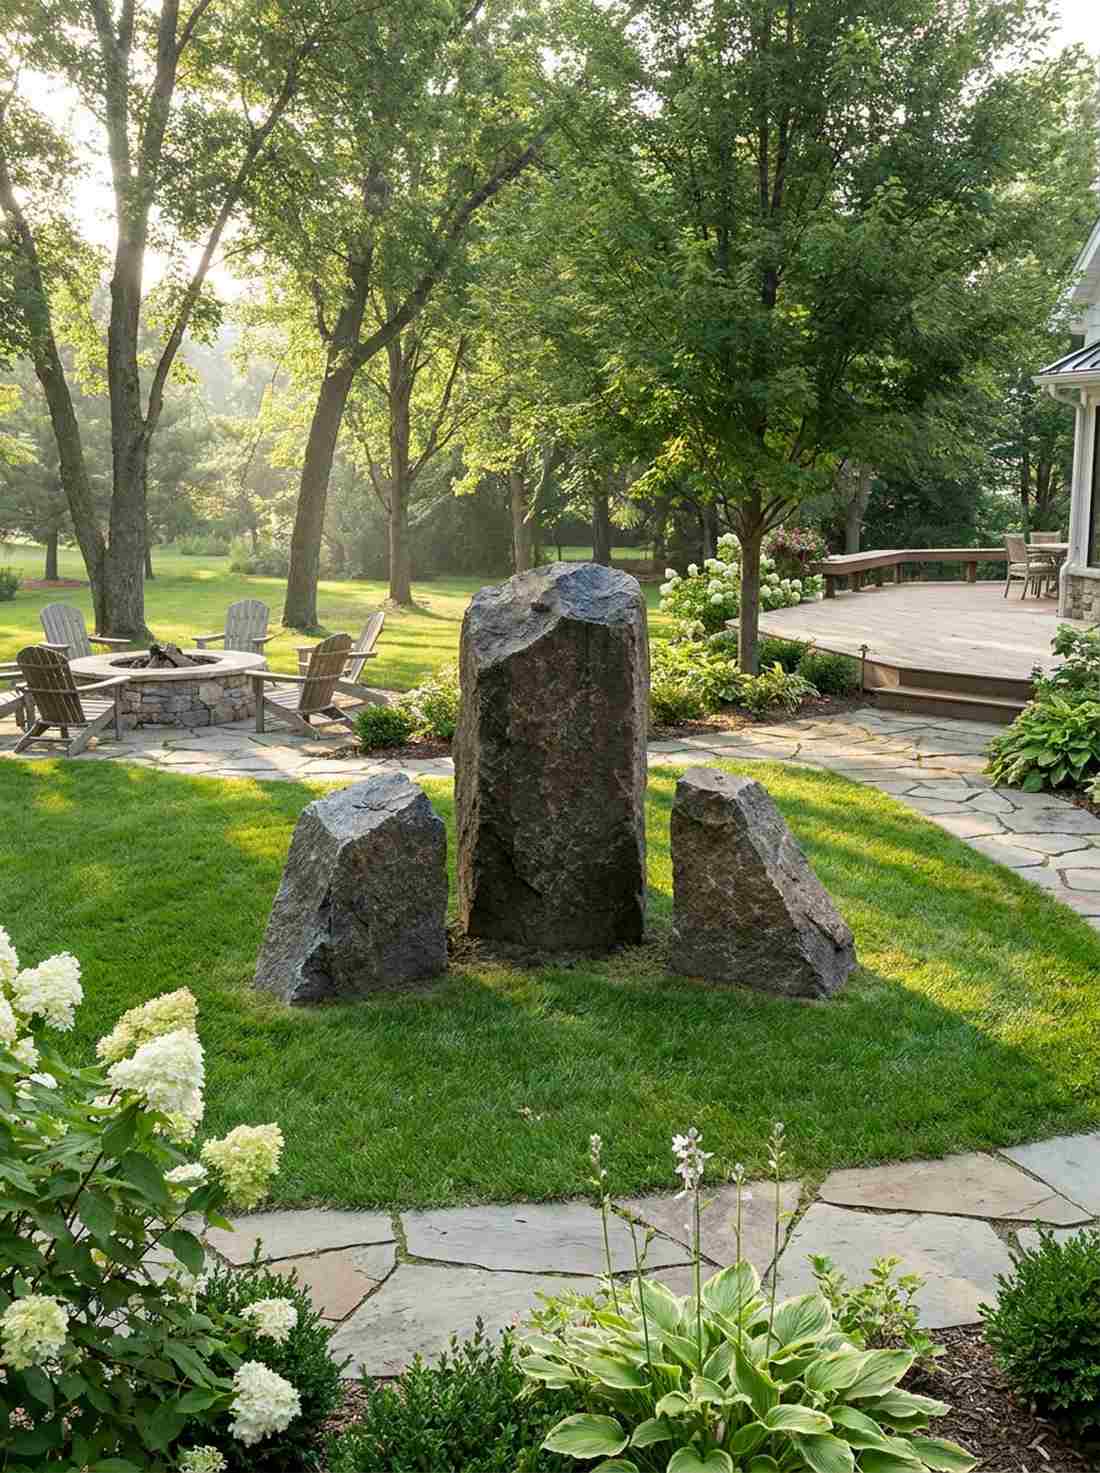
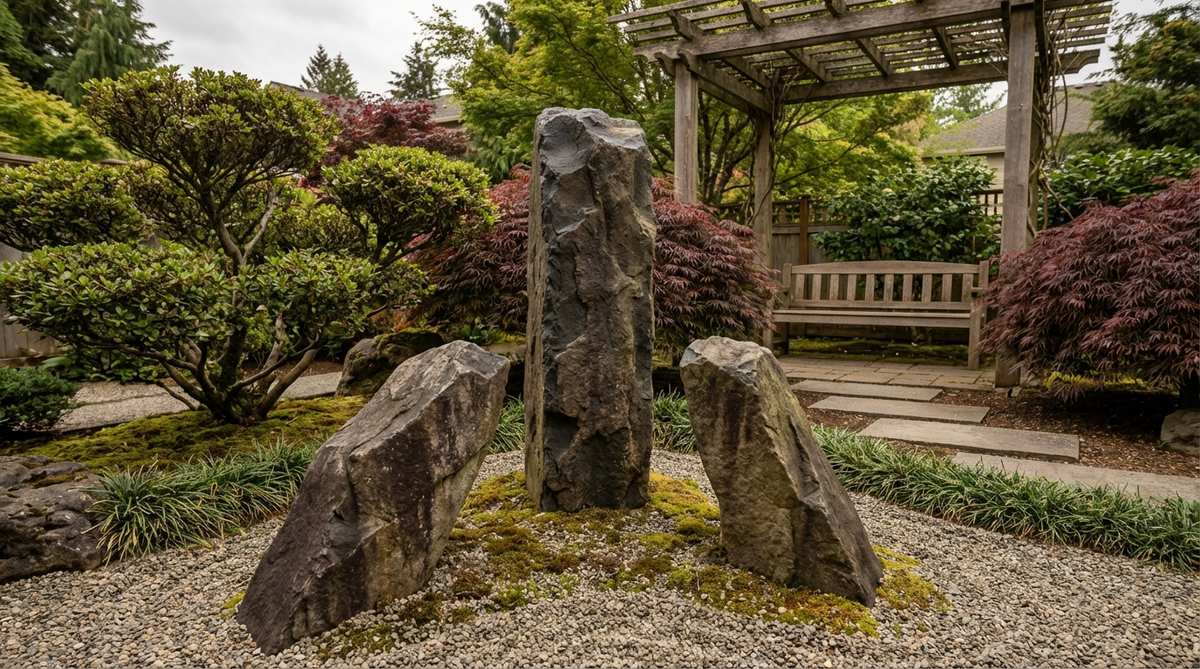
Radiates profound, undeniable power and spiritual balance. This classic three-stone focal point should be placed directly in the main sightline of your viewing window.
Randomly scattering boulders looks incredibly messy, but arranging one tall dark granite peak flanked by two subordinate, inward-leaning stones guarantees a professional, designer-level finish. This Buddhist trinity format naturally commands attention and anchors the visual weight of the entire yard.
Sourcing three quality boulders typically runs $150–$300. Save this foundational blueprint to your landscape board!
- Key Materials: One tall vertical rock, two medium rocks
- Vibe / Style: Powerful, spiritual, anchored
- Difficulty: Requires machinery or multiple people
- Budget Breakdown: Main boulder: $150 | Side boulders: $150.
- Creator’s Tip: Bury the central stone slightly deeper than the others to emphasize its grounded permanence.
- Smart Sourcing: Faux-stone lightweight landscape boulders and heavy-duty moving straps.
18. Turtle Island Arrangement
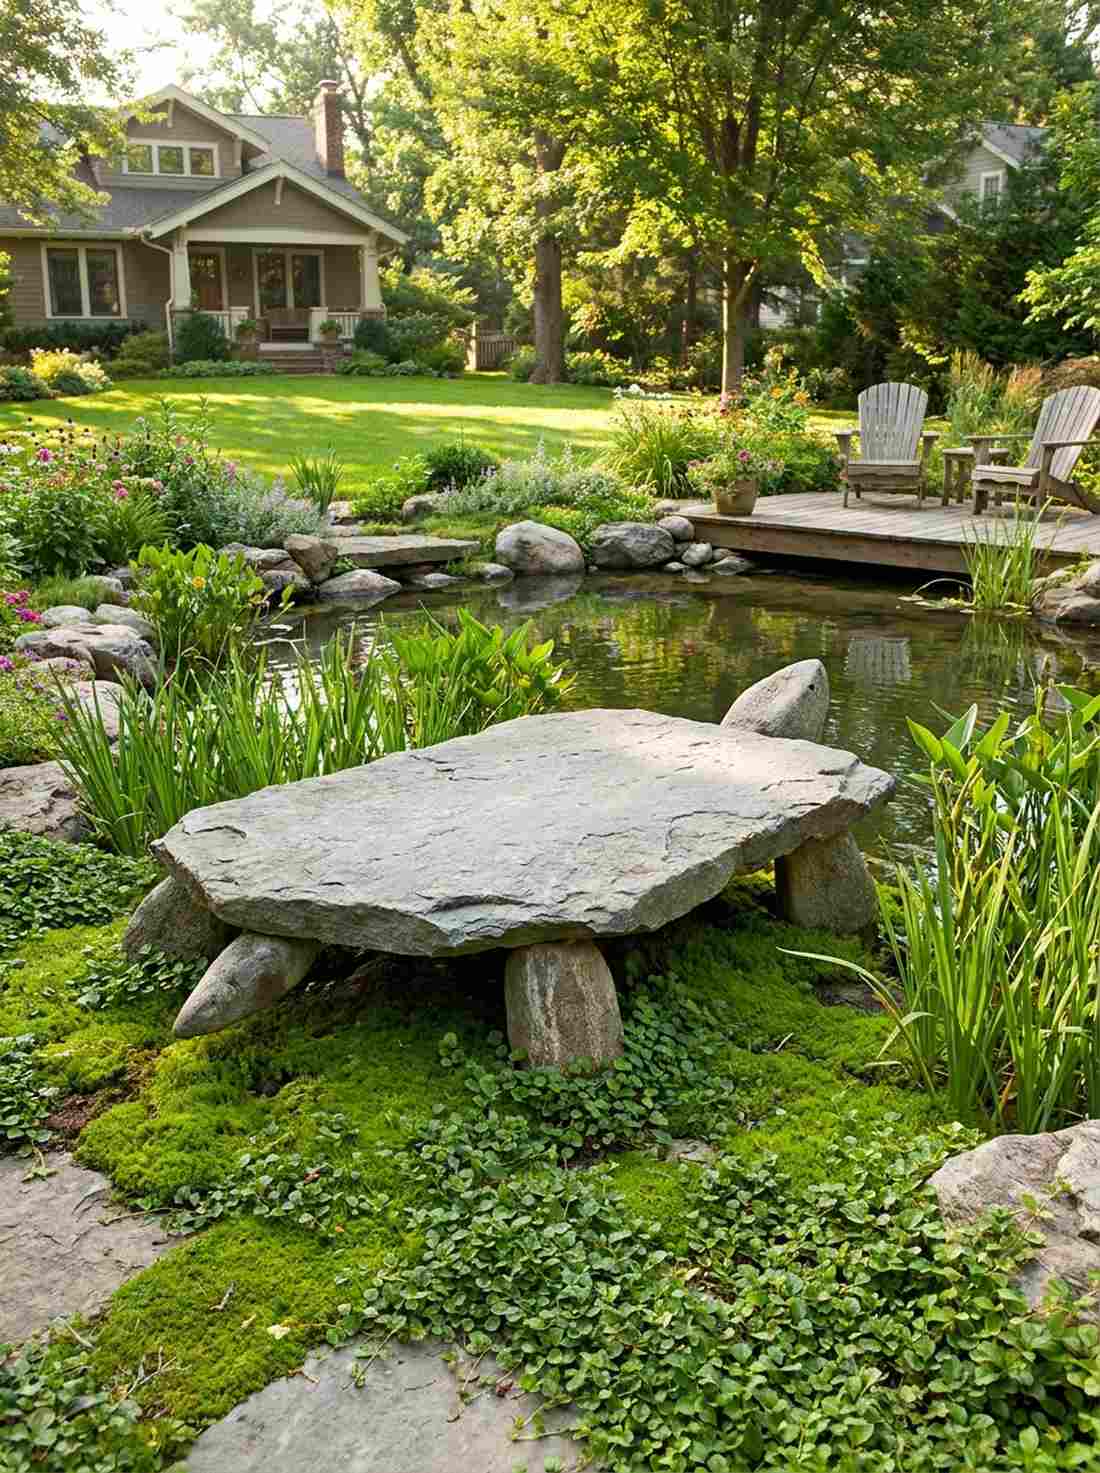
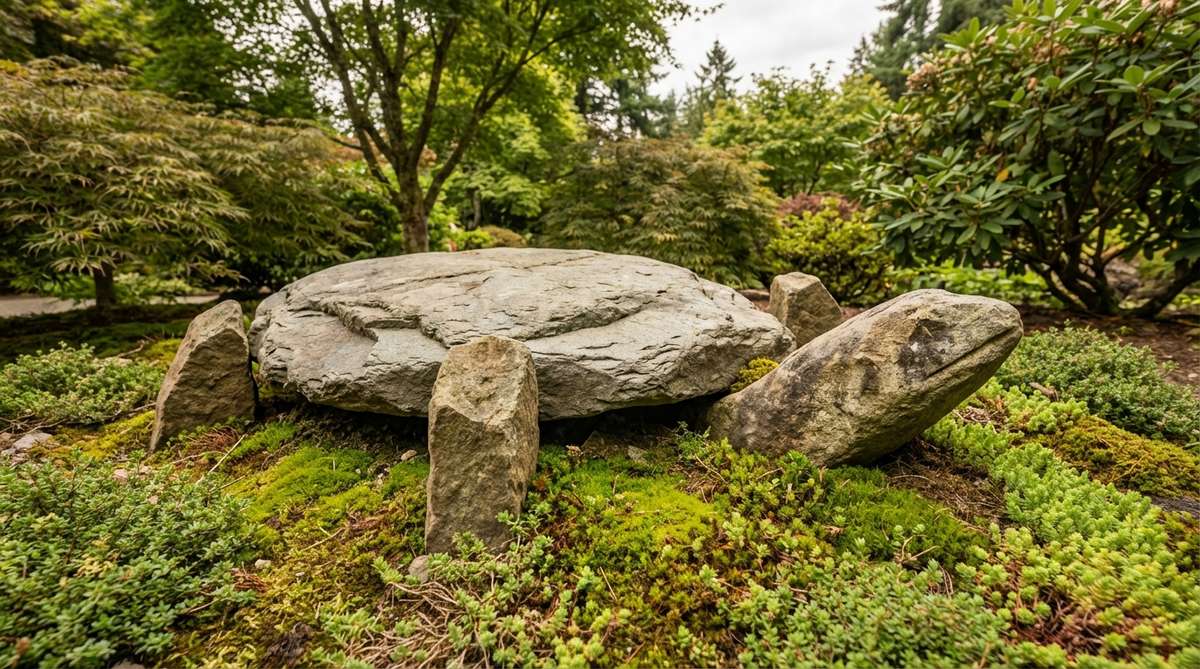
Delightfully subtle yet loaded with ancient meaning. This symbolic longevity rock cluster brings an incredible layer of storytelling to pond edges or moss beds.
A pile of rocks is just a pile of rocks, but burying four small upright “legs” under a flat “shell” stone completely bypasses the cheap amateur look. Once you strategically position a pointed head stone and let ground cover swallow the edges, the illusion of life is magical.
You can easily pull this off for around $30–$60.
- Key Materials: One flat slab, five small accent stones
- Vibe / Style: Mythic, playful, organic
- Difficulty: Very easy fun weekend project
- Budget Breakdown: Stone mix: $45 | Accent plants: $15.
- Creator’s Tip: Plant dwarf sweet flag around the “legs” to simulate the turtle emerging from water.
- Smart Sourcing: Assorted unpolished river rock kits and miniature dwarf aquatic plants.
19. Mountain Peak Grouping
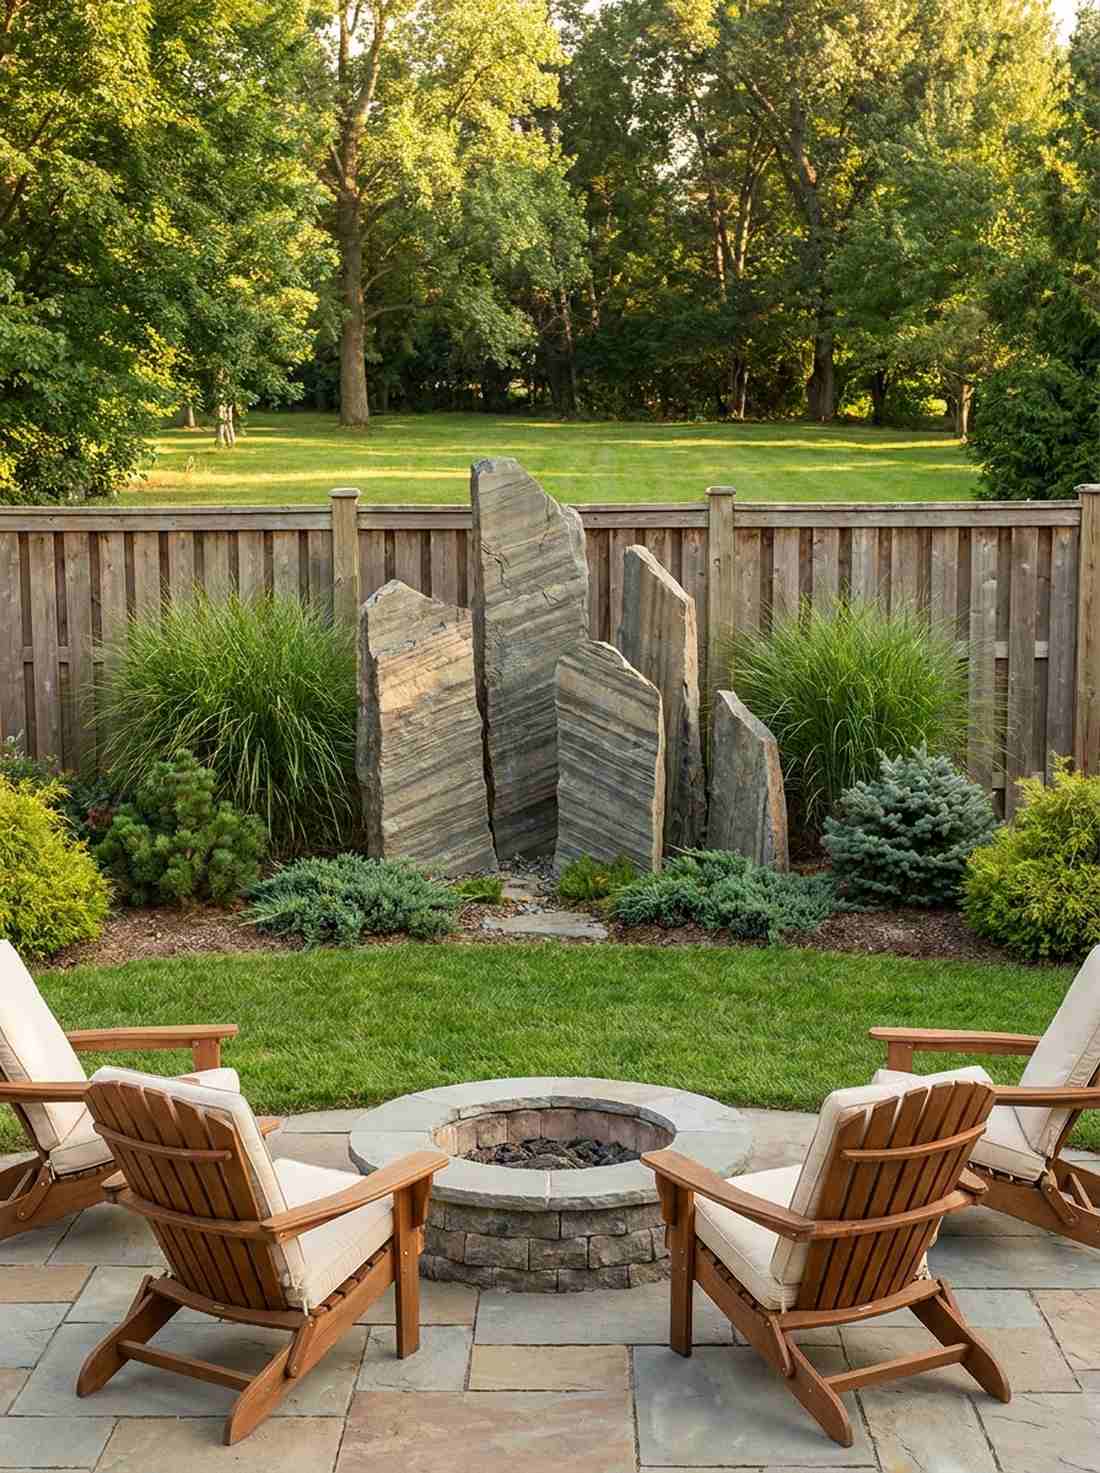
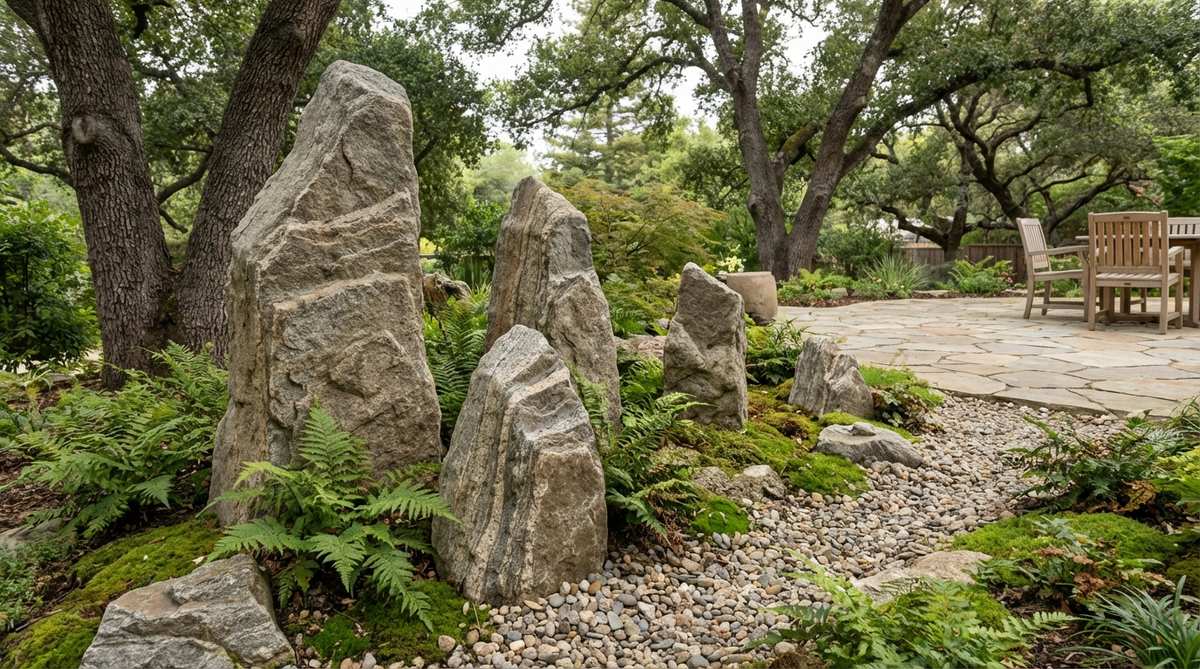
Feels like looking out over a distant, majestic alpine range. This five-stone geological arrangement serves as a breathtaking backdrop against fences or walls.
Placing rocks of identical heights looks painfully artificial, but staging five vertically stratified limestone pieces in descending, asymmetrical heights delivers a surprisingly premium look. Aligning the natural horizontal grain across all five pieces tricks the brain into seeing a single, massive mountain chain.
Budget around $120–$200 for beautifully striated pieces.
- Key Materials: Five stratified vertical stones
- Vibe / Style: Grand, sweeping, scenic
- Difficulty: Challenging to match stone grains
- Budget Breakdown: Stratified boulders: $180 | Base soil: $20.
- Creator’s Tip: Take a photo of the stones at the stone yard to plan the grain alignment before buying.
- Smart Sourcing: Natural slate standing stones (pallet) and outdoor landscaping leveling bases.
Most landscapers charge thousands for this effect, but you can build the next layout in one afternoon…
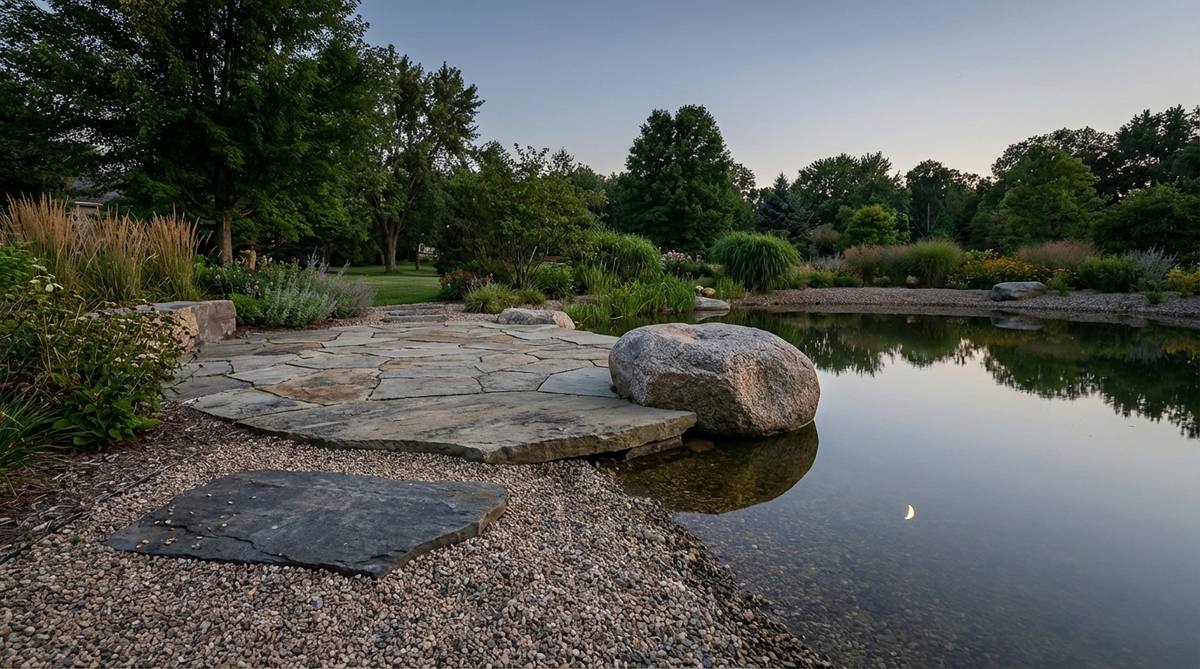
20. Reclining Shoreline Stones
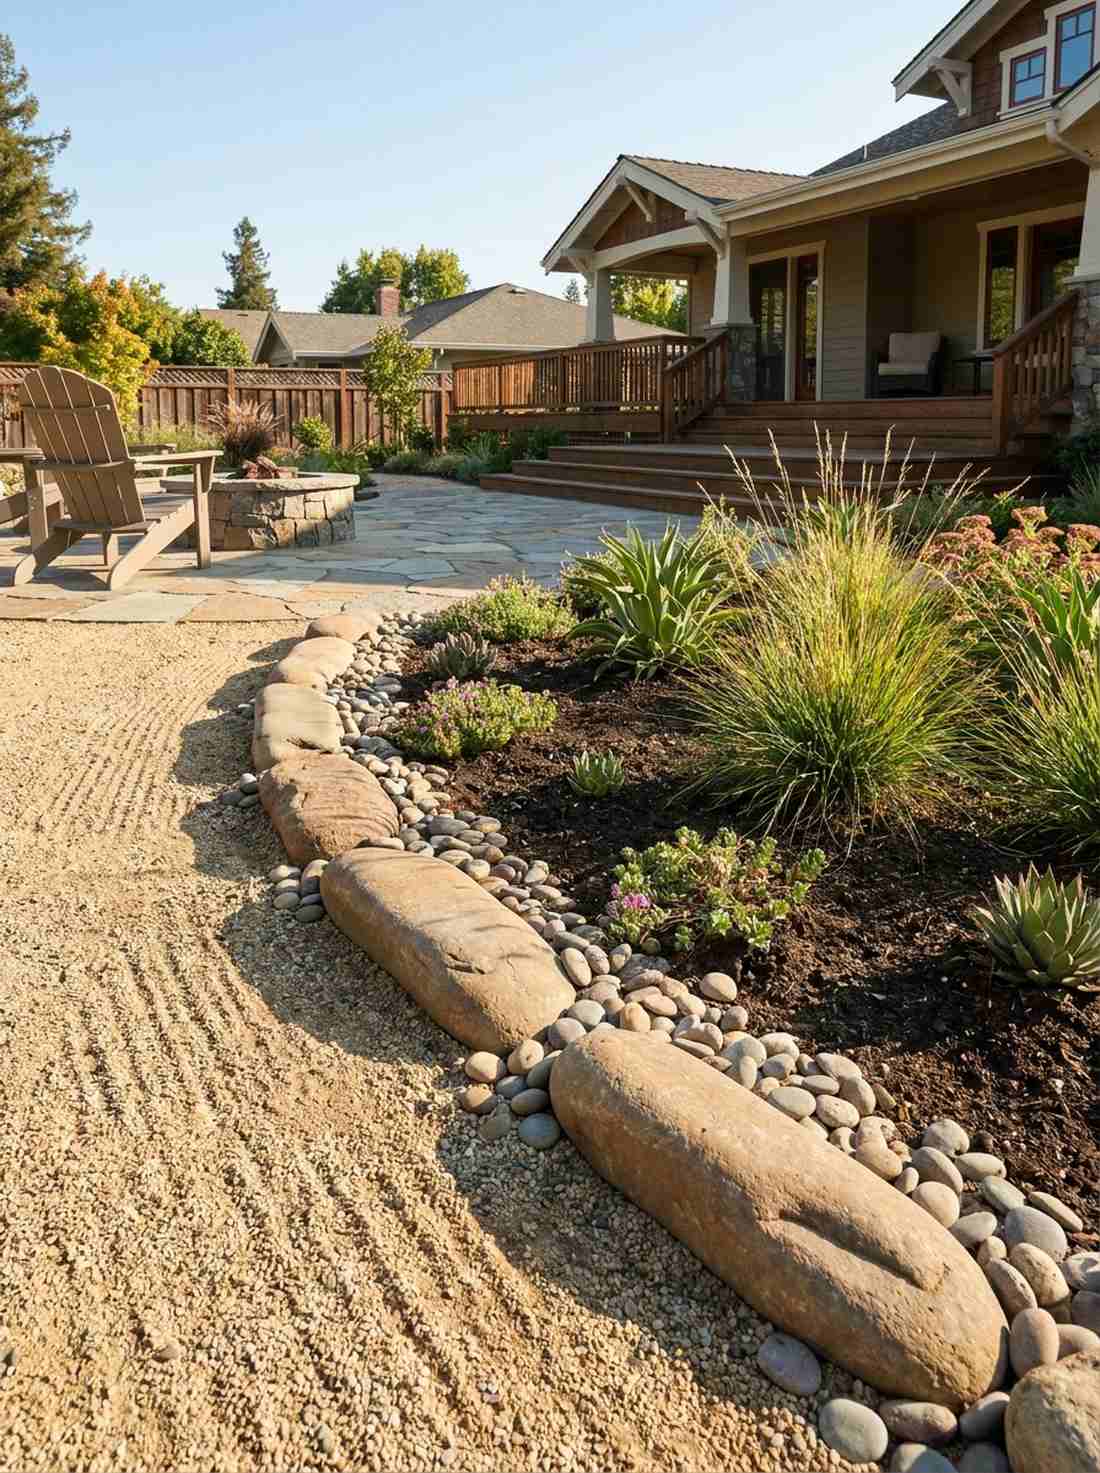
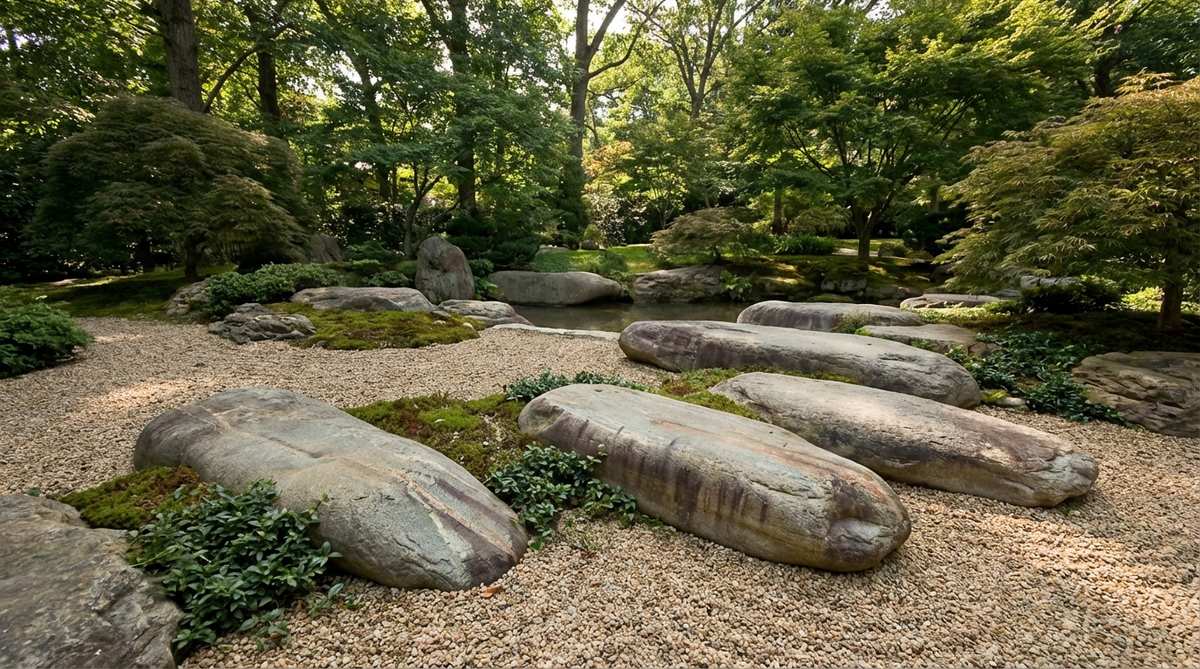
Oozes the lazy, calming energy of a remote island beach. This horizontal edge border placement softens the harsh transitions between raked gravel and soil.
Sharp, vertical rocks near flat gravel look incredibly jarring, but embedding long, reclining water-worn pieces parallel to the edge gives a designer-level finish that feels soothing. Sourcing smooth fairy garden kits style pebbles around these larger resting stones completes the shoreline illusion flawlessly.
This edge treatment costs roughly $40–$75. Pin this if you’re building a dry water feature!
- Key Materials: Long, smooth horizontal stones
- Vibe / Style: Resting, peaceful, eroded
- Difficulty: Easy embedding required
- Budget Breakdown: Shoreline stones: $60 | Accent pebbles: $15.
- Creator’s Tip: Bury the bottom half of the stone so it looks like sediment has naturally built up over it.
- Smart Sourcing: Large tumbled mexican beach pebbles and pre-cut weed barrier strips.
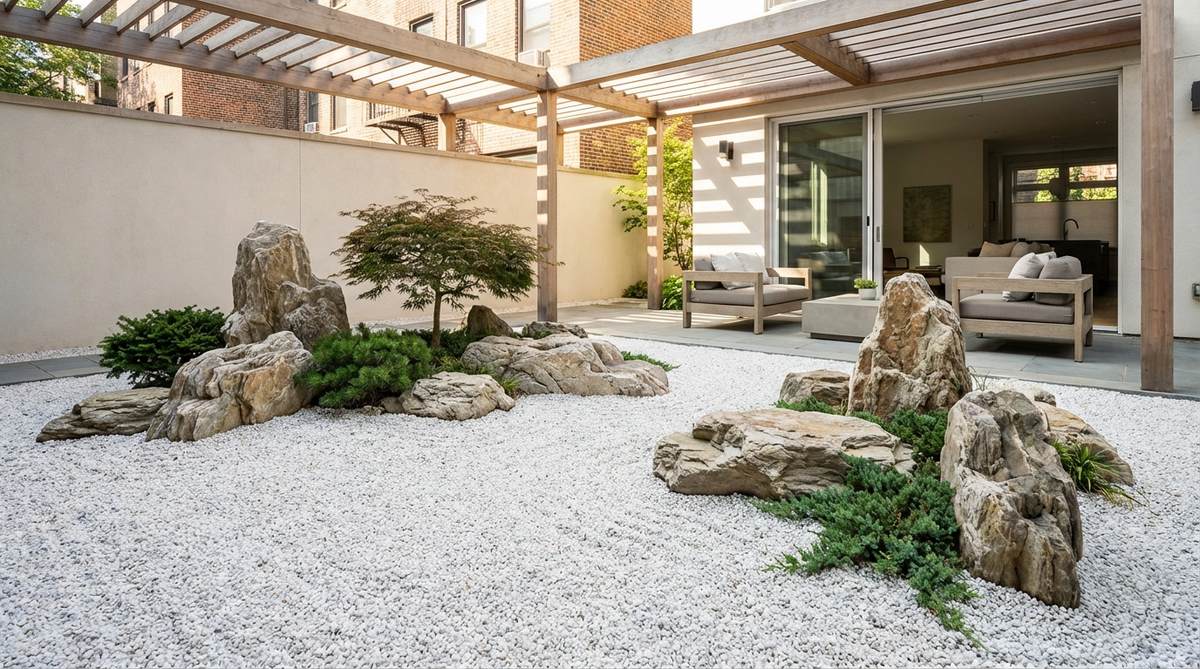
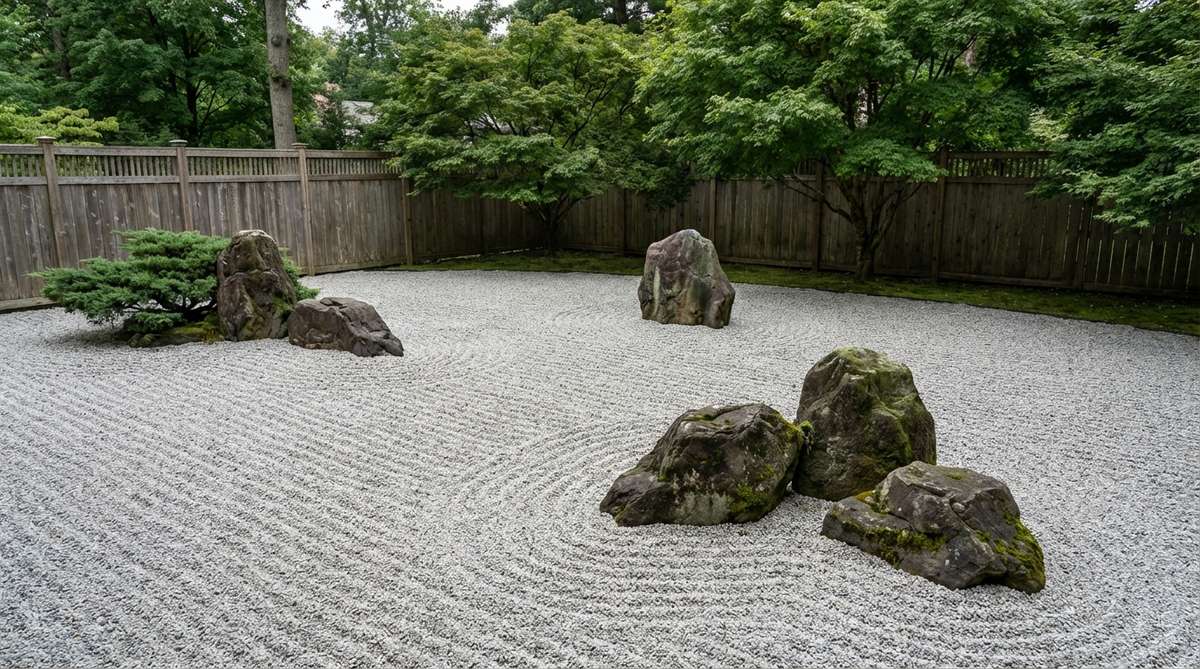
21. Five-Stone Garden Arrangement
Creates a highly dynamic, tension-filled viewing experience from every angle. This triangulated layout strategy is the absolute masterclass for whole-yard cohesion.
Placing stones symmetrically turns a zen garden into a stiff grid, but distributing five distinct rocks so no three ever form a straight line guarantees that coveted “looks expensive but isn’t” result. Mixing one dark vertical anchor with a light horizontal companion keeps the eye constantly moving.
Sourcing five diverse stones will run about $150–$250.
- Key Materials: Five highly distinct boulders
- Vibe / Style: Complex, balanced, dynamic
- Difficulty: Requires deep spatial planning
- Budget Breakdown: Varied stones: $220 | Delivery: $30.
- Creator’s Tip: Mock up the layout with cardboard boxes of similar sizes before moving heavy rocks.
- Smart Sourcing: Mixed landscape boulder pallets and heavy-duty yard carts.
22. Guardian Stones at Entrance
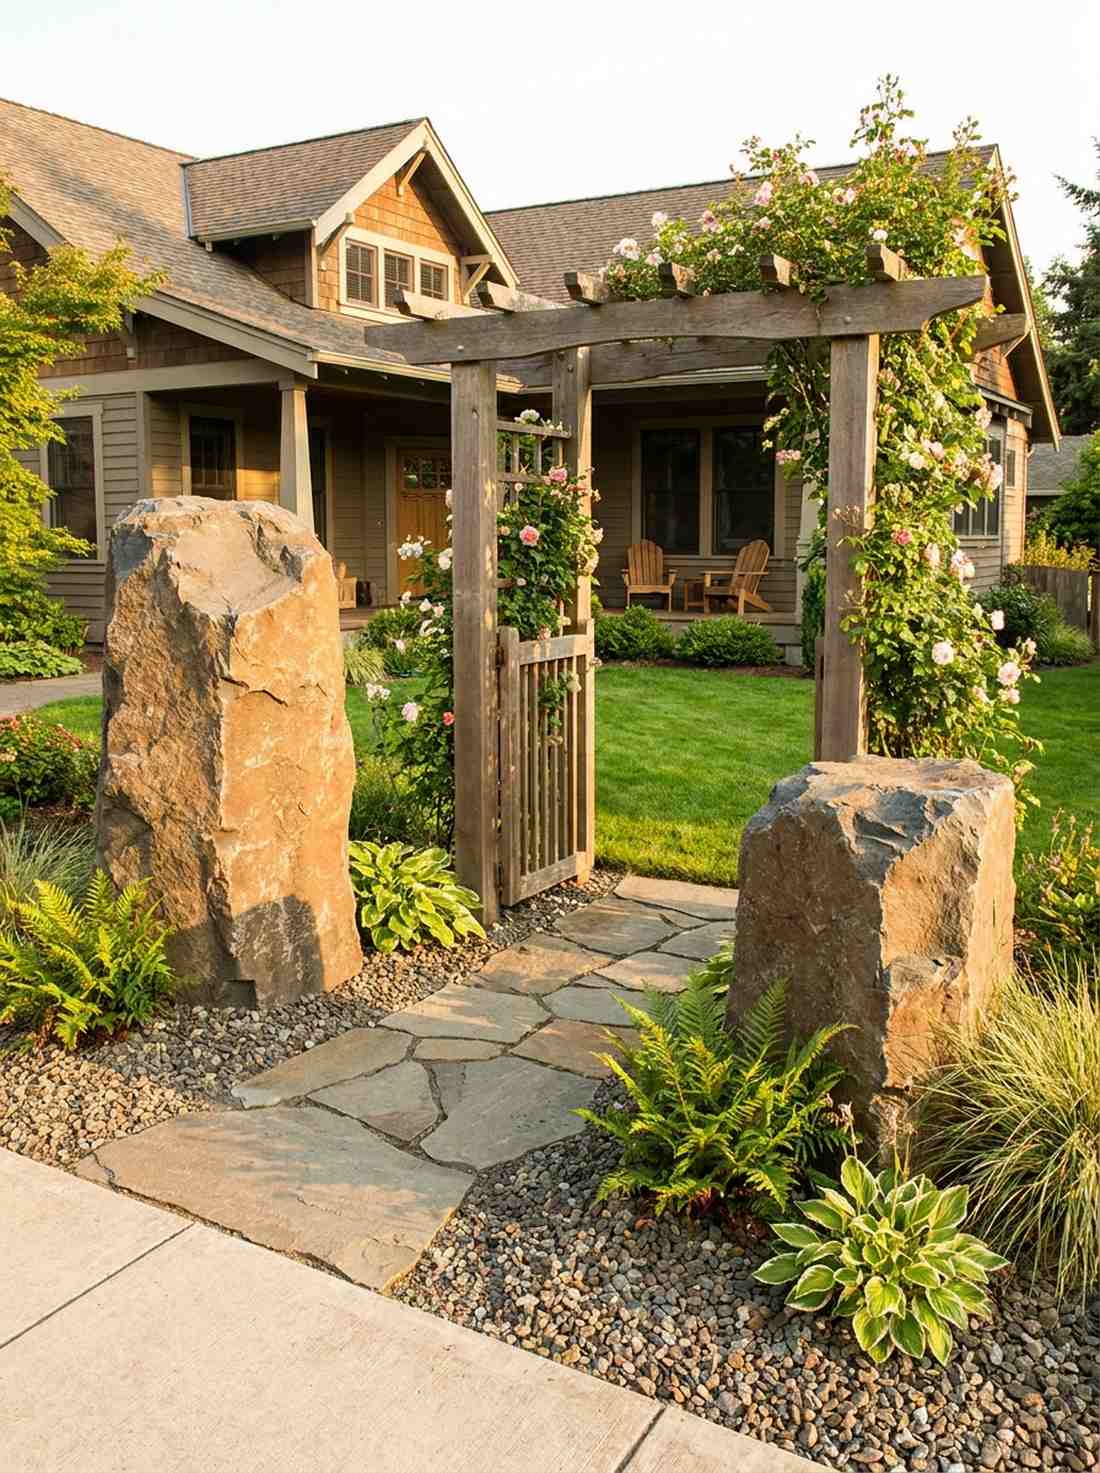
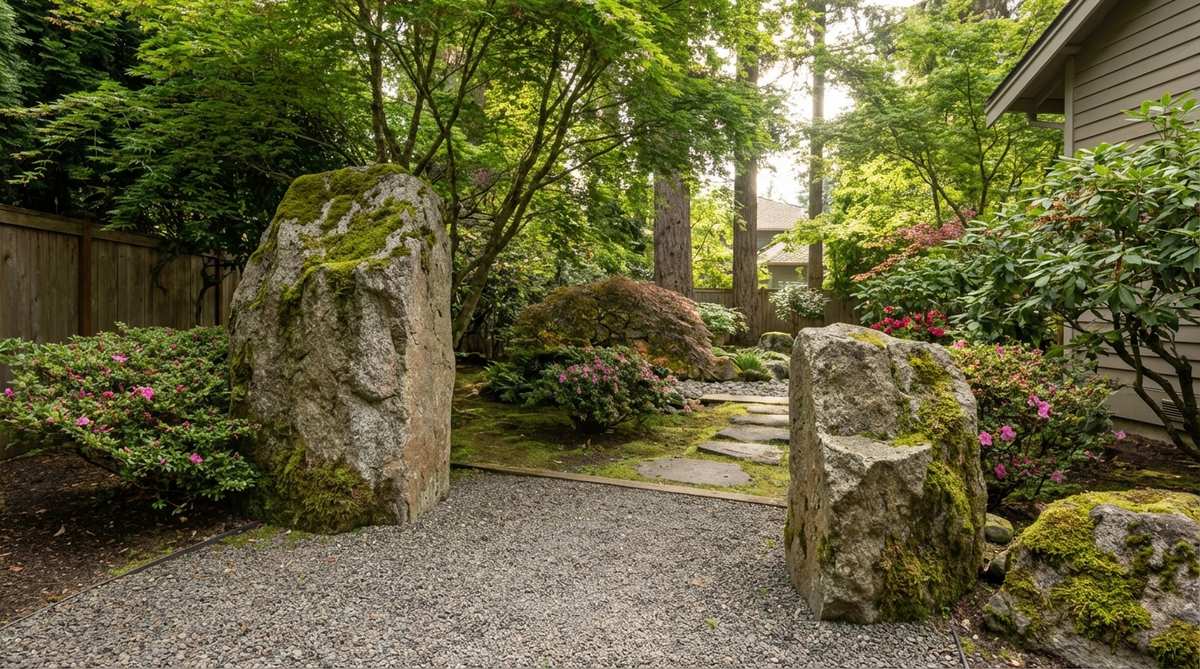
Strikes an unforgettable, majestic tone the second visitors arrive. This asymmetrical threshold framing is highly recommended for garden gates and arbor entrances.
Twin, identical pillars look like cheap driveway markers, but flanking a pathway with two substantial stones of distinctly different heights instantly bypasses the cheap amateur look. Their massive vertical presence creates a psychological gateway that demands respect and mindfulness.
You can execute this stunning entrance for roughly $90–$140. Save this for your front yard curb appeal ideas!
- Key Materials: Two tall, mismatched upright boulders
- Vibe / Style: Welcoming, protective, authoritative
- Difficulty: Requires a post-hole digger for stability
- Budget Breakdown: Boulders: $120 | Gravel base: $20.
- Creator’s Tip: Dig the hole for the taller stone deeper to ensure it never leans or topples over time.
- Smart Sourcing: Faux basalt column kits and rapid-setting anchoring cement.
23. Crane Island Configuration
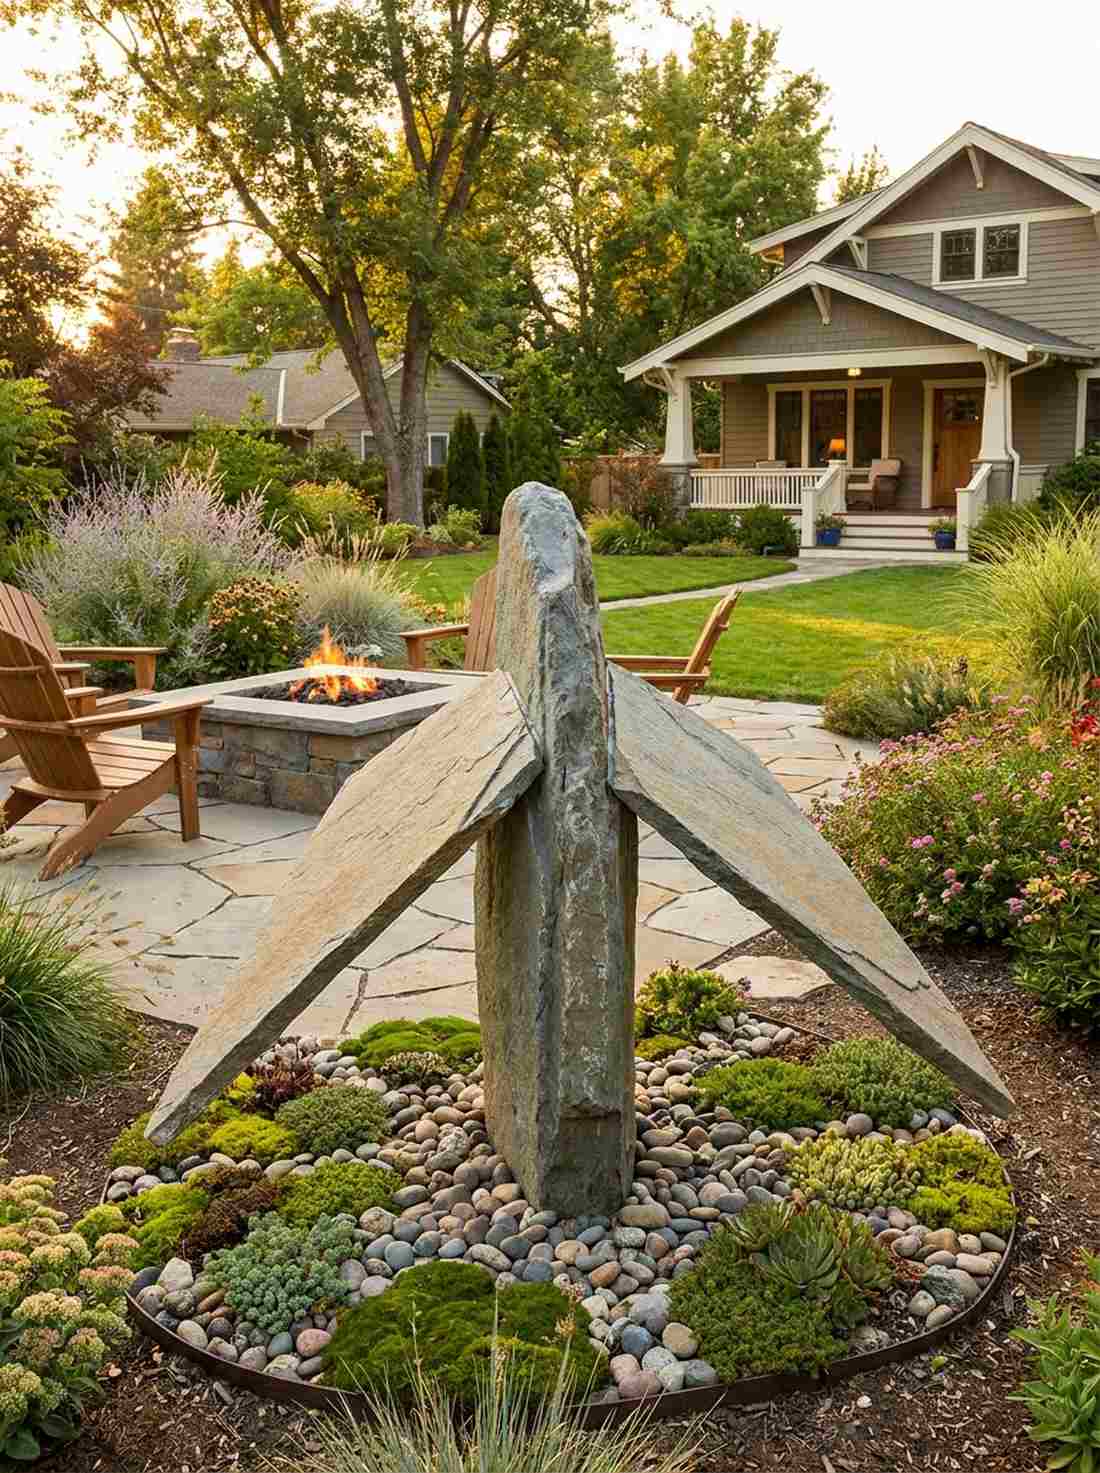
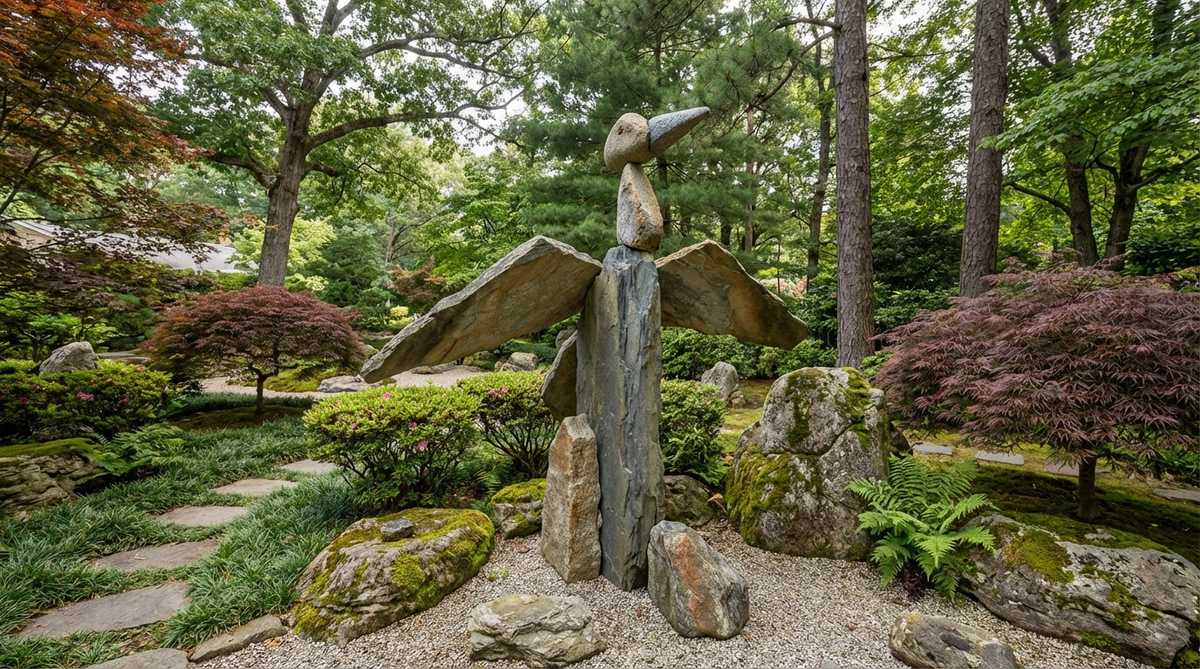
Brings a poetic, abstract sculptural element to your outdoor sanctuary. This stylized avian stone grouping represents health and soaring good fortune.
Literal animal carvings look like tacky lawn ornaments, but implying wings with angled stones projecting from a tall central body delivers a surprisingly premium look. Using high-grade miniature garden supplies to frame the base keeps the abstract piece grounded in nature.
Expect to spend about $50–$85 for this stylized grouping.
- Key Materials: One vertical stone, two angled flat stones
- Vibe / Style: Abstract, uplifting, symbolic
- Difficulty: Tricky balancing required
- Budget Breakdown: Stone pieces: $70 | Soil/Moss: $15.
- Creator’s Tip: Use outdoor epoxy to securely attach the “wing” stones if you can’t bury them deeply enough.
- Smart Sourcing: Outdoor masonry landscape epoxy and angular accent rocks.
24. Stacked Stone Grouping
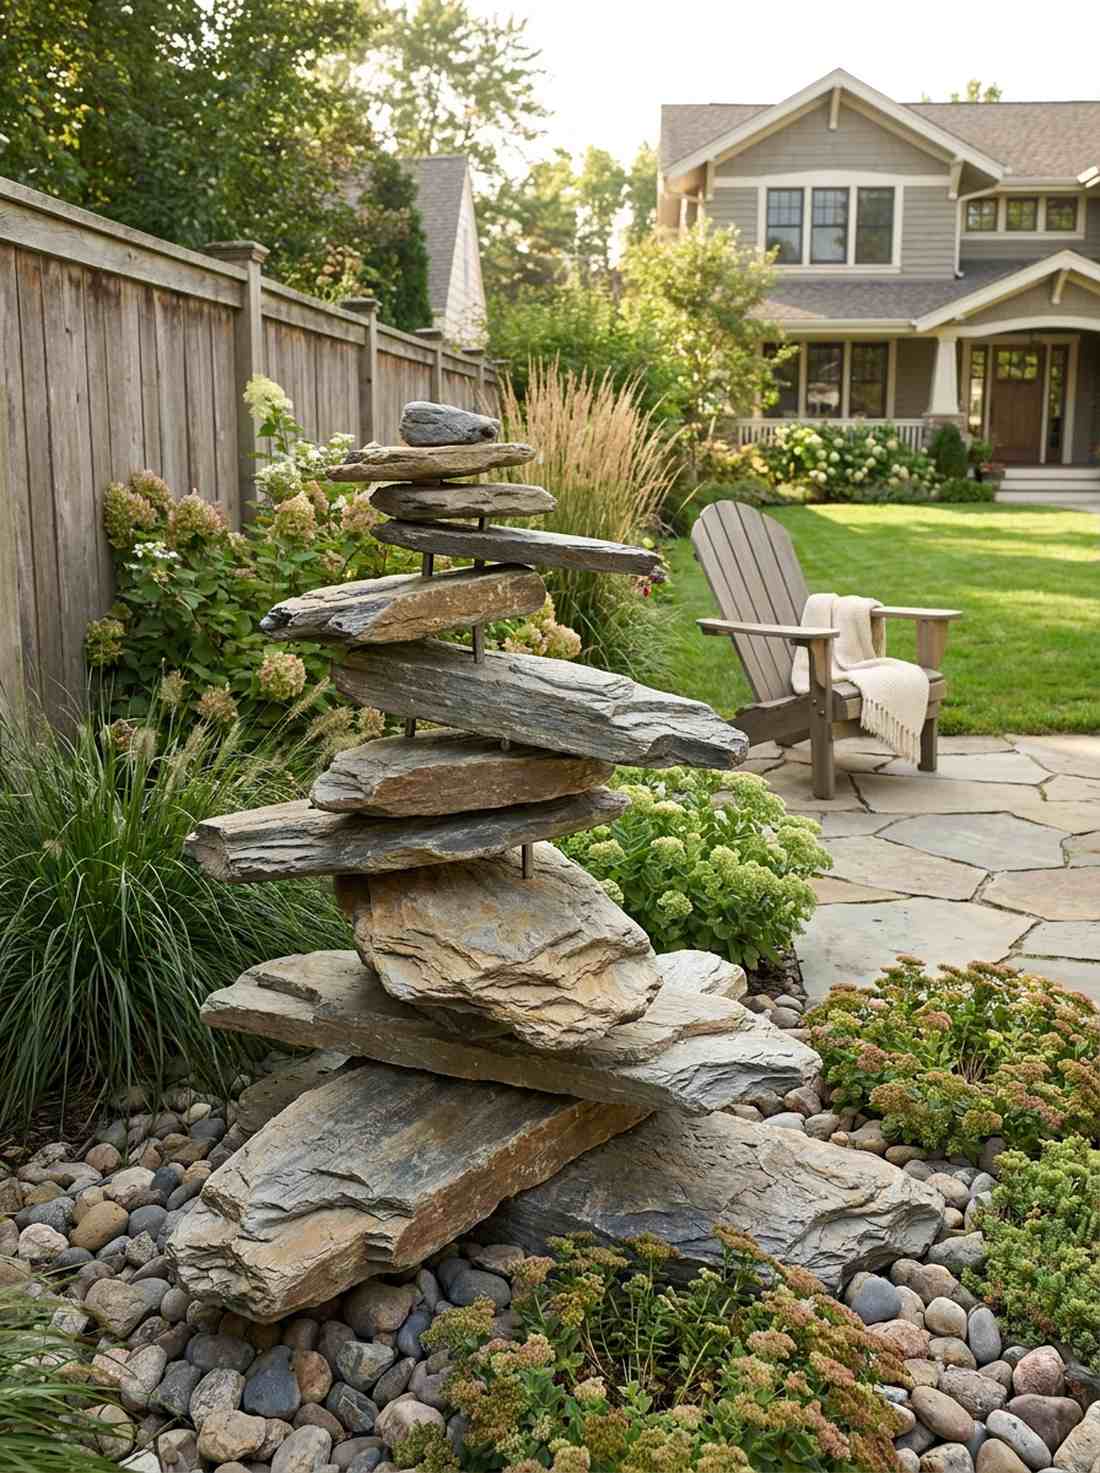
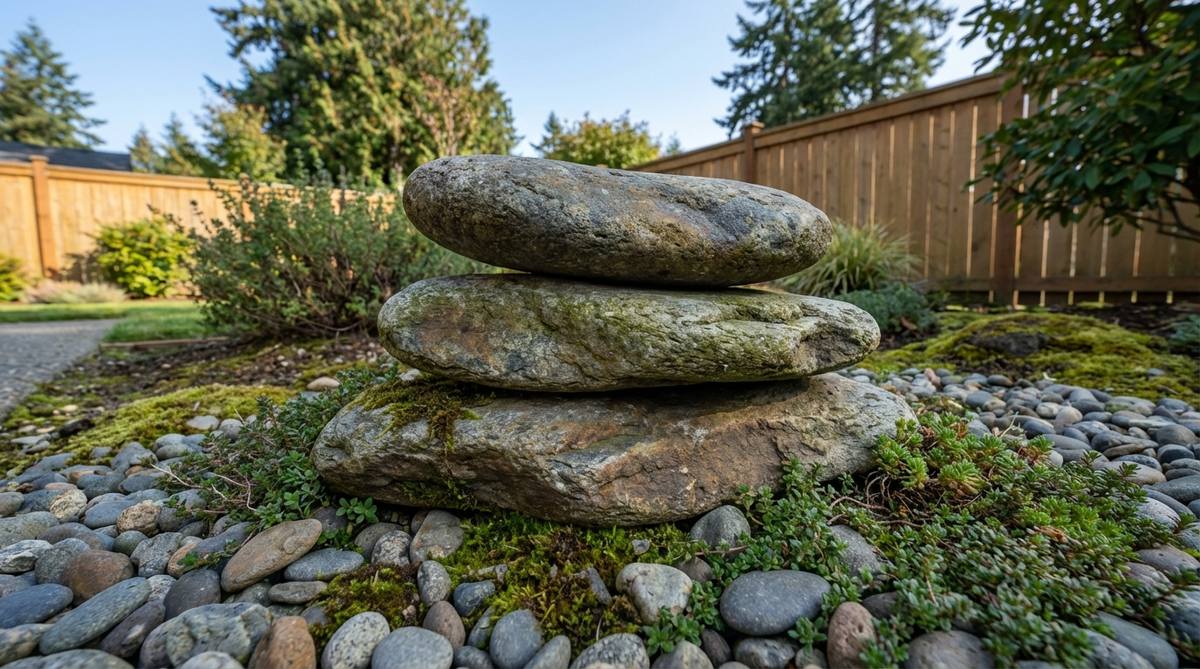
Feels precariously magical, like a monk left his mark minutes ago. This carefully layered composition adds brilliant vertical interest to flat, boring corners.
Glued-together craft store pebbles look awful in the rain, but balancing flat, highly textured slabs using hidden pins makes this setup look far more expensive than it is. The tension of a seemingly unstable stack draws the eye incredibly effectively.
You can easily pull this off for around $25–$45. Pin this if you love subtle yard art!
- Key Materials: Flat slates, hidden metal pins
- Vibe / Style: Precarious, human-touched, artistic
- Difficulty: Requires drilling
- Budget Breakdown: Slates: $30 | Metal pins: $10.
- Creator’s Tip: Use a masonry drill bit to create holes for galvanized steel pegs to permanently secure the stack.
- Smart Sourcing: Carbide masonry drill bit sets and galvanized steel rebar pegs.
If you think expensive rocks are the only way to get a luxury look, the next layout will shock you…
25. Scattered Field Stones
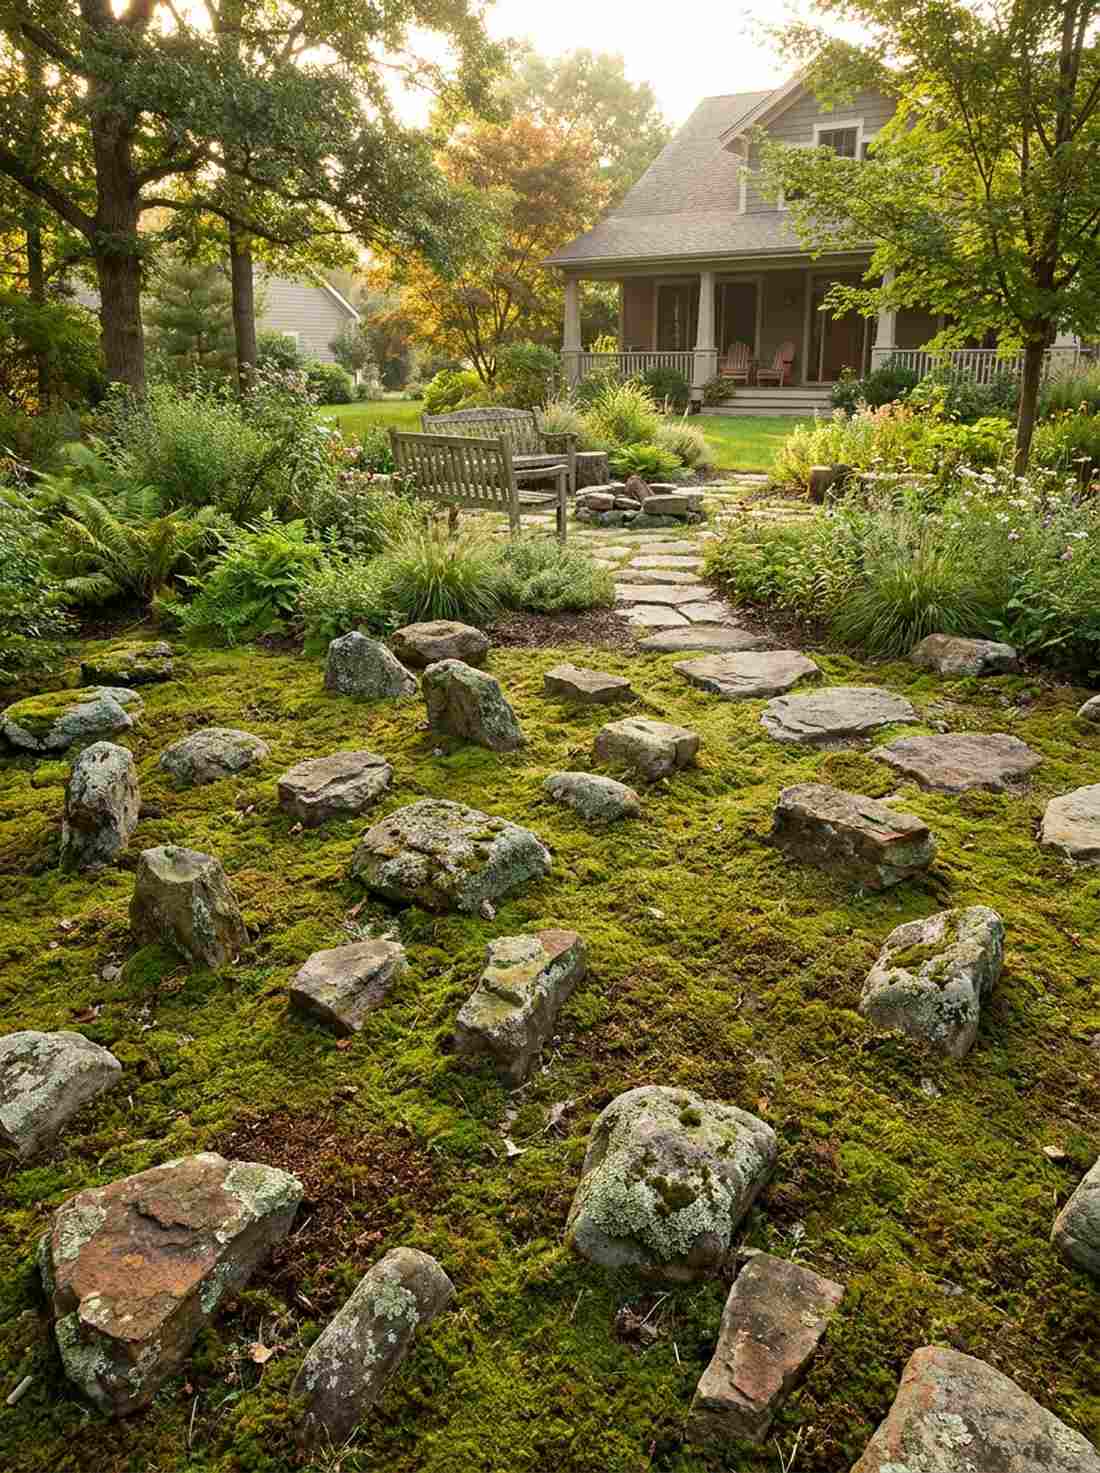
Delivers the charming, nostalgic feeling of an untouched meadow. This randomized fieldstone distribution is the perfect low-cost filler for large mossy expanses.
Placing rocks perfectly flush on the dirt looks terribly fake, but varying the burial depths of heavily weathered fieldstones gives a designer-level finish mimicking natural erosion. Sourcing bulk japanese garden rocks with lichens already attached makes the setup look a hundred years old overnight.
Budget around $40–$70. It’s a fast upgrade that completely changes the vibe.
- Key Materials: Weathered, irregular fieldstones
- Vibe / Style: Wild, ancient, naturalized
- Difficulty: Very easy
- Budget Breakdown: Fieldstones: $60 | Shovel/tools: $10.
- Creator’s Tip: Toss the stones gently onto the dirt and plant them exactly where they fall for true randomness.
- Smart Sourcing: Pre-weathered mossy fieldstones (bulk pack) and premium organic compost.
Water-Inspired Stone Placements
Many Japanese garden stone arrangements evoke water features without using actual water. These dry landscapes (karesansui) use stone and gravel to represent rivers, waterfalls, and oceans.
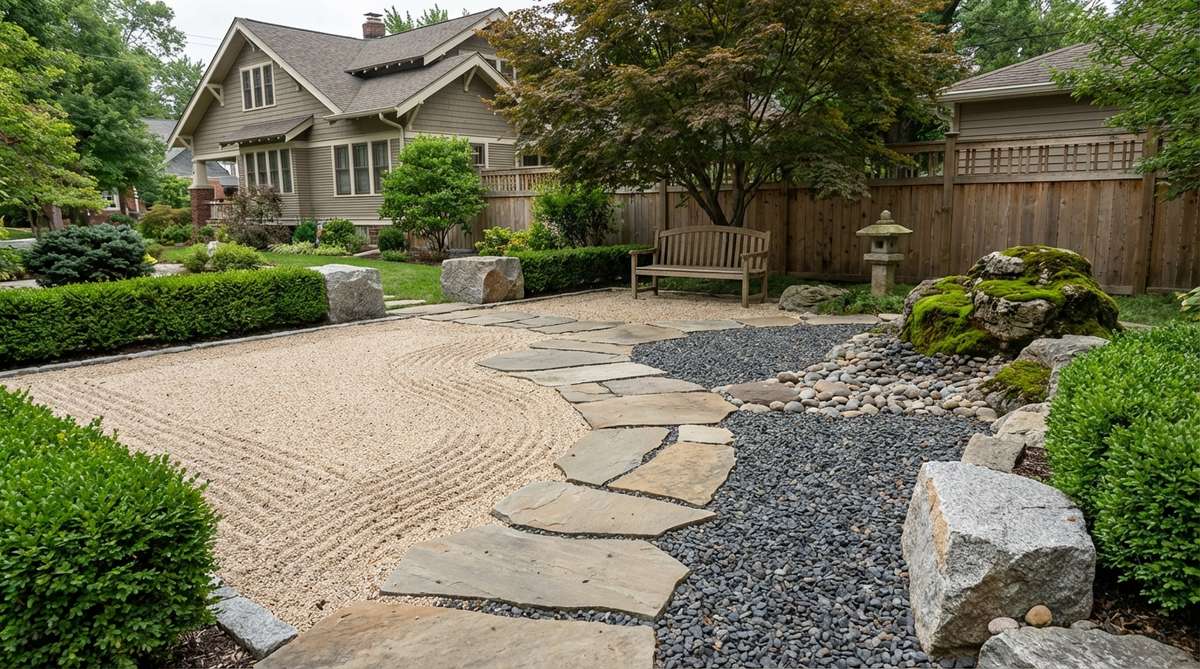
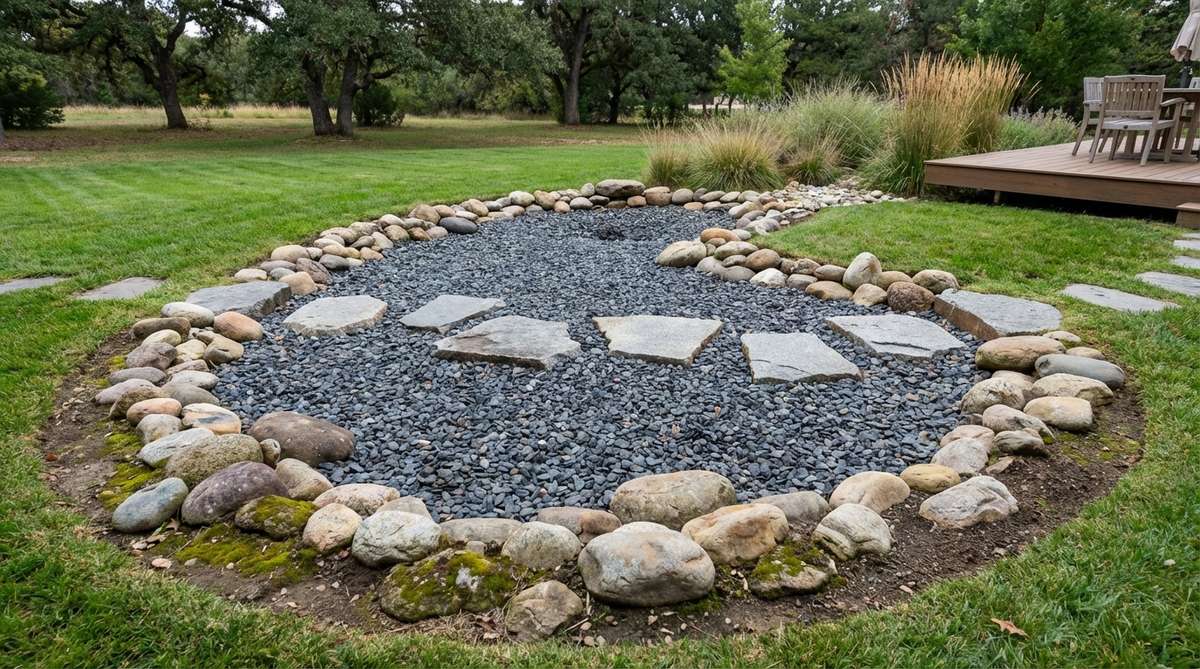
26. Dry Stream Bed
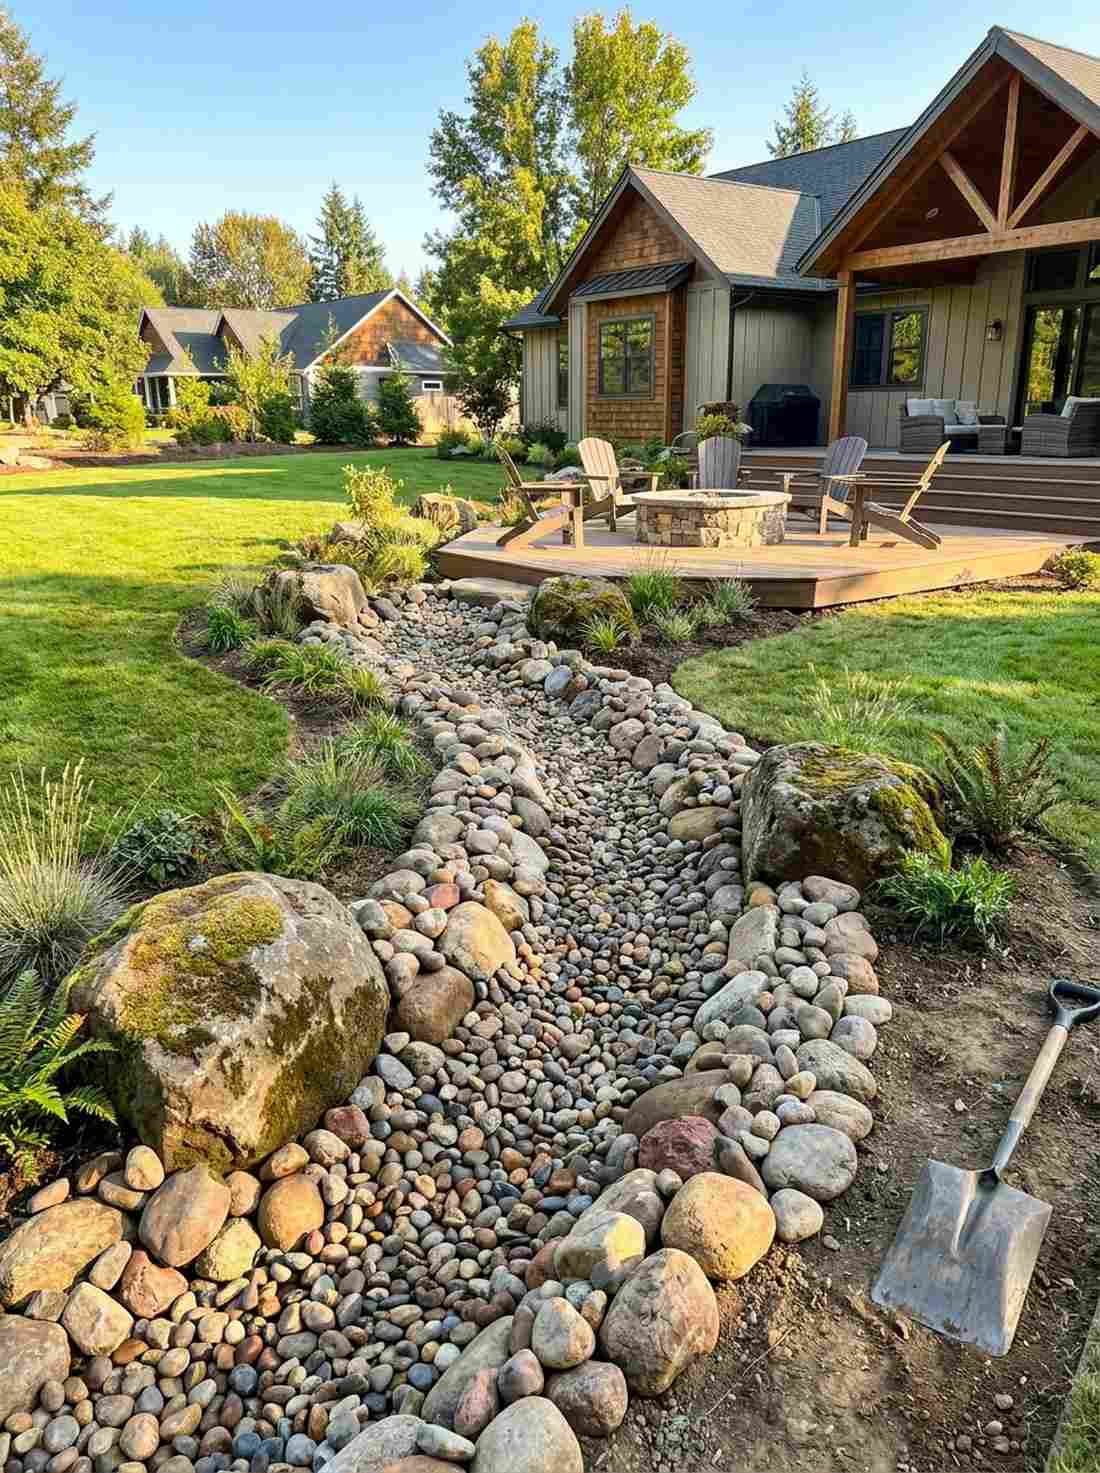
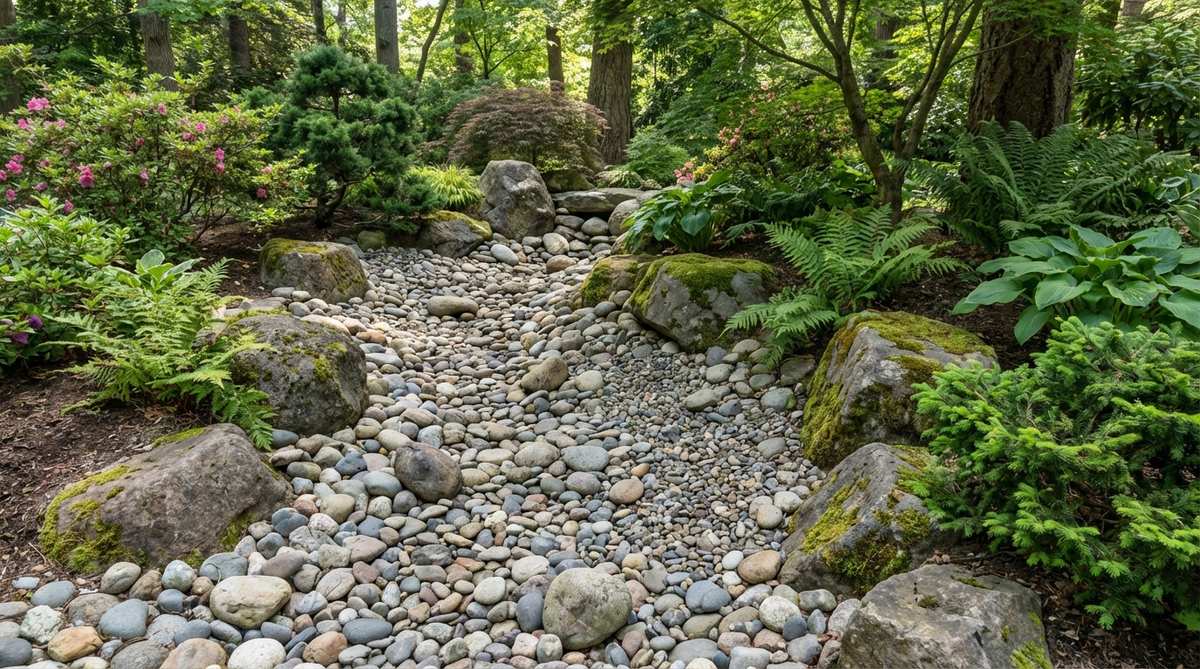
Feels like a tranquil forest river frozen in time. This dry karesansui river layout works beautifully for large, flat backyard expanses that struggle with drainage.
Many homeowners make these too straight, completely destroying the organic illusion, but creating a curved depression filled with sorted japanese garden rocks delivers a designer-level finish. Grading the size from massive boulders at the curves to tiny pebbles in the center perfectly mimics real water flow.
Expect to spend around $120–$200 depending on the length. Save this to your DIY weekend landscaping board!
- Key Materials: Mixed river rock, large curve boulders
- Vibe / Style: Flowing, natural, dynamic
- Difficulty: Heavy digging required
- Budget Breakdown: Rock mix: $150 | Weed barrier: $40.
- Creator’s Tip: Dig the center trench 4 inches deeper than the edges to give the river a realistic concave shape.
- Smart Sourcing: Mixed size polished river rock kits and heavy duty trenching shovels.
27. Vertical Waterfall Stones

Captures the breathtaking drama of a cliffside cascade. This stepped dry waterfall arrangement is a stunning solution for steep, unusable backyard slopes.
Laying stones flat on a hill just looks like a landslide, but standing tall, stratified stones on edge in a stepped pattern completely bypasses the cheap amateur look. Aligning all horizontal grain lines guarantees that coveted “looks expensive but isn’t” result of an ancient cliff face.
You can execute this dramatic feature for roughly $90–$150.
- Key Materials: Tall stratified rocks, gravel base
- Vibe / Style: Dramatic, towering, energetic
- Difficulty: Difficult balancing on slopes
- Budget Breakdown: Vertical rocks: $130 | Support gravel: $20.
- Creator’s Tip: Angle the top stones slightly forward to mimic the overhanging lip of a real waterfall.
- Smart Sourcing: Large slate standing stones and anti-erosion jute netting.
28. Ocean Wave Rock Pattern
Brings the rhythmic, rolling pulse of the sea right to your patio. This diagonal wave-breaker layout is absolutely perfect for breaking up massive gravel spaces.
Scattering rocks randomly in gravel looks cluttered, but embedding long, low rocks at a uniform 45-degree angle makes this setup look far more expensive than it is. When you rake the white gravel to crash over these partially buried stones, the illusion of movement is mesmerizing.
Budget around $60–$90. Pin this brilliant visual trick right now!
- Key Materials: Long, low rocks, white gravel
- Vibe / Style: Rhythmic, sweeping, oceanic
- Difficulty: Moderate raking skill needed
- Budget Breakdown: Wave stones: $50 | Raking tools: $30.
- Creator’s Tip: Use a specialized rake to pull gravel slightly up the face of the stone to look like splashing foam.
- Smart Sourcing: Tumbled black lava rocks and specialty wave-pattern zen rakes.
29. Pool Collection Basin
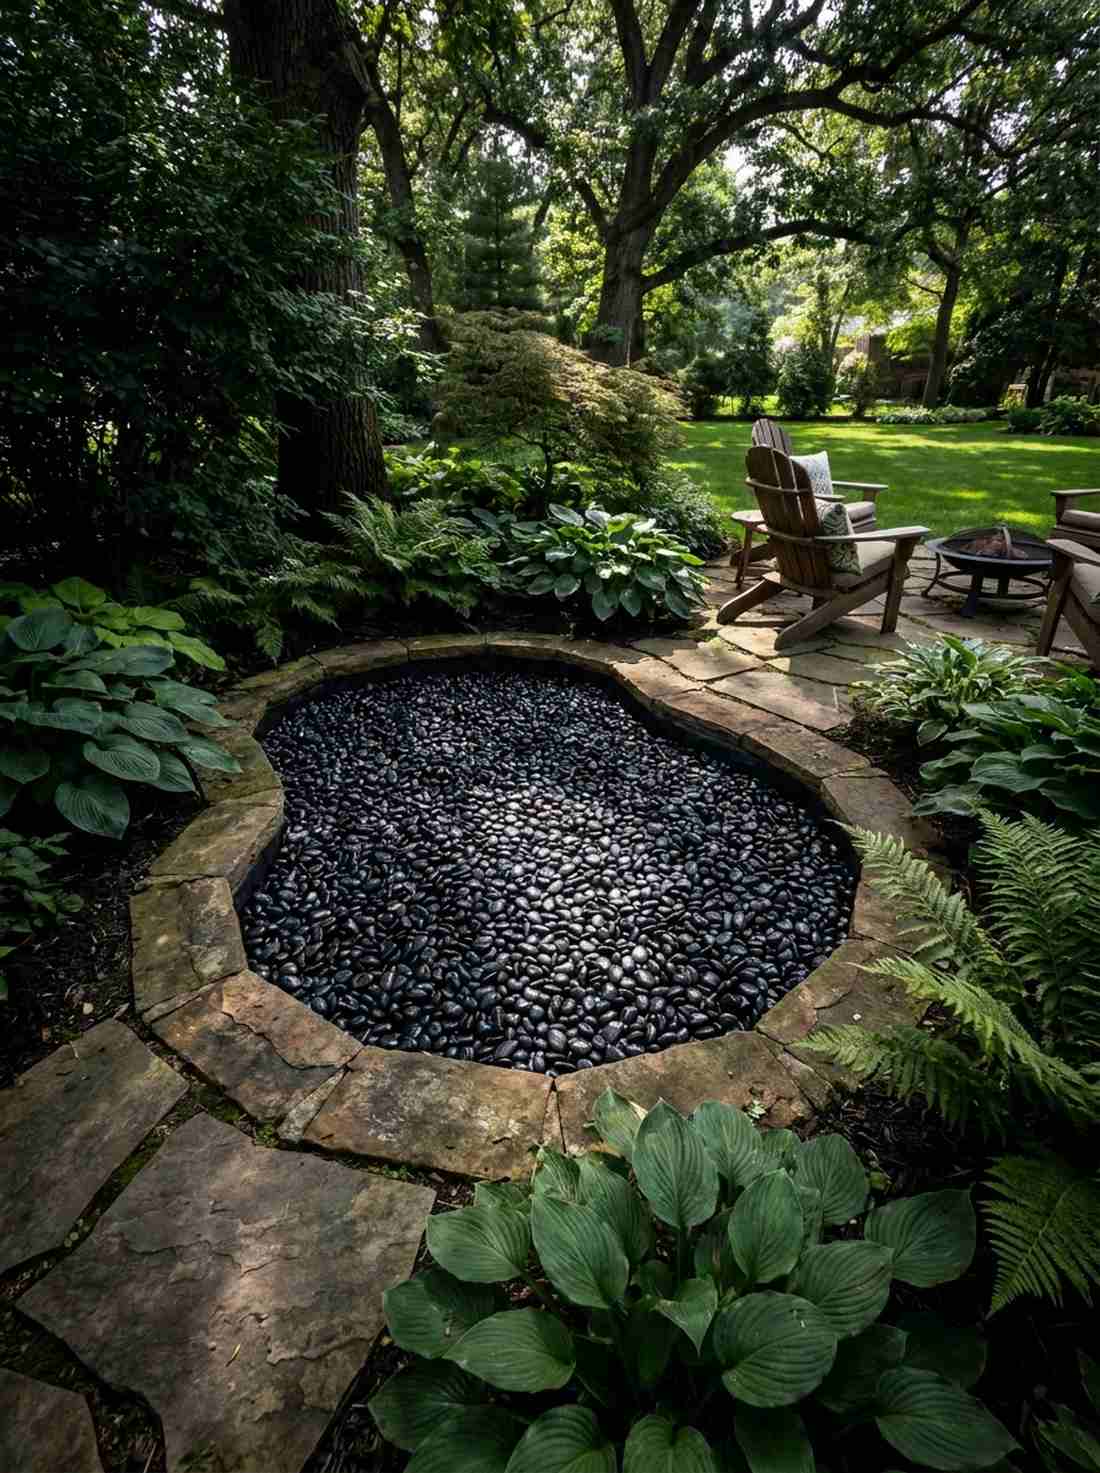
Creates a dark, mysterious oasis of calm. This sunken dry pool feature provides an incredible, low-maintenance focal point for shaded corners.
Using light gravel everywhere washes out the yard, but filling a sunken stone-lined depression with high-gloss black miniature garden supplies delivers a surprisingly premium look. The smooth perimeter stones frame the dark center perfectly, tricking the eye into seeing deep, still water.
You can easily pull this off for around $50–$80.
- Key Materials: Black polished pebbles, worn edging stones
- Vibe / Style: Deep, reflective, mysterious
- Difficulty: Easy excavation
- Budget Breakdown: Black pebbles: $40 | Edge stones: $35.
- Creator’s Tip: Spray the black pebbles with a clear gloss sealer to make them look permanently wet.
- Smart Sourcing: High-gloss black river pebbles (bulk pack) and wet-look stone sealer sprays.
Most backyards lack depth, but applying this next island illusion fixes that instantly…
30. Island Archipelago
Shrinks a vast seascape down to miniature perfection. This clustered gravel island concept is highly recommended for wide, open meditation gardens.
Putting rocks equidistant apart looks like a parking lot, but grouping 1-3 stones tightly while leaving vast asymmetrical voids between the islands gives a designer-level finish. This setup brilliantly utilizes cheap japanese garden gravel to emphasize the importance of negative space.
Expect to spend about $70–$110. Highly recommended for a quick weekend win.
- Key Materials: Small rock clusters, vast gravel sea
- Vibe / Style: Expansive, isolated, pure
- Difficulty: Minimal labor, high design thought
- Budget Breakdown: Stone clusters: $60 | Gravel expanse: $50.
- Creator’s Tip: Plant a tiny tuft of black mondo grass on one island to represent distant pine trees.
- Smart Sourcing: Miniature garden rock assortment packs and live dwarf mondo grass plugs.
31. Bridge Crossing Stones
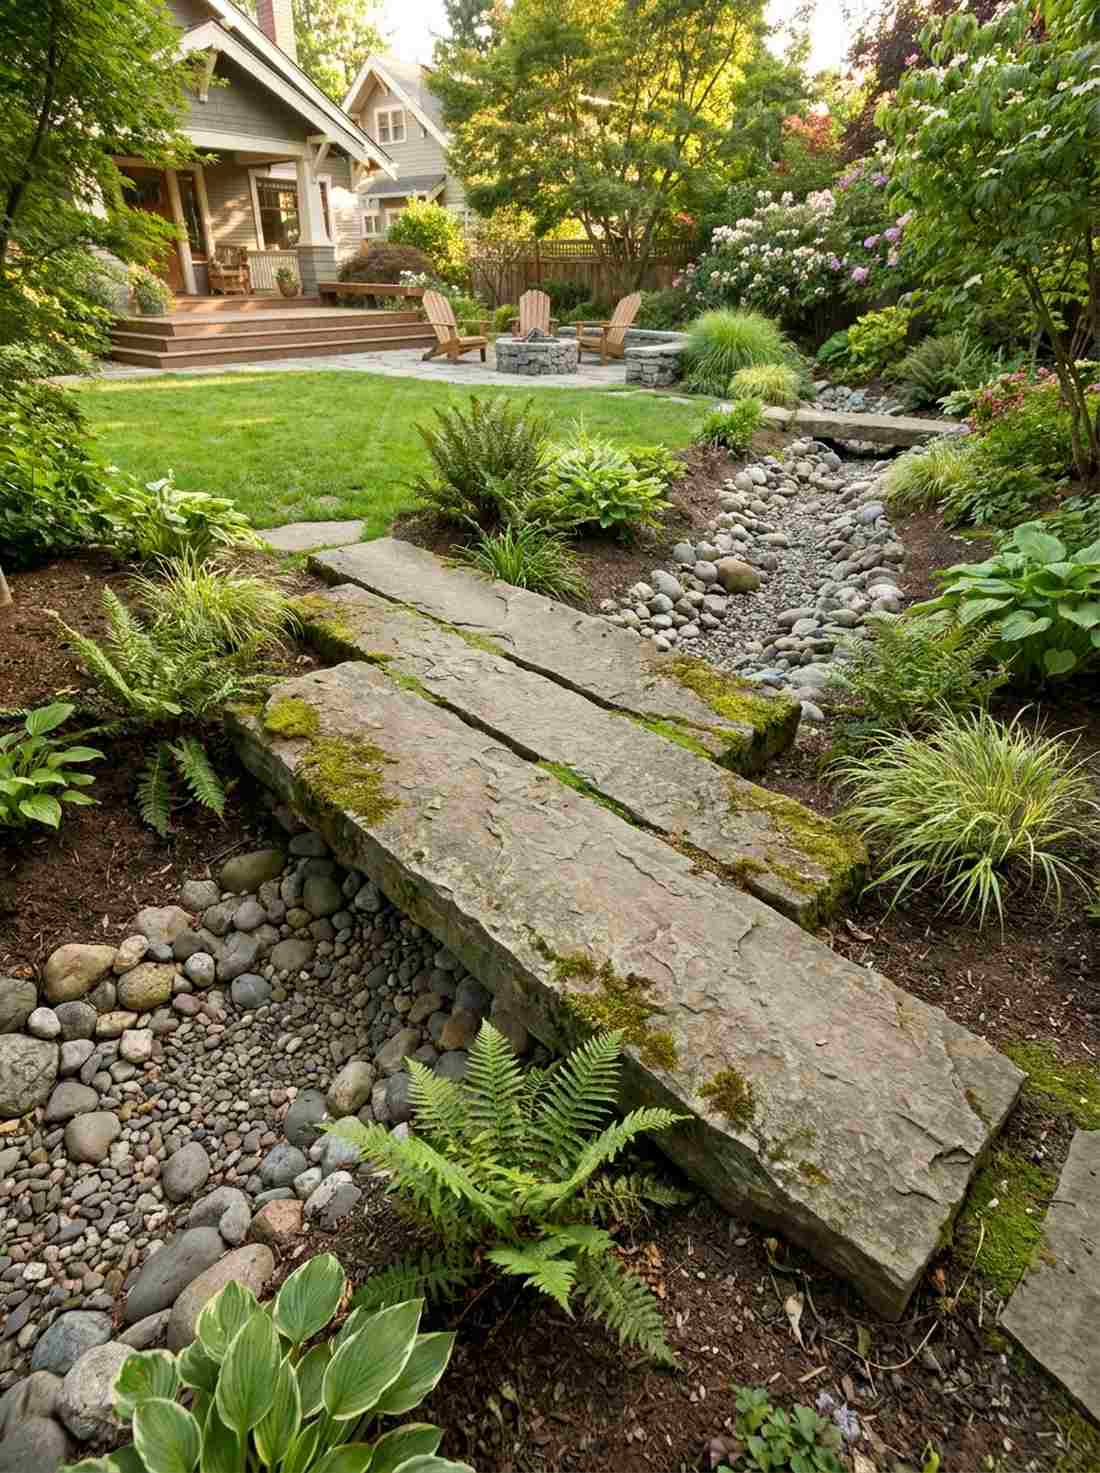

Adds a thrilling sense of adventure and interaction. This flat stone bridge placement transforms a basic dry stream into a functional pathway.
Flimsy wooden bridges rot and look tacky, but laying thick, flat slabs perpendicular across your stone river completely bypasses the cheap amateur look. Allowing moss to creep onto the top surfaces makes the crossing look centuries old and incredibly durable.
This layout usually costs around $80–$140 depending on stone thickness. Save this for your dry creek plans!
- Key Materials: Thick, elongated flat slabs
- Vibe / Style: Interactive, sturdy, ancient
- Difficulty: Heavy lifting, requires stable base
- Budget Breakdown: Bridge slabs: $100 | Base sand: $20.
- Creator’s Tip: Bury the ends of the bridge stones deep into the “banks” so they never wobble when stepped on.
- Smart Sourcing: Heavy-duty reinforced stepping stones and polymeric binding sand.
32. Rapids Stone Cluster
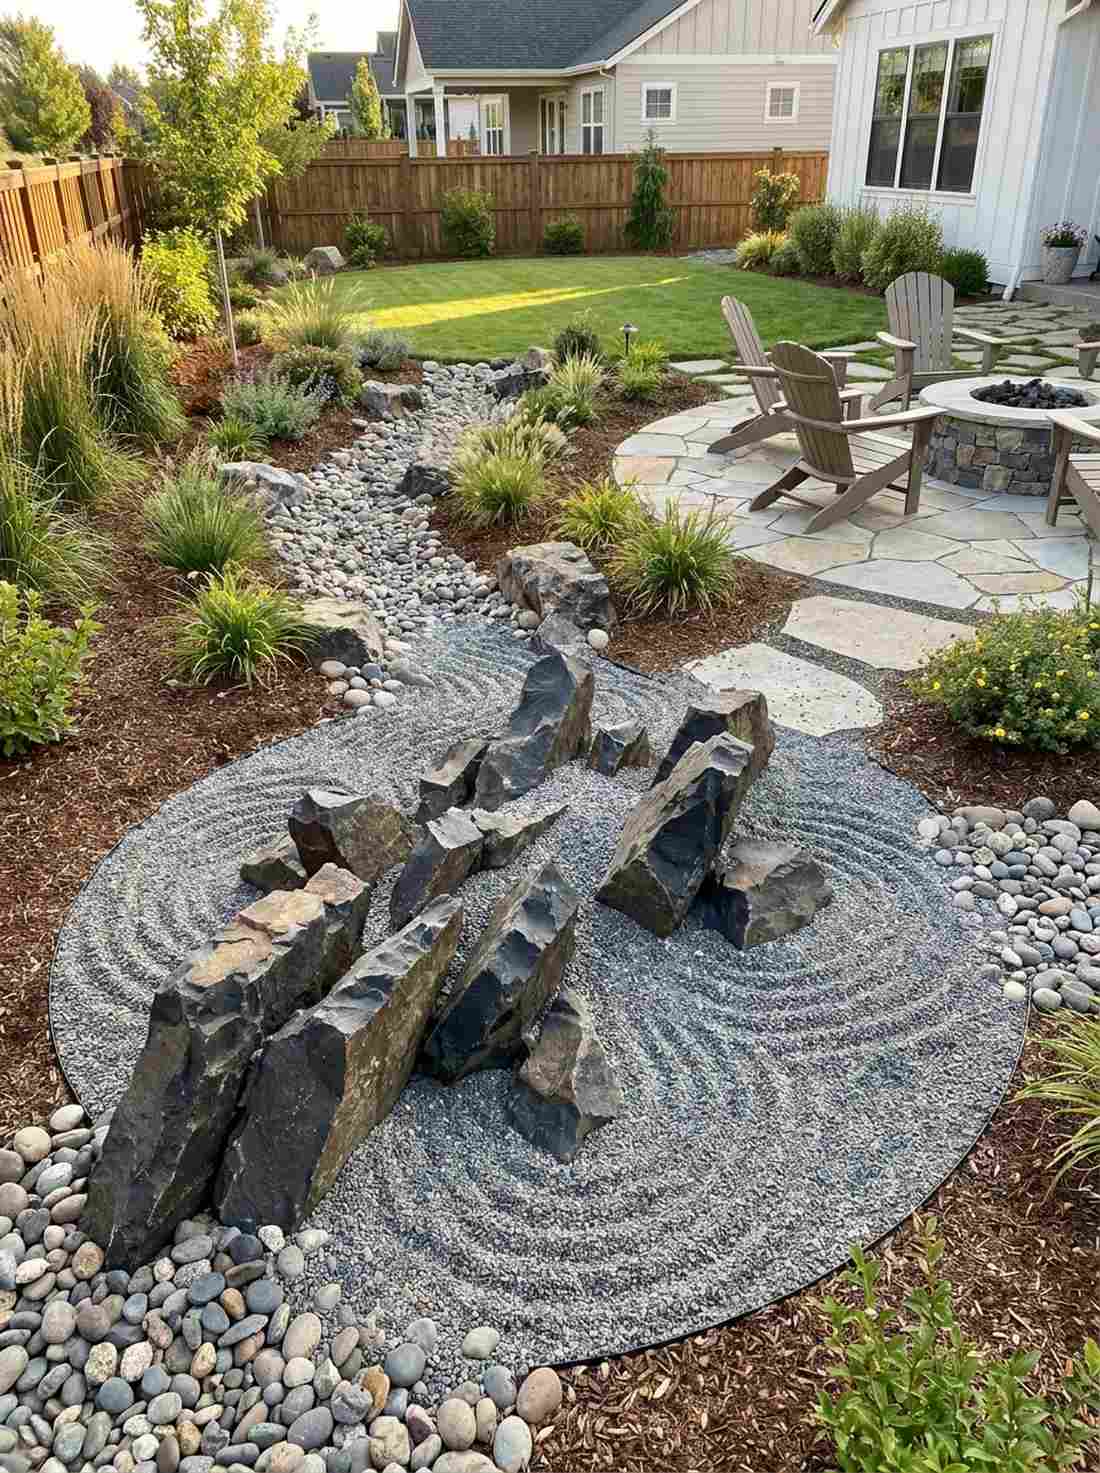
Injects chaotic, thrilling energy into an otherwise calm setup. This jagged obstacle arrangement is brilliant for the center of any dry stream bed.
Smooth stones look too sleepy on their own, but tightly clustering sharp, angular rocks in the middle of your stream makes this setup look far more expensive than it is. Raking the surrounding gravel into turbulent, splashing patterns around these jagged “hazards” creates mind-blowing visual texture.
You can execute this dramatic focal point for roughly $35–$60.
- Key Materials: Jagged angular rocks, fine gravel
- Vibe / Style: Chaotic, energetic, wild
- Difficulty: Easy placement, tricky raking
- Budget Breakdown: Angular rocks: $40 | Rake tools: $15.
- Creator’s Tip: Tilt the sharp rocks upstream to fight against the imaginary current.
- Smart Sourcing: Raw jagged basalt chunks and fine crushed granite (bulk pack).
Material Guide: Cheap vs. Premium Aesthetic
Knowing exactly where to save and where to spend makes all the difference in achieving that “looks expensive but isn’t” vibe.
- Standard vs. UV-Resistant/Premium: Standard decorative pebbles fade quickly in the sun, making your yard look cheap. Upgrading to UV-coated stones or using a premium sealant ensures that deep, wet look lasts all year.
- Pre-made Kits vs. Sourcing Locally: While finding rocks outside is free, buying pre-sorted starter kits guarantees uniform texture and color matching, which is the secret to a high-end designer finish.
Accent and Focal Point Stones
Special stones serve as accent features that draw attention, mark significant locations, or add cultural authenticity to Japanese garden designs.
33. Lantern Base Stone

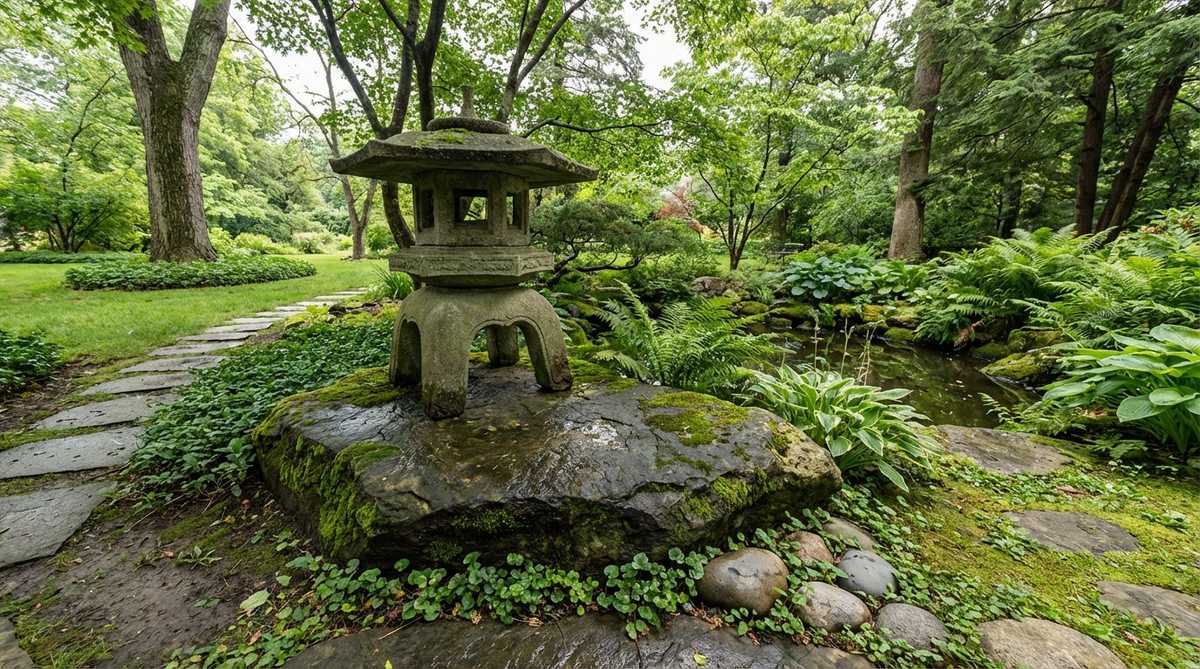
Provides an elite, grounded pedestal for your nighttime lighting. This substantive base slab is absolutely mandatory if you use stone lanterns in your garden.
Setting an expensive lantern directly in the dirt looks unfinished and causes it to sink, but partially burying a wide, textured foundation stone guarantees that coveted “looks expensive but isn’t” result. This functional pedestal protects the lantern from mud splash while adding immense visual weight.
Budget around $40–$70 for a proper base stone. Pin this to remember your lighting upgrades!
- Key Materials: Wide, flat textured slab
- Vibe / Style: Grounded, historical, functional
- Difficulty: Easy leveling required
- Budget Breakdown: Base stone: $50 | Leveling sand: $10.
- Creator’s Tip: Ensure the base stone extends at least 4 inches past the lantern’s footprint on all sides.
- Smart Sourcing: Pre-cut lantern base slabs and traditional stone garden lanterns.
34. Viewing Stone (Suiseki)

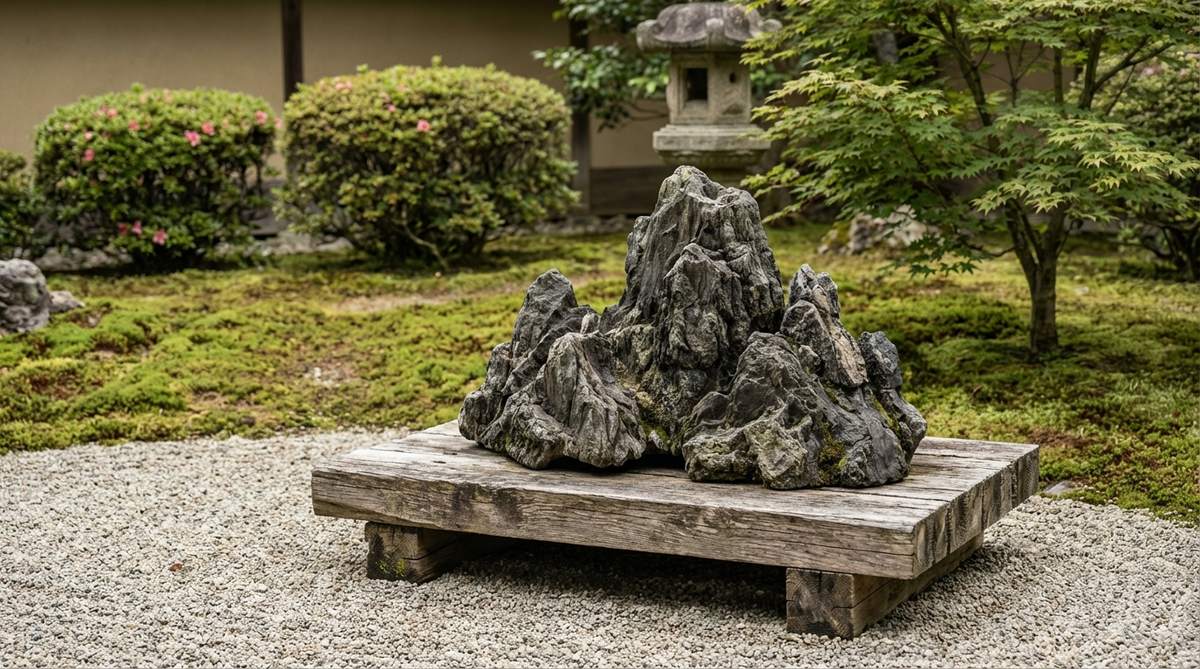
Presents a mesmerizing universe captured in a single rock. This contemplative display pedestal turns your patio into a high-end natural art exhibit.
Tossing a neat rock on a table looks like child’s play, but mounting a deeply textured specimen on a dedicated wooden stand delivers a surprisingly premium look. Using specialized terrarium accessories or a carved wooden base elevates the stone into an object of profound meditation.
You can easily pull this off for around $30–$60.
- Key Materials: Intricate specimen stone, display base
- Vibe / Style: Artistic, museum-quality, mindful
- Difficulty: Zero labor, high curation
- Budget Breakdown: Specimen stone: $40 | Carved base: $20.
- Creator’s Tip: Look for stones that naturally resemble distant mountain peaks or rugged coastlines.
- Smart Sourcing: Premium suiseki viewing stones and carved wooden display stands.
This upcoming water feature hack completely eliminates the need for expensive plumbing…
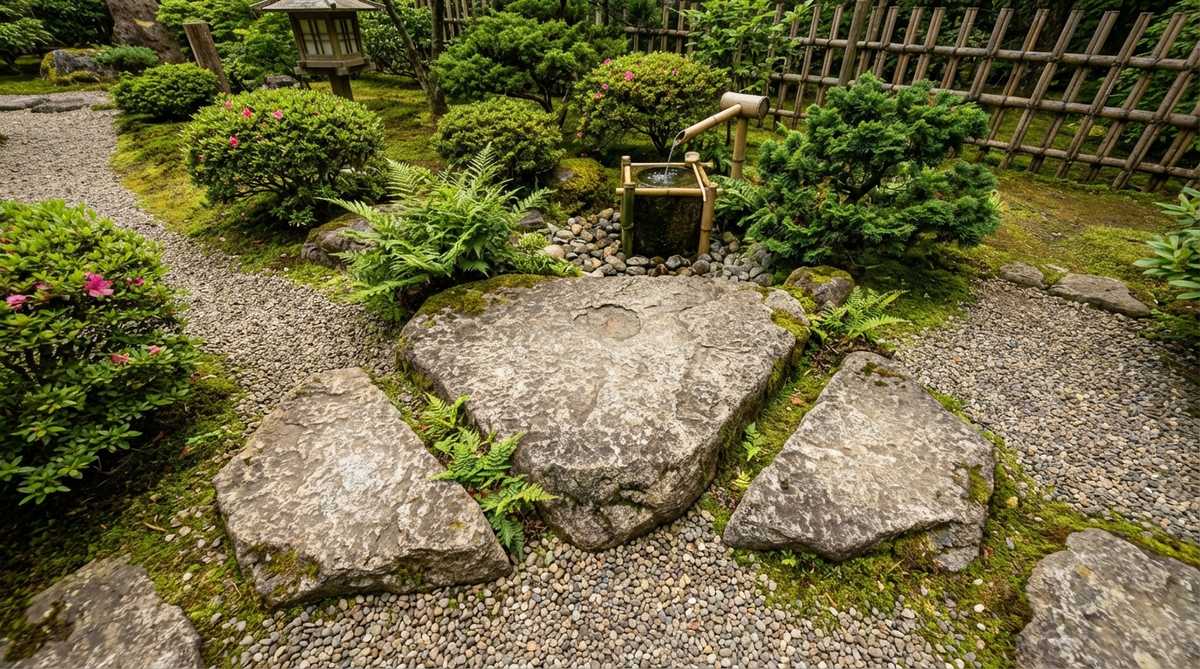
35. Tea Garden Basin Stone
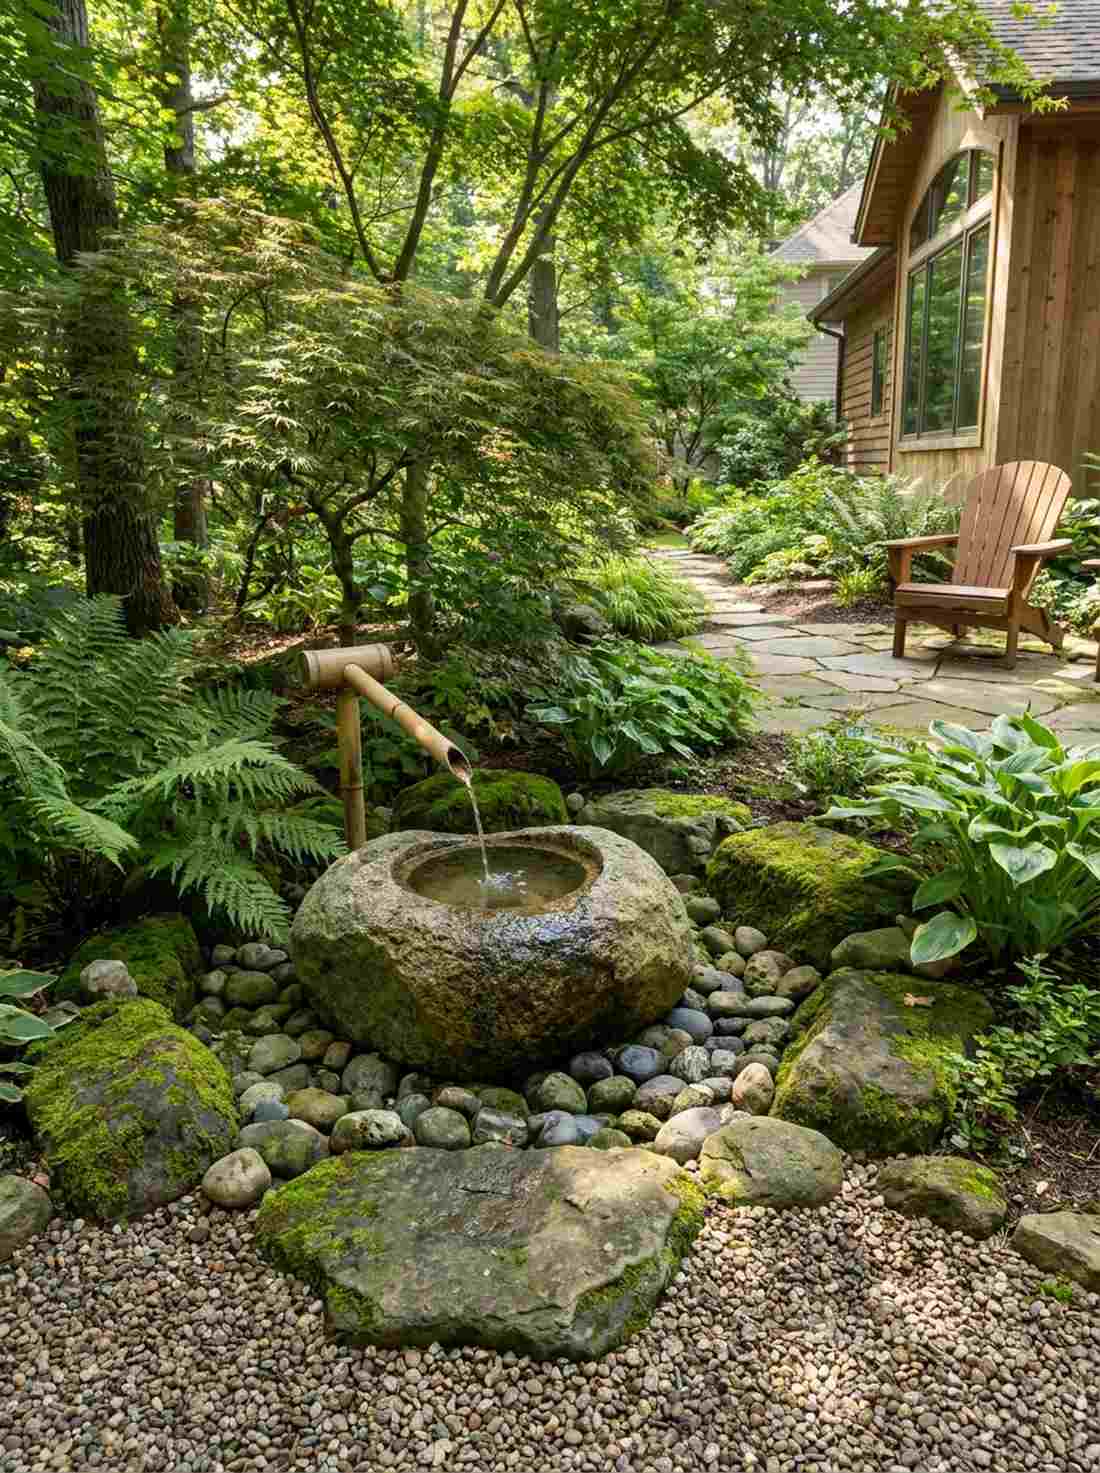
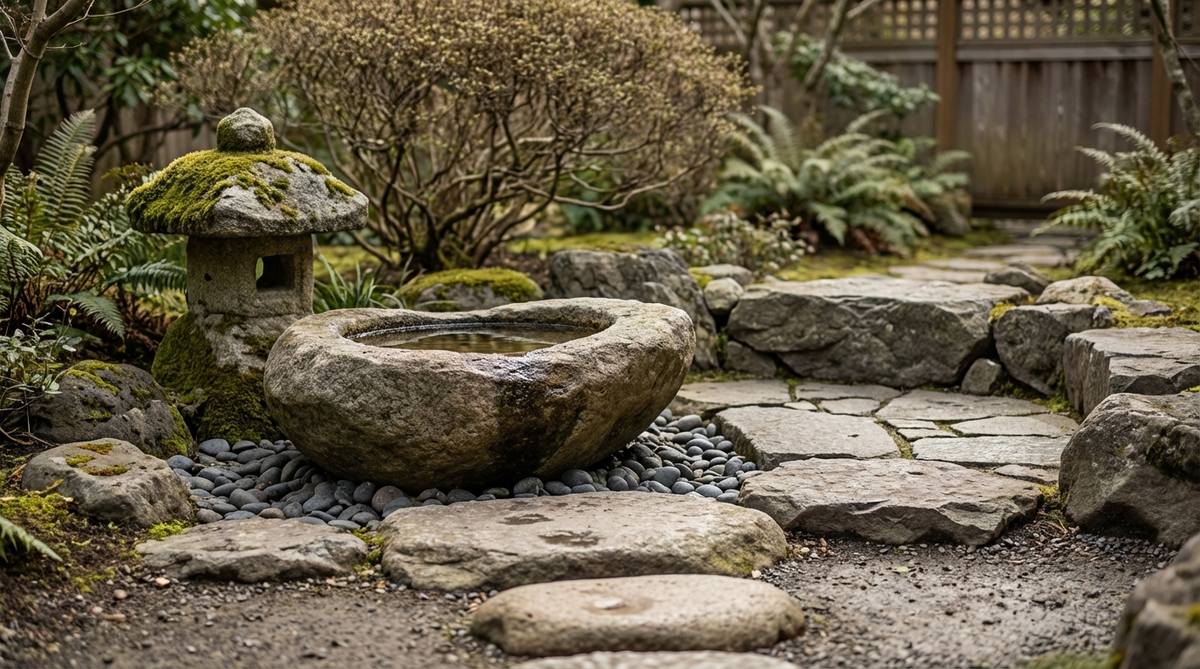
Brings a hushed, sacred ritual directly to your outdoor space. This hollowed tsukubai basin setup is the ultimate interactive centerpiece for a shaded nook.
Plastic birdbaths crack and look terrible, but installing a naturally carved stone basin surrounded by kneeling rocks completely bypasses the cheap amateur look. Forcing visitors to physically bend down to the low water level recreates the authentic humility of a traditional tea ceremony.
Expect to spend $150–$250 for a genuine carved basin. Save this for your ultimate garden wishlist!
- Key Materials: Carved basin stone, river rock drain base
- Vibe / Style: Ritualistic, humid, sacred
- Difficulty: Heavy lifting required
- Budget Breakdown: Carved basin: $180 | Drain rocks: $30.
- Creator’s Tip: Dig a deep hole underneath and fill it with coarse gravel so spilled water drains instantly.
- Smart Sourcing: Pre-drilled granite water basins and bamboo water spout kits.
36. Moon-Viewing Platform
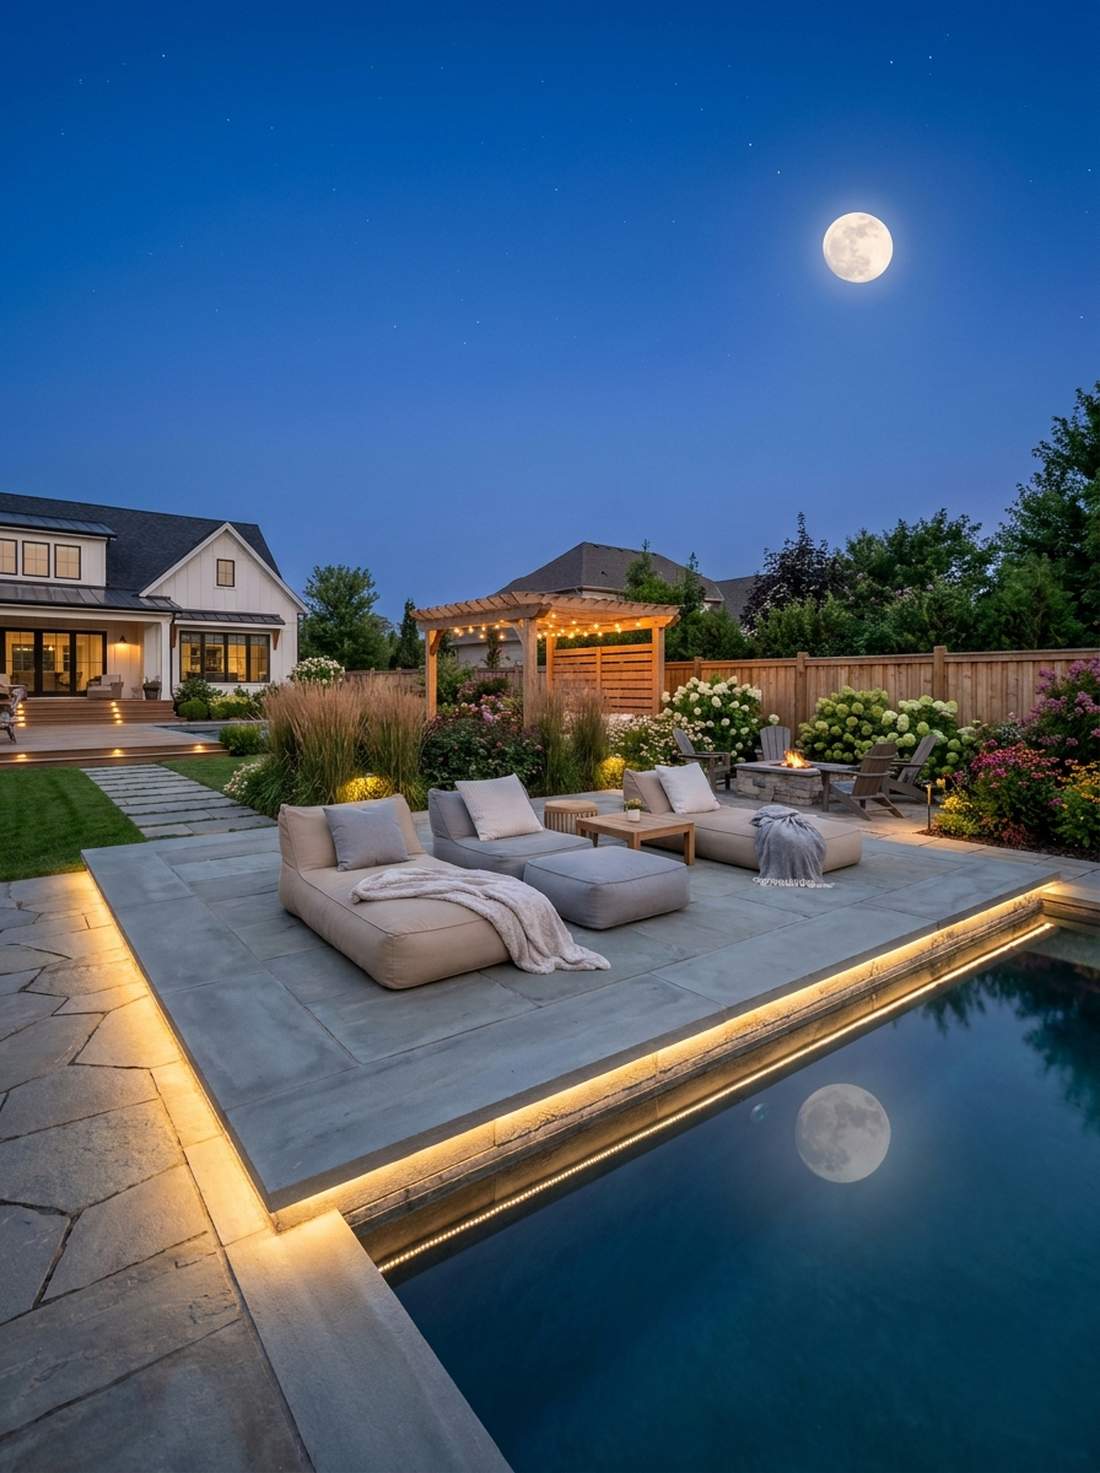
Creates a ridiculously romantic, flat expanse for nighttime observation. This massive sitting slab placement is highly recommended for positioning beside reflecting pools.
Using standard patio chairs ruins the natural aesthetic, but fitting several massive stone slabs tightly together to create a seamless floor makes this setup look far more expensive than it is. The smooth, elevated surface provides a clean, dry area for cushions while perfectly reflecting moonlight.
You can execute this luxury platform for roughly $150–$300.
- Key Materials: Massive flat stone slabs
- Vibe / Style: Romantic, expansive, luxurious
- Difficulty: Requires heavy machinery or crew
- Budget Breakdown: Large slabs: $250 | Base compaction: $40.
- Creator’s Tip: Position the platform facing southeast to catch the most dramatic moonrises.
- Smart Sourcing: Oversized smooth flagstone pallets and outdoor zen seating cushions.
37. Decorative Boulder Specimen
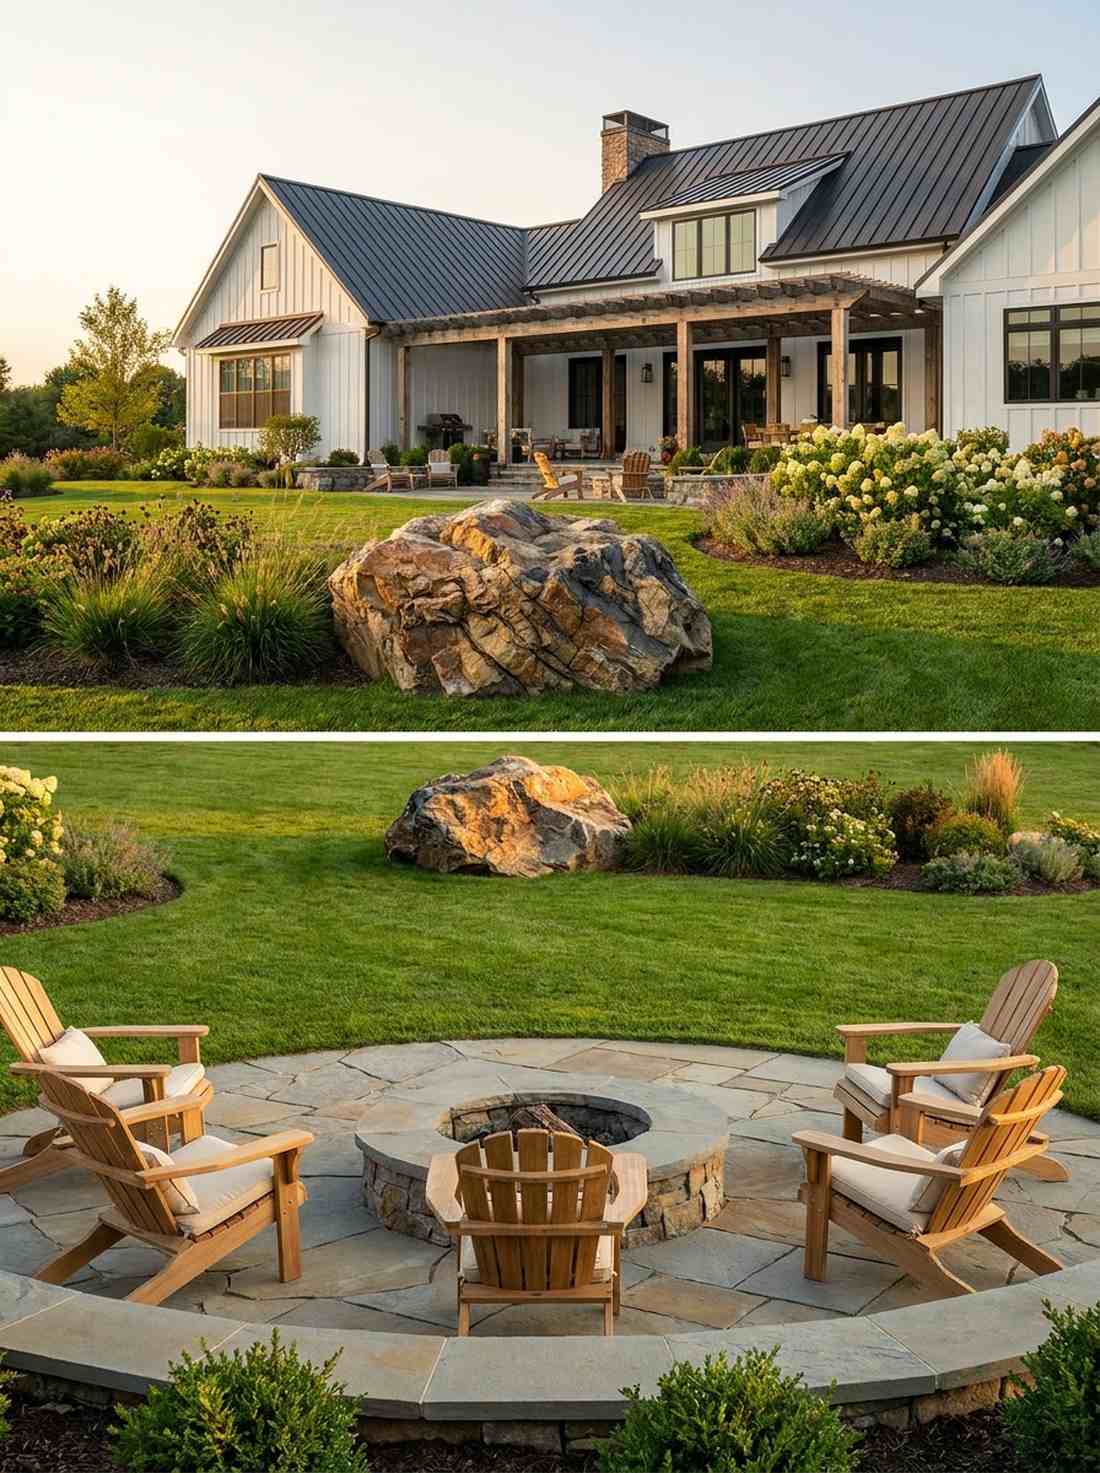
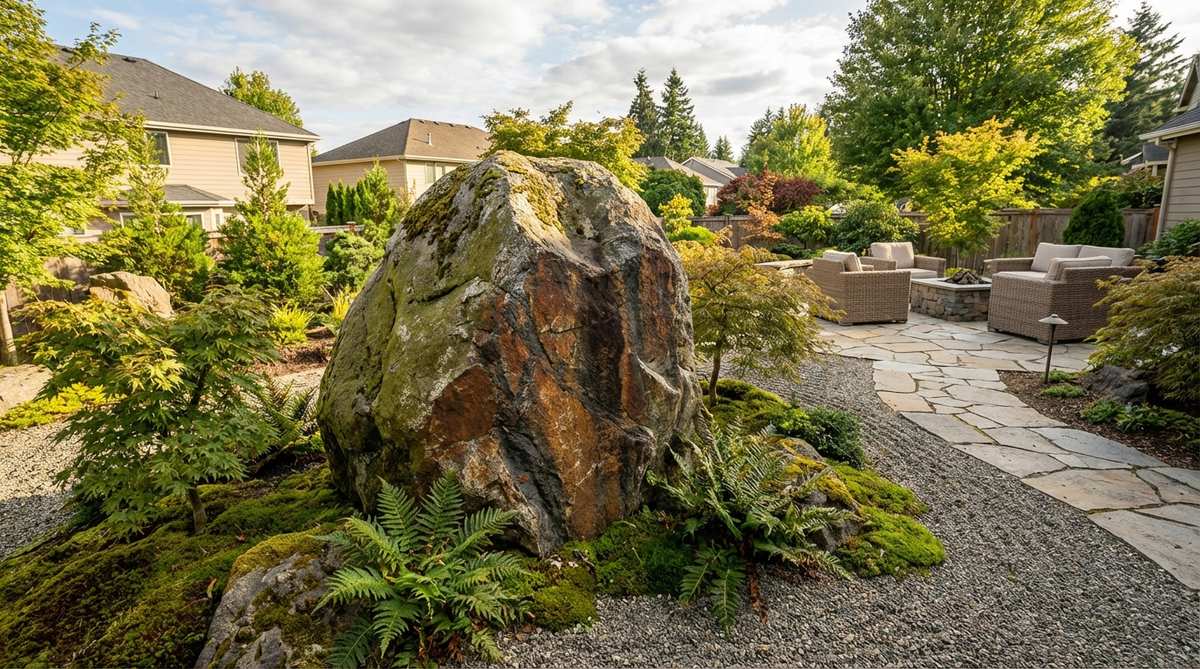
Commands absolute authority and drops jaws instantly. This singular focal point boulder acts as the unquestioned king of your entire landscaping design.
Scattering dozens of small rocks looks like a messy quarry, but investing in one spectacular boulder with crazy geological features gives a designer-level finish that anchors the yard. Burying one-third of this massive beast tricks the eye into thinking it has been resting there for millennia.
Budget around $200–$400 for a breathtaking centerpiece. Pin this to your major yard renovations board!
- Key Materials: One exceptional, massive boulder
- Vibe / Style: Dominant, anchoring, majestic
- Difficulty: Professional delivery usually required
- Budget Breakdown: Specimen boulder: $300 | Delivery fee: $80.
- Creator’s Tip: Identify the stone’s “face” (its most textured side) and point it directly at your main patio seating.
- Smart Sourcing: Premium faux-rock hollow landscape boulders and heavy duty landscape anchors.
38. Seasonal Marker Stone
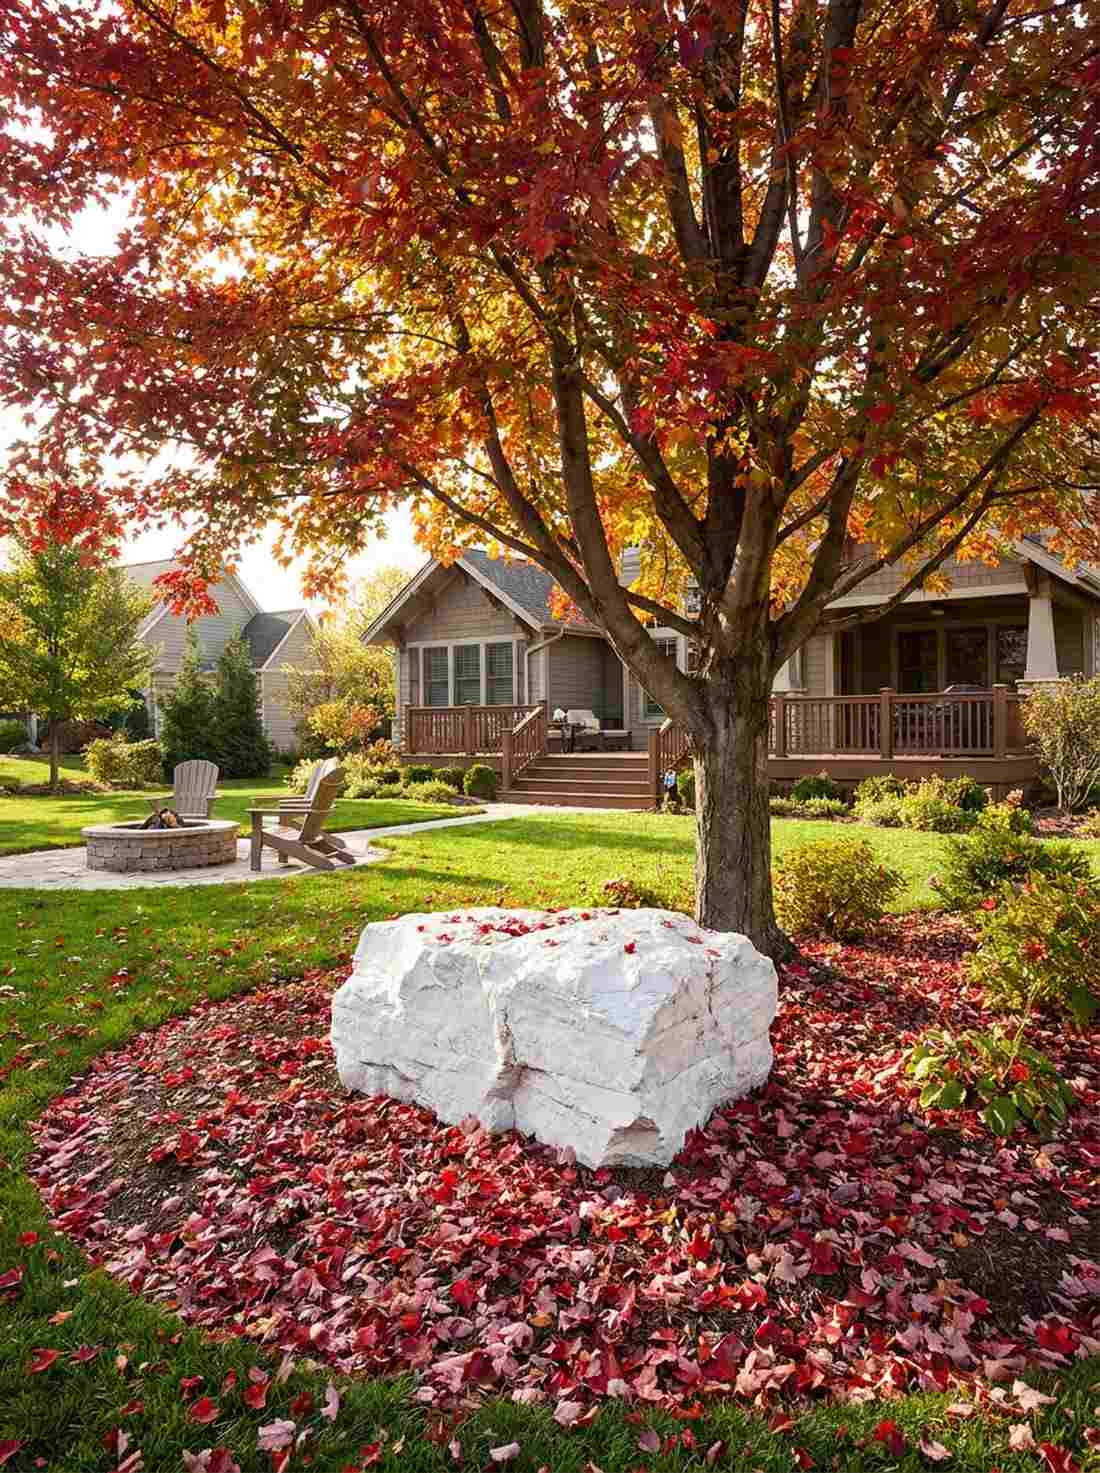
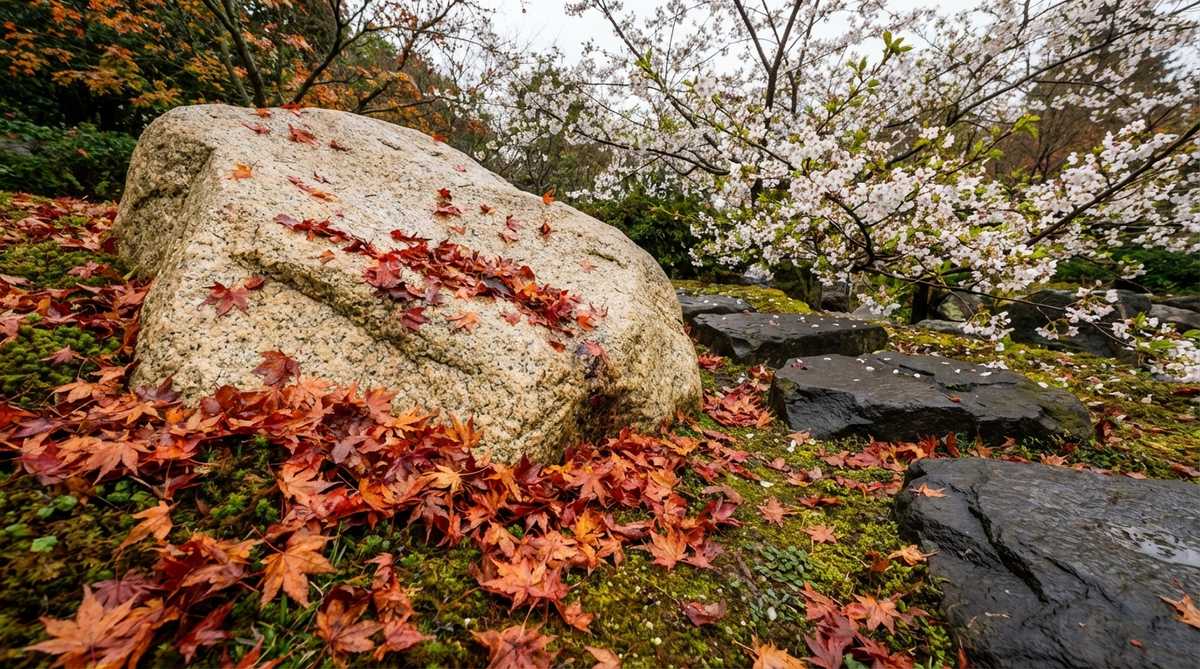
Brilliantly highlights the fleeting, poetic changes of the seasons. This strategically placed contrast stone is an absolute must beneath flowering or deciduous trees.
Most rocks just blend into the dirt, but placing a bright white stone directly where crimson maple leaves will fall guarantees that coveted “looks expensive but isn’t” result. This permanent anchor makes the seasonal pops of color look ten times more vibrant and intentional.
You can easily pull this off for around $25–$45. It’s a fast upgrade that completely changes the vibe.
- Key Materials: High-contrast medium boulder
- Vibe / Style: Poetic, changing, intentional
- Difficulty: Extremely easy
- Budget Breakdown: Contrast stone: $35 | Border mulch: $10.
- Creator’s Tip: Use dark basalt underneath light cherry blossoms, and pale limestone beneath dark autumn maples.
- Smart Sourcing: Bright white limestone chunks and dark polished basalt boulders.
39. Meditation Seat Stone
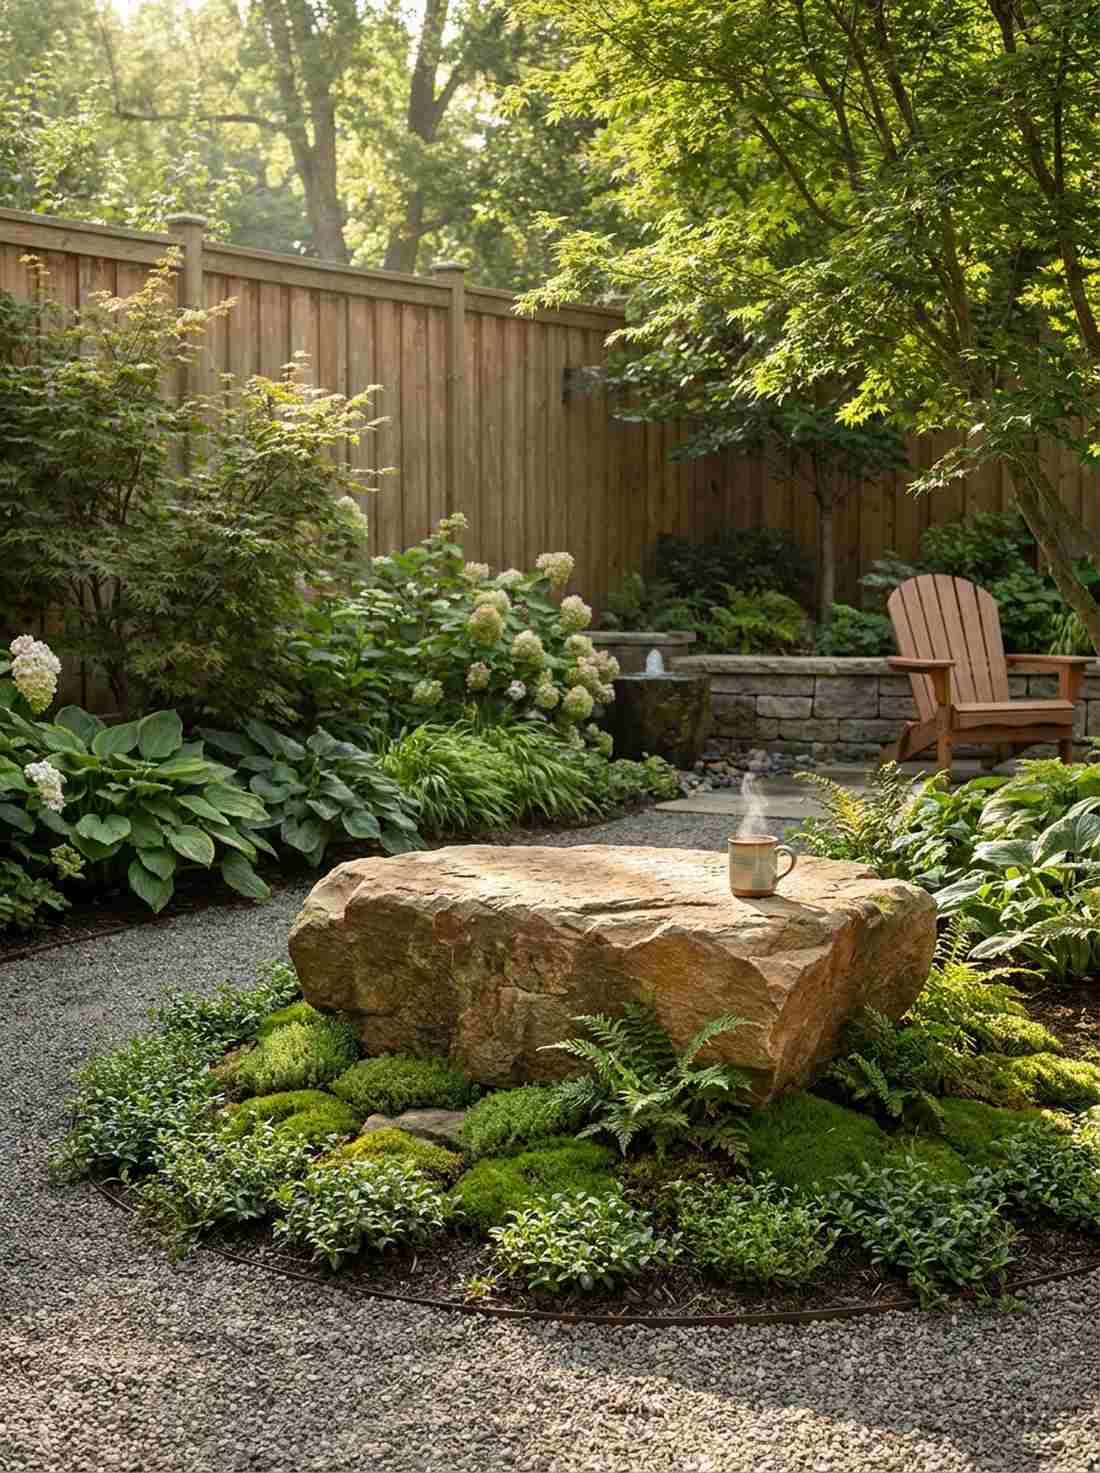

Offers a quiet, sturdy retreat hidden away from the world. This flat-topped sitting boulder perfectly equips a secluded garden corner for morning coffee.
Metal benches rust and look completely out of place in a zen space, whereas installing a naturally leveled boulder at knee-height completely bypasses the cheap amateur look. Surrounding the base with soft, high-quality fairy garden kits moss creates a welcoming, organic enclosure.
Expect to spend about $80–$130 for a comfortable, flat piece.
- Key Materials: Flat-topped boulder, low border plants
- Vibe / Style: Secluded, functional, sturdy
- Difficulty: Tricky to level perfectly
- Budget Breakdown: Sitting boulder: $100 | Base gravel: $20.
- Creator’s Tip: Use a bubble level on the top face before backfilling the dirt to ensure comfortable sitting.
- Smart Sourcing: Pre-leveled sandstone bench rocks and heavy-duty torpedo levels.
Most beginners ignore the edges of their garden… and it completely ruins the illusion. Look at this fix:
Border Stones and Transitional Elements
Border stones define garden areas, contain materials, and create transitions between different design zones. These functional elements contribute to overall aesthetic coherence when properly selected and placed.
40. Formal Cut Stone Edging
Delivers razor-sharp, geometric precision that looks incredibly rich. This rectangular stone border layout is highly recommended for containing wild gravel walkways.
Flimsy plastic edging warps and pops out of the ground, but standing precisely cut rectangular stones on edge makes this setup look far more expensive than it is. Burying them halfway locks in your japanese garden gravel permanently while providing a crisp, ceremonial frame.
You can execute this sharp border for roughly $60–$100 depending on path length. Save this for your path edging ideas!
- Key Materials: Cut rectangular stones, trenching tools
- Vibe / Style: Rigid, ceremonial, precise
- Difficulty: Heavy trench digging
- Budget Breakdown: Cut stones: $80 | Base sand: $15.
- Creator’s Tip: Use a rubber mallet to tap the stones perfectly flush with your string line.
- Smart Sourcing: Pre-cut granite edging blocks (bulk pack) and heavy duty rubber mallets.
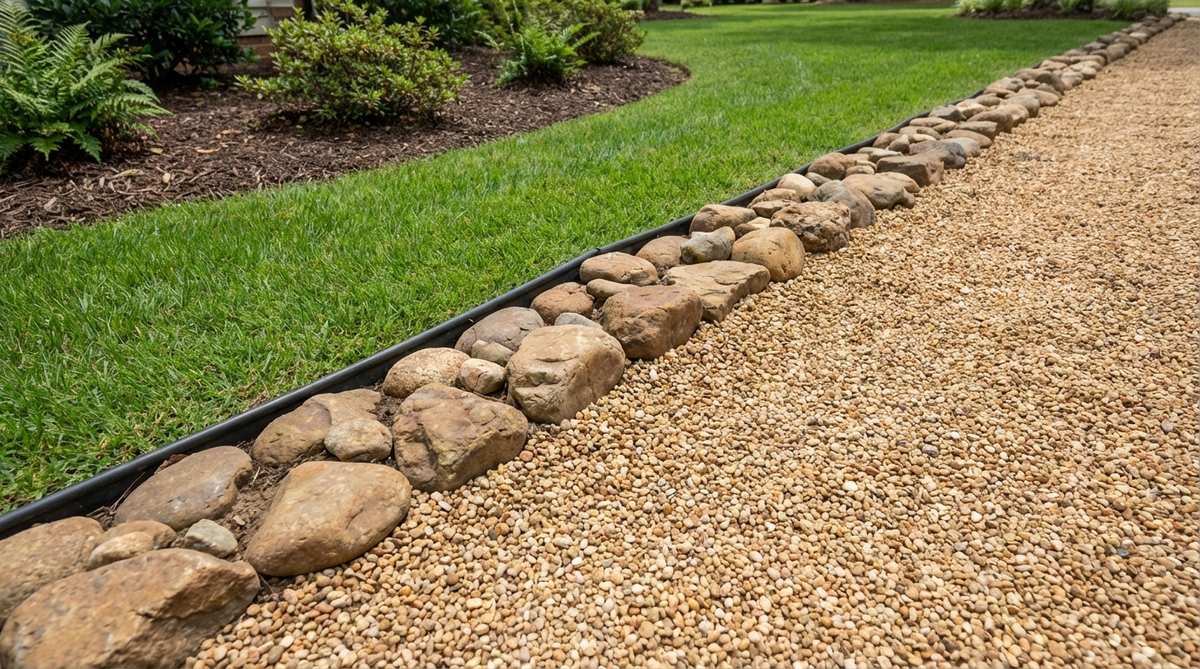
41. Natural Stone Curbing
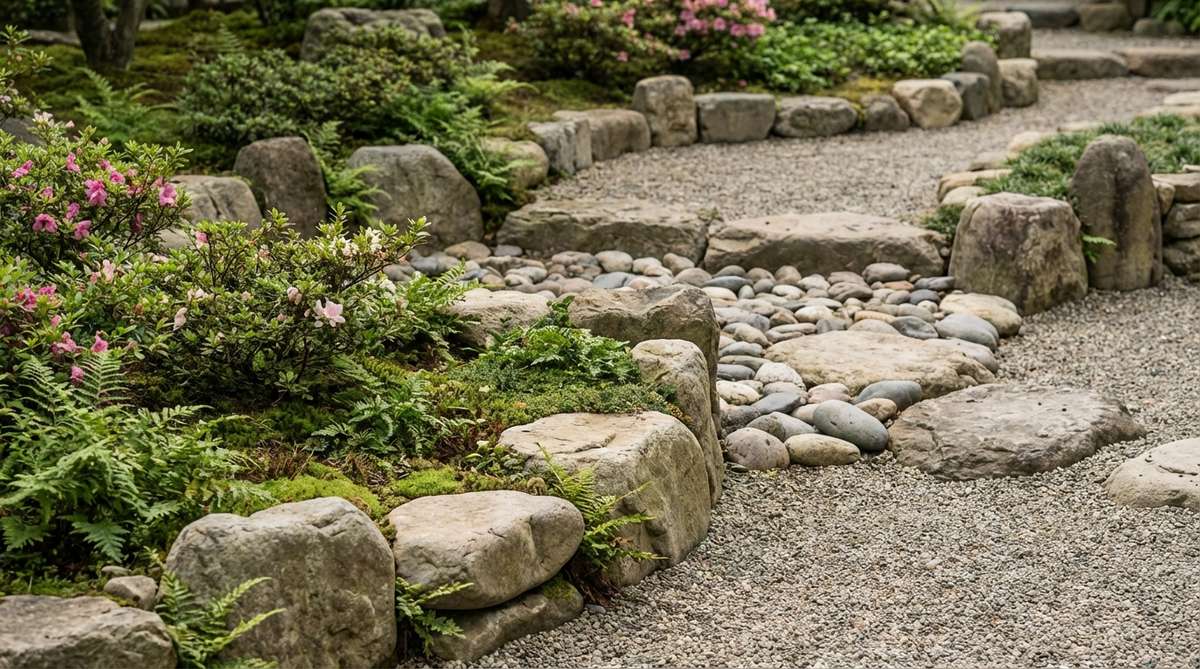
Emanates a gentle, rolling softness that frames flower beds beautifully. This uncut fieldstone edging technique completely softens harsh transitions in your yard.
Perfectly straight bricks can look overly rigid next to organic plants, but weaving irregular river rocks in a gentle curve gives a designer-level finish that feels grown, not built. Allowing creeping thyme or moss to spill over these stones hides the joints and integrates the design effortlessly.
Budget around $40–$70. It’s a fast upgrade that completely changes the vibe.
- Key Materials: Irregular river rocks or fieldstones
- Vibe / Style: Soft, organic, woven
- Difficulty: Easy puzzle-piece matching
- Budget Breakdown: River rocks: $50 | Creeping thyme: $20.
- Creator’s Tip: Dig a shallow trench so the rocks sit flush with the lawn, allowing your mower wheel to roll right over them.
- Smart Sourcing: Medium sized polished river rocks (bulk pack) and creeping thyme seed mats.
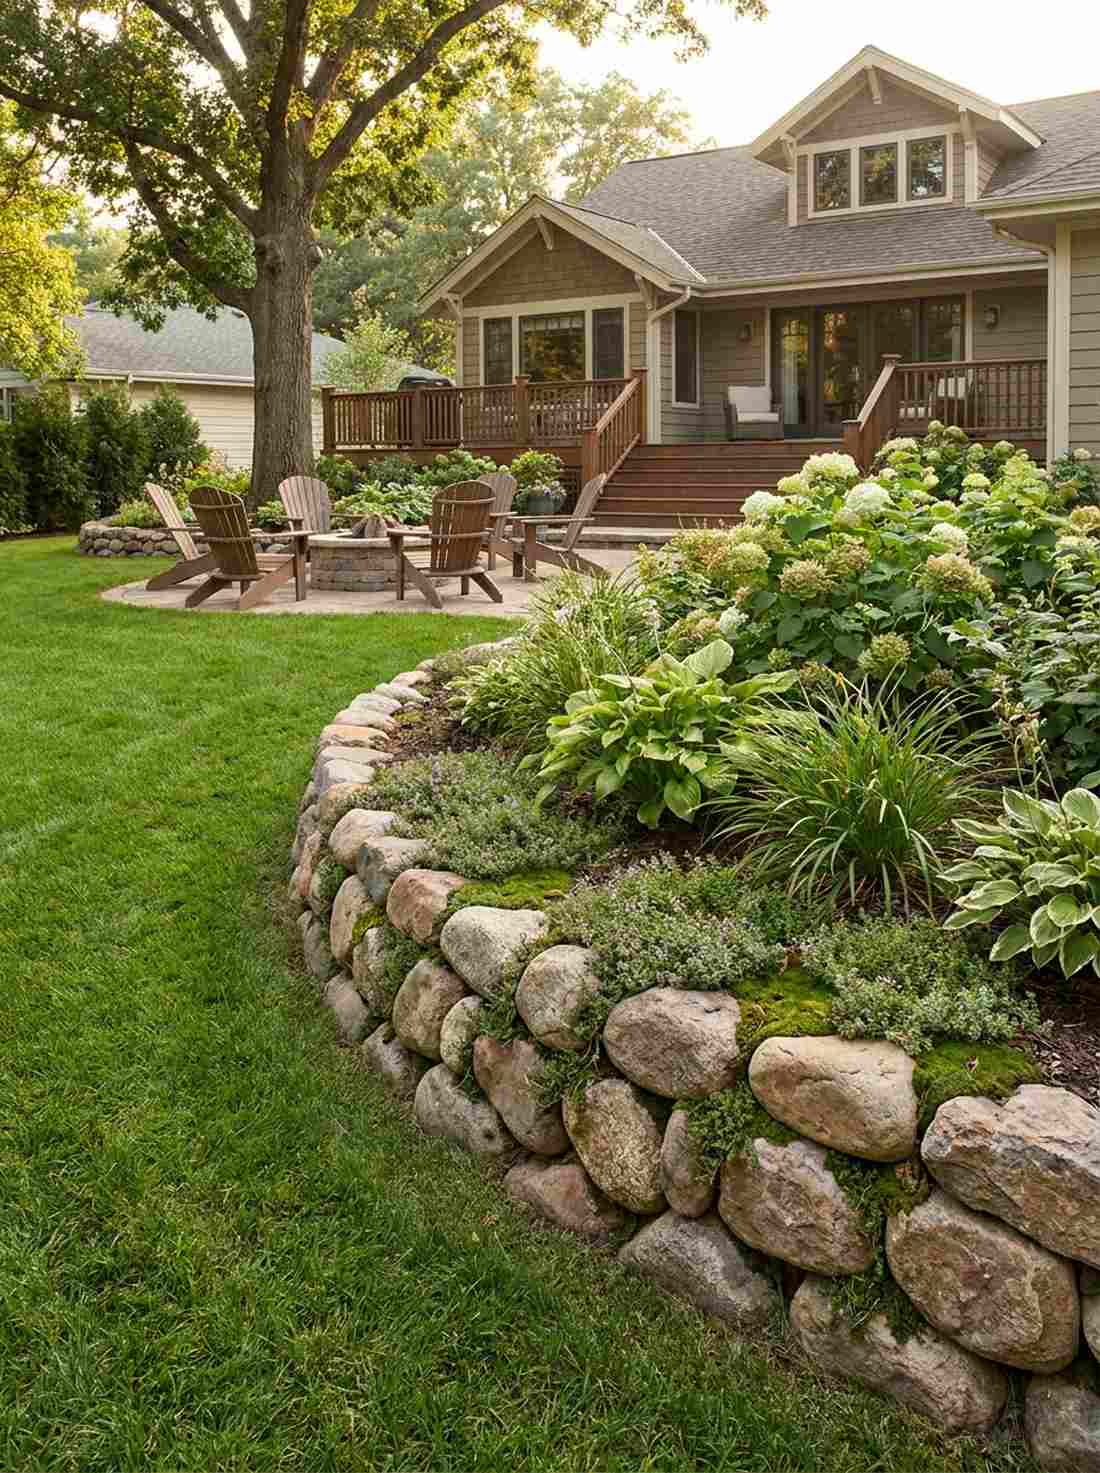
42. Raised Bed Retaining Wall
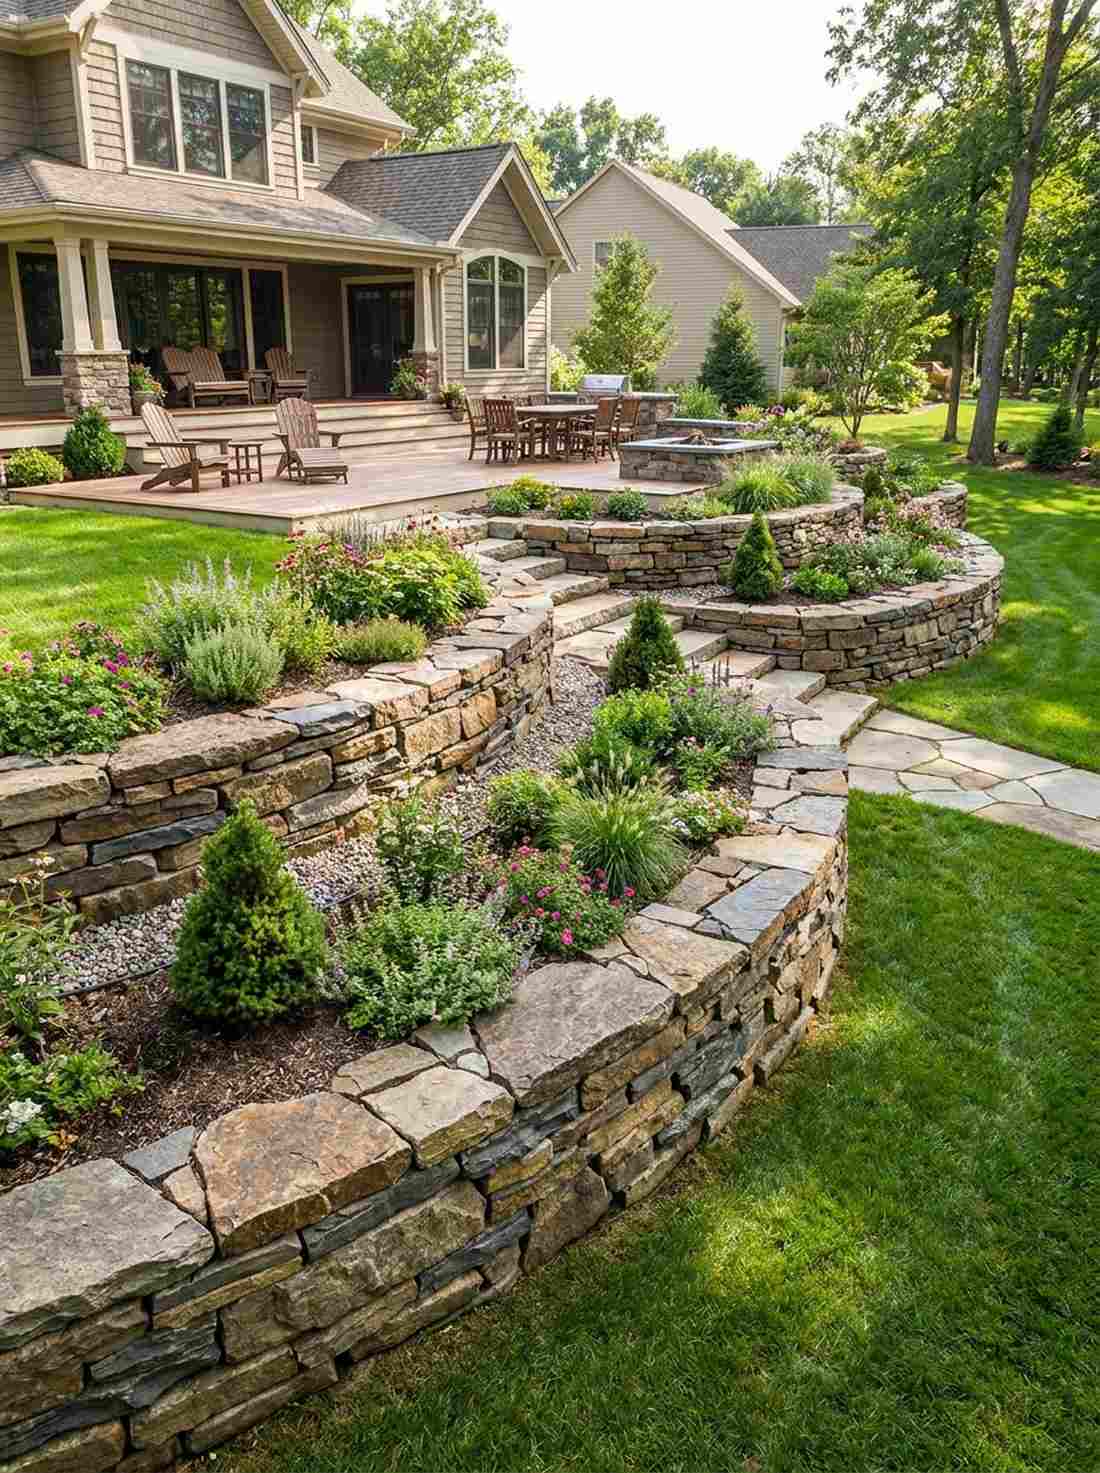
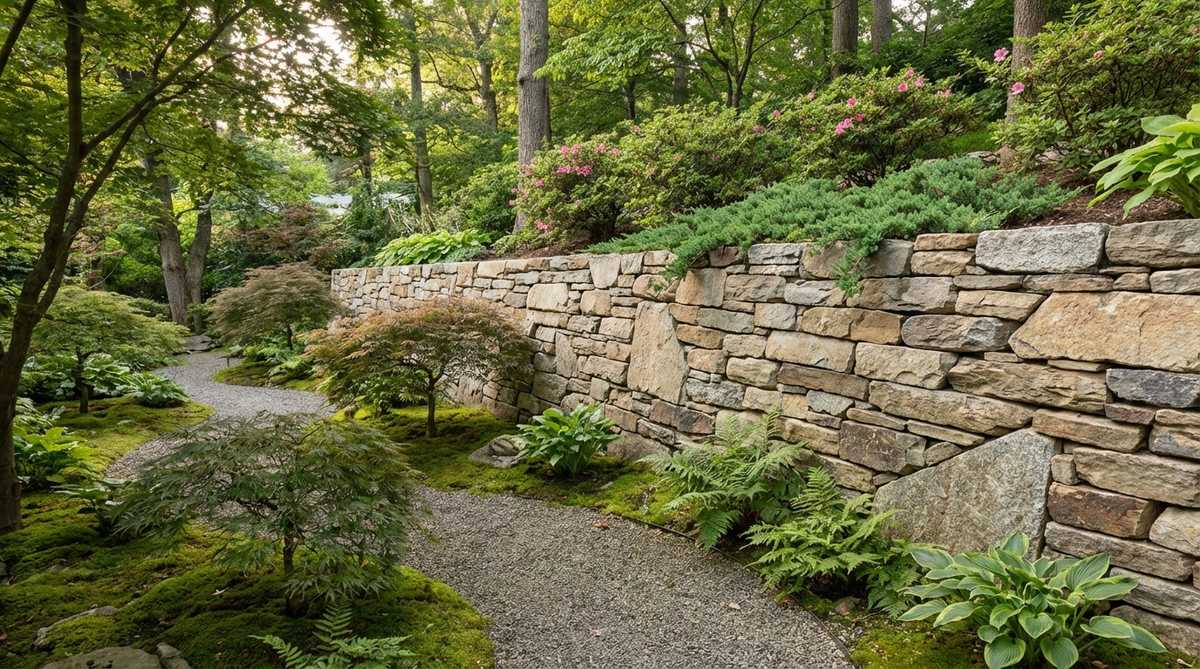
Packs massive, sturdy texture into elevated planting zones. This dry-stacked stone wall arrangement is absolutely perfect for terracing a sloping yard.
Wooden sleeper beds rot away in a few years, but stacking flat stones without mortar completely bypasses the cheap amateur look. By carefully interlocking the pieces and tilting the wall slightly backward, you create a rustic, incredibly durable structure that houses premium miniature garden supplies.
You can easily pull this off for around $120–$200 for a small wall. Pin this to your structural garden board!
- Key Materials: Flat stacking stones, drainage gravel
- Vibe / Style: Rugged, durable, terraced
- Difficulty: Physically demanding puzzle
- Budget Breakdown: Stacking stones: $160 | Backfill gravel: $30.
- Creator’s Tip: Always put a thick layer of crushed gravel behind the wall to prevent water pressure from blowing it out.
- Smart Sourcing: Dry-stack slate wall kits and heavy-duty drainage gravel bags.
43. Threshold Transition Stones
Acts as a bold, visual punctuation mark between garden rooms. This distinctive marker stone placement subconsciously prepares visitors for a change in scenery.
Blurring materials together makes a yard look messy, but dropping one massive, flat contrast stone where a path hits a patio guarantees that coveted “looks expensive but isn’t” result. This singular change in texture commands attention and gives rhythm to the walking journey.
Expect to spend about $30–$50 for one premium slab.
- Key Materials: One large, contrasting flat stone
- Vibe / Style: Punctuation, rhythm, announcement
- Difficulty: Very easy
- Budget Breakdown: Threshold stone: $40 | Base prep: $10.
- Creator’s Tip: Choose a stone that is a completely different color than the path to make the transition obvious.
- Smart Sourcing: Oversized natural stone steppers and pathway transition edging kits.
44. Gravel Containment Border
Delivers the ultimate clean line while secretly fighting back weeds. This hidden edge stone barrier is the smartest way to keep your pristine gravel in place.
Exposed plastic edging ruins the zen aesthetic instantly, but topping buried metal containment strips with a row of small, color-matched stones makes this setup look far more expensive than it is. It looks entirely intentional while providing bulletproof structural utility.
This hybrid border will cost roughly $50–$80. Save this genius landscape hack!
- Key Materials: Metal edging, small cover stones
- Vibe / Style: Clean, hidden, structured
- Difficulty: Moderate trenching required
- Budget Breakdown: Metal edging: $40 | Cover stones: $30.
- Creator’s Tip: Match the cover stones to your gravel color to make the containment line virtually invisible.
- Smart Sourcing: Heavy-duty aluminum edging rolls and color-matched decorative pebbles.
Before you finish your yard, you absolutely must bridge the gap between moss and path like this…
45. Moss-to-Gravel Transition
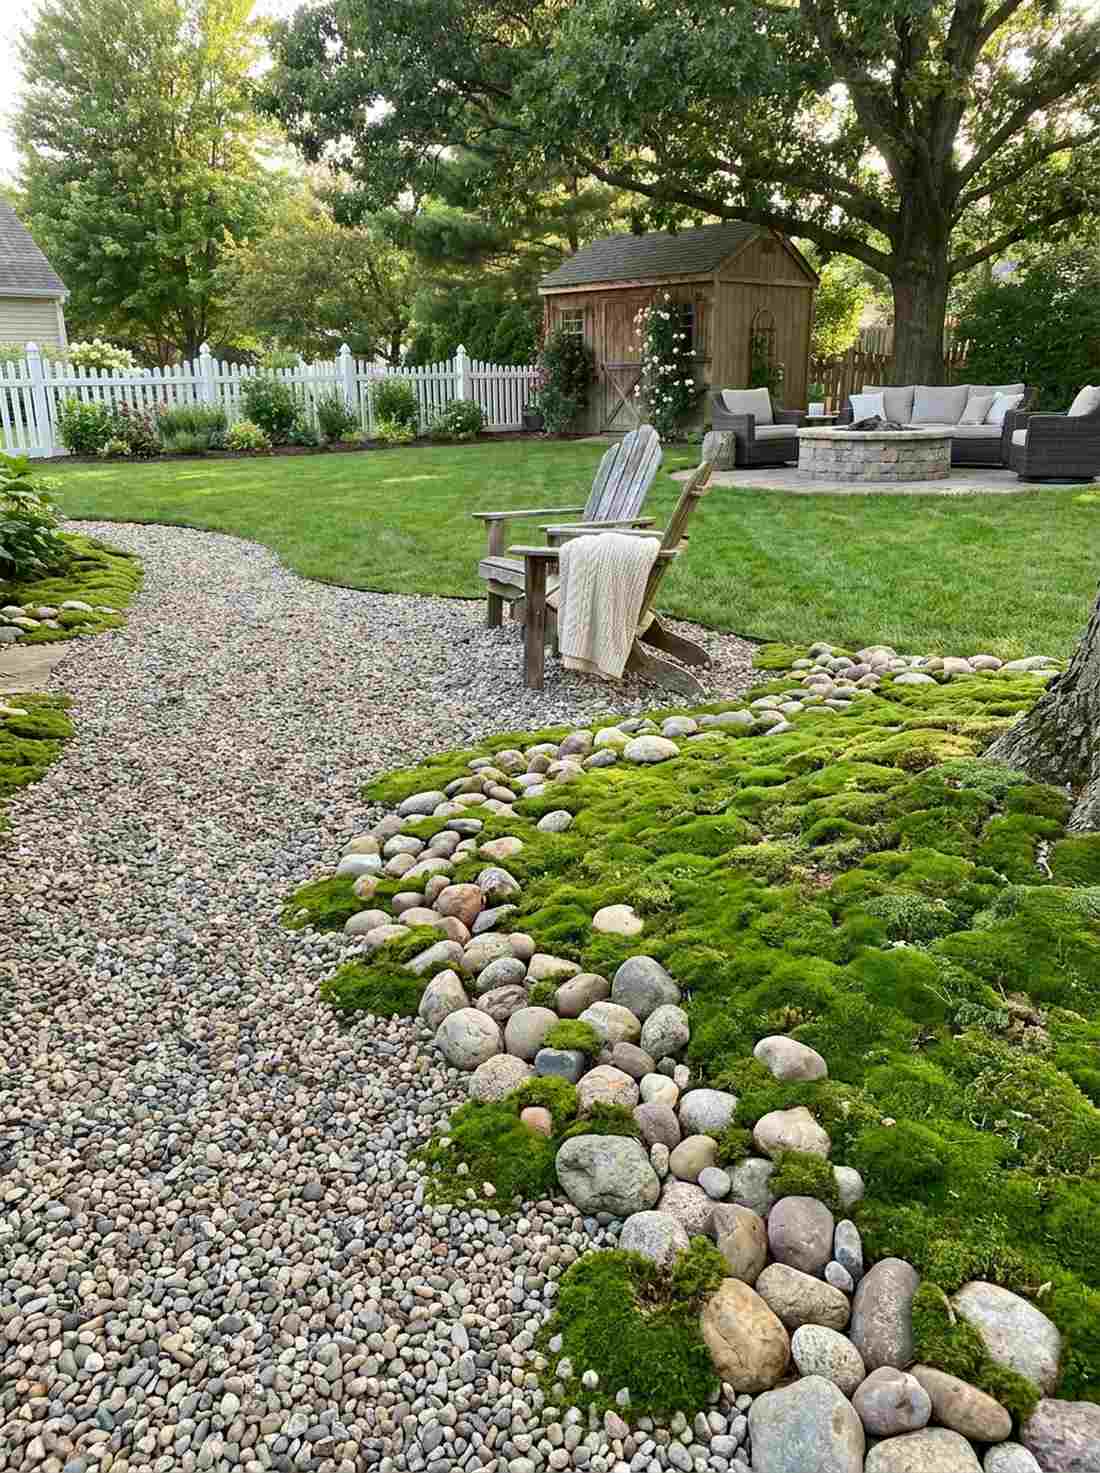
Creates a shockingly beautiful, slowly evolving living boundary. This integrated stone blending technique is highly recommended for softening hardscape edges.
Hard lines between moss and gravel look unnatural, but scattering individual stones across the boundary line gives a designer-level finish that bridges the two zones perfectly. As the moss slowly colonizes the rocks, the aged, weathered appearance becomes a breathtaking focal point.
You can execute this integration for practically free using leftover materials. Highly recommended for a quick weekend win.
- Key Materials: Mixed small stones, live moss
- Vibe / Style: Blended, aged, evolving
- Difficulty: Requires patience for moss growth
- Budget Breakdown: Scrap stones: $0 | Moss misting bottle: $10.
- Creator’s Tip: Place the stones firmly into the soil before the gravel hits them so they don’t slide around.
- Smart Sourcing: Live moss terrarium starter kits and fine misting spray bottles.
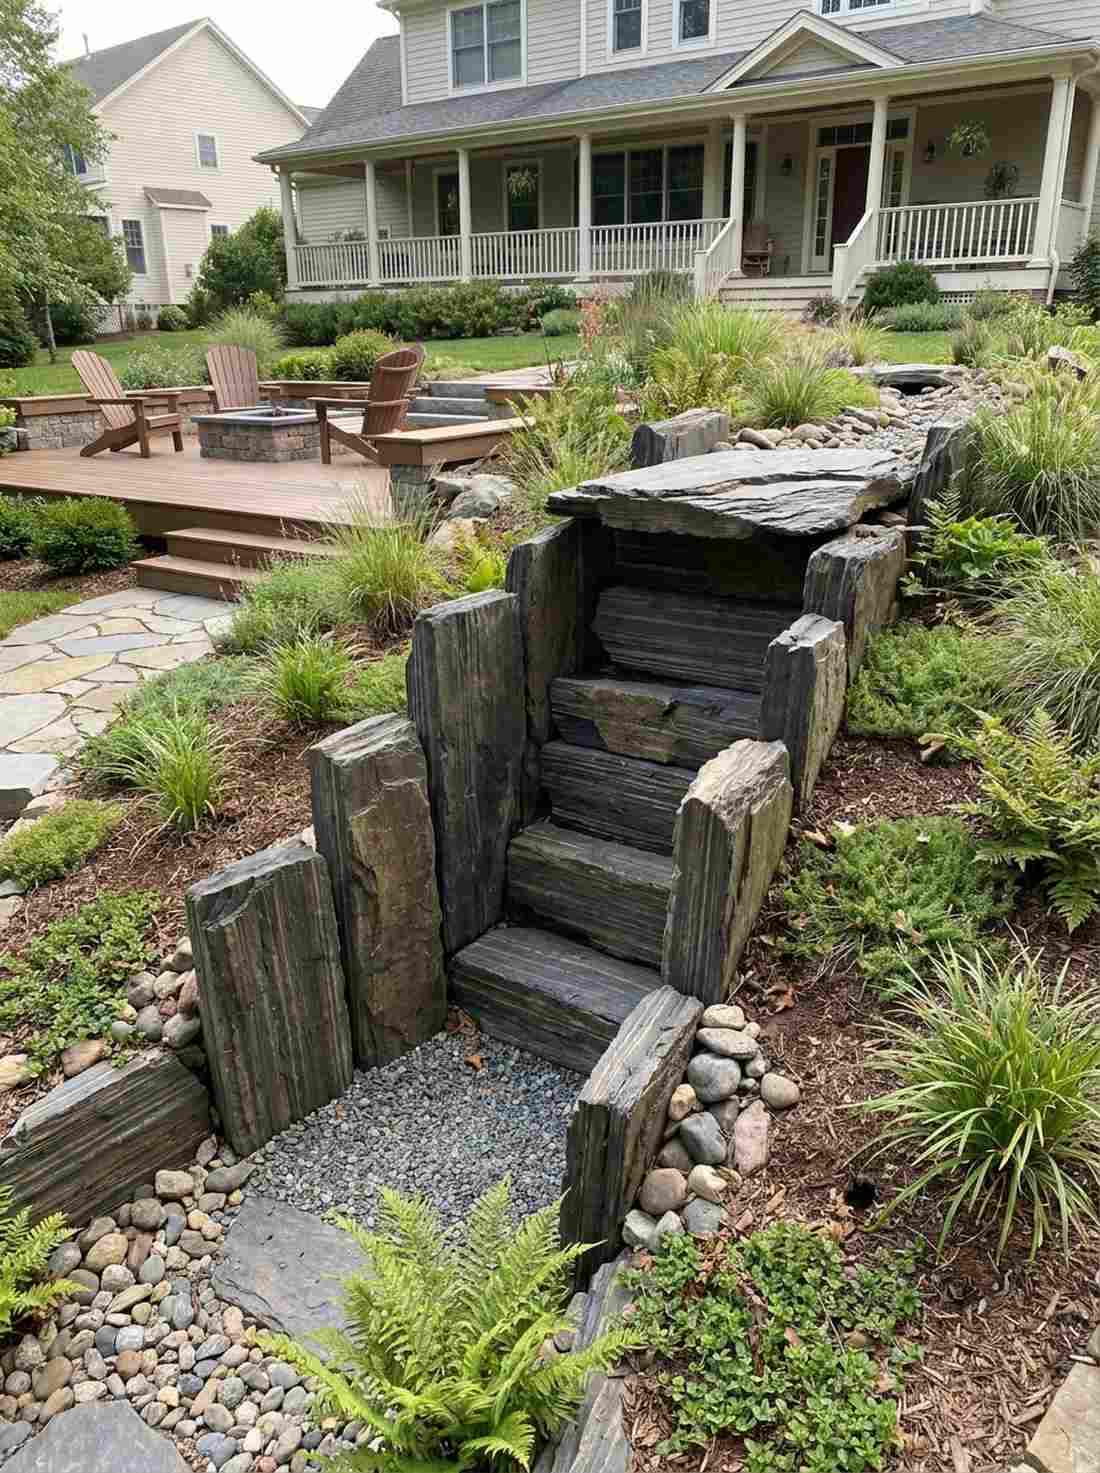
46. Stair Step Risers
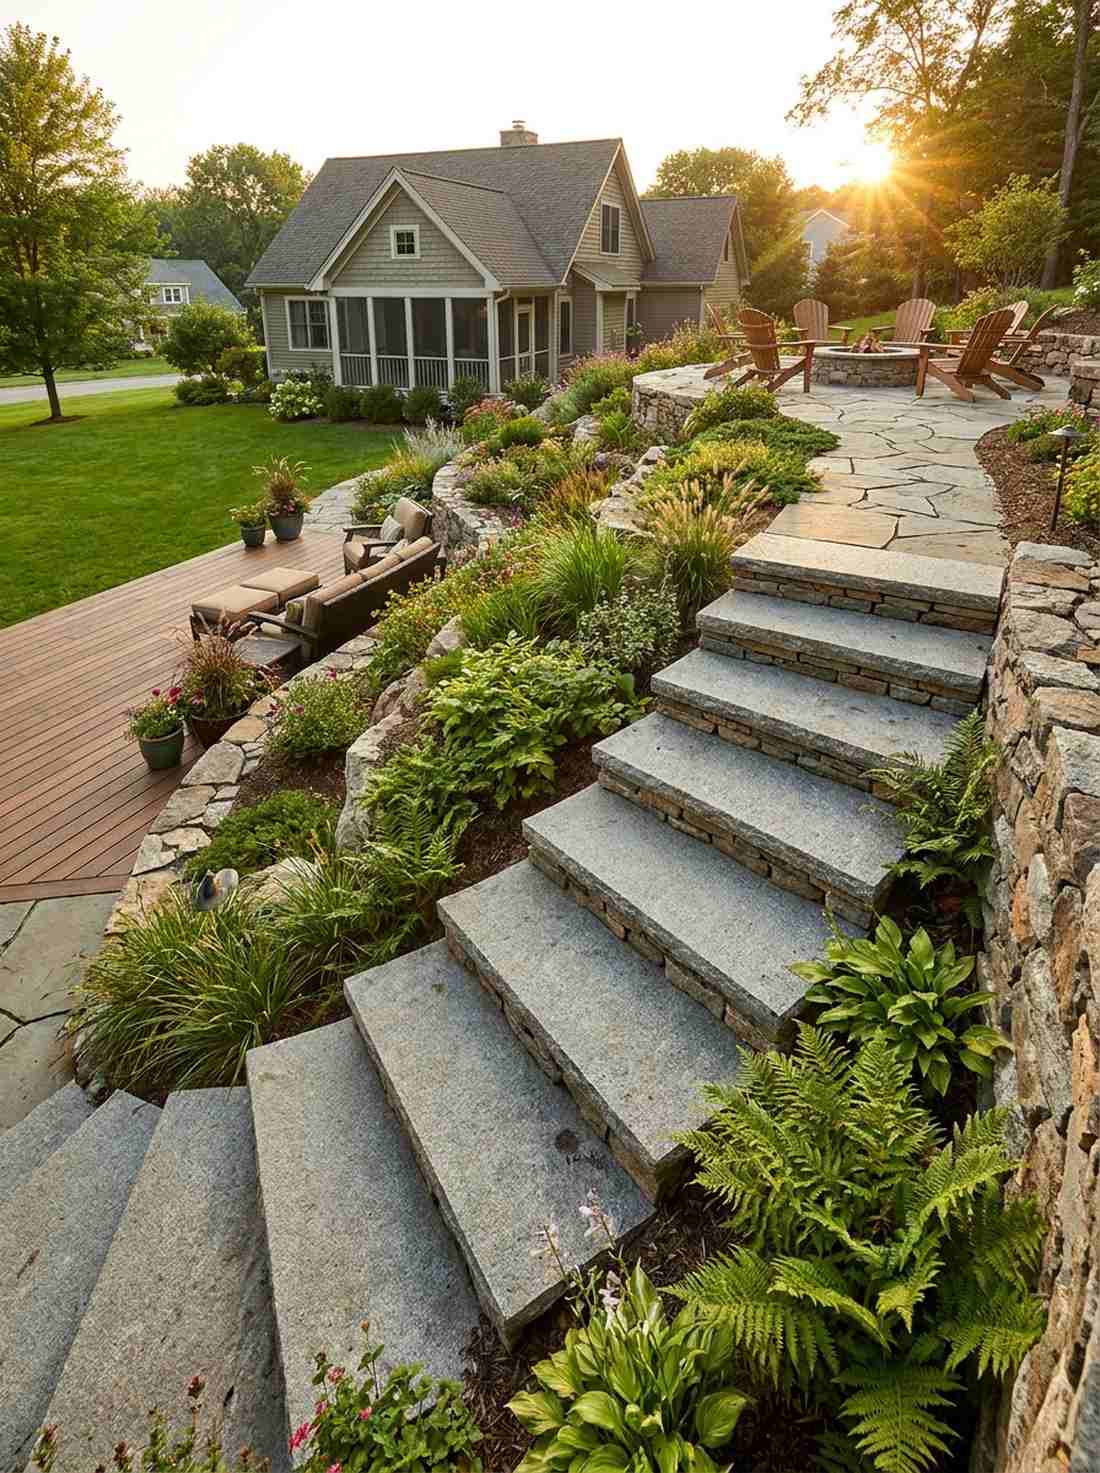
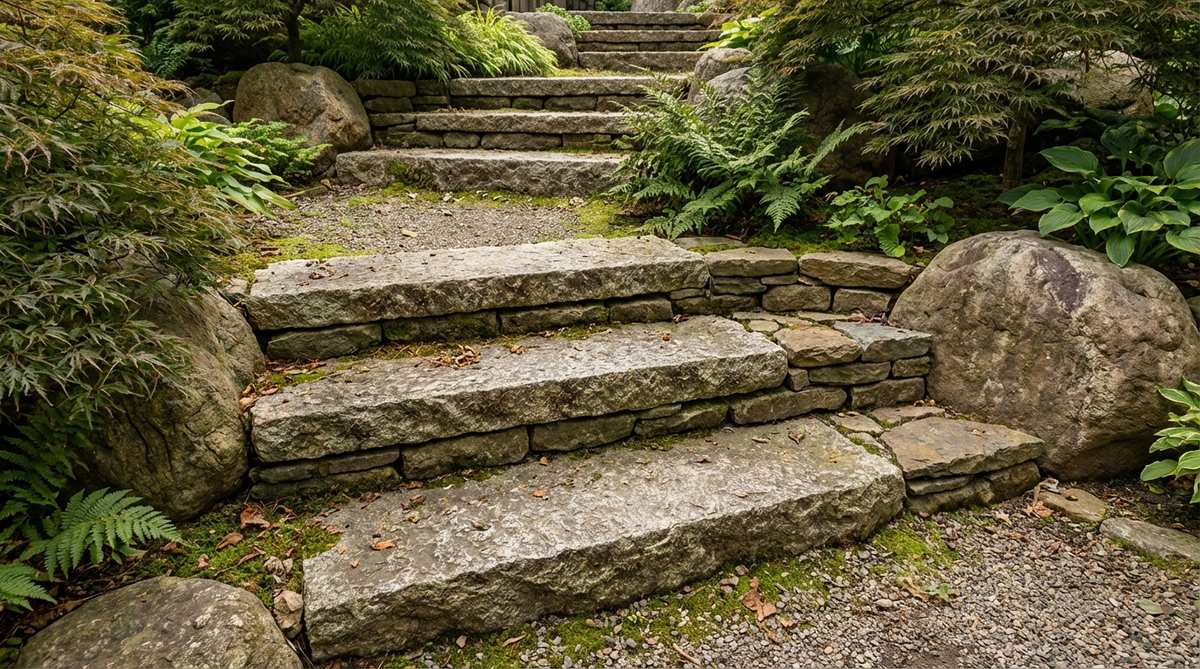
Transforms a slippery, dangerous slope into a majestic climbing experience. This stone slab stair layout injects massive character into backyard hills.
Pre-cast concrete steps look terribly generic, but stacking small rough stones for risers beneath massive granite treads completely bypasses the cheap amateur look. Over time, the weather-worn surfaces develop a non-slip texture that perfectly balances brutal utility with organic beauty.
Budget around $150–$300 depending on the elevation change. Pin this if you have a sloped yard!
- Key Materials: Thick slab treads, small stacking risers
- Vibe / Style: Grand, adventurous, secure
- Difficulty: Heavy lifting and careful leveling
- Budget Breakdown: Treads: $200 | Riser stones: $50.
- Creator’s Tip: Overhang the tread slab by one inch over the risers to cast a beautiful shadow line.
- Smart Sourcing: Thick non-slip granite stair treads and high-strength landscape block adhesive.
47. Decorative Cobblestone Fill
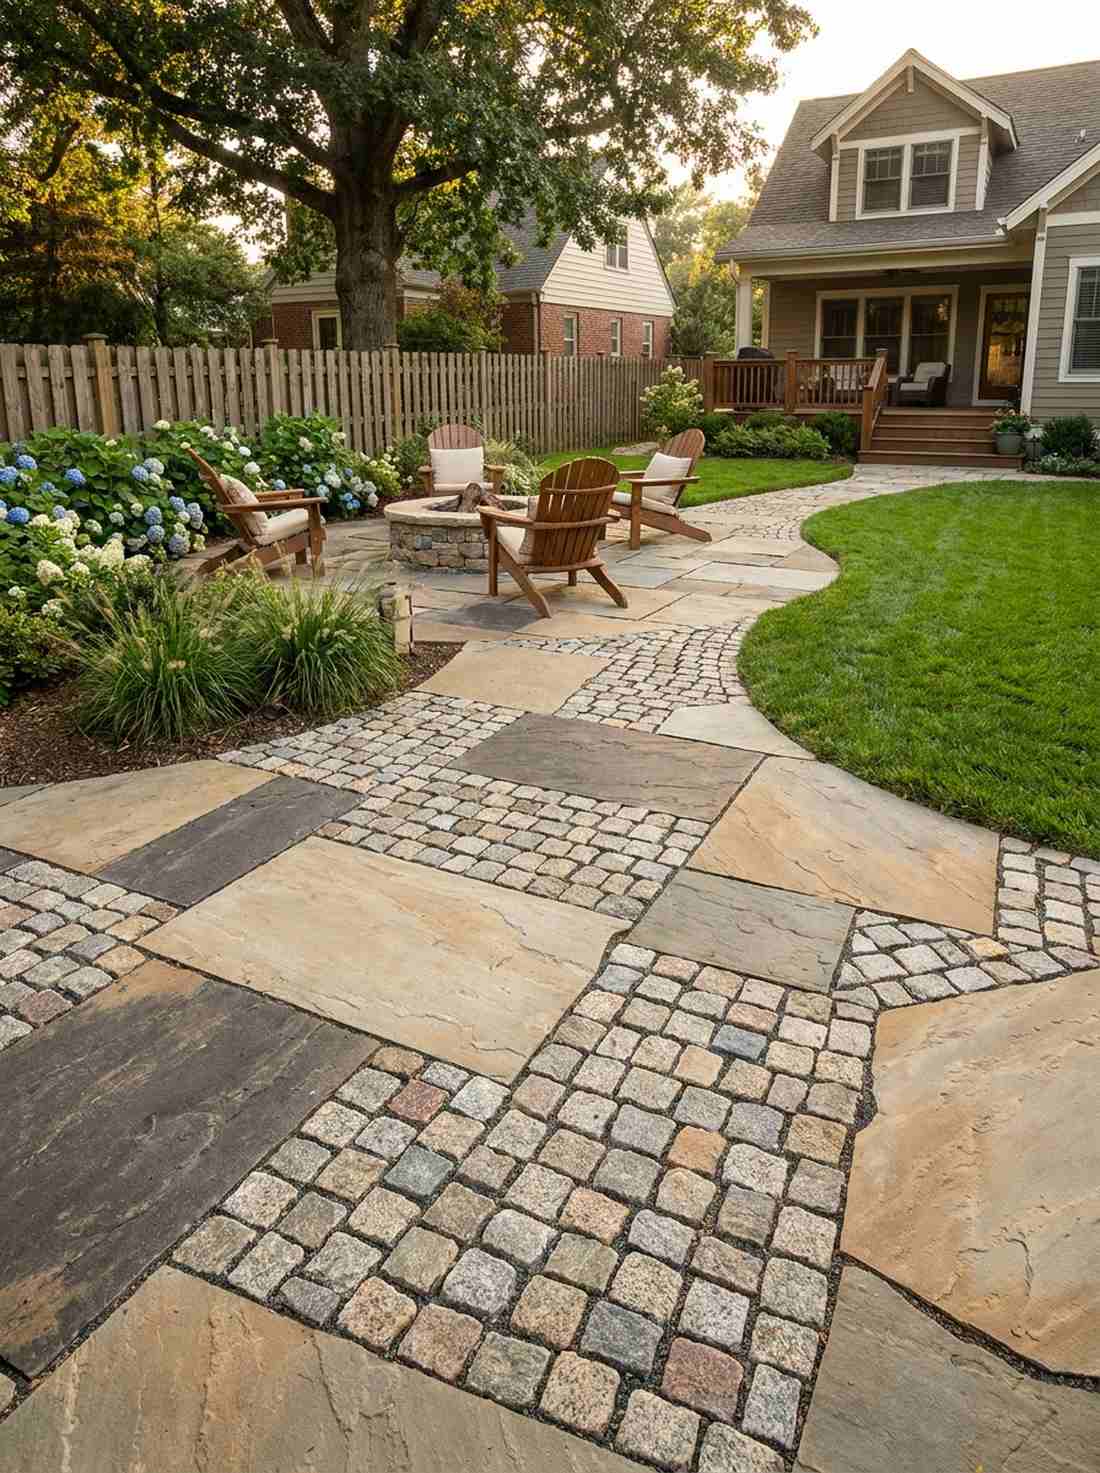
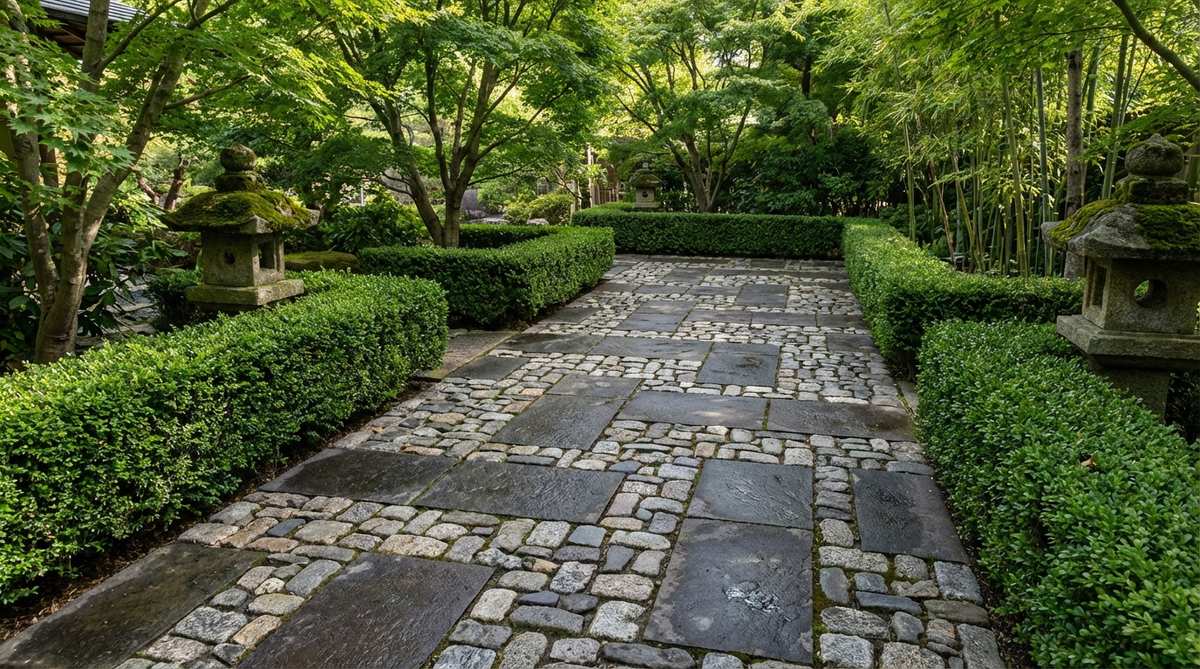
Packs an insane amount of rich, visual texture into tiny gaps. This tightly fitted cobble technique is absolutely perfect for filling the awkward spaces between large slabs.
Pouring cheap concrete between your expensive pavers ruins the entire project, but tightly packing varied cobblestones into those joints guarantees that coveted “looks expensive but isn’t” result. This semi-formal styling softens rigid borders and uses high-grade miniature garden supplies to lock everything in place.
You can easily pull this off for around $40–$75. It’s a fast upgrade that completely changes the vibe.
- Key Materials: Small uniform cobblestones, binding sand
- Vibe / Style: Textured, intricate, semi-formal
- Difficulty: Tedious fitting work
- Budget Breakdown: Cobblestones: $50 | Polymeric sand: $20.
- Creator’s Tip: Sweep polymeric sand into the tiny joints and mist with water to lock the cobbles rock-solid.
- Smart Sourcing: Tumbled granite cobblestone packs and polymeric jointing sand.
Transform Your Garden with Authentic Stone Placement
These 47 japanese garden stones layouts prove that you don’t need a massive budget to achieve a premium aesthetic. By using these exact blueprints to avoid cheap-looking symmetrical grids and instead embracing smart, productized sourcing, you instantly elevate your outdoor space. Whether you’re dropping a simple $40 UV-coated resin feature or completely revamping a walkway with pre-cut granite slabs, focus on asymmetry and deep burial techniques. Pick one of these 47 setups this weekend, grab the right starter kits, and watch your yard transform into a high-end sanctuary.
Frequently Asked Questions
What type of gravel is best for Japanese garden pathways?
Crushed granite sized between 3-8mm is the absolute gold standard if you plan to rake patterns, as the angular edges lock together to hold designs. For simple walking paths, sourcing bulk pack 10-14mm pea gravel is far more comfortable and prevents the stones from migrating into your lawn. Upgrading to a premium white quartz completely brightens shaded areas and instantly gives that expensive courtyard aesthetic.
How far apart should stepping stones be placed in a Japanese garden?
You should place stepping stones 18-24 inches apart from center to center to accommodate a natural stride, but strict uniformity looks cheap. To achieve a high-end designer look, intentionally vary the spacing—stretching some to 26 inches and tightening others to 15 inches. This brilliantly forces visitors to slow down and notice the premium miniature garden supplies and moss you’ve planted along the edges.
Should Japanese garden rocks be buried or placed on top of the ground?
Never place rocks flat on the ground; it makes them look like temporary, unstable props. You must bury at least one-third of the rock’s base into the soil so it appears to have grown from the earth over centuries. Using heavy-duty landscape trenching shovels to dig proper base holes ensures structural safety and guarantees that coveted, expensive geological look.
Can I use flagstone instead of traditional Japanese stepping stones?
Yes, but cheap, thin flagstone will crack and ruin the zen aesthetic. If you want a premium hybrid look, you must use pieces that are at least 3 inches thick with naturally tumbled edges. Space them widely apart rather than grouting them together, and fill the wide gaps with creeping thyme seed mats or dark gravel to perfectly adapt Western materials to high-end Japanese design principles.
How many rocks should be in a Japanese garden arrangement?
Always use odd numbers—specifically 3, 5, or 7 rocks per cluster—because even numbers create rigid, unnatural symmetry that looks like a cheap commercial plaza. A single, massive faux-stone landscape boulder can act as a spectacular focal point, while a classic 3-stone triad anchors the entire yard. The secret to making it look expensive is ensuring no three stones ever form a perfectly straight line.