Elevating your landscape with pea gravel gardens delivers designer-level aesthetics instantly. Discover exact material breakdowns and layout tricks for high-end permeability. Achieve that luxury outdoor finish on a realistic weekend budget.
Design Snapshot Key Principles
- Superior Drainage: Rounded stones allow water to pass through freely, preventing pooling and protecting plant roots from rot
- Comfortable Texture: Smooth, pea-sized stones feel softer underfoot than angular gravel and create a natural, organic aesthetic
- Easy Installation: Pea gravel fills any shape with minimal tools, offering design flexibility for custom layouts and borders
- Low Maintenance: Unlike organic mulches, pea gravel doesn’t decompose and hides dirt while suppressing weed growth effectively
Pathways & Walkways With Natural Flow
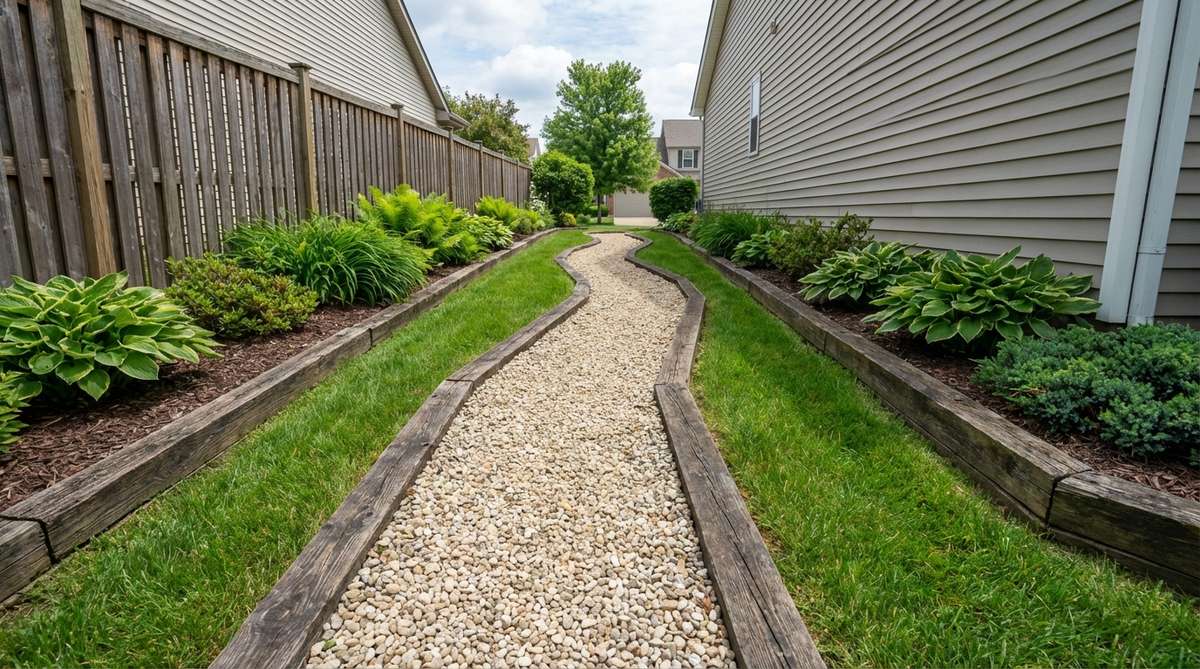
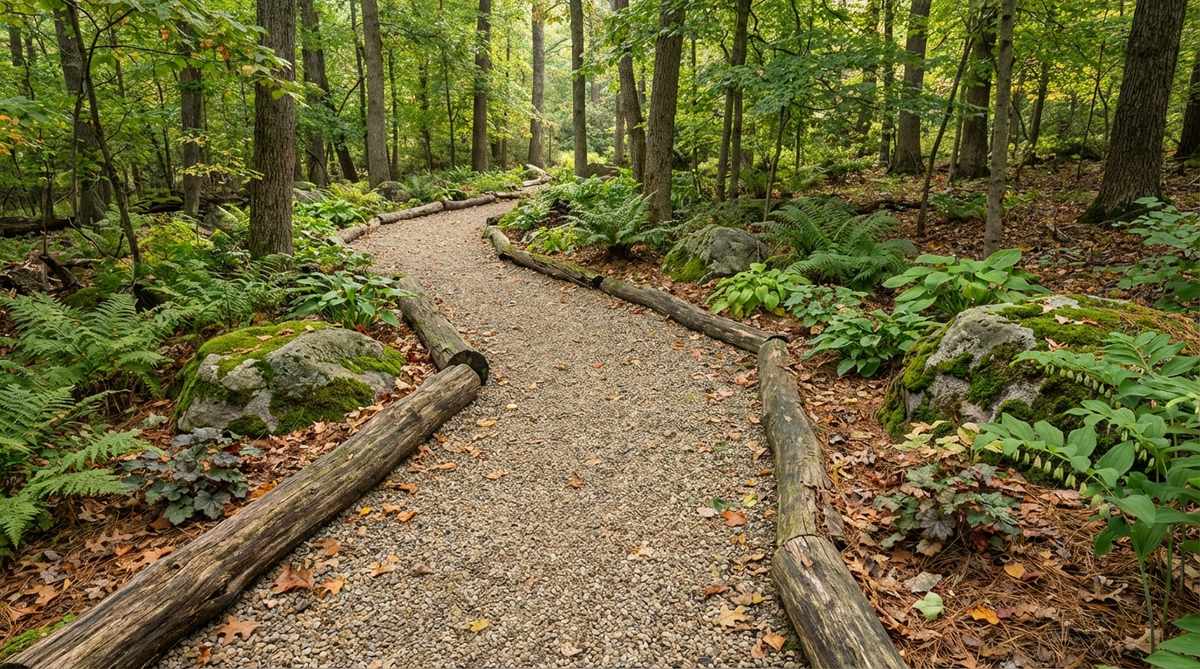
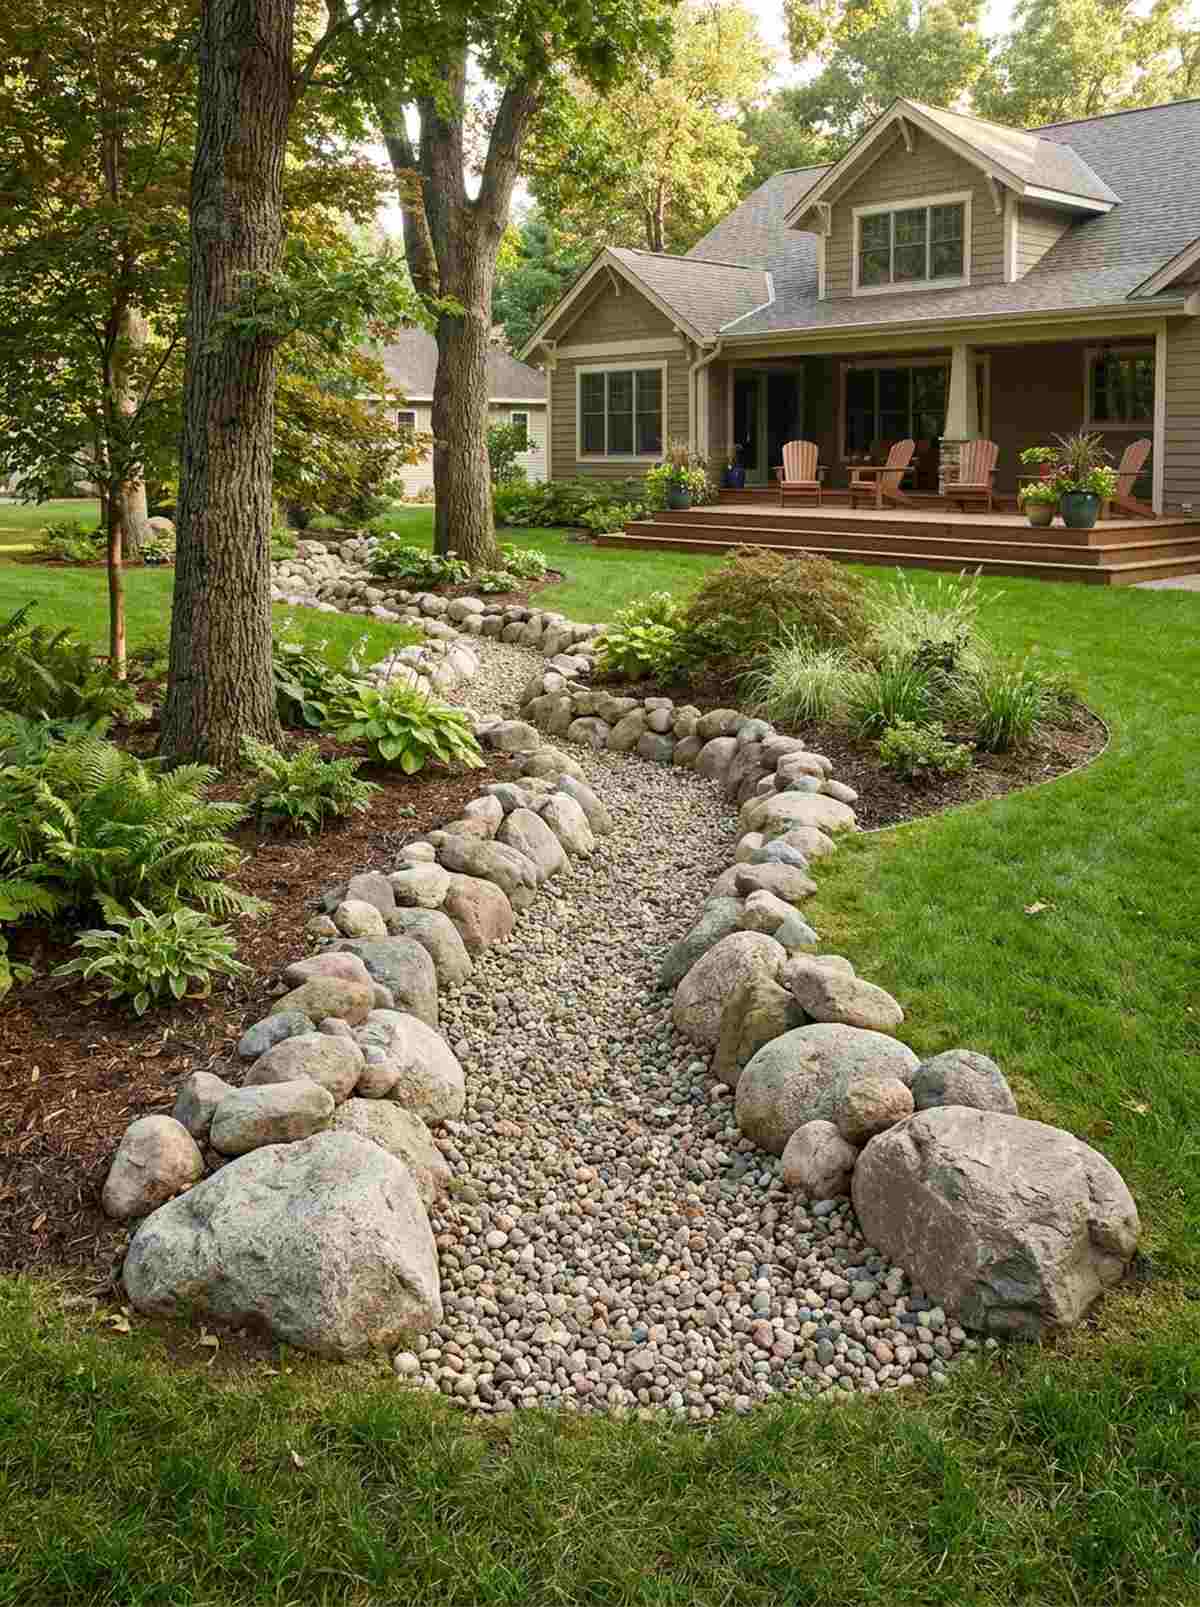
1. Meandering Cottage Garden Path
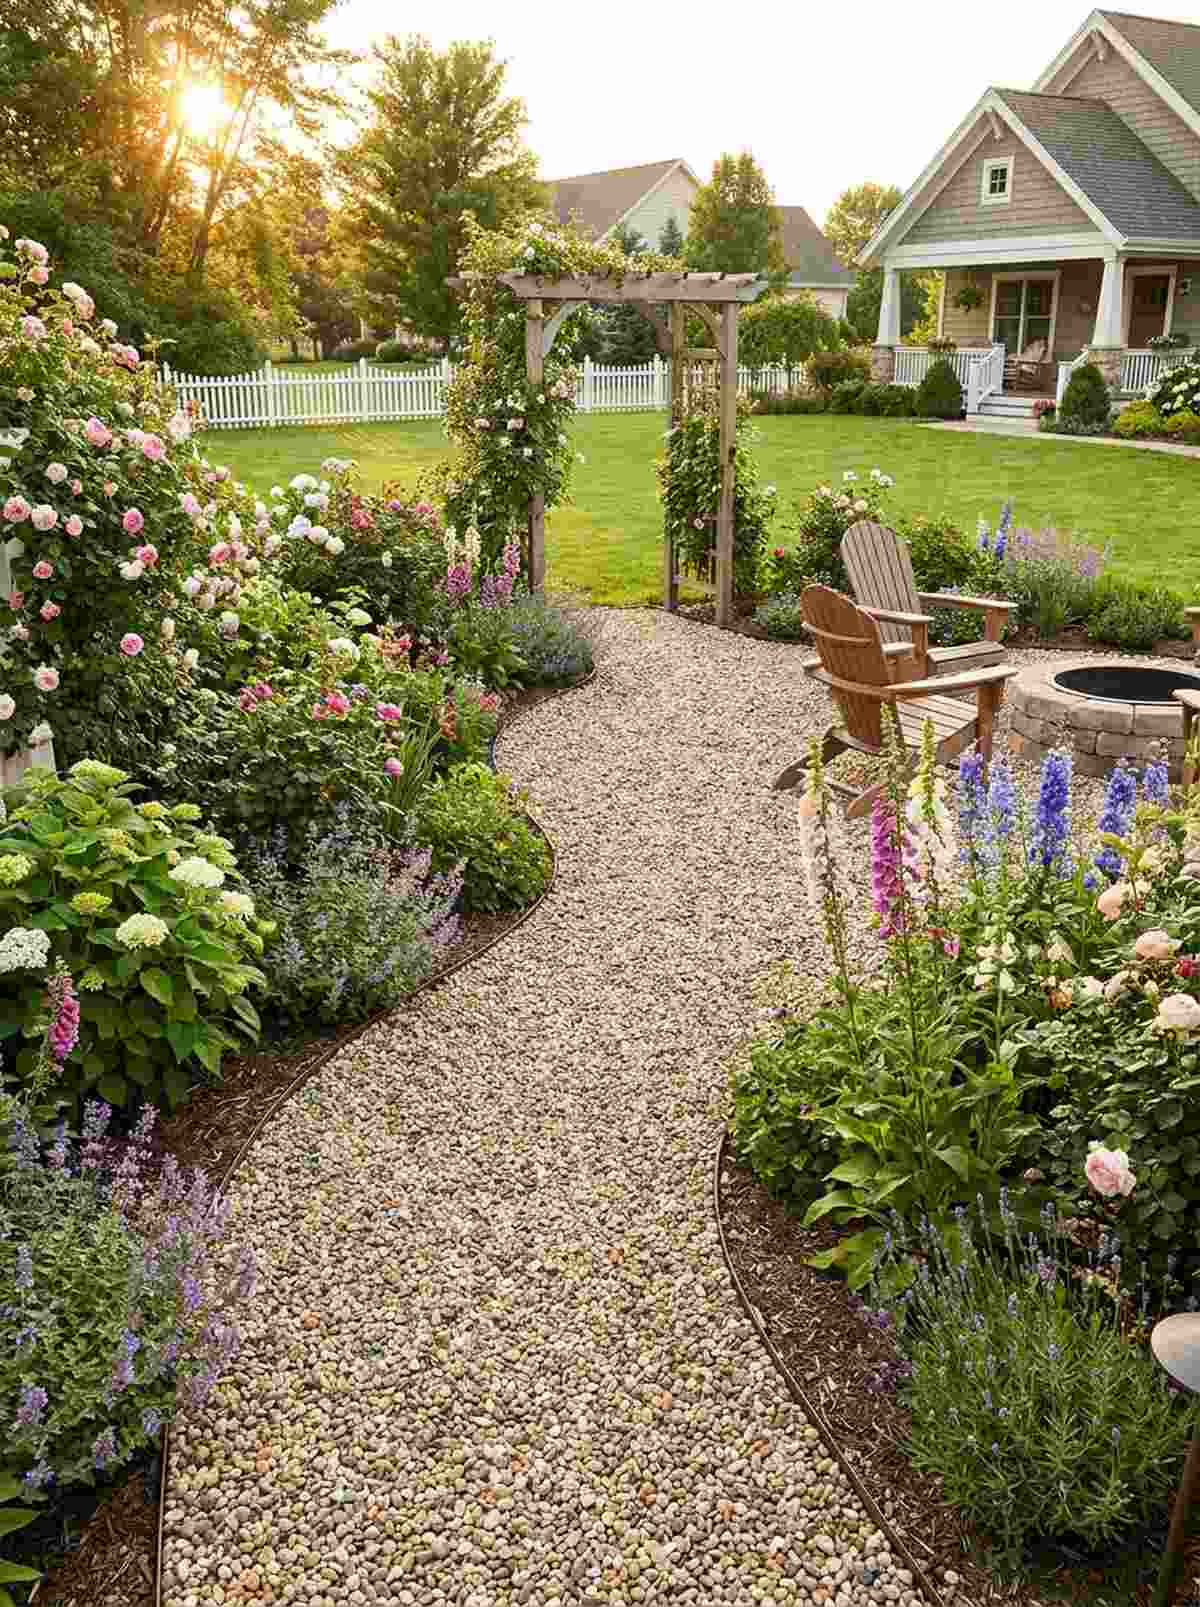
This curved cottage garden pathway feels like a hidden forest trail you accidentally discovered. It works exceptionally well for dividing deep floral beds or defining boundaries in a compact side yard.
Professional landscapers often overcharge for this organic layout, but doing it yourself delivers a surprisingly premium look. By securing a commercial-grade weed barrier underneath, you guarantee a pristine, low-maintenance walkway that outlasts expensive masonry.
You can easily pull this off for around $40–$75 depending on the pathway length. Pin this to your weekend DIY landscape board for later inspiration!
- Key Materials: Multi-tone pea gravel, heavy-duty landscape staples
- Vibe / Style: Romantic English countryside
- Difficulty: Easy weekend project
- Budget Breakdown: Materials: $45 | Edging: $25.
- Creator’s Tip: Dig a shallow trench first to keep the stone flush with your lawn and prevent kick-out.
- Smart Sourcing: pre-cut flexible steel edging kits and a bulk pack commercial weed barrier.
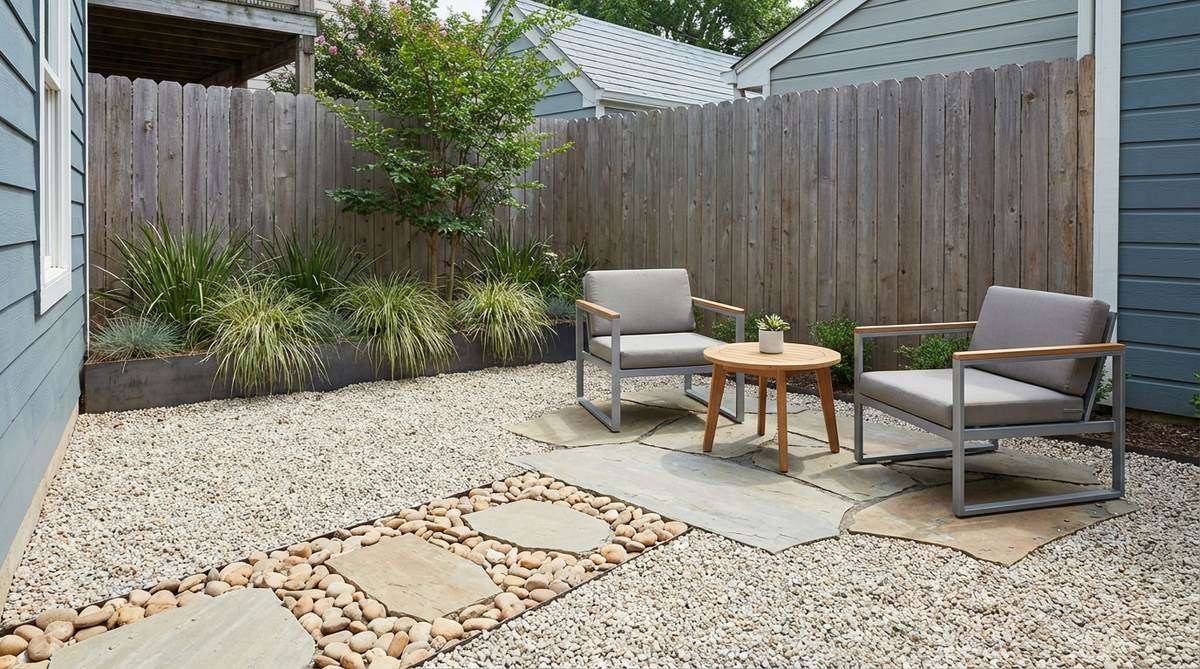
2. Stepping Stone Gravel Combination
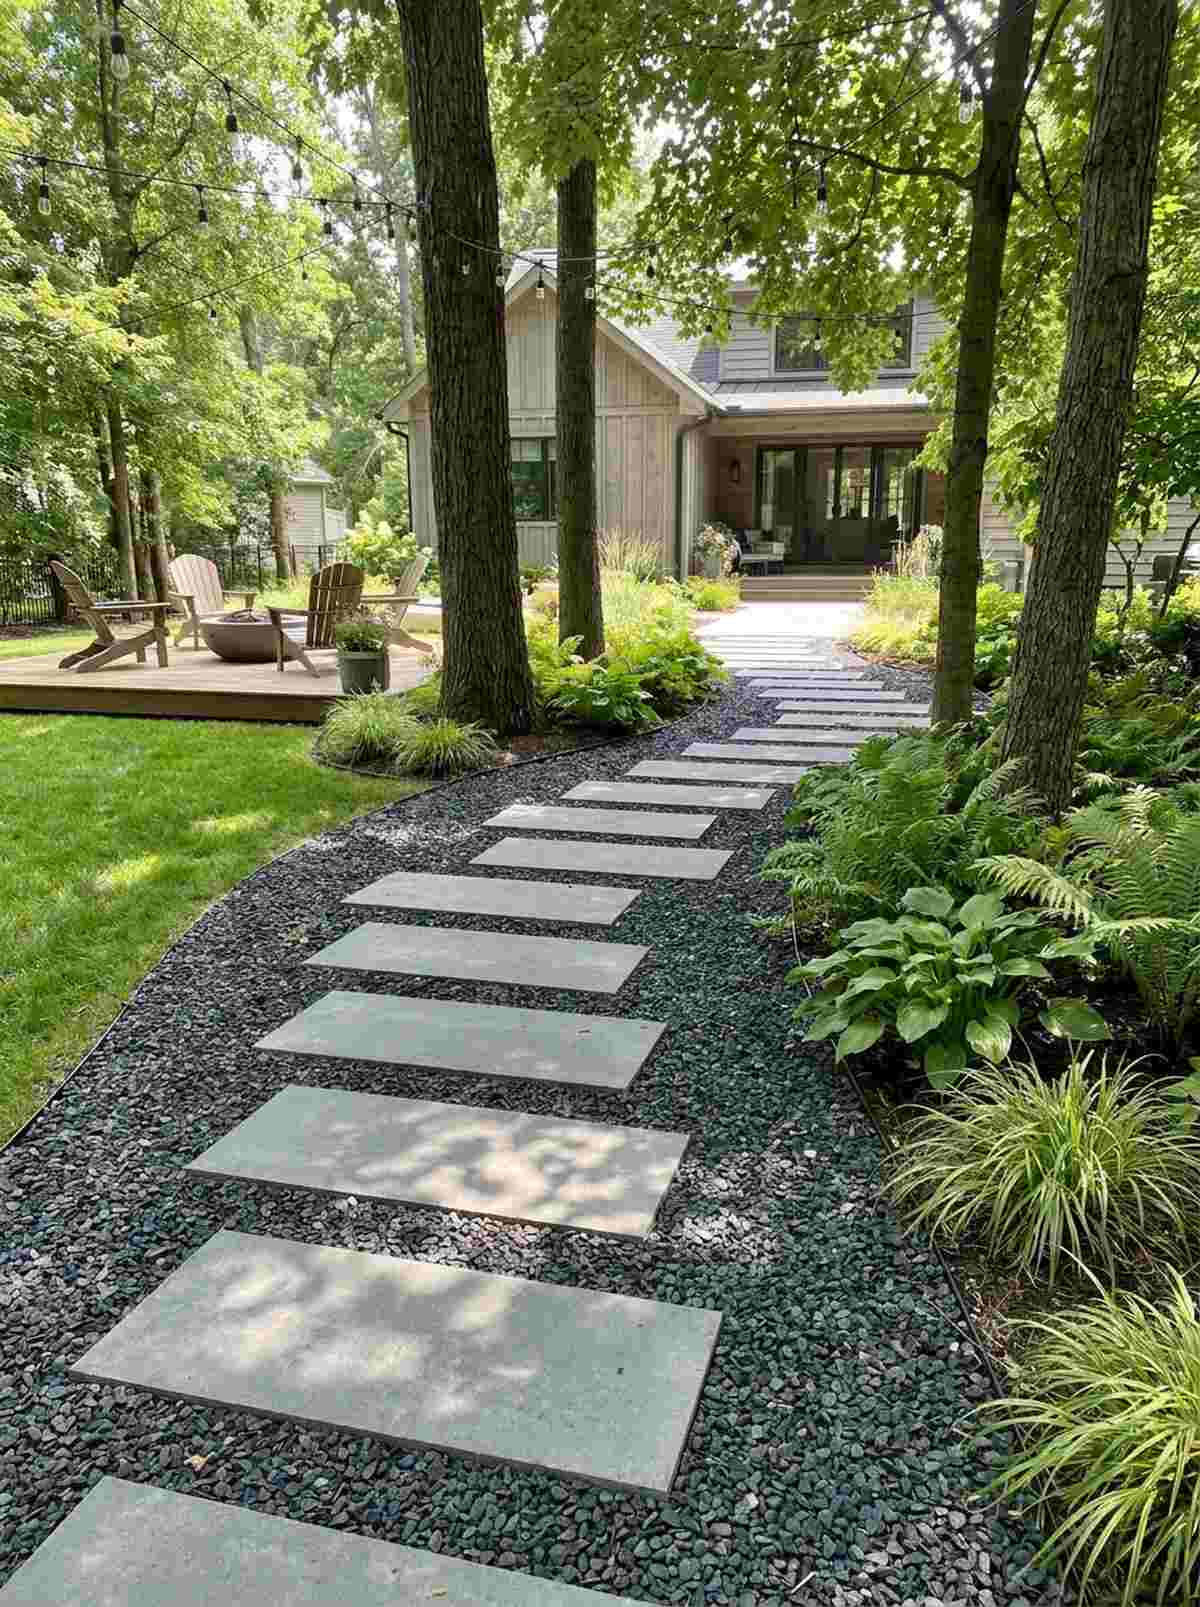
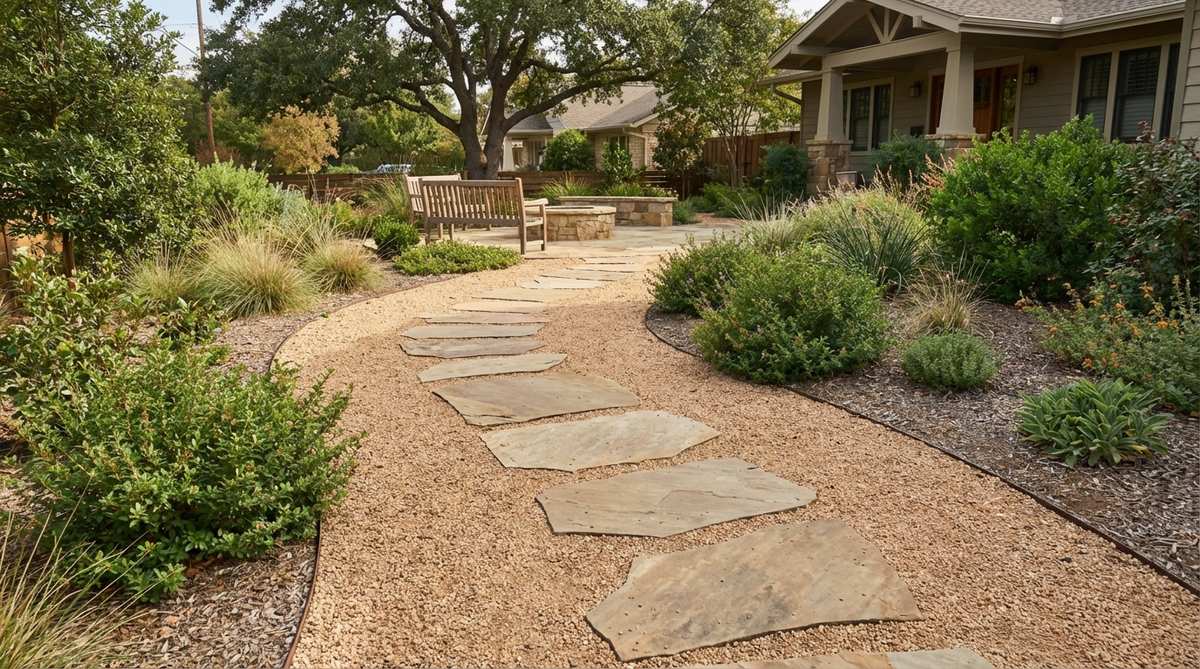
A modern stepping stone walkway radiates a sleek, curated energy that completely transforms dead grass zones. This layout is the ultimate solution for shaded areas where traditional turf refuses to grow.
Standard concrete pours look rigid compared to this dynamic, texture-rich approach. Surrounding smooth slate with loose fill gives a designer-level finish while dramatically reducing your overall hardscaping costs.
Expect to spend roughly $60–$120 depending on your choice of pavers. It’s a fast upgrade that completely changes the vibe of your home’s exterior.
- Key Materials: Large format concrete pavers, contrasting dark gravel
- Vibe / Style: Contemporary minimalist chic
- Difficulty: Moderate (requires leveling)
- Budget Breakdown: Pavers: $80 | Gravel Fill: $30.
- Creator’s Tip: Set your stones 18-24 inches apart from center-to-center for a natural walking stride.
- Smart Sourcing: UV-coated resin stepping stones and a pre-mixed leveling sand bag.
3. Side Yard Access Path
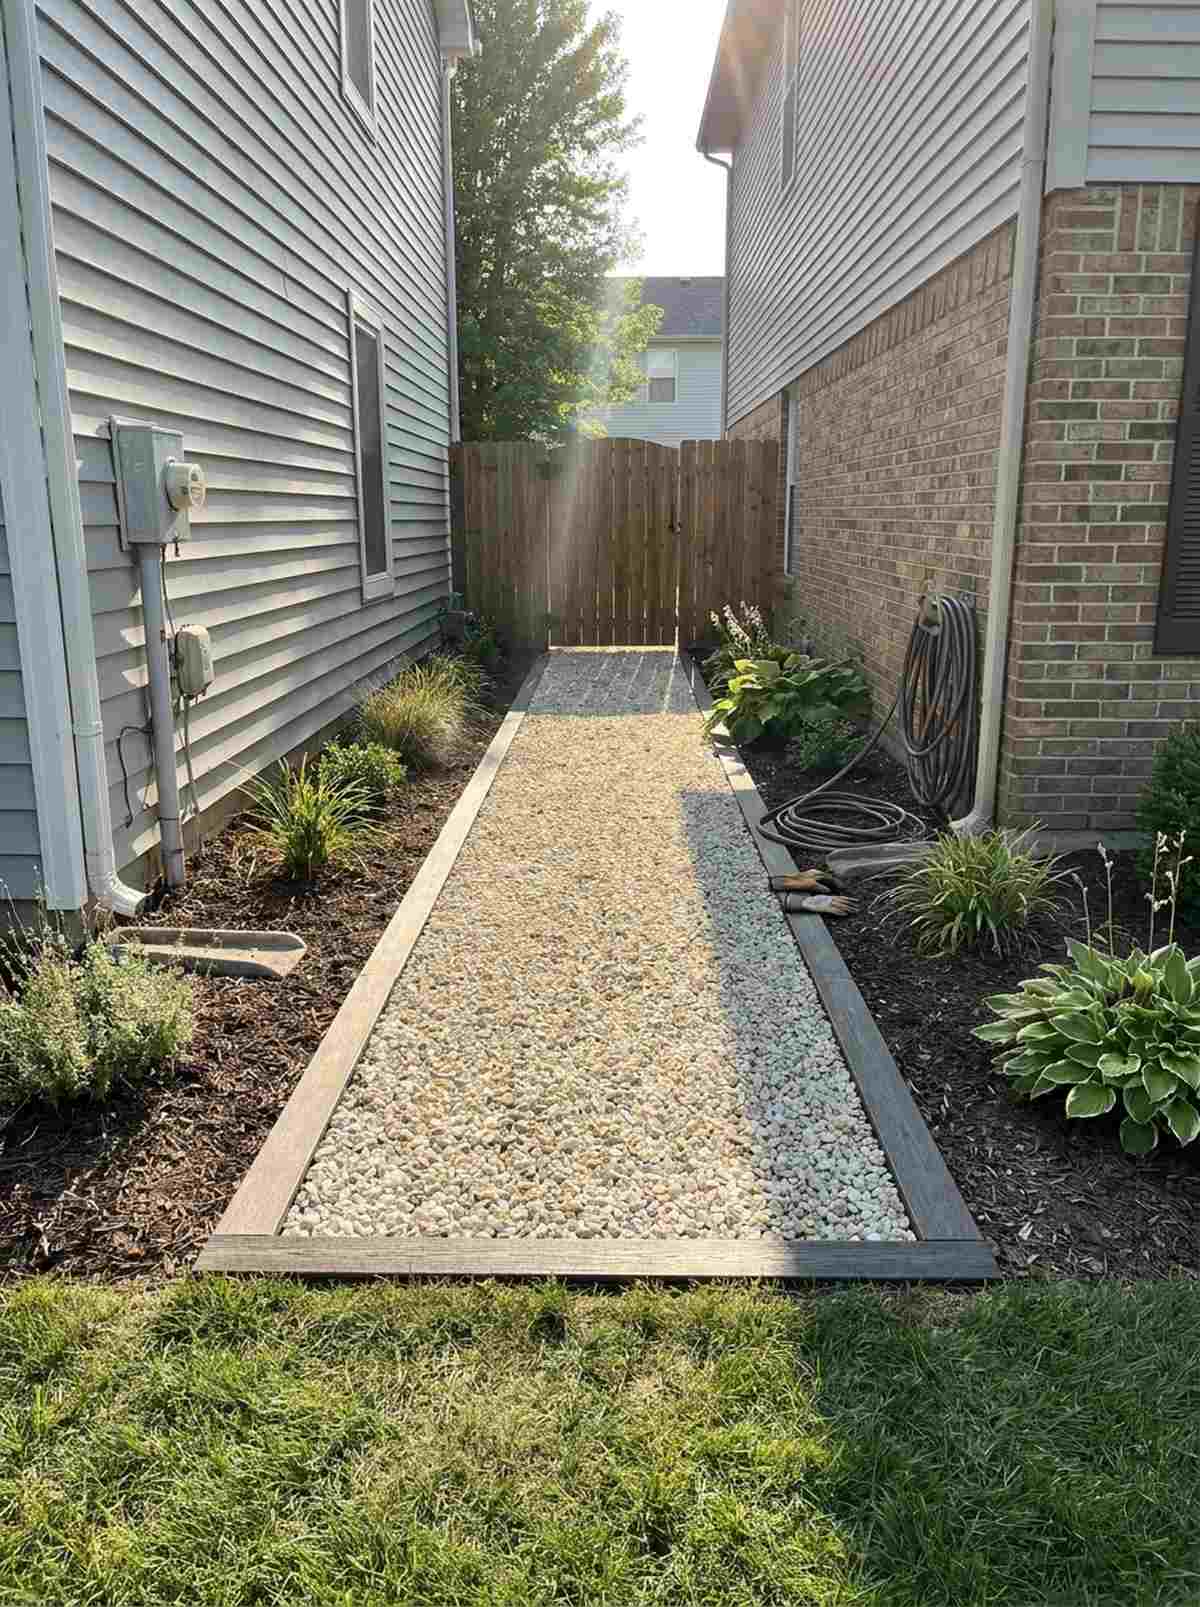
A bright gravel access trail breathes life into neglected, gloomy spaces between houses. This functional design is perfect for high-traffic zones leading to utility meters or backyard gates.
Leaving side yards bare often leads to muddy disasters, but this fix looks far more expensive than it is. Integrating heavy-duty drainage fabrics ensures zero pooling while bright stones naturally bounce sunlight into dark corridors.
You can complete this utility upgrade for about $50–$90 depending on square footage. Save this idea if you’re planning a small space upgrade this spring!
- Key Materials: Light-reflective pea gravel, composite border strips
- Vibe / Style: Clean, utilitarian brightness
- Difficulty: Beginner-friendly
- Budget Breakdown: Stone: $50 | Base fabric: $20.
- Creator’s Tip: Use a slight center crown grading to force rainwater away from your home’s foundation.
- Smart Sourcing: bulk pack composite edging boards and heavy-duty landscape fabric rolls.
4. Geometric Grid Pathway
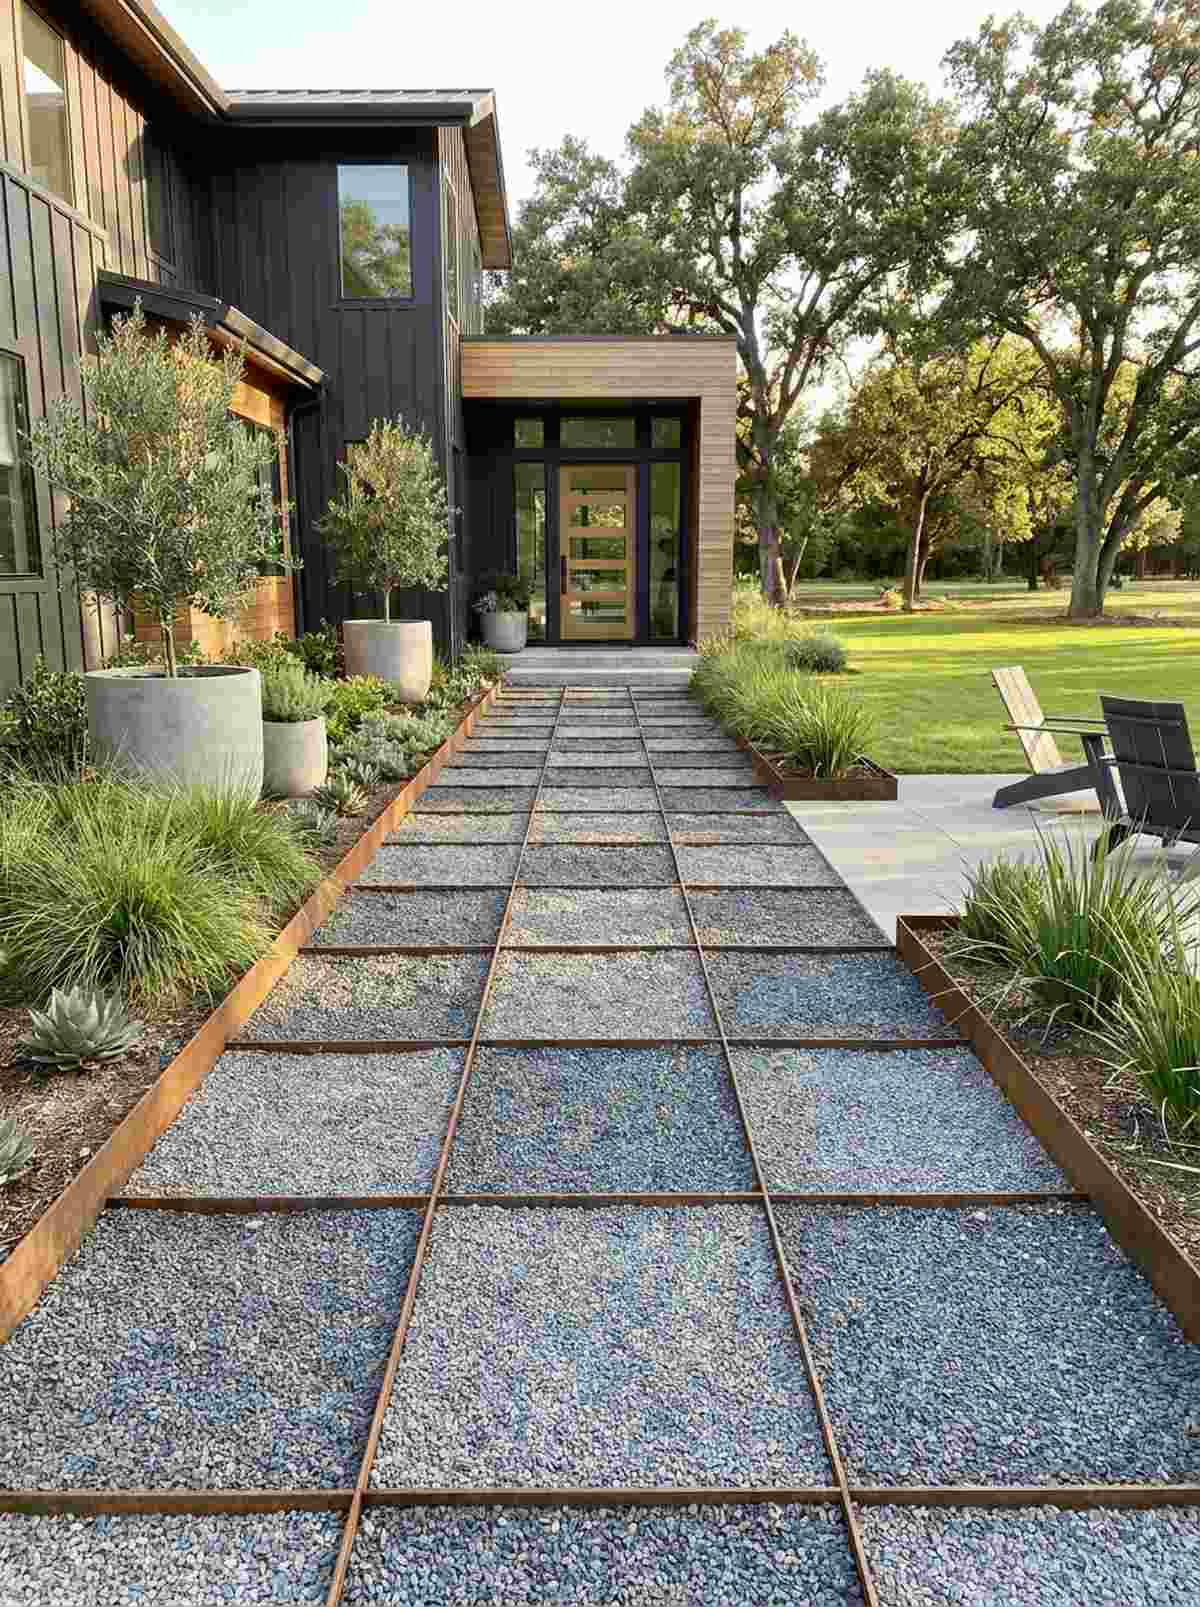

This structured grid garden path delivers an architectural symmetry that feels incredibly high-end and exclusive. It serves brilliantly as a focal point leading to a modern front entryway or a formal courtyard.
Most basic walkways lack visual tension, but this geometric blueprint demands attention. Framing loose stone with rigid steel dividers creates a striking industrial contrast that mimics luxury hotel landscaping.
Setting up a grid system generally costs around $100–$150 due to the metal framework. Highly recommended for adding massive curb appeal without pouring concrete.
- Key Materials: Weathered steel dividers, fine-grade gravel
- Vibe / Style: Structured industrial elegance
- Difficulty: Moderate to advanced measuring
- Budget Breakdown: Metal grids: $90 | Fill stone: $40.
- Creator’s Tip: Build the entire metal skeleton first before pouring a single bag of rock.
- Smart Sourcing: pre-cut powder-coated steel edging and a geometric path maker mold kit.
This next setup completely ignores traditional paving rules, and the final look is absolutely brilliant…
5. Woodland Garden Trail
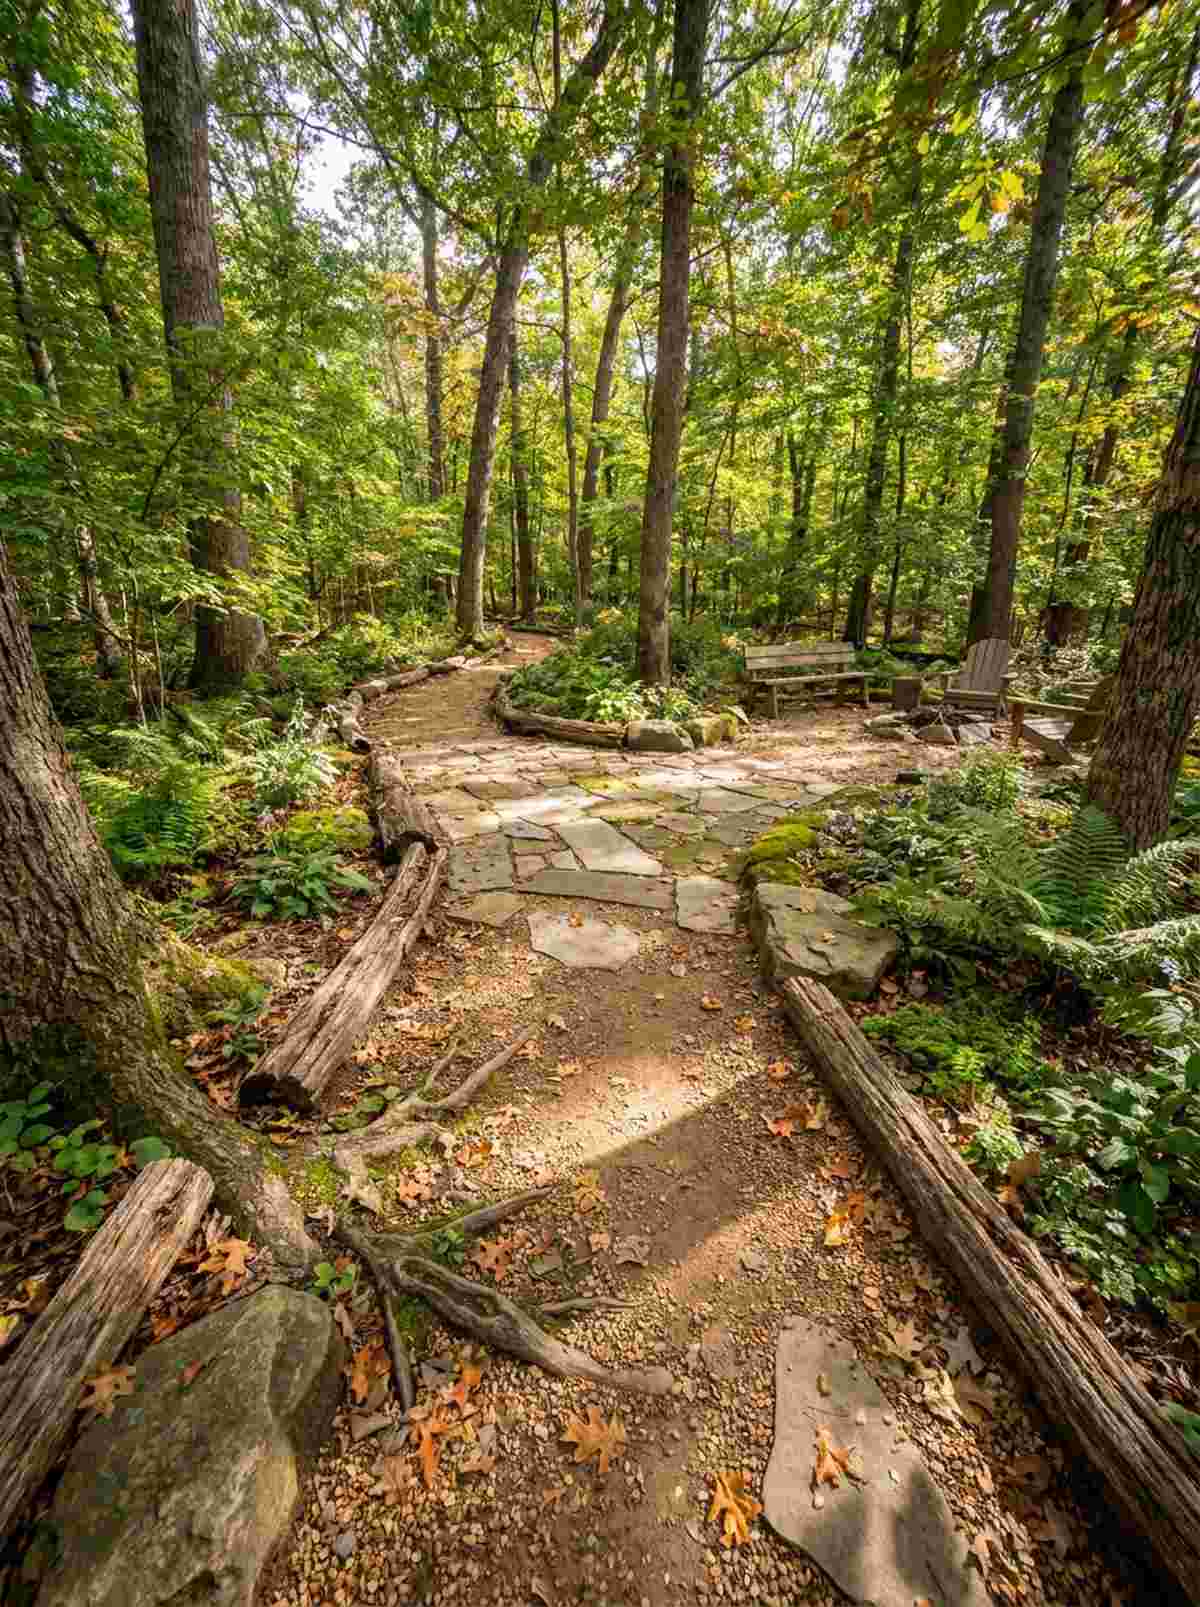
A natural woodland stone trail feels straight out of a storybook landscape painting. Use this layout to navigate beautifully through established shade trees without damaging fragile root systems.
Solid concrete suffocates old tree roots, which is why this breathable alternative is a literal lifesaver. Sourcing natural border elements like fallen logs alongside the stone creates a seamless, organic transition that looks entirely unforced.
You can execute this forest-inspired look for roughly $30–$60 using locally sourced accents. Pin this if you want to enhance your property’s natural topography.
- Key Materials: Earth-toned gravel, natural timber borders
- Vibe / Style: Untamed forest retreat
- Difficulty: Very easy
- Budget Breakdown: Gravel: $40 | Natural borders: Free/Scavenged.
- Creator’s Tip: Let seasonal leaves fall naturally over the path—it adds to the rustic woodland aesthetic.
- Smart Sourcing: bulk biodegradable landscape pins and pre-treated timber log rolls.
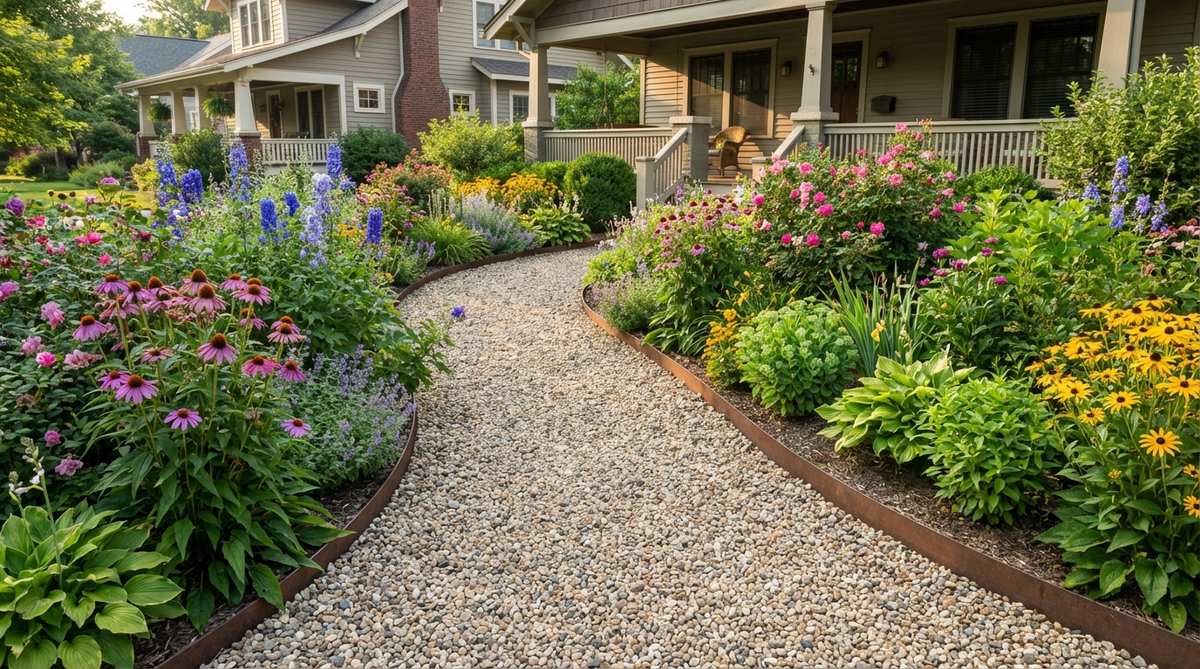
6. Front Entry Welcome Path
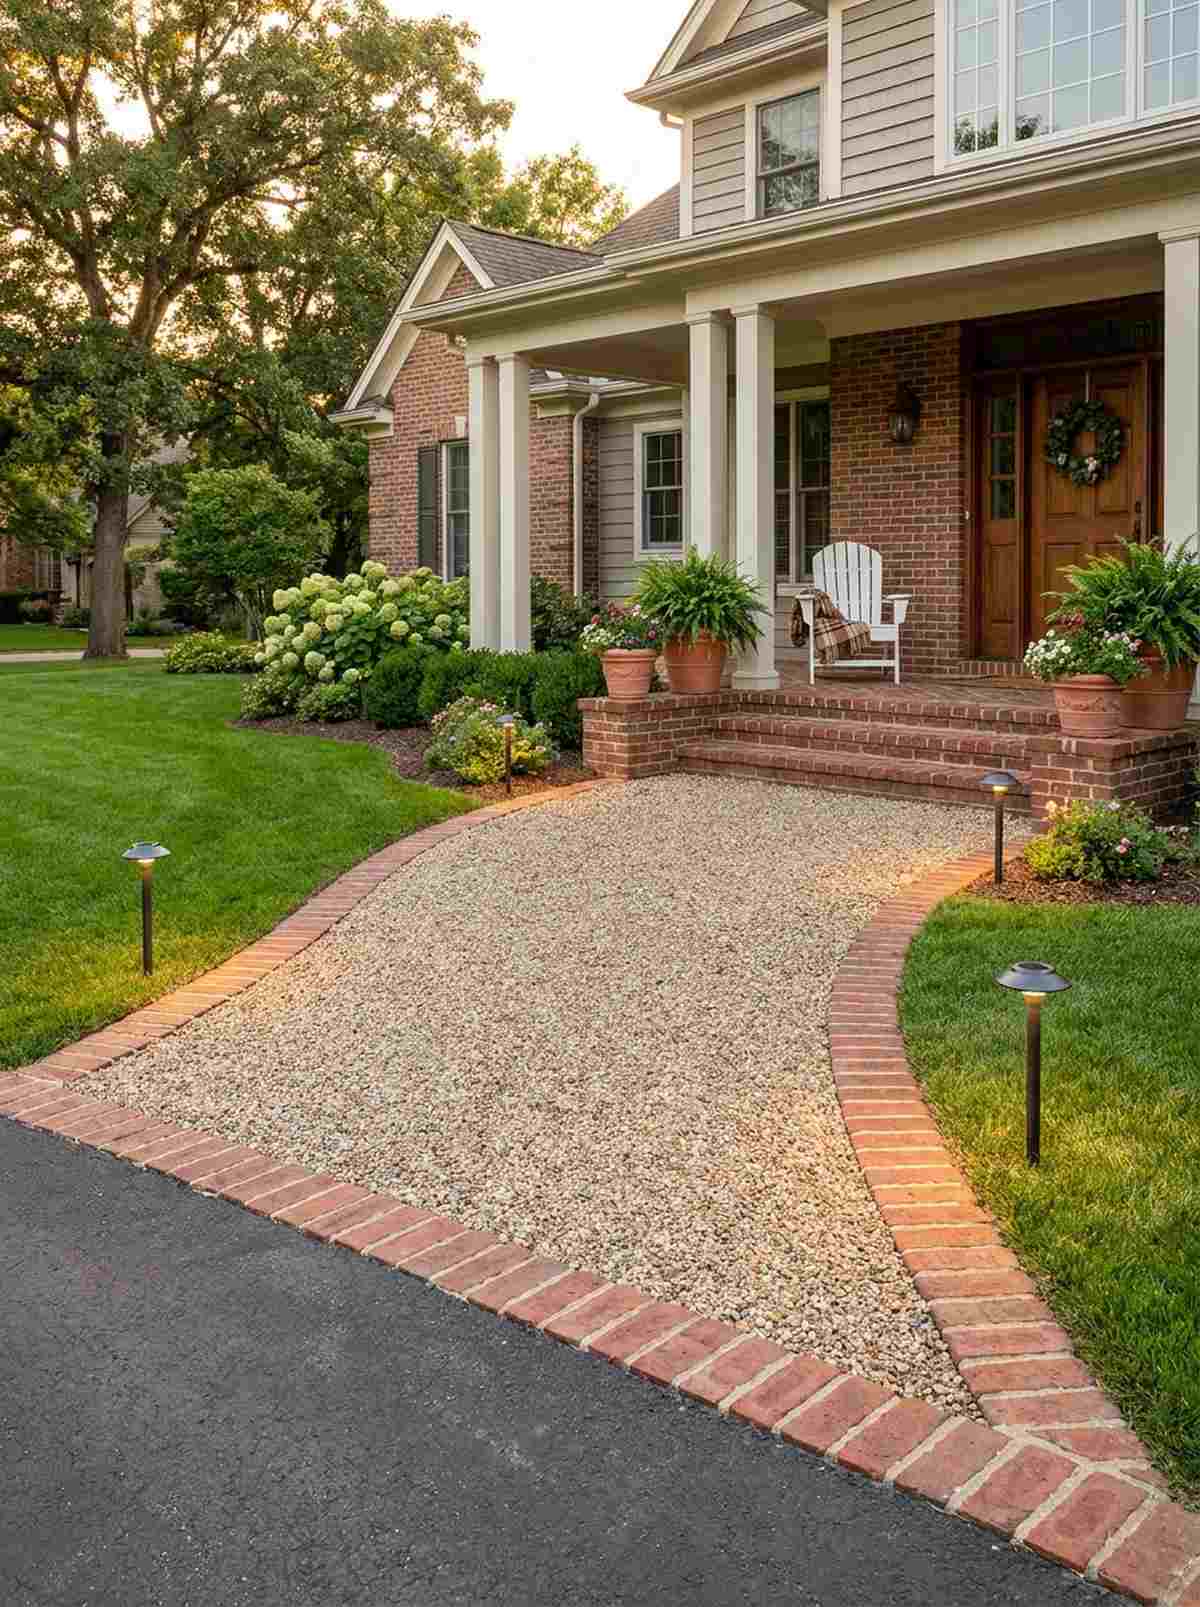
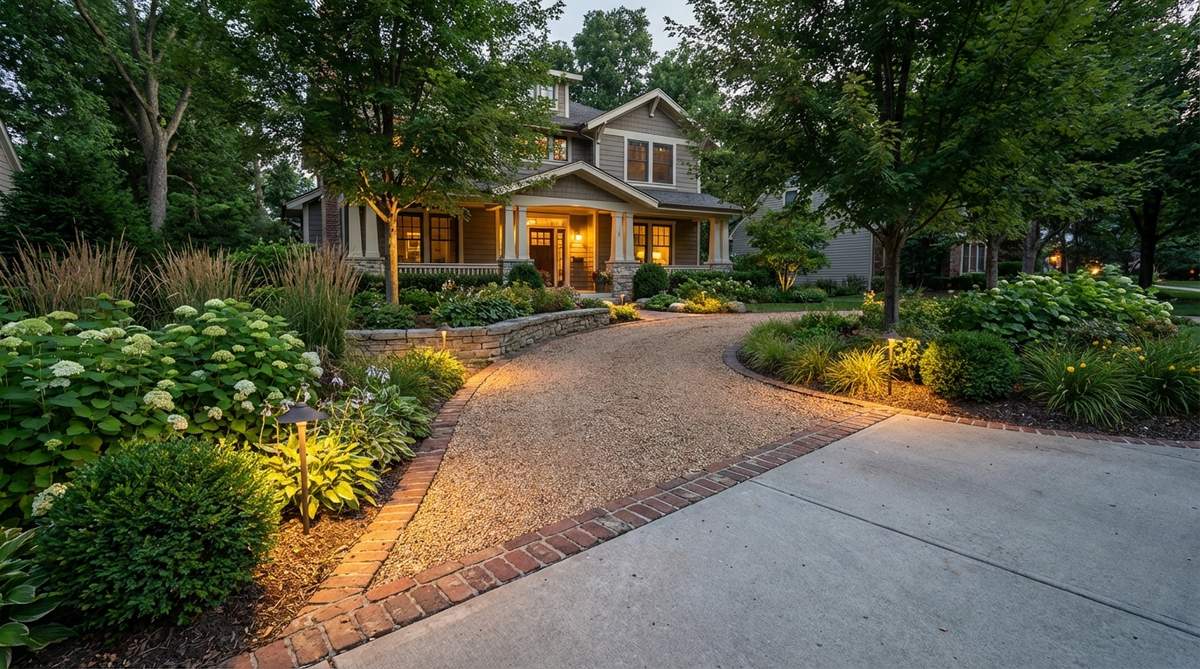
The expansive gravel welcome path exudes a warm, inviting energy that instantly boosts curb appeal. It acts as the perfect welcoming red carpet spanning from a driveway directly to a porch.
Skinny concrete paths look incredibly dated compared to a generous, sweeping stone entry. By matching your edge restraints to the brickwork of your house, you lock in a cohesive, custom-built appearance that neighbors will envy.
A wider path requires more material, usually landing around $150–$250. It’s an investment that significantly upgrades your home’s exterior first impression.
- Key Materials: Standard 3/8″ pea gravel, matching brick pavers
- Vibe / Style: Traditional welcoming estate
- Difficulty: Moderate labor
- Budget Breakdown: Stone delivery: $150 | Edge bricks: $80.
- Creator’s Tip: Install low-voltage uplighting along the margins to make the pathway glow beautifully at night.
- Smart Sourcing: UV-resistant solar path lights (bulk pack) and heavy-duty paver restraint systems.
Patios & Seating Areas For Outdoor Living
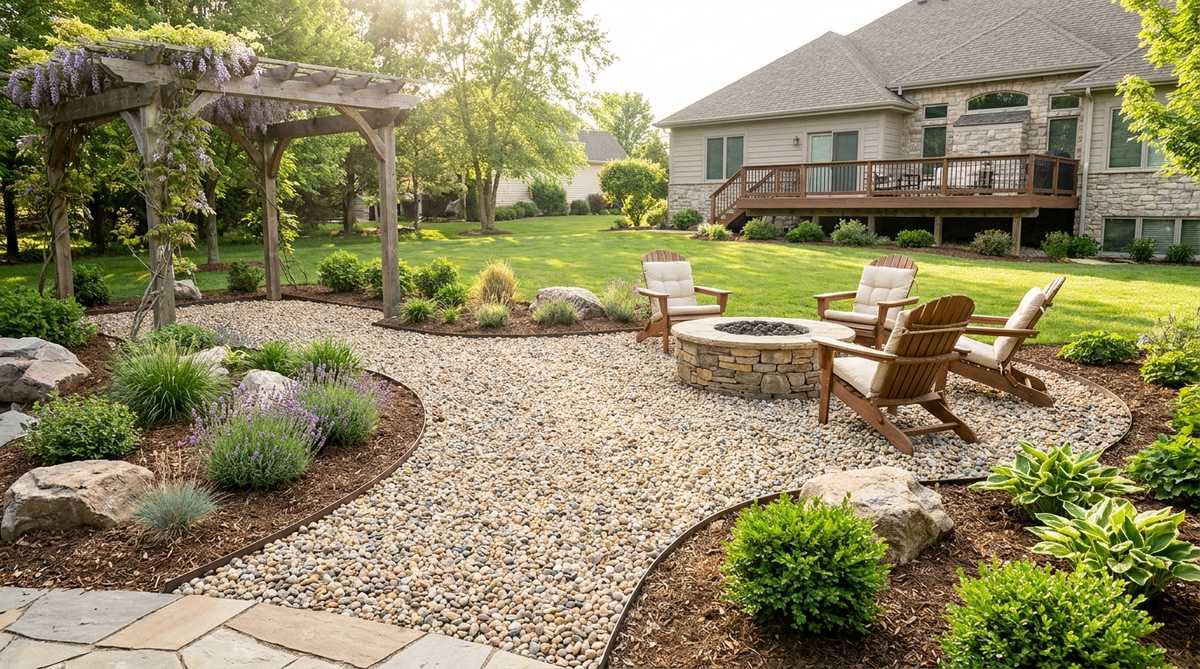
7. Circular Fire Pit Gathering Space
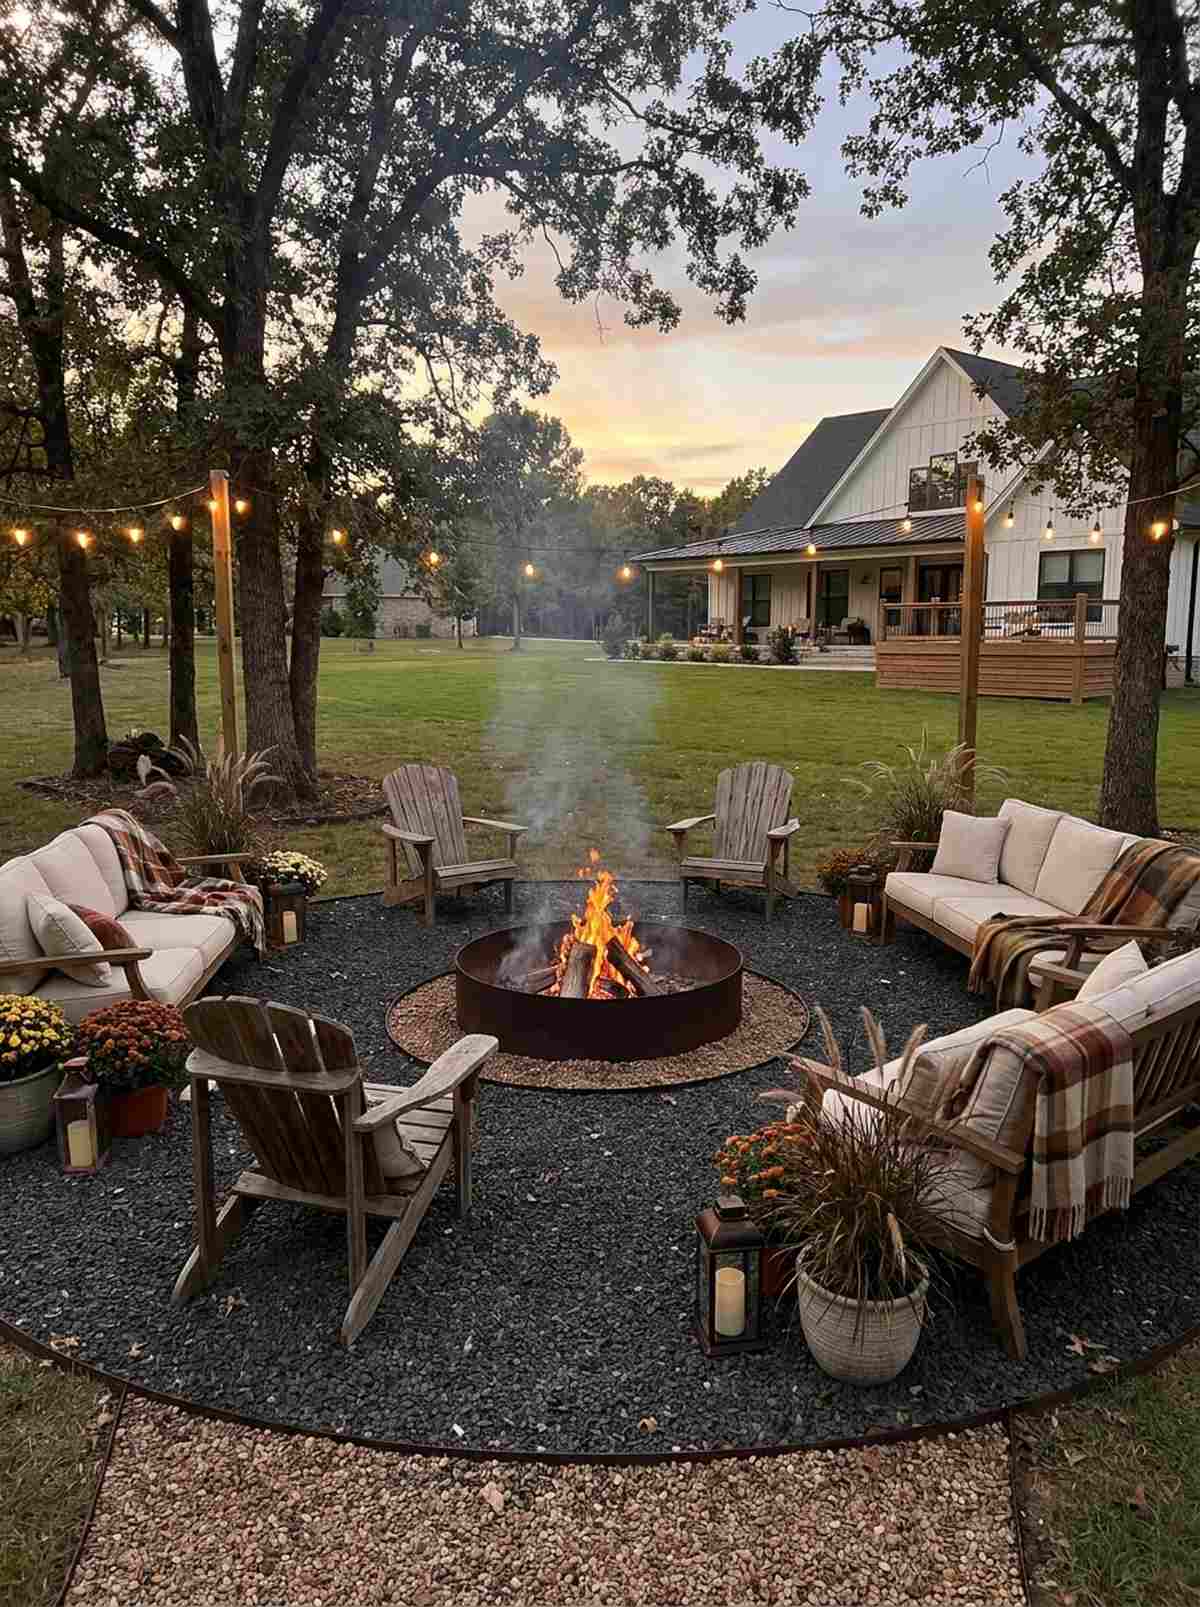
A round outdoor fire lounge sets the perfect stage for cozy autumn evenings and late-night storytelling. This setup is specifically designed to maximize seating in a centralized backyard footprint.
Wooden decks pose a massive fire risk, making this heat-resistant rock bed the ultimate safety hack. Constructing a flawless circle using a central stake and string yields a professionally drafted patio layout without hiring an architect.
Building this from scratch usually runs $100–$200 excluding the actual fire pit. Save this to your backyard entertainment board immediately!
- Key Materials: Fire-resistant crushed rock base, round metal fire ring
- Vibe / Style: Cozy campsite luxury
- Difficulty: Moderate
- Budget Breakdown: Base rock: $80 | Top gravel: $60.
- Creator’s Tip: Sink the fire ring two inches below the gravel line to prevent ash blowout on windy nights.
- Smart Sourcing: pre-cut circular metal fire rings and heavy-duty leveling sand bags.
8. Dining Terrace Under Pergola
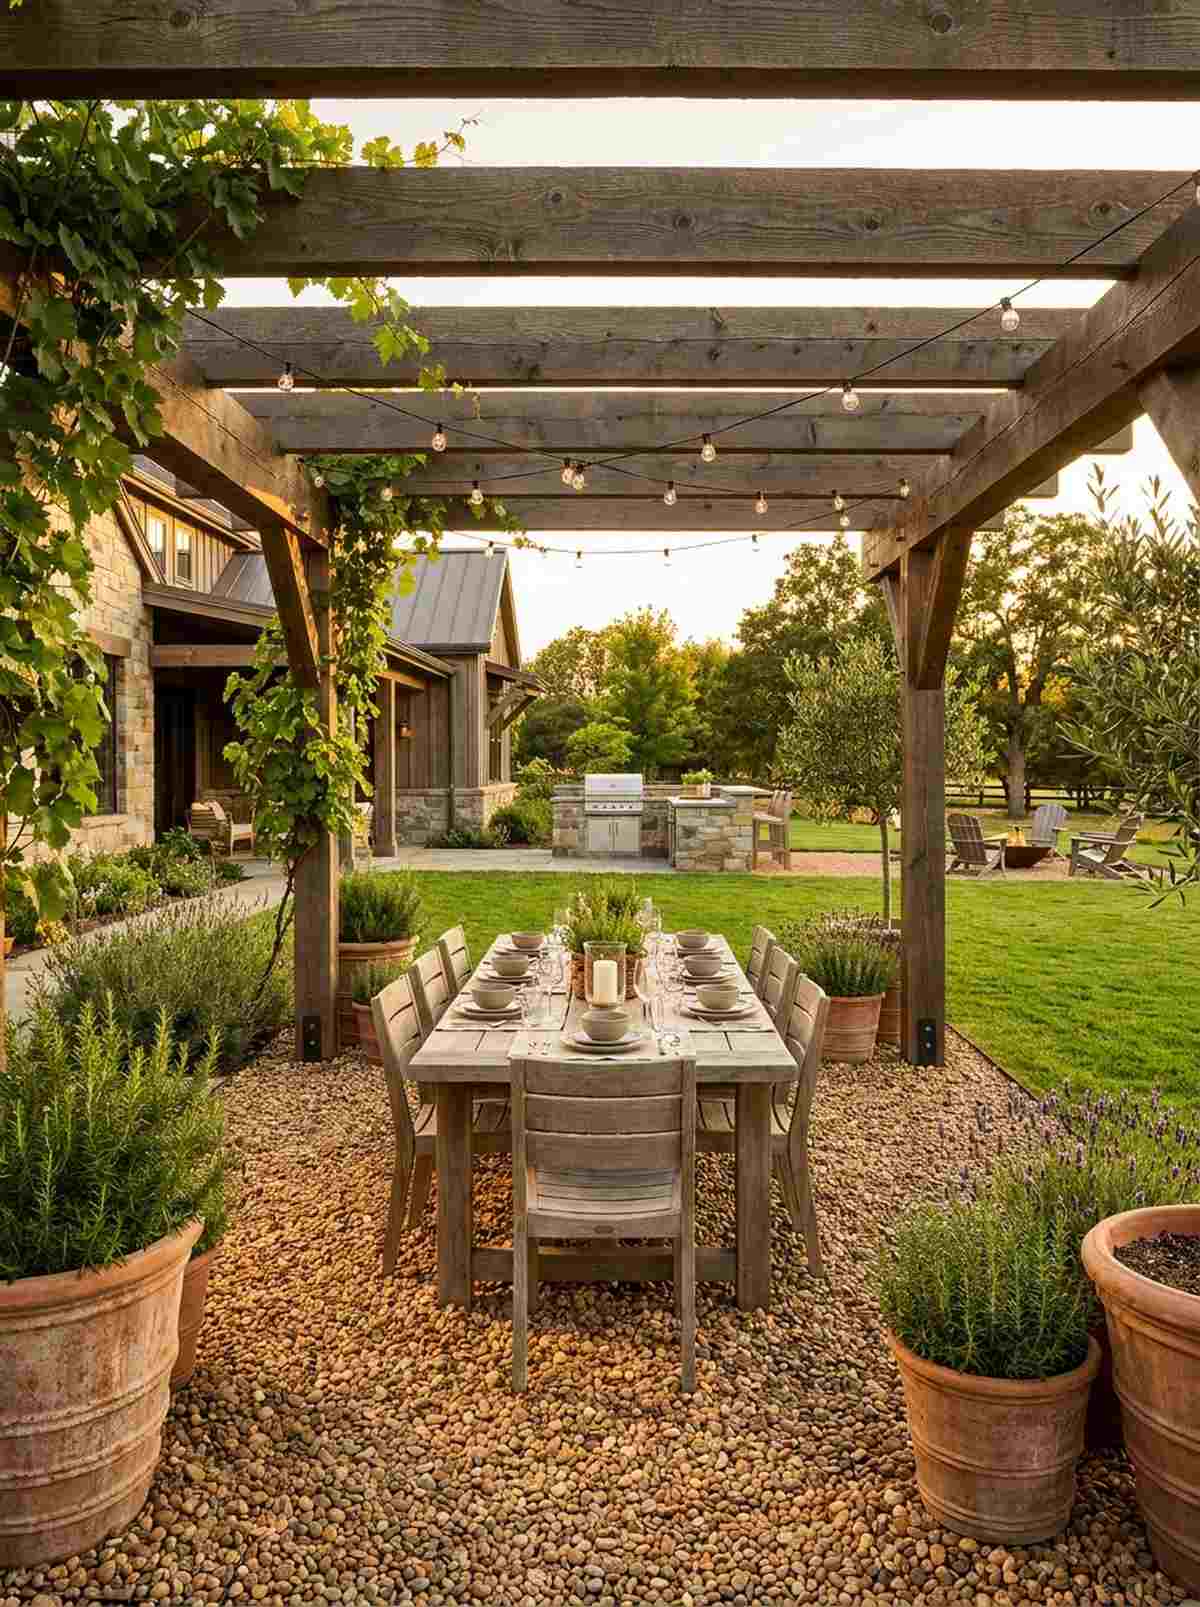
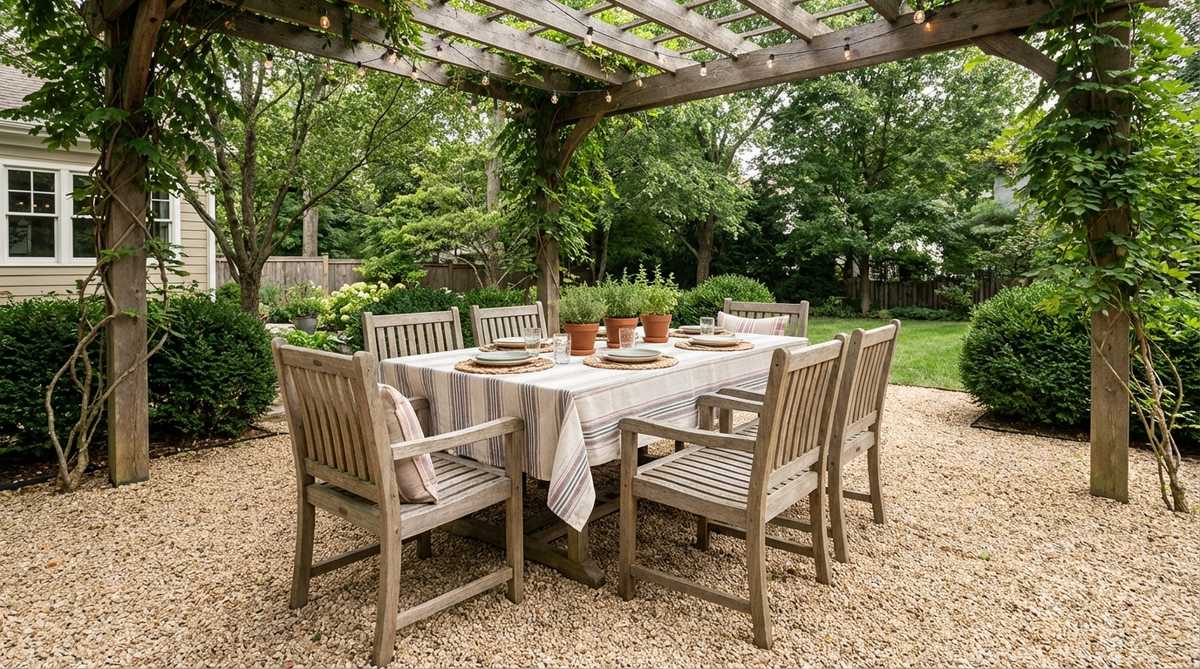
This rustic pergola dining terrace radiates the effortless charm of a European vineyard bistro. It is the absolute best flooring solution for defining an al fresco dining zone in an open yard.
Paving under heavy timber structures often leads to cracked concrete, but this flexible base eliminates that headache entirely. Utilizing a robust gravel grid underneath prevents dining chair legs from frustratingly sinking into the earth.
The flooring portion of this upgrade costs about $120–$180. It completely modernizes how you host summer dinner parties!
- Key Materials: Warm-toned river rock, permeable stabilizer grids
- Vibe / Style: Tuscan vineyard dinner
- Difficulty: Moderate (grid installation)
- Budget Breakdown: Grids: $90 | Top stone: $60.
- Creator’s Tip: Define the exact dining perimeter with large terra cotta pots to create a false wall effect.
- Smart Sourcing: interlocking gravel stabilizer grids (bulk pack) and commercial-grade shade sail kits.
People usually overspend by hundreds here, but the upcoming trick slashes that cost instantly…
9. Modern Lounge Patio
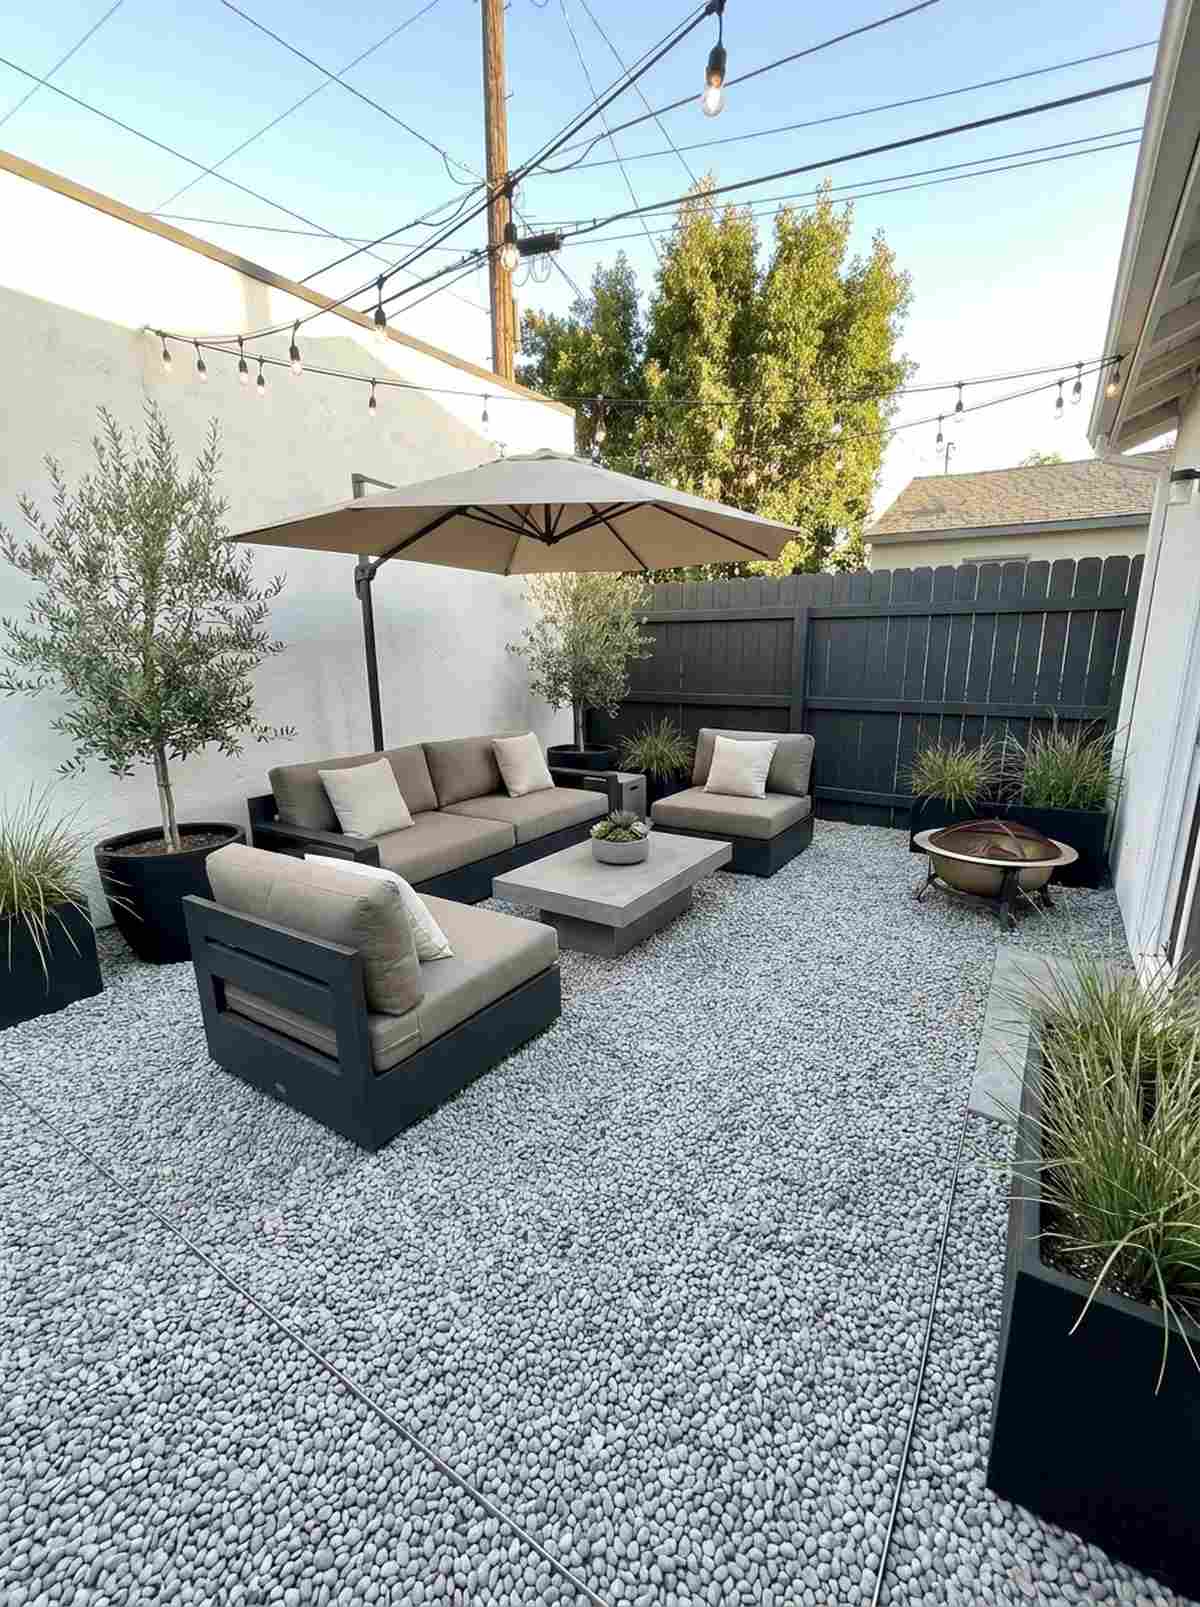
A monochromatic gravel lounge feels like a VIP relaxation sector at a high-end beach club. This aesthetic thrives in urban micro-yards where maximizing every square inch of space is mandatory.
Cluttered wooden decking shrinks small spaces, whereas a unified stone floor visually pushes the boundaries outward. Selecting ultra-smooth, light gray stones effortlessly reflects summer sun, keeping the lounge remarkably cool during heat waves.
You can execute this minimalist floor for approximately $80–$140. Pin this layout if you are tired of staining and sealing a wooden deck.
- Key Materials: Light gray smooth gravel, invisible edge restraints
- Vibe / Style: Sleek urban oasis
- Difficulty: Easy
- Budget Breakdown: Stone: $90 | Edging: $30.
- Creator’s Tip: Keep the stone depth strictly at two inches—anything deeper makes walking feel like trudging through deep sand.
- Smart Sourcing: invisible plastic paver edging (starter kit) and UV-resistant weed barrier fabric.
💡 Must-Have Supplies for High-End Setups
To build these setups faster and ensure they last, skip the generic craft aisles and invest in the right foundational kits.
- Base & Support: Heavy-duty interlocking gravel stabilizer grids
- Setup Tools: Pre-cut flexible steel edging starter kits
- Weather/Durability Protection: UV-coated commercial landscape fabric blocks
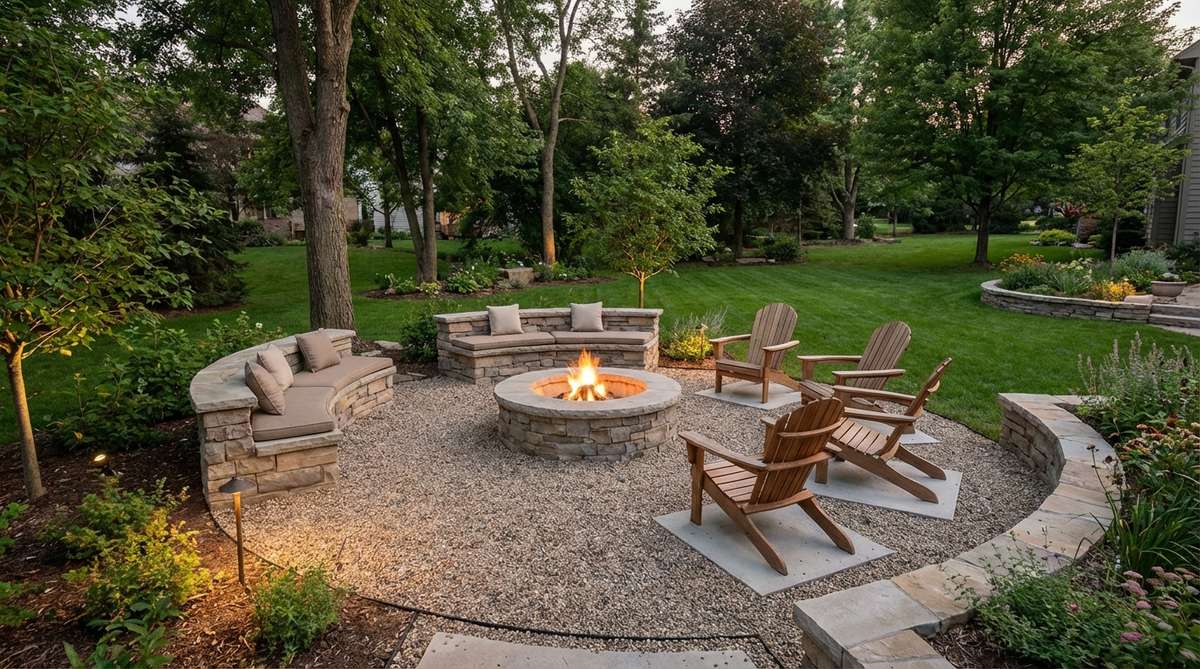
10. Sunken Conversation Pit
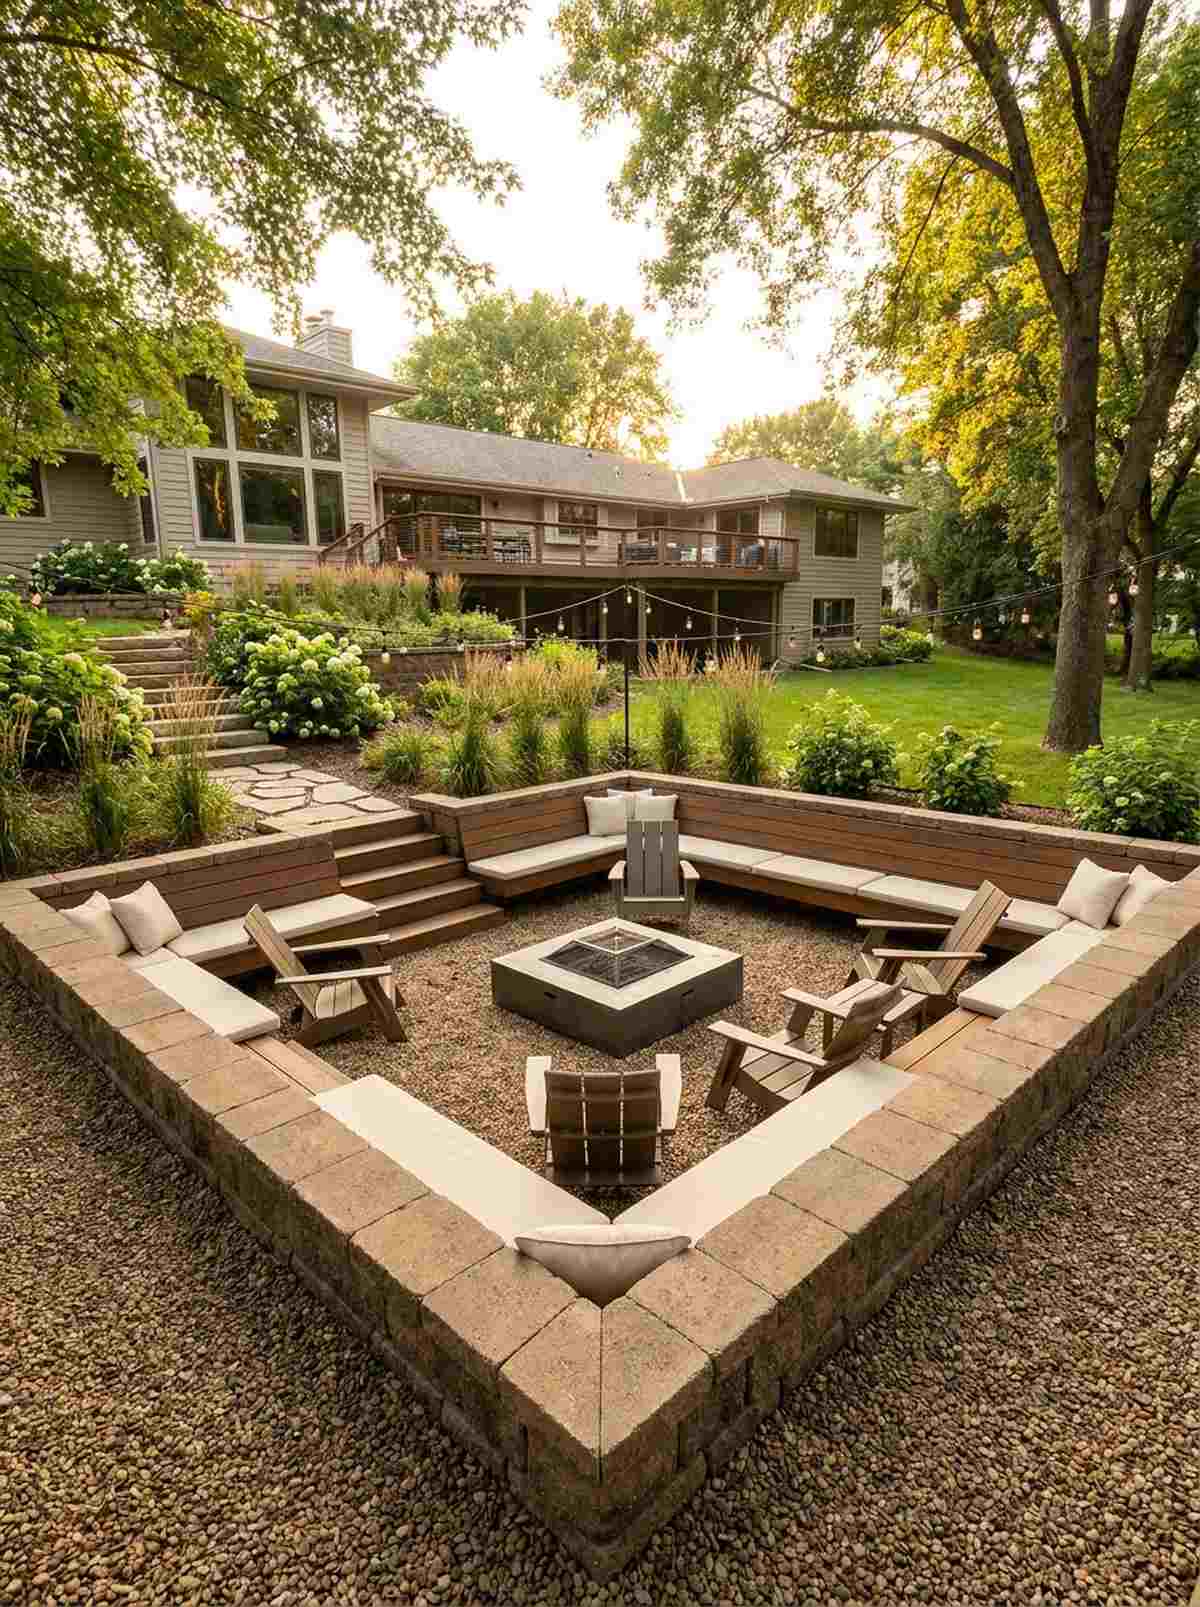
This recessed outdoor conversation pit creates an incredibly intimate, wind-protected bubble for socializing. Nestling this area directly into a sloped backyard transforms unusable hills into premium real estate.
Leveling a steep yard is notoriously expensive, but carving out a tiered seating zone leverages the natural terrain brilliantly. Installing a concealed French drain beneath the floor ensures your cozy hideaway never turns into a muddy pond.
Due to the required excavation and retaining blocks, expect this to run $300–$600. It is a massive property value booster that pays off instantly.
- Key Materials: Retaining wall blocks, French drain piping, deep fill gravel
- Vibe / Style: Retro modern hideout
- Difficulty: Advanced (requires digging and drainage)
- Budget Breakdown: Drain kits: $100 | Retaining walls: $300 | Stone: $100.
- Creator’s Tip: Slope the dirt sub-base at a 2% grade toward the center drain before adding the final rocks.
- Smart Sourcing: pre-assembled French drain starter kits and heavy-duty retaining wall adhesive.
11. Bistro Nook In Courtyard
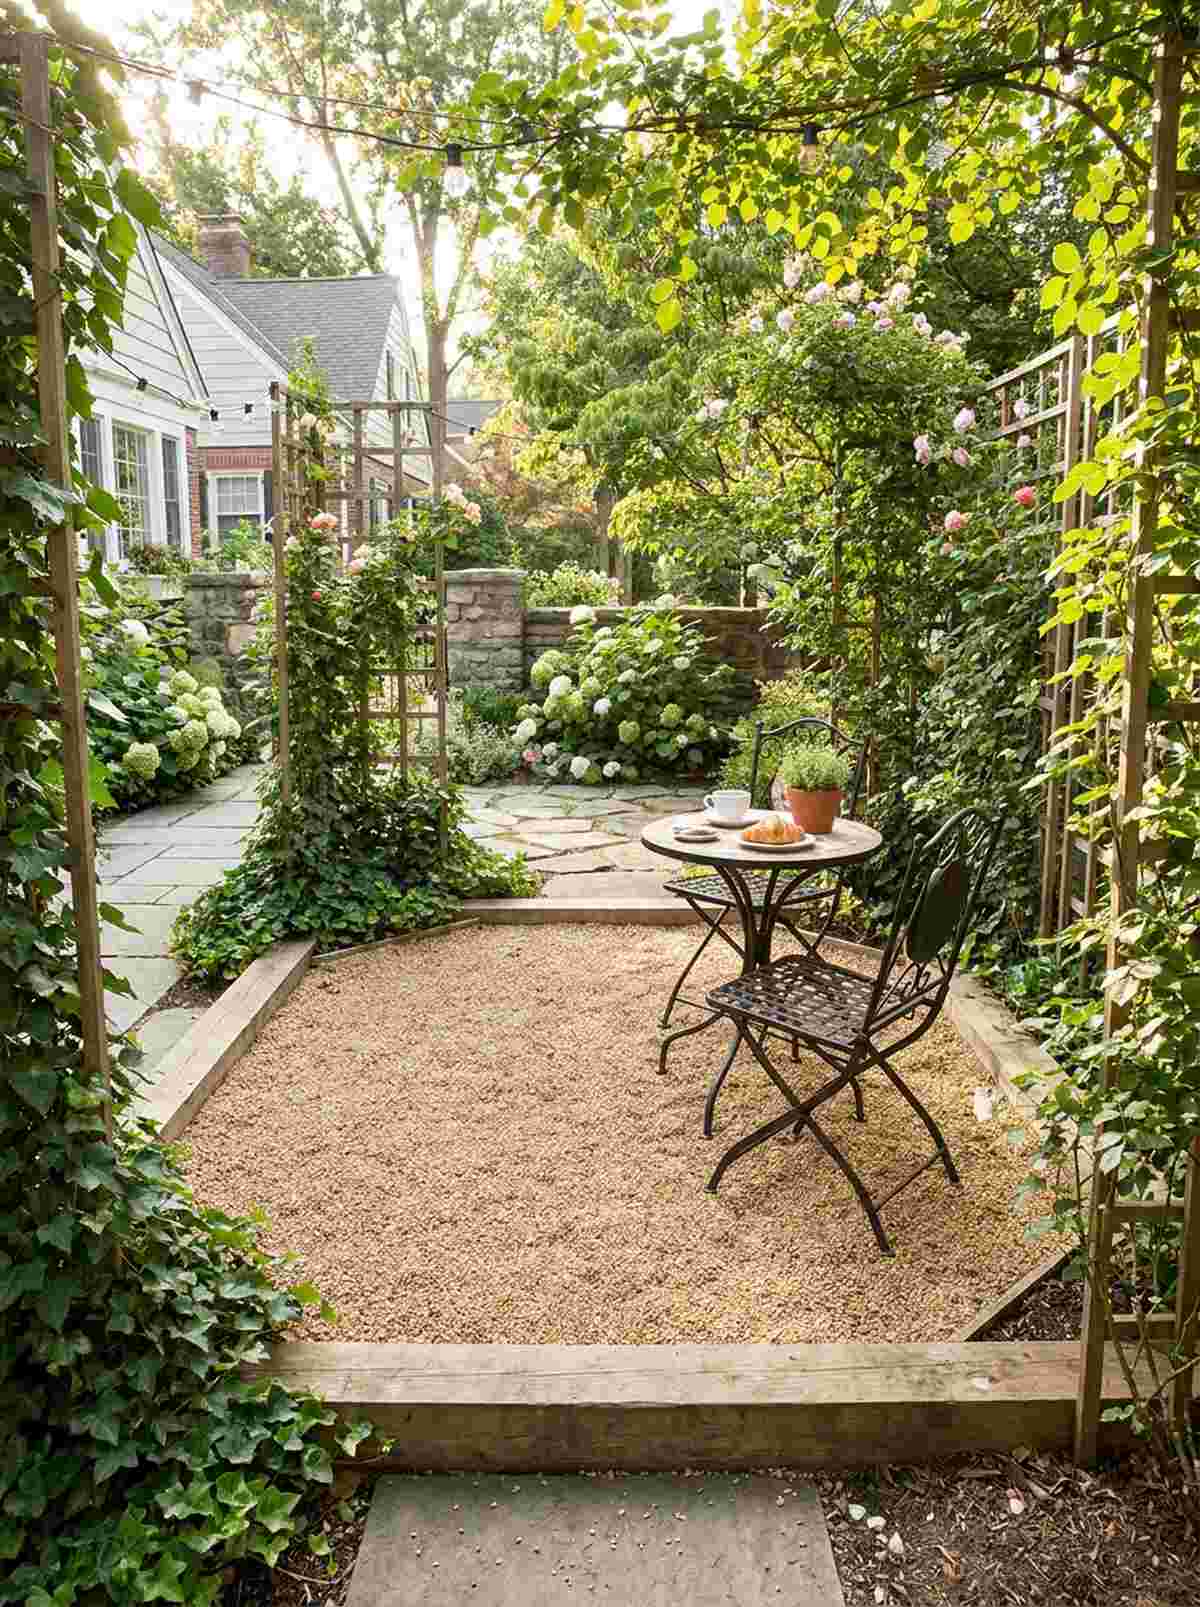
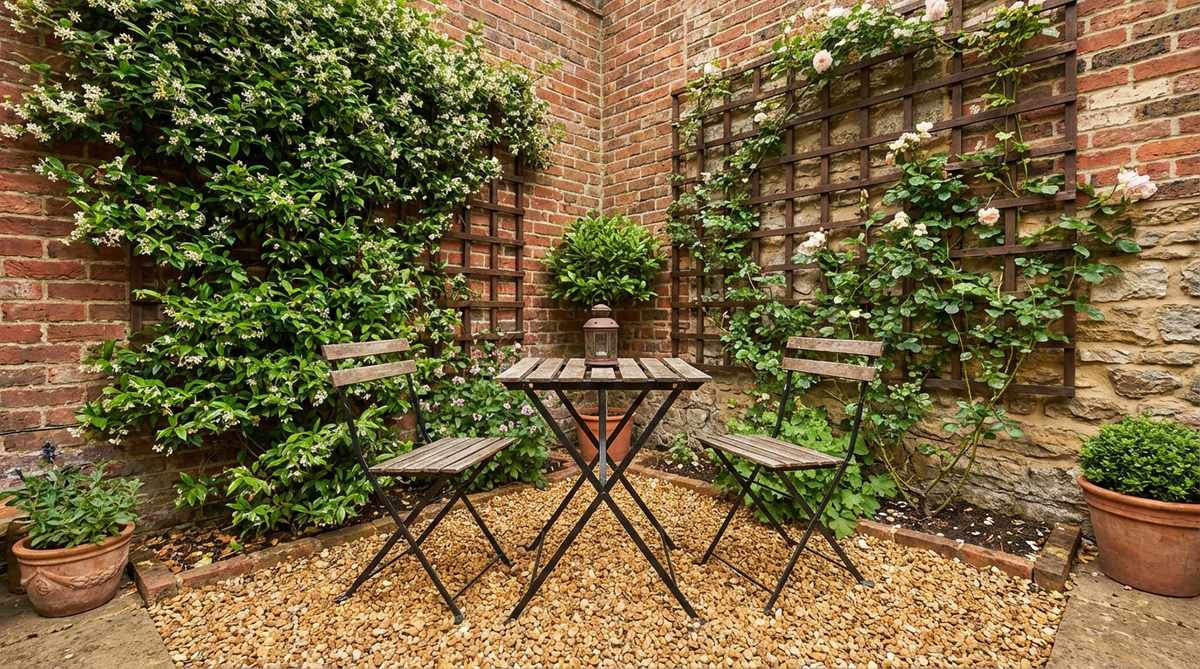
A hidden gravel bistro nook radiates the quiet, romantic energy of a secret Parisian café. This brilliant micro-design is perfect for turning a useless, awkward corner into your favorite morning coffee spot.
Most homeowners abandon tight corners, but applying a quick two-inch rock base resurrects these forgotten dead zones. Framing the floor with vertical climbing trellises draws the eye upward, making the tiny footprint feel intentionally designed.
You can throw this together in one hour for under $40. Save this idea for a zero-stress weekend transformation!
- Key Materials: Fine-grade tan gravel, simple wooden border
- Vibe / Style: Intimate cafe escape
- Difficulty: Extremely easy
- Budget Breakdown: Gravel bag: $25 | Wood border: $15.
- Creator’s Tip: Because there’s no heavy traffic, you only need a thin layer of stone to achieve the full aesthetic.
- Smart Sourcing: pre-cut wooden border rolls and rust-proof metal garden trellises.
12. Mixed Material Entertainment Deck
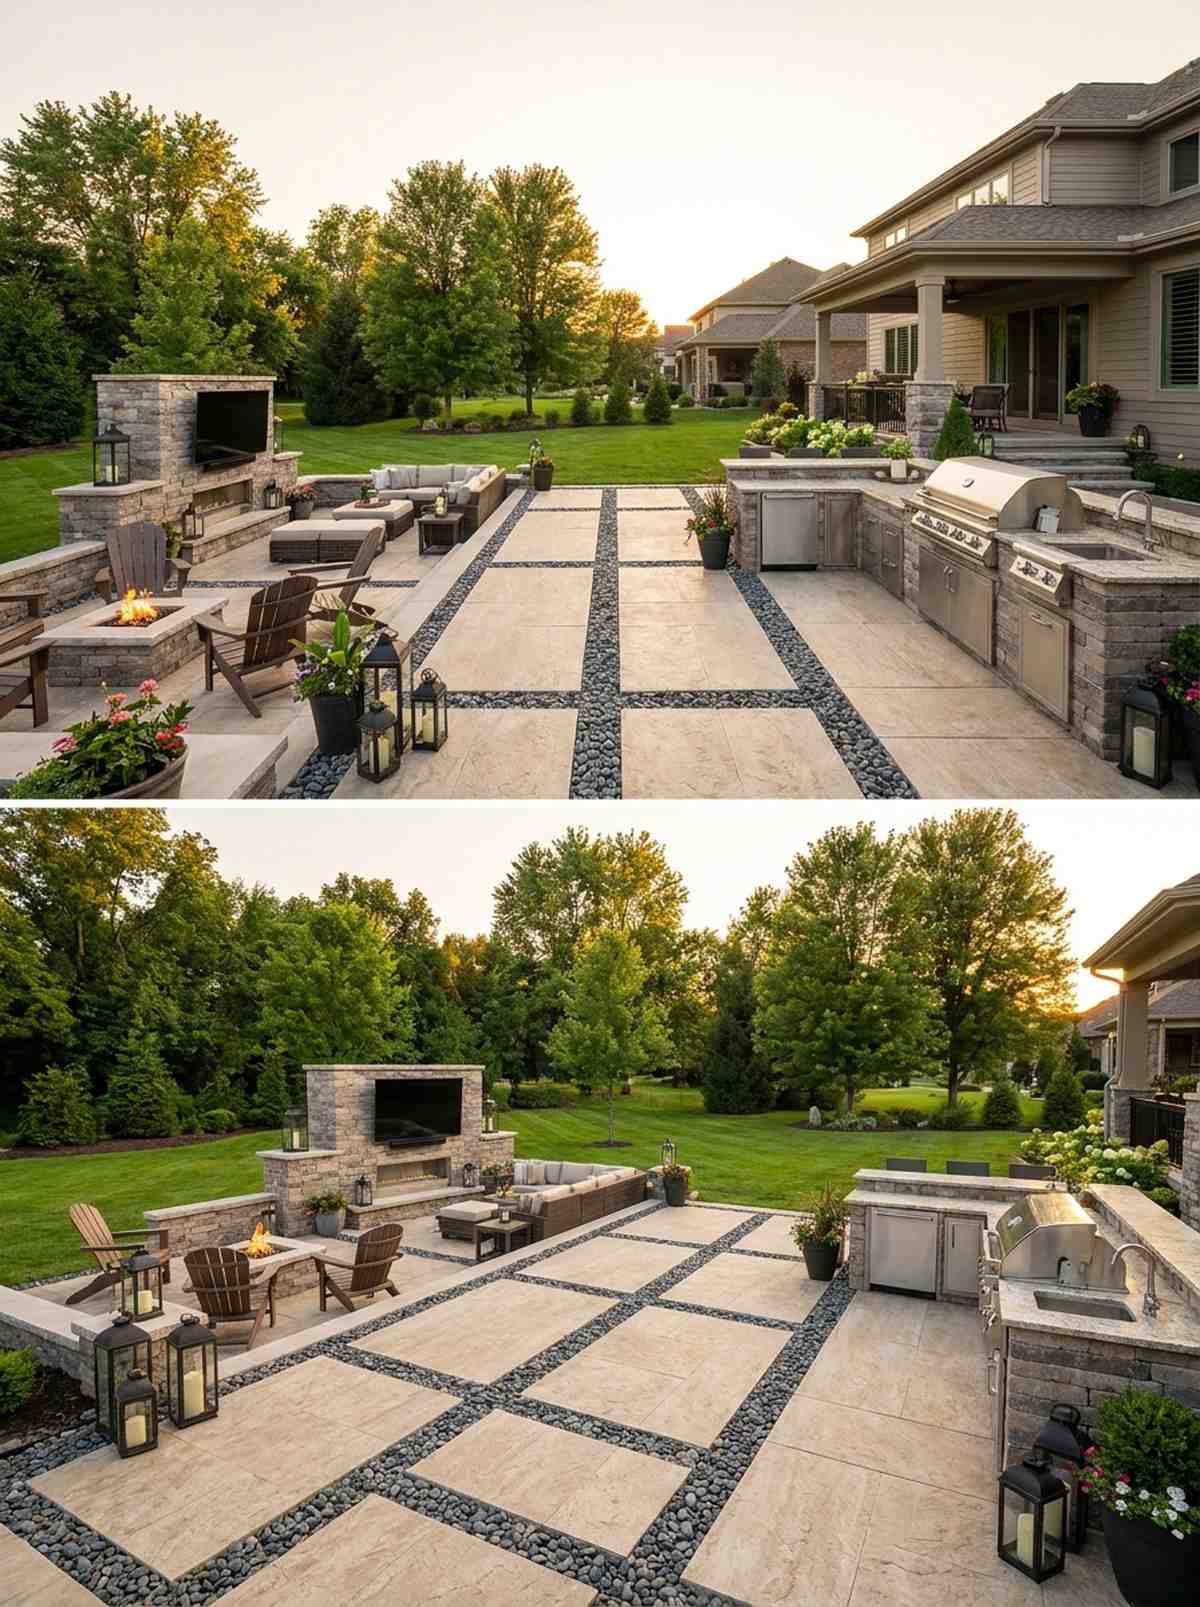
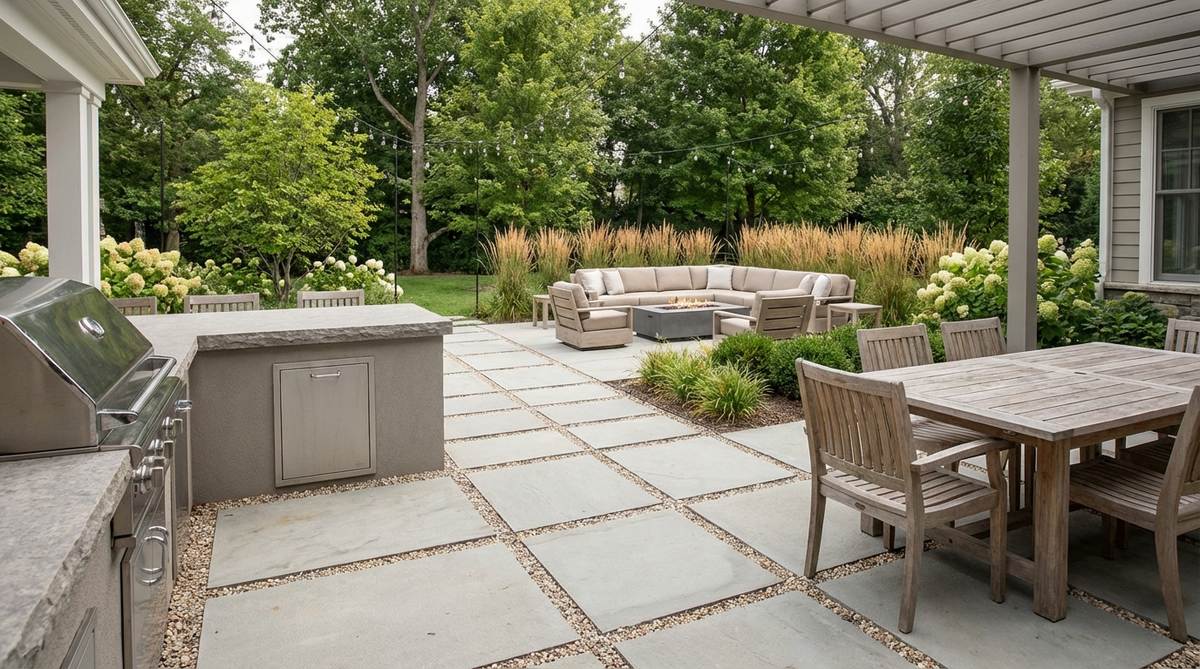
The hybrid stone and paver deck delivers a highly textured, luxurious surface that screams custom architecture. It perfectly anchors a massive outdoor entertainment system or an elaborate grill station.
Pouring a massive concrete slab looks industrial and cold, but breaking up giant pavers with soft stone completely elevates the space. This floating technique allows individual blocks to shift during winter freezes without cracking your expensive flooring.
This hybrid approach costs about $200–$400, offering a premium resort look on a fraction of the budget. Highly recommended for avid outdoor hosts.
- Key Materials: Oversized porcelain outdoor tiles, contrasting filler gravel
- Vibe / Style: Luxury resort patio
- Difficulty: Moderate (heavy lifting)
- Budget Breakdown: Large pavers: $250 | Gravel joints: $80.
- Creator’s Tip: Use a leaf blower on the lowest setting to keep the pavers clean without blowing the joint stones away.
- Smart Sourcing: UV-coated porcelain patio tile kits and bulk pack paver spacers.
If you have dead zones where nothing grows, the following design is a total game-changer…
Garden Beds & Borders With Texture
13. Raised Bed Gravel Surround
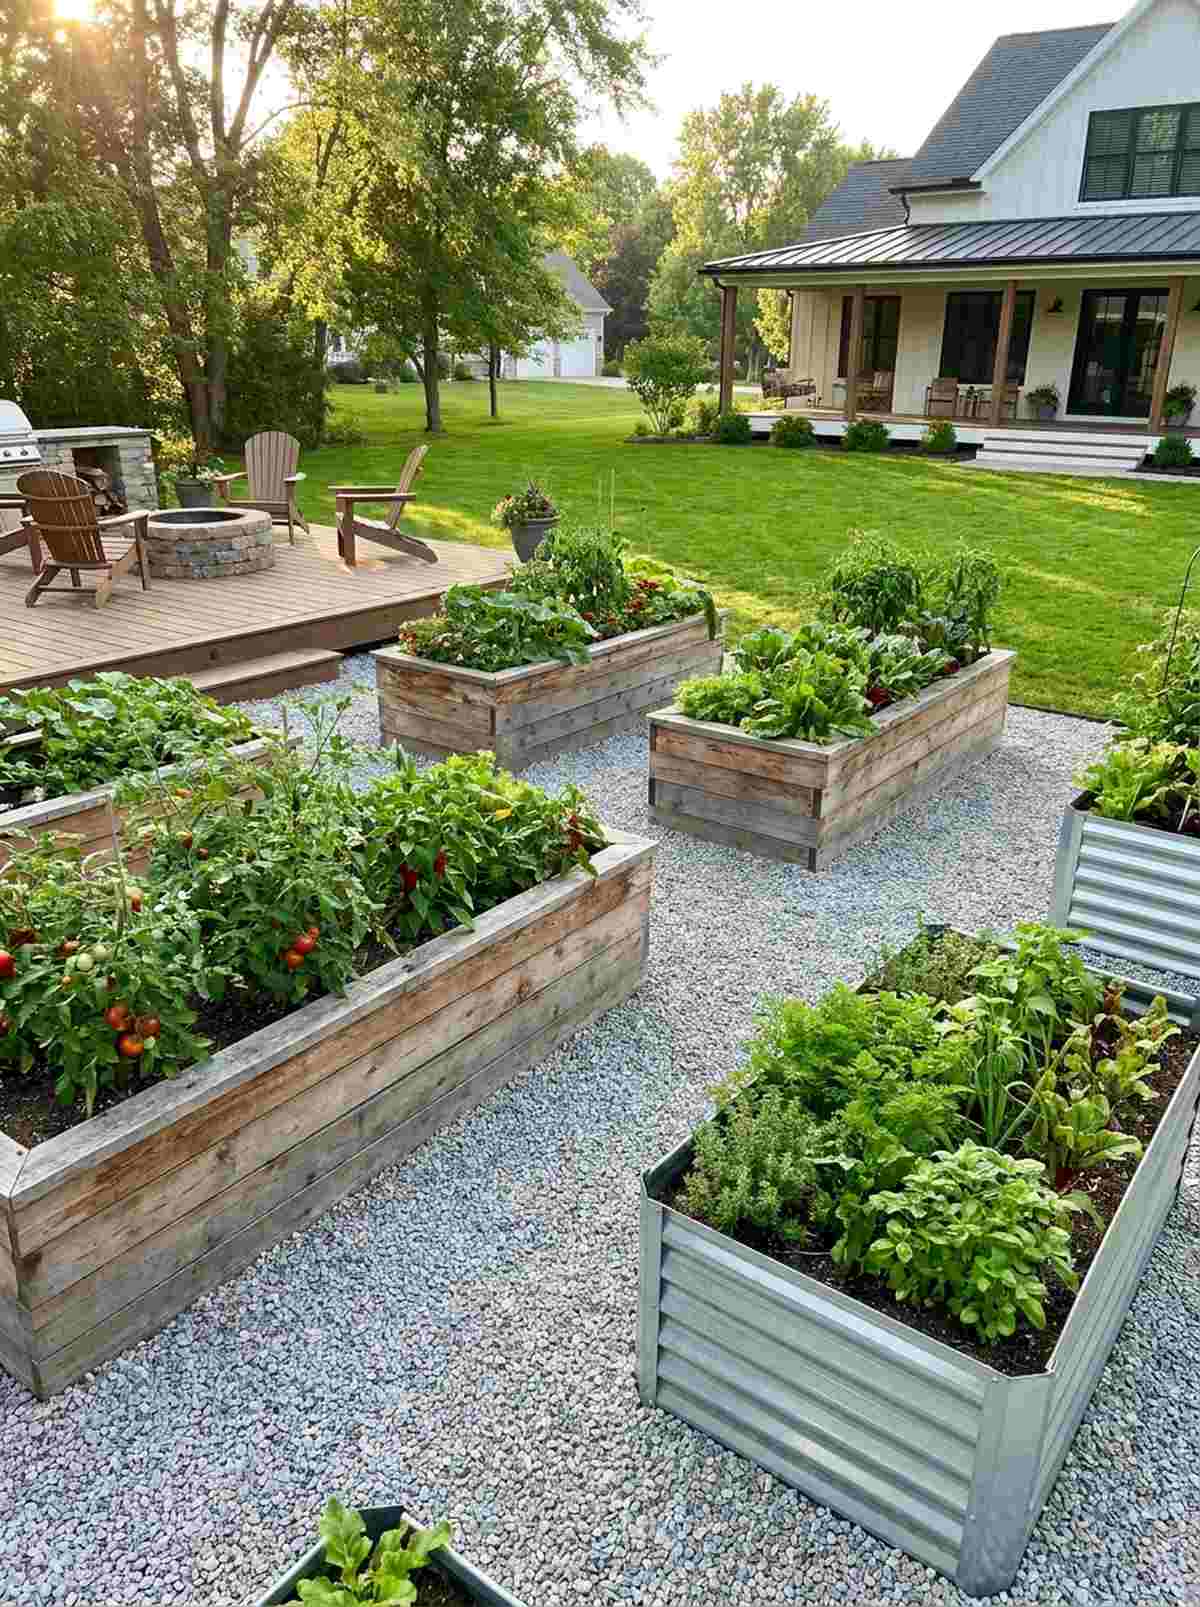
A clean gravel vegetable garden floor feels like a highly organized, professional botanical farm. It is the absolute best flooring to put between cedar planting boxes to guarantee mud-free harvesting.
Standard grass pathways between planters require constant weed-whacking, which inevitably damages your expensive wooden beds. Putting down a thick layer of aggregate stops aggressive weeds dead while keeping your shoes perfectly clean after a rainstorm.
Expect to spend around $100–$150 to fill the walking channels. Pin this to your homesteading board for the ultimate garden hack!
- Key Materials: Crushed stone base, standard 3/8″ top gravel
- Vibe / Style: Tidy urban farm
- Difficulty: Easy but labor-intensive
- Budget Breakdown: Stone: $120 | Fabric: $30.
- Creator’s Tip: Staple the weed barrier directly to the inside bottom edges of the raised beds for a seamless, weed-free seal.
- Smart Sourcing: pre-cut galvanized steel raised beds and a bulk pack landscape fabric staple kit.
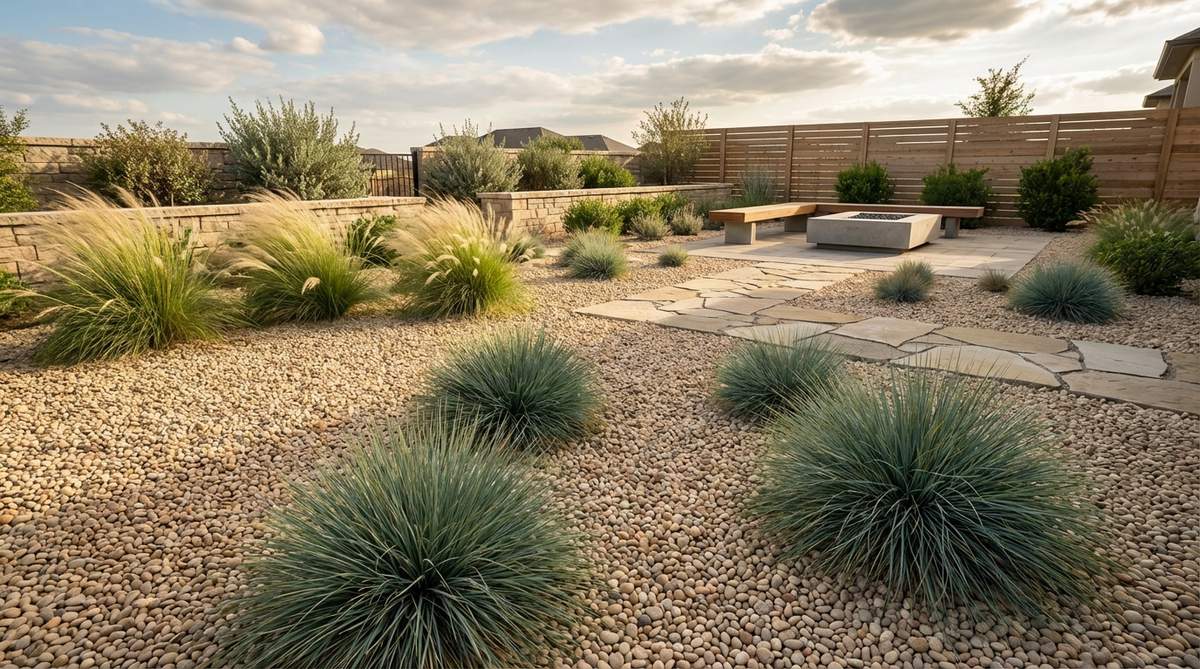
14. Succulent Garden With Gravel Mulch
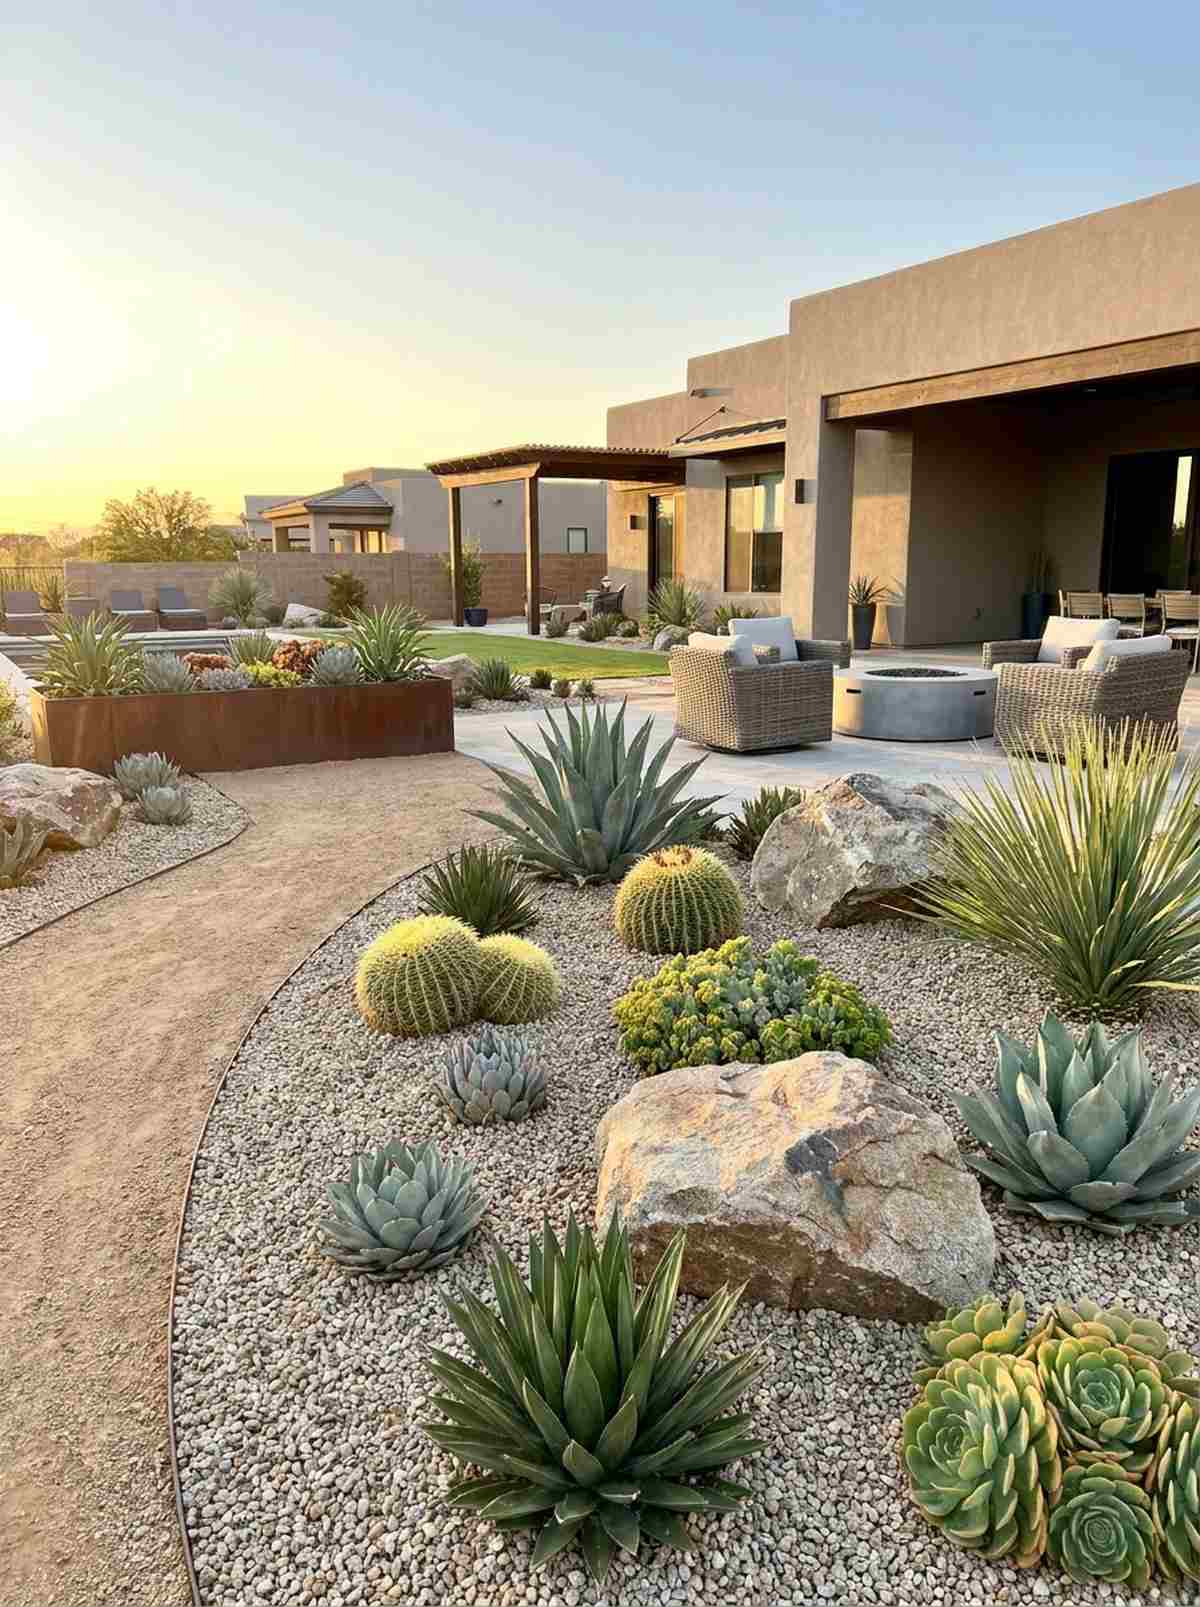
This arid succulent rock garden captures the striking, architectural beauty of an elite desert landscape. Use this moisture-wicking setup to keep drought-tolerant plants thriving without the threat of root rot.
Traditional wood mulch holds moisture like a sponge, quickly assassinating expensive succulents overnight. Swapping to a stone top-dress instantly reflects excessive heat and drastically improves soil drainage, mimicking their native harsh environments perfectly.
Creating this desert aesthetic costs practically nothing—usually around $20–$40 for a small bed. It’s an easy weekend win for hot climate zones.
- Key Materials: Light-colored pea gravel, cacti soil mix
- Vibe / Style: Sleek Southwestern modern
- Difficulty: Very easy
- Budget Breakdown: Gravel mulch: $20 | Soil amendments: $15.
- Creator’s Tip: Brush excess dust off the stones before laying them to keep the vibrant colors of your succulents popping.
- Smart Sourcing: premium miniature garden supplies (stone variety) and pre-mixed succulent soil bags.
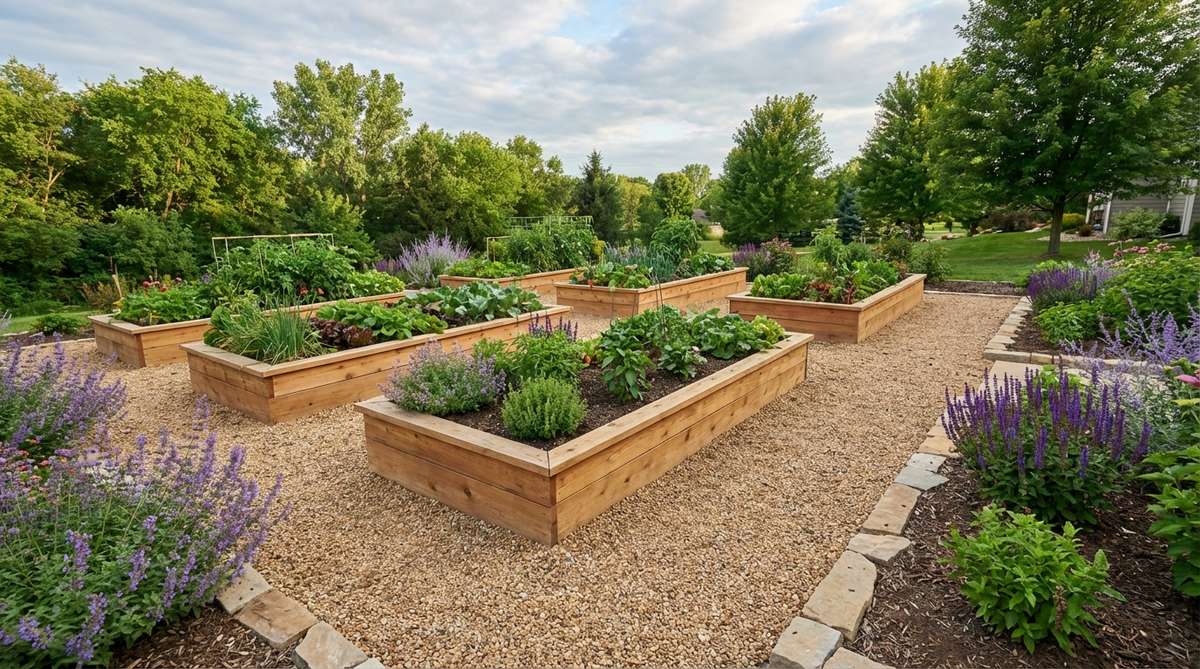
15. Perennial Border With Gravel Base
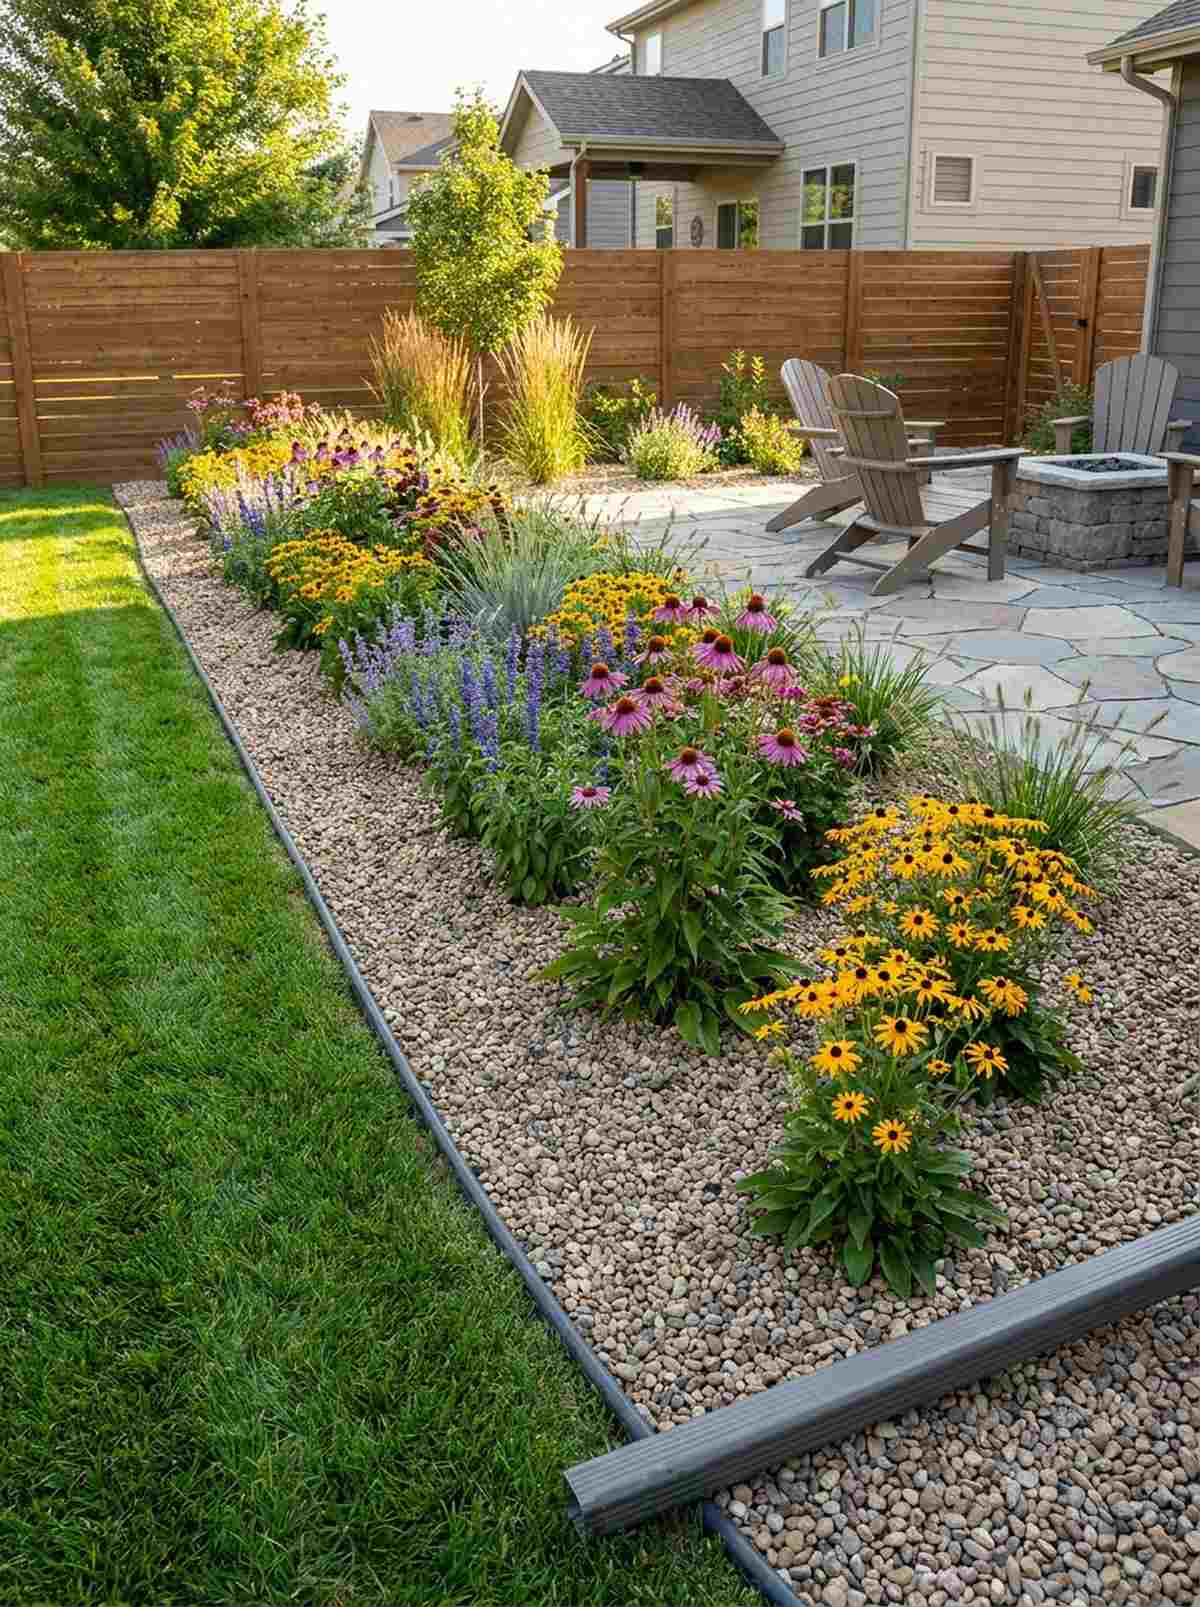
A stone-mulched perennial border gives traditional flowering beds a shockingly sharp, contemporary edge. It serves as a brilliant neutral canvas that makes vibrant seasonal blooms pop aggressively against the ground.
Bark mulch fades into an ugly gray mush every single year, requiring endless backbreaking replacements. A permanent aggregate layer completely solves this problem, locking down soil moisture while delivering an evergreen, designer-level finish.
Upgrading a standard flower bed costs roughly $50–$80 in rock. Save this if you are absolutely done buying bags of mulch every spring!
- Key Materials: Neutral-toned pea gravel, composted soil base
- Vibe / Style: Modern botanical display
- Difficulty: Easy
- Budget Breakdown: Stone: $60 | Base compost: $20.
- Creator’s Tip: Leave a two-inch breathing ring completely bare around plant stems to prevent accidental fungal infections.
- Smart Sourcing: UV-coated flexible garden edging and bulk organic compost starter packs.
16. Specimen Tree Gravel Ring
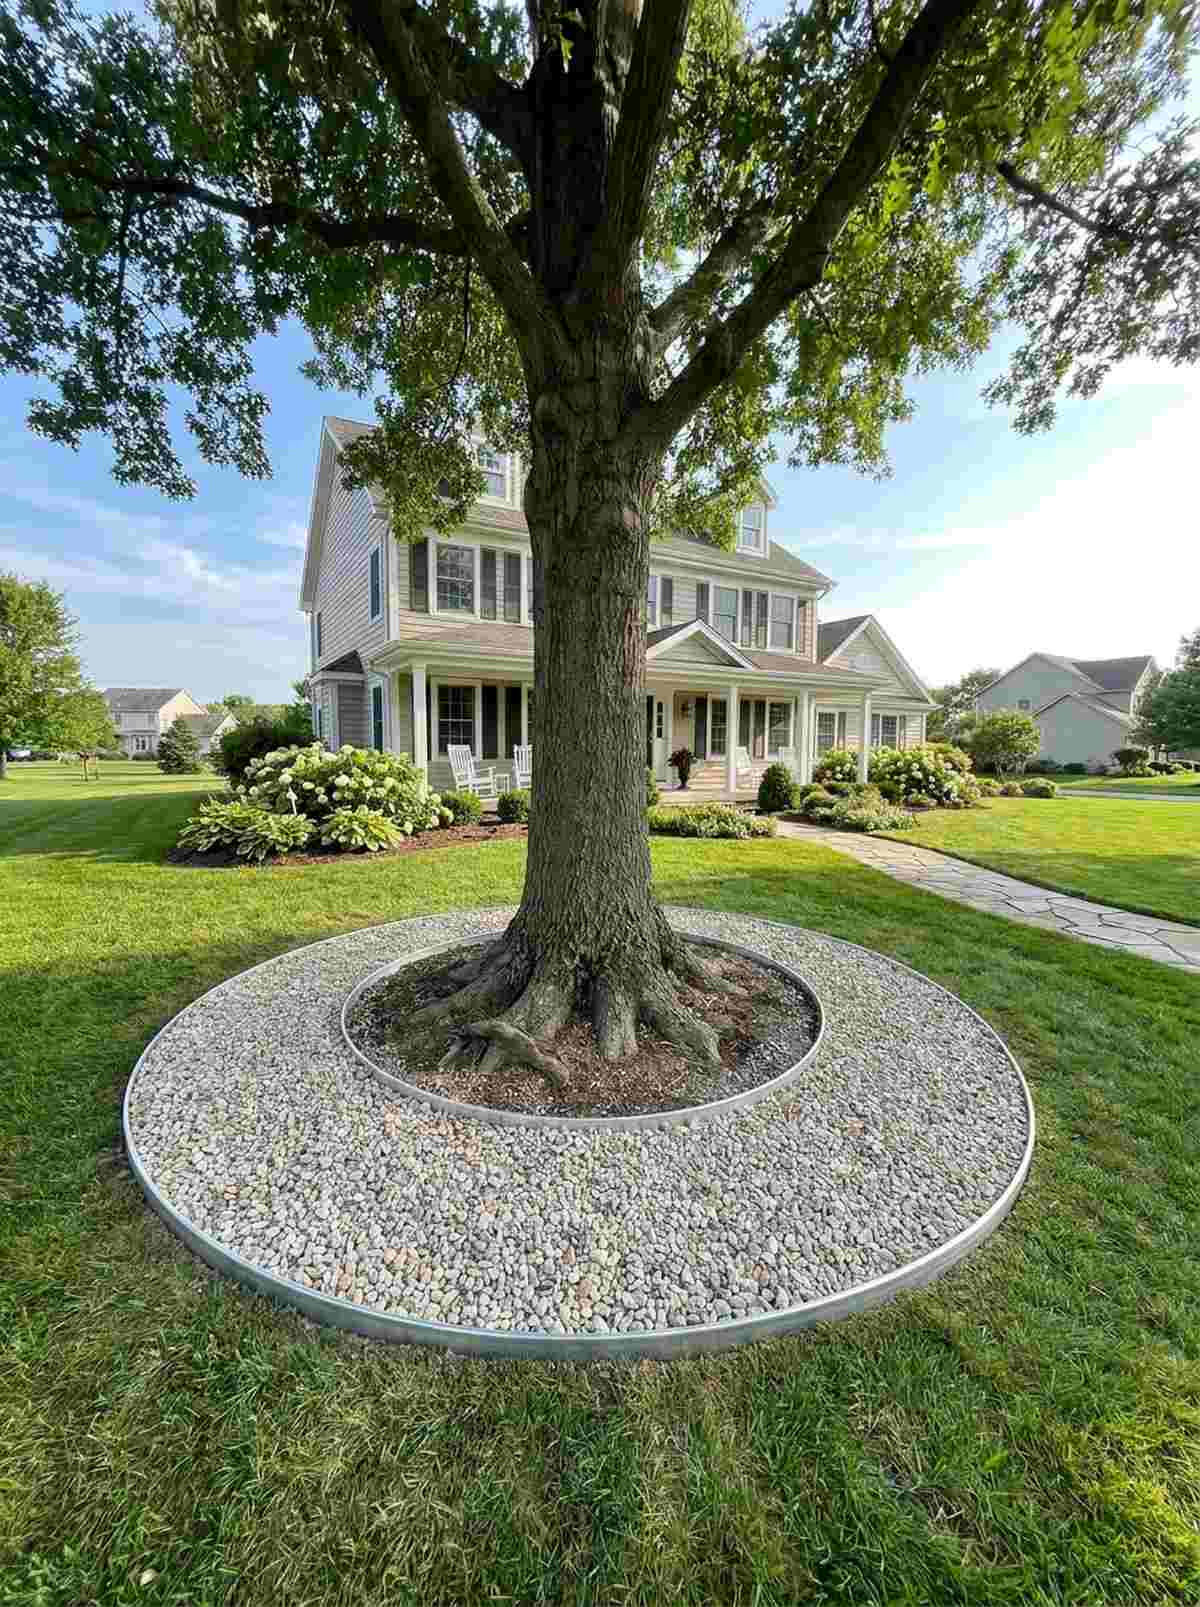
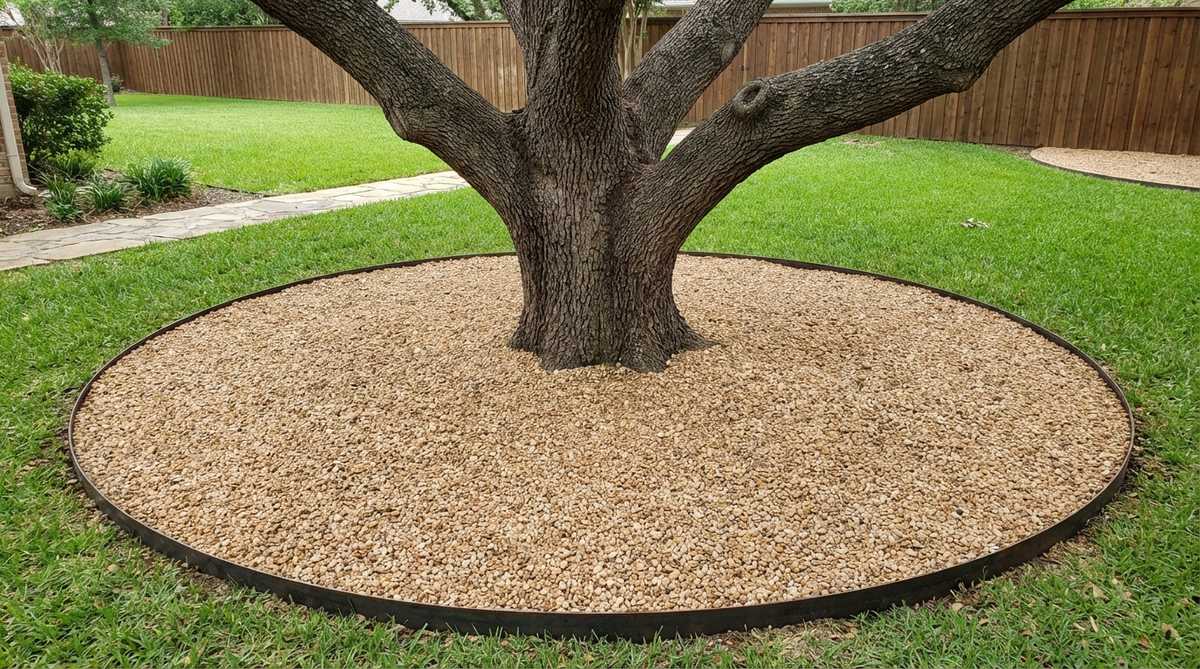
This crisp tree perimeter ring brings a manicured, estate-quality focal point directly to your front lawn. It is the ultimate protective shield for mature trees with aggressive surface roots that destroy lawnmowers.
Battling turf grass under a giant canopy is a losing war that looks incredibly messy. Installing a sharp aluminum bender board filled with stone instantly elevates the tree’s architecture while safely delivering oxygen directly to the root system.
You can execute this protective halo for about $35–$60. It’s a fast upgrade that completely changes the vibe of your landscaping.
- Key Materials: Aluminum bender board, contrasting decorative gravel
- Vibe / Style: Manicured estate grounds
- Difficulty: Easy
- Budget Breakdown: Metal edge: $30 | Stone: $20.
- Creator’s Tip: Never pile the rocks directly against the tree trunk; slope it away slightly to prevent devastating bark rot.
- Smart Sourcing: pre-cut aluminum landscape edging kits and heavy-duty root barrier rolls.
Wait until you see how this next layout turns a basic corner into a high-end focal point…
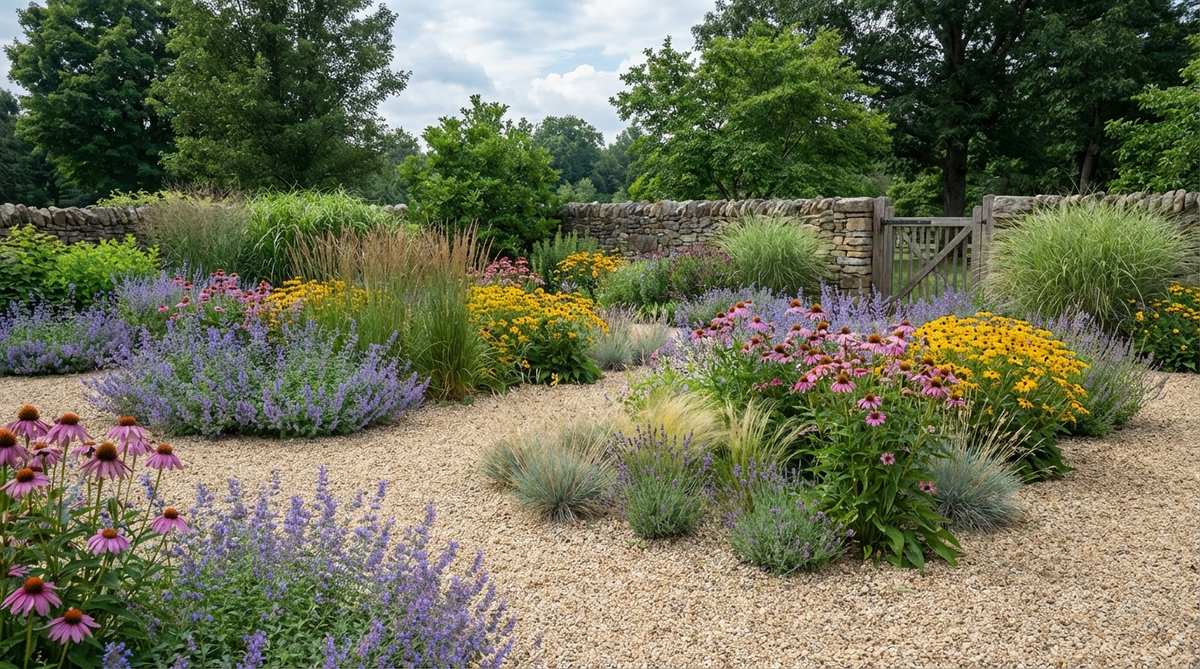
17. Ornamental Grass Gravel Meadow
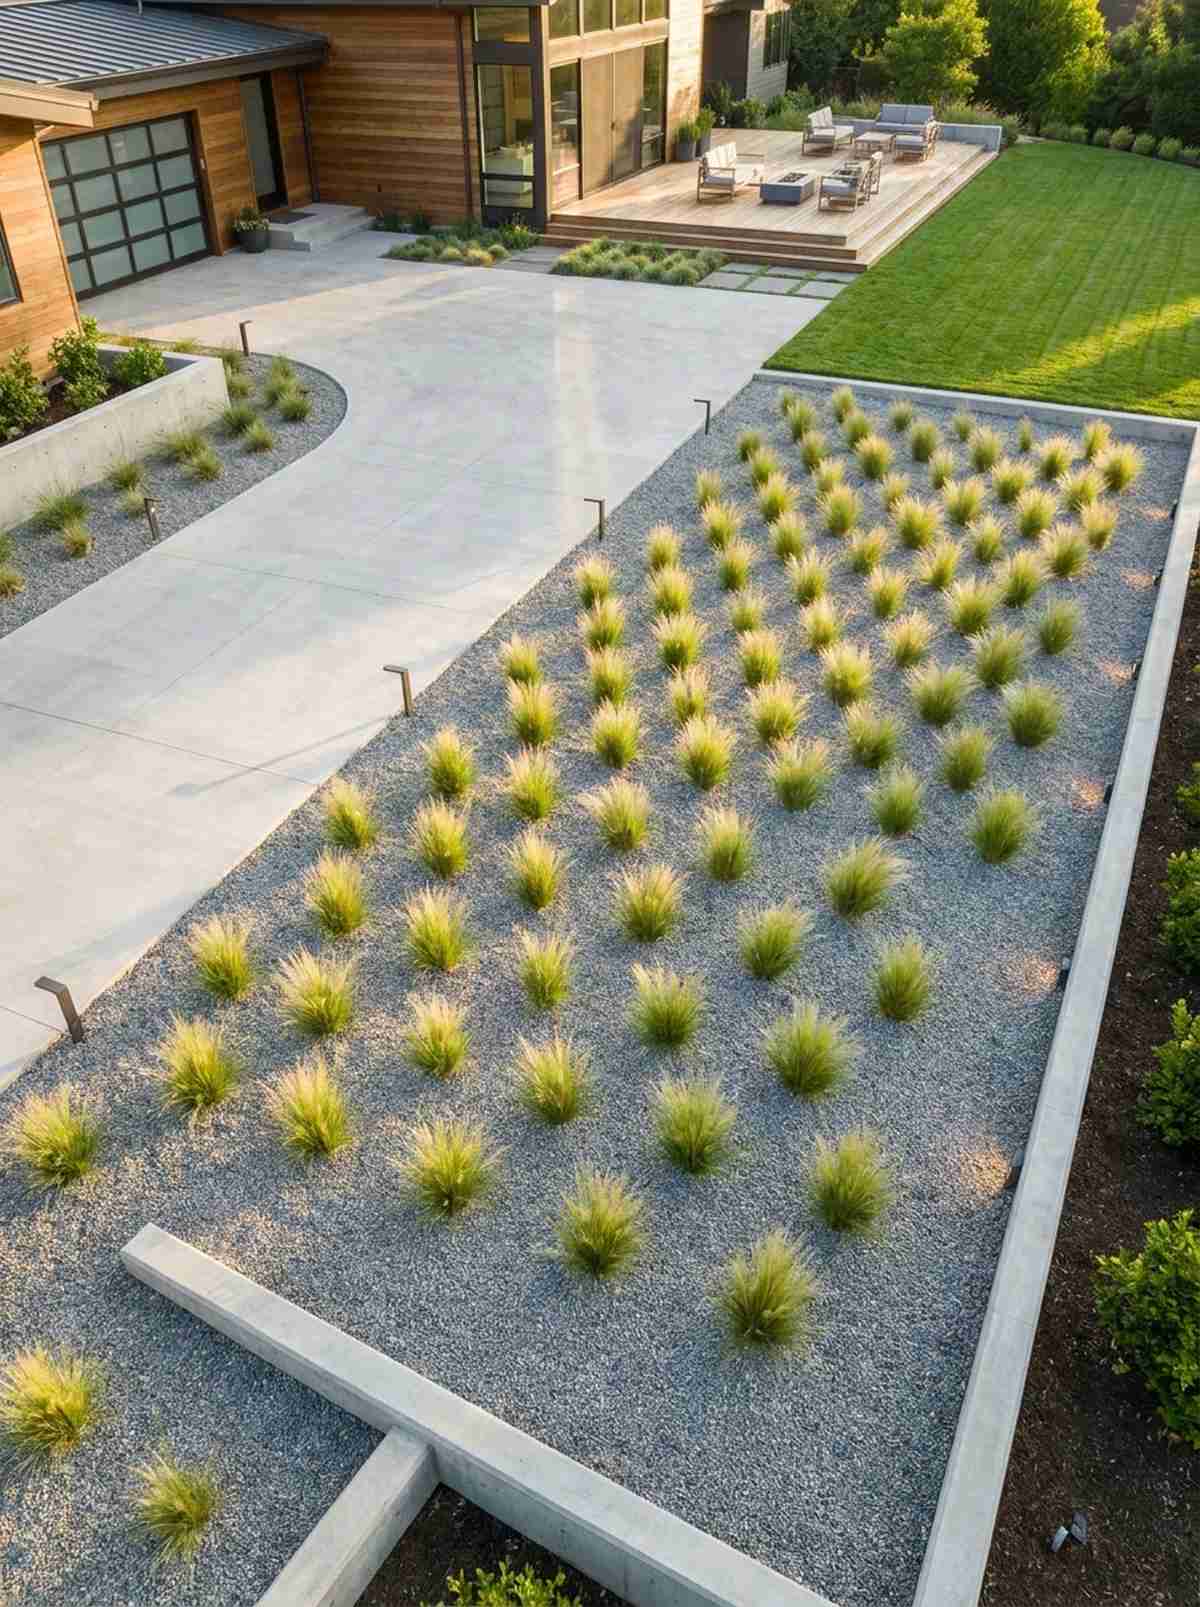
The minimalist grass stone meadow feels like a tranquil, high-end corporate courtyard design brought home. This is visually striking when planted along long driveways or sprawling modern front yards.
Clumping grasses scattered in standard dirt look like neglected weeds waiting to be pulled. Boxing them within a pristine sea of uniform pebbles immediately transforms them into deliberate, architectural sculptures that require zero watering.
Creating this sweeping look costs $100–$200 depending on the total footprint. Pin this idea to completely eliminate your tedious weekend mowing routine.
- Key Materials: Mexican feather grass, fine gray pea gravel
- Vibe / Style: Architectural xeriscape
- Difficulty: Moderate (large area prep)
- Budget Breakdown: Stone delivery: $120 | Grass plugs: $60.
- Creator’s Tip: Space the grass plugs uniformly using a tape measure to maintain that strict, modern architectural geometry.
- Smart Sourcing: bulk pack ornamental grass starter plugs and commercial-grade weed barrier.
18. Alpine Rock Garden
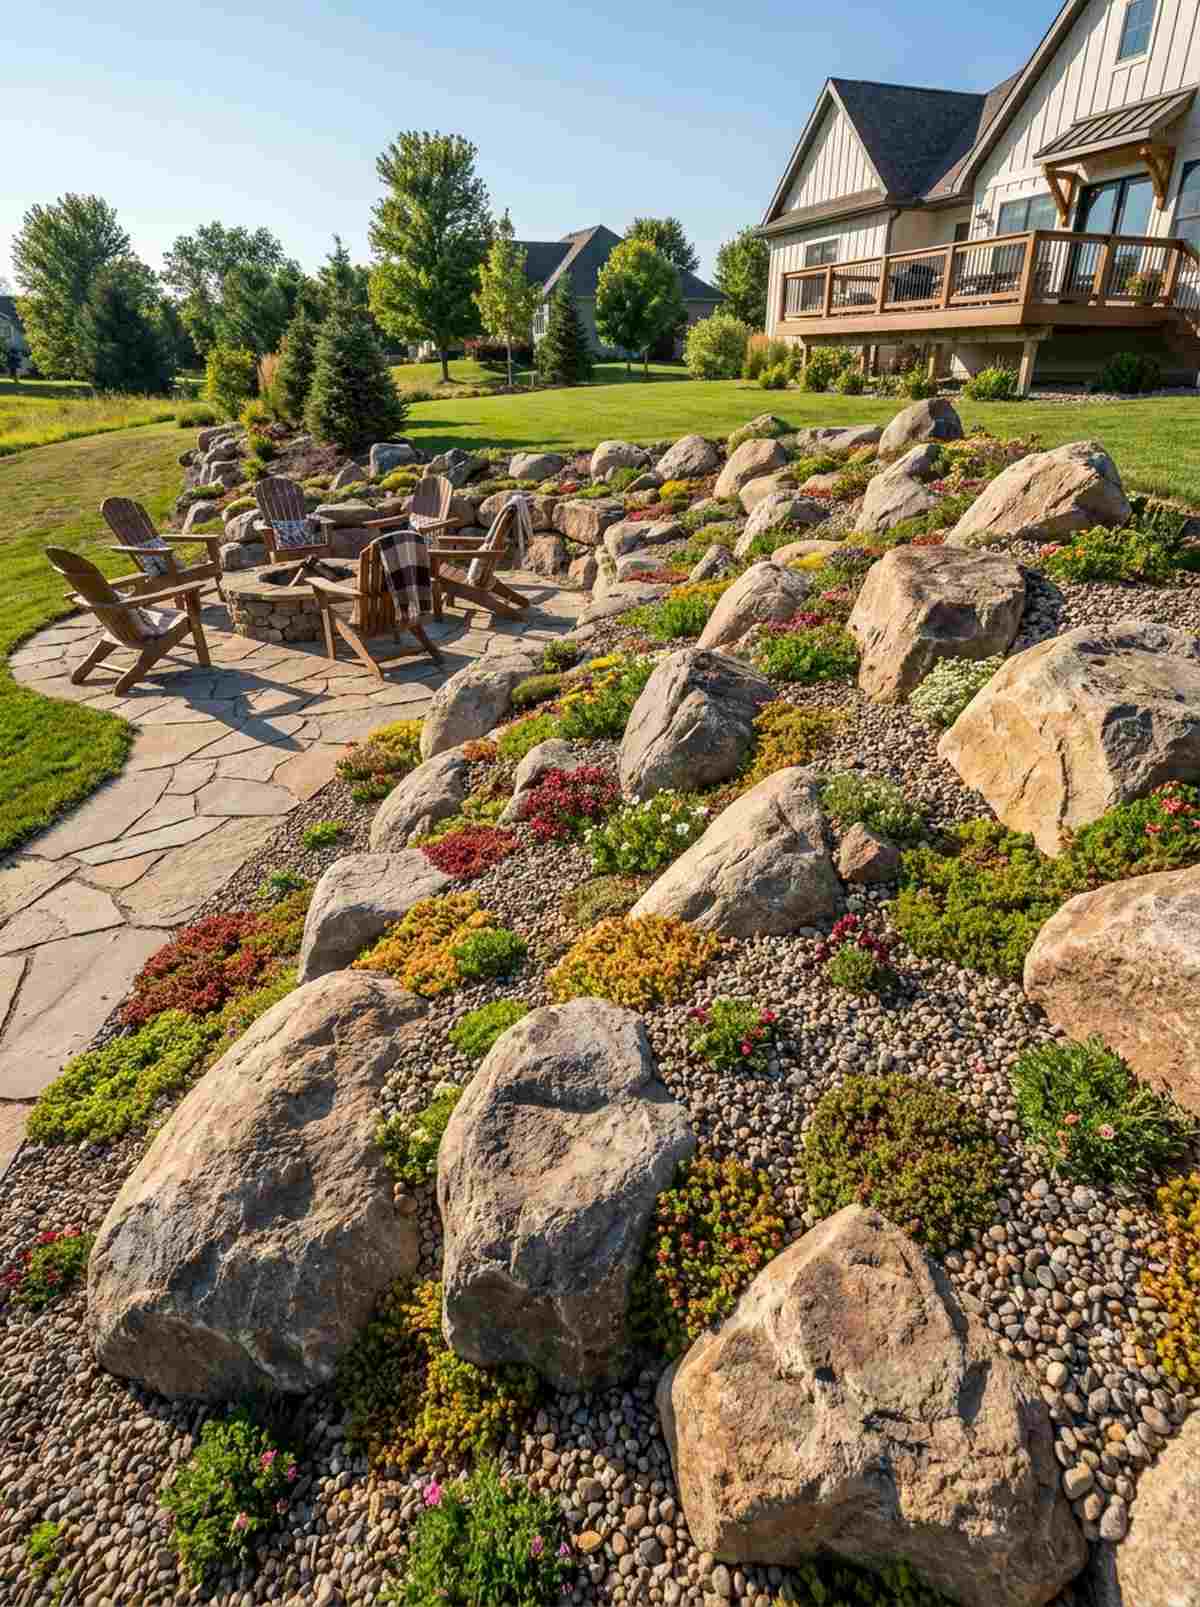
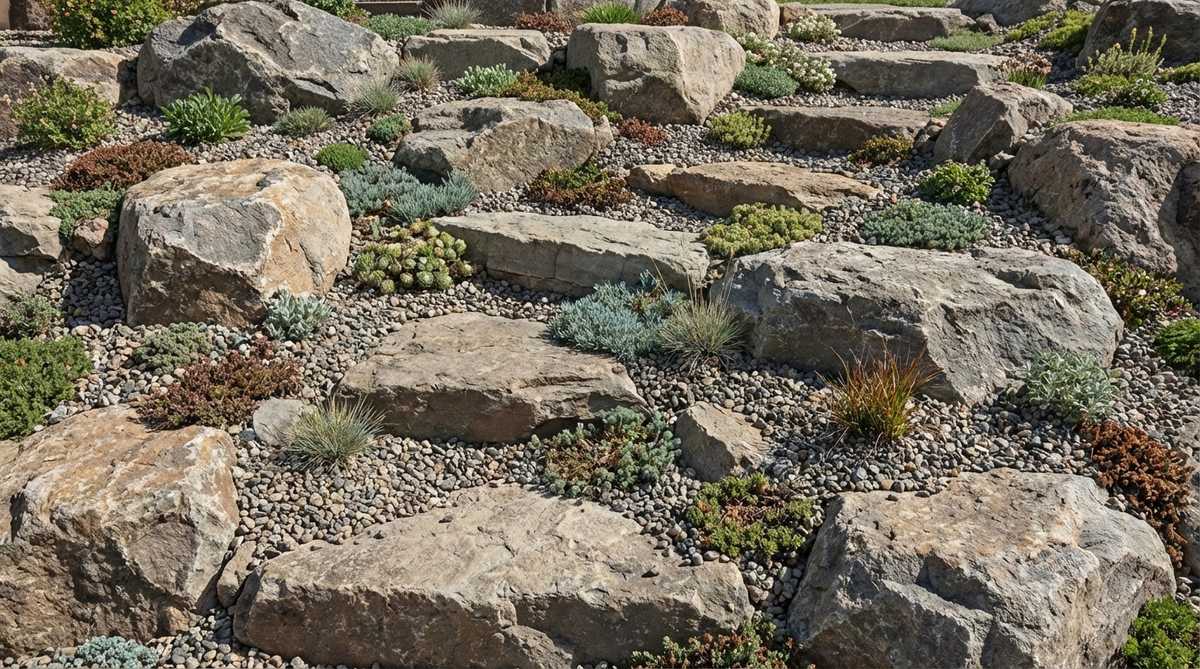
An elevated alpine scree garden captures the rugged, untamed magic of a miniature mountainside ecosystem. It’s the perfect brilliant solution for baking-hot hillsides where basic topsoil washes away during storms.
Attempting to grow traditional groundcover on harsh slopes usually results in a dead, patchy mess. Strategically stacking massive boulders and filling the crevices with tiny aggregate mimics high-altitude drainage, allowing rare alpine flora to explode with color.
Building an alpine feature runs about $80–$150 primarily for the accent boulders. This is highly recommended for adding vertical drama to flat yards.
- Key Materials: Large anchor boulders, varied size pea gravel, creeping sedum
- Vibe / Style: Rugged mountain terrain
- Difficulty: Heavy labor
- Budget Breakdown: Boulders: $100 | Fill gravel: $40.
- Creator’s Tip: Bury the bottom third of your large boulders into the dirt so they look naturally ancient, not just dropped on top.
- Smart Sourcing: miniature garden supplies (crevice tools) and pre-mixed alpine plant starter kits.
Courtyards & Outdoor Rooms
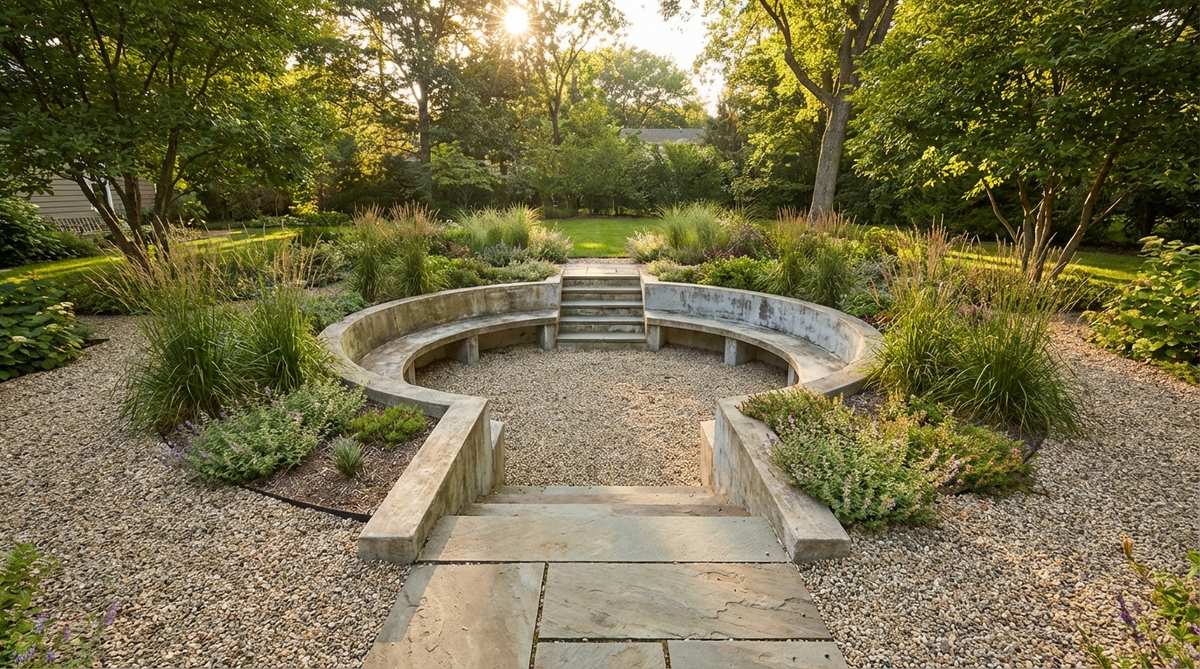
19. Zen Meditation Corner
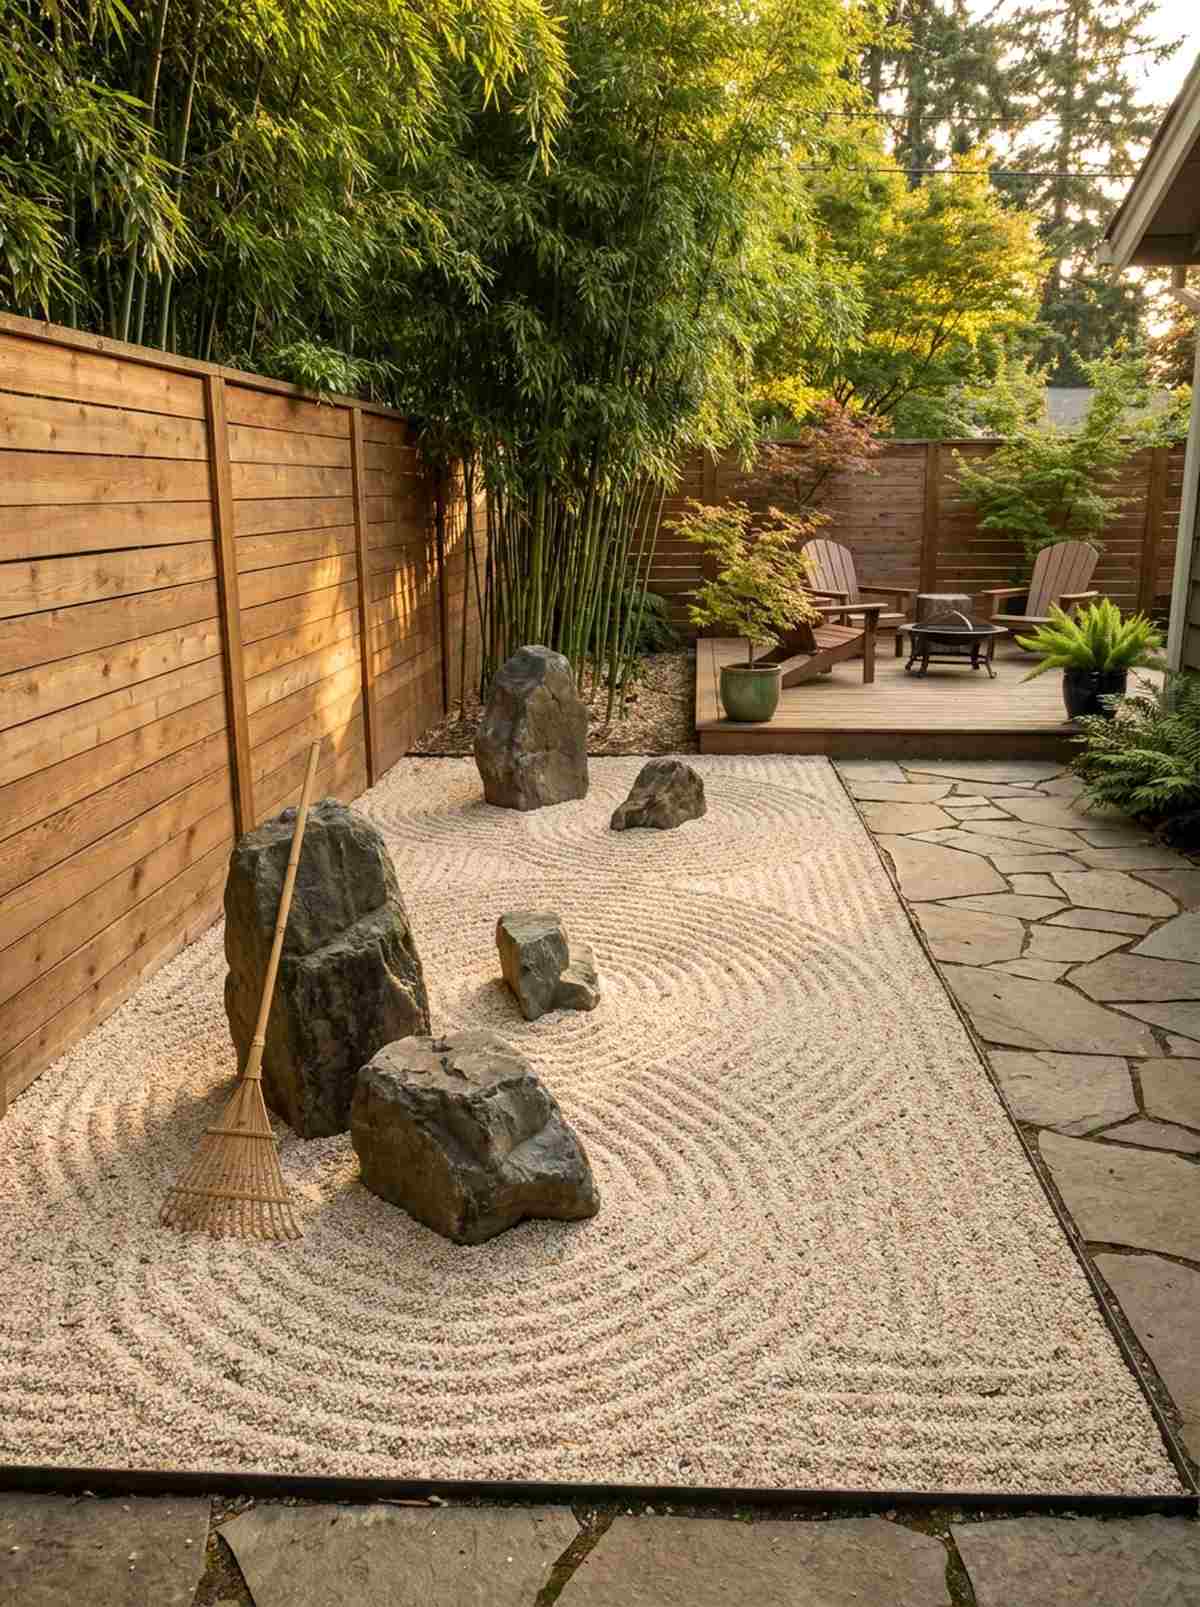
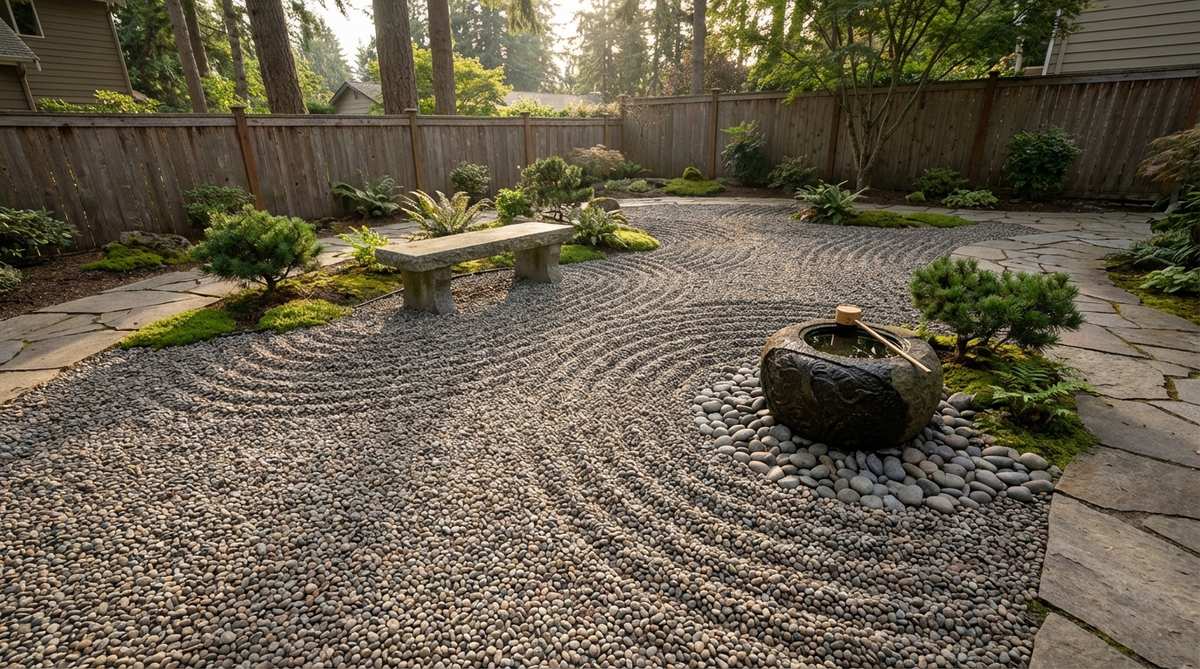
This tranquil Zen courtyard layout feels like an exclusive mindfulness retreat tucked behind your own house. It functions beautifully in narrow, enclosed patios where standard furniture feels too bulky.
Cramming plastic chairs into a tiny yard instantly cheapens the aesthetic of your home. Embracing empty space with carefully raked aggregate and singular accent rocks forces a profound sense of scale and deeply calming visual movement.
You can construct this peaceful escape for roughly $60–$90. Pin this to your mental wellness and outdoor decor board right now!
- Key Materials: Fine-grain smooth gravel, large display stones, bamboo rake
- Vibe / Style: Japanese minimalist sanctuary
- Difficulty: Easy setup, ongoing maintenance
- Budget Breakdown: Fine gravel: $50 | Accent stones: $30.
- Creator’s Tip: Use crushed granite or very fine pea gravel because standard round stones will not hold the iconic rake patterns.
- Smart Sourcing: traditional bamboo Zen garden rakes and premium polished river rock (bulk pack).
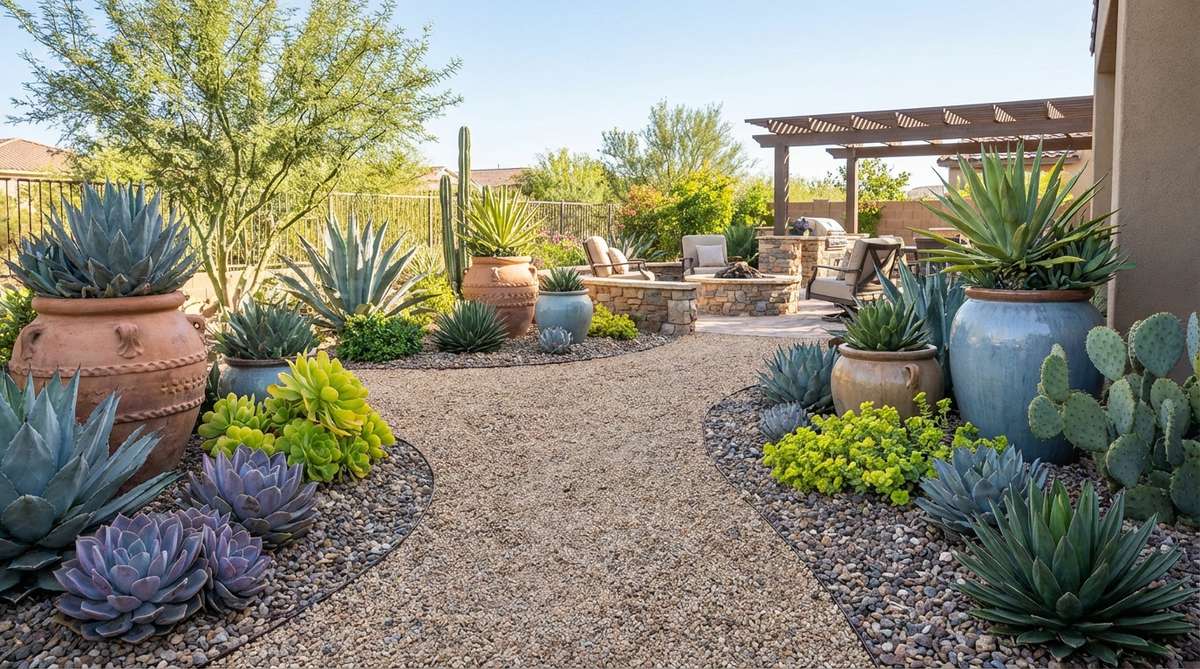
20. Spanish Style Interior Courtyard
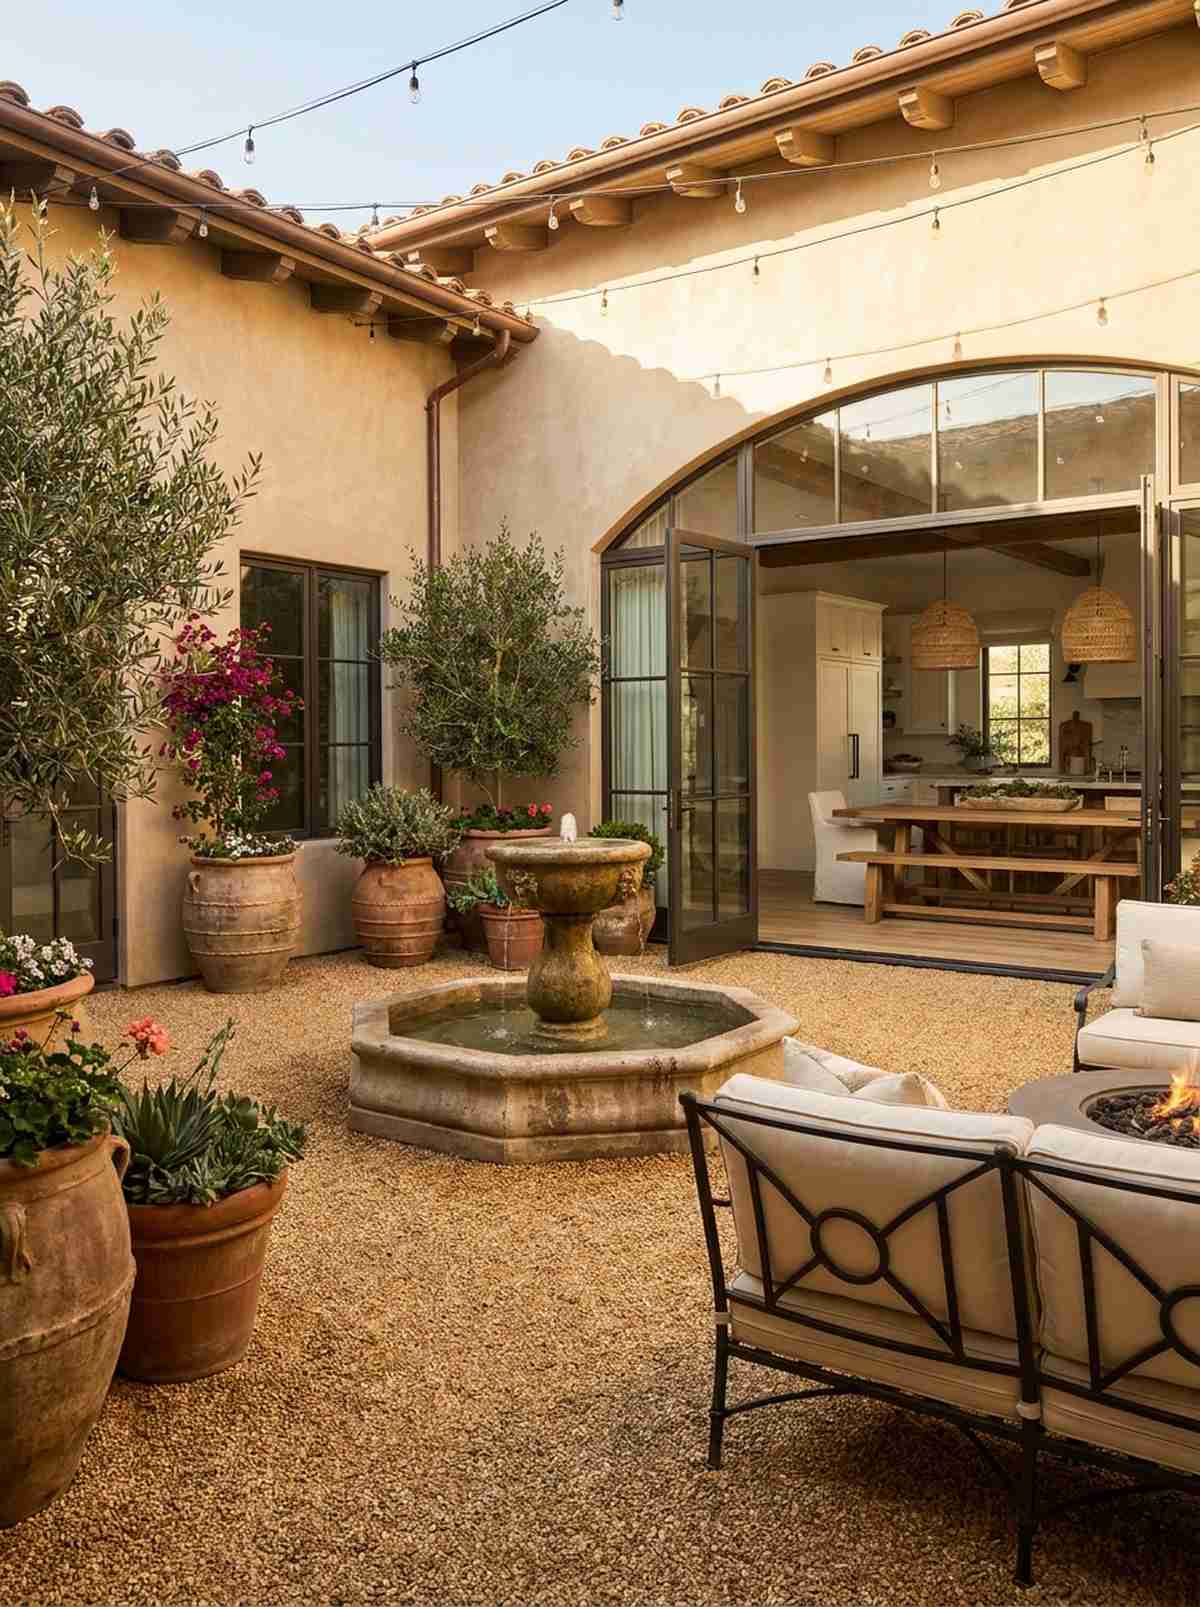
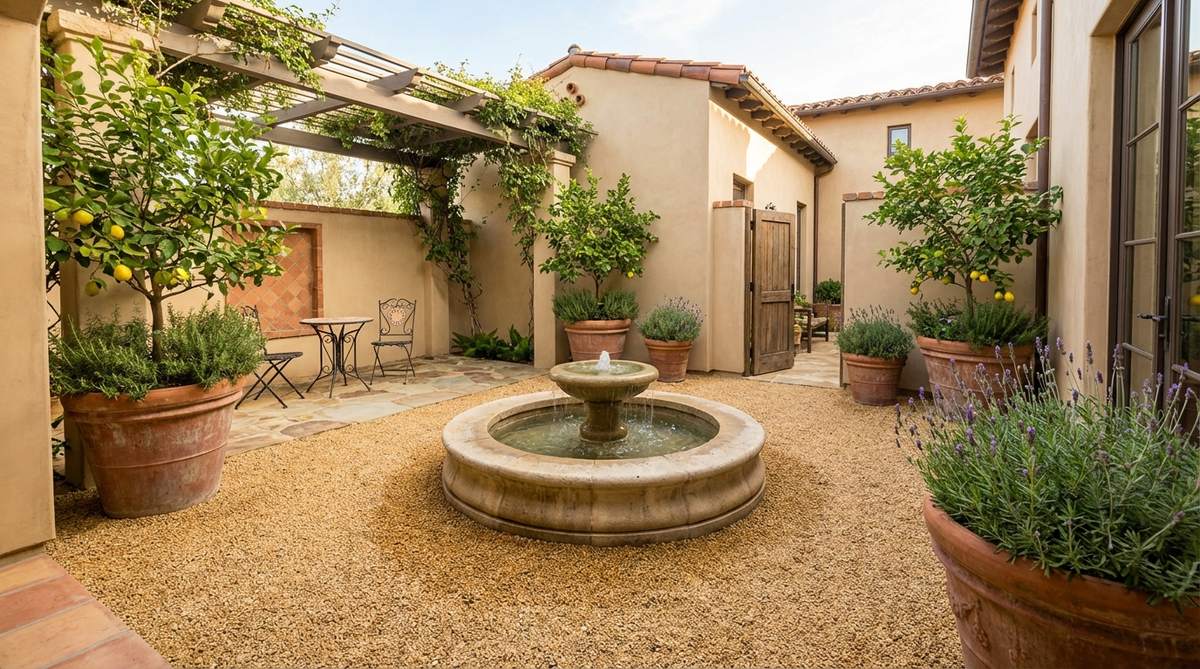
A golden Mediterranean courtyard floor radiates the sun-drenched, rustic romance of an old-world Spanish villa. This flooring seamlessly unites central fountains and heavy terracotta pottery in enclosed architecture.
Standard patio tiles absorb summer heat, turning walled courtyards into suffocating outdoor ovens. Applying a thick layer of warm-toned aggregate significantly reduces heat retention while elegantly muffling echoing footsteps against stucco walls.
The flooring portion of this courtyard costs around $100–$180. It’s an essential upgrade that instantly cools down hot climate zones.
- Key Materials: Warm tan/gold pea gravel, terracotta planters
- Vibe / Style: Old-world Mediterranean villa
- Difficulty: Moderate
- Budget Breakdown: Gold stone: $120 | Edge trim: $40.
- Creator’s Tip: Install a discrete overflow pipe near your central fountain that drains directly beneath the porous stone layer.
- Smart Sourcing: UV-coated terracotta pot sealer and pre-cut hidden landscape edging.
Material Guide: Cheap vs. Premium Aesthetic
Knowing exactly where to save and where to spend makes all the difference in achieving that “looks expensive but isn’t” vibe.
- Standard vs. UV-Resistant/Premium Edging: Cheap plastic borders warp and snap after one summer. Upgrading to UV-coated composite or steel keeps lines razor-sharp for decades.
- Pre-made Kits vs. Sourcing Locally: While local stone yards save you cash on bulk gravel, utilizing pre-made interlocking stabilizer grids guarantees your furniture won’t sink, saving you massive frustration.
21. Modern Sculpture Courtyard
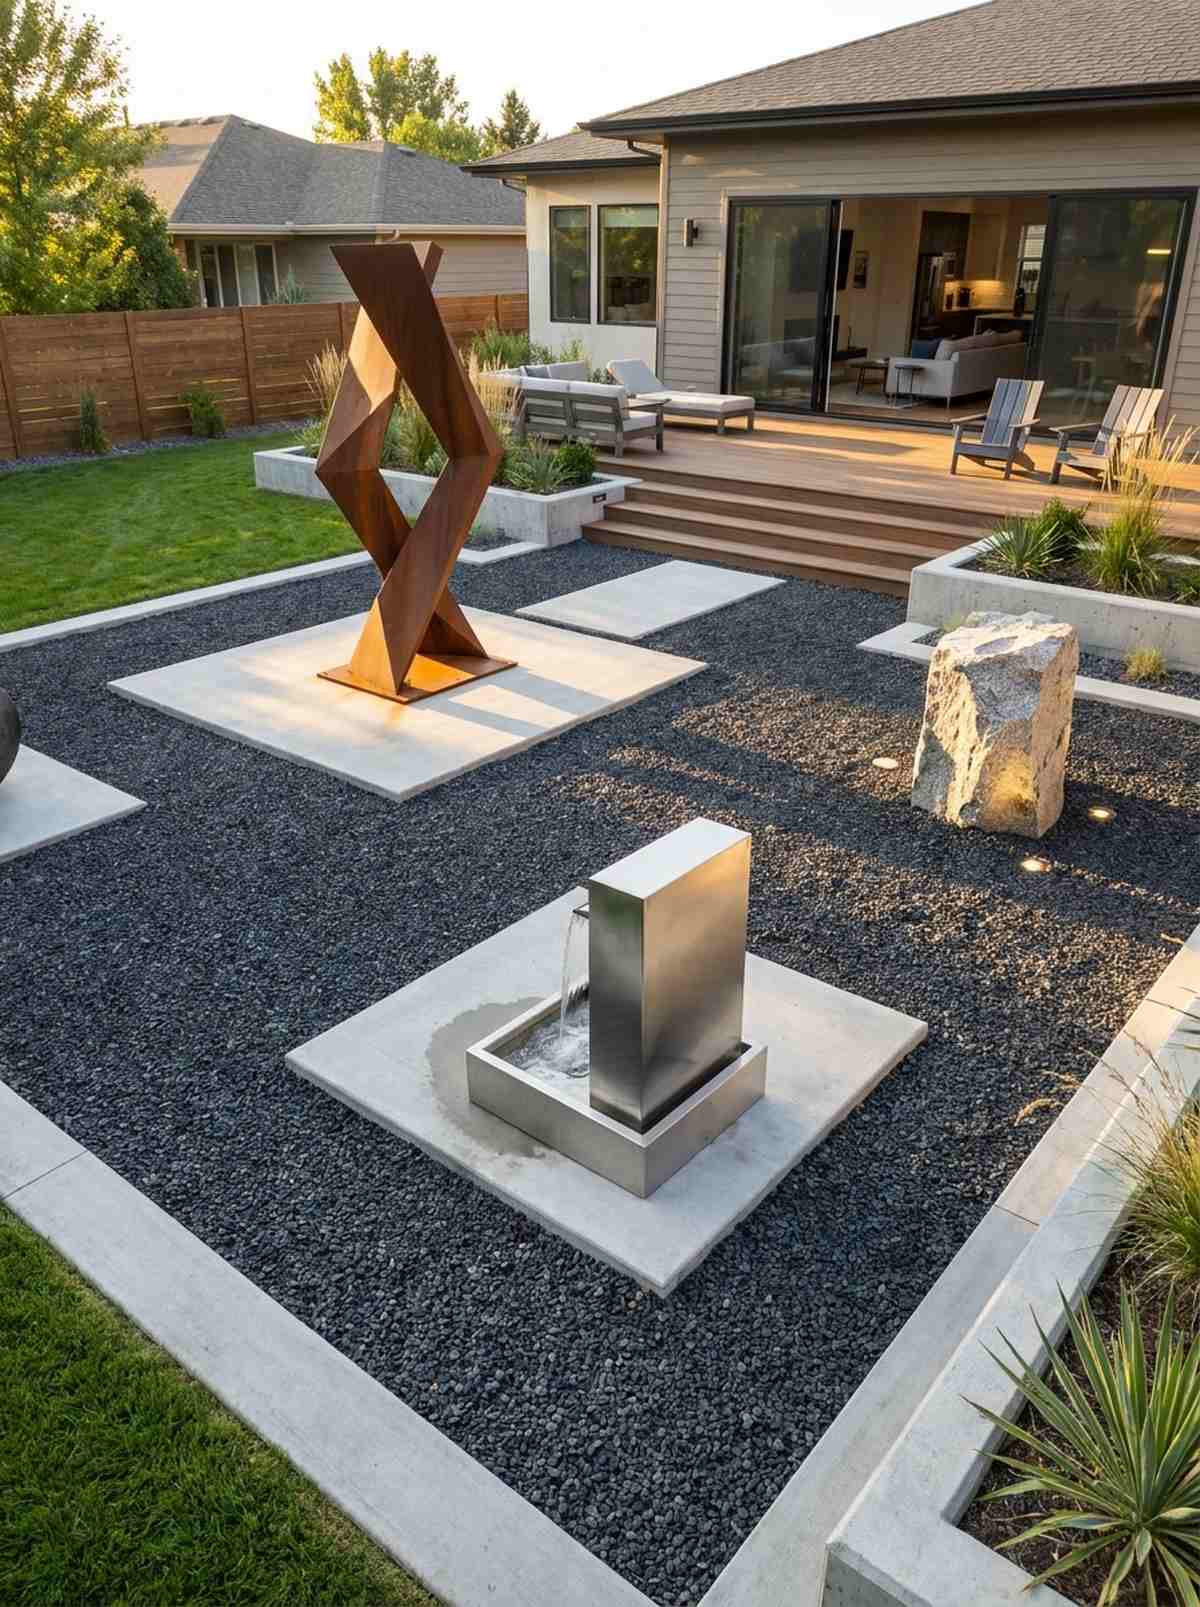
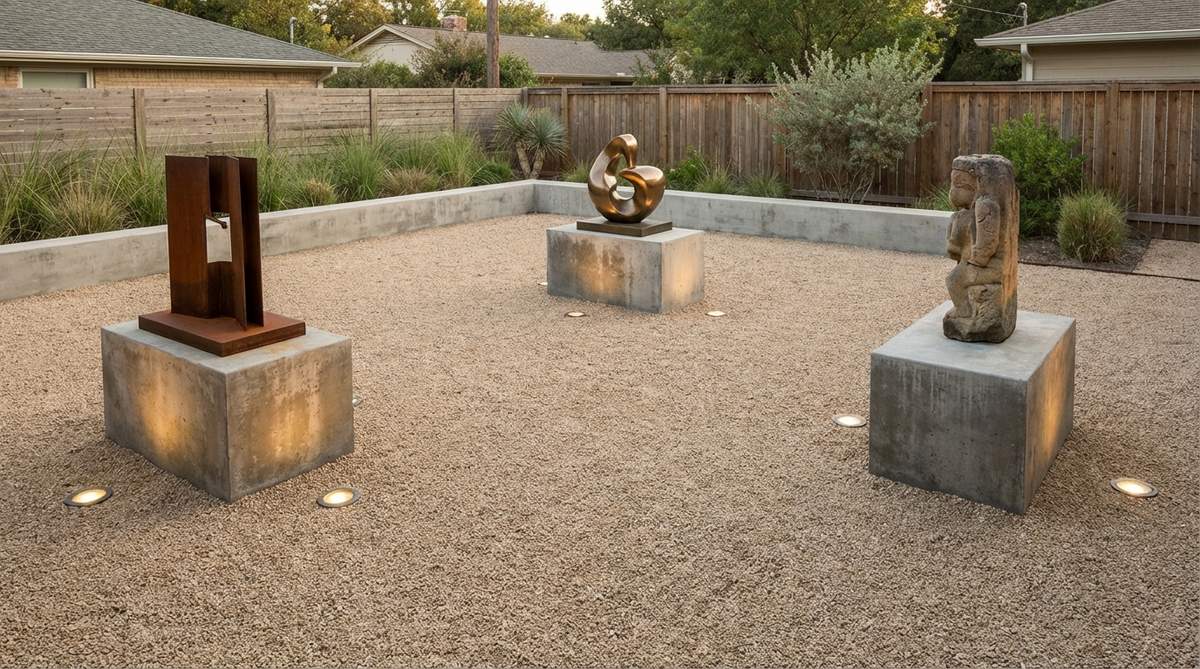
This gallery-style gravel display floor acts as a pristine, distraction-free pedestal for bold outdoor art. It is the perfect sophisticated backdrop for highlighting architectural metalwork or contemporary water features.
Busy garden beds steal visual attention away from expensive statement pieces and sculptures. Utilizing a severe, monochromatic stone layer isolates the artwork, delivering an incredibly refined, museum-quality curation right in your backyard.
Setting this neutral stage runs about $70–$120 for the base materials. Save this idea if you love rotating outdoor decor without ripping up plants.
- Key Materials: Uniform black or white gravel, flush concrete pads
- Vibe / Style: Curated modern art gallery
- Difficulty: Easy
- Budget Breakdown: Stone: $80 | Pad forms: $30.
- Creator’s Tip: Bury cinder blocks flush with the dirt line to create hidden, hyper-stable pedestals for heavy statues.
- Smart Sourcing: heavy-duty concrete pedestal molds and LED solar uplight kits (starter kit).
22. Secret Garden Pocket Courtyard
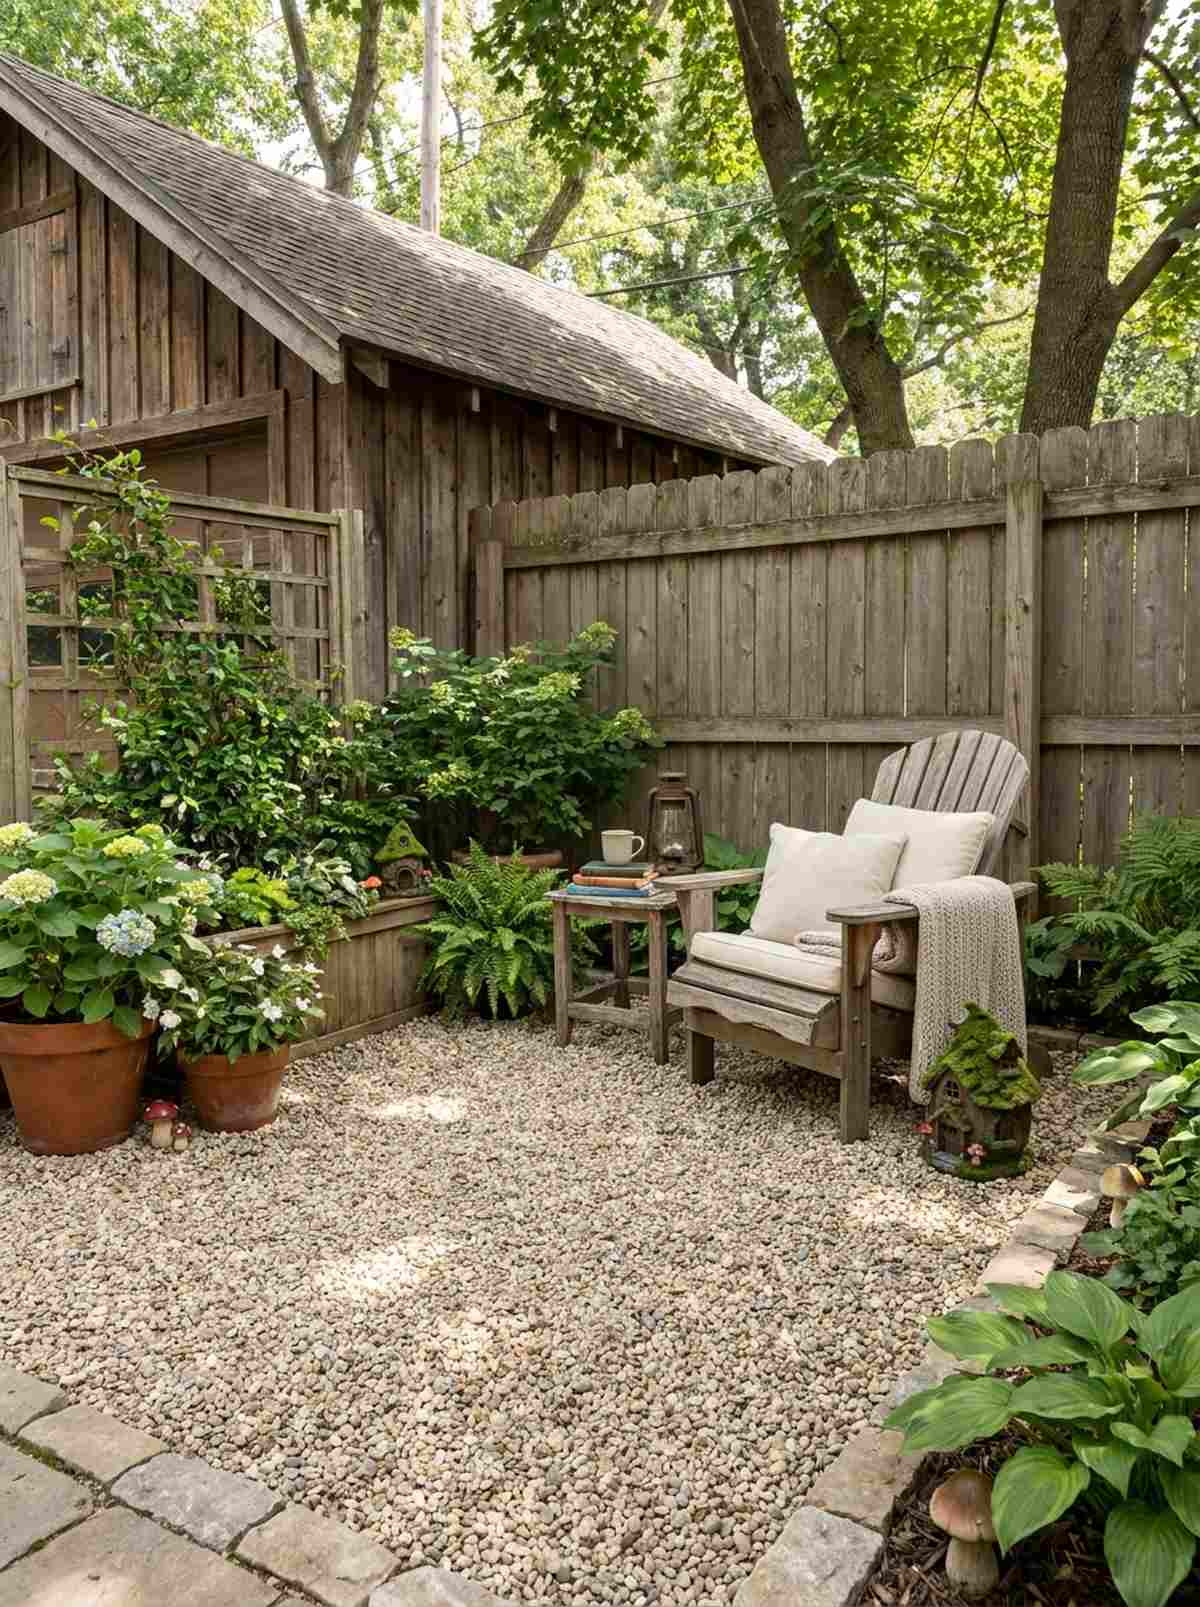
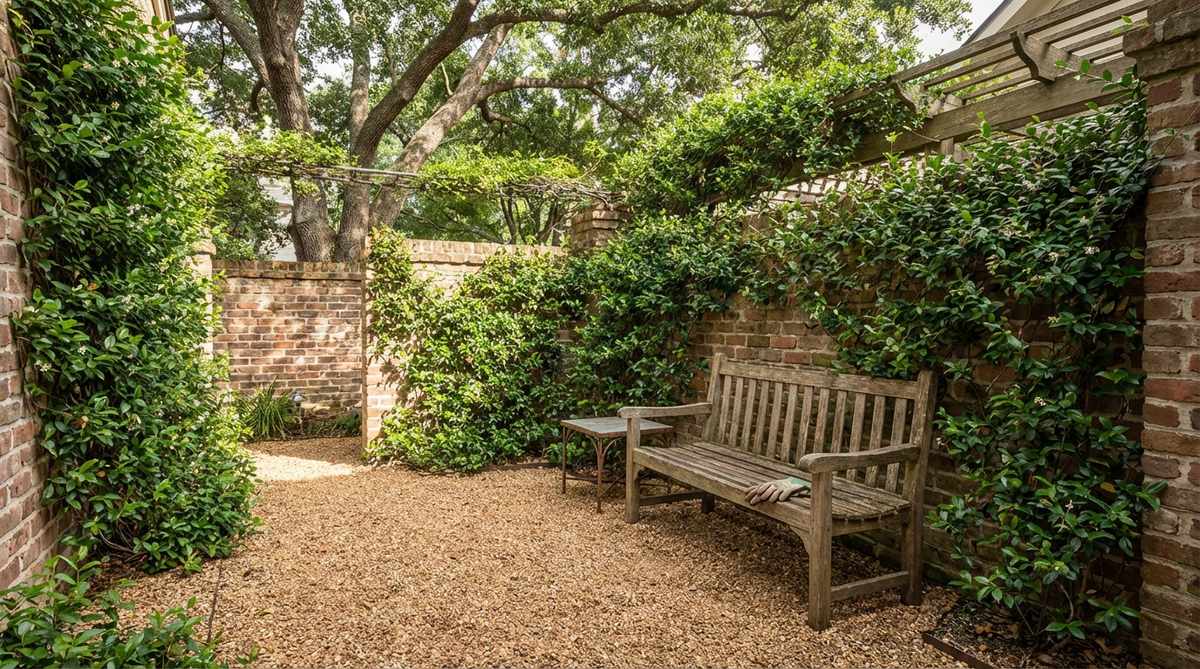
A hidden gravel pocket sanctuary feels incredibly intimate and protected from the chaos of the outside world. This design transforms the awkward, heavily shaded footprint directly behind a garage into a magical reading nook.
Dark corners usually turn into muddy moss pits that homeowners completely abandon. Laying down premium weed fabric and bright pebbles instantly sanitizes the space, while the crunching rocks act as a brilliant auditory security alarm for your hidden retreat.
Reviving a dead space like this costs practically nothing, usually around $35–$50. Highly recommended for creating a private weekend escape!
- Key Materials: Light reflective gravel, premium weed barrier
- Vibe / Style: Private enchanted hideaway
- Difficulty: Very easy
- Budget Breakdown: Base fabric: $15 | Gravel bag: $30.
- Creator’s Tip: Choose stones no larger than 3/8-inch so it remains comfortable enough to walk on with bare feet.
- Smart Sourcing: UV-coated resin fairy cottage kits and bulk pack commercial landscape pins.
23. Multi Level Terrace Courtyard
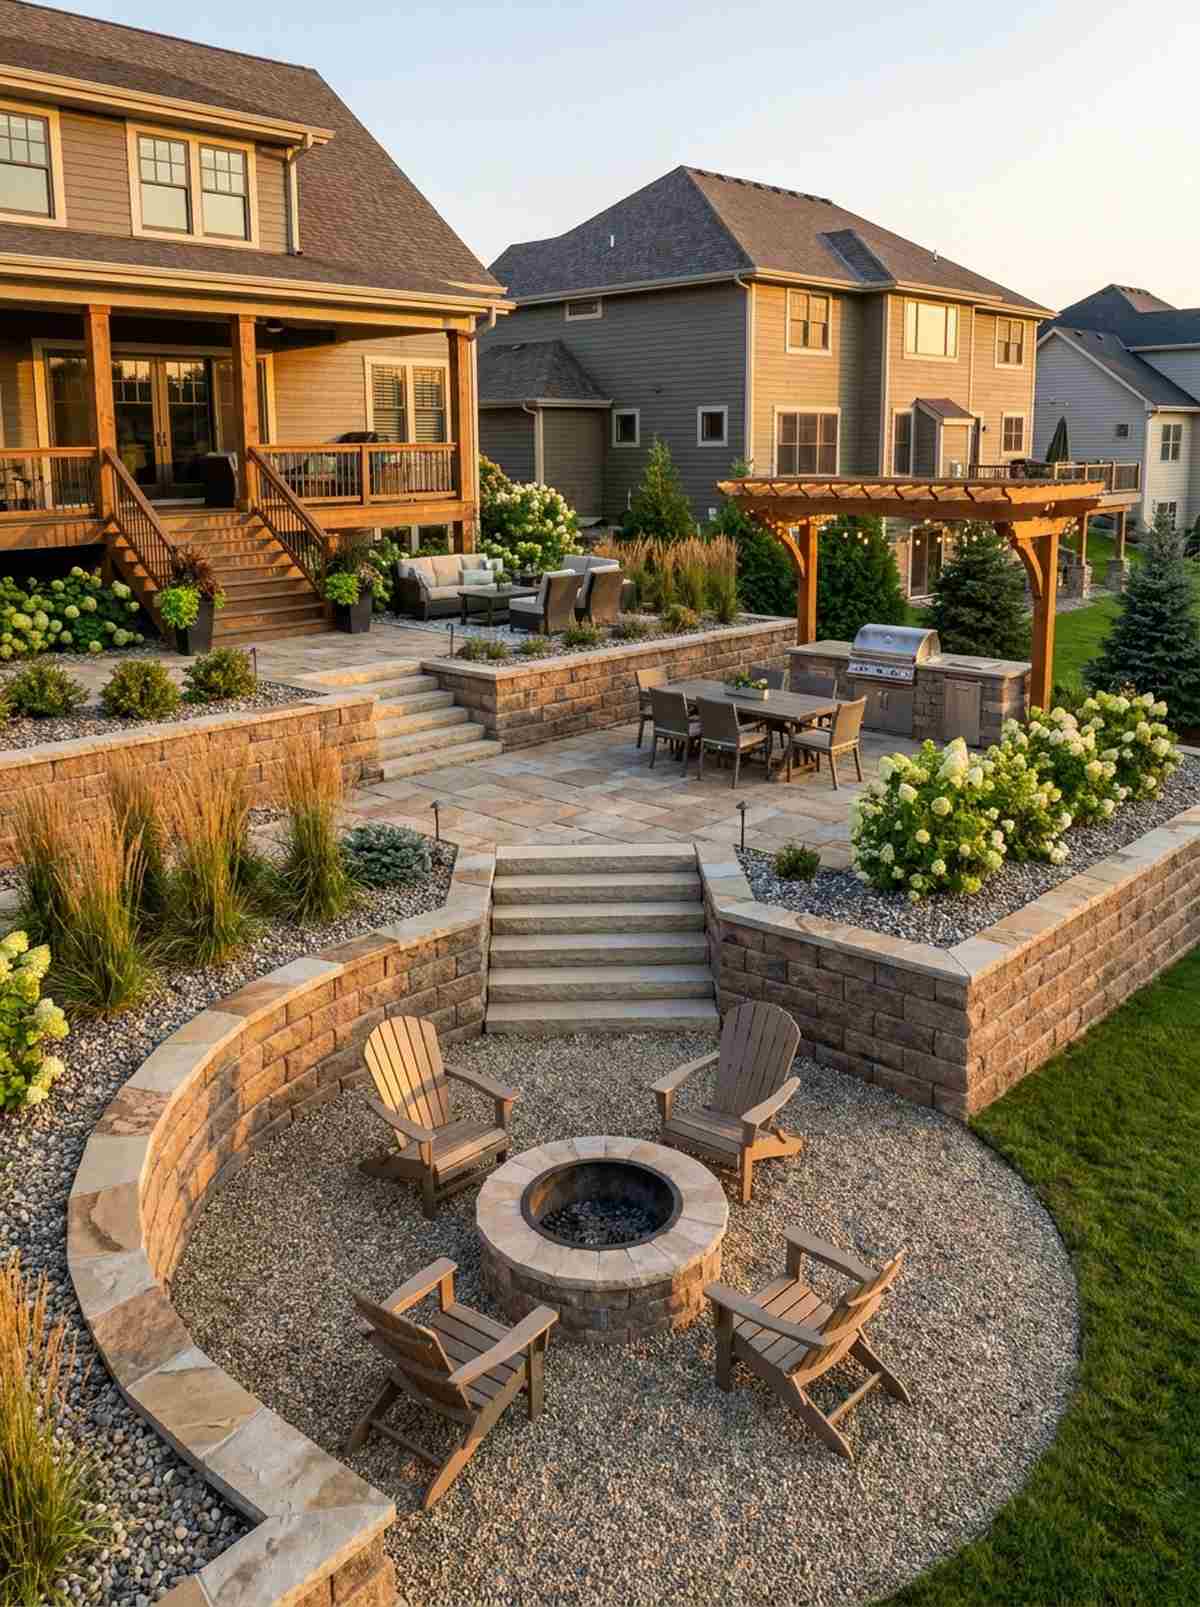
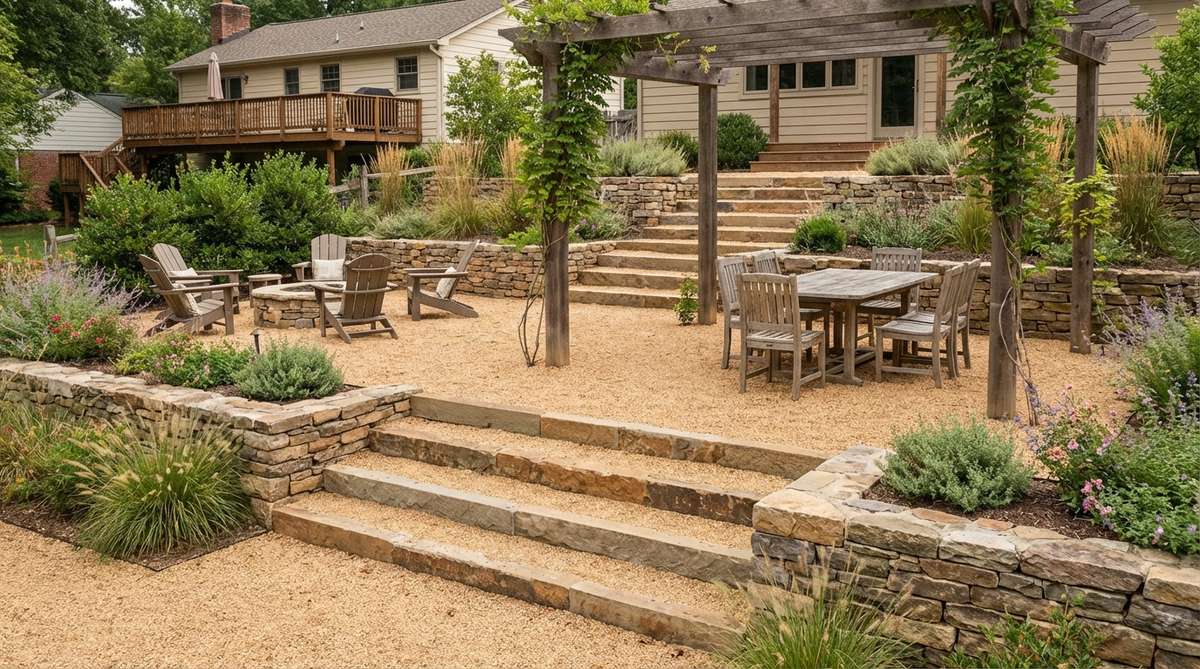
This stepped terrace stone courtyard brilliantly masters vertical space, feeling like a luxury cliffside resort. It effortlessly connects steep, disjointed yard elevations using a unified flooring aesthetic.
Building massive wooden stairs or concrete tiers requires insane engineering and massive budgets. Utilizing stacked retaining blocks filled with aggregate absorbs the dramatic grade changes economically while locking the entire landscape’s visual theme together.
Due to the wall construction, this project can run $400–$800 depending on the slope severity. Pin this layout to conquer that frustratingly steep backyard.
- Key Materials: Stacking wall blocks, structural base rock, finishing gravel
- Vibe / Style: Tiered cliffside luxury
- Difficulty: Advanced (structural planning)
- Budget Breakdown: Wall blocks: $400 | Base/Top stone: $200.
- Creator’s Tip: Tamp the base layer of crushed stone obsessively on each tier to prevent the final layout from slowly sinking downhill.
- Smart Sourcing: heavy-duty retaining wall adhesive and pre-cut interlocking terrace blocks.
The functional upgrades coming up actually protect your home’s foundation while looking incredibly chic…
Functional Spaces & Drainage Solutions
24. Foundation Drainage Zone
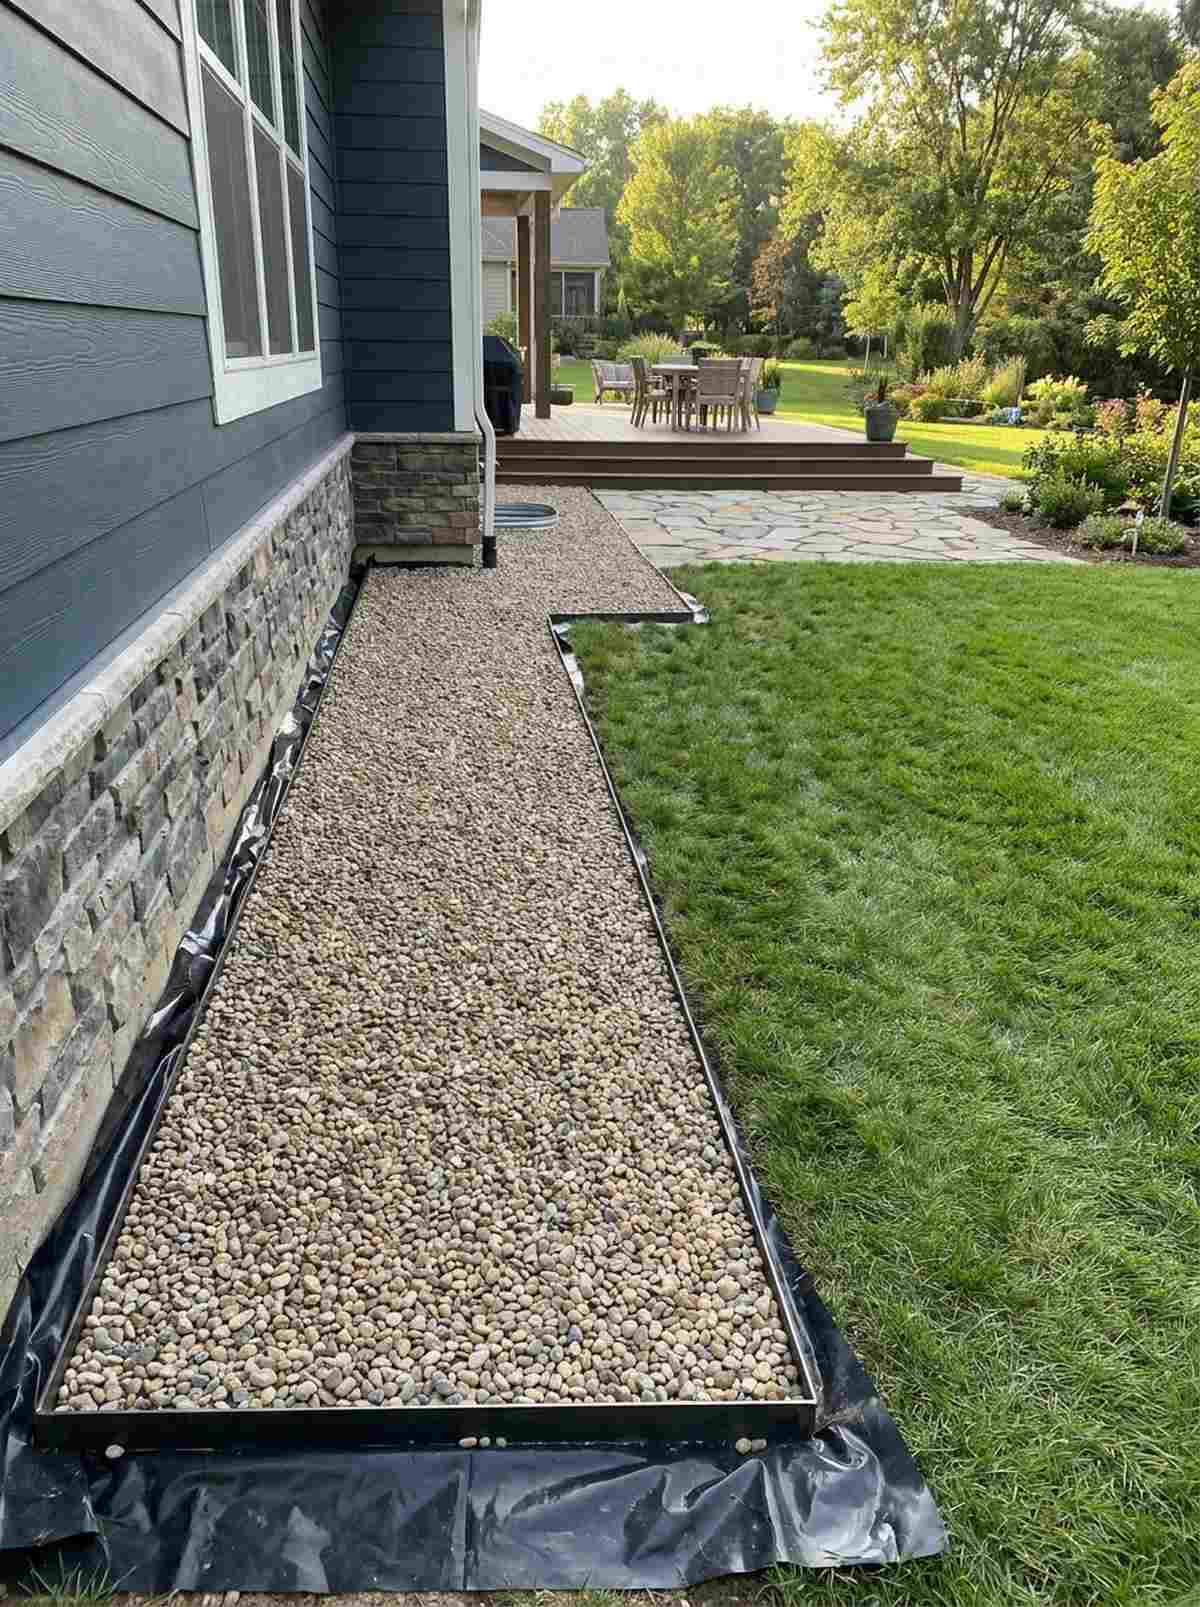
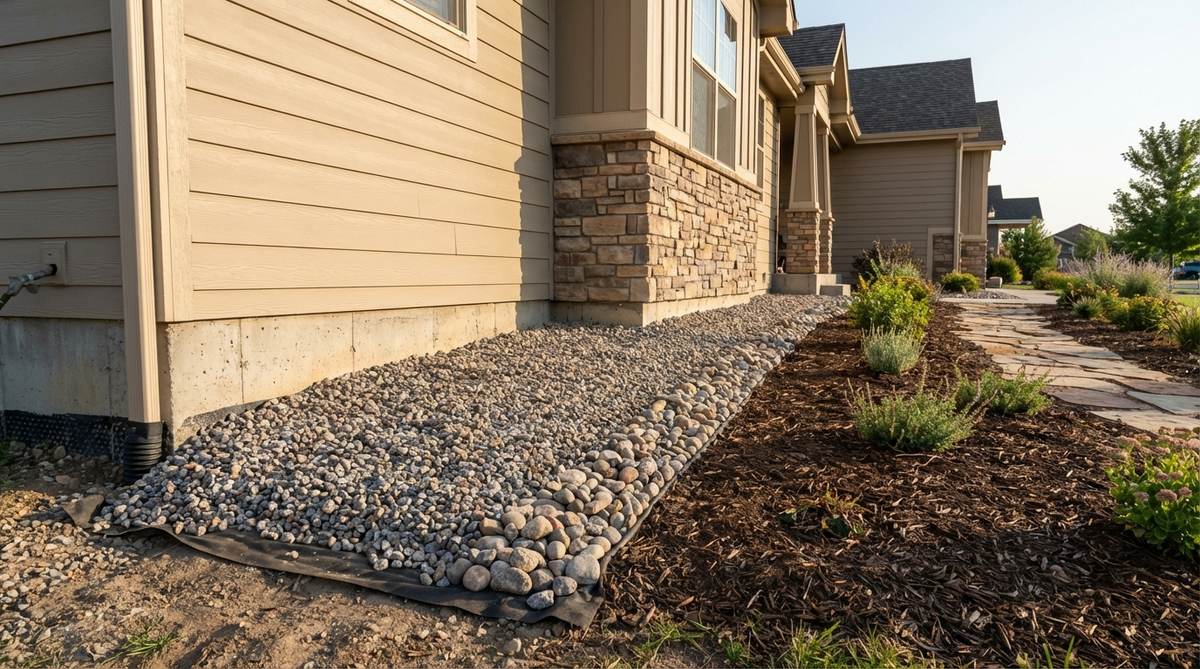
A clean perimeter drainage strip acts as an impenetrable shield protecting your house from catastrophic water damage. This layout is absolutely critical for the three-foot zone directly touching your home’s siding.
Shoving damp wood mulch against your siding invites terrifying termite infestations and deep structural rot. A strictly sloped aggregate barrier completely starves pests of moisture while aggressively forcing roof runoff away from your expensive basement walls.
Protecting your foundation costs about $100–$200 in materials. It is the cheapest insurance policy you will ever buy for your property.
- Key Materials: 3/8″ pea gravel, sloped dirt base, heavy plastic sheeting
- Vibe / Style: Crisp architectural utility
- Difficulty: Moderate (requires precise grading)
- Budget Breakdown: Stone: $120 | Sheeting: $50.
- Creator’s Tip: Ensure the dirt beneath the stone slopes downward at exactly 1 inch for every 10 feet to guarantee outward flow.
- Smart Sourcing: commercial-grade waterproofing membrane rolls and pre-cut steel border edging.
25. Dry Creek Bed Drainage
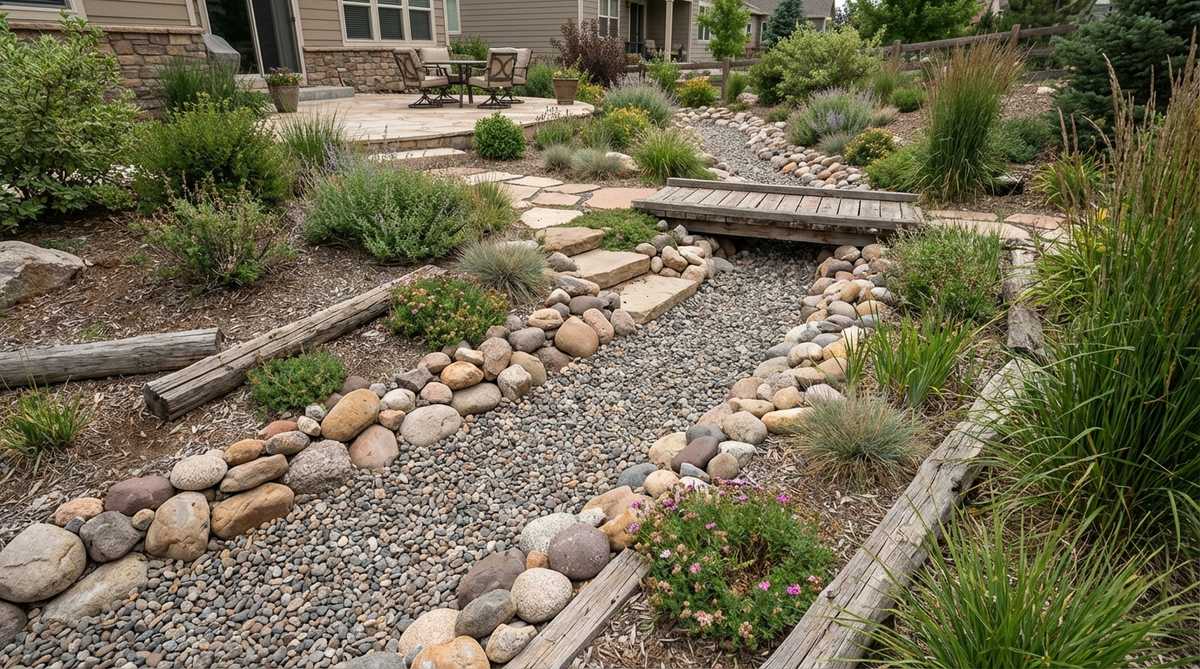
This sculpted dry creek bed transforms an ugly yard flooding problem into a breathtaking natural water feature. It routes aggressive storm runoff safely through your property while mimicking the beauty of a dried mountain stream.
Ugly plastic corrugated pipes ruining your lawn are entirely obsolete with this genius camouflage technique. Blending tiny aggregate through the center while flanking the edges with massive river rocks violently slows down erosion during heavy monsoons.
Building an effective creek bed costs roughly $150–$300 depending on the boulder sizing. Save this brilliant idea to fix those frustrating soggy lawn patches!
- Key Materials: Assorted river boulders, mixed pea gravel, non-woven geotextile
- Vibe / Style: Naturalistic landscape engineering
- Difficulty: Heavy lifting required
- Budget Breakdown: Boulders: $150 | Center fill: $80 | Fabric: $40.
- Creator’s Tip: Wind the trench naturally around existing trees rather than digging a straight line to make it look geologically authentic.
- Smart Sourcing: bulk pack heavy-duty drainage fabric and pre-mixed river rock assortments.
26. Pet Friendly Dog Run
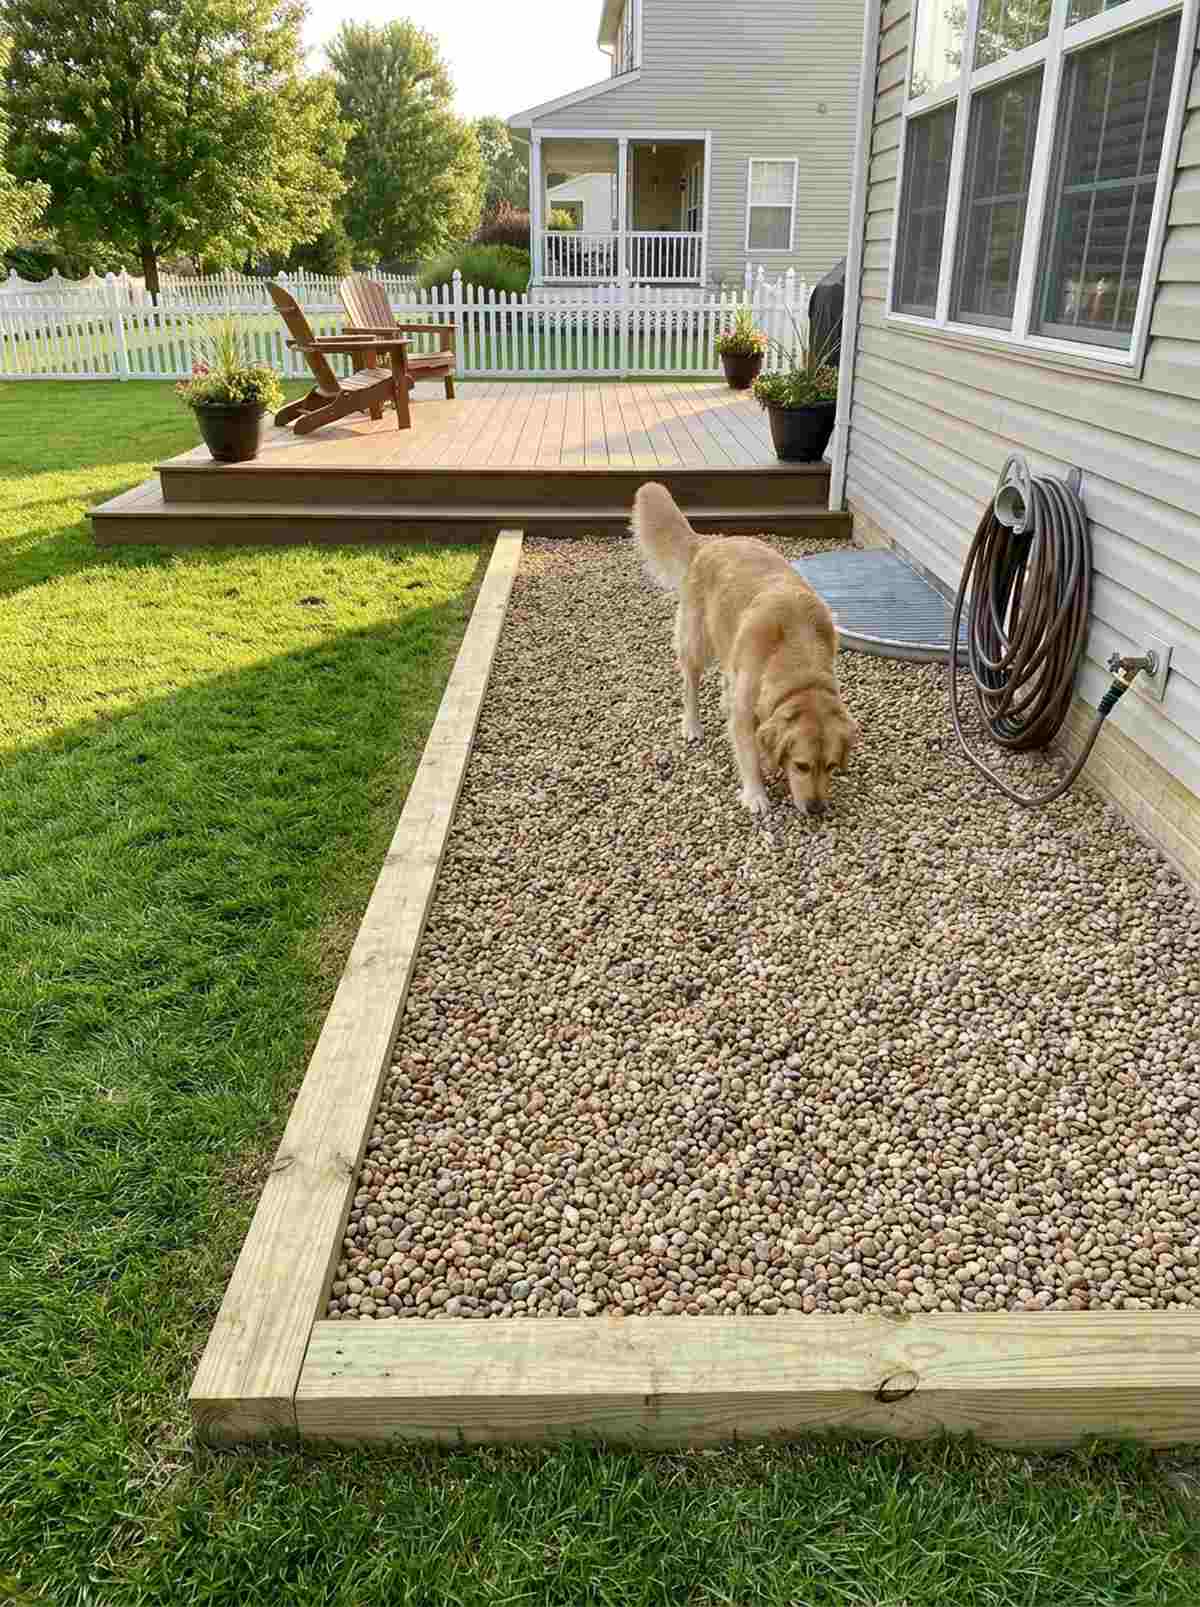
A sanitary stone dog run acts as the ultimate low-maintenance bathroom and exercise zone for active pets. It completely isolates pet waste from your primary entertainment lawn, keeping your grass pristine.
Letting dogs destroy grass creates a muddy, bacteria-filled swamp that gets tracked straight into your kitchen. Selecting a slightly larger, rounded stone prevents the rocks from wedging into paws while allowing you to effortlessly hose down odors.
Installing a proper pet zone costs about $100–$150 in materials. It is an absolute lifesaver for dog owners who want a clean house.
- Key Materials: 1/2″ rounded pea gravel, permeable weed barrier
- Vibe / Style: Tidy functional utility
- Difficulty: Easy
- Budget Breakdown: Stone delivery: $100 | Barrier fabric: $30.
- Creator’s Tip: Dig down 4 inches and frame it with pressure-treated wood so the rocks never spill over into the mowing zone.
- Smart Sourcing: pet-safe outdoor odor neutralizer (bulk pack) and heavy-duty ground cover staples.
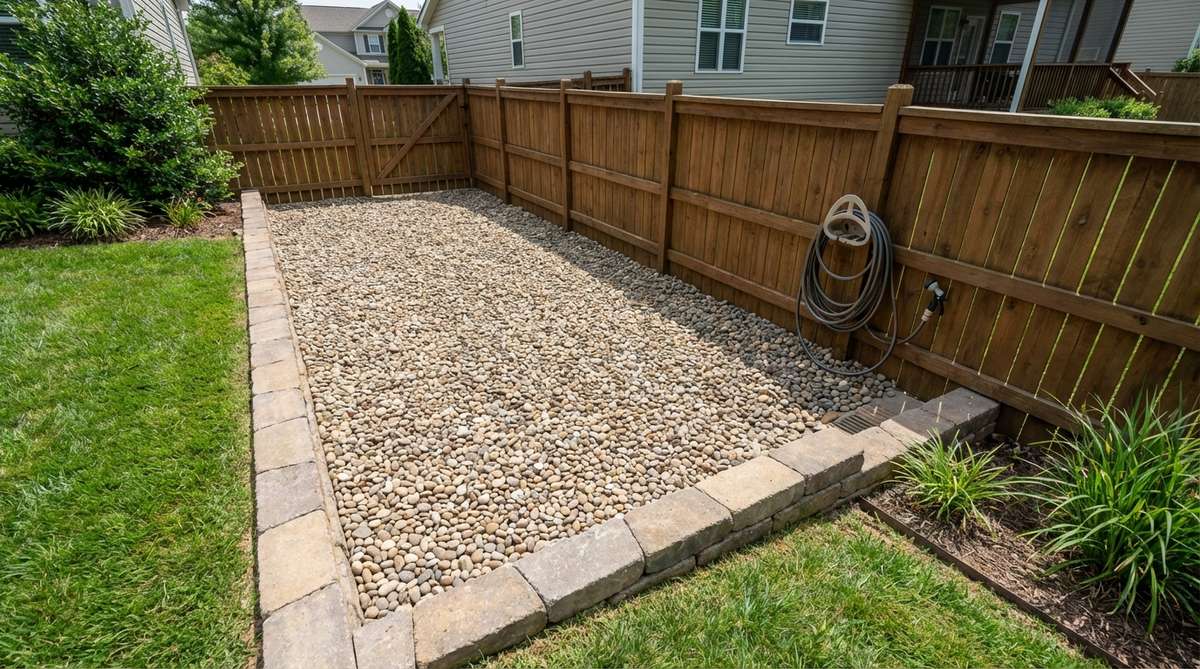
27. Utility Access Pad
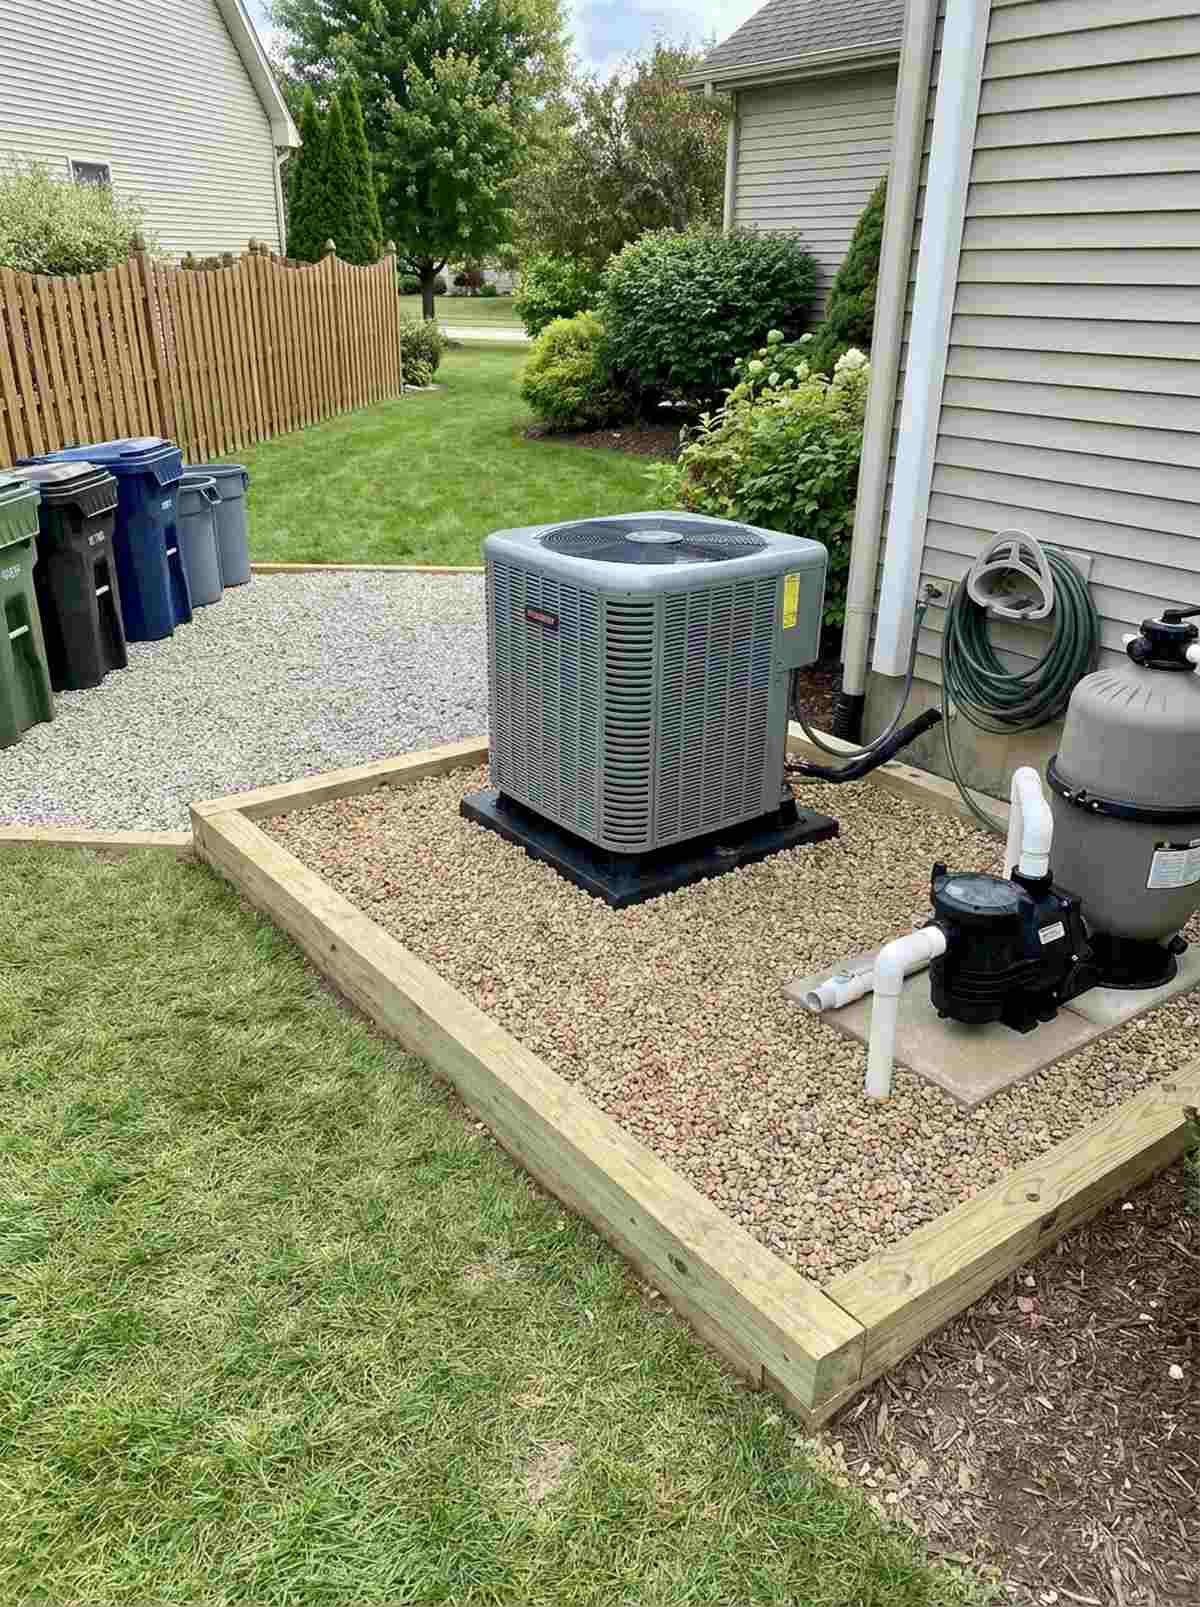
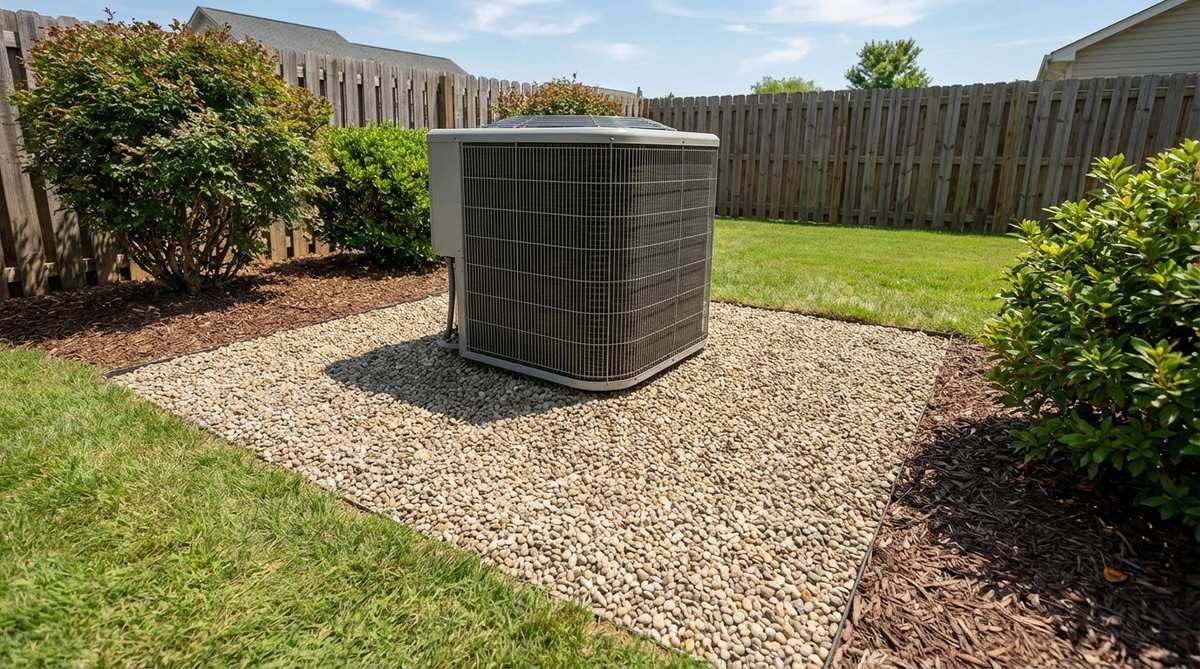
This crisp utility equipment pad creates an incredibly stable, clean footing zone for servicing major home appliances. It flawlessly anchors heavy AC units, pool pumps, or messy trash bin staging areas.
Pouring expensive concrete pads limits future upgrades and cracks violently under vibrating machinery. A deeply compacted aggregate box absorbs heavy vibrations silently while managing massive condensation drips without ever turning into a mud pit.
Creating a quick access pad takes two hours and costs under $50. Pin this weekend chore to drastically clean up your side yard.
- Key Materials: Crushed stone sub-base, pea gravel top layer, timber frame
- Vibe / Style: Professional maintenance zone
- Difficulty: Very easy
- Budget Breakdown: Sub-base: $15 | Top stone: $15 | Wood frame: $20.
- Creator’s Tip: Extend the footprint at least 24 inches past the equipment so technicians have clean space to kneel during repairs.
- Smart Sourcing: pre-cut treated timber borders and heavy-duty equipment vibration pads.
28. Lightweight Vehicle Parking Pad
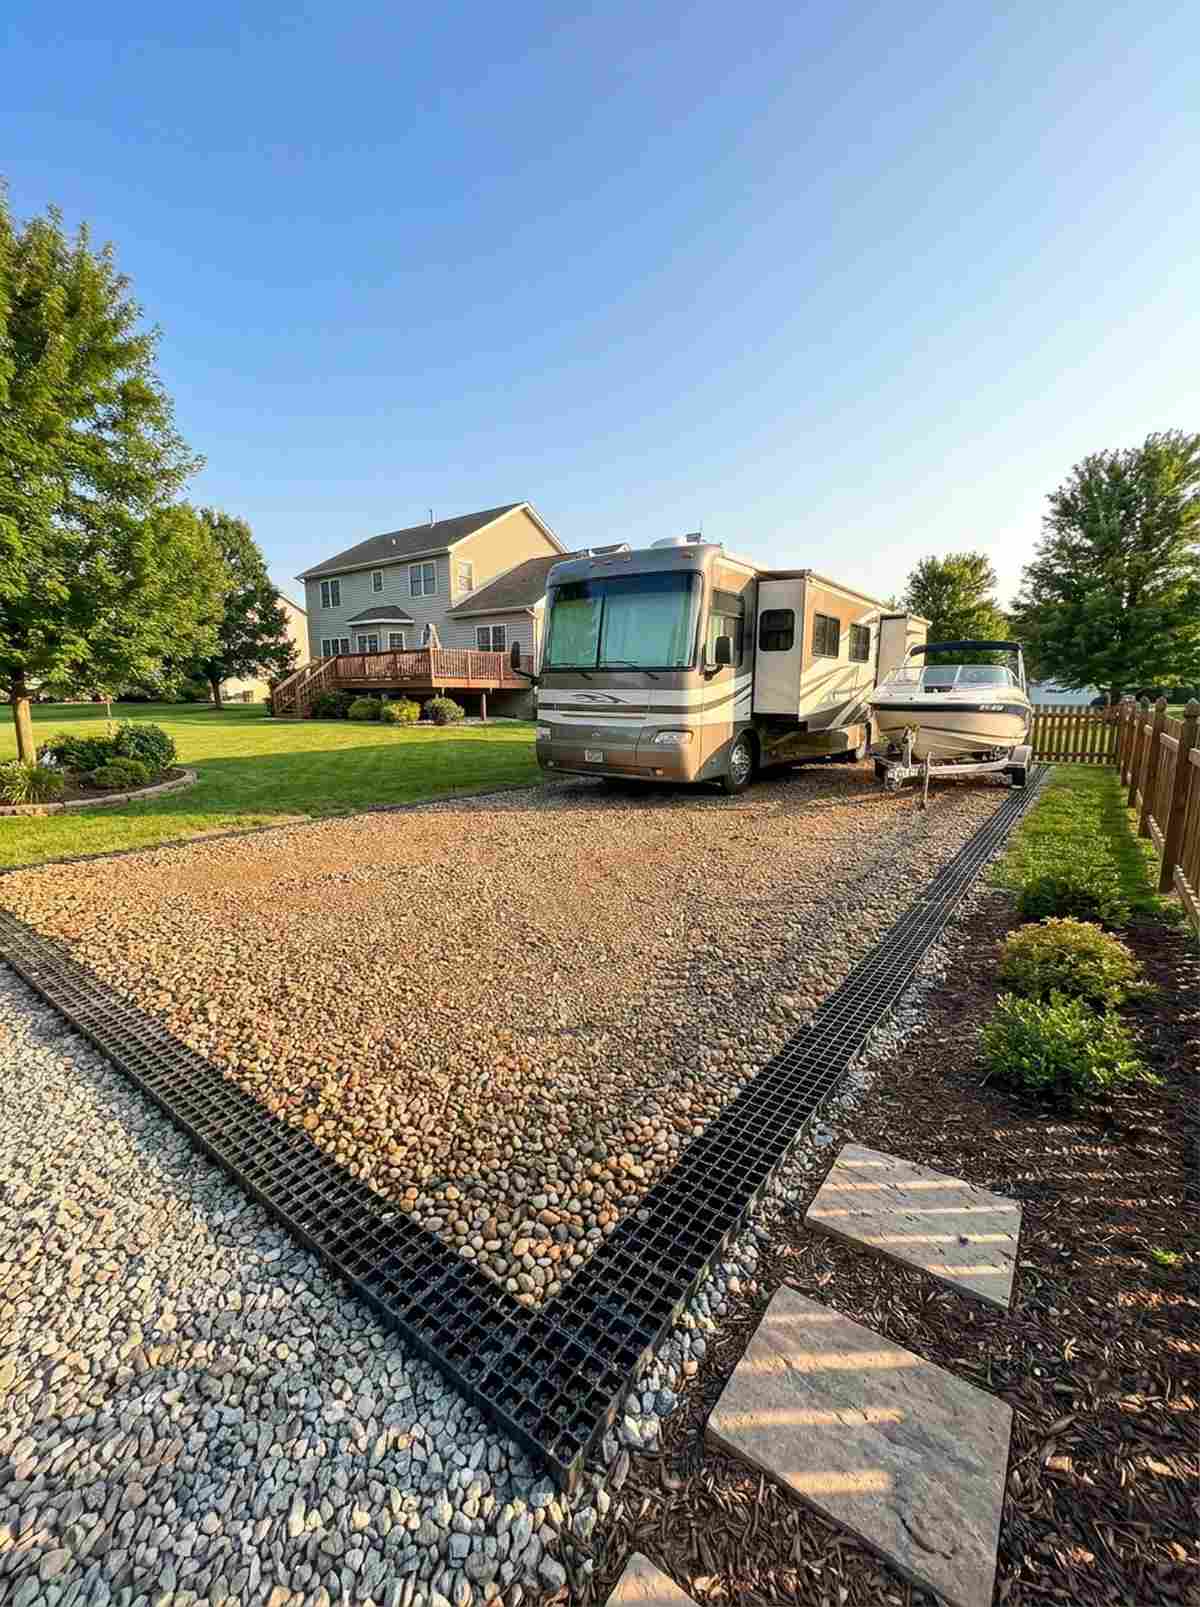
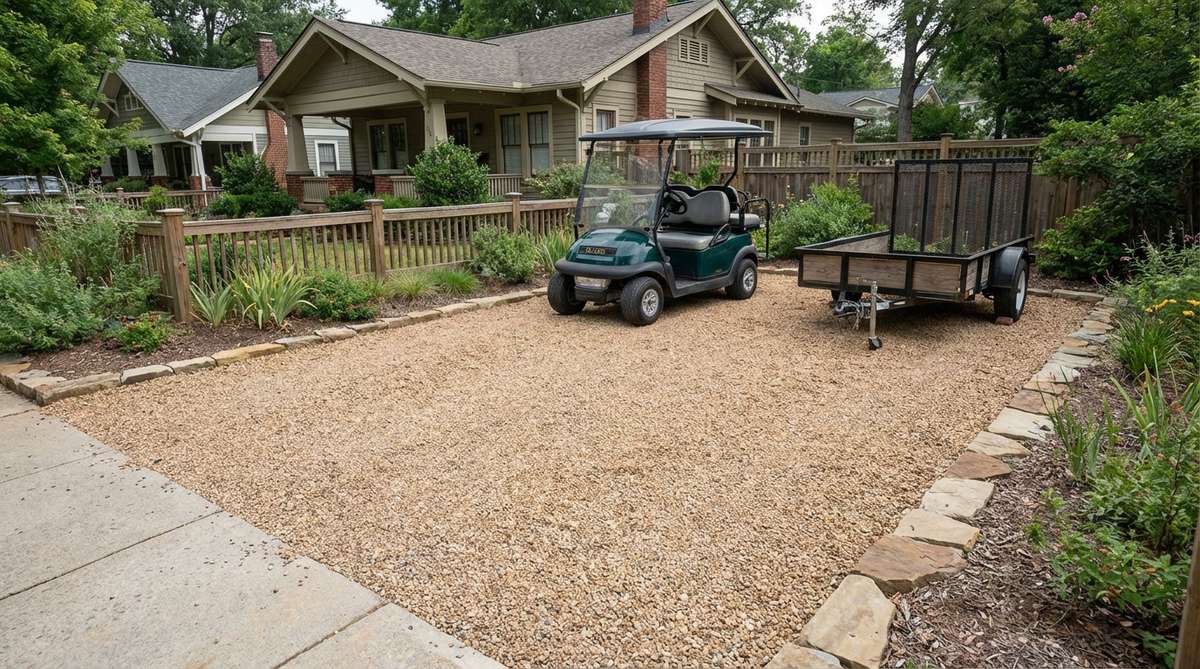
A reinforced aggregate parking pad delivers a highly durable, permeable surface for storing recreational vehicles or boats. It provides the heavy load support of a driveway without triggering local hardscaping tax penalties.
Parking heavy trailers directly on grass causes deep, permanent ruts and illegal storm runoff. Locking the rocks into a heavy-duty plastic stabilization grid absolutely guarantees the surface will never shift, dip, or deform under tire weight.
Building a reinforced pad runs about $200–$400 depending on the grid size. This is the smartest way to expand your driveway footprint legally!
- Key Materials: Driveway stabilizer grids, crushed structural base, decorative top gravel
- Vibe / Style: Rugged property expansion
- Difficulty: Moderate (significant excavation)
- Budget Breakdown: Grid system: $150 | Base/Top rock: $150.
- Creator’s Tip: You must compact the dirt and the sub-base with a rented plate compactor; stepping on it is not enough for vehicle loads.
- Smart Sourcing: heavy-duty interlocking driveway grids (bulk pack) and commercial-grade geotextile fabric rolls.
Conclusion
These 28 premium pea gravel gardens prove that you can achieve high-end, luxury outdoor aesthetics without the astronomical costs of traditional hardscaping. By utilizing smart sourcing—like interlocking grids, UV-coated borders, and commercial-grade fabrics—you guarantee a functional, weed-free layout that drastically boosts property value. Stop letting dead zones and drainage issues ruin your yard; grab your materials and transform your landscape into a textured, permeable masterpiece today.
Frequently Asked Questions
How deep should pea gravel be for pathways and patios?
Install pea gravel exactly 2-3 inches deep for pathways and patios to achieve that premium, stable feel. Going deeper makes it feel like walking in quicksand, while shallower layers expose the ugly fabric underneath. To do it right, excavate 4-6 inches total, lay down a solid base of compacted crushed stone, and finish with the top layer. Always use heavy-duty interlocking gravel stabilizer grids in high-traffic patio zones to completely eliminate shifting and keep the aesthetic flawless.
Does pea gravel need landscape fabric underneath?
Yes, laying a barrier is absolutely mandatory if you want a zero-maintenance setup that looks expensive long-term. Skipping this step means your expensive stones will sink into the mud while aggressive weeds completely destroy the layout. Throw away the cheap plastic that rips instantly; you must invest in a commercial-grade woven weed barrier (bulk roll). It blocks UV light from germinating seeds but remains highly permeable so rainwater drains instantly without pooling.
What size pea gravel is best for gardens?
Standard 3/8-inch pea gravel is the undeniable sweet spot for maximizing both high-end looks and practical comfort. Smaller 1/4-inch stones wash away during heavy rain, while bulky 3/4-inch rocks look industrial and twist your ankles when walking. If you are sourcing materials for a delicate layout like a fairy garden, consider mixing in premium miniature garden supplies or polished river stones for a custom, designer-curated finish.
How do you keep pea gravel from spreading into the lawn?
You absolutely must install rigid containment borders to prevent your clean setup from looking like a messy, scattered construction site. Avoid cheap, thin plastics that warp in the sun and look terrible after one season. Instead, upgrade to pre-cut powder-coated steel edging or UV-resistant composite boards installed flush with the grass. Sinking the edge 3-4 inches deep stops underground root creep and keeps your mower blades perfectly safe from flying rocks.
Is pea gravel more expensive than mulch?
While the initial bag cost is slightly higher, it is infinitely cheaper than organic mulch over a 5-year timeline. Mulch rots, fades, and requires expensive, backbreaking replacements every single spring. Stone is a permanent, one-and-done investment that drastically increases your home’s curb appeal forever. By utilizing pre-cut weed barrier starter kits underneath, you essentially eliminate your yearly garden budget and never have to pull a weed again.