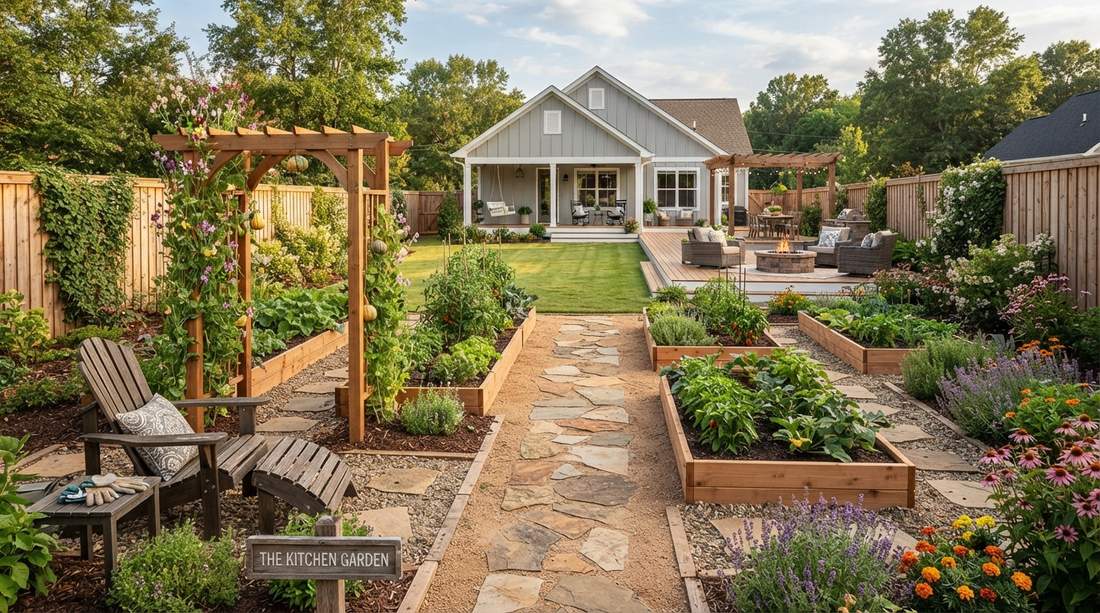
Strategic vegetable garden pathways instantly elevate your yard from messy to magazine-worthy. Access our exact material breakdowns and budget-friendly sourcing blueprints below. Achieve that premium architectural look without paying professional installation fees.
Design Snapshot: Smart Layout Principles
- Width optimization: 2-4 feet allows cart access while prioritizing maximum growing space.
- Material selection: Permeable, commercial-grade surfaces stop runoff and protect soil health.
- Layout efficiency: Standardized grid patterns ensure you never crush delicate root zones.
- Maintenance reduction: Heavy-duty double-layer systems eradicate weeds permanently.
Permeable Pathways That Capture Water and Nutrients
These modern pathway frameworks prioritize rapid water infiltration. By utilizing high-end porous materials, you effortlessly redirect heavy rainfall into your vegetable root zones while keeping your boots entirely mud-free.
1. Decomposed Granite With Stabilizer
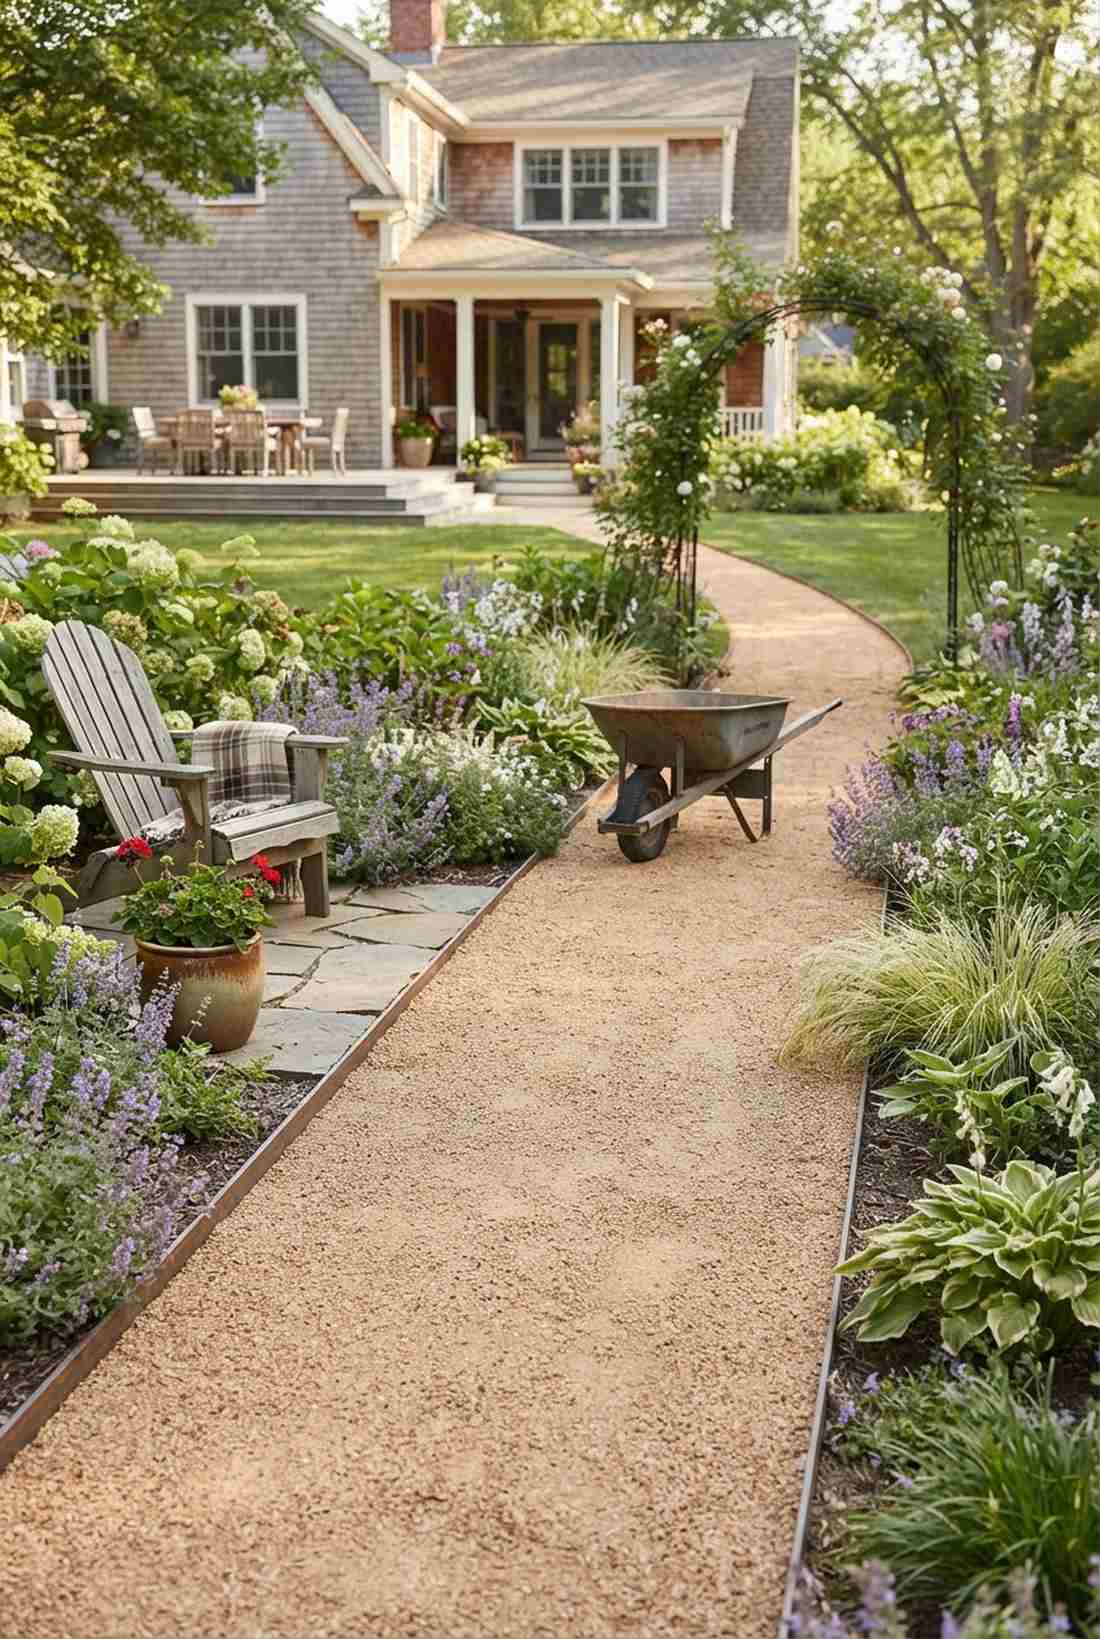
Feels like walking through a private European potager garden you accidentally discovered. This compacted crushed granite pathway works exceptionally well for high-traffic central garden arteries where you need solid footing.
Most beginners ruin their layouts with loose dirt, but adding a high-grade binding agent delivers a surprisingly premium look. Seamlessly integrating commercial landscape stabilizer kits ensures your heavy wheelbarrows will never sink or create ugly ruts.
You can easily pull this off for around $30–$50 per linear foot. Pin this if you’re planning a massive yard upgrade this season!
- Key Materials: Fine granite aggregate, polymer binding powder
- Vibe / Style: Clean structural elegance
- Difficulty: Moderate weekend project
- Budget Breakdown: Aggregate: $20 | Stabilizer Agent: $15
- Creator’s Tip: Tamp the base layer twice before adding the final topcoat to prevent future flaking.
- Smart Sourcing: Pre-mixed natural stone binder (bulk bucket) or a heavy-duty steel hand tamper.
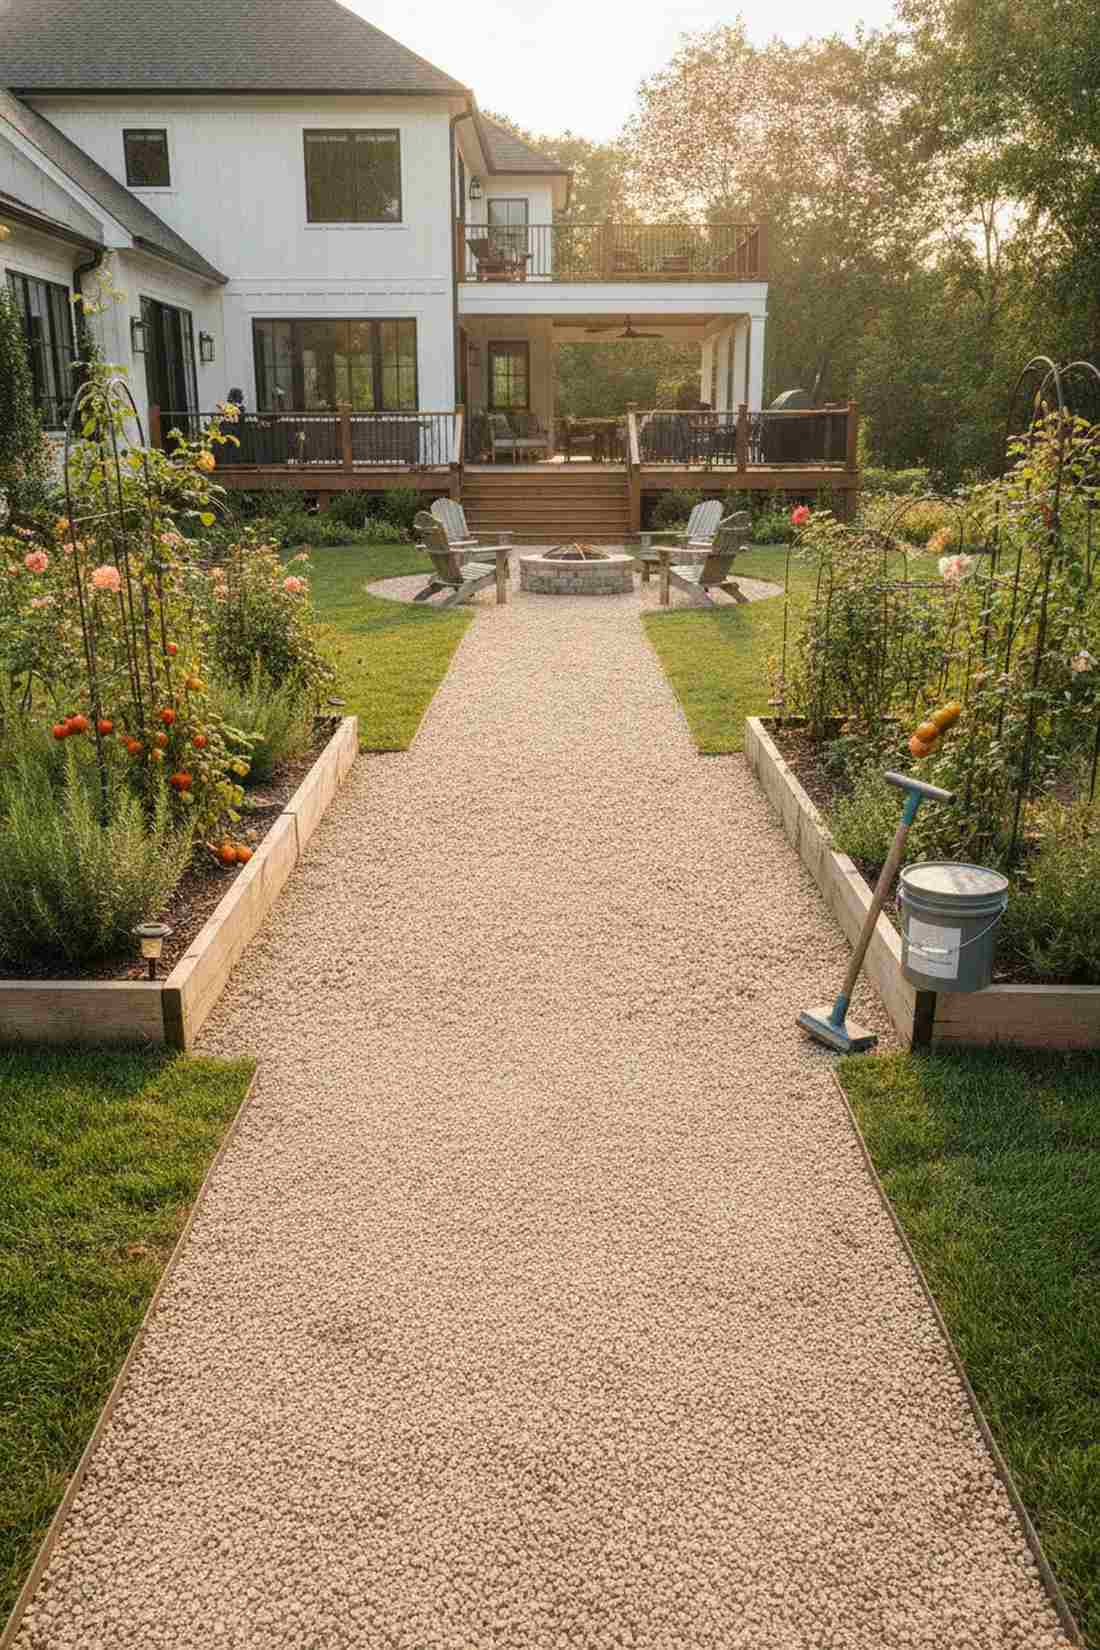
2. Pea Gravel Between Steel Edging
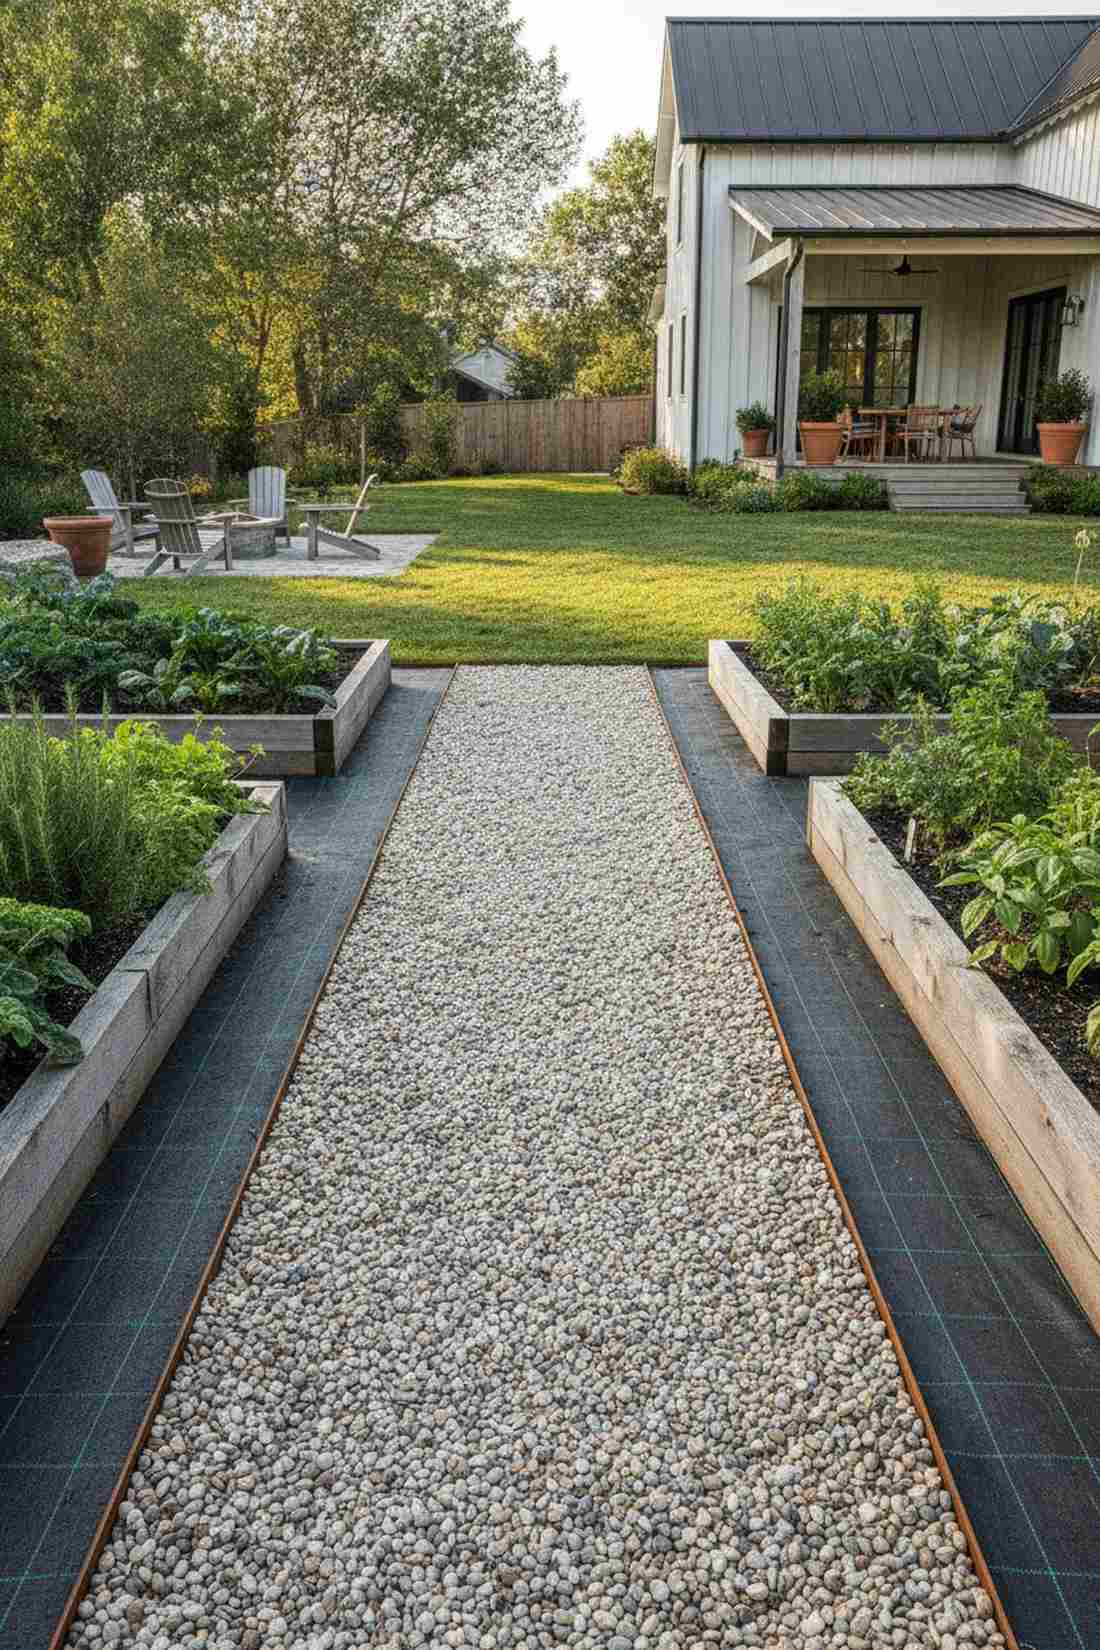
Straight out of a modern farmhouse magazine feature. A crisp pea gravel garden walk offers a satisfying crunch underfoot and is absolutely perfect for dividing large raised bed sections.
Skipping cheap plastic borders in favor of metal gives a designer-level finish that outlasts harsh winters. Installing a high-quality weed barrier fabric membrane underneath is non-negotiable if you want zero maintenance moving forward.
Expect to spend roughly $20–$35 for a standard section. It’s a fast upgrade that completely changes the vibe of your backyard.
- Key Materials: 1/4-inch rounded gravel, metallic edging stakes
- Vibe / Style: Modern architectural precision
- Difficulty: Easy beginner setup
- Budget Breakdown: Gravel Bags: $15 | Metal Edging: $10
- Creator’s Tip: Keep the stone depth strictly under 3 inches to prevent that annoying “sinking” feeling when walking.
- Smart Sourcing: Pre-cut corten steel border strips and commercial-grade woven weed matting (bulk roll).
3. Crushed Slate Aggregate
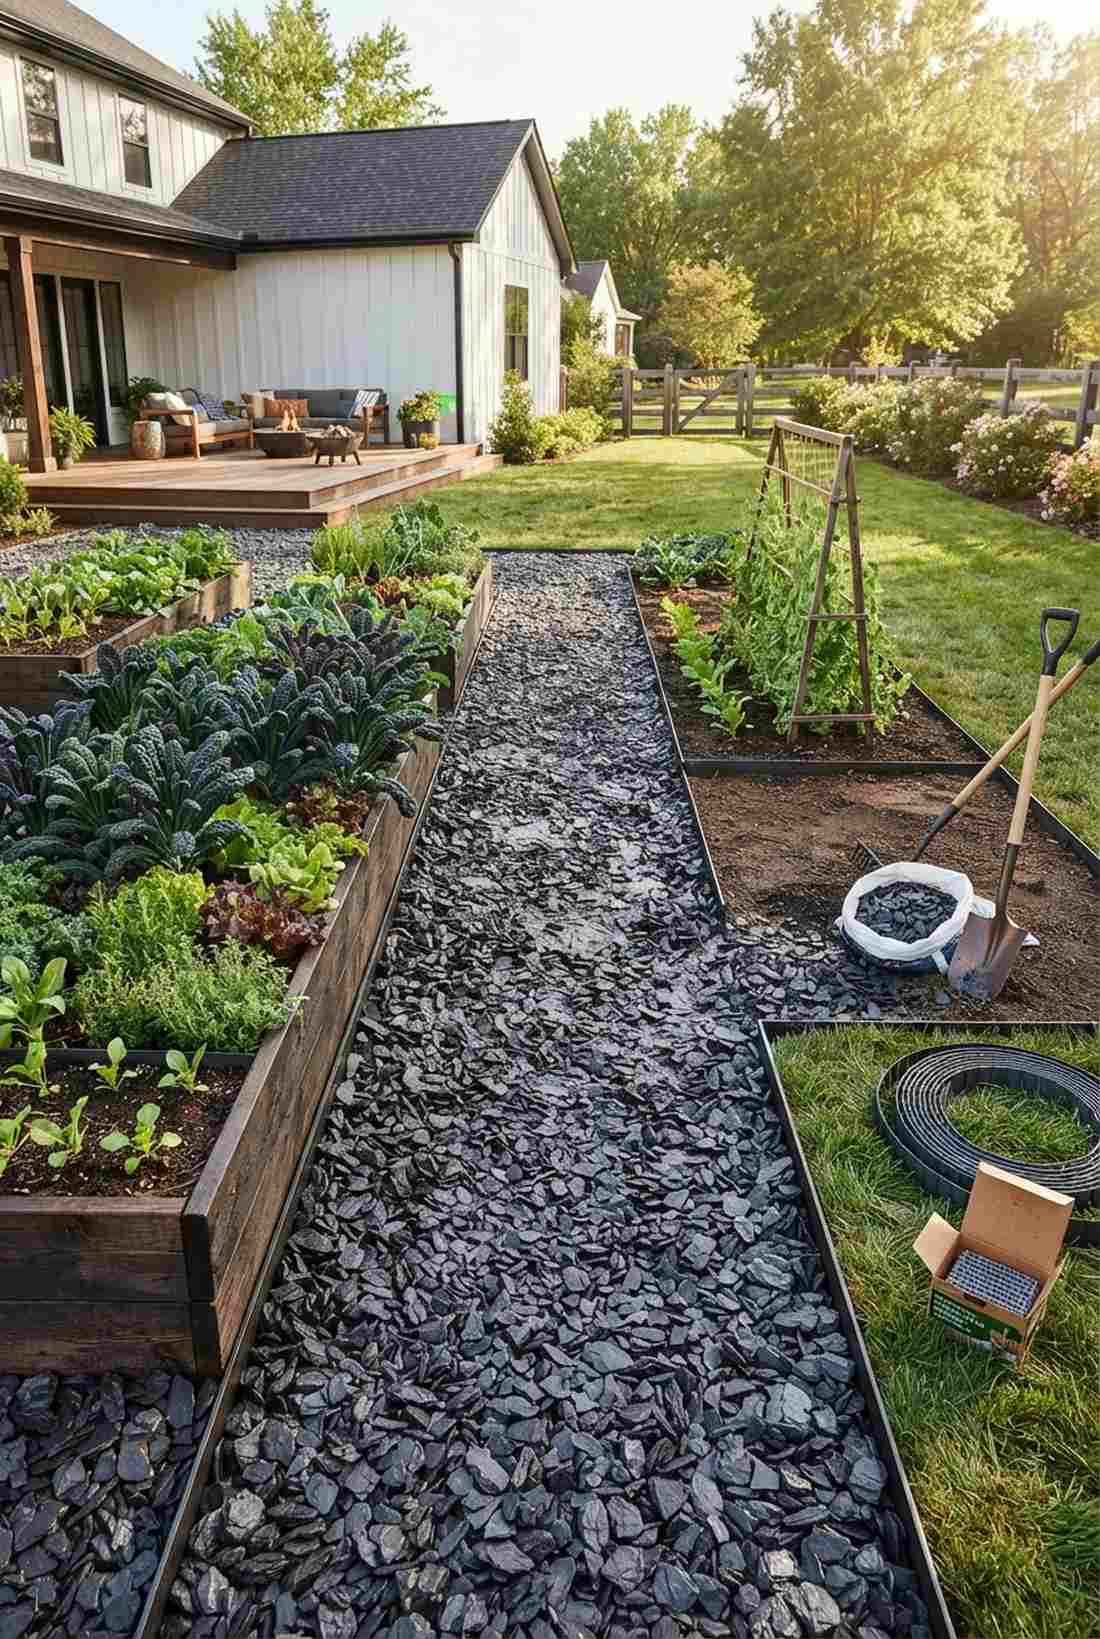
Radiates a moody, high-end botanical garden atmosphere. Using dark angular slate paths creates a striking visual contrast, functioning beautifully next to lush green lettuce and kale beds.
While rounded stones slip and slide, this jagged layout locks together, looking far more expensive than it is. It traps solar heat efficiently, making it a brilliant passive warming technique for early-spring seedlings.
Sourcing local materials brings this to a highly affordable $15–$25 per yard. Highly recommended for a quick weekend win.
- Key Materials: Crushed charcoal slate, rigid base layer
- Vibe / Style: Sleek contemporary contrast
- Difficulty: Simple shovel-and-rake job
- Budget Breakdown: Slate Chips: $18 | Underlayment: $5
- Creator’s Tip: Hose down the slate immediately after laying it to reveal its true dark color and wash away dust.
- Smart Sourcing: UV-coated rigid pathway grids and heavy-duty landscaping staples (bulk pack).
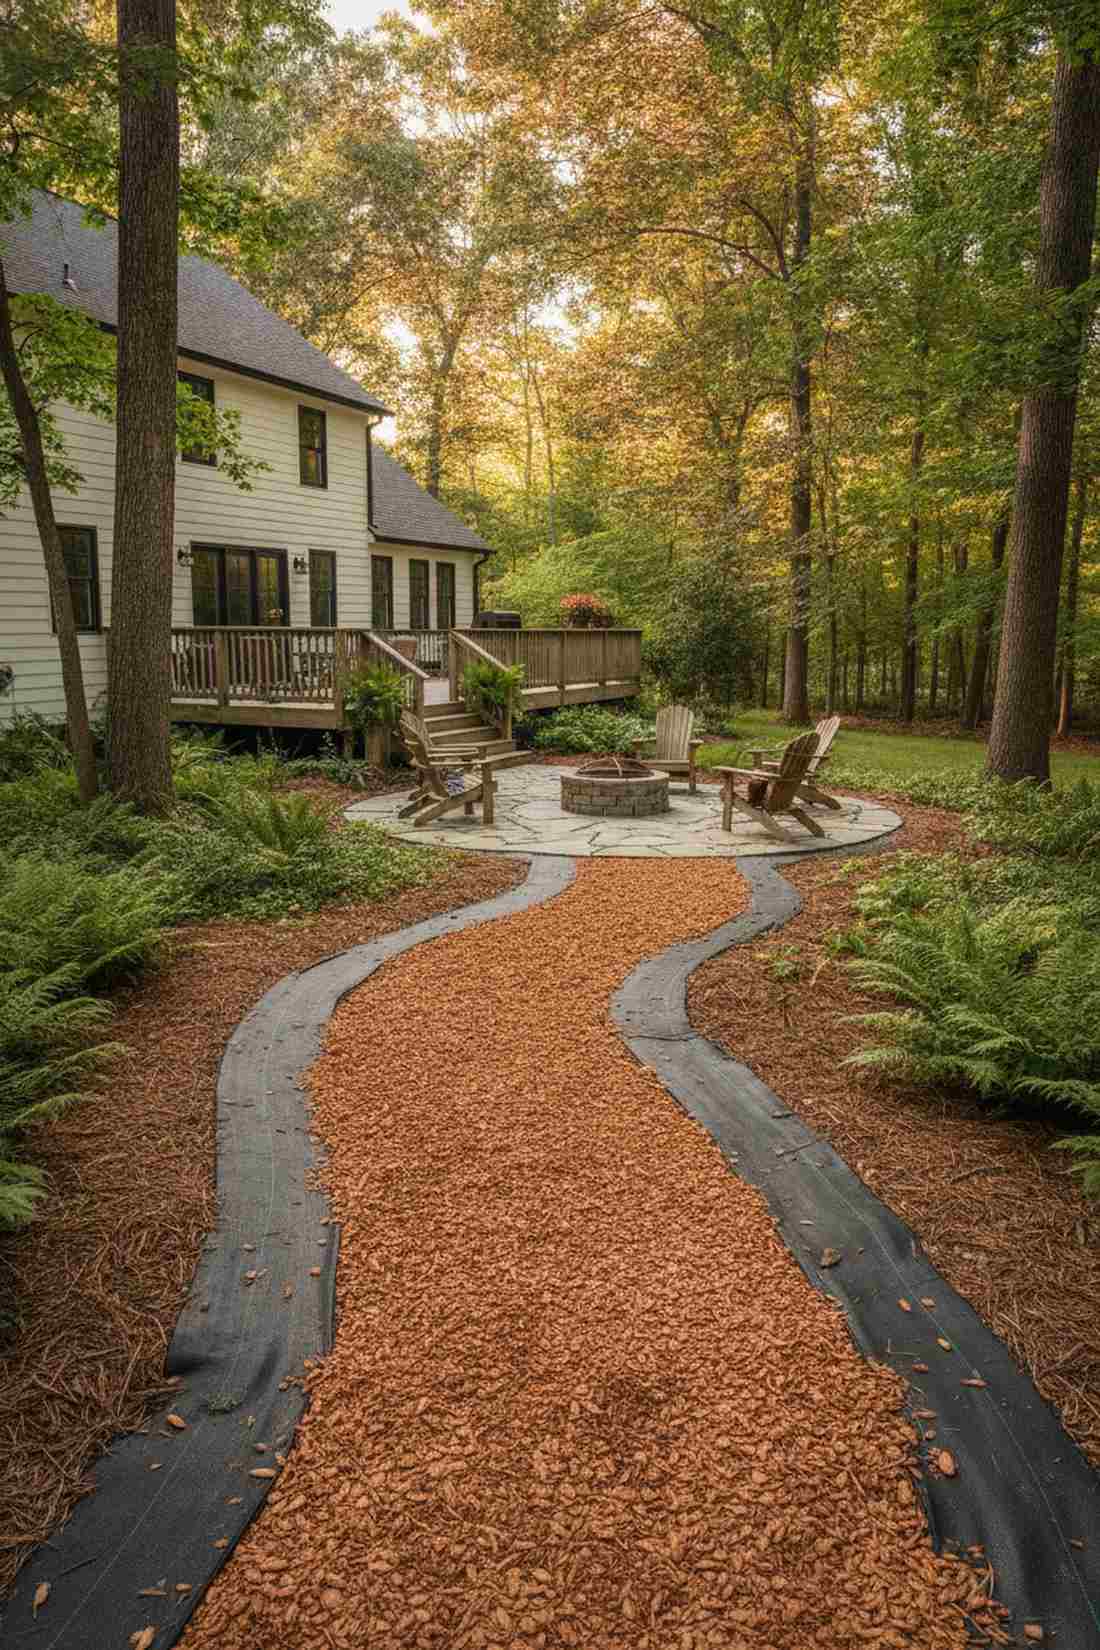
4. Gorilla Hair Mulch Compacted
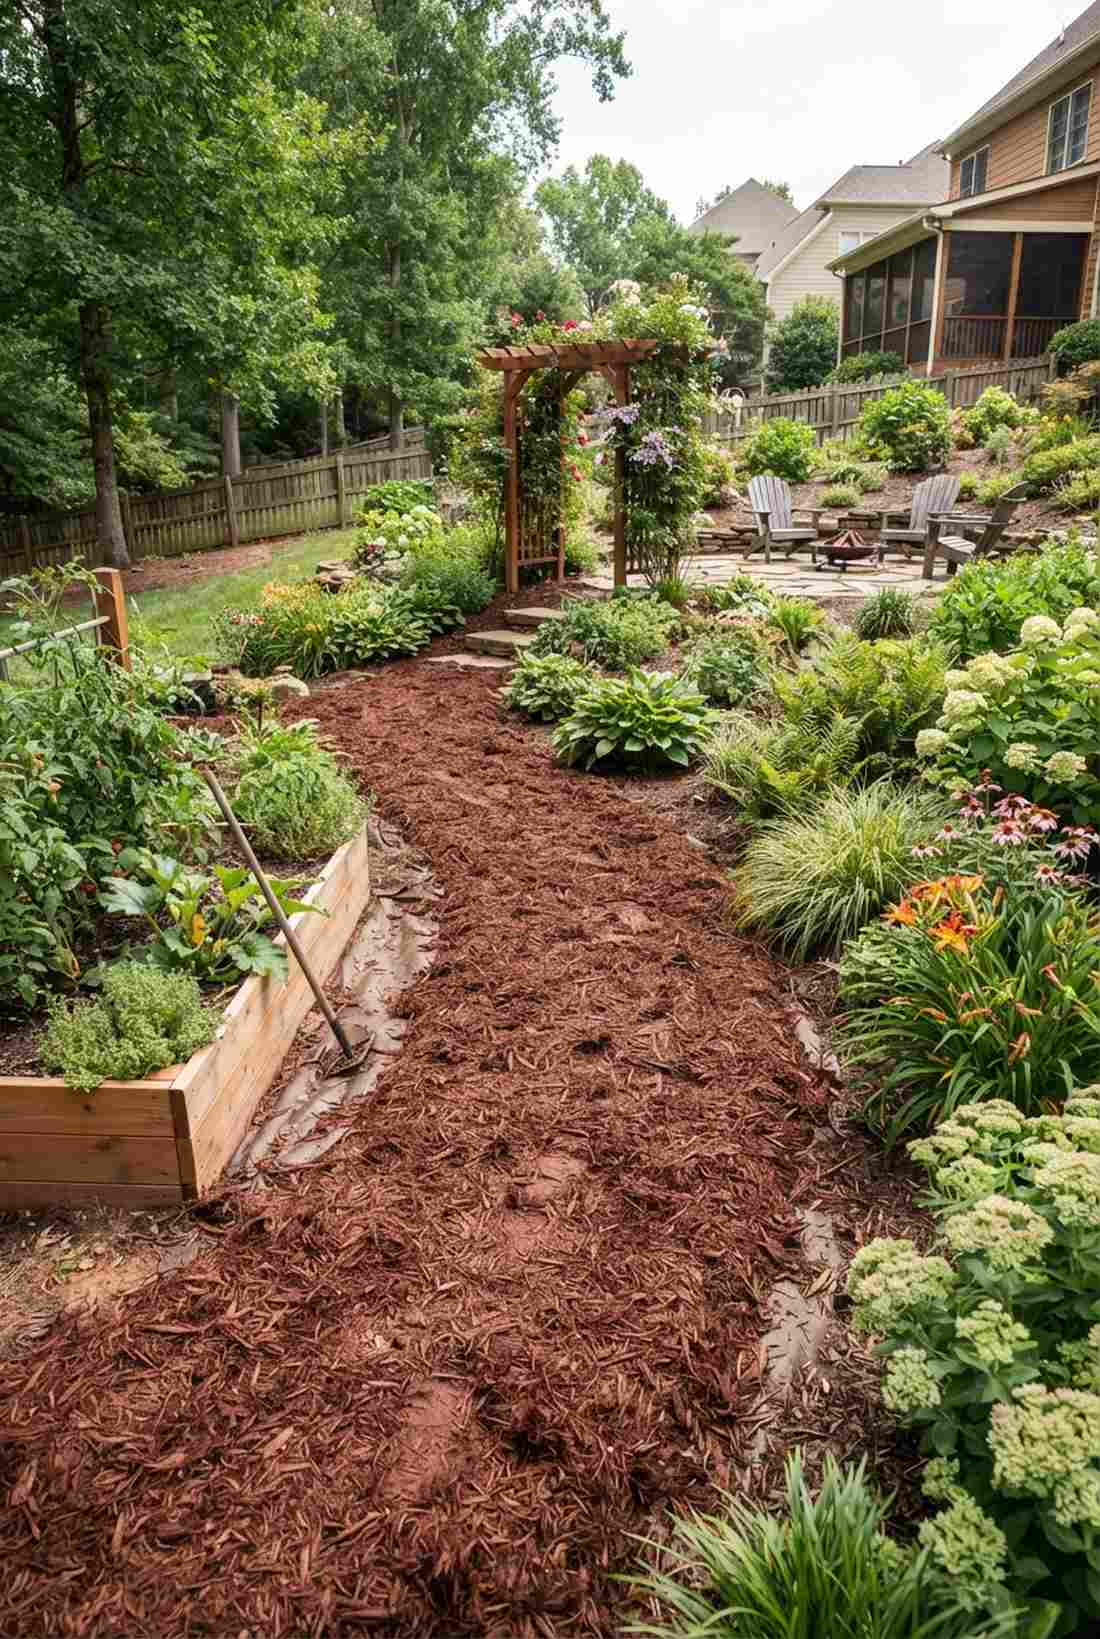
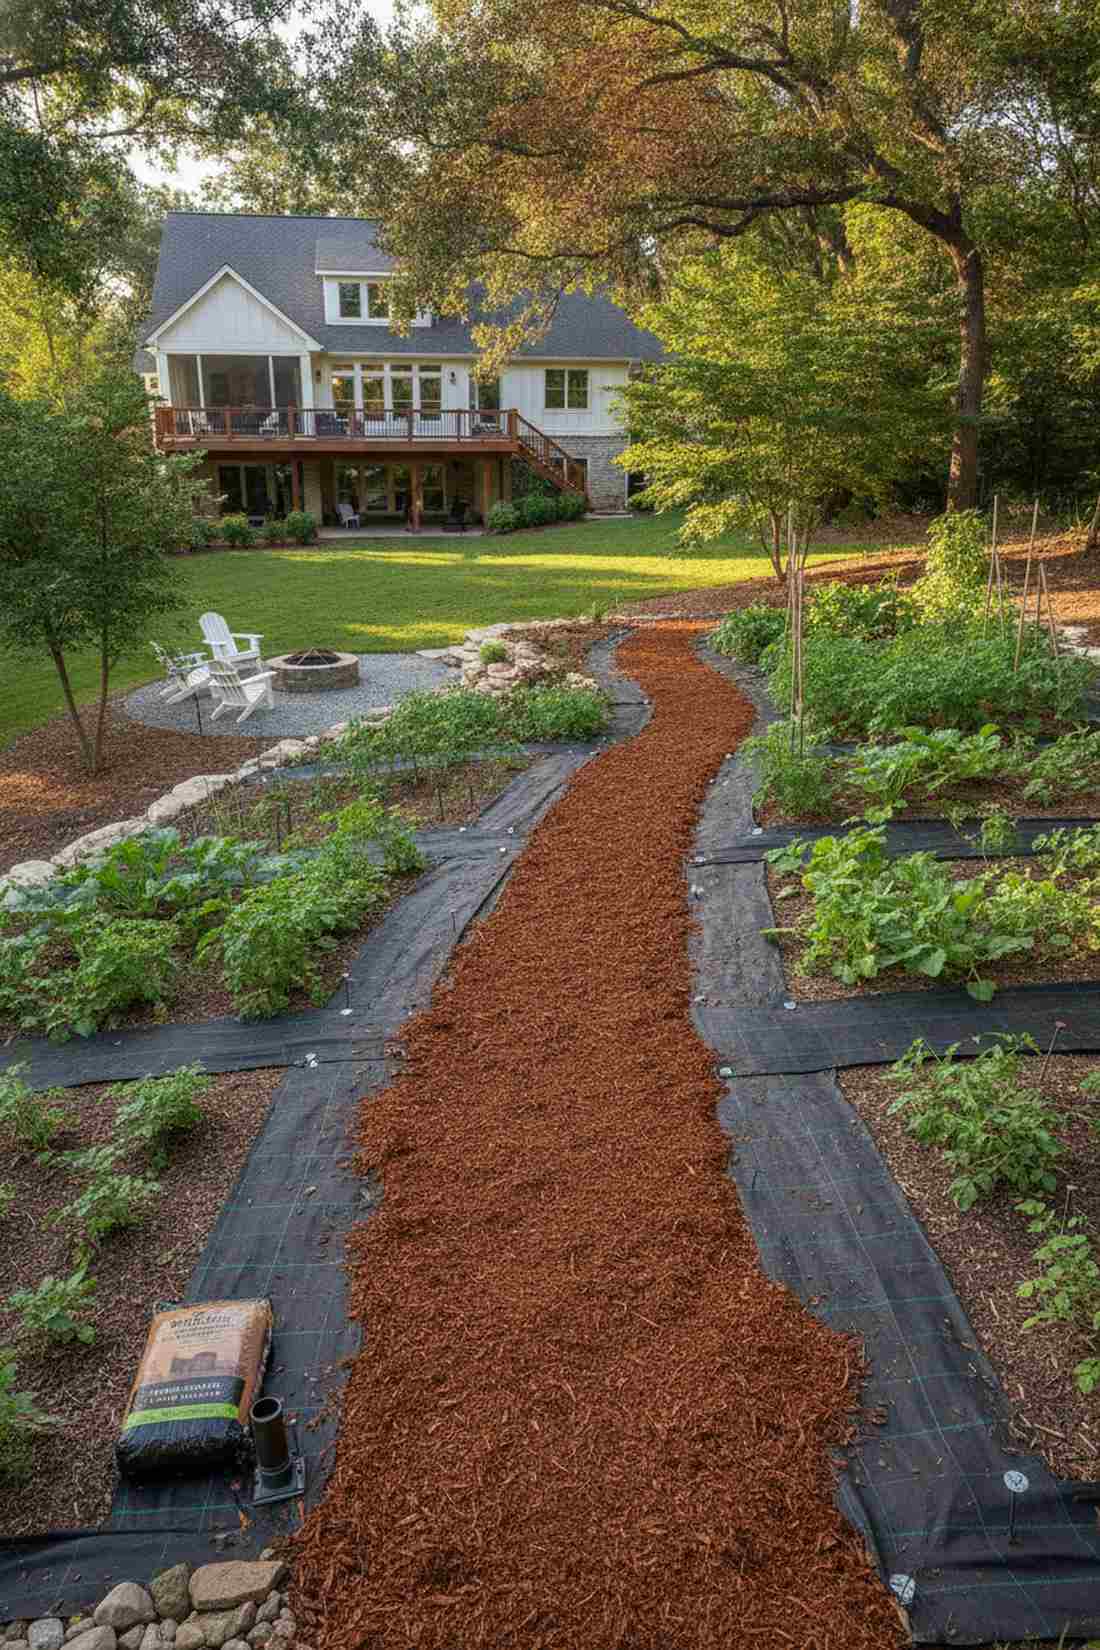
Feels like wandering through an enchanted, shaded forest trail. This fibrous shredded bark trail is practically slip-proof, serving as the ultimate solution for hillside vegetable plots.
Many novice gardeners complain about mulch washing away, but this interlocking texture binds together flawlessly to combat severe erosion. By putting down heavy-duty ground cover fabric first, you block stubborn perennial weeds for years.
You can execute this textured look for just $10–$20 a section. Save this to your budget landscaping board immediately!
- Key Materials: Shredded redwood/cedar bark, tamper tool
- Vibe / Style: Rugged organic warmth
- Difficulty: Very physically undemanding
- Budget Breakdown: Bark Bales: $12 | Base Fabric: $5
- Creator’s Tip: Wet the material heavily during the tamping process to activate its natural interlocking fibers.
- Smart Sourcing: Organic shredded mulch (compressed bale) or galvanized anchor pins (100-pack).
This next setup is ridiculously cheap to execute but looks exactly like a $5,000 custom masonry installation…
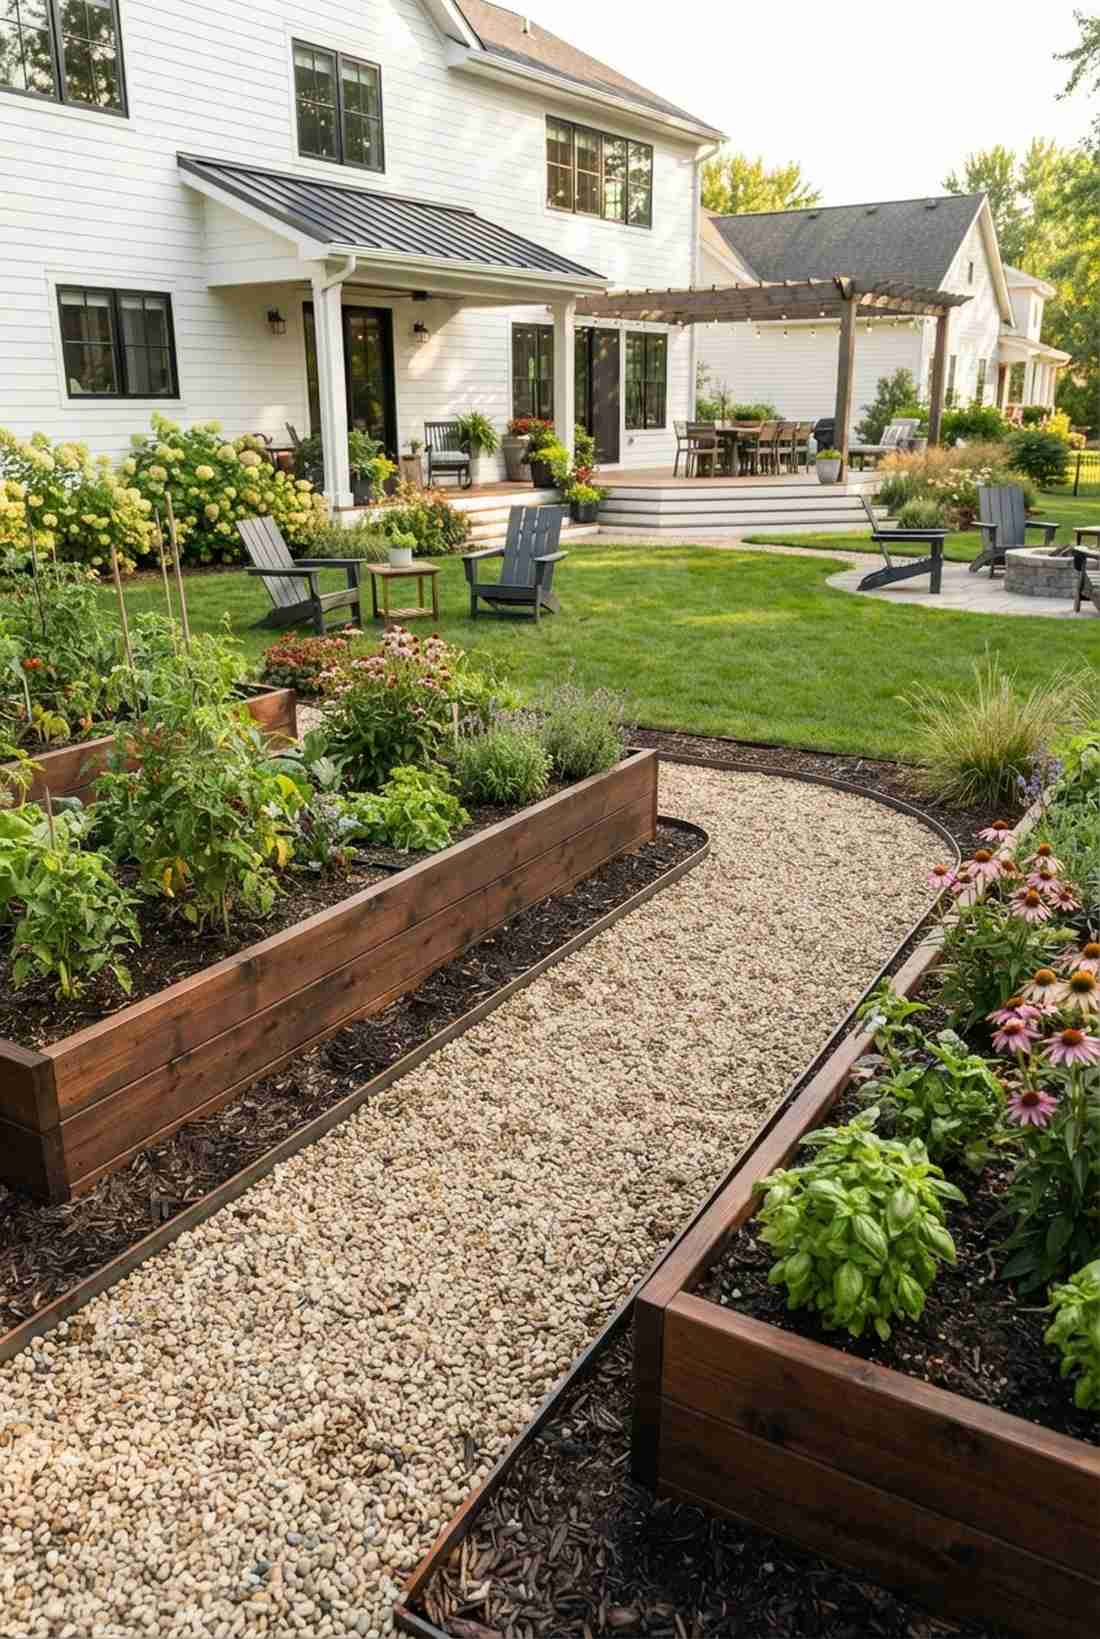
5. Permeable Pavers With Gravel Joints
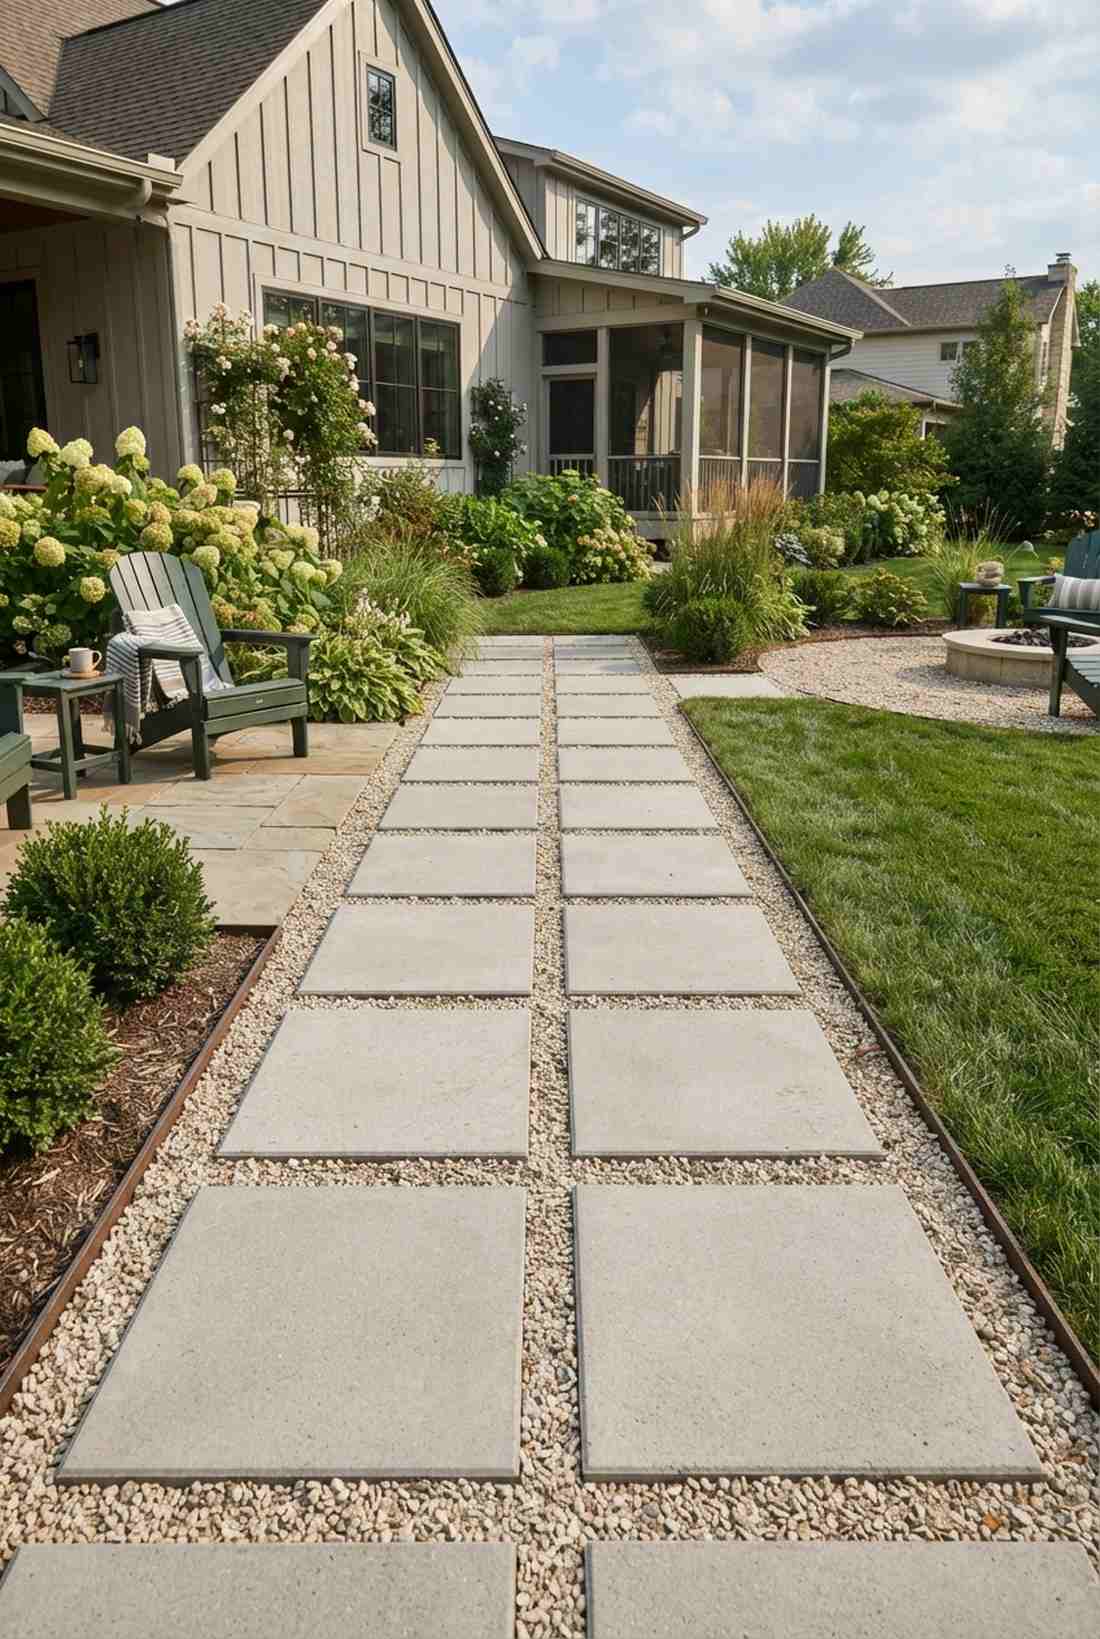
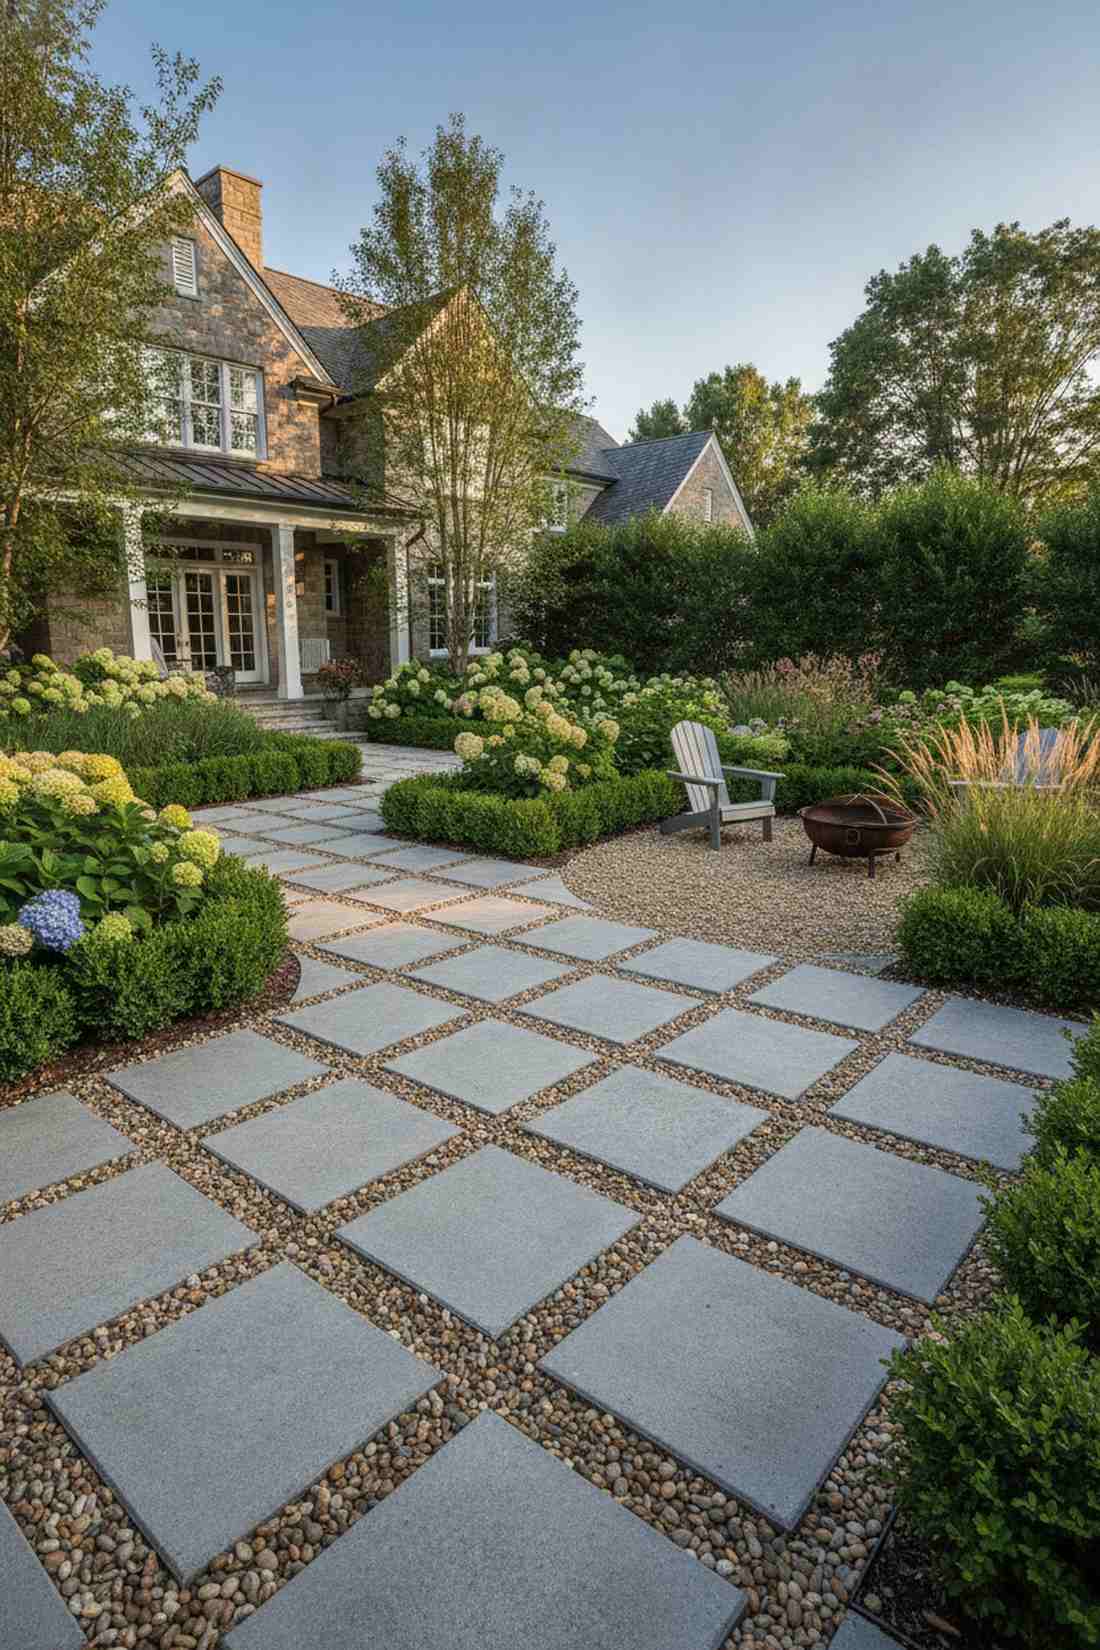
Exudes the sophisticated charm of a luxury estate courtyard. Integrating a stone paver and gravel hybrid system transforms muddy walkways into a structured, all-weather harvesting route.
Pouring solid concrete is an expensive mistake when this modular layout naturally drains torrential downpours. Spacing them perfectly gives that coveted designer-level finish while ensuring you never step in a puddle again.
Budget around $40–$60 depending on your stone choice. It’s an absolute game-changer for heavy rain climates.
- Key Materials: Cast concrete step stones, fine filler gravel
- Vibe / Style: Structured estate garden
- Difficulty: Requires precise measuring
- Budget Breakdown: Pavers: $35 | Filler Stone: $15
- Creator’s Tip: Always install the stepping stones slightly above the gravel line so rocks don’t scatter onto the blocks.
- Smart Sourcing: Pre-cast square concrete molds (starter set) and polymeric jointing sand (weatherproof bag).
Durable Hardscape for Intensive Production
When you demand a lifetime of heavy use, permanent hardscaping is the only answer. These heavy-duty setups effortlessly handle fully loaded garden carts while keeping your production zones visually pristine year-round.
6. Brick in Herringbone Pattern
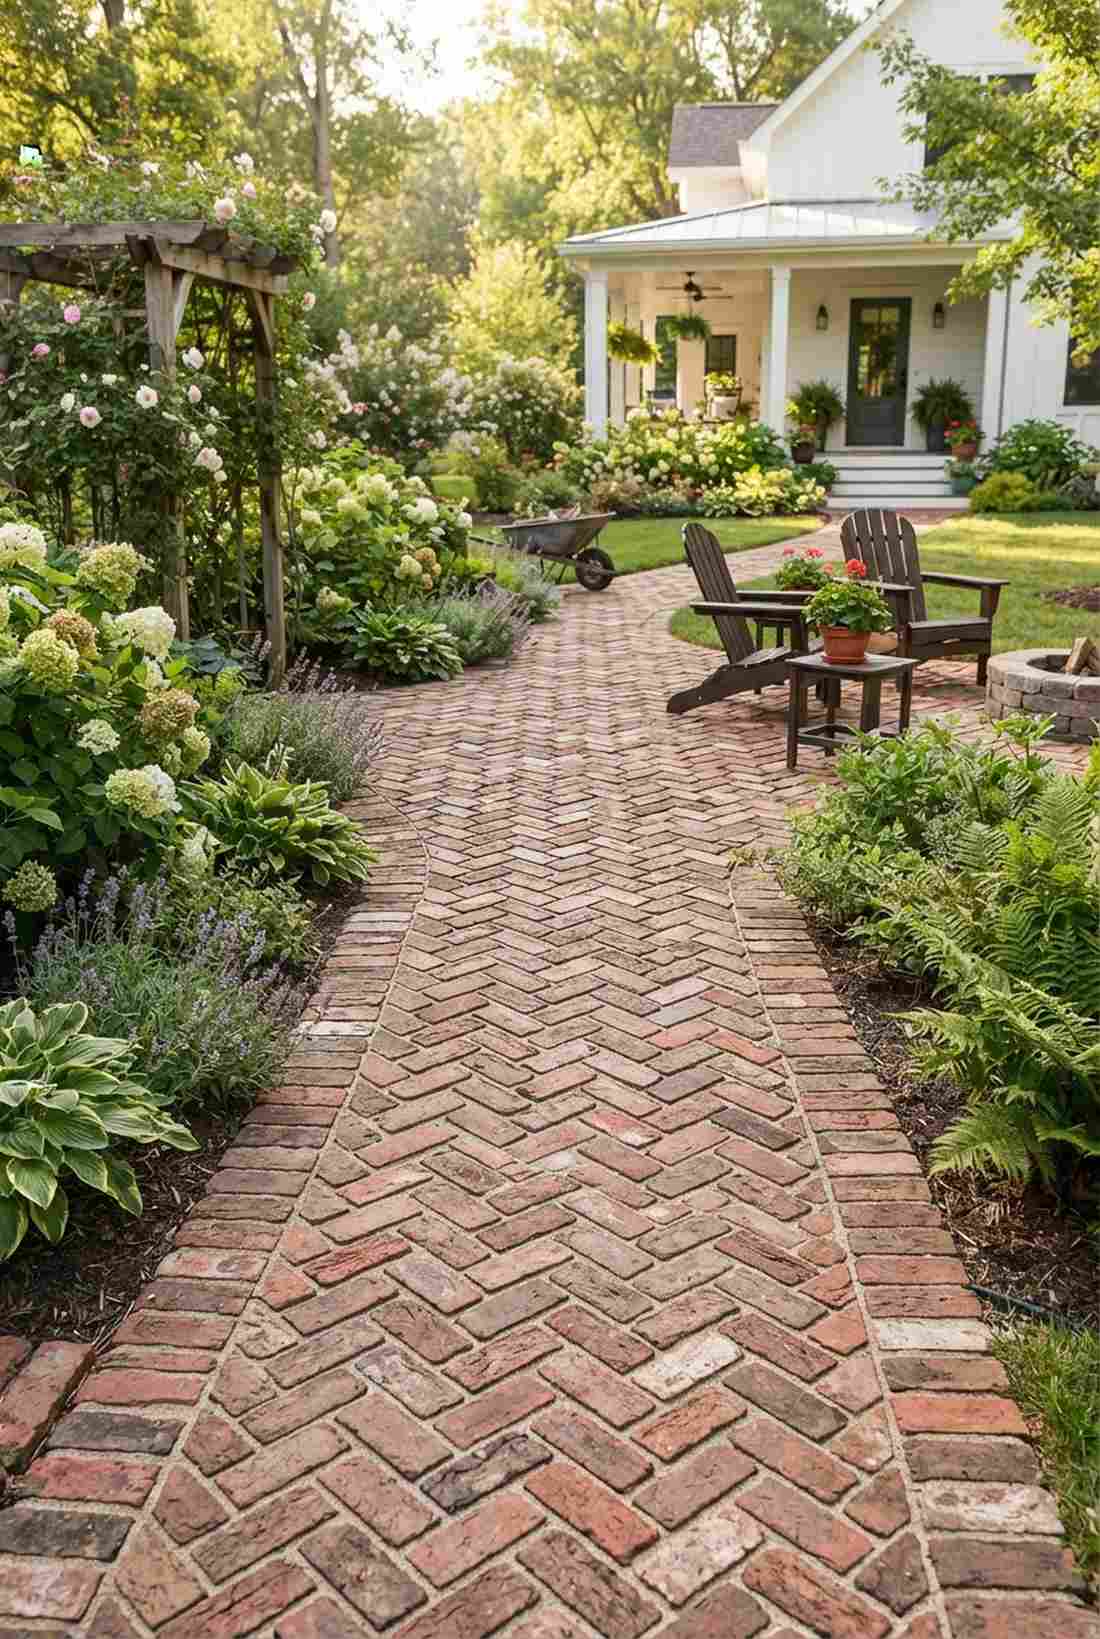
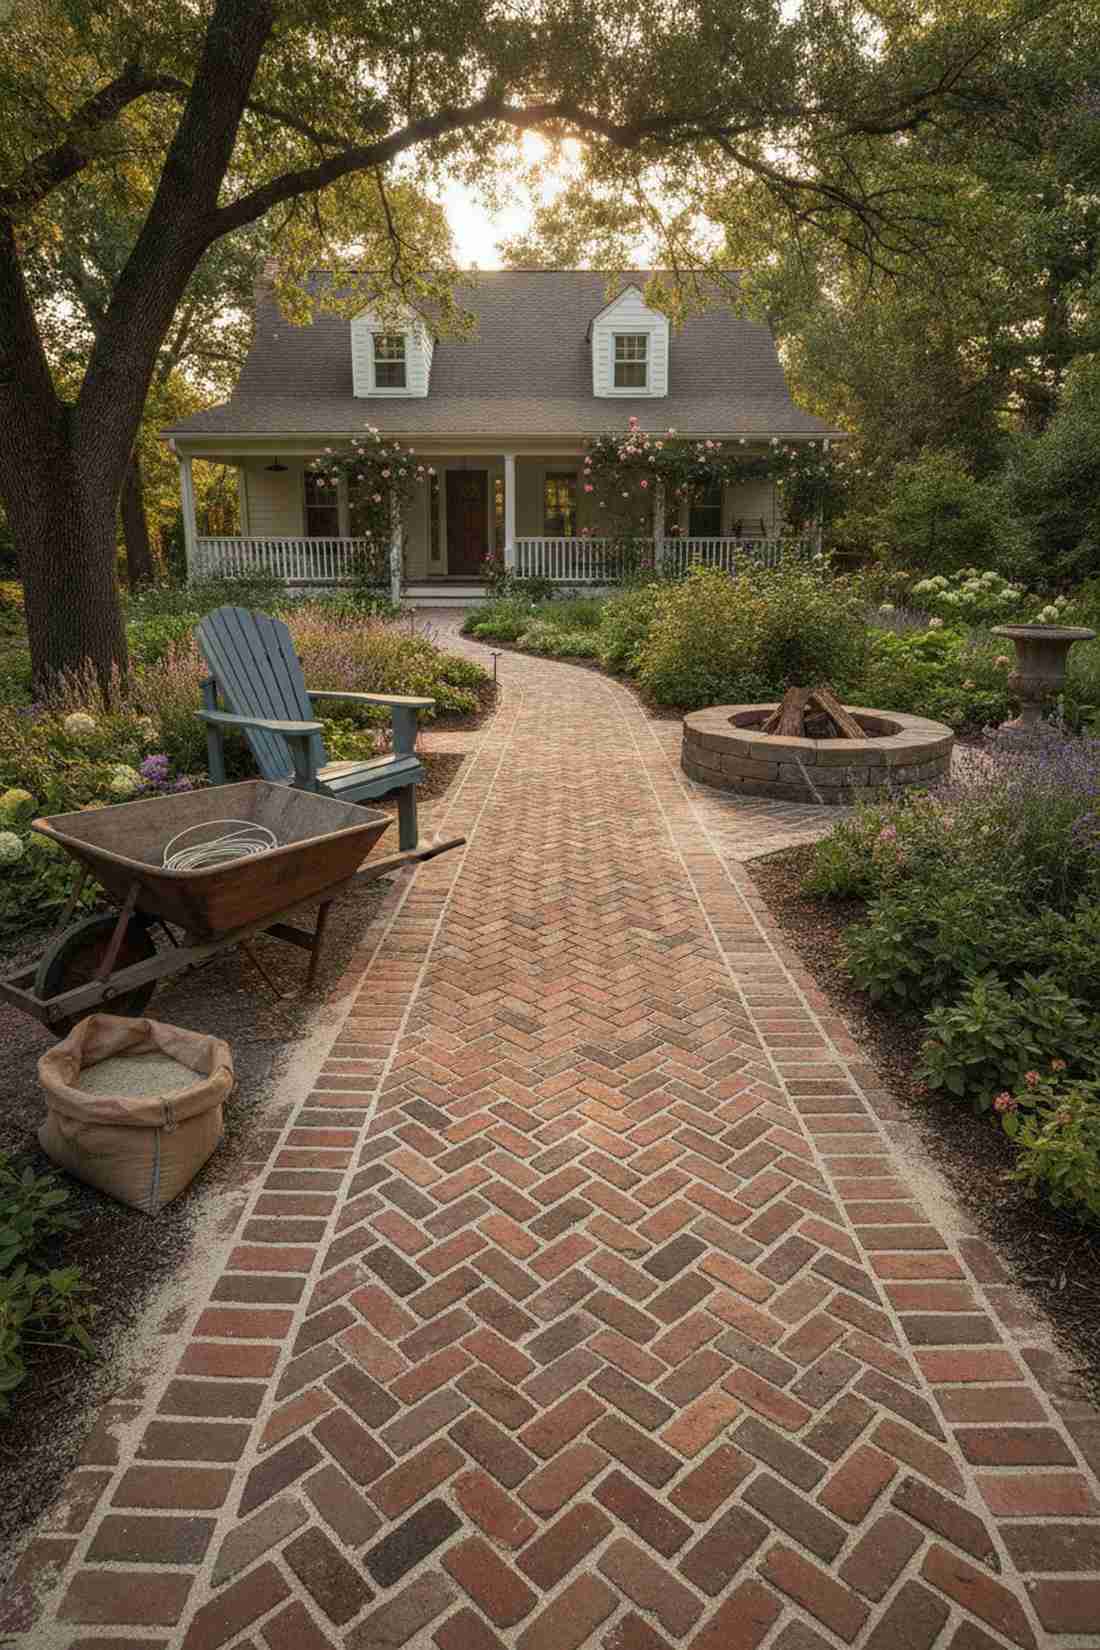
Feels like stepping into a centuries-old heritage garden. The classic herringbone brick walkway is visually captivating and serves as an ultra-durable runway for your heaviest wheelbarrows.
Laying bricks straight is a rookie error that leads to shifting; this zig-zag blueprint looks far more expensive than it is and locks the entire path in place. Sweeping premium polymeric binding sand into the cracks guarantees an ant-proof, weed-free finish.
Salvaged materials can bring this down to $30–$50 per square meter. Pin this if you love timeless vintage aesthetics!
- Key Materials: Reclaimed clay bricks, leveling sand
- Vibe / Style: Timeless vintage charm
- Difficulty: Advanced weekend project
- Budget Breakdown: Bricks (Salvaged): $20 | Base Sand: $15
- Creator’s Tip: Use a rubber mallet and a tight string line to ensure your angles stay perfectly aligned during installation.
- Smart Sourcing: Professional-grade masonry string line and pre-mixed leveling sand (bulk sack).
7. Concrete Pavers in Running Bond
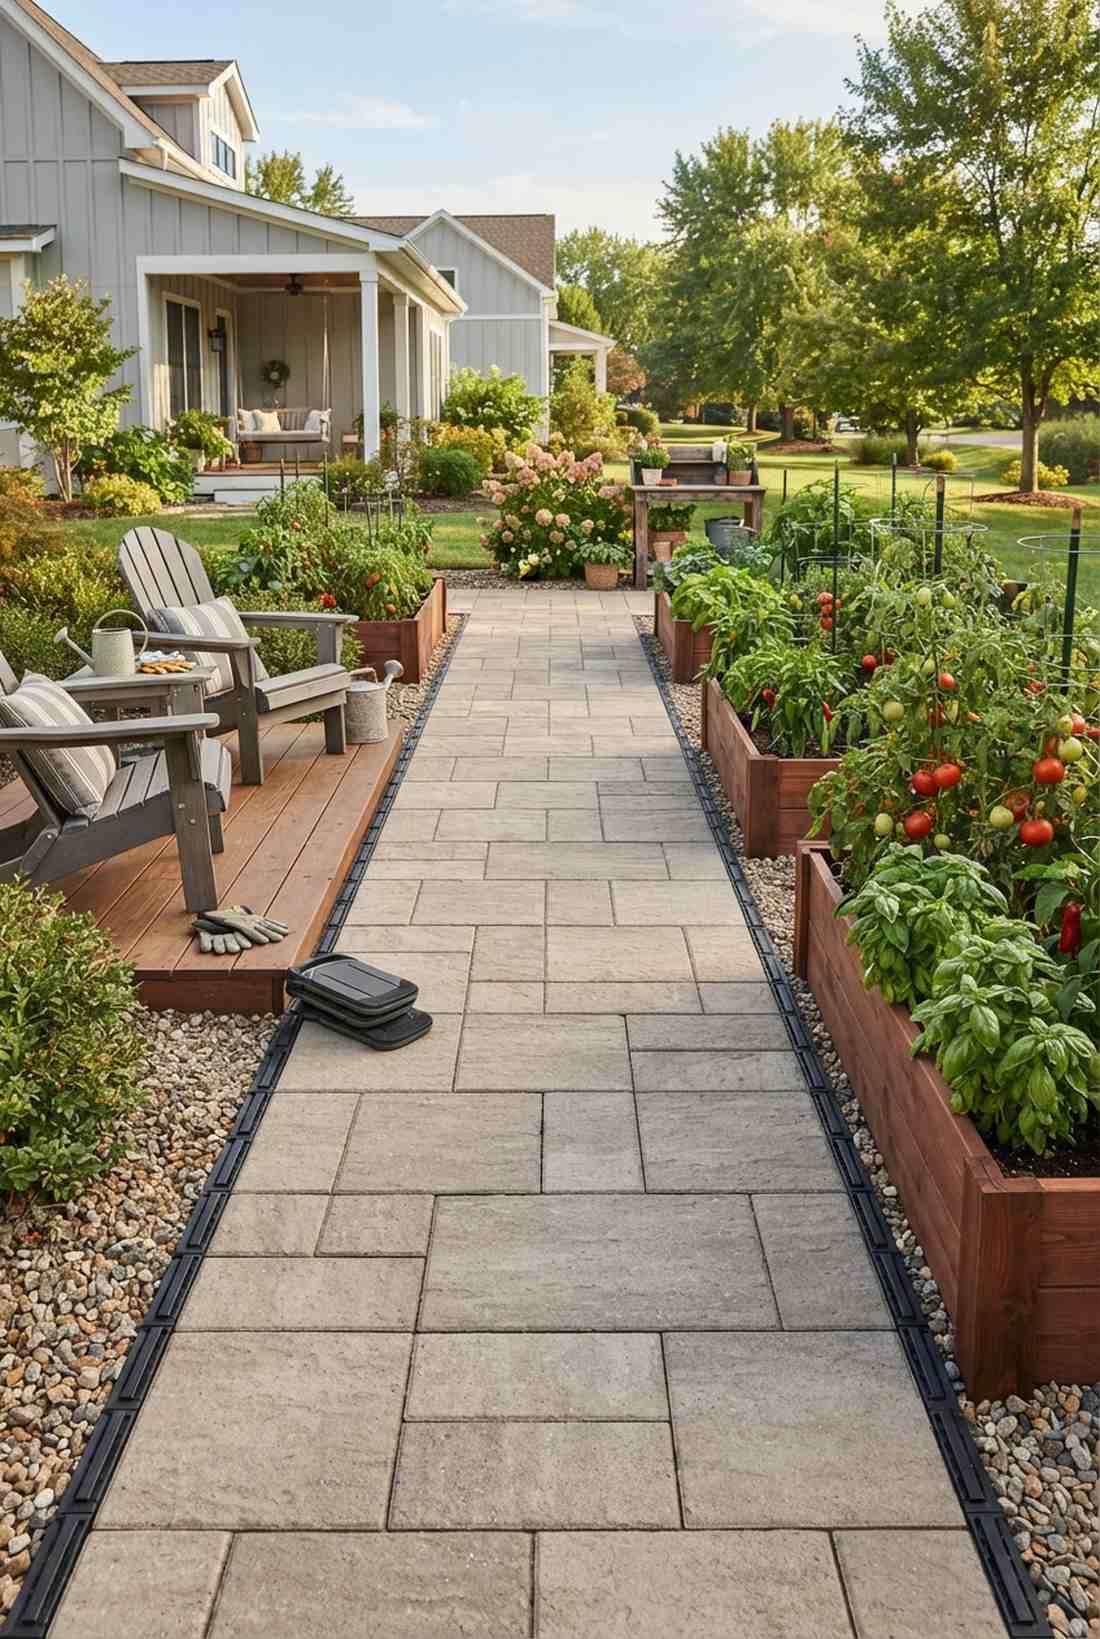
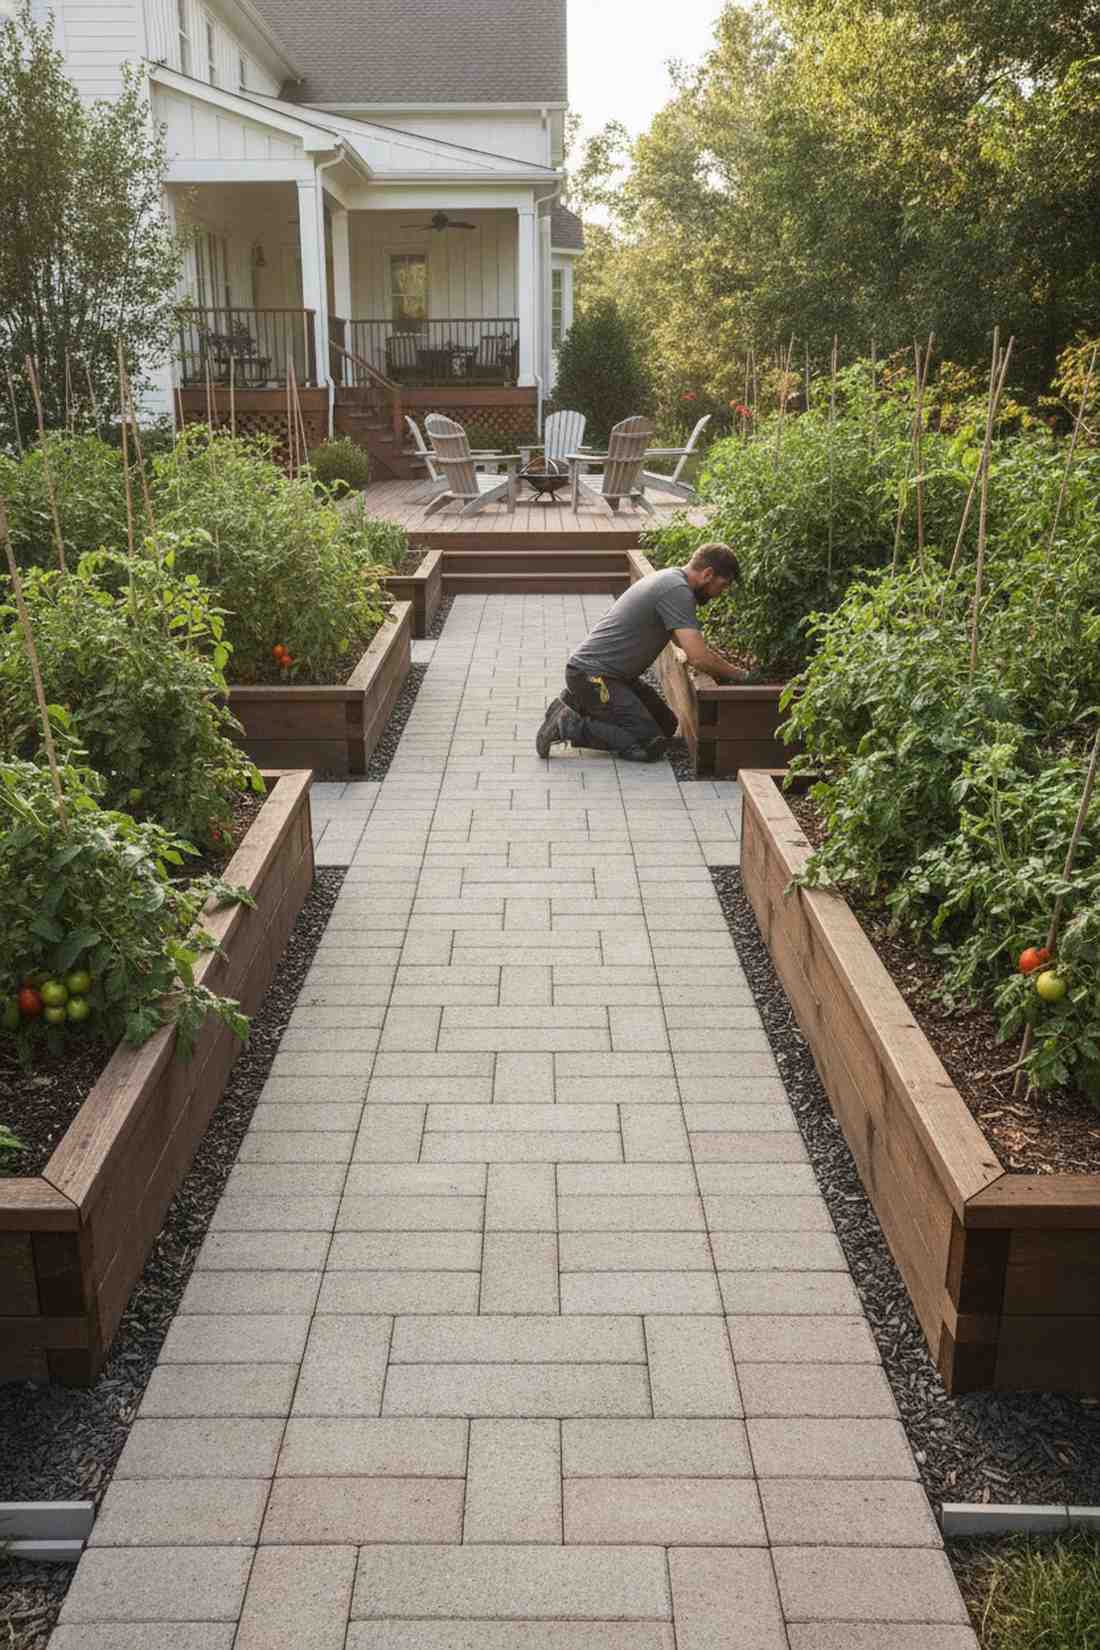
Delivers the crisp, uniform aesthetic of a high-end commercial nursery. A running bond paver path provides an incredibly stable, slip-resistant surface perfect for organizing massive raised garden beds.
Complicated cuts waste time, but this offset layout requires zero special tools while delivering immense structural stability. Opting for textured, neutral-toned blocks ensures your vibrant tomato plants remain the visual focal point.
A highly predictable budget of $25–$40 per section makes this a favorite. You will never regret installing a solid, flat walkway.
- Key Materials: Rectangular manufactured pavers, base gravel
- Vibe / Style: Clean geometric order
- Difficulty: Moderate heavy lifting
- Budget Breakdown: Concrete Blocks: $25 | Base Stone: $10
- Creator’s Tip: Dig an extra inch deep and add a crushed rock sub-base to prevent winter frost heaving.
- Smart Sourcing: Heavy-duty knee protection pads (gel-core) and pre-cut plastic paver restraints.
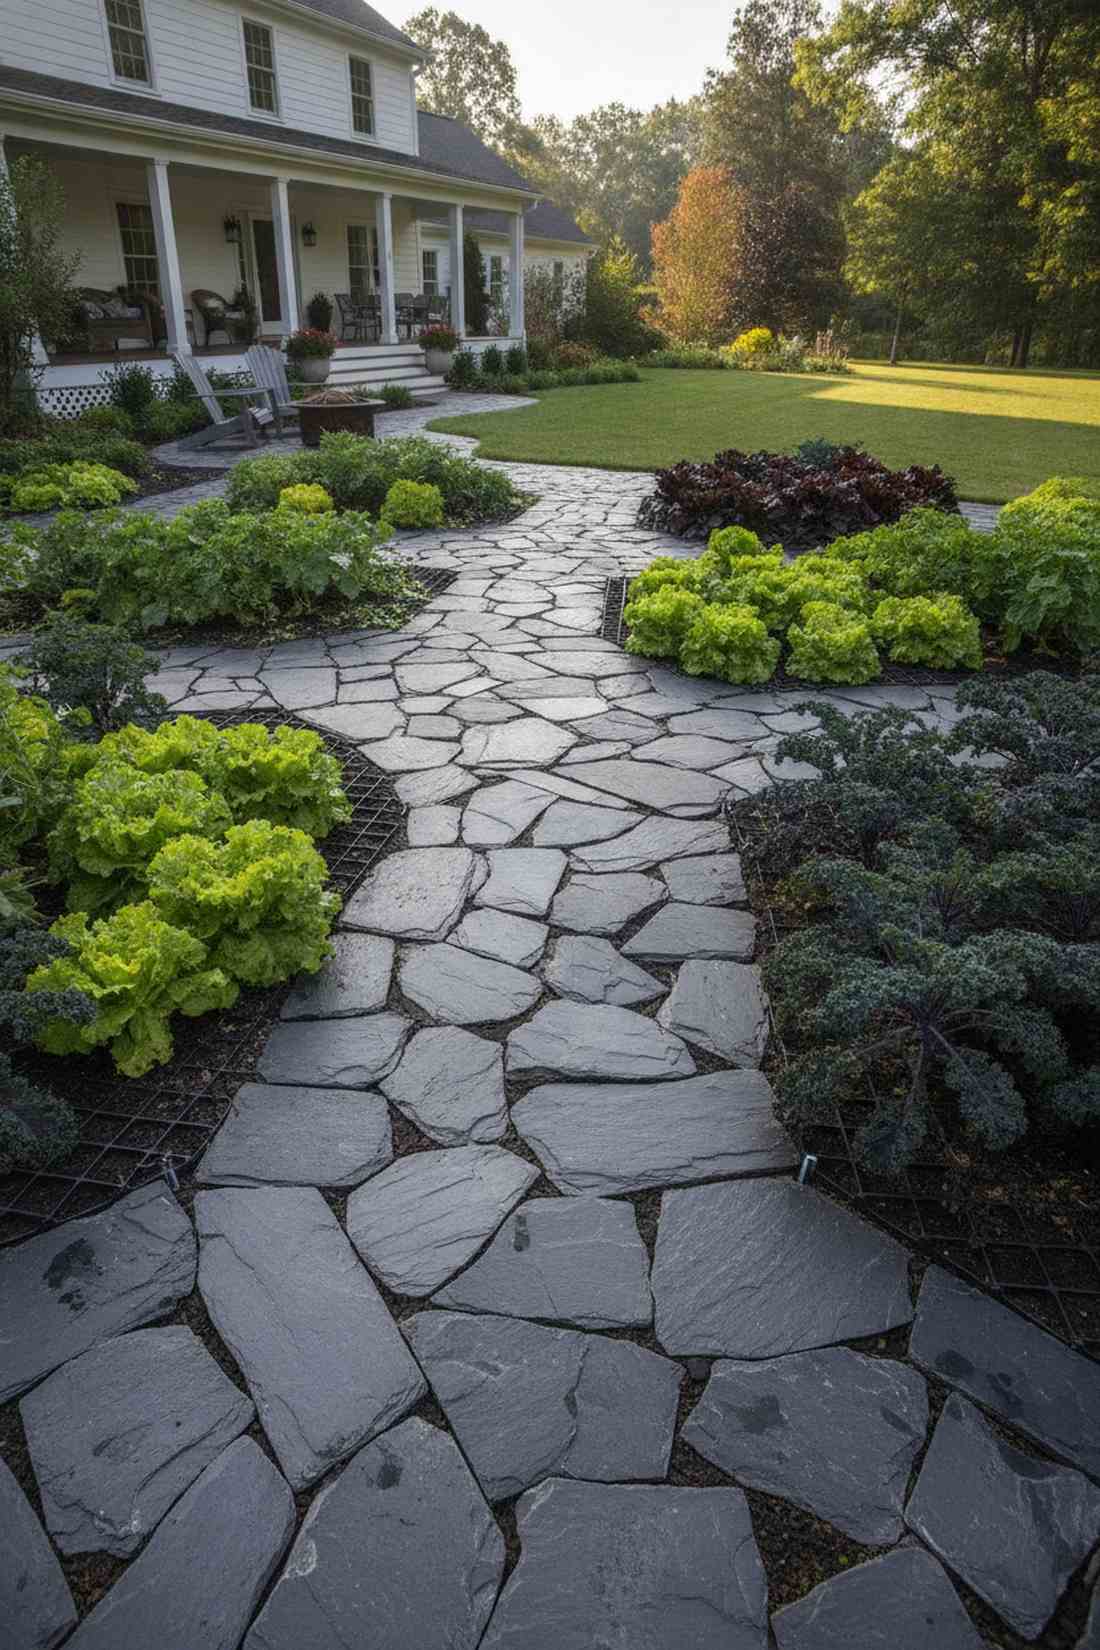
8. Flagstone With Moss Joints
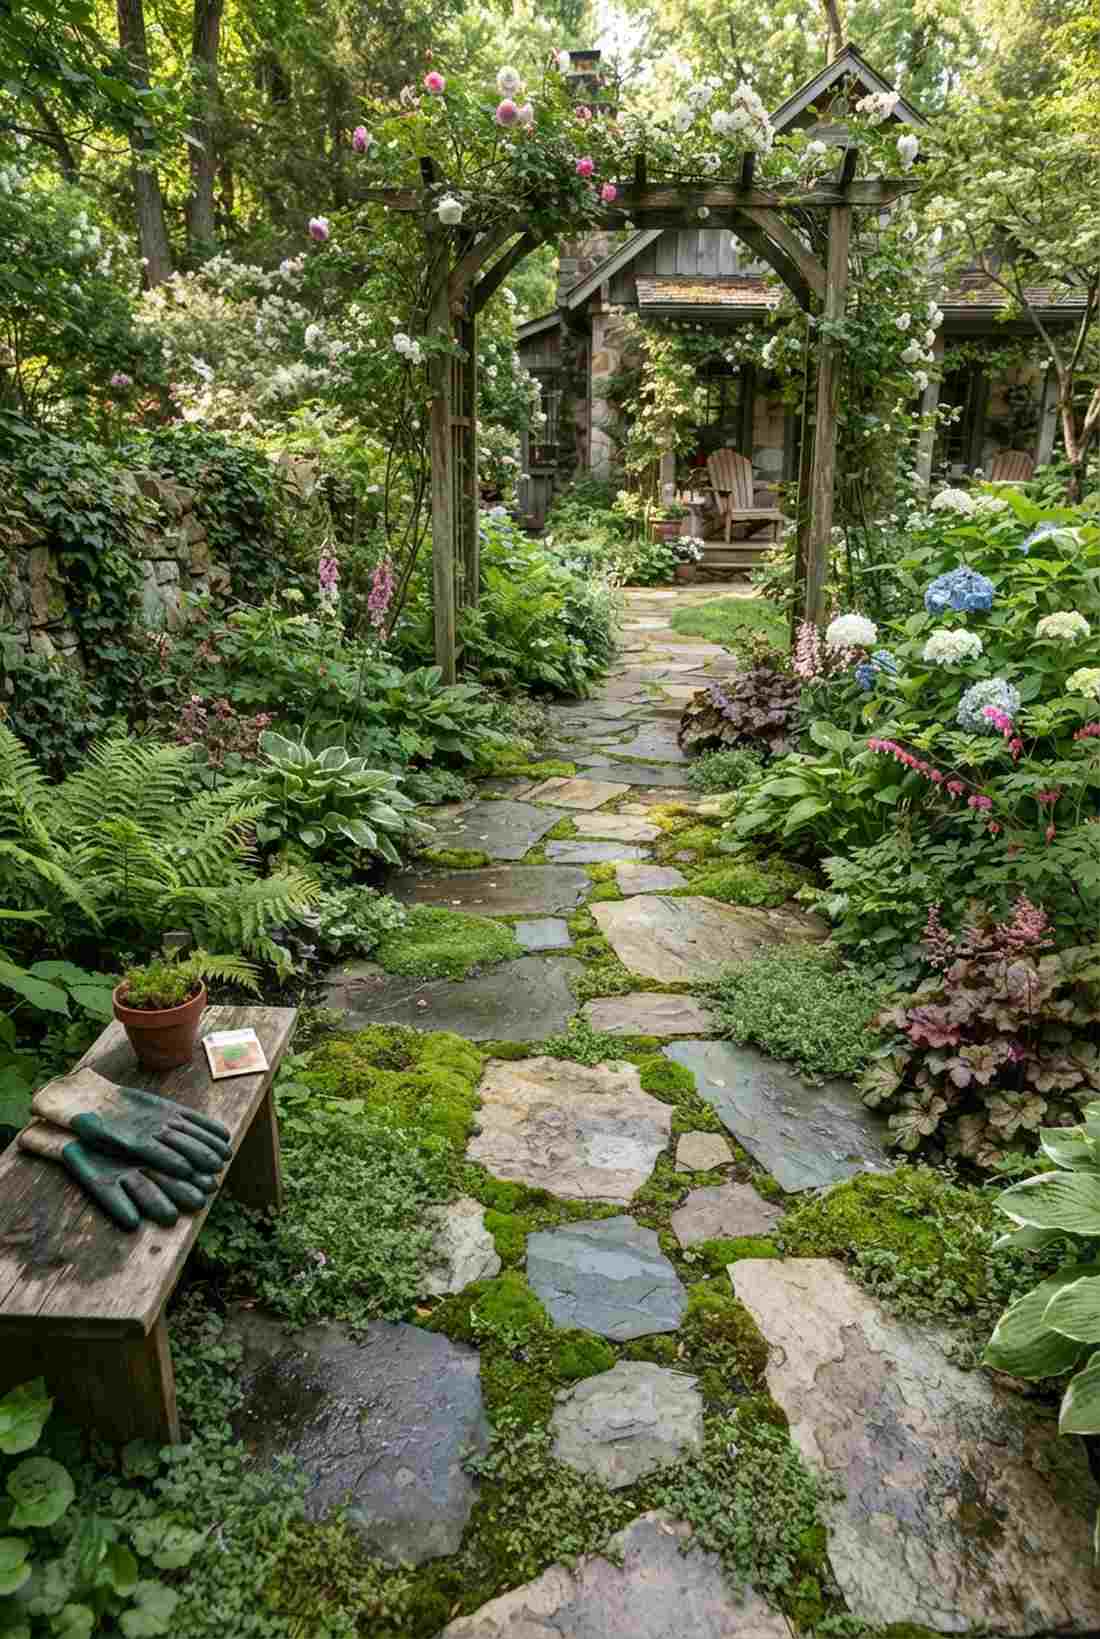
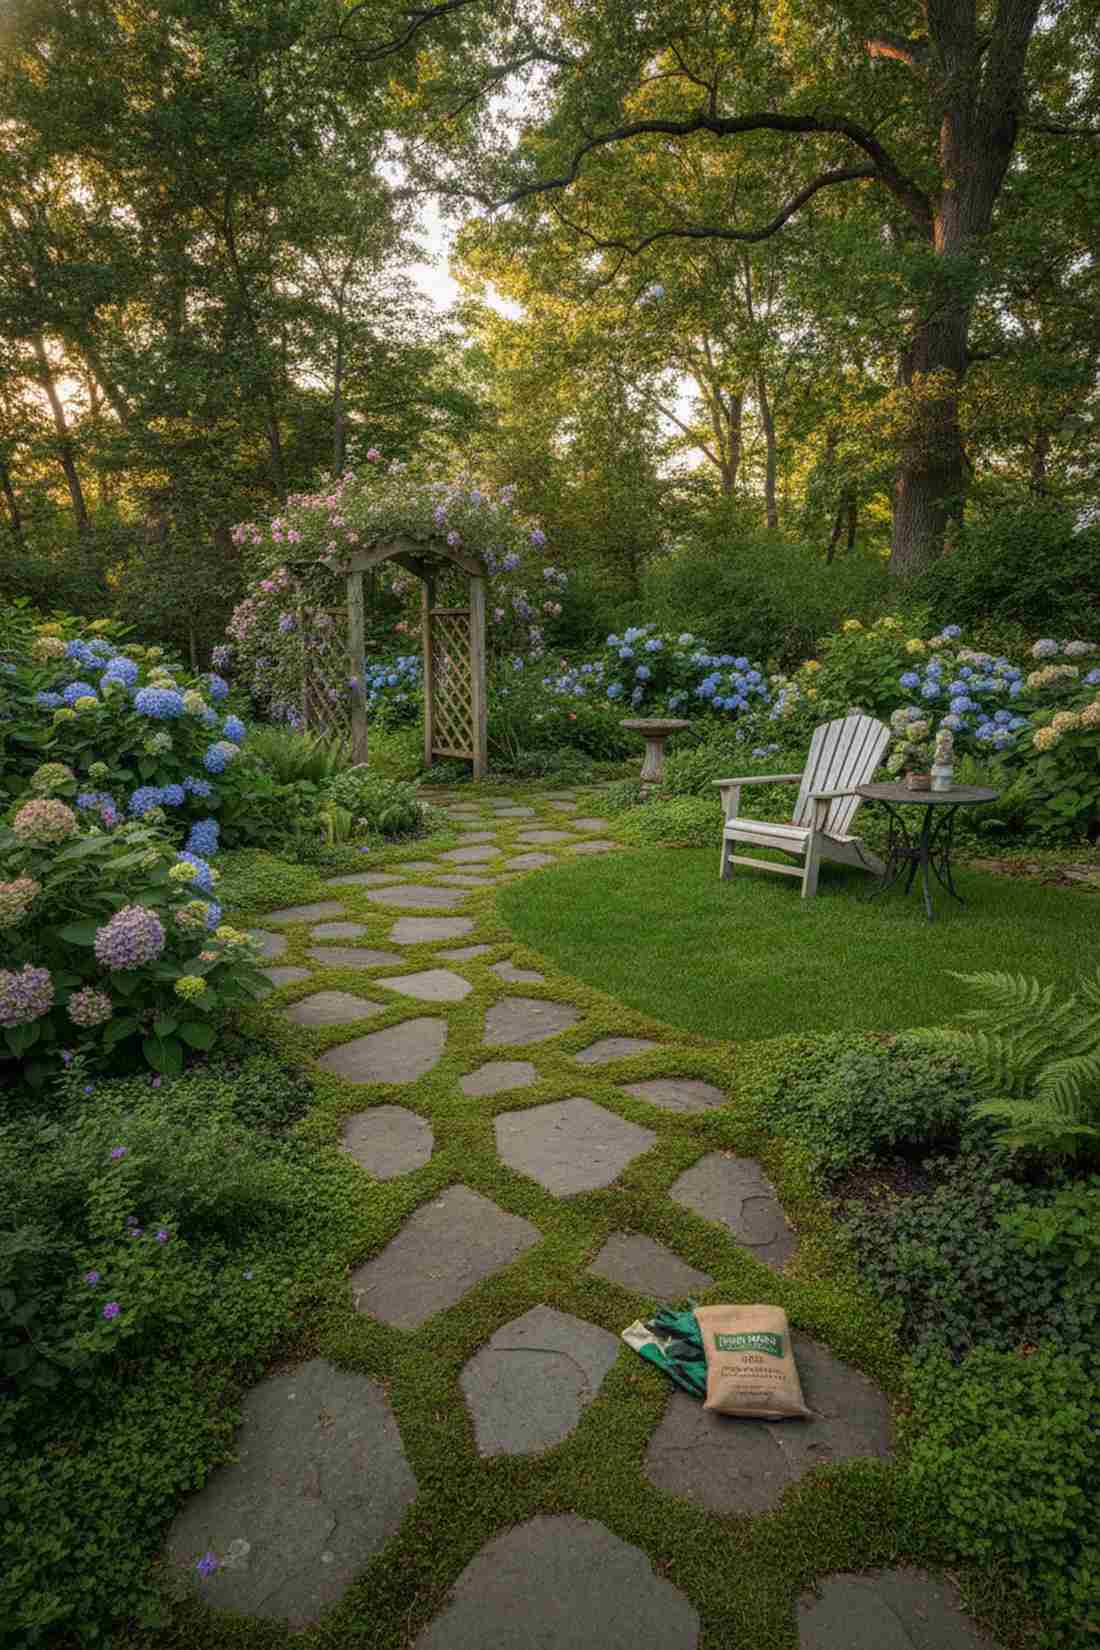
Looks like a whimsical fairytale path straight out of a storybook. Implementing a natural flagstone and living moss walkway adds unmatched rustic charm, ideal for shaded, informal garden corners.
Rigid concrete paths feel too harsh, but sneaking soft groundcovers into the cracks delivers a surprisingly premium look. Using a specialized organic seed starter mix in the joints encourages rapid, lush green growth between the stones.
Local stone yards let you complete this for around $45–$70. Save this idea if you are craving that dreamy cottagecore vibe!
- Key Materials: Irregular stone slabs, shade-loving groundcover
- Vibe / Style: Whimsical cottagecore
- Difficulty: Creative puzzle-fitting
- Budget Breakdown: Flagstone: $50 | Moss Spores: $15
- Creator’s Tip: Mix buttermilk with moss fragments in a blender and paint it into the cracks for explosive growth.
- Smart Sourcing: Irish moss seed starter kits and waterproof gardening gloves (multipack).
Most DIYers overspend on basic layouts… until they try the genius optical illusion coming up next.
9. Stamped Concrete With Vegetable Motifs
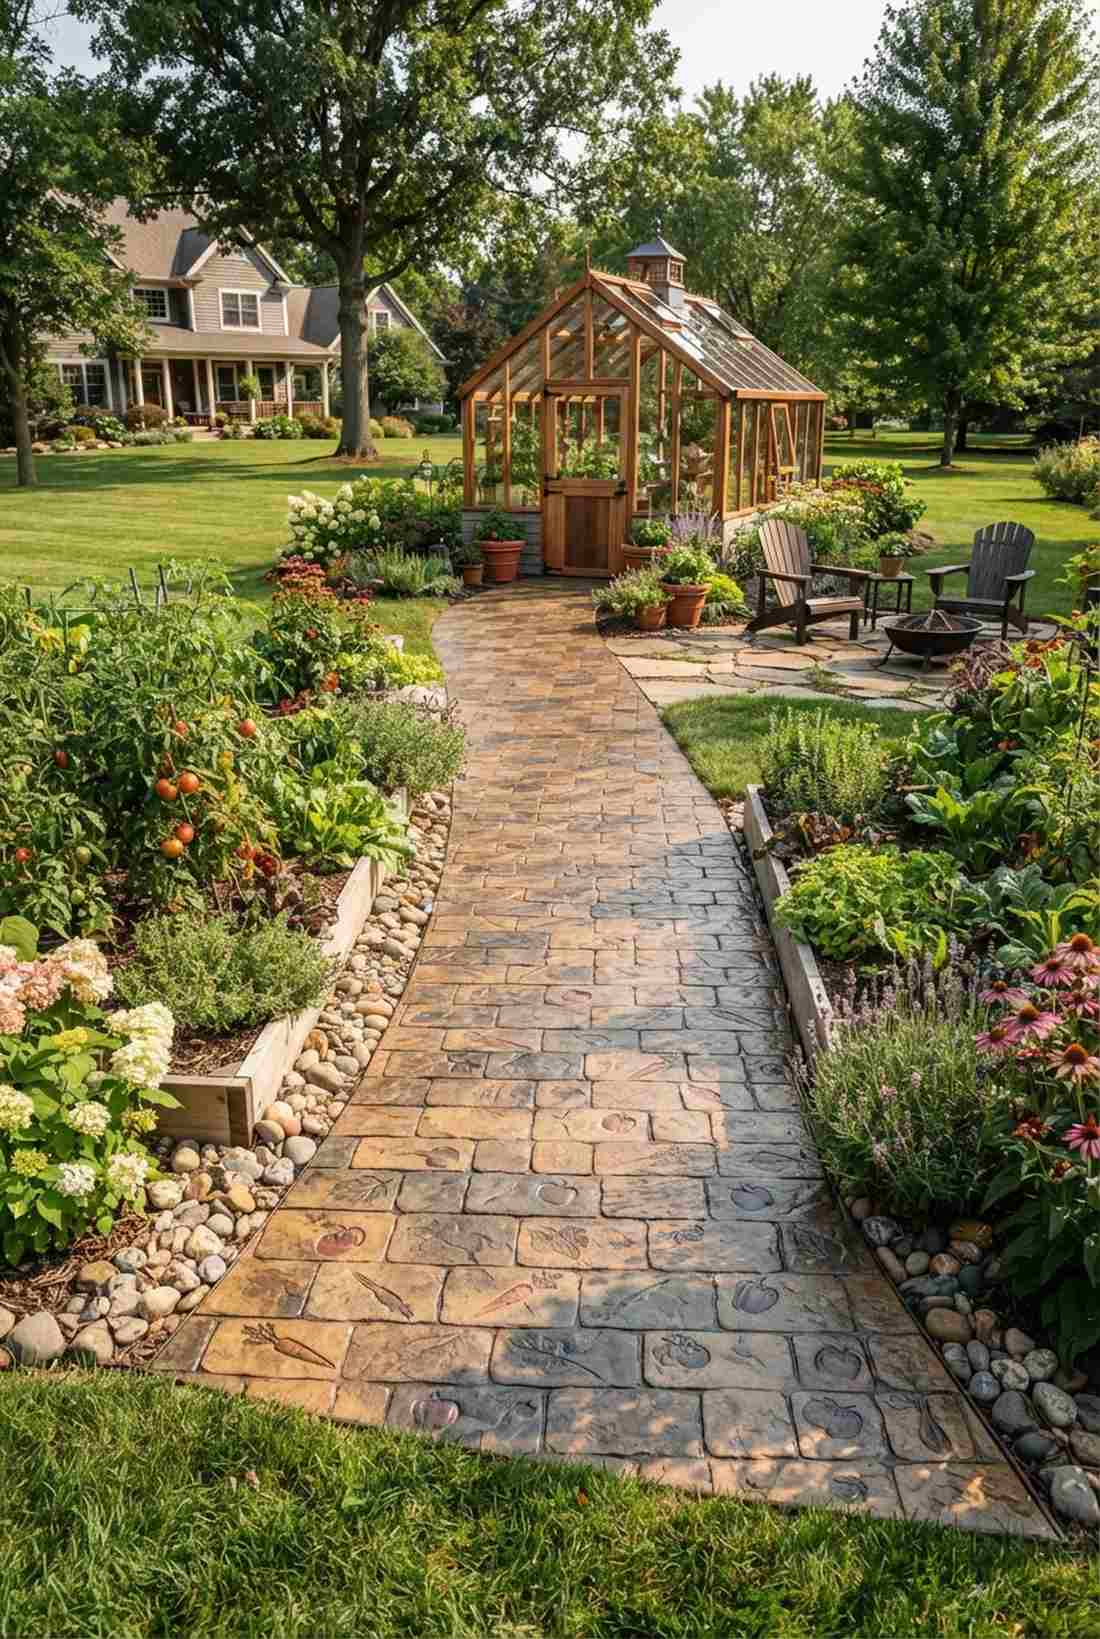
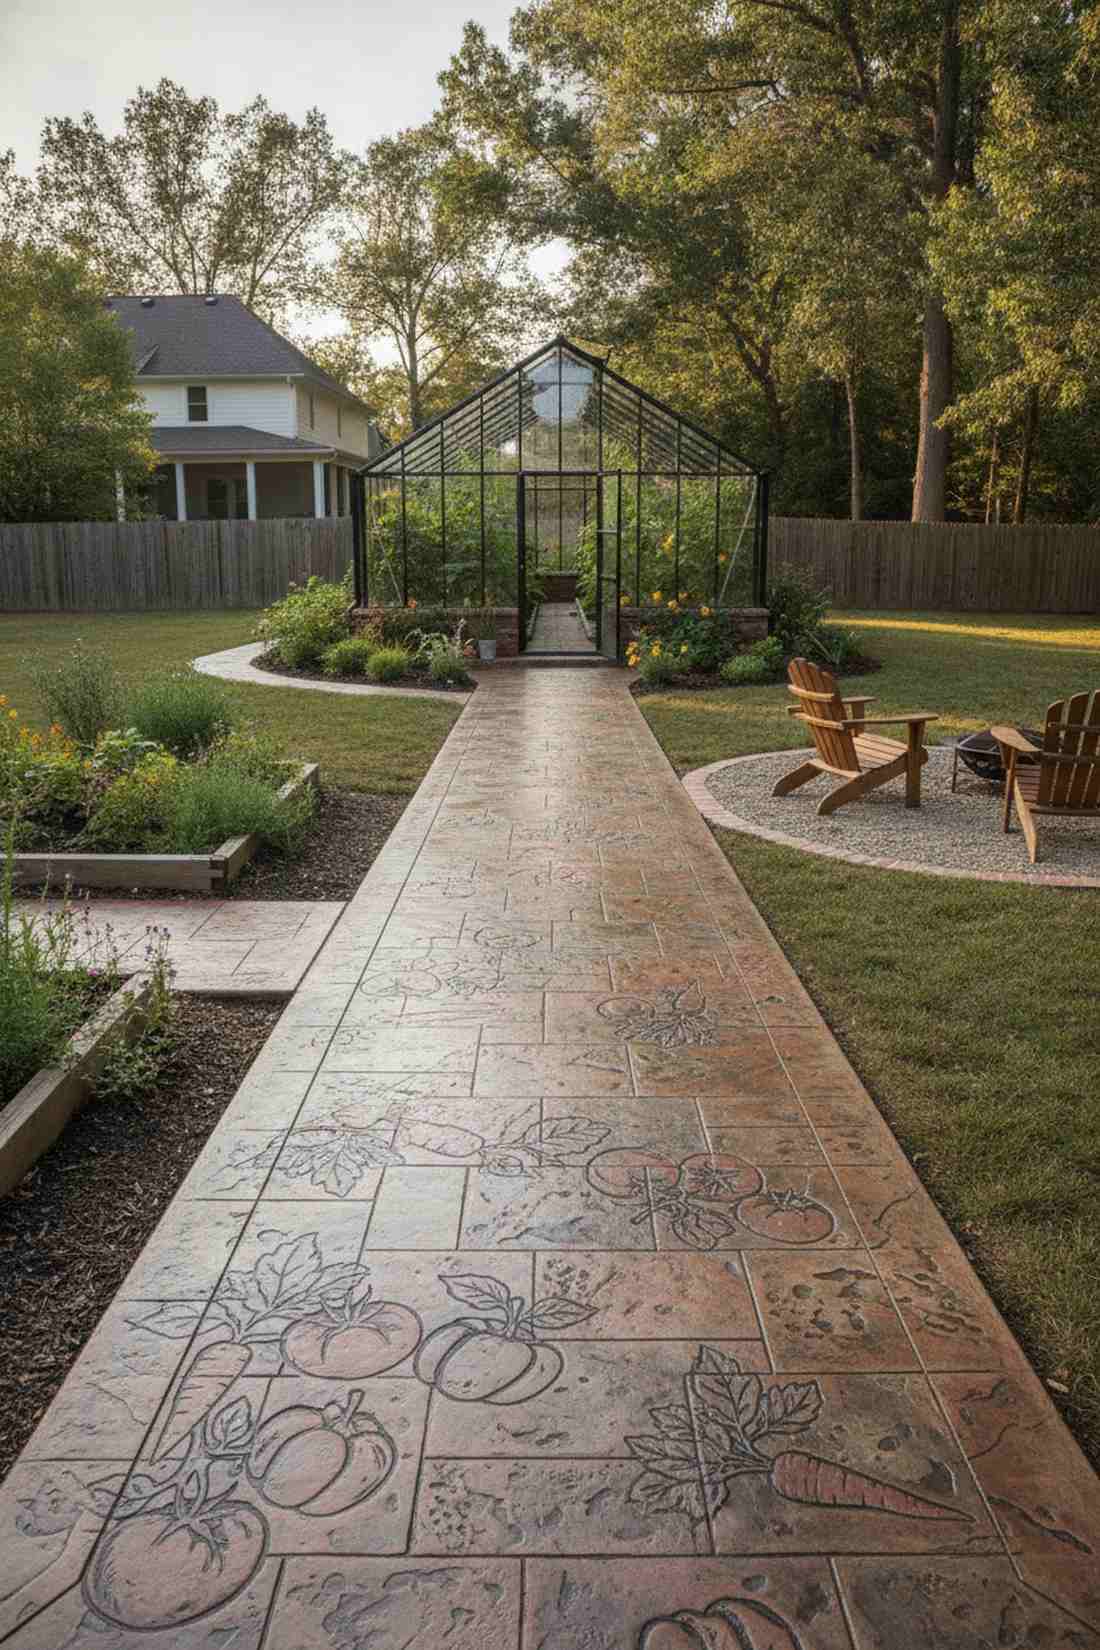
Feels like a bespoke luxury hardscape custom-made by an artist. Pouring a stamped concrete faux-stone path is the ultimate permanent solution for primary access routes leading to your greenhouse.
Individual stones inevitably settle and trip you, but this continuous slab layout completely eradicates weeds while mimicking expensive masonry. Applying a UV-resistant concrete sealant locks in the rich, earthy tones so they never fade in the summer sun.
While pricier at $70–$100 a segment, it pays for itself in zero maintenance. An absolute must for serious homesteaders.
- Key Materials: Wet concrete mix, rubber stamping mats
- Vibe / Style: Upscale permanent infrastructure
- Difficulty: Requires rapid timing
- Budget Breakdown: Concrete: $40 | Color Release: $20
- Creator’s Tip: Always use an antique release agent powder before stamping to create realistic, shadowed stone textures.
- Smart Sourcing: Reusable polyurethane cobble stamps and high-gloss concrete sealer (UV-coated).
💡 Must-Have Supplies for High-End Setups
To build these setups faster and ensure they last, skip the generic craft aisles and invest in the right foundational kits.
- Base & Support: Commercial-grade woven landscape fabric (bulk roll)
- Setup Tools: Heavy-duty steel tamper and leveling rake starter kits
- Weather/Durability Protection: UV-resistant acrylic stone sealants
Living Pathways That Enhance Soil Biology
Why waste money on inert materials when your pathways could actively feed your plants? These organic solutions naturally break down over time, injecting rich, beneficial nutrients directly into your vegetable beds while suppressing weeds.
10. Cedar Chip Double Layer
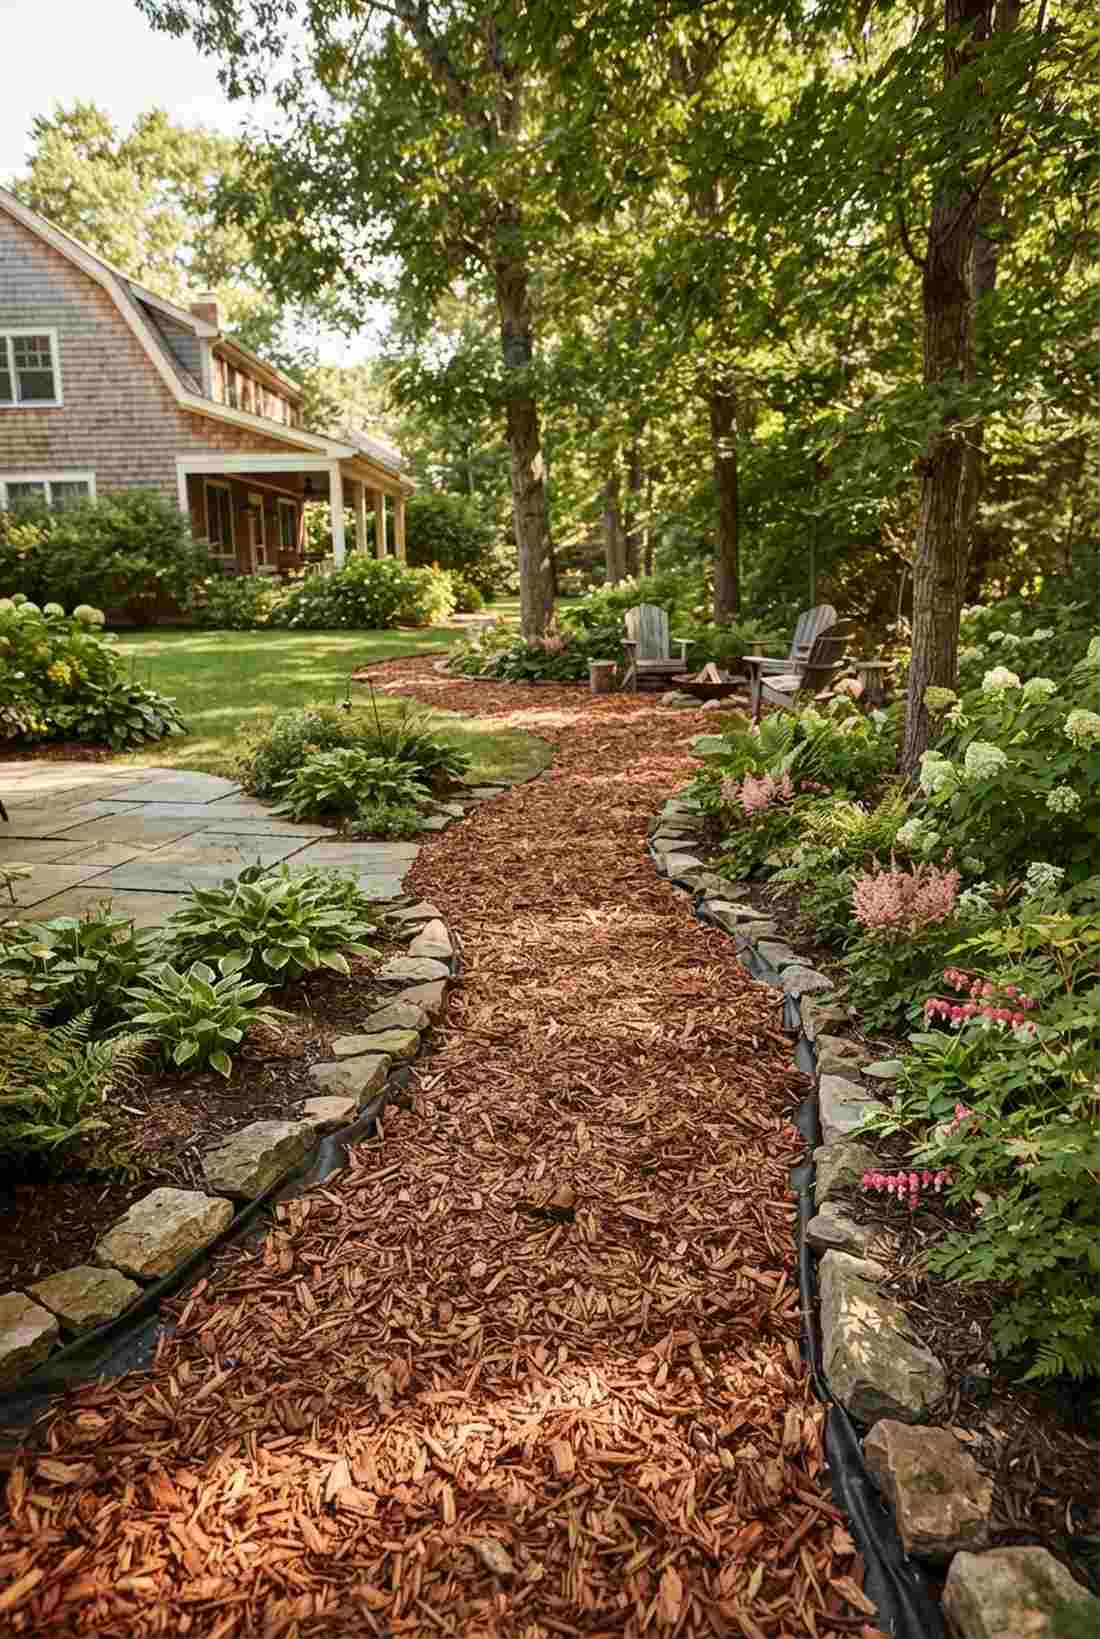
Breathes a rich, woody aroma into your yard that feels incredibly grounding. A thick cedar chip double-layer path brightens up shaded spaces and works perfectly as a soft perimeter walk.
Cheap pine bark rots instantly, but this pest-repelling blueprint looks far more expensive than it is and lasts three times longer. Laying down a heavy-duty weed membrane first ensures you won’t be pulling thistles all summer.
You can cover massive areas for just $15–$30. Pin this to your sustainable gardening board for later!
- Key Materials: Aromatic cedar chips, barrier cloth
- Vibe / Style: Bright rustic woodland
- Difficulty: Fast and effortless
- Budget Breakdown: Bulk Cedar: $20 | Fabric: $10
- Creator’s Tip: Buy in bulk yards from a local arborist rather than expensive plastic bags from the hardware store.
- Smart Sourcing: Pre-cut heavy duty landscape matting and bulk organic cedar flakes.
11. Straw Over Cardboard Foundation
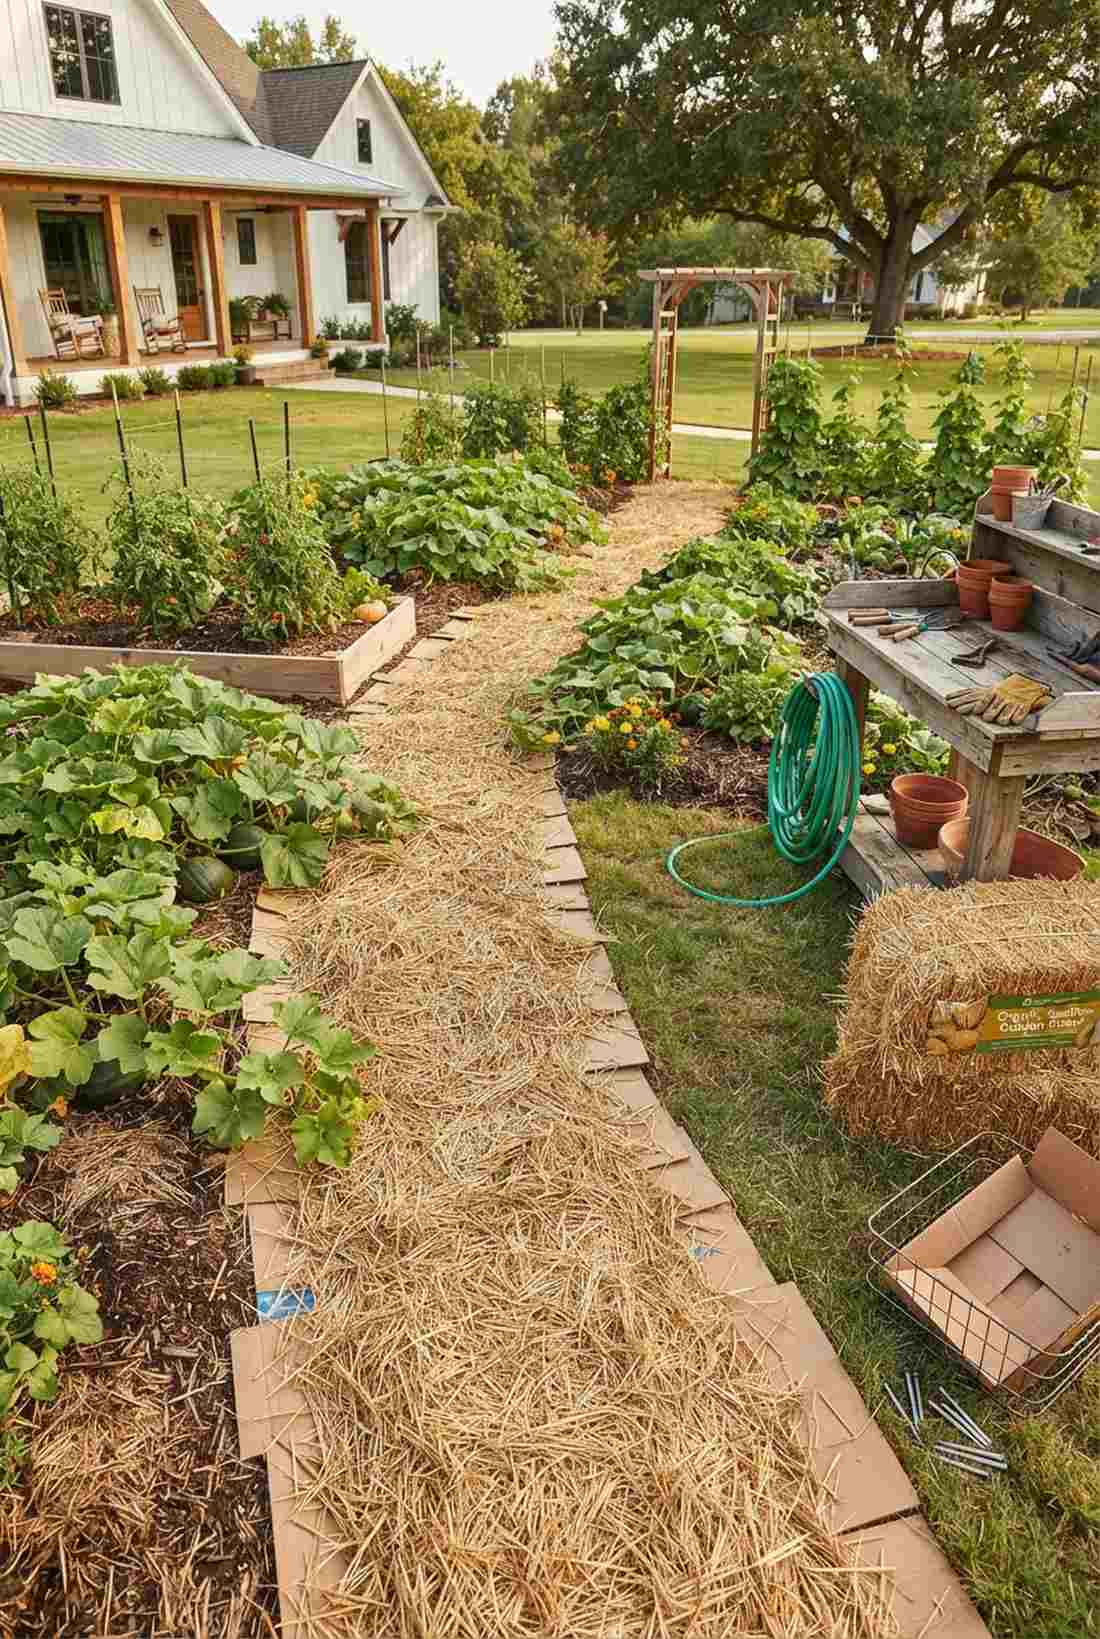
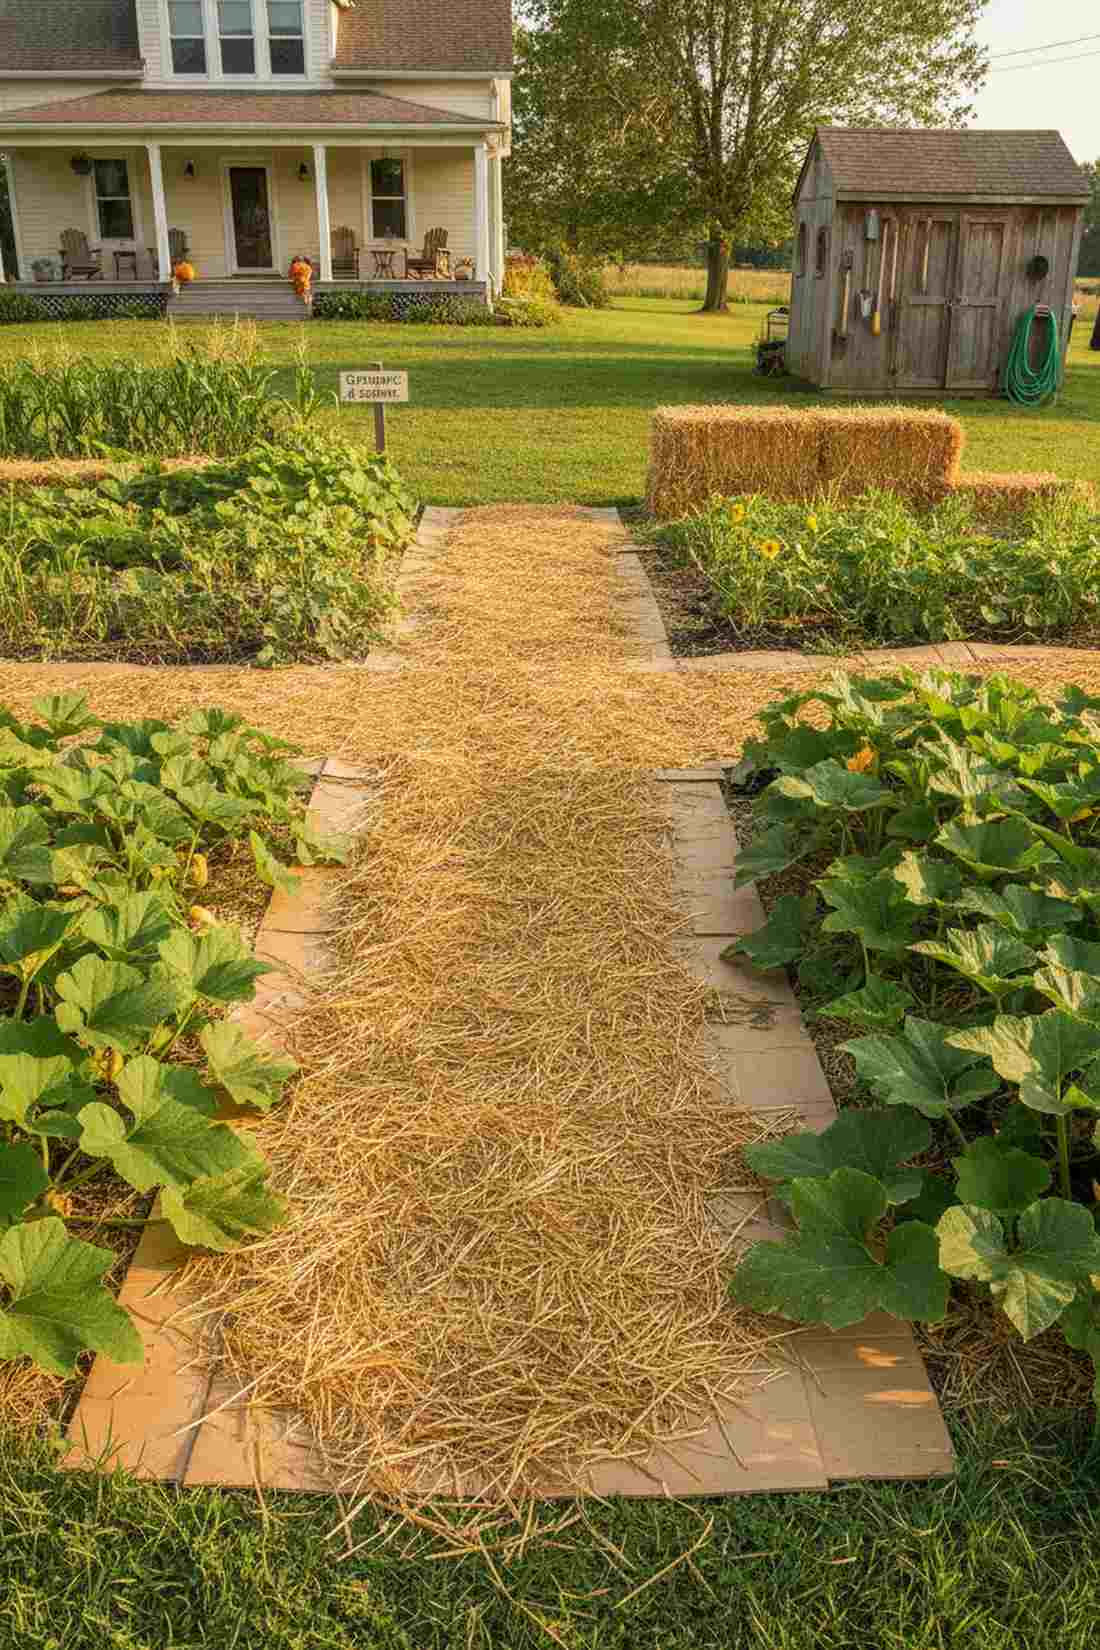
Radiates a wholesome, off-grid homesteader vibe. This cardboard and straw mulched walkway is the ultimate regenerative farming hack for feeding the soil between your squash and pumpkin vines.
Most people throw their delivery boxes away, but this sheet-mulching technique completely suffocates grass while creating a spongy, walking surface. Investing in organic seed-free straw bales is vital so you don’t accidentally plant a wheat field in your yard.
Costing virtually nothing ($5–$15), it is the most budget-friendly method here. Highly recommended for expanding new garden zones.
- Key Materials: Flattened cardboard boxes, clean straw
- Vibe / Style: Permaculture homesteader
- Difficulty: Extremely simple recycling
- Budget Breakdown: Cardboard: $0 | Straw Bales: $10
- Creator’s Tip: Overlap the cardboard by at least six inches and soak it with a hose immediately so it doesn’t blow away.
- Smart Sourcing: Pre-packaged seedless golden straw (compact bale) and heavy-duty ground staples.
12. Wood Chip Boardwalk Sections
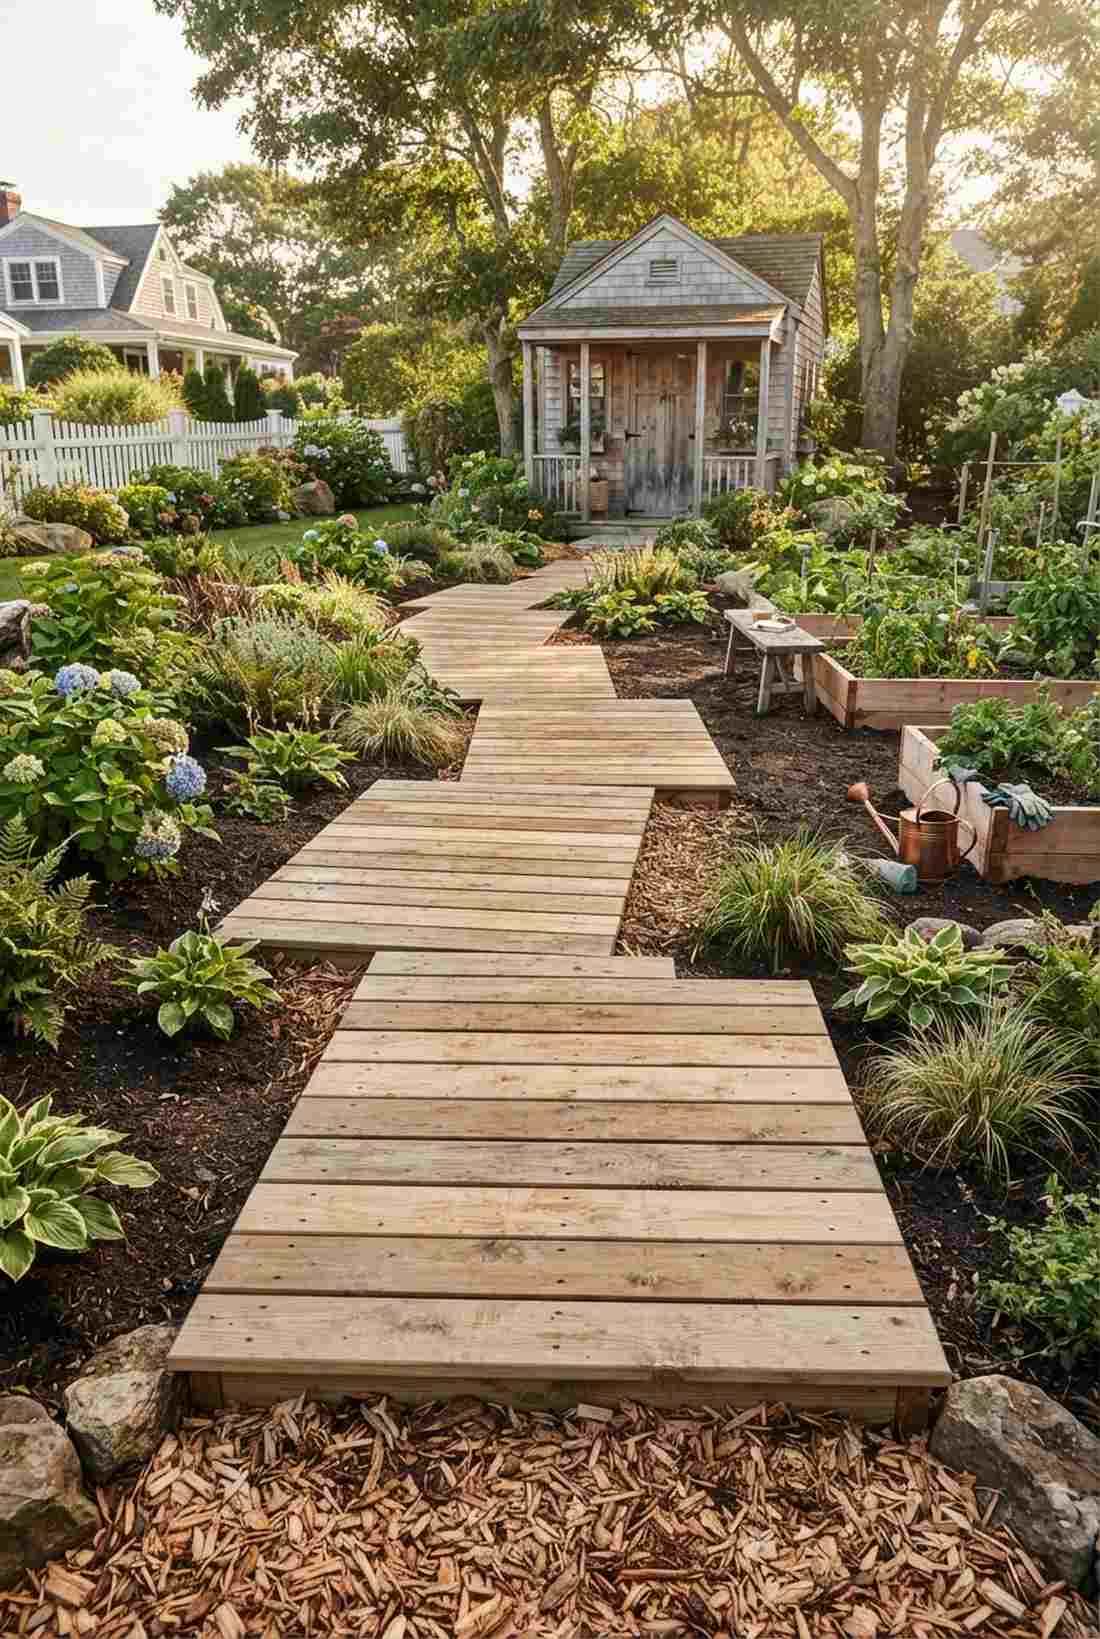
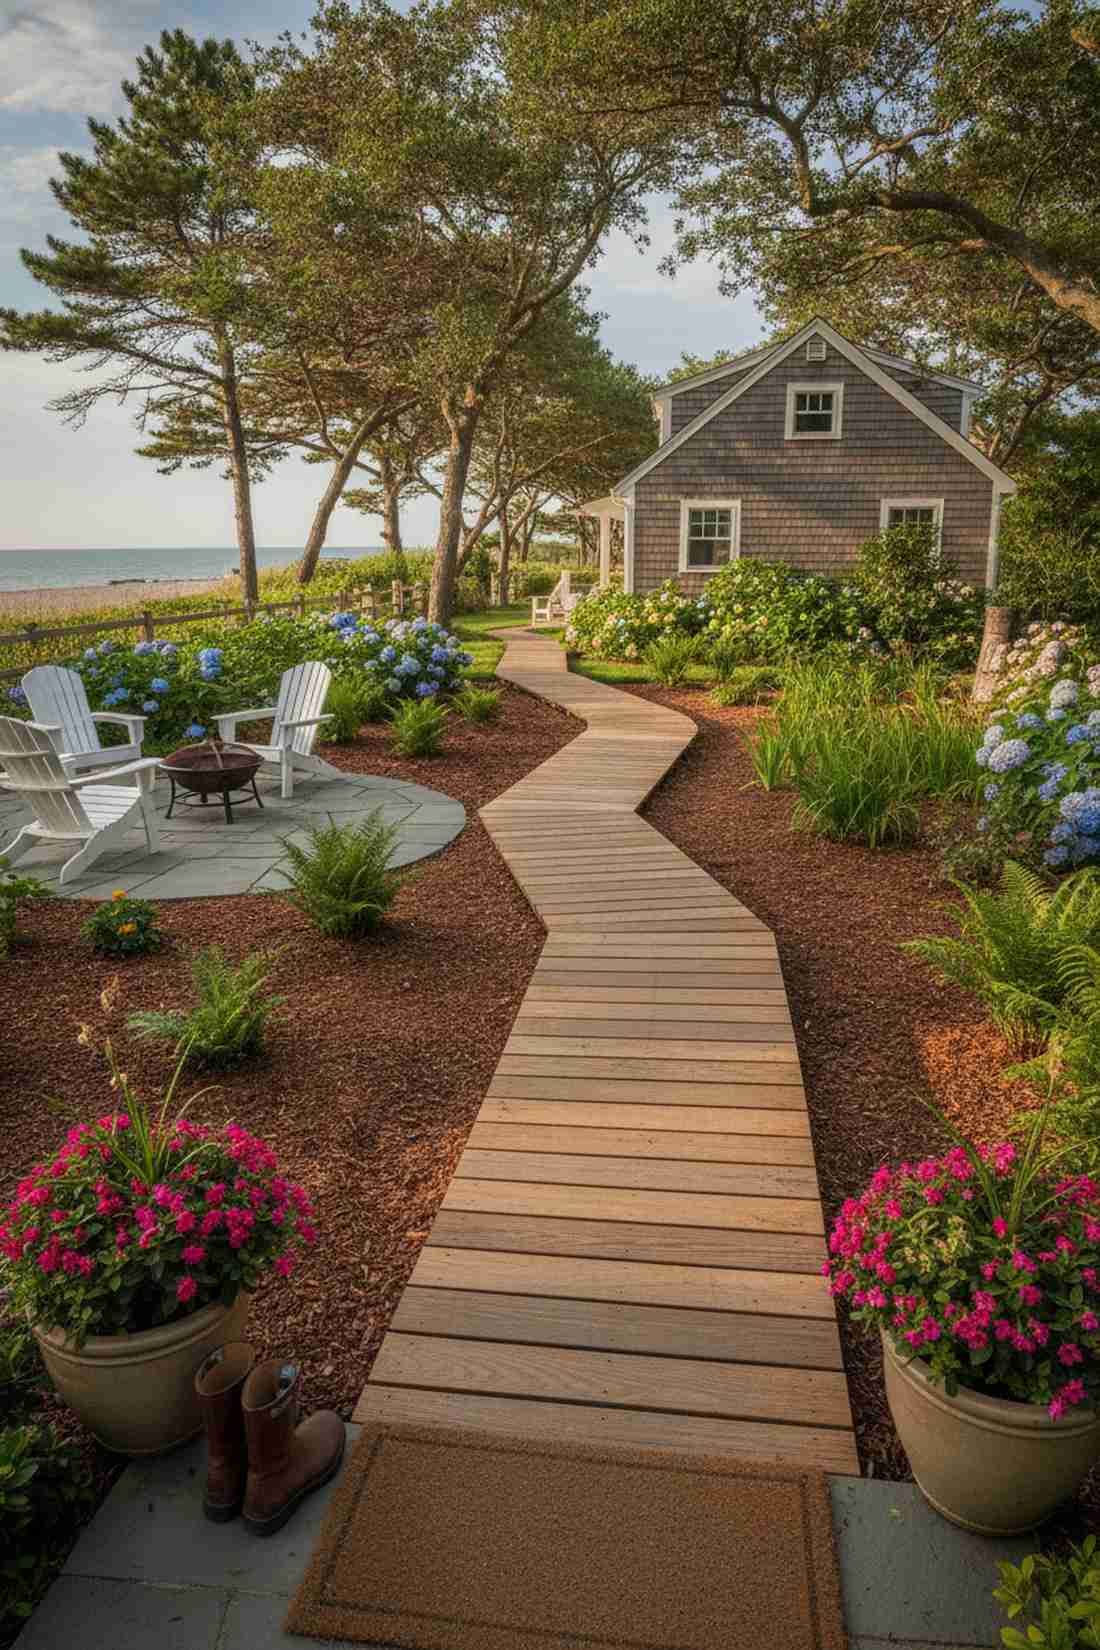
Looks like a private pathway leading to a secret beach house. Crafting a wooden slat boardwalk over mulch elevates your feet entirely, making it perfect for heavily irrigated or naturally boggy garden corners.
Sinking in mud ruins the harvest experience, but this hybrid layout delivers a surprisingly premium look and keeps your shoes spotless. Treating the timber with a non-toxic wood preserver sealant ensures the boards won’t rot against the damp earth.
Easily assembled for about $20–$40 per section. Save this if you hate getting your boots caked in wet soil!
- Key Materials: Untreated lumber planks, base chips
- Vibe / Style: Coastal utility walkway
- Difficulty: Basic saw and drill skills
- Budget Breakdown: Wood Slats: $25 | Base Chips: $5
- Creator’s Tip: Leave a small quarter-inch gap between every single board so heavy rain falls right through.
- Smart Sourcing: Pre-cut weatherized lumber planks (multi-pack) and eco-friendly timber waterproofing spray.
Stop scrolling if you want to know how commercial farmers maximize their space… this next blueprint is a total layout cheat code.
13. Pine Straw in Formal Rows
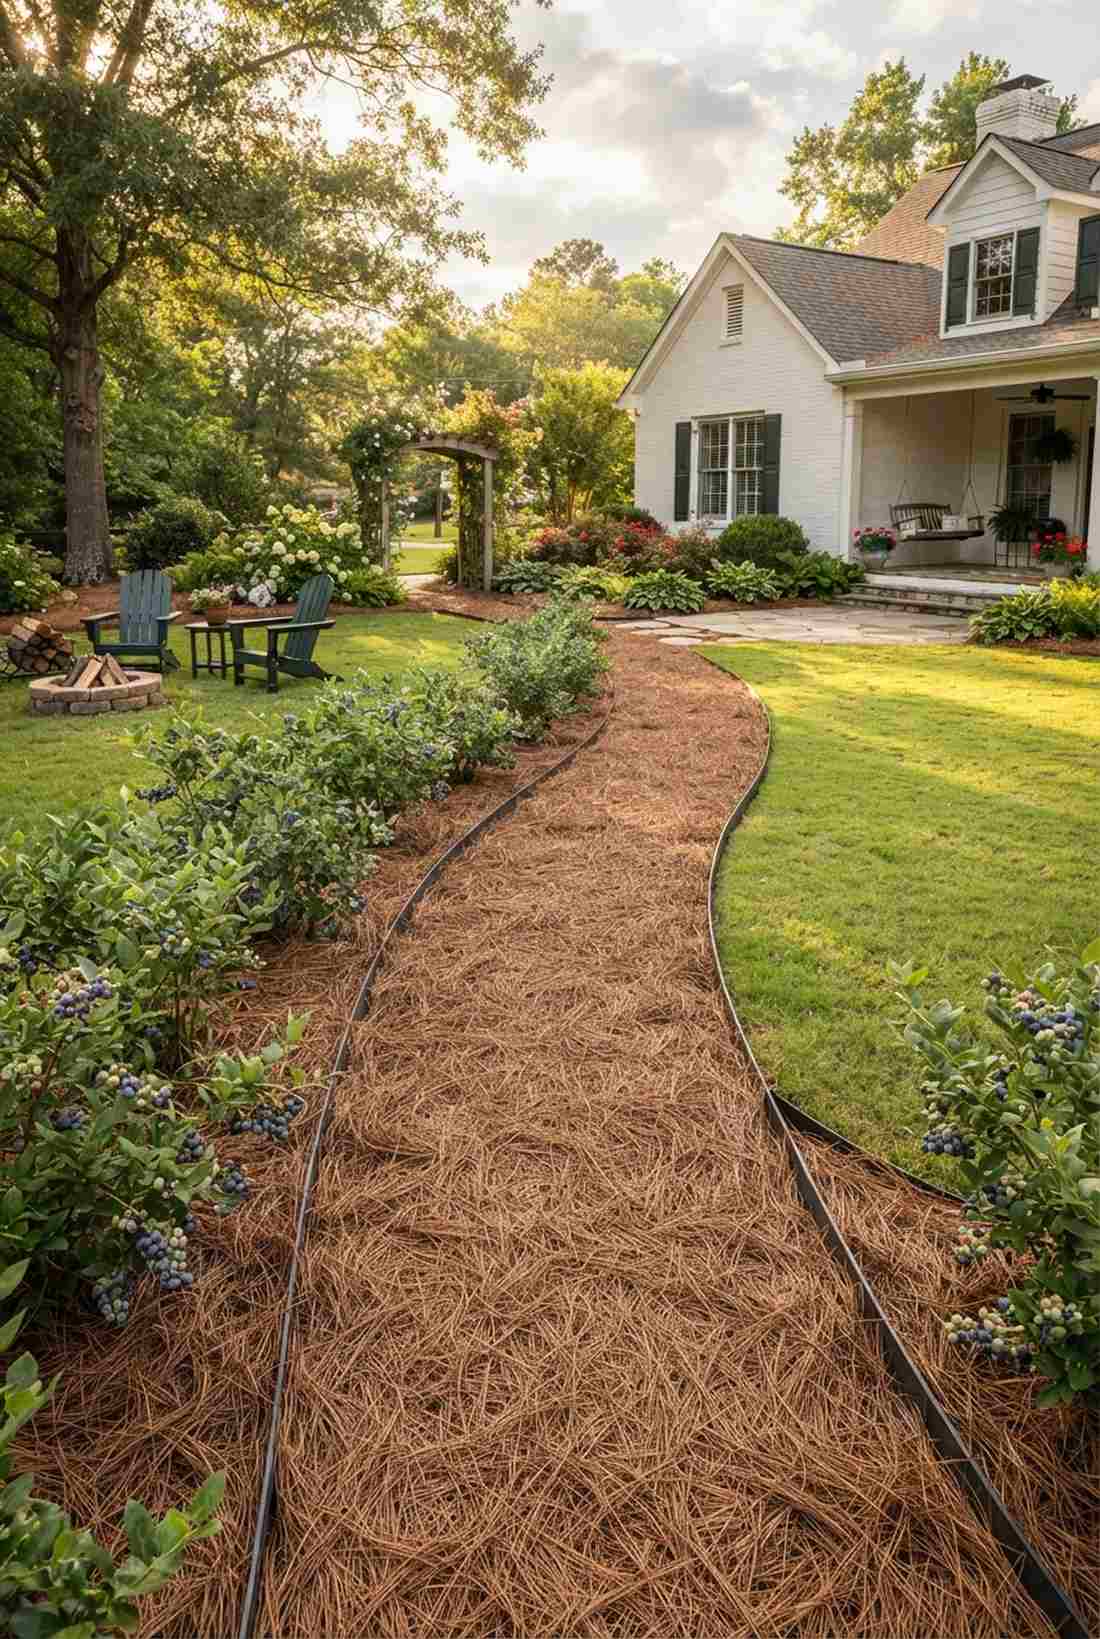
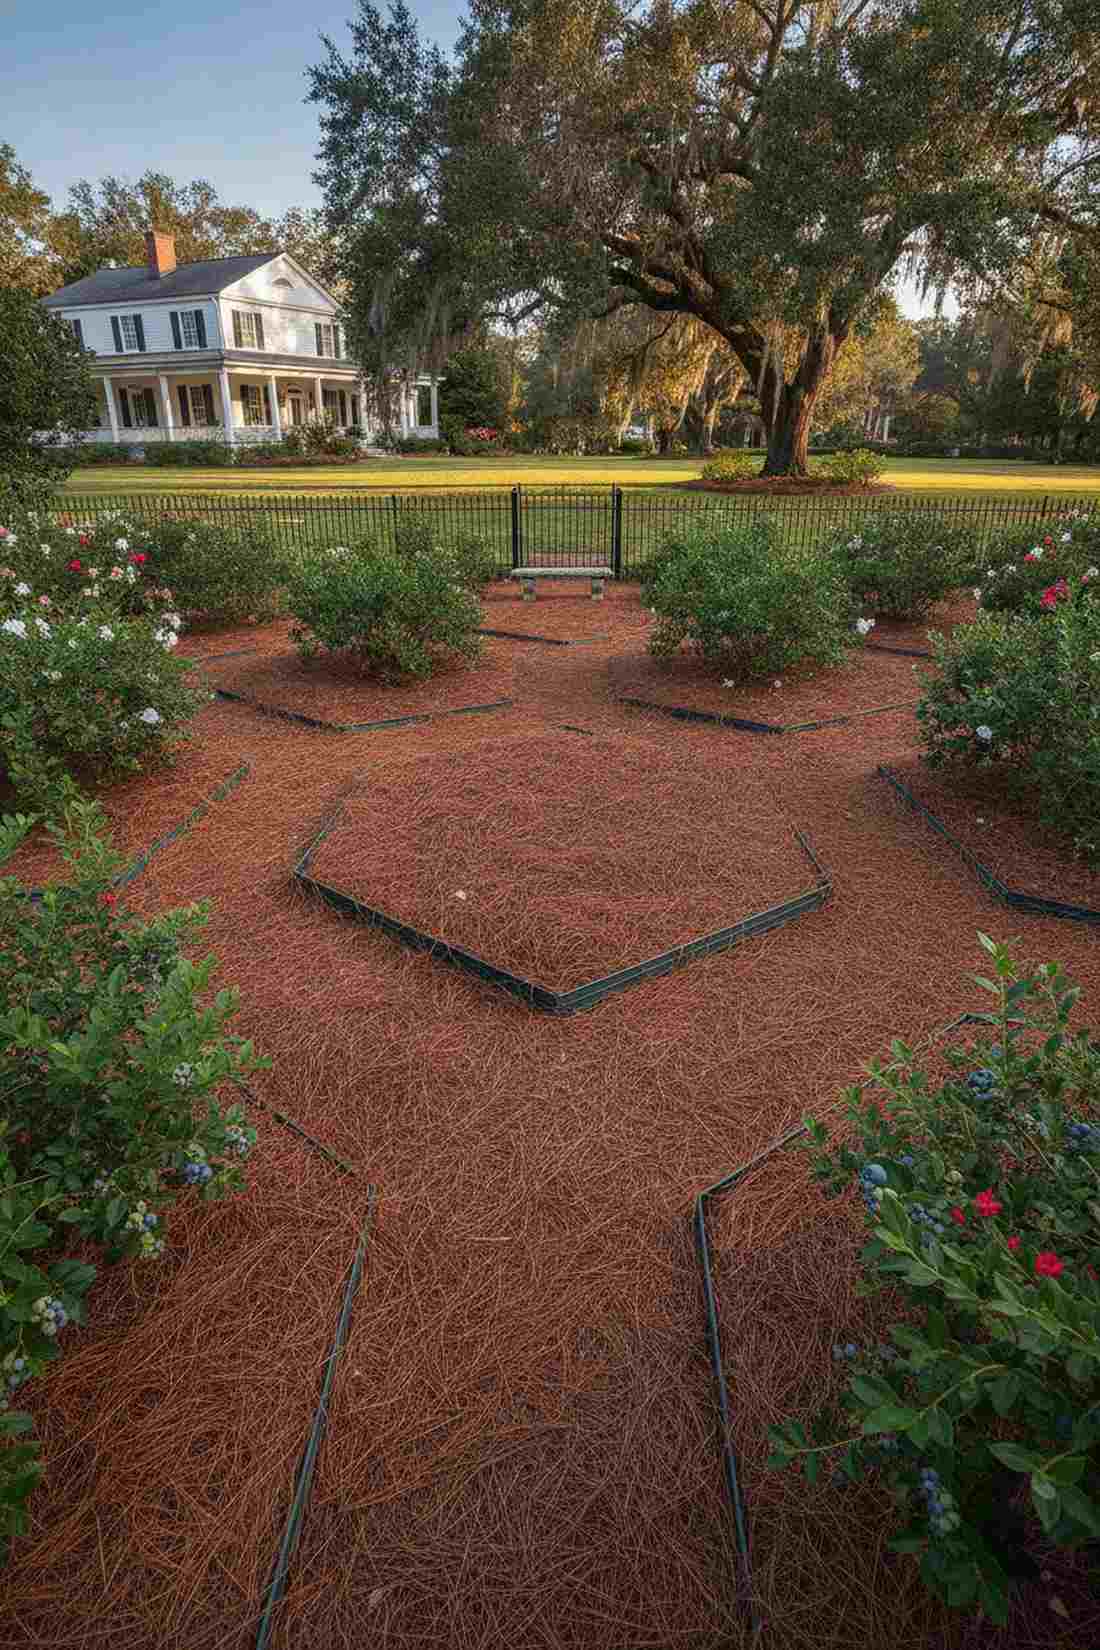
Feels effortlessly neat, like a perfectly manicured southern estate. Using interlocking pine needle paths creates a formal, acid-loving environment that is absolutely stellar alongside blueberry bushes.
Lightweight leaf mulch blows away in a breeze, but these long needles naturally weave together, making this blueprint look far more expensive than it is. Adding a flexible steel border trim locks the needles in tight, creating a striking contrast against green foliage.
A highly economical choice at roughly $10–$25 depending on your region. It’s a fantastic, low-effort weekend transformation.
- Key Materials: Baled pine straw, containment edging
- Vibe / Style: Tidy southern traditional
- Difficulty: Fast raking application
- Budget Breakdown: Pine Bales: $15 | Trim: $10
- Creator’s Tip: Fluff the bales vigorously as you spread them; they expand massively and cover twice the ground you expect.
- Smart Sourcing: Long-leaf pine straw (compressed bulk box) and UV-coated flexible garden edging.
Professional Systems for Maximum Productivity
Take the guesswork out of your garden layout by copying exactly what profitable market farmers do. These spatial configurations are mathematically optimized to eliminate wasted space, allowing you to grow significantly more food in a smaller footprint.
14. Standardized 30-Inch Beds With 18-Inch Paths
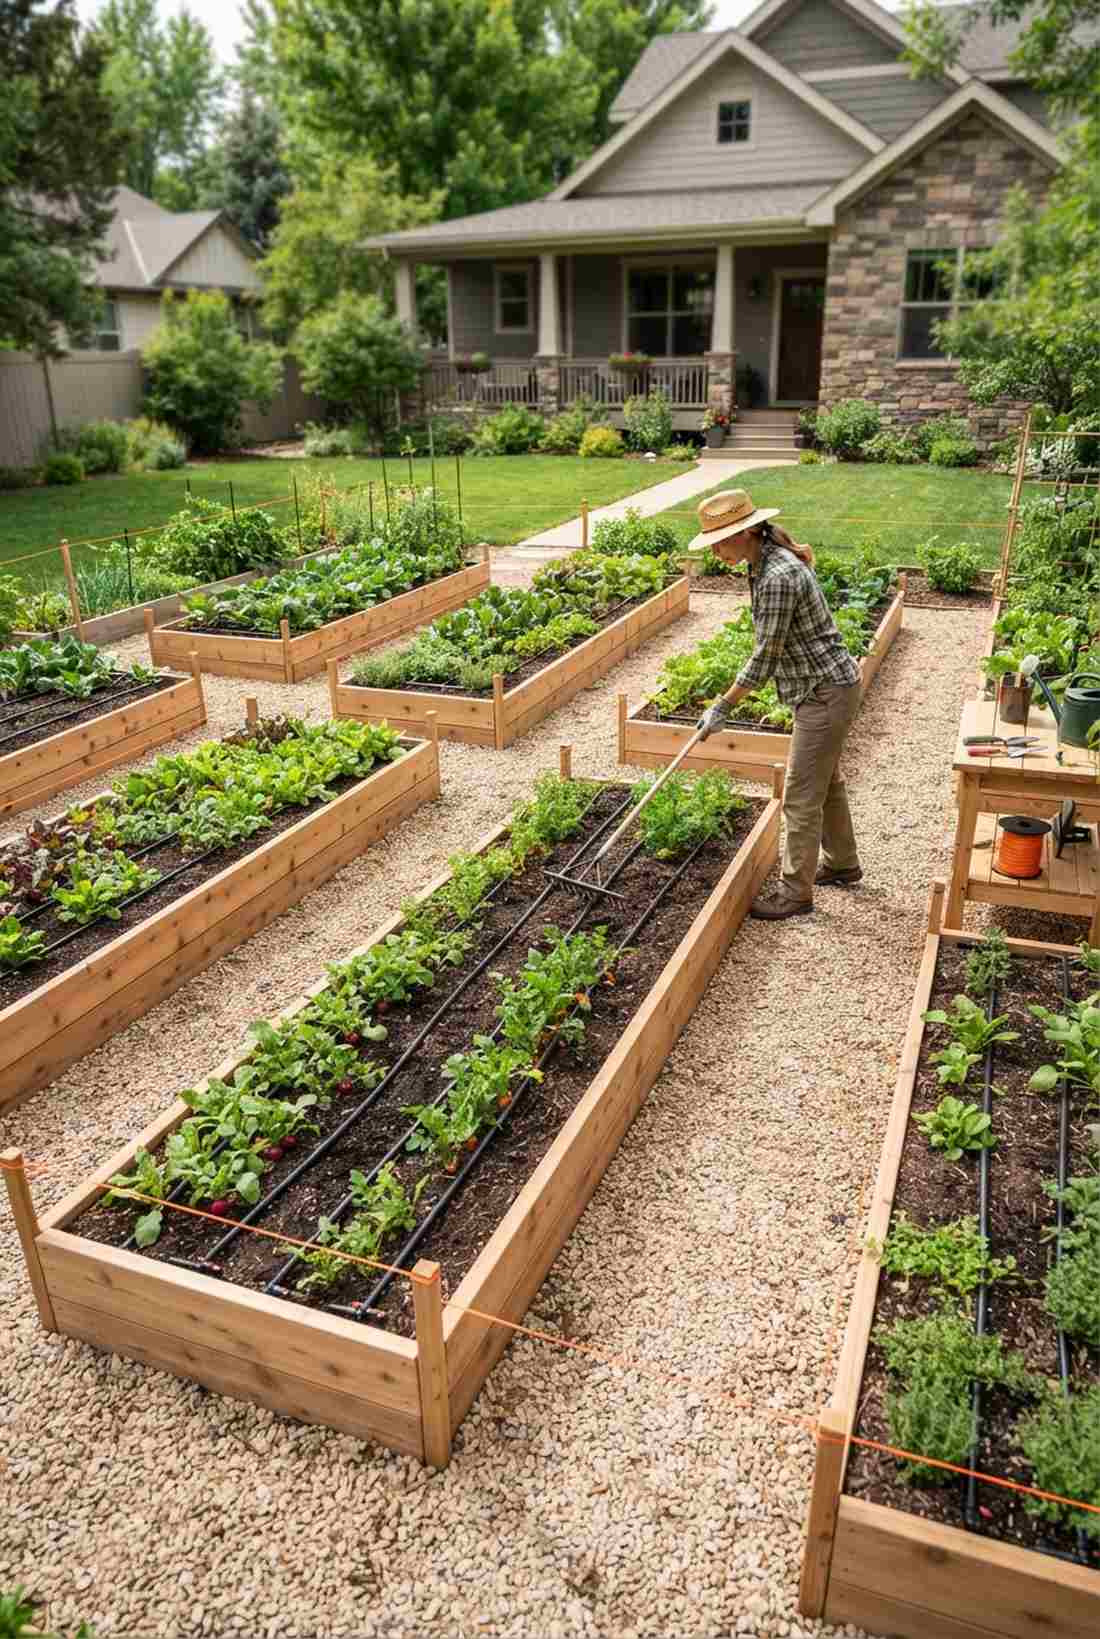
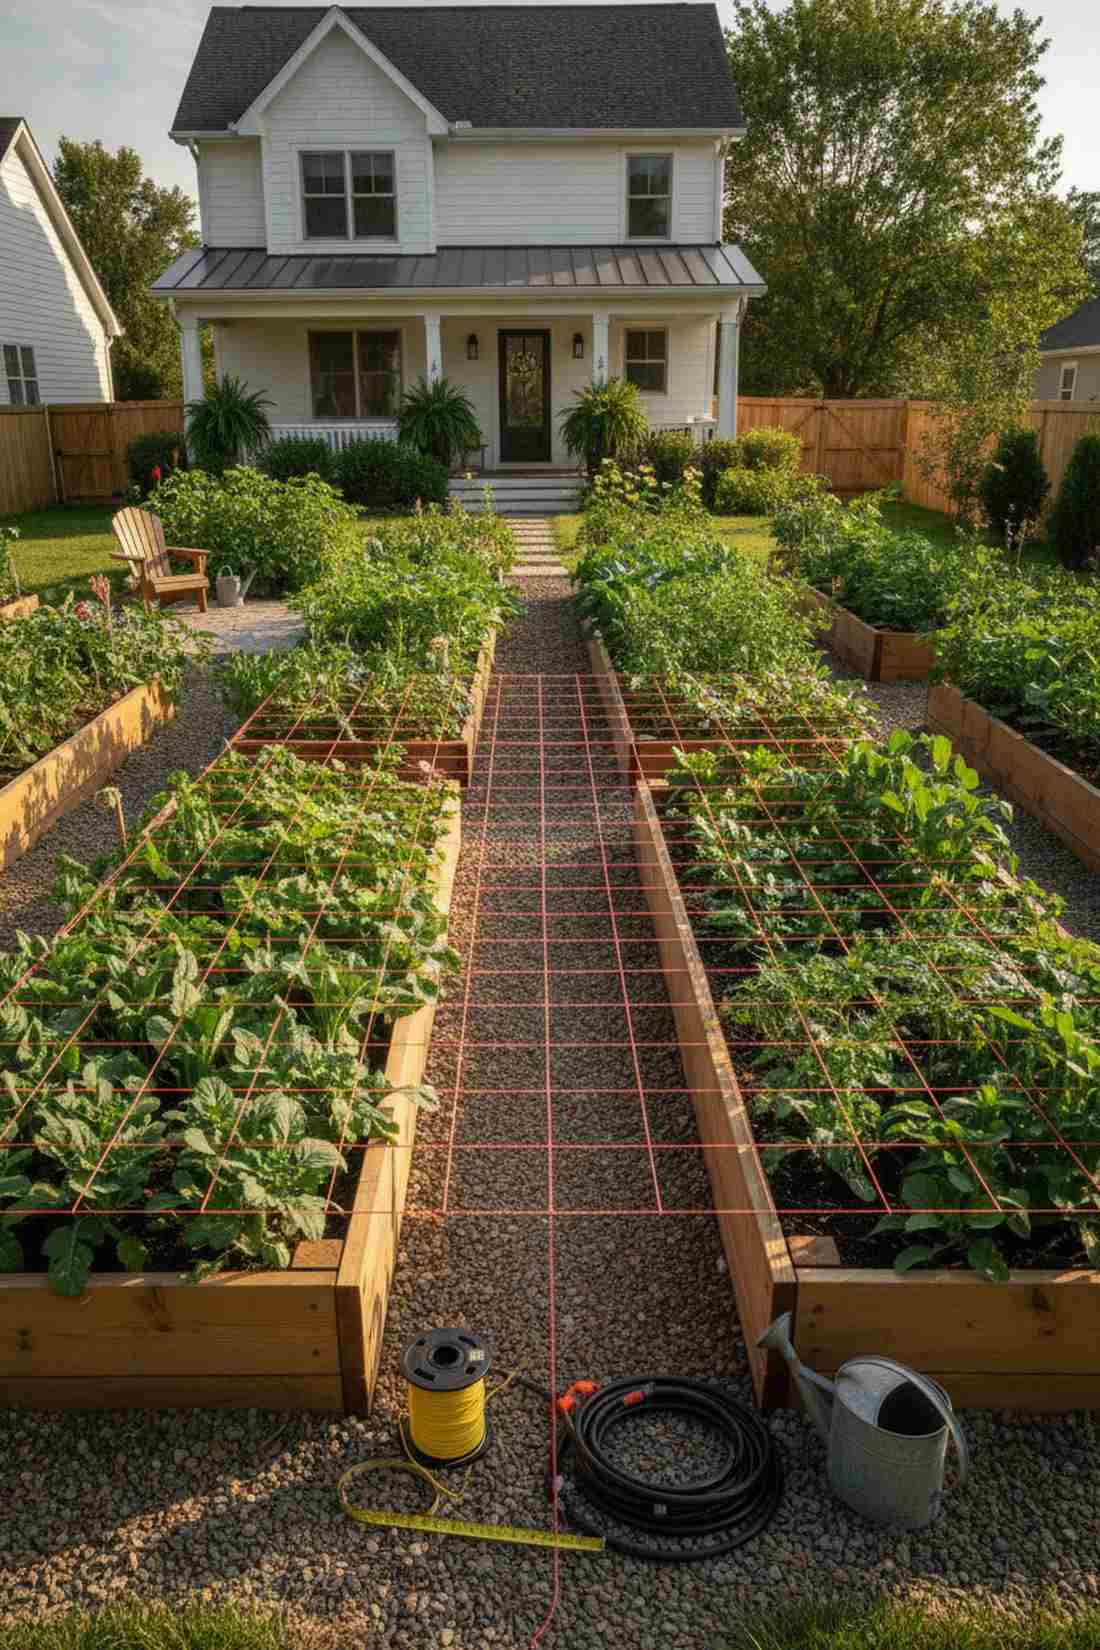
Radiates intense, hyper-organized productivity. Adopting the 30-inch bed market garden layout forces you to maximize every square inch, making it the absolute best framework for small urban backyards.
Guessing your path widths usually leads to wasted space, but this exact formula gives a designer-level finish and perfectly fits standard gardening rakes. Utilizing precision raised bed irrigation kits ensures water goes strictly to the roots, keeping the narrow paths bone-dry.
Layouts like this cost nothing extra ($0–$15) to map out. Pin this blueprint if you want to double your harvest yields this year!
- Key Materials: Measuring tape, marking string
- Vibe / Style: Hyper-efficient market farm
- Difficulty: Requires careful math
- Budget Breakdown: Measuring Tools: $10 | Layout String: $5
- Creator’s Tip: Use brightly colored builder’s twine pulled extremely tight to establish perfectly straight lines before digging.
- Smart Sourcing: High-visibility nylon mason line (bulk spool) and commercial drip irrigation starter kits.
Material Guide: Cheap vs. Premium Aesthetic
Knowing exactly where to save and where to spend makes all the difference in achieving that “looks expensive but isn’t” vibe.
- Standard Plastic vs. UV-Resistant Steel Edging: Cheap plastics crack and warp in the sun after one season. Upgrading to UV-coated steel stops fading, prevents breaking, and instantly elevates the pathway’s visual borders.
- Bagged Mulch vs. Bulk Premium Sourcing: Buying tiny retail bags wastes money. Sourcing commercial-grade bulk packs or starter kits often saves both time and money while providing a uniform, professional finish.
15. 42-Inch Growing Rows With Machinery Access
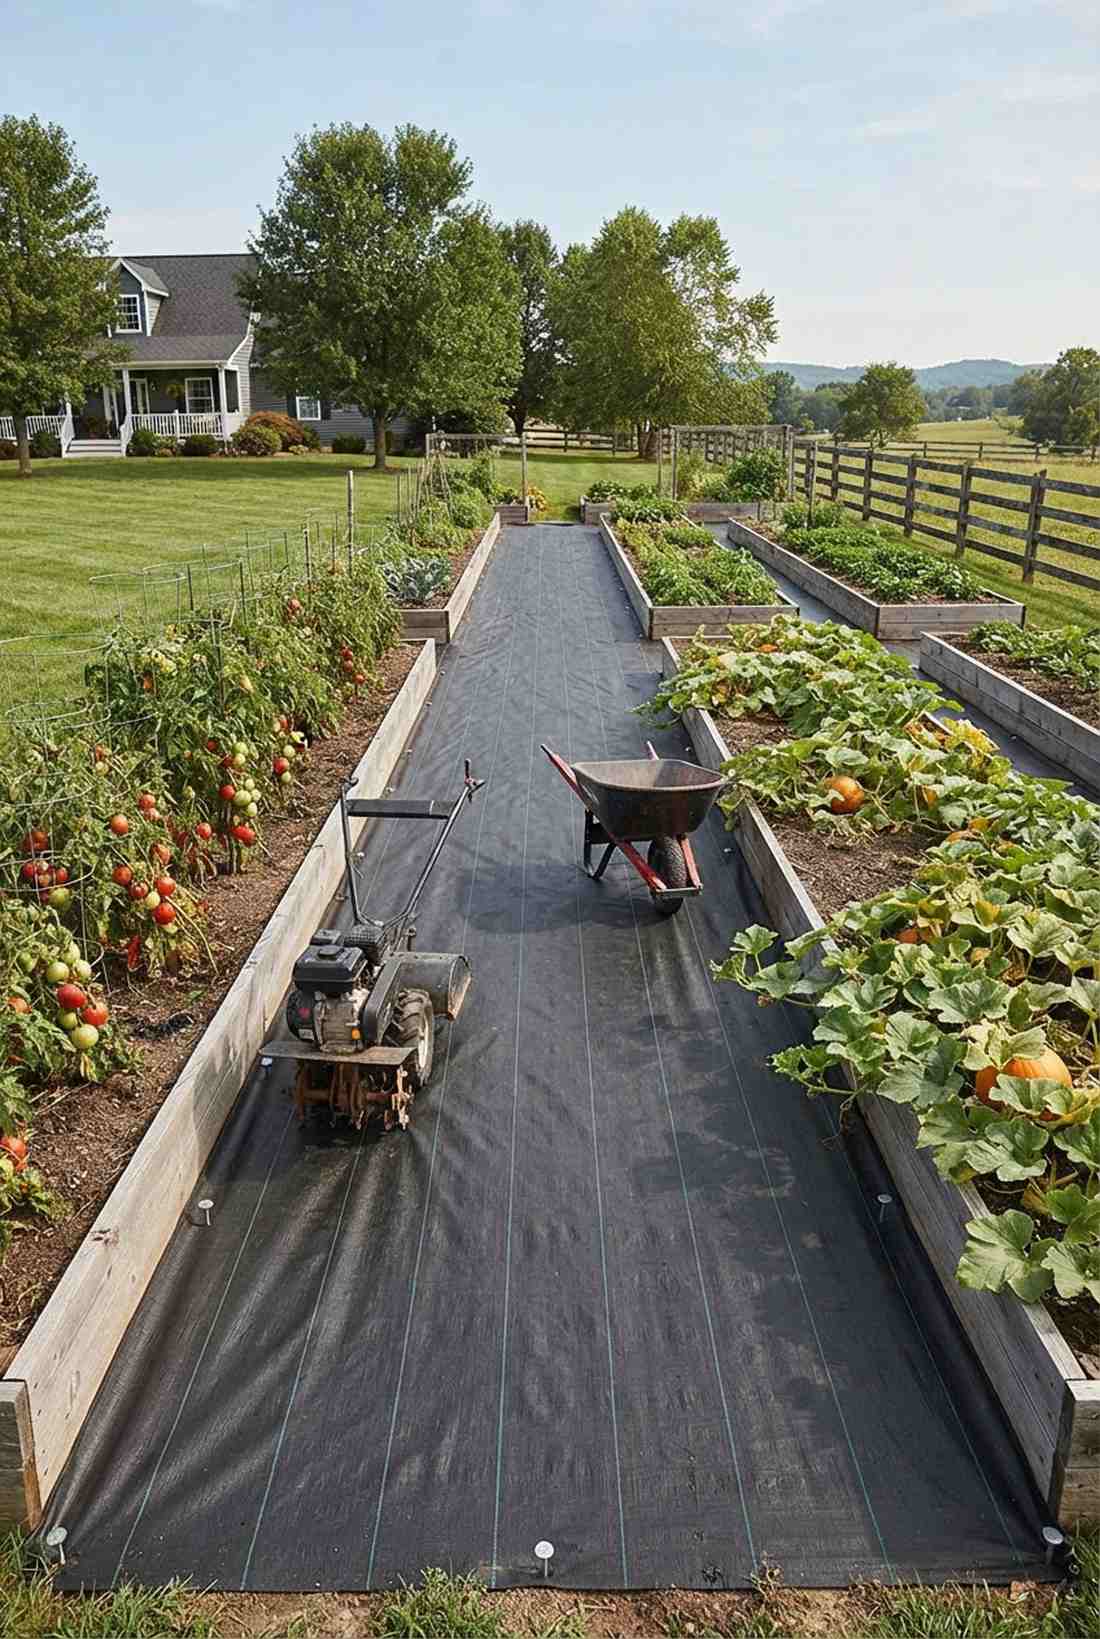
Looks like a serious, heavy-duty agricultural operation. Implementing extra-wide 42-inch tractor pathways is critical if you are managing sprawling crops like pumpkins or using heavy mechanical tillers.
Narrow paths trap you when tomatoes overgrow, but this generous spacing completely solves claustrophobic harvesting. Investing in commercial grade miniature garden supplies like wide-span weed barriers ensures these large aisles remain entirely maintenance-free.
It requires more upfront area but costs the same $15–$30 to prep. A lifesaver for those using power tools in the dirt.
- Key Materials: Wide ground cover, marking stakes
- Vibe / Style: Serious agricultural infrastructure
- Difficulty: Moderate land clearing
- Budget Breakdown: Wide Fabric: $25 | Stakes: $5
- Creator’s Tip: Always measure the exact width of your largest wheelbarrow or tiller wheel-base before finalizing these rows.
- Smart Sourcing: Extra-wide heavy-duty weed membrane (bulk roll) and steel ground anchoring pegs.
16. Primary and Secondary Path Networks
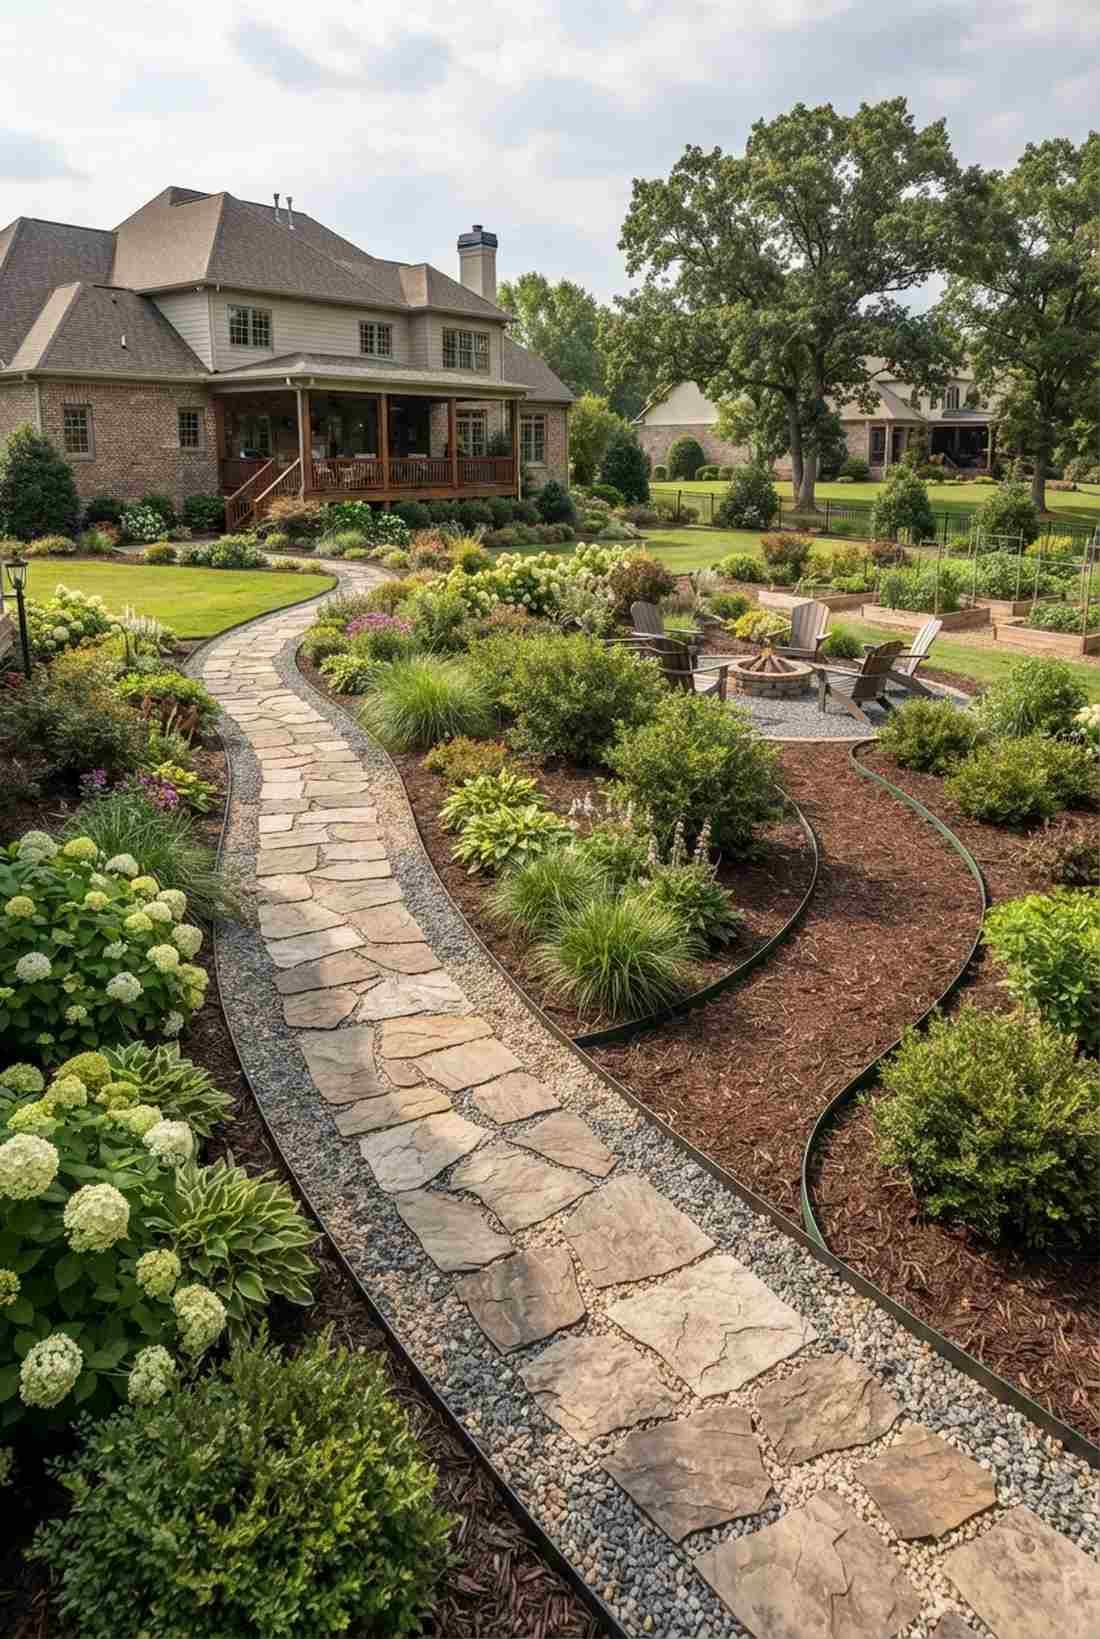
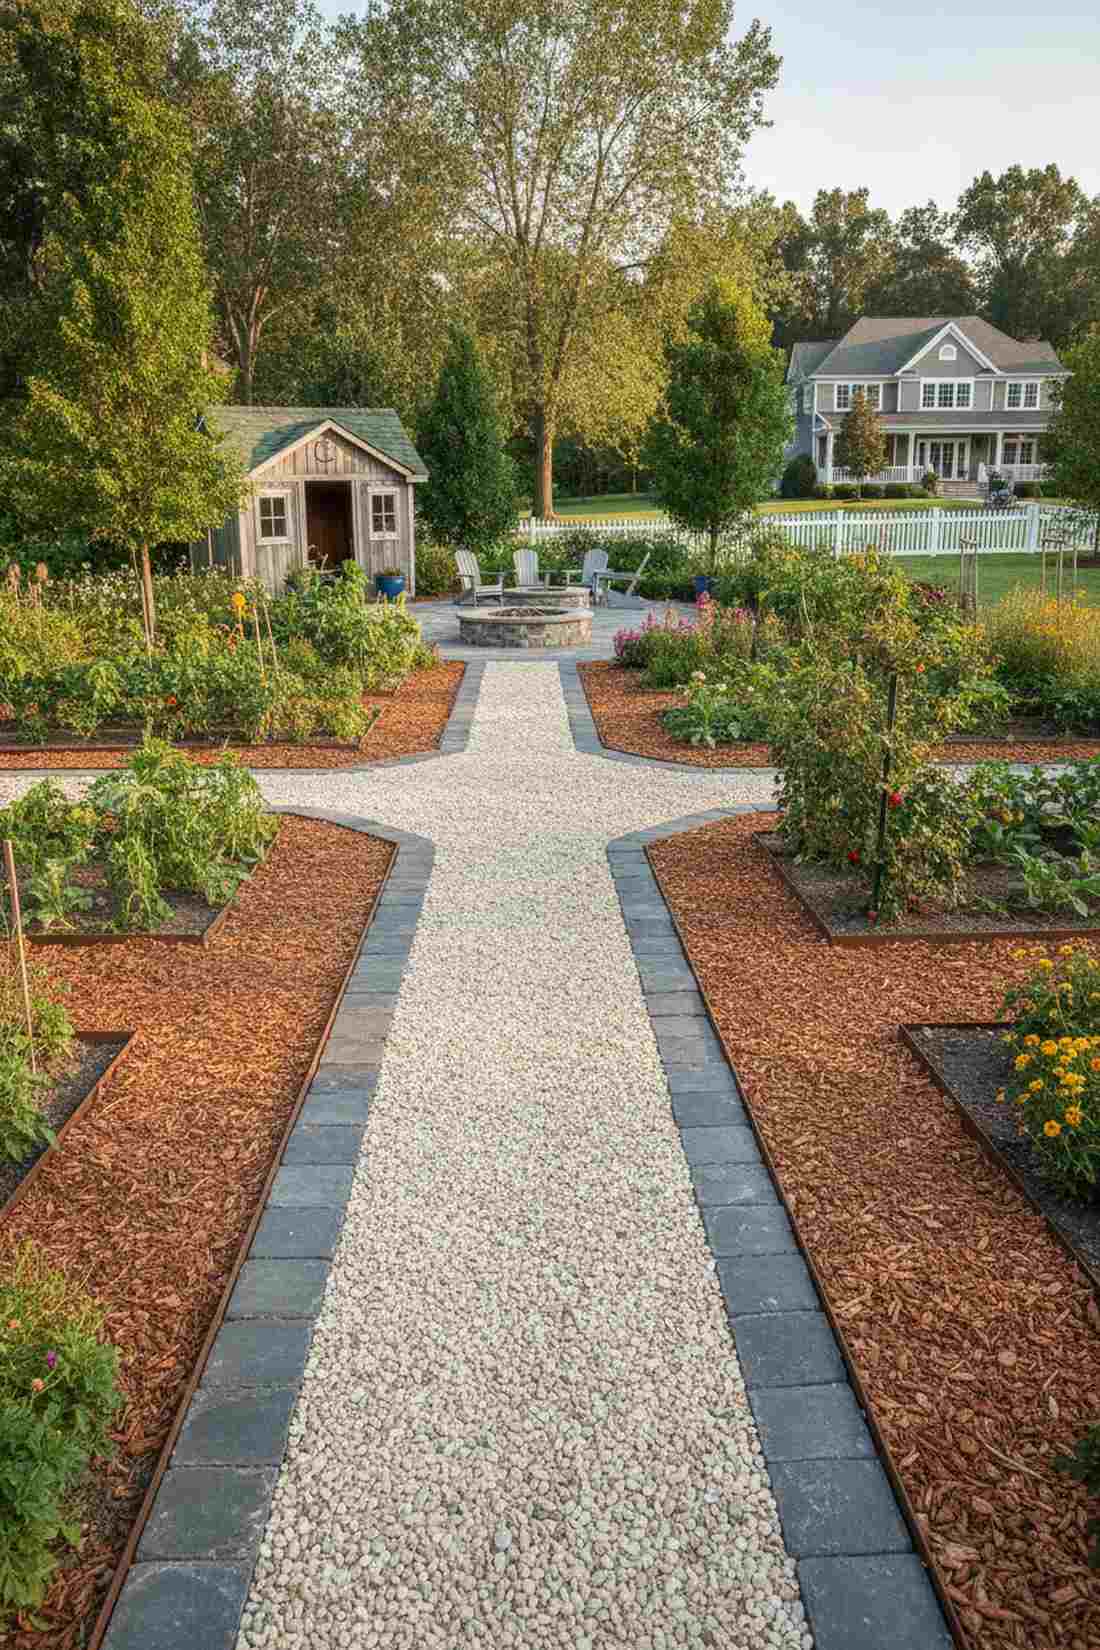
Feels like navigating a master-planned botanical park. Designing a hierarchical main-and-sub path layout seamlessly directs foot traffic, acting as the perfect skeletal structure for expansive community plots.
Treating every path equally burns through your wallet, but this dual-tier blueprint looks far more expensive than it is by concentrating premium stone only where needed. Utilizing bulk pack pathway border kits on the main arteries creates a stunning visual hierarchy.
By blending materials, you balance the budget beautifully around $40–$80 total. Save this genius layout strategy to your master-planning board!
- Key Materials: Premium stone (main), cheap mulch (sub)
- Vibe / Style: Master-planned estate
- Difficulty: Advanced spatial mapping
- Budget Breakdown: Primary Stone: $50 | Secondary Mulch: $20
- Creator’s Tip: Make the main artery wide enough for two wheelbarrows to pass each other without tipping over.
- Smart Sourcing: Pre-cut flexible garden edging strips (bulk pack) and two-tone landscaping gravel.
Most people trample their delicate topsoil into concrete… until they discover this brilliant, temporary walkway hack coming up next.
17. Removable Plank Walkways

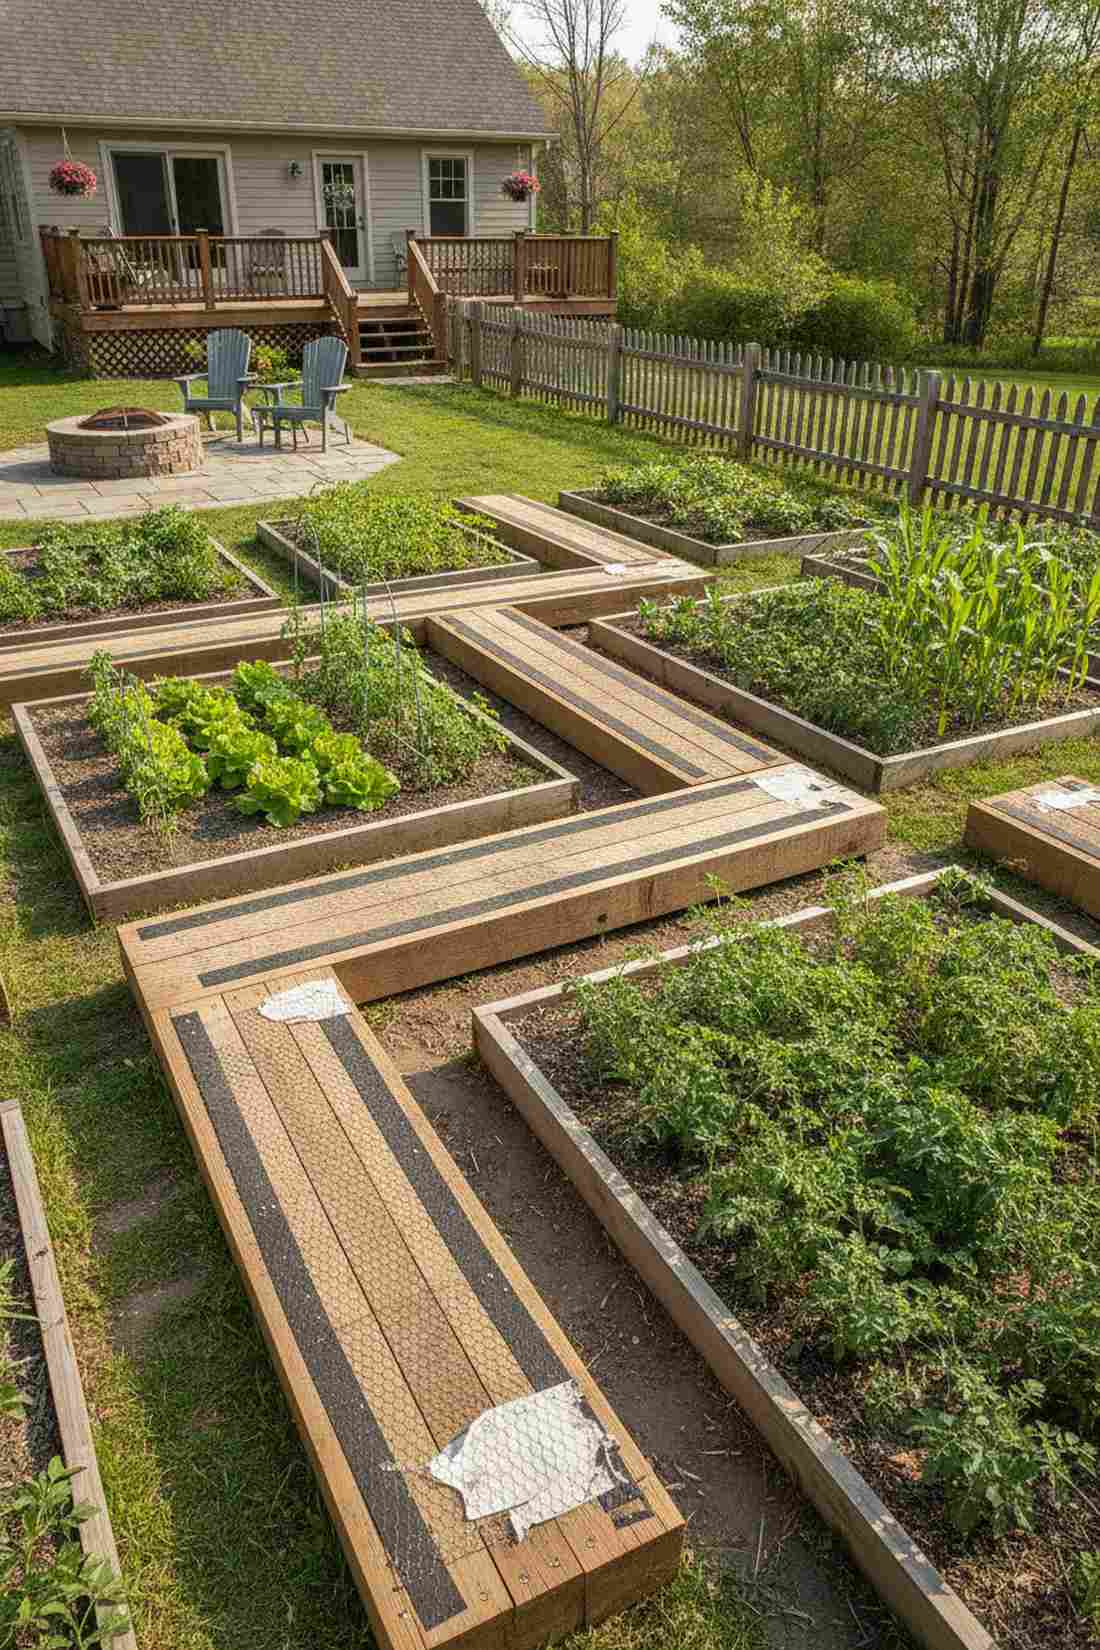
Exudes a smart, adaptive, and highly functional utilitarian aesthetic. Using temporary wooden harvest planks provides instant bridging over muddy zones and works flawlessly for seasonal crop rotation beds.
Permanent paths lock you into one design forever, but this clever layout delivers immense flexibility and stops soil compaction instantly. Snagging some pre-cut weatherized timber boards lets you rearrange your entire garden layout in under five minutes.
Extremely budget-friendly at around $15–$25 per board. It’s the ultimate hack for indecisive gardeners.
- Key Materials: Thick timber planks, anti-slip grips
- Vibe / Style: Utilitarian and adaptive
- Difficulty: Zero installation required
- Budget Breakdown: 2×10 Lumber: $18 | Grip Tape: $5
- Creator’s Tip: Staple some old chicken wire or roofing paper to the top of the planks to prevent slipping when it rains.
- Smart Sourcing: Pre-cut pressure-treated walkway planks and heavy-duty anti-slip traction tape (commercial roll).
18. Living Clover Pathways for Nitrogen Fixation
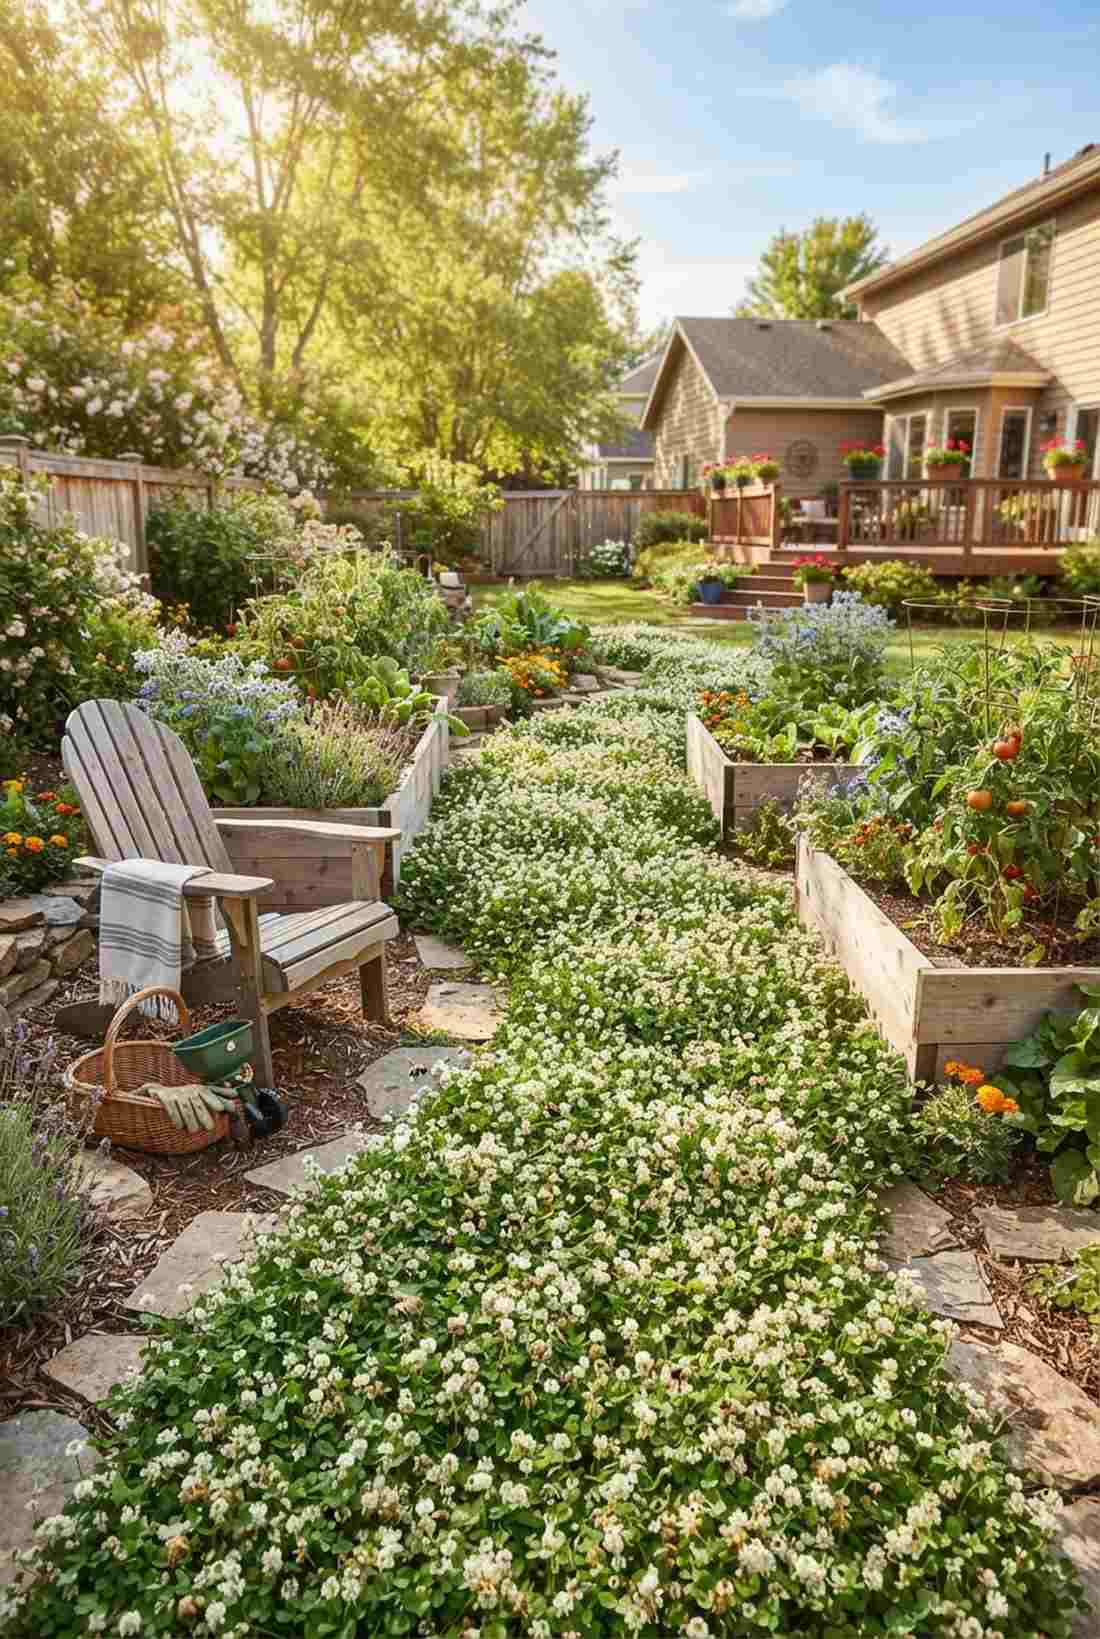
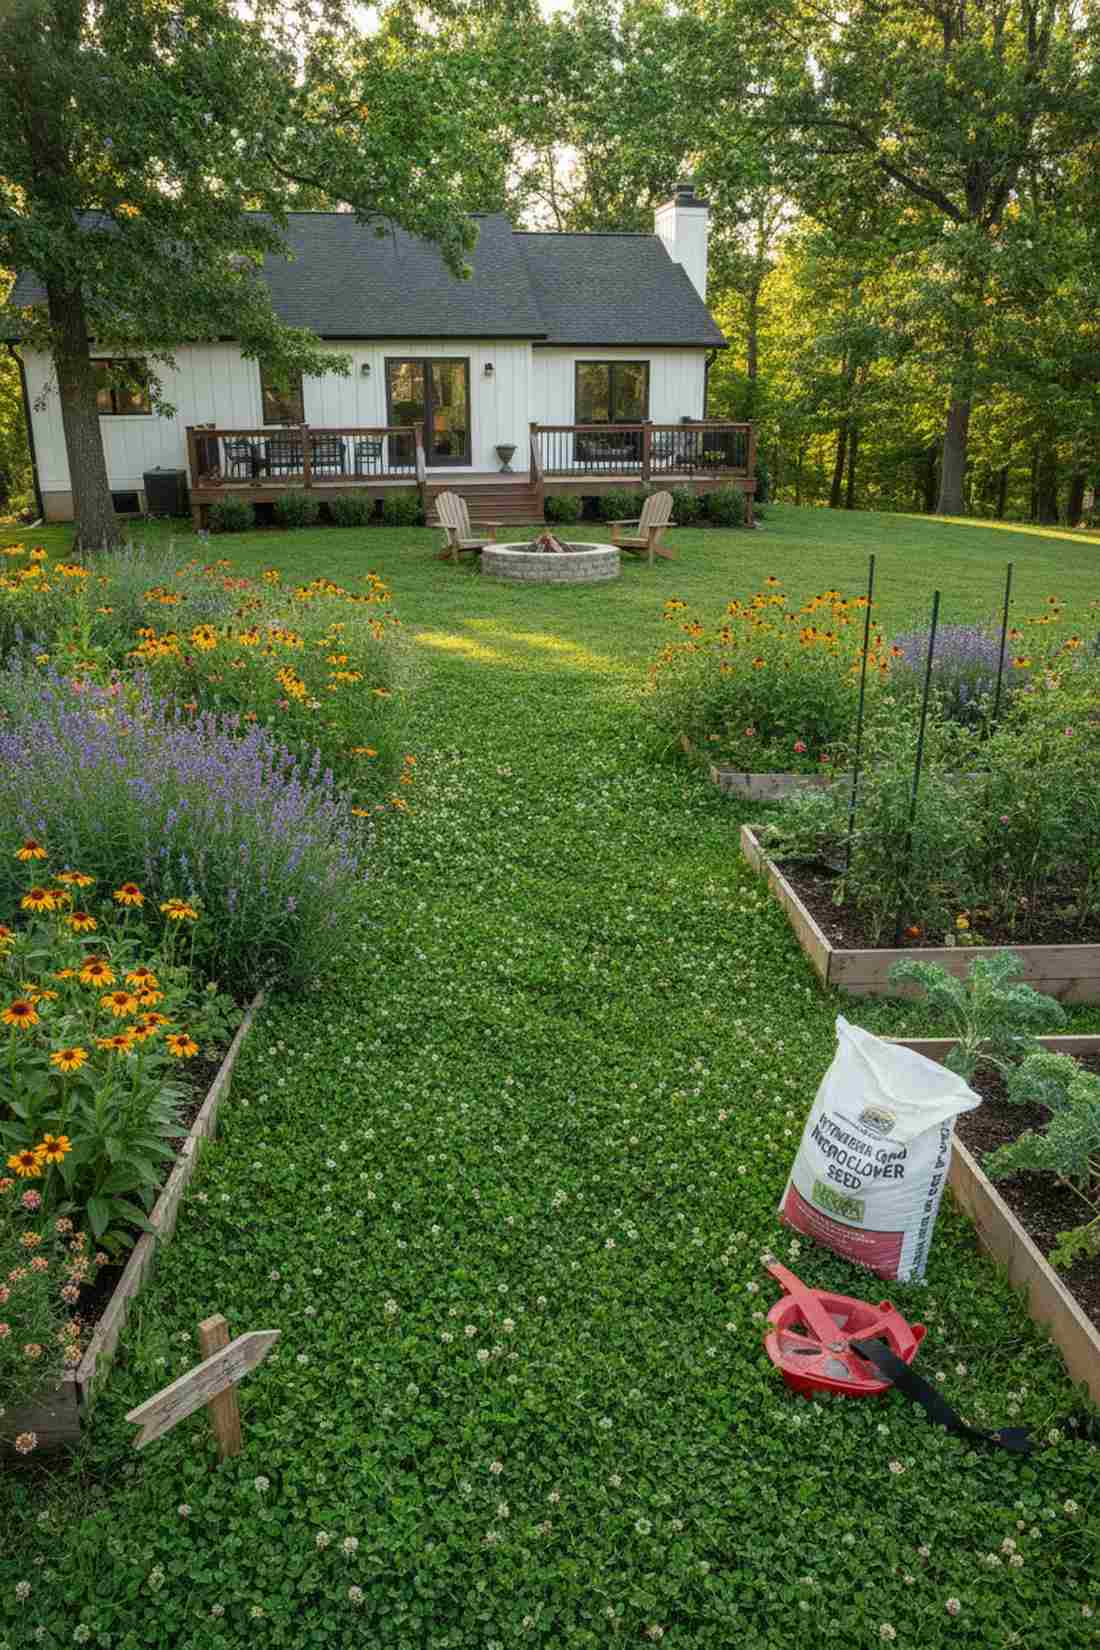
Looks like a vibrant, buzzing green carpet of pure life. Seeding a dense white clover living pathway creates an incredibly soft walking surface that perfectly complements organic, pollinator-friendly garden setups.
Bare soil degrades rapidly in the sun, but this living blueprint naturally fixes nitrogen into the earth, feeding your adjacent crops for free. Picking up a premium drought-resistant clover starter kit guarantees a lush green fill that easily crowds out invasive weeds.
A few bags of seeds make this an absolute steal at $15–$25. Highly recommended if you want to invite more bees to your backyard!
- Key Materials: Dutch white clover seeds, broadcast spreader
- Vibe / Style: Lush pollinator paradise
- Difficulty: Easy sowing and watering
- Budget Breakdown: Premium Seed: $20 | Peat Moss Cover: $5
- Creator’s Tip: Mix the tiny clover seeds with a bucket of dry sand before tossing them to ensure a perfectly even spread.
- Smart Sourcing: Nitrogen-coated microclover seed (bulk bag) and handheld rotary seed spreaders.
Building Pathways That Work as Hard as You Do
Executing these 18 strategic vegetable garden pathways completely changes the game by maximizing your growing space and eradicating daily maintenance. By skipping the generic craft aisles and prioritizing smart, productized sourcing—like UV-resistant edging and commercial-grade membranes—you secure a high-end, premium look on a DIY budget. Calculate your square footage, grab your heavy-duty materials, and transform your muddy backyard into a highly efficient, magazine-worthy production zone today.
Frequently Asked Questions
What is the ideal width for vegetable garden pathways?
To achieve that high-end aesthetic while maintaining functionality, primary pathways must measure 3-4 feet wide to comfortably fit heavy-duty garden carts. Secondary paths should be mapped strictly at 18-24 inches to maximize high-yield growing space. Investing in a commercial measuring tape and string line kit ensures your grid layout looks professionally installed rather than haphazardly thrown together.
Should I choose gravel or mulch for garden pathways?
Gravel delivers a premium, permanent finish that never rots, making it the superior choice for high-traffic layouts bordered by UV-coated steel edging. Mulch is significantly cheaper upfront and feeds the soil, but demands seasonal top-offs. If your budget allows, bulk landscaping stones always provide a more upscale, “looks expensive but isn’t” architectural vibe for long-term setups.
How do I prevent weeds in vegetable garden pathways?
You absolutely must install a heavy-duty double-layer defense system. Lay down a commercial-grade woven landscape fabric (bulk roll) before topping it with 3-4 inches of thick gravel or cedar chips. Skipping this base layer is why most DIY pathways fail and become overgrown weed traps within a single growing season.
Can pathways improve water management in my garden?
Yes, swapping solid concrete for permeable systems like compacted granite or paver hybrids acts as passive, high-efficiency irrigation. By utilizing premium stabilizer kits with your stones, you force heavy rainfall directly down into your vegetable root systems instead of flooding your yard, easily saving hundreds on summer water bills.
What pathway materials work best for sloped vegetable gardens?
Sloped terrain demands materials that aggressively lock together. Compacted gorilla hair mulch or crushed angular slate paired with a heavy-duty steel hand tamper guarantees your walkway won’t wash down the hill during a storm. Never use loose pea gravel on a slope without securing it in terraced, pre-cut rigid border frames.