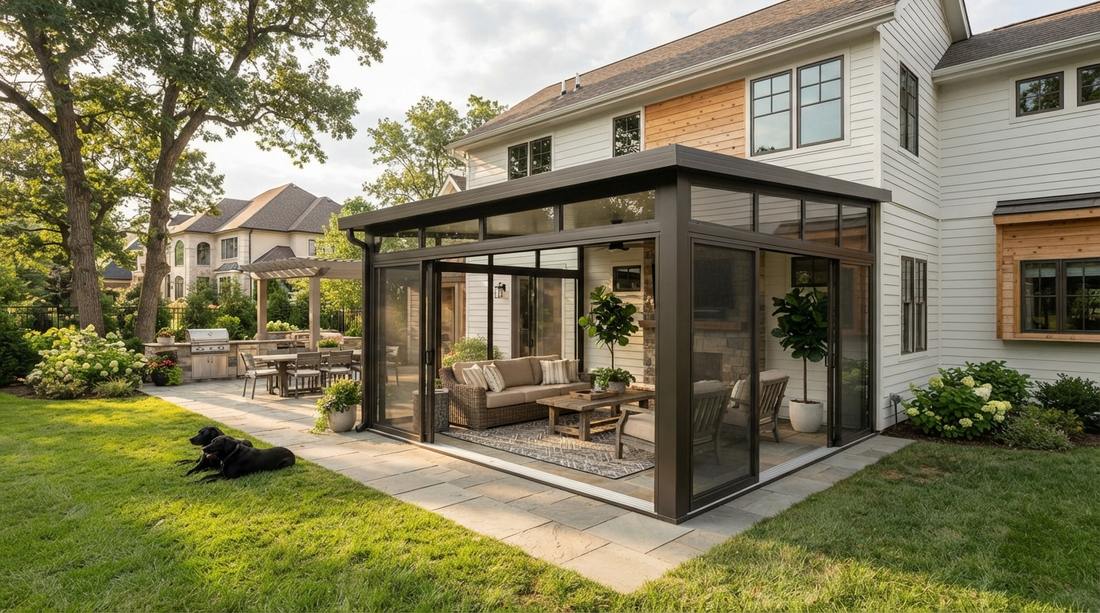
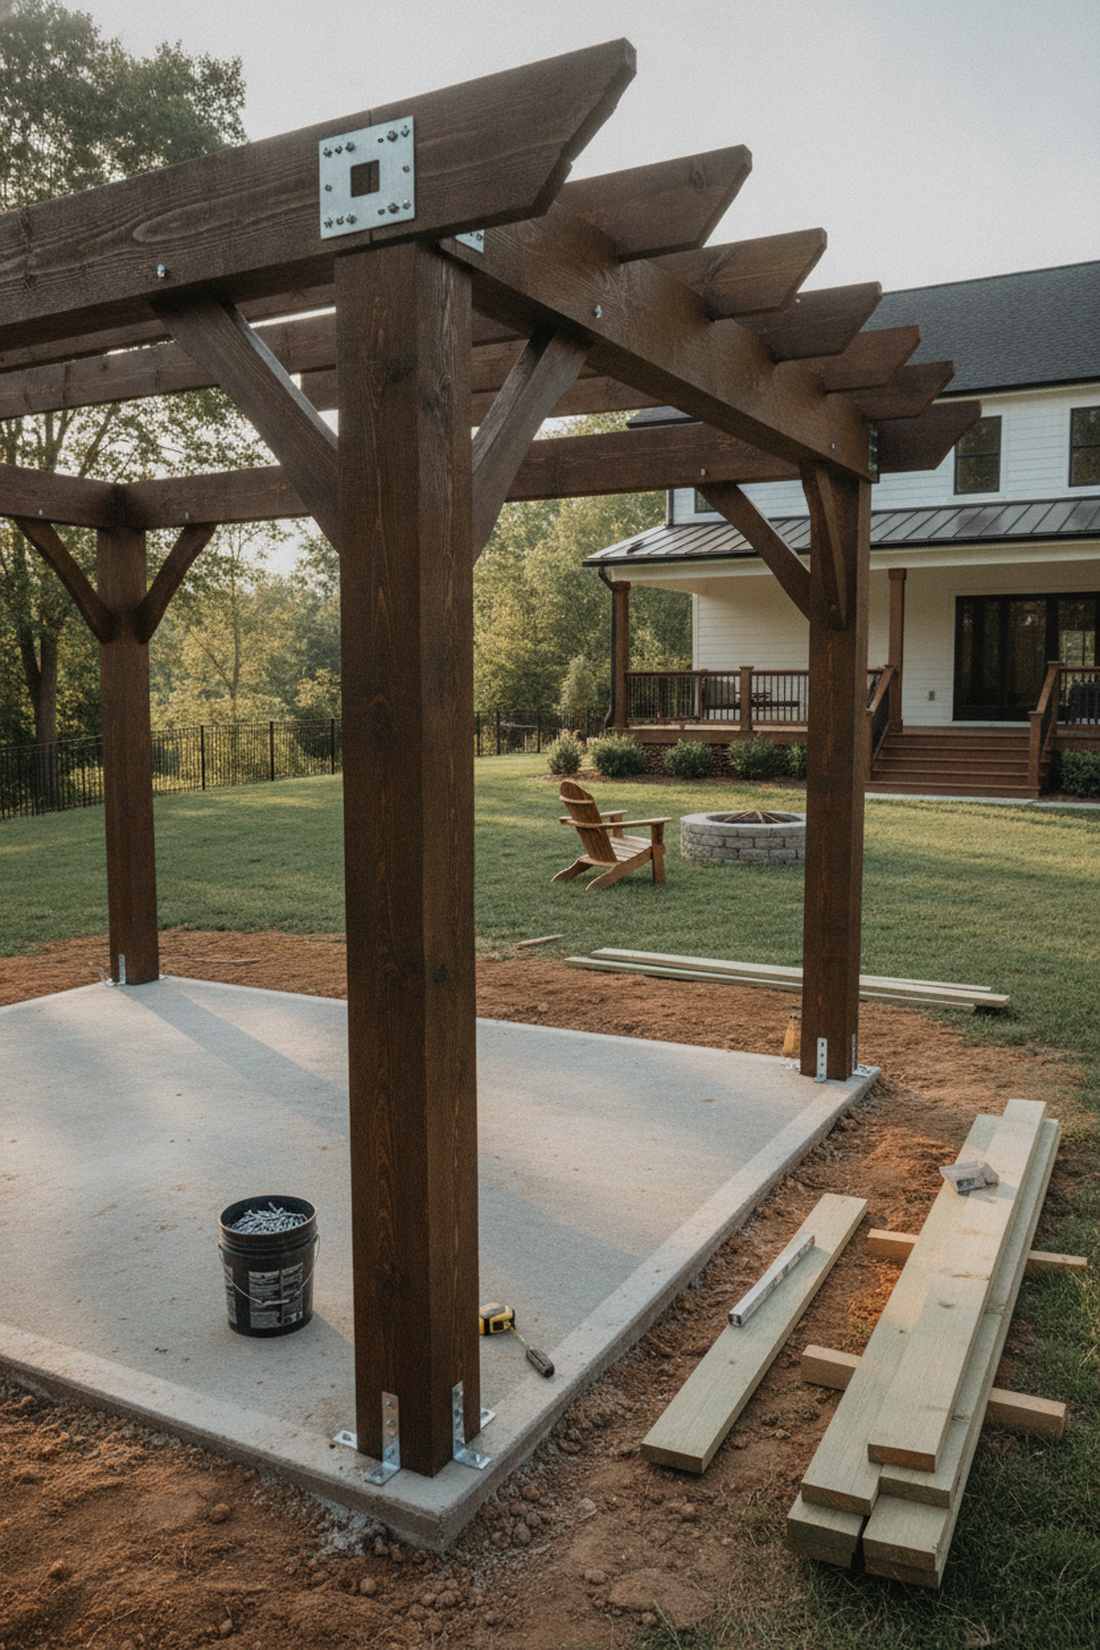
An outdoor patio enclosure completely redefines your backyard architecture. You get permanent weather protection and high-end visual appeal using smart material sourcing. These builds look incredibly expensive but maximize your budget effortlessly.
Design Snapshot: Key Principles
- Climate Compatibility: Choose materials that withstand your region’s temperature extremes, humidity levels, and precipitation patterns
- Functional Flexibility: Incorporate retractable or removable elements to adjust enclosures between seasons and weather conditions
- Structural Integration: Match enclosure architecture to your home’s exterior style and existing roofline for visual cohesion
- Light Management: Balance natural illumination with shade control using tinted glass, polycarbonate panels, or adjustable louvers
Glass Sunroom Enclosures
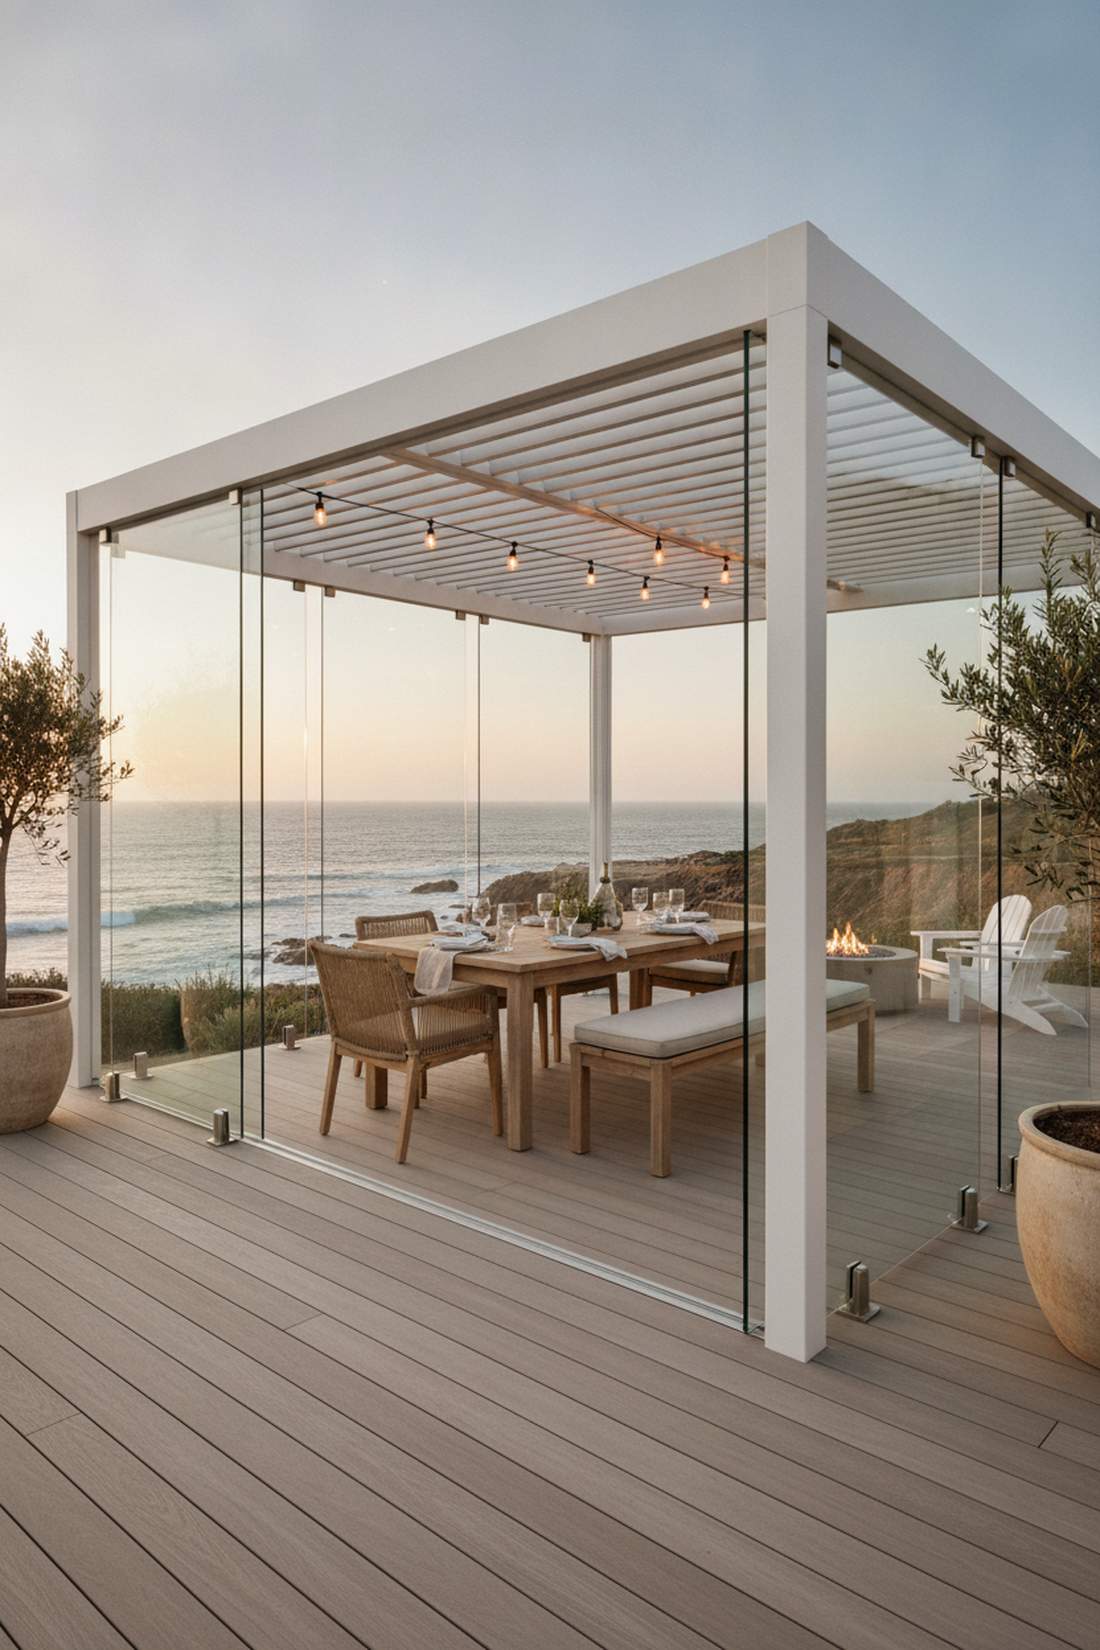
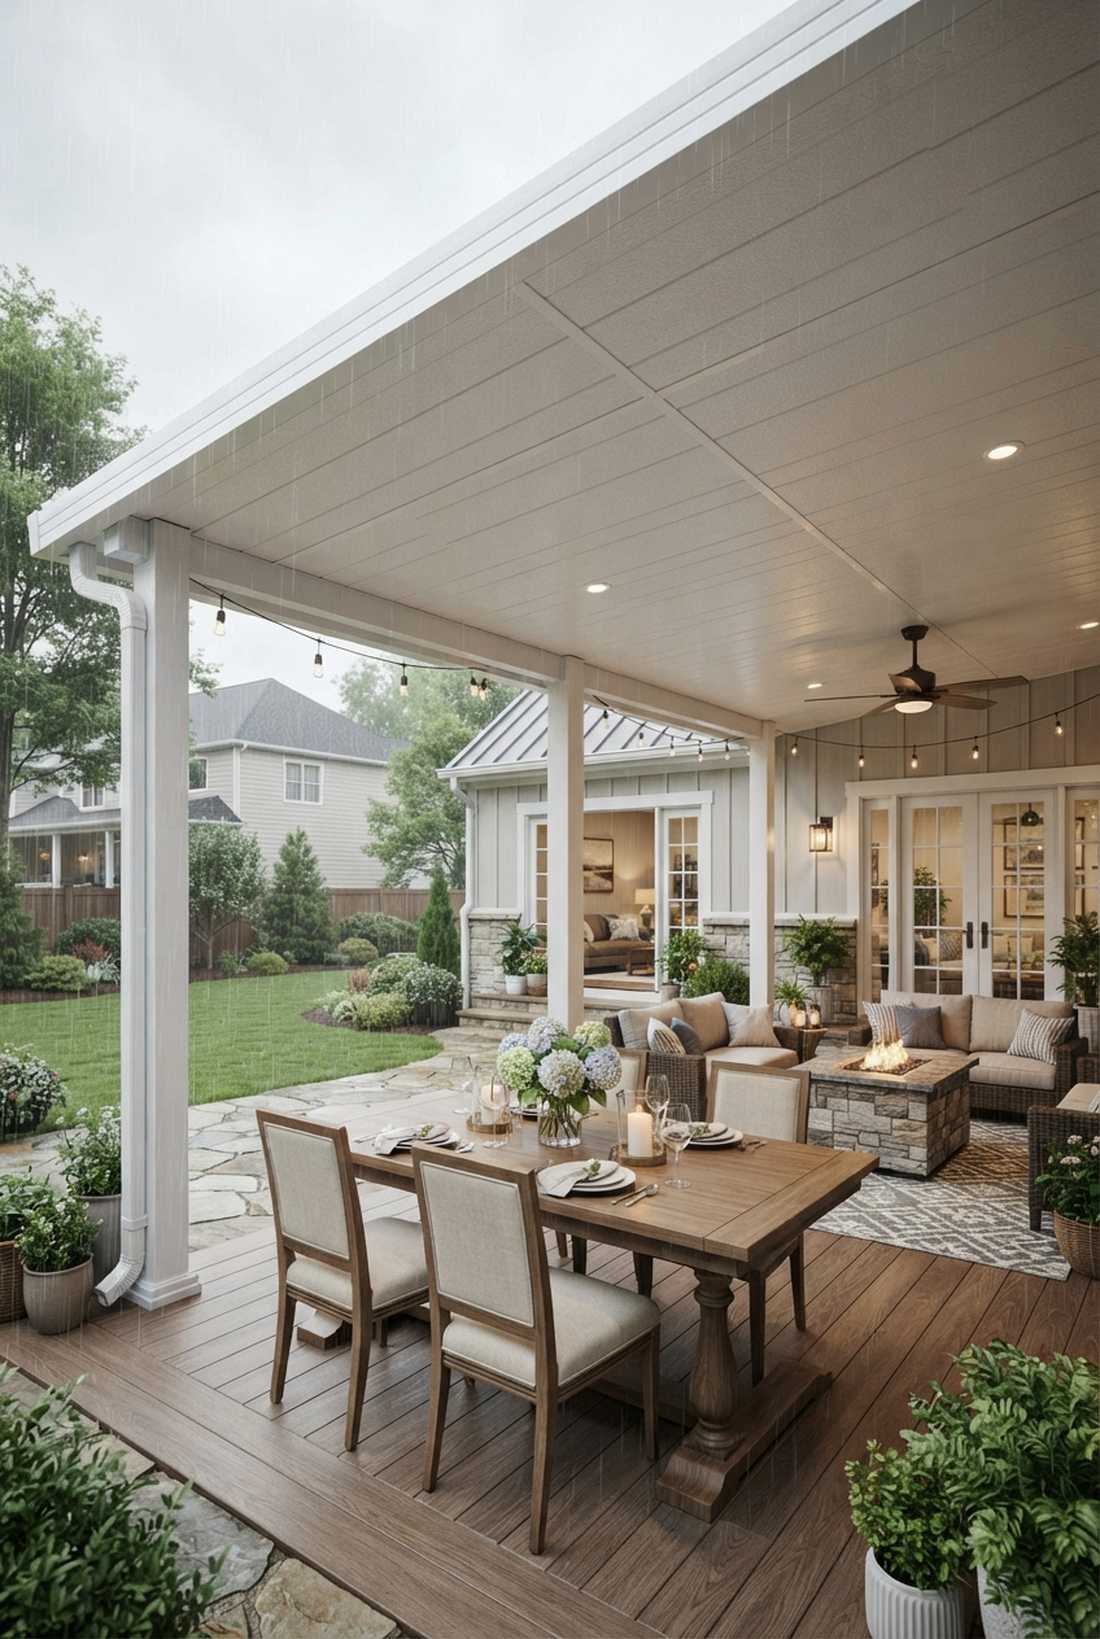
1. Four-Season Insulated Glass Sunroom
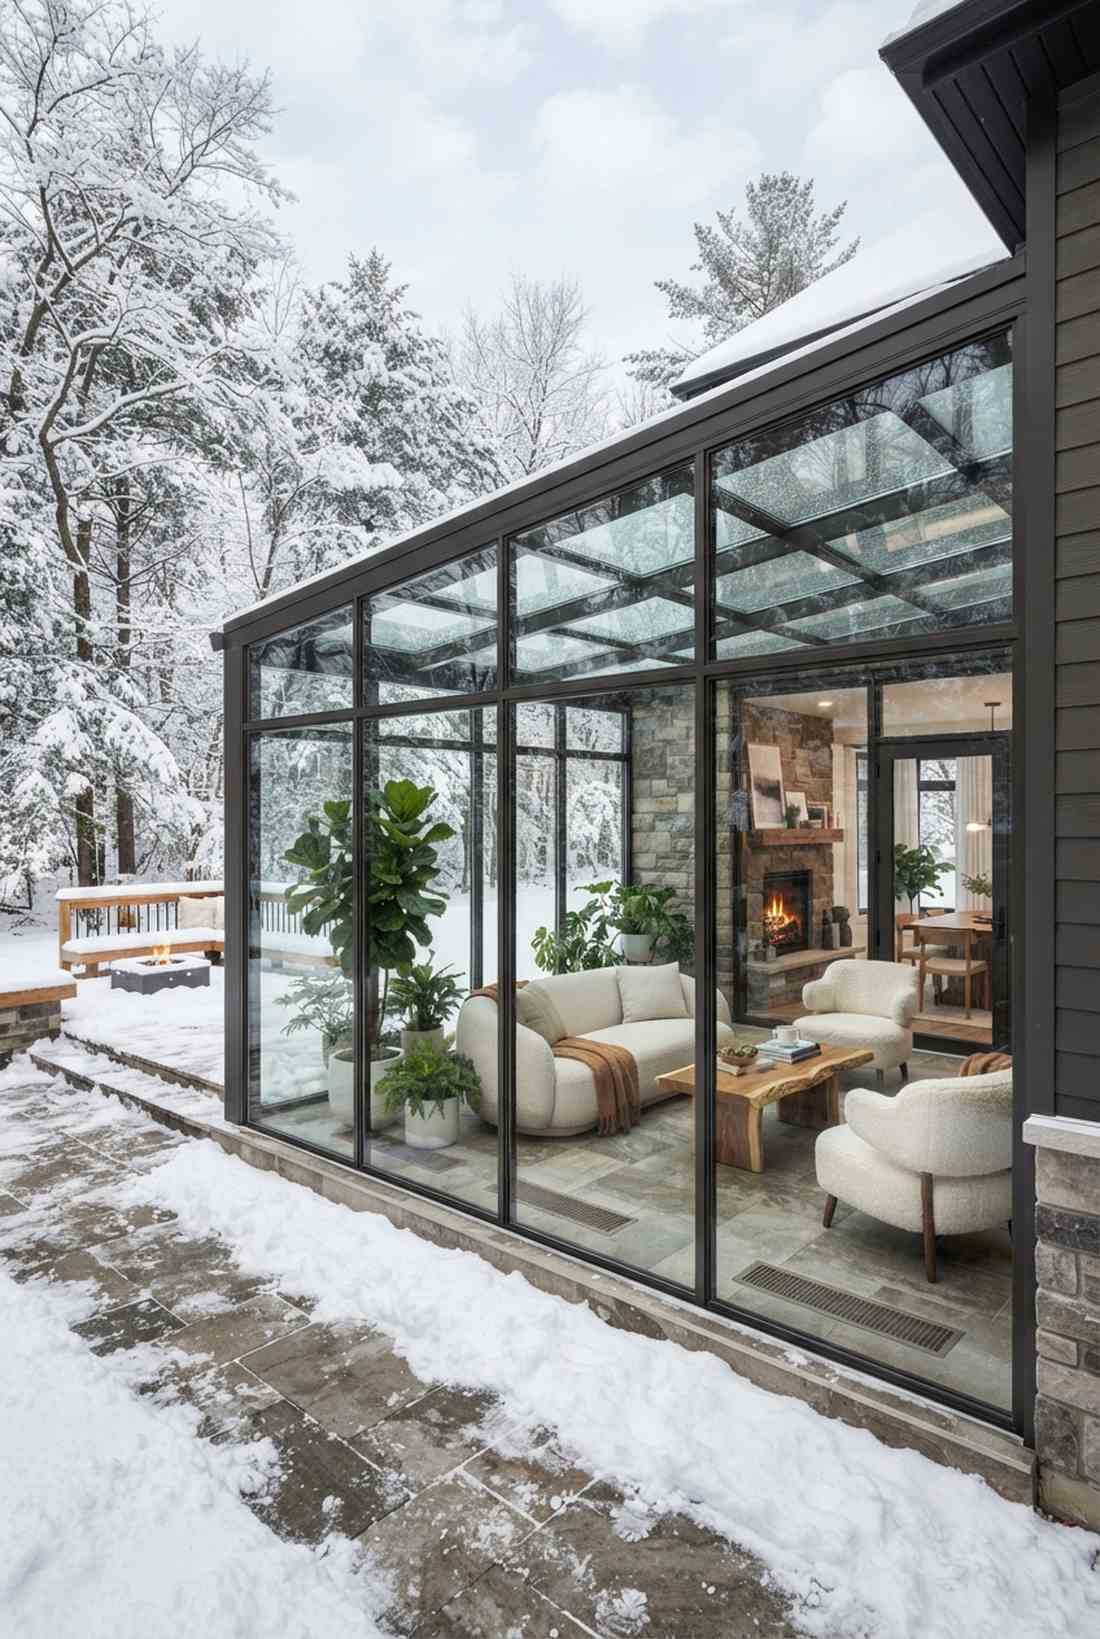
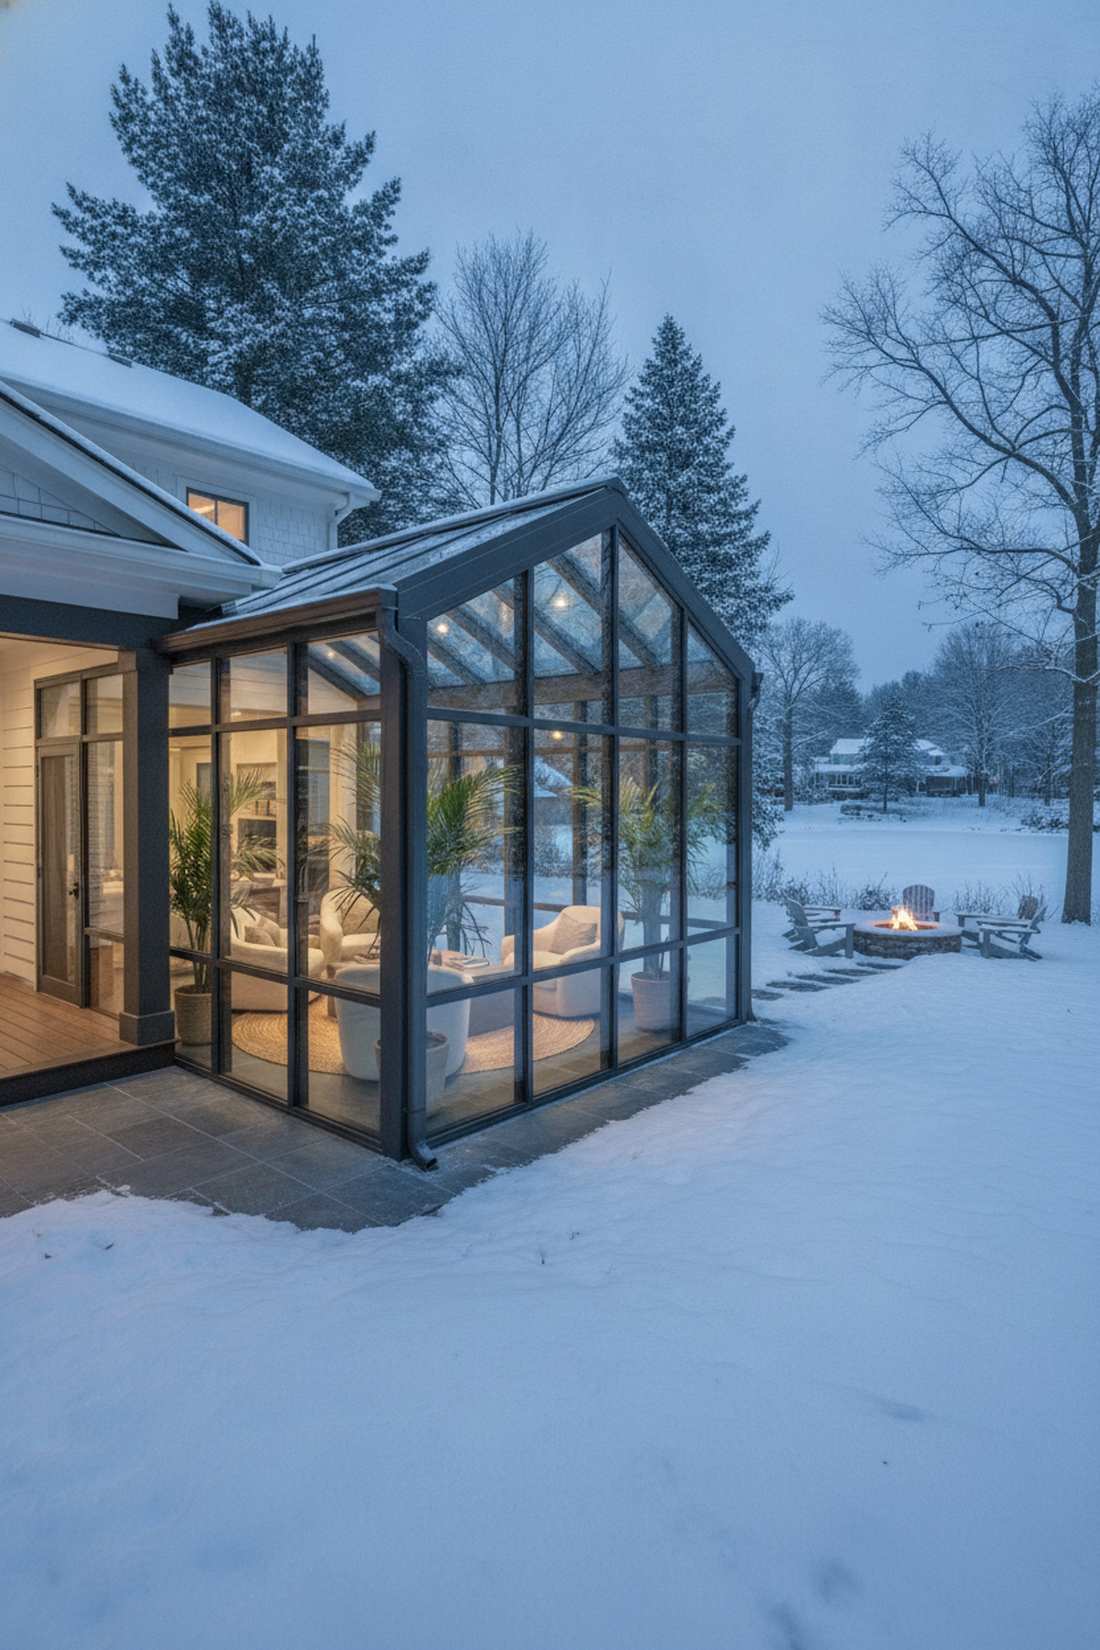
This setup feels like a billionaire’s private conservatory right in your backyard. Featuring panoramic insulated glass patio walls, it works exceptionally well for deep winter climates where snow-watching is a priority.
Most people assume full additions require chaotic construction, but modular pre-fab frames deliver a surprisingly premium look in half the time. Utilizing double-paned thermal units and commercial-grade heavy-duty sealant kits ensures pristine climate control without energy waste.
You can easily pull off a scaled-down version for around $12,000–$25,000 depending on square footage. Save this to your luxury home upgrade board for future DIY blueprint inspiration!
- Key Materials: Double-pane thermal glass, extruded aluminum structural frames
- Vibe / Style: Architectural modern retreat
- Difficulty: Advanced contractor installation
- Budget Breakdown: Glass units: $8,000 | Framework: $5,000.
- Creator’s Tip: Integrate floor-level radiant heating before laying down the final tile to prevent winter drafts.
- Smart Sourcing: Start with pre-cut thermal window inserts (bulk pack) and UV-coated framing joint kits.
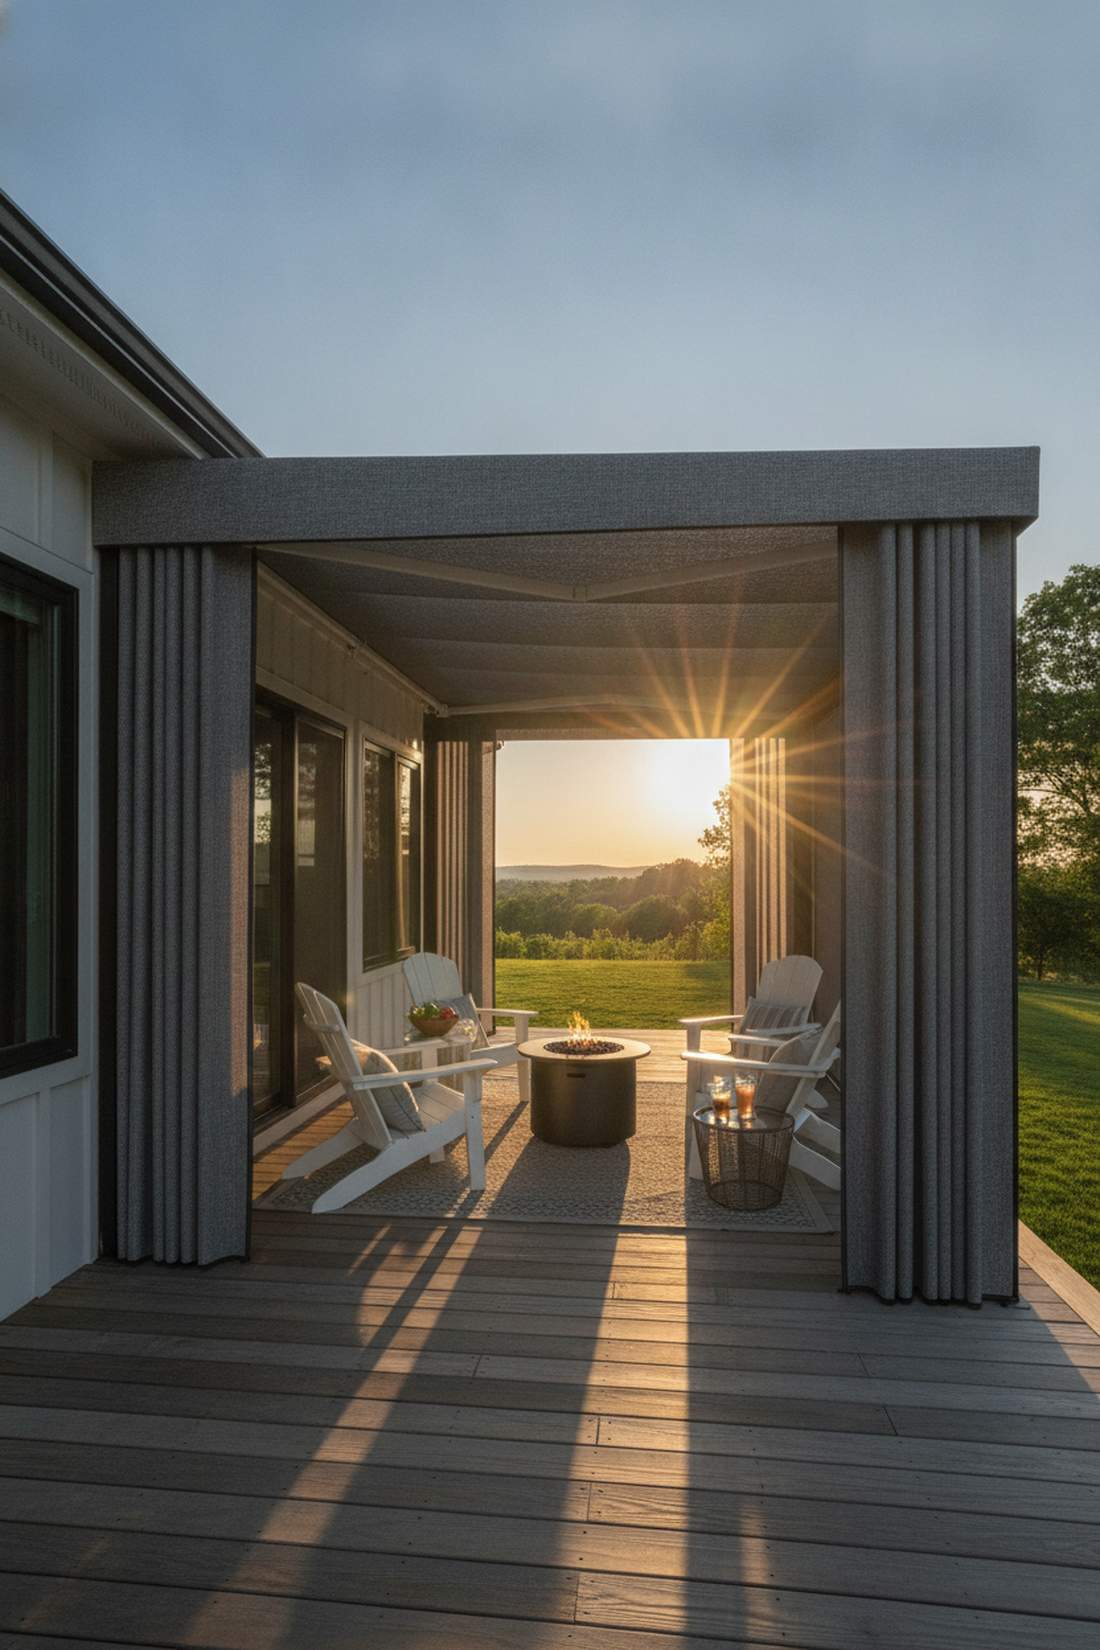
2. Three-Season Rolling Glass Panels
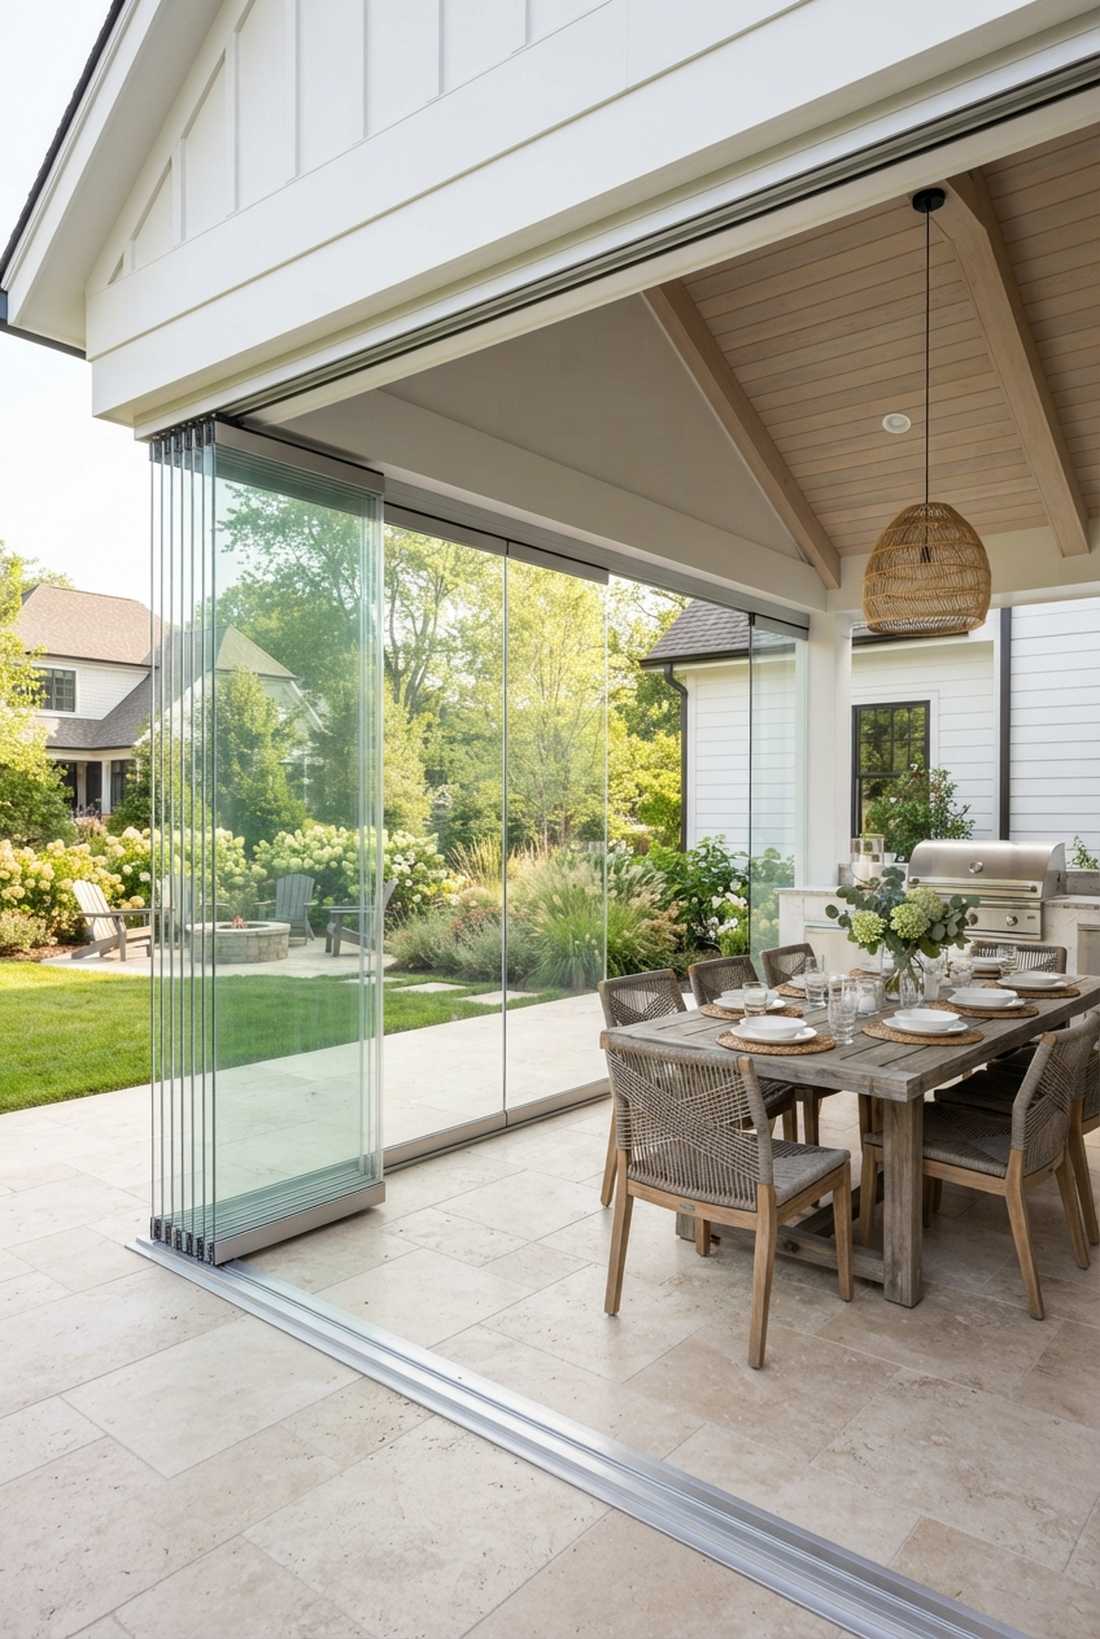
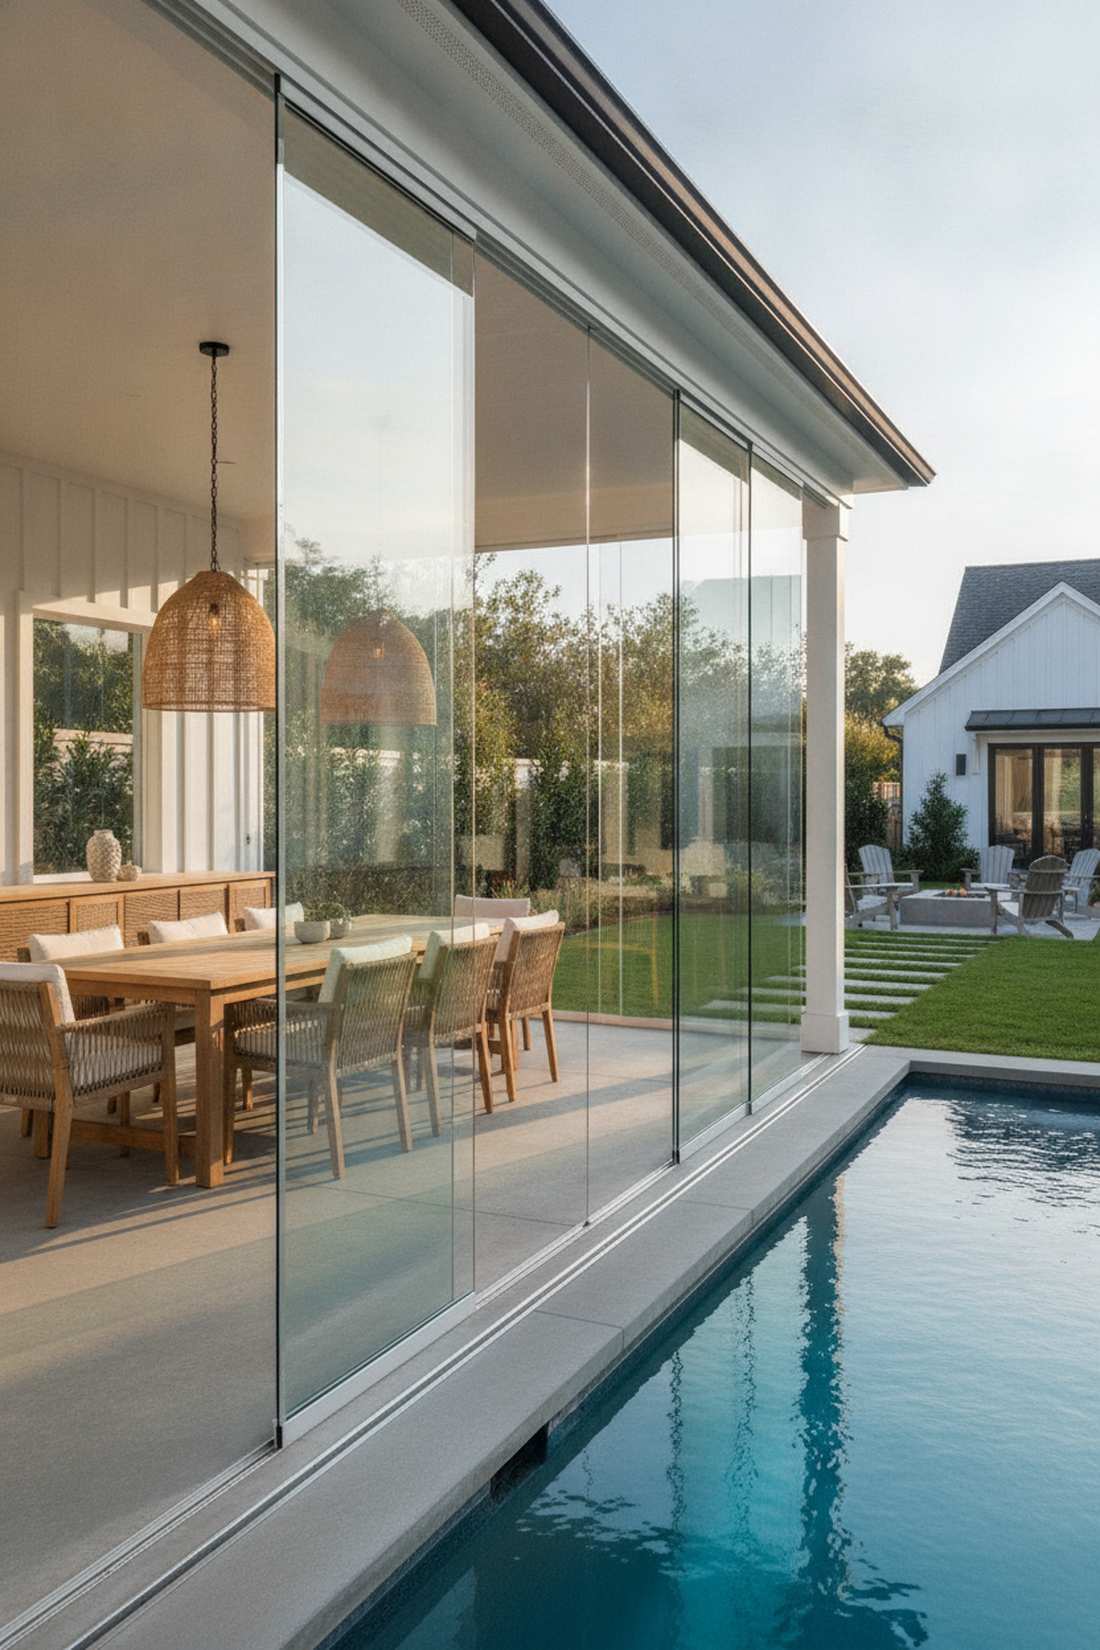
Capturing the magic of an open-air resort, this feels like a breezy coastal cabana. These frameless sliding patio partitions are perfect for a transitional spring-to-summer outdoor dining space.
Rigid permanent walls can kill a backyard’s flow, but track-mounted rolling panels look far more expensive than they are. By adding top-rated acrylic track rollers and safety-tempered glass, you get seamless operation that glides open with one finger.
Expect materials for a standard patio edge to run about $3,000–$6,000. It’s a high-impact upgrade that completely modernizes tired backyard spaces.
- Key Materials: Tempered safety glass, aluminum rolling tracks
- Vibe / Style: Breezy minimalist cabana
- Difficulty: Intermediate structural setup
- Budget Breakdown: Rolling hardware: $900 | Glass panels: $2,500.
- Creator’s Tip: Always install a slight sub-floor drainage slope beneath the tracks so rainwater doesn’t pool and rust the rollers.
- Smart Sourcing: Use heavy-duty stainless track runners and pre-sized tempered patio glass panels.
3. Tinted Glass Solar Control Enclosure
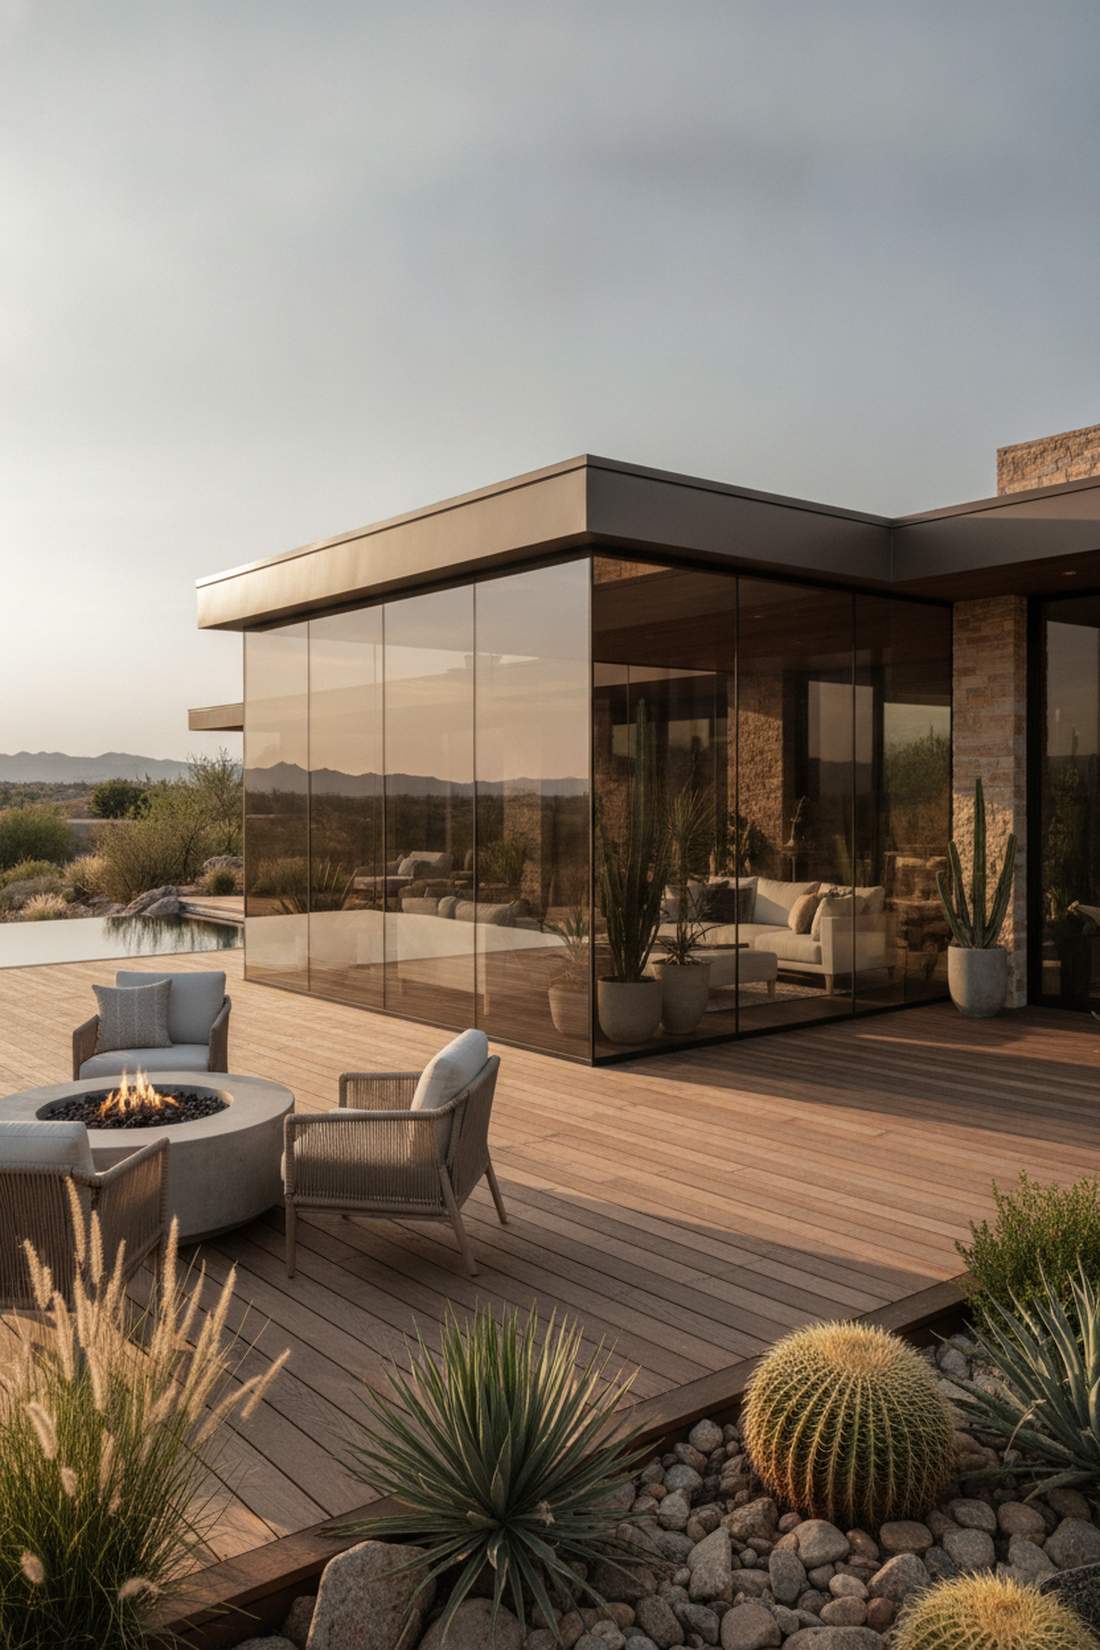
Emanating a cool, moody desert oasis energy, this design stops the sun in its tracks. A solar-tinted outdoor room is brilliant for sun-drenched southern exposures facing brutal afternoon heat.
Clear glass turns summer patios into greenhouses, yet this reflective barrier gives a designer-level finish while slashing temperatures. Incorporating broad outdoor patio enclosure ideas like reflective window films completely transforms standard glass into high-efficiency shields.
Upgrading standard panels with commercial-grade tints costs an extra $400–$800. Pin this if you’re planning a small space upgrade that prioritizes climate control!
- Key Materials: Bronze-tinted glass sheets, structural silicone
- Vibe / Style: Sleek contemporary oasis
- Difficulty: Intermediate with careful handling
- Budget Breakdown: Standard panels: $2,000 | Tinting/Film: $600.
- Creator’s Tip: Opt for a 70% heat-rejection metallic tint; it provides daytime privacy without making the room too dark.
- Smart Sourcing: Grab commercial-grade solar window film (bulk roll) and UV-resistant squeegee application kits.
4. Frameless Glass Corner Enclosure
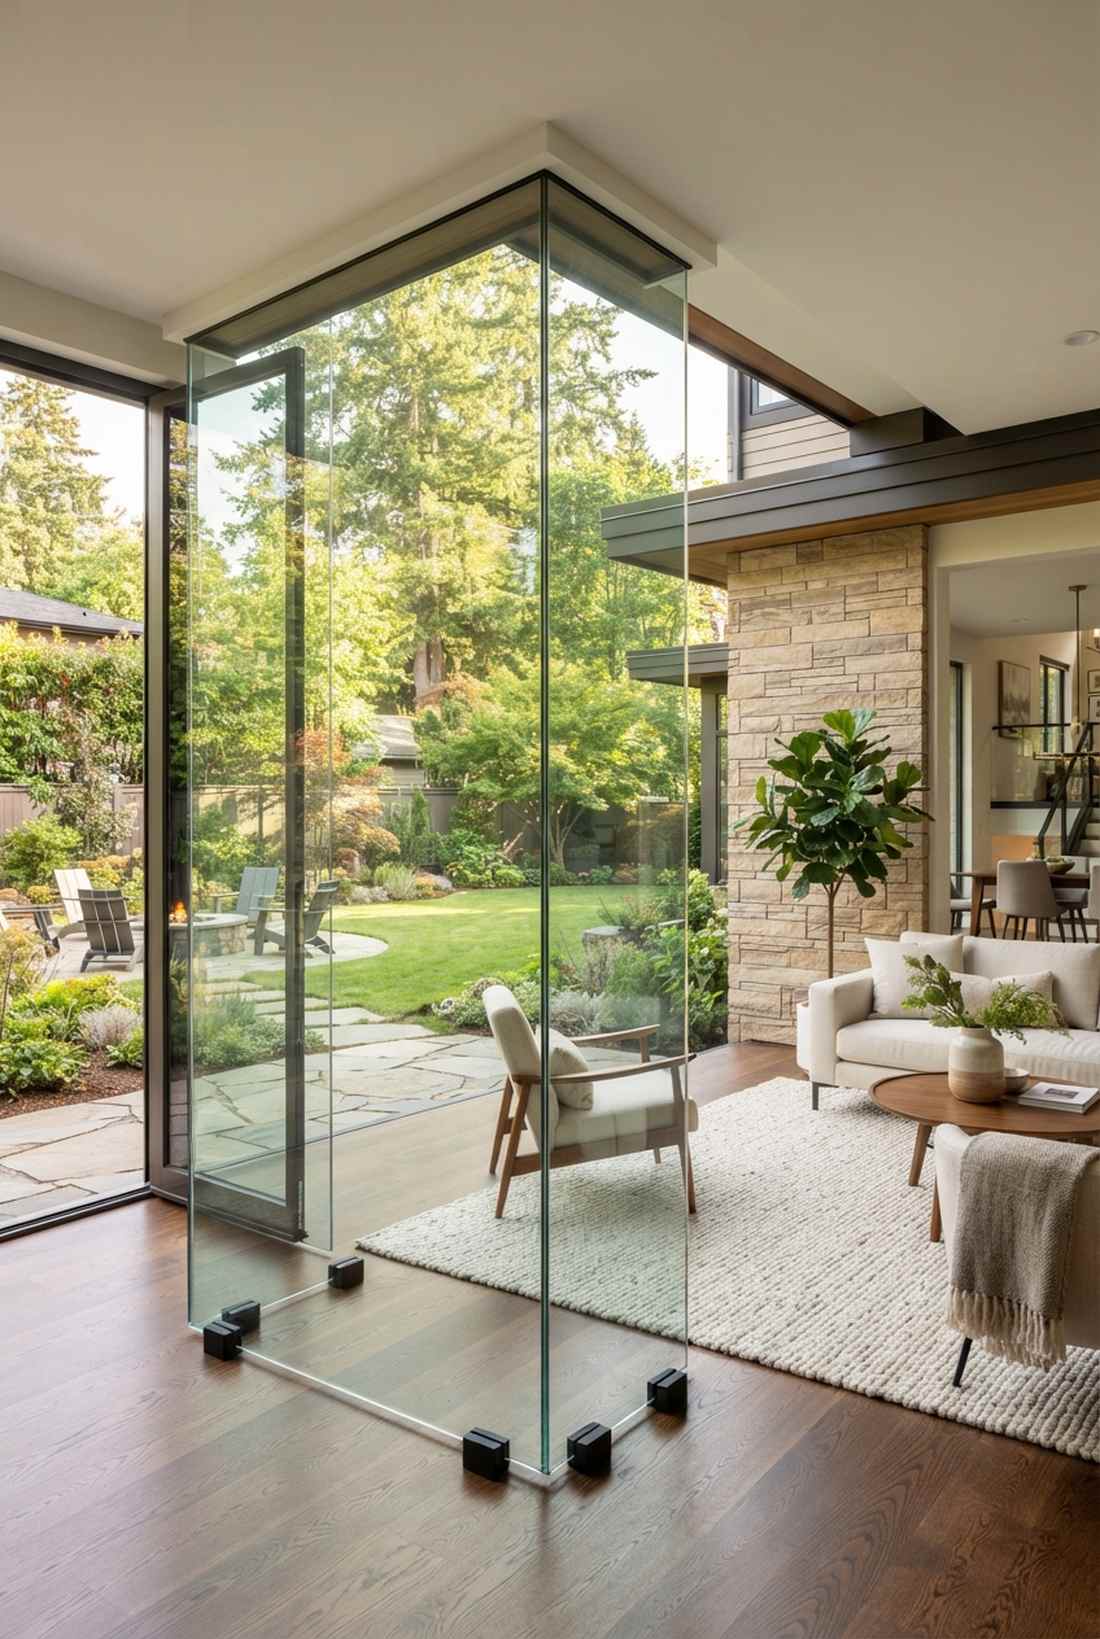
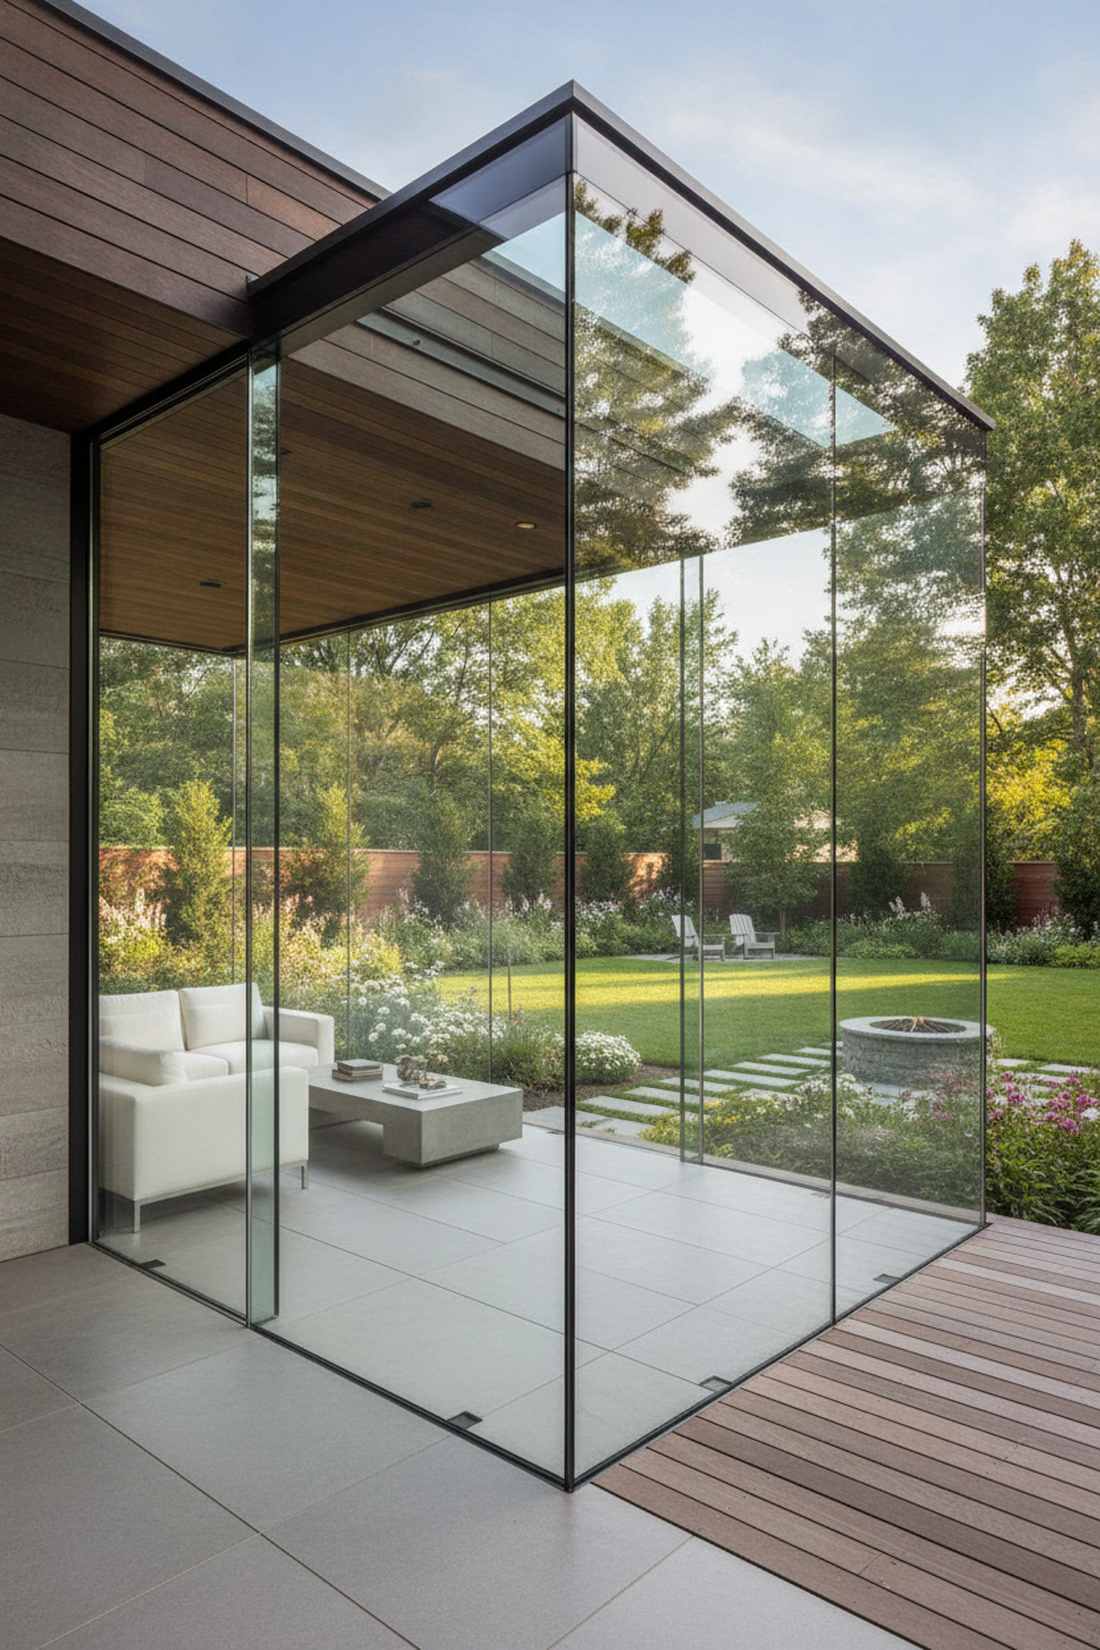
Stepping into this space feels like standing inside a transparent jewelry box. The invisible corner glass sunroom is an absolute showstopper for contemporary homes with expansive garden views.
Bulky corner pillars instantly date a house, but using structural silicone joints elevates the entire property value. It requires premium grade architectural glass supplies, but the unobstructed visual flow is unmatched.
This premium architectural finish usually starts around $8,000 for a small corner section. Highly recommended if you want maximum wow-factor with minimal visual clutter.
- Key Materials: Thick architectural glass, clear structural silicone
- Vibe / Style: Ultra-modern invisible edge
- Difficulty: Expert precision required
- Budget Breakdown: Custom glass: $6,500 | Adhesives: $300.
- Creator’s Tip: Use black spacer blocks at the floor level to give the illusion that the glass is hovering slightly.
- Smart Sourcing: Use industrial clear structural silicone (pro pack) and heavy-duty glass suction lifter kits.
This next setup is ridiculously cheap but looks like a custom $5,000 designer addition when finished correctly…
Screen Room Solutions
5. Aluminum-Frame Fiberglass Screen Room
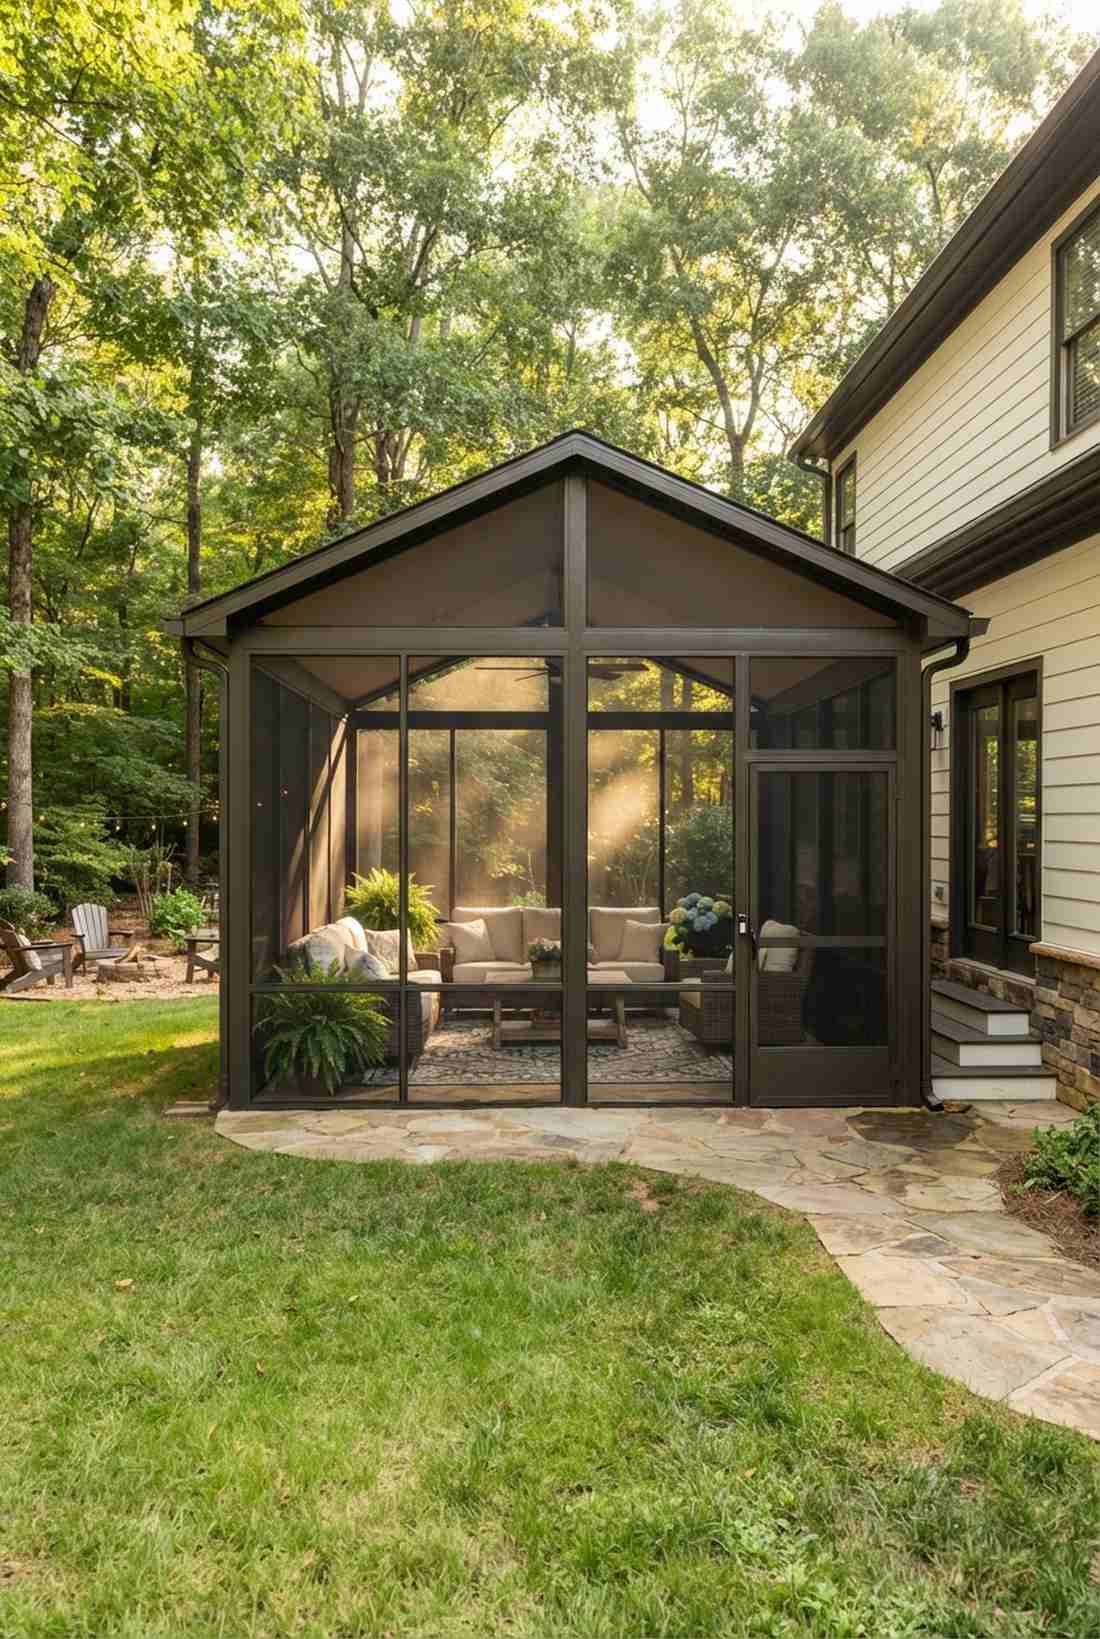
Radiating a cozy southern porch aesthetic, this setup feels like lazy summer afternoons. A permanent aluminum screened patio works perfectly for wooded backyards prone to relentless mosquito invasions.
Wood frames rot in extreme humidity, but powder-coated aluminum delivers a virtually indestructible framework. By weaving in top-rated fiberglass mesh kits, you achieve a flawless tension that refuses to sag or tear over time.
You can effectively enclose a 10×10 space for about $1,200–$2,500. Save this to your weekend DIY warrior board for a fast, high-return project!
- Key Materials: Powder-coated aluminum extrusions, fiberglass mesh
- Vibe / Style: Classic bug-free lounge
- Difficulty: Beginner to Intermediate
- Budget Breakdown: Frame kit: $900 | Screen mesh: $150.
- Creator’s Tip: Buy the screen rolling spline tool with metal wheels, the cheap plastic ones will ruin your wrists during installation.
- Smart Sourcing: Get pre-cut aluminum framing systems and a heavy-duty fiberglass mesh bulk roll.
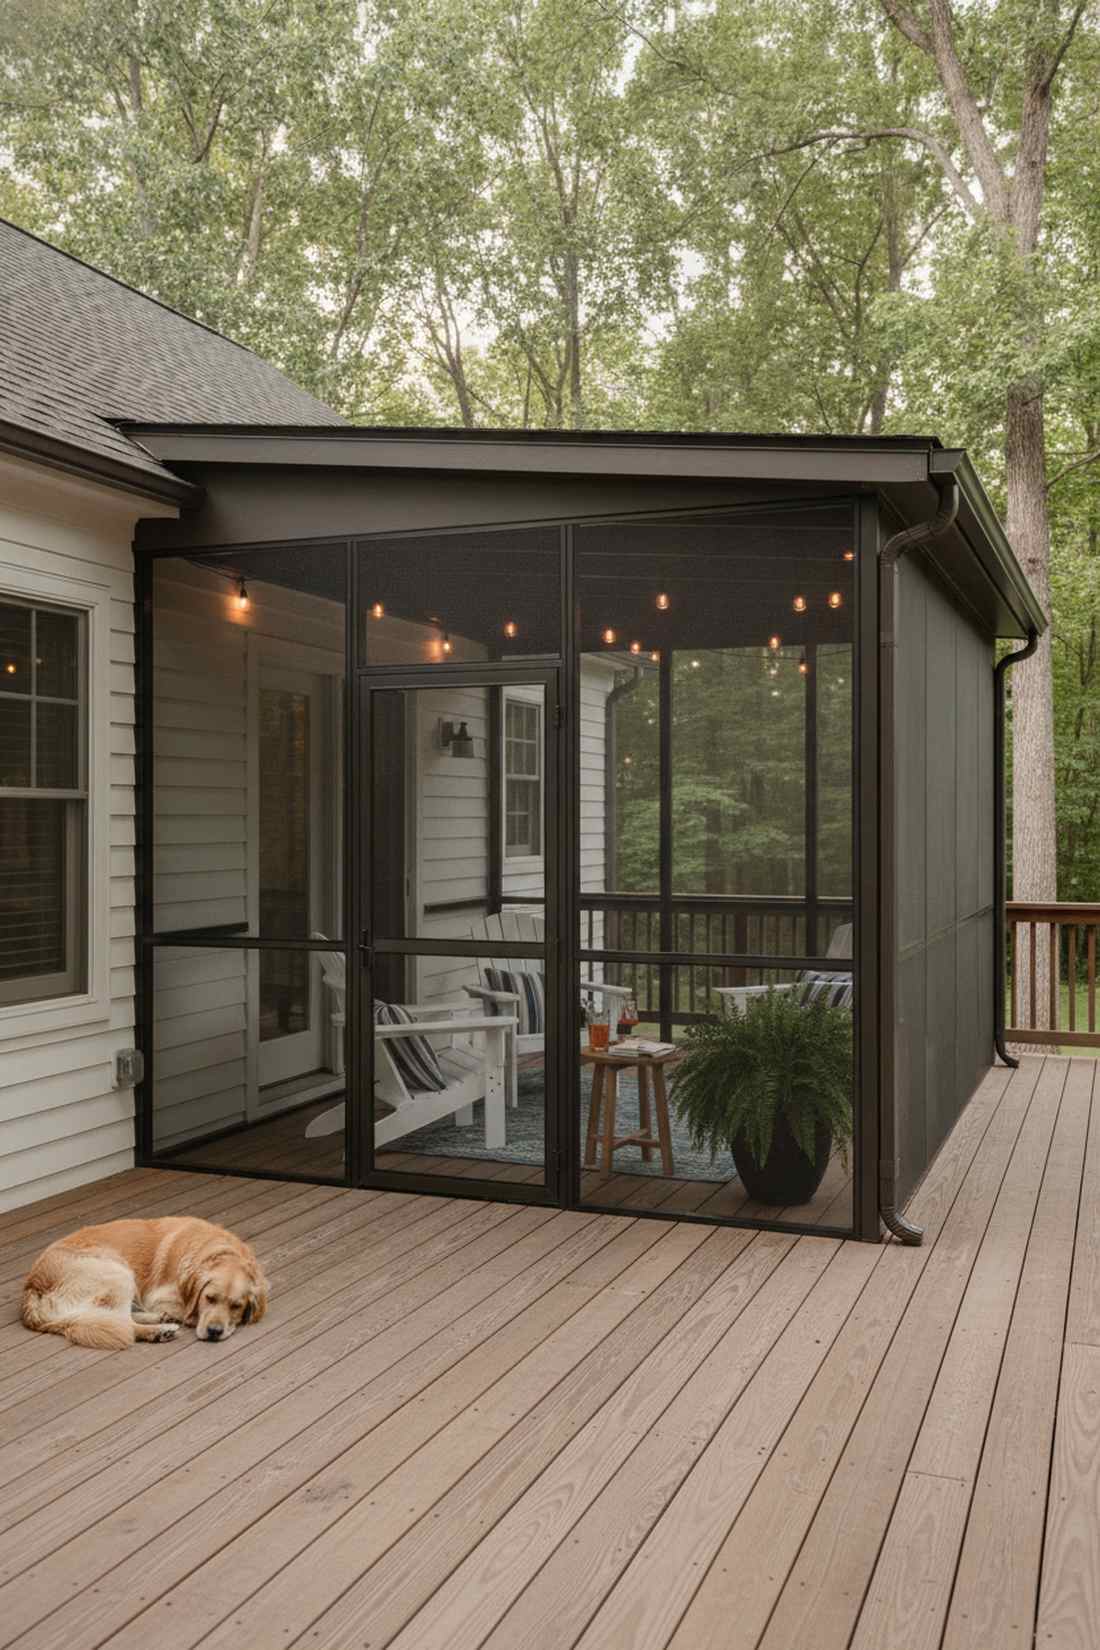
6. Retractable Motorized Screen System
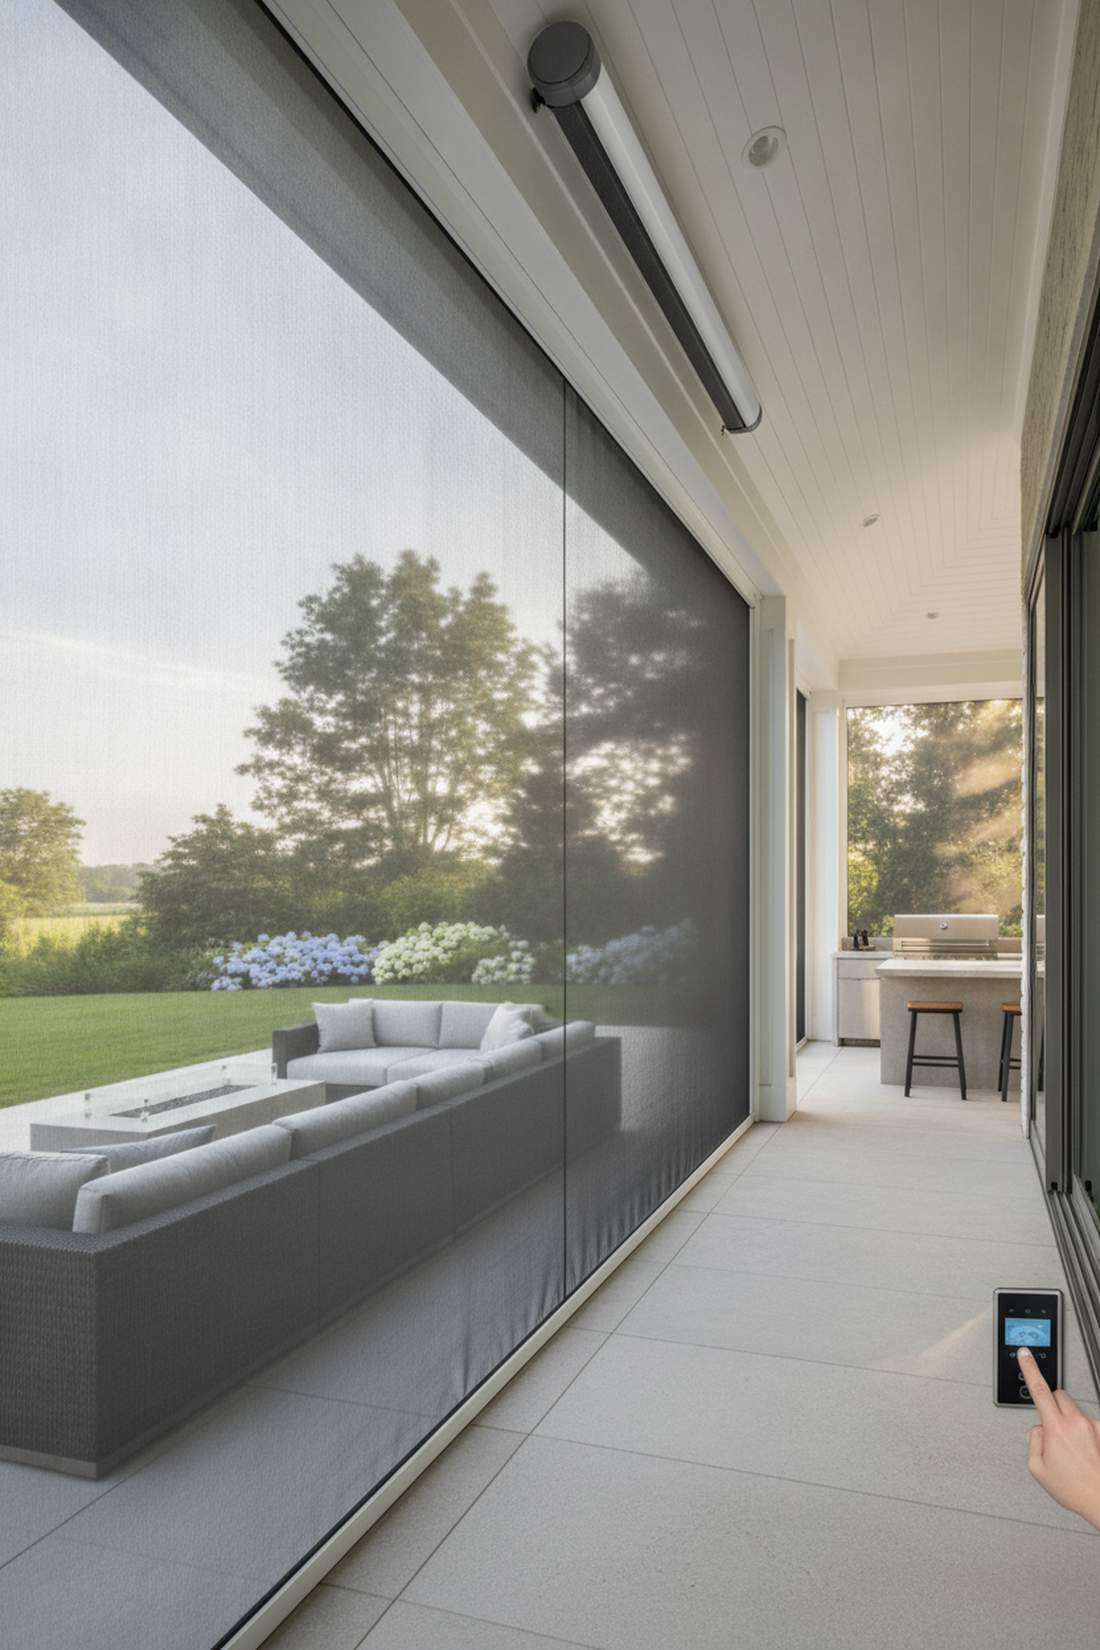
With the push of a button, this space feels like a futuristic smart-home oasis. An automated drop-down patio screen is the ultimate flex for high-traffic entertaining areas.
Static screens block your winter views, but a concealed motorized housing offers brilliant on-demand flexibility. Sourcing broad outdoor patio enclosure ideas like smart-hub integrated motors gives a designer-level finish that wows guests instantly.
A multi-sided motorized setup runs around $3,000–$5,000 depending on width. It’s an incredible quality-of-life upgrade for dynamic weather zones.
- Key Materials: Motorized roller tube, solar-rated mesh screen
- Vibe / Style: High-tech luxury
- Difficulty: Intermediate electrical
- Budget Breakdown: Motor unit: $1,200 | Custom fabric: $800.
- Creator’s Tip: Install wind sensors so the screens automatically retract during unexpected severe storms to prevent tearing.
- Smart Sourcing: Look for weatherproof automated screen motor kits and UV-coated solar mesh panels.
7. Freestanding Screen House Pavilion
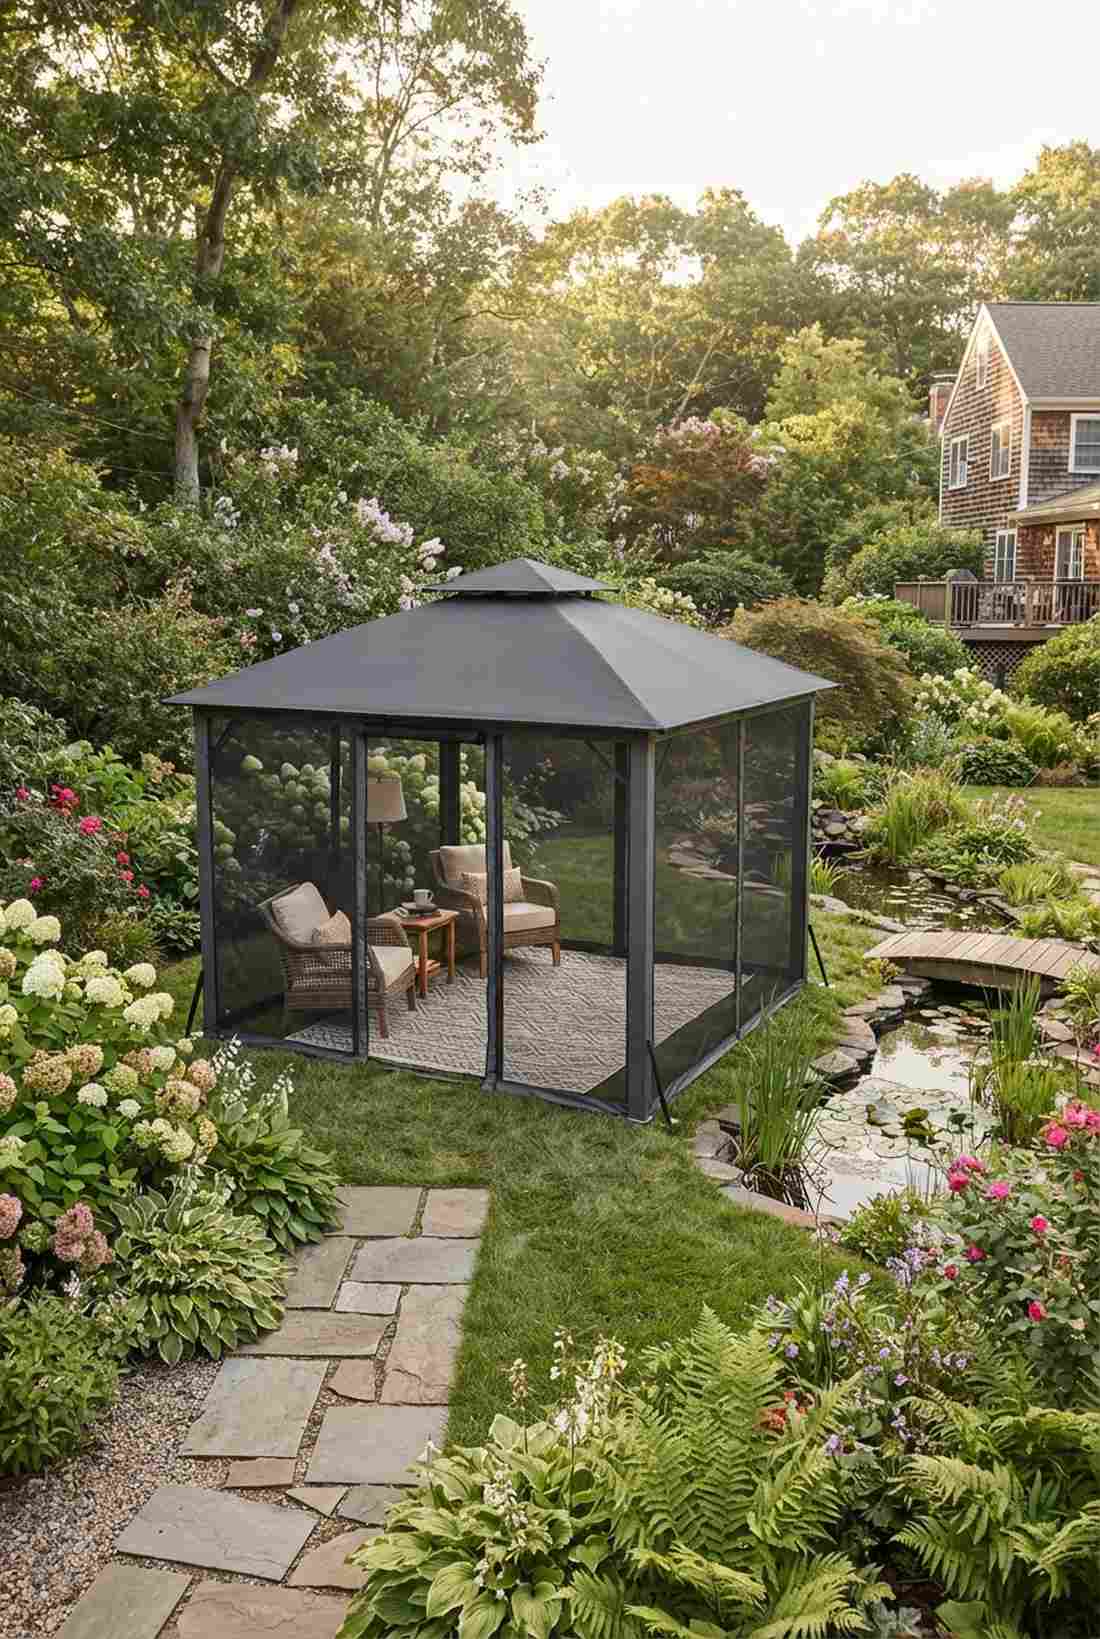
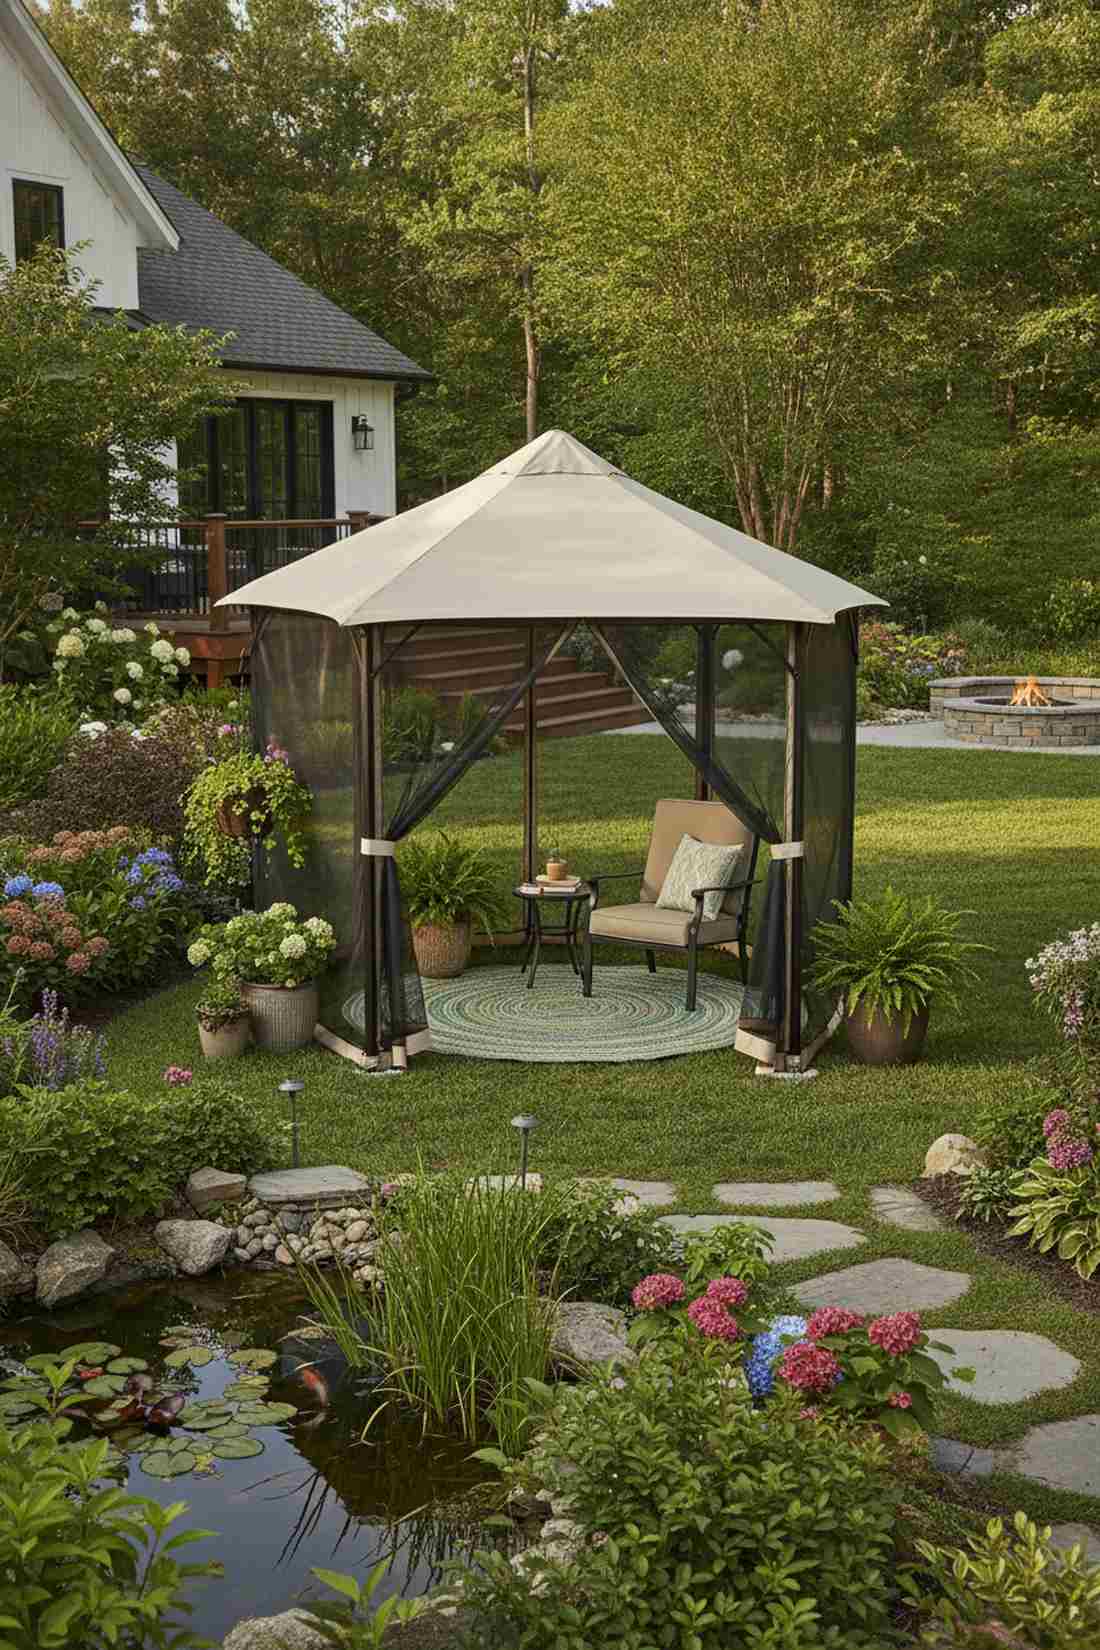
Looking straight out of a botanical garden, this setup feels like a secret backyard hideaway. A detached screen pavilion is magnificent for creating an isolated reading nook near a garden pond.
Tying structures into your main roofline often requires nightmare permits, but a freestanding unit bypasses most zoning headaches. By leveraging pre-fabricated gazebo frames and heavy-duty insect barriers, it looks far more expensive than a traditional build.
Complete freestanding kits range from $800 to $2,000. Pin this if you want a standalone escape without destroying your home’s exterior siding!
- Key Materials: Steel or aluminum pop-up frame, canopy roof
- Vibe / Style: Secret garden sanctuary
- Difficulty: Easy beginner setup
- Budget Breakdown: Pavilion kit: $1,100 | Anchor weights: $50.
- Creator’s Tip: Place outdoor rugs over the grass floor inside to prevent ground insects from climbing up your legs.
- Smart Sourcing: Invest in a rust-proof aluminum pavilion starter kit and heavy-duty ground anchor stakes.
8. DIY Roll-Up Screen Panels
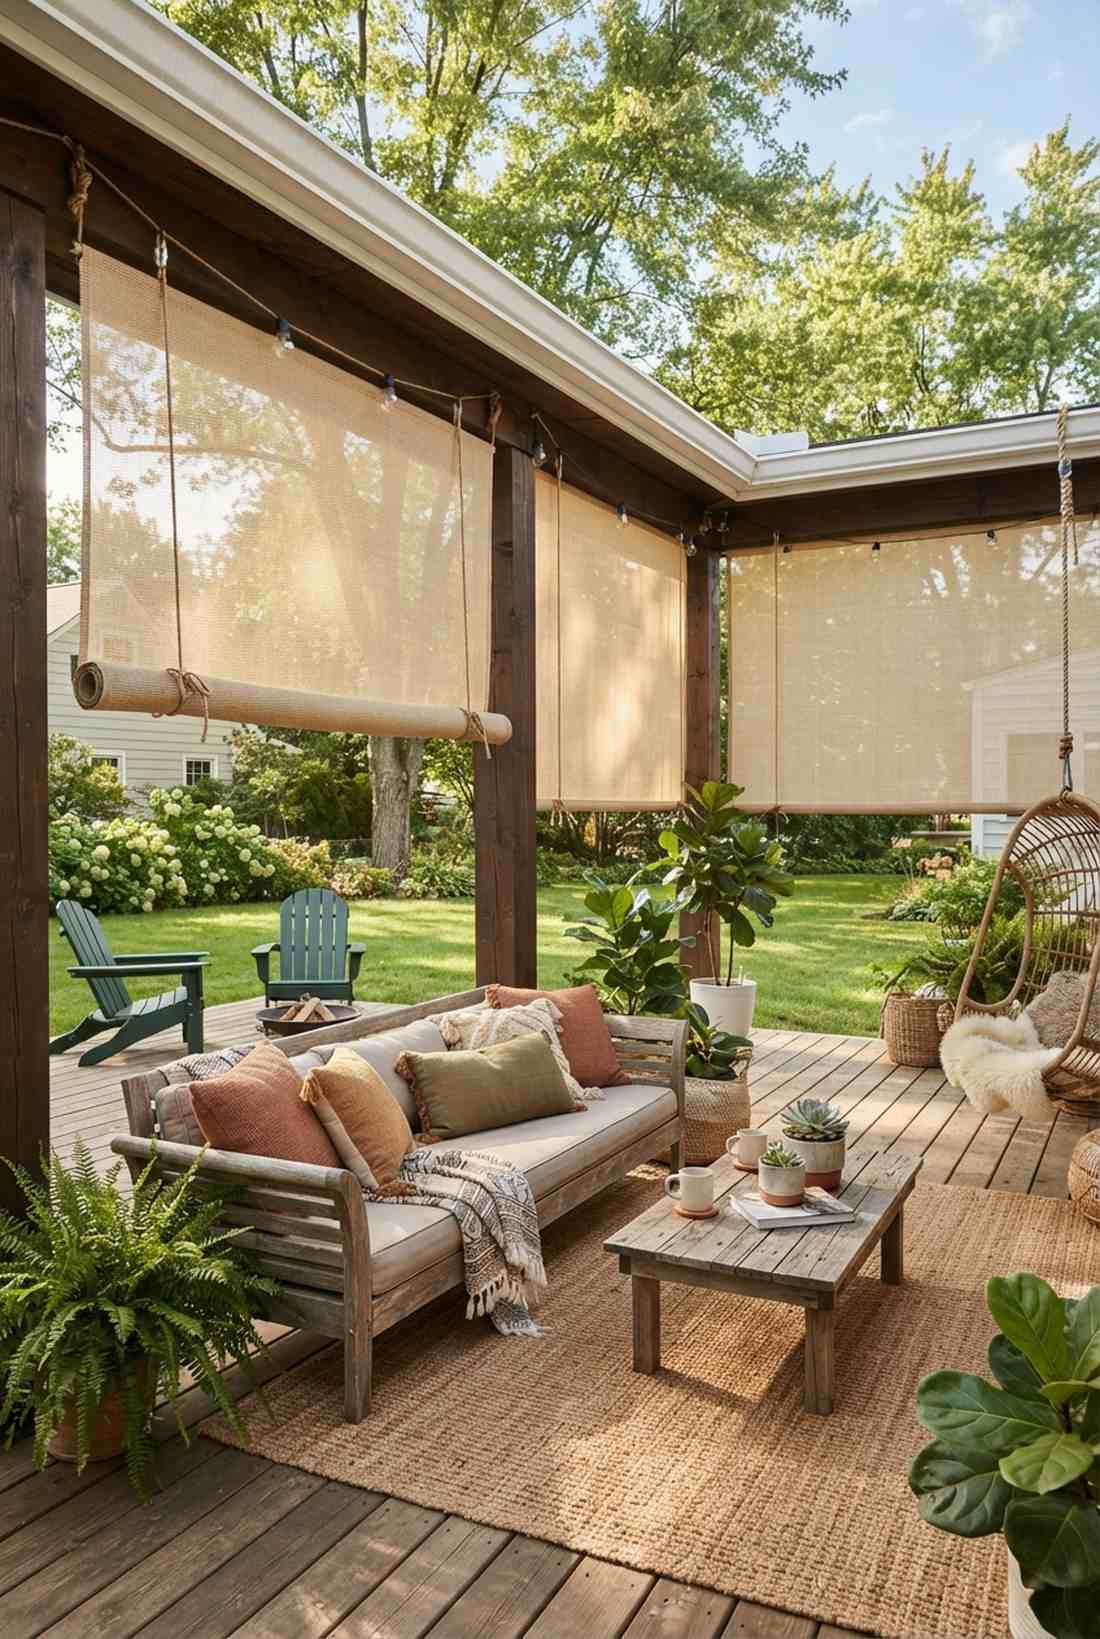
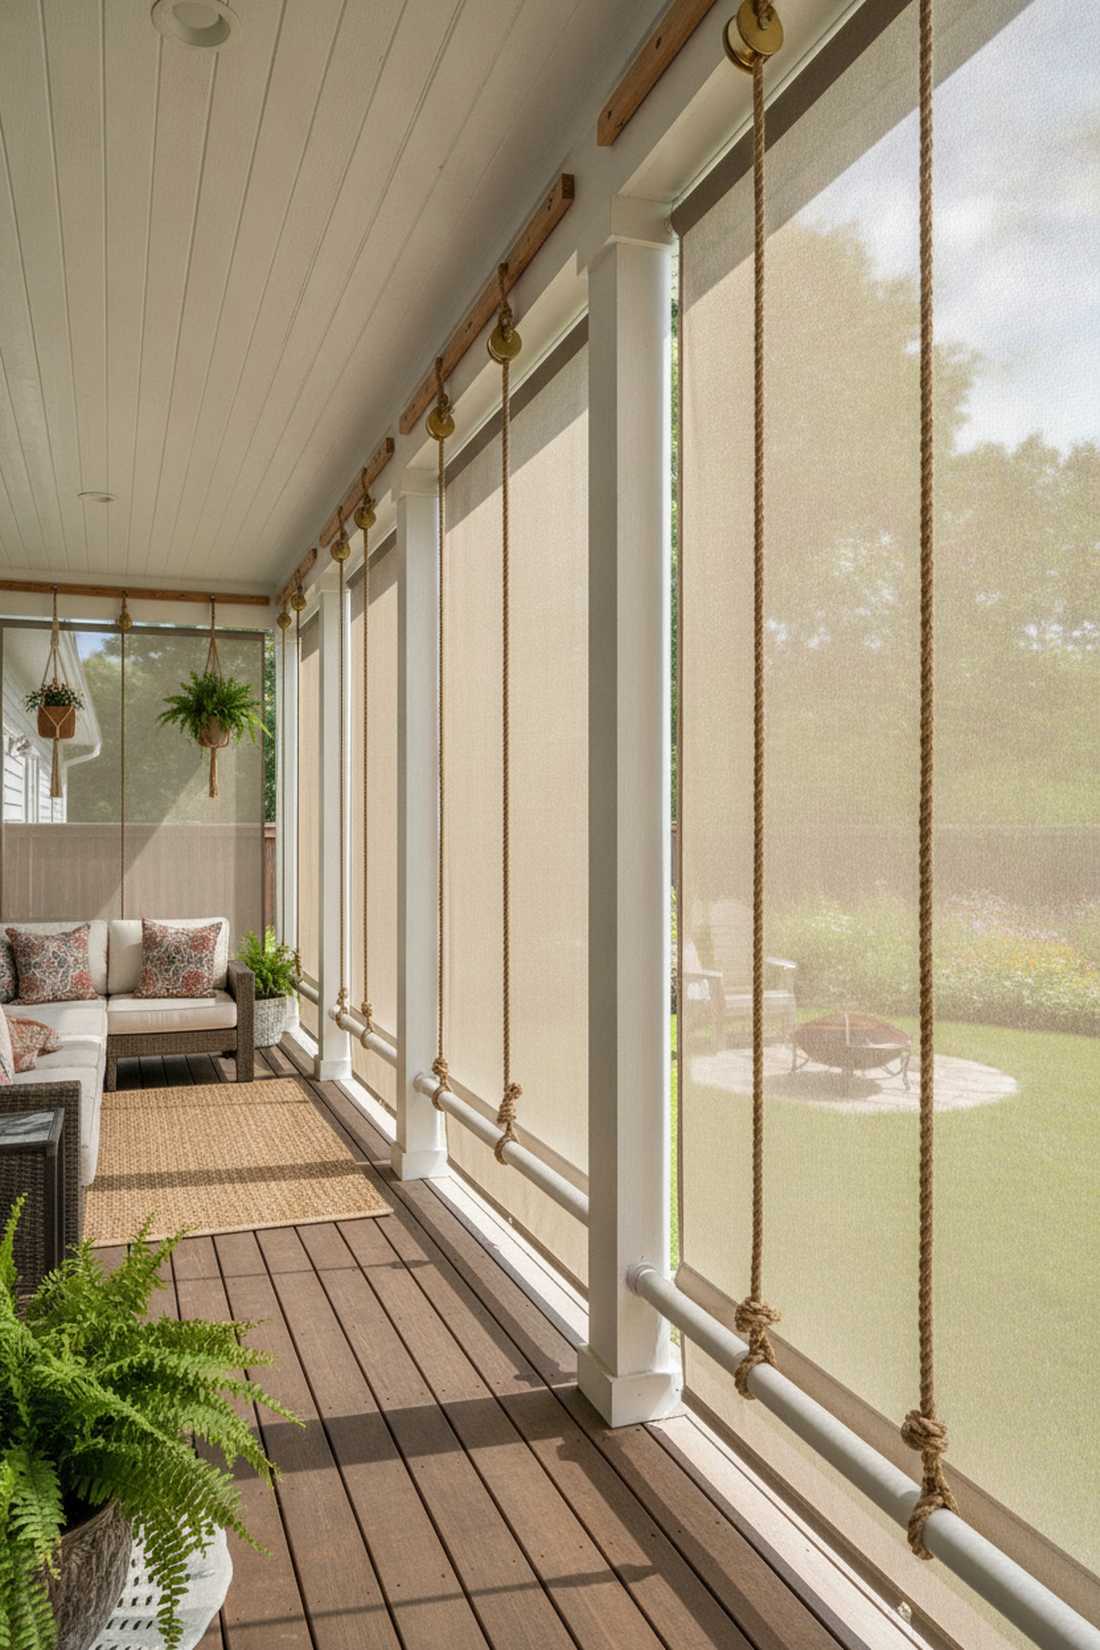
Emanating a charming, relaxed bohemian vibe, this setup feels wonderfully organic. Using manual roll-up mesh panels works exceptionally well for renters or budget-conscious porch updates.
Permanent frames can cost thousands, but using marine-grade canvas and rope pulleys delivers a surprisingly premium look for pennies. Integrating affordable outdoor patio wall ideas like track hardware ensures the panels stay taut during light breezes.
You can easily pull this off for around $100–$250 total. Save this to your budget backyard makeover board immediately!
- Key Materials: Flexible screen fabric, rope, marine-grade pulleys
- Vibe / Style: Bohemian casual
- Difficulty: Easy afternoon DIY
- Budget Breakdown: Screen fabric: $80 | Pulleys/Rope: $40.
- Creator’s Tip: Sew a length of PVC pipe into the bottom hem to act as a hidden weight, keeping the roll straight when pulling it up.
- Smart Sourcing: Buy marine-grade pulley hardware kits and UV-coated flexible screening (bulk roll).
Most beginners completely overspend on roofing… until they discover the exact hybrid layout coming up next.
Hybrid Pergola Enclosures
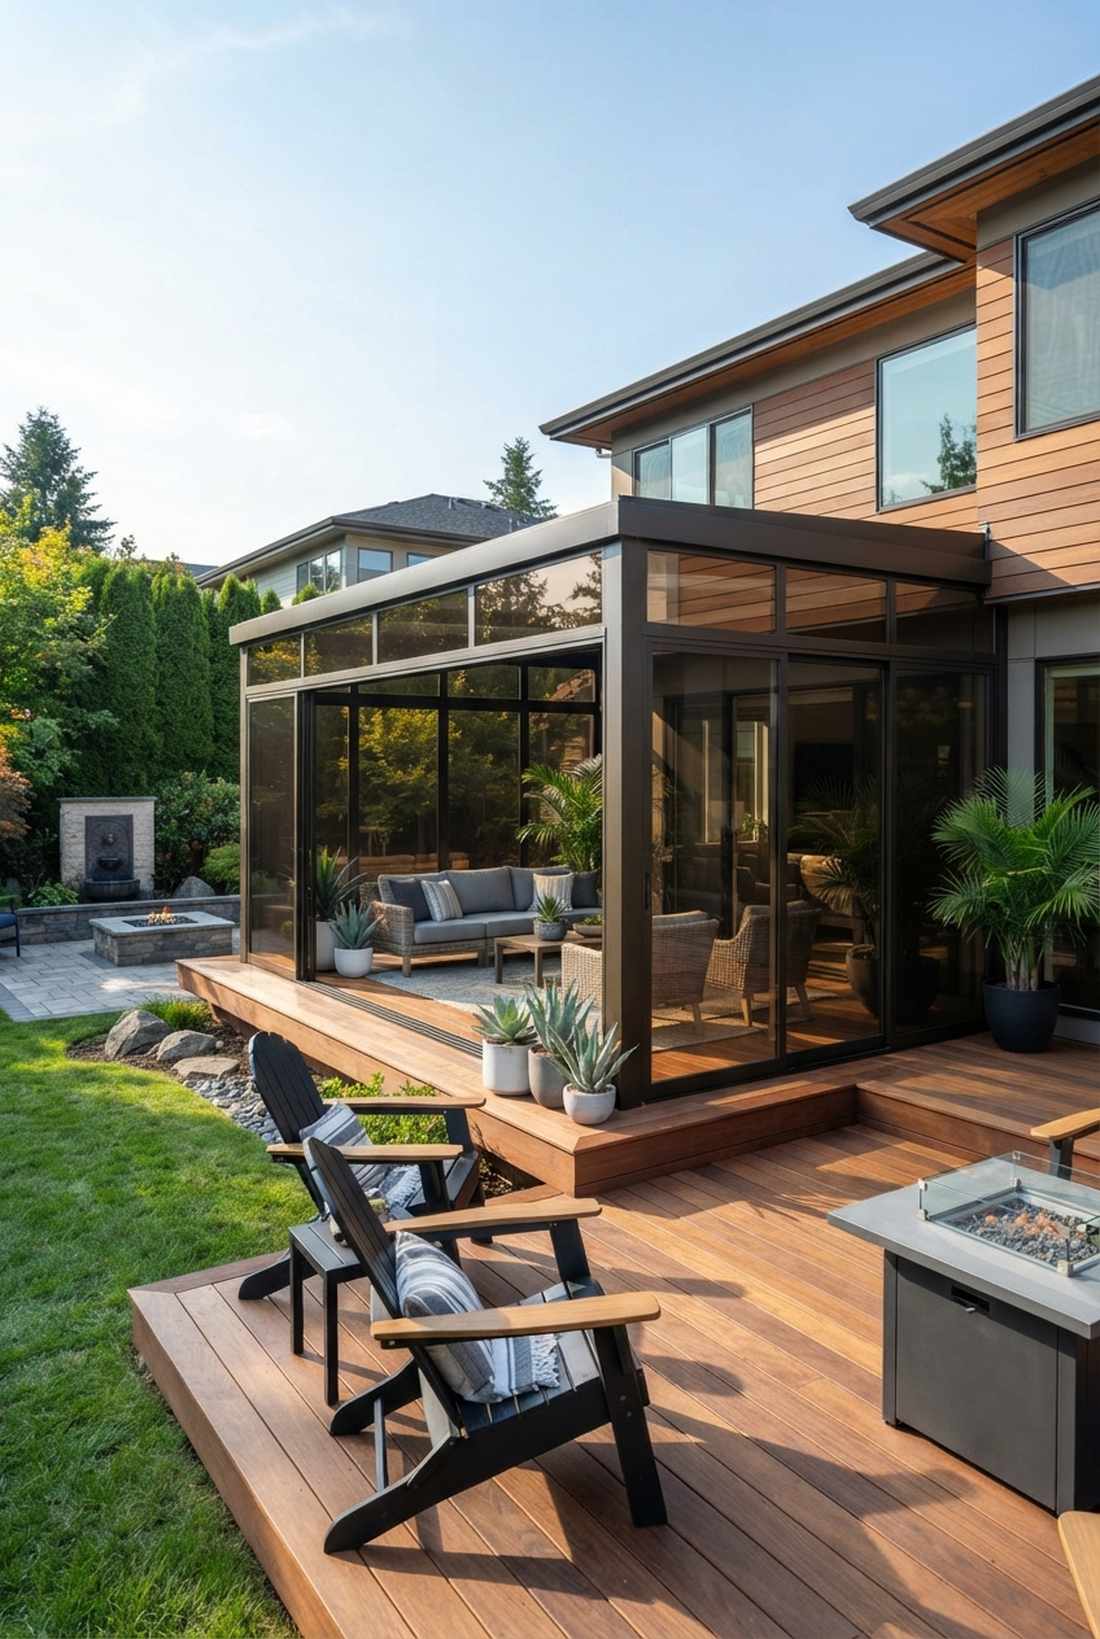
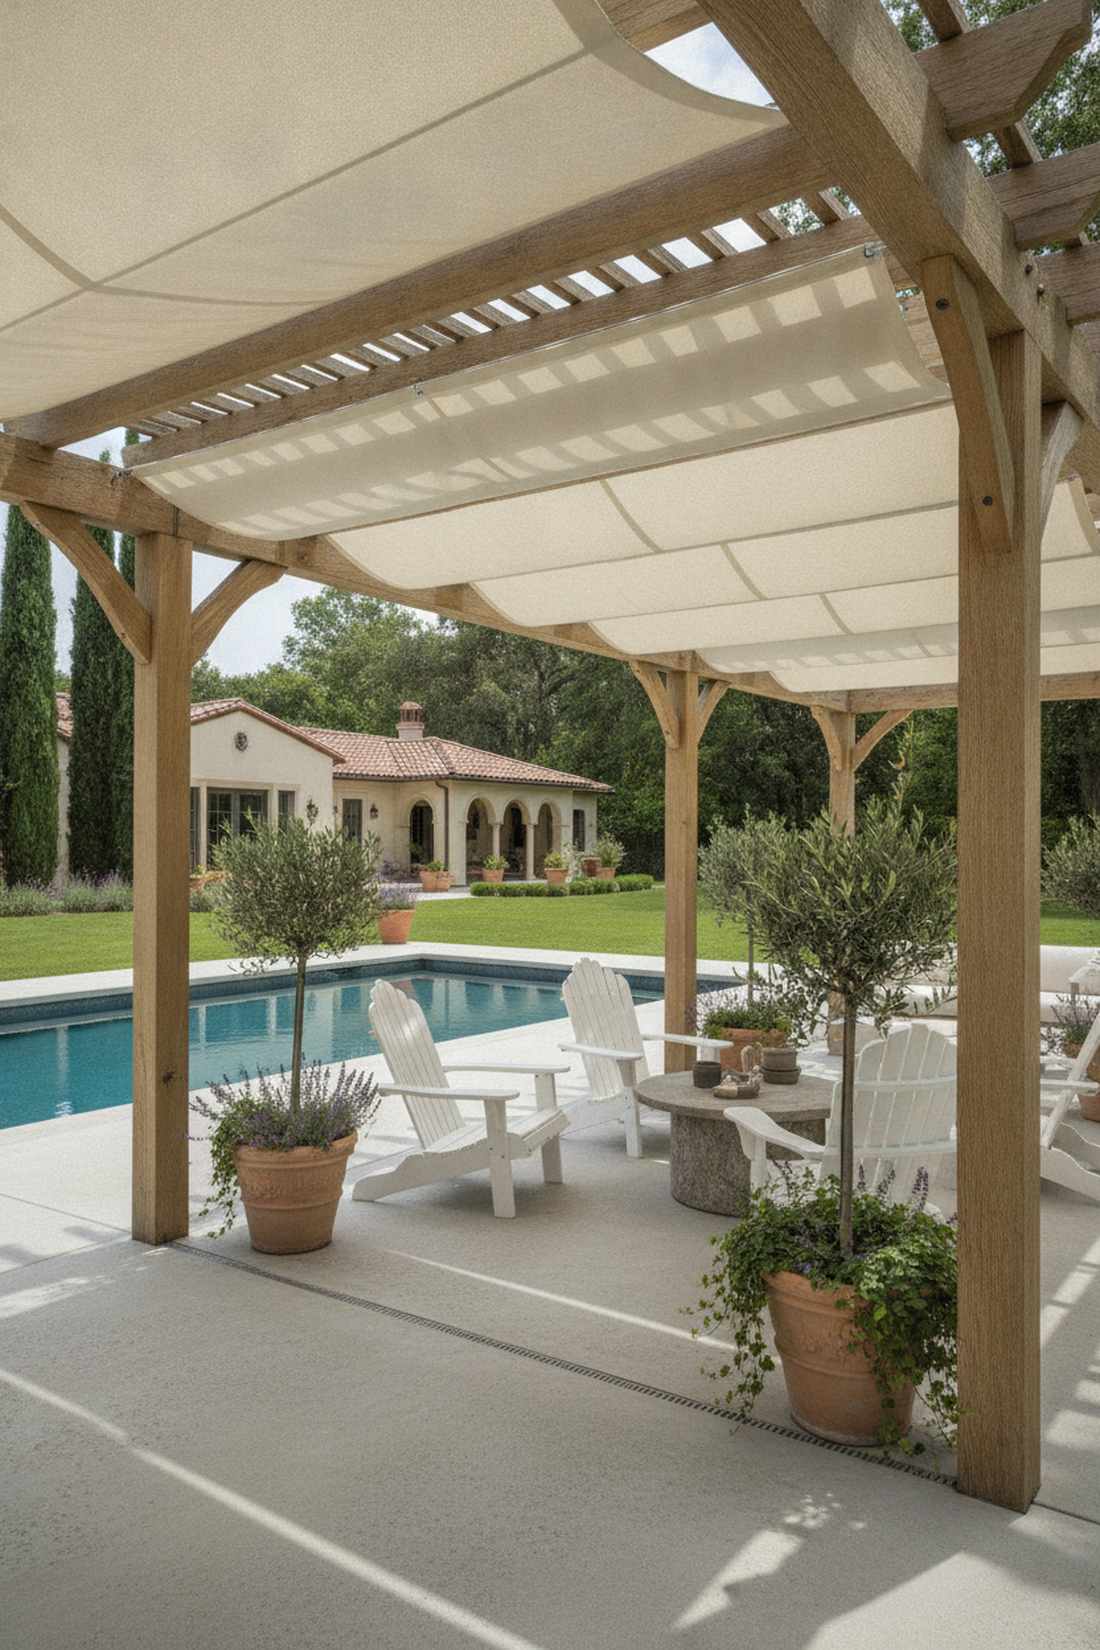
9. Polycarbonate Panel Pergola Roof
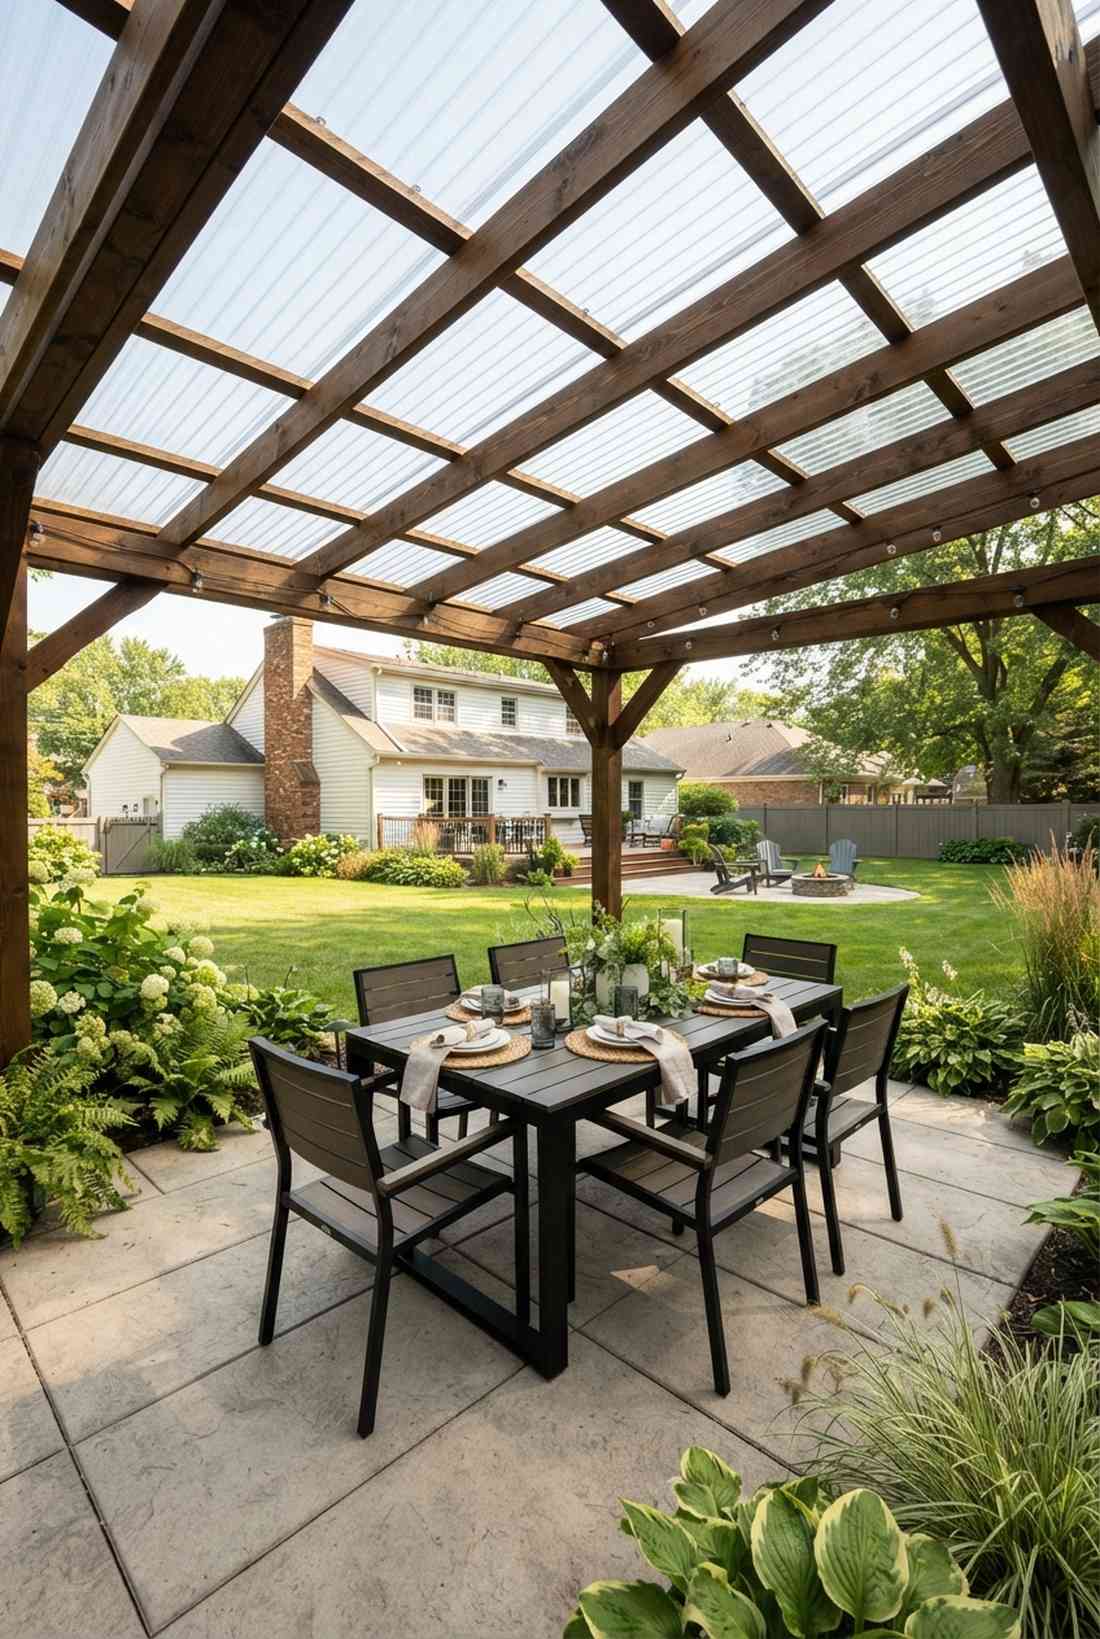
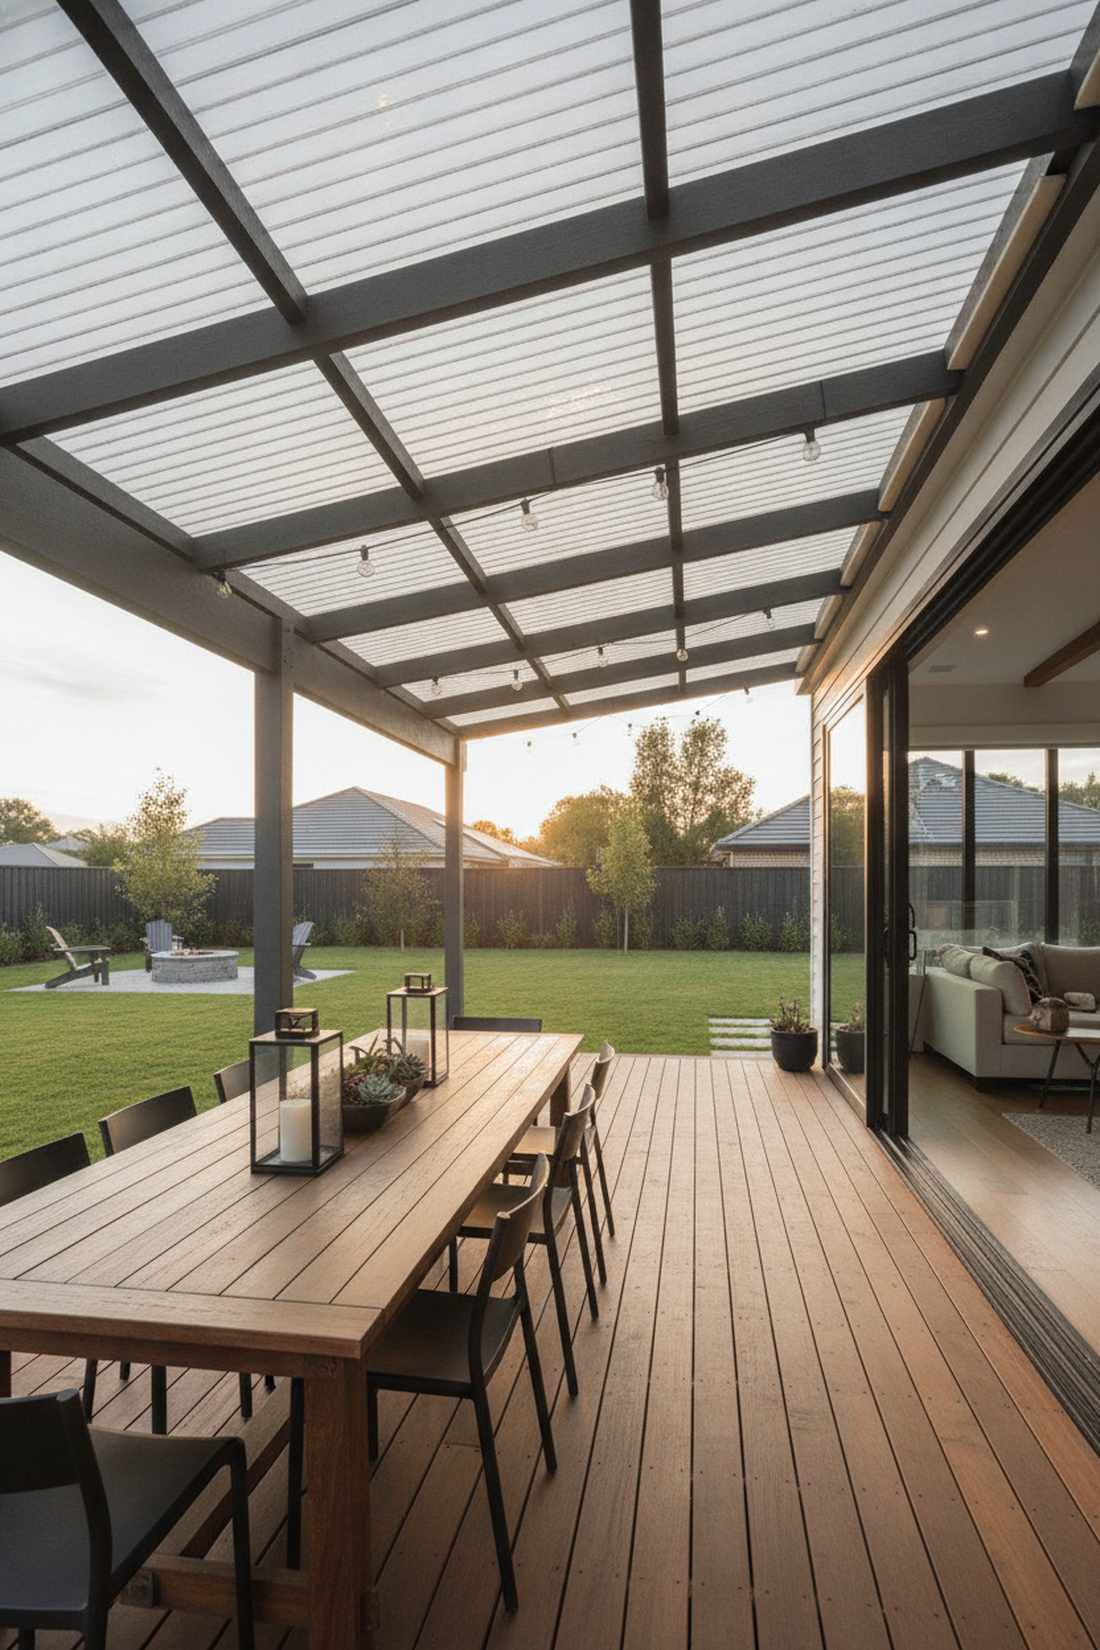
This setup feels like a modern greenhouse infused with industrial chic. A translucent pergola roof cover is ideal for transforming a standard slatted wood structure into an all-weather dining room.
Flimsy canvas covers rip after one season, but rigid corrugated plastic creates an indestructible, luminous barrier. Slipping these high-CPC outdoor patio enclosure materials over existing rafters looks insanely professional while keeping the space flooded with natural light.
To cover an average pergola, expect to spend $300–$600 on panels. It’s the absolute best bang-for-your-buck weatherproofing upgrade available.
- Key Materials: Corrugated polycarbonate sheets, foam closure strips
- Vibe / Style: Luminous industrial chic
- Difficulty: Intermediate roofing
- Budget Breakdown: Poly panels: $400 | Specialized screws: $45.
- Creator’s Tip: Pre-drill all your holes slightly larger than the screws to allow the plastic panels to expand and contract in the heat without cracking.
- Smart Sourcing: Use UV-coated polycarbonate roof panels (bulk pack) and waterproof roofing screw kits.
💡 Must-Have Supplies for High-End Setups
To build these setups faster and ensure they last, skip the generic craft aisles and invest in the right foundational kits.
- Base & Support: Pre-cut powder-coated aluminum framing extrusions
- Setup Tools: Heavy-duty spline roller and track alignment starter kits
- Weather/Durability Protection: Commercial-grade clear silicone structural sealants
10. Adjustable Louvered Pergola System
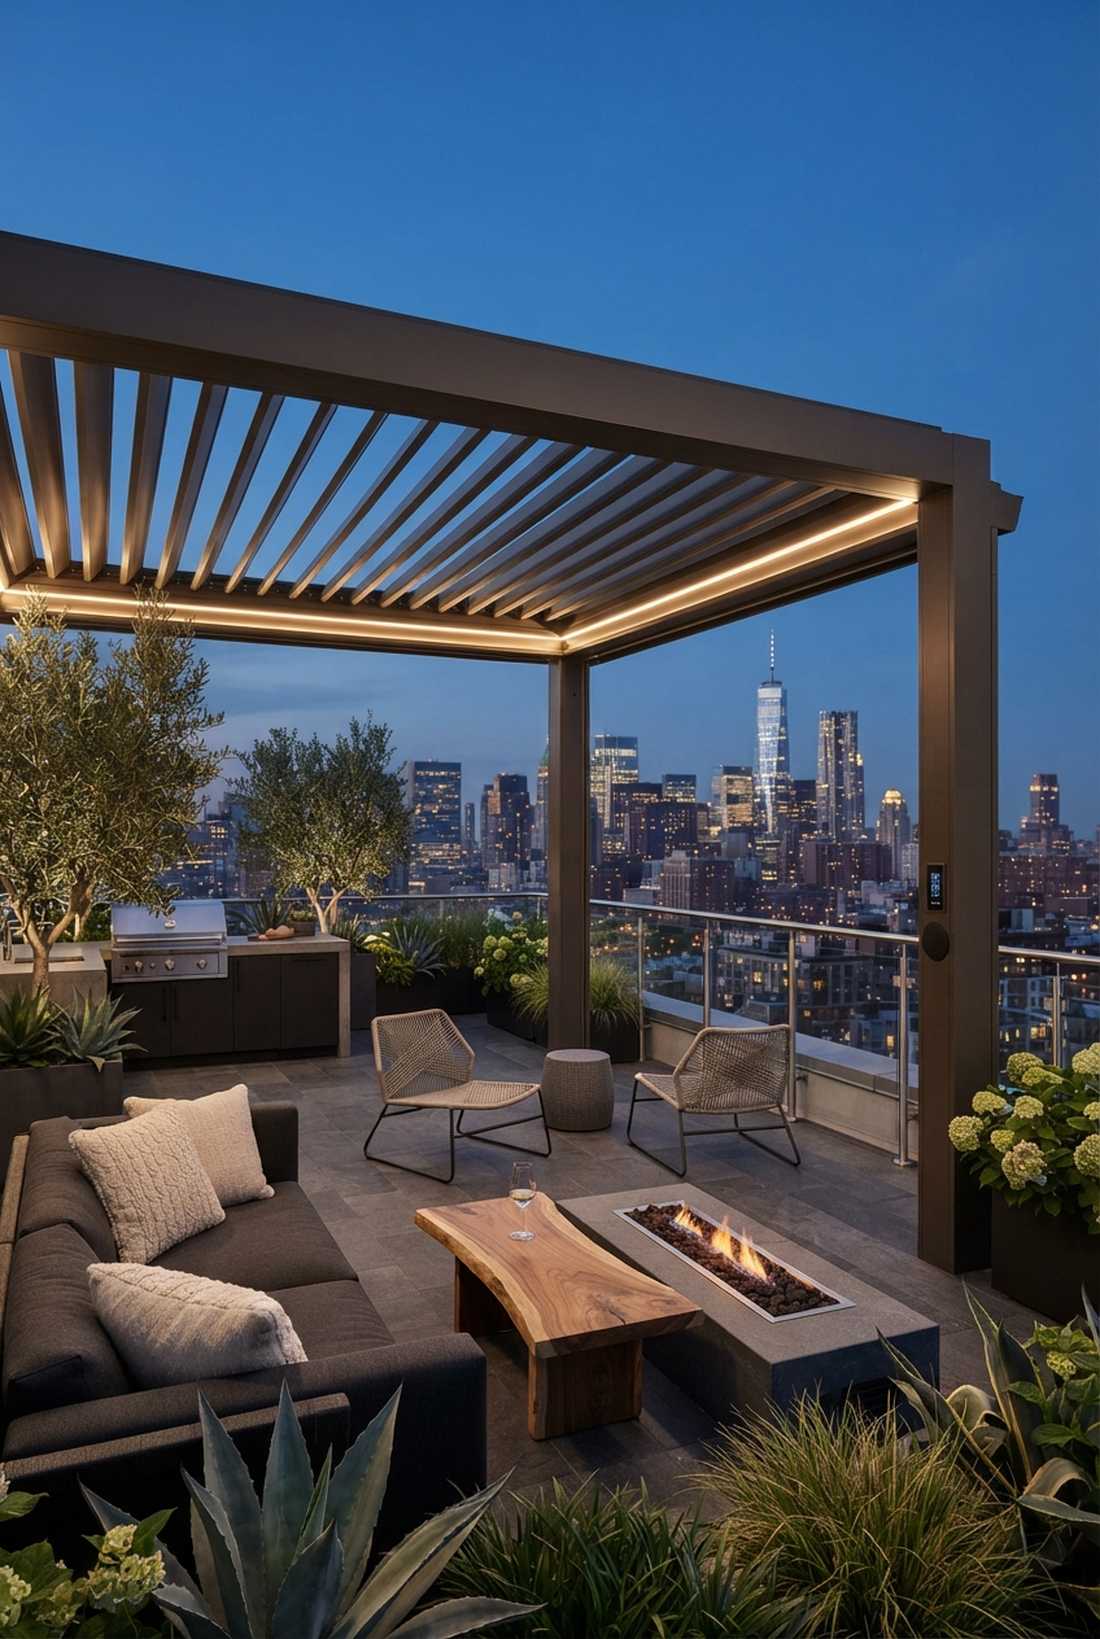
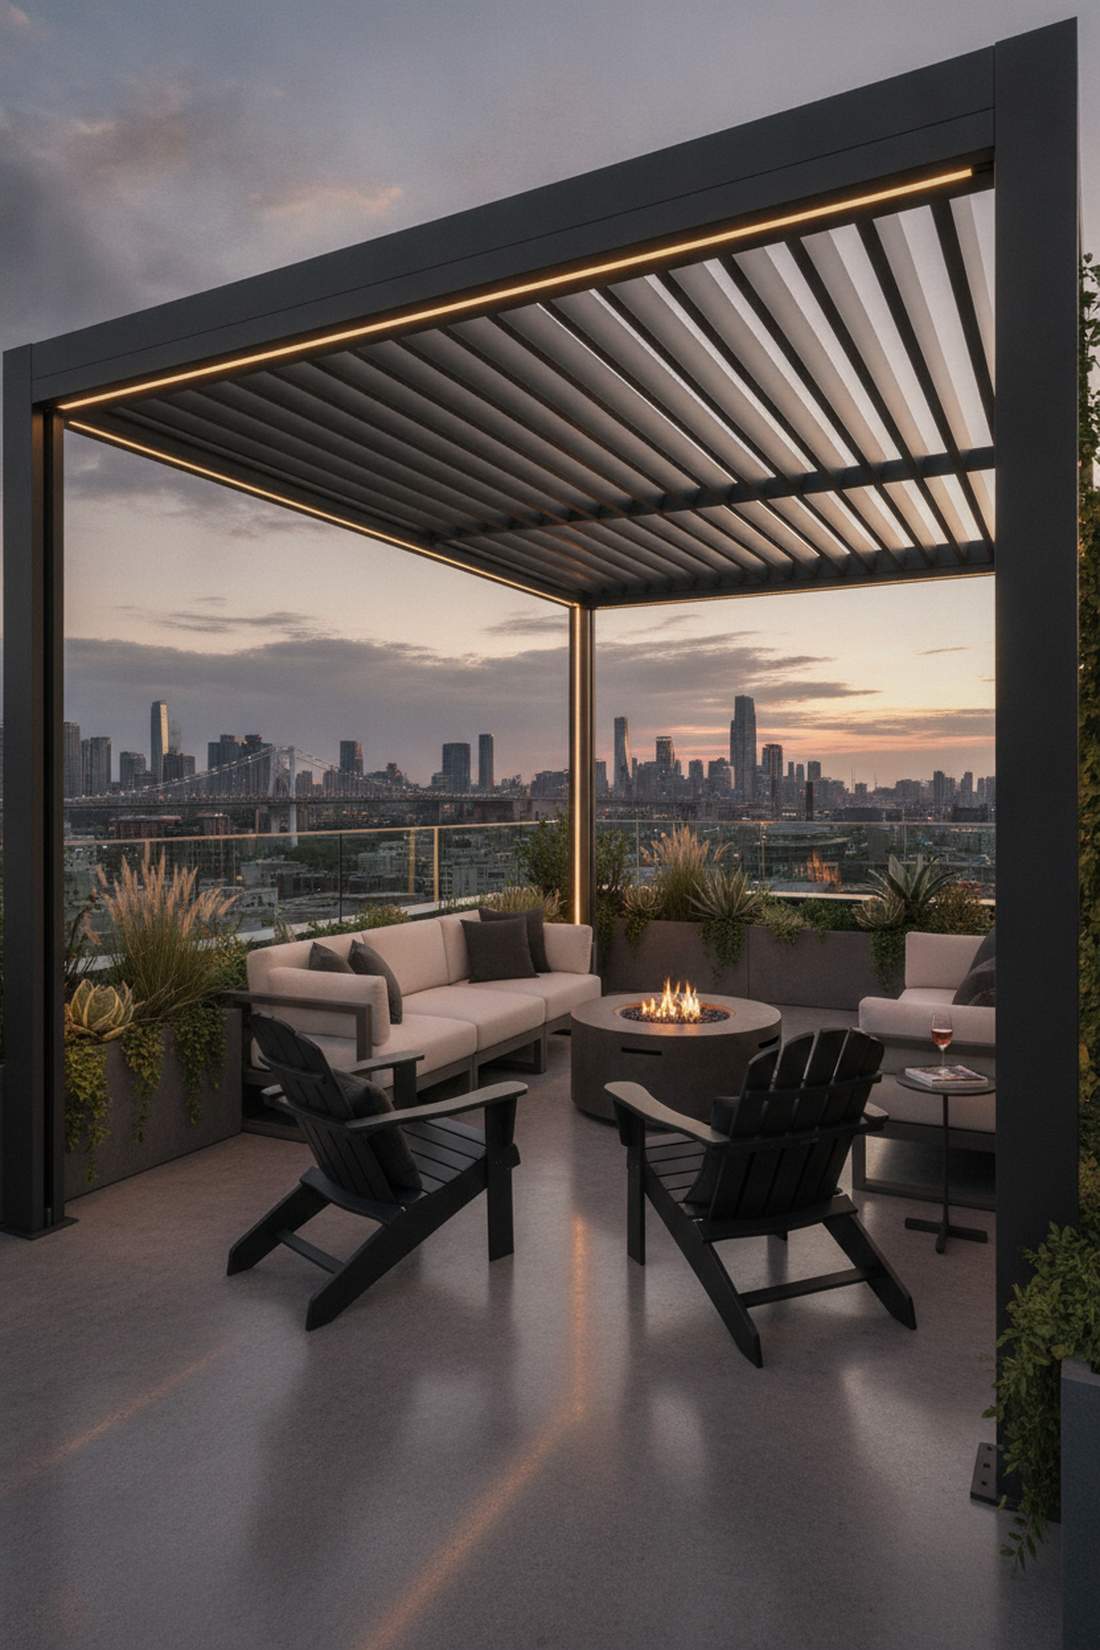
Delivering severe modern luxury, this space feels like an exclusive penthouse terrace. An automated louvered roof pergola is the ultimate flex for seamless sun-to-shade transformation.
Most fixed roofs force you to commit to darkness, but pivoting metal slats give you total atmospheric control. Utilizing premium architectural kits creates a space that handles torrential rain seamlessly when closed.
This premium route typically runs $5,000–$12,000. Save this to your ultimate dream home inspiration board!
- Key Materials: Extruded aluminum louvers, hidden gutter tracks
- Vibe / Style: Penthouse architectural luxury
- Difficulty: Advanced installation
- Budget Breakdown: Louver kit: $4,500 | Integrated lighting: $350.
- Creator’s Tip: Connect the louver motor to a smart weather app so the roof automatically snaps shut the moment rain is forecasted in your zip code.
- Smart Sourcing: Look for adjustable aluminum louver starter kits and waterproof LED channel lighting.
11. Pergola with Retractable Canopy
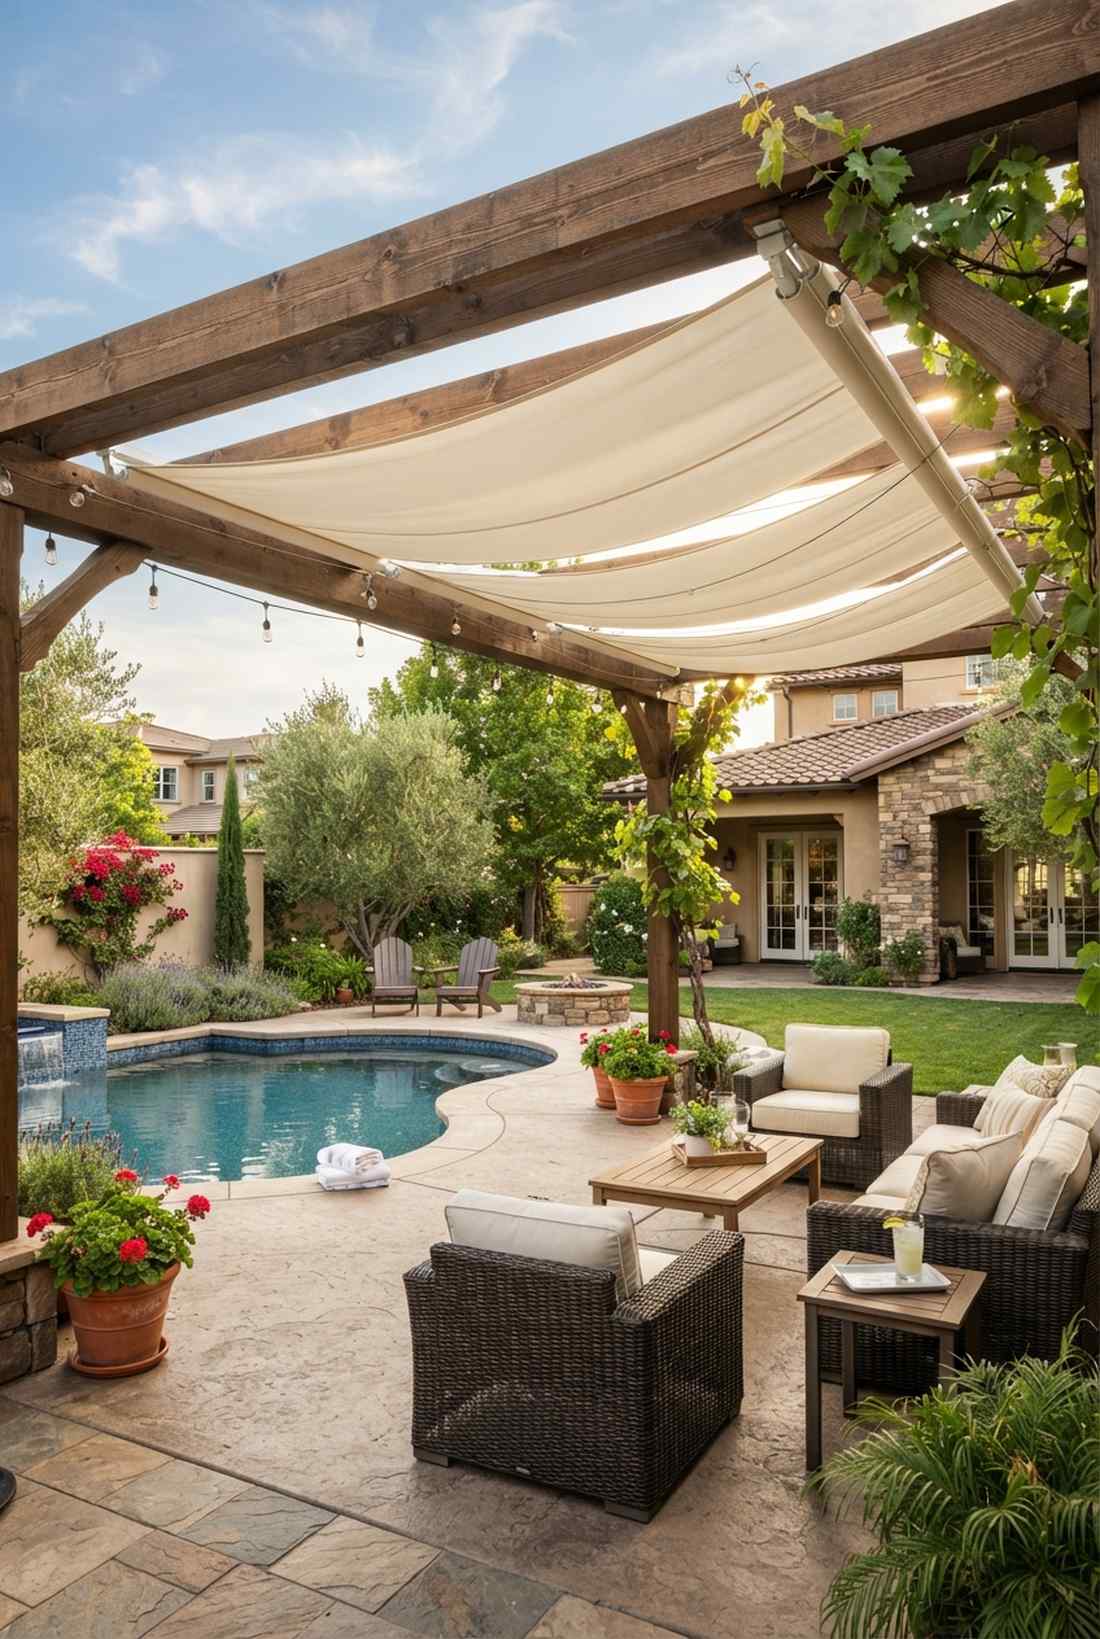
Bringing a soft, romantic Tuscan vineyard aesthetic, this design feels effortlessly elegant. A wire-hung sliding patio canopy works beautifully for shading hot concrete poolside lounges.
Solid roofs trap hot air, but sliding fabric swoops deliver a surprisingly premium look with fantastic ventilation. By integrating high-end marine fabrics and stainless steel cable guides, you completely eliminate the saggy tarp look.
You can DIY this overhead elegance for about $200–$500. Highly recommended for a quick weekend win before a big summer party.
- Key Materials: Waterproof outdoor fabric, stainless steel wire rope
- Vibe / Style: Romantic Tuscan lounge
- Difficulty: Easy afternoon install
- Budget Breakdown: Canopy fabric: $150 | Wire rigging: $60.
- Creator’s Tip: Spray the canopy tracks with dry silicone lubricant twice a year to ensure the fabric glides back and forth with zero friction.
- Smart Sourcing: Get a pre-cut waterproof shade sail canopy kit and marine-grade stainless rigging hardware.
12. Glass Panel-Sided Pergola
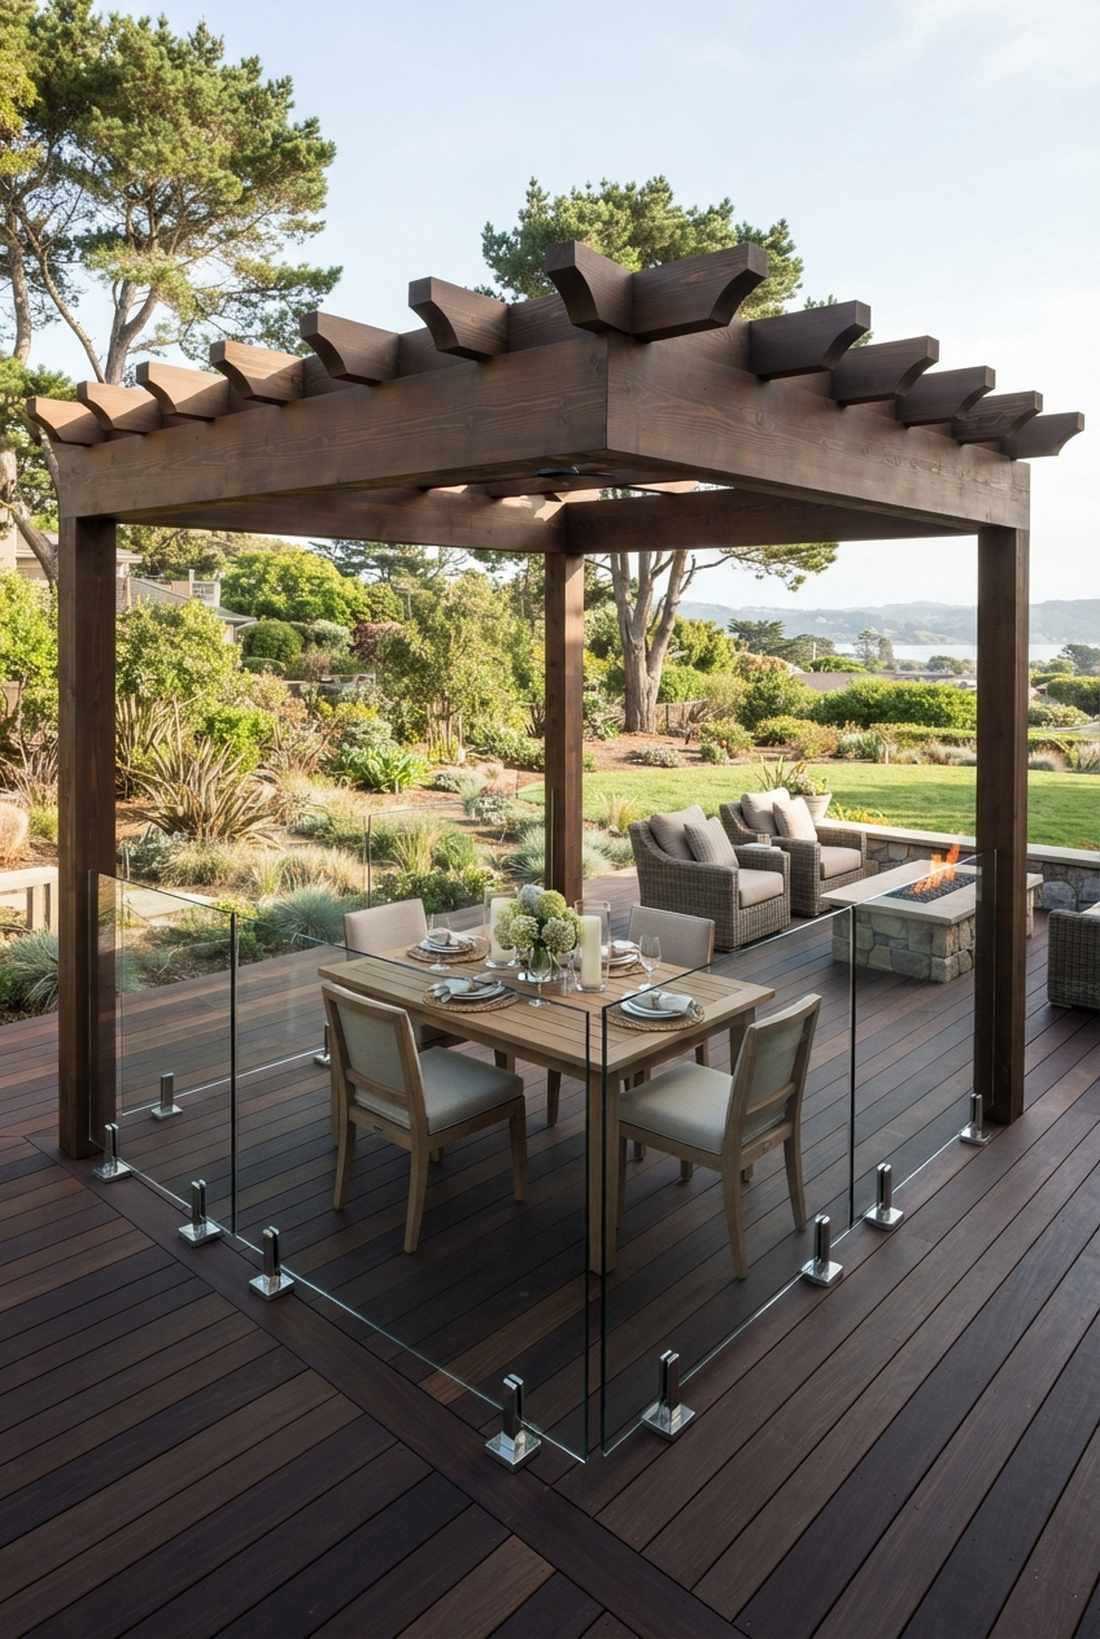
Balancing airy openness with solid protection, this feels like an upscale boutique dining space. Using half-height glass windbreaks is perfect for breezy hilltop patios or coastal decks.
Closing off a pergola entirely makes it feel like a box, but transparent half-walls block the chill while maintaining wide open sightlines. Implementing premium outdoor patio privacy ideas like tempered glass clamps elevates the entire structure into high-end real estate territory.
Adding glass side walls averages $1,000–$3,000 depending on linear feet. Pin this if you love dining outside but hate having your napkins blown away!
- Key Materials: Thick tempered glass, stainless steel base spigots
- Vibe / Style: Upscale coastal dining
- Difficulty: Intermediate structural
- Budget Breakdown: Glass panes: $1,200 | Mounting spigots: $400.
- Creator’s Tip: Leave a two-inch gap between the bottom of the glass and the deck floor so you can easily sweep leaves and water underneath.
- Smart Sourcing: Use heavy-duty glass railing base clamps (bulk pack) and pre-cut tempered windbreak panels.
If you think privacy walls have to be boring wooden fences, the next hyper-modern layout will blow your mind…
Outdoor Patio Privacy Ideas
13. Horizontal Timber Slat Wall
Radiating a calm, mid-century modern aesthetic, this setup feels incredibly grounded. A stained horizontal wood privacy screen works exceptionally well for tight urban courtyards surrounded by nosy neighbors.
Vertical fence pickets look basic, but running narrow boards horizontally gives a designer-level finish immediately. Mixing these sleek outdoor patio wall ideas with dark, rich wood stains completely transforms cheap lumber into a luxury backdrop.
You can easily pull this off for around $150–$300 in lumber. Save this to your modern landscaping board for the ultimate weekend transformation!
- Key Materials: 1×2 cedar or treated pine strips, exterior wood stain
- Vibe / Style: Mid-century urban courtyard
- Difficulty: Easy beginner DIY
- Budget Breakdown: Lumber: $200 | Premium stain: $45.
- Creator’s Tip: Use a spare piece of 1-inch wood as a physical spacer block between every slat to guarantee perfectly uniform gaps without measuring.
- Smart Sourcing: Buy pre-sanded wood slats (bulk bundle) and UV-blocking exterior wood sealer.
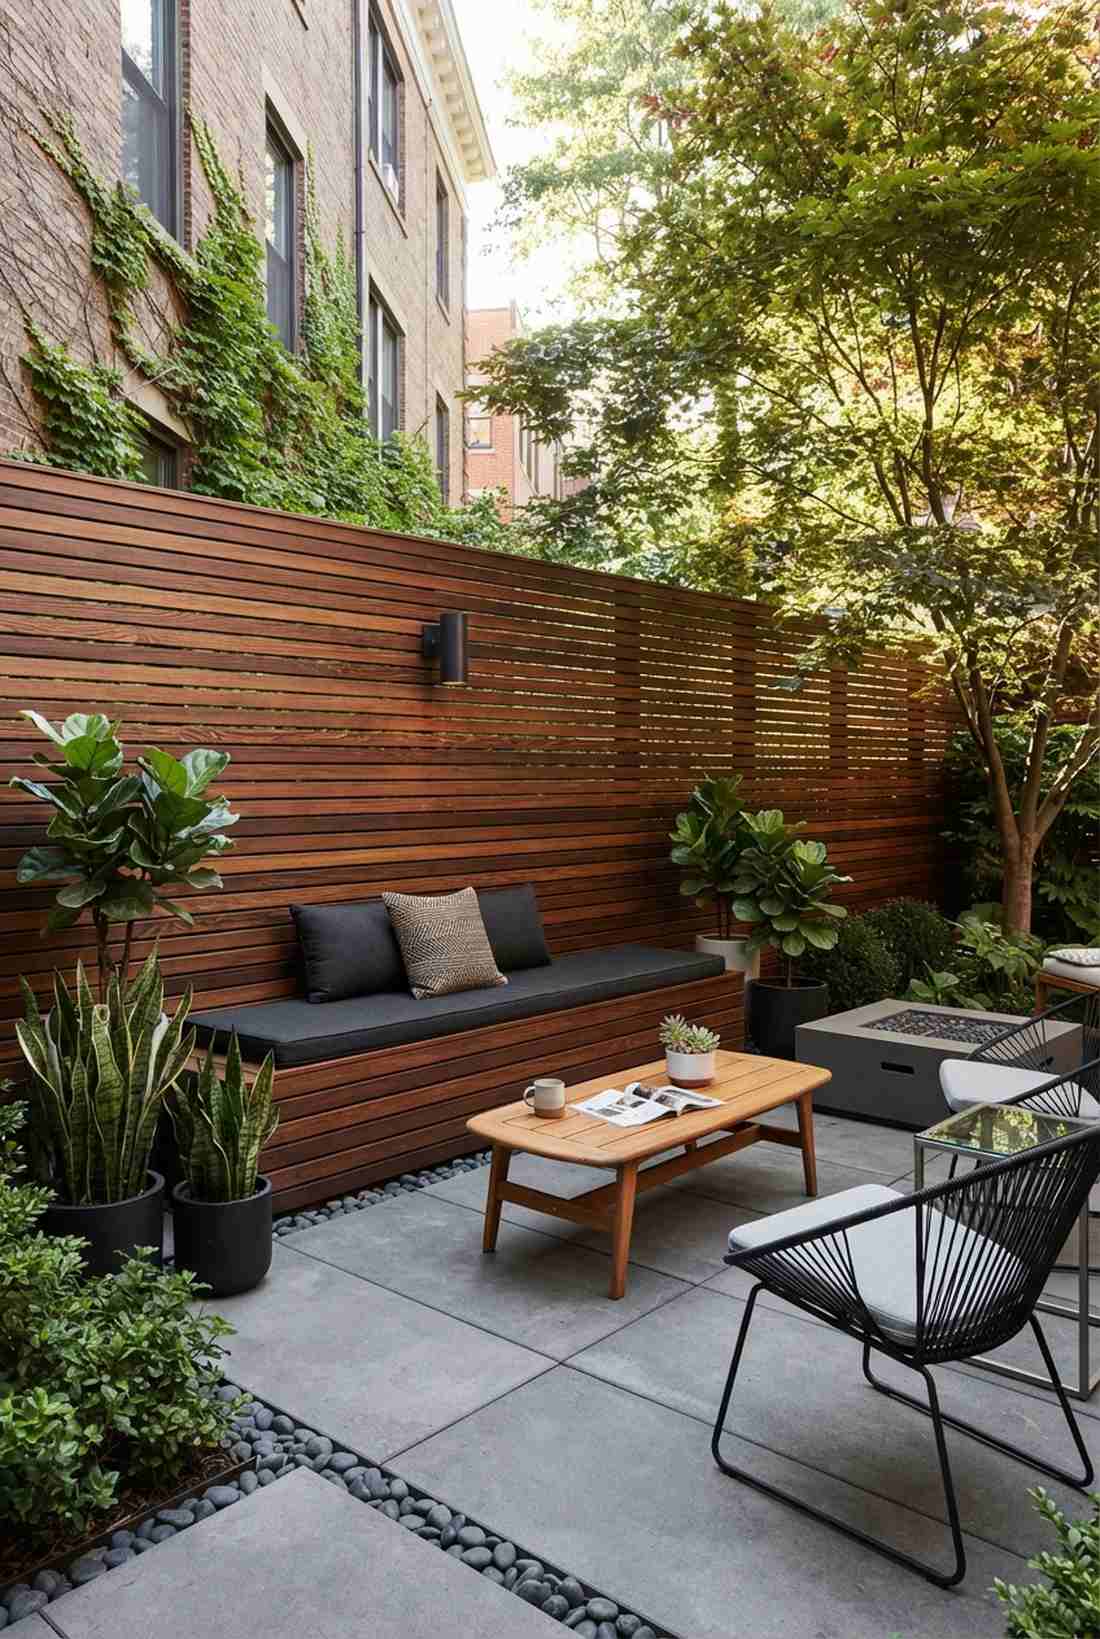
14. Laser-Cut Metal Privacy Panels

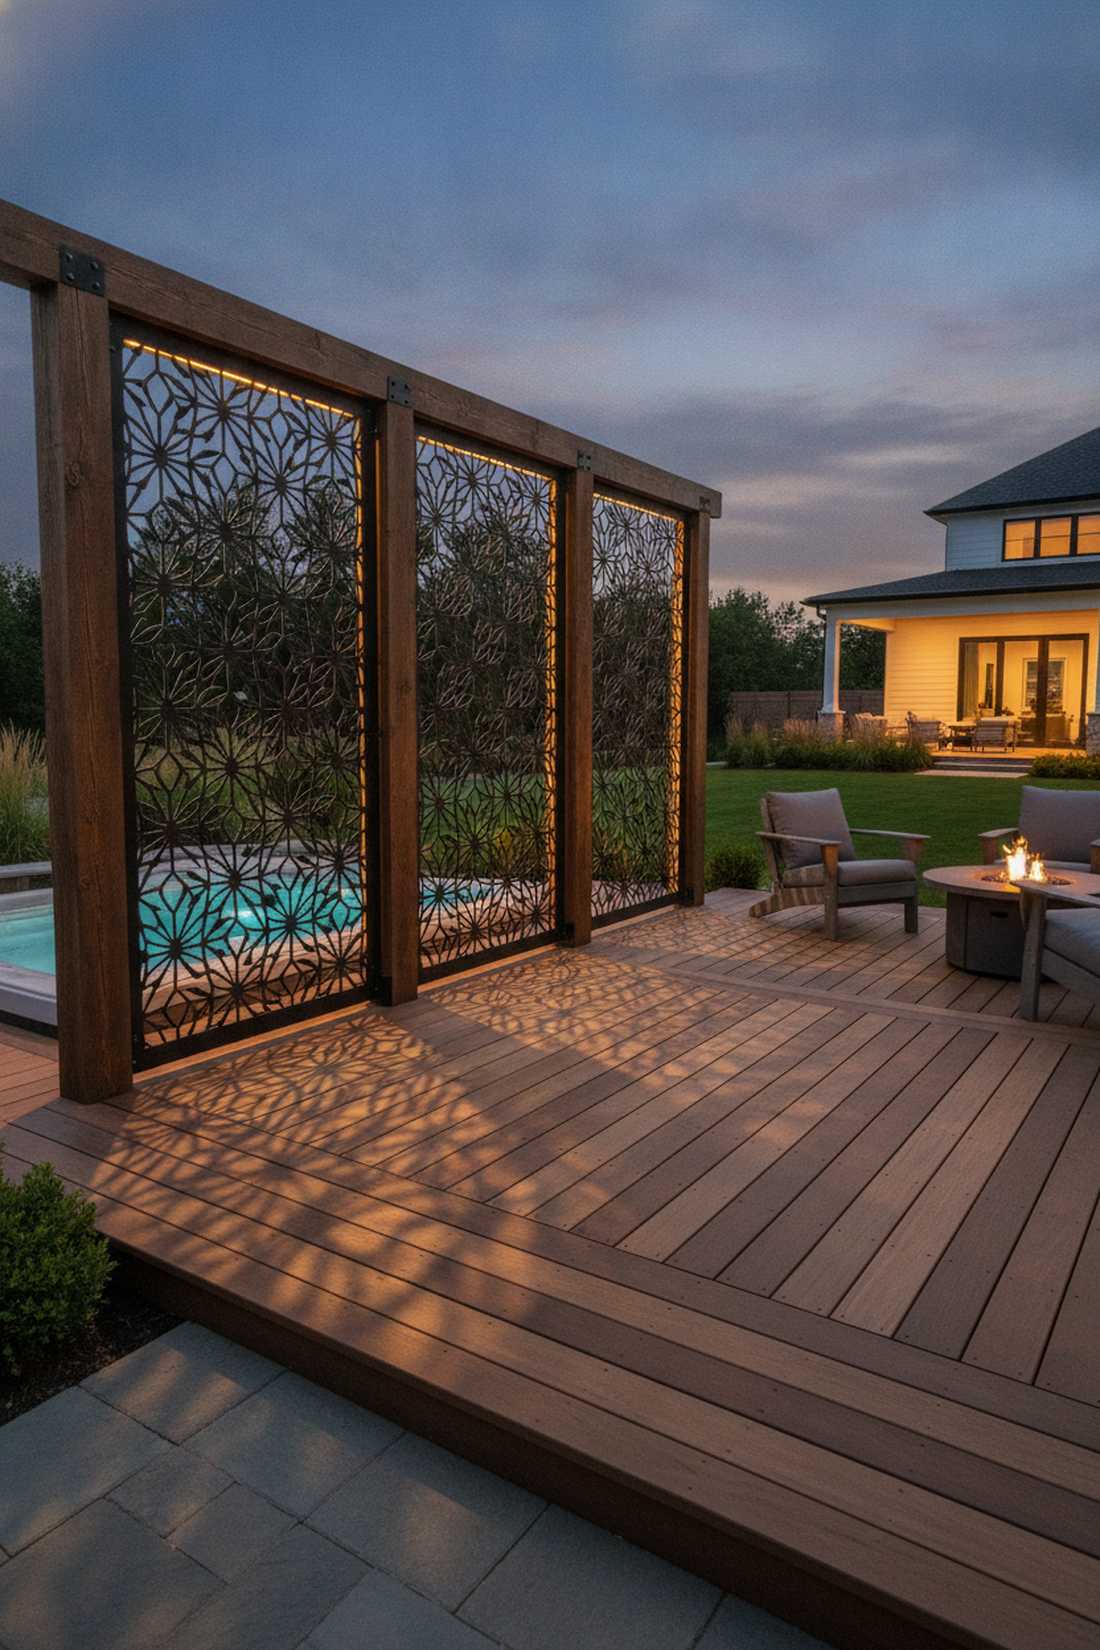
Casting dramatic, intricate shadows across the deck, this space feels like an interactive art exhibit. Sourcing geometric metal privacy screens is ideal for sectioning off a hot tub area with undeniable flair.
Solid walls can make small spaces feel claustrophobic, but laser-cut patterns look far more expensive than they are while letting the breeze through. Sliding these durable architectural pieces into a basic wooden frame delivers extreme visual impact.
Individual premium panels run about $100–$250 each. It’s a fast upgrade that completely changes the vibe of a blank backyard wall.
- Key Materials: Powder-coated steel or aluminum patterned sheets
- Vibe / Style: Contemporary artistic flair
- Difficulty: Easy bolt-on installation
- Budget Breakdown: 3 Metal panels: $450 | Frame lumber: $60.
- Creator’s Tip: Mount warm LED strip lights behind the metal panels to make the geometric patterns glow intensely at night.
- Smart Sourcing: Look for laser-cut privacy screen panels (starter kits) and rust-proof black mounting screws.
15. Living Green Wall with Trellis
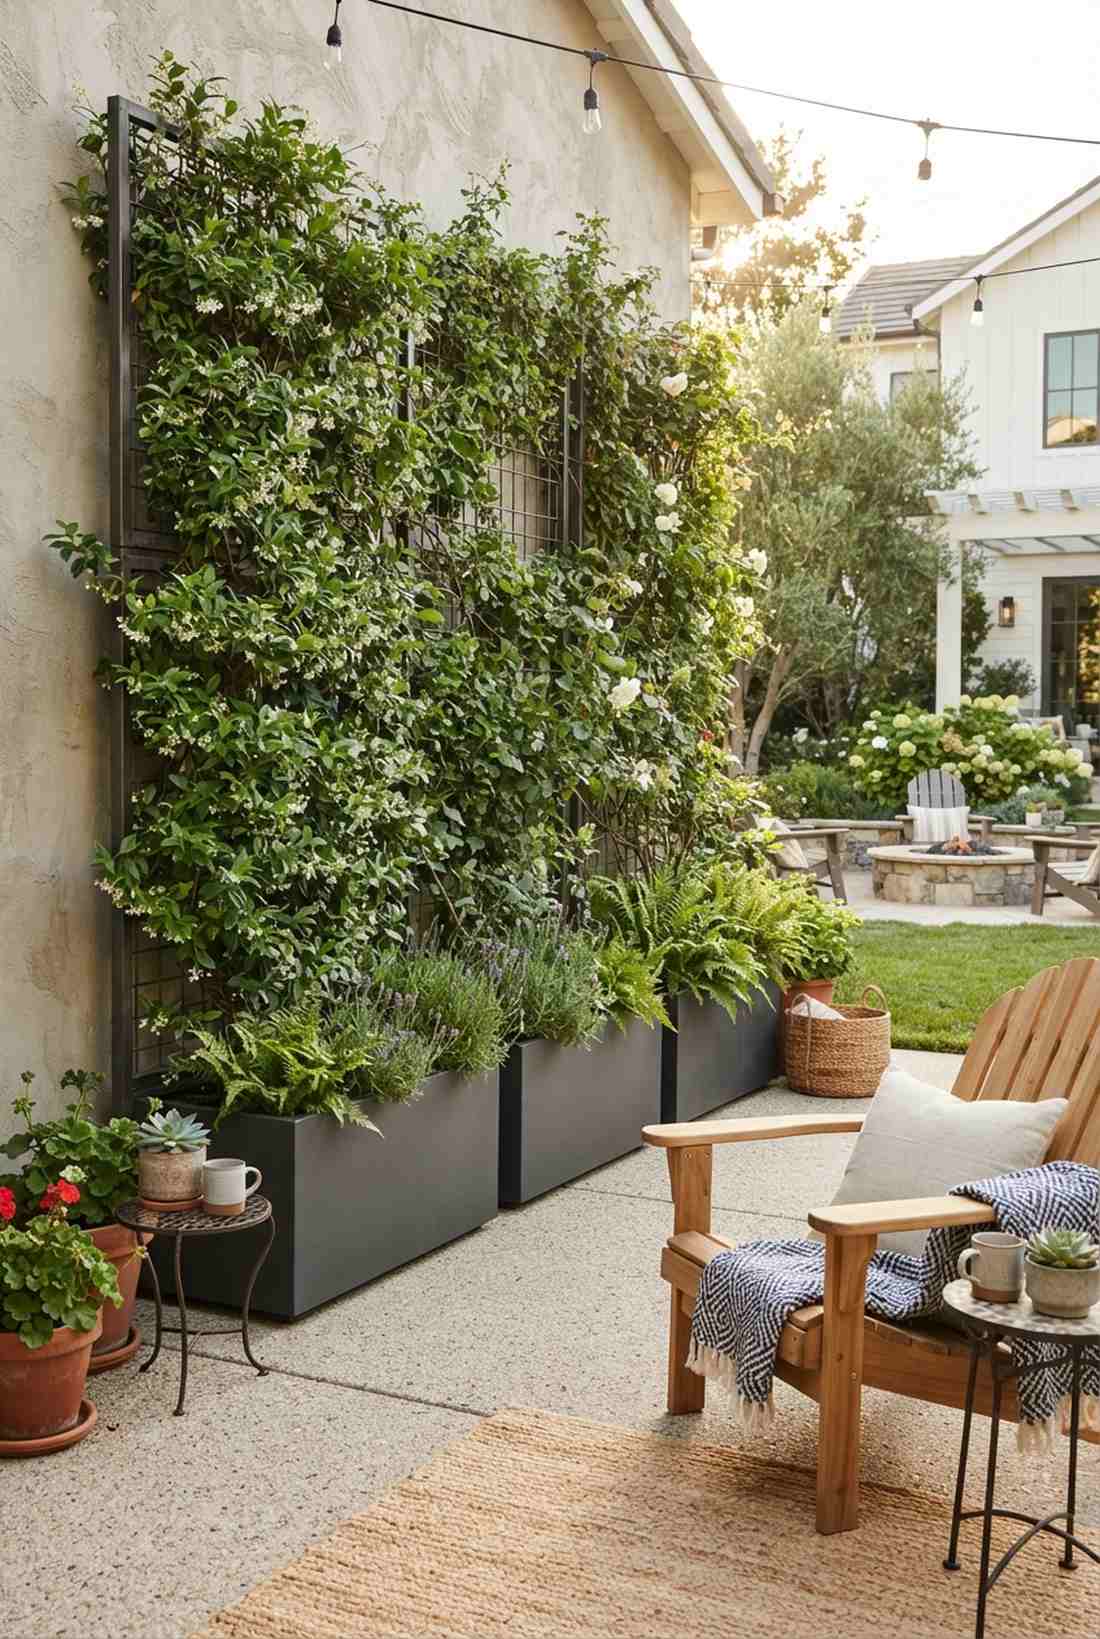
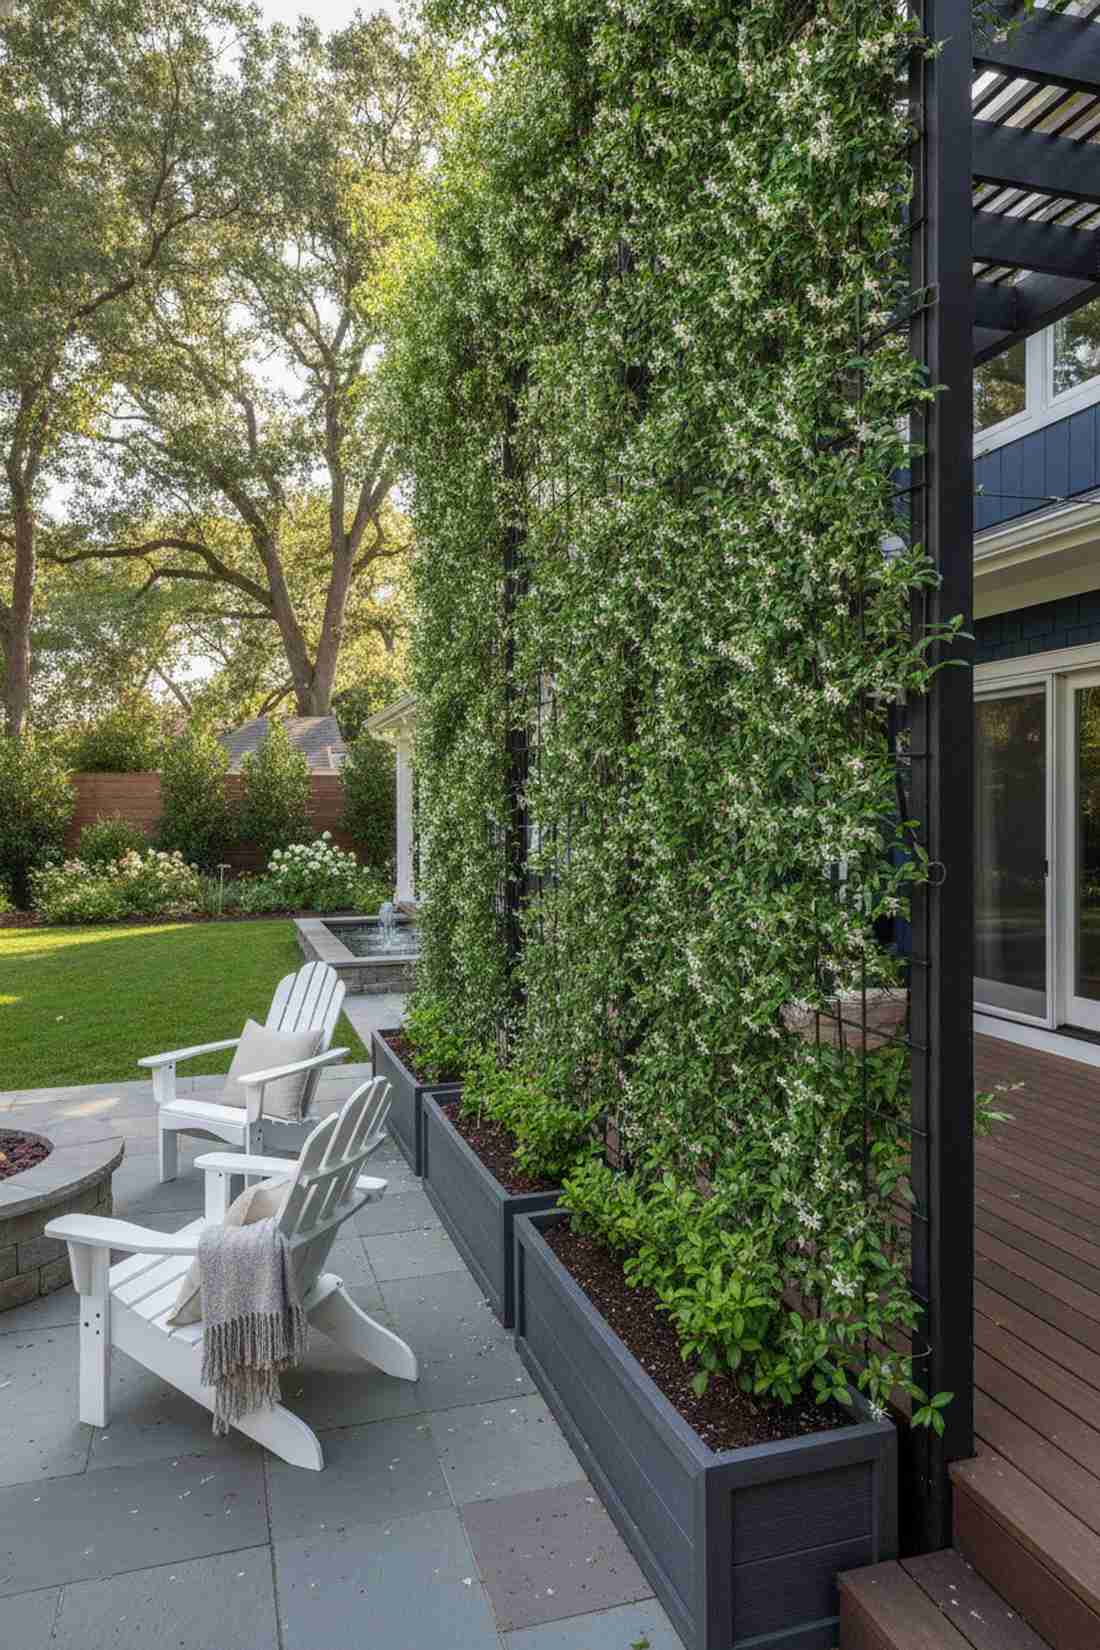
Bursting with organic energy, this setup feels like a lush secret garden you accidentally discovered. A vertical plant trellis enclosure is brilliant for softening harsh concrete patios.
Stark walls can feel uninviting, but wrapping wire mesh in fast-growing vines delivers a surprisingly premium look with minimal hardware. Infusing your outdoor patio privacy ideas with jasmine or ivy creates a living, breathing barrier that also smells incredible.
You can build the structural frame and buy starter vines for around $100. Pin this if you love eco-friendly upgrades that blend seamlessly into nature!
- Key Materials: Welded wire mesh, climbing vine starter plants
- Vibe / Style: Lush botanical retreat
- Difficulty: Beginner friendly
- Budget Breakdown: Wire grid: $40 | Plants & Soil: $60.
- Creator’s Tip: Plant evergreen climbers like Star Jasmine so your privacy wall doesn’t turn into a bare skeleton during the winter months.
- Smart Sourcing: Invest in a heavy-duty metal trellis grid kit and outdoor self-watering planter boxes.
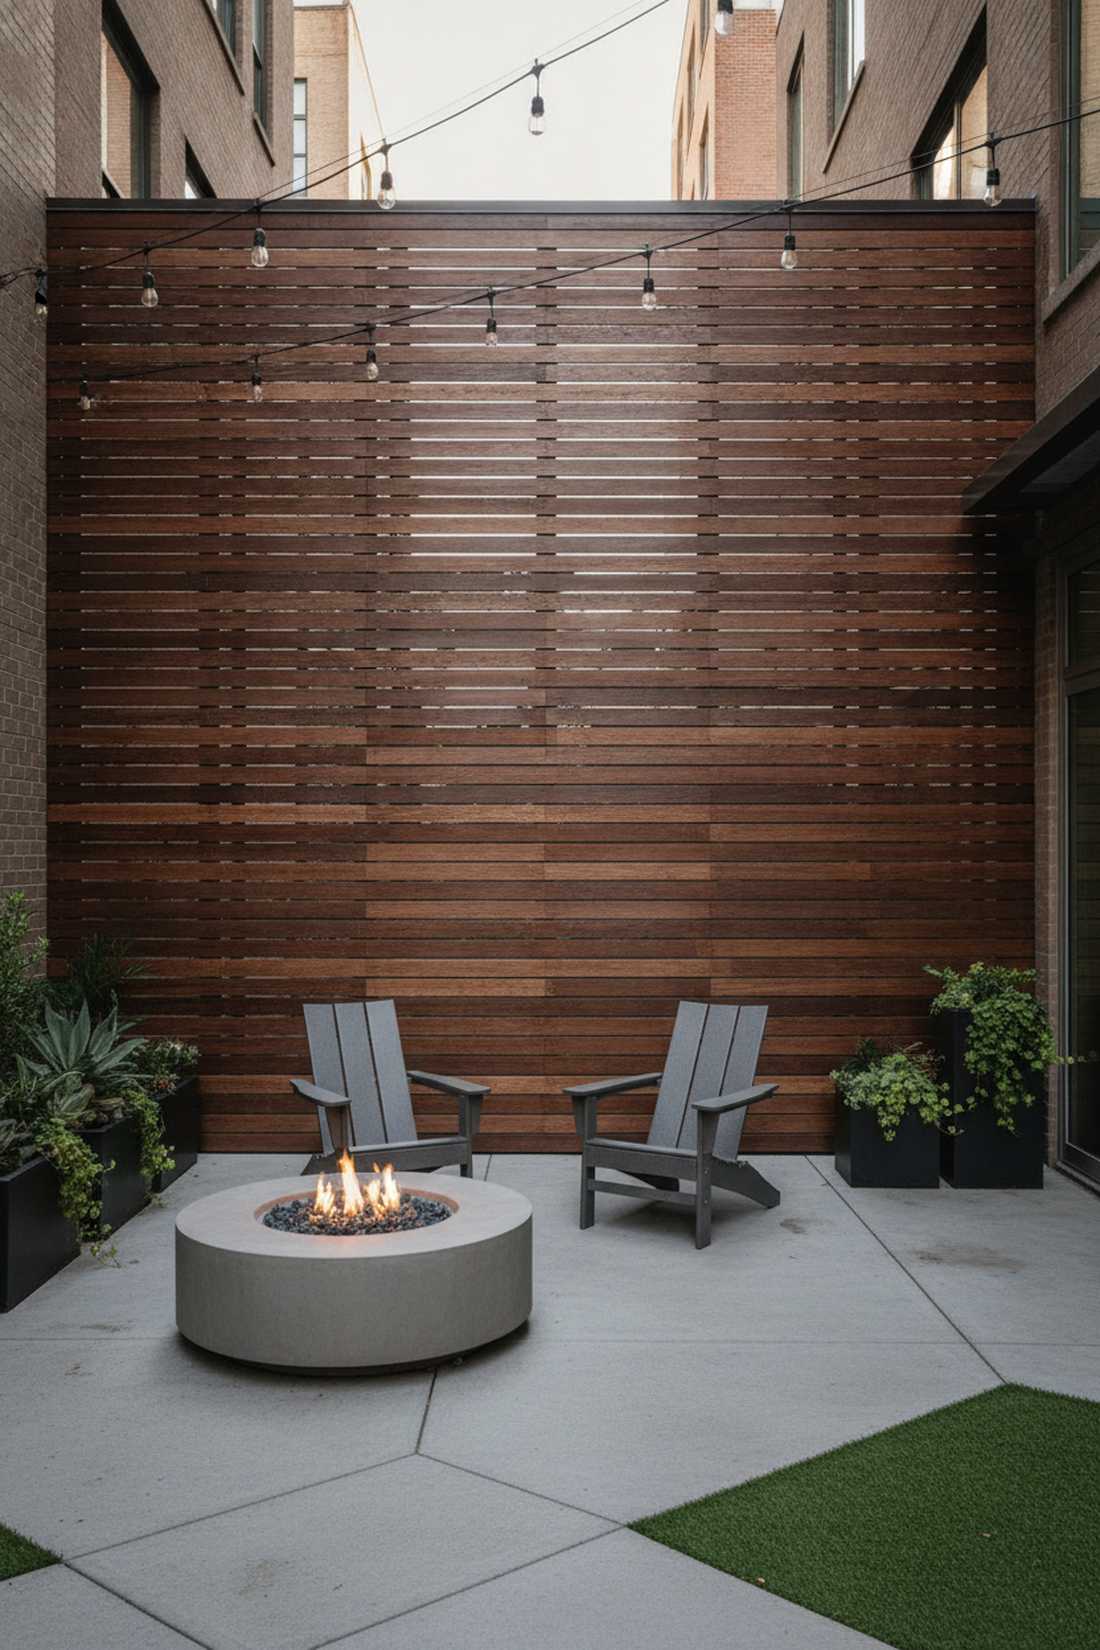
16. Decorative Brick Courtyard Wall
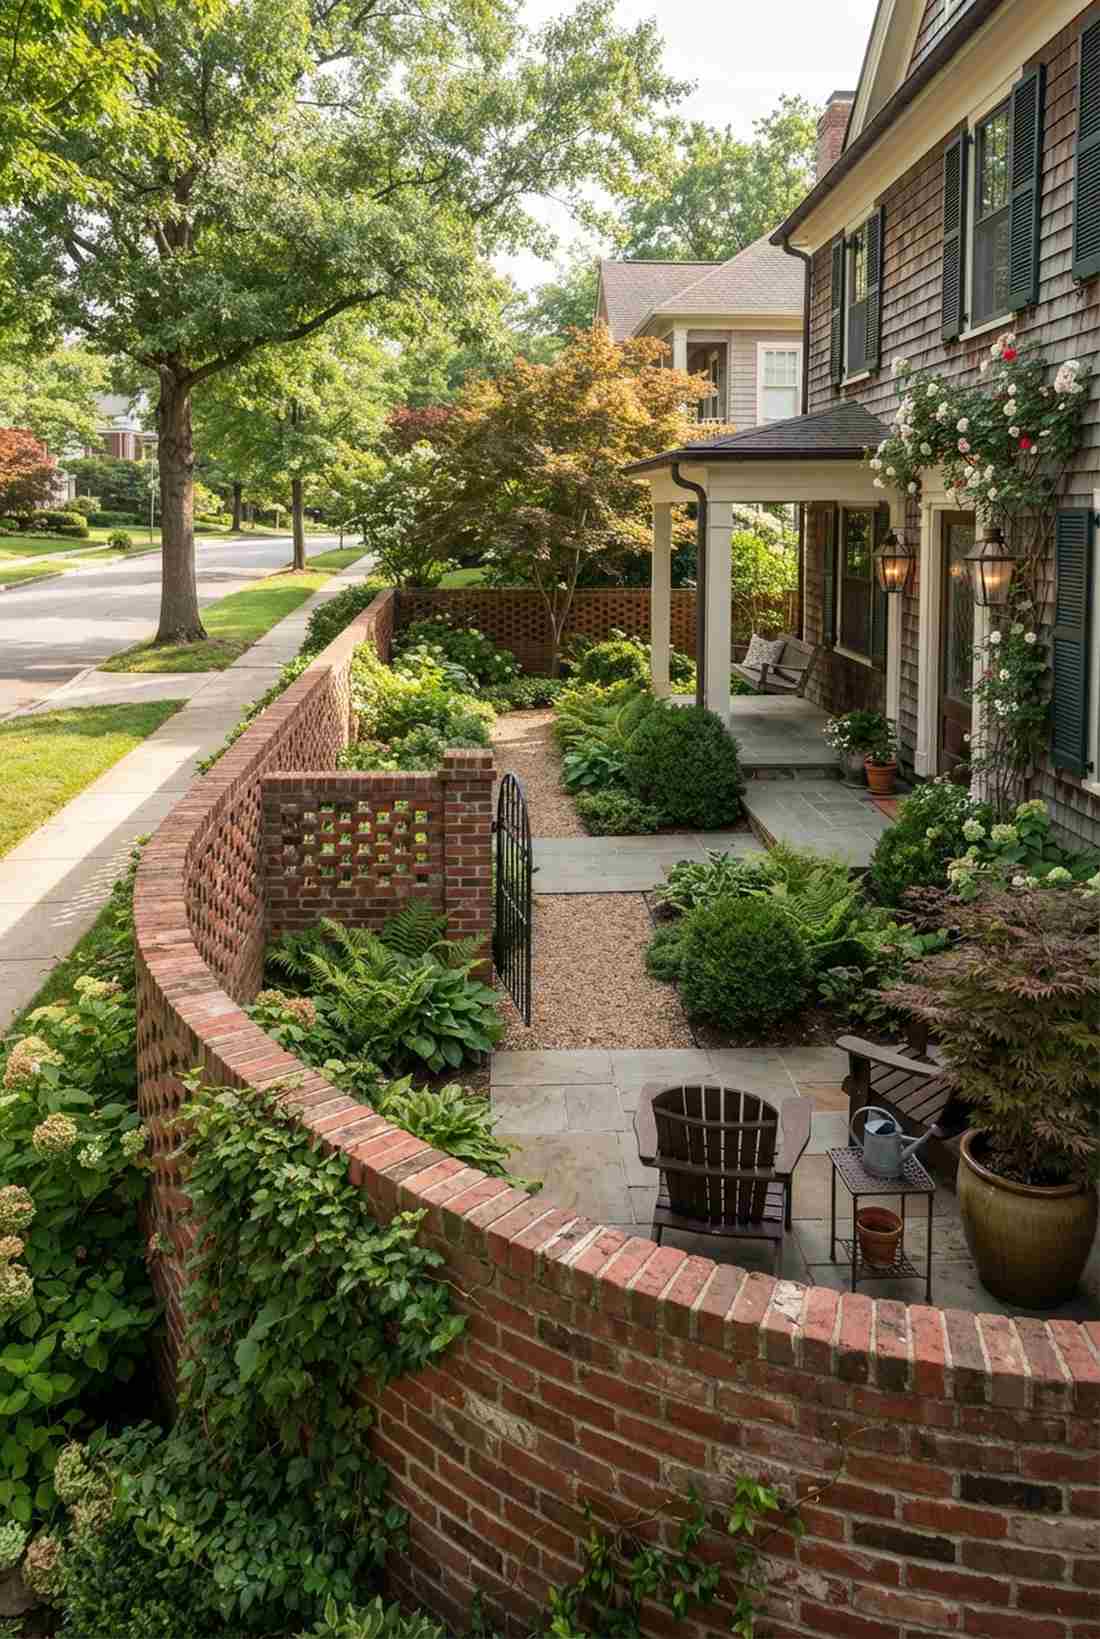
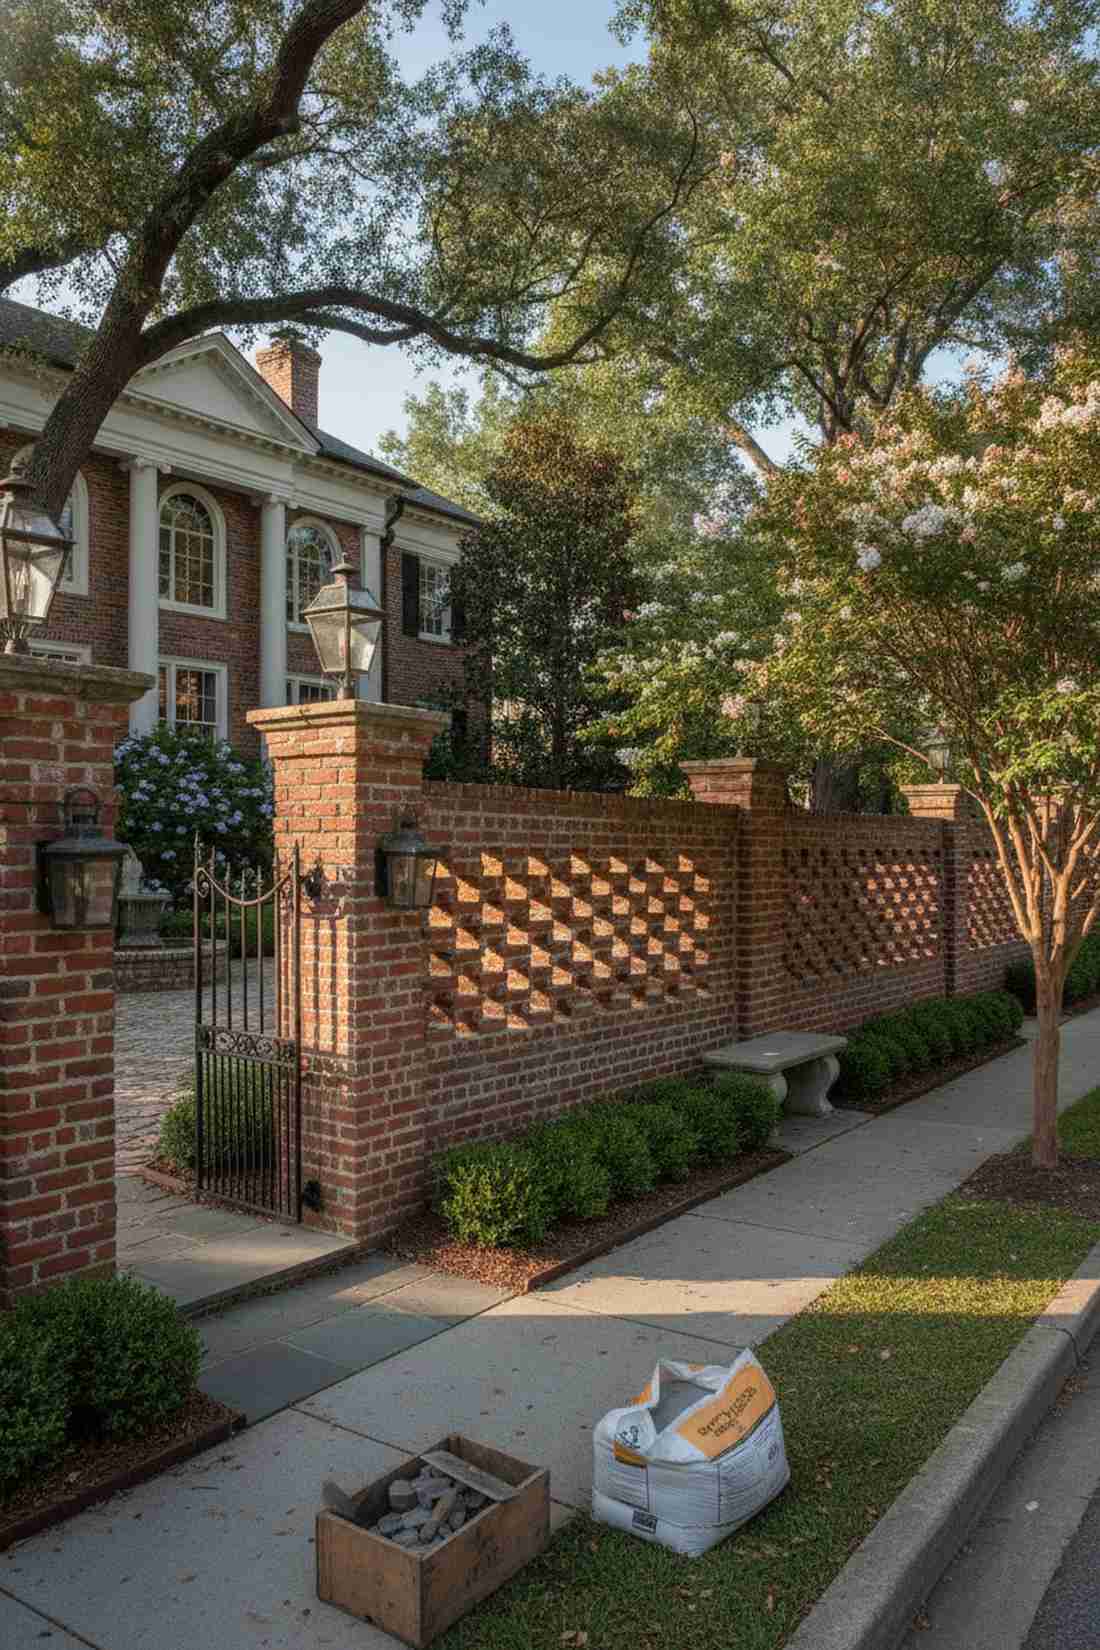
Emanating a timeless, historic estate vibe, this space feels permanent and powerful. A pierced brick masonry screen works perfectly for establishing a firm property boundary near busy sidewalks.
Solid brick walls can look like a fortress, but omitting every other brick in the top rows creates a designer-level finish that filters light beautifully. While laying brick takes patience, the acoustic sound dampening and hurricane-proof durability are unmatched.
Materials for a short courtyard wall usually cost $400–$800. It’s a heavy-duty investment that immediately boosts your home’s curb appeal.
- Key Materials: Red clay bricks, high-strength mortar
- Vibe / Style: Historic estate elegance
- Difficulty: Advanced masonry
- Budget Breakdown: Bricks: $350 | Mortar: $60.
- Creator’s Tip: Always use a string line and a heavy-duty level on every single course; a masonry wall that leans even half an inch will look disastrous.
- Smart Sourcing: Get pre-mixed structural mortar (bulk bags) and a professional masonry trowel starter kit.
17. Half-Height Fence with Pergola
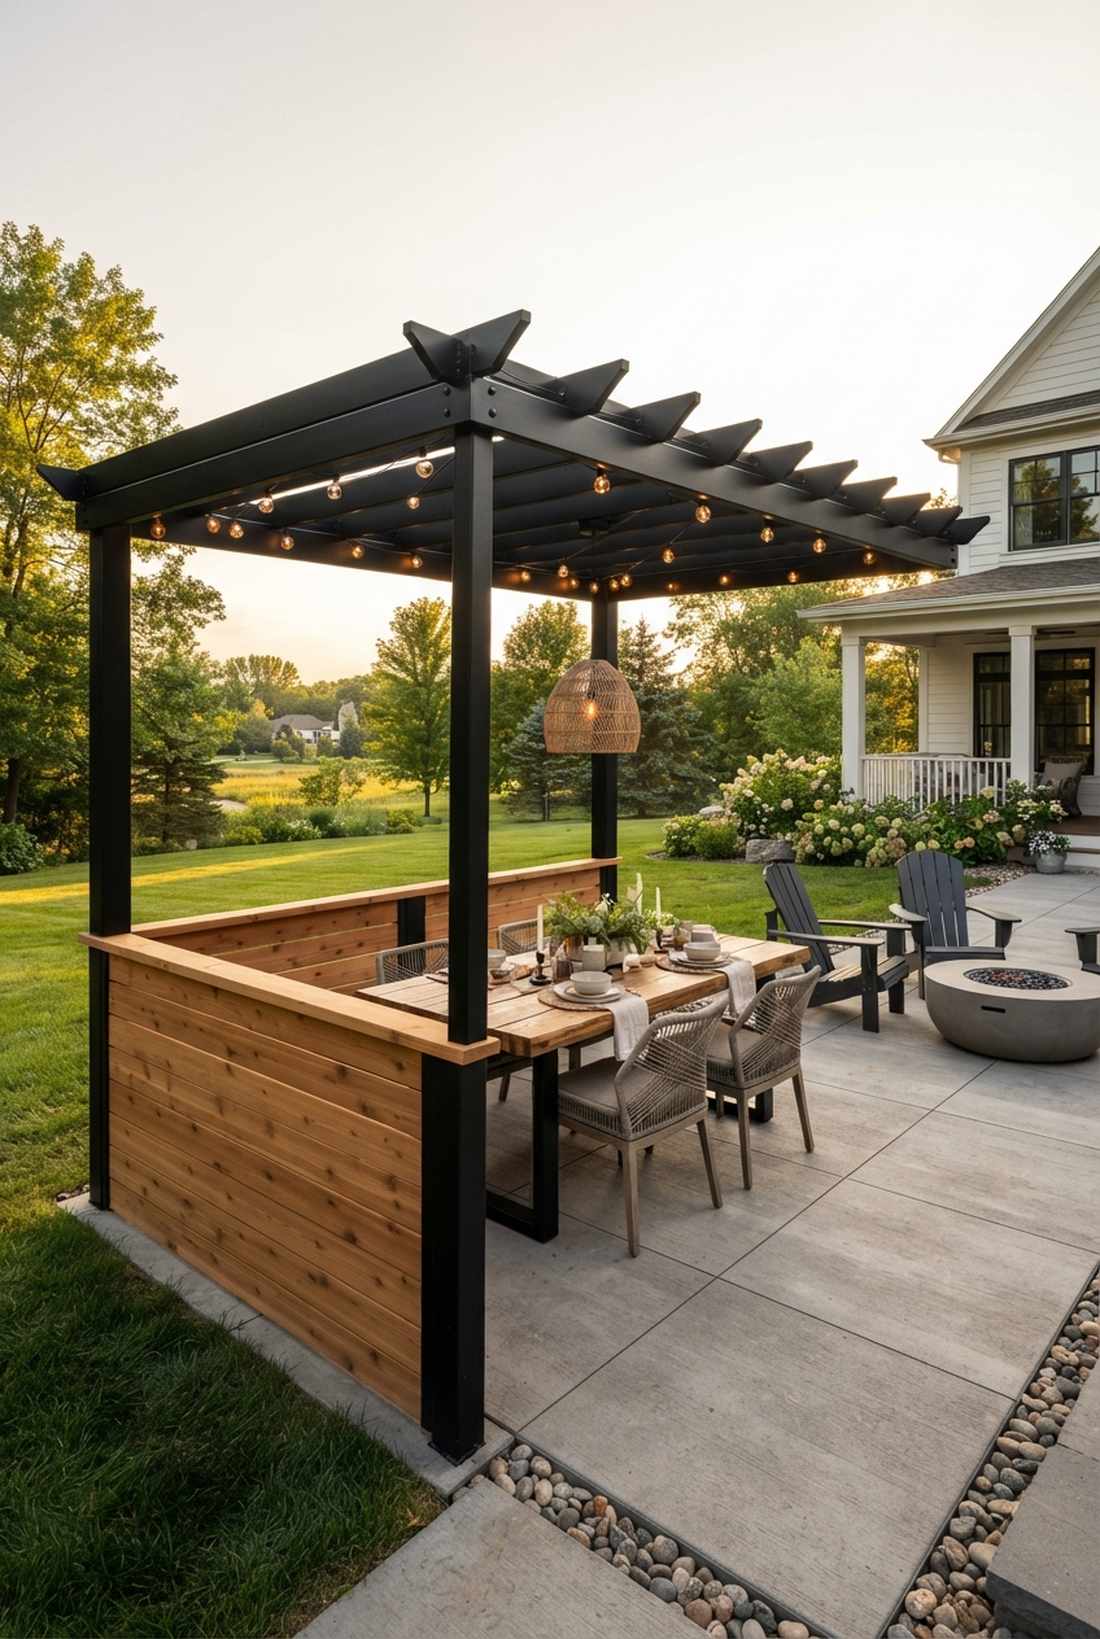
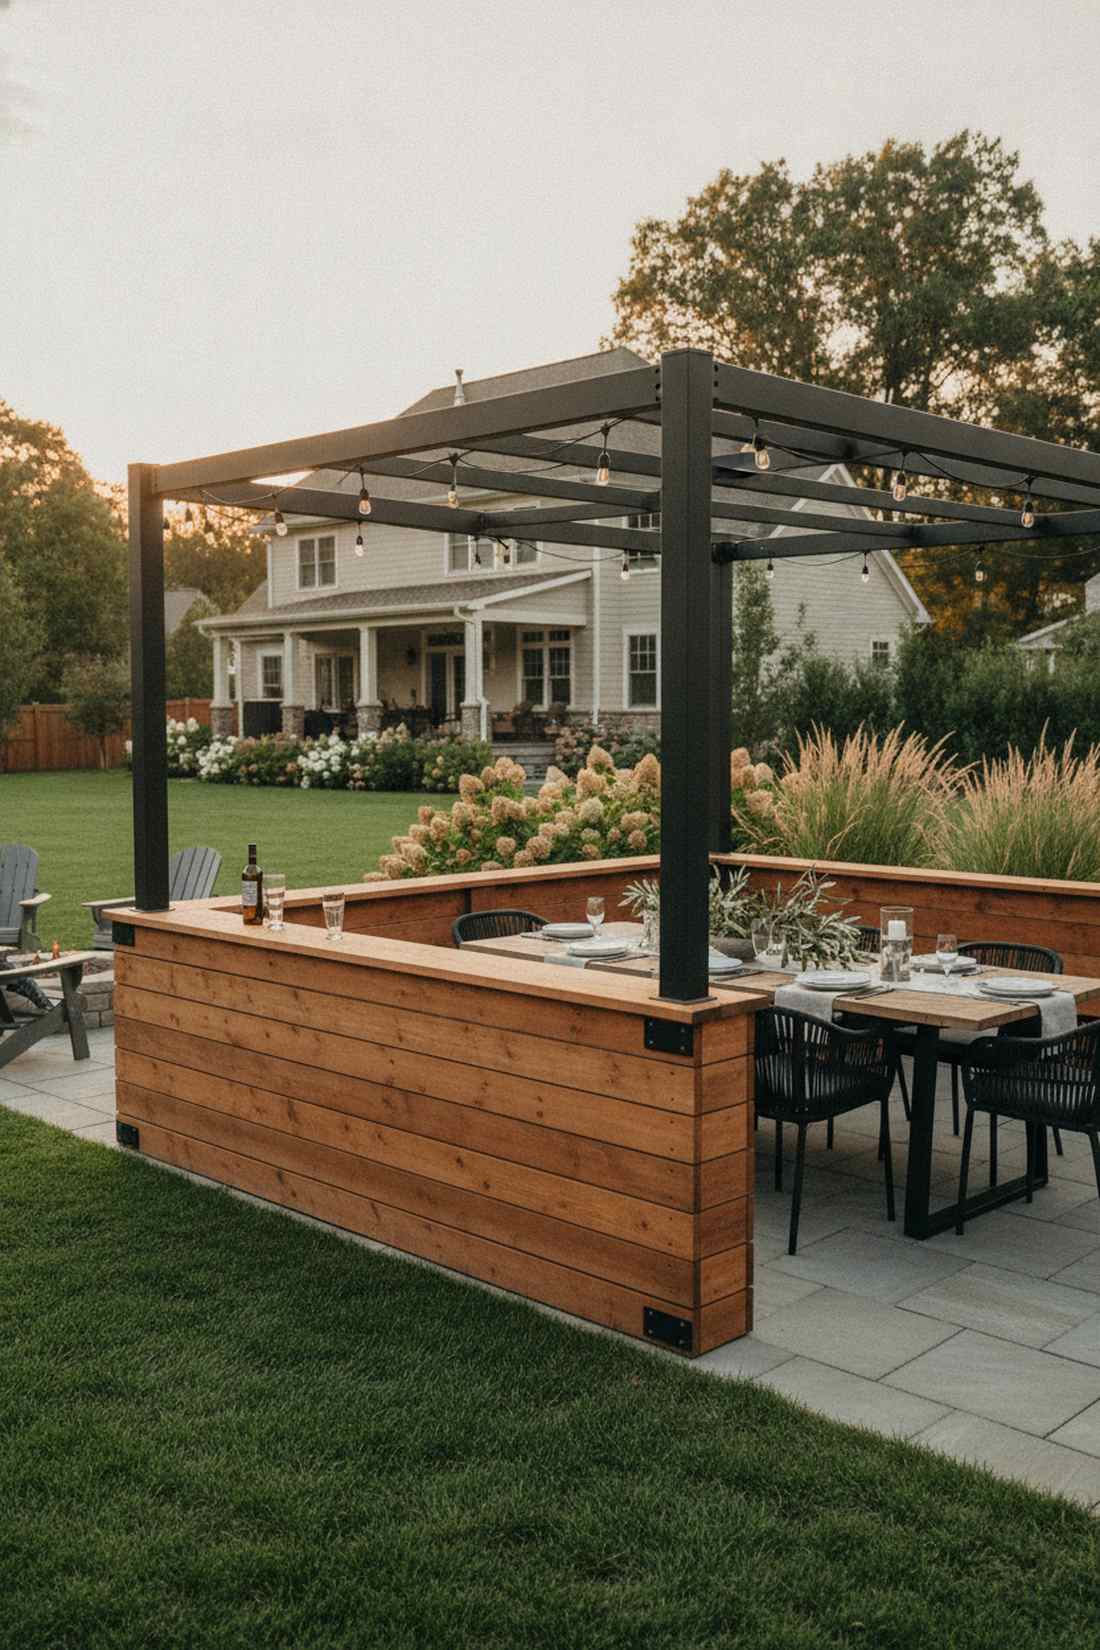
Feeling cozy without feeling trapped, this layout strikes the perfect spatial balance. A partial privacy wall beneath an open roof is ideal for defining a dining zone without blocking the sunset.
Building massive enclosures can block your neighborly views, but keeping the visual block at waist height looks far more expensive than it is. Integrating outdoor patio enclosure ideas like contrasting black pergolas with warm cedar bases creates striking visual geometry.
You can easily pull this off for around $300–$600. Save this to your patio dining inspiration board for a perfectly balanced layout!
- Key Materials: 4×4 posts, 1×4 horizontal fencing slats
- Vibe / Style: Balanced modern dining
- Difficulty: Intermediate carpentry
- Budget Breakdown: Posts & Slats: $350 | Hardware: $50.
- Creator’s Tip: Cap the top of the half-wall with a wider 2×6 board so guests have a place to rest their drinks while standing.
- Smart Sourcing: Pick up pre-cut wood fencing panels and black powder-coated post brackets.
18. Tropical Cutout Steel Panels
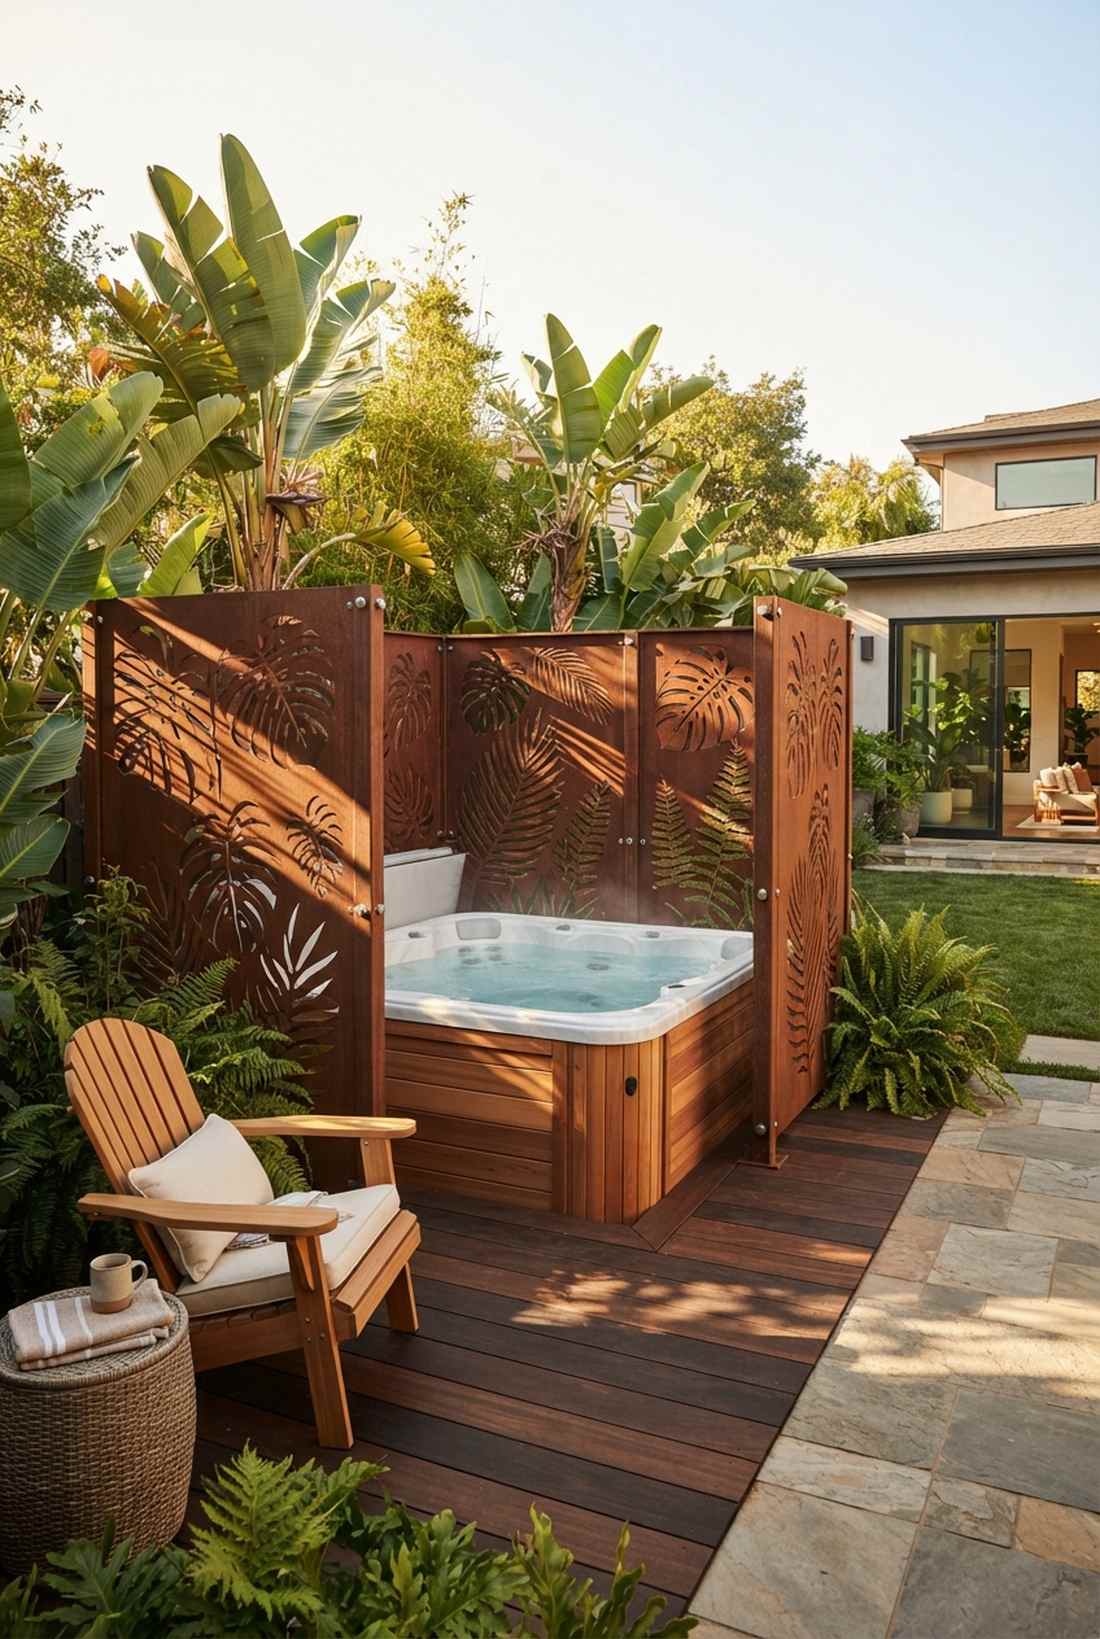
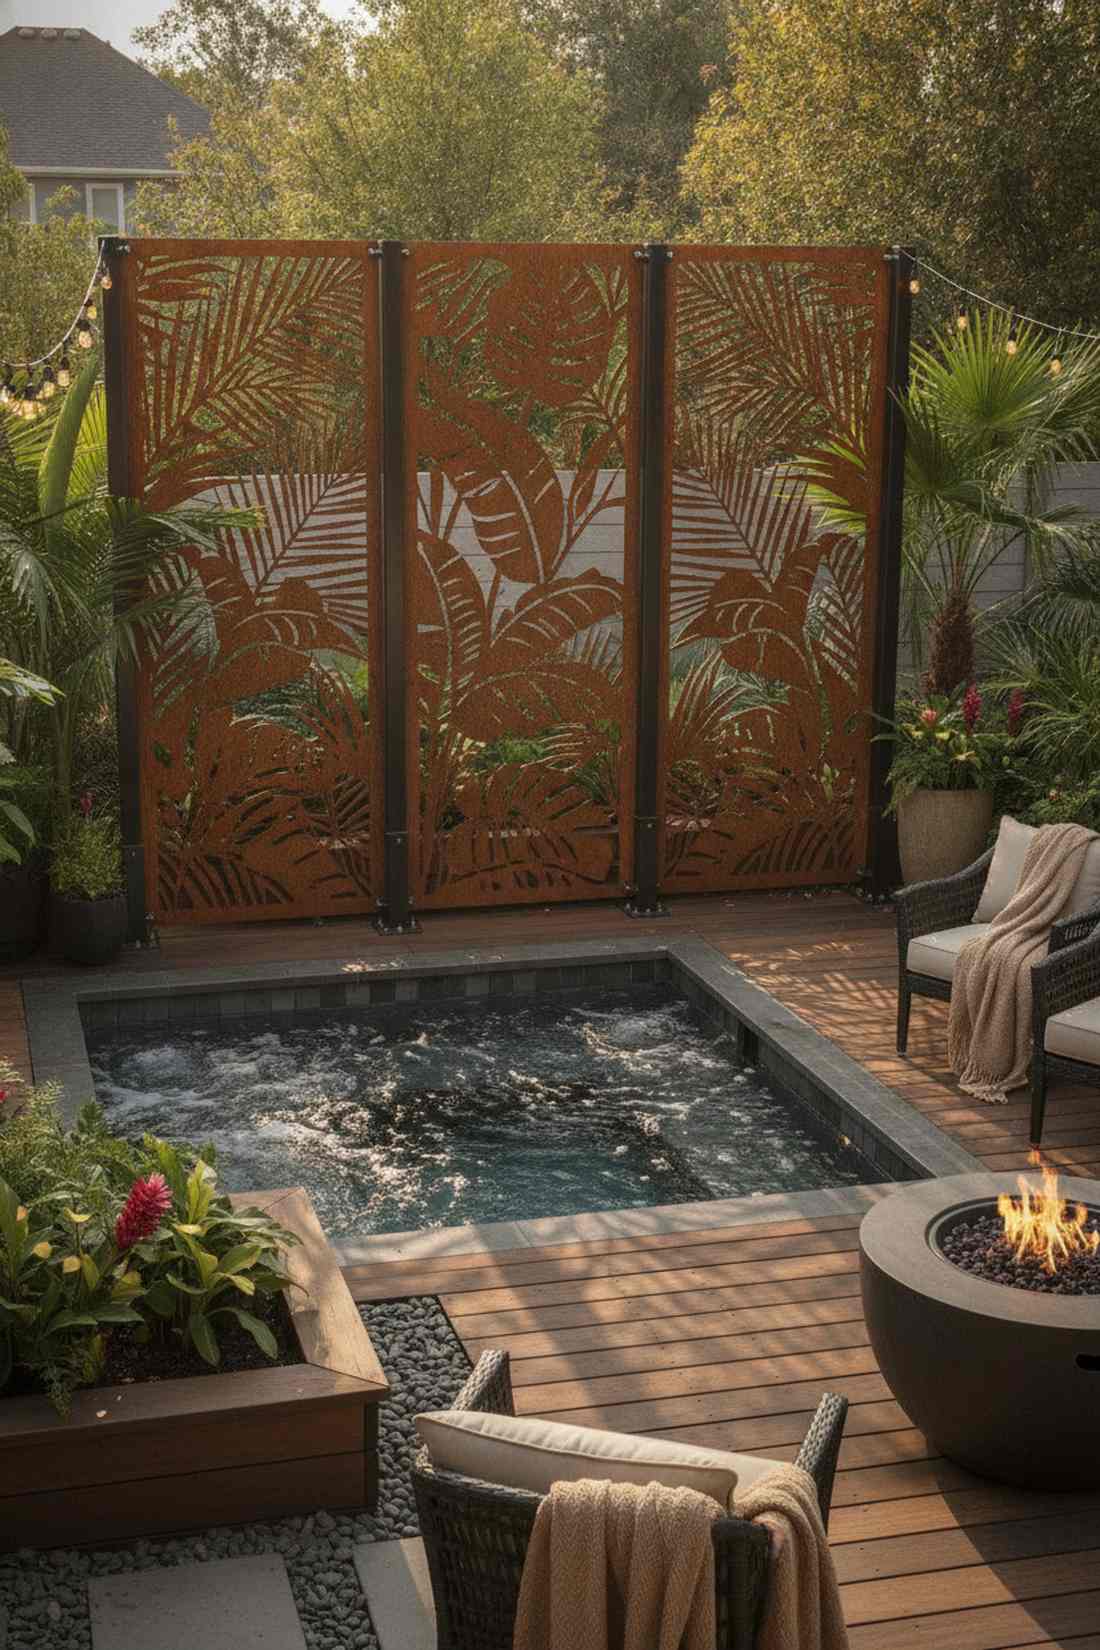
Bringing massive vacation energy, this setup feels like a high-end Balinese resort. Rust-colored botanical steel privacy screens work exceptionally well for hot tub enclosures surrounded by foliage.
Standard fencing looks boring, but massive leaf cutouts in Corten steel give a designer-level finish that intentionally rusts into a beautiful patina. These heavy-duty architectural pieces require zero maintenance once they develop their signature weathered look.
Expect to spend $200–$400 per specialized steel panel. It’s an unforgettable upgrade that completely alters the shadow play on your deck.
- Key Materials: Corten steel patterned panels, sturdy mounting frames
- Vibe / Style: Balinese resort chic
- Difficulty: Easy but heavy lifting
- Budget Breakdown: Corten panels: $600 | Mounting bolts: $30.
- Creator’s Tip: Spray the steel panels with a saltwater solution on day one to instantly accelerate the beautiful rusting process.
- Smart Sourcing: Buy pre-weathered botanical steel screens and heavy-duty metal mounting standoffs.
Most homeowners settle for cheap umbrellas, but this next retractable system offers storm-proof protection without the permanent commitment…
Retractable Weather Systems
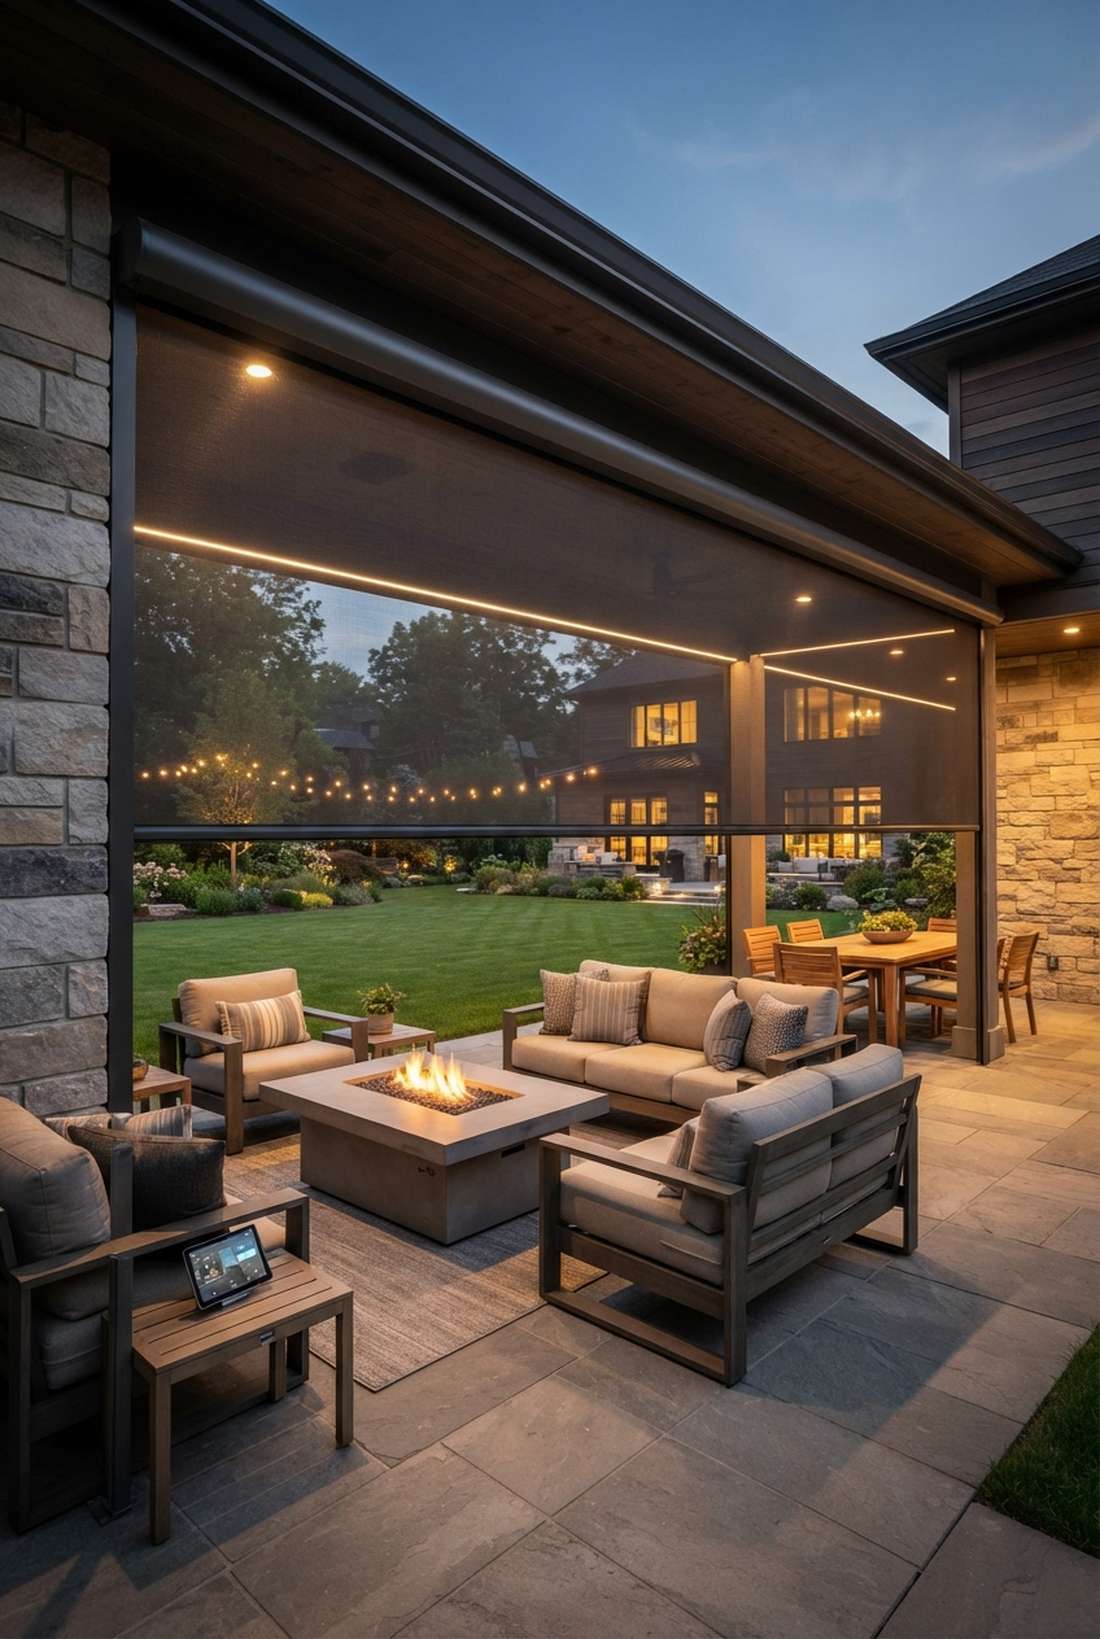
19. Retractable Awning with Side Drop Screens

Offering massive versatility, this setup feels like a transformer for your backyard. A motorized awning with vertical wind drops is brilliant for western-facing decks that suffer from blinding afternoon glare.
Static roofs cast permanent shadows, but a modular fabric system looks far more expensive than it is while adapting to the hour. Sourcing high-end acrylic outdoor patio enclosure materials guarantees it sheds water effortlessly without fading in the sun.
A full automated system typically runs $2,000–$4,500. Save this if you want absolute climate control that completely disappears when you don’t need it!
- Key Materials: UV-coated acrylic fabric, motorized articulated arms
- Vibe / Style: Adaptive modern comfort
- Difficulty: Intermediate with electrical
- Budget Breakdown: Awning unit: $2,500 | Drop screen add-on: $500.
- Creator’s Tip: Pitch the awning at least 15 degrees downward so unexpected heavy rain rolls right off instead of pooling and snapping the arms.
- Smart Sourcing: Invest in a remote-controlled motorized awning kit and UV-coated acrylic fabric replacements.
20. Clear Vinyl Winter Panels
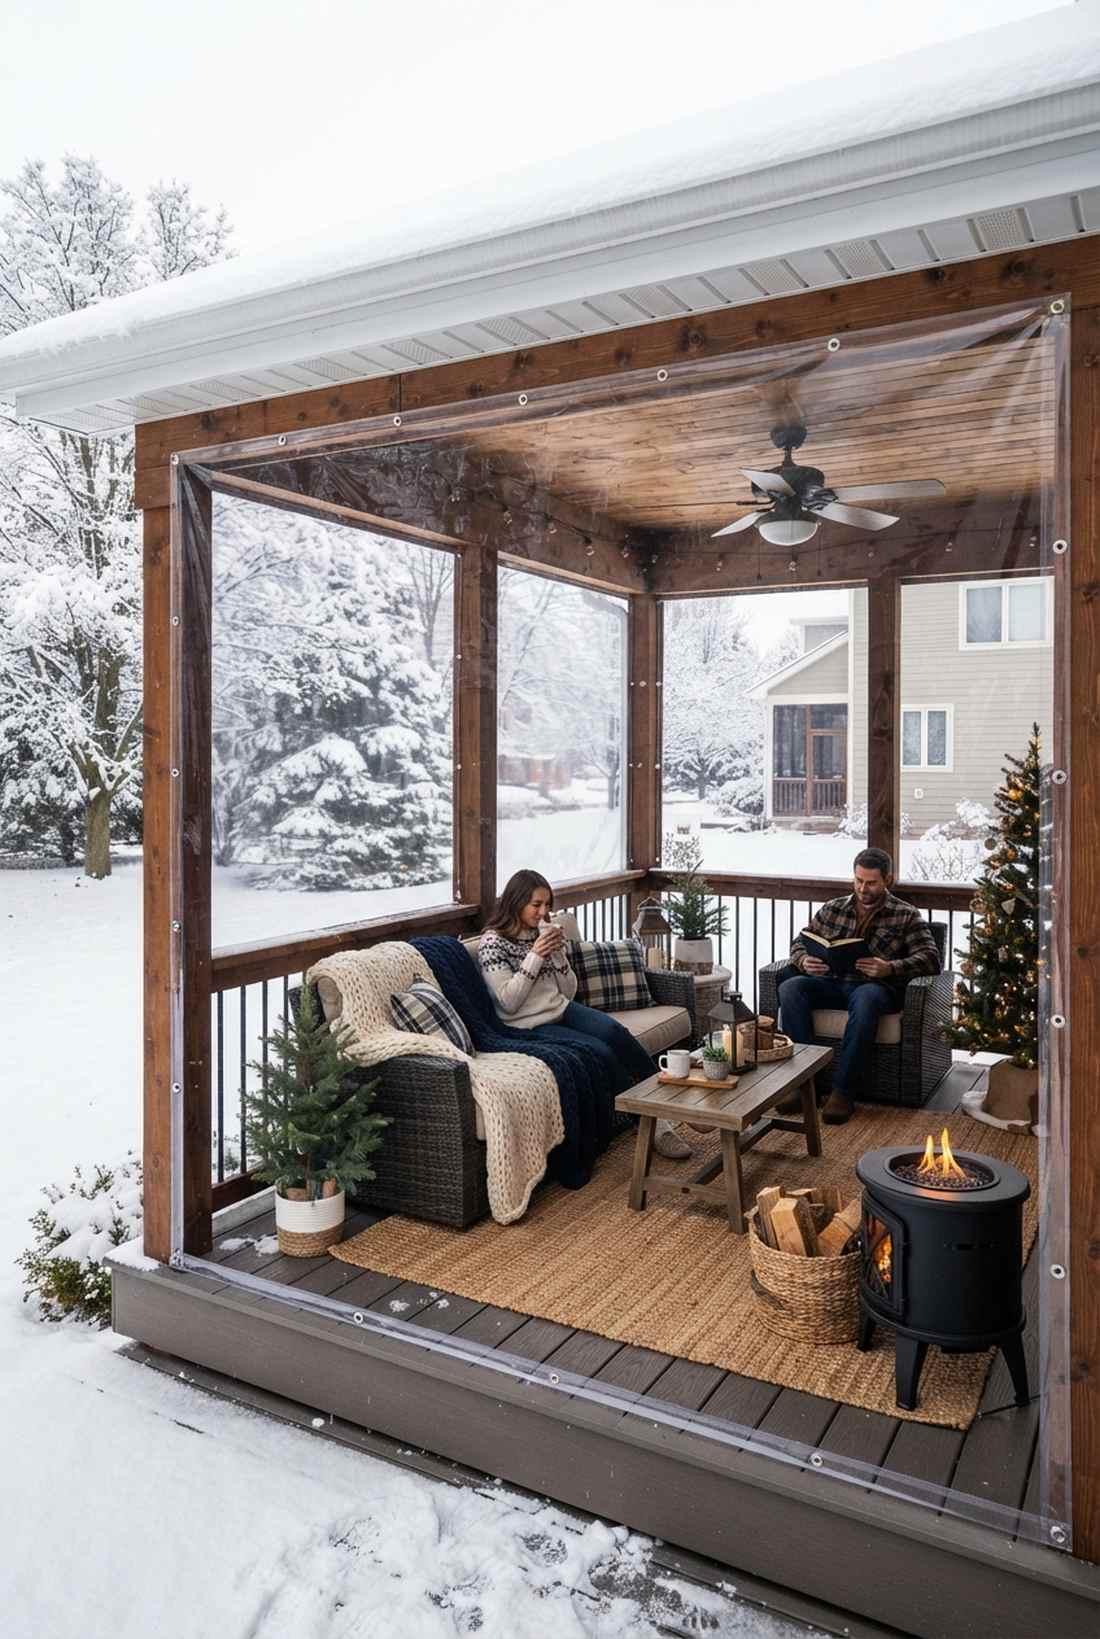

Creating a surprisingly warm microclimate, this setup feels like a cozy winter bubble. Snap-on transparent vinyl sheets work exceptionally well for converting a summer screen porch into a snowy holiday lounge.
Installing real glass windows costs a fortune, but marine-grade clear vinyl delivers a surprisingly premium look for a fraction of the price. By using industrial marine snaps, you can tightly seal out freezing drafts in under twenty minutes.
You can enclose a standard porch for roughly $300–$700. It’s a highly recommended DIY hack to squeeze three more months out of your outdoor space.
- Key Materials: 20-gauge clear vinyl, marine snap fasteners
- Vibe / Style: Cozy winterized bubble
- Difficulty: Easy beginner DIY
- Budget Breakdown: Clear vinyl roll: $150 | Snap kit & tools: $60.
- Creator’s Tip: Install the vinyl panels on a warm afternoon; the plastic stretches easier when hot, ensuring a drum-tight fit once the temperature drops.
- Smart Sourcing: Pick up a heavy-duty marine clear vinyl (bulk roll) and a stainless steel canvas snap kit.
21. Sliding Glass Door Panels
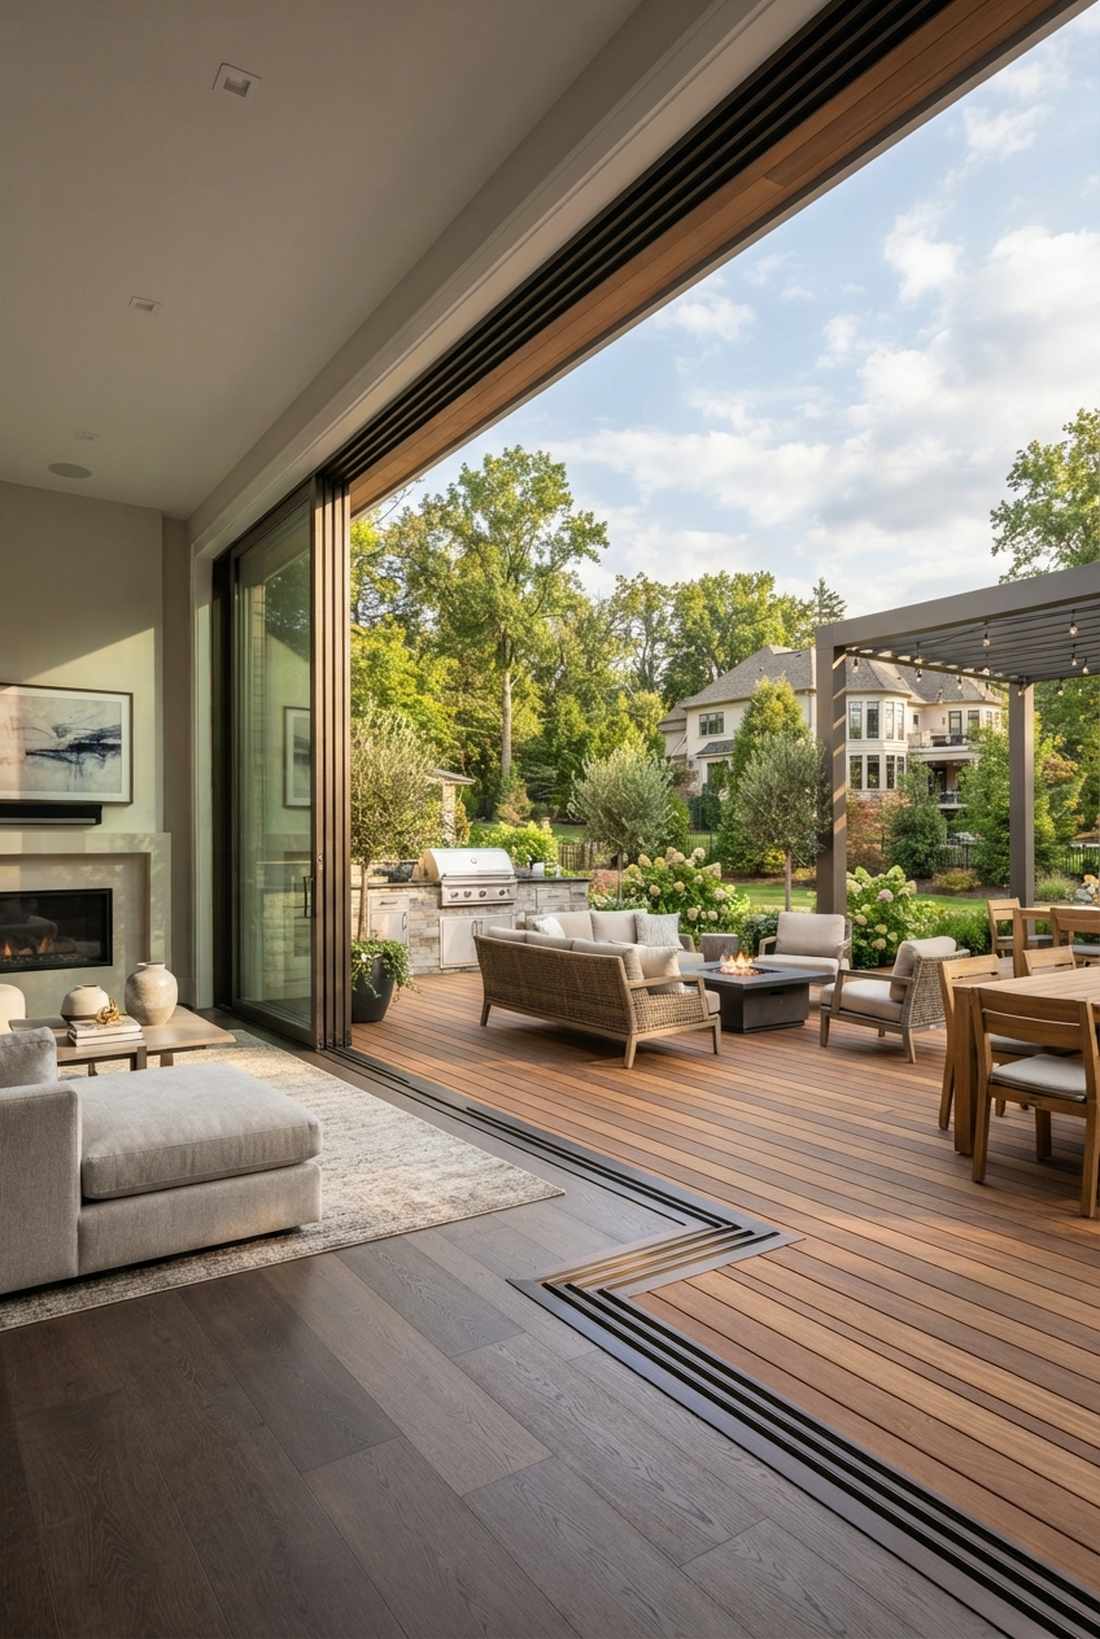
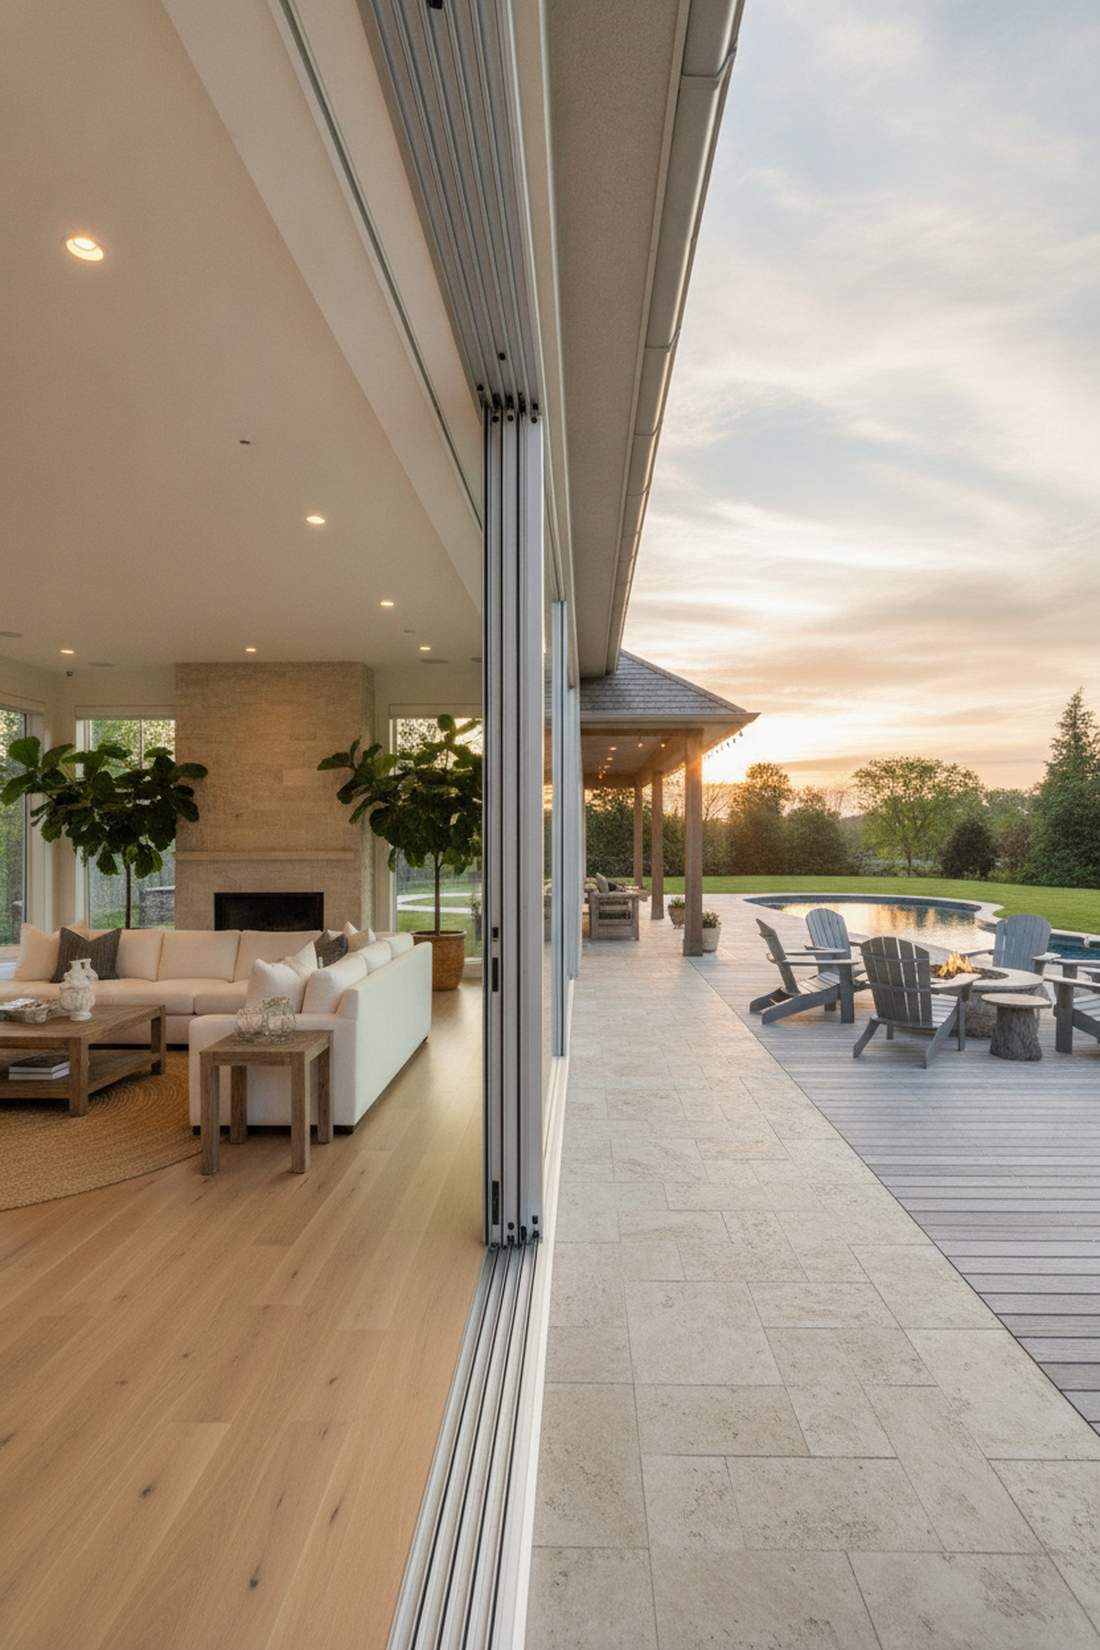
Providing seamless indoor-outdoor flow, this space feels incredibly expansive. Stacking floor-to-ceiling sliding glass walls is the ultimate upgrade for blending a living room directly into the patio.
Standard French doors eat up valuable floor space, but multi-track sliders give a designer-level finish by hiding entirely out of the way. Utilizing high-CPC architectural tracks ensures these massive panes glide with zero friction.
These massive door systems are an investment, typically costing $4,000–$10,000. Pin this to your major renovation board for when you’re ready to break down walls!
- Key Materials: Multi-track aluminum rails, large tempered glass doors
- Vibe / Style: Expansive indoor-outdoor luxury
- Difficulty: Expert contractor required
- Budget Breakdown: Door system: $5,500 | Header reinforcement: $1,200.
- Creator’s Tip: Recess the bottom track flush with your interior flooring to eliminate the tripping hazard and create a true seamless transition.
- Smart Sourcing: Use heavy-duty sliding door track hardware kits and pre-cut tempered replacement panes.
Material Guide: Cheap vs. Premium Aesthetic
Knowing exactly where to save and where to spend makes all the difference in achieving that “looks expensive but isn’t” vibe.
- Standard Vinyl vs. Marine-Grade Clear Vinyl: Standard craft vinyl yellows and cracks in the cold. Marine-grade acrylic vinyl stays crystal clear and withstands heavy winter wind without shattering.
- Raw Lumber vs. Powder-Coated Aluminum Kits: While raw wood is cheaper upfront, pre-made aluminum framing kits save days of labor and never rot, warp, or require re-staining.
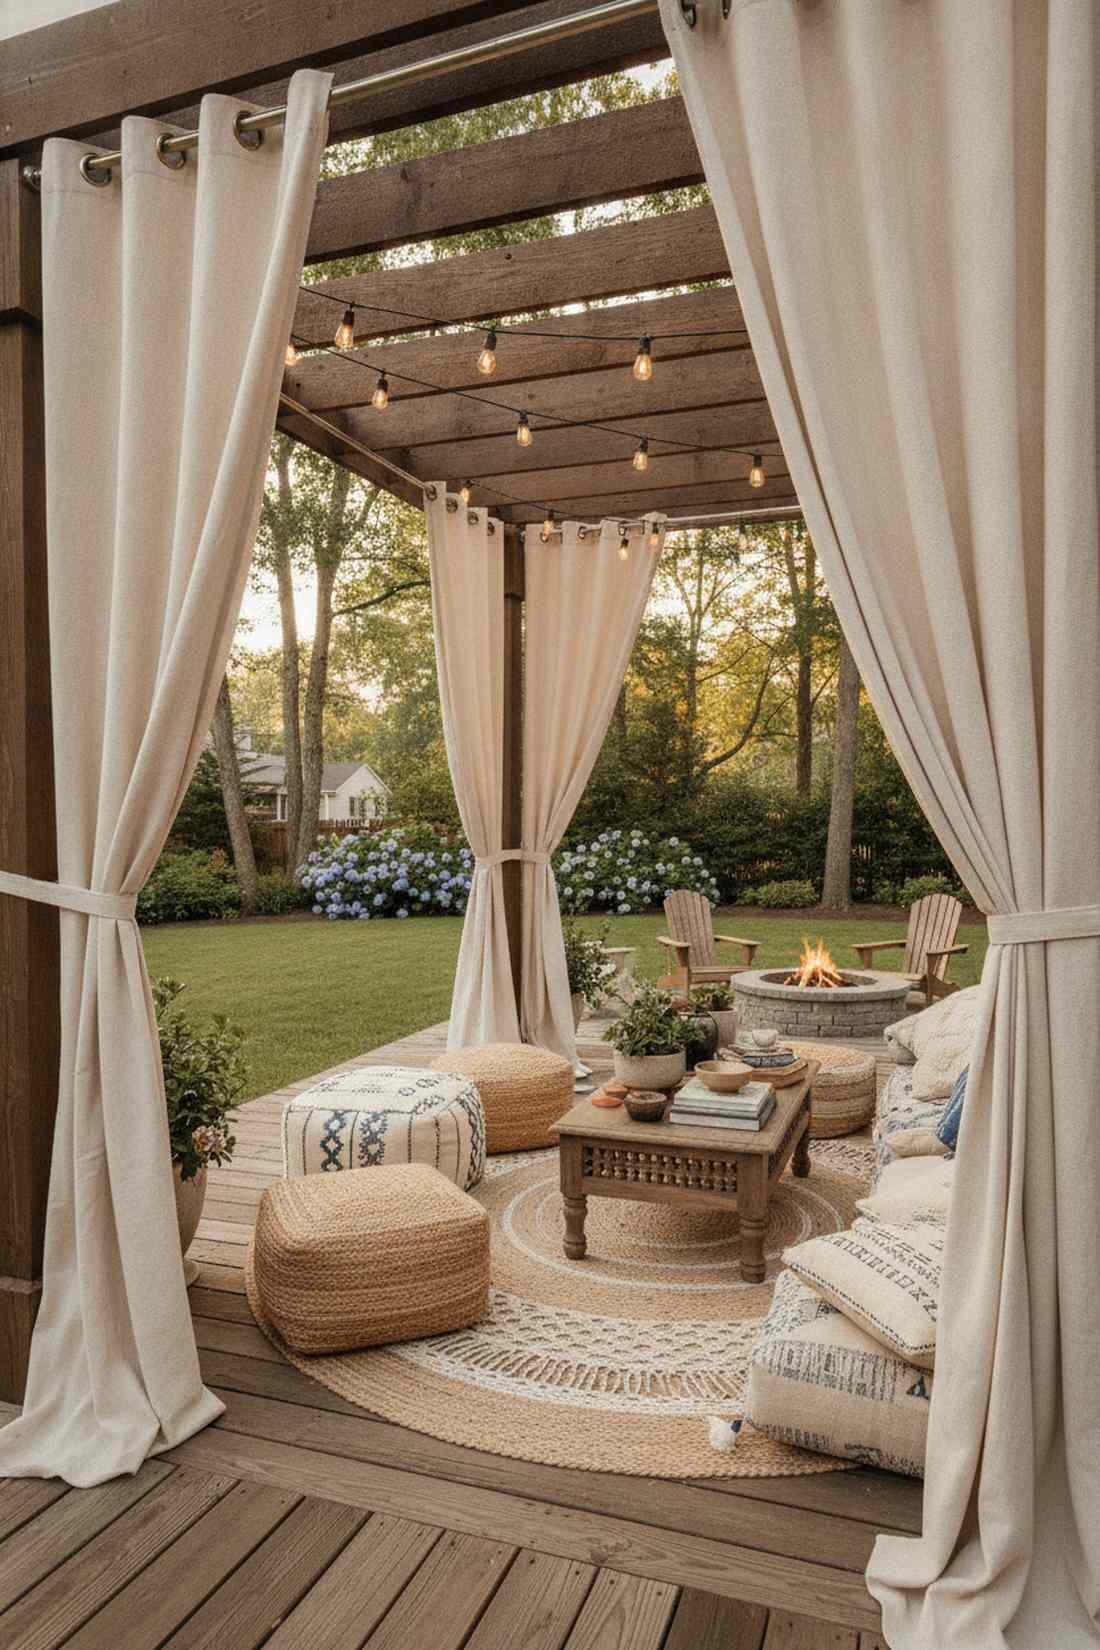
22. Tension Rod Outdoor Curtains
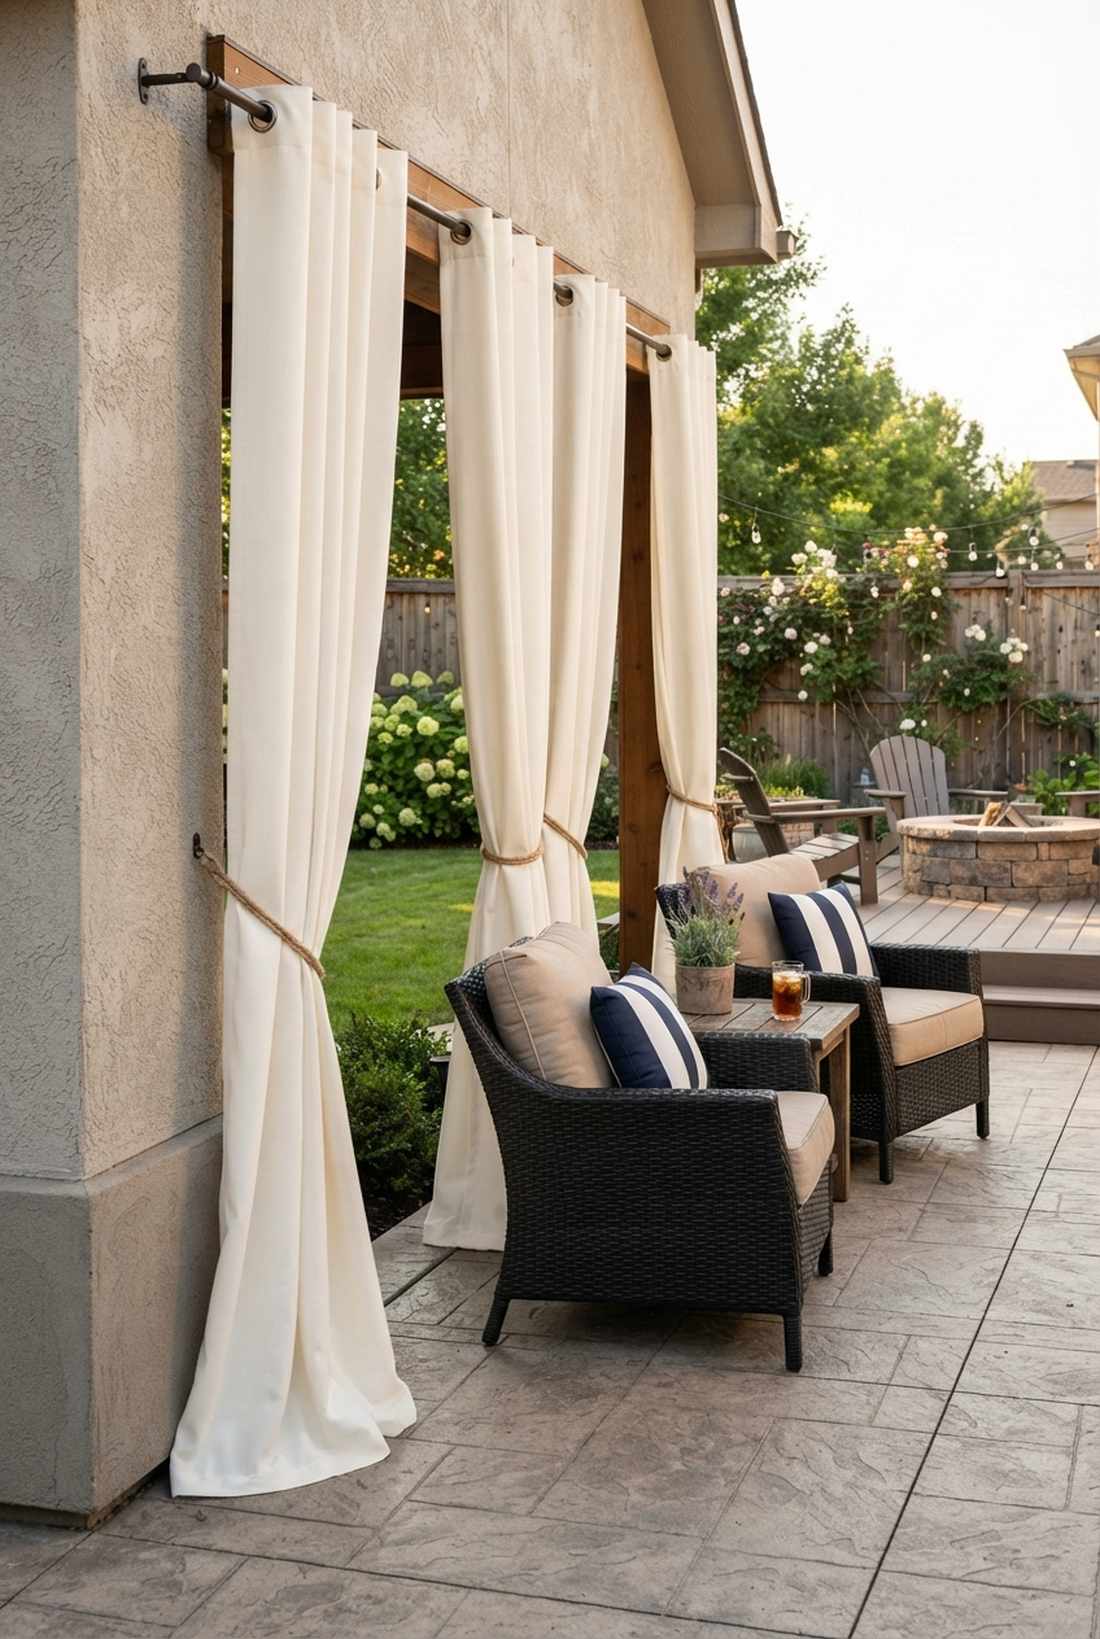
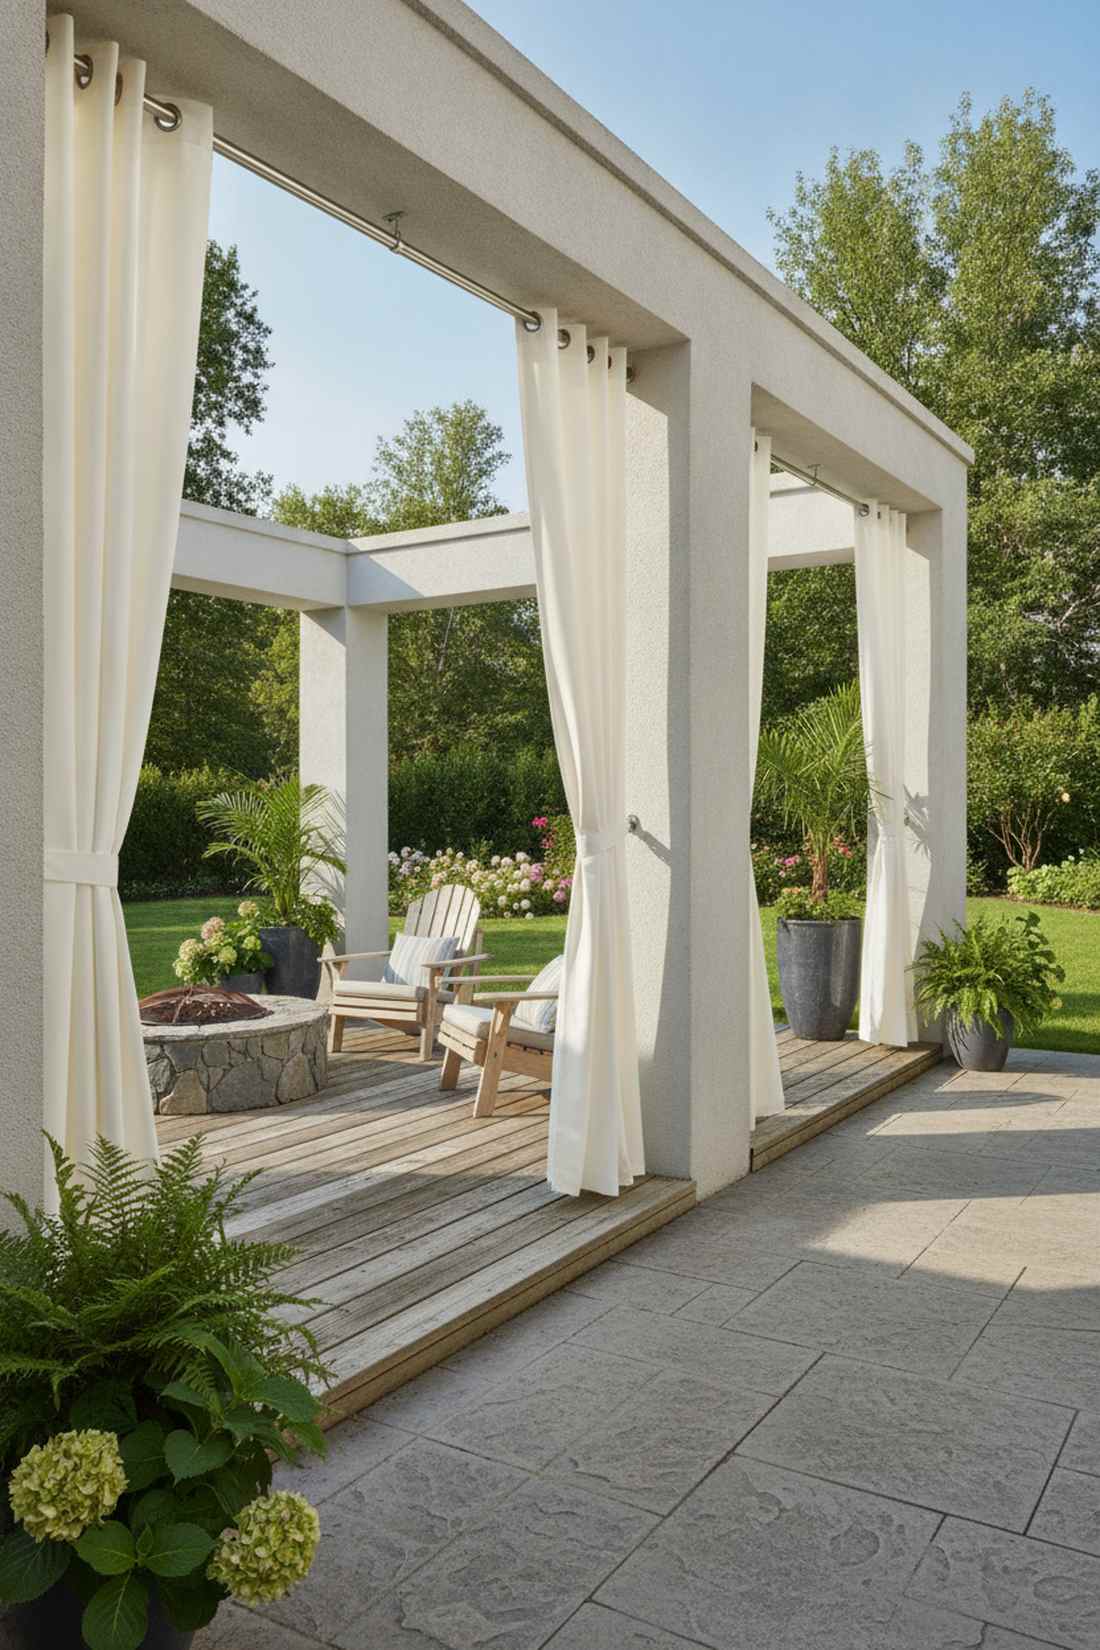
Emanating a soft, romantic cabana aesthetic, this setup feels incredibly relaxing. Heavy-duty outdoor fabric drapes work exceptionally well for renters looking for zero-damage privacy.
Drilling holes into stucco can ruin your security deposit, but industrial tension rods look far more expensive than they are when paired with luxurious flowing fabric. Grabbing these affordable outdoor patio wall ideas instantly softens harsh concrete architecture.
You can easily pull this off for around $80–$150 per side. Highly recommended for a lightning-fast weekend aesthetic boost.
- Key Materials: Industrial tension rods, mildew-resistant outdoor curtains
- Vibe / Style: Soft romantic cabana
- Difficulty: Instant beginner setup
- Budget Breakdown: Tension rod: $40 | Curtain panels: $60.
- Creator’s Tip: Buy curtains with weighted hems or sew heavy washers into the bottom seam so they don’t blow wildly out of control in the wind.
- Smart Sourcing: Get rust-proof industrial tension rods and UV-coated waterproof outdoor curtain panels.
23. Powder-Coated Aluminum Patio Cover
Delivering sharp, clean architectural lines, this setup feels indestructible. A solid aluminum roof canopy is brilliant for scorching desert climates where shade is a matter of survival.
Wooden roofs eventually succumb to termites and dry rot, but baked-on powder coating delivers a surprisingly premium look that literally lasts decades. Because aluminum is so lightweight, you can achieve massive overhead spans without needing intrusive center support columns.
A standard 12×12 aluminum cover runs around $2,000–$4,000. Save this to your permanent home improvement board!
- Key Materials: Interlocking aluminum roof panels, extruded support beams
- Vibe / Style: Crisp modern permanence
- Difficulty: Intermediate structural
- Budget Breakdown: Roof kit: $2,800 | Concrete anchors: $40.
- Creator’s Tip: Wash the powder-coated surface twice a year with mild dish soap and water to prevent mineral buildup from permanently etching the finish.
- Smart Sourcing: Look for pre-cut powder-coated aluminum awning kits and heavy-duty concrete post anchors.
24. Insulated Aluminum Roof Panels

Creating a surprisingly dense, quiet space, this setup feels like a true home addition. Foam-core metal roof panels work exceptionally well for silencing deafening rainstorms over your dining table.
Single-sheet metal roofs sound like a snare drum during a storm, but sandwich-construction panels give a designer-level finish while completely deadening noise. Implementing these high-CPC outdoor patio enclosure materials also stops radiant heat dead in its tracks.
Upgrading to insulated panels adds about 30% to your roofing costs, usually running $1,500–$3,500. It’s a fast upgrade that completely changes the acoustic vibe of your space.
- Key Materials: 3-inch insulated aluminum panels, heavy-duty sealant
- Vibe / Style: Quiet, climate-controlled comfort
- Difficulty: Intermediate roofing
- Budget Breakdown: Insulated panels: $2,000 | Flashing: $150.
- Creator’s Tip: Cap the exposed foam edges with U-channel aluminum trim to prevent birds and bugs from pecking away at the insulation.
- Smart Sourcing: Buy insulated foam-core aluminum roof panels (bulk) and weatherproof roof flashing tape.
If you think building structures has to be incredibly expensive, this next rugged aesthetic proves you can do it for under $200…
25. Modern Steel Frame Enclosure
Emitting a powerful industrial loft energy, this setup feels bold and unyielding. A welded blackened steel framework is perfect for framing large glass panels in severe wind-load zones.
Basic aluminum can sometimes look flimsy, but heavy-duty steel tubing looks far more expensive than it is. By painting the welds with matte charcoal rust-inhibitor, you create a striking contrast against green garden foliage.
Custom steel fabrication is pricey, generally starting around $4,000 for the raw frame. Pin this if you love the harsh, beautiful lines of modern industrial architecture!
- Key Materials: Square steel tubing, matte black rust-preventative paint
- Vibe / Style: Heavy industrial loft
- Difficulty: Advanced welding required
- Budget Breakdown: Raw steel: $1,200 | Fabrication labor: $2,500.
- Creator’s Tip: Always cap the top of hollow steel tubes or drill a weep hole at the bottom so condensation doesn’t rust the structure from the inside out.
- Smart Sourcing: Use matte black rust-preventative enamel (bulk gallon) and heavy-duty structural steel brackets.
Wood & Timber Enclosures
26. Cedar Pergola with Lattice Walls
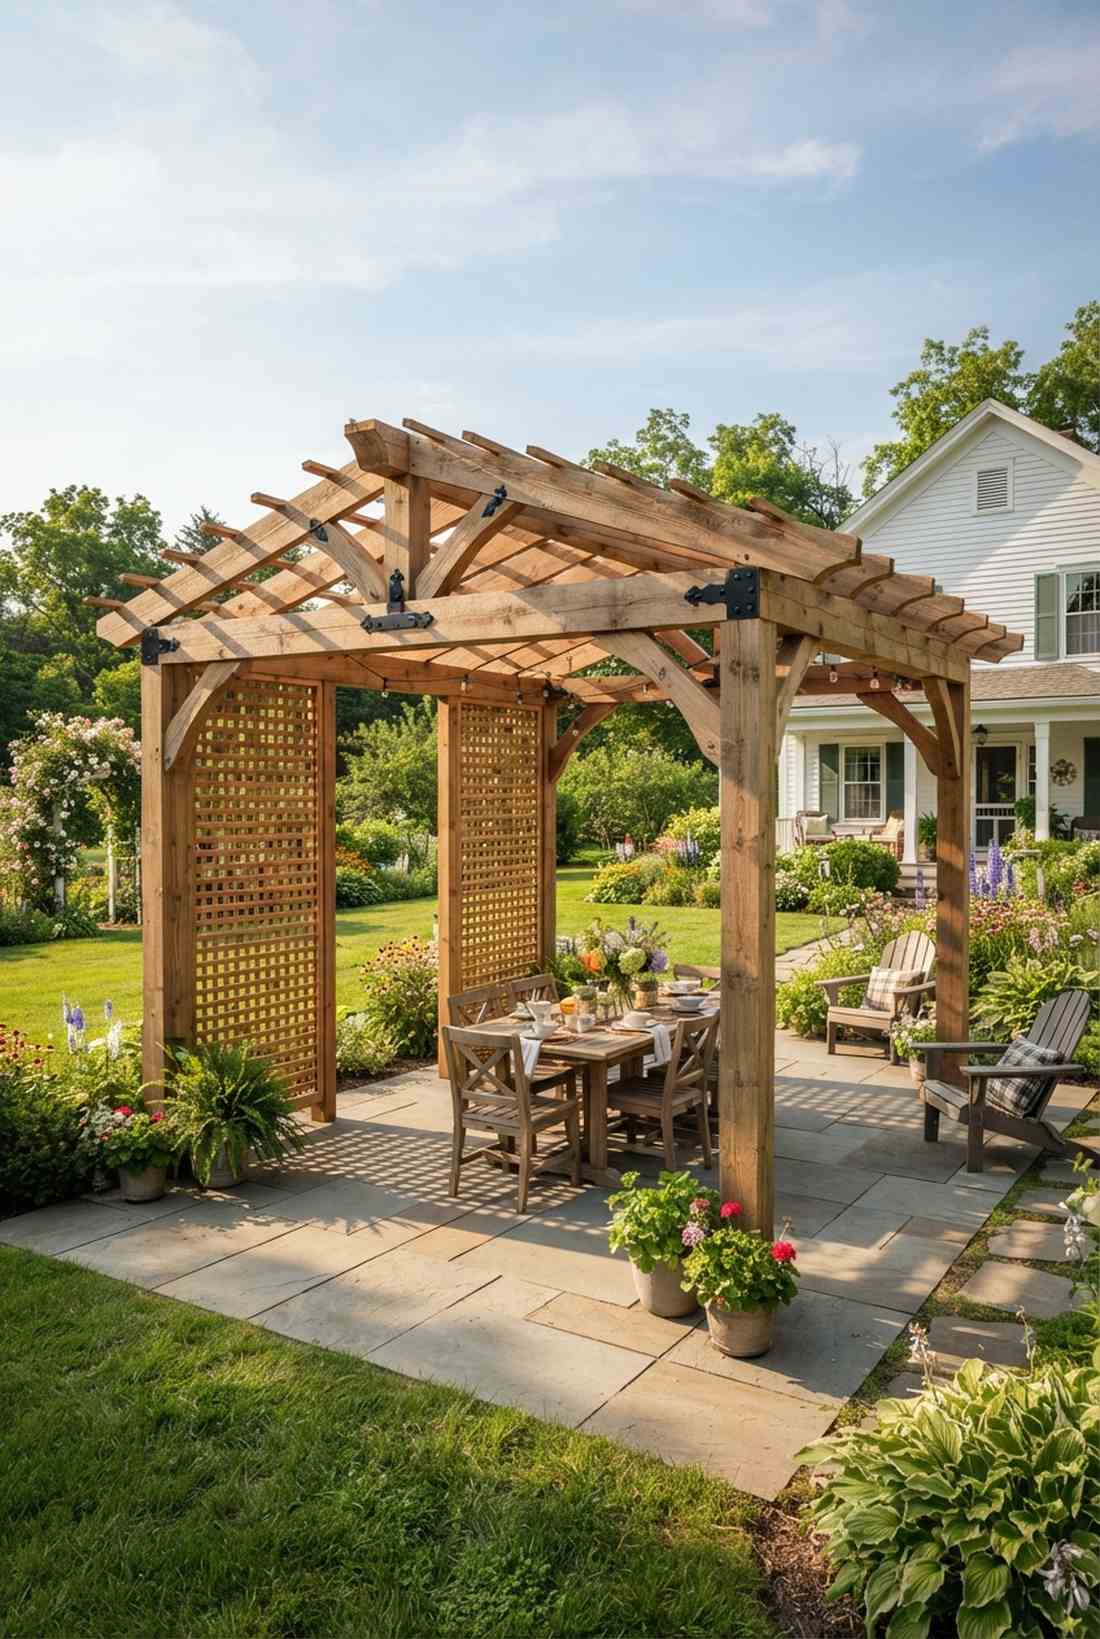
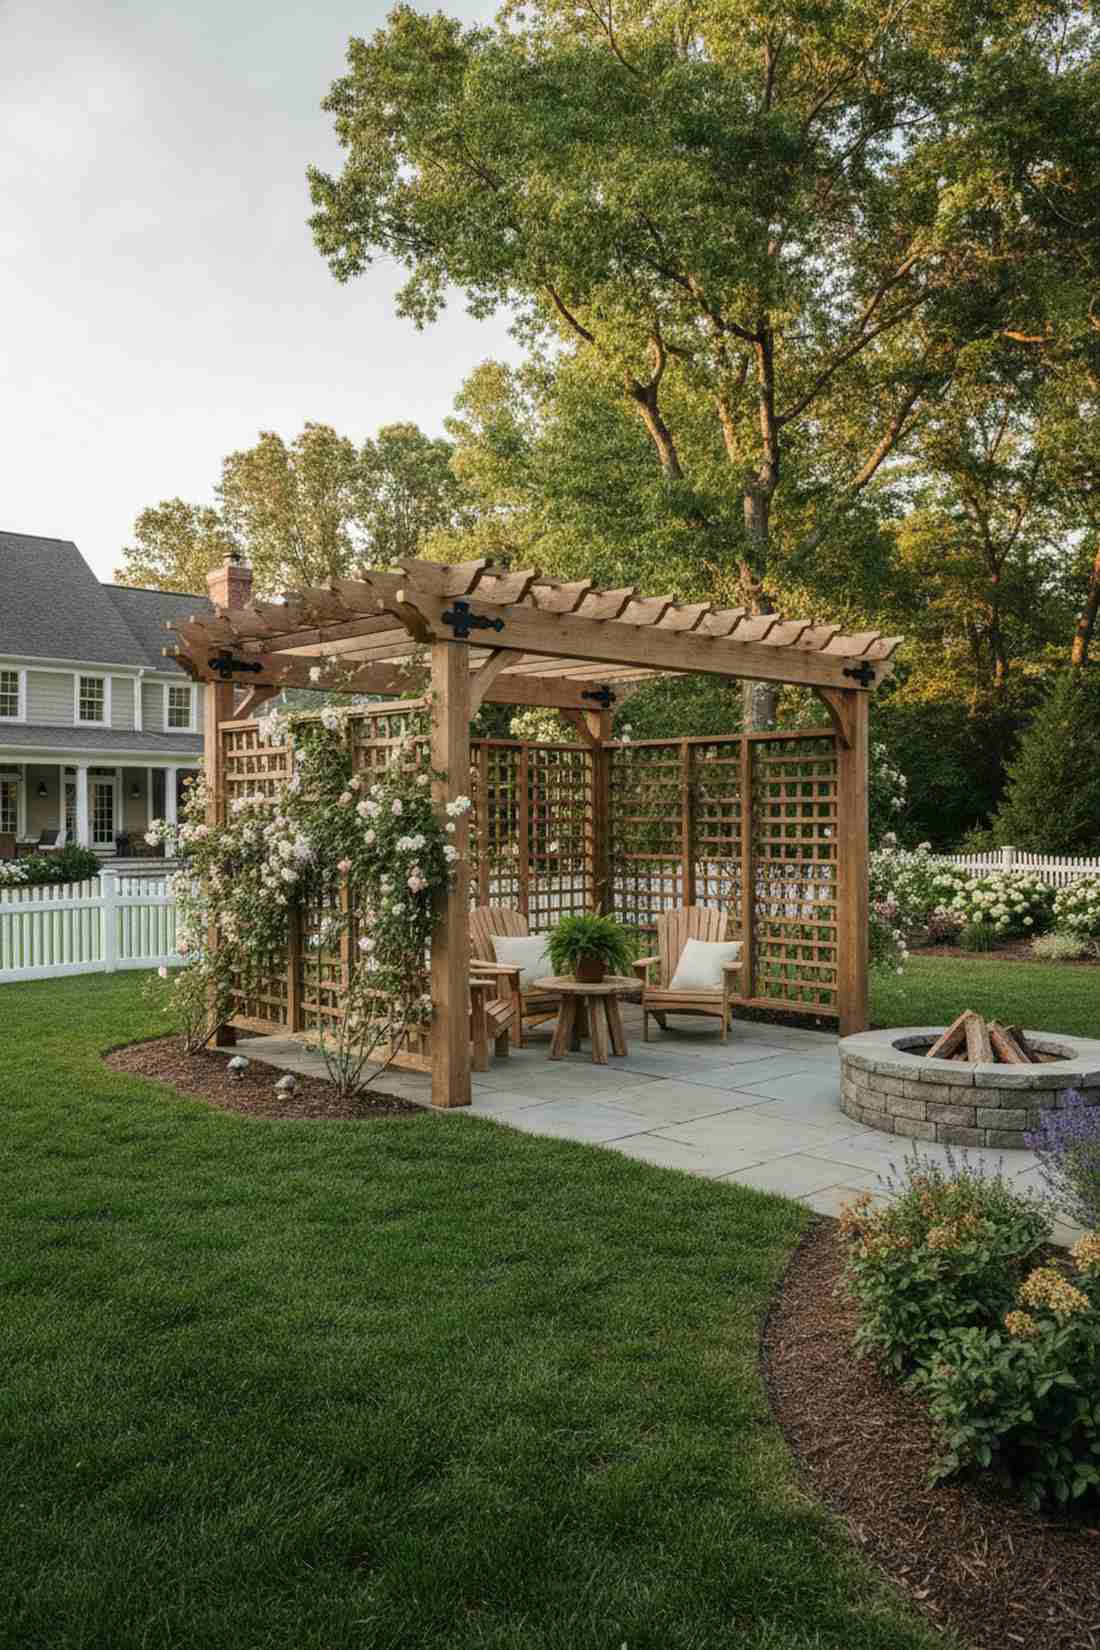
Radiating a classic, warm cottage garden charm, this setup feels deeply nostalgic. A fragrant cedar wood pavilion works exceptionally well for classic farmhouse aesthetics.
Plastic pergolas look cheap up close, but aromatic raw cedar gives a designer-level finish that naturally fights off rot and insects. Pairing the heavy beams with delicate lattice outdoor patio privacy ideas creates a beautiful play of dappled sunlight.
You can build a stunning cedar enclosure for roughly $1,500–$3,000. Save this to your traditional landscaping board for a timeless backyard upgrade.
- Key Materials: Rough-sawn cedar beams, pre-made cedar lattice panels
- Vibe / Style: Classic farmhouse charm
- Difficulty: Intermediate carpentry
- Budget Breakdown: Cedar timber: $1,800 | Hardware: $150.
- Creator’s Tip: Don’t stain cedar immediately; let the wood weather in the sun for two months to open the grain so the sealer penetrates deeply.
- Smart Sourcing: Buy pre-cut wood lattice screen panels and heavy-duty decorative pergola hardware kits.
27. Pressure-Treated Timber Frame
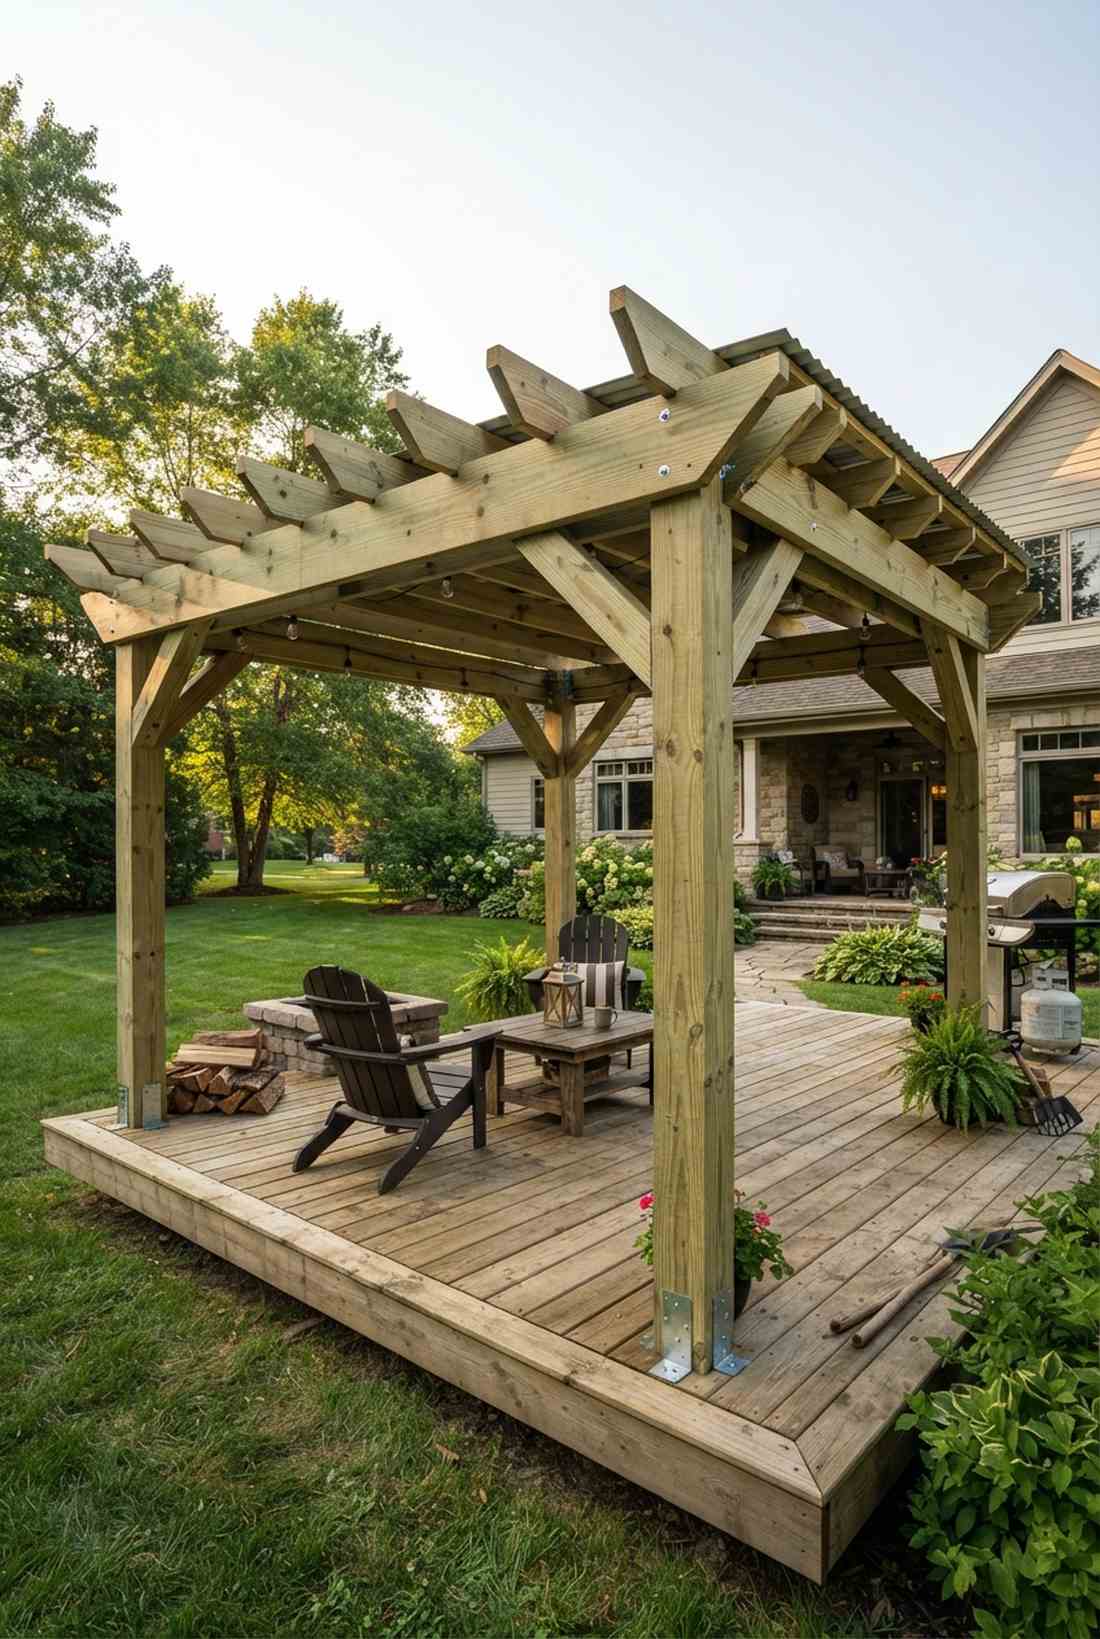
Offering raw, unstoppable strength, this setup feels incredibly robust. A heavy-duty treated pine structure is brilliant for supporting massive snow loads on a budget.
Premium woods cost a fortune, but chemically treated lumber looks far more expensive than it is once you apply a solid dark stain. It provides the perfect, affordable skeleton for screwing on metal roofing or heavy glass panels.
Framing a basic structure usually costs under $800 in raw lumber. Highly recommended for DIYers who want structural integrity without the premium price tag.
- Key Materials: Pressure-treated 4×4 and 2×6 pine, galvanized structural screws
- Vibe / Style: Rugged and reliable
- Difficulty: Intermediate framing
- Budget Breakdown: Treated lumber: $600 | Fasteners: $80.
- Creator’s Tip: Because treated wood is often wet from the chemical process, let it dry out fully before painting it, or the paint will peel off in sheets.
- Smart Sourcing: Get galvanized exterior structural wood screws (bulk bucket) and heavy-duty joist hanger kits.
28. Reclaimed Wood Privacy Screen
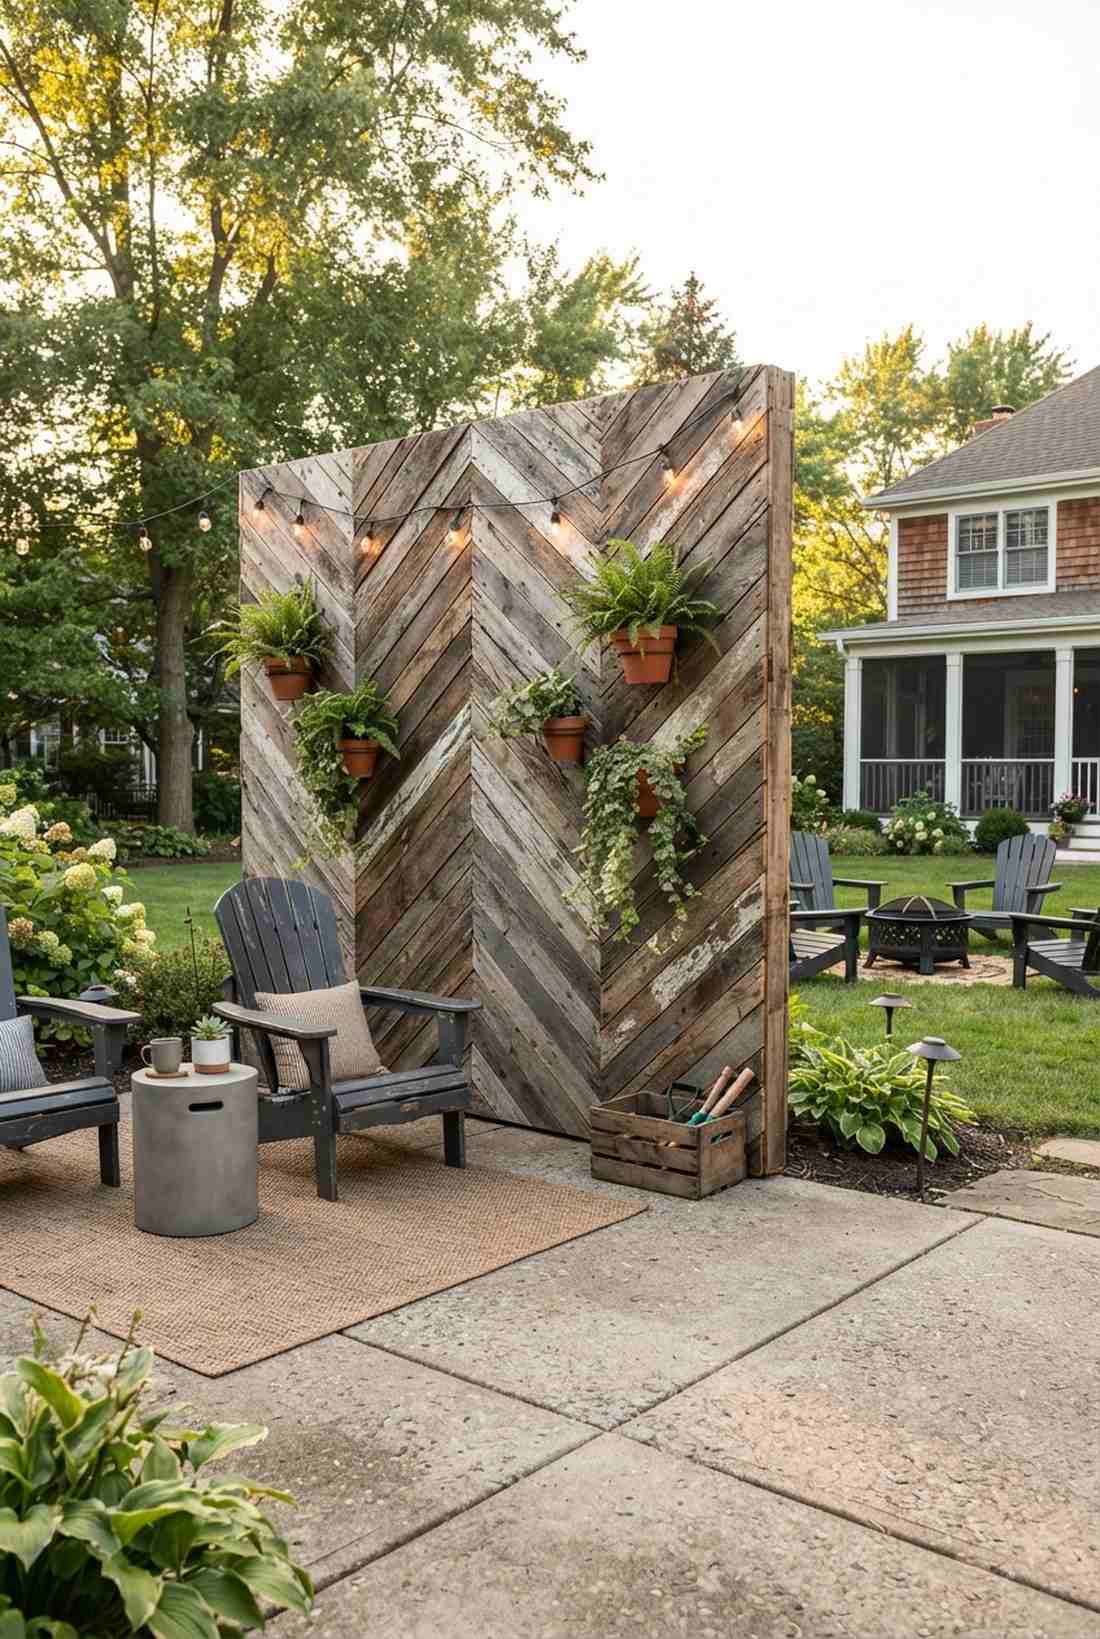
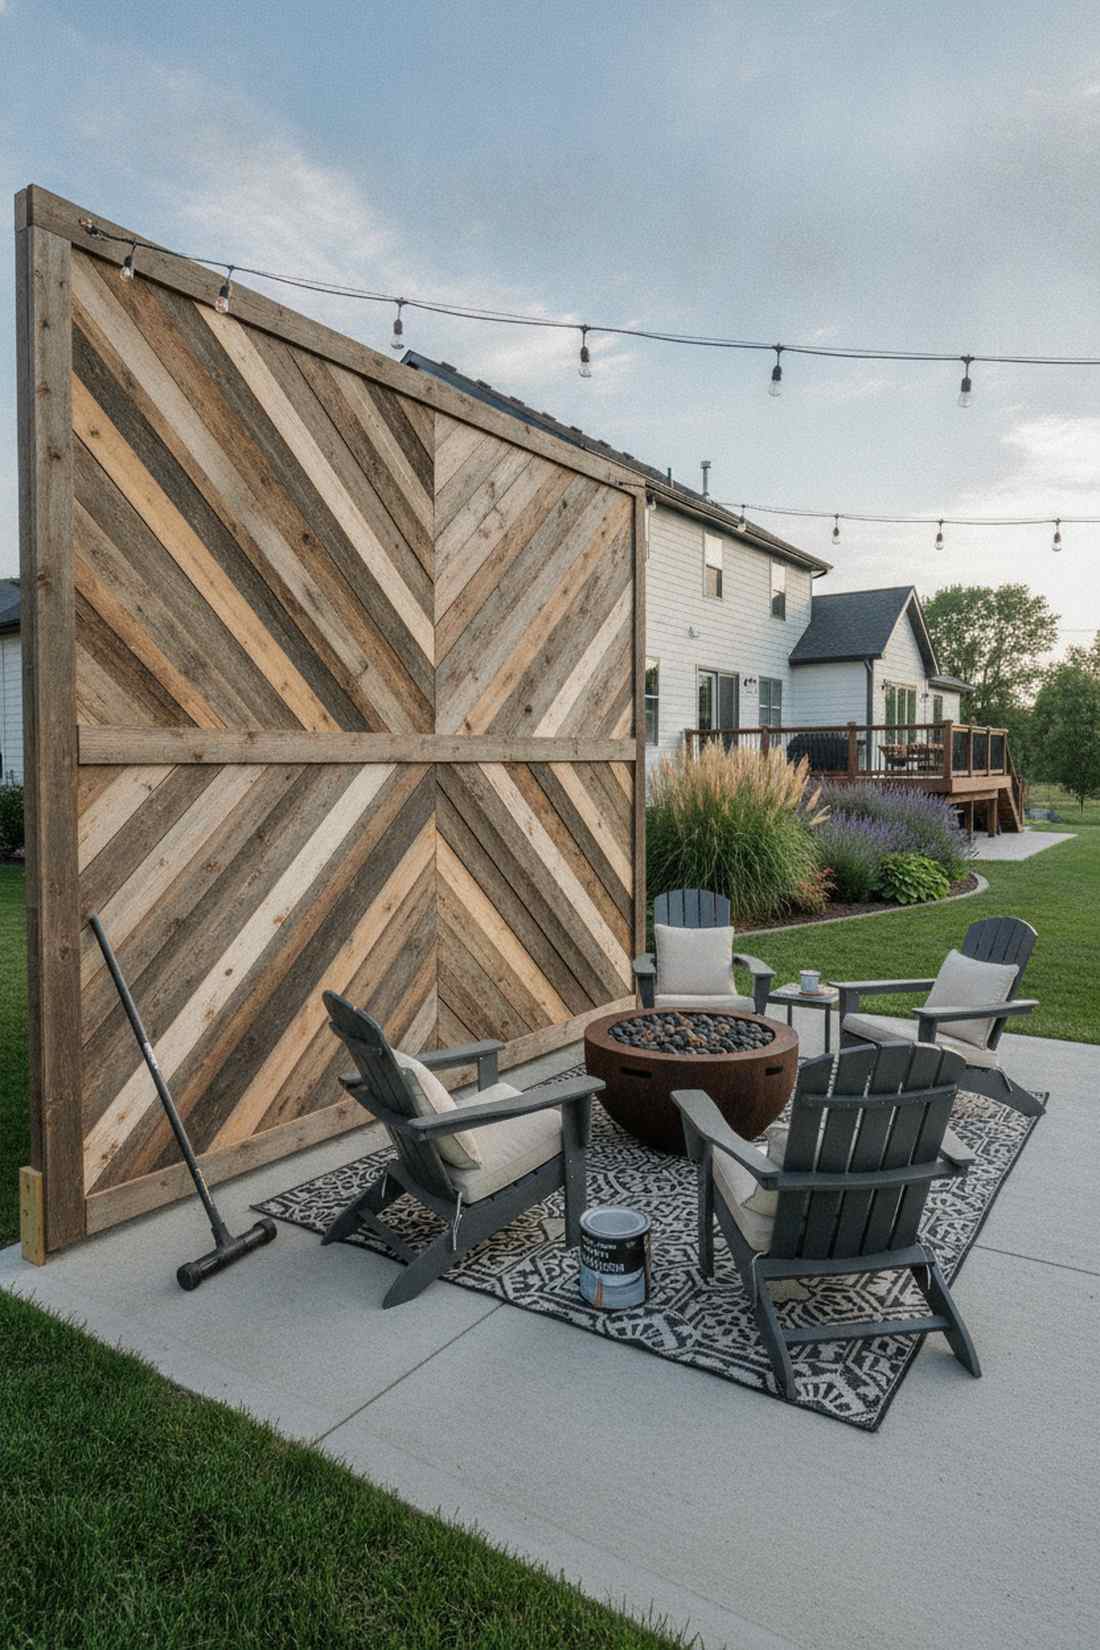
Oozing with history and texture, this space feels like a high-end hipster coffee shop. A weathered barn wood accent wall works exceptionally well for adding instant character to brand new concrete patios.
Buying pre-distressed wood from a big box store looks fake, but sourcing genuine pallet boards delivers a surprisingly premium look for almost zero dollars. Arranging these rugged outdoor patio wall ideas into a chevron pattern completely elevates the rustic vibe.
If you source pallets locally, this project only costs the price of screws ($20–$50). Pin this if you love upcycling trash into absolute treasure!
- Key Materials: Salvaged pallet boards, exterior clear-coat
- Vibe / Style: Rustic upcycled chic
- Difficulty: Easy but time-consuming
- Budget Breakdown: Wood: Free | Screws & Sealer: $45.
- Creator’s Tip: Run a metal detector wand over the reclaimed wood before cutting it to avoid destroying your saw blade on hidden rusty nails.
- Smart Sourcing: Invest in a heavy-duty wood pallet dismantling pry bar and matte exterior clear wood sealer.
Most people overcomplicate overhead shade, but this next geometric layout provides massive coverage for almost zero effort…
Budget-Friendly Options
29. Shade Sail Triangle Enclosure
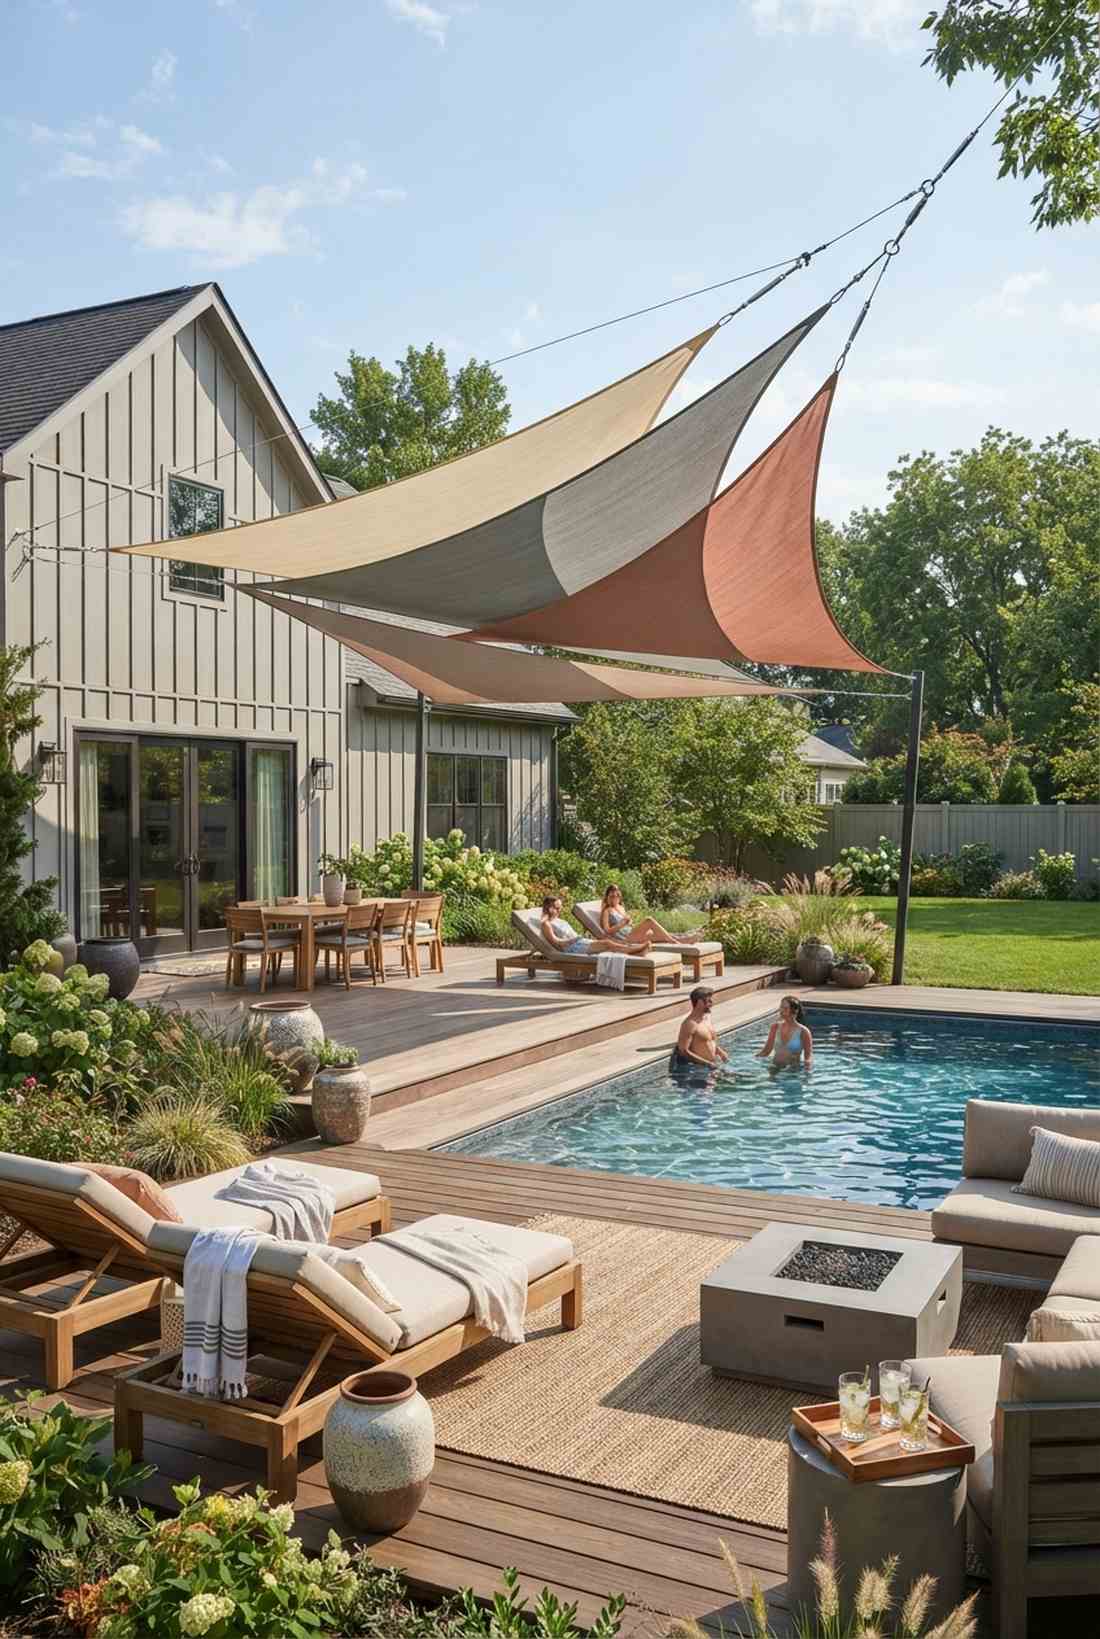
Casting dynamic, modern shadows, this setup feels incredibly architectural and light. Tensioned geometric shade canopies are perfect for covering massive pool decks without pouring concrete footings.
Building a massive roof is financially draining, but overlapping high-density fabric triangles looks far more expensive than it is. Sourcing these high-CPC outdoor patio enclosure elements creates an ultra-modern, resort-style vibe that blocks 95% of UV rays.
You can buy and rig three large sails for around $150–$300. Save this to your fast weekend makeover board!
- Key Materials: HDPE fabric triangles, stainless turnbuckles
- Vibe / Style: Modern geometric resort
- Difficulty: Easy rigging setup
- Budget Breakdown: Shade sails: $120 | Rigging hardware: $80.
- Creator’s Tip: Always install one corner of the triangle significantly lower than the others so heavy rain slides off instead of stretching the fabric into a bowl.
- Smart Sourcing: Look for UV-blocking geometric shade sail kits and heavy-duty stainless steel turnbuckles.
30. Corrugated Metal Roofing
Sounding absolutely magical during a rainstorm, this setup feels like a cozy backcountry cabin. Galvanized wavy steel panels work exceptionally well for quick, indestructible overhead protection.
Asphalt shingles require complex layering, but screwing down large metal sheets delivers a surprisingly premium look with incredible speed. It channels water perfectly and creates a brilliant industrial aesthetic when left unpainted.
Covering a basic patio structure with metal runs about $200–$400. It’s a fast upgrade that completely secures your outdoor furniture from the elements.
- Key Materials: Galvanized corrugated panels, rubber-washer roofing screws
- Vibe / Style: Rugged industrial cabin
- Difficulty: Easy beginner roofing
- Budget Breakdown: Metal sheets: $250 | Screws: $30.
- Creator’s Tip: Always drive the screws through the peak of the corrugation wave, never in the valley, to ensure water doesn’t pool around the screw hole and leak.
- Smart Sourcing: Use galvanized corrugated roof panels (bulk pack) and self-tapping roofing screws with rubber washers.
31. PVC Pipe Screen Frame
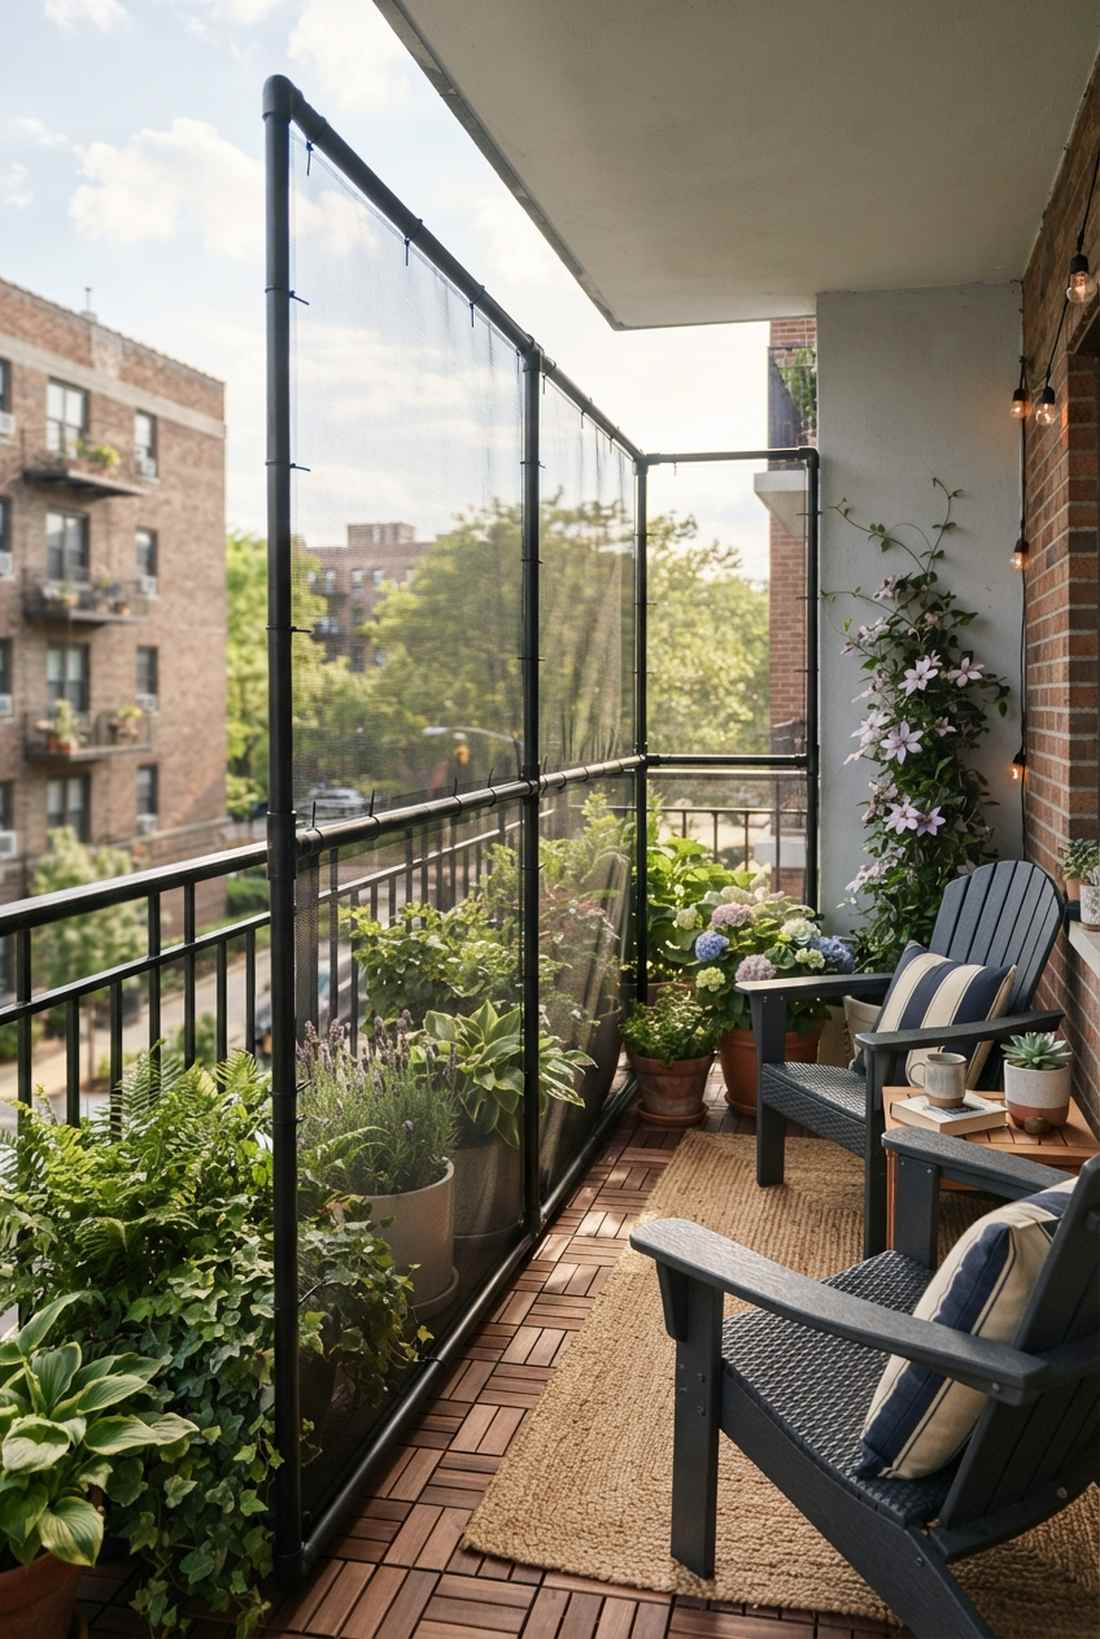
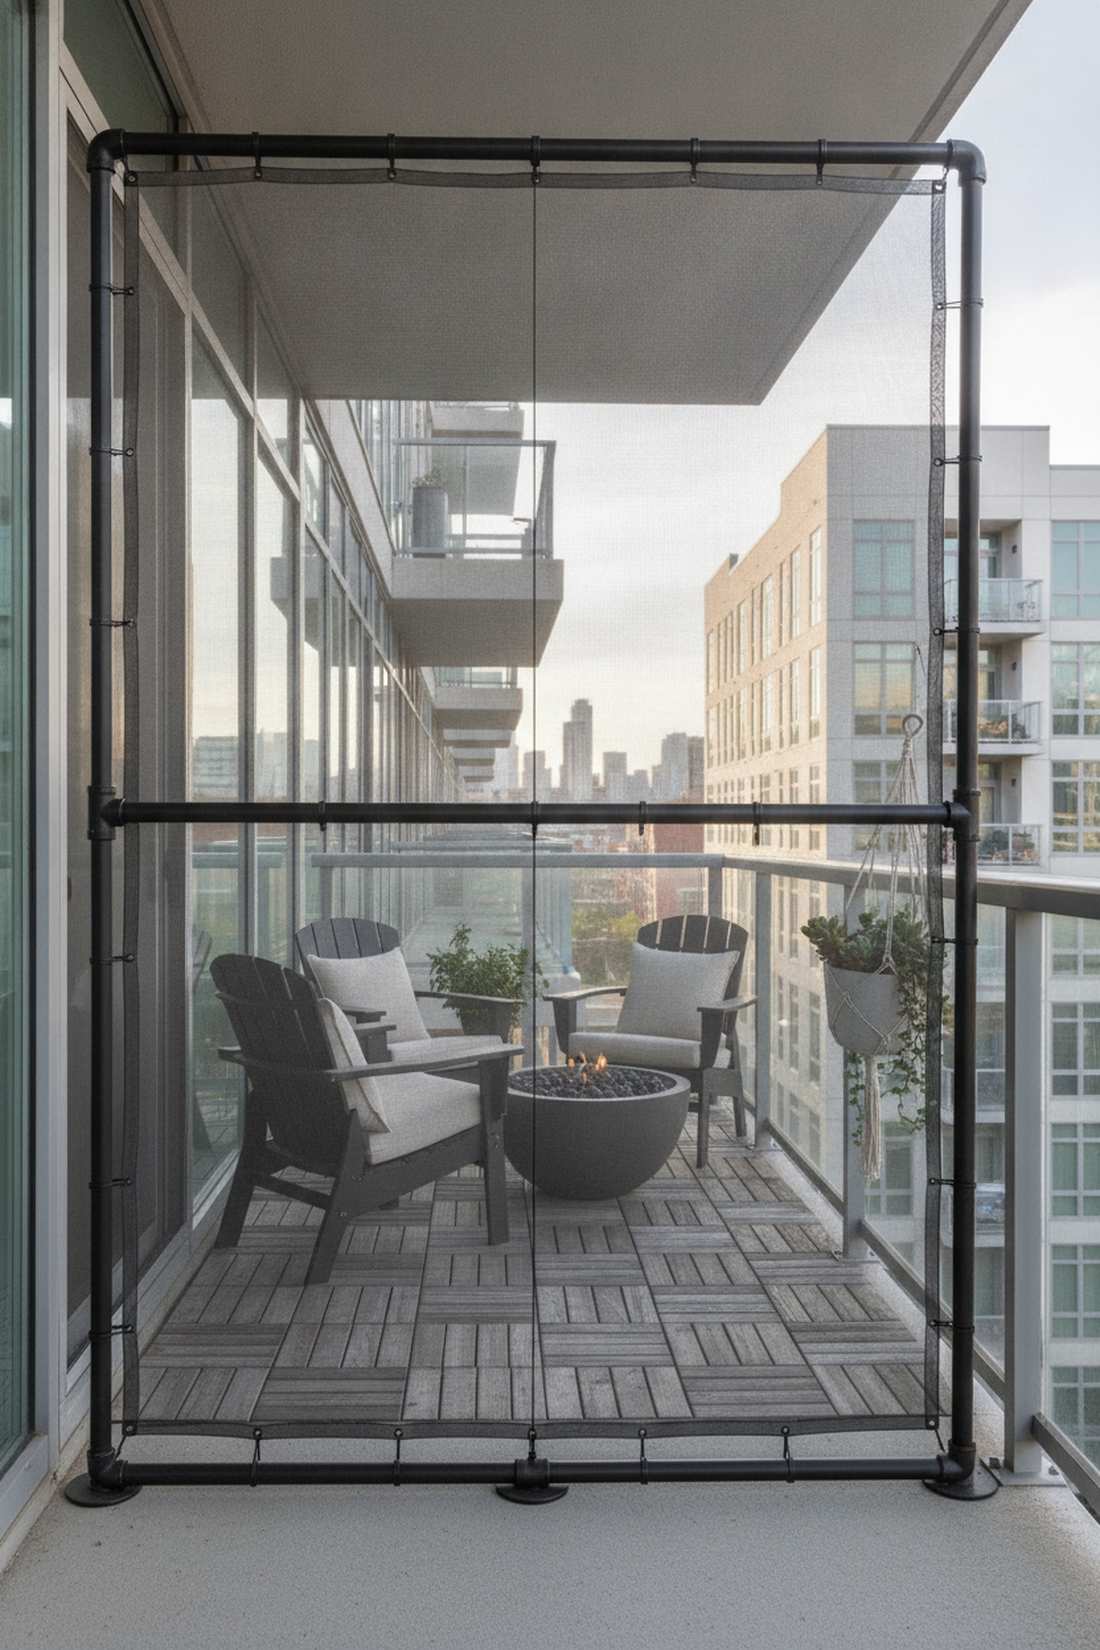
Super lightweight and endlessly customizable, this setup feels like the ultimate life hack. A modular PVC bug screen framework is brilliant for apartment balconies where permanent attachments are strictly forbidden.
Custom metal frames are heavy and expensive, but standard plumbing pipes look far more expensive than they are once painted matte black. By zip-tying affordable mesh to the frame, you get a totally freestanding barrier against mosquitoes.
You can build an entire balcony bug shield for under $50. Pin this immediately if your landlord hates when you drill holes!
- Key Materials: 3/4-inch PVC pipes, standard window screen roll
- Vibe / Style: Clever minimalist hack
- Difficulty: Instant beginner DIY
- Budget Breakdown: PVC & fittings: $30 | Screen mesh: $15.
- Creator’s Tip: Fill the bottom PVC pipes with play sand before gluing the joints to give the lightweight frame heavy stability against sudden wind gusts.
- Smart Sourcing: Buy pre-cut fiberglass window screening (bulk roll) and a PVC pipe cutter hand tool.
32. Canvas Drop Cloth Curtains

Draping beautifully like heavy linen, this setup feels incredibly organic and grounded. Upcycled painter’s canvas screens work exceptionally well for defining a bohemian lounge space on an extreme budget.
Custom heavy-weight outdoor curtains cost a fortune, but raw cotton drop cloths deliver a surprisingly premium look for pennies. They provide total visual privacy while blocking harsh winds that ruin dinner parties.
You can drape an entire pergola for around $60. Highly recommended for a quick weekend win before hosting a backyard event.
- Key Materials: Heavy-duty canvas drop cloths, brass grommet kit
- Vibe / Style: Rustic bohemian lounge
- Difficulty: Easy beginner sewing/clipping
- Budget Breakdown: Canvas cloths: $45 | Grommets: $15.
- Creator’s Tip: Wash and dry the drop cloths twice before hanging them to soften the stiff fabric and remove the industrial chemical smell.
- Smart Sourcing: Grab heavy-duty cotton canvas drop cloths (multi-pack) and an easy-press brass grommet punch kit.
Create Your Perfect All-Weather Retreat
These 32 incredible outdoor patio enclosure blueprints prove that high-end weather protection and striking aesthetics are achievable on any budget. Whether you are sourcing UV-resistant polycarbonate panels for a modern hybrid pergola or investing in a four-season insulated glass sunroom kit, the exact materials you choose dictate the longevity of your space. Stop letting seasonal weather dictate your outdoor living schedule. Start by measuring your space, securing the right high-quality foundation kits, and transforming your exposed patio into a luxurious, all-weather sanctuary that massively boosts your property value.
Frequently Asked Questions
What is the most durable material for an outdoor patio enclosure?
Aluminum framing paired with heavy-duty tempered glass or UV-coated polycarbonate stands out as the ultimate durable solution. Unlike raw wood that rots or cheap plastic that cracks, pre-cut powder-coated aluminum framing extrusions resist corrosion and require zero maintenance. If you’re building a privacy screen, investing in Corten steel or treated timber starter kits will give you a setup that easily lasts 30+ years.
How much does it cost to enclose an outdoor patio?
Costs swing wildly depending on materials, but smart sourcing keeps budgets low. A DIY geometric shade sail enclosure can cost under $200 using bulk kits, while aluminum-framed screen rooms run $1,500–$3,000. For high-end aesthetics, a custom four-season glass sunroom utilizing premium thermal window inserts will cost $15,000+. Always compare raw material costs versus easy-to-install pre-fab starter kits to find your perfect budget balance.
Do I need a permit to build a patio enclosure?
If you are attaching a permanent roof structure to your home’s exterior wall or pouring deep concrete footings, you almost certainly need a building permit. However, temporary structures like tension rod curtains, PVC screen frames, or freestanding pop-up pavilions usually bypass local zoning laws. Always double-check your local codes before ordering heavy-duty structural steel brackets or insulated roof panels.
What is the difference between a sunroom and a screen room?
Sunrooms use insulated glass patio walls to create a fully climate-controlled space that handles extreme winter weather, often requiring commercial-grade silicone sealants. Screen rooms utilize fiberglass mesh bulk rolls on aluminum frames to block bugs while maintaining massive airflow for summer comfort. Sunrooms are high-CPC investments that add massive home equity, while screen rooms offer fast, budget-friendly seasonal upgrades.
Can outdoor patio enclosures withstand heavy rain and snow?
Yes, but only if you use the right materials. Insulated foam-core aluminum roof panels and thick tempered glass will easily hold heavy northern snow loads. If you are using canvas drop cloths or motorized awning kits, they must be retracted during severe storms. Always ensure your structure incorporates waterproof roof flashing tape and proper drainage slopes to prevent pooling water from destroying the foundation.