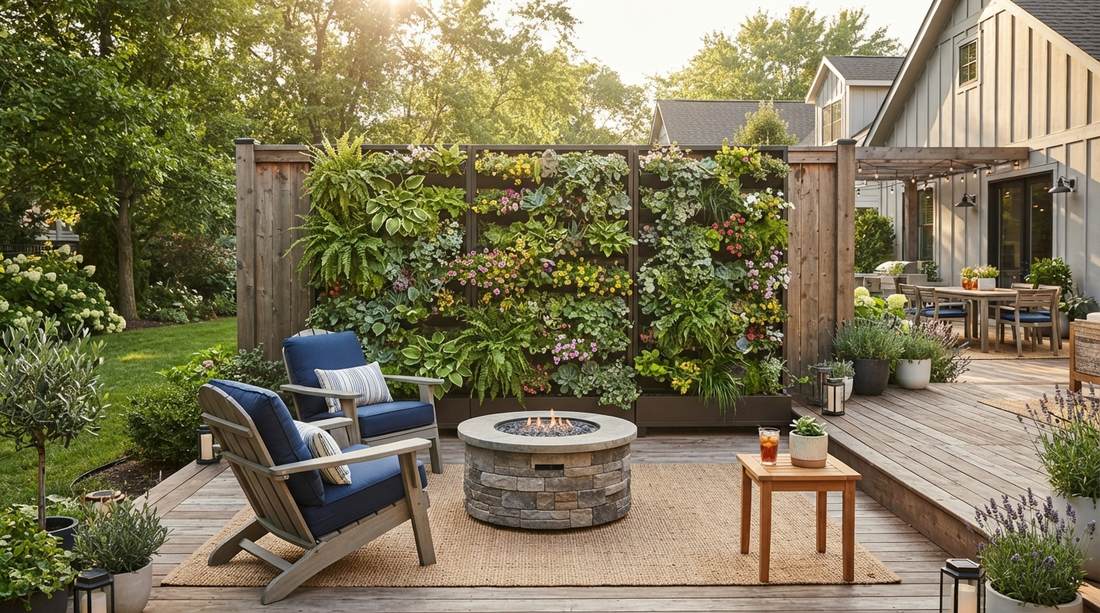
Stop settling for exposed sightlines when an outdoor living wall provides designer-level seclusion instantly. By leveraging smart material sourcing, you can achieve luxury aesthetic screening cheaply. These layout blueprints guarantee a premium finish that neighbors will envy.
Design Snapshot Key Principles
- Layered Privacy: Combine plant density, panel structure, and strategic placement to control sight lines without creating fortress-like barriers
- Structural Integration: Anchor living wall systems to existing pergolas, fences, or freestanding frames engineered for vertical load and wind resistance
- Irrigation Planning: Install drip systems or self-watering modules before planting to sustain vertical gardens through seasonal variations
- Plant Selection Logic: Match species to sun exposure, mature spread, and growth rate to maintain aesthetic consistency with minimal intervention
Modular Systems for Instant Privacy
1. Stacked Pocket Planter Panels
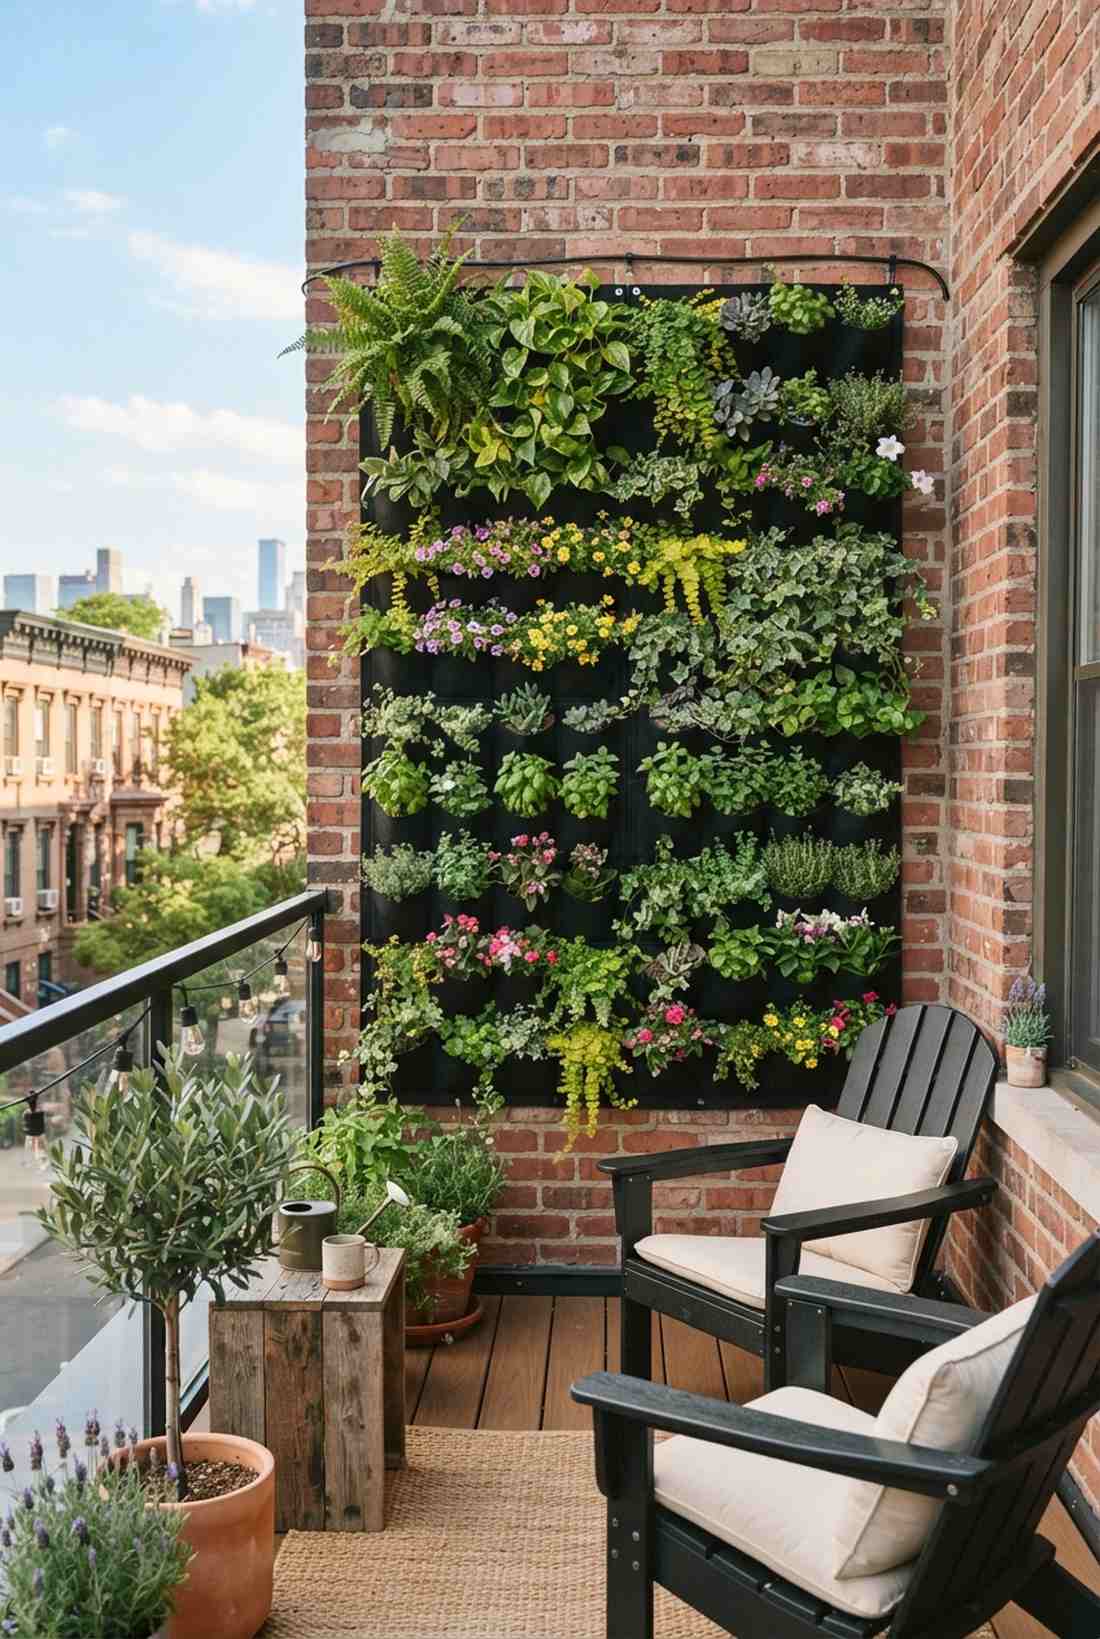
Feels exactly like a lush cascade of greenery you would spot in a luxury hotel courtyard. This fabric vertical garden layout works exceptionally well for an urban sun-facing balcony.
Many beginners overspend on rigid frames, yet this straightforward pocket approach delivers a surprisingly premium look. Grabbing heavy-duty, UV-resistant fabric grids ensures long-lasting coverage without sagging over time.
You can easily pull this off for around $30–$50 depending on the grid size. Save this to your DIY weekend garden board!
- Key Materials: UV-treated synthetic felt pockets, overhead drip line tubing
- Vibe / Style: Lush contemporary courtyard
- Difficulty: Easy beginner setup
- Budget Breakdown: Pockets: $25 | Drip Kit: $15 | Plants: $20.
- Creator’s Tip: Layer trailing plants at the bottom to hide any exposed fabric edges.
- Smart Sourcing: pre-cut felt planting pockets (bulk pack) and starter drip irrigation kits.
2. Tray-Based Hydroponic Modules
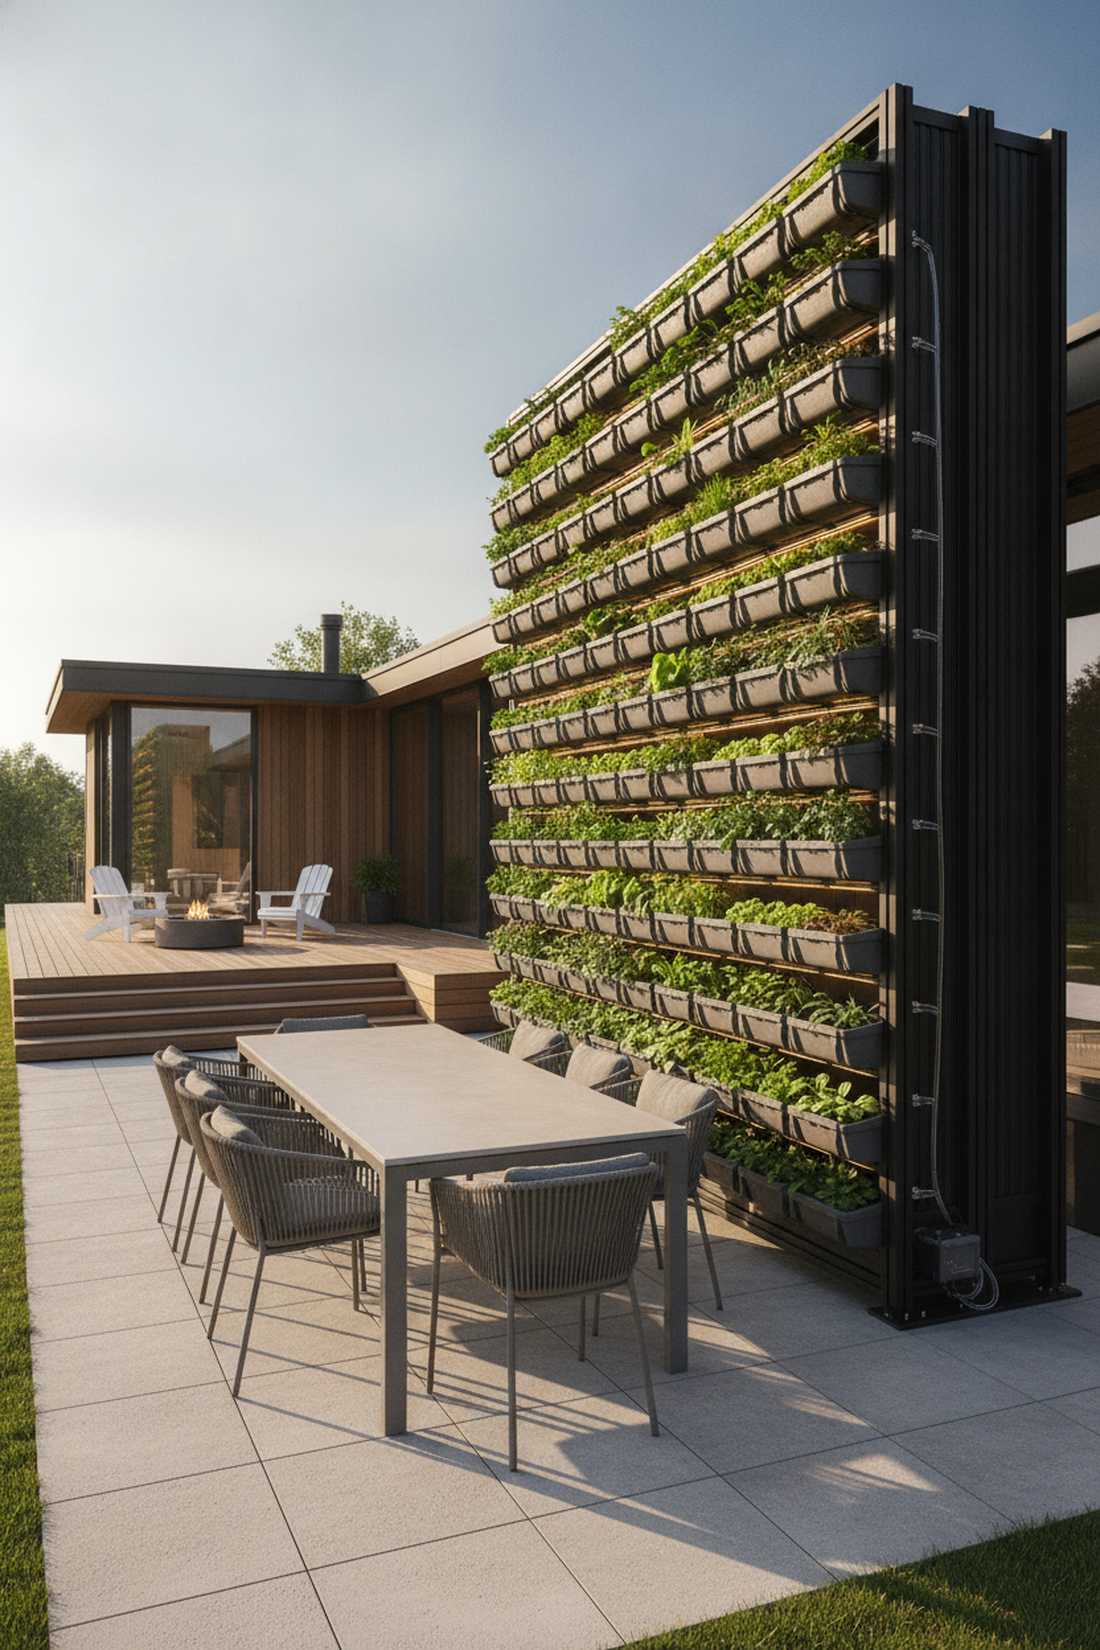
Gives off the ultra-modern energy of a high-tech eco-mansion. This tray-based hydroponic wall is the perfect placement for patio dining areas needing pristine, dirt-free aesthetics.
It completely removes the messy soil aspect, giving a designer-level finish that looks far more expensive than it actually is. Utilizing rigid locking trays with built-in hydroponic nutrient reservoirs eliminates water runoff issues.
Expect to spend about $60–$90 for a solid foundational framework. It is a fast upgrade that completely changes the vibe.
- Key Materials: Locking plastic growing trays, submersible water pump
- Vibe / Style: Modern architectural sleek
- Difficulty: Intermediate plumbing involved
- Budget Breakdown: Trays: $45 | Pump/Tubing: $25 | Nutrients: $15.
- Creator’s Tip: Use a smart plug to automate your watering cycles effortlessly.
- Smart Sourcing: commercial-grade modular wall frames and hydroponic nutrient starter packs.
3. Pre-Vegetated Panel Systems
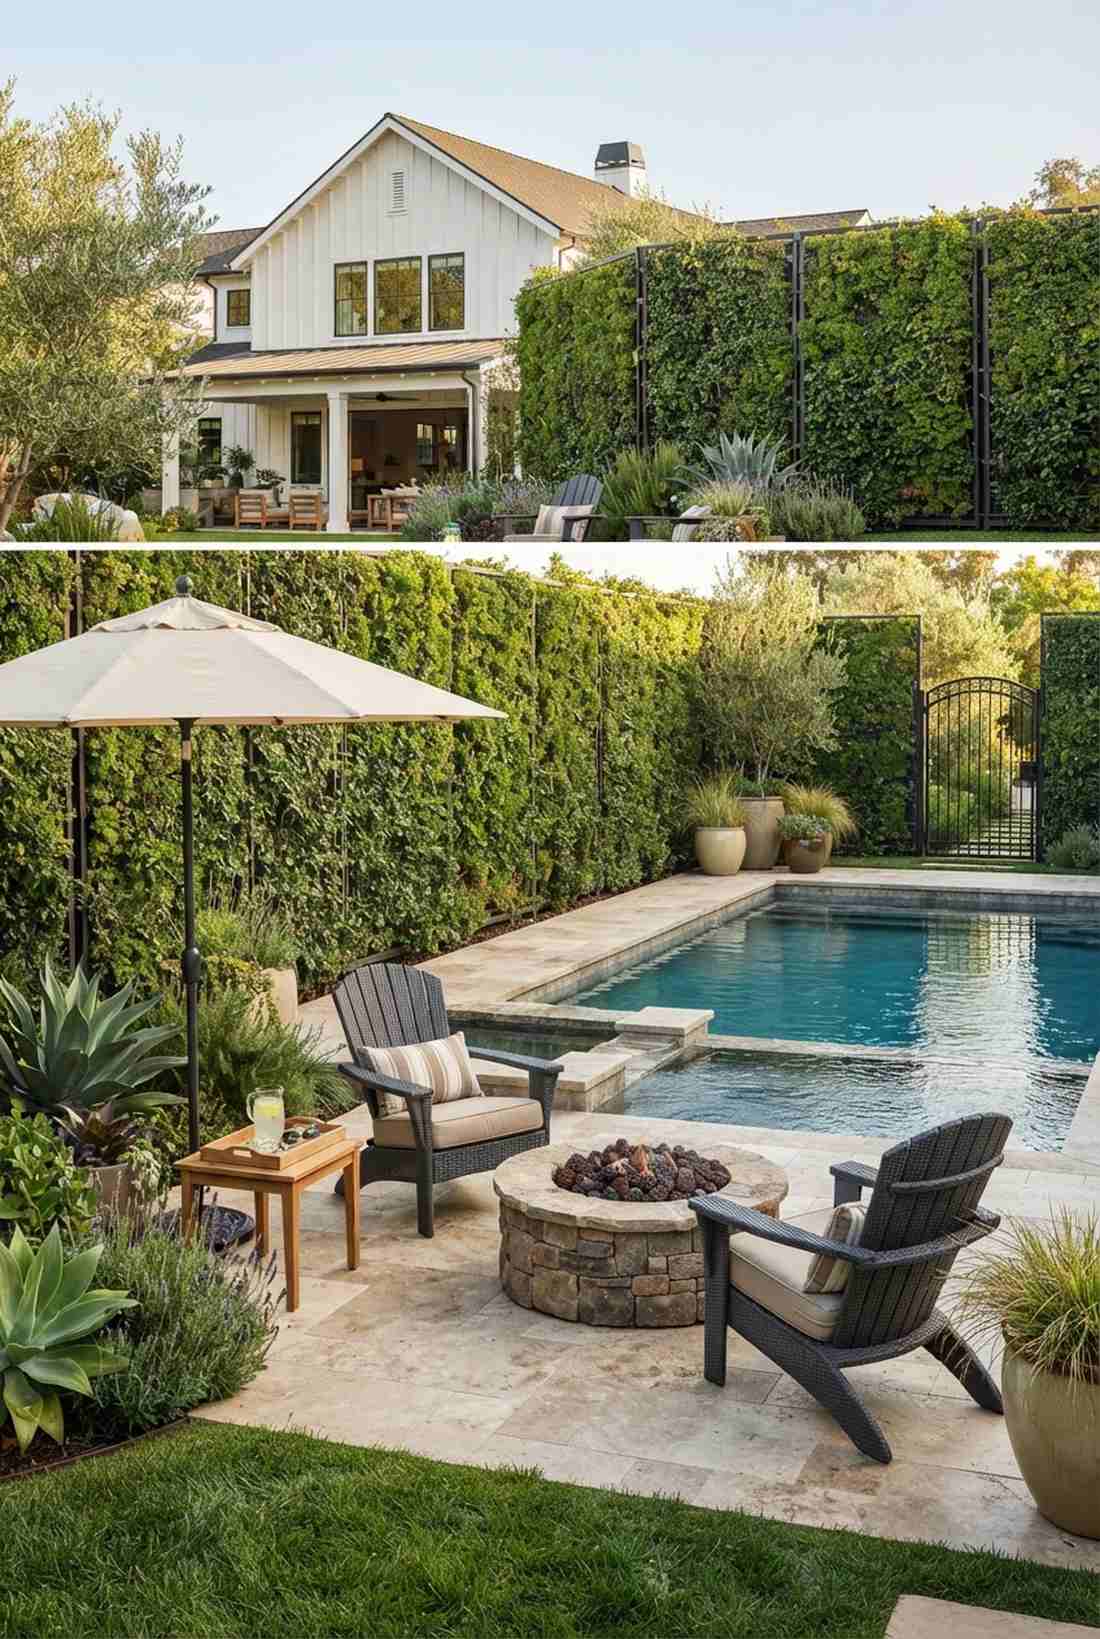
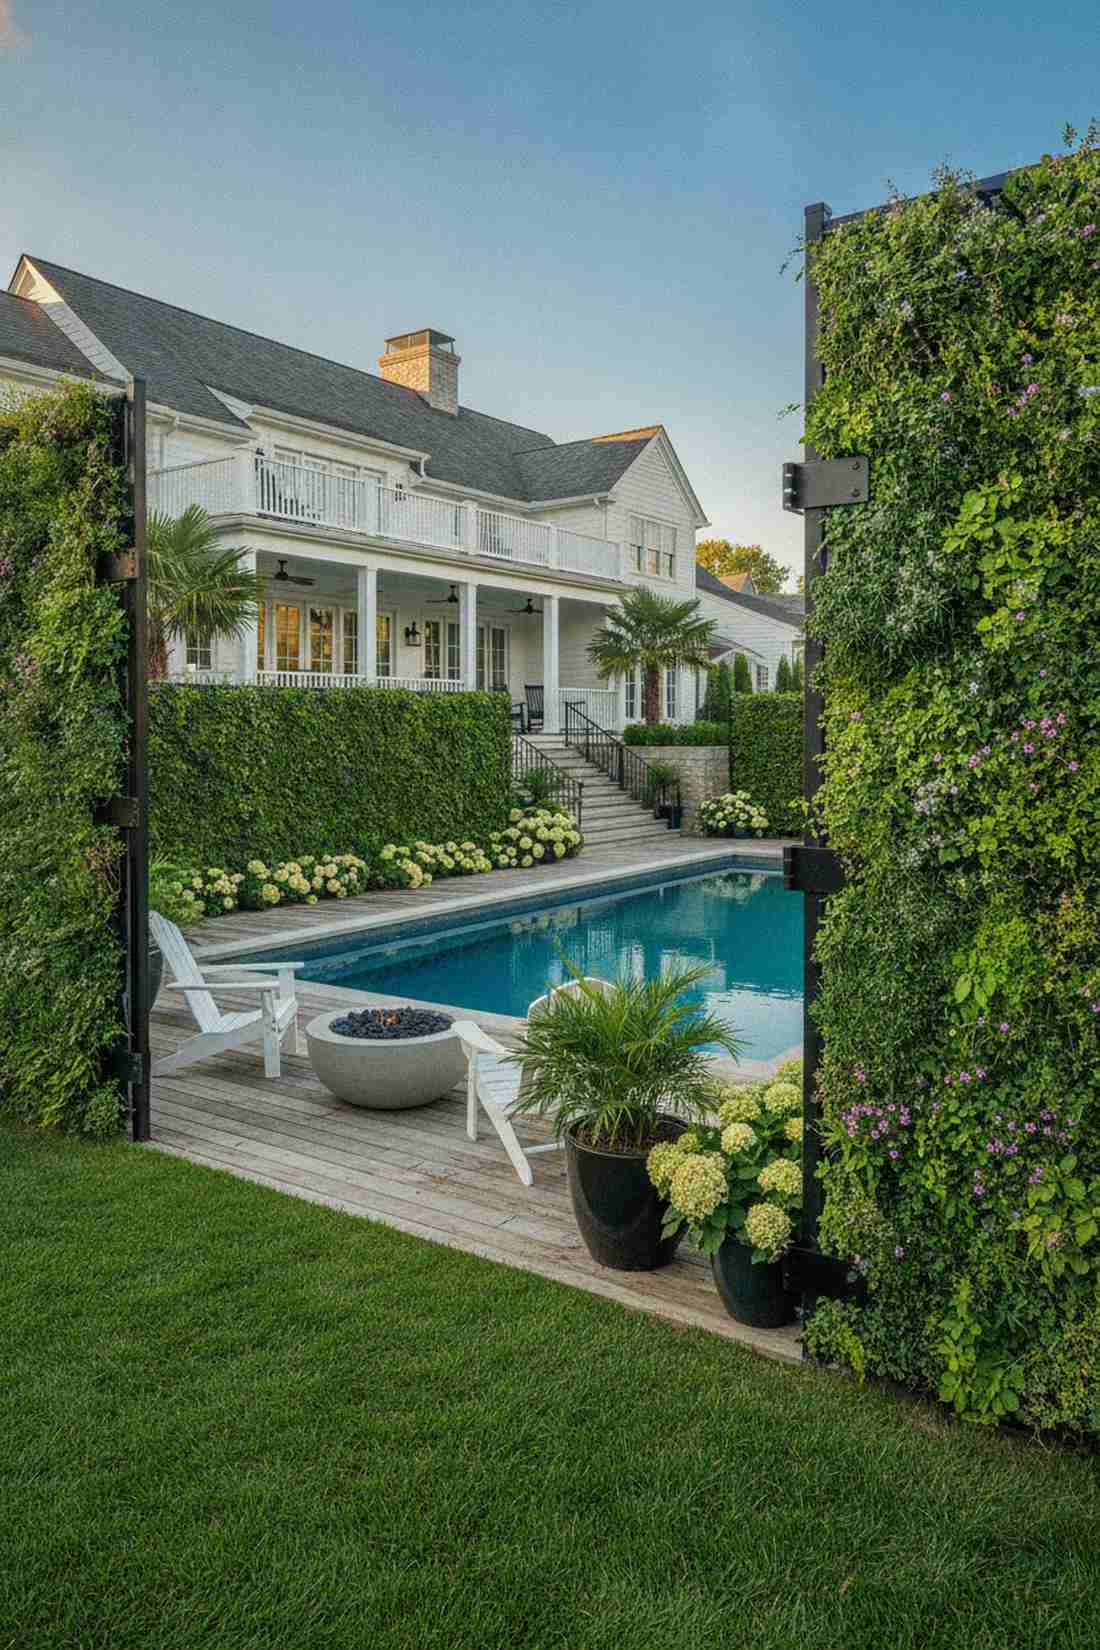
Feels like instant gratification magic directly out of a home makeover show. A pre-grown living screen is ideal for pool enclosures where immediate full privacy is required.
Waiting months for plants to grow is frustrating, which is why commercial-grade pre-vegetated mats provide an incredible hack. Securing these stabilized mats immediately masks ugly fencing while resisting high winds.
This shortcut runs higher, usually around $150 per section, but saves months of waiting. Pin this if you are planning a rapid outdoor transformation!
- Key Materials: Established sedum/ivy mats, heavy-duty mounting brackets
- Vibe / Style: Instant luxury estate
- Difficulty: Heavy lifting required
- Budget Breakdown: Pre-grown Mats: $120 | Hardware: $30.
- Creator’s Tip: Ensure your underlying structure is reinforced to handle the immediate water weight.
- Smart Sourcing: fully rooted green wall panels and rust-proof mounting hardware kits.
4. Stackable Planter Box Towers
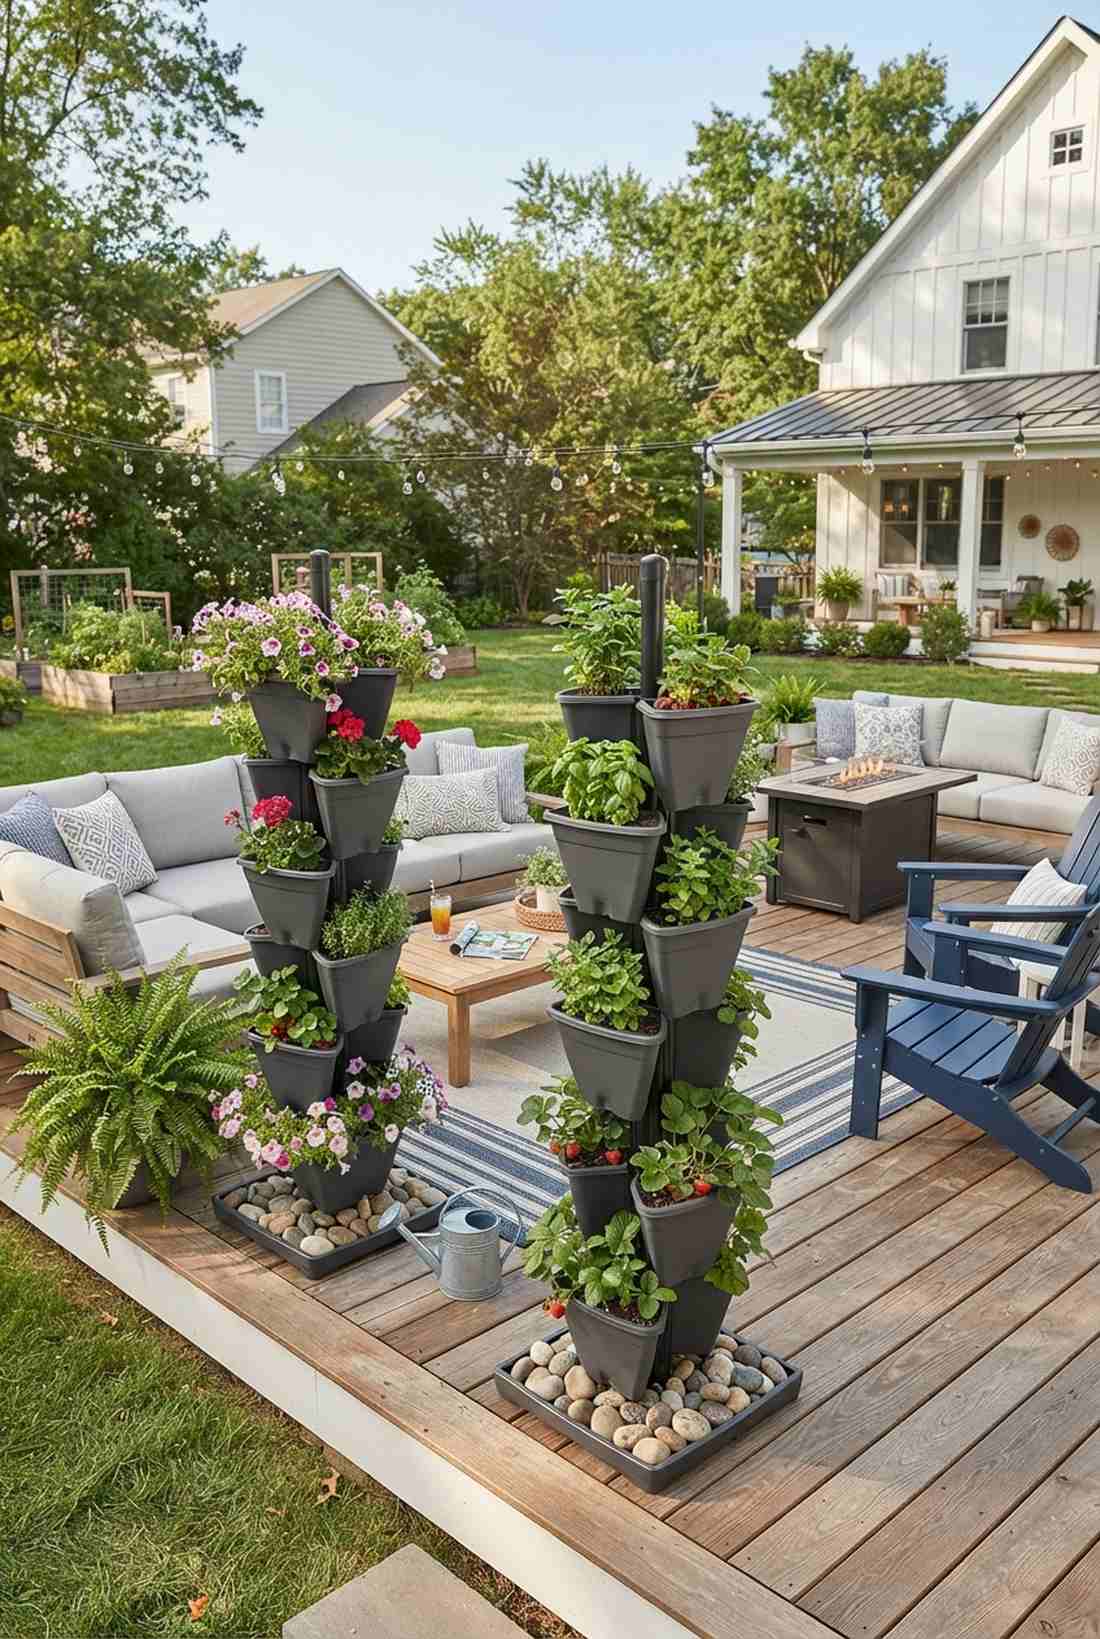
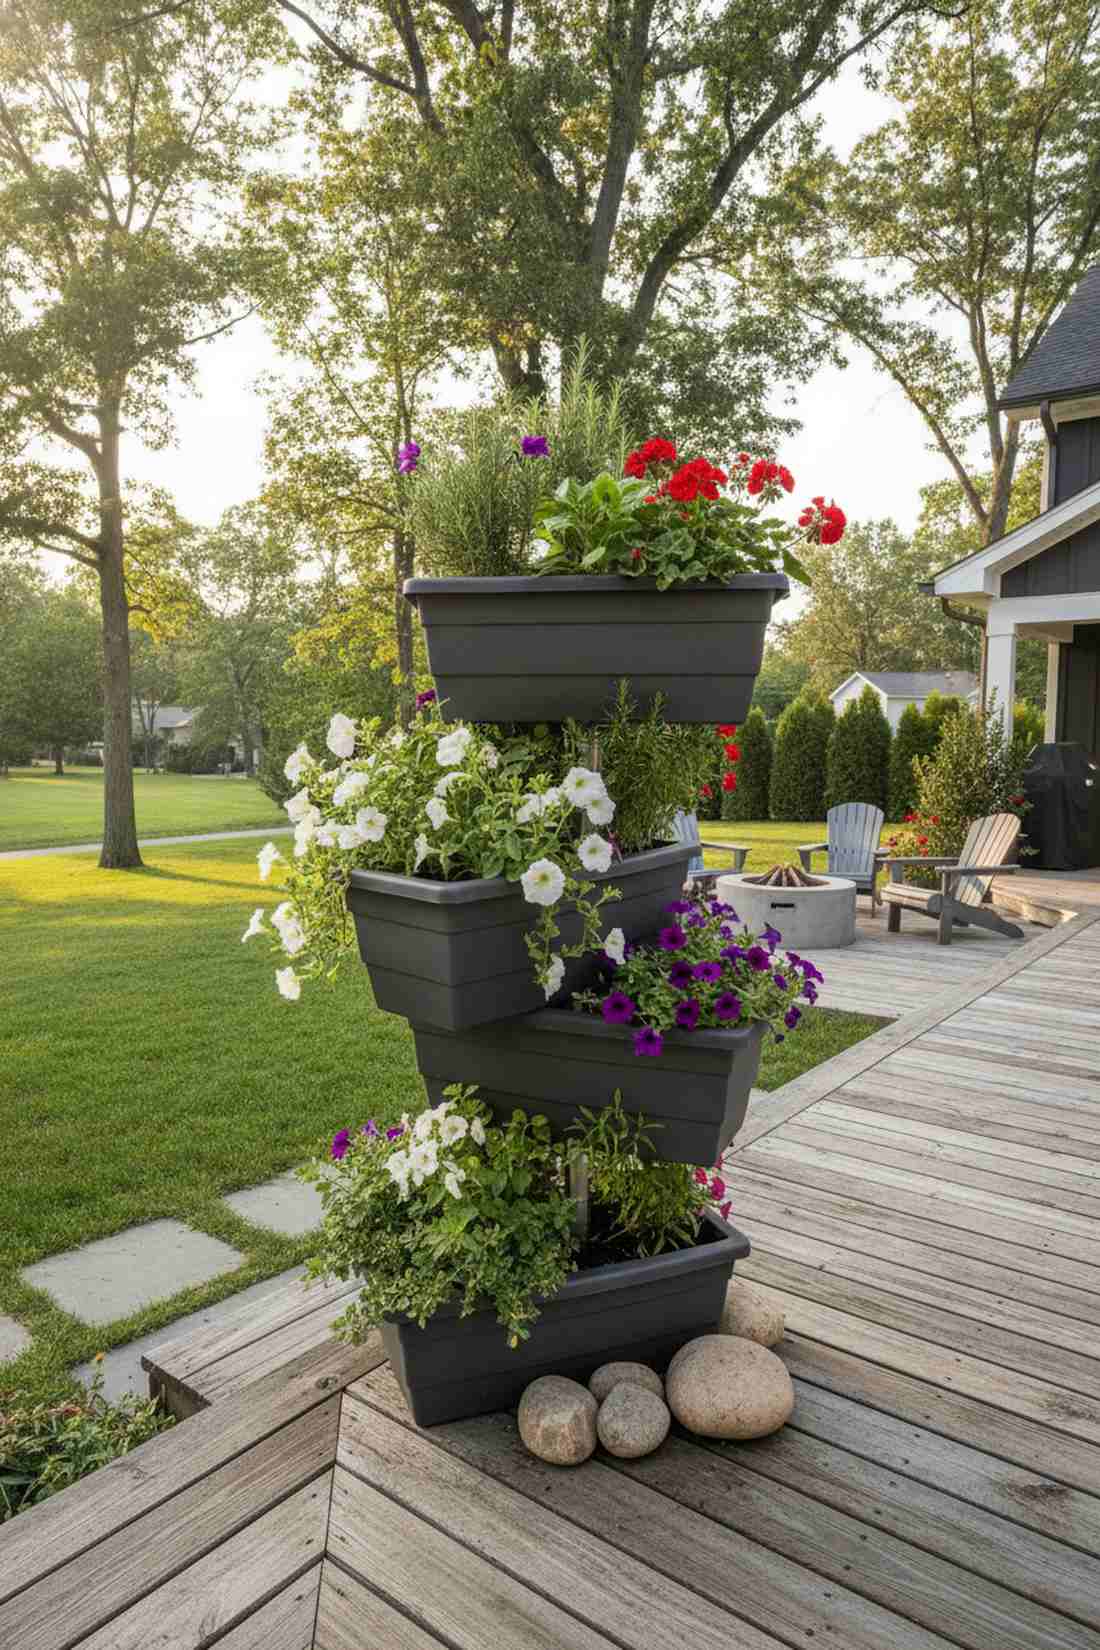
Brings a playful, sculptural element that feels like a modern art installation. An offset planter box tower works beautifully as a movable barrier on open deck edges.
The staggered rotation trick maximizes sunlight while easily outperforming expensive permanent fencing in visual appeal. Simply locking together high-quality plastic or resin tiers gives you total control over the height and coverage.
A basic tower configuration sets you back around $40–$60. Highly recommended for renters needing non-permanent boundaries.
- Key Materials: Tiered resin planters, central support pole
- Vibe / Style: Dynamic vertical modernism
- Difficulty: Simple tool-free assembly
- Budget Breakdown: Tower Kit: $45 | Potting Mix: $15.
- Creator’s Tip: Place heavy decorative stones in the bottom tier to prevent wind tipping.
- Smart Sourcing: UV-coated stackable planter kits and lightweight perlite soil blends (bulk).
Most people get this completely wrong… until they try the exact layout coming up next.
Climbing Plant Frameworks
5. Steel Cable Grid Walls
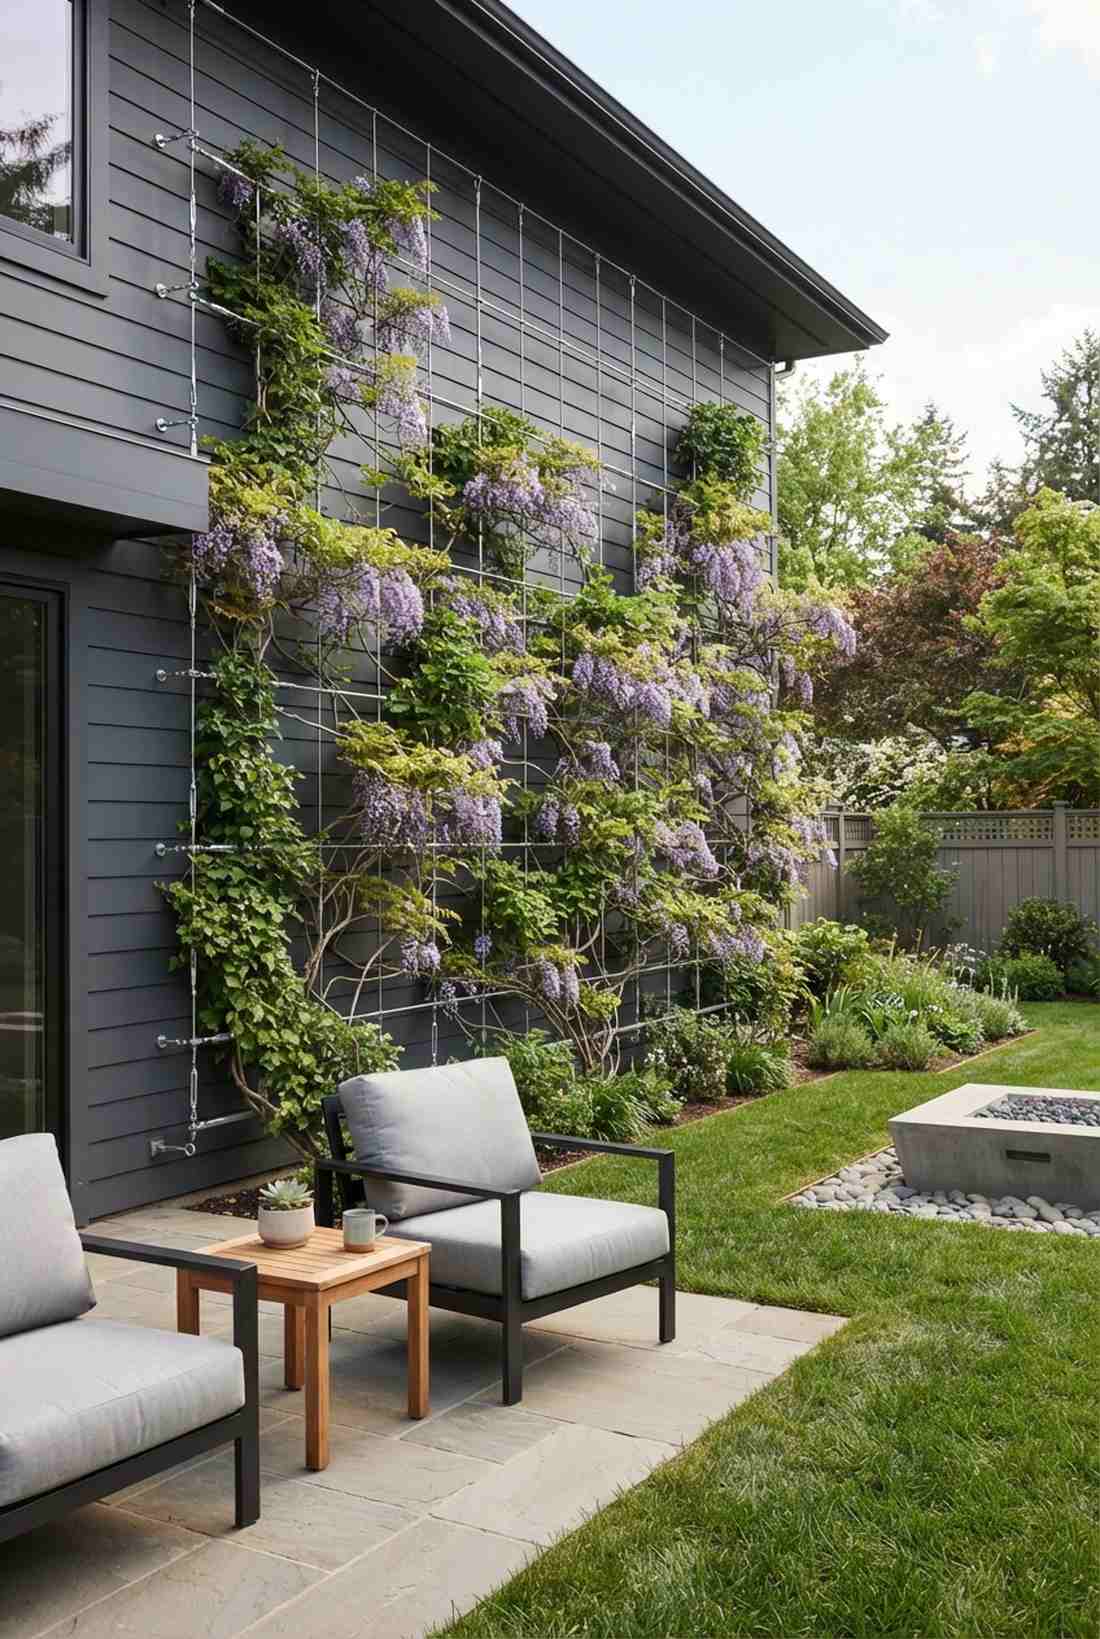
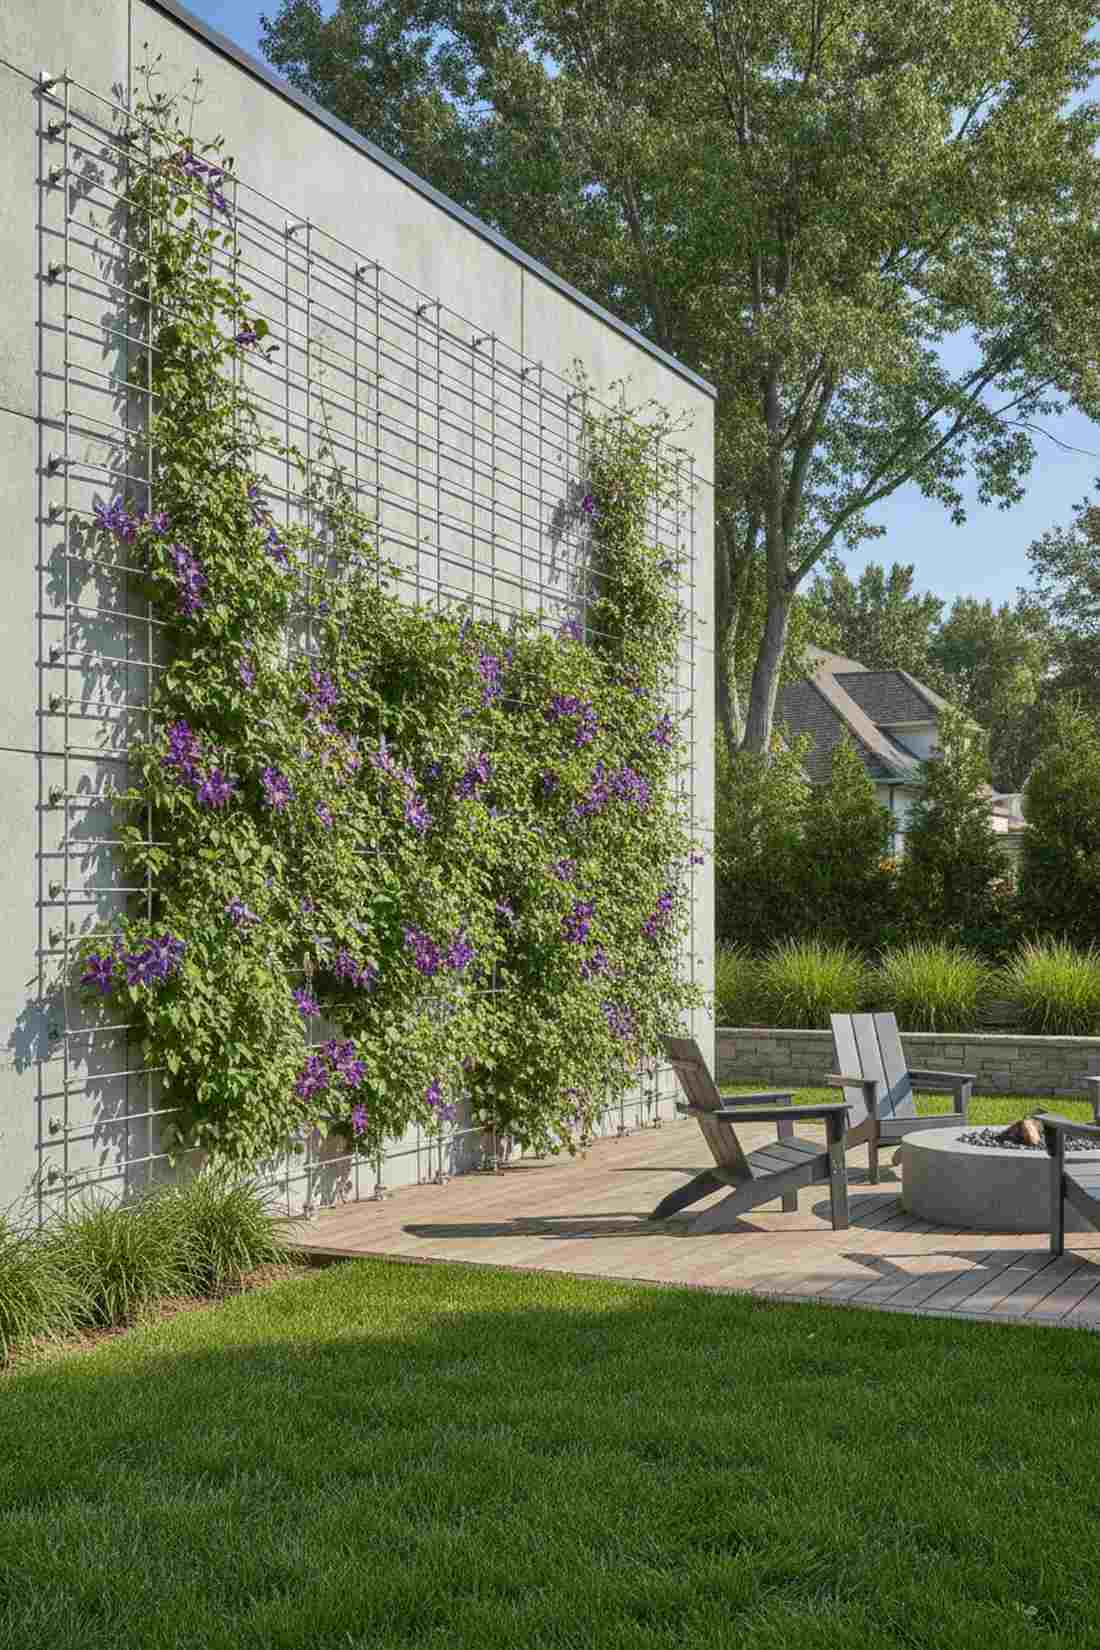
Feels sleek and almost invisible, letting the blooming vines steal the entire show. Using a tensioned steel wire grid is a flawless approach for contemporary exterior siding.
Wood trellises rot eventually, but implementing marine-grade cable networks ensures a permanent, high-end facade that never warps. It blends industrial materials with organic growth for an incredibly sophisticated architectural contrast.
Materials generally cost around $70–$100 depending on the tensioners. Pin this to your minimalist garden inspiration board!
- Key Materials: Stainless steel wire rope, turnbuckles, eye hooks
- Vibe / Style: Industrial chic botanic
- Difficulty: Requires precise measuring
- Budget Breakdown: Cable: $30 | Tensioners: $45 | Anchor Posts: $25.
- Creator’s Tip: Space the cables at least 8 inches apart so thick vines have room to weave.
- Smart Sourcing: stainless steel trellis wire kits and heavy-duty turnbuckle multipacks.
6. Bamboo Lattice Screens
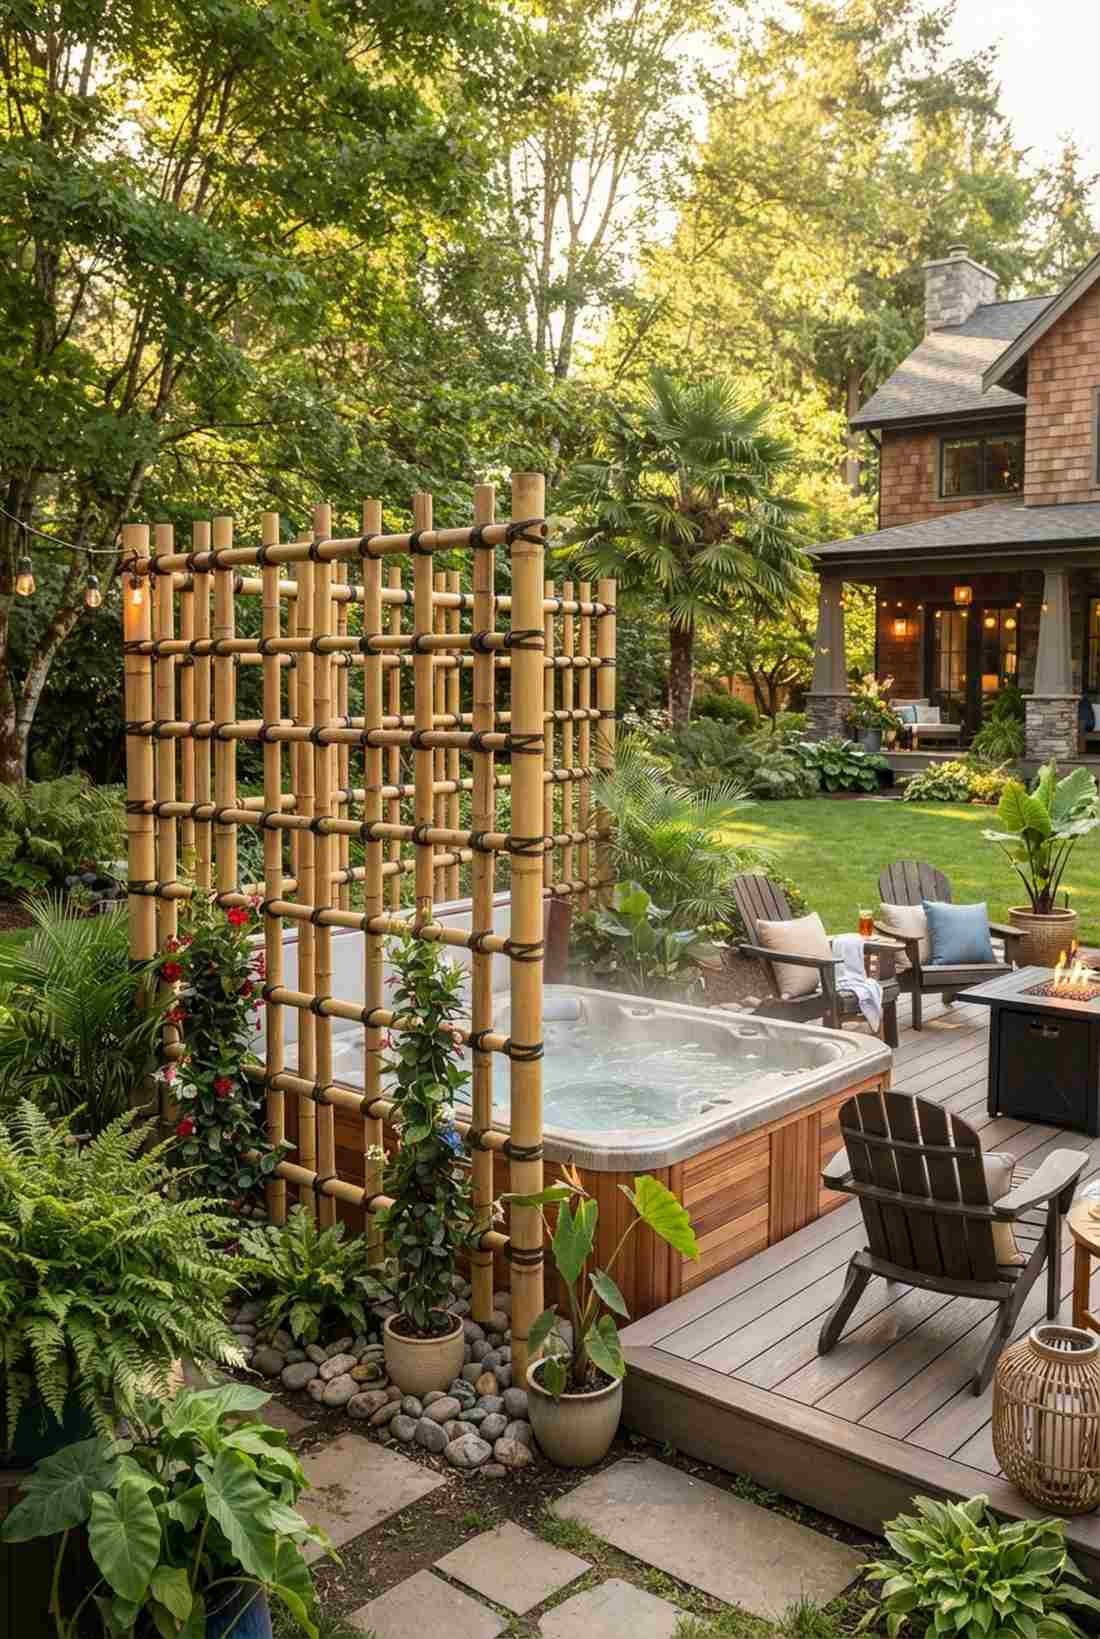
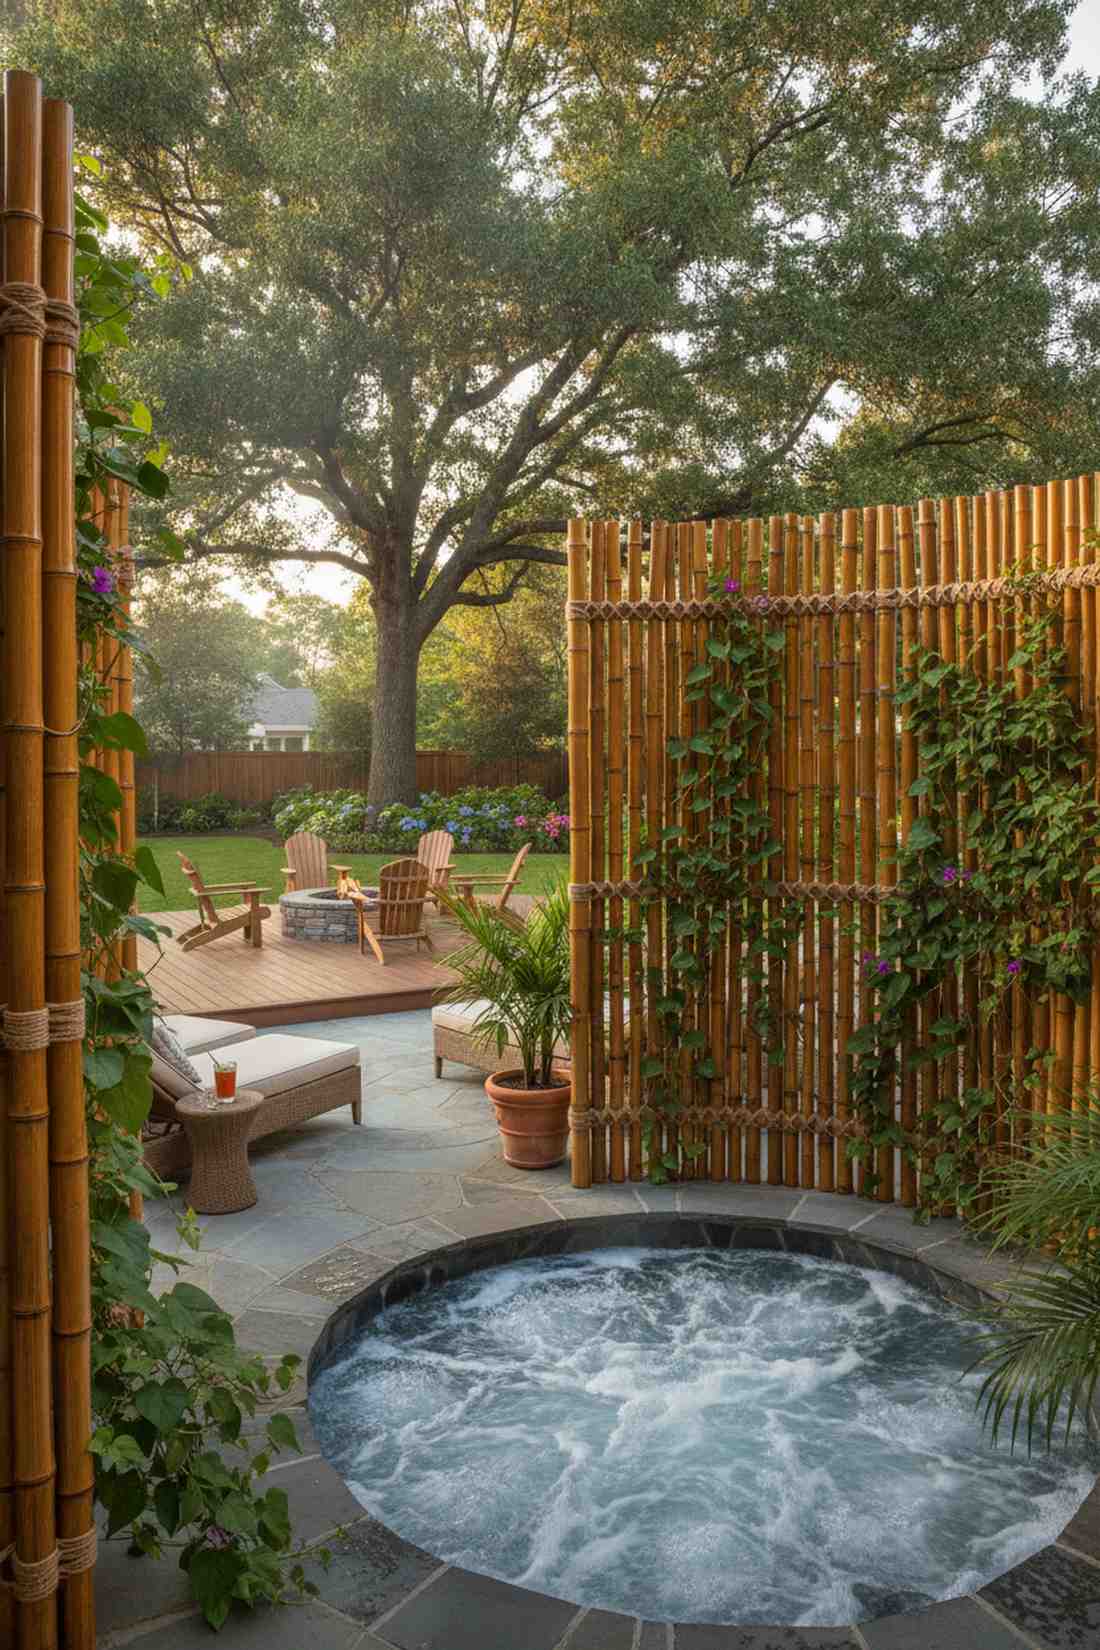
Radiates a warm, tropical resort energy that instantly lowers your stress levels. A natural bamboo grid screen is perfect for framing an outdoor spa or hot tub zone.
Skip the cheap plastic lattices; utilizing authentic treated cane provides a rich, textured backdrop that elevates the whole yard. Lashing them with UV-resistant zip ties or natural twine creates a sturdy framework for rapid-growing annual vines.
You can build a large section for surprisingly little, right around $25–$40. It is a fantastic afternoon project for instant gratification.
- Key Materials: Thick bamboo poles, lashing cord or weather-proof zip ties
- Vibe / Style: Balinese spa retreat
- Difficulty: Very beginner friendly
- Budget Breakdown: Bamboo pack: $25 | Lashing wire: $10.
- Creator’s Tip: Coat the bamboo with a clear outdoor sealant to prevent it from turning gray.
- Smart Sourcing: pre-cut bamboo pole bundles and outdoor-grade clear wood sealant.
7. Welded Wire Mesh Panels
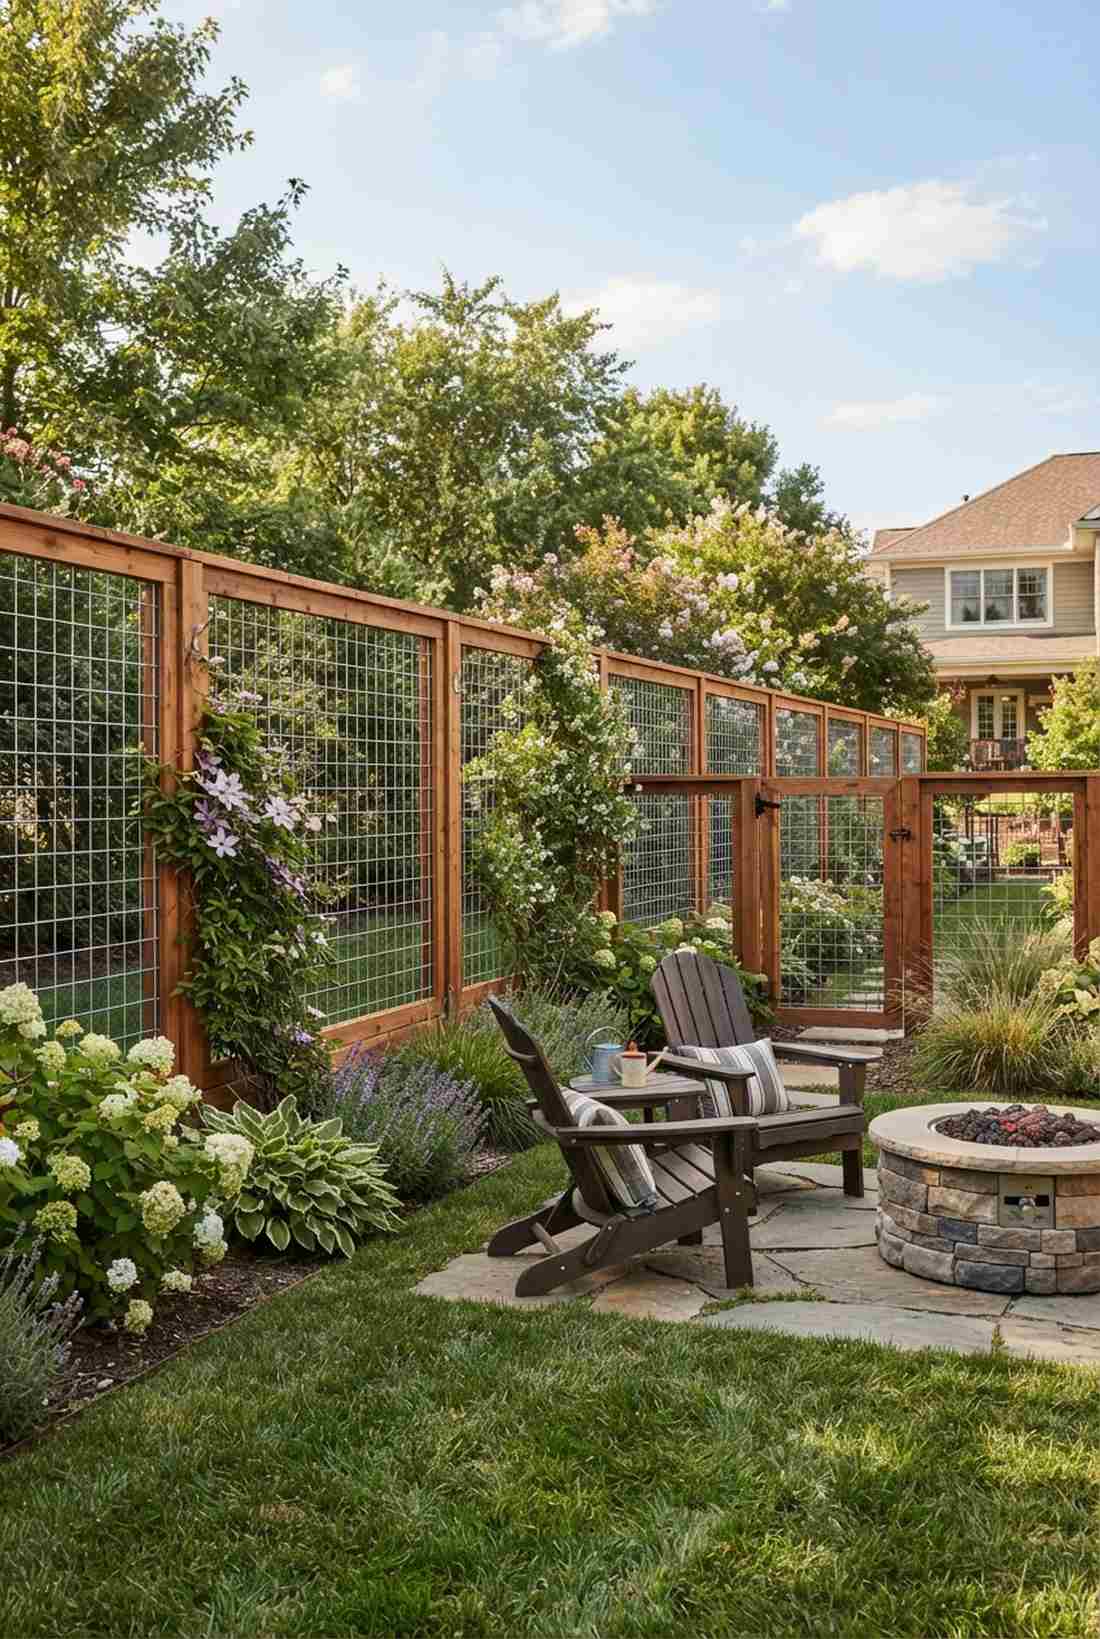
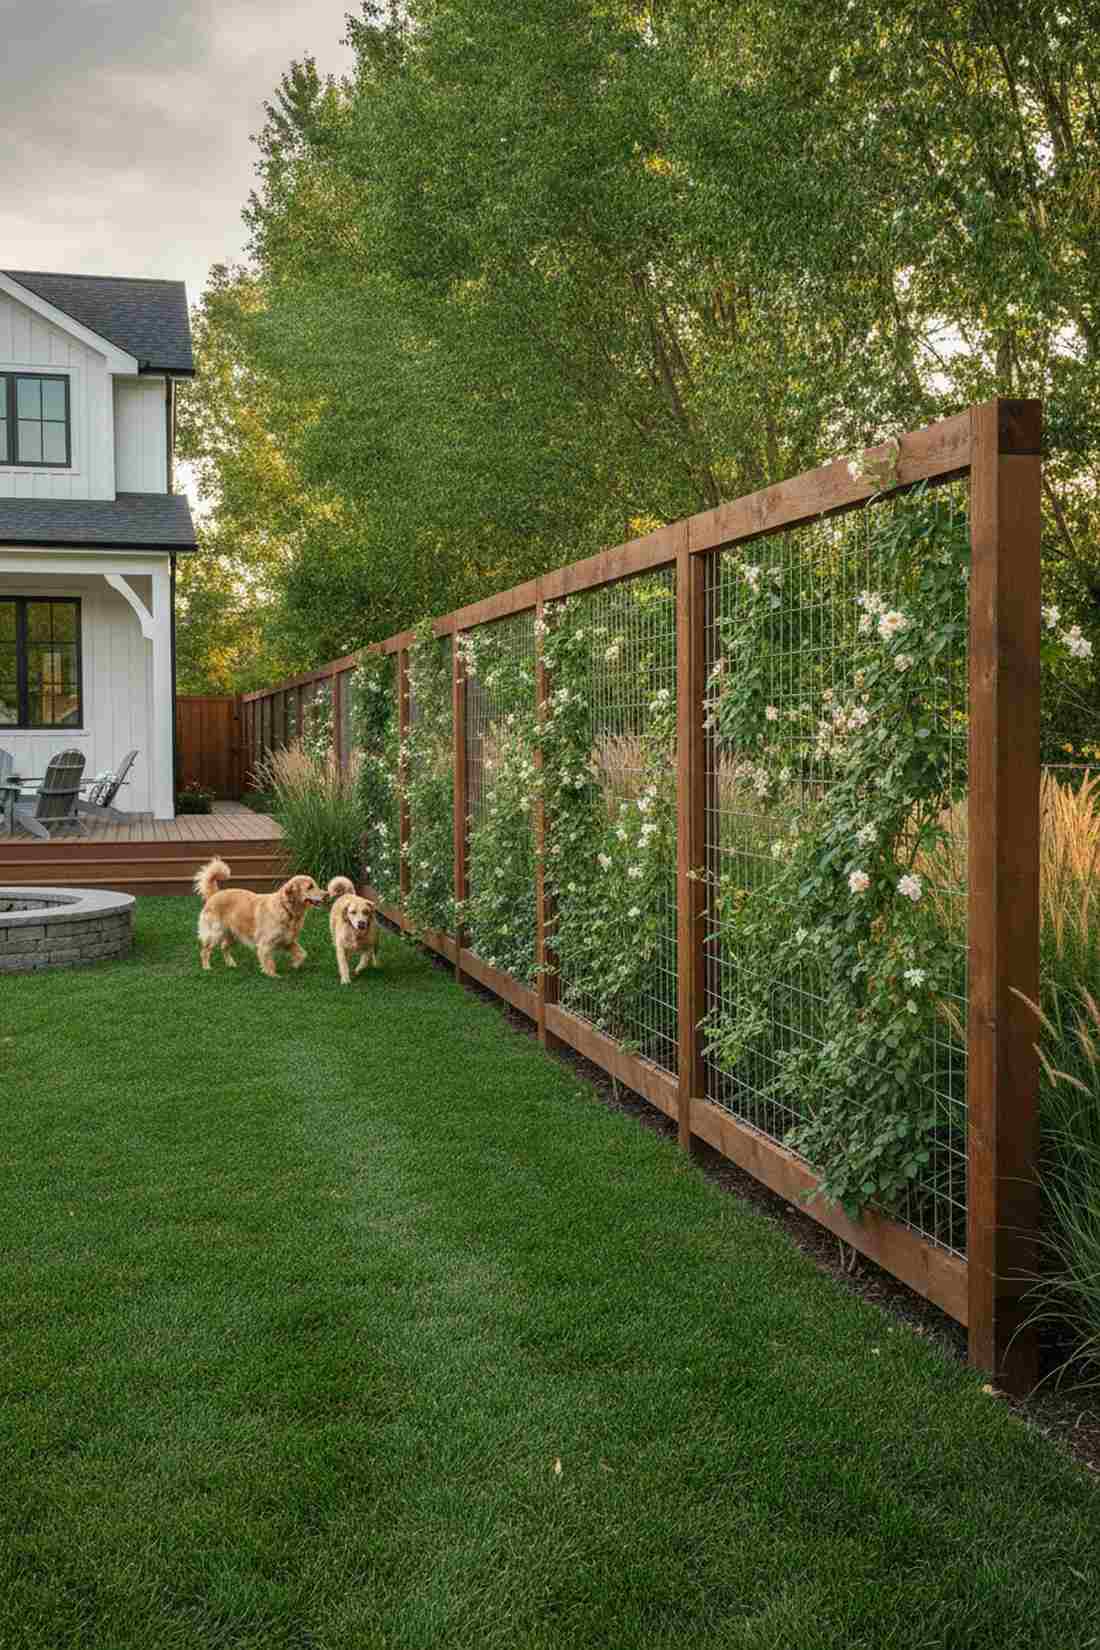
Gives off an organized, modern farmhouse aesthetic that feels incredibly intentional. A heavy-gauge wire climbing wall acts as the ultimate durable boundary between property lines.
Flimsy chicken wire bends and sags, but stepping up to rigid, cattle-panel style mesh creates a virtually indestructible living fence. Enclosing the mesh within a stained timber frame transforms agricultural supplies into a luxury feature.
Expect to spend $50–$80 per framed panel section. Save this if you need dog-proof backyard privacy!
- Key Materials: Galvanized welded wire panels, cedar framing lumber
- Vibe / Style: Upscale modern farmhouse
- Difficulty: Moderate woodworking
- Budget Breakdown: Wire Panel: $35 | Timber: $30 | Screws: $10.
- Creator’s Tip: Use U-nails (poultry staples) to firmly secure the metal grid to the wood frame.
- Smart Sourcing: heavy-duty welded wire rolls and galvanized framing staples (bulk pack).
8. Gabion Wall Planters
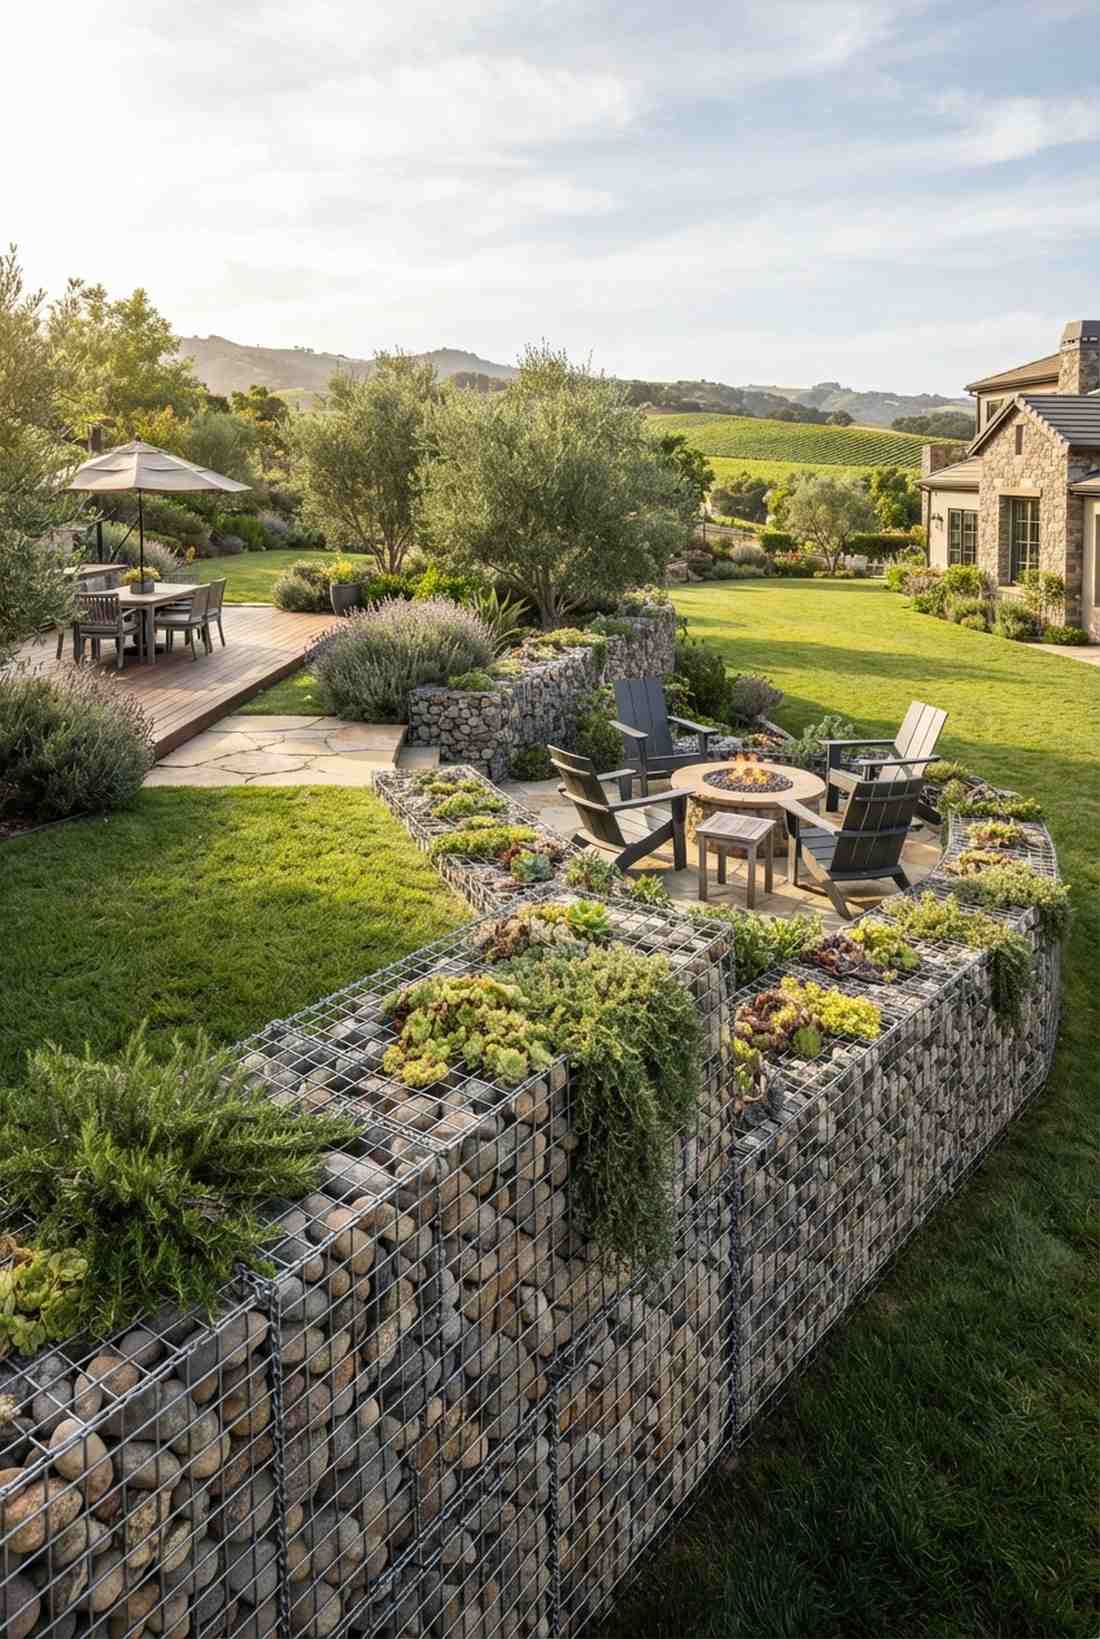
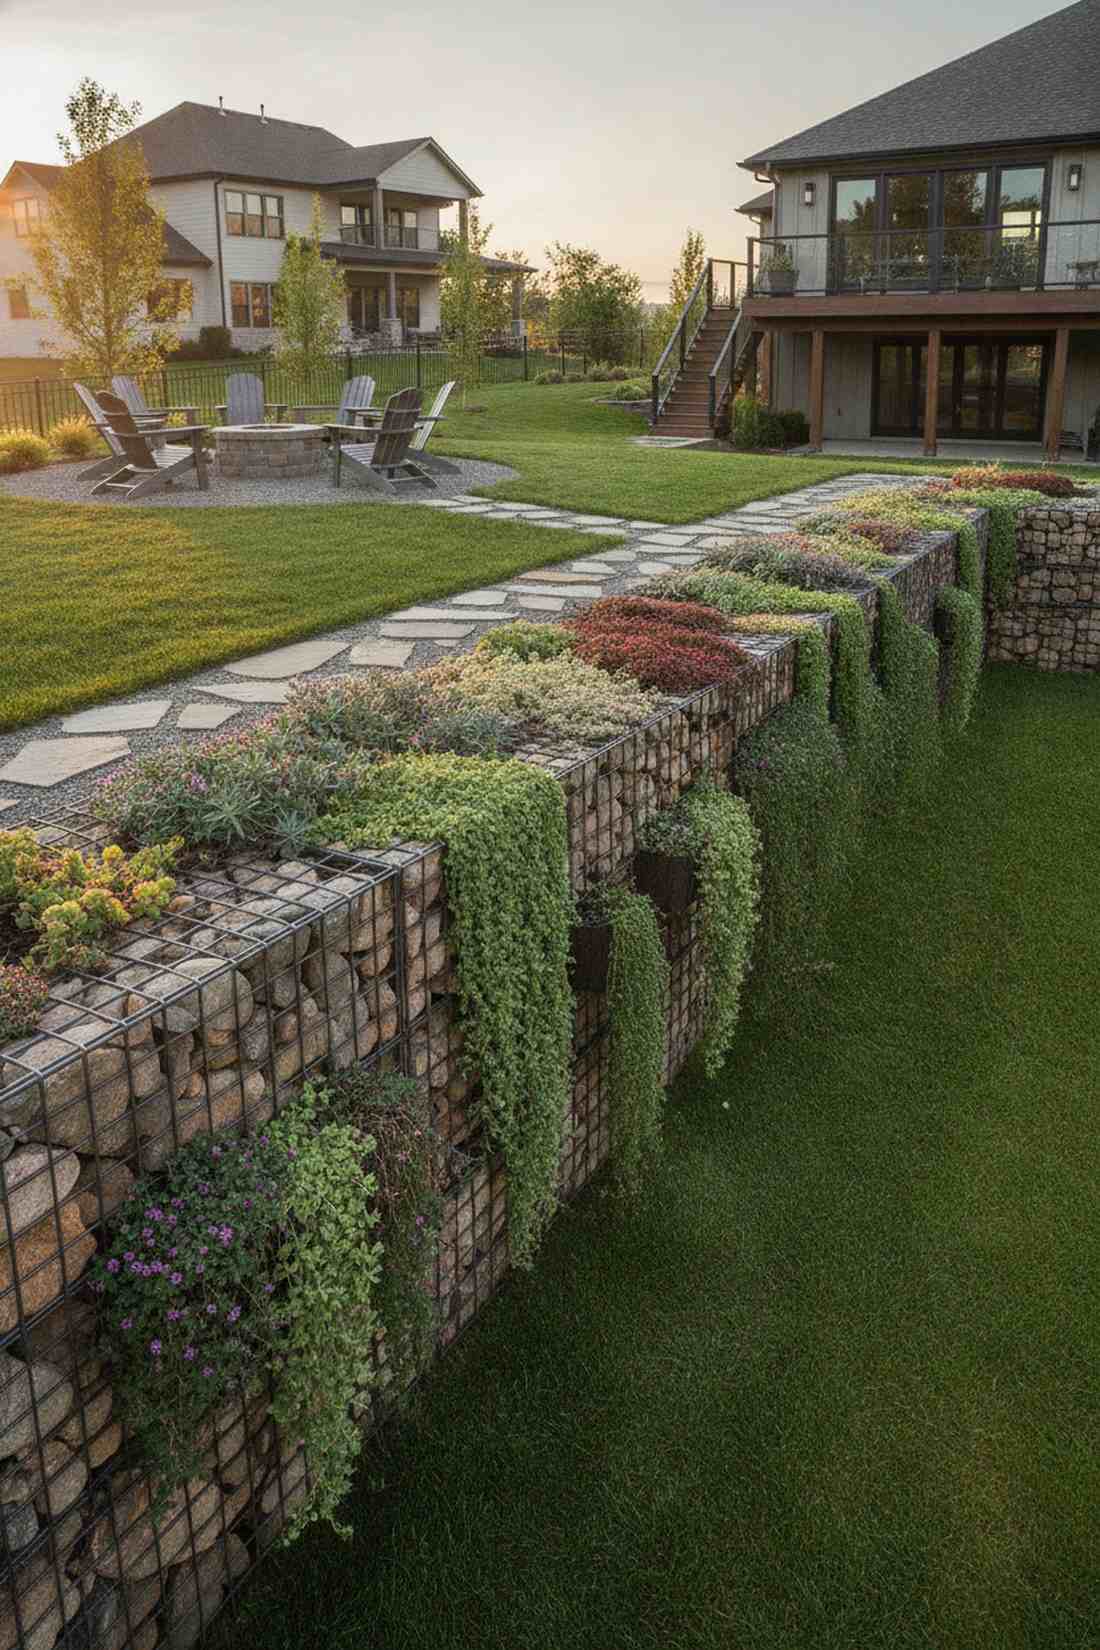
Looks like a rugged piece of earth-art you would find at a high-end commercial vineyard. The stone gabion planter barrier is absolutely stunning as a sloped retaining wall.
It completely defies traditional fencing rules, relying on the massive weight of river rocks combined with creeping groundcovers. Stuffing permeable root pouches between the stones allows cascading greens to soften the stark industrial cages.
The mesh cages run about $40, but stone costs vary locally. The result is a maintenance-free masterpiece.
- Key Materials: Steel gabion baskets, river rock, trailing succulents
- Vibe / Style: Rugged architectural hybrid
- Difficulty: Labor intensive
- Budget Breakdown: Cages: $45 | Stone (local): $50 | Plants: $25.
- Creator’s Tip: Place cheaper gravel in the hidden center and display premium river rocks on the visible outside edges.
- Smart Sourcing: rust-resistant gabion basket kits and heavy-duty landscape fabric rolls.
9. Arched Trellis Gateways
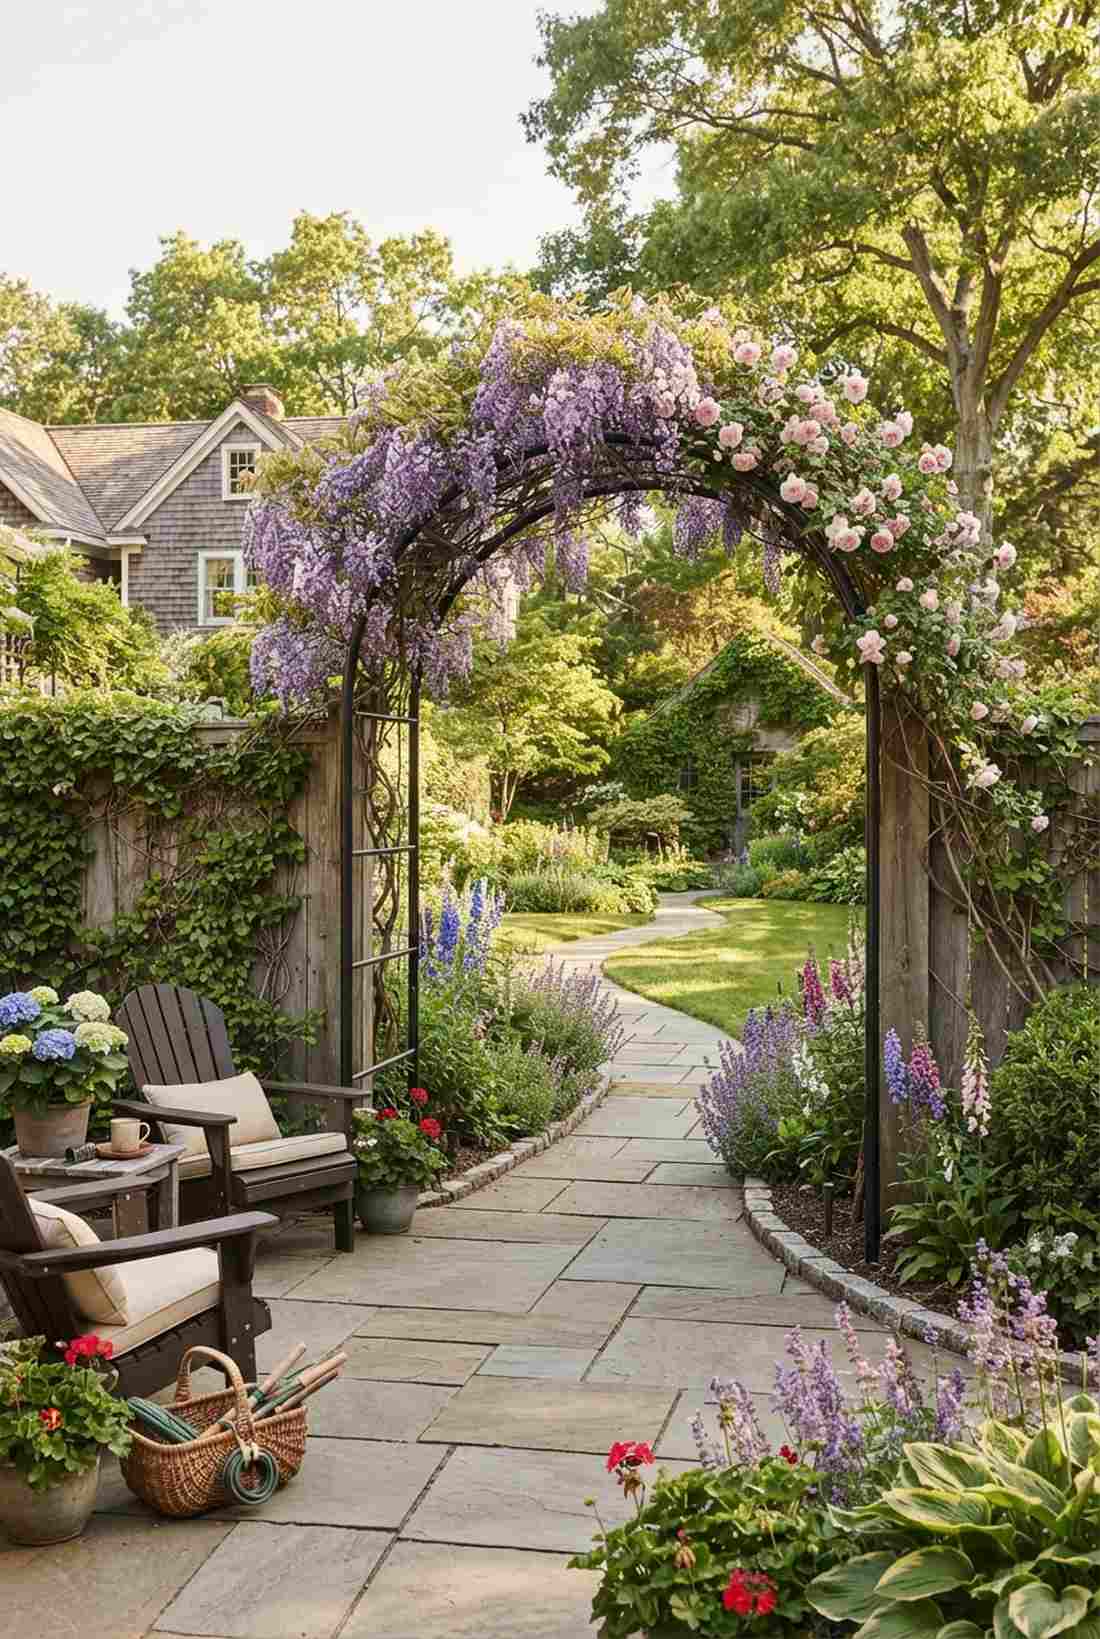
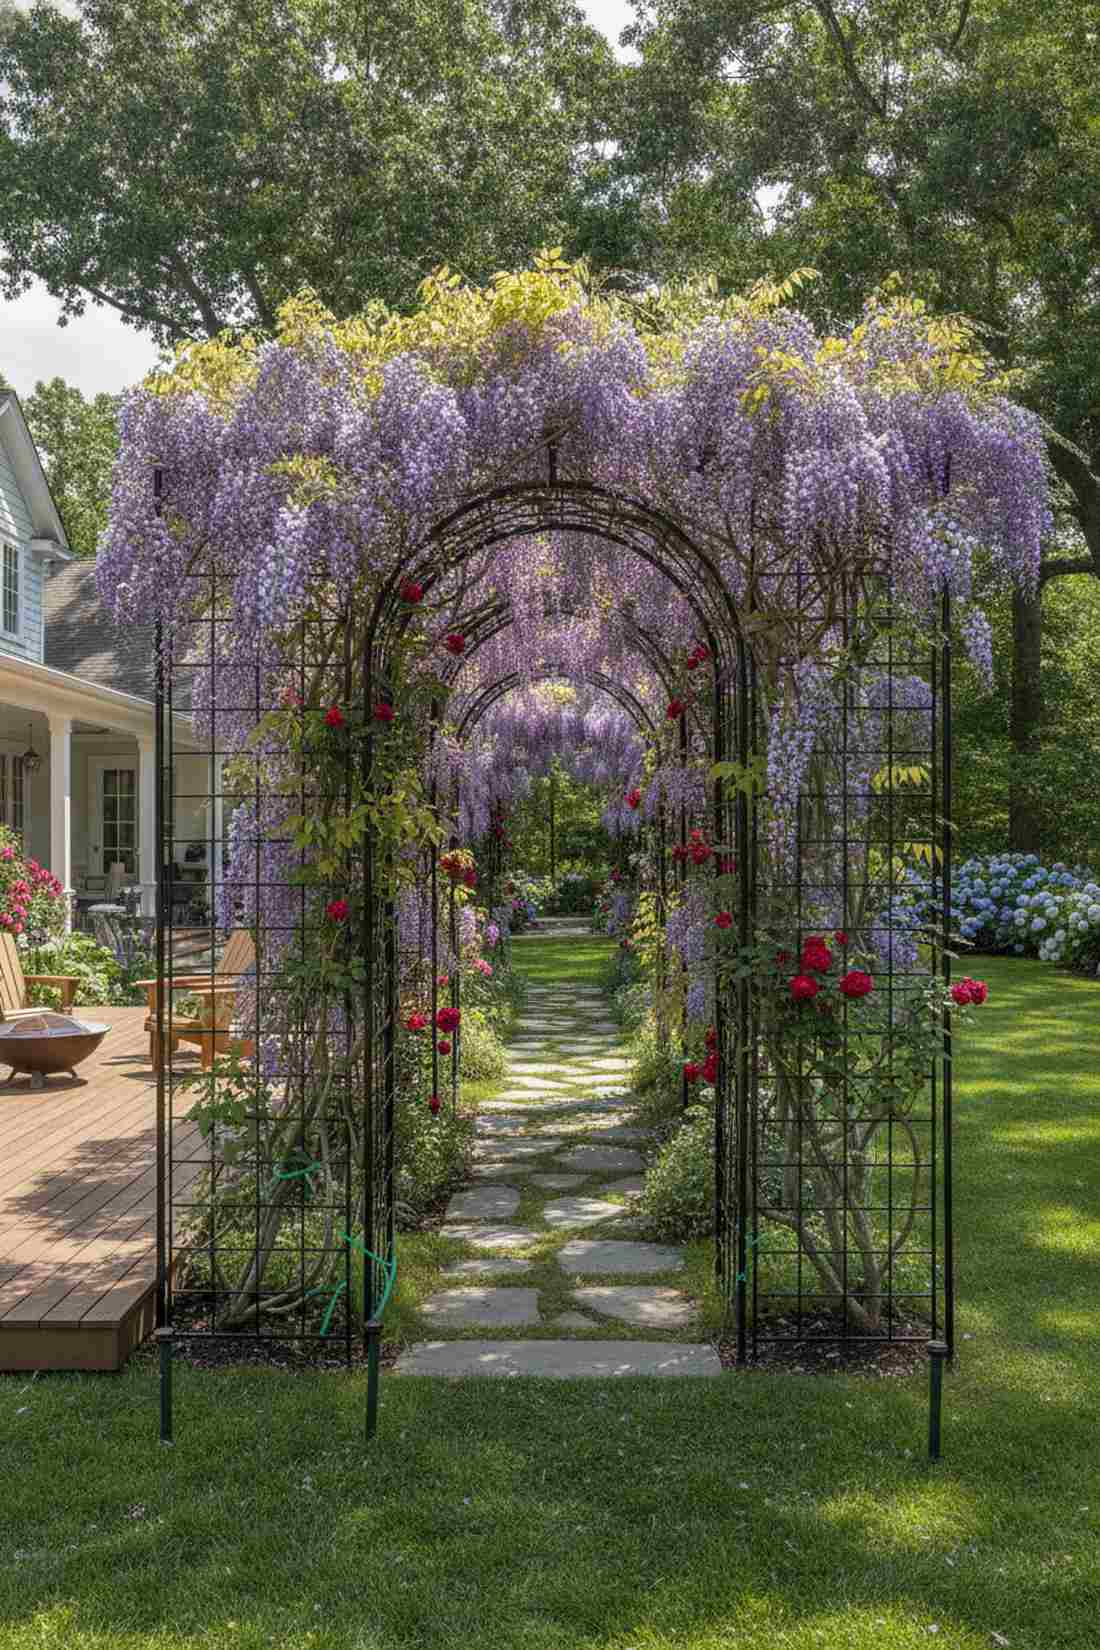
Feels like stepping straight out of a storybook into a hidden secret garden. Placing a curved flowering archway serves as a dramatic transition between your patio and lawn.
Connecting two flat privacy screens with an overhead span gives a designer-level finish that frames the view perfectly. Training wisteria or climbing roses over a sturdy steel tunnel structure creates a breathtaking, fragrant canopy.
A solid metal arch kit generally costs $60–$120. Pin this to your dream garden layout board!
- Key Materials: Tubular steel arch kit, ground anchors
- Vibe / Style: Romantic English estate
- Difficulty: Straightforward assembly
- Budget Breakdown: Arch Frame: $85 | Ground Spikes: $15.
- Creator’s Tip: Weave the primary vine stems horizontally before letting them climb up for thicker lower coverage.
- Smart Sourcing: powder-coated garden arch kits and flexible plant tie rolls.
This next setup is ridiculously cheap but looks like a $500 custom display…
💡 Must-Have Supplies for High-End Setups
To build these setups faster and ensure they last, skip the generic craft aisles and invest in the right foundational kits.
- Base & Support: commercial-grade modular wall frames
- Setup Tools: hydroponic nutrient starter packs
- Weather/Durability Protection: outdoor-grade clear wood sealant
Succulent and Drought-Tolerant Compositions
10. Sedum Tapestry Walls
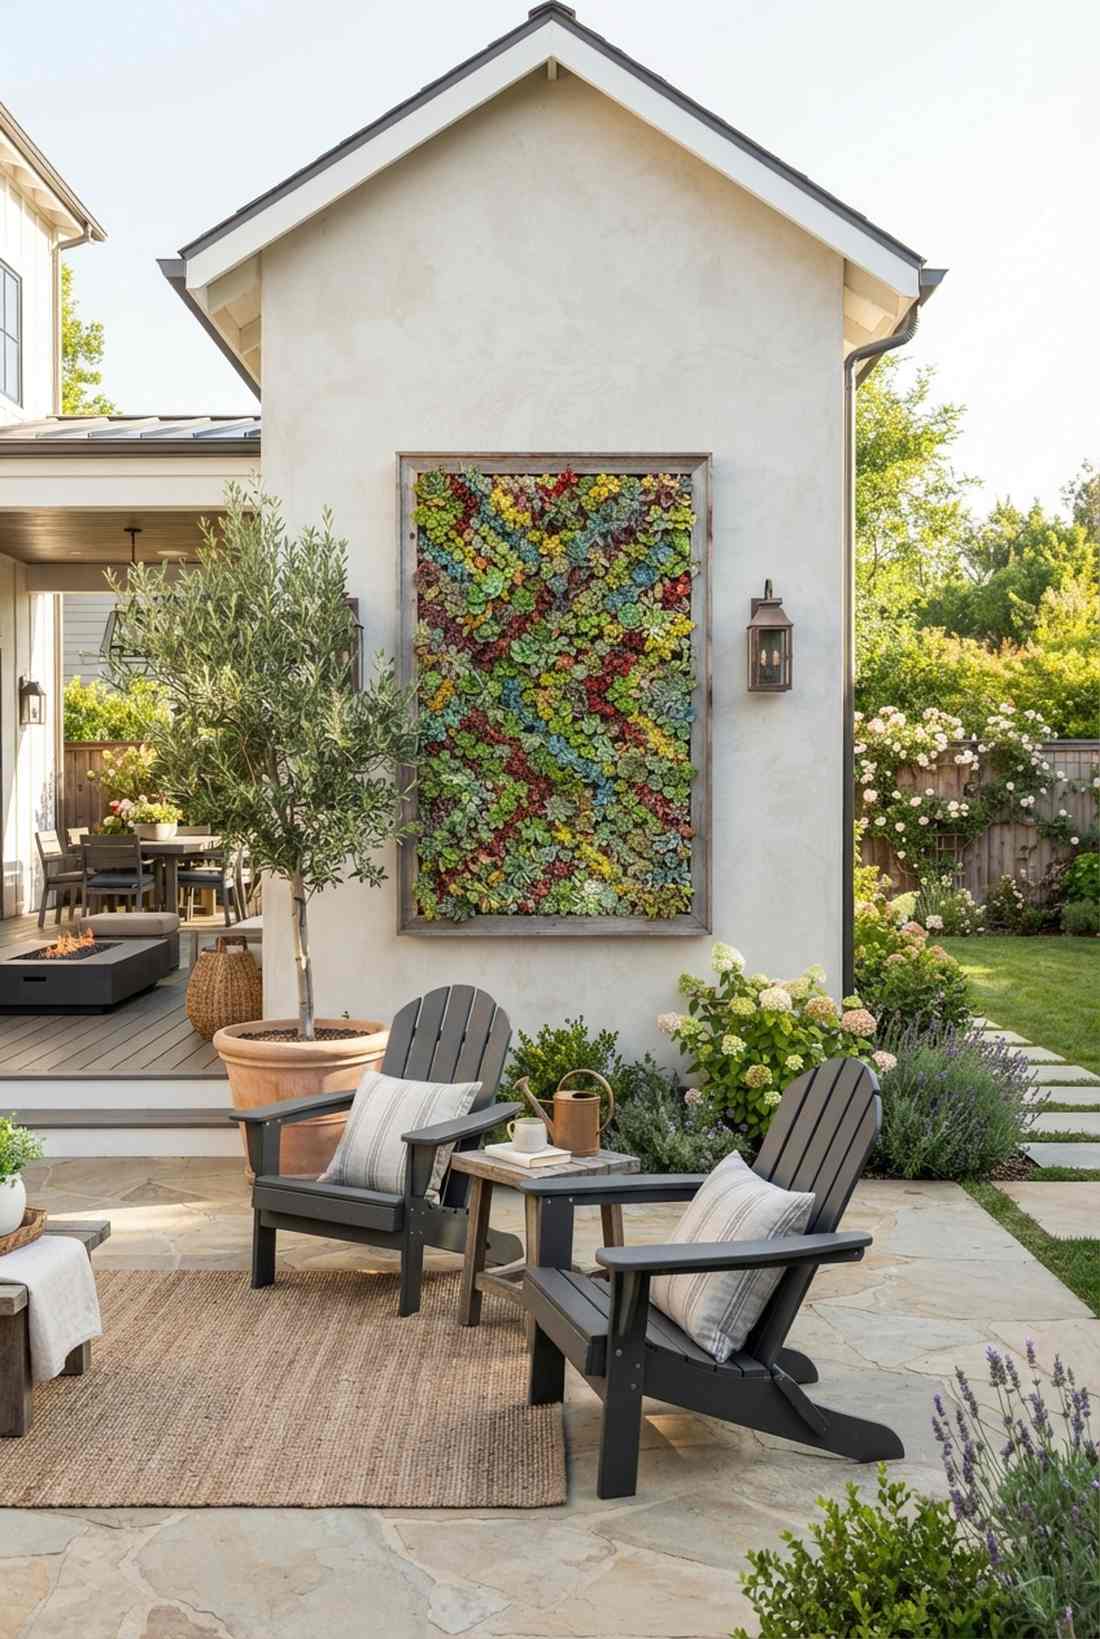
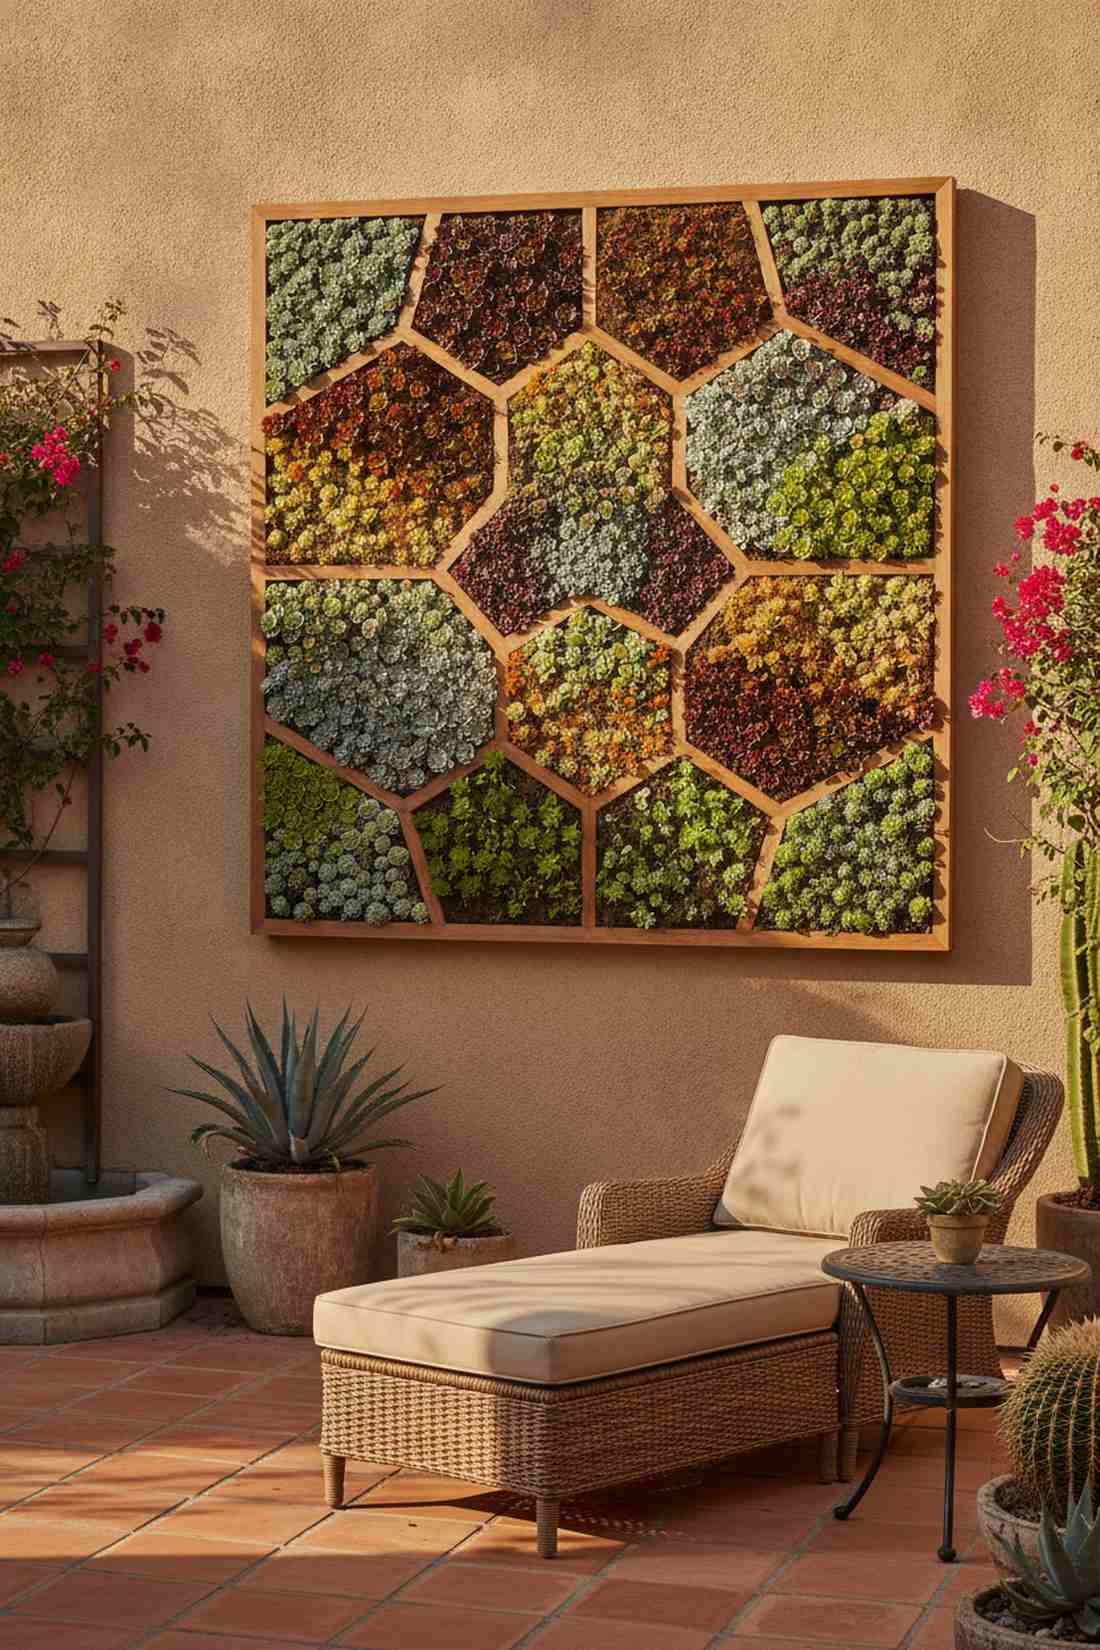
Resembles a living, breathing mosaic painting hung right on your exterior wall. This geometric succulent frame thrives beautifully in blazing, sun-baked courtyard spaces.
Instead of battling thirsty ferns, utilizing shallow-rooted sedum delivers a remarkably premium look that requires zero daily watering. Packing different colored cuttings into tightly meshed moss grids forces them to grow into a dense, carpet-like texture.
You can put together a medium frame for about $40–$60. It is a bulletproof project for forgetful waterers.
- Key Materials: Shallow cedar frame, sphagnum moss, wire mesh
- Vibe / Style: Living geometric art
- Difficulty: Moderate crafting
- Budget Breakdown: Frame: $25 | Moss/Mesh: $20 | Sedum Plugs: $15.
- Creator’s Tip: Keep the frame flat on the ground for 4 weeks so roots grab the moss before hanging it vertically.
- Smart Sourcing: pre-cut sphagnum moss sheets and live succulent cuttings (bulk pack).
11. Echeveria Rosette Displays
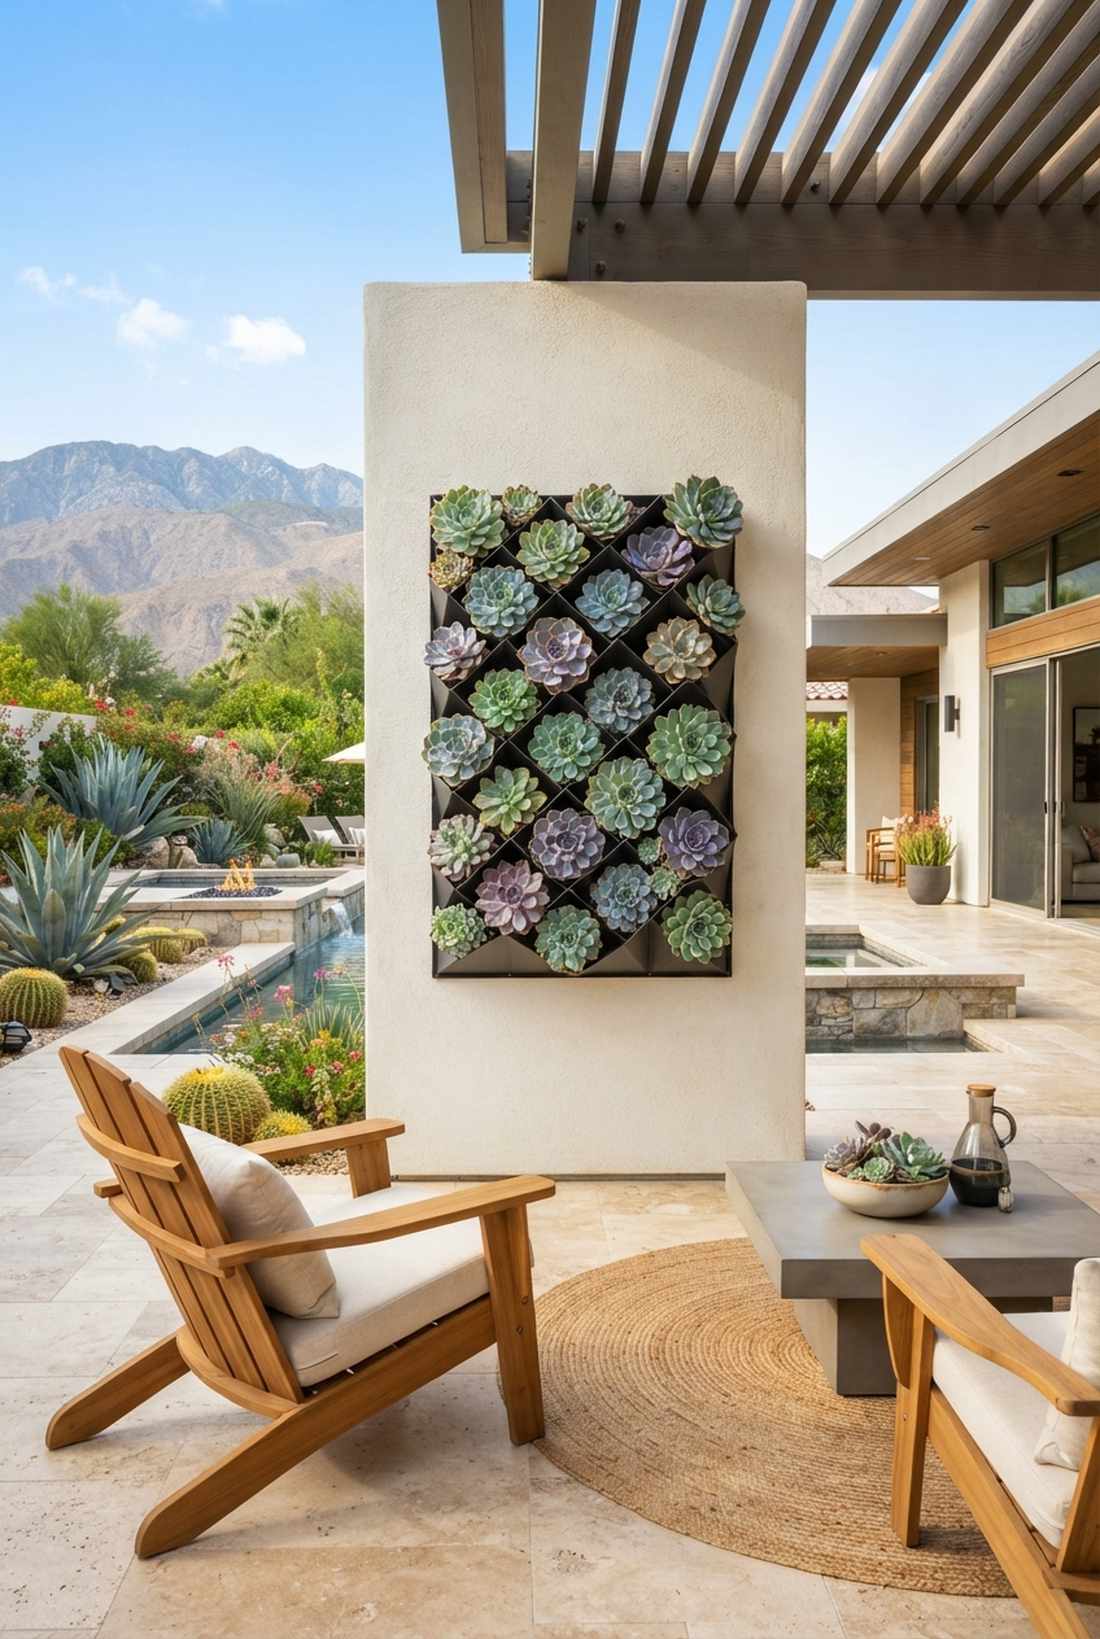
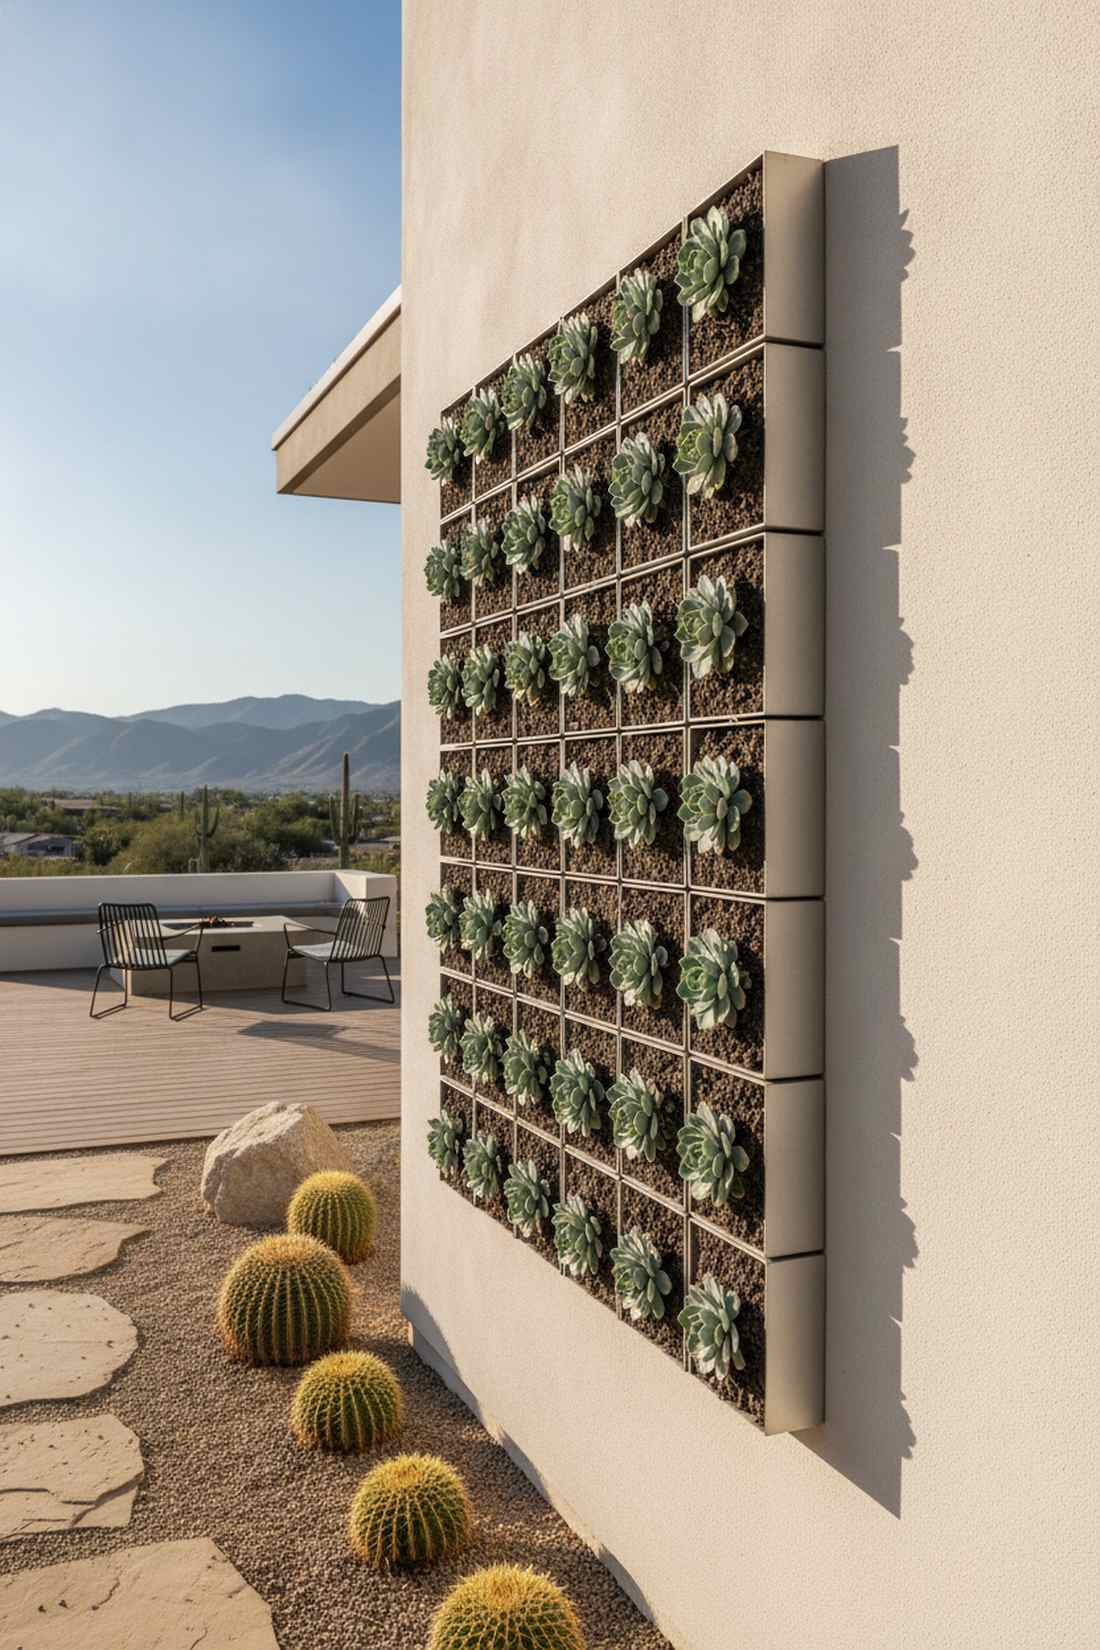
Feels incredibly precise, almost like an expensive architectural feature in a modern museum. Staggering an echeveria shadowbox layout brings immense sophistication to a blank stucco wall.
Many generic planters look cluttered, but isolating perfect rosettes creates a highly curated aesthetic that demands attention. Utilizing tilted planting cells ensures water drains instantly, preventing the rot that usually destroys expensive succulents.
Expect a materials cost of around $50–$75 for a dense arrangement. Save this if you love clean, contemporary decor!
- Key Materials: Angled pocket planter, cactus soil mix
- Vibe / Style: Minimalist desert modern
- Difficulty: Easy planting
- Budget Breakdown: Pocket Wall: $35 | Echeveria: $30 | Soil: $10.
- Creator’s Tip: Dust off the powdery coating on the leaves gently with a soft makeup brush during installation.
- Smart Sourcing: multi-pocket vertical wall planters and fast-draining cactus soil mixes.
12. Trailing Ice Plant Cascades
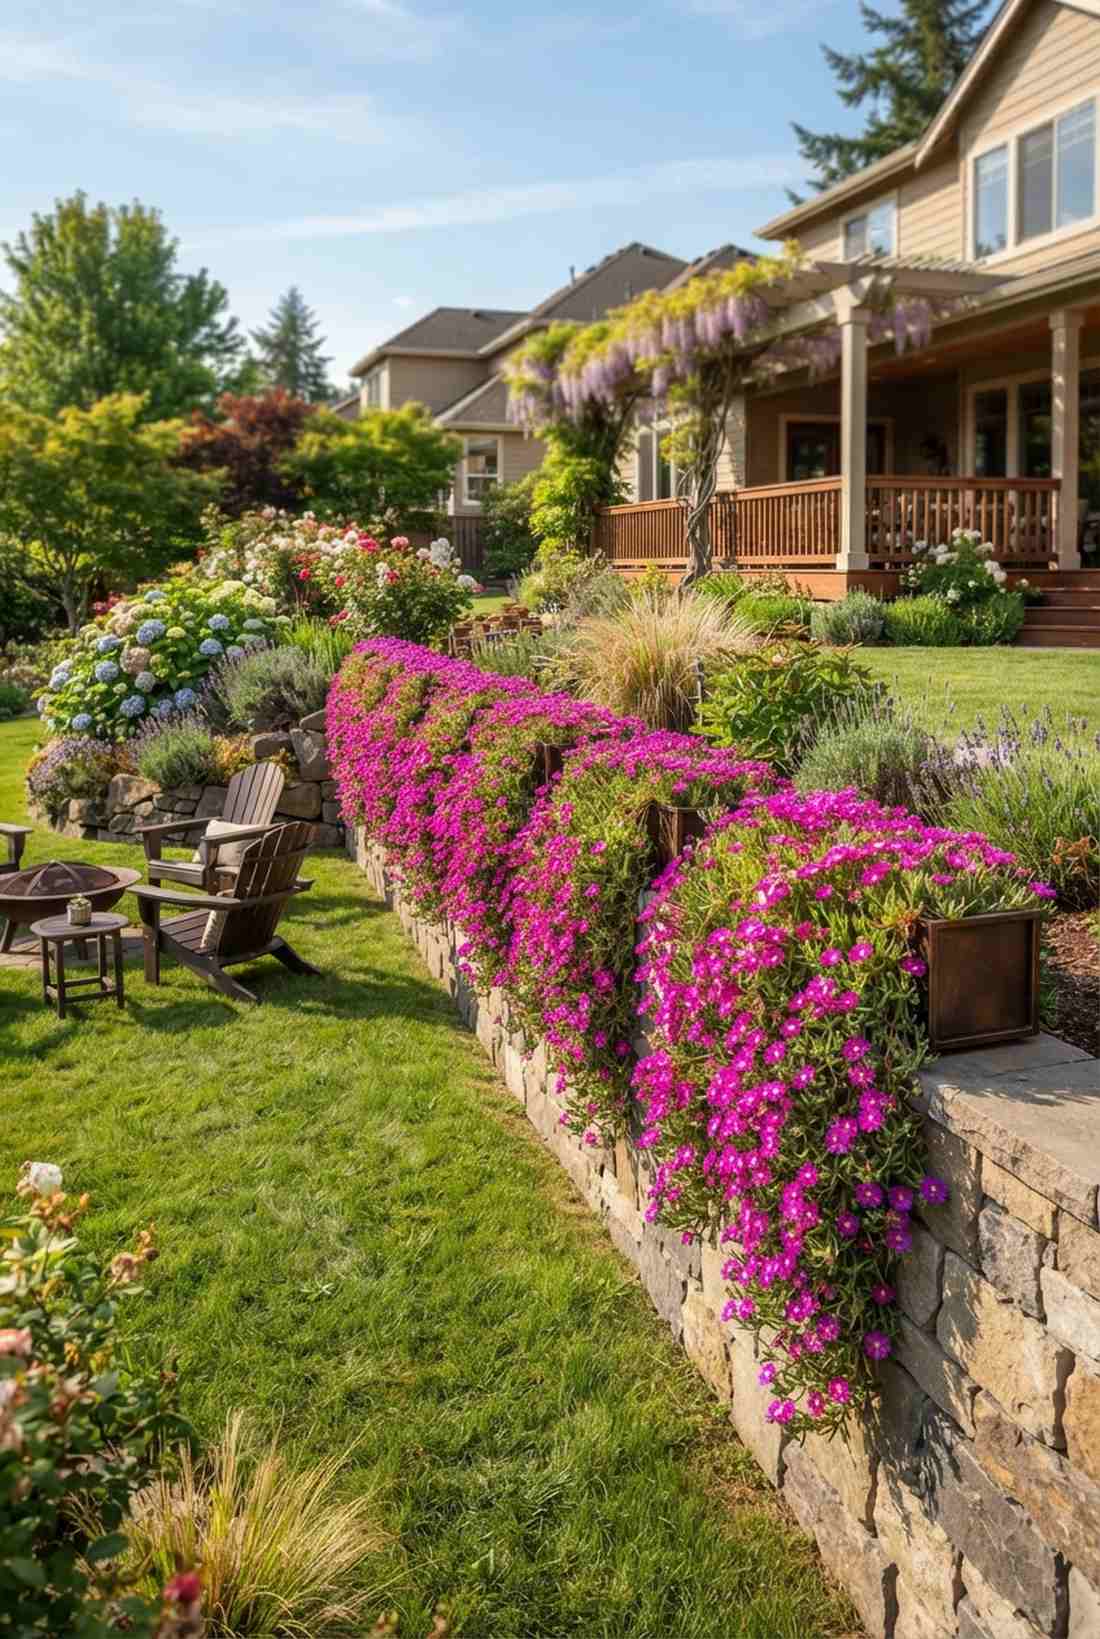
Looks like a neon waterfall of vibrant magenta and green spilling from the sky. Hanging a cascading ice plant trough works absolute wonders on the top ridge of a retaining wall.
While most vines need constant pruning, these trailing succulents offer a low-maintenance hack that looks far more expensive than it is. Relying on their fleshy leaves allows them to tolerate massive heat waves without dropping flowers.
Setting up a long trough row generally costs under $40. Highly recommended for injecting massive color quickly.
- Key Materials: Elongated window boxes, trailing Delosperma
- Vibe / Style: Bright Mediterranean cascade
- Difficulty: Very simple
- Budget Breakdown: Troughs: $20 | Plants: $15 | Pumice: $5.
- Creator’s Tip: Mix pumice into the soil at a 50/50 ratio to guarantee aggressive drainage in heavy rains.
- Smart Sourcing: UV-resistant window box kits and horticultural pumice (bulk bag).
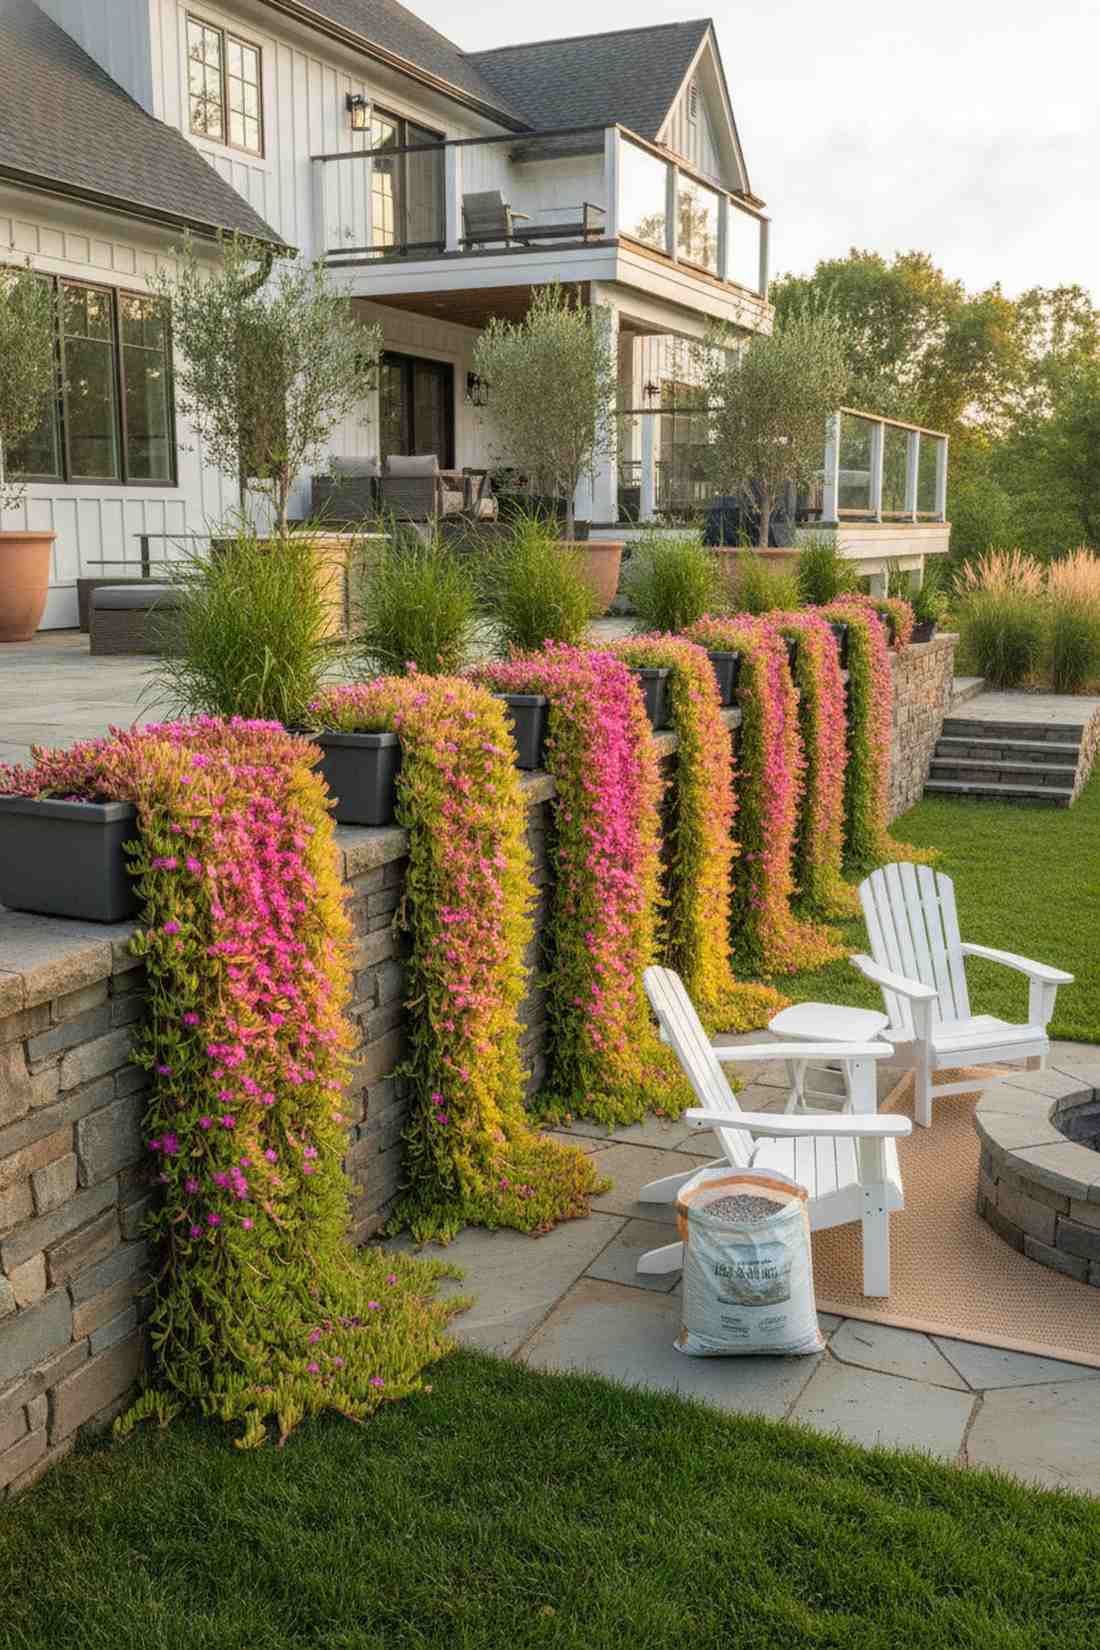
13. Agave and Grass Combinations
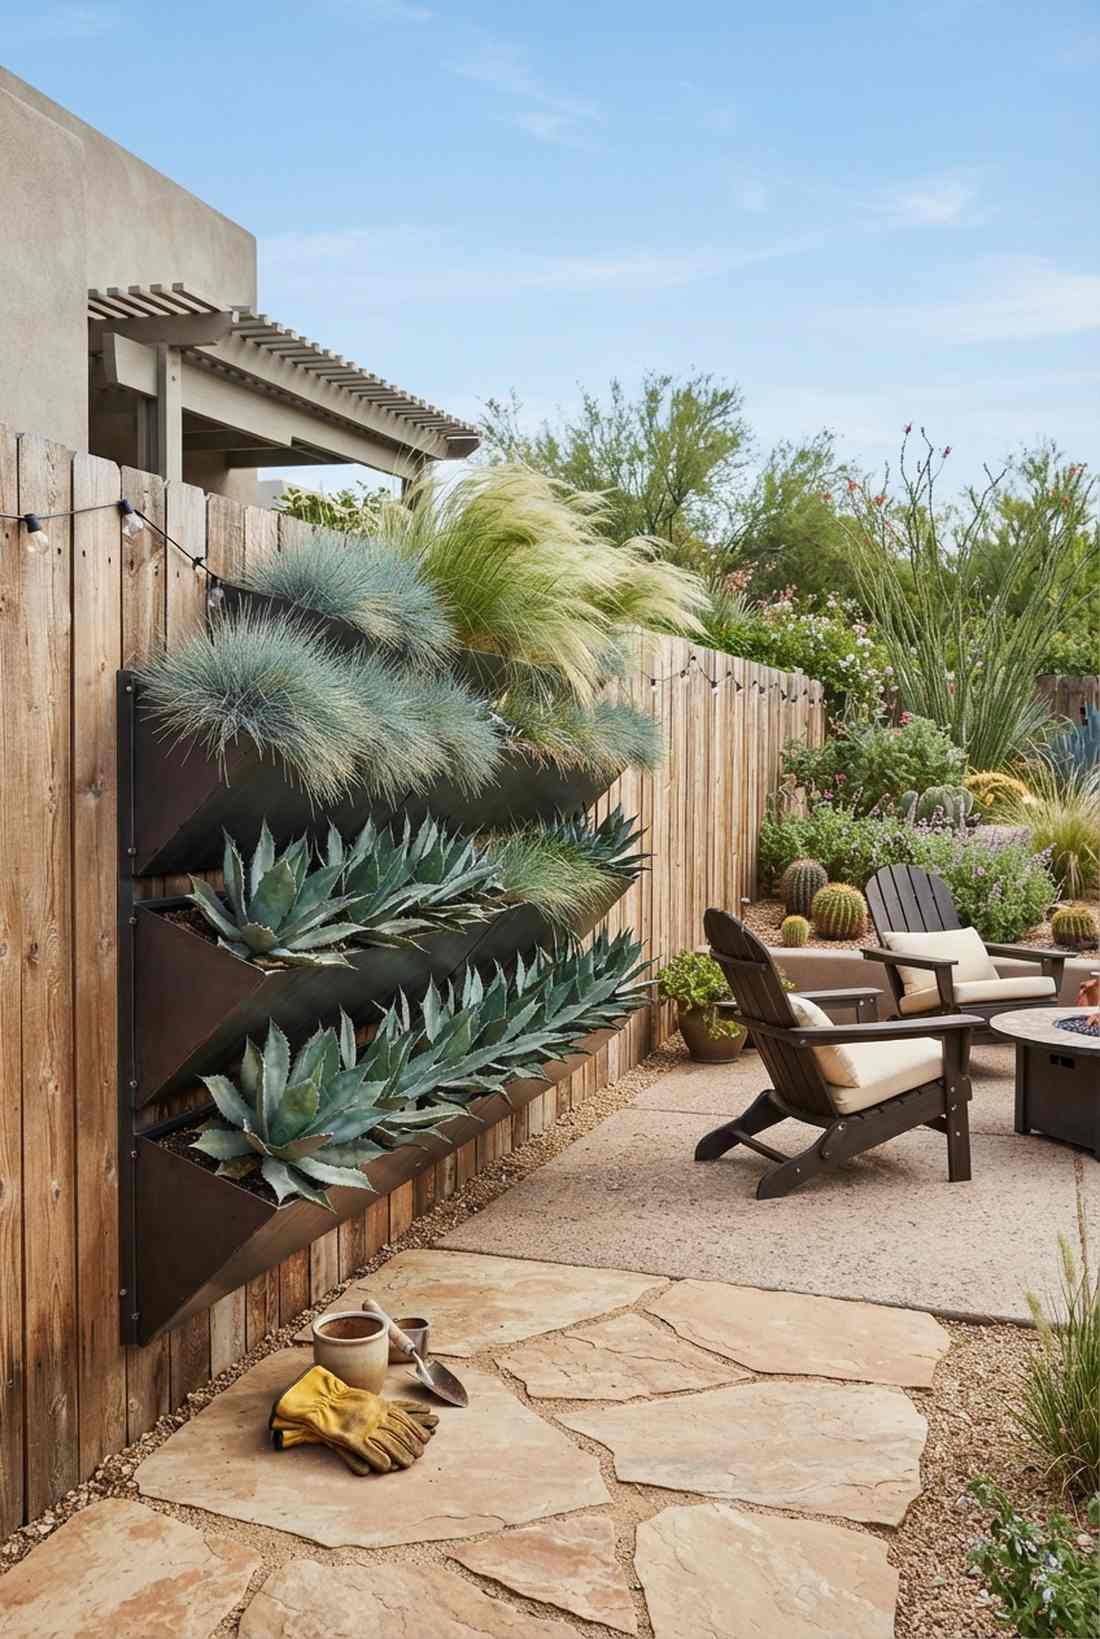
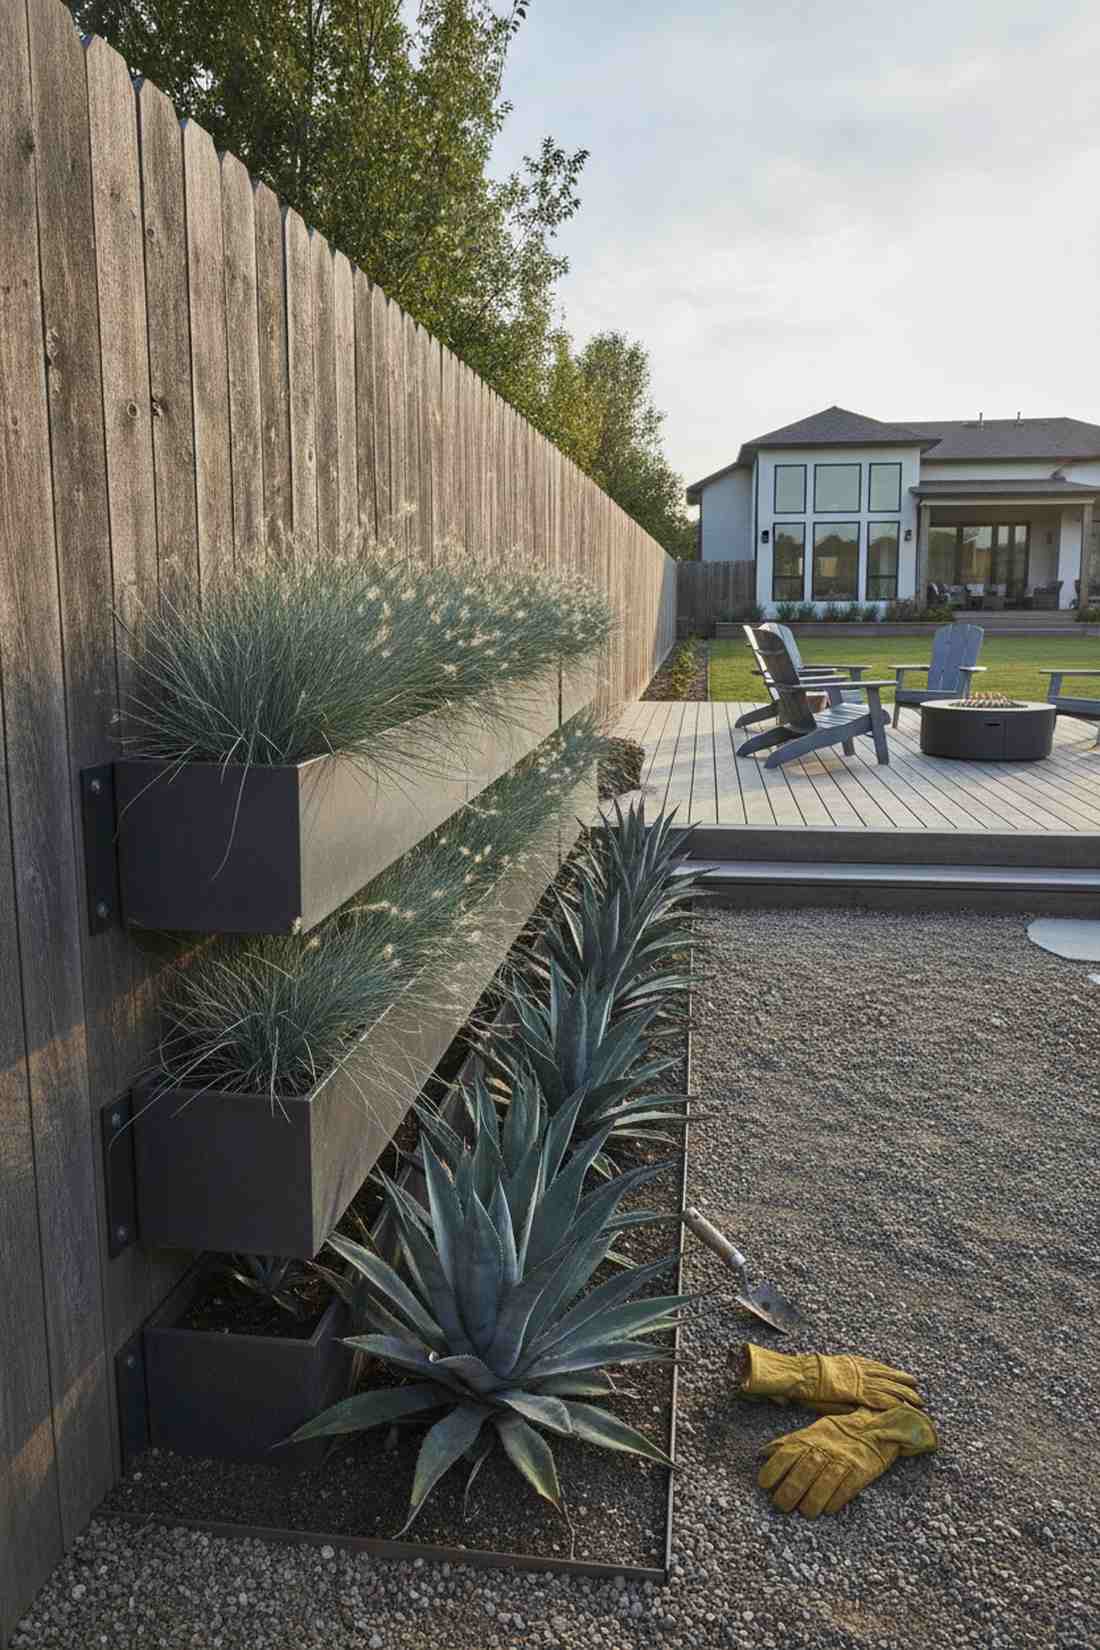
Exudes a dramatic, wind-swept energy that transforms a boring fence line into a luxury resort feature. The spiky agave and grass tier is perfect for adding movement to rigid privacy screens.
Combining heavy architectural spikes with wispy ornamental grasses delivers a surprisingly premium look through pure textural contrast. Securing the heavier agaves in reinforced lower pockets keeps the center of gravity safe while grasses blow up top.
You can structure this hybrid look for around $50–$80. Pin this if you live in a drought-prone state!
- Key Materials: Heavy-duty tiered planters, blue fescue, dwarf agave
- Vibe / Style: Upscale arid landscape
- Difficulty: Careful handling required
- Budget Breakdown: Planter System: $45 | Grass/Agave: $35.
- Creator’s Tip: Wear thick leather welding gloves when positioning the agave to avoid painful punctures.
- Smart Sourcing: heavy-duty tiered wall planters and puncture-resistant gardening gloves.
Wait until you see how simple the next technique is—it completely redefines small spaces.
Edible Walls for Functional Beauty
14. Vertical Herb Gardens
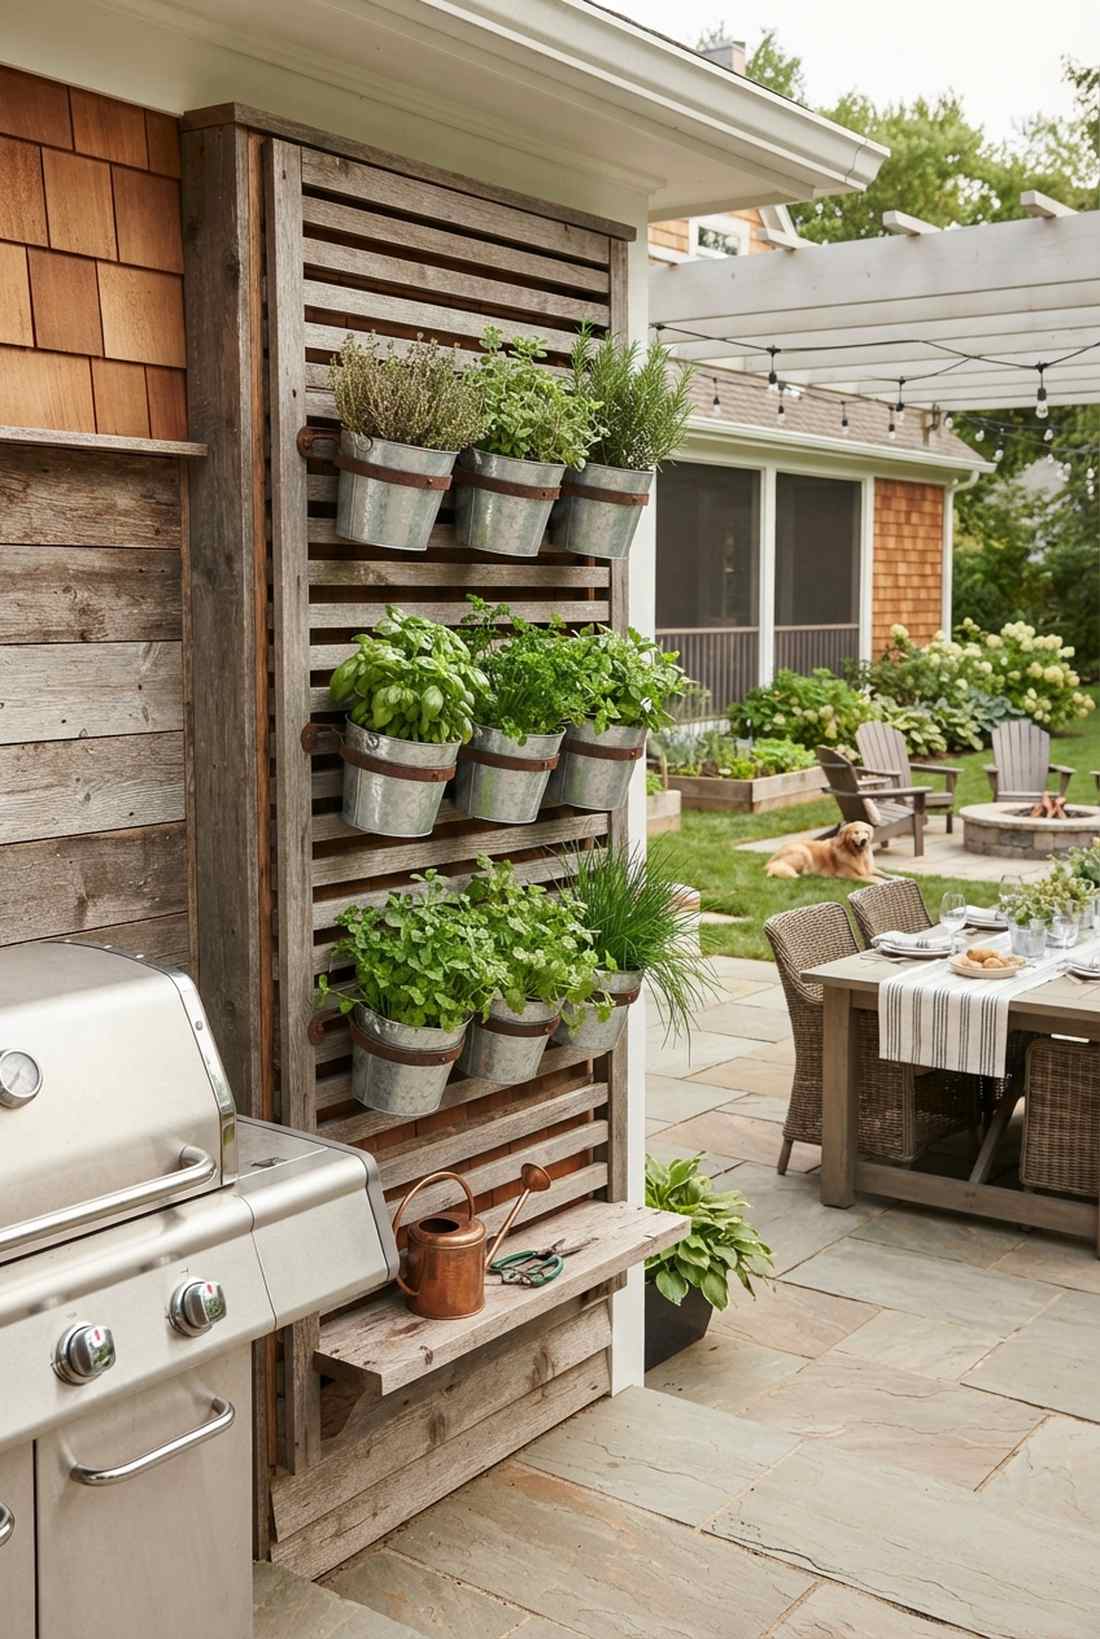
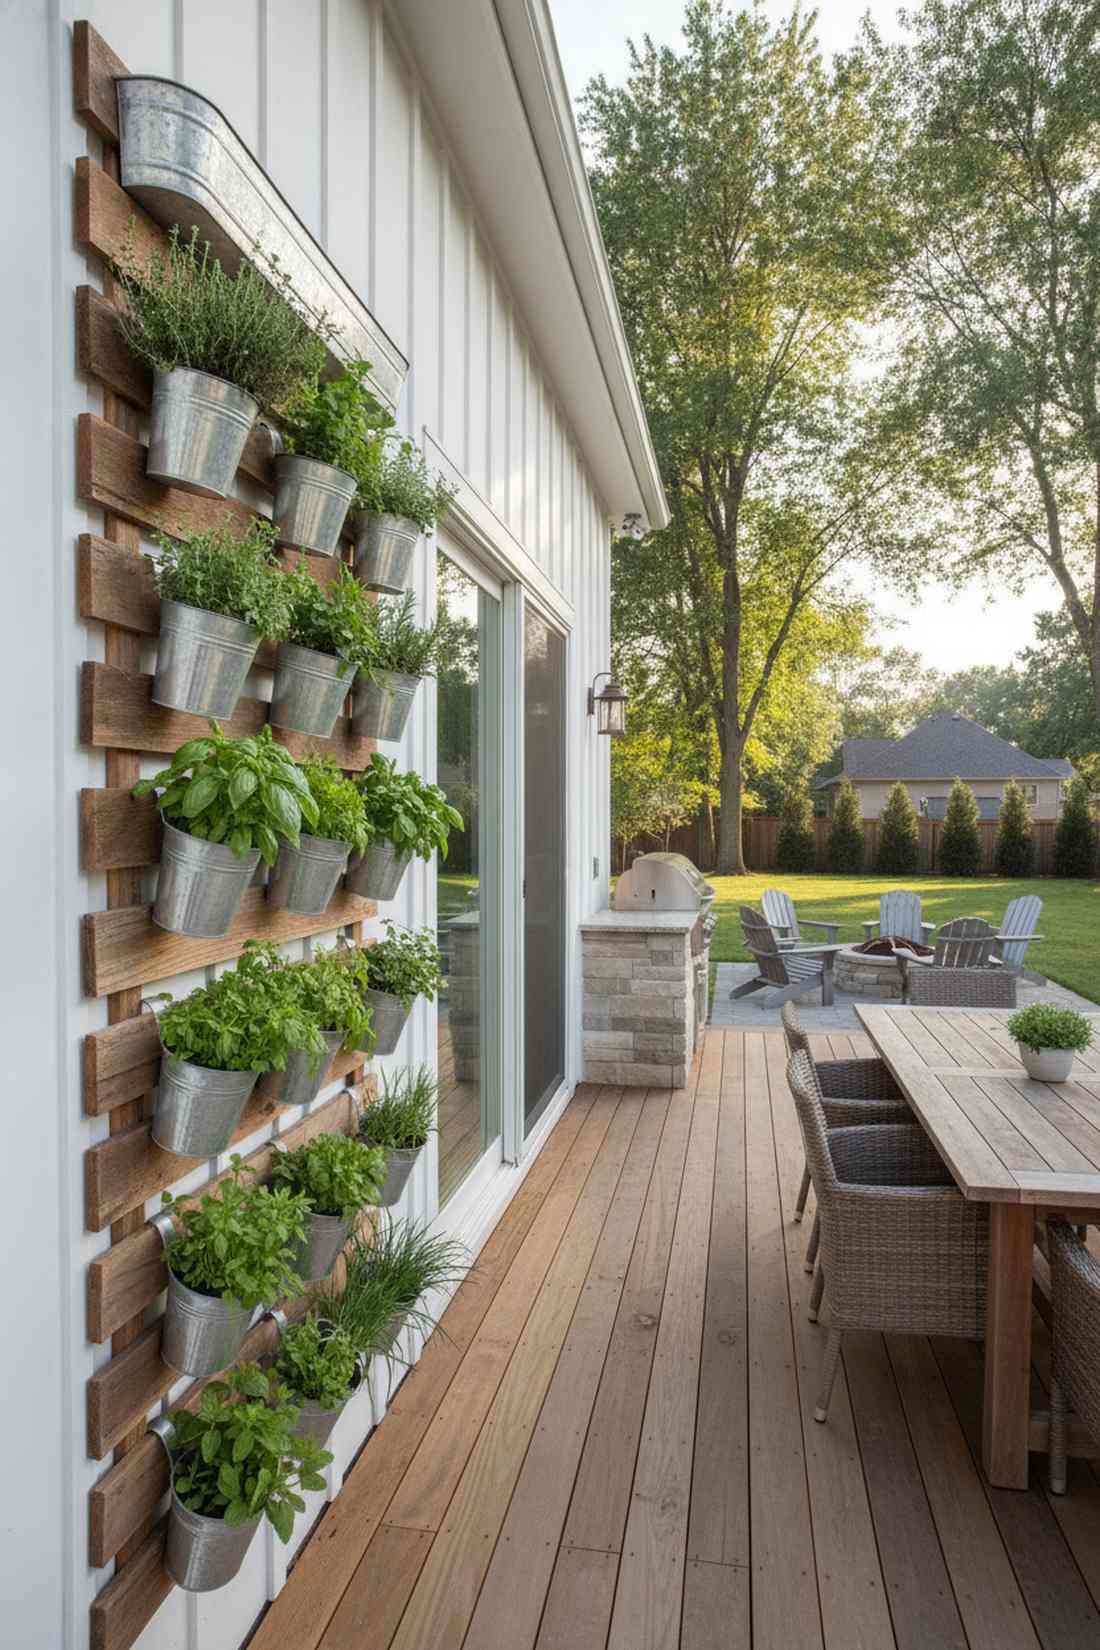
Feels like your own private, chef-inspired bistro setup right outside the back door. A tiered culinary herb wall is the ultimate upgrade for an outdoor kitchen or barbecue zone.
Keeping herbs in small, cluttered pots is chaotic, but organizing them vertically gives a designer-level finish that is highly functional. Stacking moisture-loving herbs at the bottom and dry-loving thyme at the top perfectly utilizes overhead dripping water.
This tasty project usually costs $30–$50 to assemble fully. It is a fast upgrade that pays for itself in grocery savings.
- Key Materials: Wooden slatted rack, metal hanging pots
- Vibe / Style: Farm-to-table rustic
- Difficulty: Beginner friendly
- Budget Breakdown: Rack: $25 | Pots/Clips: $15 | Herb Starts: $10.
- Creator’s Tip: Harvest from the top down to encourage the plants to grow bushier and provide better visual coverage.
- Smart Sourcing: wall-mounted herb garden kits and galvanized hanging plant rings.
15. Strawberry Tower Panels
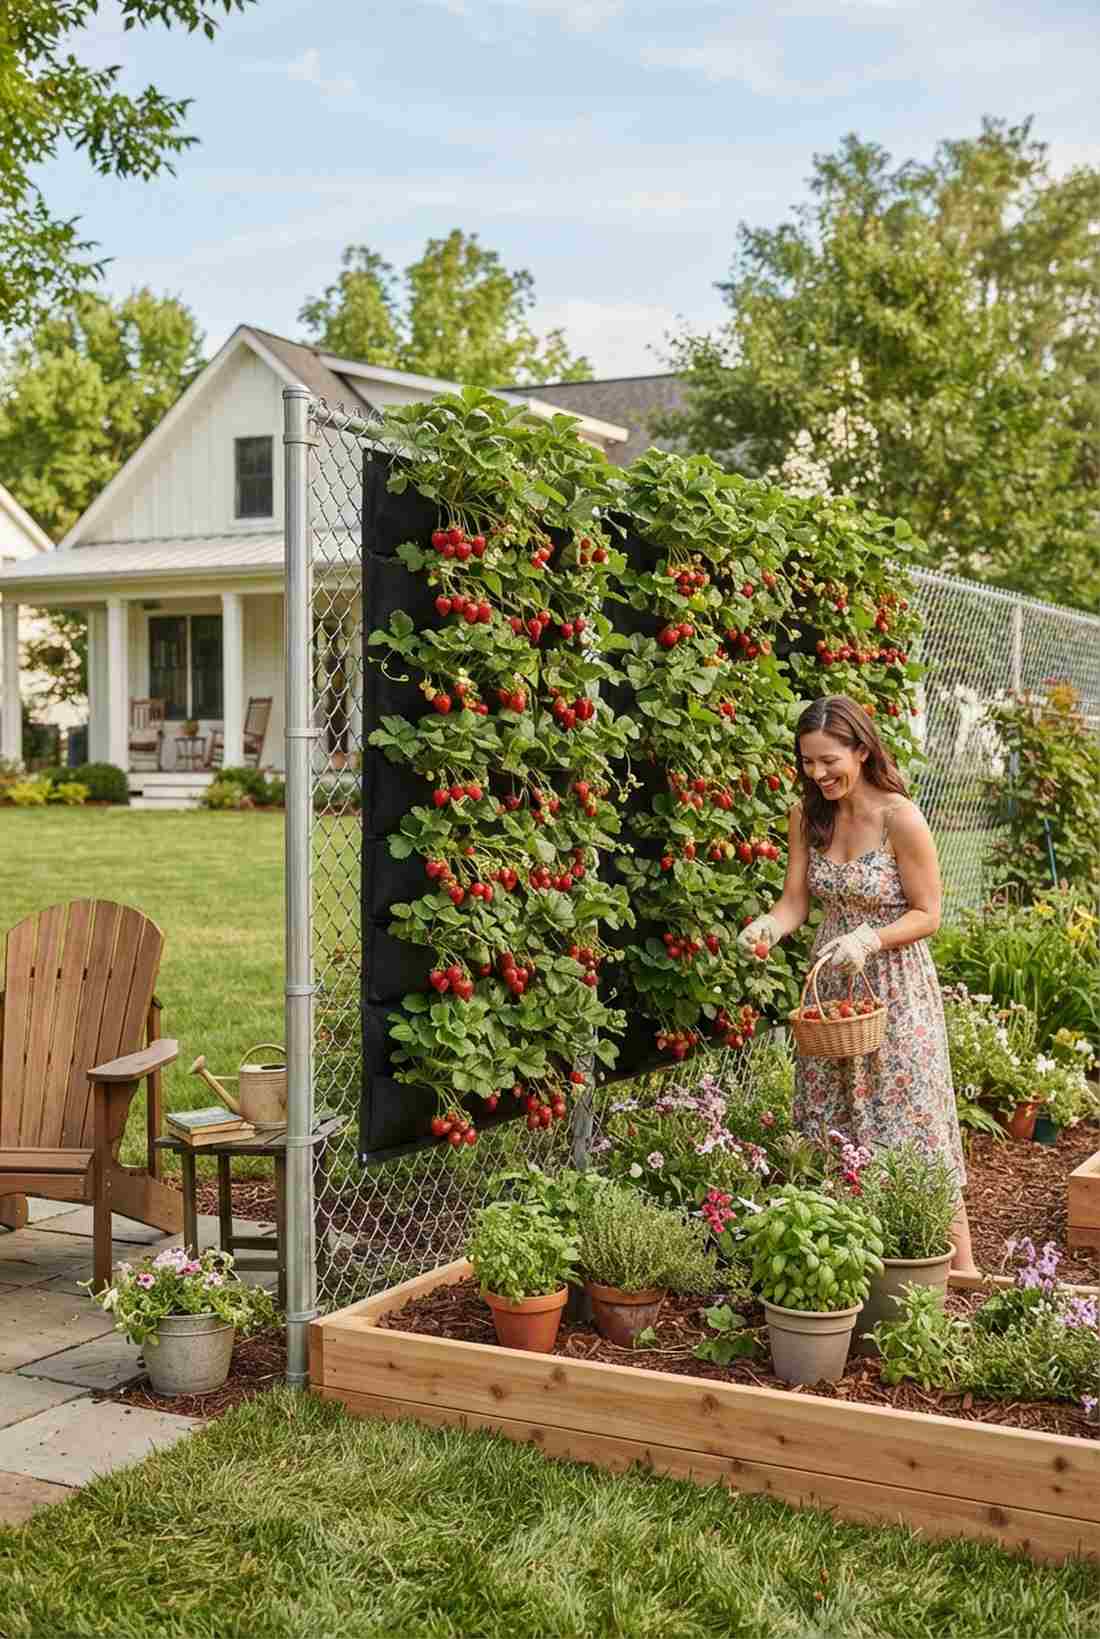
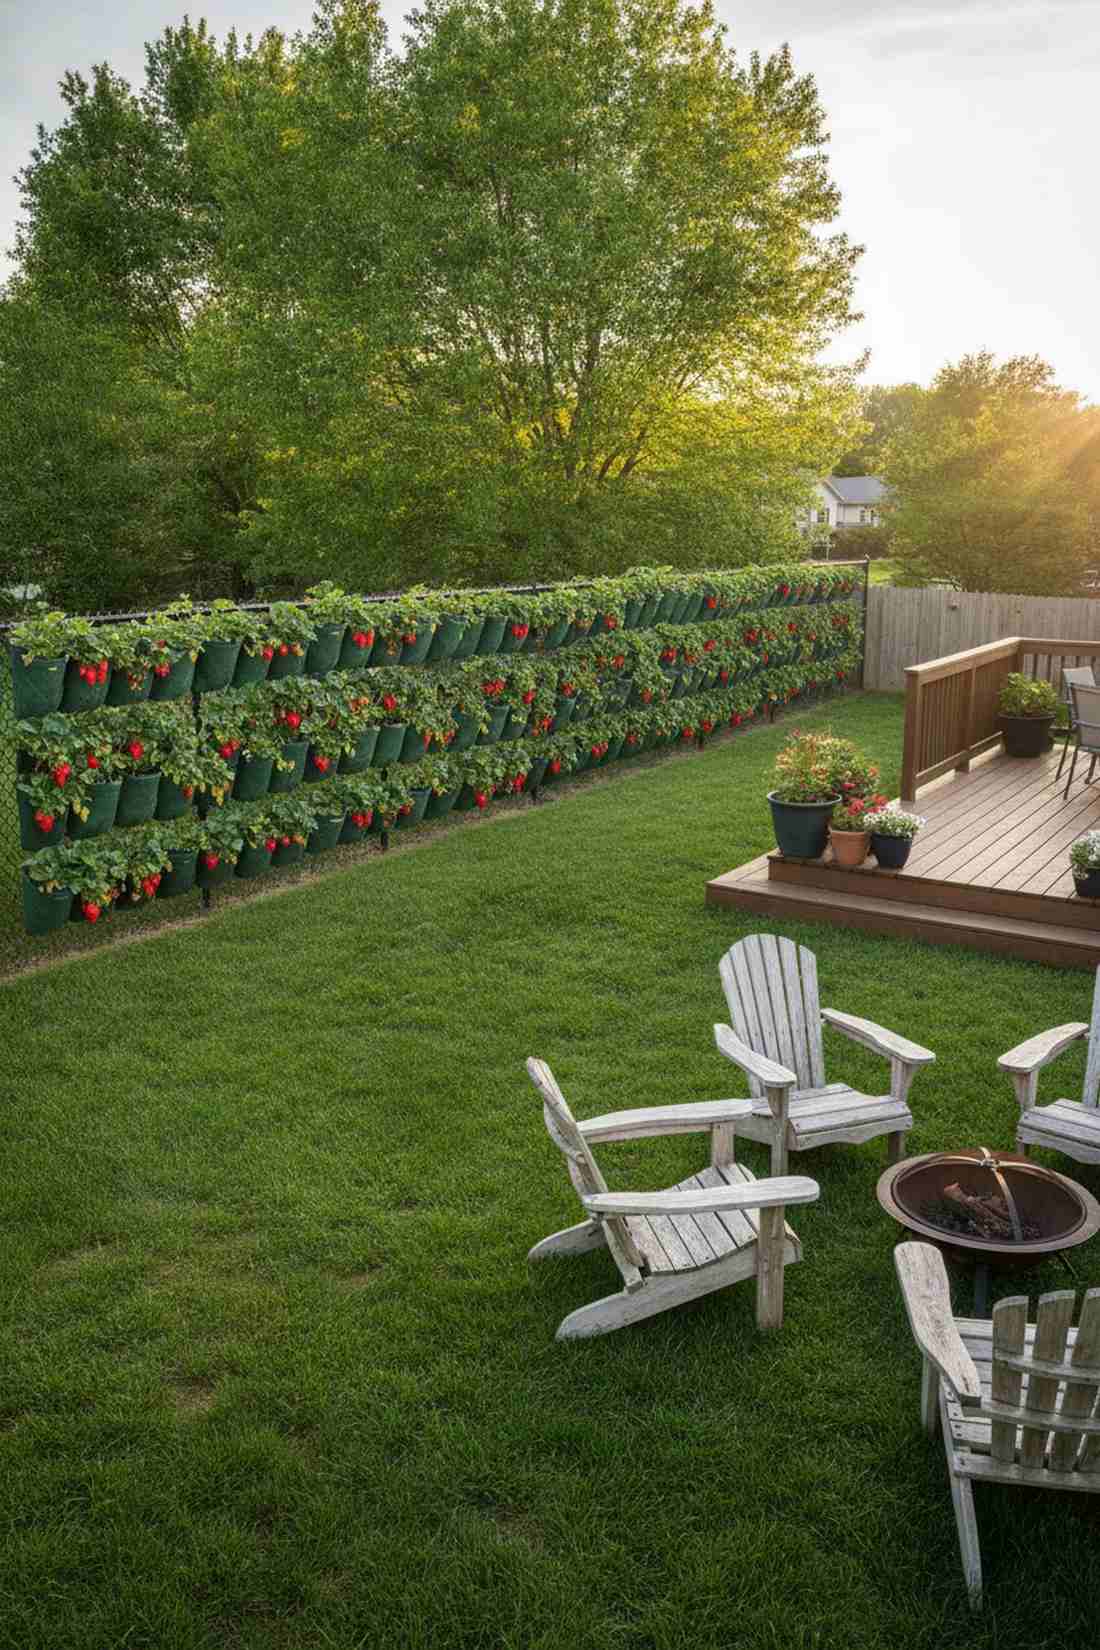
Looks like a whimsical candy wall dripping with bright red jewels all summer long. Setting up a cascading strawberry pocket screen is brilliant for covering an ugly chain-link fence.
Growing berries on the ground invites rot and bugs, but elevating them creates a pristine display that looks incredible. Shoving runners into adjacent empty pockets quickly multiplies your harvest while filling in any visual gaps.
A multi-pocket berry setup runs about $25–$45. Save this to your edible landscaping ideas board!
- Key Materials: Soft-sided felt pocket panels, bare-root strawberry crowns
- Vibe / Style: Playful abundant garden
- Difficulty: Easy planting
- Budget Breakdown: Felt Panel: $20 | Bare Roots: $15 | Compost: $10.
- Creator’s Tip: Add a handful of organic worm castings to each pocket for massive fruit yields without chemical fertilizers.
- Smart Sourcing: breathable felt wall planters and organic worm castings (bulk bag).
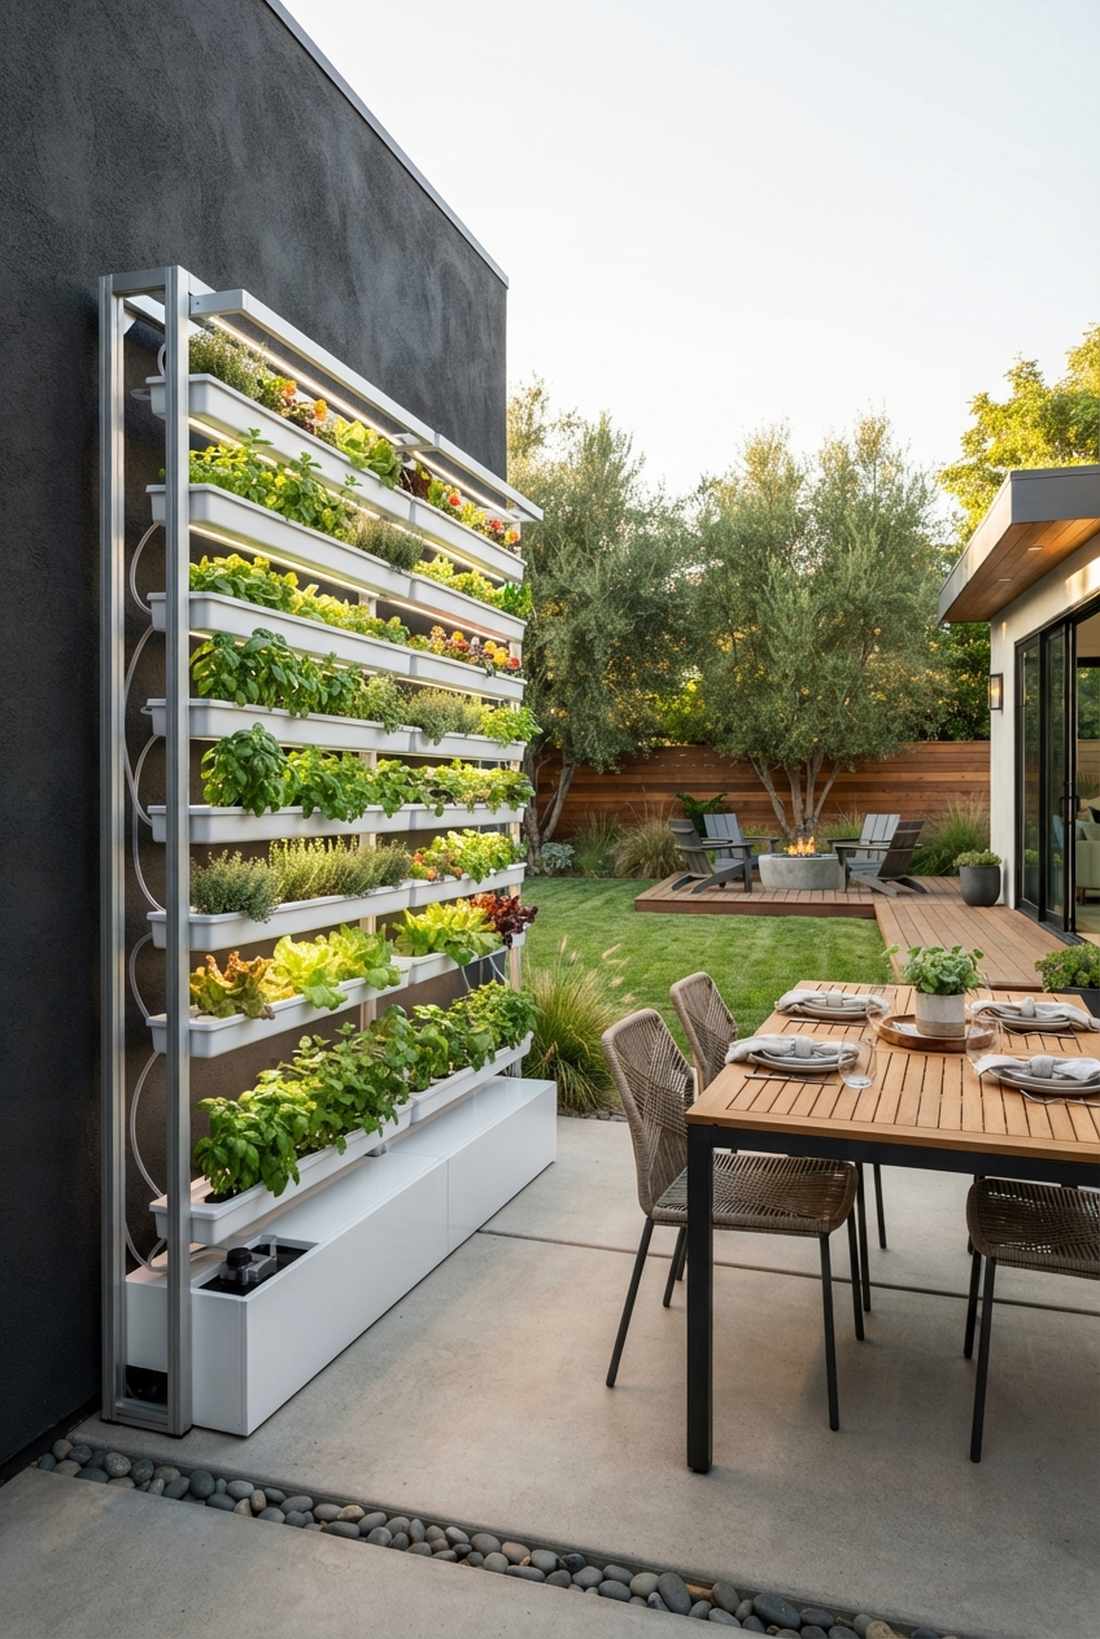
16. Salad Green Living Walls
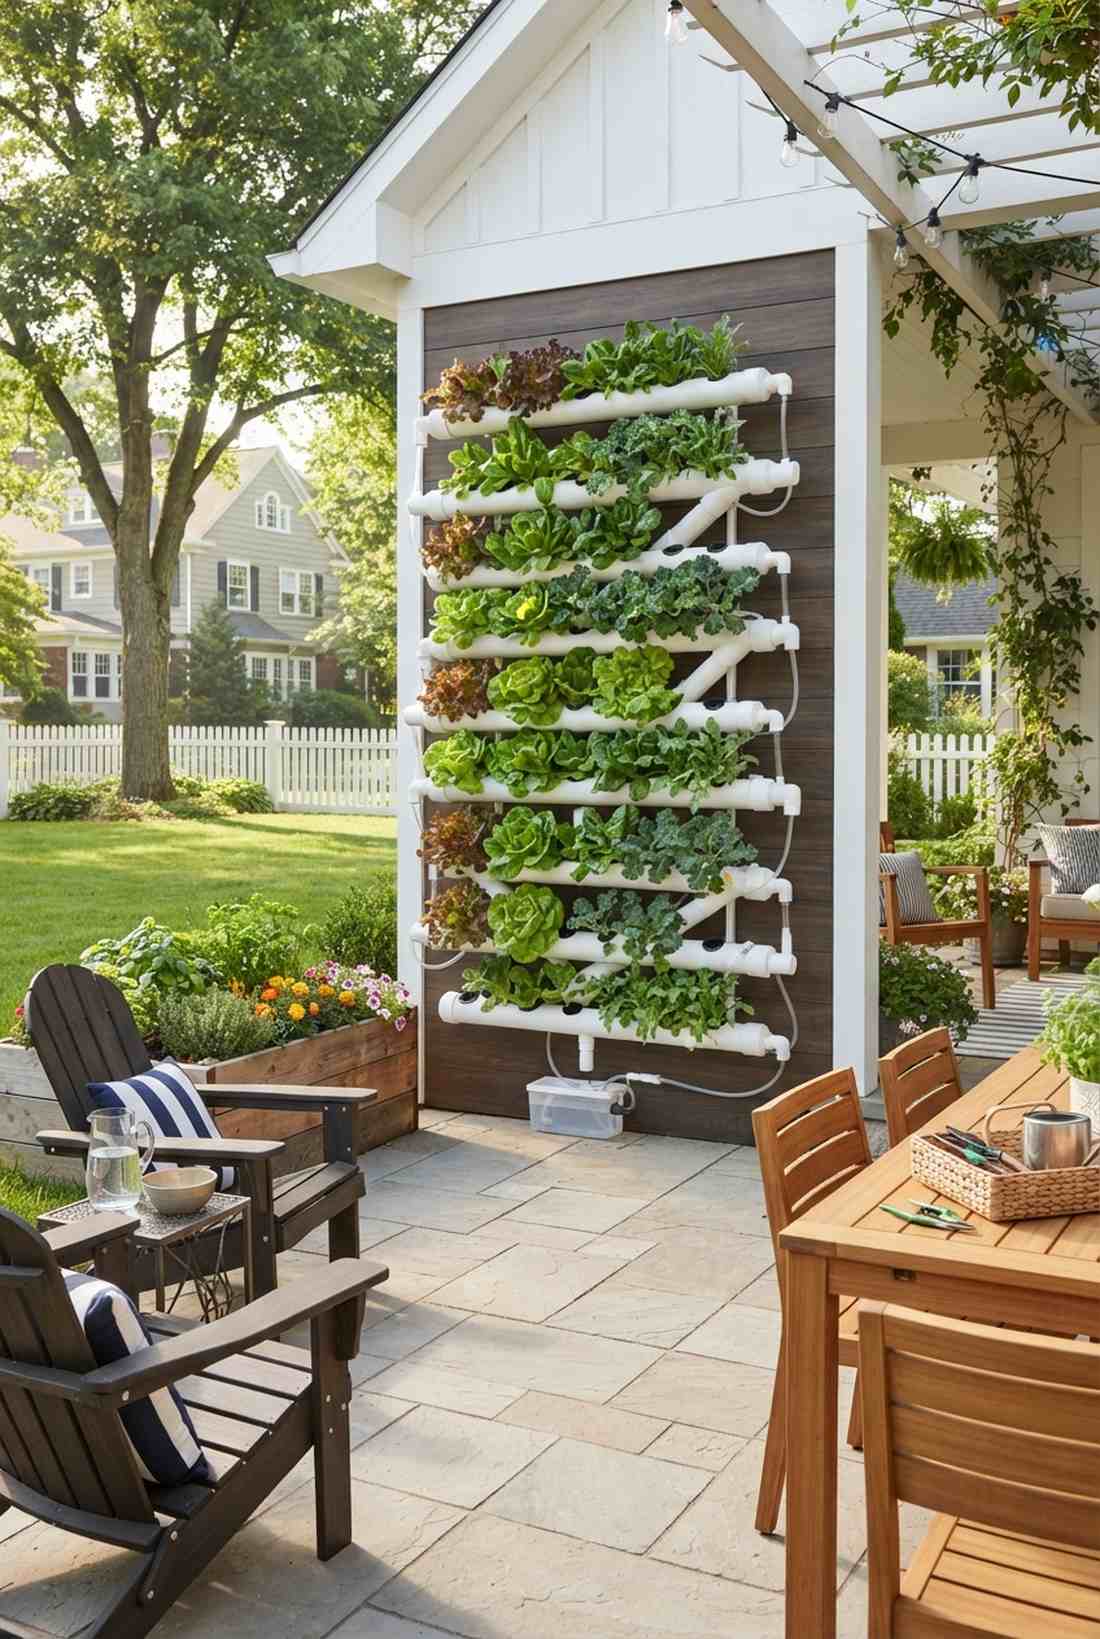
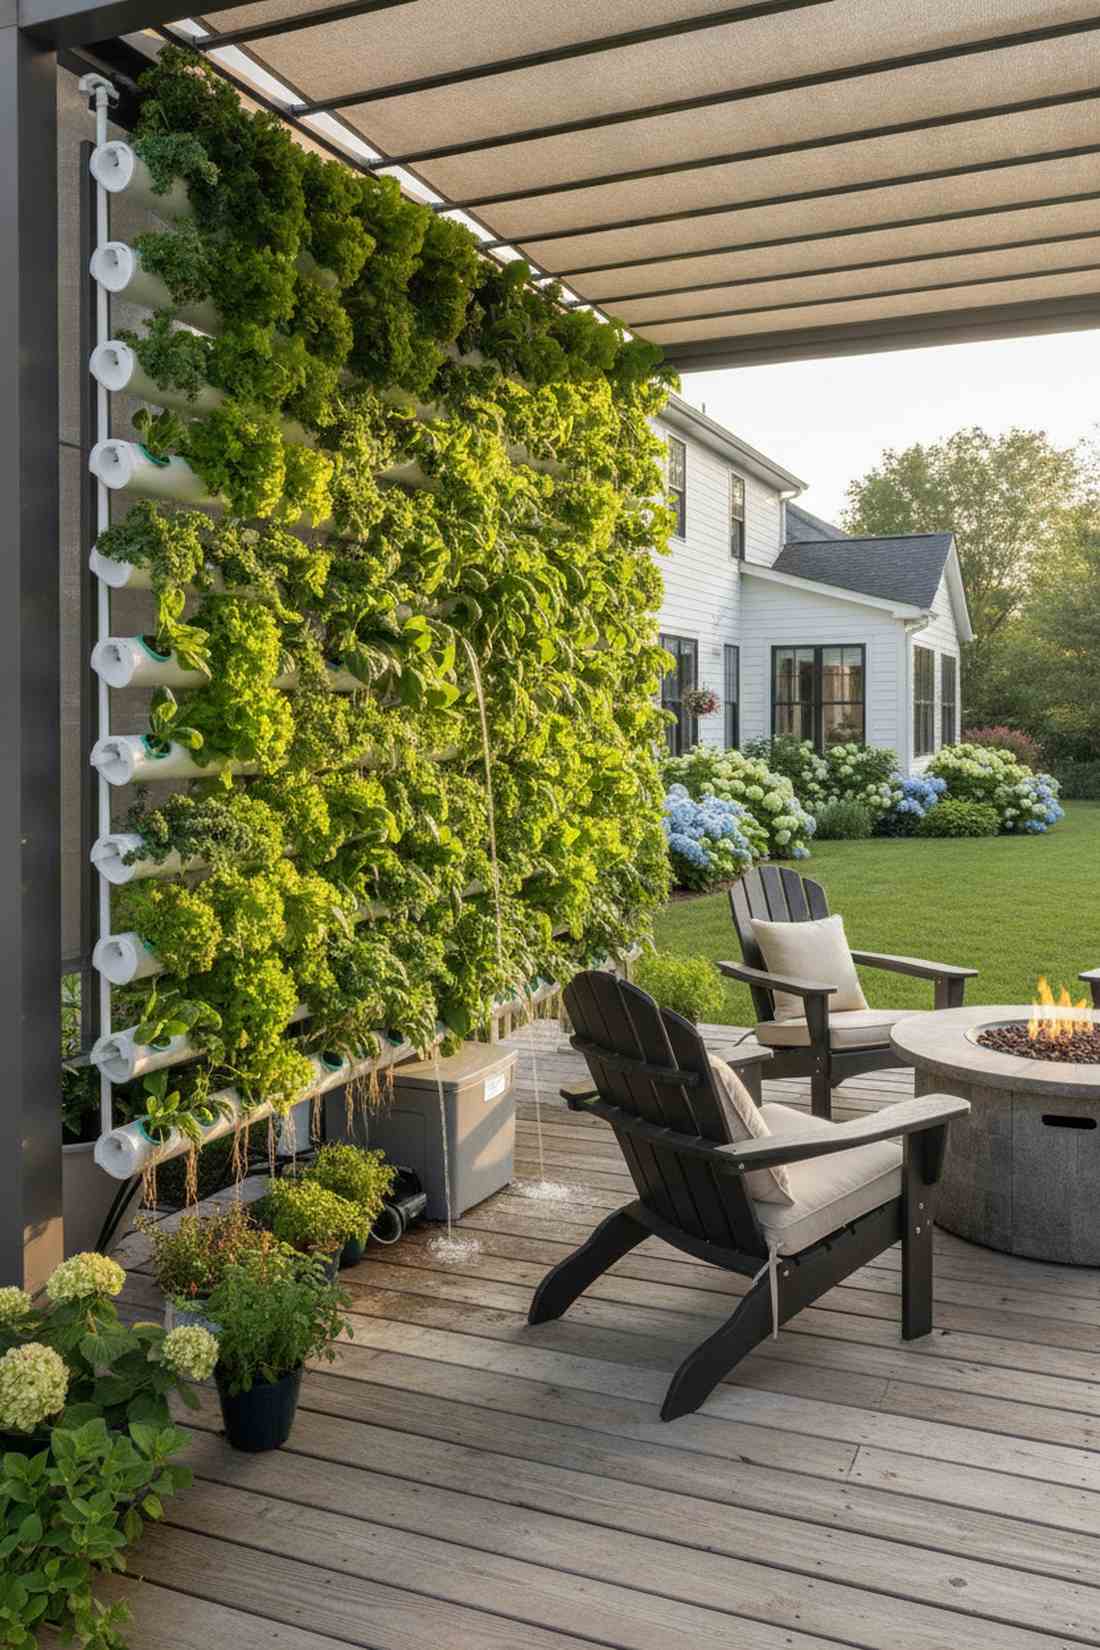
Radiates fresh, crisp energy that makes you want to eat healthier just by looking at it. A hydroponic salad green wall is the smartest addition for a shady morning-sun patio.
Conventional raised beds take up massive square footage, yet this vertical tube method delivers a surprisingly premium look in zero footprint. Using continuous flow irrigation accelerates growth wildly, turning leafy greens into a vibrant, edible privacy curtain.
Expect to spend $70–$110 for a good recirculating setup. It is entirely worth the initial hardware investment.
- Key Materials: PVC nutrient film tubes, water pump, net cups
- Vibe / Style: High-tech homesteading
- Difficulty: Intermediate assembly
- Budget Breakdown: Tube Kit: $60 | Pump/Tank: $30 | Seeds/Cups: $15.
- Creator’s Tip: Plant staggered batches two weeks apart so you never run out of mature greens.
- Smart Sourcing: vertical PVC hydroponic starter kits and heavy-duty net cups (bulk pack).
17. Climbing Tomato Espaliers
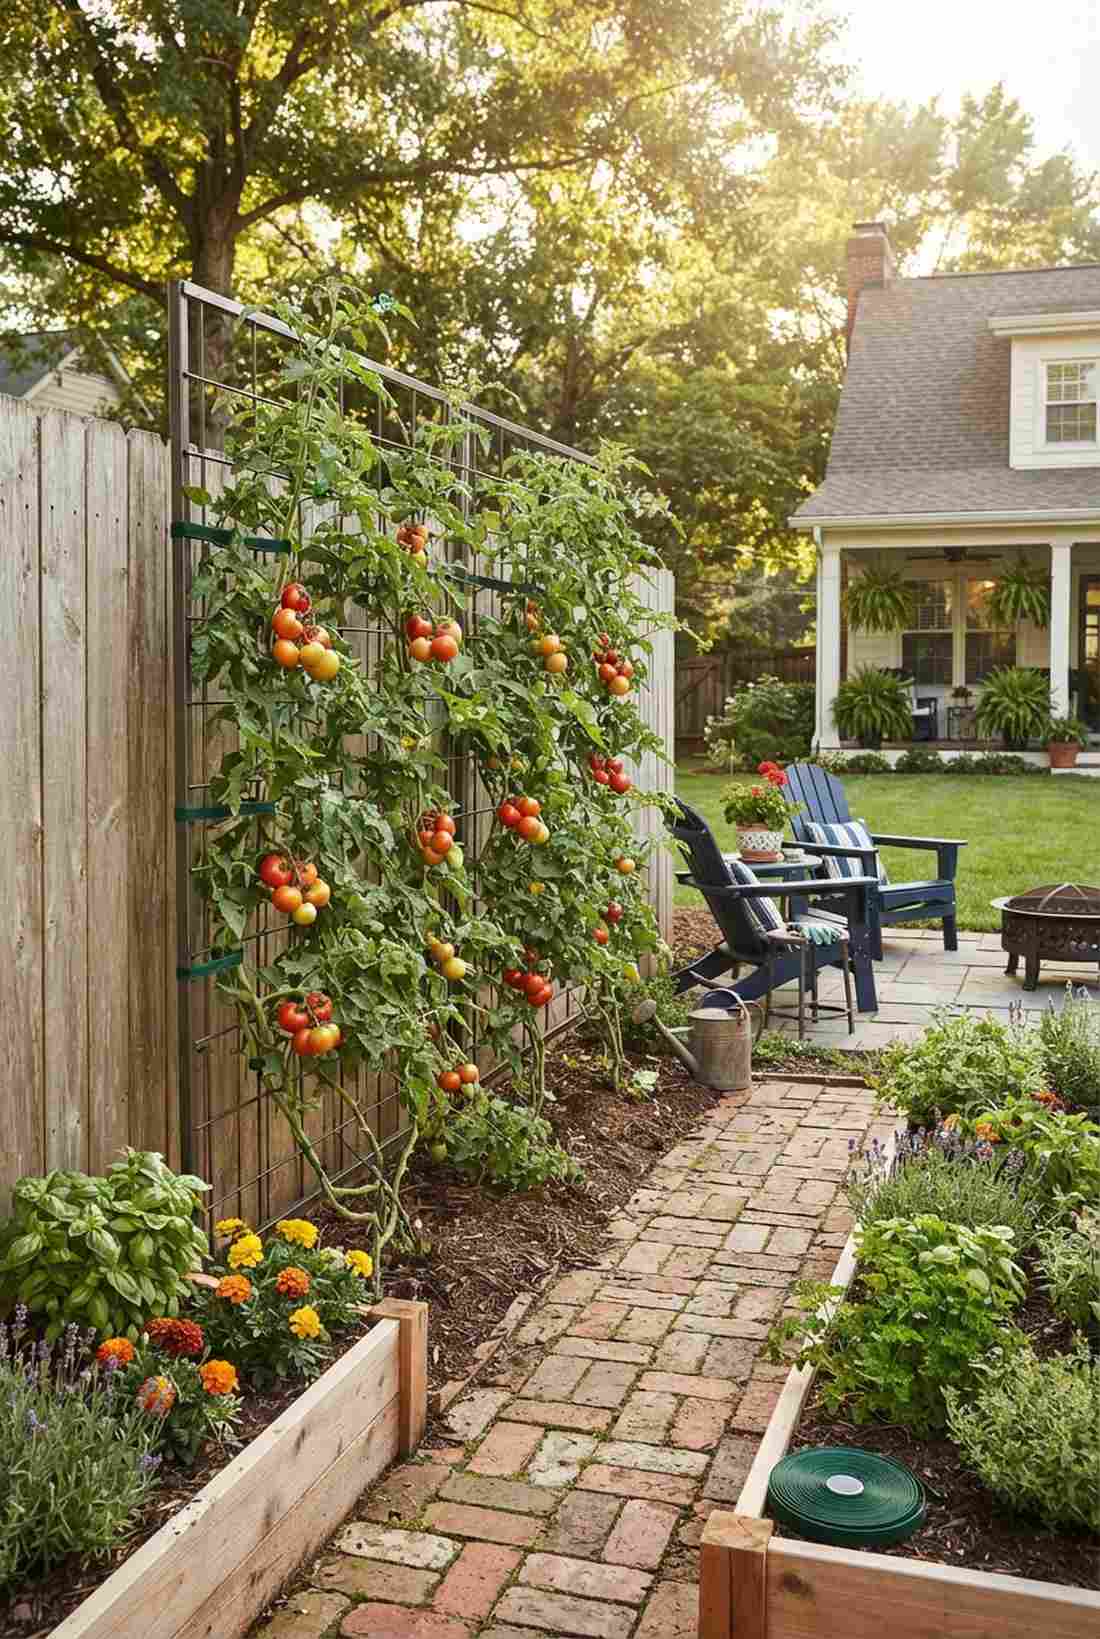
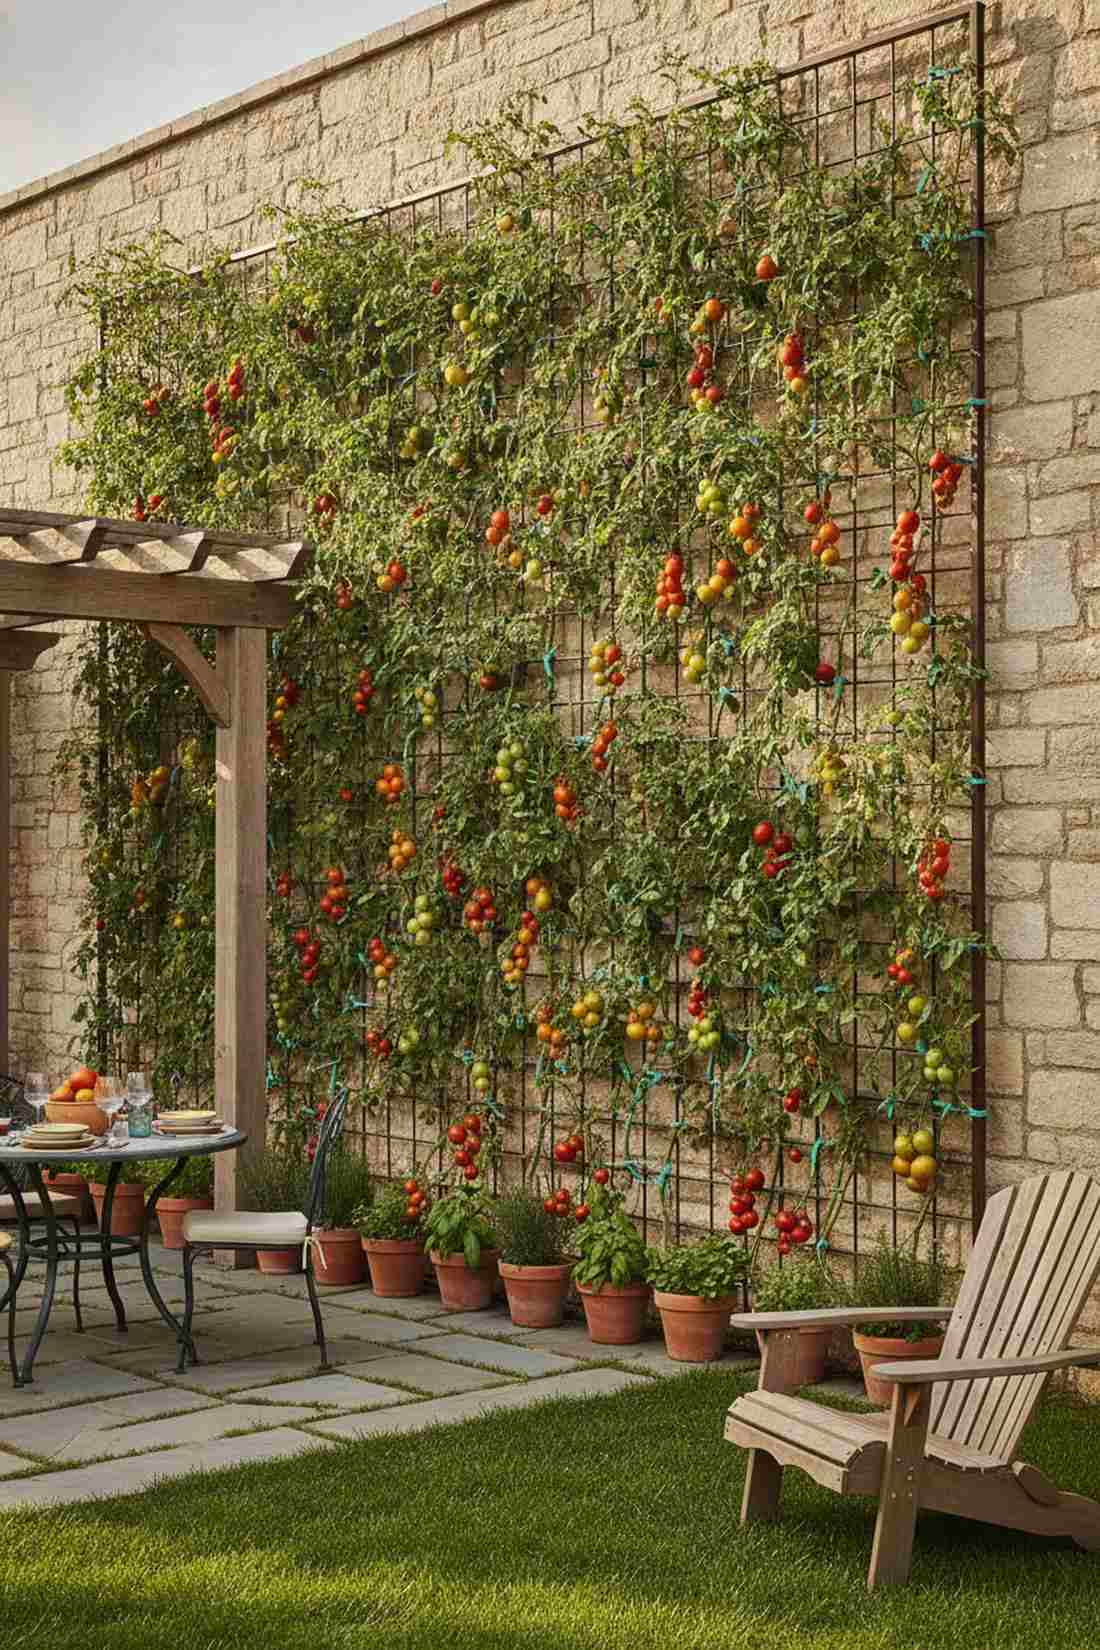
Feels like a lush, old-world Italian courtyard packed with ripening harvest colors. Training an espaliered tomato trellis completely redefines how a sunny boundary fence functions.
Wild tomato bushes are an eyesore, but aggressively pruning them flat against a grid gives a designer-level finish that is highly organized. Securing the main indeterminate vines with soft ties ensures maximum airflow, stopping blight while acting as a living wall.
You can set up the grid and ties for about $20–$35. Pin this if you want maximum food from minimal space!
- Key Materials: Sturdy wire grid, soft plant ties, indeterminate tomatoes
- Vibe / Style: Structured Mediterranean
- Difficulty: Requires ongoing pruning
- Budget Breakdown: Grid Panel: $20 | Soft Ties: $8 | Fertilizer: $7.
- Creator’s Tip: Pinch off all the lateral “suckers” weekly so the plant focuses entirely on vertical height.
- Smart Sourcing: heavy-duty metal trellis grids and velcro plant tie rolls.
18. Vertical Bean and Pea Trellises
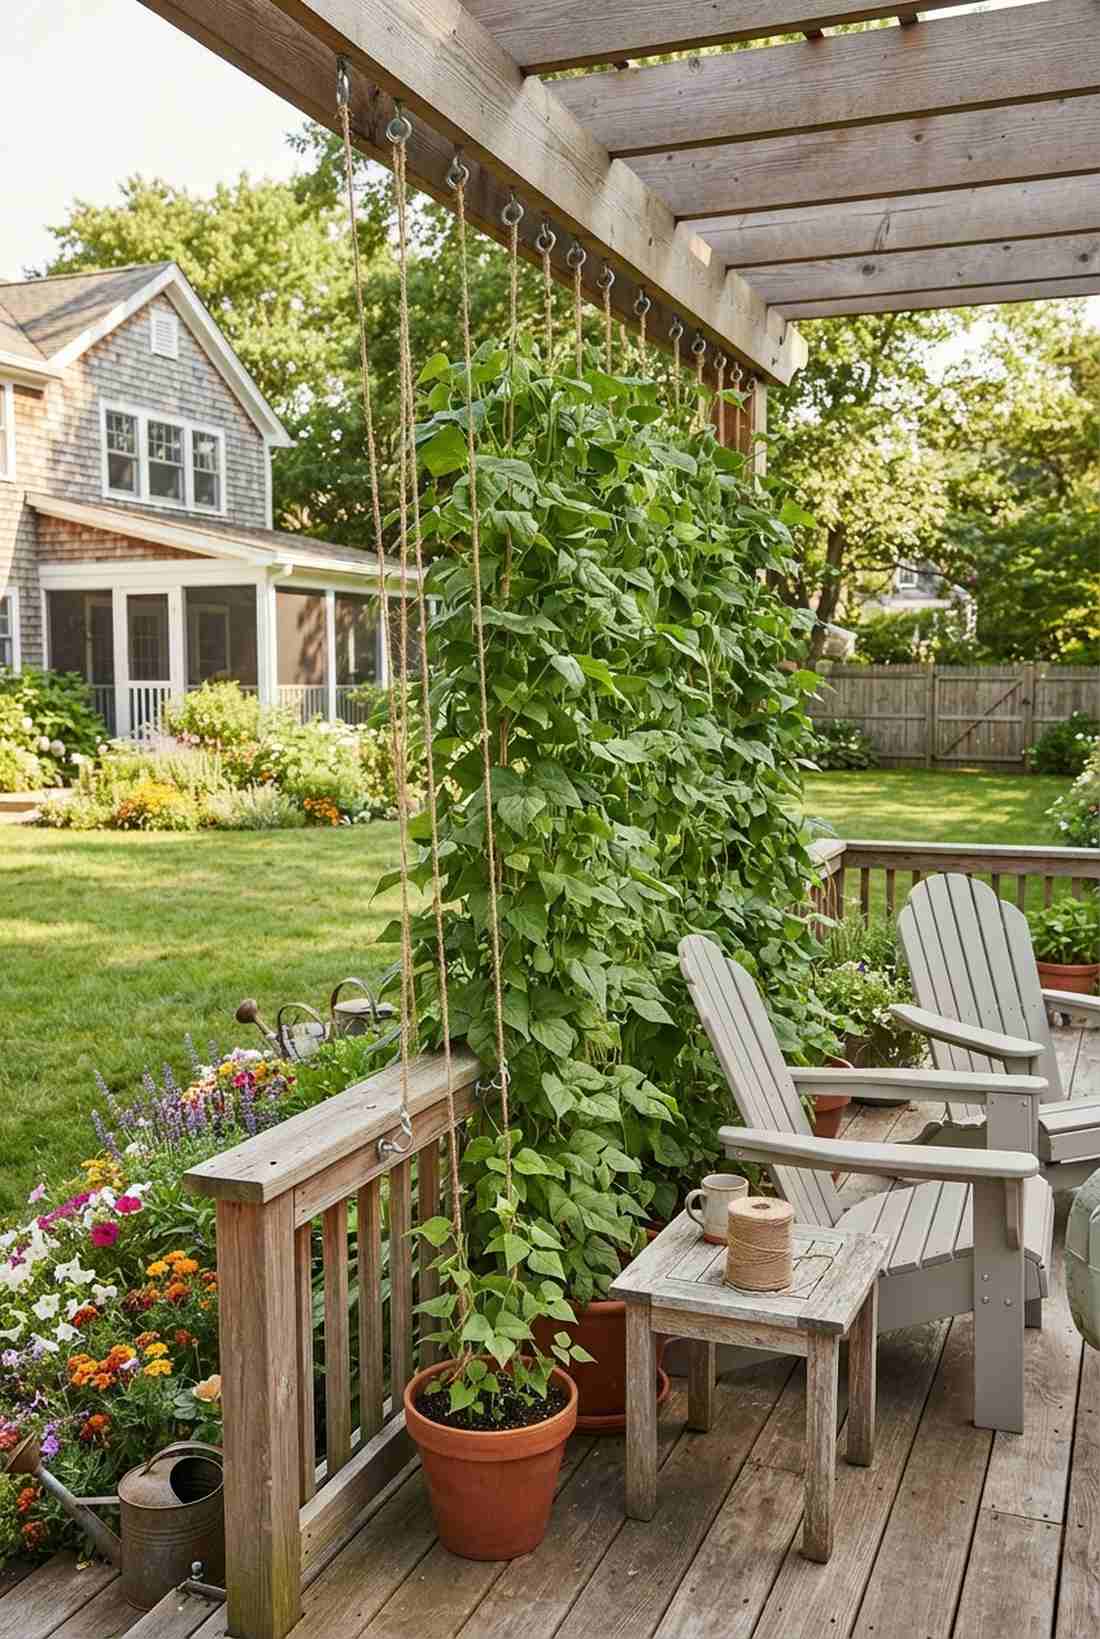
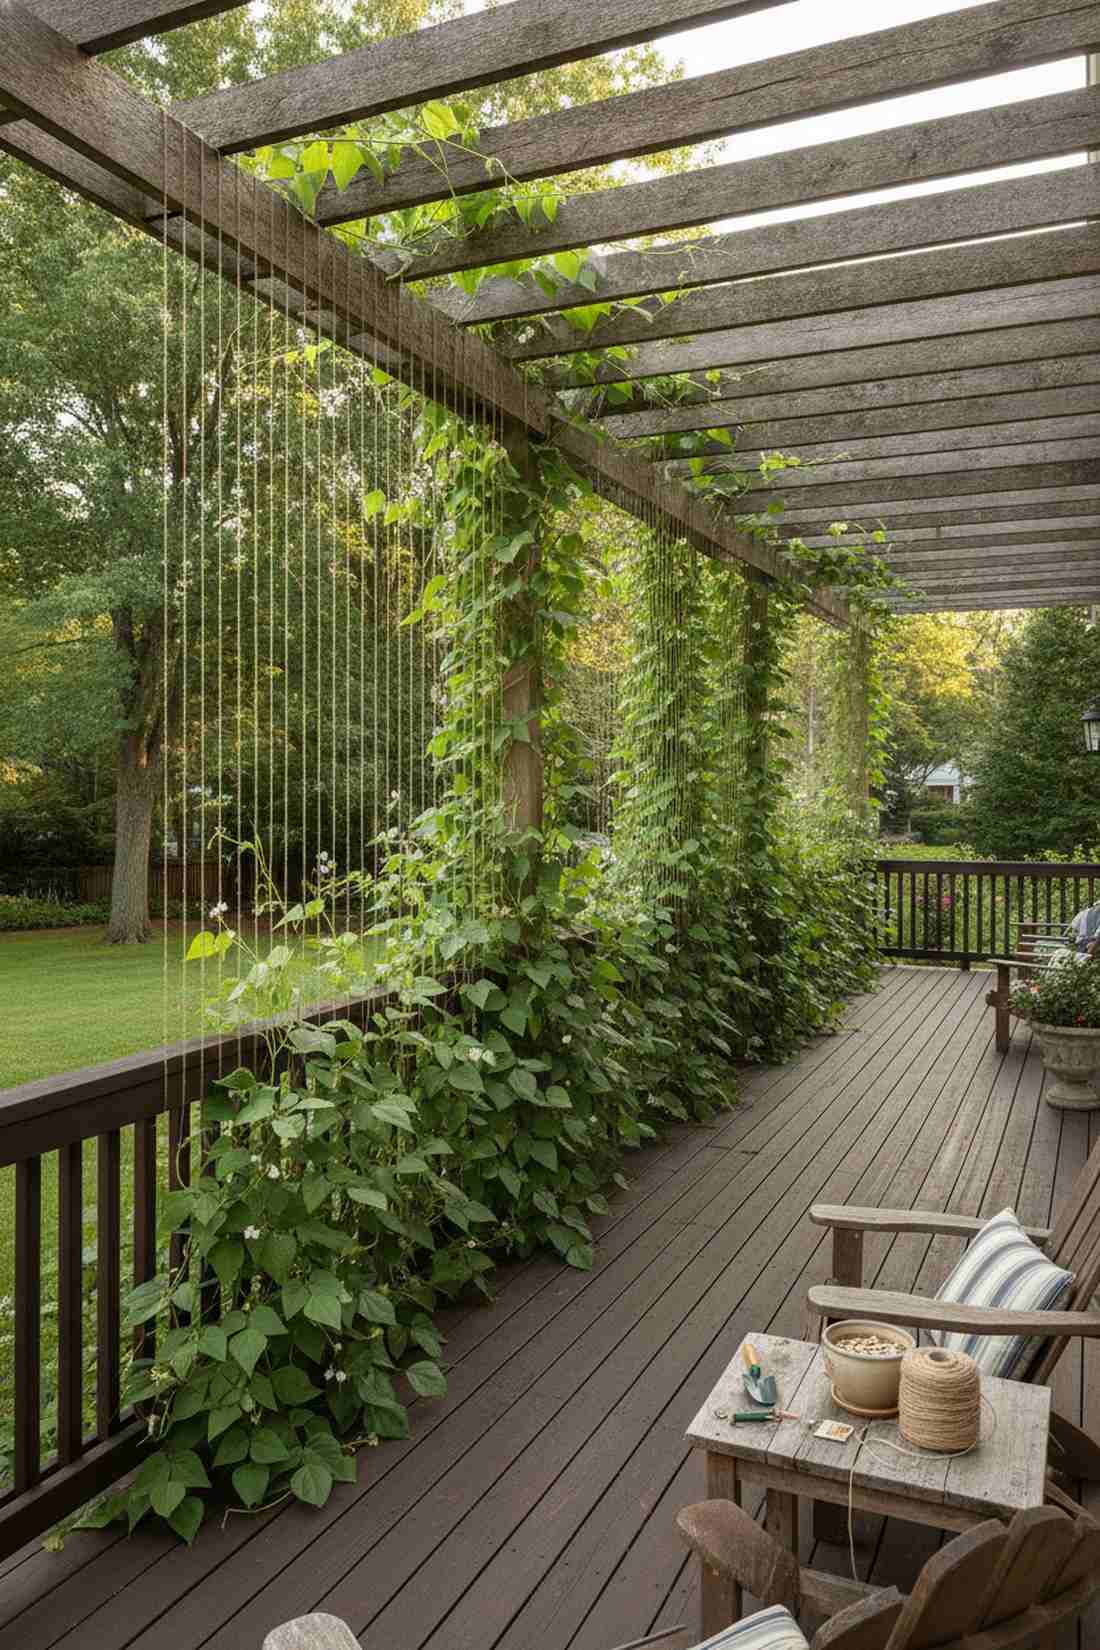
Looks like a solid, vibrant green wall that rockets upward almost overnight. A taut twine climbing frame is the absolute fastest way to screen a deck during the summer months.
Many people drop hundreds on artificial screens, but this seed-grown approach completely masks views for pennies. Stringing heavy jute twine from the deck railing to an overhead beam creates the perfect gripping surface for aggressive pole beans.
Materials cost less than $15 to pull this off. Highly recommended for a high-impact, low-budget weekend win.
- Key Materials: Heavy jute twine, screw hooks, pole bean seeds
- Vibe / Style: Classic cottage garden
- Difficulty: Extremely simple
- Budget Breakdown: Twine/Hooks: $10 | Seeds: $4.
- Creator’s Tip: Soak your bean seeds in water for 12 hours before planting to speed up germination times immensely.
- Smart Sourcing: natural jute twine (bulk spool) and weather-resistant eye hooks.
Stop wasting money on flimsy trellises; the upcoming hybrid design is an absolute game-changer.
Architectural Hybrid Solutions
19. Laser-Cut Metal with Vine Pockets
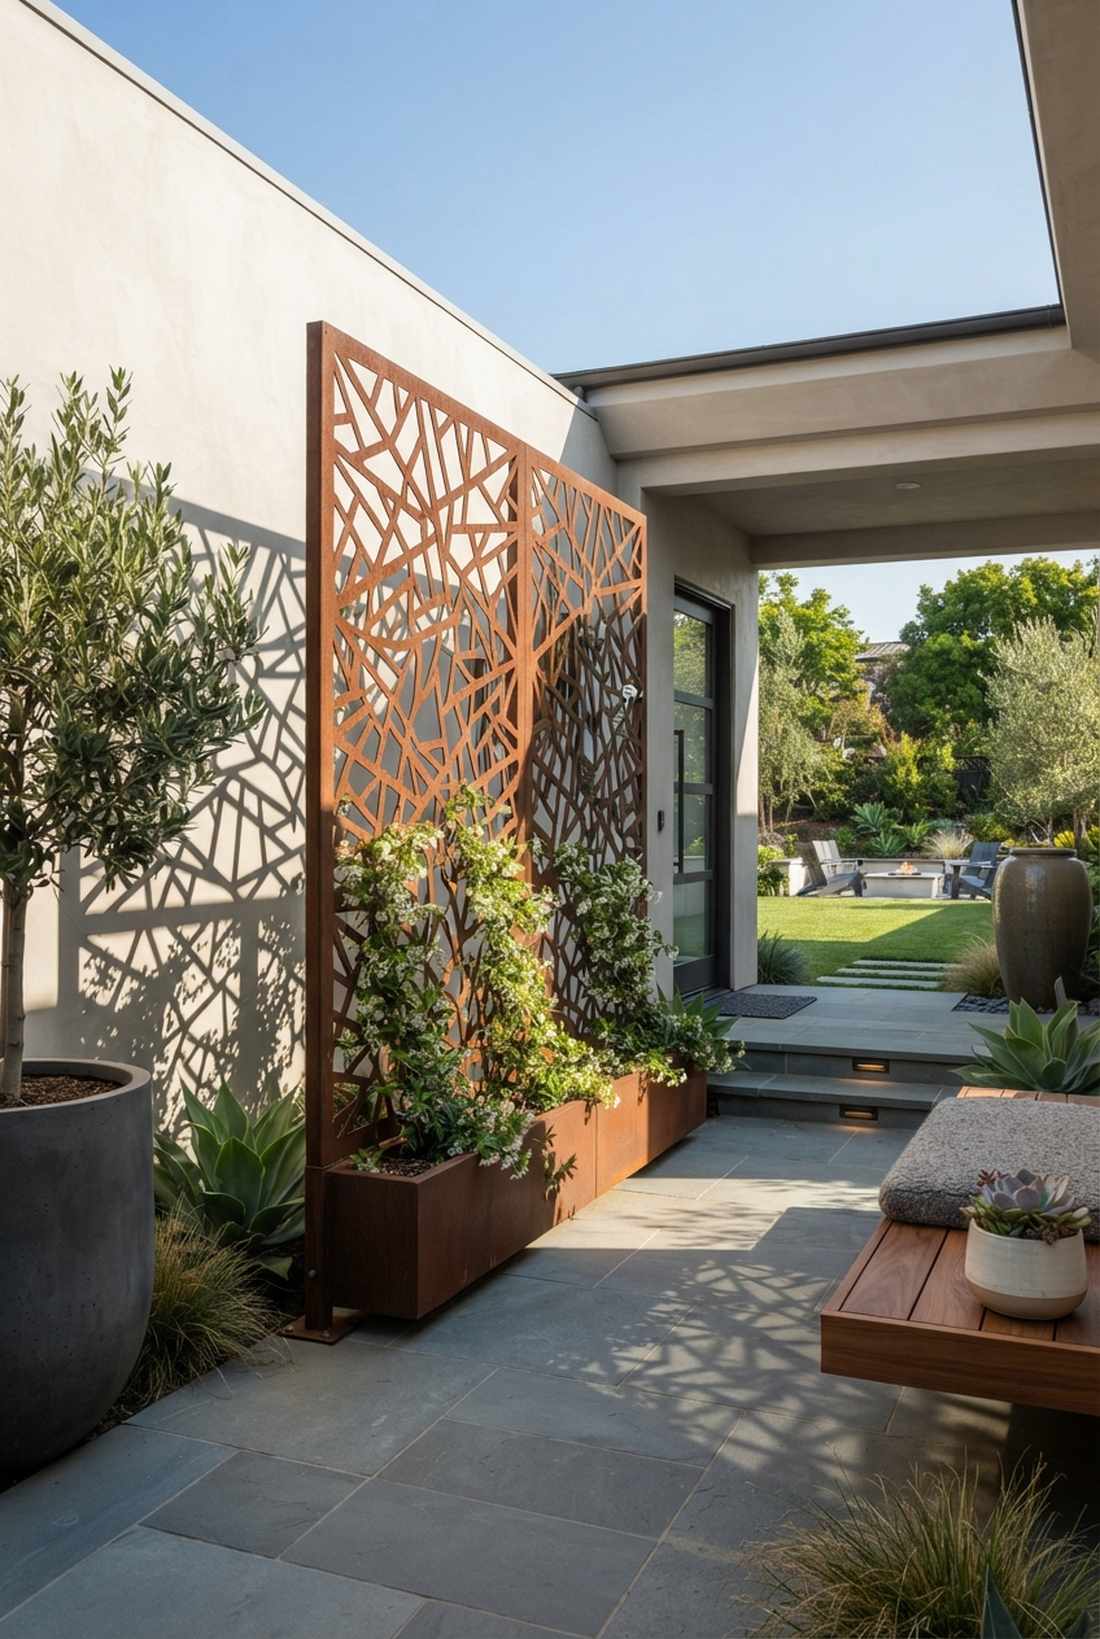
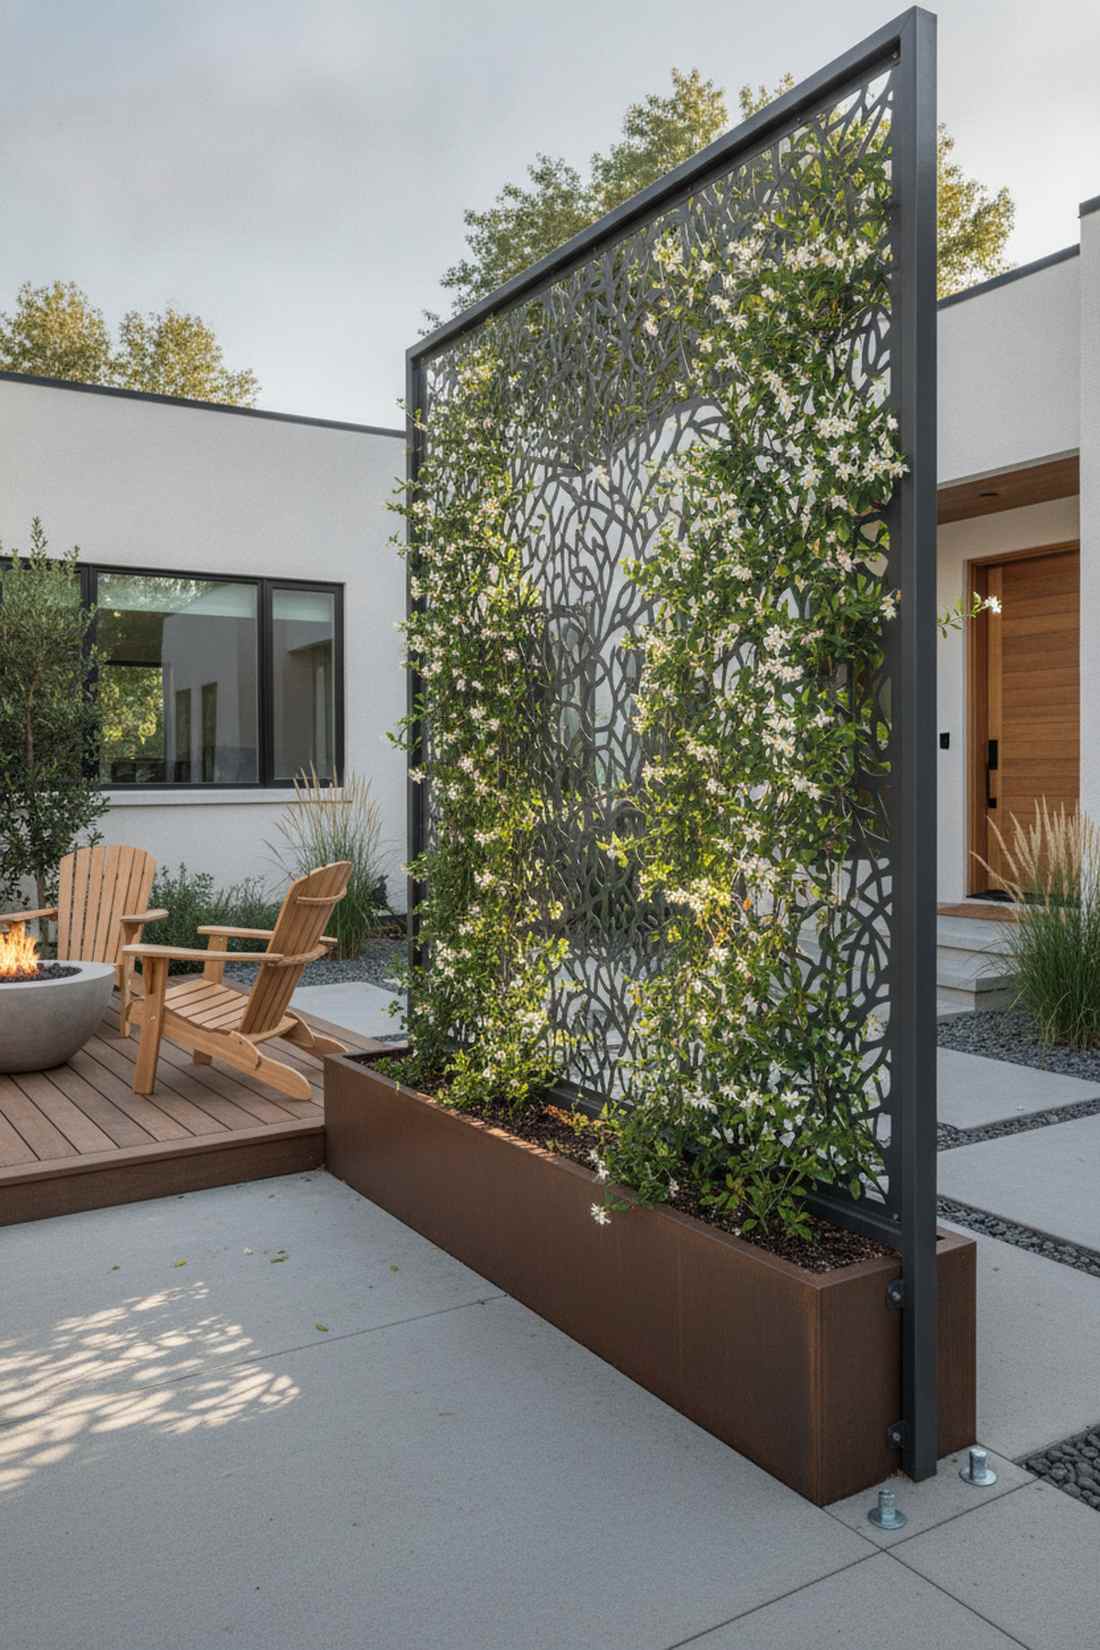
Radiates high-end custom architecture that instantly boosts your home’s exterior appeal. Integrating a laser-cut privacy screen with greenery is flawless for modern entryway courtyards.
Standard wood fences block too much breeze, but this perforated metal concept delivers a surprisingly premium look with beautiful shadow play. Bolting discrete planter boxes to the base allows star jasmine to weave through the geometric cuts.
Metal panels cost roughly $100–$200 each, but the aesthetic return is massive. Save this for your ultimate backyard renovation!
- Key Materials: Corten or powder-coated metal screen, base planter
- Vibe / Style: Ultra-modern custom design
- Difficulty: Requires masonry or deck anchoring
- Budget Breakdown: Metal Screen: $150 | Planter Base: $40 | Vines: $20.
- Creator’s Tip: Choose Corten steel if you want a natural rust patina that blends seamlessly with garden earth tones.
- Smart Sourcing: laser-cut metal privacy screens and heavy-duty concrete anchor bolts.
20. Timber Slat Walls with Planter Boxes
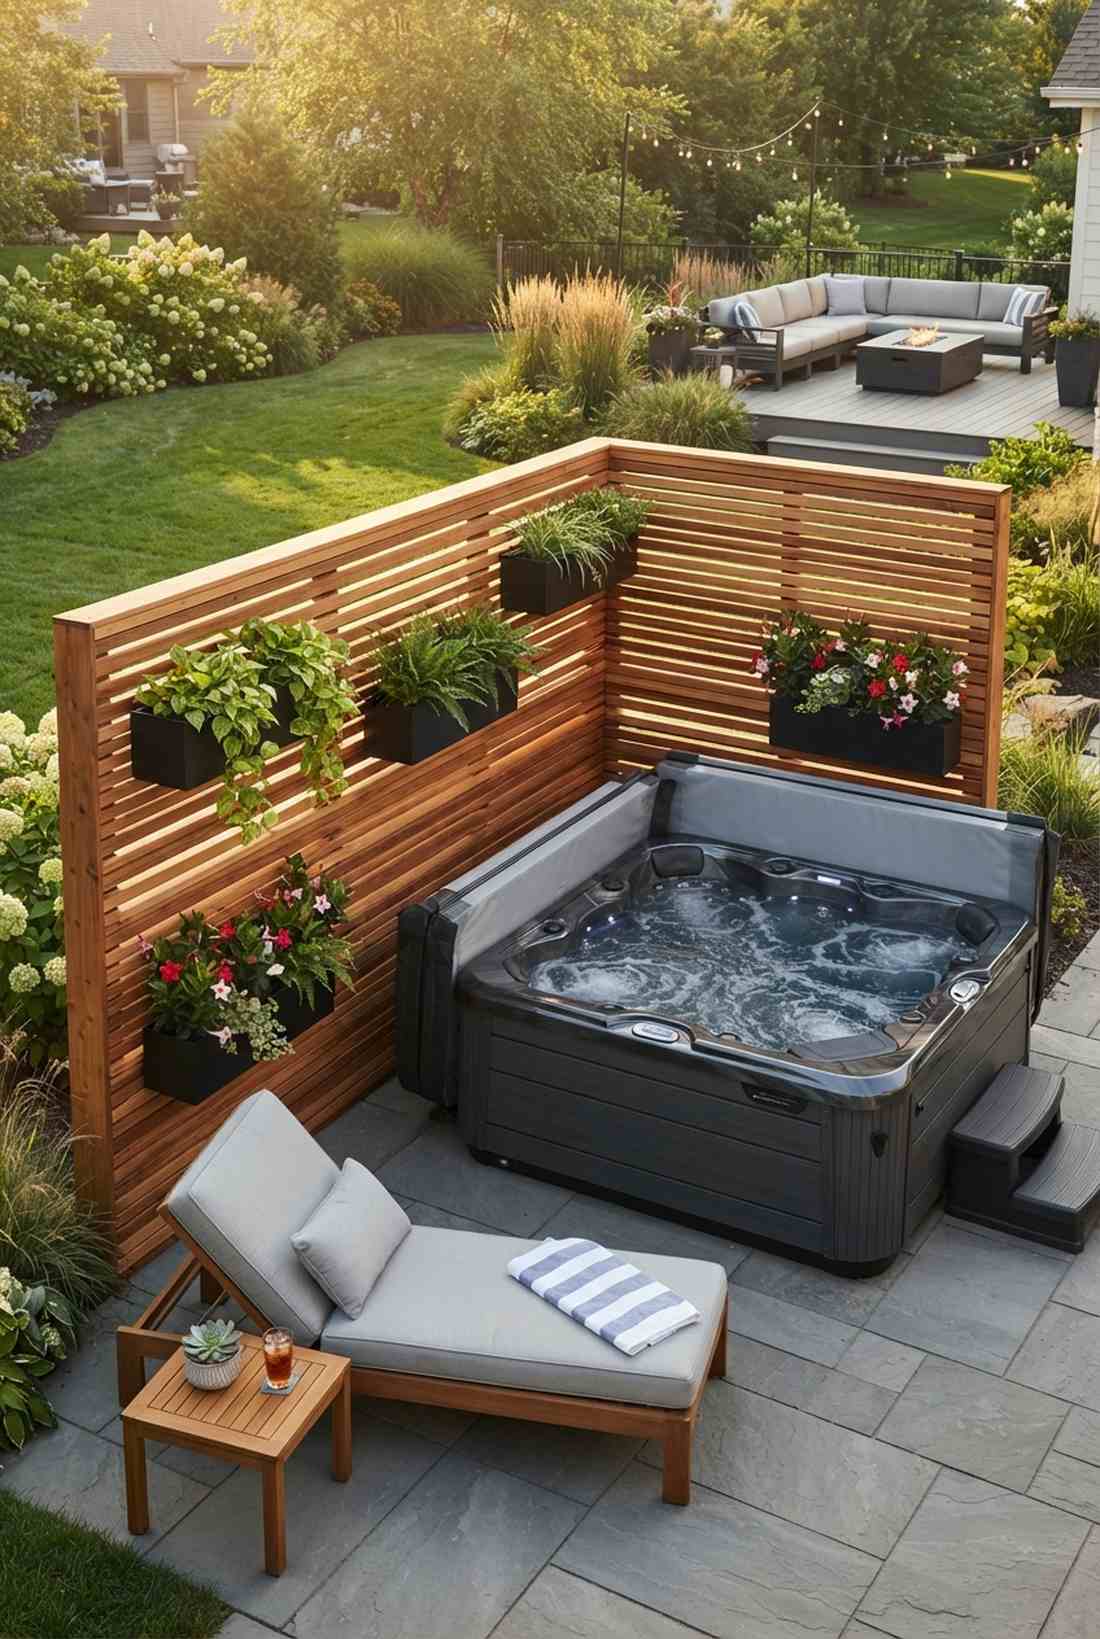
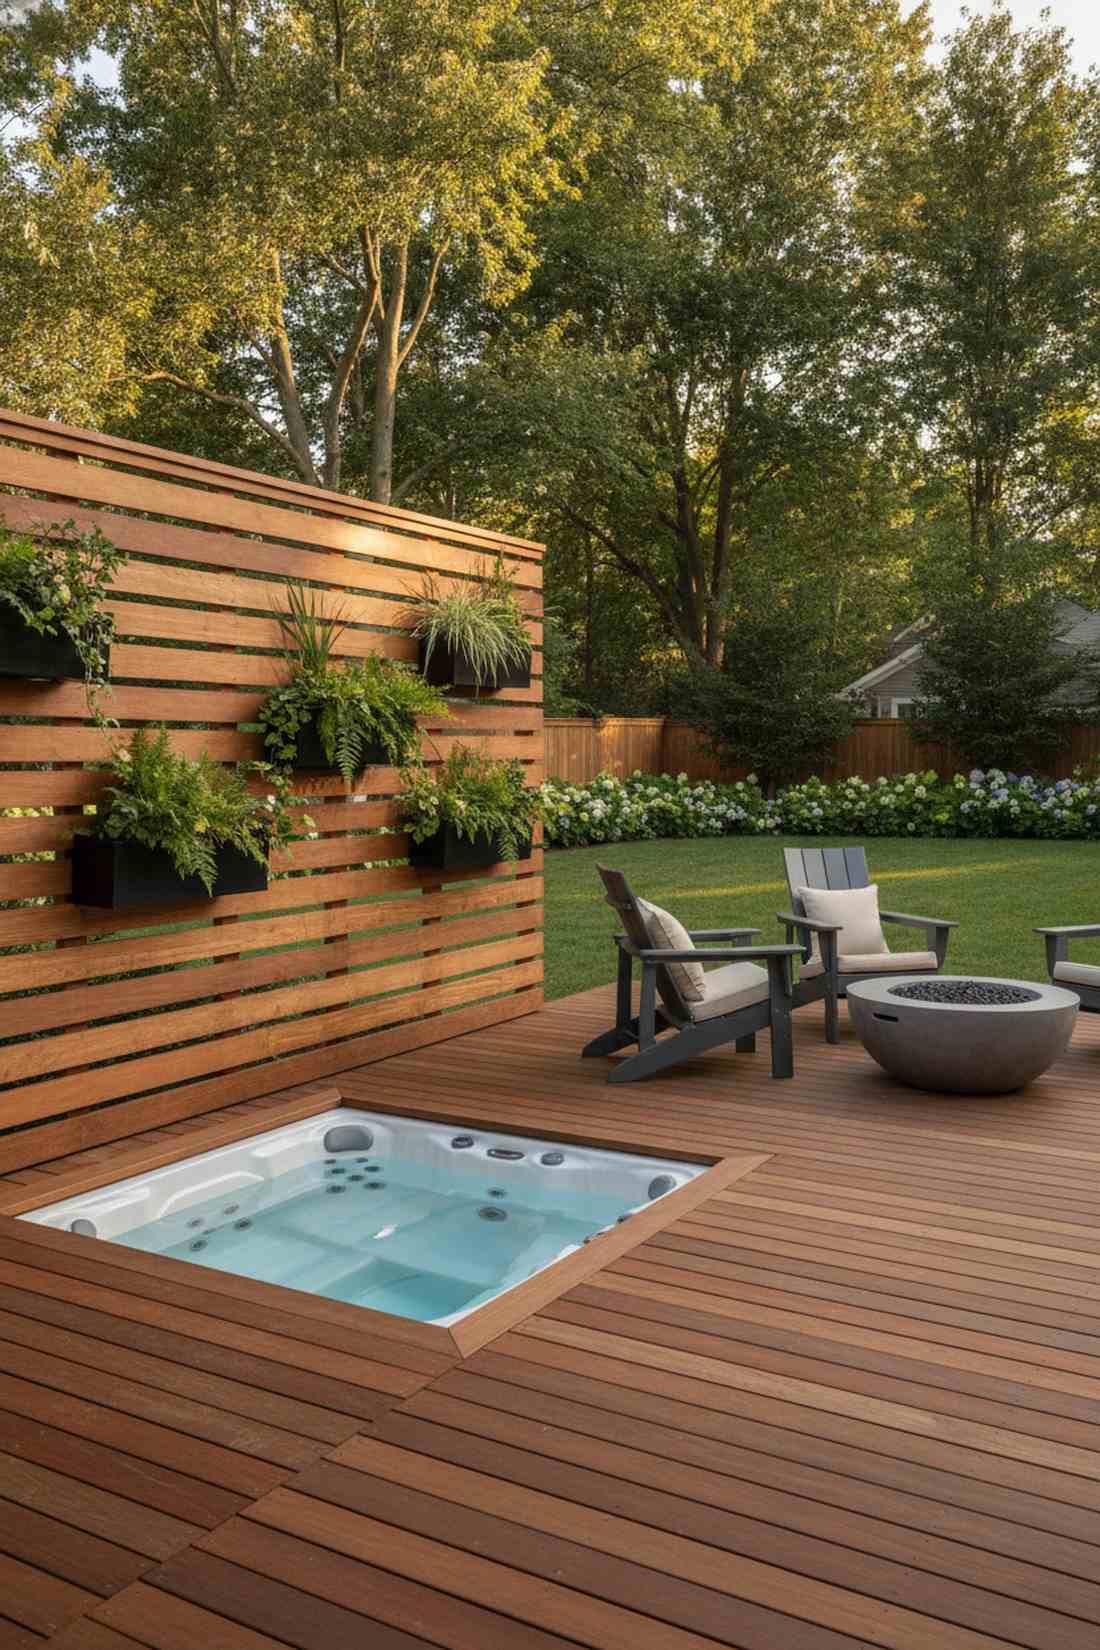
Feels like the VIP cabana section at an exclusive beach club. A horizontal cedar slat wall with integrated boxes completely transforms an exposed hot tub area.
Standard solid fences feel claustrophobic, but spacing the timber gives a designer-level finish that allows light to filter beautifully. Building hidden shelves between the slats to hold black resin planters creates the illusion of floating greenery.
Lumber and boxes typically run about $150–$250 depending on wood choice. It is a fantastic weekend carpentry project.
- Key Materials: Cedar furring strips, outdoor screws, rectangular planters
- Vibe / Style: High-end resort cabana
- Difficulty: Intermediate woodworking
- Budget Breakdown: Cedar: $120 | Hardware: $30 | Planters: $50.
- Creator’s Tip: Stain all sides of the timber before assembling it to protect the wood from hidden moisture decay.
- Smart Sourcing: UV-resistant rectangular planter boxes and exterior wood stain/sealer kits.
Material Guide: Cheap vs. Premium Aesthetic
Knowing exactly where to save and where to spend makes all the difference in achieving that “looks expensive but isn’t” vibe.
- Standard vs. UV-Resistant/Premium: Standard plastics crack in one season, while UV-resistant commercial grids survive a decade without fading.
- Pre-made Kits vs. Sourcing Locally: While hardware stores are great for lumber, buying specialized hydroponic trays or heavy-duty felts via starter kits saves massive time and prevents messy leaks.
21. Gabion and Succulent Feature Walls

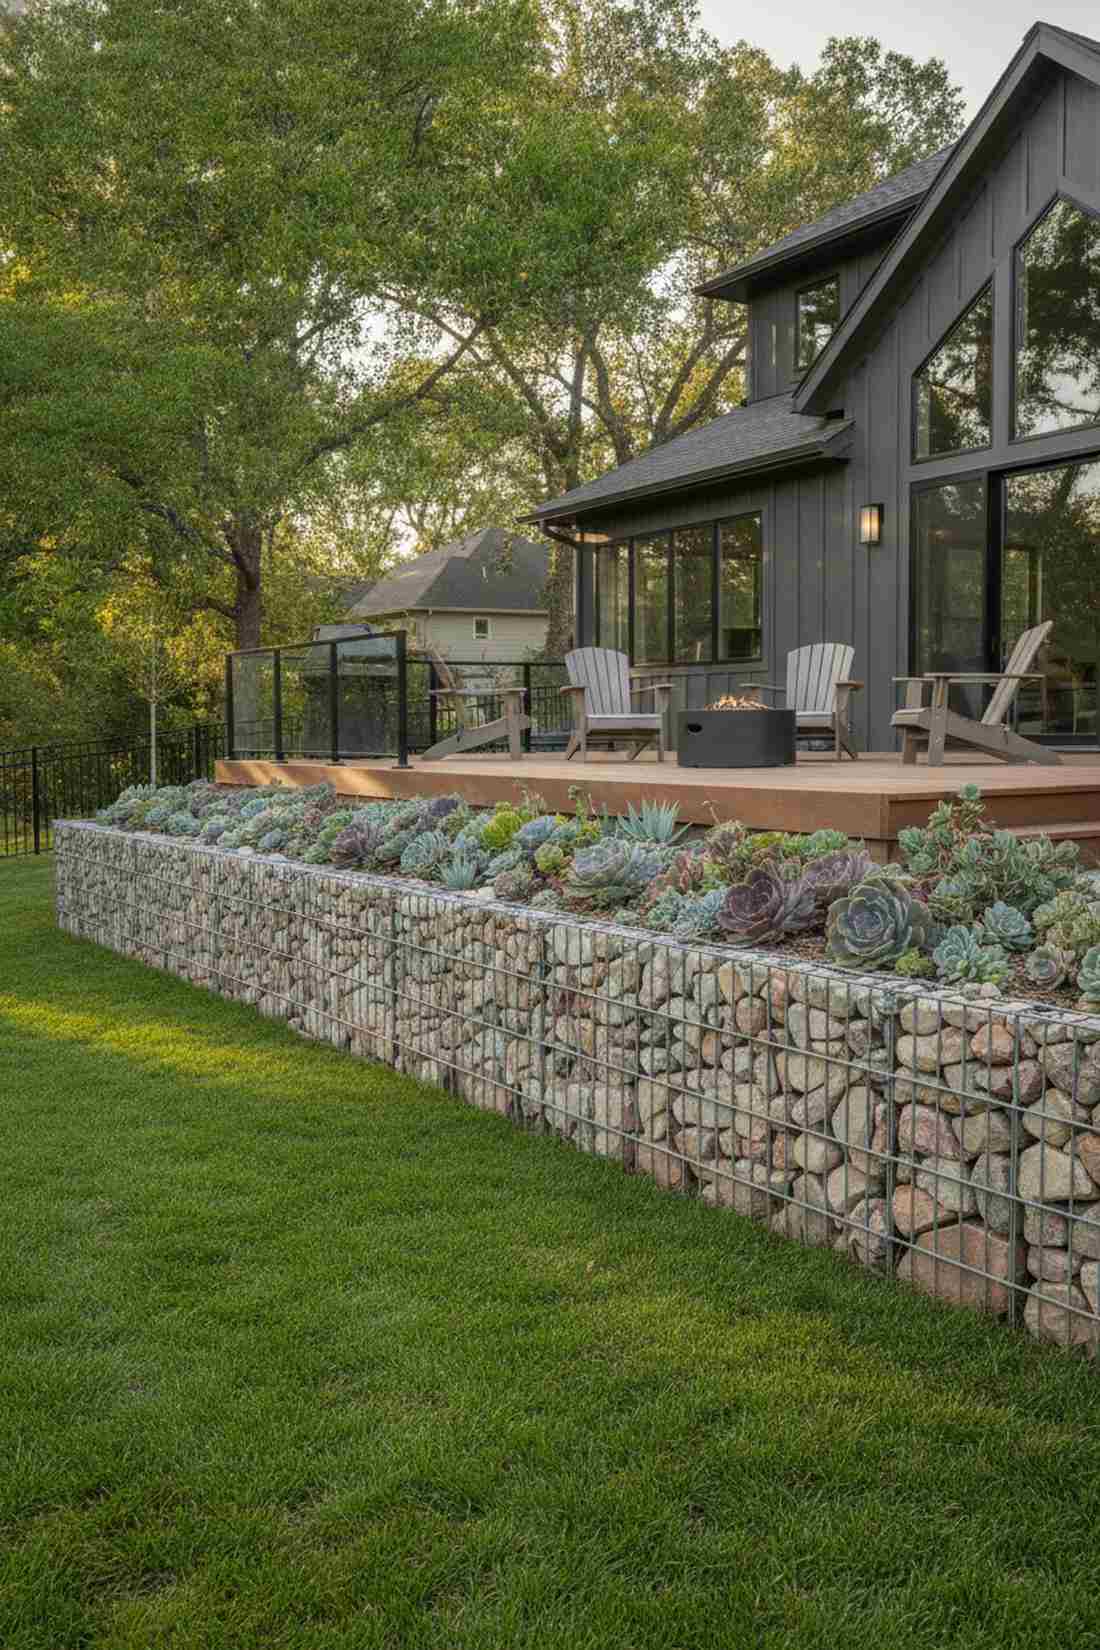
Looks like a masterclass in modern landscape architecture seamlessly blending earth and life. The stone-base succulent transition wall is spectacular for taming aggressive backyard slopes.
Pure stone walls can feel cold, but topping them with drought-proof greens gives a designer-level finish that perfectly balances the heavy mass. Tucking hardy succulents right into the top layer of rocks ensures incredible drainage and deep root security.
This hybrid feature costs around $80–$130 per section. Pin this if you need a beautiful retaining wall solution!
- Key Materials: Steel gabion cages, local stone fill, hardy succulents
- Vibe / Style: Contemporary earthen hybrid
- Difficulty: High physical effort
- Budget Breakdown: Cages: $45 | Stone Fill: $60 | Plants: $25.
- Creator’s Tip: Wash the river rocks before loading them in to remove dust and make the colors pop immediately.
- Smart Sourcing: galvanized steel gabion wire kits and live hardy succulent packs (bulk).
22. Glass Block and Fern Combinations

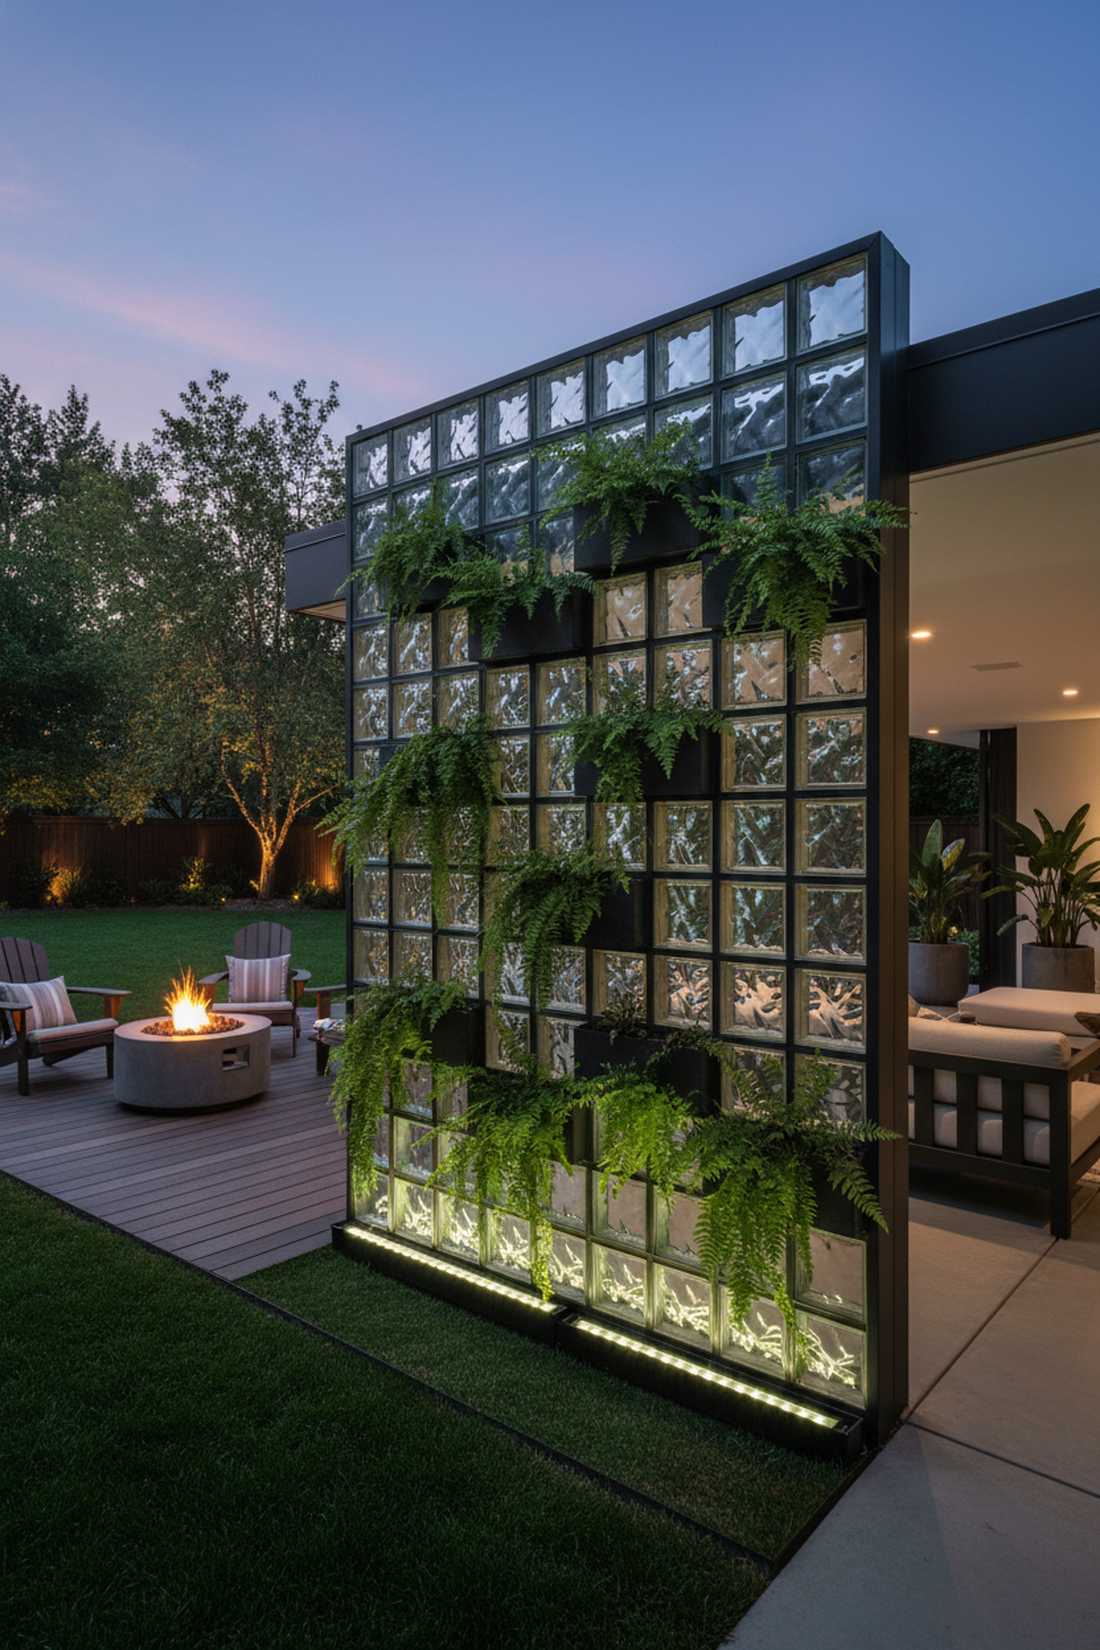
Exudes a moody, glowing mid-century modern aesthetic that looks incredible at dusk. A frosted glass and fern divider is the ultimate hack for spaces where you need privacy but cannot block the sunlight.
Solid walls create dark, dingy corners, yet this combination delivers a surprisingly premium look that transmits a soft, diffused glow. Framing the glass blocks with deep, shaded pockets provides the exact high-humidity microclimate that delicate ferns crave.
Glass blocks push the budget higher, around $150–$300. It is an unmatched aesthetic for high-end courtyard renovations.
- Key Materials: Translucent glass blocks, mortar or silicone track system, fern plugs
- Vibe / Style: Mid-century botanical glow
- Difficulty: Advanced masonry/assembly
- Budget Breakdown: Glass Blocks: $180 | Frame Track: $50 | Ferns: $30.
- Creator’s Tip: Add a hidden LED strip behind the ferns to illuminate the glass blocks from the bottom up at night.
- Smart Sourcing: acrylic glass block installation kits and waterproof outdoor LED strip lights.
The next configuration looks so high-end, your guests will assume you hired a landscape architect.
Shade-Loving Vertical Gardens
23. Fern Tapestry Walls
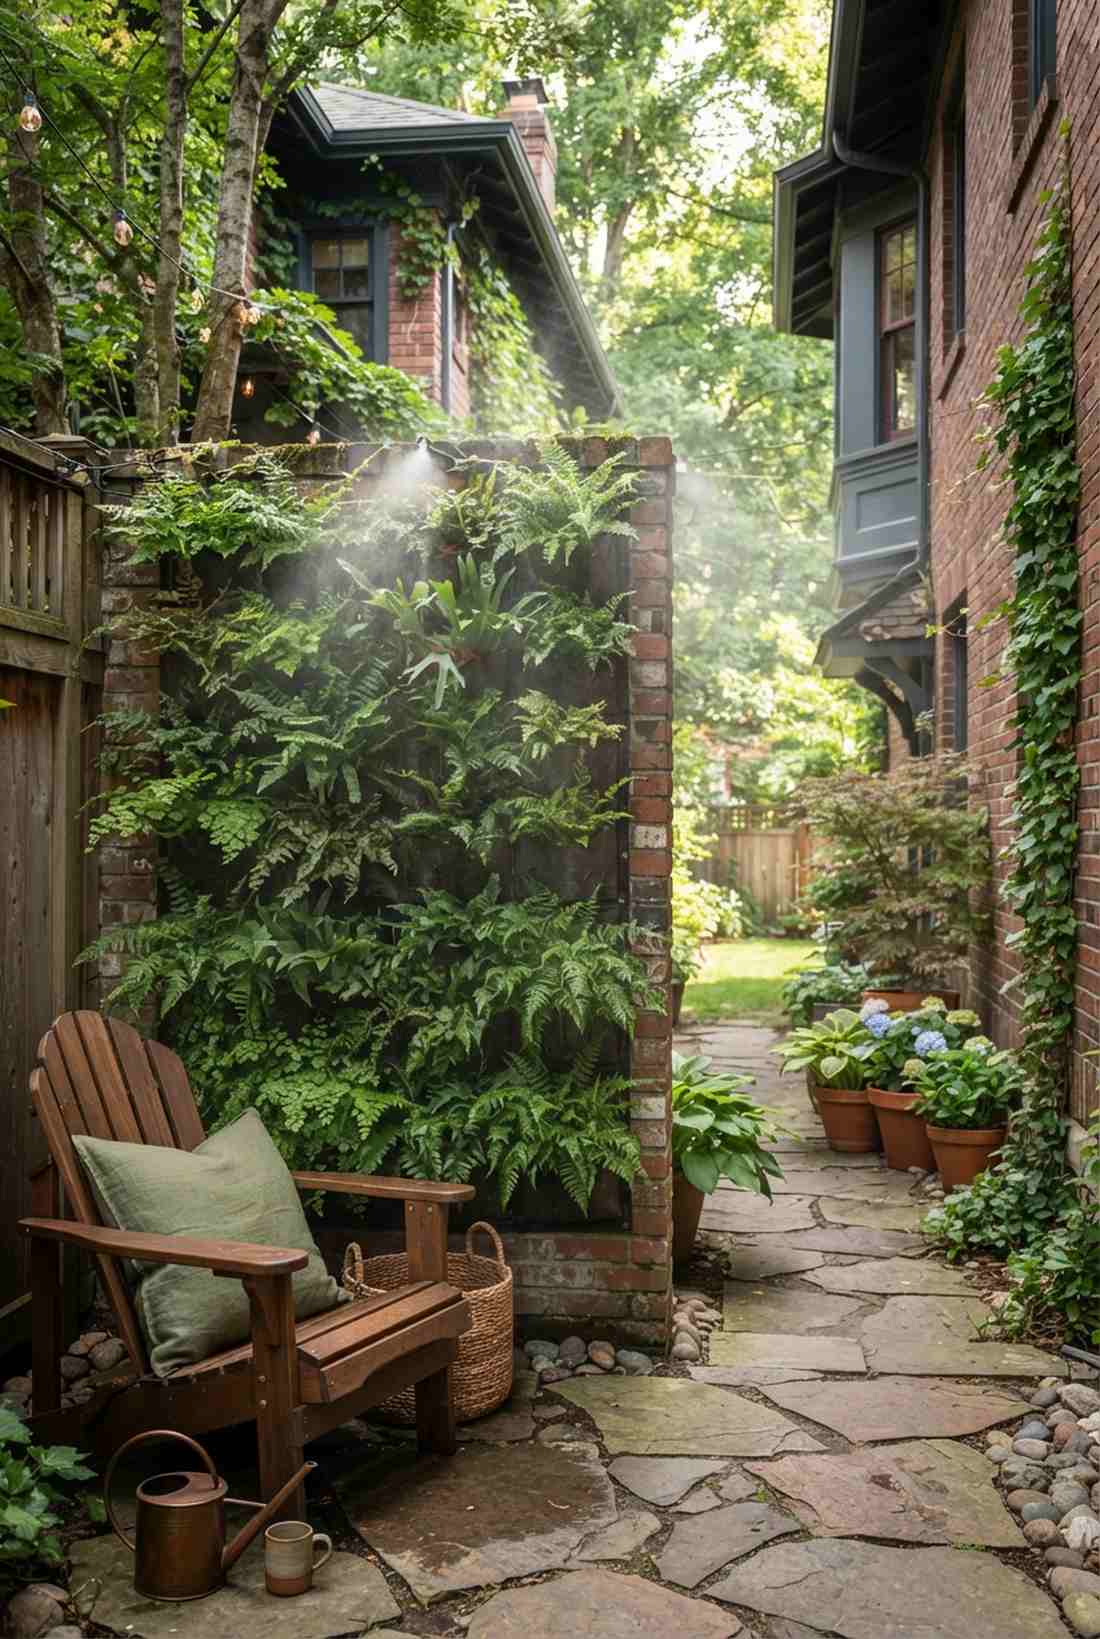
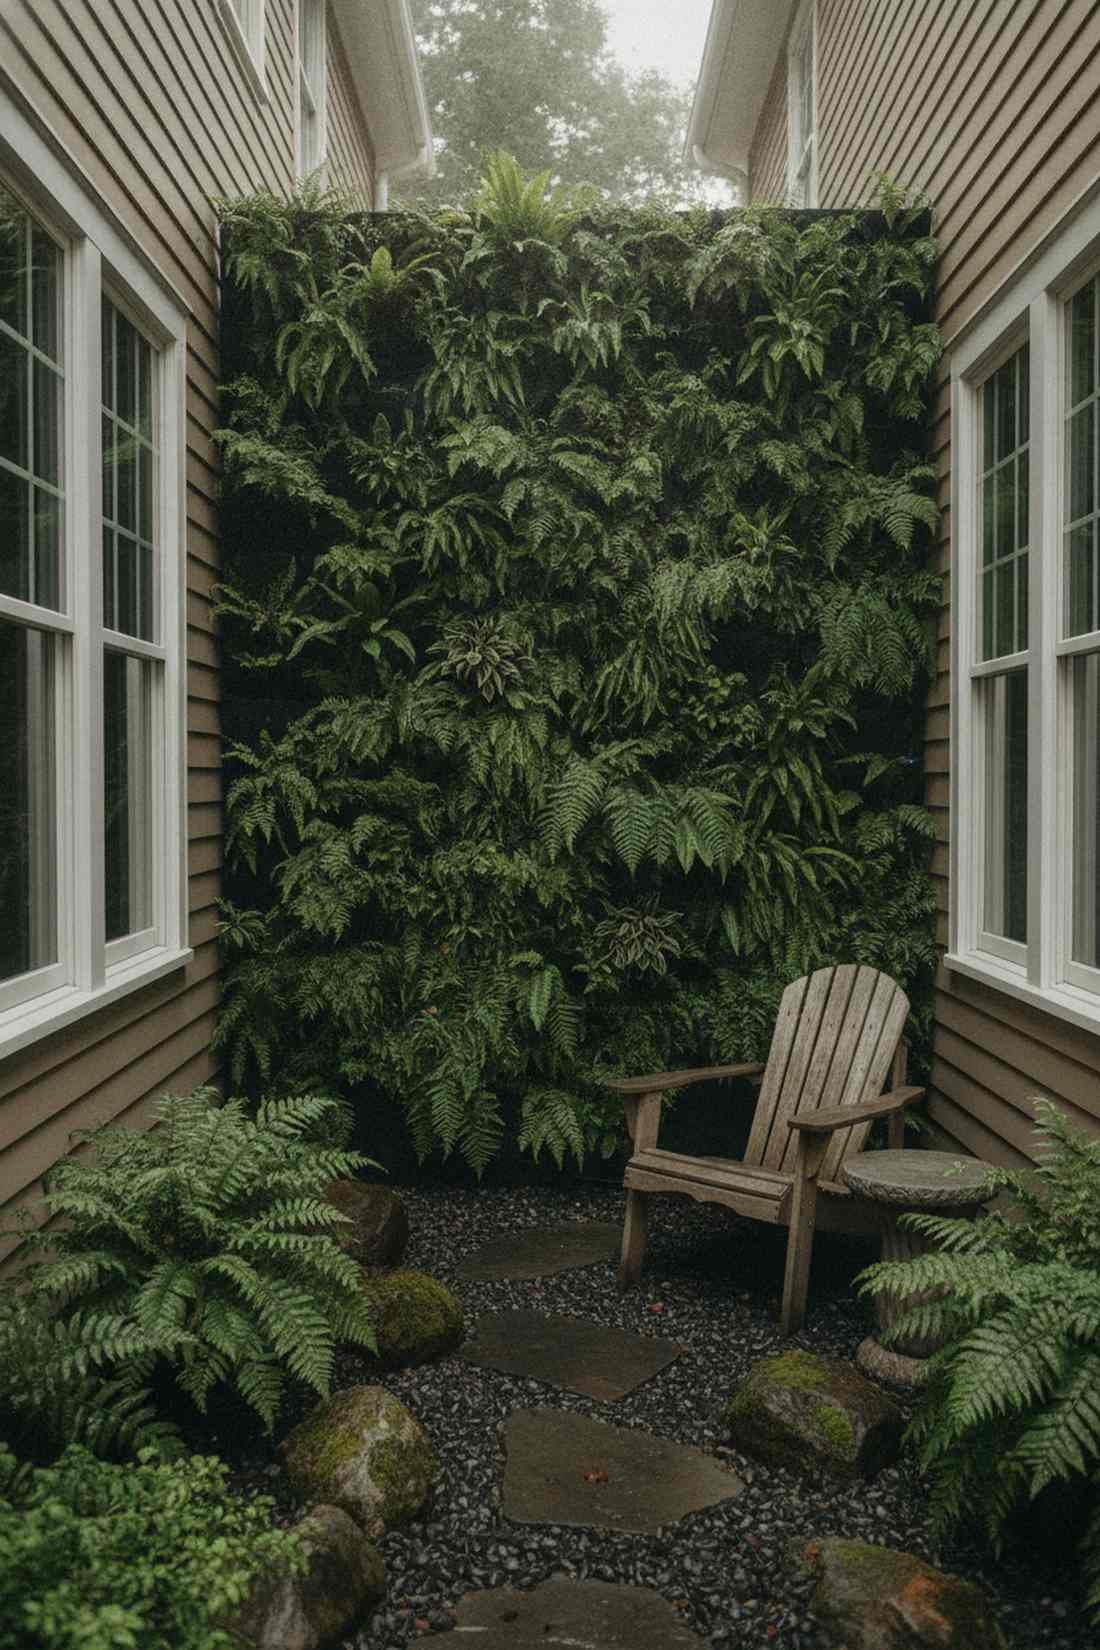
Feels like a lush, prehistoric jungle pocket hidden right in the city. The layered fern fabric wall is the best possible layout for deep, sunless alleys between houses.
Most blooming plants die in heavy shade, but embracing broad-leaf ferns gives a designer-level finish that thrives in the darkness. Mixing different frond textures in a heavily misted pocket system creates incredible depth without needing a single flower.
You can set up a large shade grid for about $50–$80. Pin this to rescue your dark backyard corners!
- Key Materials: Moisture-retaining felt grid, mixed fern varieties
- Vibe / Style: Deep forest sanctuary
- Difficulty: Easy planting, requires misting
- Budget Breakdown: Pocket Grid: $30 | Ferns: $35 | Misting Hose: $15.
- Creator’s Tip: Install an automated micro-mister on a timer to keep the fronds perfectly humidified during dry spells.
- Smart Sourcing: multi-pocket vertical wall planters and automated garden misting kits.
24. Hosta and Heuchera Panels
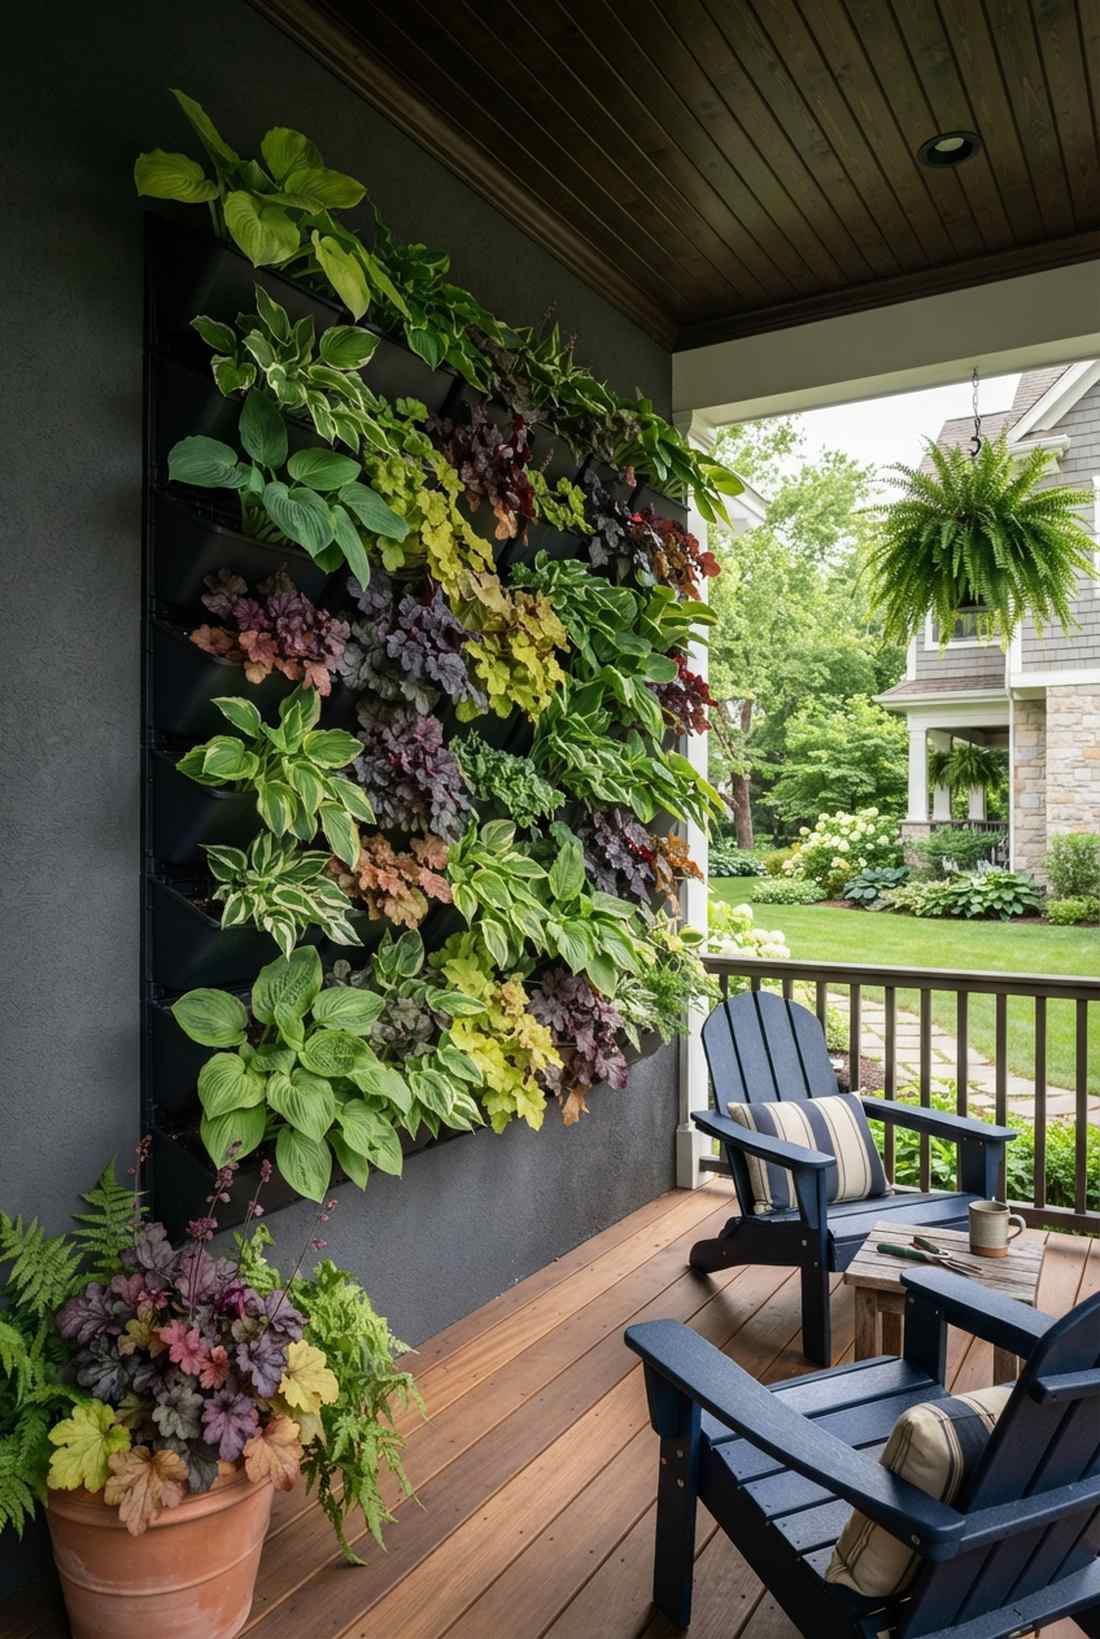
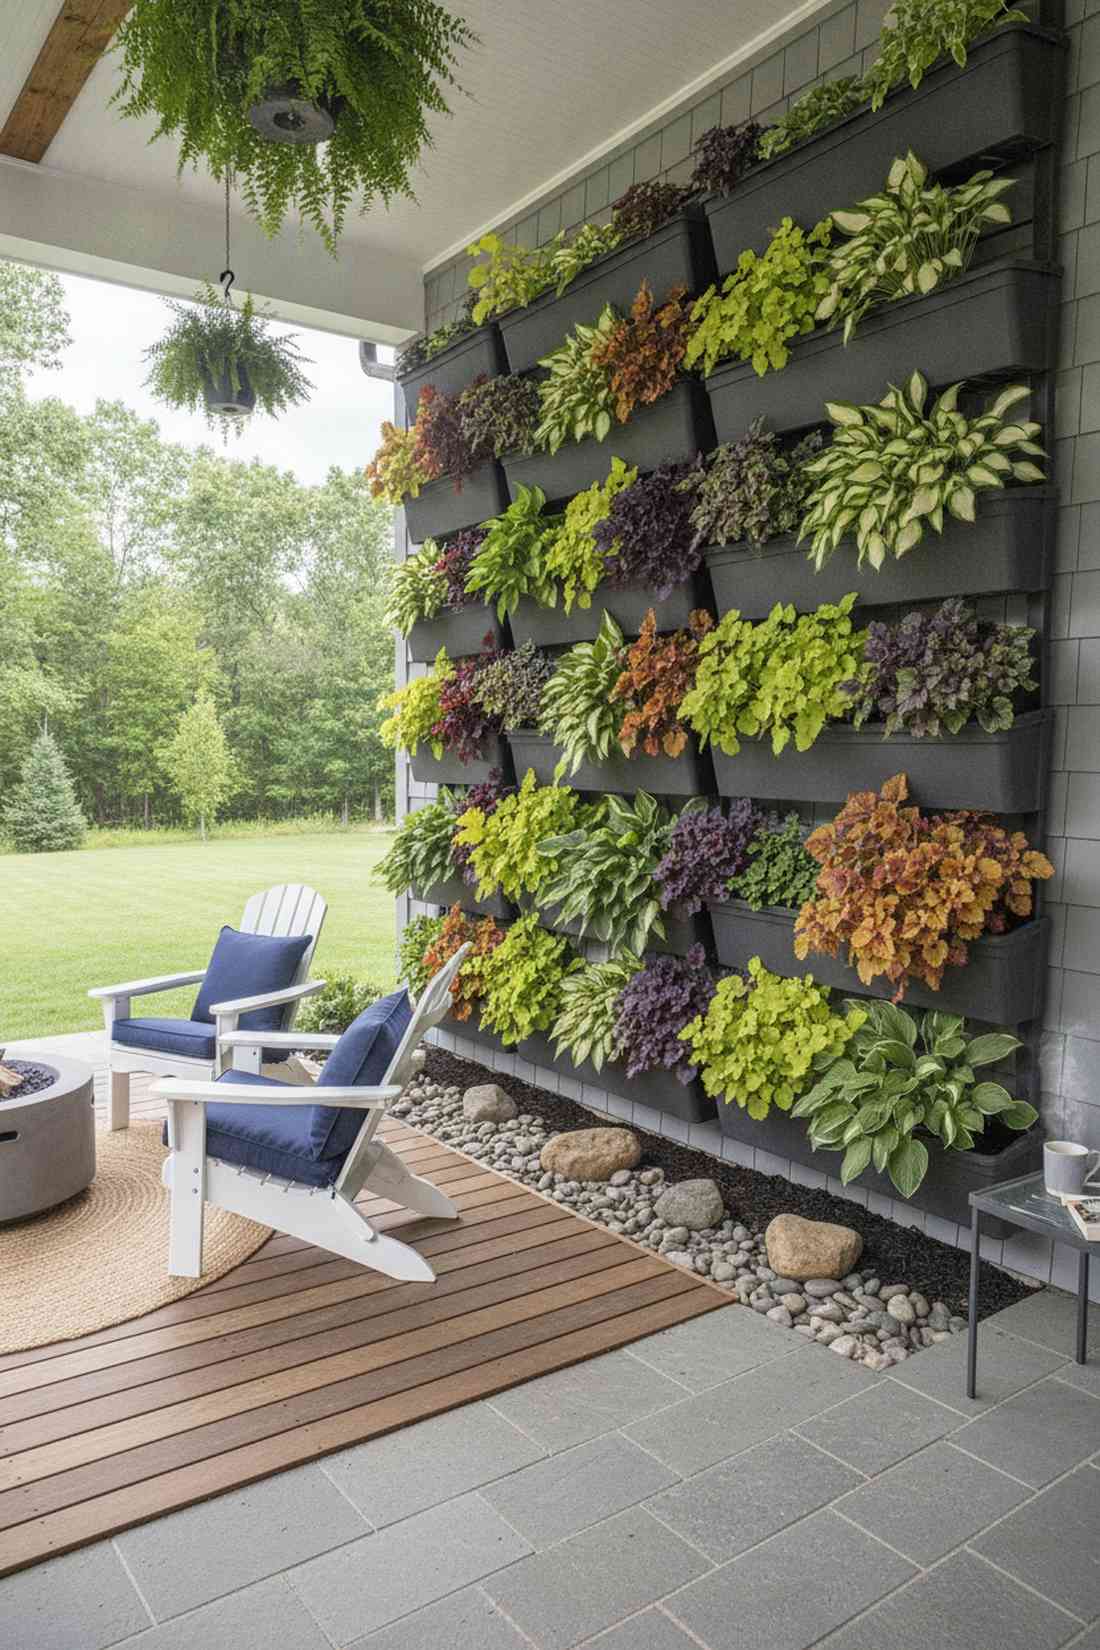
Radiates vibrant, striking color patterns without relying on a single ray of direct sunlight. A broadleaf hosta modular wall completely revitalizes a boring north-facing porch.
People assume shade means boring green, yet this foliage-heavy approach delivers a surprisingly premium look full of purples and chartreuse. Using deep, rigid planters gives these larger root systems the exact space they need to explode in size.
A multi-box setup costs roughly $60–$90. Highly recommended for a high-impact, low-light upgrade.
- Key Materials: Deep modular plastic bins, rich compost, Heuchera plugs
- Vibe / Style: Bold colorful shade
- Difficulty: Simple installation
- Budget Breakdown: Wall Bins: $45 | Plants: $35 | Compost: $10.
- Creator’s Tip: Snip off the tall, stringy flowers they produce in summer to force the plant to keep growing massive leaves.
- Smart Sourcing: deep-root vertical planter boxes and organic compost blends (bulk).
25. Ivy and Pachysandra Combinations
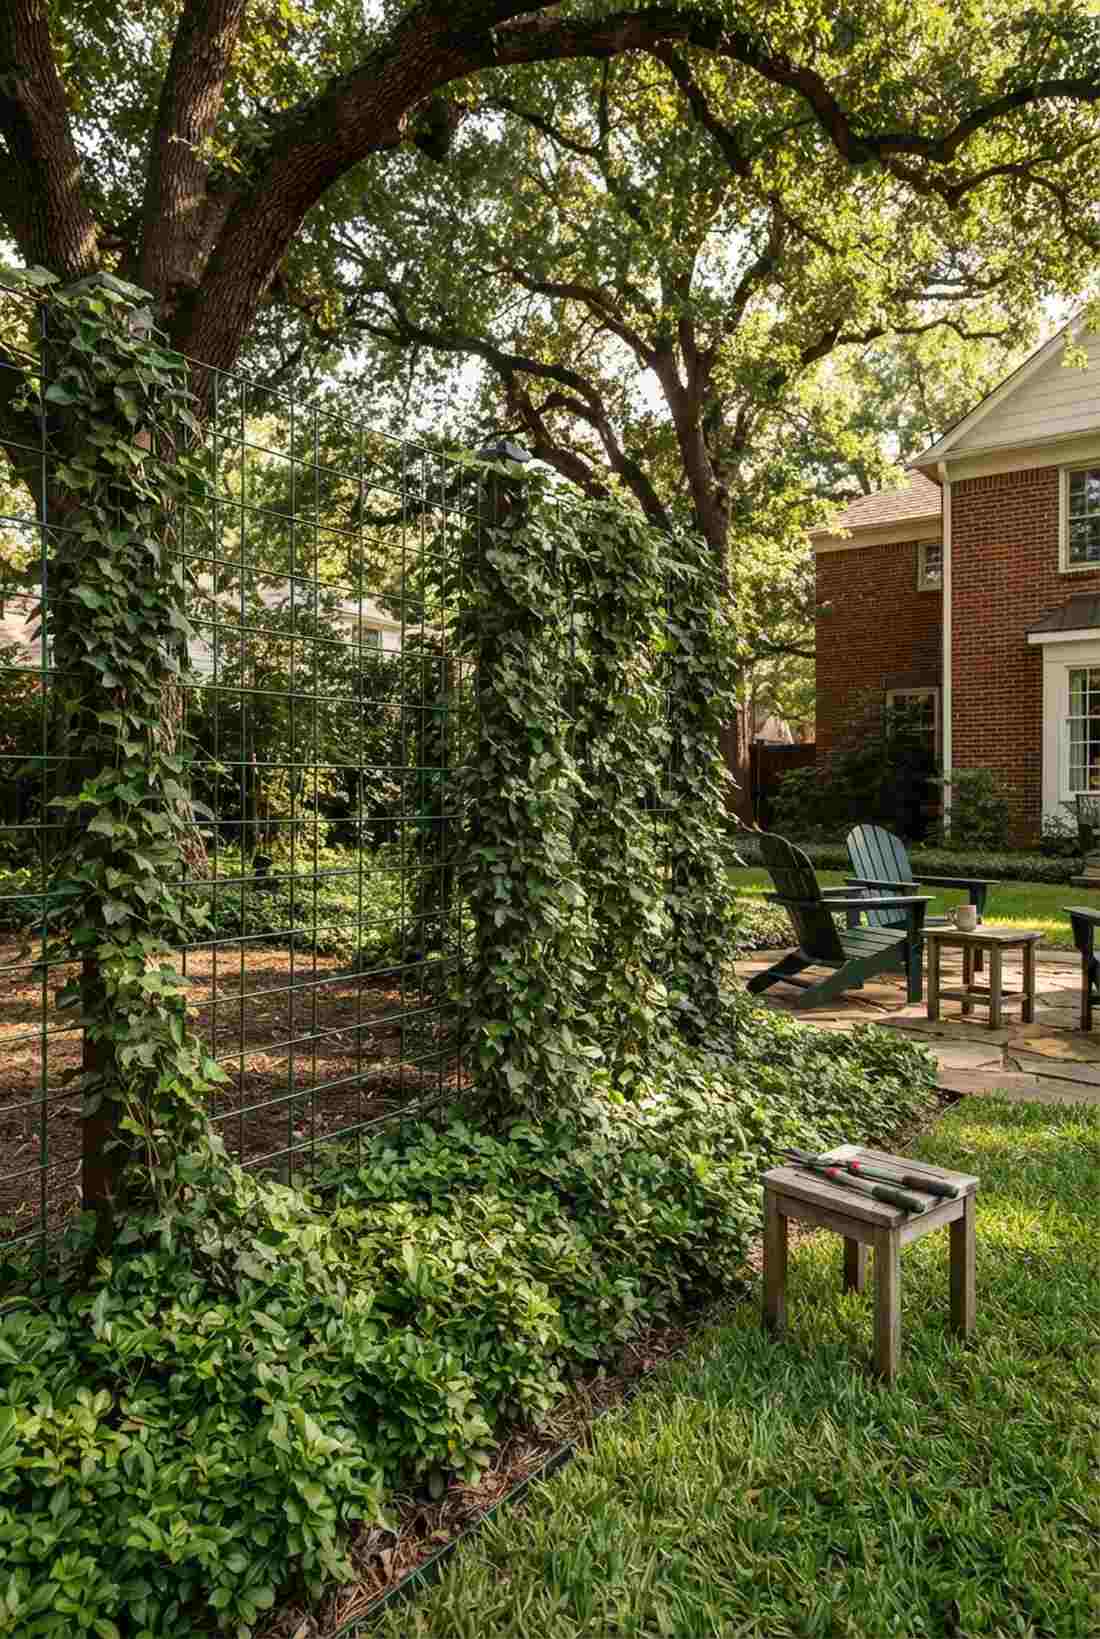
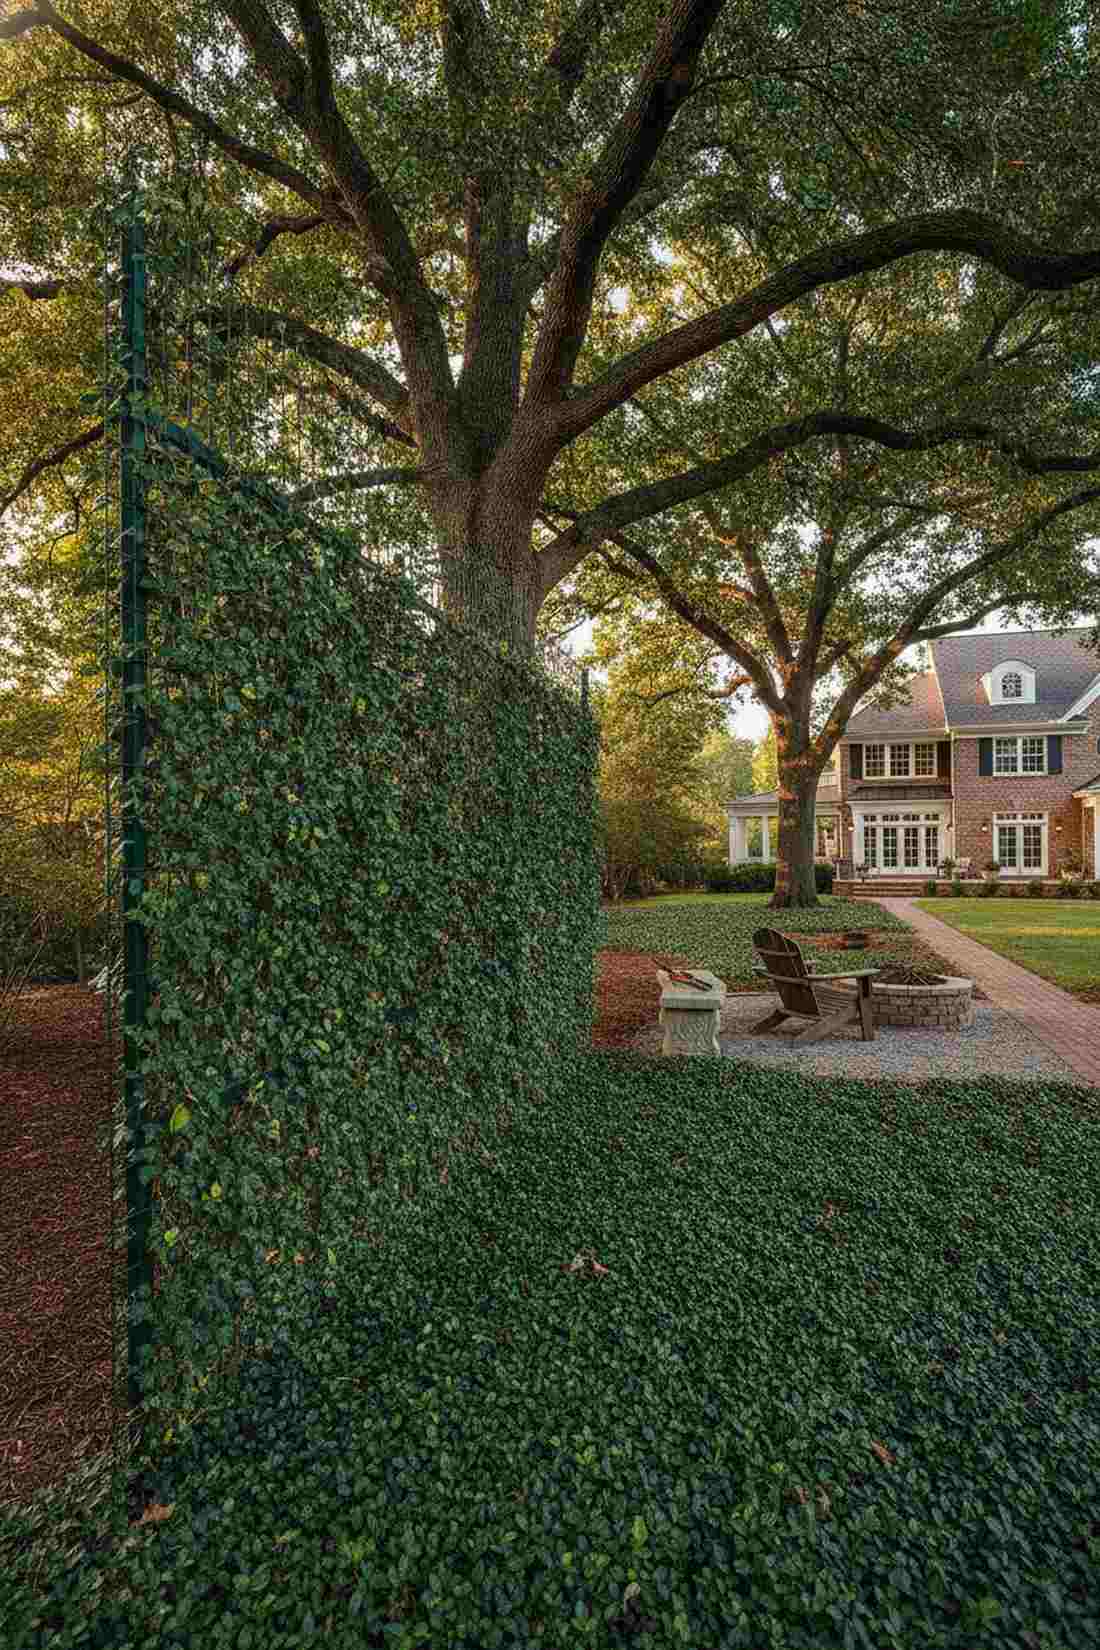
Looks like the stately, ivy-covered brickwork of an Ivy League university library. Training an evergreen ivy grid acts as a permanent, impenetrable screen under massive oak trees.
Grass refuses to grow under heavy tree canopies, but forcing these aggressive climbers upward completely masks unsightly bare spots. Using a rigid wire mesh gives the vines something to grab instantly, speeding up coverage dramatically.
You can cover a massive area for extremely cheap, around $30. Save this if you are battling dead zones under trees!
- Key Materials: Coated wire mesh, English Ivy, Pachysandra groundcover
- Vibe / Style: Classic academic estate
- Difficulty: Requires aggressive pruning later
- Budget Breakdown: Wire Mesh: $15 | Ivy Plugs: $15.
- Creator’s Tip: Keep the ivy strictly on the trellis and prune the base sharply to stop it from invading your lawn.
- Smart Sourcing: green PVC coated welded wire and heavy-duty bypass pruning shears.
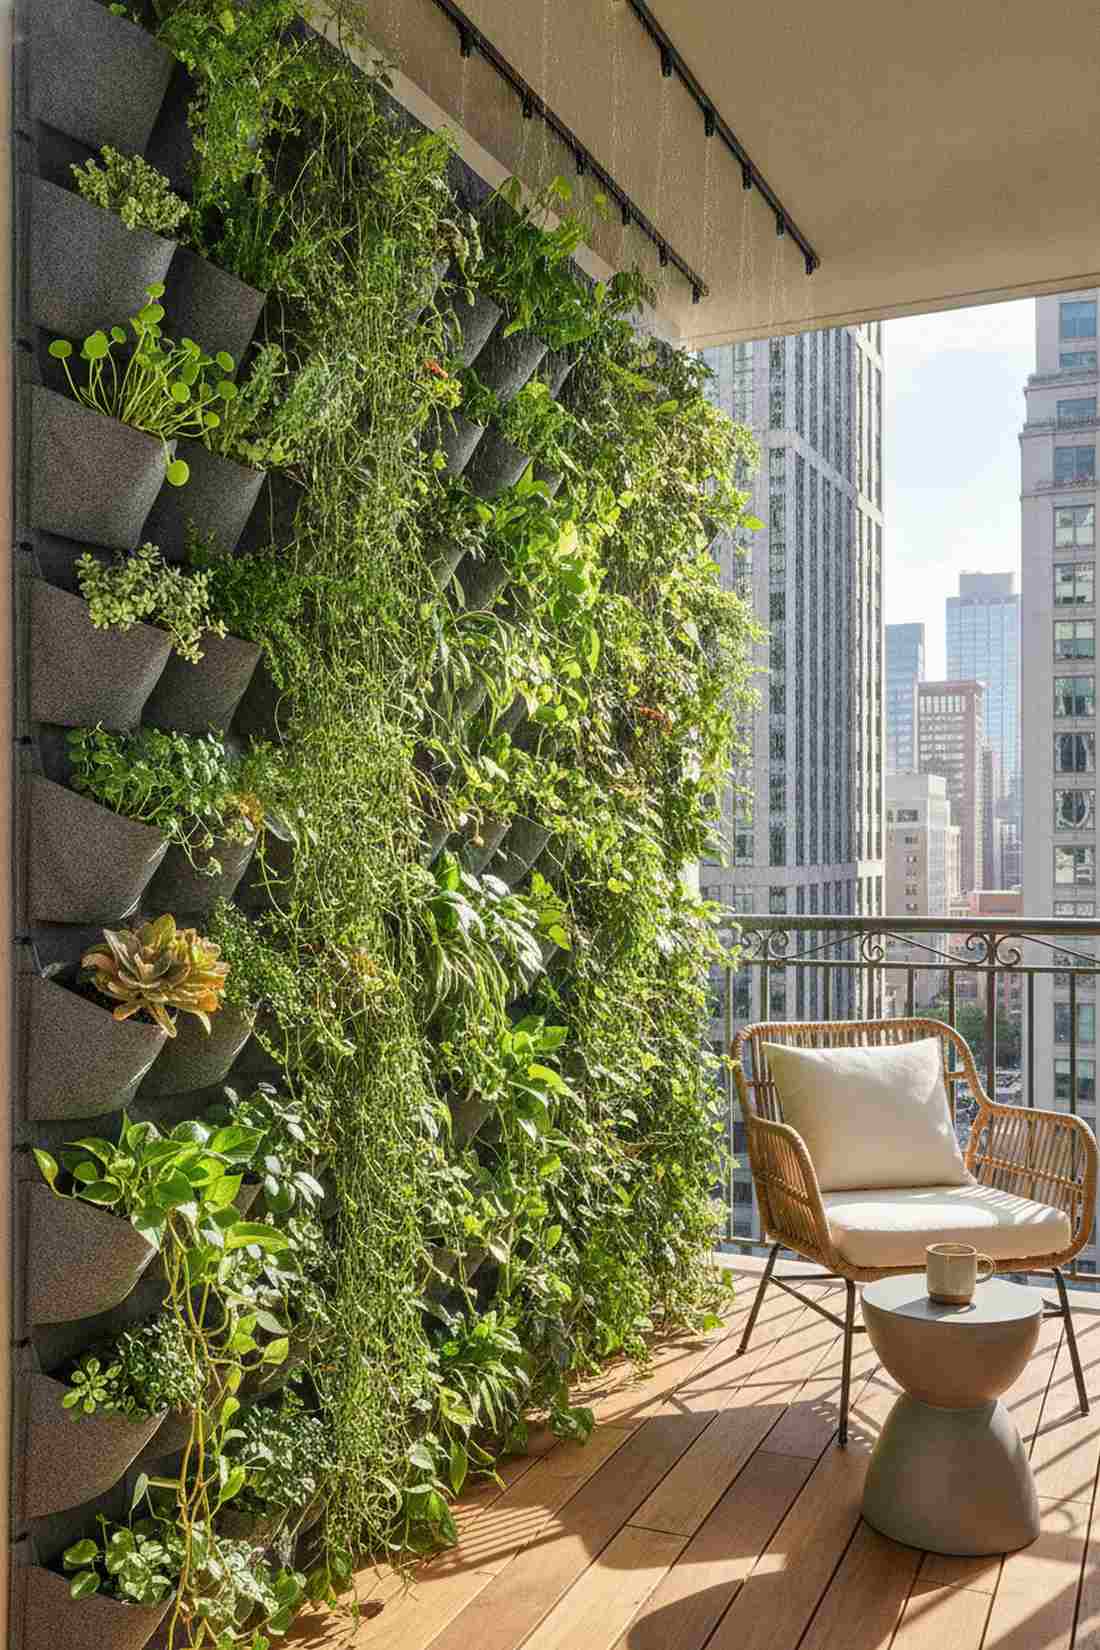
26. Begonia and Impatiens Seasonal Color
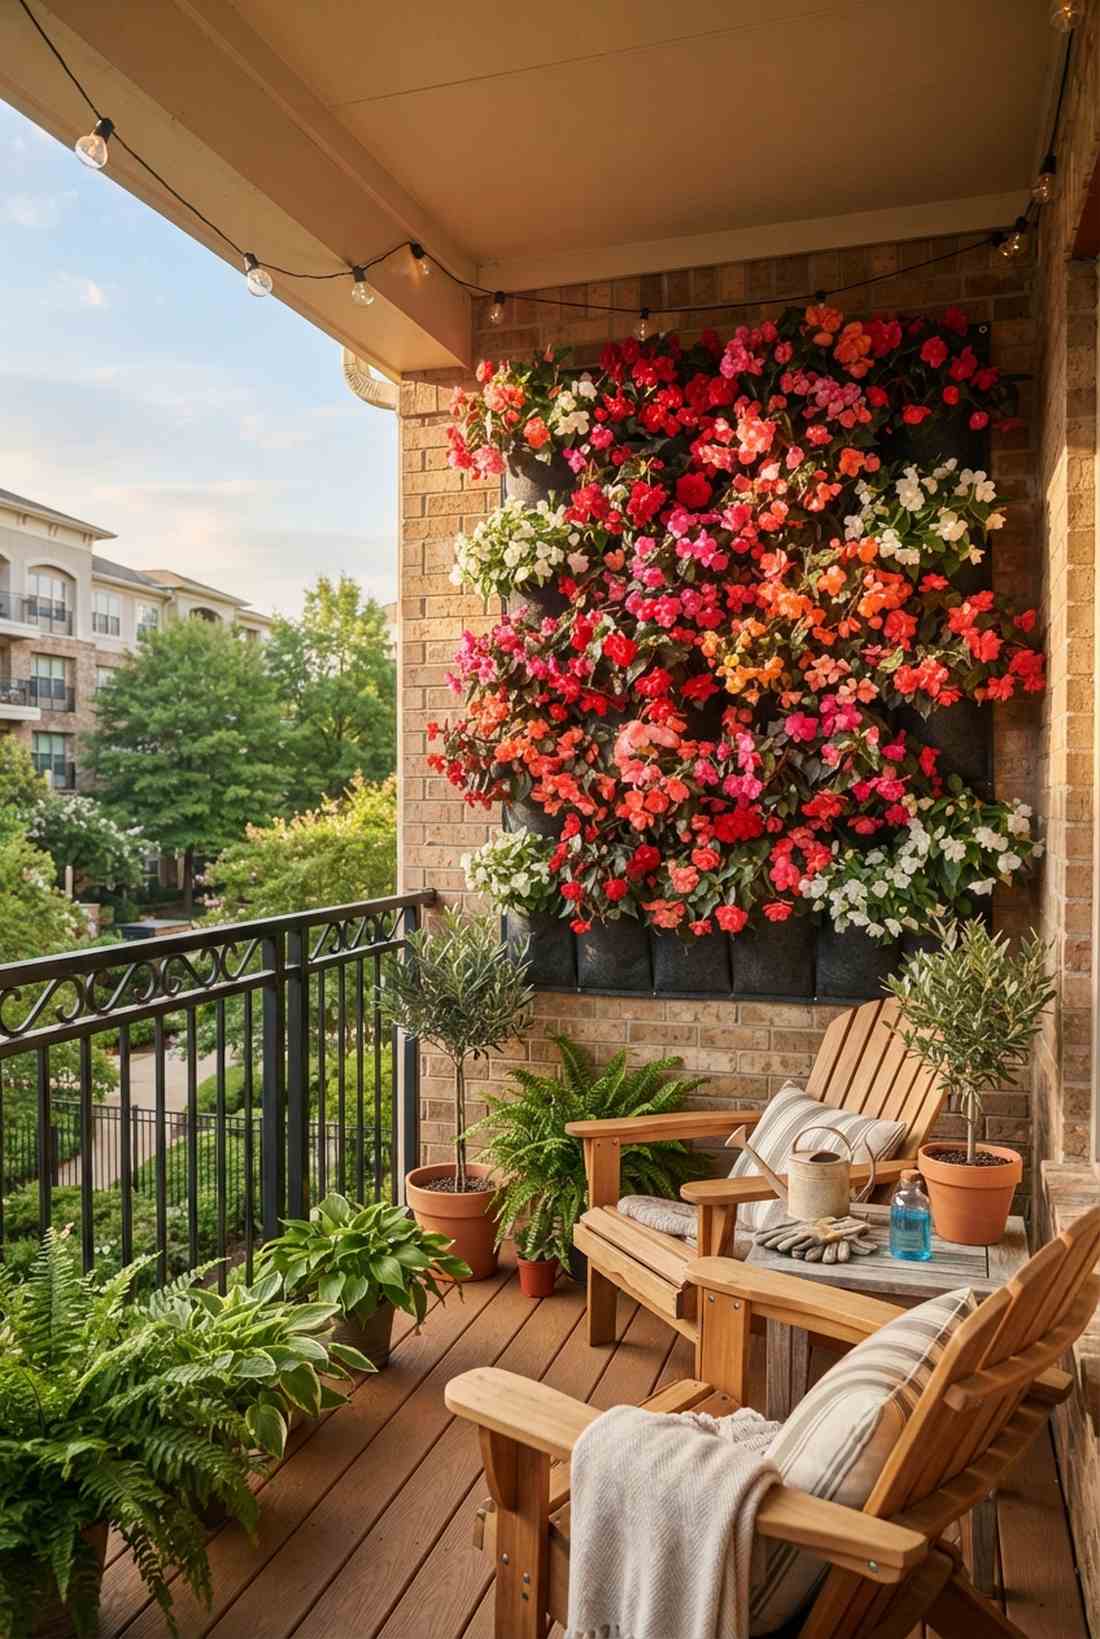
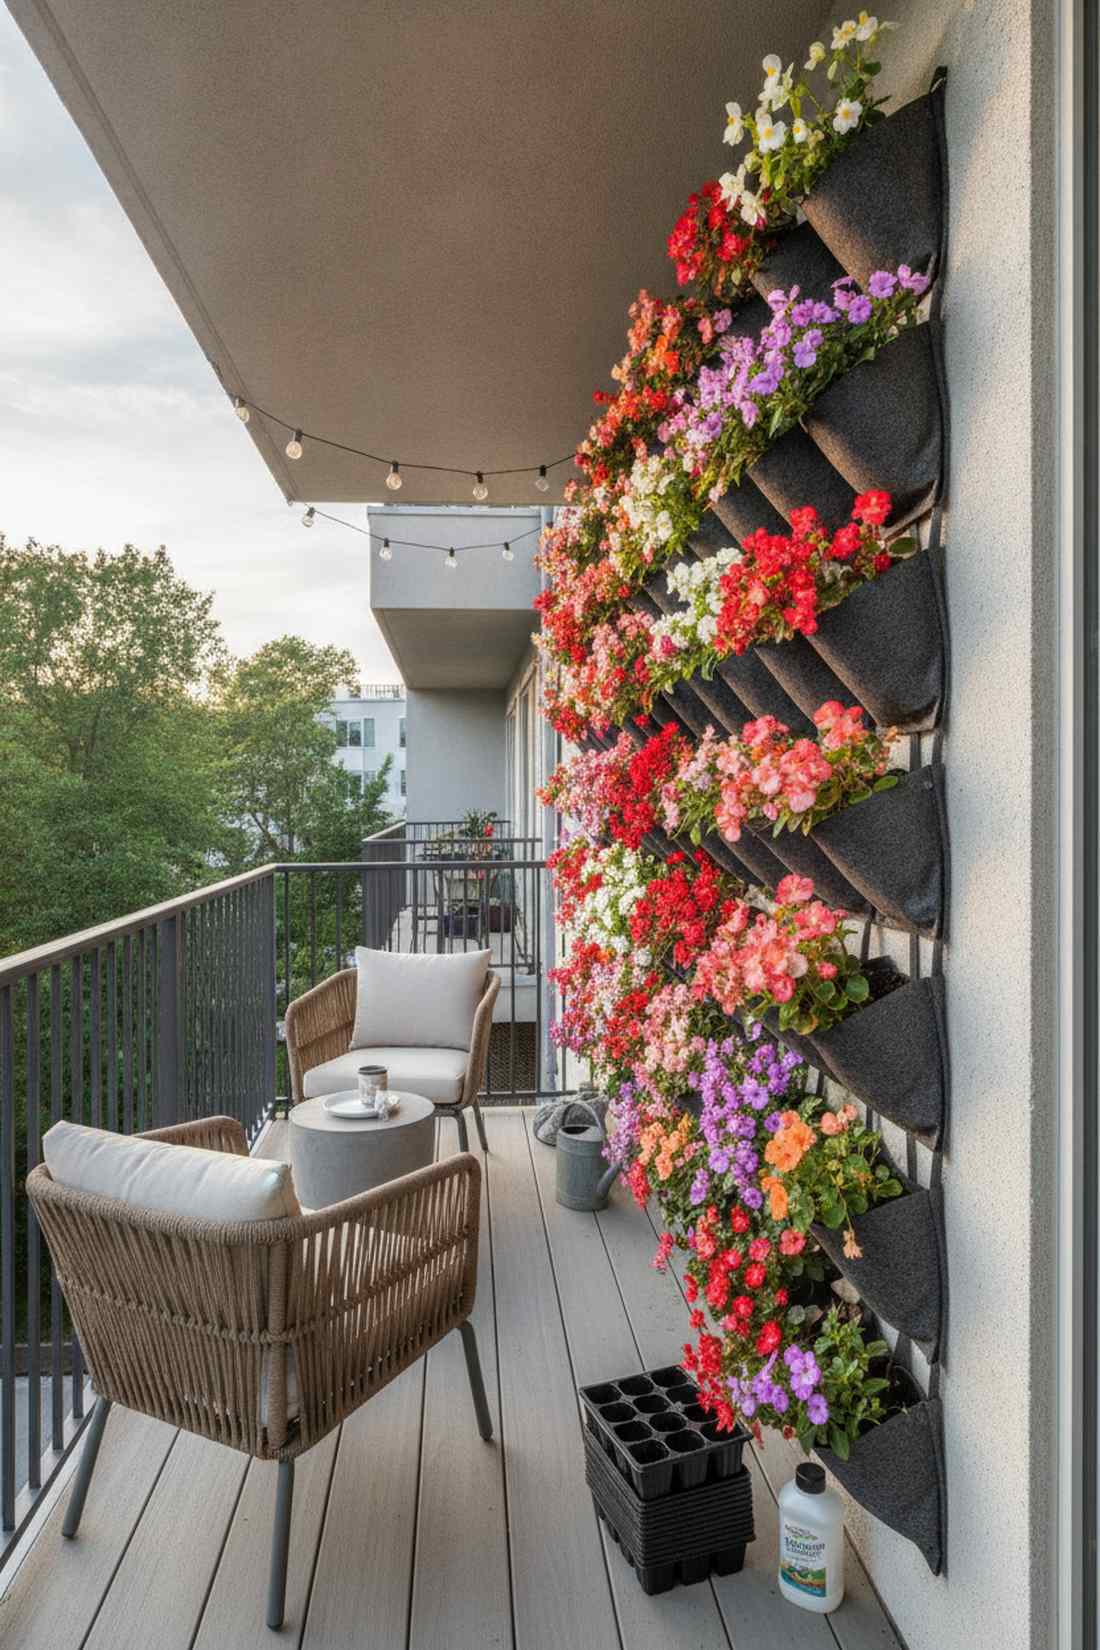
Feels like a massive, floating fireworks display of continuous summer blooms. A seasonal blooming pocket display is perfect for injecting life into a covered apartment balcony.
Permanent shrubs get boring, but rotating cheap shade-bloomers delivers a surprisingly premium look that you can change every year. Slipping cheap nursery pots directly into flexible wall pouches means zero repotting mess on your patio.
This brilliant color hack costs around $25–$40 per season. It is a fast upgrade that completely changes the vibe.
- Key Materials: Fabric wall pouches, seasonal nursery six-packs
- Vibe / Style: Explosive seasonal color
- Difficulty: Very beginner friendly
- Budget Breakdown: Pouches: $15 | Nursery Flowers: $20.
- Creator’s Tip: Use a water-soluble bloom booster fertilizer every two weeks to keep the flowers pushing until the first frost.
- Smart Sourcing: breathable felt planting pockets and water-soluble bloom booster fertilizer.
27. Moss Wall Installations
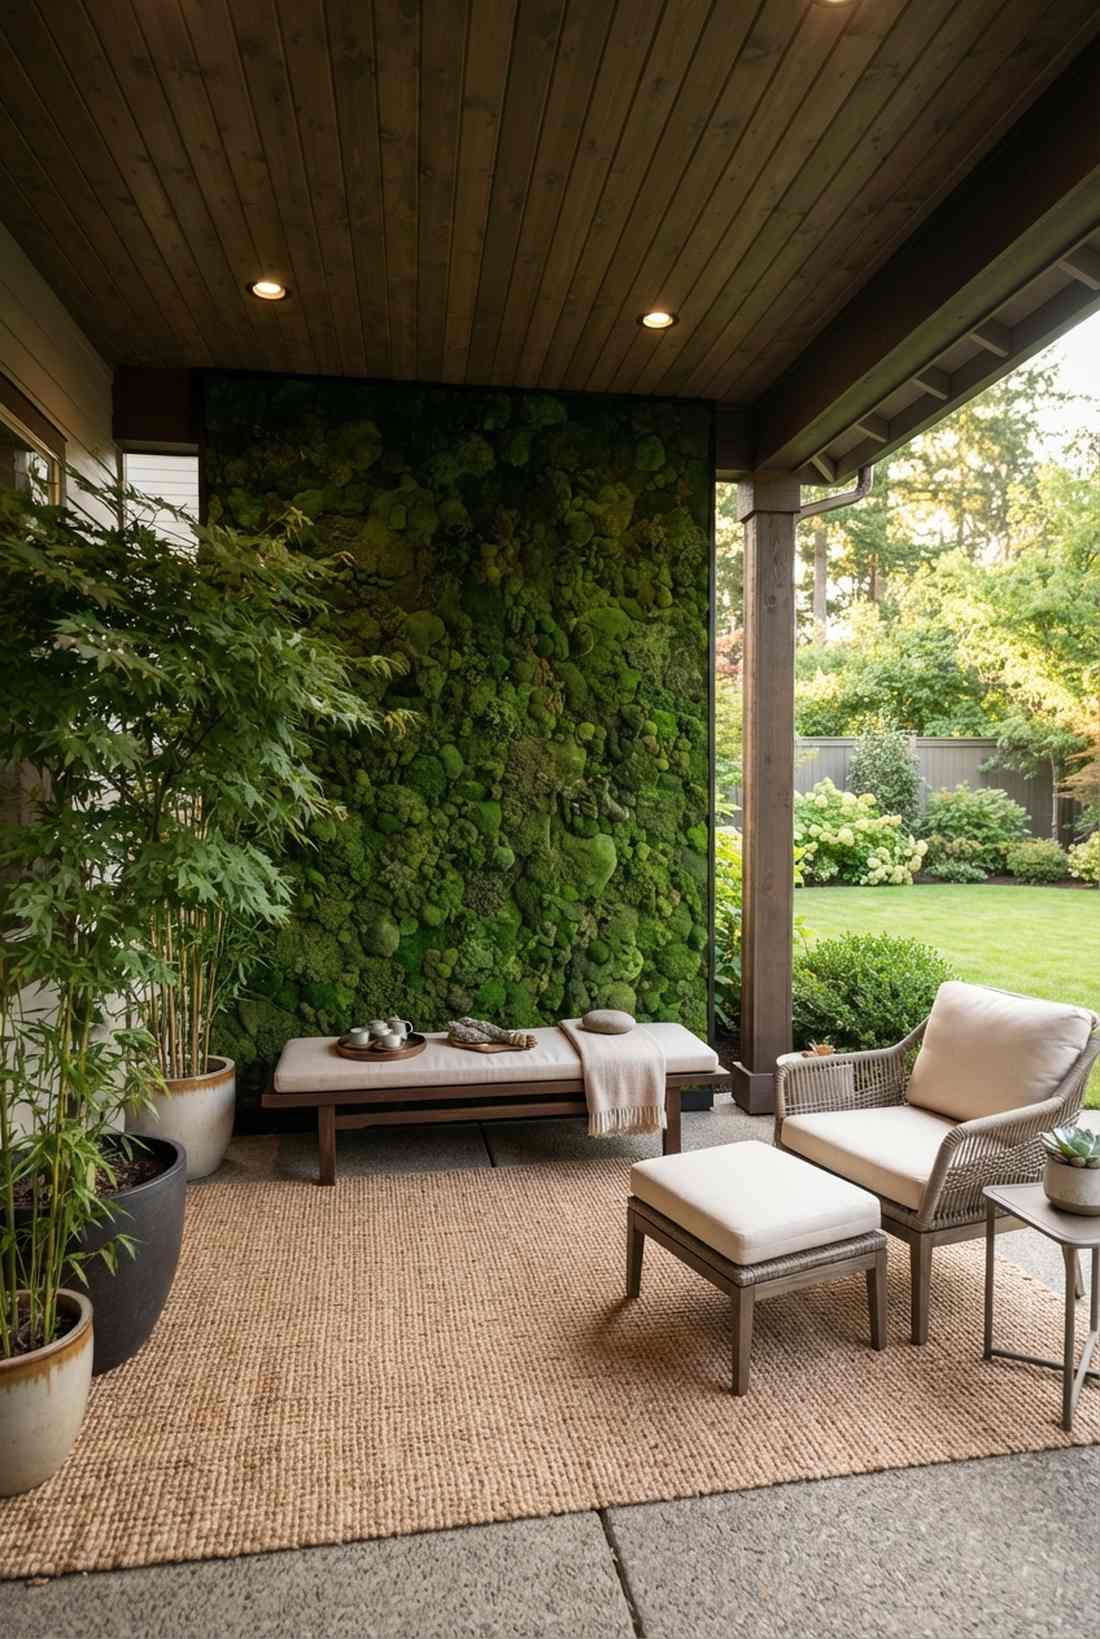
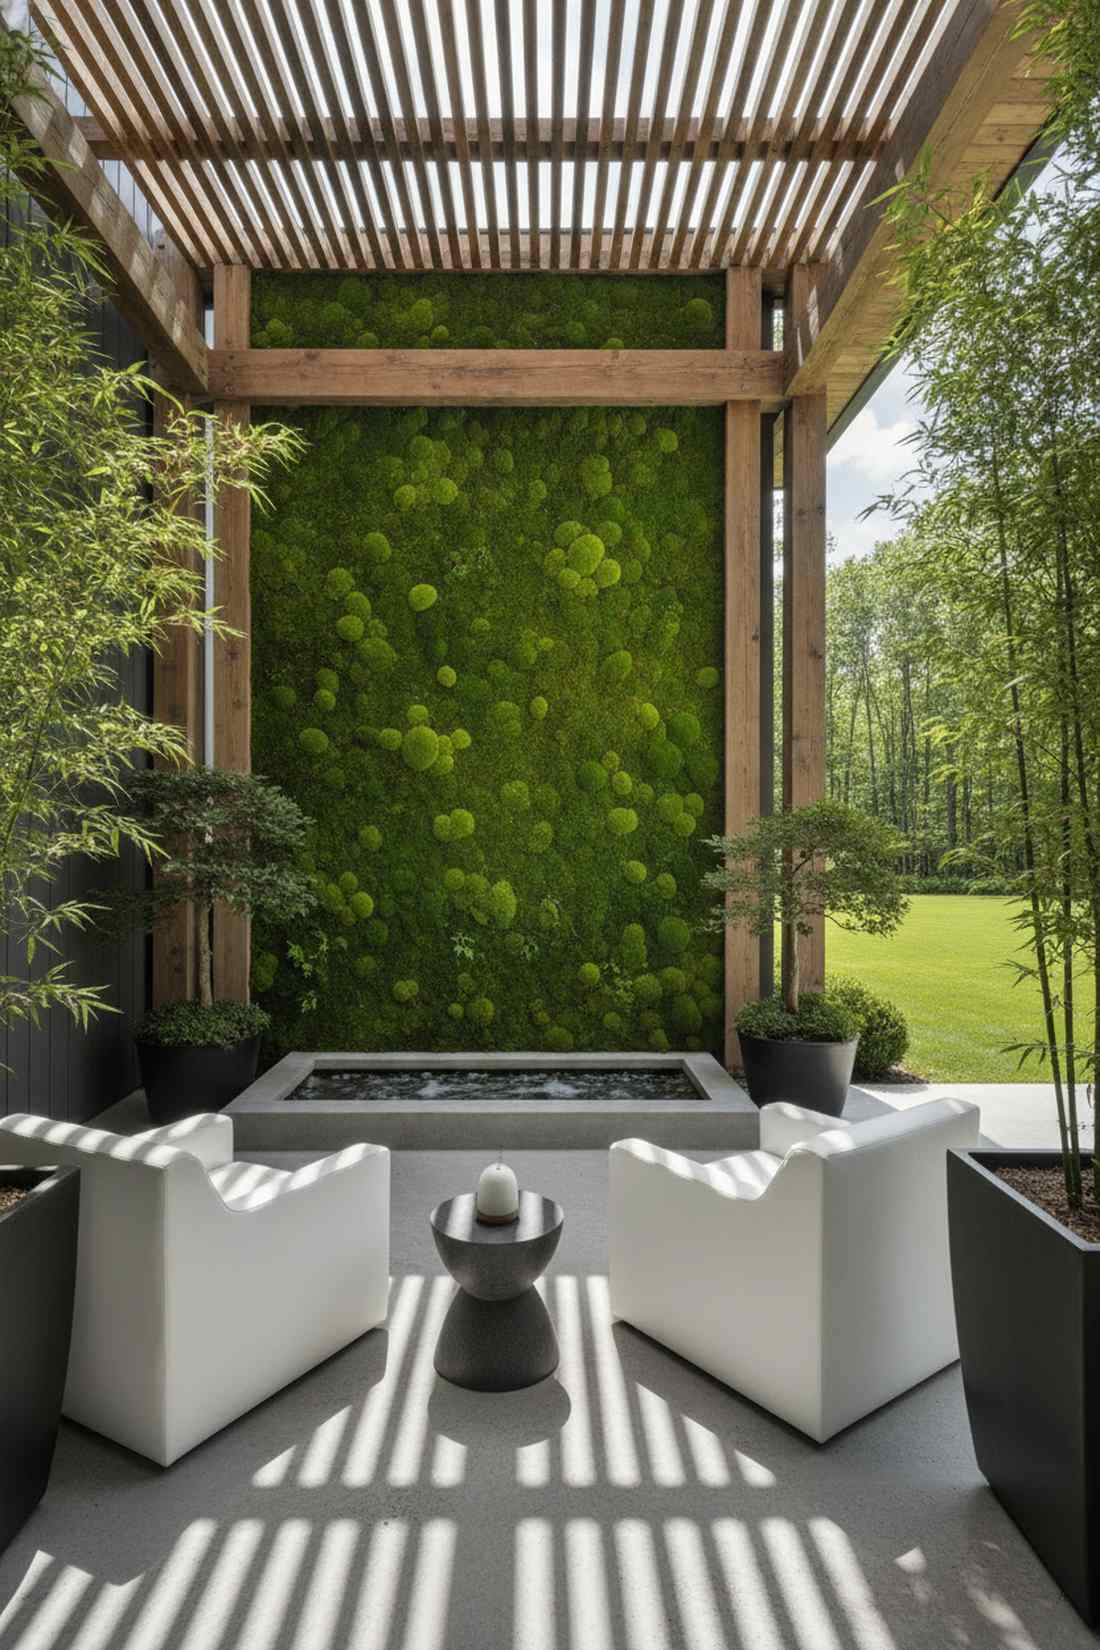
Exudes extreme calm, acting as a velvety acoustic dampener for loud city noise. A preserved moss panel wall is the ultimate luxury touch for a covered outdoor meditation space.
Keeping live moss damp outdoors is agonizing, yet utilizing commercially preserved moss gives a designer-level finish with absolute zero maintenance. Gluing bulk moss sheets to waterproof backing boards creates a deeply textured, monochromatic masterpiece.
Preserved materials run higher, around $80–$150 depending on thickness. Pin this for the ultimate low-maintenance aesthetic!
- Key Materials: Preserved moss sheets, waterproof backer board, outdoor adhesive
- Vibe / Style: Zen minimalist retreat
- Difficulty: Simple crafting
- Budget Breakdown: Moss Sheets: $90 | Backer/Glue: $30.
- Creator’s Tip: Keep this setup strictly under a patio roof; direct rainfall will wash away the preservation dyes over time.
- Smart Sourcing: pre-cut preserved moss sheets (bulk pack) and heavy-duty outdoor construction adhesive.
Conclusion
An outdoor living wall delivers immense value by immediately solving privacy issues while elevating your exterior aesthetic. By testing out these 27 distinct layouts, ranging from commercial-grade hydroponic frames to simple wire grids, you can engineer the perfect high-end look without overspending. Always select your base kits and UV-resistant materials carefully, ensuring your new living barrier handles harsh weather effortlessly. Start with a smaller pilot frame to master your watering technique before scaling up to cover your entire boundary line.
Frequently Asked Questions
How much does an outdoor living wall cost to install?
While custom luxury builds can run $100 to $300 per square foot, you can drastically cut costs by utilizing DIY vertical garden starter kits. Basic fabric pocket panels cost as little as $30 for a massive grid, while rigid hydroponic modular trays offer a premium look for under $100. Sourcing your framing materials and plants locally while buying bulk pack hardware online ensures the best aesthetic return for your budget.
What plants work best for full sun outdoor living walls?
If your wall faces blazing afternoon sun, you must prioritize drought-tolerant succulents or tough edibles to prevent immediate wilting. Using live succulent cuttings (bulk pack) like sedum and trailing ice plant guarantees survival while looking like a high-end tapestry. For edible sun setups, utilizing deep pockets for cherry tomatoes and strawberries is a fantastic way to maximize harvest value.
How do you water an outdoor living wall?
Hand-watering vertical surfaces is messy and ineffective, which is why smart setups rely entirely on automated garden misting kits or drip lines. Running a cheap 1/4-inch drip hose across the top tier allows gravity to perfectly saturate every lower pocket without effort. Upgrading to a recirculating pump with hydroponic nutrient starter packs saves massive amounts of water while accelerating plant growth wildly.
Can outdoor living walls survive winter in cold climates?
Absolutely, but you must select hardy perennials rated specifically for your region to prevent costly spring replanting. Opting for tough evergreens like pachysandra or sourcing fully rooted green wall panels featuring cold-hardy sedum ensures your privacy screen survives deep freezes. For extremely harsh zones, building a modular wall allows you to simply unhook the UV-coated stackable planter kits and move them into a garage.
How tall should a living wall be for privacy screening?
To completely block standing sightlines from neighbors, aim for a sturdy vertical height of 6 to 8 feet using heavy-duty metal trellis grids. If you only need to screen a seated patio or hot tub area, a 4 to 5-foot structure using cedar slat panels works perfectly while keeping costs low. Always check local zoning limits on freestanding heights, though attaching laser-cut metal privacy screens to existing structures often bypasses those rules.