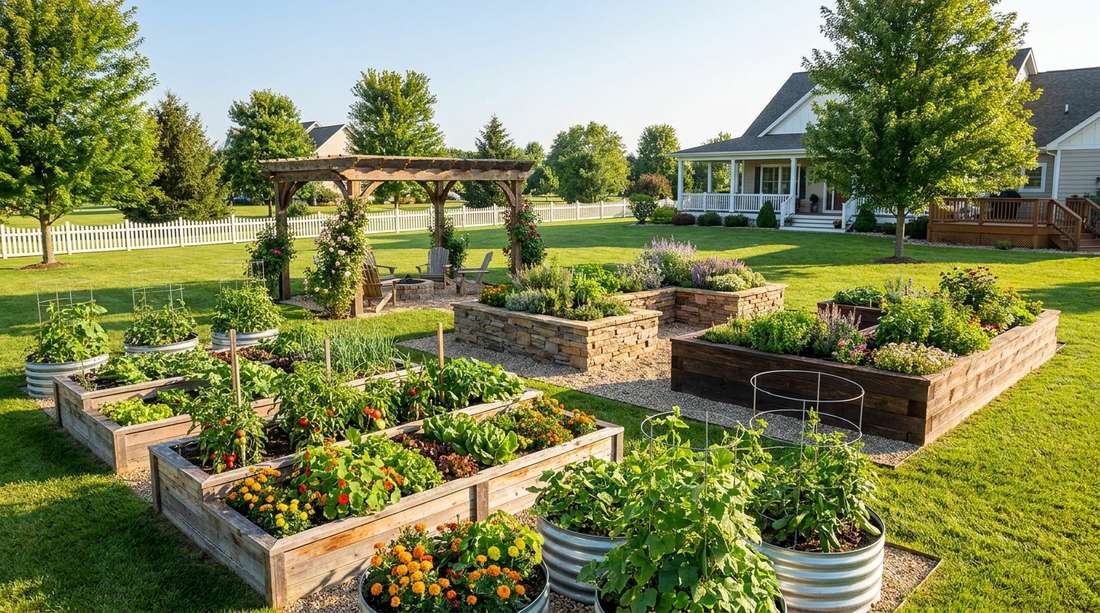
Most people assume achieving a magazine-worthy yard requires spending thousands on landscaping, when in reality, the right garden design raised beds can give you that high-end look for a fraction of the cost. This guide breaks down the exact budget secrets, smart material sourcing, and layout blueprints needed to pull off a premium vegetable and flower sanctuary. Whether you’re hunting for space-saving garden design ideas with raised beds or expansive backyard transformations, these exact formulas deliver designer aesthetics without the luxury price tag.
Design Snapshot Key Principles
- Accessibility First: Design pathways 24-48 inches wide for comfortable access with wheelbarrows and garden carts.
- Sun Exposure: Orient beds east-west with tall plants on the north side to prevent shading shorter crops.
- Intensive Planting: Raised beds allow tighter spacing than traditional rows, increasing yields per square foot.
- Soil Quality: Elevated beds provide superior drainage and let you control soil composition for optimal growth.
Classic Rectangular Configurations That Maximize Production
Rectangular beds form the foundation of productive vegetable gardening. These workhorse layouts provide straightforward construction, efficient space usage, and simple crop rotation. Knowing exactly how to source materials for these keeps the budget extremely low.
1. Standard 4×8 Family Garden Bed
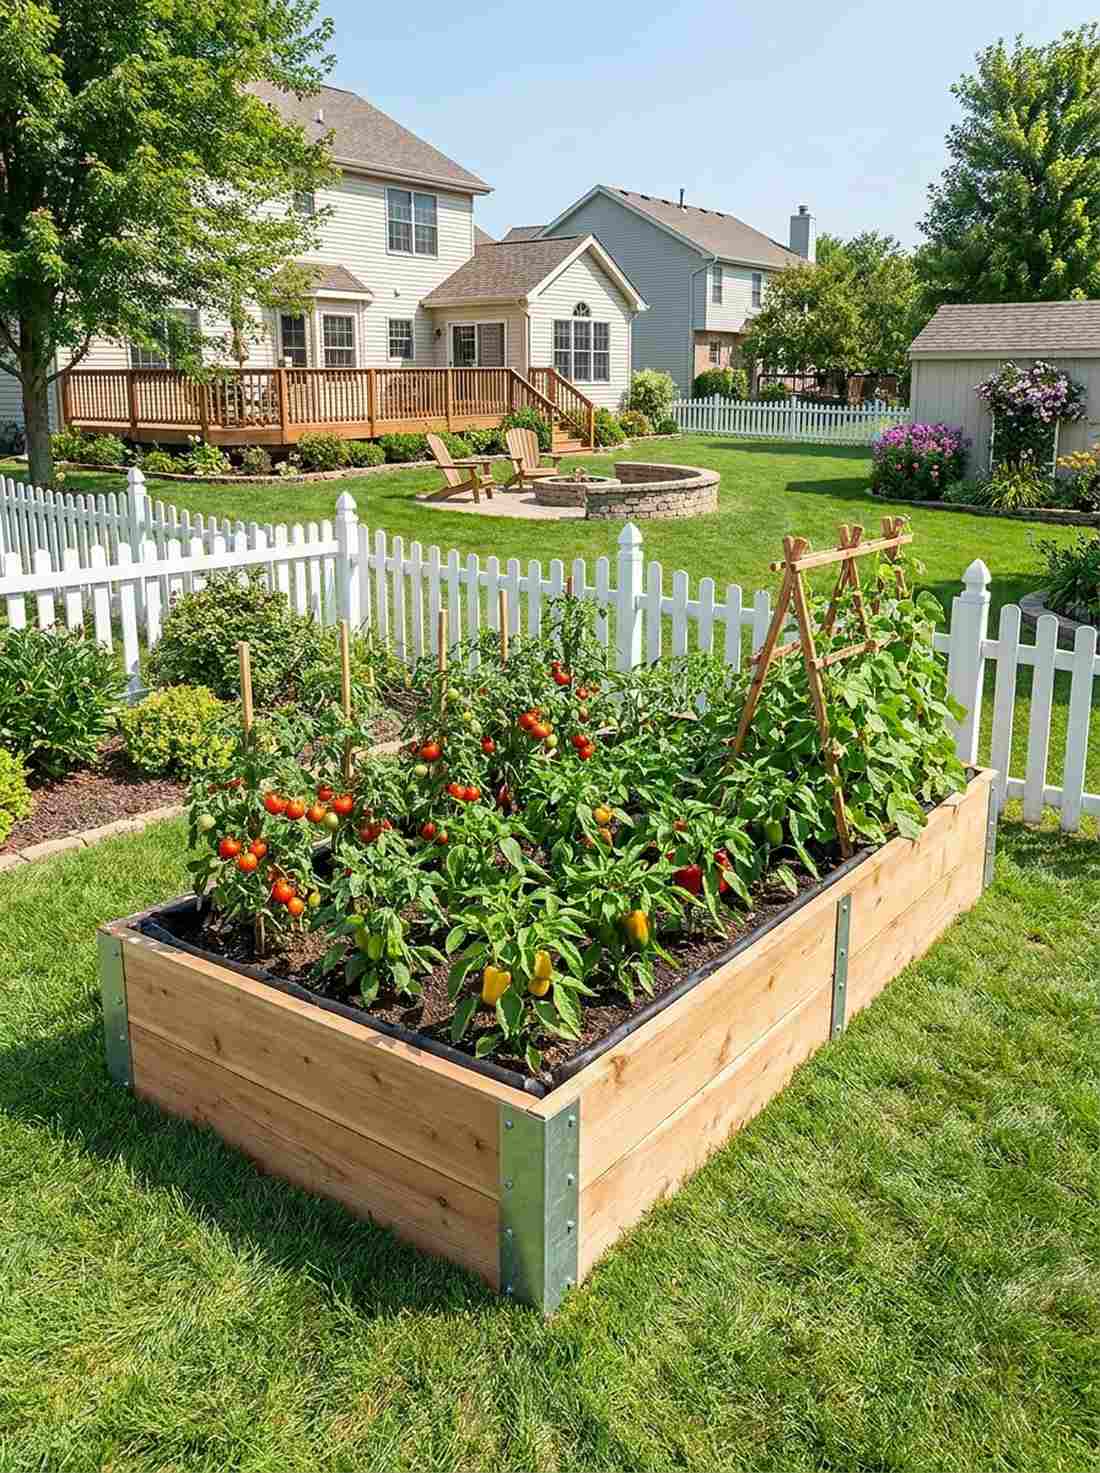
This layout creates a vibe that feels like a bountiful harvest sanctuary right out of a farmhouse magazine. Featuring classic cedar garden design raised beds, it works exceptionally well for a standard suburban backyard where maximizing food production is the goal.
While many overcomplicate simple structures, this 4×8 configuration delivers a surprisingly premium look with minimal effort. Plant eight neat rows spanning the length, placing heavy yielders like tomatoes and peppers alongside climbing beans. By incorporating a heavy-duty raised bed liner kit, you easily protect the wood and maintain pristine soil conditions.
You can easily pull this off for around $40–$60 if you source untreated lumber smartly. Pin this to your DIY weekend garden board so you don’t lose the exact dimensions.
- Key Materials: Pre-cut untreated cedar planks, corner brackets
- Vibe / Style: Rustic homestead utility
- Difficulty: Easy beginner setup
- Budget Breakdown: Lumber: $35 | Hardware: $15
- Creator’s Tip: Add a thin layer of gravel at the very bottom before soil for hyper-drainage.
- Smart Sourcing: Use pre-cut galvanized steel corner brackets (bulk pack) and organic raised bed soil starter kits.
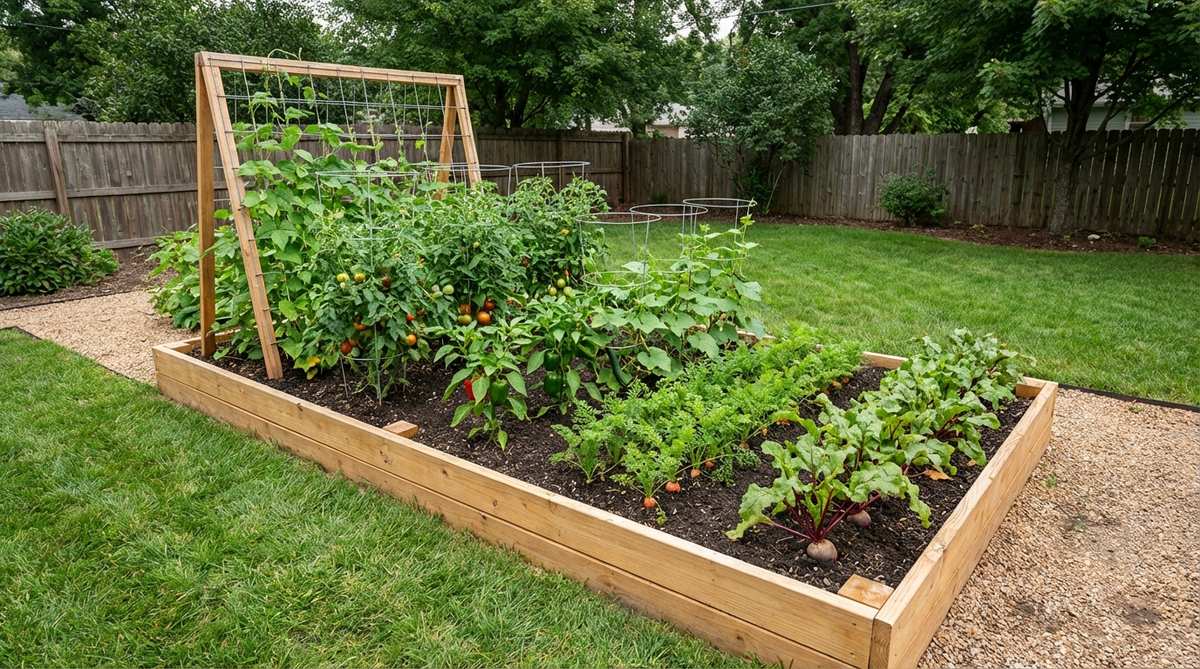
2. Double-Row Production Bed
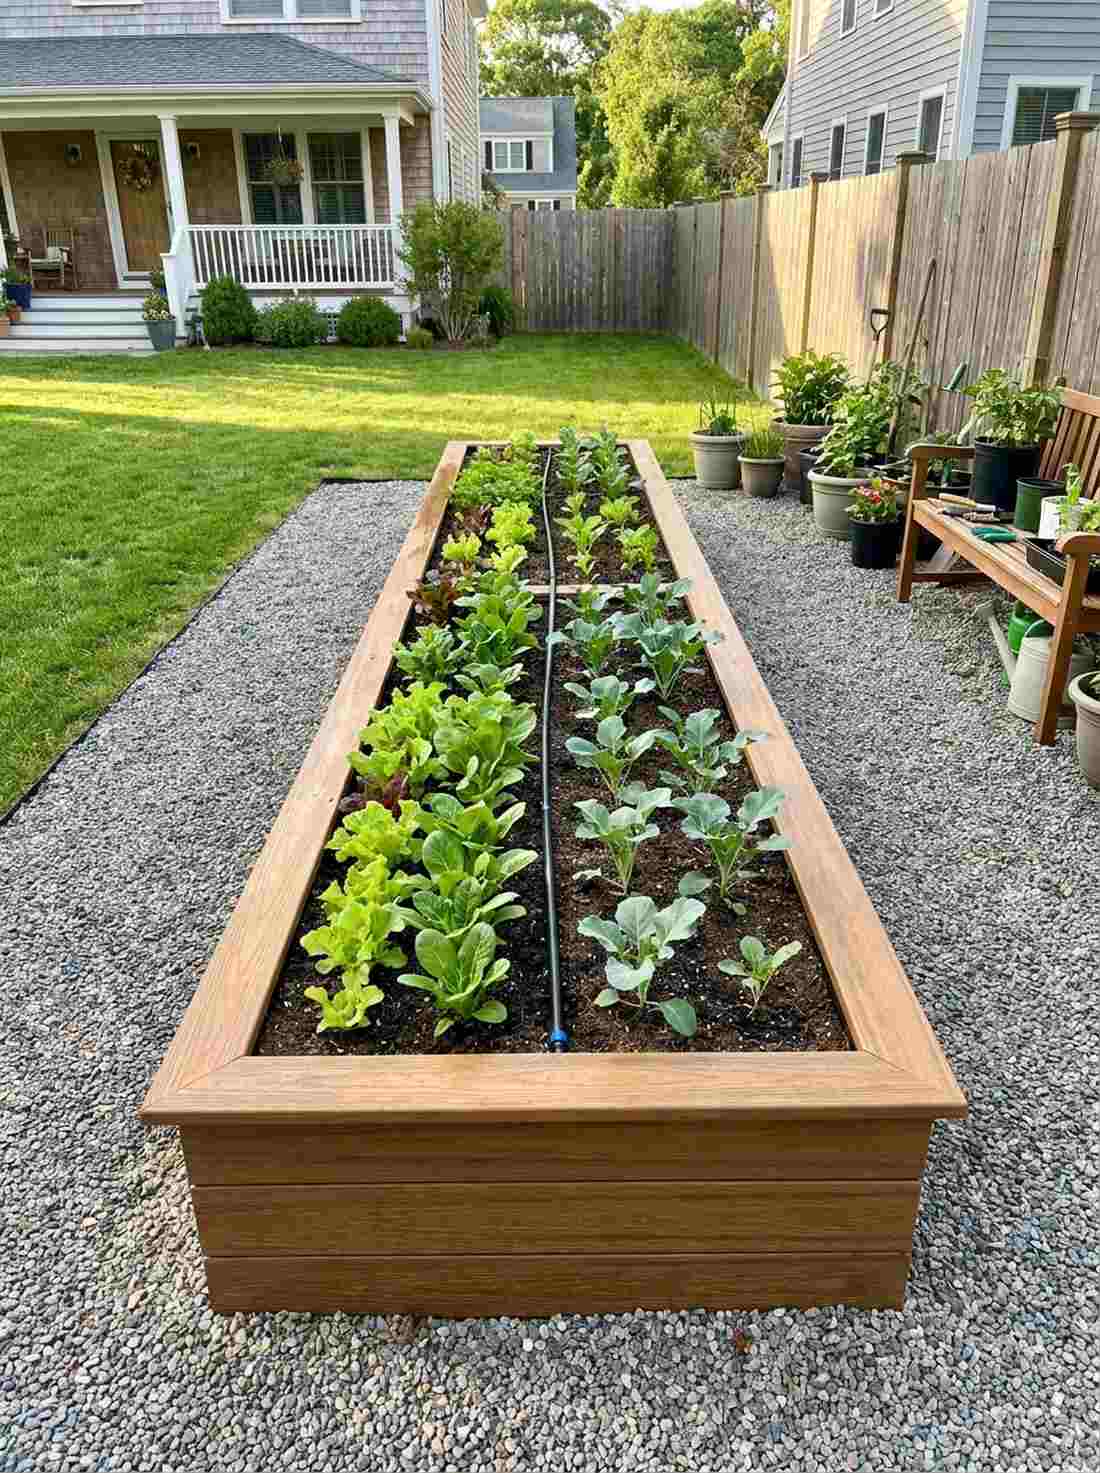
Embodying a streamlined, high-efficiency aesthetic, this feels like stepping into a professional market gardener’s plot. The narrow double-row planter box works brilliantly for side yards or along wide pathways where reaching across is difficult.
This simple trick looks far more expensive than it is because the 3×12 foot profile mimics high-end agricultural setups. Dedicate one parallel row to quick-growing greens and the other to slower brassicas, swapping them seamlessly. To ensure longevity, always apply a UV-resistant clear wood sealant to the exterior faces.
Expect to spend roughly $50–$75 for the expanded length. It’s a fast upgrade that completely changes the productivity vibe of your space.
- Key Materials: Extra-long composite boards, landscape fabric
- Vibe / Style: Commercial market garden
- Difficulty: Easy beginner setup
- Budget Breakdown: Boards: $50 | Fasteners: $10
- Creator’s Tip: Install a central drip line before planting to automate watering from day one.
- Smart Sourcing: Grab UV-coated composite garden panels and an automated micro-drip irrigation starter kit.
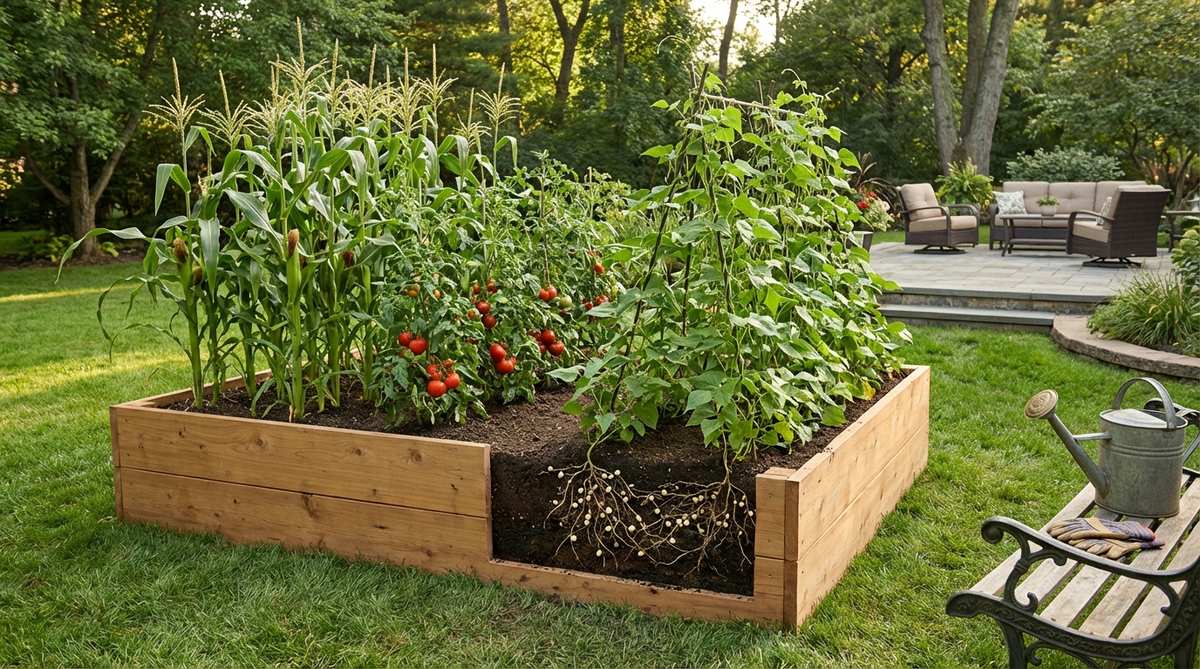
3. Three Sisters Arrangement
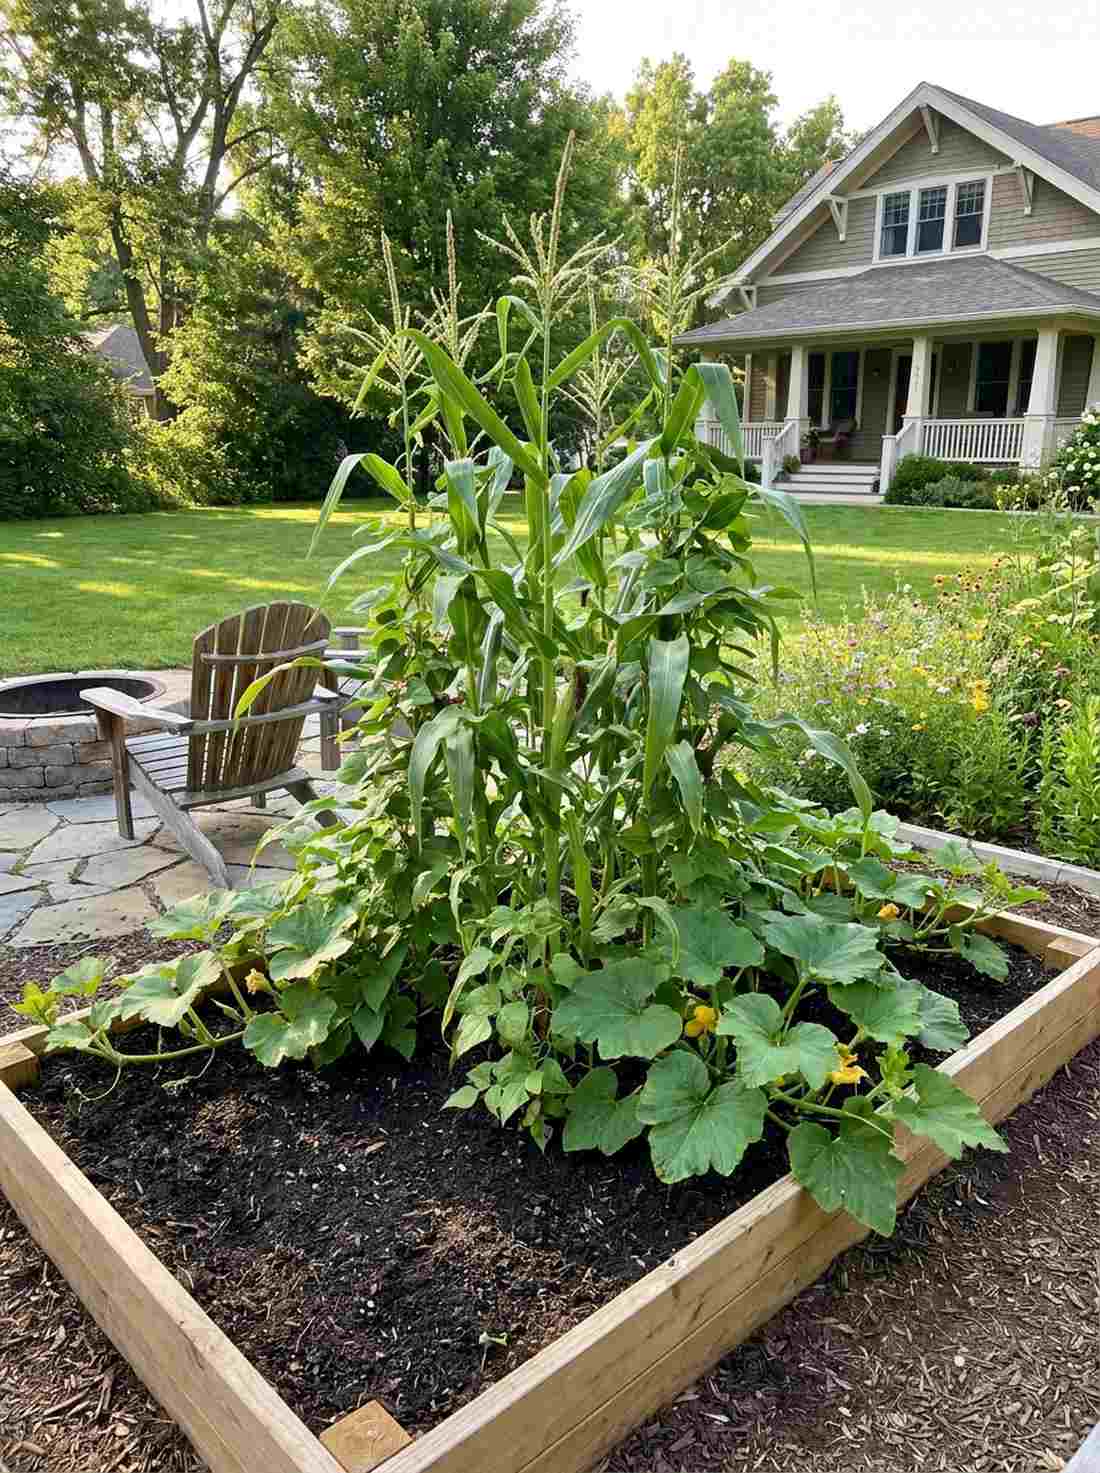
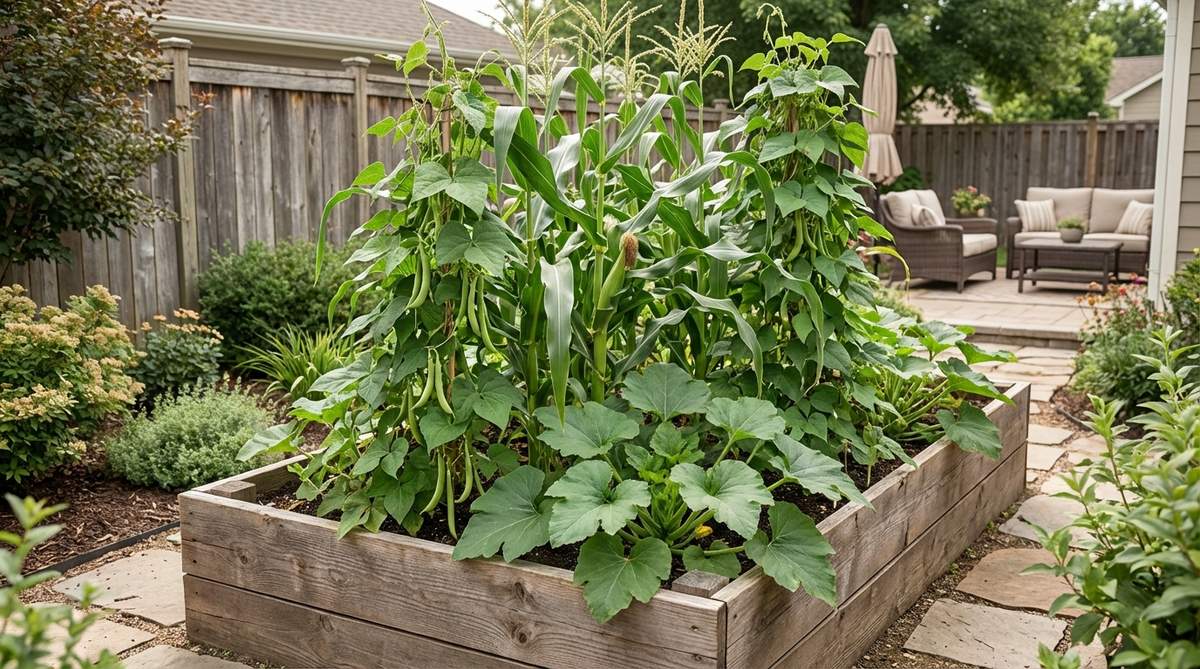
A true celebration of indigenous agriculture, this setup feels like a living, breathing tapestry of interconnected life. The companion planting garden layout is perfect for open, sunny patches in your yard where tall corn can act as a centerpiece.
This layout gives a designer-level finish to what is essentially a survivalist technique. By grouping corn, pole beans, and squash, you create a self-sustaining microclimate that smothers weeds and fixes nitrogen naturally. Injecting organic heirloom seed vaults ensures robust, picture-perfect growth across all three layers.
Building the 4×6 base and planting it out costs a mere $30–$45. Highly recommended for a quick weekend win with immense historical value.
- Key Materials: 4×6 wooden frame, rich compost blend
- Vibe / Style: Organic polyculture wildness
- Difficulty: Moderate (timing is key)
- Budget Breakdown: Frame: $25 | Seeds/Compost: $15
- Creator’s Tip: Wait until corn is 6 inches tall before sowing the climbing beans, or the beans will drag the corn down.
- Smart Sourcing: Buy pre-mixed Three Sisters seed bundles and high-nitrogen organic compost booster packs.
4. Alternating Height Bed
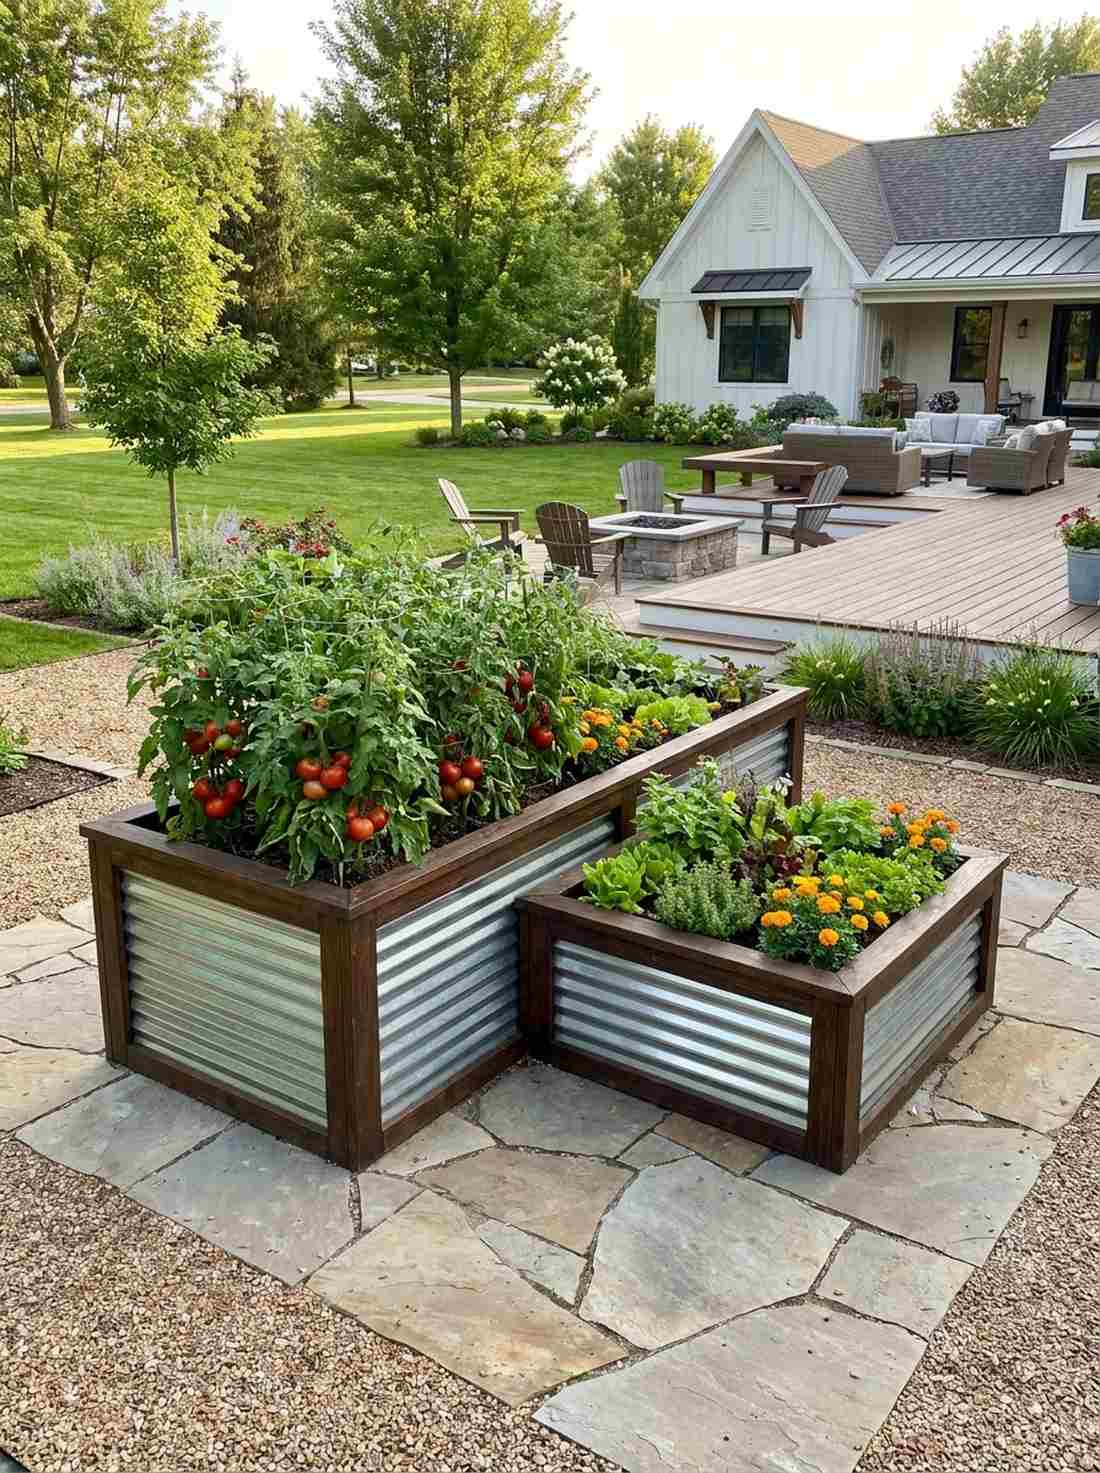
Providing a dynamic, architectural feel, this setup looks like a custom installation from a high-end landscape architect. The multi-tiered garden design for raised beds works perfectly for patios or yards that need instant visual depth.
People often ignore verticality, but stepping a 12-inch bed next to a 24-inch bed instantly breaks up visual monotony. Deep-rooted tomatoes thrive in the tall section, while the lower tier houses shallow greens, optimizing soil usage. Adding heavy-duty corrugated metal siding elevates the modern aesthetic even further.
You can create this custom look for around $80–$120. Save this idea if you’re planning a multi-level visual upgrade.
- Key Materials: Mixed-height framing lumber, internal cross-braces
- Vibe / Style: Modern architectural garden
- Difficulty: Intermediate woodworking
- Budget Breakdown: Wood: $70 | Soil fill: $40
- Creator’s Tip: Fill the bottom half of the 24-inch bed with organic matter (logs, branches) to save a fortune on topsoil.
- Smart Sourcing: Source pre-cut galvanized steel panels and bulk organic raised bed filler blocks.
Most people get this completely wrong… until they try the exact layout coming up next.
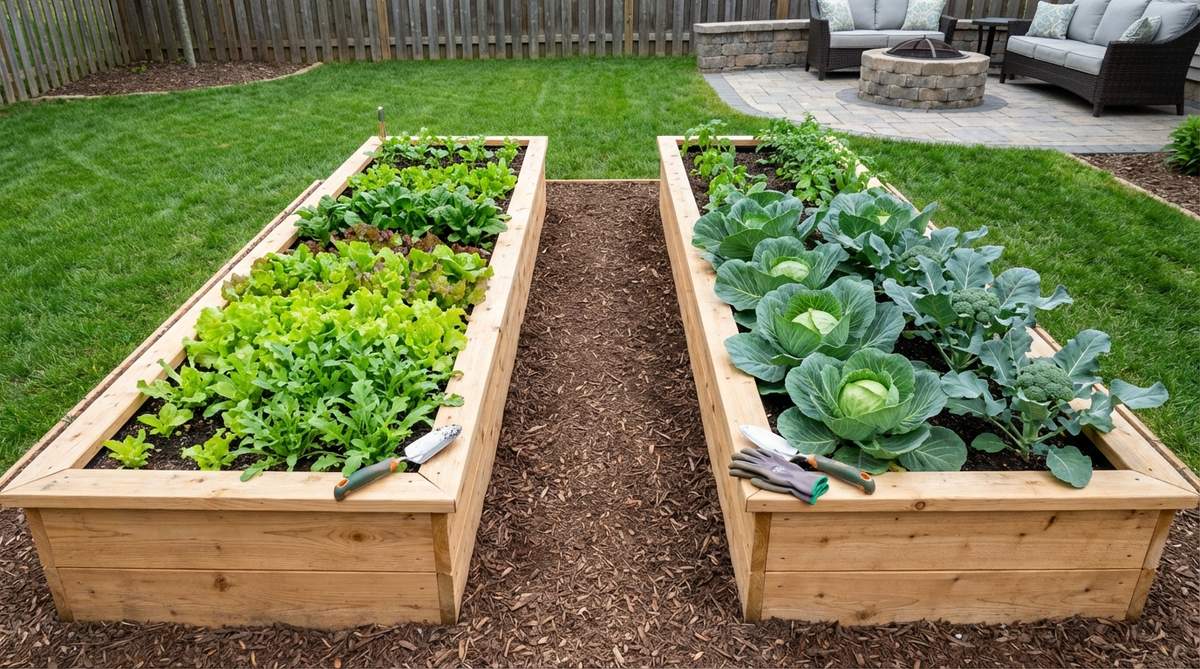
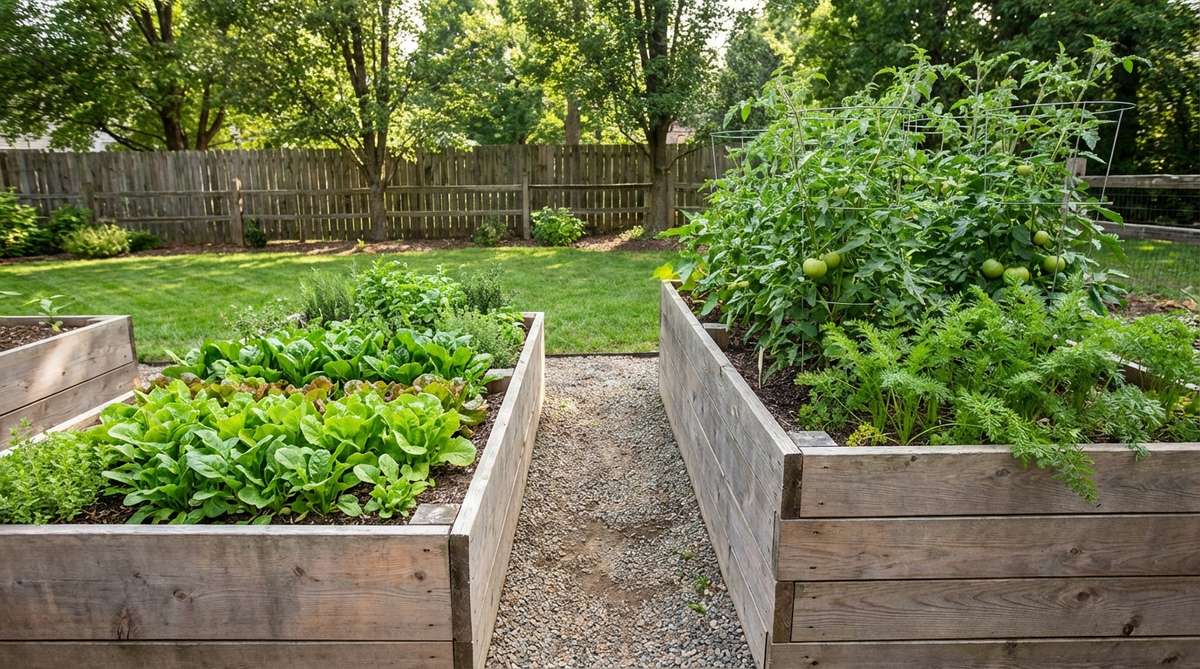
5. Mirror Image Twin Beds
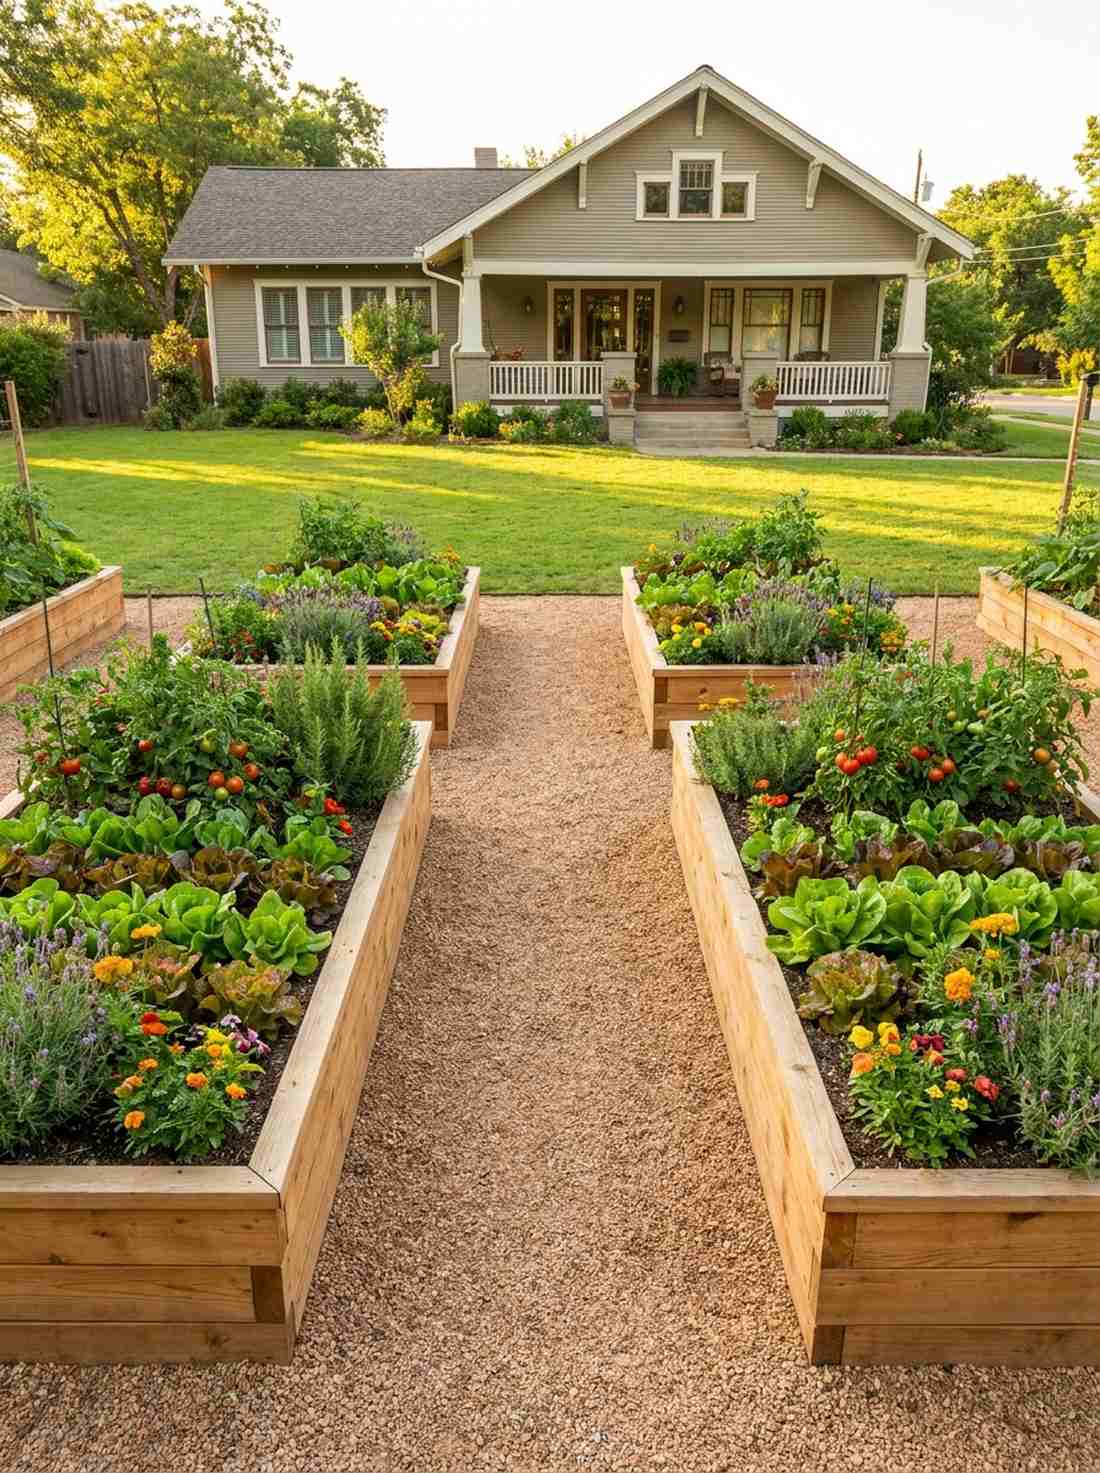
Evoking the grand symmetry of European estates, this dual-layout feels like a curated botanical exhibit. These symmetrical vegetable garden design raised beds are ideal for framing a central walkway or creating a prominent focal point in a front yard.
The trick here is that identical twin beds provide a ridiculously premium aesthetic without requiring complex math. Positioning two 3×8 beds with a crisp gravel pathway between them allows for effortless crop rotation and drip line mirroring. Upgrading the path with premium weed-barrier landscape fabric keeps it looking flawless year-round.
Total cost for the dual setup runs about $90–$130. Pin this layout to your front yard curb appeal board!
- Key Materials: Twin lumber sets, pathway gravel
- Vibe / Style: Formal French potager
- Difficulty: Easy but requires precision measuring
- Budget Breakdown: Twin Frames: $80 | Pathway Gravel: $30
- Creator’s Tip: Use a string line level when installing both beds to ensure they are perfectly parallel and flat.
- Smart Sourcing: Order heavy-duty commercial weed barrier fabric (bulk roll) and pre-drilled corner assembly kits.
6. Tiered Cascading Beds
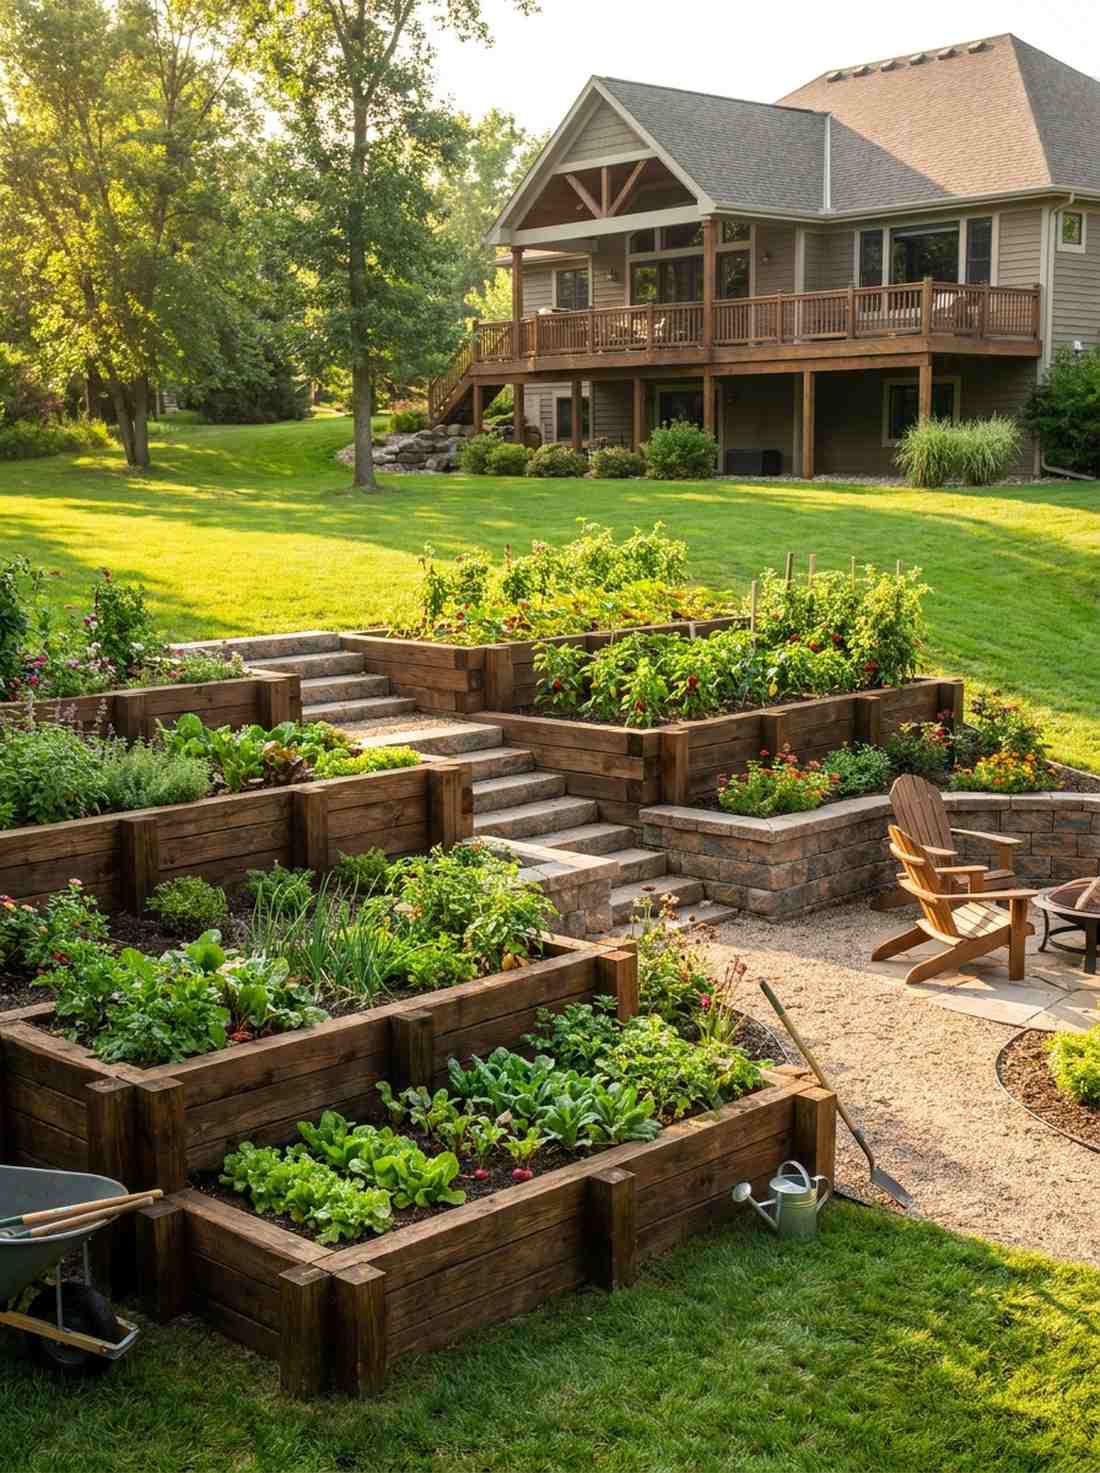
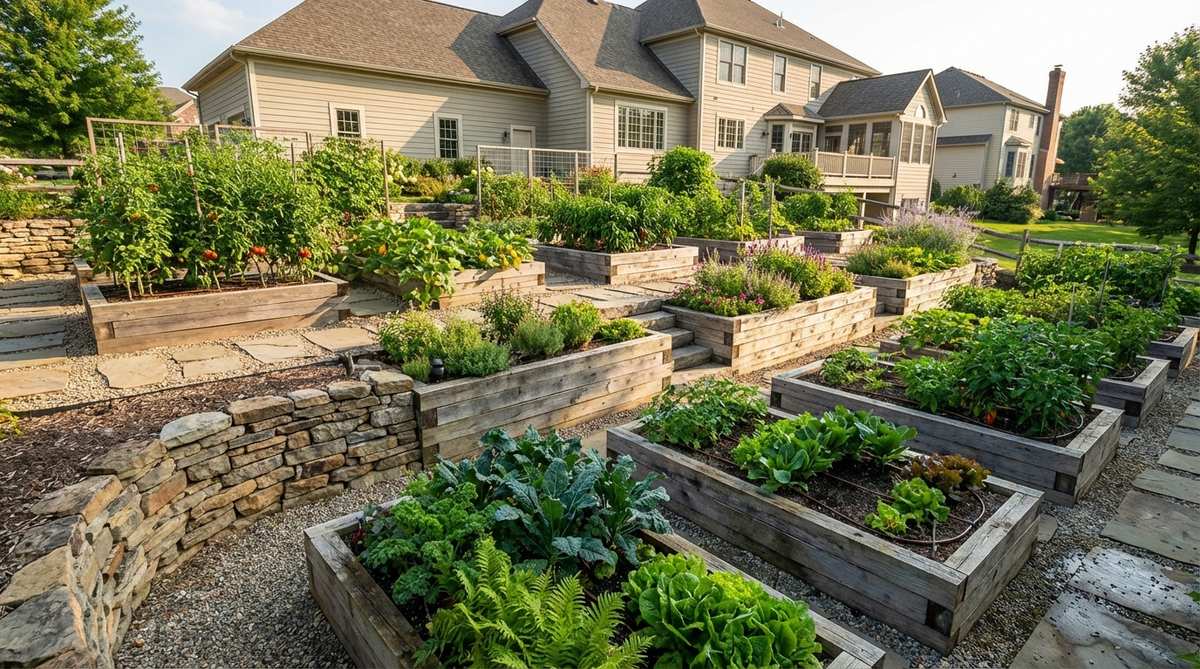
Looking like an ancient terraced hillside, this design transforms awkward slopes into breathtaking displays. A cascading garden design using raised beds is the absolute best solution for uneven, sloping terrain that is otherwise unusable.
While retaining walls cost thousands, stepping raised boxes down a hill completely changes the terrain for pennies on the dollar. Each level acts as a microclimate, holding moisture for greens at the bottom and radiating heat for peppers at the top. Incorporating weatherproof retaining wall block kits can give it a stone finish if wood isn’t your style.
Depending on the slope, expect to spend $150–$250. It completely redefines the property value of a hilly yard.
- Key Materials: Thick timber stakes, treated ground-contact wood
- Vibe / Style: Dramatic hillside terrace
- Difficulty: Advanced (requires digging into the slope)
- Budget Breakdown: Heavy Timber: $120 | Rebar/Stakes: $40
- Creator’s Tip: Dig the back edge of each box deeply into the hill to anchor it against soil pressure.
- Smart Sourcing: Use heavy-duty galvanized rebar stakes and waterproofing wood sealant (gallon jug).
Vertical Growing Structures For Maximum Space Utilization
Vertical elements triple your growing capacity by using airspace above beds. When sourcing garden design ideas raised beds, look up! Trellises and arches create high-value real estate.
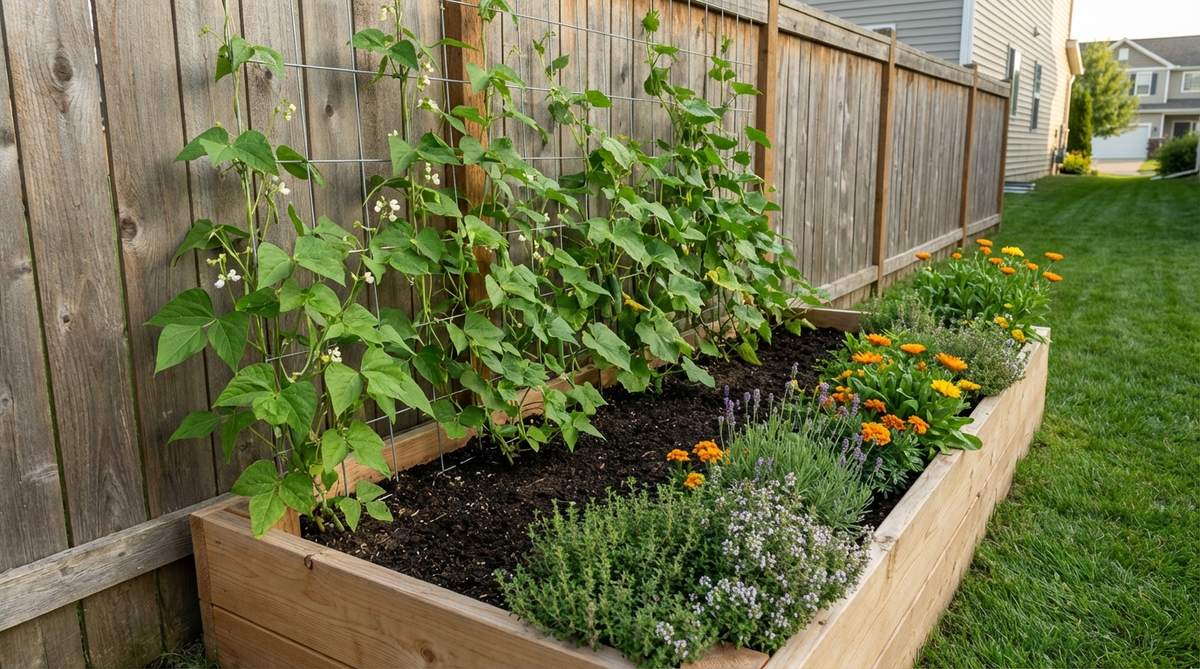
7. Wire Panel Trellis Wall
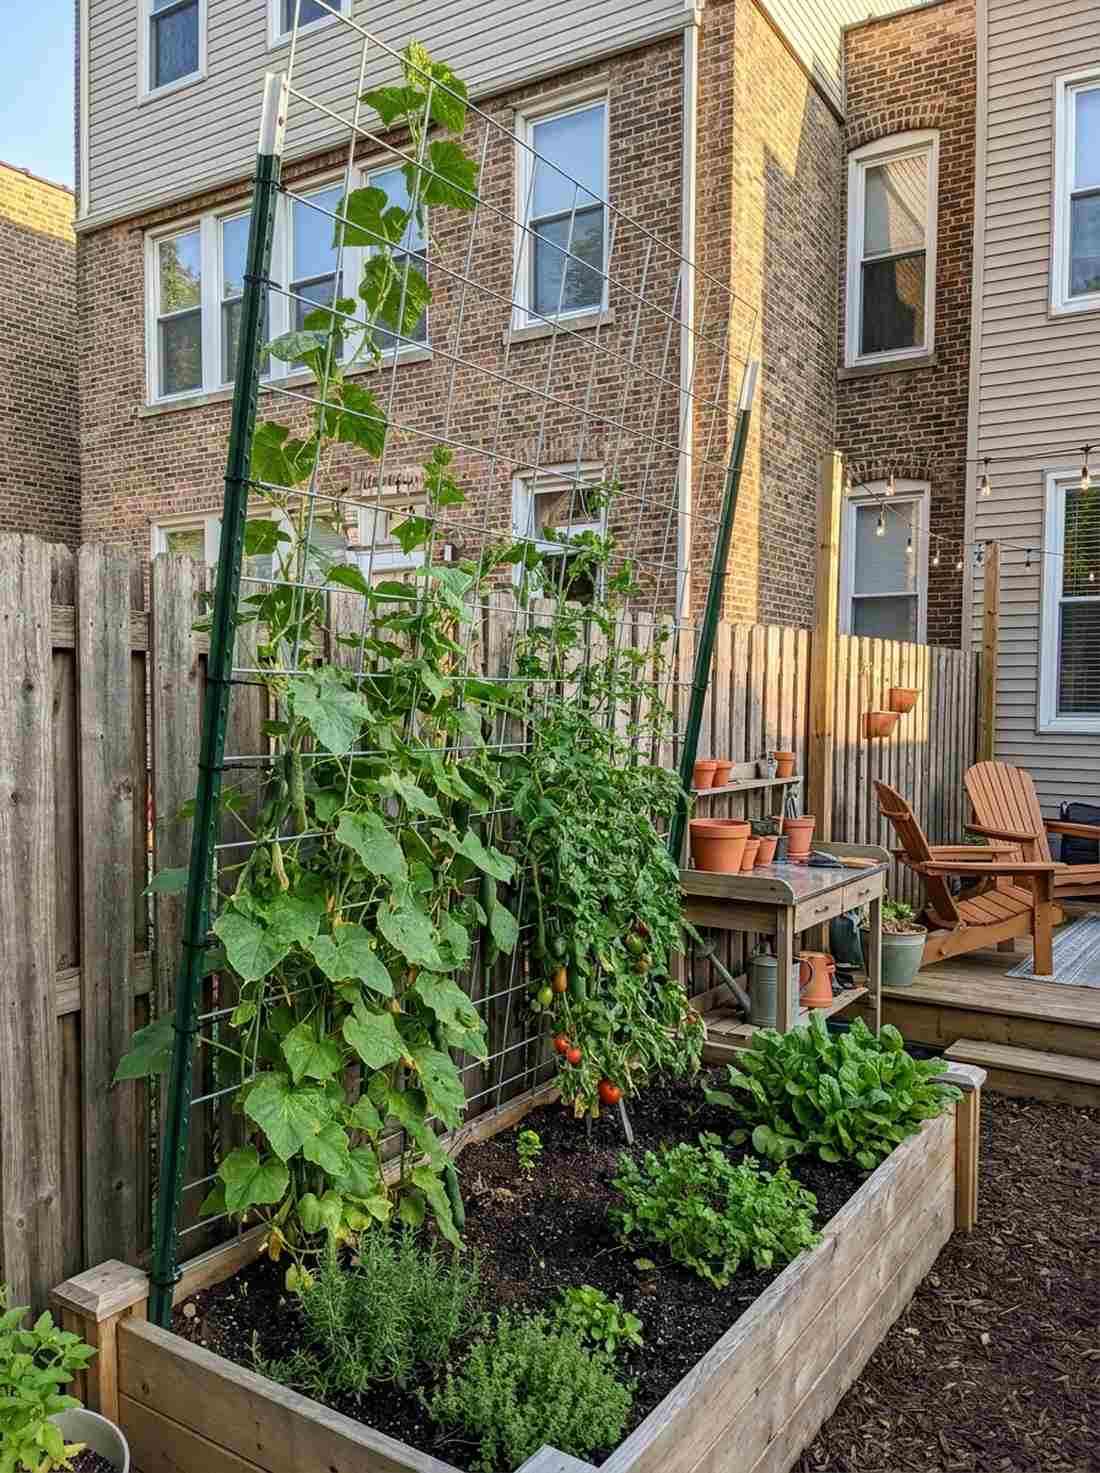
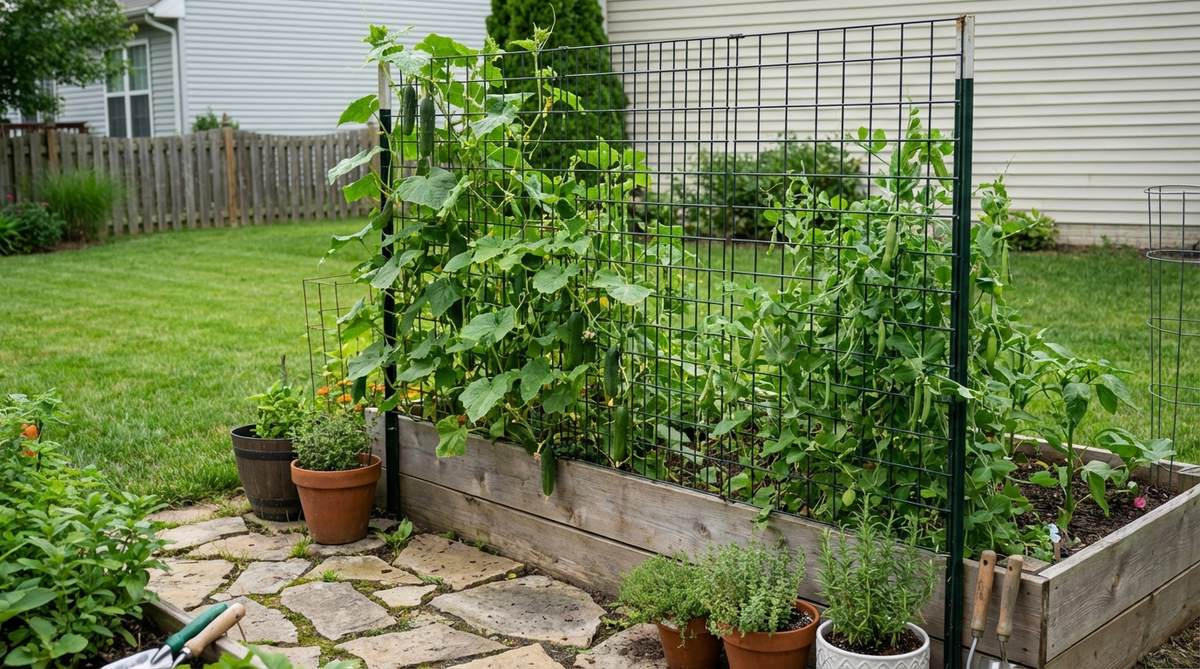
This high-impact addition feels like opening up a living green wall of productivity. A cattle panel vertical garden design works exceptionally well for tight urban plots where horizontal space is practically non-existent.
Using livestock panels looks wildly industrial-chic and holds up ten times better than flimsy garden center netting. Mounting a 4×8 welded wire panel to the north side of the bed gives vining crops infinite grip while keeping airflow pristine. Snagging some UV-resistant outdoor zip ties ensures the mesh never slips during a storm.
You can hack this together for just $30–$50. Save this if you need massive yields from a tiny footprint!
- Key Materials: Welded wire cattle panel, heavy-duty T-posts
- Vibe / Style: Industrial urban farming
- Difficulty: Easy (requires two people to lift)
- Budget Breakdown: Panel: $25 | T-Posts: $15
- Creator’s Tip: Lean the panel backward at a 10-degree angle so heavy cucumbers hang down naturally for easy picking.
- Smart Sourcing: Get heavy-duty steel T-posts (4-pack) and UV-coated commercial zip ties.
8. Arched Tunnel Trellis
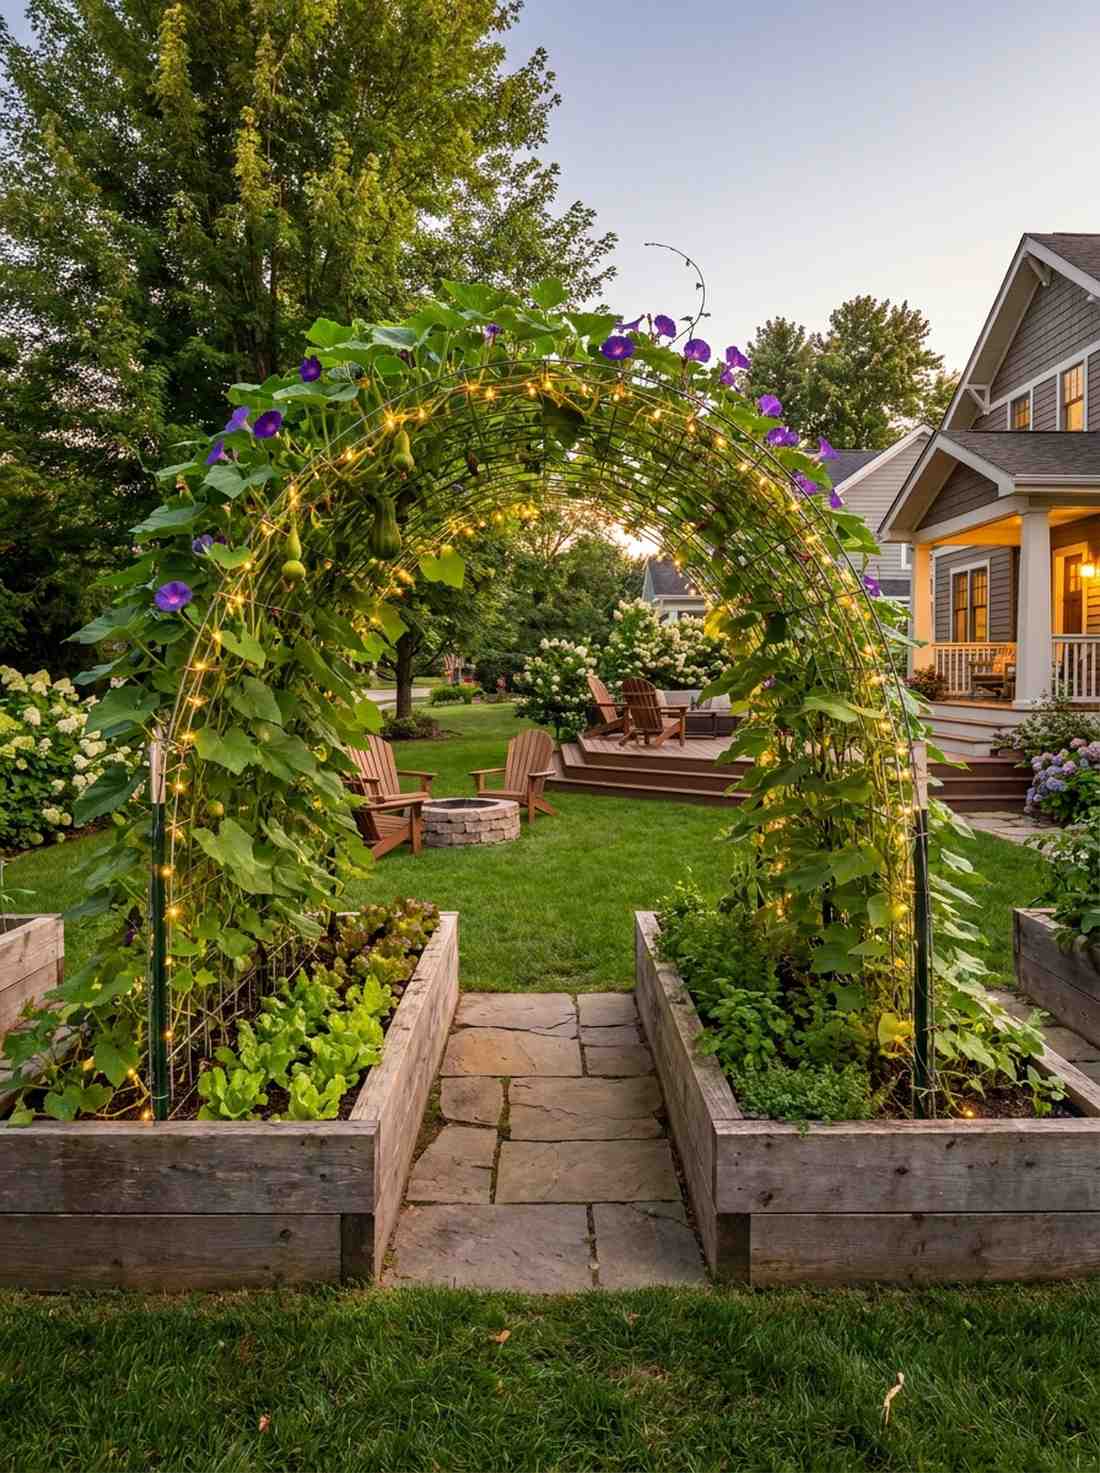

Walking under this structure feels like entering a magical, secret garden straight out of a storybook. The walk-through arched garden tunnel is a breathtaking use-case for connecting two raised beds over a central pathway.
This layout guarantees a jaw-dropping reaction from guests while being insanely practical for shade-loving crops. Bending a cattle panel between two beds creates a romantic archway for squash or morning glories, simultaneously shading delicate lettuce underneath. Adding outdoor solar fairy light strings makes it a stunning nighttime feature.
Creating this majestic walkway costs only $40–$60 per arch. A must-do if you want that whimsical Pinterest aesthetic.
- Key Materials: 16-foot wire panel, U-nails
- Vibe / Style: Romantic fairytale garden
- Difficulty: Moderate (bending panels requires force)
- Budget Breakdown: Panel: $35 | Staples/Hooks: $10
- Creator’s Tip: Secure the ends of the arch to the inside of the wooden bed frame using heavy duty galvanized U-nails.
- Smart Sourcing: Use heavy-duty galvanized U-staples (bulk bucket) and waterproof solar-powered fairy lights.
9. A-Frame Double-Sided Trellis
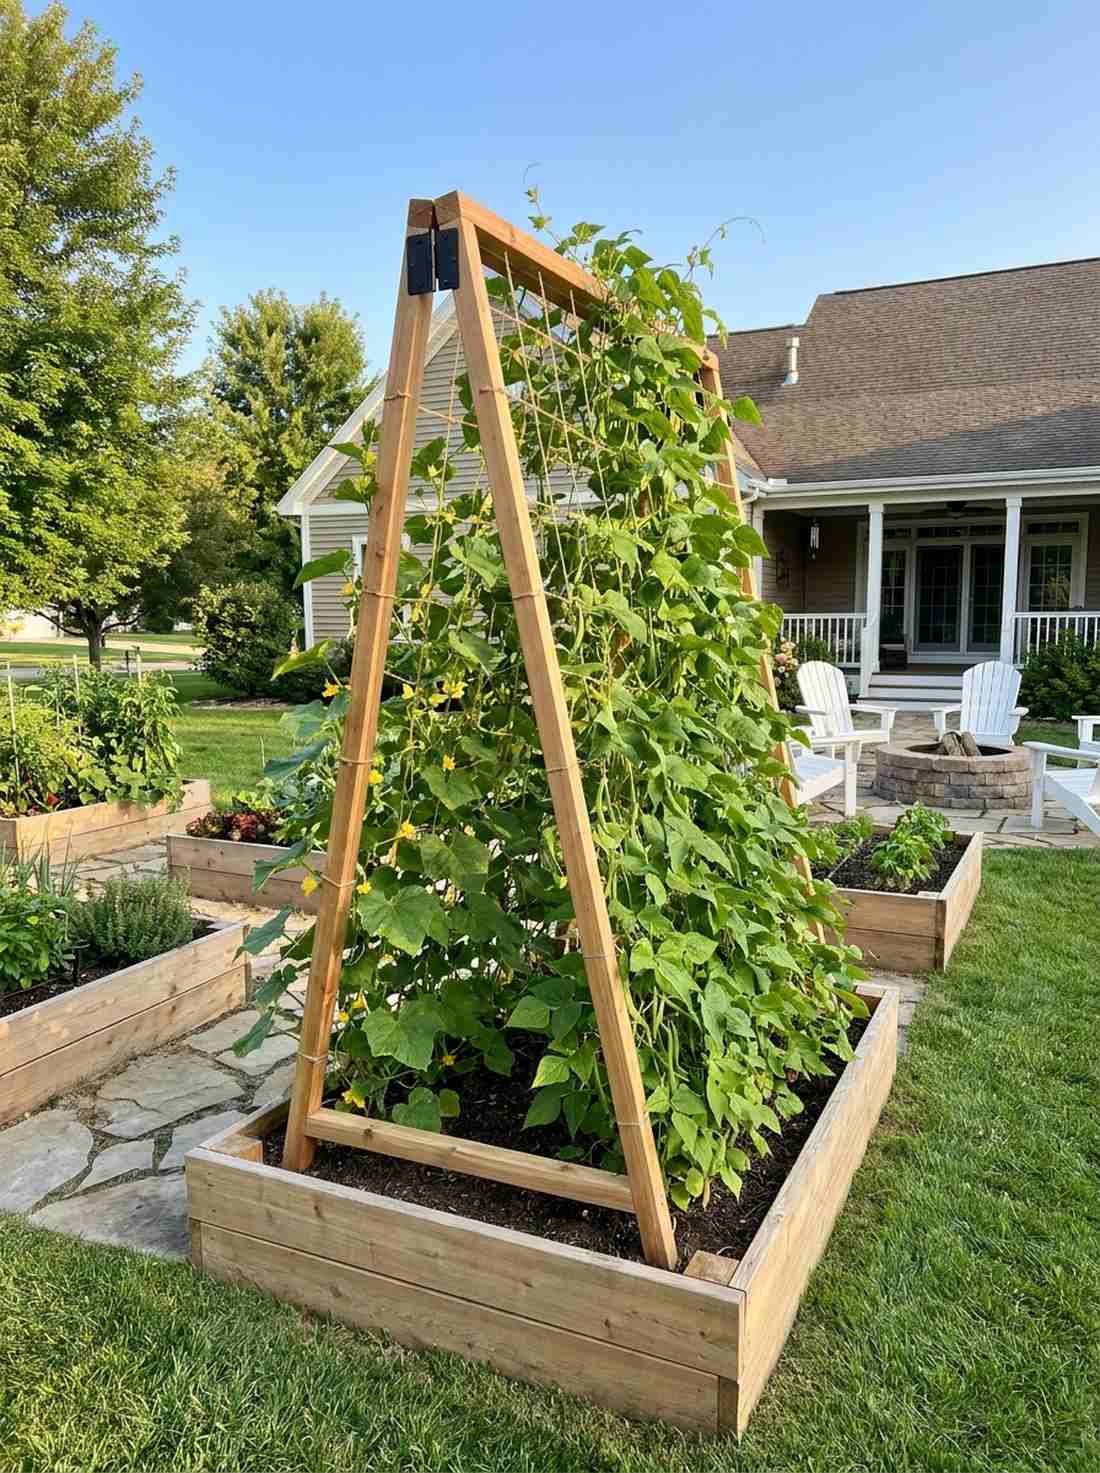
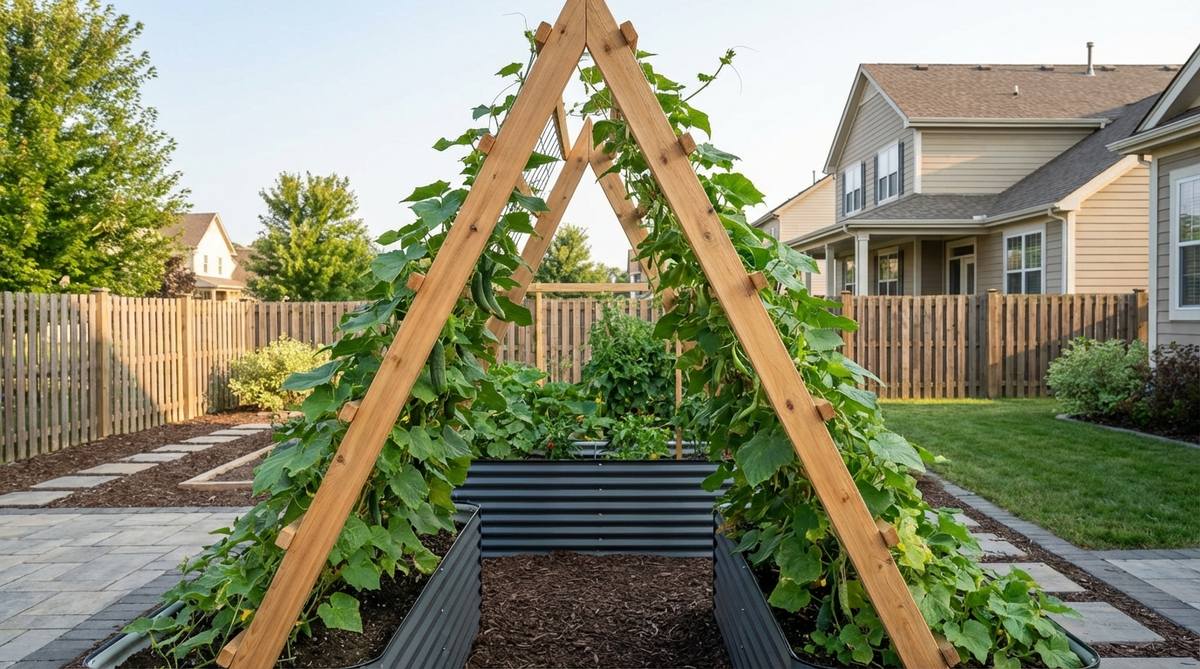
This peaked structure brings a cathedral-like geometry to your vegetable plot. The A-frame raised bed trellis is perfect for windy, exposed backyards where flat vertical surfaces might act like a sail and blow over.
Most trellises snap in high wind, but this triangular blueprint creates maximum stability while doubling your climbing surface. Straddling cucumbers on one side and pole beans on the other creates an incredibly dense canopy of production. Sourcing rot-resistant cedar garden supplies ensures the frame lasts for decades.
This highly stable build will run you about $45–$65. Pin this if you live in a breezy climate and need sturdy support.
- Key Materials: 2×2 lumber, exterior hinges, twine or netting
- Vibe / Style: Clean geometric utility
- Difficulty: Intermediate woodworking
- Budget Breakdown: Lumber: $30 | Netting: $15
- Creator’s Tip: Use hinges at the top peak so you can fold the trellis flat and store it during the winter.
- Smart Sourcing: Pick up heavy-duty rust-proof exterior hinges and nylon heavy-duty trellis netting (pre-cut).
💡 Must-Have Supplies for High-End Setups
To build these setups faster and ensure they last, skip the generic craft aisles and invest in the right foundational kits to protect your vegetable garden design raised beds.
- Base & Support: Pre-cut galvanized metal raised bed kits (corner brackets included)
- Setup Tools: Heavy-duty landscape stapler and weed barrier combo sets
- Weather/Durability Protection: Eco-friendly non-toxic clear wood sealant (gallon size)
This next setup is ridiculously cheap but looks like a $100 custom display…
10. Bamboo Teepee Cluster
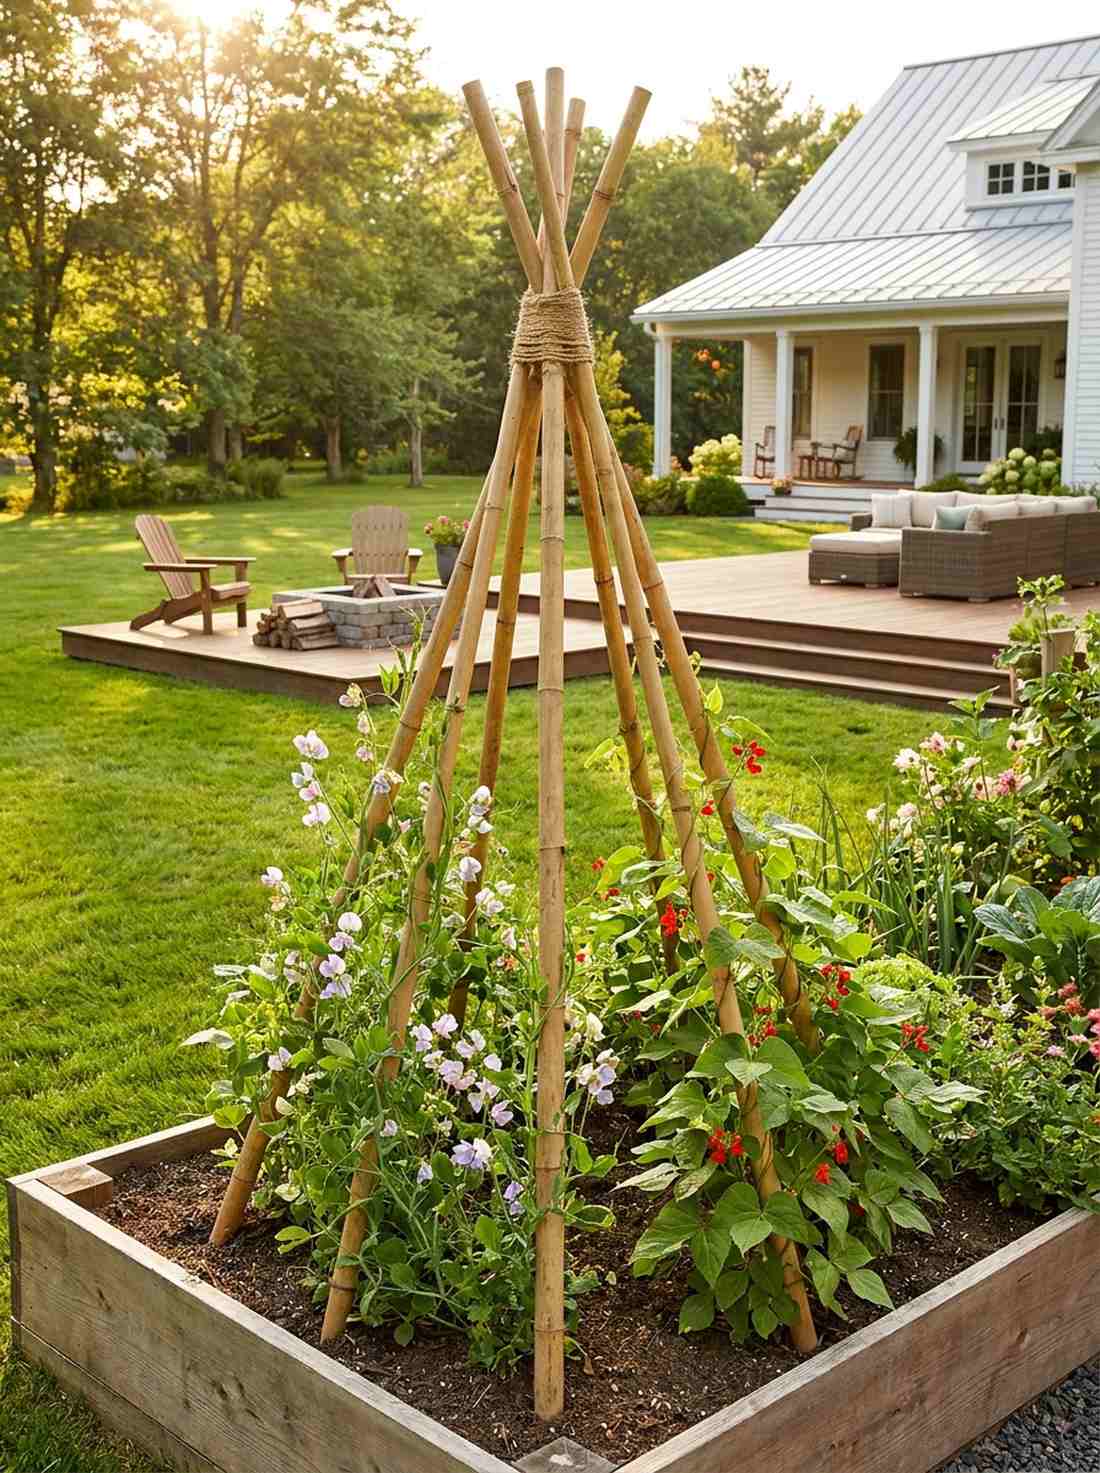
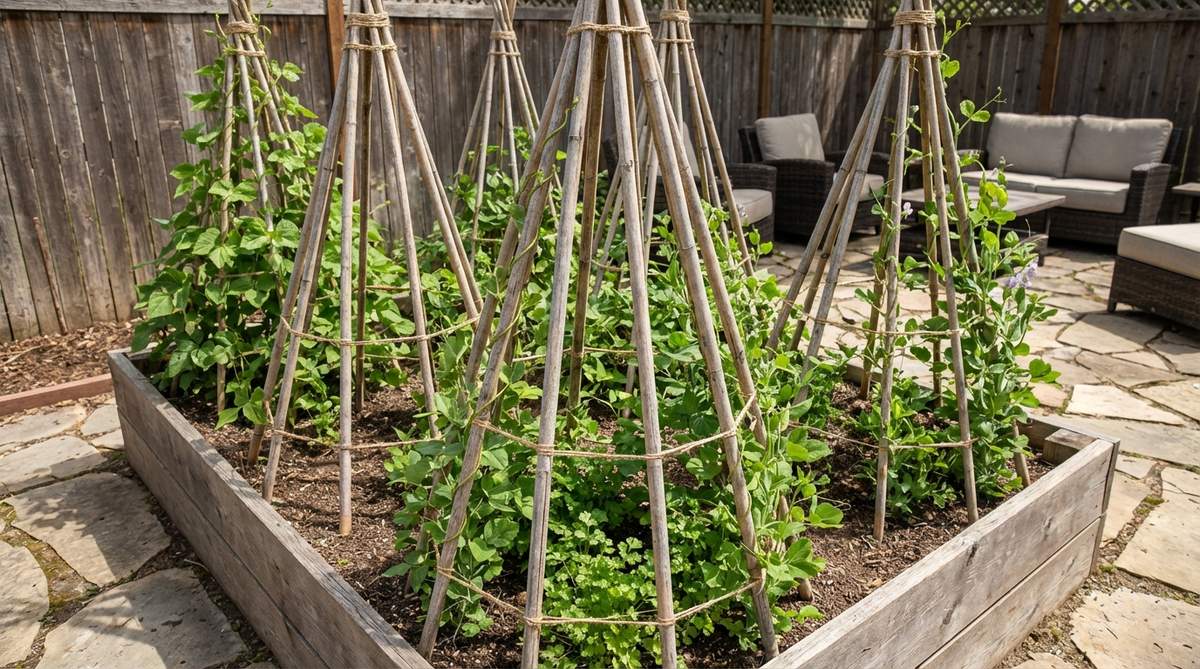
Injecting rustic charm, this natural vertical accent feels like a cozy wilderness camp in the middle of your greens. The bamboo teepee garden structure works beautifully tucked into the corners of large square beds for dramatic height.
Foregoing expensive metal for sustainable bamboo gives a high-end boho aesthetic for pennies. Securing 6-8 thick poles at the top creates an unshakeable cone, perfect for sweet peas or runner beans to spiral up aggressively. Grabbing biodegradable premium garden twine ensures the whole thing is compostable at year’s end.
You can bundle this together for $15–$25. Highly recommended for a fast afternoon project with kids.
- Key Materials: 6-foot bamboo poles, garden twine
- Vibe / Style: Boho rustic wilderness
- Difficulty: Extremely easy
- Budget Breakdown: Bamboo bundle: $15 | Twine: $5
- Creator’s Tip: Push the bamboo sticks at least 8 inches into the soil before tying the top to prevent shifting.
- Smart Sourcing: Grab thick-walled natural bamboo stakes (bulk pack) and weather-resistant jute garden twine.
11. String Trellis System
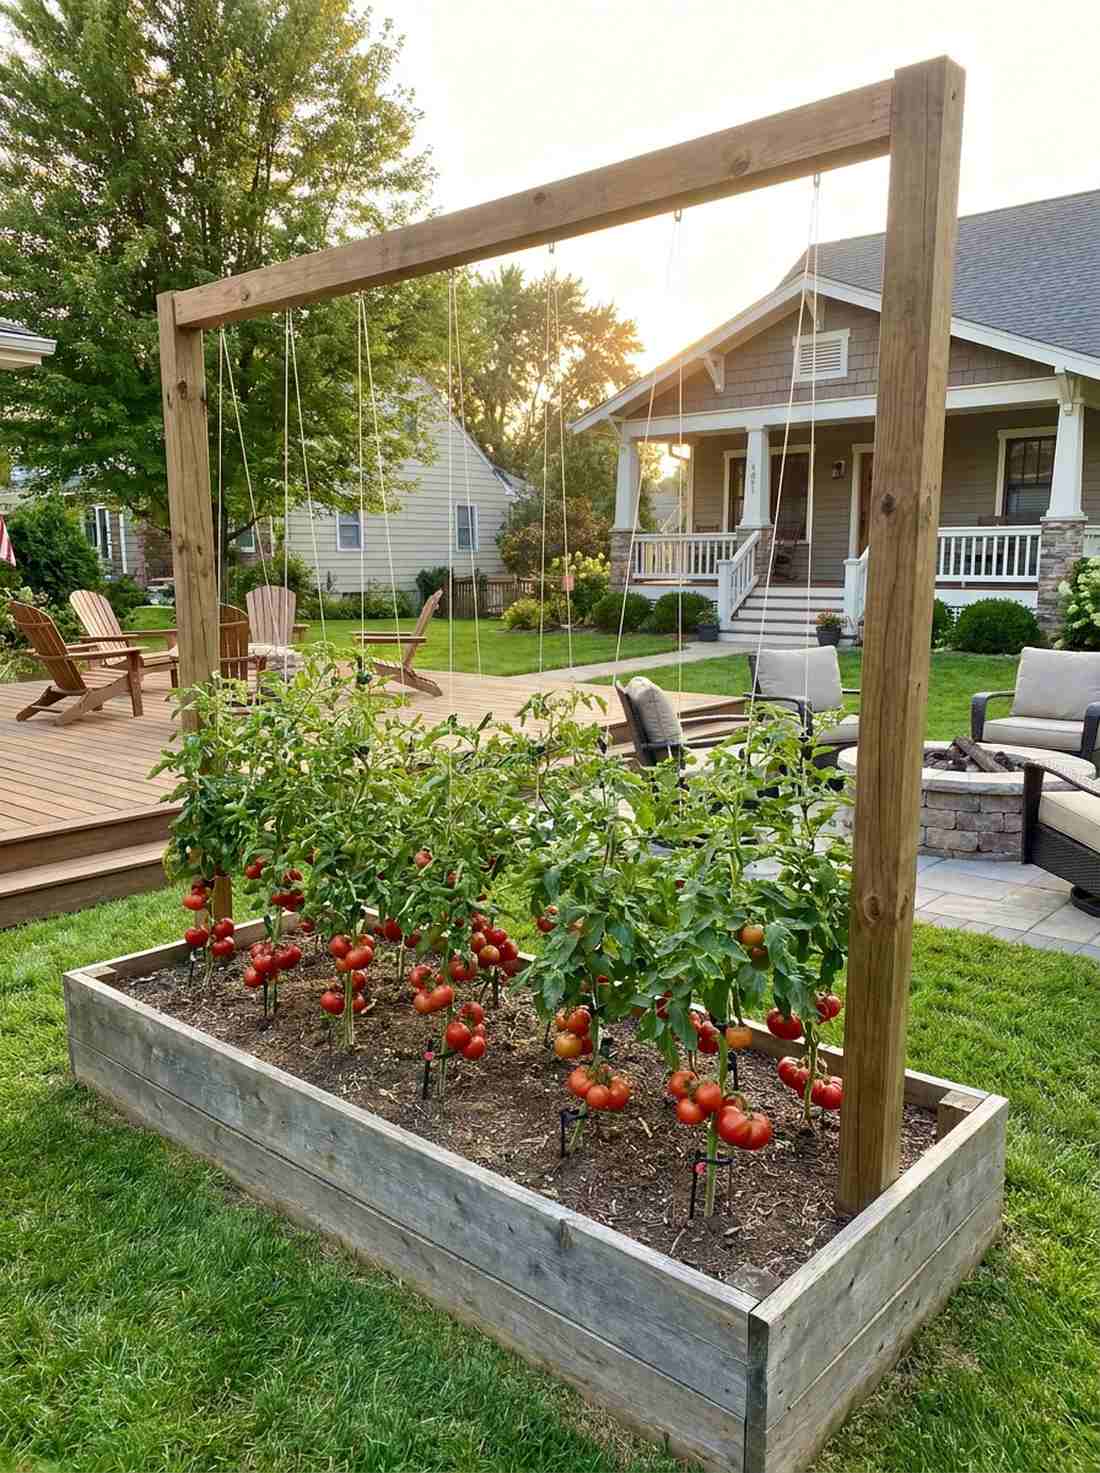
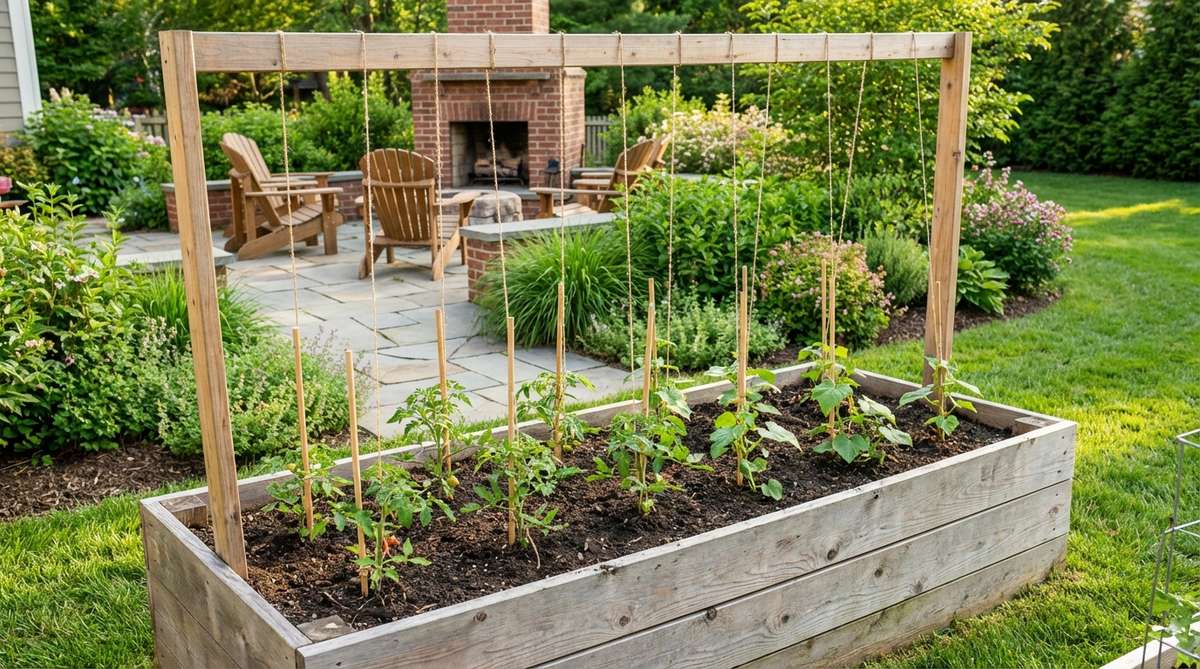
Mimicking commercial hydroponic setups, this design feels incredibly precise and aggressively modern. The tomato string trellis suspension system is ideal for serious growers aiming to maximize yield in a single rectangular bed.
Commercial growers use this secret to produce flawless fruit, and it looks surprisingly architectural in a home garden. Running a top 2×4 beam and dropping individual strings allows you to prune indeterminate tomatoes into sleek, single-vine columns. Snagging some quick-release tomato support clips makes daily maintenance a breeze.
Setting up the overhead gantry costs around $40–$70. Pin this to your advanced gardening strategies board!
- Key Materials: Tall 4×4 posts, top beam, nylon string, clips
- Vibe / Style: High-tech greenhouse precision
- Difficulty: Advanced (requires solid framing)
- Budget Breakdown: Frame: $40 | String/Clips: $15
- Creator’s Tip: Wind extra string on a spool at the top so you can lower the vines as they reach the roof.
- Smart Sourcing: Use heavy-duty commercial tomato clips (bulk pack) and UV-stabilized poly trellis twine.
12. Obelisk Tower Accents

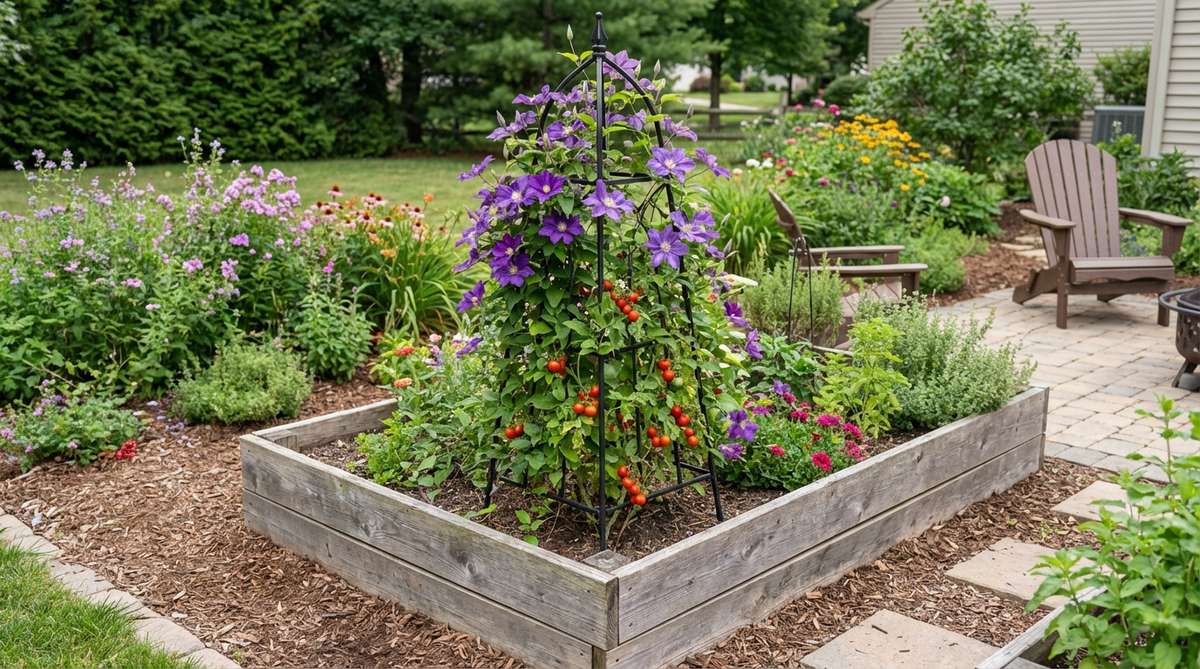
Standing like proud garden monuments, these structures feel like you’ve imported elements from an English royal garden. A decorative obelisk tower focal point works flawlessly as the centerpiece for beds combining edible and ornamental plants.
These majestic pyramids instantly elevate a basic wooden box into a designer statement piece. Whether crafted from painted wood or oxidized iron, an obelisk provides off-season structure while supporting cherry tomatoes or clematis. Opting for a rust-proof powder-coated metal kit guarantees it survives harsh winters unscathed.
Depending on the material, this upgrade runs $40–$90. It completely changes the winter silhouette of your yard.
- Key Materials: Metal or wood obelisk frame
- Vibe / Style: Formal English estate
- Difficulty: Easy (mostly pre-assembled)
- Budget Breakdown: Obelisk Unit: $60
- Creator’s Tip: Bury the bottom 6 inches of the obelisk into the soil so it doesn’t topple when laden with heavy vines.
- Smart Sourcing: Source powder-coated steel garden obelisks (pre-built) and rust-proof anchor pegs.
Specialty Shaped Beds For Unique Garden Spaces
Non-rectangular beds adapt to challenging yard layouts. When searching for small garden design with raised beds, unusual shapes solve spatial nightmares and become stunning conversation pieces.
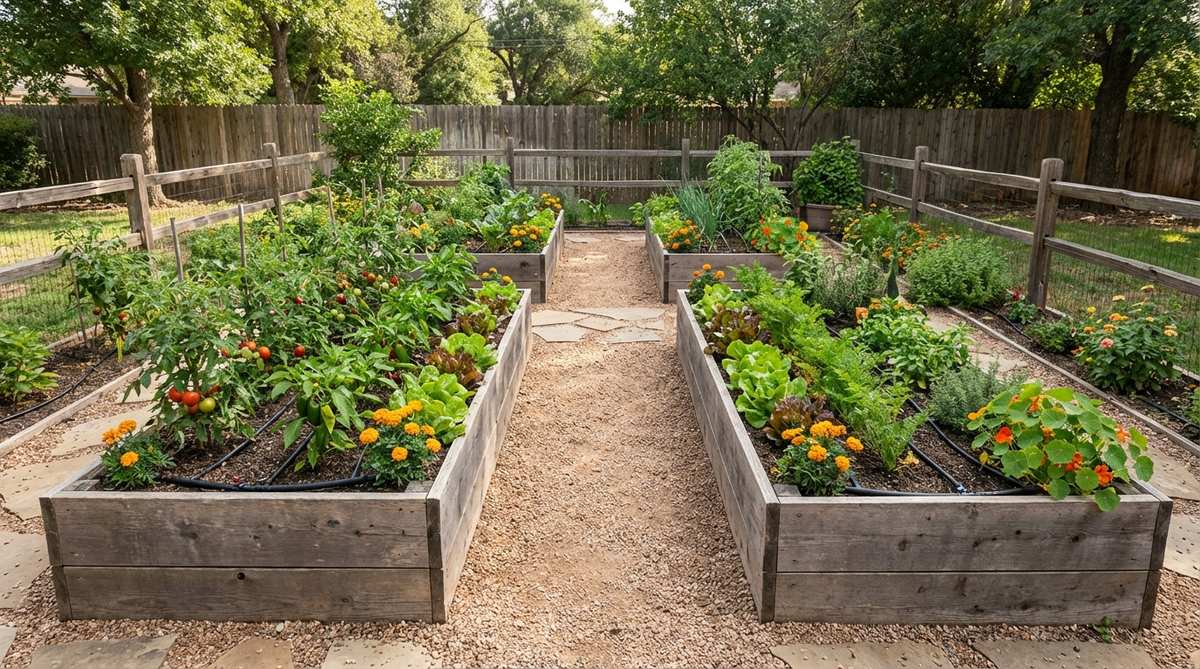
13. U-Shaped Accessibility Bed
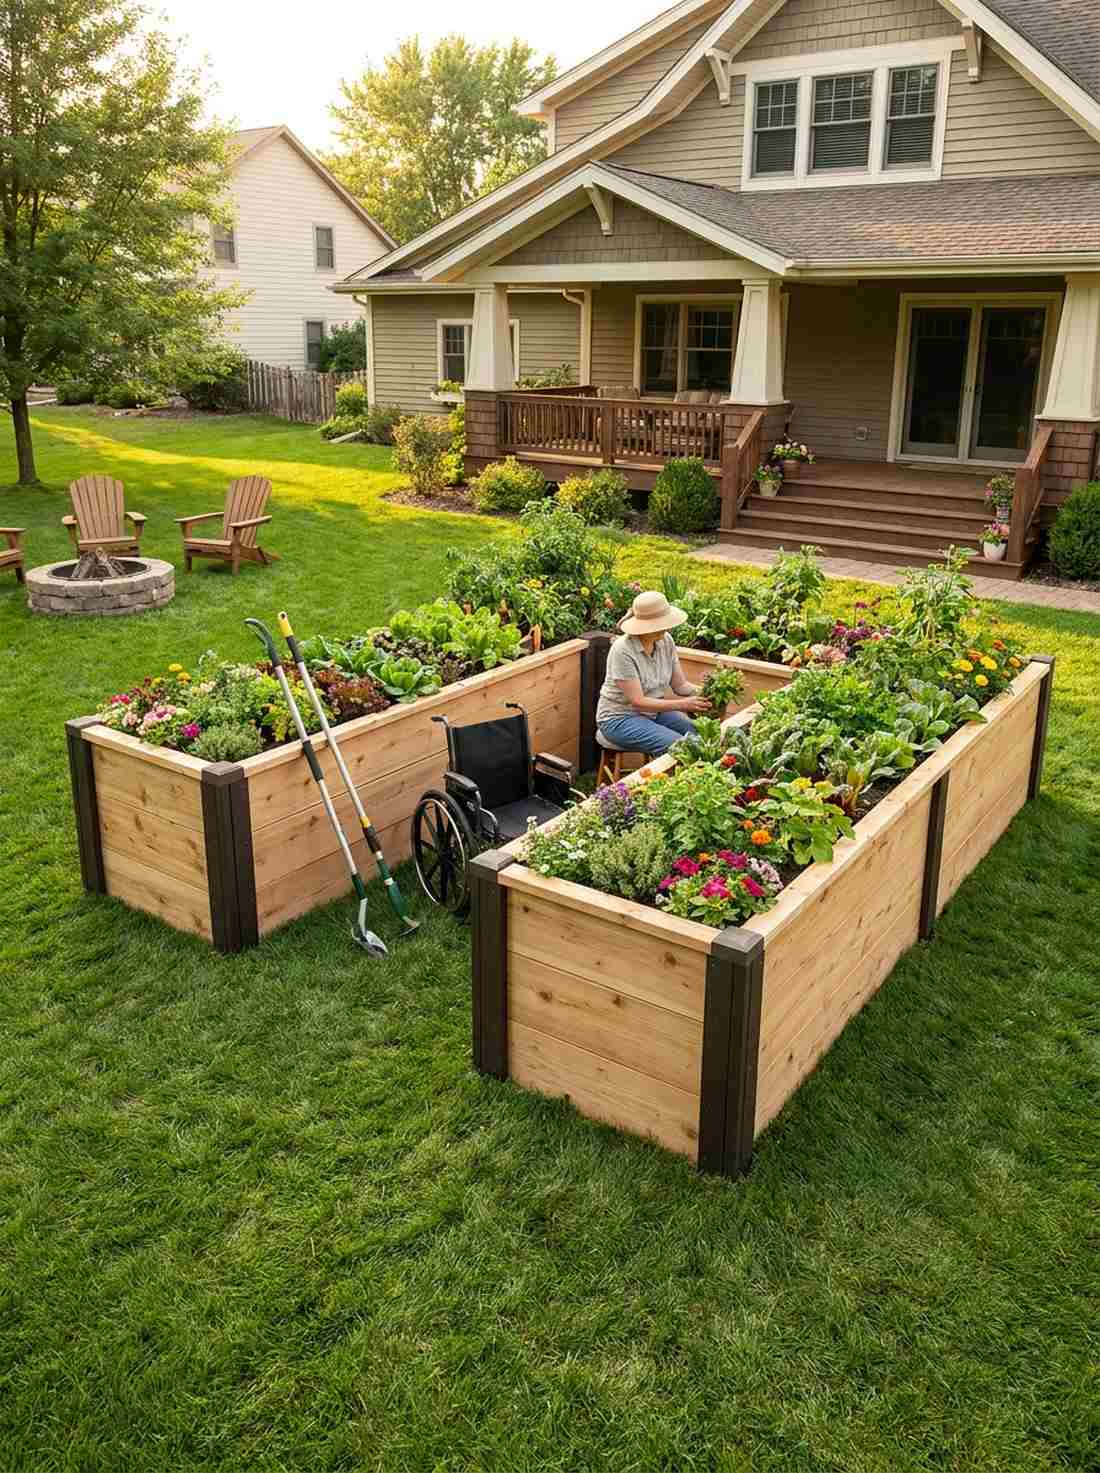
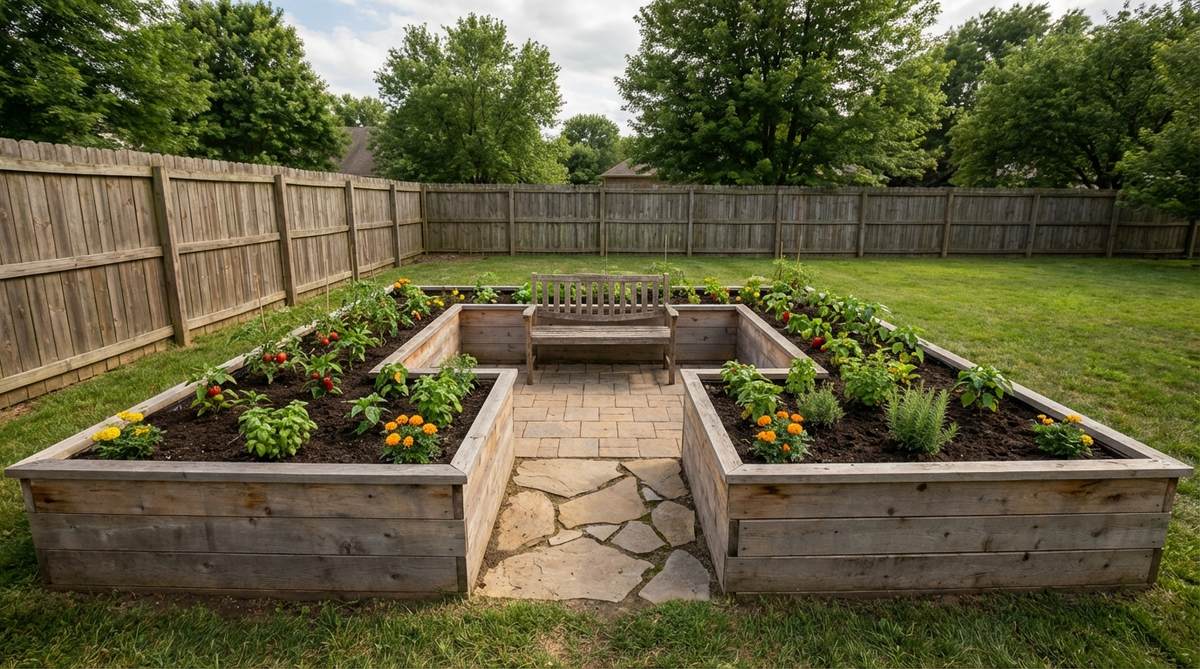
Embracing the gardener in a cocoon of greenery, this layout feels like a private, immersive outdoor room. The U-shaped accessible raised bed is the ultimate solution for wheelchair users or anyone looking to minimize walking while harvesting.
This wraparound design proves that extreme functionality can also look high-end and custom-built. Creating a three-sided work area puts every single plant within arm’s reach from a central standing or sitting position. Using pre-cut composite corner joints makes building this complex shape surprisingly easy.
The total footprint build costs roughly $120–$180. Save this genius layout if you want to eliminate back strain.
- Key Materials: High-grade lumber, heavy corner brackets
- Vibe / Style: Ergonomic immersive sanctuary
- Difficulty: Intermediate (lots of cuts and angles)
- Budget Breakdown: Wood: $110 | Hardware: $40
- Creator’s Tip: Keep the central cutout path at exactly 48 inches wide to comfortably accommodate wheelchairs or large garden carts.
- Smart Sourcing: Grab heavy-duty right-angle steel brackets (bulk pack) and ergonomic long-reach garden tool starter kits.
Most people leave dead corners in their yard empty… until they try this exact layout coming up next.
14. L-Shaped Corner Garden
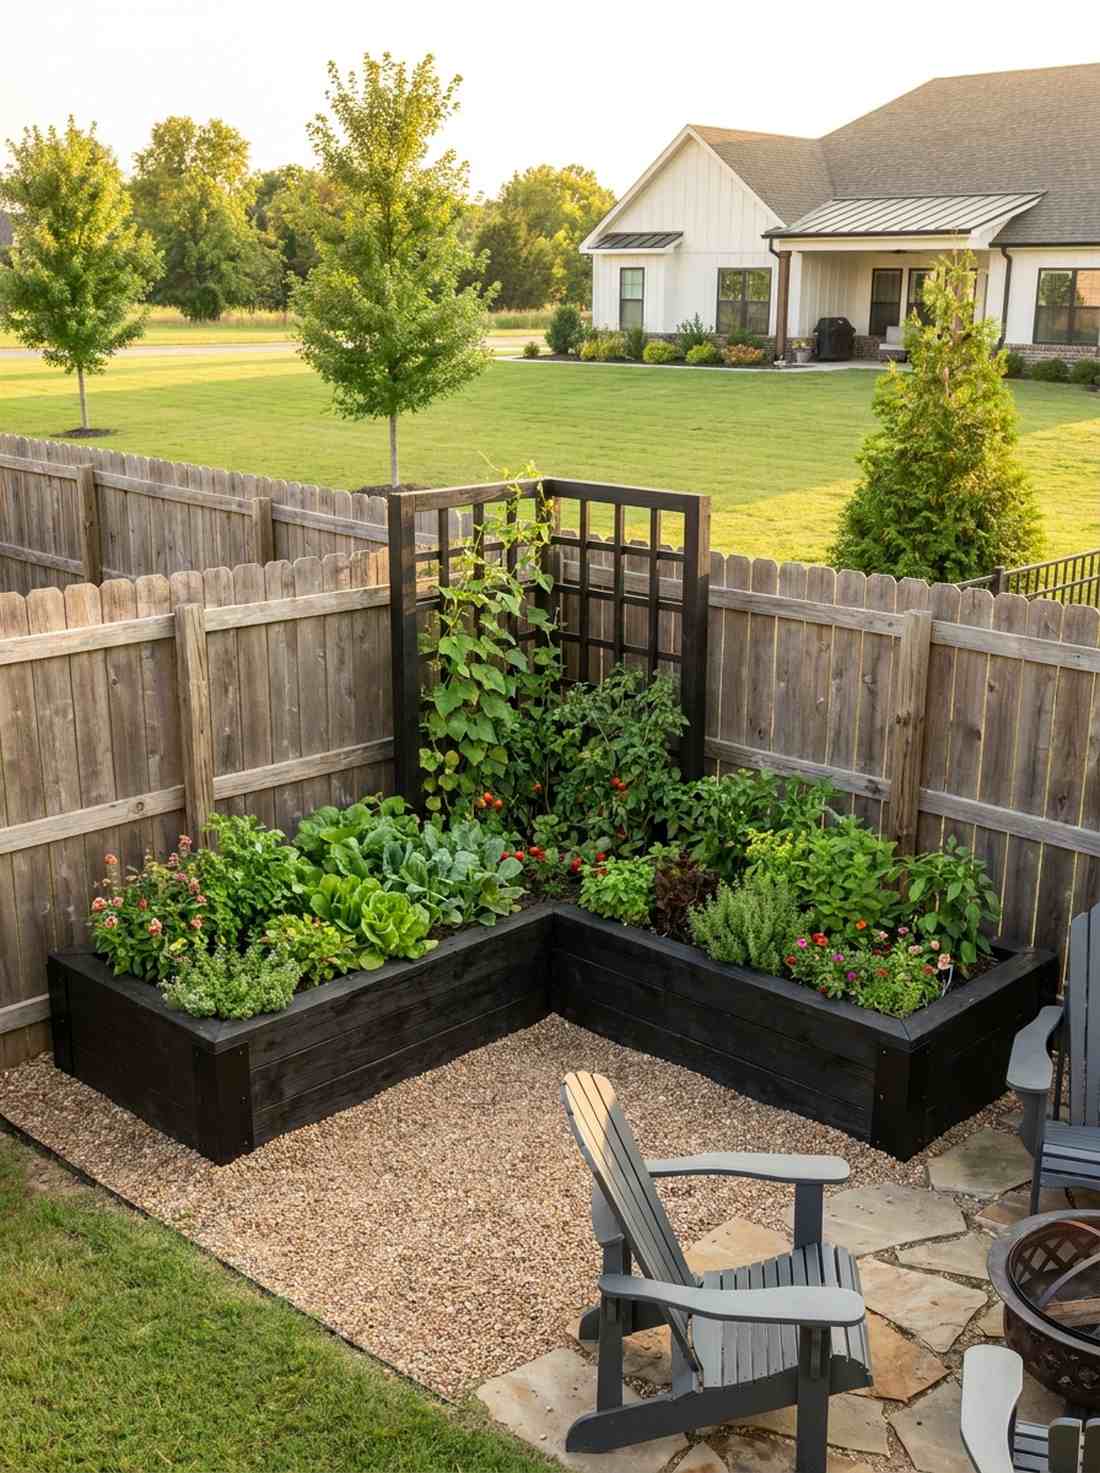
Snugging perfectly into property lines, this layout feels like a clever architectural hack that maximizes every inch of space. The L-shaped corner garden design works exceptionally well for dead zones along fences or patio edges.
Transforming a neglected, weed-filled corner into a productive L-bed gives a highly tailored, custom-fit appearance. Utilizing two perpendicular sections tied together allows for intense corner vertical planting, taking advantage of structural fences. Coating the wood with eco-friendly black timber stain provides a striking, modern contrast against green leaves.
Building this custom corner will cost around $80–$130. It’s the smartest way to reclaim lost real estate in a small yard.
- Key Materials: Framing timber, corner brace plates
- Vibe / Style: Sleek space-saving modernism
- Difficulty: Moderate
- Budget Breakdown: Timber: $80 | Braces: $20
- Creator’s Tip: Put your tallest trellis right in the inner corner elbow—it anchors the design without shading the rest of the bed.
- Smart Sourcing: Use heavy-duty flat L-bracket repair plates and non-toxic exterior black wood stain.
15. Keyhole Garden Bed
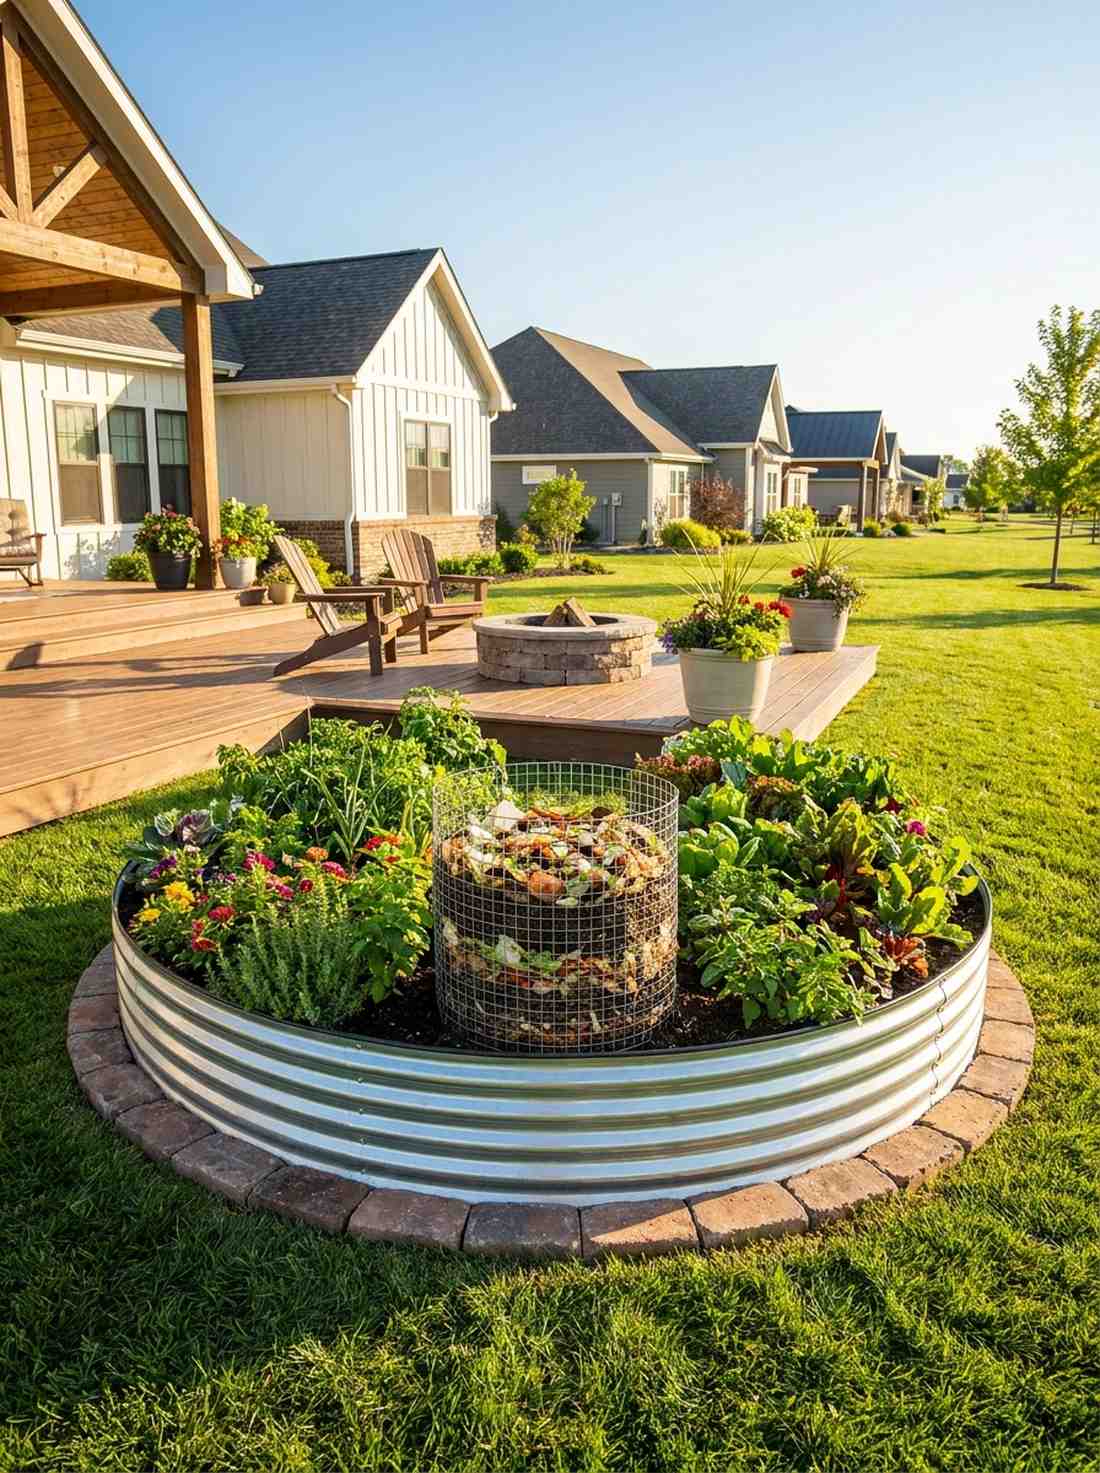
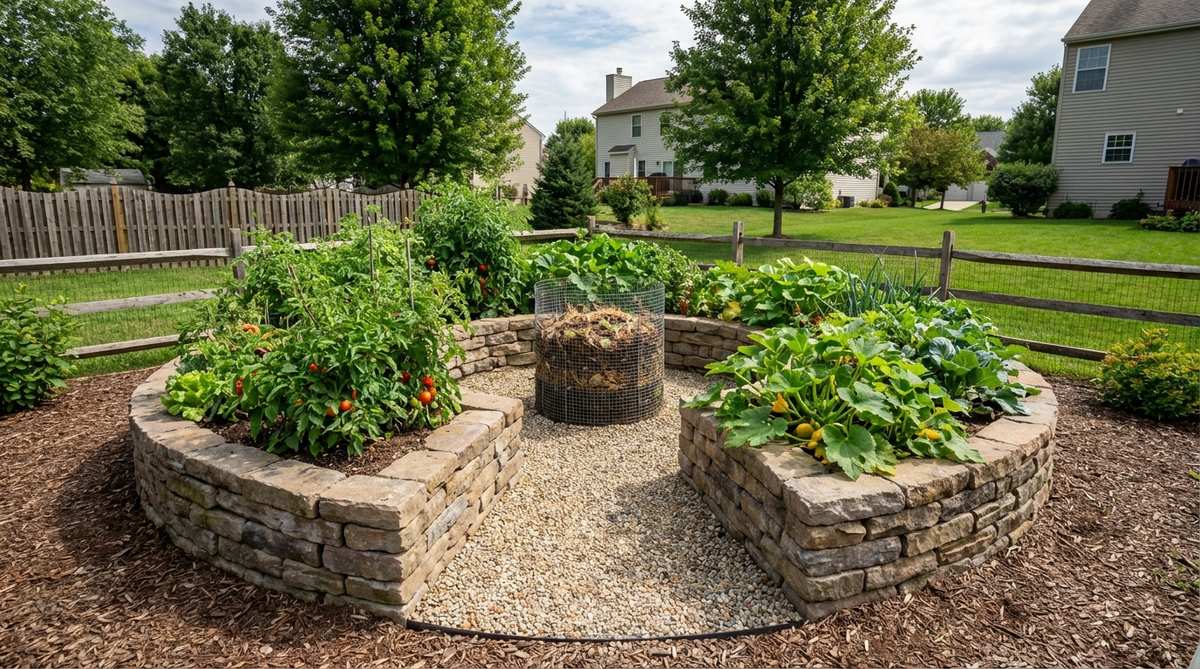
Radiating from a central hub, this layout feels like a mystical crop circle of incredible fertility. The African keyhole garden design using raised beds is a masterclass in sustainability, perfect for drought-prone climates.
This ancient layout looks like an expensive eco-resort feature, blending a compost basket directly into a circular growing area. By watering the central basket containing kitchen scraps, nutrients leach outward into the soil, feeding crops continuously. Purchasing a pre-rolled galvanized wire mesh for the center basket speeds up the build.
Constructing this eco-marvel runs roughly $90–$140. Pin this if you want to combine composting and growing into one stunning feature.
- Key Materials: Flexible metal edging, wire mesh basket, bricks
- Vibe / Style: Sustainable eco-oasis
- Difficulty: Intermediate (creating circles takes patience)
- Budget Breakdown: Edging/Stone: $100 | Wire Basket: $15
- Creator’s Tip: Layer the bottom of the entire circle with cardboard and sticks (hugelkultur style) to retain massive amounts of moisture.
- Smart Sourcing: Get rust-proof galvanized hardware cloth (wire mesh) and flexible corrugated metal landscape edging.
16. Hexagonal Honeycomb Layout
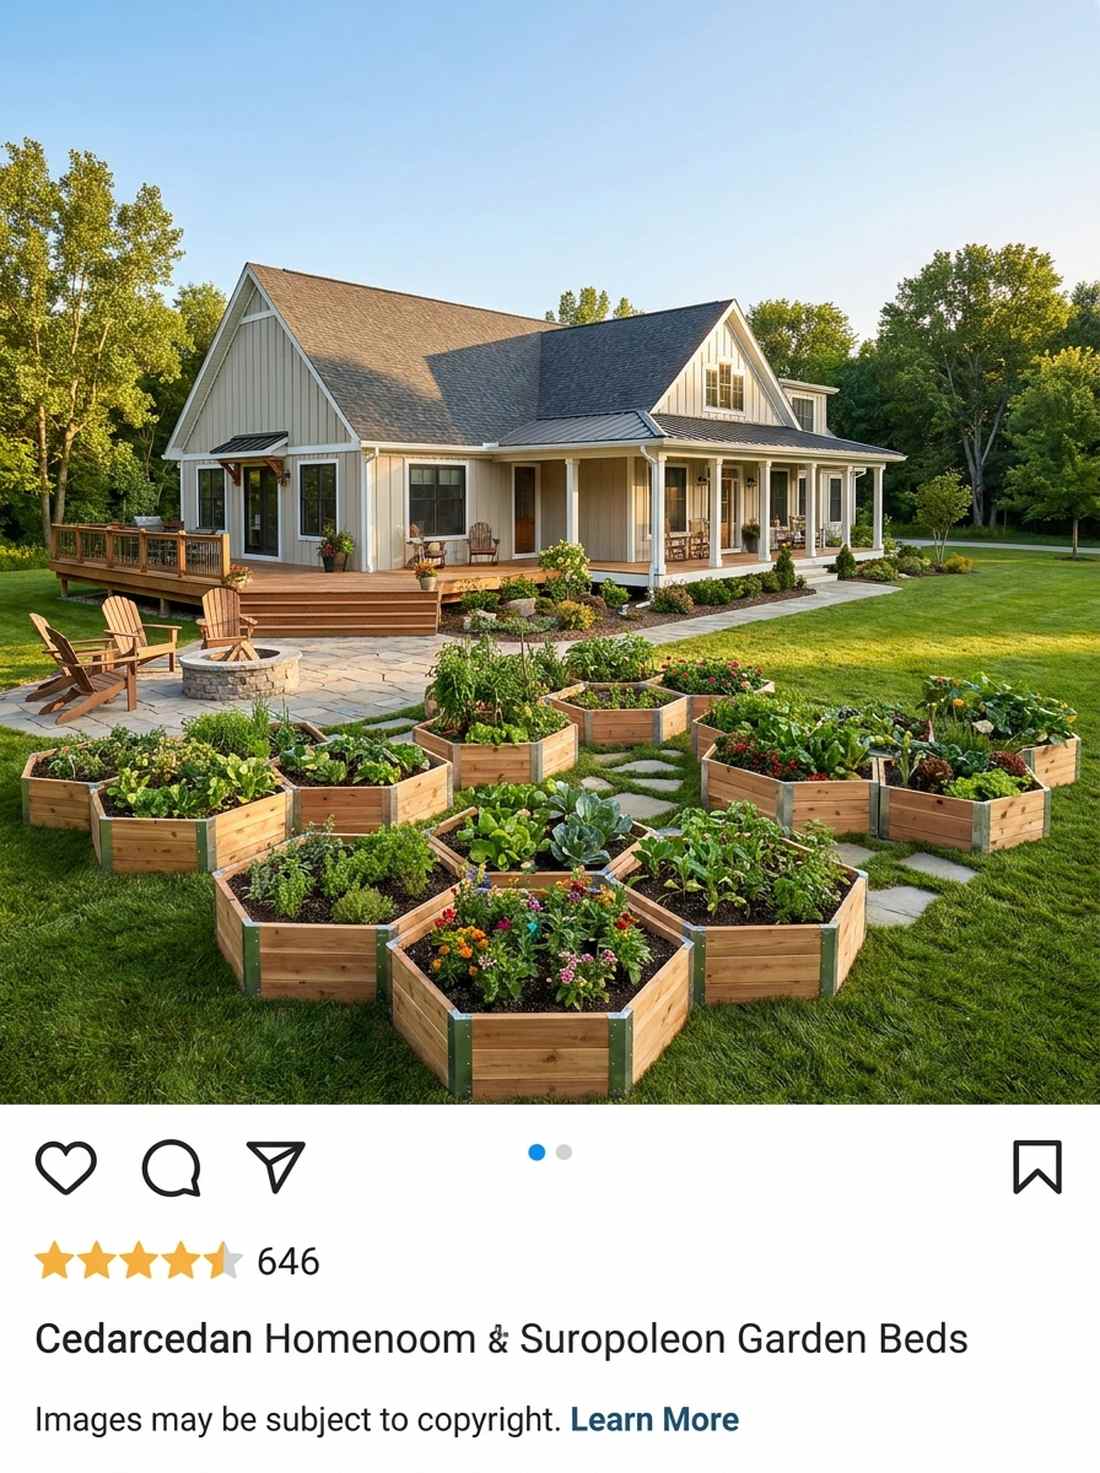
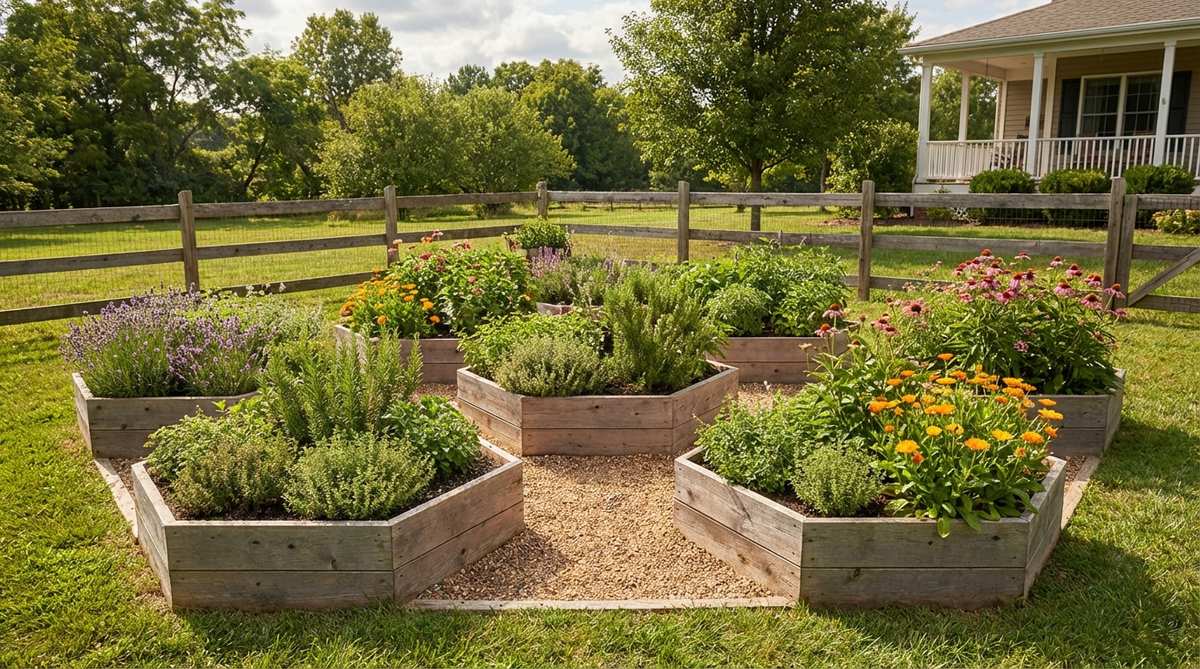
Nesting together perfectly, this layout feels like stepping inside a giant, organic beehive. The geometric honeycomb garden bed layout is a brilliant modular solution for expanding a garden over several seasons.
Moving away from squares into six-sided shapes delivers a high-end, mathematical aesthetic that mesmerizes guests. Each hexagon allows easy reach to the center while leaving minimal dead space in the pathways between connected pods. Picking up pre-cut hexagonal bracket kits eliminates the nightmare of measuring 120-degree angles.
Each pod costs around $45–$65 to build. It completely redefines how modern modular gardening should look.
- Key Materials: Short timber pieces, specialized angled brackets
- Vibe / Style: Modern geometric modular
- Difficulty: Advanced (unless using pre-made brackets)
- Budget Breakdown: Wood per pod: $30 | Angled Hardware: $25
- Creator’s Tip: Build one master hexagon template out of scrap wood to ensure every subsequent pod fits perfectly flush against it.
- Smart Sourcing: Source 120-degree pre-bent corner brackets (bulk kit) and premium cedar decking offcuts.
17. Circular Mandala Garden
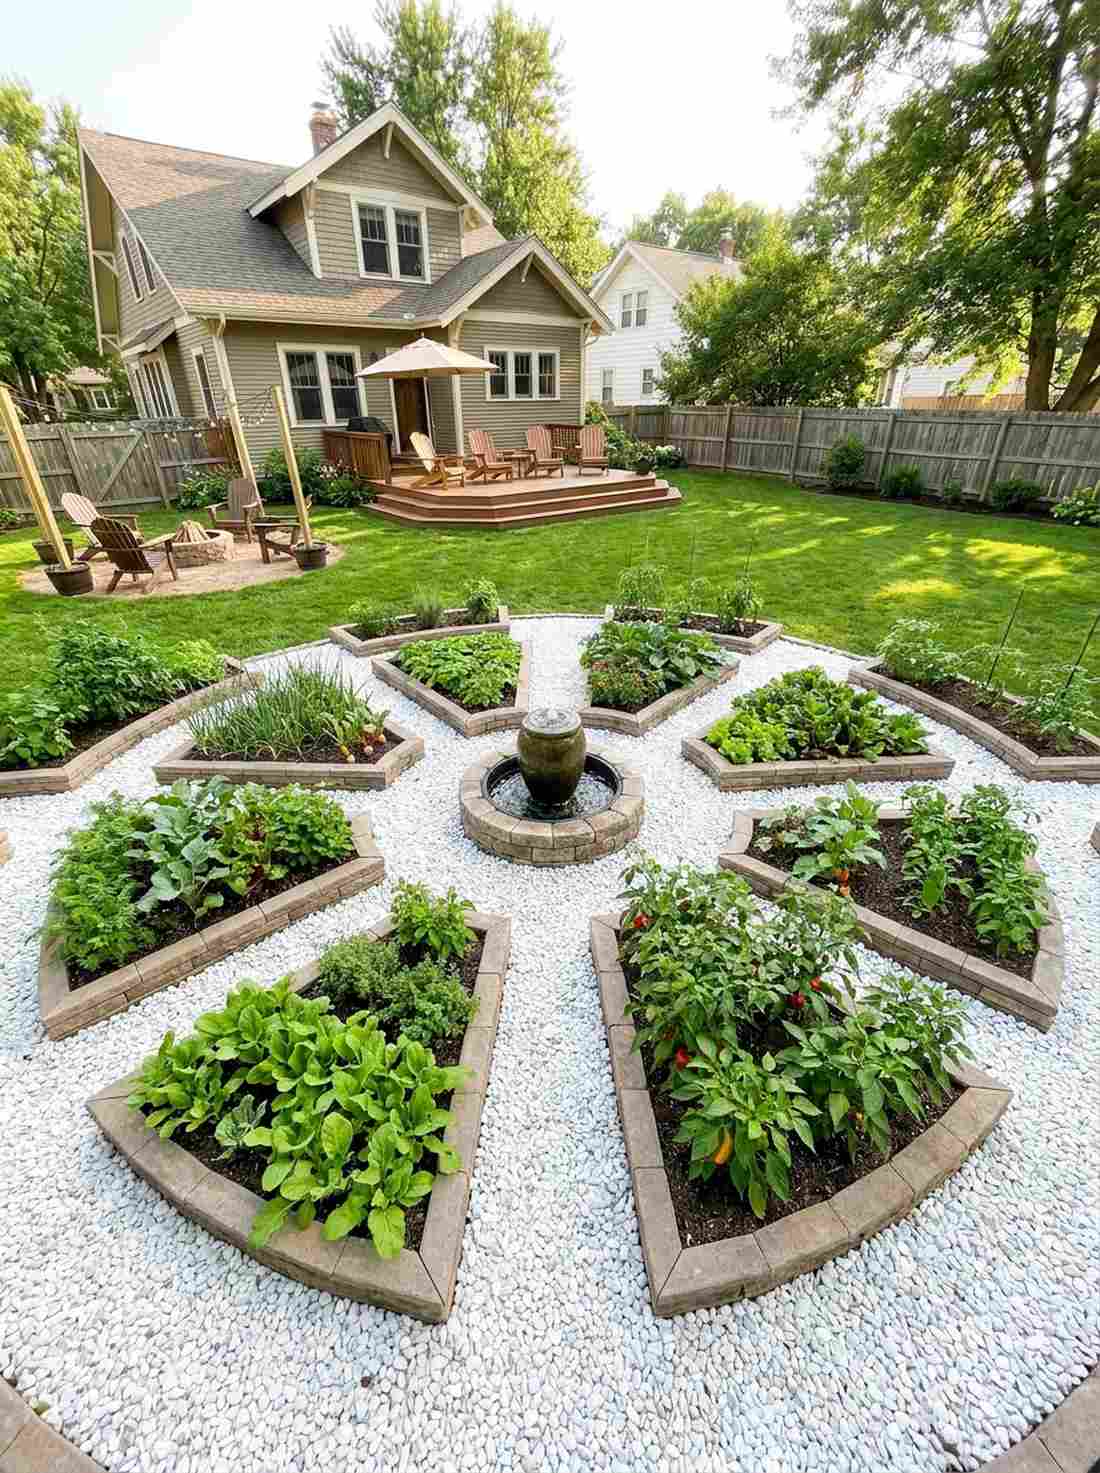
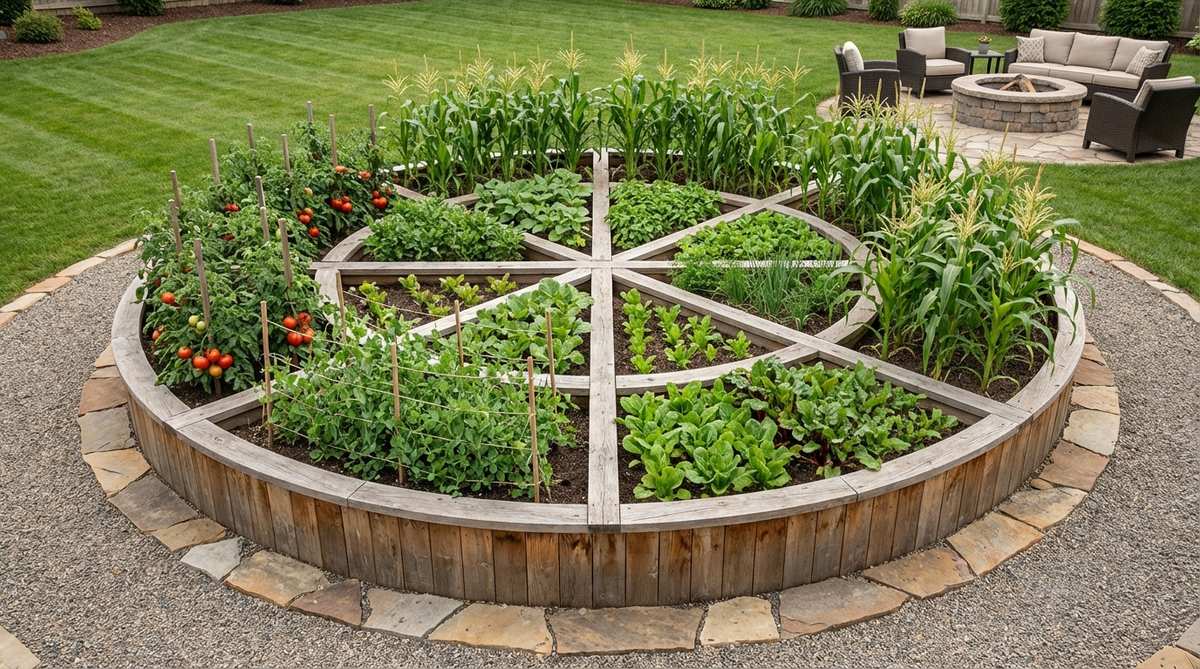
Radiating peace and organization, this garden feels like a deeply spiritual, meditative sanctuary. The circular mandala vegetable garden design raised beds work beautifully as the grand centerpiece of a large, flat backyard.
Dividing a large circle into pie-wedge sections looks incredibly sophisticated and naturally structures your crop rotation map. By placing stone edging to separate plant families, you create an intentional, artistic display rather than a chaotic patch. Applying white landscaping marble chips to the pathways makes the green wedges visually pop.
Setting up the dividers and borders costs about $150–$250. Save this if you crave extreme aesthetic organization.
- Key Materials: Curved landscape edging, path gravel, center feature
- Vibe / Style: Meditative artistic display
- Difficulty: Intermediate
- Budget Breakdown: Edging: $90 | Pathway Gravel: $80
- Creator’s Tip: Place a birdbath, fountain, or fruit tree at the exact dead center of the mandala to anchor the entire design.
- Smart Sourcing: Order heavy-duty flexible composite edging blocks and bright white premium marble landscape chips.
18. Serpentine Curved Bed


Flowing like a gentle river through the yard, this shape feels soft, organic, and incredibly soothing. The serpentine winding raised bed is the perfect design to soften the harsh straight edges of modern patio concrete.
While everyone builds rigid boxes, bending your borders into an ‘S’ shape gives a luxury, landscape-architect vibe. The sweeping curves naturally create micro-pockets of sun and shade, ideal for tucking in ornamental flowers alongside veggies. Utilizing bendable corten steel edging guarantees a flawless, rust-patina curve that won’t snap.
This flowing layout runs about $100–$180 depending on the steel used. A must-have for a highly ornamental food space.
- Key Materials: Flexible steel or composite edging, stakes
- Vibe / Style: Organic flowing landscape
- Difficulty: Moderate
- Budget Breakdown: Corten Steel: $120 | Stakes: $20
- Creator’s Tip: Lay out the curve with a garden hose first, stand back to check the flow, then spray paint the line before digging.
- Smart Sourcing: Grab weathering corten steel flexible garden edging kits and heavy-duty marking spray paint.
You can spend thousands on pest control, or you can use the wildly effective layout trick coming up next…
Companion Planting Layouts That Boost Garden Health
Strategic plant pairings reduce pests, improve pollination, and increase yields. Combining smart garden design for raised beds with companion science creates self-sustaining mini-ecosystems.
19. Tomato-Basil-Marigold Triangle
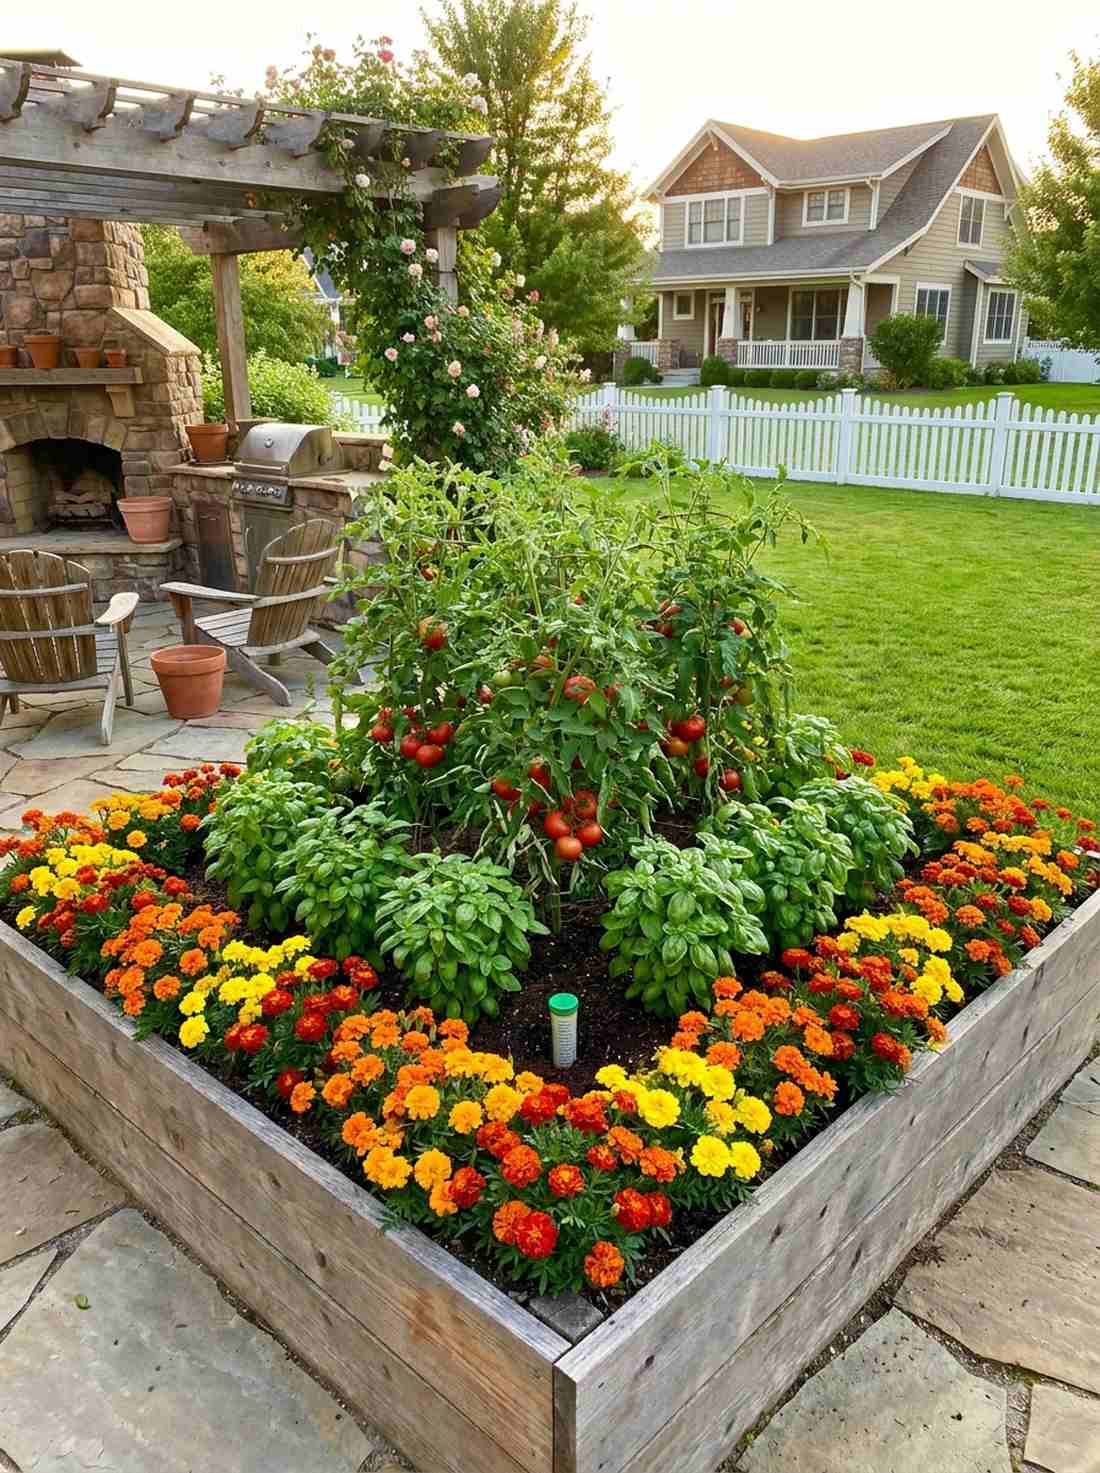
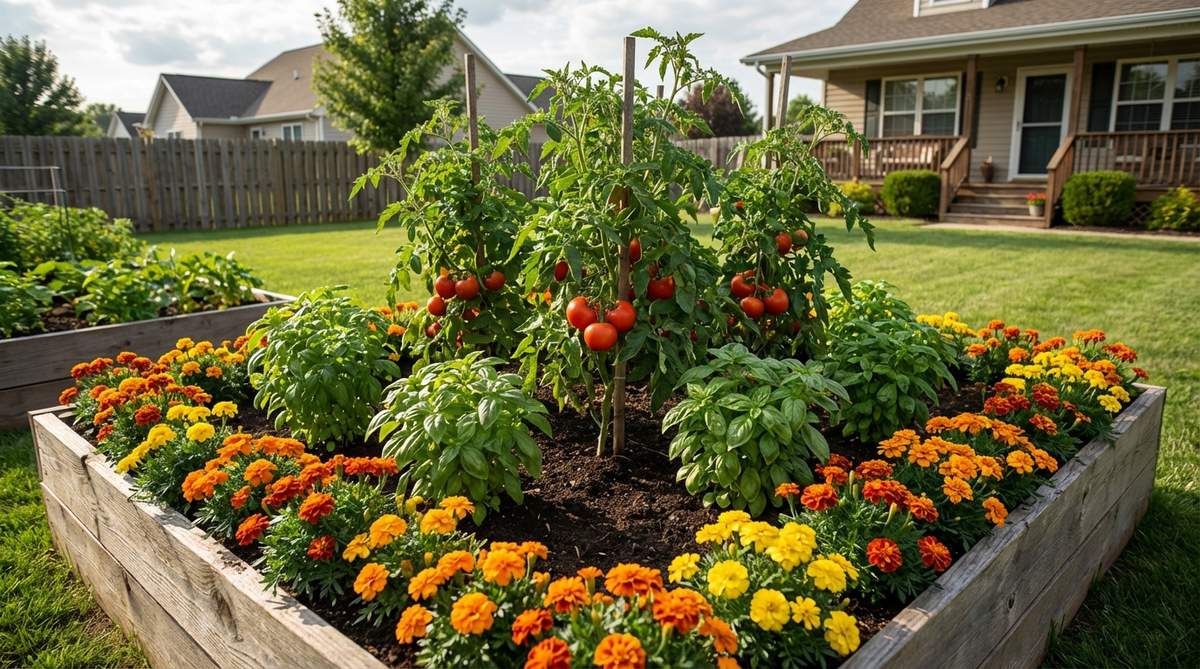
Bursting with scent and color, this combination feels like a lush Italian villa courtyard. The classic companion planting raised bed is absolutely mandatory for anyone wanting massive, pest-free tomato yields in a small space.
This layout looks incredibly intentional and vibrant, banishing the messy look of a standard vegetable patch. Placing tomatoes at the center, guarded by a ring of basil and a border of neon marigolds, confuses hornworms and repels aphids natively. Using a premium slow-release organic fertilizer spike ensures all three layers feed without competing.
Seed and start costs are a mere $15–$25. Pin this layout to your summer gardening tips board immediately!
- Key Materials: Plant starts, rich compost
- Vibe / Style: Vibrant Tuscan potager
- Difficulty: Easy
- Budget Breakdown: Plant Starts: $20 | Fertilizer: $5
- Creator’s Tip: Plant the marigolds heavily on the outer edge; their root exudates kill harmful soil nematodes before they reach the tomatoes.
- Smart Sourcing: Get organic slow-release tomato fertilizer spikes and heirloom French marigold seed bulk packs.
20. Carrot-Onion Interplanting
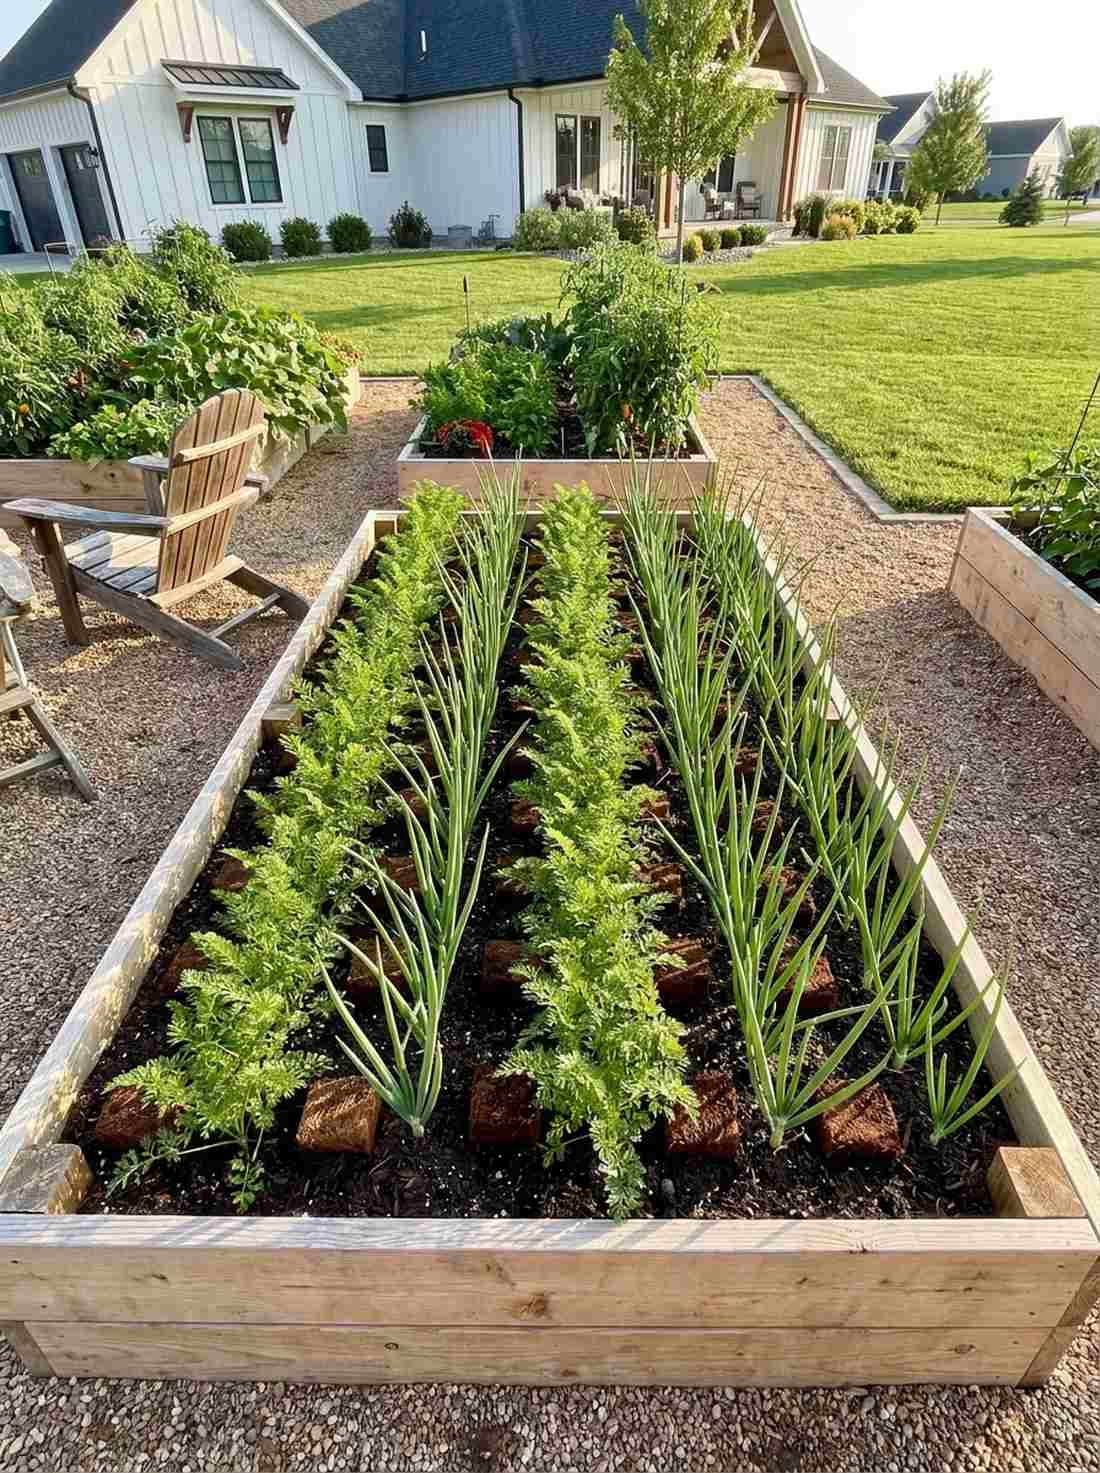
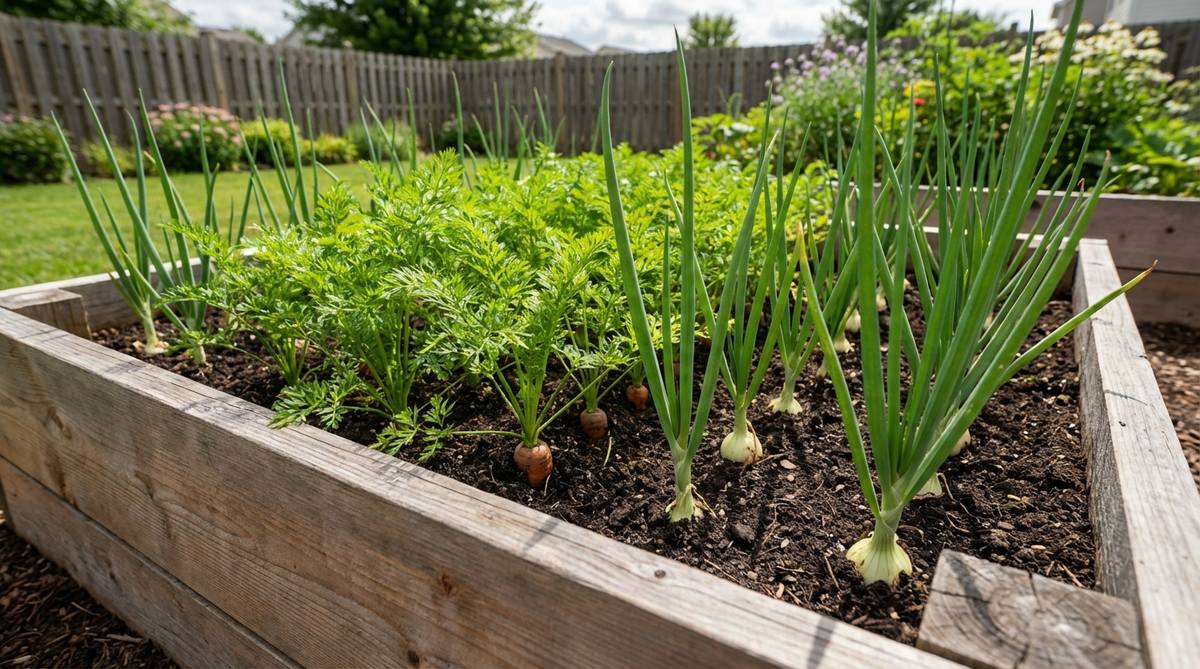
Showcasing tight, disciplined lines of green, this setup feels incredibly sharp and space-efficient. The root crop interplanting layout is an ingenious use-case for shallow rectangular beds where maximizing output is critical.
Many gardeners suffer from root maggots, but alternating rows of carrots and onions creates an invisible chemical shield that pests hate. The strong allium scent masks the sweet carrot tops, and their differing root depths mean they never fight for space. Adding fluffy coconut coir blocks to the soil guarantees perfectly straight, competition-quality carrots.
Seed costs for this protective grid are around $10–$15. It’s the smartest way to double your harvest in a 3×6 bed.
- Key Materials: Onion sets, pelleted carrot seeds
- Vibe / Style: Dense high-yield utility
- Difficulty: Easy
- Budget Breakdown: Seeds/Sets: $12 | Soil Amendment: $15
- Creator’s Tip: Use pelleted carrot seeds; they are much easier to space out perfectly between the onion bulbs.
- Smart Sourcing: Source expanded coconut coir brick starter packs and precision seed sowing syringe tools.
21. Pest-Confusing Polyculture Bed
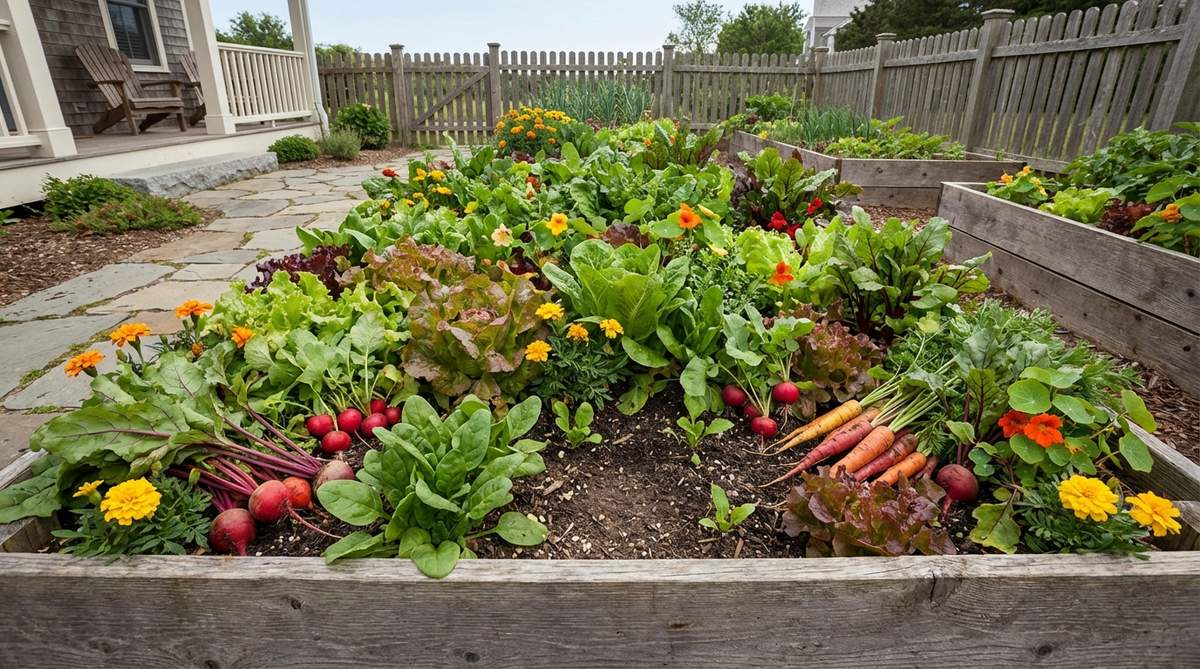
Resembling a wild, untamed meadow, this dense planting style feels like Mother Nature took over in the best way possible. The high-density polyculture raised bed works wonders for gardeners who want to ditch chemical pesticides entirely.
Throwing out row planting for a “chaotic” mix actually provides a wildly sophisticated, disease-resistant ecosystem. By blending radishes, spinach, and flowers indiscriminately, specialist insects literally cannot find their host plants through the visual noise. Sprinkling beneficial nematode predator packets into the soil makes this bed completely bulletproof.
This wild living mulch costs about $20–$30 to seed. Save this to your organic gardening board for a pesticide-free summer.
- Key Materials: Mixed seed shaker, compost
- Vibe / Style: Wild chaotic abundance
- Difficulty: Easy (just scatter and water)
- Budget Breakdown: Mixed Seeds: $20 | Soil Prep: $10
- Creator’s Tip: Harvest by “thinning” the largest plants out of the chaos, creating light gaps for the younger plants to surge.
- Smart Sourcing: Order live beneficial nematode garden protectors and mixed culinary herb and flower seed shakers.
22. Nitrogen-Fixing Bean Partnership
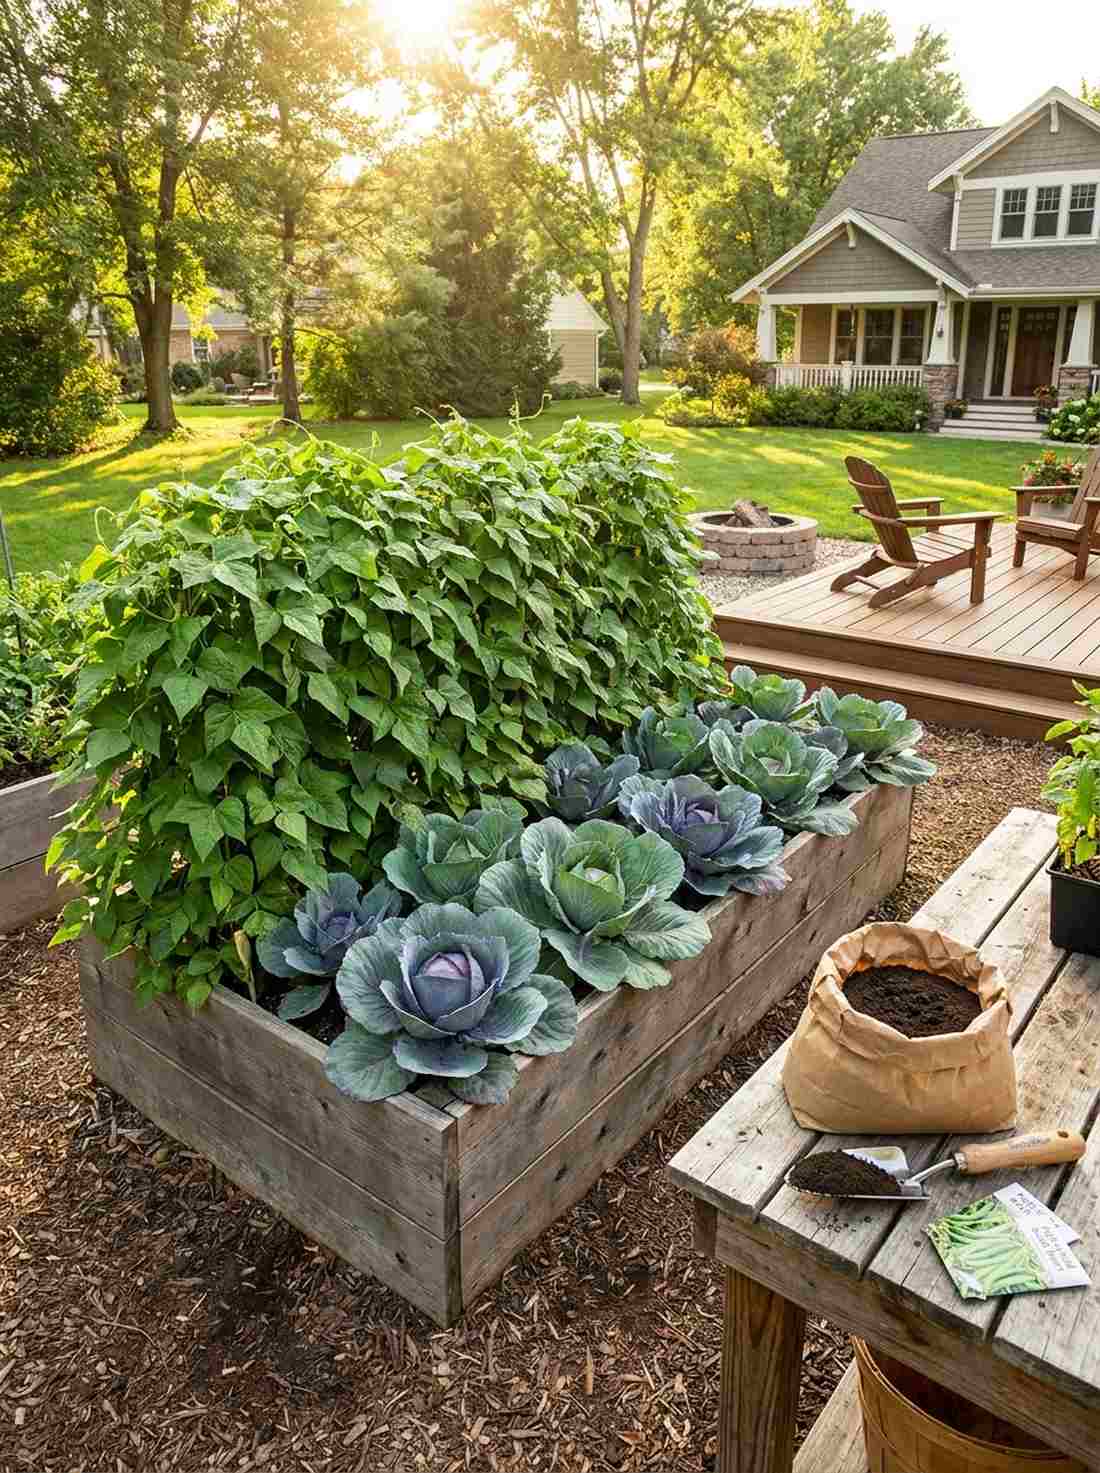
Creating a towering wall of green next to heavy-feeding cabbages, this layout feels like a perfectly balanced biological machine. The nitrogen-fixing companion bed layout is ideal for intensive vegetable garden design raised beds that get depleted quickly.
Fertilizer costs add up, but planting bush beans next to nitrogen-hungry brassicas hacks the soil chemistry for free. The beans pull nitrogen from the air and lock it into the soil, feeding the neighboring crops organically and saving you money. Mixing in an organic rhizobia legume inoculant powder supercharges this root process tenfold.
Seed and inoculant costs are only $15–$25. A brilliant biological hack for sustainable growing.
- Key Materials: Legume seeds, heavy feeder plants
- Vibe / Style: Scientific biological synergy
- Difficulty: Moderate (requires root inoculant)
- Budget Breakdown: Seeds: $15 | Inoculant: $10
- Creator’s Tip: Never pull the beans up by the roots at the end of the season; cut them at the base so the nitrogen nodules stay in the soil.
- Smart Sourcing: Use organic legume root inoculant powder and high-yield bush bean seed collections.
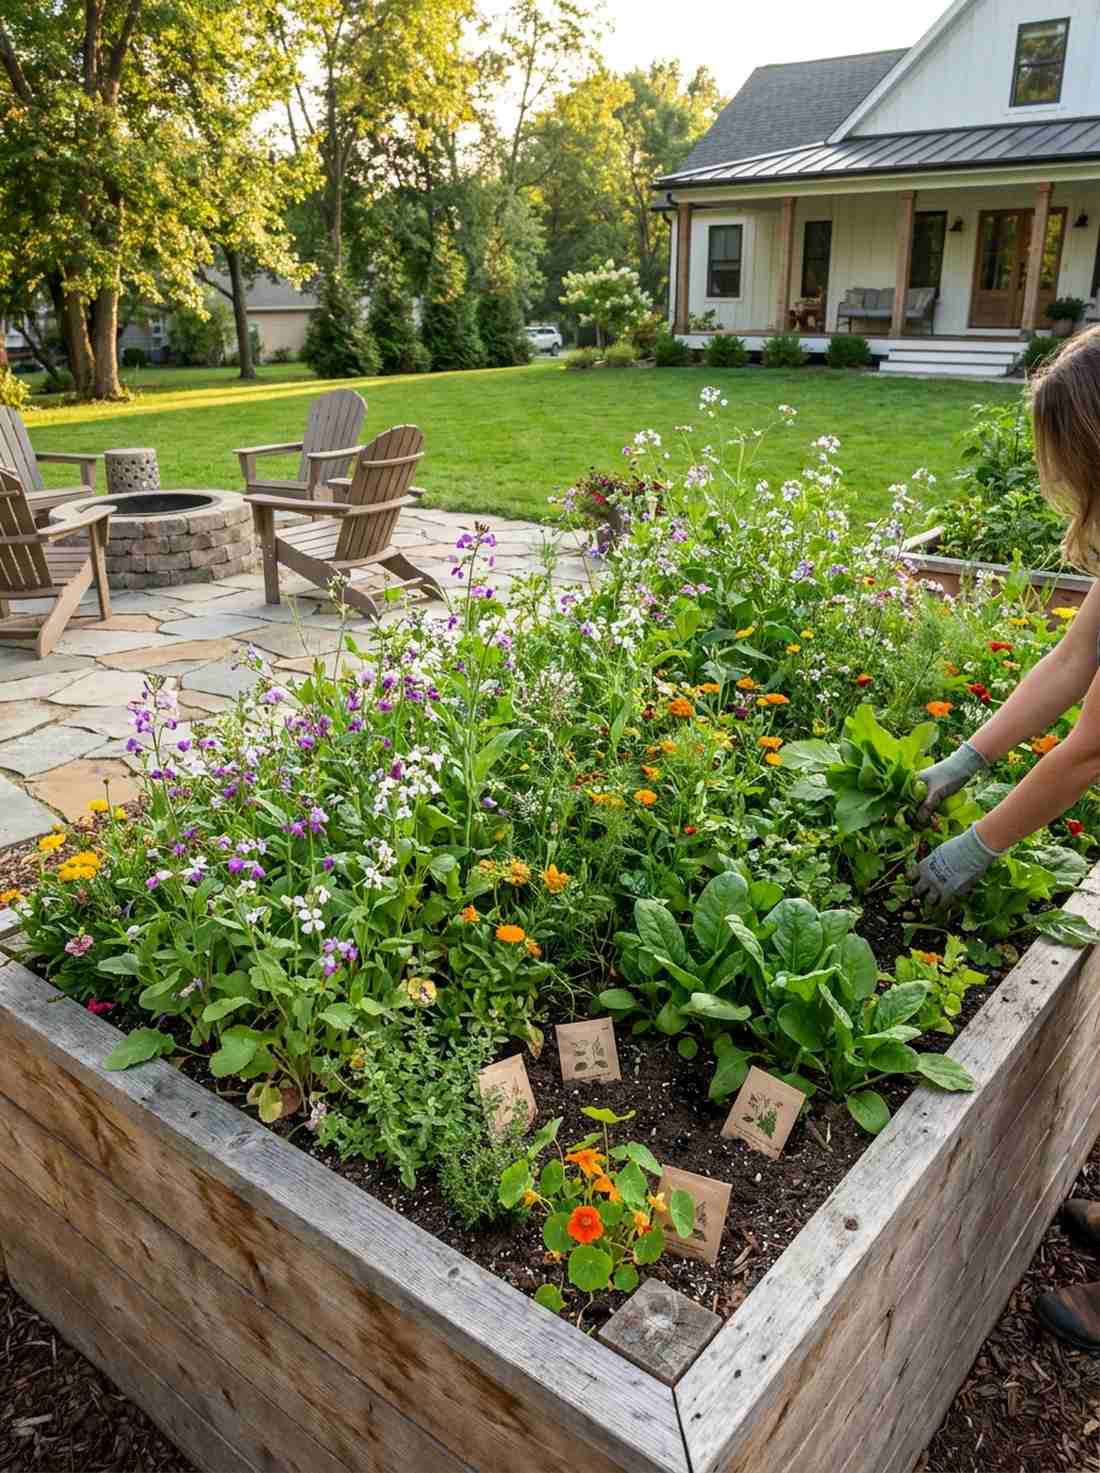
23. Pollinator-Attracting Edge Planting
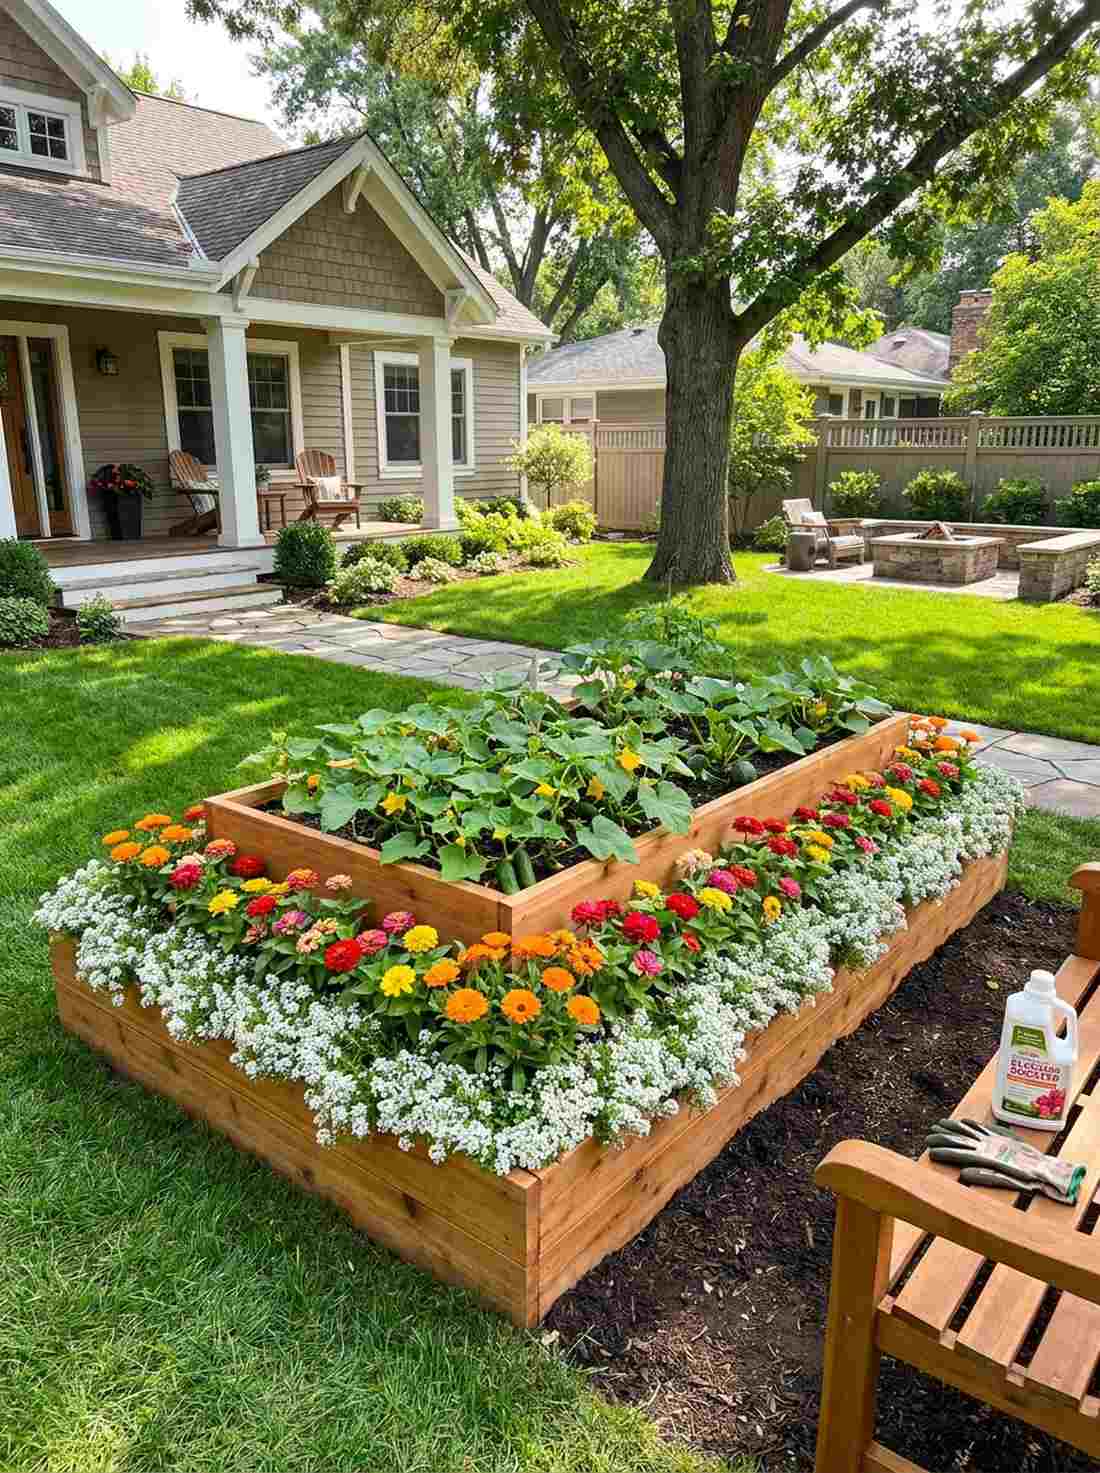
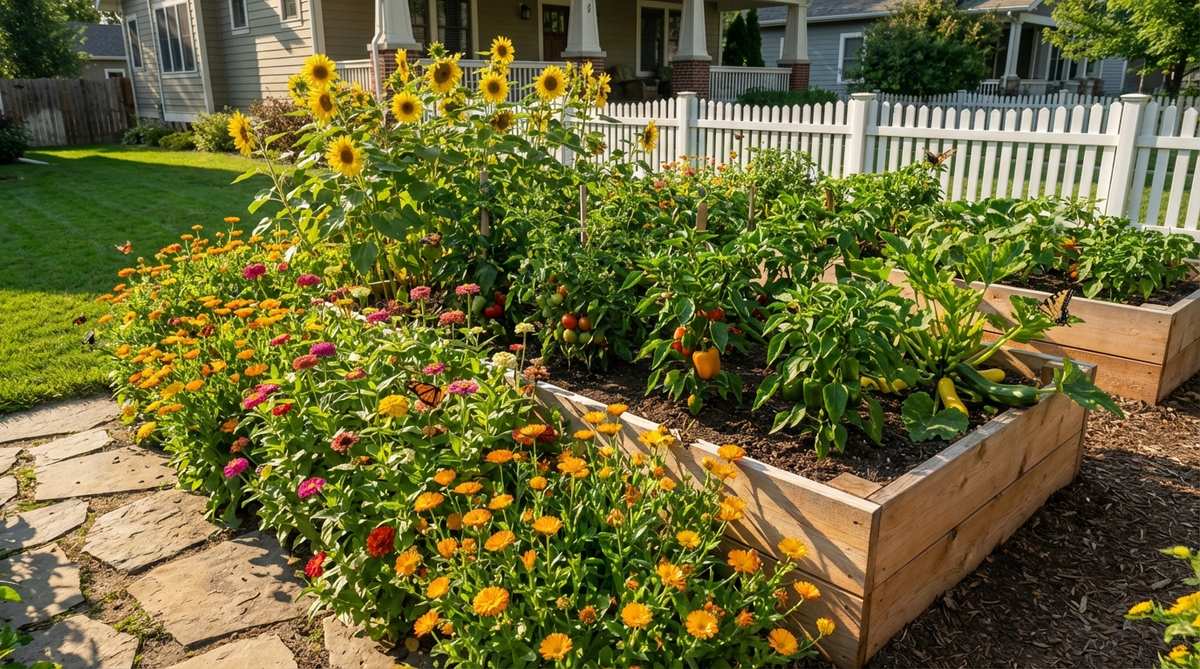
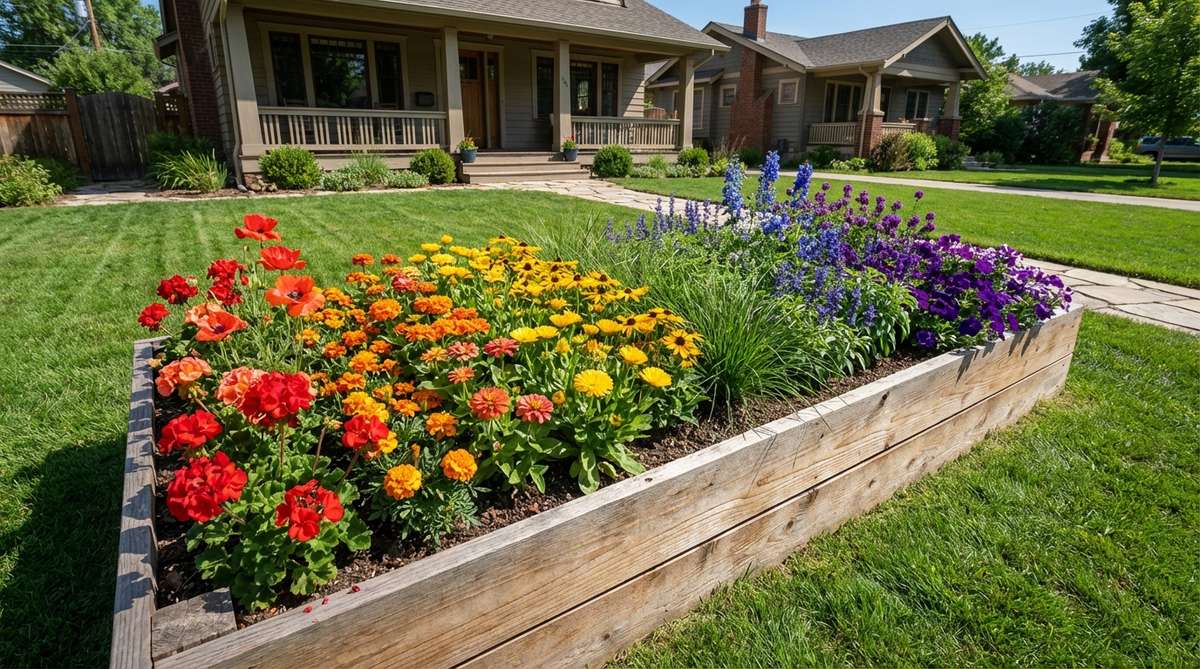
Framed with a brilliant halo of blossoms, this setup feels like a vibrant fireworks display wrapping around your veggies. A pollinator border raised bed design is the absolute perfect use-case for front yard gardens where HOA aesthetics matter.
Wrapping a boring vegetable box in continuous blooming annuals elevates the entire yard into a designer landscape. Including calendula, zinnias, and alyssum guarantees a massive influx of bees, which passively doubles the fruit set on your cucumbers and squash. Sourcing pre-mixed pollinator wildflower seed mats makes installing the border take five seconds.
This stunning visual edge costs about $20–$35. Pin this layout to guarantee your yard hums with life all season.
- Key Materials: Flower seeds/mats, border soil
- Vibe / Style: Colorful ornamental food-scape
- Difficulty: Easy
- Budget Breakdown: Seed Mats: $25
- Creator’s Tip: Use white sweet alyssum right at the very front edge—it spills over the wood beautifully and attracts tiny parasitic wasps that eat aphids.
- Smart Sourcing: Grab biodegradable pollinator wildflower seed mats and premium organic blossom booster liquid fertilizer.
24. Herb Spiral Garden
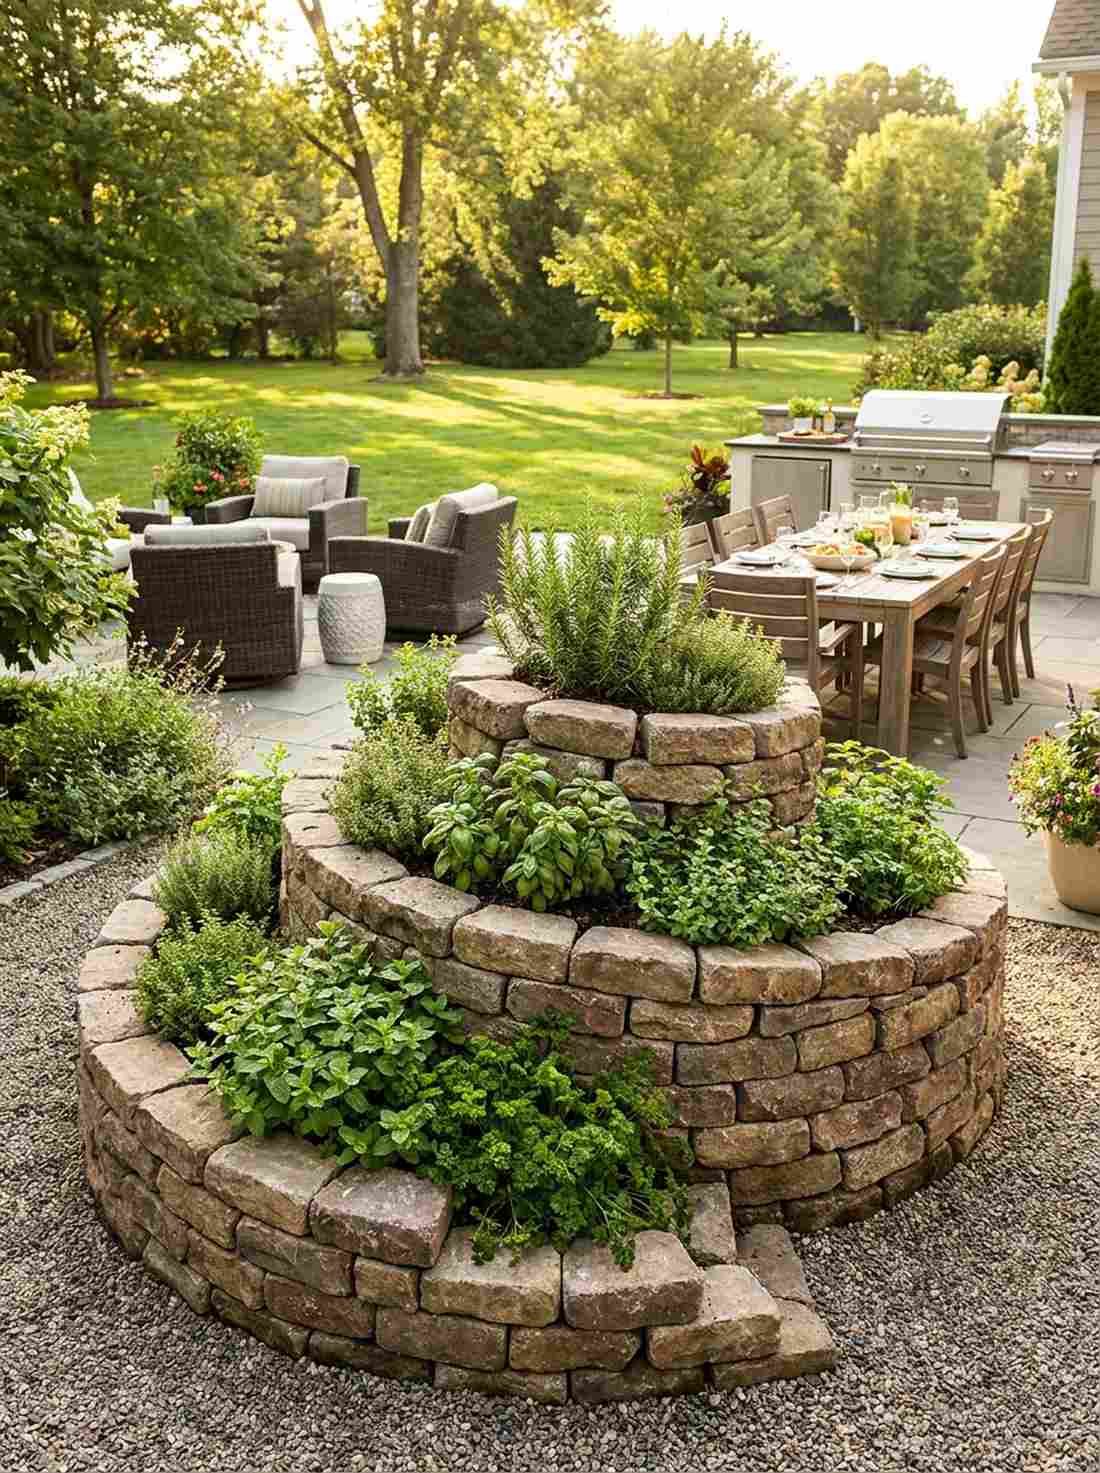
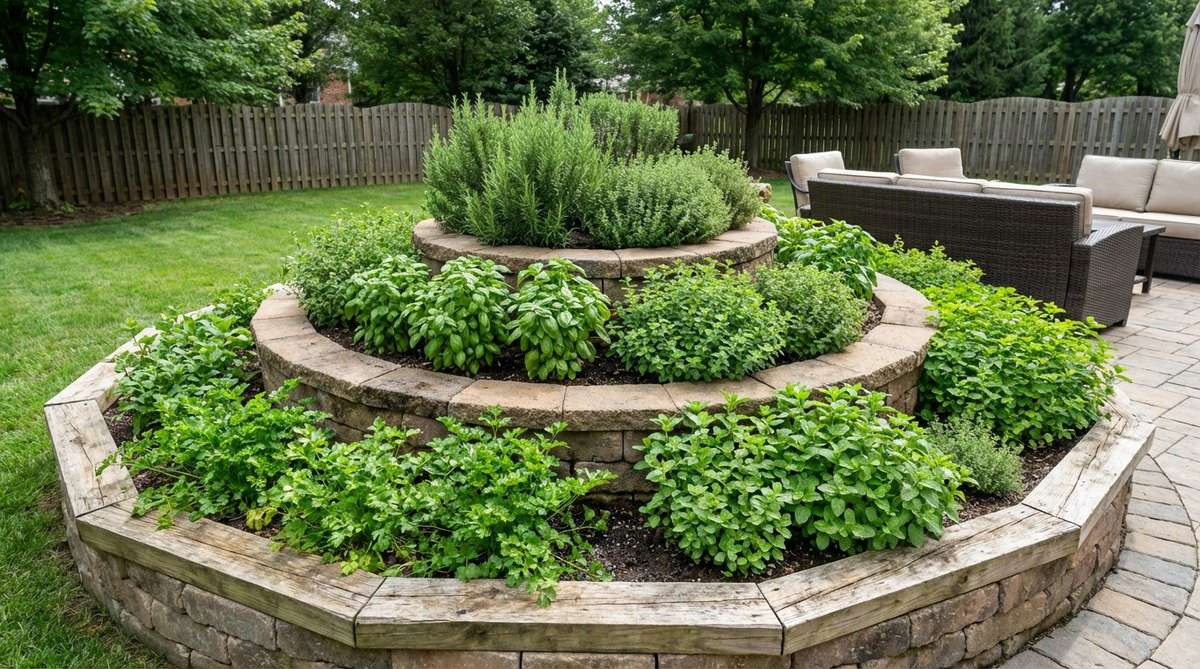
Winding upward like a miniature green mountain, this sculptural piece feels like an ancient, mystical garden artifact. The 3D herb spiral garden design is the ultimate space-saving centerpiece for a patio or culinary space.
Most herb gardens are flat and boring, but a vertical stone spiral creates multiple micro-climates in a 5-foot footprint. The hot, dry peak is perfect for rosemary, while water drains down to keep the base moist for thirsty mint and parsley. Stacking rustic tumbled retaining wall stones gives it an authentic, centuries-old appearance.
Building this stunning stone feature costs $60–$120. It’s the most gorgeous way to grow 20 different herbs in one spot.
- Key Materials: Stone blocks, sandy soil, rich compost
- Vibe / Style: Ancient sculptural kitchen garden
- Difficulty: Intermediate
- Budget Breakdown: Stone: $70 | Soil Mixes: $30
- Creator’s Tip: Fill the core of the mound with construction rubble or broken bricks to save money on soil and improve internal drainage.
- Smart Sourcing: Source tumbled landscape retaining wall bricks and perlite drainage soil amendment bulk bags.
Material Guide: Cheap vs. Premium Aesthetic
Knowing exactly where to save and where to spend makes all the difference in achieving that “looks expensive but isn’t” garden vibe.
- Standard Wood vs. Premium Cedar: Untreated pine rots in 3 years. Cedar costs double upfront but lasts 15 years, saving massive labor and money over time.
- Pre-made Kits vs. Sourcing Locally: While buying raw lumber seems cheaper, pre-cut galvanized steel corner brackets save hours of frustrating geometry and give a much cleaner, professional finish.
Decorative Flower-Focused Designs For Cut Flowers And Beauty
Raised beds aren’t just for vegetables. Combining garden design ideas raised beds with cut flowers creates a beautiful potager-style yard with immense curb appeal.
25. Cut-Flower Production Row
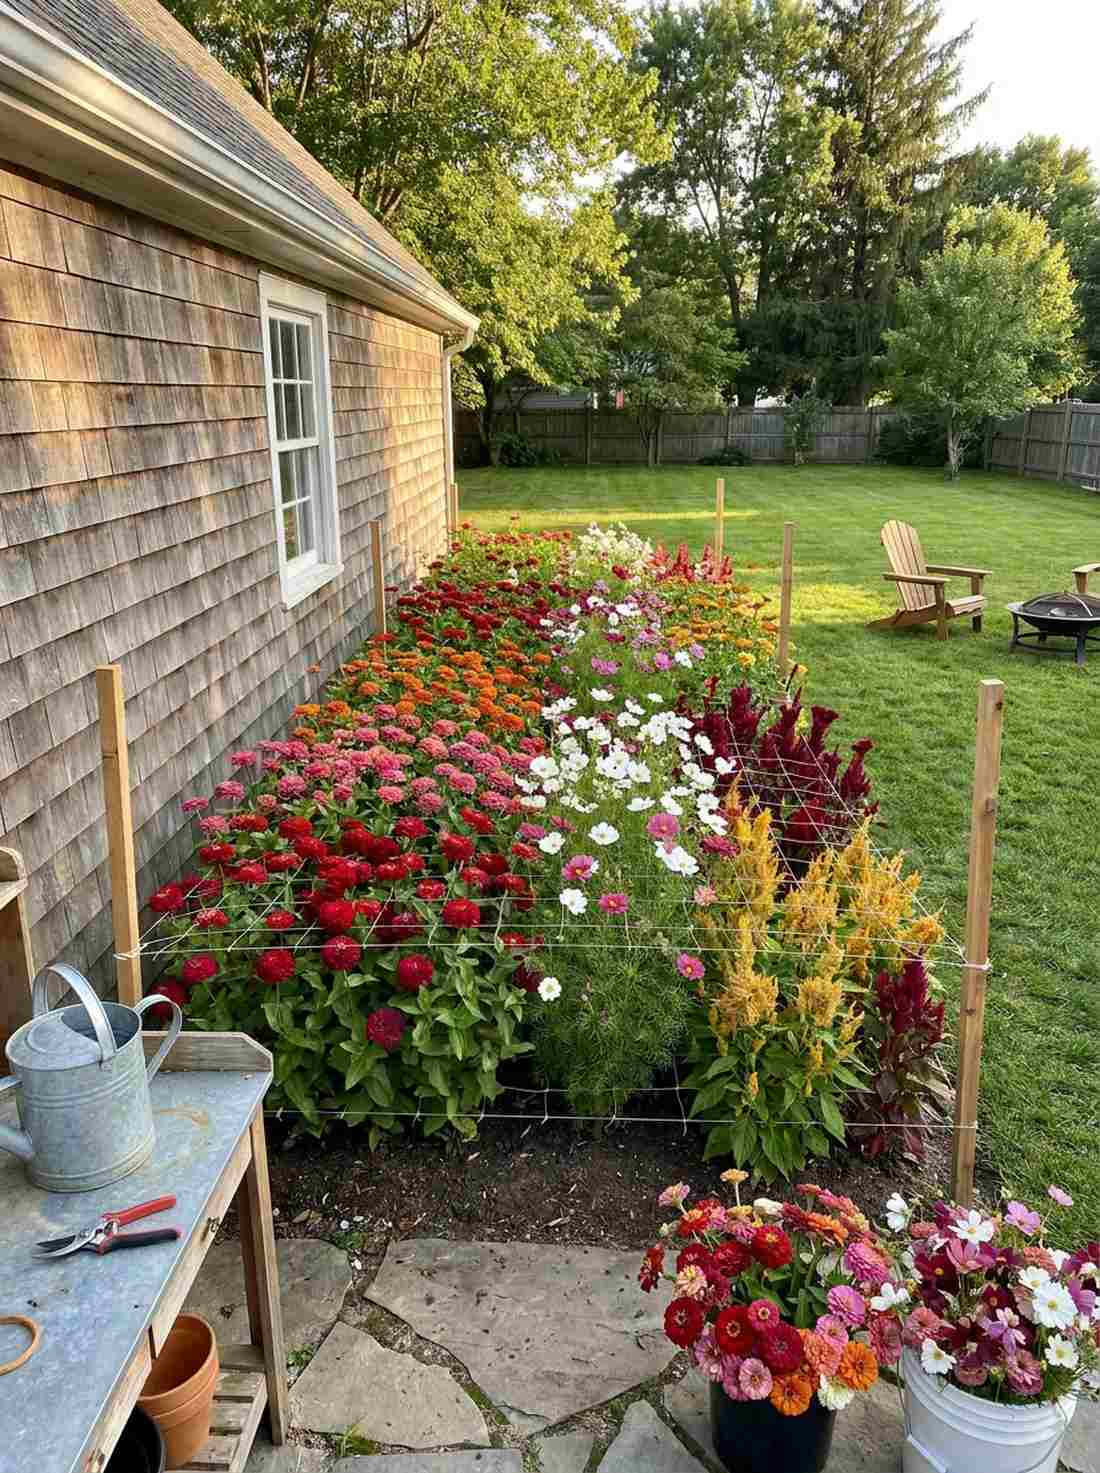
Looking like a miniature commercial floral farm, this layout feels vibrant, dense, and hyper-productive. The cut-and-come-again flower bed works perfectly along a sunny garage wall where you want maximum blooms for indoor vases.
Ditching ornamental spacing and packing zinnias, cosmos, and celosia in tight grids yields a shocking amount of high-end bouquets. By grouping flowers in solid color blocks rather than chaotic mixes, the bed maintains a clean, utilitarian aesthetic that looks professional. Securing a horizontal floral support netting kit prevents heavy blooms from snapping in summer storms.
Seed and netting costs for this bloom factory are roughly $20–$40. Pin this if you want fresh indoor flowers every single day.
- Key Materials: Cut flower seed packets, support netting
- Vibe / Style: Commercial floral farm
- Difficulty: Easy
- Budget Breakdown: Seeds: $20 | Netting/Stakes: $15
- Creator’s Tip: Pinch the center stem of zinnias and snapdragons when they are 8 inches tall to force them to branch out and produce 4x the blooms.
- Smart Sourcing: Use horizontal heavy-duty floral support netting and bulk professional cut flower seed mixes.
26. Rainbow Gradient Bed
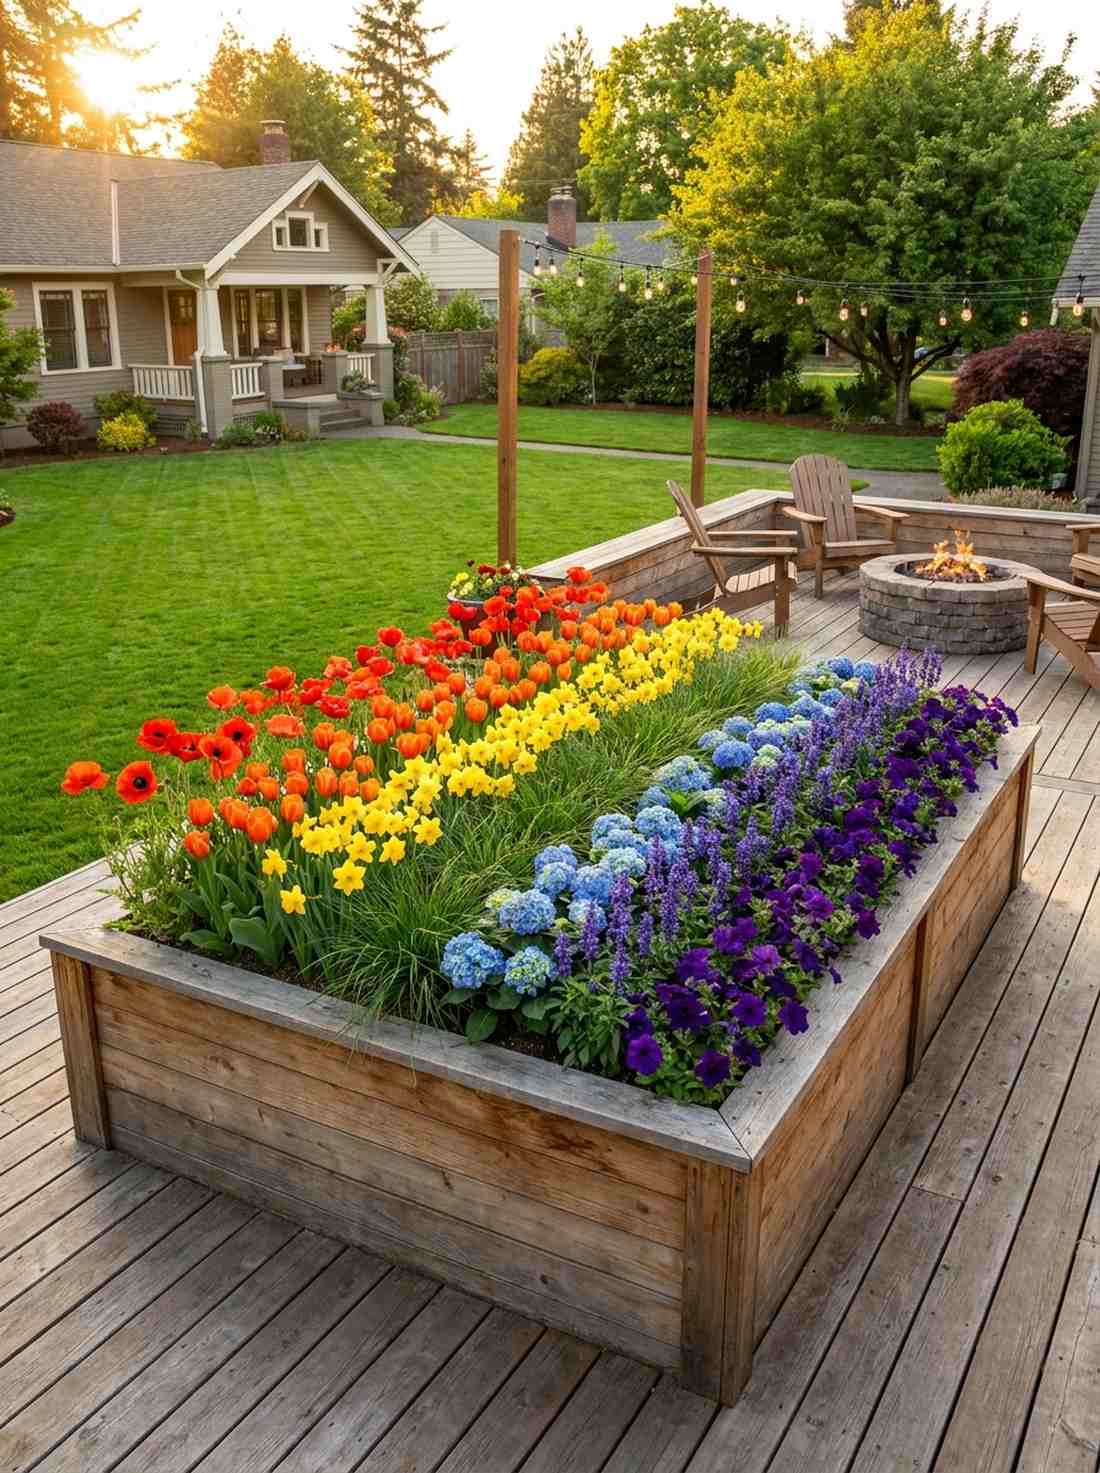
Sweeping from fiery reds into deep violets, this layout feels like a master painter’s palette spilled onto the soil. The ombre gradient garden design is an absolute showstopper for front-yard raised beds where you want to drop jaws.
While chaotic color mixes look like a standard cottage garden, organizing blooms in strict diagonal color bands delivers a highly curated, designer-level finish. The smooth transition of warm to cool colors creates stunning Instagram-worthy impact from every angle. Picking up color-sorted premium bulb collections makes planning this visual trick incredibly simple.
Achieving this ombre effect costs around $50–$80 depending on the flower choices. It’s a high-impact aesthetic trick that transforms any basic box.
- Key Materials: Color-specific plant starts or bulbs
- Vibe / Style: Curated artistic ombre
- Difficulty: Moderate (requires strict planning)
- Budget Breakdown: Color-sorted Plants: $70
- Creator’s Tip: Ensure all the flowers you choose have the exact same mature height, otherwise the gradient effect gets ruined by shadows.
- Smart Sourcing: Get pre-sorted color gradient flower bulb kits and premium organic bloom boosting soil.
27. Four-Season Succession Bed
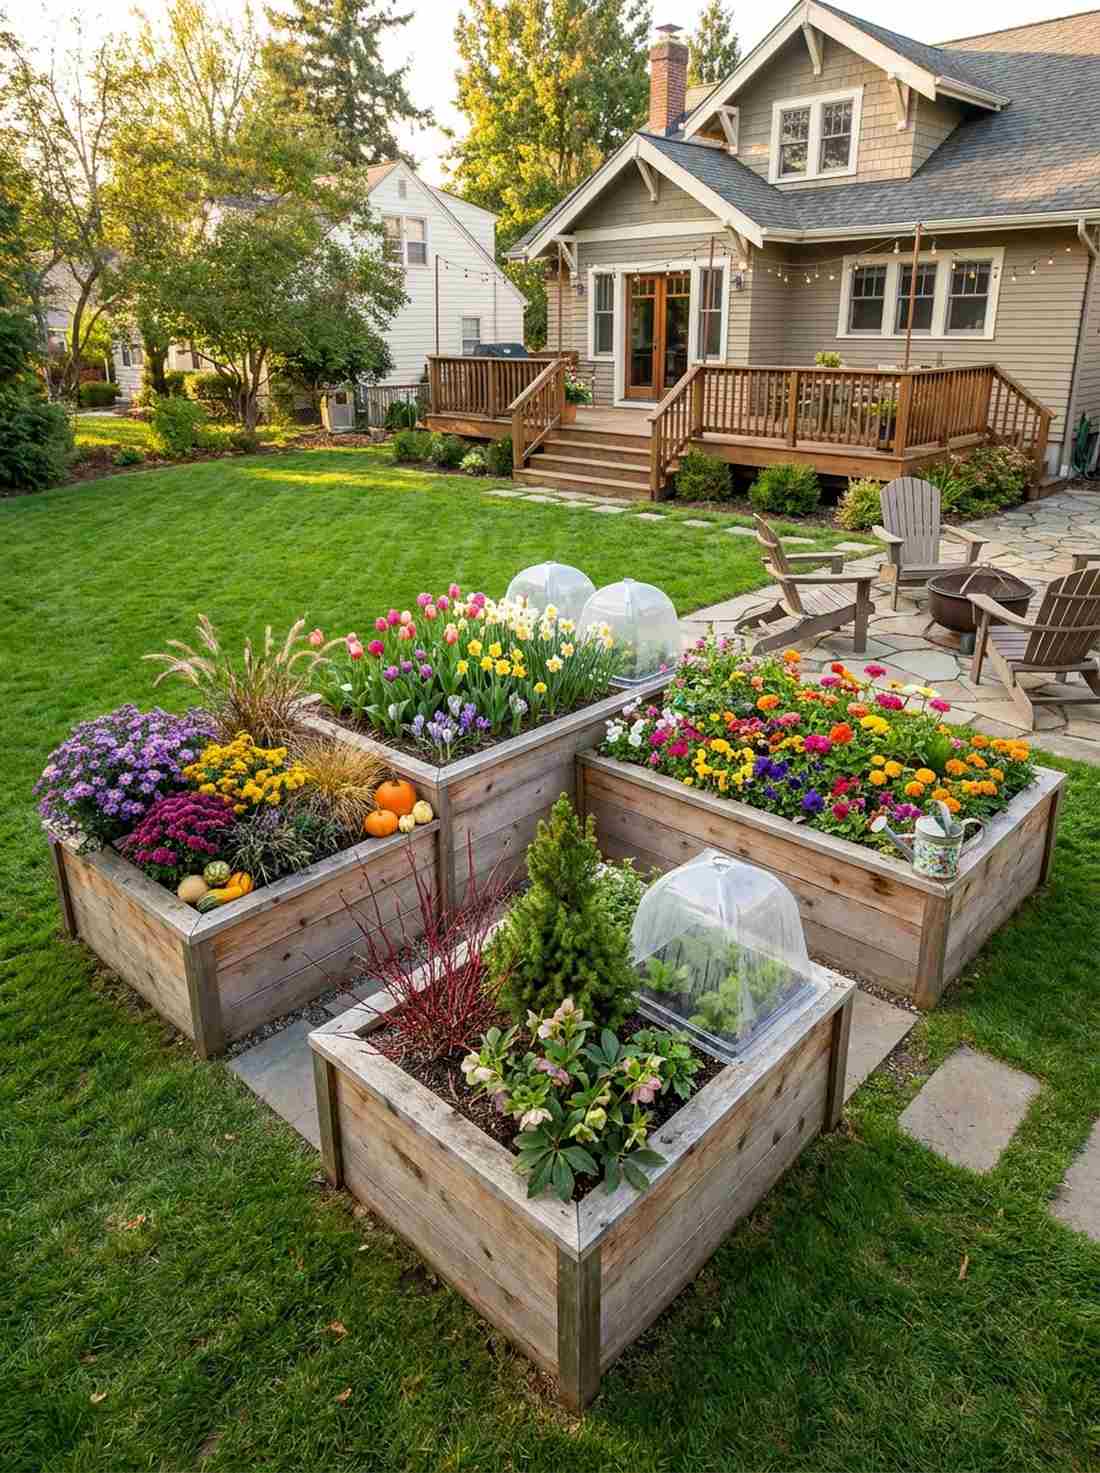
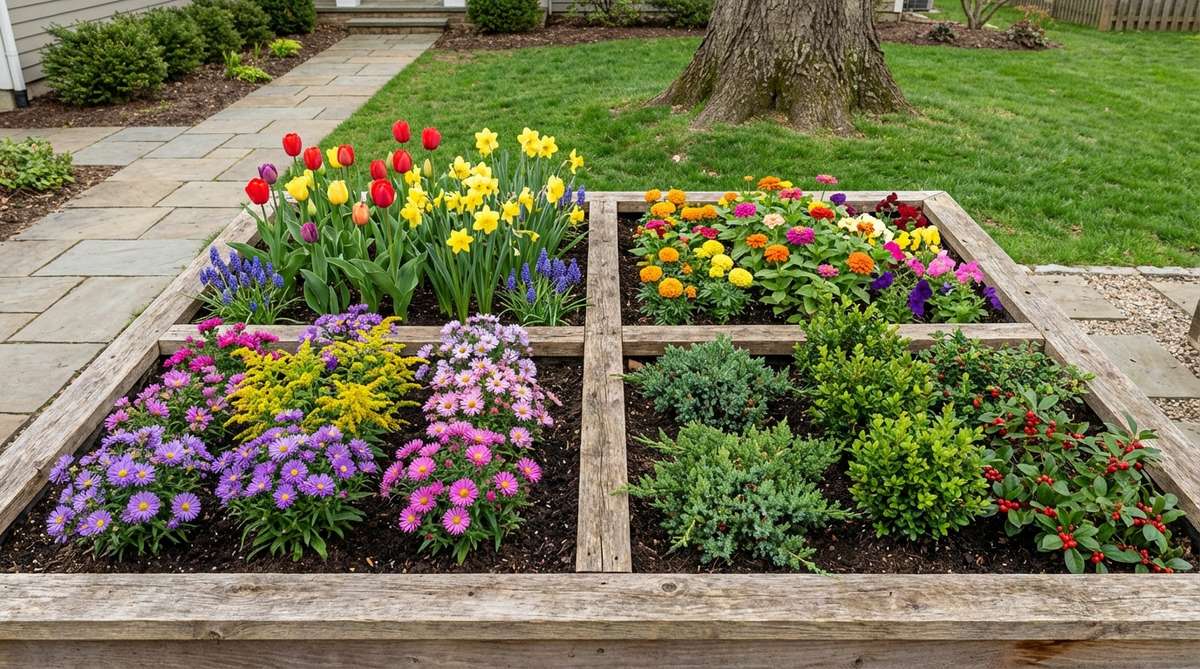
Shifting seamlessly through the year, this layout feels like a dynamic, living calendar that never sleeps. The four-quadrant seasonal raised bed is the best solution for small yards that cannot afford to look dead from November to March.
Dividing a bed into four distinct blooming seasons ensures your yard never experiences that depressing “brown phase.” Grouping spring bulbs, summer annuals, fall asters, and winter evergreens in dedicated corners keeps the structure visually anchored year-round. Using heavy-duty frost protection cloches extends the shoulder seasons dramatically.
Stocking four seasons of interest costs roughly $80–$140. Save this idea if you hate looking at empty dirt in the winter!
- Key Materials: Bulbs, perennials, evergreens, winter mulch
- Vibe / Style: Ever-changing dynamic display
- Difficulty: Advanced (requires deep timing knowledge)
- Budget Breakdown: Plants/Bulbs: $100 | Mulch: $20
- Creator’s Tip: Plant the winter interest (like dwarf conifers or red twig dogwood) right in the center to anchor the bed when everything else dies back.
- Smart Sourcing: Source reusable heavy-duty plant frost cloches (multi-pack) and premium four-season perennial bulb collections.
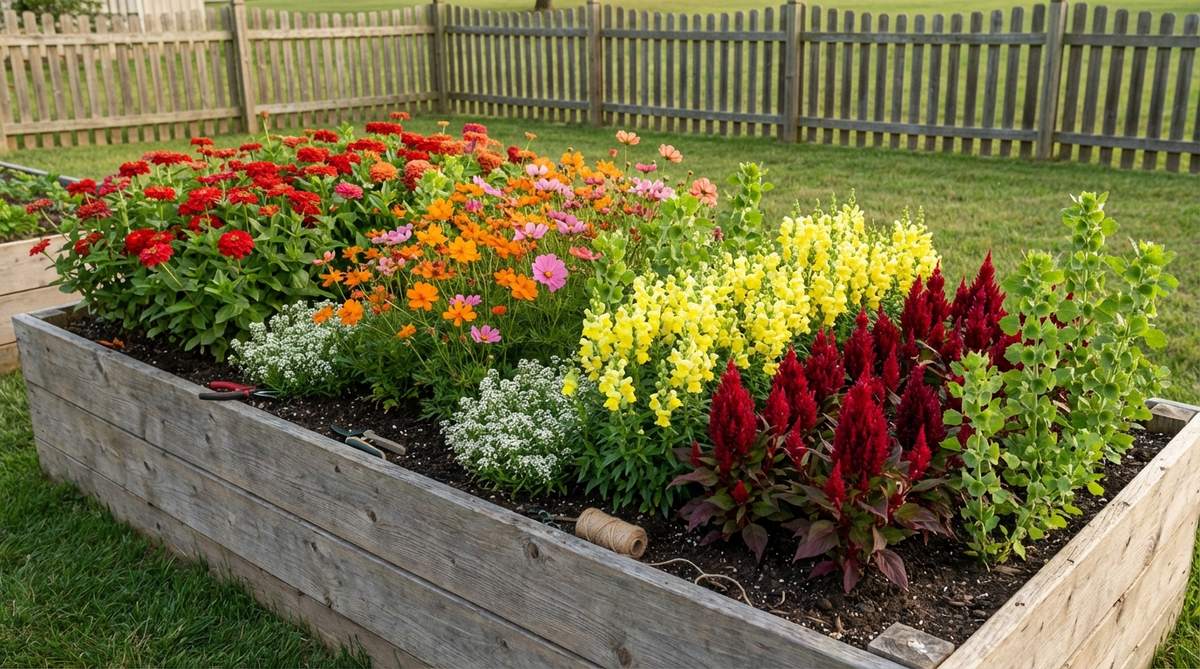
28. Cottage Garden Mix
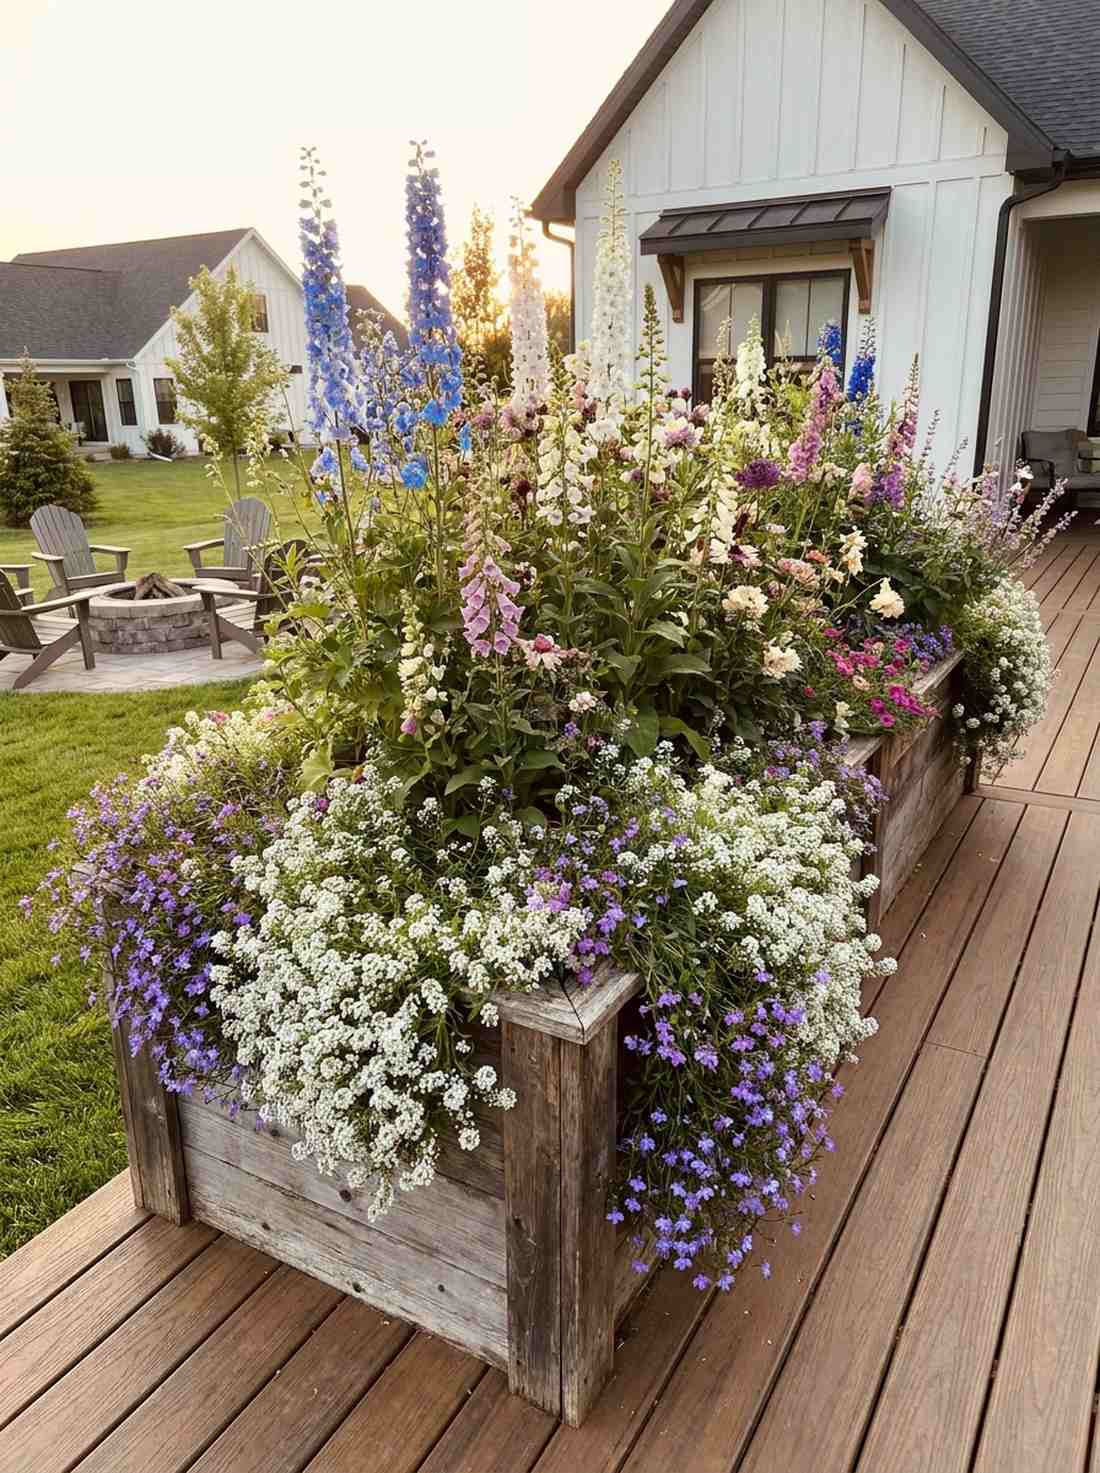
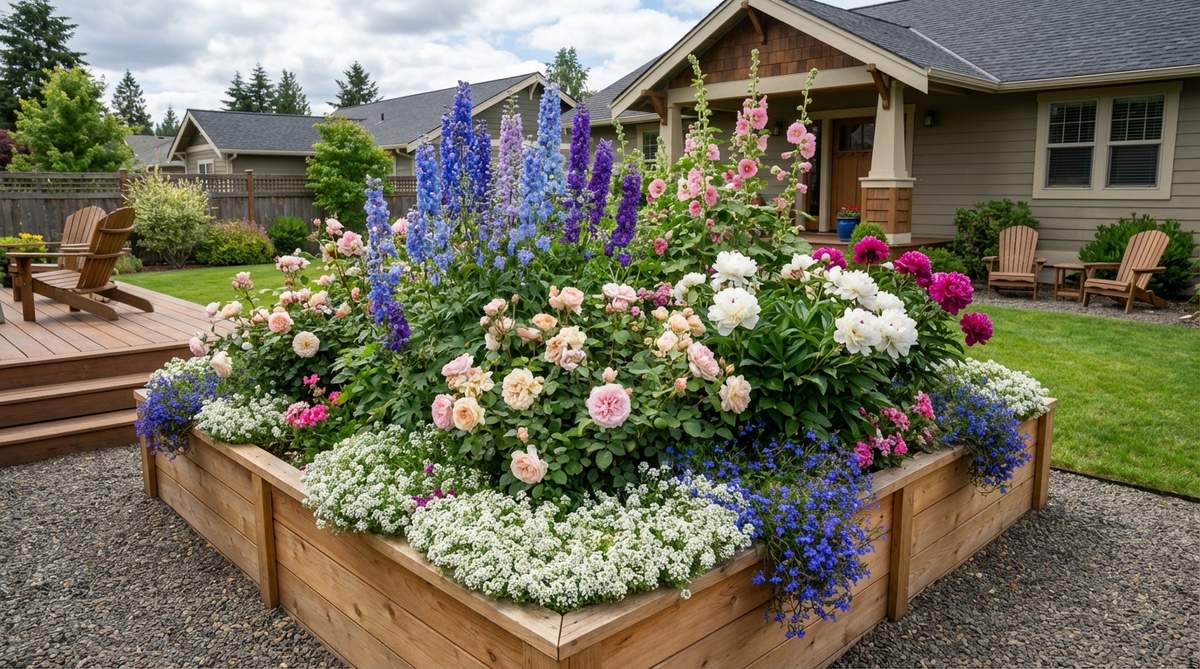
Spilling wildly over the edges in romantic chaos, this layout feels like an antique painting brought to life. The lush English cottage garden bed works beautifully to soften harsh modern architecture or standard wooden patio decks.
Cramming a bed so full that no dirt is visible gives a rich, extravagant vibe while actively suppressing weeds. Layering towering delphiniums in the back and letting alyssum aggressively cascade down the wooden sides creates incredible lushness. Adding a layer of premium moisture-control potting mix is critical when planting this densely.
This beautifully chaotic display costs $60–$100 to stuff fully. It’s the most forgiving design for absolute beginners.
- Key Materials: Mixed perennials, tall spikes, trailing edge plants
- Vibe / Style: Romantic overgrown English cottage
- Difficulty: Easy
- Budget Breakdown: Plant Starts: $80 | Soil Booster: $20
- Creator’s Tip: Pack the plants 20% closer together than the tag recommends to force them to intermingle and stand each other up.
- Smart Sourcing: Use premium moisture-control raised bed soil mix and organic liquid kelp fertilizer concentrate.
Most backyard setups waste huge amounts of space… until you see the hyper-efficient method below.
29. Dahlia Showcase Bed
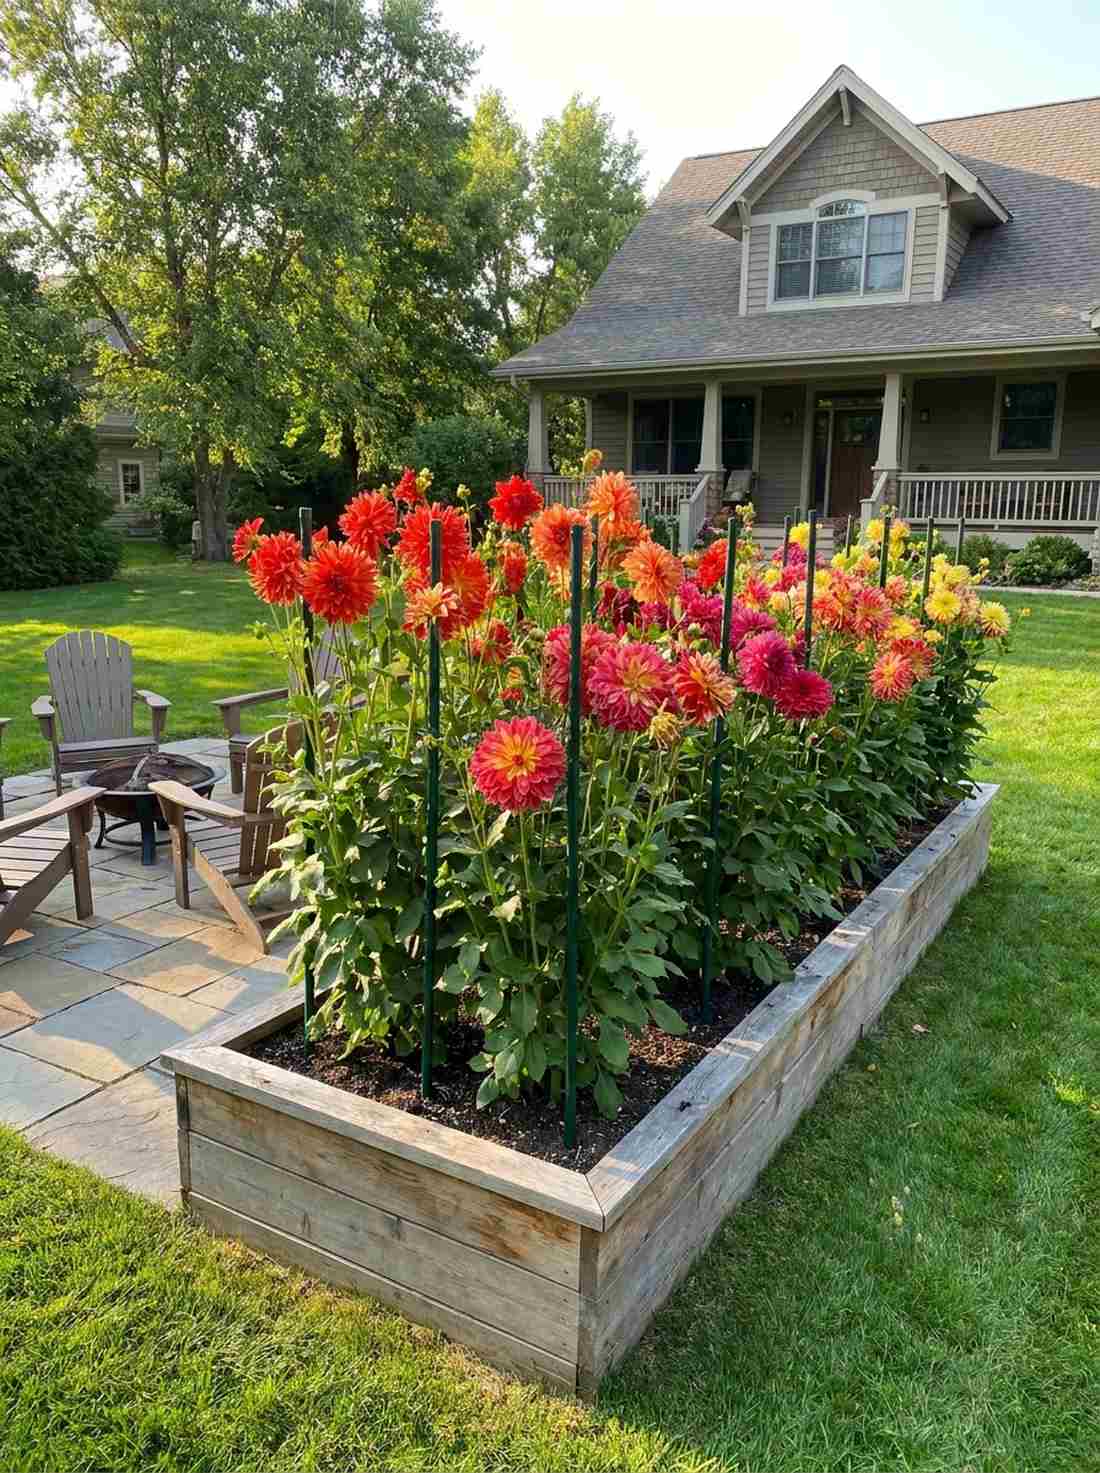
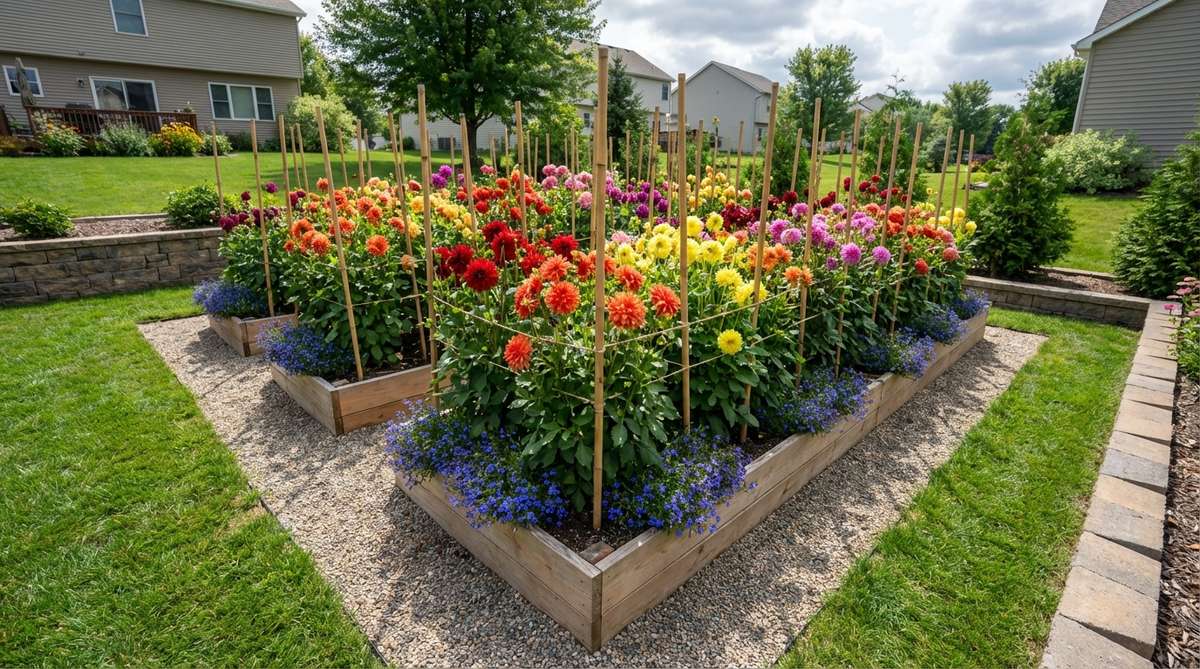
Exploding with massive, dinner-plate-sized blooms, this layout feels like an exclusive botanical garden exhibit. The dedicated dahlia tuber raised bed is a must-have for late summer when the rest of the yard starts looking tired.
Dedicating an entire space solely to dahlias looks remarkably opulent and solves the issue of their fragile, rot-prone tubers. The elevated wooden box provides the razor-sharp drainage dahlias demand, ensuring you don’t lose expensive tubers to soggy clay. Hammering in heavy-duty steel plant support stakes at planting time keeps the massive heads from snapping.
Premium tubers and stakes will cost $80–$150. Pin this to your floral dreams board—the late summer payoff is insane.
- Key Materials: Dahlia tubers, heavy stakes, sharp draining soil
- Vibe / Style: High-end botanical showcase
- Difficulty: Moderate (requires winter digging in cold zones)
- Budget Breakdown: Tubers: $100 | Stakes: $30
- Creator’s Tip: Strip the bottom 12 inches of leaves off the mature plants to improve airflow and completely prevent powdery mildew.
- Smart Sourcing: Order heavy-duty vinyl-coated steel plant stakes and premium giant dinnerplate Dahlia tuber sets.
30. Butterfly and Hummingbird Haven
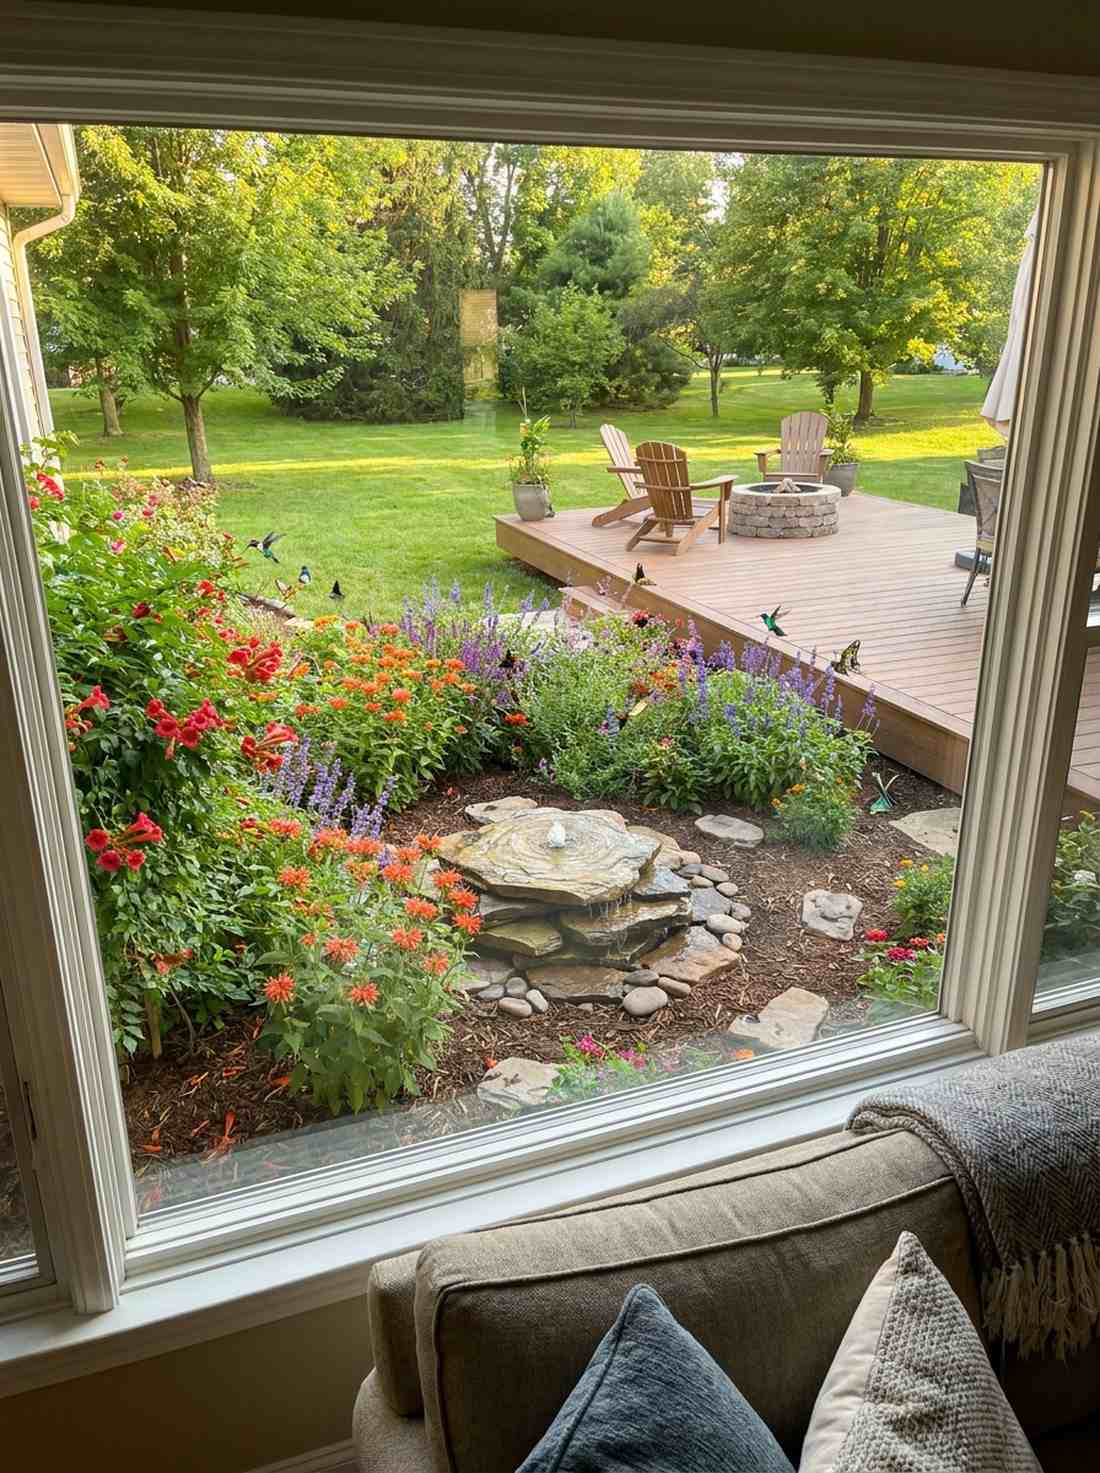
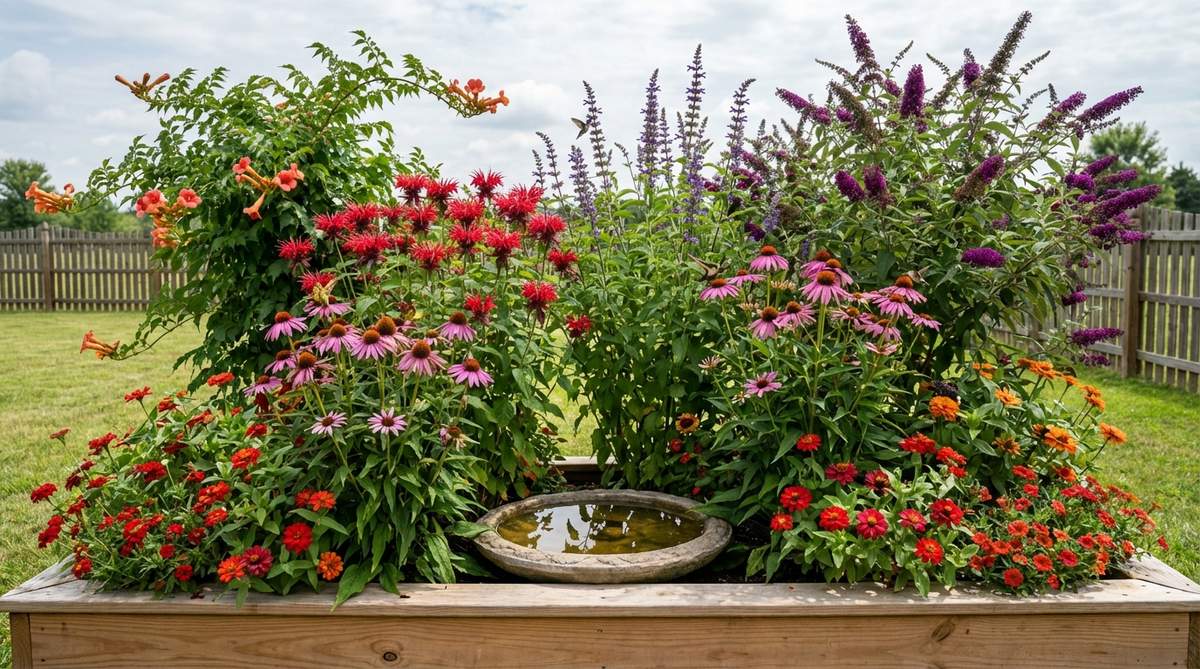
Humming with kinetic energy and jewel-toned wings, this setup feels like an interactive wildlife sanctuary right outside your window. The nectar-rich pollinator garden bed is a perfect focal point for a living room window view.
Stacking reds, oranges, and purples creates a visual siren song that transforms a static garden into a living entertainment center. Layering trumpet vine, salvia, and bee balm creates dense feeding zones that attract hummingbirds instantly. Embedding a shallow solar-powered water fountain directly in the soil gives butterflies a crucial drinking spot.
Creating this wildlife magnet runs $70–$110. It completely elevates the energy and soundscape of a quiet backyard.
- Key Materials: Nectar-heavy perennials, shallow water source
- Vibe / Style: Interactive wildlife paradise
- Difficulty: Easy
- Budget Breakdown: Plants: $75 | Water Feature: $25
- Creator’s Tip: Include flat rocks in the bed layout; butterflies need hot, flat stones to warm their wings in the morning sun before they can fly.
- Smart Sourcing: Get miniature solar-powered garden fountains and hummingbird-attracting perennial starter kits.
Space-Efficient Solutions For Small Yards And Urban Gardens
Limited space demands creative solutions that maximize every square inch. From small garden design with raised beds to tight balconies, these configurations prove you don’t need acreage to grow a massive harvest.
31. Elevated Table Garden
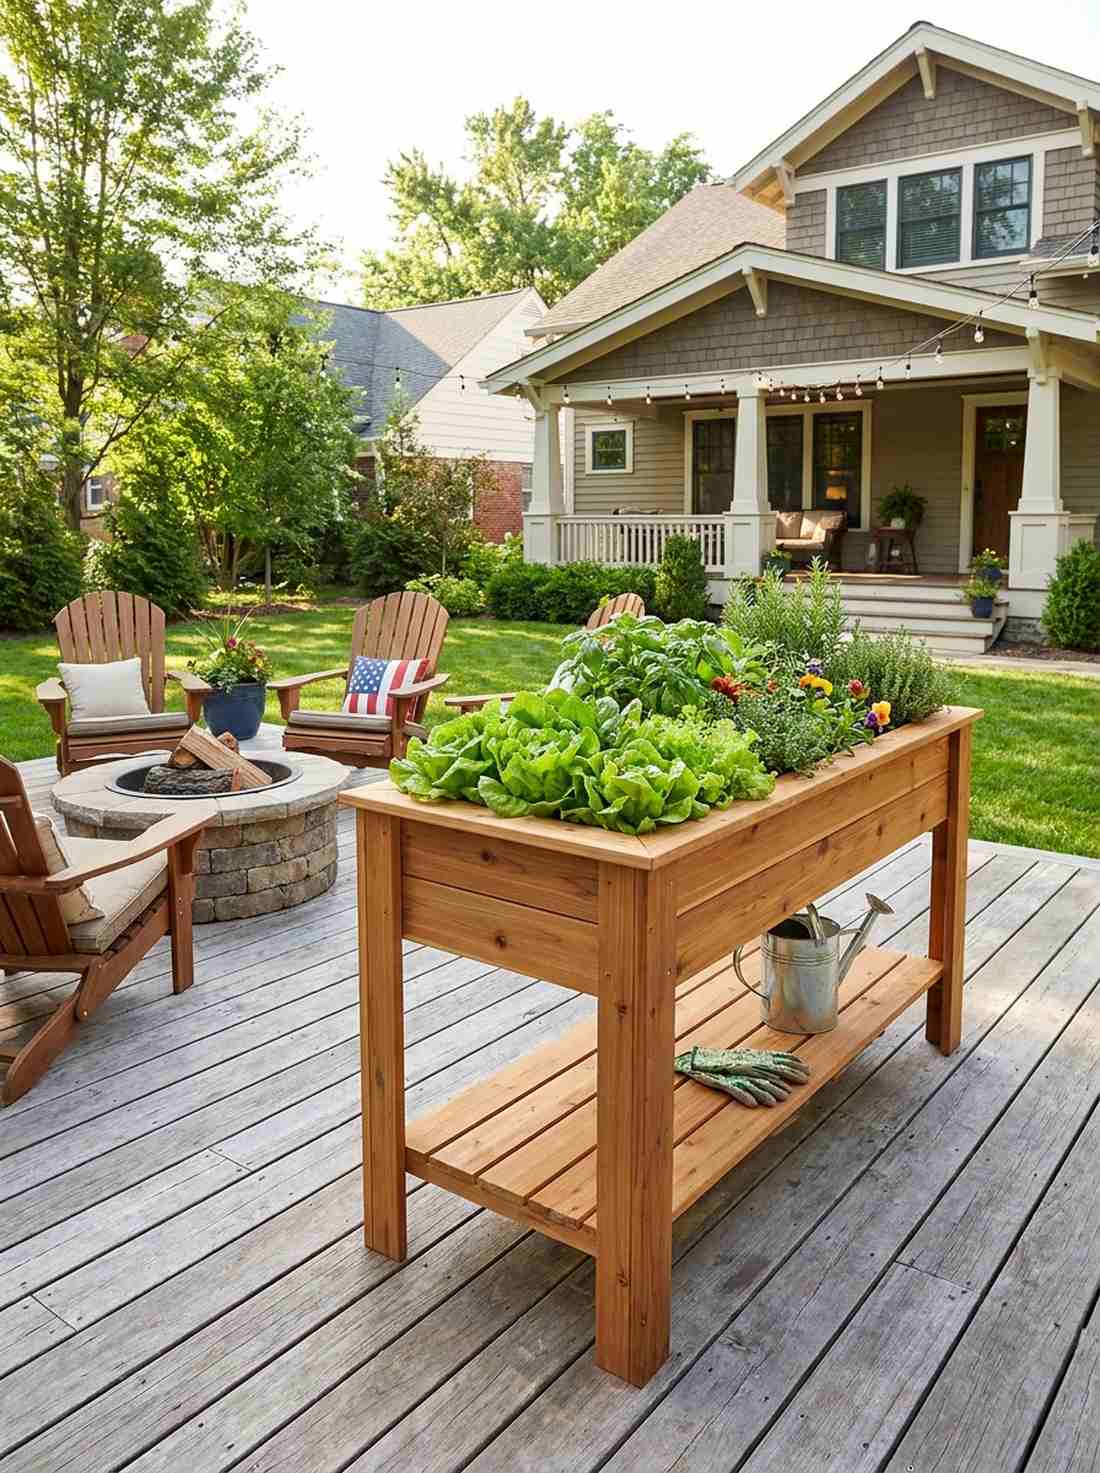
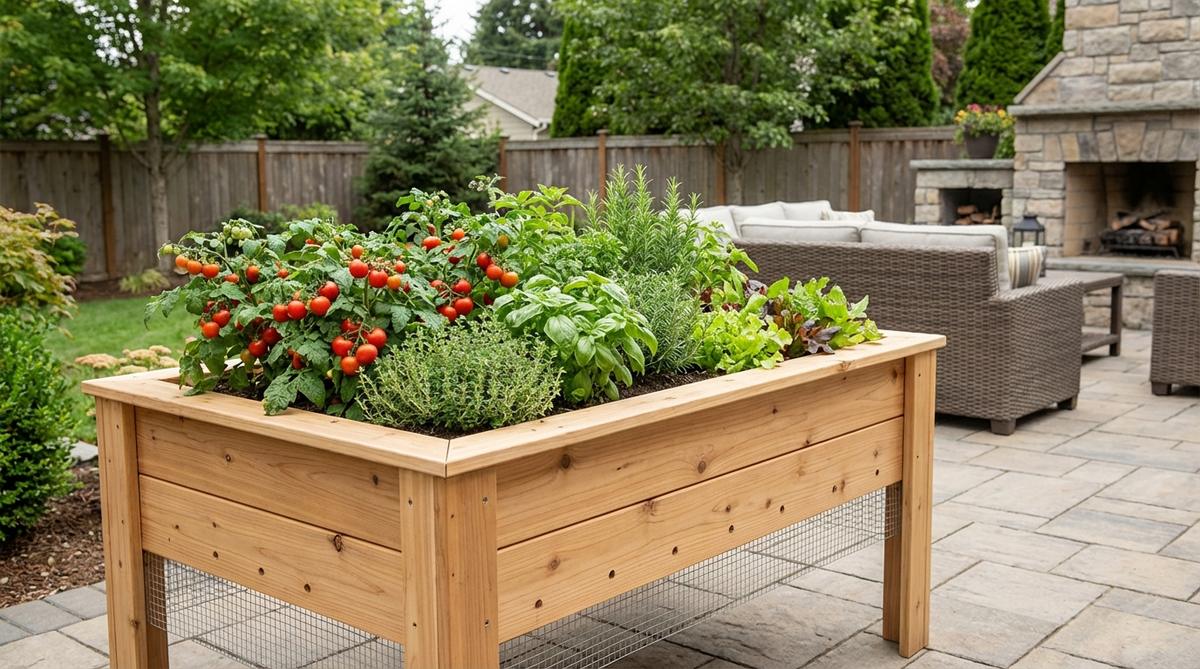
Standing comfortably at waist height, this setup feels like a chic, ergonomic kitchen prep station moved outdoors. The elevated standing planter table is an absolute game-changer for concrete balconies or gardeners with chronic back pain.
Ditching the ground entirely for a table height box gives a sleek, modern look while completely eliminating rabbit damage. This portable, waist-high unit can be shifted to chase the sun, making it perfect for shallow-rooted lettuce and herbs. Snagging a pre-built cedar elevated planter kit makes assembly take less than ten minutes.
Buying or building this ergonomic dream costs $90–$160. Save this if you want to garden without ever bending over again!
- Key Materials: Elevated standing planter box, lightweight soil
- Vibe / Style: Modern ergonomic patio
- Difficulty: Very easy
- Budget Breakdown: Table Kit: $120 | Lightweight Soil: $30
- Creator’s Tip: Mix 30% perlite into your soil; table legs hold a lot of weight, so making the soil incredibly airy prevents structural collapse.
- Smart Sourcing: Pick up pre-built cedar elevated planter tables and lightweight premium organic potting soil (bulk bag).
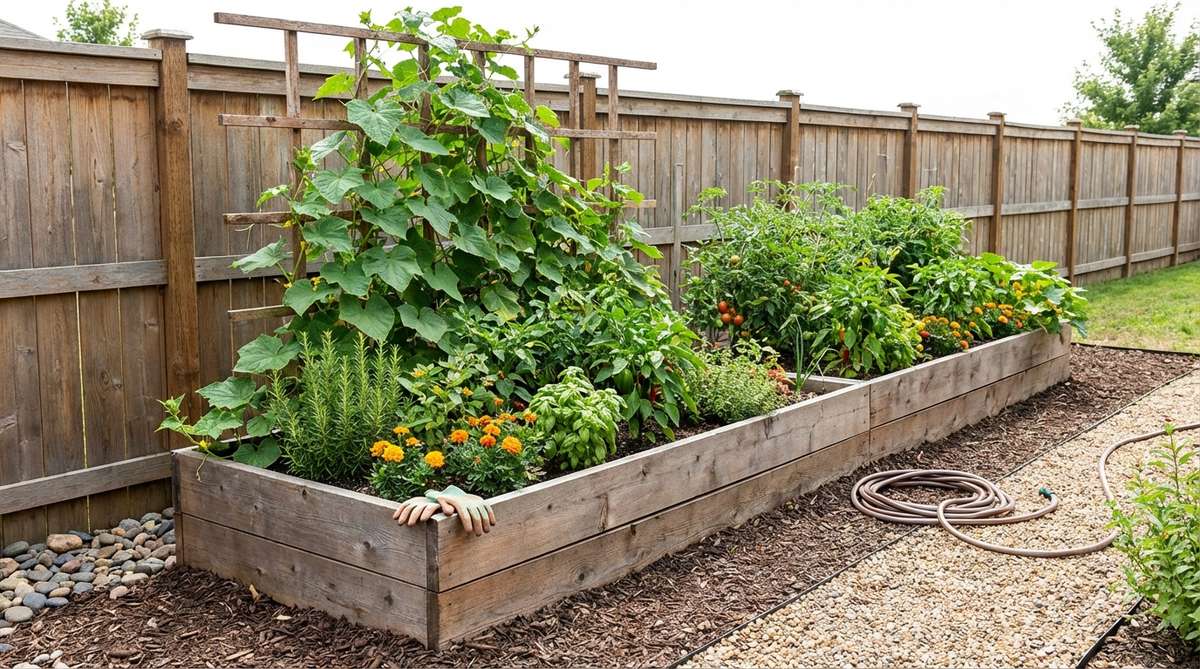
32. Fence-Line Narrow Bed
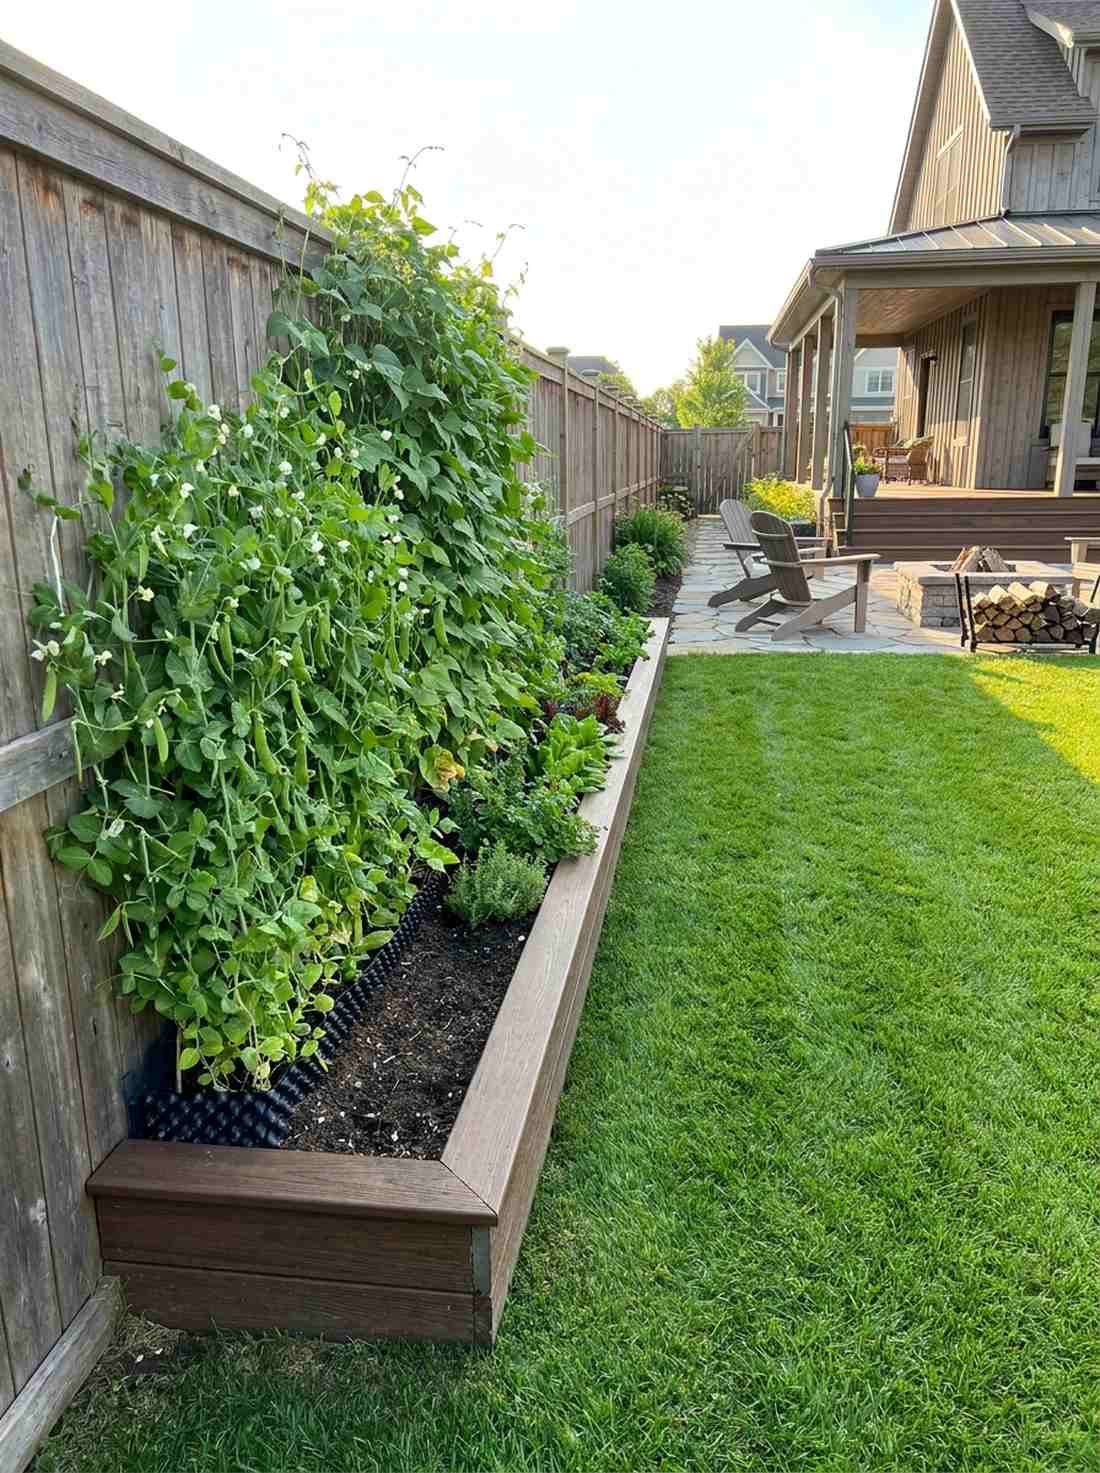
Hugging the perimeter tightly, this sleek profile feels like a sharp, architectural frame around your yard. The ultra-narrow boundary raised bed is a genius use-case for utilizing dead grass space right up against property fences.
Building a shallow 18-inch-wide box turns a boring privacy fence into a massive, productive green wall. By letting peas and pole beans aggressively climb the existing fence structure, you create high-yield verticality without buying a trellis. Using heavy-duty rot-resistant ground-contact timber ensures the bed survives sitting right against the lawn edge.
This brilliant perimeter hack runs $50–$90 per section. Pin this to instantly add curb appeal and privacy to your side yard.
- Key Materials: Narrow lumber boards, long stakes
- Vibe / Style: Sleek architectural perimeter
- Difficulty: Easy
- Budget Breakdown: Timber: $60 | Soil: $20
- Creator’s Tip: Install a root barrier plastic sheet against the fence side to prevent constant moisture from rotting your wooden property line.
- Smart Sourcing: Source heavy-duty plastic root barrier rolls and narrow profile composite decking boards.
33. Stacked Tiered Planter
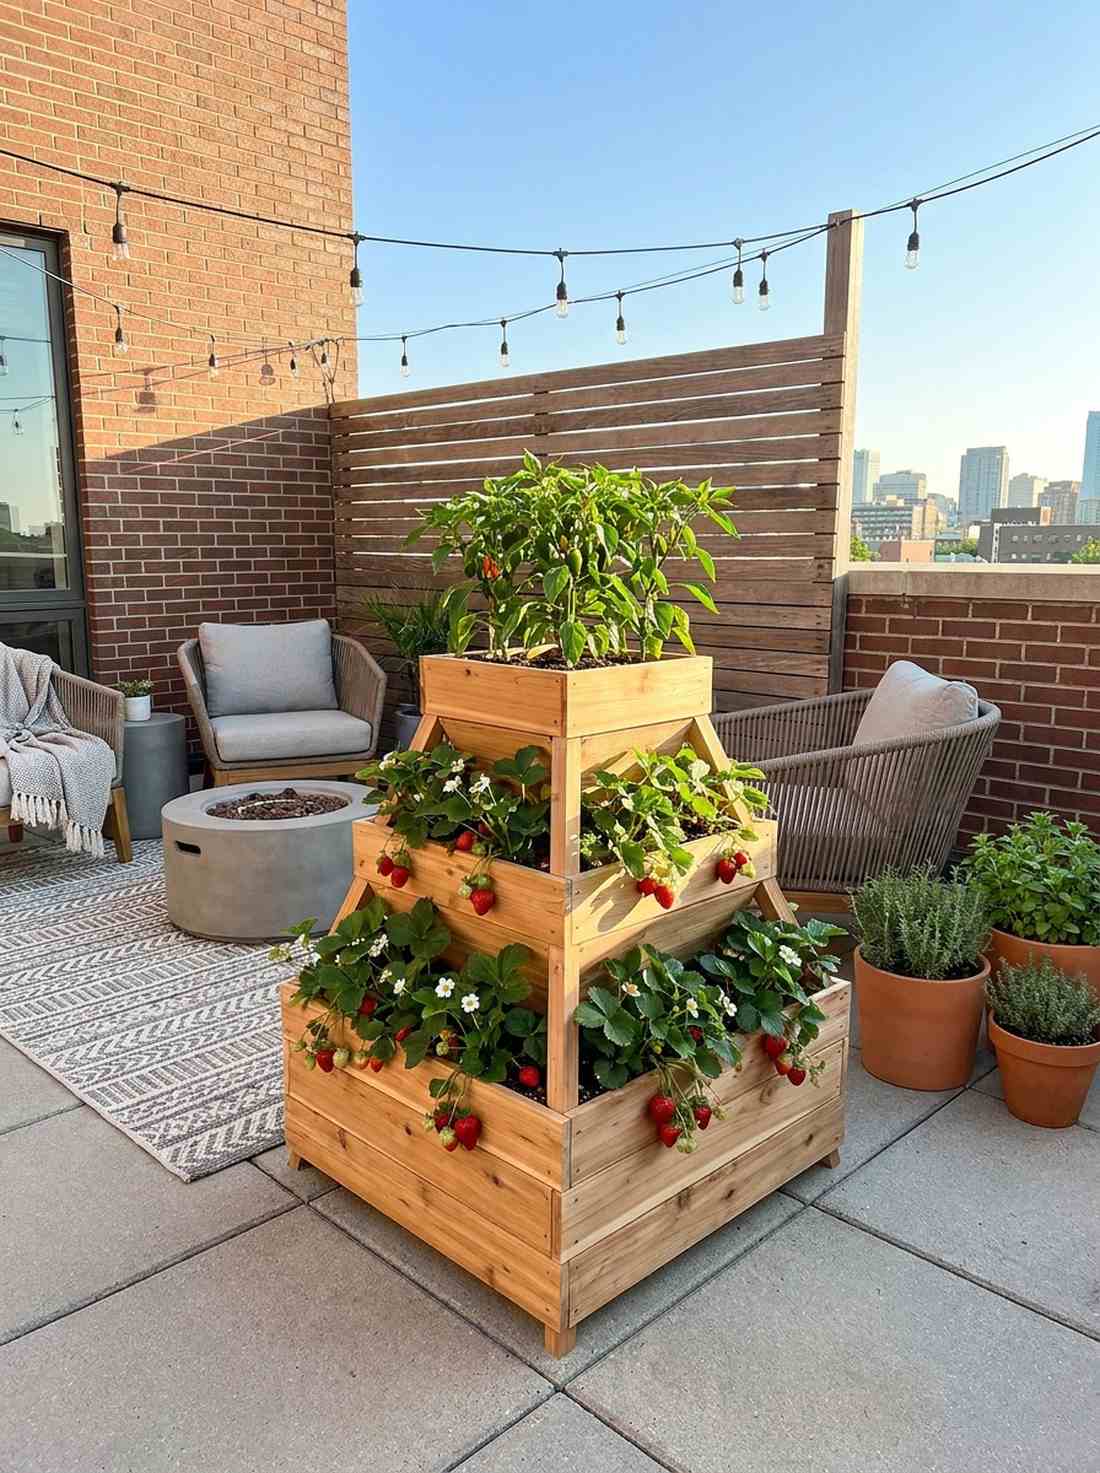
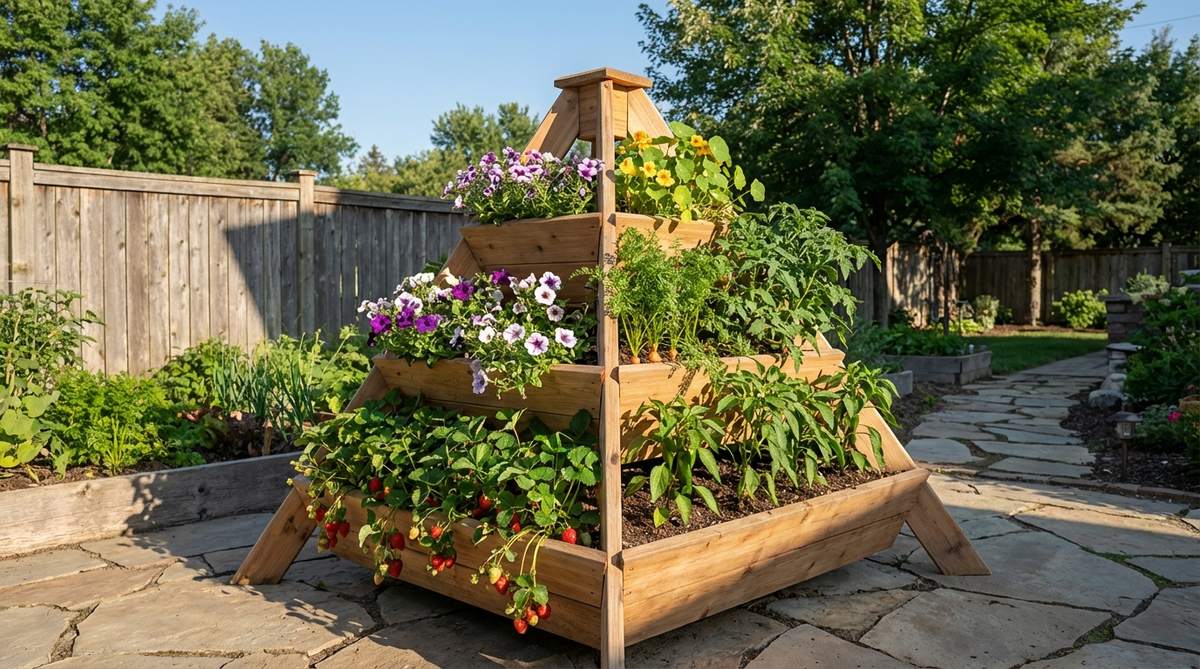
Rising like a miniature wooden ziggurat, this compact footprint feels incredibly sculptural and dense. The pyramid stacked tiered planter is the ultimate vertical solution for tight apartment patios or small concrete corner spaces.
Stacking three concentric wooden boxes steps back the planting zone, creating a stunning 3D centerpiece that holds a massive amount of plants. Strawberries cascade beautifully down the sides while deep-rooted peppers thrive in the tall center column. Picking up pre-cut tiered cedar garden kits avoids the nightmare of measuring perfectly diminishing squares.
This architectural focal point costs roughly $80–$140. Save this genius blueprint if you only have a 4×4 footprint to work with.
- Key Materials: Three decreasing square frames
- Vibe / Style: Vertical patio sculptural
- Difficulty: Intermediate
- Budget Breakdown: Wood Kit: $100 | Soil: $40
- Creator’s Tip: Only fill the outer rings with expensive compost; fill the dead inner core of the bottom box with empty plastic bottles to reduce weight and soil cost.
- Smart Sourcing: Buy pre-cut multi-tiered cedar planter kits and cascading everbearing strawberry bare roots.
If you have absolutely zero space but want massive food yields, you must see this final intensive layout…
34. Square-Foot Intensive Bed
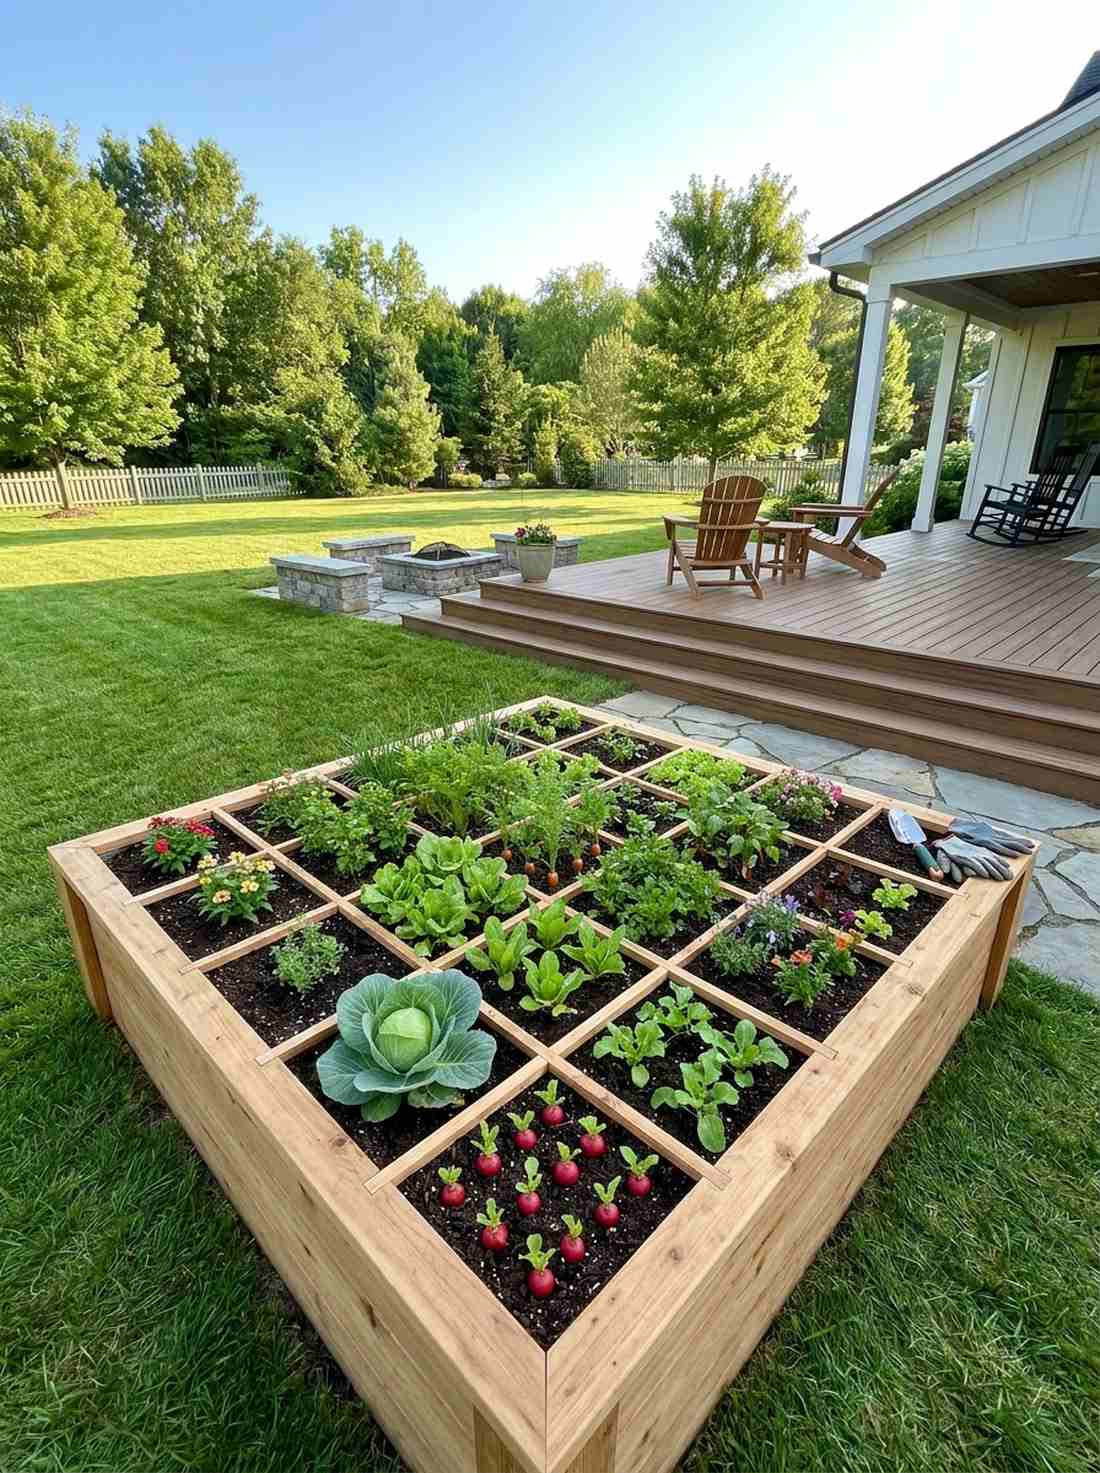
Displaying extreme grid-like precision, this layout feels like a highly optimized, high-tech agricultural spreadsheet. The square-foot intensive gardening layout is absolutely mandatory for absolute beginners trying to pull massive food from a tiny 4×4 box.
Laying a physical grid over the soil gives a ridiculously clean, structured look that completely eliminates overcrowding mistakes. By dedicating exact plant counts per 12-inch square (like 16 radishes or 1 cabbage), you maximize diversity and guarantee zero wasted soil. Using a pre-made wooden garden grid divider kit makes the setup look incredibly professional and sharp.
Establishing this highly-organized box costs $40–$70. Pin this to your beginner gardening board—it is the ultimate foolproof blueprint.
- Key Materials: 4×4 frame, string or wood grid dividers
- Vibe / Style: Hyper-organized precision grid
- Difficulty: Very easy
- Budget Breakdown: Wood Box: $35 | Grid Materials: $15
- Creator’s Tip: Use thin strips of cedar lath screwed to the top of the box to create the permanent grid; string sags and rots after one season.
- Smart Sourcing: Pick up pre-made cedar garden grid dividers and high-yield square foot gardening seed vaults.
Building Your Dream Raised Bed Garden
These 34 garden design raised beds offer proven, high-end solutions for every yard size, skill level, and budget. Start with one or two basic rectangular setups to build confidence, then rapidly experiment with vertical structures and specialty shapes to give your yard that expensive, landscape-architect aesthetic. Remember that the best layout balances extreme productivity with smart material sourcing—using the right pre-cut kits and premium starter bundles ensures a beautiful garden that doesn’t rot or collapse.
Whether you are implementing intricate vegetable garden design raised beds for food independence or a lush flower gradient for front yard curb appeal, raised beds provide the ultimate control. The exact formulas and blueprints featured here from Fresh Garden Ideas will prevent you from wasting money at the hardware store. Pin your favorite designs, grab the suggested materials, and transform your outdoor space into a premium sanctuary this weekend.
Frequently Asked Questions
What is the best size for a raised vegetable garden bed?
A 4×8 foot bed provides optimal growing space while maintaining that premium, structured aesthetic seen in top-tier garden design ideas raised beds. This footprint keeps all plants within comfortable reach from either side, maximizing yield without stepping on the soil. To build this efficiently, sourcing pre-cut 8-foot cedar planks and heavy-duty corner bracket kits eliminates waste and gives a designer-level finish. For limited mobility, a 3×6 format is superior.
How deep should raised beds be for vegetables and flowers?
Most vegetable garden design with raised beds require at least 10-12 inches of depth for optimal root health, though deep-rooted crops like carrots thrive in 18-24 inch boxes. Deeper beds provide aggressive drought resistance since the massive soil volume retains moisture longer between waterings. If you are building tall, save money by filling the bottom 40% with logs or using bulk organic raised bed filler blocks instead of expensive premium topsoil.
Should I line the bottom of raised garden beds?
Leave bottoms open when building on healthy soil to allow deep root access and natural worm migration. However, you absolutely must add a high-quality commercial-grade heavy-duty landscape fabric if building over invasive bermudagrass or contaminated dirt. For setups on concrete patios, use slatted wood bottoms combined with premium drainage mats to prevent waterlogging, completely avoiding cheap plastic liners that create anaerobic rot.
How far apart should raised garden beds be spaced?
Space your garden design using raised beds exactly 24-36 inches apart for a clean, formal aesthetic that allows easy maintenance. If you use wheelbarrows or require accessible garden design for raised beds, increase the pathway to a strict 48 inches. Upgrading these pathways with commercial weed barrier rolls and premium gravel not only suppresses mud but instantly makes the entire layout look like an expensive European potager.
Can I grow both vegetables and flowers in the same raised bed?
Absolutely. Mixing ornamentals into vegetable garden design raised beds is the secret to a highly productive, pest-free yard. Flowers act as a biological shield; planting marigolds, nasturtiums, and zinnias along the borders attracts predatory insects that decimate aphids. To get this look fast, using pre-mixed pollinator wildflower seed mats around the edges provides a gorgeous pop of color while doubling your tomato and squash yields.
What orientation is best for raised garden beds?
Orient your beds east-west with the long axis running horizontally. This positioning ensures plants on the north side don’t cast shadows on the south side during peak midday sun, maximizing the photosynthesis of small garden design with raised beds. Always position your heavy-duty vertical trellis kits on the extreme north edge so their massive shade footprint falls entirely outside the bed, keeping your low-growing greens bathed in sunlight.