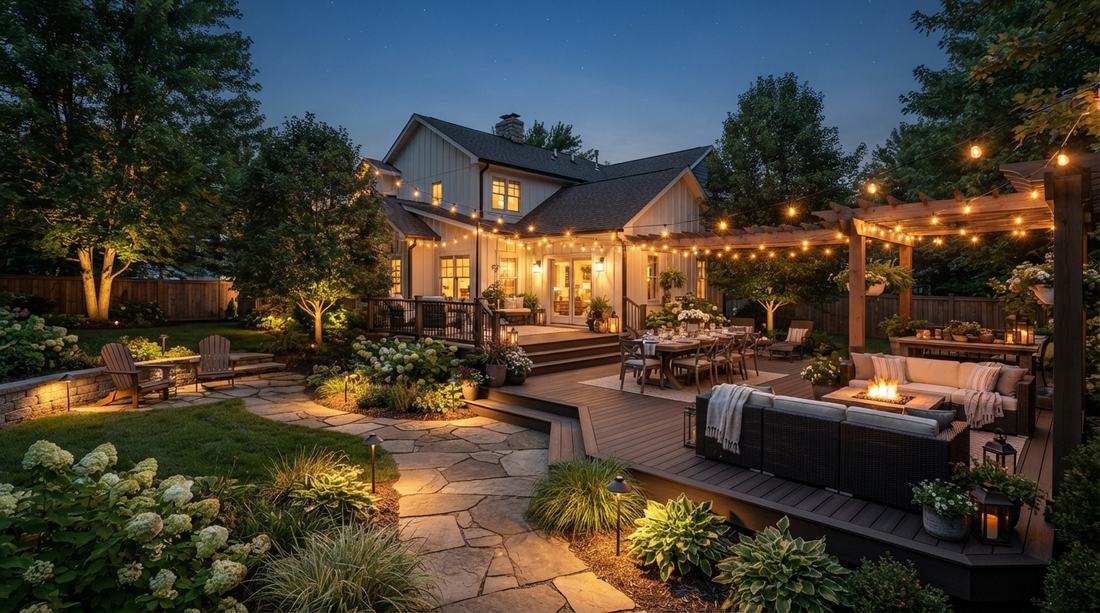
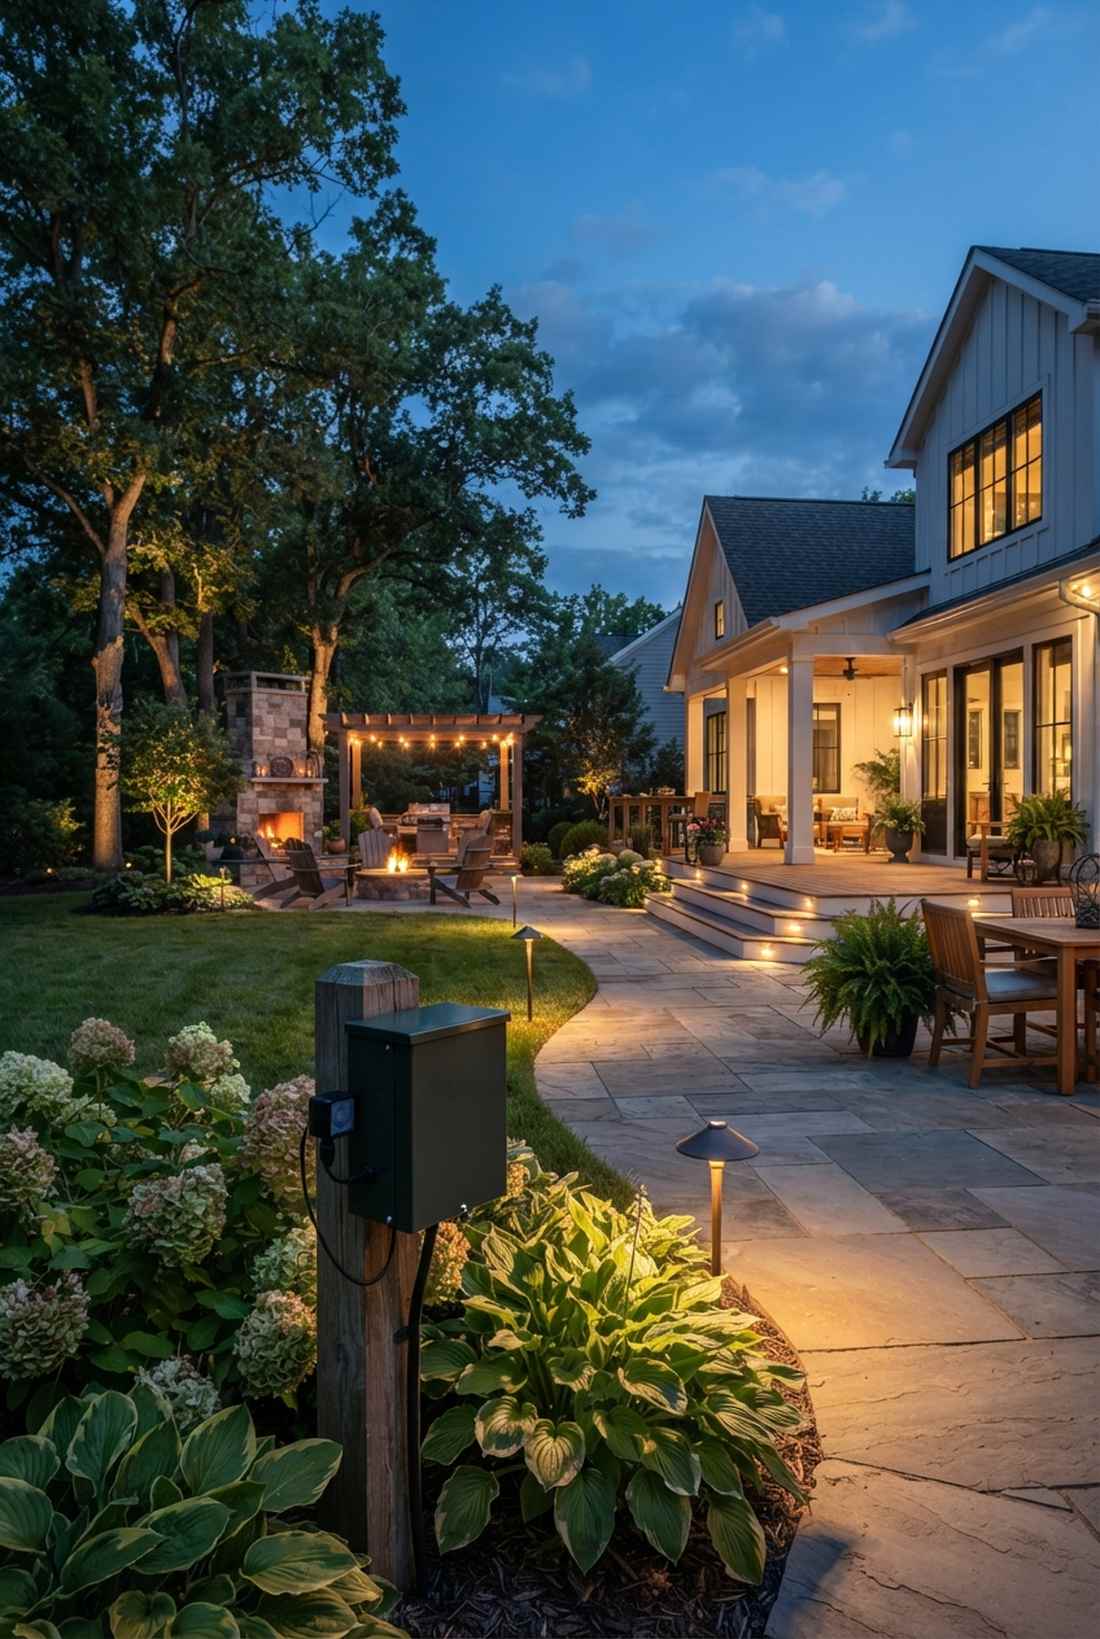
Installing professional backyard garden lights instantly elevates a basic lawn into a designer-level evening retreat. By skipping overpriced contractors and using commercial-grade bulk setups, you achieve high-end illumination on a DIY budget. Here are the blueprints.
Design Snapshot: Key Principles
- Layered Illumination: Combine ambient, task, and accent lighting to create depth and functionality in your outdoor space.
- Power Source Strategy: Match your lighting system to your garden’s infrastructure—low-voltage for extensive layouts, solar for remote areas, and line-voltage for high-output needs.
- Warm Color Temperatures: Opt for 2700K–3000K LED bulbs to create residential-friendly ambiance that complements natural evening tones.
- Directional Control: Position fixtures to minimize light pollution and wildlife disruption while maximizing visual impact on intended features.
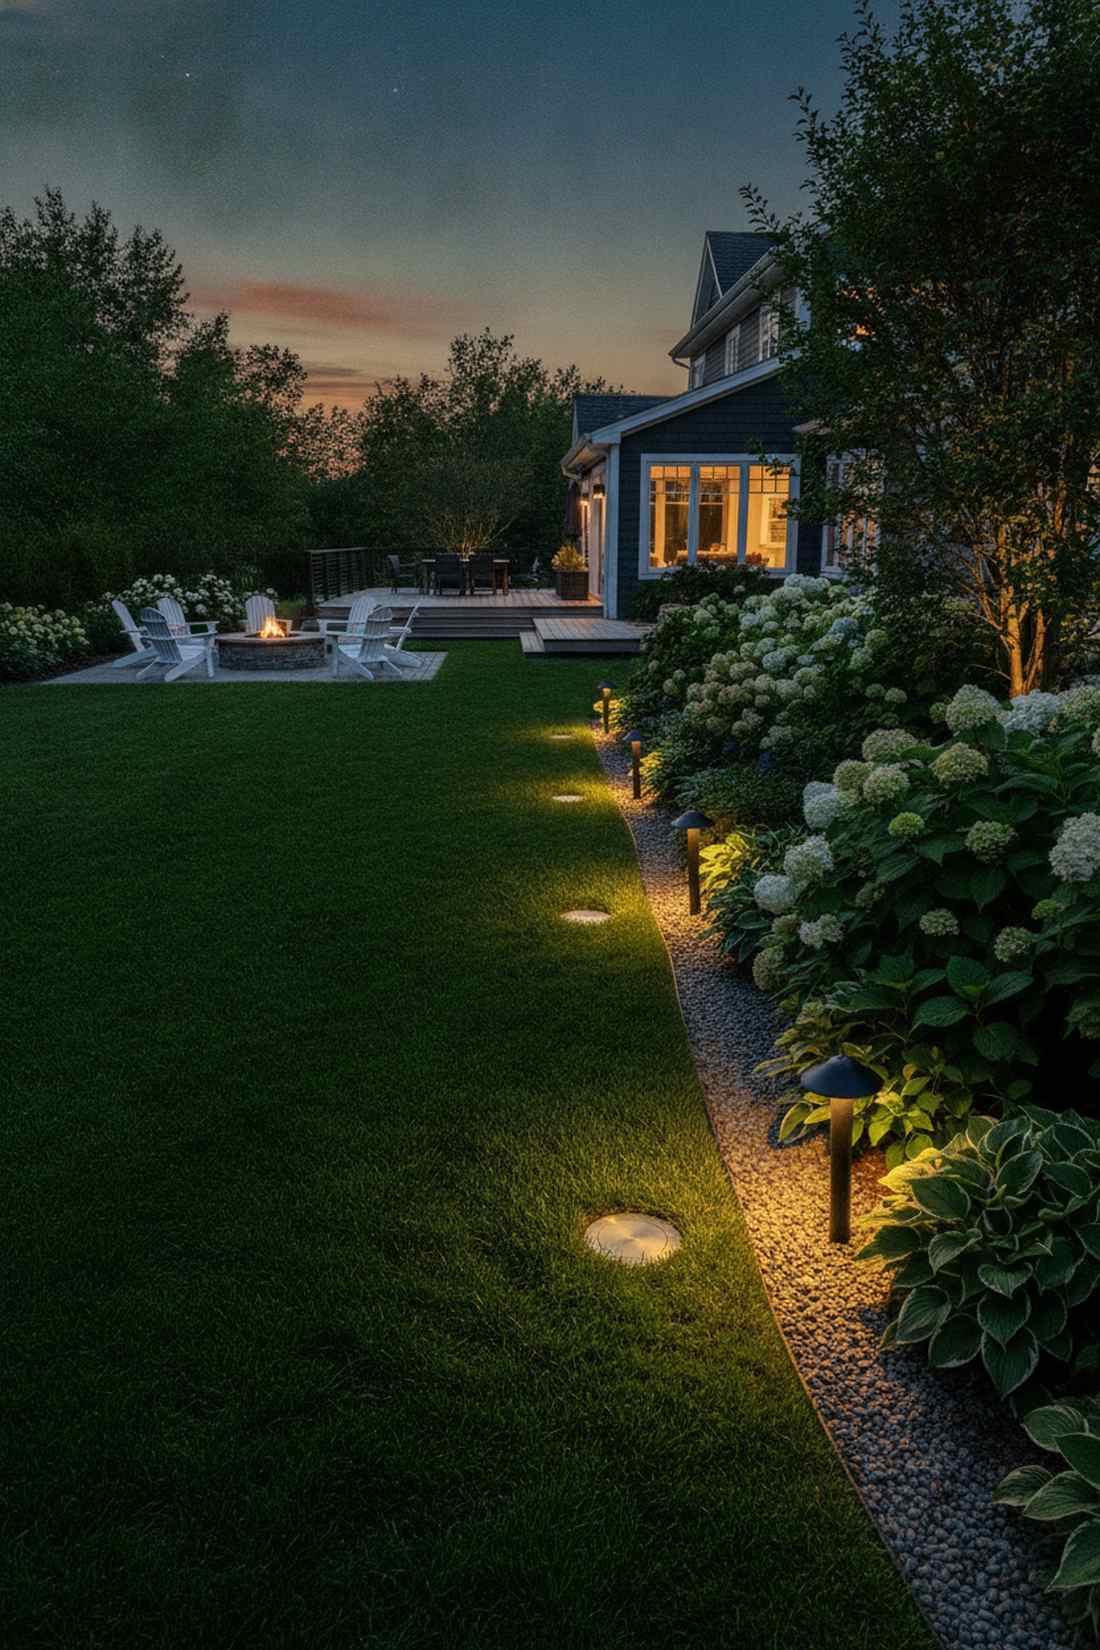
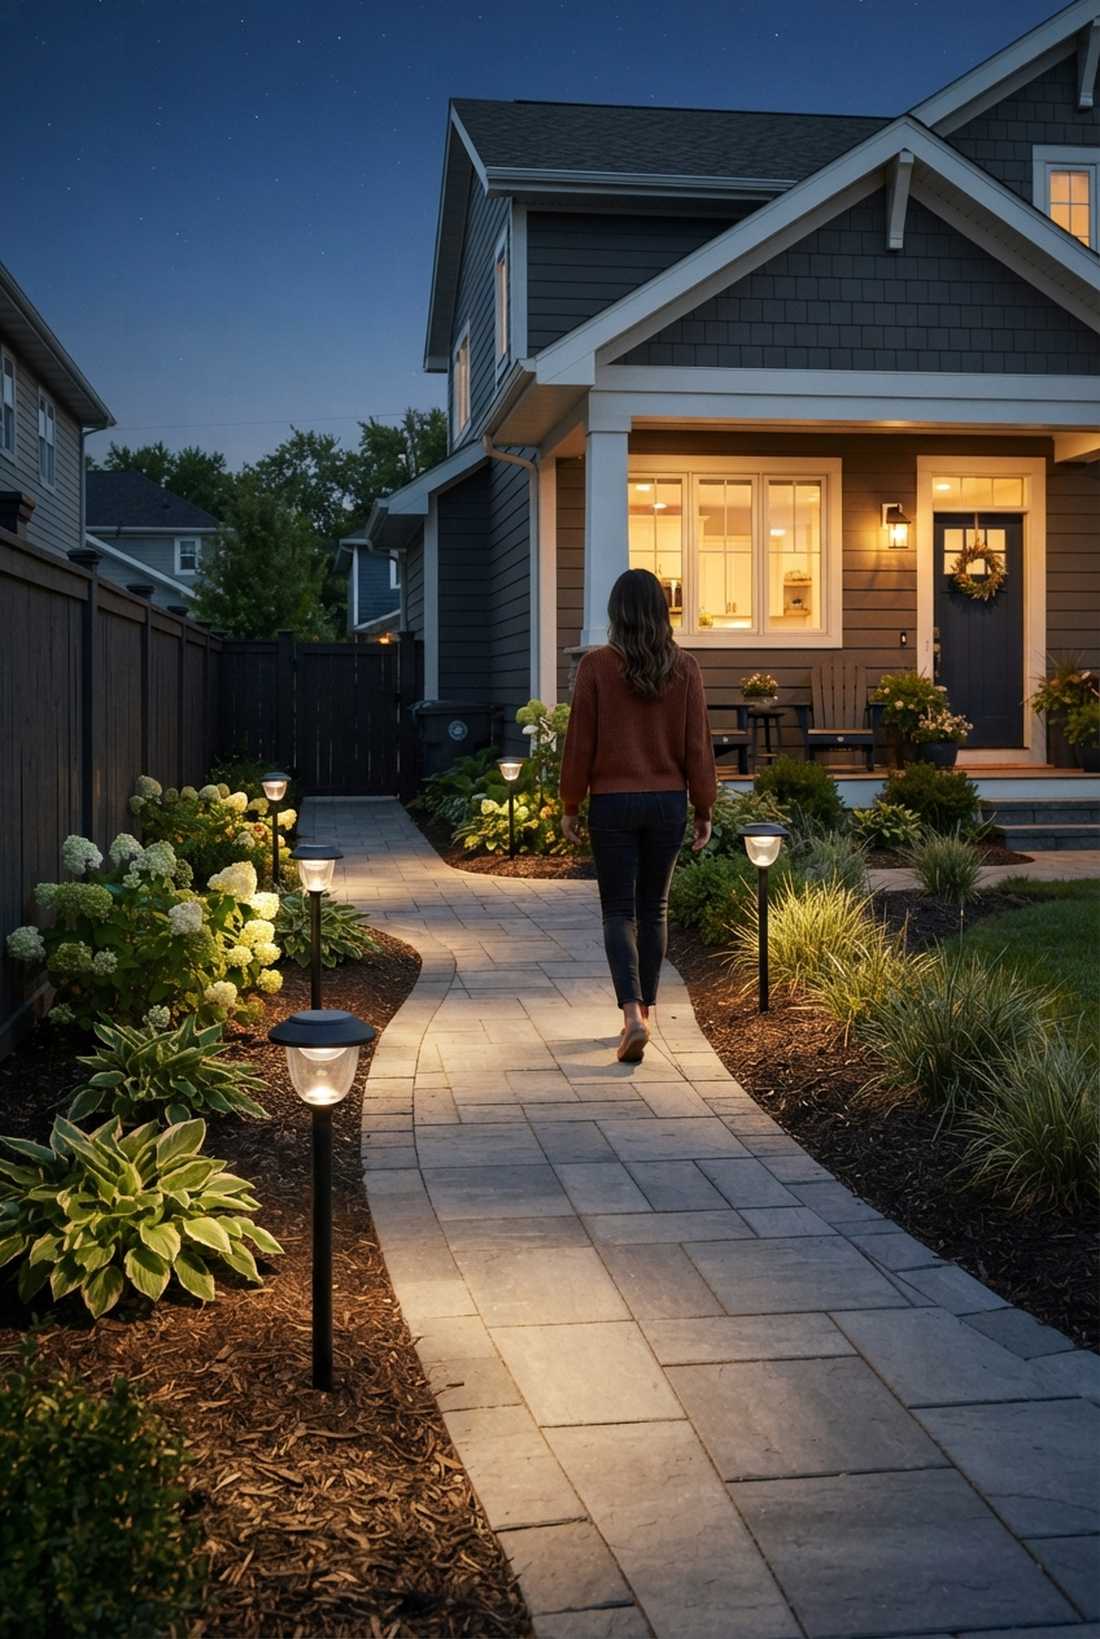
Pathway and Walkway Lighting Systems
Pathway lighting serves dual purposes in landscape design—it guides foot traffic safely while defining the spatial boundaries of your garden. Professional installations space fixtures 6 to 8 feet apart along walkways, creating consistent illumination without over-lighting.
1. Low-Voltage Bollard Pathway Lights
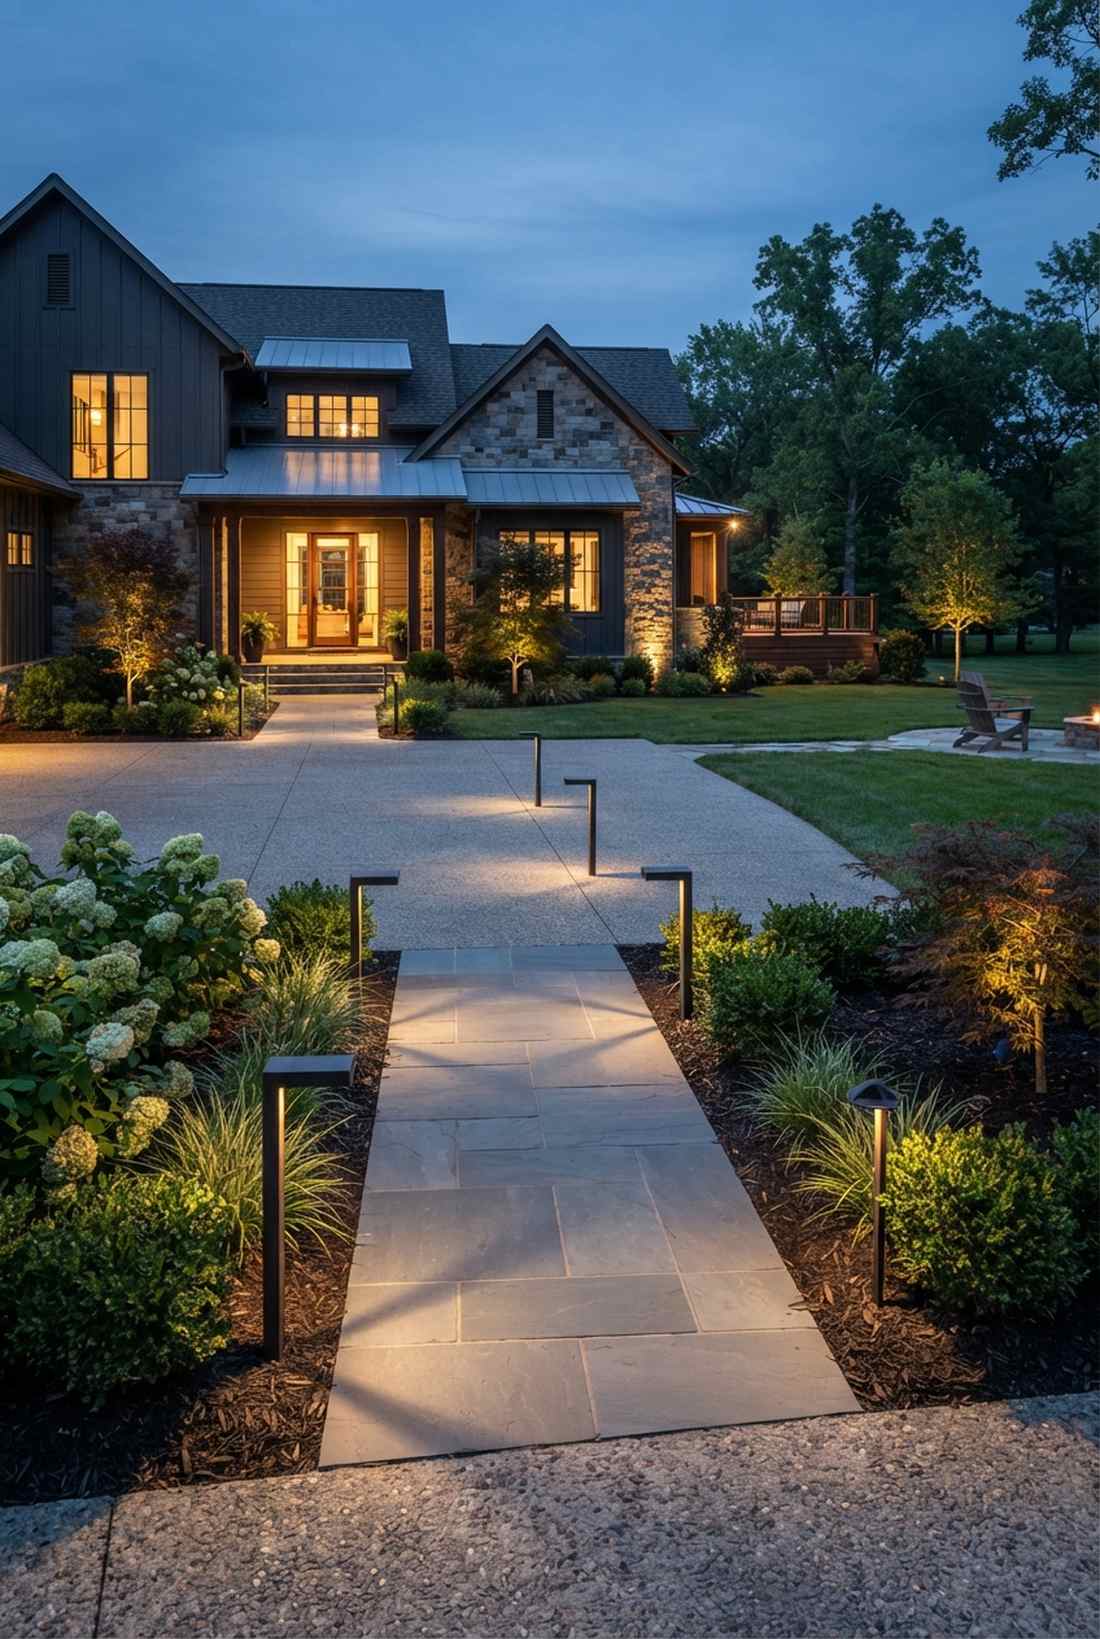
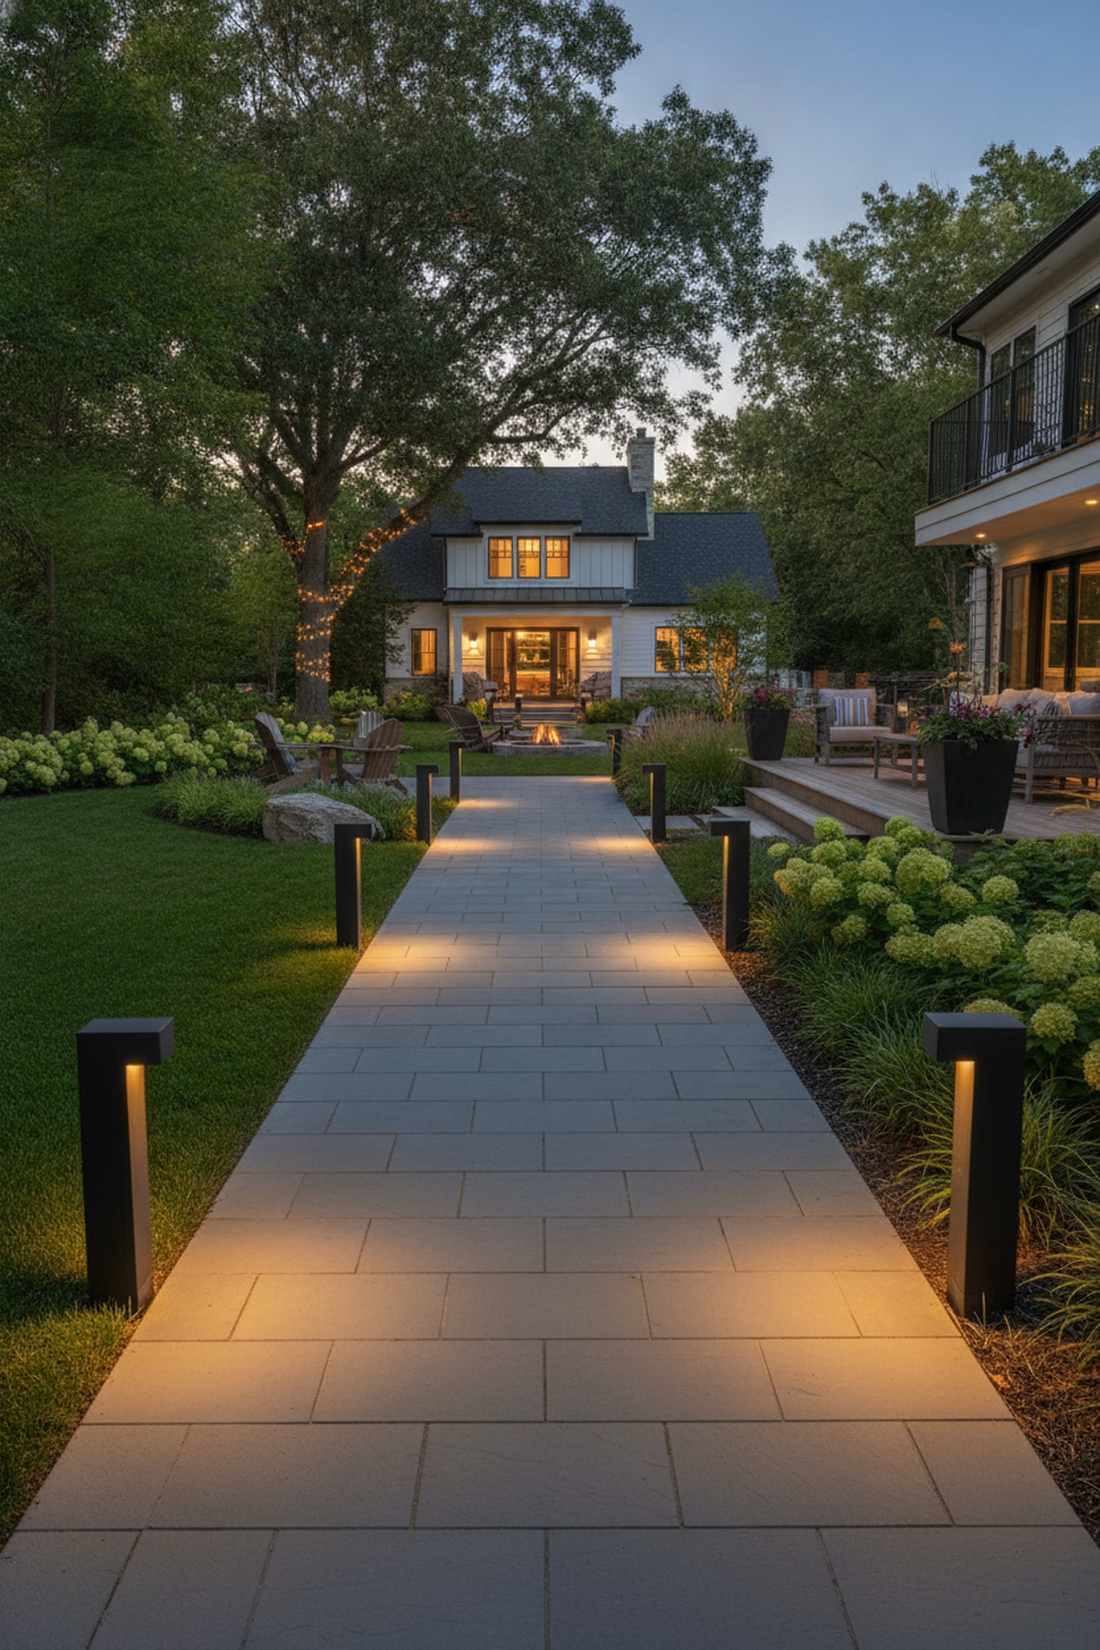
This layout feels like strolling through an exclusive five-star resort courtyard. Modern architectural walkway lighting works exceptionally well for framing straight, formal entrance paths.
Most beginners mistakenly buy flimsy plastic, but heavy-duty cast aluminum frames deliver a surprisingly premium look that survives harsh winters. Grab a complete professional landscape lighting kit to ensure seamless voltage drop control across the entire yard.
You can easily pull this off for around $150–$300 for a long driveway. Save this to your DIY weekend garden board!
- Key Materials: Cast aluminum bollards, 12V transformer, direct burial wire
- Vibe / Style: Contemporary luxury
- Difficulty: Moderate DIY setup
- Budget Breakdown: Materials: $120 | Wiring: $30.
- Creator’s Tip: Stagger the lights in a zig-zag pattern to avoid the “airport runway” effect.
- Smart Sourcing: Weatherproof cast-aluminum bollard lights (bulk pack) and a smart low-voltage outdoor transformer.
2. Solar-Powered Path Markers
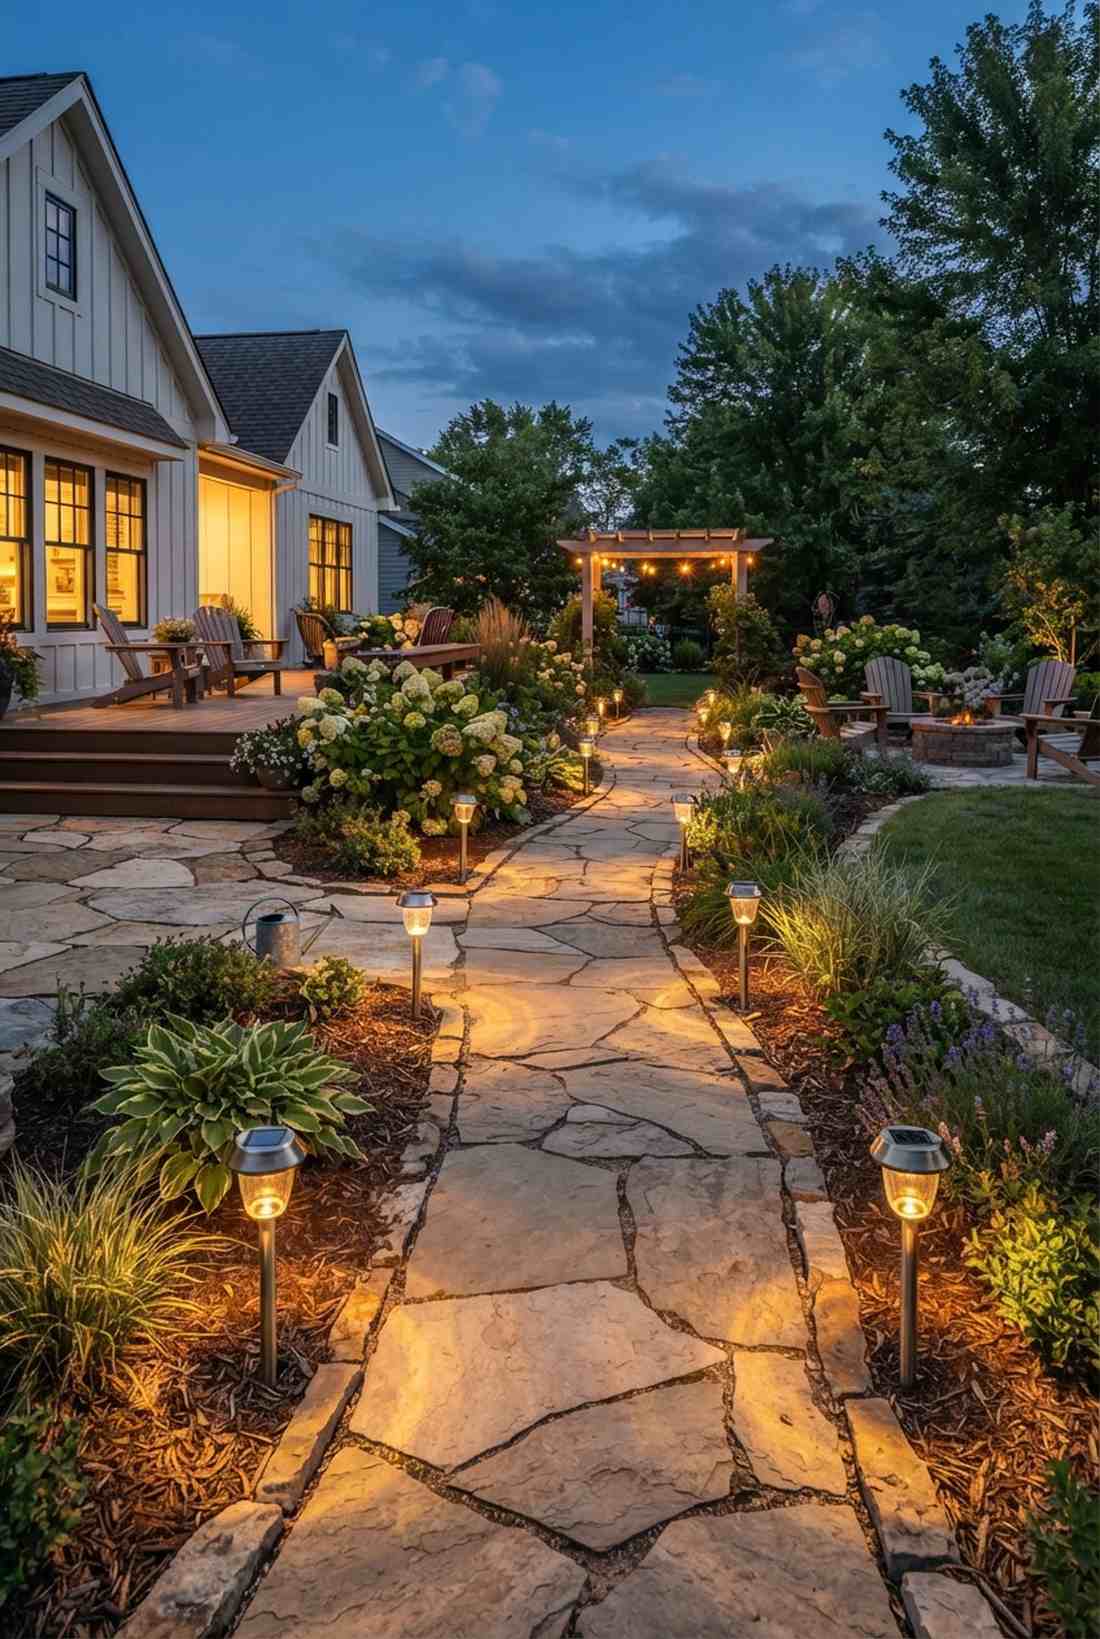
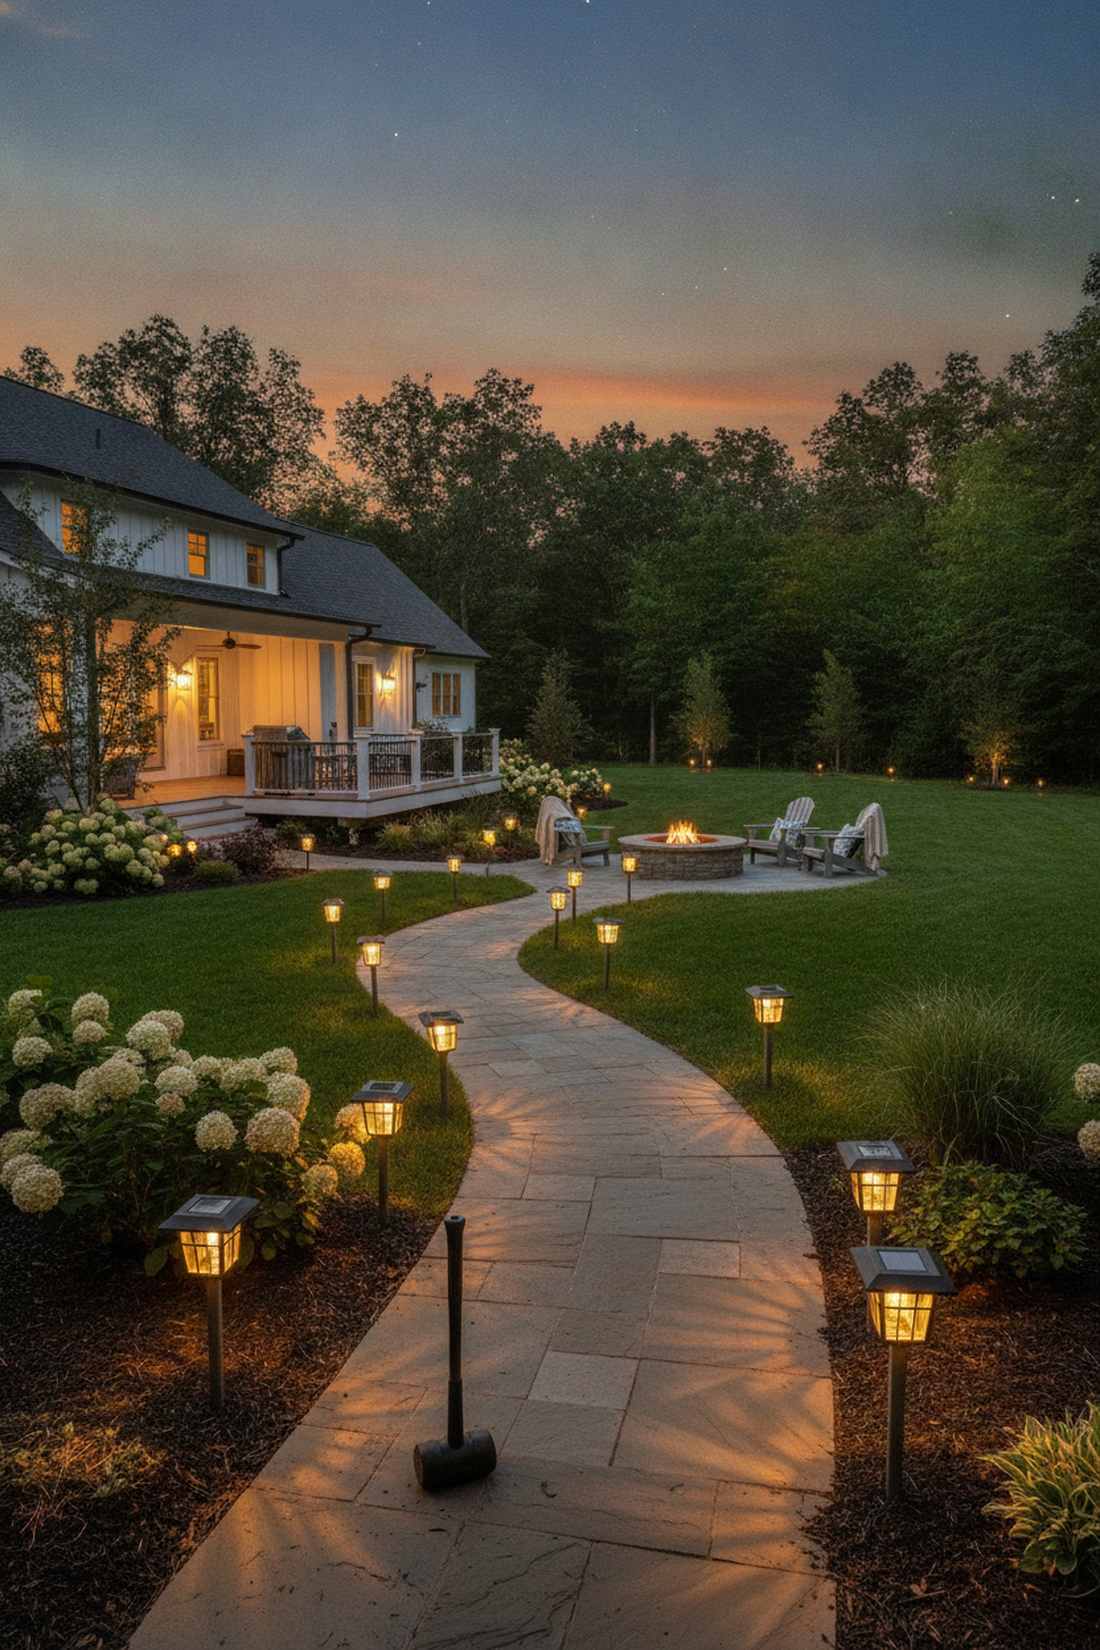
It radiates cozy neighborhood charm without the nightmare of digging trenches. Wireless garden edge markers are the ultimate solution for illuminating remote side yards where outlets don’t exist.
The biggest trap is buying dim big-box store units; upgrading to high-lumen, monocrystalline panels looks far more expensive than it is. Integrate these with broad outdoor garden lighting sets for a cohesive look without hiring an electrician.
Expect to spend just $40–$60 to line an entire walkway. It’s a fast upgrade that completely changes the vibe.
- Key Materials: High-lumen solar stakes, rubber mallet
- Vibe / Style: Warm and welcoming
- Difficulty: Absolute beginner
- Budget Breakdown: 12-pack Markers: $45.
- Creator’s Tip: Wipe the solar panels monthly with a damp cloth to maintain maximum charging efficiency.
- Smart Sourcing: High-lumen glass solar path lights (starter kit) and UV-resistant mounting stakes.
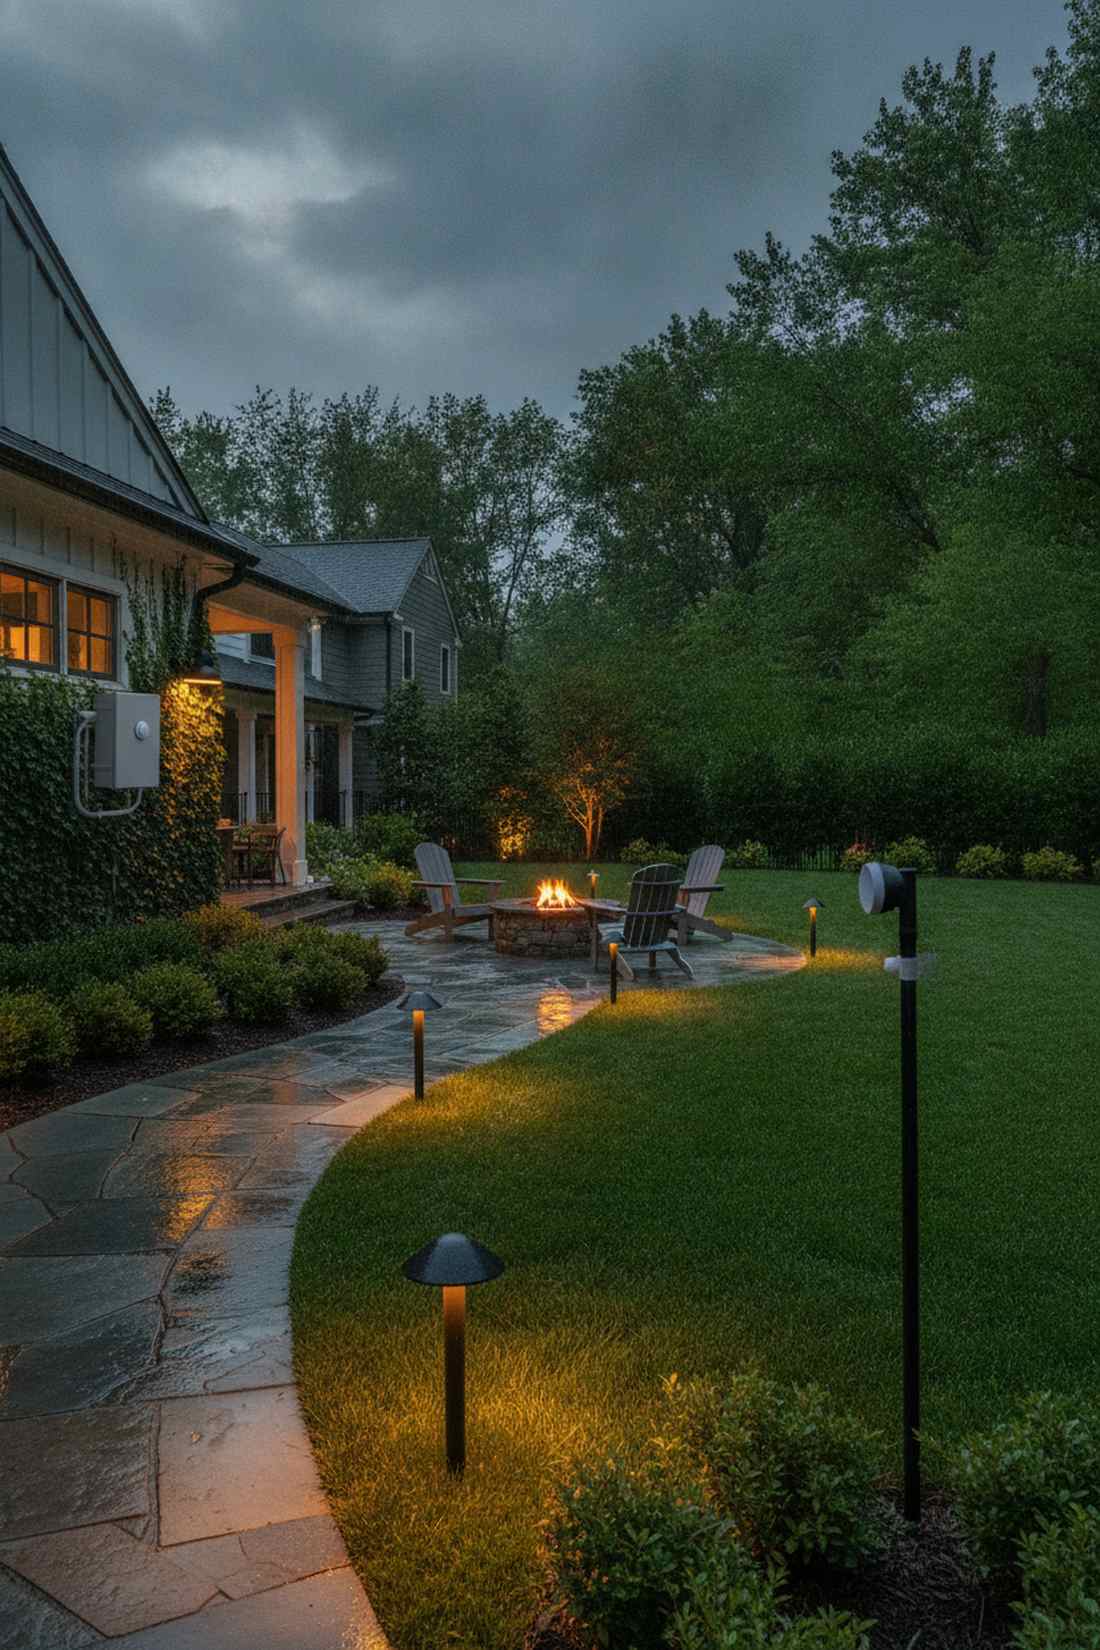
3. Mushroom Cap Pathway Fixtures
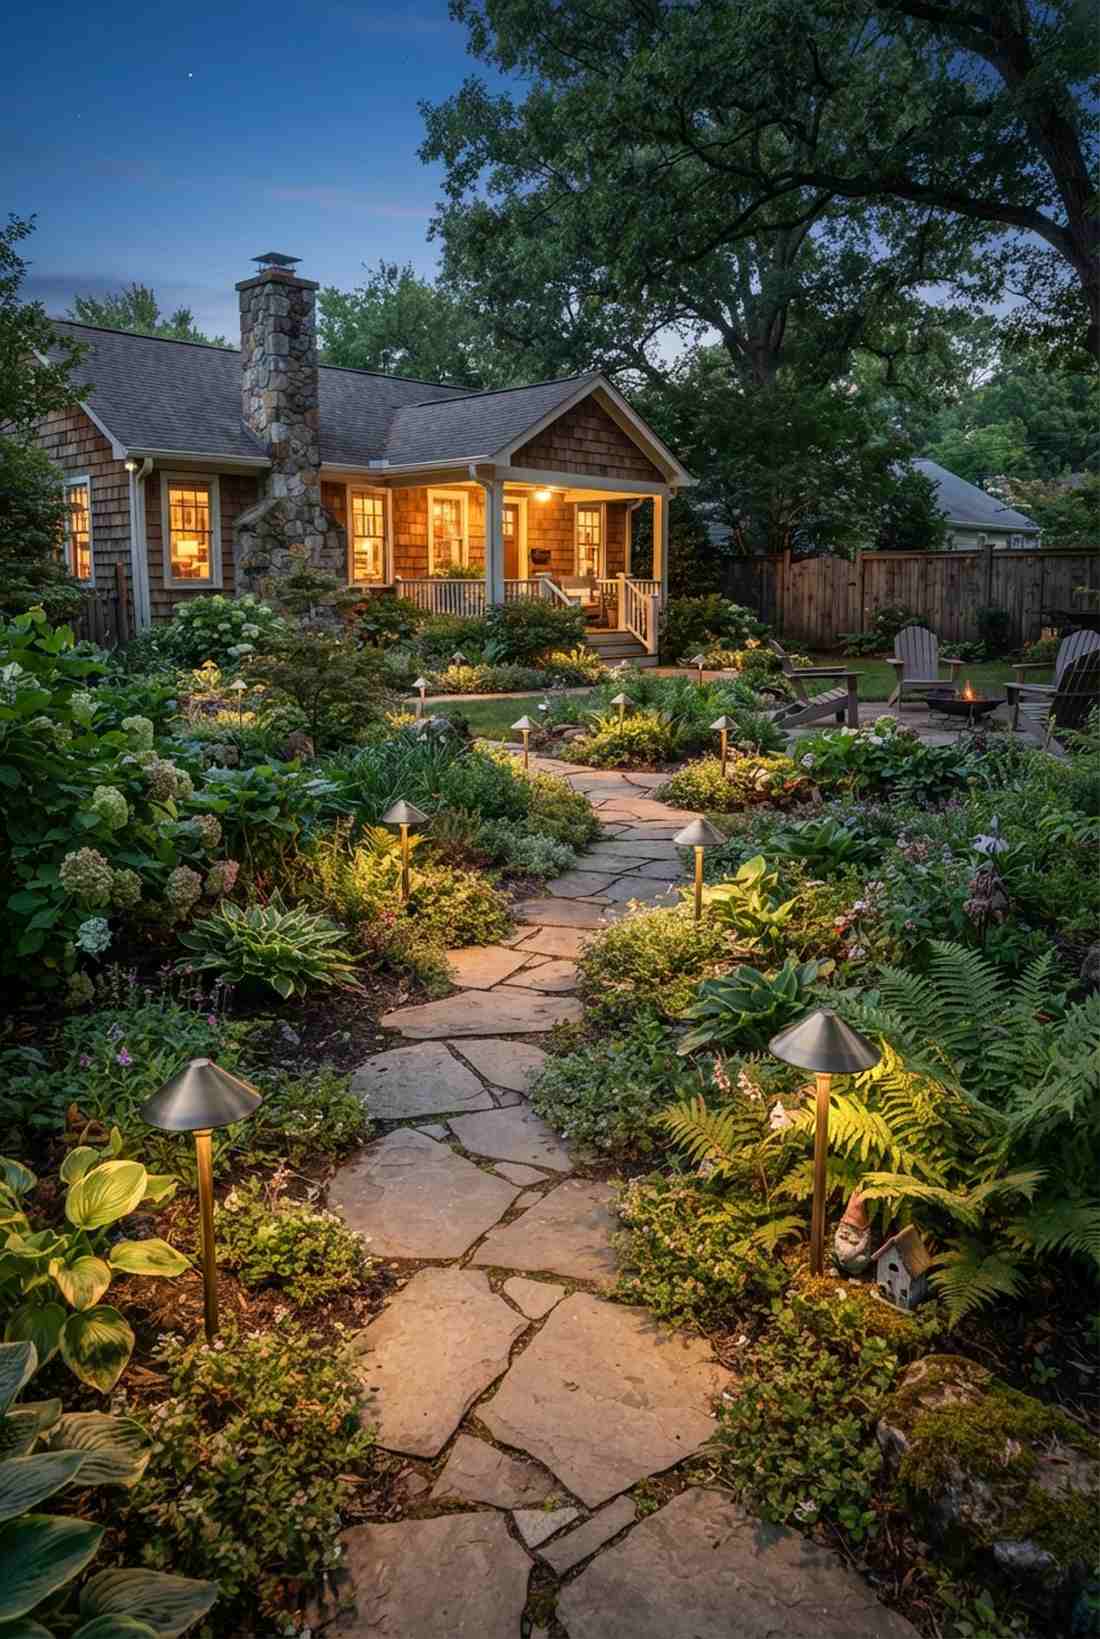
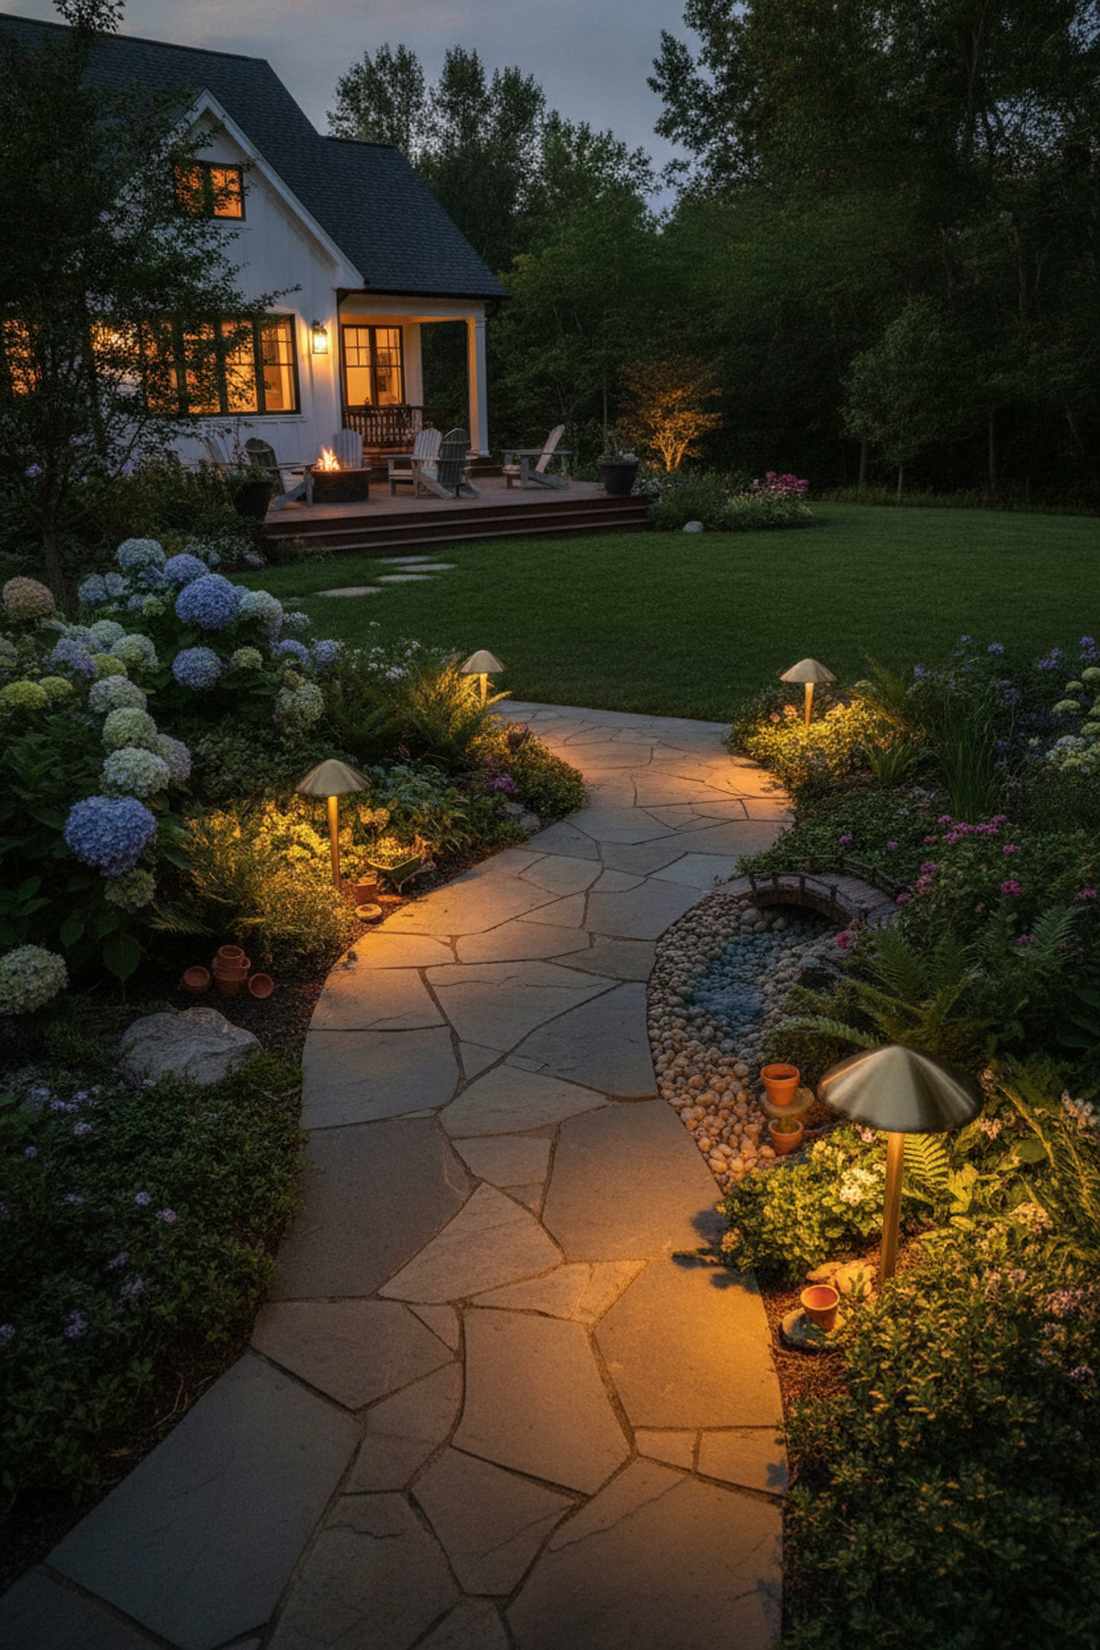
This setup feels like a tiny hidden forest you accidentally discovered at dusk. Whimsical mushroom pathway illumination is perfect for weaving through dense flower beds and organic, curved walkways.
Aiming raw light upwards causes blinding glare, but utilizing a domed cap gives a designer-level finish that casts a soft 360-degree pool of light. Seamlessly pair these with miniature garden supplies to create enchanting focal points.
A full bed transformation runs roughly $90–$140. Pin this if you love soft, ambient fairy-tale aesthetics!
- Key Materials: Brass mushroom fixtures, low-voltage cabling
- Vibe / Style: Enchanted woodland
- Difficulty: Intermediate
- Budget Breakdown: Fixtures: $100 | Connectors: $15.
- Creator’s Tip: Keep the caps at least 2 inches above your tallest groundcover plants for unimpeded light throw.
- Smart Sourcing: Solid brass mushroom path lights (pre-wired) and waterproof gel-filled wire connectors.
4. Recessed Step Lights
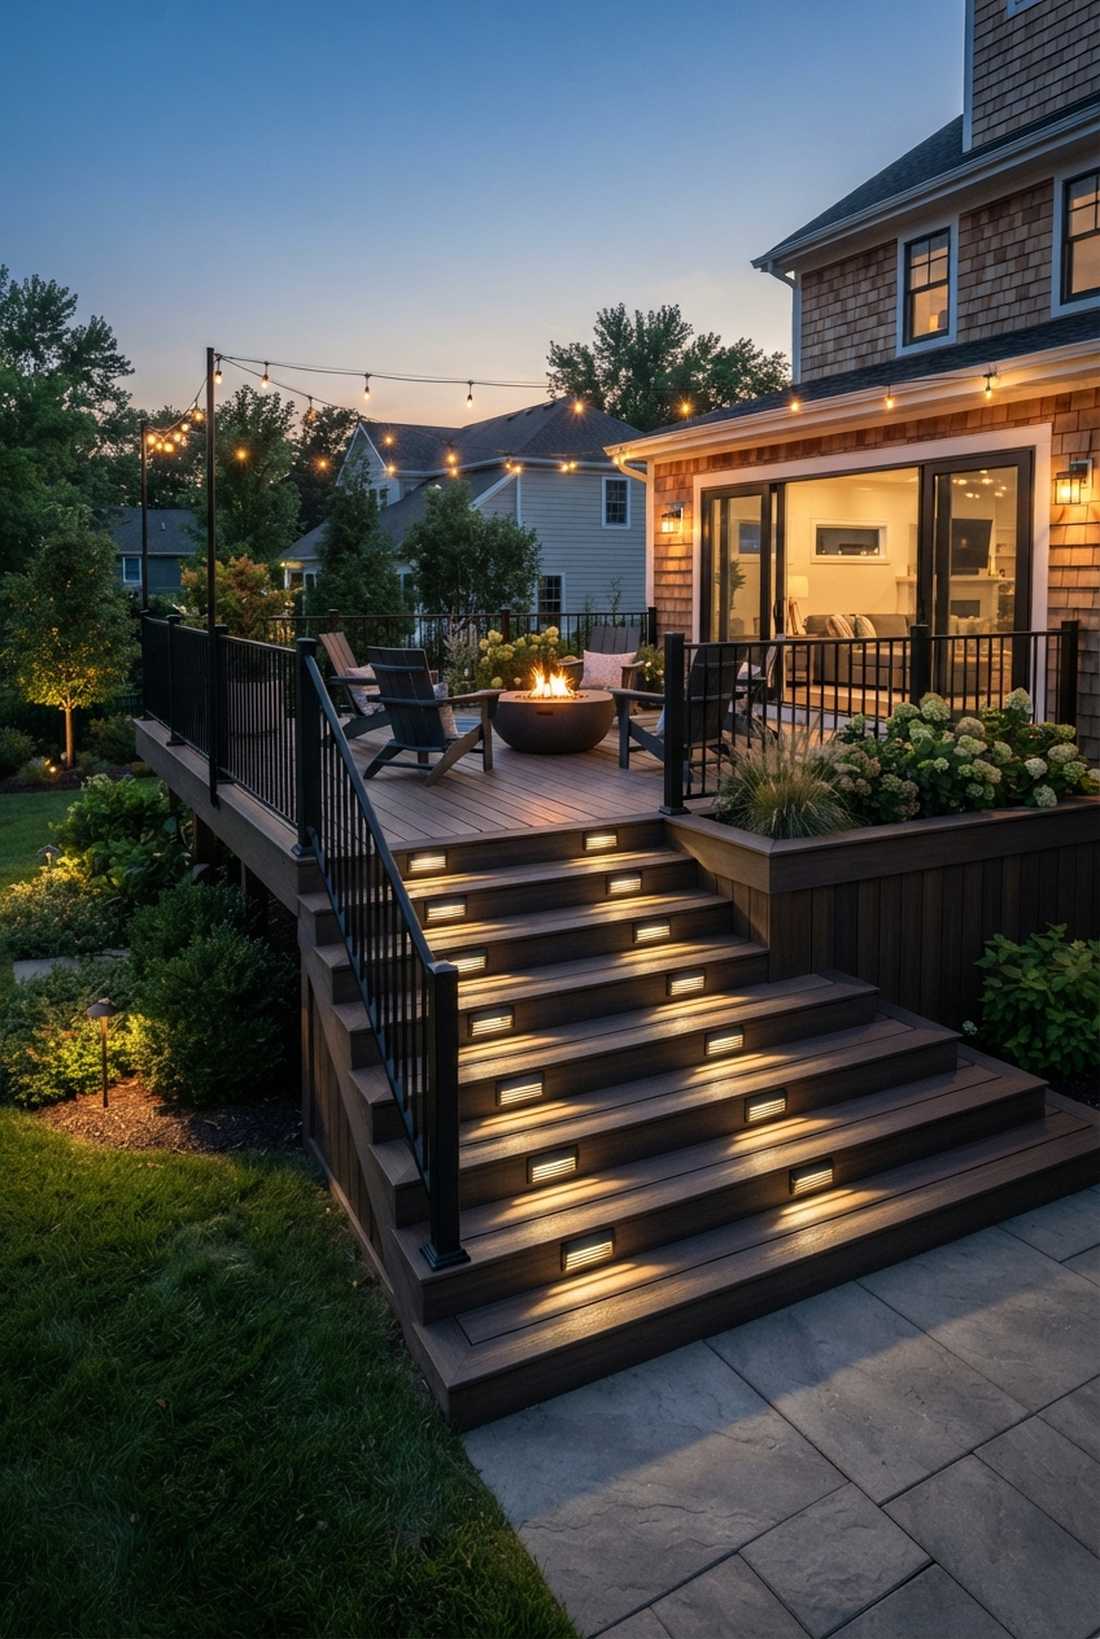
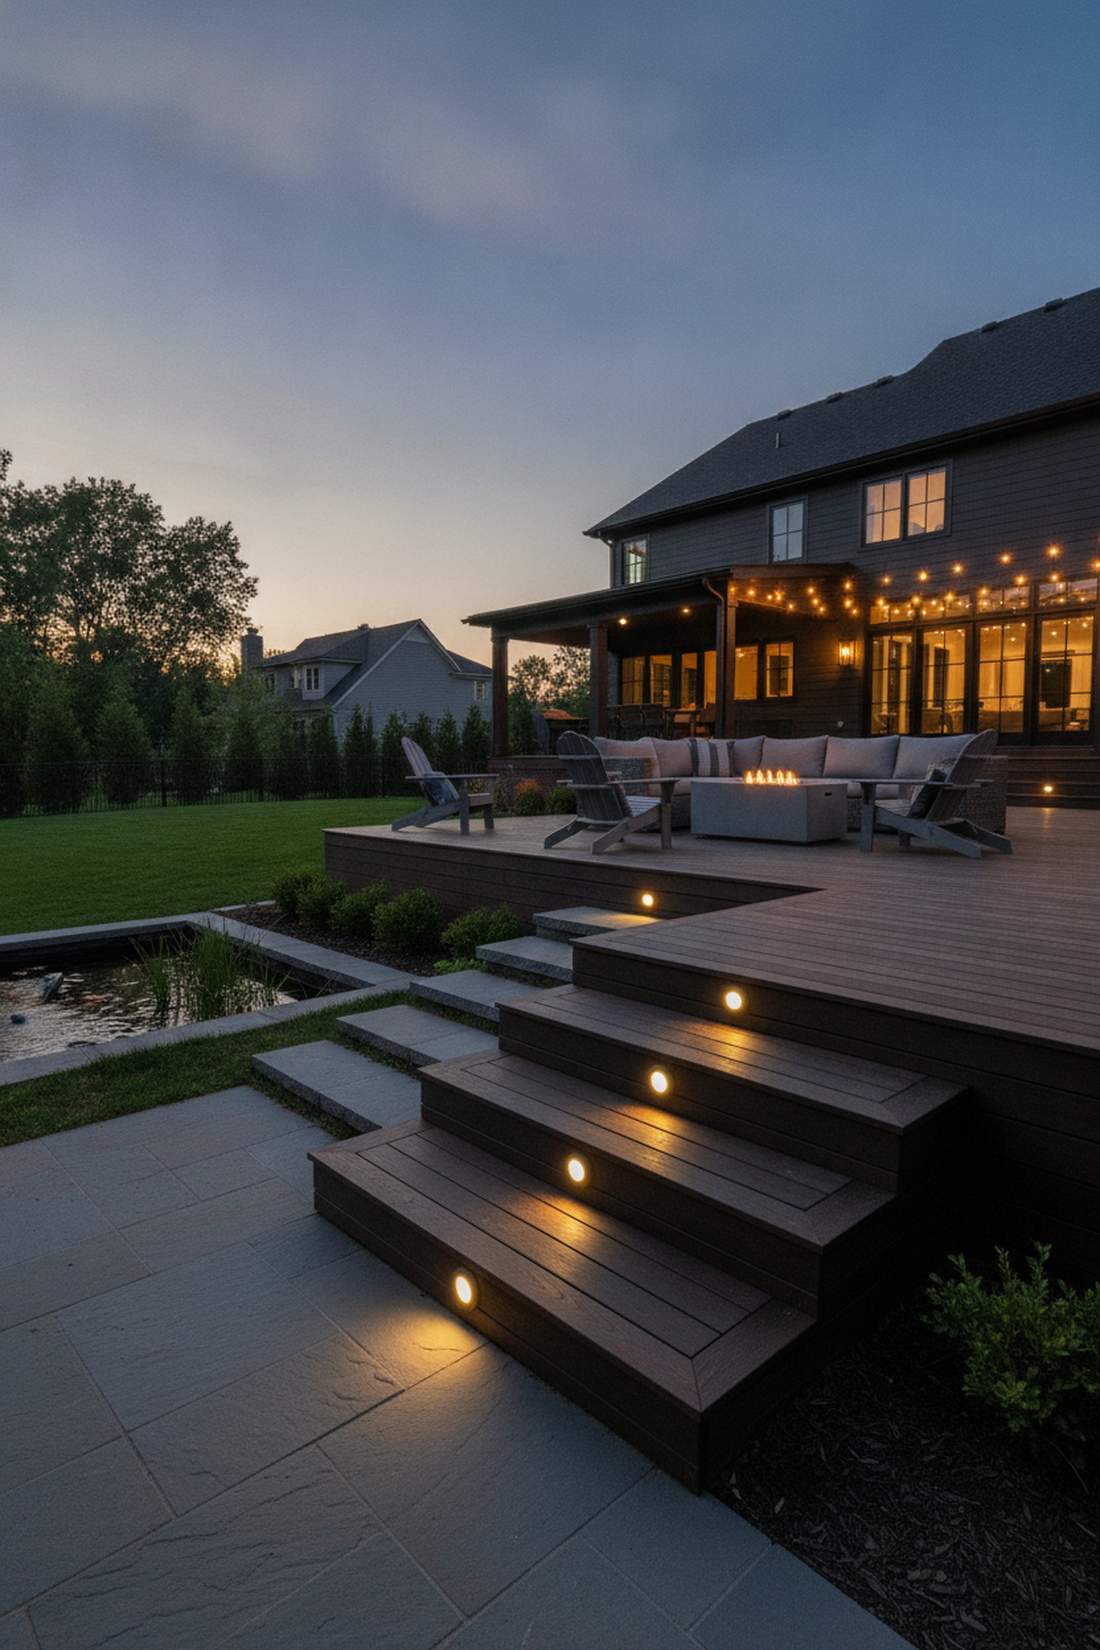
Nothing screams high-end architecture quite like a seamlessly glowing staircase. Flush-mounted deck stair lighting is an absolute necessity for elevated patios or multi-tier backyard layouts.
Taping up exposed wires looks incredibly cheap; routing them behind the risers ensures a flawless, zero-trip-hazard aesthetic. Opt for hardwired LED step light kits to guarantee consistent brightness across every single tread.
This safety and style upgrade costs about $15–$25 per step. Highly recommended for a quick weekend win.
- Key Materials: Recessed LED louvers, hole saw, outdoor wire
- Vibe / Style: Sleek safety
- Difficulty: Advanced DIY
- Budget Breakdown: Lights: $120 | Tools: $25.
- Creator’s Tip: Alternate sides on each step instead of placing them perfectly center for a more dynamic shadow play.
- Smart Sourcing: Die-cast aluminum recessed step lights (multi-pack) and a heavy-duty hole saw kit.
This next setup completely changes how outdoor seating feels, and it costs less than a fast-food dinner…
5. Ground-Flush Deck Lights

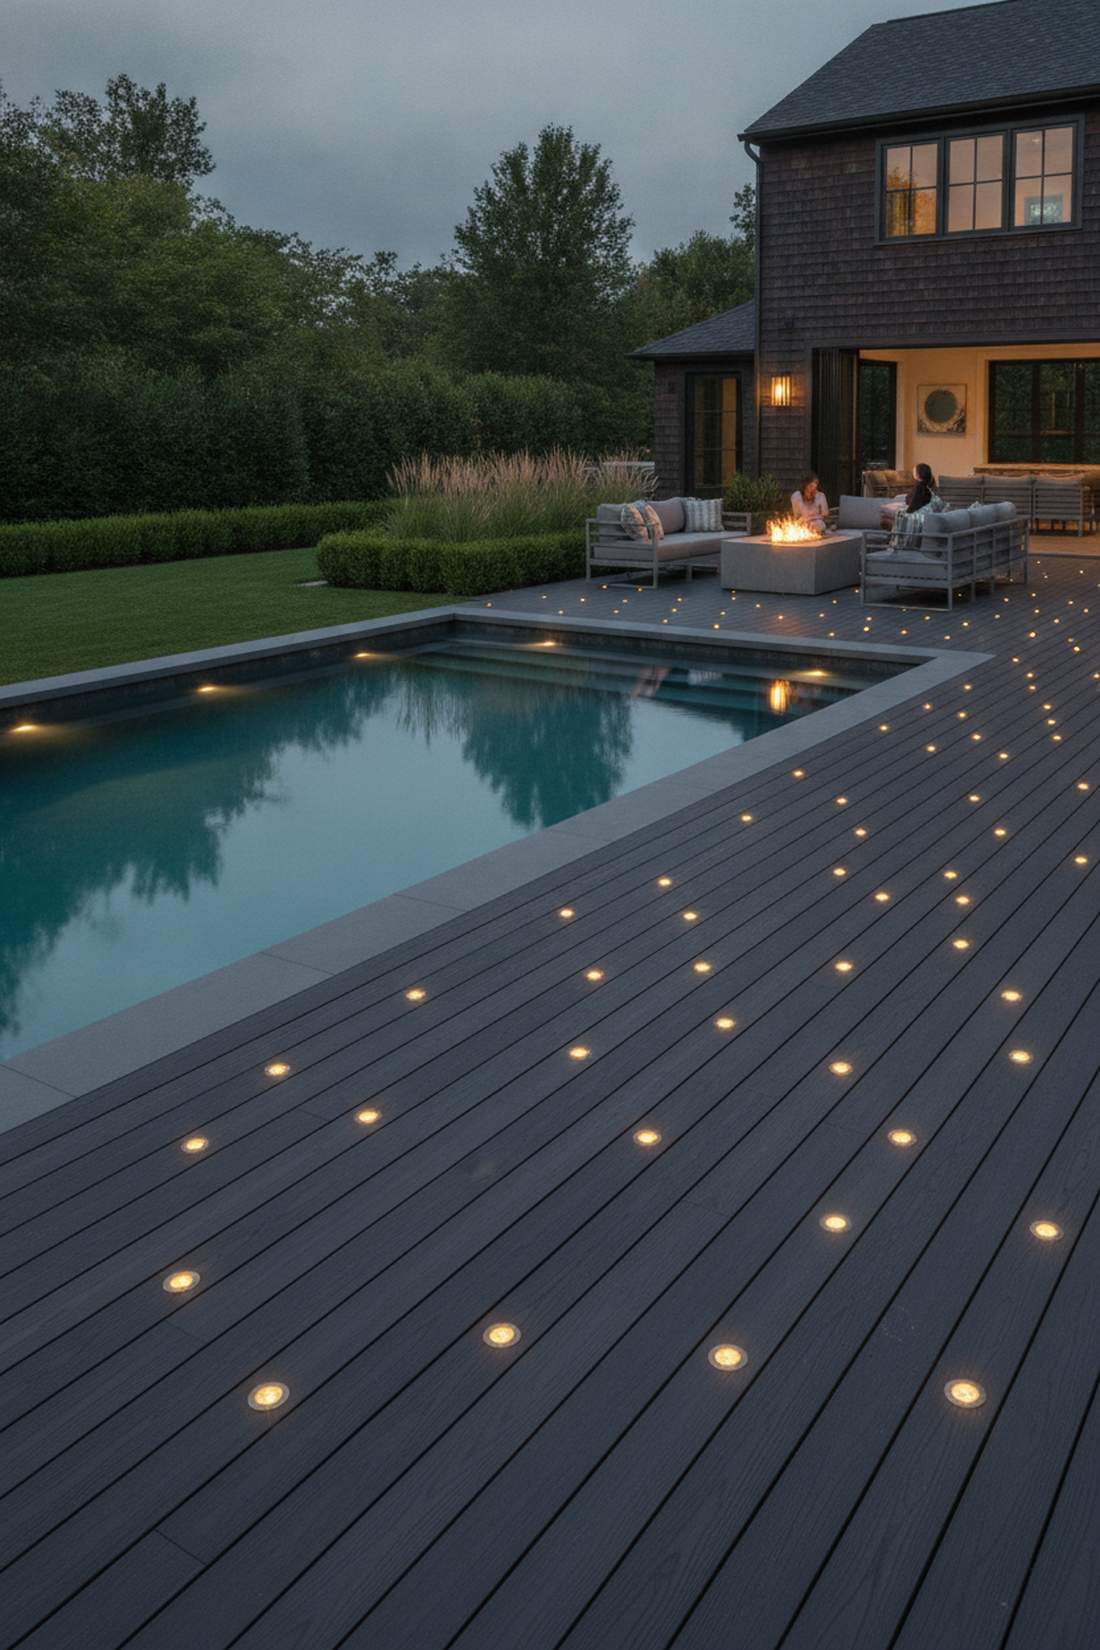
Imagine your patio floor mimicking a starry night sky beneath your feet. Submersible ground up-lighting works brilliantly around pool edges and flat entertainment spaces.
Surface-mounted pucks easily get kicked and broken, but flush-tempered glass units deliver an unbreakable, luxury resort aesthetic. Integrating heavy-duty waterproof decking accessories ensures they easily withstand heavy furniture and foot traffic.
A set of 10 nodes usually runs $50–$80. Save this to your ultimate backyard makeover board!
- Key Materials: Low-profile deck dots, drill, low-voltage power supply
- Vibe / Style: Starlit luxury
- Difficulty: Intermediate
- Budget Breakdown: Light Kit: $65 | Forstner Bit: $15.
- Creator’s Tip: Map out the light placement with chalk at night before drilling a single hole.
- Smart Sourcing: IP67 waterproof flush deck lights (starter kit) and pre-cut outdoor cable extensions.
6. Linear Pathway Strip Lighting
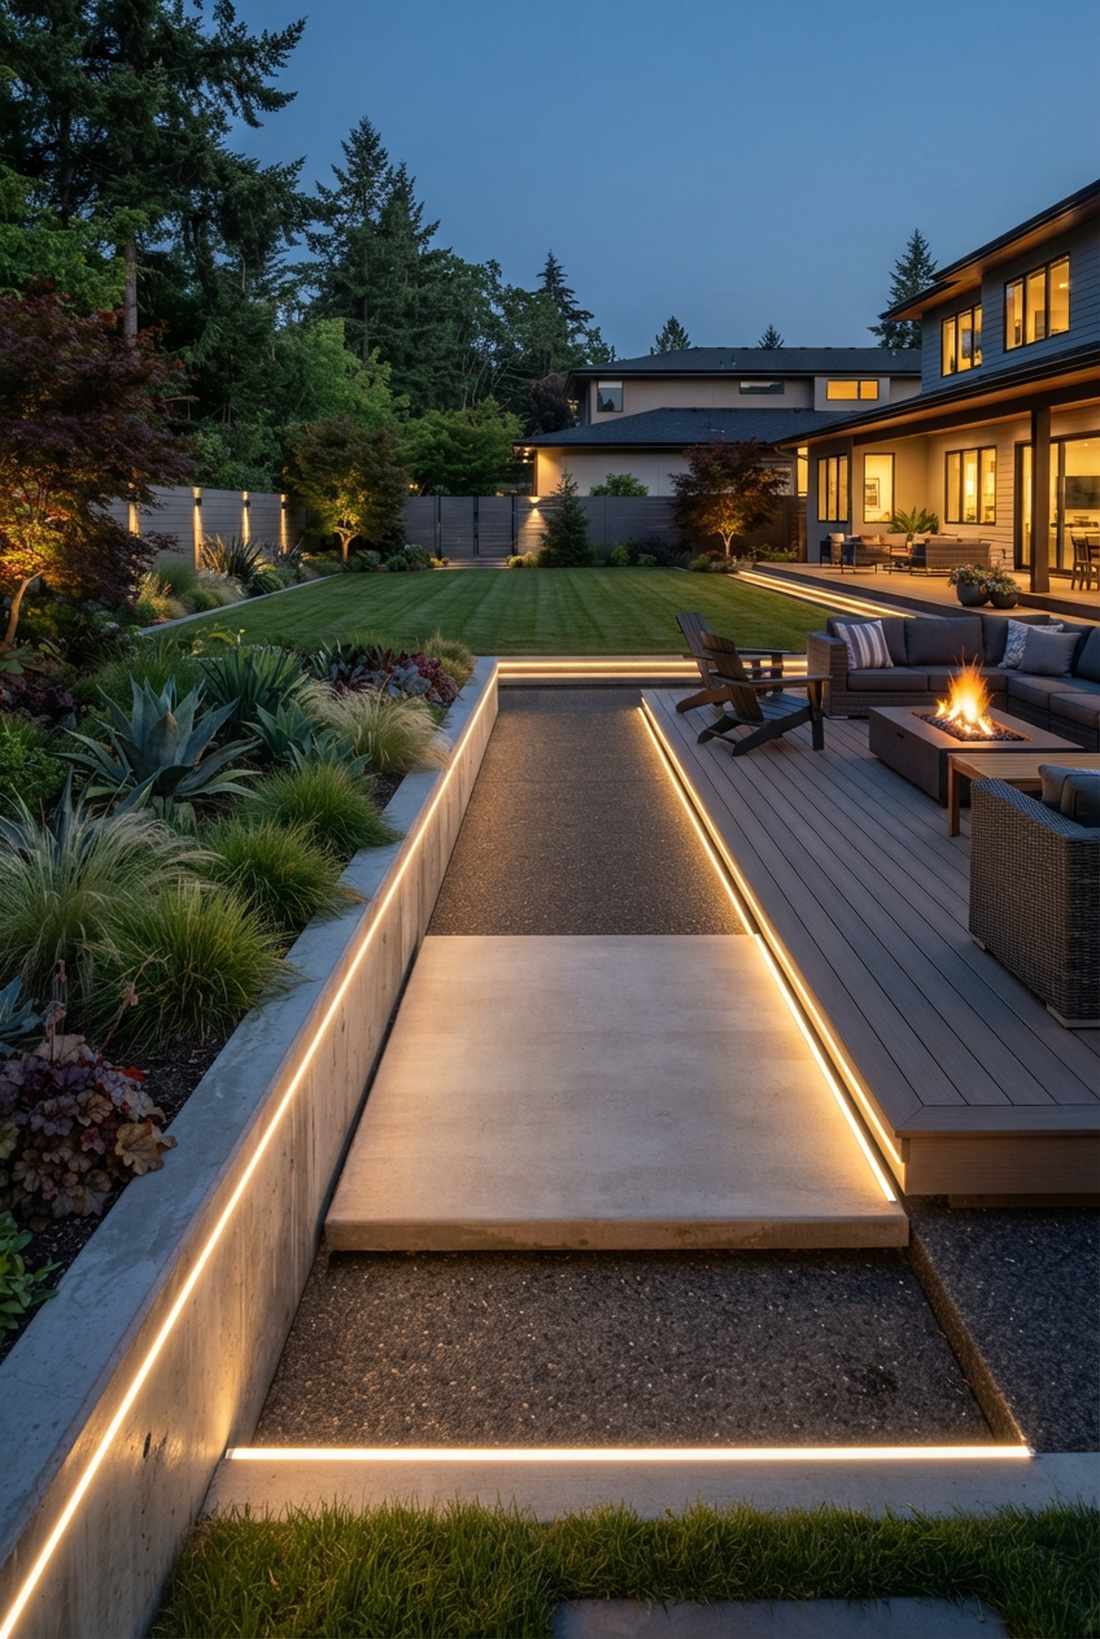
It creates a razor-sharp, futuristic boundary that looks straight out of a billionaire’s estate. Continuous neon garden edging is the ultimate hack for minimalist, concrete-heavy landscapes.
Flimsy indoor strips fail in days, but silicone-encased IP68 ribbons guarantee a flawless, weather-proof glow. For maximum impact, tuck these high-lumen outdoor LED strip light kits directly under the lip of hardscape retainer walls.
A massive 32-foot run only costs about $60–$90. It’s a fast upgrade that completely changes the vibe.
- Key Materials: IP68 LED neon rope, aluminum mounting channels
- Vibe / Style: Ultra-modern boundary
- Difficulty: Easy
- Budget Breakdown: Strip Spool: $50 | Channel Tracks: $30.
- Creator’s Tip: Always use aluminum tracking instead of adhesive tape—the tape will peel off outdoors instantly.
- Smart Sourcing: UV-coated silicone LED neon rope (bulk spool) and pre-cut aluminum diffuser channels.
Overhead Ambient Lighting Solutions
Overhead lighting creates the foundational ambiance for outdoor living spaces by washing large areas in soft, diffused light. This category includes suspended fixtures and string light systems that define vertical space.
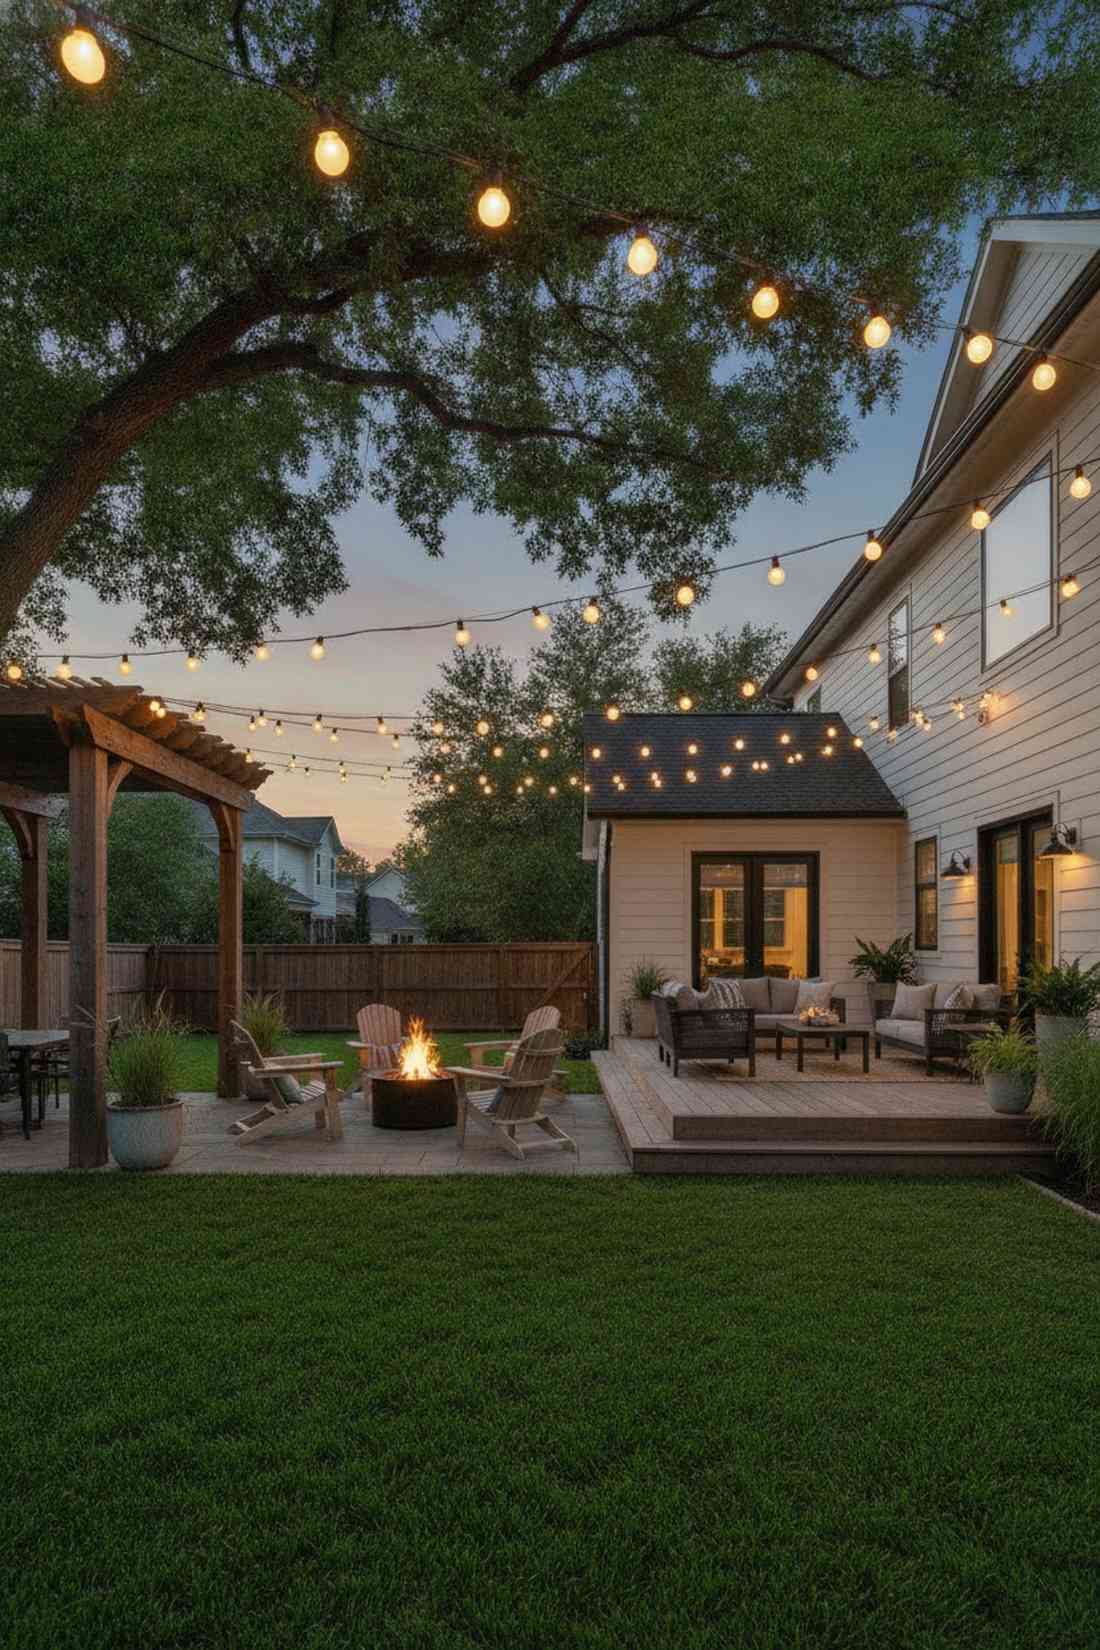
7. Cafe-Style Bistro String Lights
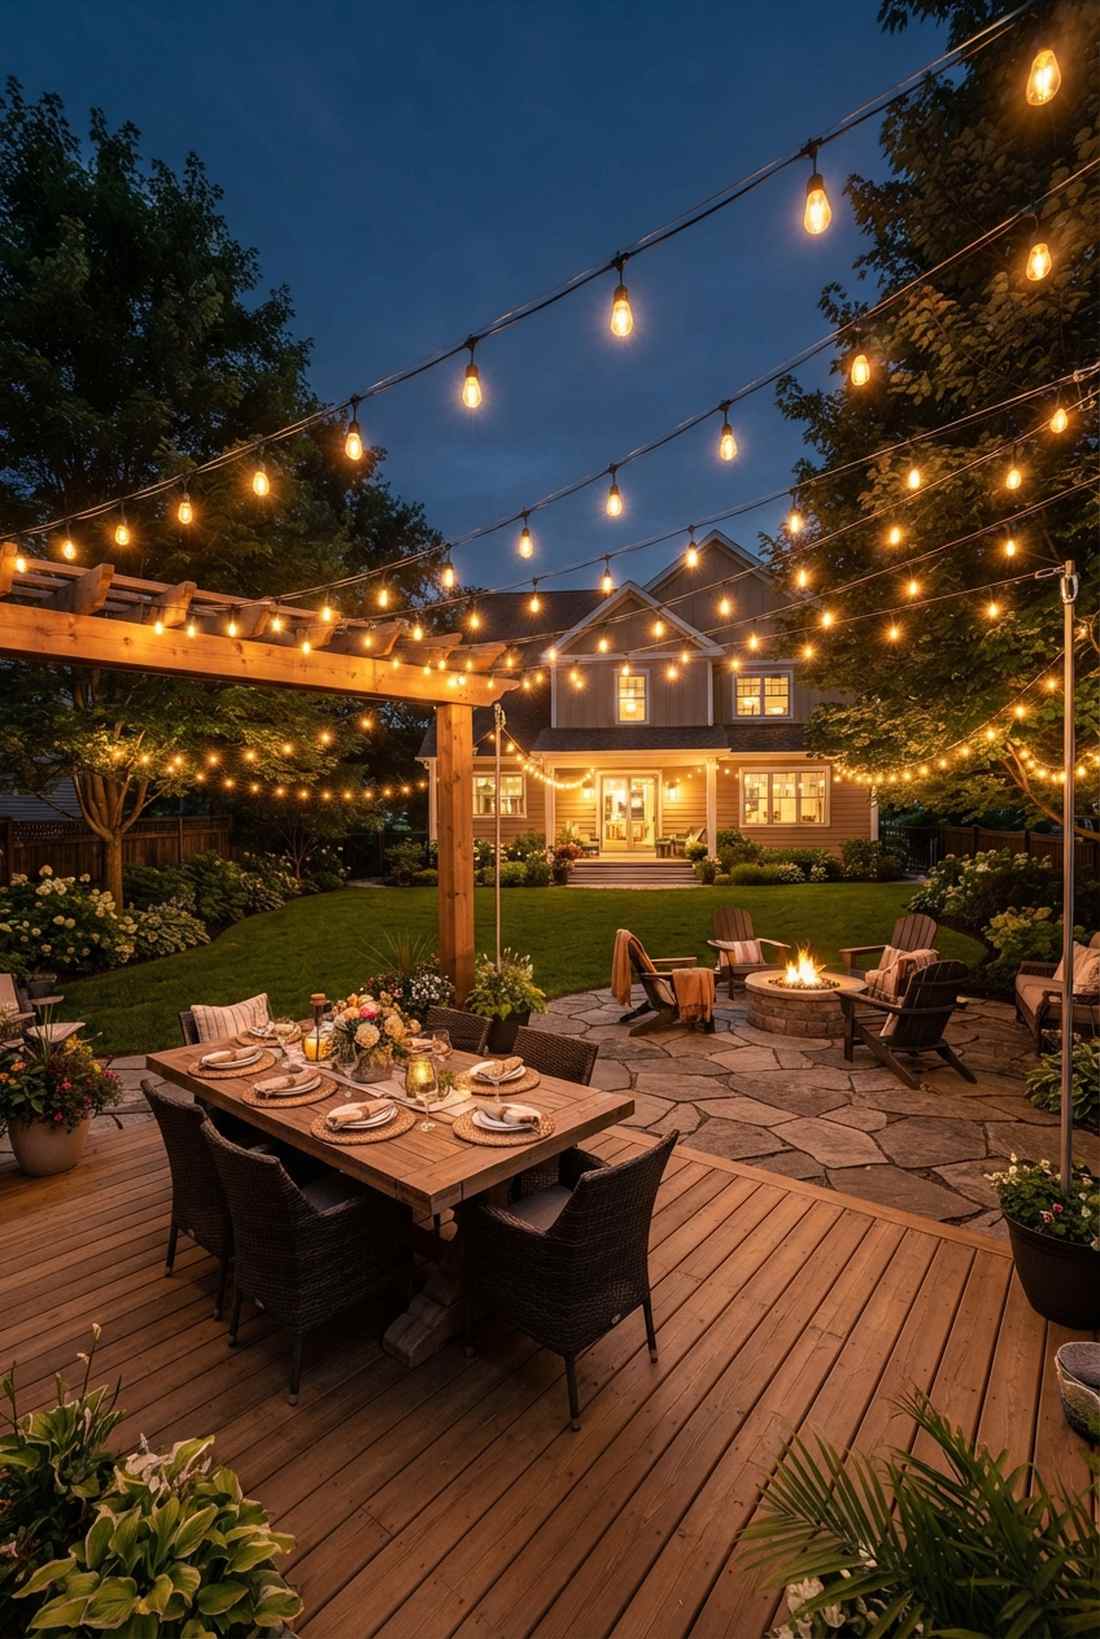
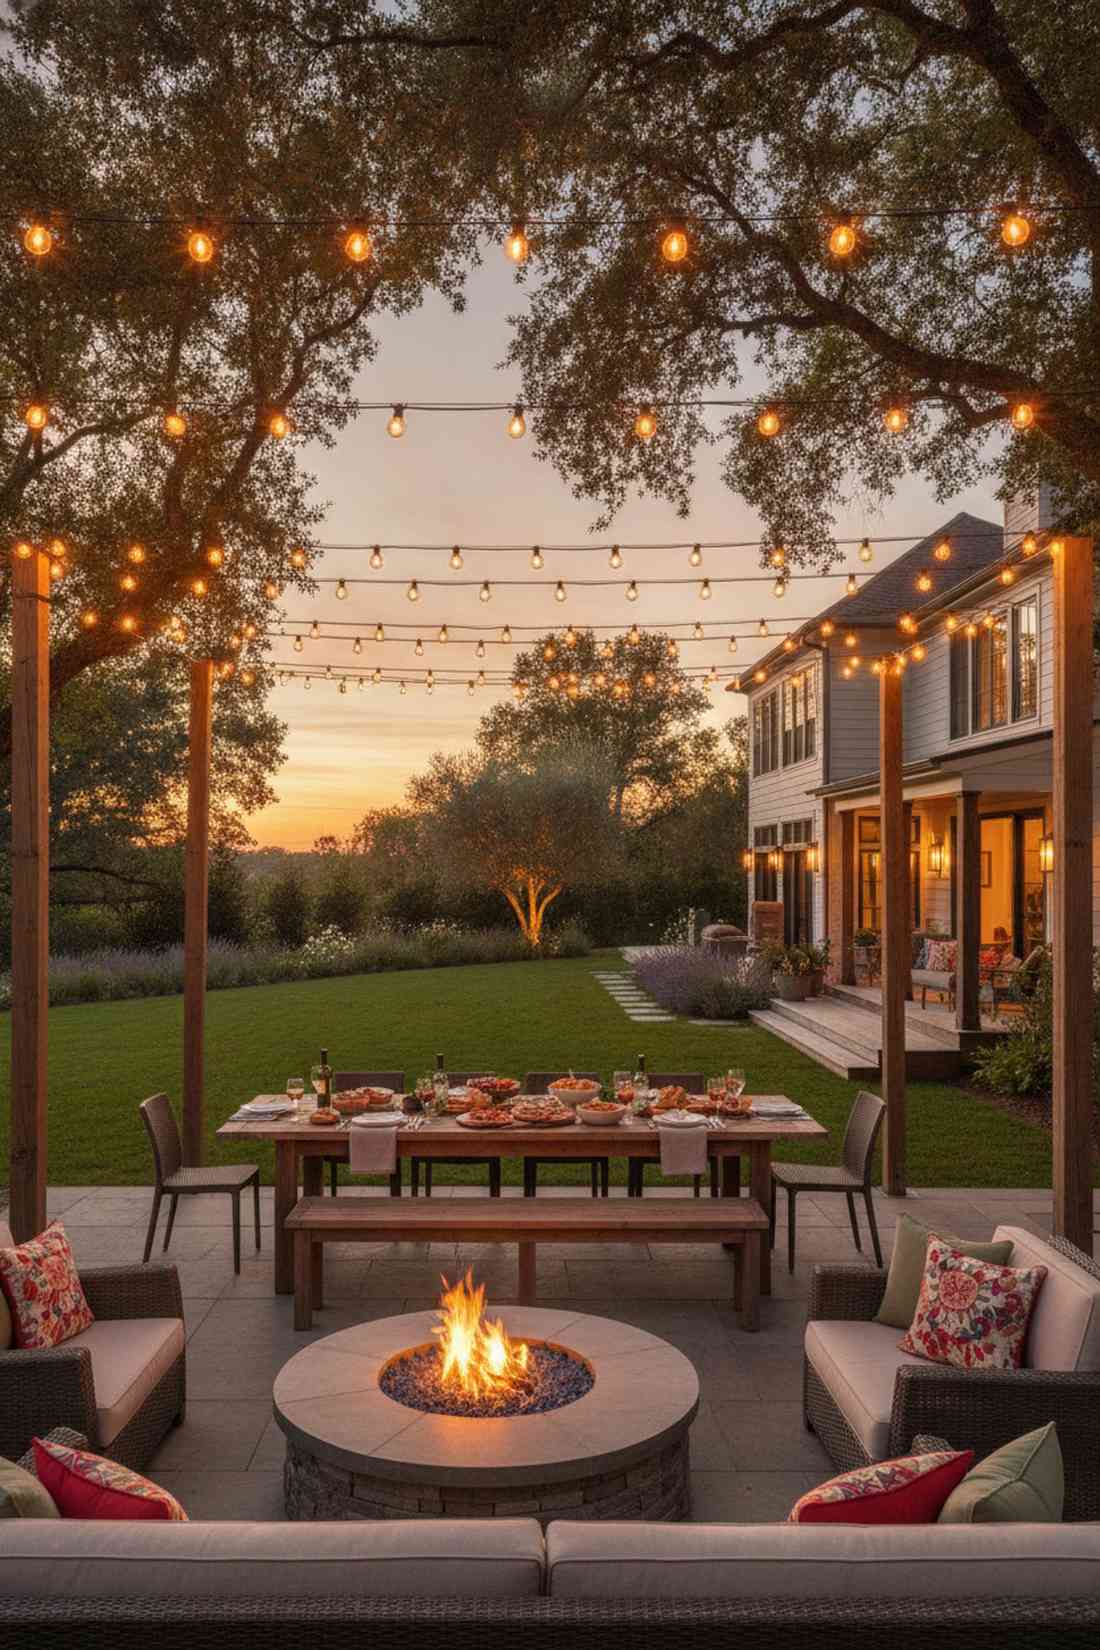
It radiates the bustling, magnetic energy of an outdoor Italian cafe. Edison bulb canopy lighting is an absolute must-have for expansive dining tables and open-air fire pits.
Hanging them directly from tree branches guarantees sagging over time; using tensioned steel cables delivers a tight, professional-grade look. Investing in shatterproof outdoor string light sets prevents disastrous glass breakage during sudden windstorms.
A massive 100-foot commercial canopy costs roughly $70–$110. Pin this if you’re planning a massive backyard bash!
- Key Materials: S14 LED string lights, steel tension cable, carabiners
- Vibe / Style: Warm festivity
- Difficulty: Intermediate
- Budget Breakdown: Lights: $60 | Suspension Kit: $35.
- Creator’s Tip: Remove all the bulbs before hanging the main wire to prevent accidental smashing.
- Smart Sourcing: Shatterproof commercial string lights (bulk pack) and a stainless steel wire rope suspension kit.
8. Fairy Light Canopy Systems
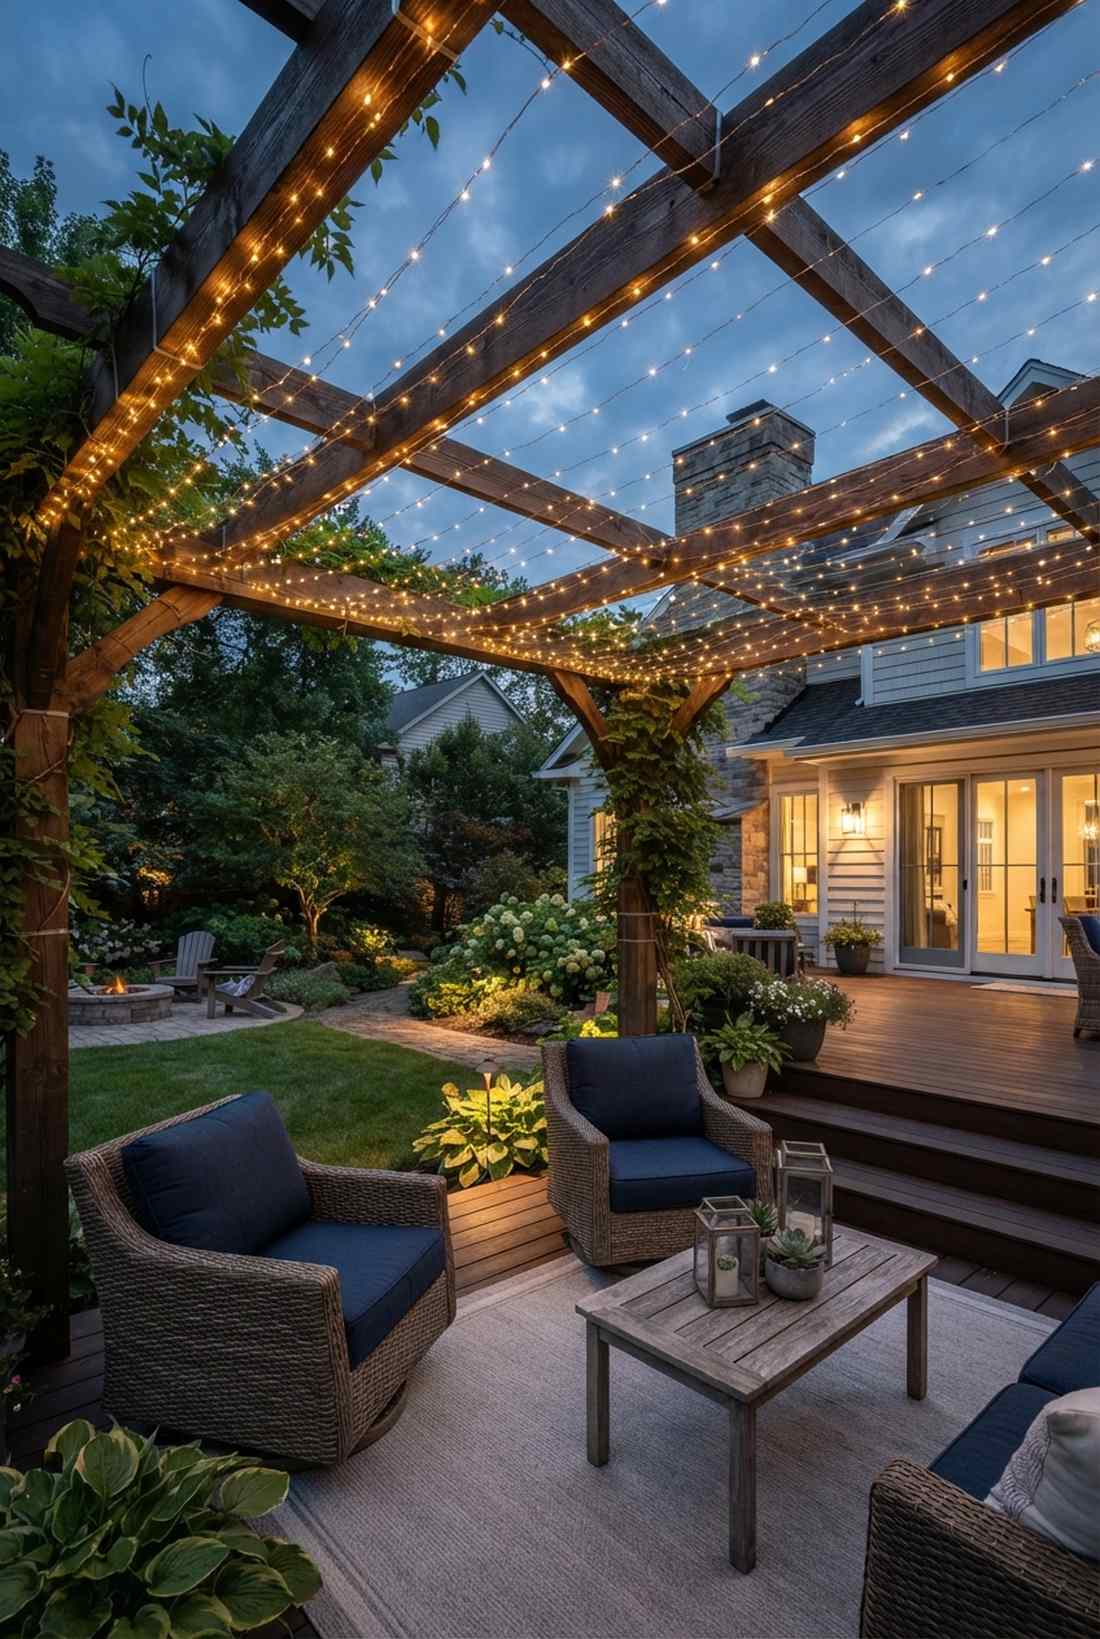
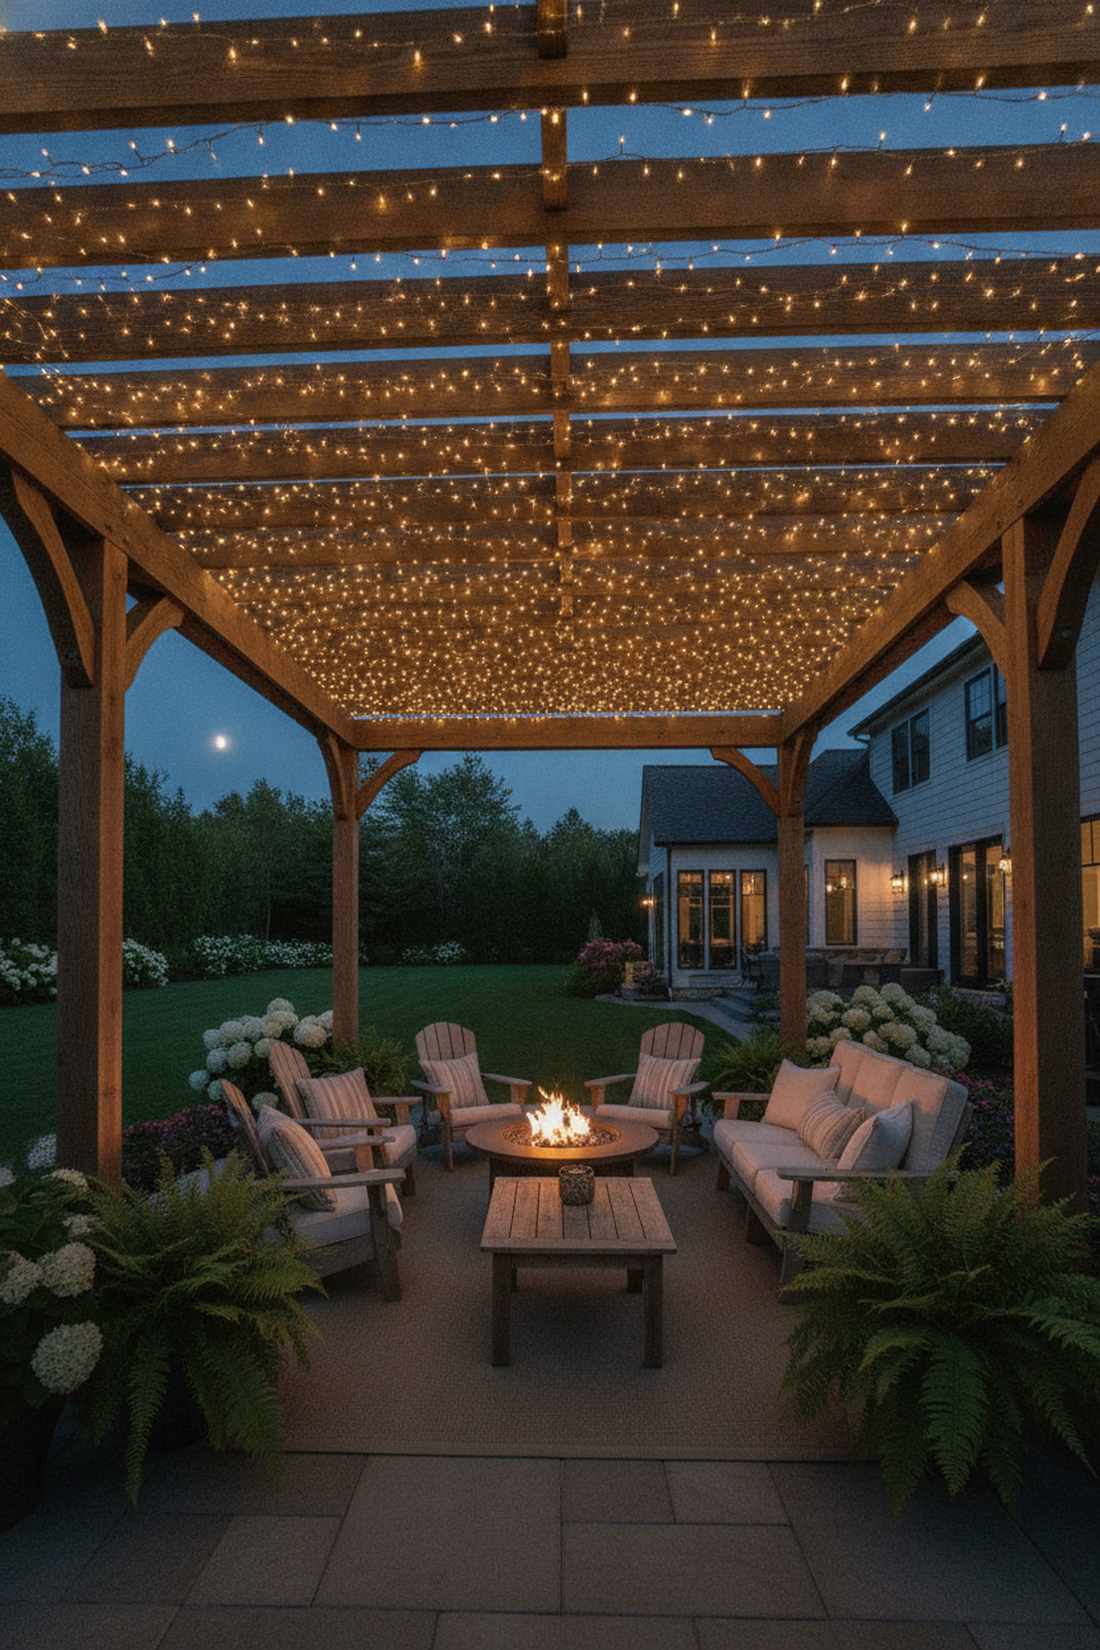
This layout feels like stepping into a magical, shimmering galaxy above your patio. Micro-LED pergola draping works wonders for transforming rigid wooden structures into soft, romantic havens.
Thick green wires ruin the daytime aesthetic, but ultra-thin copper wire disappears completely into the wood grain. This is a brilliant way to utilize fairy garden kits on a macro scale to achieve an ethereal glow.
You can easily pull this off for $20–$40. Highly recommended for a quick weekend win.
- Key Materials: Copper wire fairy lights, staple gun, zip ties
- Vibe / Style: Ethereal magic
- Difficulty: Easy
- Budget Breakdown: Light spools: $25.
- Creator’s Tip: Use a remote-controlled plug dimmer so you don’t have to reach up into the beams every night.
- Smart Sourcing: Waterproof copper wire string lights (bulk spool) and UV-resistant clear zip ties.
9. Outdoor Chandelier Fixtures
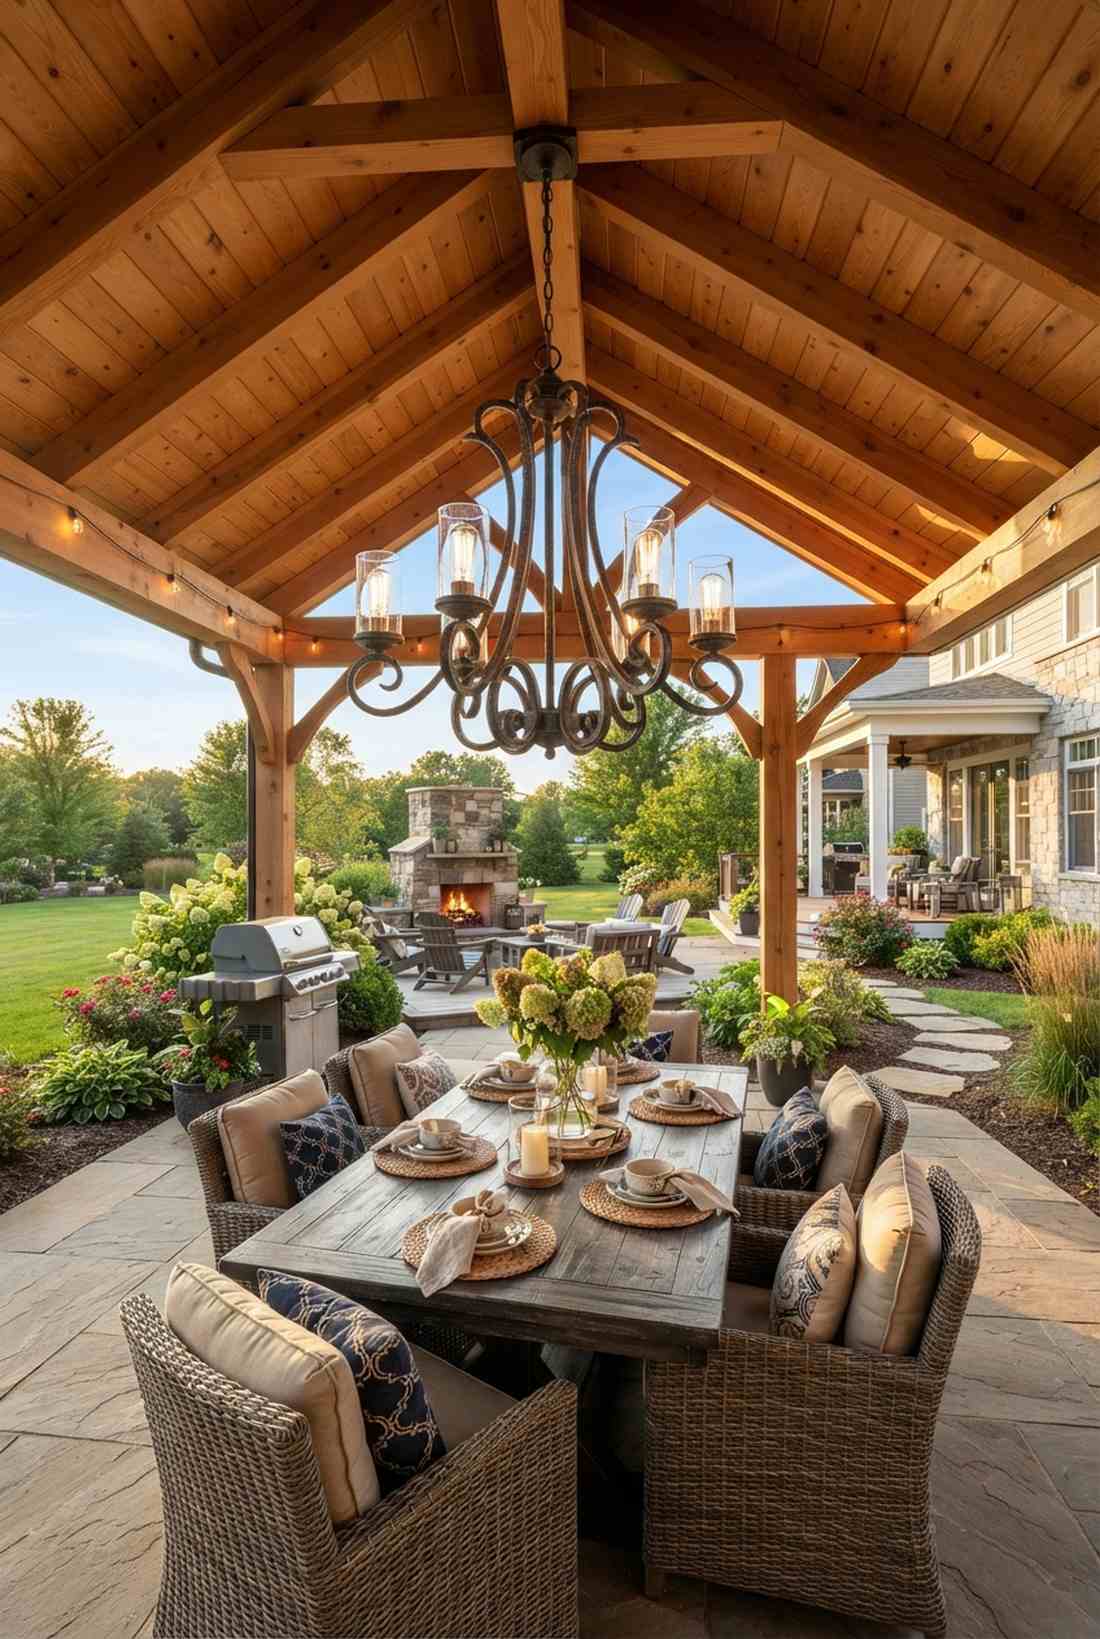
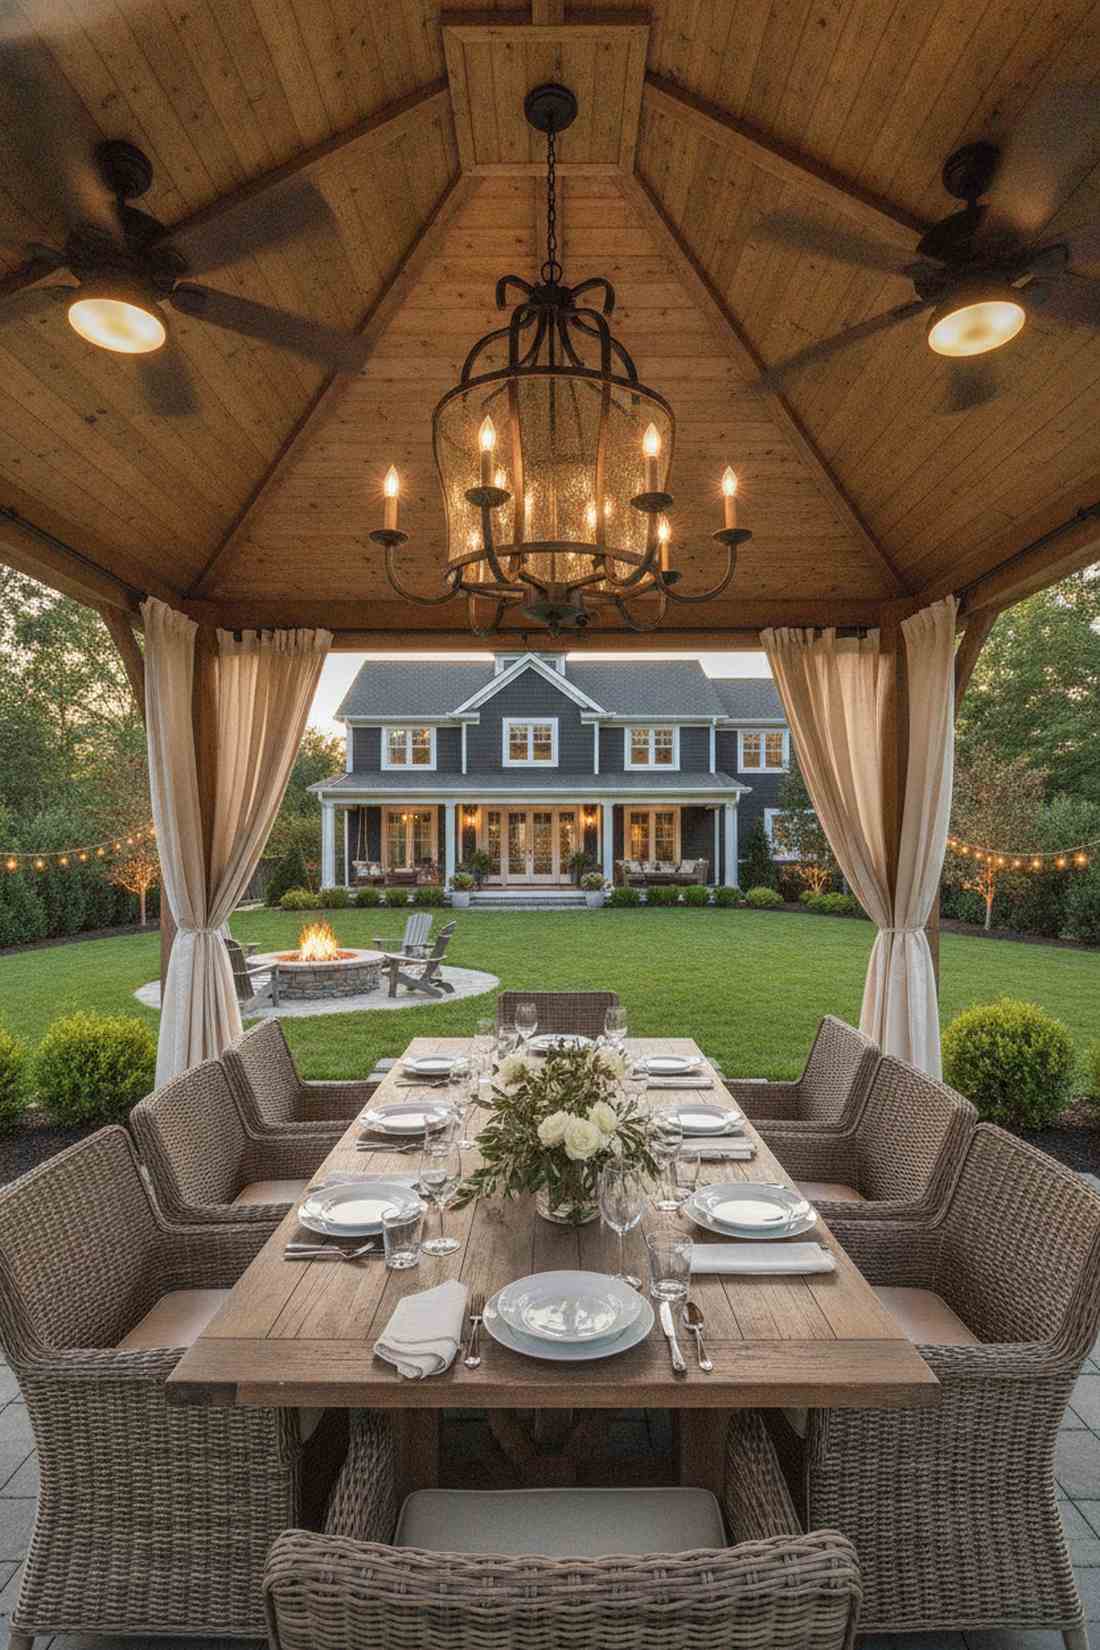
Nothing establishes a regal, indoor-outdoor living experience quite like this. Weatherproof gazebo chandeliers are perfect for anchoring large, covered outdoor dining pavilions.
Repurposing an indoor fixture is a massive fire hazard; sourcing true damp-rated architectural pieces looks far more expensive while remaining strictly code-compliant. Pair it with high-end patio ceiling fan accessories for a complete designer overhaul.
A stunning statement piece will set you back $150–$400. Save this to your DIY weekend garden board!
- Key Materials: Damp-rated chandelier, weatherproof junction box
- Vibe / Style: Al fresco elegance
- Difficulty: Advanced (requires electrical)
- Budget Breakdown: Fixture: $250 | Hardware: $40.
- Creator’s Tip: Add a smart switch indoors so you can activate the chandelier before you even step outside.
- Smart Sourcing: Wet-rated outdoor rustic chandelier and a heavy-duty weatherproof electrical box.
Before you hire an electrician, wait until you see the genius plug-and-play layout coming up next…
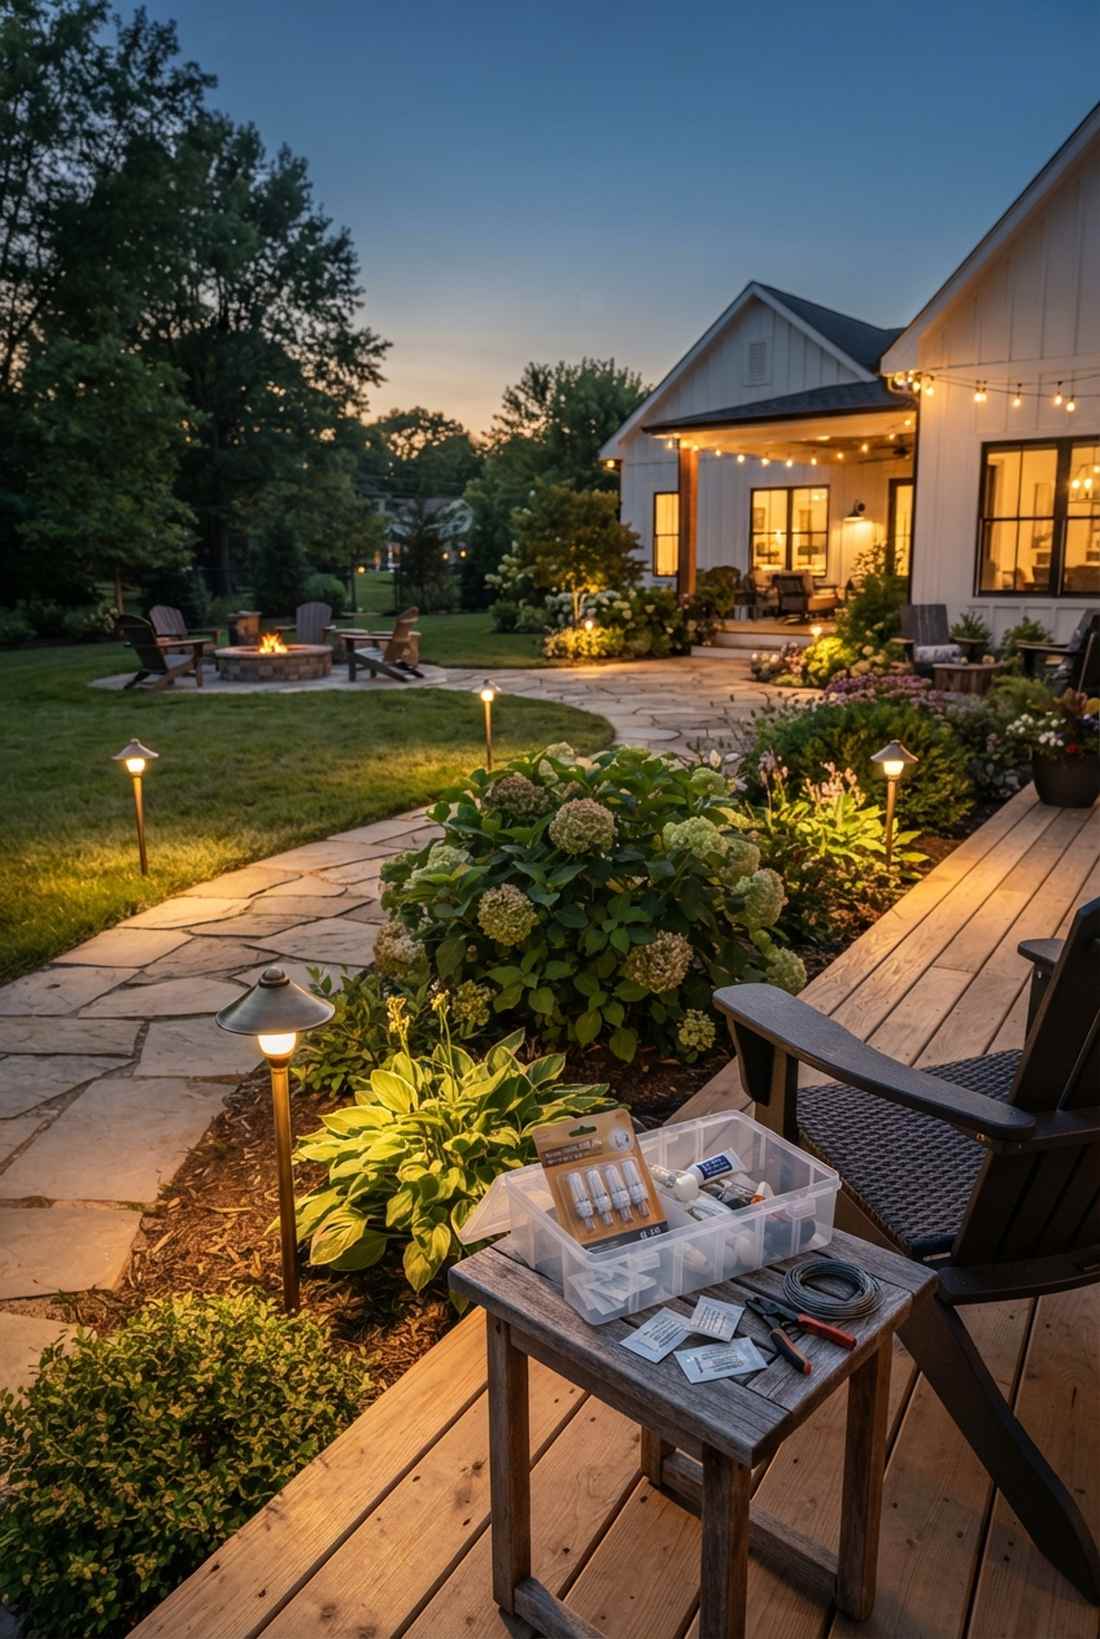
💡 Must-Have Supplies for High-End Setups
To build these setups faster and ensure they last, skip the generic craft aisles and invest in the right foundational kits.
- Base & Support: Heavy-duty 14/2 low-voltage landscape wire spool
- Setup Tools: Waterproof silicone-filled wire connector starter kit
- Weather/Durability Protection: UV-coated clear dielectric grease for bulb sockets
10. Pendant Light Clusters
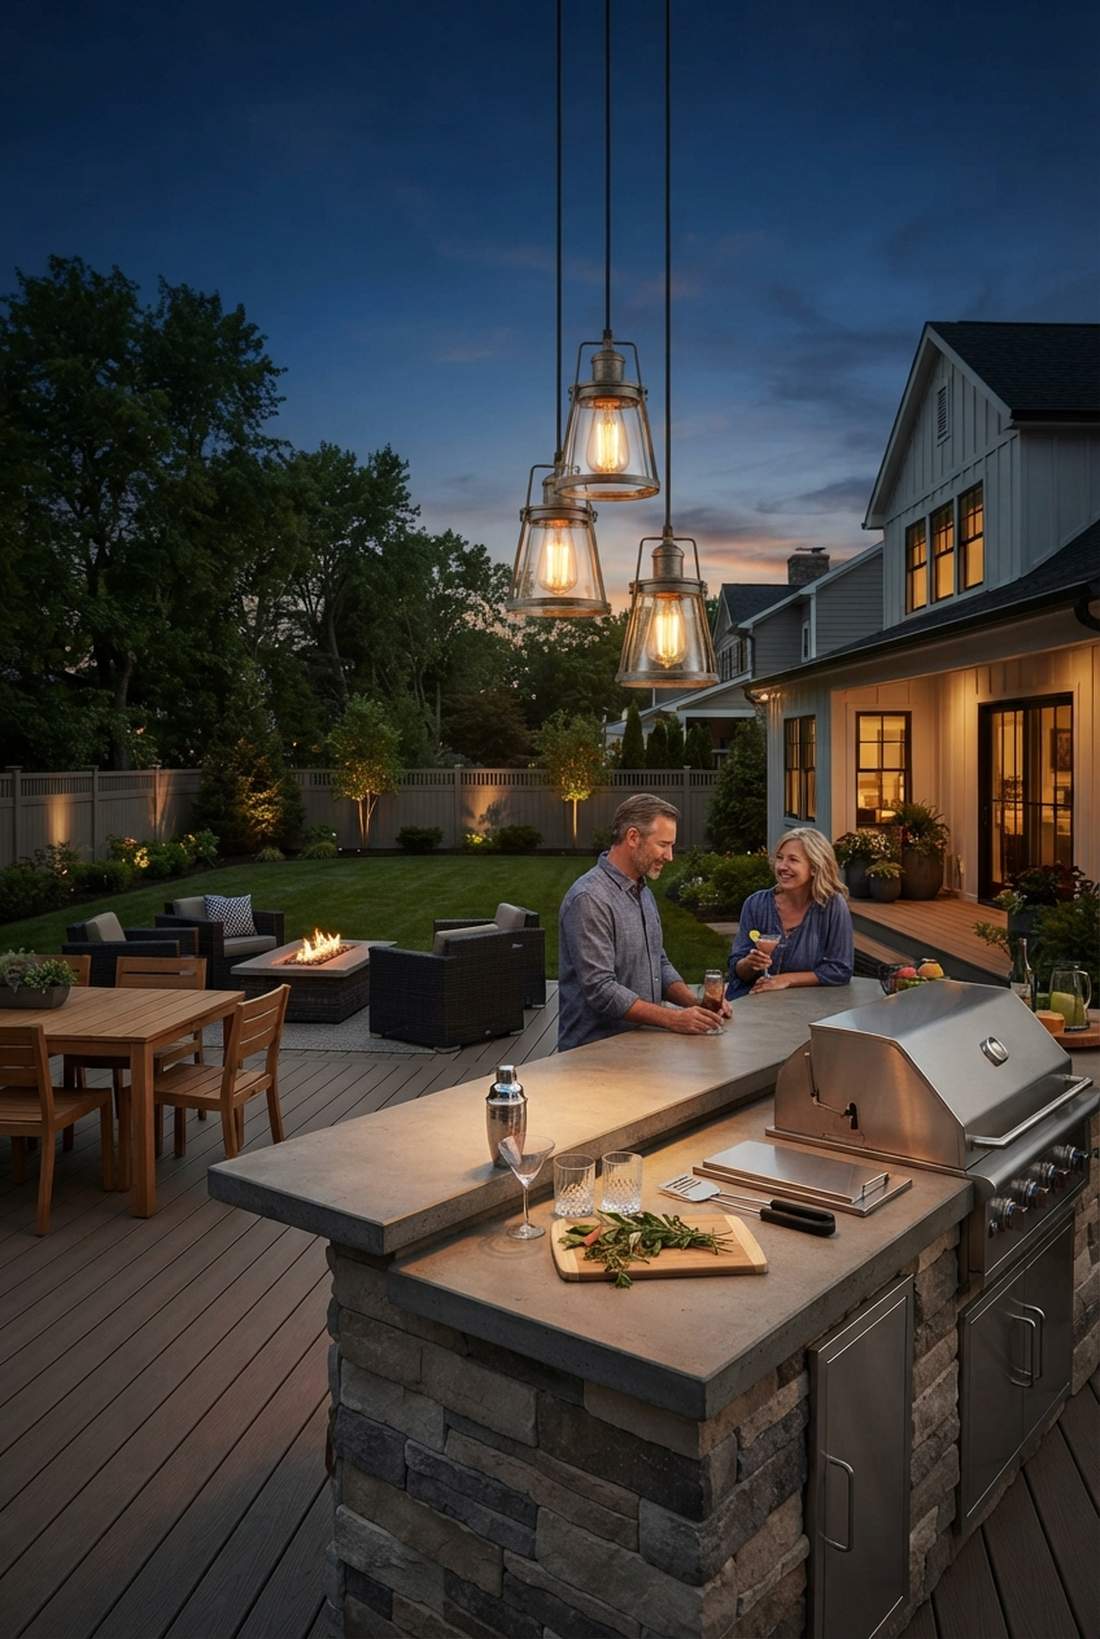
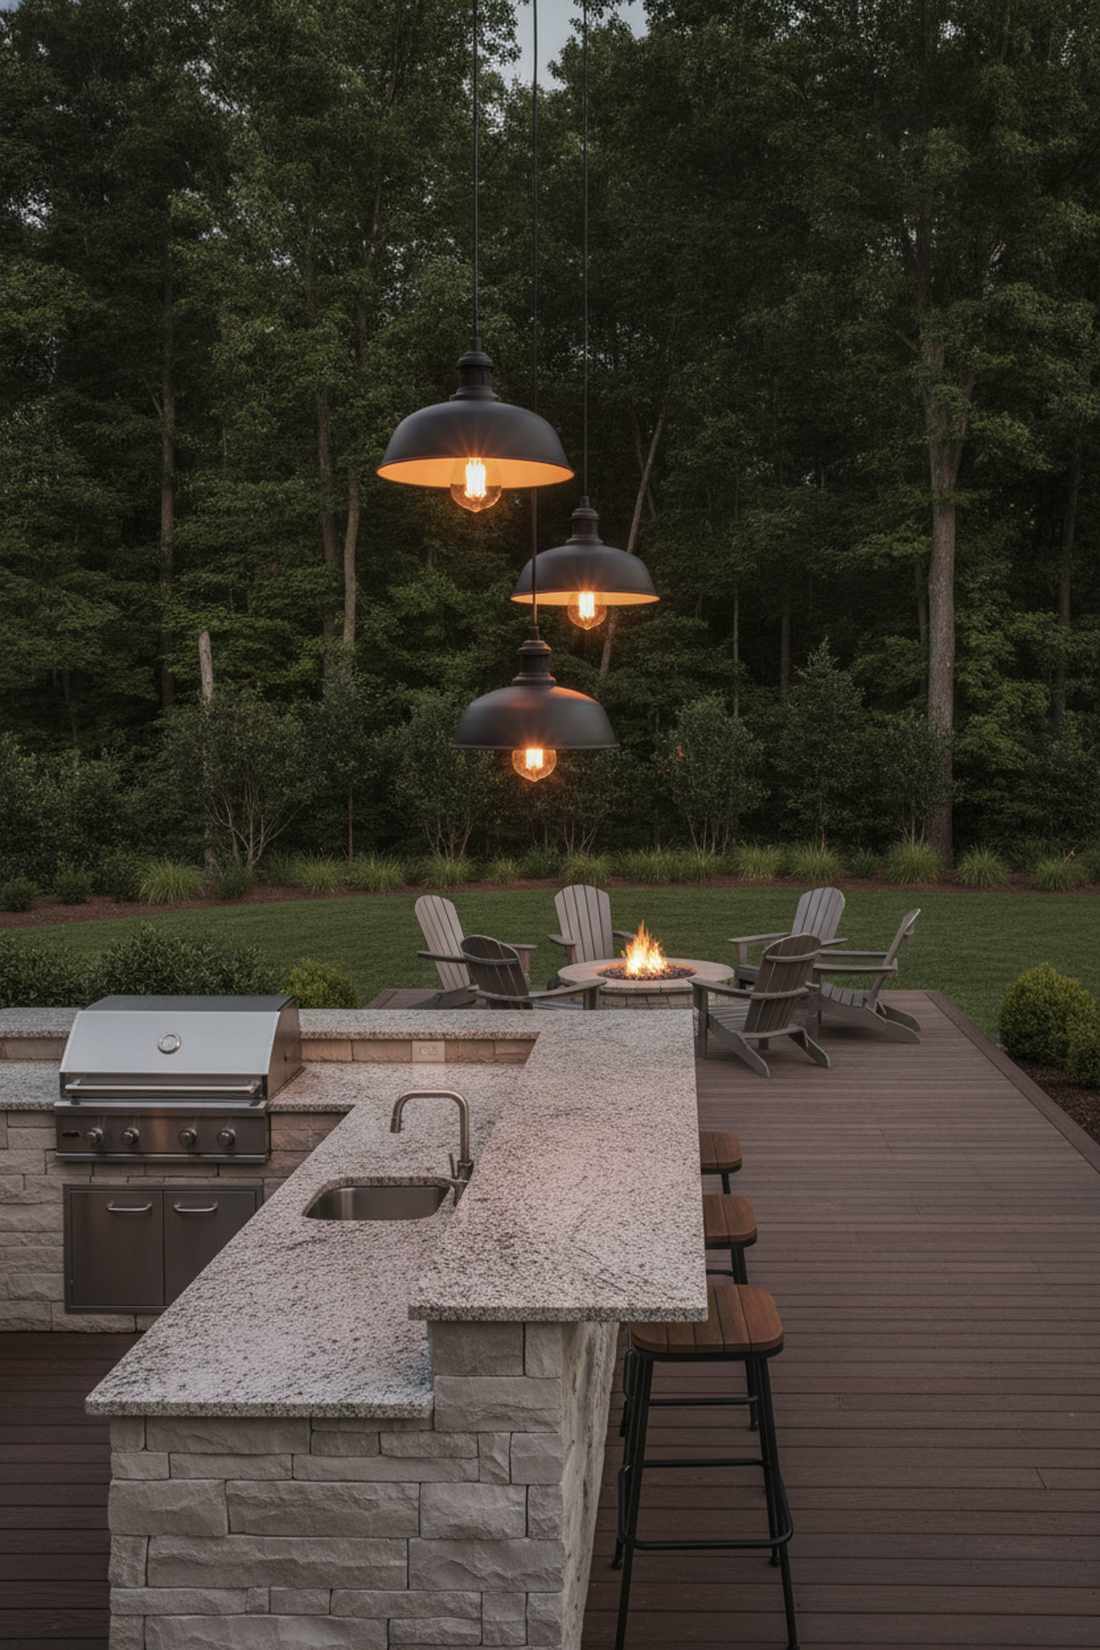
It mimics the moody, intimate vibe of a high-end cocktail bar. Staggered overhead task lighting is incredibly effective when hung directly over a built-in outdoor kitchen island or bar.
Hanging them all at the exact same height looks rigid and boring, but varying the drop lengths gives a bespoke designer-level finish. Hard keywords like outdoor rated hanging lantern kits ensure you buy products that won’t rust in a week.
You can create a cluster of three for around $100–$180. It’s a fast upgrade that completely changes the vibe.
- Key Materials: Outdoor pendant cords, metal or glass shades
- Vibe / Style: Industrial chic
- Difficulty: Intermediate
- Budget Breakdown: Pendants: $120 | Bulbs: $20.
- Creator’s Tip: Space them roughly 30 inches apart to prevent harsh shadows on your grill or prep space.
- Smart Sourcing: Plug-in waterproof pendant cords (3-pack) and shatter-resistant vintage Edison bulbs.
11. Market Umbrella Lighting
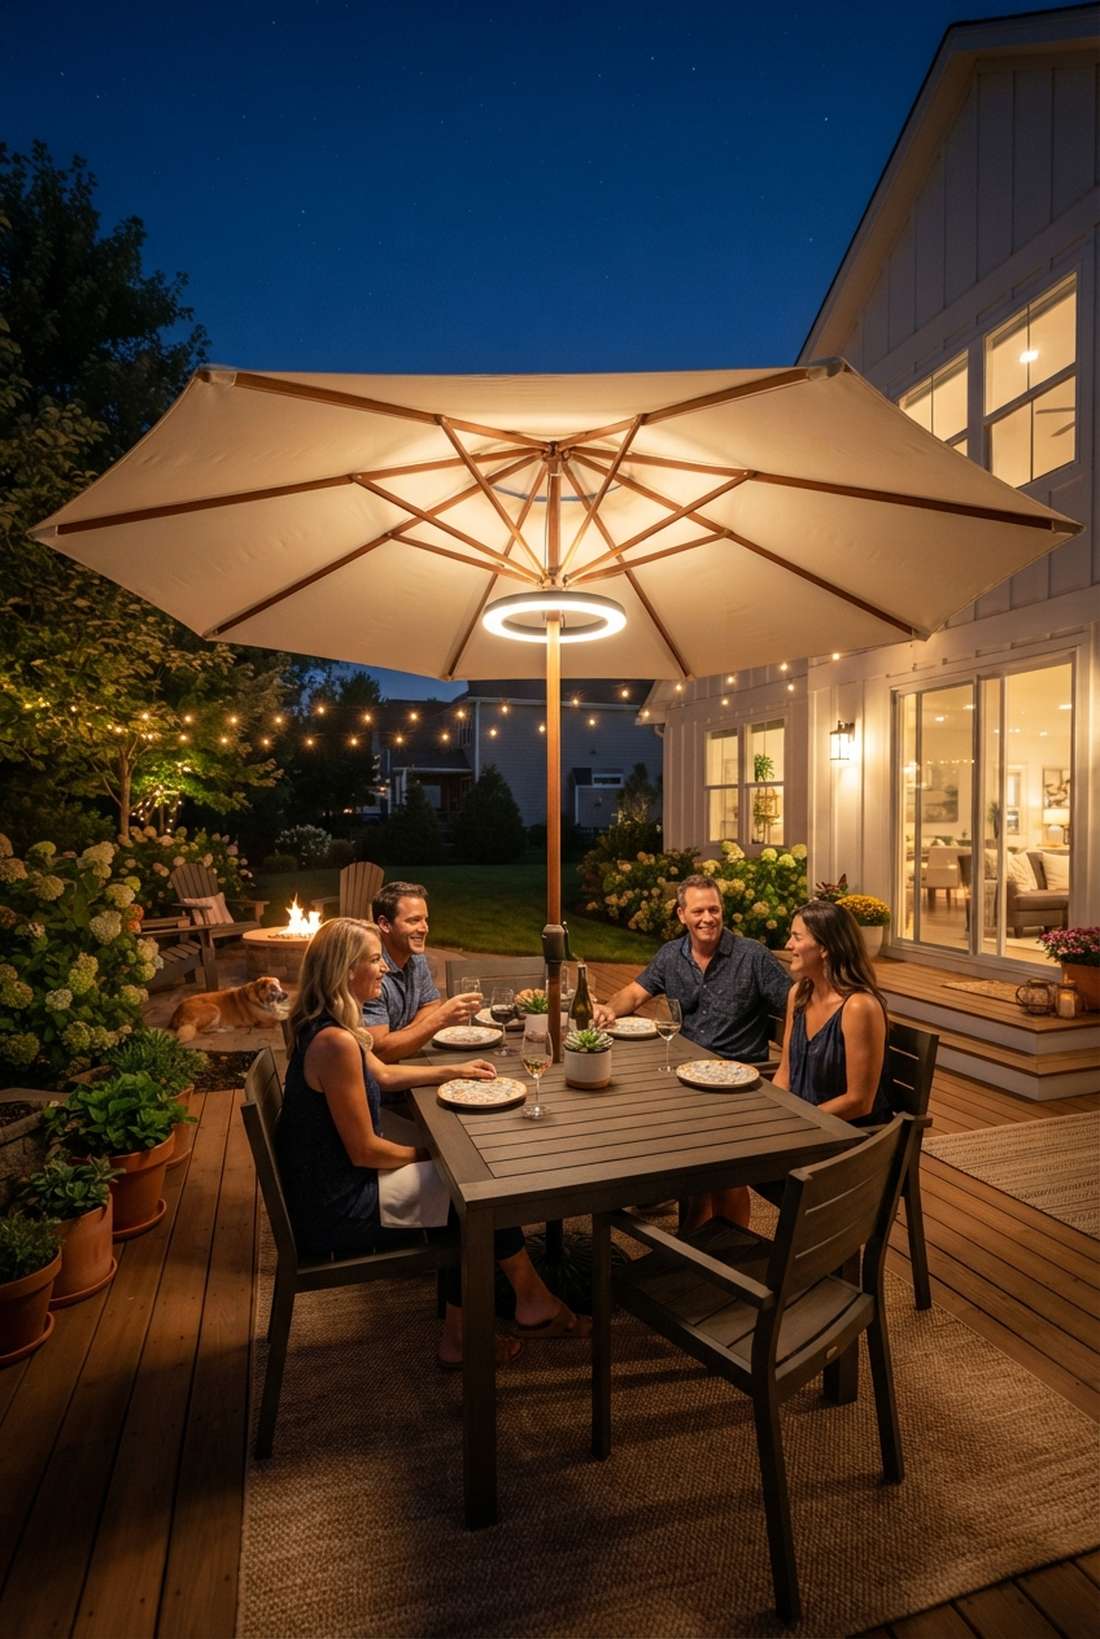

This transforms a basic daytime sunshade into a glowing nighttime epicenter. Under-canopy umbrella illumination is perfect for temporary or rented patios where permanent wiring is impossible.
Clamping a heavy flashlight looks terrible; sleek, ring-mounted LEDs clamp seamlessly and deliver a surprisingly premium look. This zero-wire solution completely eliminates the need for expensive battery operated patio decor scattered everywhere.
This brilliant snap-on hack costs around $20–$35. Pin this if you’re planning a small space upgrade!
- Key Materials: Battery-powered umbrella ring light
- Vibe / Style: Portable lounge
- Difficulty: Absolute beginner
- Budget Breakdown: Ring Light: $25.
- Creator’s Tip: Face the LEDs upward into a light-colored umbrella fabric to create a massive, soft light diffuser.
- Smart Sourcing: Rechargeable patio umbrella pole light (starter kit) and high-capacity rechargeable batteries.
12. Globe String Light Systems
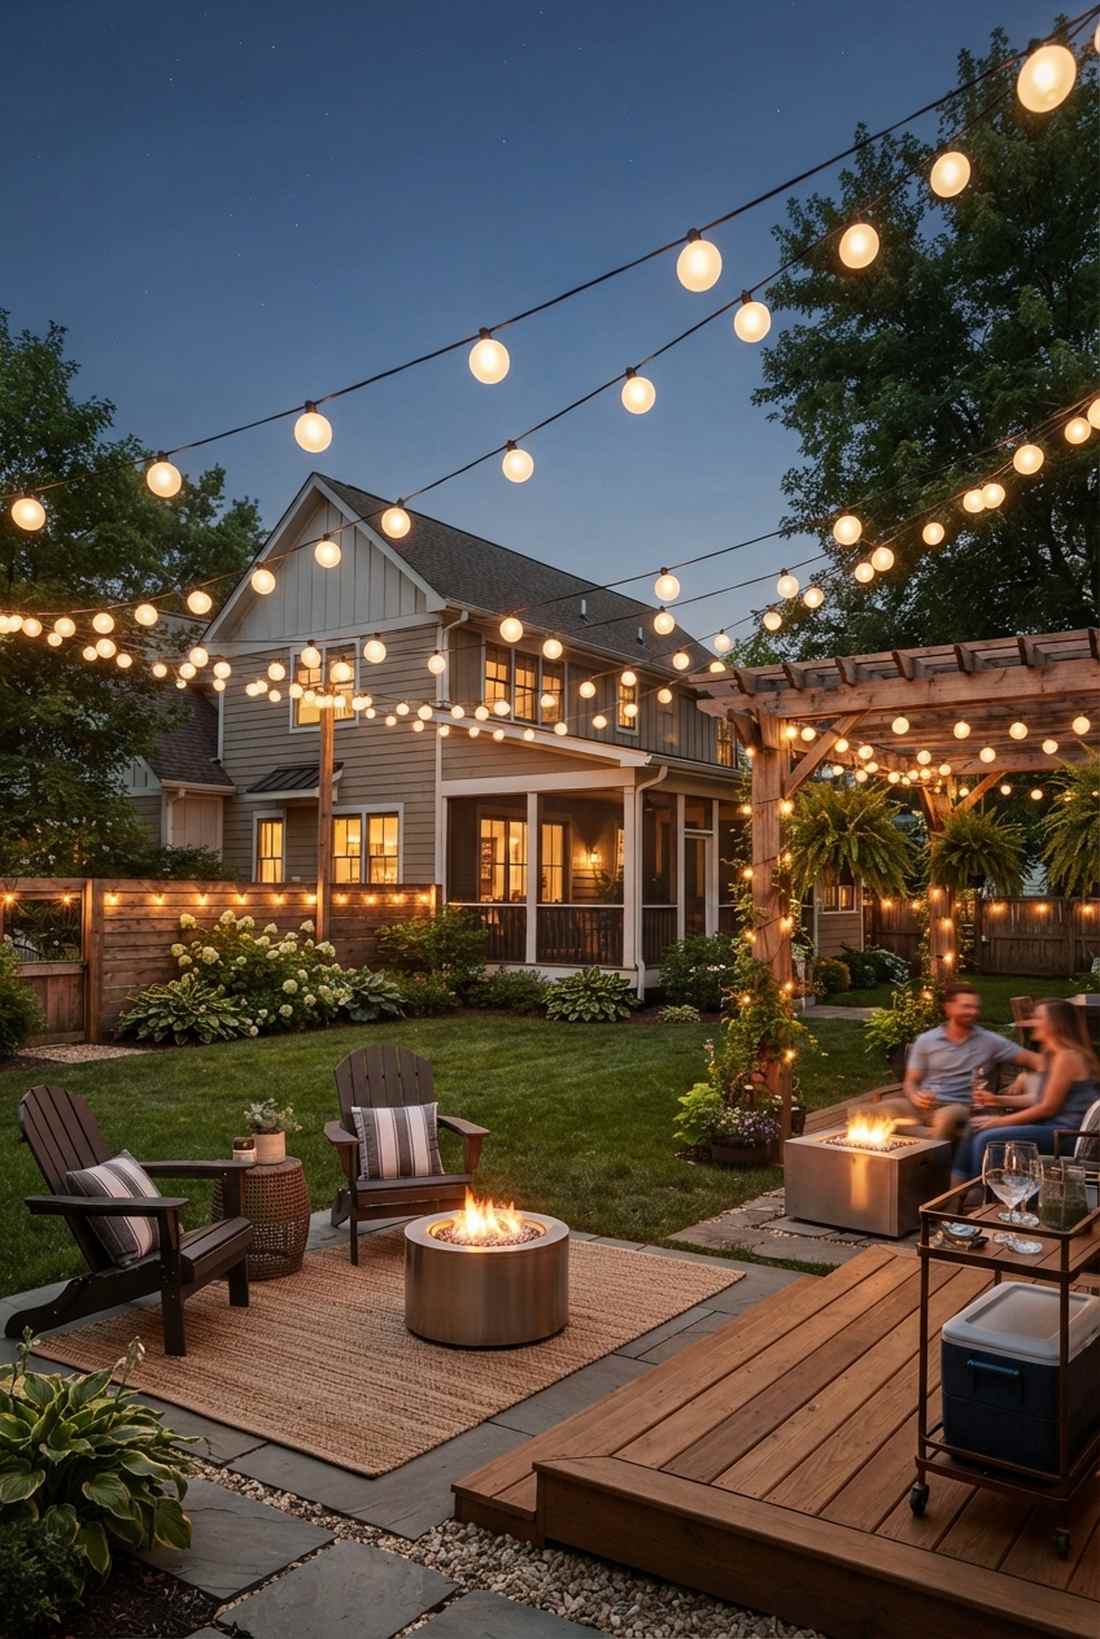
It radiates the fun, quirky energy of a summer carnival. Frosted orb string draping works exceptionally well for zigzagging across narrow suburban backyards or courtyard spaces.
Clear glass bulbs blind your guests, but frosted white globes provide a creamy, even glow that looks far more expensive than it is. Using shatterproof outdoor lighting kits guarantees they survive the occasional rogue basketball.
A full courtyard zig-zag setup runs $50–$90. Highly recommended for a quick weekend win.
- Key Materials: G40 frosted globe lights, zip ties, command hooks
- Vibe / Style: Festive courtyard
- Difficulty: Easy
- Budget Breakdown: 50ft Strand: $45 | Hooks: $15.
- Creator’s Tip: Buy strands with E12 sockets so you can easily swap out individual dead bulbs instead of tossing the whole string.
- Smart Sourcing: Shatterproof G40 globe string lights (bulk pack) and UV-coated outdoor light hanging clips.
Accent and Focal Point Techniques
Accent lighting directs attention to specific landscape features—specimen plants, architectural details, or sculptural elements. These techniques use focused beams to create dramatic contrast against darker backgrounds.
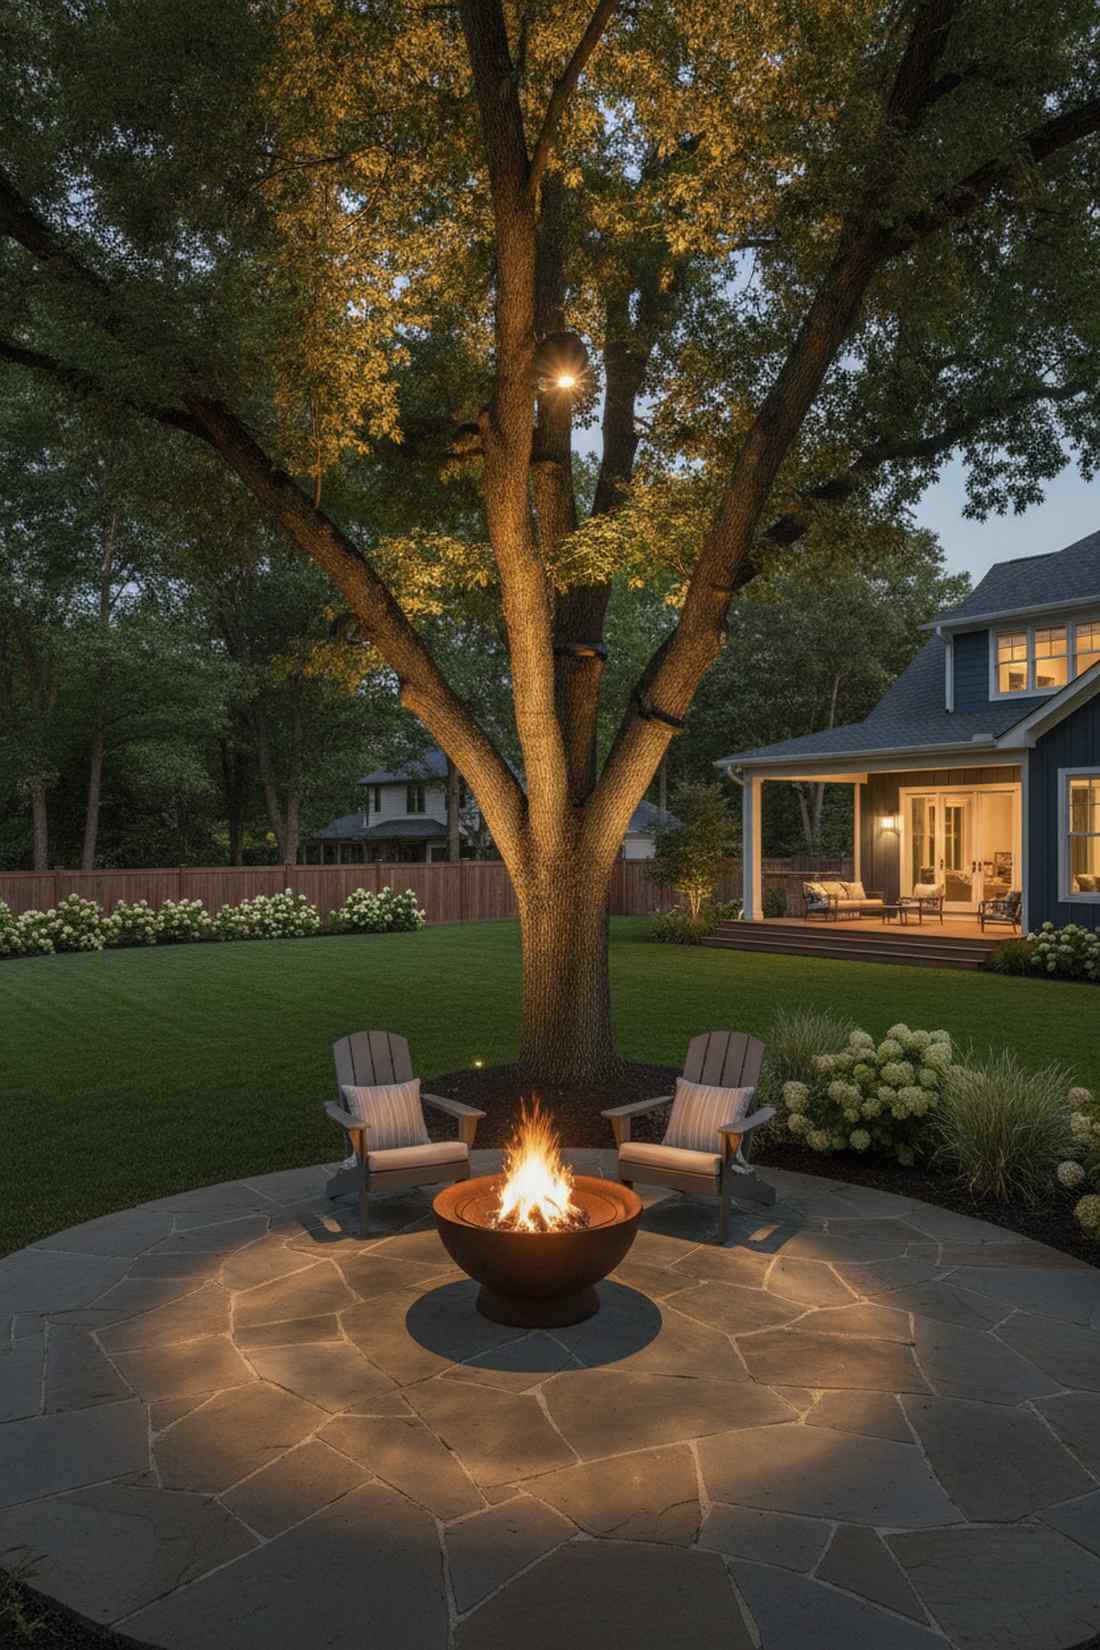
13. Uplighting for Trees
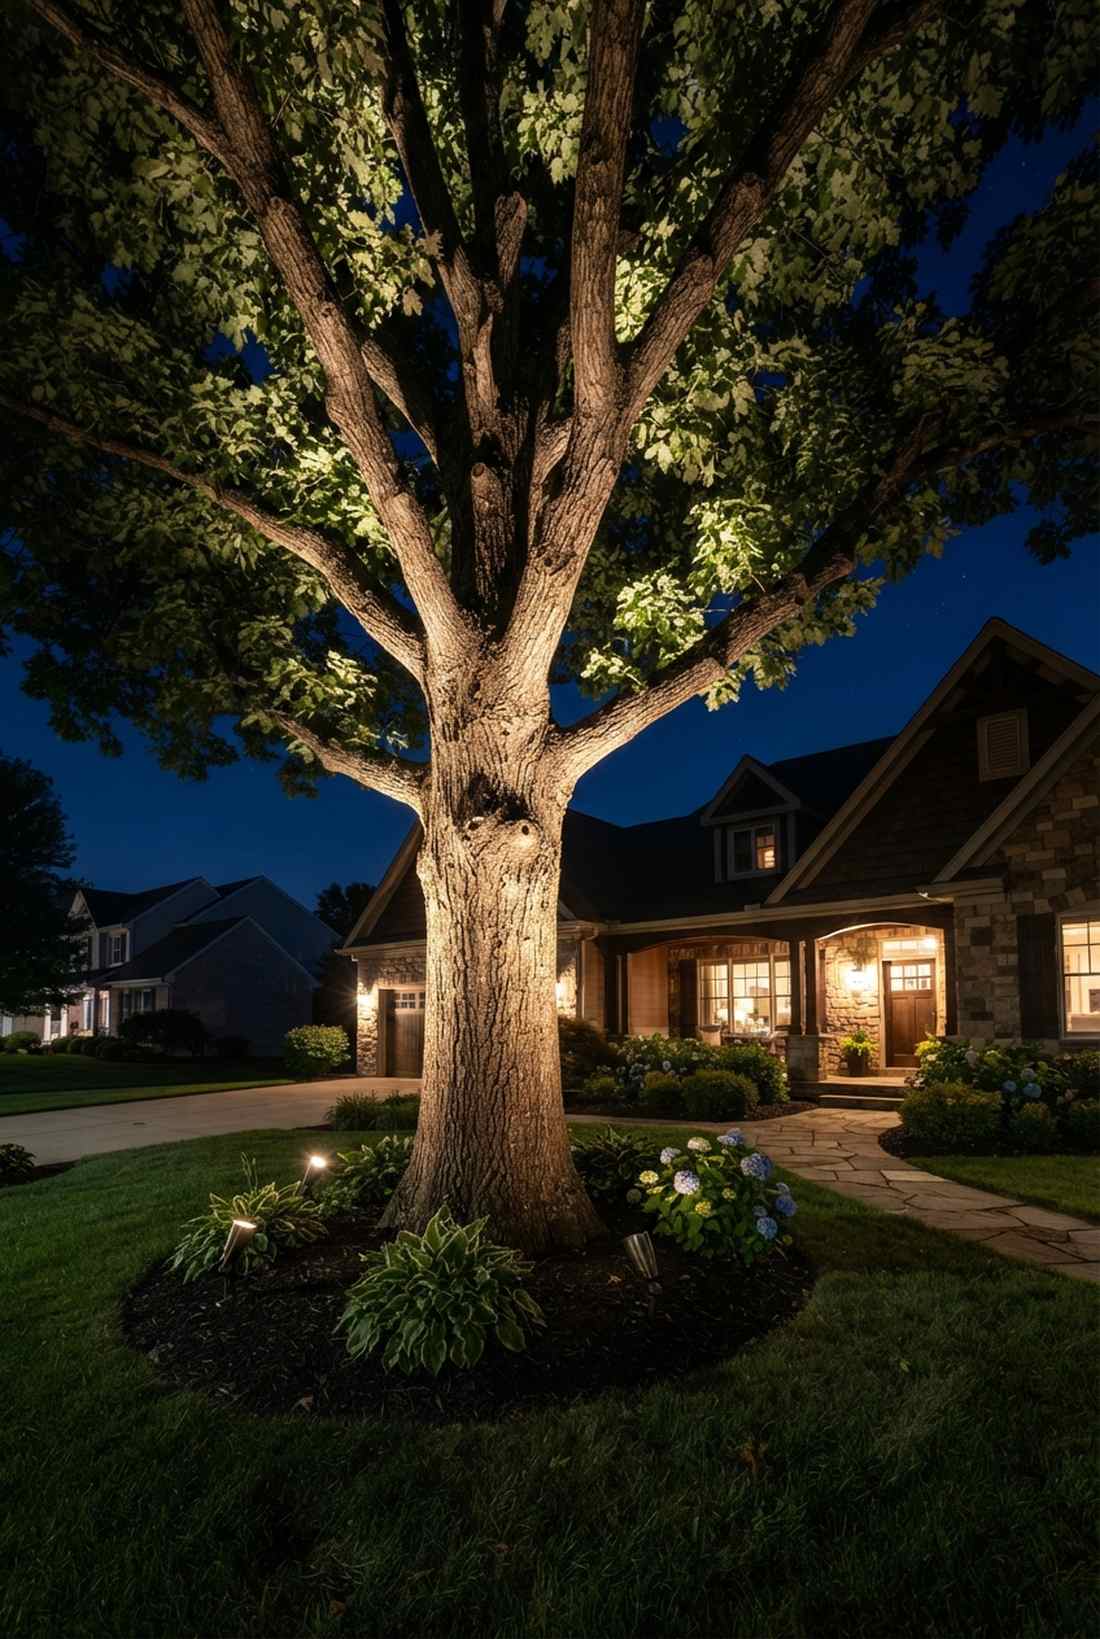
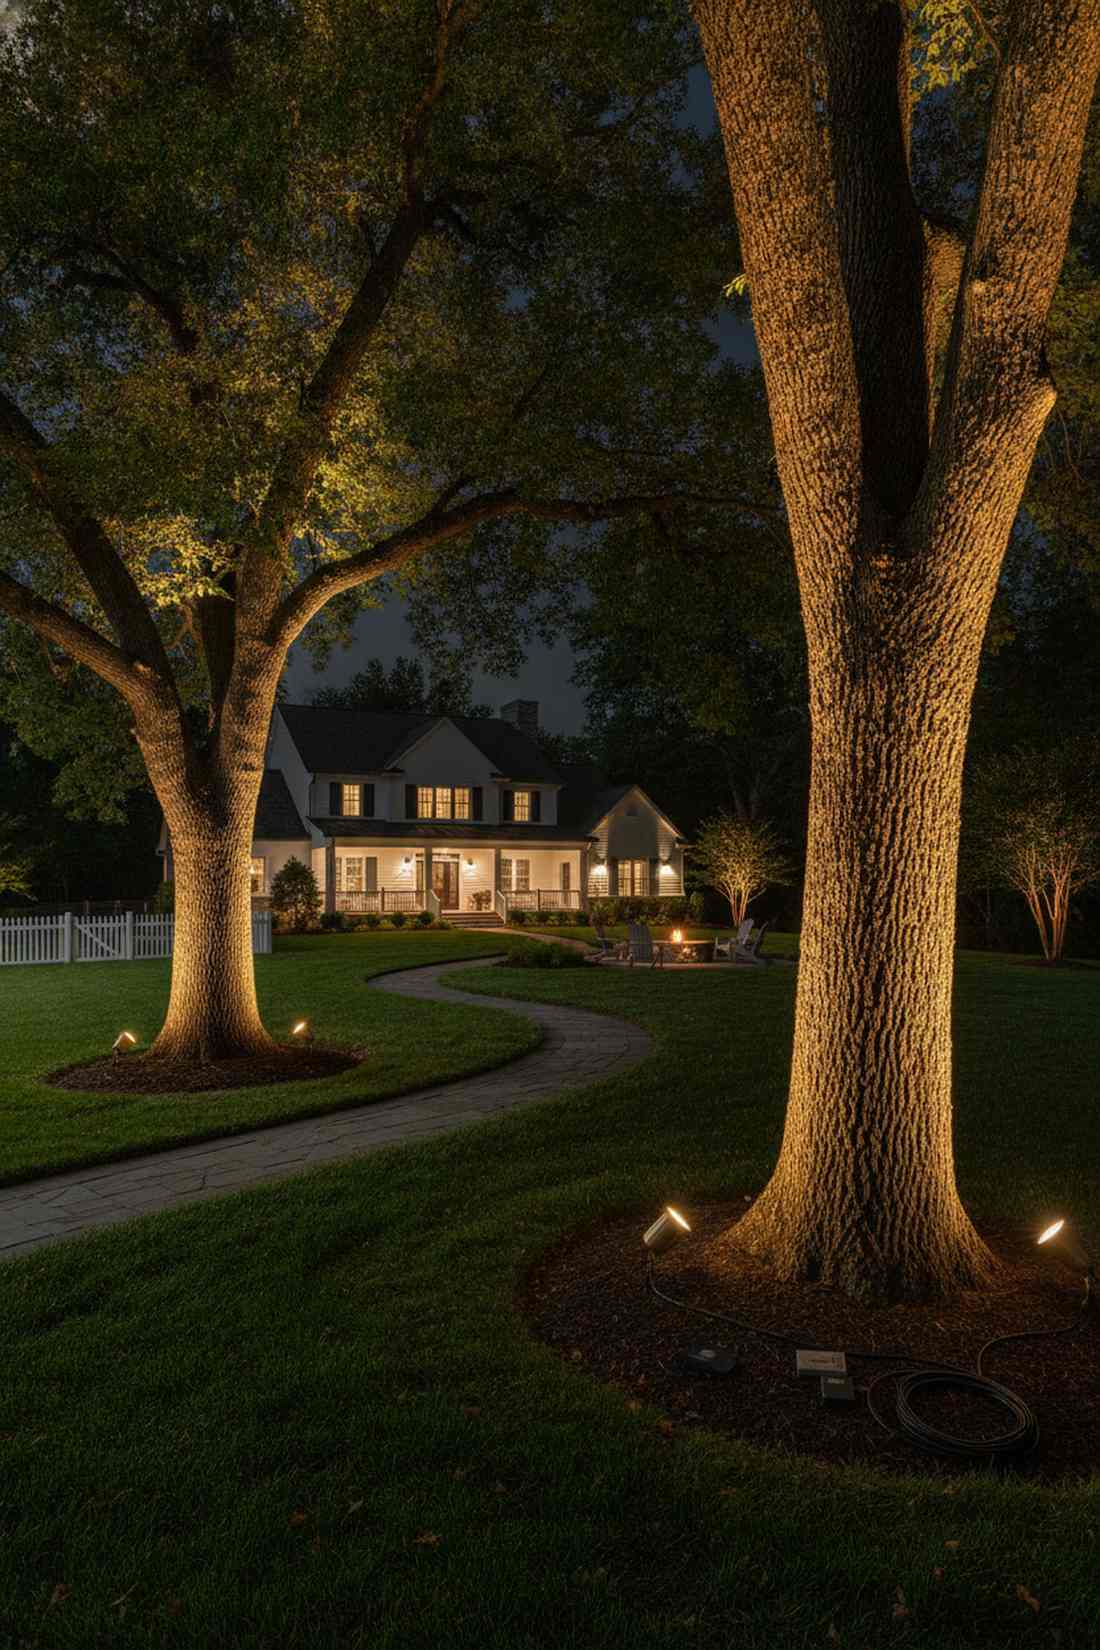
This layout creates a towering, majestic silhouette that dominates the night sky. Focused tree trunk illumination is mandatory for highlighting large oak, maple, or palm trees in your front yard.
Placing the light ten feet away washes out the texture, but pushing it inches from the base gives a dramatic, designer-level finish. Snagging high-lumen directional landscape spotlight kits ensures the light punches all the way into the top canopy.
A two-light setup for a massive tree costs $80–$140. Save this to your DIY weekend garden board!
- Key Materials: Brass bullet spotlights, 3000K LED MR16 bulbs
- Vibe / Style: Majestic drama
- Difficulty: Intermediate
- Budget Breakdown: Spotlights: $90 | Wire: $20.
- Creator’s Tip: Always cross-light a large tree from two distinct angles to eliminate flat, dead shadows.
- Smart Sourcing: Heavy-duty brass uplight fixtures (2-pack) and pre-cut waterproof wire splicing kits.
14. Moonlighting Technique
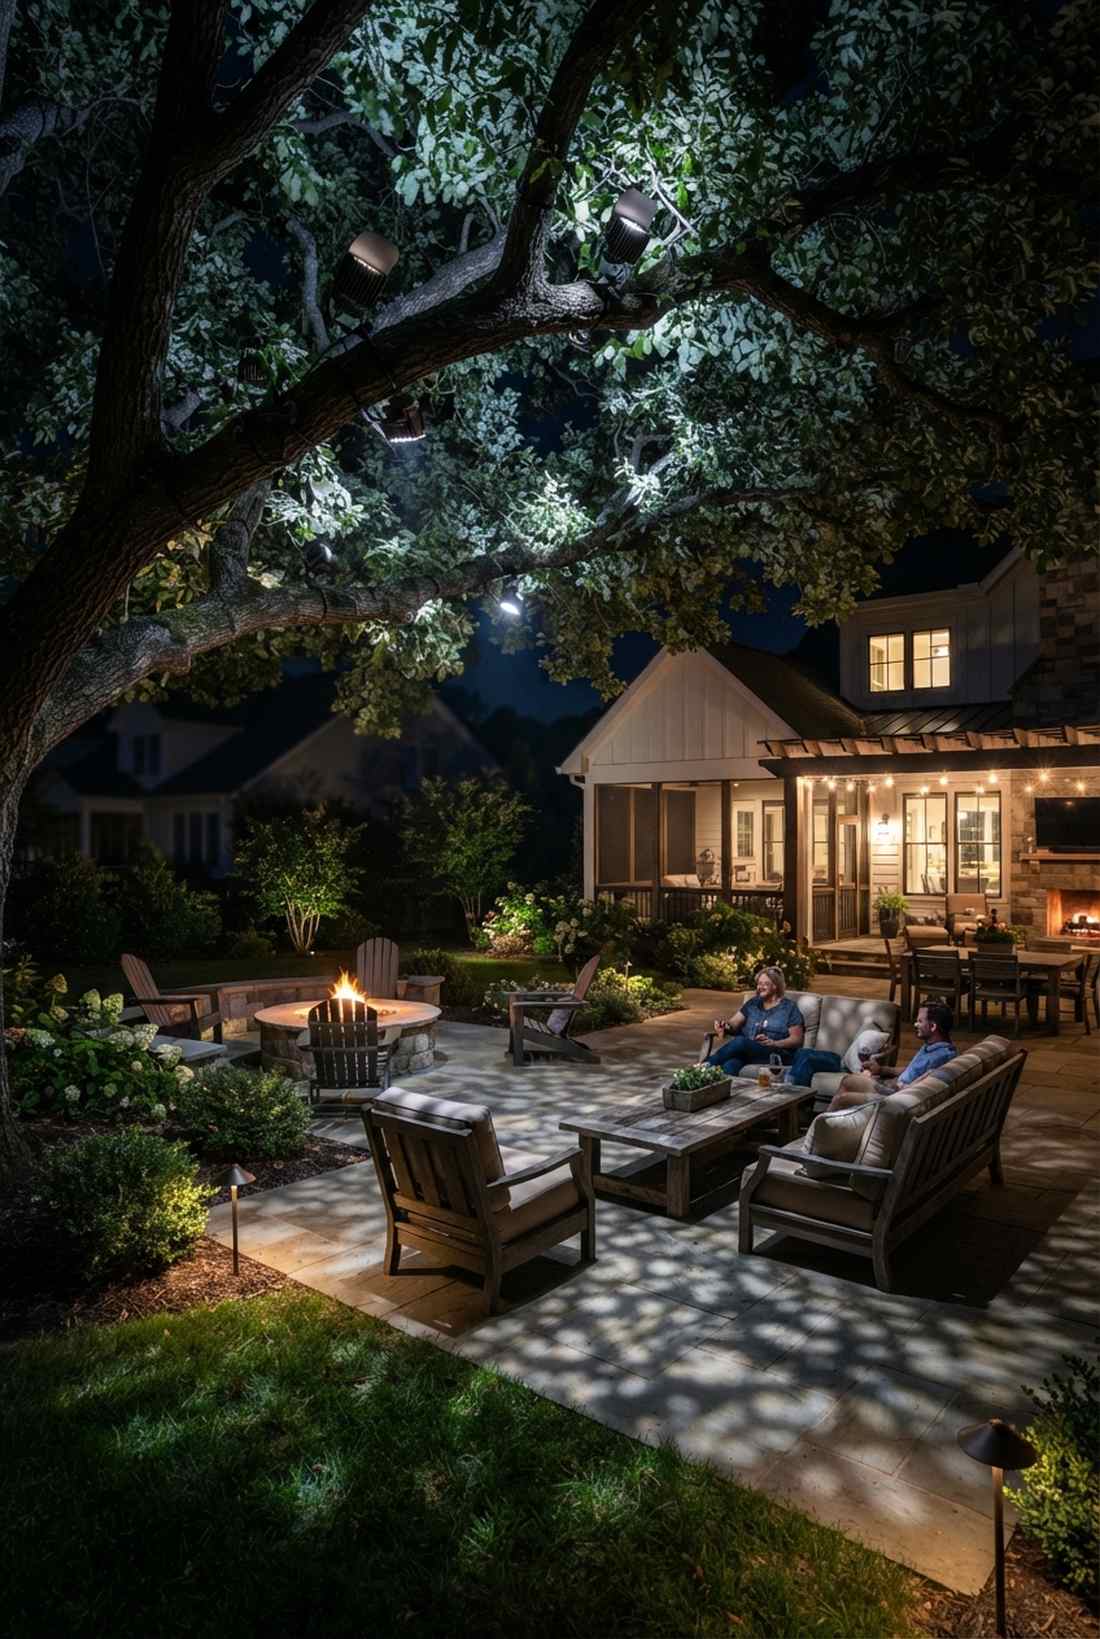
It genuinely feels like a full moon is permanently shining directly over your patio. Canopy down-lighting is incredible for casting natural, dappled shadows across wide outdoor seating areas.
Bolting a harsh floodlight ruins the illusion; wrapping a soft, shielded fixture high in the branches looks far more expensive than it is. Integrating professional tree mounting hardware ensures you don’t slowly kill the tree as it grows.
You can execute this premium landscaping trick for $60–$100 per tree. It’s a fast upgrade that completely changes the vibe.
- Key Materials: Tree-mount spotlight, glare shield, exterior cable
- Vibe / Style: Organic moonlight
- Difficulty: Advanced (requires climbing)
- Budget Breakdown: Fixture w/ Mount: $75.
- Creator’s Tip: Use a hex-louver inside the lens to completely hide the LED bulb from people looking up.
- Smart Sourcing: Tree-friendly mounting bracket with spotlight and UV-coated zip ties (bulk pack).
If you think your garden is too boring for lighting, this next trick will absolutely blow your mind…
15. Silhouetting Technique
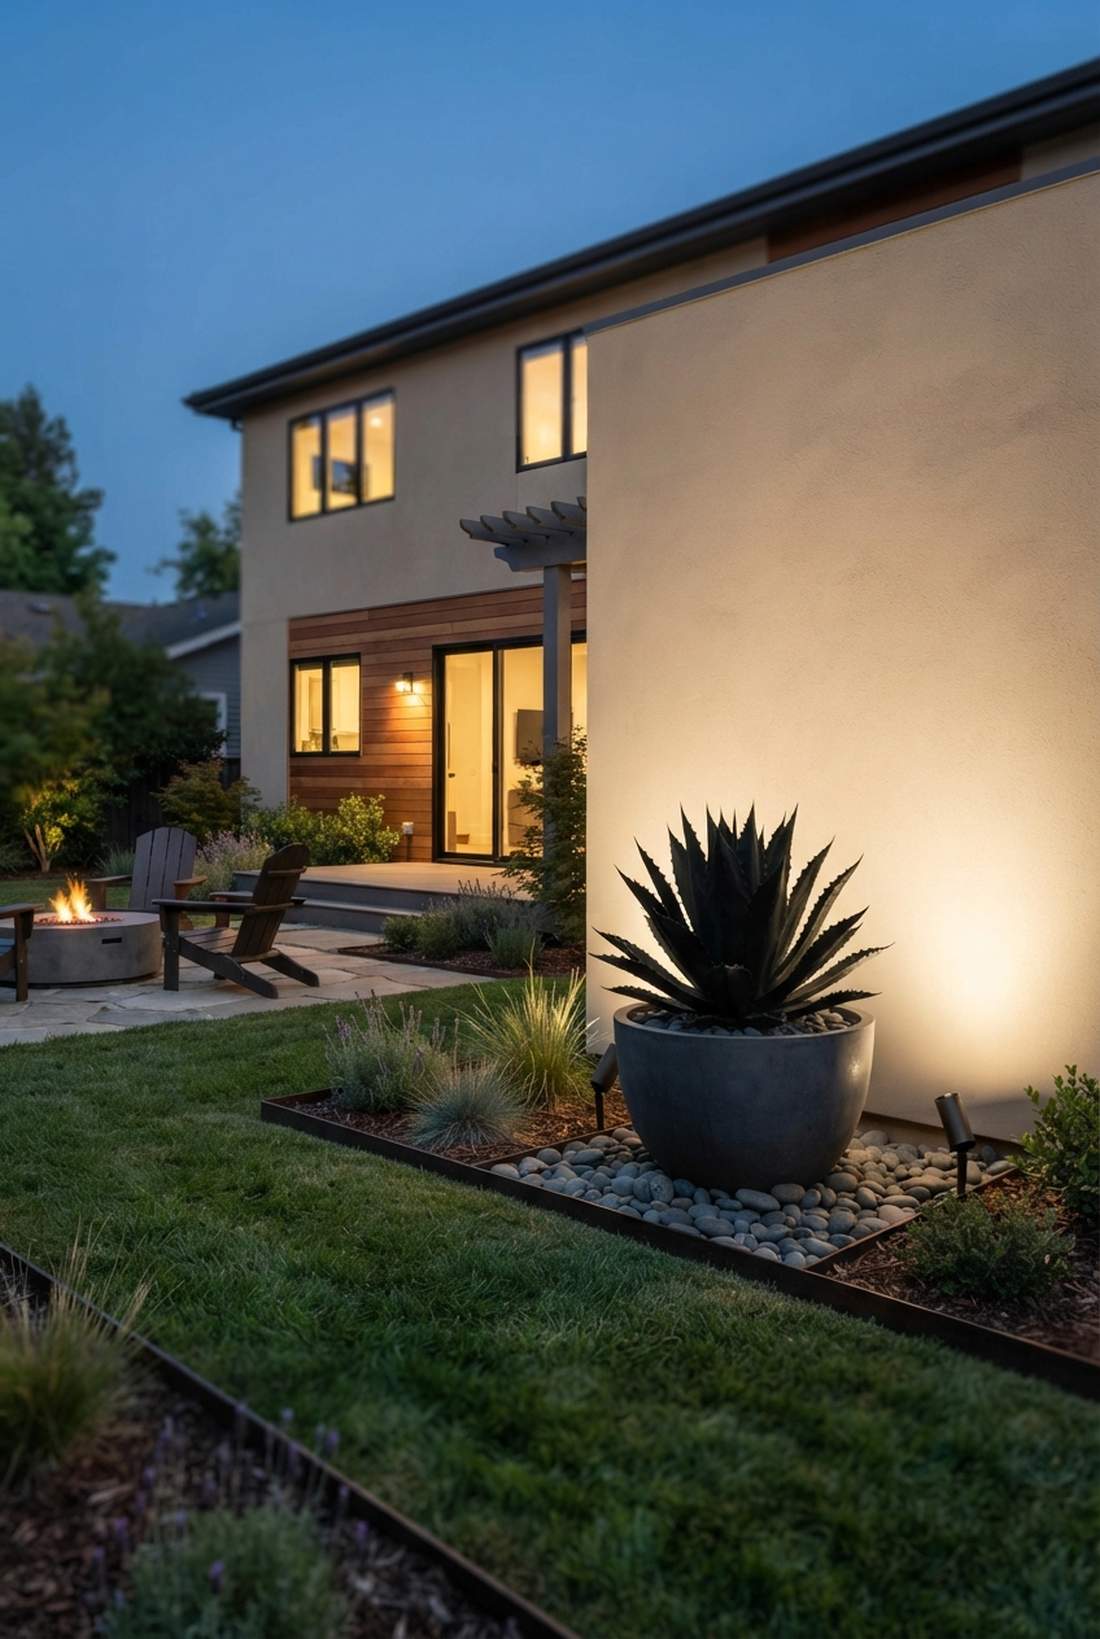
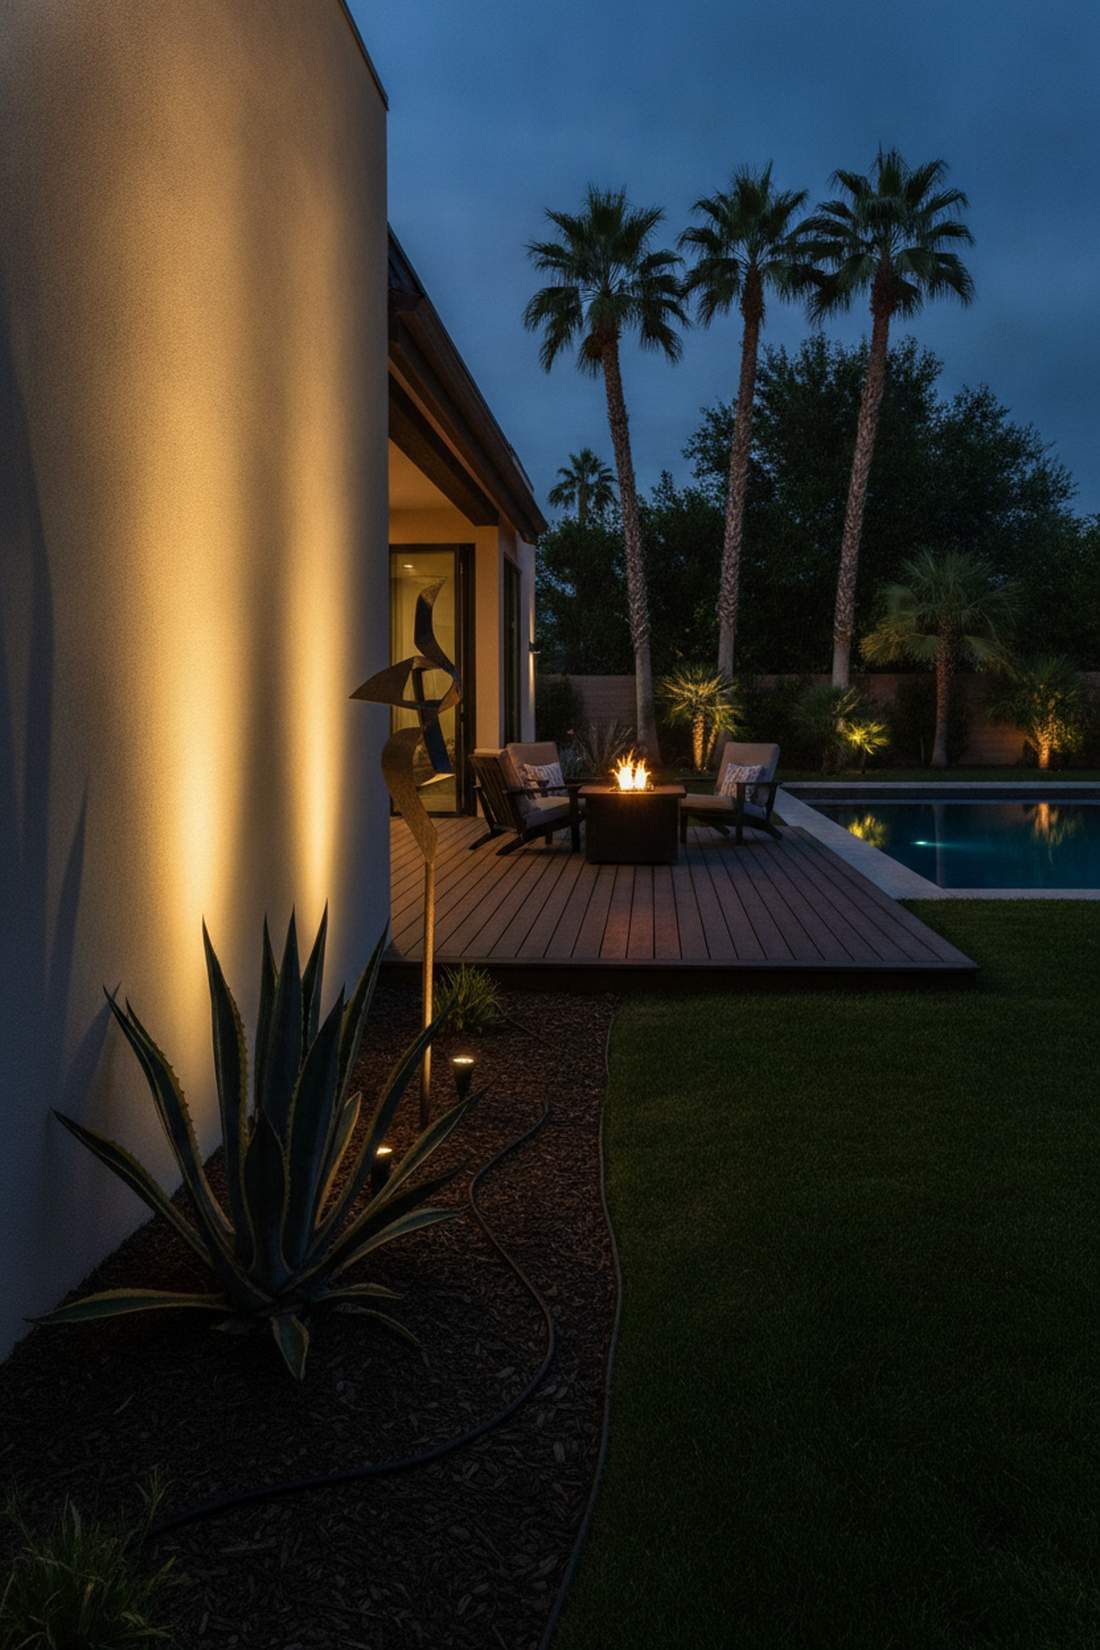
This creates an ominous, sharp, artistic profile that pops against the background. Backlit architectural shrubbery is the perfect visual concept for highlighting prickly agaves or modern statues.
Shining light directly onto the object flattens it completely, but aiming a wide wash against the wall behind it delivers a surprisingly premium look. Utilizing wide-angle landscape flood kits ensures the backdrop is evenly painted with light.
Achieving this artistic gallery look only costs $40–$70. Pin this if you love striking modern architecture!
- Key Materials: Wide-beam wash light, low-voltage wire
- Vibe / Style: Modern art gallery
- Difficulty: Easy
- Budget Breakdown: Wash Light: $50.
- Creator’s Tip: Ensure the wall behind the plant is a light color (white or tan) to maximize the dark contrast of the silhouette.
- Smart Sourcing: Low-voltage LED flood wash light (starter kit) and pre-cut landscape wire.
16. Shadowing Technique
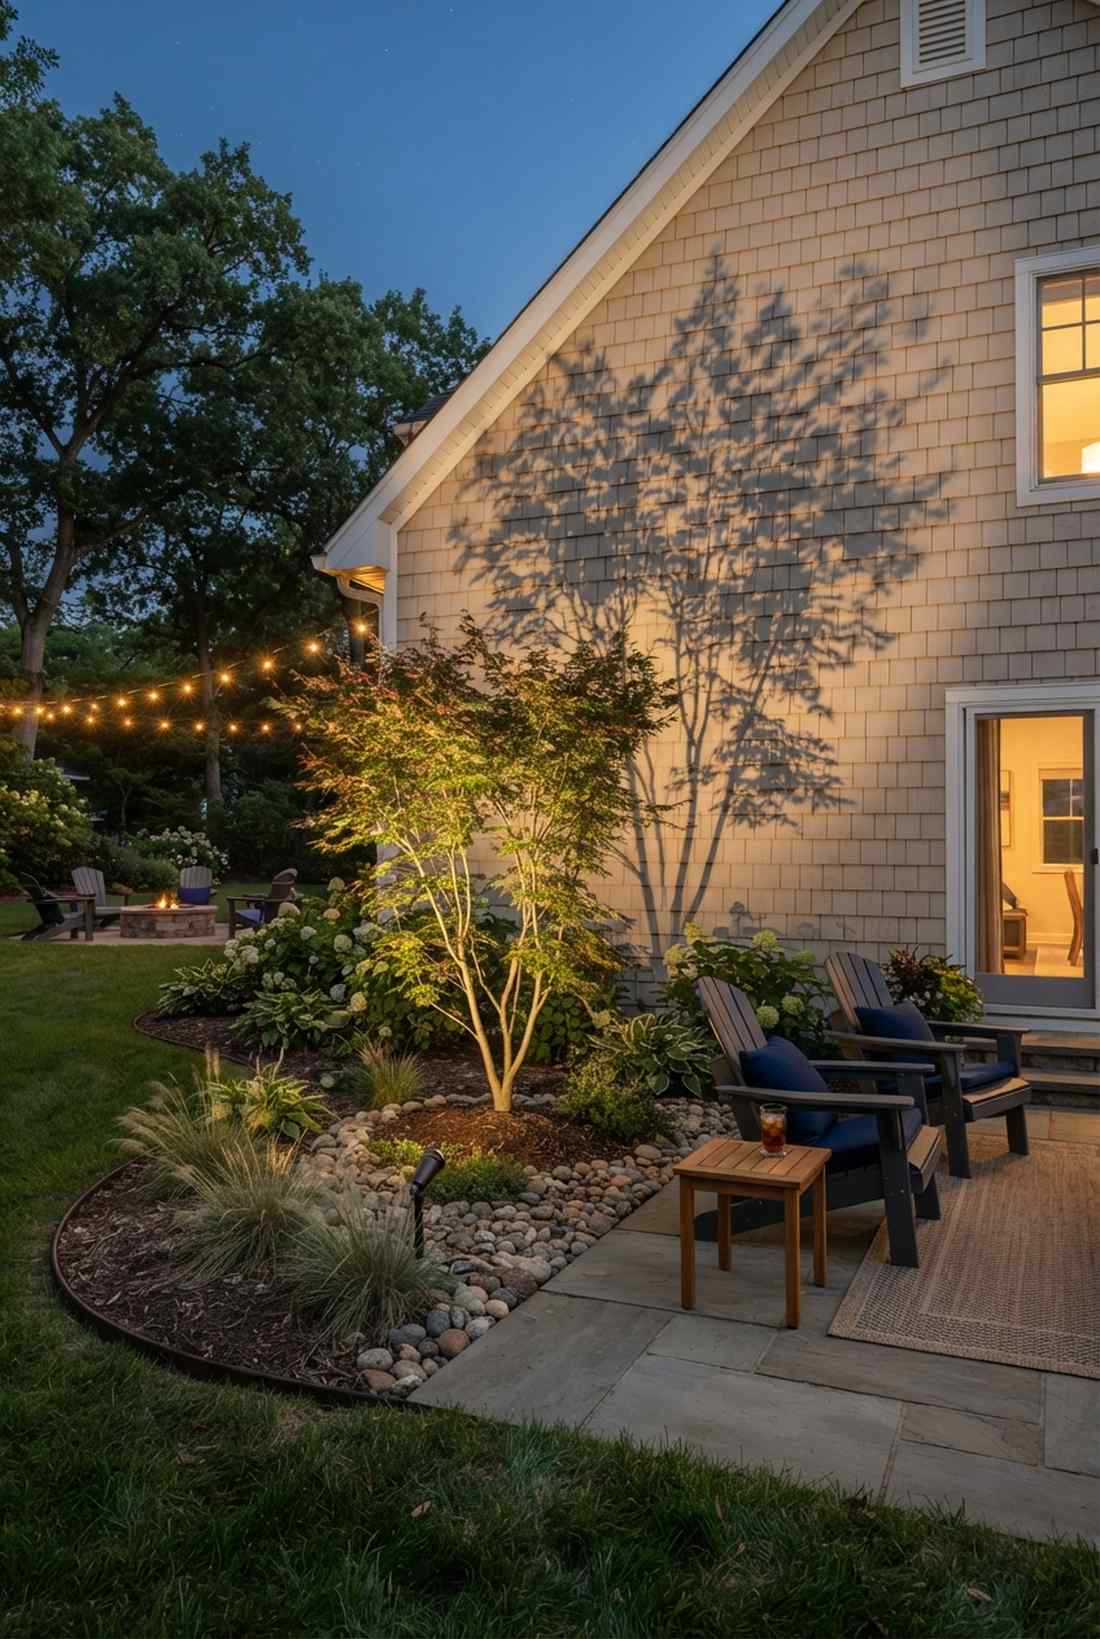
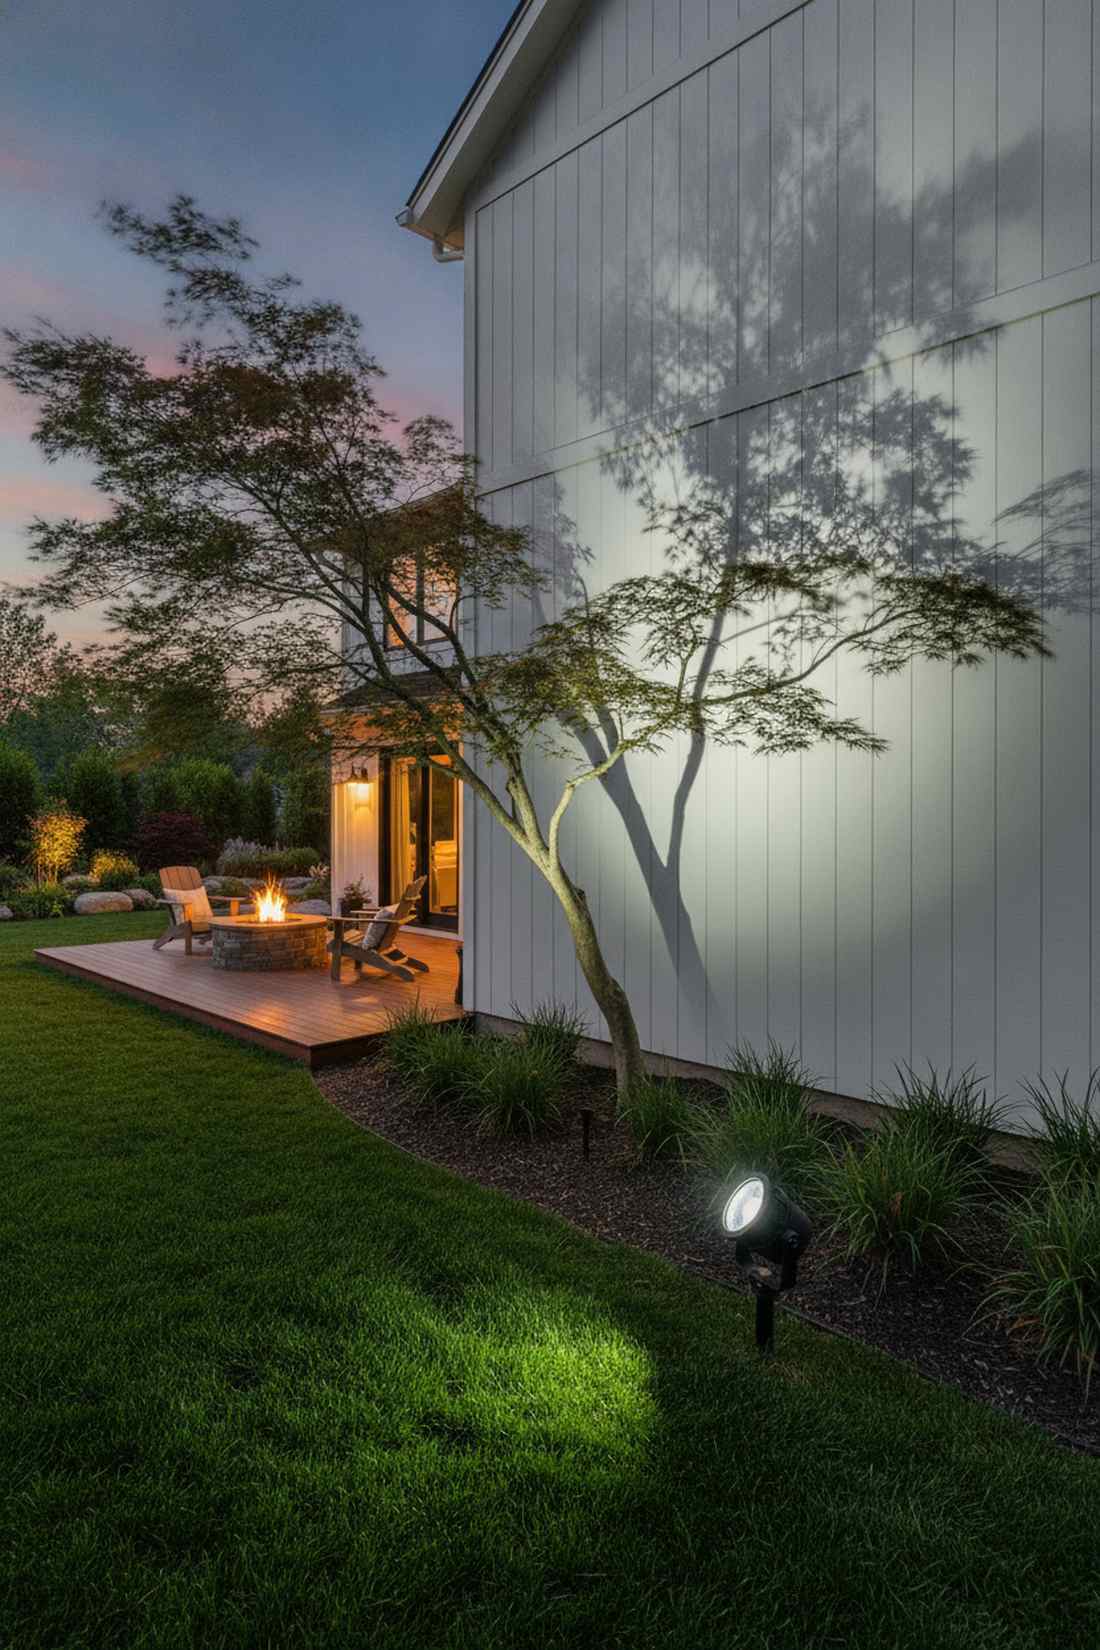
It projects a massive, swaying monster of foliage onto your blank siding. Dynamic plant shadow casting works brilliantly with delicate, wind-blown plants like Japanese maples or tall ornamental grasses.
Most homeowners try this with a diffused bulb, but using a crisp, clear lens gives a designer-level finish that makes the shadows razor-sharp. You don’t need fancy smart landscape lighting kits for this, just precise physical placement.
A single spotlight costs around $35–$60. Highly recommended for a quick weekend win.
- Key Materials: Narrow-beam spotlight, ground stake
- Vibe / Style: Dynamic movement
- Difficulty: Easy
- Budget Breakdown: Spotlight: $40.
- Creator’s Tip: Place the light very low to the ground and close to the plant to make the projected shadow massive.
- Smart Sourcing: Adjustable LED landscape spotlight (bulk pack) and UV-coated clear glass lenses.
17. Grazing Wall Wash Technique
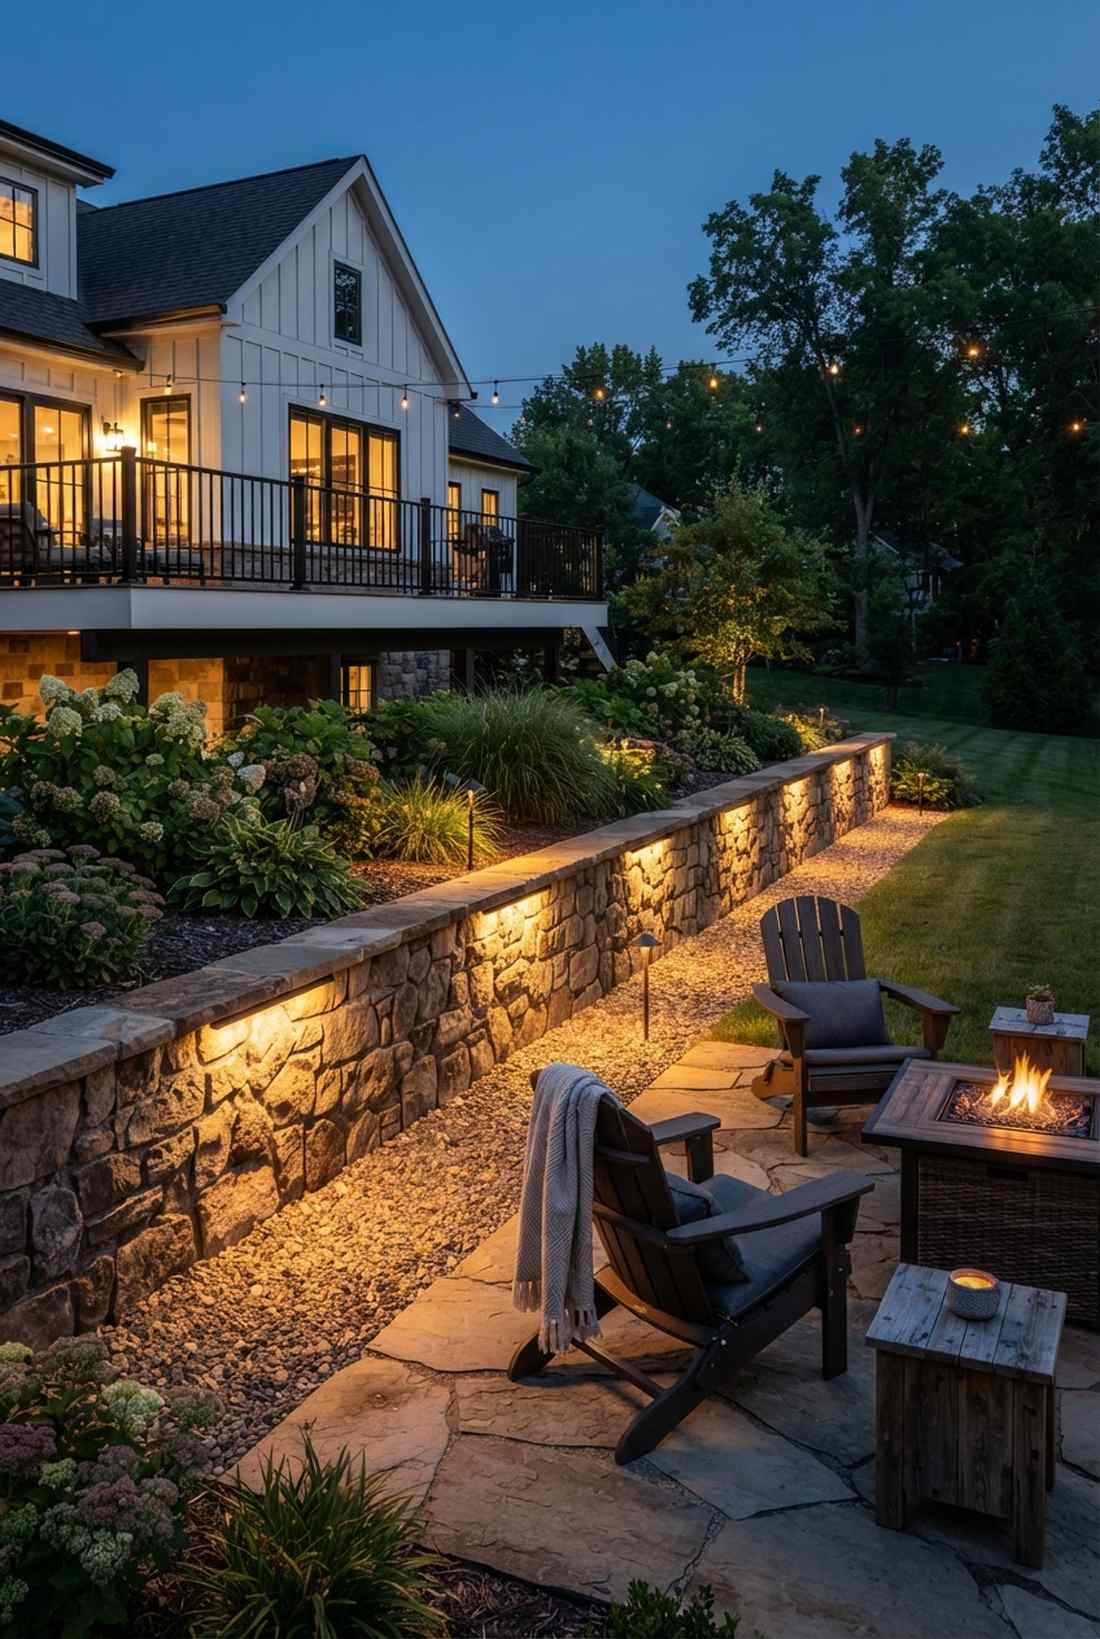
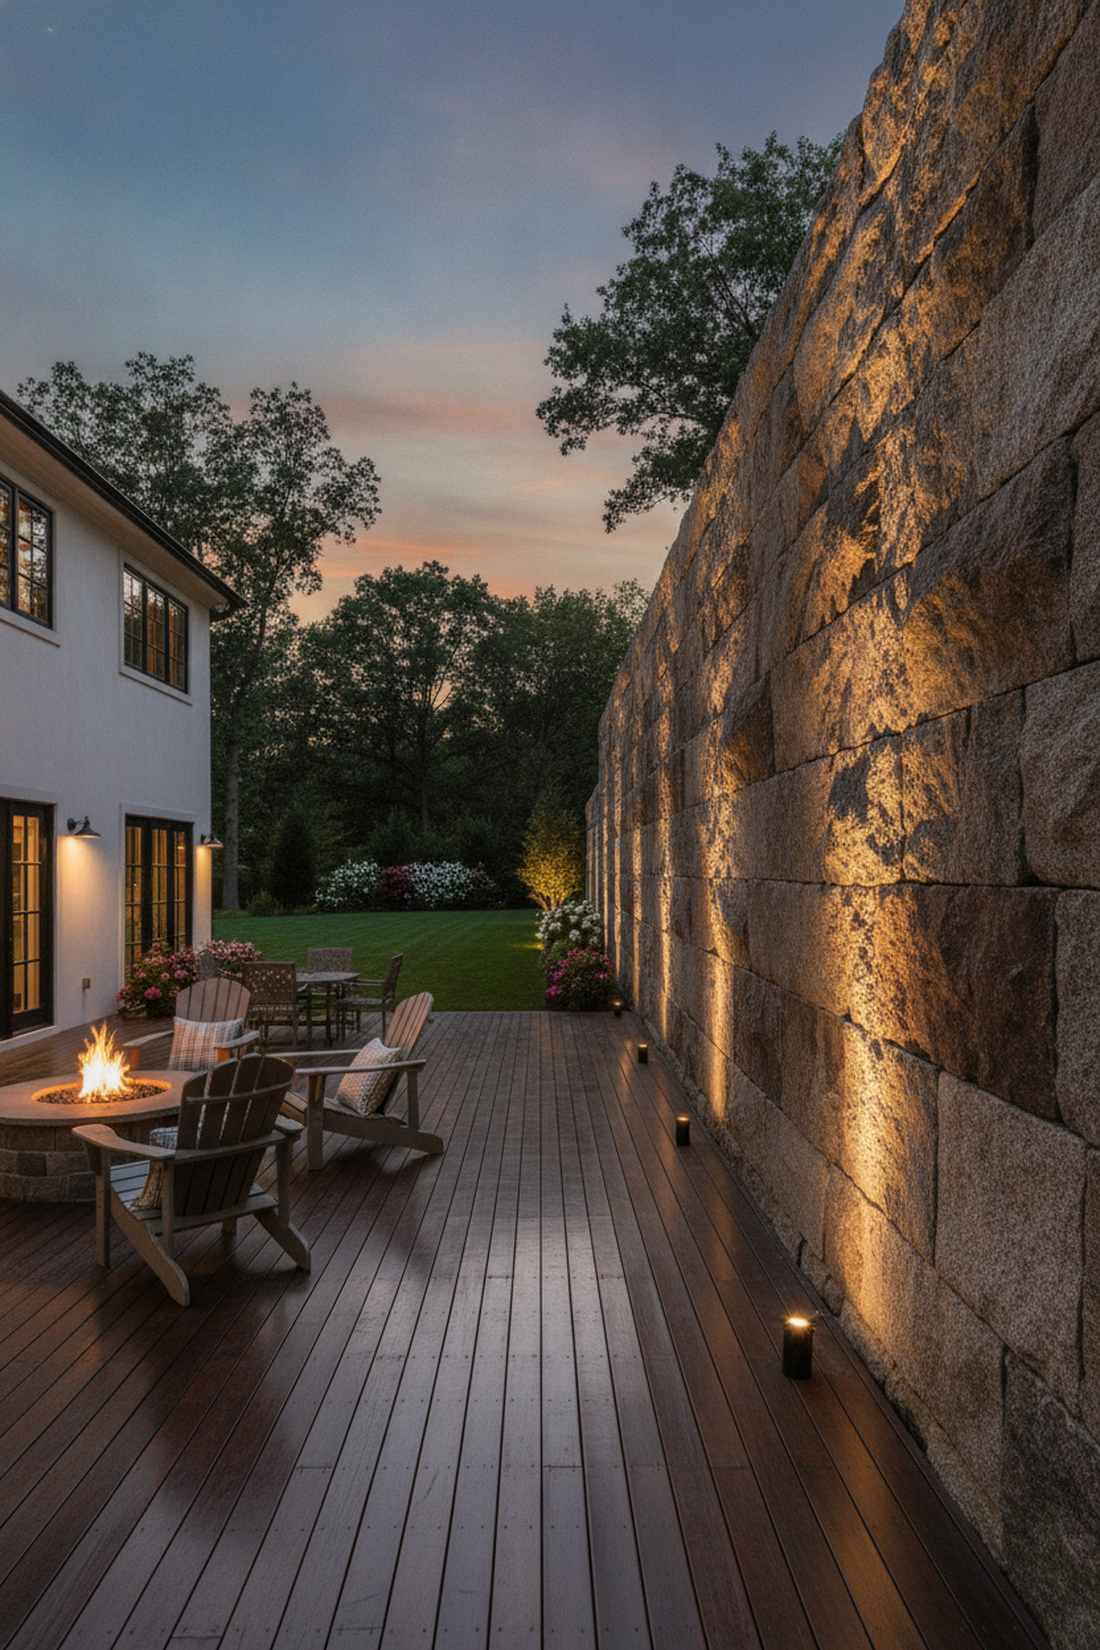
It makes plain brick or stone siding look like a centuries-old castle wall. Extreme vertical texture illumination is ideal for large, boring retaining walls or flat stucco house fronts.
Placing lights a few feet back ruins the effect, but jamming linear lights right against the foundation looks far more expensive than it is. Utilizing commercial hardscape retaining wall lights pushes the beam aggressively upward to catch every single bump.
Transforming a 20-foot wall will cost around $100–$160. Save this to your DIY weekend garden board!
- Key Materials: Hardscape linear lights, masonry drill bit
- Vibe / Style: Textural depth
- Difficulty: Intermediate
- Budget Breakdown: Linear Lights: $120 | Tapcon Screws: $10.
- Creator’s Tip: Space the fixtures exactly 4 feet apart for a continuous wash without dark spots in between.
- Smart Sourcing: LED hardscape swivel lights (starter kit) and pre-cut masonry fasteners.
18. Well Lights for Plant Beds
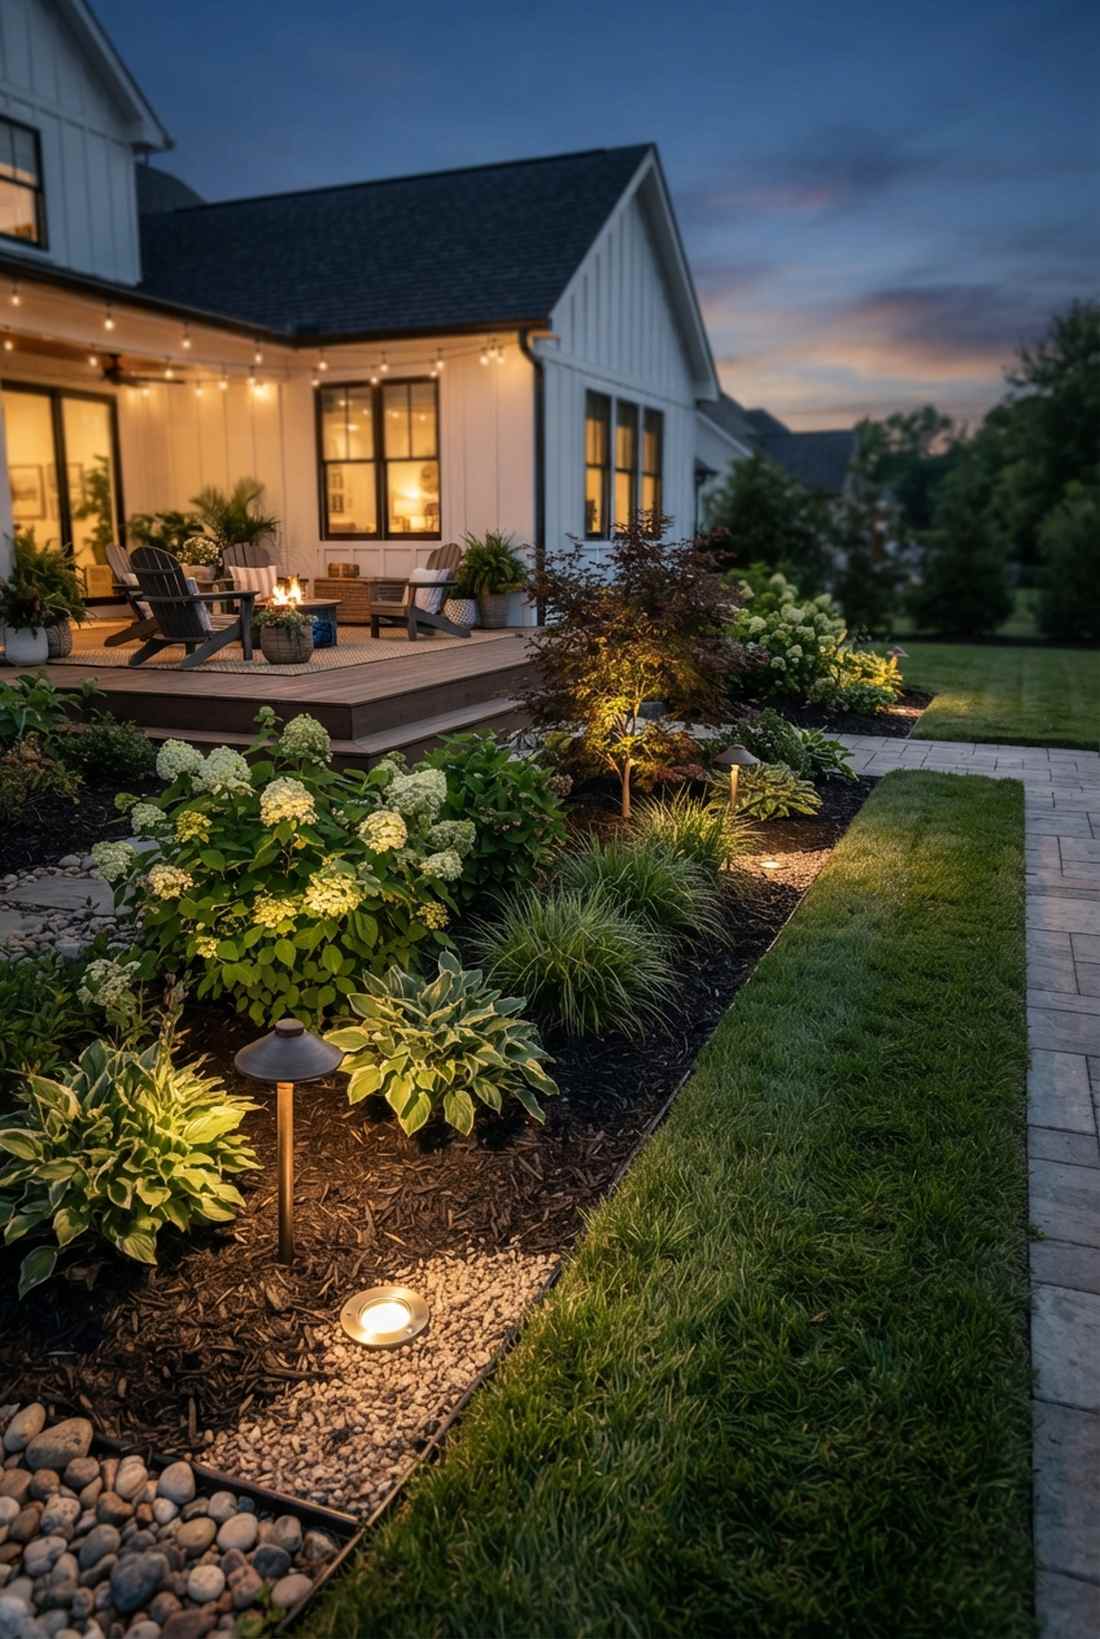
This layout feels clean, invisible, and completely flush with the earth. Subterranean garden bed uplighting is perfect for lighting up bushes right next to a lawnmower-heavy grass line.
Standard staked lights get kicked and snapped instantly, but burying shielded canisters delivers a surprisingly premium look that handles heavy foot traffic. Seamlessly incorporate in-ground landscape lighting kits to hide the hardware completely.
A pack of 4 professional well lights runs $80–$130. It’s a fast upgrade that completely changes the vibe.
- Key Materials: In-ground well lights, gravel for drainage
- Vibe / Style: Invisible elegance
- Difficulty: Intermediate (requires digging)
- Budget Breakdown: Well Lights: $90 | Gravel: $10.
- Creator’s Tip: Always dig the hole 3 inches deeper than needed and fill the bottom with pea gravel so rain drains away from the bulb.
- Smart Sourcing: Heavy-duty brass well lights (bulk pack) and UV-resistant waterproof wire nuts.
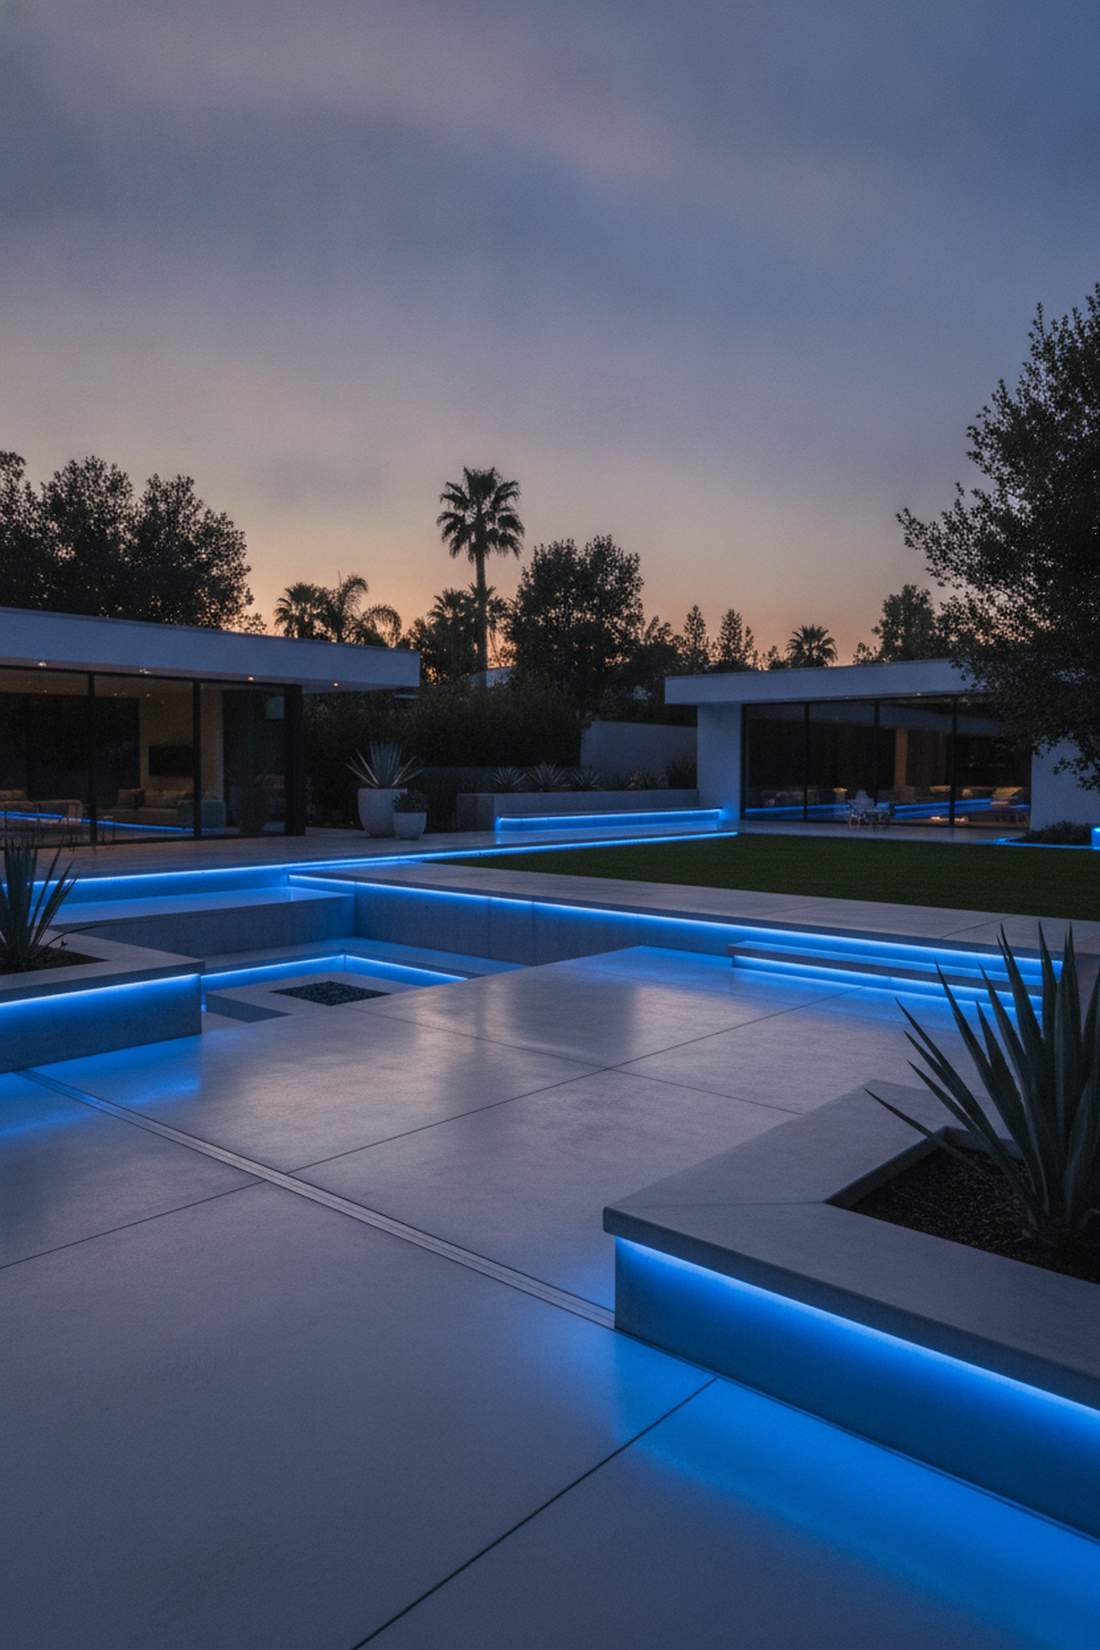
19. Color Wash Accent Lighting
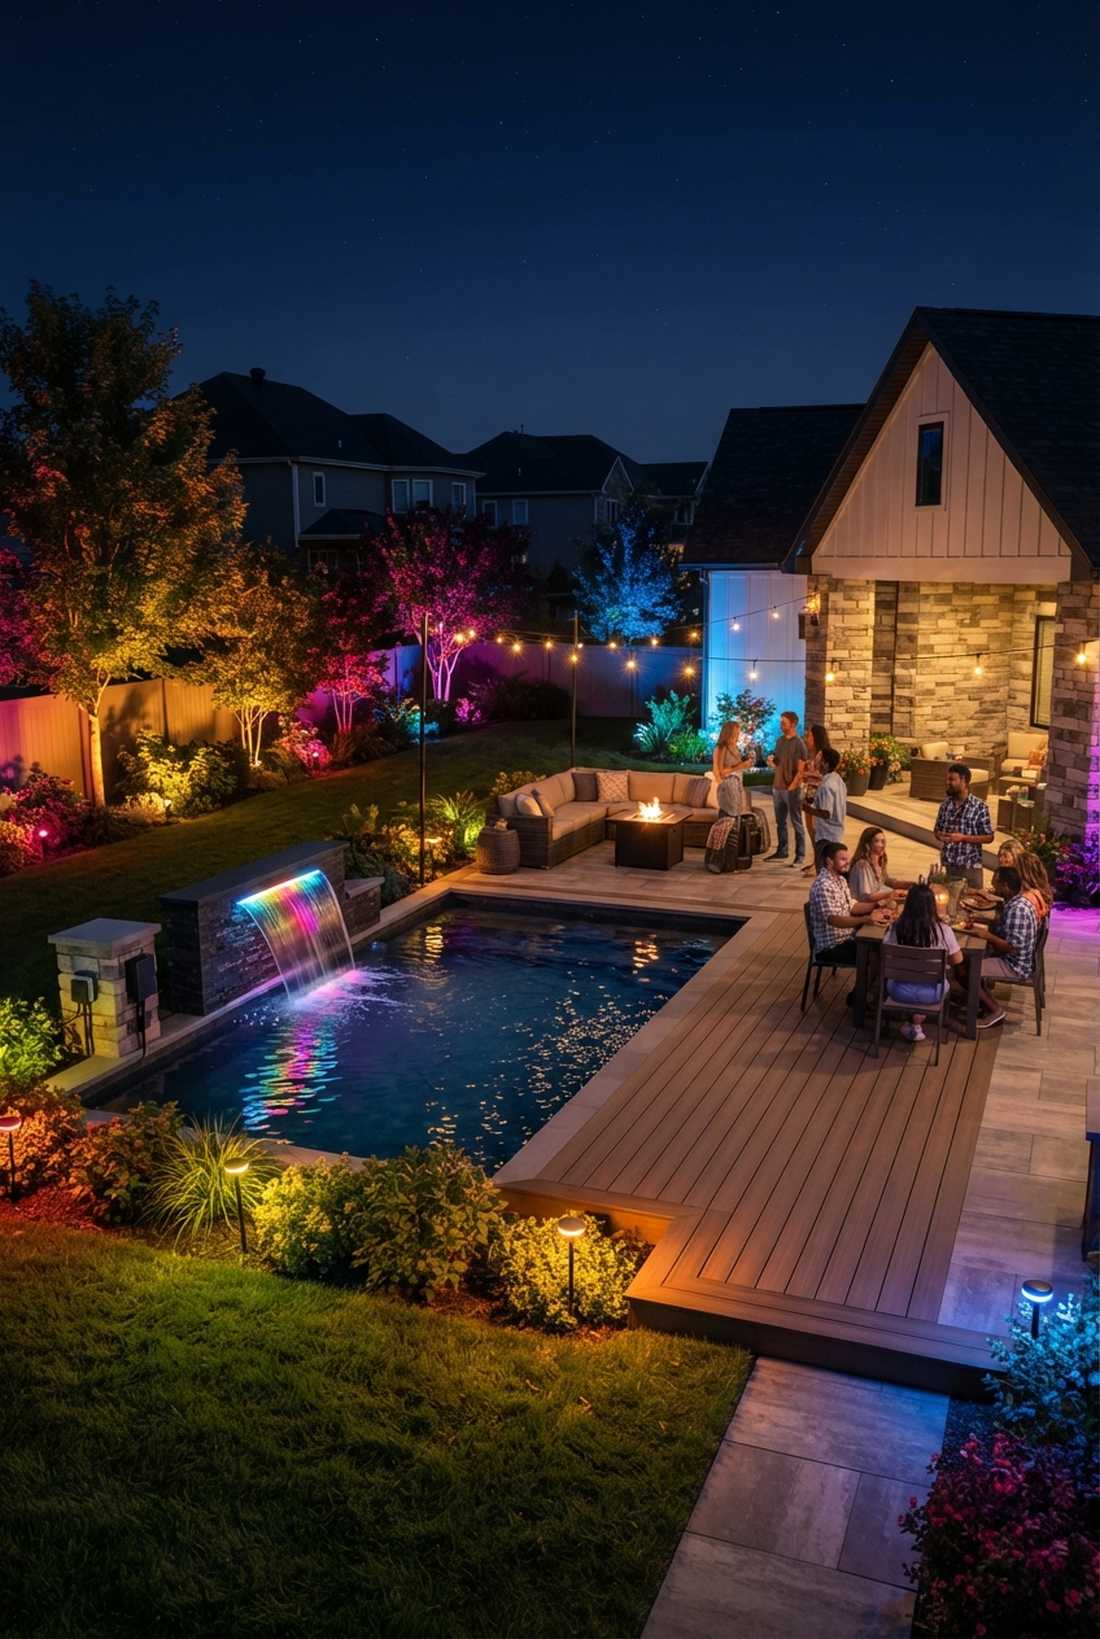
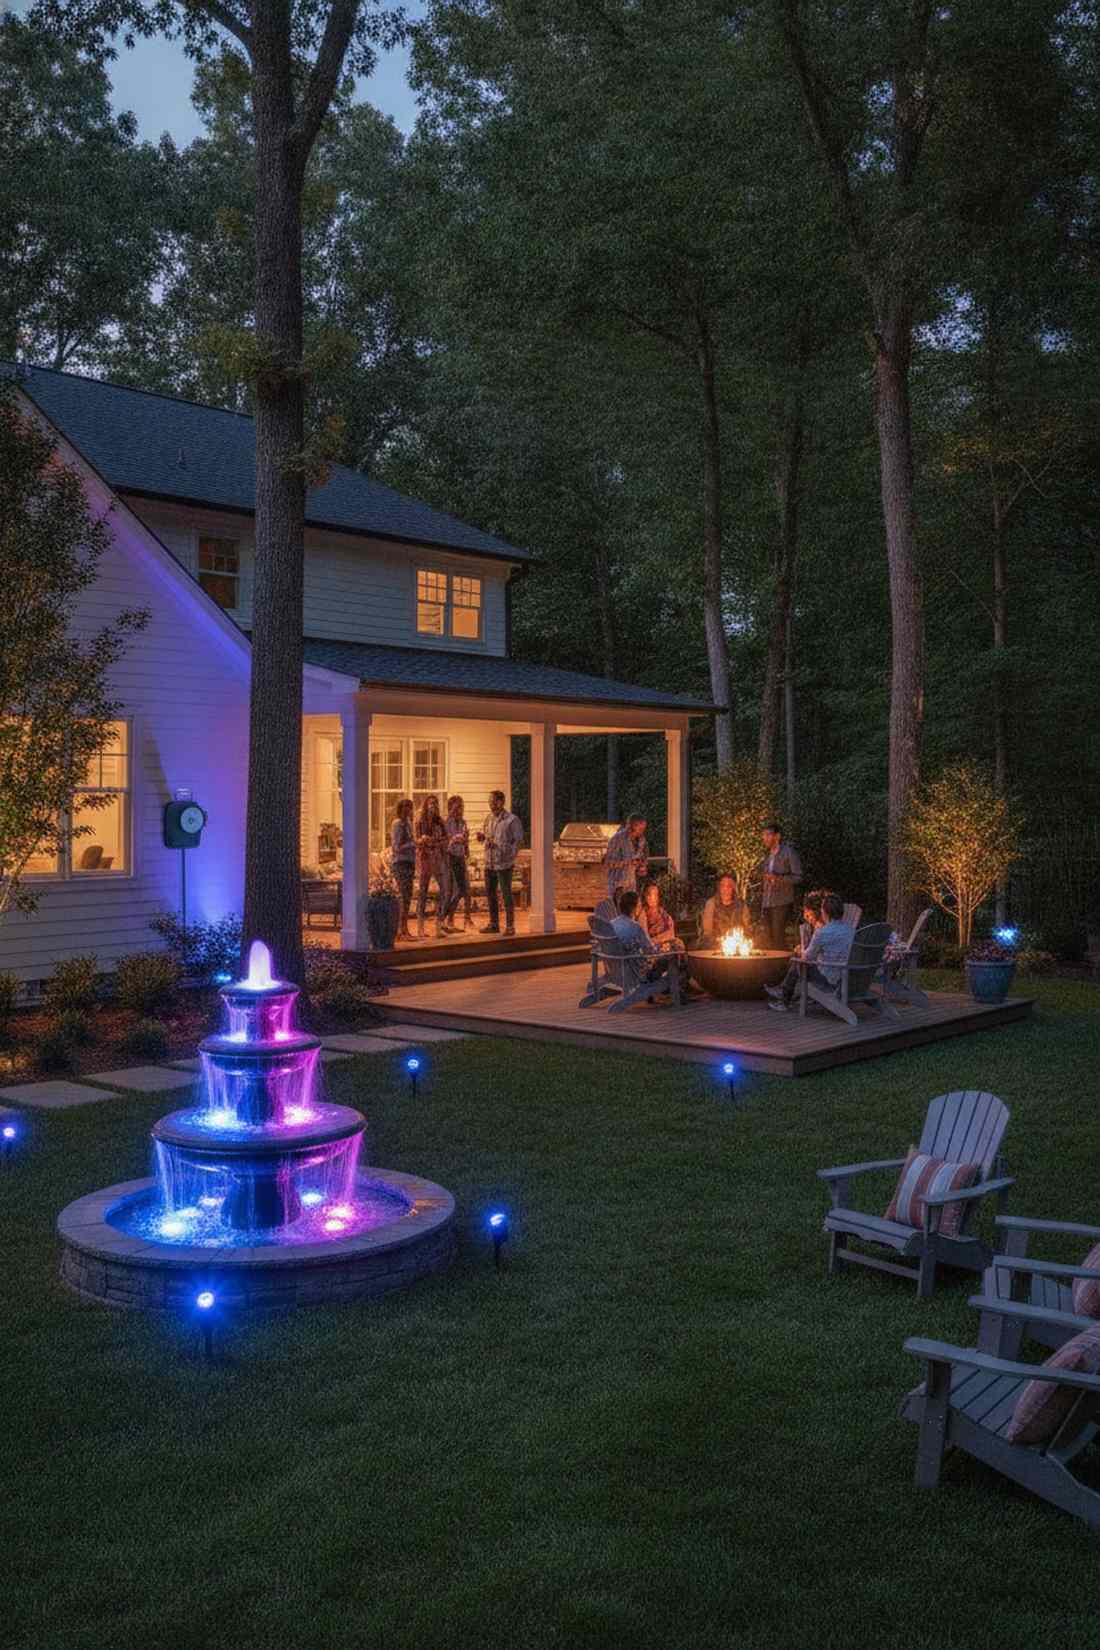
It turns a standard suburban yard into a pulsing, vibrant party zone. RGB architectural color casting is the ultimate flex for holiday displays or highlighting modern water fountains.
Sticking to cheap colored plastic lenses looks terrible; investing in smart color-changing LED chips gives a designer-level finish controllable from your phone. Tapping into smart outdoor transformer supplies allows you to sync the yard to your favorite playlist.
A smart RGB setup will cost $150–$250. Pin this if you love hosting massive backyard parties!
- Key Materials: Smart RGB LED spotlights, WiFi bridge
- Vibe / Style: Vibrant festivity
- Difficulty: Easy setup, moderate tech
- Budget Breakdown: RGB Lights: $180 | App Setup: Free.
- Creator’s Tip: Use deep amber or warm gold for everyday elegance, and save the neon pinks and blues for actual parties.
- Smart Sourcing: WiFi-enabled RGB landscape spotlights (starter kit) and a weatherproof smart plug hub.
Most people completely ignore this next zone, leaving their yard looking half-finished and cheap…
Decorative and Specialty Fixtures
Decorative lighting fixtures serve as daytime garden art while providing evening illumination. These pieces blend sculptural form with lighting function, adding personality to outdoor spaces.
20. Solar Lantern Stakes
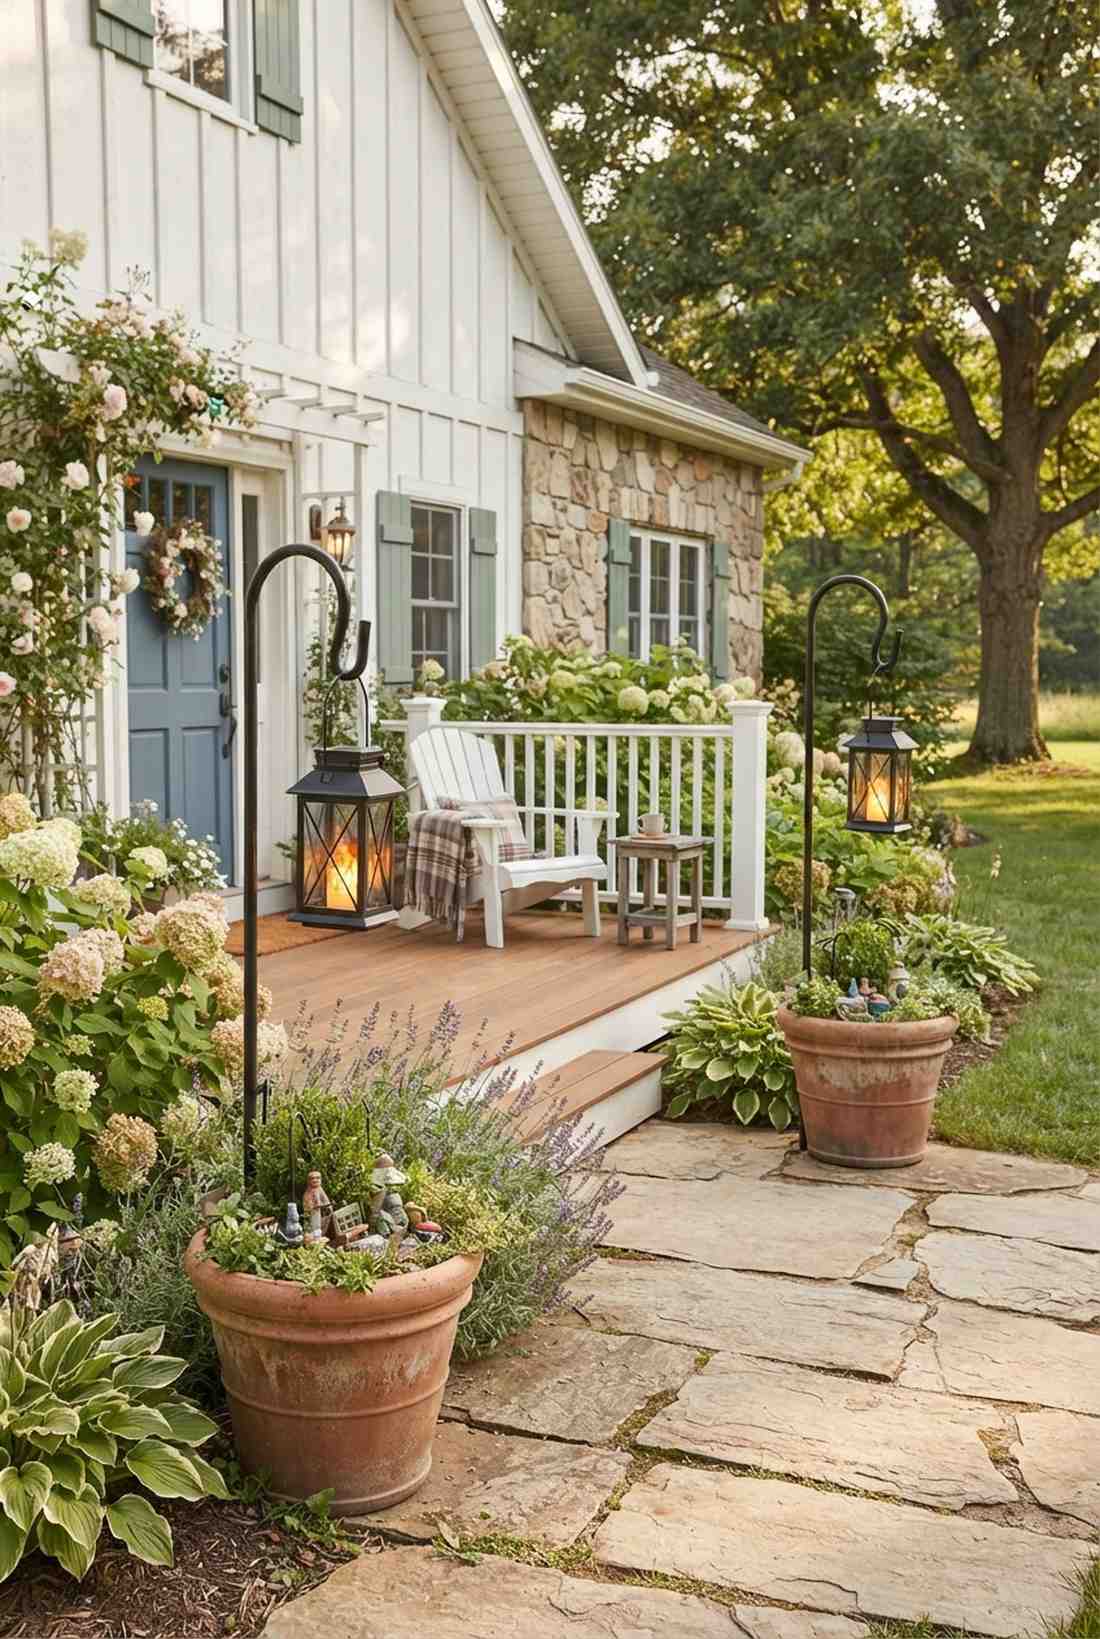
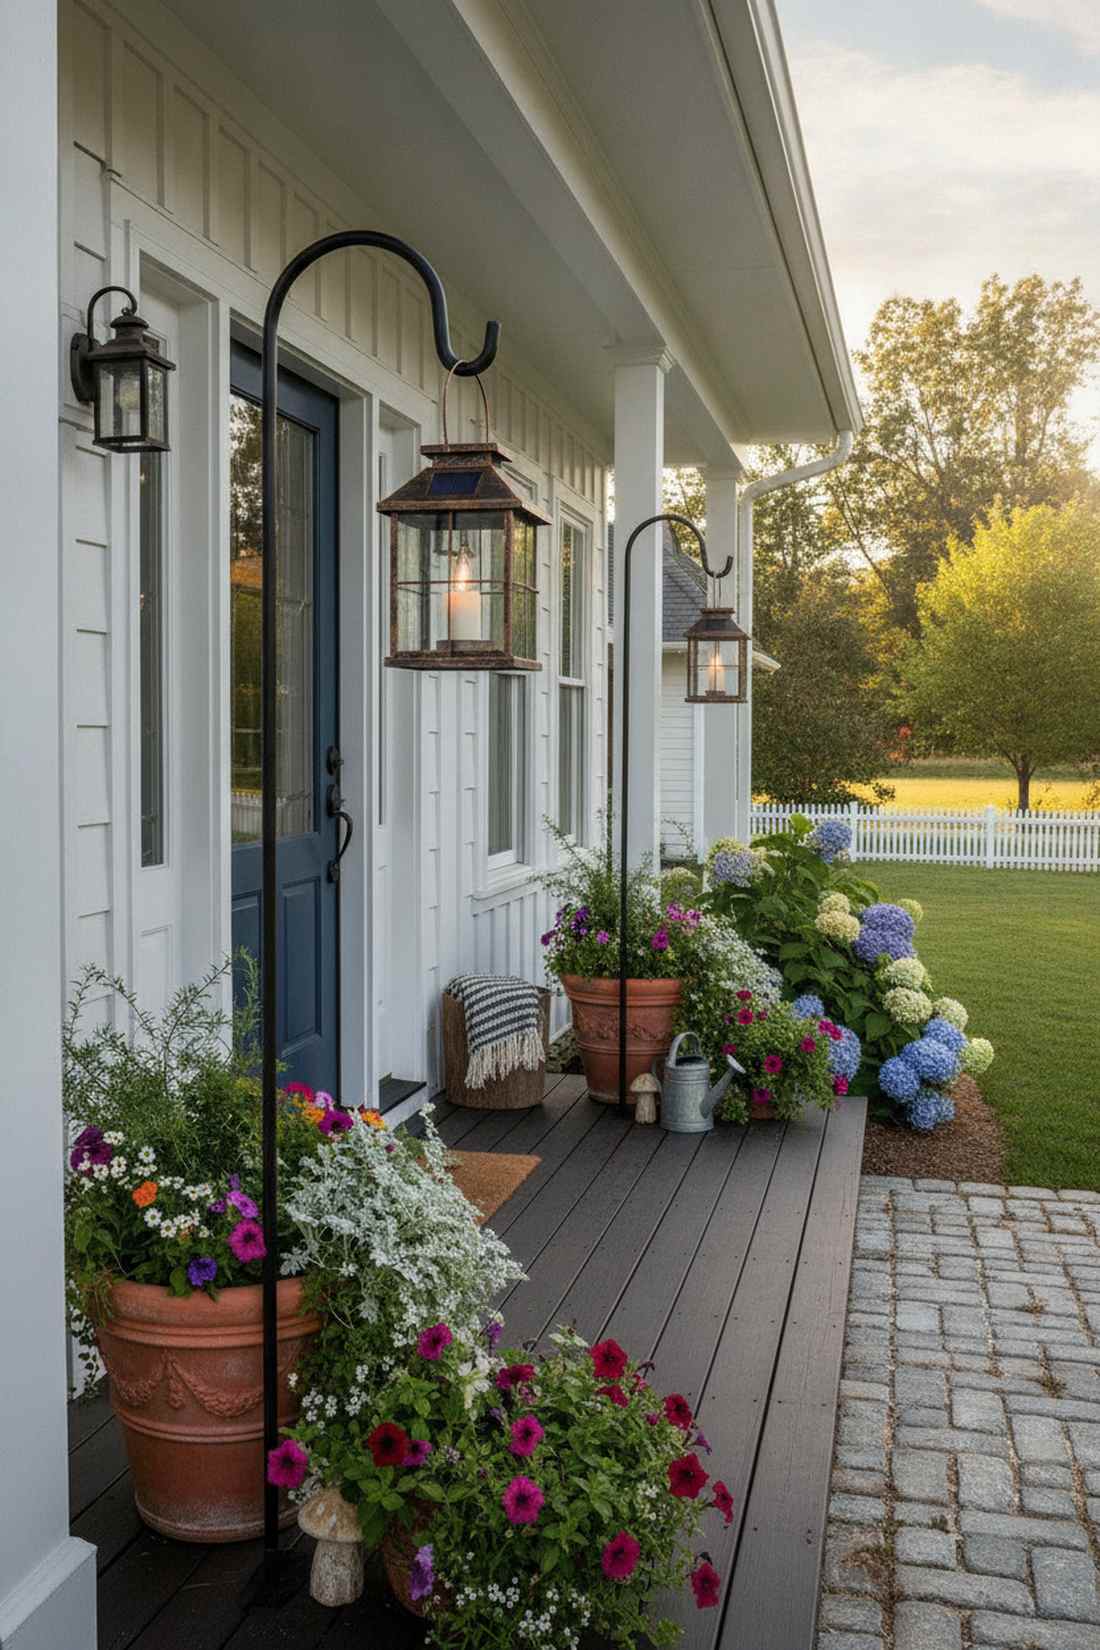
It radiates a charming, vintage farmhouse aesthetic without any wiring stress. Freestanding decorative path lanterns are excellent for popping into large potted planters or flanking a small front door.
Flimsy plastic poles snap in the wind, but solid iron shepherd’s hooks deliver a surprisingly premium look. Using high-end miniature garden accessories to surround the base anchors the aesthetic beautifully.
You can set up a pair of these for just $30–$50. Save this to your DIY weekend garden board!
- Key Materials: Metal shepherd hooks, solar hanging lanterns
- Vibe / Style: Rustic cottage
- Difficulty: Absolute beginner
- Budget Breakdown: Lanterns: $35 | Iron Stakes: $15.
- Creator’s Tip: Make sure the solar panel on the roof of the lantern isn’t blocked by the hook’s overhang.
- Smart Sourcing: Heavy-duty iron shepherd hooks (bulk pack) and flickering flame solar lanterns.
21. Moroccan-Style Hanging Lanterns
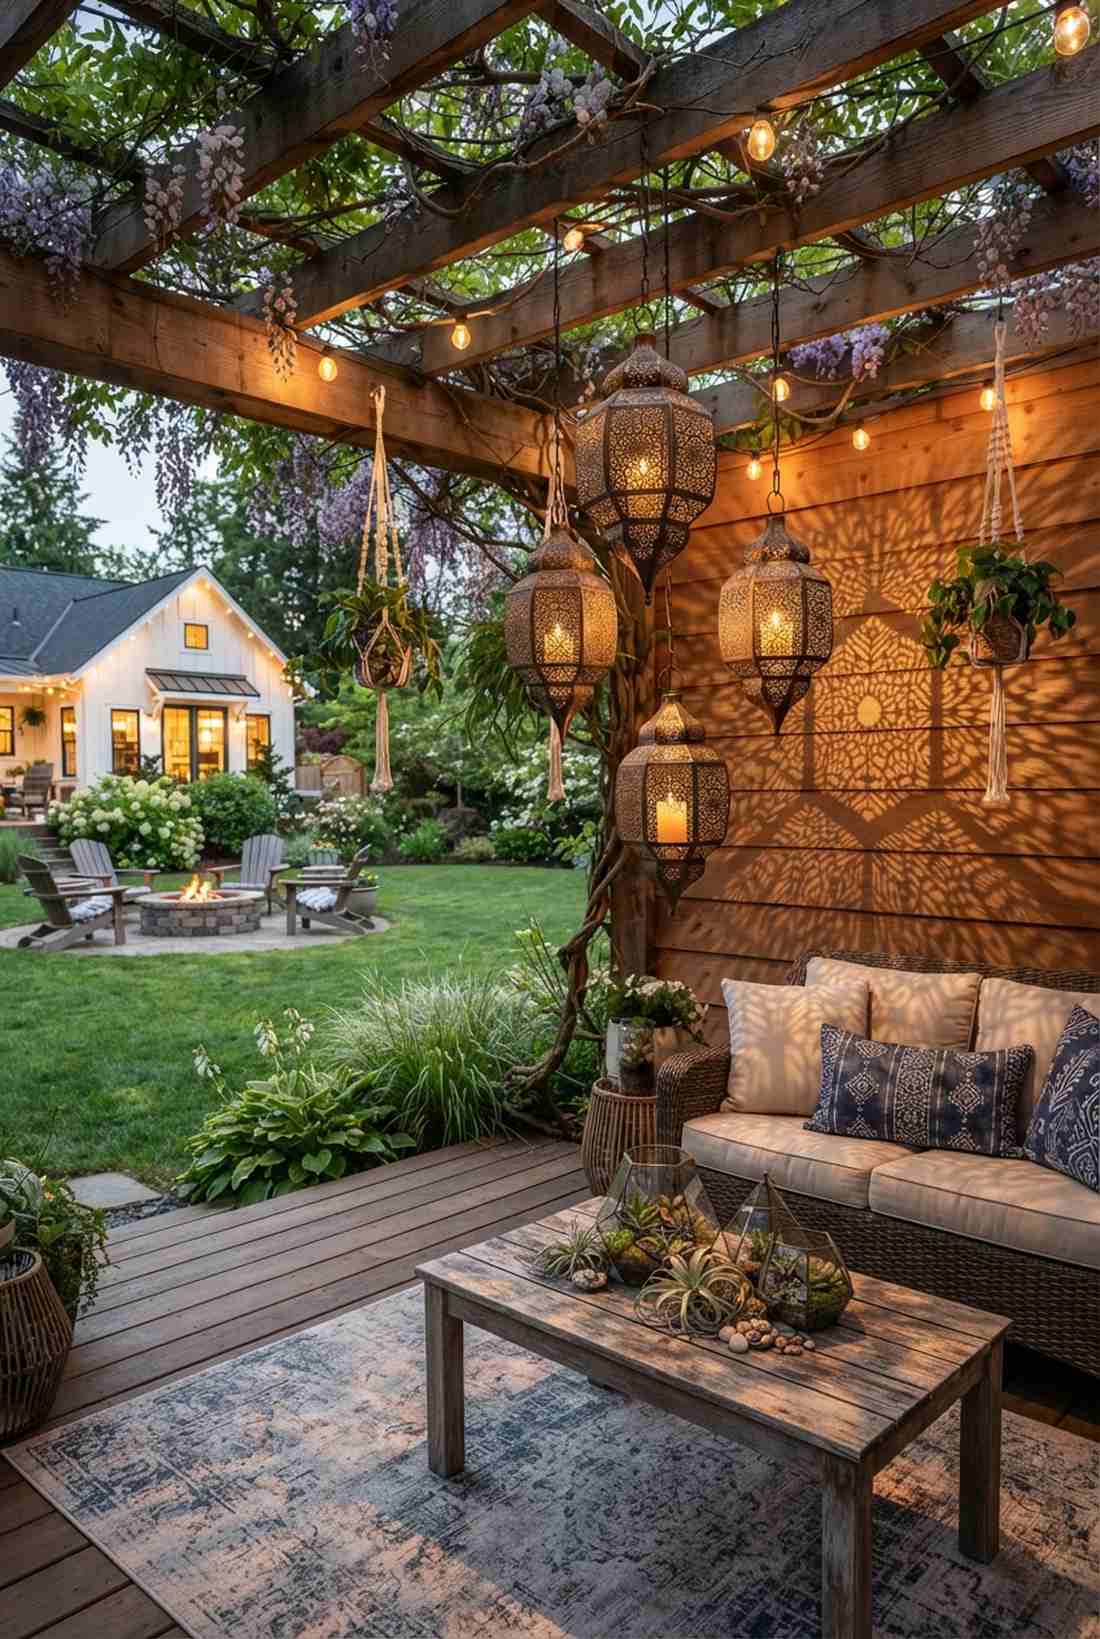
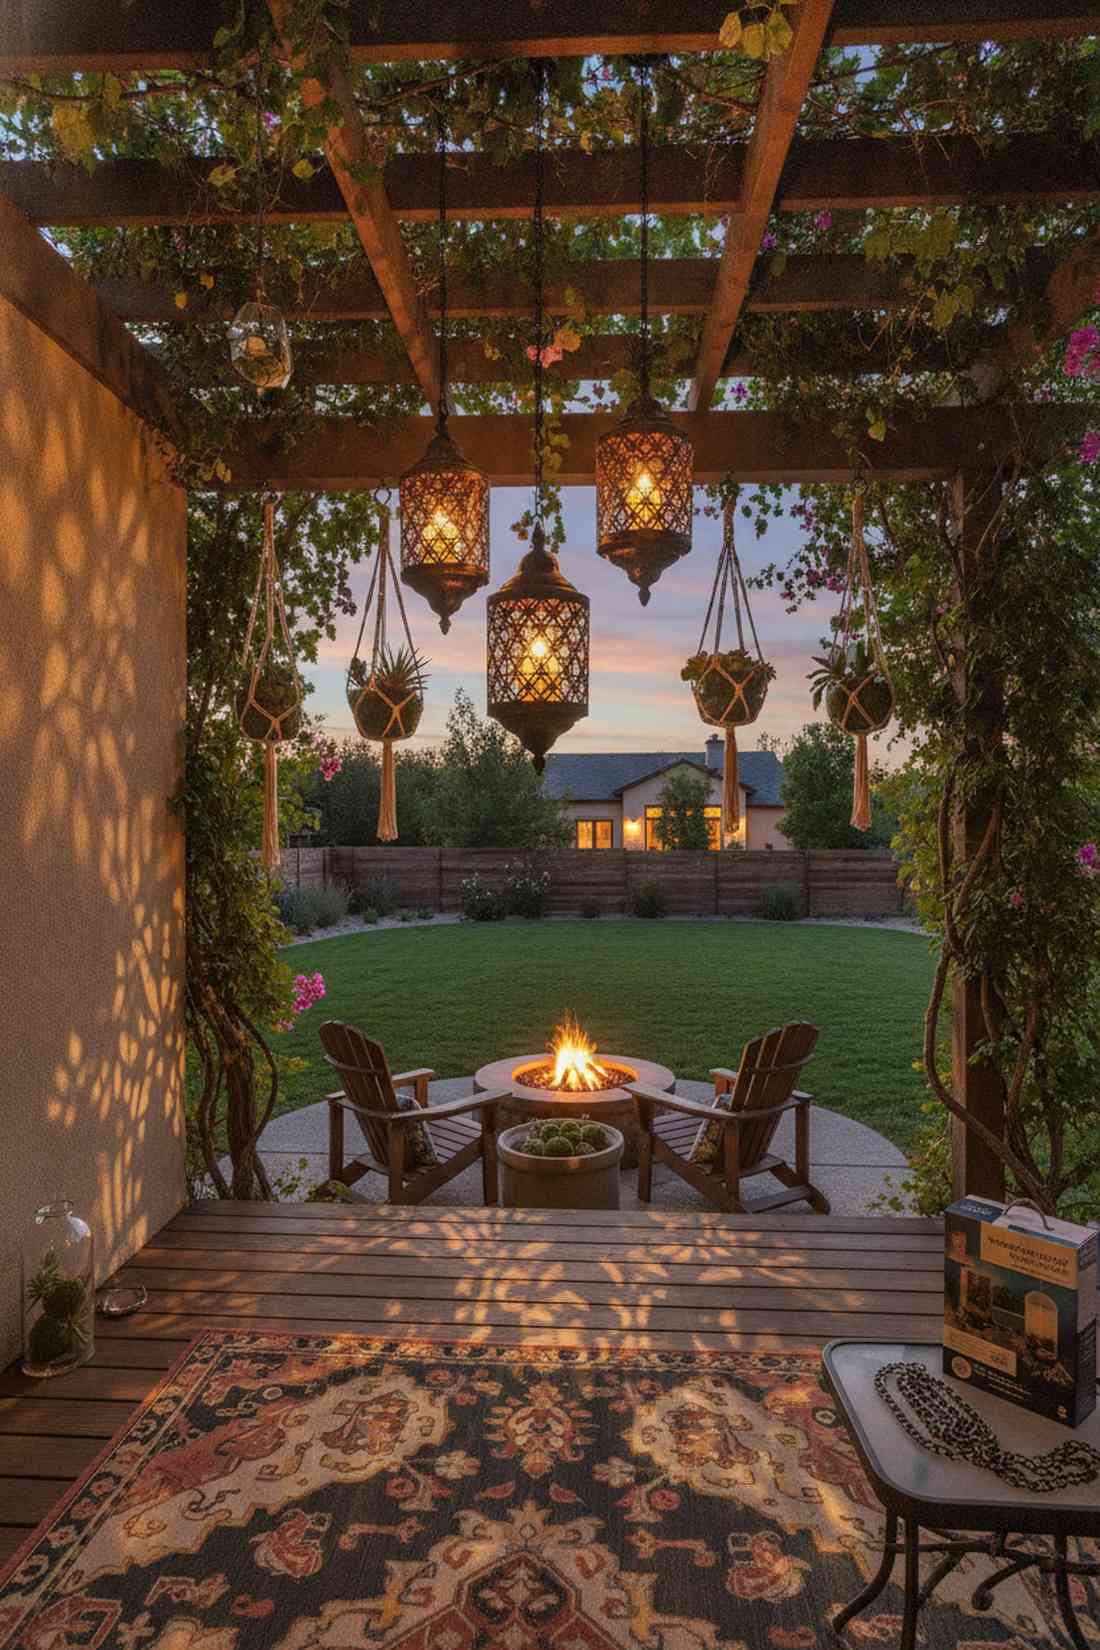
This layout projects an intricate, breathtaking geometric web of shadows across your deck. Bohemian punched-metal lighting works exceptionally well dangling from a densely vine-covered pergola.
Leaving real candles in these is a massive fire risk; dropping in a flickering battery-operated pillar looks far more expensive than it is. Integrate these with terrarium accessories and hanging plants to complete the desert oasis vibe.
A cluster of three lanterns costs around $60–$100. It’s a fast upgrade that completely changes the vibe.
- Key Materials: Pierced metal lanterns, LED flameless candles, chain
- Vibe / Style: Global bohemian
- Difficulty: Easy
- Budget Breakdown: Lanterns: $75 | LED Candles: $20.
- Creator’s Tip: Hang them at staggered heights in a corner to create an overlapping shadow effect on two walls.
- Smart Sourcing: Pre-cut metal hanging chain (spool) and waterproof outdoor LED pillar candles (starter kit).
22. LED Garden Orb Lights

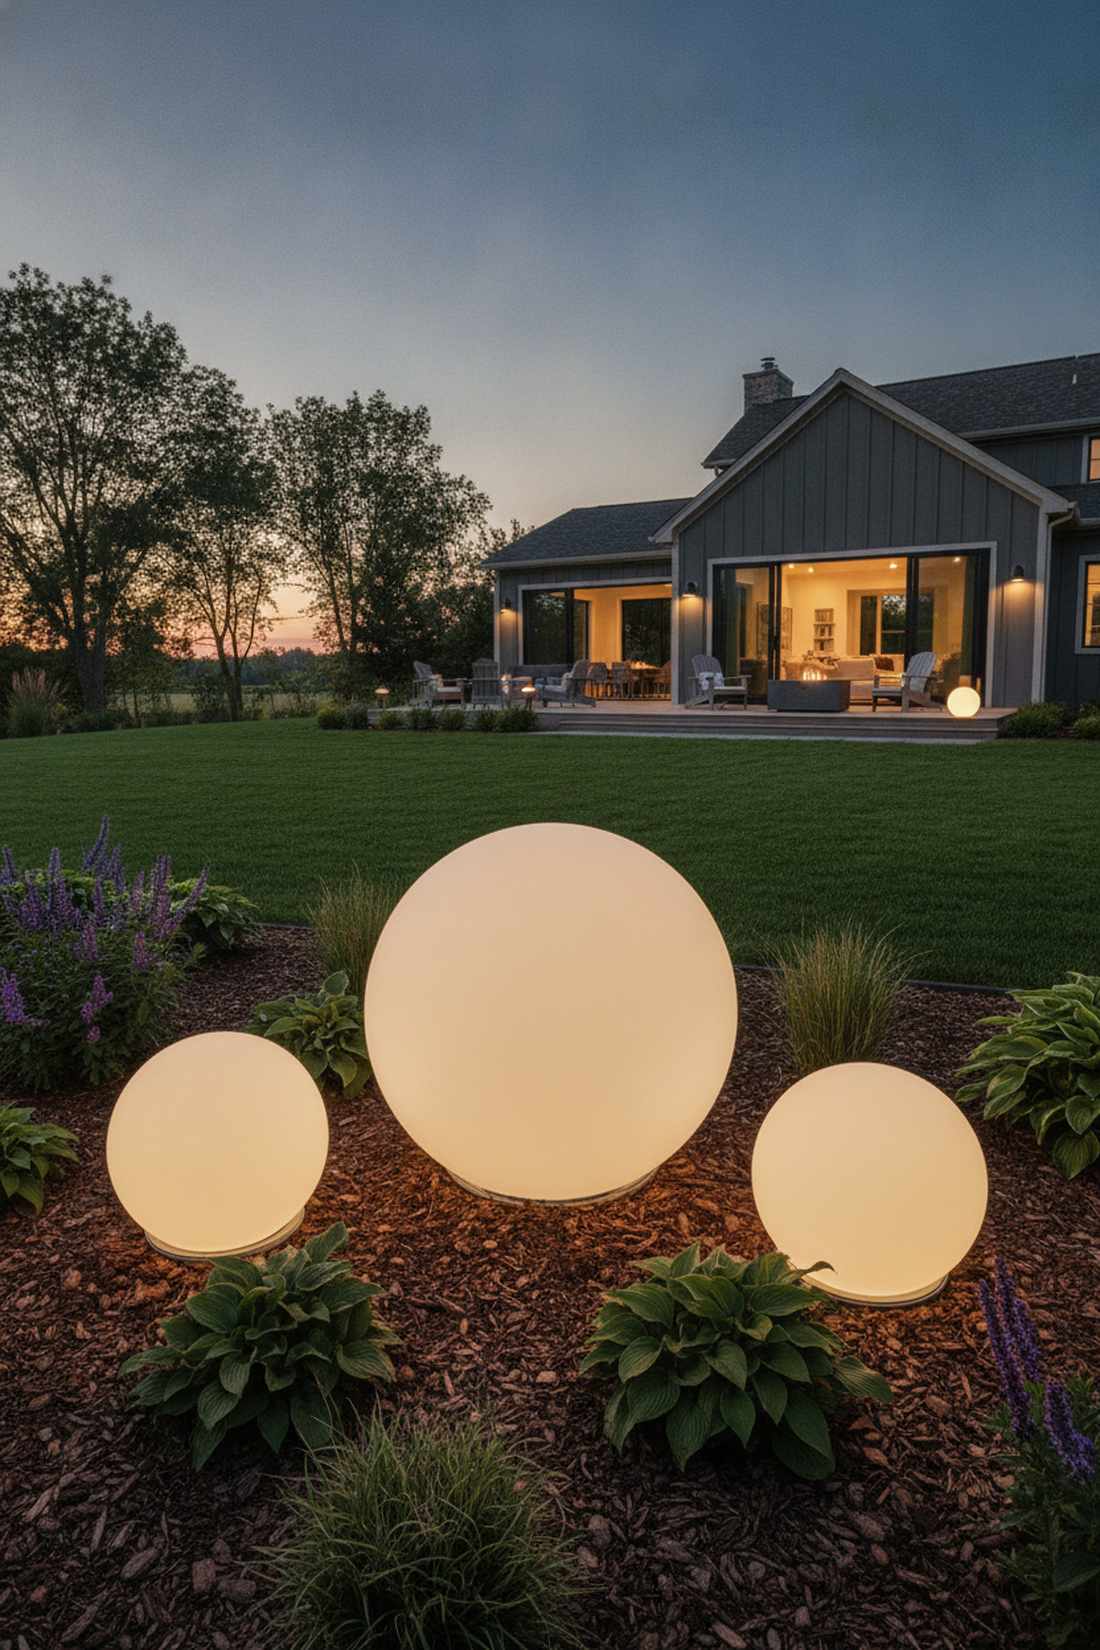
Imagine massive, glowing pearls resting softly in your freshly mulched flower beds. Luminous spherical garden decor is the ultimate statement piece for ultra-modern, minimalist landscape designs.
Wired versions are a tripping hazard nightmare, but rechargeable, waterproof spheres give a designer-level finish that you can move around freely. These serve as massive glowing fairy garden centerpieces that immediately draw the eye.
A set of three varied sizes usually runs $80–$150. Pin this if you want an ultra-modern aesthetic!
- Key Materials: PE plastic LED orbs, remote control
- Vibe / Style: Minimalist glow
- Difficulty: Absolute beginner
- Budget Breakdown: 3-Orb Set: $110.
- Creator’s Tip: Hide the flat base of the orb slightly under the mulch so it looks perfectly round and organically placed.
- Smart Sourcing: Rechargeable waterproof LED glow spheres (multi-pack) and UV-coated charging bases.
23. Tiki Torch Systems
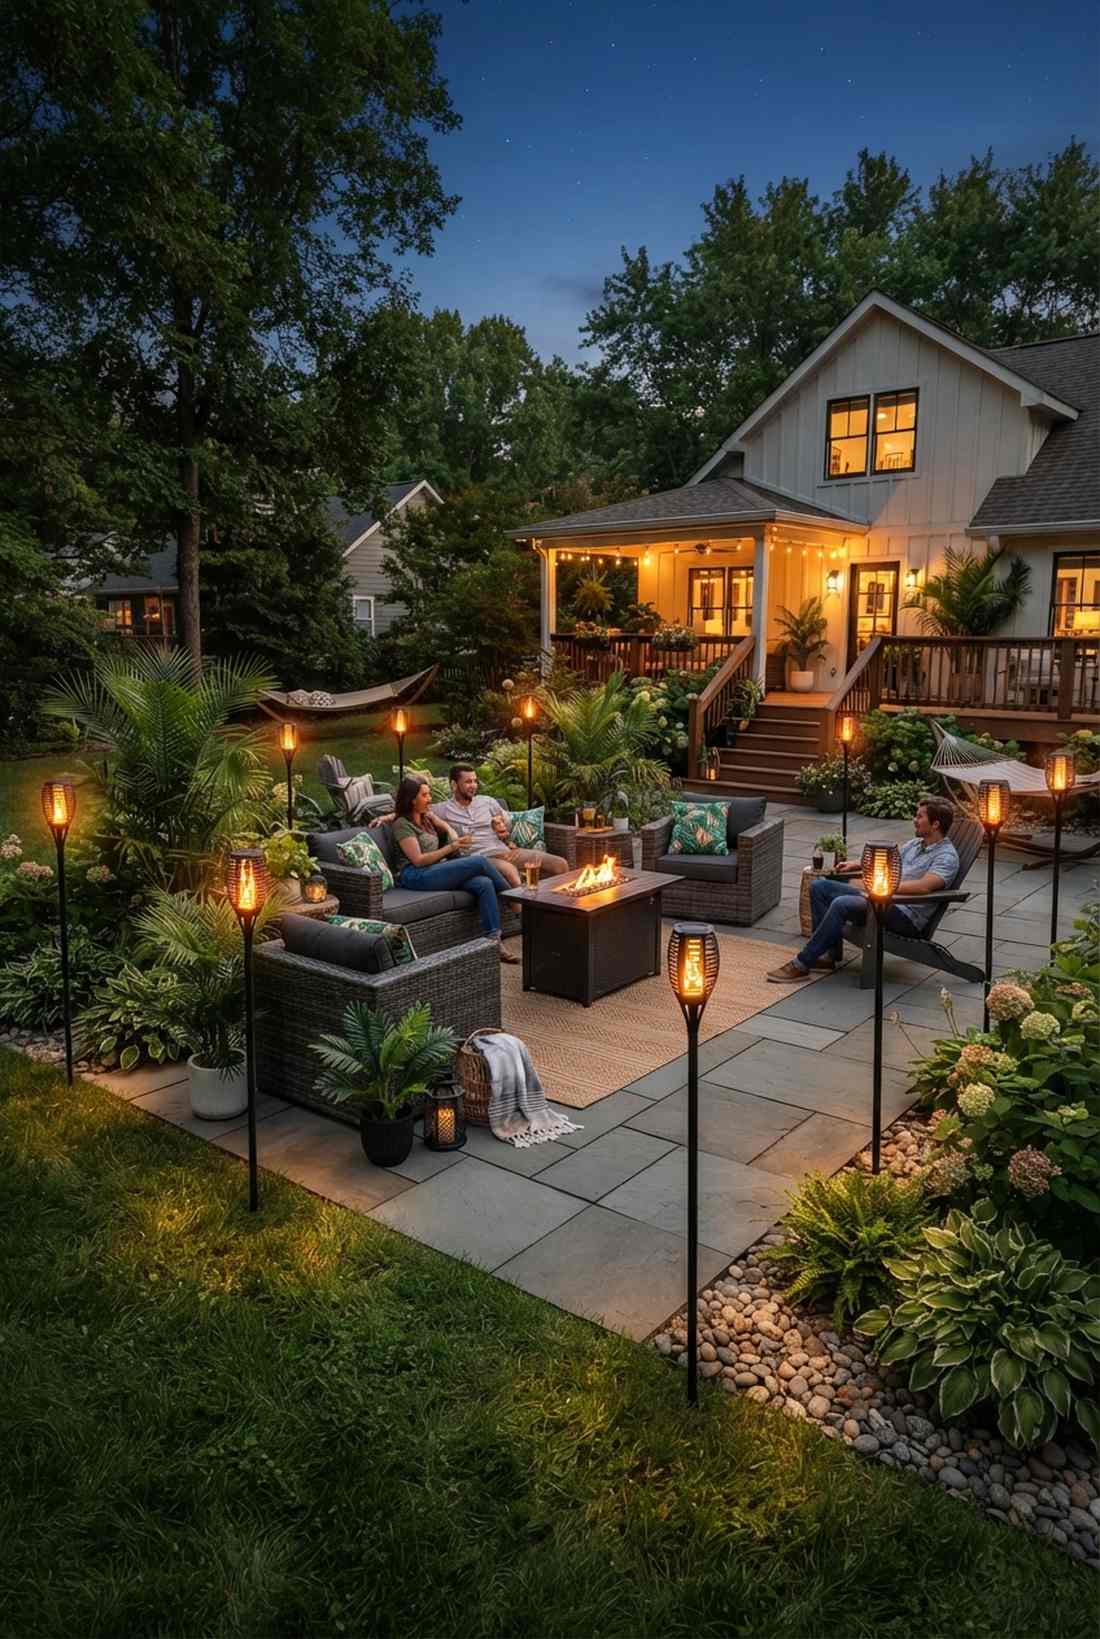
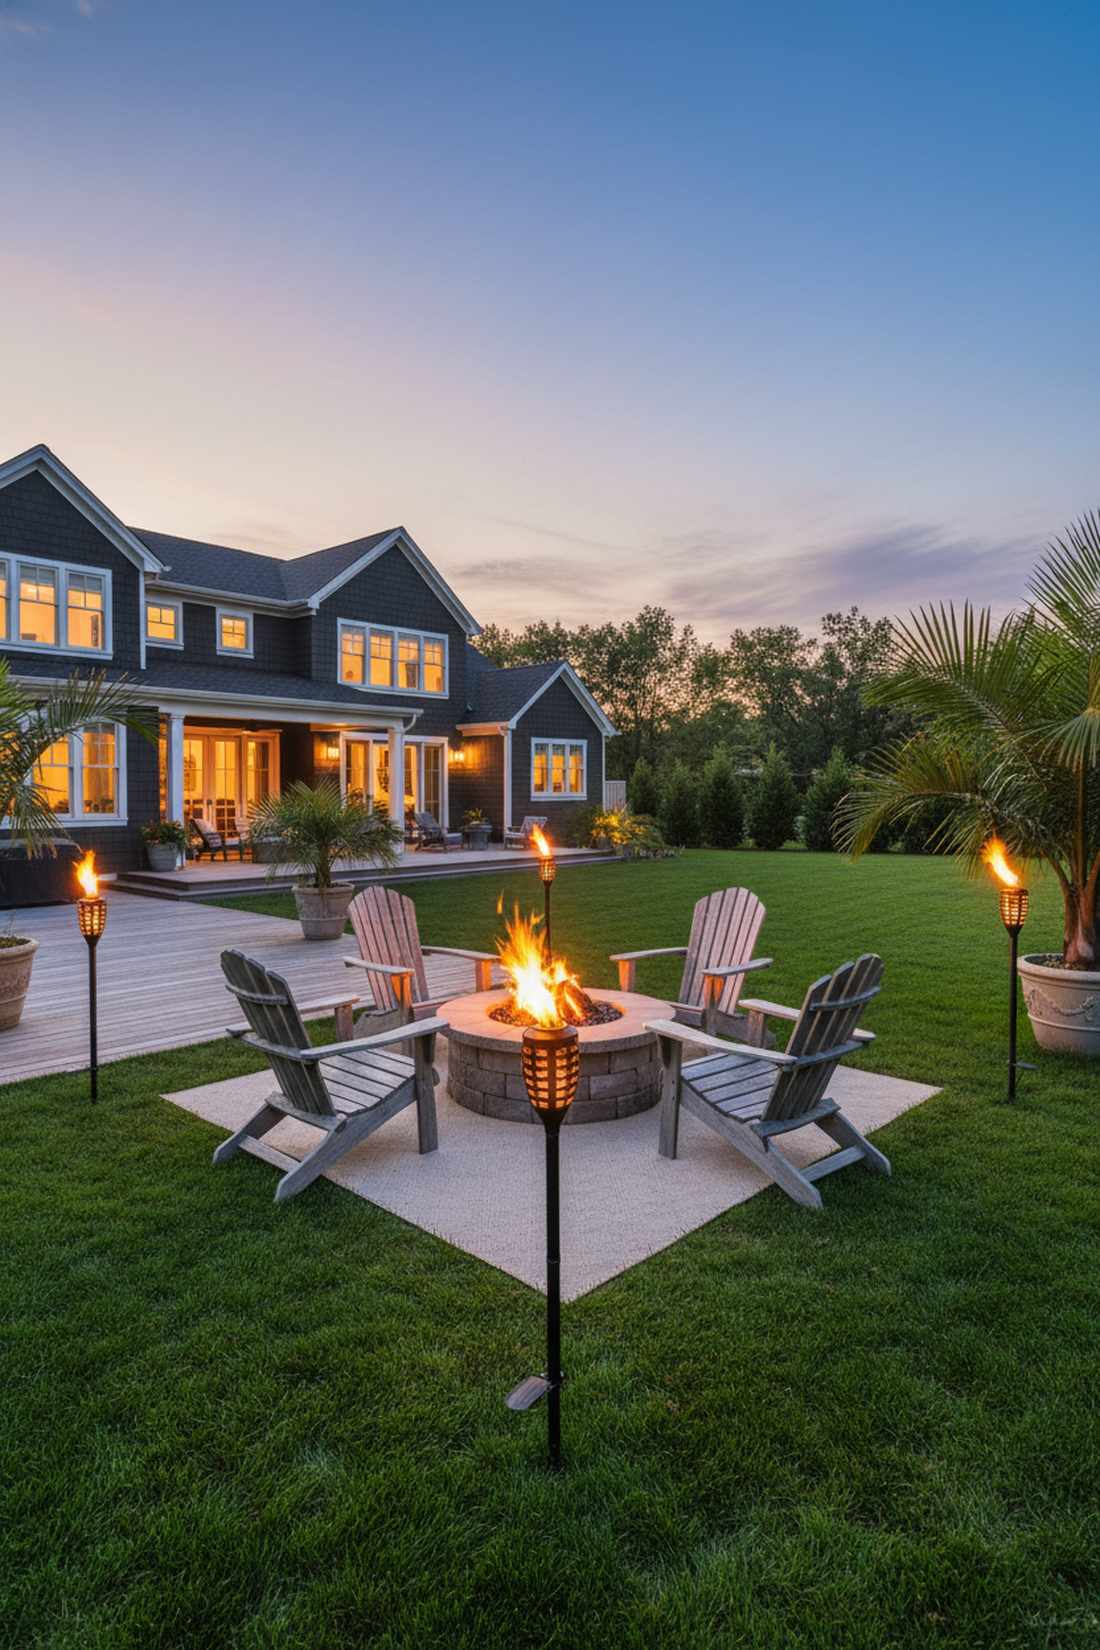
It brings the wild, flickering primal energy of a tropical beach resort right to your backyard. Perimeter flame illumination is perfect for enclosing an outdoor seating area while keeping mosquitos away.
Spilling fluid from bamboo sticks is dangerous and messy; upgrading to powder-coated steel canisters delivers a surprisingly premium look. You don’t need real fire either—high-end solar flame effect lights look shockingly realistic today.
Lining a patio costs roughly $50–$90. Highly recommended for a quick weekend win.
- Key Materials: Metal torch poles, citronella fuel or solar flame heads
- Vibe / Style: Tropical resort
- Difficulty: Easy
- Budget Breakdown: 4 Torches: $60 | Fuel: $20.
- Creator’s Tip: Space them exactly 6 to 8 feet apart to create a functional barrier for bug repellent to overlap.
- Smart Sourcing: Solar flickering flame torch lights (bulk pack) and heavy-duty steel ground stakes.
24. Mason Jar String Lights
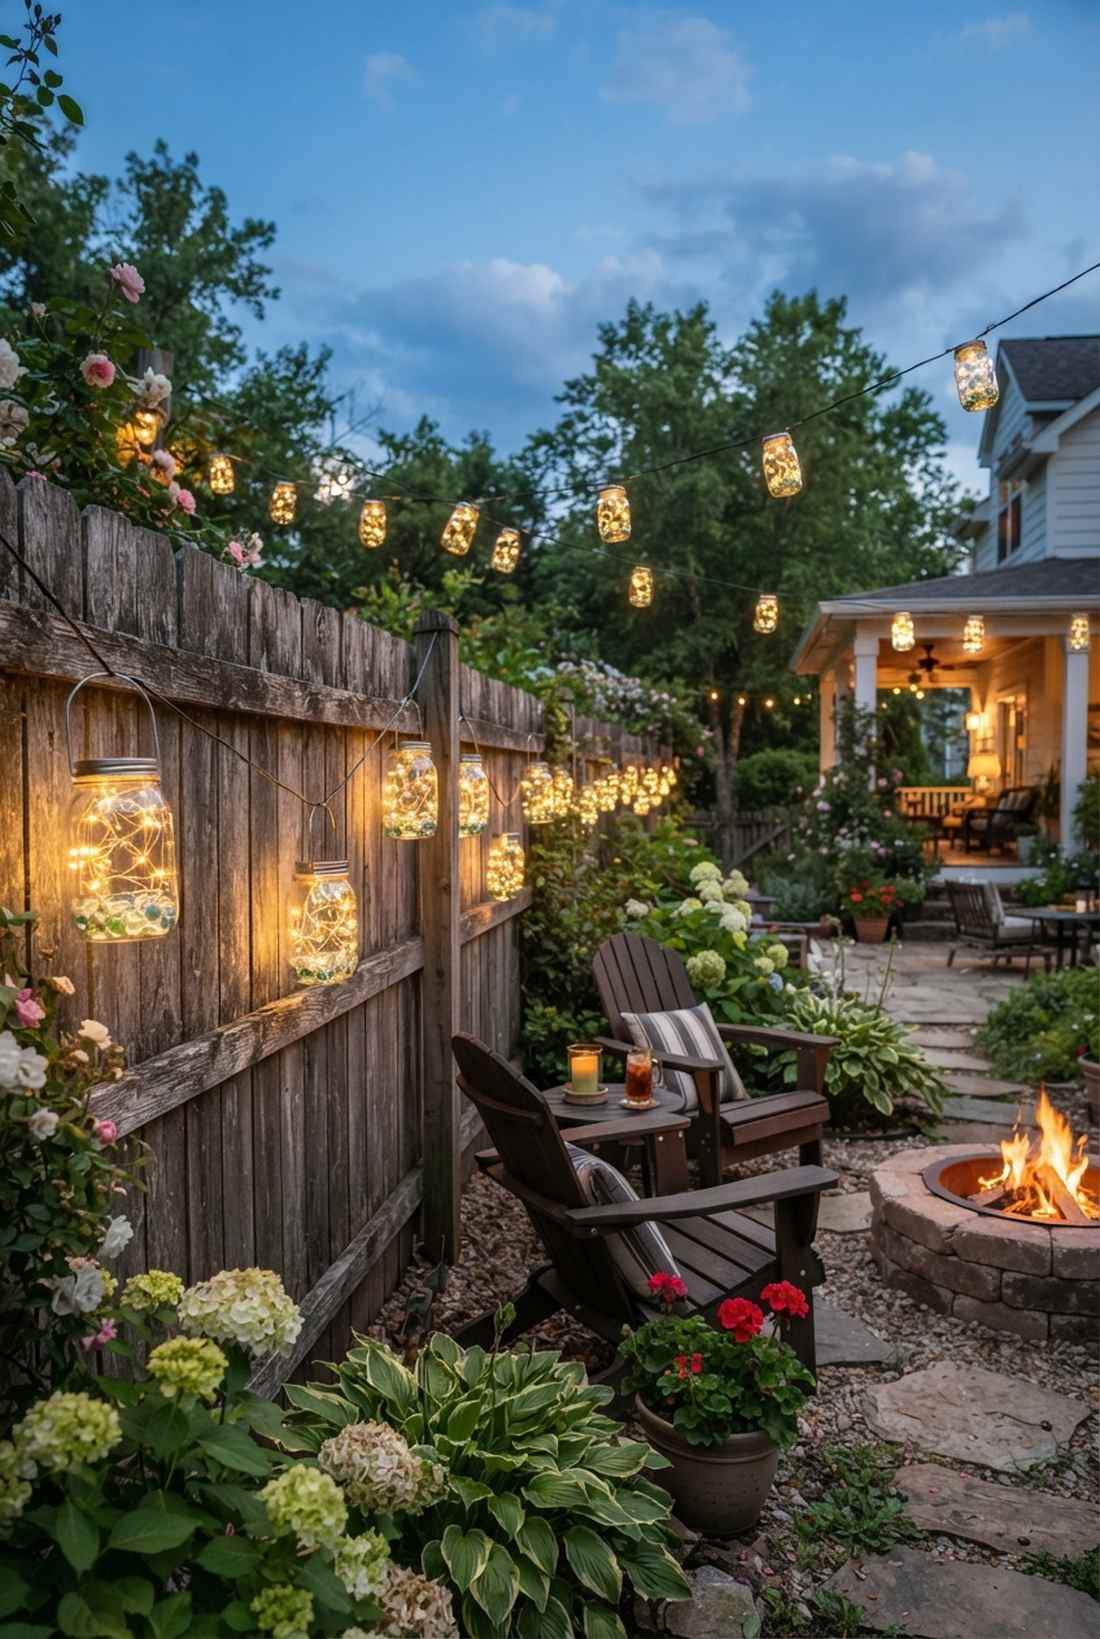
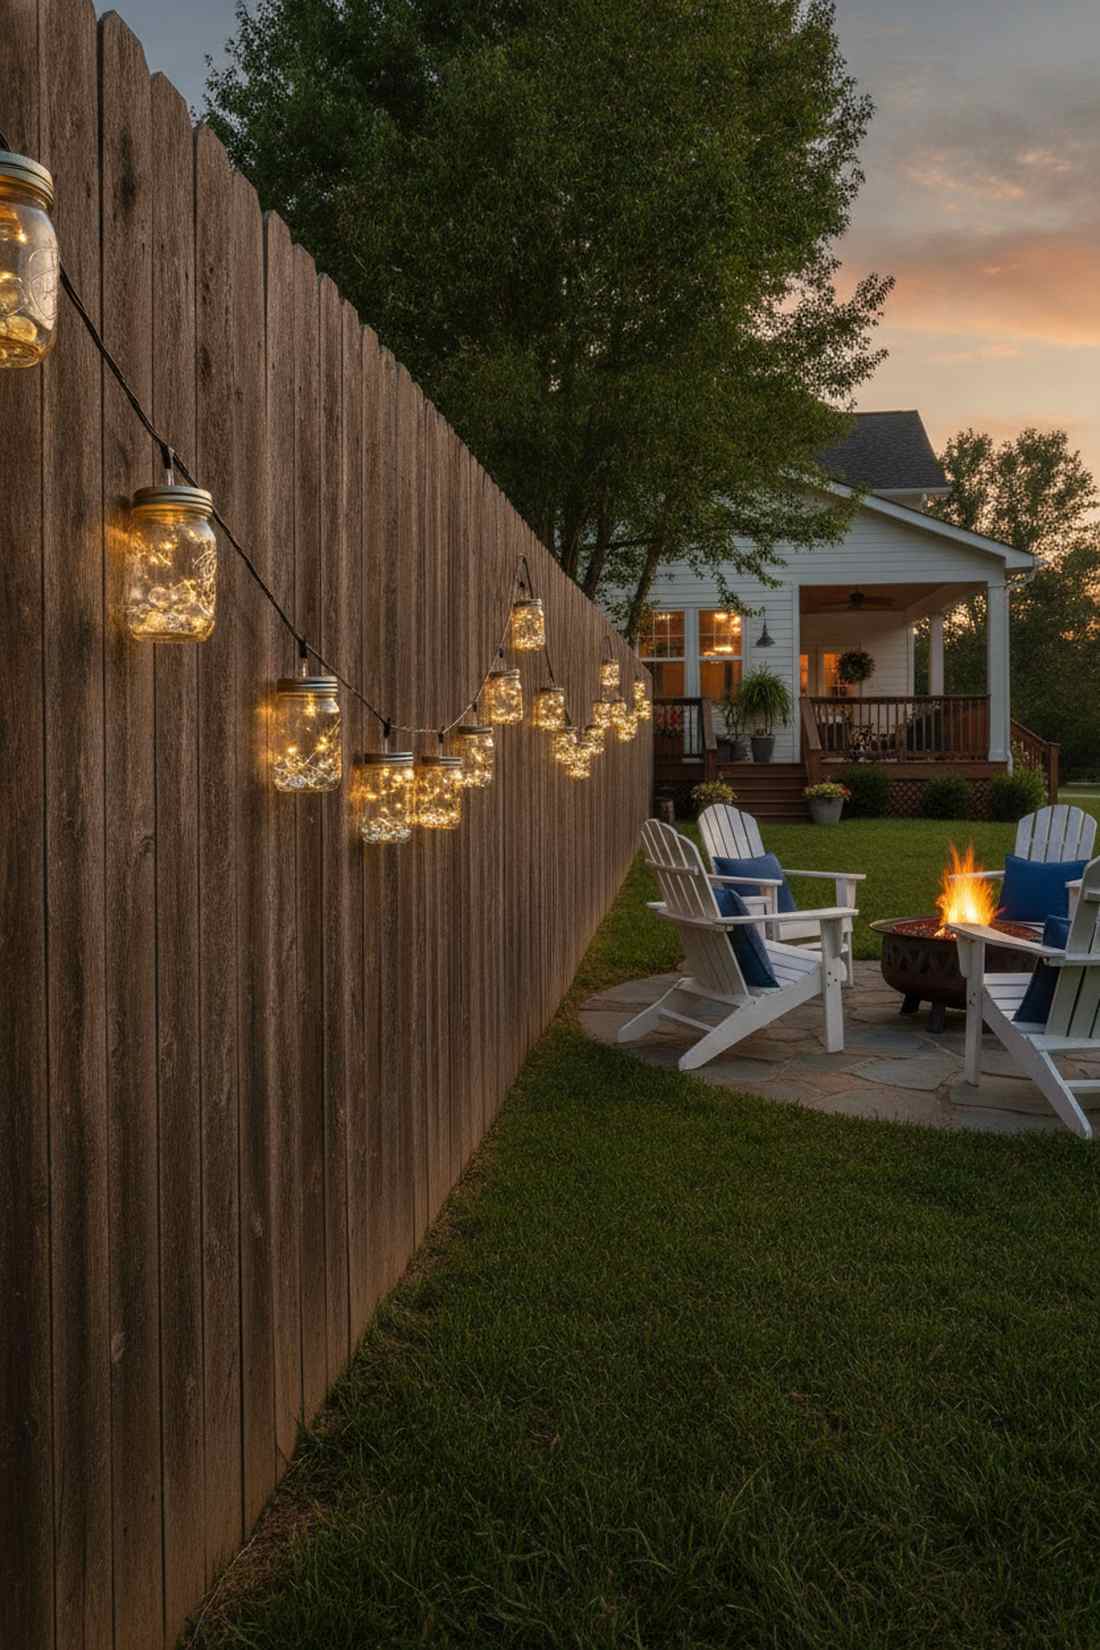
This layout radiates the cozy, nostalgic warmth of a southern country barn wedding. Upcycled glass jar canopy lighting works beautifully draped along a weathered wooden privacy fence.
Screwing heavy glass onto standard wires causes snapping, but using reinforced commercial stringers looks far more expensive than it is. This is the perfect excuse to use bulk craft supplies to create a high-impact, low-cost rustic vibe.
A 20-foot strand setup runs $35–$60. Save this to your DIY weekend garden board!
- Key Materials: Glass mason jars, fairy light inserts, hanging wire
- Vibe / Style: Rustic country
- Difficulty: Easy DIY
- Budget Breakdown: Light Lids: $25 | Jars: $15.
- Creator’s Tip: Add a small handful of clear glass marbles inside each jar to bounce and magnify the internal LED light.
- Smart Sourcing: Solar mason jar lid light inserts (starter kit) and pre-cut steel hanging handles.
If you have zero grass and only a tiny concrete balcony, this next trick is your holy grail…
25. Lighted Planters
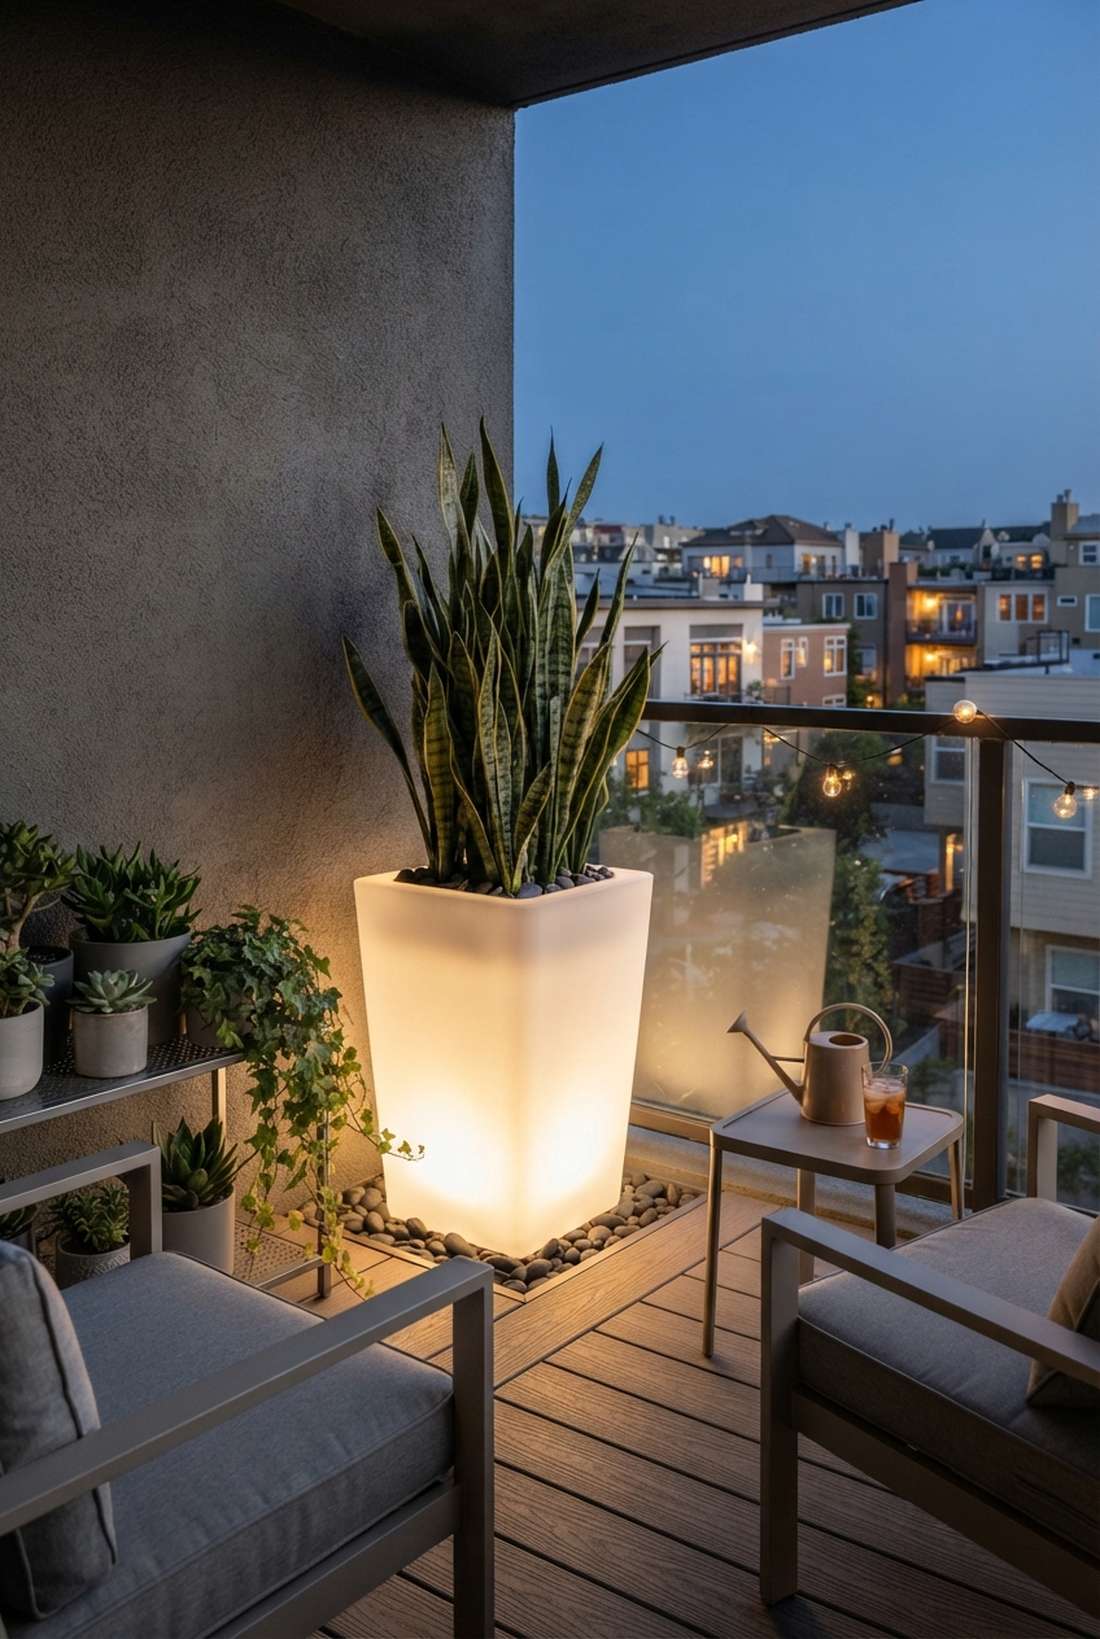
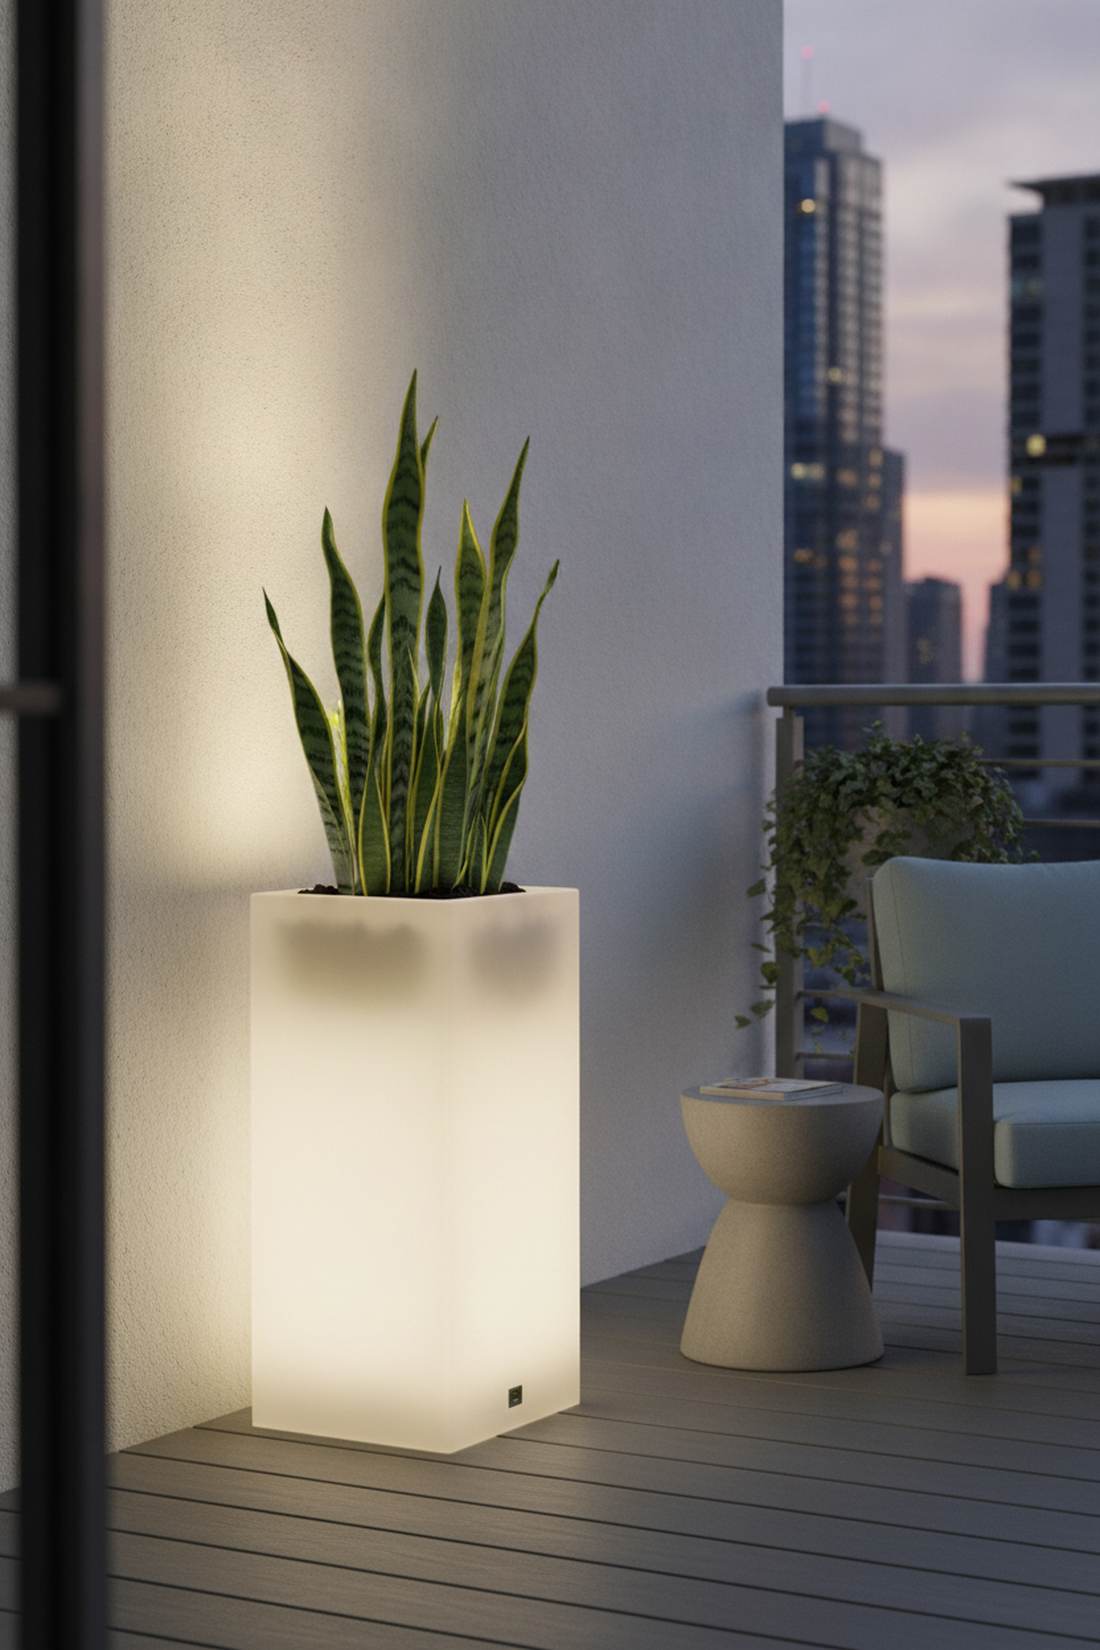
It makes your favorite tall snake plants look like they are erupting from a block of pure light. Translucent glowing container gardens are a lifesaver for small apartment balconies or tight entryways.
Most people buy cheap glow-in-the-dark paint, but investing in actual LED-integrated resin pots gives a designer-level finish. It acts as both a vessel for your miniature garden supplies and a massive ambient room light.
One large statement planter will cost $90–$160. It’s a fast upgrade that completely changes the vibe.
- Key Materials: Roto-molded LED planter, potting soil, architectural plant
- Vibe / Style: Contemporary chic
- Difficulty: Easy
- Budget Breakdown: Planter: $120 | Soil/Plant: $30.
- Creator’s Tip: Keep the planter near a wall so the glowing base reflects off the siding, doubling the light output.
- Smart Sourcing: Rechargeable illuminated resin planters and pre-mixed lightweight potting soil.
26. Outdoor Floor Lamps
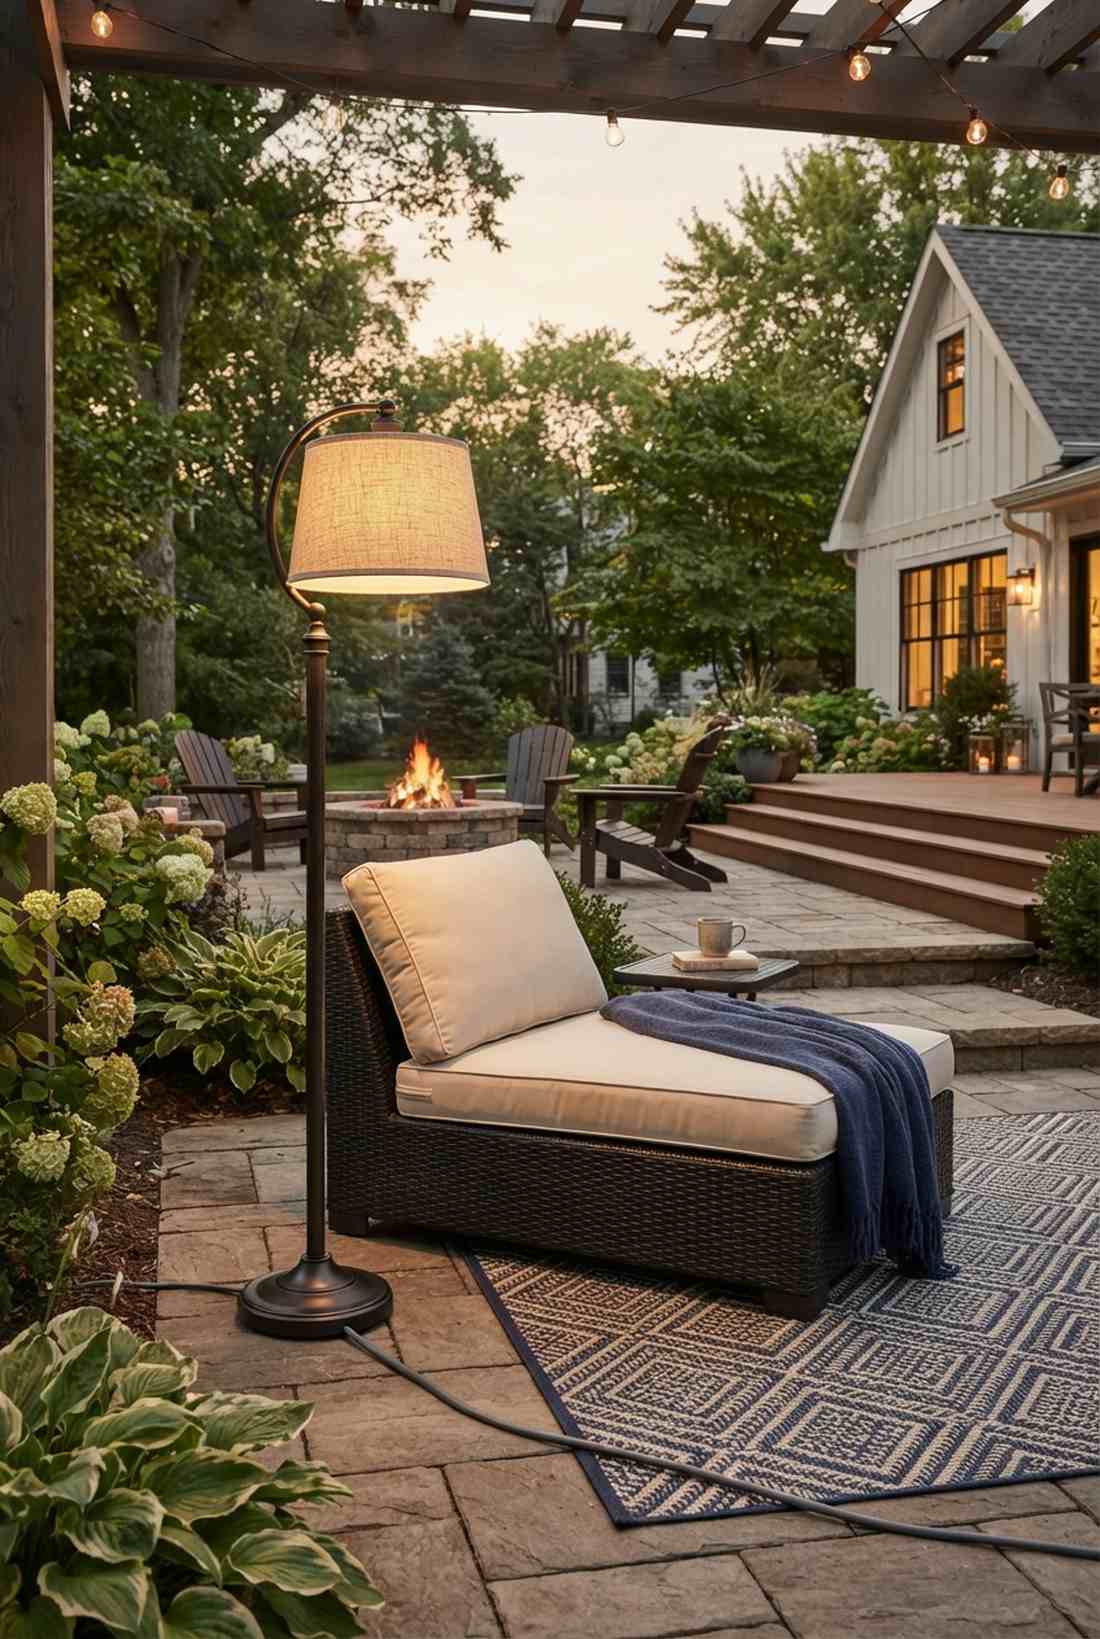
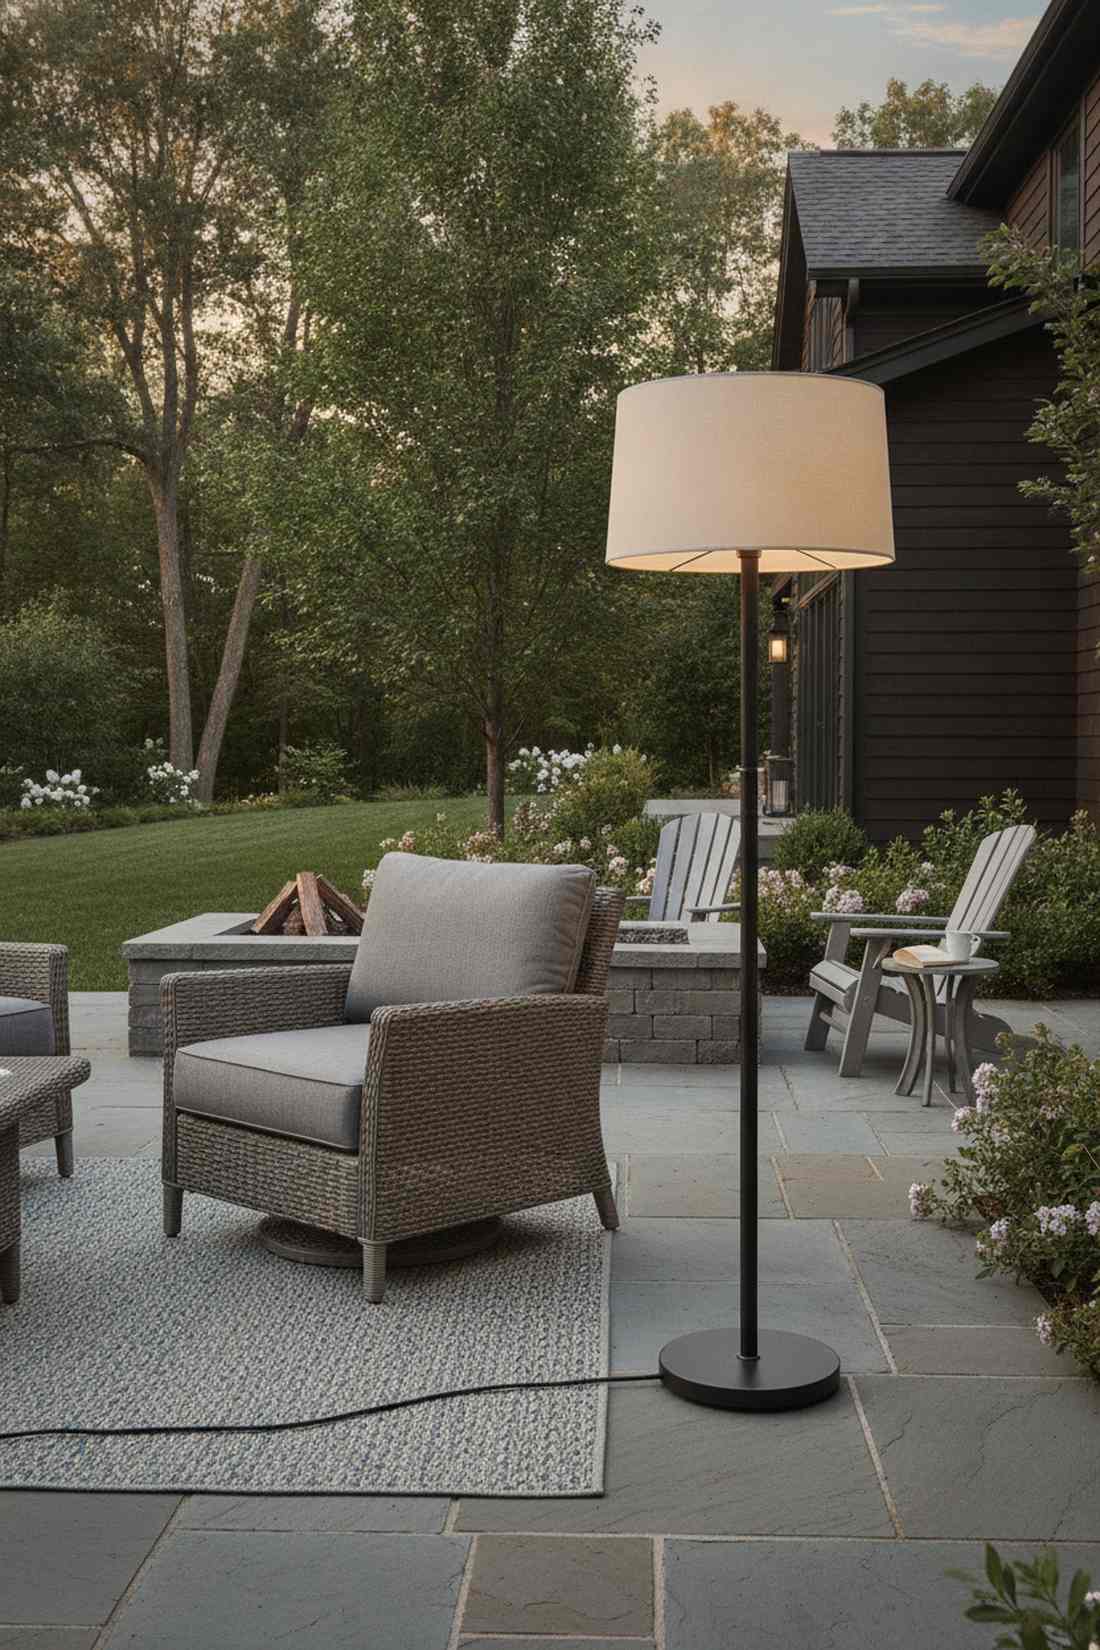
This completely blurs the line between your cozy indoor living room and the wild outdoors. Weatherproof freestanding reading light setups are perfect for that lonely lounge chair in the corner of the patio.
Dragging an indoor lamp outside is a shocking hazard; sourcing heavy-weighted, marine-grade fixtures delivers a surprisingly premium look that defies the rain. Pair it with thick outdoor rated extension cables to safely reach your exterior outlets.
A heavy-duty outdoor lamp runs $150–$250. Pin this if you want a true outdoor living room!
- Key Materials: Damp-rated floor lamp, weighted base, GFCI outlet
- Vibe / Style: Cozy lounge
- Difficulty: Absolute beginner
- Budget Breakdown: Lamp: $180 | Bulb: $10.
- Creator’s Tip: Hide the thick electrical cord under an outdoor rug so it remains a completely seamless look.
- Smart Sourcing: Waterproof patio floor lamp with weighted base and UV-coated exterior extension cords.
Architectural Structure Lighting
Structural lighting emphasizes built elements in your landscape—pergolas, arbors, decks, and fences. These installations define vertical planes and architectural details after dark.
27. Pergola Beam Lighting
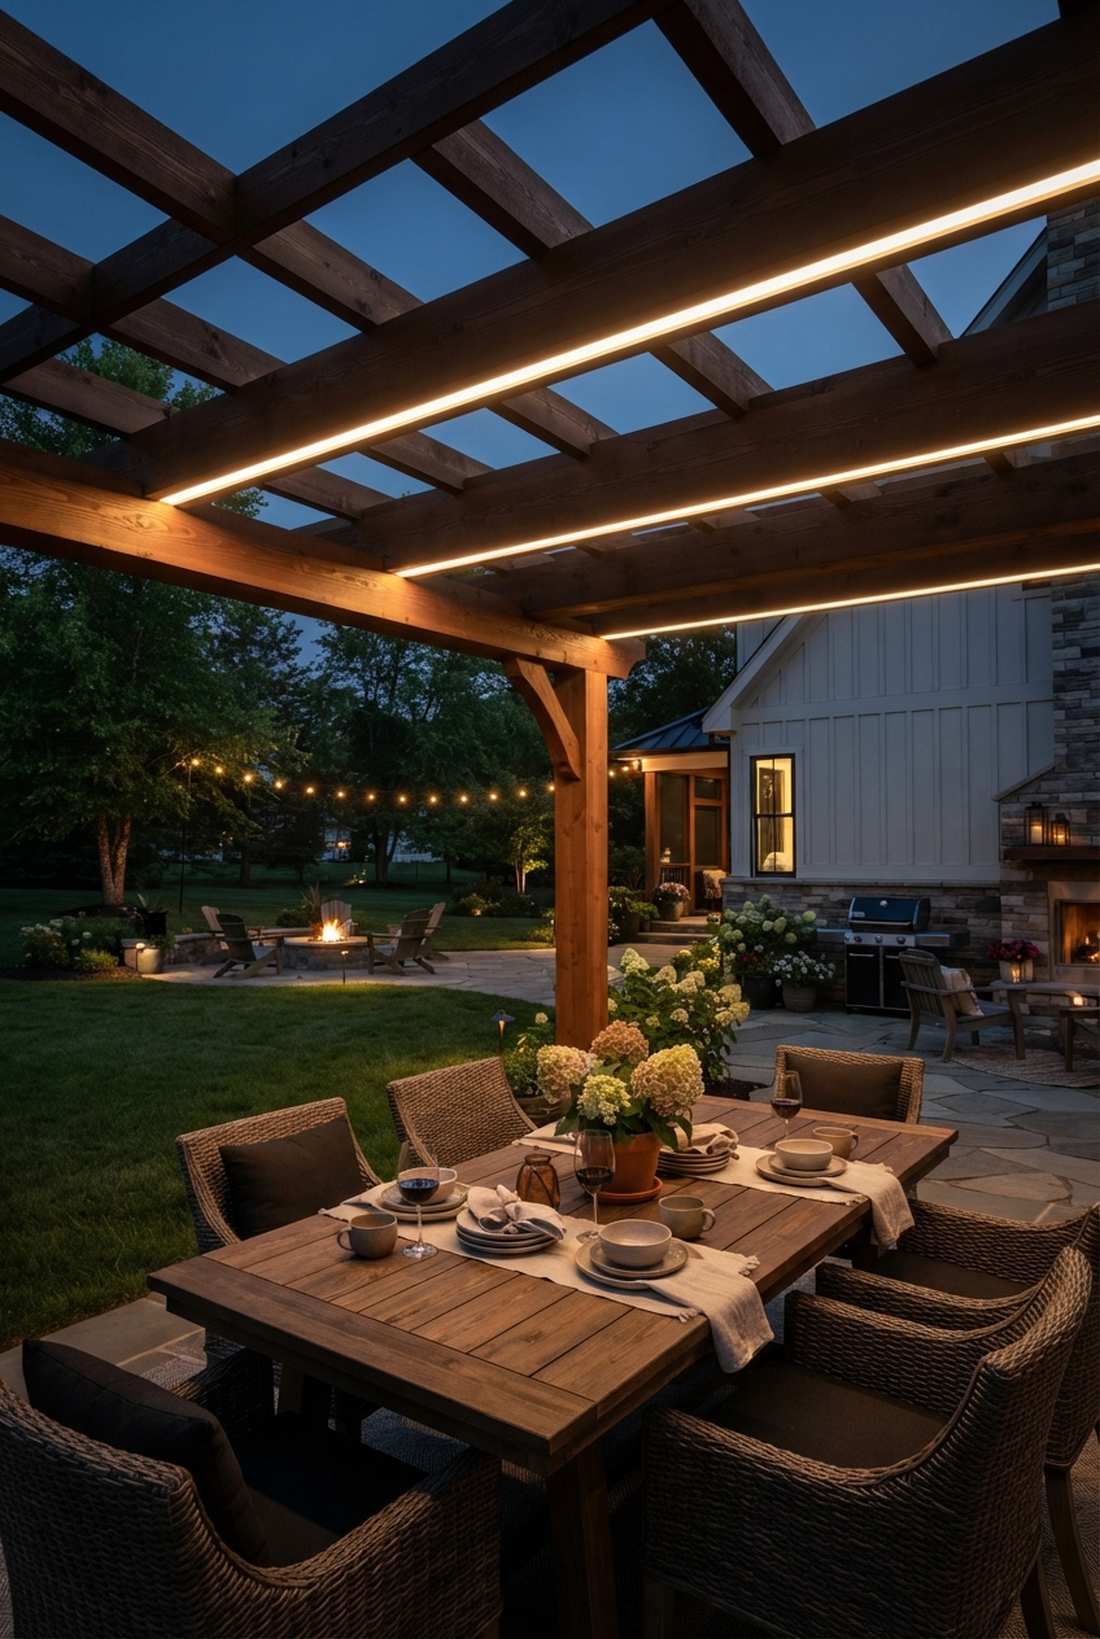
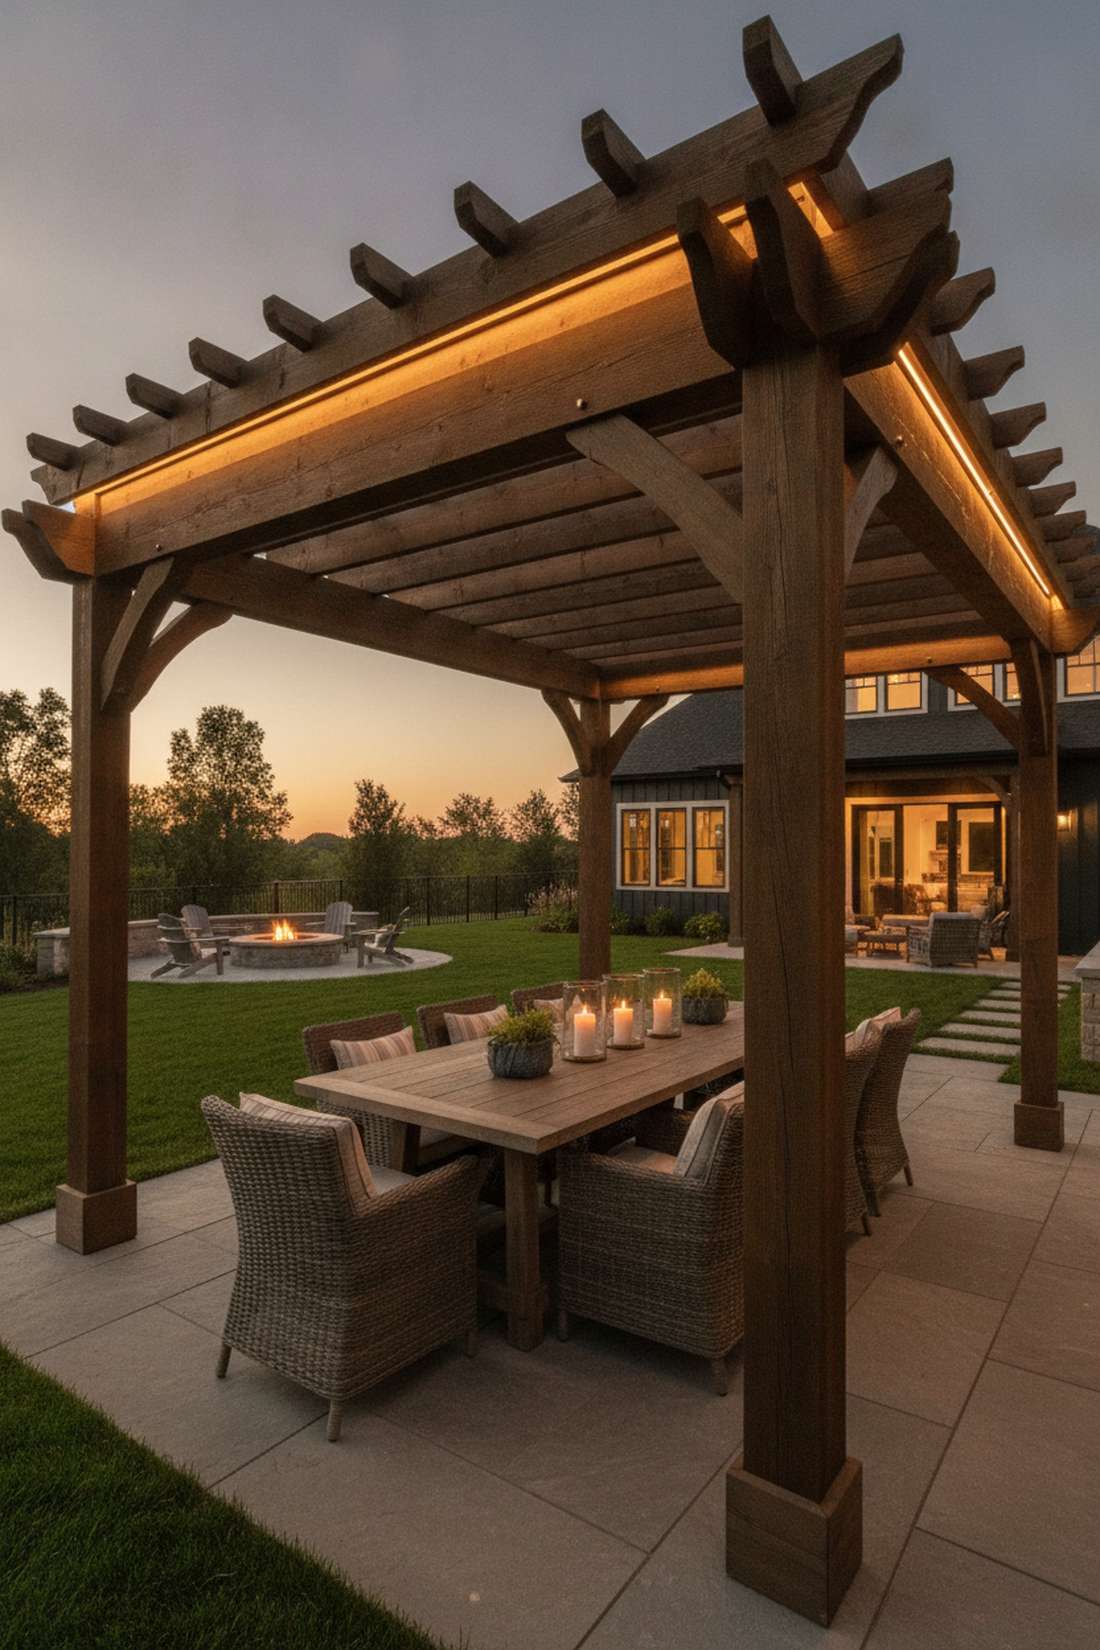
It turns a bulky wooden sunshade into a glowing, floating architectural masterpiece. Recessed timber beam downlighting is the absolute best way to illuminate a dining table without dangling wires.
Nailing exposed strips looks sloppy and cheap, but routing a tiny channel to hide the lights looks far more expensive than it is. Using custom LED channel diffusers completely eliminates the ugly dotted-light reflection on your table.
A full beam integration project costs roughly $80–$140. Save this to your DIY weekend garden board!
- Key Materials: LED tape light, aluminum channels, wood router
- Vibe / Style: Seamless architecture
- Difficulty: Advanced DIY
- Budget Breakdown: LEDs: $50 | Aluminum Track: $40.
- Creator’s Tip: Mount the lights on the *sides* of the top beams facing inward to bounce light, rather than shining straight down.
- Smart Sourcing: Pre-cut aluminum LED channels with diffusers and waterproof COB LED strip lights (spool).
28. Deck Rail Lighting
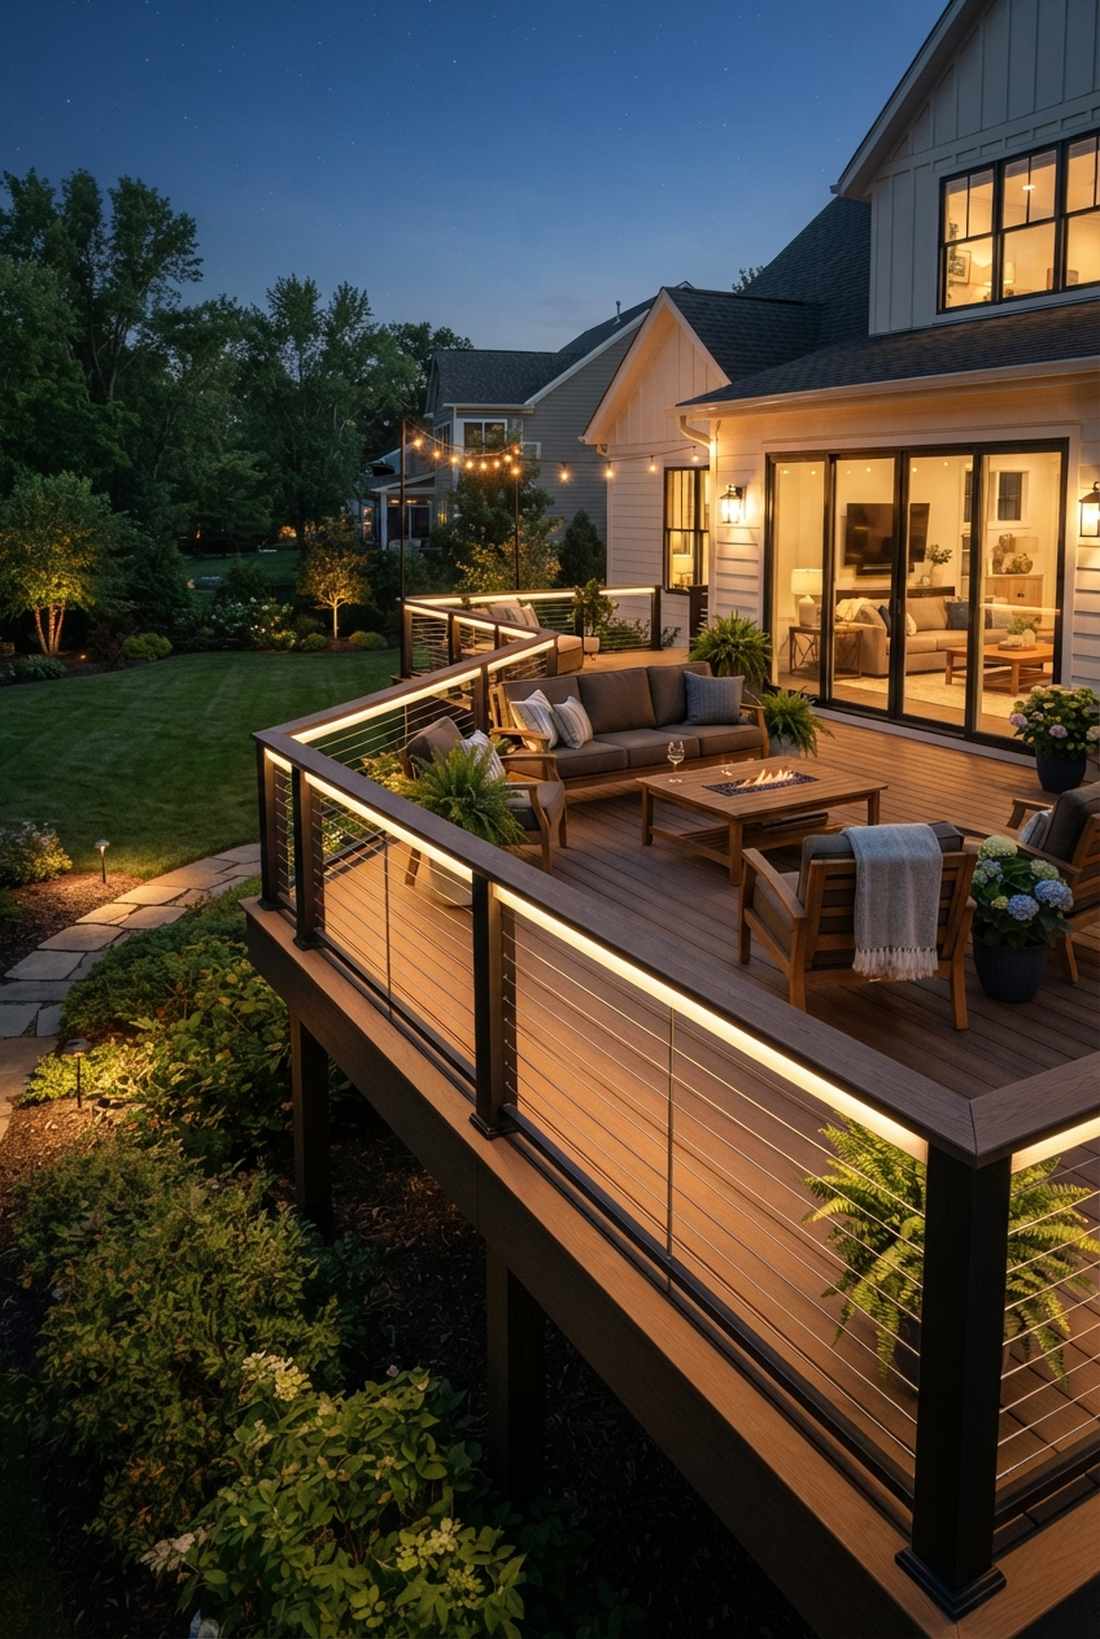
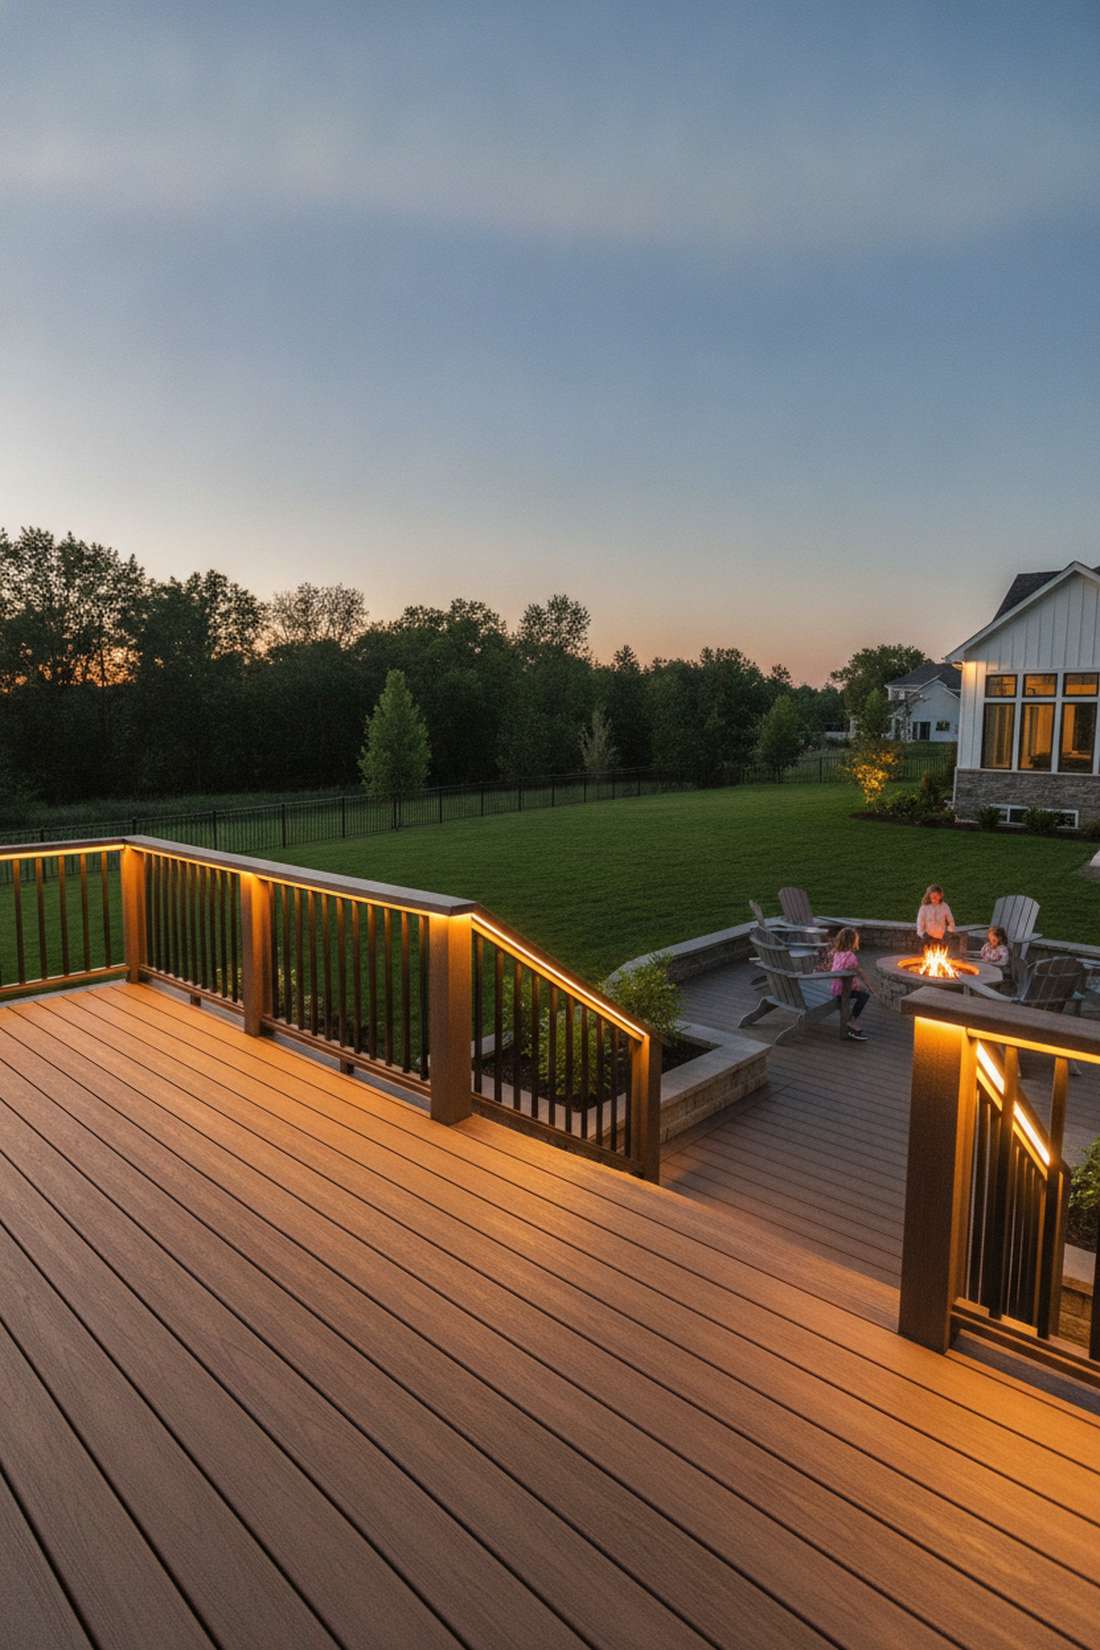
This layout outlines your property boundaries like a sleek, glowing perimeter shield. Under-handrail strip illumination is the ultimate safety and style upgrade for elevated wooden or composite decks.
Bulky post-cap lights can look dated, but hiding a continuous LED ribbon under the lip gives a designer-level finish that is invisible during the day. This is a brilliant way to use marine-grade wiring kits to protect against rain runoff.
Lighting a 40-foot railing usually costs $70–$120. Highly recommended for a quick weekend win.
- Key Materials: IP65 LED strips, adhesive clips, low-voltage transformer
- Vibe / Style: Sleek perimeter
- Difficulty: Intermediate
- Budget Breakdown: Strip Kit: $60 | Hardware: $20.
- Creator’s Tip: Clean the underside of the railing with rubbing alcohol before applying any adhesive track to prevent peeling.
- Smart Sourcing: IP65 waterproof LED tape lights (starter kit) and UV-coated screw-in wire clips (bulk pack).
29. Trellis Accent Lighting
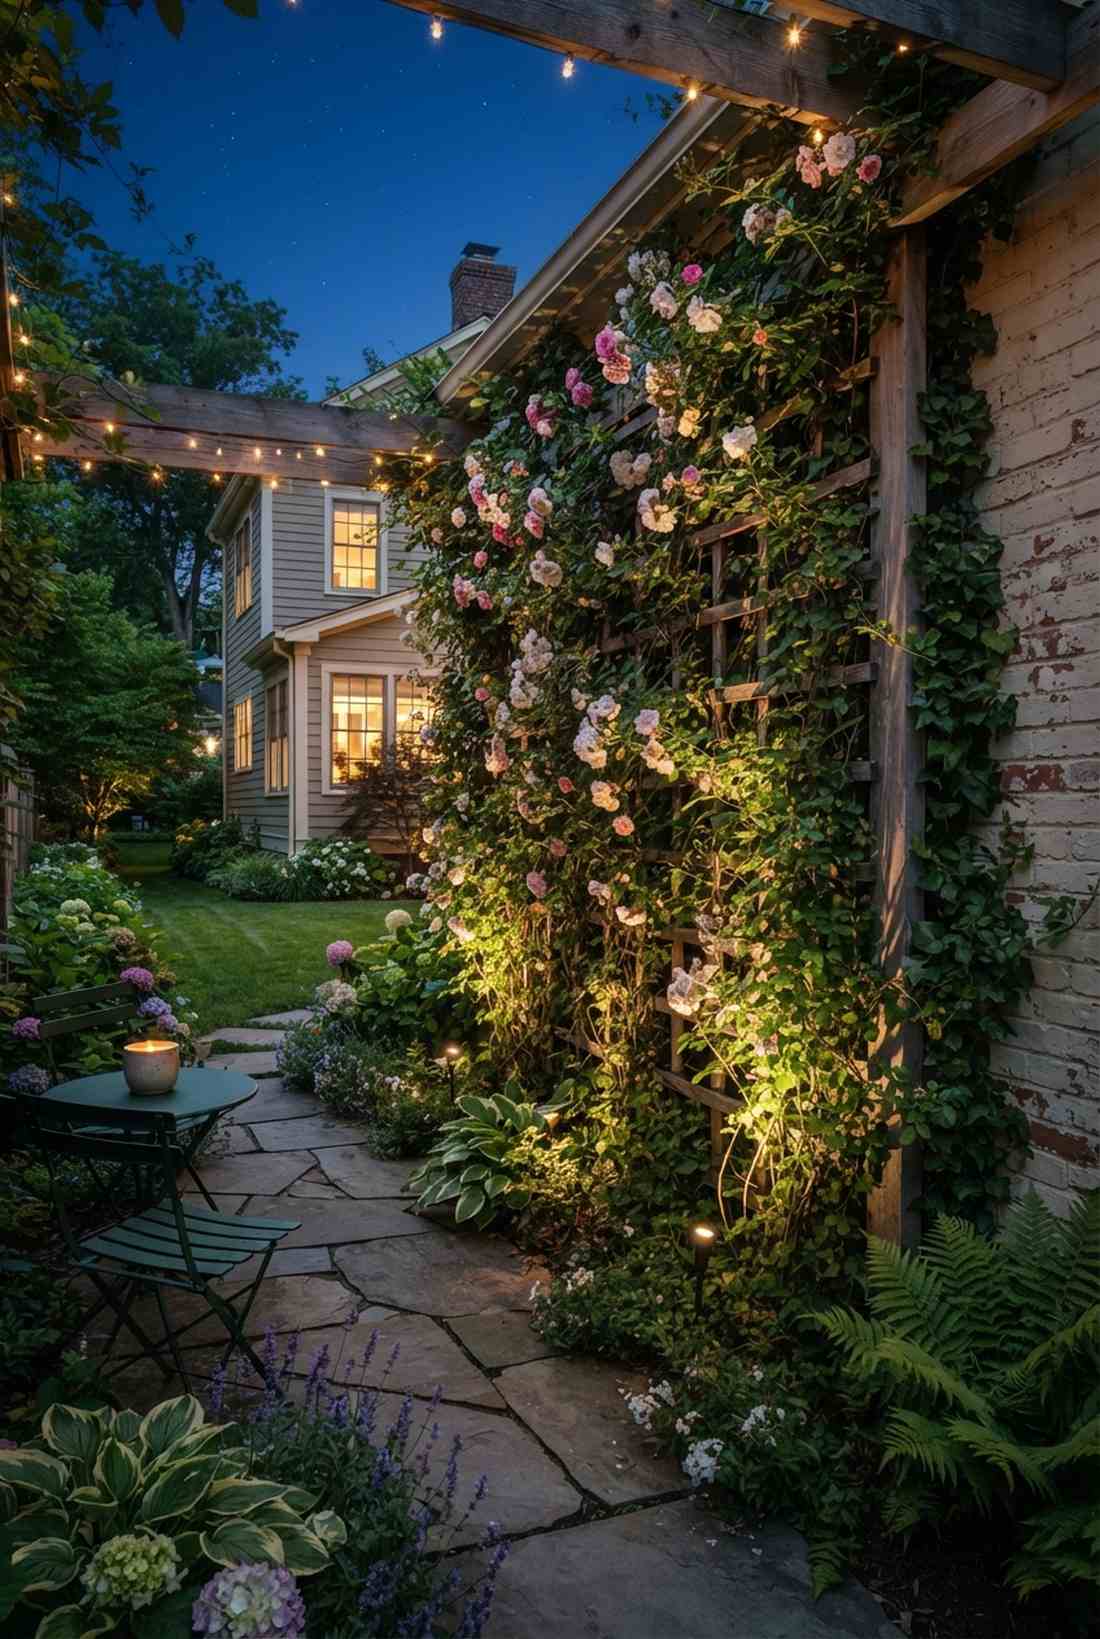
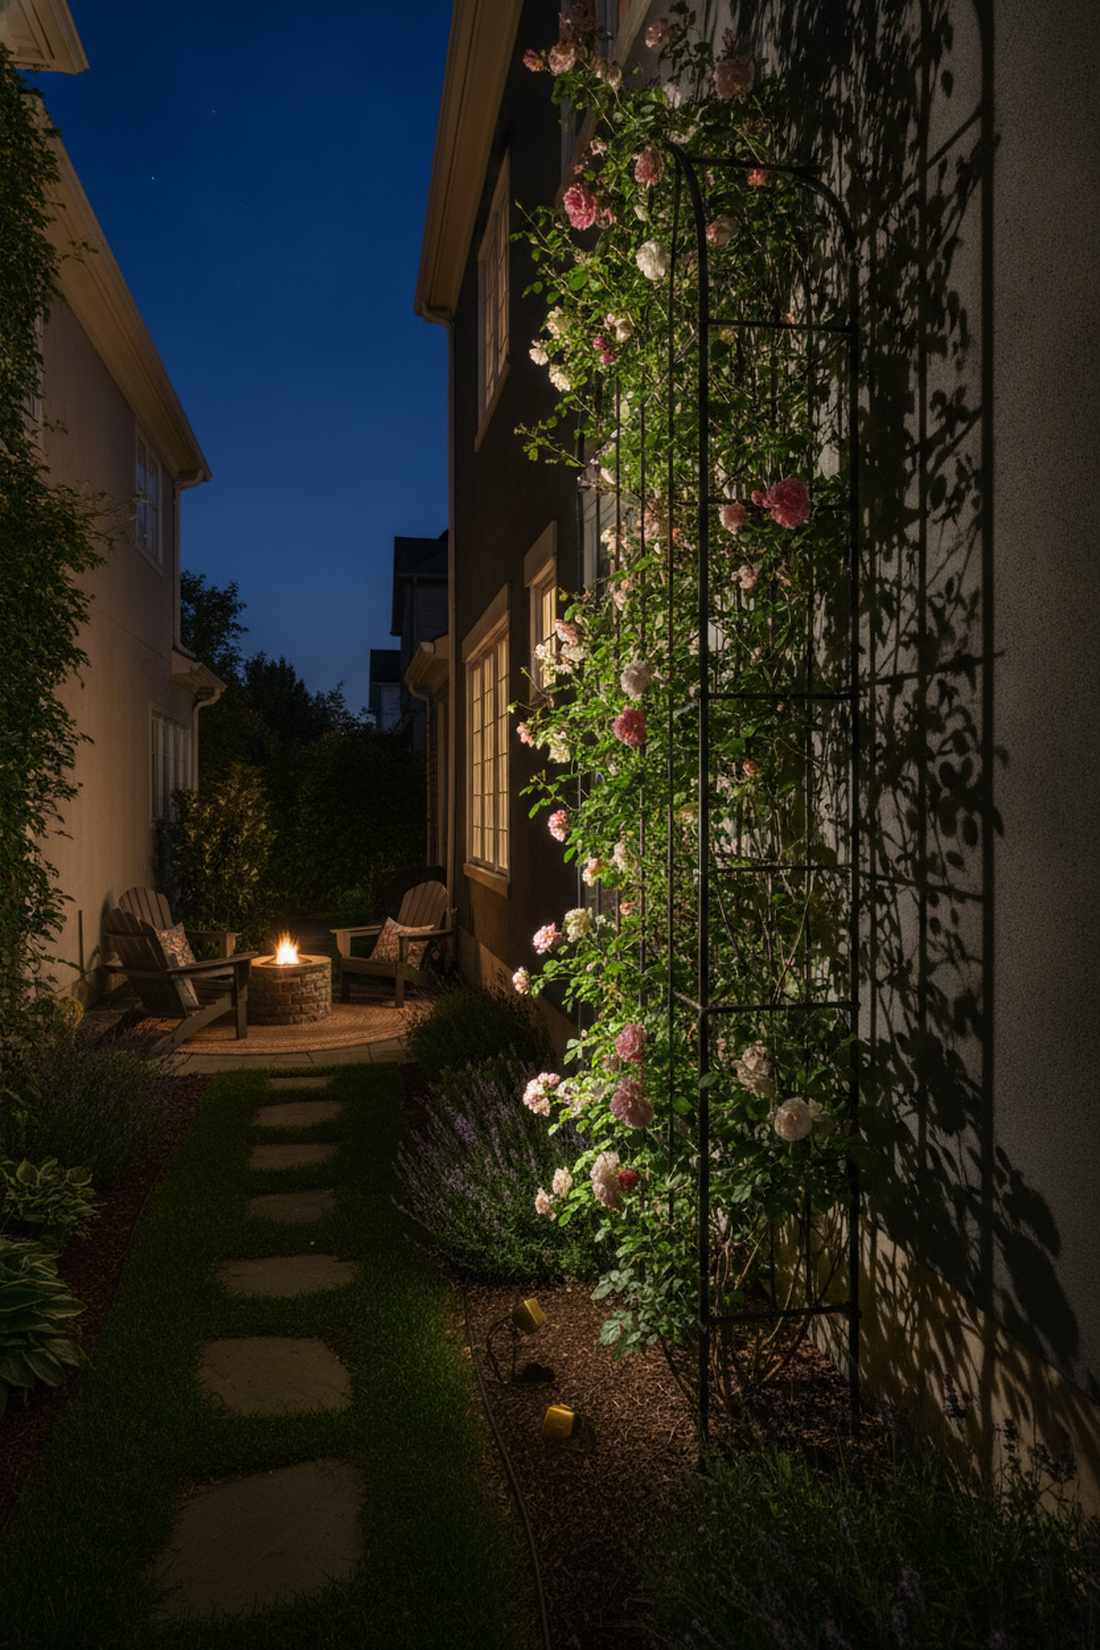
It makes climbing ivy and blooming roses look incredibly dramatic against the night sky. Vertical garden structure uplighting works wonders for small, narrow side yards that lack floor space.
Blasting it with a huge floodlight washes out the plant, but tiny clip-on micro-spots deliver a surprisingly premium look that highlights the delicate leaves. It perfectly mimics the look of high-end fairy garden kits but on a life-sized scale.
You can light up a beautiful trellis for just $30–$50. Pin this if you love lush, vertical greenery!
- Key Materials: Micro spotlights, zip ties, low-voltage wire
- Vibe / Style: Secret garden
- Difficulty: Easy
- Budget Breakdown: Micro Spots: $35.
- Creator’s Tip: Aim the lights slightly sideways across the trellis rather than straight at the wall to create deep leaf shadows.
- Smart Sourcing: Miniature brass landscape spotlights (2-pack) and pre-cut clear zip ties.
Most people leave their backyard boundaries completely dark, but this next trick makes your yard look twice as big…
30. Fence Panel Backlighting
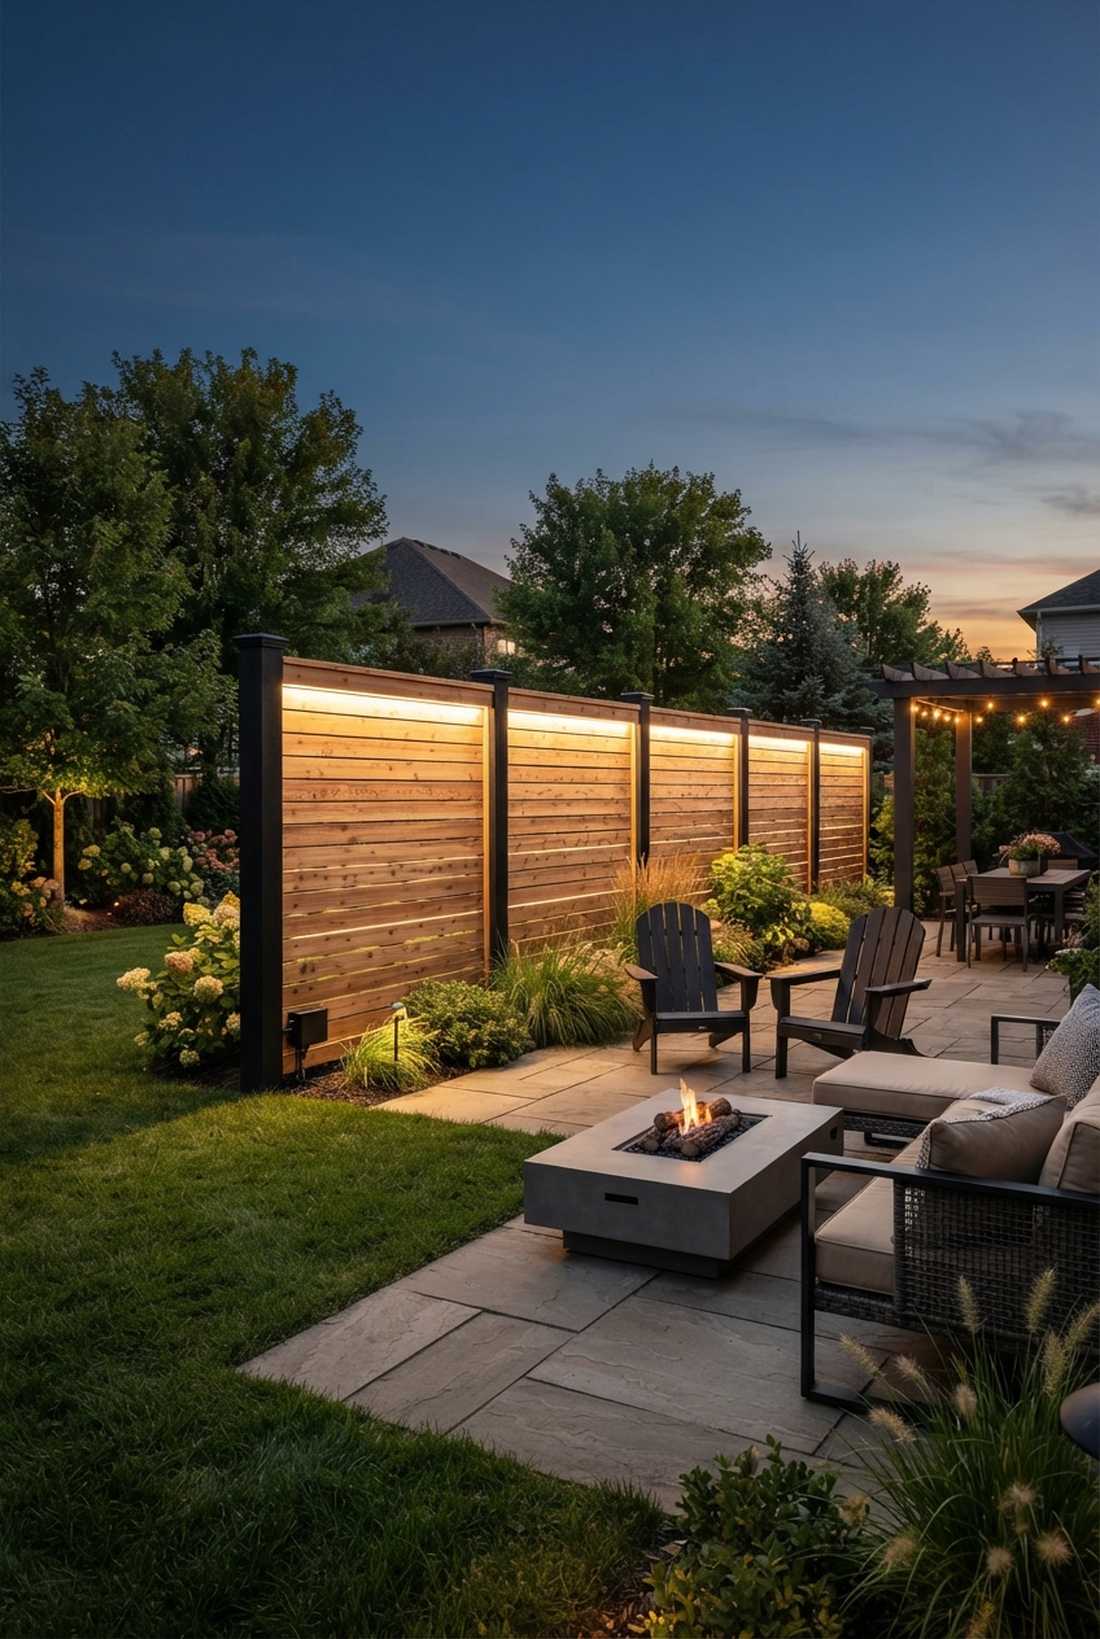
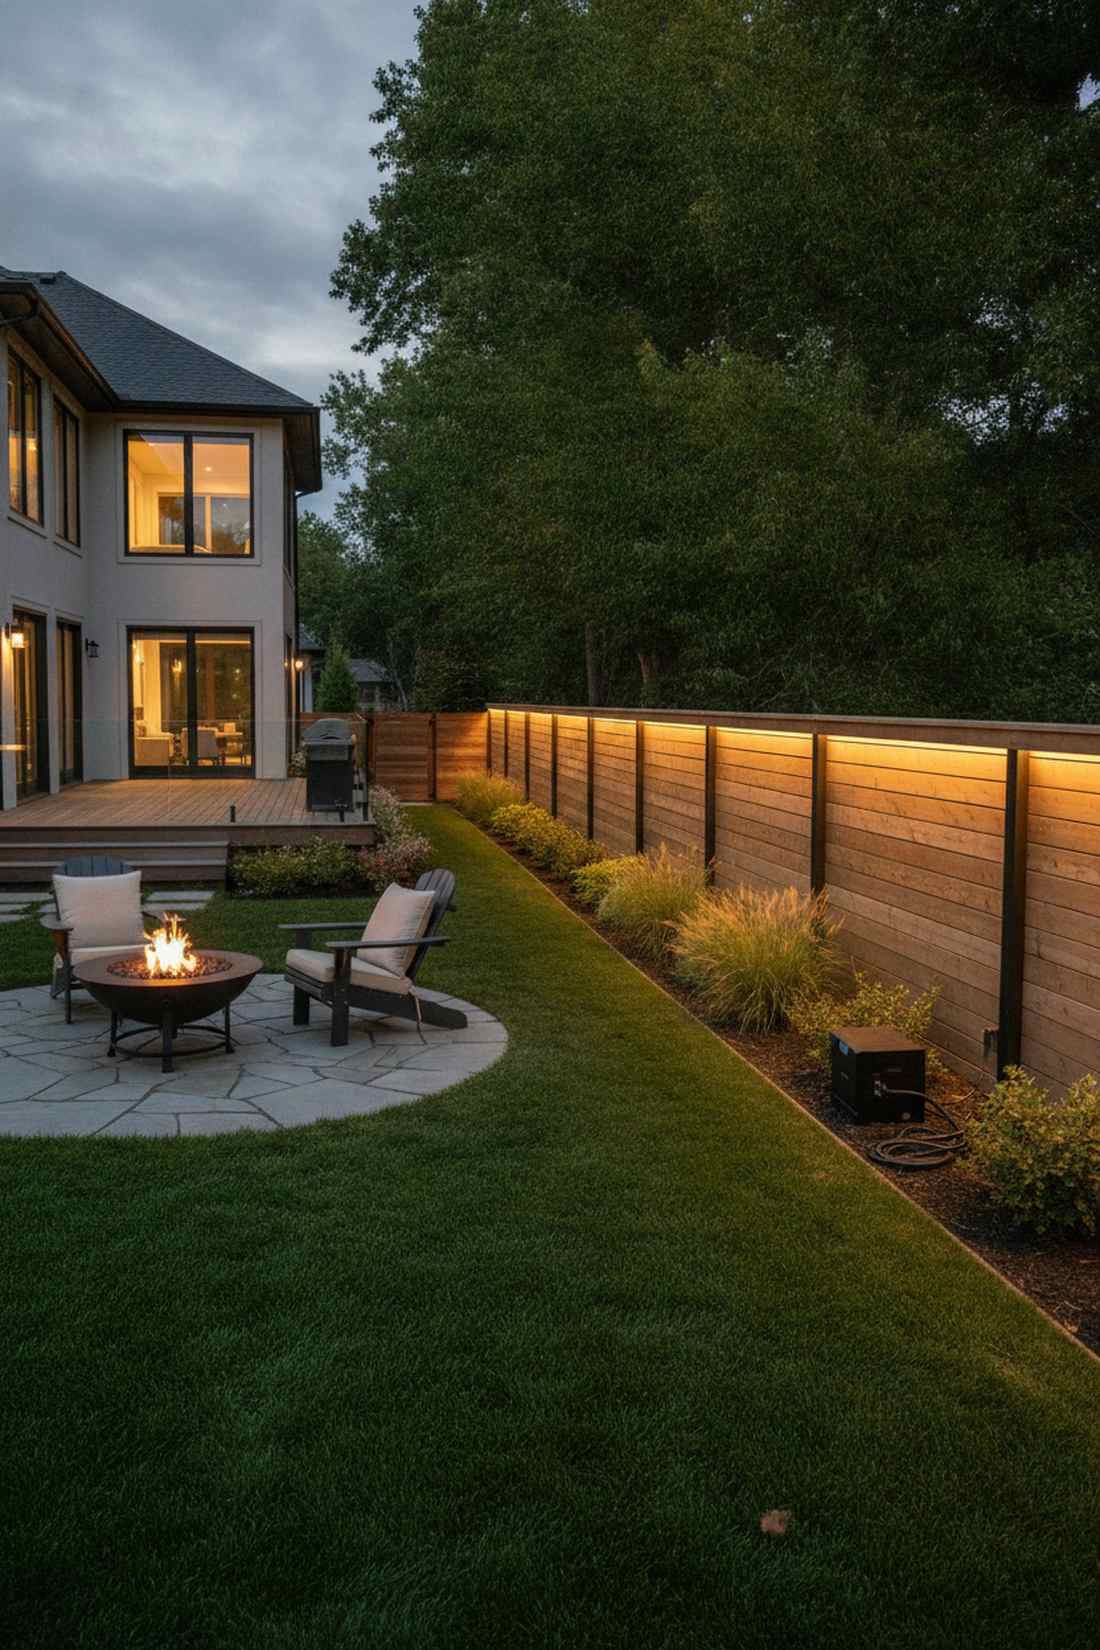
This creates a glowing, floating wall effect that visually expands your property line. Slatted privacy fence illumination is a jaw-dropping trick for modern horizontal cedar fencing.
Stapling Christmas lights behind the boards is a hack; mounting rigid neon bars behind the gaps looks far more expensive than it is. Utilizing commercial waterproof LED drivers ensures the massive run of lights stays perfectly bright at the far end.
A 30-foot glowing fence section costs around $100–$180. Save this to your DIY weekend garden board!
- Key Materials: Rigid LED bars, waterproof connectors, exterior wood screws
- Vibe / Style: Modern boundary
- Difficulty: Intermediate
- Budget Breakdown: LED Bars: $120 | Power Supply: $40.
- Creator’s Tip: Paint the fence posts black behind the lights so the hardware completely disappears into the shadows.
- Smart Sourcing: Rigid waterproof LED light bars (bulk pack) and a heavy-duty 12V outdoor power supply.
31. Arbor Entry Lighting
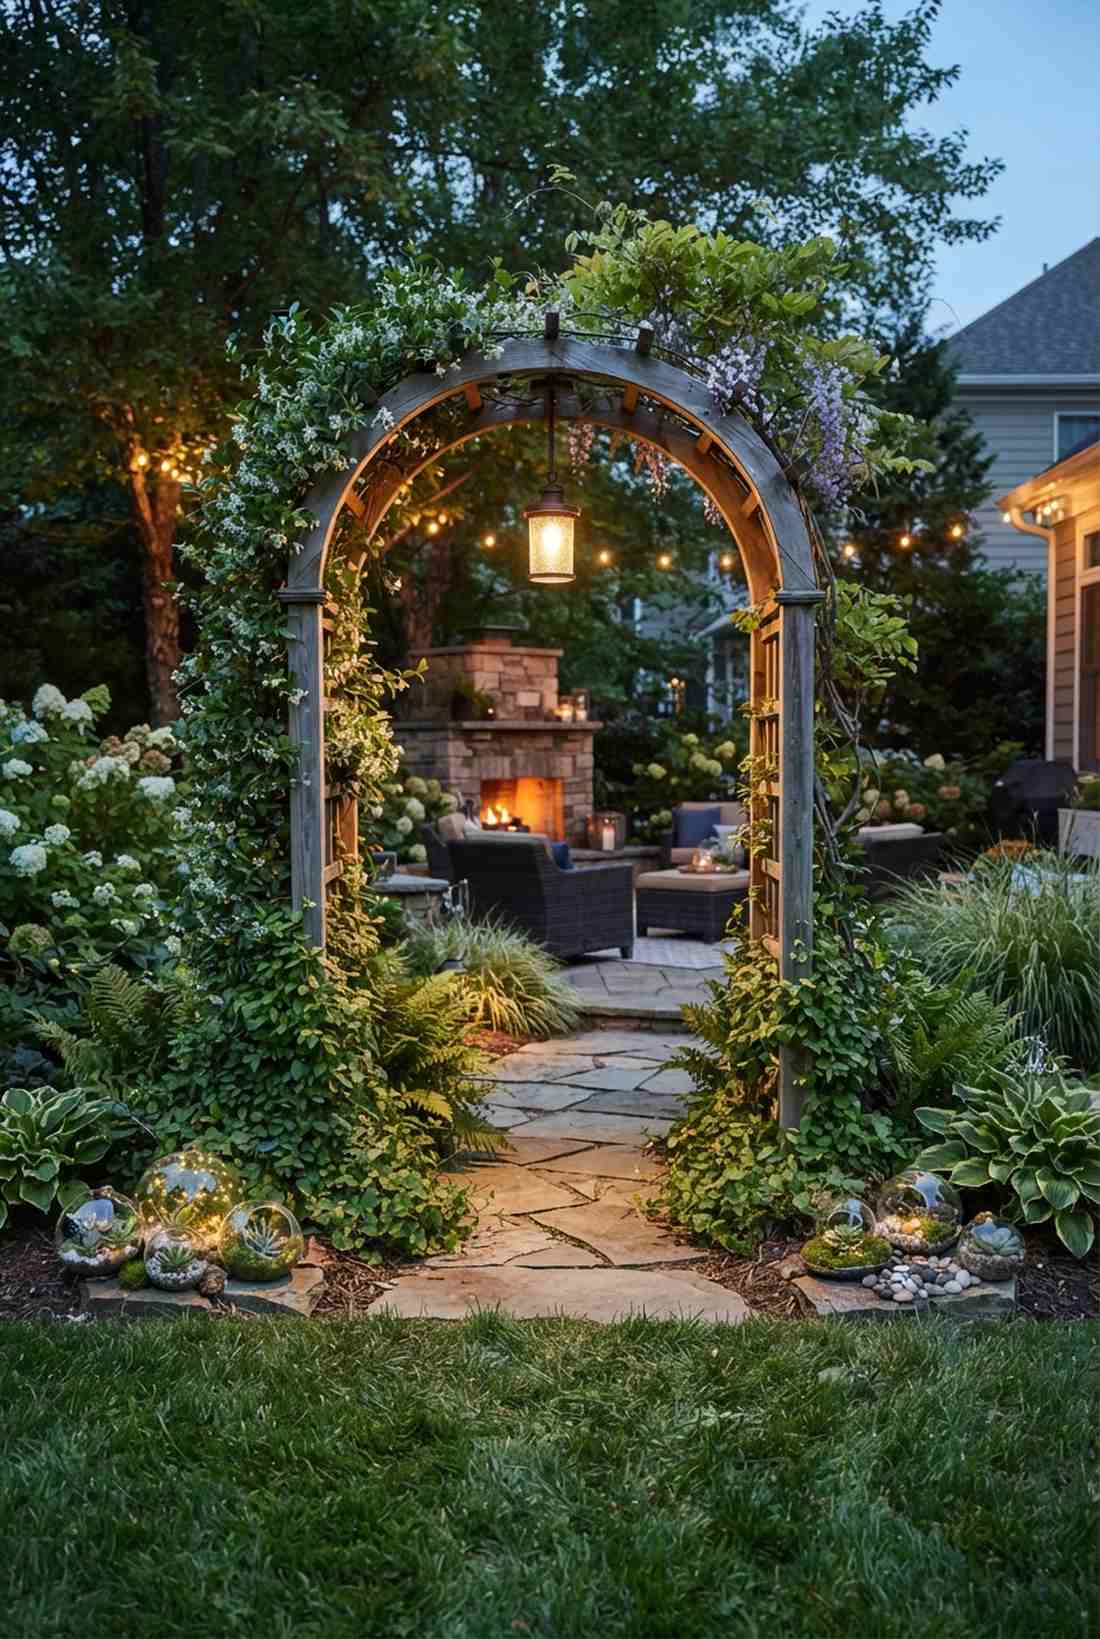
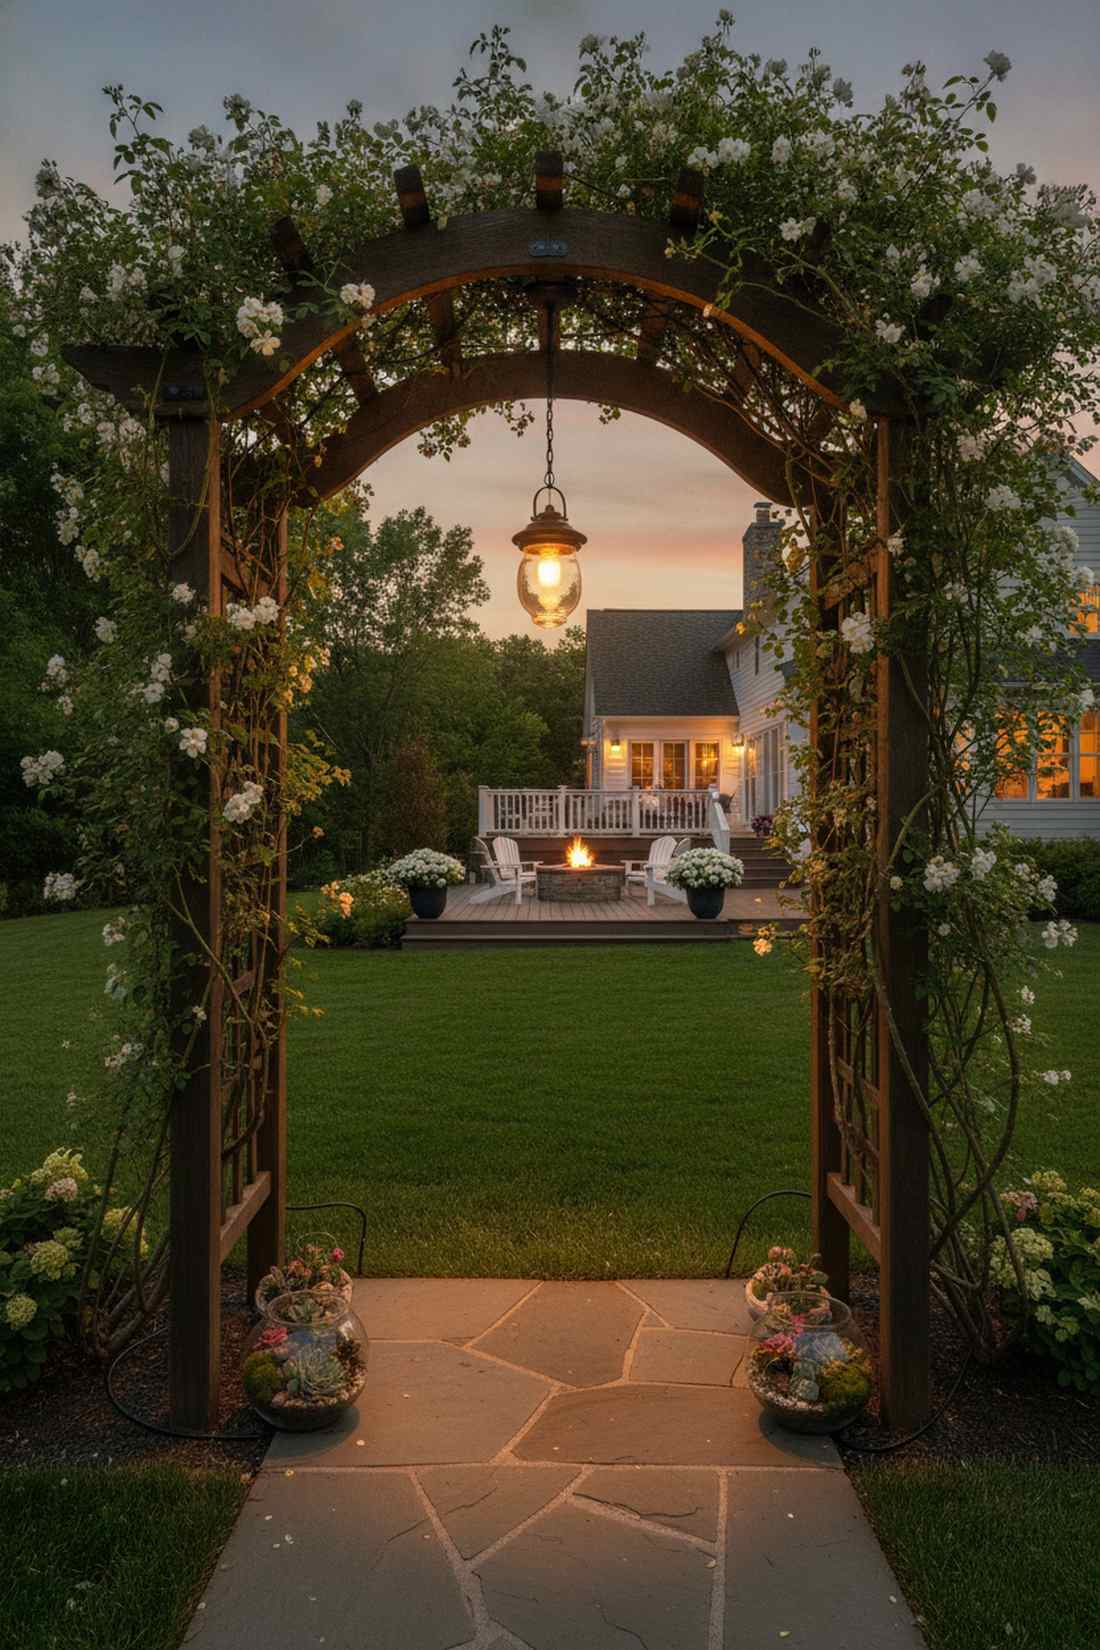
It serves as a glowing, magical gateway transporting you from the lawn to the patio. Overhead archway threshold lighting is an absolute necessity for framing the entrance to a secret garden.
A single harsh bulb blinds you as you walk through, but a soft dangling mini-pendant gives a designer-level finish that welcomes guests. Pair it with creeping vines and terrarium accessories planted at the base for a full aesthetic.
Creating this grand entrance costs roughly $40–$75. It’s a fast upgrade that completely changes the vibe.
- Key Materials: Damp-rated mini pendant, staple gun, low-voltage wire
- Vibe / Style: Welcoming gateway
- Difficulty: Easy DIY
- Budget Breakdown: Pendant: $45 | Wire hooks: $10.
- Creator’s Tip: Hang the pendant exactly 7.5 feet off the ground so it clears tall guests but remains visually intimate.
- Smart Sourcing: Low-voltage outdoor hanging lantern (starter kit) and UV-coated insulated cable staples.
32. Gazebo Canopy Lighting
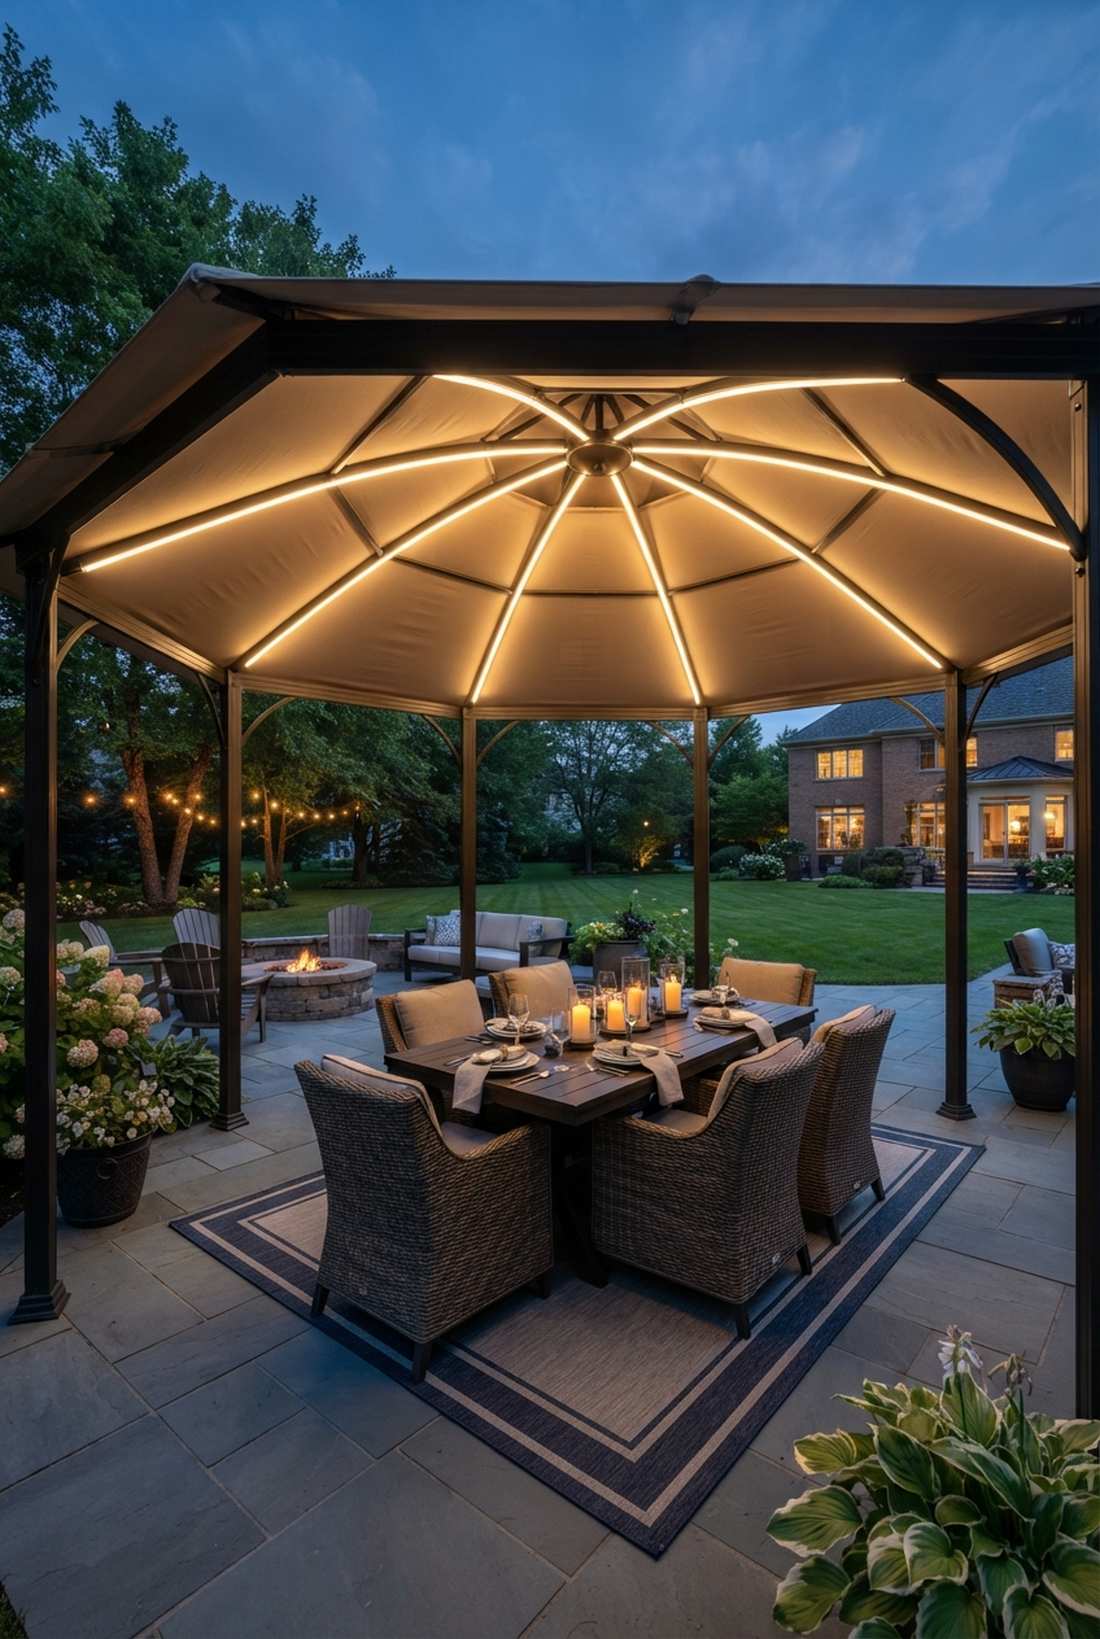
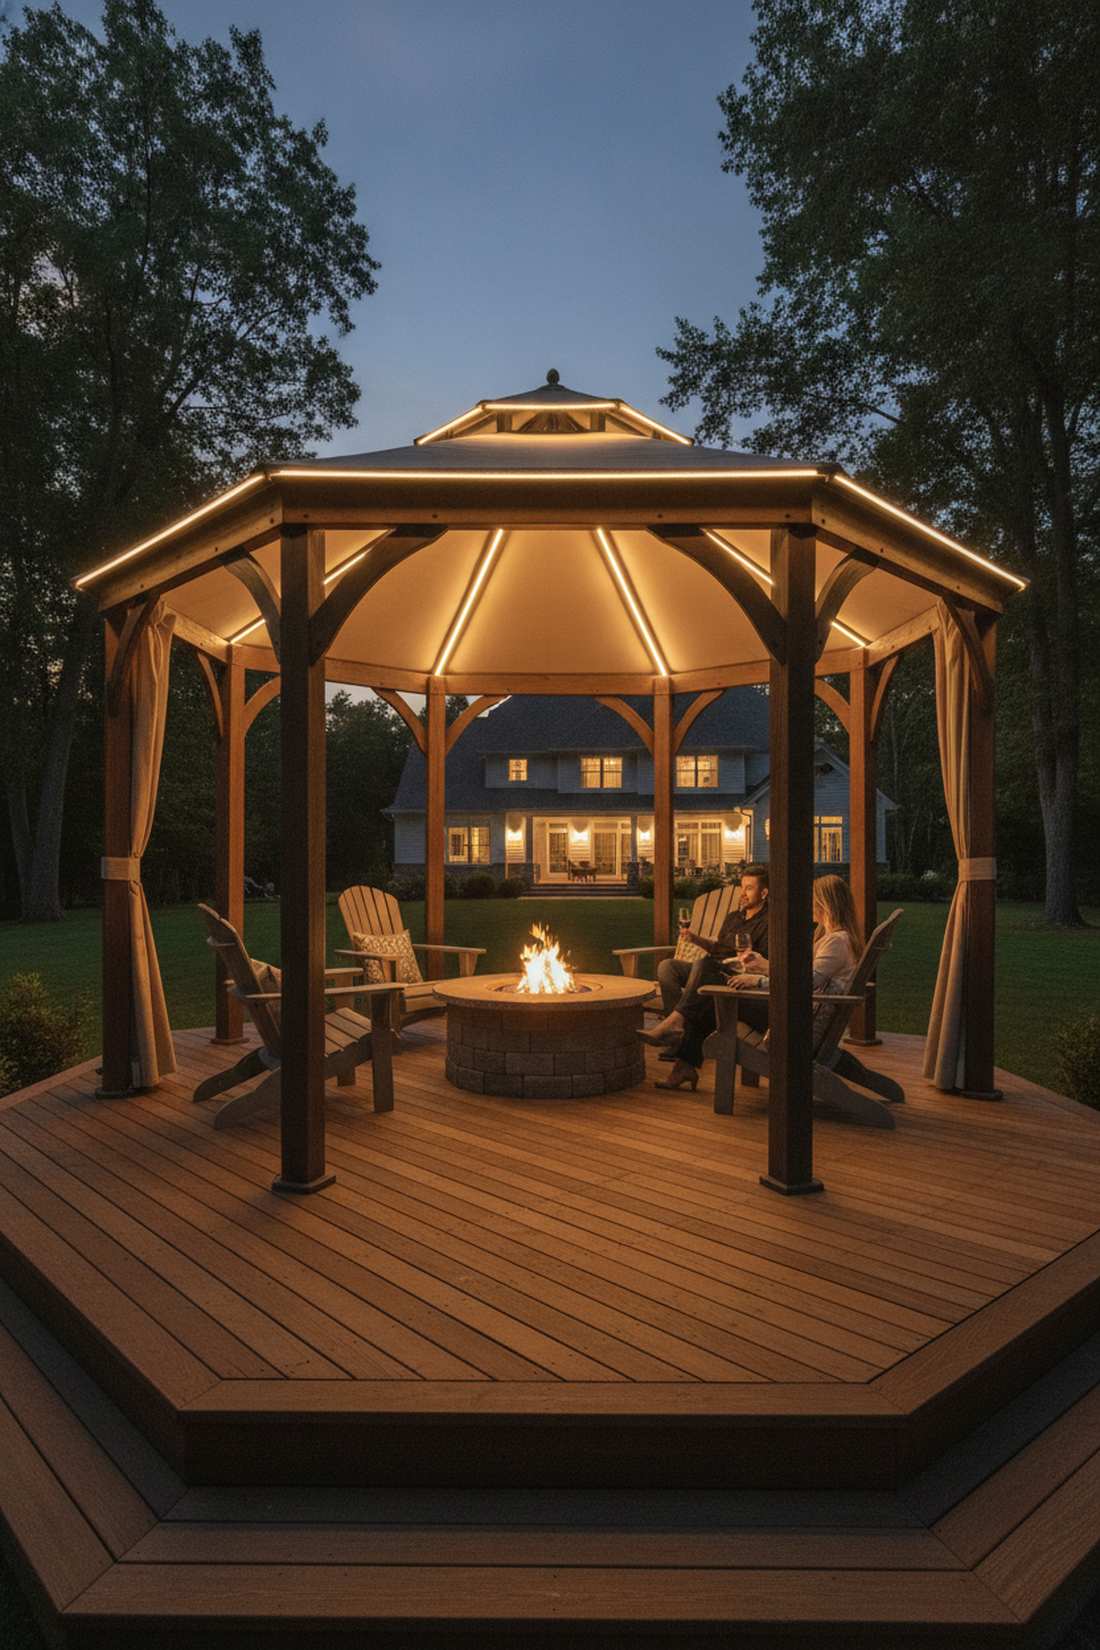
This completely transforms a dark, buggy tent into a luxurious VIP outdoor lounge. Octagonal roof interior washing is perfect for large fabric or metal gazebos centered on a patio.
Hanging cheap plastic globes ruins the upscale vibe; running warm LED strips tightly along the inner ribs delivers a surprisingly premium look. You can seamlessly integrate smart landscape lighting kits to dim the entire roof from your phone.
Lighting all 8 ribs runs about $60–$100. Pin this if you love hosting evening dinners!
- Key Materials: Flexible LED strips, mounting track, smart dimmer
- Vibe / Style: VIP cabana
- Difficulty: Intermediate
- Budget Breakdown: LEDs: $40 | Smart Dimmer: $30.
- Creator’s Tip: If you have a fabric gazebo canopy, use heavy-duty outdoor velcro strips instead of adhesive to mount the lights.
- Smart Sourcing: IP65 warm white LED tape (bulk spool) and pre-cut outdoor heavy-duty velcro tape.
Material Guide: Cheap vs. Premium Aesthetic
Knowing exactly where to save and where to spend makes all the difference in achieving that “looks expensive but isn’t” vibe.
- Standard vs. UV-Resistant/Premium: Generic plastic housings fade, crack, and turn yellow after one summer. Upgrading to cast brass or UV-coated resin prevents weather degradation and guarantees the lights survive for over a decade.
- Pre-made Kits vs. Sourcing Locally: Running to the hardware store for individual bulbs and wires will cost you triple. Leveraging commercial-grade starter kits gives you bulk pricing, matched color temperatures, and guaranteed waterproof connections right out of the box.
Water Feature Illumination
Water feature lighting creates dramatic focal points by combining movement, reflection, and illumination. These specialized systems withstand submersion and moisture exposure while adding magic to ponds, fountains, and pools.
33. Submersible Pond Lights
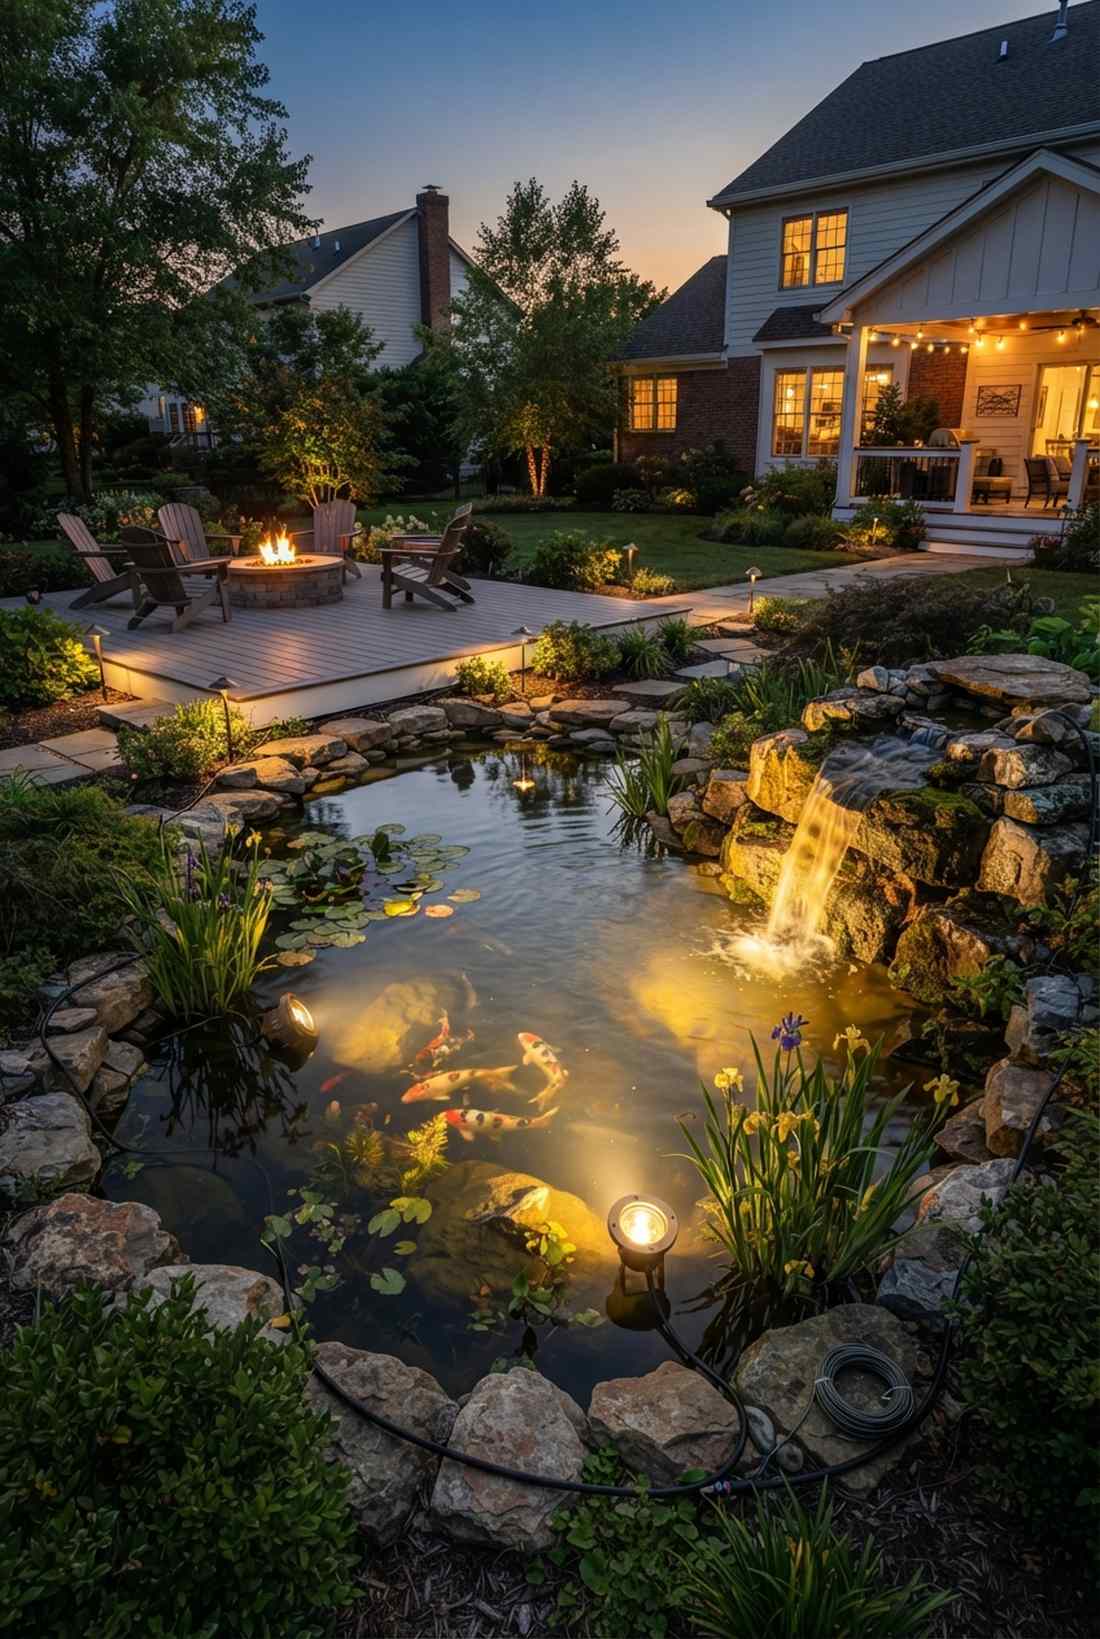
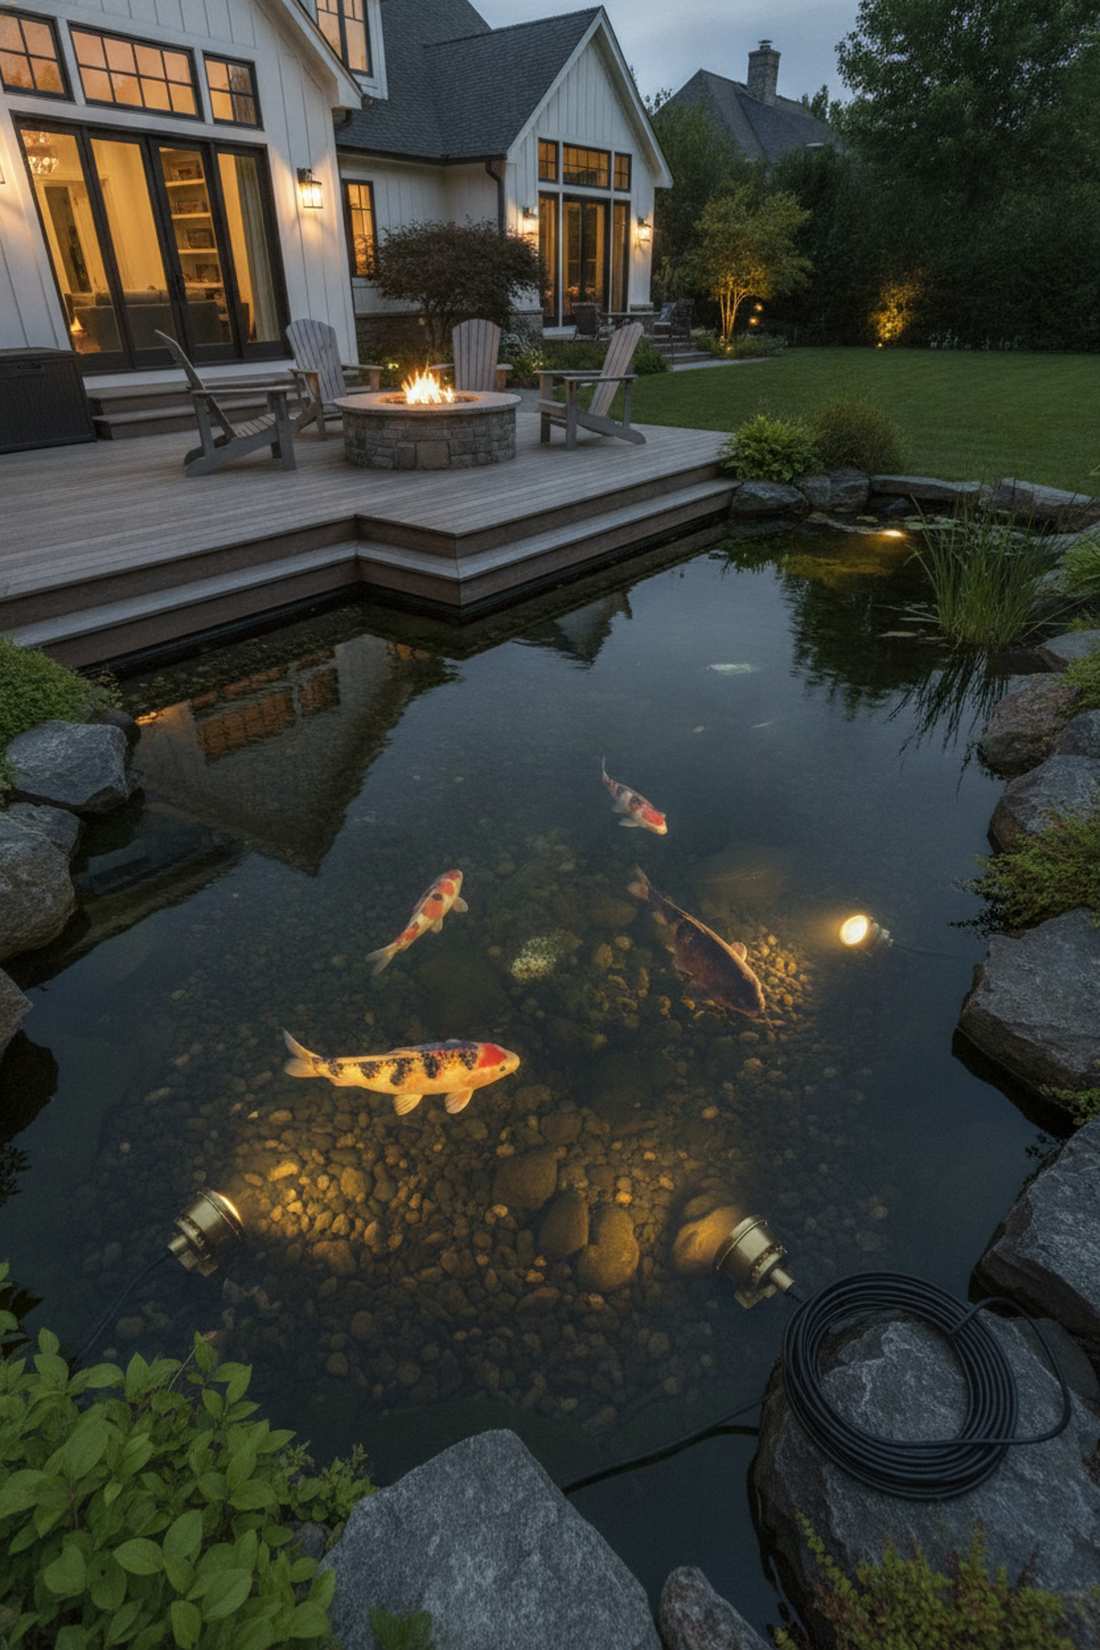
It makes the water glow from within, creating a mesmerizing, aquatic dreamscape. Deep-water structural up-lighting is incredible for showcasing koi fish and submerged rock formations.
Using cheap unsealed lights will electrocute your pond, but heavy-duty IP68 weighted fixtures look far more expensive than they are and sink safely to the bottom. This is where professional landscape lighting kits pay off with thick, waterproof cabling.
A proper 3-light submersible rig costs $70–$130. Save this to your DIY weekend garden board!
- Key Materials: IP68 brass spotlights, weighted bases, waterproof splices
- Vibe / Style: Glowing depths
- Difficulty: Intermediate
- Budget Breakdown: Lights: $85 | Waterproof Nuts: $15.
- Creator’s Tip: Leave an extra 3 feet of coiled wire underwater so you can easily pull the fixture out to clean the lens.
- Smart Sourcing: Weighted submersible brass pond lights (starter kit) and pre-cut silicone-filled wire nuts.
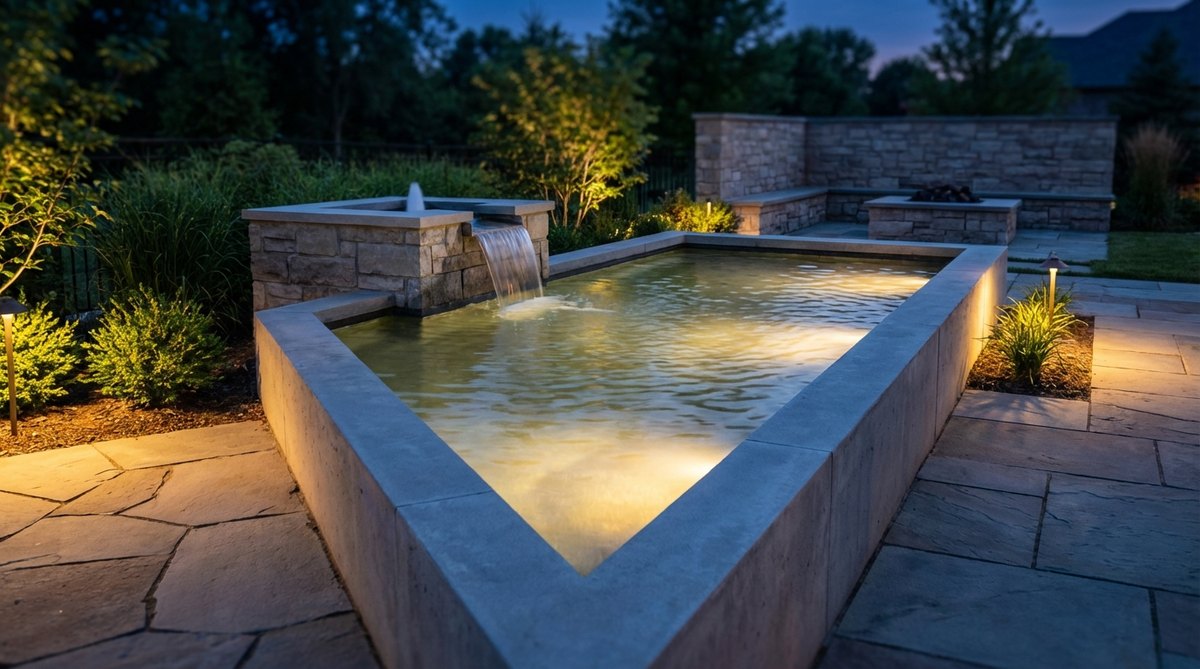
34. Fountain Ring Lights
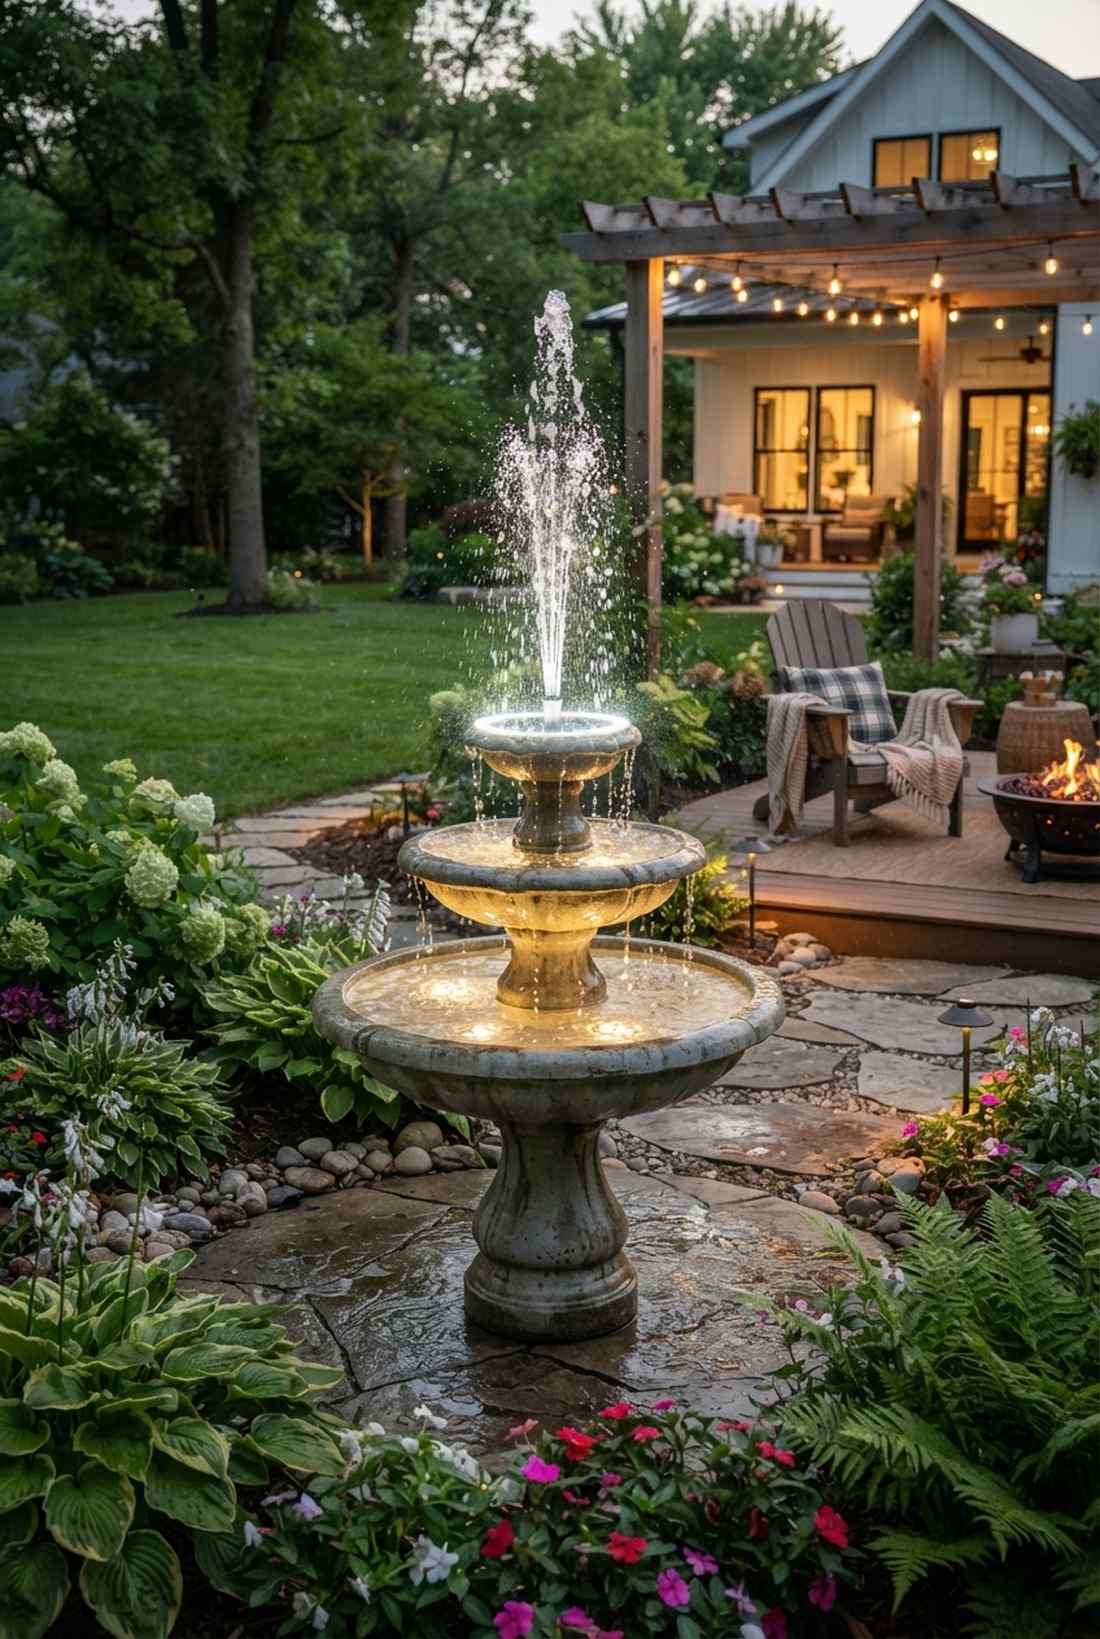
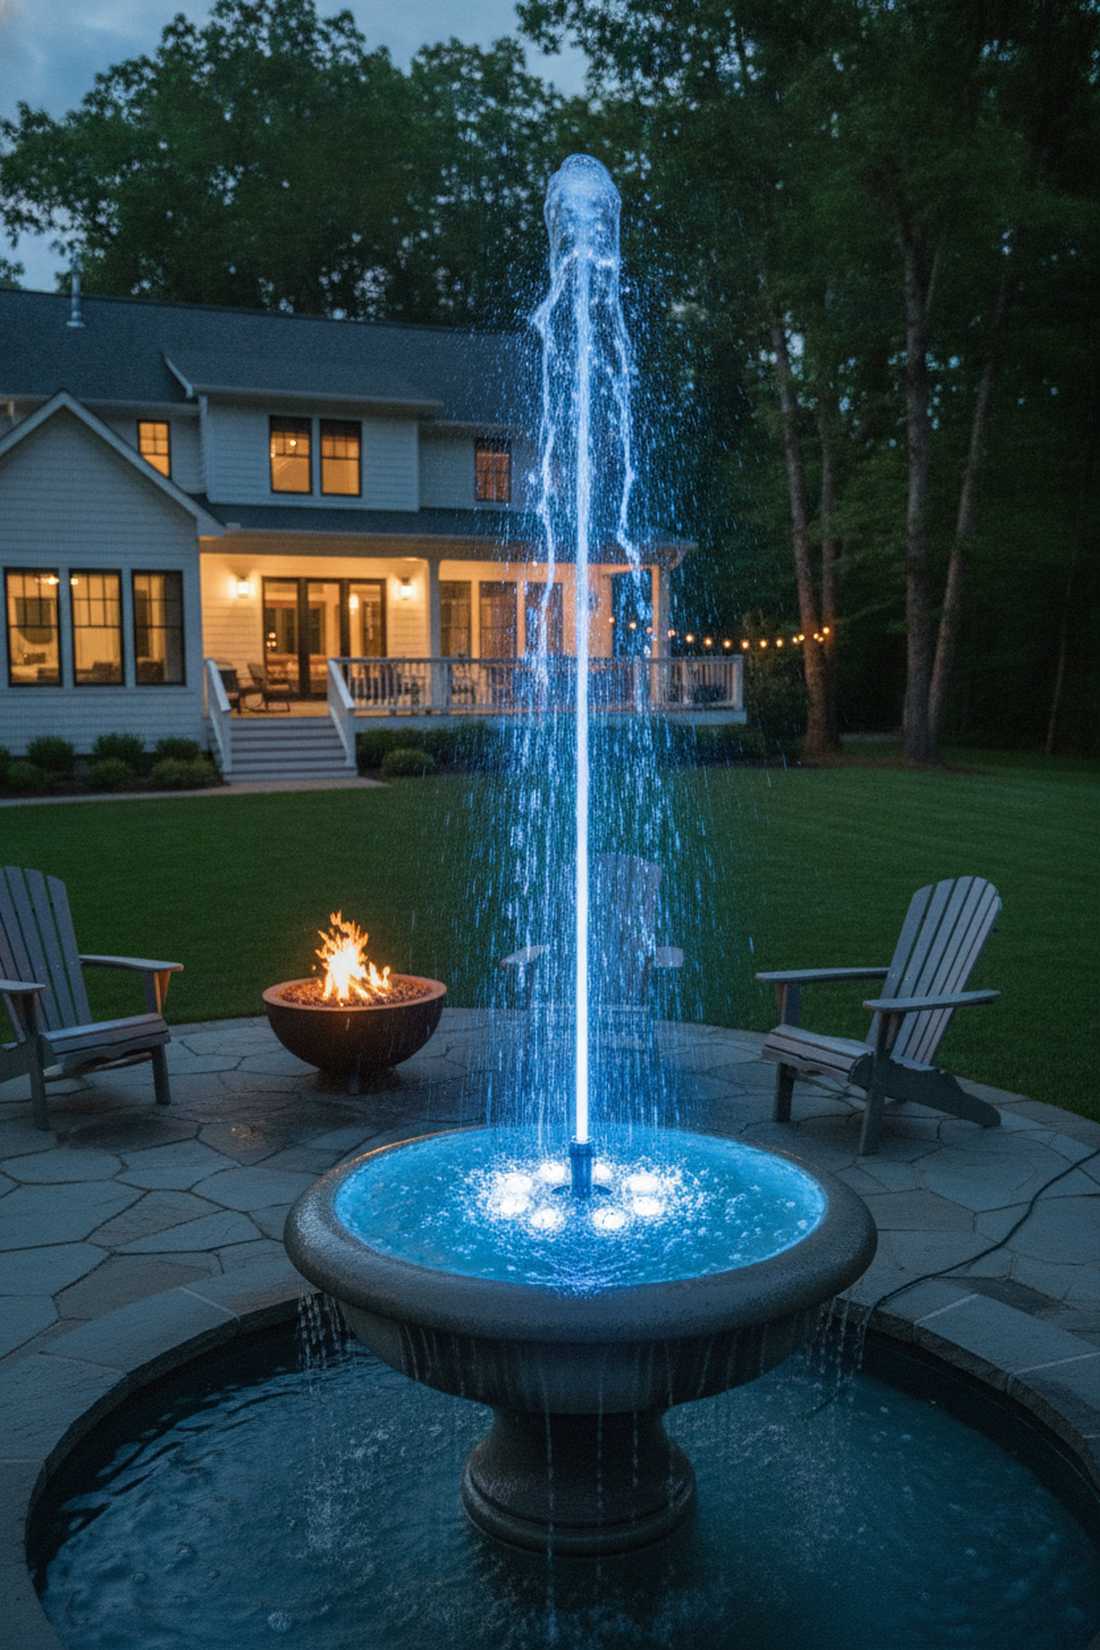
This layout catches every single dancing droplet of water, freezing it in stunning light. Center-jet water ring illumination is a massive upgrade for tiered concrete fountains or bubbling urns.
Trying to wedge standard spots around the base creates ugly, uneven shadows, but a central ring light gives a designer-level finish that shoots straight up the water column. Grab specialized miniature fountain accessories to ensure it fits perfectly around the PVC pipe.
An LED ring light kit costs about $30–$60. It’s a fast upgrade that completely changes the vibe.
- Key Materials: LED ring light, low-voltage wire, fountain pump
- Vibe / Style: Dancing diamonds
- Difficulty: Easy DIY
- Budget Breakdown: Ring Light: $40.
- Creator’s Tip: Tie the light to the exact same timer as the pump so it never turns on while the fountain is dry.
- Smart Sourcing: Submersible LED fountain ring light and UV-coated underwater electrical tape.
If you don’t have the budget to wire your pool or pond, this next hack is an absolute game changer…
35. Floating Solar Orbs

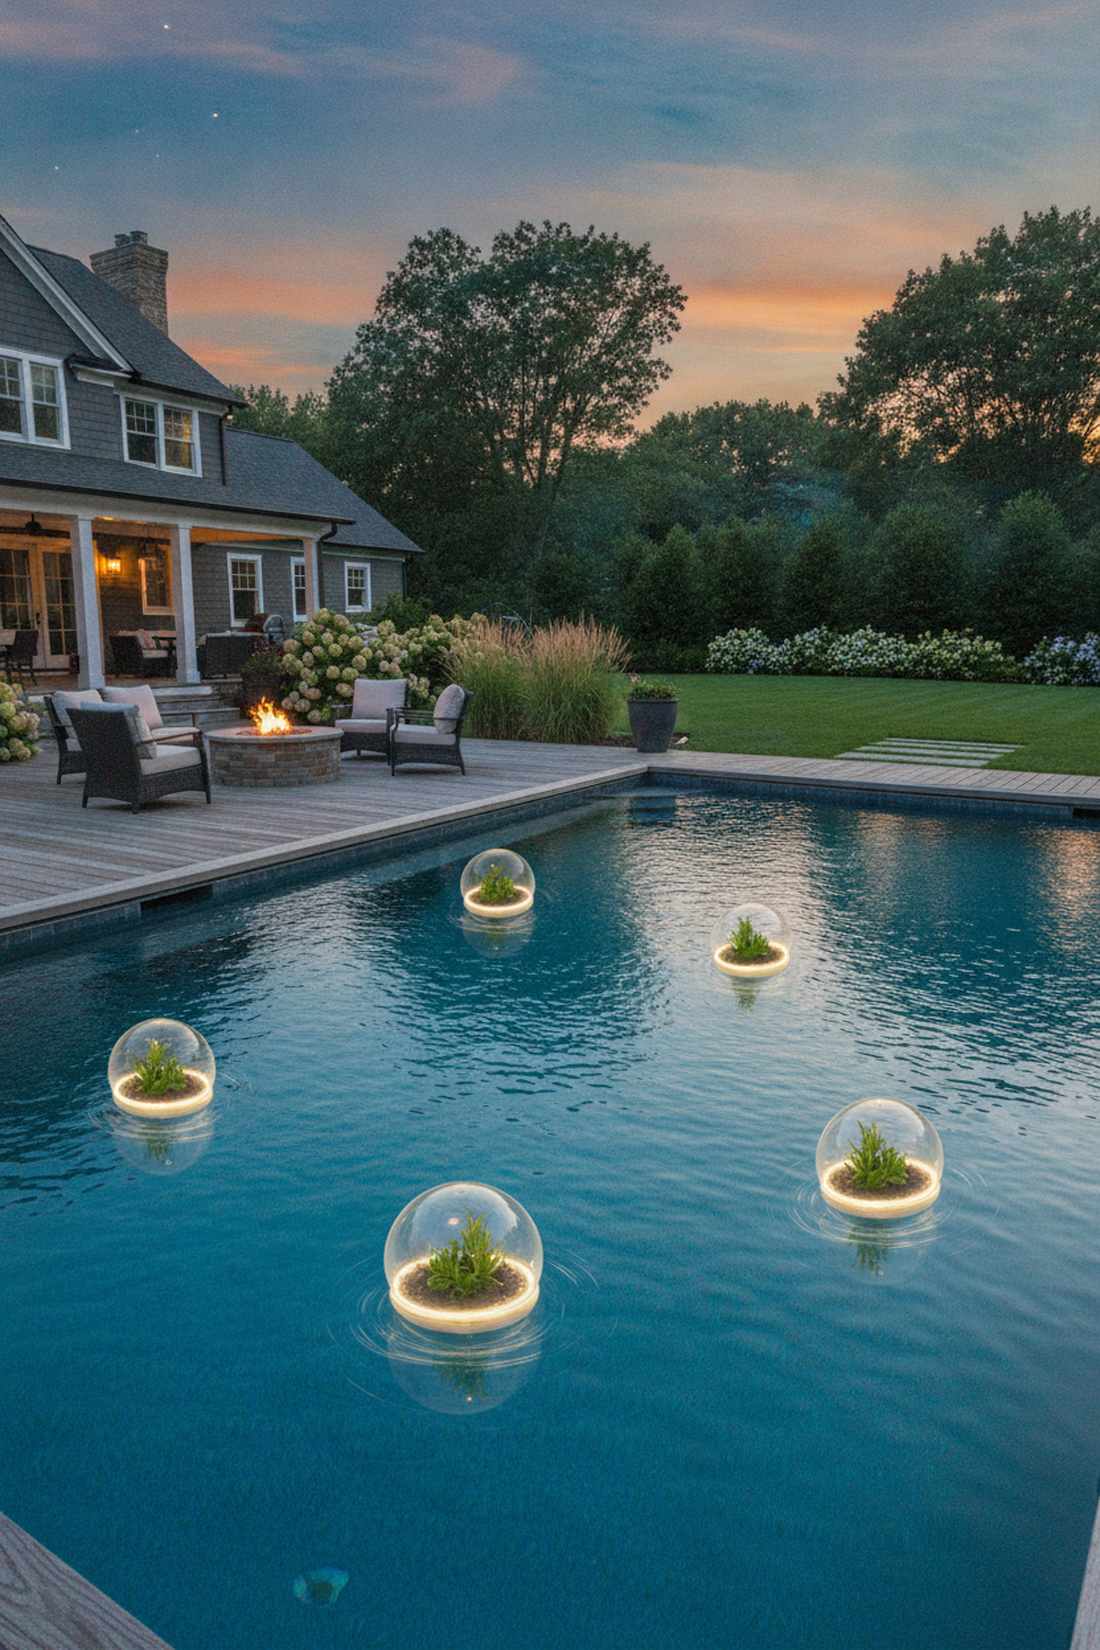
Imagine magical, glowing lily pads gently drifting across the surface of your pool. Autonomous water surface illumination is the ultimate hack for renters or those who absolutely refuse to wire anything.
Standard cheap plastic balls leak and sink in a week, but high-quality ultrasonically welded spheres deliver a surprisingly premium look. They act like massive floating terrarium accessories that add dynamic, wind-blown movement to still water.
A pack of four glowing orbs runs $40–$75. Pin this if you love zero-effort pool upgrades!
- Key Materials: Waterproof solar spheres
- Vibe / Style: Drifting magic
- Difficulty: Absolute beginner
- Budget Breakdown: 4-Pack Orbs: $55.
- Creator’s Tip: Toss a few of these into a dry garden bed during winter to repurpose them as glowing snowball decor.
- Smart Sourcing: Ultrasonically sealed floating solar orbs (bulk pack) and UV-resistant plastic shells.
36. Waterfall Accent Lights
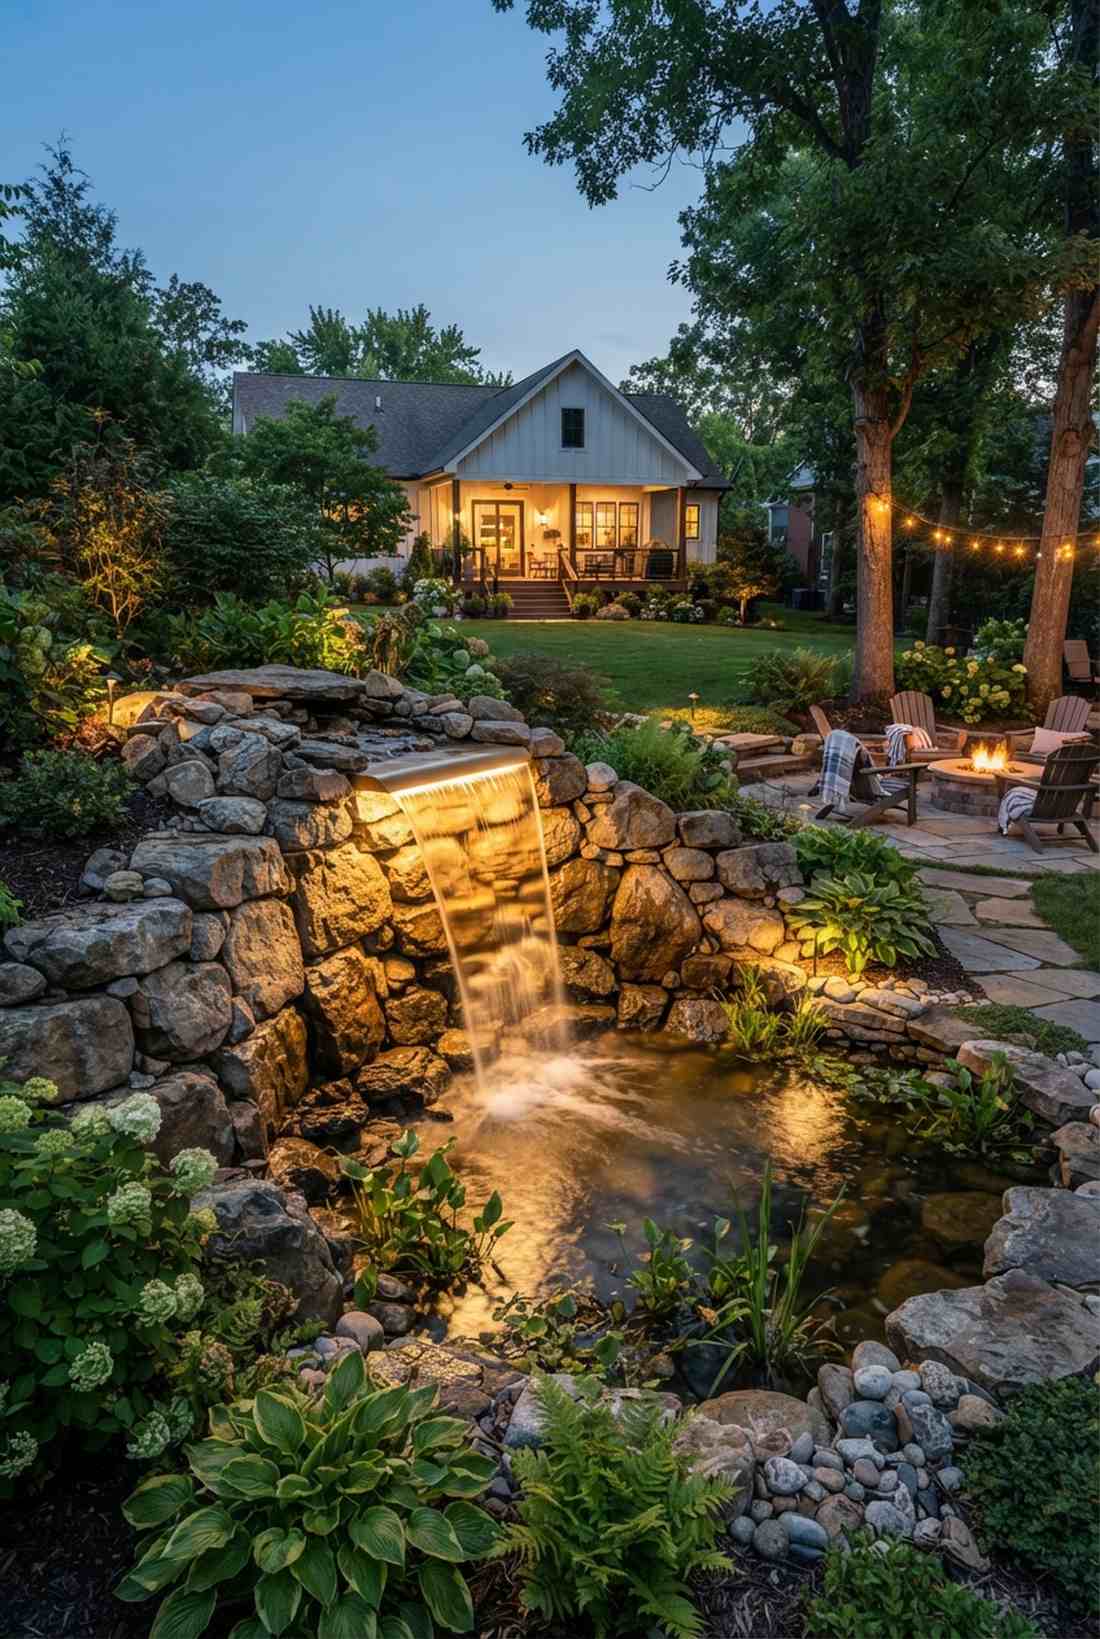
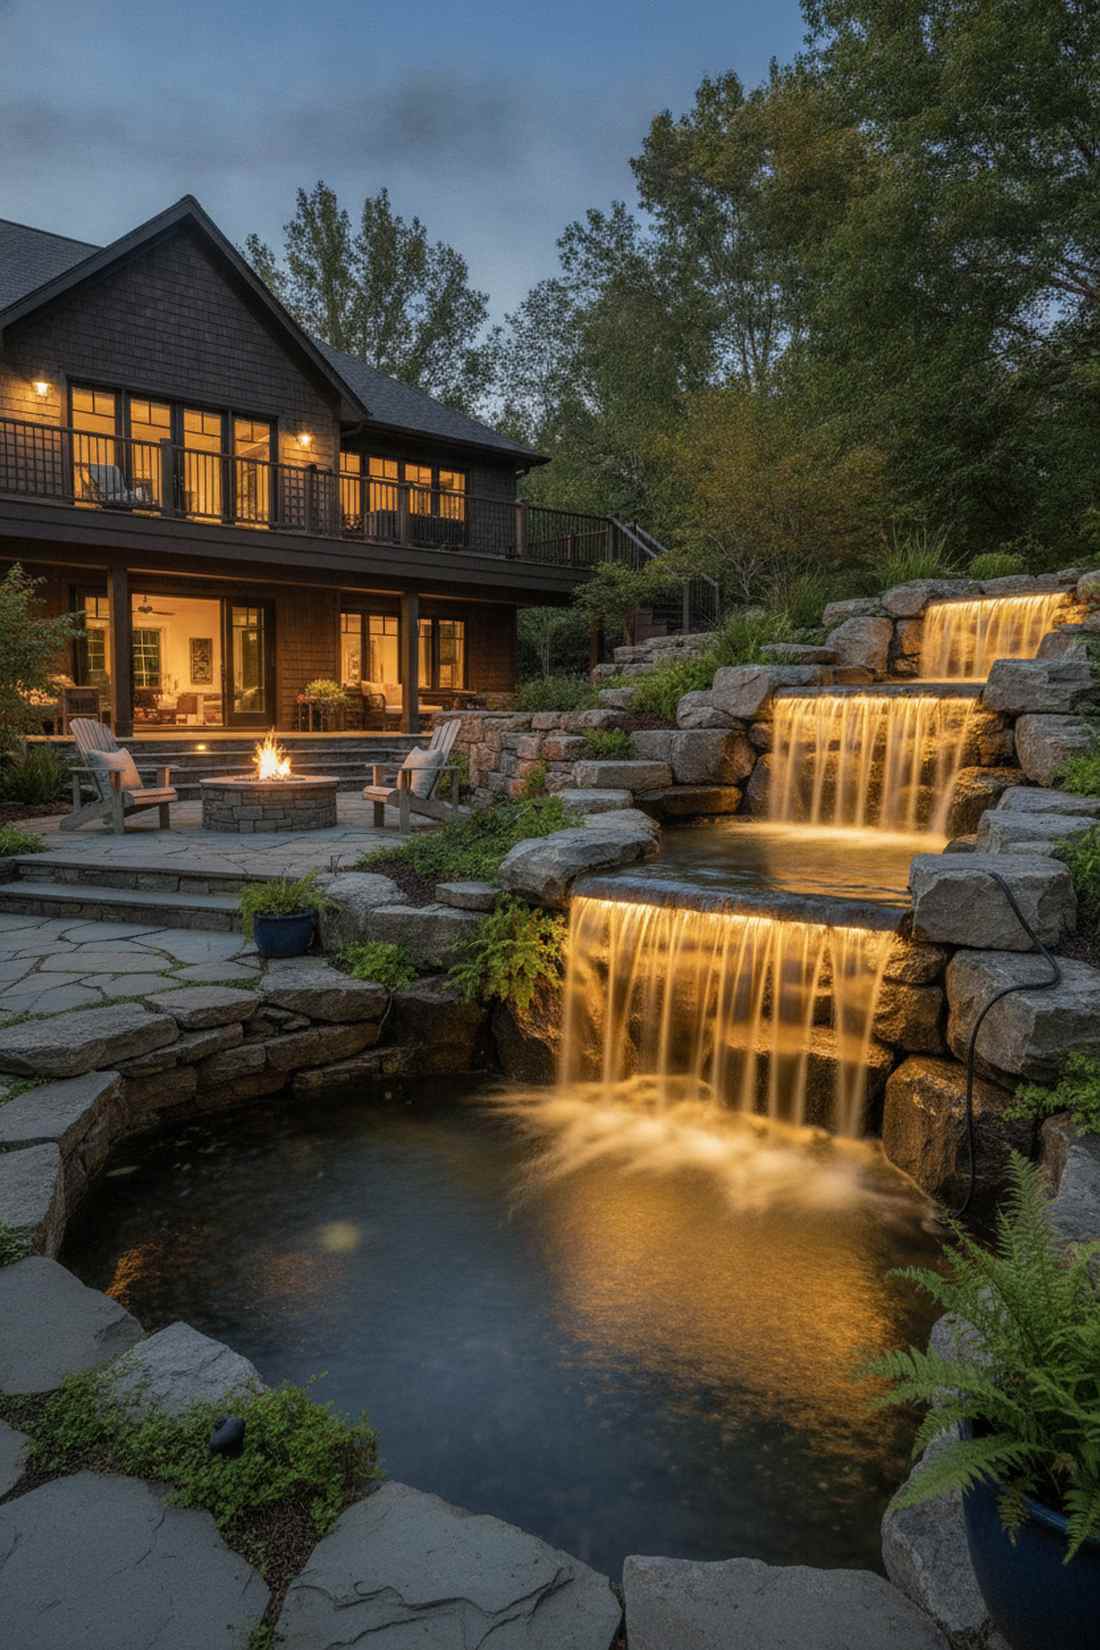
It creates a sheet of liquid glass that shimmers and catches the eye from across the yard. Cascading rock face illumination is mandatory for highlighting expensive backyard rock waterfalls.
Shining light straight at the water creates a blinding mirror reflection, but placing it underneath to backlight the cascade looks far more expensive than it is. Utilizing specialized outdoor LED hardscape kits allows you to wedge the light directly under the spillway.
A proper spillway setup costs $80–$140. Highly recommended for a quick weekend win.
- Key Materials: Brass lip lights, masonry chisel, outdoor wire
- Vibe / Style: Liquid glass
- Difficulty: Intermediate
- Budget Breakdown: Lip Light: $90 | Connectors: $15.
- Creator’s Tip: Buy a warm 2700K bulb; cold white light makes the waterfall look like a scary, freezing glacier.
- Smart Sourcing: Heavy-duty brass waterfall lip light (starter kit) and pre-cut low-voltage splice kits.
37. Stream Bed Lighting
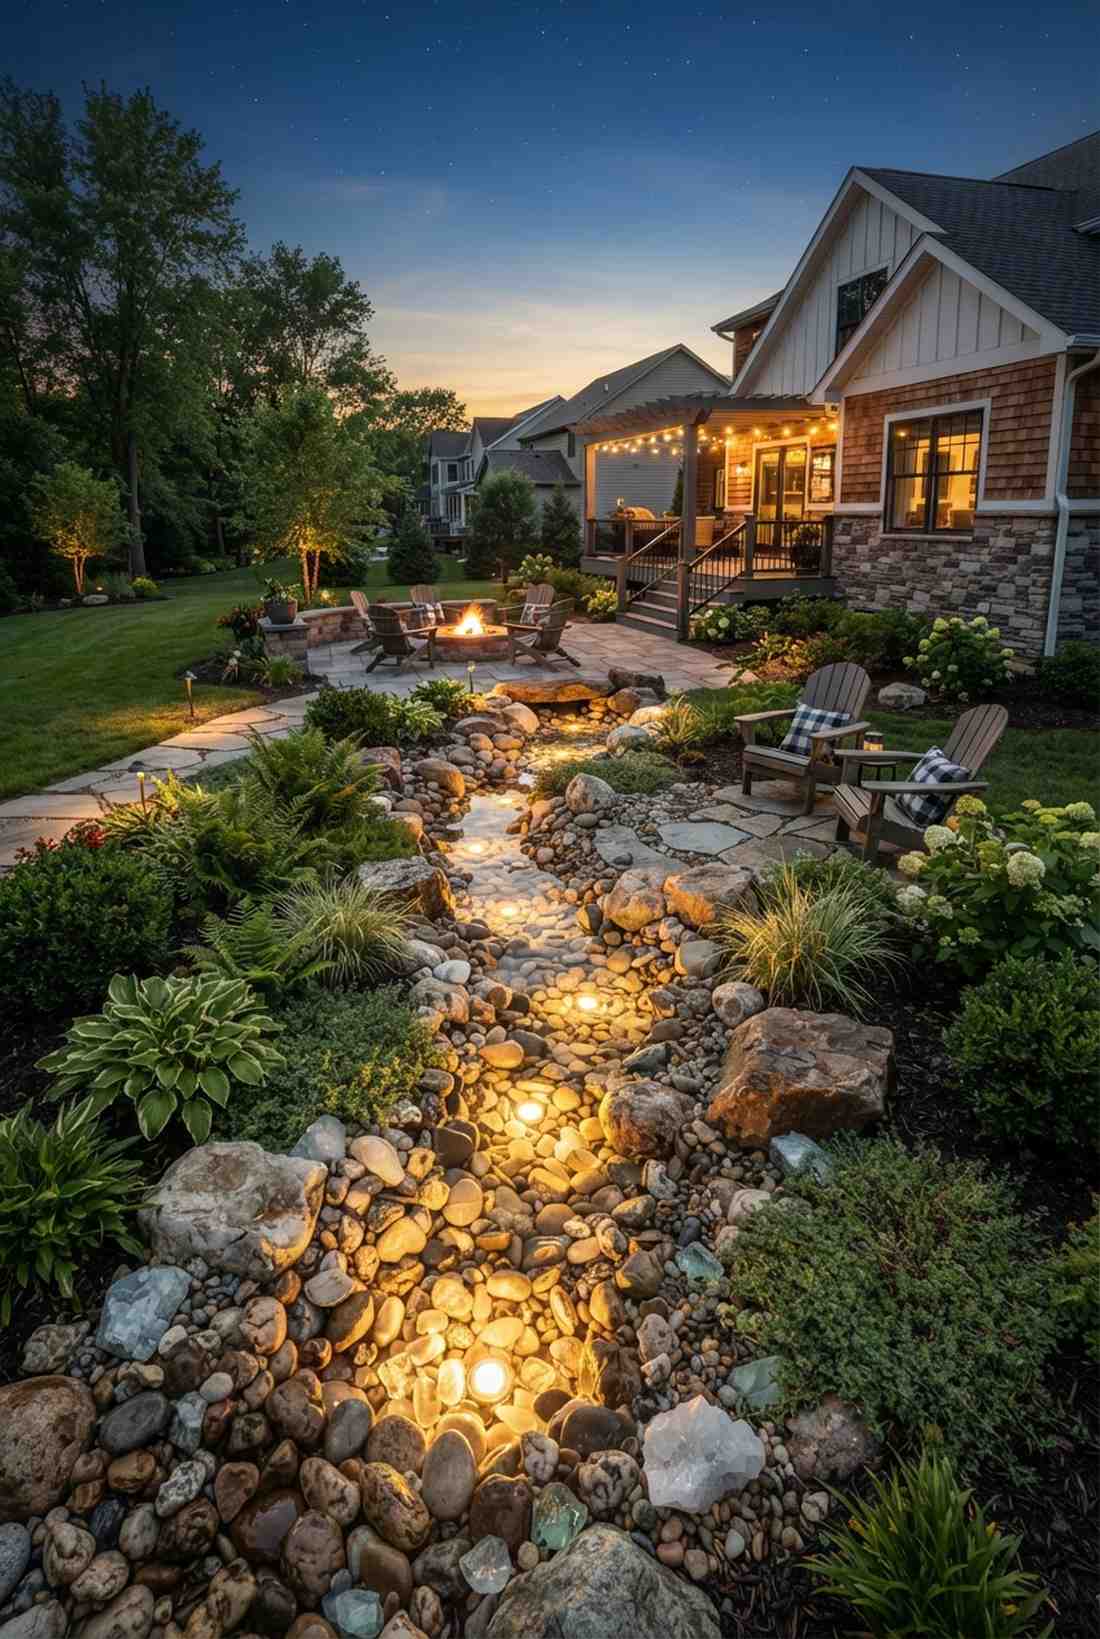
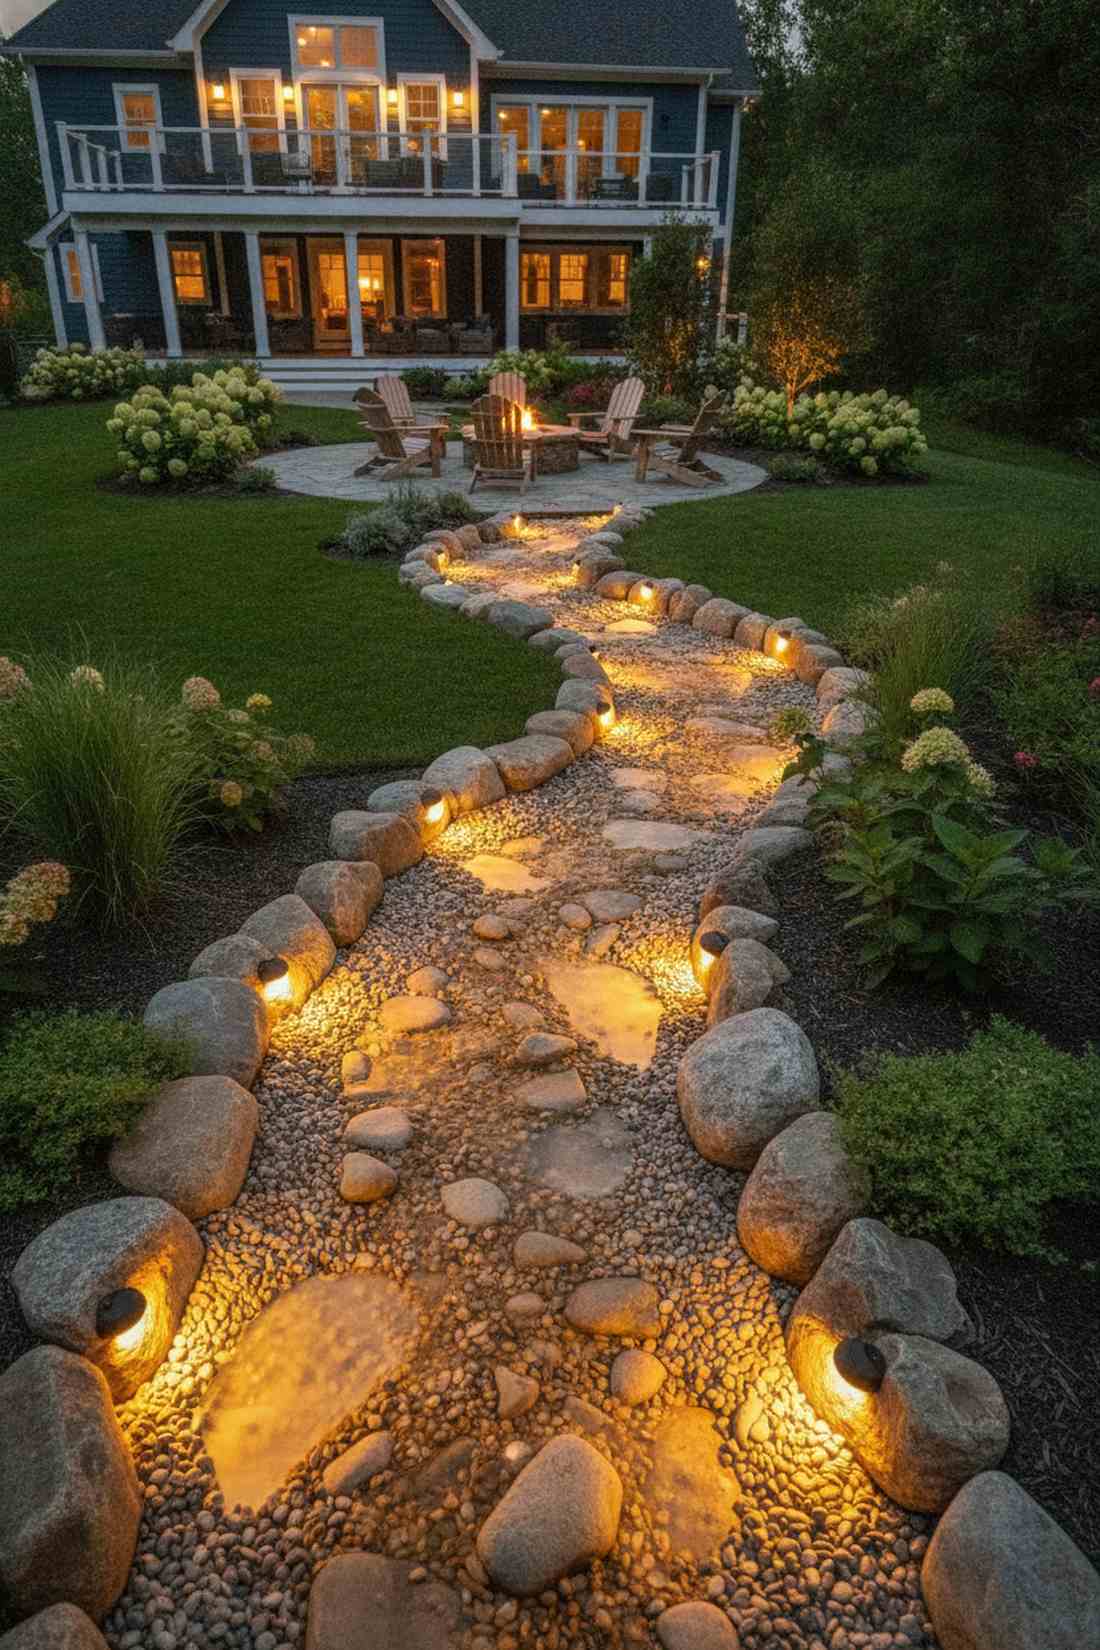
This mimics the look of a glowing vein of gold cutting through your landscape. Shallow rock channel up-lighting is fantastic for dry river beds or active shallow creeks.
Throwing a spotlight on it from a tree flattens the texture completely, but burying tiny pucks beneath the rocks gives a designer-level finish. It feels just like arranging fairy garden kits, weaving tiny lights between the river stones.
Lighting a 15-foot stream costs around $100–$150. Save this to your DIY weekend garden board!
- Key Materials: Submersible LED pucks, river rock, gravel
- Vibe / Style: Glowing creek
- Difficulty: Intermediate
- Budget Breakdown: Puck Kit: $110 | River Stones: $20.
- Creator’s Tip: Hide the actual light fixture completely under a large piece of quartz or frosted glass to diffuse the hot spot.
- Smart Sourcing: Waterproof IP68 LED puck lights (multi-pack) and bulk pack frosted river stones.
Sustainable and Smart Lighting Systems
Modern backyard garden lighting ideas embrace energy efficiency and intelligent controls. These systems reduce environmental impact while increasing convenience through automation and remote management.
38. Motion-Sensor Pathway Lights
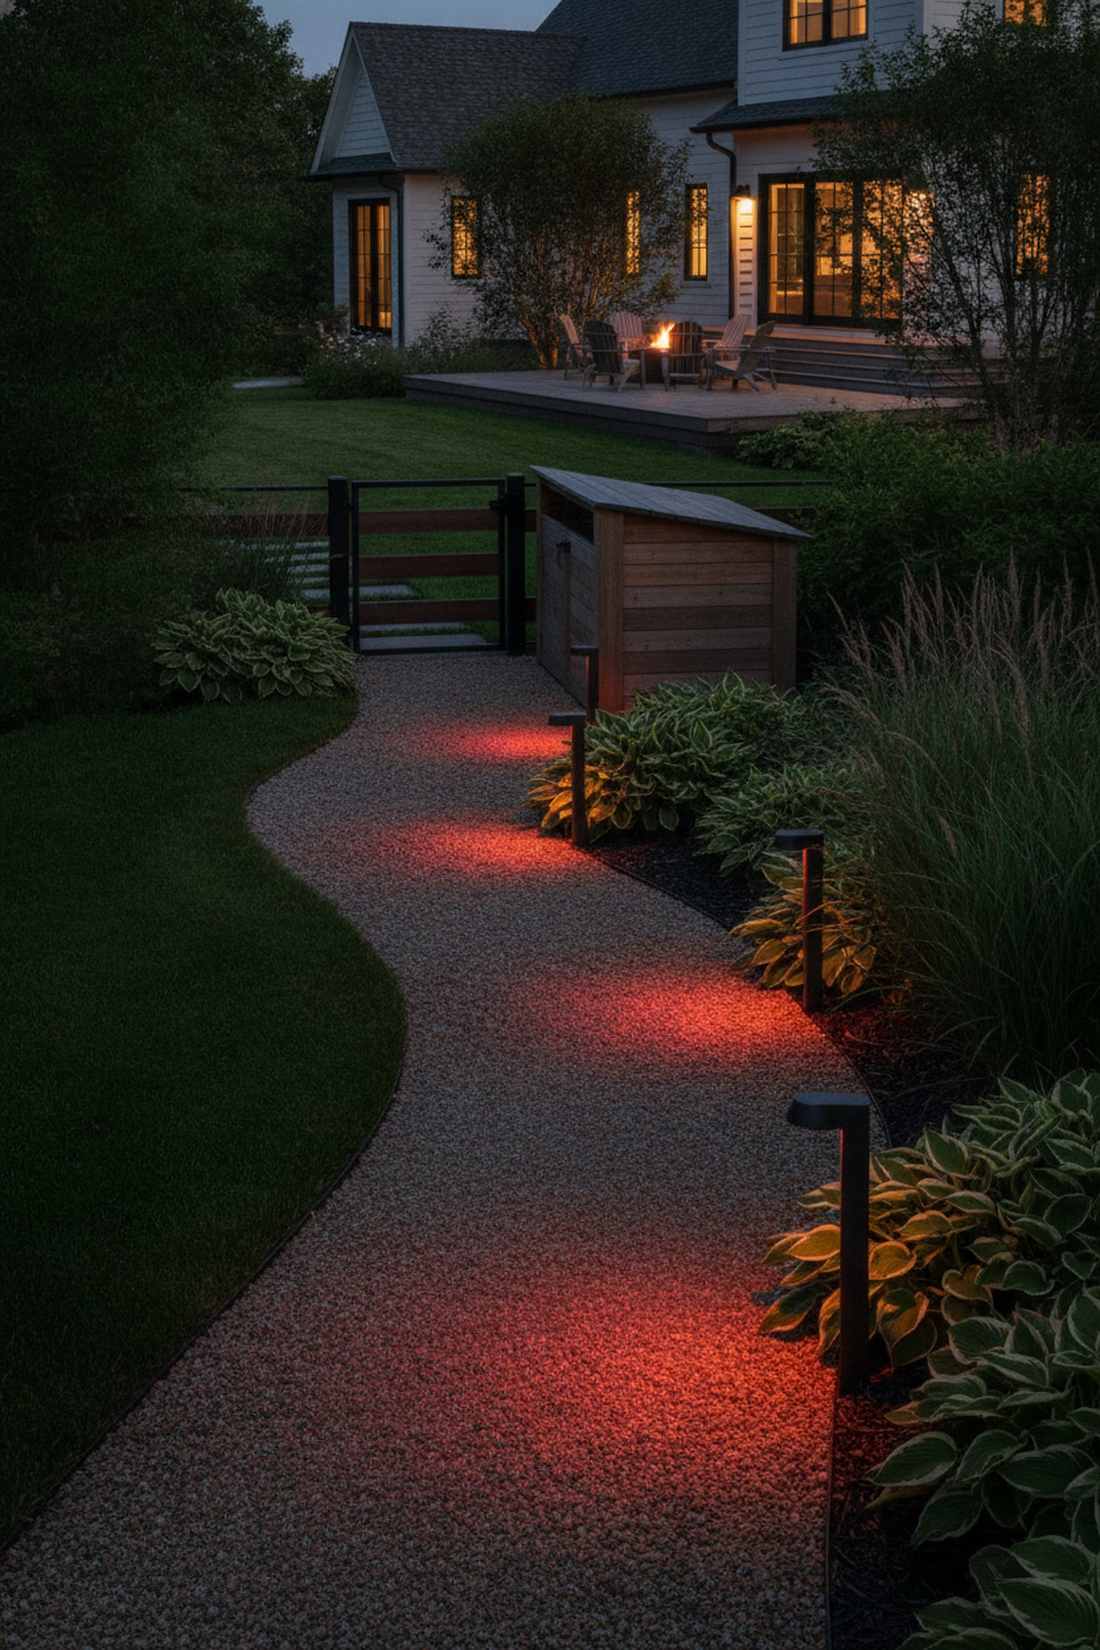
It provides an elegant red-carpet effect, lighting up magically right before you take a step. Automated foot-traffic illumination is a genius addition to side gates and garbage can routes.
Having glaring lights on all night annoys neighbors, but a smooth fade-on sensor delivers a surprisingly premium look while saving massive electricity. High-end smart outdoor lighting kits integrate these sensors seamlessly without ugly external boxes.
A set of sensor-driven path lights runs $60–$100. It’s a fast upgrade that completely changes the vibe.
- Key Materials: PIR sensor path lights, battery or low-voltage power
- Vibe / Style: Smart luxury
- Difficulty: Easy
- Budget Breakdown: Sensor Lights: $75.
- Creator’s Tip: Point the sensor dome slightly downward so it only triggers for humans and dogs, not blowing tree branches.
- Smart Sourcing: Battery-operated motion sensor path lights (bulk pack) and UV-coated ground stakes.
Stop wrestling with manual timers in the dark. This next system completely automates your entire yard…
39. Smart WiFi Landscape Lighting
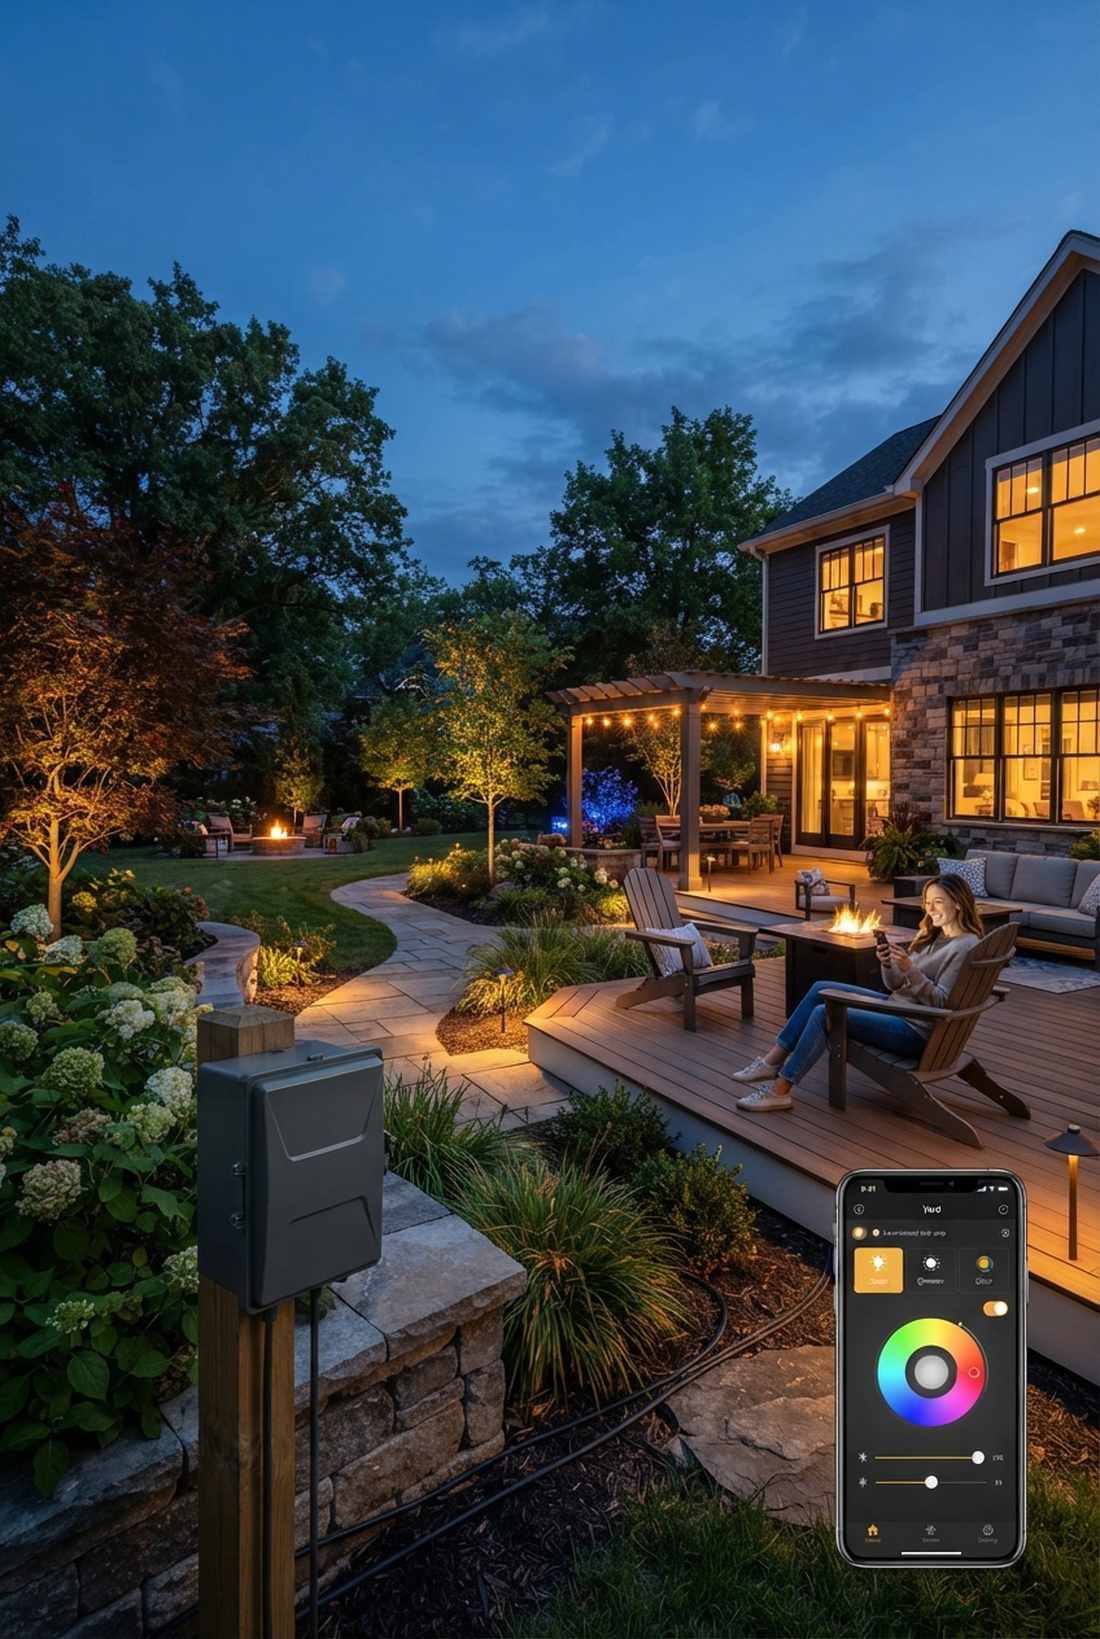
Imagine controlling the exact mood, brightness, and color of your entire yard from your couch. Cloud-connected garden zoning is the ultimate flex for the modern tech-savvy homeowner.
Relying on cheap mechanical timers is outdated; upgrading to a WiFi transformer looks far more expensive than it is and syncs with your local sunset time automatically. Tapping into premium smart home landscape tools completely eliminates the need to ever touch a switch again.
A smart transformer upgrade costs $80–$150. Pin this if you want ultimate convenience!
- Key Materials: Smart WiFi 12V transformer, smartphone app
- Vibe / Style: Automated genius
- Difficulty: Intermediate
- Budget Breakdown: Smart Transformer: $110.
- Creator’s Tip: Program a “Security Mode” that randomly turns different yard zones on and off when you are away on vacation.
- Smart Sourcing: WiFi-enabled outdoor low-voltage transformer and a pre-cut weatherproof mounting box.
40. Photocell Automated Systems
It guarantees your yard is never plunged into darkness, even during unexpected afternoon storms. Ambient light-triggered transformers are the foolproof backbone of a set-it-and-forget-it yard.
Clunky timers require constant adjusting for daylight savings, but a simple photocell eye gives a designer-level finish of total reliability. This is a staple in all commercial professional landscape lighting kits for a reason.
Adding a photocell sensor only costs $15–$30. Save this to your DIY weekend garden board!
- Key Materials: Photocell light sensor, compatible transformer
- Vibe / Style: Invisible reliability
- Difficulty: Easy
- Budget Breakdown: Photocell Unit: $20.
- Creator’s Tip: Never mount the photocell eye where a porch light or street lamp will shine on it, or it will trick the system into turning off.
- Smart Sourcing: Plug-in outdoor photocell light sensor (starter kit) and UV-resistant mounting tape.
41. High-Efficiency LED Conversions
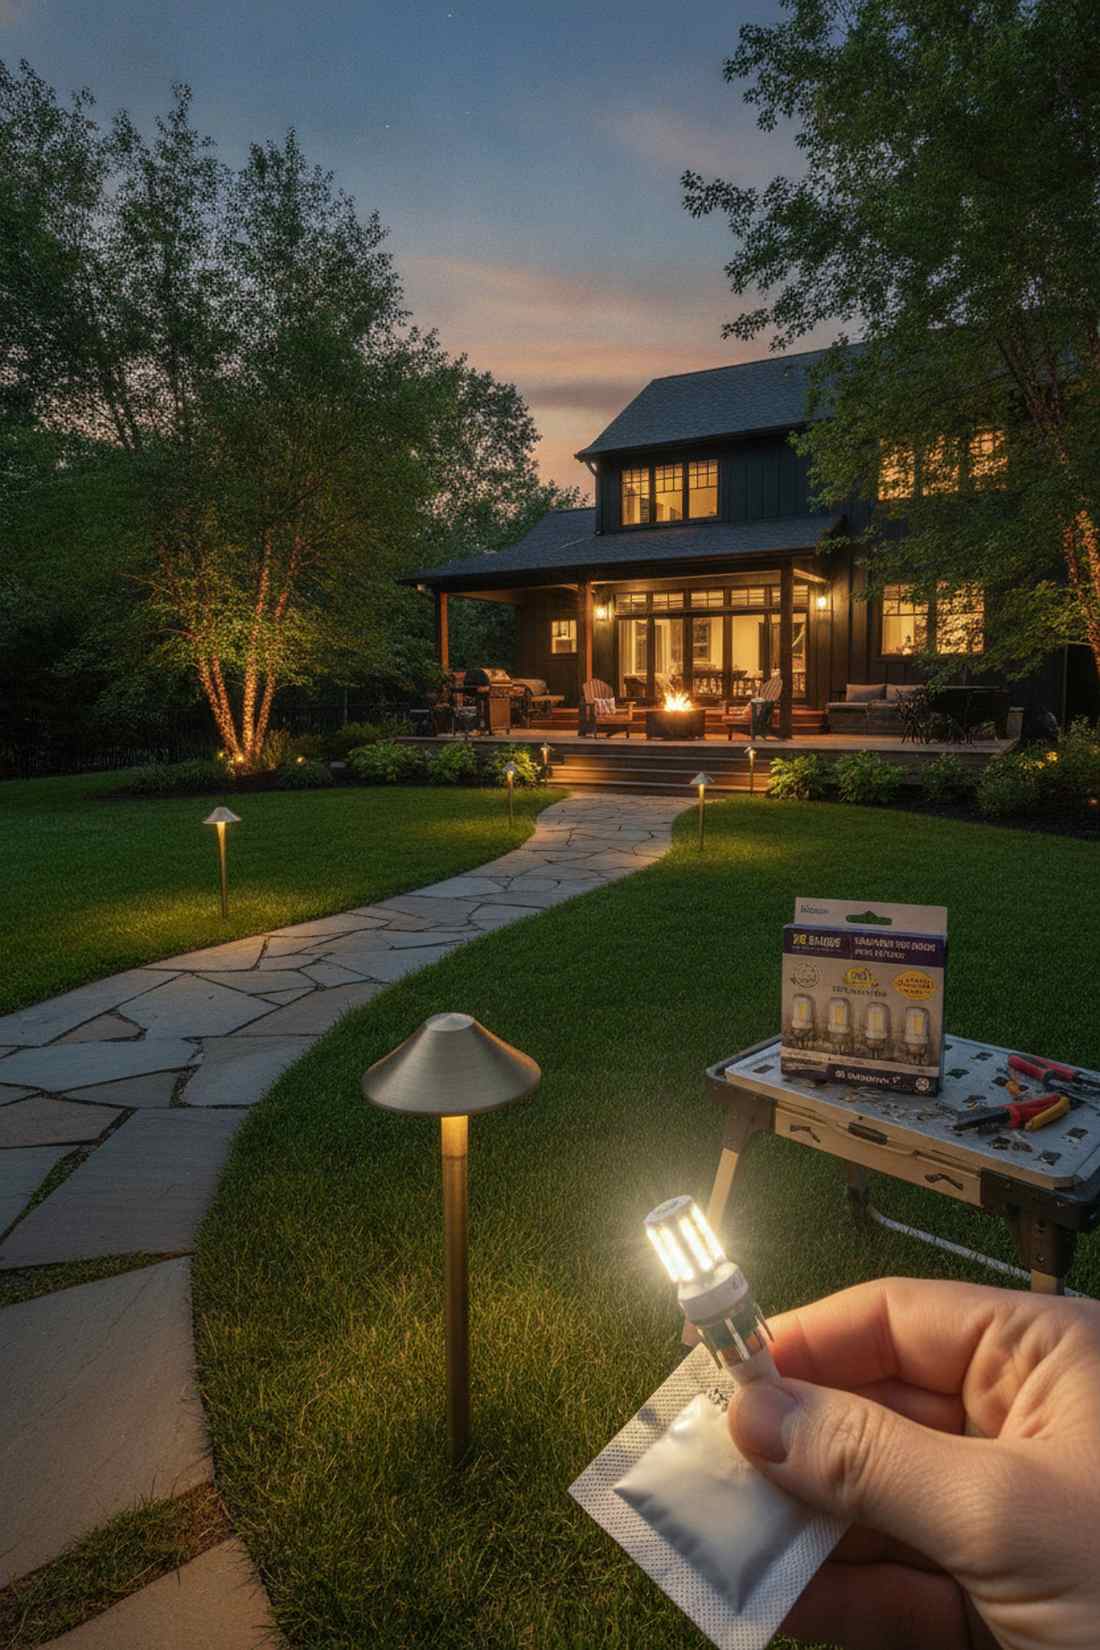
It instantly slashes your electric bill while pumping out double the brightness. Halogen to LED retrofit upgrades are the absolute smartest move for reviving an old, dead lighting system.
Throwing away solid brass fixtures just because the bulb died is a massive waste of money; swapping in a 3W LED bulb looks far more expensive than it is. Plus, finding exact replacements at a hardware store is tough, so buying bulk landscape lighting supplies online saves a fortune.
Retrofitting 10 fixtures costs around $30–$50. Highly recommended for a quick weekend win.
- Key Materials: LED MR16 or G4 bi-pin bulbs, dielectric grease
- Vibe / Style: Eco-friendly bright
- Difficulty: Absolute beginner
- Budget Breakdown: LED Bulbs: $35 | Grease: $5.
- Creator’s Tip: Smear a tiny dab of dielectric grease on the bulb pins before pushing them in to prevent corrosion and flickering.
- Smart Sourcing: Warm white LED G4 bi-pin bulbs (bulk pack) and pre-cut dielectric grease packets.
42. Solar Flood Security Lights
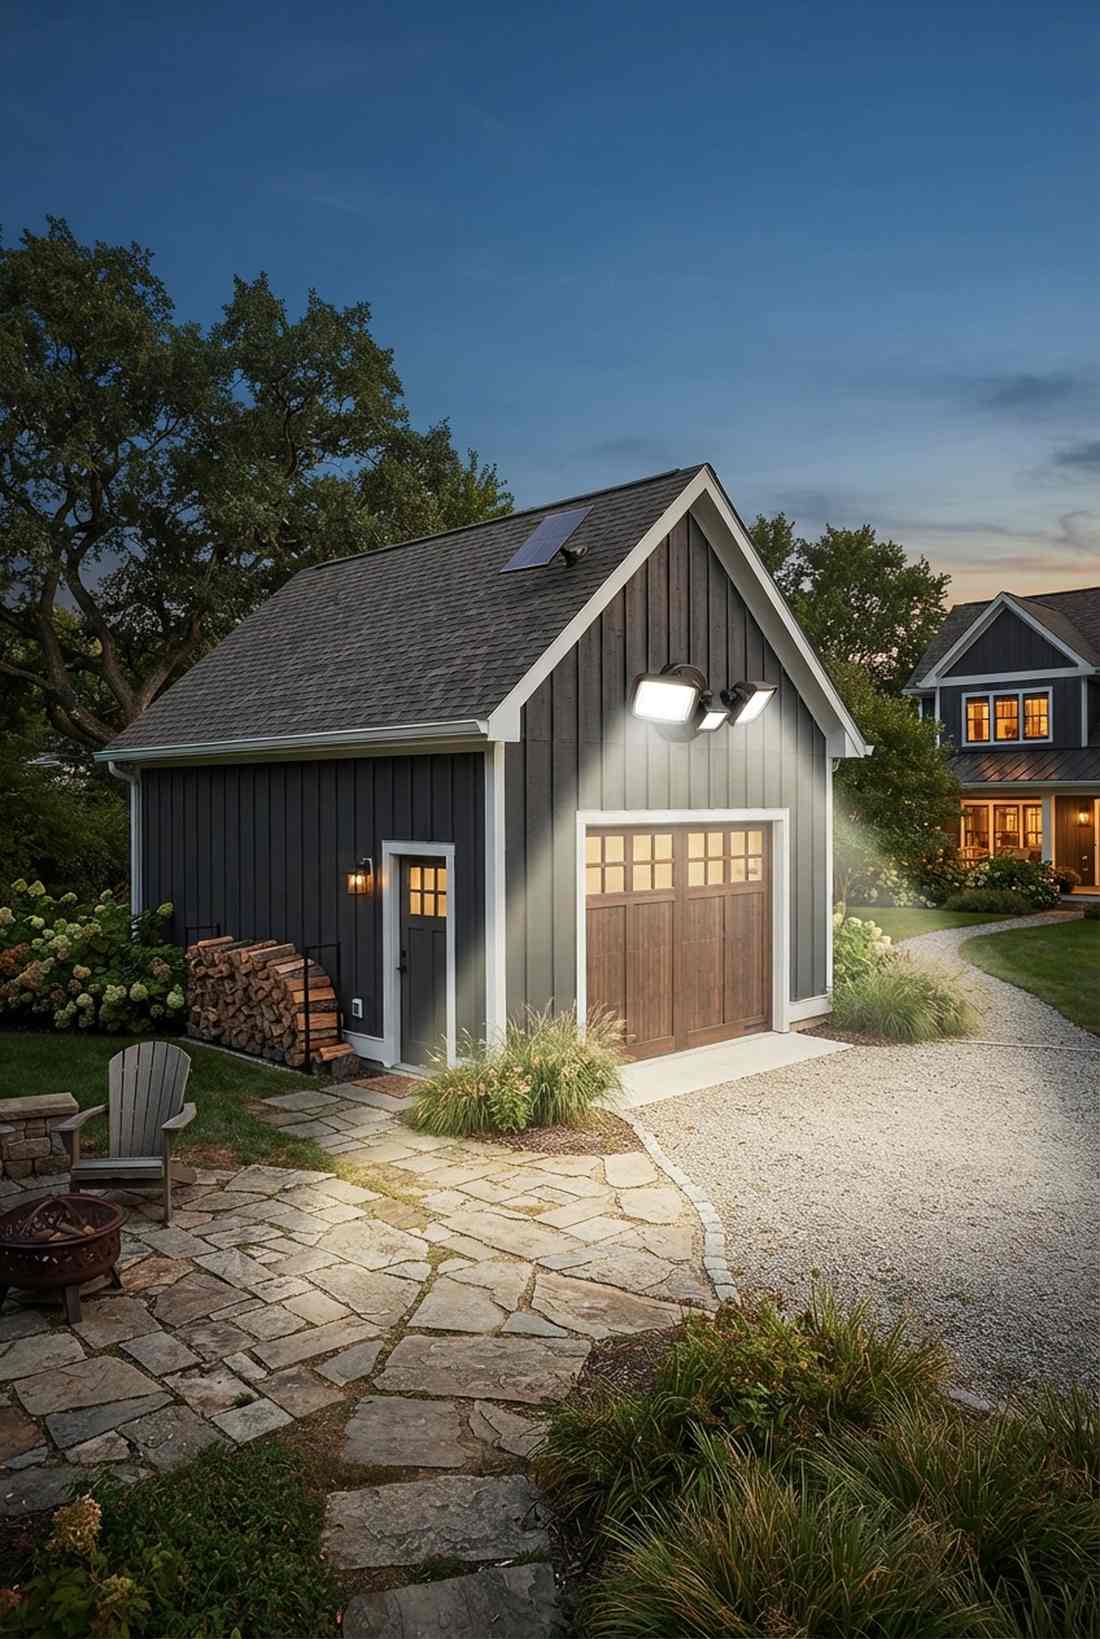
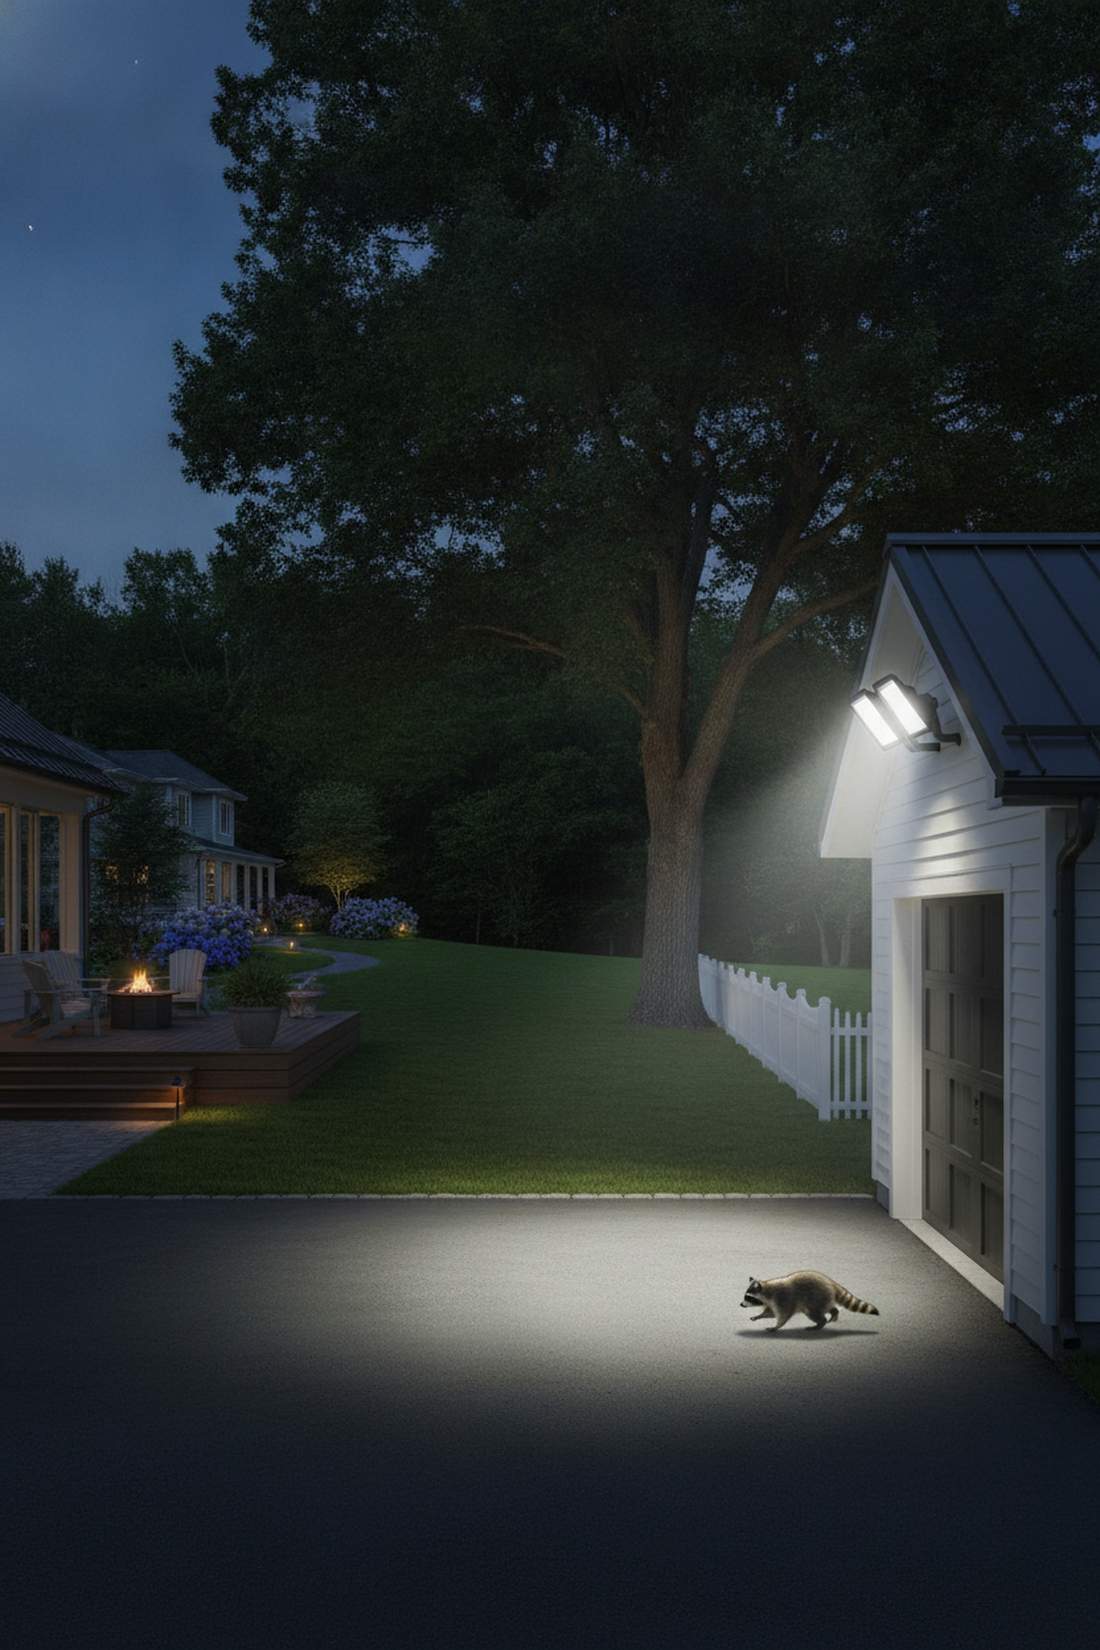
It blasts the dark corners of your property with daylight, instantly scaring off pests. Wire-free perimeter security blasting is an absolute must-have for detatched garages or dark alleyways.
Hardwiring a floodlight to a shed costs hundreds in electrician fees, but screwing a high-lumen solar panel to the roof delivers a surprisingly premium look for pennies. Heavy-duty outdoor property protection kits ensure it triggers instantly every single time.
A dual-head solar floodlight costs $40–$70. It’s a fast upgrade that completely changes the vibe.
- Key Materials: Solar motion floodlight, drill, exterior screws
- Vibe / Style: Blazing safety
- Difficulty: Easy DIY
- Budget Breakdown: Floodlight: $50.
- Creator’s Tip: Make sure the solar panel has a clear view of the southern sky to get the absolute maximum winter charging.
- Smart Sourcing: High-lumen solar motion security light (starter kit) and UV-coated exterior mounting screws.
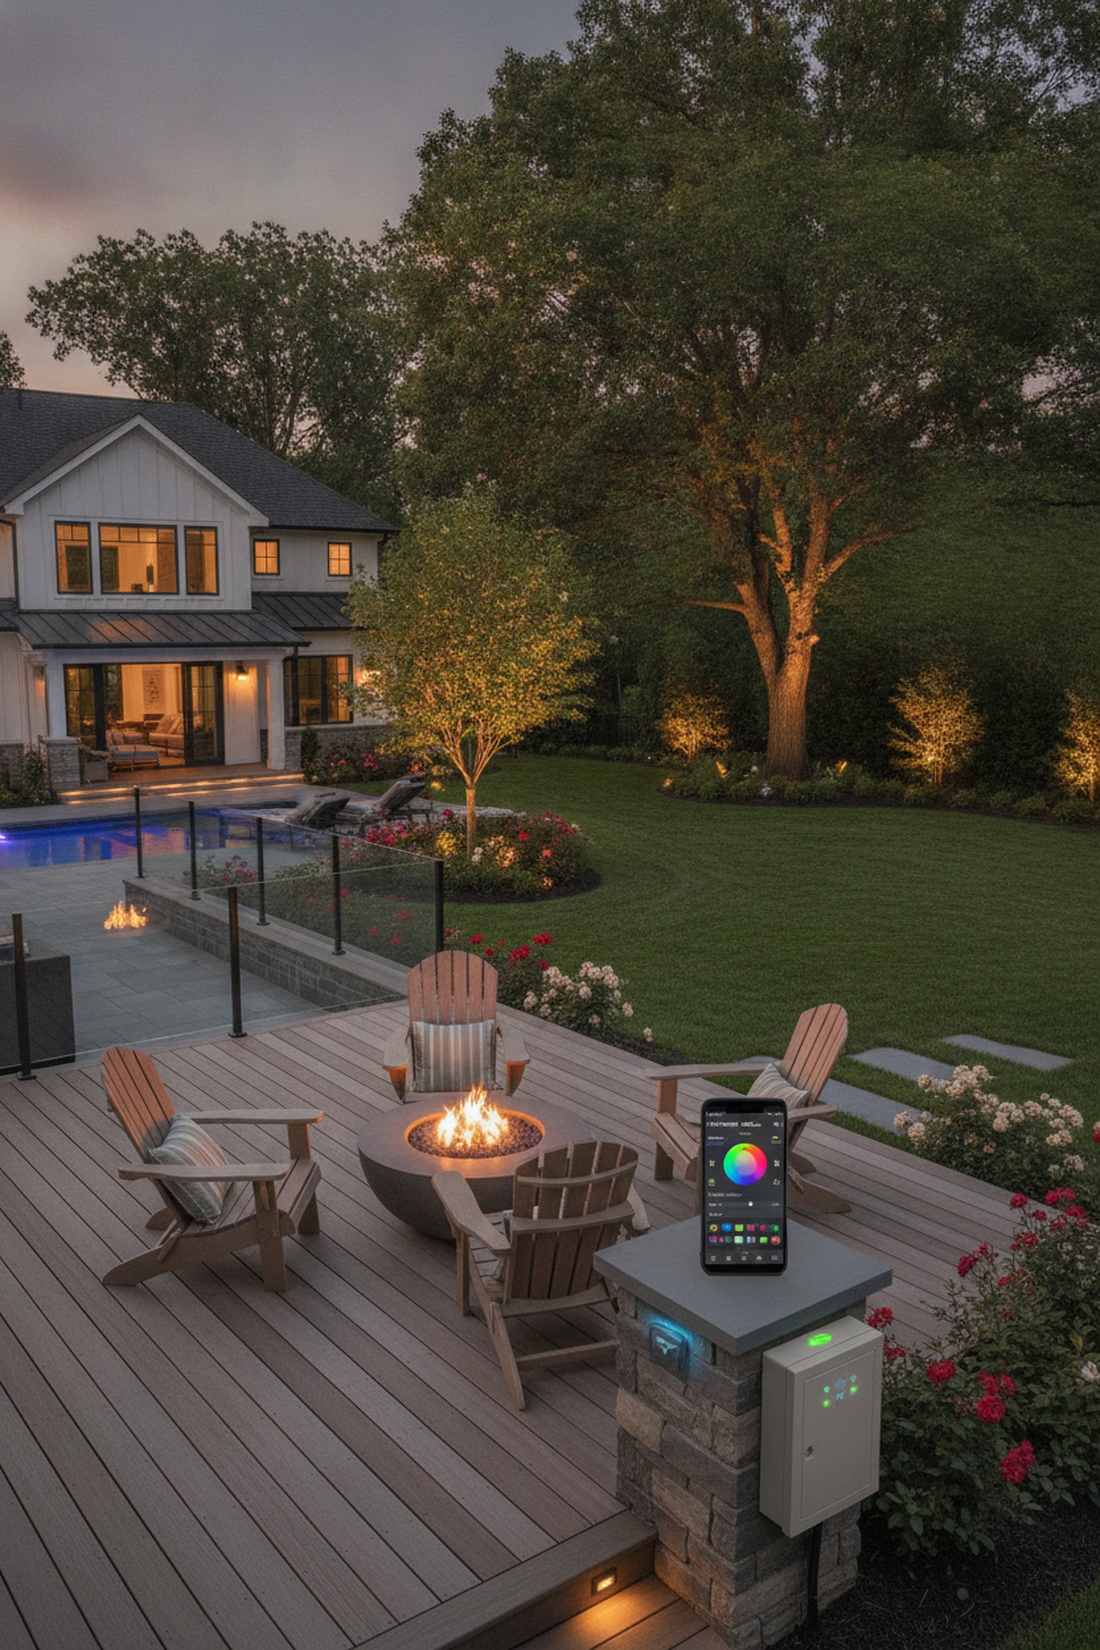
43. Zoned Dimming Systems
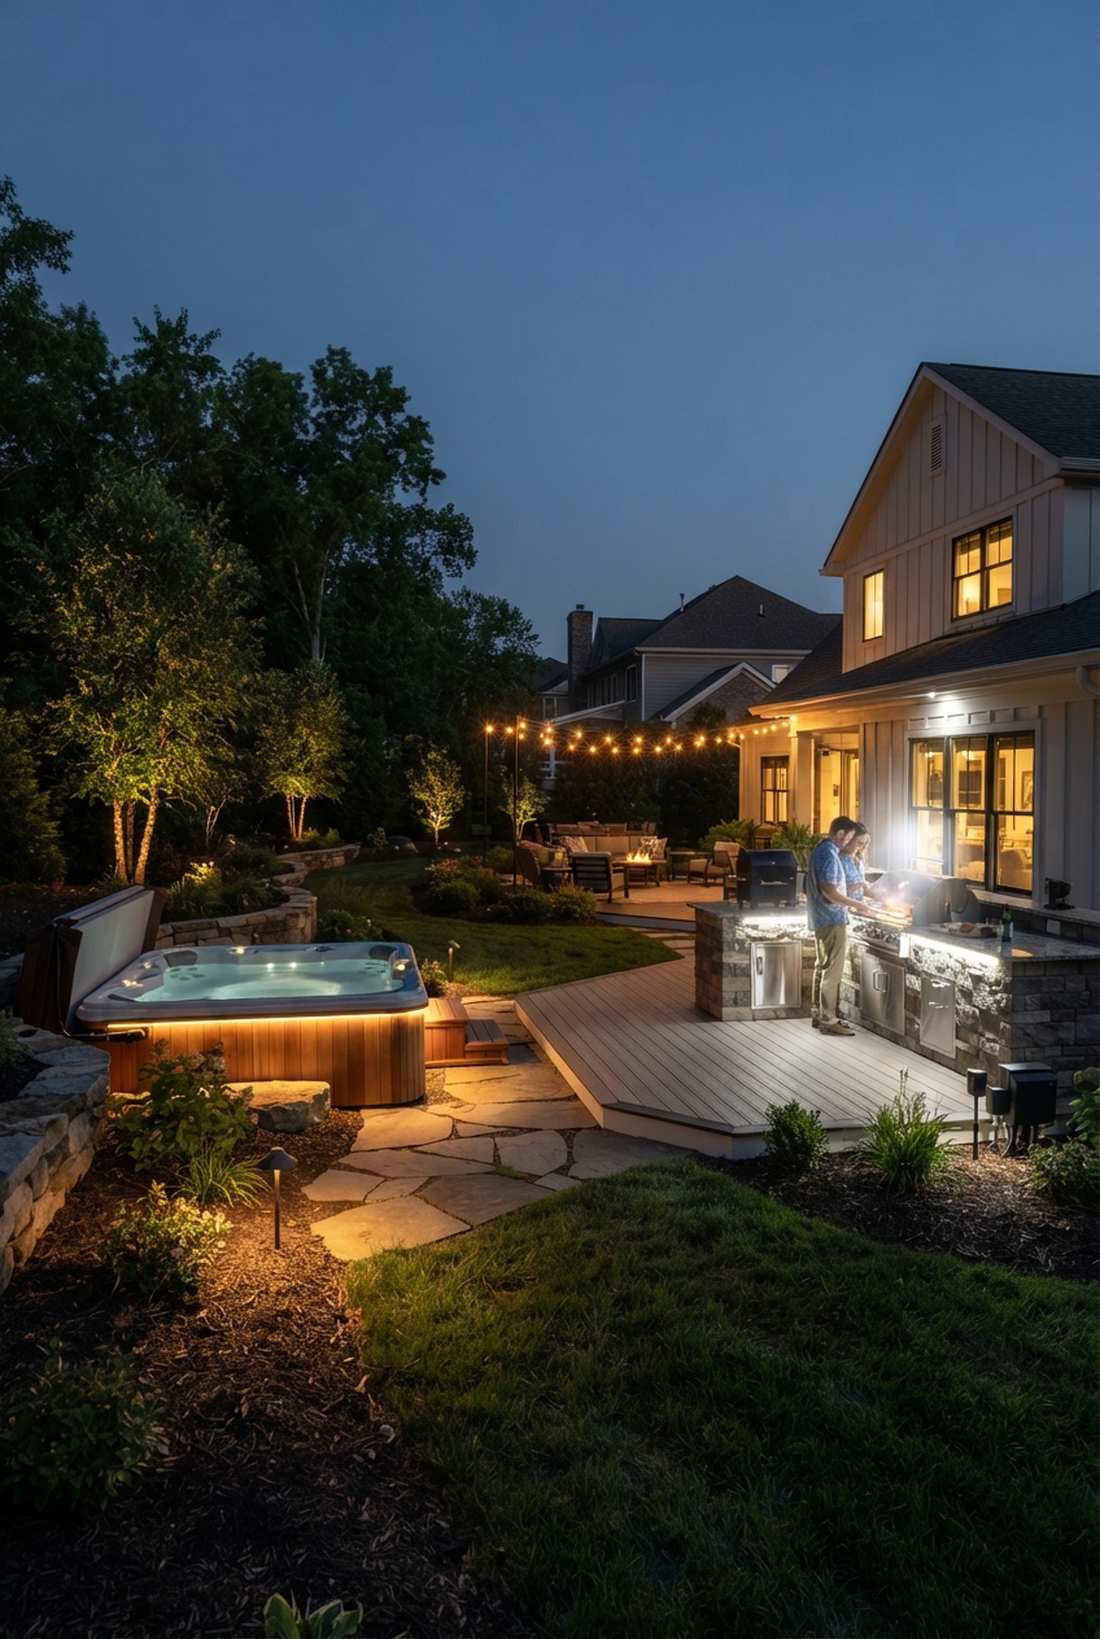
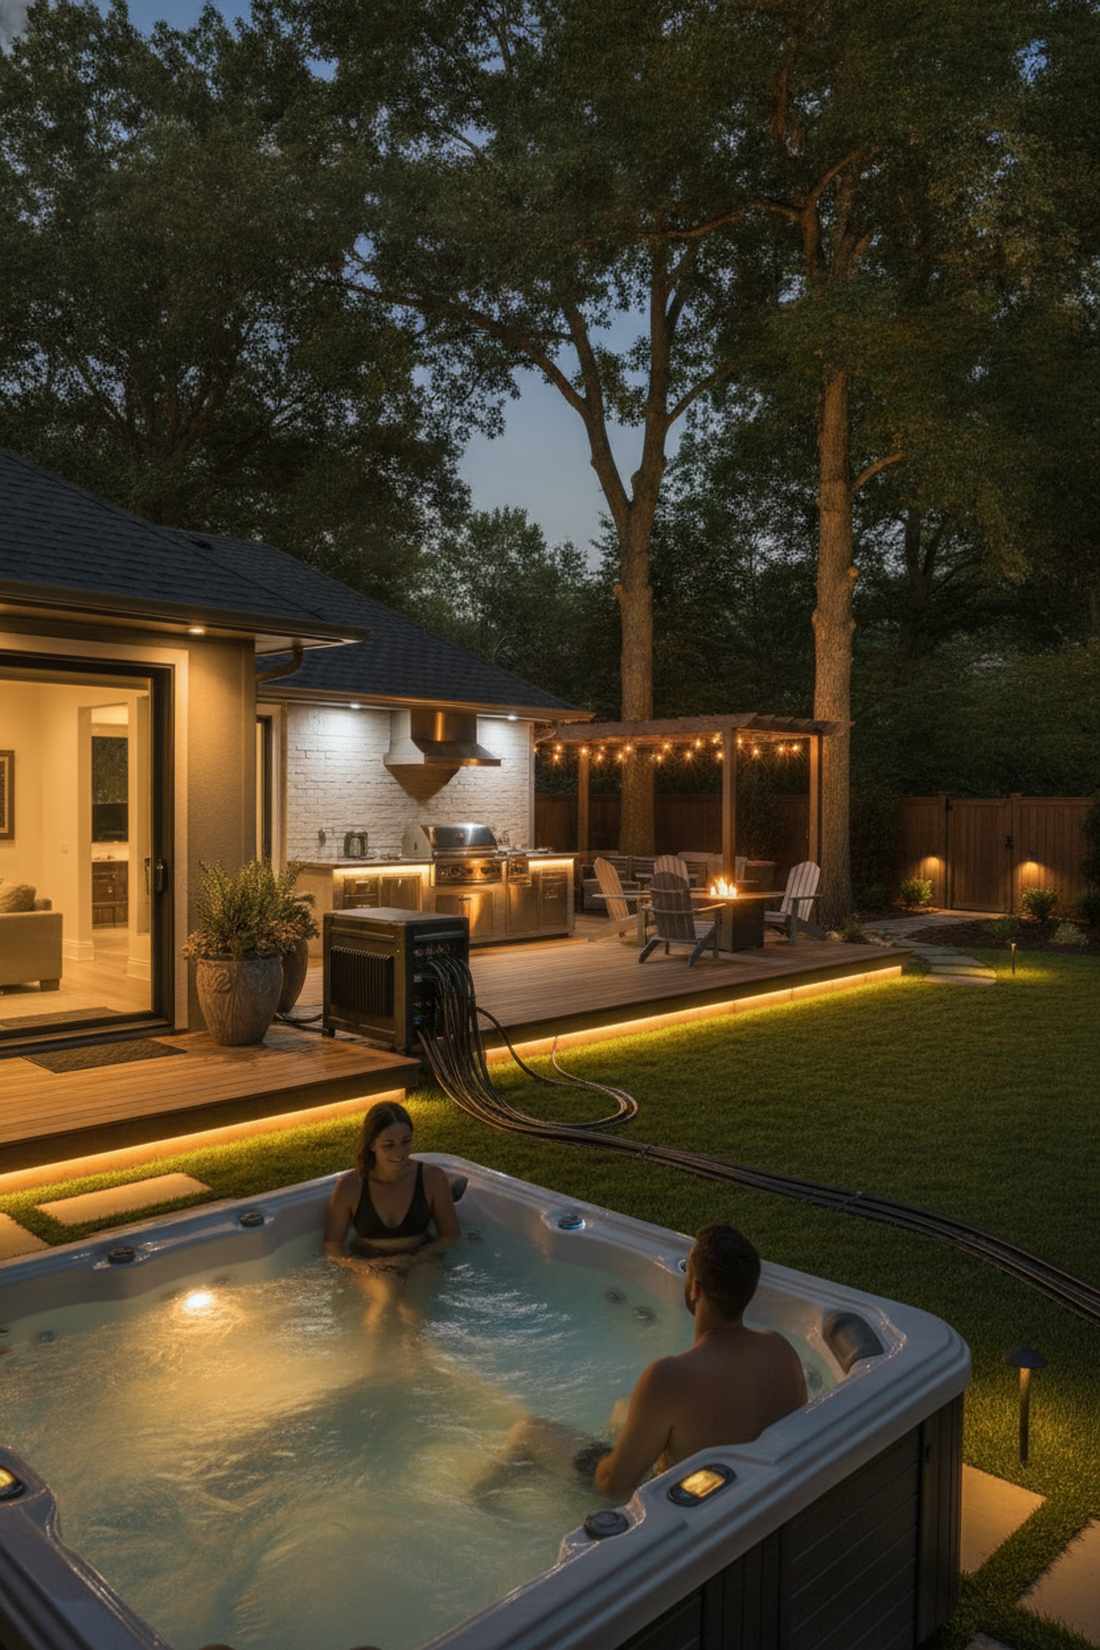
This allows you to dim the hot tub area to a romantic glow while keeping the grilling station blazing bright. Multi-channel backyard zoning creates the ultimate bespoke, high-end entertainment experience.
Wiring every single light to one master switch is what cheap builders do; splitting them into discrete zones gives a designer-level finish that rivals million-dollar mansions. Utilizing multi-tap commercial outdoor transformer kits handles the heavy lifting effortlessly.
Setting up a two-zone system runs $150–$250. Pin this if you love absolute control over your space!
- Key Materials: Multi-zone transformer, smart dimmers, 12-gauge wire
- Vibe / Style: Million-dollar control
- Difficulty: Advanced DIY
- Budget Breakdown: Zone Transformer: $180 | Wire: $40.
- Creator’s Tip: Put your path lights on Zone 1 to run all night for security, and put your tree accents on Zone 2 to turn off at midnight to save power.
- Smart Sourcing: Dual-zone low-voltage landscape transformer and heavy-duty 12/2 direct burial wire (bulk spool).
Transform Your Evening Garden Experience
By implementing these exact 43 backyard garden lights setups, you can instantly achieve a premium, high-end look without paying massive contractor markup. The secret lies in skipping generic big-box store aisles and strategically sourcing commercial-grade starter kits, bulk pack LEDs, and heavy-duty transformers. Whether you are using smart WiFi controllers to zone your patio or embedding waterproof pucks into your stream bed, utilizing these high-ROI blueprints guarantees a jaw-dropping evening transformation that dramatically increases your home’s nighttime curb appeal.
Frequently Asked Questions
What type of outdoor lighting is best for backyard gardens?
Low-voltage LED systems offer the best combination of energy efficiency, installation flexibility, and longevity for backyard gardens. Leveraging professional landscape lighting kits and a solid 12-volt transformer reduces electrical costs by 75 to 90 percent compared to line-voltage alternatives. Bulk pack LED bulbs last 25,000 hours or more and generate minimal heat. For areas without electrical access, high-lumen solar starter kits provide viable alternatives.
How many lumens do I need for backyard garden lighting?
Pathway lighting typically requires 50 to 100 lumens per fixture when using pre-cut commercial fixtures spaced 6 to 8 feet apart. Accent lighting for trees and focal features uses 200 to 400 lumens. Most residential gardens achieve an expensive evening ambiance with 2,000 to 4,000 total lumens. Utilizing a heavy-duty outdoor transformer allows you to easily scale up the brightness without stressing the system.
Should I use warm or cool LED lights for outdoor gardens?
Warm white LEDs in the 2700K to 3000K range create the most natural and inviting aesthetic for residential gardens, avoiding the cheap motel look of blue-white bulbs. These color temperatures complement high-end landscaping materials like cedar wood and natural stone. Reserve cool white LEDs strictly for UV-coated security floodlights where maximum safety visibility matters more than ambiance.
How far apart should pathway lights be spaced?
Standard pathway lights should be spaced 6 to 8 feet apart to avoid the cluttered “airport runway” effect. This spacing works perfectly using bulk pack brass pathway kits that produce 50 to 100 lumens. Adjust the distance based on path width—wider walkways benefit from staggered placement, which gives a far more custom, designer-level finish.
Are solar garden lights bright enough for pathways?
High-quality monocrystalline solar starter kits provide adequate illumination for walkways, though they typically produce lower lumen output than wired kits. Premium solar fixtures generate 5 to 50 lumens, heavily depending on direct sunlight exposure. For guaranteed, punchy brightness that lasts all night long, investing in a low-voltage LED landscape system is always the smarter long-term financial decision.
How do I prevent backyard lighting from disturbing neighbors?
Use shielded fixtures with downward-facing domed caps and full glare guards to direct light only where it belongs. Sourcing professional landscape lighting accessories allows you to install hex-louvers to completely block side-glare. Install lights on separate zones with smart outdoor dimming controls so you can easily drop the brightness near property boundaries with a tap on your phone.