Elevate your home instantly with these premium outdoor decor spring blueprints. We reveal the exact UV-resistant materials and budget breakdowns for high-end exterior transformations. Skip the generic retail traps and upgrade smarter.
Design Snapshot: Key Principles
- Color Saturation: Layer moss green, dusty pink, and muted jewel blue against warm neutral backdrops for dimensional impact.
- Vertical Interest: Use climbing vines, waterfall planters, and tiered arrangements to maximize visual height.
- Textural Contrast: Combine rattan, weathered wood, and ceramic surfaces with soft petals and flowing foliage.
- Functional Florals: Select fragrant, pollinator-friendly blooms that perform multiple sensory roles.
Floral Entry Statements That Define Spring Outdoor Decor
First impressions begin at the threshold where strategic floral placements signal seasonal transition. These entry-focused installations combine bold blooms with structural elements to anchor your outdoor aesthetic.
1. Oversized Tulip Wreath
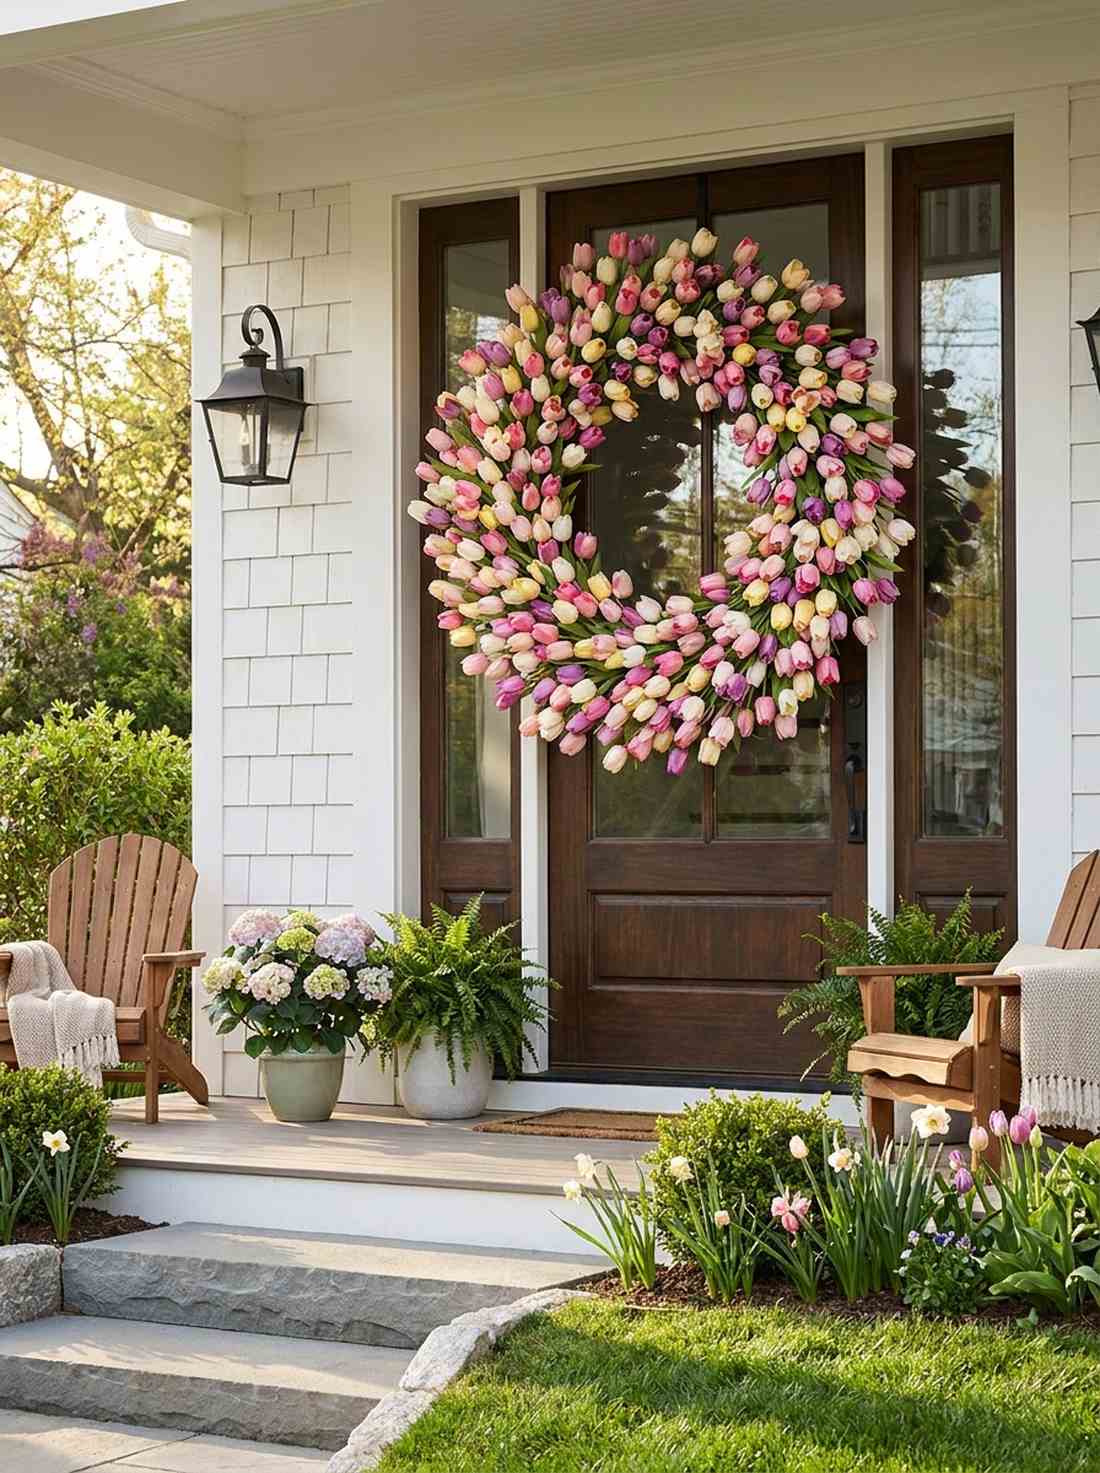
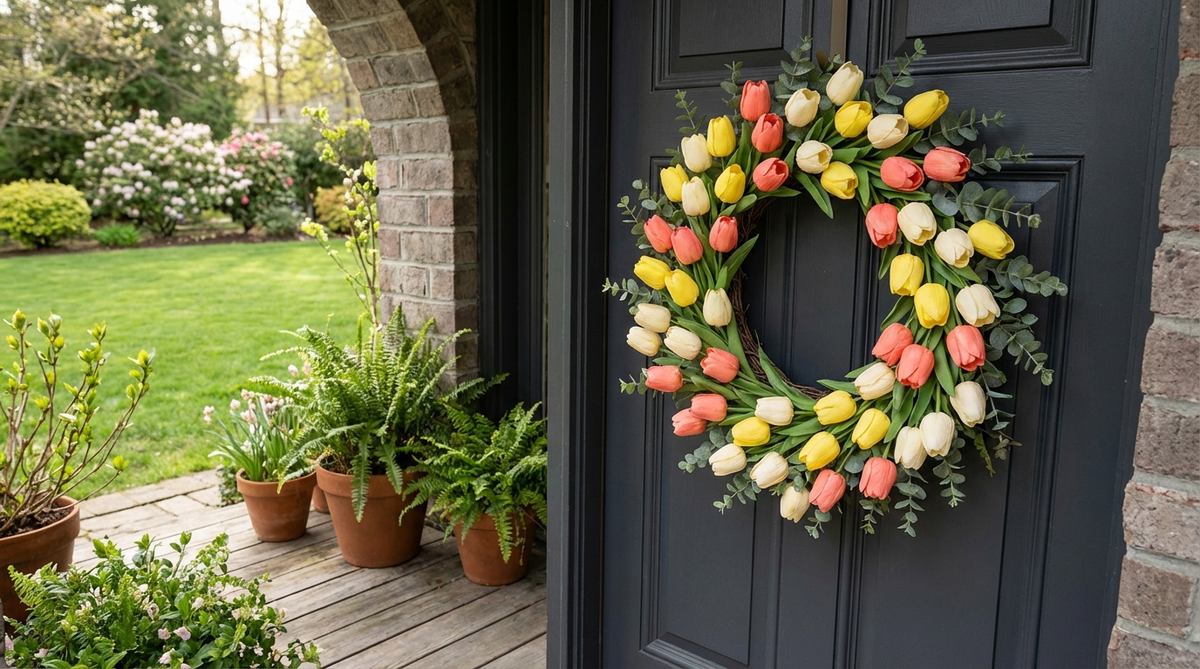
Feels like a vibrant storybook entrance you just had to stop and stare at. This bold installation functions brilliantly as a spring front door floral display for instant curb appeal.
Most homeowners settle for flimsy retail wreaths, but layering high-grade, UV-resistant artificial botanicals delivers a surprisingly premium look. By securing weatherproof silk stems tightly on a heavy-duty wire frame, you mimic expensive custom florist setups.
You can easily pull this off for around $35–$50 using bulk supplies. Pin this to your exterior styling board so you don’t lose the blueprint!
- Key Materials: Weatherproof faux tulips, 24-inch metal wire frame, floral wire.
- Vibe / Style: Bold contemporary farmhouse.
- Difficulty: Easy beginner setup.
- Budget Breakdown: Frame: $10 | Faux Florals: $30.
- Creator’s Tip: Alternate the direction of your blooms every five stems to create maximum organic volume.
- Smart Sourcing: UV-coated silk tulips (bulk pack) and pre-cut florist wire bundles.
2. Cascading Hyacinth Doorstep Display
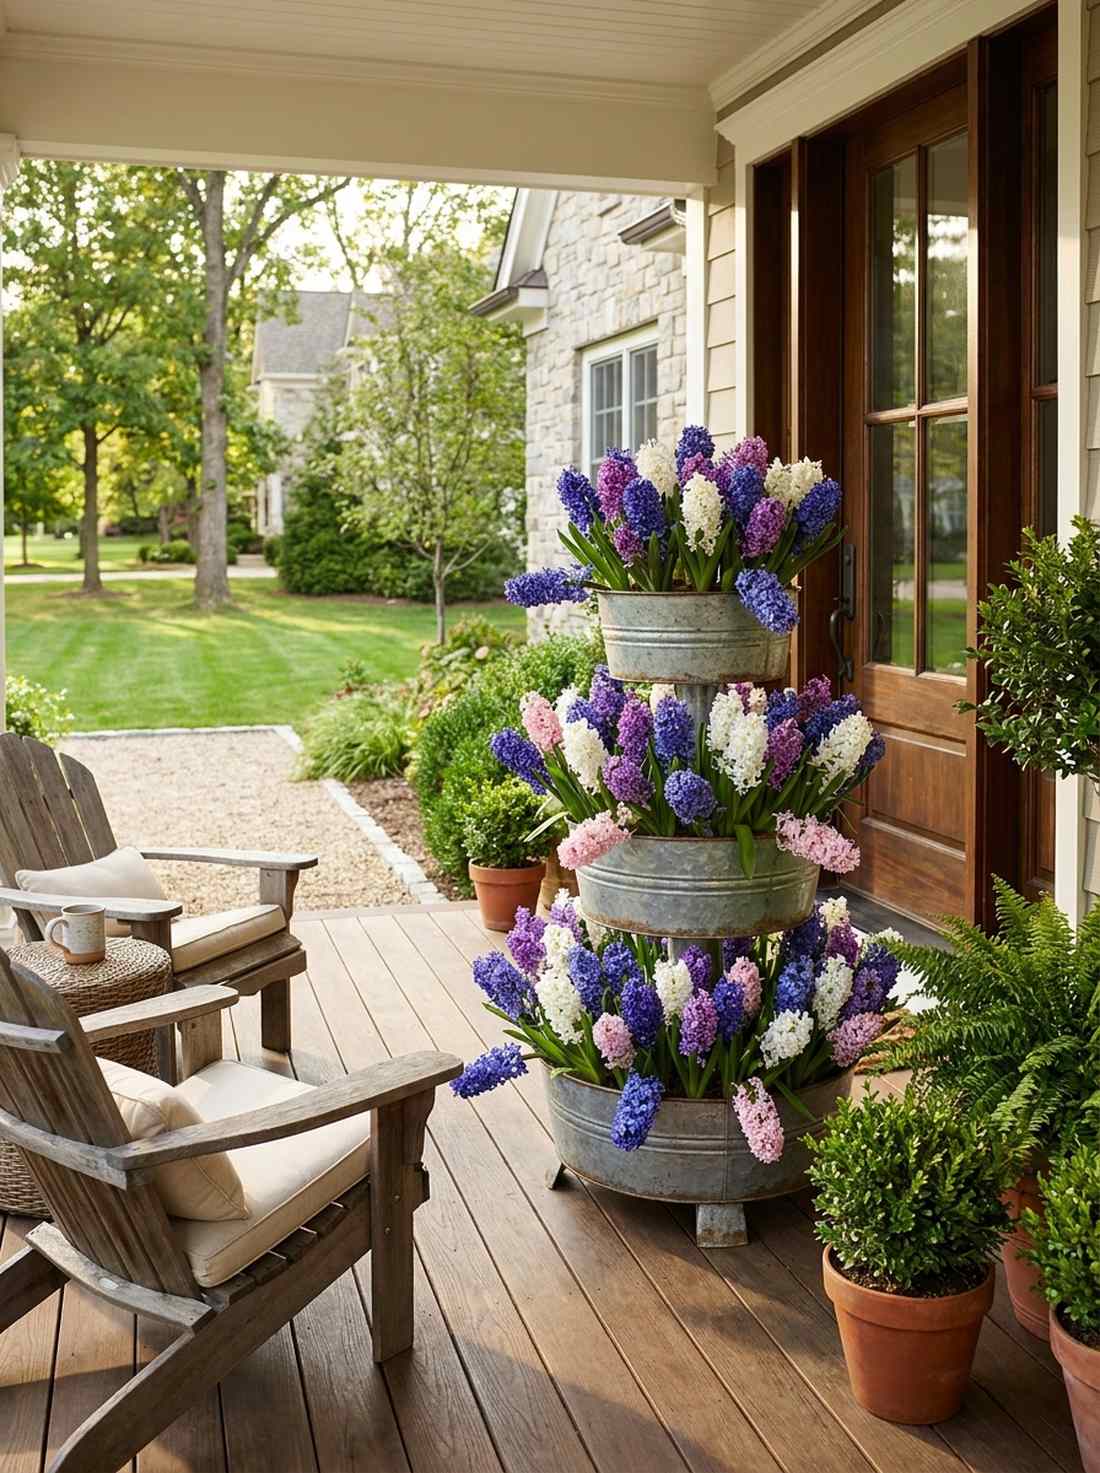
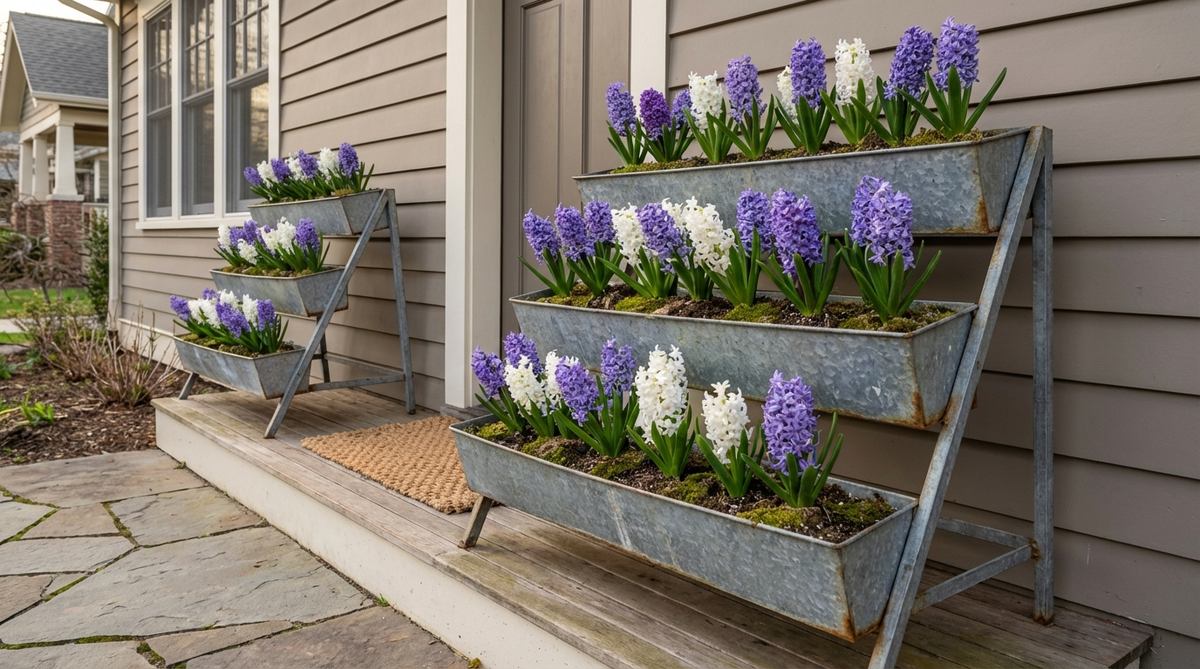
Delivers that wealthy countryside estate energy right on your front porch. This stacked floral presentation is perfect as a narrow porch space-saving garden.
Avoid the amateur mistake of flat ground planting; building upward gives a designer-level finish. Utilizing tiered galvanized planters packed with aromatic bulbs guarantees a striking visual impact that punches way above its weight class.
Expect to spend about $40–$60 depending on your planter choice. It’s a fast upgrade that completely changes the entrance vibe.
- Key Materials: 3-tier galvanized metal stand, premium potting mix, hyacinth bulbs.
- Vibe / Style: Rustic English cottage.
- Difficulty: Moderate (requires synchronized planting).
- Budget Breakdown: Tiered Planter: $35 | Bulbs & Soil: $20.
- Creator’s Tip: Always water from the bottom tray to prevent devastating crown rot in the upper tiers.
- Smart Sourcing: Pre-drilled galvanized stacking planters and slow-release bulb fertilizer kits.
3. Daisy Chain Mailbox Garland
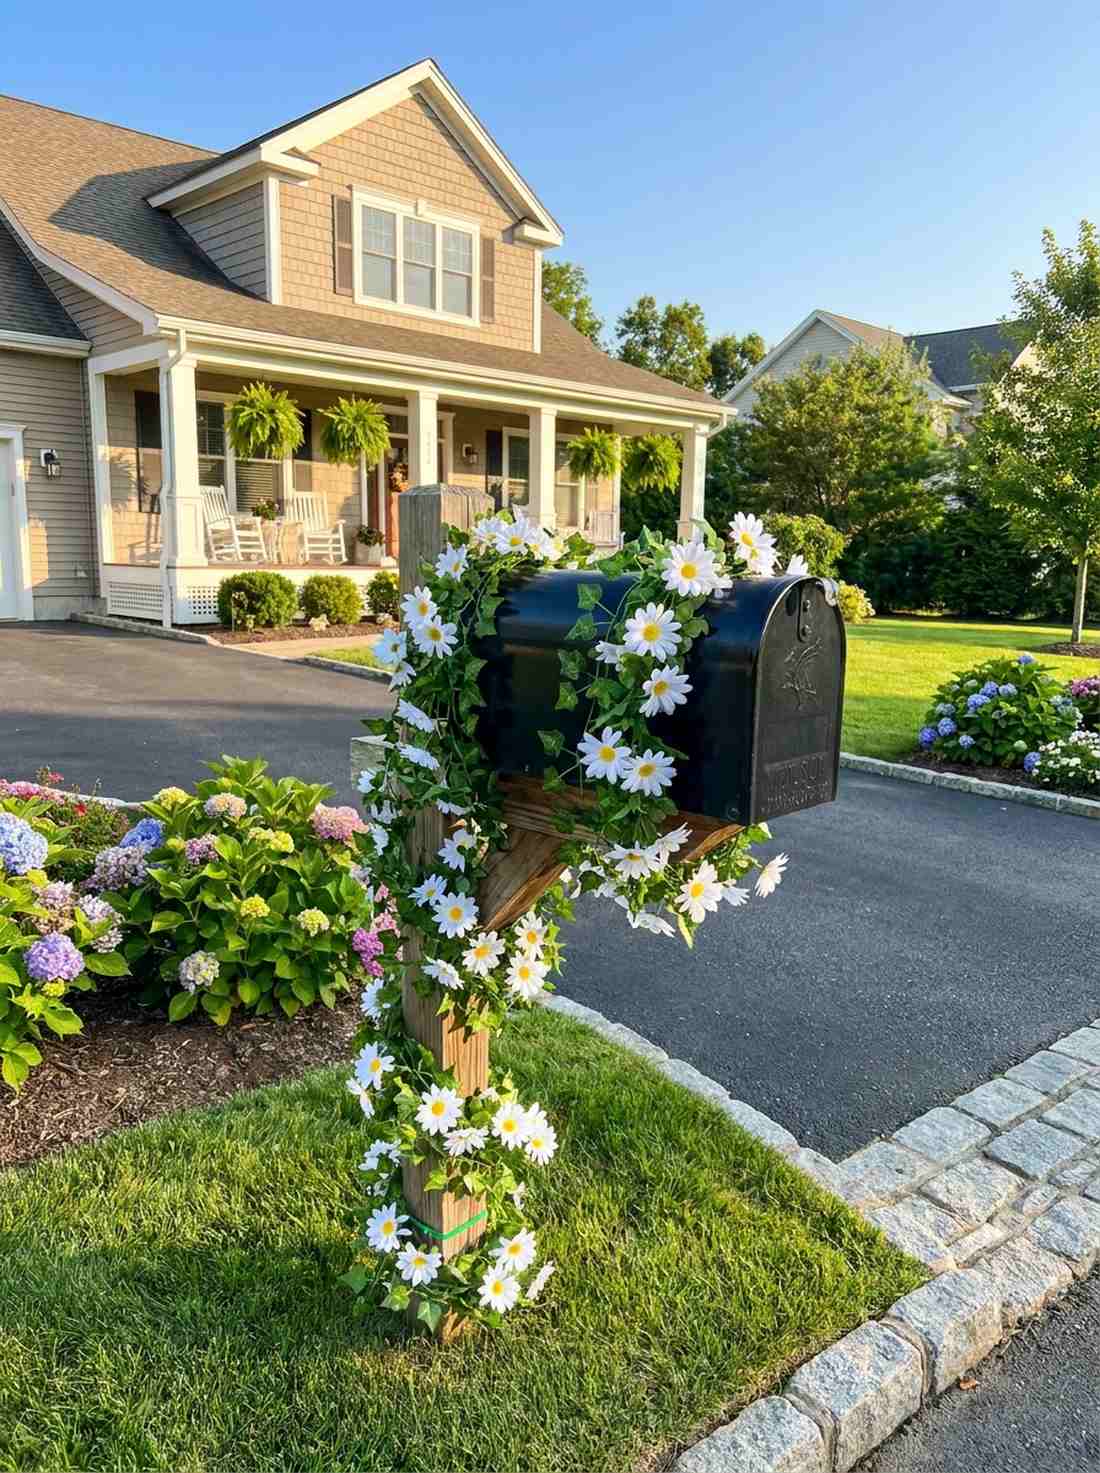
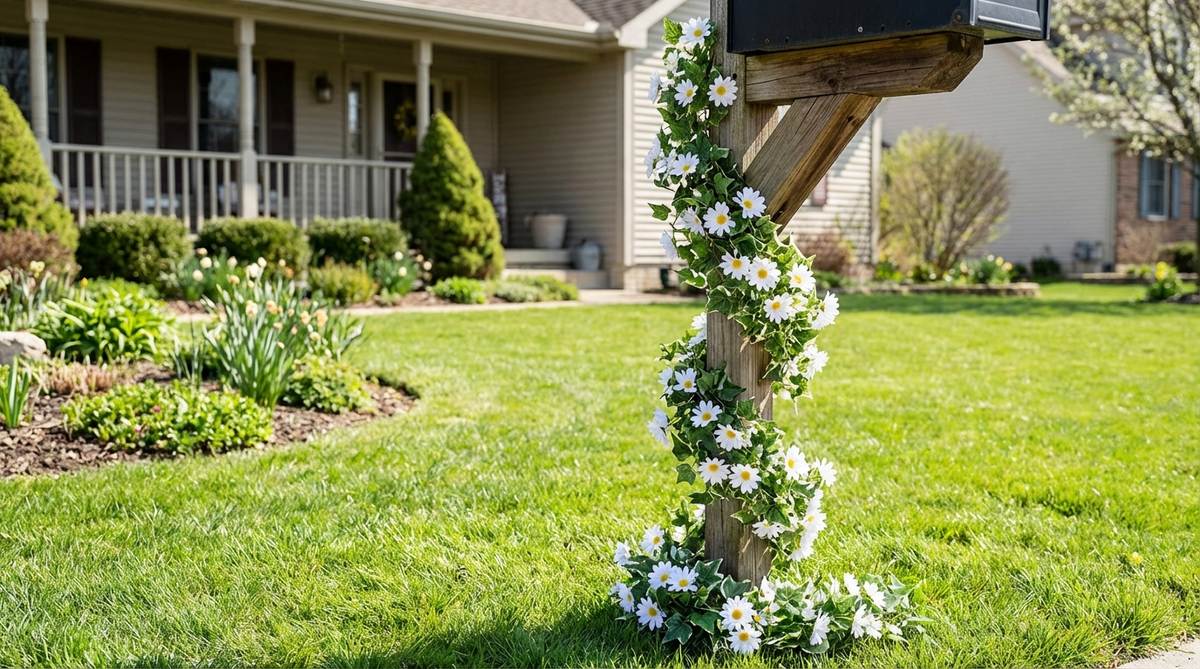
Radiates a cheerful, whimsical charm that instantly upgrades your property line. This weather-proof floral wrap is the ultimate curb appeal mailbox upgrade for sunny driveways.
While fresh vines die quickly near hot asphalt, commercial-grade artificials look far more expensive than they are. Weaving UV-treated silk daisies with durable ivy strands ensures this roadside highlight survives blistering afternoon sun.
This durable installation costs roughly $25–$40 to complete. Save this to your DIY weekend exterior board!
- Key Materials: 6-foot artificial ivy garland, UV-treated silk daisies, zip ties.
- Vibe / Style: Playful suburban chic.
- Difficulty: Very easy.
- Budget Breakdown: Garland Base: $15 | Floral Add-ins: $15.
- Creator’s Tip: Secure the garland at exactly 12-inch intervals with hidden green zip ties to prevent sagging after heavy rain.
- Smart Sourcing: UV-resistant artificial ivy rolls and heavy-duty outdoor zip ties.
4. Rain Boot Planter Trio

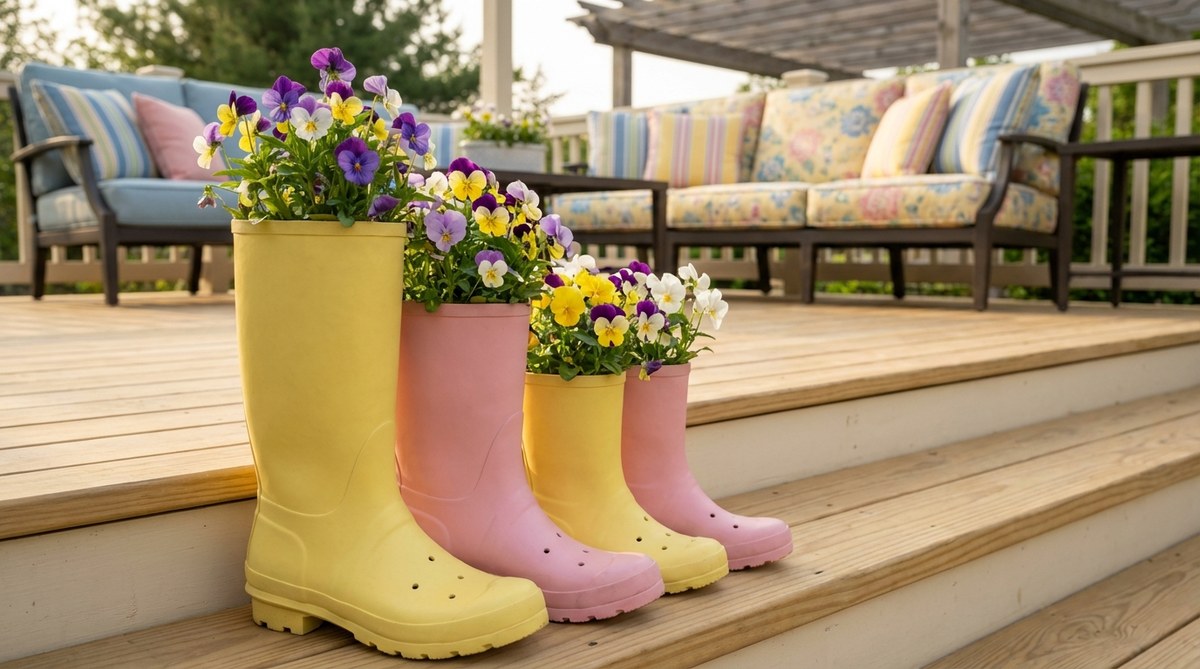
Feels like a nostalgic childhood memory brought back to life as chic garden art. These vibrant upcycled containers serve as an adorable porch step flower display.
Repurposing old items often looks messy, but intentionally color-blocking rubber boots achieves a highly curated aesthetic. Drilling strategic drainage and using lightweight moisture-control soil completely prevents the roots from drowning.
You can execute this quirky project for under $20 if you already own old boots.
- Key Materials: Brightly colored rubber rain boots, power drill, pansy starters.
- Vibe / Style: Quirky vintage garden.
- Difficulty: Easy beginner project.
- Budget Breakdown: Thrifted Boots: $10 | Flowers & Soil: $10.
- Creator’s Tip: Weigh down the toes with a handful of river rocks before adding soil so they don’t tip over in high winds.
- Smart Sourcing: Moisture-control potting soil mix and bulk river rock fillers.
Most people get their front porch styling completely wrong… until they try the exact vertical layout coming up next.
5. Lavender Bundle Door Hanger
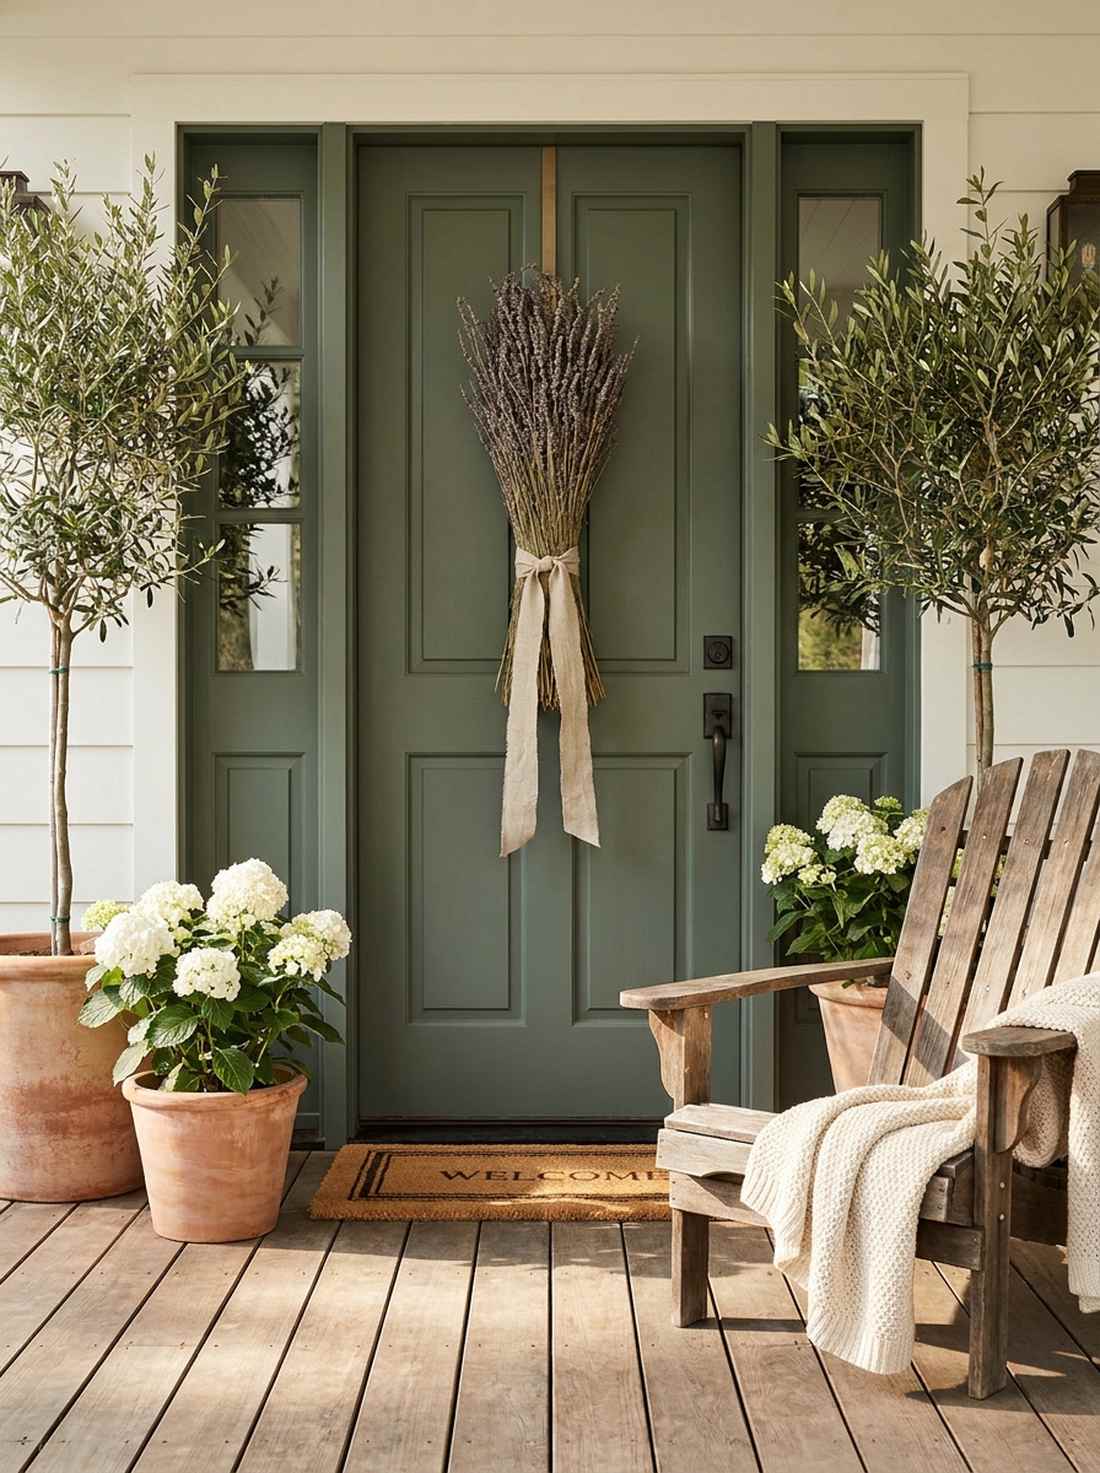
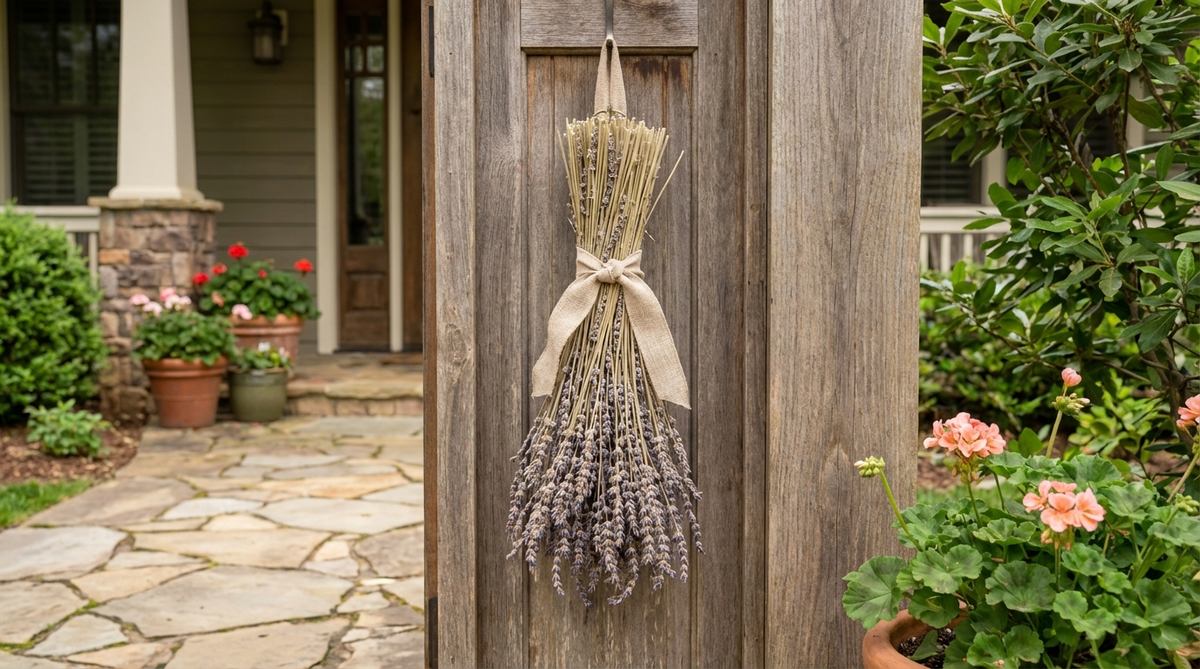
Exudes the sophisticated calm of a secluded French countryside villa. This fragrant, slender accent is a flawless narrow front door decor solution.
Ditching the traditional circular wreath for a vertical bound arrangement delivers a surprisingly high-end minimalist look. Tying dried, peak-harvest lavender with natural raw linen ribbon creates a textural masterpiece that smells incredible.
This minimalist setup will only set you back about $15–$25. Highly recommended for a quick weekend win.
- Key Materials: Dried culinary-grade lavender stems, raw linen ribbon, floral tape.
- Vibe / Style: French provincial minimalist.
- Difficulty: Quick 10-minute craft.
- Budget Breakdown: Dried Lavender: $15 | Linen Ribbon: $5.
- Creator’s Tip: Give the bundle a gentle squeeze once a week to crush a few buds and release a fresh wave of essential oils.
- Smart Sourcing: Pre-dried bulk lavender bundles and frayed-edge linen ribbon spools.
6. Flowering Window Box Canopy
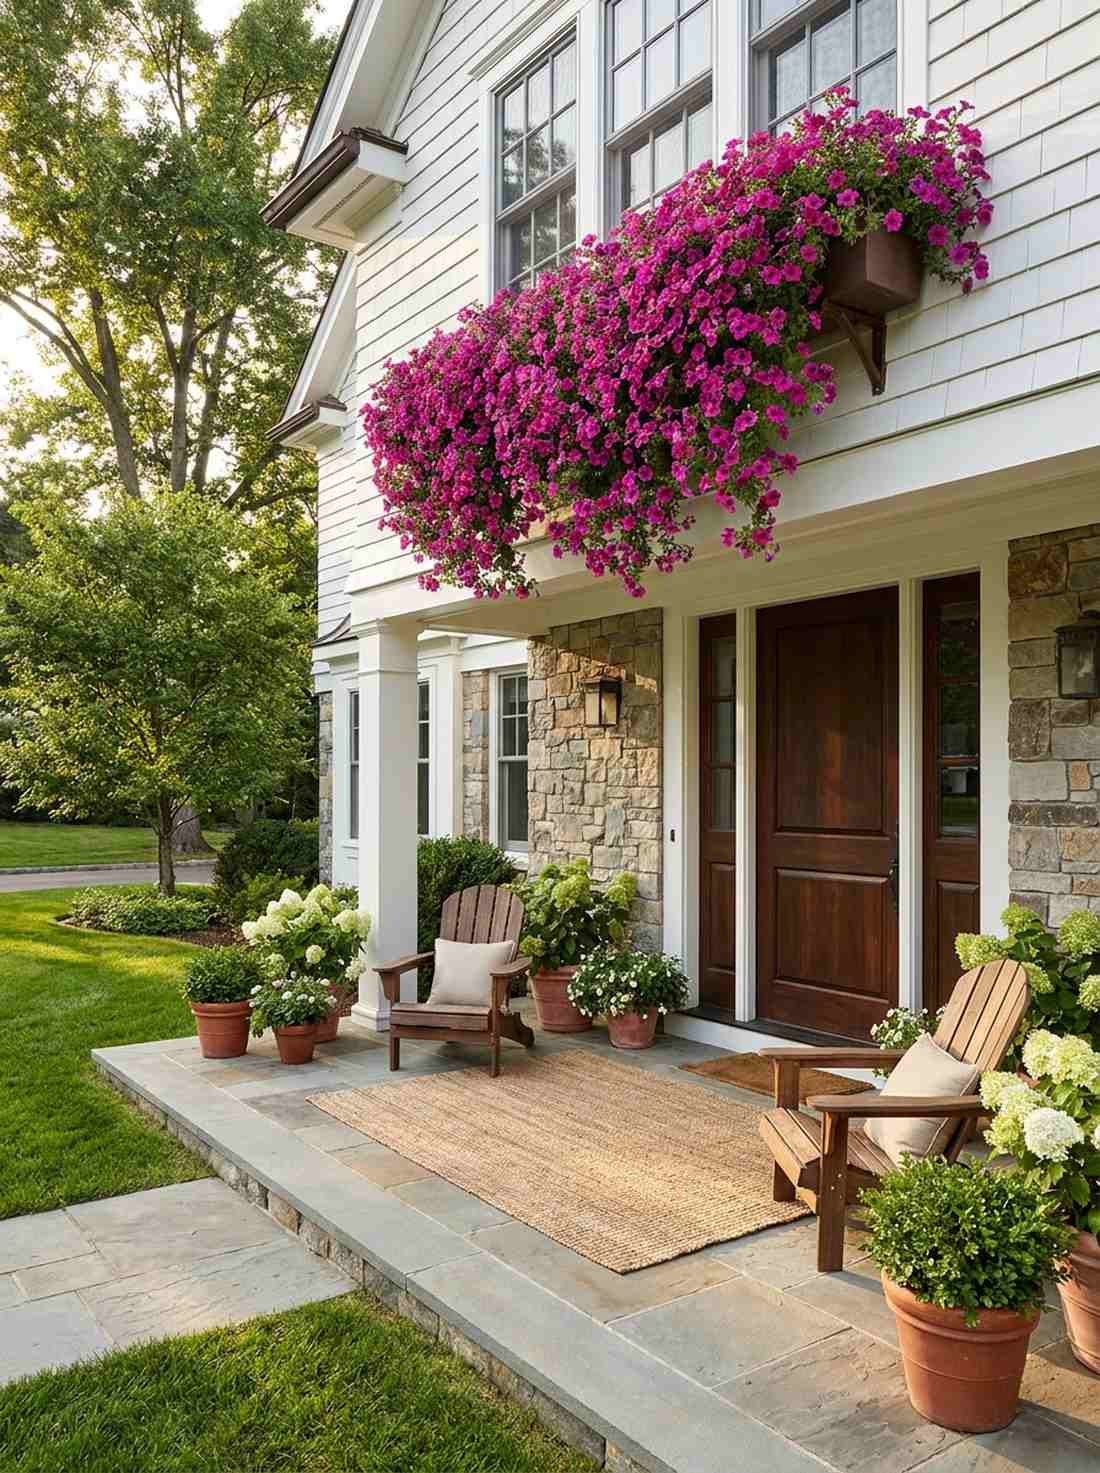
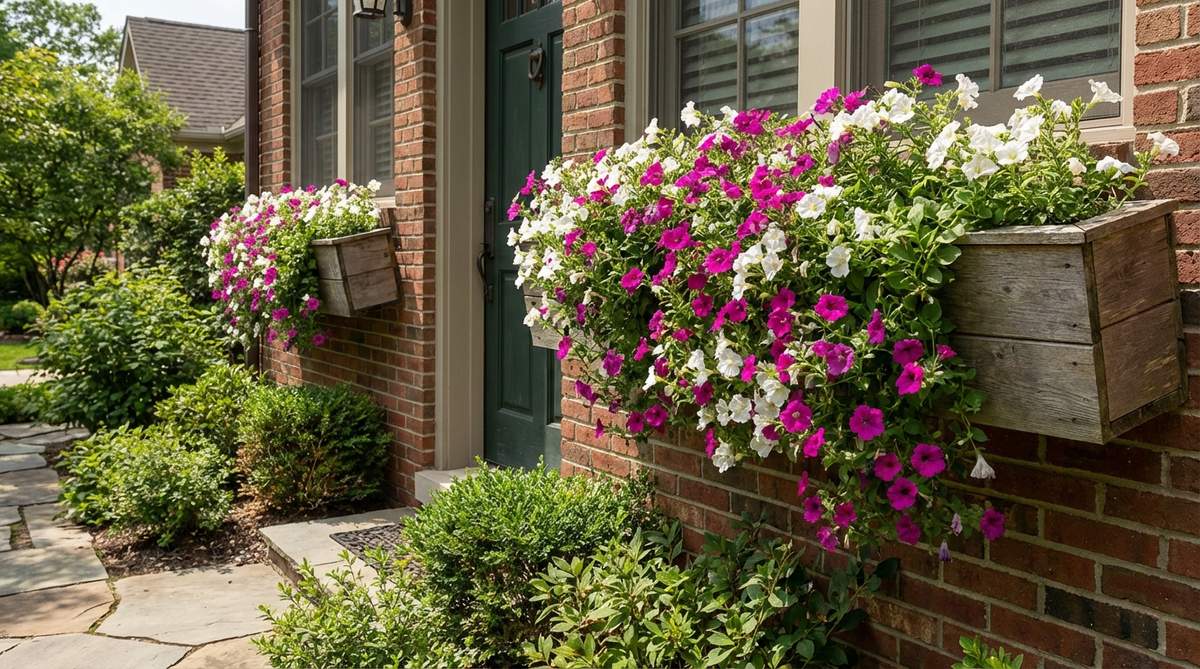
Creates a dramatic, spilling waterfall of color that softens harsh architectural lines. This cascading setup is the definitive over-door floral canopy for grand entrances.
Standard window boxes tend to look flat, but engineering a forward-tilted mount gives a designer-level finish with massive visual volume. Utilizing trailing petunias guarantees a relentless flush of magenta that naturally disguises the container.
Building this lush canopy costs around $50–$75, depending on the box hardware. Pin this to your curb appeal inspiration board!
- Key Materials: 36-inch window box, heavy-duty mounting brackets, trailing petunias.
- Vibe / Style: Lush botanical estate.
- Difficulty: Advanced (requires secure drilling).
- Budget Breakdown: Box & Hardware: $40 | Trailing Plants: $30.
- Creator’s Tip: Install the brackets with a subtle 3-inch forward tilt to force water runoff and encourage frontward floral cascading.
- Smart Sourcing: Self-watering rectangular planters and rust-proof masonry wall brackets.
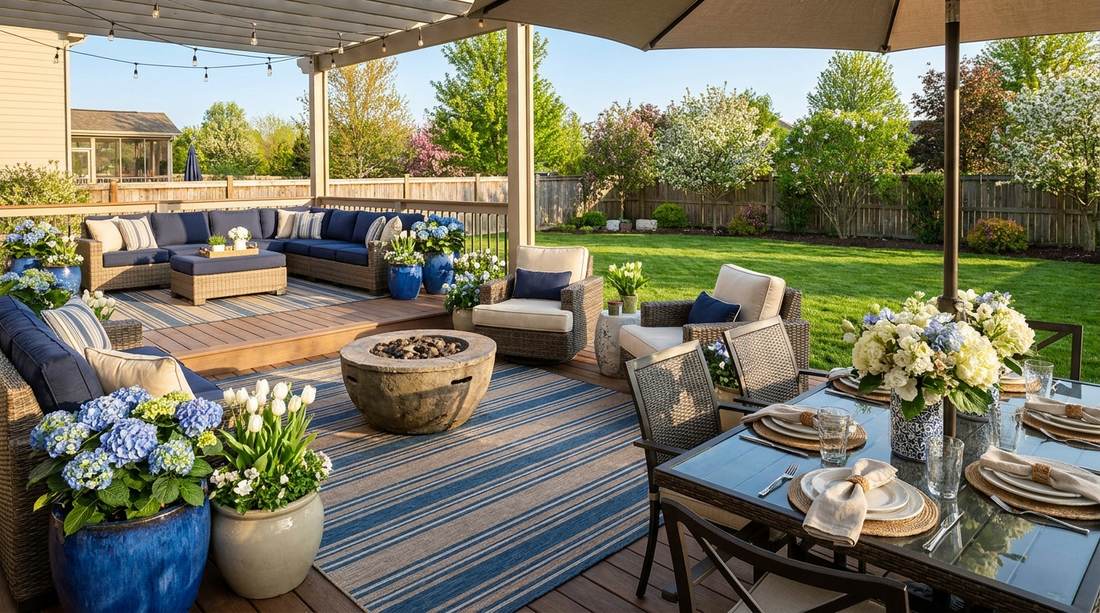
Patio Color Infusions for Spring Outdoor Decor Energy
Hardscaping provides the canvas for strategic color deployment that transforms neutral zones into vibrant gathering spaces. Designers in 2026 favor saturated hues applied through portable elements that allow seasonal rotation.
7. Oxblood Accent Wall
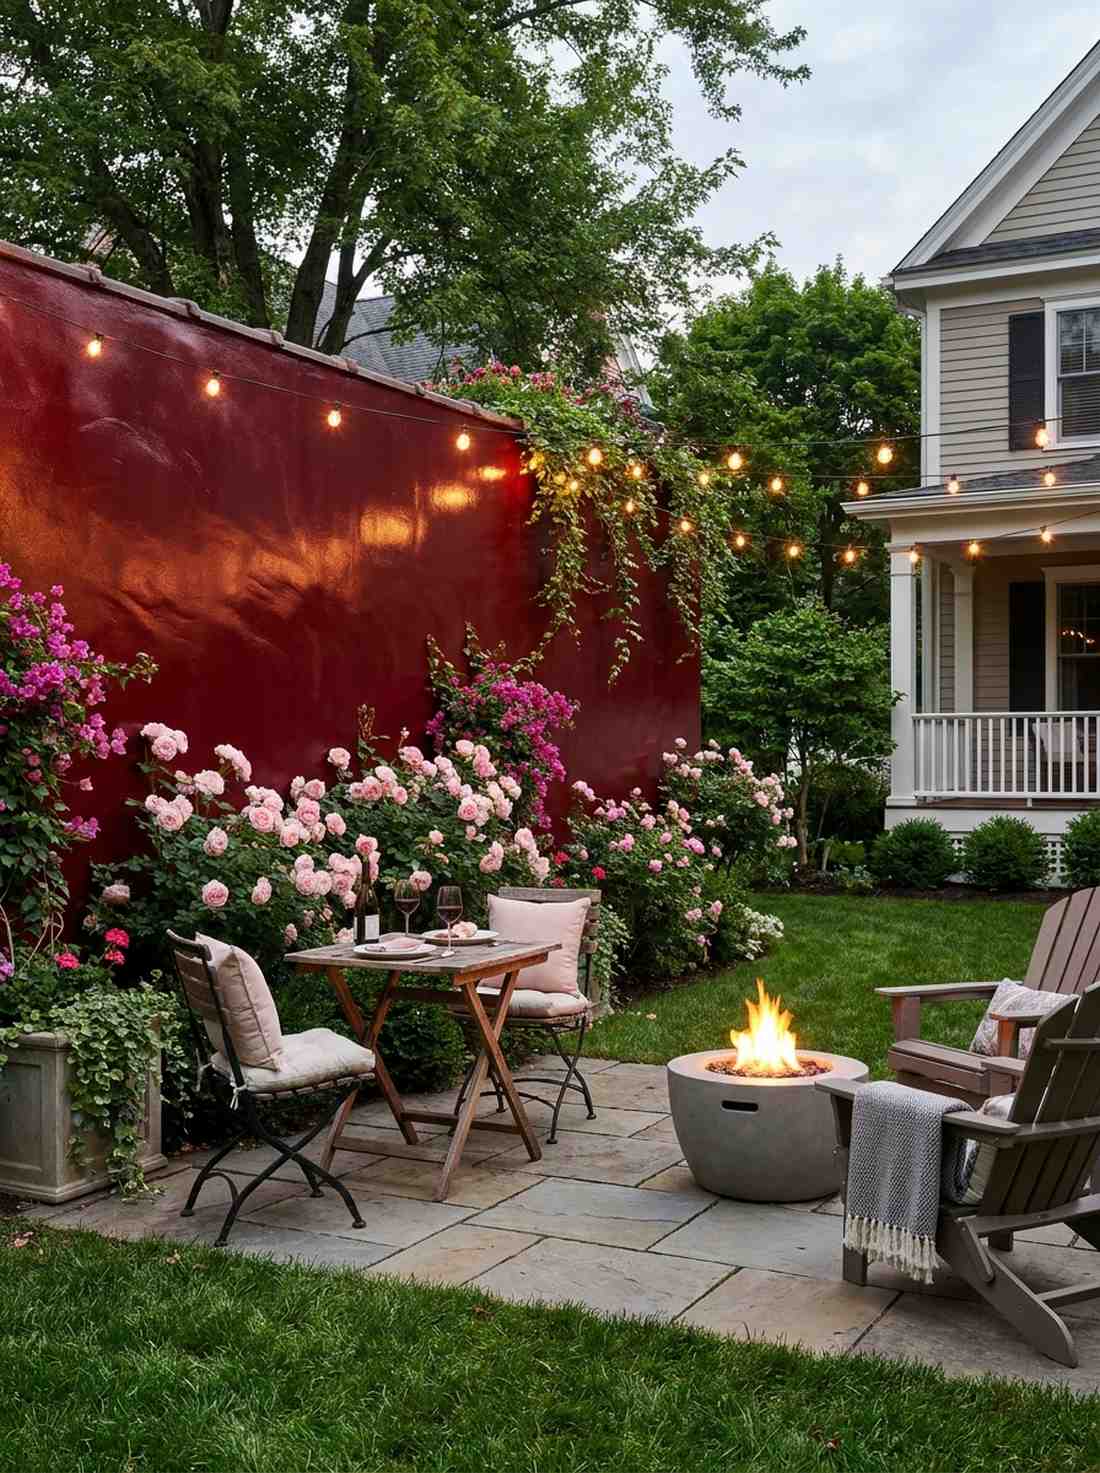
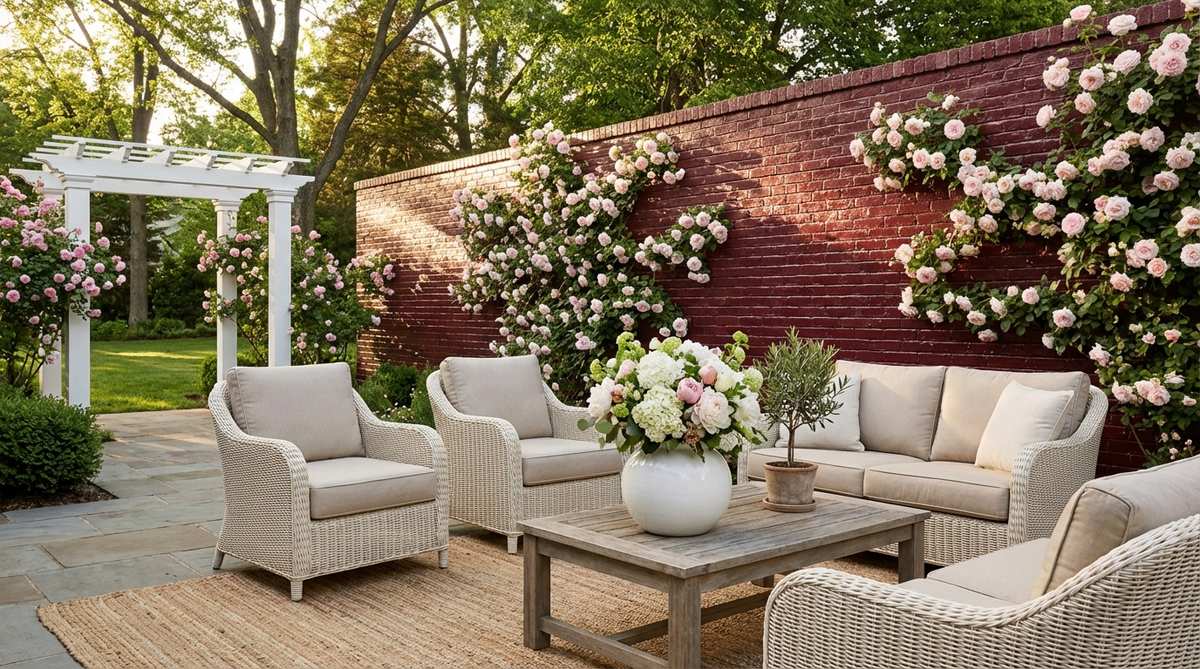
Feels like stepping into an exclusive, dimly lit luxury courtyard cafe. This rich, dramatic paint application is ideal for a small patio backdrop upgrade.
Fear of dark colors keeps most patios looking sterile, but a single deep oxblood plane looks far more expensive than it is. Using high-gloss exterior enamel creates sweeping, reflective light pools that beautifully contrast against soft pink botanicals.
A gallon of premium paint makes this a stunning $40–$60 transformation.
- Key Materials: High-gloss exterior masonry paint, heavy-nap rollers, painter’s tape.
- Vibe / Style: Moody modern luxury.
- Difficulty: Moderate weekend project.
- Budget Breakdown: Premium Paint: $40 | Supplies: $15.
- Creator’s Tip: Scrub the brick with a wire brush and TSP substitute before painting; skipping this guarantees peeling within a year.
- Smart Sourcing: Exterior masonry bonding primer and high-gloss weather-seal paint.
8. Moss Green Planter Cluster
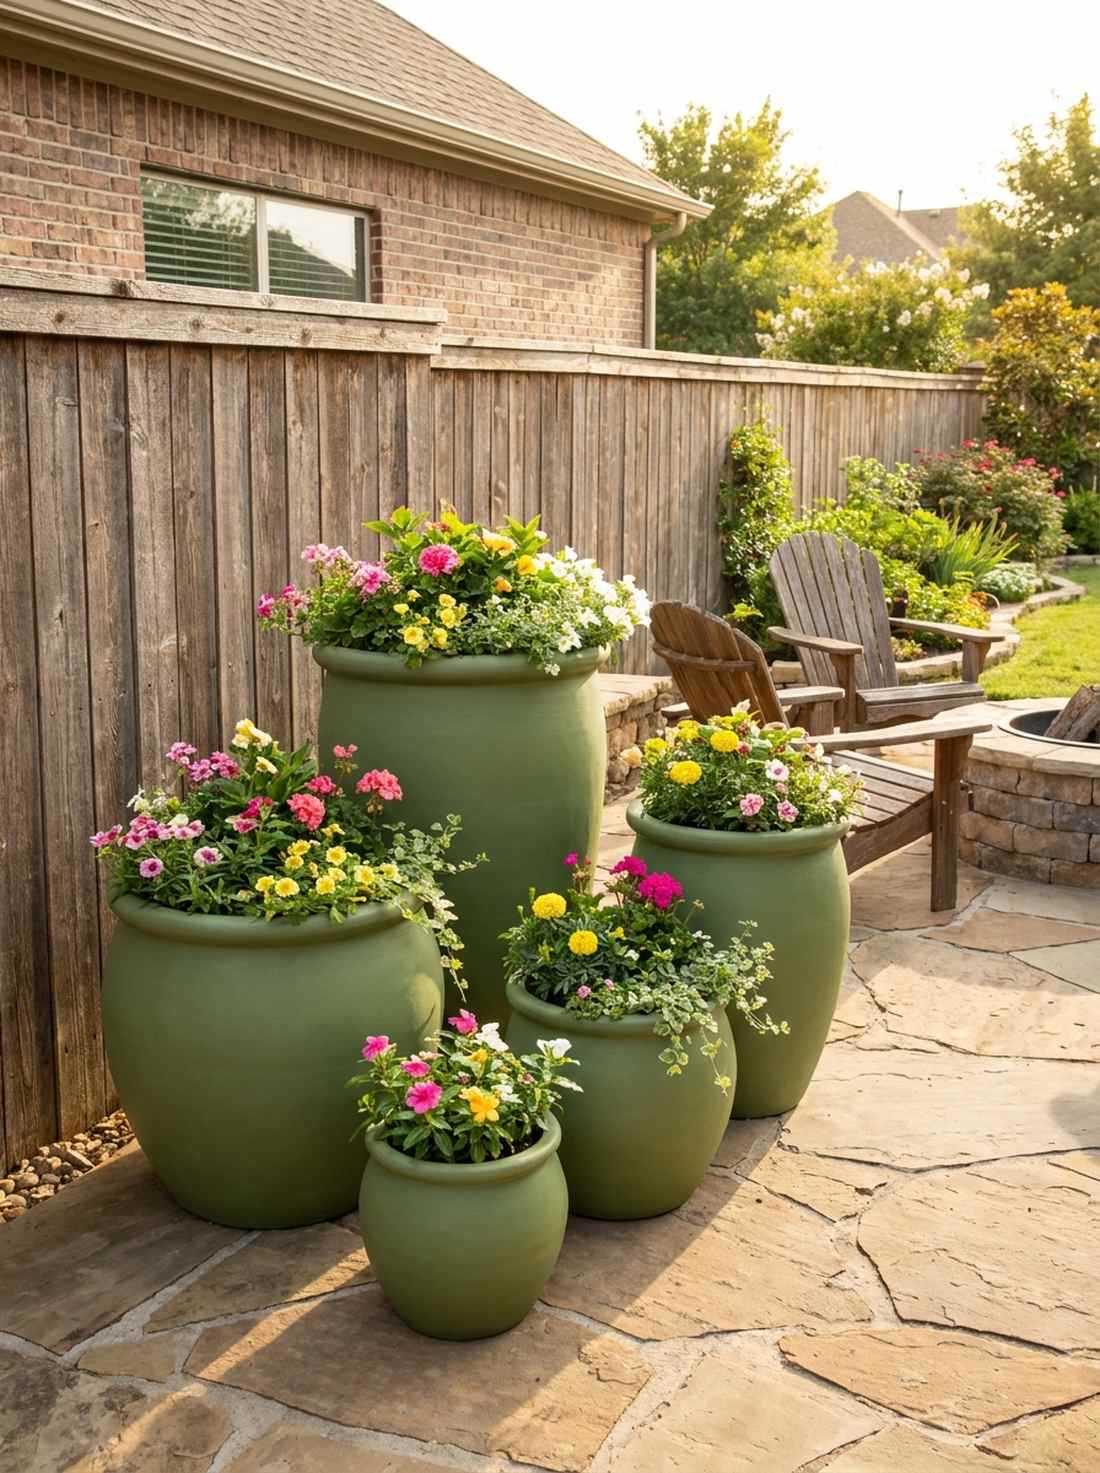
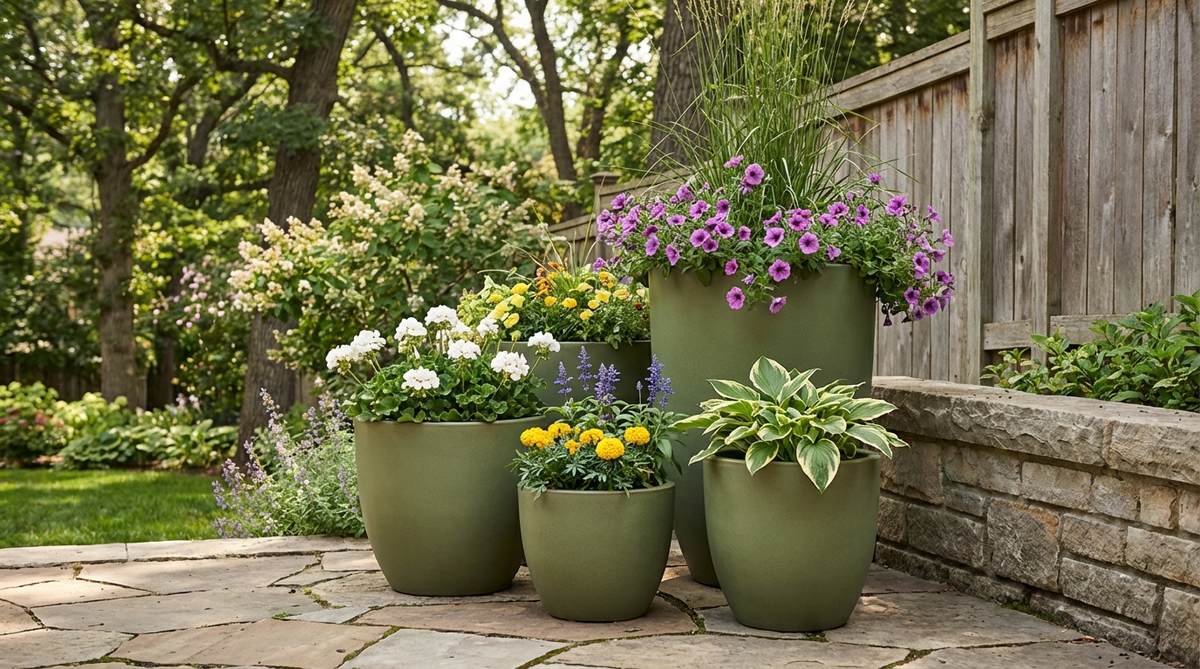
Presents a calm, grounded aesthetic that blends seamlessly into the surrounding nature. This monochromatic grouping works wonders as a patio corner space filler.
Mismatched pots look chaotic, but unifying varied sizes with a matte green finish delivers a surprisingly premium look. The earthy undertones of the ceramic force the bright floral blooms to visually pop forward, avoiding aesthetic clutter.
Achieve this designer grouping for roughly $60–$90 using thrifted pots and quality spray paint. Pin this if you love organized, earthy aesthetics.
- Key Materials: 5 graduated ceramic pots, matte moss green exterior spray paint.
- Vibe / Style: Organic modern minimalist.
- Difficulty: Easy.
- Budget Breakdown: Thrifted Pots: $40 | Matte Spray Paint: $20.
- Creator’s Tip: Always arrange them in odd numbers (3, 5, or 7) with the tallest piece anchoring the back corner.
- Smart Sourcing: Matte outdoor spray paint (bulk pack) and pre-cut drainage mesh pads.
💡 Must-Have Supplies for High-End Setups
To build these setups faster and ensure they last, skip the generic craft aisles and invest in the right foundational kits.
- Base & Support: Heavy-duty rust-proof mounting brackets (bulk pack)
- Setup Tools: Miniature garden supplies and specialized floral wire kits
- Weather/Durability Protection: UV-resistant clear acrylic sealant sprays
This next setup is ridiculously cheap but looks like a $1,000 custom designer arrangement…
9. Dusty Pink Bistro Set
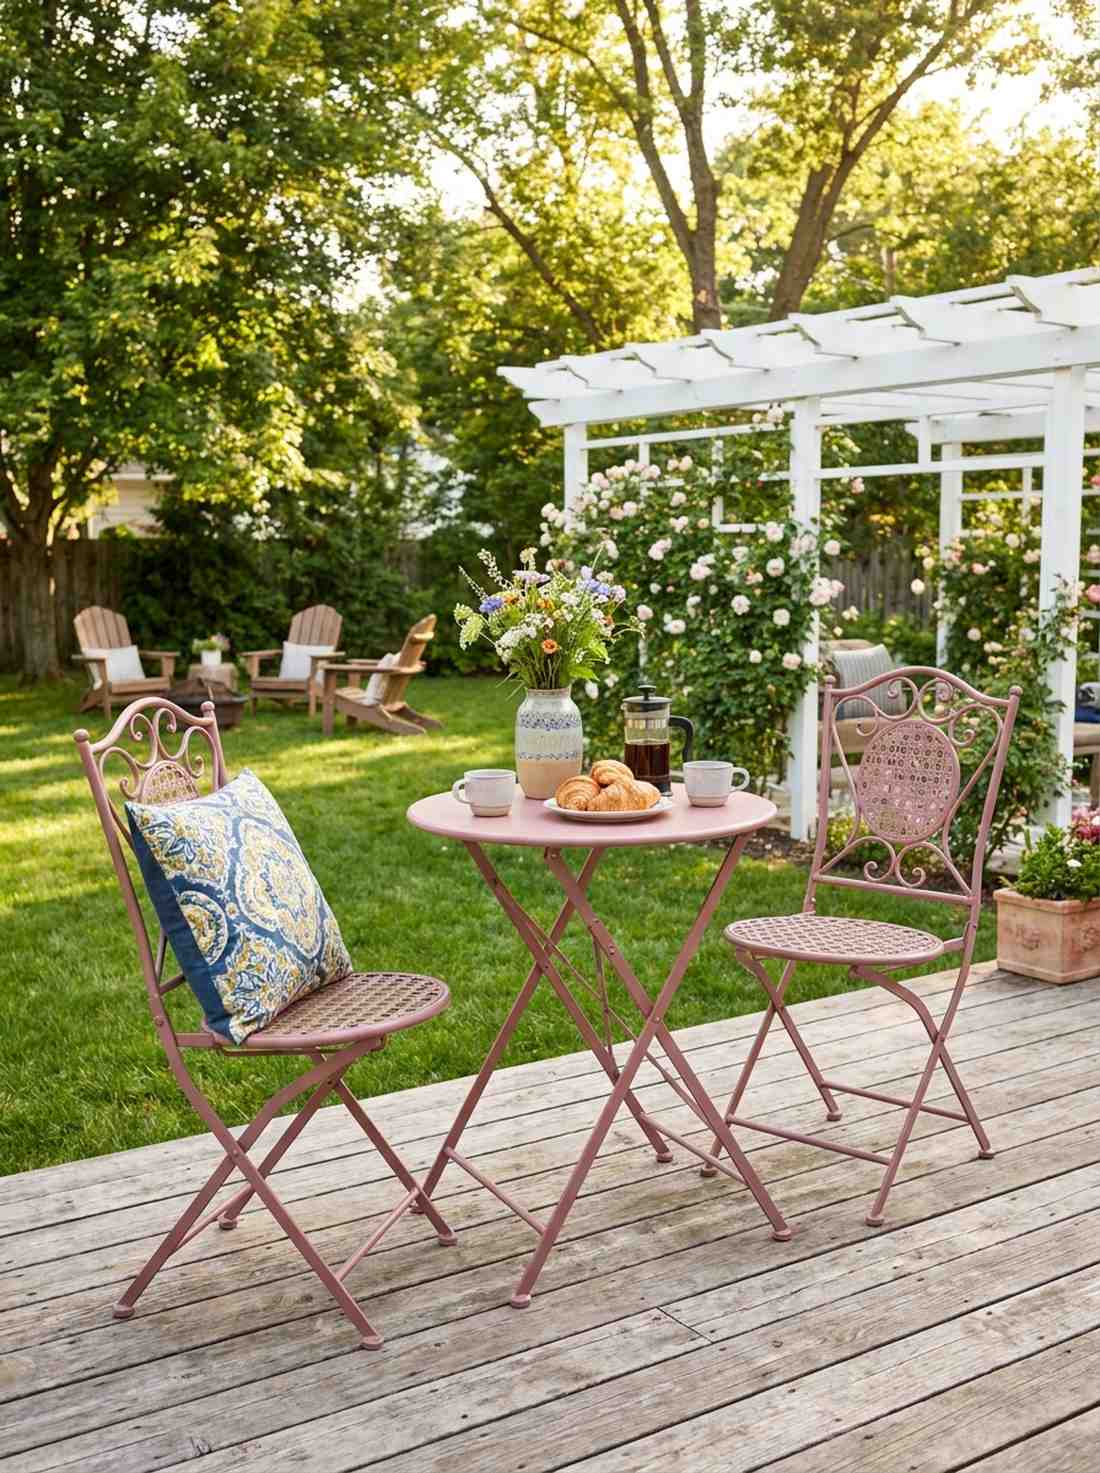
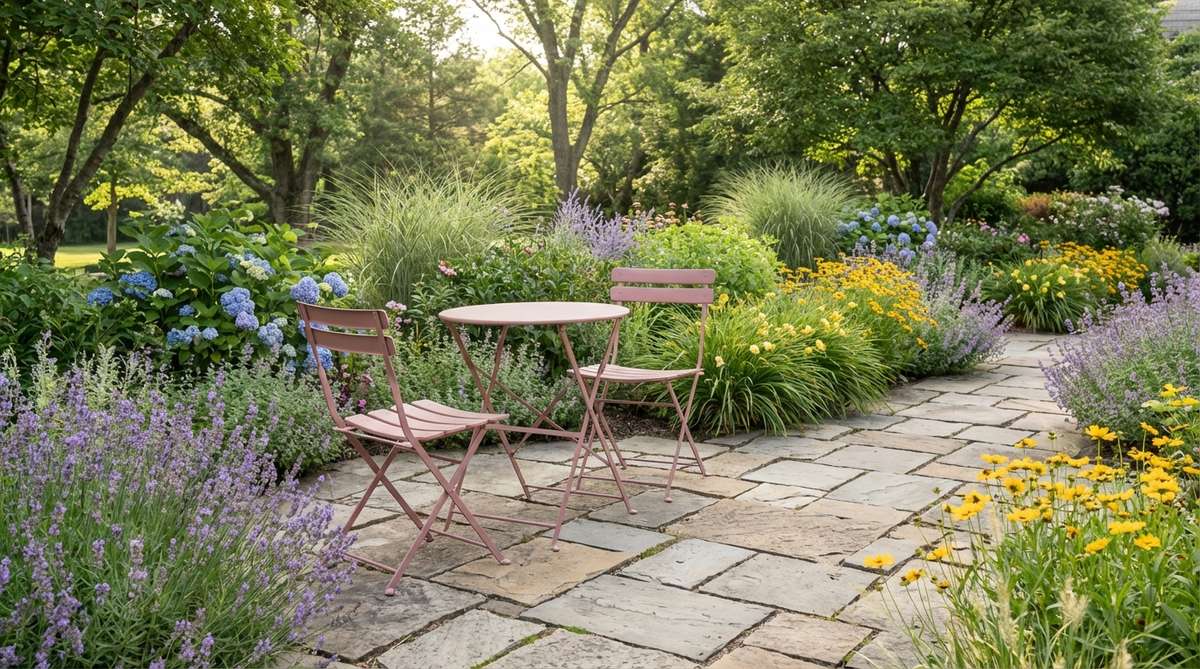
Brings a soft, romantic Parisian cafe vibe straight to your backyard. This colorful hardware flip is the perfect balcony breakfast nook idea.
Throwing away rusted metal furniture is a costly mistake when powder-coated style paint gives a designer-level finish for pennies. The muted pink tone acts as a warm neutral, effortlessly complementing both cool blues and bright yellows in your garden.
You can completely rehab an old set for about $30 in materials.
- Key Materials: Metal bistro set, wire brush, rust-inhibiting dusty pink spray paint.
- Vibe / Style: Parisian romance.
- Difficulty: Moderate (prep work is key).
- Budget Breakdown: Rust Converter: $10 | Color Paint: $20.
- Creator’s Tip: Apply two coats of a UV-protective clear sealant after the color dries to lock in the vibrancy against harsh sunlight.
- Smart Sourcing: Rust-reforming spray primers and UV-resistant clear coat sprays.
10. Striped Outdoor Rug
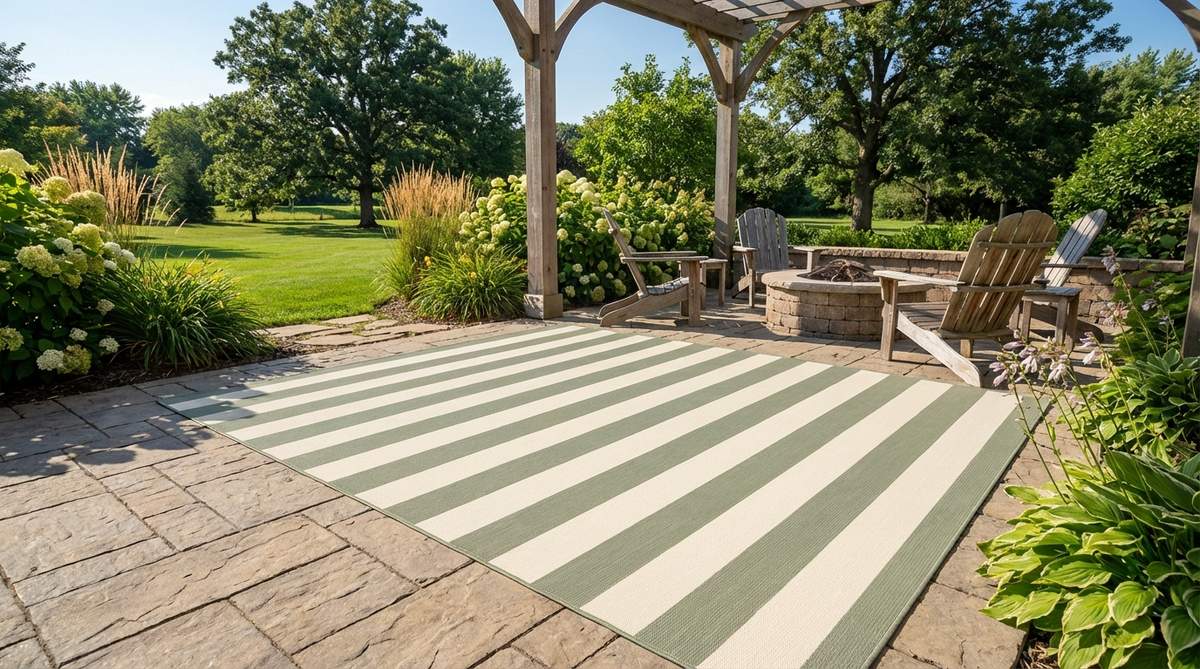
Instantly anchors floating furniture to create a cozy, defined outdoor living room. This geometric textile trick is a brilliant large patio zoning solution.
Bare concrete feels cold, but rolling out a UV-treated polypropylene rug looks far more expensive than it is. The alternating cream and sage directional stripes trick the eye, making cramped outdoor spaces appear significantly wider and more intentional.
Expect to invest $70–$120 for a high-quality, weather-resistant rug. Save this for your spring outdoor decor planning phase!
- Key Materials: 8×10 polypropylene outdoor rug, heavy-duty rug pad.
- Vibe / Style: Preppy coastal chic.
- Difficulty: Zero-effort setup.
- Budget Breakdown: Rug: $90 | Rug Tape/Pad: $20.
- Creator’s Tip: Hose it down bi-weekly and let it bake in the sun to prevent pollen and mildew from embedding in the fibers.
- Smart Sourcing: Fade-resistant polypropylene patio rugs and weatherproof outdoor rug tape.
11. Cobalt Ceramic Side Tables
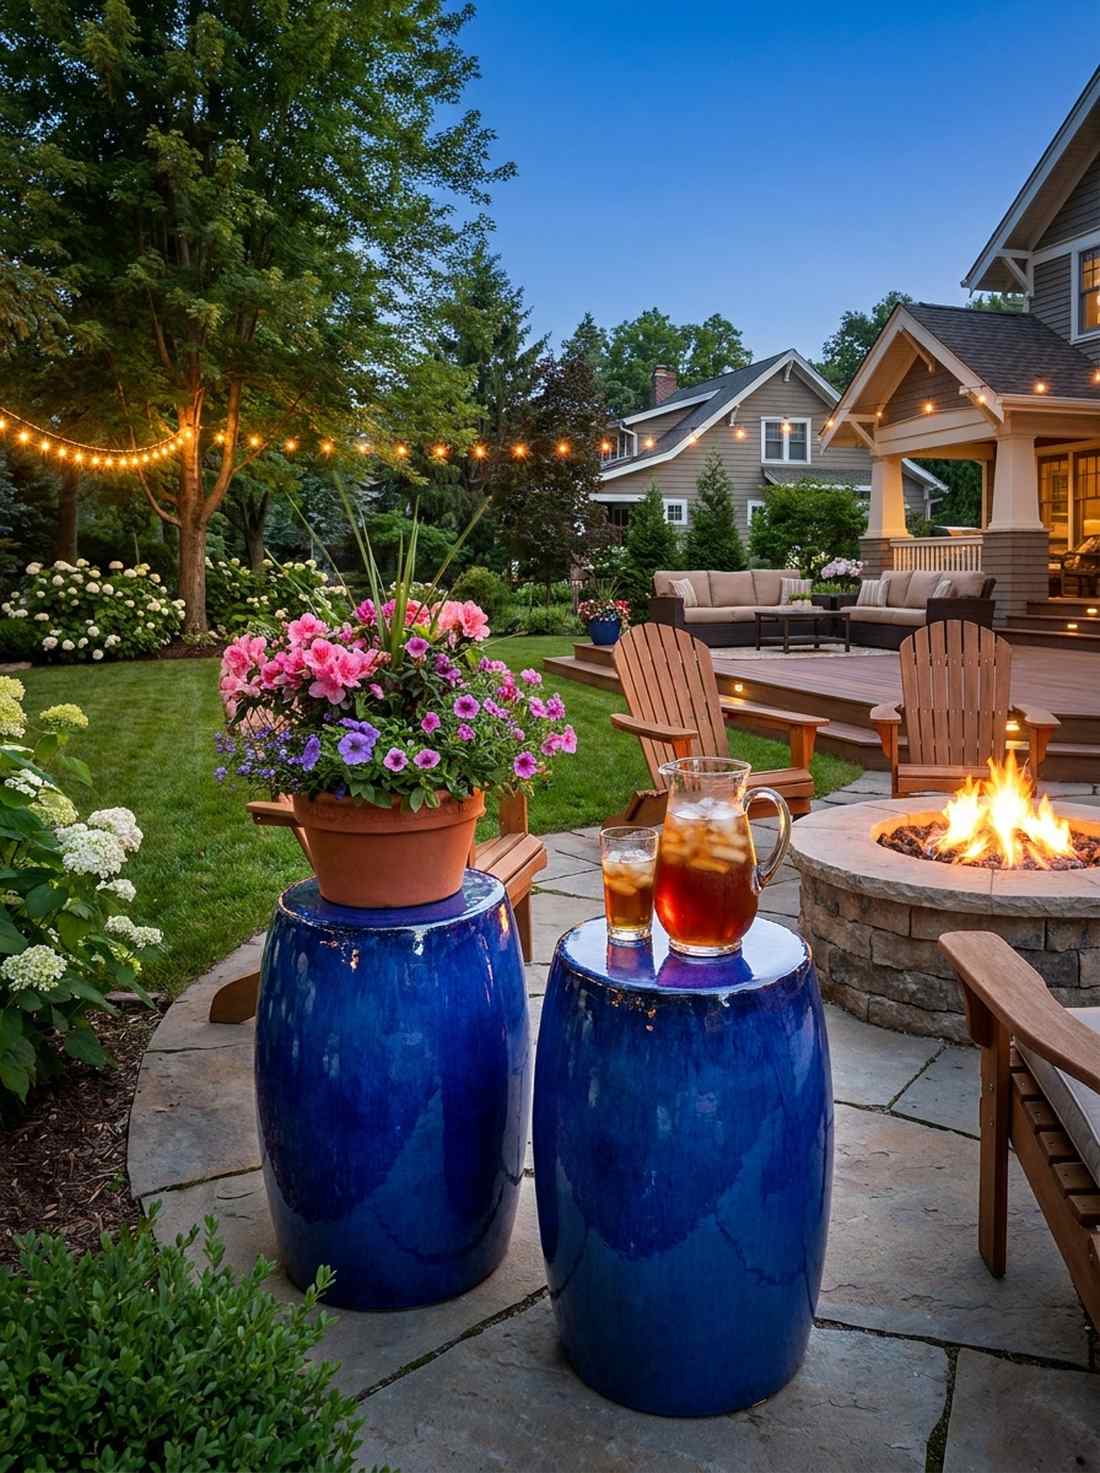
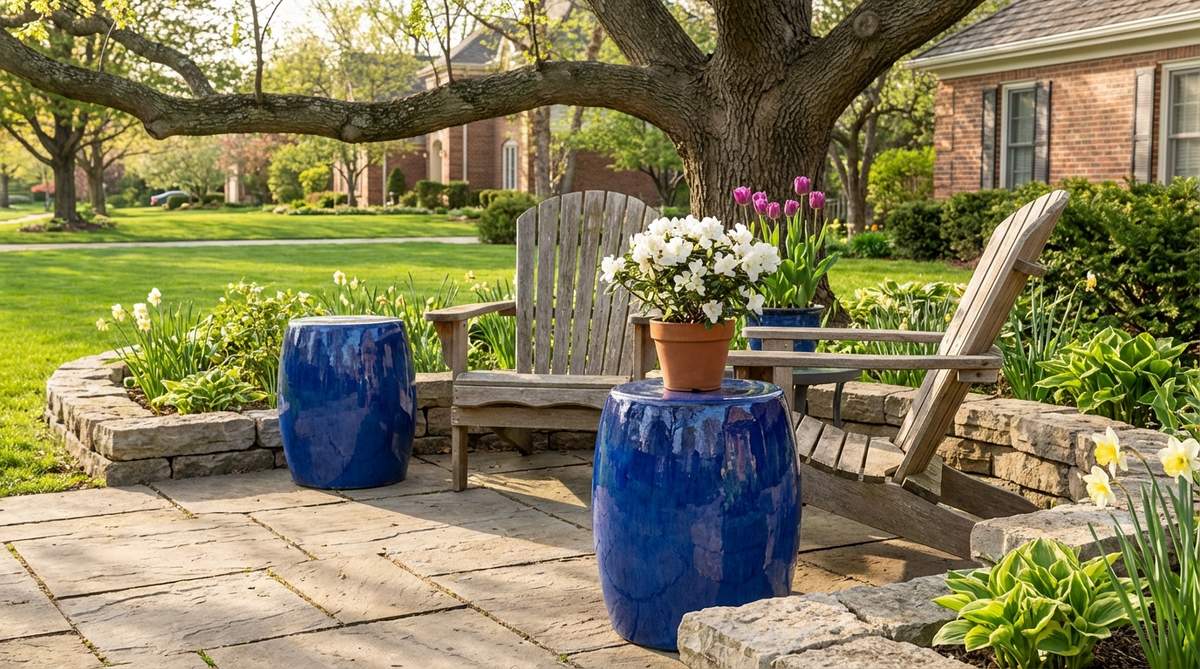
Flashes like a brilliant sapphire hidden among the garden greenery. These versatile glazed stools serve as an impeccable multi-functional patio accent.
Using cheap plastic side tables ruins a luxury aesthetic, whereas investing in high-shine glazed ceramics delivers a surprisingly premium look. The intense cobalt finish practically glows, reflecting the colors of nearby spring blooms while doubling as waterproof plant stands.
These statement pieces usually run $50–$80 each, but last a lifetime.
- Key Materials: Glazed ceramic garden stool/table.
- Vibe / Style: Bold eclectic luxury.
- Difficulty: Zero-effort setup.
- Budget Breakdown: Ceramic Stool: $65.
- Creator’s Tip: Place them near warm-toned lighting at night; the glaze catches the light and creates a stunning glowing effect.
- Smart Sourcing: High-gloss ceramic garden stools and clear rubber table bumpers.
12. Painted Concrete Checkerboard
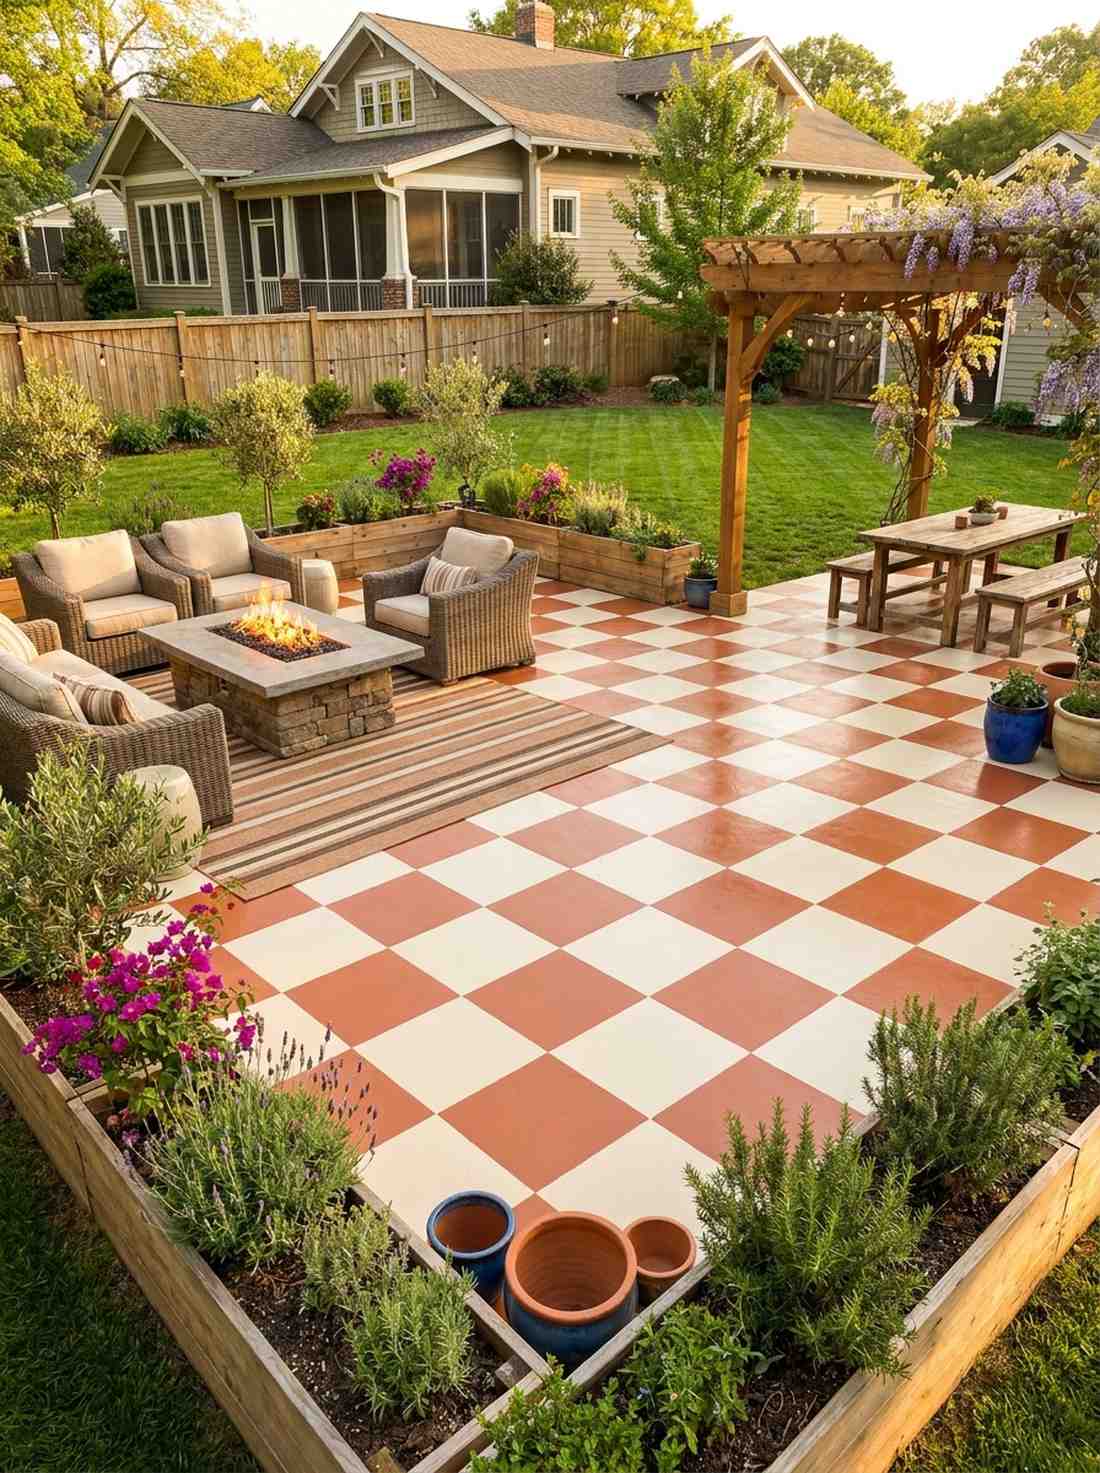
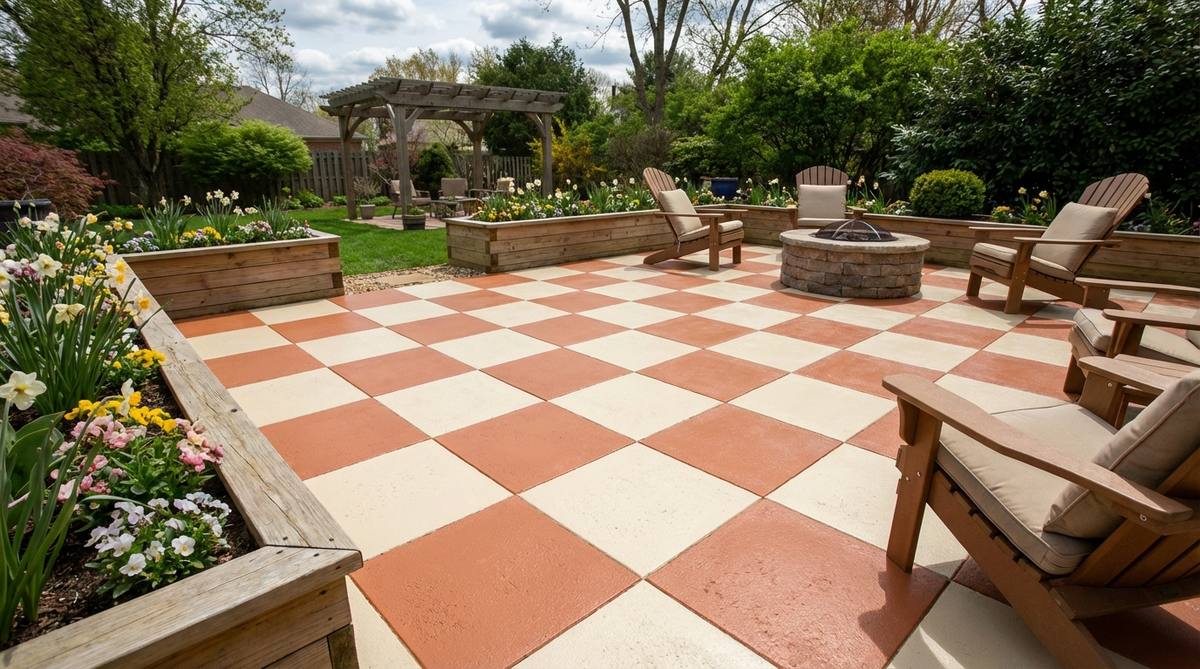
Feels like a whimsical trip to Wonderland right in your own backyard. This high-contrast floor treatment is a jaw-dropping concrete slab makeover idea.
Ripping out old concrete is brutally expensive, but stenciling a terra cotta and cream geometric pattern gives a designer-level finish for a fraction of the cost. Utilizing heavy-duty outdoor porch paint ensures this permanent optical illusion withstands heavy foot traffic and dragging chairs.
This massive aesthetic overhaul costs around $80–$120 in specialty paints. Pin this if you hate your boring gray patio!
- Key Materials: Concrete cleaner, masonry porch paint (2 colors), clear acrylic sealer, precise painter’s tape.
- Vibe / Style: Mediterranean courtyard.
- Difficulty: Advanced weekend project.
- Budget Breakdown: Masonry Paint: $60 | Sealer & Tape: $40.
- Creator’s Tip: Score the tape edges lightly with a razor before peeling to prevent the thick masonry paint from lifting off in chunks.
- Smart Sourcing: Heavy-duty concrete floor paint and industrial acrylic concrete sealers.
Wait until you see this next trick—most people completely ignore their vertical space until they realize how much bigger it makes the yard feel.
Vertical Garden Installations Maximize Spring Outdoor Decor Impact
Upward expansion conserves ground space while creating living walls that filter views and soften boundaries. These systems range from simple trellises to modular panel installations.
13. Jasmine-Covered Pergola Posts

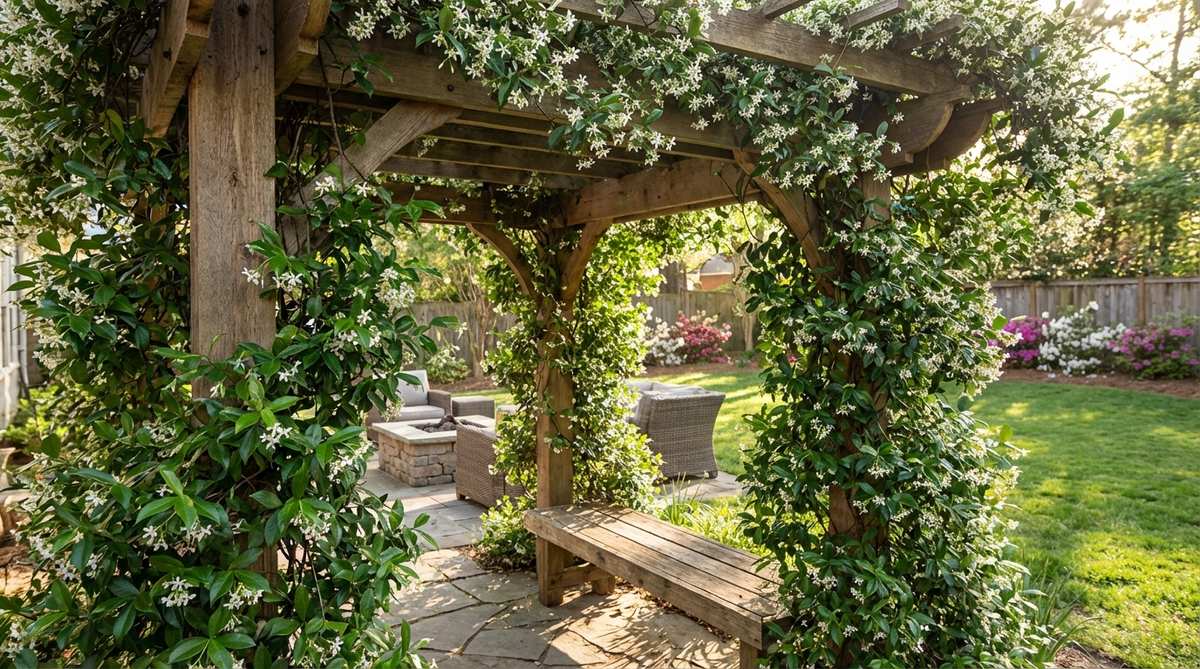
Wraps you in a cloud of sweet evening perfume while you dine al fresco. Training these vines is an exceptional natural structural shade solution.
Leaving wooden support columns bare is a missed opportunity; wrapping them in living vines looks far more expensive than it is. Using jute twine to guide glossy Star Jasmine upward creates a dense, evergreen pillar that brilliantly contrasts rough cedar beams.
Establishing these living pillars costs about $40–$60 per post in mature plants.
- Key Materials: Star jasmine mature cuttings, jute twine, enriched compost.
- Vibe / Style: Romantic botanical oasis.
- Difficulty: Moderate (requires ongoing training).
- Budget Breakdown: Jasmine Plants: $40 | Twine & Soil: $15.
- Creator’s Tip: Loosely tie the new tendrils every 6 inches; tying too tight will choke the vine as the stem thickens over the summer.
- Smart Sourcing: Natural jute garden twine (bulk spool) and climbing vine fertilizer spikes.
14. Mandevilla Obelisk Trio
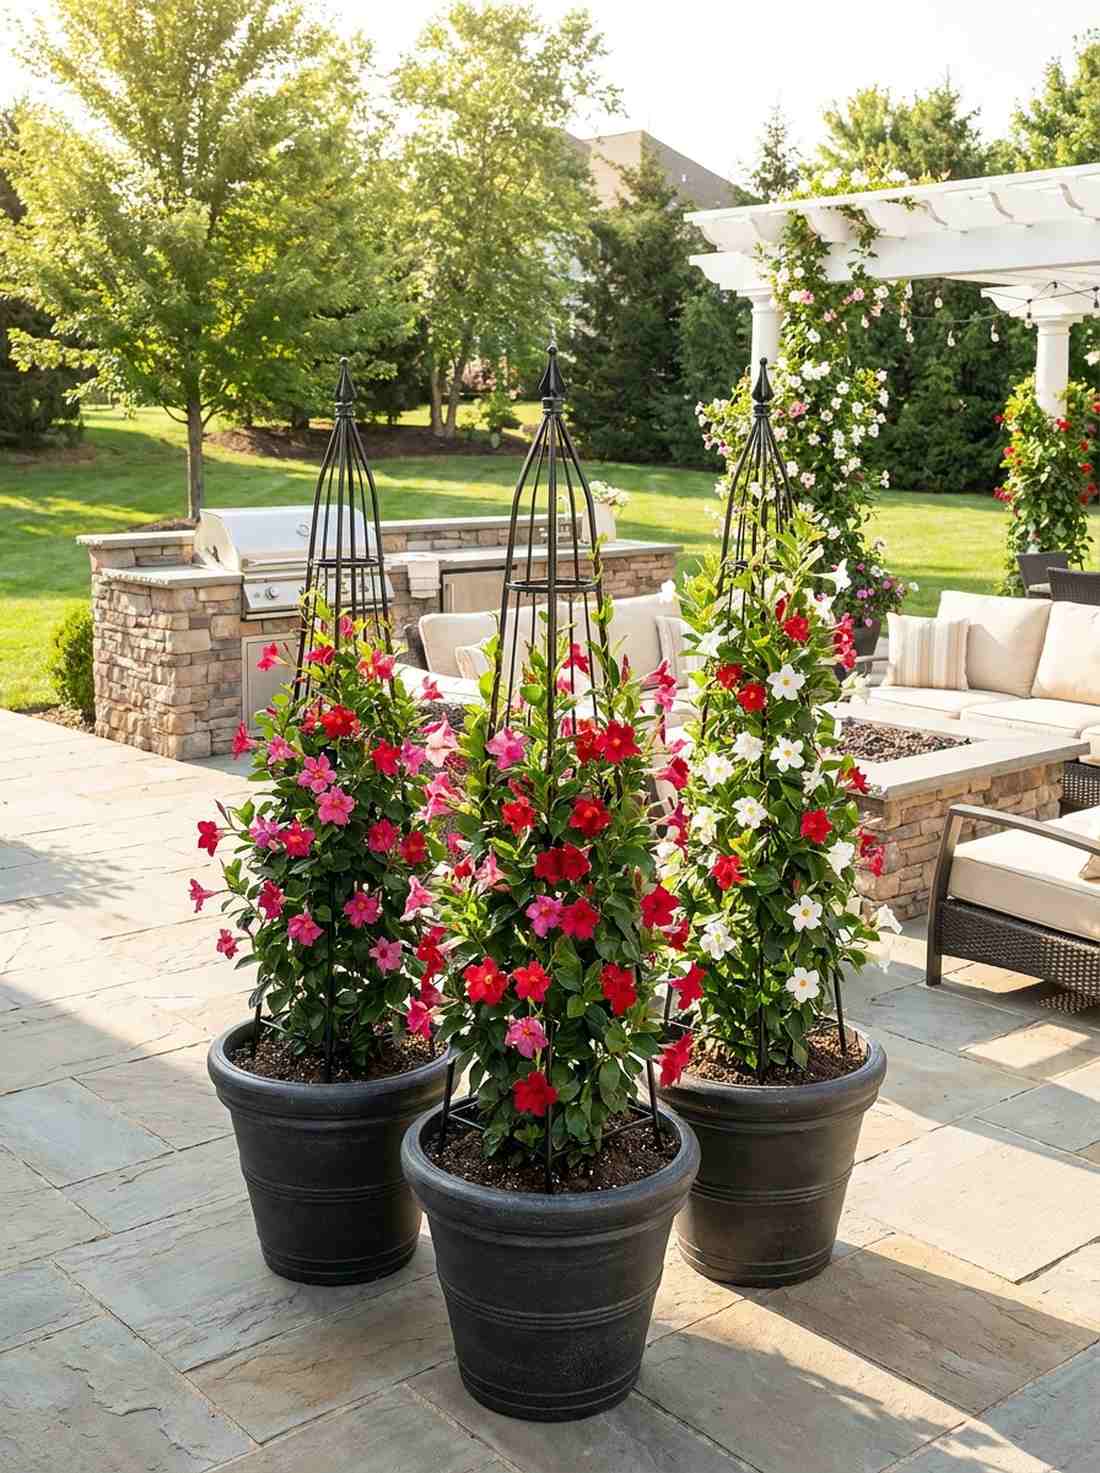
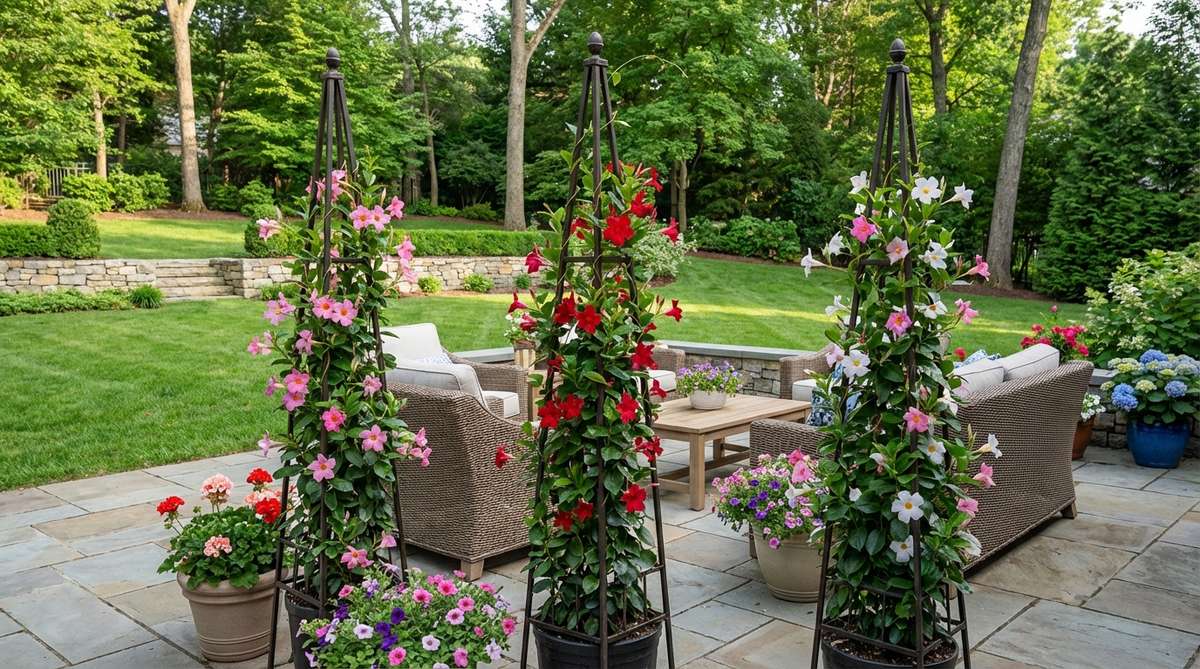
Creates majestic, portable towers of tropical color that command attention. These striking vertical accents serve beautifully as a movable patio framing setup.
Relying solely on low ground cover lacks drama, but injecting towering metal obelisks delivers a surprisingly premium look. By training vibrant Mandevilla vines up these geometric frames, you engineer lush, structural focal points that thrive in blistering full sun.
Setting up a trio of these towers will run about $90–$130. Save this for your high-impact landscaping board.
- Key Materials: 3 wrought iron obelisks, Mandevilla plants, deep decorative pots.
- Vibe / Style: Structured tropical resort.
- Difficulty: Easy.
- Budget Breakdown: Metal Obelisks: $75 | Vines: $40.
- Creator’s Tip: Aggressively deadhead the spent blooms weekly to trick the plant into pushing all its energy into aggressive upward climbing.
- Smart Sourcing: Rust-resistant garden obelisk trellises and heavy-base resin planters.
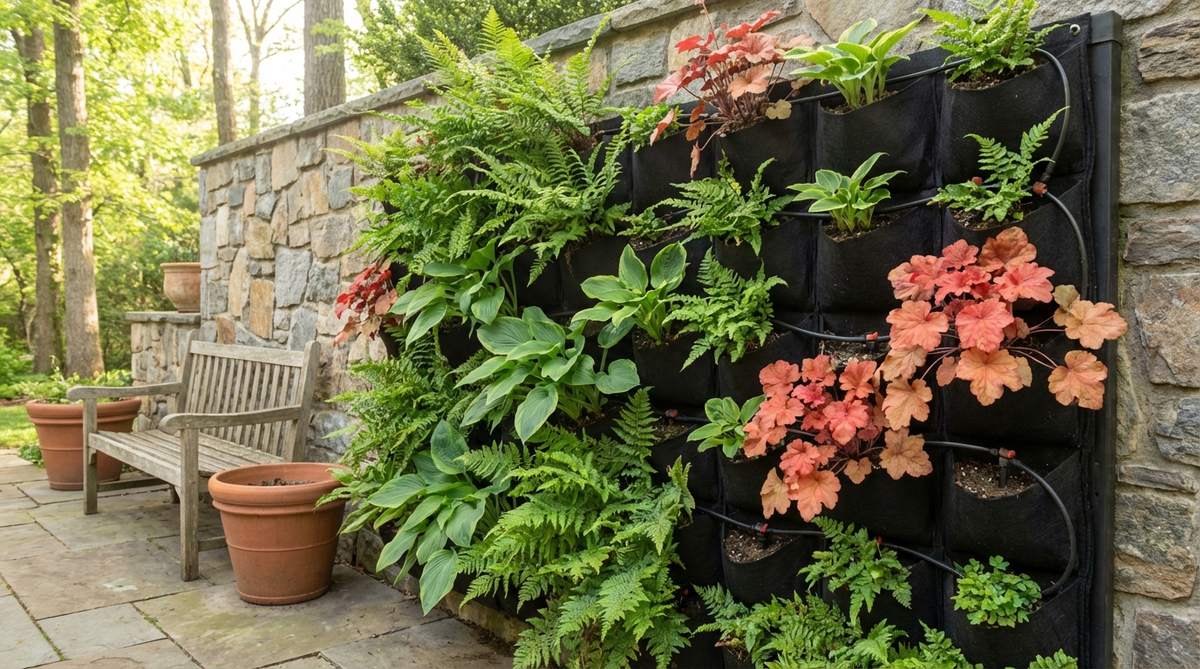
15. Fern Wall Panel System
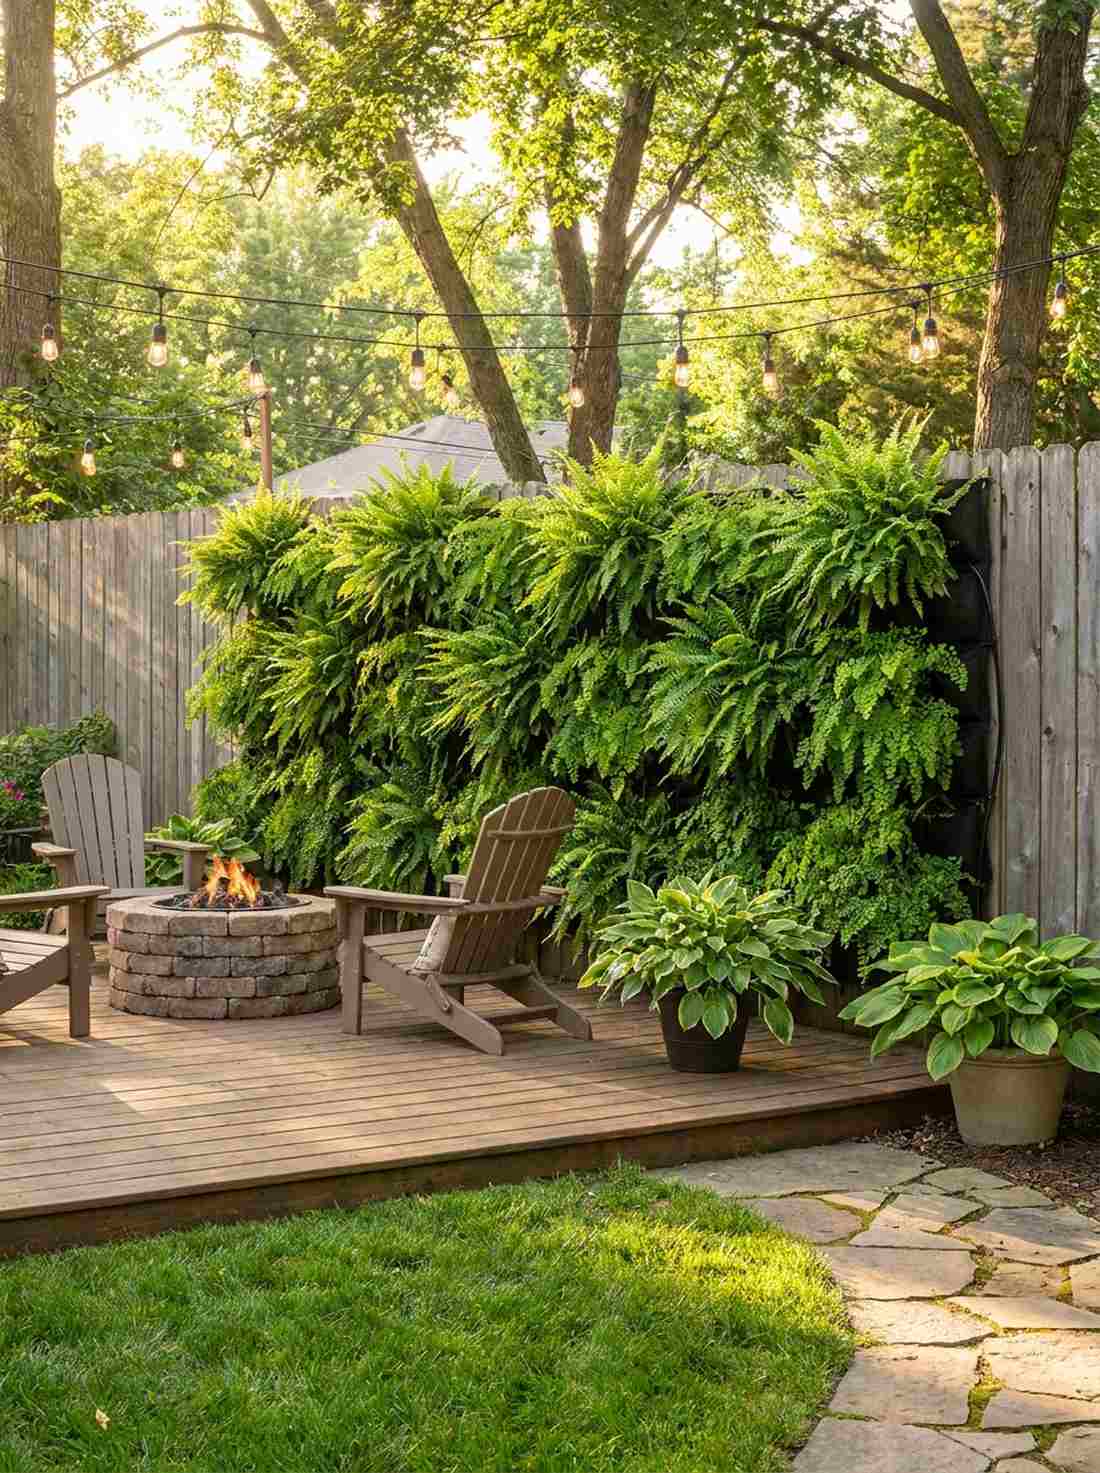
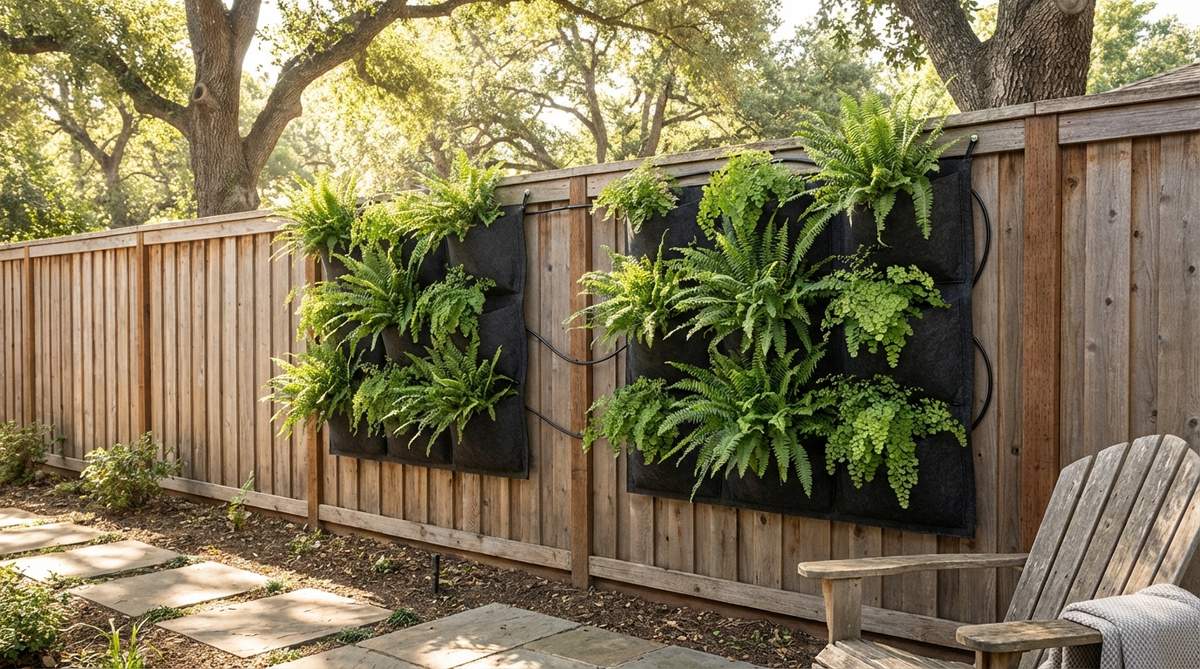
Feels like uncovering an ancient, lush jungle right on your property line. This modular greenery wall is the ultimate ugly fence concealment trick.
Staring at a rotting privacy fence is depressing, but installing a felt pocket system gives a designer-level finish almost instantly. Layering Boston and maidenhair ferns into an irrigated vertical grid dramatically softens harsh boundaries and cools the immediate ambient air.
Expect a $100–$150 investment for the pockets, soil, and plants.
- Key Materials: Modular felt planting pockets, drip line tubing, assorted shade ferns.
- Vibe / Style: Secret garden sanctuary.
- Difficulty: Advanced (irrigation setup required).
- Budget Breakdown: Wall Pockets: $40 | Drip System: $30 | Ferns: $60.
- Creator’s Tip: Hook a micro-drip irrigation line behind the felt; hand-watering vertical walls leads to massive runoff and dying upper rows.
- Smart Sourcing: Waterproof vertical wall planters (bulk pack) and micro-drip irrigation starter kits.
16. Clematis Lattice Screen
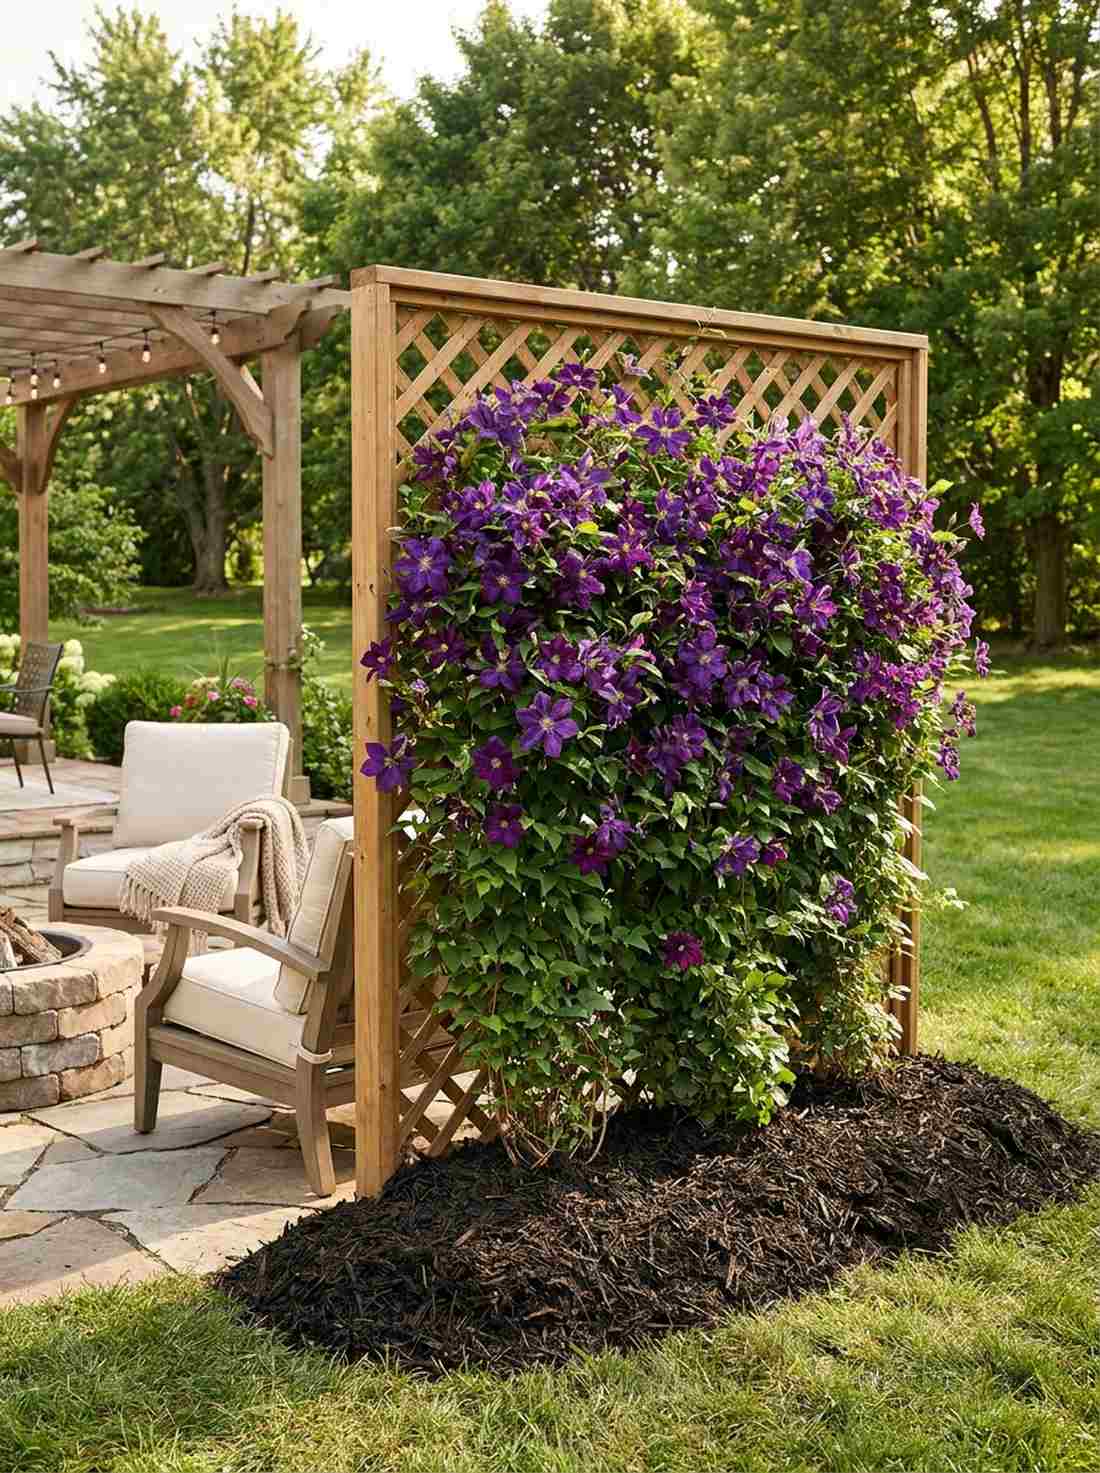
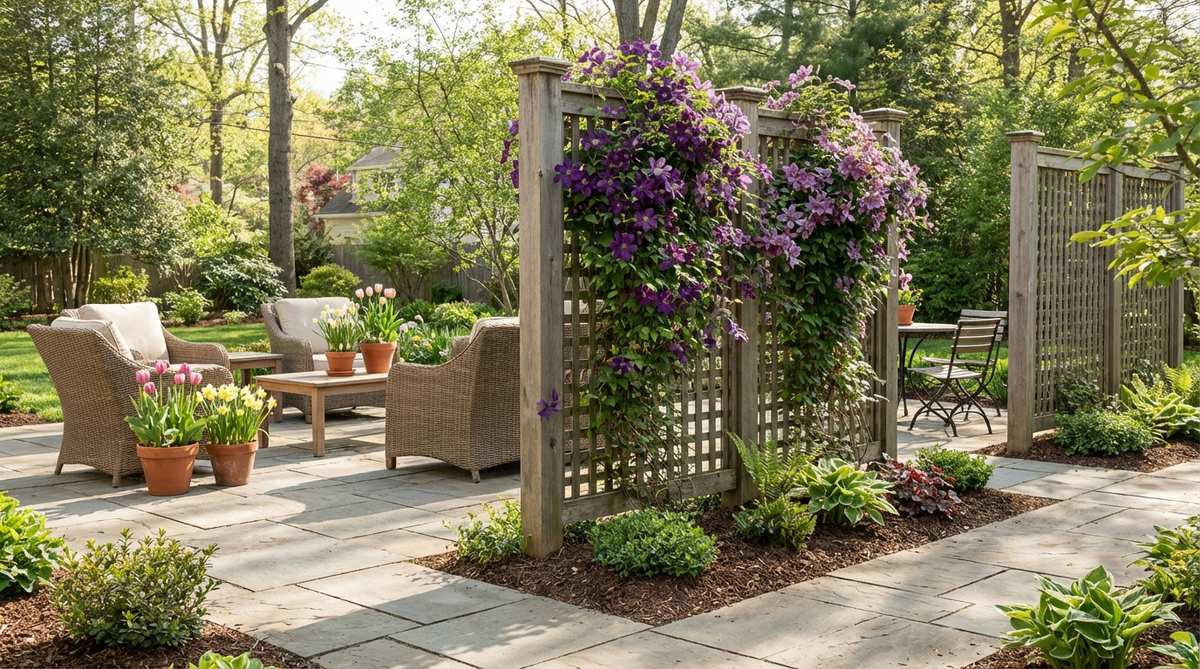
Offers a breathtaking curtain of deep purple stars that sways in the breeze. This freestanding divider is a brilliant outdoor privacy zoning idea.
Building solid wood walls makes small spaces feel claustrophobic, but an open-weave lattice covered in blooming vines looks far more expensive than it is. The airy structure allows cool spring breezes to pass through while the dense clematis foliage shields you from nosy neighbors.
You can construct this living screen for about $70–$100. Pin this to your outdoor privacy hacks board!
- Key Materials: Freestanding wood lattice panel, Clematis vines, deep mulch.
- Vibe / Style: Elegant cottage core.
- Difficulty: Moderate.
- Budget Breakdown: Lattice Panel: $50 | Vines & Mulch: $35.
- Creator’s Tip: Clematis loves its “head in the sun, feet in the shade,” so pile 3 inches of thick mulch over the root base to keep it ice cold.
- Smart Sourcing: Pre-treated wood lattice panels and organic root-cooling mulch.
17. Succulent Vertical Frame
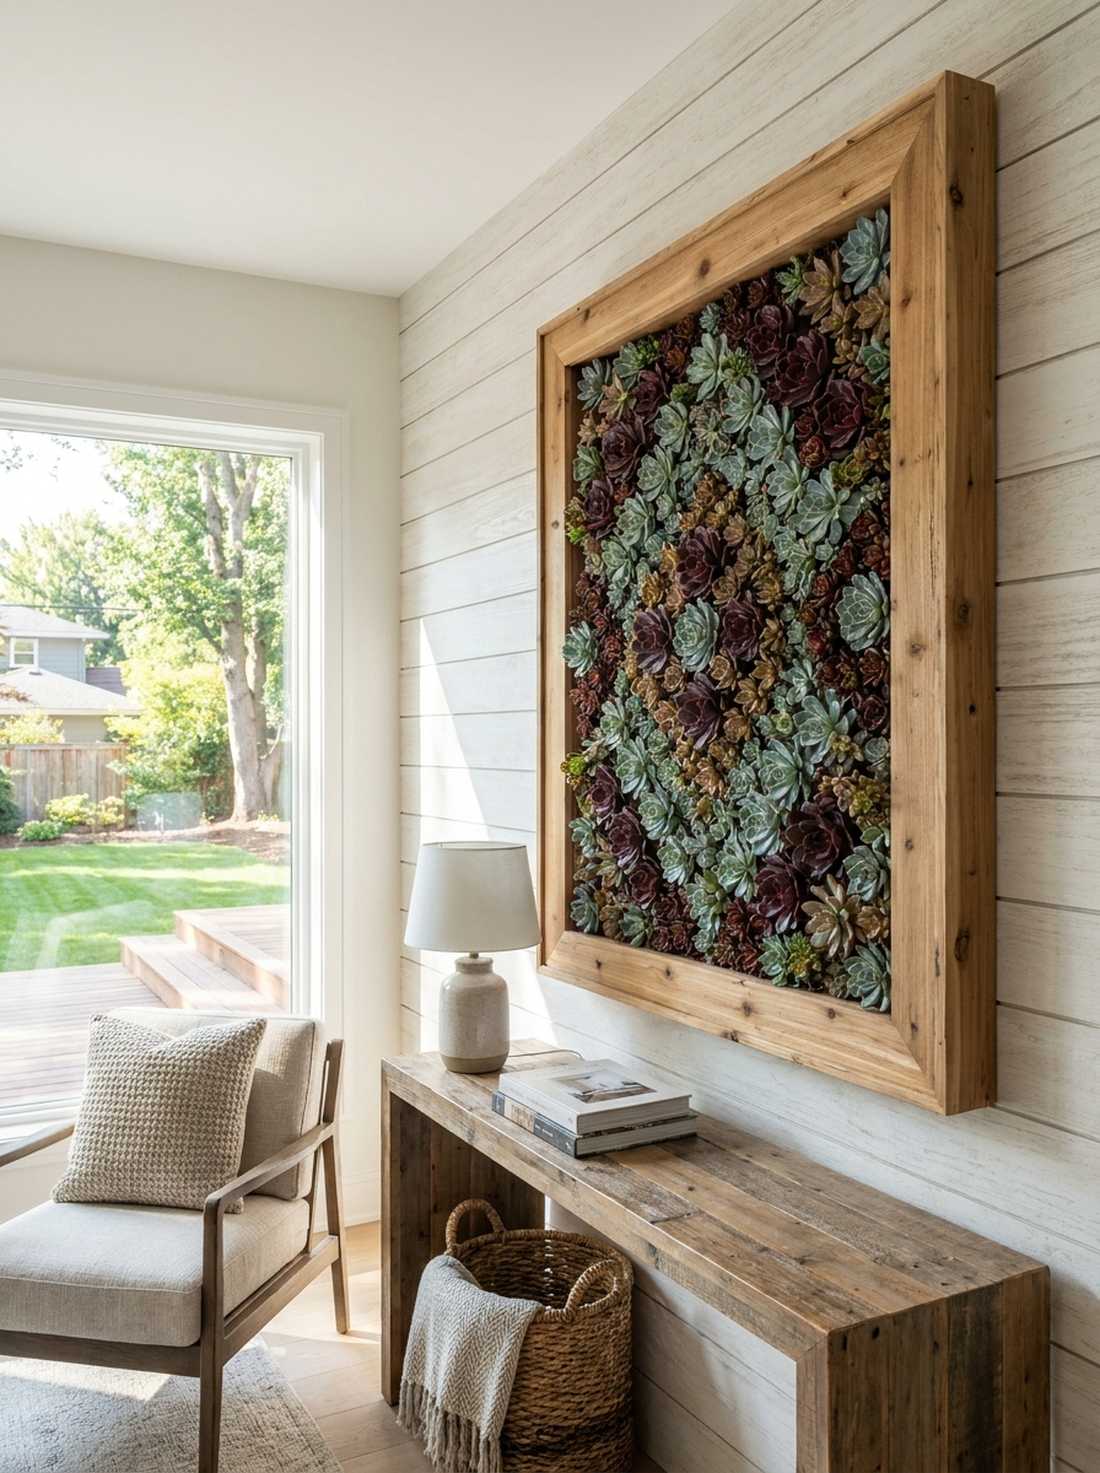
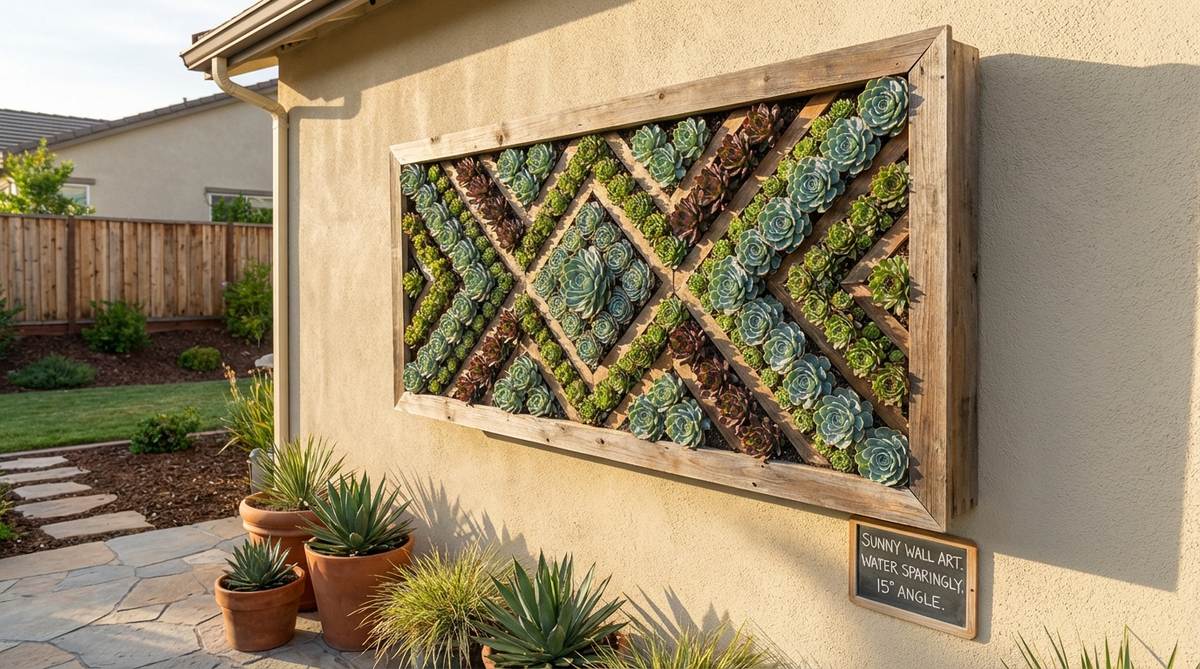
Looks like a high-end gallery art piece composed entirely of living geometry. This zero-footprint arrangement is perfect as a sunny wall aesthetic upgrade.
Standard hanging baskets dry out too fast, but a specialized shallow shadow box packed with drought-tolerant sedums delivers a surprisingly premium look. Utilizing a hidden wire mesh backing secures the intricate burgundy and blue-green patterns, preventing the soil from falling out.
Building this living mosaic costs roughly $45–$65. It’s a fast upgrade that completely changes the vibe.
- Key Materials: Cedar shadow box, chicken wire, sphagnum moss, miniature garden supplies.
- Vibe / Style: Modern desert architectural.
- Difficulty: Moderate (requires rooting patience).
- Budget Breakdown: Frame & Wire: $25 | Succulent Cuttings: $30.
- Creator’s Tip: Leave the newly planted frame laying flat on a table for 4 weeks so the roots lock into the wire before hanging it vertically.
- Smart Sourcing: Pre-cut sphagnum moss sheets and succulent rooting hormone powder.
If you think luxury outdoors has to cost a fortune, this next brilliant hack will completely blow your mind…
18. Morning Glory Mailbox Arch
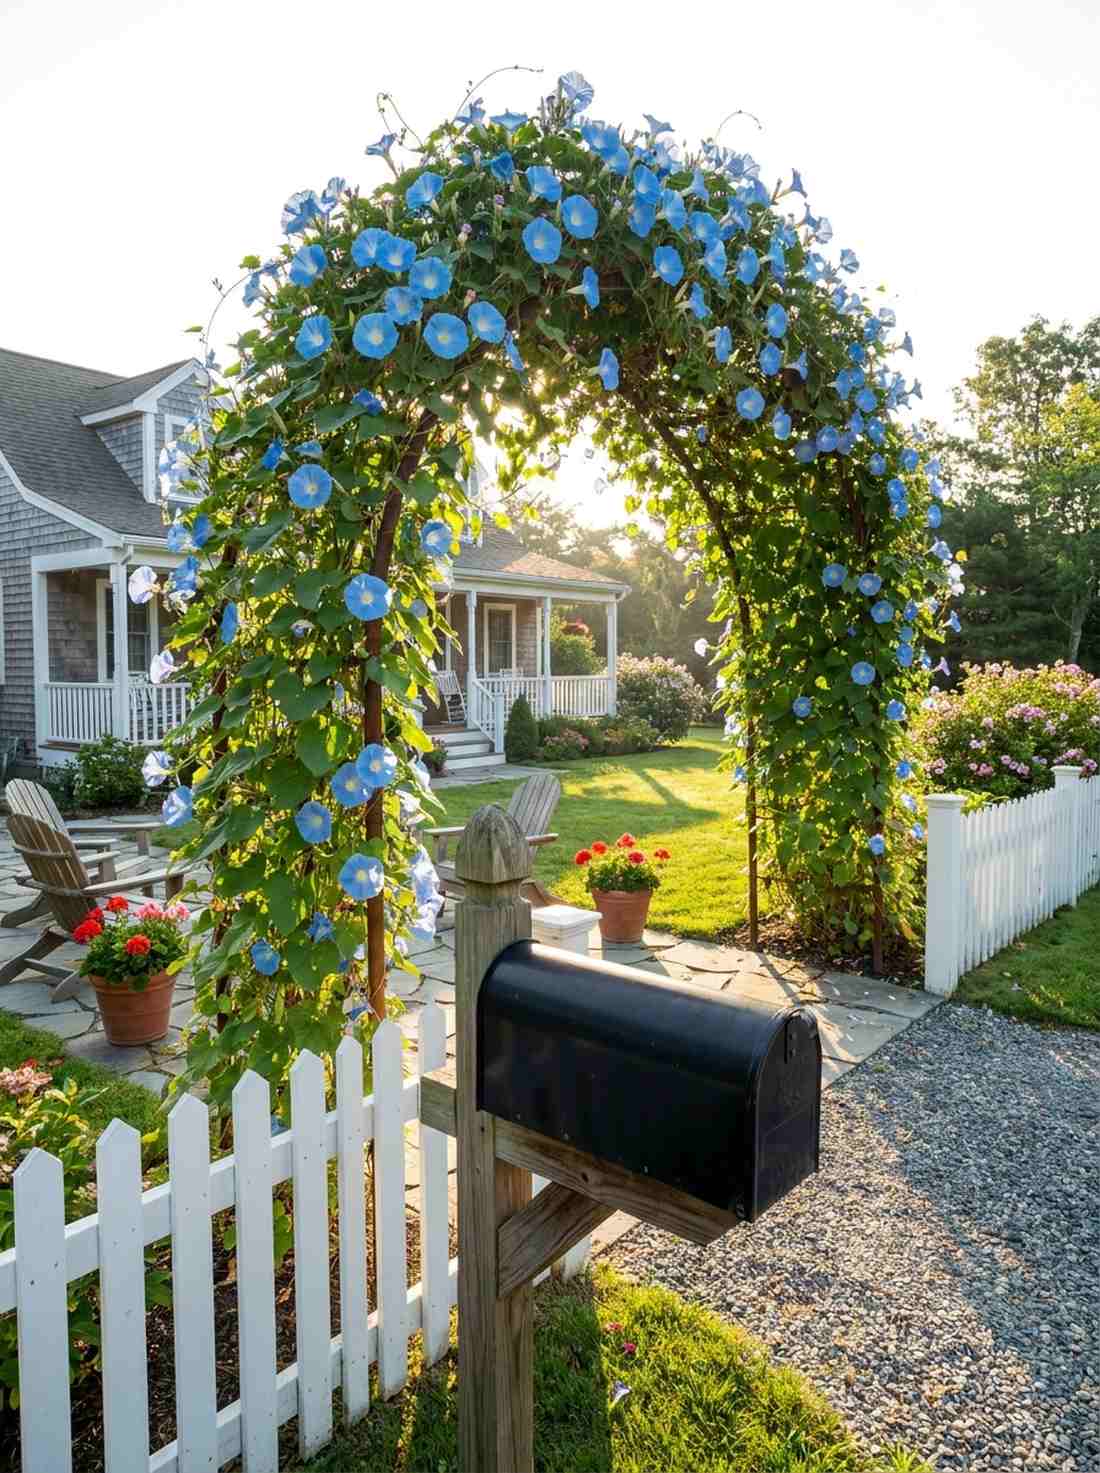
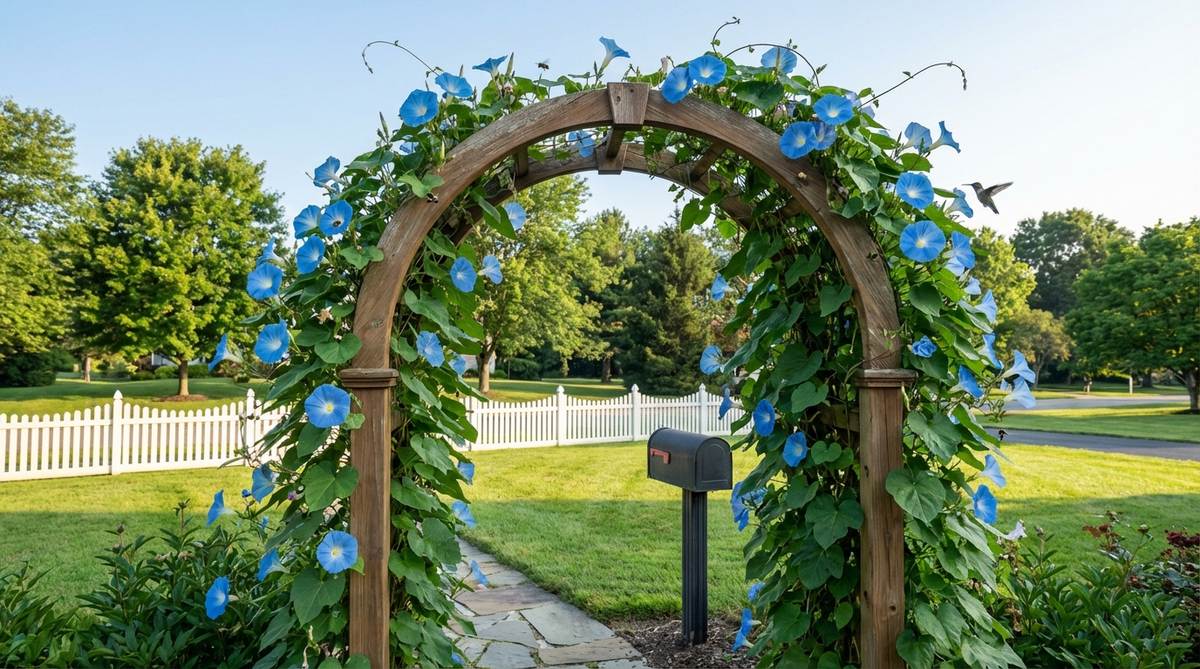
Greets the sunrise every single day with hundreds of fresh, sky-blue trumpets. This aggressive blooming structure serves beautifully as a driveway entrance focal point.
Leaving the post bare is functional but boring; adding a cheap metal arch gives a designer-level finish when consumed by rapid-growth vines. Morning glories cost pennies from seed but self-attach relentlessly, turning a mundane utility post into a jaw-dropping floral tunnel.
You can create this spectacular floral arch for under $30.
- Key Materials: Metal garden archway, Morning Glory seed packets, garden twine.
- Vibe / Style: Whimsical country lane.
- Difficulty: Easy.
- Budget Breakdown: Metal Arch: $25 | Seeds: $4.
- Creator’s Tip: Soak the hard seeds in warm water overnight before planting to crack the hull and guarantee an explosive 3-day germination.
- Smart Sourcing: Rust-proof tubular garden arches and bulk morning glory seed packs.
Furniture & Textile Updates for Vibrant Spring Outdoor Decor
Soft goods offer the fastest route to seasonal transformation with minimal investment. Current trends favor vintage frames paired with contemporary fabrics in saturated colors.
19. Coral Velvet Cushion Set
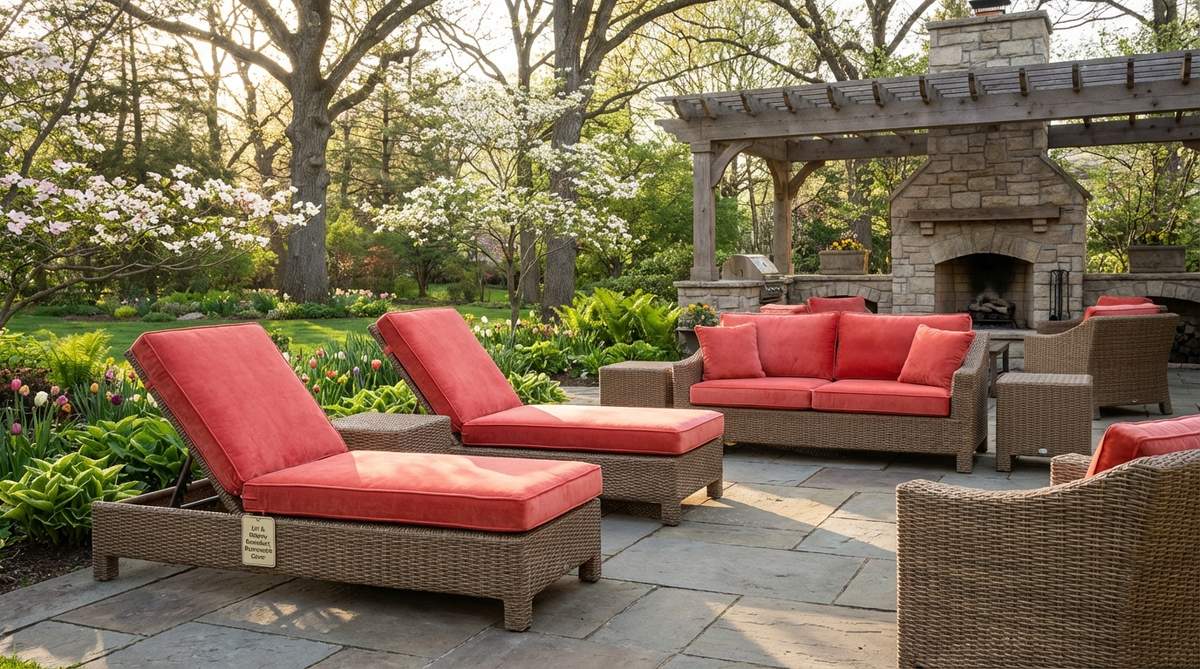
Injects an unexpected, electrifying shock of luxury into standard wicker seating. These rich textiles are an incredible quick patio seating refresh.
Canvas cushions feel rough and basic, but upgrading to outdoor-rated plush velvet looks far more expensive than it is. The dense fabric pile catches the afternoon sunlight differently than flat materials, giving your spring outdoor decor setup massive textural depth.
Swapping out covers costs roughly $40–$60. Pin this if you love rich, tactile textures!
- Key Materials: Outdoor-rated coral velvet covers, mildew-resistant inserts.
- Vibe / Style: Electic bohemian luxury.
- Difficulty: Zero-effort setup.
- Budget Breakdown: Covers: $40 | Waterproofing Spray: $15.
- Creator’s Tip: Treat the velvet with an extra layer of marine-grade waterproofing spray to stop pollen from sticking deep into the fibers.
- Smart Sourcing: UV-resistant velvet pillow covers and marine-grade fabric waterproof spray.
20. Vintage Rocker Restoration
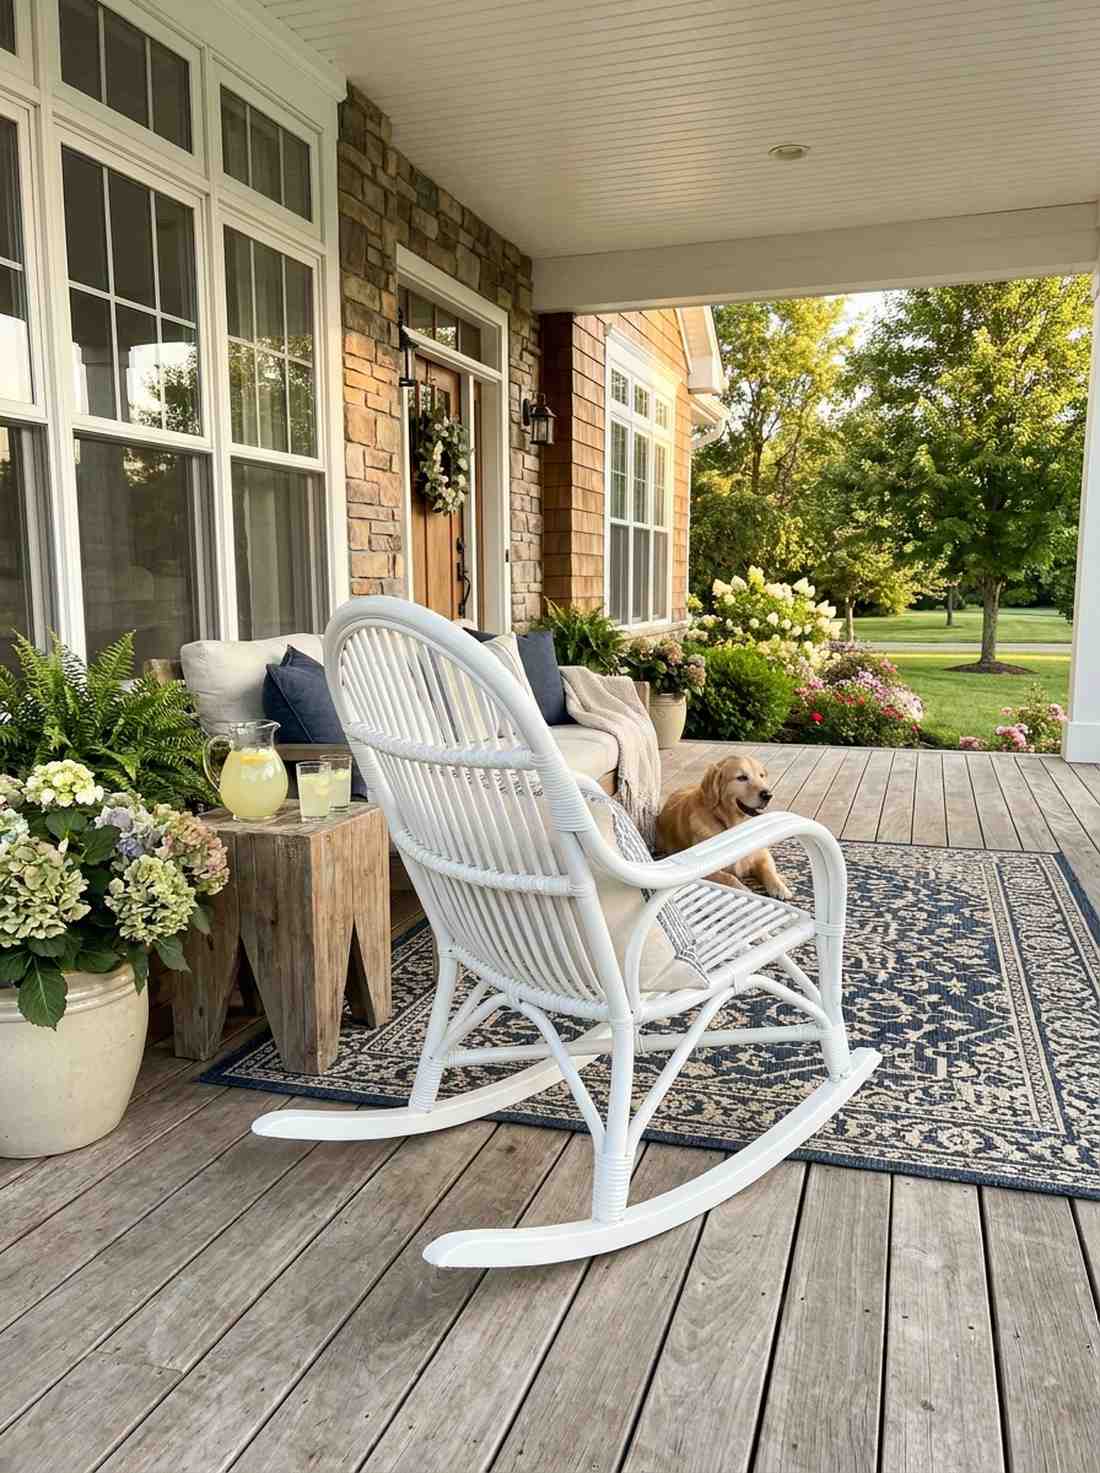
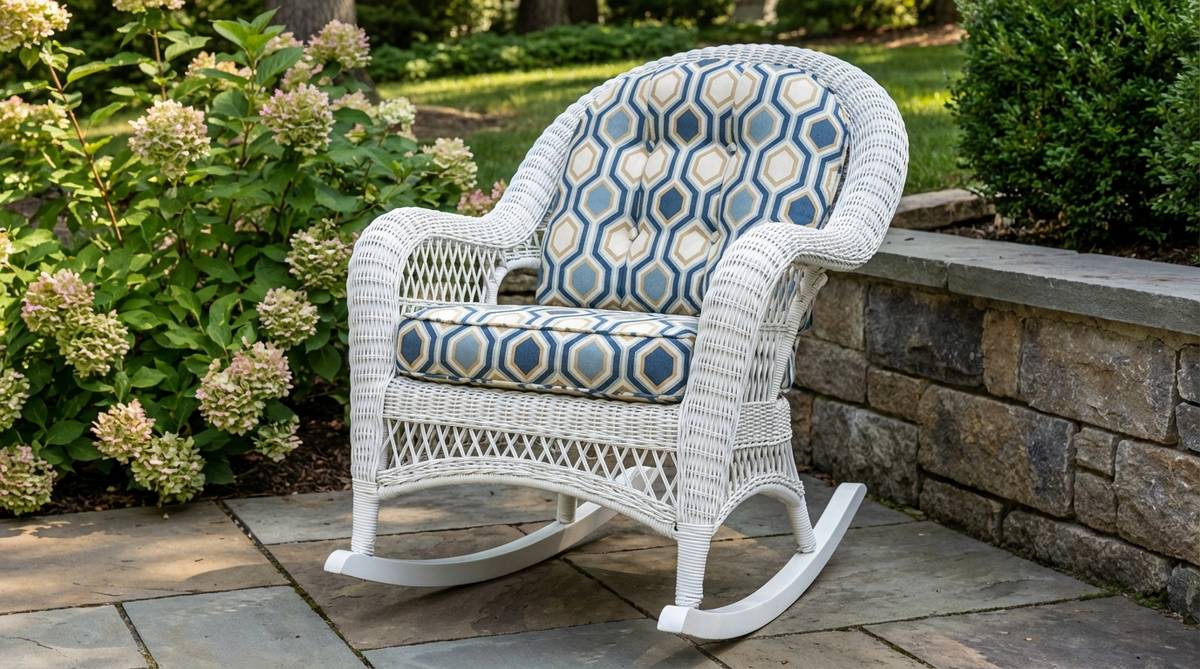
Transforms a dusty attic heirloom into a striking, high-gloss conversational centerpiece. This smart upcycling tactic is an ideal front porch seating hack.
Buying new rattan furniture is incredibly expensive, but properly restoring a vintage piece delivers a surprisingly premium look. Using an extreme-bond primer underneath a glossy white enamel completely modernizes the silhouette while preserving the structural heritage.
You can completely rehab a thrifted rocker for about $25 in premium paint.
- Key Materials: Vintage rattan rocker, bonding primer spray, exterior gloss enamel.
- Vibe / Style: Modern heritage chic.
- Difficulty: Moderate weekend project.
- Budget Breakdown: Primer: $10 | Enamel Paint: $15.
- Creator’s Tip: Lightly scuff the entire surface with a fine sanding sponge before priming; otherwise, the glossy paint will chip off in sheets.
- Smart Sourcing: Extreme-bond surface primers and high-gloss exterior enamel sprays.
21. Indigo Striped Hammock
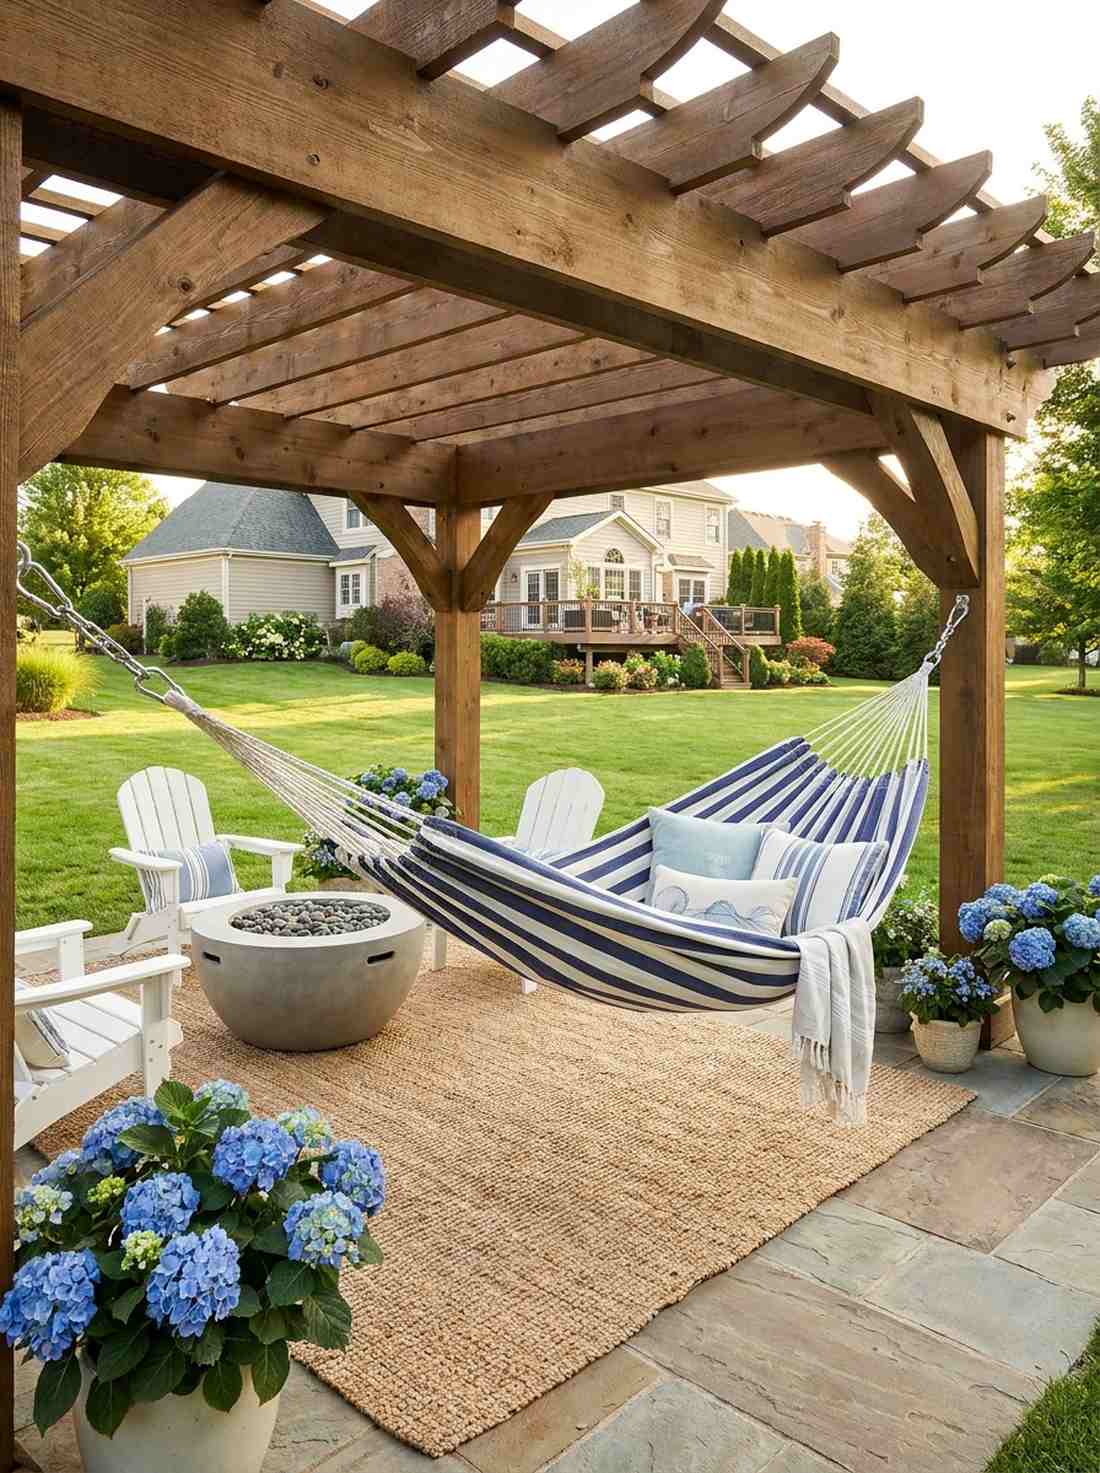
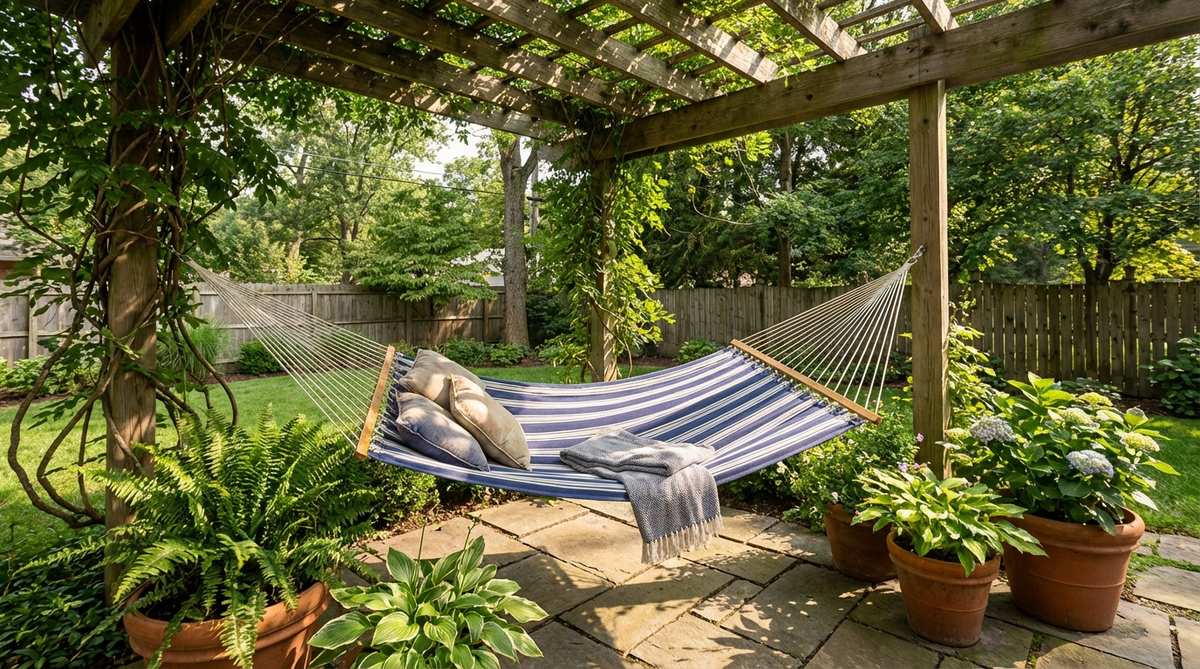
Radiates the effortless, breezy relaxation of a high-end coastal resort. This suspended lounge piece is a fantastic shaded pergola seating addition.
Heavy iron swings look clunky, but a nautical cotton canvas sling looks far more expensive than it is. Suspending this bold indigo-and-white striped fabric between sturdy beams introduces instant horizontal movement and a dedicated afternoon napping zone.
A high-quality canvas hammock sets you back roughly $45–$70. Save this to your ultimate relaxation board!
- Key Materials: Indigo striped canvas hammock, heavy-duty suspension carabiners.
- Vibe / Style: Nautical coastal ease.
- Difficulty: Moderate (requires secure mounting).
- Budget Breakdown: Hammock: $50 | Mounting Hardware: $15.
- Creator’s Tip: Ensure your anchor hooks are driven deep into solid wood studs, never just the fascia board, to safely support 400+ lbs.
- Smart Sourcing: Heavy-duty steel hammock hanging kits and fade-resistant canvas hammocks.
22. Butterfly Print Throw Pillows

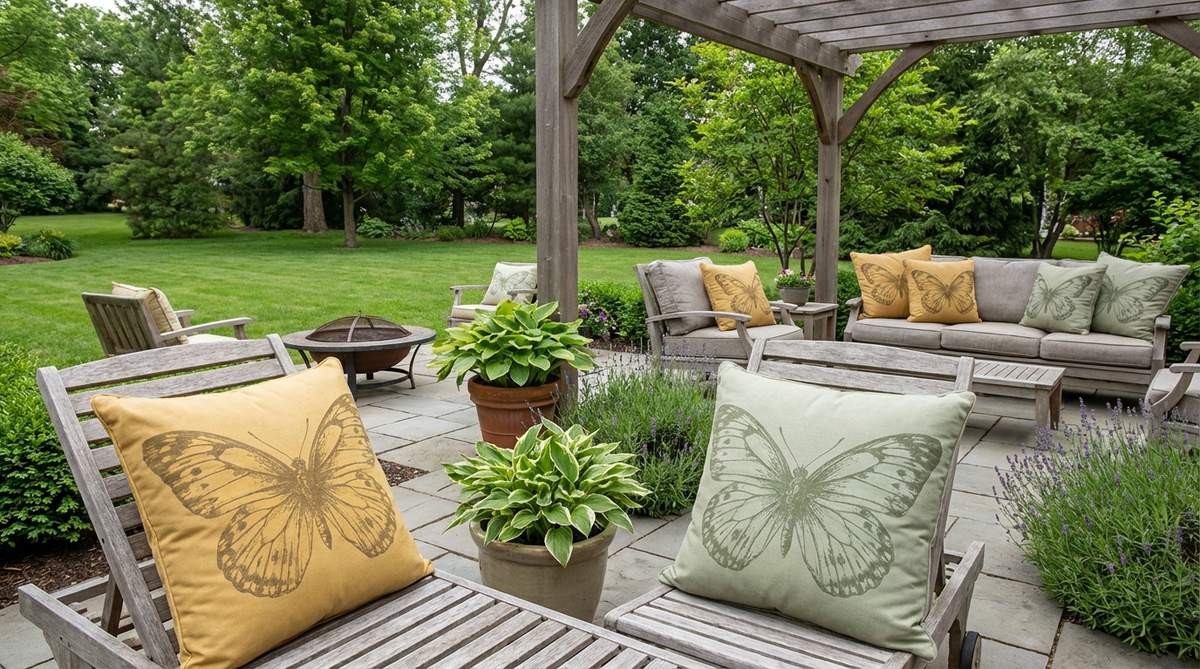
Adds an oversized splash of botanical whimsy that pops loudly from across the yard. These bold graphics act as a superb solid-color sofa upgrade.
Using tiny, repetitive patterns creates visual clutter, but scaling up to massive, singular insect prints gives a designer-level finish. Mixing mustard and sage butterfly motifs against neutral beige seating grounds the playful design and ties directly into your garden beds.
You can refresh your whole seating arrangement for under $40.
- Key Materials: 24-inch printed pillow covers, oversized polyester inserts.
- Vibe / Style: Playful botanical graphic.
- Difficulty: Zero-effort setup.
- Budget Breakdown: Oversized Covers: $25 | Inserts: $15.
- Creator’s Tip: Always buy an insert that is exactly 2 inches larger than your pillow cover to achieve that ultra-plush, expensive overstuffed look.
- Smart Sourcing: Oversized outdoor pillow inserts (bulk pack) and botanical print waterproof covers.
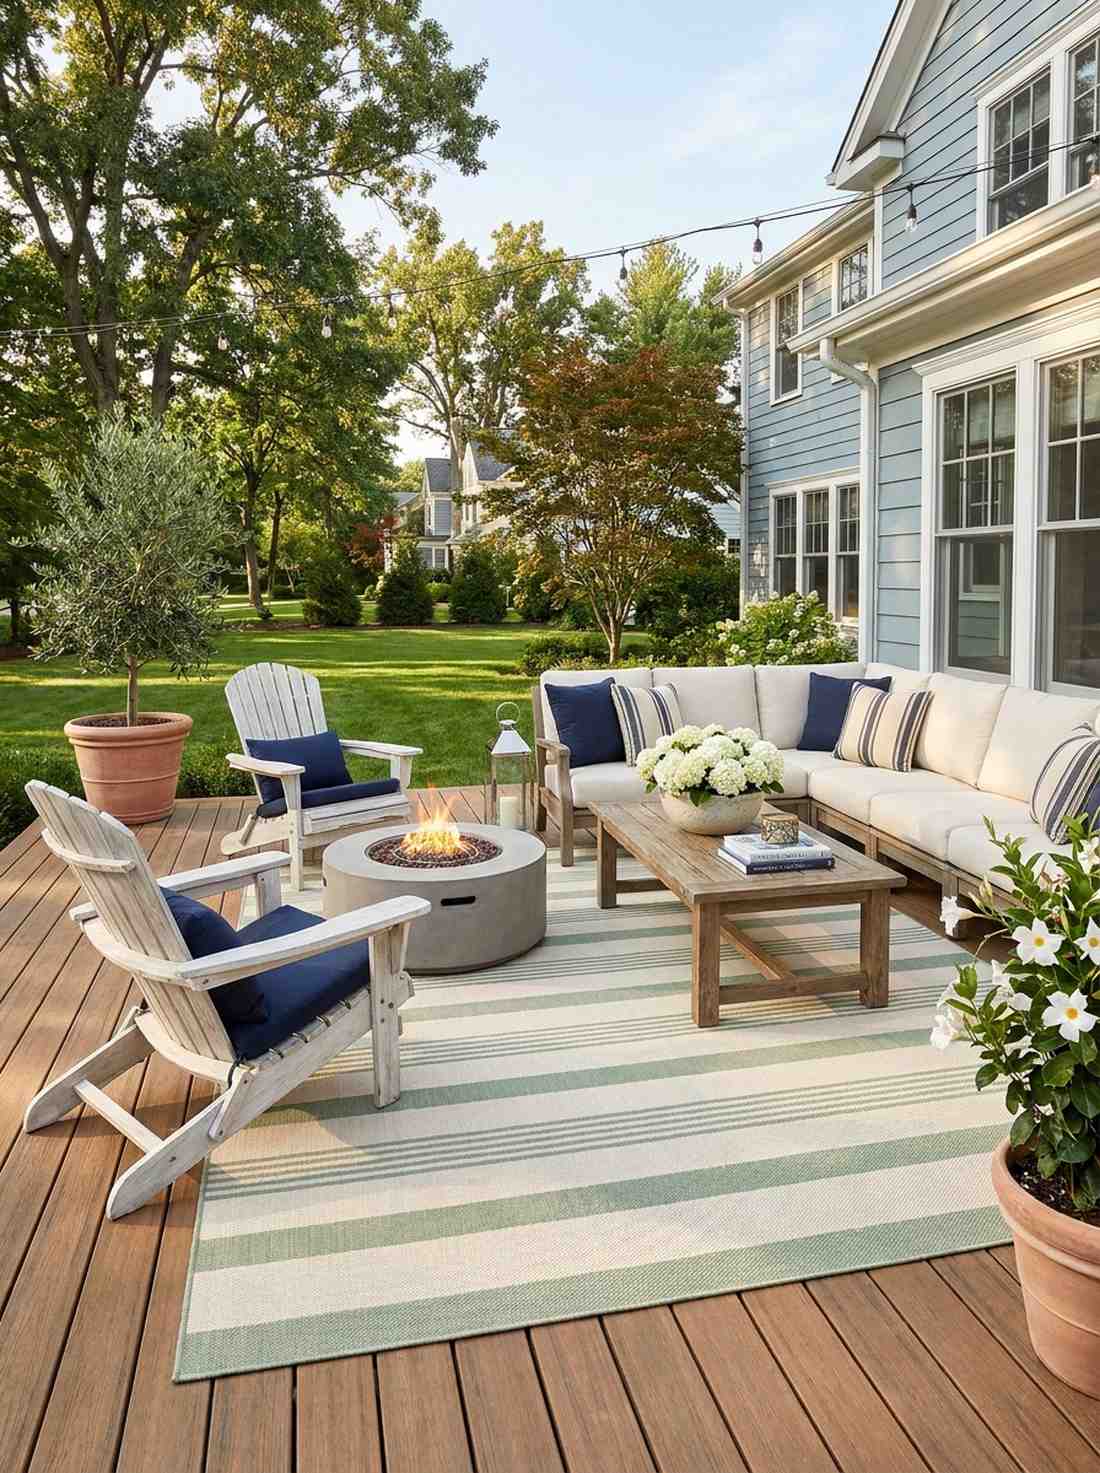
23. Painted Adirondack Chairs
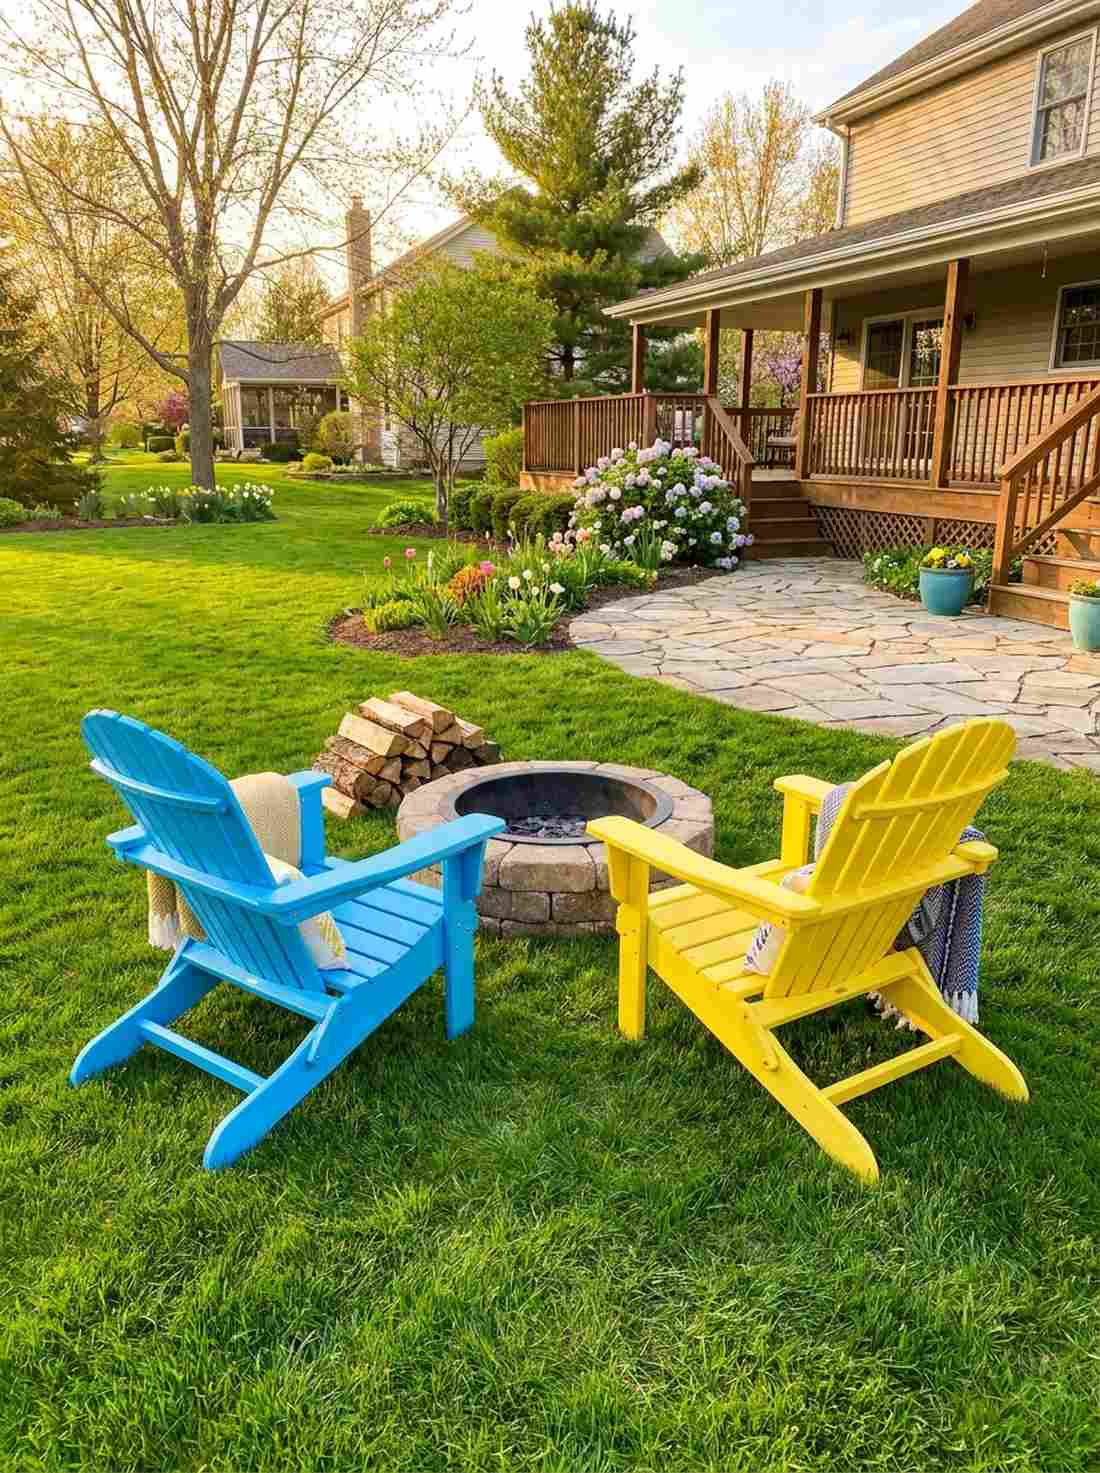

Creates a striking, high-contrast visual magnet against the lush green spring lawn. This energetic color treatment serves as an amazing fire pit seating arrangement.
Leaving classic wood chairs natural is safe, but painting them in electric sky blue and lemon yellow delivers a surprisingly premium look. The saturated colors act as massive pieces of lawn art, signaling a playful energy that invites guests to sit down.
A fresh coat of vibrant exterior paint costs around $30 for a pair of chairs. Pin this to your weekend DIY board!
- Key Materials: Wooden Adirondack chairs, exterior wood primer, angled detailing brushes, exterior latex paint.
- Vibe / Style: Cheerful summer camp.
- Difficulty: Moderate (requires brush patience).
- Budget Breakdown: Premium Paint: $25 | Brushes: $10.
- Creator’s Tip: Tilt the chairs backward and paint the undersides first; sealing the bottom prevents ground moisture from rotting the wood upward.
- Smart Sourcing: UV-resistant exterior latex paints and synthetic angled brush kits.
Most homeowners blow their entire budget on furniture, ignoring the cheap material upgrades that actually make a patio look expensive.
Material Guide: Cheap vs. Premium Aesthetic
Knowing exactly where to save and where to spend makes all the difference in achieving that “looks expensive but isn’t” vibe.
- Standard vs. UV-Resistant/Premium: Standard fabrics bleach out in a month. Investing $15 in marine-grade waterproofing and UV sprays triples the lifespan of your textiles.
- Pre-made Kits vs. Sourcing Locally: While thrift stores are great for pots, using starter kits for vertical walls and miniature garden supplies often saves you money by preventing structural failures.
24. Macrame Swing Installation
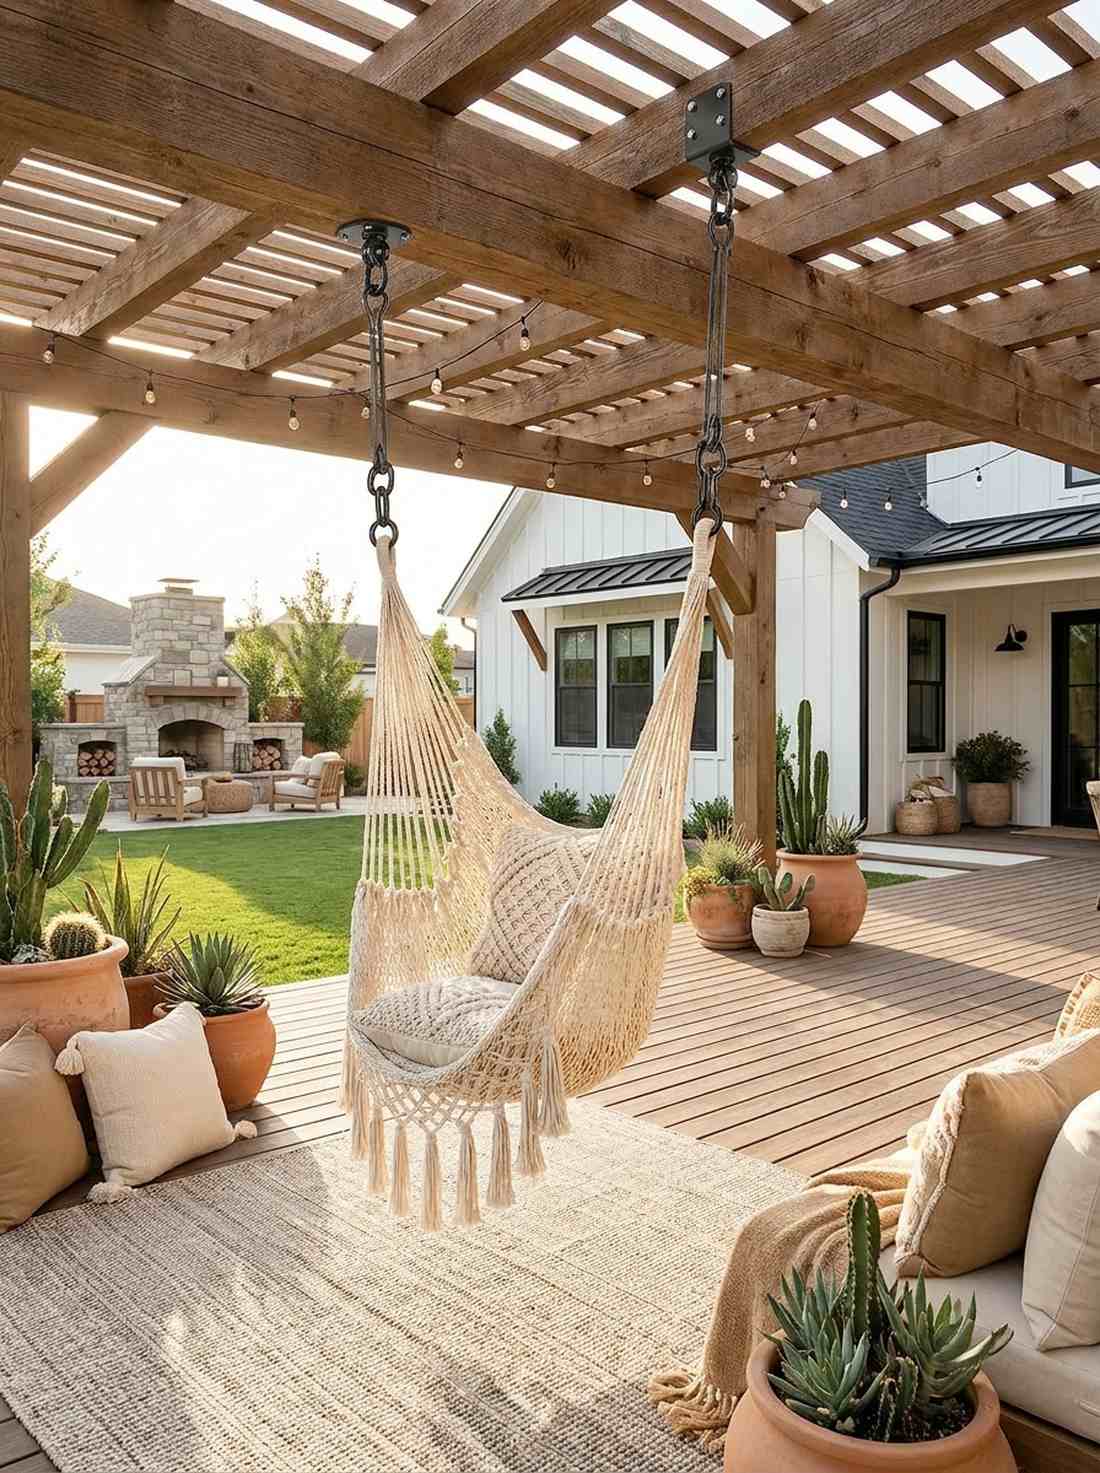
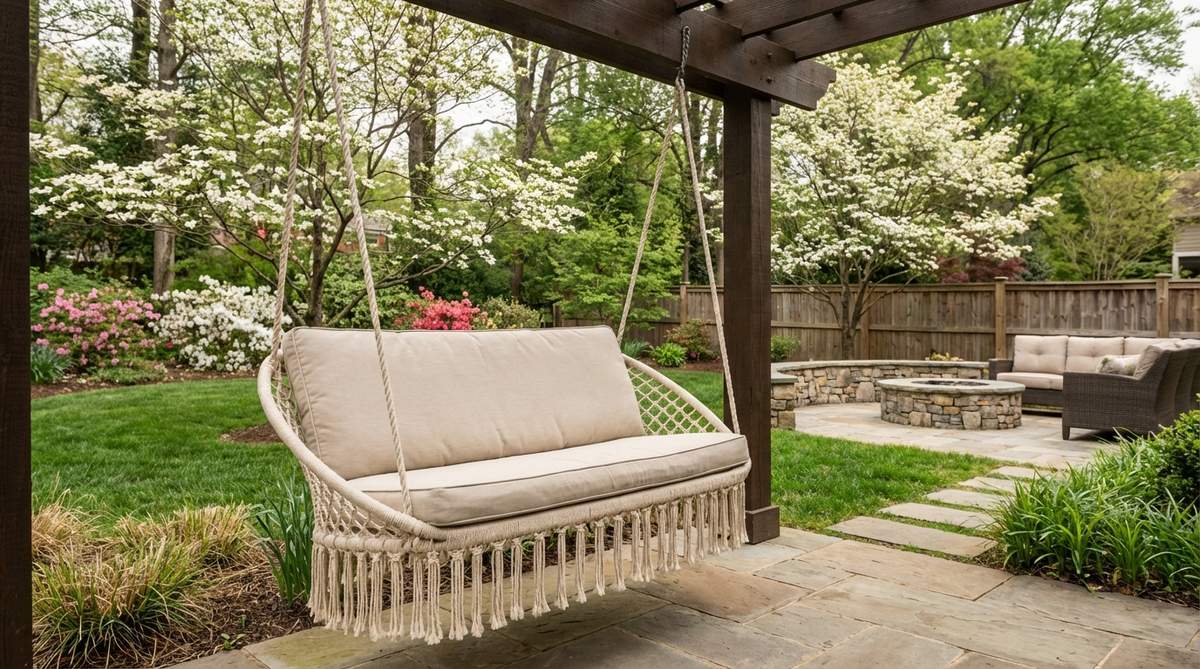
Brings an intricate, handwoven bohemian texture to your shaded outdoor corners. This hanging seat is a flawless floating pergola lounge solution.
Standard patio chairs block the floor plan, but suspending a natural cotton rope chair looks far more expensive than it is. Floating the seat 18 inches off the ground maintains open sightlines while introducing a striking vertical architectural element.
You can buy and safely install a premium woven swing for about $60–$90.
- Key Materials: Woven macrame swing chair, heavy-duty rotating ceiling mount.
- Vibe / Style: Relaxed desert boho.
- Difficulty: Moderate (requires beam drilling).
- Budget Breakdown: Macrame Swing: $60 | Mount Hardware: $20.
- Creator’s Tip: Upgrade to a 360-degree rotating swivel mount so the ropes never twist or fray when spinning in the breeze.
- Smart Sourcing: Heavy-duty 360-degree swing mounts and weather-treated macrame hanging chairs.
25. Kilim Outdoor Poufs
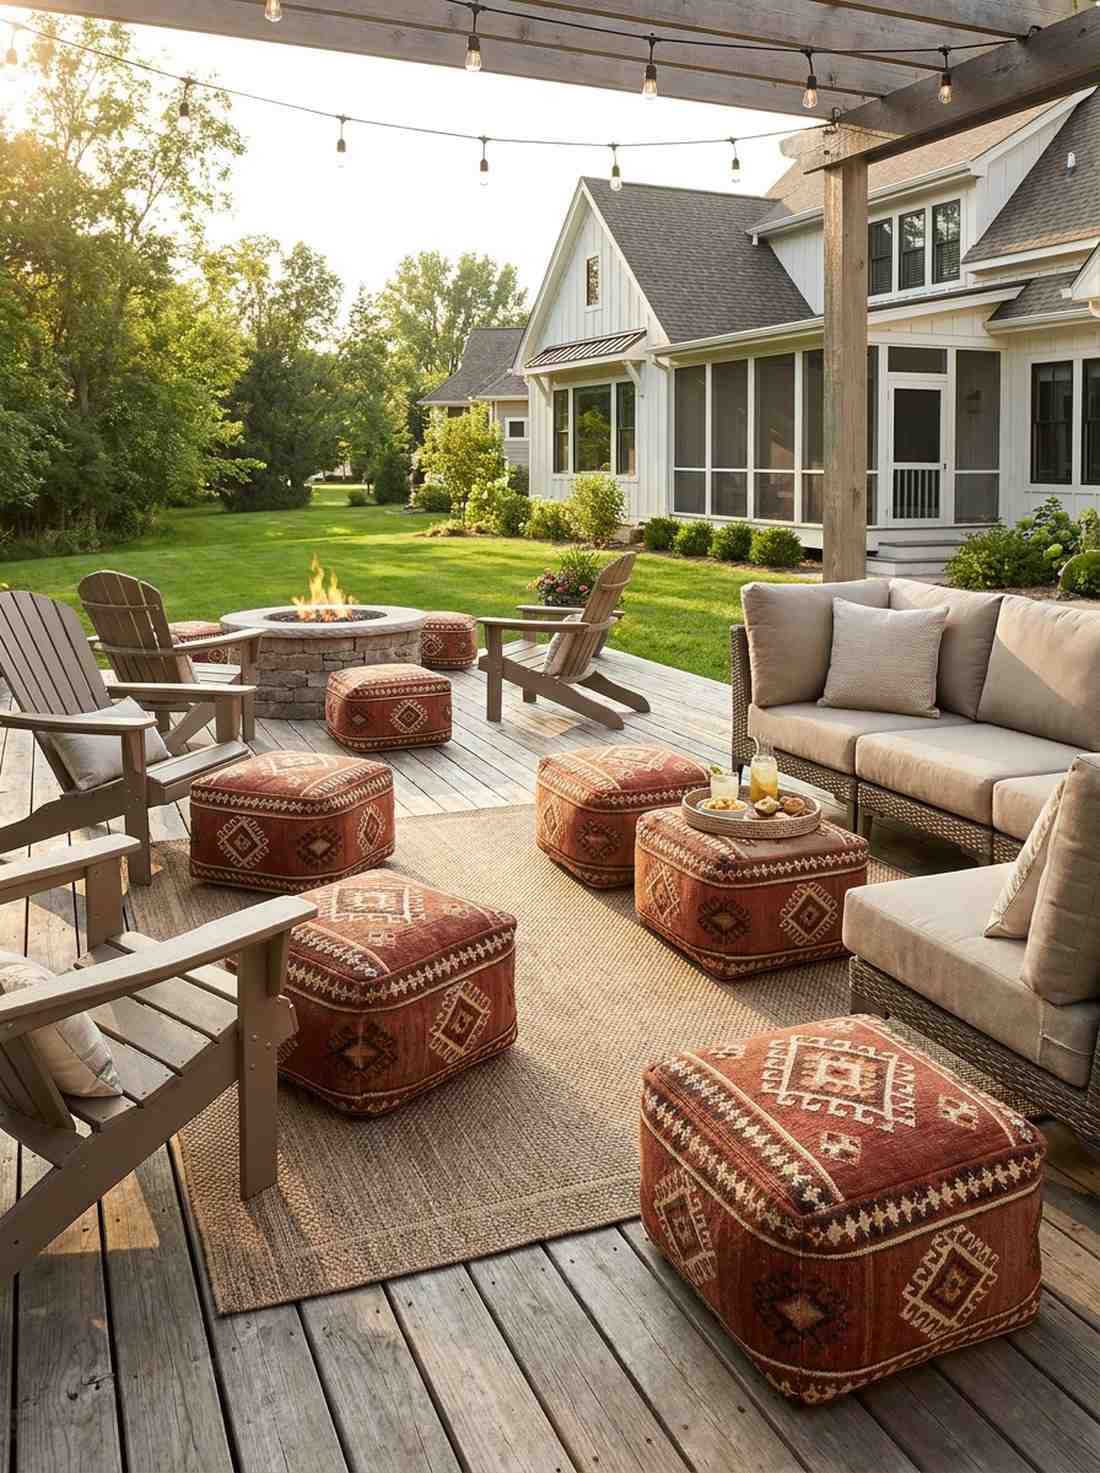
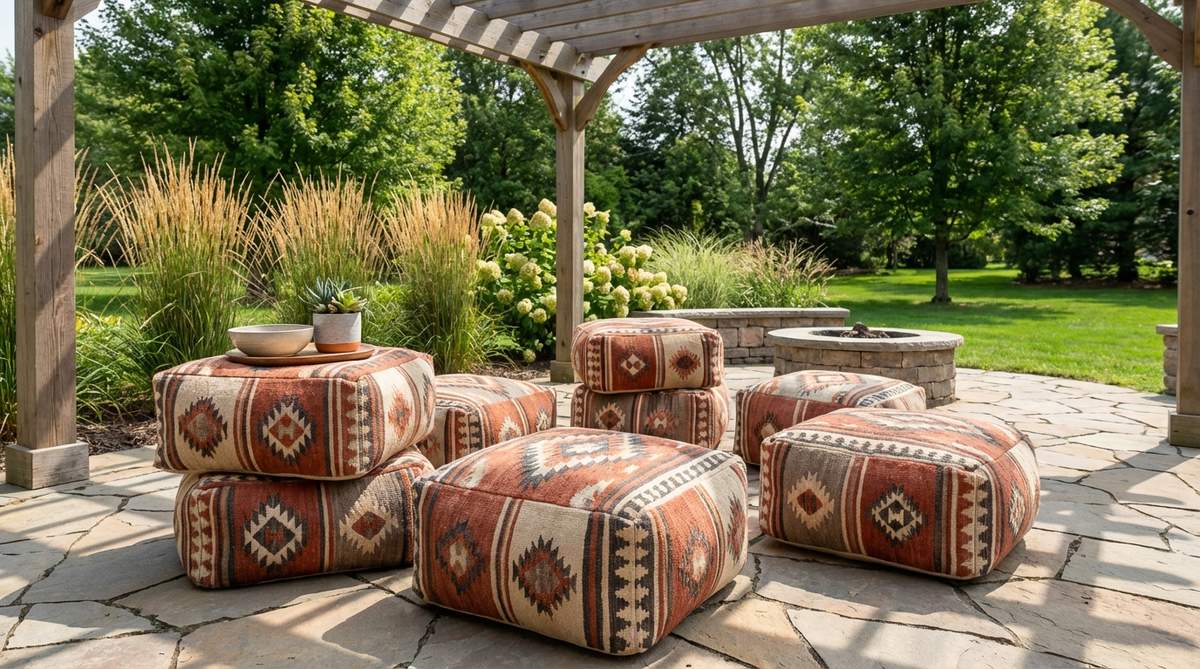
Provides highly flexible, low-profile seating that easily shifts around as the party moves. These tribal-patterned cushions are the ultimate casual gathering space addition.
Rigid furniture limits conversation flow, but introducing weather-treated rust and cream geometric poufs gives a designer-level finish. They double effortlessly as footrests or improvised side tables, blending rich textural history with modern patio utility.
These functional accent pieces run around $40–$60 each. Highly recommended for a quick seating win.
- Key Materials: Weather-treated kilim fabric pouf covers, waterproof bean bag filler.
- Vibe / Style: Global nomadic chic.
- Difficulty: Zero-effort setup.
- Budget Breakdown: Pouf Cover: $35 | EPS Filler: $15.
- Creator’s Tip: Stuff the pouf with old winter blankets and towels instead of expensive foam beads to save money and add heavy wind-proof weight.
- Smart Sourcing: Waterproof geometric pouf covers and bulk EPS bean bag filler.
Container Garden Compositions Elevate Spring Outdoor Decor
Container gardening allows precise color control and seasonal flexibility that in-ground beds cannot match. Designers are using pottery as sculptural elements that perform even when plantings rest.
26. Thriller-Filler-Spiller Formula
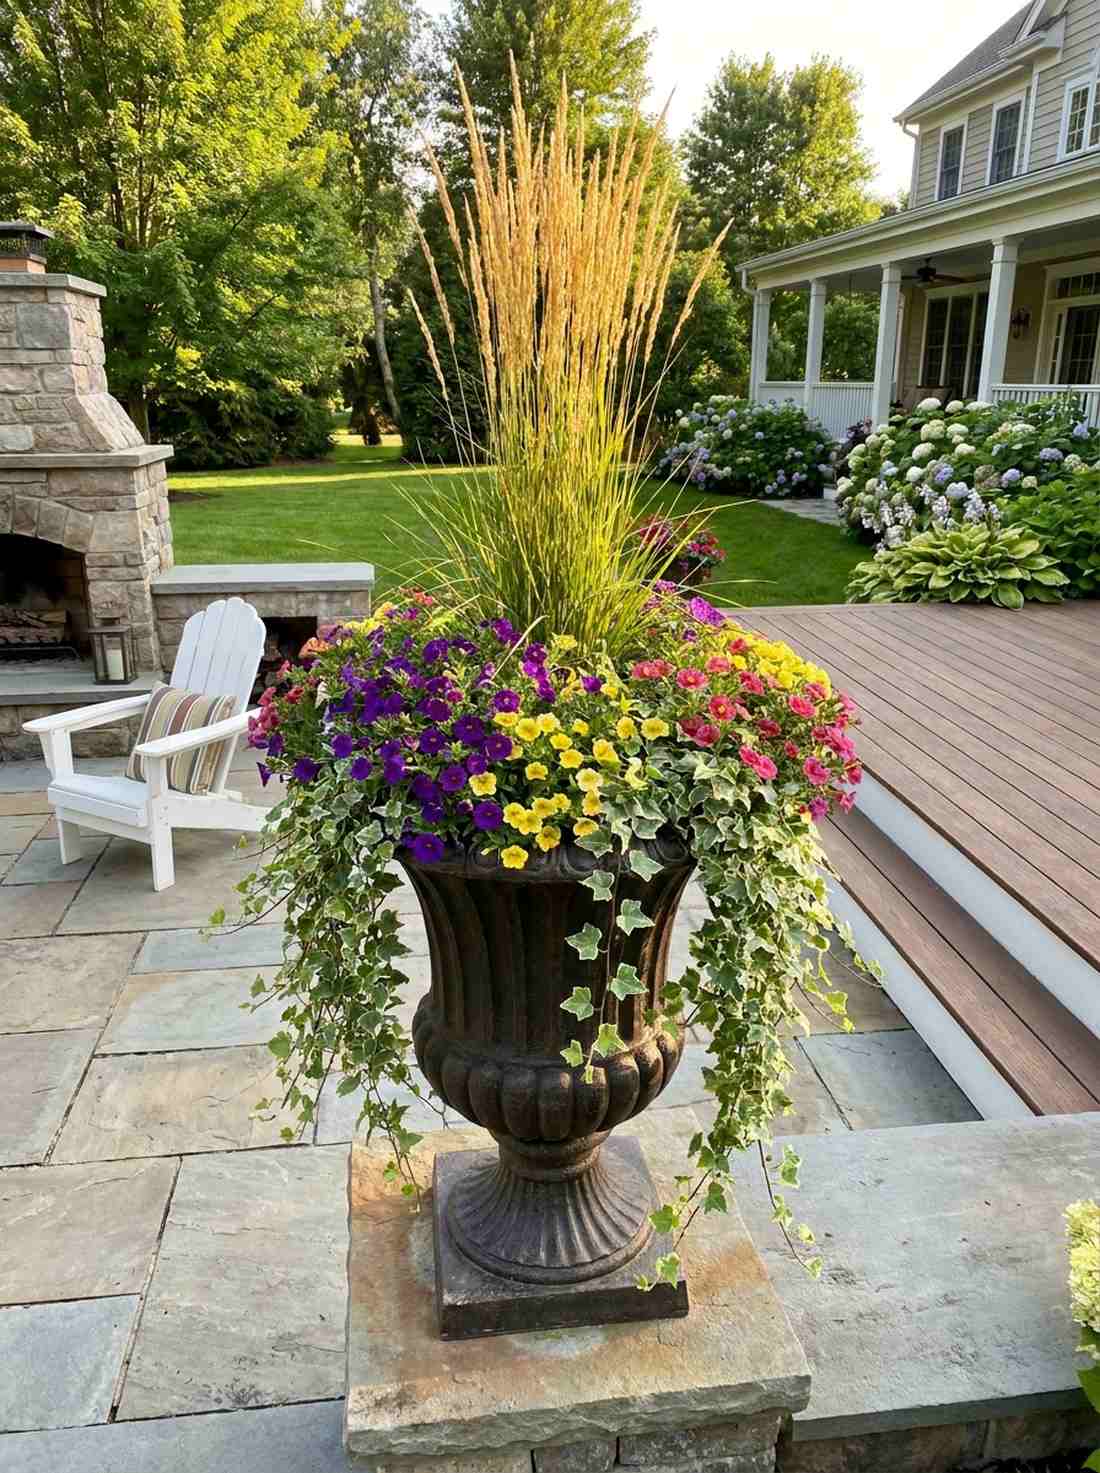
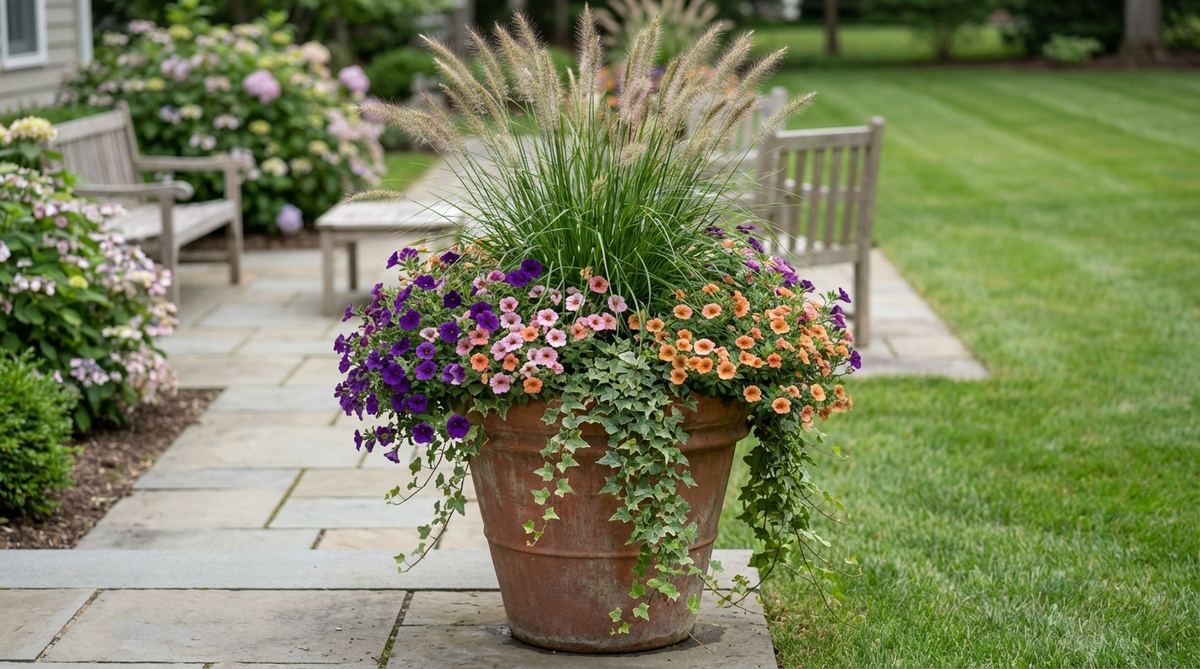
Creates a massive, professional-grade explosion of layered foliage and trailing blooms. This structured planting method is the definitive large urn focal point hack.
Just stuffing random flowers into a pot looks amateurish, but rigorously applying this three-tier formula delivers a surprisingly premium look. Anchoring with an ornamental grass, packing the middle with calibrachoa, and cascading ivy over the edges creates a perfectly balanced architectural display.
A massive layered urn will cost about $50–$80 to construct properly. Pin this to your container gardening masterclass board!
- Key Materials: Large focal urn, ornamental grass (thriller), calibrachoa (filler), trailing ivy (spiller).
- Vibe / Style: Professional botanical estate.
- Difficulty: Moderate (requires spatial planning).
- Budget Breakdown: Statement Urn: $40 | Mixed Plants: $35.
- Creator’s Tip: Position your tall “thriller” plant slightly off-center in the back if the pot is placed against a wall, pushing the fillers forward.
- Smart Sourcing: Lightweight resin statement urns and slow-release container fertilizer granules.
27. Citrus Tree Container Grove
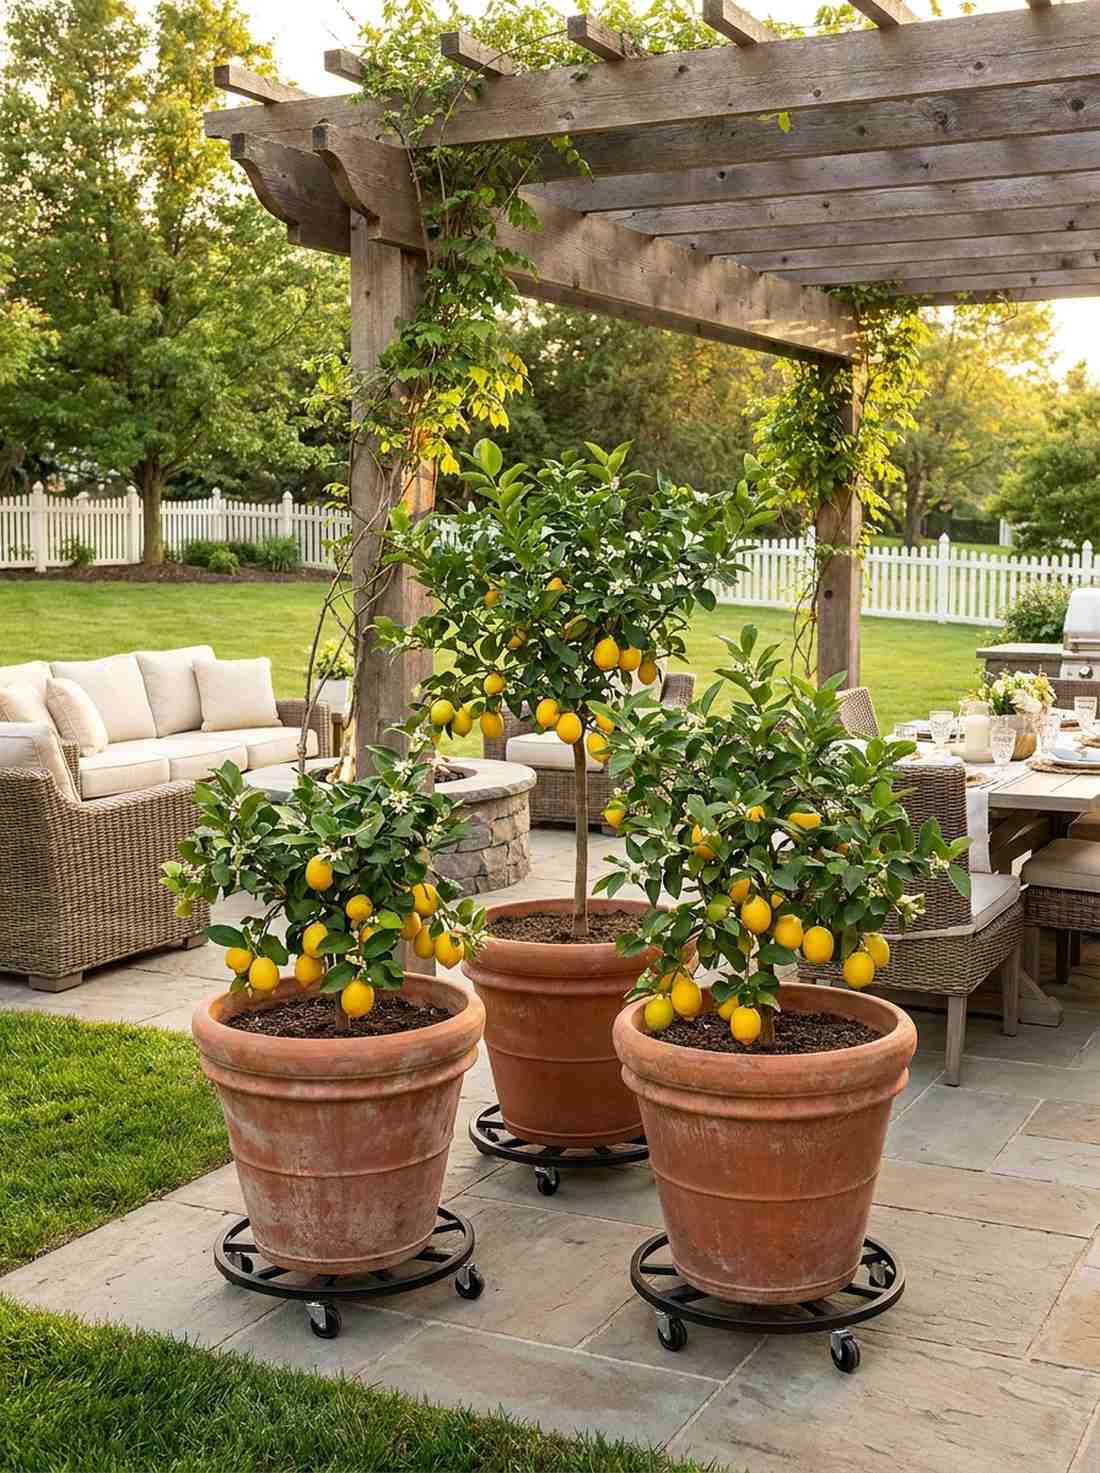
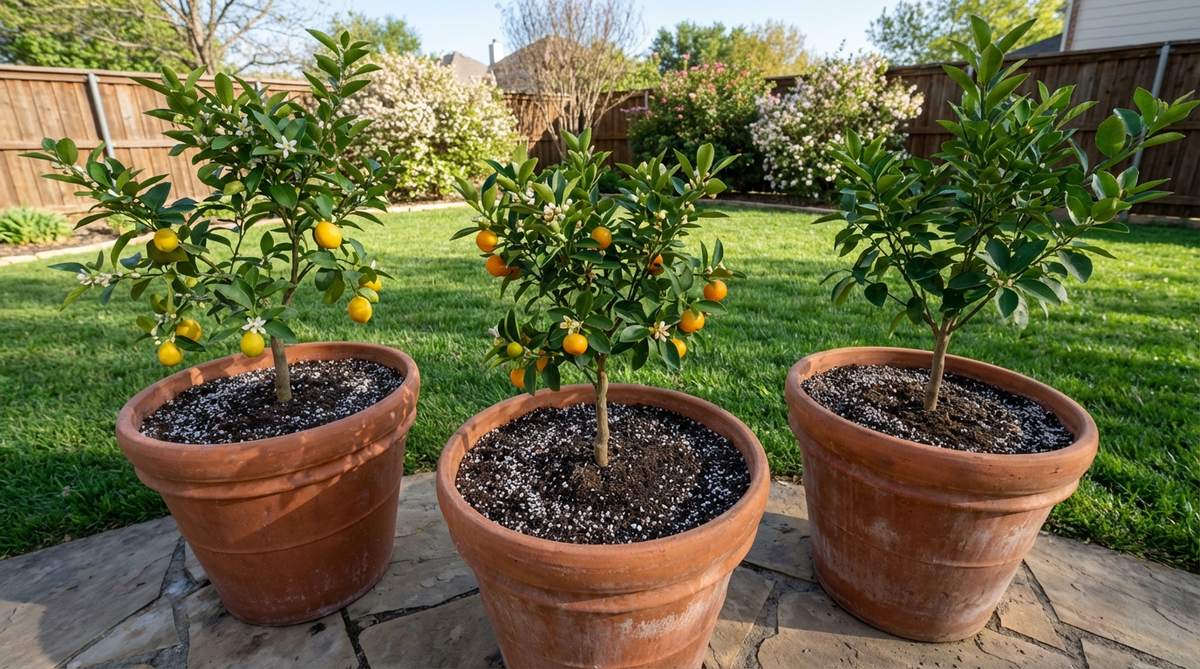
Fills your patio with the intoxicating, sweet scent of blossoming lemon blossoms. This portable orchard is an exceptional edible patio landscaping trick.
Planting delicate fruit trees in the ground risks frost death, but utilizing terracotta pots on rolling caddies gives a designer-level finish while protecting your investment. Dwarf Meyer lemons thrive in restricted root spaces and provide a stunning pop of yellow against deep green foliage.
Setting up a trio of dwarf trees costs roughly $100–$150. Save this if you love functional garden aesthetics!
- Key Materials: Dwarf Meyer lemon trees, heavy terracotta pots, citrus-specific potting mix, heavy-duty rolling caddies.
- Vibe / Style: Tuscan courtyard orchard.
- Difficulty: Moderate (requires feeding schedules).
- Budget Breakdown: Dwarf Tree: $40 | Pot & Soil: $25 (each).
- Creator’s Tip: Elevate the pots onto rolling caddies; terracotta stains concrete badly, and you’ll need to roll them into the sun easily.
- Smart Sourcing: Heavy-duty plant caddies with wheels and organic citrus tree fertilizer spikes.
28. Painted Tire Planters

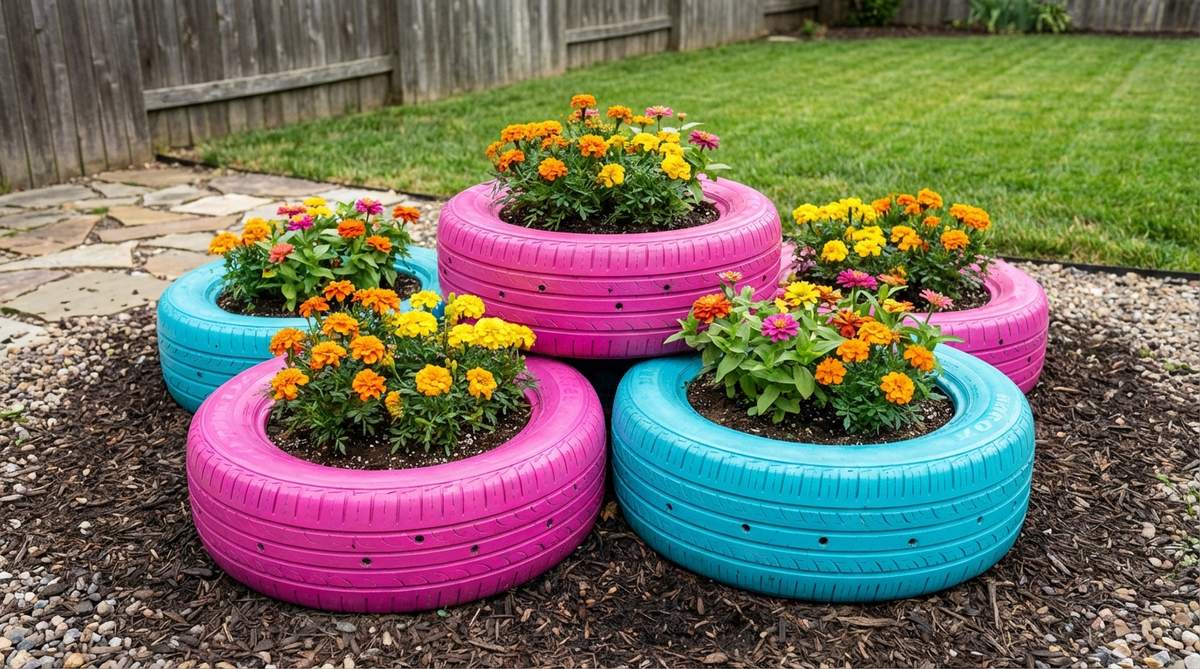
Turns literal garbage into a vibrant, electric pop of neon color for the garden. This bold upcycling project serves as a fantastic budget heat-loving flower bed.
Leaving tires black looks like a junkyard, but coating them in electric pink and turquoise outdoor paint looks far more expensive than it is. The thick rubber acts as an incredible heat sink, warming the soil rapidly to supercharge the growth of zinnias and marigolds.
This virtually free container setup costs about $15 in spray paint.
- Key Materials: Recycled rubber tires, outdoor primer, neon spray paint, heavy-duty drill.
- Vibe / Style: Eclectic neon punk garden.
- Difficulty: Easy.
- Budget Breakdown: Tires: $0 | Paint & Soil: $15.
- Creator’s Tip: You absolutely must drill five large drainage holes along the bottom curve, or the tire will become a stagnant mosquito breeding pool.
- Smart Sourcing: Neon exterior spray paints (bulk pack) and heavy-duty titanium drill bits.
You might think high-end decor requires a contractor, but this next simple trick proves you just need the right hardware…
29. Berry Basket Herb Collection
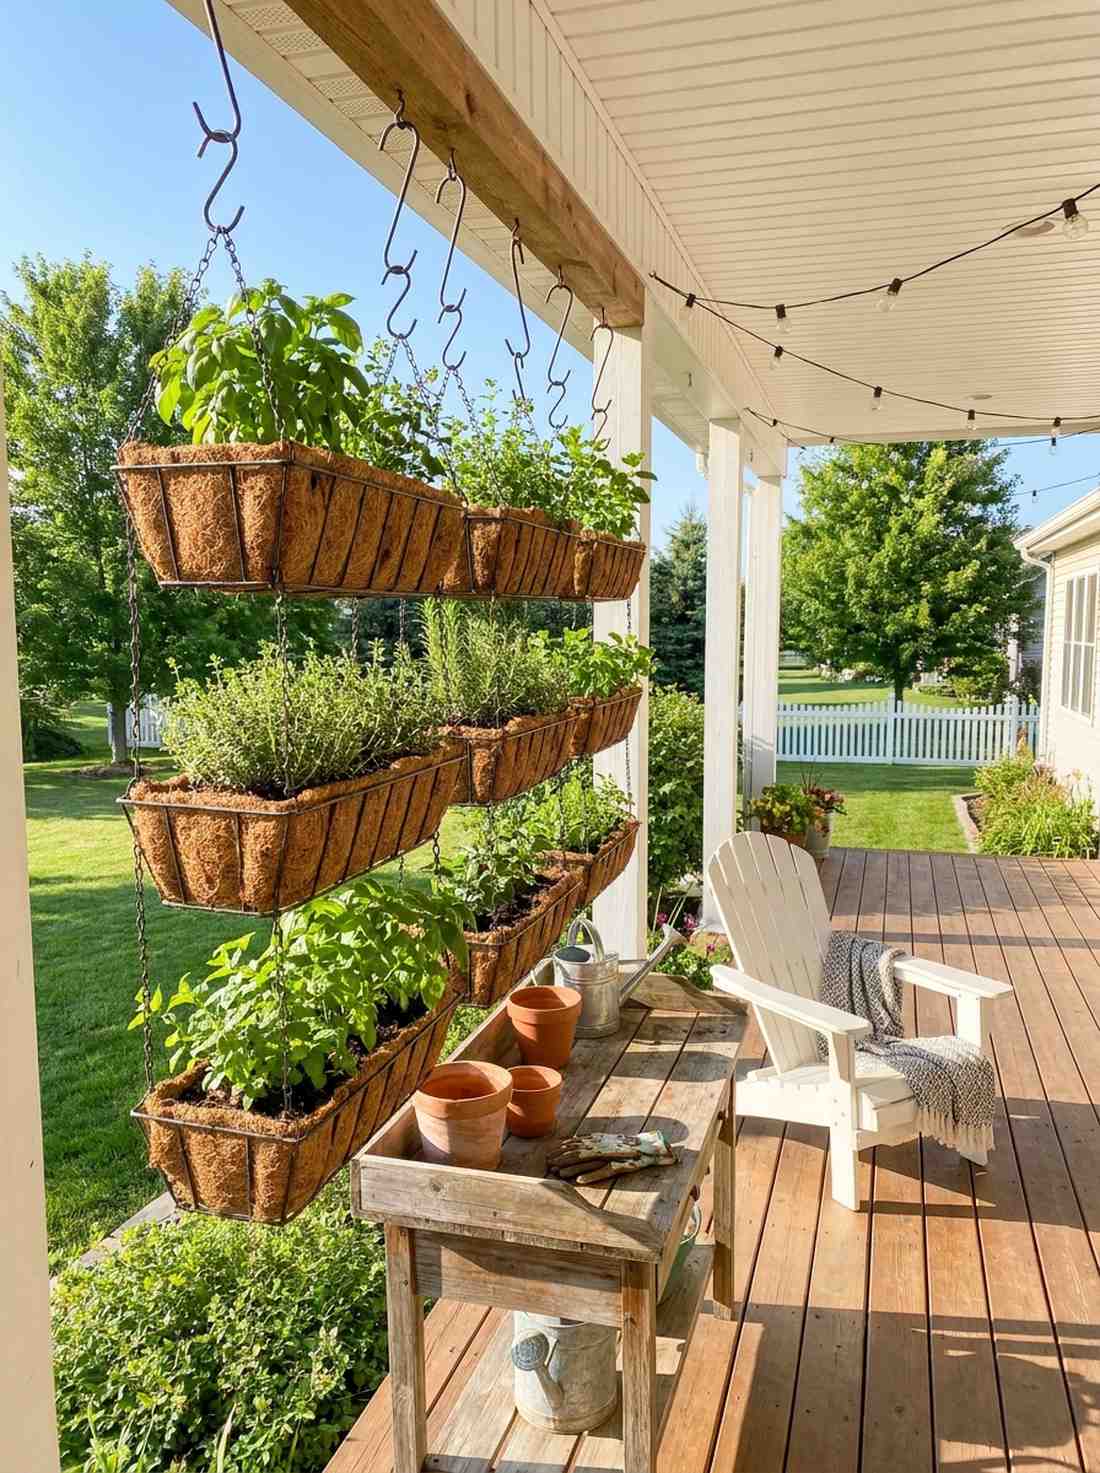
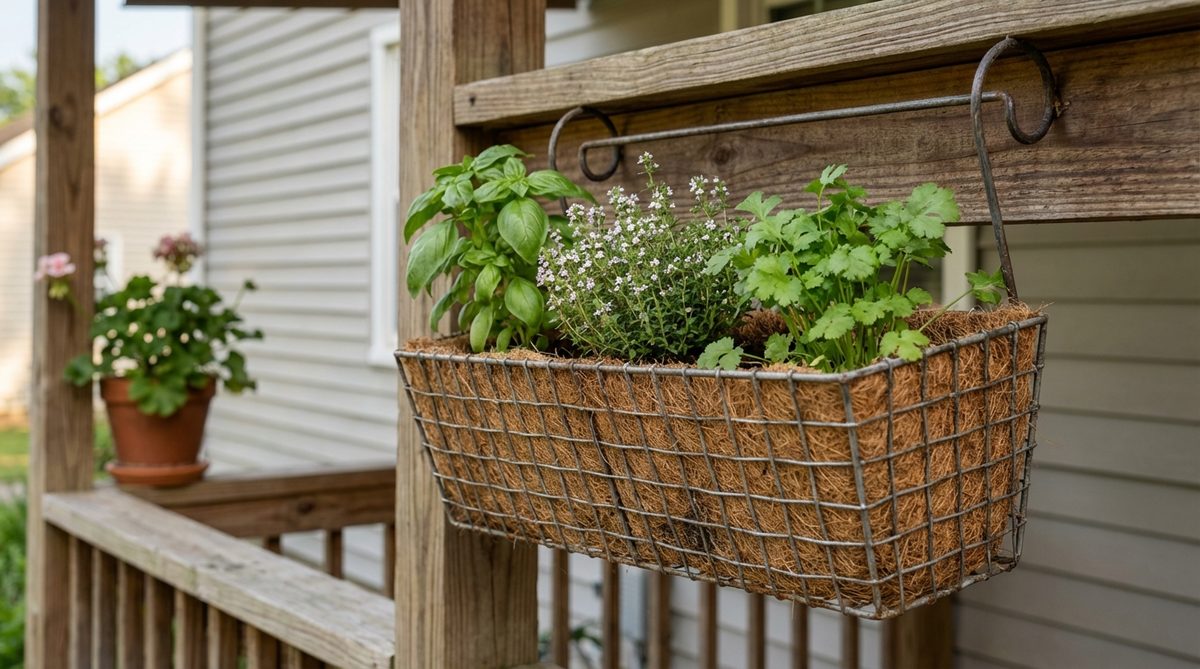
Dangles a fragrant, reachable mini-kitchen right outside your back door. This rustic hanging system is an ideal vertical porch kitchen garden.
Plastic herb pots look cheap and dry out, but lining vintage wire berry baskets with natural coir gives a designer-level finish. The open-wire weave provides phenomenal oxygen circulation to the roots, preventing root rot while offering instant access to fresh basil and thyme.
You can assemble this functional rustic display for under $30.
- Key Materials: Vintage wire berry baskets, coco coir liners, assorted culinary herbs, S-hooks.
- Vibe / Style: Rustic farmhouse kitchen.
- Difficulty: Easy.
- Budget Breakdown: Baskets & Liners: $20 | Herb Starters: $10.
- Creator’s Tip: Cut a small circle from a plastic grocery bag and place it at the very bottom of the coir liner to retain a tiny reservoir of water.
- Smart Sourcing: Pre-cut coco coir basket liners and heavy-duty metal S-hooks.
30. Monochrome Succulent Bowl
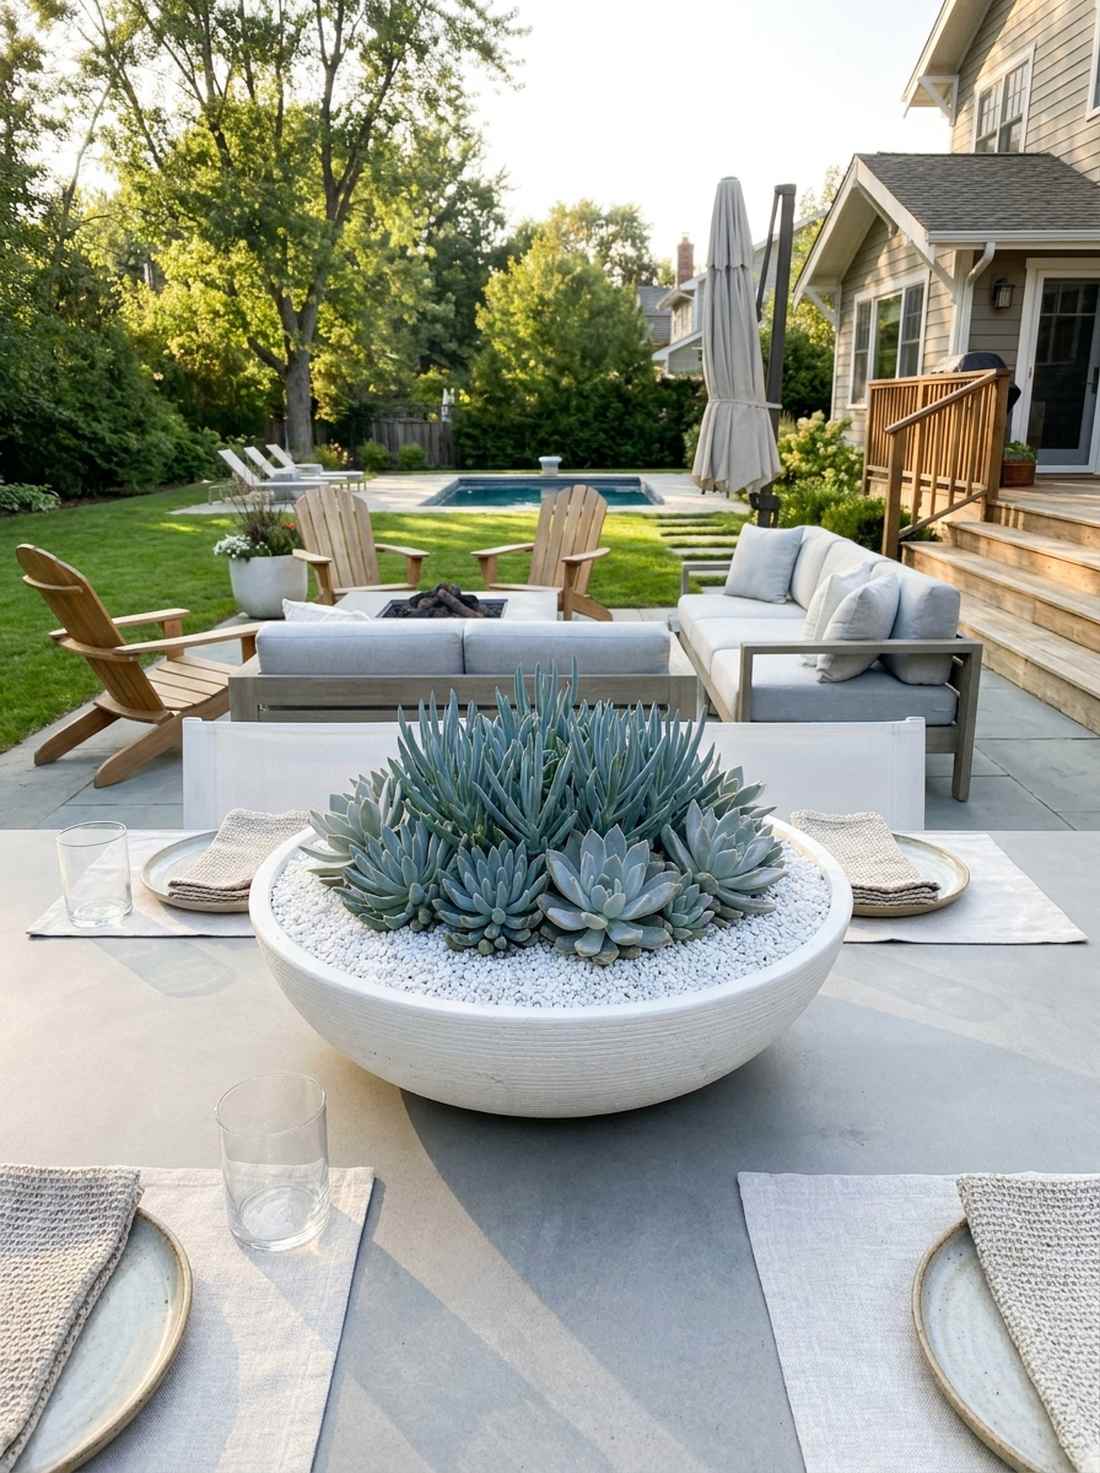
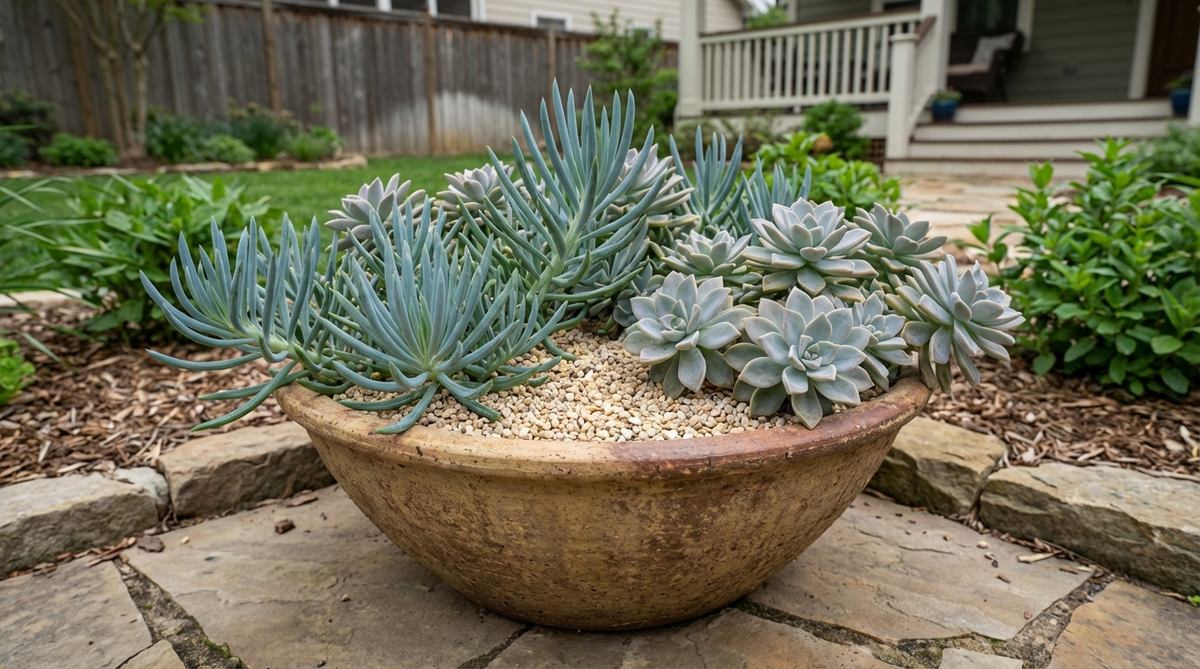
Projects a serene, ocean-inspired calmness through perfect geometric symmetry. This low-water focal point is a striking modern patio table centerpiece.
Mixing crazy colors often looks messy, but restricting the palette entirely to blue-gray varieties delivers a surprisingly premium look. Grouping Blue Chalk Sticks and Ghost Plants in a wide, shallow ceramic bowl mimics the high-end minimalist styling seen in luxury resort lobbies.
A dense, monochromatic bowl costs roughly $35–$50 to assemble. Pin this if you constantly forget to water your plants!
- Key Materials: Wide ceramic dish planter, cactus/succulent soil mix, blue-gray succulent cuttings, fine top-dressing gravel.
- Vibe / Style: Coastal modern minimalist.
- Difficulty: Easy.
- Budget Breakdown: Ceramic Bowl: $20 | Succulents & Soil: $25.
- Creator’s Tip: Top-dress the exposed soil with fine white aquarium gravel; it stops fungus gnats and makes the blue tones pop aggressively.
- Smart Sourcing: Fast-draining succulent soil mix and fine decorative top-dressing gravel.
31. Caladium Shade Container
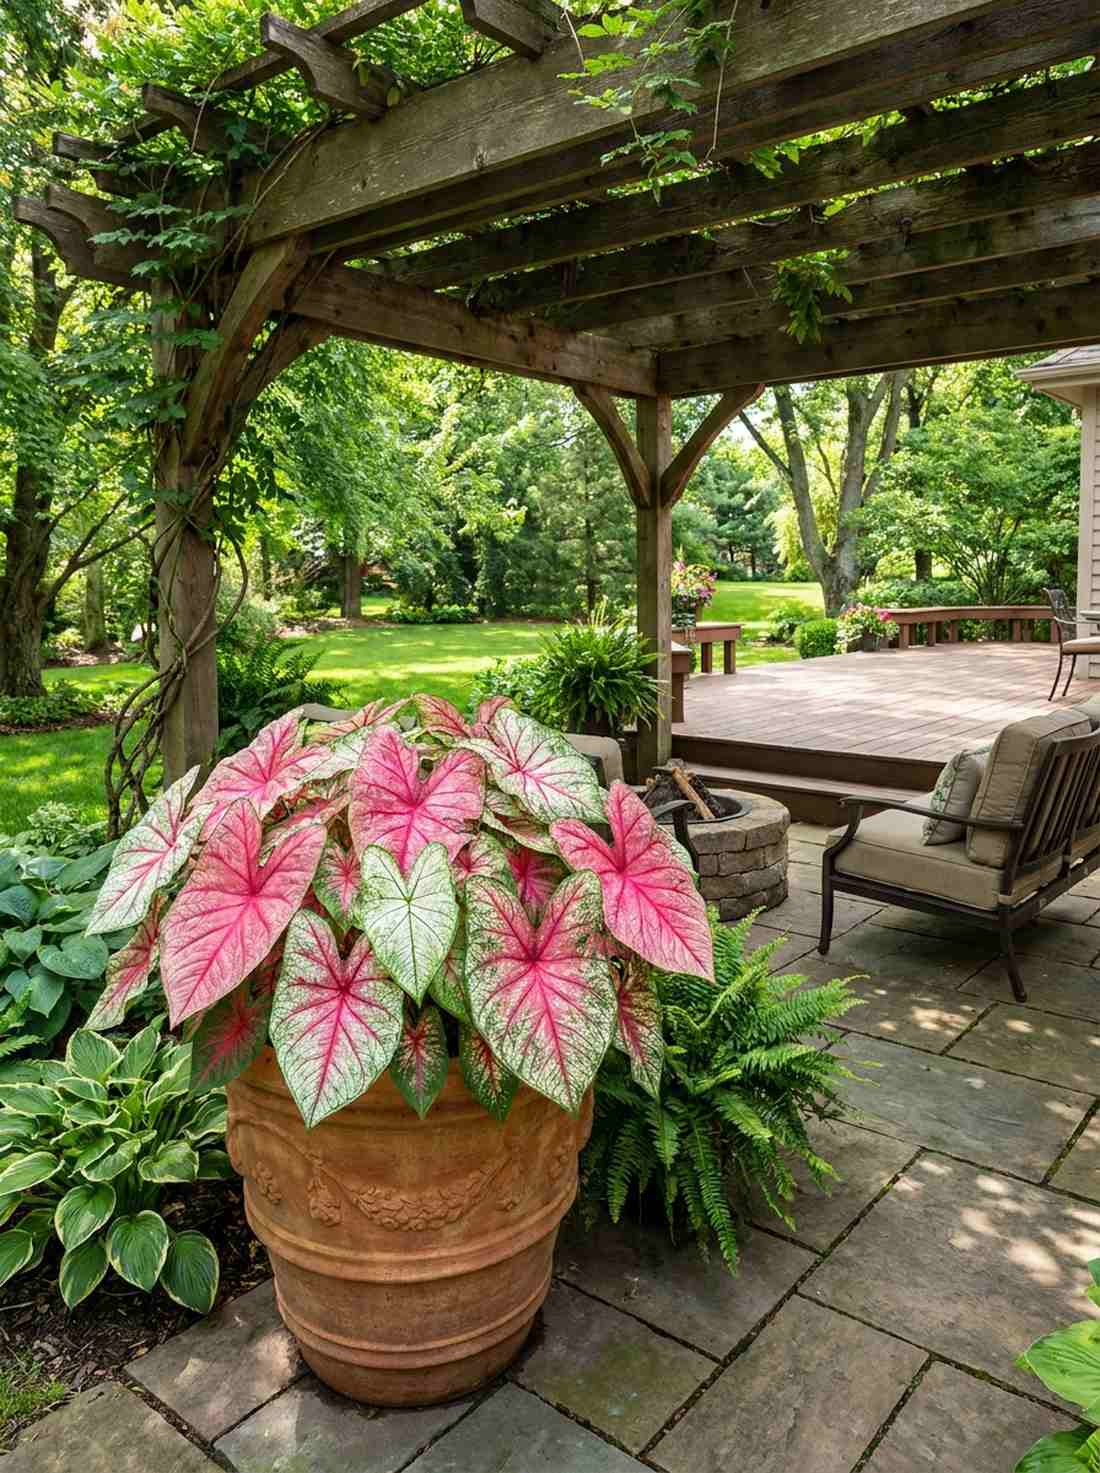
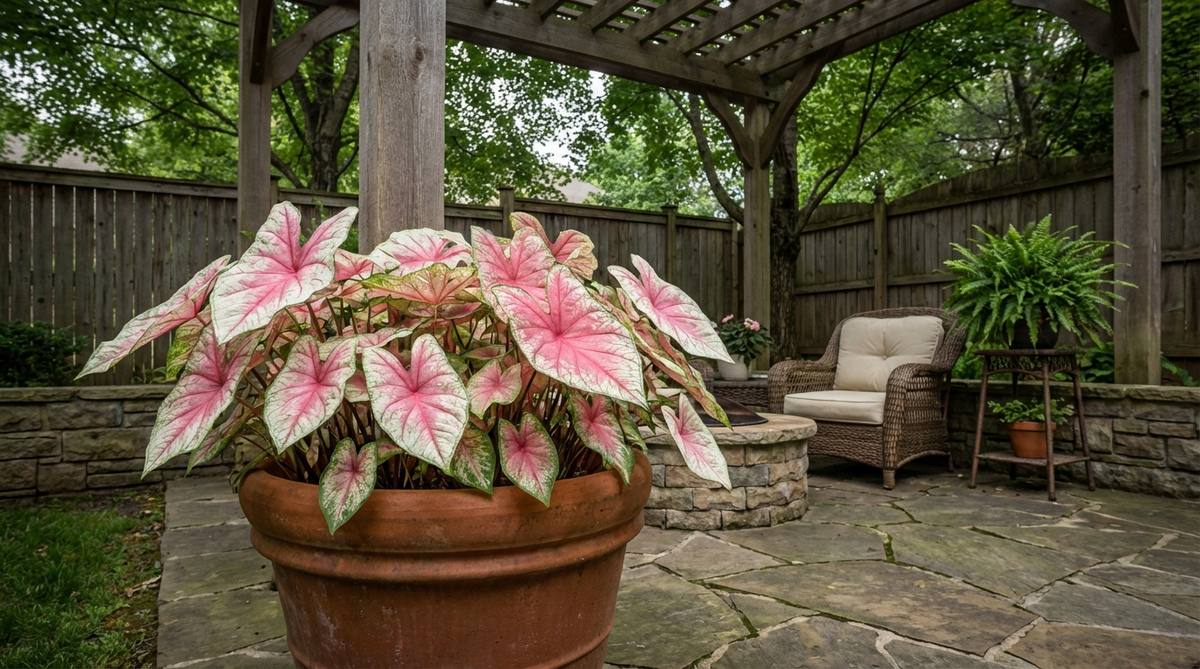
Lights up the darkest corners of your yard with striking, neon-veined foliage. This zero-flower strategy is the ultimate deep shade patio brightener.
Forcing sun-loving flowers into the shade guarantees a leggy, dying mess; however, leaning into massive variegated leaves looks far more expensive than it is. Caladiums offer a massive surface area of pink and white patterns that read visually as massive blooms without requiring direct sunlight.
A massive pot of these tropical beauties costs around $30 in bulbs.
- Key Materials: Caladium tubers, large decorative pot, moisture-retaining soil.
- Vibe / Style: Lush tropical understory.
- Difficulty: Easy.
- Budget Breakdown: Bulbs: $15 | Potting Mix: $15.
- Creator’s Tip: Do not plant the tubers until the nighttime soil temperatures reliably stay above 70°F, or they will rot in the ground.
- Smart Sourcing: Jumbo caladium tubers (bulk pack) and moisture-control potting mixes.
32. Stacked Crate Planter Tower
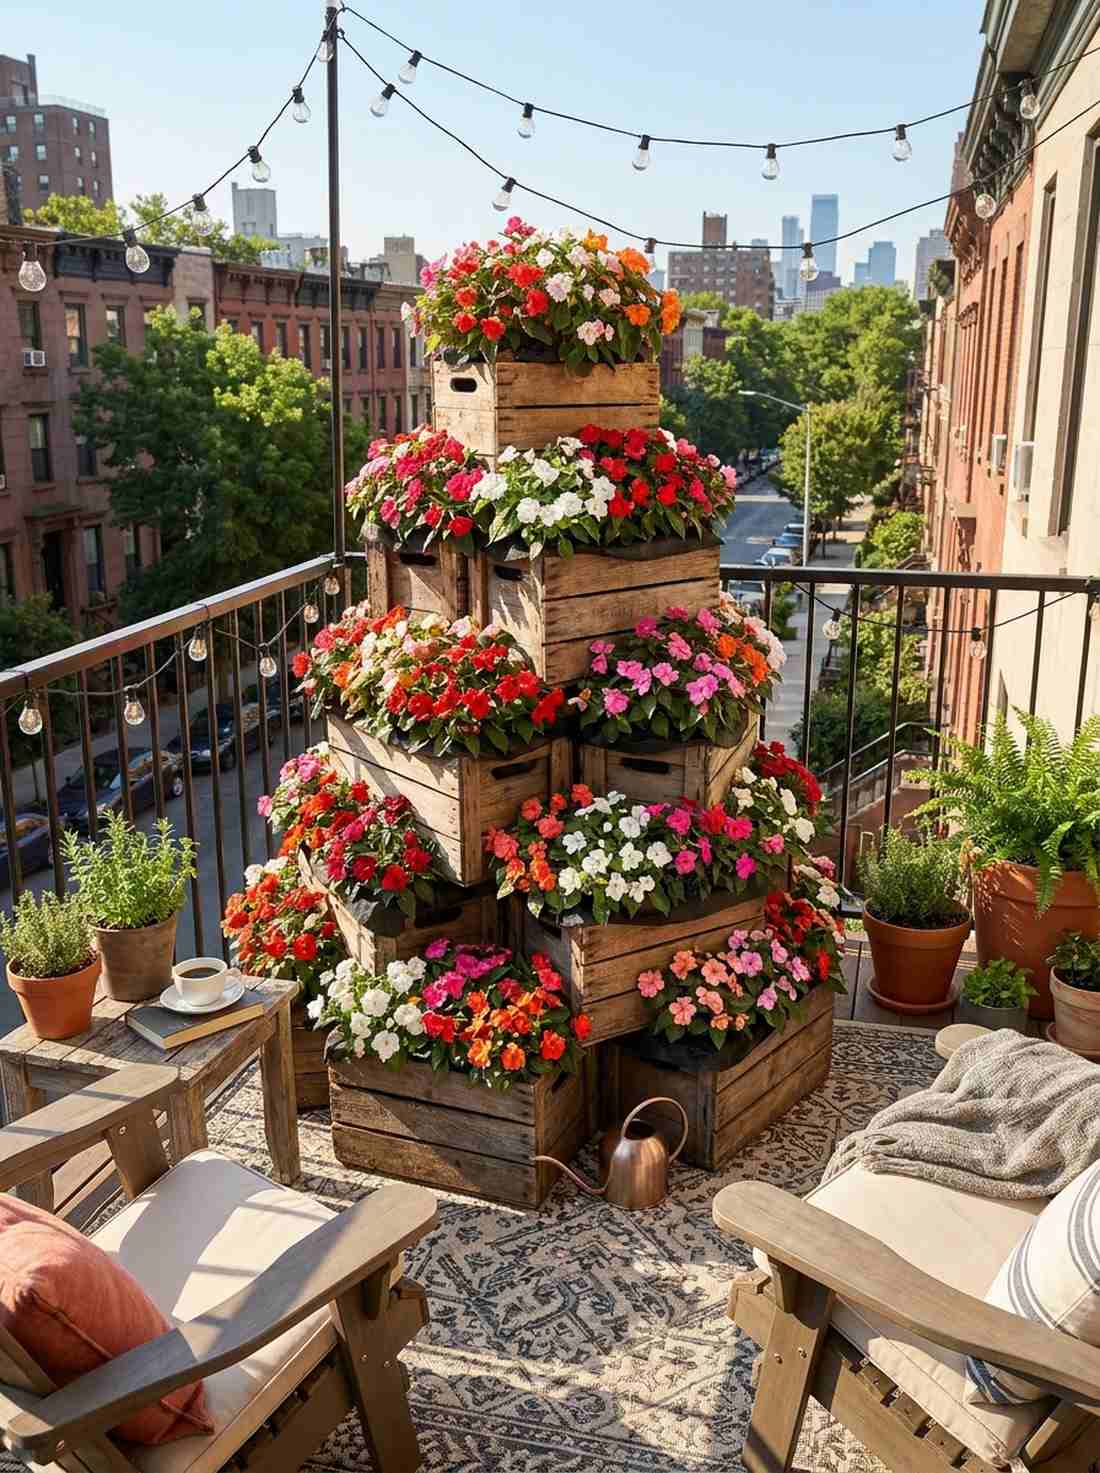
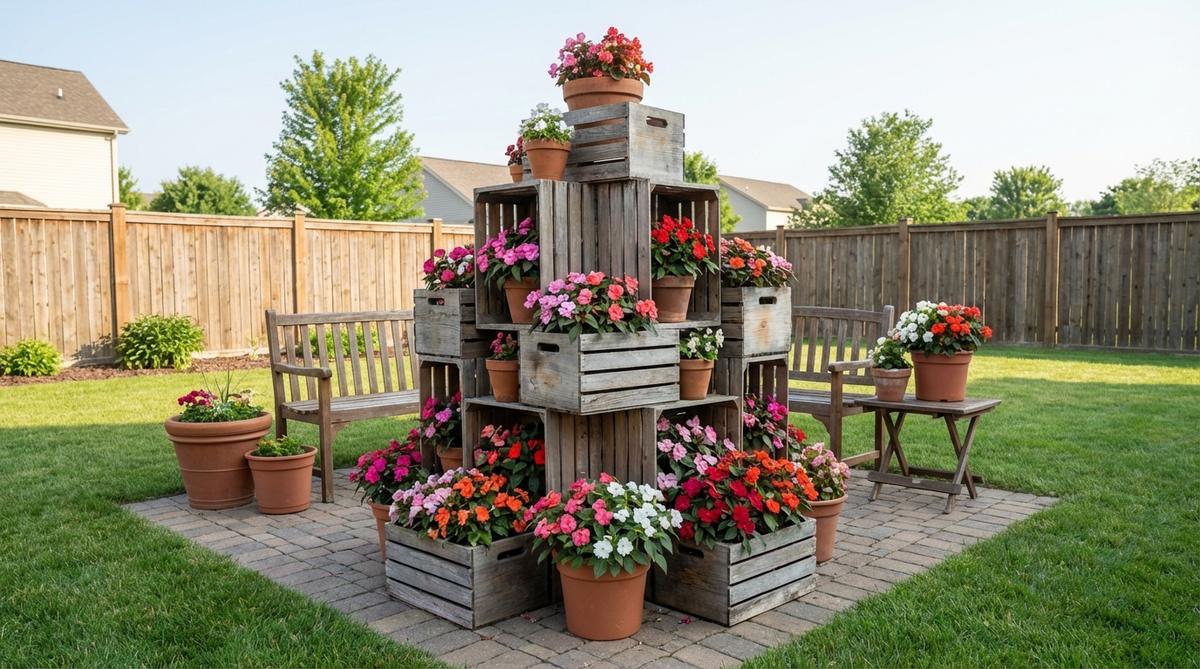
Constructs a massive, multi-level mountain of color taking up almost zero floor space. This tiered wooden setup is a brilliant small balcony vertical garden hack.
Setting individual pots on the floor looks cluttered, but screwing vintage wooden crates into a pyramid gives a designer-level finish. This rigged tower allows you to pack dozens of impatiens and begonias into a tightly layered arrangement that dominates the visual space.
You can build this structural tower for about $40–$60. Save this for your small space apartment garden board!
- Key Materials: 5 wooden apple crates, wood screws, landscape fabric, assorted shade flowers.
- Vibe / Style: Upcycled farmer’s market.
- Difficulty: Moderate (requires power drilling).
- Budget Breakdown: Wood Crates: $30 | Hardware & Fabric: $15.
- Creator’s Tip: Heavily staple thick landscape fabric inside the crates before adding soil so the wet dirt doesn’t rot the wood from the inside out.
- Smart Sourcing: Pre-cut heavy-duty landscape fabric and exterior rust-proof wood screws.
Lighting & Ambiance Layers for Evening Spring Outdoor Decor
Illumination extends usability hours while highlighting architectural and botanical features. Current installations blend functional task lighting with ambient glow sources.
33. Solar Lantern Pathway
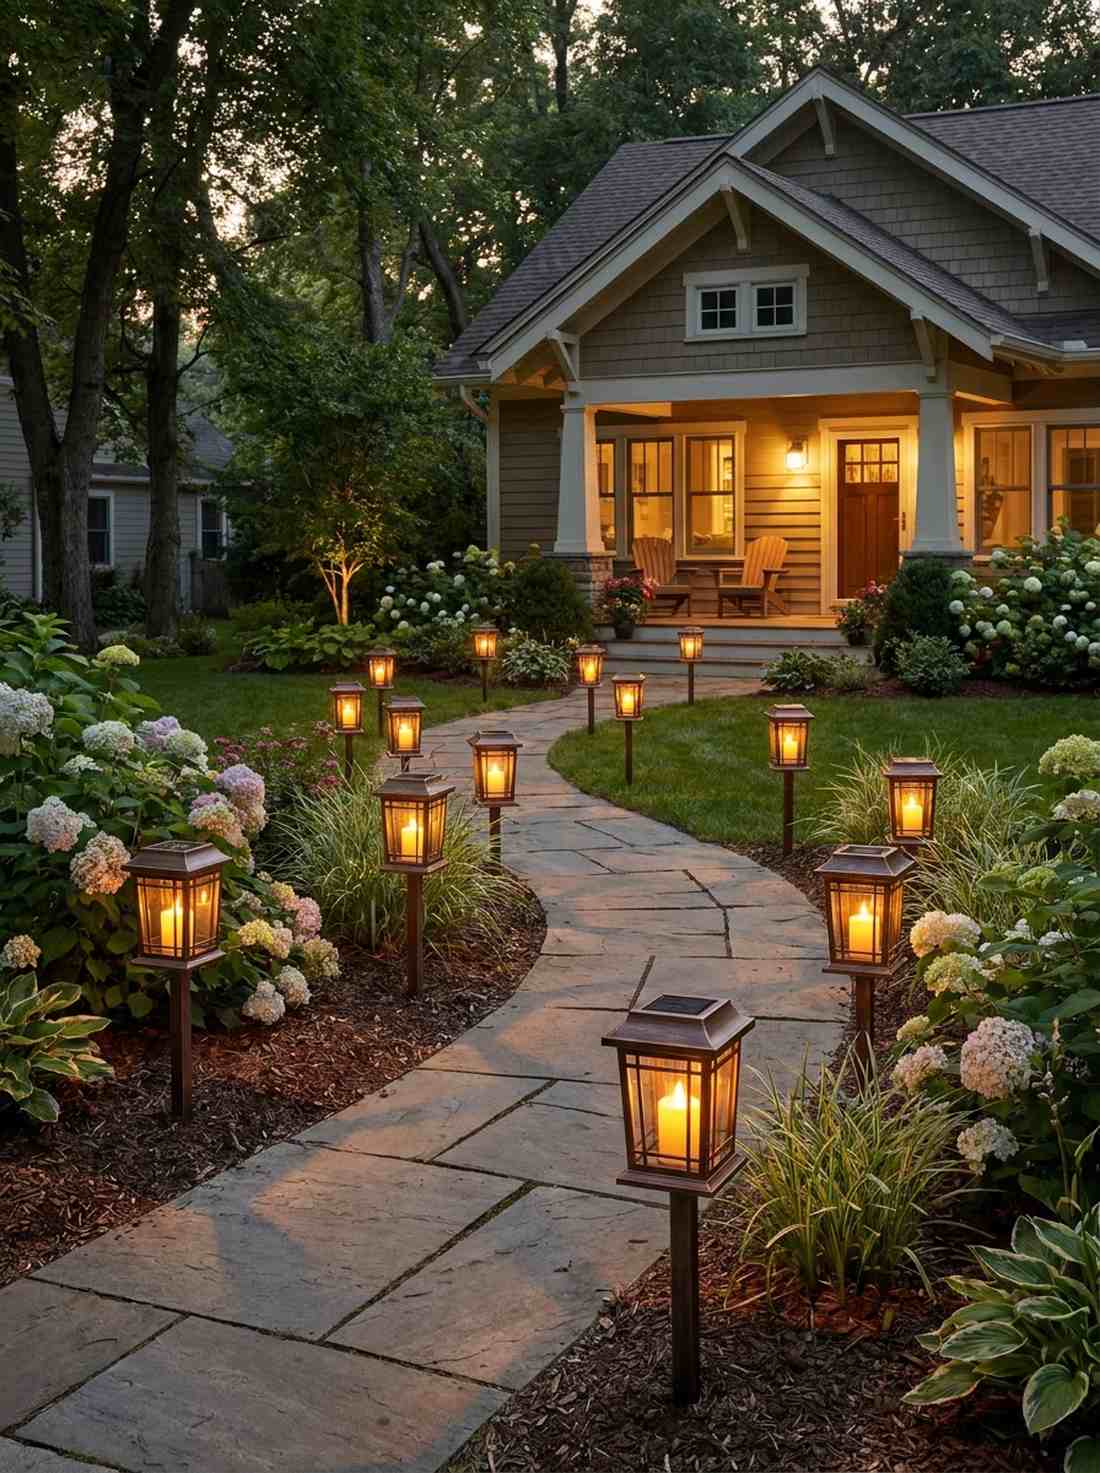
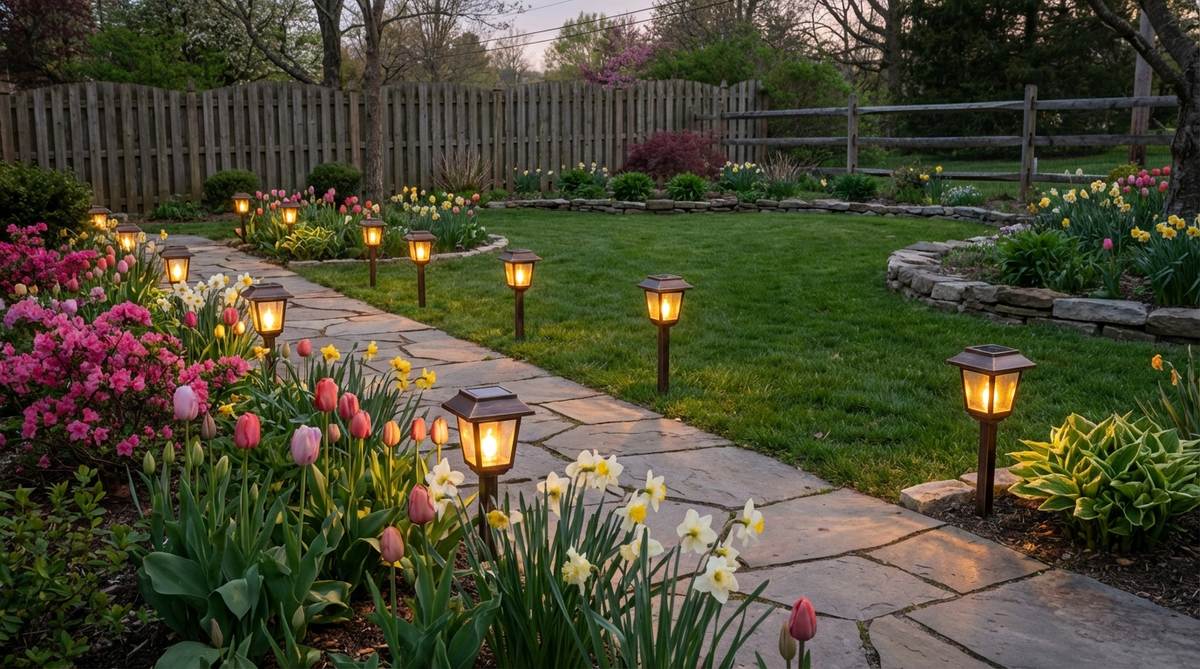
Guides your guests through a magical, softly glowing twilight garden journey. This zero-wiring installation serves as a perfect garden walkway safety illumination.
Harsh white floodlights blind your guests, but spacing out bronze-finished LED lanterns delivers a surprisingly premium look. Staking these warm-glow solar units near your most vibrant floral patches mimics the romantic, flickering aesthetic of real candlelight without the fire hazards.
A full set of high-quality solar lanterns runs about $40–$60. Pin this if you love cozy evening vibes!
- Key Materials: Bronze solar LED path lanterns, pathway ground stakes.
- Vibe / Style: Romantic twilight estate.
- Difficulty: Zero-effort setup.
- Budget Breakdown: 6-Pack Solar Lanterns: $50.
- Creator’s Tip: Never place them in a perfectly straight runway line; stagger them in a gentle zigzag to create organic depth and mystery.
- Smart Sourcing: Warm-white solar LED path lanterns (bulk pack) and glass-cleaning panel wipes.
34. String Light Canopy
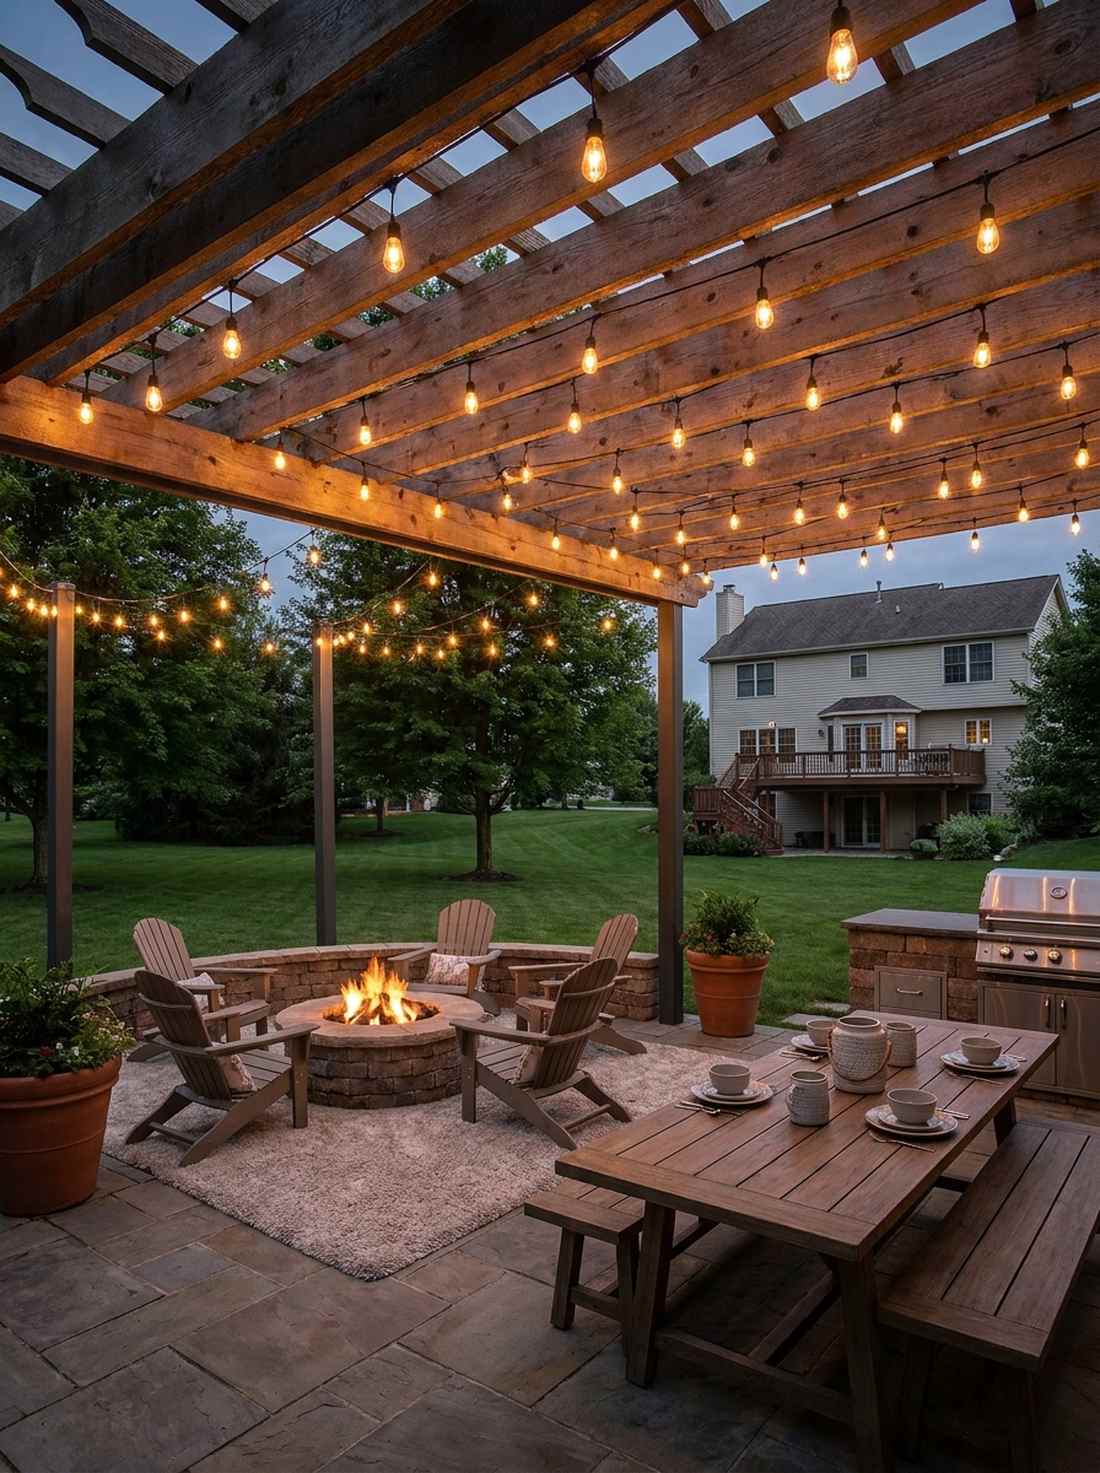
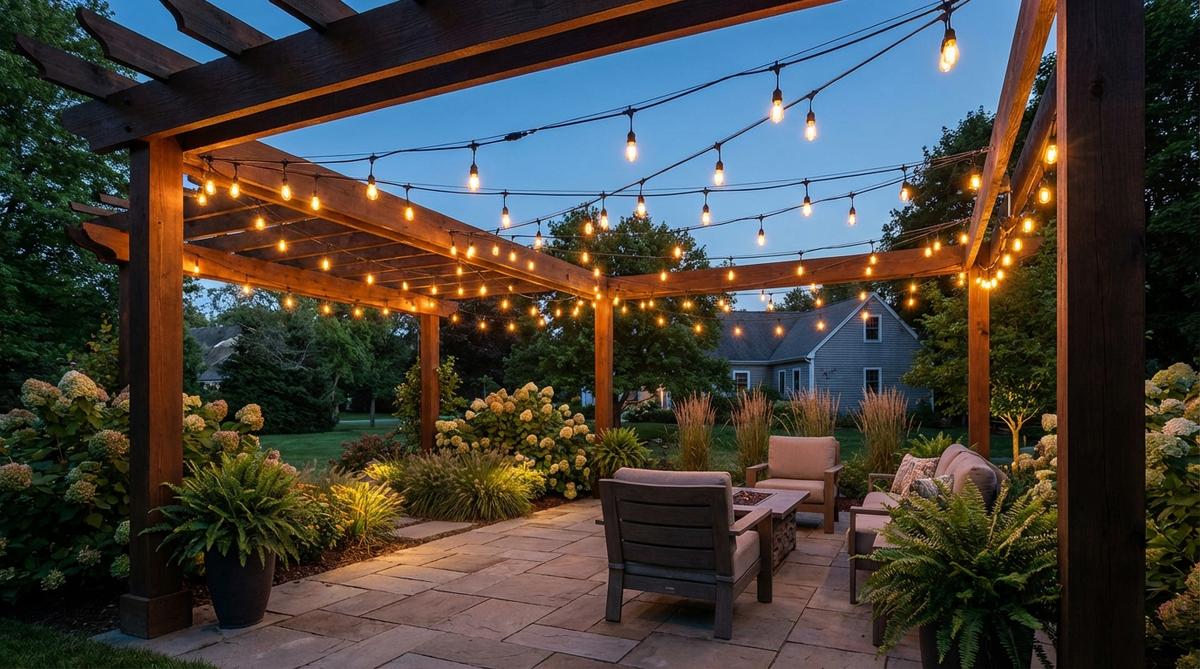
Creates an intimate, glowing artificial ceiling that turns an empty void into a defined room. This overhead grid is an absolute must-have open patio ambiance upgrade.
Using cheap indoor fairy lights outdoors leads to short circuits, whereas investing in heavy-duty commercial Edison bulbs looks far more expensive than it is. Stringing a tight zigzag pattern high above the seating area provides a vintage, industrial character that warms up cold spring nights.
A commercial-grade lighting canopy will cost around $80–$120.
- Key Materials: Commercial-grade outdoor Edison string lights, steel tension wire kit.
- Vibe / Style: Industrial outdoor bistro.
- Difficulty: Advanced (requires tension mounting).
- Budget Breakdown: String Lights: $70 | Tension Cable Kit: $30.
- Creator’s Tip: You must use a steel tension cable guide wire; hanging heavy commercial bulbs by their own cord causes snapping during spring storms.
- Smart Sourcing: Commercial-grade shatterproof string lights and stainless steel wire tension kits.
Most people ruin their expensive garden by leaving it totally dark at night. This next lighting hack makes cheap trees look like million-dollar sculptures.
35. Uplighting for Specimen Trees
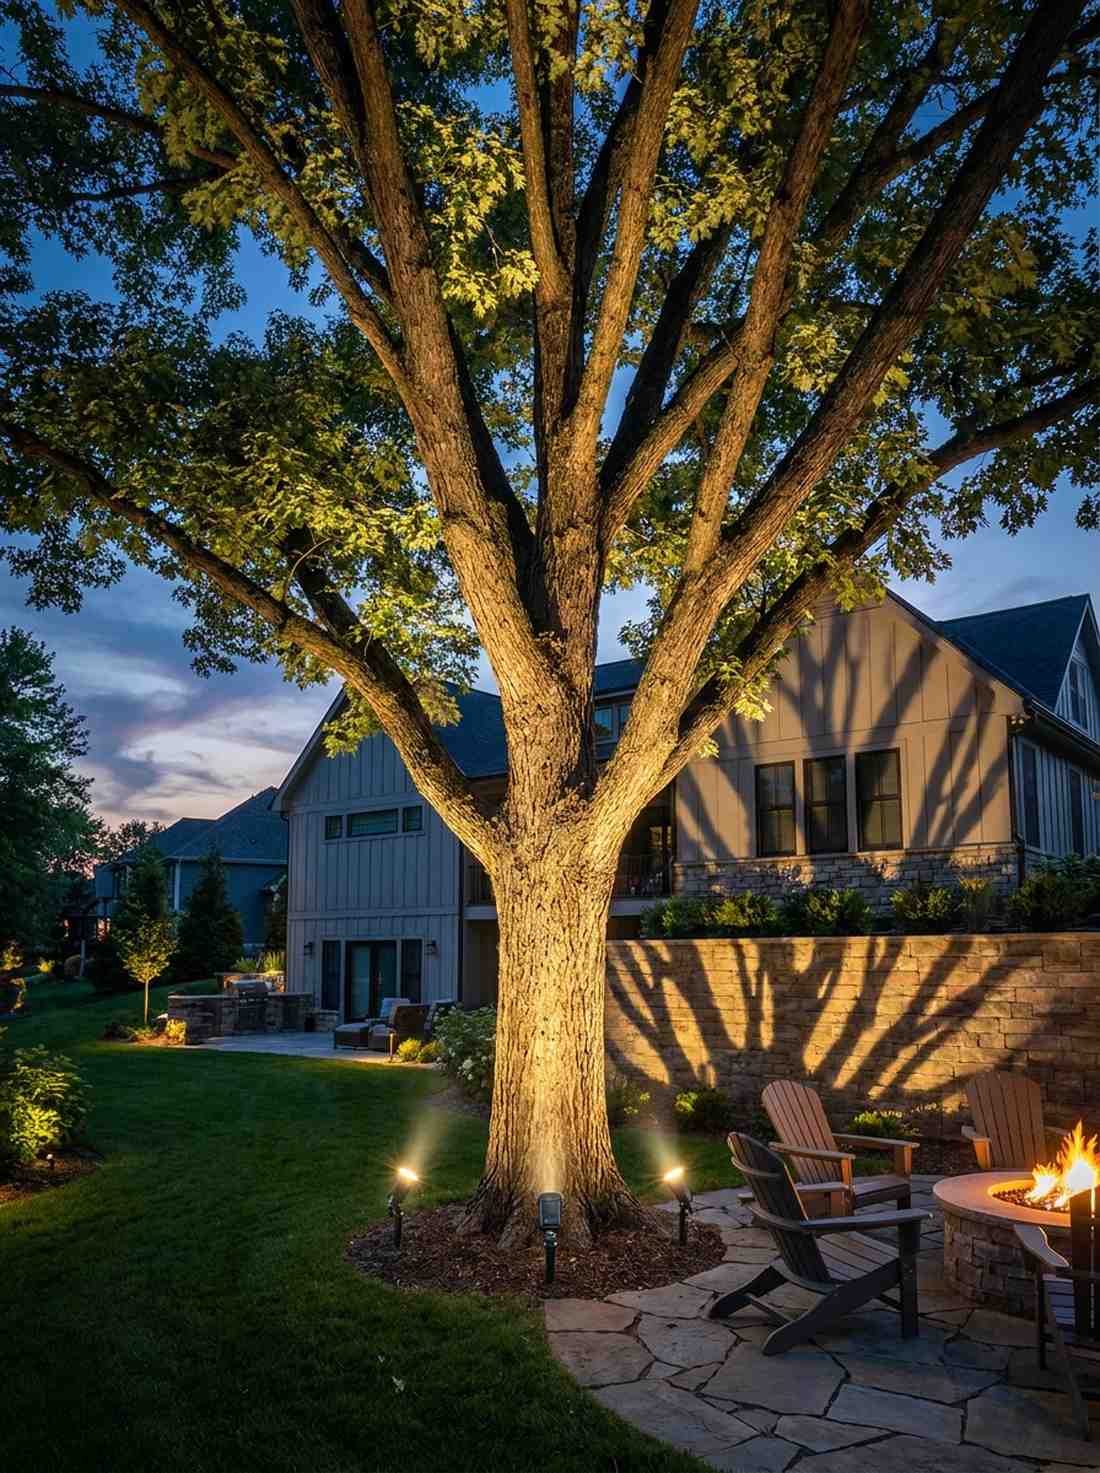
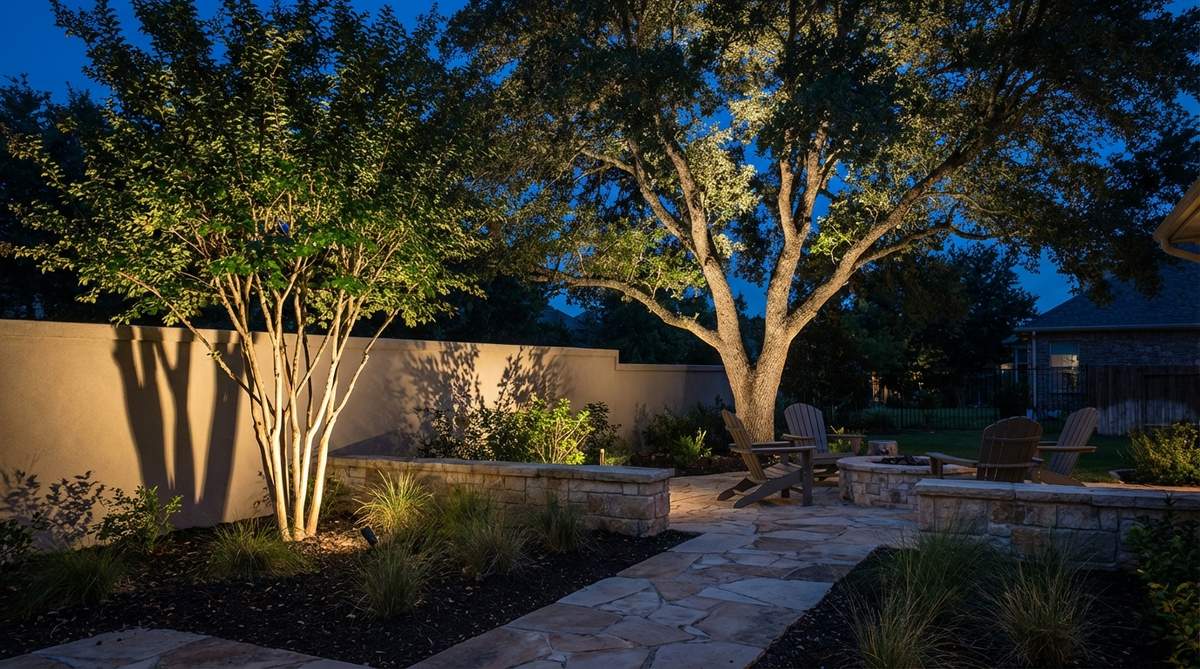
Casts massive, dramatic, moving shadows that turn standard trees into living modern art. This high-contrast technique is a phenomenal yard depth enhancement strategy.
Lighting a tree from the top flattens it, but driving ground-mounted spotlights straight up into the canopy gives a designer-level finish. The intense upward beam highlights the intricate bark textures and makes your entire property feel twice as large by drawing the eye up.
A set of strong solar uplights costs roughly $45–$70. Save this for your luxury landscaping board!
- Key Materials: Narrow-beam LED solar spotlights, adjustable ground spikes.
- Vibe / Style: Architectural luxury resort.
- Difficulty: Easy.
- Budget Breakdown: 4-Pack LED Spotlights: $60.
- Creator’s Tip: Mount the light at the very base of the trunk pointing almost straight up, rather than stepping back and flooding the whole tree.
- Smart Sourcing: High-lumen solar landscape spotlights and adjustable angle ground spikes.
36. Mason Jar Votive Hangers
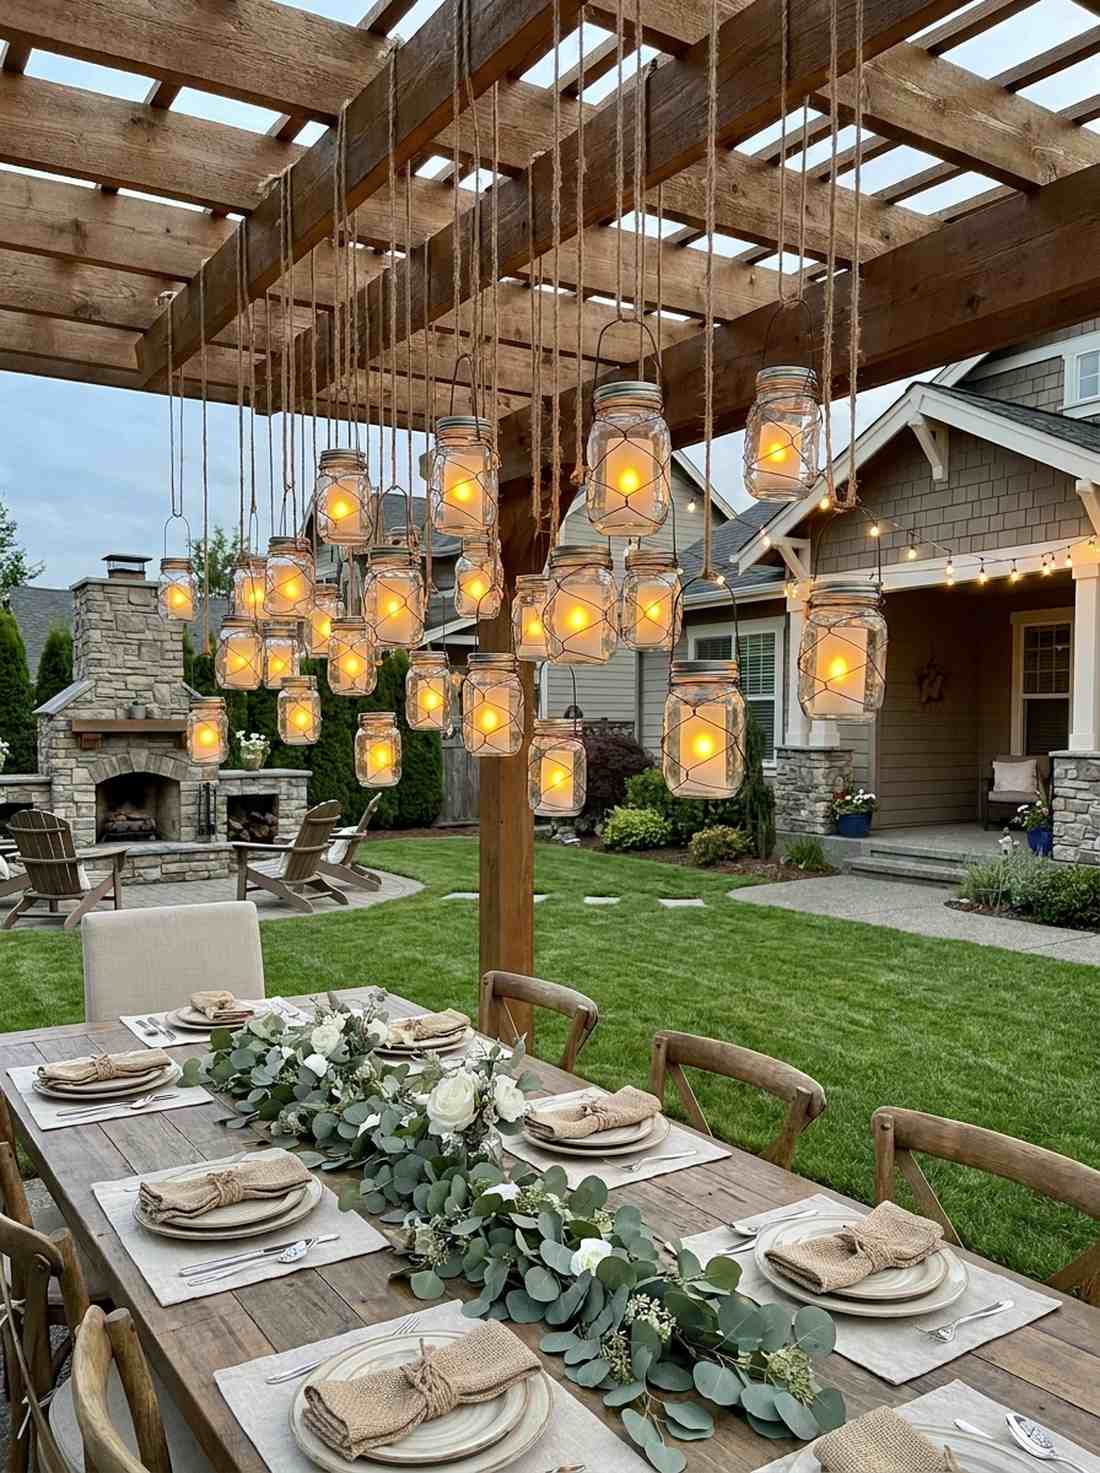
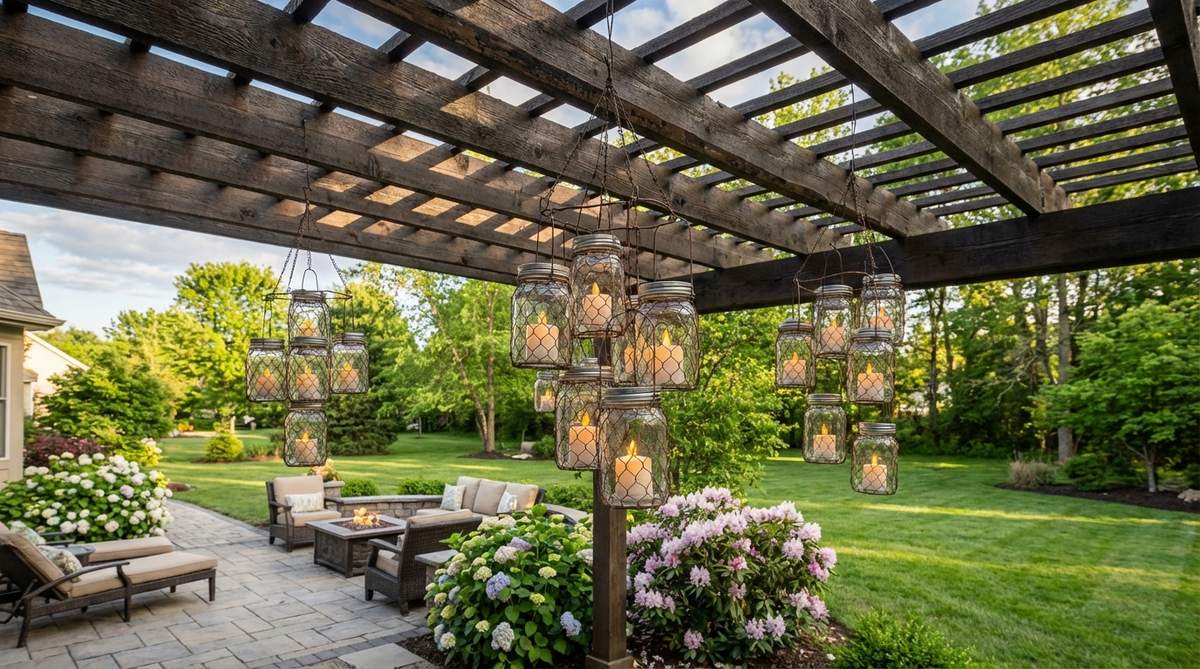
Suspends dozens of tiny, flickering fireflies directly over your dining table. This rustic clustering trick serves as a stunning pergola ceiling centerpiece.
Real candles drip wax and blow out constantly, but utilizing battery-operated LED votives inside wire-wrapped jars looks far more expensive than it is. Hanging an odd-numbered cluster at varying heights creates a dense, organic lighting chandelier that costs almost nothing to maintain.
You can build this whimsical hanging chandelier for under $35.
- Key Materials: Glass mason jars, battery-operated LED votives, thick craft wire, wire cutters.
- Vibe / Style: Whimsical farmhouse wedding.
- Difficulty: Easy beginner craft.
- Budget Breakdown: Jars: $10 | LED Votives & Wire: $20.
- Creator’s Tip: Smudge the inside of the mason jars with a tiny bit of frosted glass spray to diffuse the LED bulb and make it look like a real glowing flame.
- Smart Sourcing: Flickering LED votive candles (bulk pack) and pre-cut frosted glass sprays.
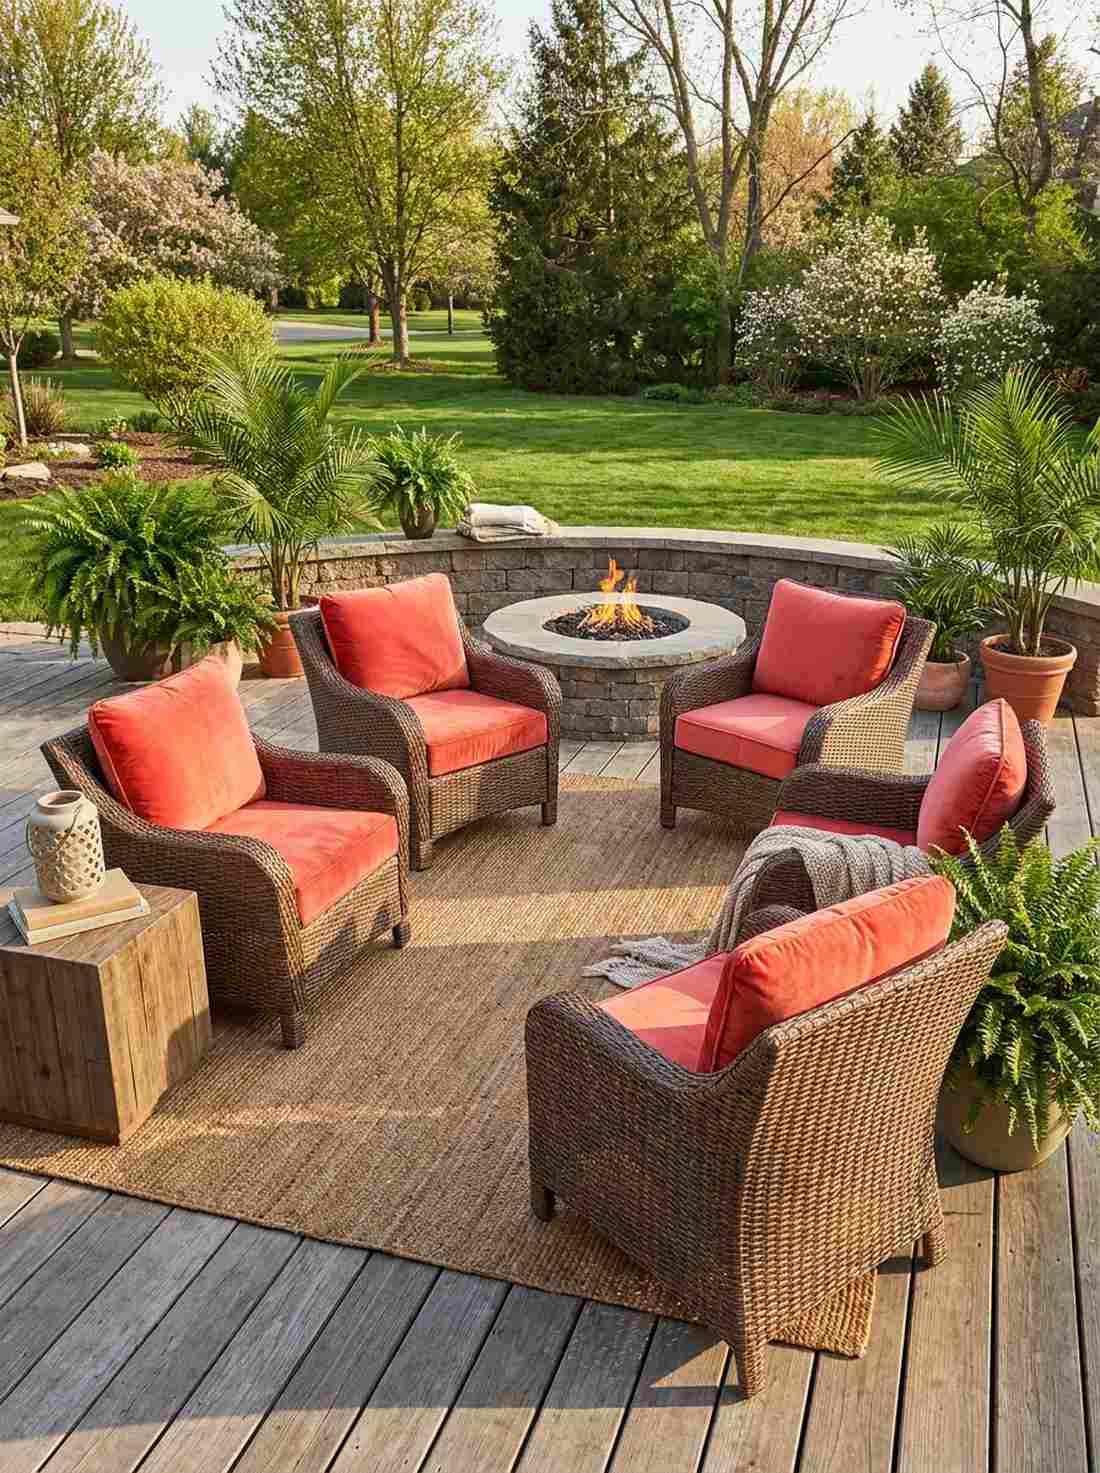
37. Fire Pit Seating Circle
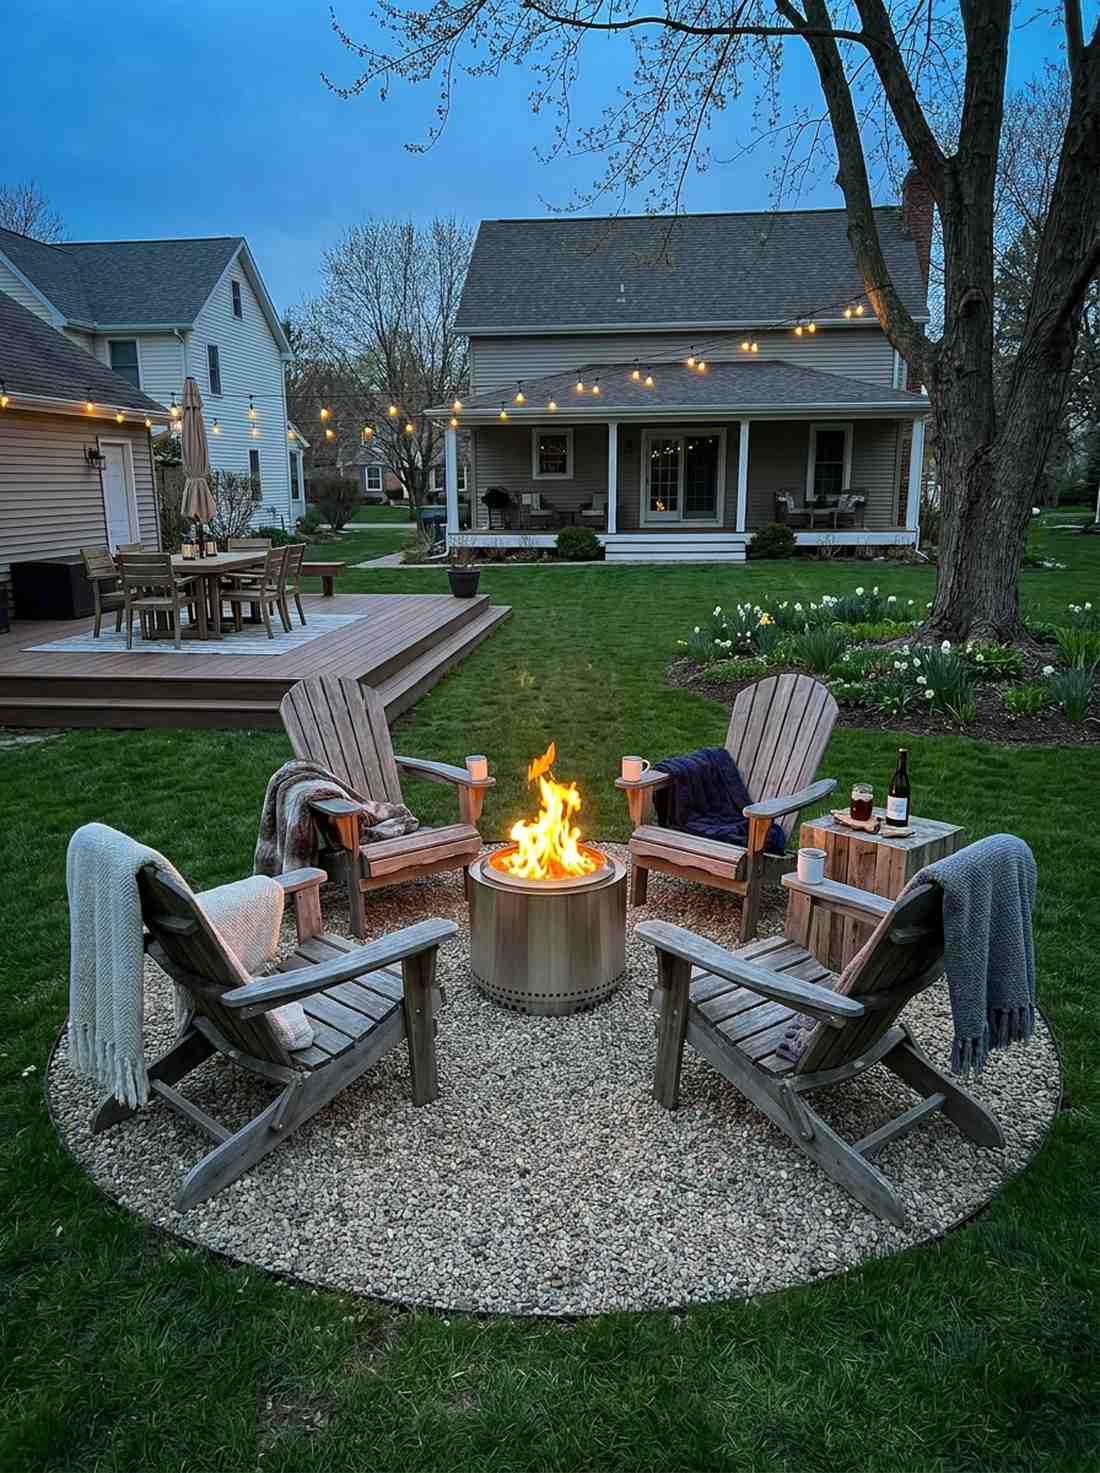
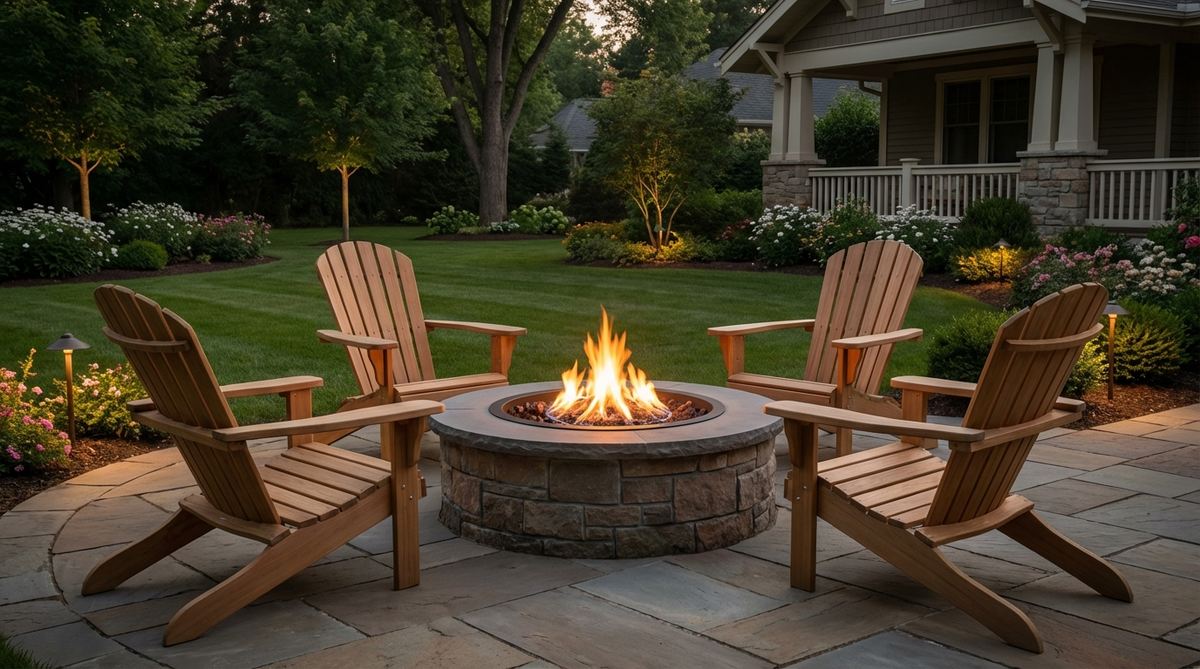
Becomes the undeniable gravitational center of your yard where everyone wants to gather. This heated arrangement is the quintessential chilly spring evening lounge area.
Scattering chairs randomly ruins conversation flow, but aggressively anchoring Adirondacks around a modern gas fire pit delivers a surprisingly premium look. A tight 36-inch radius forces intimate conversation and keeps everyone enveloped in the warm glow as the spring temperatures drop.
Setting up a portable gas pit zone costs roughly $150–$250. Pin this to your ultimate outdoor entertaining board!
- Key Materials: Portable gas fire pit, Adirondack chairs, pea gravel base.
- Vibe / Style: Cozy modern campground.
- Difficulty: Moderate.
- Budget Breakdown: Gas Fire Pit: $150 | Gravel Base: $30.
- Creator’s Tip: Dig out a shallow 10-foot circle and fill it with cheap pea gravel; this instantly zones the area and prevents muddy feet around the fire.
- Smart Sourcing: Smokeless portable propane fire pits and bulk decorative pea gravel.
Architectural Floral Features Define Premium Spring Outdoor Decor
These permanent or semi-permanent installations integrate florals with structural elements to create design continuity. They represent higher-investment strategies with multi-season returns.
38. Rose-Covered Arbor Gate
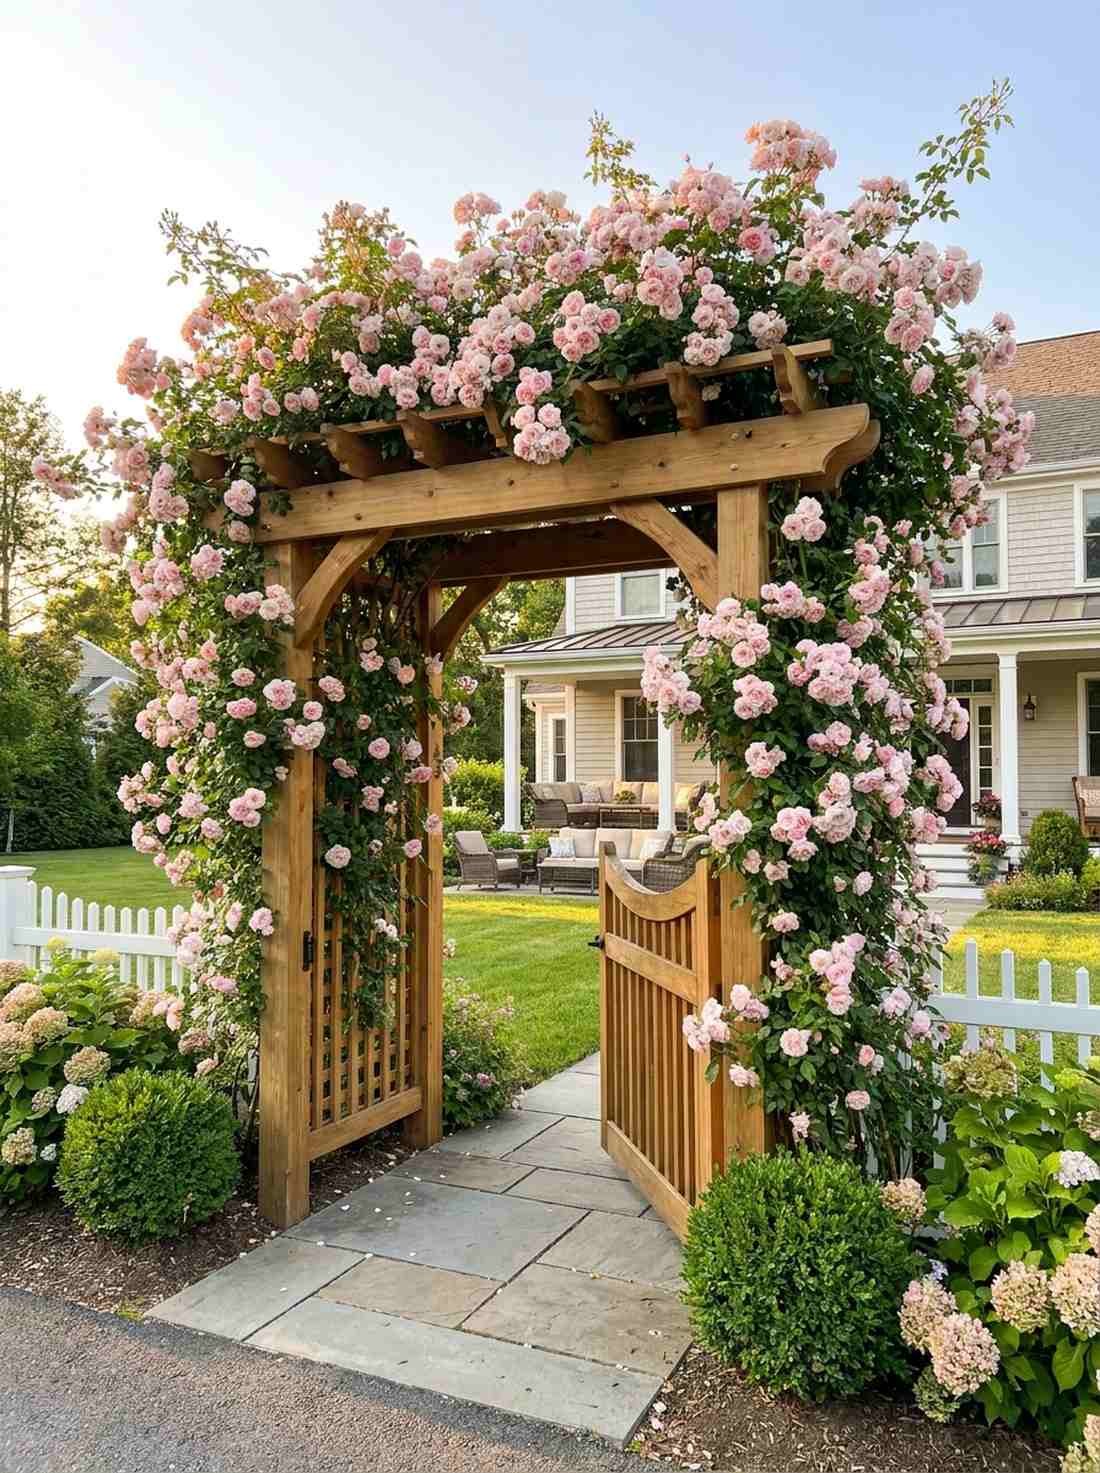
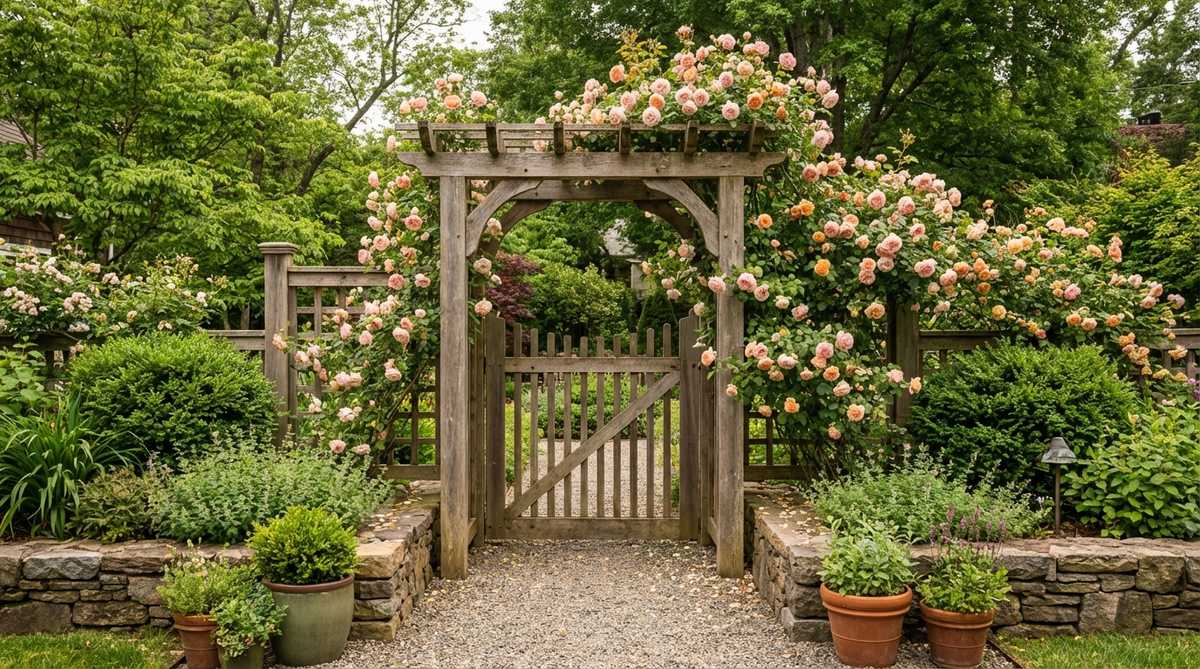
Frames your property entrance with a breathtaking, fairytale-level explosion of blush petals. This permanent structure is the ultimate garden pathway grand entrance.
Flimsy metal arches collapse under heavy vines, but sinking a solid wooden arbor into concrete gives a designer-level finish. Training climbing roses horizontally across the heavy beams forces massive bloom clusters at eye level, creating an architectural masterpiece that defines the yard.
A heavy wooden arbor installation costs around $200–$350, yielding decades of value.
- Key Materials: Solid wood arbor kit, fast-setting concrete, climbing rose bushes.
- Vibe / Style: English manor estate.
- Difficulty: Advanced (requires post-hole digging).
- Budget Breakdown: Arbor Kit: $200 | Concrete & Roses: $60.
- Creator’s Tip: Never let climbing roses grow straight up; bend the main canes horizontally along the lattice to force hundreds of lateral blooming shoots.
- Smart Sourcing: Pre-cut cedar arbor kits and heavy-duty leather rose pruning gloves.
39. Wisteria Pergola Cascade
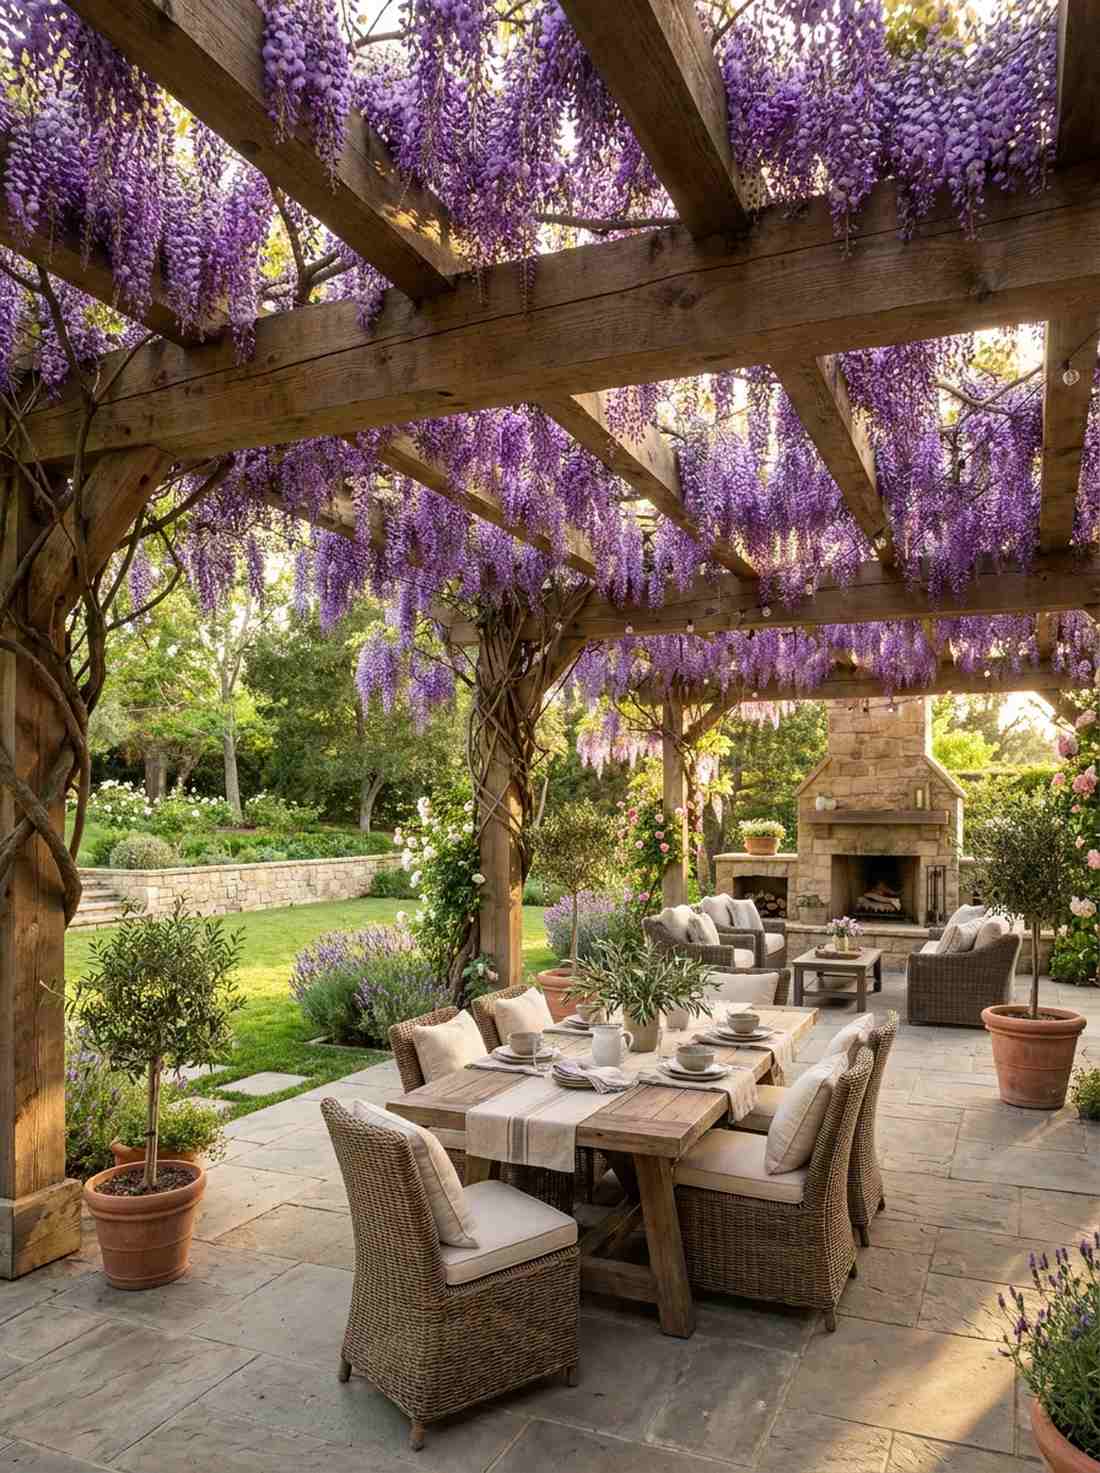

Creates an absolutely jaw-dropping ceiling of dripping purple racemes that smell like heaven. This aggressive vine installation is a masterpiece patio shade roof canopy.
Planting wisteria on weak structures is a disaster waiting to happen, but utilizing massive 6×6 pergola beams looks far more expensive than it is. The thick, woody vines eventually wrap and lock onto the heavy lumber, producing a reliable, spectacular mid-spring waterfall of color.
Expect to invest $100–$150 in mature vines for an existing pergola. Save this if you dream of a lush floral roof!
- Key Materials: Mature Wisteria sinensis vines, heavy timber pergola, heavy-duty pruning shears.
- Vibe / Style: Mediterranean luxury villa.
- Difficulty: Moderate (requires aggressive biannual pruning).
- Budget Breakdown: Mature Vines: $120.
- Creator’s Tip: You must ruthlessly prune the whippy shoots back to just 3 buds every single summer and winter to shock the plant into massive flowering.
- Smart Sourcing: Heavy-duty bypass pruning shears and climbing vine support hooks.
Most backyard renovations cost tens of thousands, but this next architectural trick looks like a high-end contractor built it over a single weekend.
40. Living Wall Backdrop
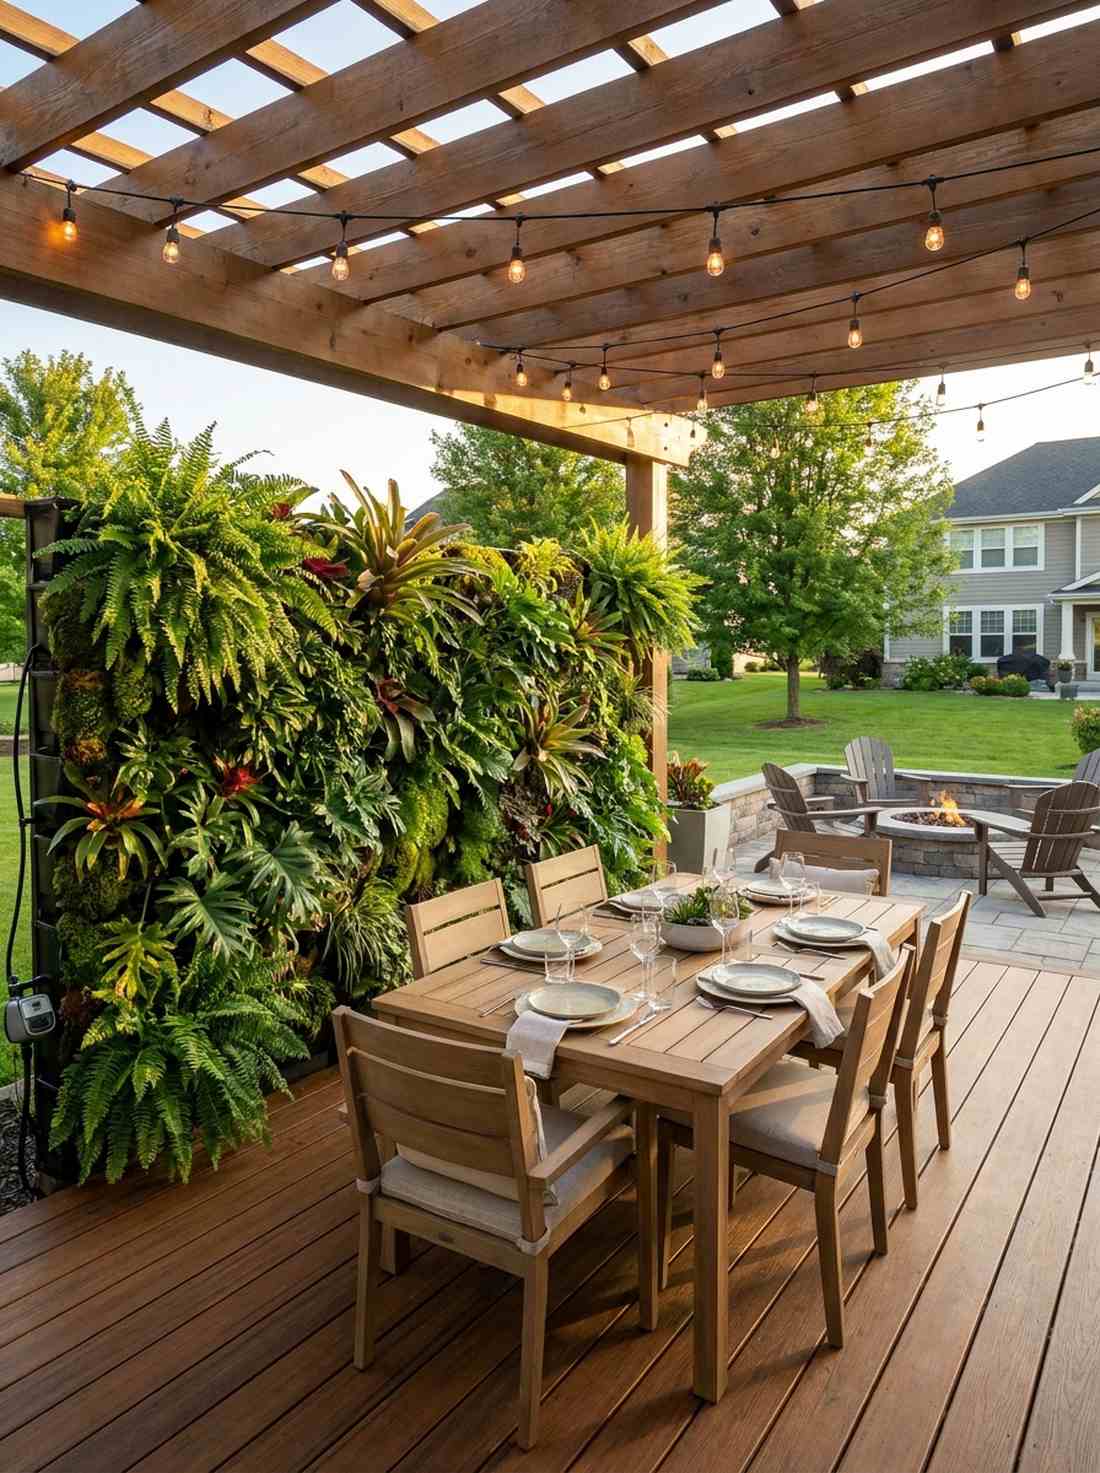
Erects a dense, sweeping wall of lush tropical greenery directly behind your dining table. This irrigated system serves as a stunning outdoor dining focal wall.
Attempting to hand-water a vertical wall is a guaranteed failure, but snapping together modular irrigated planter boxes delivers a surprisingly premium look. By plugging in an automated timer to the drip lines, you sustain a massive, living piece of modern art with zero daily maintenance.
A fully automated modular wall system costs roughly $250–$400.
- Key Materials: Modular plastic wall planters, automated water timer, drip tubing, assorted shade plants.
- Vibe / Style: High-end modern eco-resort.
- Difficulty: Advanced (plumbing required).
- Budget Breakdown: Modular Grid: $150 | Timer/Drip: $60 | Plants: $100.
- Creator’s Tip: Hook up a digital hose timer specifically dedicated to the wall, set to run for just 5 minutes every single morning to prevent dry-out.
- Smart Sourcing: Automated digital hose water timers and modular vertical garden starter kits.
41. Flowering Vine Privacy Screen
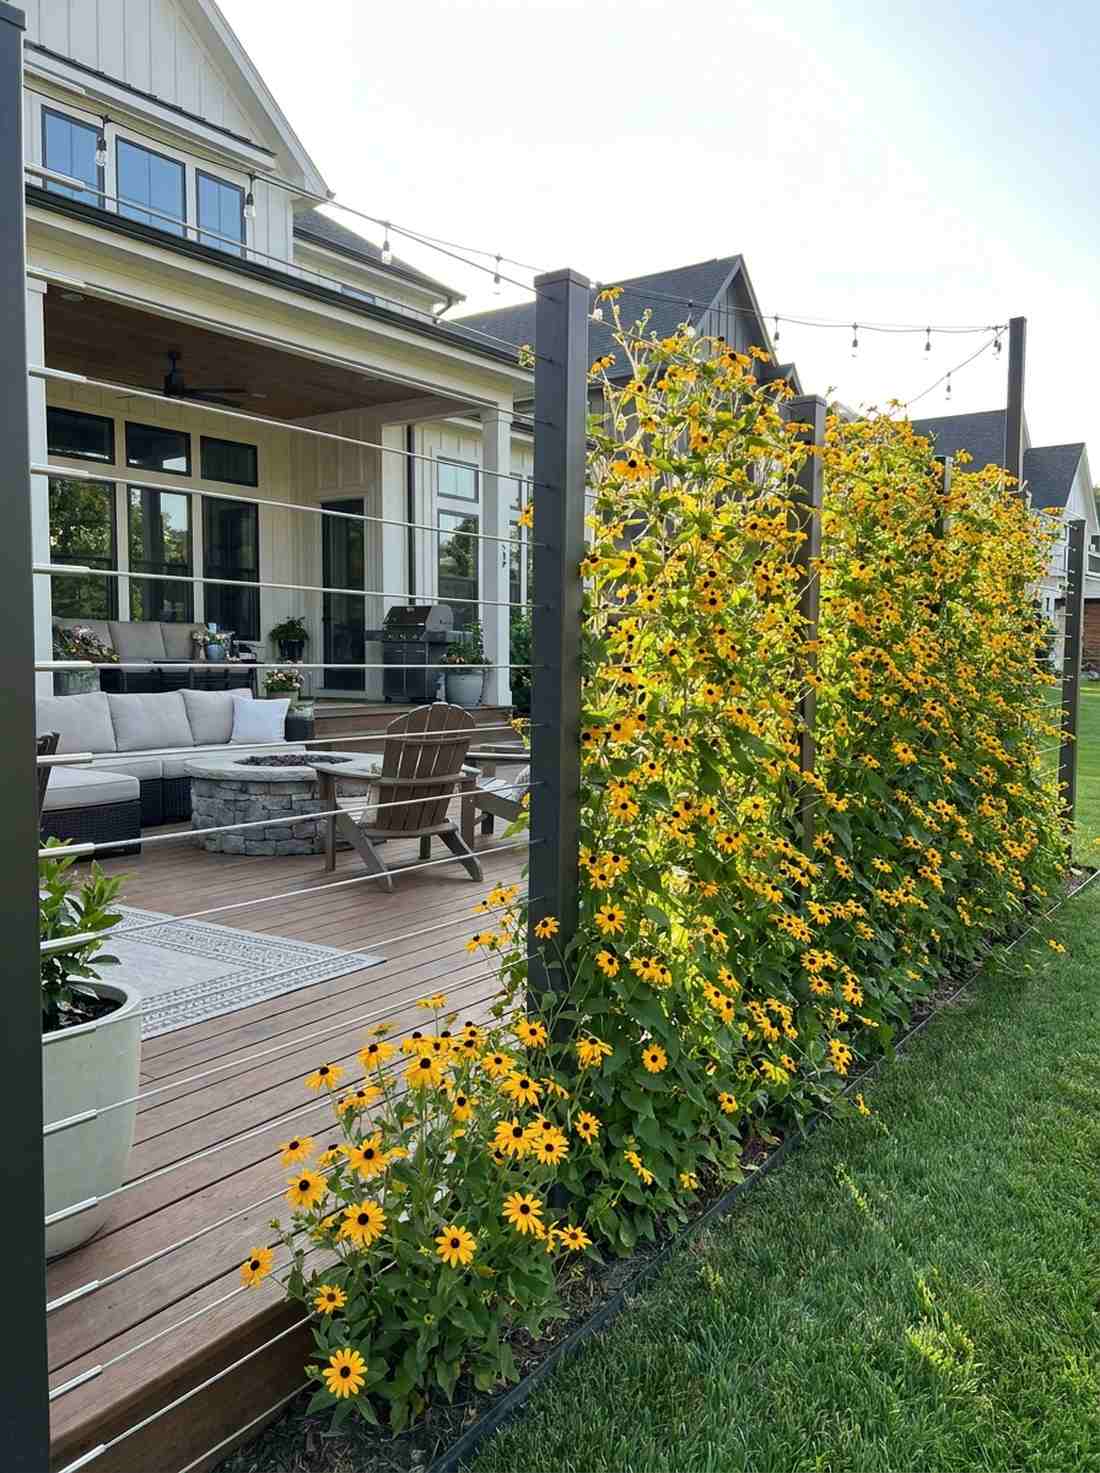
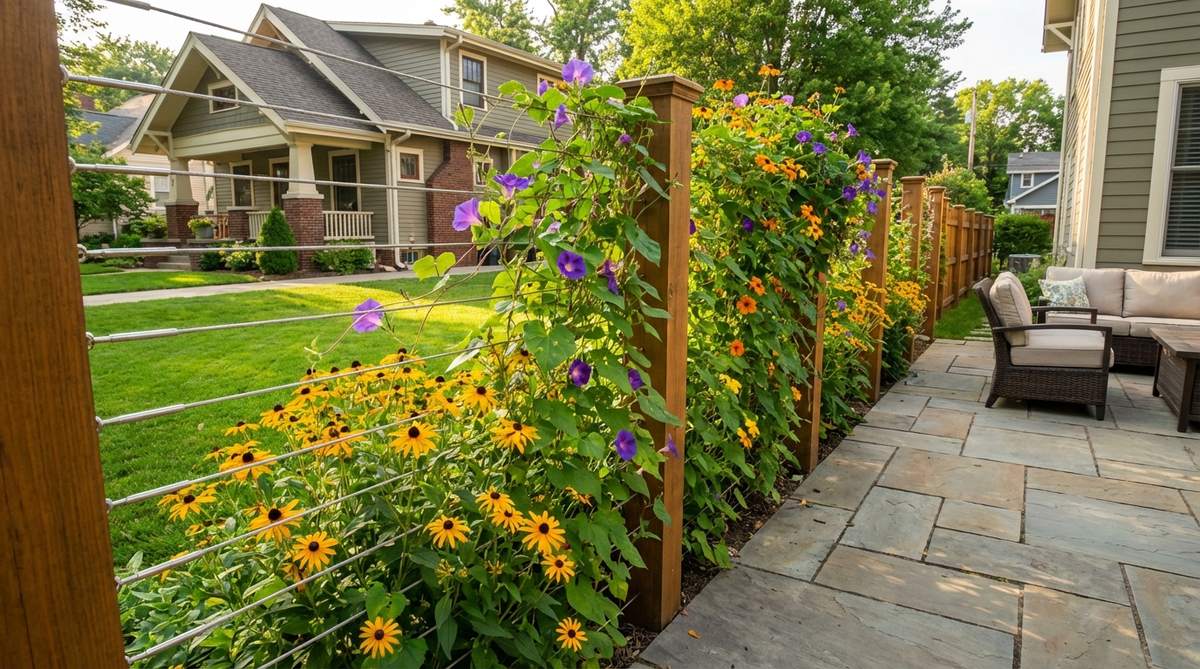
Builds an invisible wall that suddenly explodes into a dense, blooming barrier by late spring. This wire-tension trick is an elite modern property line divider.
Chainlink fences are an eyesore, but installing a sleek stainless steel cable system looks far more expensive than it is. Stretching parallel wires between two anchor posts provides the perfect invisible climbing grid for Black-Eyed Susan vines, blocking nosy neighbors while letting the breeze through.
This minimalist cable screen costs about $80–$120 to install. Pin this to your modern landscaping board!
- Key Materials: Stainless steel cable wire kit, turnbuckles, fast-growing annual vines.
- Vibe / Style: Sleek contemporary minimalist.
- Difficulty: Moderate.
- Budget Breakdown: Cable Kit: $70 | Seeds/Vines: $20.
- Creator’s Tip: Space the horizontal cables exactly 8 inches apart; any wider and the young vines will struggle to reach the next level to climb.
- Smart Sourcing: Stainless steel tension wire kits (bulk pack) and heavy-duty metal turnbuckles.
42. Espalier Fruit Tree Fence
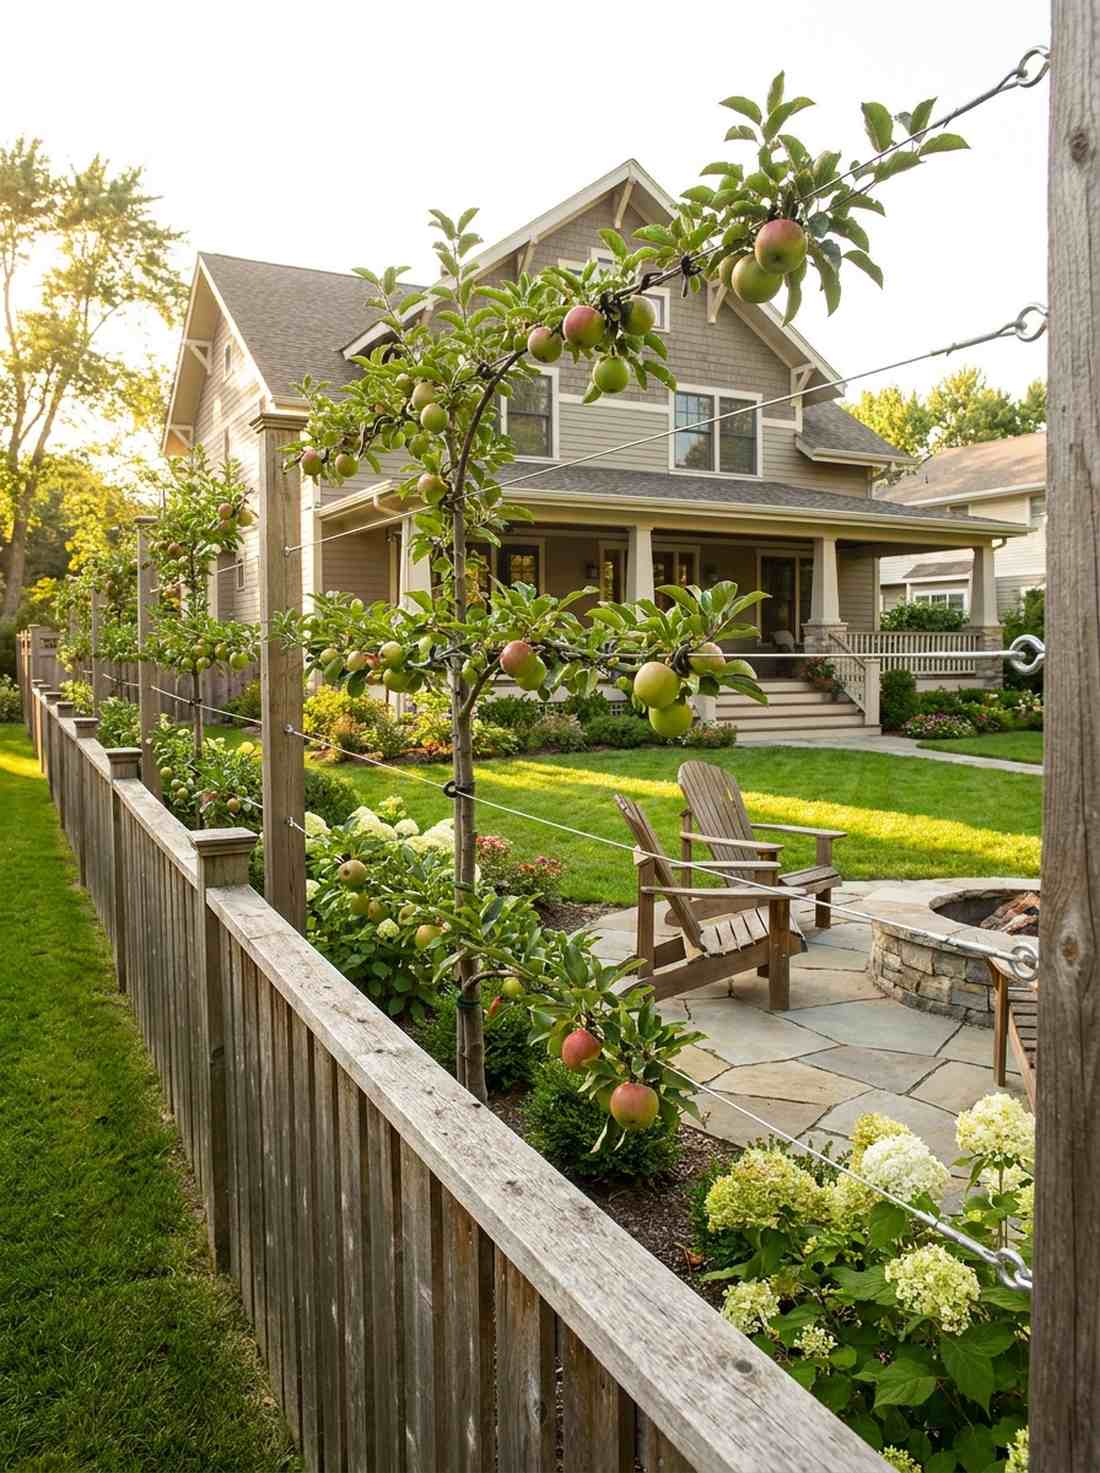
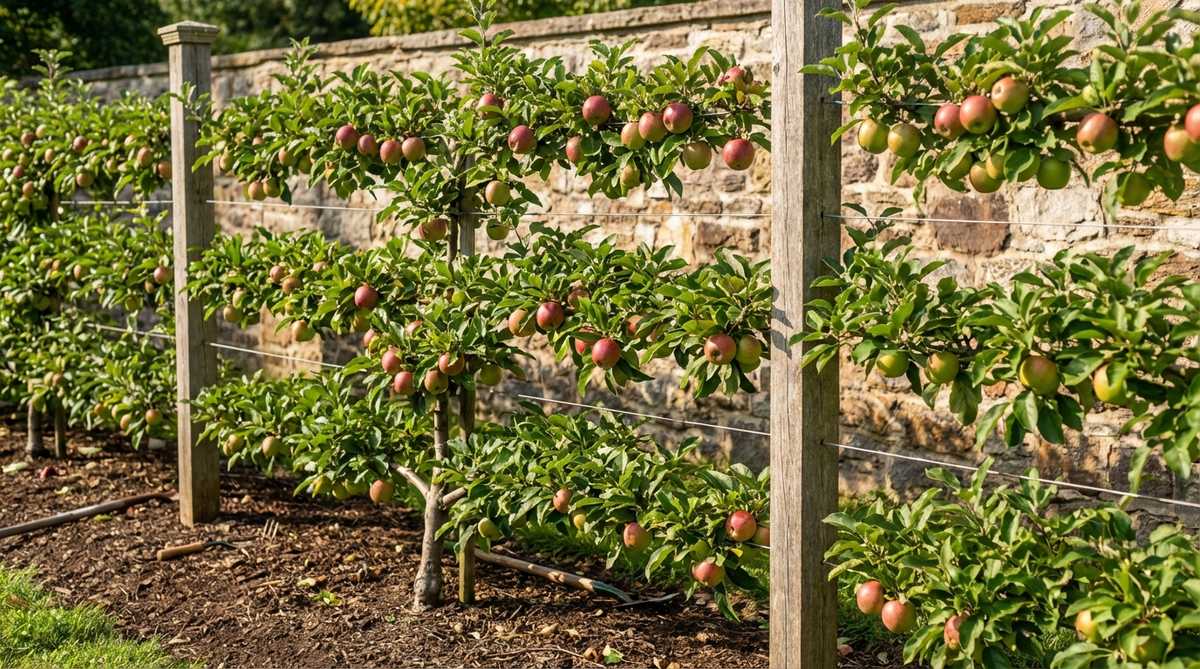
Transforms a boring wooden fence into a flat, living architectural orchard. This elite pruning technique is a phenomenal narrow side-yard landscaping idea.
Letting fruit trees grow wild wastes massive yard space, but meticulously tying them flat against a grid gives a designer-level finish. This centuries-old espalier method forces stunning horizontal lines covered in spring blossoms, perfectly marrying high-end aesthetics with edible urban farming.
Buying pre-started espalier trees runs about $100–$150 each, saving years of training.
- Key Materials: Pre-trained espalier apple/pear tree, heavy-duty guide wire, soft plant ties.
- Vibe / Style: Sophisticated European orchard.
- Difficulty: Advanced (requires precision pruning).
- Budget Breakdown: Espalier Tree: $130 | Wire & Ties: $20.
- Creator’s Tip: Never use zip ties or hard wire to strap the branches to the fence; use soft, stretchy green tape so the tree can naturally expand.
- Smart Sourcing: Stretchable soft plant tie tape and heavy-duty fence mounting hooks.
43. Hydrangea Hedge Foundation
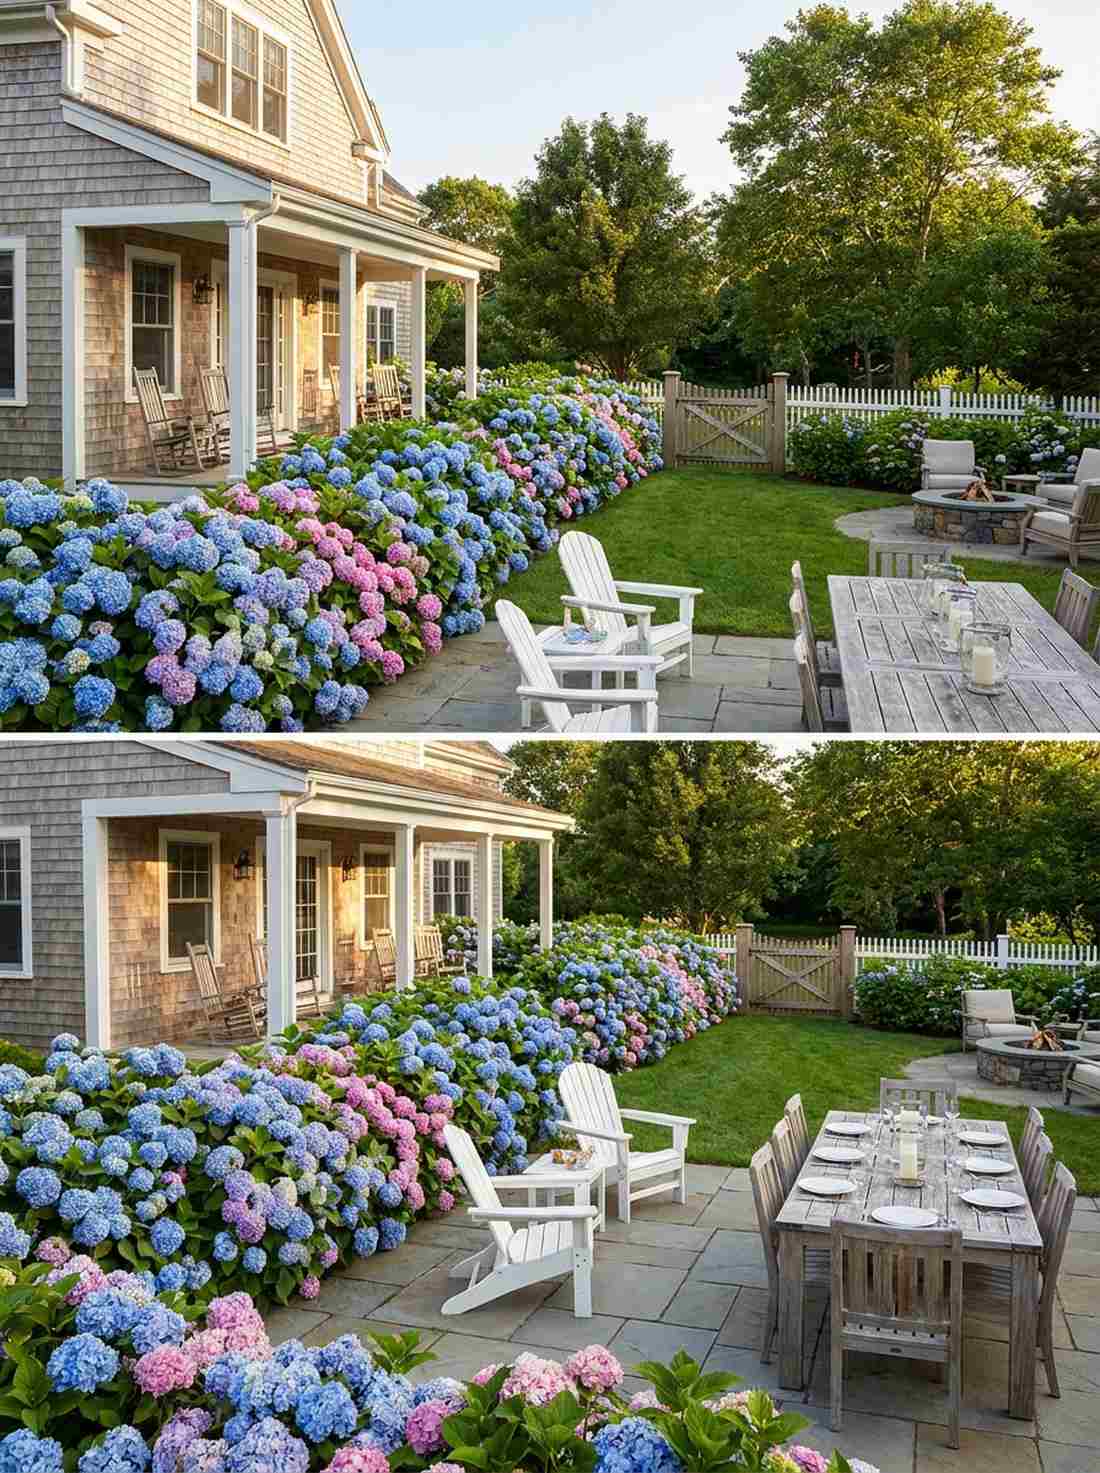
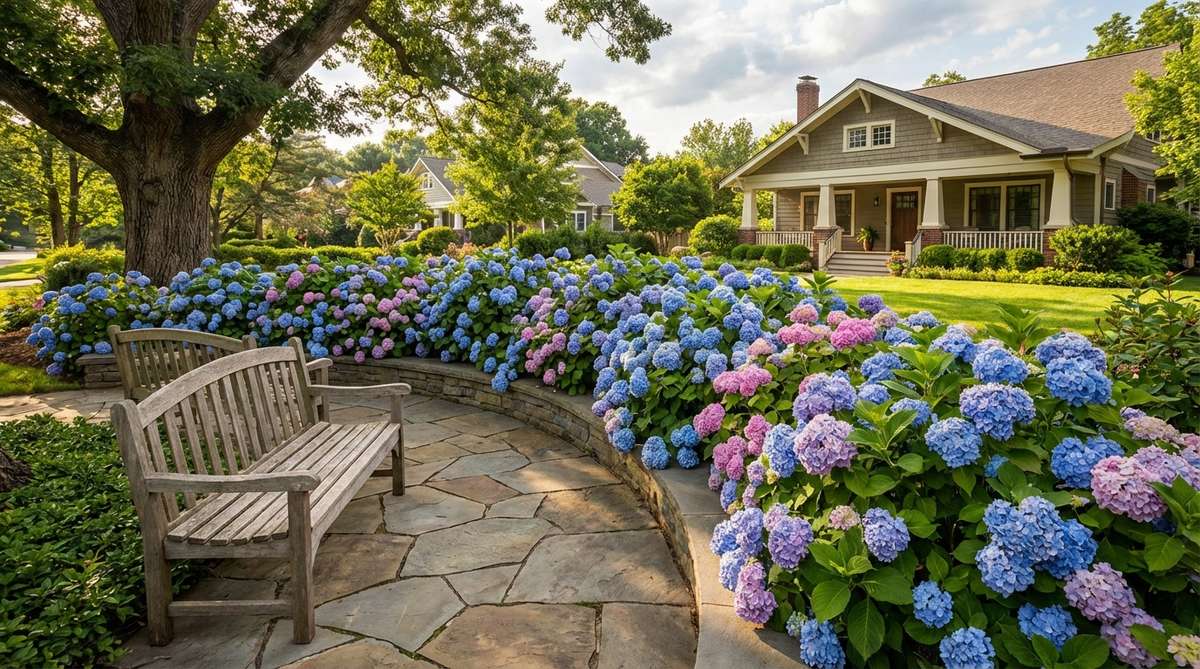
Wraps the entire base of your home in a billowing, luxurious cloud of massive mophead blooms. This mass-planting strategy acts as the ultimate softening patio border line.
Planting single shrubs looks disjointed, but digging a continuous trench for a tight hydrangea hedge delivers a surprisingly premium look. The overwhelming volume of massed blue and pink petals completely hides ugly concrete foundations and creates a sweeping, high-impact property boundary.
A 20-foot mass planted hedge costs roughly $200–$300. Save this for your major yard renovation plans!
- Key Materials: 6-8 Hydrangea macrophylla shrubs, soil acidifier (for blue), slow-release fertilizer.
- Vibe / Style: Classic Nantucket coastal.
- Difficulty: Moderate (requires heavy digging).
- Budget Breakdown: Shrubs: $200 | Soil Amendments: $40.
- Creator’s Tip: Plant them exactly 36 inches apart; they will look small the first year, but will perfectly interlock into a solid wall by season two.
- Smart Sourcing: Aluminum sulfate soil acidifier (for blue blooms) and bulk organic shrub fertilizer.
Conclusion
Executing these 43 premium outdoor decor spring blueprints completely shifts your yard from basic to breathtaking. By ignoring overpriced retail options and strategically investing in high-grade UV-resistant materials, starter kits, and smart structural hardware, you lock in a designer aesthetic that lasts. Focus on layering those vertical garden supplies and bold textile upgrades first. We highly recommend grabbing the exact pre-cut materials and bulk pack items mentioned to construct a high-end exterior that dominates your neighborhood’s curb appeal.
Frequently Asked Questions
What are the best low-maintenance flowers for spring outdoor decor?
If you want a high-end look without the daily hassle, skip delicate varieties and invest in premium calibrachoa or specialized petunia starter kits. These resilient performers give a designer-level finish and handle unpredictable temperature swings. Planting them in self-watering containers with a bulk pack of slow-release fertilizer guarantees an expensive, cascading aesthetic with practically zero deadheading.
How do I protect spring outdoor decor from unexpected frost?
The biggest mistake is leaving expensive arrangements exposed. Keep a pre-cut frost cloth or heavy-duty UV-coated tarp on standby to instantly drape over vulnerable planters when temperatures dip below 35°F. For smaller setups featuring miniature garden supplies, swiftly move them indoors, and heavily water your larger outdoor beds before the freeze—hydrated roots survive cold shocks vastly better than dry ones.
Which colors work best for spring outdoor decor in shaded areas?
Dark corners kill visual depth, so avoid deep purples that disappear in the shadows. Instead, leverage bright whites, pale pinks, and chartreuse foliage to aggressively reflect ambient light. Using premium materials like high-gloss glazed pots or UV-resistant bright planters dramatically amplifies this brightening effect, making shaded patios look incredibly intentional and expensive.
How often should I water container gardens in spring?
A standard watering schedule is a recipe for root rot. Instead, rely on moisture-control potting soil mixes and finger-test the top two inches daily. Terracotta naturally wicks moisture rapidly, while treated resin holds water longer. Upgrading your pots with pre-cut drainage mesh and mixing in bulk perlite ensures your high-end floral investments thrive without drowning.
Can I use indoor furniture outdoors for spring decorating?
You can, but it requires aggressive preventative care to avoid instant destruction. If you place indoor pieces on a covered porch, you must douse the fabrics in marine-grade fabric waterproof spray and seal wooden legs with exterior acrylic clear coats. Never leave untreated cushions exposed to morning dew, and strongly consider buying UV-resistant outdoor pillow covers to slip over indoor items for a cheap, durable upgrade.