These small garden ideas deliver custom-built aesthetics without the premium price tag. Smart spatial design instantly transforms awkward footprints into luxury outdoor retreats. Skip generic layouts and maximize every inch efficiently.
Design Snapshot Key Principles
- Vertical Integration: Utilize walls, fences, and overhead structures to expand planting zones upward rather than outward
- Layered Planting: Arrange plants in foreground, mid-ground, and background tiers to create dimensional perspective
- Spatial Division: Break up rectangular footprints with curved paths, screens, or material transitions that obscure full views
- Reflected Light: Position mirrors and reflective surfaces strategically to multiply perceived square footage
Smart Layout Strategies for Small Garden Design
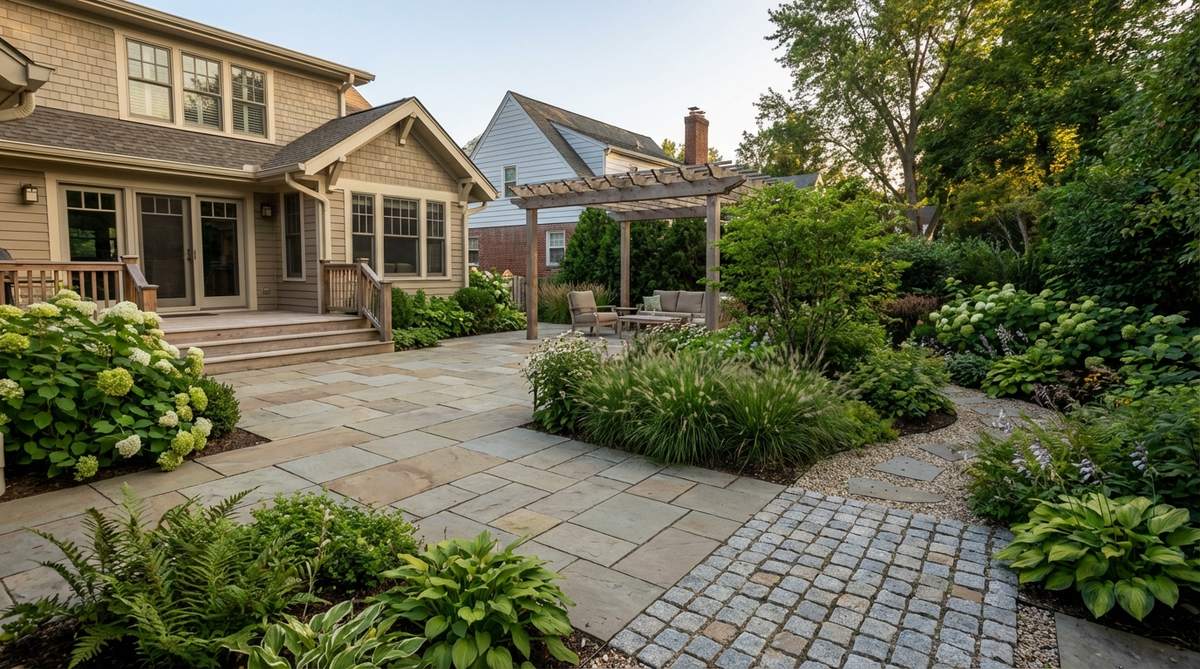
1. Botanical Bento Box Zoning
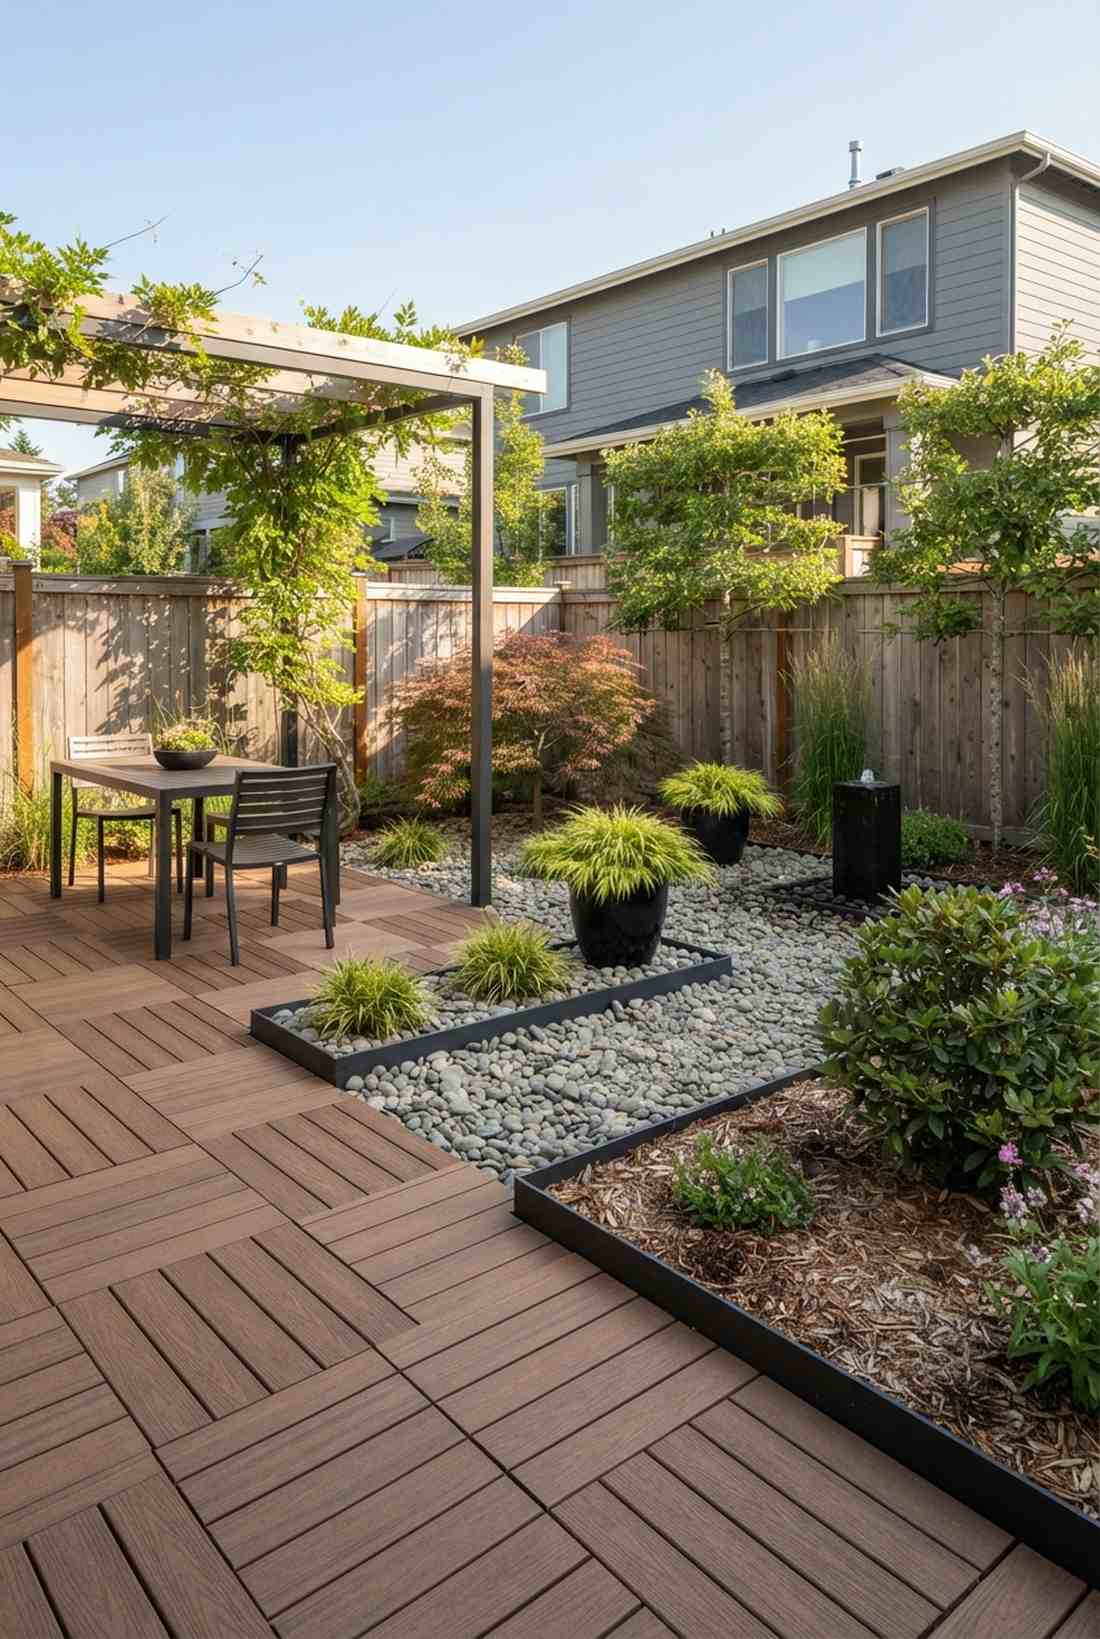
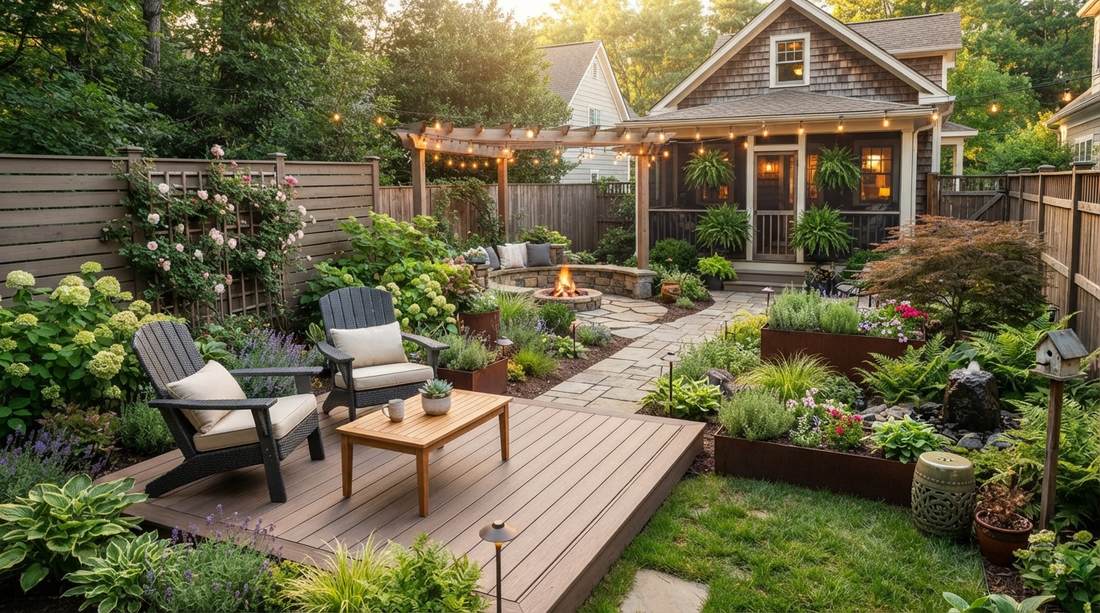
Feels like a modern zen retreat tucked away in the city. Using structured small patio garden decor to segment areas works exceptionally well for flat, featureless yards.
Most beginners ignore zoning, but strictly compartmentalizing your footprint delivers a surprisingly premium look. Utilizing proper landscaping border kits to divide dining from planting creates a high-end designer finish.
You can easily pull this off for around $80–$150 per zone. Pin this if you’re planning a small space upgrade this season.
- Key Materials: Composite decking squares, low-profile gravel
- Vibe / Style: Minimalist Japanese courtyard
- Difficulty: Moderate weekend build
- Budget Breakdown: Pavers: $40 | Edging: $30 | Gravel: $20.
- Creator’s Tip: Keep border heights uniform so the eye flows naturally across the zones.
- Smart Sourcing: Use pre-cut flexible steel edging and a bulk pack polished river rock.
2. Curved Border Pathways
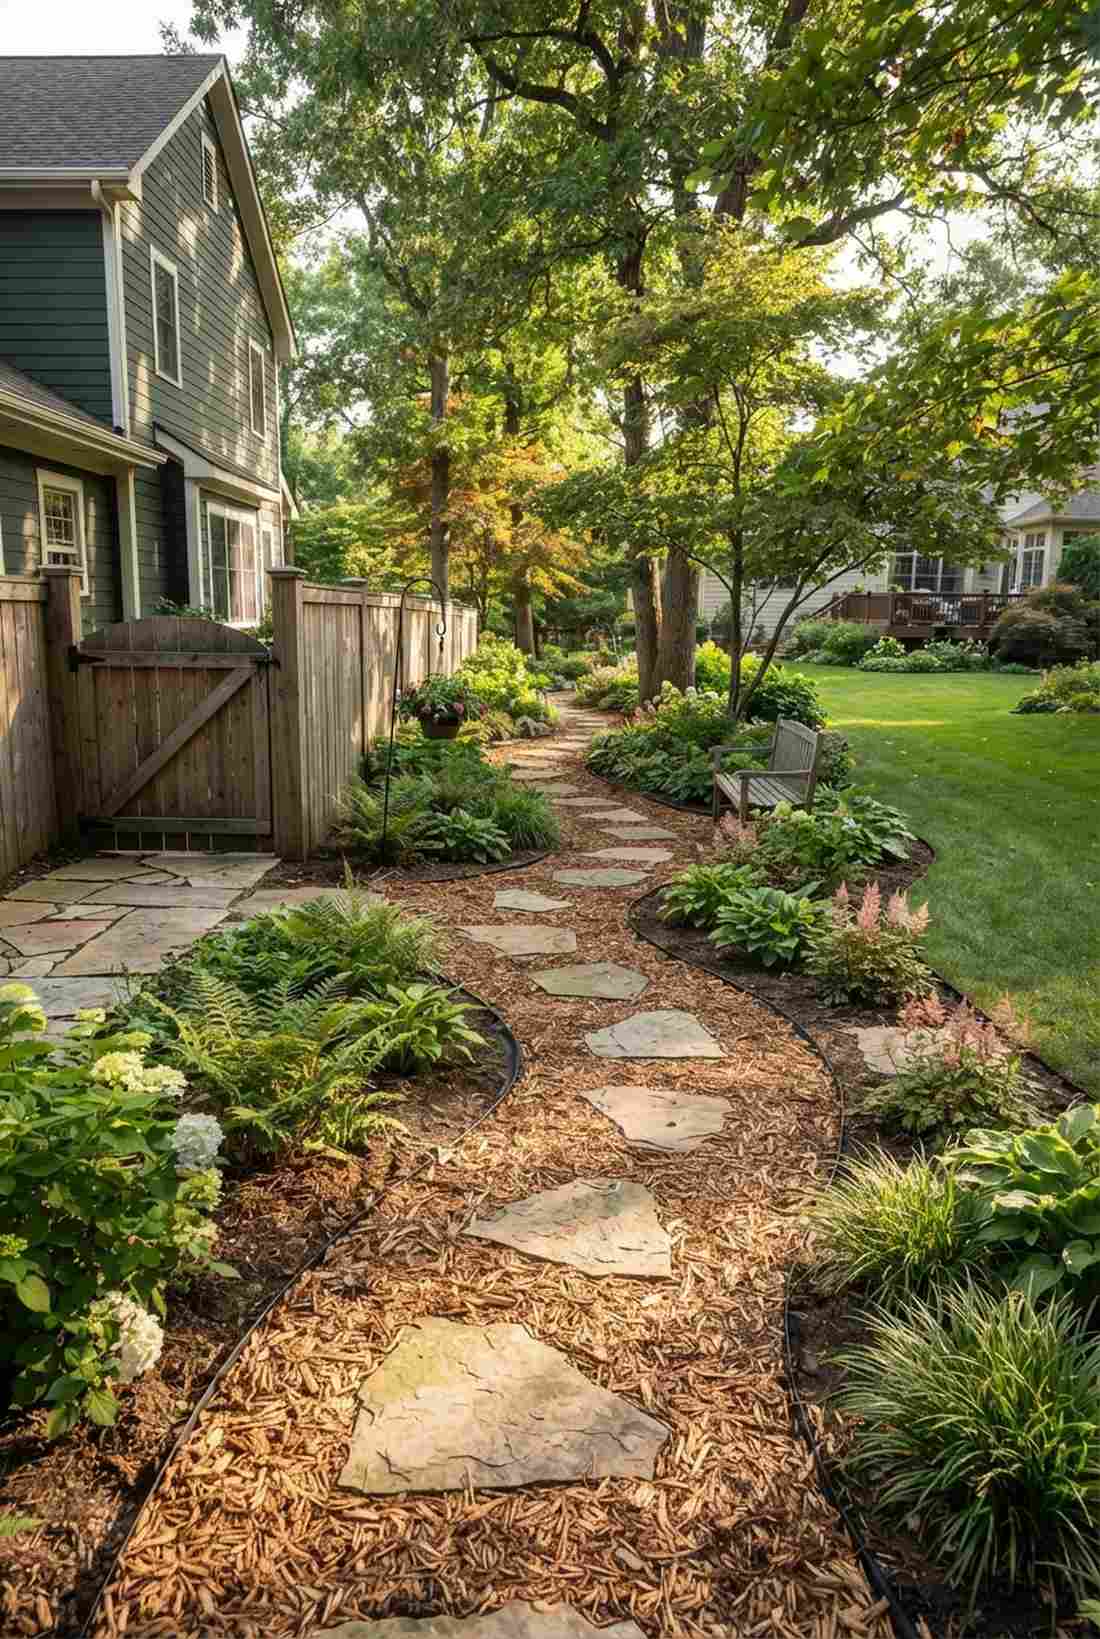
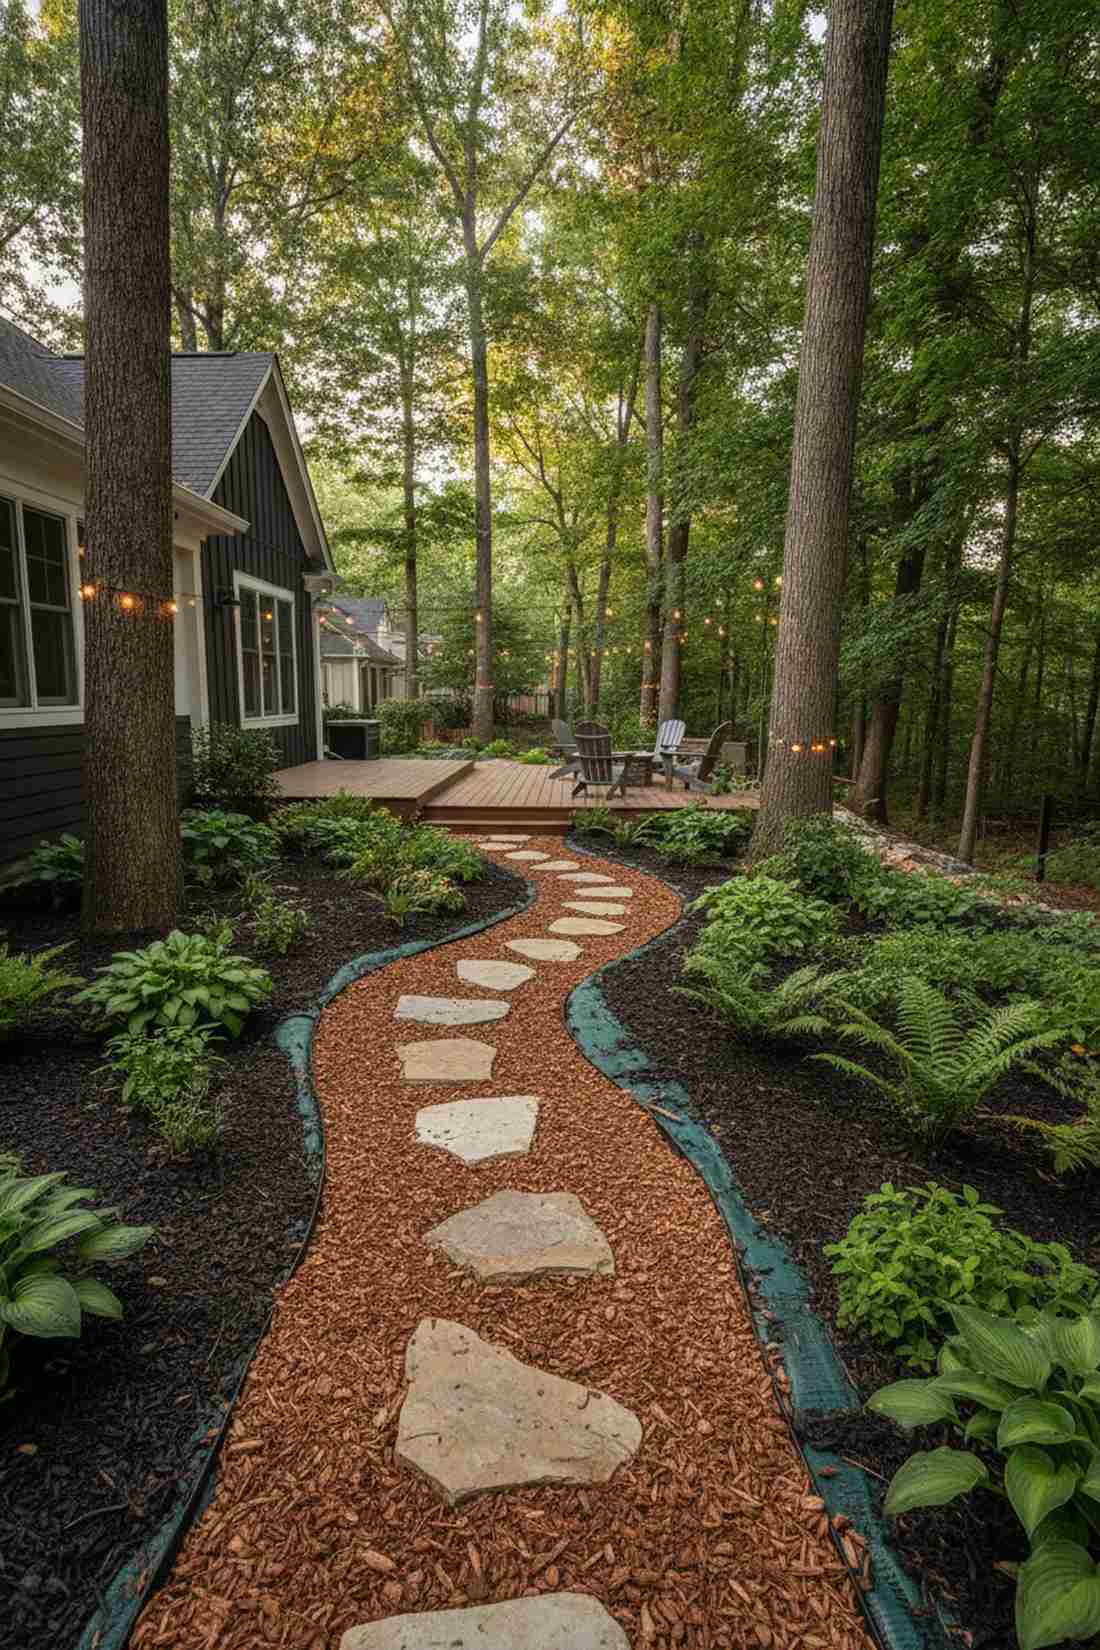
This path feels like a hidden forest you accidentally discovered right out back. A winding narrow side yard landscaping approach works perfectly for long, restrictive property lines.
Forget rigid, straight paths; injecting gentle S-curves looks far more expensive than it is. Investing in durable weed barrier fabric rolls beneath your path ensures this sweeping layout remains pristine.
Expect to spend about $50–$90 on quality path materials. Highly recommended for a quick weekend win.
- Key Materials: Shredded cedar mulch, natural stone steppers
- Vibe / Style: Organic woodland escape
- Difficulty: Easy beginner setup
- Budget Breakdown: Steppers: $60 | Mulch: $20 | Fabric: $10.
- Creator’s Tip: Use a garden hose to mock up the perfect curve before digging.
- Smart Sourcing: Get heavy-duty commercial weed fabric and pre-sealed stone steppers.
3. Diagonal Paving Patterns
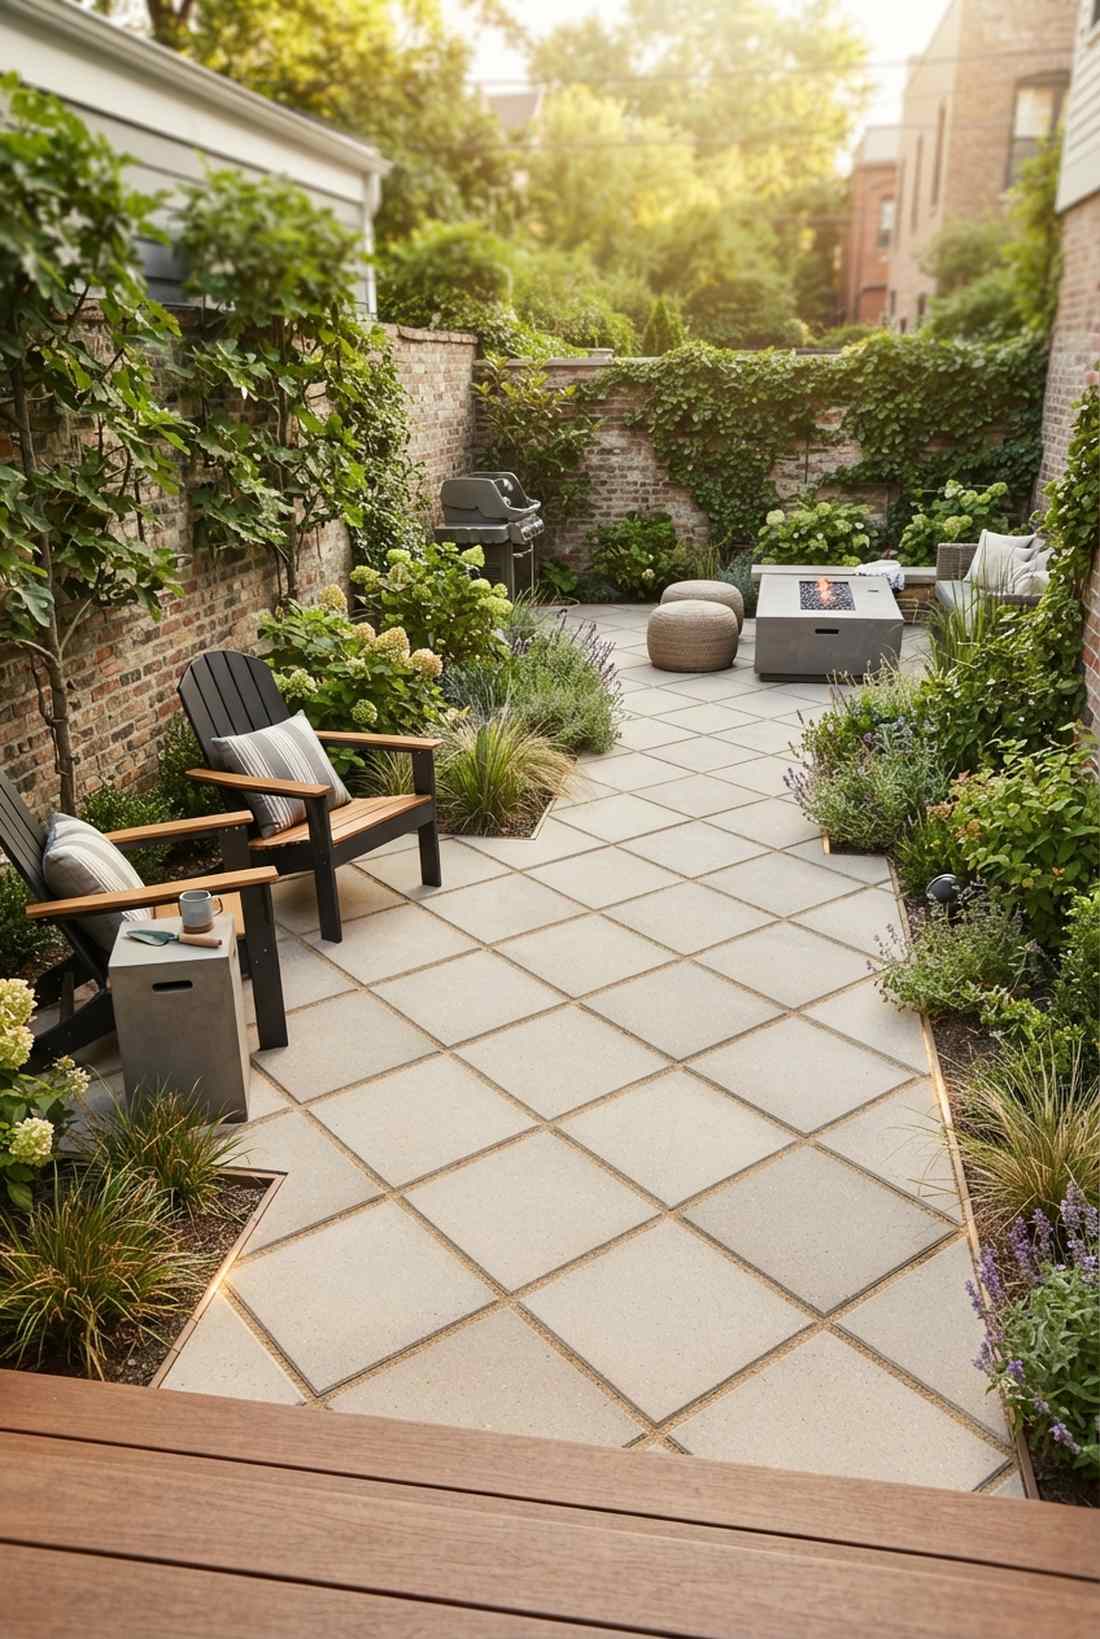
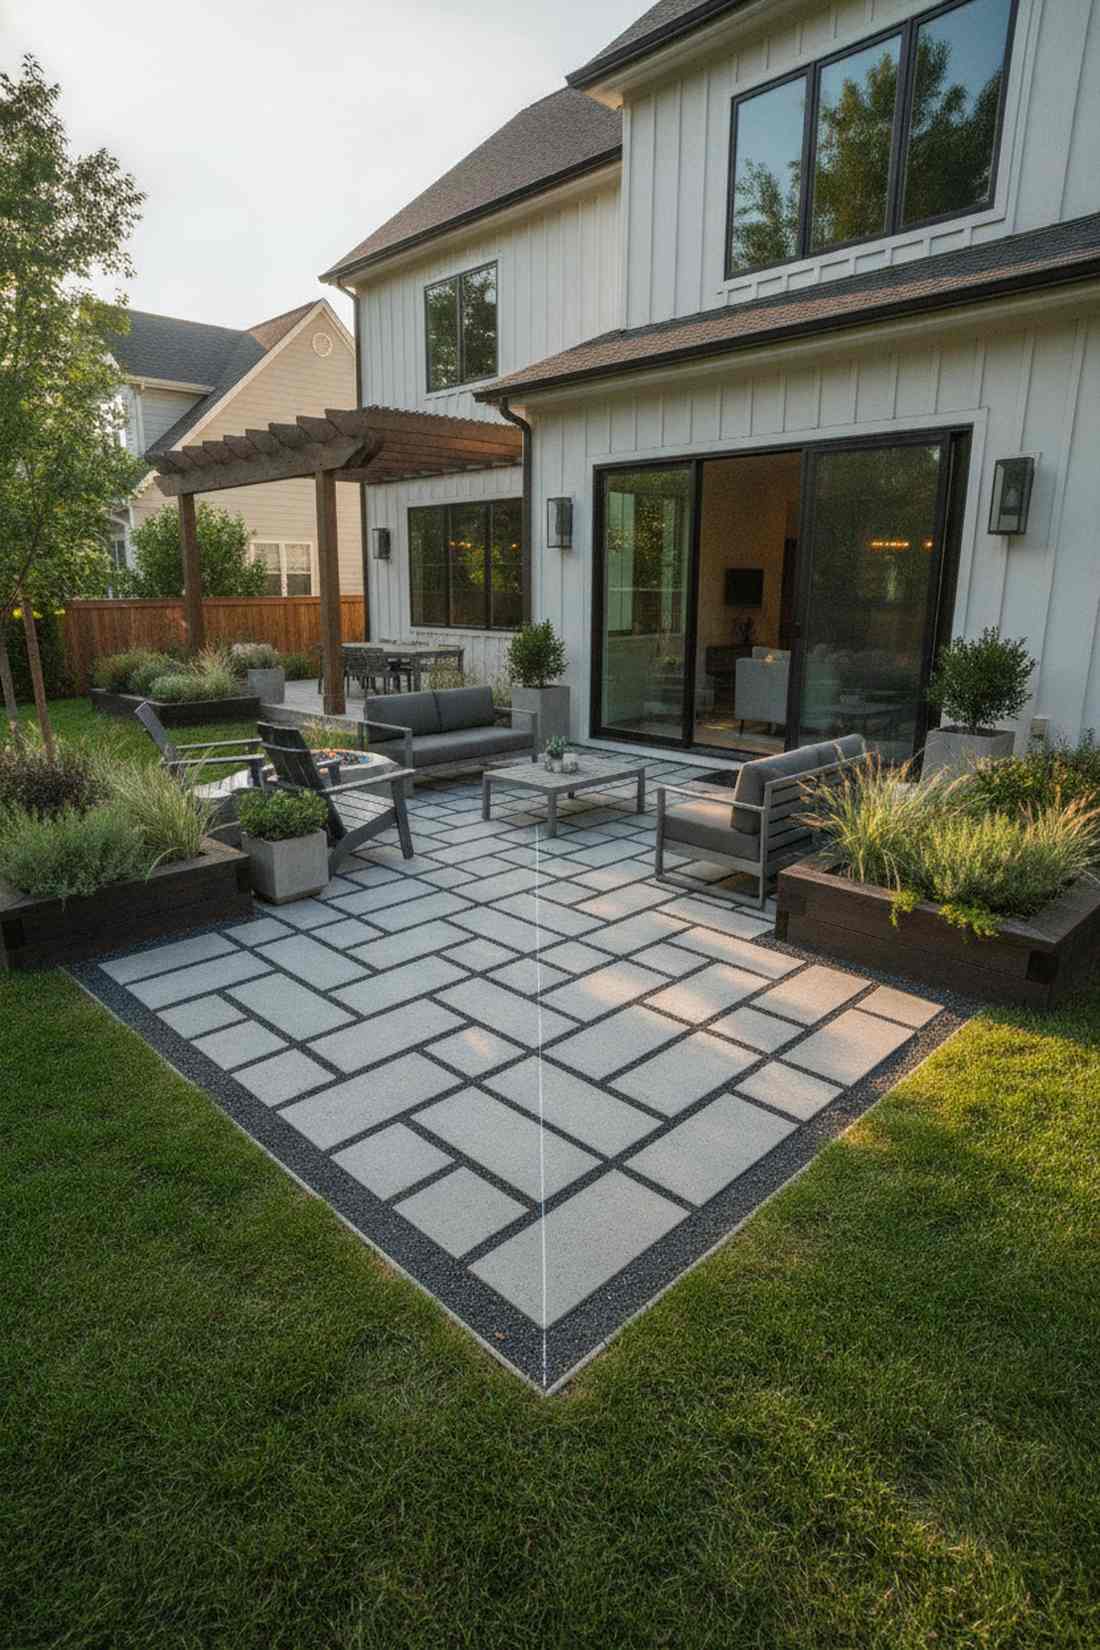
Creates an optical illusion that expands your outdoor footprint instantly. This small garden layout trick is ideal for boxed-in urban terraces.
Laying pavers parallel is a rookie mistake; rotating them 45 degrees gives a designer-level finish that tricks the eye. Combining this with premium jointing sand prevents weed growth and locks the illusion in place.
You can complete a small patio section for roughly $120–$200. Save this clever geometric trick to your DIY layout board.
- Key Materials: Concrete square pavers, leveling sand
- Vibe / Style: Modern architectural terrace
- Difficulty: Moderate measuring required
- Budget Breakdown: Pavers: $100 | Base sand: $30 | Polymeric sand: $20.
- Creator’s Tip: Snap a chalk line at an exact 45-degree angle from your main doorway for a perfect starting point.
- Smart Sourcing: Grab UV-resistant polymeric jointing sand and bulk leveling base kits.
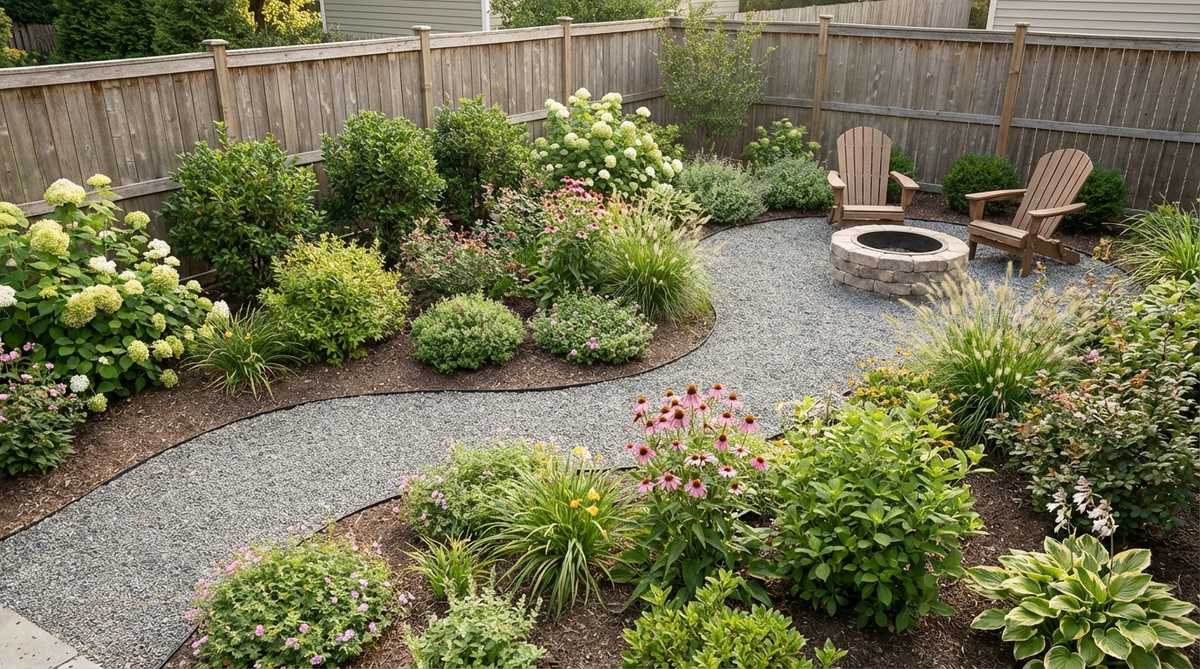
4. Sunken Conversation Pits
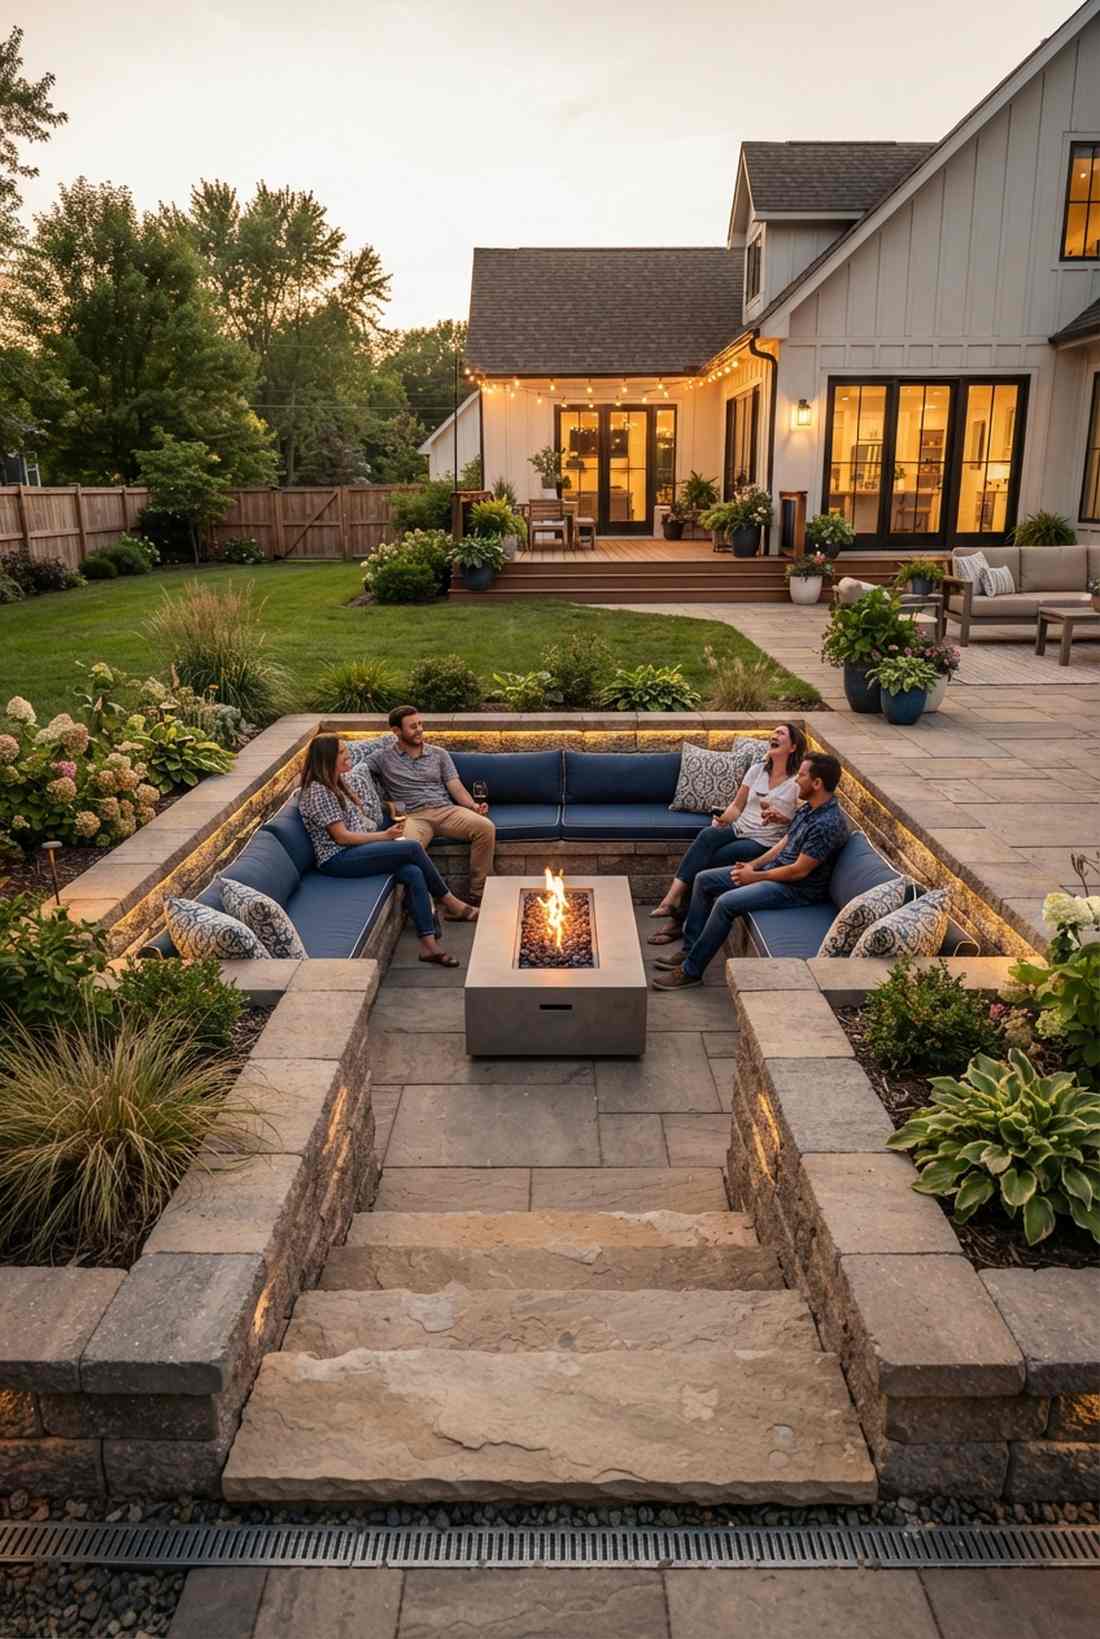

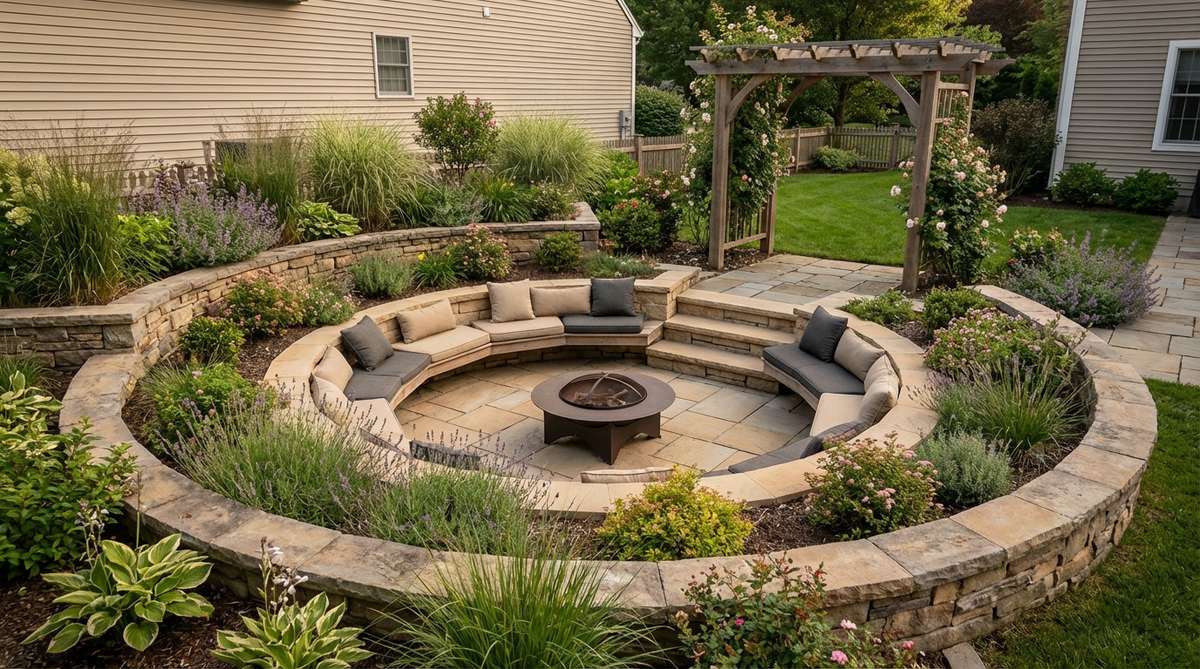
Brings a heavy dose of retro-luxe cozy right to your backyard. This lowered courtyard seating design is perfect for intimate nighttime gatherings.
Building upward clutters tight spaces; digging down instantly elevates the aesthetic by adding architectural depth. Dropping in waterproof patio cushions creates a permanent lounge vibe that outlasts the weather.
Excavation and retaining wall blocks run about $250–$400 for a compact pit.
- Key Materials: Retaining wall blocks, drainage gravel, outdoor seating
- Vibe / Style: Mid-century modern lounge
- Difficulty: Advanced digging project
- Budget Breakdown: Blocks: $200 | Drainage: $50 | Cushions: $100.
- Creator’s Tip: Ensure proper French drain installation at the bottom so it doesn’t become a swimming pool.
- Smart Sourcing: Invest in heavy-duty modular retaining blocks and a pre-cut French drain kit.
This next setup is ridiculously cheap but looks like a $100 custom display…
5. Off-Center Focal Points
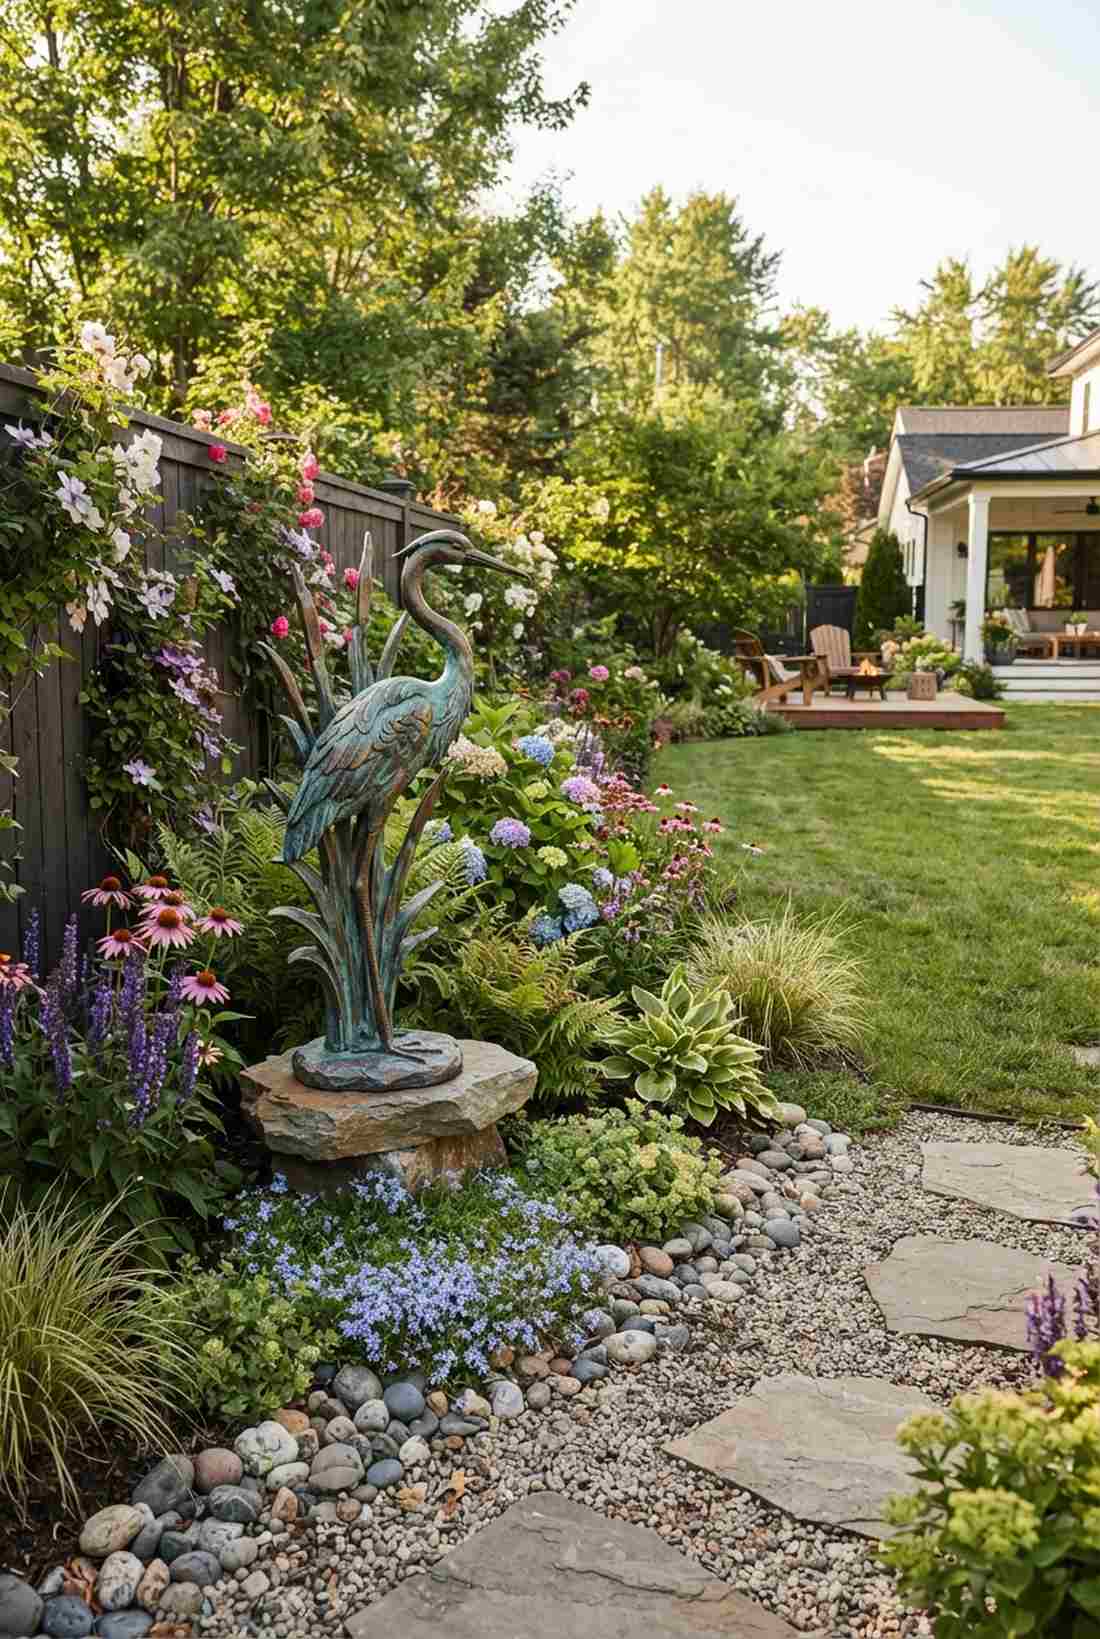
Draws the eye deep into the yard like an intentional gallery display. A striking small garden design element placed asymmetrically works beautifully near plain fences.
Placing everything dead-center makes yards feel smaller; shifting focus to the back-third bypasses the usual cheap look. Integrating an oversized resin garden sculpture or water bowl anchors the space with authority.
A stunning focal piece can be sourced for around $40–$80. Pin this layout strategy so you don’t forget the rule of thirds.
- Key Materials: Ceramic birdbath or sculptural planter, accent gravel
- Vibe / Style: Intentional gallery aesthetic
- Difficulty: Very easy
- Budget Breakdown: Focal piece: $60 | Accent stone: $15.
- Creator’s Tip: Plant lower groundcover directly beneath the focal point to make it pop further.
- Smart Sourcing: Look for weatherproof composite birdbaths or UV-coated decorative garden spheres.
6. Hidden Utility Zones

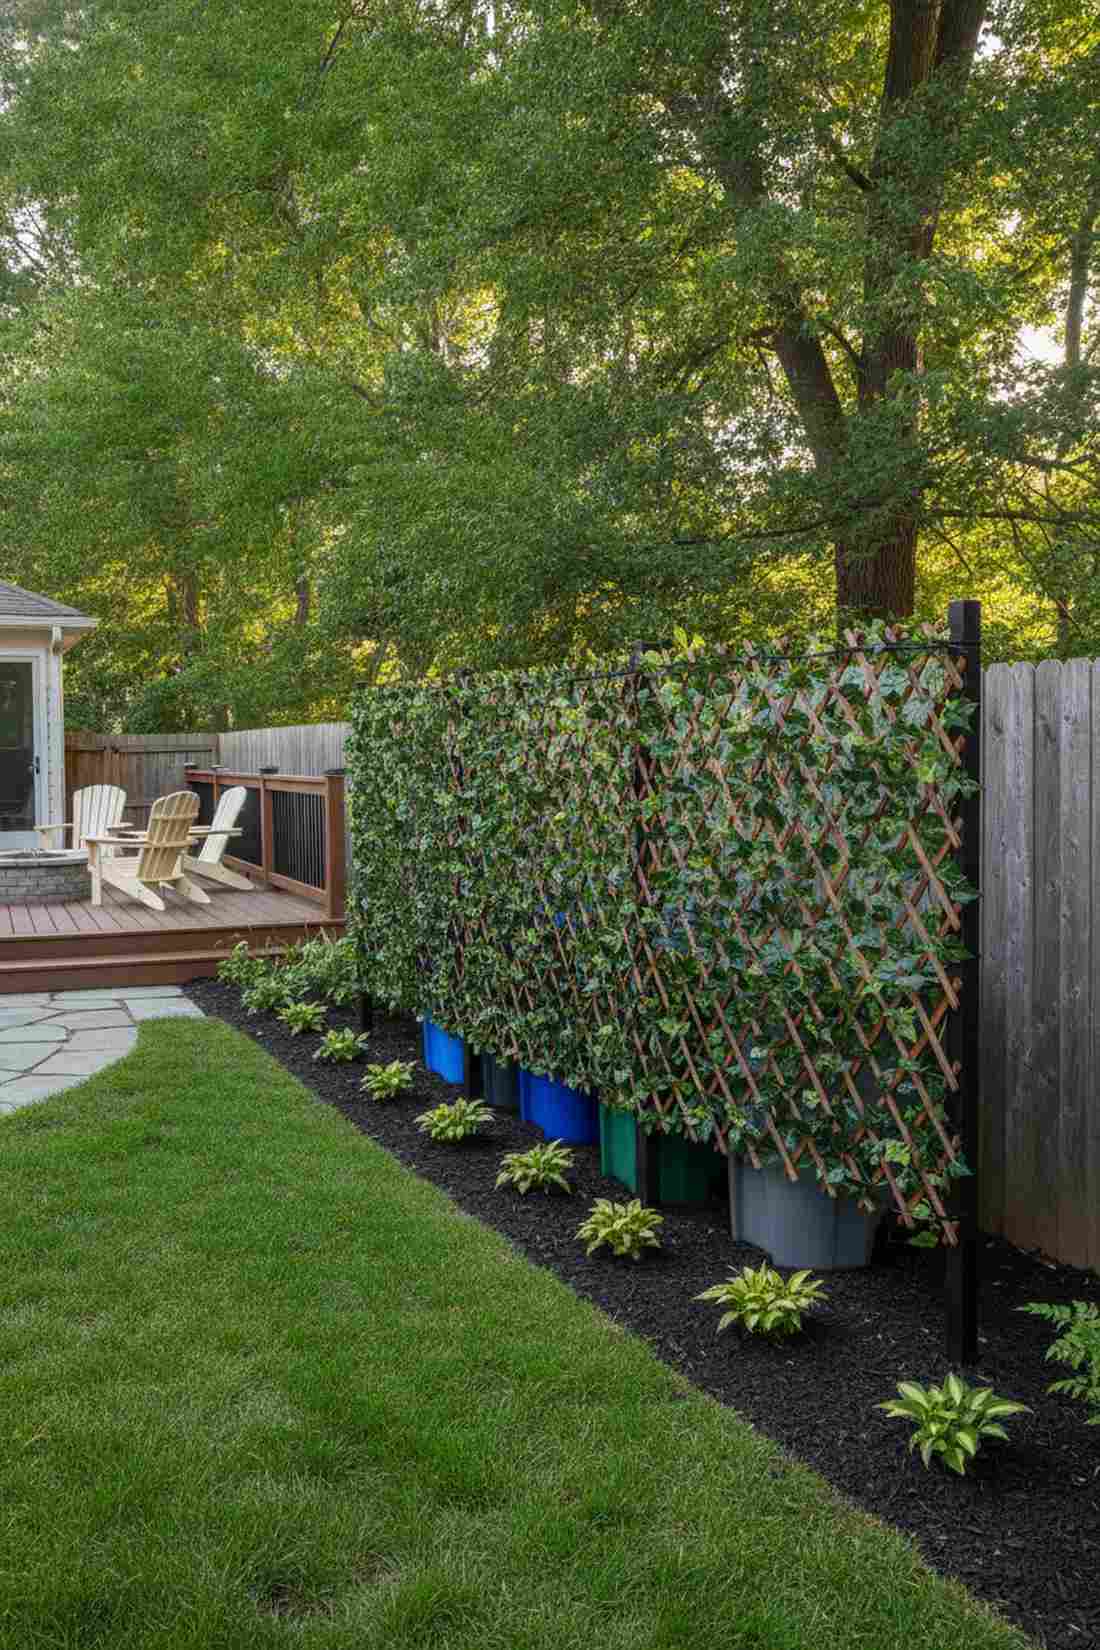

Keeps the messy stuff completely out of sight while maintaining a lush perimeter. Sleek garden privacy screen ideas are an absolute must for hiding trash cans or composters.
Exposed utilities ruin the magic; building a living camouflage feels like a custom-built installation. Attaching faux ivy expandable screens to a simple frame solves the problem in under an hour.
Concealing your functional corners costs about $30–$60.
- Key Materials: Expandable trellis, zip ties, wooden stakes
- Vibe / Style: Clean uninterrupted greenery
- Difficulty: Quick 30-minute fix
- Budget Breakdown: Trellis: $35 | Stakes: $10.
- Creator’s Tip: Use black zip ties instead of green—they blend into shadows better.
- Smart Sourcing: Order an expandable faux leaf privacy fence and weather-resistant nylon zip ties.
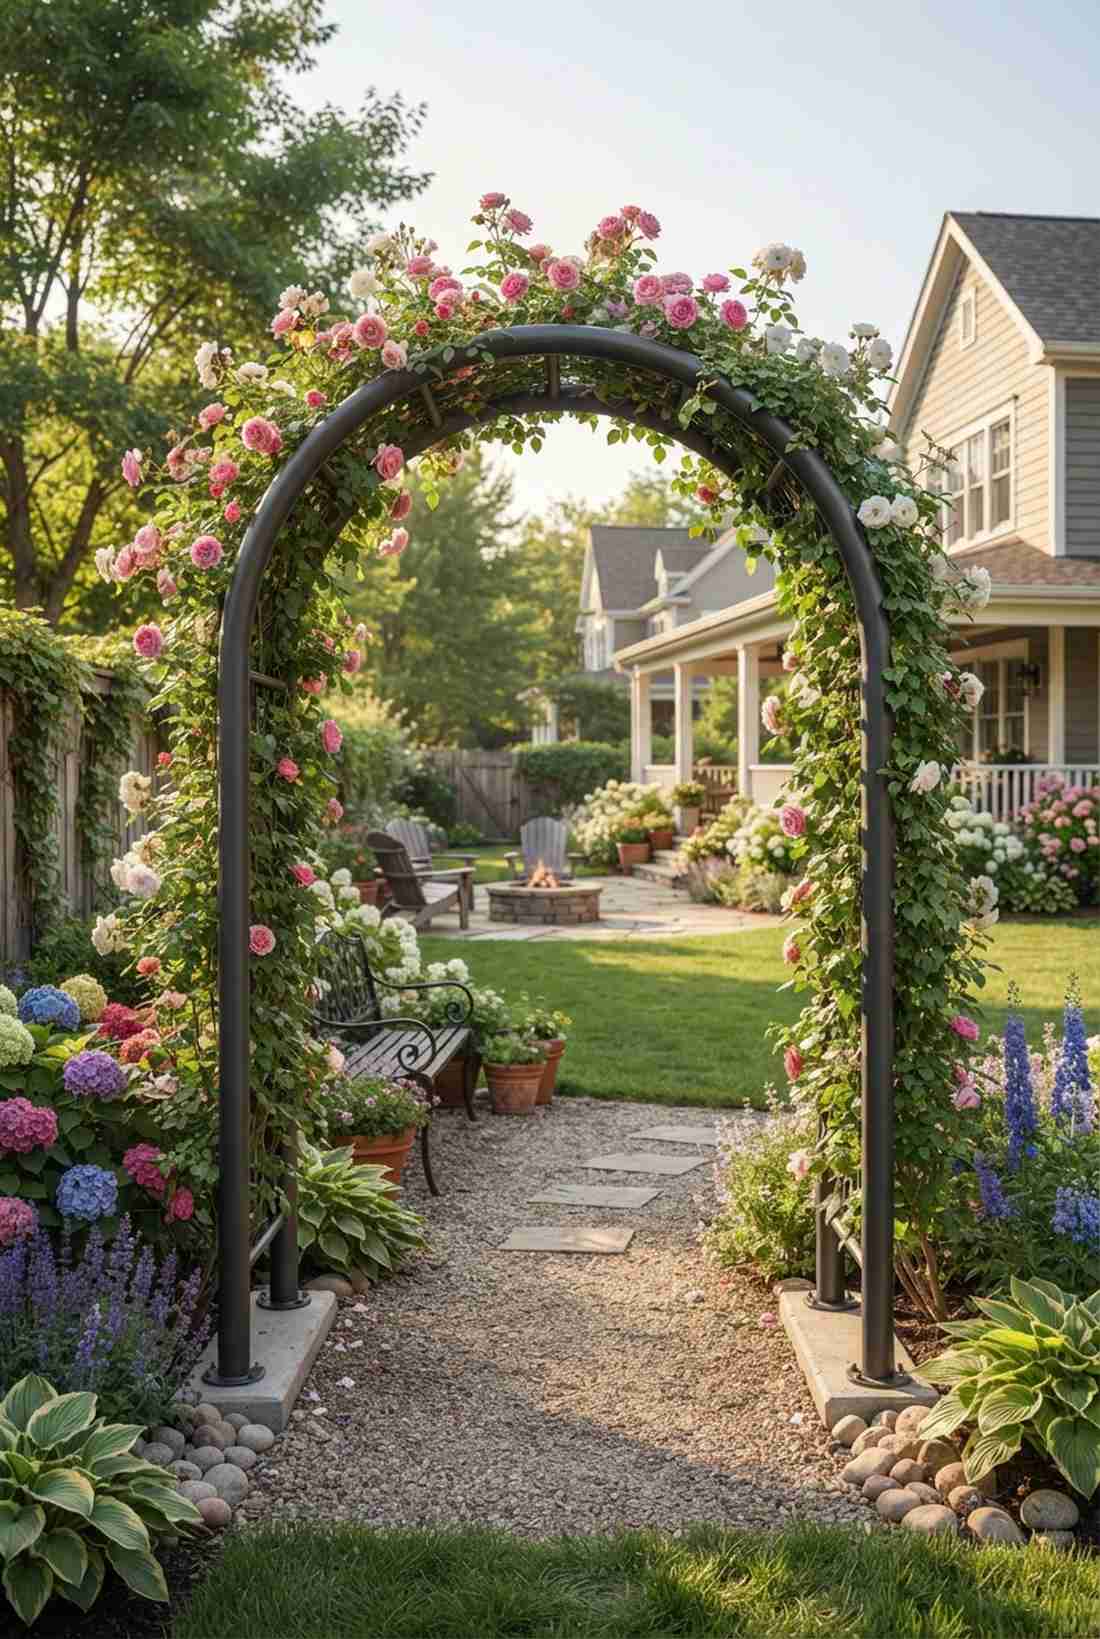
7. Threshold Garden Rooms
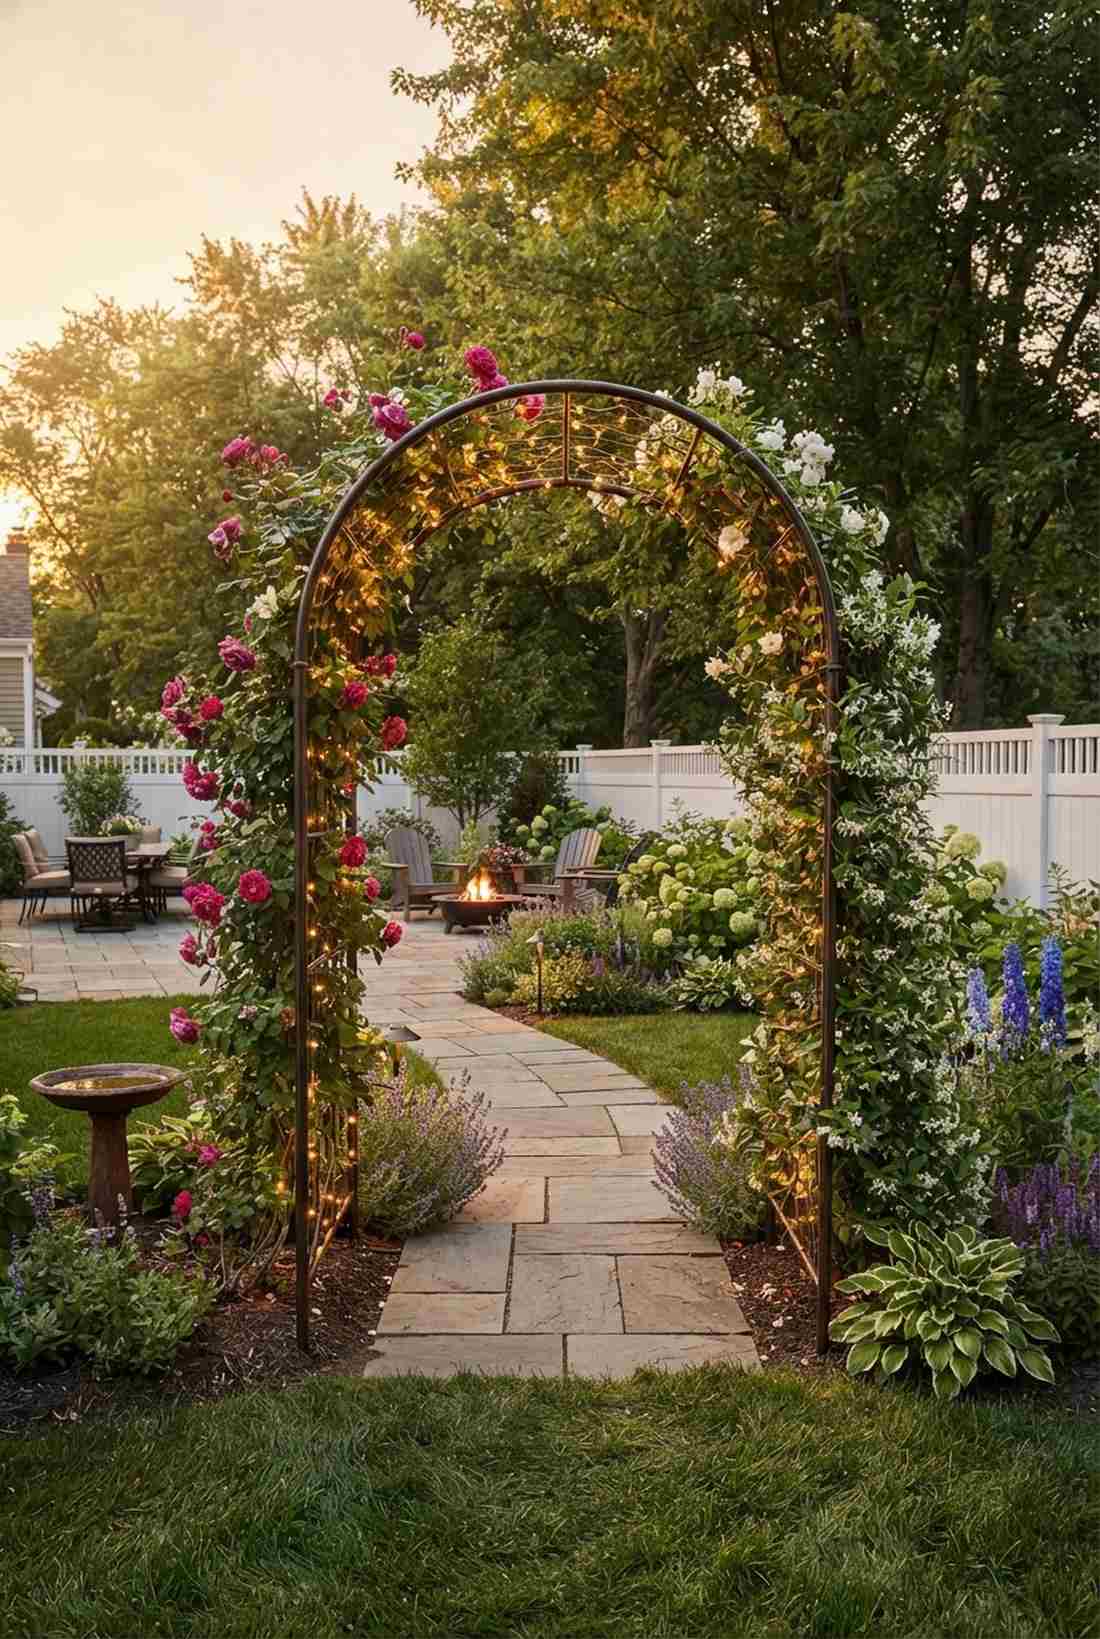
Steps right out of a fairytale with an inviting, framed entrance. Utilizing an arched garden pathway structure separates the patio from the green space flawlessly.
A flat yard feels boring; creating vertical doorways forces perspective and looks custom-made. Adding outdoor fairy lights around the archway guarantees massive evening curb appeal.
A basic metal threshold arbor will set you back about $45–$90.
- Key Materials: Metal garden arch, climbing vines
- Vibe / Style: Romantic cottage entrance
- Difficulty: Easy assembly
- Budget Breakdown: Arch: $50 | Fast-growing vines: $25.
- Creator’s Tip: Plant climbing roses or jasmine at the base for an immediate scent barrier.
- Smart Sourcing: Find a rust-resistant tubular steel arbor and solar-powered copper wire lights.
Vertical Growing Solutions for Small Garden Landscape
8. Modular Living Walls
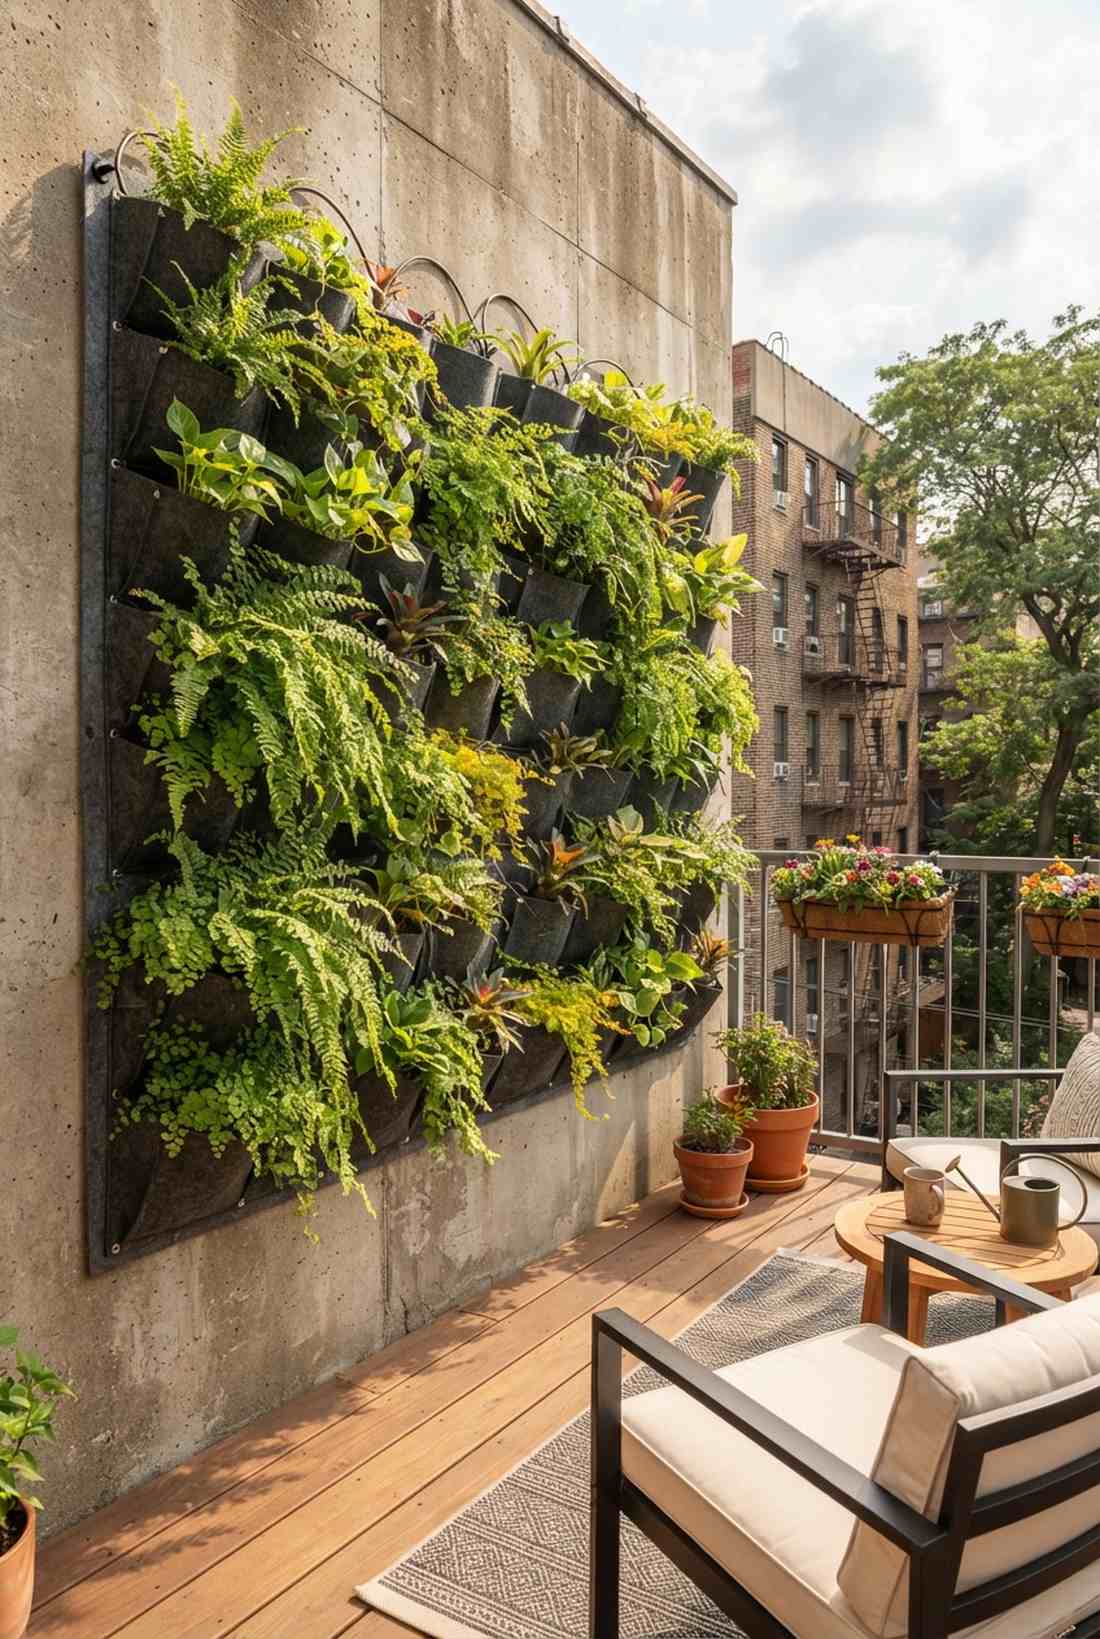
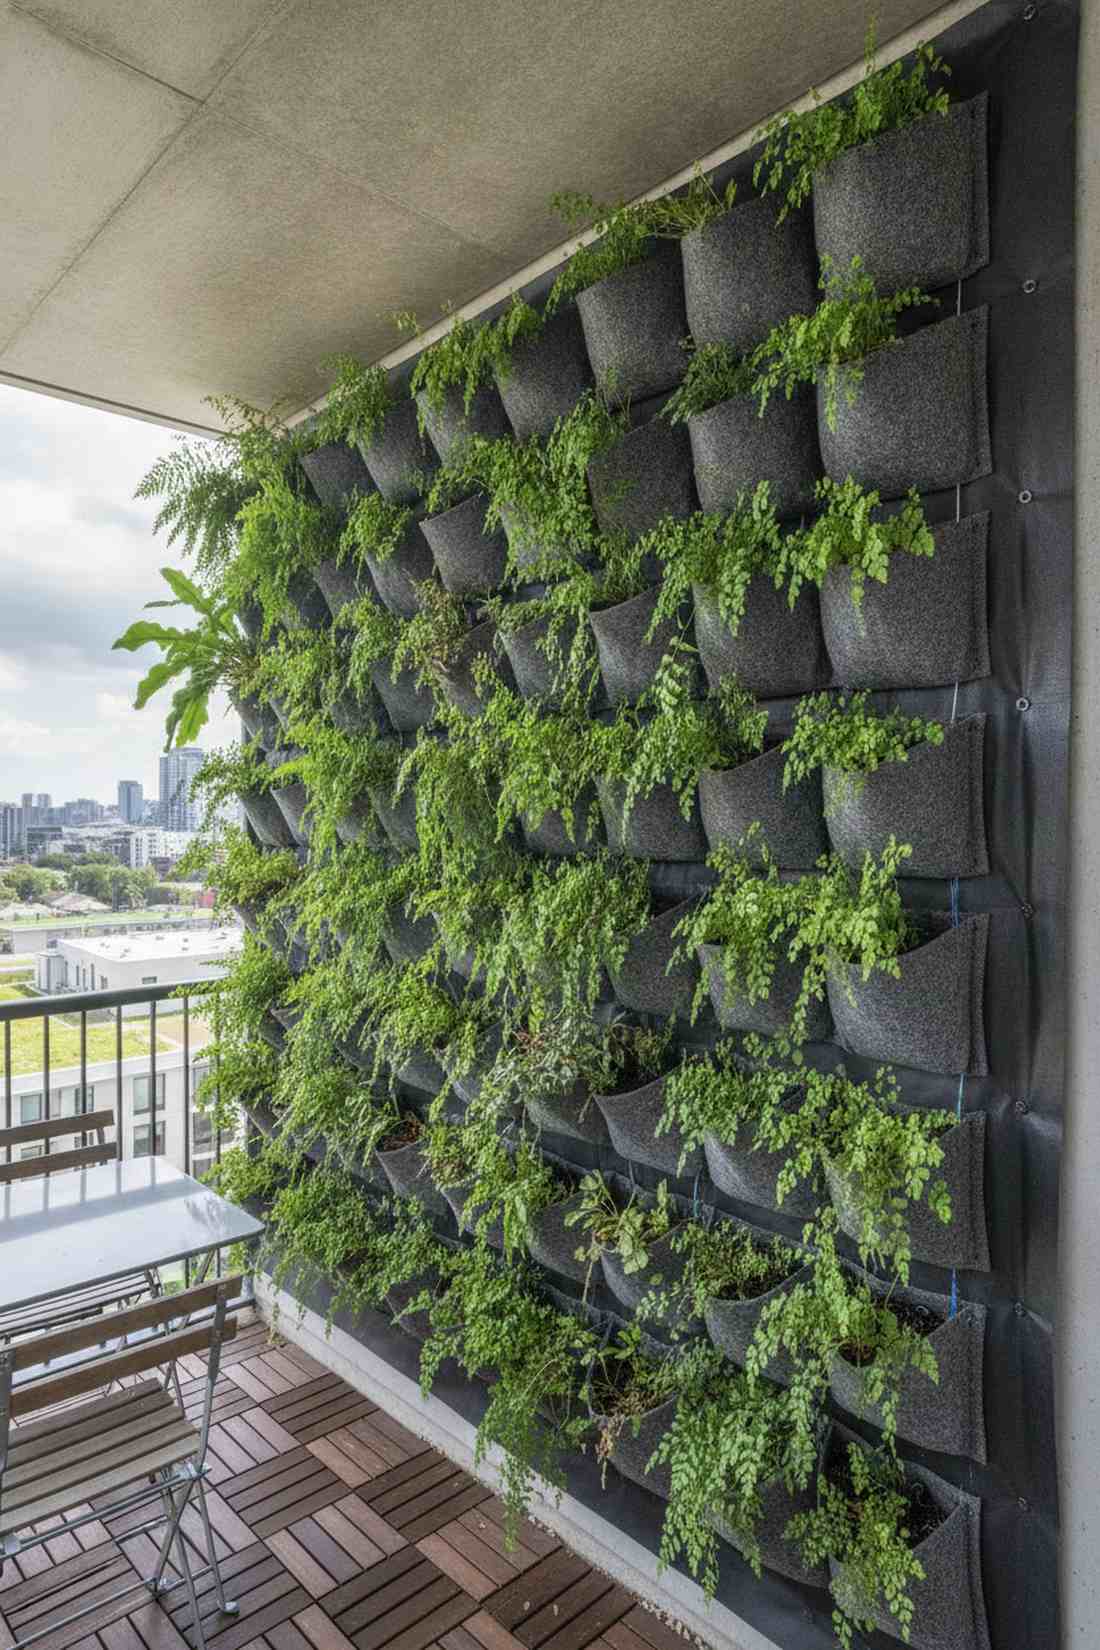
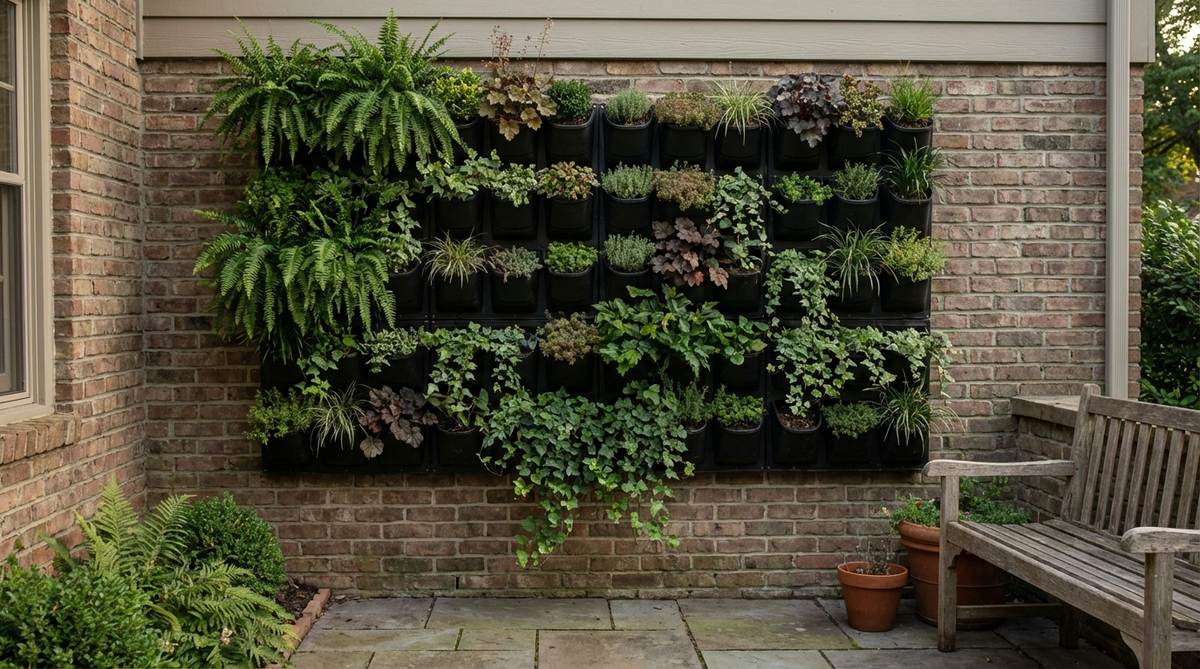
Transforms a dead concrete fence into an exploding cascade of greenery. This intensive vertical planter system is brilliant for cramped apartment balconies.
Traditional pots waste floor space; going entirely vertical adds instant property value and dramatic impact. Incorporating hydroponic planter pockets ensures your vertical jungle thrives without rotting your walls.
A starter wall setup costs approximately $60–$120. Save this to your balcony makeover board.
- Key Materials: Felt planting pockets, trailing ferns, wall anchors
- Vibe / Style: Lush urban jungle
- Difficulty: Requires basic drilling
- Budget Breakdown: Pocket panels: $40 | Plants: $60 | Hardware: $10.
- Creator’s Tip: Install a waterproof backing board behind the pockets to protect your siding.
- Smart Sourcing: Use heavy-duty felt vertical grow bags and pre-cut waterproof membrane sheets.
💡 Must-Have Supplies for High-End Setups
To build these setups faster and ensure they last, skip the generic craft aisles and invest in the right foundational kits.
- Base & Support: Pre-treated ground contact timber kits
- Setup Tools: Complete landscape fabric & staple starter kits
- Weather/Durability Protection: UV-blocking clear exterior sealant sprays
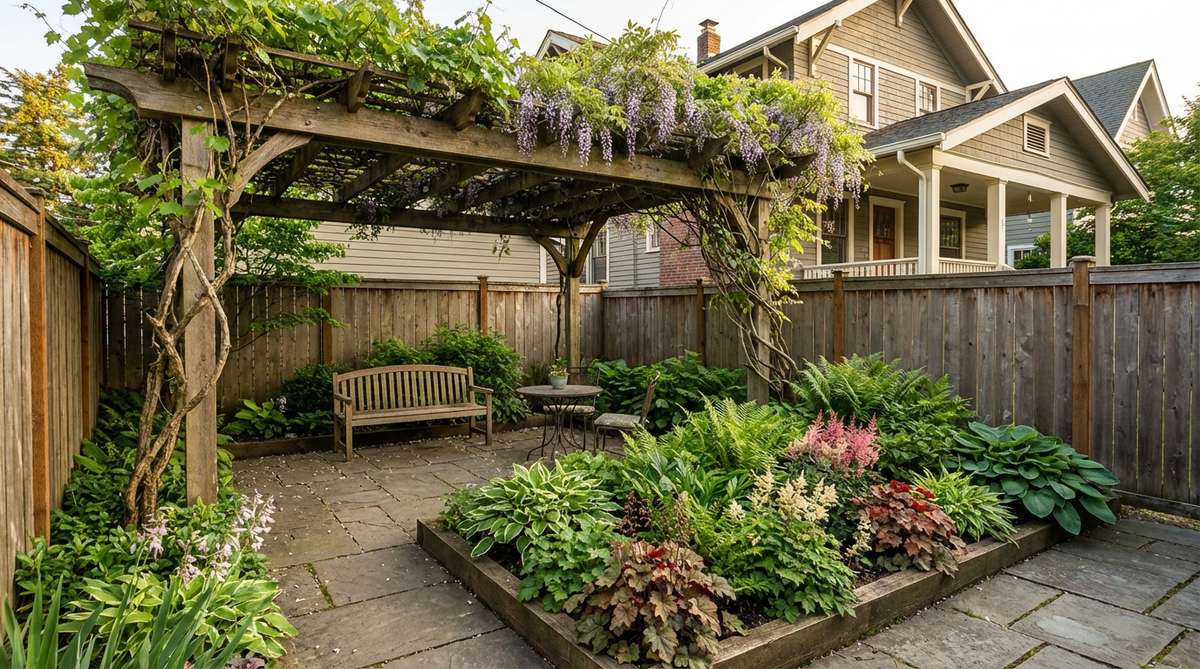
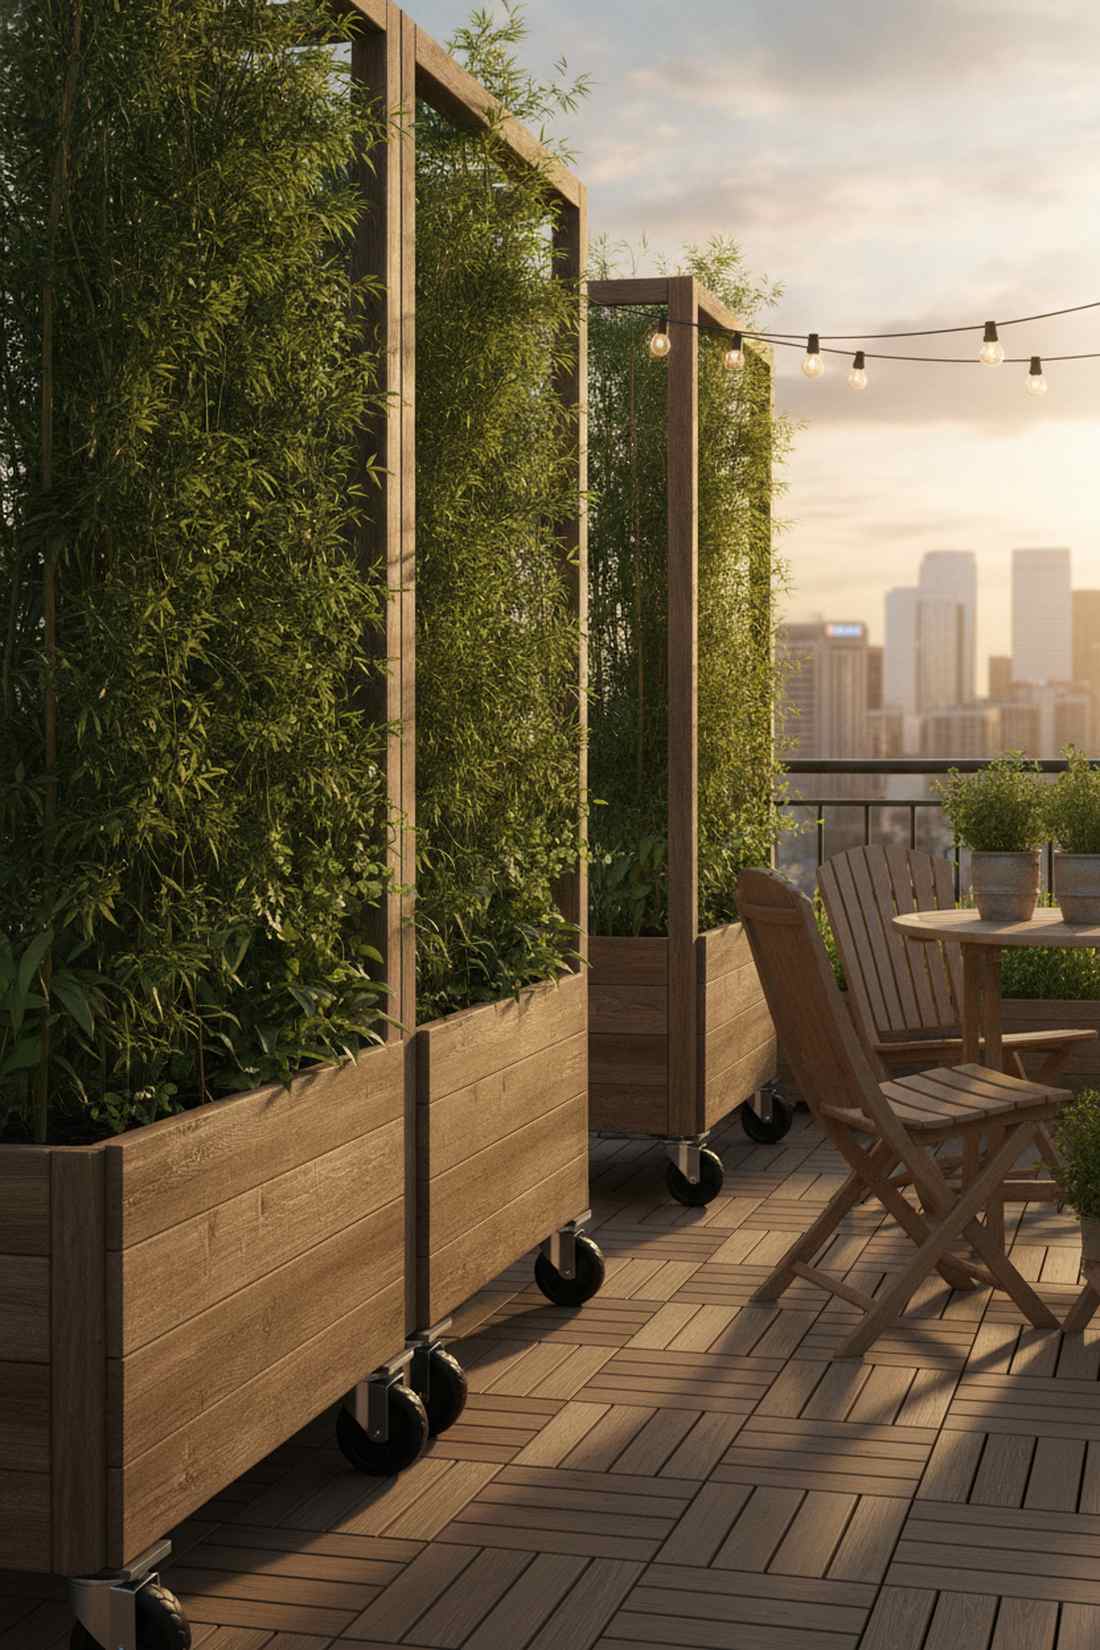
9. Freestanding Trellis Walls
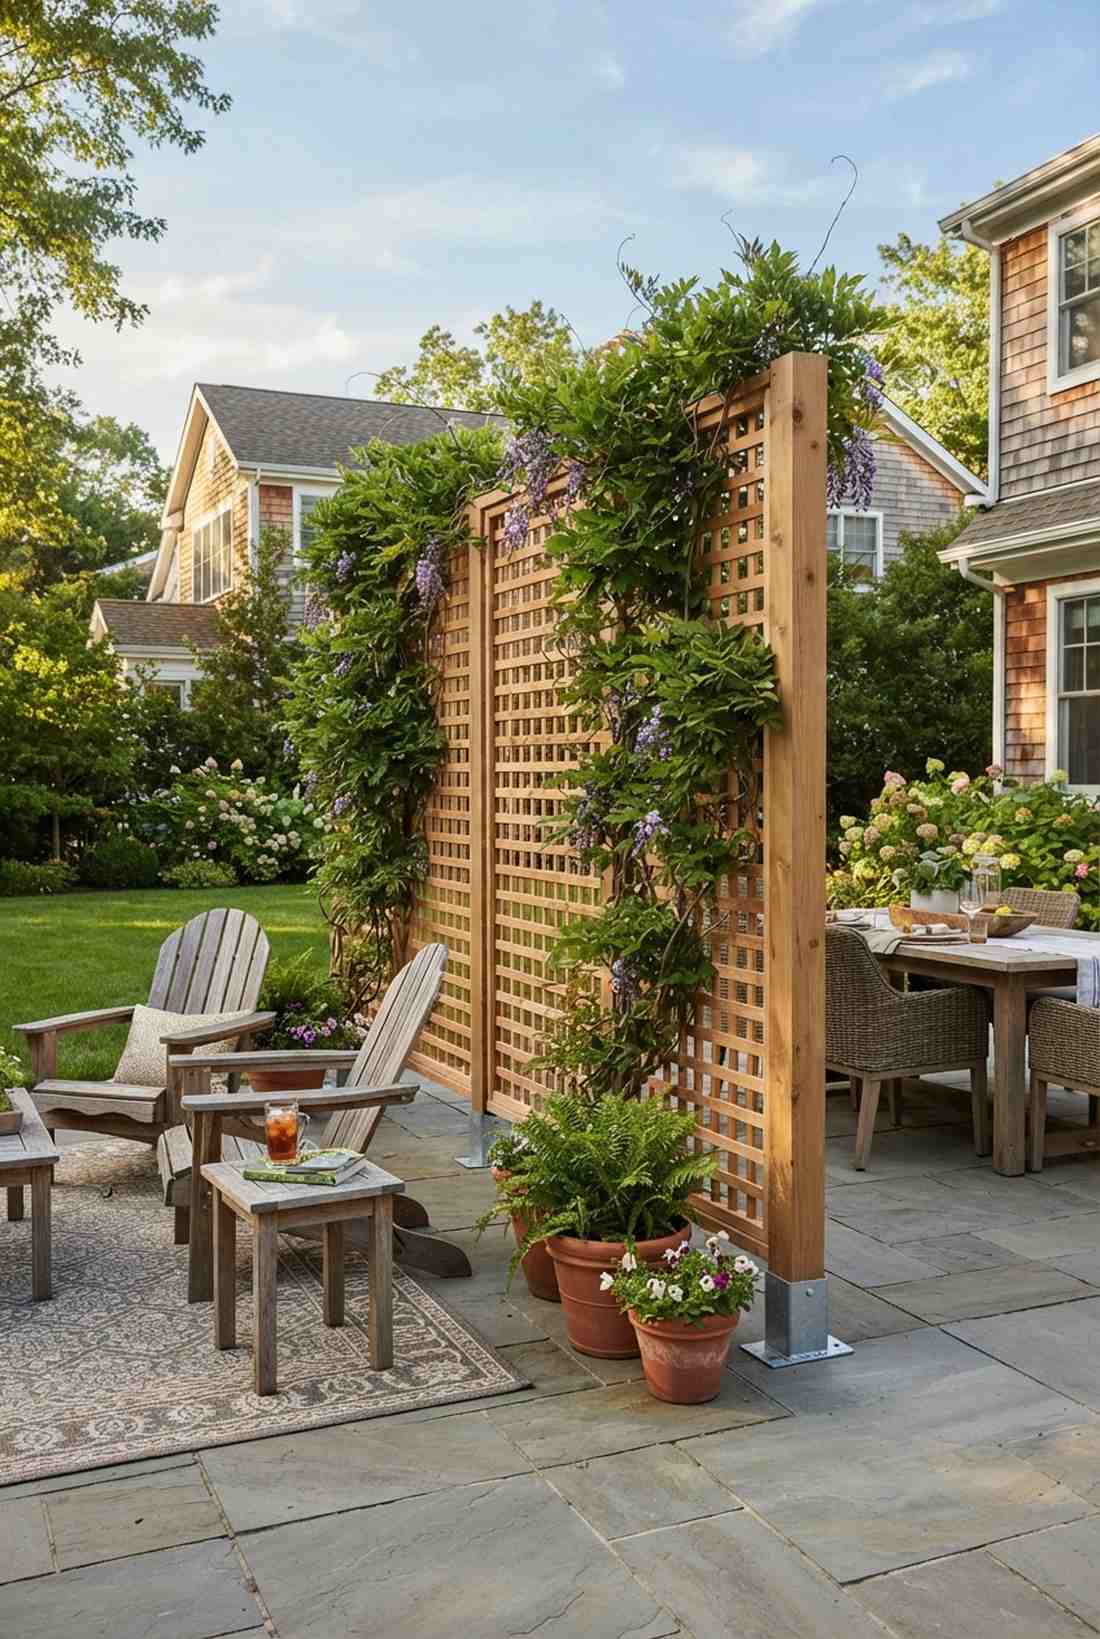
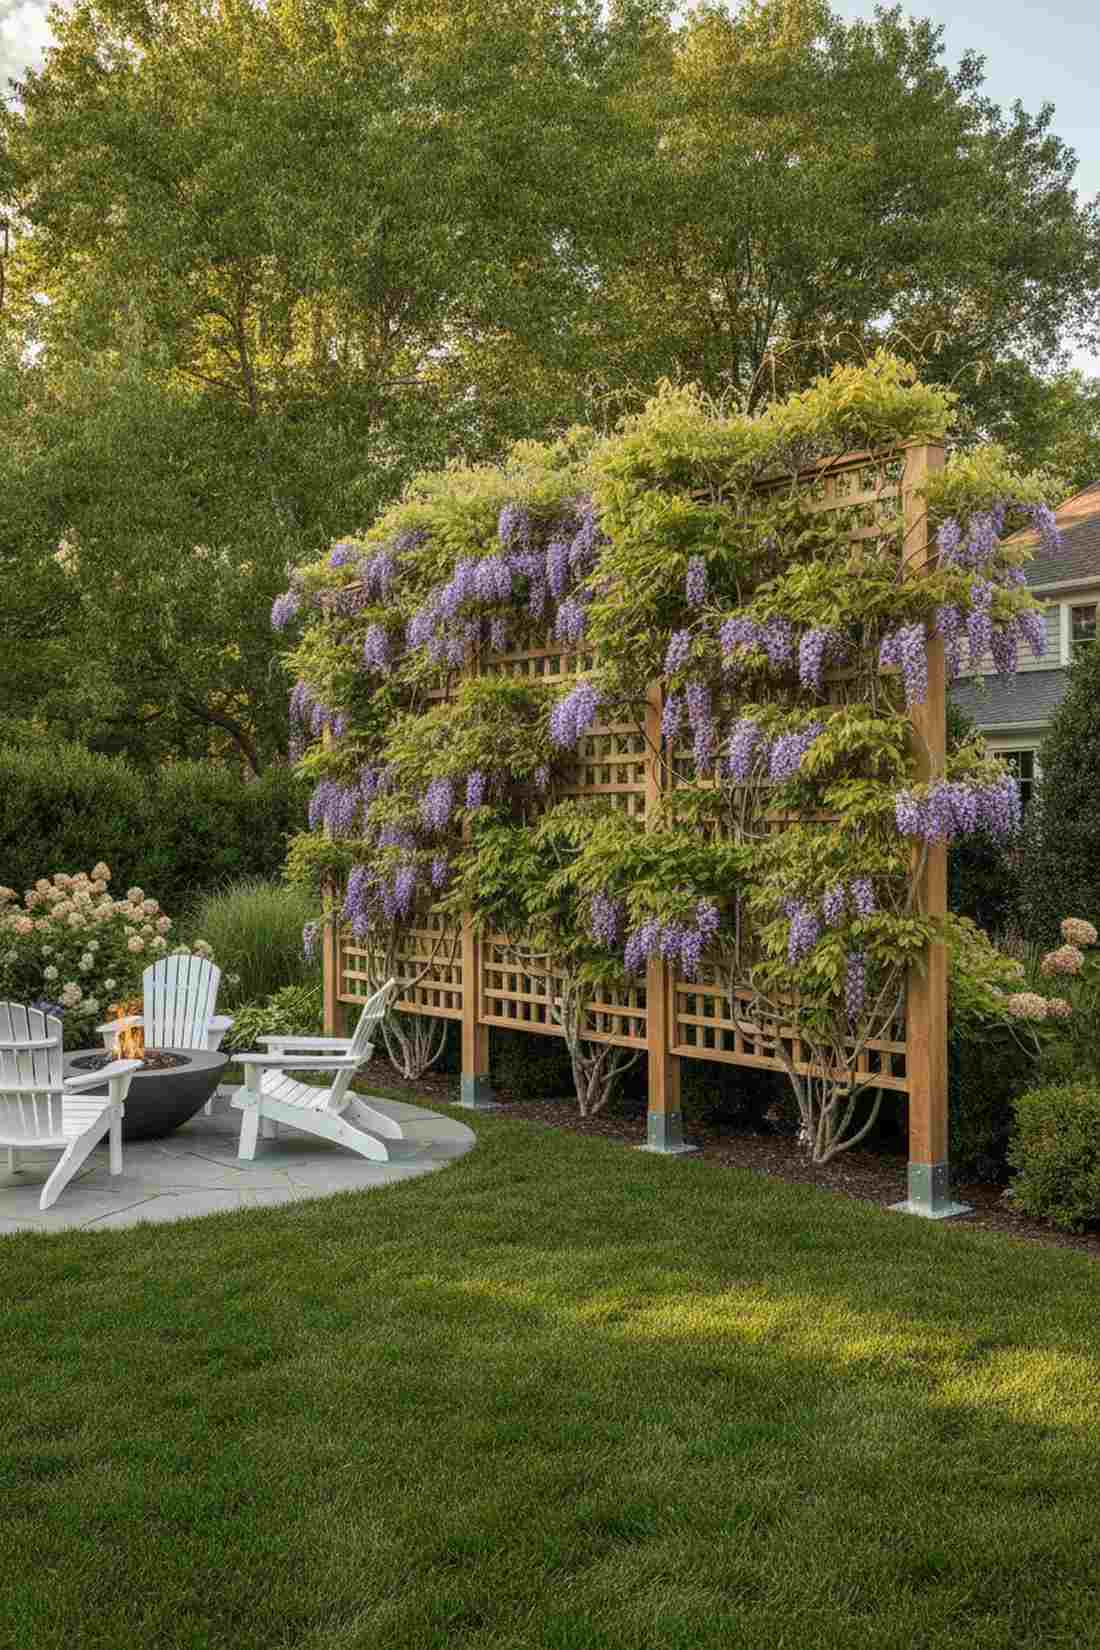

Acts like a floating green partition that divides space without blocking sunlight. A freestanding garden screen works wonders for hiding neighbors while keeping airflow.
Solid fences make small yards feel like prisons; a permeable trellis wall delivers a surprisingly premium look. Utilizing a heavy-duty lattice kit lets you grow heavy vines like wisteria safely.
You can construct a sturdy freestanding divider for $70–$130.
- Key Materials: Wooden lattice panels, 4×4 posts, post bases
- Vibe / Style: Airy architectural partition
- Difficulty: Moderate woodworking
- Budget Breakdown: Lattice: $40 | Posts: $30 | Hardware: $20.
- Creator’s Tip: Leave a 2-inch gap at the bottom to prevent wood rot from ground moisture.
- Smart Sourcing: Get pre-treated cedar lattice panels and galvanized steel post anchors.
Most people get this completely wrong… until they try the exact layout coming up next.
10. Tiered Plant Towers

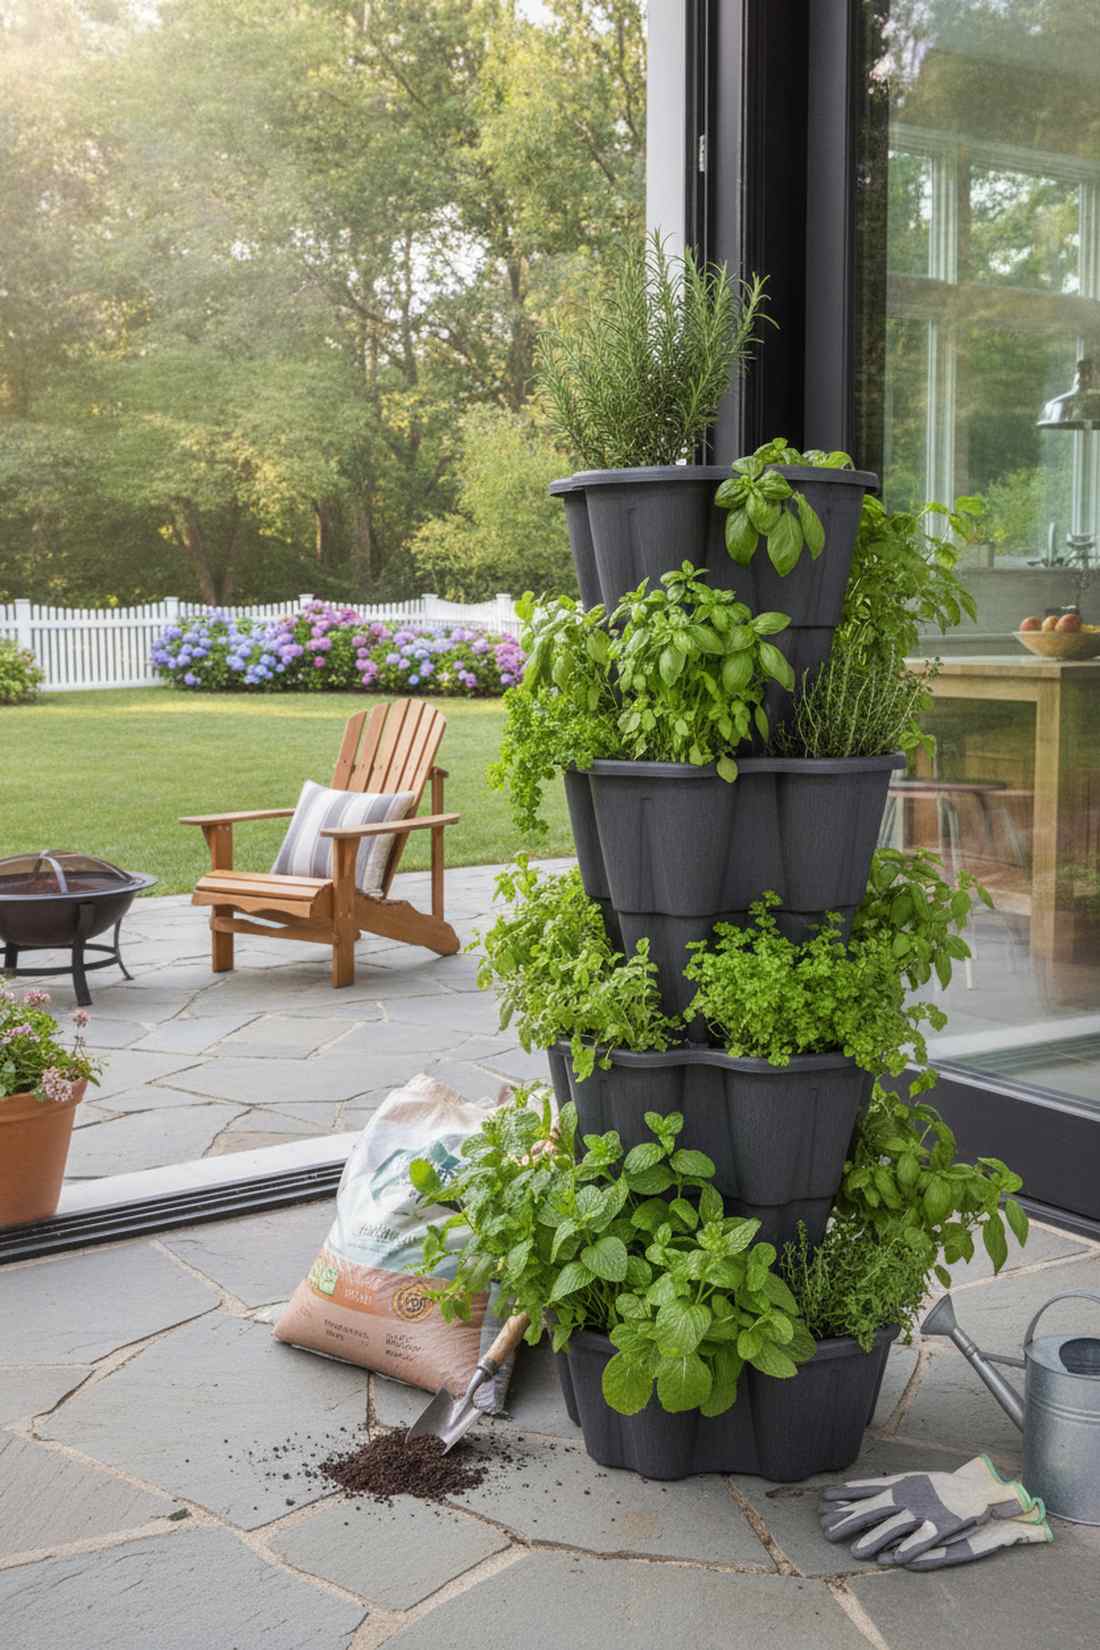
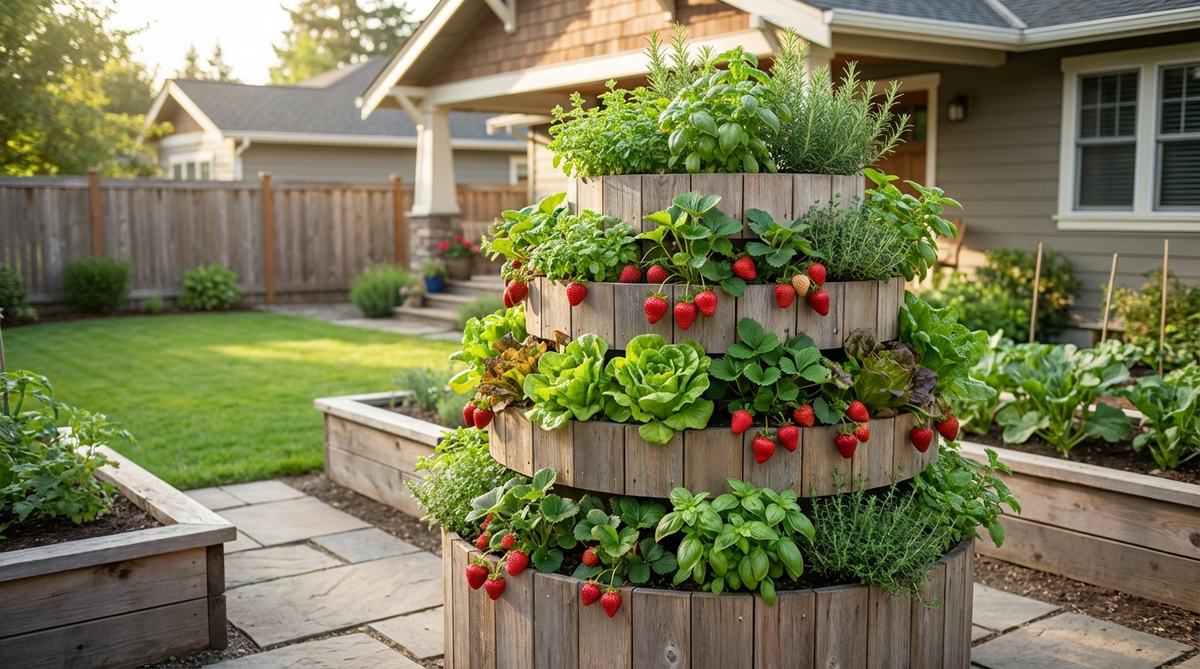
Creates a towering pillar of fresh herbs right outside your kitchen door. A small garden landscape utilizing vertical stacking is unmatched for maximum harvest yields.
Sprawling veggie patches are inefficient; stacking vertically maximizes production and gives a designer-level finish. Utilizing stackable planter pots allows you to rotate tiers to chase the sun.
A full 5-tier tower setup is easily done for $35–$60. Pin this if you love fresh cooking.
- Key Materials: Interlocking plastic tiers, moisture-control potting mix
- Vibe / Style: Productive culinary corner
- Difficulty: Extremely easy
- Budget Breakdown: Tower kit: $35 | Soil/Seeds: $20.
- Creator’s Tip: Put the thirstiest plants (like mint) at the bottom so they catch top-down drainage.
- Smart Sourcing: Buy a UV-resistant 5-tier vertical planter kit and a bulk bag of perlite soil mix.
11. Cable Wire Systems
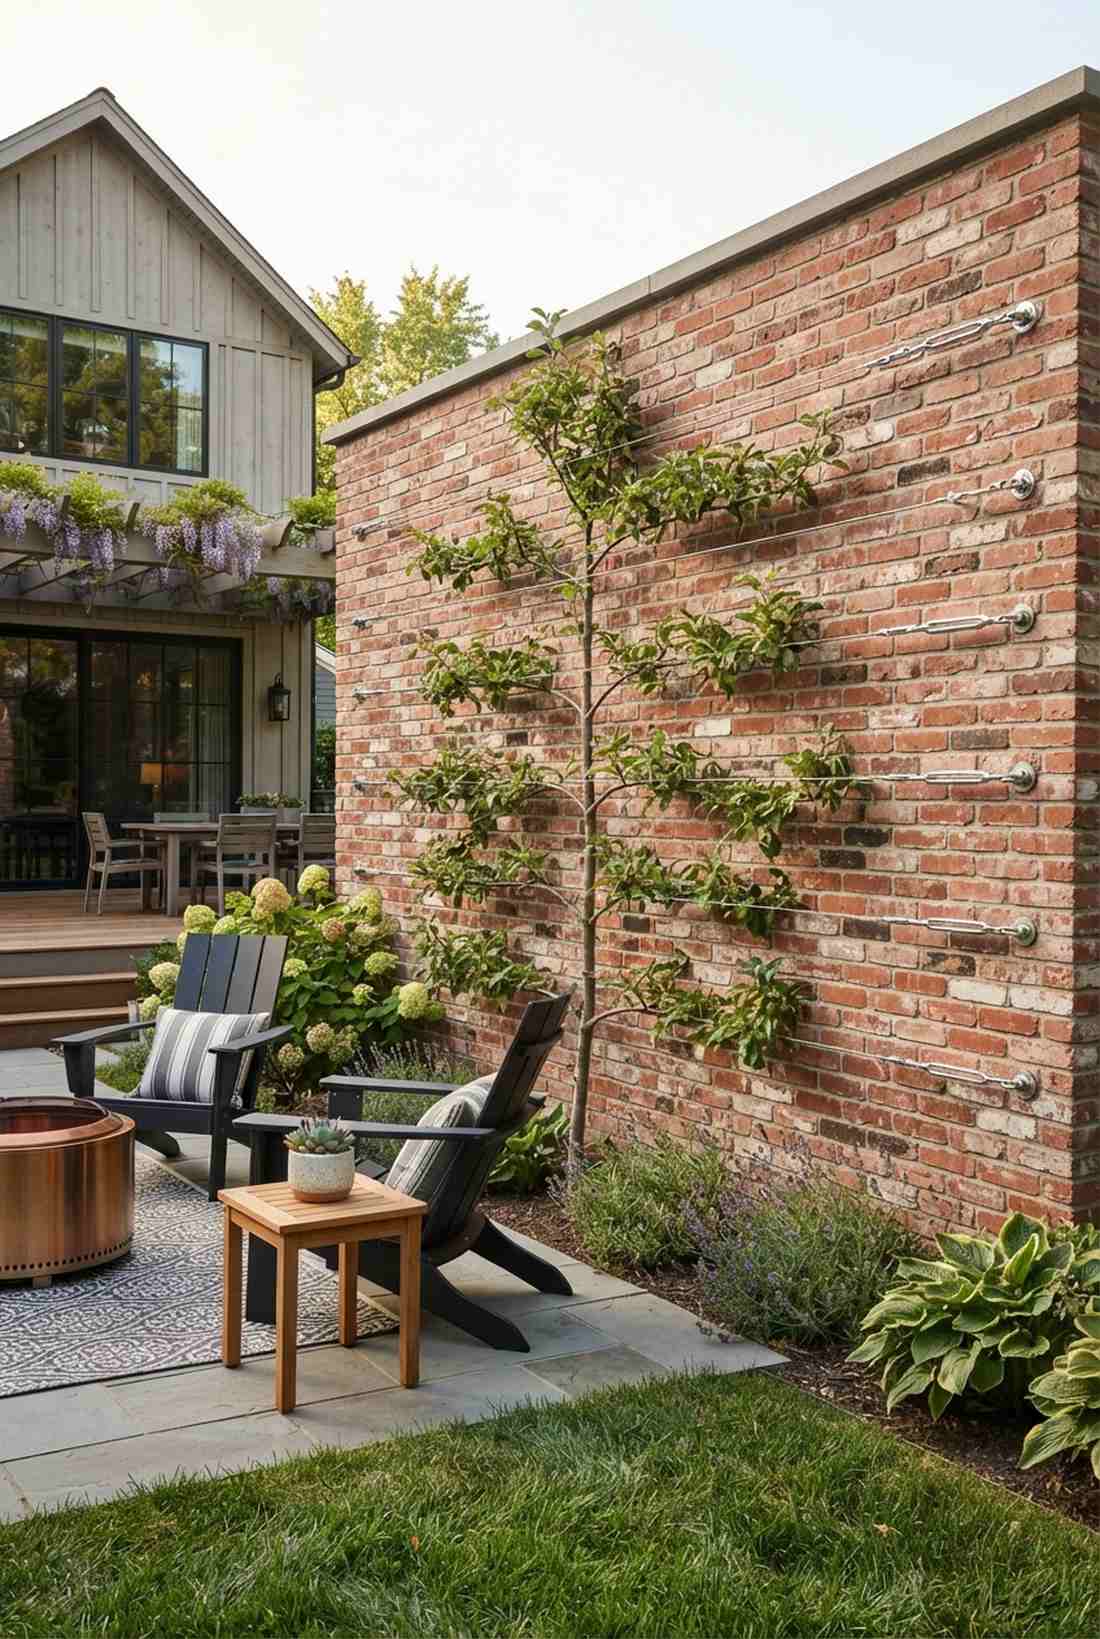
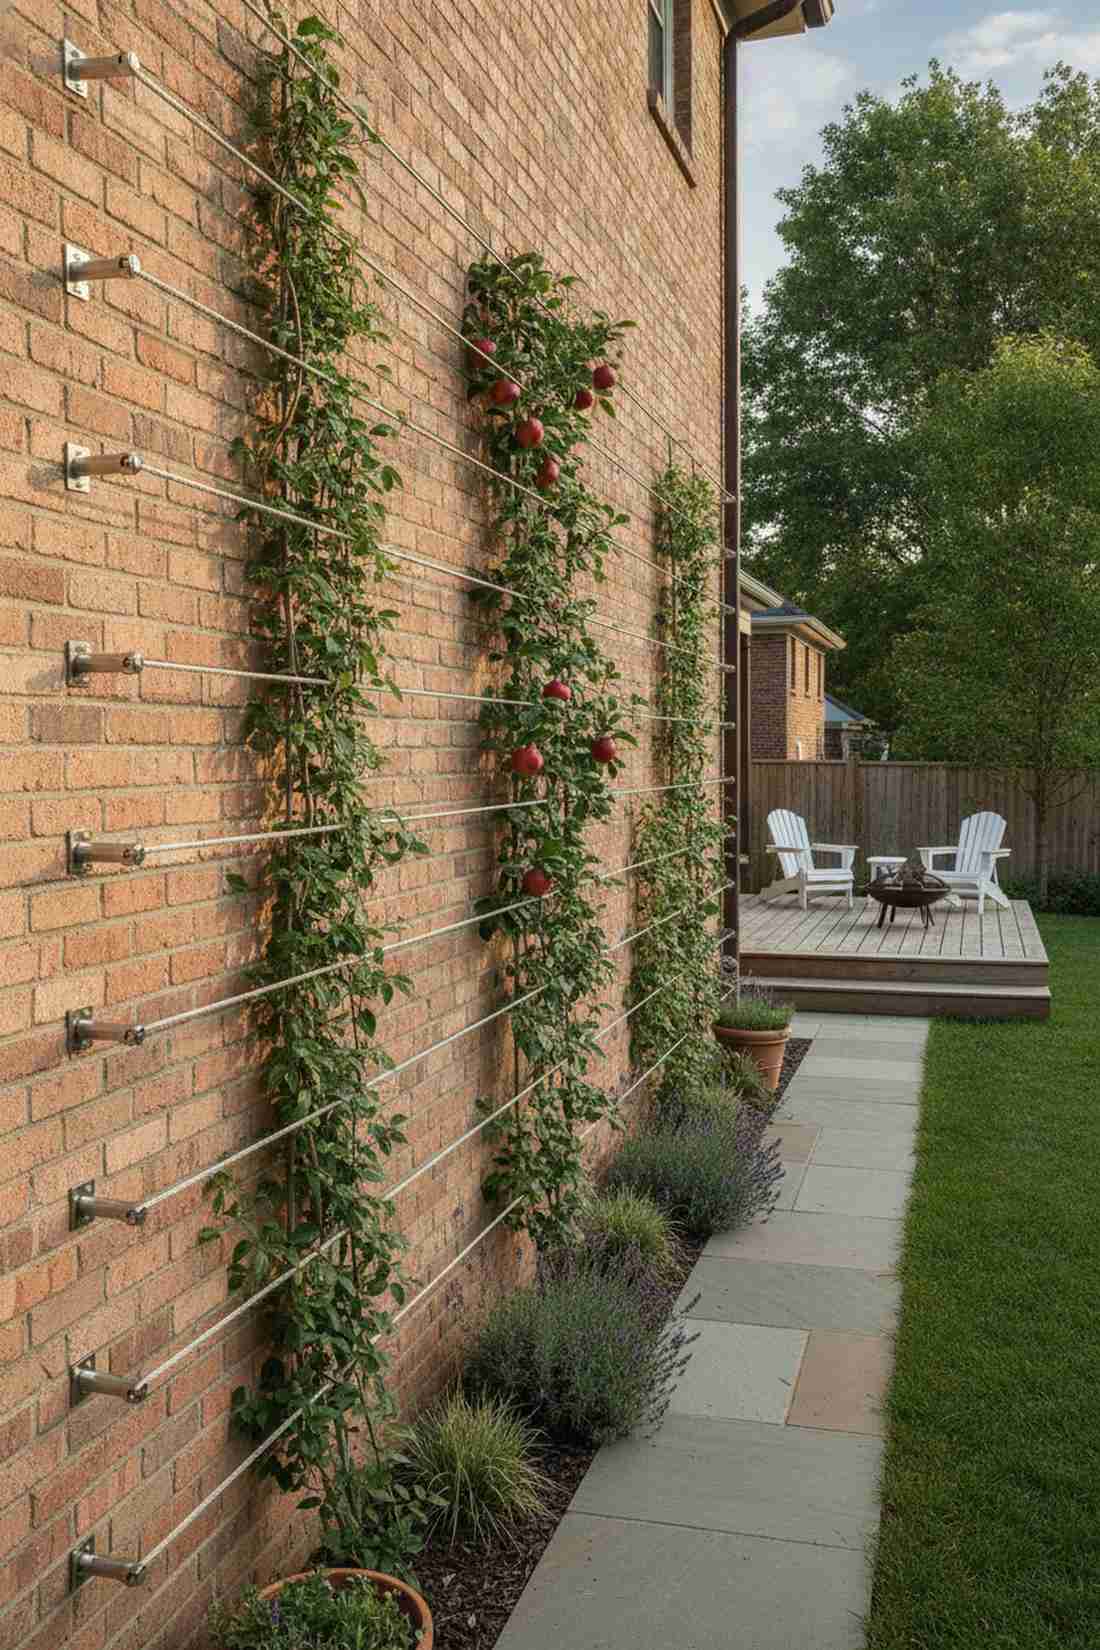
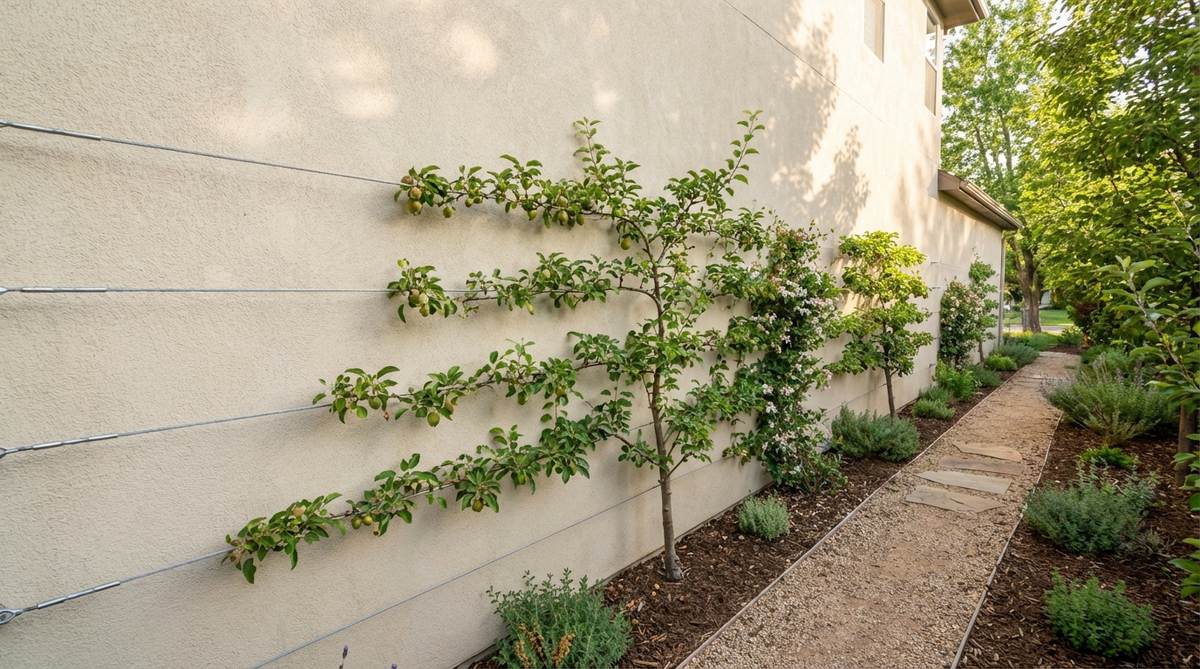
Looks like a high-end commercial winery right against your brick wall. A sleek espalier wire support is the ultimate flex for narrow exterior corridors.
Bulky wooden frames warp over time; marine-grade wire systems bypass the usual cheap look for an ultra-modern finish. Sourcing stainless steel turnbuckle kits ensures the lines stay incredibly taut under heavy foliage.
This architectural wire setup will cost about $40–$80 per wall.
- Key Materials: Steel cables, turnbuckles, masonry anchors
- Vibe / Style: Minimalist modern orchard
- Difficulty: Moderate DIY
- Budget Breakdown: Wire kit: $40 | Anchors: $15.
- Creator’s Tip: Space horizontal wires exactly 12 inches apart for classical espalier proportions.
- Smart Sourcing: Use a stainless steel wire rope tension kit and heavy-duty masonry drill bits.
12. Hanging Gutter Gardens
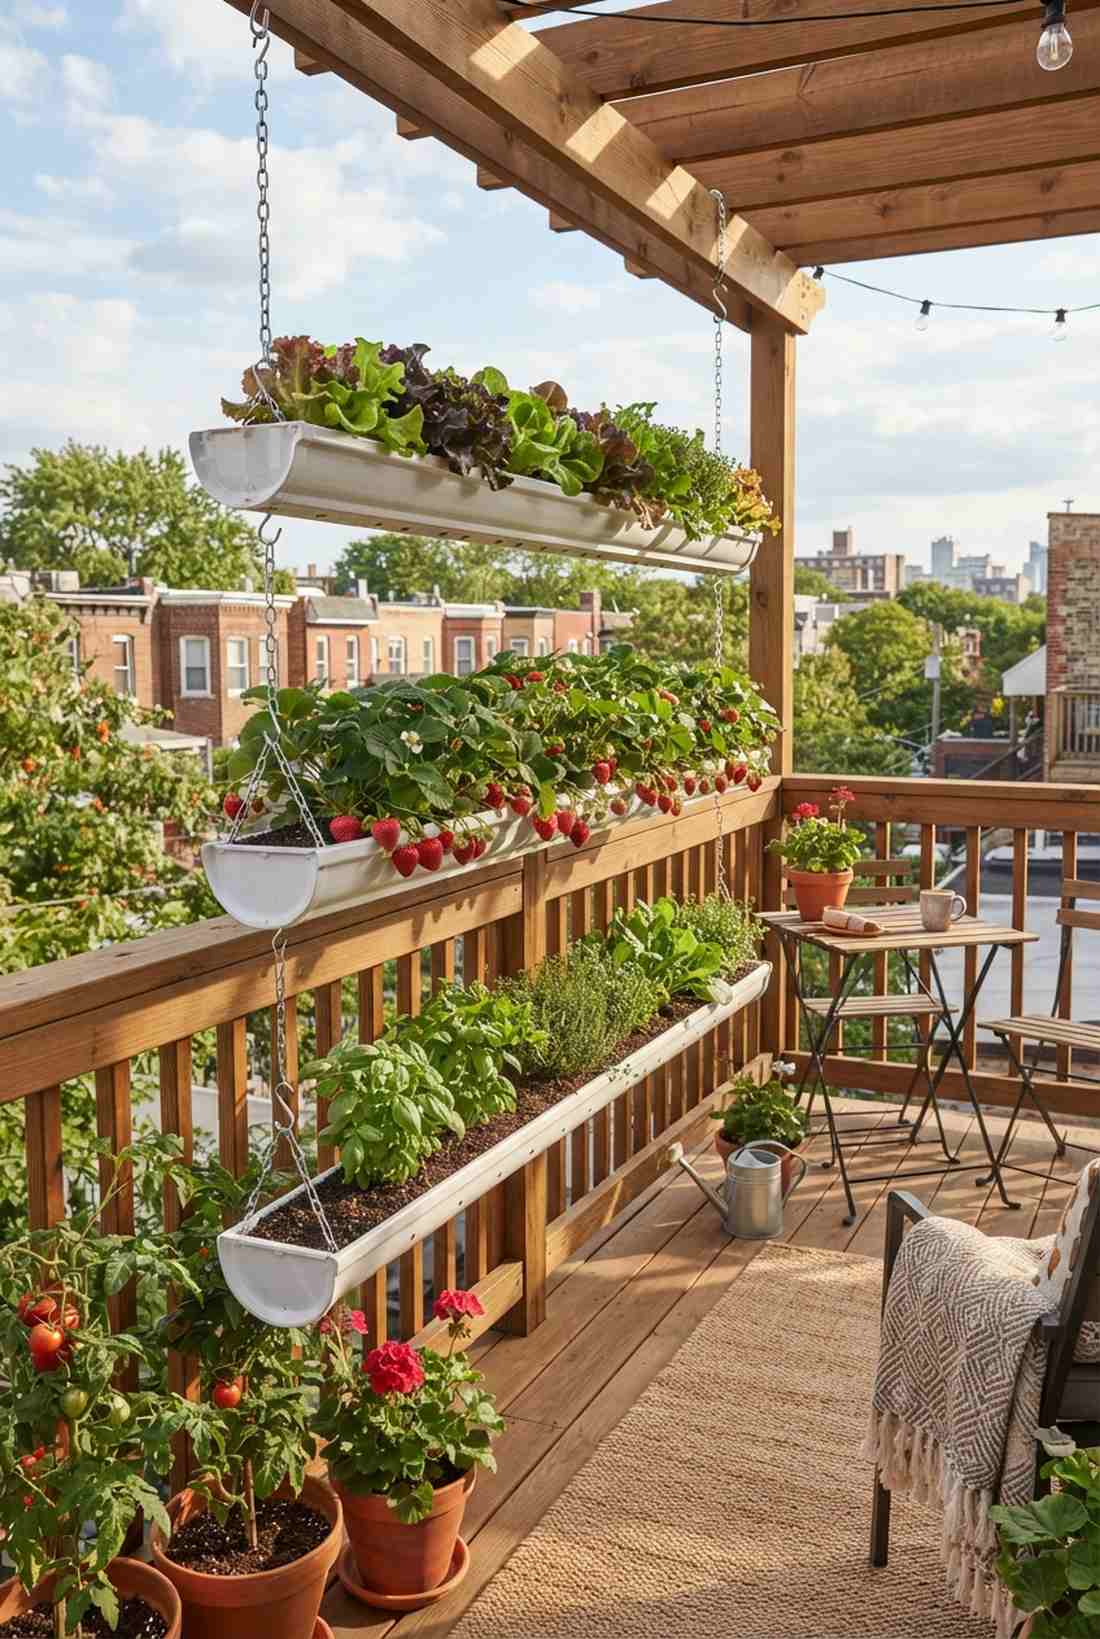
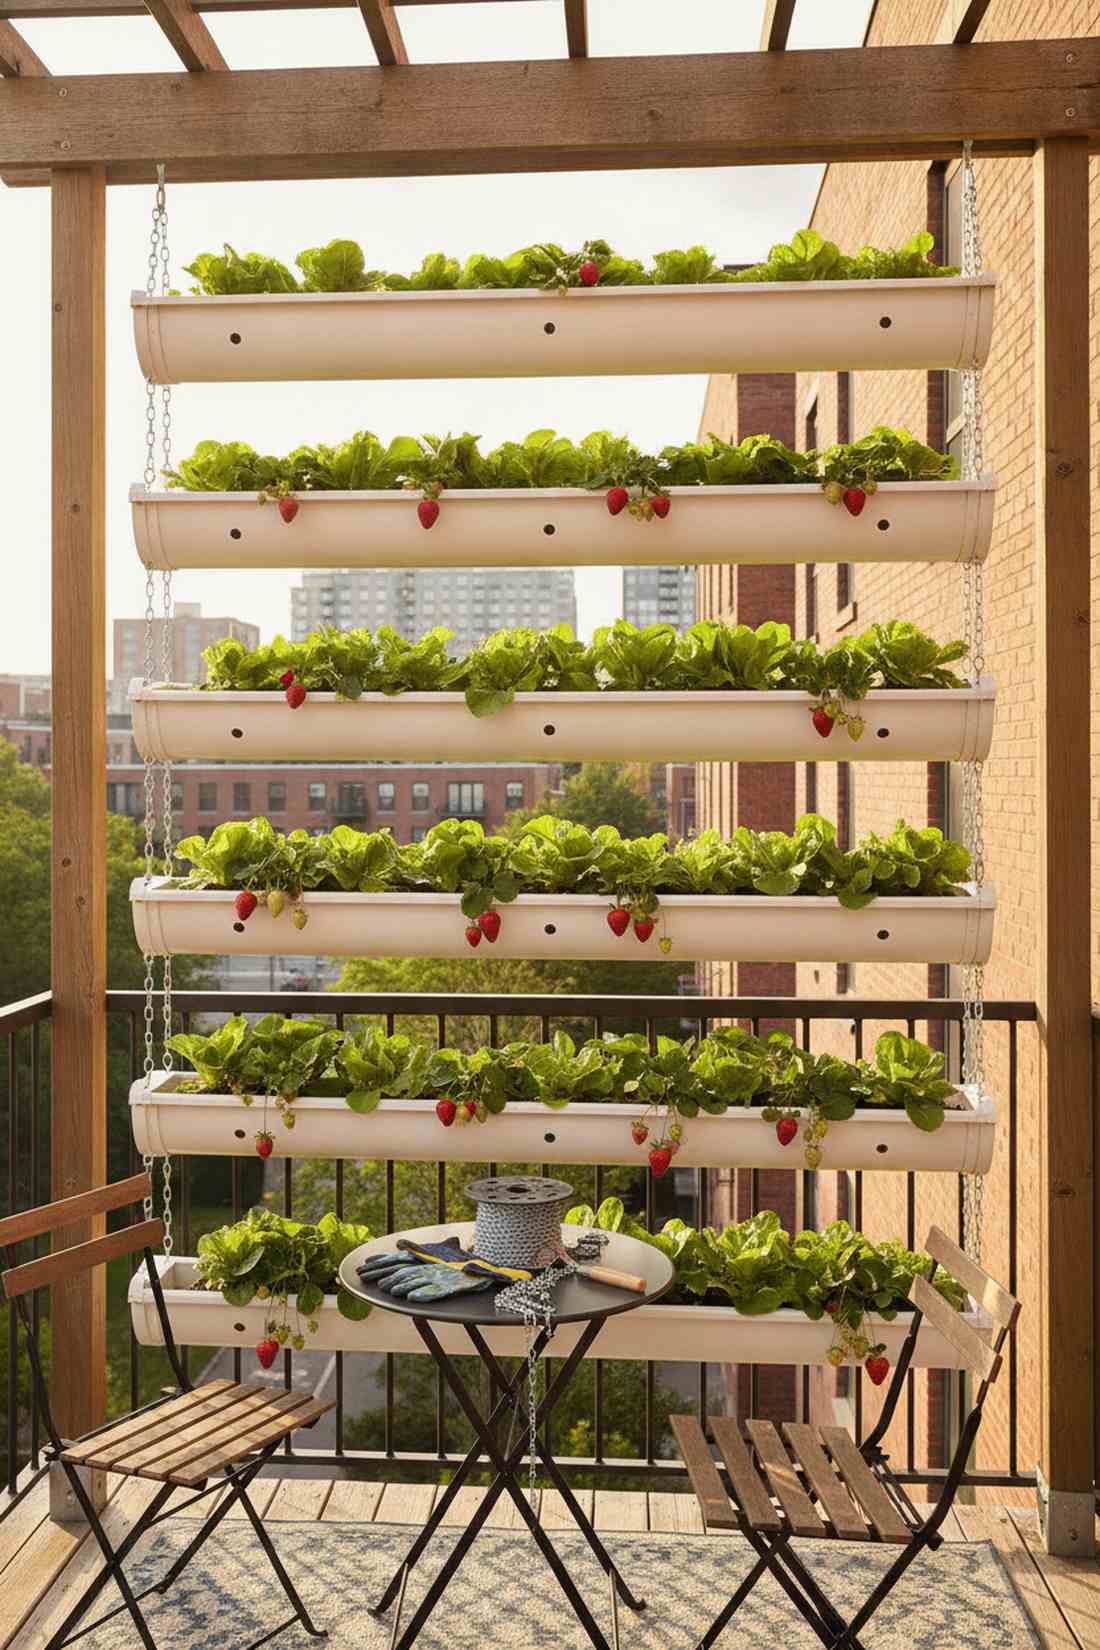
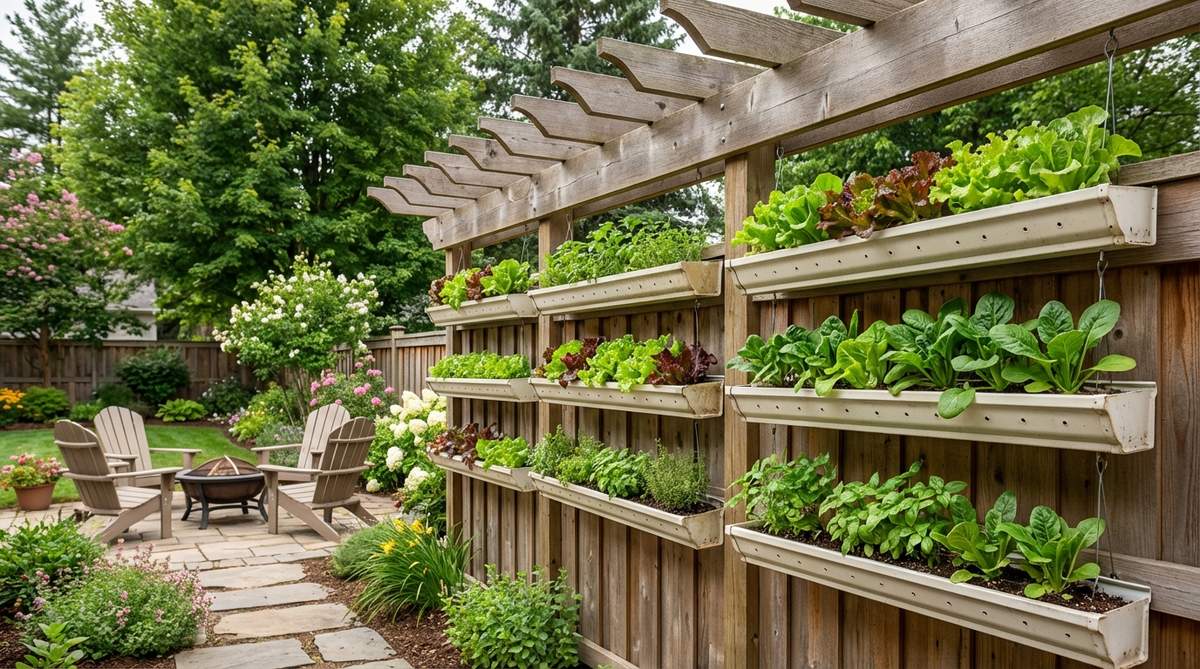
Suspends a continuous ribbon of bright lettuce and strawberries in mid-air. This clever DIY balcony garden approach reclaims completely unused vertical space.
Floor planters get shaded out; hoisting shallow crops up high feels like a custom-built installation. Snagging vinyl rain gutter halves is an incredibly cheap way to get massive linear planting volume.
You can mount three rows of gutters for just $25–$45.
- Key Materials: Vinyl gutters, end caps, steel hanging chain
- Vibe / Style: Resourceful urban farm
- Difficulty: Easy drilling required
- Budget Breakdown: Gutters: $15 | Chains/Hooks: $15 | End caps: $10.
- Creator’s Tip: Drill a drainage hole every 4 inches so shallow roots never get waterlogged.
- Smart Sourcing: Pick up pre-cut vinyl gutter sections and a zinc-plated hanging chain spool.
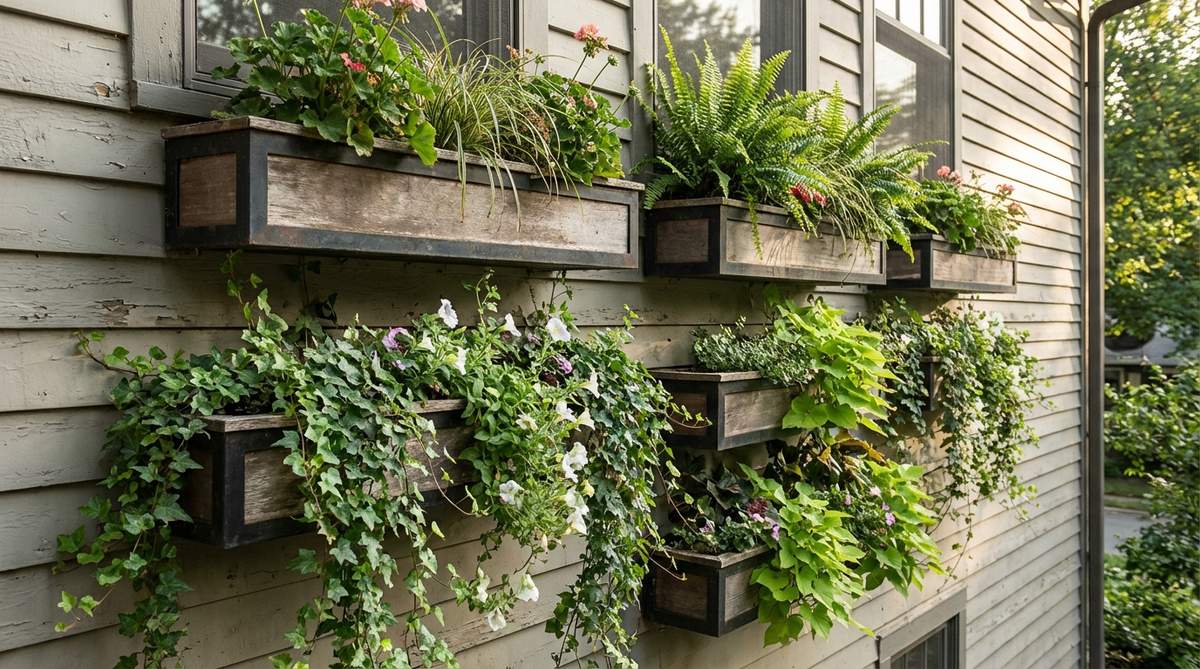
13. Vertical Pallet Planters
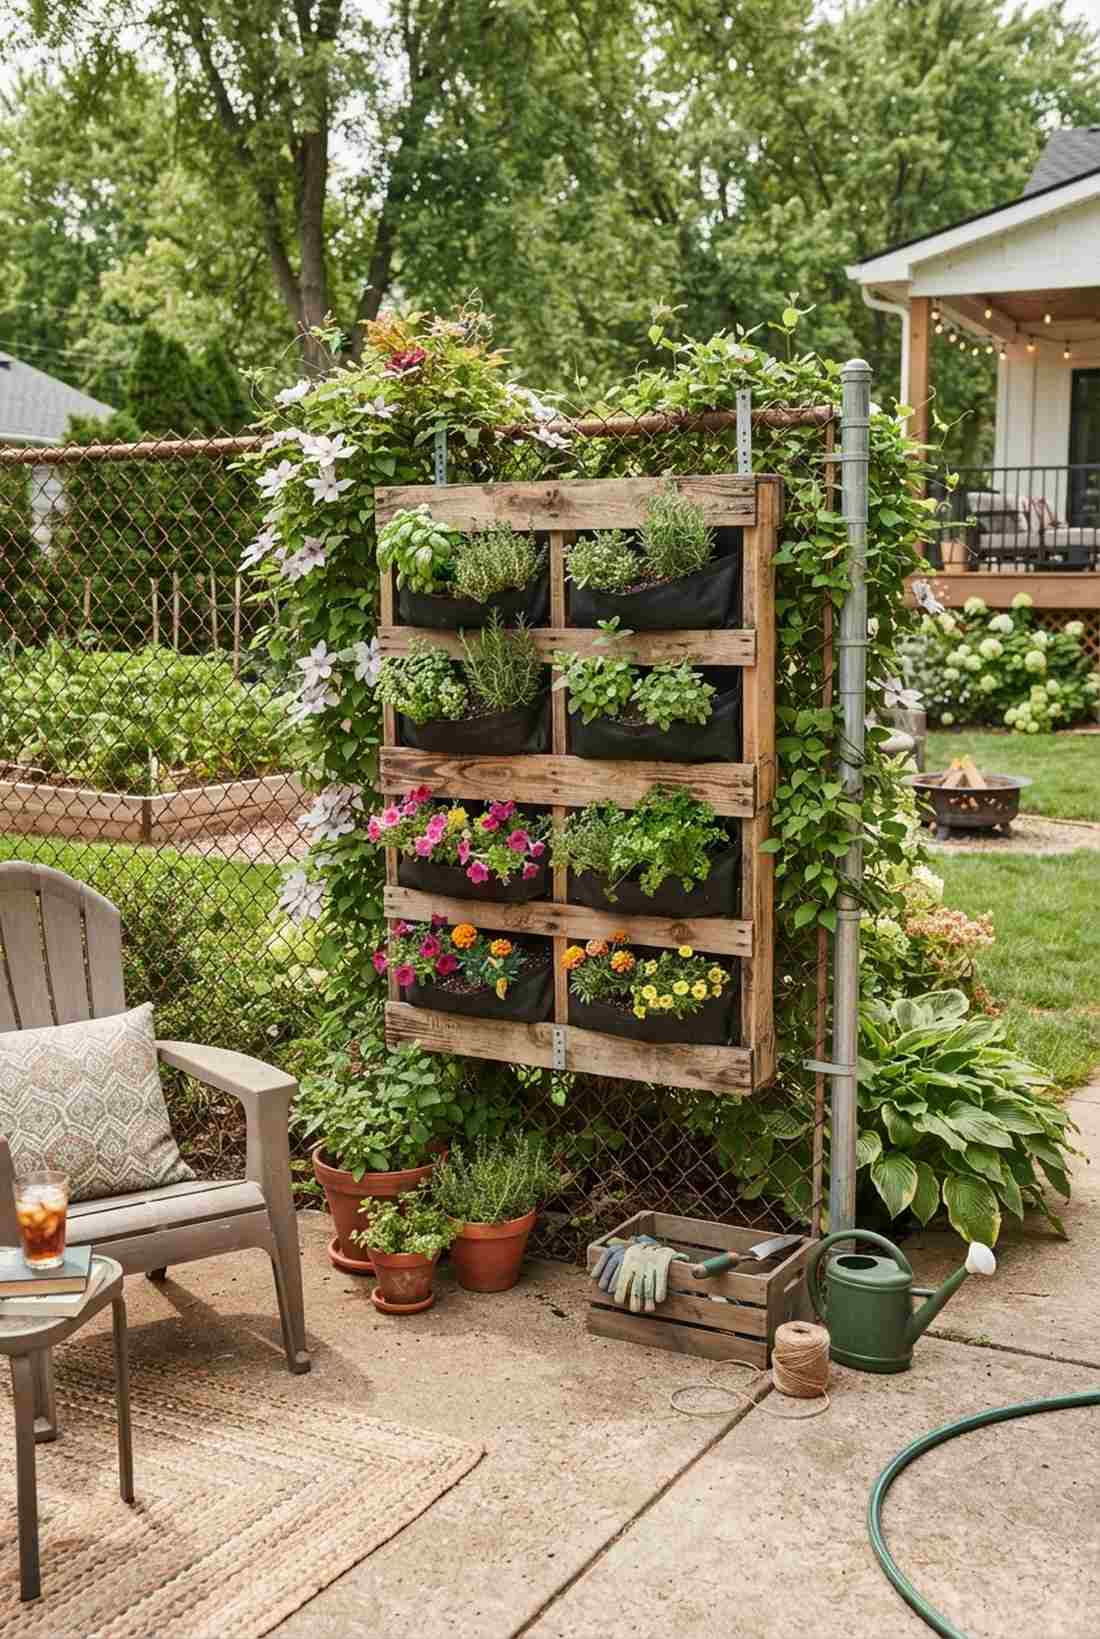

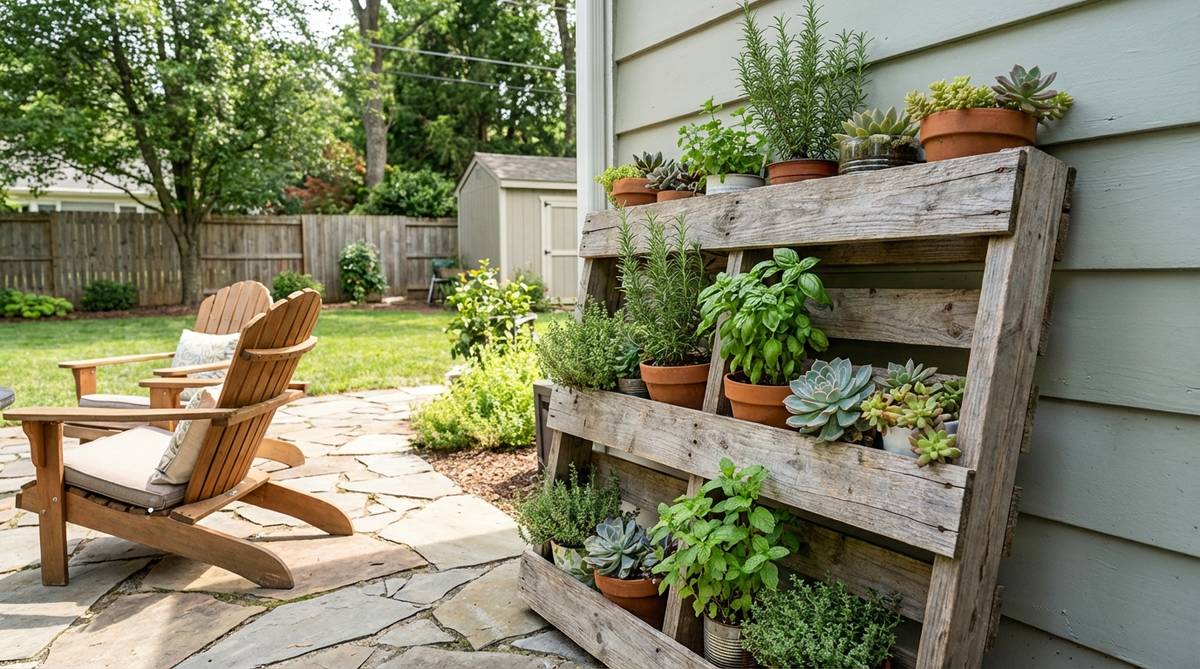
Radiates a cozy, rustic charm that completely hides ugly chain-link fences. Upcycled small garden decoration projects like this bring instant warmth to cold concrete patios.
Throwing away old wood is a missed opportunity; securing backing fabric transforms trash into a piece that instantly elevates the aesthetic. Stapling heavy-duty landscape fabric to the back guarantees your soil actually stays put.
This nearly-free setup only costs about $15–$25 for soil and fabric. Save this to your budget DIY boards.
- Key Materials: Heat-treated pallet, staple gun, potting mix
- Vibe / Style: Upcycled farmhouse chic
- Difficulty: Fast beginner project
- Budget Breakdown: Pallet: Free | Fabric: $10 | Staples: $5.
- Creator’s Tip: Only use pallets stamped “HT” (Heat Treated) to avoid toxic chemical leaching into your soil.
- Smart Sourcing: Buy commercial-grade weed barrier fabric and a heavy-duty staple gun kit.
14. Obelisk Climbing Structures
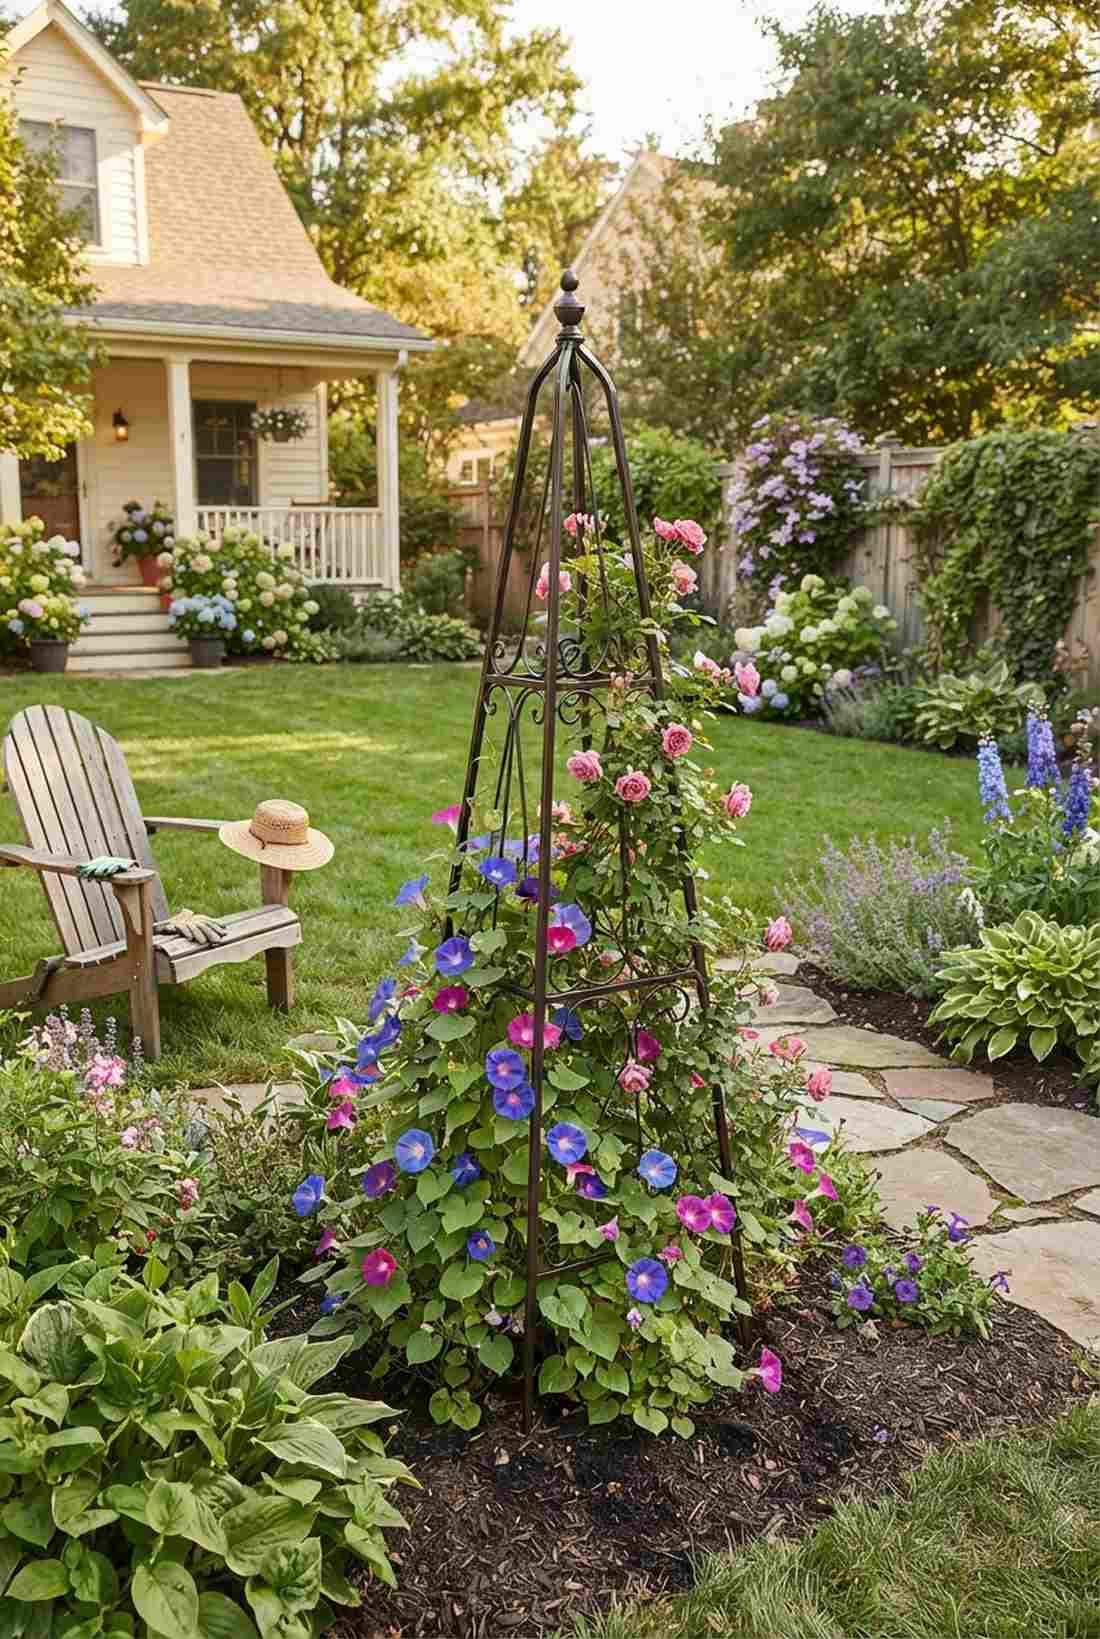
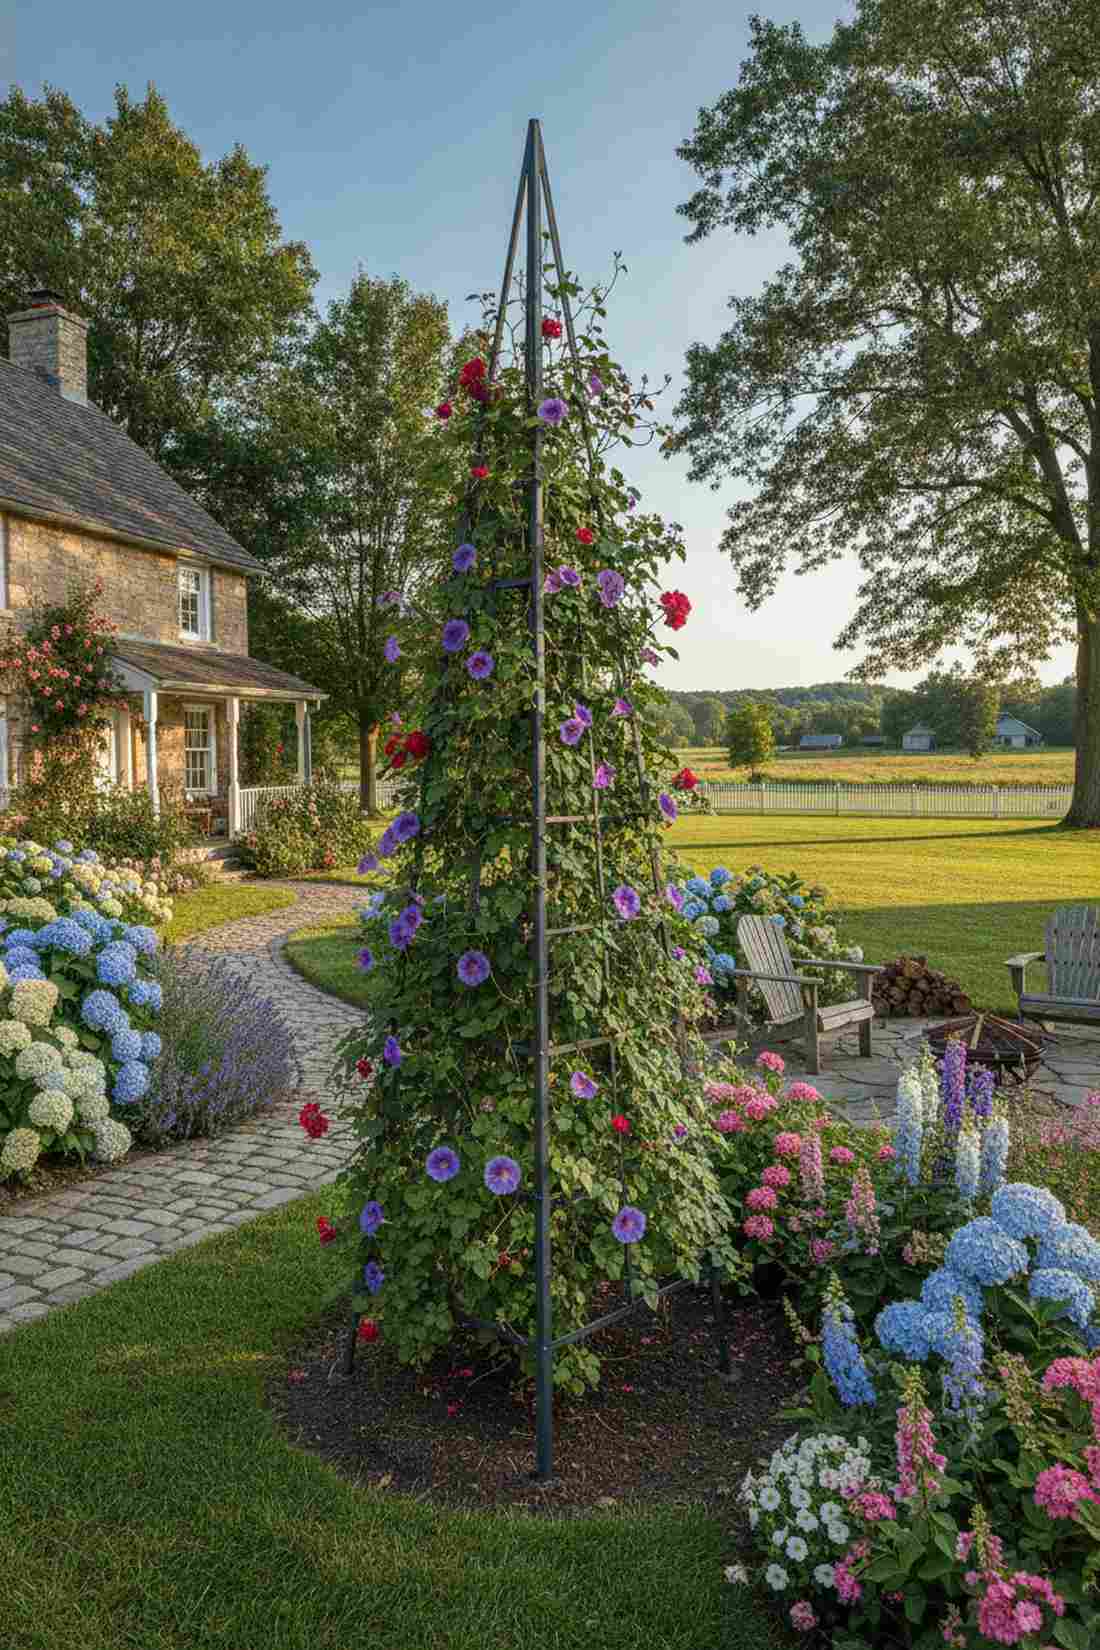
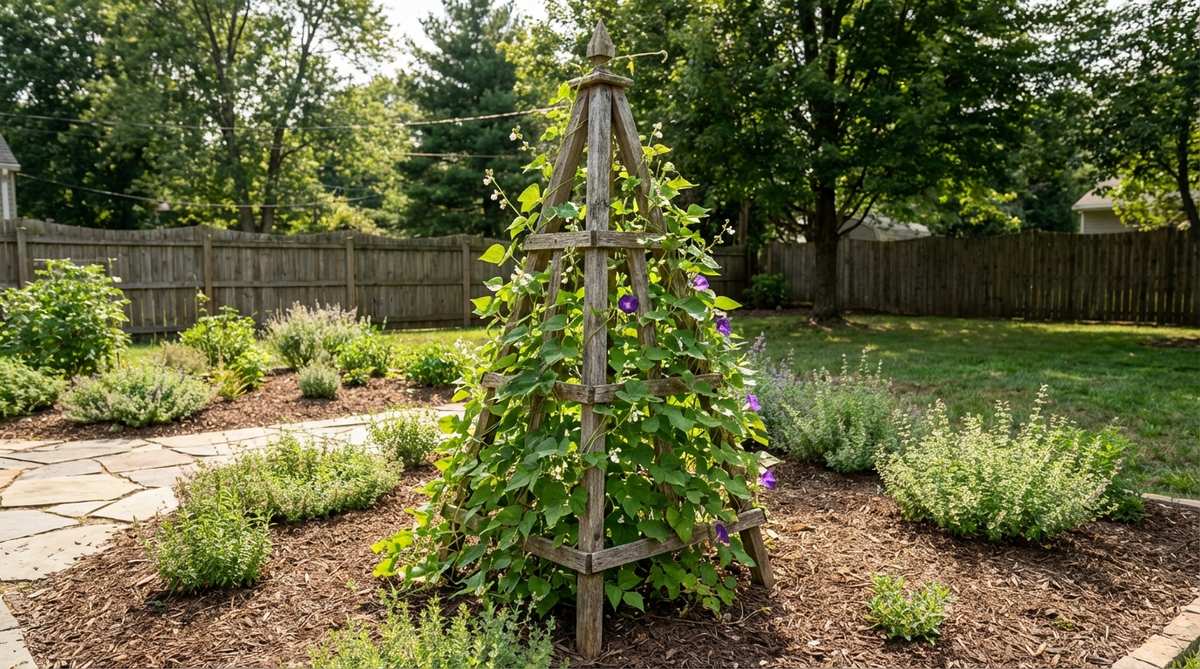
Shoots a burst of color straight into the sky, drawing the eyes upward. A structural garden decor centerpiece works brilliantly to add height to flat flower beds.
Flat gardens look two-dimensional; dropping in a pyramidal tower gives a designer-level finish instantly. Using a weatherproof steel obelisk provides sturdy backing for heavy climbers like morning glories or roses.
A striking metal obelisk can be grabbed for $30–$60.
- Key Materials: Metal obelisk frame, climbing flowers
- Vibe / Style: Classic English cottage
- Difficulty: No-tool setup
- Budget Breakdown: Structure: $40 | Seeds/Starts: $10.
- Creator’s Tip: Push the base legs at least 6 inches into the soil so wind storms don’t topple your vines.
- Smart Sourcing: Snag a rust-proof powder-coated obelisk trellis and rapid-growth climbing flower seeds.
You won’t believe how this next trick instantly doubles your perceived yard size…
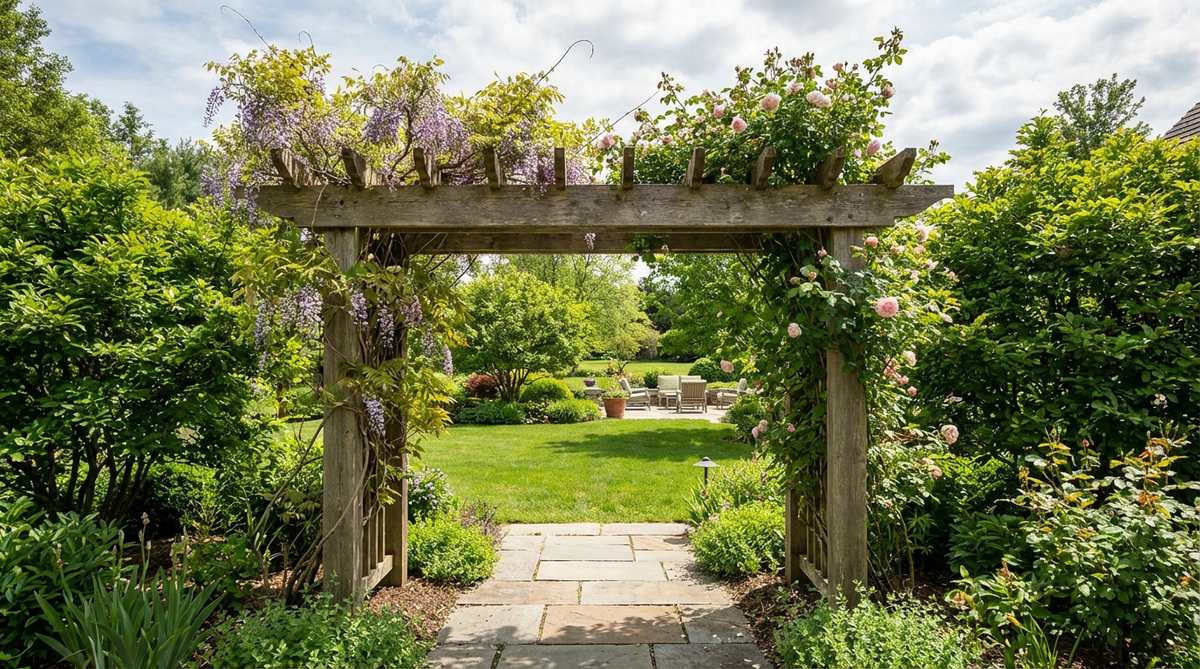
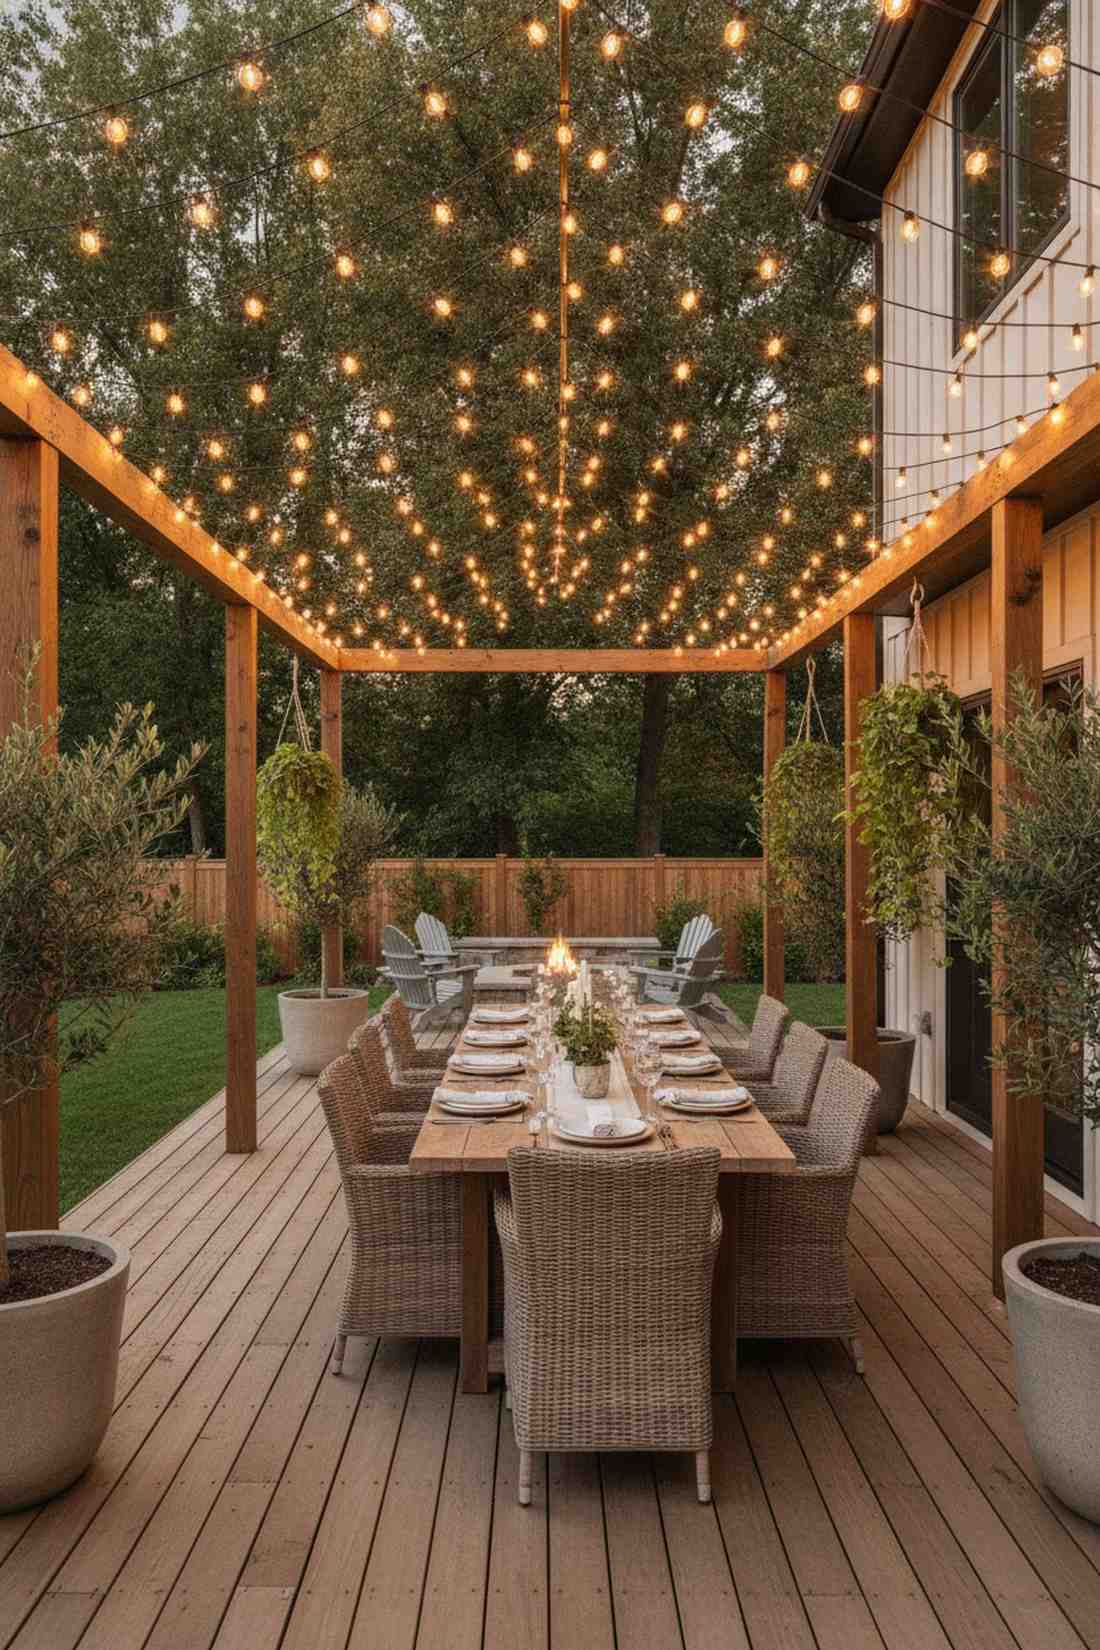
15. Pergola Overhead Gardens
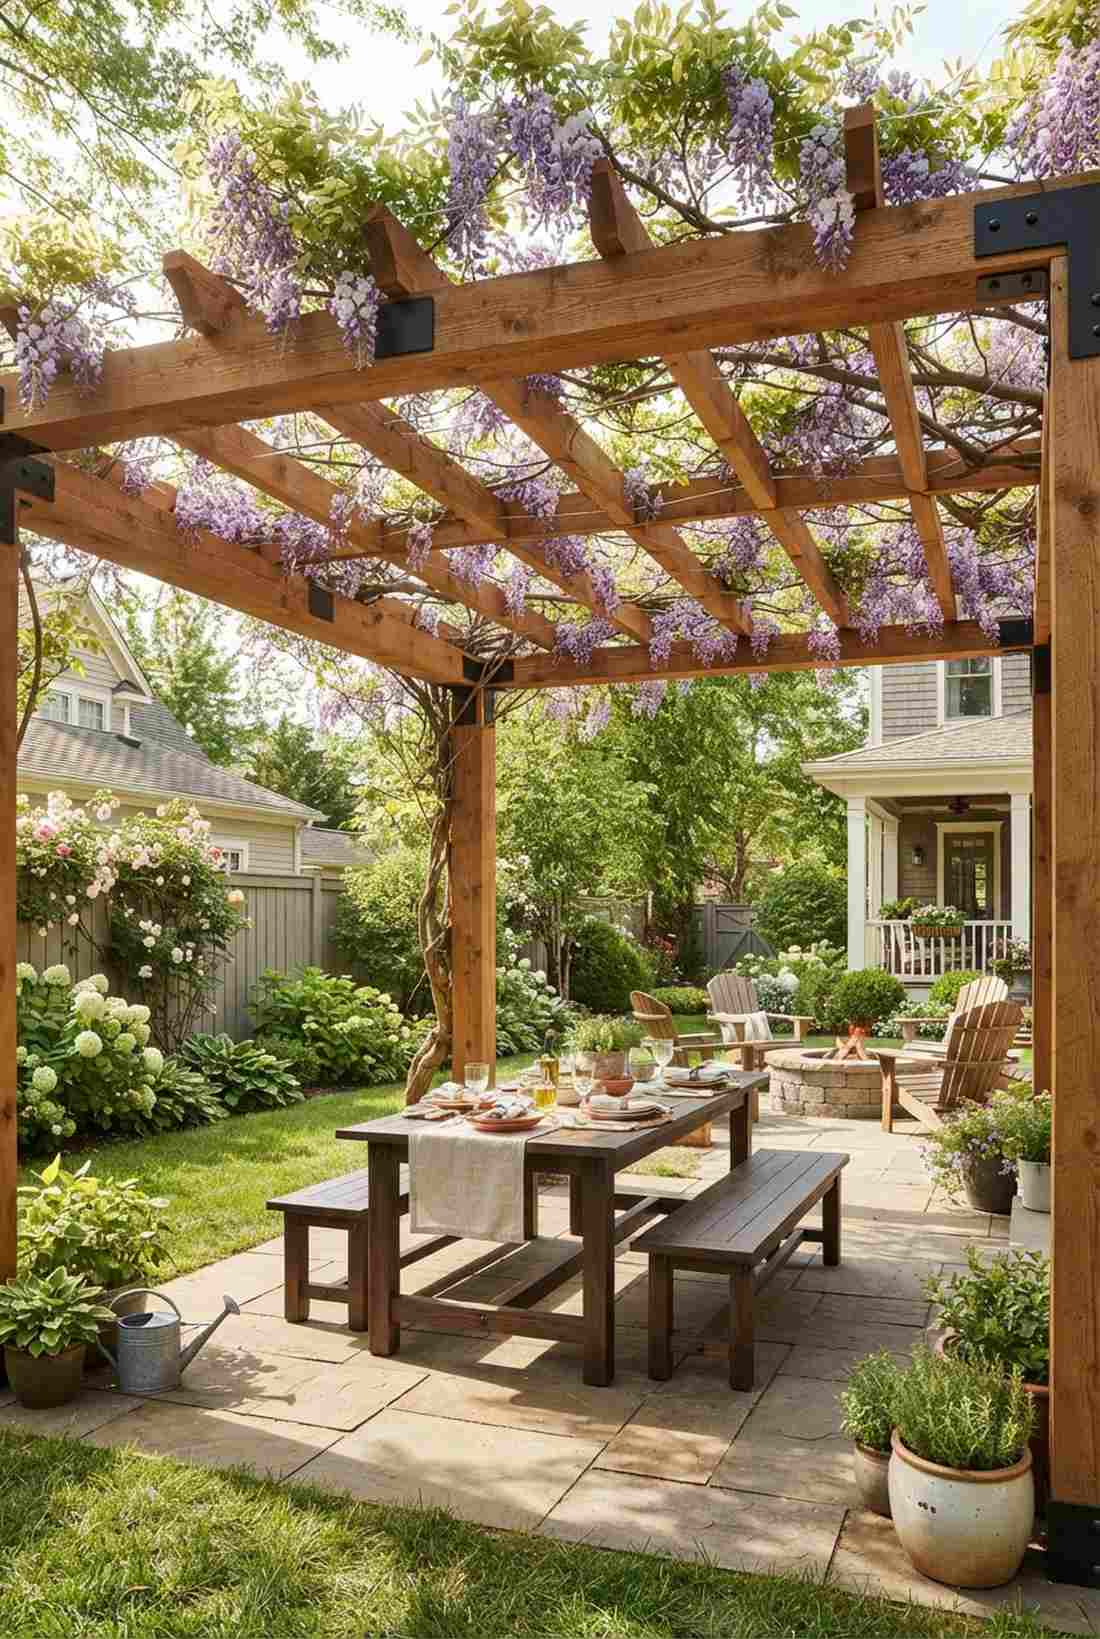
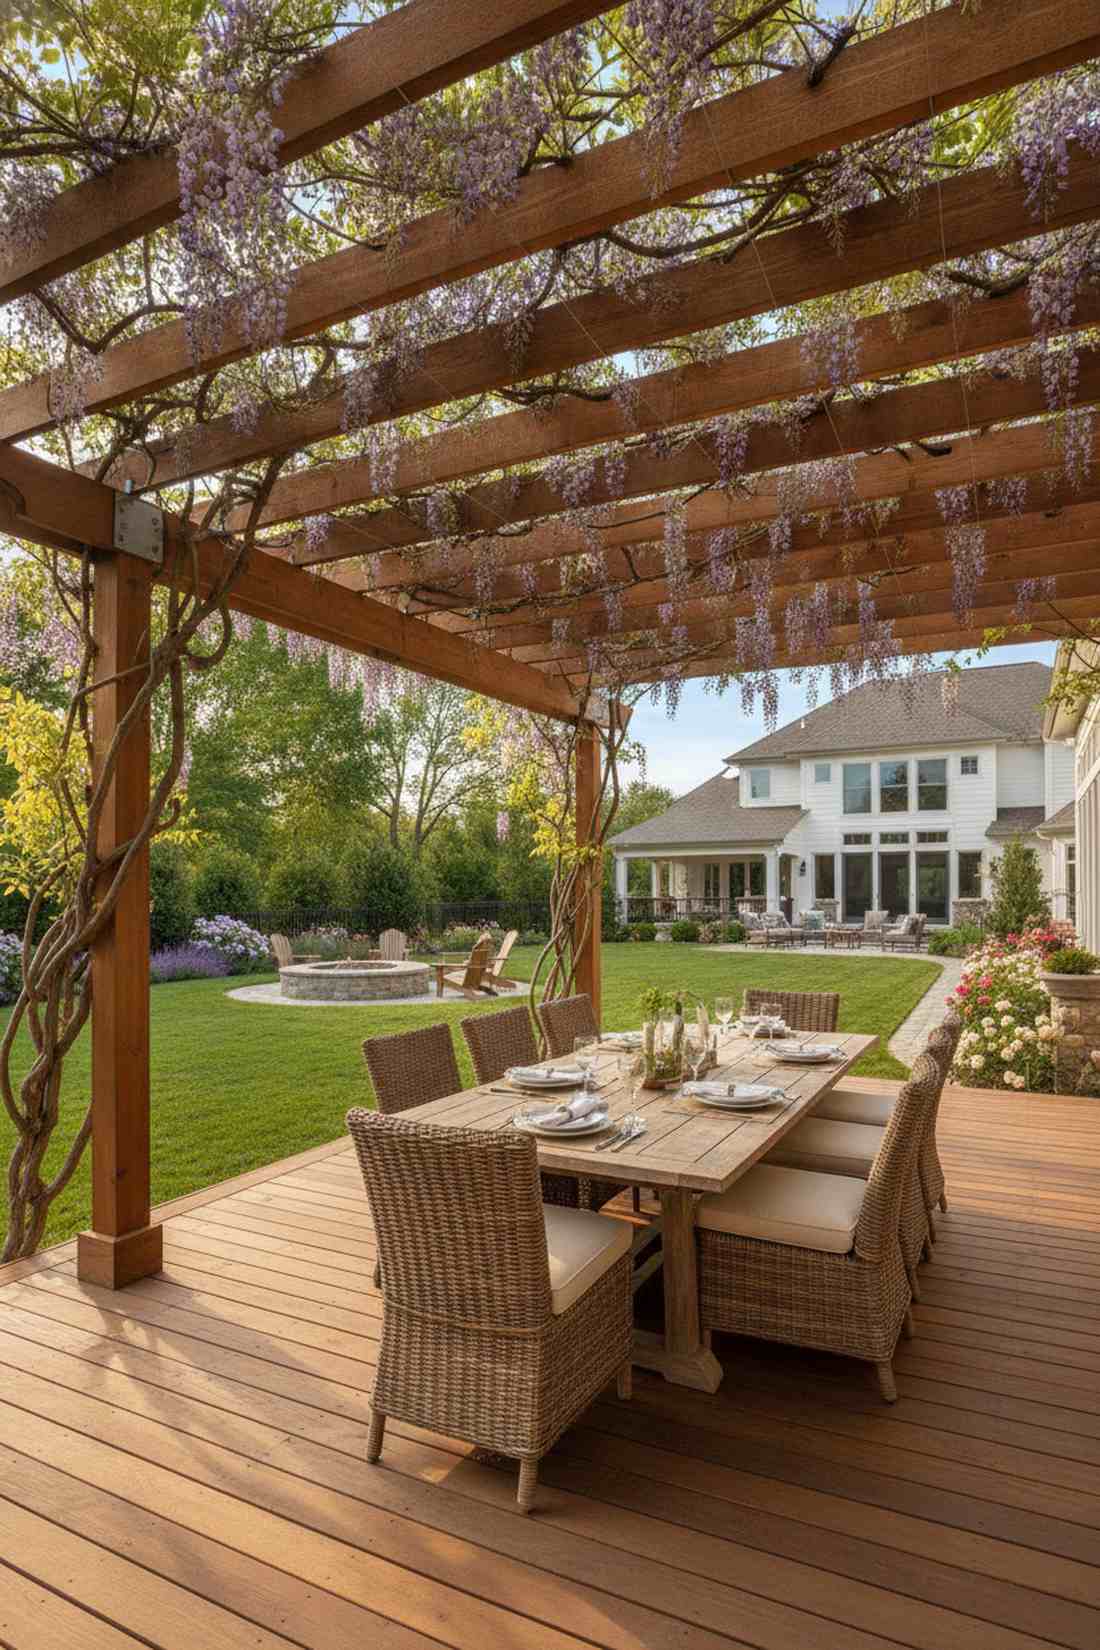
Creates a breathtaking living ceiling that filters harsh summer sunlight perfectly. An overhead small garden layout utilizes the sky, making it flawless for exposed seating areas.
Using umbrellas feels temporary; training vines over a wooden frame looks far more expensive than it is. Integrating shade sail tension hardware adds structural support while the vines mature.
A basic DIY overhead canopy frame runs about $150–$300.
- Key Materials: Wooden pergola brackets, 4×4 beams, climbing wisteria
- Vibe / Style: Mediterranean dining canopy
- Difficulty: Heavy lifting involved
- Budget Breakdown: Hardware kit: $80 | Lumber: $150.
- Creator’s Tip: String clear fishing line between the rafters to give young vines an invisible path to grab.
- Smart Sourcing: Invest in heavy-duty steel pergola corner brackets and high-tensile clear mono-filament.
16. Window Box Stacking
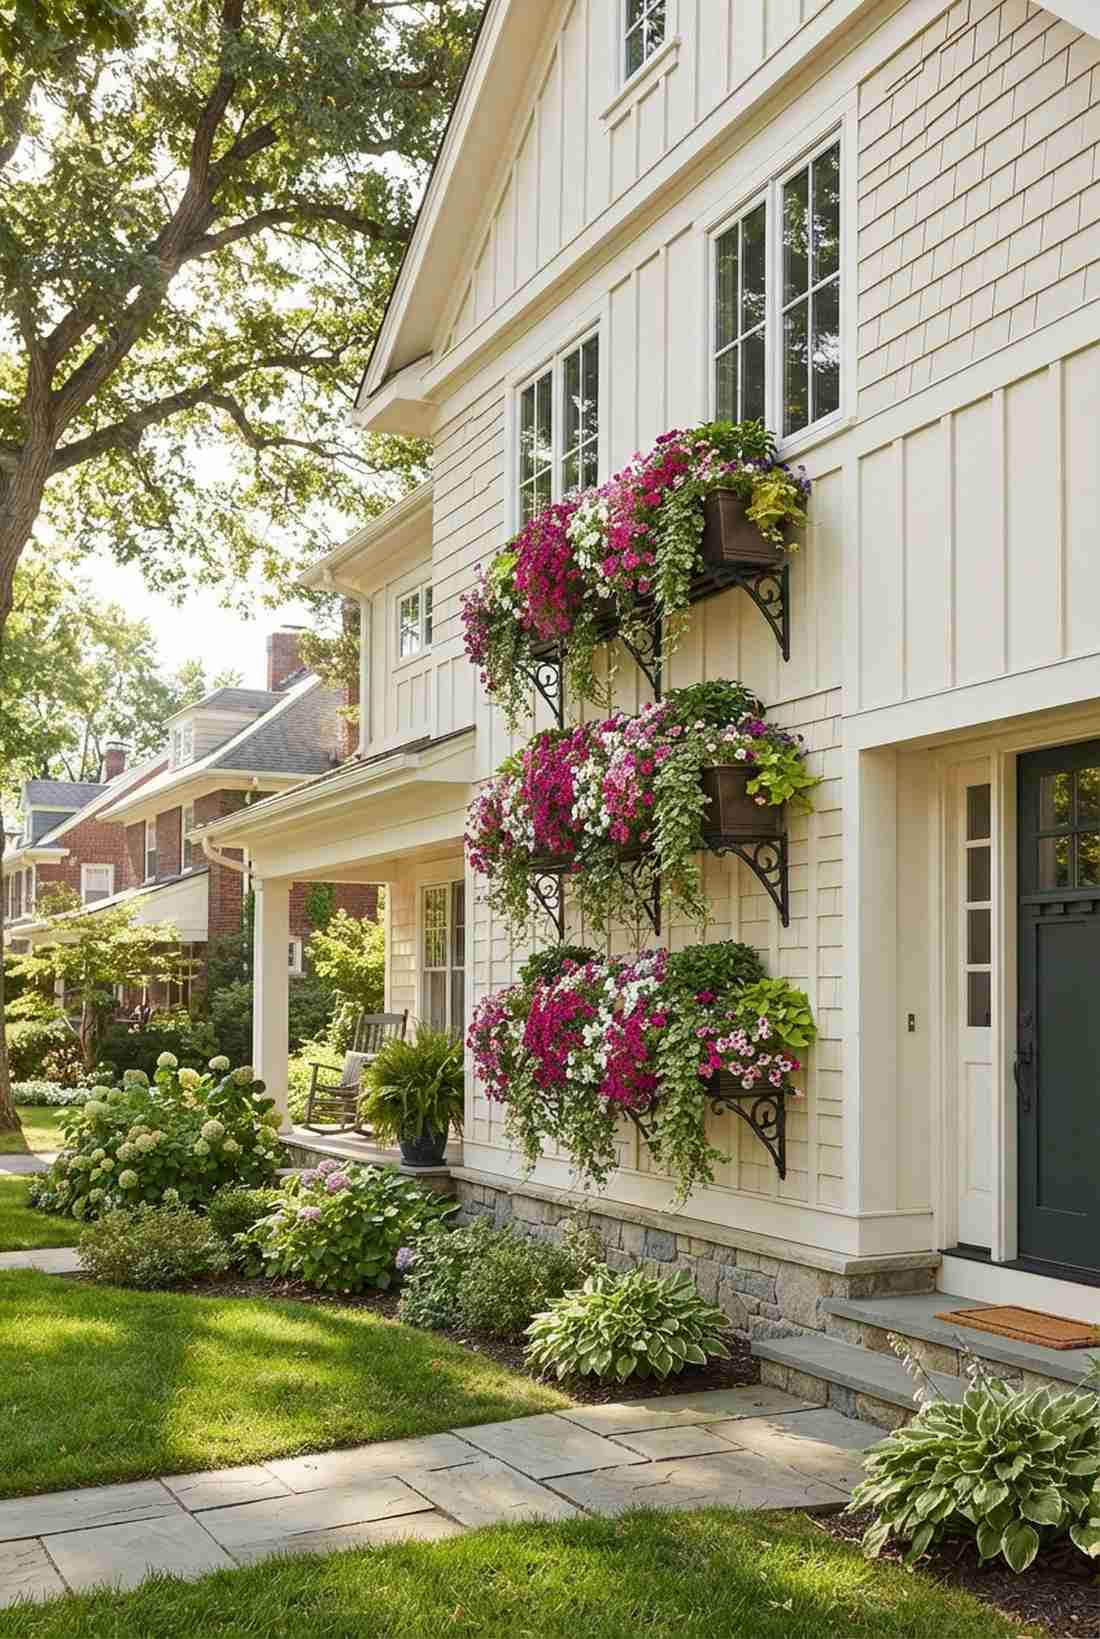
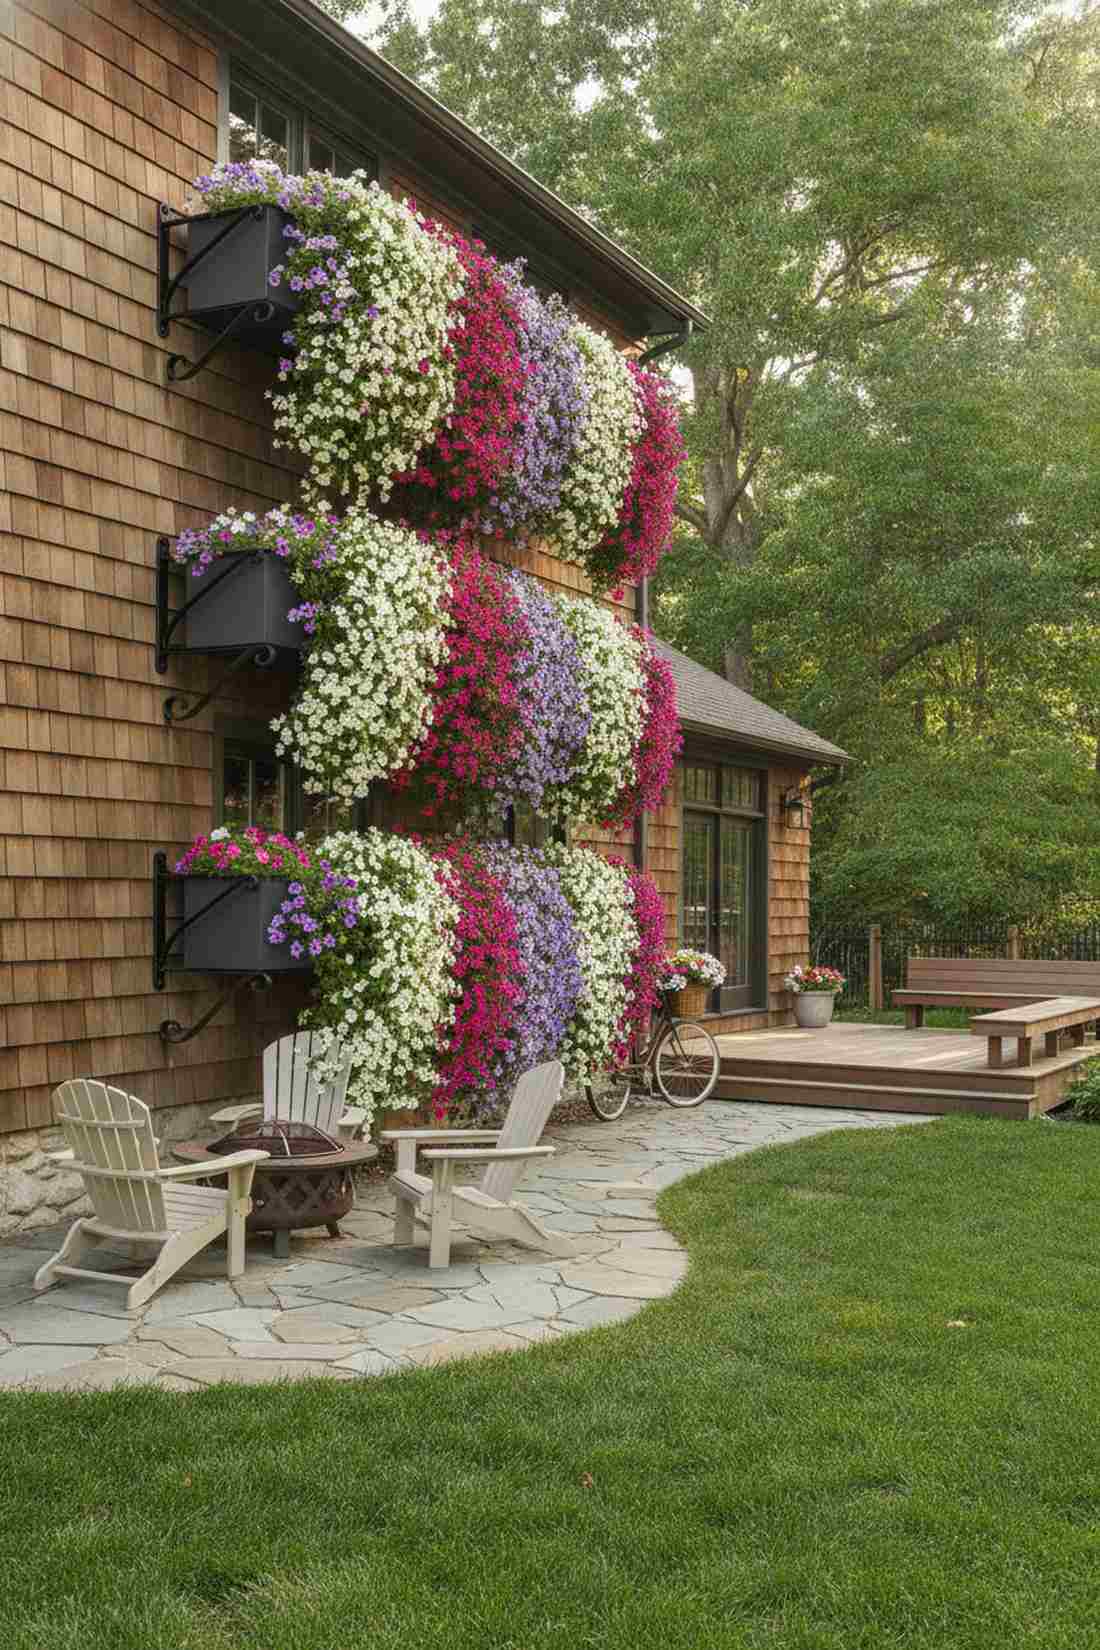
Cascades massive waves of floral color right down the side of your house. Layering compact balcony greenery turns a boring wall into a focal masterpiece.
Single window boxes are predictable; staggering multiple boxes vertically bypasses the usual cheap look for a dramatic facade. Installing self-watering trough planters guarantees the top tiers won’t dry out in the afternoon sun.
You can set up a staggered 3-box display for $75–$120. Pin this for ultimate curb appeal.
- Key Materials: Window boxes, sturdy wall brackets, trailing petunias
- Vibe / Style: European street-side cafe
- Difficulty: Requires stud-finding and drilling
- Budget Breakdown: Boxes: $60 | Brackets: $30.
- Creator’s Tip: Use a lightweight potting mix heavily cut with perlite to reduce the shear weight on your siding.
- Smart Sourcing: Get self-watering rectangular planters and heavy-duty forged steel shelf brackets.
Visual Depth and Illusion Techniques
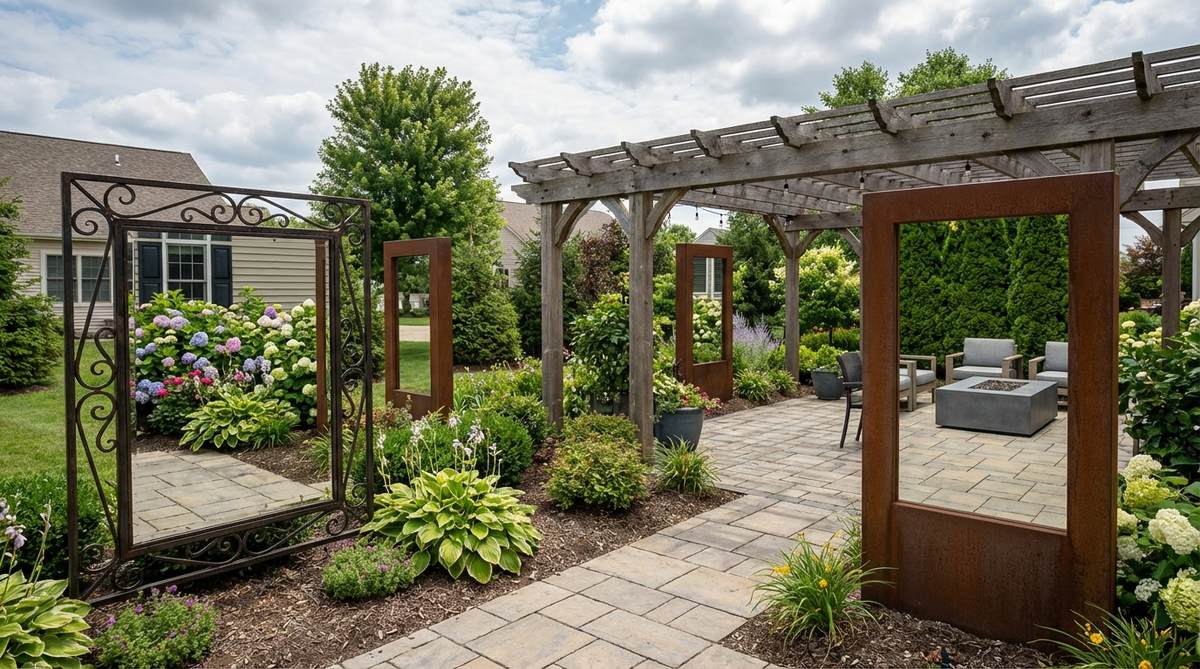
17. Strategic Mirror Placement
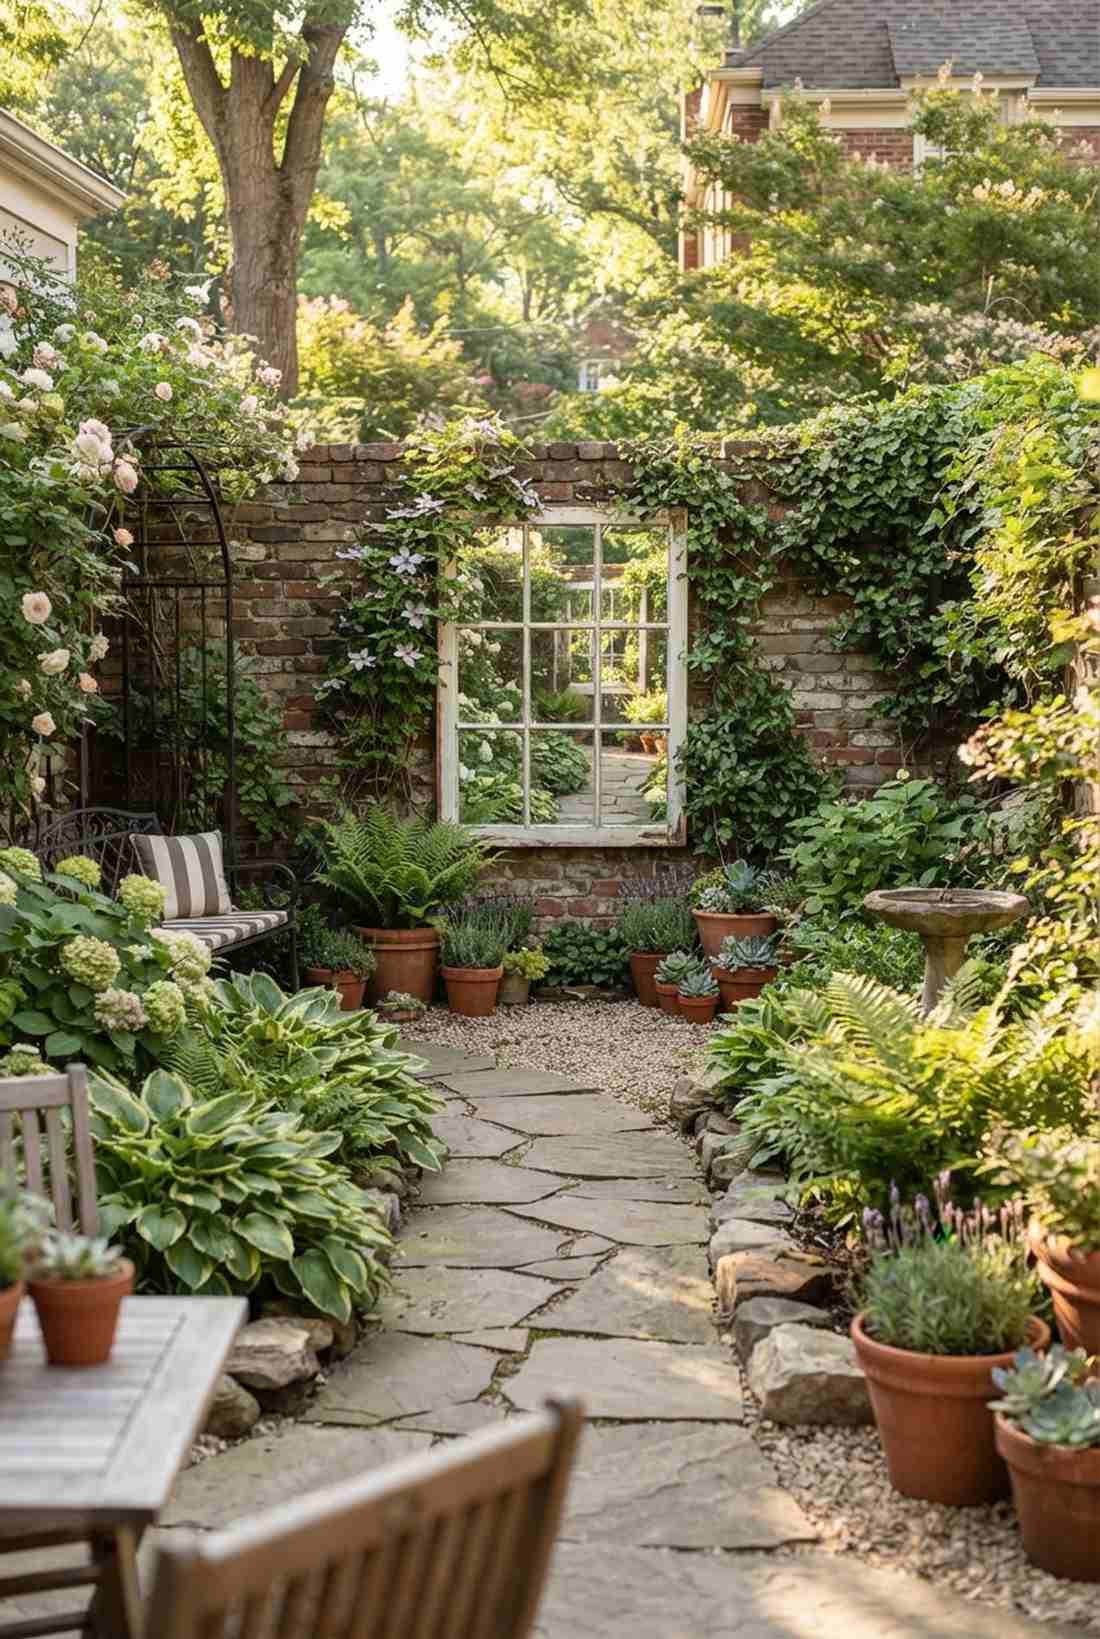

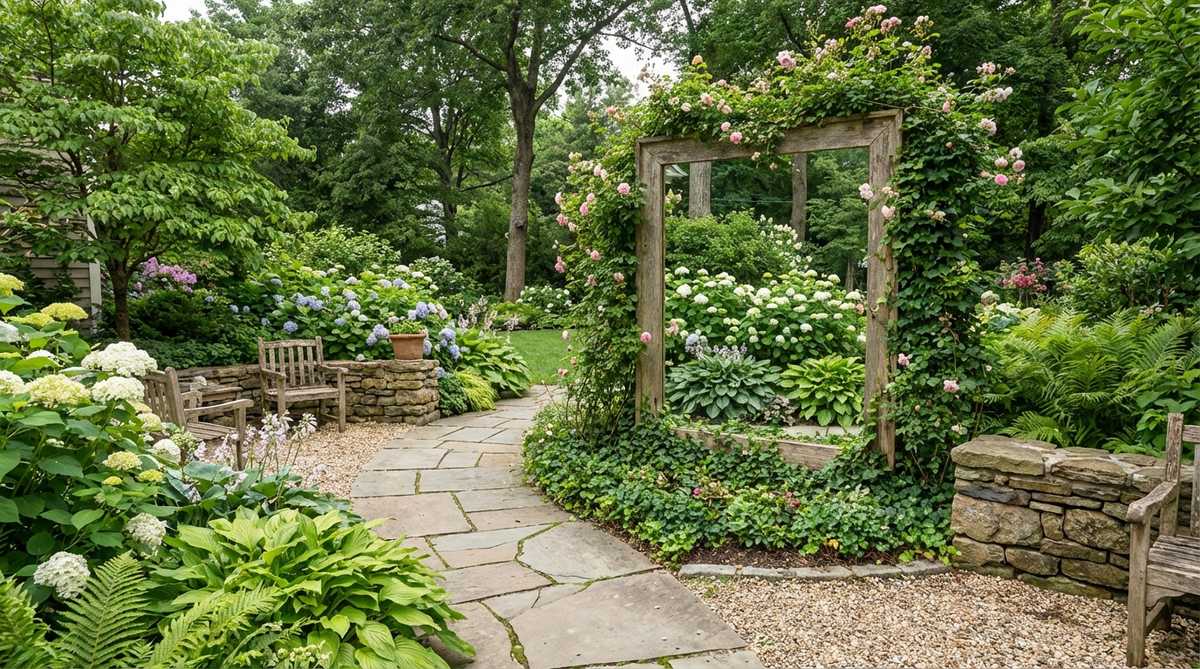
Feels like your garden casually continues into a secret alternate dimension. Integrating an outdoor illusion mirror at the end of a path tricks the brain spectacularly in walled courtyards.
Most small spaces feel boxed in; bouncing the green reflection back adds instant property value and double the depth. Sourcing acrylic shatterproof mirrors ensures safety and durability against stray rocks or bad weather.
A faux-window garden mirror setup costs around $50–$100. Save this magic trick to your favorite board.
- Key Materials: Acrylic mirror sheet, vintage window frame
- Vibe / Style: Secret garden illusion
- Difficulty: Easy mounting
- Budget Breakdown: Mirror sheet: $40 | Frame/Adhesive: $20.
- Creator’s Tip: Angle the mirror slightly downward so it reflects the plants, not your own reflection.
- Smart Sourcing: Pick up an impact-resistant acrylic mirror panel and waterproof silicone construction adhesive.
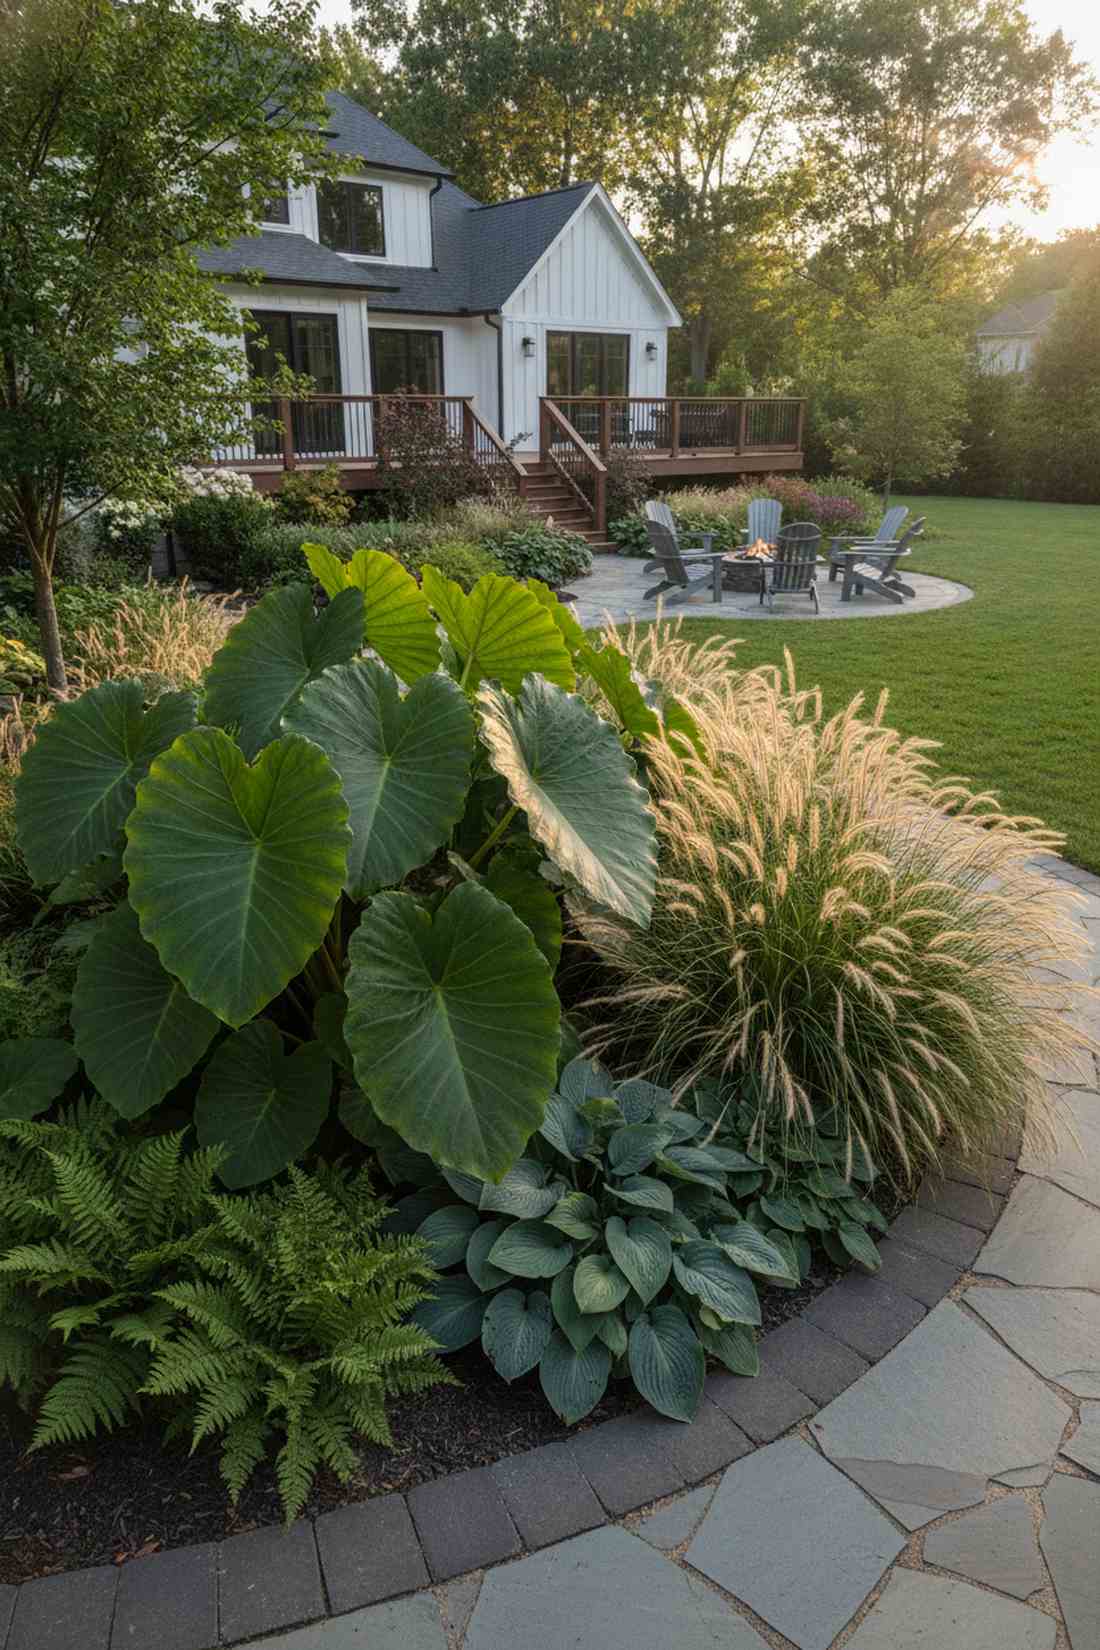
18. Forced Perspective Planting
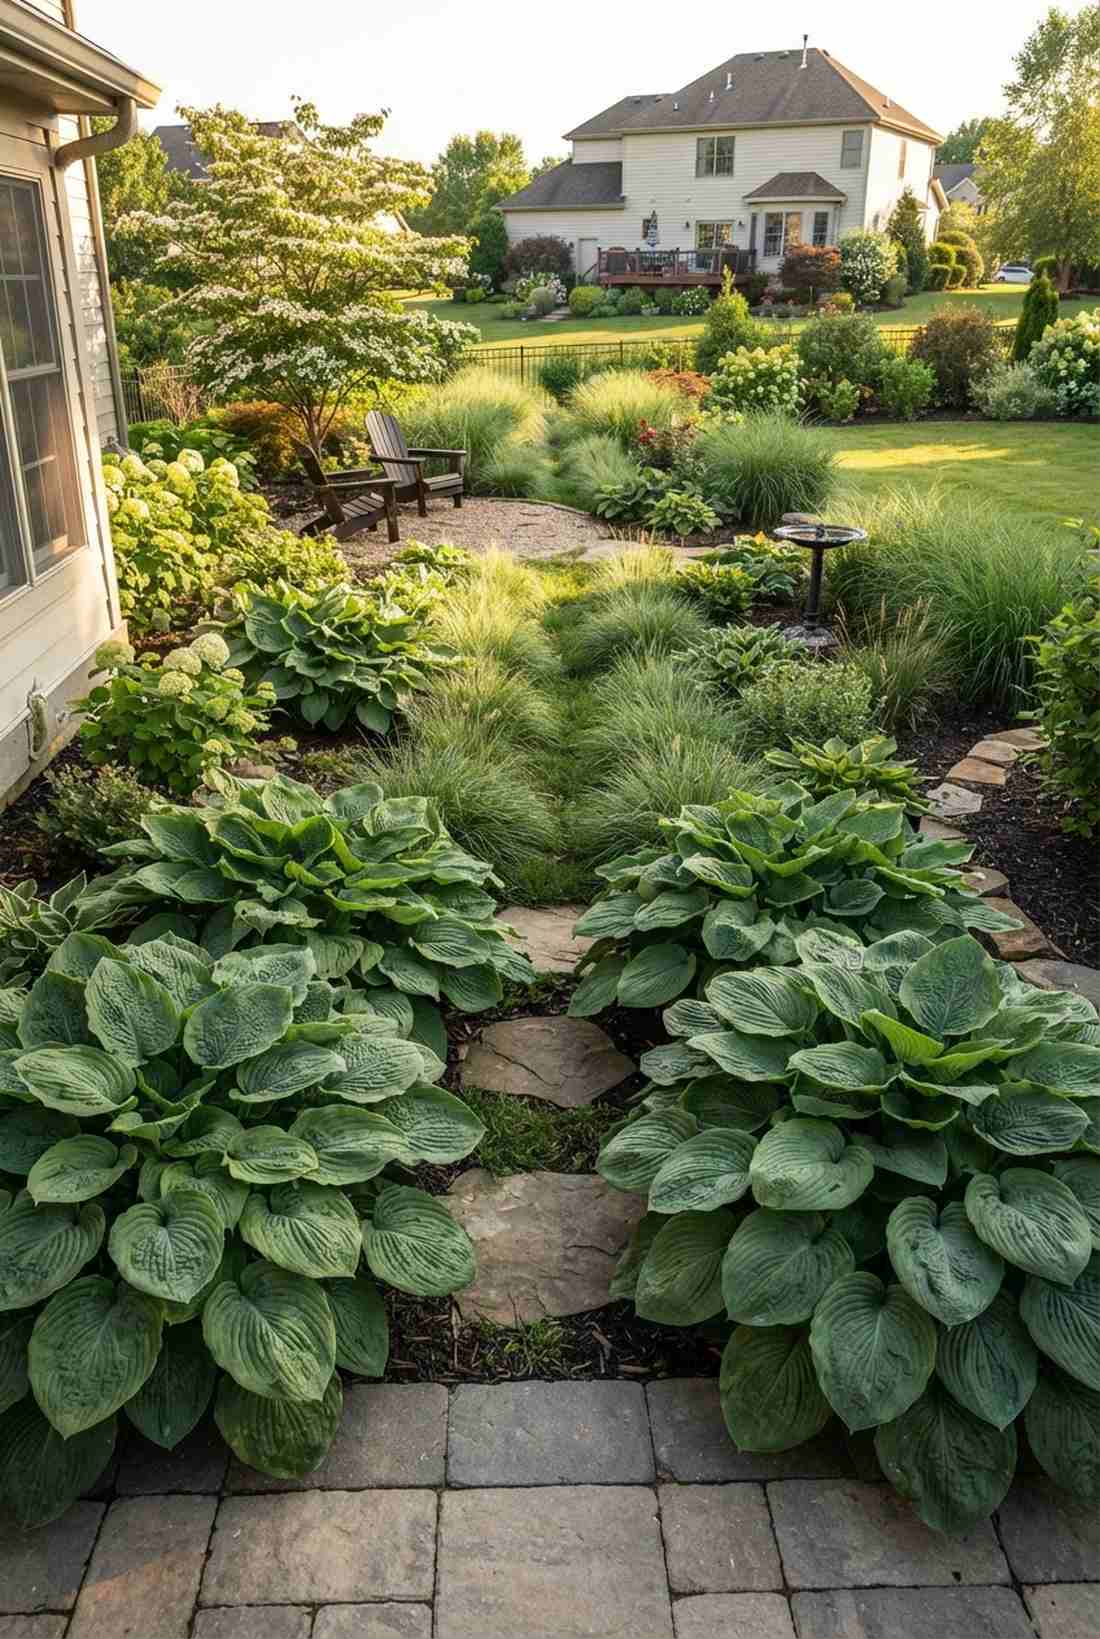
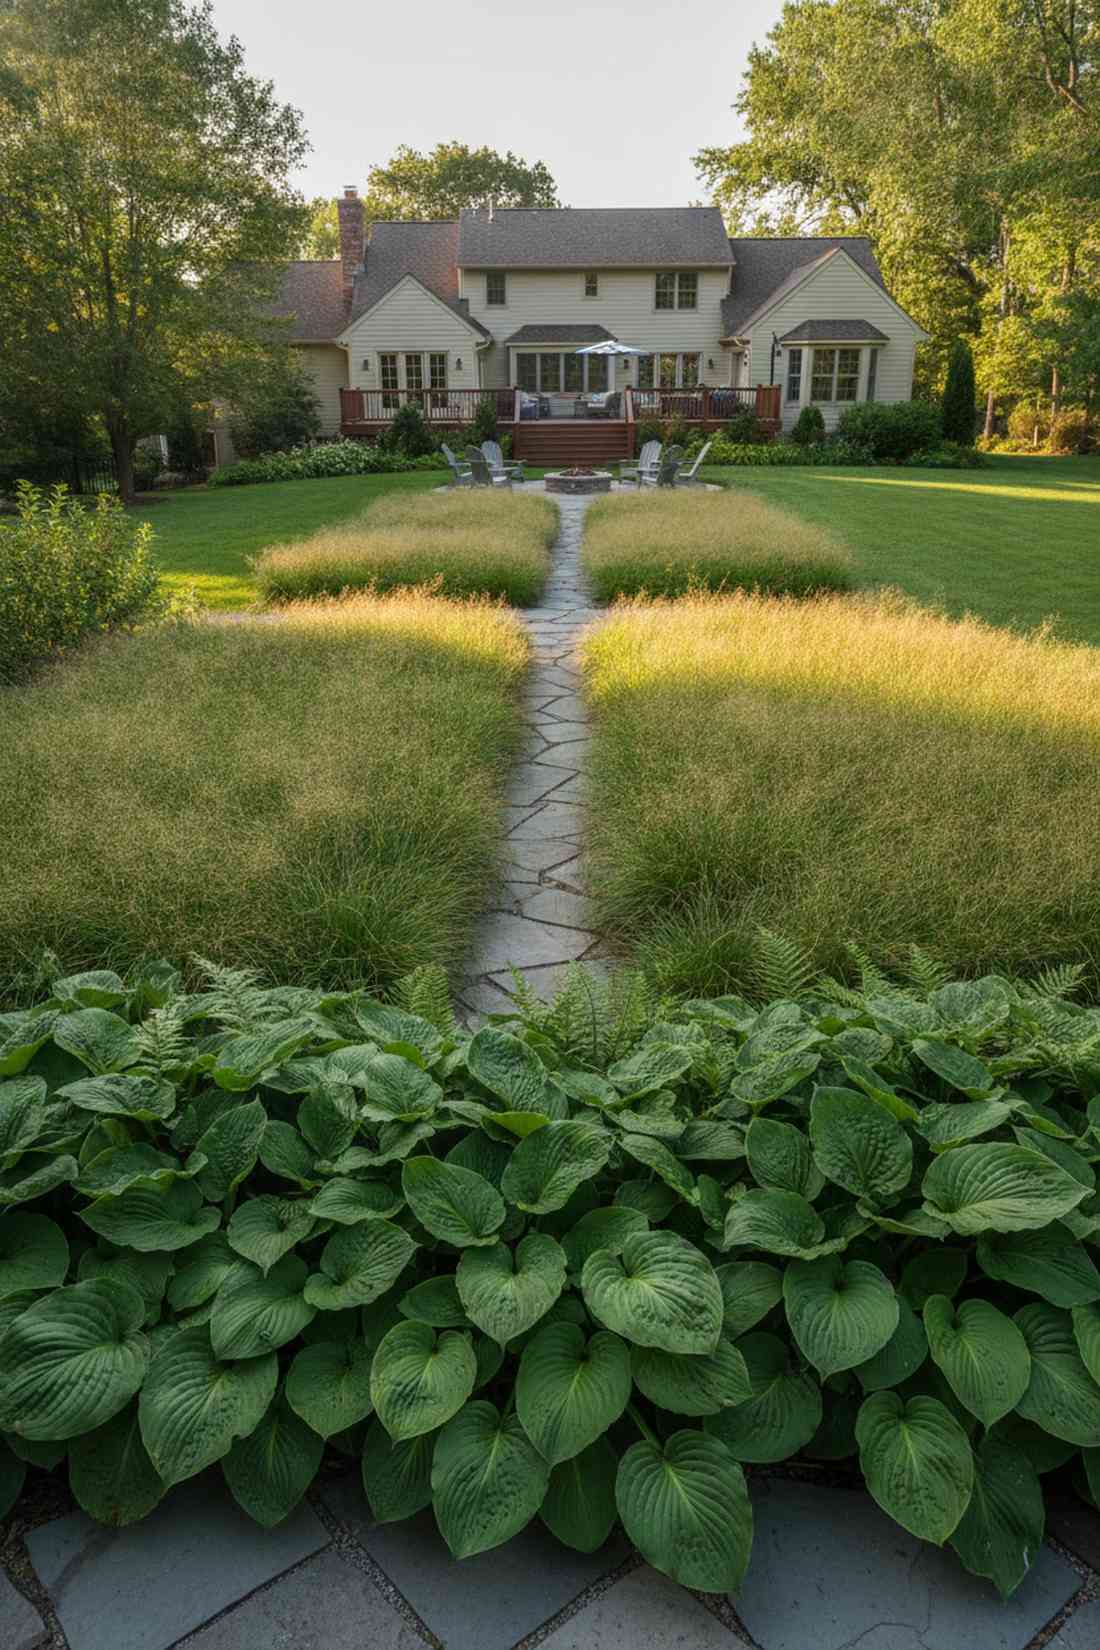
Stretches the physical boundaries of your yard using nothing but clever plant sizing. This psychological small garden landscaping idea is brilliant for shallow, wide yards.
Planting uniformly flattens a yard; staging large bold leaves up front and tiny textures in the back feels like a custom-built installation. Grabbing a bulk pack of ornamental grasses for the rear creates a faux-horizon line.
This layout shift costs nothing extra if you’re already buying plants.
- Key Materials: Giant hostas (front), fine-leaf ferns or grasses (back)
- Vibe / Style: Expansive botanical estate
- Difficulty: Planning phase only
- Budget Breakdown: Foreground plants: $40 | Background fillers: $30.
- Creator’s Tip: Narrow your pathways slightly as they reach the back to physically exaggerate the vanishing point.
- Smart Sourcing: Buy bare-root giant hosta bulbs and a bulk tray of fine fescue grass plugs.
19. Color Gradient Depth
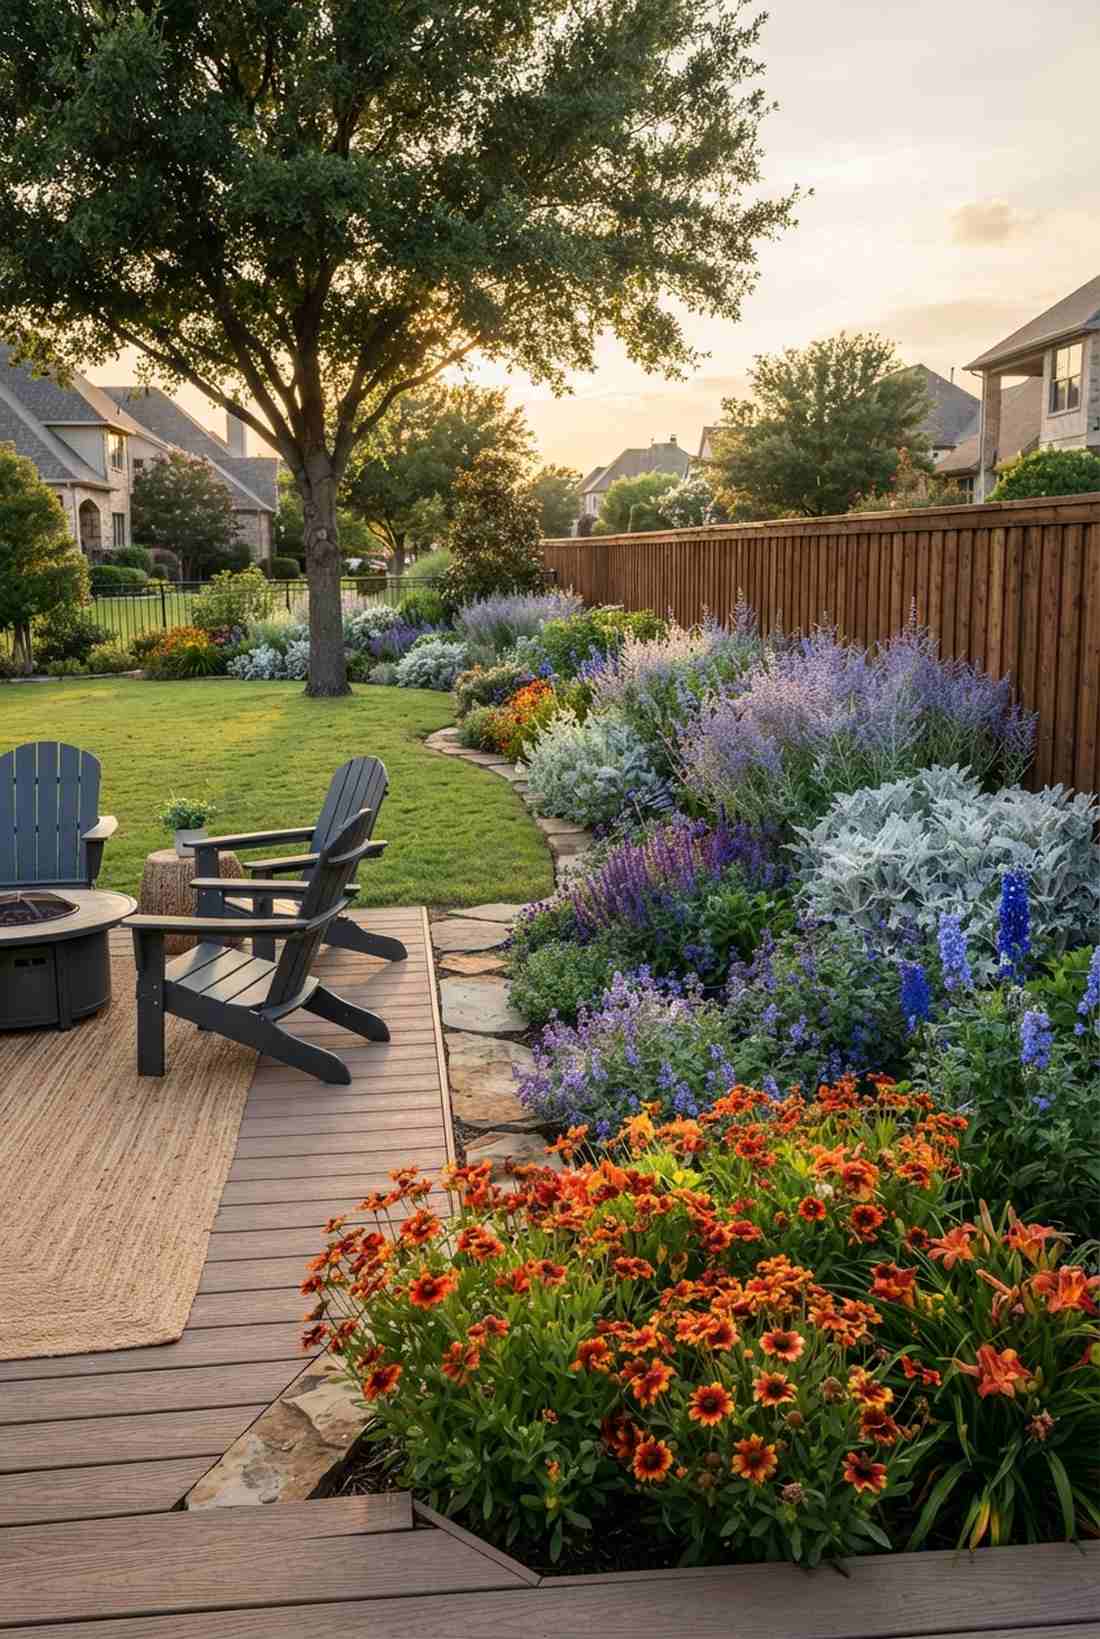

Paints your yard with a fading sunset effect that visually pushes fences backward. Utilizing warm-to-cool garden color schemes naturally tricks the eye into seeing more space.
Random color mixing causes visual chaos; strict color staging delivers a surprisingly premium look by making cool colors “recede.” Securing premium perennial starter kits in blue and purple hues creates the perfect shadowy backdrop.
You can execute this color strategy for about $60–$90.
- Key Materials: Red/Orange blooms (front), Blue/Silver foliage (rear)
- Vibe / Style: Curated artistic border
- Difficulty: Beginner-friendly sorting
- Budget Breakdown: Warm flowers: $35 | Cool foliage: $35.
- Creator’s Tip: Use dusty miller or Russian sage at the very back—the silver leaves blur the property line flawlessly.
- Smart Sourcing: Snag a blue perennial seed collection and silver foliage starter packs.
Wait until you see how this next lighting trick completely transforms cheap walls…
20. Trompe-l’Oeil Murals
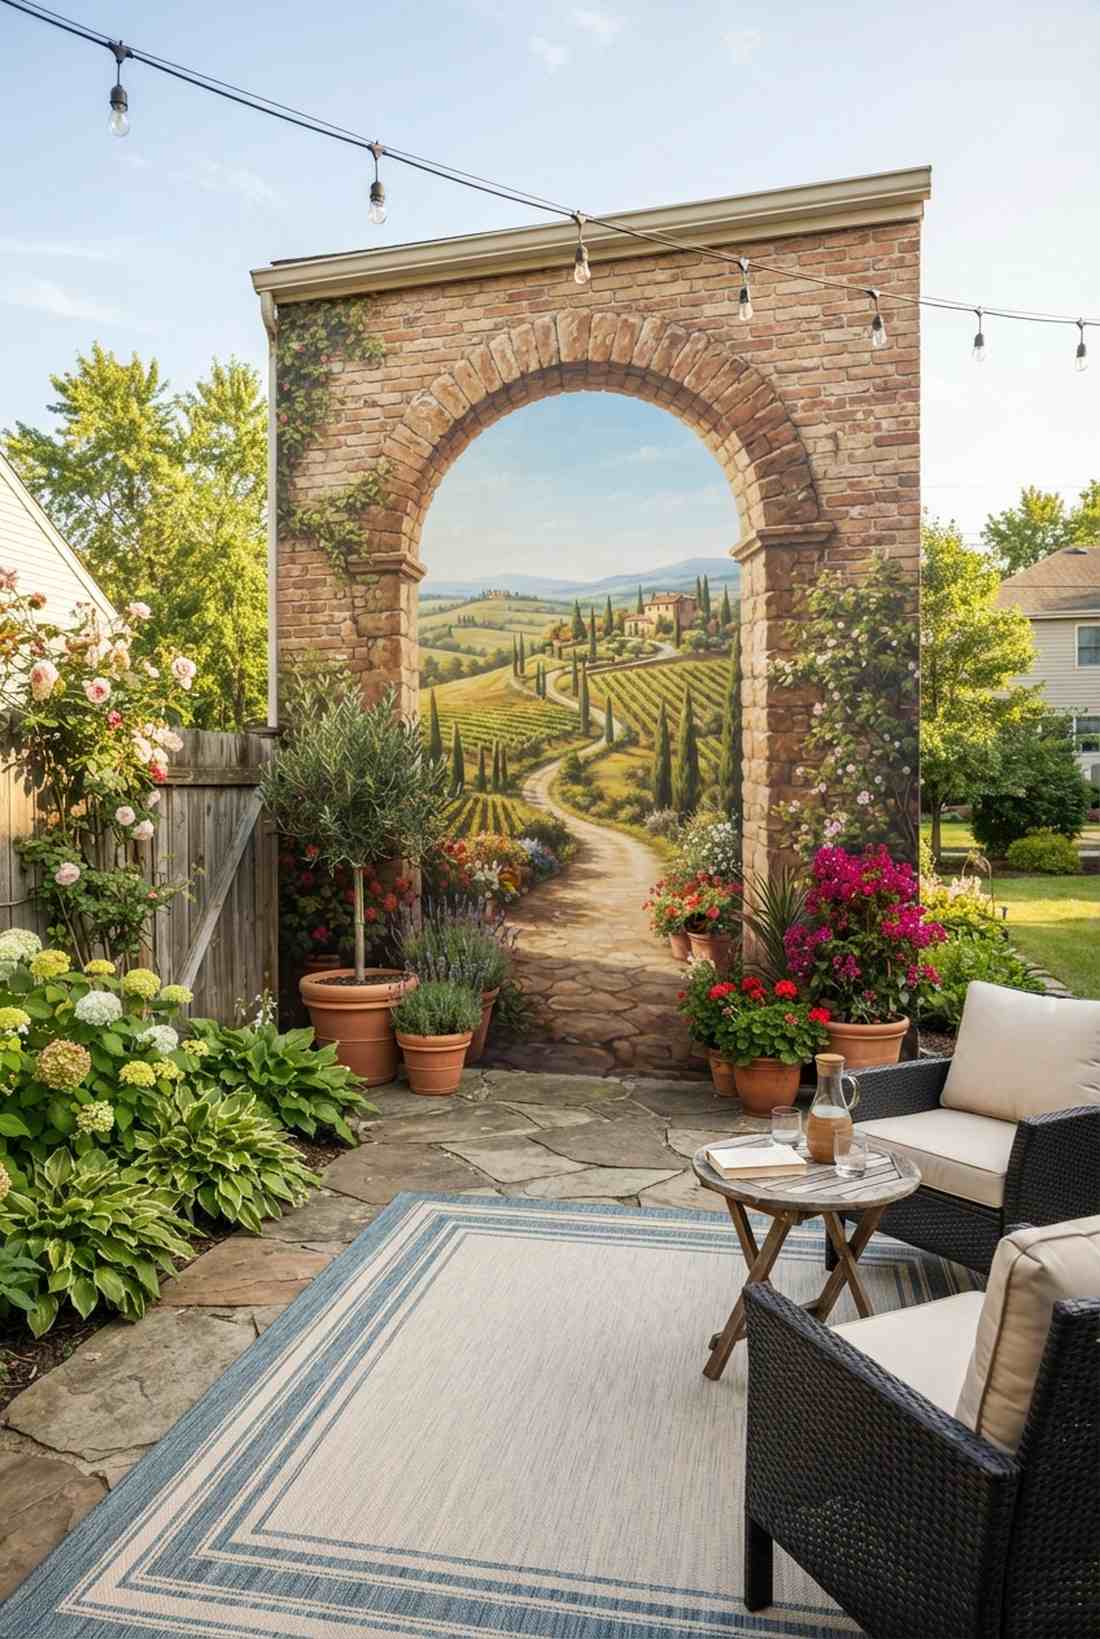
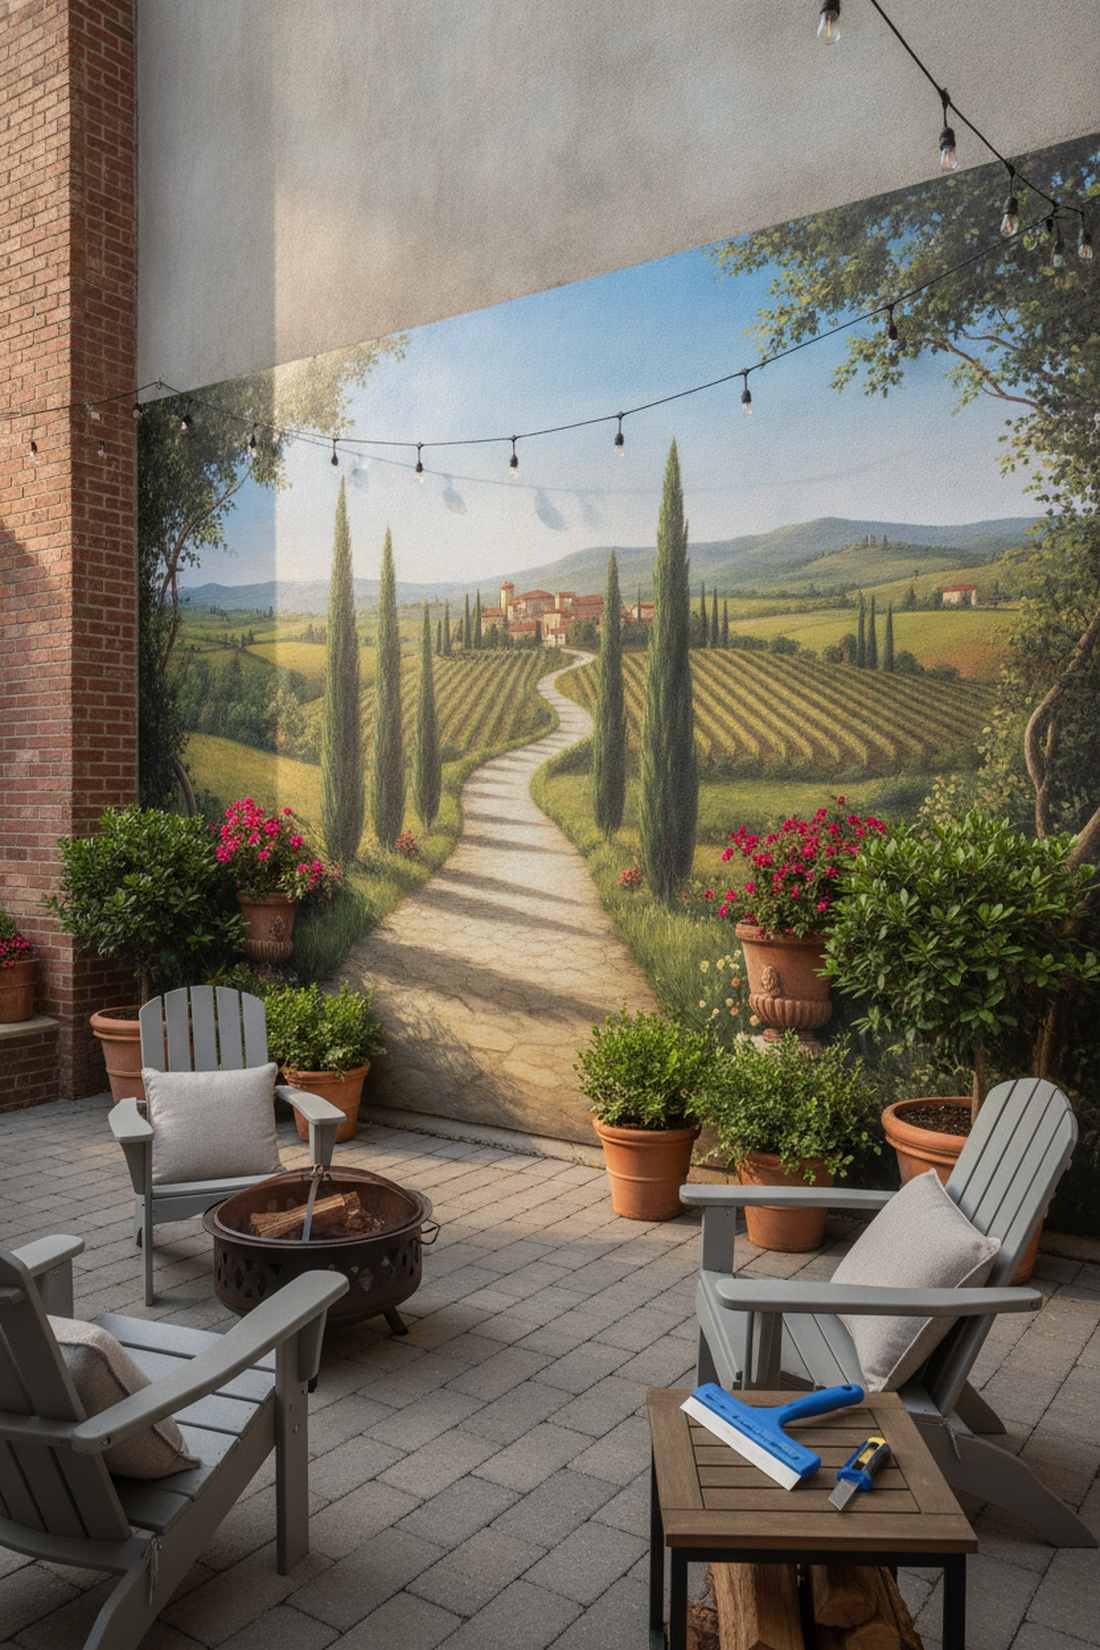
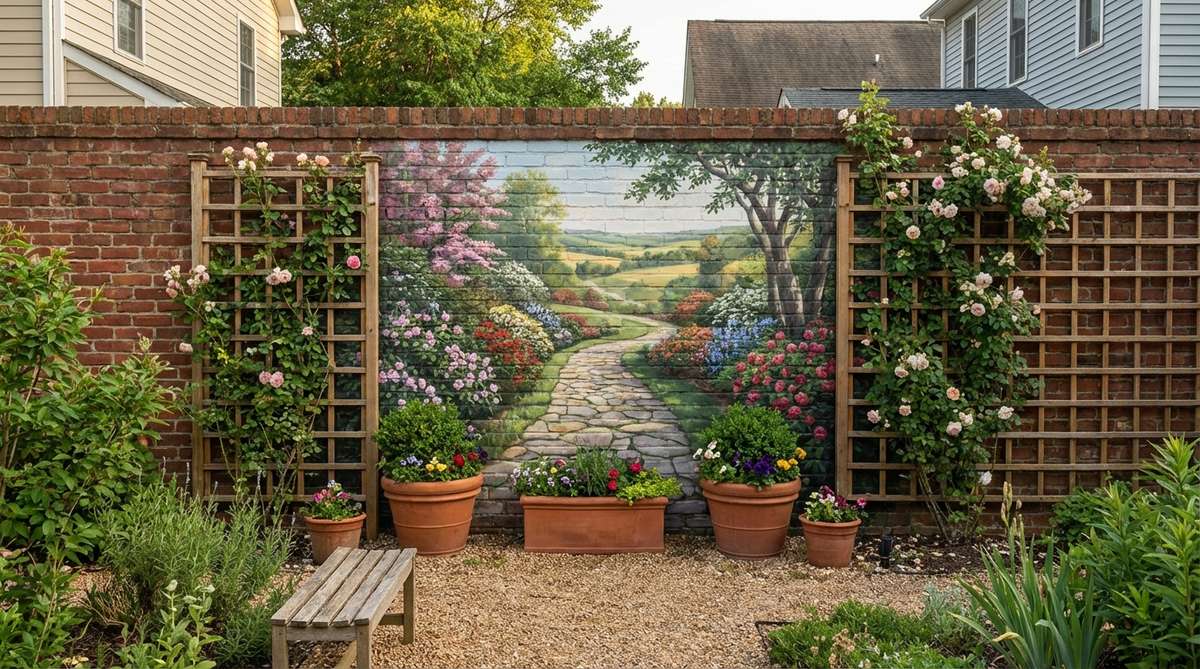
Transports your drab concrete wall into a sweeping Italian countryside view. A weatherproof outdoor wall mural is the ultimate cheat code for depressing urban patios.
Staring at blank brick is miserable; a hyper-realistic vanishing point gives a designer-level finish and fake square footage. Applying a UV-coated exterior vinyl wrap means the illusion won’t peel or fade in direct sunlight.
A massive wall illusion wrap can be installed for $100–$250. Pin this to your small patio makeover board!
- Key Materials: Exterior vinyl mural, squeegee, cleaning prep
- Vibe / Style: Faux Mediterranean escape
- Difficulty: Careful application needed
- Budget Breakdown: Vinyl mural: $150 | Application tools: $15.
- Creator’s Tip: Put real potted plants right at the base of the painted path to blend reality with the artwork.
- Smart Sourcing: Grab a UV-resistant outdoor vinyl mural wrap and a heavy-duty vinyl squeegee kit.
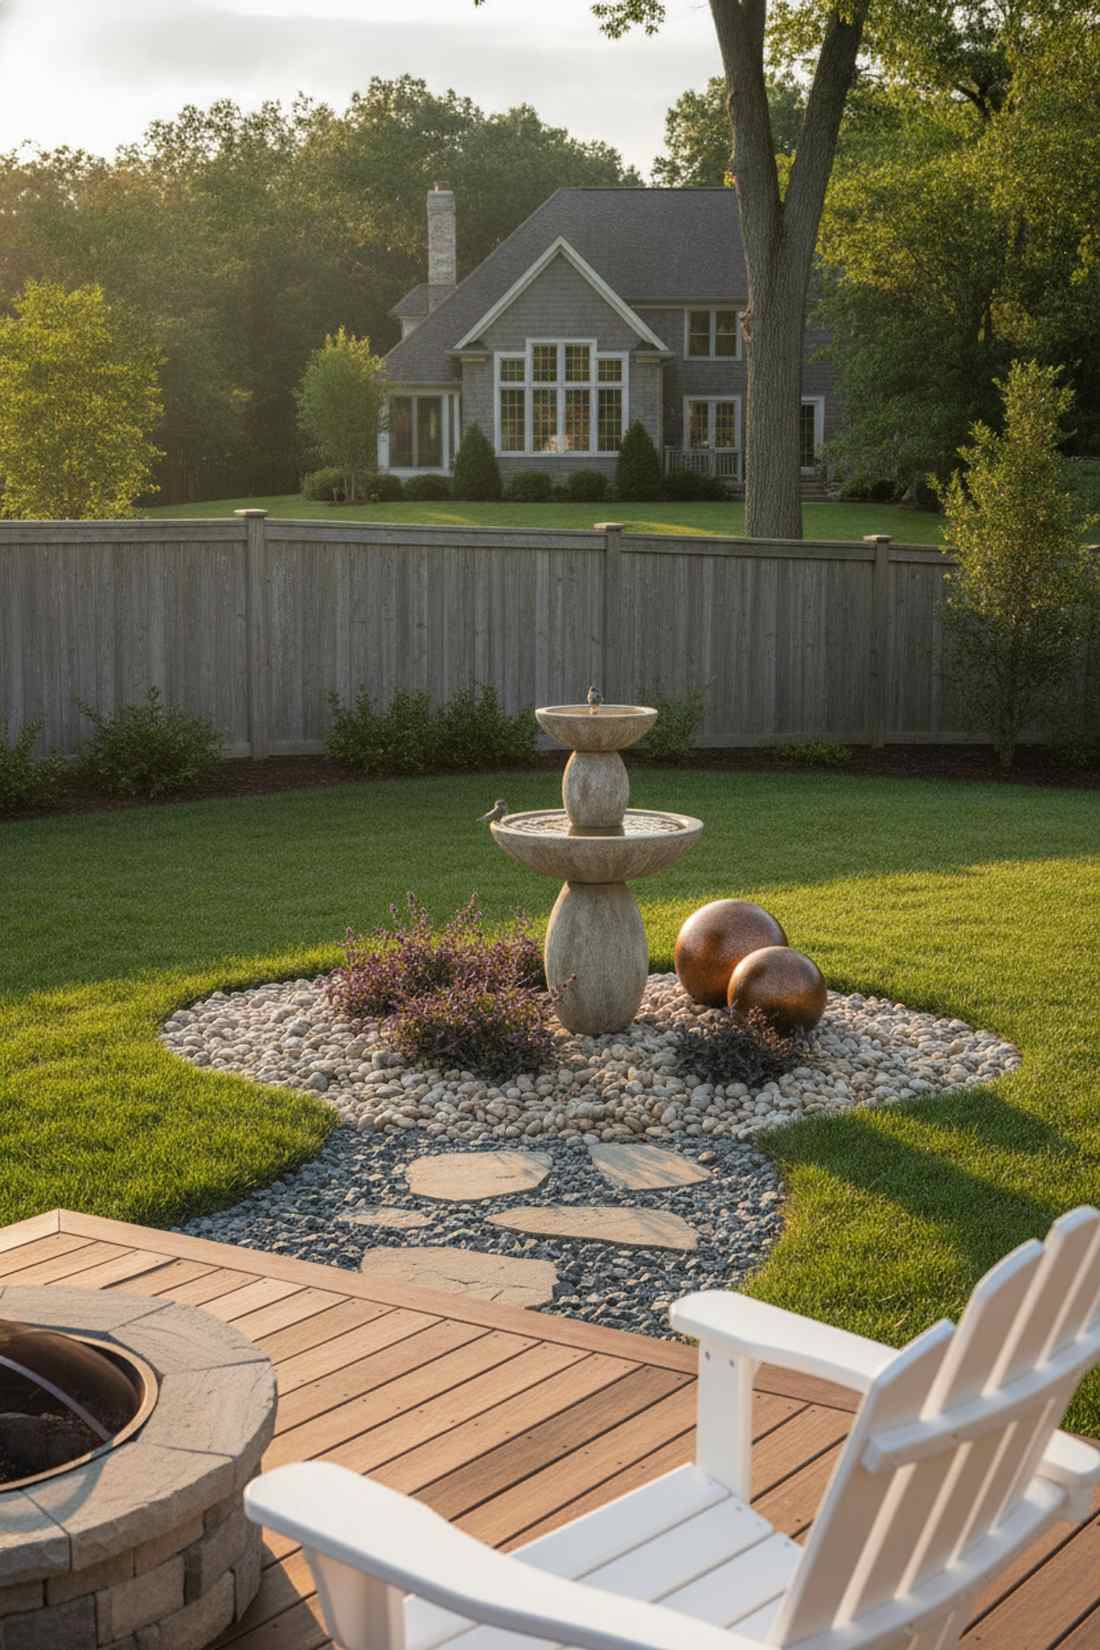
21. Reflective Water Features
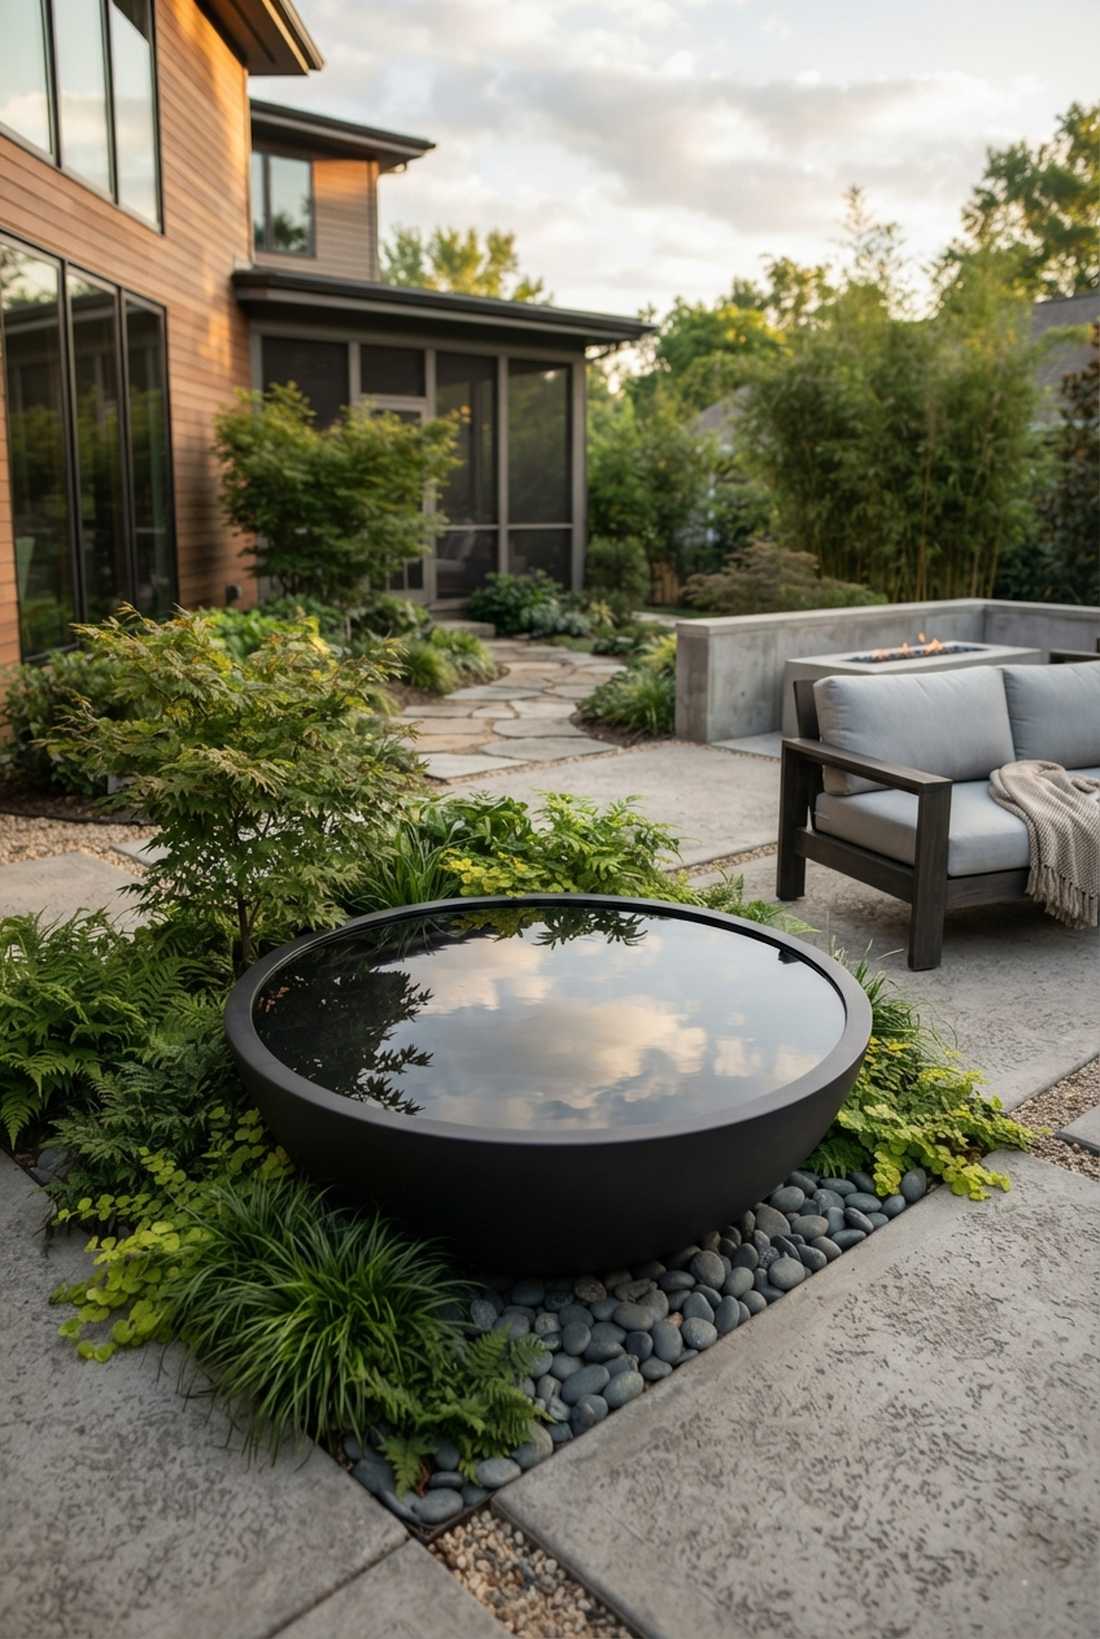
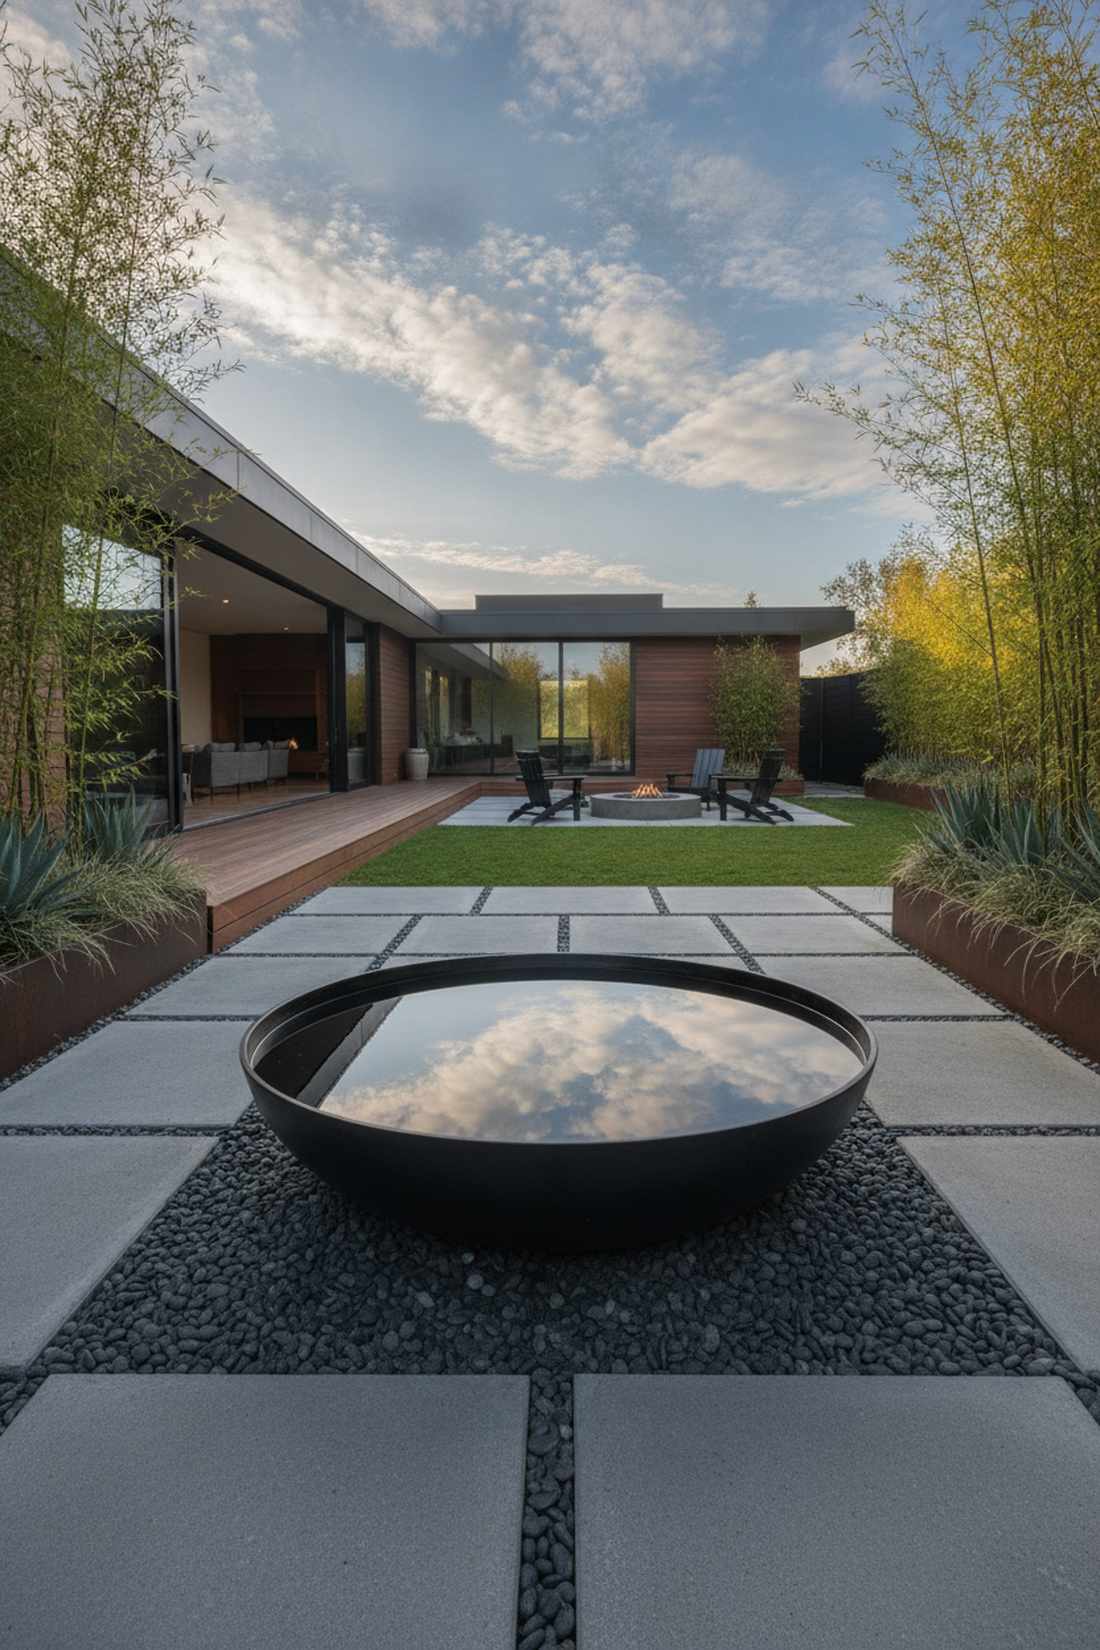

Catches passing clouds and perfectly mirrors your best plants, doubling the lushness. Adding a low-profile small garden decor water bowl is stunning for minimalist courtyards.
Bulky roaring fountains waste space; a flat, dark reflective pool bypasses the usual cheap look for high-end modernism. Picking up a black interior pond liner makes the water hyper-reflective like a black mirror.
You can build a still-water reflection bowl for roughly $40–$80.
- Key Materials: Shallow wide bowl, dark waterproofing sealant
- Vibe / Style: Ultra-modern zen pool
- Difficulty: Very easy
- Budget Breakdown: Bowl: $40 | Sealant: $15.
- Creator’s Tip: Paint the inside of your container matte black before filling to maximize the mirror reflection.
- Smart Sourcing: Use a matte black fiberglass planter bowl and fish-safe liquid rubber sealant.
22. Layered Screening
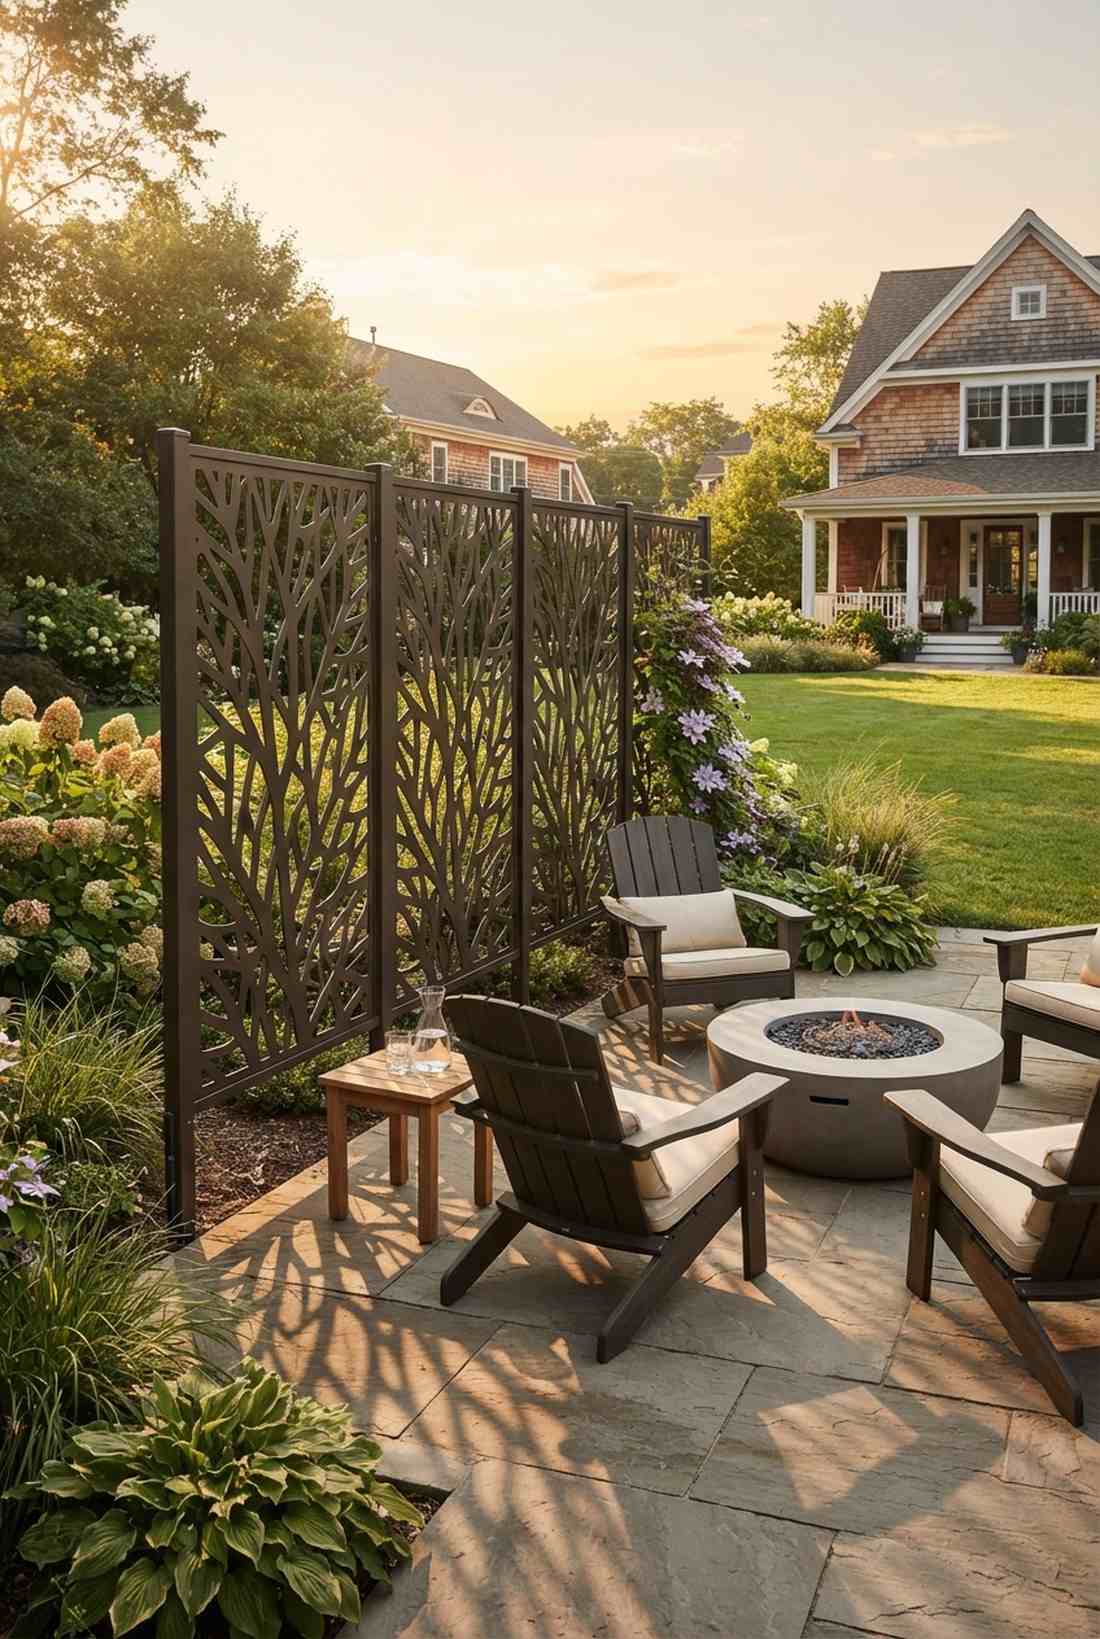
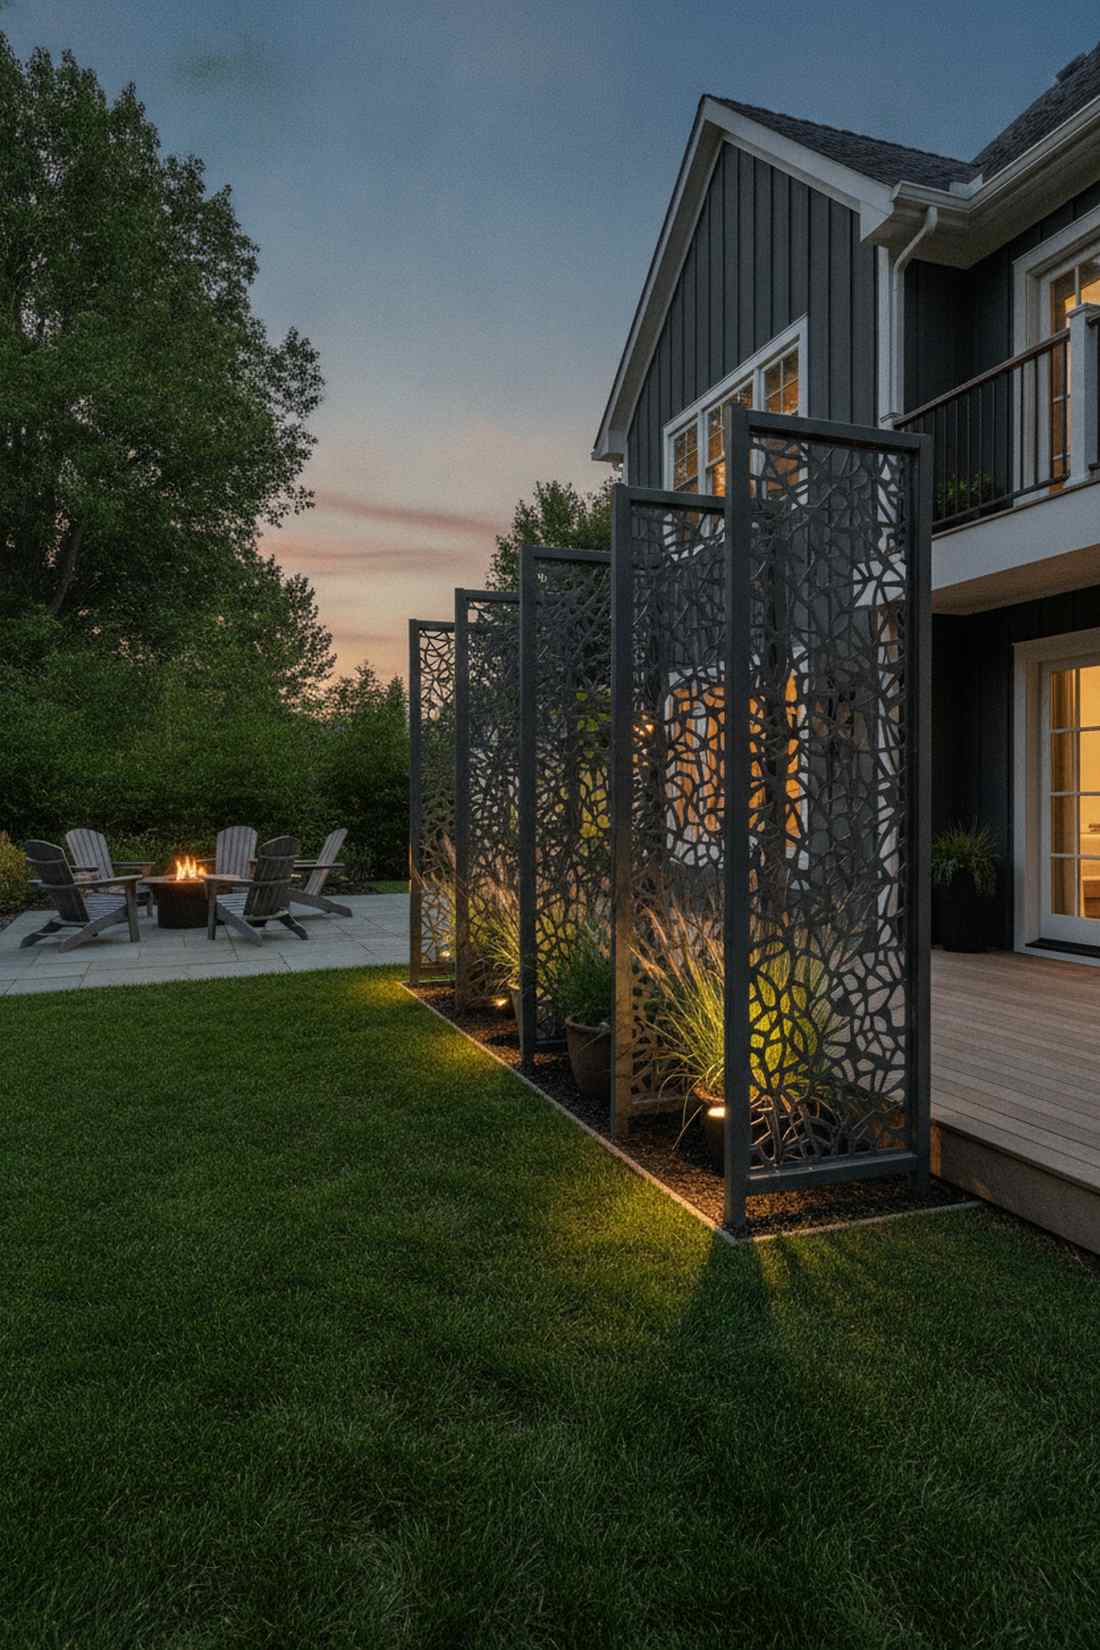
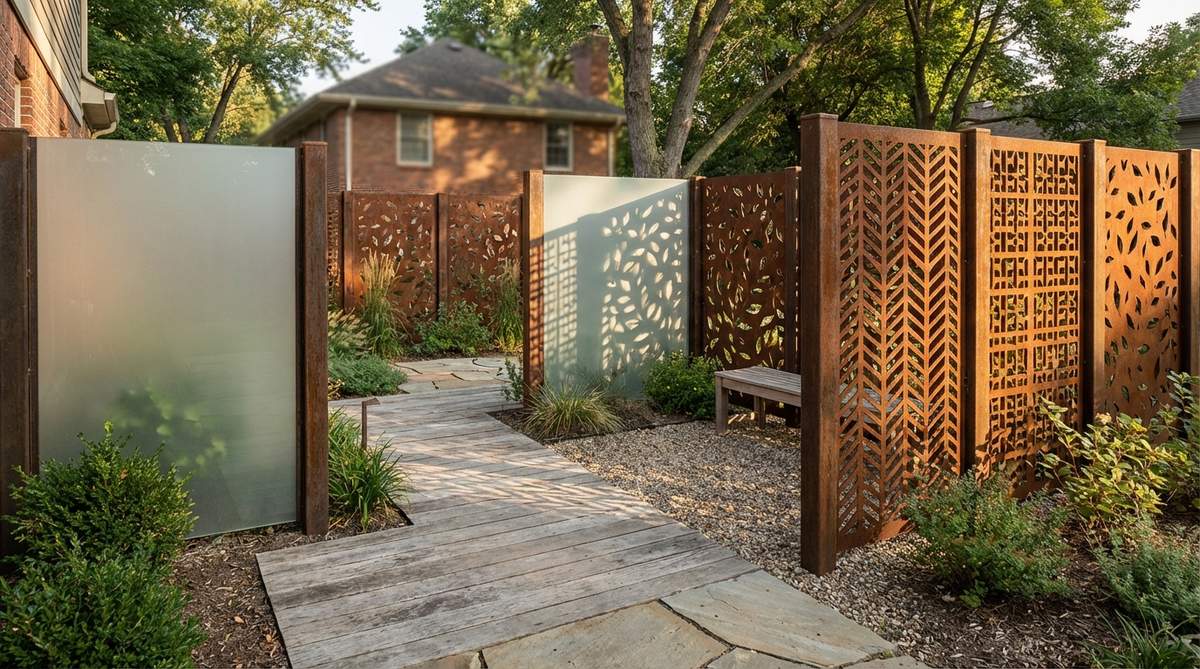
Teases the eye with glimpses of greenery, creating a mysterious, deeper layout. Utilizing a decorative garden partition breaks up flat spaces without choking off sunlight.
Solid fences aggressively shrink a yard; laser-cut semi-transparent panels instantly elevate the aesthetic by adding layered shadows. Installing rust-proof metal privacy screens ensures you get a permanent, architectural dividing line.
High-end layered screening runs about $100–$200 per panel.
- Key Materials: Laser-cut metal panels, ground stakes
- Vibe / Style: Contemporary architectural garden
- Difficulty: Easy stake-in installation
- Budget Breakdown: Screen panel: $120 | Stakes/Hardware: $25.
- Creator’s Tip: Backlight the screen at night with a small LED to cast massive, dramatic shadows across your yard.
- Smart Sourcing: Get powder-coated laser-cut aluminum screens and heavy-duty ground anchor stakes.
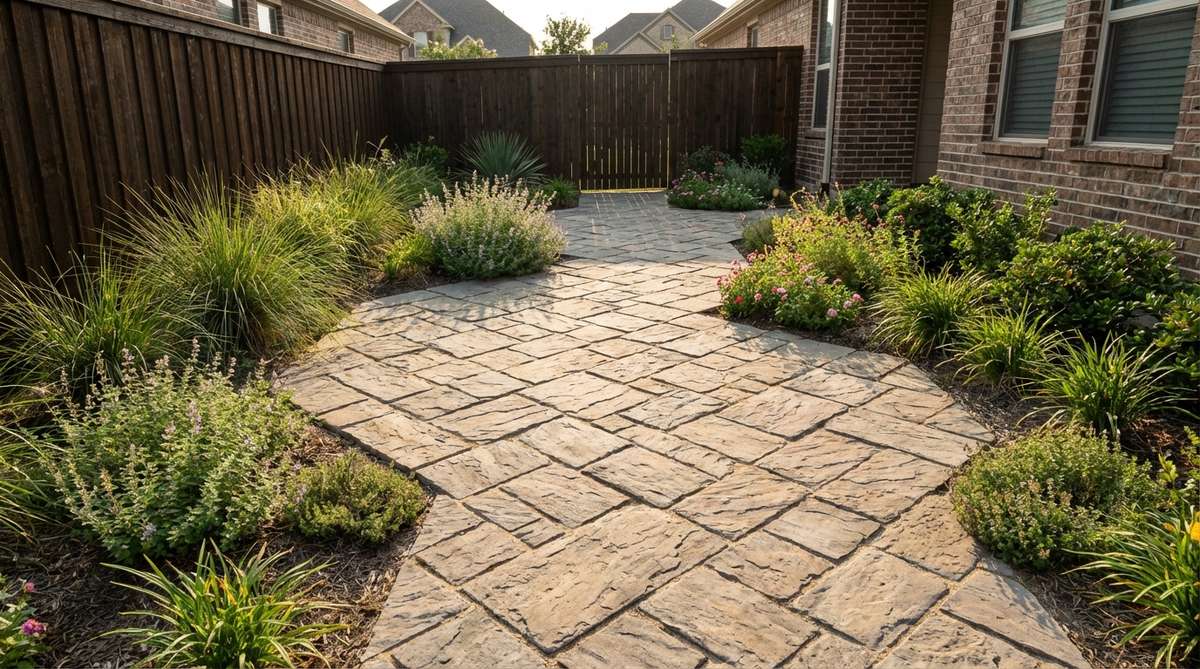
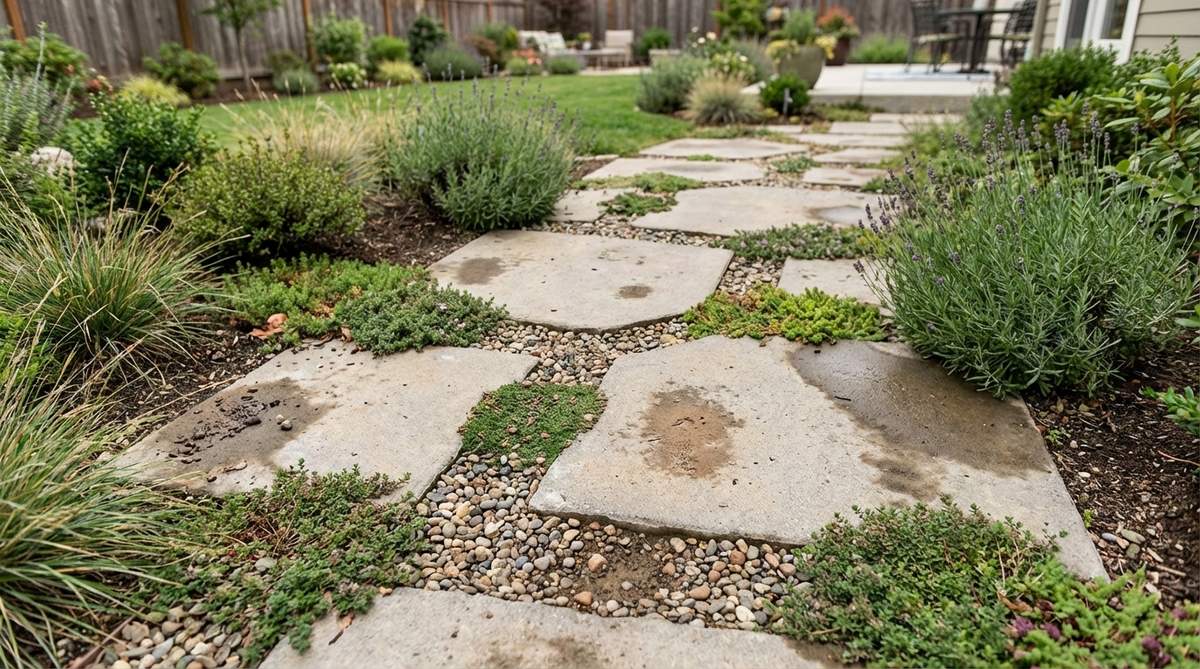
23. Graduated Paving Sizes
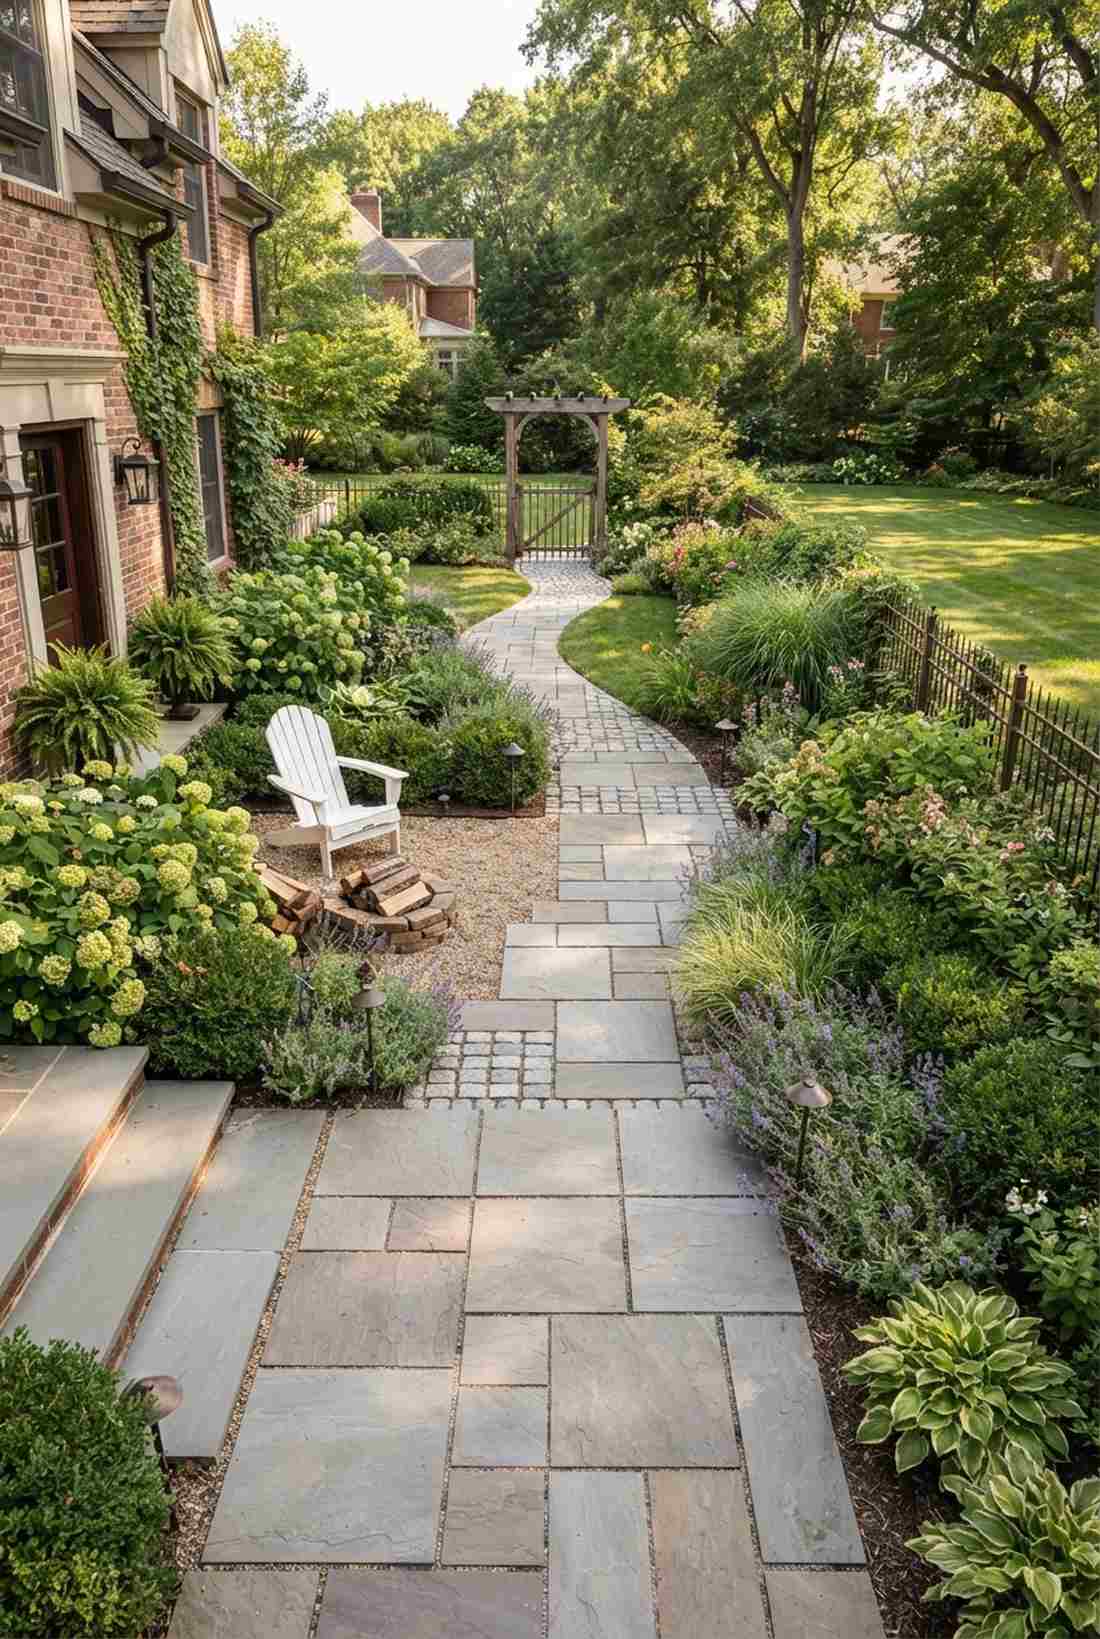
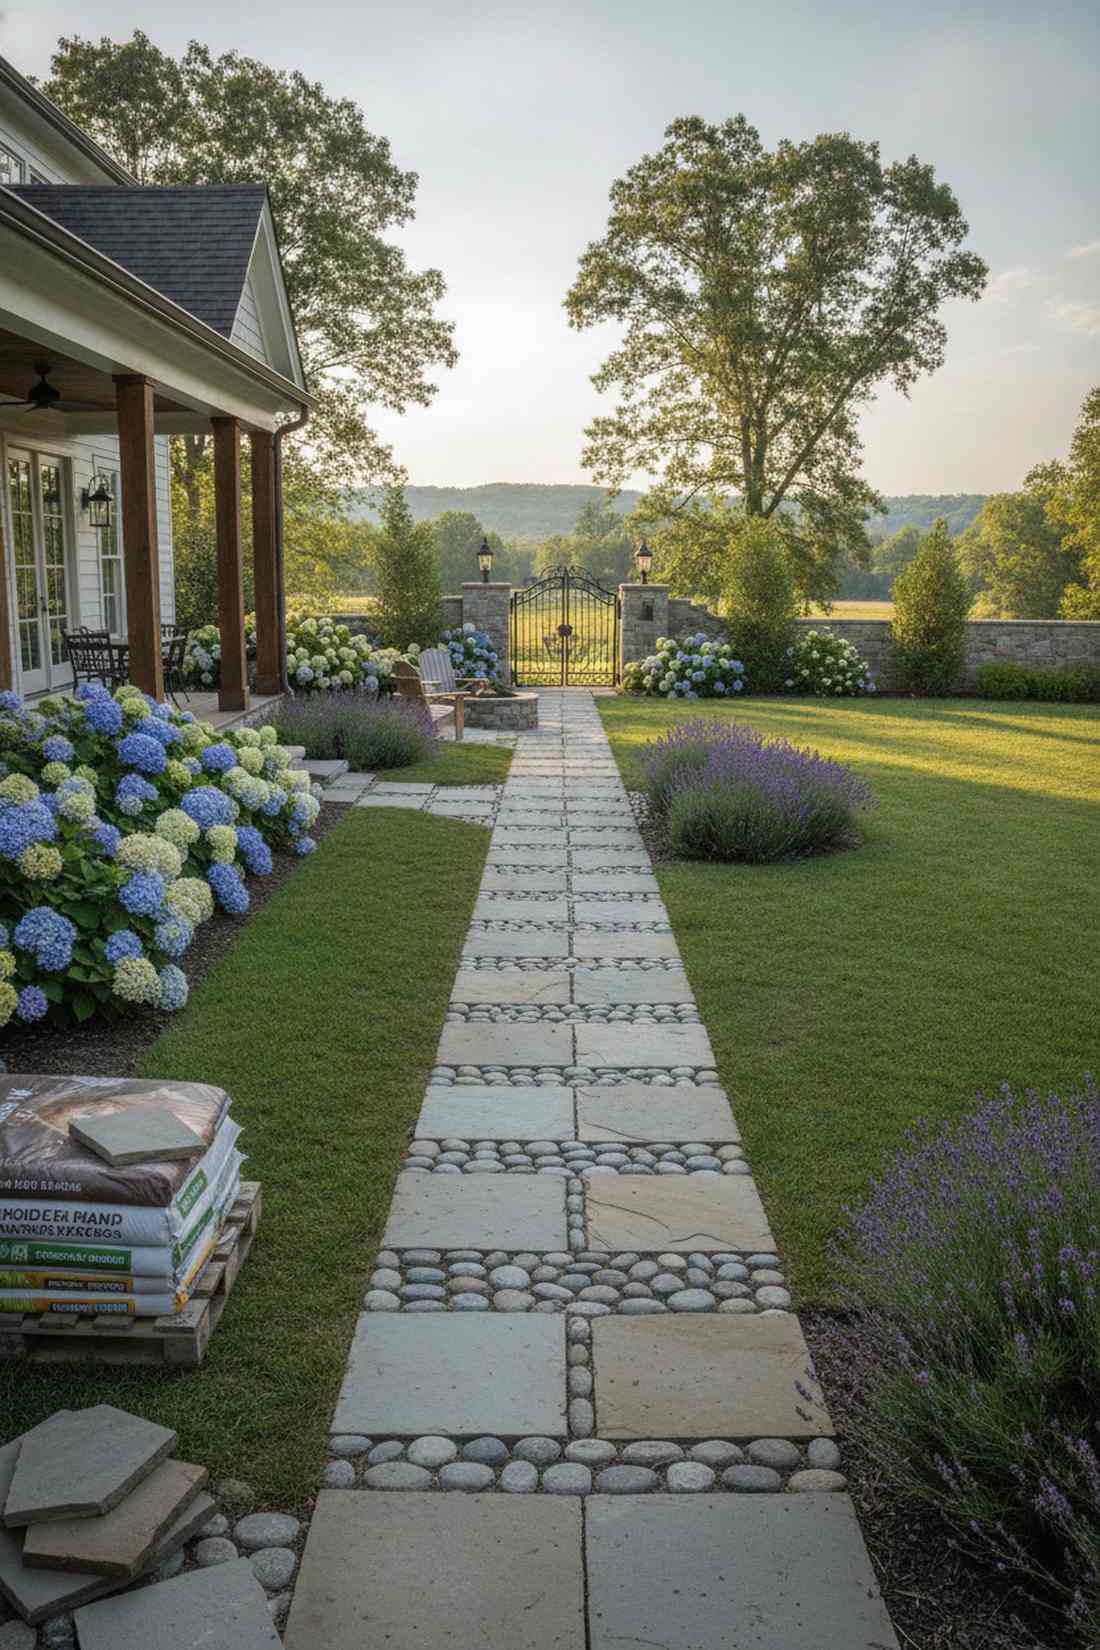
Forces the human eye to believe the pathway is much longer than reality. This brilliant small garden layout idea is historically used by castle landscape architects.
Using the exact same paver size everywhere is flat; shrinking pavers as they move away feels like a custom-built installation. Snagging a mixed-size patio paver kit makes achieving this forced perspective incredibly simple.
Laying a dynamic perspective path costs around $100–$180. Save this secret design principle!
- Key Materials: Large, medium, and small stone pavers
- Vibe / Style: Classical estate walkway
- Difficulty: Moderate leveling required
- Budget Breakdown: Mixed stones: $120 | Base: $30.
- Creator’s Tip: Place massive 24-inch stones at your door, scaling down to tiny 6-inch cobbles by the back fence.
- Smart Sourcing: Order a multi-size natural stone paver pallet and pre-mixed leveling sand bags.
Container and Portable Garden Ideas
24. Wheeled Planter Systems
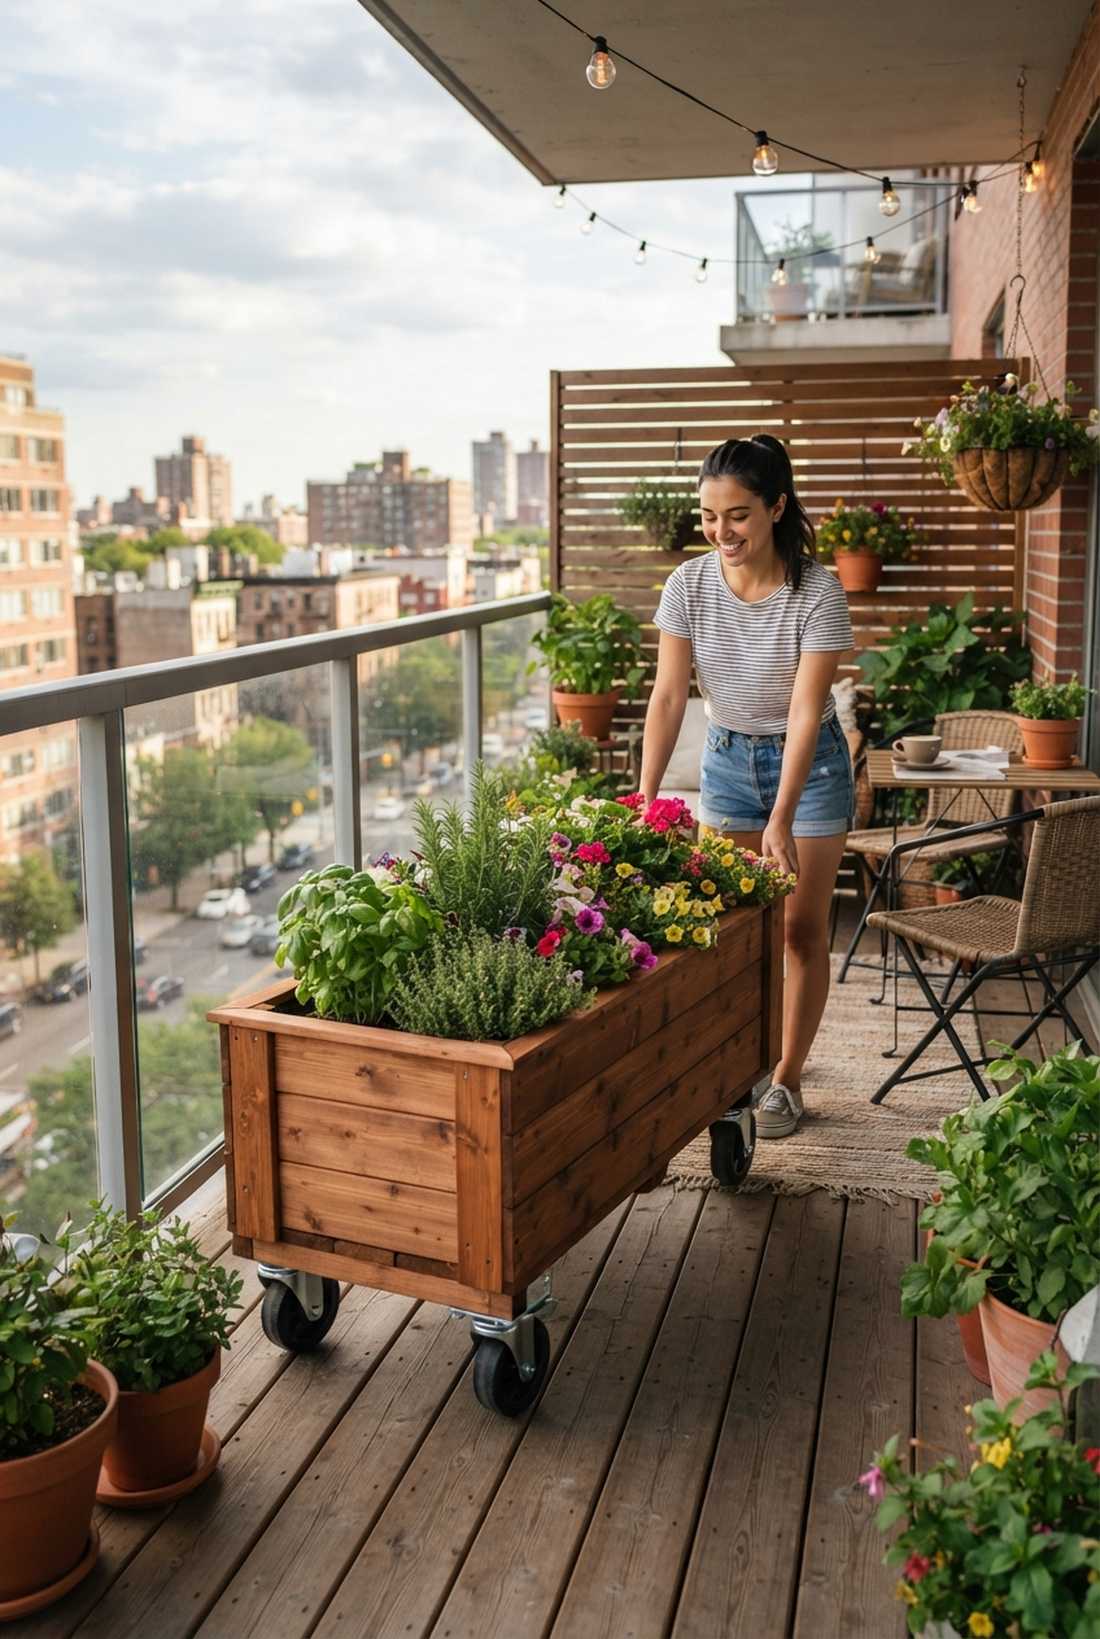
Glides massive privacy screens out of the way effortlessly when guests arrive. This fully mobile small garden decor hack completely unlocks small apartment balconies.
Static pots trap you into one layout; adding heavy-duty casters looks far more expensive than it is and offers total flexibility. Bolting industrial locking swivel casters to wooden troughs lets you chase the sun or hide ugly views on demand.
Converting existing planters to wheels costs just $20–$35.
- Key Materials: Wooden planter box, 4 swivel casters, lag bolts
- Vibe / Style: Dynamic adaptable urban space
- Difficulty: Easy drill-and-bolt
- Budget Breakdown: Casters: $20 | Hardware: $5.
- Creator’s Tip: Always buy casters rated for 2x the weight of your planter—wet soil is shockingly heavy.
- Smart Sourcing: Get a 4-pack of polyurethane locking casters and rust-resistant galvanized lag bolts.
This next hack takes a $10 item and turns it into a premium space-saver…
25. Tiered Corner Displays
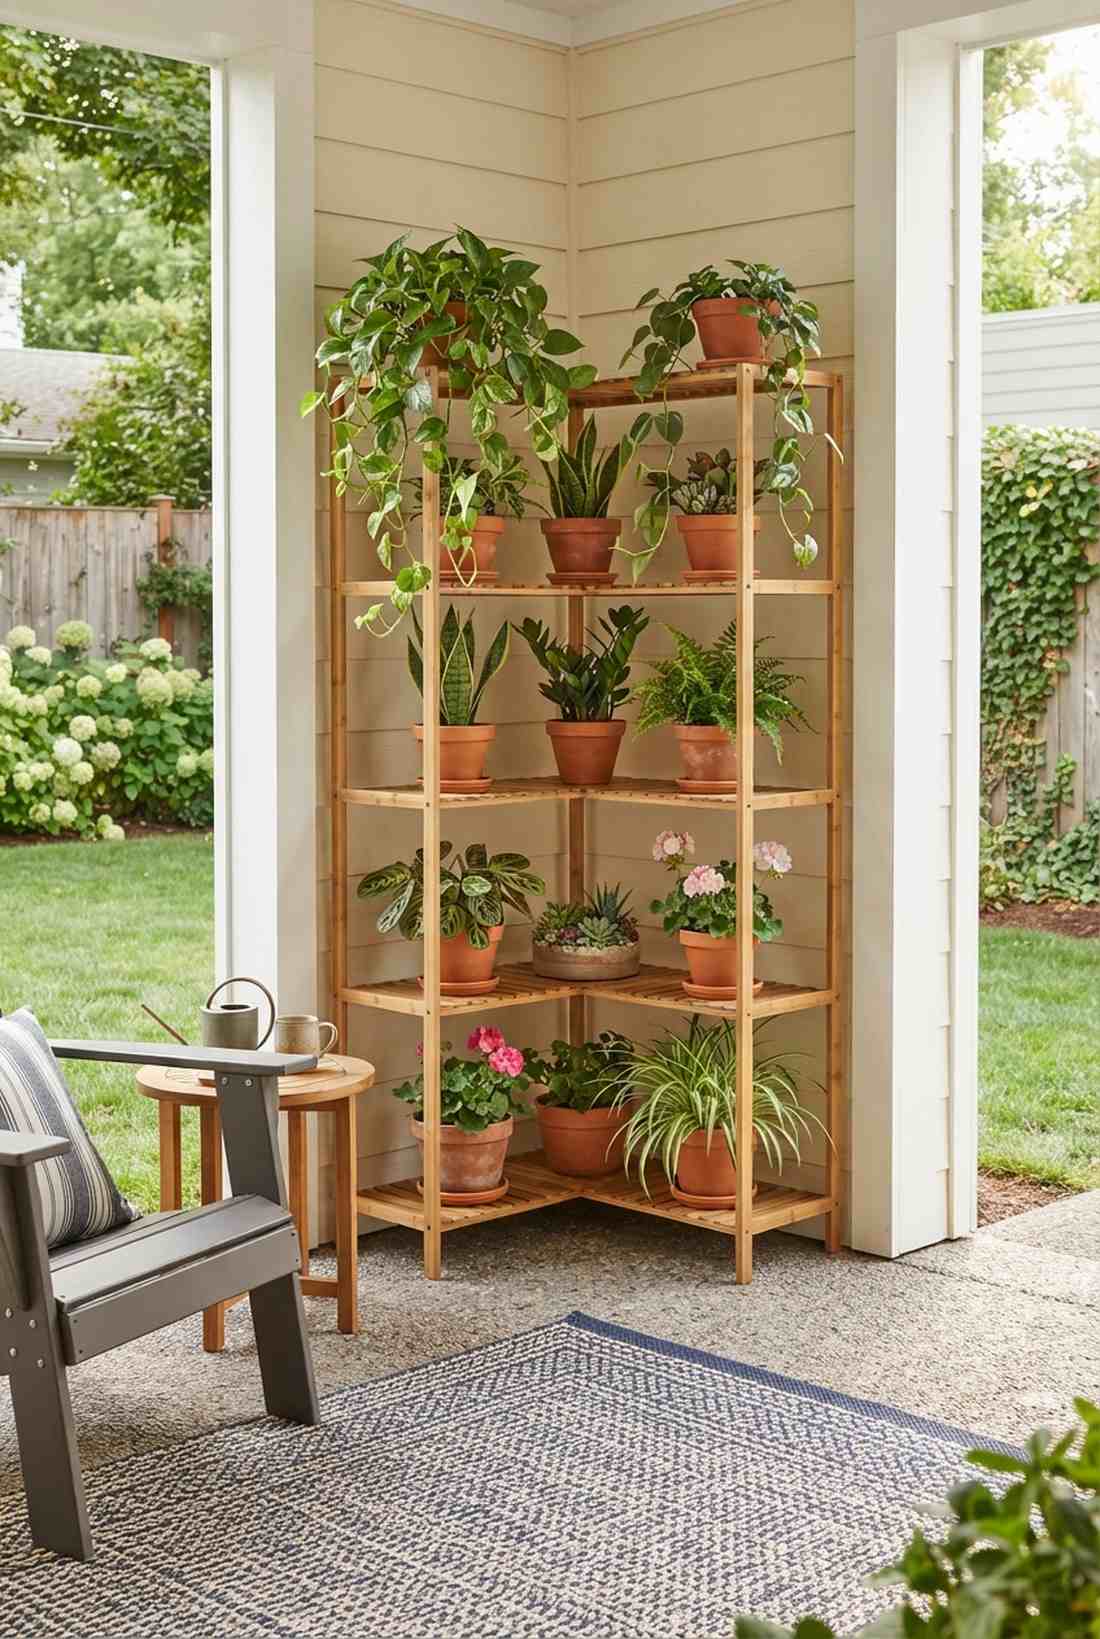
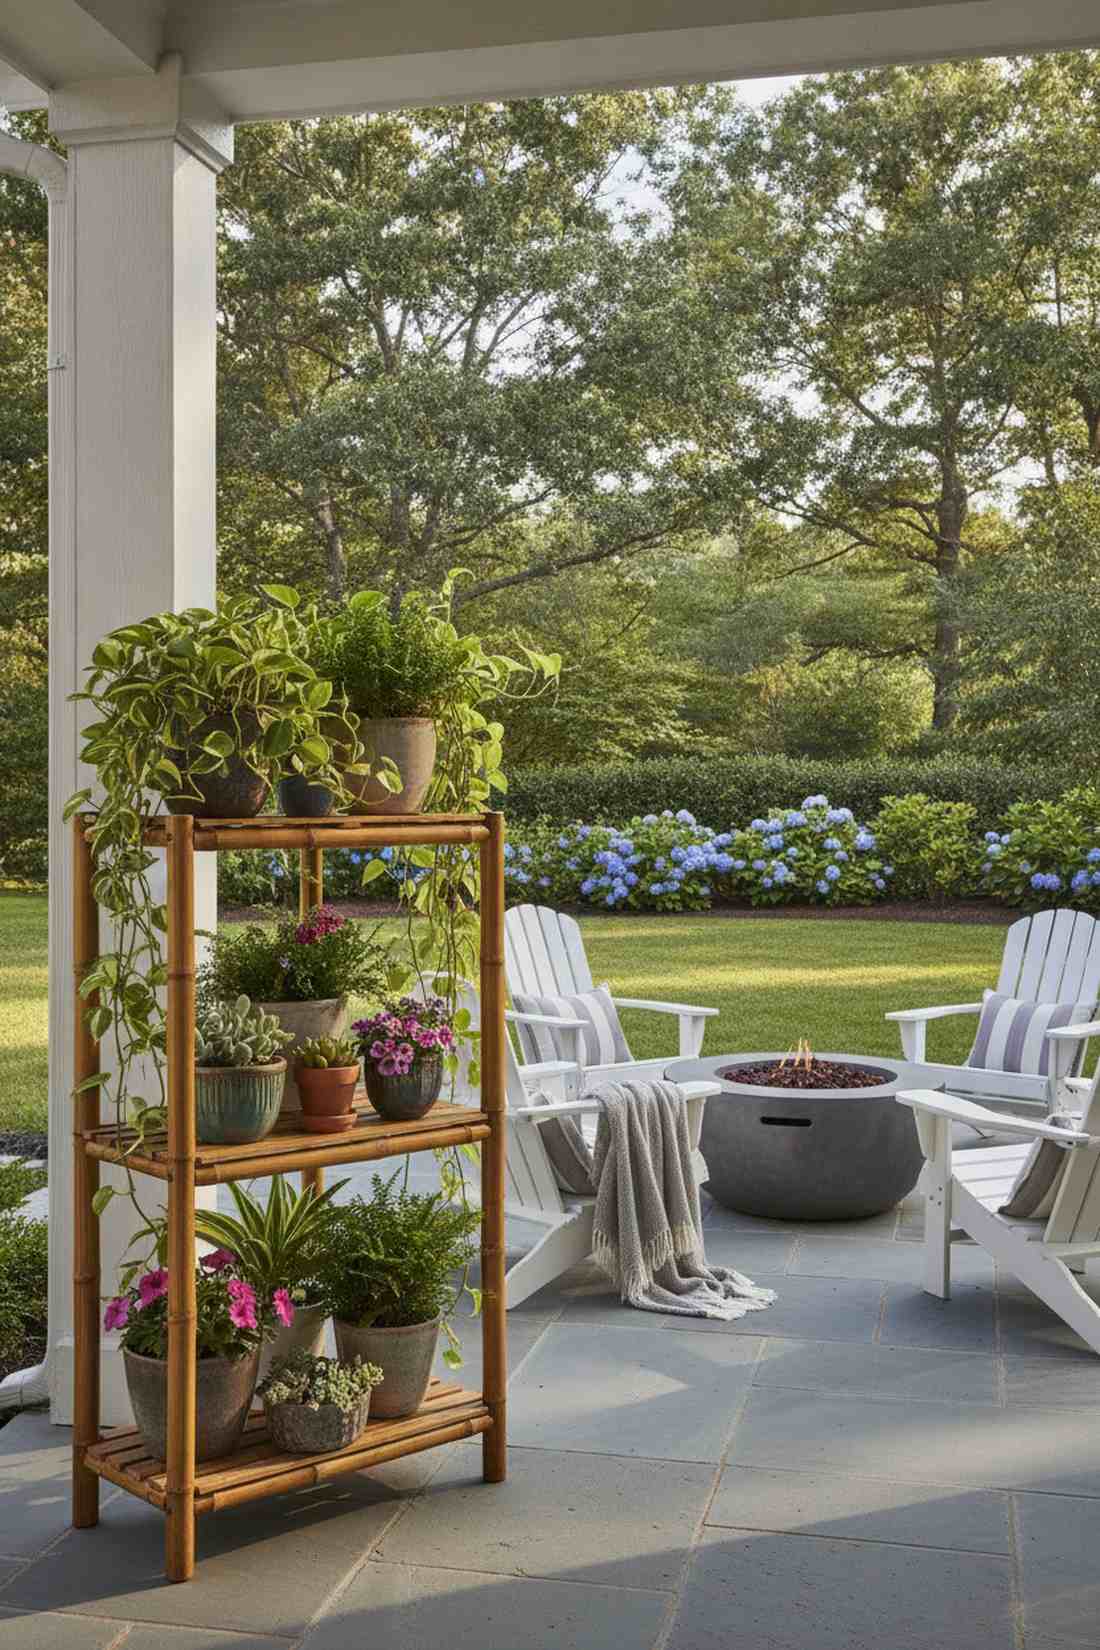
Packs an entire greenhouse worth of pots into a completely useless 90-degree corner. A corner plant stand setup is an absolute lifesaver for cramped patios.
Leaving corners empty is wasting prime real estate; a stepped wedge display delivers a surprisingly premium look with zero footprint penalty. Using a weatherproof bamboo plant shelf brings warmth while resisting mold and rot.
A tall corner shelving unit runs about $35–$65. Pin this space-saving layout immediately!
- Key Materials: Corner tier stand, varied potted plants
- Vibe / Style: Lush maximized corner
- Difficulty: Tool-free assembly
- Budget Breakdown: Stand: $45 | Pots: $20.
- Creator’s Tip: Put trailing vines like pothos on the top shelf to drape down and hide the structural legs.
- Smart Sourcing: Snag a multi-tier bamboo corner plant stand and a bulk pack of terracotta pots.
26. Railing Saddle Planters
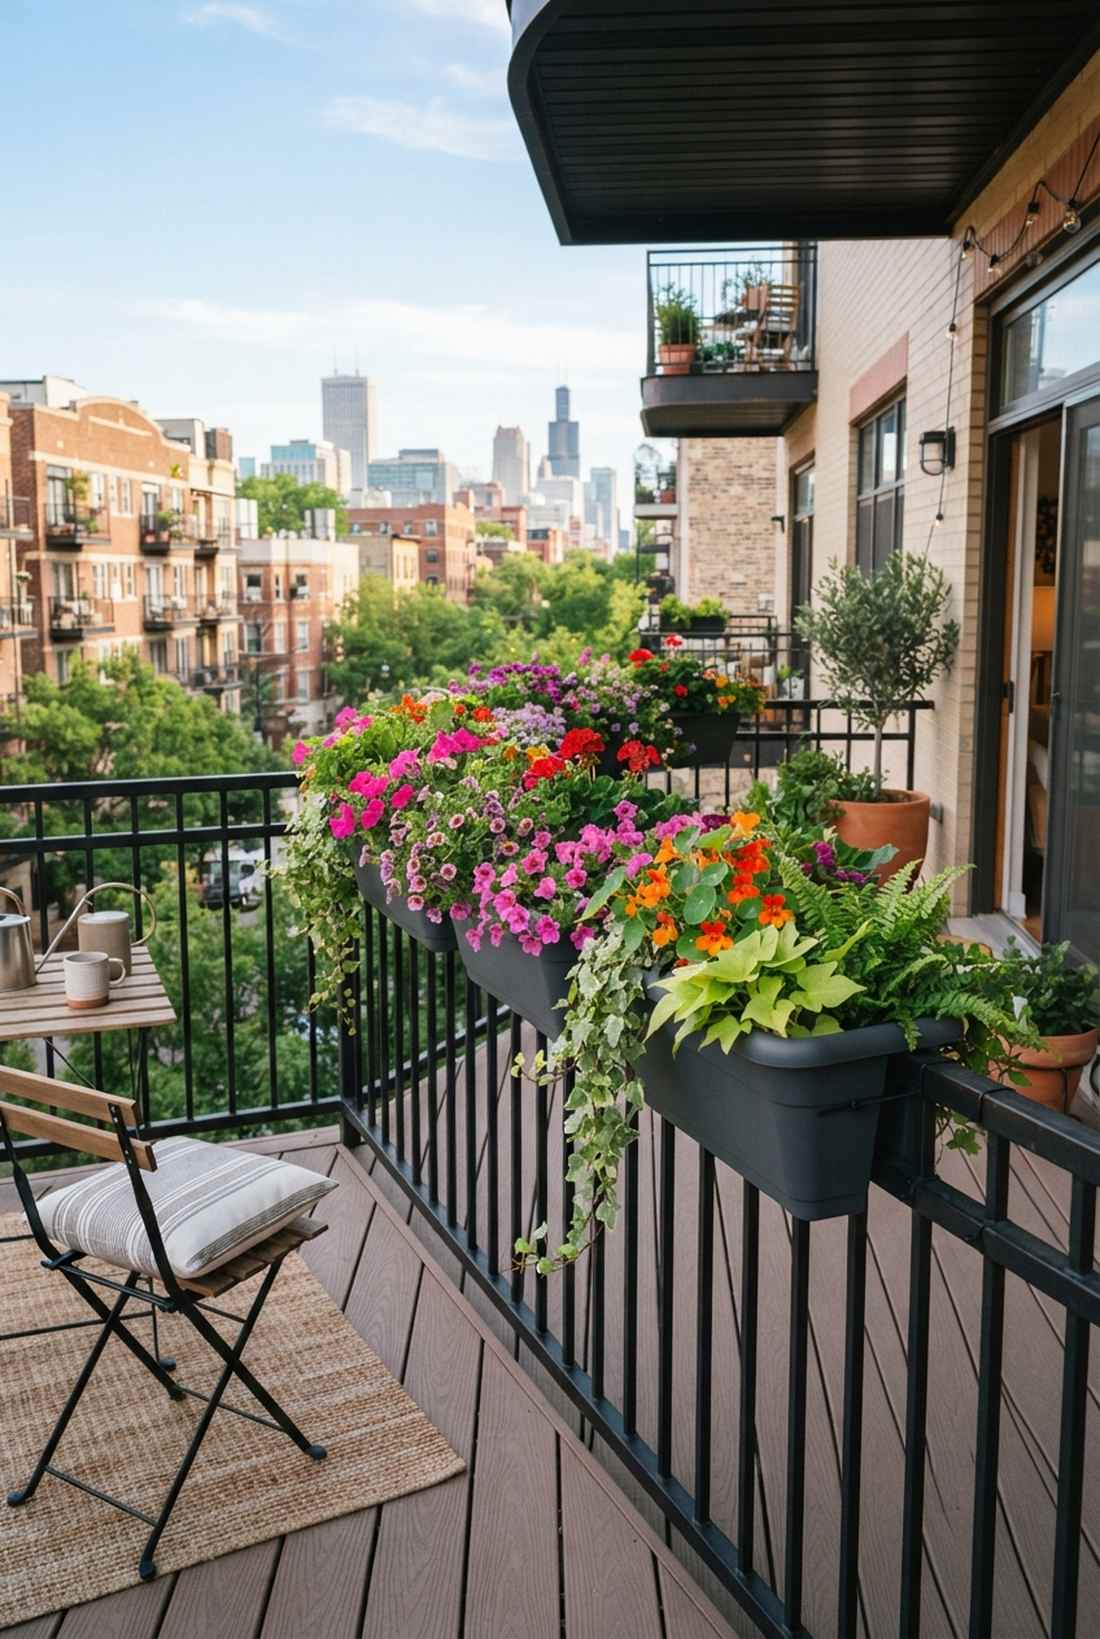
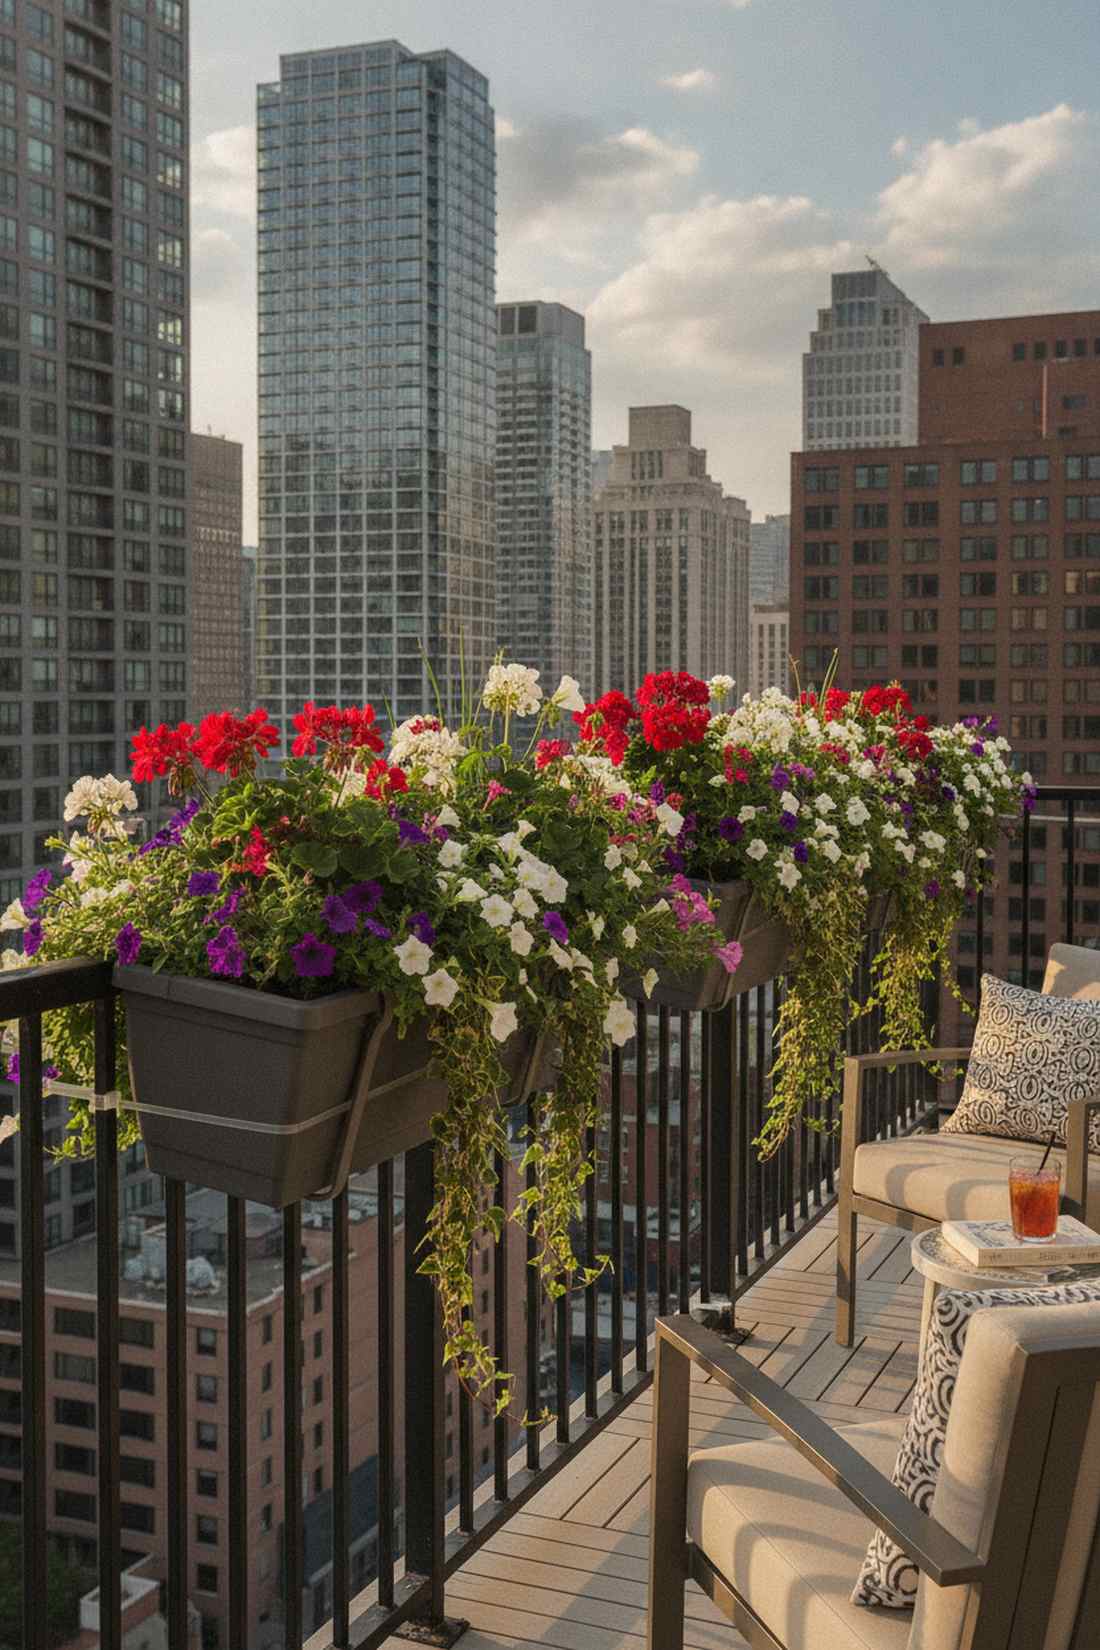
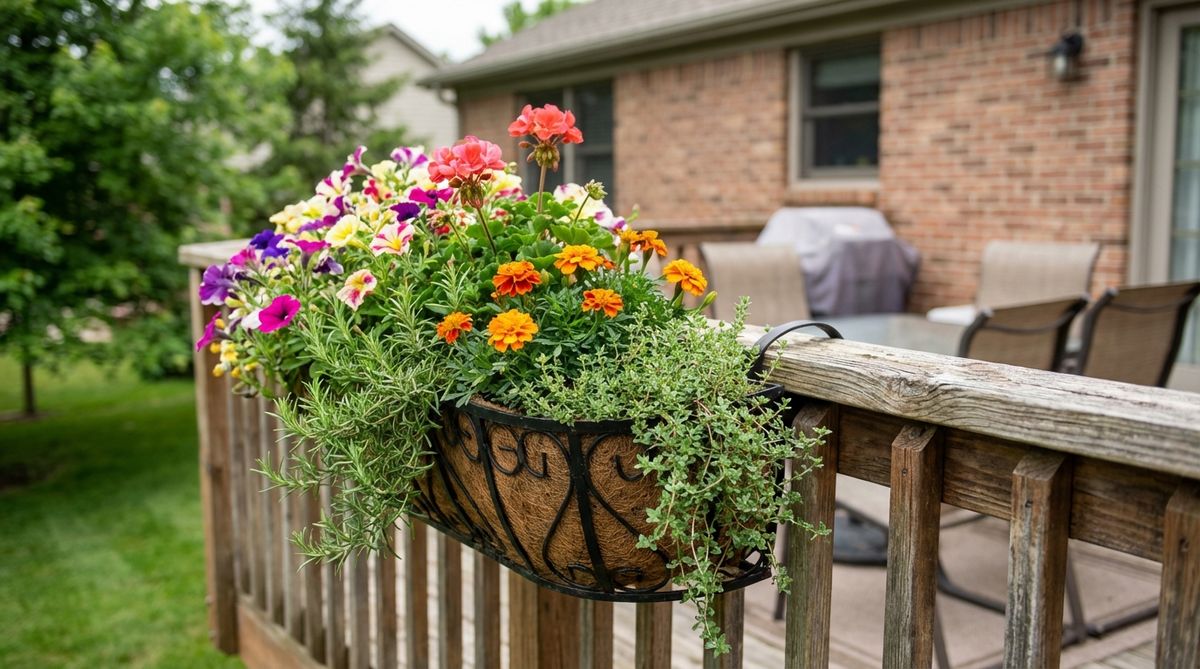
Straddles your balcony edge perfectly to give you an eye-level floral explosion. These balcony planter boxes utilize the very edges of your property line brilliantly.
Balcony floors get cluttered fast; throwing saddle pots over the railing bypasses the usual cheap look and keeps floor space 100% clear. Choosing deep-channel resin saddle planters ensures they grip the rail safely in high winds.
You can outfit your entire railing for roughly $40–$70.
- Key Materials: Saddle planters, zip ties (for extra security)
- Vibe / Style: Vibrant city railline
- Difficulty: Simply drop in place
- Budget Breakdown: Planters (x4): $45 | Soil: $15.
- Creator’s Tip: Secure a hidden zip-tie through the drainage hole around the railing spindle for storm-proof security.
- Smart Sourcing: Use heavy-duty compression railing planters and UV-resistant mounting zip ties.
27. Self-Watering Reservoirs
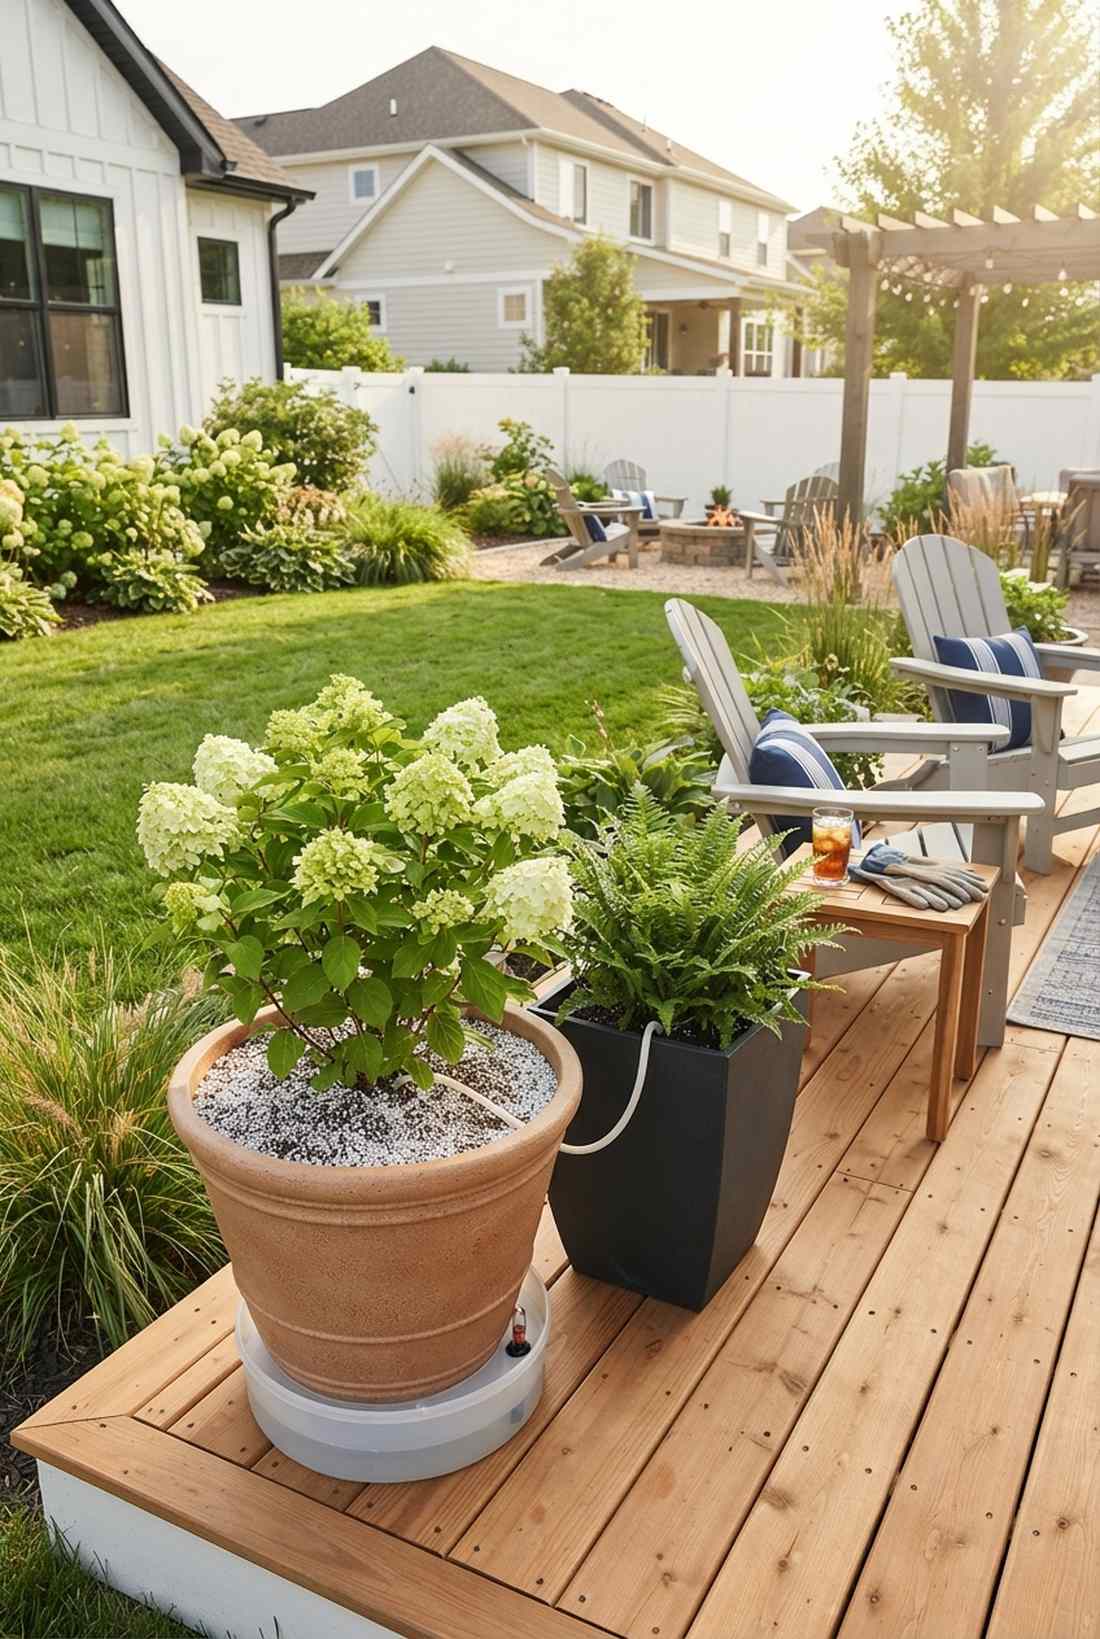
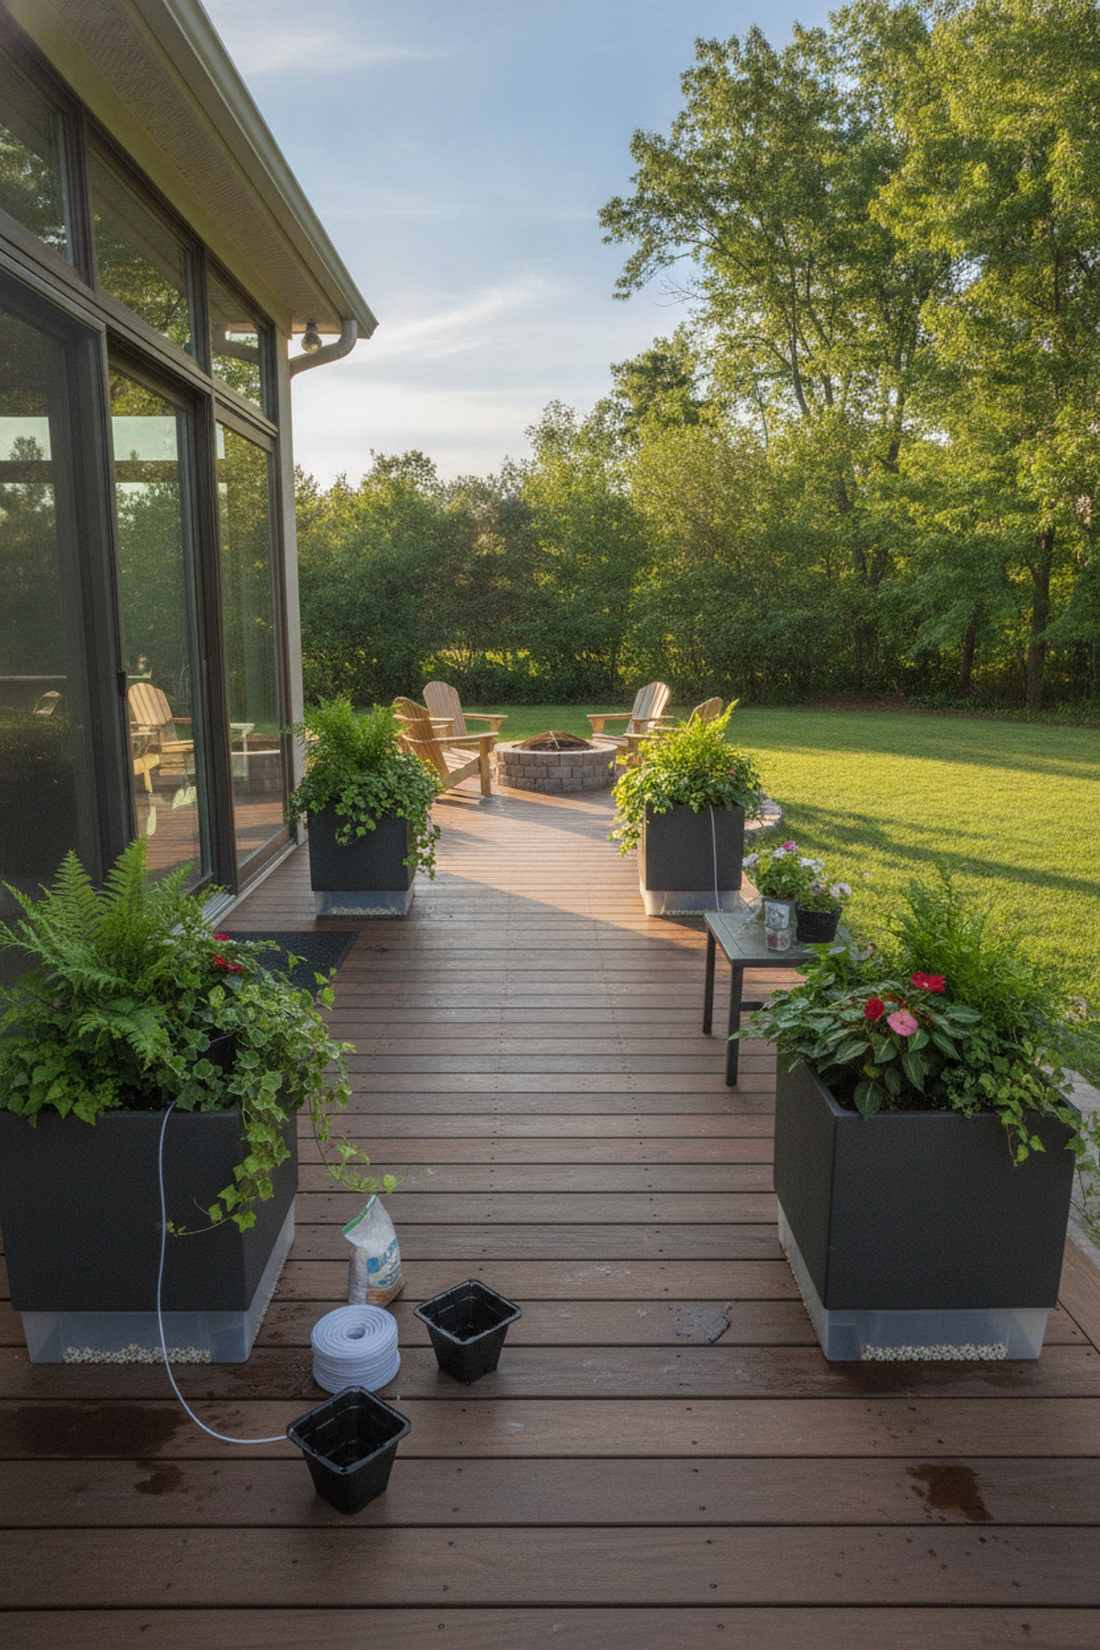
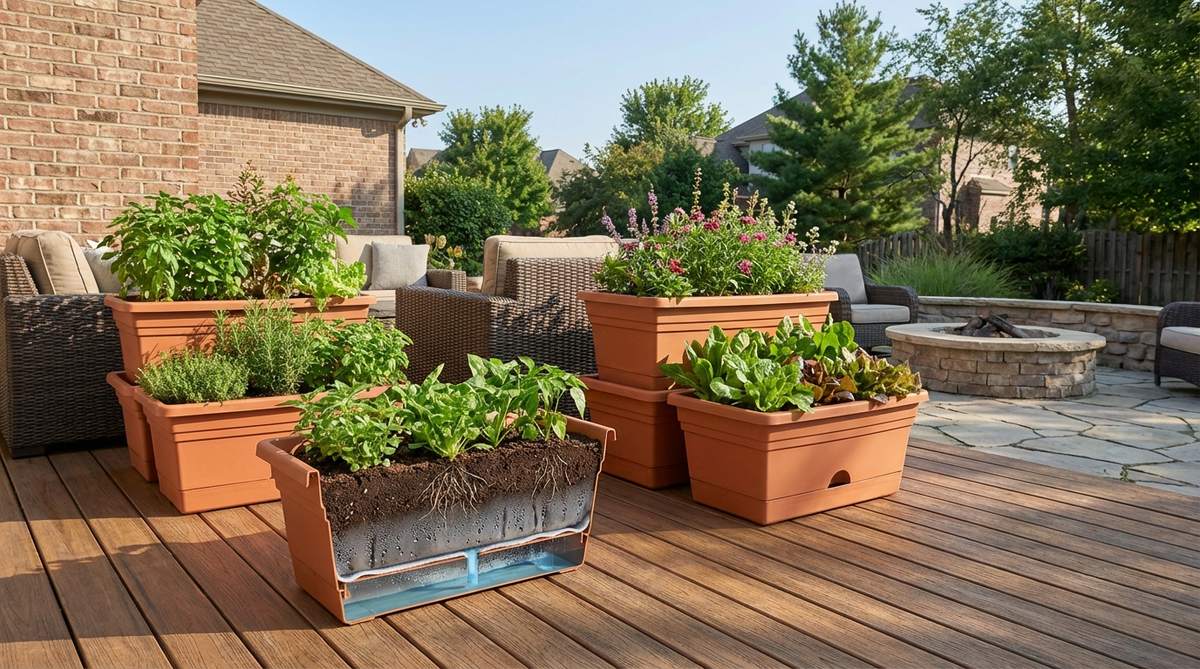
Keeps your pristine patio plants alive for weeks while you are on vacation. Integrating self-watering container systems is the ultimate cheat code for forgetful gardeners.
Daily watering is tedious and causes runoff stains; a reservoir system feels like a custom-built installation that manages itself. Adding capillary wicking cords to any standard pot instantly converts it into a high-tech smart planter.
Converting your pots to self-watering costs a mere $15–$30. Save this if you hate dead plants!
- Key Materials: Wicking cord, plastic reservoir base, perlite
- Vibe / Style: Low-maintenance modern deck
- Difficulty: Fast interior pot setup
- Budget Breakdown: Wicking cord: $10 | Reservoir inserts: $20.
- Creator’s Tip: Mix 30% extra perlite into your soil to prevent the constant wicking action from causing root rot.
- Smart Sourcing: Buy a bulk roll of fiberglass wicking cord and universal self-watering pot inserts.
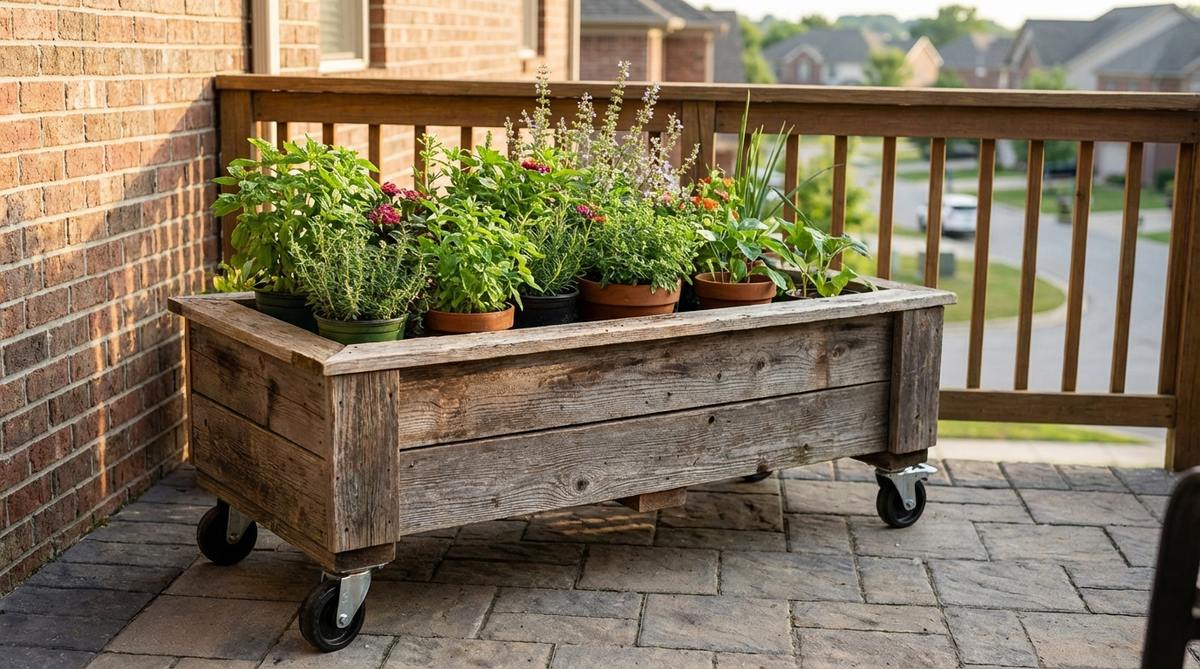
28. Upcycled Container Gardens
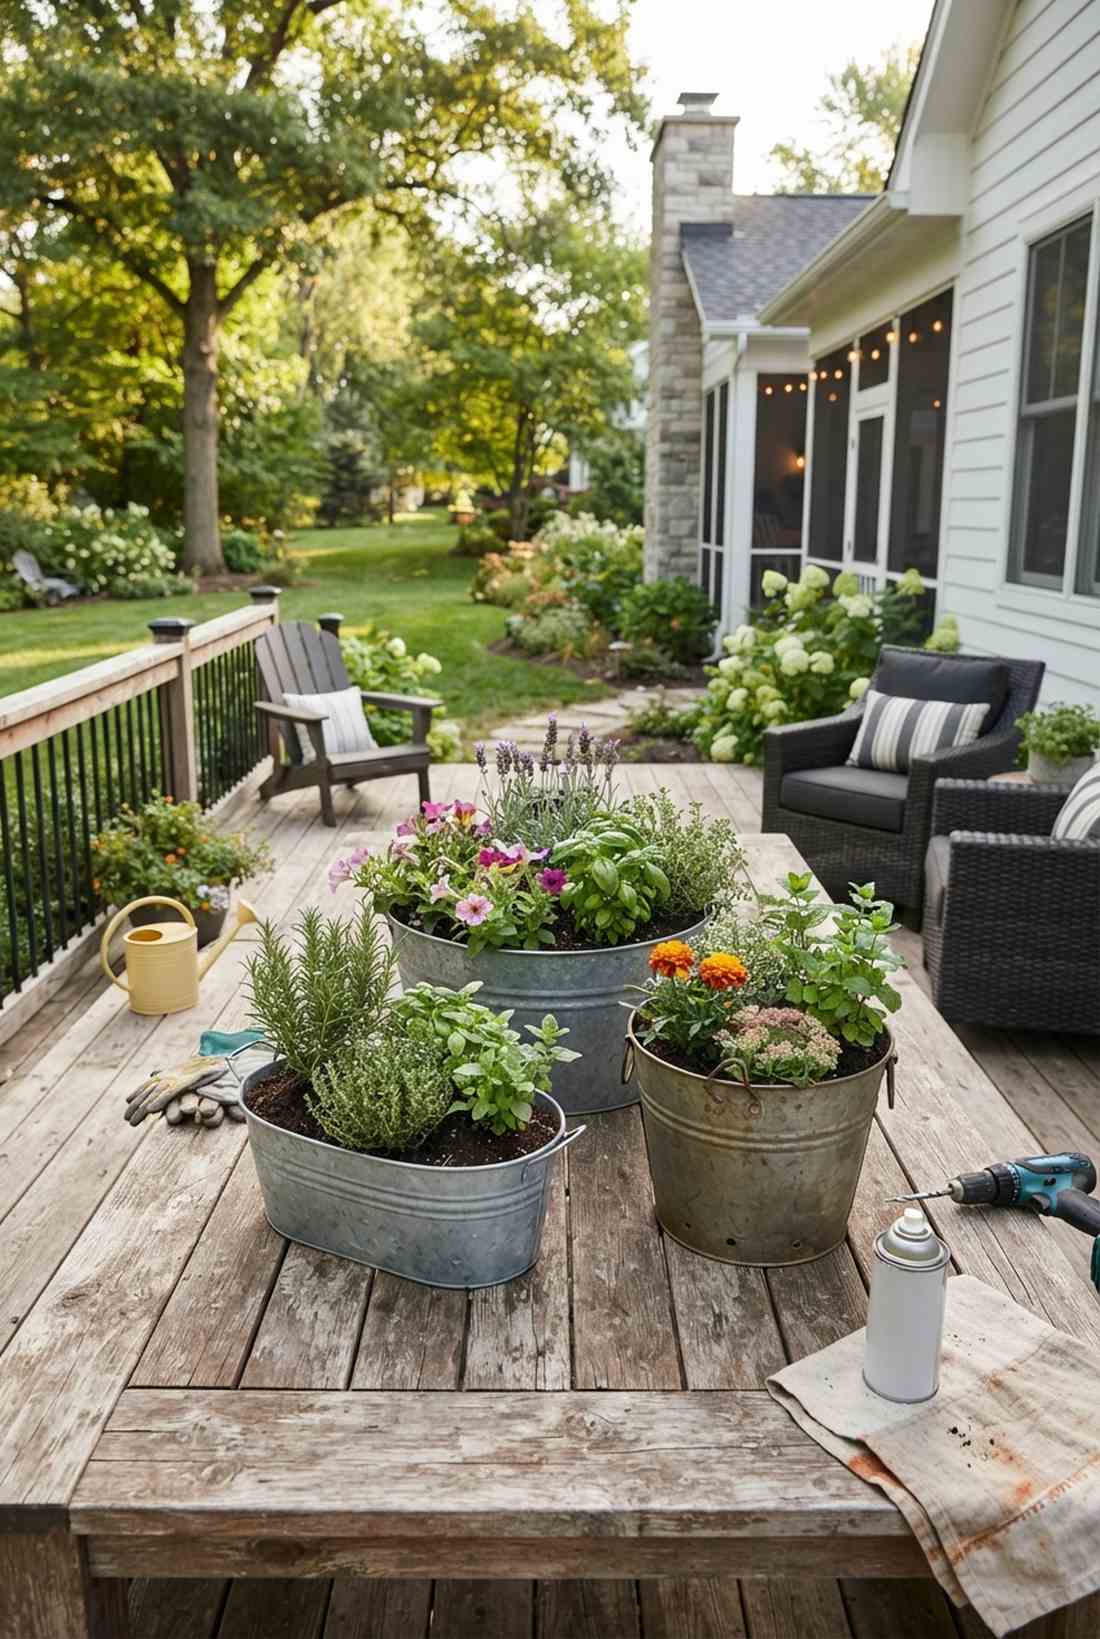
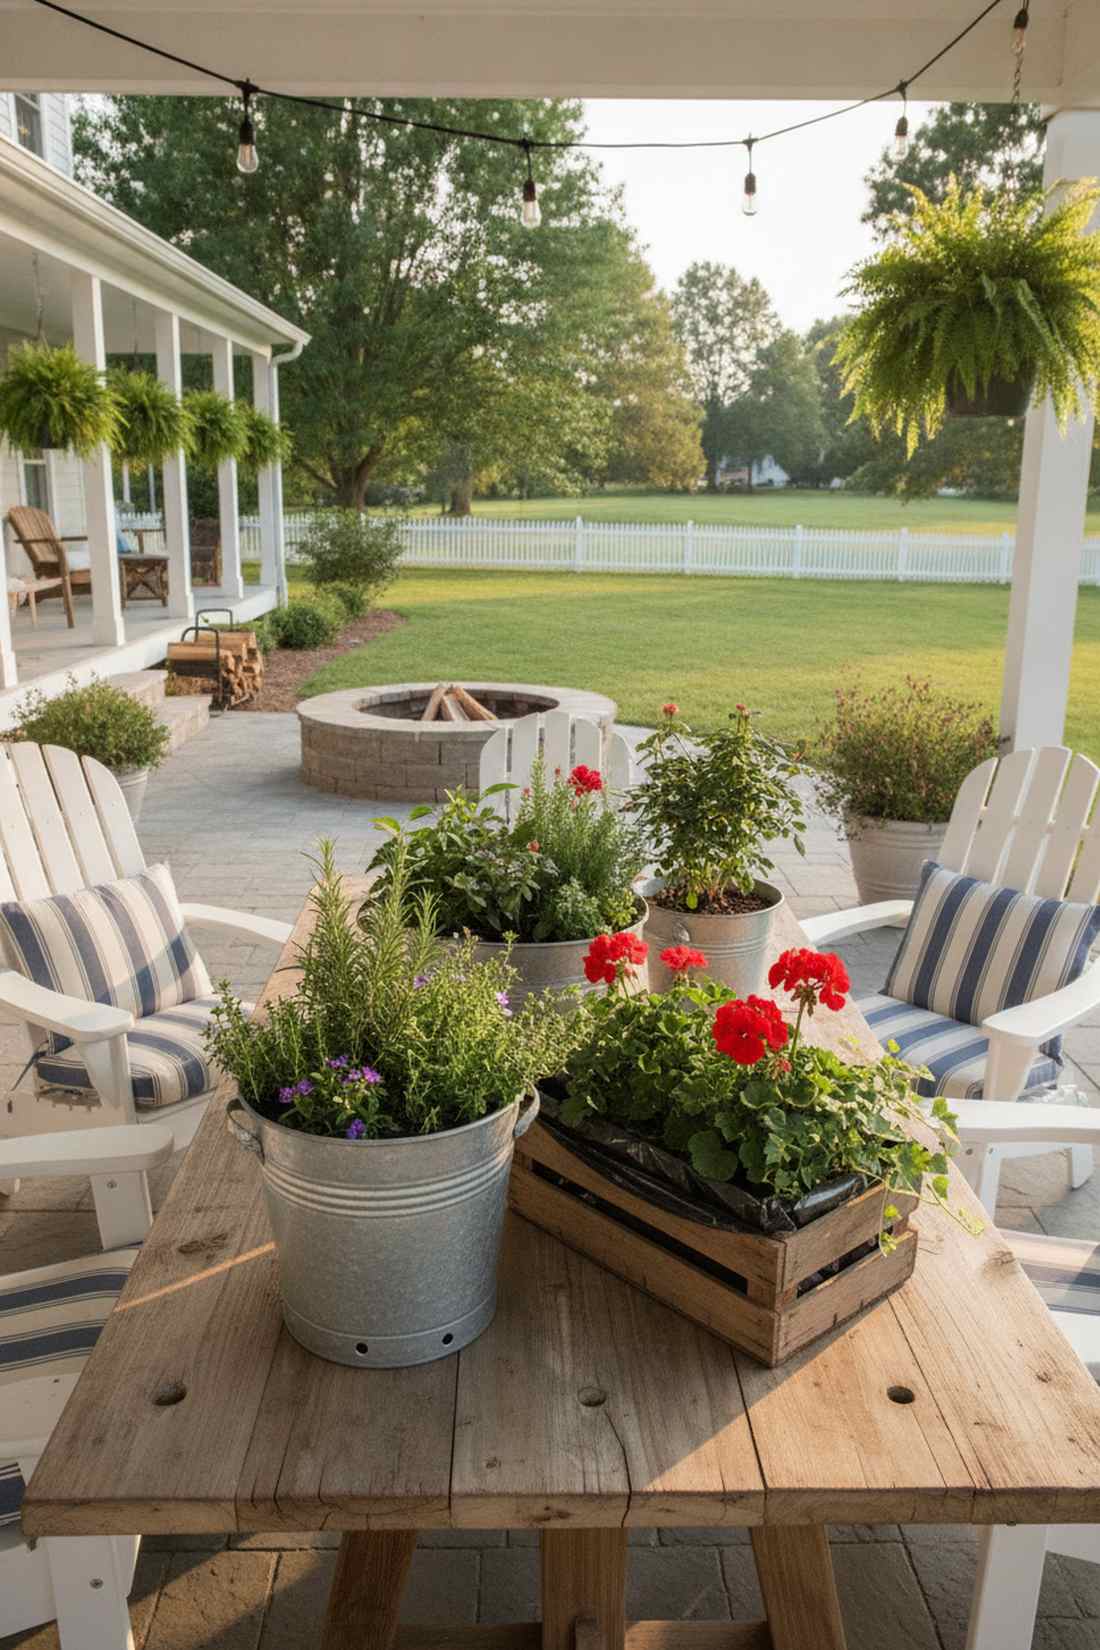
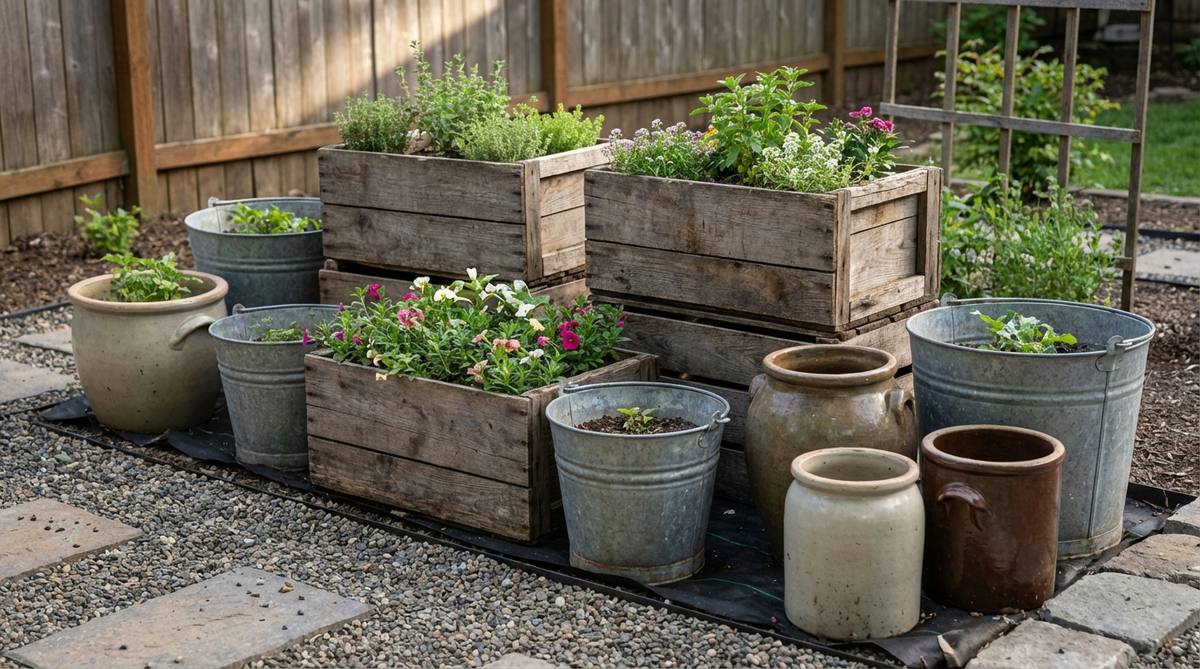
Turns vintage trash into absolute rustic treasure right on your patio table. Using galvanized tubs or crates for small garden decoration adds immense character on a dime.
Plastic pots crack and look tacky; repurposing metal olive buckets instantly elevates the aesthetic to farmhouse chic. Drilling holes and spraying a clear rust-converter sealant ensures the bottom won’t bleed orange stains onto your concrete.
This upcycling trick costs around $10–$25 if you thrift the containers.
- Key Materials: Thrifted metal/wood containers, drill, clear sealant
- Vibe / Style: Vintage farmhouse eclectic
- Difficulty: Requires a drill
- Budget Breakdown: Thrifted bins: $15 | Sealant: $8.
- Creator’s Tip: Line the inside of old wooden crates with heavy trash bags before adding soil to stop wood rot.
- Smart Sourcing: Pick up a metal-piercing titanium drill bit set and matte clear rust-preventative spray.
29. Seasonal Rotation Systems
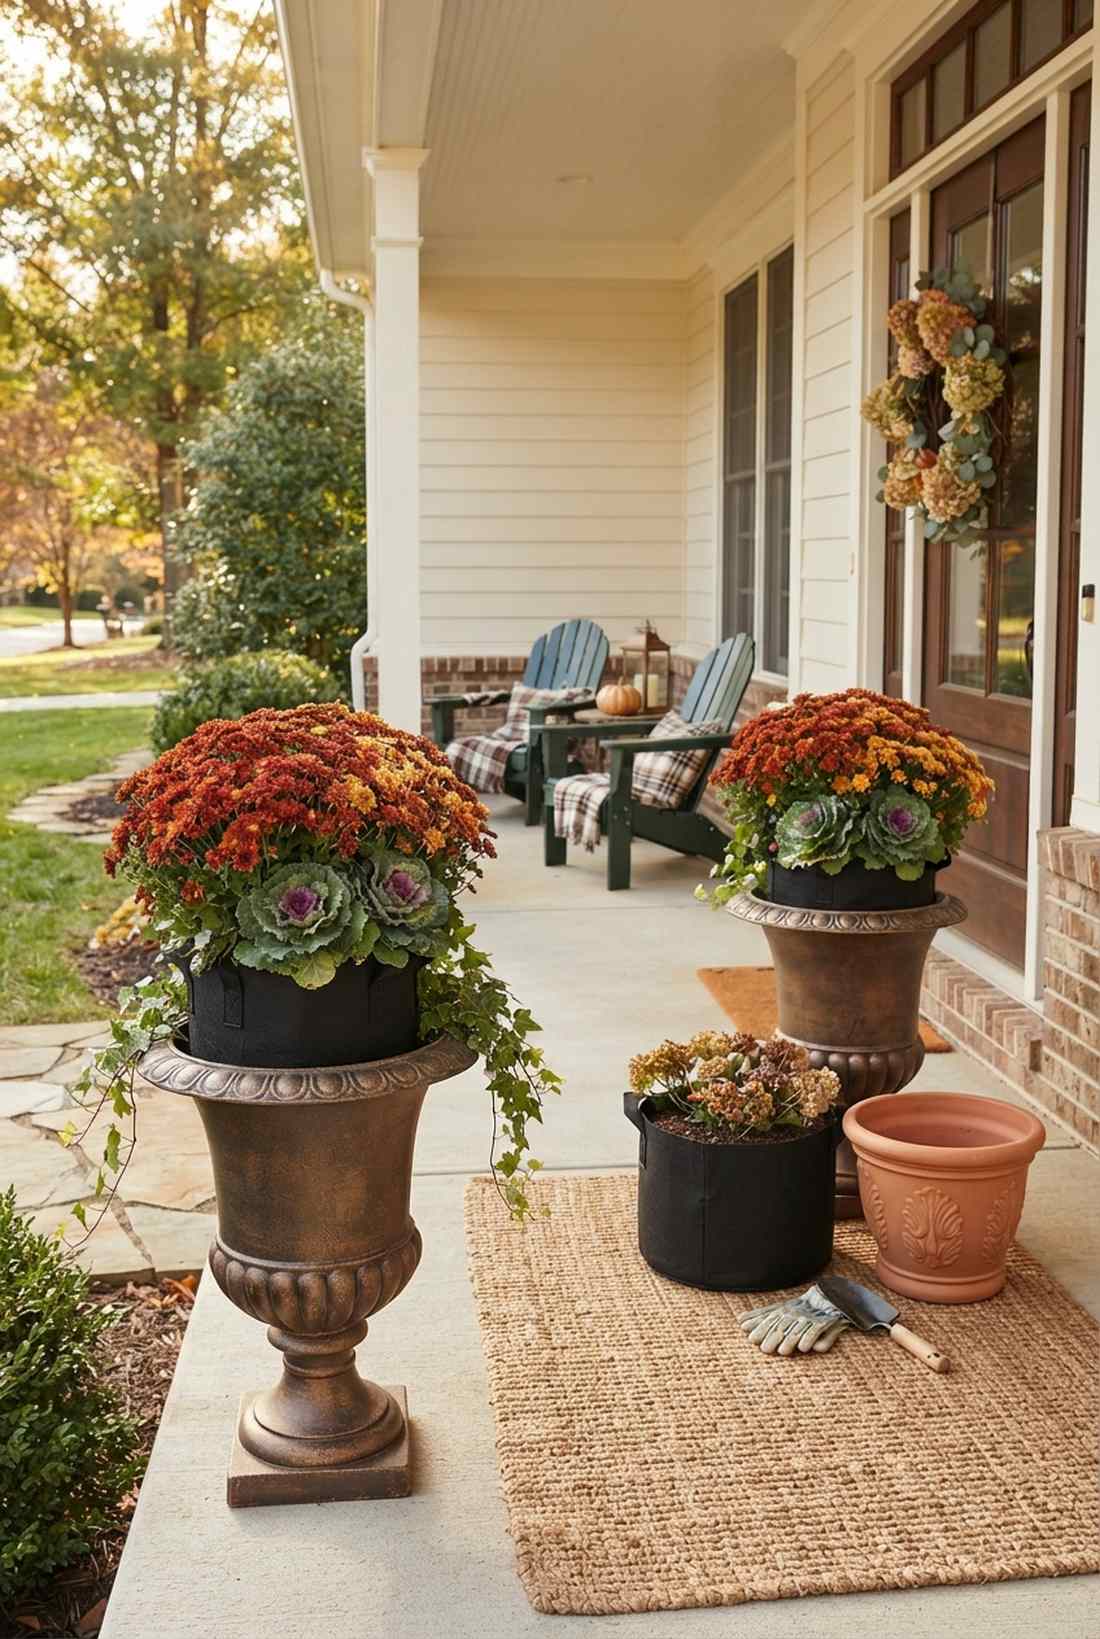
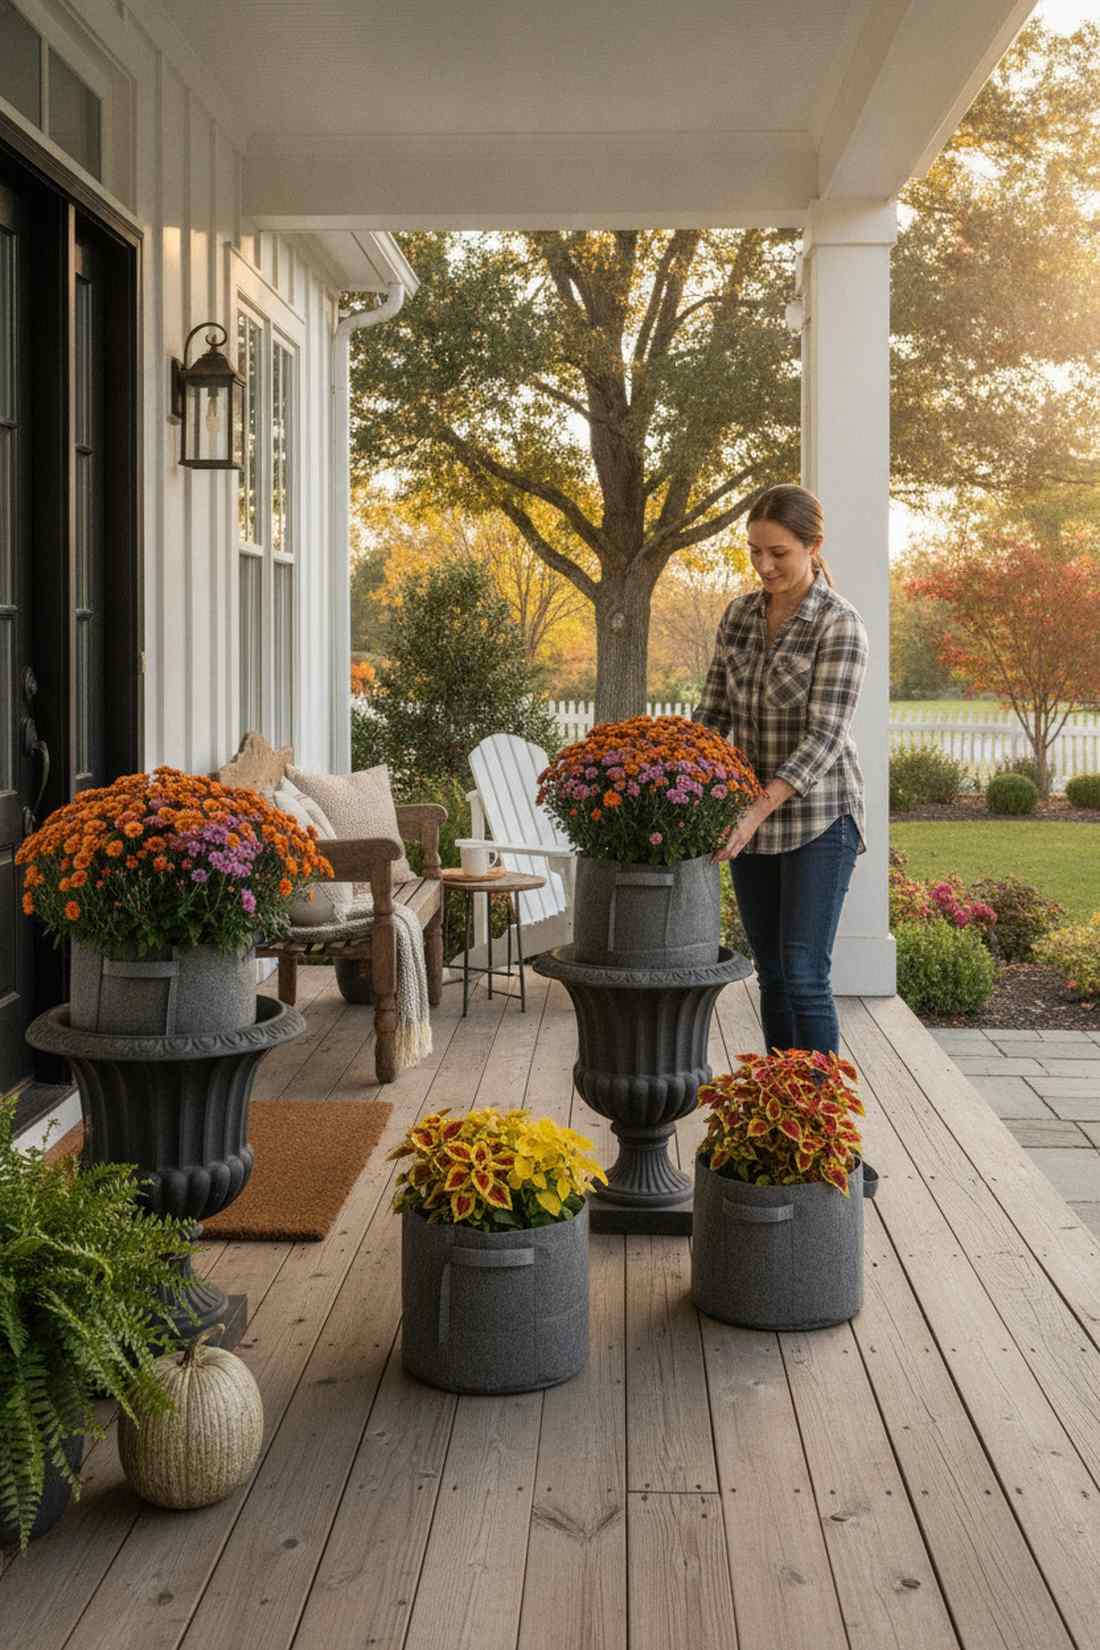
Keeps your front porch looking perfectly in-season without replanting a single root. A modular potted garden layout allows you to swap out dead plants in literal seconds.
Ripping out soil every season is a nightmare; utilizing a drop-in cachepot system gives a designer-level finish all year long. Using sturdy nursery grow bags lets you lift summer flowers out and drop fall mums right into the decorative outer pot.
Setting up a hidden drop-in system runs about $20–$40.
- Key Materials: Large decorative cachepots, fabric grow bags
- Vibe / Style: Always-perfect seasonal display
- Difficulty: Extremely easy
- Budget Breakdown: Grow bags: $15 | Filler foam: $5.
- Creator’s Tip: Put empty plastic bottles at the bottom of the main pot to lift the grow bag to the perfect height.
- Smart Sourcing: Use a multi-pack of breathable fabric grow bags and a premium weatherproof decorative urn.
30. Companion Planting Bowls
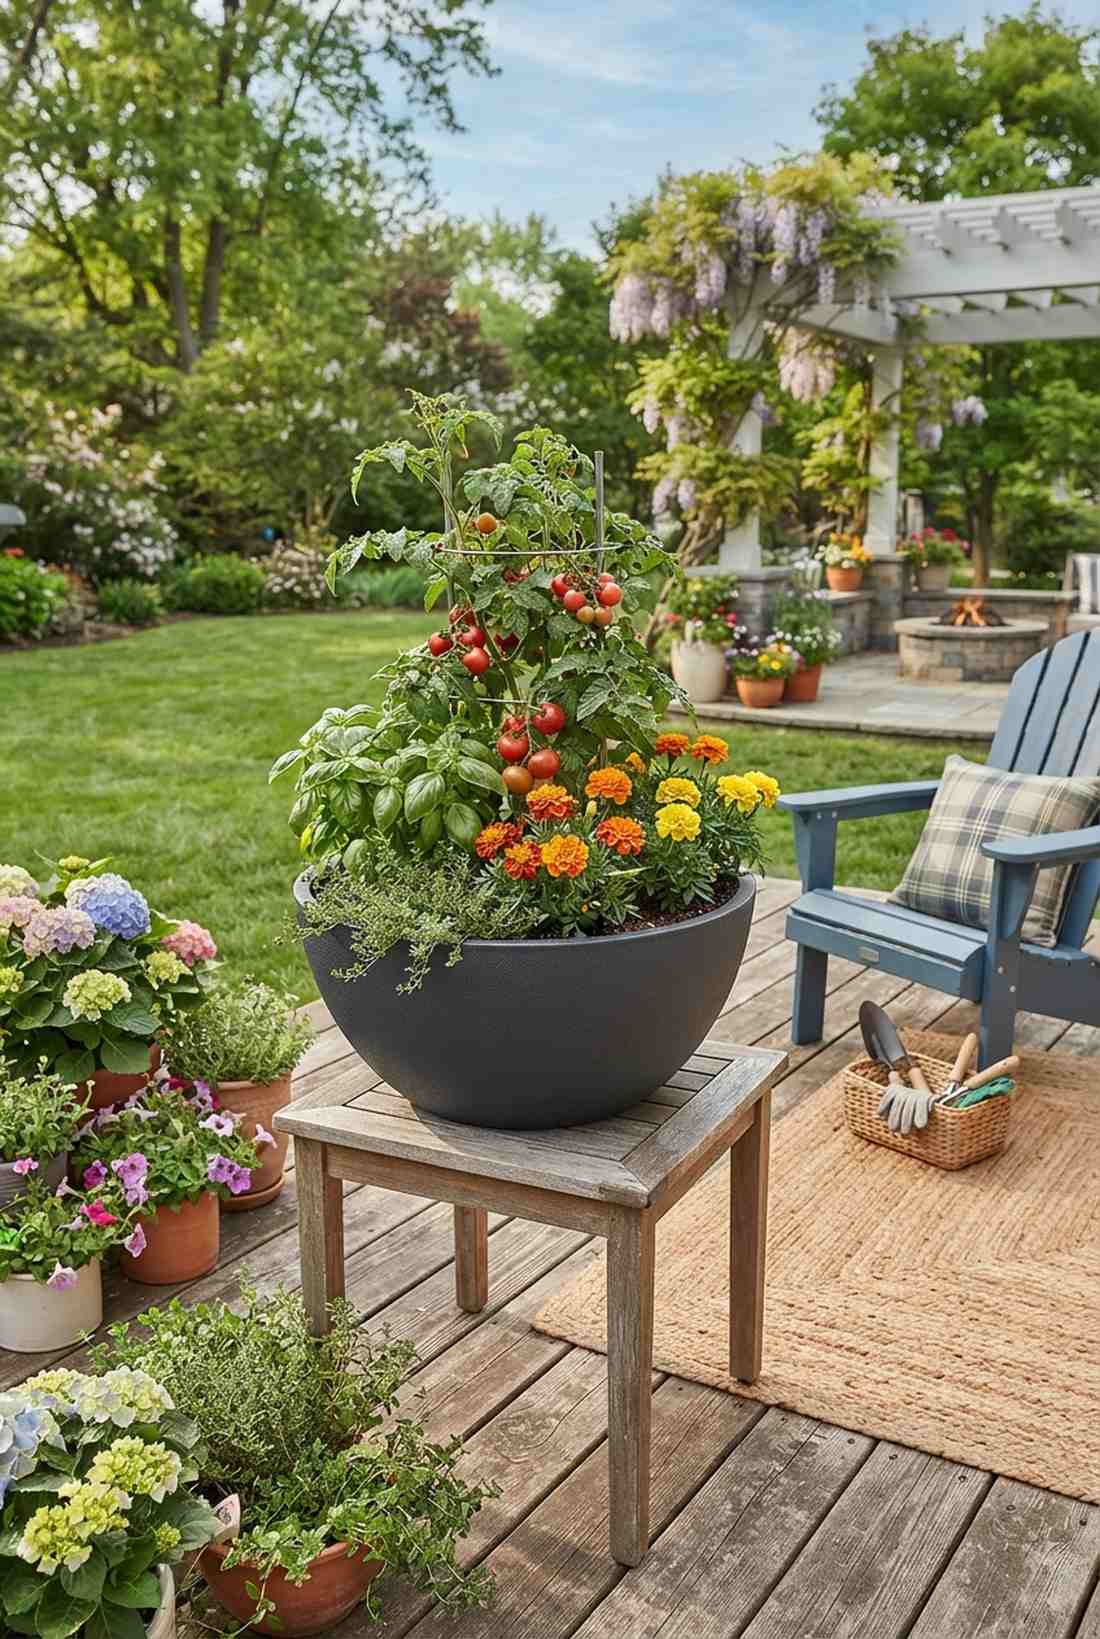
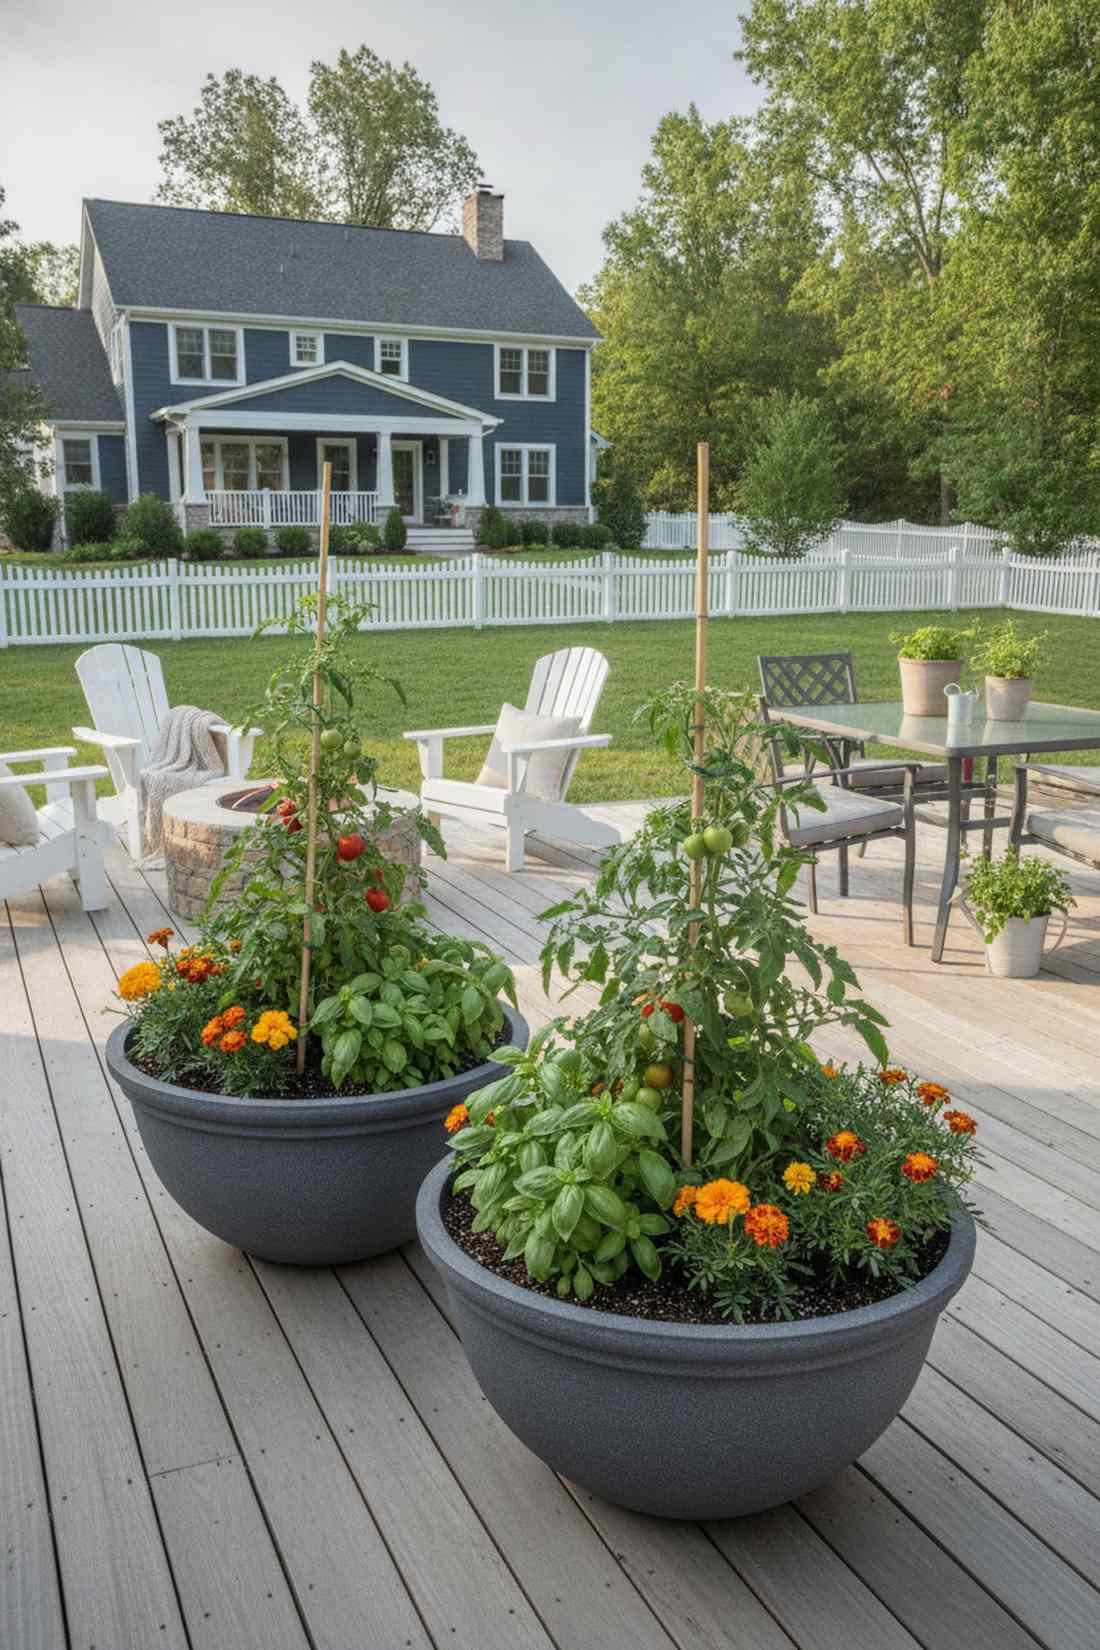
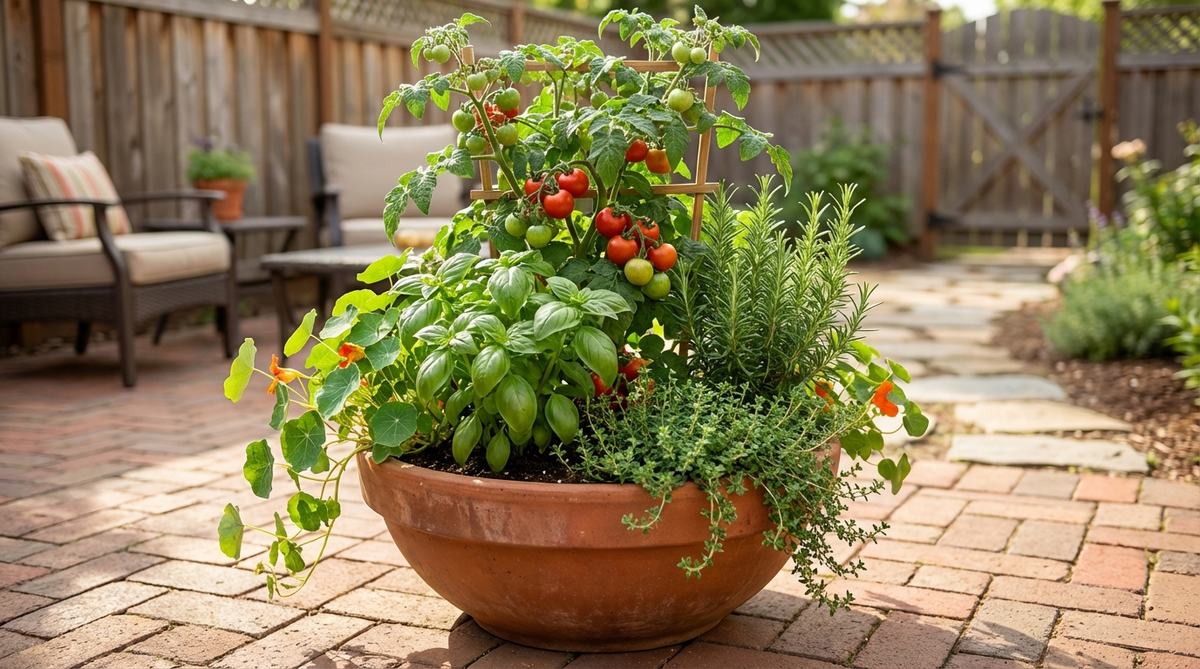
Packs a tomato, basil, and marigold all into one thriving, unified pot. This hyper-efficient miniature garden supply strategy mimics nature for explosive growth.
Planting one seed per pot wastes space; mixing compatible species bypasses the usual cheap look and naturally wards off pests. Investing in deep-root aeration planters provides enough oxygen for three different root systems to thrive together.
A massive, thriving companion bowl costs around $30–$50 to establish. Pin this for bigger vegetable yields!
- Key Materials: Large 20-inch bowl pot, diverse companion seeds
- Vibe / Style: Abundant micro-ecosystem
- Difficulty: Moderate plant knowledge required
- Budget Breakdown: Large bowl: $25 | Quality soil: $15.
- Creator’s Tip: Pair a tall structural plant (tomato), a sprawling soil cover (thyme), and a pest-deterrent (marigold).
- Smart Sourcing: Order a heavy-duty 24-inch resin bowl planter and a pre-mixed companion seed variety pack.
31. Compact Raised Beds
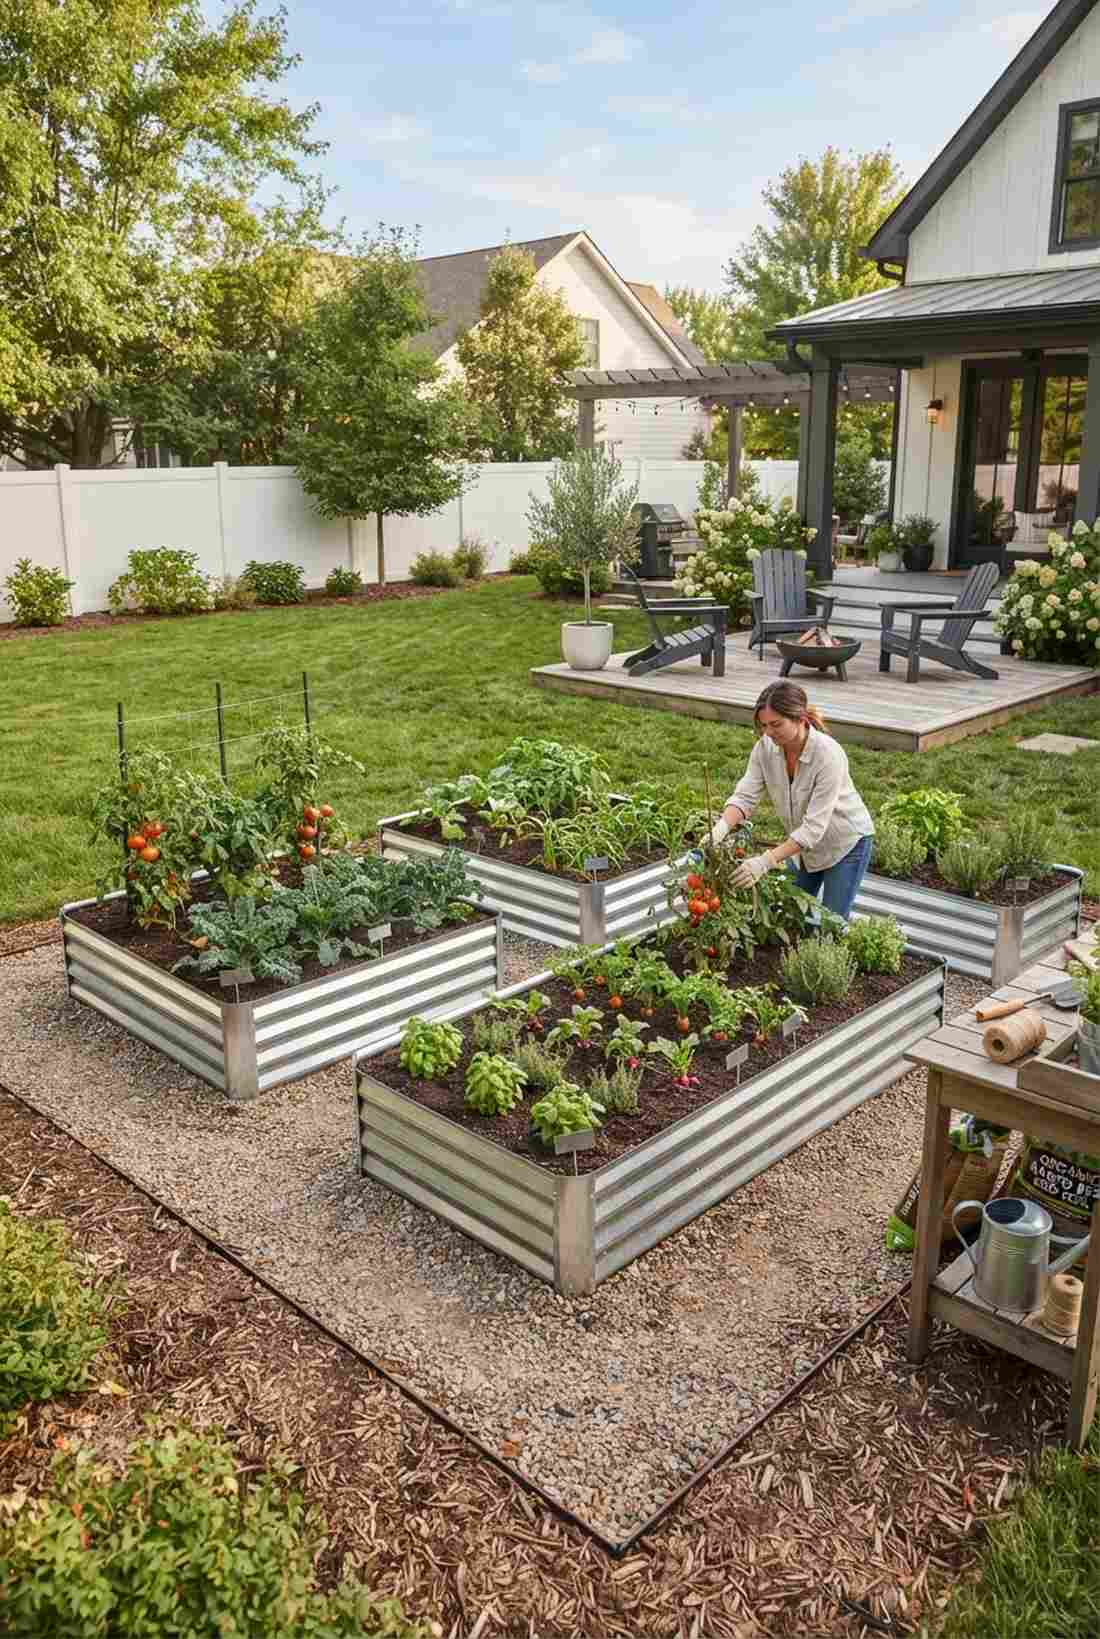
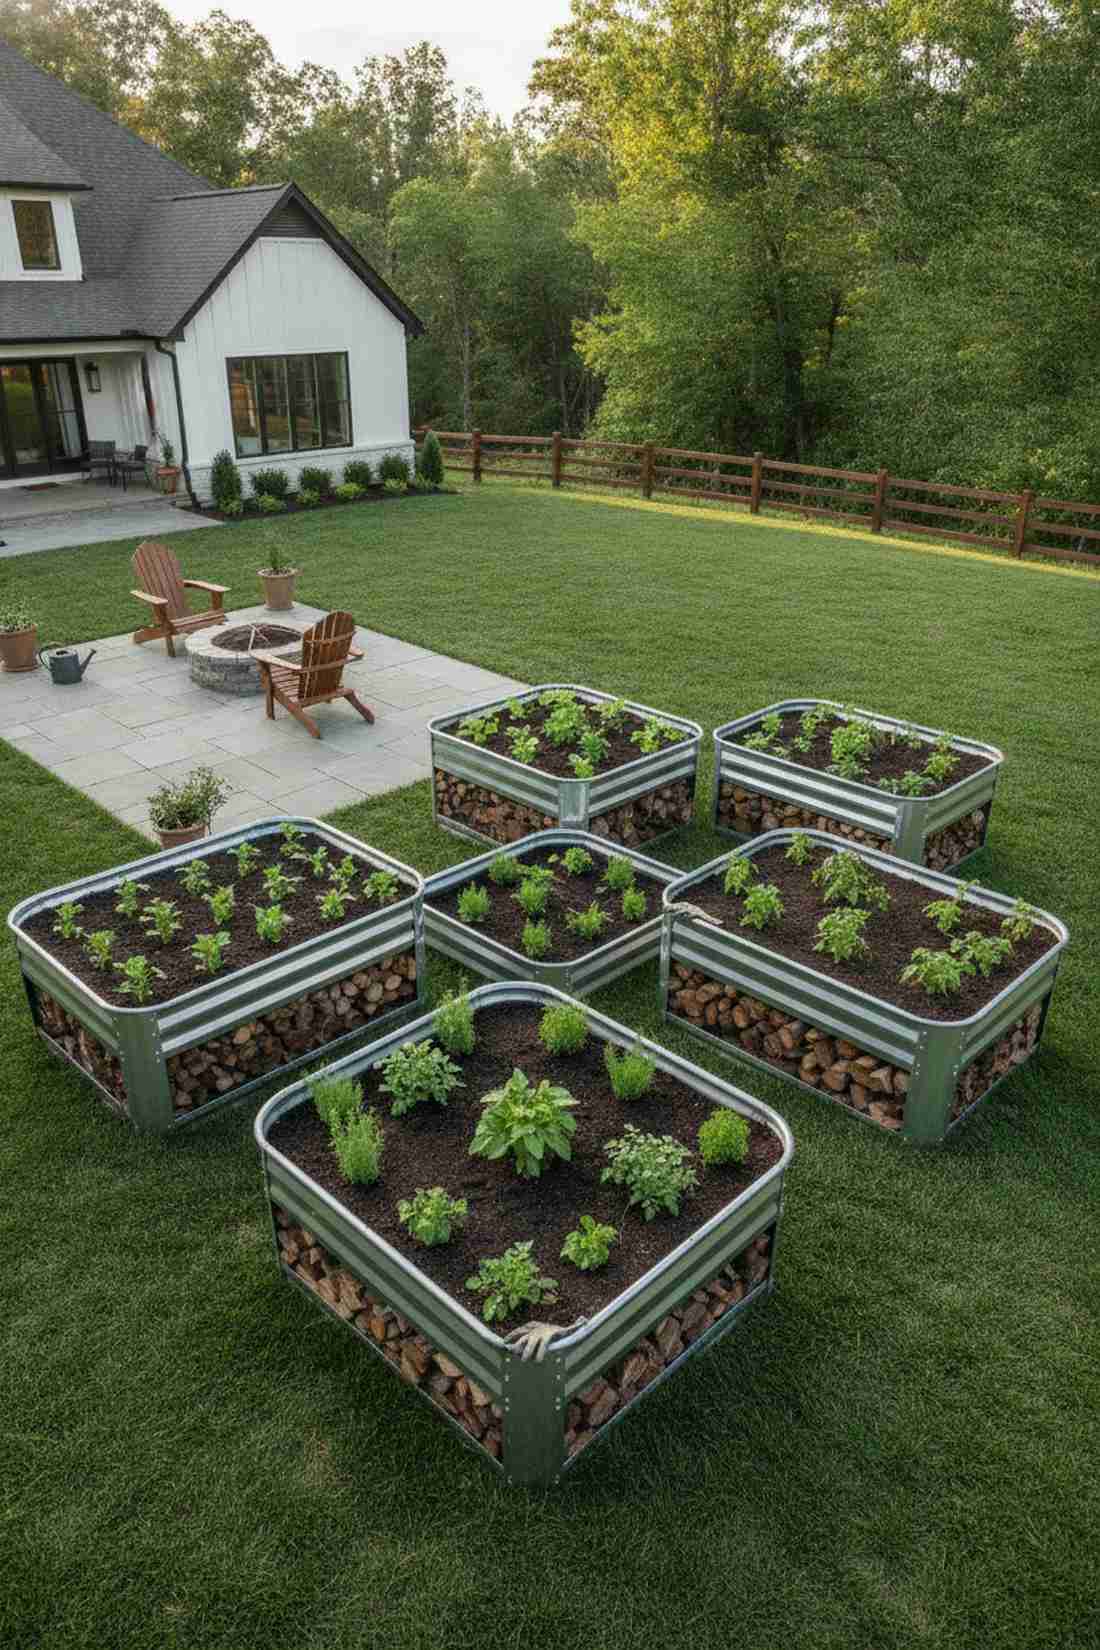
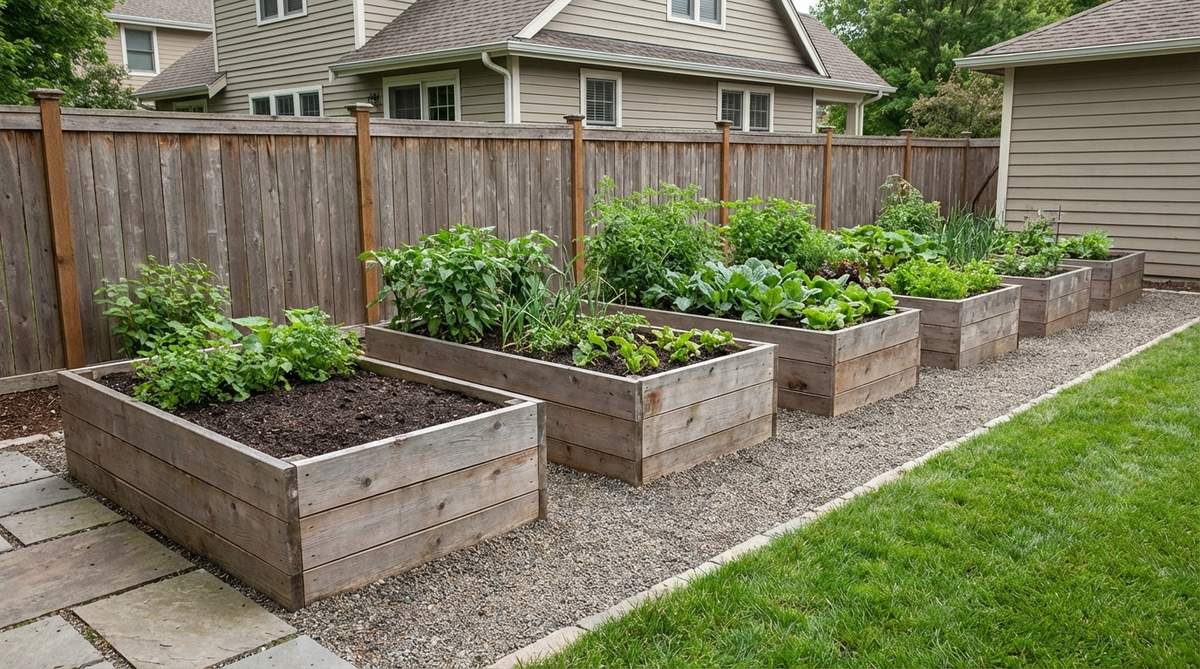
Defines a crisp, clean growing zone that saves your back from constant bending. A modern raised garden bed layout is the gold standard for high-yield urban yards.
Planting straight into poor ground soil is a gamble; elevating the dirt looks far more expensive than it is and guarantees perfect drainage. Assembling corrugated galvanized steel beds brings an industrial-chic edge that outlasts rotting wood.
You can build a stylish metal raised bed for $50–$90.
- Key Materials: Metal raised bed kit, premium topsoil
- Vibe / Style: Neat industrial farm
- Difficulty: Easy bolt assembly
- Budget Breakdown: Bed kit: $60 | Soil: $30.
- Creator’s Tip: Fill the bottom 40% of the bed with cheap logs and branches (hugelkultur) to save massive money on soil.
- Smart Sourcing: Grab a rust-resistant galvanized steel planter kit and a bulk pack of organic raised bed soil.
Plant Layering and Texture
32. Foreground Groundcovers
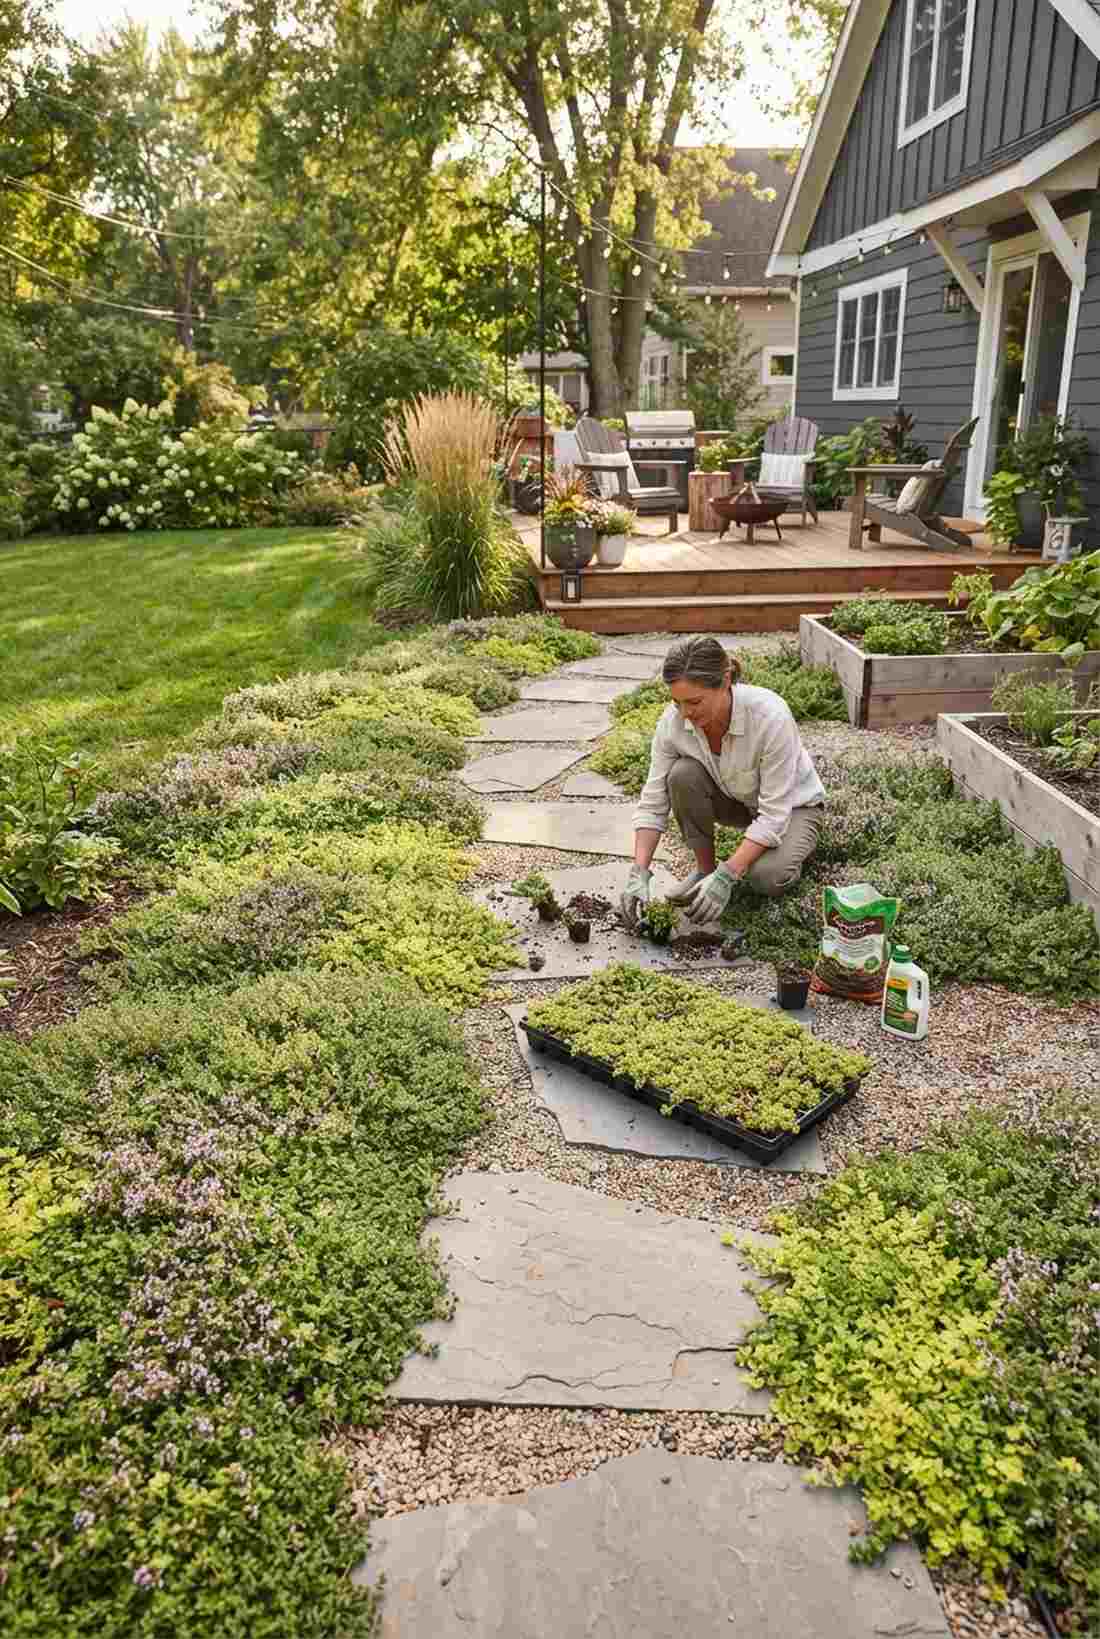
Spreads a dense, living carpet that chokes out weeds while looking incredible. Establishing low-growing garden pathway borders creates a polished floor for your outdoor room.
Naked mulch looks unfinished; packing the edges with creeping thyme delivers a surprisingly premium look that softens harsh concrete. Using live creeping groundcover flats gives you an instant green floor without waiting for seeds.
A lush front-border cover setup costs roughly $30–$60. Save this to your low-maintenance garden board!
- Key Materials: Creeping thyme or sedum plugs, compost
- Vibe / Style: Seamless green carpeting
- Difficulty: Very easy planting
- Budget Breakdown: Plant flats: $40 | Compost: $10.
- Creator’s Tip: Space plugs in a zigzag pattern rather than a straight line so they knit together twice as fast.
- Smart Sourcing: Order a bulk tray of creeping sedum plugs and root-stimulating starter fertilizer.
If you want a garden that looks professional, you absolutely cannot skip this middle step…
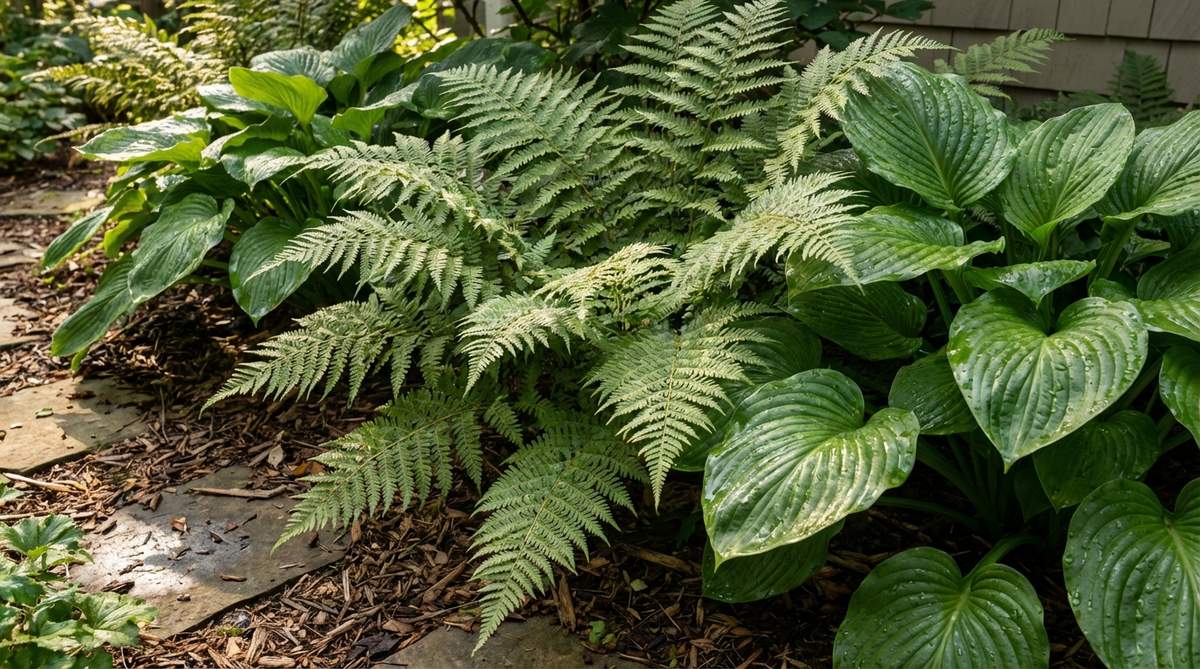
33. Mid-Level Perennials
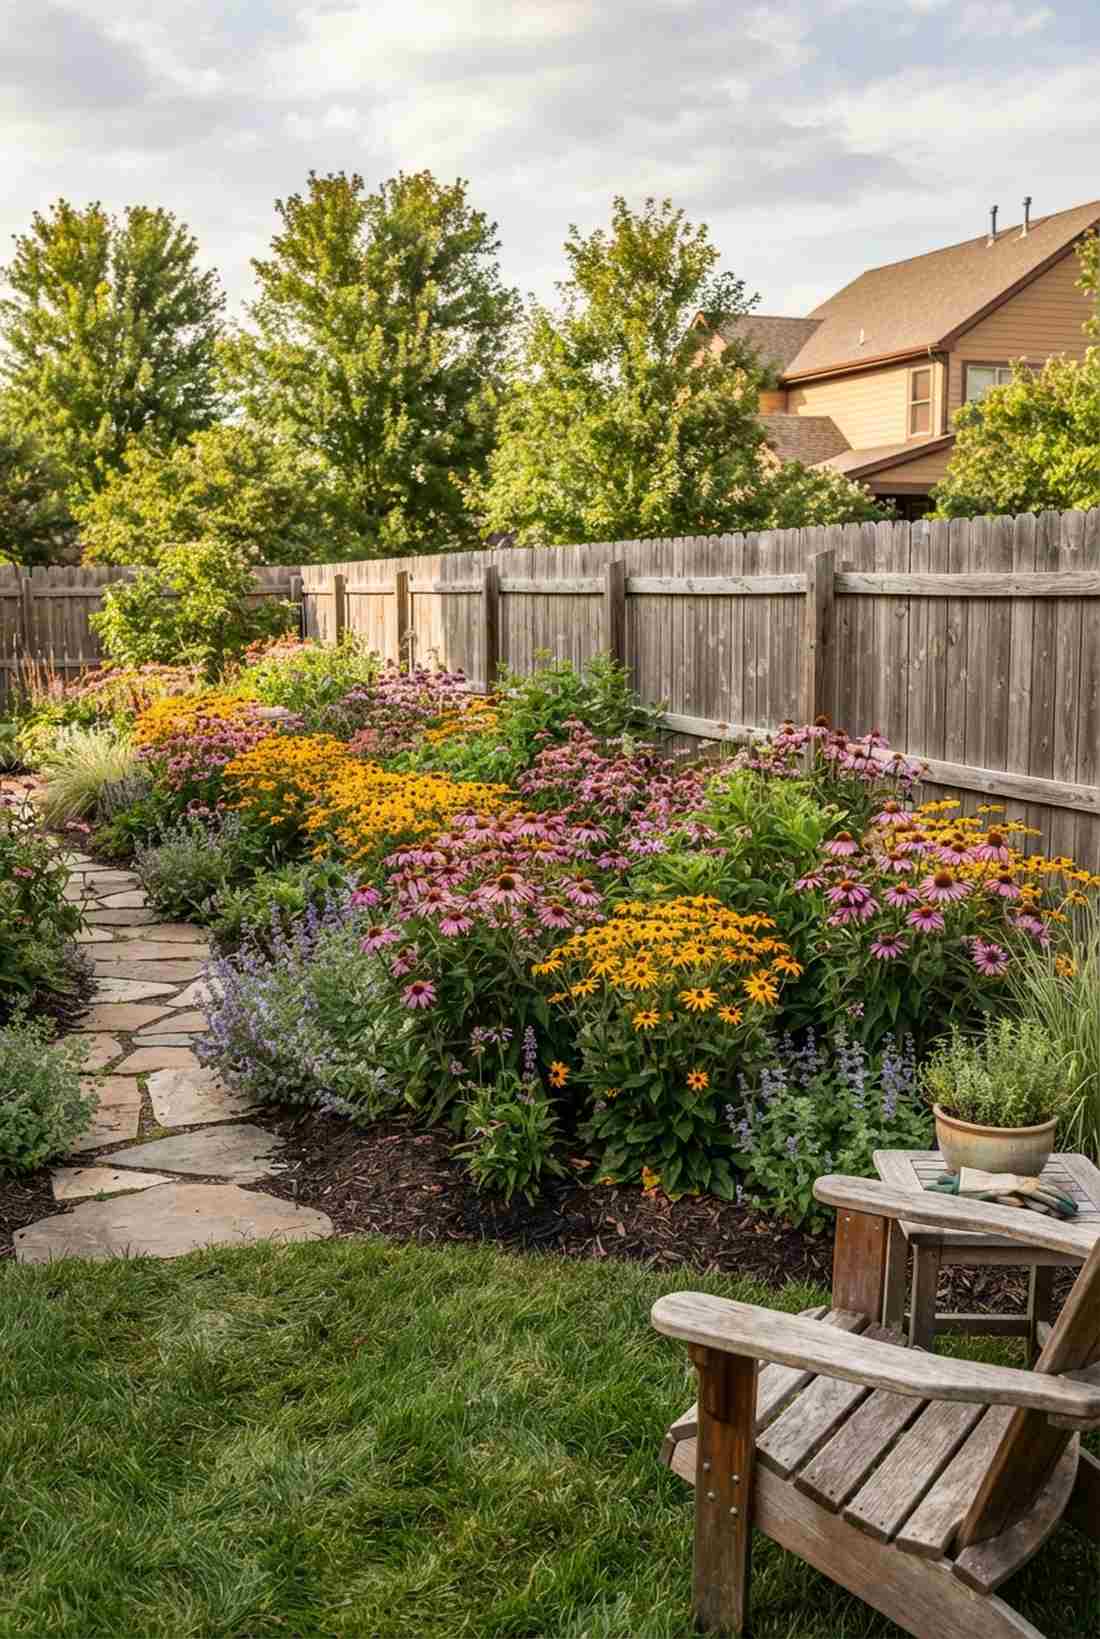
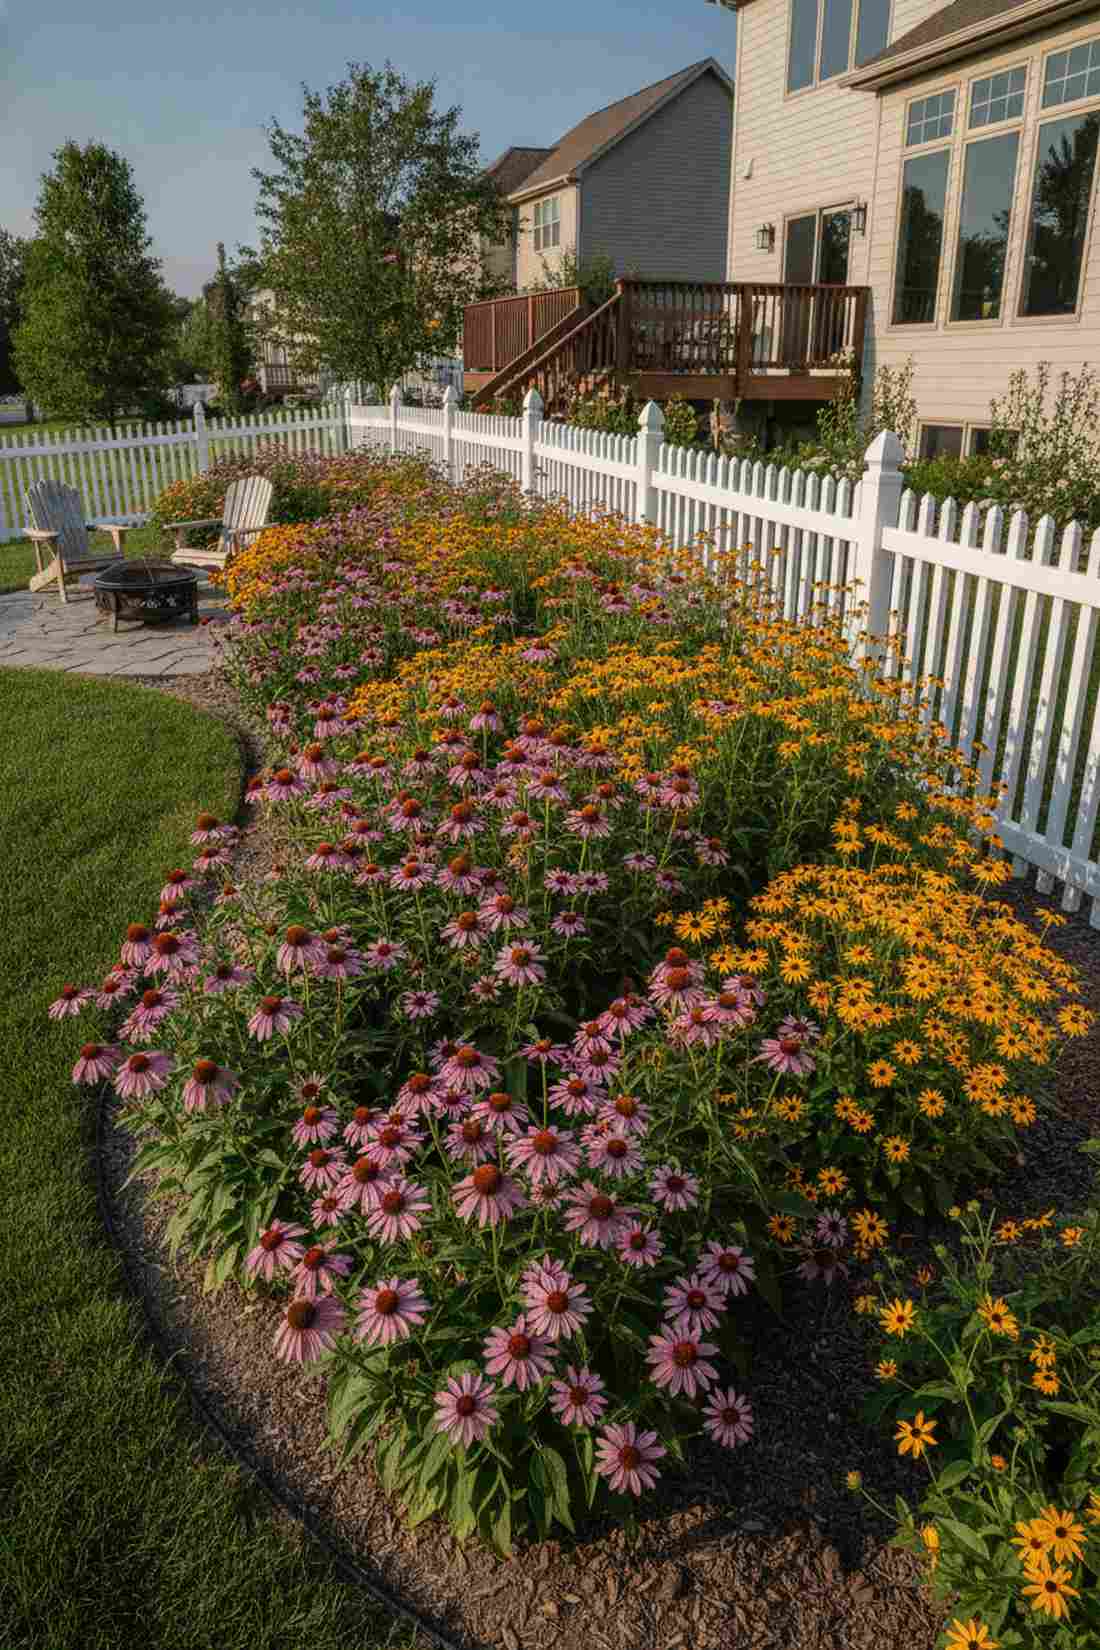
Fills the awkward gap between flat ground and tall fences with vibrant movement. This small garden landscaping idea builds the “meat” of a professional flower bed.
Skipping the middle layer makes gardens look hollow; packing in dense 2-foot perennials feels like a custom-built installation. Utilizing bare-root perennial packs is the cheapest way to get massive, bushy plants by mid-summer.
Filling out a mid-layer border will cost about $45–$85.
- Key Materials: Coneflowers, black-eyed Susans, rich topsoil
- Vibe / Style: Dense cottage garden border
- Difficulty: Basic digging
- Budget Breakdown: Bare-roots: $50 | Soil prep: $15.
- Creator’s Tip: Plant them in tight clusters of three or five (never even numbers) to make the grouping look naturally wild.
- Smart Sourcing: Buy a premium bare-root perennial collection and a slow-release bloom booster fertilizer.
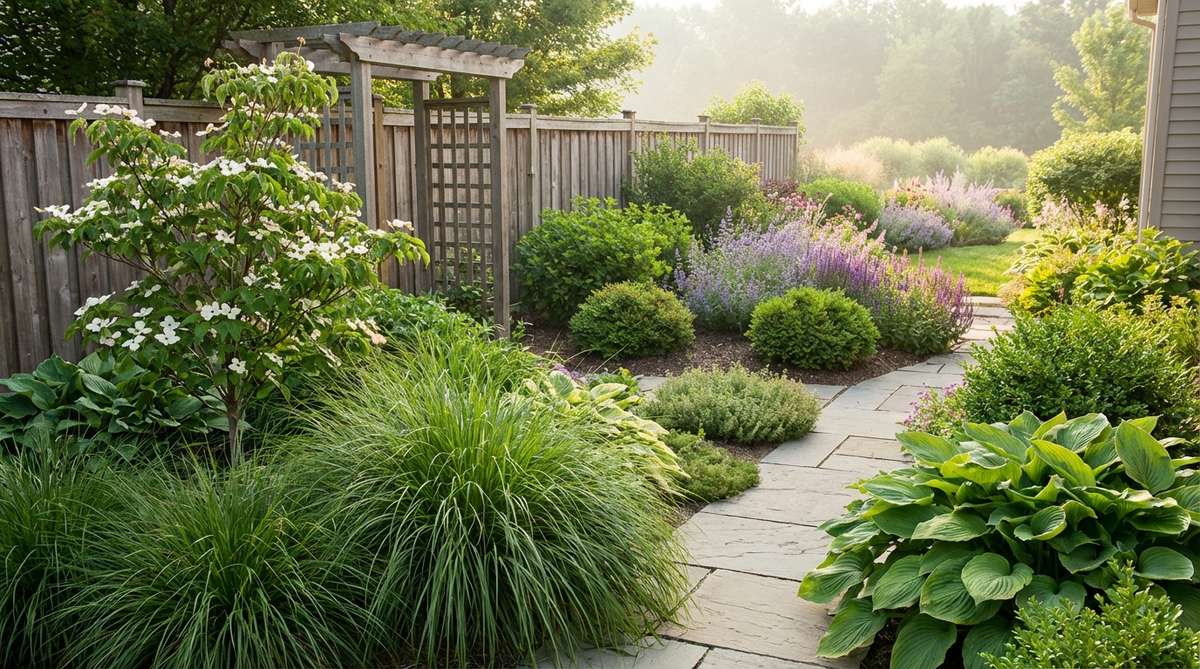
34. Backdrop Evergreens

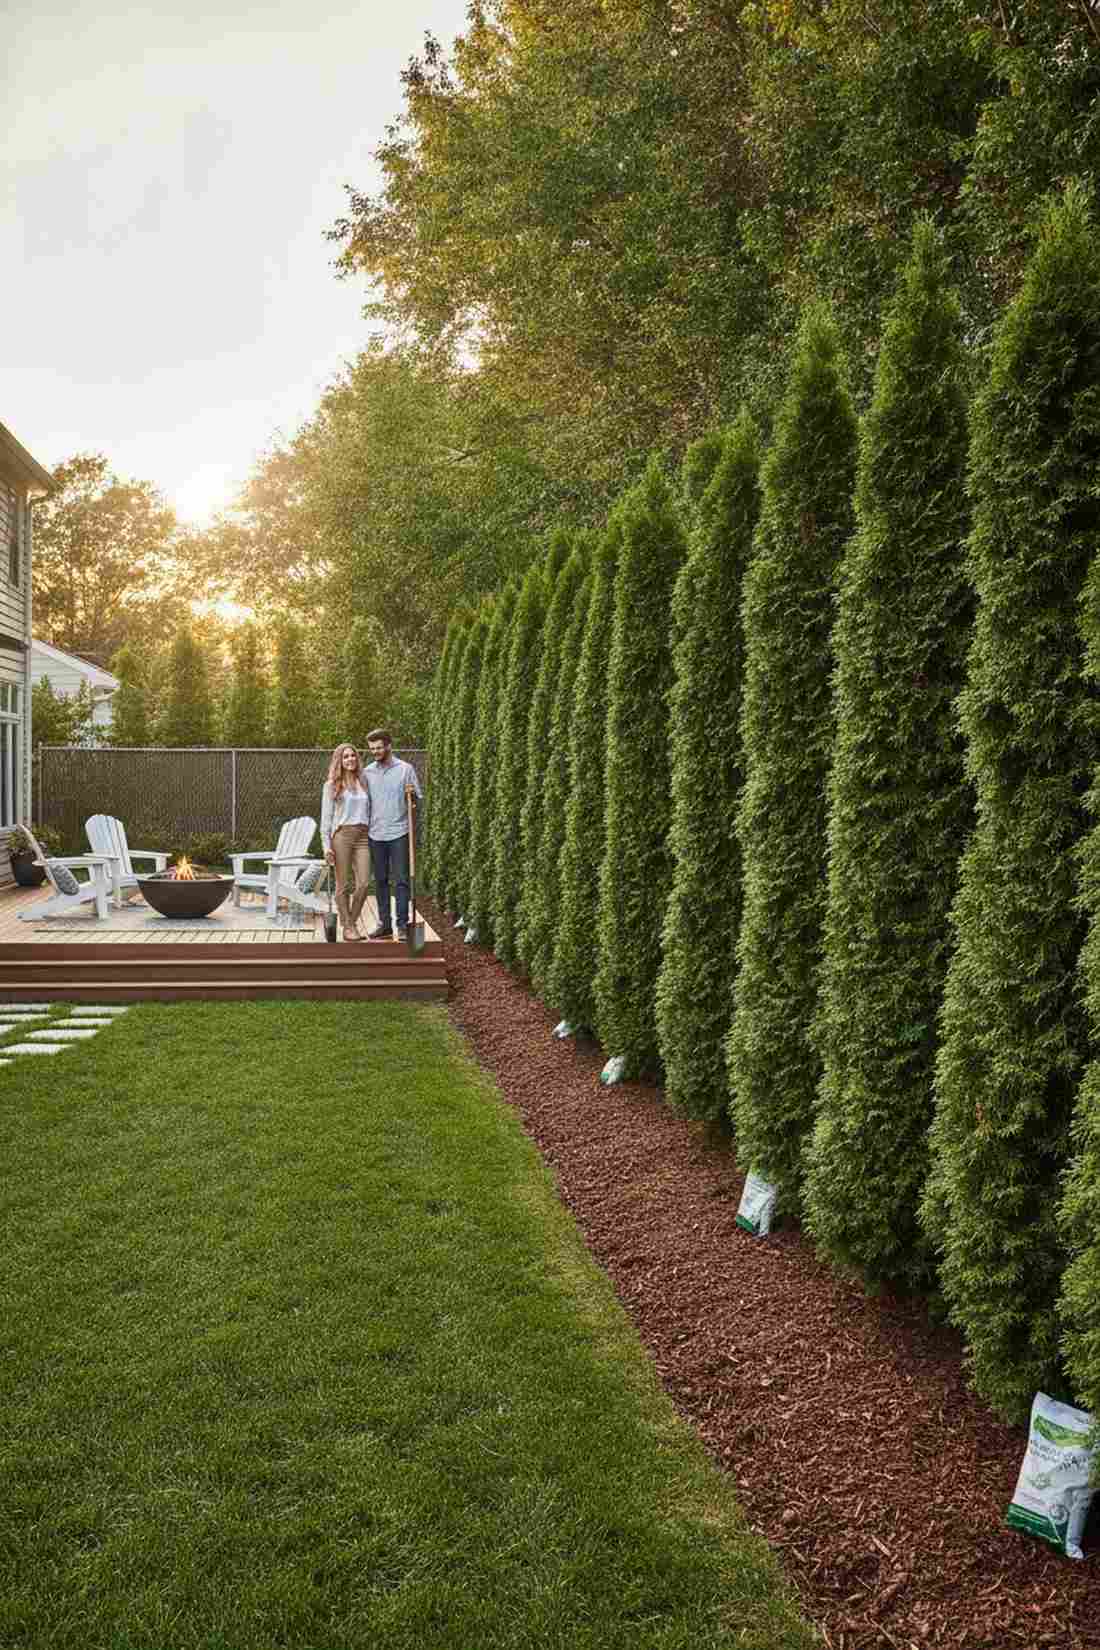
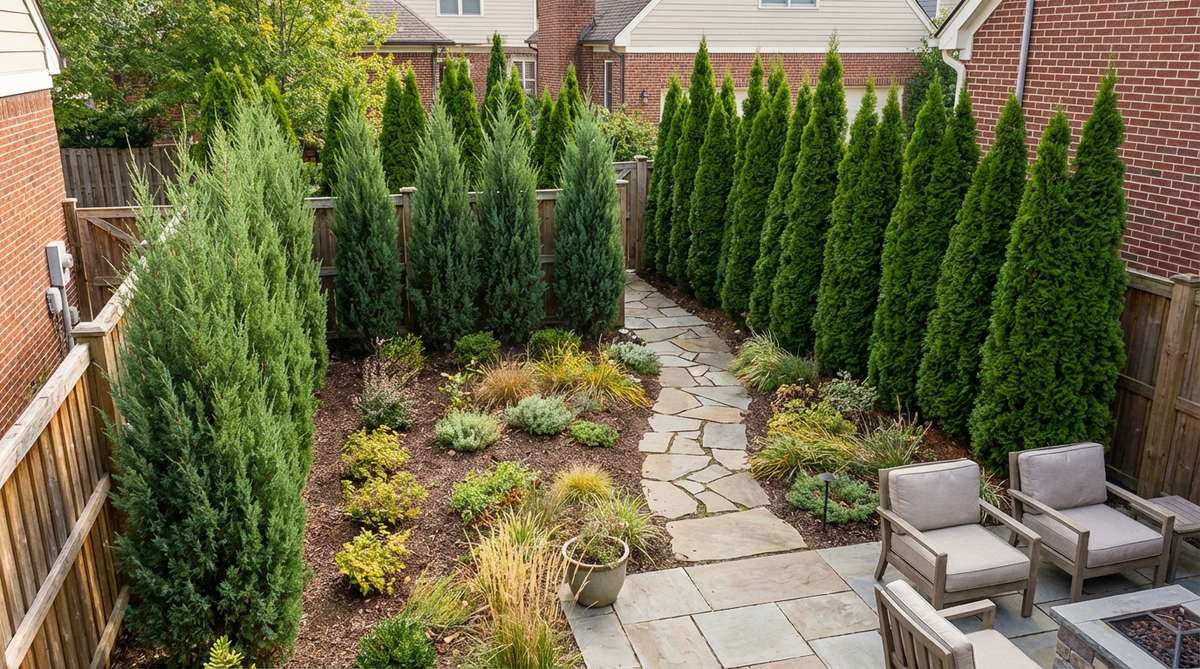
Stands like a solid green wall that hides ugly fencing 365 days a year. Tall columnar small garden design elements provide the critical structural spine for the yard.
Deciduous bushes leave you staring at bare sticks all winter; a tight row of narrow evergreens instantly elevates the aesthetic. Grabbing fast-growing arborvitae starters gets you a 6-foot privacy wall incredibly fast.
A starter row of backdrop trees costs roughly $100–$200.
- Key Materials: Emerald green arborvitae or sky pencil holly, mulch
- Vibe / Style: Structured estate boundary
- Difficulty: Heavy digging required
- Budget Breakdown: Trees (x5): $150 | Mulch: $20.
- Creator’s Tip: Dig a trench rather than individual holes to ensure the trees line up perfectly straight against the fence.
- Smart Sourcing: Find bulk nursery-grade evergreen starters and mycorrhizal root inoculant powder.
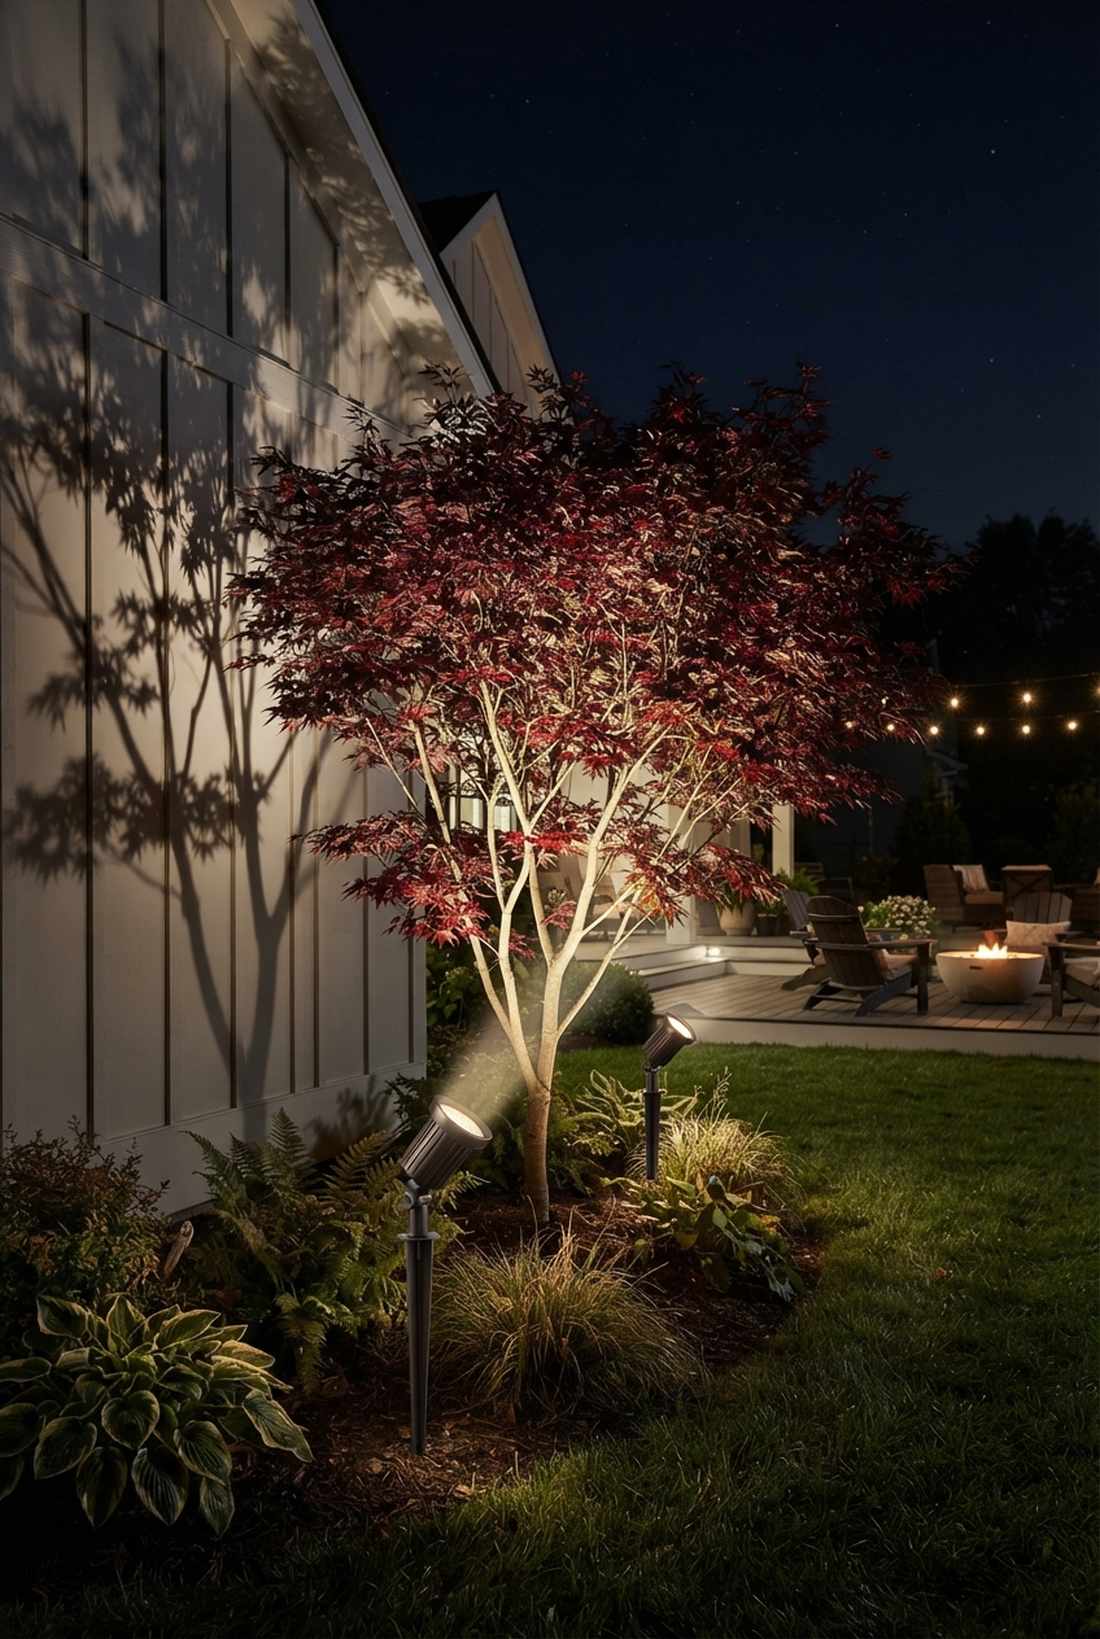
35. Accent Specimen Trees
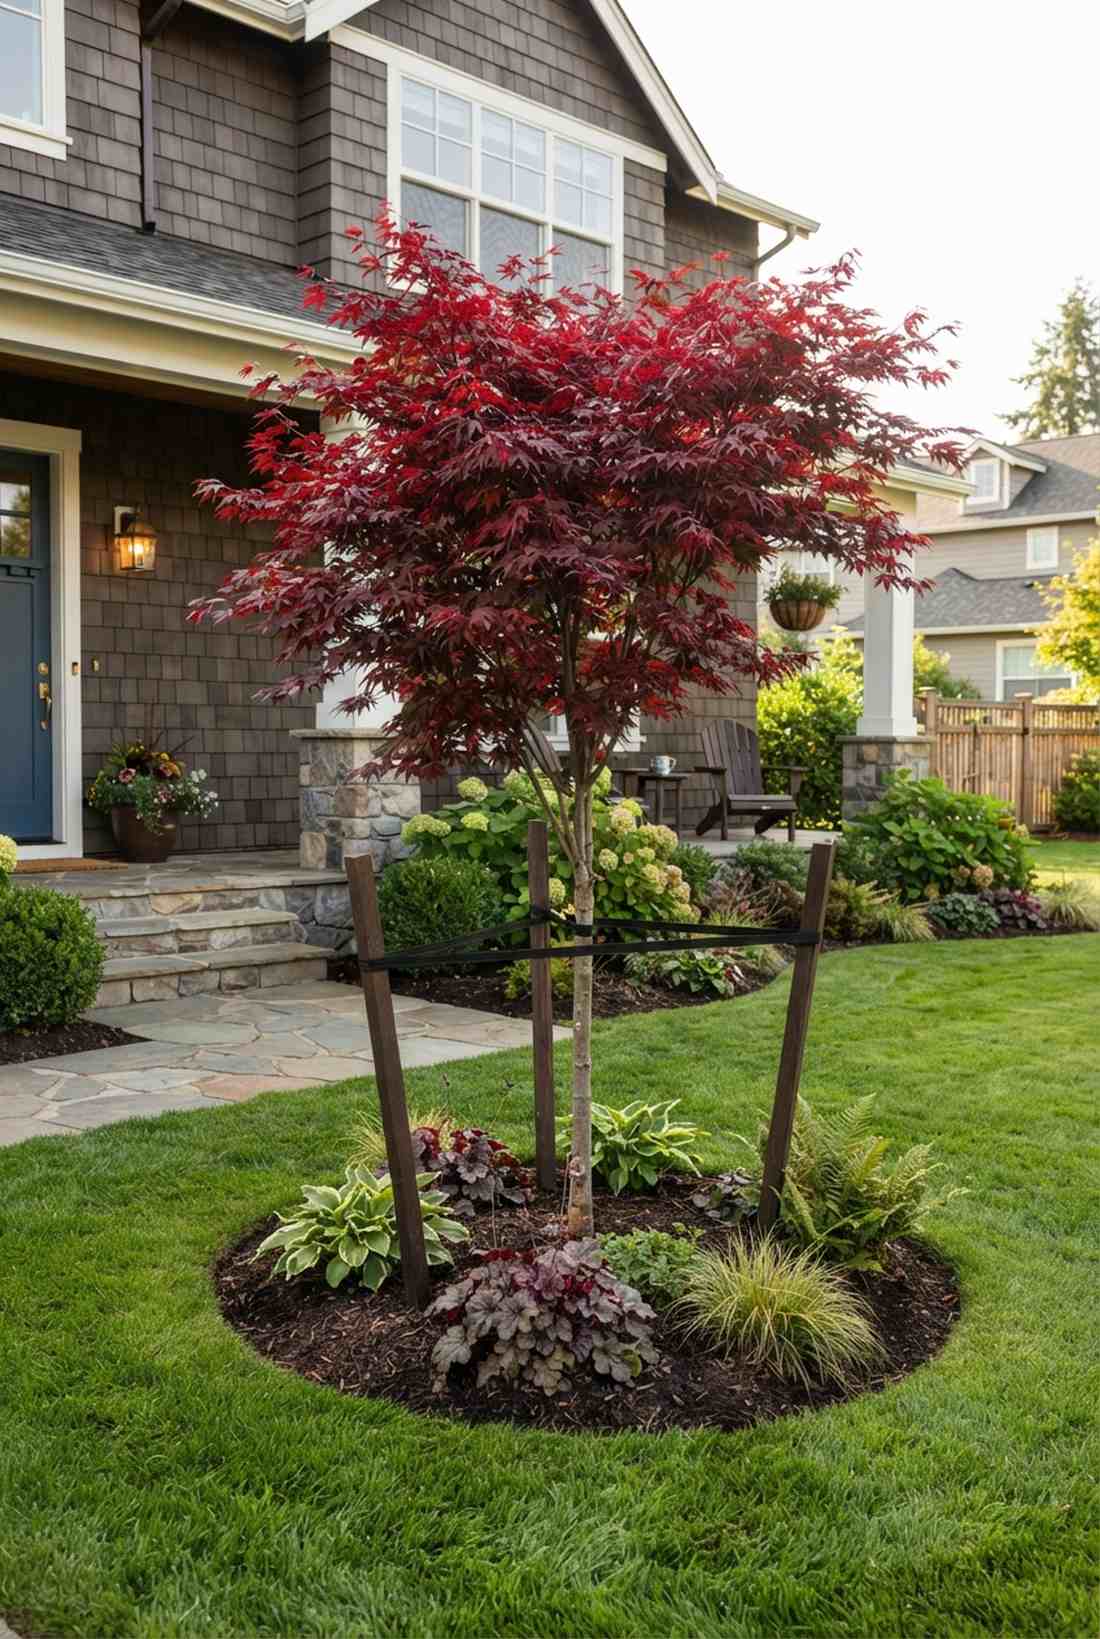
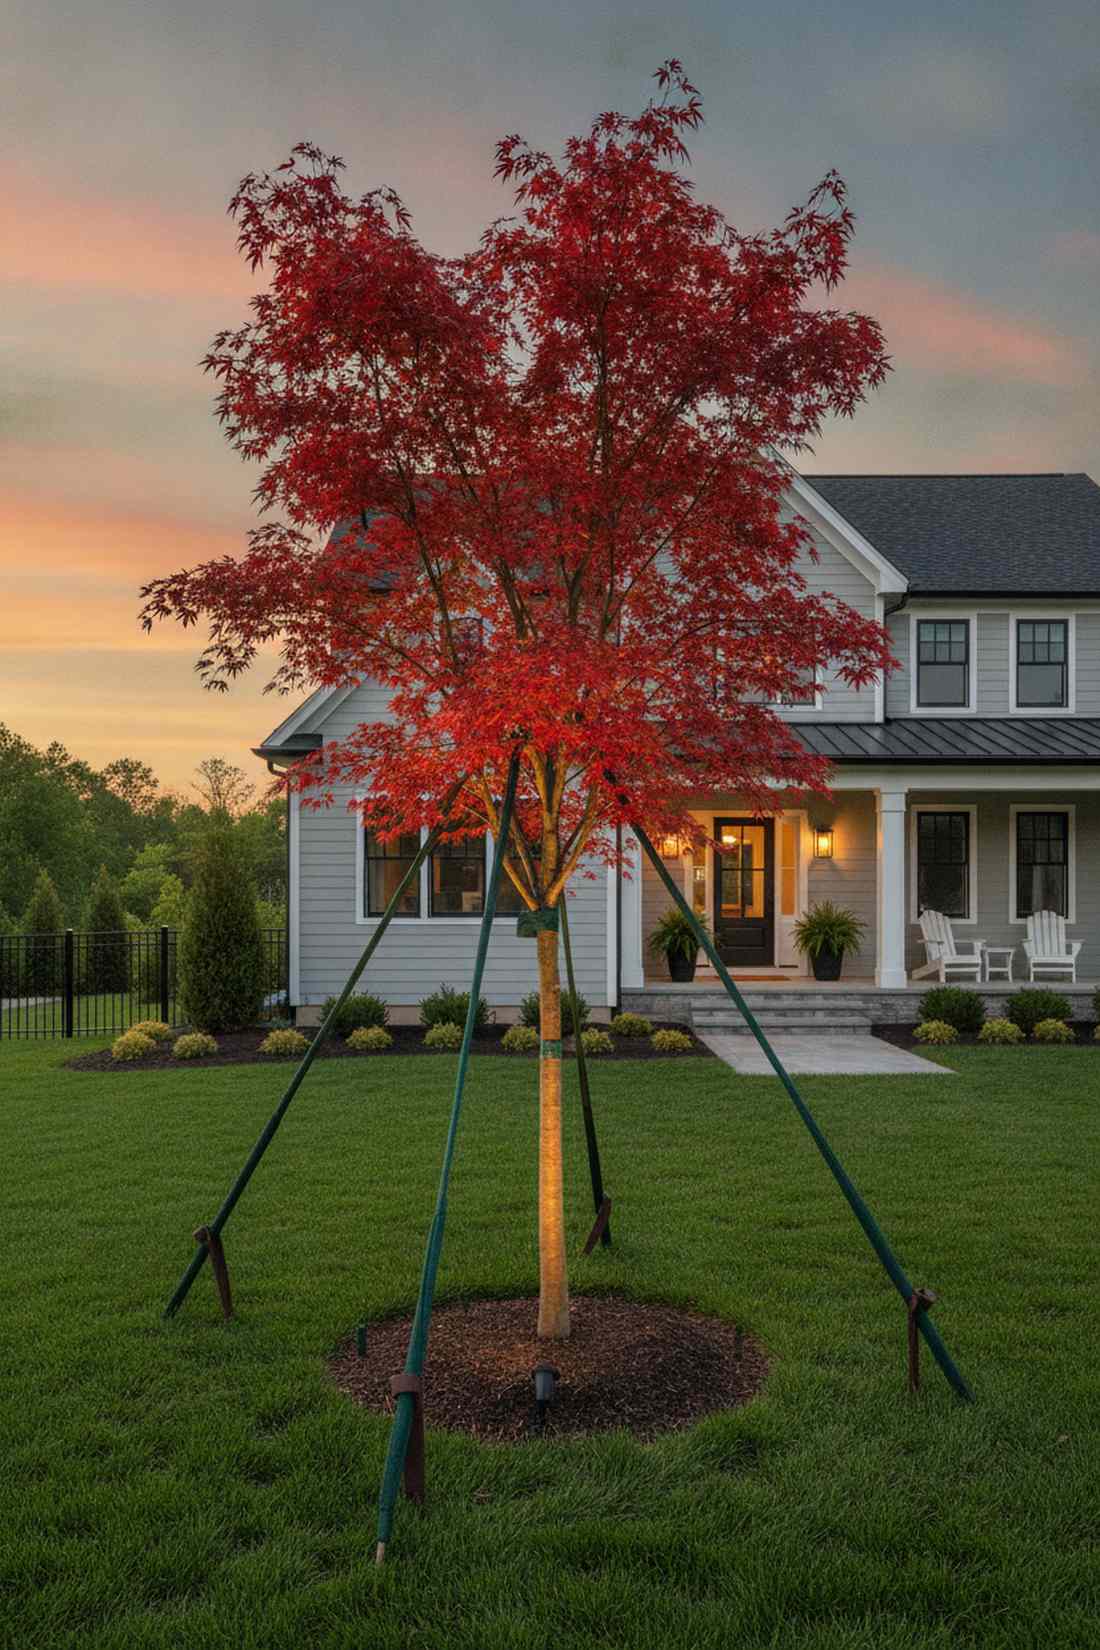
Stops everyone in their tracks with weeping branches or striking red leaves. A single small landscape tree acts as the crown jewel of a tiny front yard.
Crowding trees causes a messy jungle; isolating one spectacular Japanese Maple bypasses the usual cheap look and feels highly curated. Using a heavy-duty tree staking kit ensures it grows perfectly straight during windy seasons.
A quality specimen tree will run $80–$150. Pin this to remember to highlight, not hide, your best trees.
- Key Materials: Dwarf specimen tree (like Japanese Maple), staking wire
- Vibe / Style: Curated gallery focal point
- Difficulty: Moderate planting
- Budget Breakdown: Tree: $100 | Staking kit: $15.
- Creator’s Tip: Uplight the tree from the base at night to cast a giant, dramatic silhouette on your house siding.
- Smart Sourcing: Use a professional-grade tree staking kit and a slow-release tree fertilizer spike pack.
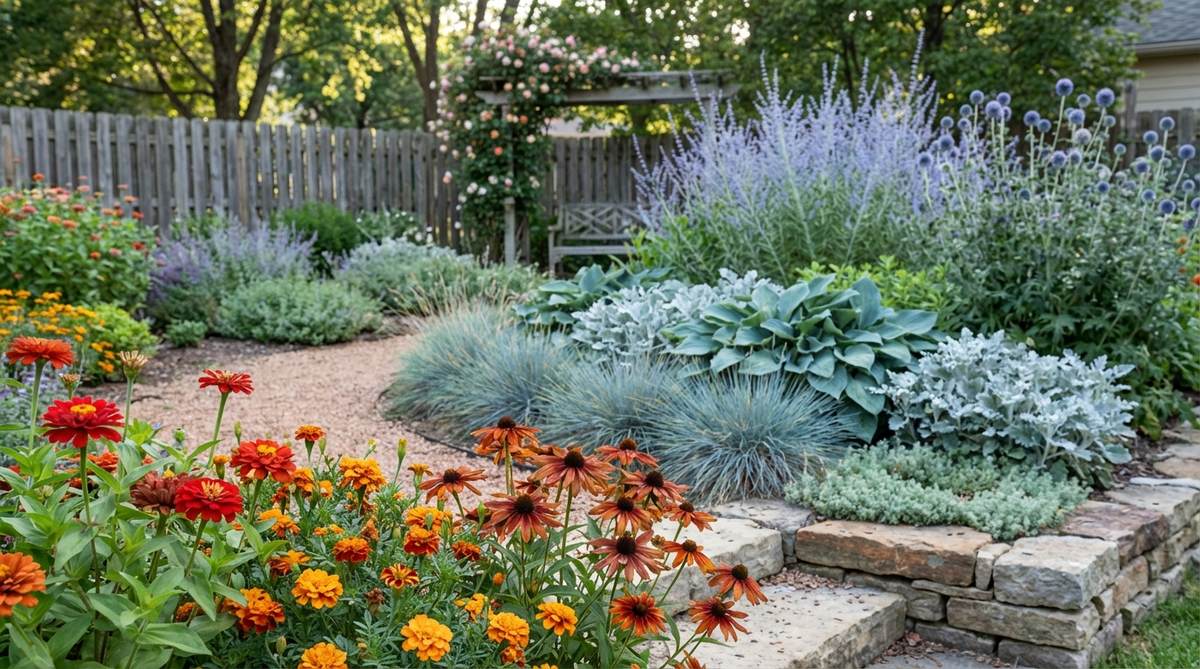
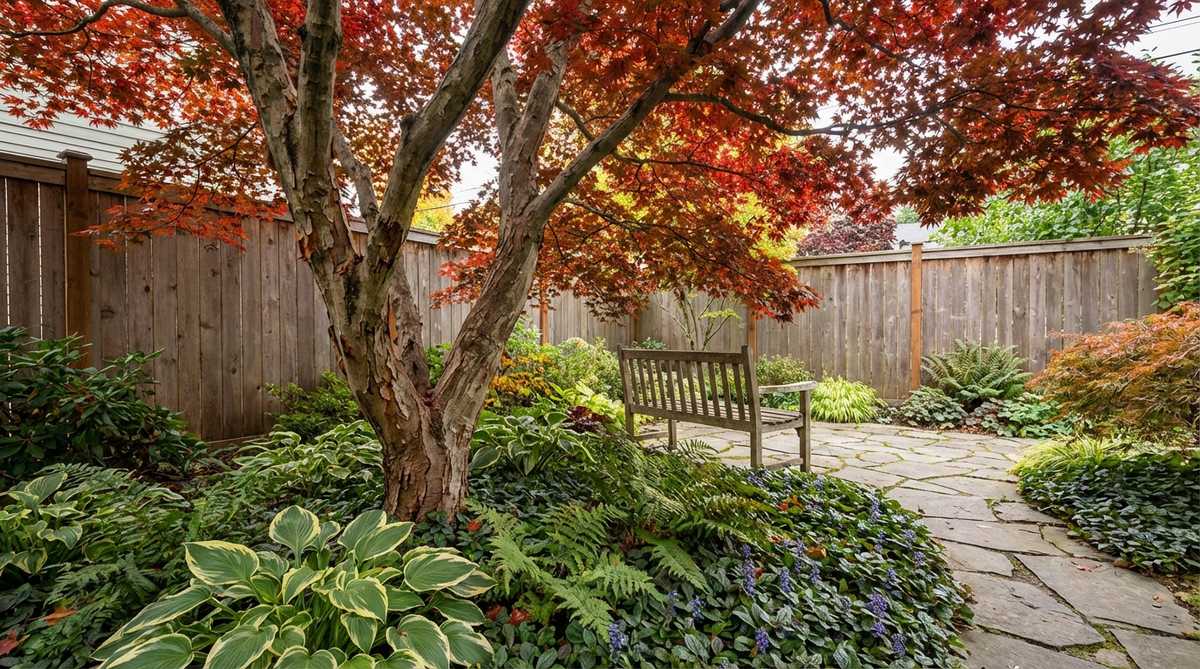
36. Textural Contrast Mixing
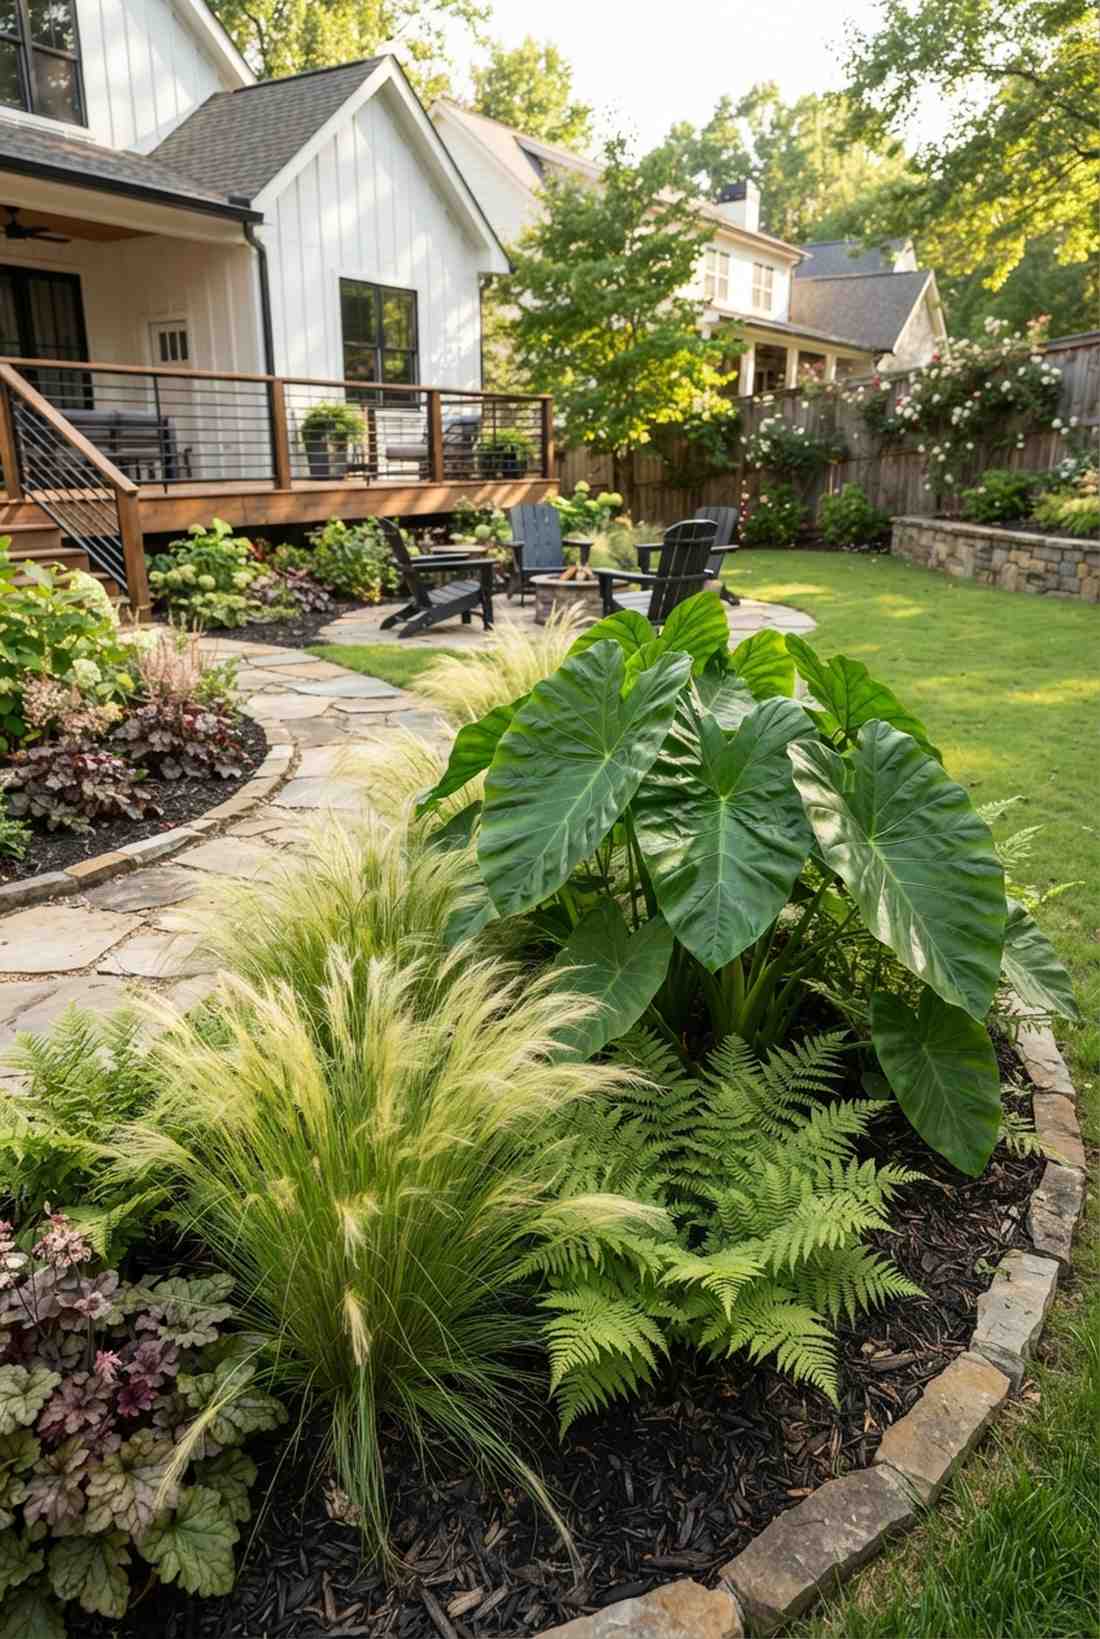
Makes your plants practically pop off each other like a high-def photograph. Mastering garden layout ideas based on leaf shape is a pure professional secret.
Planting too many small leaves creates a blurry green mess; forcing giant, smooth leaves next to spiky, feathery grass gives a designer-level finish. Snagging giant elephant ear bulbs to pair alongside delicate ferns creates an aggressive, beautiful contrast.
This texture-pairing strategy costs about $30–$60 to execute.
- Key Materials: Bold-leaved hostas, fine-textured ferns
- Vibe / Style: High-contrast botanical park
- Difficulty: Design-focused placement
- Budget Breakdown: Bulbs: $20 | Grasses: $20.
- Creator’s Tip: Mix matte-finish leaves with glossy-finish leaves so the sunlight bounces off them differently.
- Smart Sourcing: Buy premium massive elephant ear bulbs and ornamental feather grass seeds.
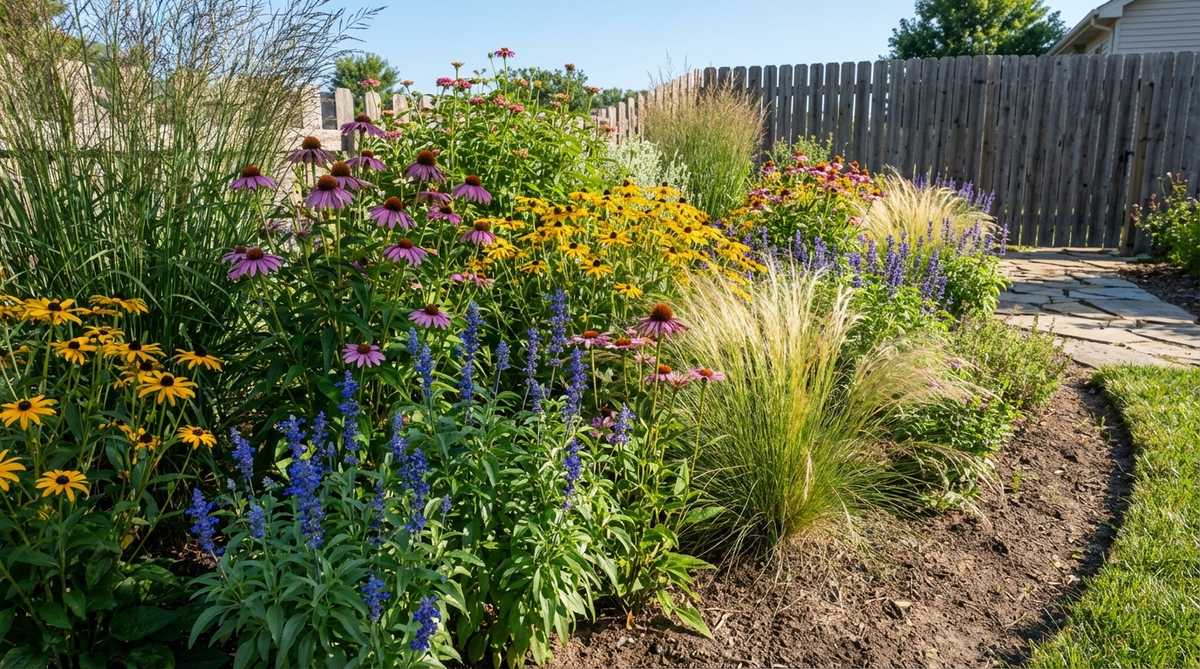
37. Native Plant Selections
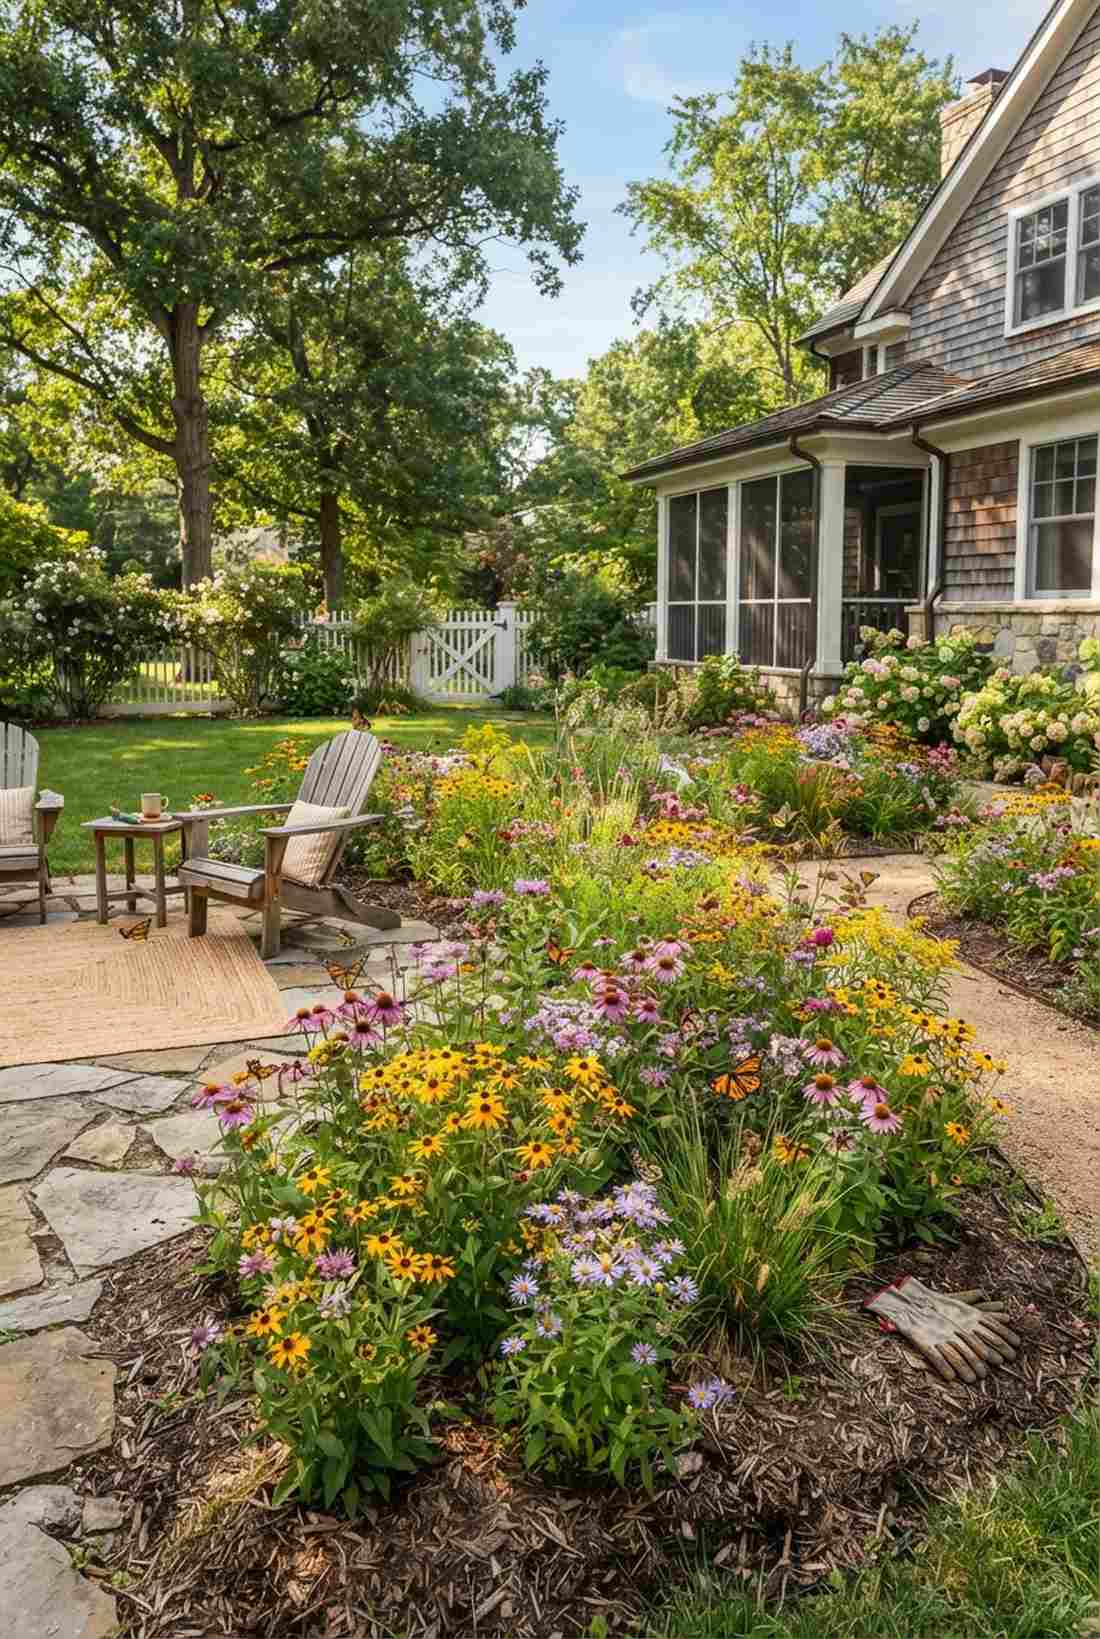
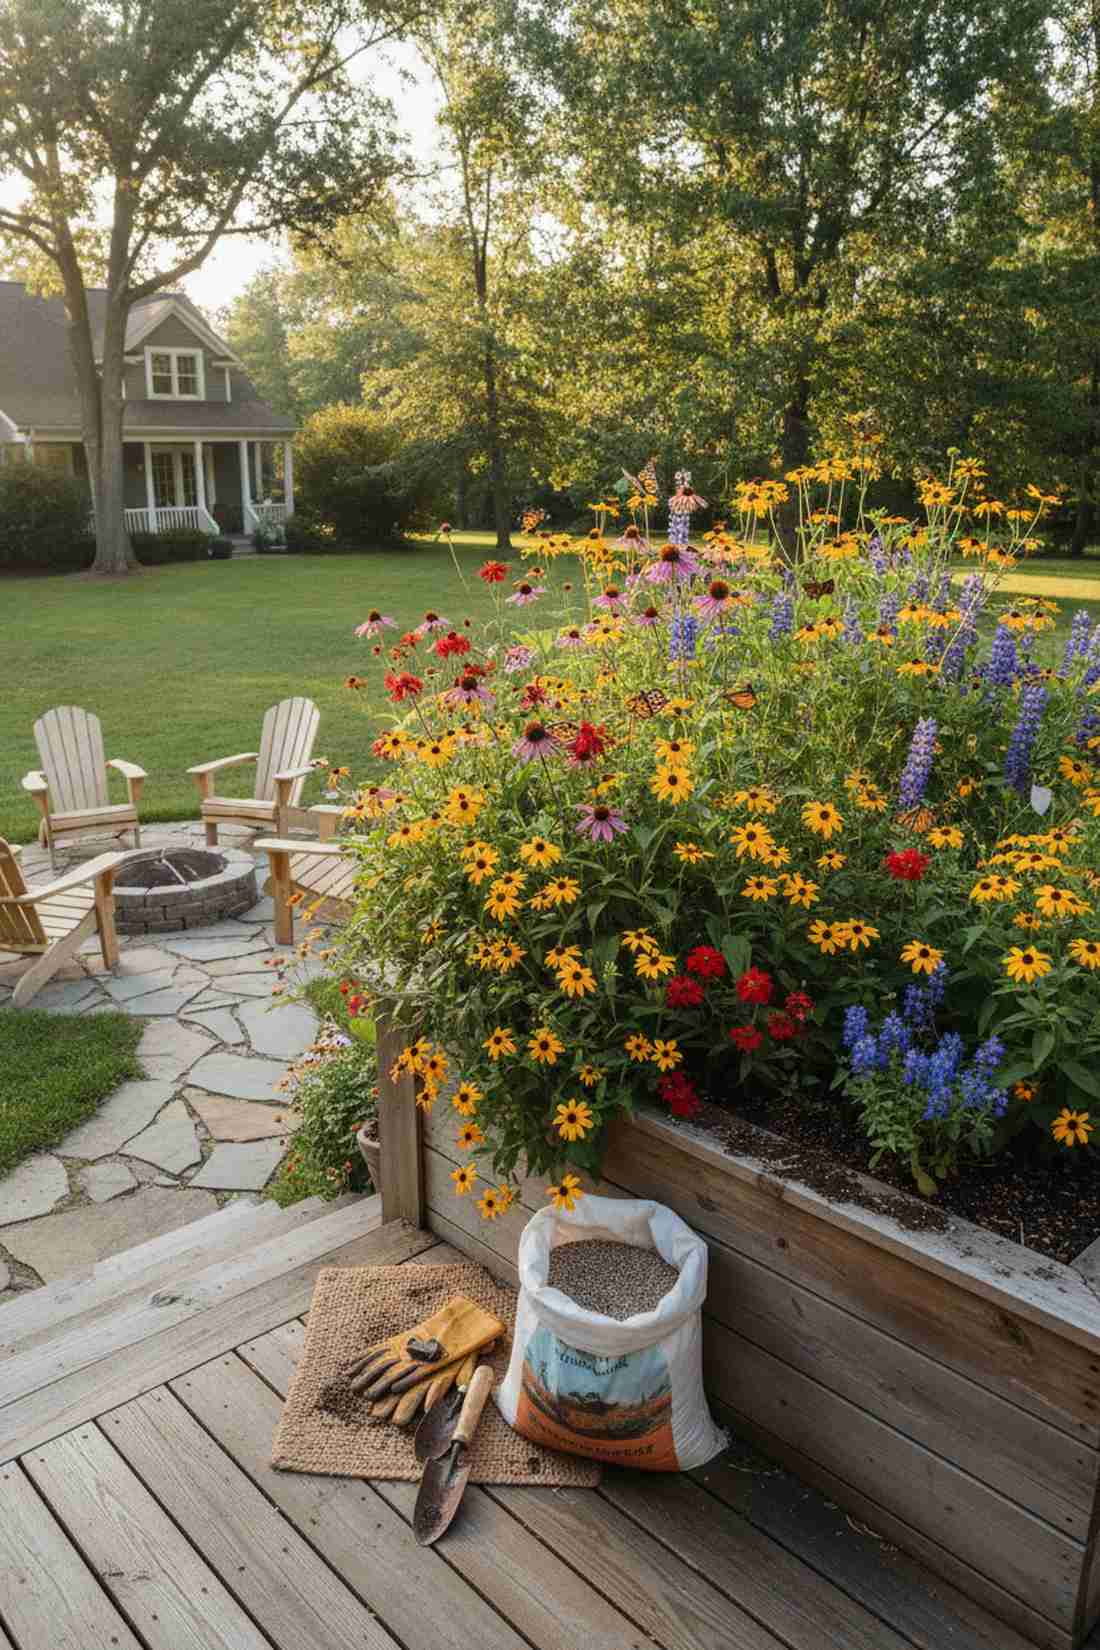
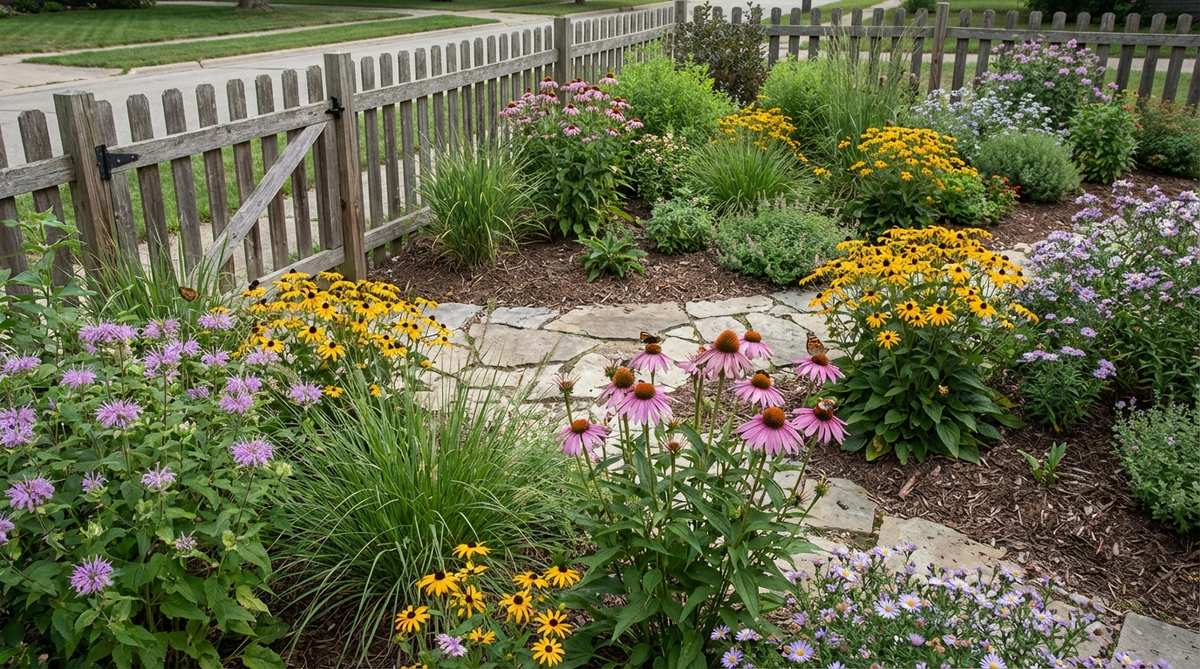
Thrives on total neglect while bringing beautiful local butterflies to your patio. Integrating local garden layout ideas is the smartest hack for a bulletproof yard.
Fighting your local climate with exotic flowers is expensive and exhausting; planting natives looks far more expensive than it is because they grow massive with zero effort. Utilizing regional wildflower seed mixes guarantees a massive explosion of color that requires no watering.
Establishing a native pocket costs a mere $15–$30. Save this for a zero-maintenance weekend project!
- Key Materials: Regional seed mix, weed-free topsoil
- Vibe / Style: Wild ecological sanctuary
- Difficulty: Incredibly easy
- Budget Breakdown: Seed mix: $15 | Prep soil: $10.
- Creator’s Tip: Rough up the top inch of soil and step the seeds in lightly—don’t bury them deep.
- Smart Sourcing: Order a region-specific native wildflower seed bulk pack and organic compost starter.
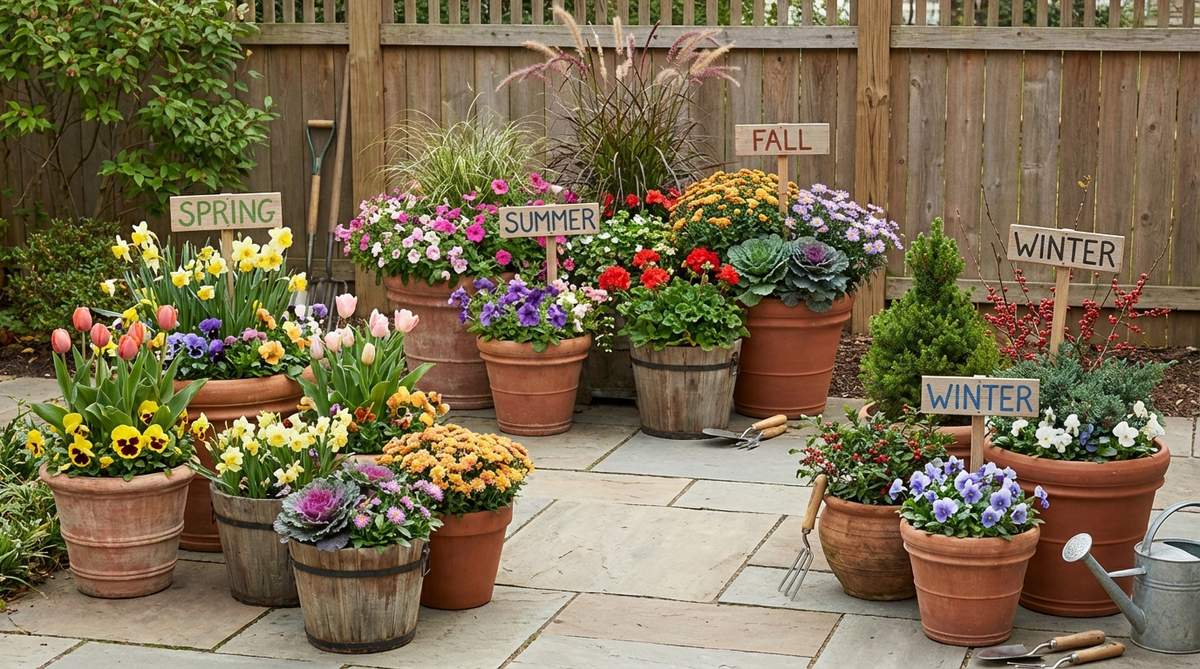
38. Seasonal Succession Planning
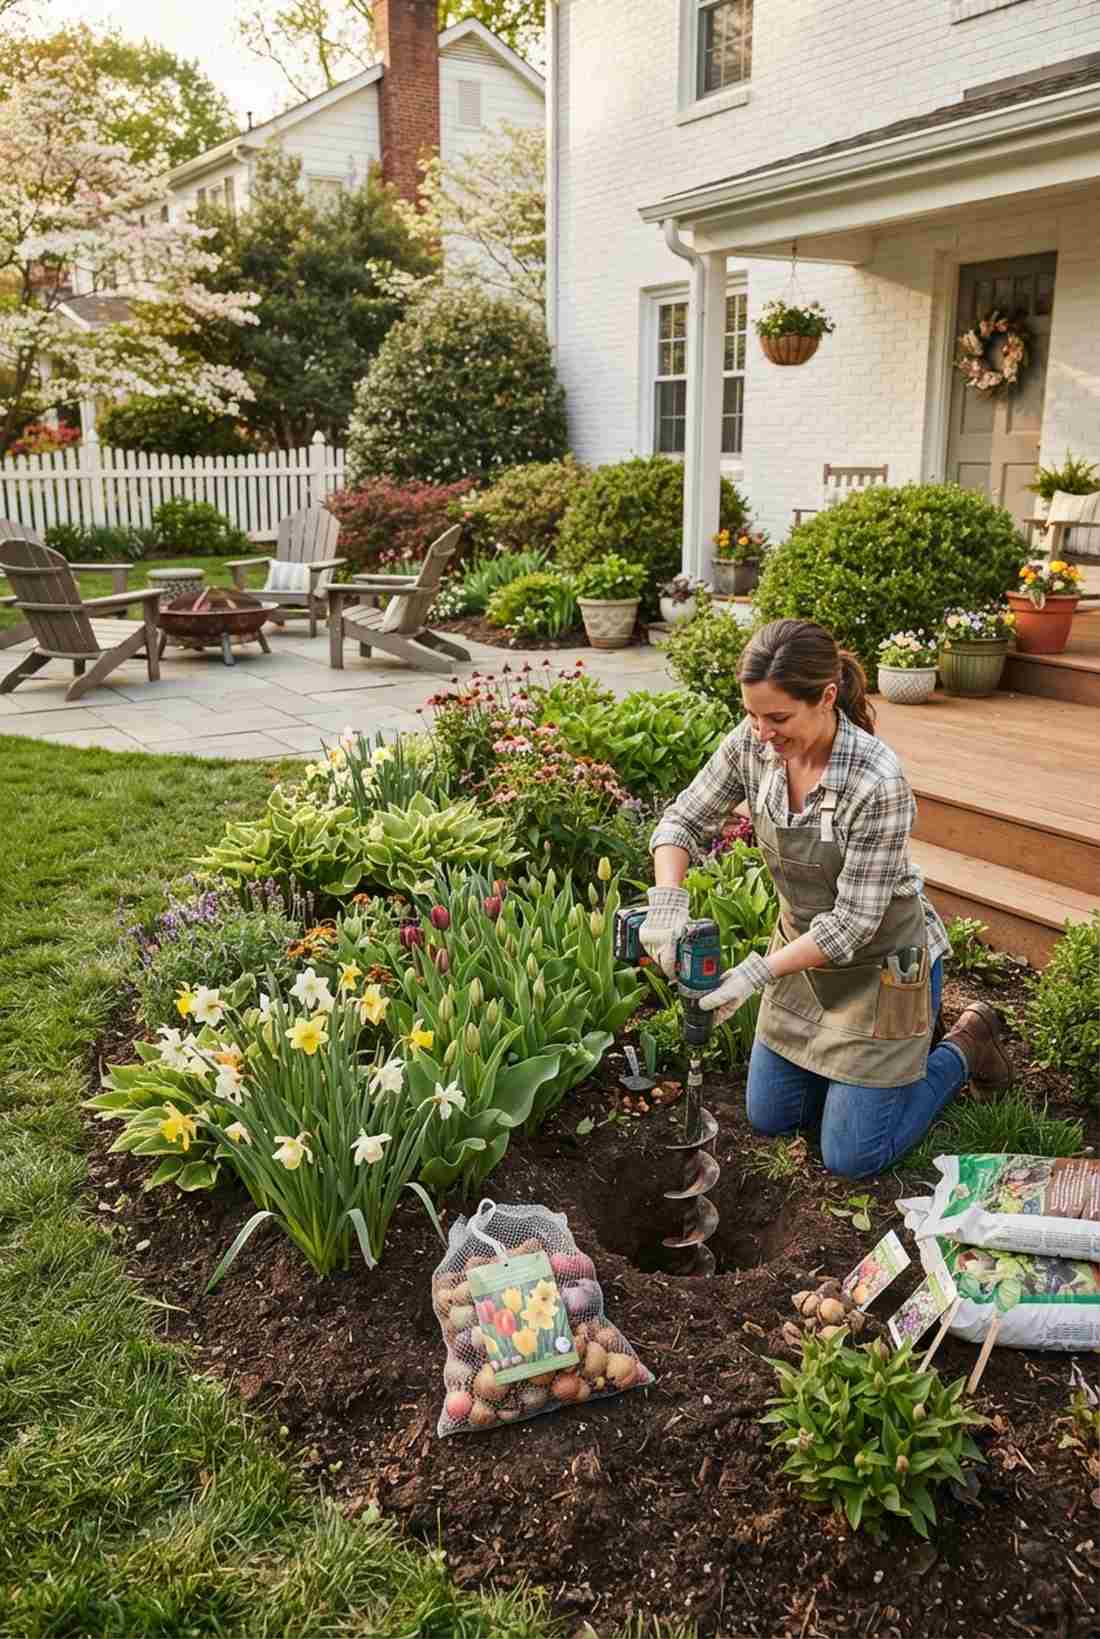
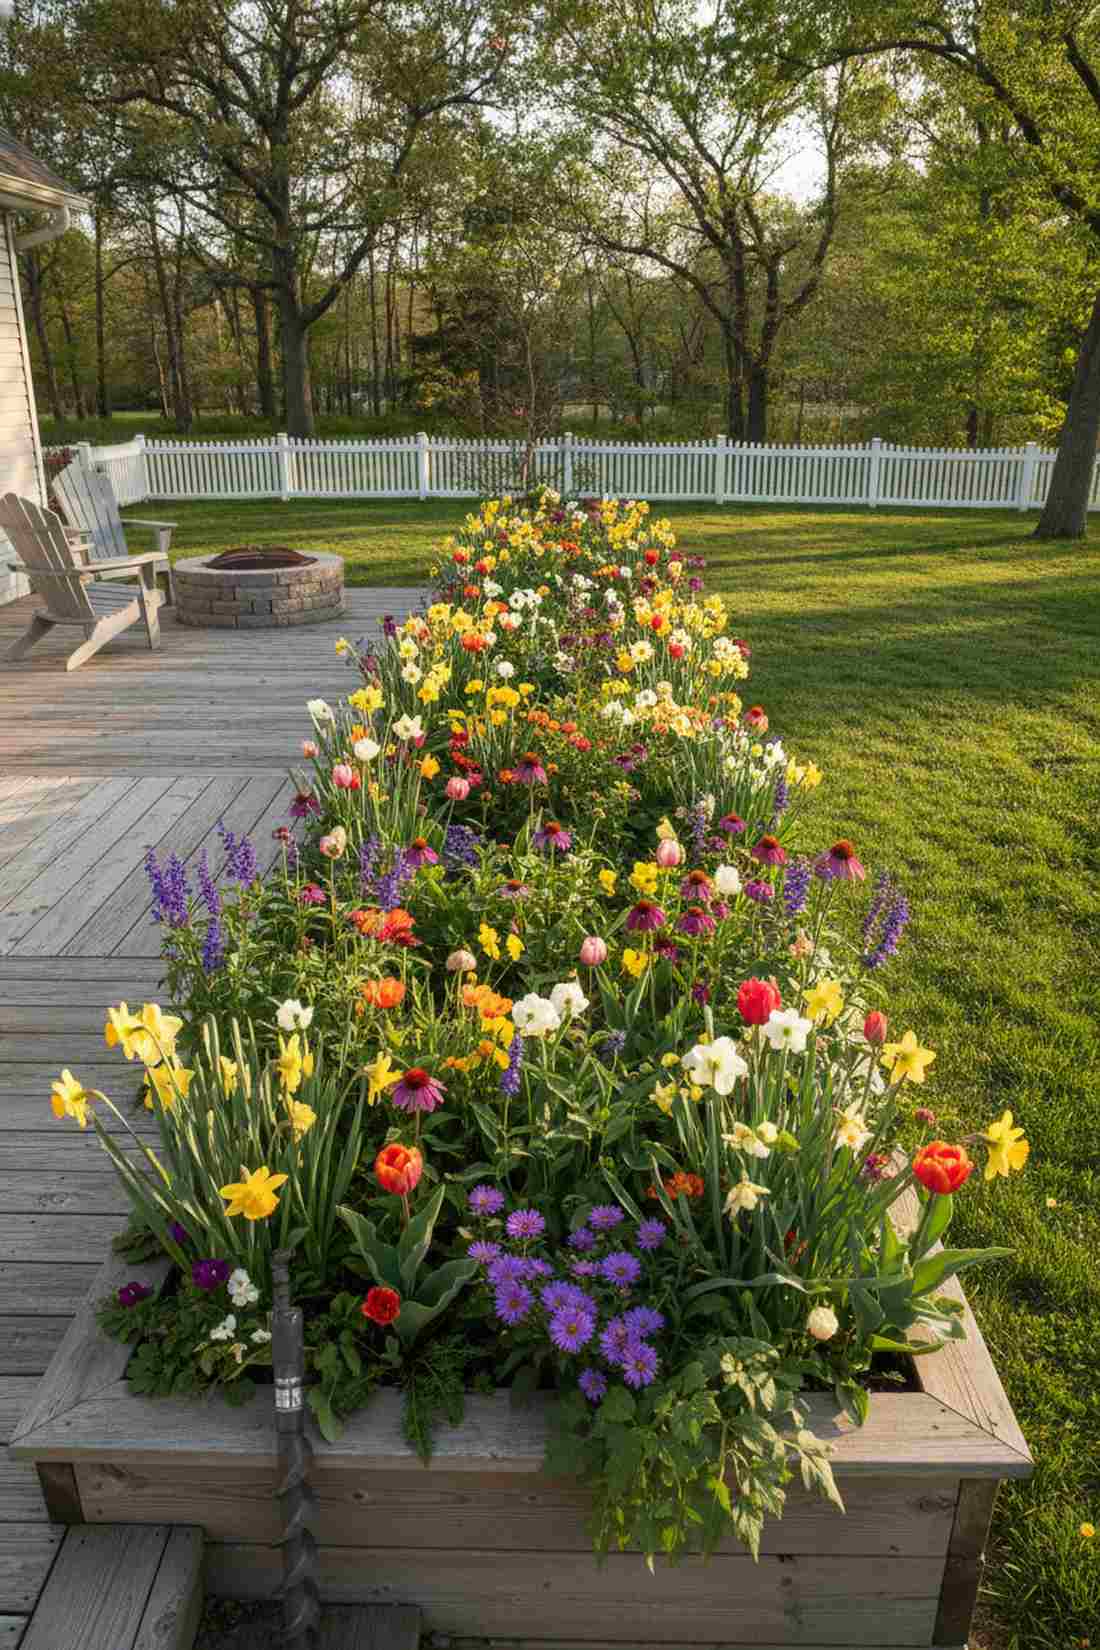
Ensures your compact bed never looks dead from early April through late November. A rolling small garden design strategy means as one flower dies, another blooms right through it.
Planting only summer flowers leaves your yard barren in spring; stacking bulb layers feels like a custom-built installation of perpetual color. Dropping bulk tulip and daffodil kits directly under your summer perennials is the ultimate space-saving hack.
A three-season overlapping bulb setup runs about $40–$75.
- Key Materials: Spring bulbs, summer perennials, fall asters
- Vibe / Style: Ever-changing botanical clock
- Difficulty: Moderate planning
- Budget Breakdown: Bulb bags: $30 | Perennials: $30.
- Creator’s Tip: Dig one deep hole. Put late bloomers at the bottom, cover with 2 inches of soil, then put early bloomers on top.
- Smart Sourcing: Get a mixed-season premium bulb collection and a heavy-duty bulb planting auger bit.
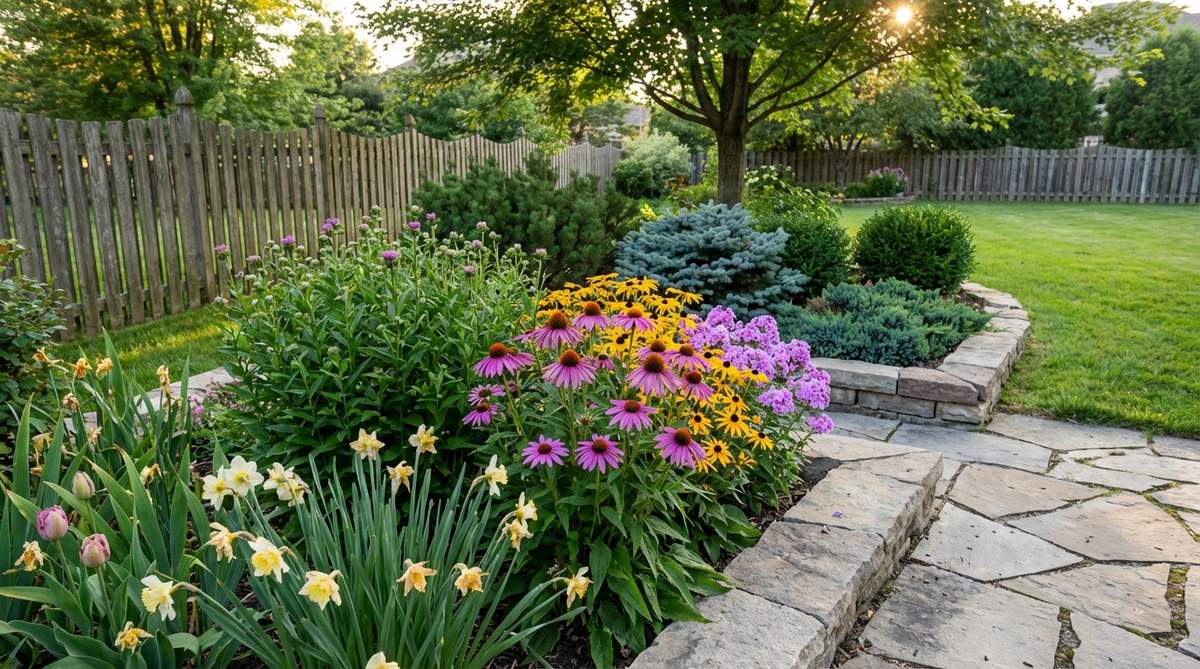
39. Edible Ornamental Integration
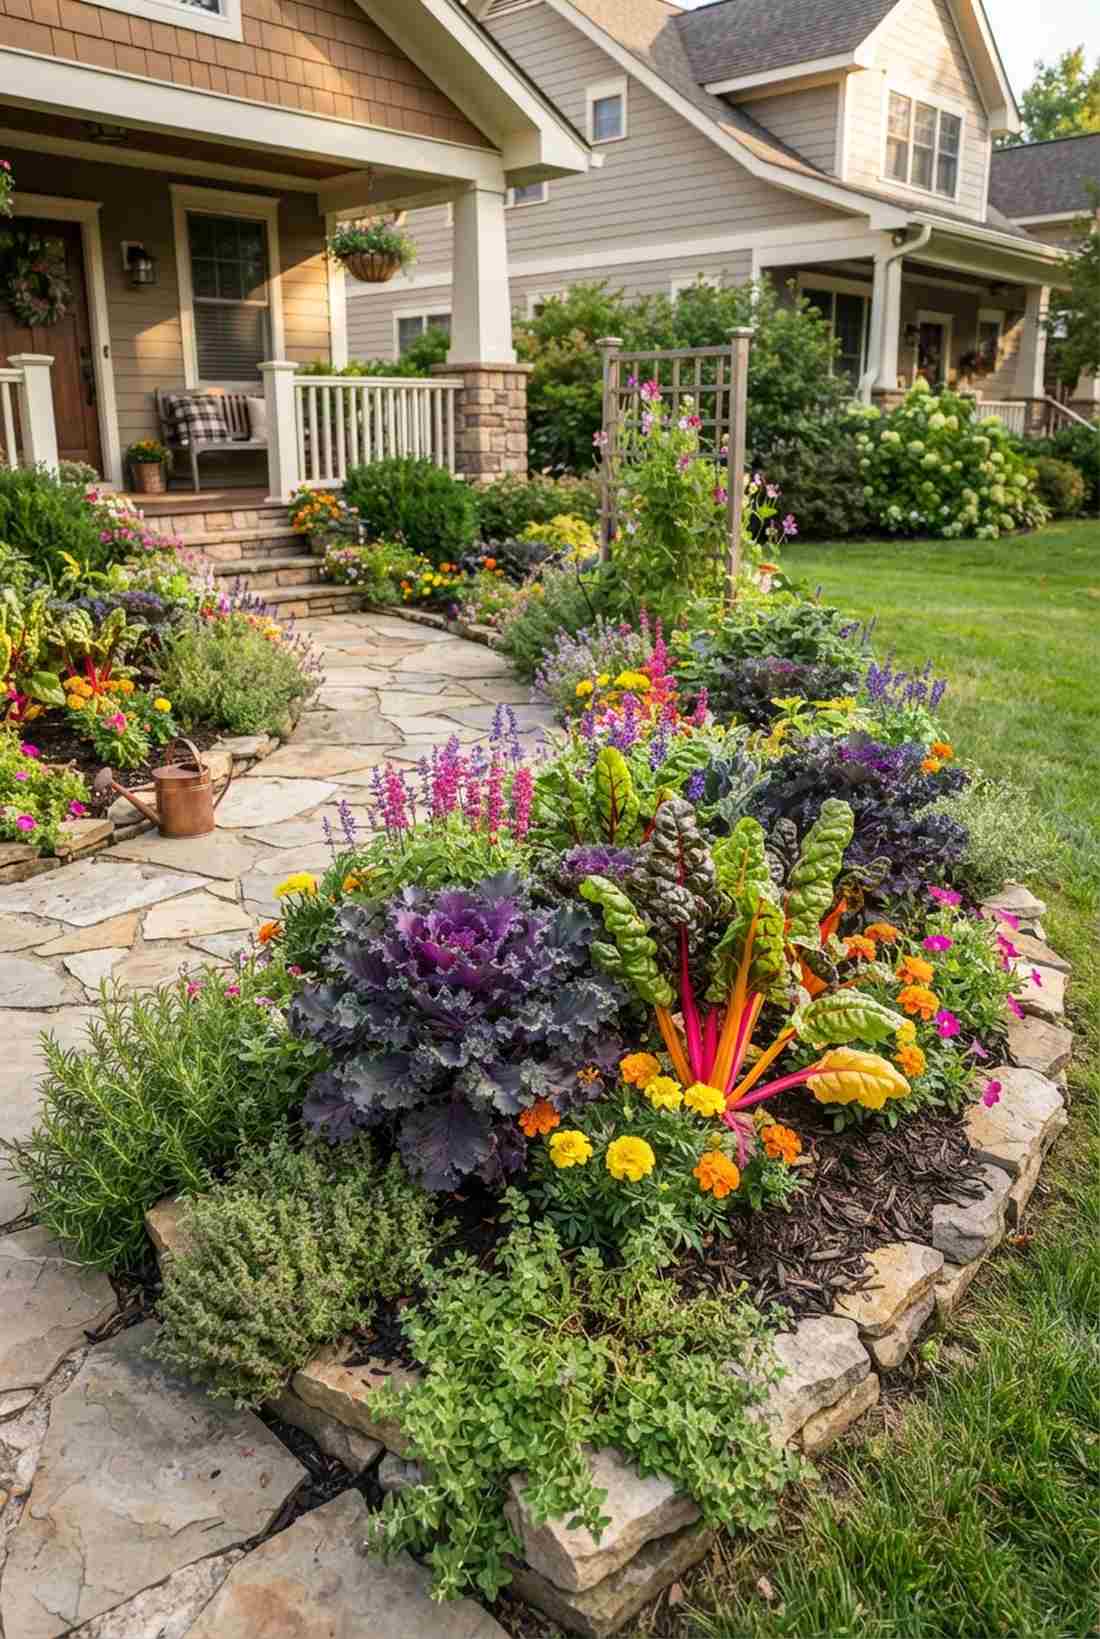
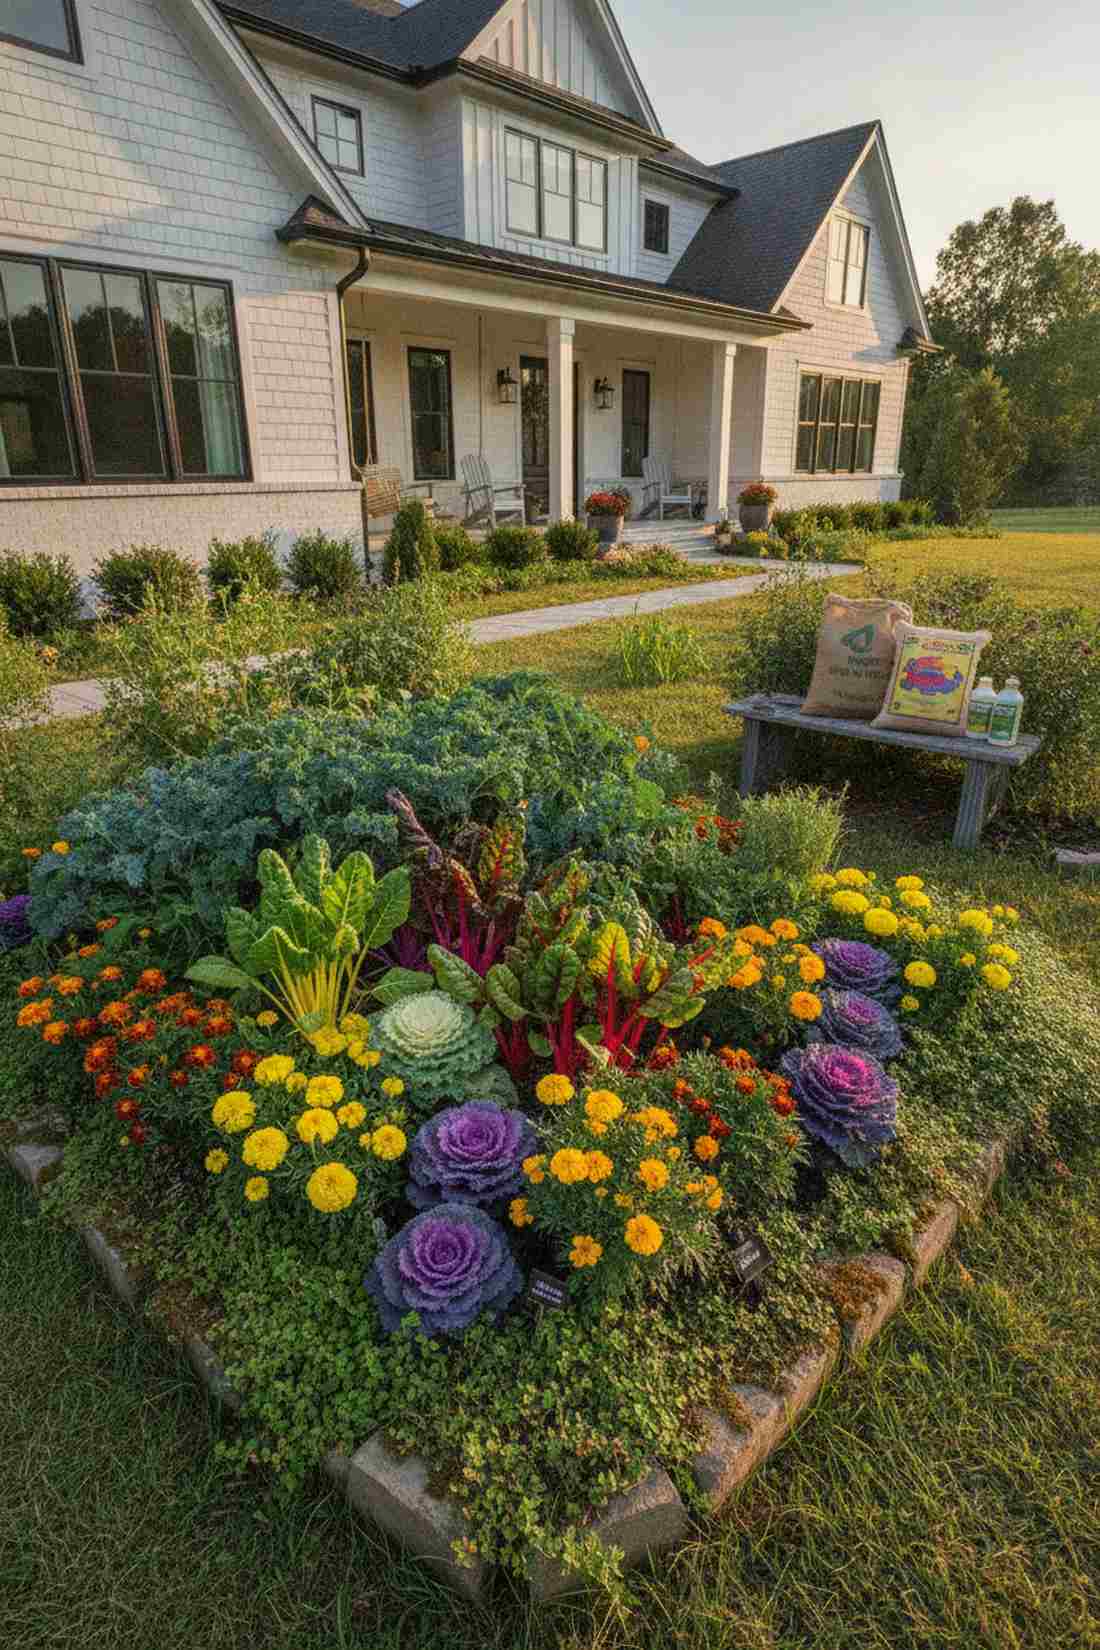
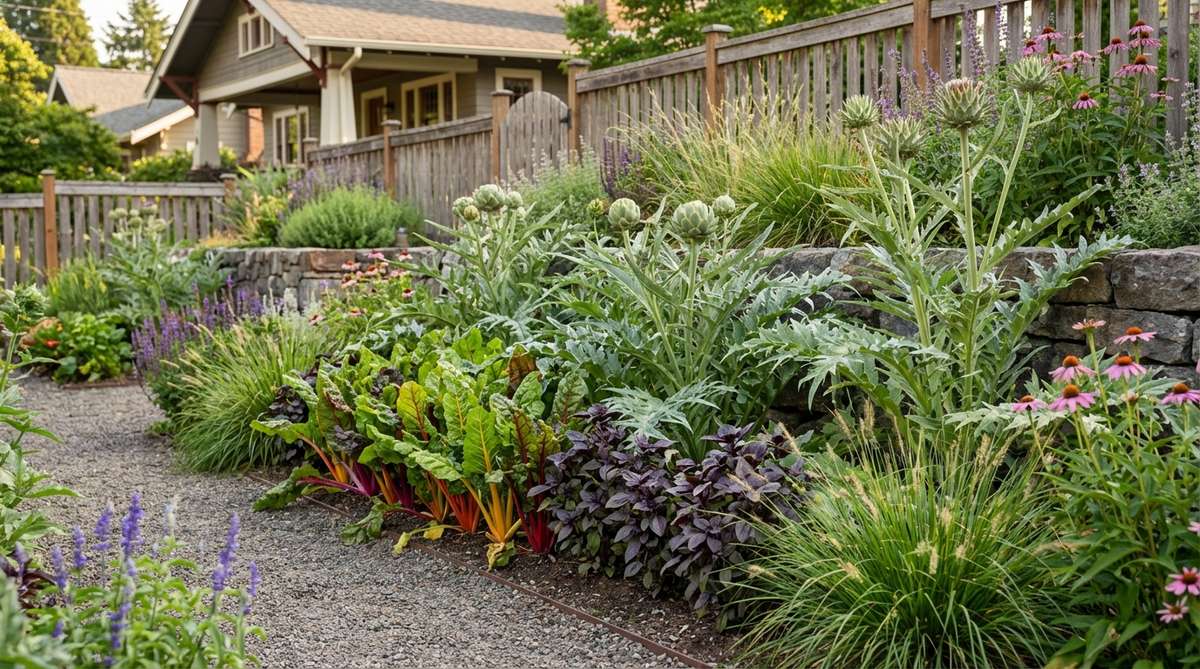
Blends striking purple cabbage seamlessly into your front-yard flower displays. This hybrid small garden landscaping approach hides your groceries in plain sight.
Hiding vegetable gardens in the back wastes space; mixing kale next to marigolds instantly elevates the aesthetic to a French potager garden. Using rainbow chard seed packets adds shocking neon stems that rival any traditional ornamental flower.
Mixing edibles into existing beds costs just $10–$20.
- Key Materials: Ornamental kale, rainbow chard, rich compost
- Vibe / Style: French potager edible landscape
- Difficulty: Easy seed scattering
- Budget Breakdown: Seeds: $10 | Compost top-dress: $10.
- Creator’s Tip: Use trailing herbs like creeping thyme or oregano to spill over the front edges of your flower beds.
- Smart Sourcing: Grab a rainbow heirloom vegetable seed kit and organic fish emulsion fertilizer.
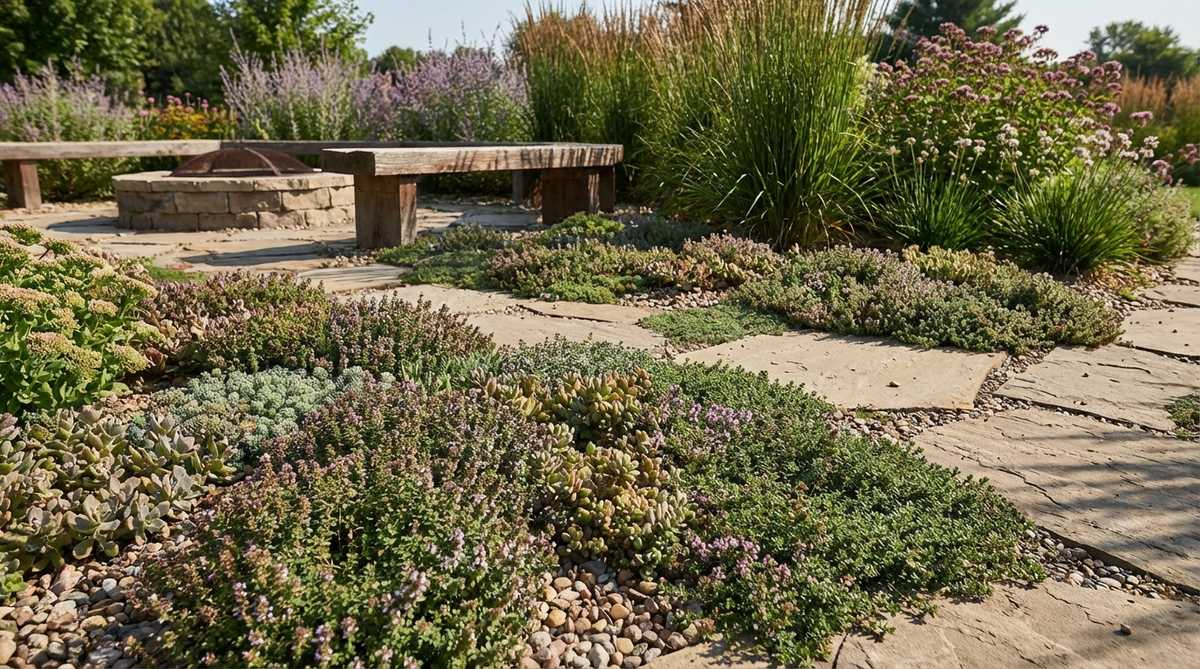
40. Grass Softening Layers
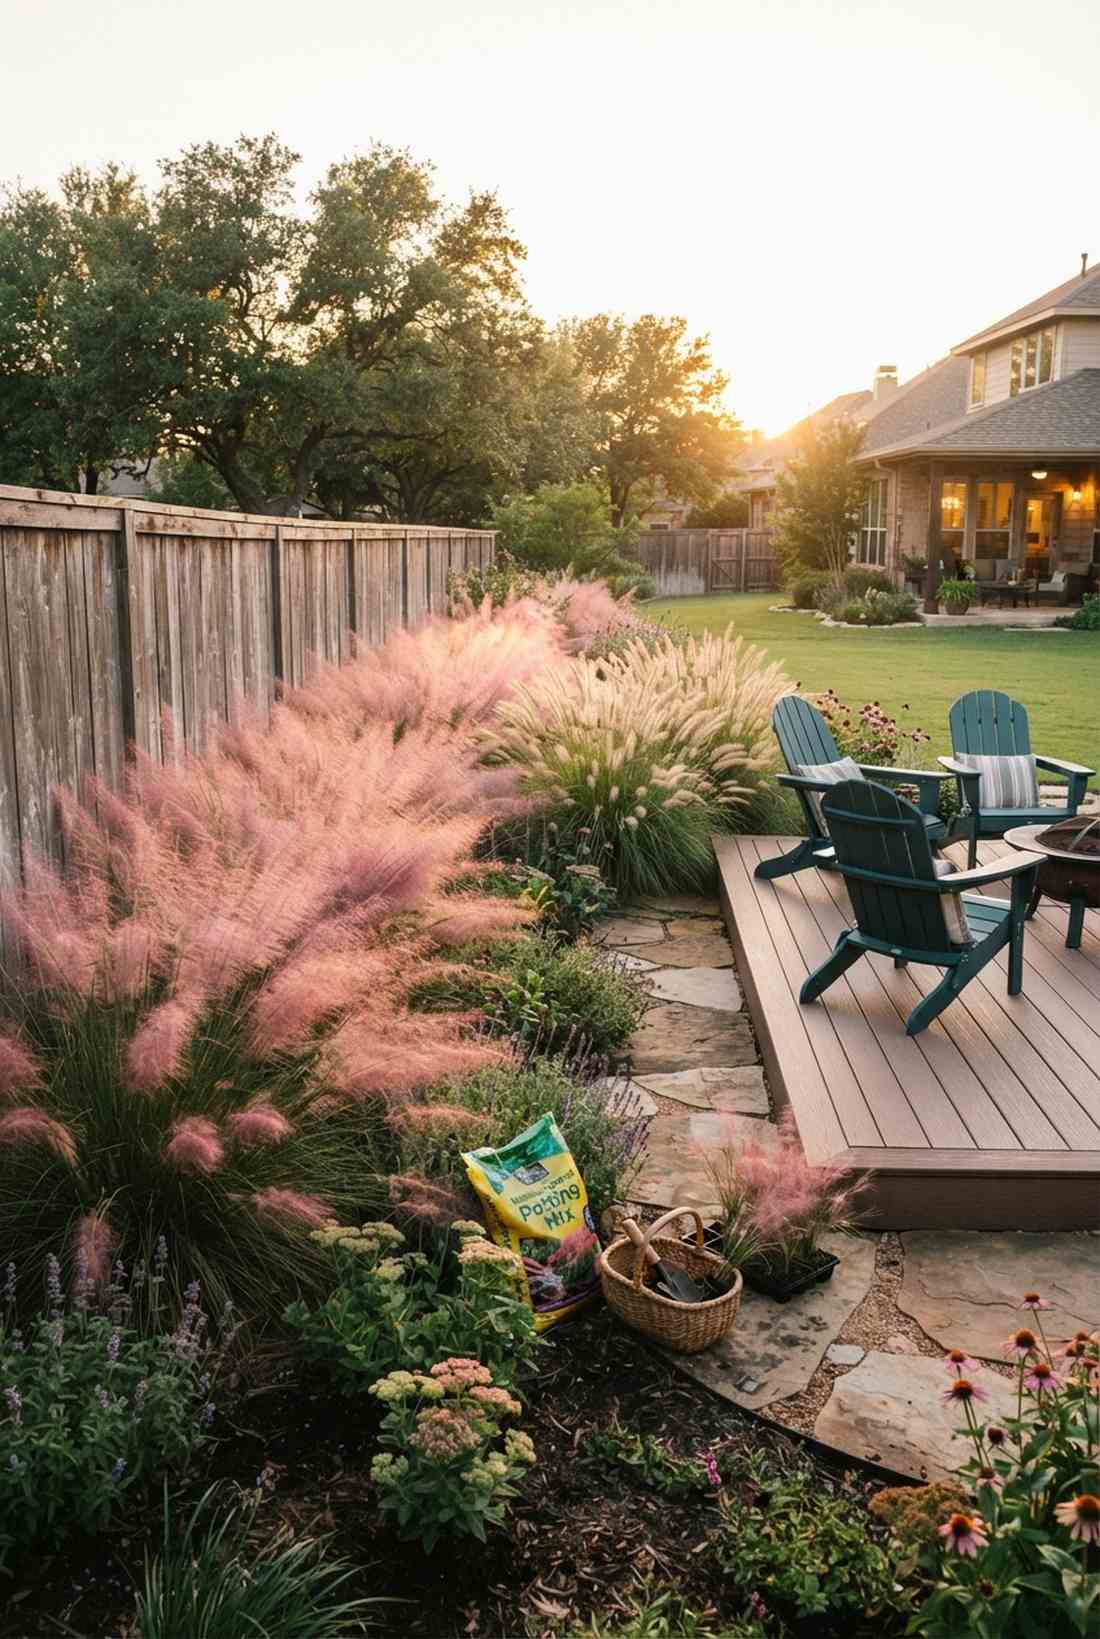
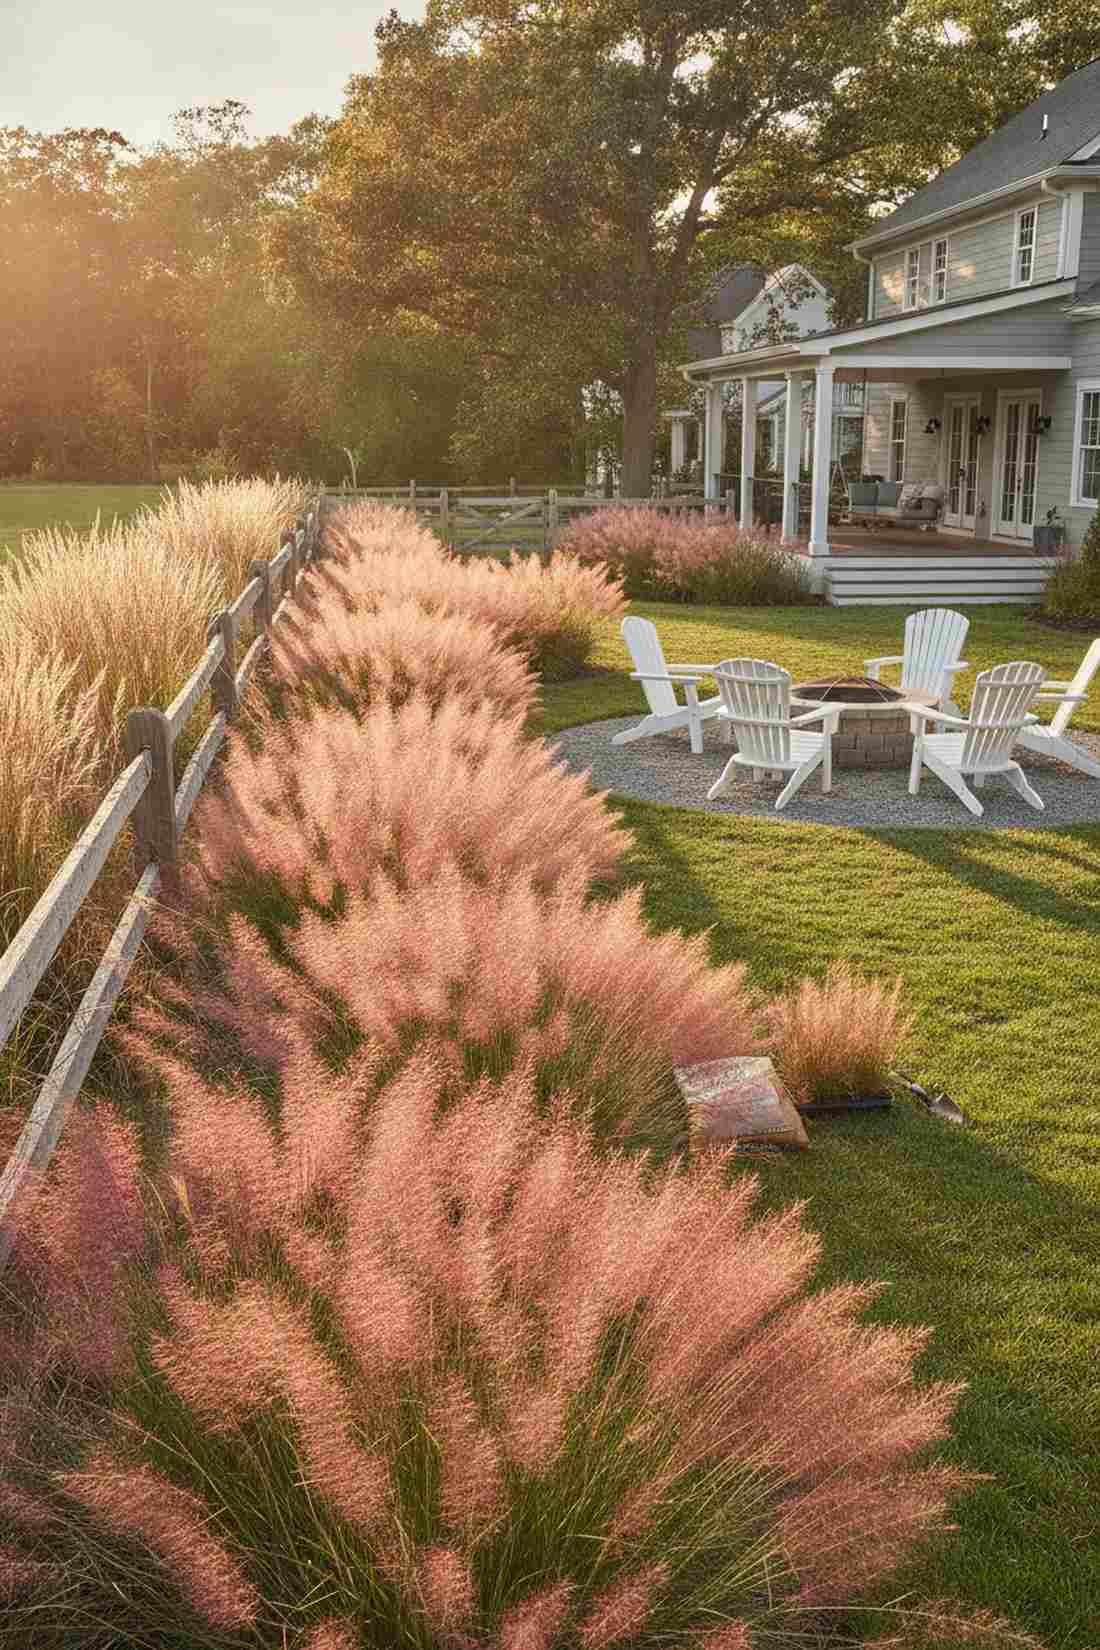
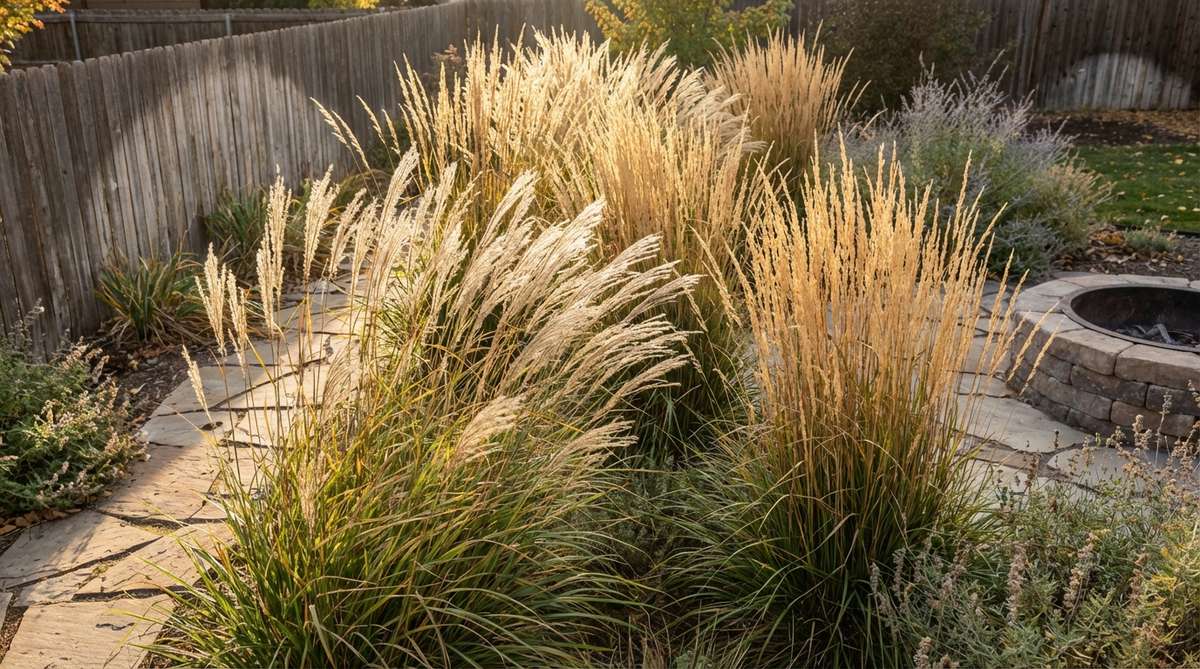
Catches the golden-hour sunlight and sways beautifully with the slightest breeze. Adding ornamental garden grasses breaks up stiff, rigid fence lines perfectly.
Too many broad-leaf plants make a yard feel heavy; injecting feathery grasses delivers a surprisingly premium look with incredible texture. Securing pink muhly grass plugs gives an unbelievable cotton-candy visual effect in late summer.
You can add soft grass textures to your yard for $25–$50. Pin this to add magical movement to your space!
- Key Materials: Ornamental grasses (fountain or muhly), spacing trowel
- Vibe / Style: Breezy coastal meadow
- Difficulty: Very easy
- Budget Breakdown: Grass plugs: $35 | Planting soil: $10.
- Creator’s Tip: Never cut ornamental grasses down in the fall; leave the dried stalks up for striking winter architectural interest.
- Smart Sourcing: Use a multi-pack of pink muhly grass starts and long-lasting moisture control soil.
Lighting and Ambiance
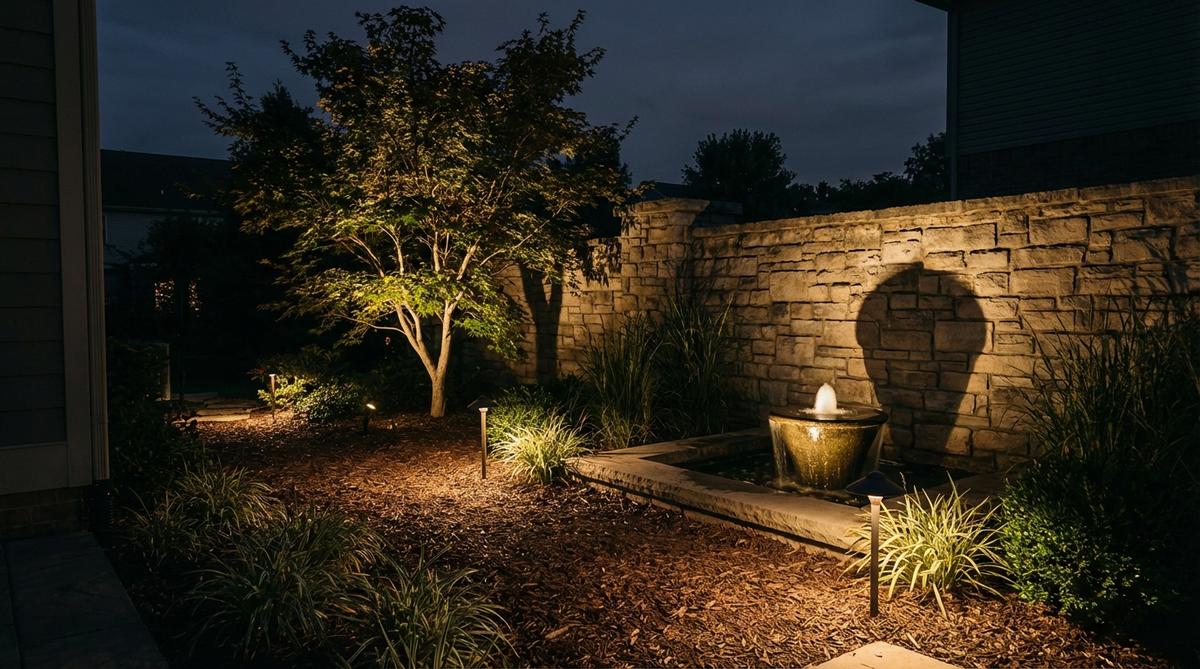
41. Uplighting Boundary Walls
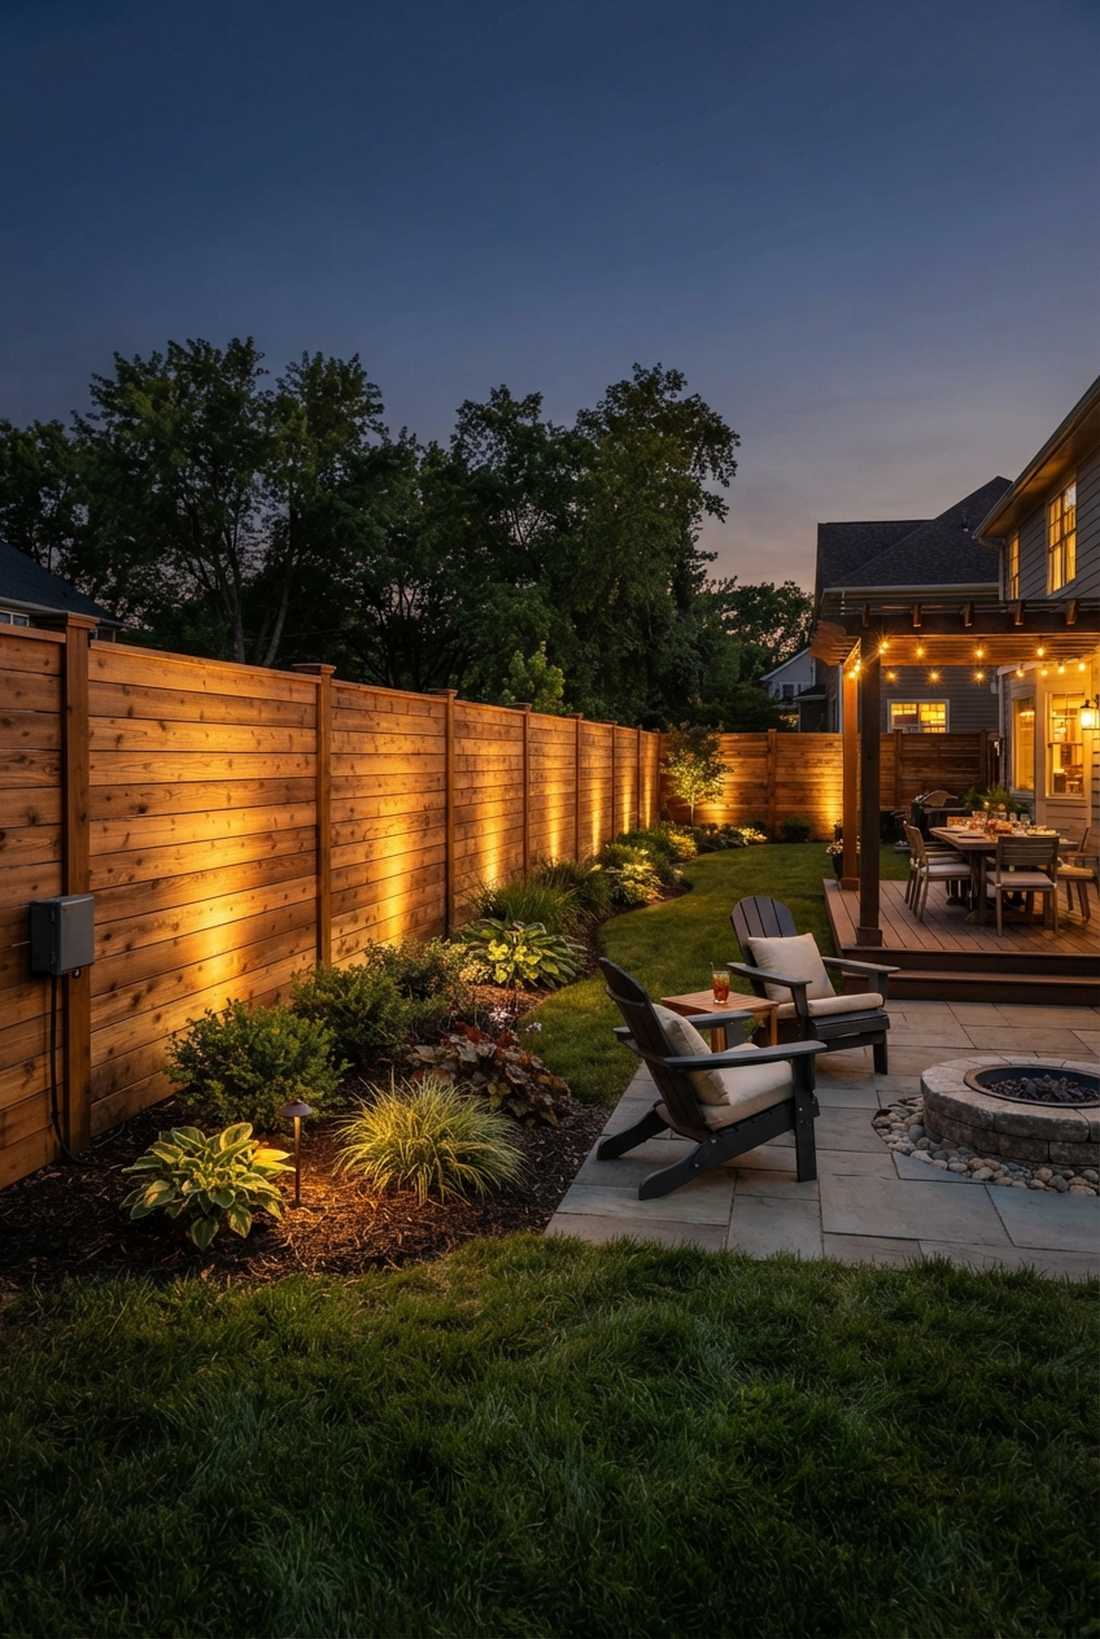
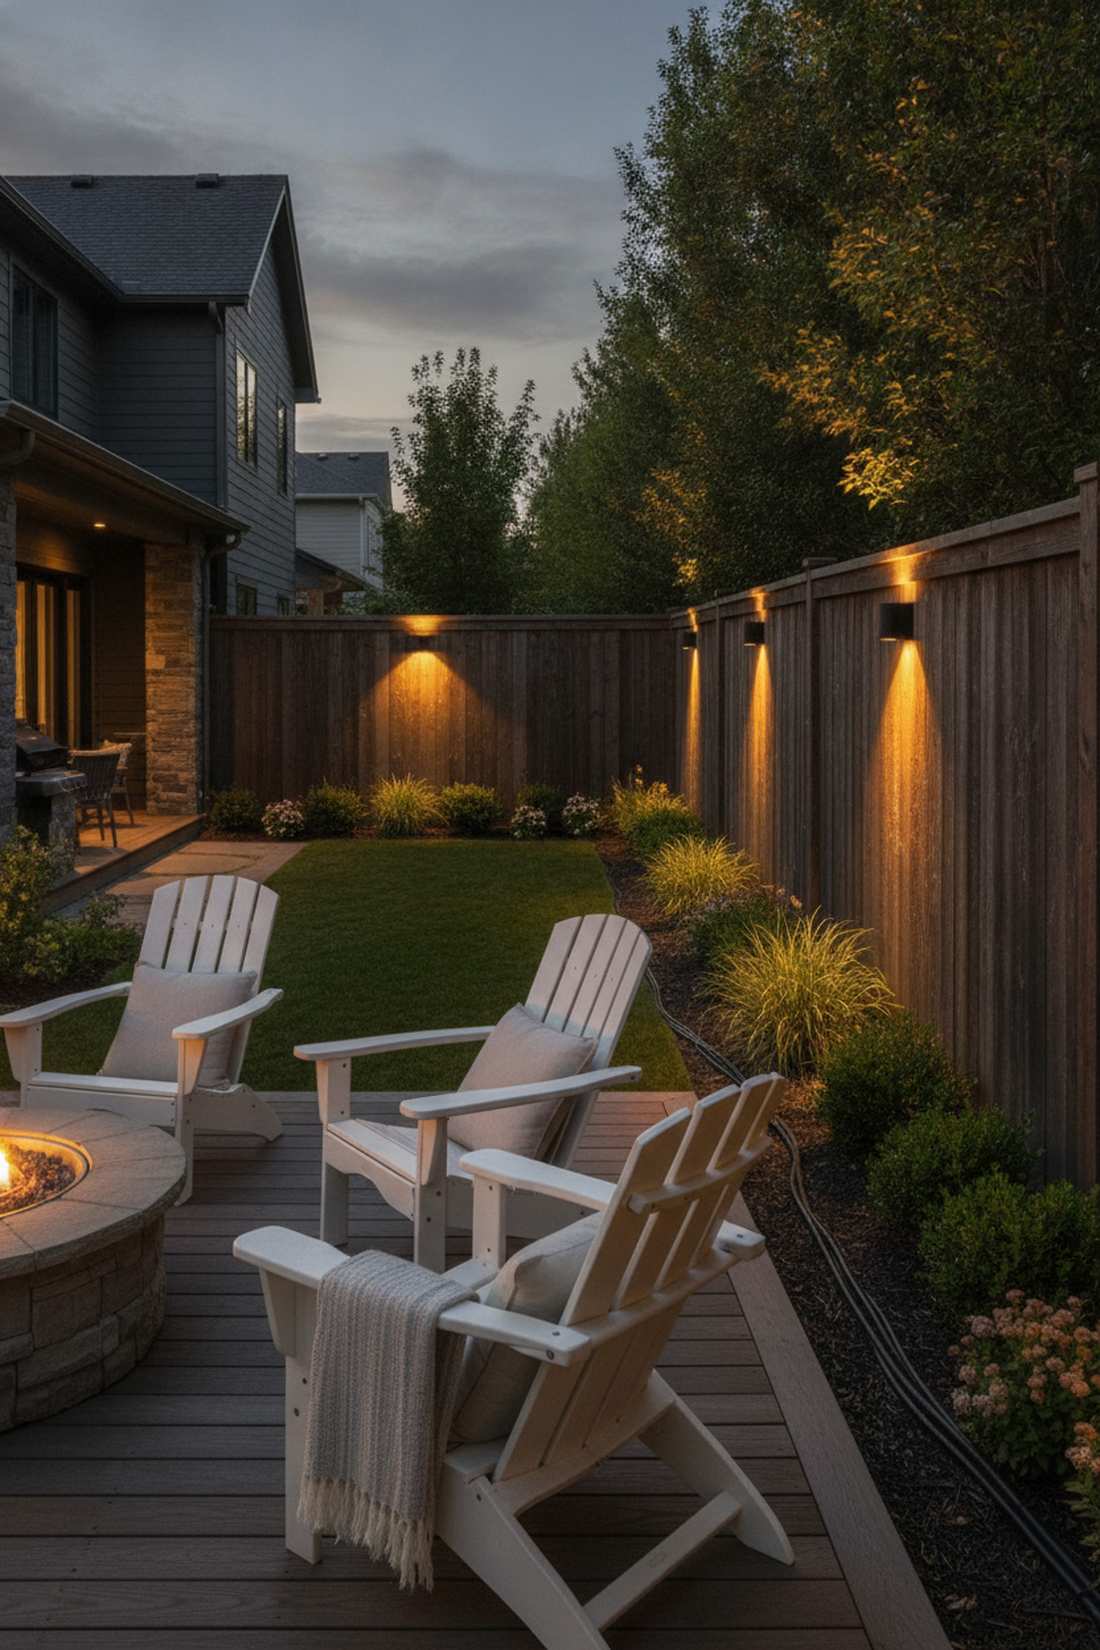
Washes your boring fence panels in a luxurious, warm hotel-lobby glow. This outdoor patio decor lighting trick instantly makes narrow yards feel expansive at night.
Harsh overhead floodlights ruin the mood; grazing walls from the bottom up bypasses the usual cheap look and highlights wood or brick textures beautifully. Hooking up a low-voltage landscape lighting kit takes an hour and transforms the entire property.
A 4-light uplight kit runs roughly $60–$120.
- Key Materials: Low-voltage LED spotlights, outdoor transformer, wiring
- Vibe / Style: High-end luxury resort
- Difficulty: Moderate wire burying
- Budget Breakdown: Light kit: $80 | Extra wire: $20.
- Creator’s Tip: Place the lights about 6 to 8 inches away from the wall, pointing slightly inward to catch the texture without blinding guests.
- Smart Sourcing: Invest in a weatherproof low-voltage LED uplight kit and direct-burial landscape wire.
42. Pathway Step Lights
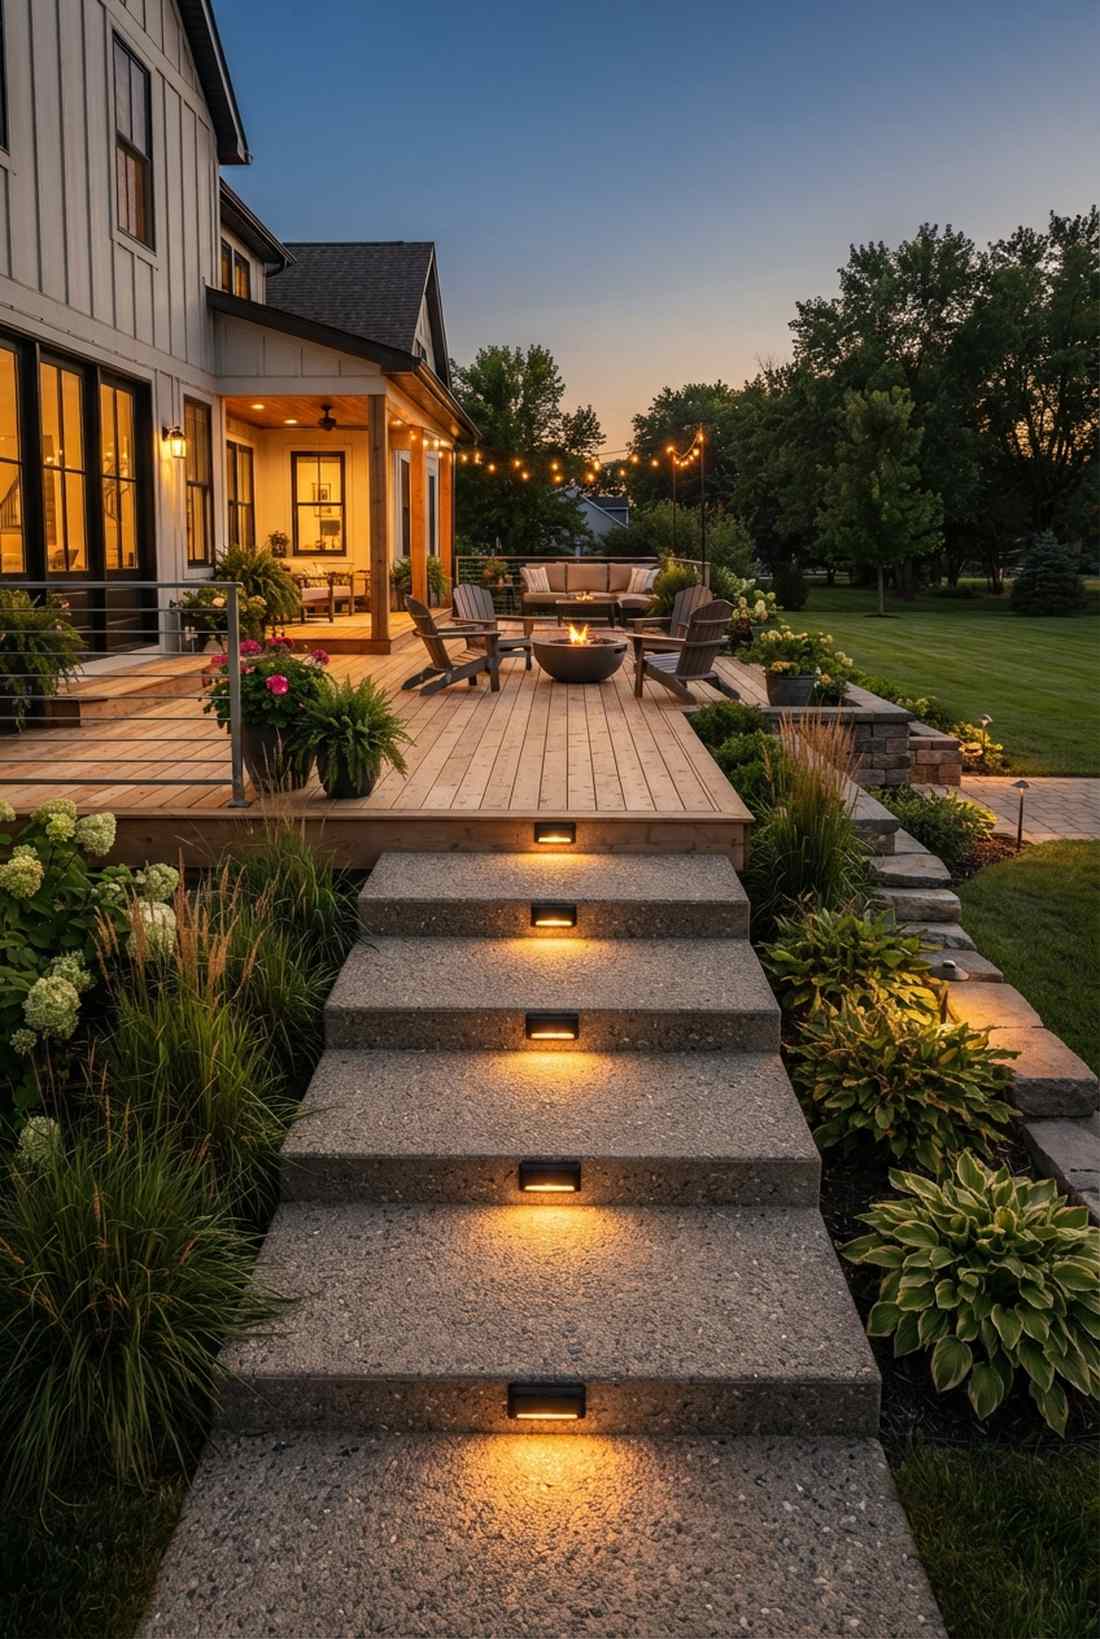
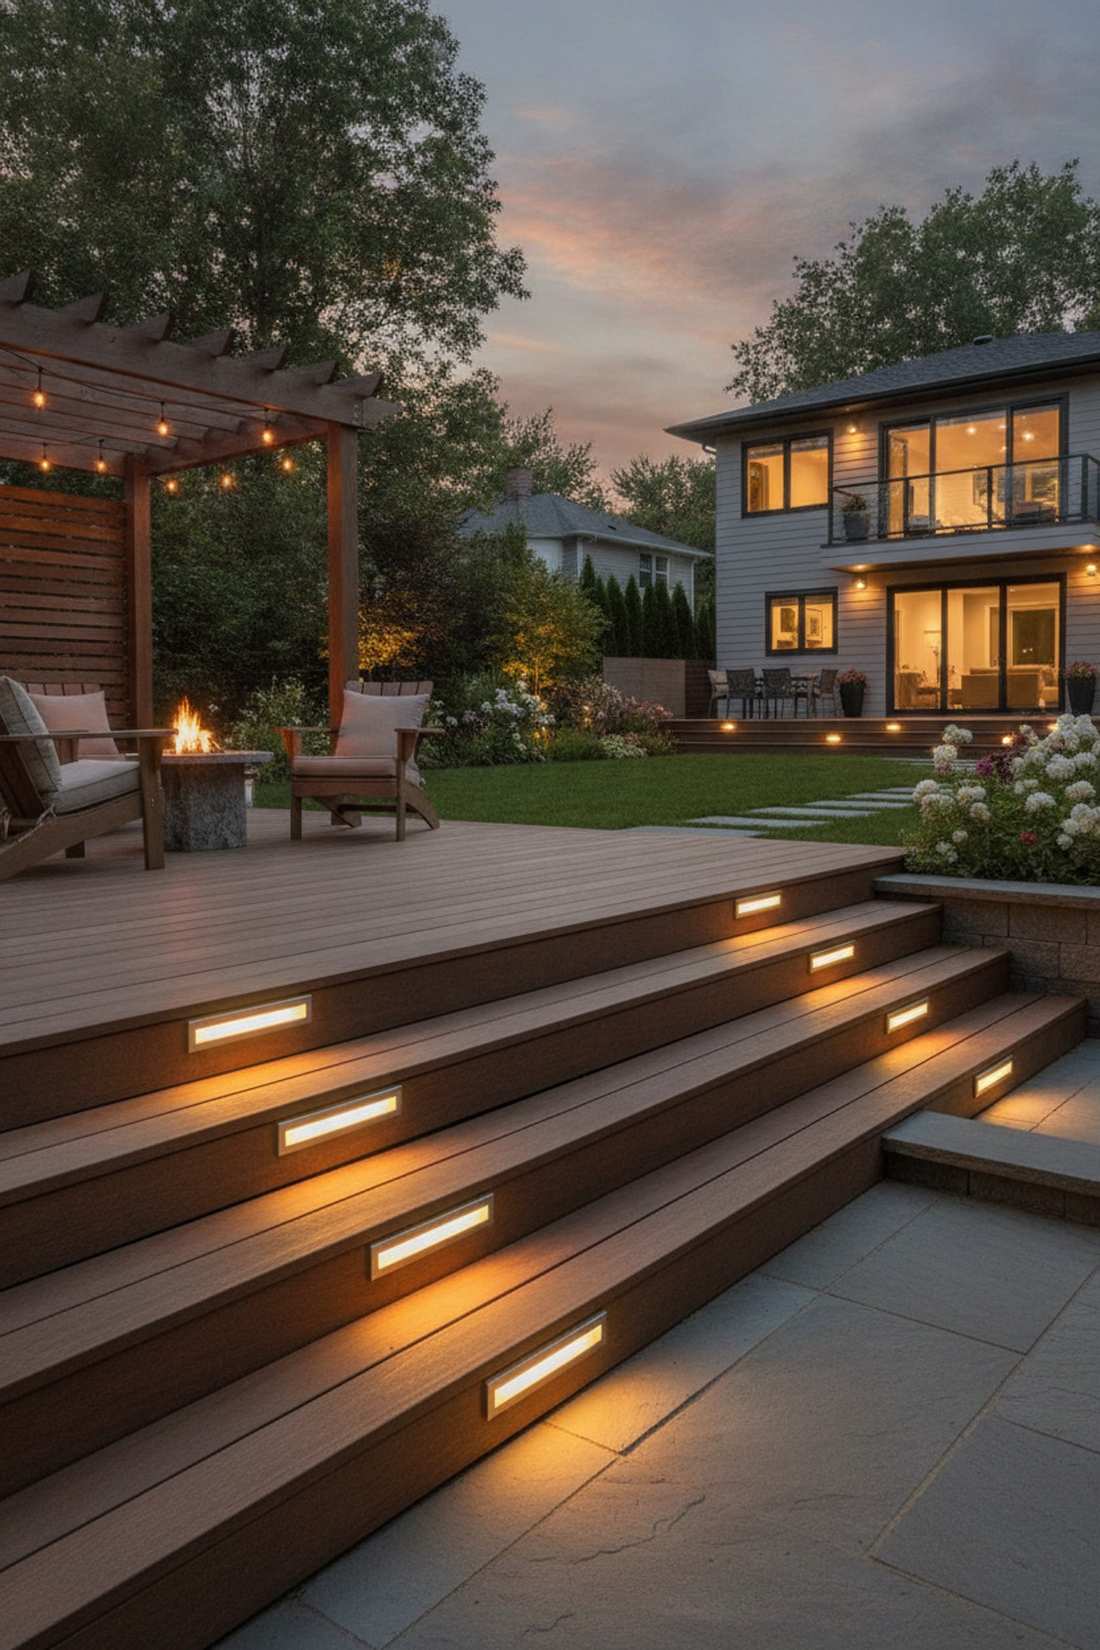
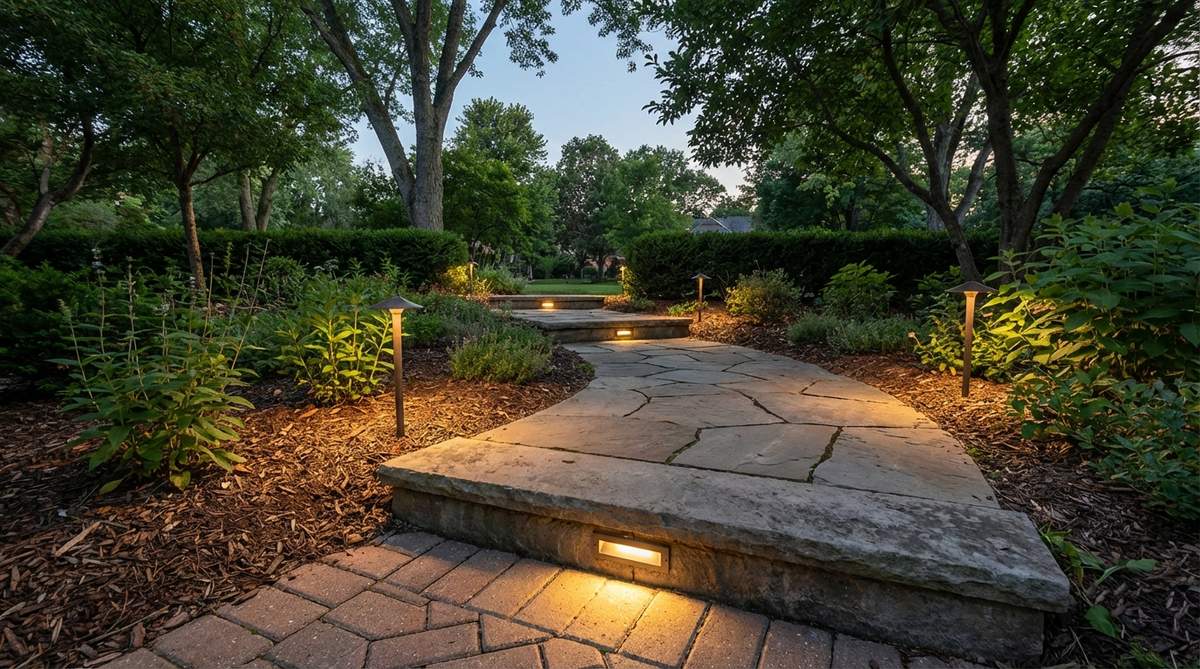
Guides your footsteps with a sleek, low-profile glow that looks completely integrated. Adding stairway lighting layouts is crucial for safety while keeping the aesthetic moody.
Solar stakes that stick out look messy; flush-mounted step lights give a designer-level finish that looks professionally hardwired. Snagging adhesive solar step lights allows you to get this custom look without drilling a single hole in your concrete.
Upgrading your stairs costs about $30–$50 for a pack of lights. Save this for an instant evening upgrade.
- Key Materials: Flat LED step lights, outdoor mounting tape
- Vibe / Style: Modern architectural path
- Difficulty: Just peel and stick
- Budget Breakdown: Step light pack: $35 | Mounting tape: $10.
- Creator’s Tip: Mount them on the vertical riser of the stair, not the flat tread, to prevent people from stepping on them.
- Smart Sourcing: Buy a bulk pack of weatherproof solar step lights and heavy-duty exterior mounting tape.
43. String Light Canopies
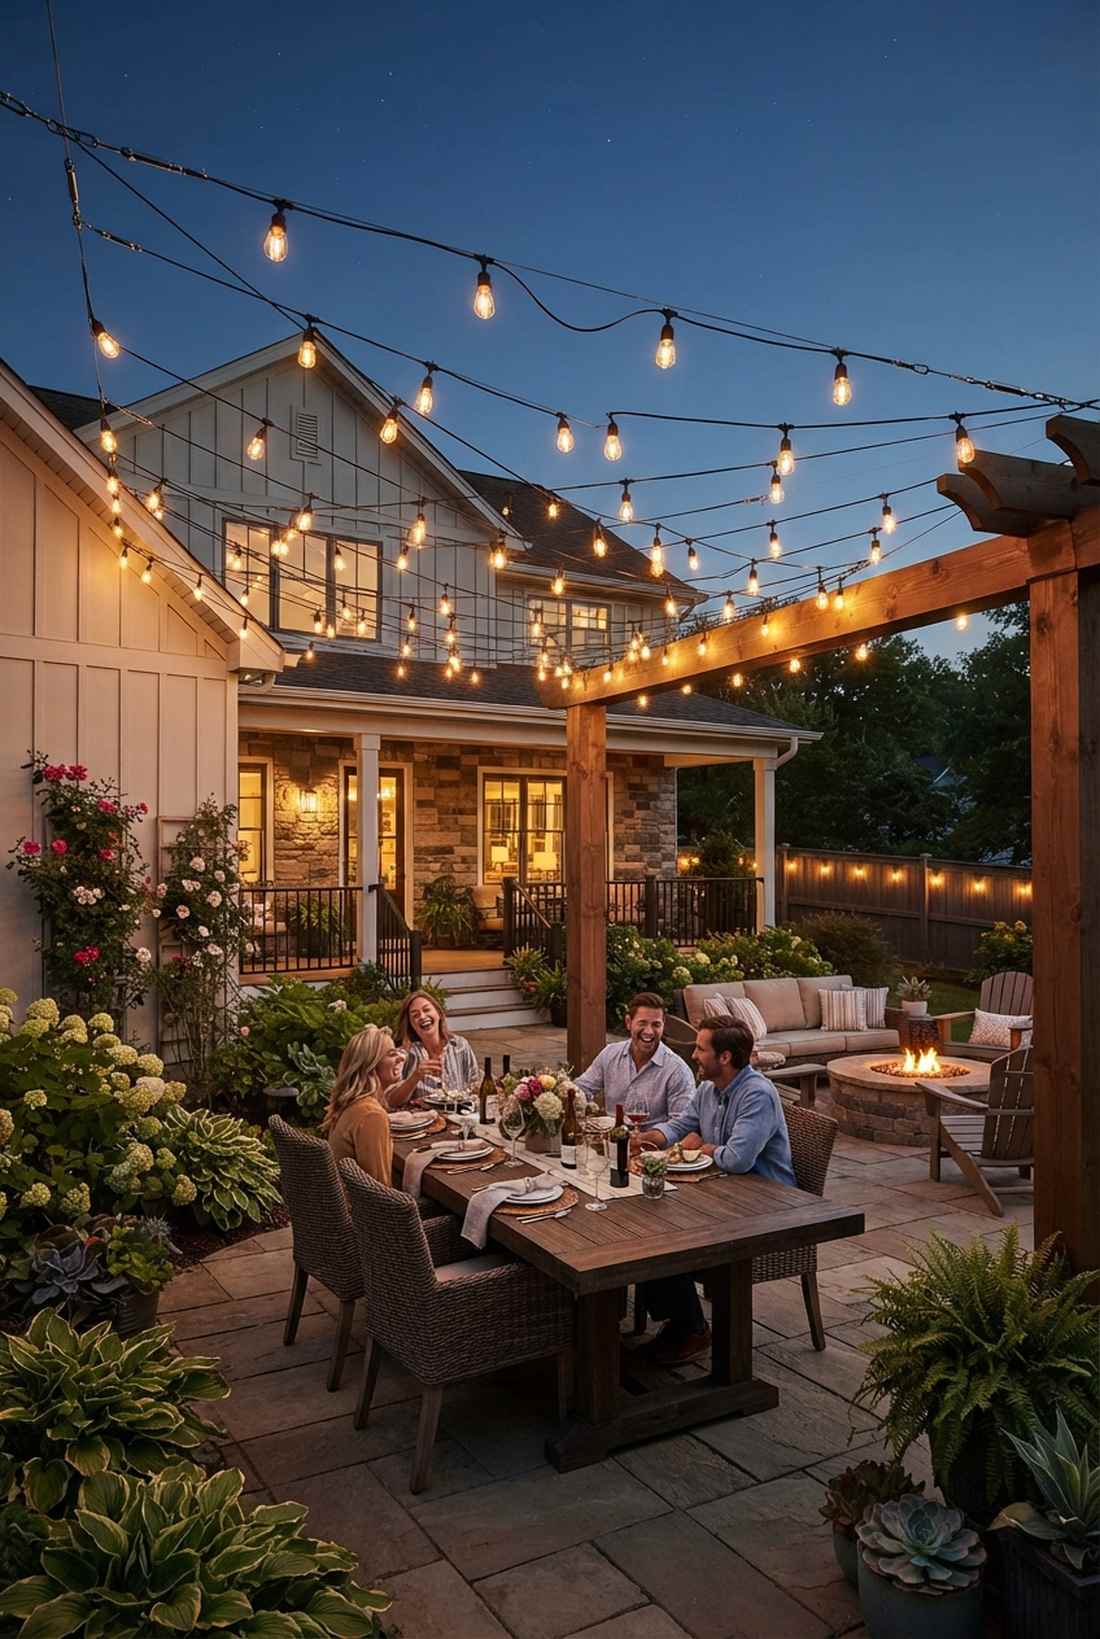
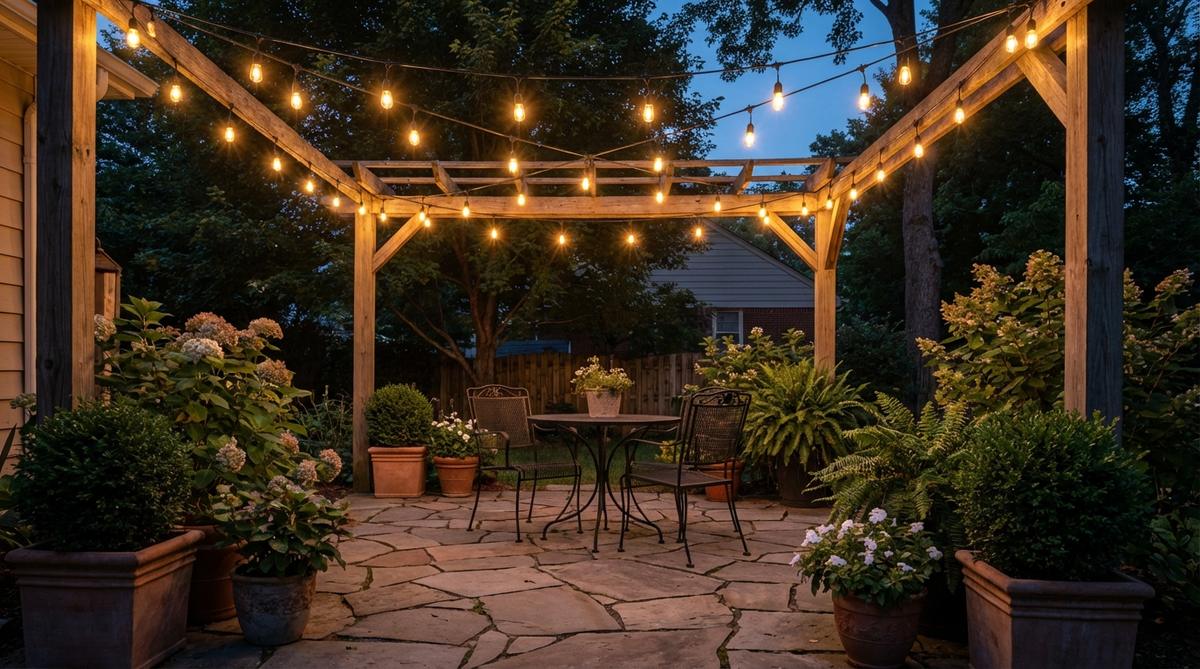
Creates a floating ceiling of warm stars right over your outdoor dining table. A classic patio decor setup using canopy lights instantly defines an outdoor room without walls.
Draping lights loosely looks sloppy; pulling them tight on a zig-zag grid feels like a custom-built installation. Utilizing a steel wire tension kit ensures your heavy Edison bulbs won’t sag dramatically in the summer heat.
A tight, professional canopy string setup costs $50–$90.
- Key Materials: Commercial-grade string lights, steel guide wire, turnbuckles
- Vibe / Style: Cozy Italian bistro
- Difficulty: Requires sturdy anchor points
- Budget Breakdown: Lights: $45 | Wire kit: $25.
- Creator’s Tip: Always hang the steel wire first, pull it tight, and then zip-tie the light cord to it. Never use the light cord for tension.
- Smart Sourcing: Order shatterproof commercial LED string lights and a stainless steel globe light suspension kit.
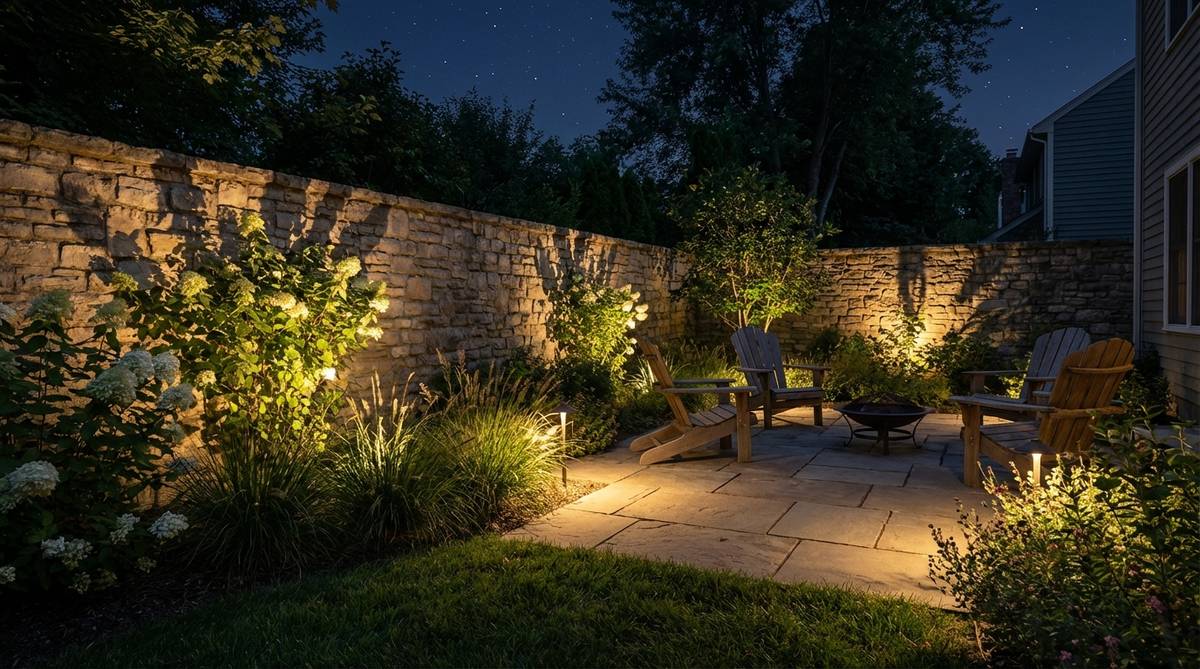
44. Accent Plant Spotlights
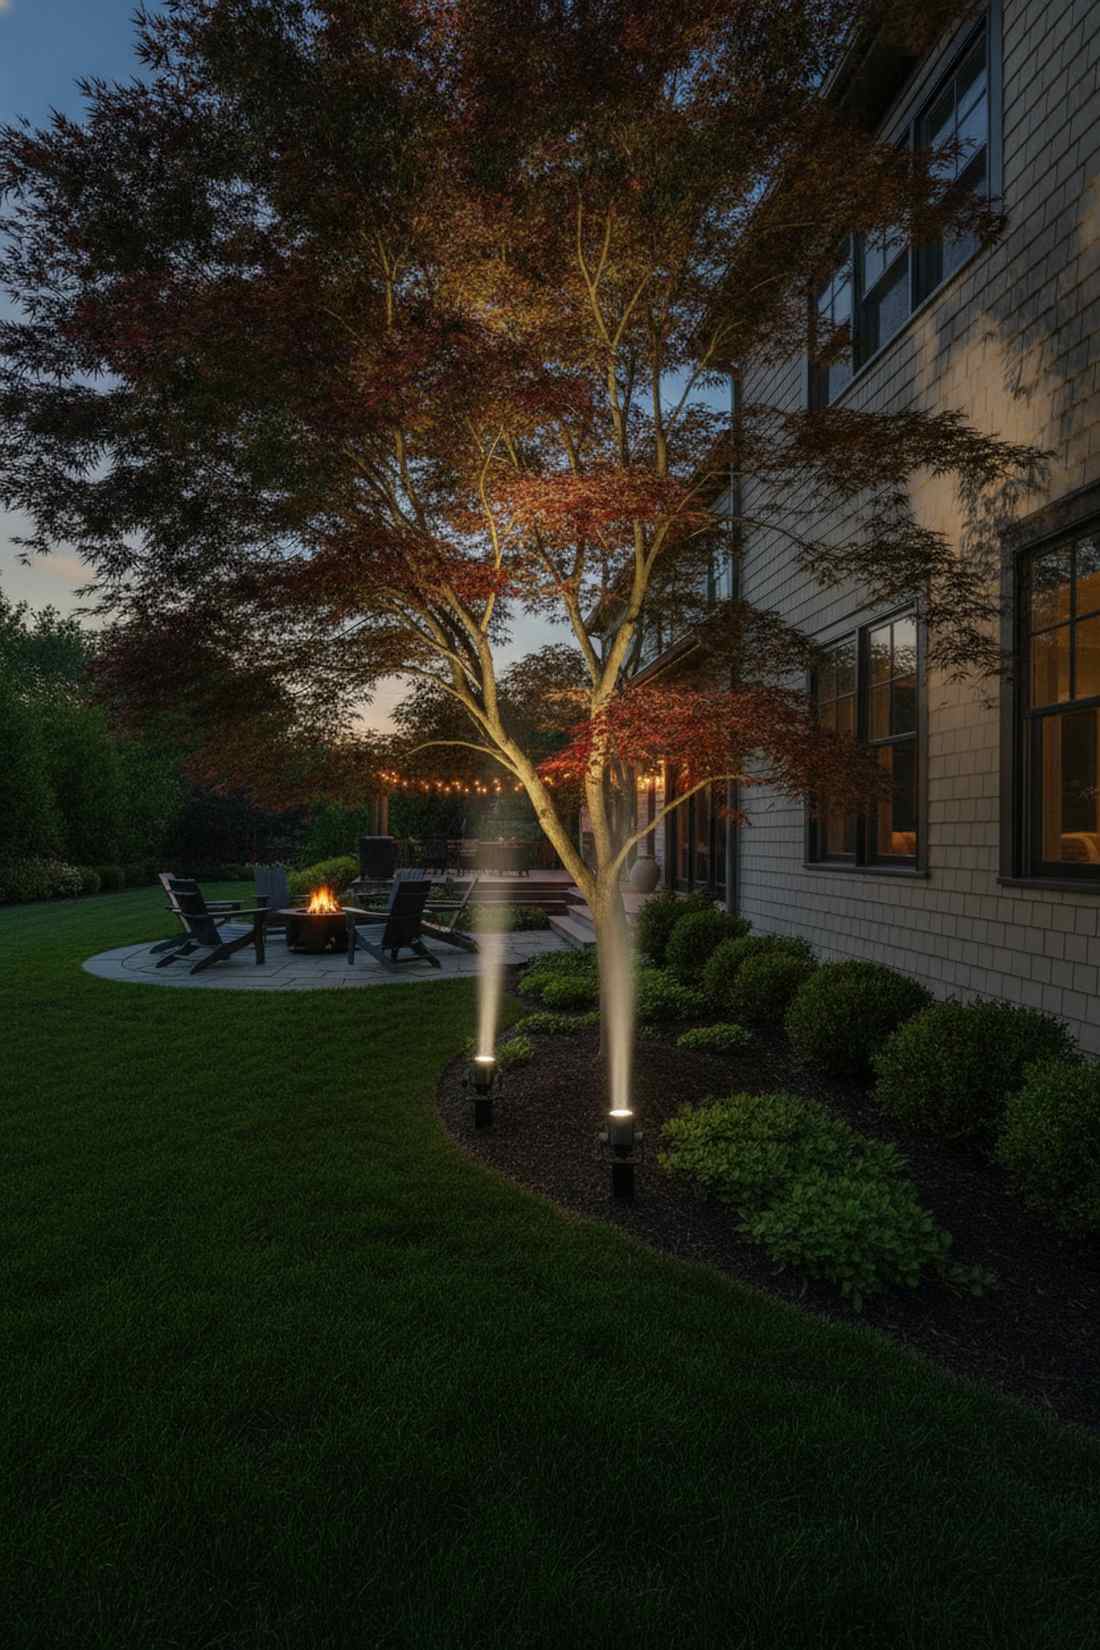
Throws massive, dramatic shadows of your best trees against the side of the house. Focusing small garden landscape ideas around selective lighting makes cheap plants look expensive.
Lighting up the whole yard flattens it; precision spotlighting instantly elevates the aesthetic by creating intense focal points. Using solar-powered narrow beam spots lets you highlight that Japanese maple without running wires across the lawn.
Two high-quality spotlights will cost about $40–$70. Pin this to dramatically change your yard’s night profile!
- Key Materials: Narrow-beam LED spotlights, mounting stakes
- Vibe / Style: Dramatic botanical gallery
- Difficulty: Very easy push-in setup
- Budget Breakdown: Spotlight pair: $50.
- Creator’s Tip: Position the light directly under the plant facing straight up to catch the underside of the leaves for an eerie, glowing effect.
- Smart Sourcing: Pick up adjustable beam solar landscape spotlights and a heavy-duty ground stake replacement pack.
Material Guide: Cheap vs. Premium Aesthetic
Knowing exactly where to save and where to spend makes all the difference in achieving that “looks expensive but isn’t” vibe.
- Standard vs. UV-Resistant/Premium: Cheap plastics shatter and fade in one season. Upgrading to UV-coated resin or composite ensures your planters look like stone and last a decade.
- Pre-made Kits vs. Sourcing Locally: While lumber is cheaper locally, hardware kits (like pergola brackets or wire tensioners) save massive frustration and guarantee a perfectly straight, professional build.
45. Water Feature Lighting

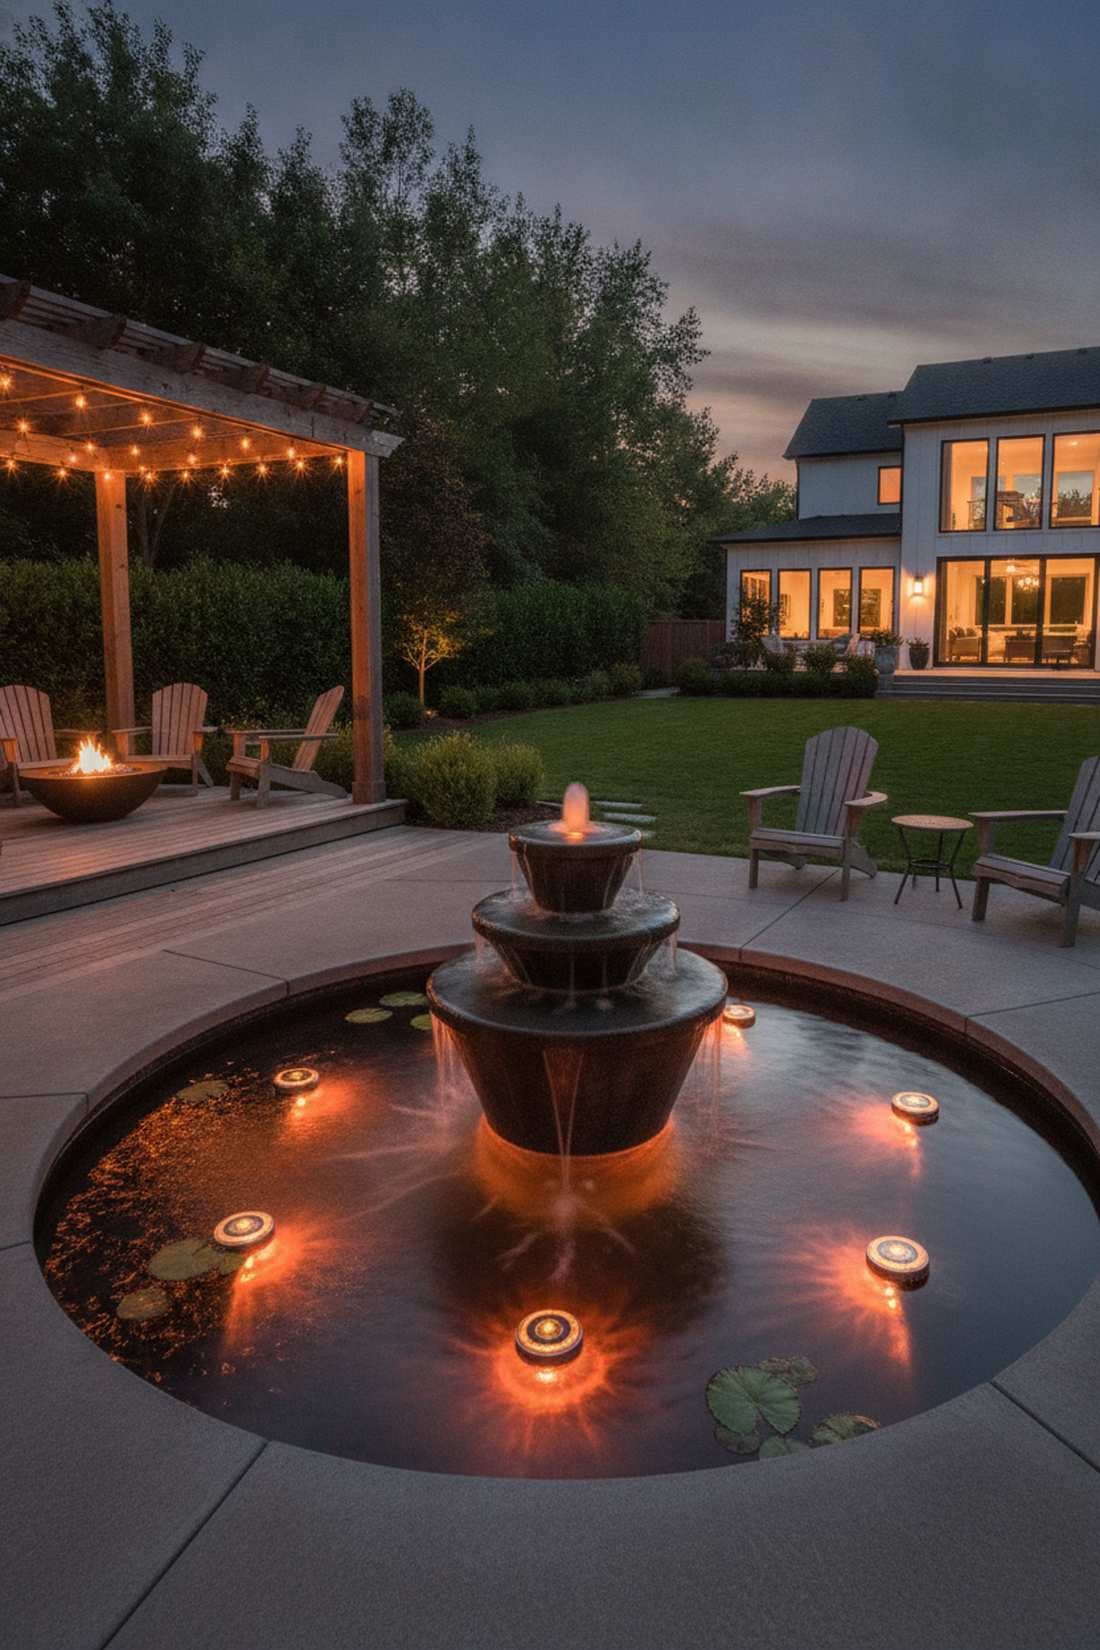
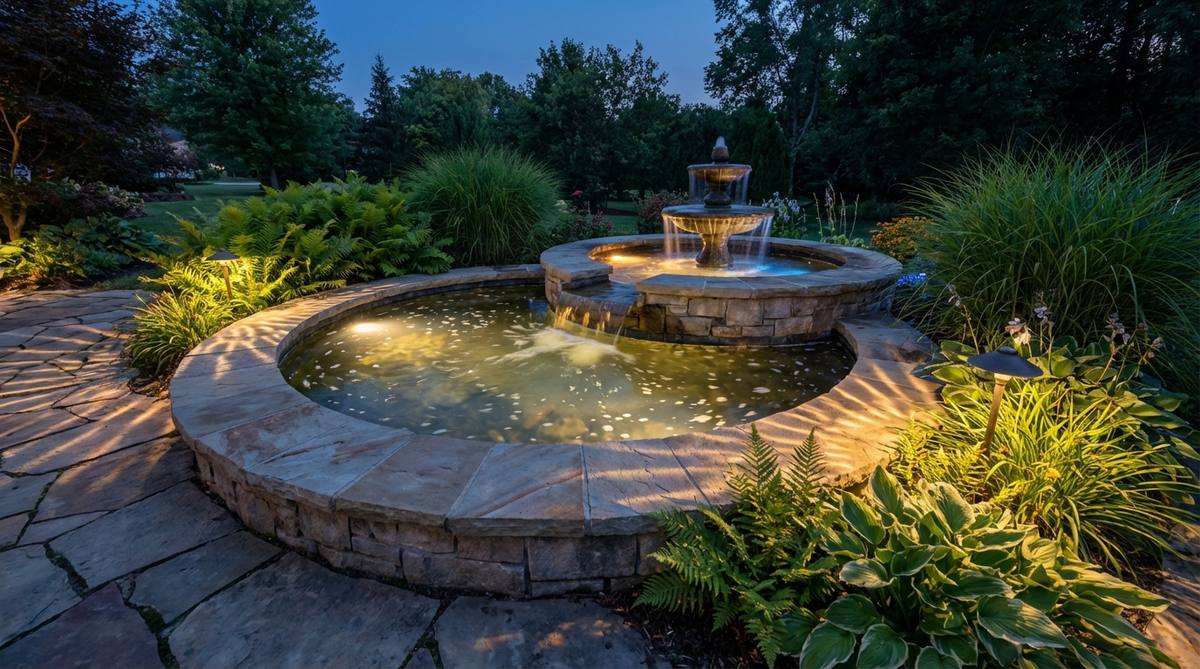
Makes the ripples in your tiny fountain dance and glow like liquid fire. A brilliant miniature garden supply trick is dropping submersible LEDs into water bowls.
A dark water feature disappears at night; underwater illumination delivers a surprisingly premium look by casting moving light patterns nearby. Grabbing remote-controlled submersible puck lights allows you to change the glow to match the mood without wet hands.
Adding magic to your water feature costs a mere $15–$30.
- Key Materials: Waterproof LED pucks, glass weights
- Vibe / Style: Enchanted modern oasis
- Difficulty: Drop and go
- Budget Breakdown: Waterproof lights: $20.
- Creator’s Tip: If the lights float, glue a heavy flat river rock to the bottom with marine silicone to keep them submerged.
- Smart Sourcing: Use a multi-pack of IP68 waterproof submersible LEDs and clear aquarium-safe silicone.
46. Solar Lantern Clusters

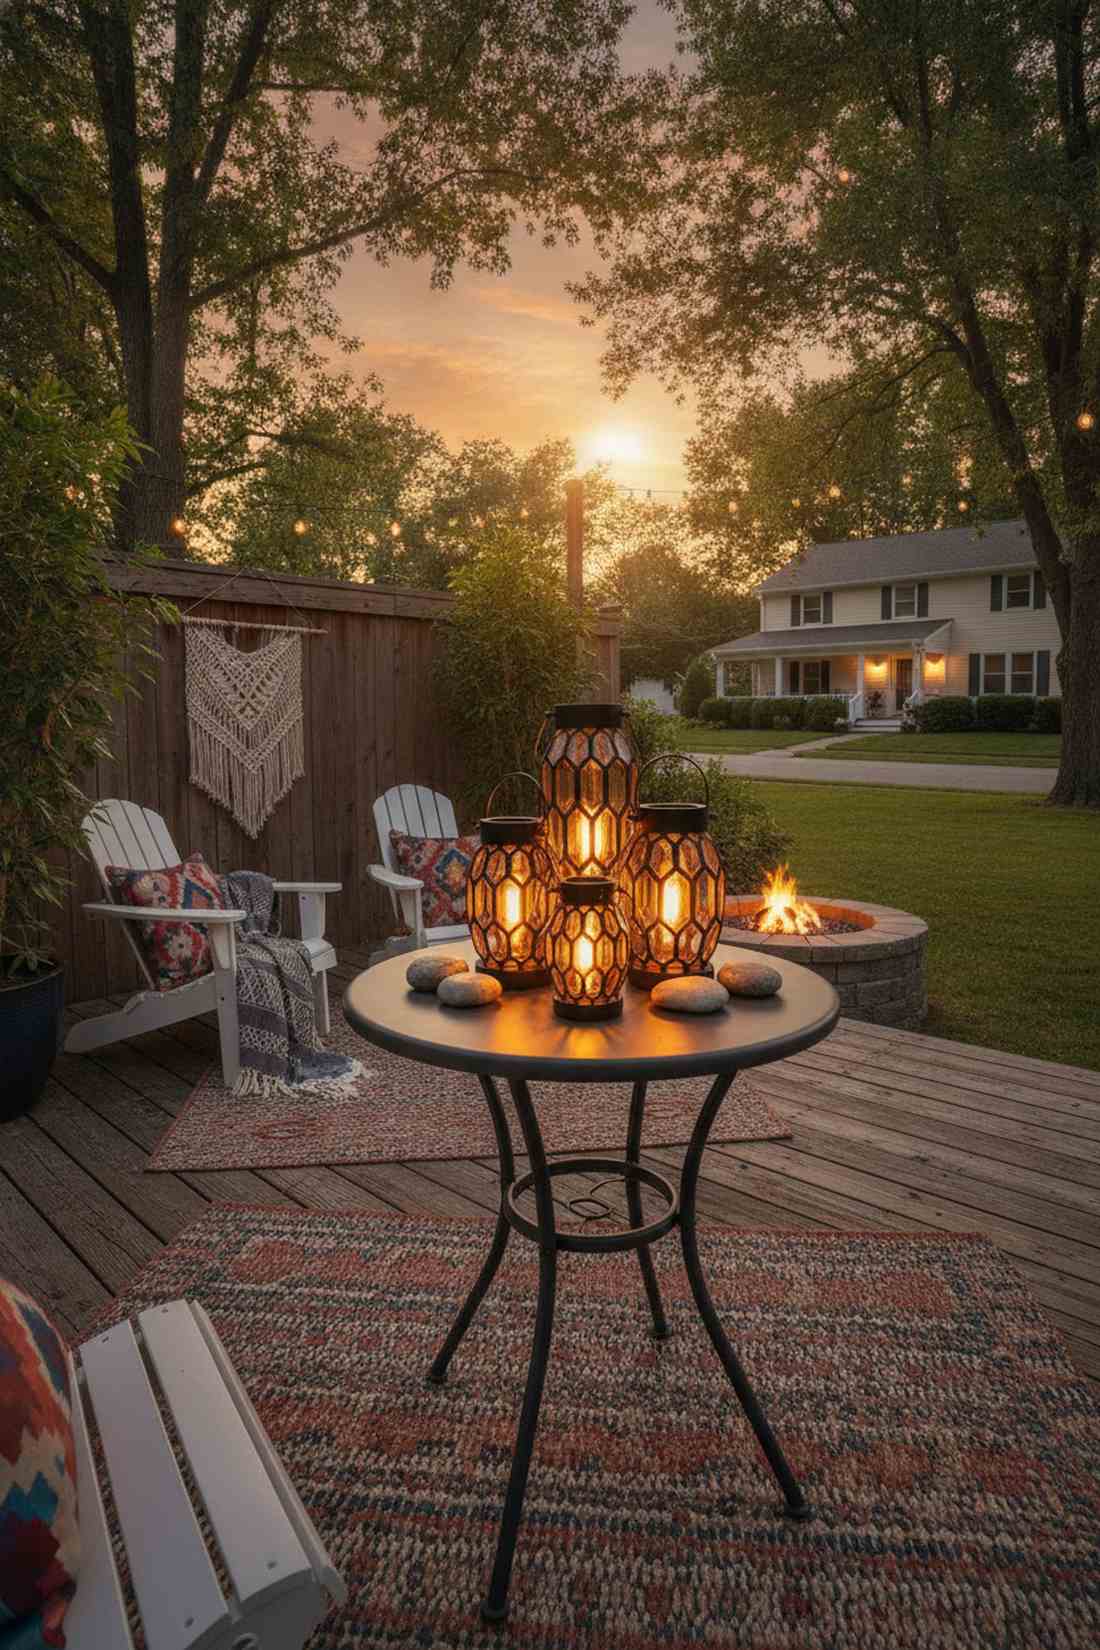

Creates a glowing, romantic centerpiece right on your tiny bistro table. A cluster of decorative outdoor lanterns adds instant warmth to cold, dark patio corners.
One small light looks lonely; grouping three varied heights bypasses the usual cheap look for an intentional, curated display. Using flickering flame solar lanterns mimics real fire without the danger of knocking over candles.
A stunning cluster of three lanterns runs about $40–$80. Save this for easy table decor!
- Key Materials: Mixed-size solar lanterns, outdoor table
- Vibe / Style: Bohemian patio lounge
- Difficulty: Zero effort
- Budget Breakdown: Lantern cluster: $50.
- Creator’s Tip: Make sure they are placed where they receive at least 5 hours of direct sun, or they will die before your dinner party ends.
- Smart Sourcing: Order a 3-piece flickering LED solar lantern set and heavy-duty tabletop wind weights.
47. Under-Bench Illumination
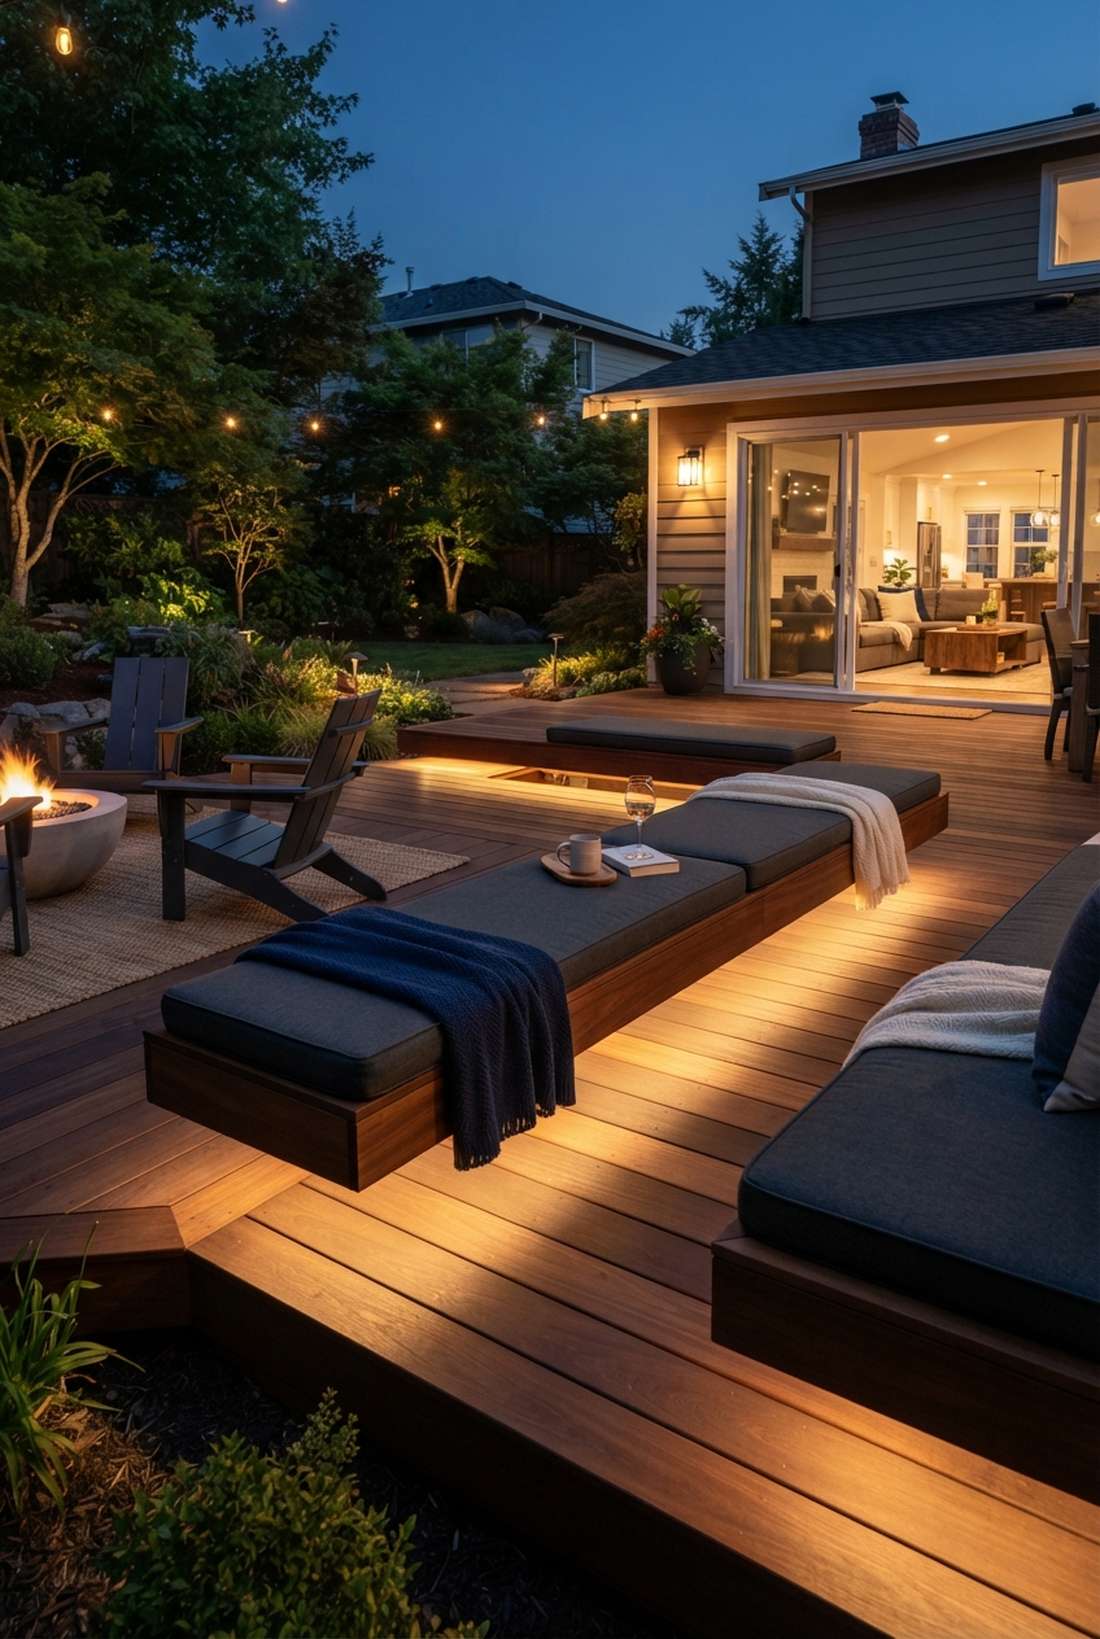
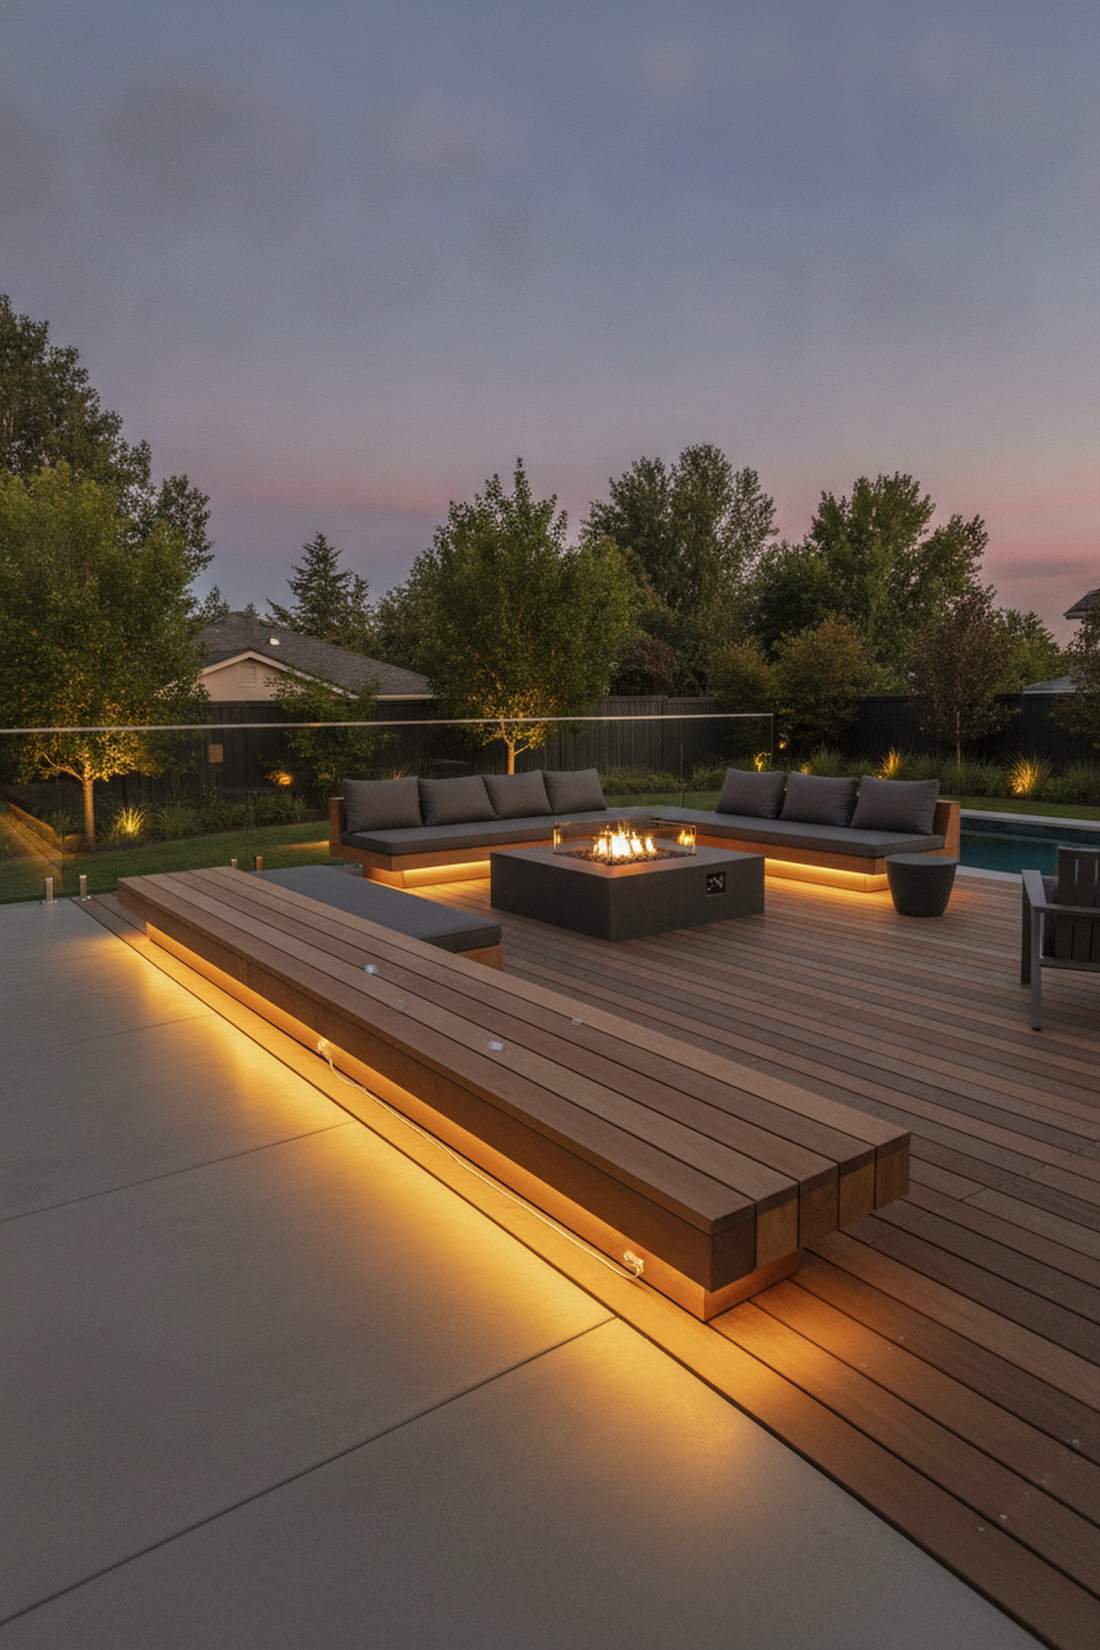

Makes your built-in seating look like it’s magically levitating off the ground. Utilizing hidden deck layout lighting creates the ultimate modern lounge atmosphere.
Exposed bulbs are blinding; hiding strips pointing down gives a designer-level finish that safely lights the floor. Securing waterproof LED strip tapes under the lip of a step or bench is a high-tech upgrade that takes ten minutes.
The floating bench effect can be yours for $25–$50.
- Key Materials: Outdoor LED strip lights, securing clips
- Vibe / Style: Ultra-modern floating lounge
- Difficulty: Peel-and-stick with clips
- Budget Breakdown: LED strips: $30 | Mounting clips: $10.
- Creator’s Tip: Do not rely on the adhesive backing alone outdoors; always use screw-in silicone mounting clips every 12 inches.
- Smart Sourcing: Buy an IP65 waterproof outdoor LED strip spool and a pack of silicone strip mounting brackets.
Hardscape and Structure
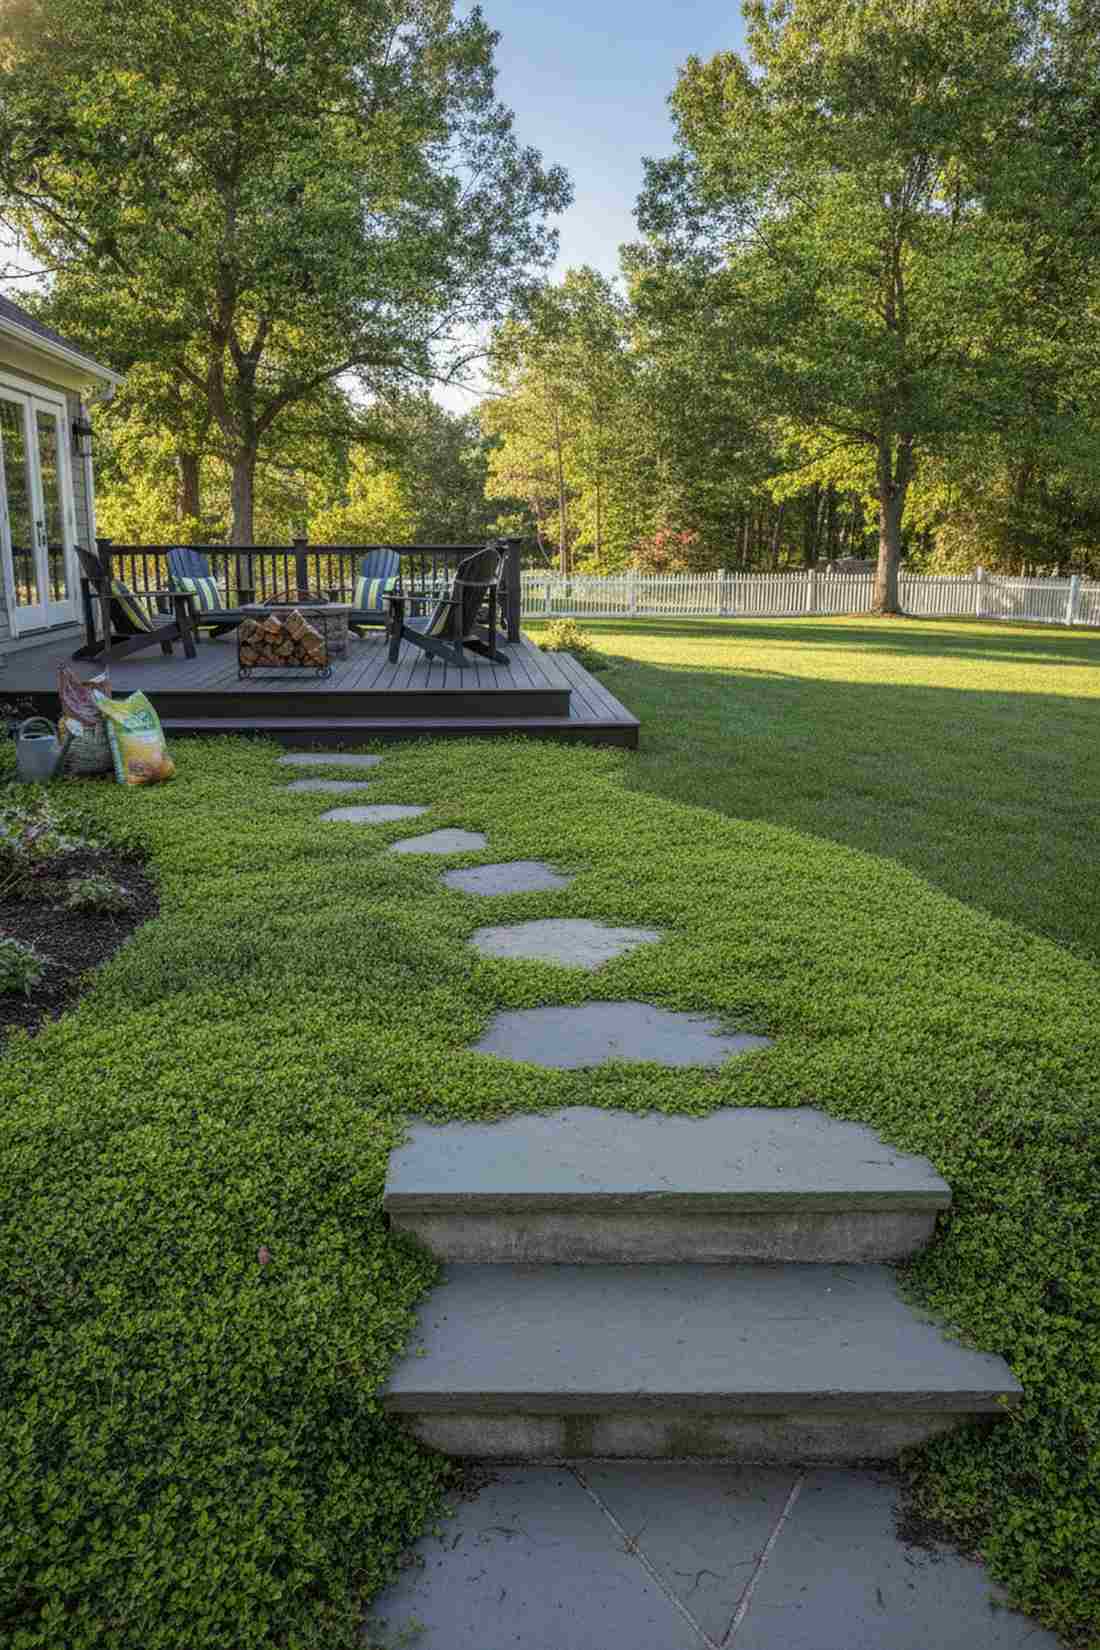
48. Permeable Paving Systems
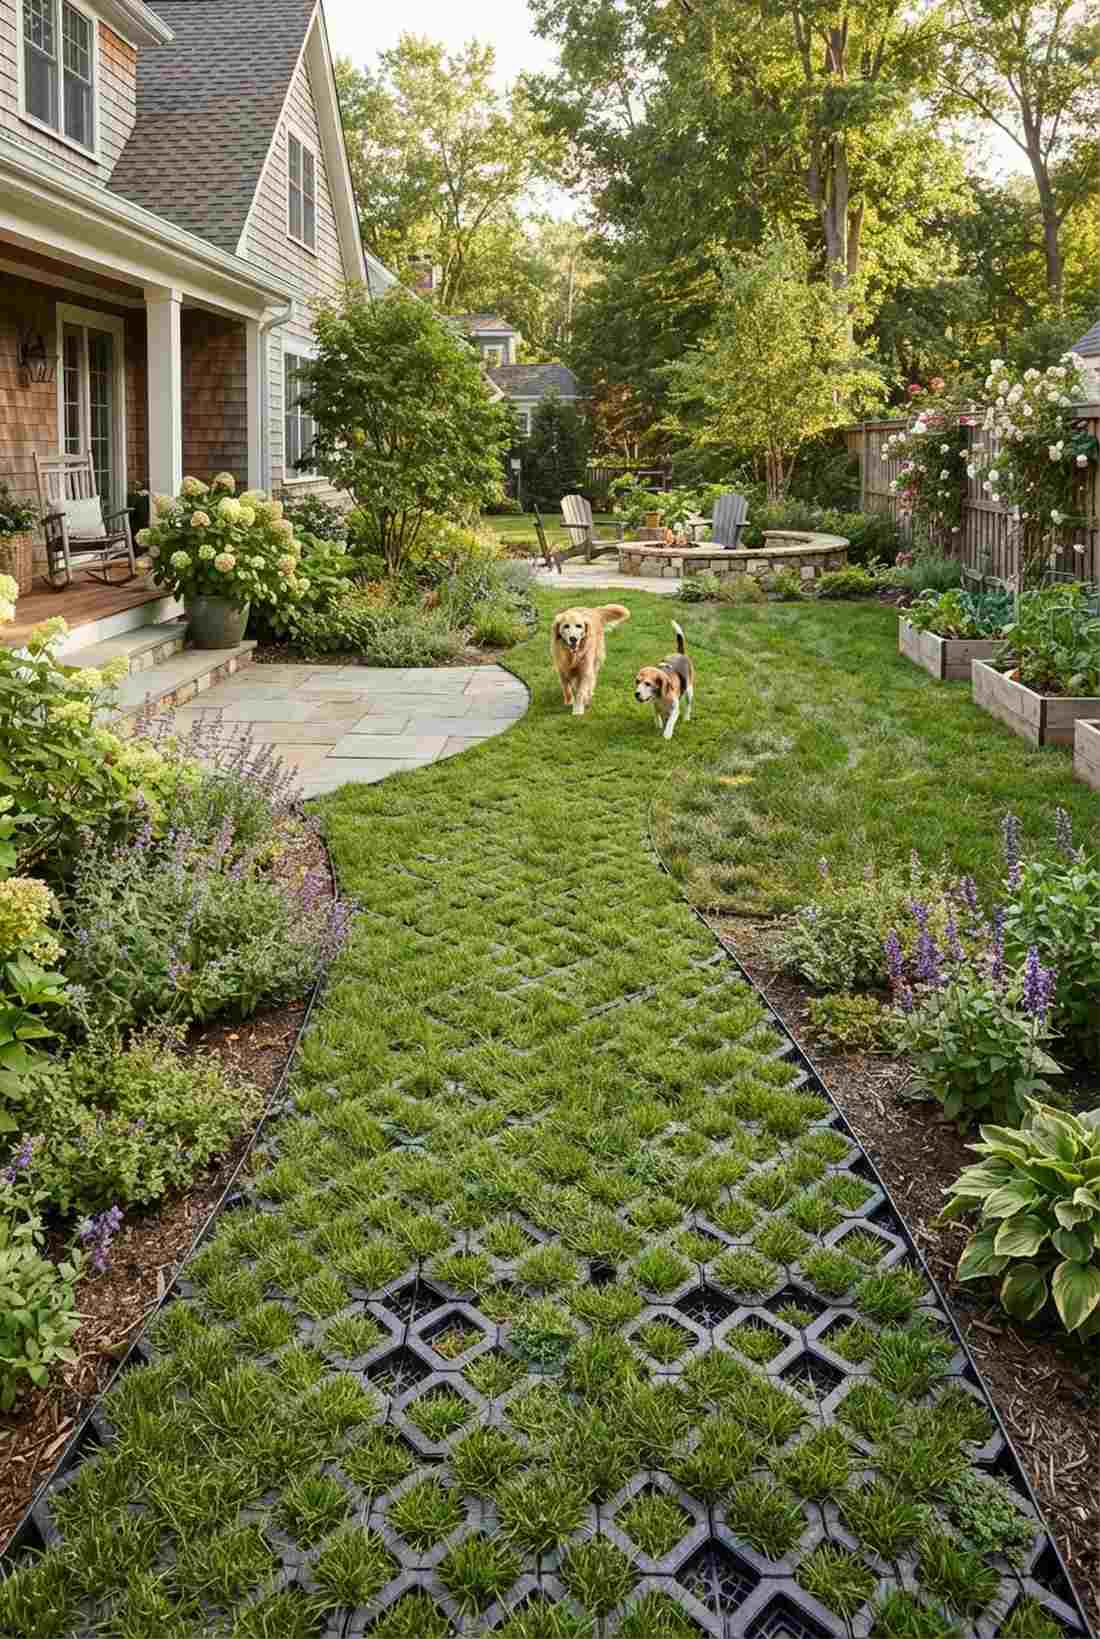
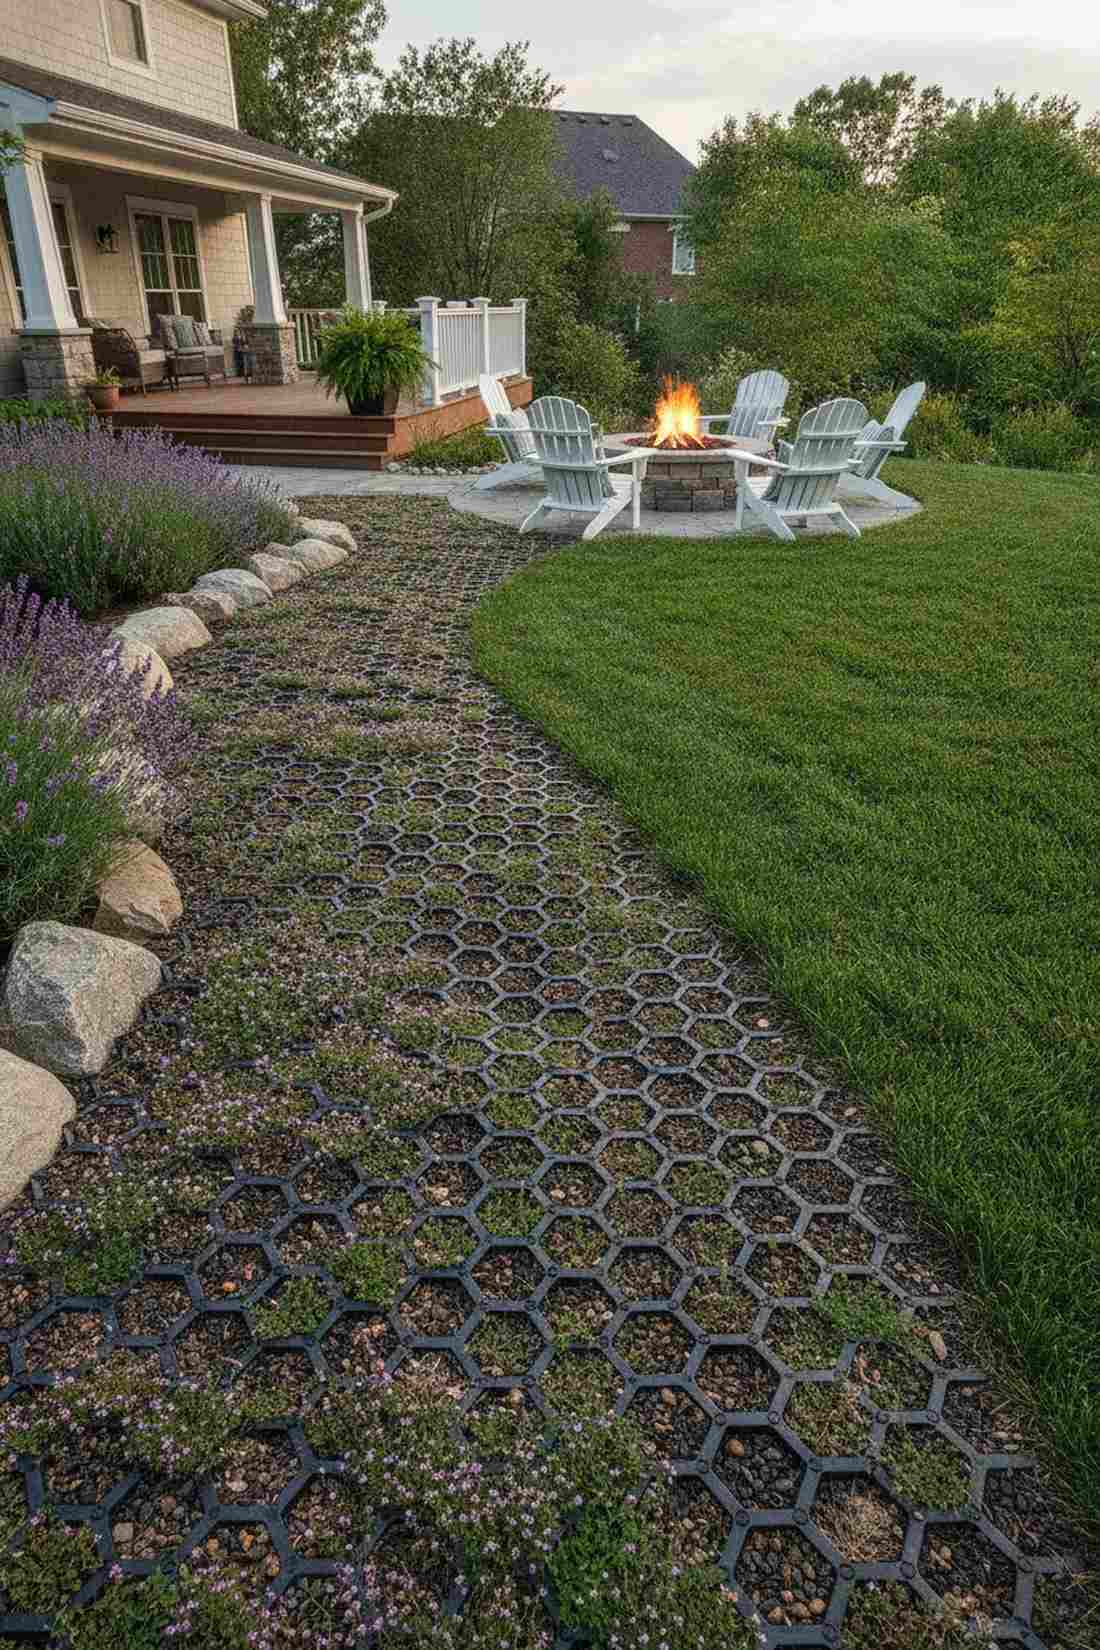
Softens a harsh concrete driveway by letting lush green grass grow right through the stone. This eco-friendly small garden design solves muddy spots while looking incredible.
Solid concrete blocks heat and runoff; using an open-cell grid feels like a custom-built installation of living stone. Snapping together heavy-duty permeable paving grids locks gravel or grass in place so it never ruts under foot traffic.
You can grid and fill a small path for about $80–$150.
- Key Materials: Plastic paving grids, topsoil, durable grass seed
- Vibe / Style: Eco-chic living hardscape
- Difficulty: Moderate ground leveling
- Budget Breakdown: Grid tiles: $70 | Soil/Seed: $25.
- Creator’s Tip: Mix a hardy creeping thyme seed with dwarf fescue so the path smells incredible when you step on it.
- Smart Sourcing: Use interlocking permeable gravel grid pavers and a high-traffic dwarf grass seed blend.
49. Built-In Planter Benches
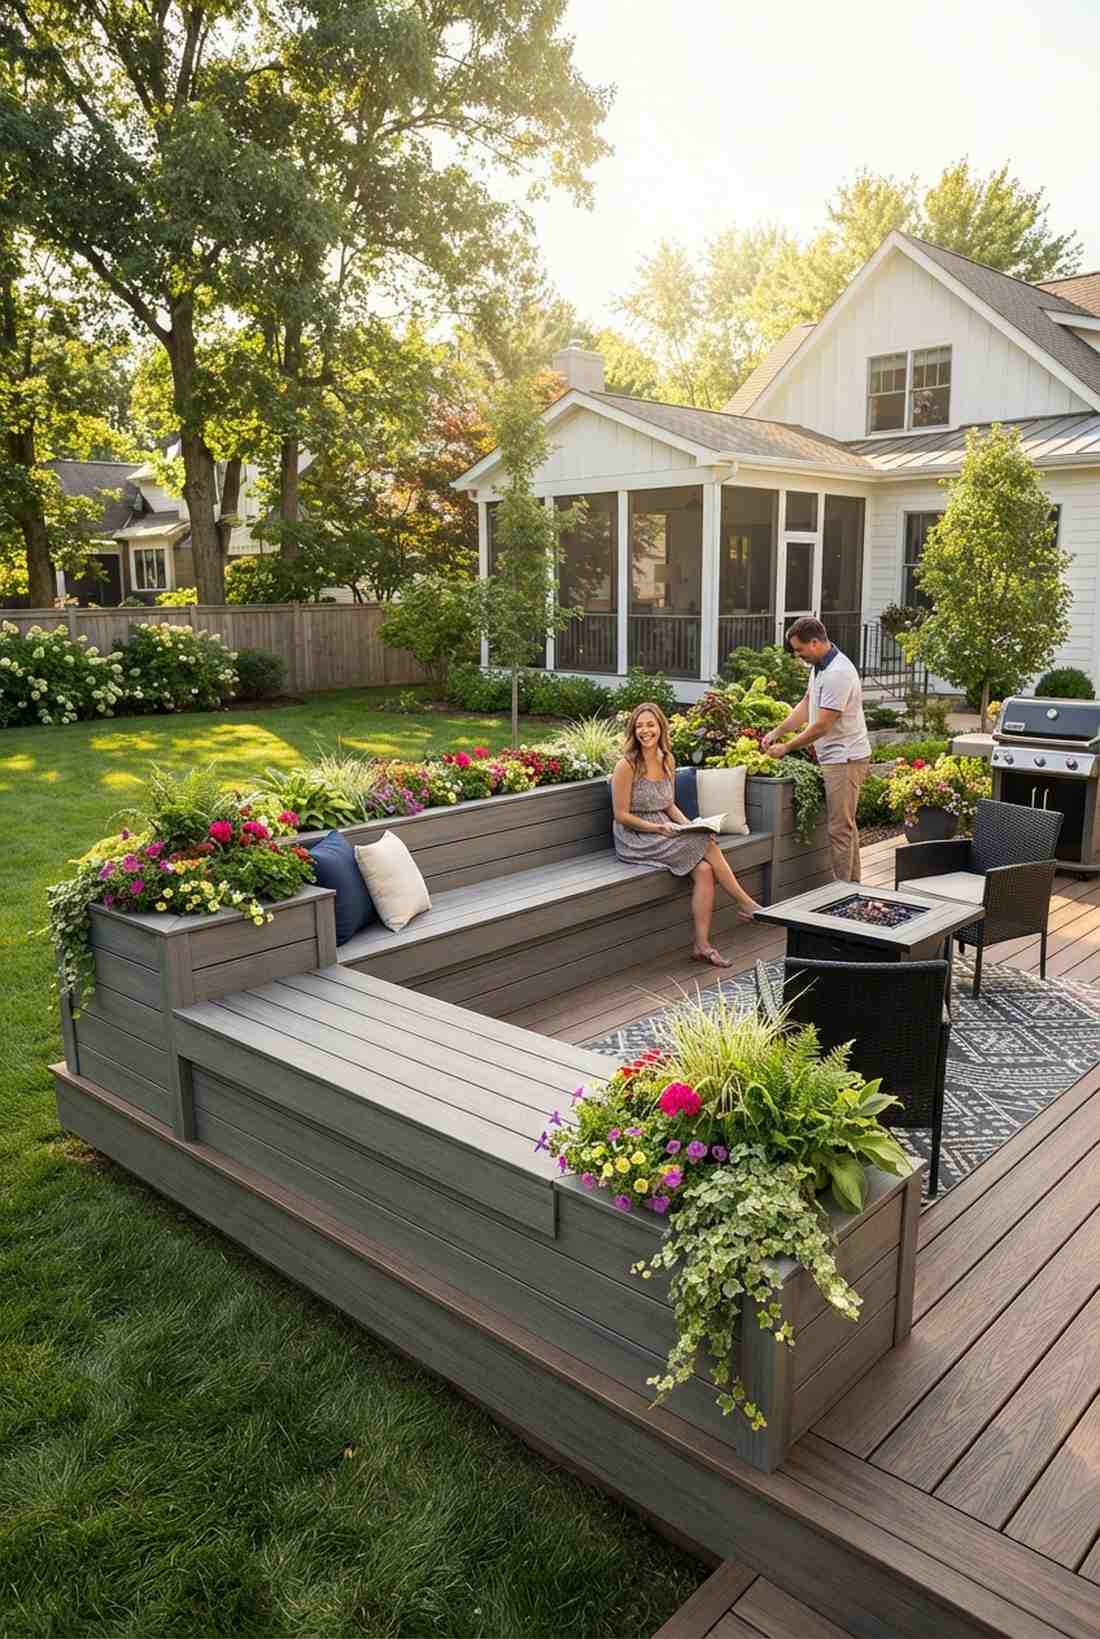
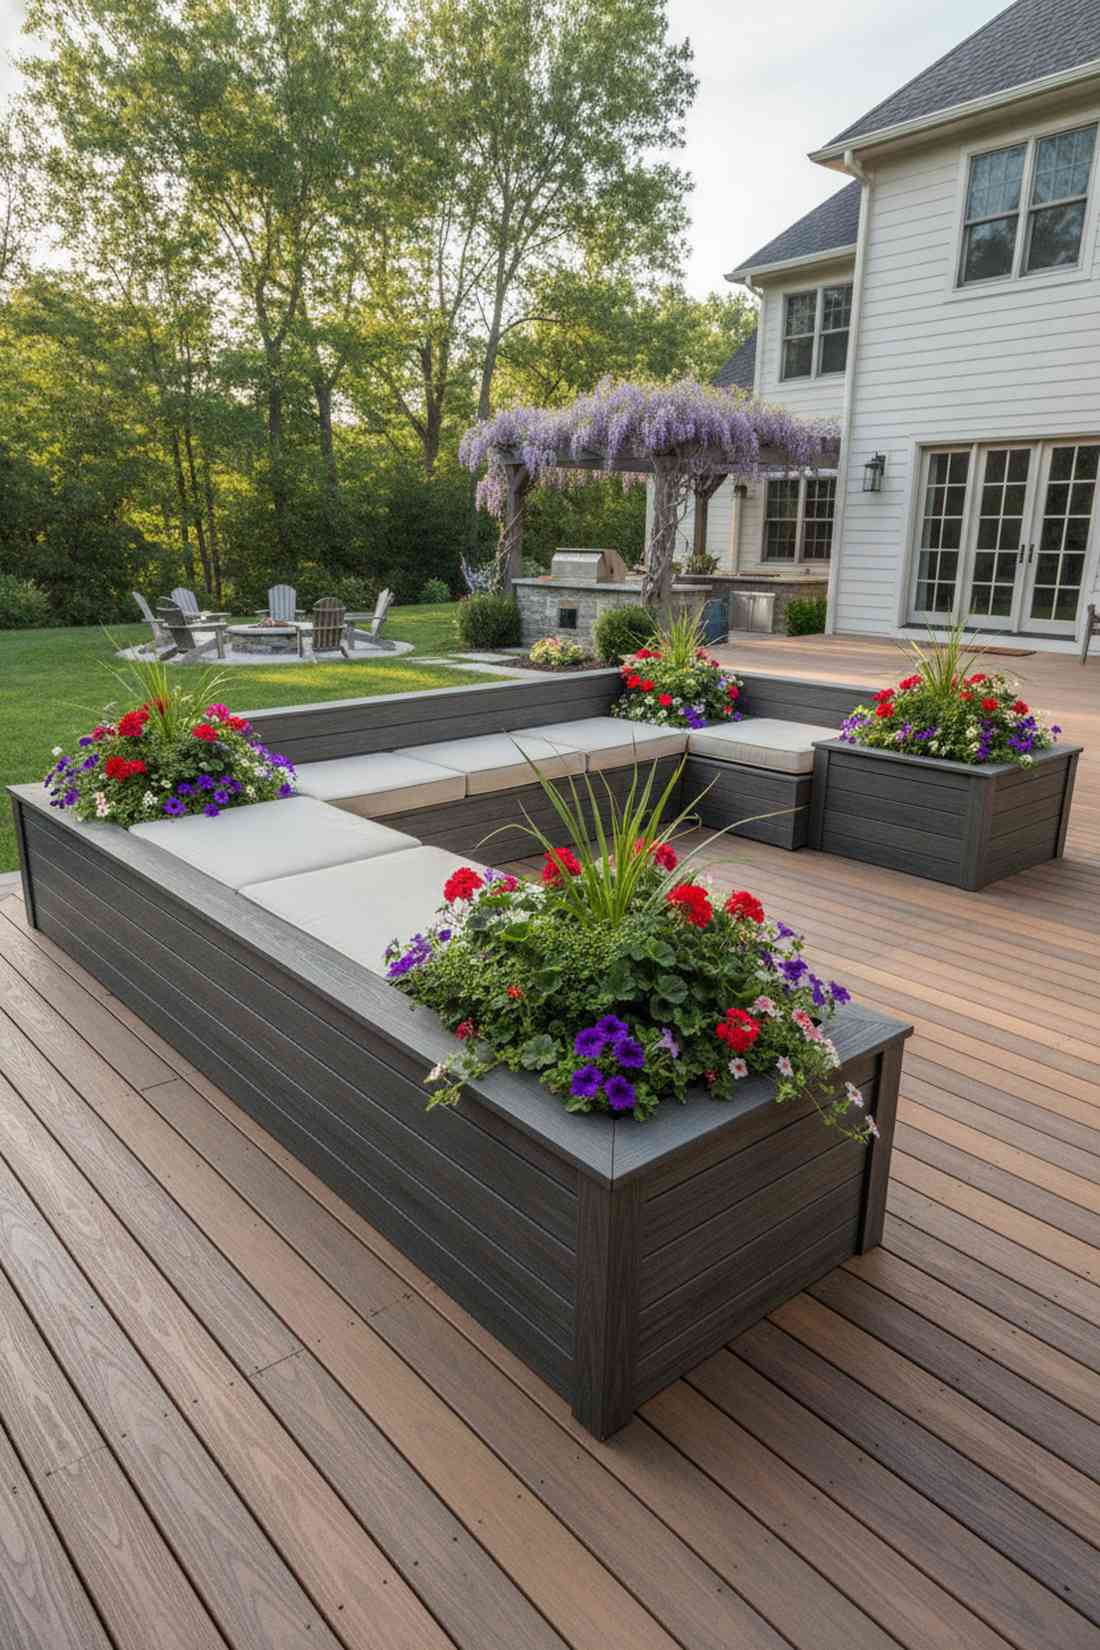
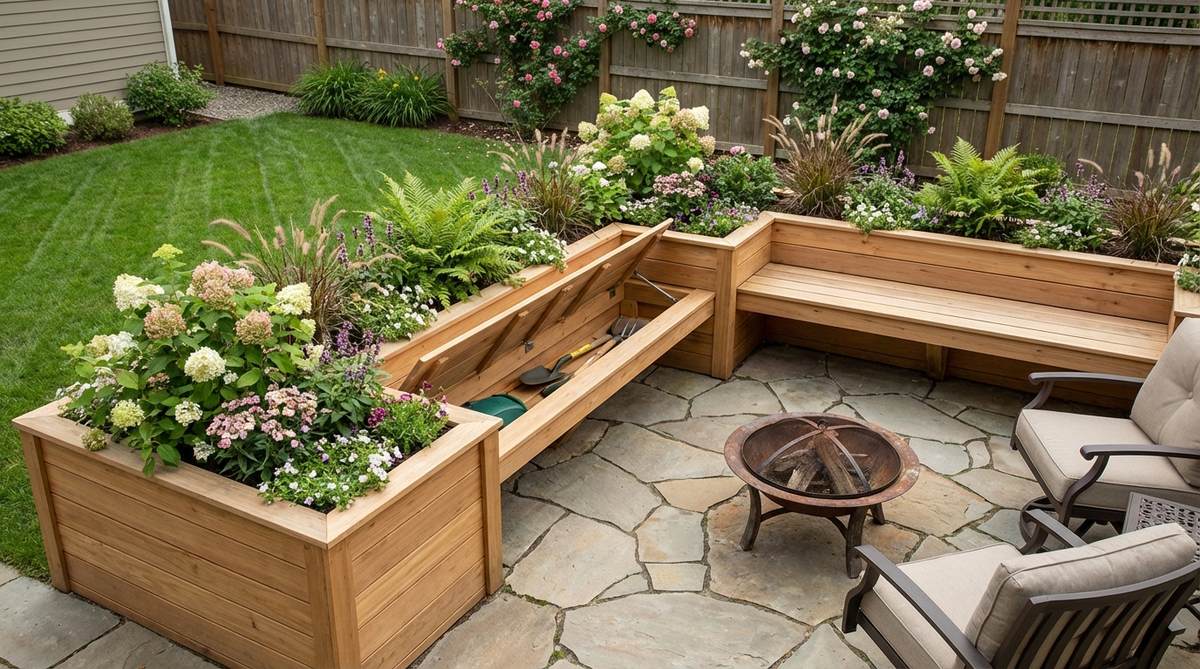
Wraps seating and lush flowers into one continuous, sleek wooden unit. Integrating a small garden layout that multi-tasks saves massive square footage on a deck.
Buying separate chairs and pots clutters the floor; building a unified bench instantly elevates the aesthetic to a custom carpenter finish. Utilizing weatherproof composite fascia boards ensures your bench won’t splinter or rot from the wet soil inside the ends.
A DIY planter-bench combo costs roughly $150–$300 to build. Pin this space-saving blueprint!
- Key Materials: 2×4 framing, composite decking, deck screws
- Vibe / Style: Custom-built architectural deck
- Difficulty: Advanced carpentry project
- Budget Breakdown: Framing: $60 | Composite decking: $150 | Screws: $20.
- Creator’s Tip: Line the planter box sections with heavy pond liner to completely isolate the wet soil from your wooden frame.
- Smart Sourcing: Grab premium composite decking boards and epoxy-coated exterior deck screws.
50. Decorative Screen Panels
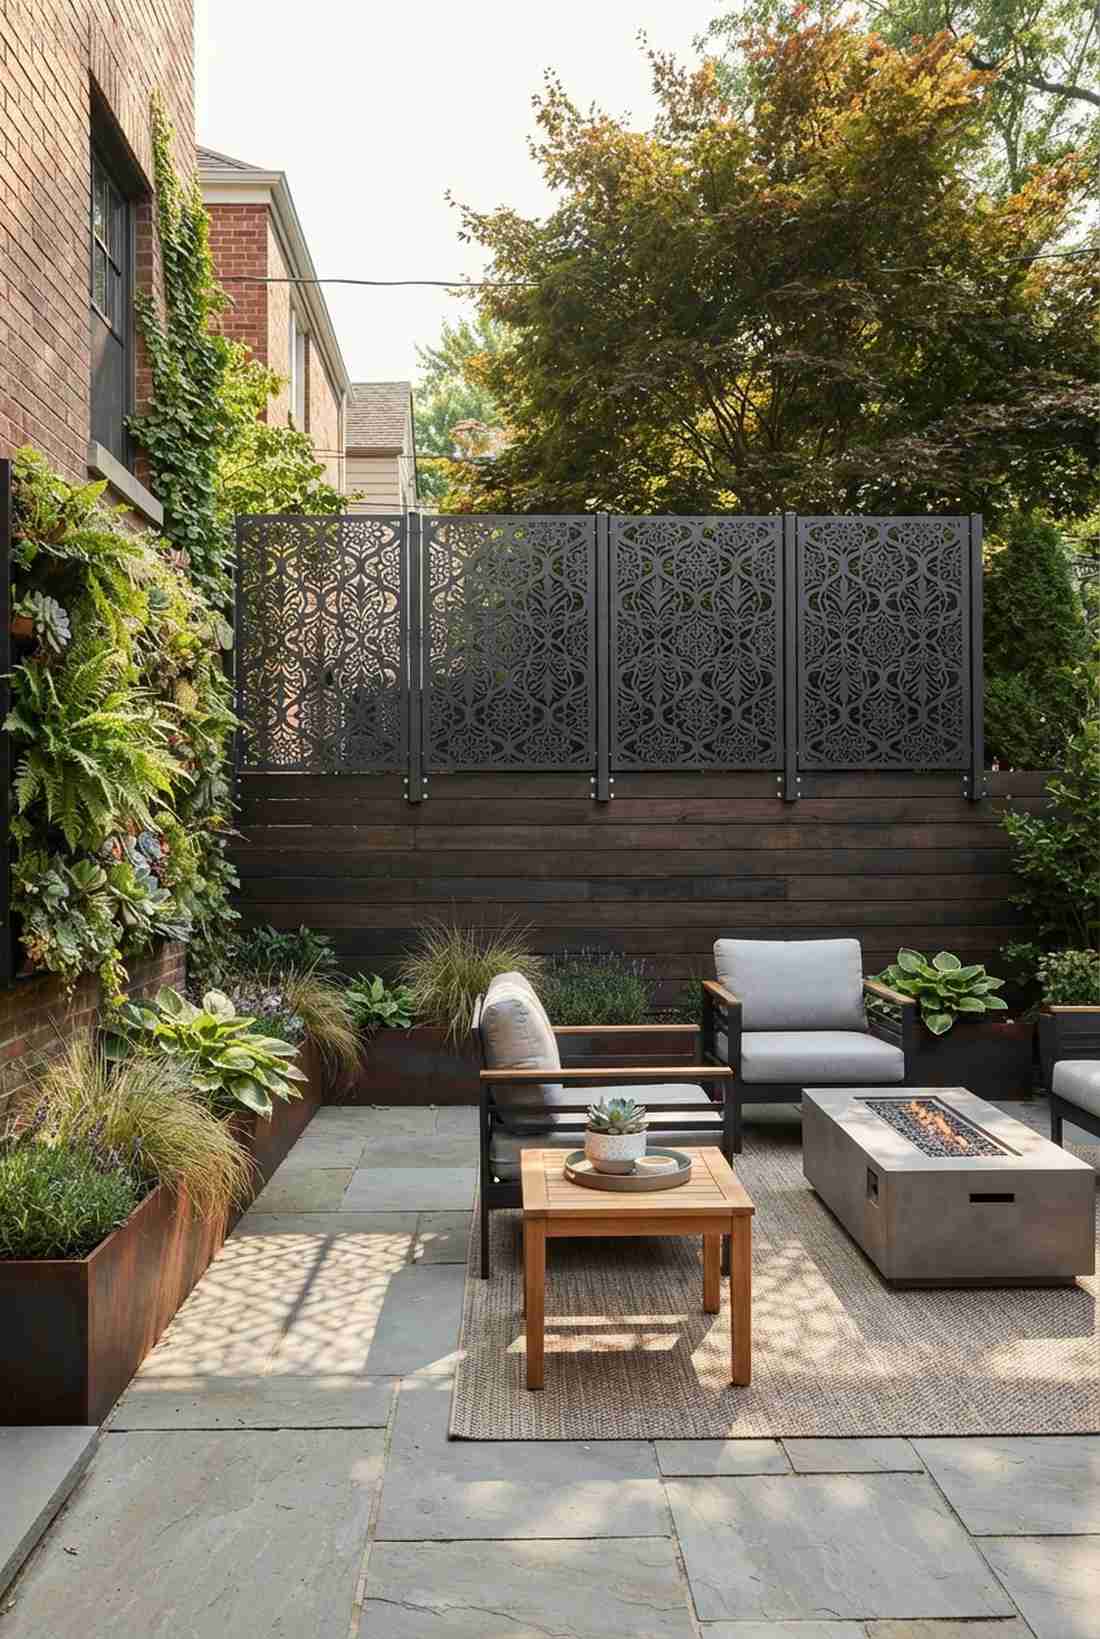
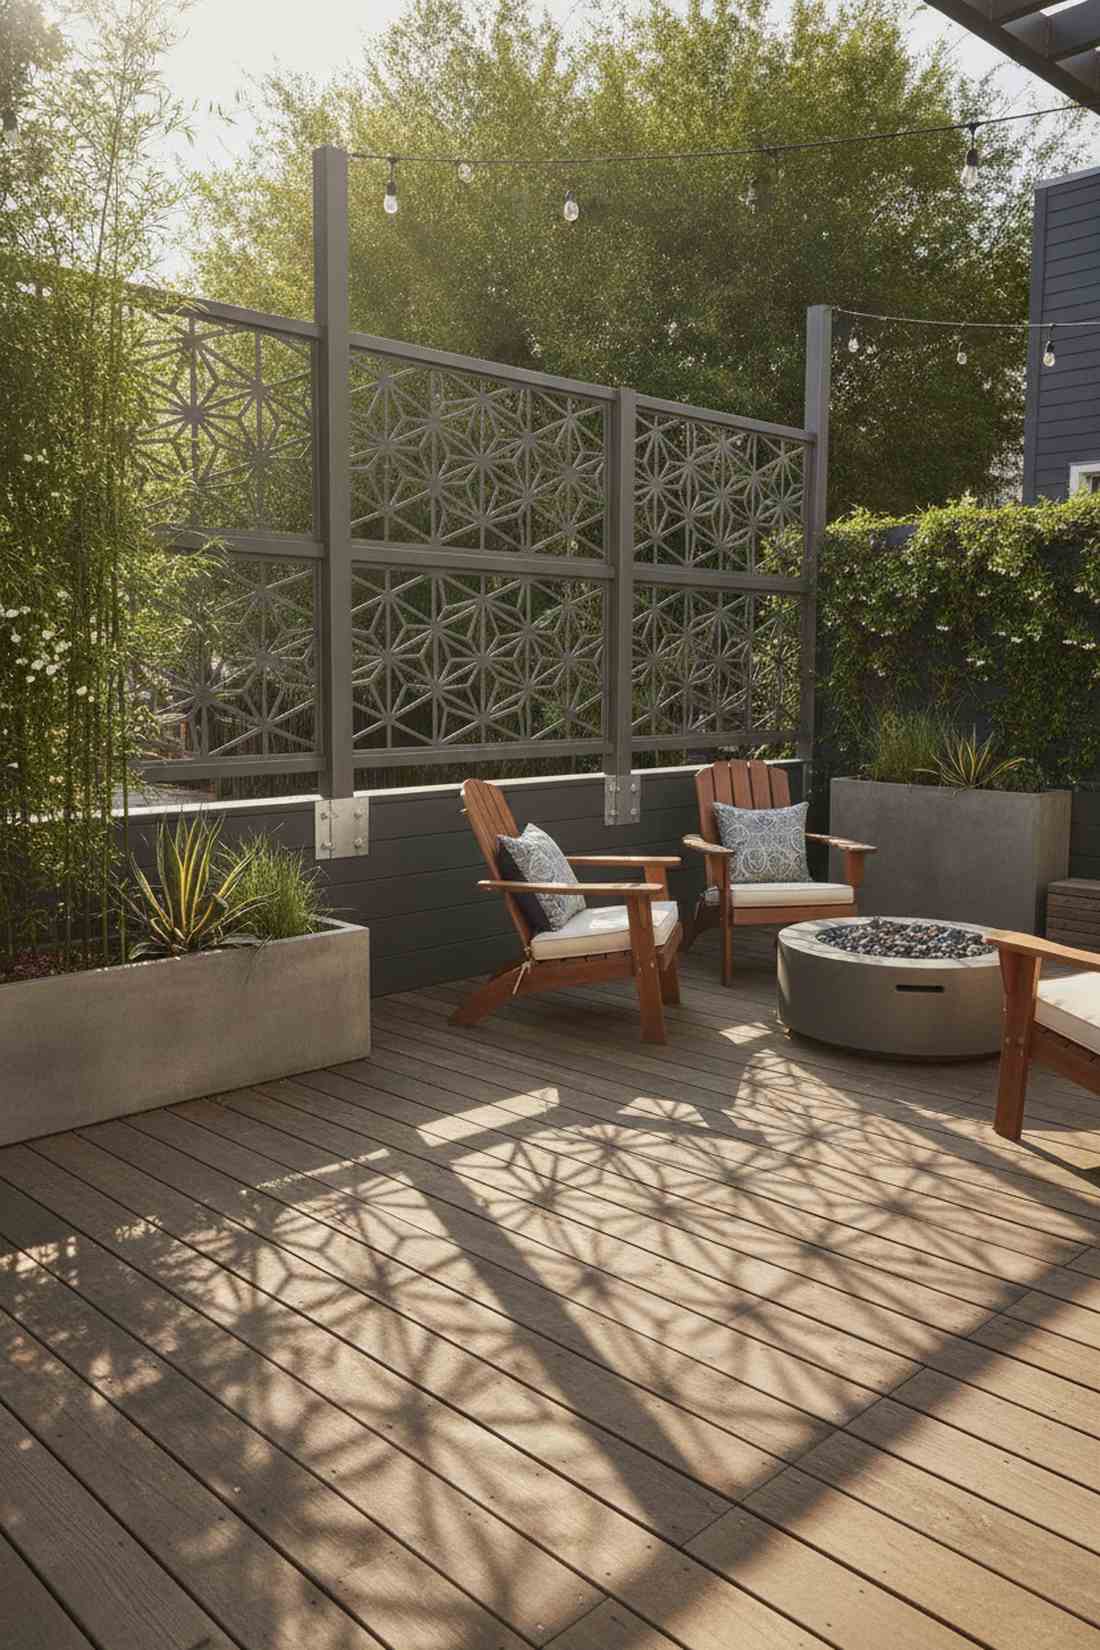
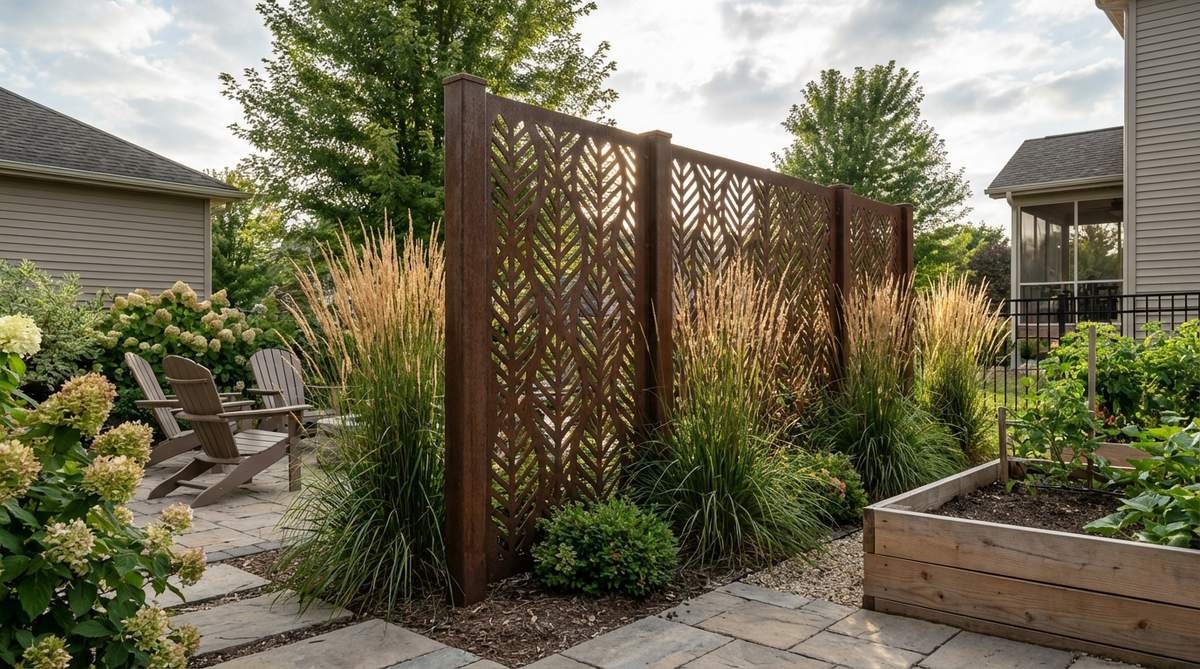
Casts stunning geometric shadows across your patio while blocking out the ugly alleyway. Using outdoor privacy decor is the fastest way to wall off a chic urban retreat.
Wood lattice looks cheap and dated; laser-cut metal panels bypass the usual cheap look for an ultra-modern privacy solution. Mounting a powder-coated privacy screen gives you a permanent, rust-free piece of outdoor art.
A premium metal screen partition runs $100–$250.
- Key Materials: Metal screen panel, frame brackets, mounting hardware
- Vibe / Style: Upscale modern courtyard
- Difficulty: Drill and mount
- Budget Breakdown: Screen panel: $150 | Brackets: $30.
- Creator’s Tip: Mount them horizontally above your fence line to legally add 2 extra feet of privacy without violating standard fence height codes.
- Smart Sourcing: Order laser-cut galvanized steel privacy screens and heavy-duty aluminum standoff brackets.
Do not underestimate the power of sound… this next piece transforms a noisy yard completely.
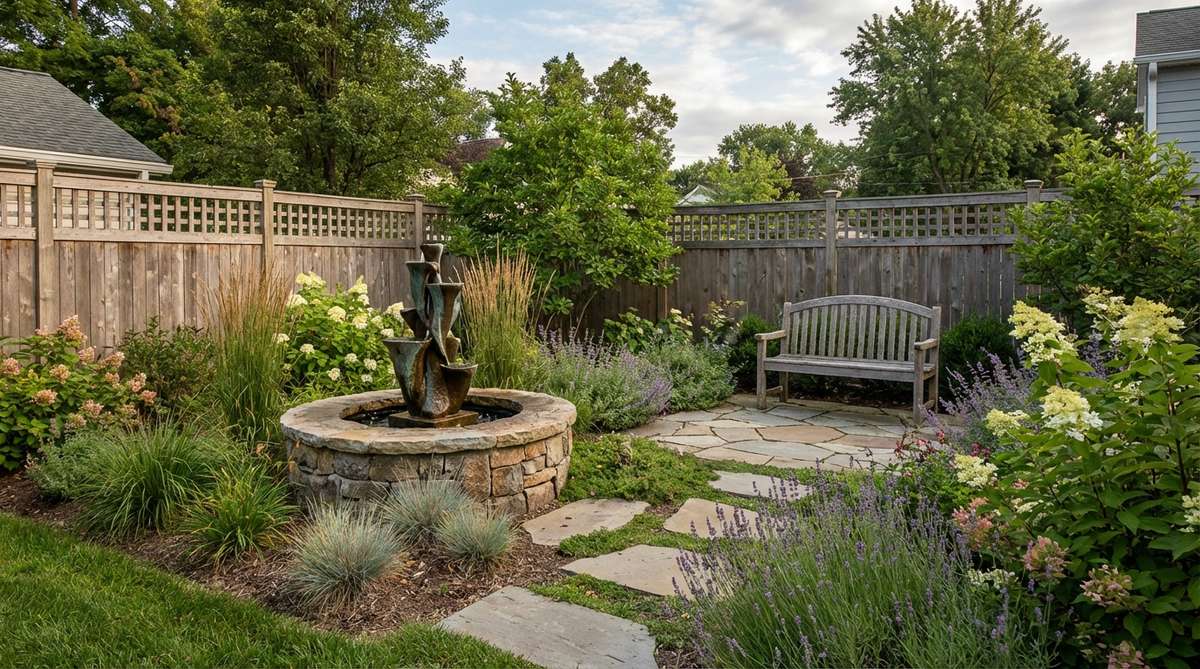
51. Compact Water Fountains
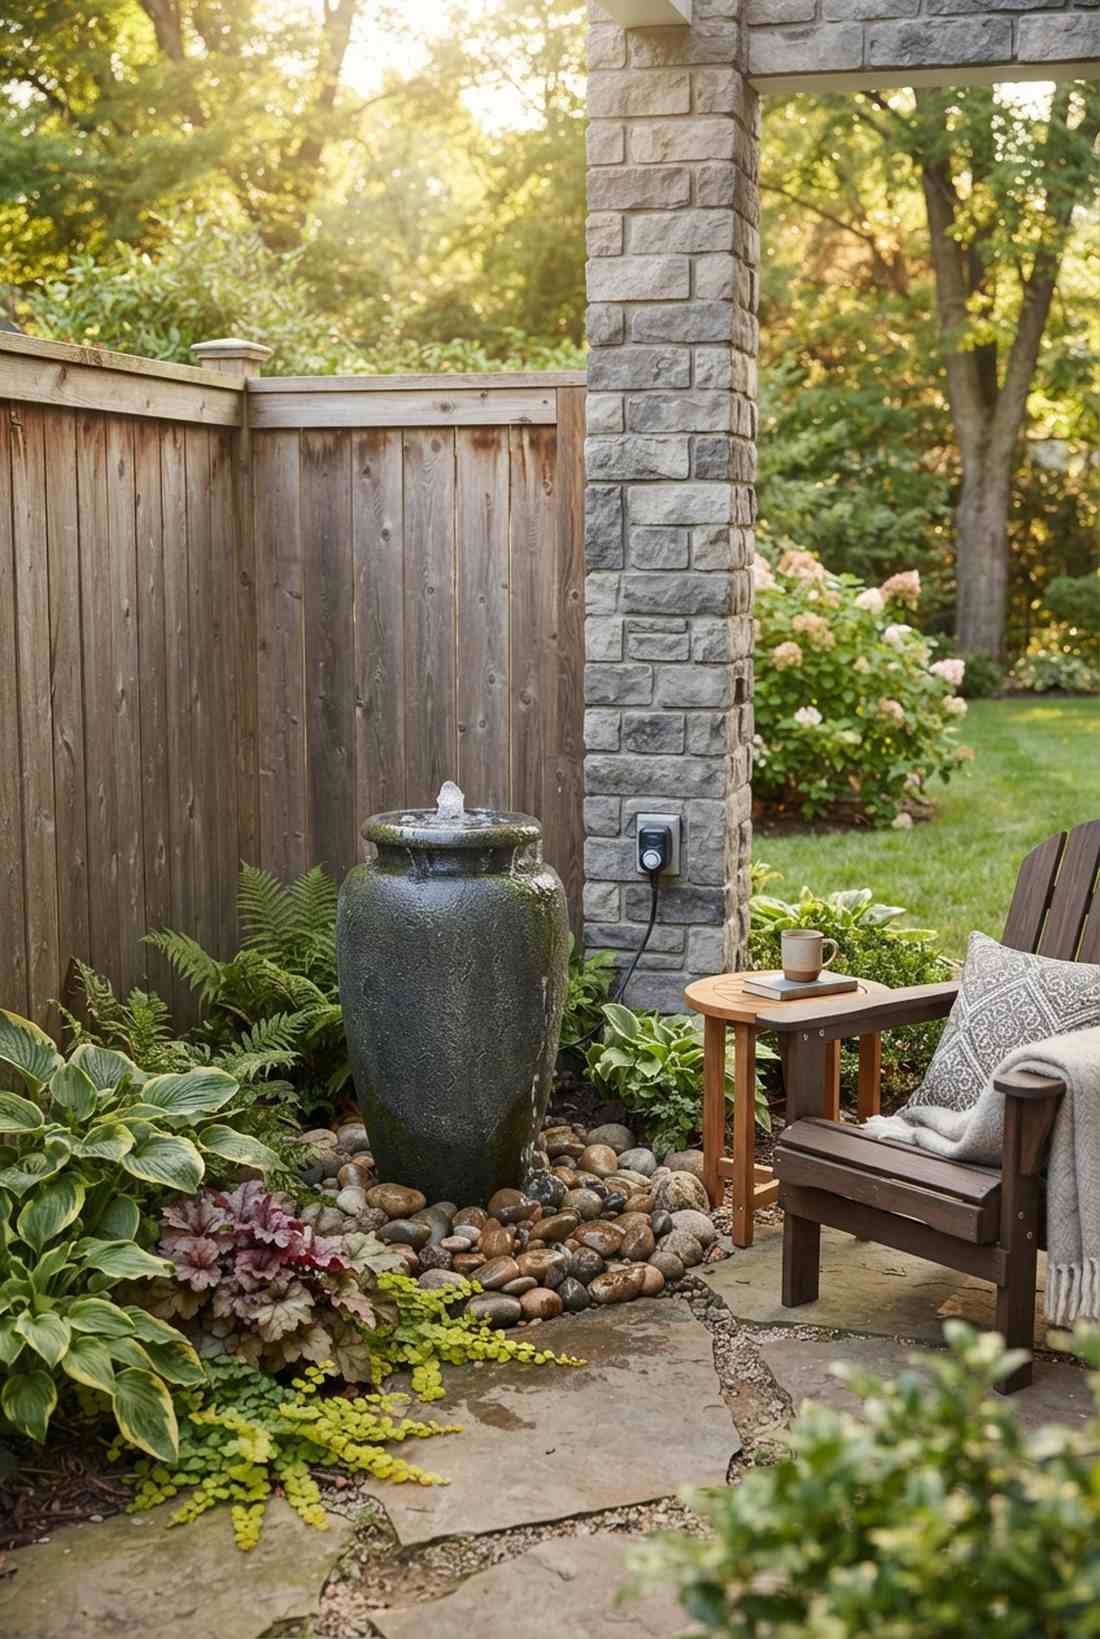
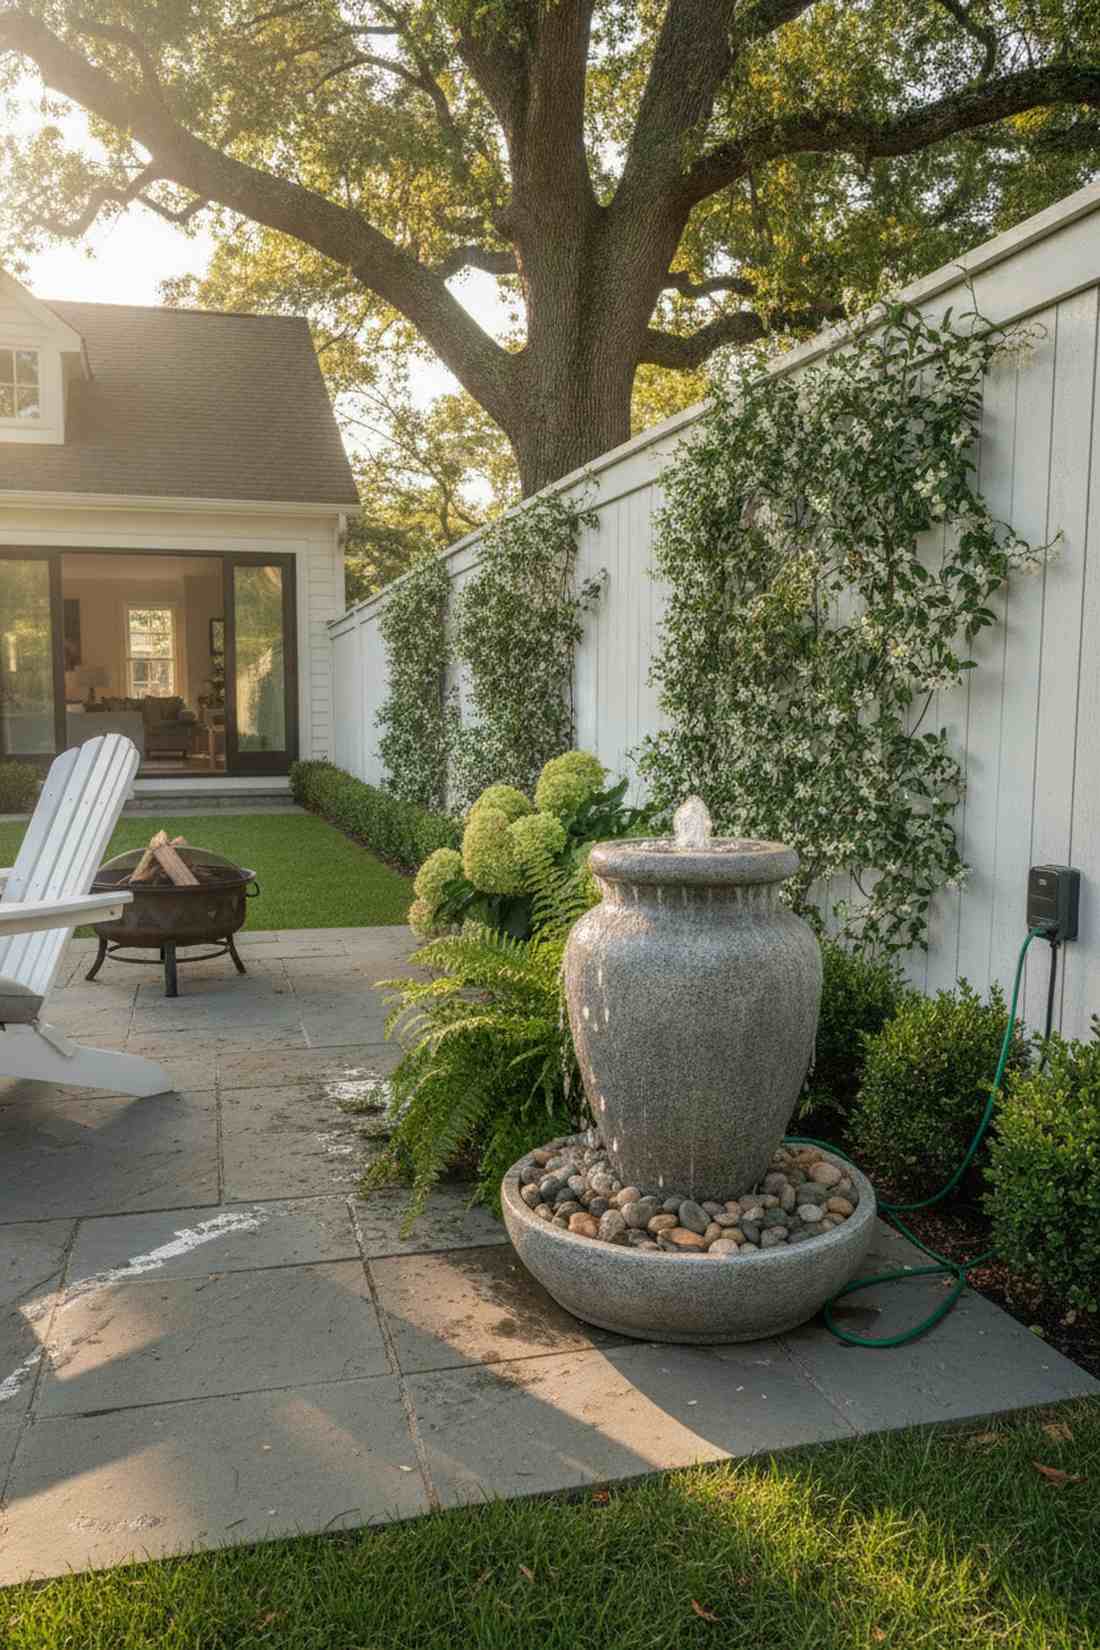
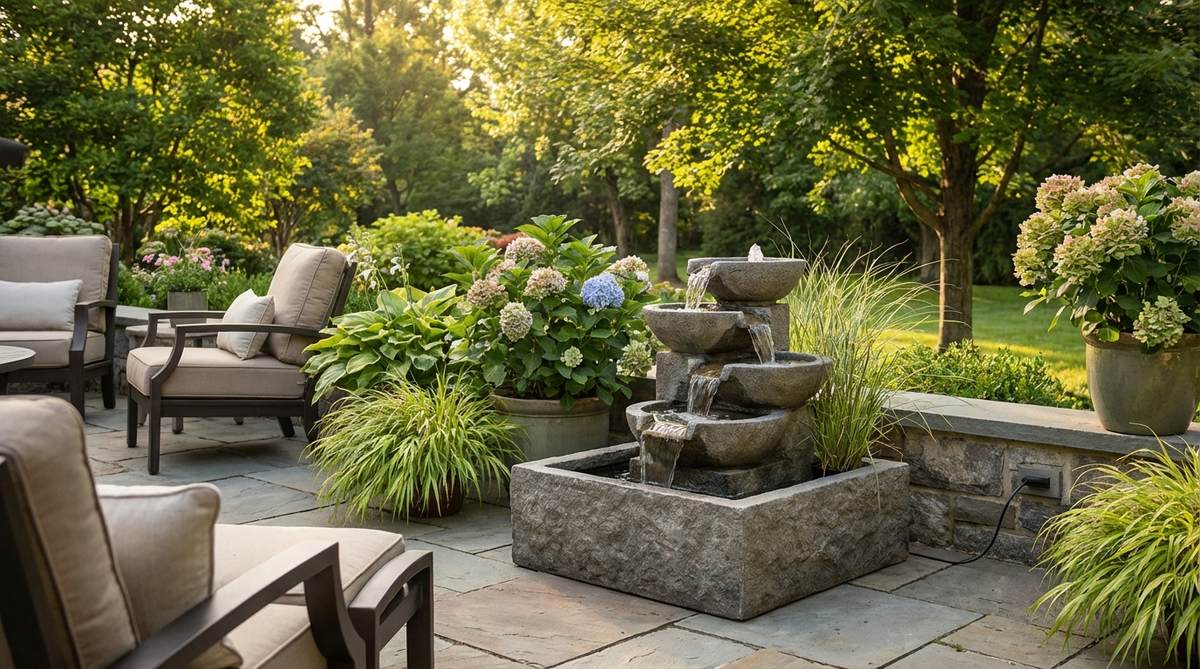
Drowns out annoying street traffic with the soothing, bubbly sound of a private spa. A standalone miniature garden supply fountain fits perfectly in unused corners.
Digging a full pond is a nightmare; a self-contained recirculating urn delivers a surprisingly premium look with just a single plug. Snagging a resin stone-look fountain kit gives you the heavy aesthetic of concrete at a fraction of the weight.
A beautiful corner bubbler costs about $100–$200. Save this trick to block out noisy neighbors!
- Key Materials: Plug-in resin fountain, decorative river rock
- Vibe / Style: Serene acoustic sanctuary
- Difficulty: Plug and play
- Budget Breakdown: Fountain kit: $120 | Extension cord: $20.
- Creator’s Tip: Place a timer on the plug so the fountain automatically shuts off at night to save the pump motor and electricity.
- Smart Sourcing: Get a lightweight composite stone-look fountain and a weatherproof outdoor smart plug timer.
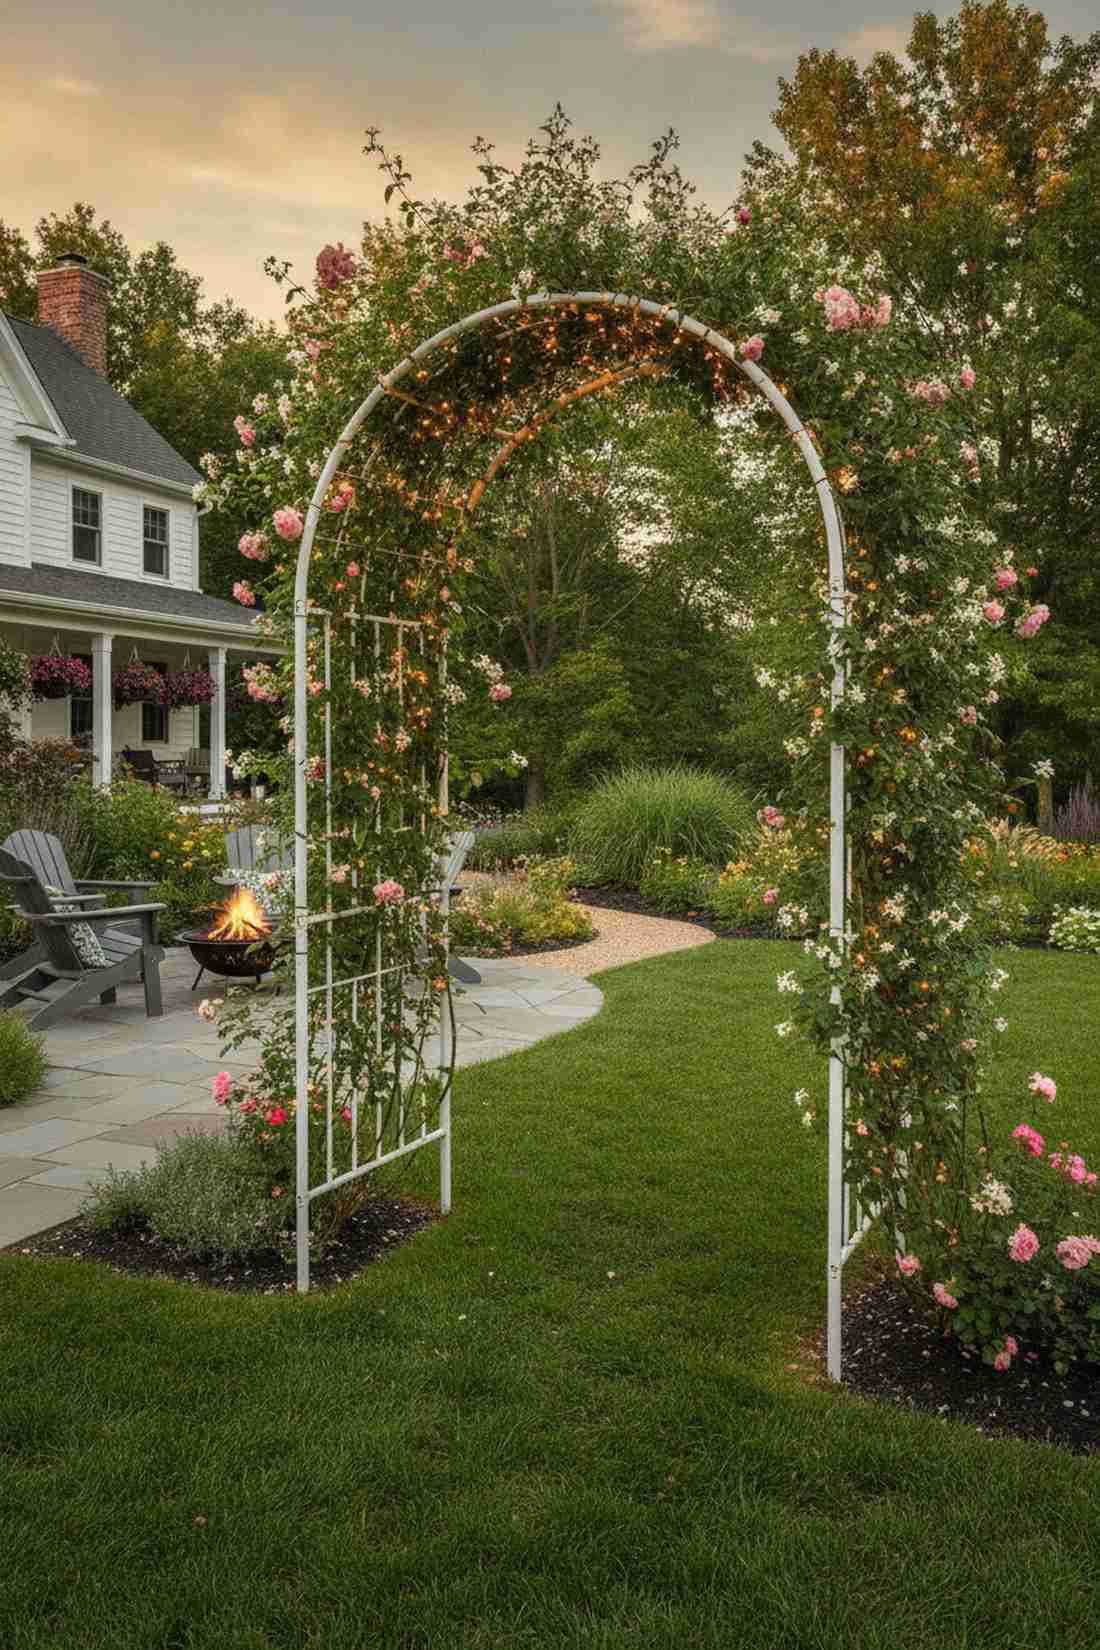
52. Garden Arch Gateways
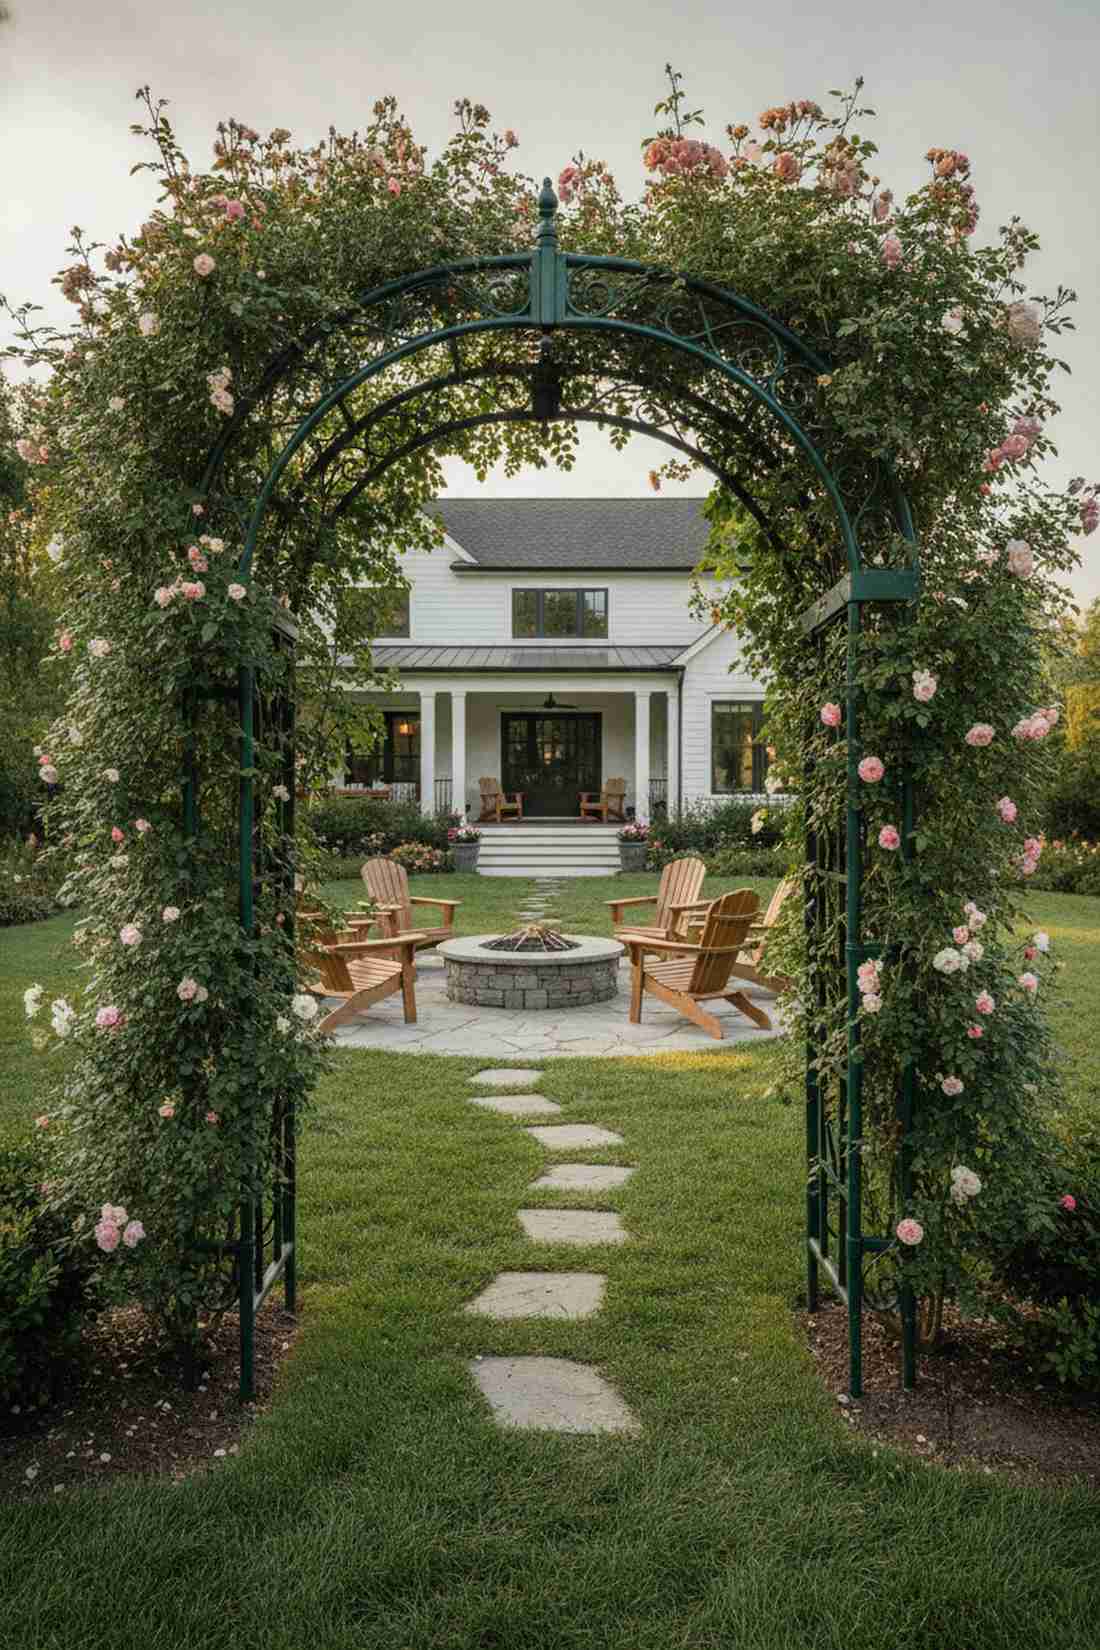

Frames the entrance to your yard like a lush, blooming portal to another world. An overhead garden decor centerpiece acts as a massive visual anchor.
Flat entrances are forgettable; erecting an arched threshold feels like a custom-built installation that signals you are entering a specific “room.” Using a heavy-gauge steel arbor prevents heavy vines from crushing the structure over time.
A sturdy metal threshold setup costs roughly $80–$150.
- Key Materials: Steel arch kit, climbing ivy or roses
- Vibe / Style: Classic romantic entrance
- Difficulty: Moderate assembly
- Budget Breakdown: Arch kit: $90 | Anchor stakes: $20.
- Creator’s Tip: Dig the legs down at least 10 inches and pour a half-bag of quick-set concrete on each leg to make it hurricane-proof.
- Smart Sourcing: Buy a rust-proof tubular steel garden arch and fast-setting post hole concrete.
53. Decorative Edging Systems
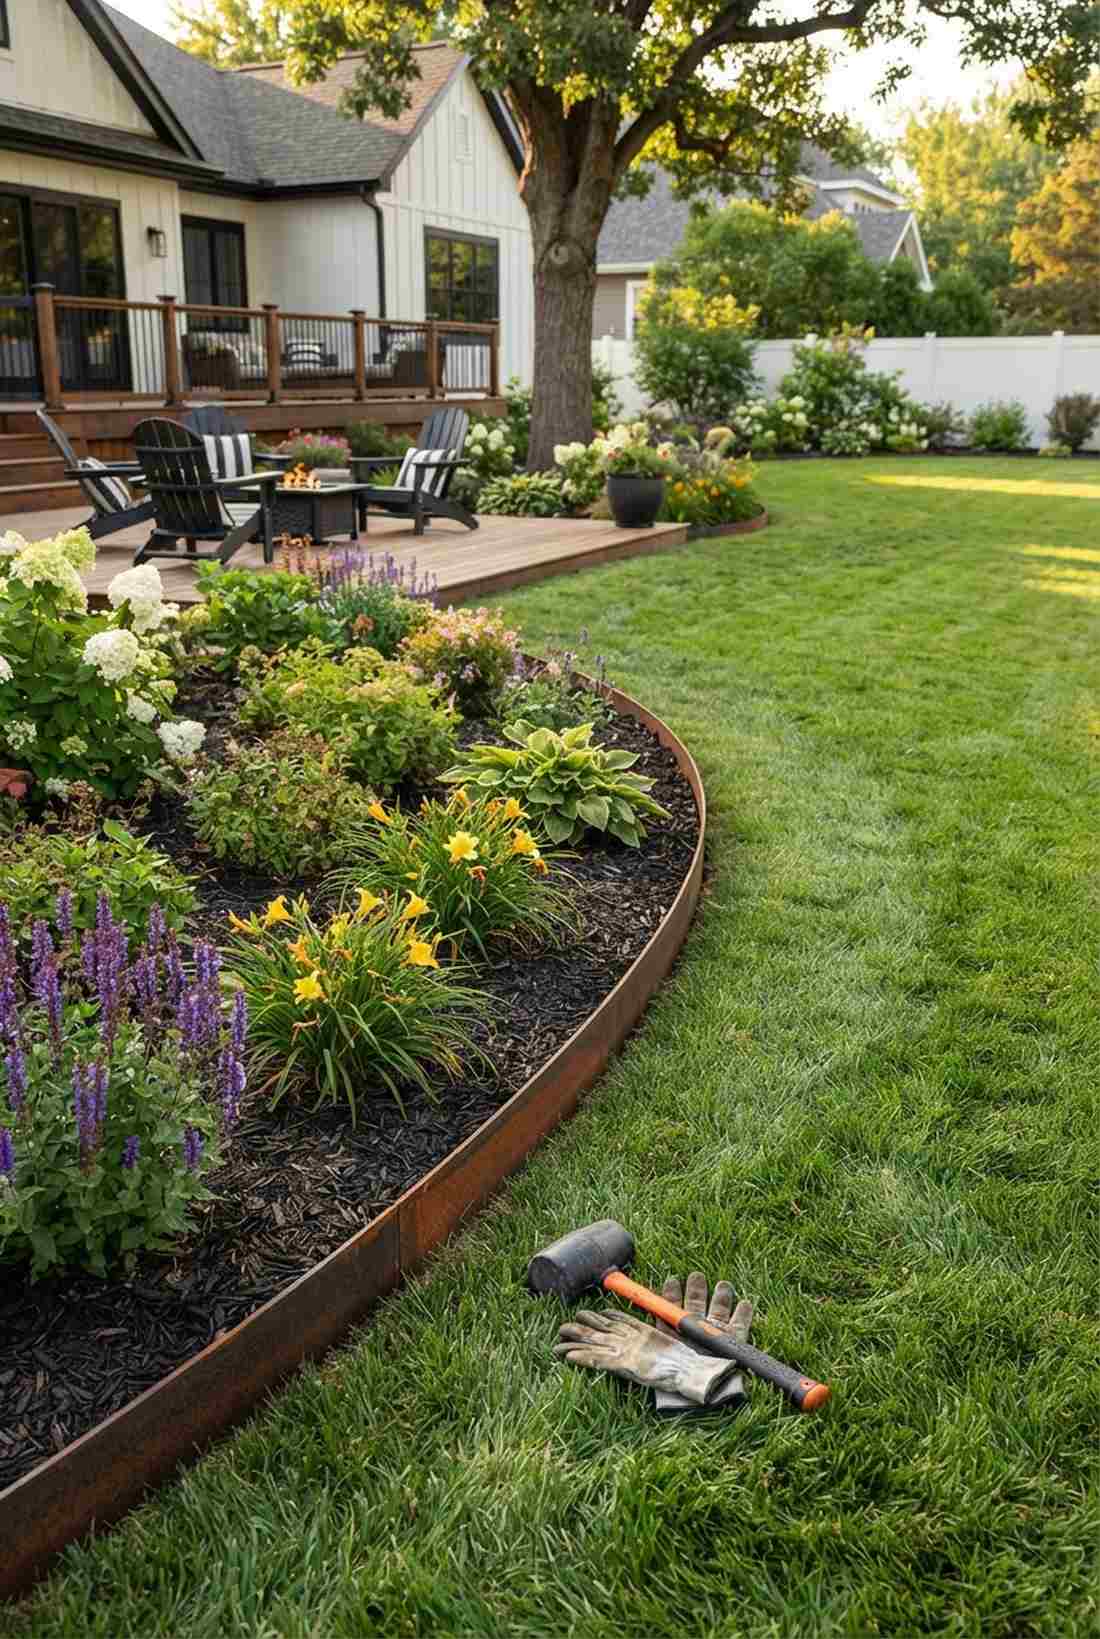
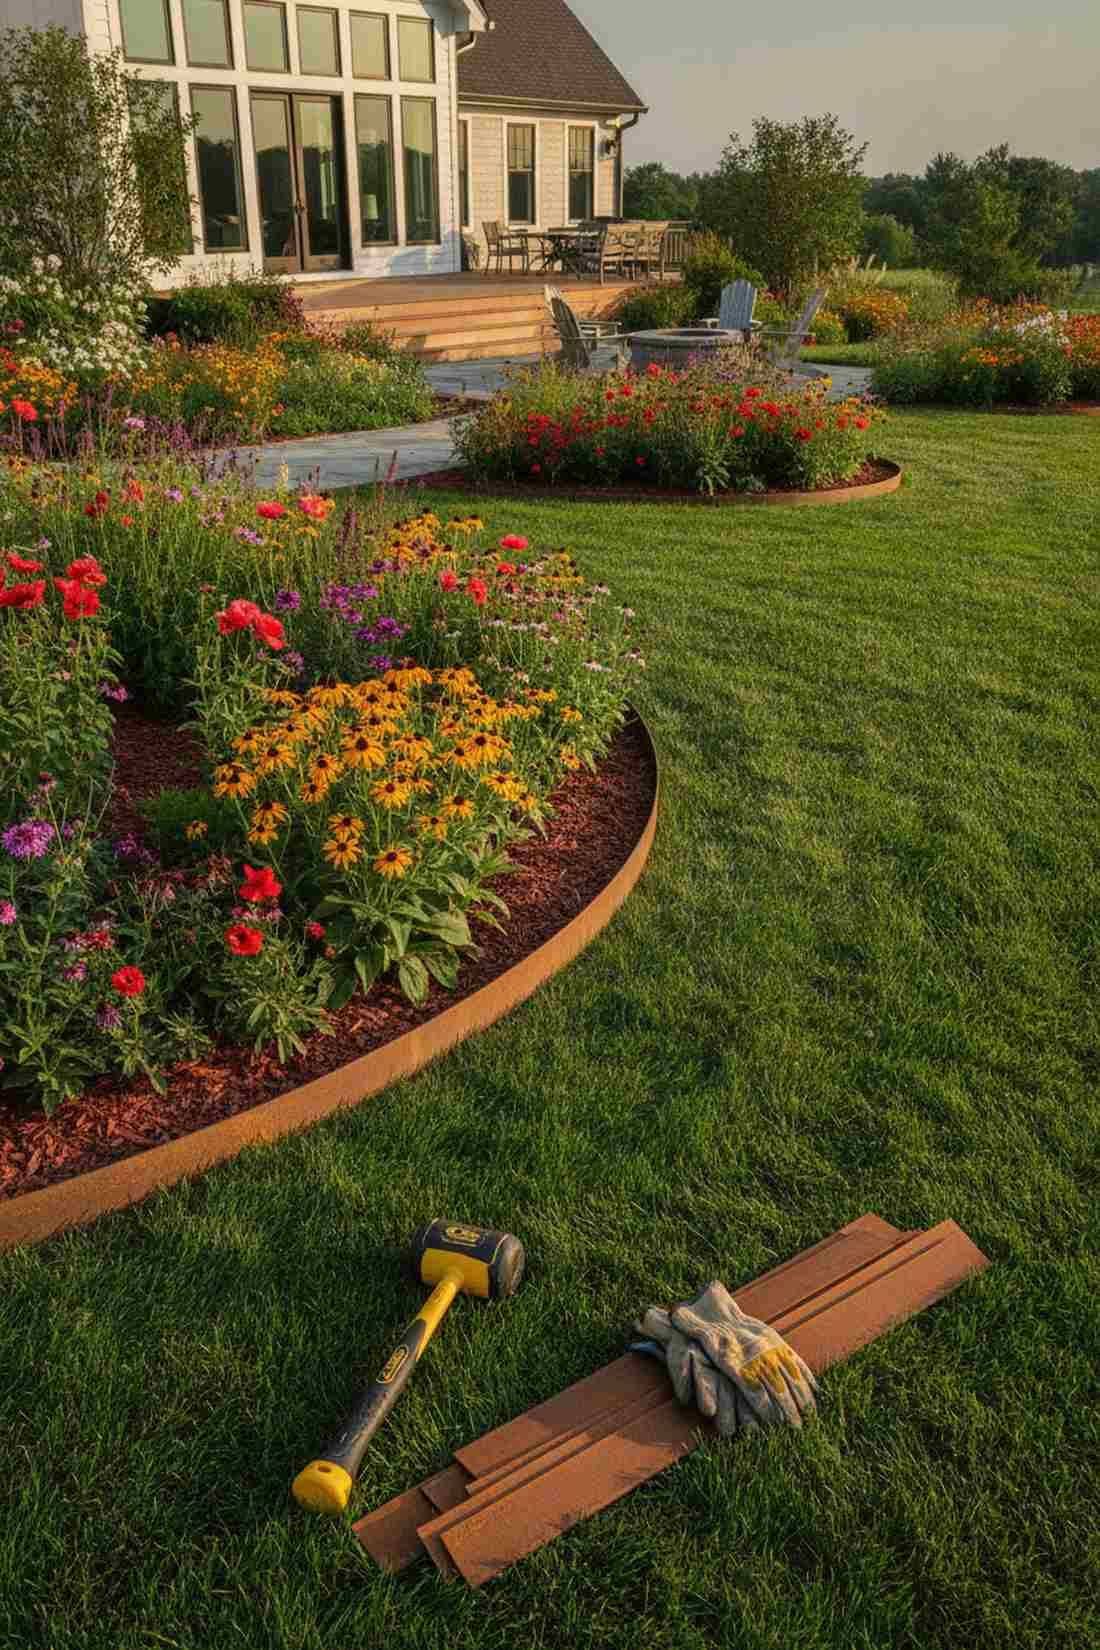
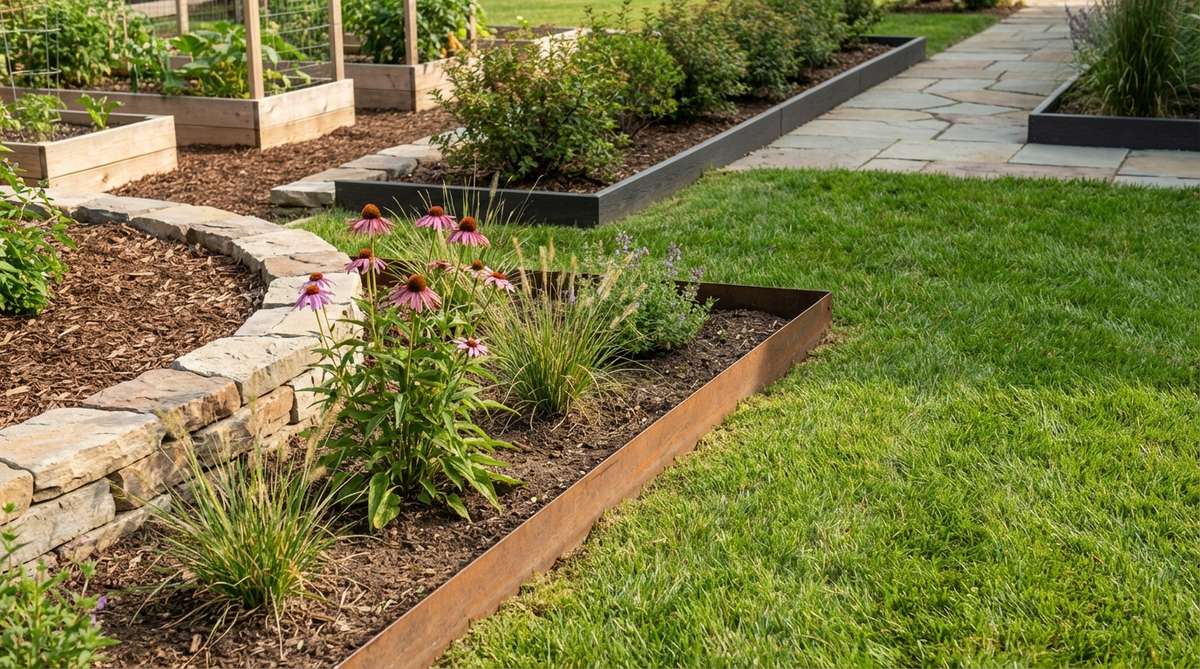
Draws a razor-sharp, satisfying line between your wild flowers and the manicured lawn. Implementing sleek small garden landscaping borders stops mulch from spilling everywhere.
Plastic wavy edging always pops out of the ground; driving in solid steel strips gives a designer-level finish that stays perfectly crisp. Banging in cor-ten steel edging strips allows them to rust beautifully over time, blending into the soil.
A high-end metallic border will run you about $60–$120. Pin this for the cleanest yard on the block.
- Key Materials: Steel border strips, rubber mallet
- Vibe / Style: Impeccably manicured estate
- Difficulty: Requires heavy hammering
- Budget Breakdown: Steel edging kit: $80 | Mallet: $10.
- Creator’s Tip: Water the ground heavily the night before installation; pounding steel into dry, baked clay is almost impossible.
- Smart Sourcing: Pick up a pre-cut Corten weathering steel edging kit and a heavy-duty deadblow rubber mallet.
54. Compact Fire Features
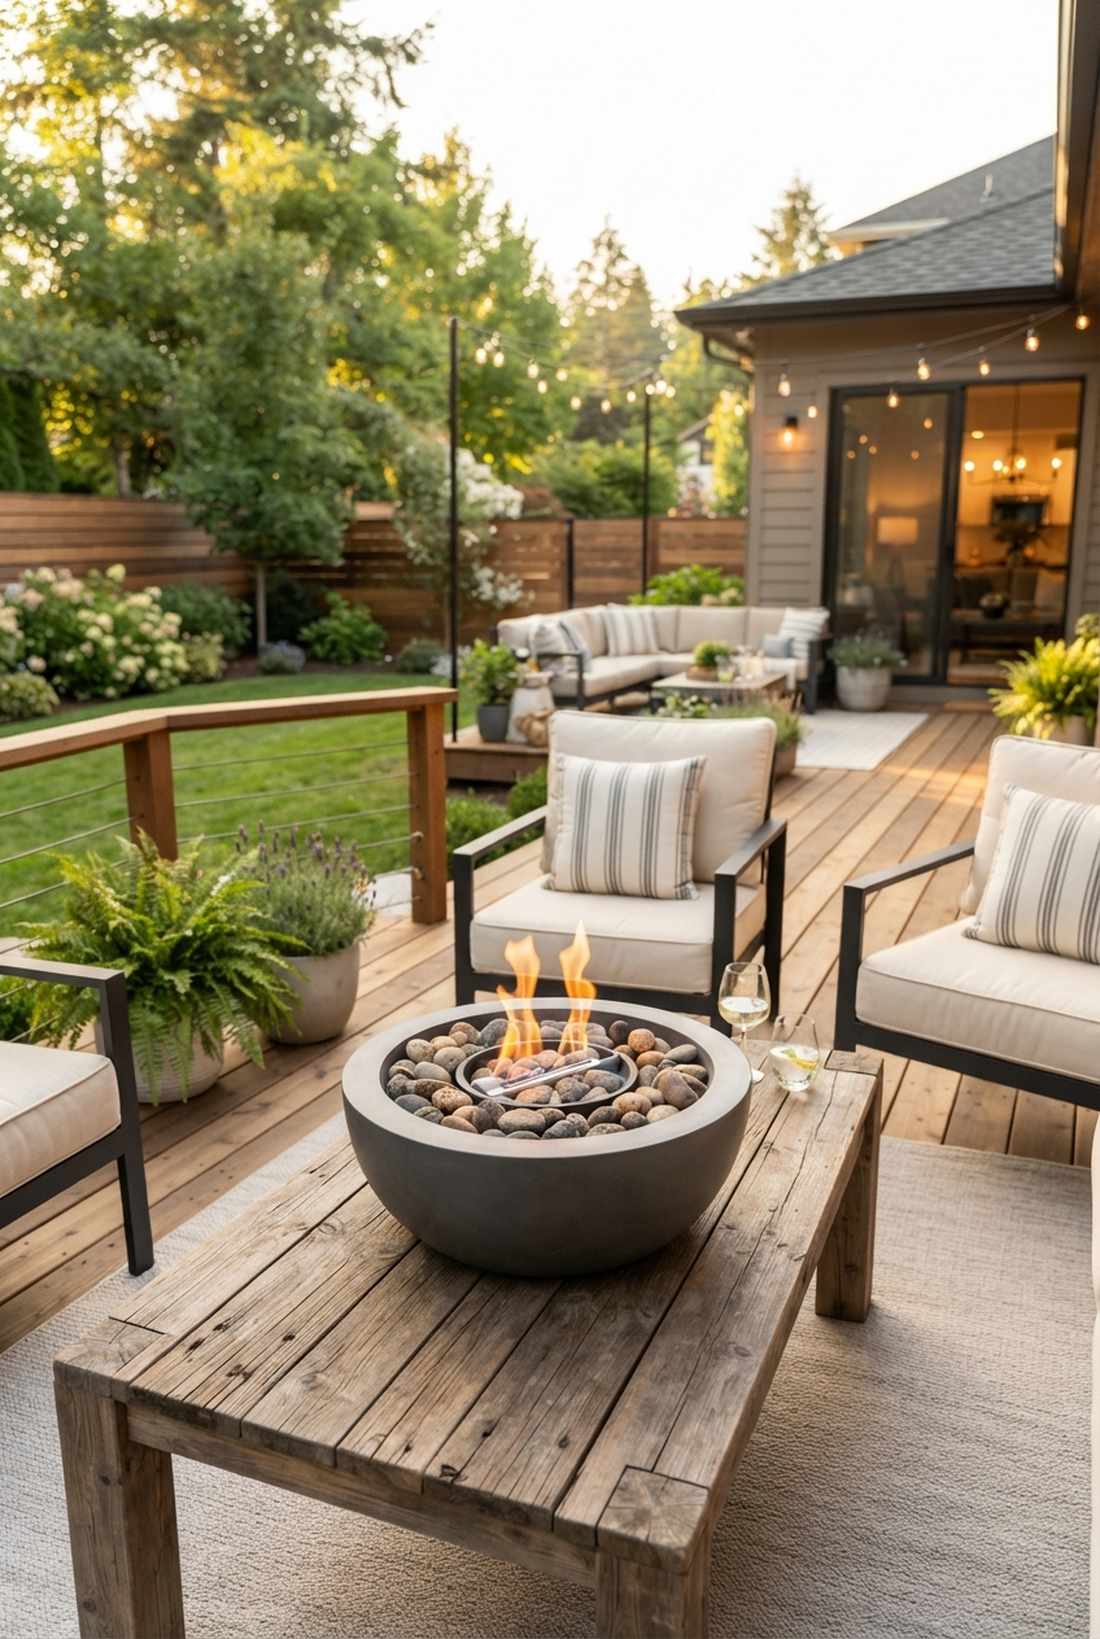

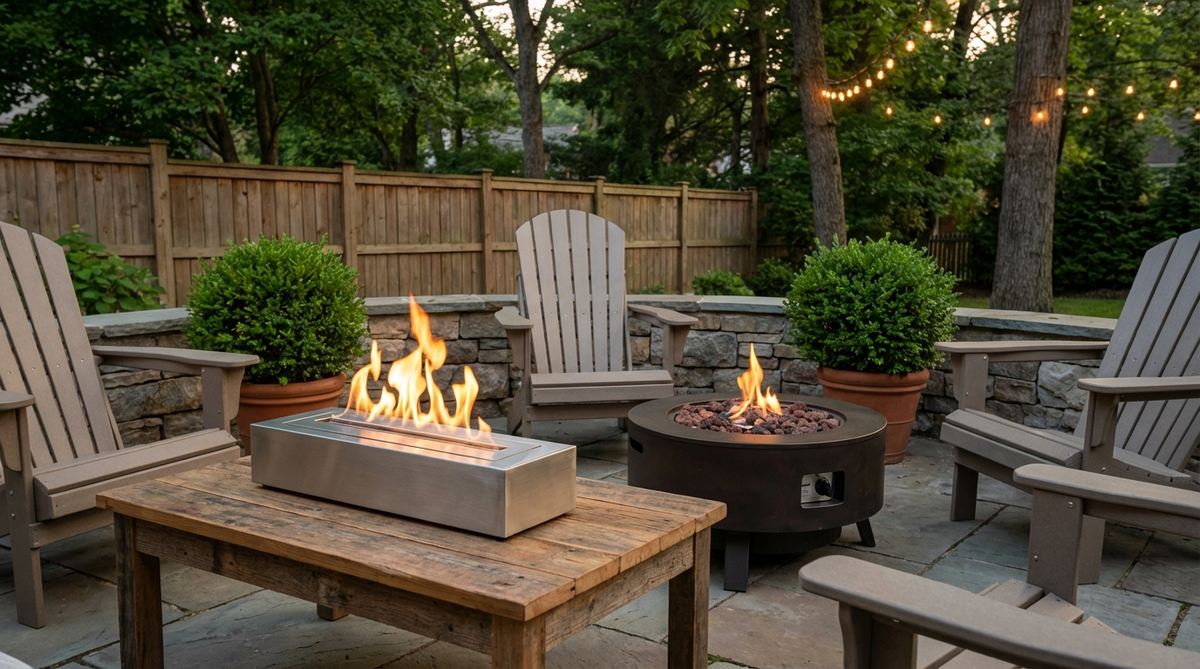
Throws dancing flames across your tabletop without taking up any precious floor space. A portable patio decor fire bowl is the absolute peak of modern outdoor luxury.
Giant fire pits eat up the whole yard; a sleek tabletop bioethanol bowl bypasses the usual cheap look and requires zero wood chopping. Sourcing a smokeless tabletop fire pit means you won’t smoke out your neighbors on a tight balcony.
You can get that luxury fire vibe for just $40–$80.
- Key Materials: Concrete fire bowl, bioethanol fuel
- Vibe / Style: High-end modern lounge
- Difficulty: Simply pour and light
- Budget Breakdown: Fire bowl: $50 | Fuel: $20.
- Creator’s Tip: Only use 100% clean-burning bioethanol indoors or on covered balconies to completely avoid soot buildup on your ceiling.
- Smart Sourcing: Use a cast concrete tabletop fire bowl and clean-burn bioethanol fuel quarts.
Small Garden Decoration and Finishing Touches
55. Vertical Art Installations
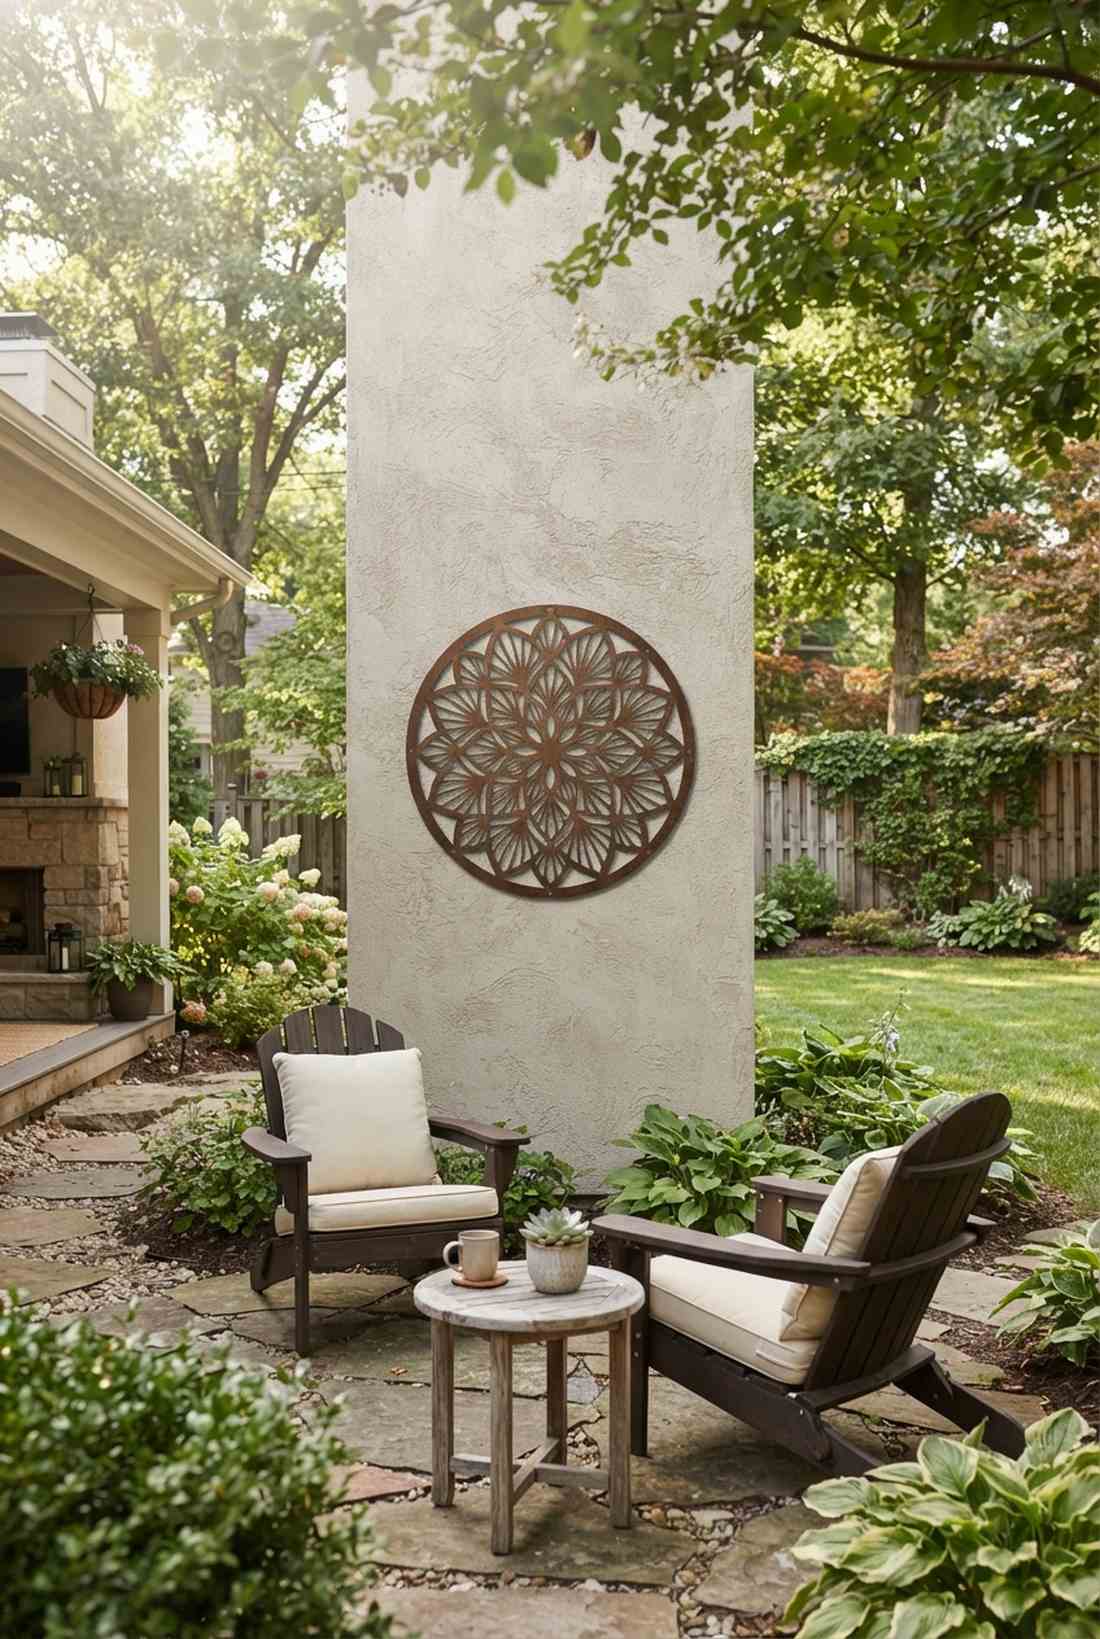
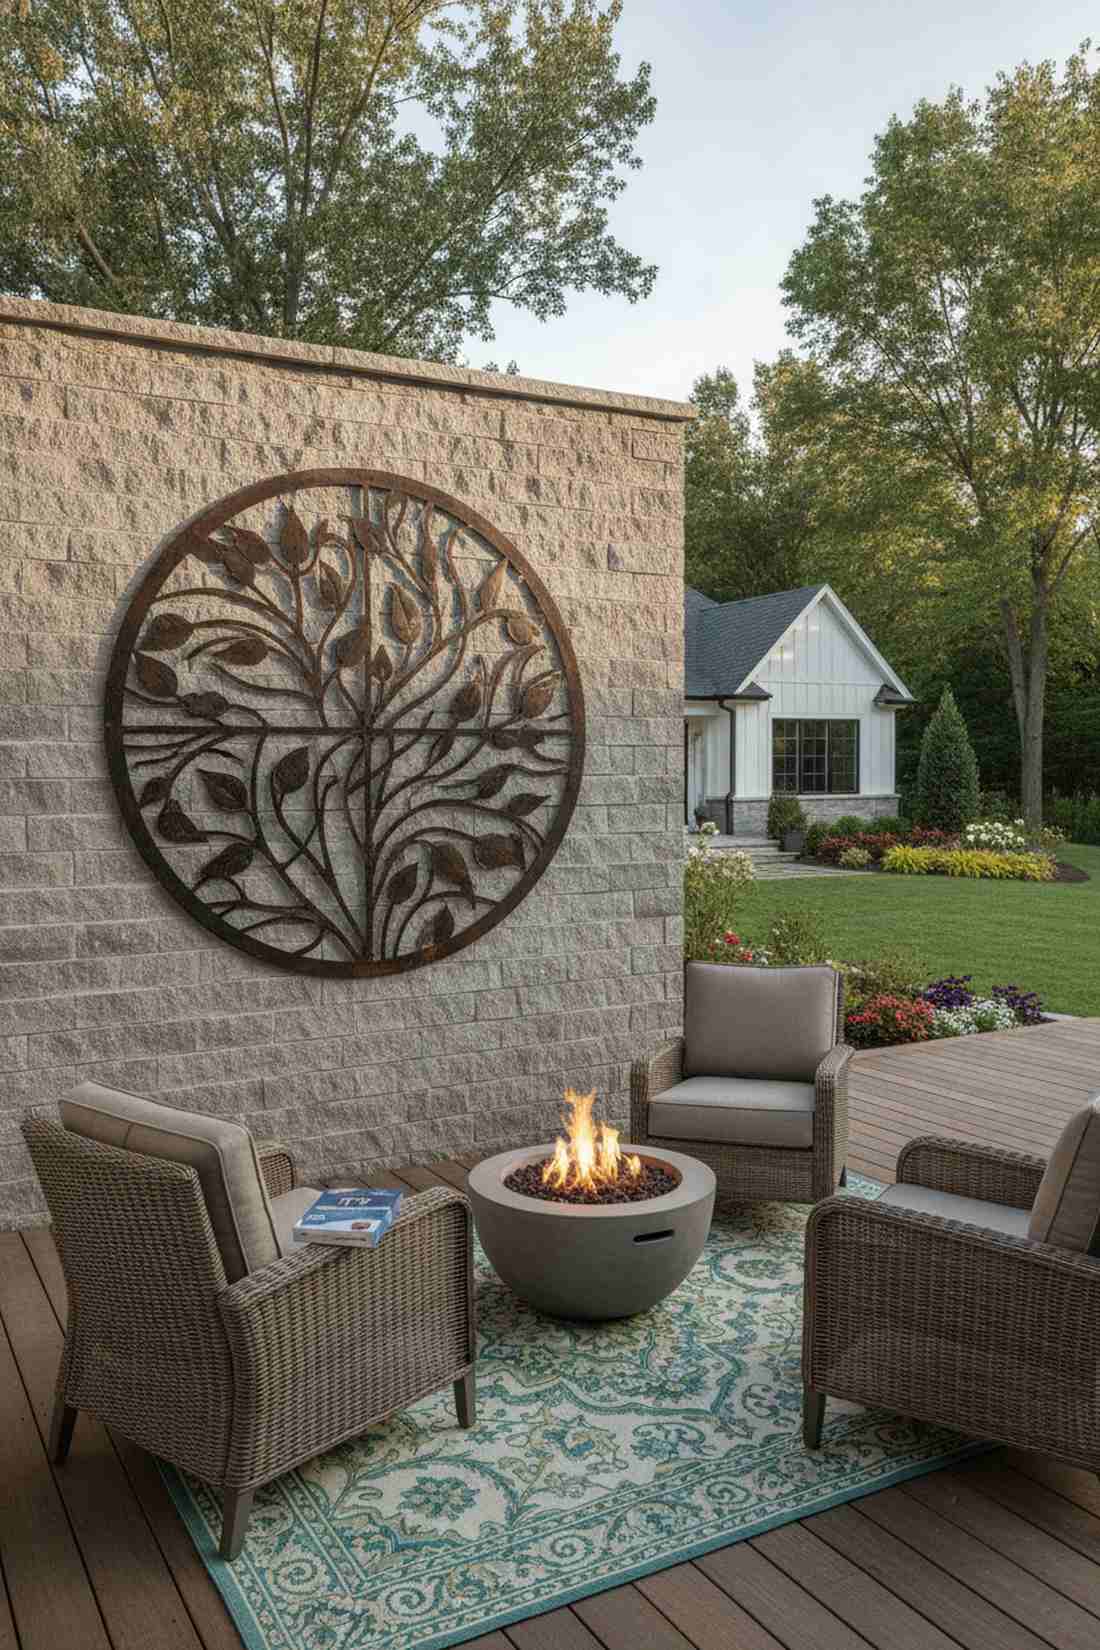
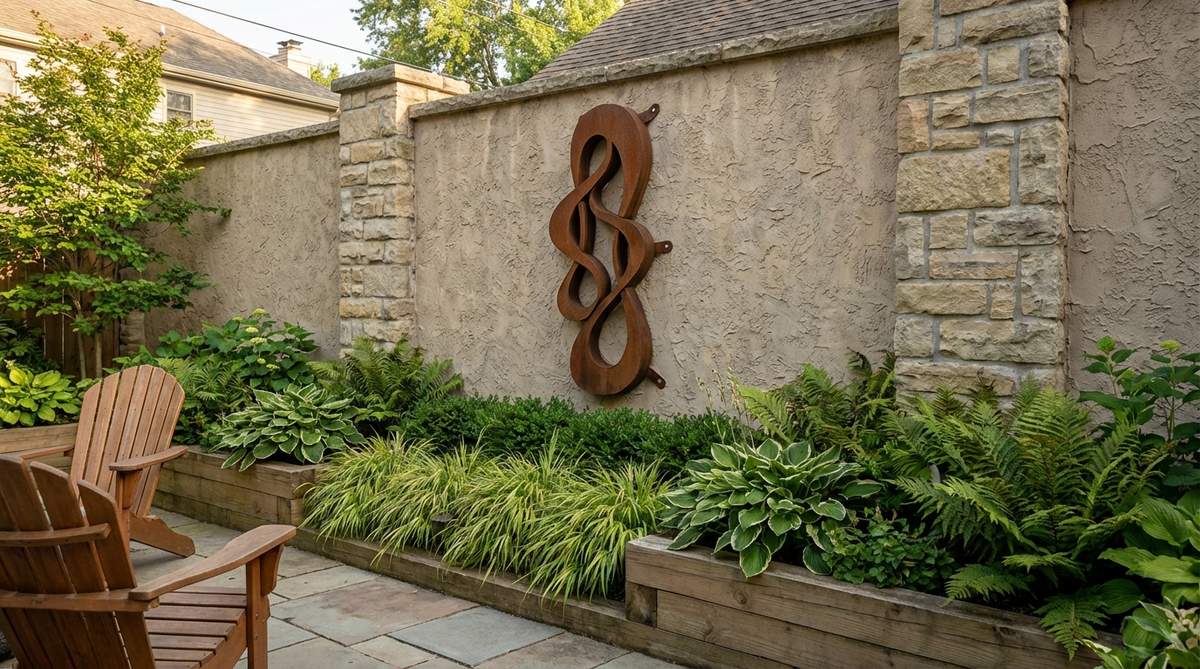
Turns an ugly bare wall into a massive conversation piece without touching the grass. Adding outdoor garden decor ideas vertically is the ultimate cheat for cramped footprints.
Cluttering the lawn with gnomes looks messy; hanging large-scale metal art instantly elevates the aesthetic to a curated gallery space. Utilizing weatherproof composite wall plaques guarantees the art won’t rot or fade after one rainy season.
A striking piece of exterior art usually costs $50–$100. Save this to your outdoor styling board!
- Key Materials: Large outdoor wall art, masonry screws
- Vibe / Style: Curated exterior gallery
- Difficulty: Simple drill mounting
- Budget Breakdown: Wall art: $70 | Anchors: $10.
- Creator’s Tip: Mount the art exactly at eye level from the seated position of your patio chairs, not your standing height.
- Smart Sourcing: Get a weatherproof laser-cut metal wall medallion and a masonry anchor drill kit.
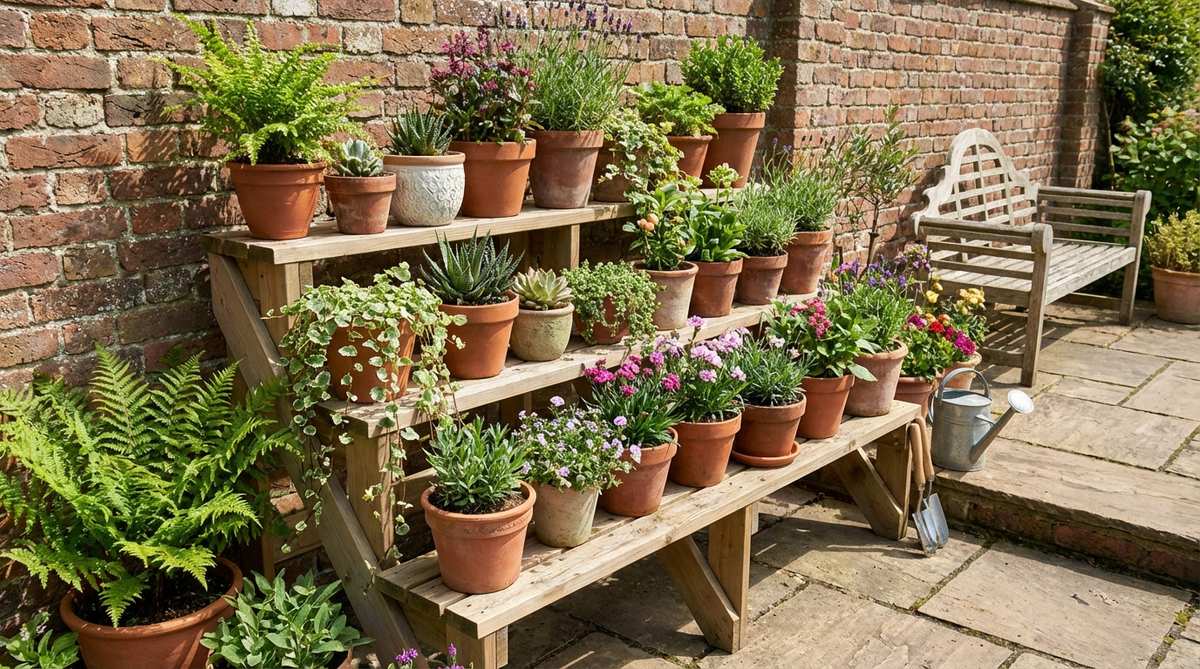
56. Decorative Pot Groupings
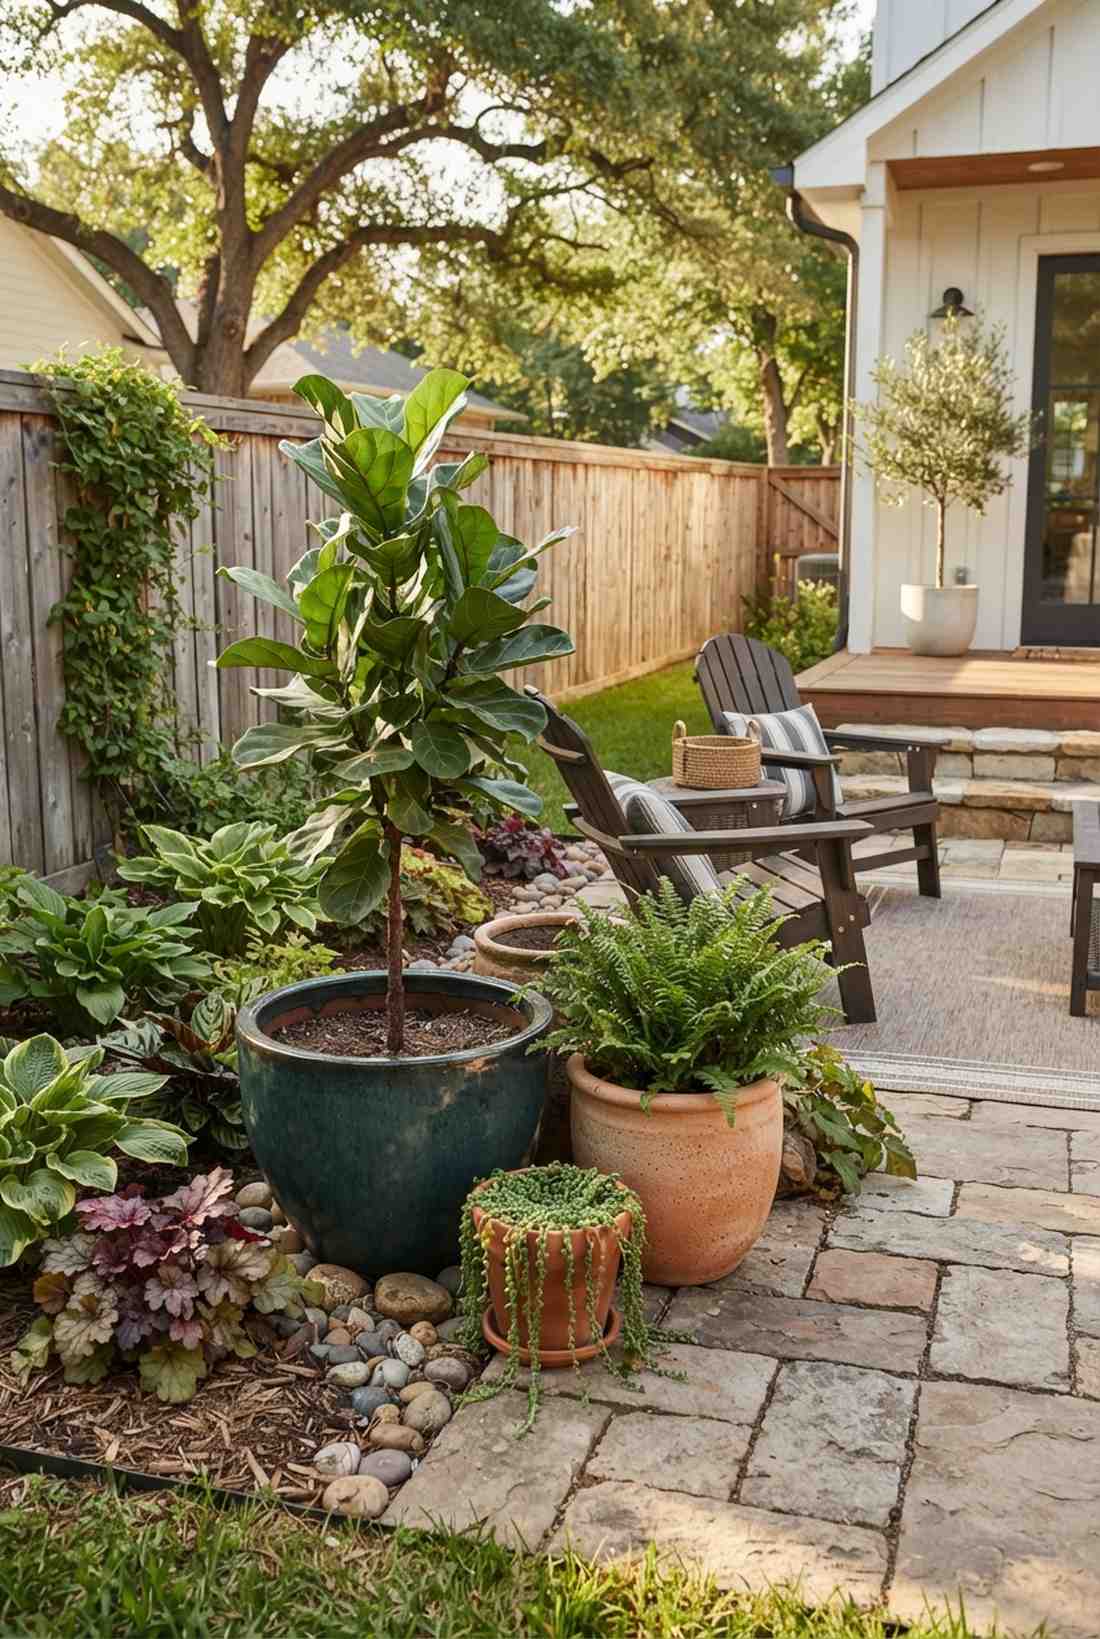
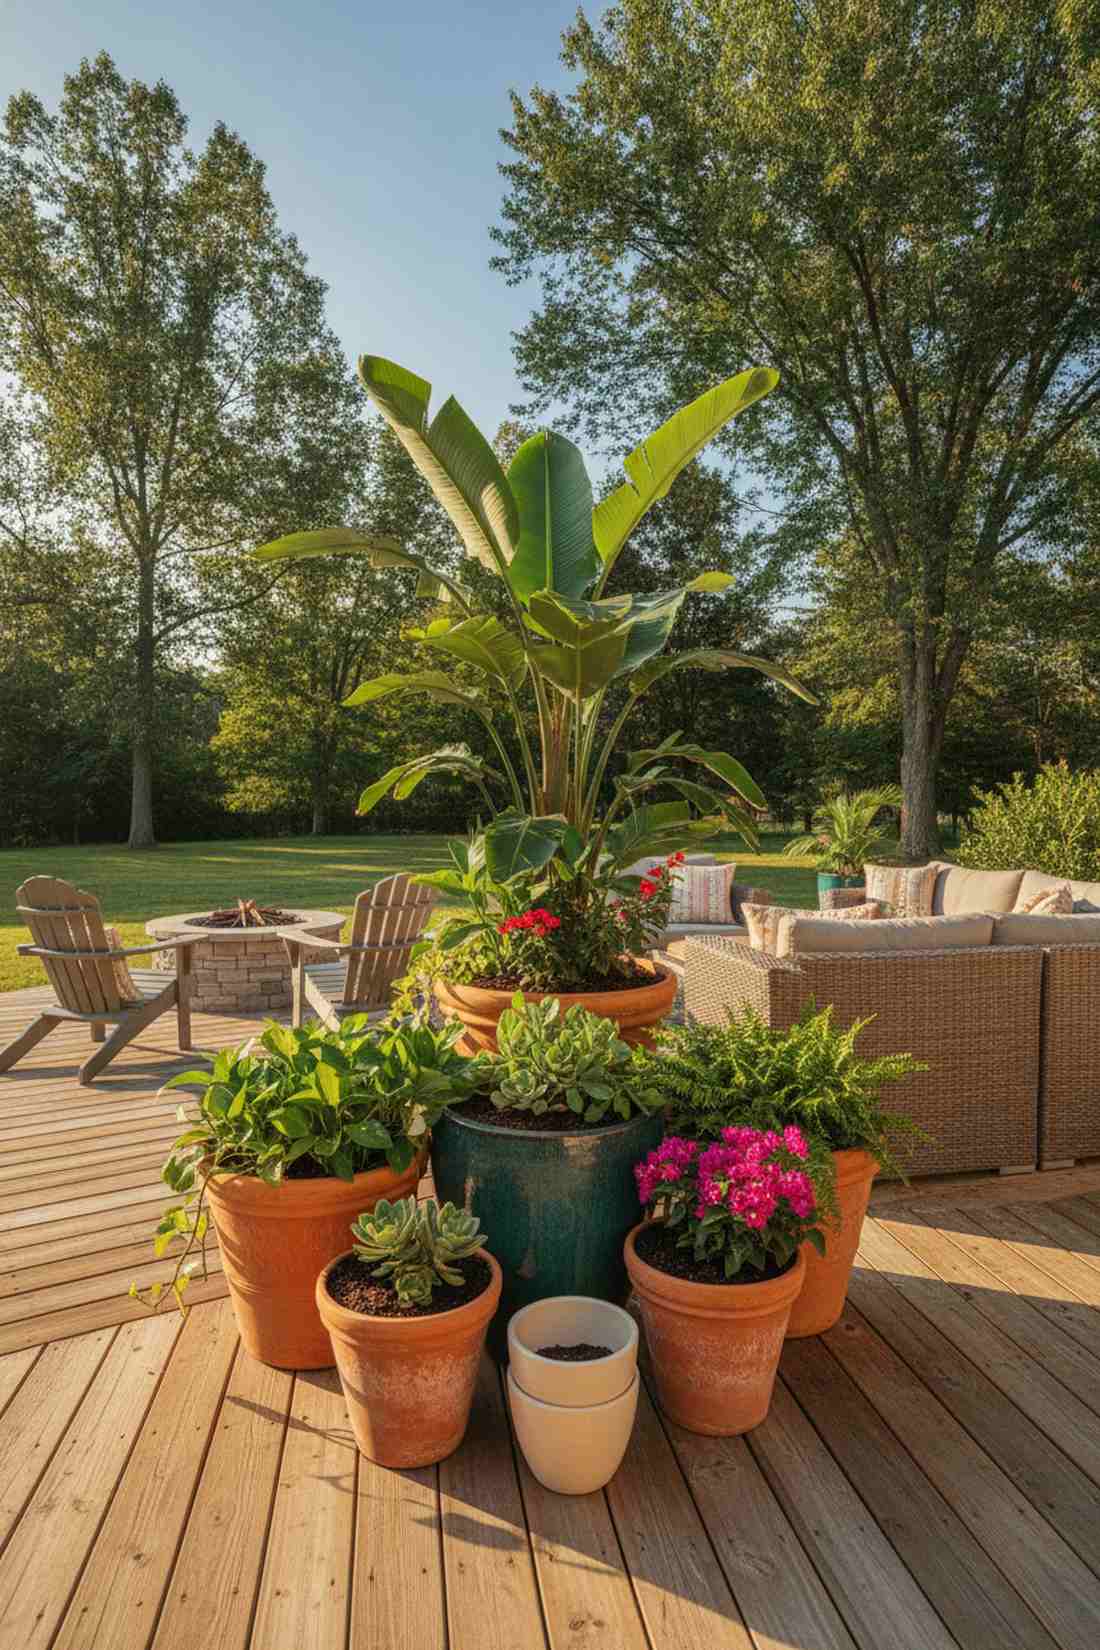
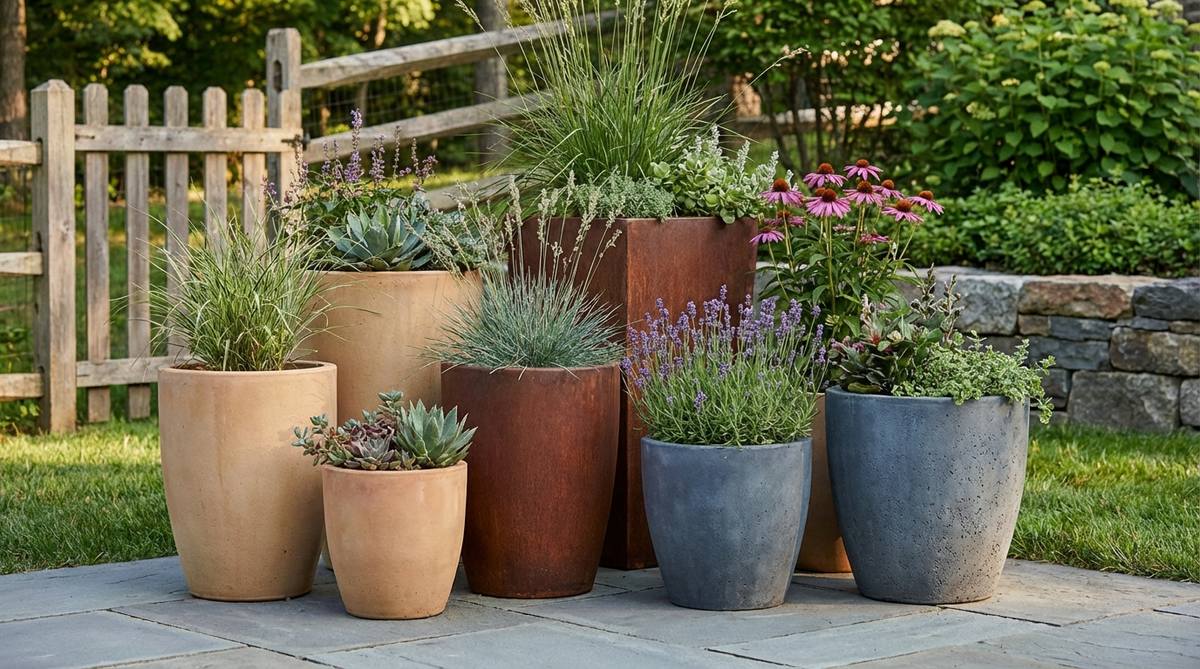
Clusters massive textures and colors together to create a lush, abundant focal point. This potted patio layout strategy turns an empty corner into a jungle oasis.
Spreading pots randomly looks chaotic; grouping them in tight, odd-numbered triangles delivers a surprisingly premium look. Mixing a bulk pack of terracotta planters with one giant glazed ceramic bowl creates intentional, designer-level contrast.
A stylish cluster of three varied pots runs about $60–$120.
- Key Materials: Large, medium, and small pots, varying plant heights
- Vibe / Style: Abundant eclectic courtyard
- Difficulty: Just arrange and fill
- Budget Breakdown: 3-pot set: $80 | Potting soil: $20.
- Creator’s Tip: Always place the tallest, most structural plant in the back of the cluster to act as the visual anchor.
- Smart Sourcing: Buy a 3-piece graduated ceramic planter set and premium moisture-control potting mix.
57. Outdoor Mirror Frames

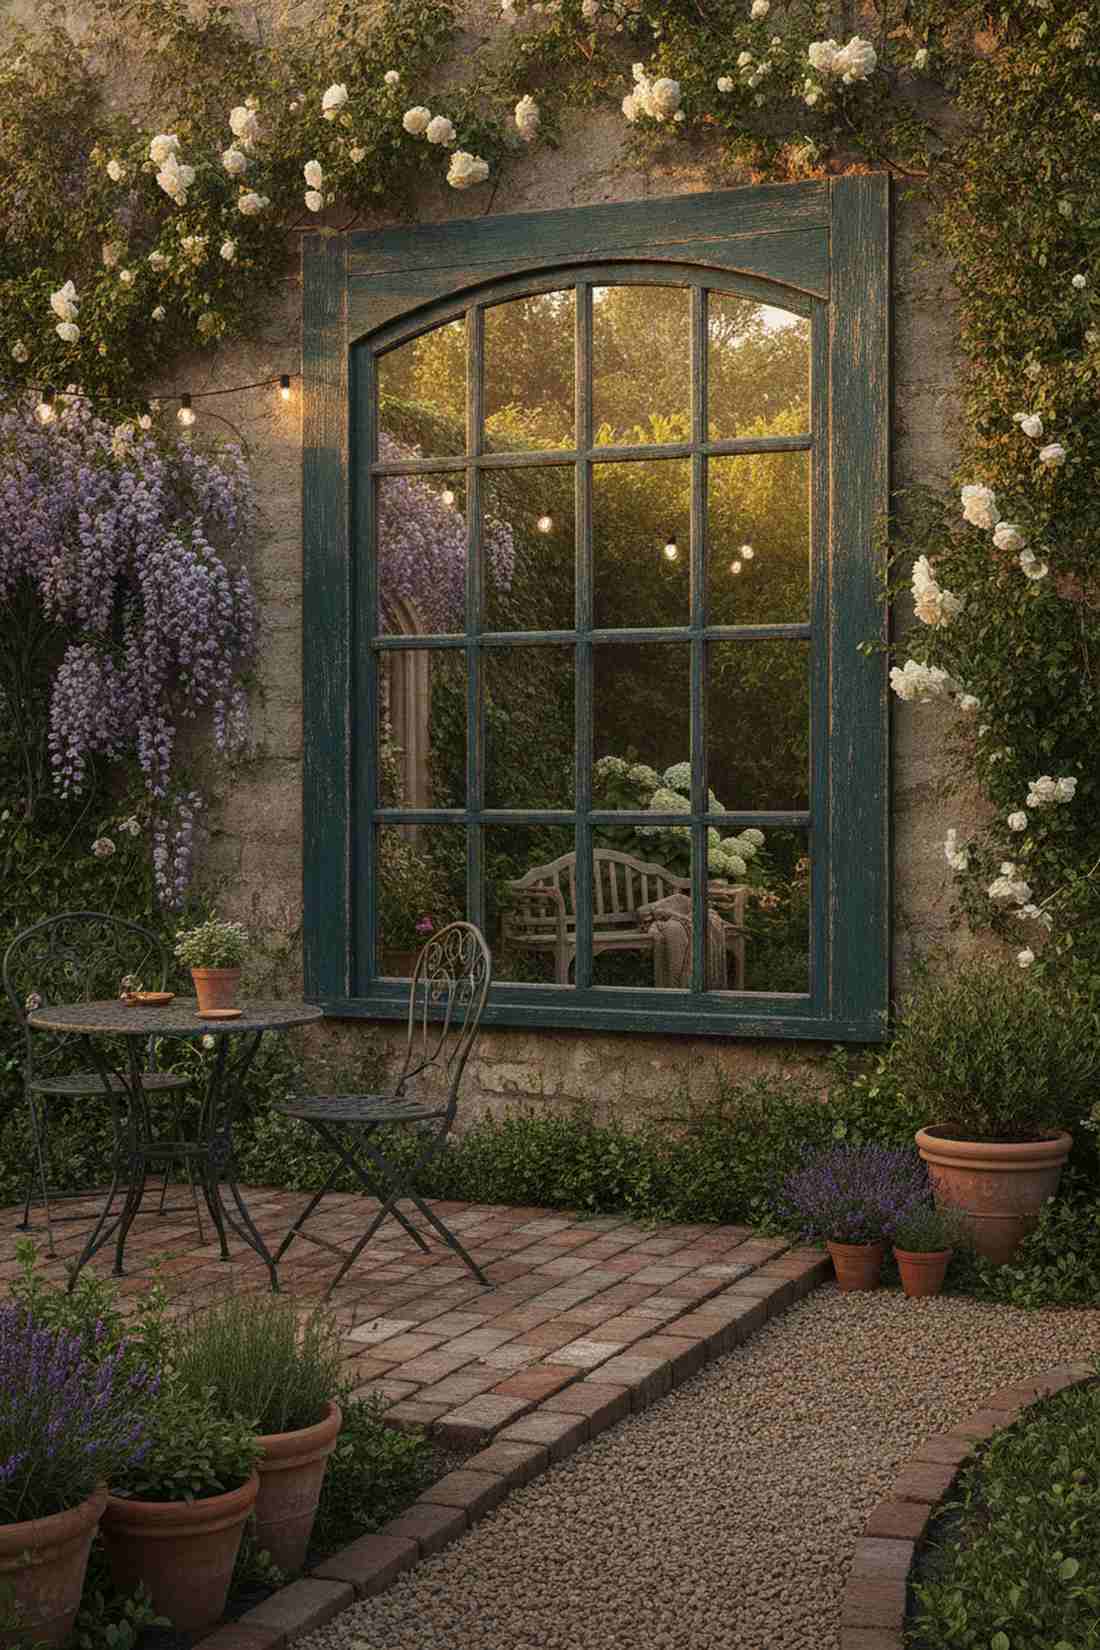
Makes your patio look twice as big while reflecting golden hour light everywhere. A vintage outdoor garden mirror is the ultimate optical illusion for tiny courtyards.
Frameless mirrors look like cheap gym glass; securing a rustic wooden frame gives a designer-level finish that looks like a real architectural window. Snagging an acrylic shatterproof mirror panel to glue inside a thrifted frame is the safest DIY route.
This faux-window upgrade costs around $40–$80 to build. Pin this brilliant space-expanding trick!
- Key Materials: Old window frame, mirror cut to size, exterior glue
- Vibe / Style: Secret cottage garden
- Difficulty: Easy gluing project
- Budget Breakdown: Thrifted frame: $20 | Mirror: $30 | Glue: $10.
- Creator’s Tip: Distress the frame with sandpaper and seal it heavily with polyurethane so it withstands rain without falling apart.
- Smart Sourcing: Get an impact-resistant acrylic mirror sheet and heavy-duty exterior construction adhesive.
58. Wind Chime Accents
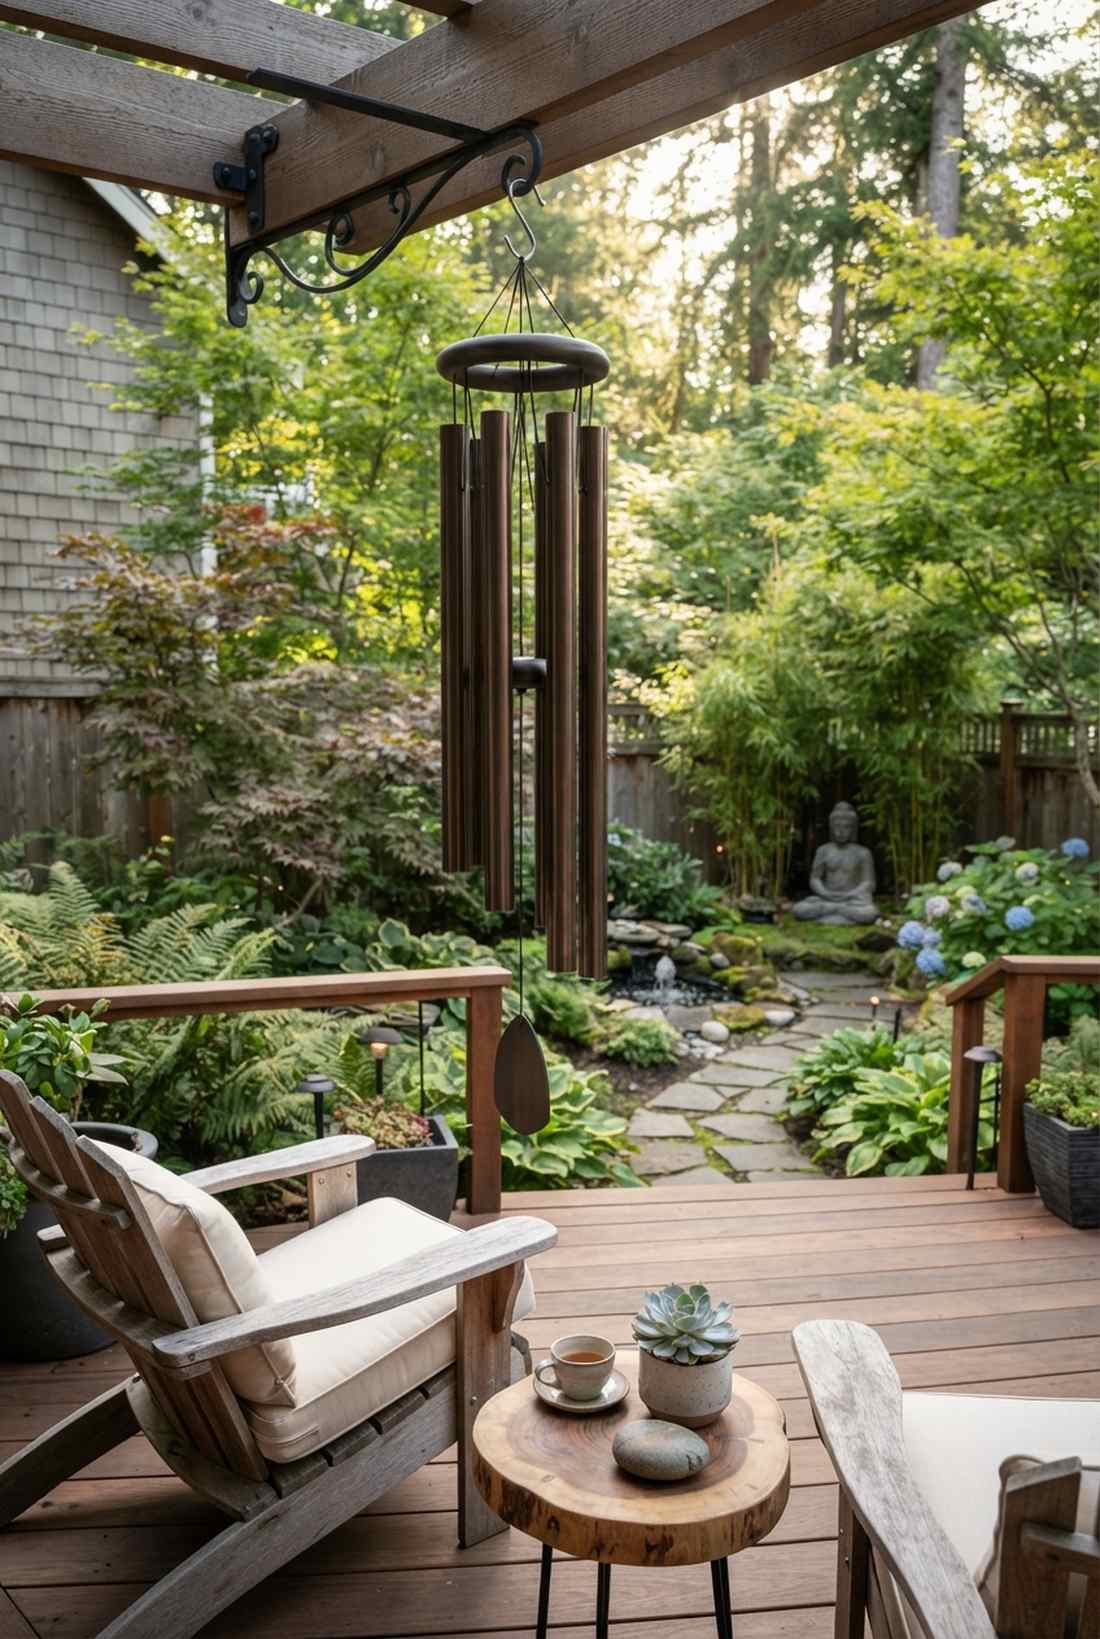
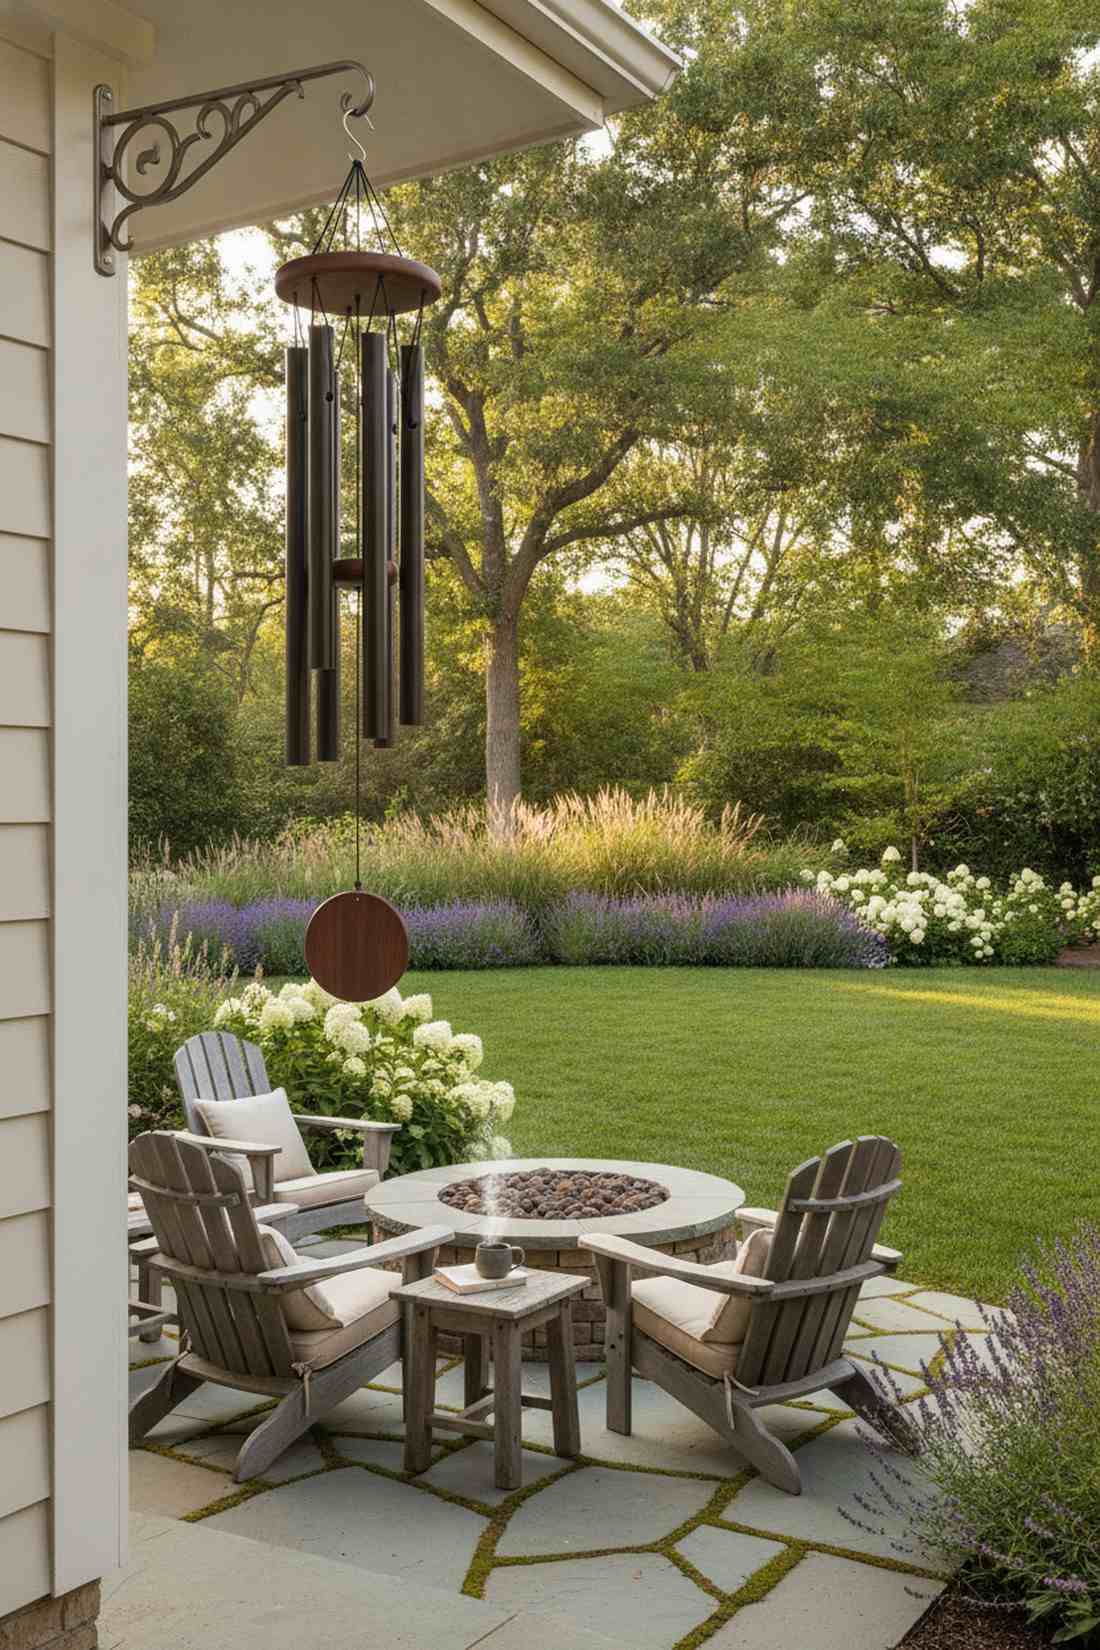
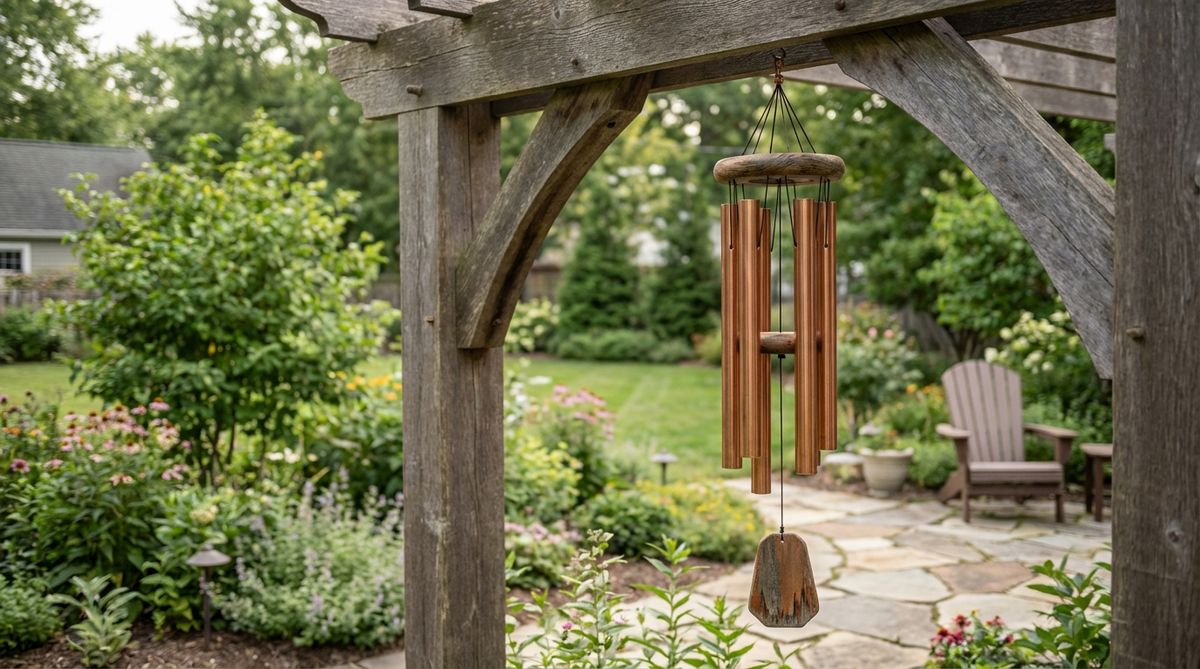
Fills the silent, dead air with a deep, resonating acoustic ambiance. A high-quality small garden decor chime acts as an invisible layer of relaxation.
Cheap tin chimes sound annoying; investing in thick aluminum tubes bypasses the usual cheap look and produces a deep, spa-like resonance. Hanging a corrosion-resistant tuned wind chime ensures you get perfect acoustic chords that last for years.
A premium, deep-tone chime will run you $40–$90.
- Key Materials: Tuned wind chime, heavy-duty hanging hook
- Vibe / Style: Zen meditation retreat
- Difficulty: Just hang it up
- Budget Breakdown: Premium chime: $60 | S-hook: $5.
- Creator’s Tip: Hang it near a corner where wind naturally funnels, but keep it at least 3 feet from the wall so it doesn’t bang the siding.
- Smart Sourcing: Order a musically tuned deep-resonance aluminum wind chime and stainless steel S-hooks.
59. Decorative Mulch Layers
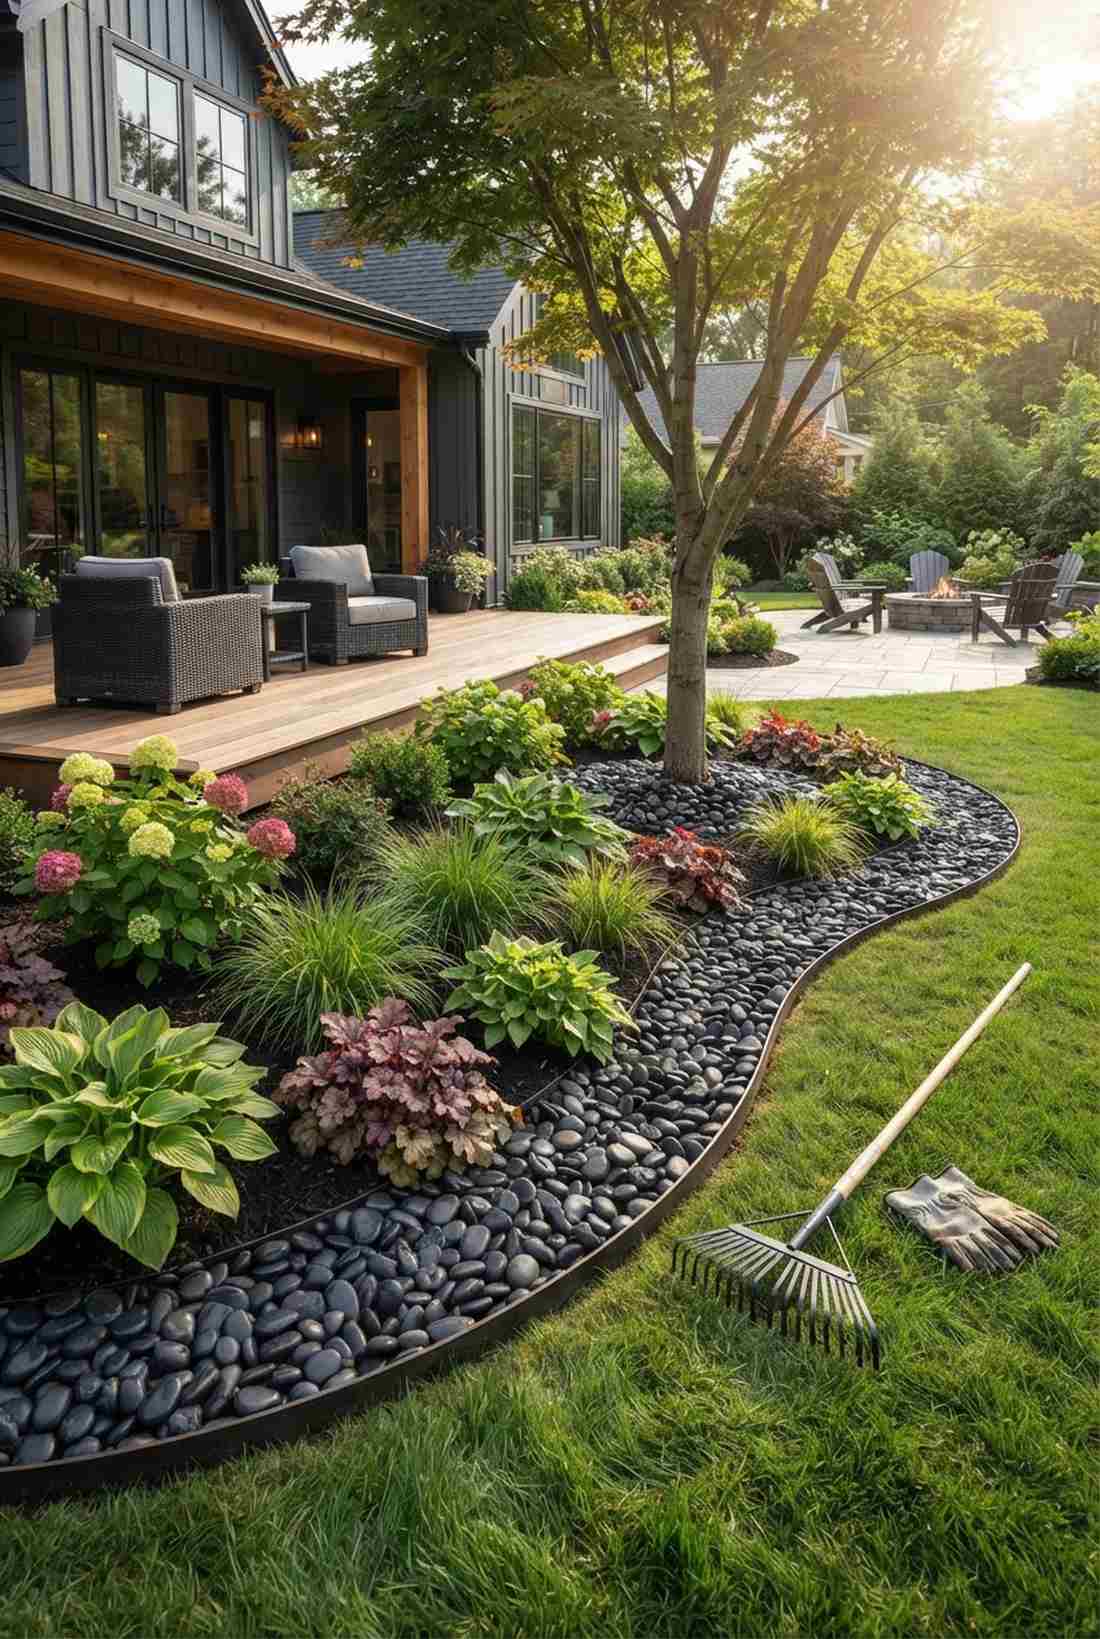
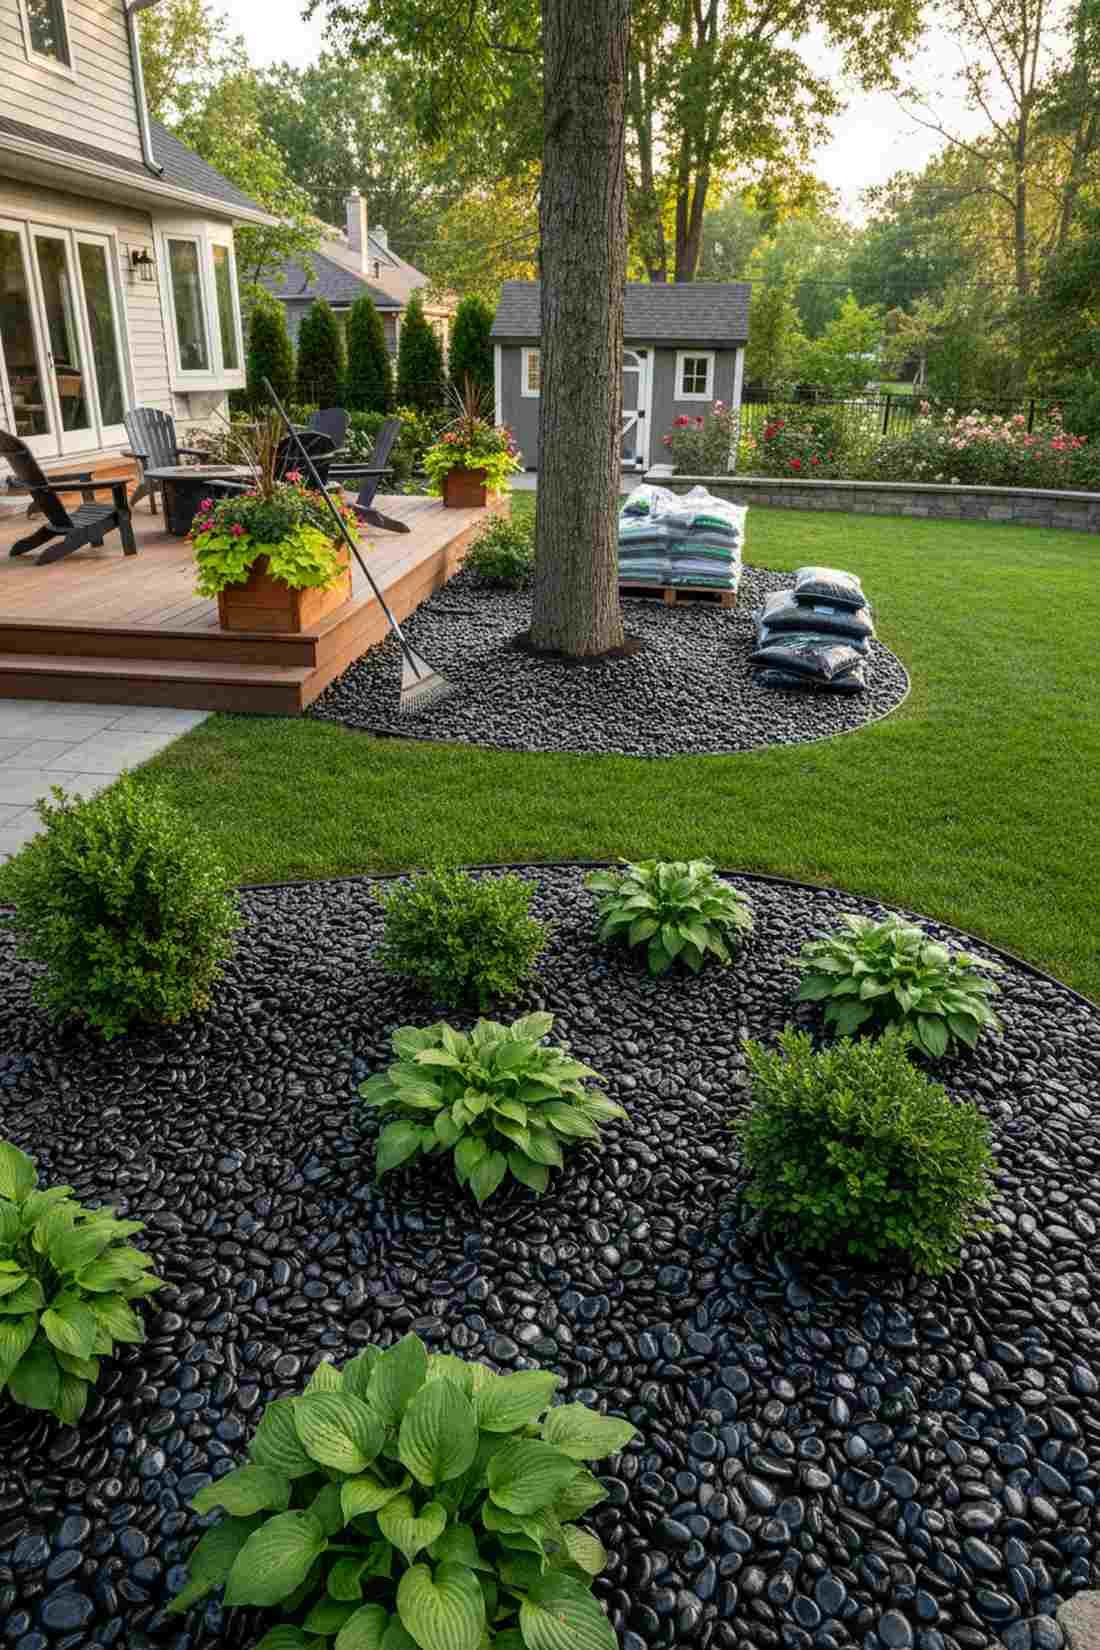

Seals off your flower beds with a jet-black contrast that makes green leaves absolutely explode visually. Utilizing premium landscaping border ideas is the final touch every yard needs.
Bare dirt looks unfinished and invites weeds; topping the soil with dark mulch feels like a custom-built installation. Spreading a bulk pack of polished river stones instead of wood chips gives a modern, permanent floor that never rots.
Capping off your beds properly costs about $30–$70.
- Key Materials: Black mulch or river stones, garden rake
- Vibe / Style: Ultra-crisp modern finish
- Difficulty: Basic spreading
- Budget Breakdown: Mulch/Stones: $50 | Gloves: $5.
- Creator’s Tip: Keep mulch at least 2 inches away from the base of tree trunks to prevent fatal root rot.
- Smart Sourcing: Buy a bulk pallet of black polished river pebbles and a heavy-duty steel bow rake.
60. Bistro Furniture Sets
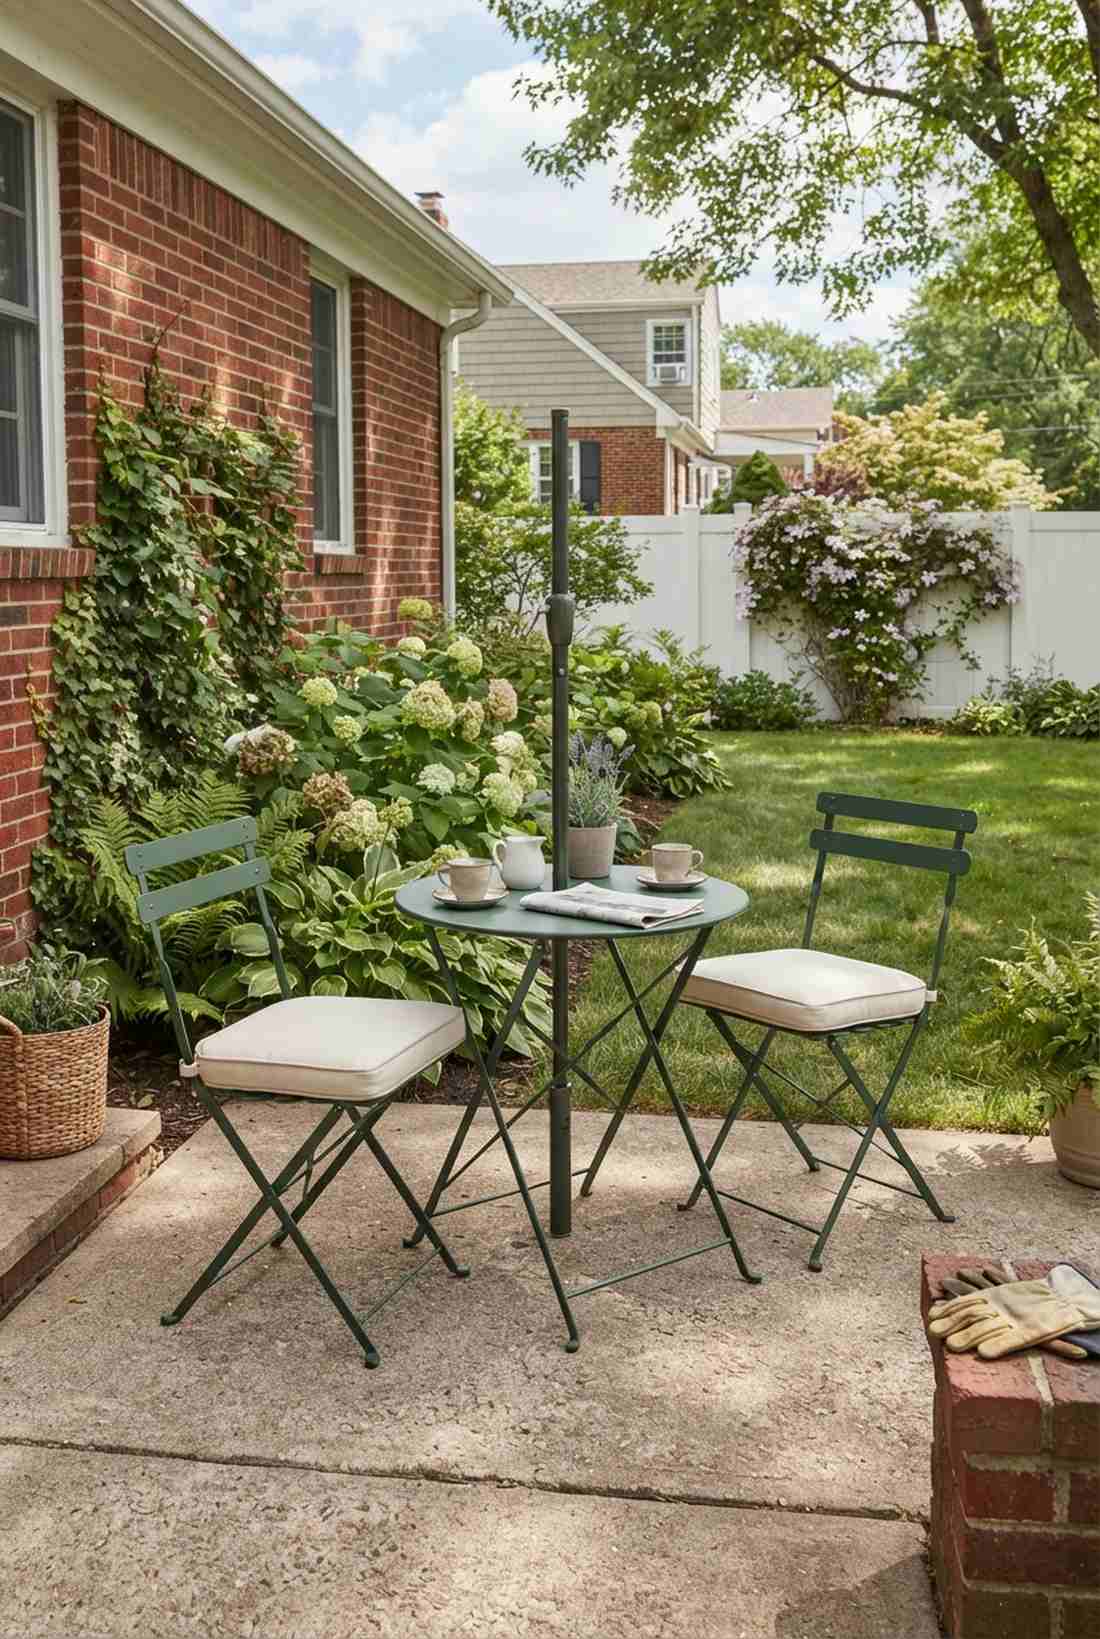
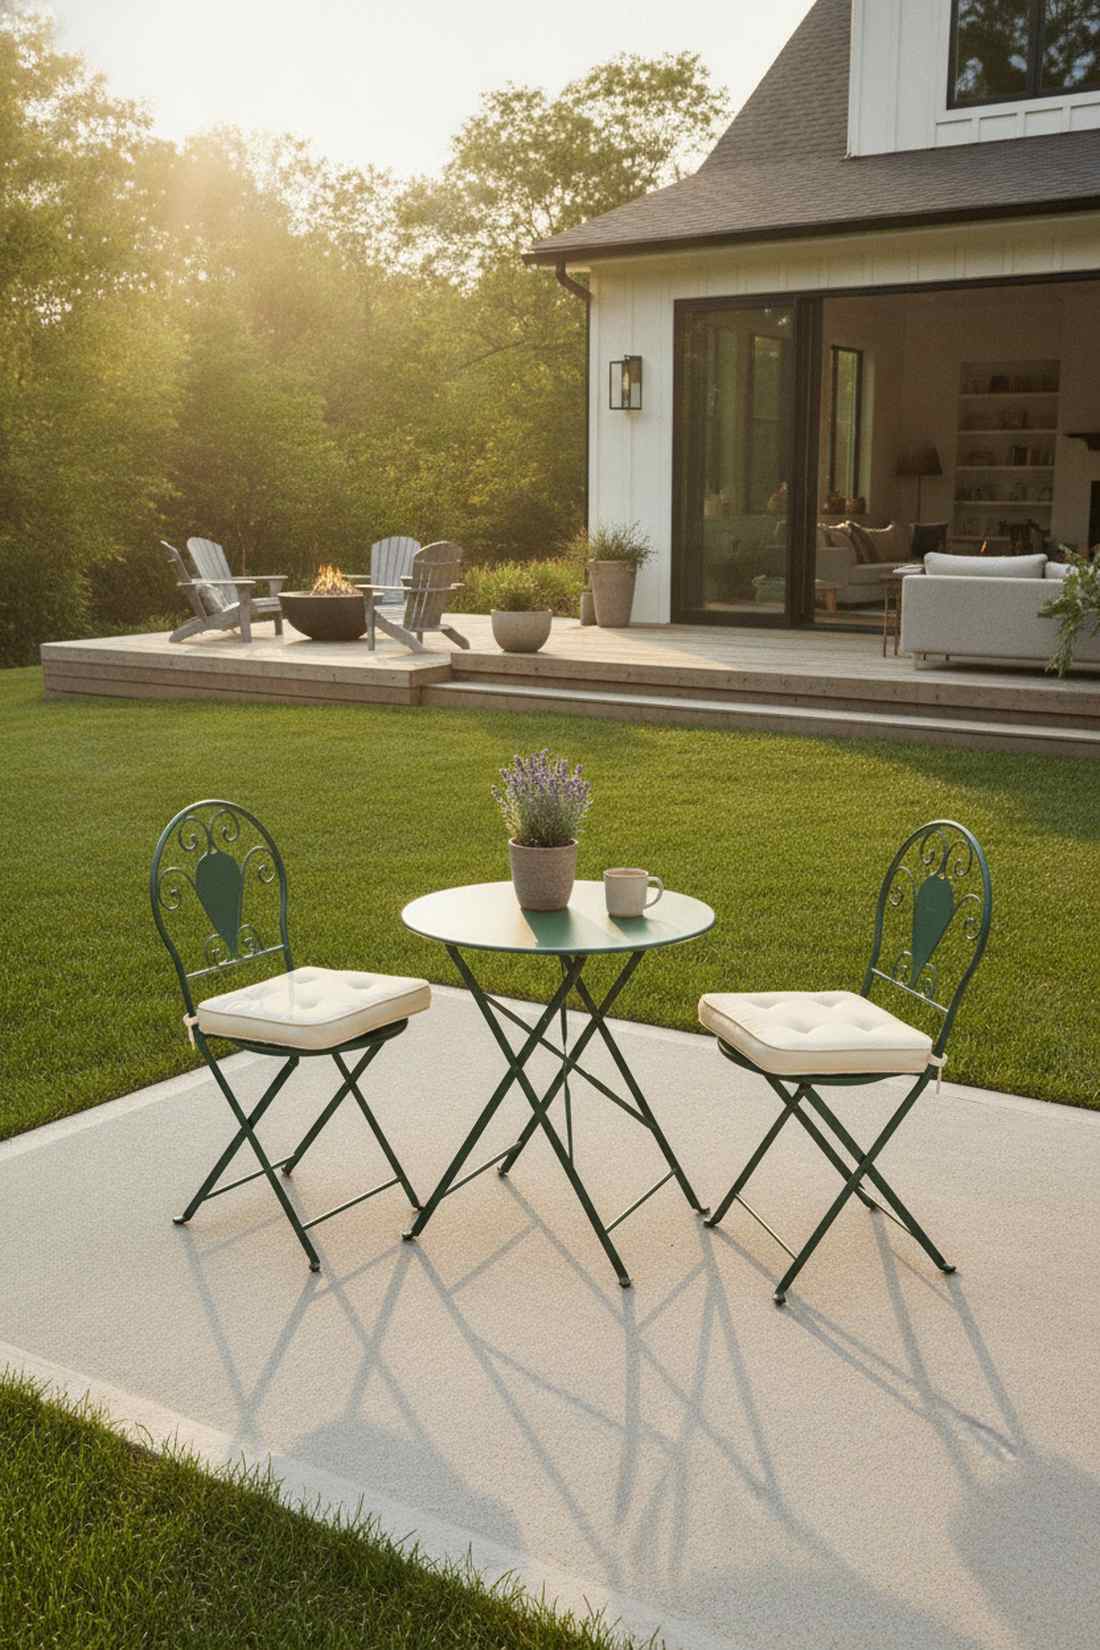
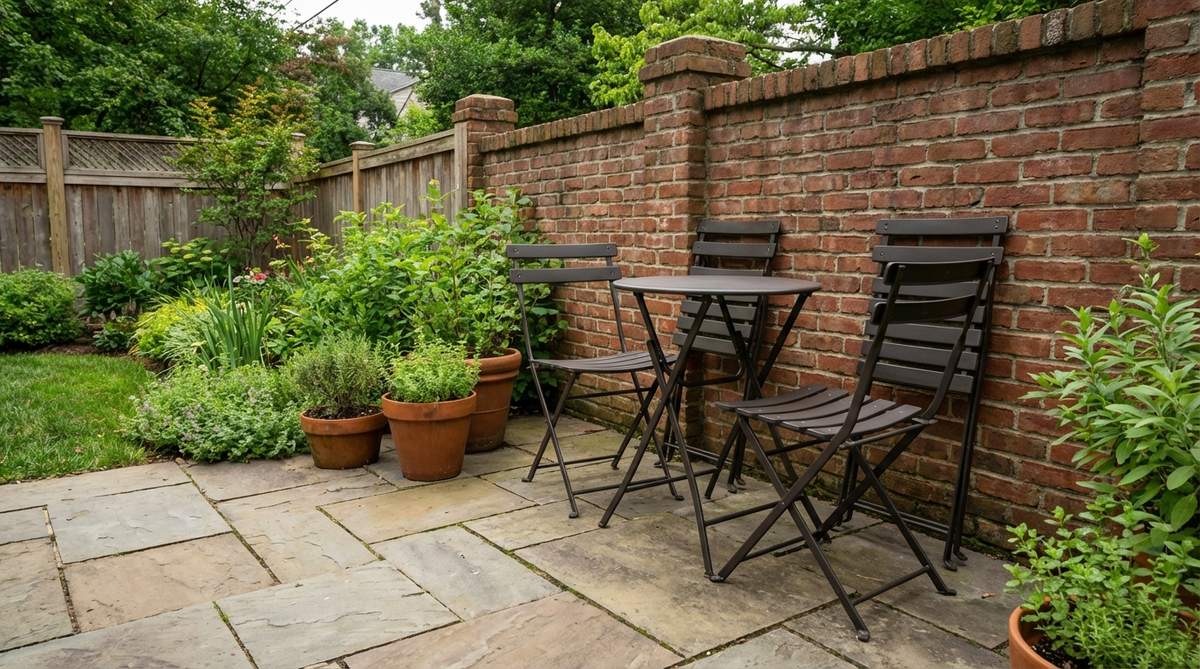
Transforms an empty concrete slab into a charming morning coffee destination instantly. A sleek folding small garden layout table is the ultimate use of a 4×4 footprint.
Bulky sectionals trap you in small spaces; a delicate wrought-iron set instantly elevates the aesthetic while leaving plenty of visual breathing room. Choosing a powder-coated folding bistro kit means you can completely clear the patio in under a minute.
A classic, durable two-person table set costs around $90–$160. Save this space-saving setup to your layout boards!
- Key Materials: Metal folding table, two matching chairs, seat cushions
- Vibe / Style: Parisian sidewalk cafe
- Difficulty: Unfold and sit
- Budget Breakdown: Bistro set: $120 | Cushions: $30.
- Creator’s Tip: Get a set with an umbrella hole in the table center even if you don’t use it right away—you’ll want the shade option later.
- Smart Sourcing: Grab a rust-resistant powder-coated steel bistro set and waterproof outdoor seat cushions.
Transform Your Compact Space into a Dimensional Retreat
Implementing these 60 small garden ideas completely redefines what a cramped footprint can achieve. By upgrading basic materials to premium pre-cut kits and using clever spatial tricks, you achieve a custom designer look without the luxury price tag. The key to high-end small garden design is precision—whether it’s vertical layering, strategic mirror sourcing, or high-contrast plant layouts. Start by incorporating just two or three of these high-impact blueprints. With smart bulk sourcing and a focus on visual depth, even the smallest patio can become the ultimate outdoor sanctuary.
Frequently Asked Questions
What is the most effective technique to make a small garden look bigger?
Combining vertical living walls with strategic acrylic outdoor mirrors is the ultimate hack to instantly multiply your perceived square footage. Utilizing premium vertical planter systems pulls the eye upward, while placing a shatterproof mirror at the end of a pathway reflects the green space backward. Skip cheap temporary setups and invest in UV-coated materials to ensure this illusion remains convincing and durable year-round.
How many plants can fit in a small garden without overcrowding?
To avoid a messy jungle look, professional small garden landscaping ideas rely on calculated layering rather than just cramming pots together. A standard 100-square-foot space easily supports one dwarf specimen tree, 3-5 structural backdrop evergreens, and a dozen mid-level perennials. To triple this capacity safely, utilize heavy-duty tiered plant stands and hanging saddle planters to push your growing zones into the unused vertical airspace.
What are the best low-maintenance plants for small gardens?
The smartest investment is sourcing regional native starter kits and hardy ornamental grasses. These premium perennial selections naturally resist local pests and require almost zero supplemental watering once established. To maintain a crisp aesthetic with zero weekend labor, bypass finicky hybrid roses and load up on fast-spreading creeping thyme, dwarf conifers, and drought-resistant sedums that look expensive but act like weeds.
How do I create privacy in a small garden without blocking light?
Never box yourself in with solid lumber walls; instead, use laser-cut metal partition panels or freestanding lattice walls. These decorative garden screens break the line of sight for neighbors while allowing crucial sunlight to dapple through. Upgrading to powder-coated aluminum kits or pre-treated cedar screens gives a designer-level finish that is both a privacy barrier and an architectural focal point.
Can small gardens include both functional and decorative elements?
Absolutely. The secret to a premium small garden layout is demanding that every single item pulls double duty. Upgrading a basic wooden bench into a built-in planter with hidden storage beneath maximizes utility without eating floor space. Integrating striking rainbow chard or deep purple kale directly into your ornamental flower borders is a highly efficient way to grow food that looks like high-end decorative foliage.
What is the ideal budget for designing a small garden?
A high-end visual upgrade can be done smartly for $500–$1,500 if you utilize smart sourcing, like bulk-pack gravel, pre-cut edging kits, and bare-root perennials. For a complete structural overhaul featuring premium composite decking and low-voltage lighting kits, budget around $3,000–$5,000. The key to a budget-friendly small garden is spending heavy on permanent hardscape foundations and saving money by propagating cheap groundcovers and using DIY vertical planter systems.