A premium small garden shed instantly elevates your backyard’s functional footprint. Discover brilliant layouts that maximize vertical potential using budget-friendly structural kits. Transform tight patios into high-end storage hubs without breaking the bank.
Design Snapshot: Core Principles
- Vertical Maximization: Wall-mounted systems and tall shelving units multiply storage capacity without expanding footprint
- Multi-Functional Layouts: Modular designs adapt spaces for storage, workspace, and seasonal needs within compact dimensions
- Strategic Placement: Corner, lean-to, and attached configurations utilize awkward spaces while maintaining garden flow
- Material Intelligence: Pressure-treated timber, steel frames, and weather-resistant cladding ensure durability with minimal maintenance
Compact Storage Sheds For Every Garden
Maximize your tightest outdoor corners with these high-efficiency layouts that prioritize intelligent organization and premium aesthetics.
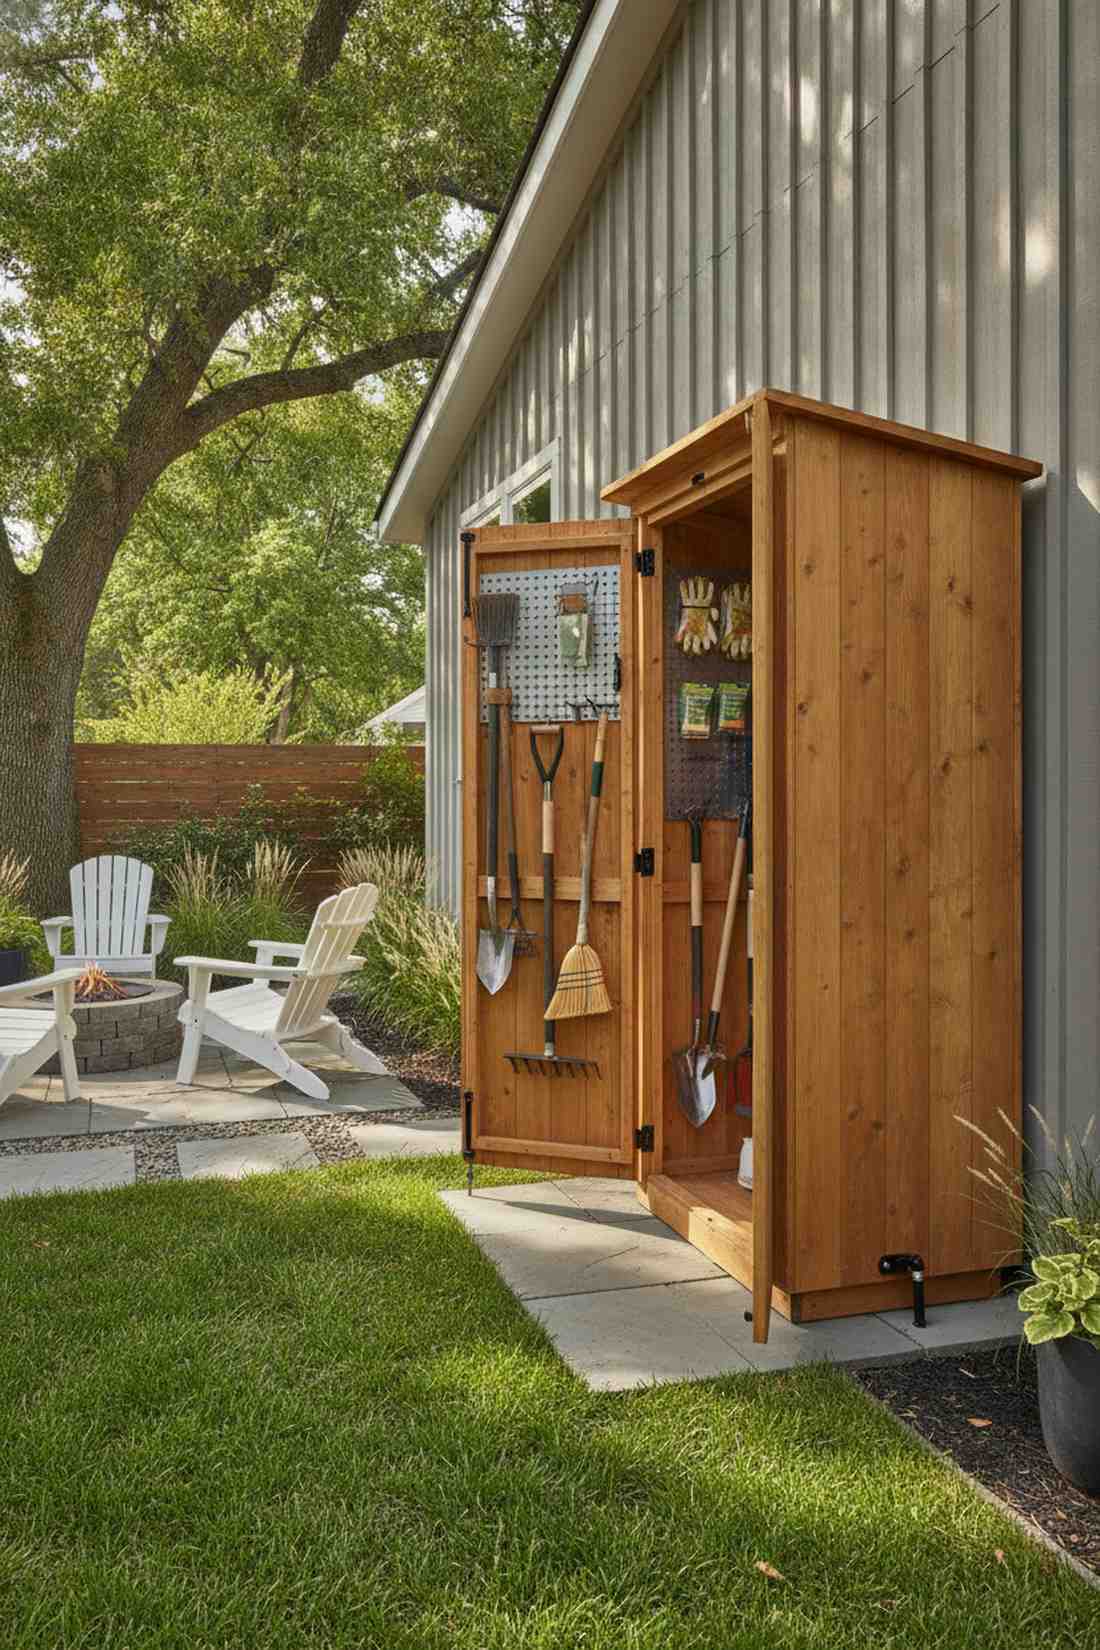
1. Lean-To Storage Shed
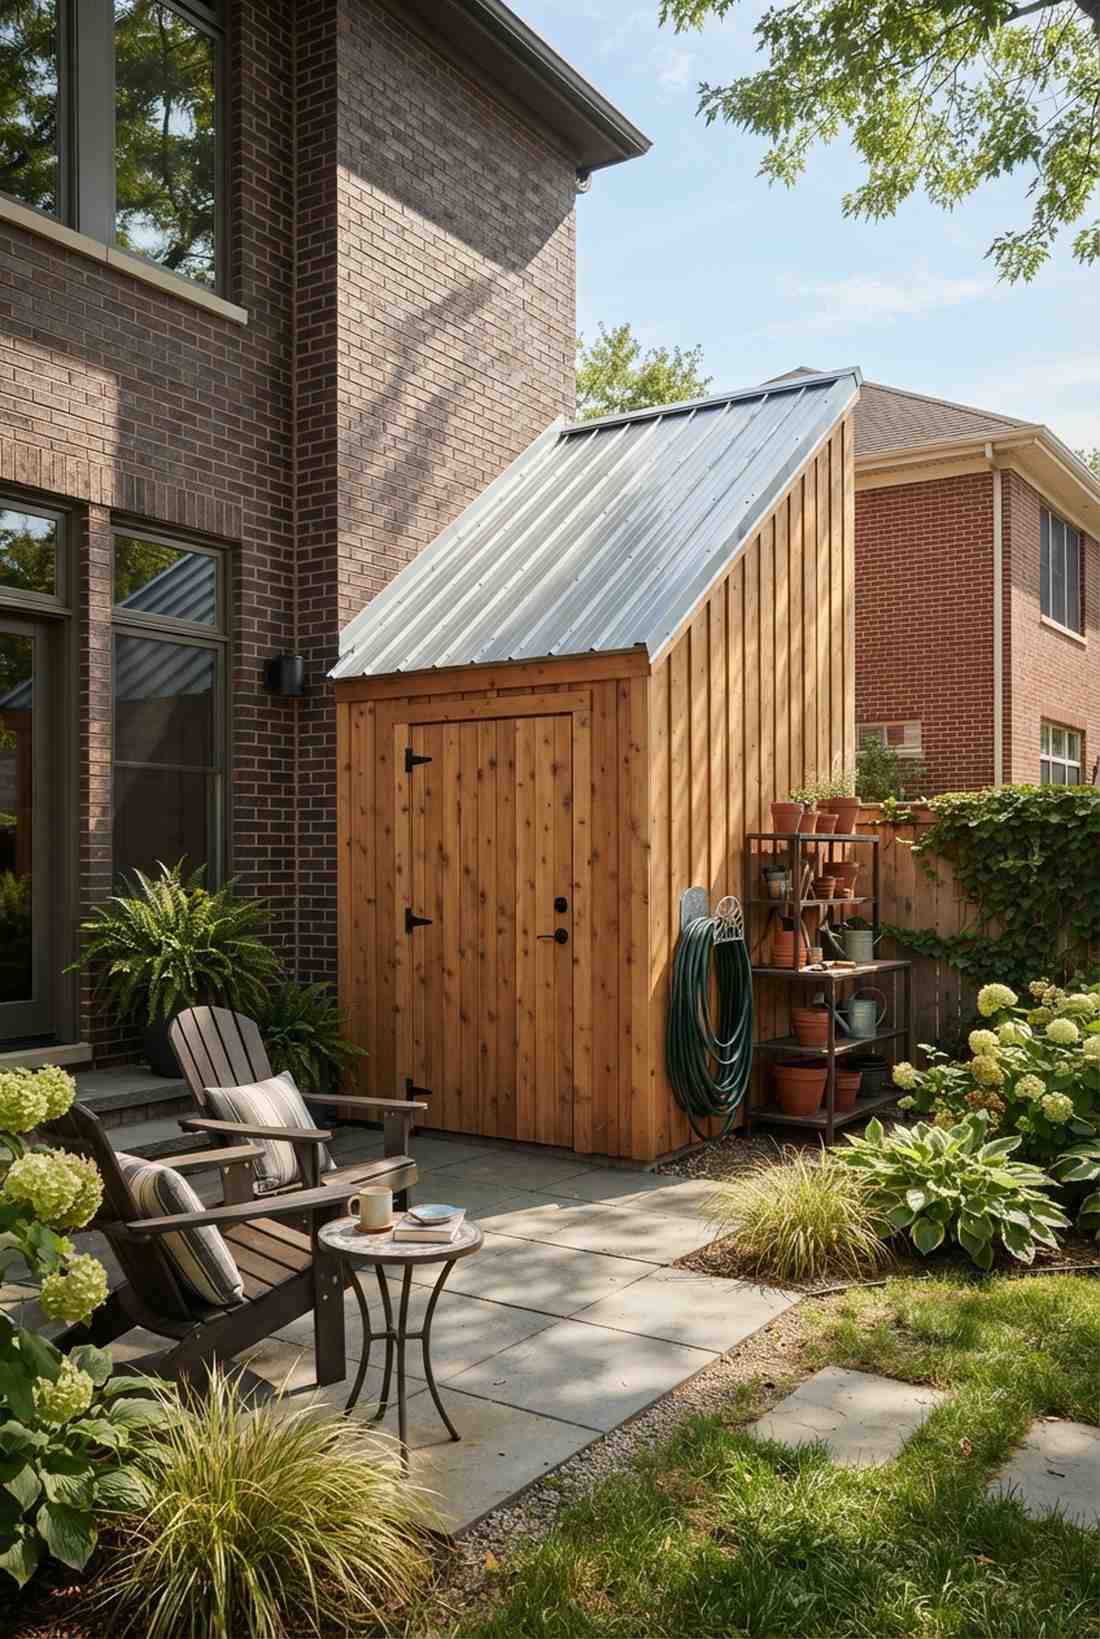

Feels like a brilliantly hidden architectural secret, this narrow attached structure works exceptionally well for tight urban townhouses. It completely vanishes against your primary house wall while offering immense utility.
Homeowners often overbuild, but anchoring directly to existing siding delivers a surprisingly premium look with half the materials. Utilize heavy-duty galvanized bracket kits and weather-resistant shiplap for a top-tier finish.
You can easily pull this off for around $150–$300 depending on your lumber choices. Pin this if you are planning a weekend small garden shed ideas board.
- Key Materials: Pre-treated timber framing, galvanized steel roofing panels
- Vibe / Style: Minimalist urban utility
- Difficulty: Intermediate DIY project
- Budget Breakdown: Frame: $85 | Roofing: $65 | Hardware: $40
- Creator’s Tip: Angle the sloped roof at least 15 degrees to guarantee rapid rainwater runoff during heavy storms.
- Smart Sourcing: Pre-cut corrugated metal roof sheets (bulk pack) and UV-coated exterior wood sealants.
2. Corner Wedge Shed
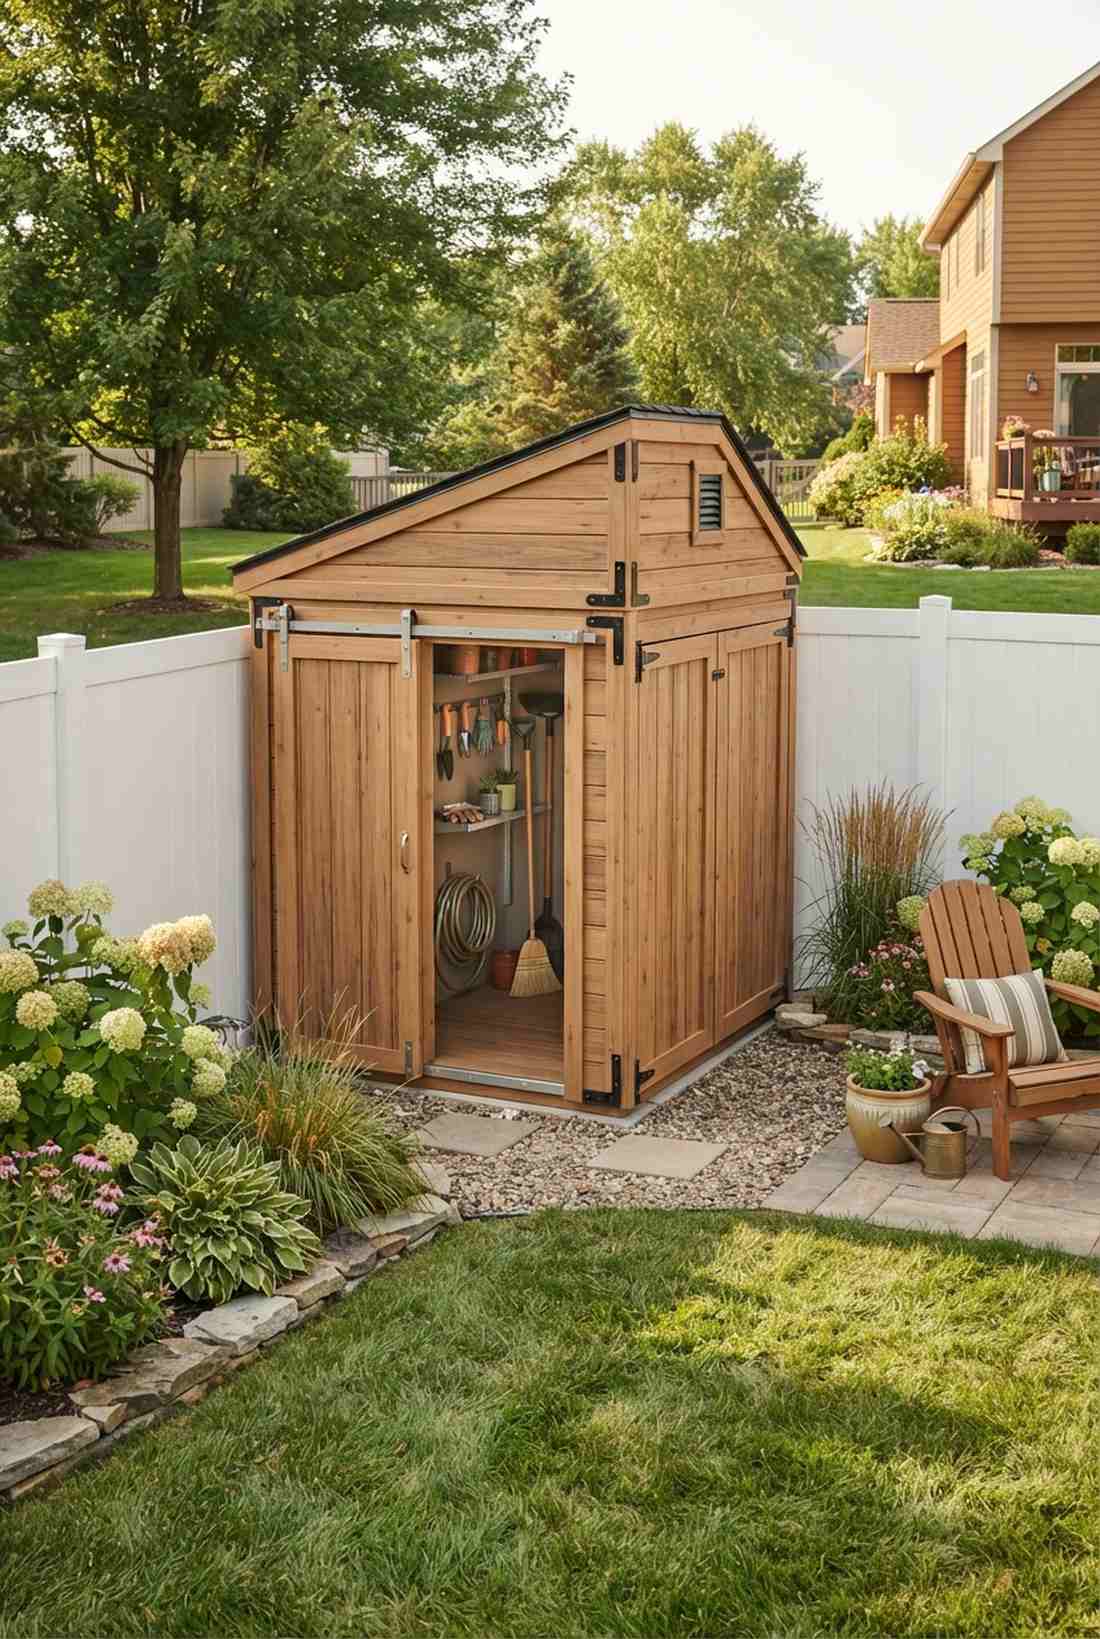
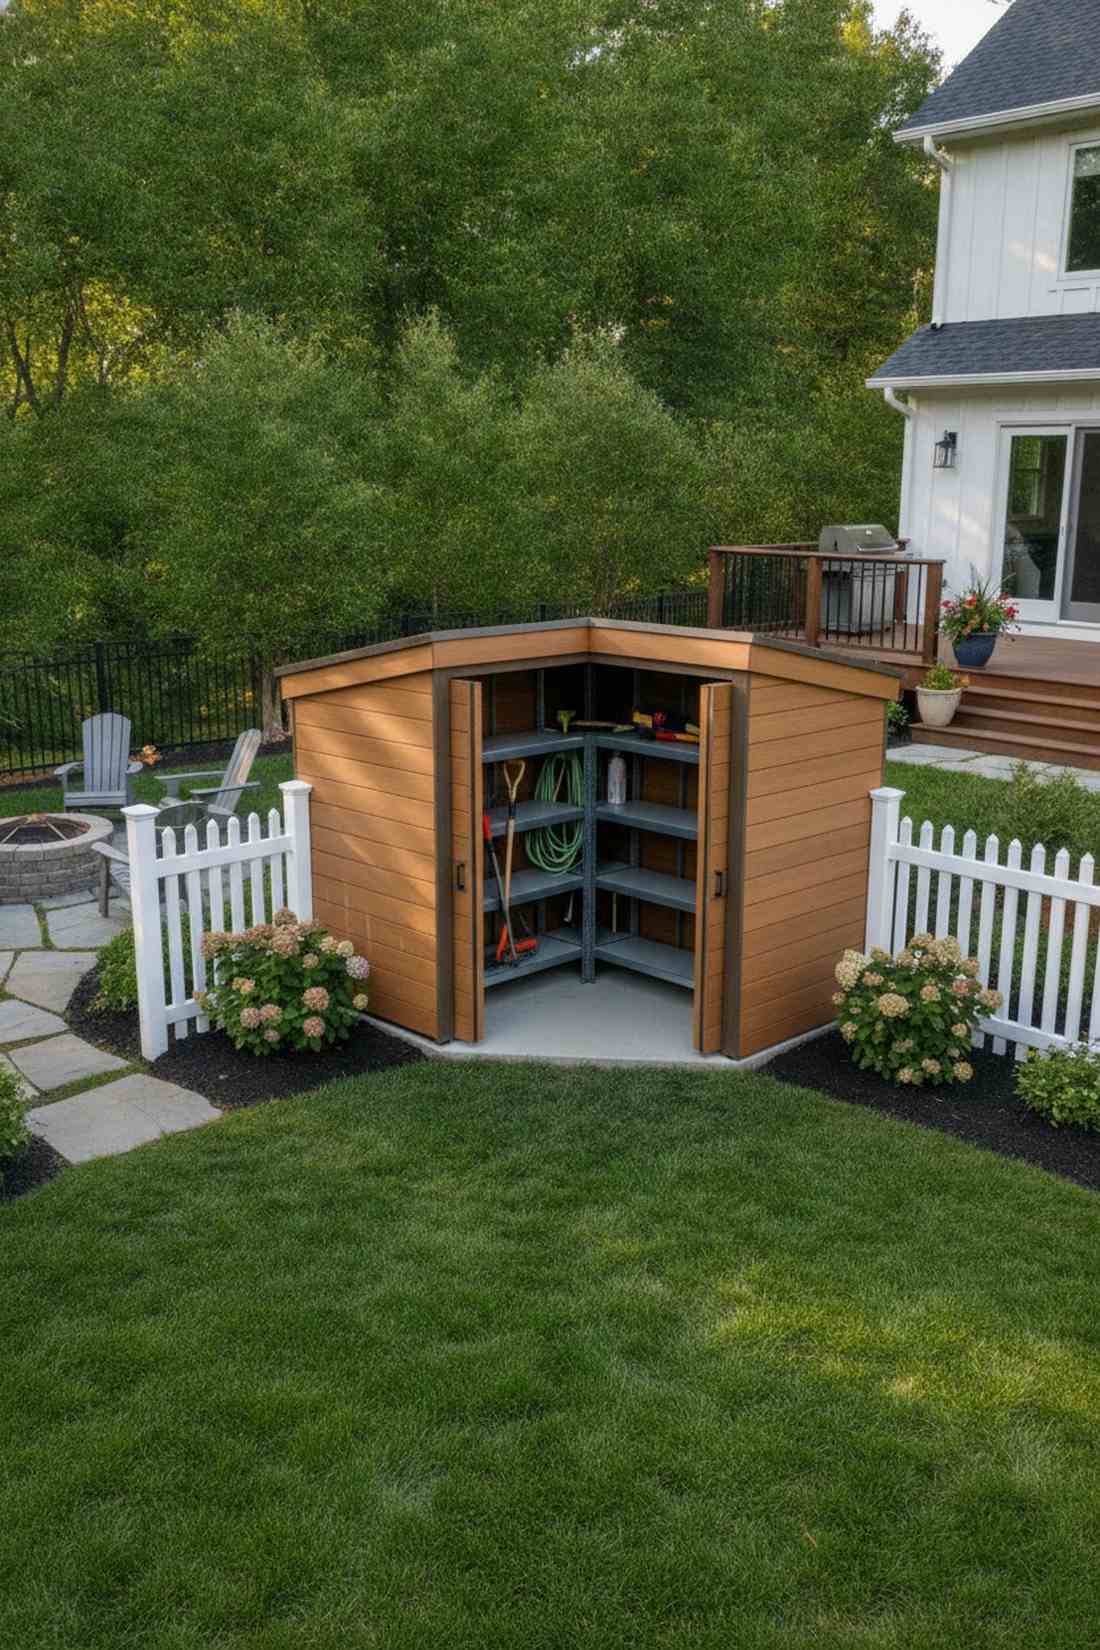
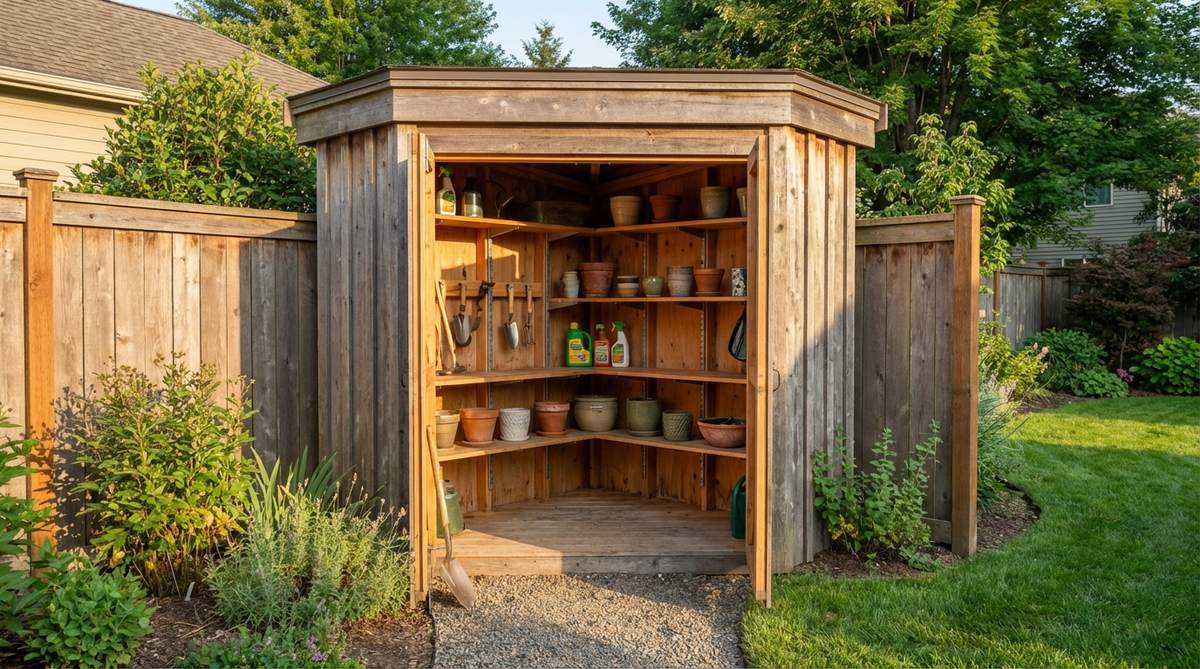
Brings a sense of satisfying geometry to an otherwise dead zone, this triangular corner unit is perfect for L-shaped suburban fences. It turns wasted dirt patches into a highly optimized storage hub.
Skip the bulky square designs that block pathways; a wedge shape gives a designer-level finish to your perimeter. Incorporate heavy-duty corner shelving systems and sliding doors to save even more swing clearance.
Expect to spend roughly $200–$400 for a solid cedar or composite build. It is a fast weekend upgrade that completely changes the backyard’s flow.
- Key Materials: Composite decking boards, heavy-duty hinges
- Vibe / Style: Seamless fence-line integration
- Difficulty: Moderate cutting required
- Budget Breakdown: Materials: $250 | Base Foundation: $50
- Creator’s Tip: Use adjustable internal wall brackets to accommodate varying lengths of seasonal tools.
- Smart Sourcing: Weather-resistant corner bracket kits and pre-cut composite wall panels.
3. Vertical Locker Shed
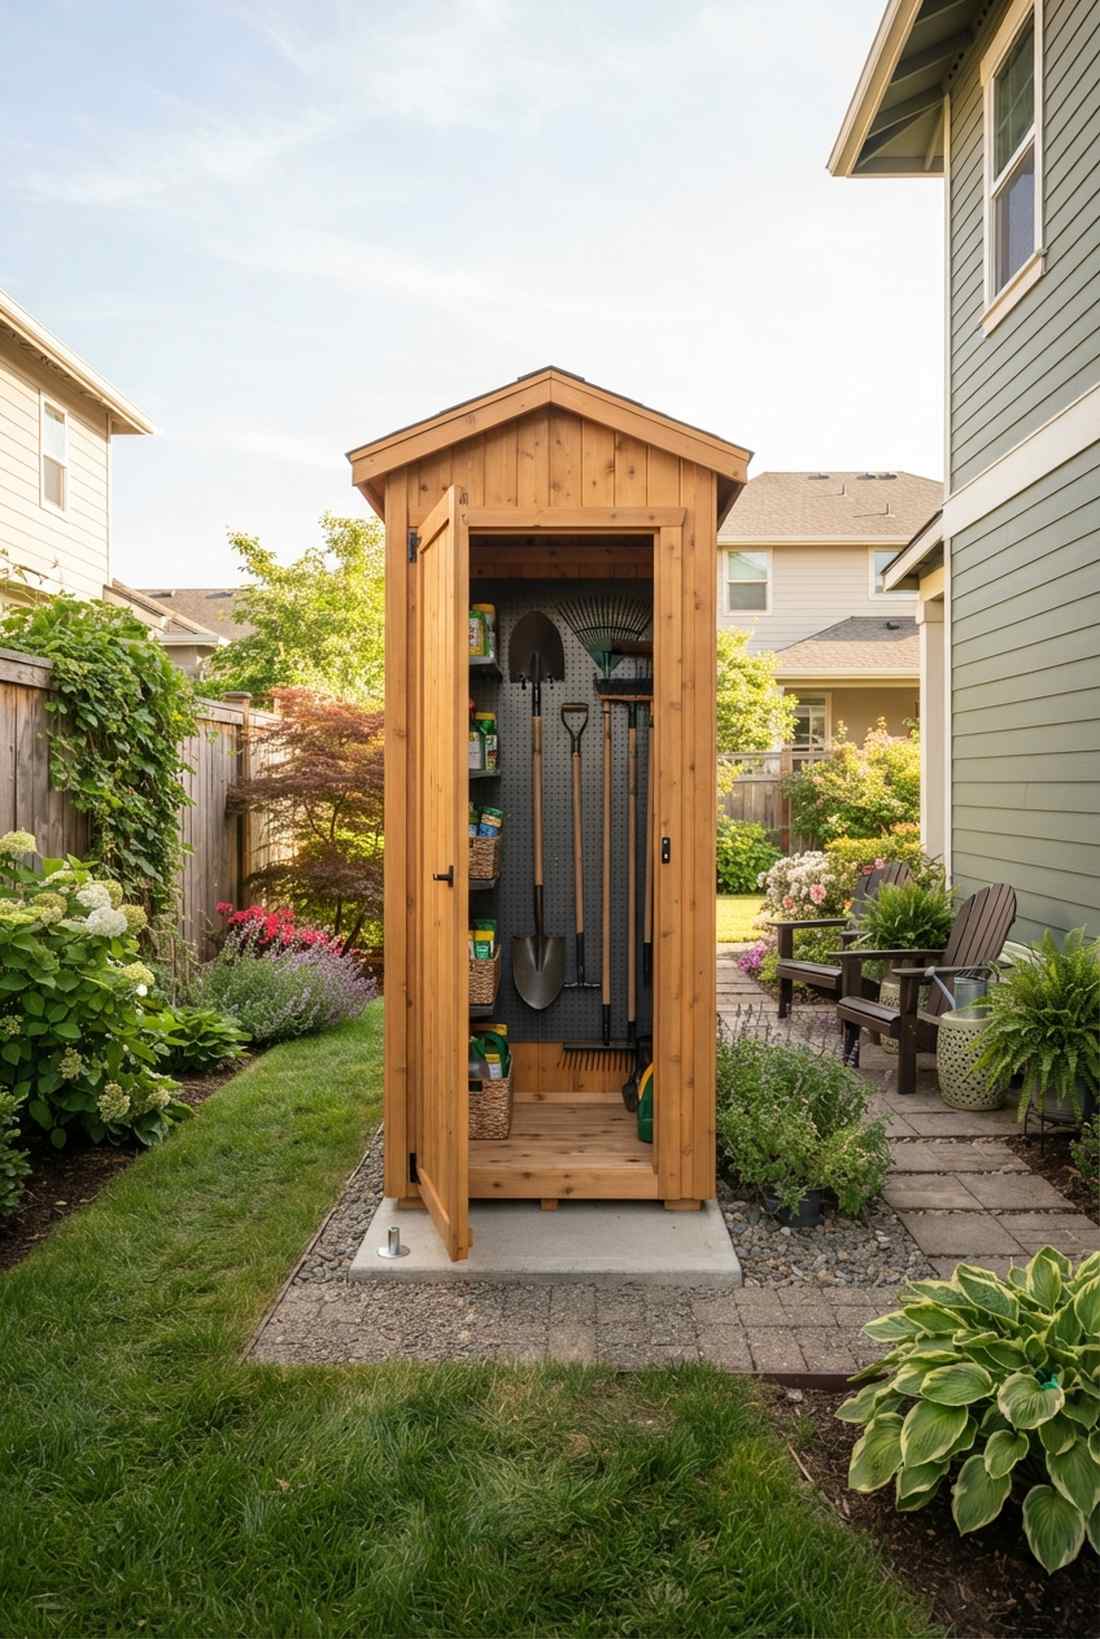

Straight out of an outdoor lifestyle magazine, this tall sentry-style locker is brilliant for narrow side-yards. It forces you to build upward, claiming vertical space without eating your lawn.
The trick nobody tells you is that going tall instead of wide slashes your footprint by 70%. Install industrial-grade pegboards on the back wall to hang long-handled tools and miniature garden supplies securely.
This compact marvel usually costs under $150 if you use repurposed wood. Save this layout for when you finally organize that chaotic side patio.
- Key Materials: Tongue-and-groove pine, magnetic door latches
- Vibe / Style: Sleek vertical sentry
- Difficulty: Easy beginner build
- Budget Breakdown: Wood: $90 | Hardware: $30 | Stain: $25
- Creator’s Tip: Add a sturdy ground anchor if you live in a high-wind area to prevent tipping.
- Smart Sourcing: Heavy-duty steel pegboard kits (2-pack) and waterproof magnetic lock systems.
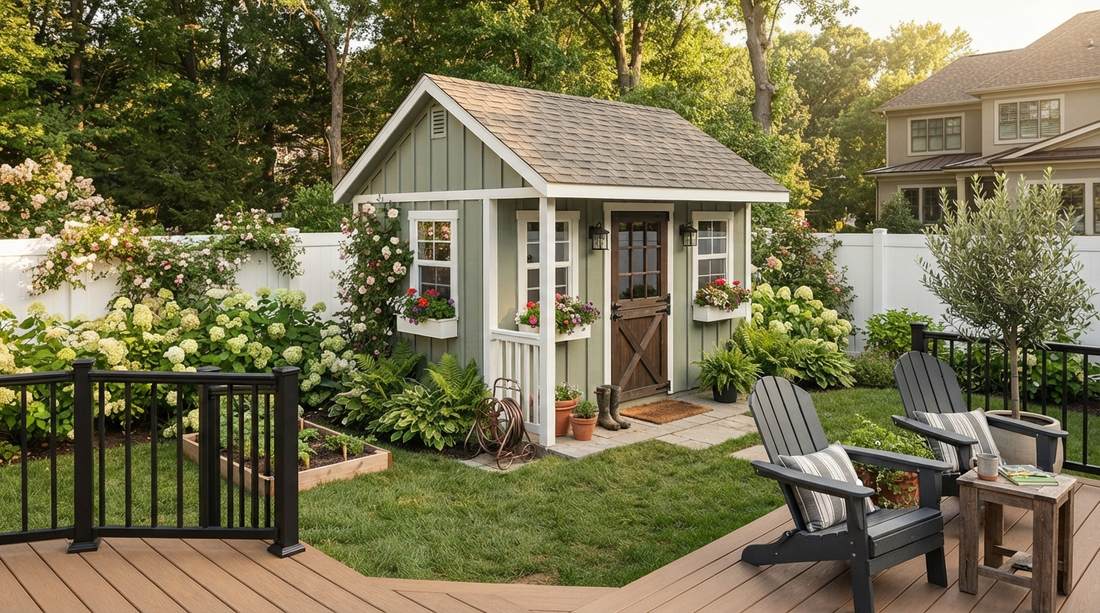
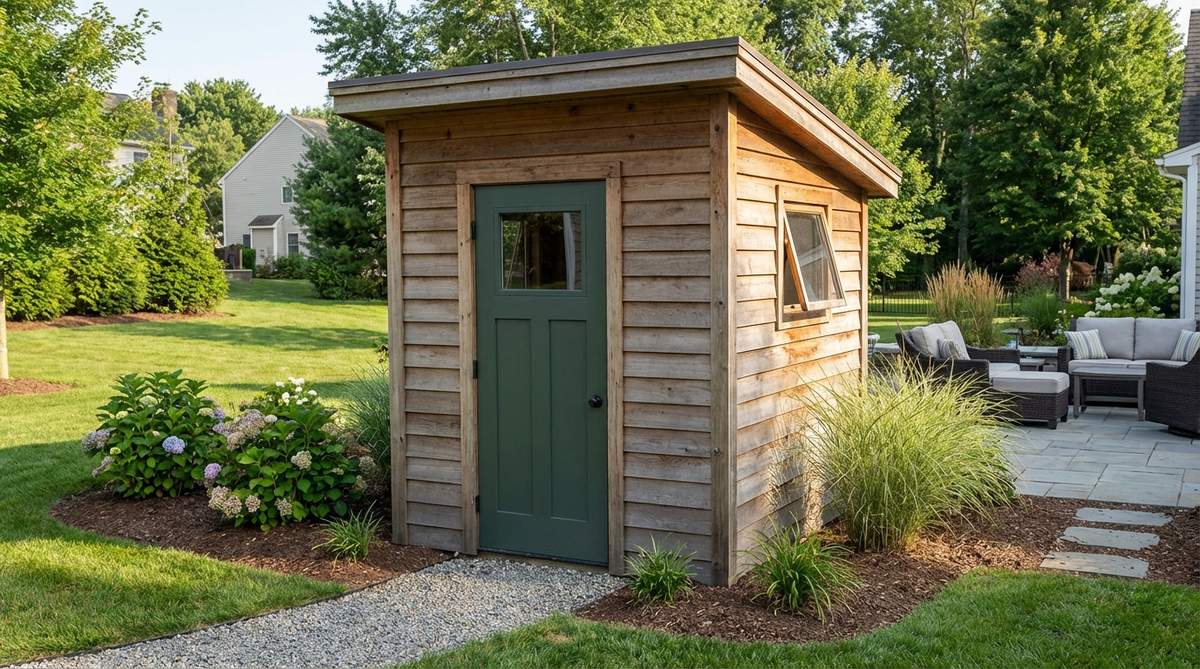
4. Apex Roof Compact
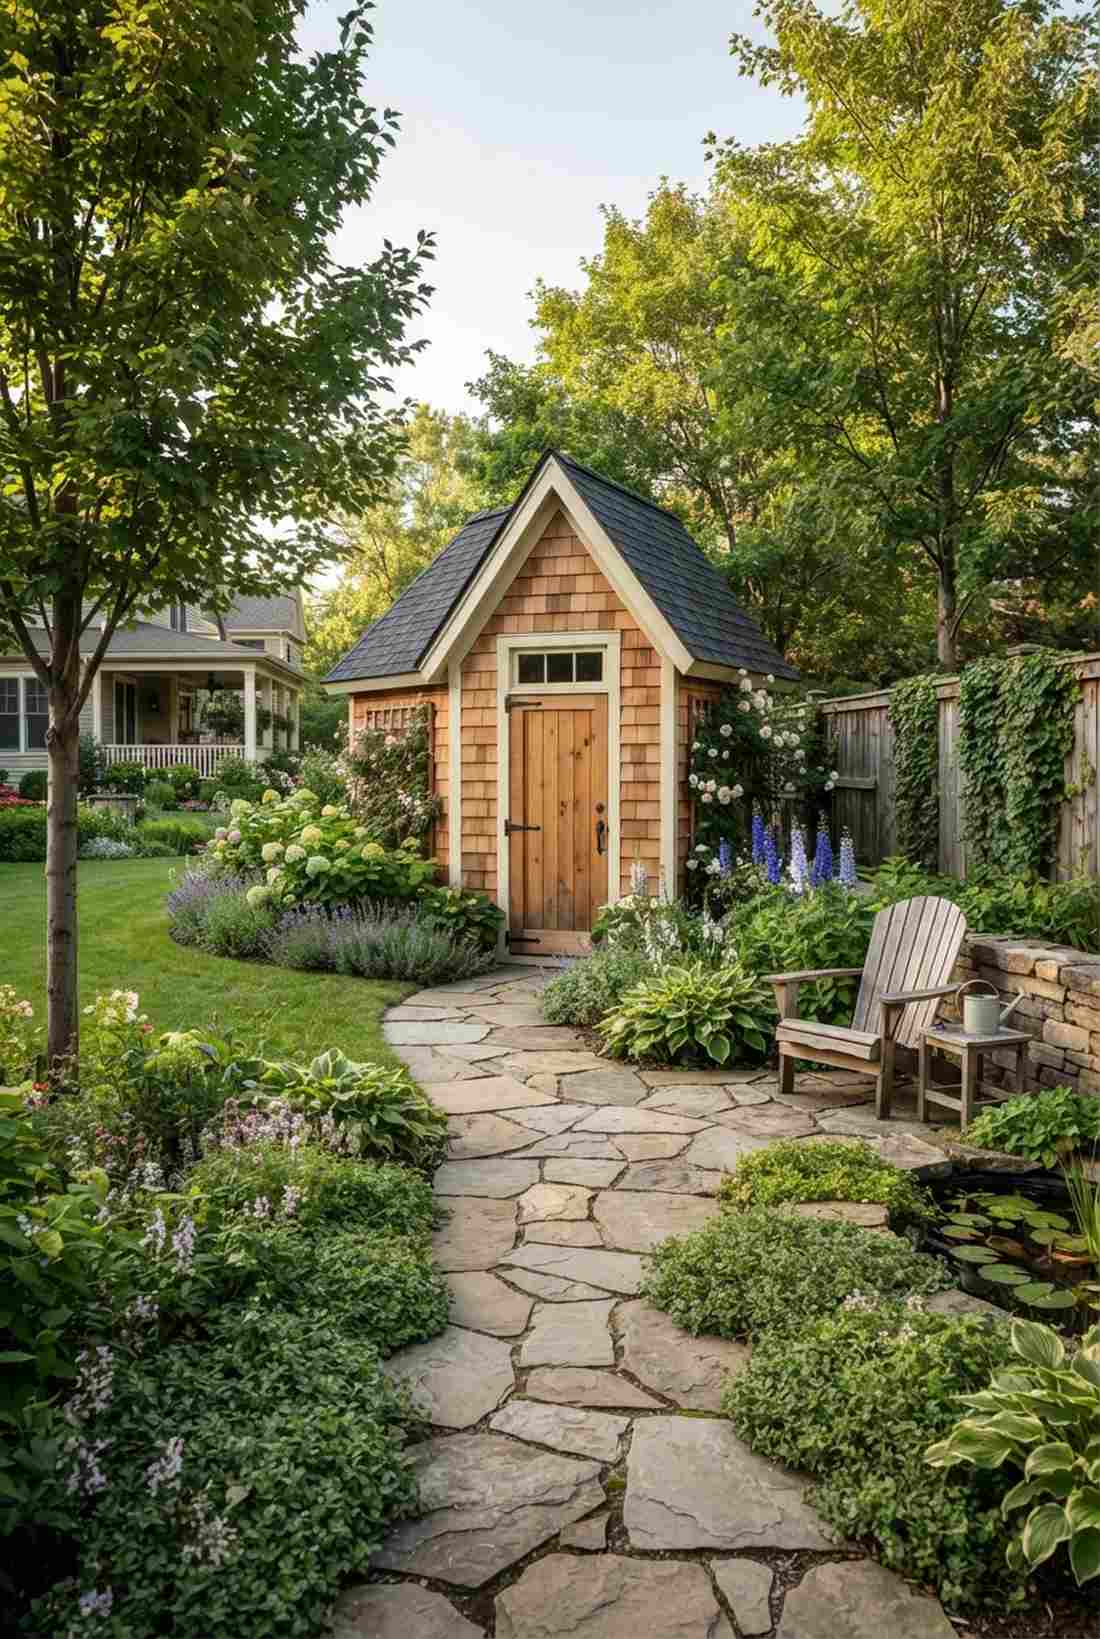
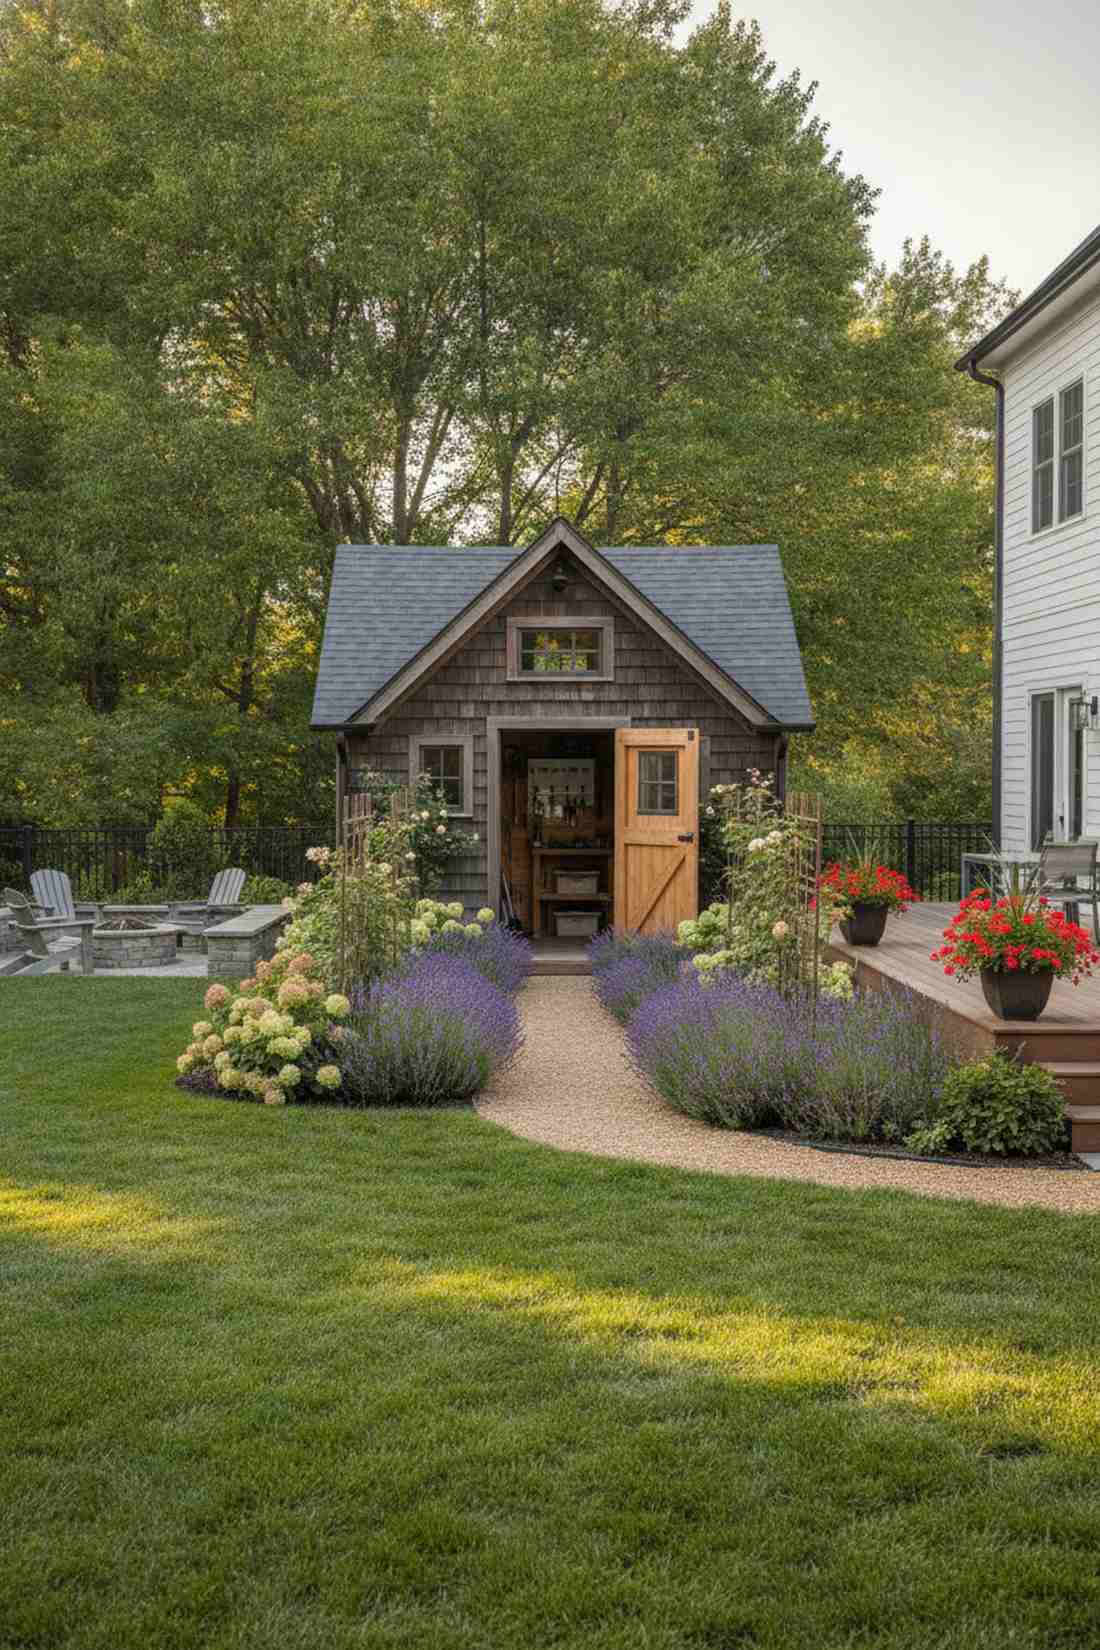

Captures the essence of a classic English cottage, this peaked roof mini-barn serves as a stunning visual focal point. Works wonders at the end of a long garden pathway.
While flat roofs are trendy, a traditional apex structure looks far more expensive than it is and sheds snow effortlessly. Line the interior with premium garden tool organizers to keep the floor completely clear.
Budget around $300–$500 for a durable setup that outlasts cheap plastic alternatives. Highly recommended for areas with unpredictable weather.
- Key Materials: Asphalt shingles, overlap cladding
- Vibe / Style: Traditional rustic charm
- Difficulty: Intermediate framing
- Budget Breakdown: Roofing: $120 | Timber: $200 | Trim: $80
- Creator’s Tip: Install a small glass transom window above the door for free natural lighting.
- Smart Sourcing: Pre-bundled asphalt roofing shingles and anti-rot treated overlap timber sets.
This next layout is ridiculously clever for modern spaces and looks like a $1,000 custom architectural feature…
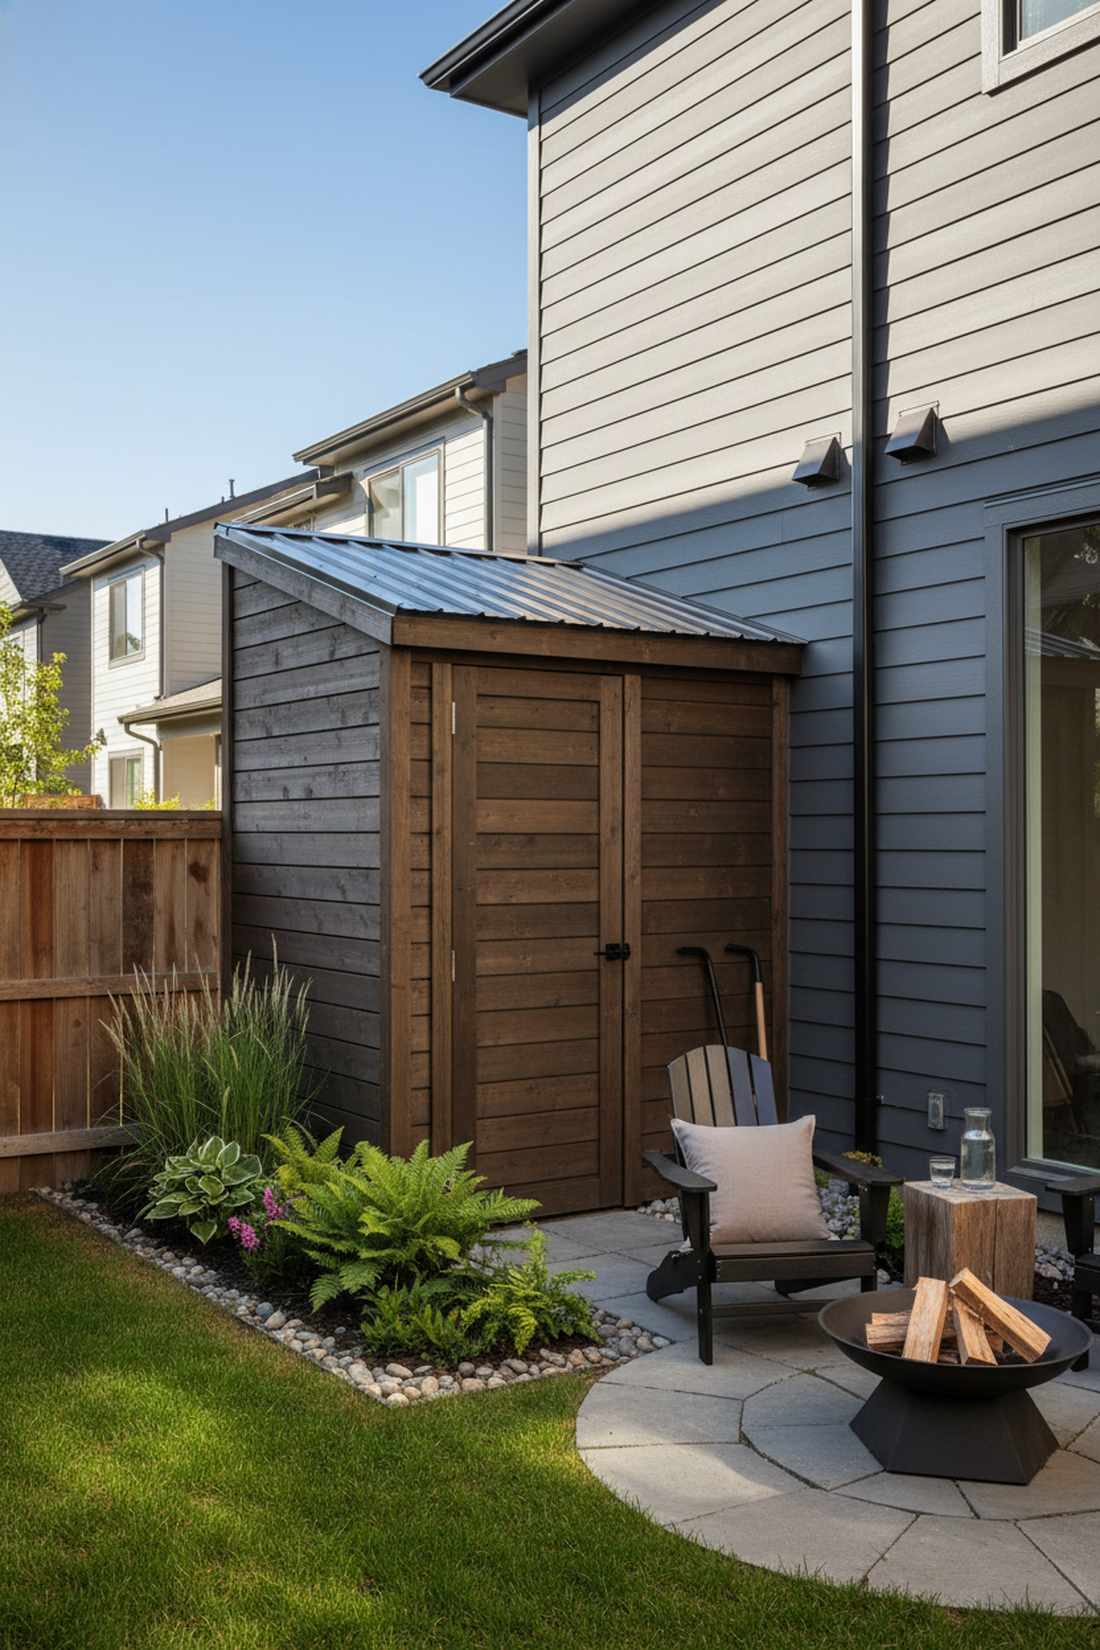
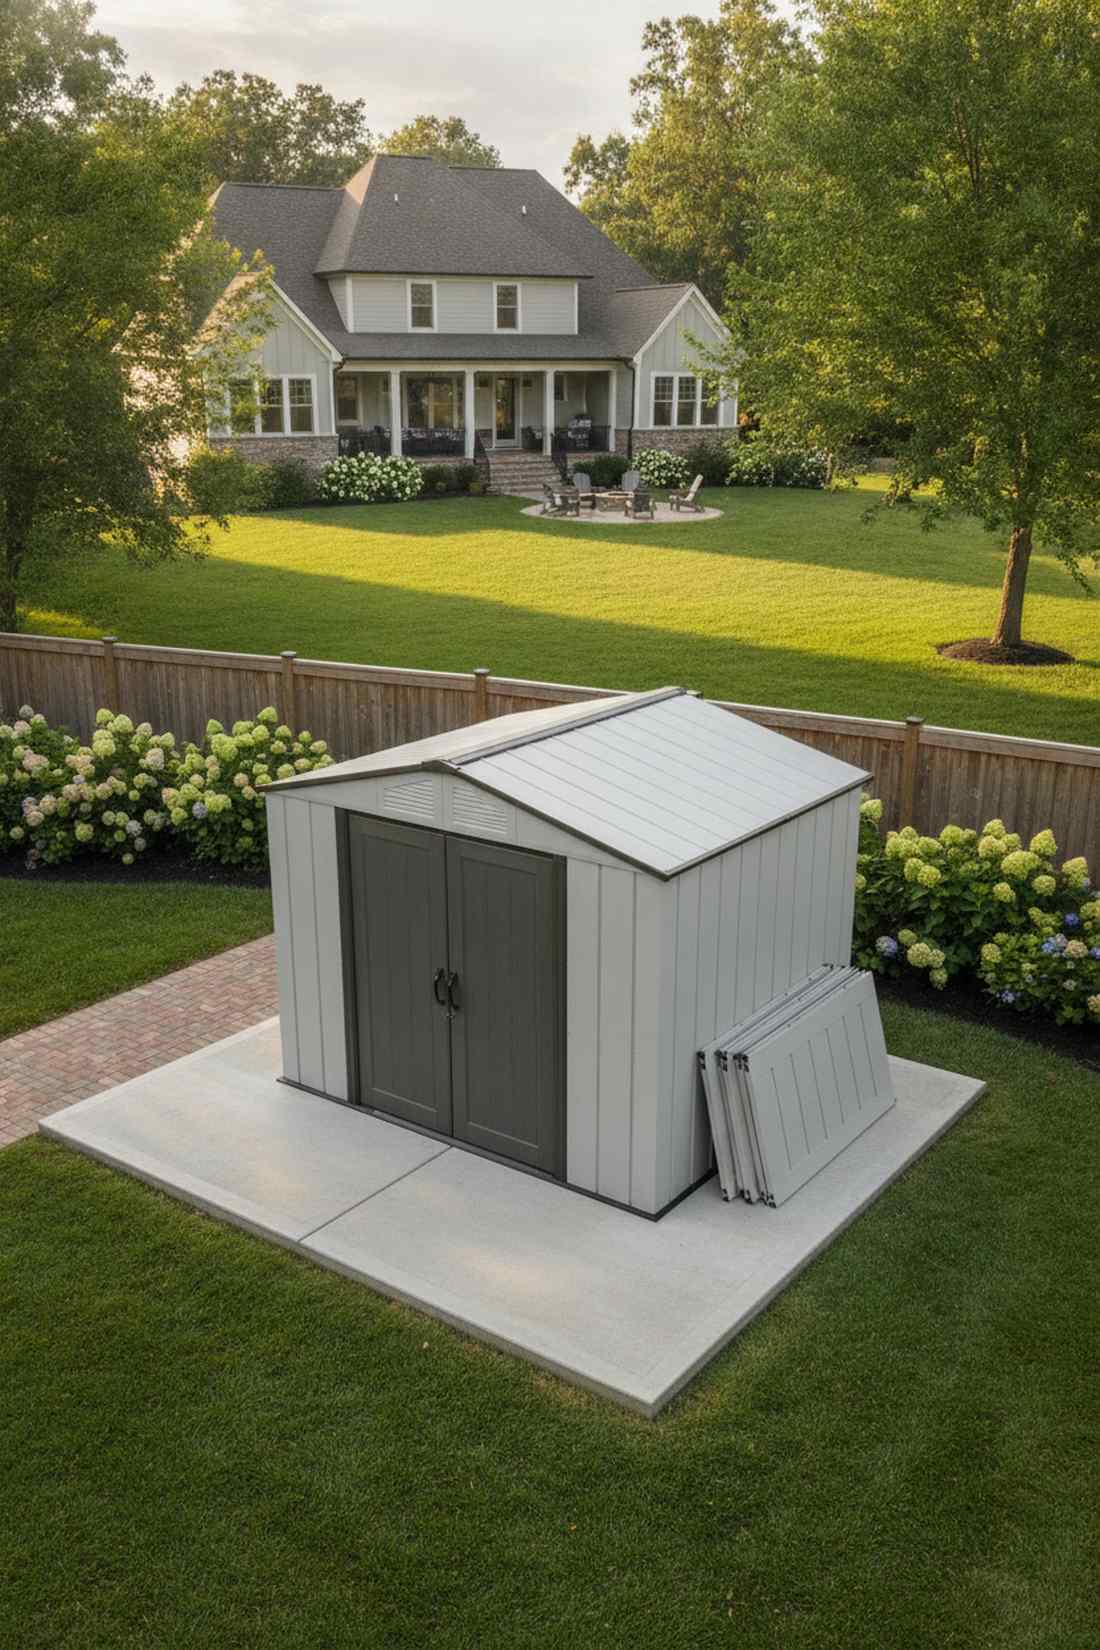
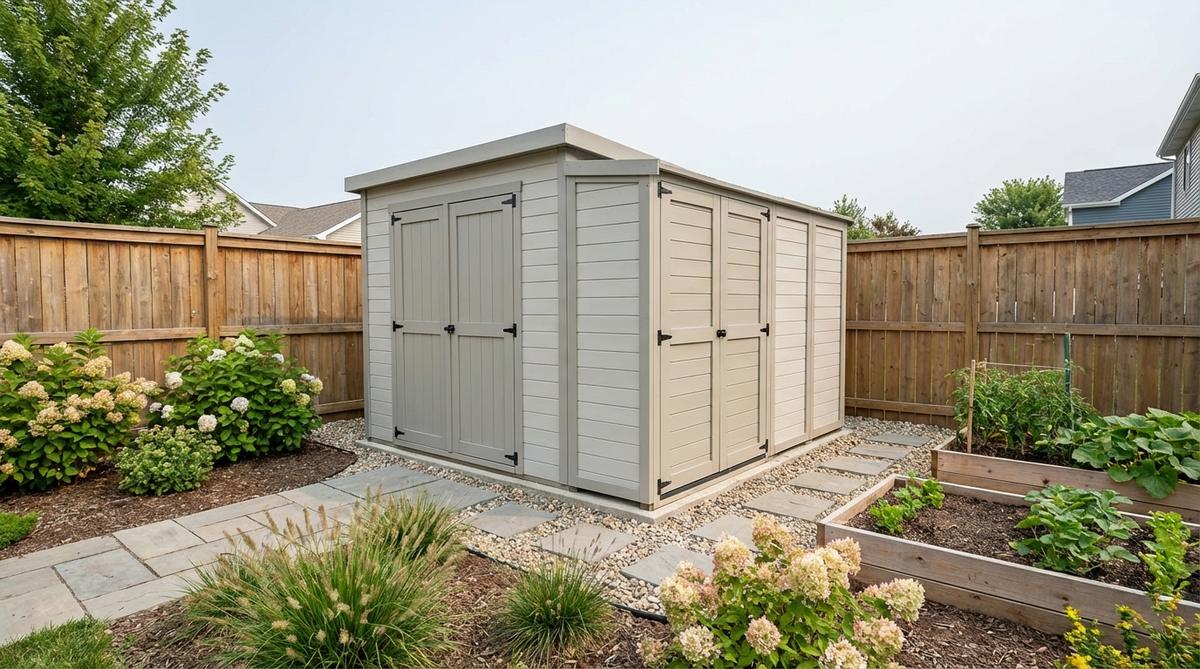
5. Pent Roof Mini
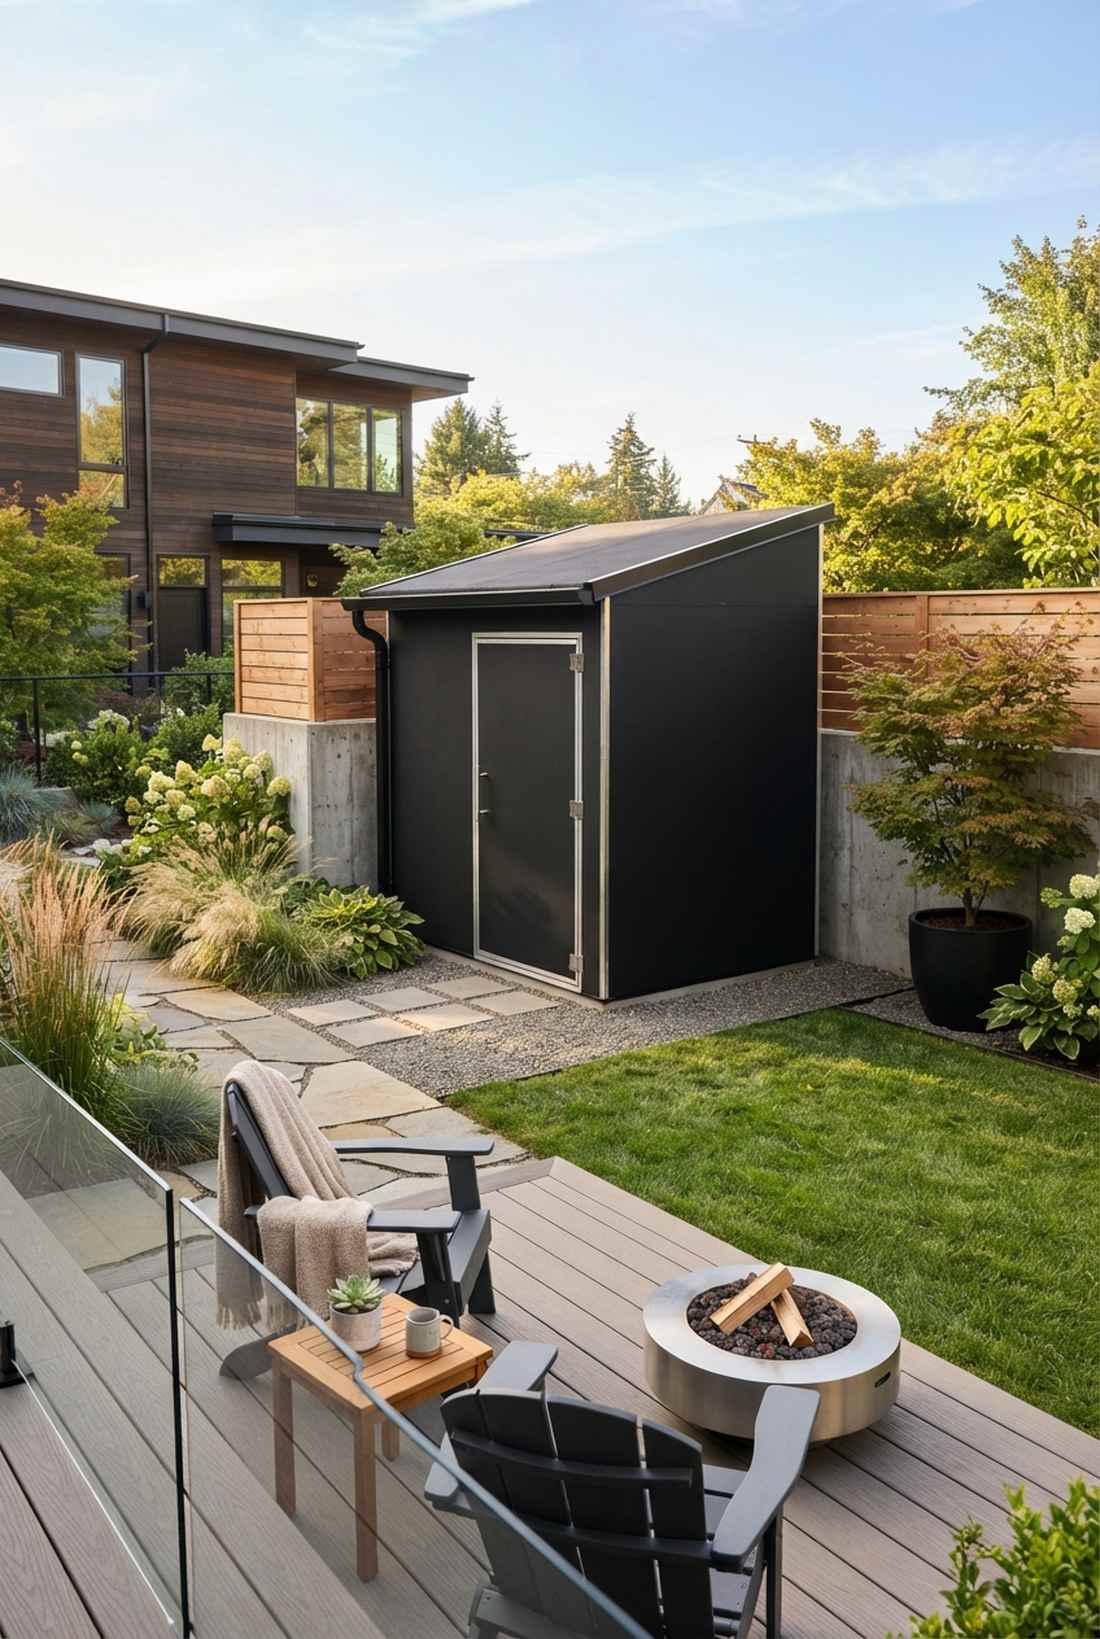
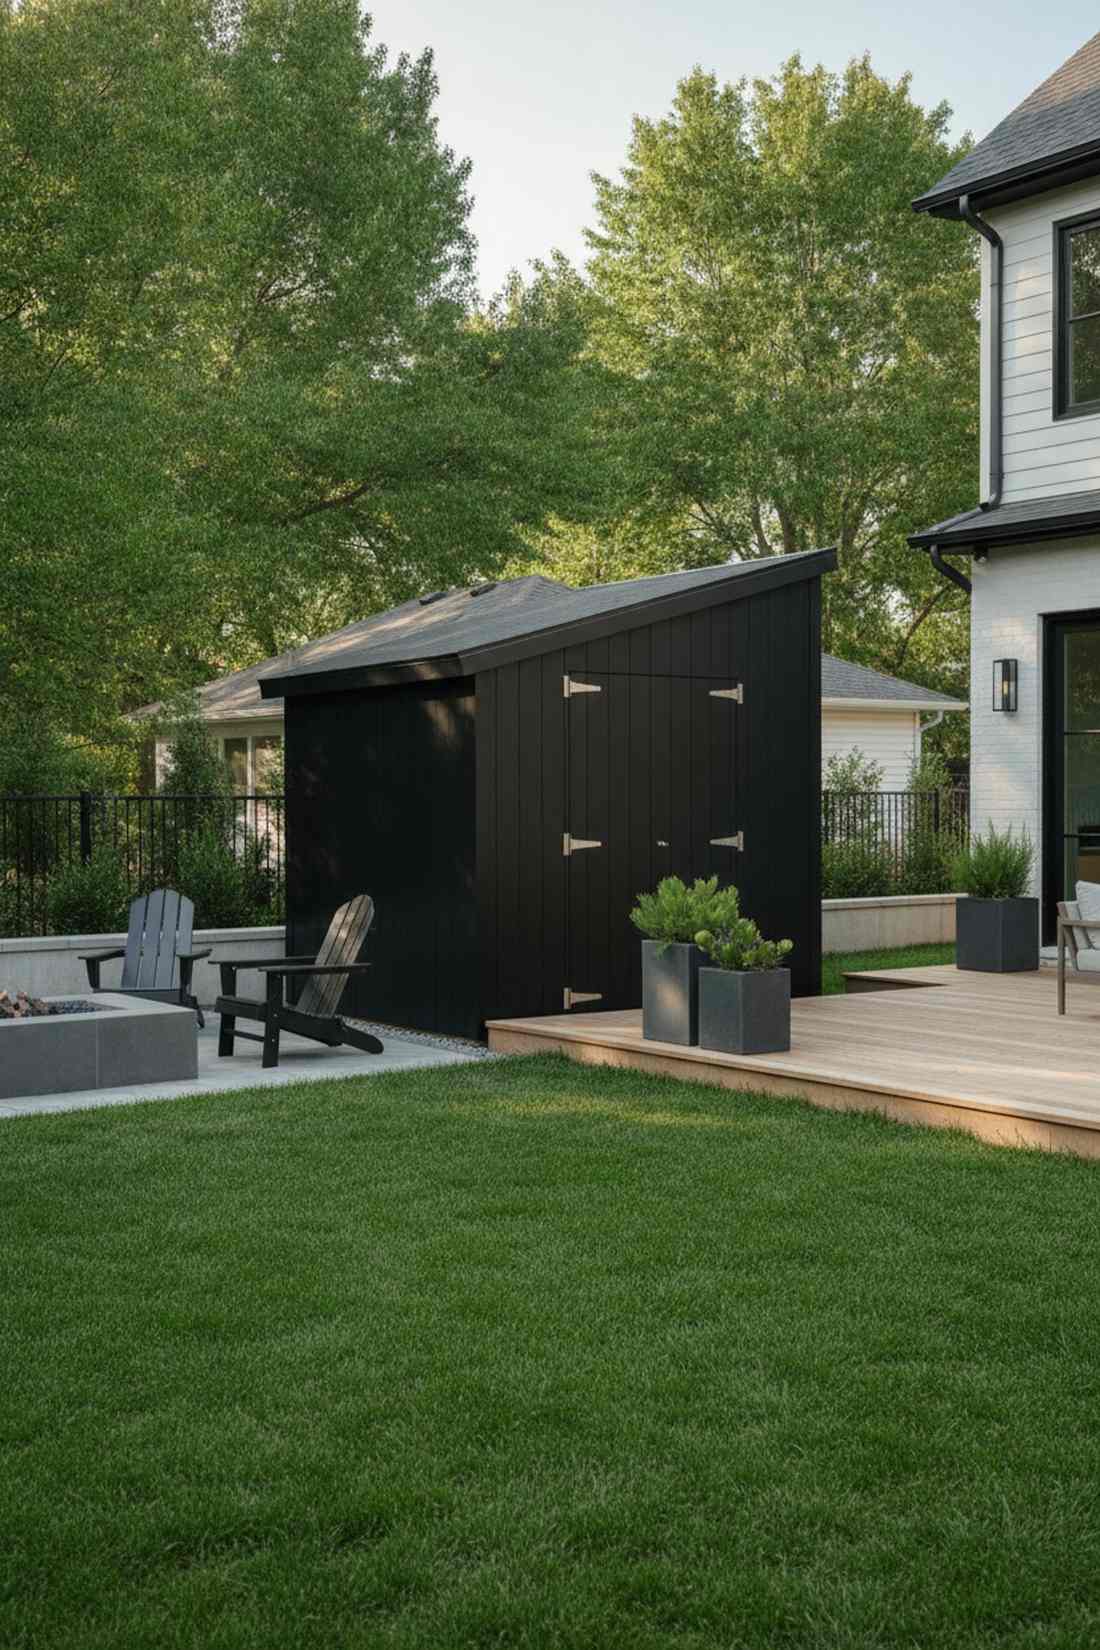
Emanates a chic, ultra-modern energy, this slanted-roof cube perfectly complements contemporary architecture. It sits beautifully against low boundary walls where height restrictions matter.
Most basic sheds look terribly dated, but a single-slope pent design instantly modernizes your outdoor aesthetic. Enhance the exterior with UV-coated matte black paint and sleek stainless-steel hardware for a luxury feel.
You can construct this minimalist dream for about $250. Pin this to your modern outdoor styling board for future inspiration.
- Key Materials: Smooth exterior plywood, EPDM rubber roofing
- Vibe / Style: Modern architectural cube
- Difficulty: Straightforward assembly
- Budget Breakdown: EPDM Roof: $90 | Wood: $110 | Paint: $40
- Creator’s Tip: Slant the roof strictly towards the back to hide the drainage gutter from the front view.
- Smart Sourcing: One-piece EPDM rubber roof kits and matte exterior acrylic sealant (gallon).
6. Modular Expandable Shed
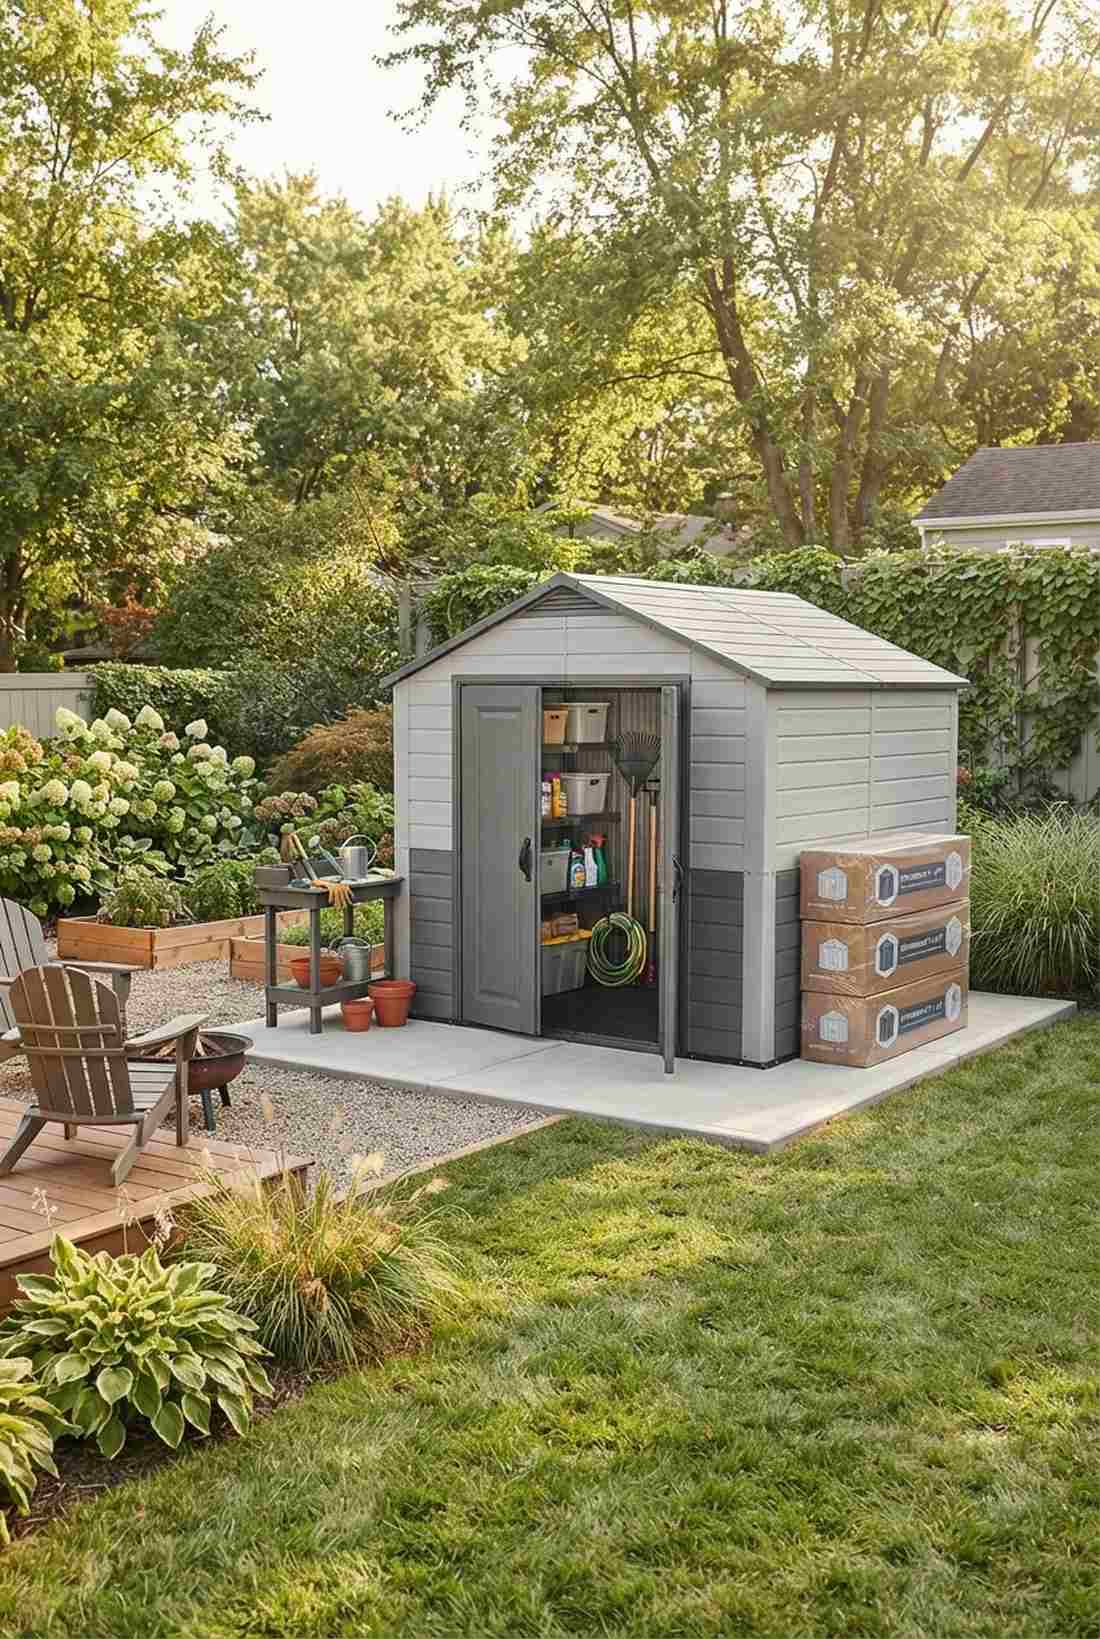
Feels like playing with life-sized building blocks, this scalable modular frame adapts as your hobbies grow. It is the ultimate future-proof storage unit for expanding families.
Why lock yourself into a tiny box when snap-together panel systems let you double your space next year? Invest in high-grade resin or composite base kits that allow seamless wall extensions later.
Starting costs hover around $350 for the base module. It is a brilliant financial move that prevents you from buying a whole new structure later.
- Key Materials: Modular resin panels, reinforced steel base clips
- Vibe / Style: High-tech functional
- Difficulty: Very easy bolt-together
- Budget Breakdown: Base Kit: $350 | Expansion Slot: $150
- Creator’s Tip: Always lay a perfectly level concrete or paving slab foundation so future panels align flawlessly.
- Smart Sourcing: Interlocking resin storage shed starter kits and heavy-duty modular shelving brackets.
Vertical Organization Systems
7. Floating Shelf Array
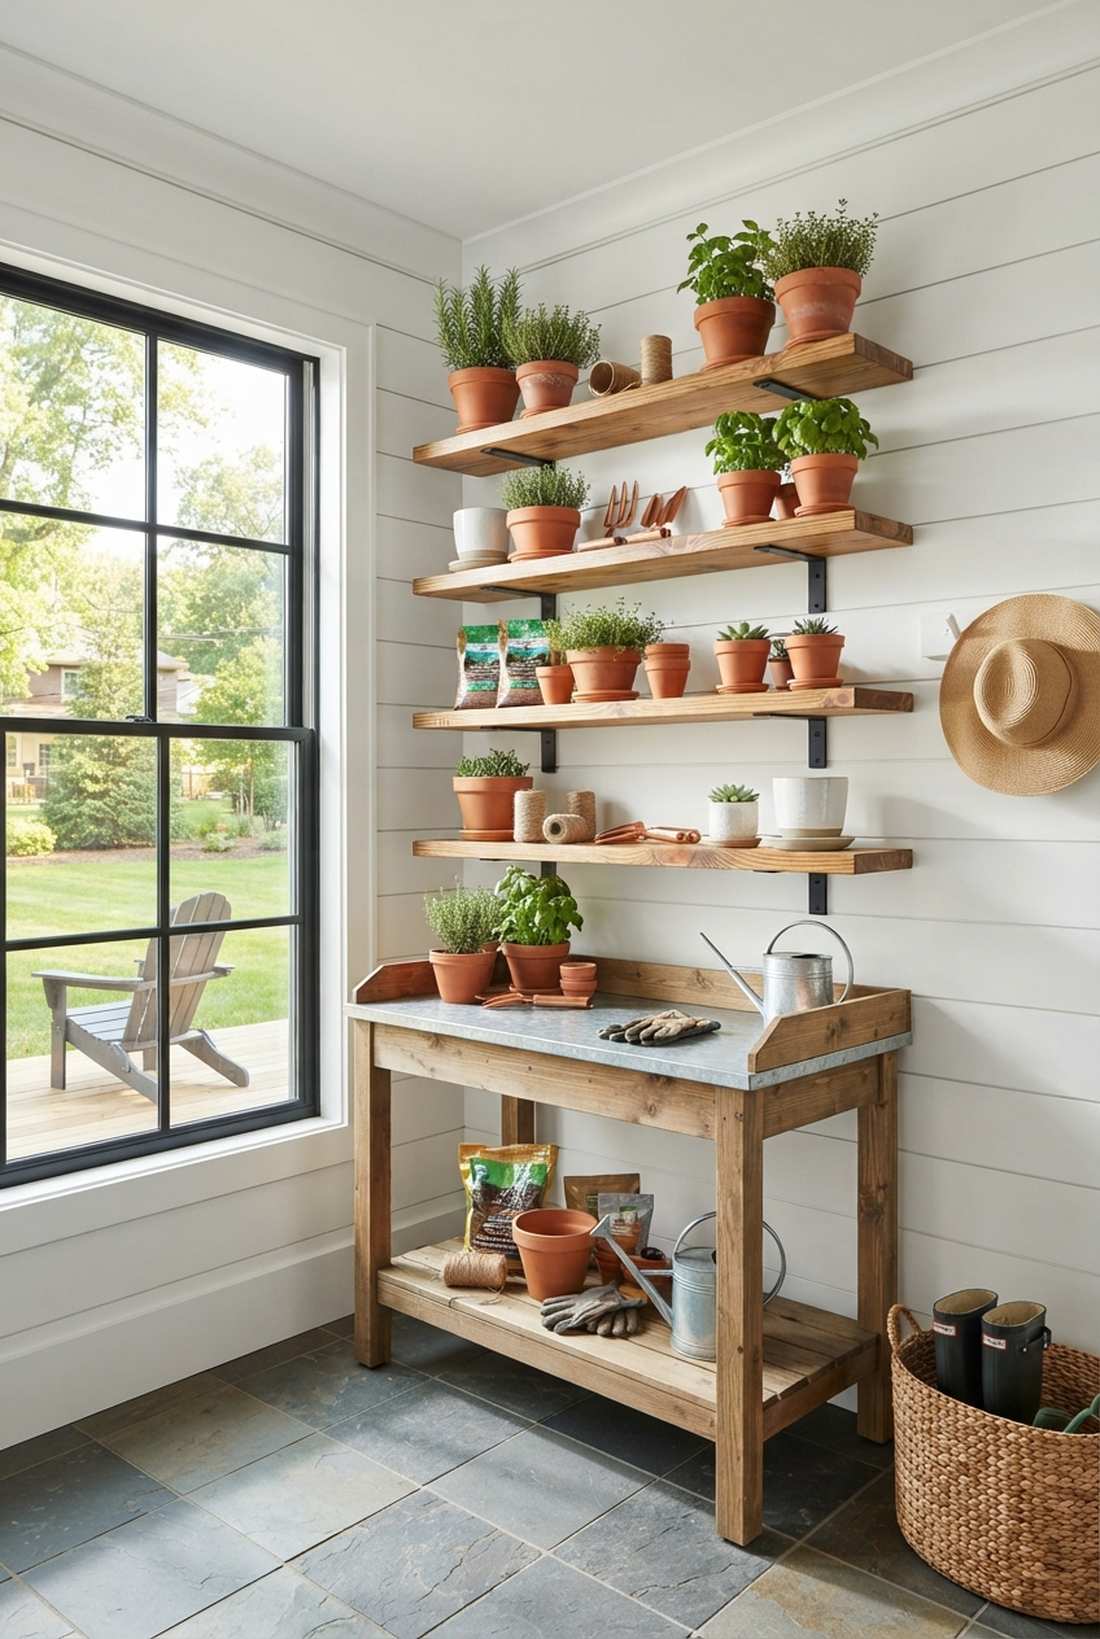
Gives off an incredibly satisfying look of hovering organization, this tiered floating wall system is perfect for displaying terracotta pots. It magically frees up every inch of your floor space.
Standard bulky bookcases swallow room, but blind-bracket floating shelves create an illusion of expansive width. Utilize industrial-strength hidden hardware to safely support heavy soil bags and ceramic planters.
A full wall array usually runs $60–$100. Save this idea if you are tired of tripping over messy gardening supplies.
- Key Materials: Thick pine planks, heavy-duty blind shelf supports
- Vibe / Style: Airy and organized
- Difficulty: Easy drilling project
- Budget Breakdown: Brackets: $45 | Wood Planks: $35
- Creator’s Tip: Seal the raw wood with marine varnish to prevent warping from humid greenhouse environments.
- Smart Sourcing: Concealed heavy-duty shelf bracket kits and pre-cut edge-glued pine boards.
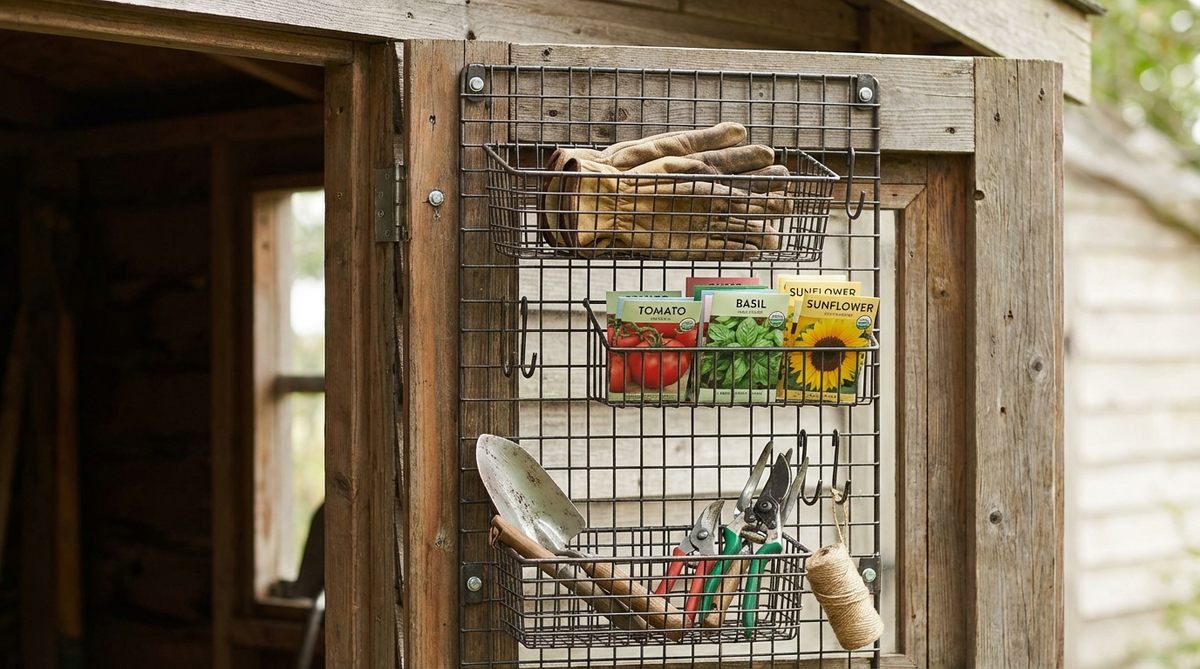
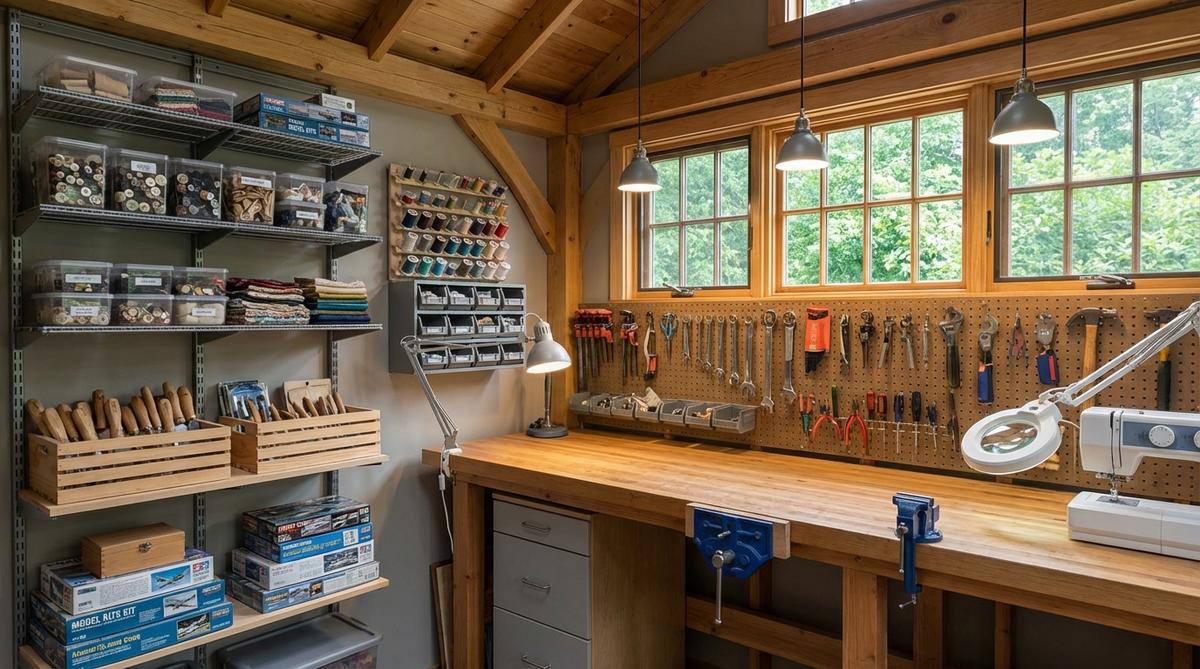
8. Pegboard Wall System
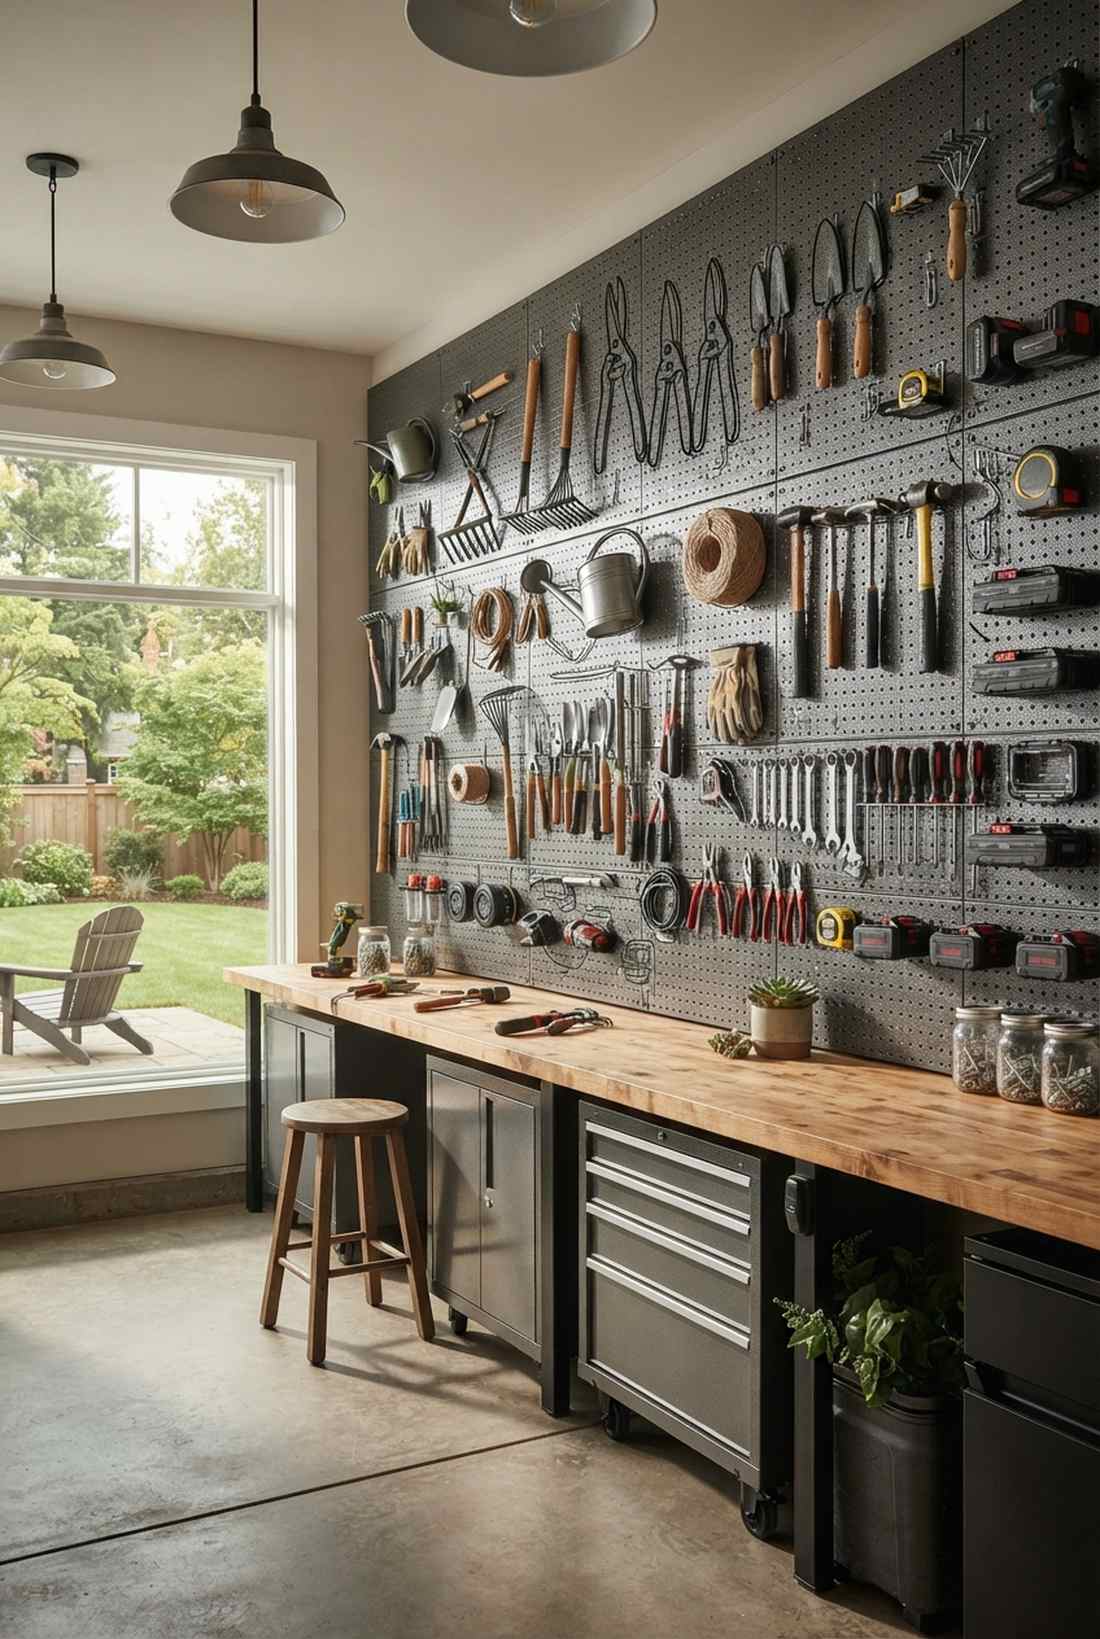
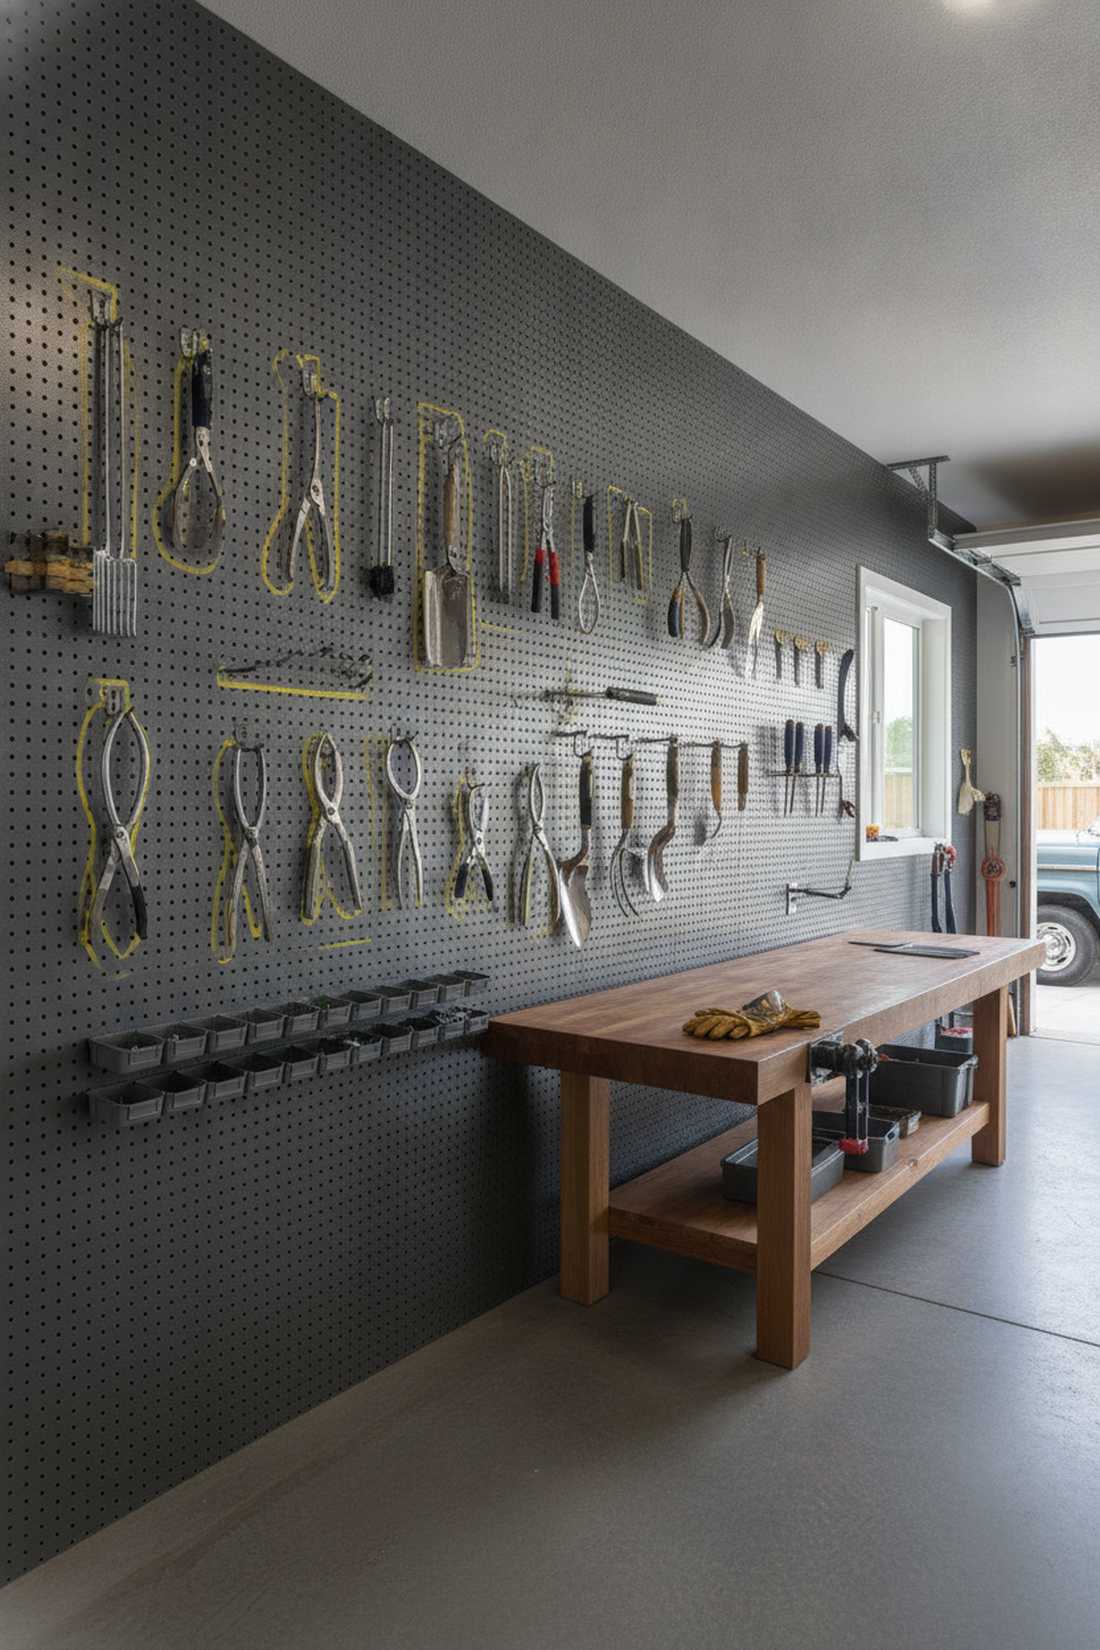
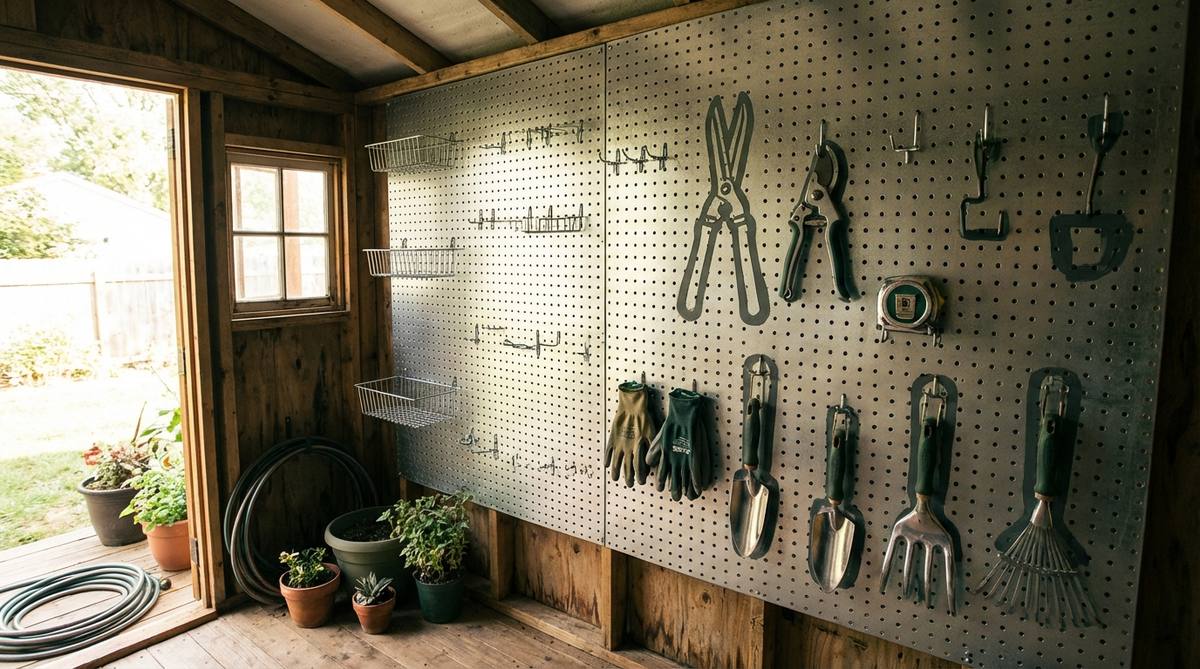
Feels like stepping into a master craftsman’s sanctuary, this floor-to-ceiling pegboard installation turns a chaotic wall into an art piece. Highly effective for visualizing your entire tool collection at a glance.
Skip the cheap wooden boards that warp in the damp; upgrading to galvanized steel pegboards guarantees a lifetime of rust-free use. Draw bold outlines around your premium shears and trowels so everything returns to its exact home.
You can set up a professional-grade steel wall for roughly $120. It’s an afternoon project that fundamentally upgrades your workflow.
- Key Materials: Metal pegboard panels, assorted steel hooks
- Vibe / Style: Industrial workshop
- Difficulty: Quick screw-in setup
- Budget Breakdown: Metal Panels: $80 | Hook Assortment: $35
- Creator’s Tip: Mount the panels on 1-inch furring strips to ensure the hooks have enough clearance behind the board.
- Smart Sourcing: Powder-coated steel pegboard starter kits and heavy-duty locking hook assortments (50-pack).
9. Ceiling Mounted Racks
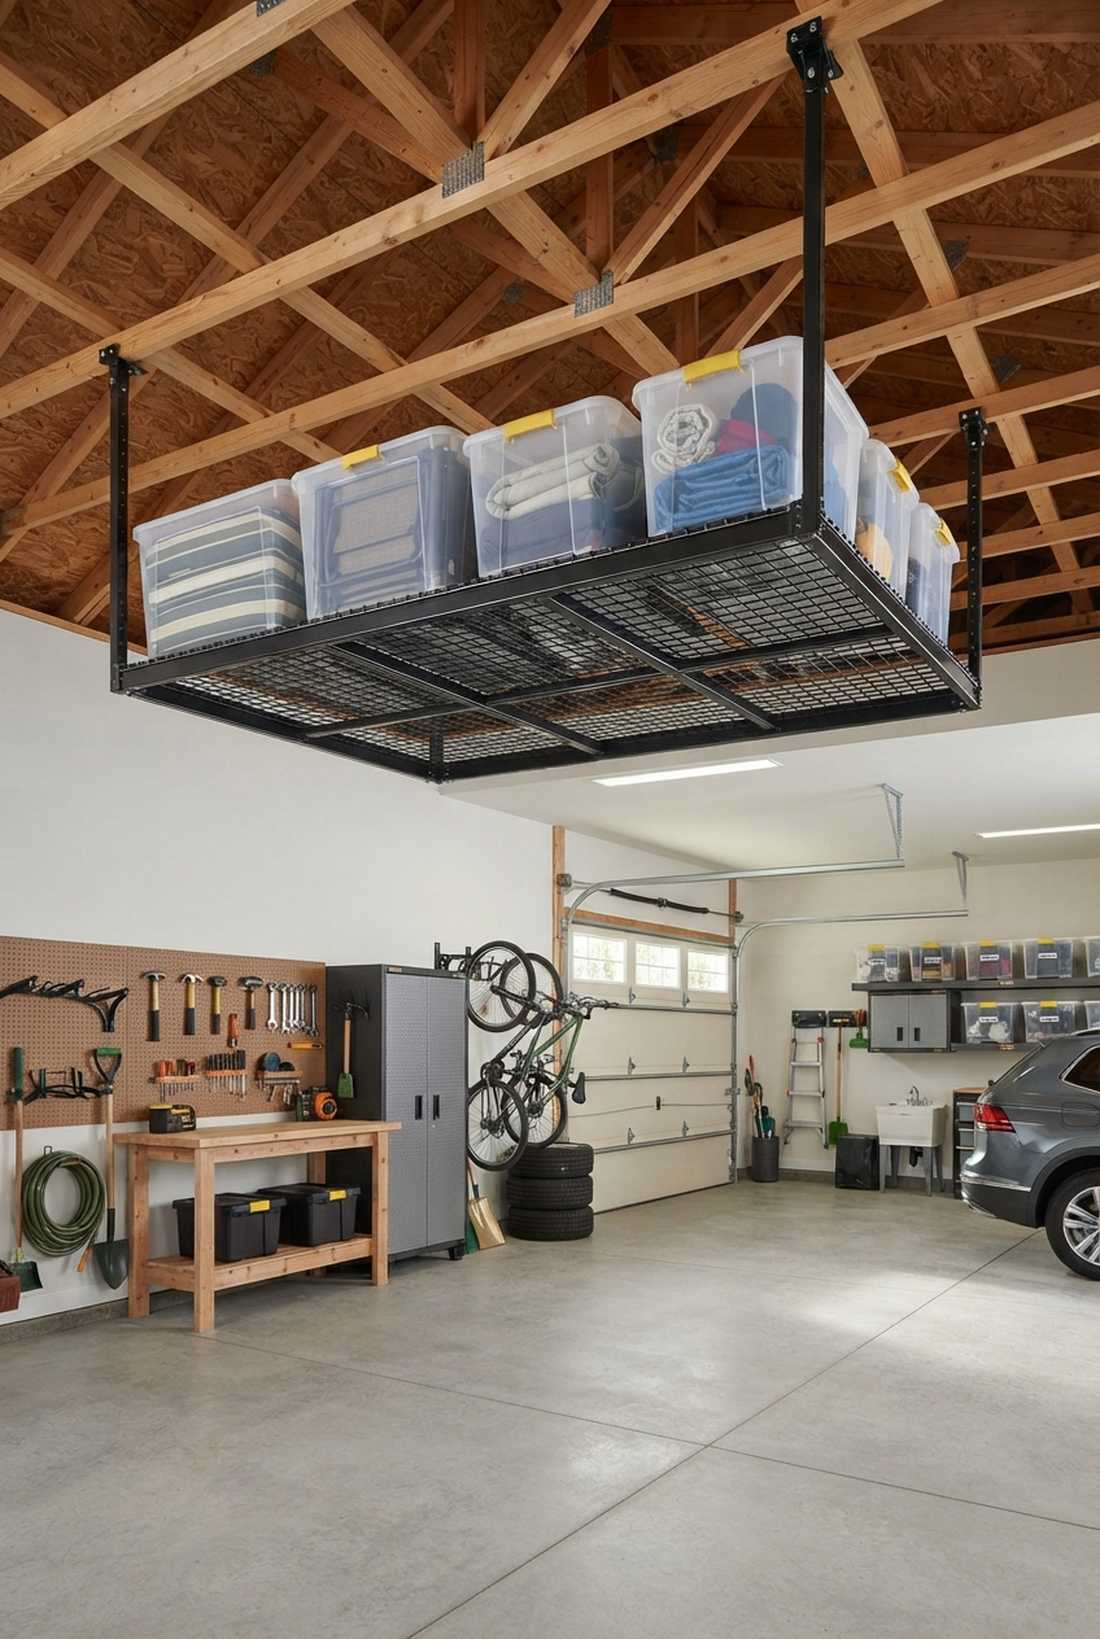
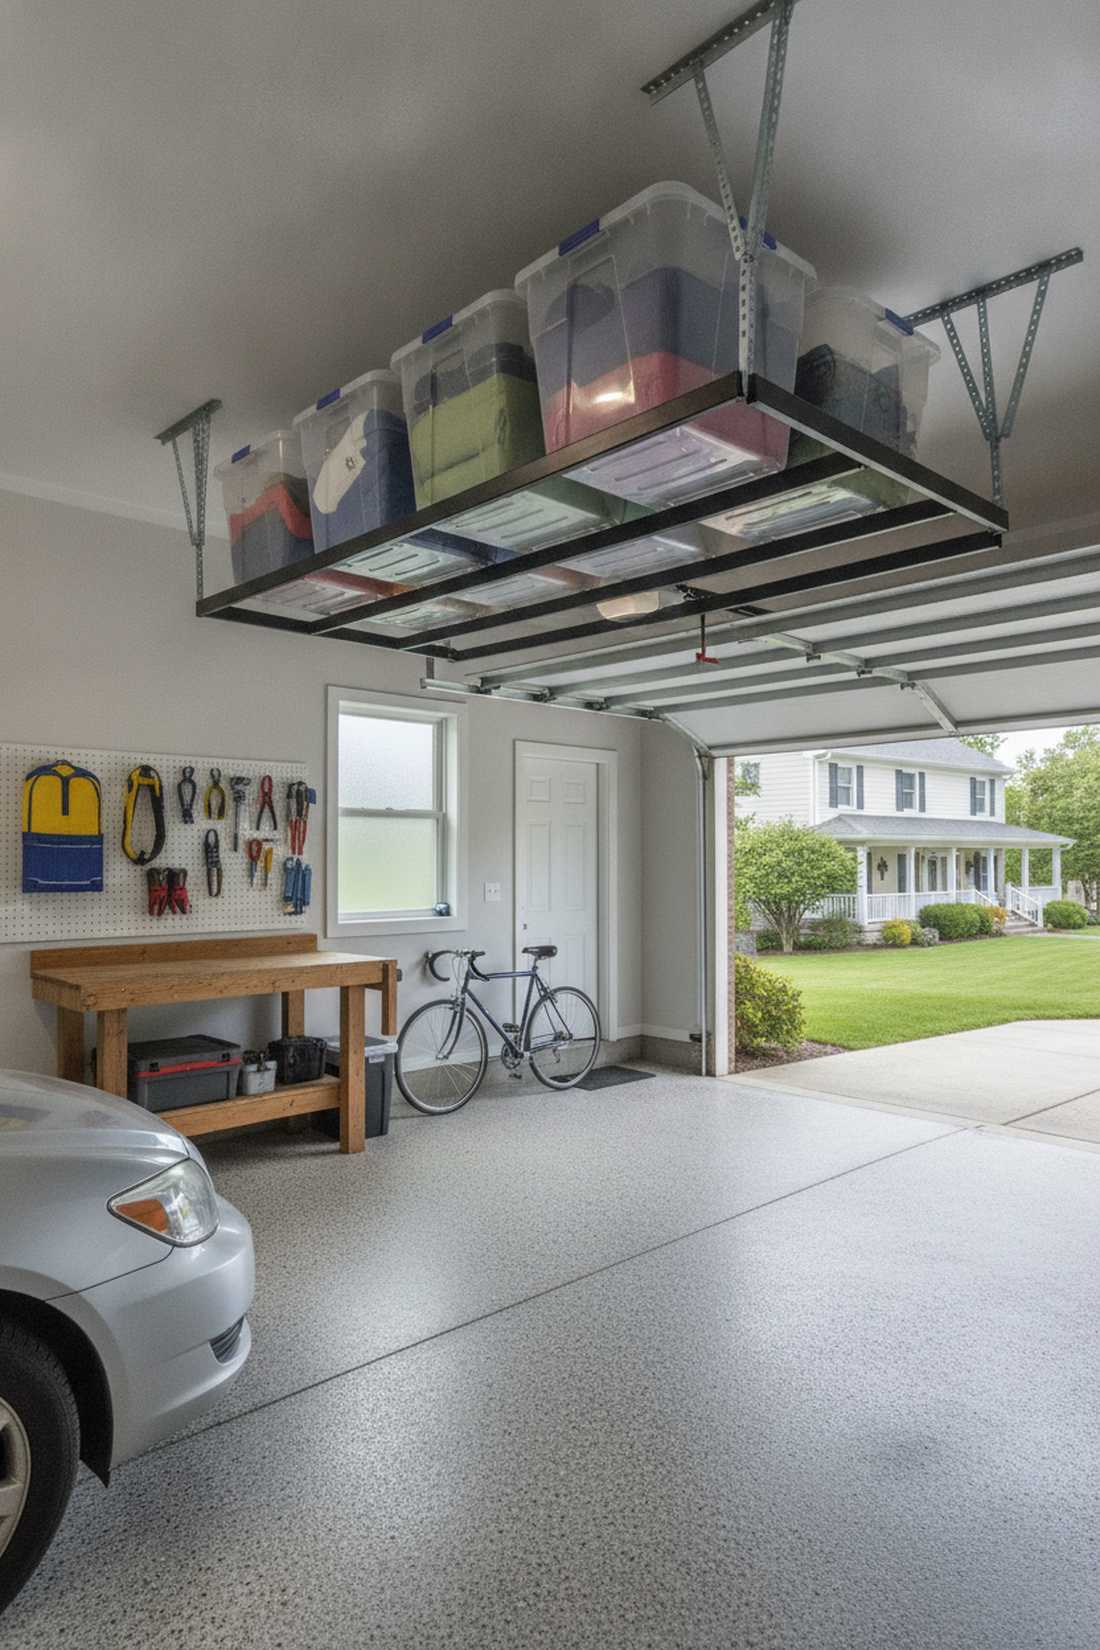
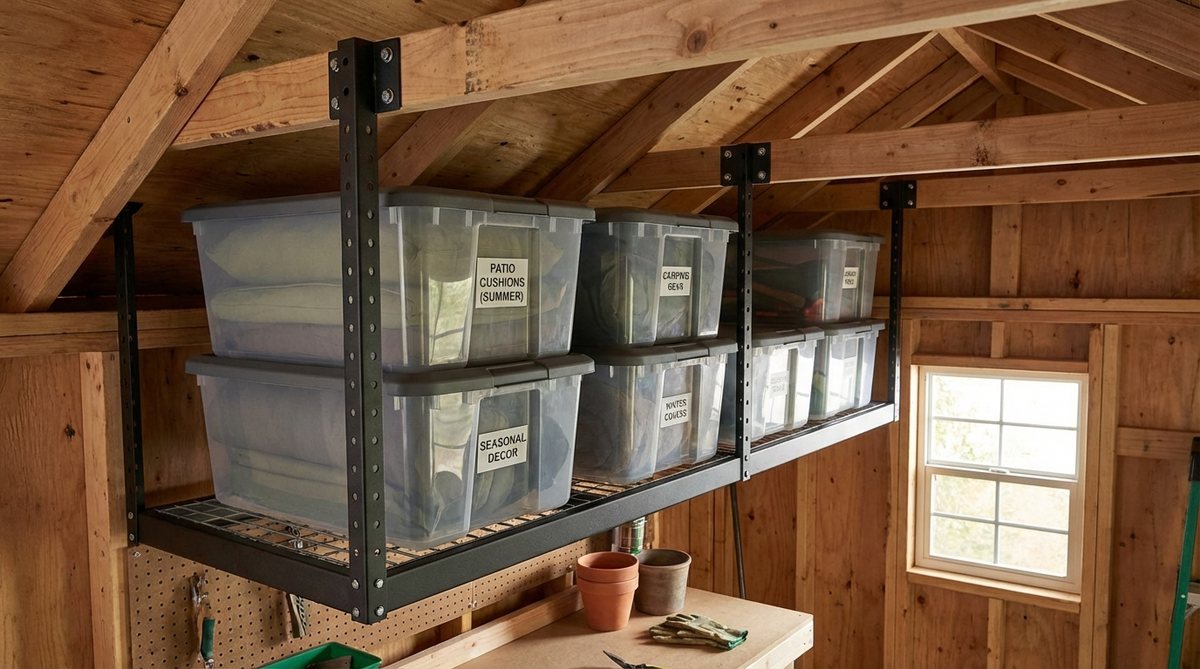
Unlocks a hidden realm of storage you never knew you had, this overhead joist rack is the ultimate hack for seasonal items. Perfectly suited for tucking away patio cushions and bulky winter covers.
Most people only stare at their walls, but tapping into ceiling trusses safely hides your largest, ugliest gear. Install commercial-grade sliding track rails up high to easily glide heavy bins out of sight.
A solid ceiling system costs about $75 to install. Pin this directly to your garage or shed organization board.
- Key Materials: Ceiling storage hoists, structural lag bolts
- Vibe / Style: Stealthy overhead utility
- Difficulty: Moderate (requires locating joists)
- Budget Breakdown: Rack Frame: $60 | Lag Bolts: $10
- Creator’s Tip: Use clear waterproof bins for overhead storage so you can easily identify contents without pulling them down.
- Smart Sourcing: Adjustable overhead garage rack kits and heavy-duty transparent storage totes (4-pack).
Most weekend DIYers get this completely wrong… until they try the exact high-efficiency layouts coming up next.
💡 Must-Have Supplies for High-End Setups
To build these premium small garden shed layouts faster and ensure they outlast the winter, skip the generic hardware aisles and invest in the right foundational kits.
- Base & Support: Interlocking heavy-duty shed foundation grids
- Setup Tools: Professional magnetic level and stud finder kits
- Weather Protection: UV-resistant clear silicone sealant (bulk pack)
10. Door-Back Organizers
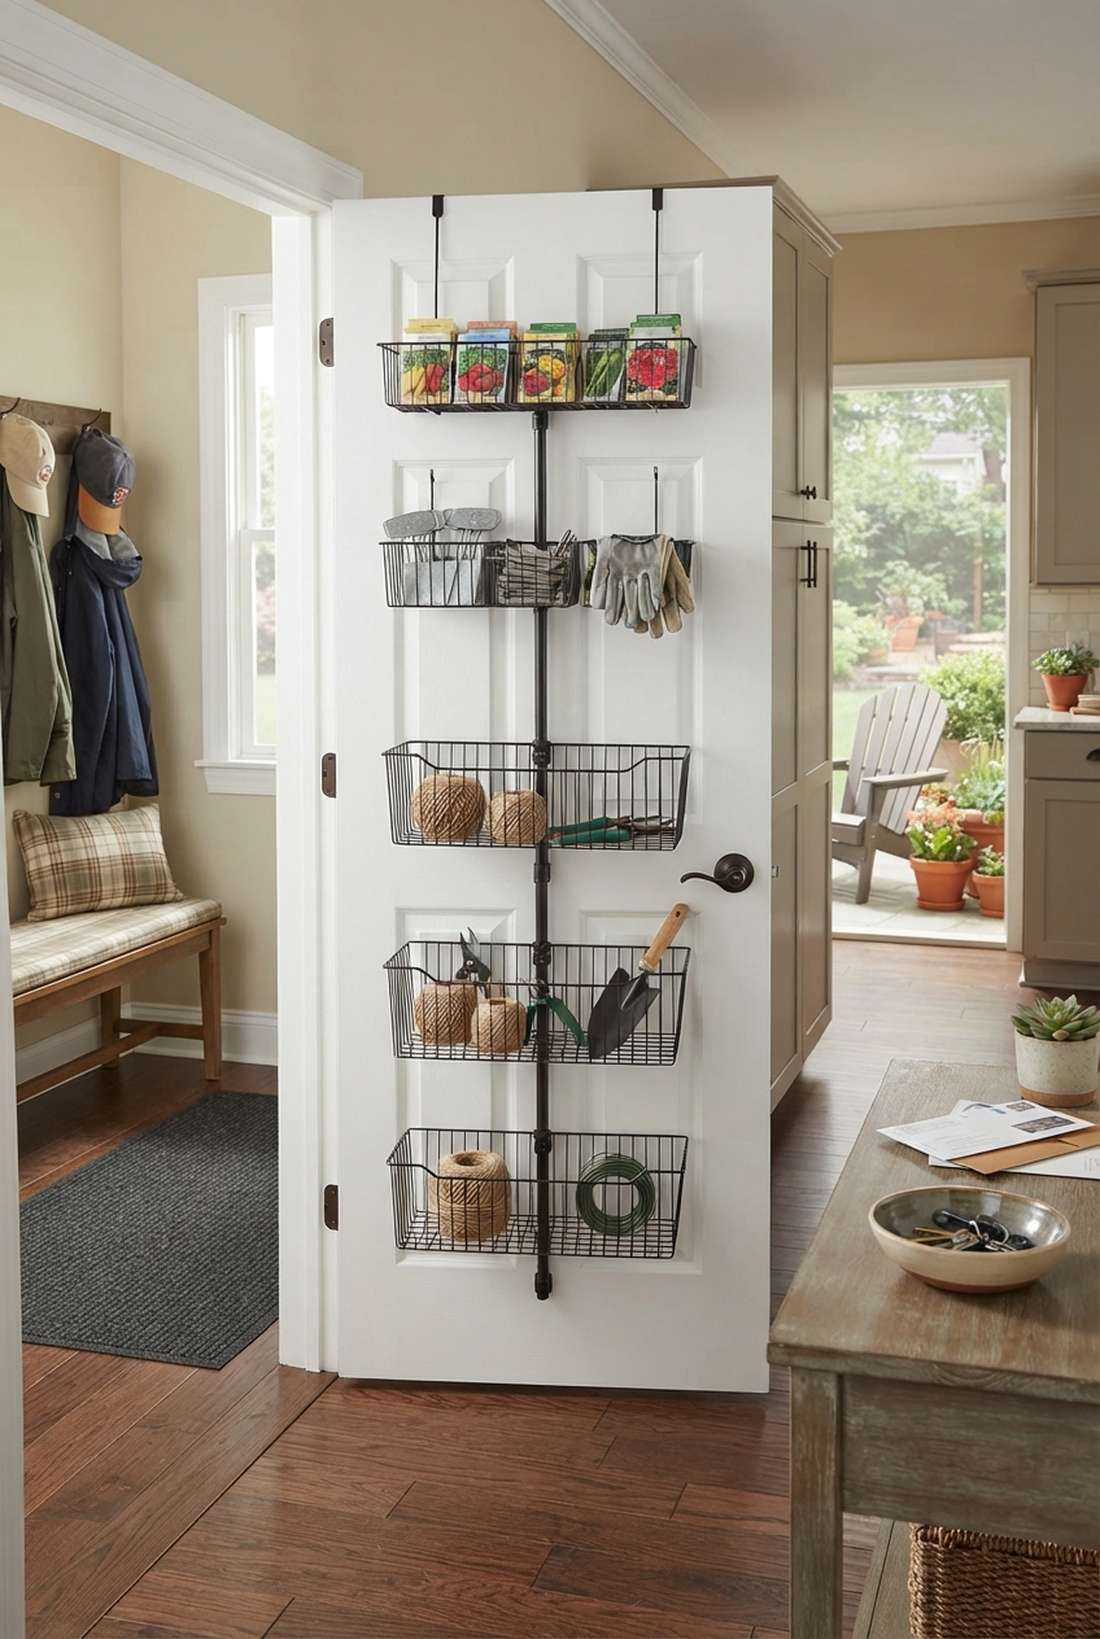
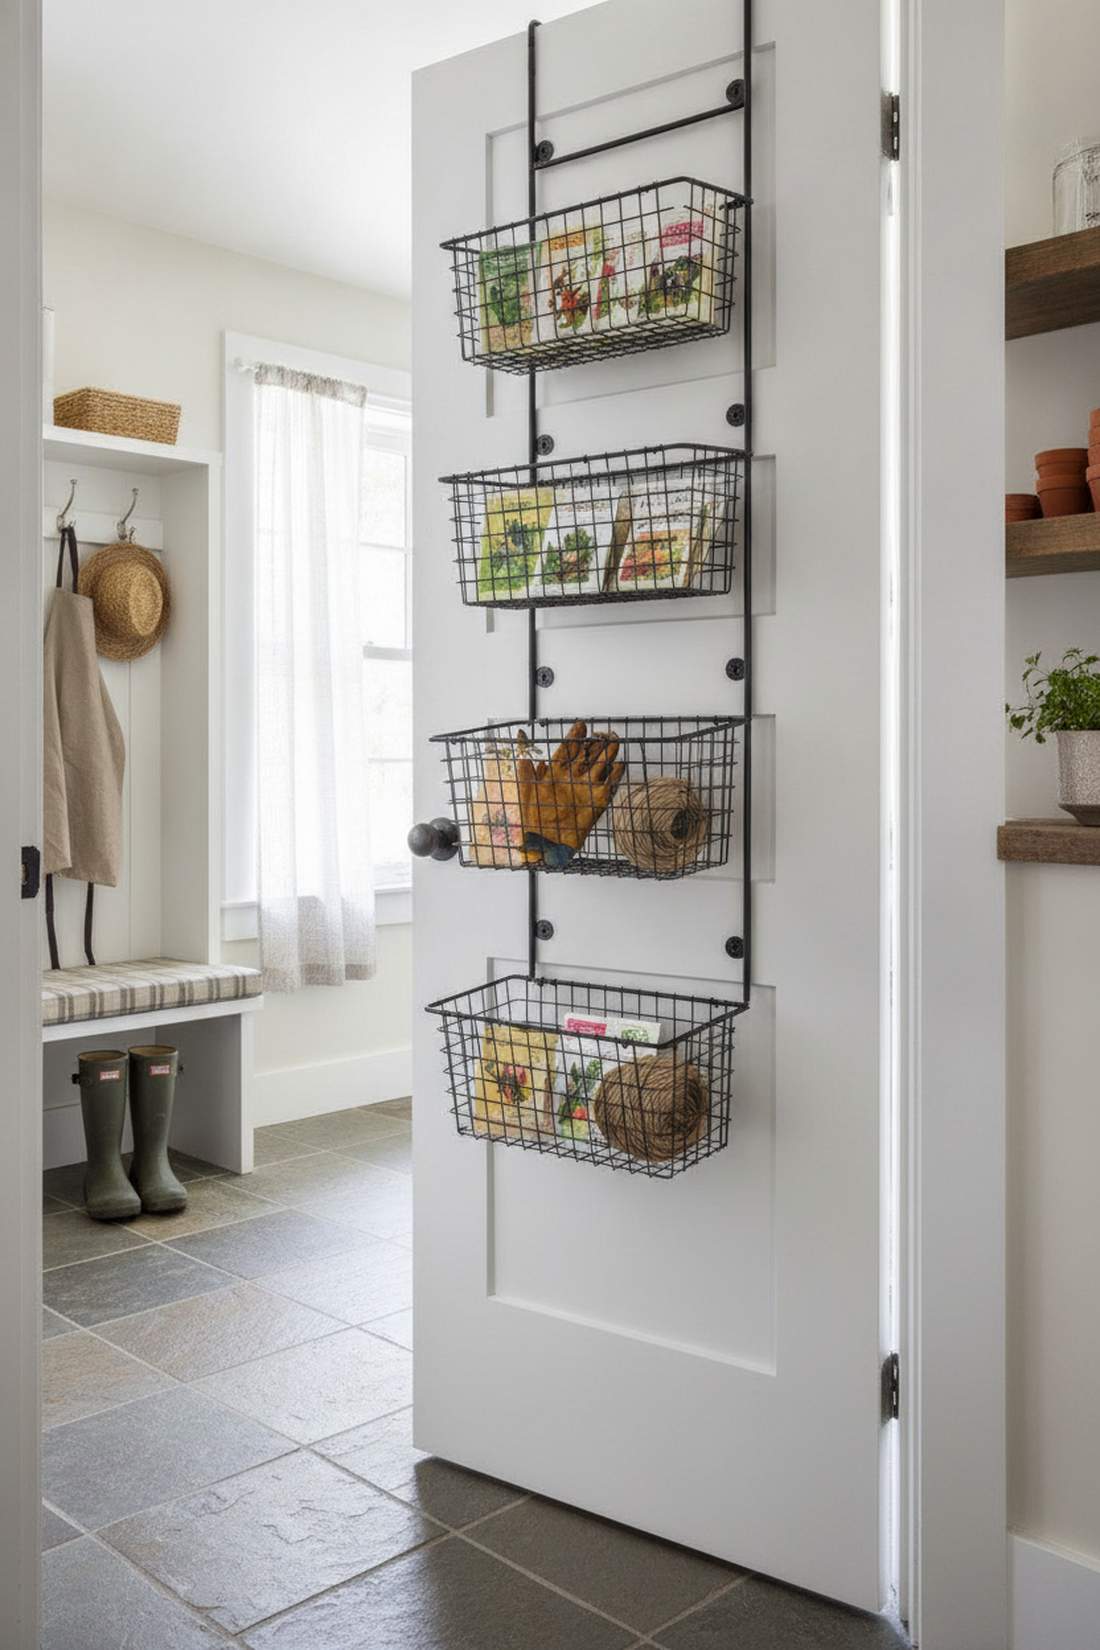
Feels like unlocking a secret compartment, this door-mounted wire rack system utilizes totally forgotten space. Great for holding lightweight items like seed packets, gloves, and twine right at the entrance.
A blank interior door is a massive waste of real estate, but screwing on tiered baskets instantly creates a dedicated grab-and-go station. Ensure you secure the hardware into the thickest part of the door frame to prevent nasty sagging.
This micro-upgrade is wildly cheap, often costing just $25–$40. It is a highly satisfying, ten-minute weekend win.
- Key Materials: Over-door wire baskets, short wood screws
- Vibe / Style: Hyper-efficient tidiness
- Difficulty: Very easy
- Budget Breakdown: Basket System: $30 | Anchors: $5
- Creator’s Tip: Avoid placing heavy liquid fertilizers on the door to keep the hinges operating smoothly over time.
- Smart Sourcing: Adjustable pantry door organizer kits and reinforced door hinge replacements.
11. Track and Hook Rails
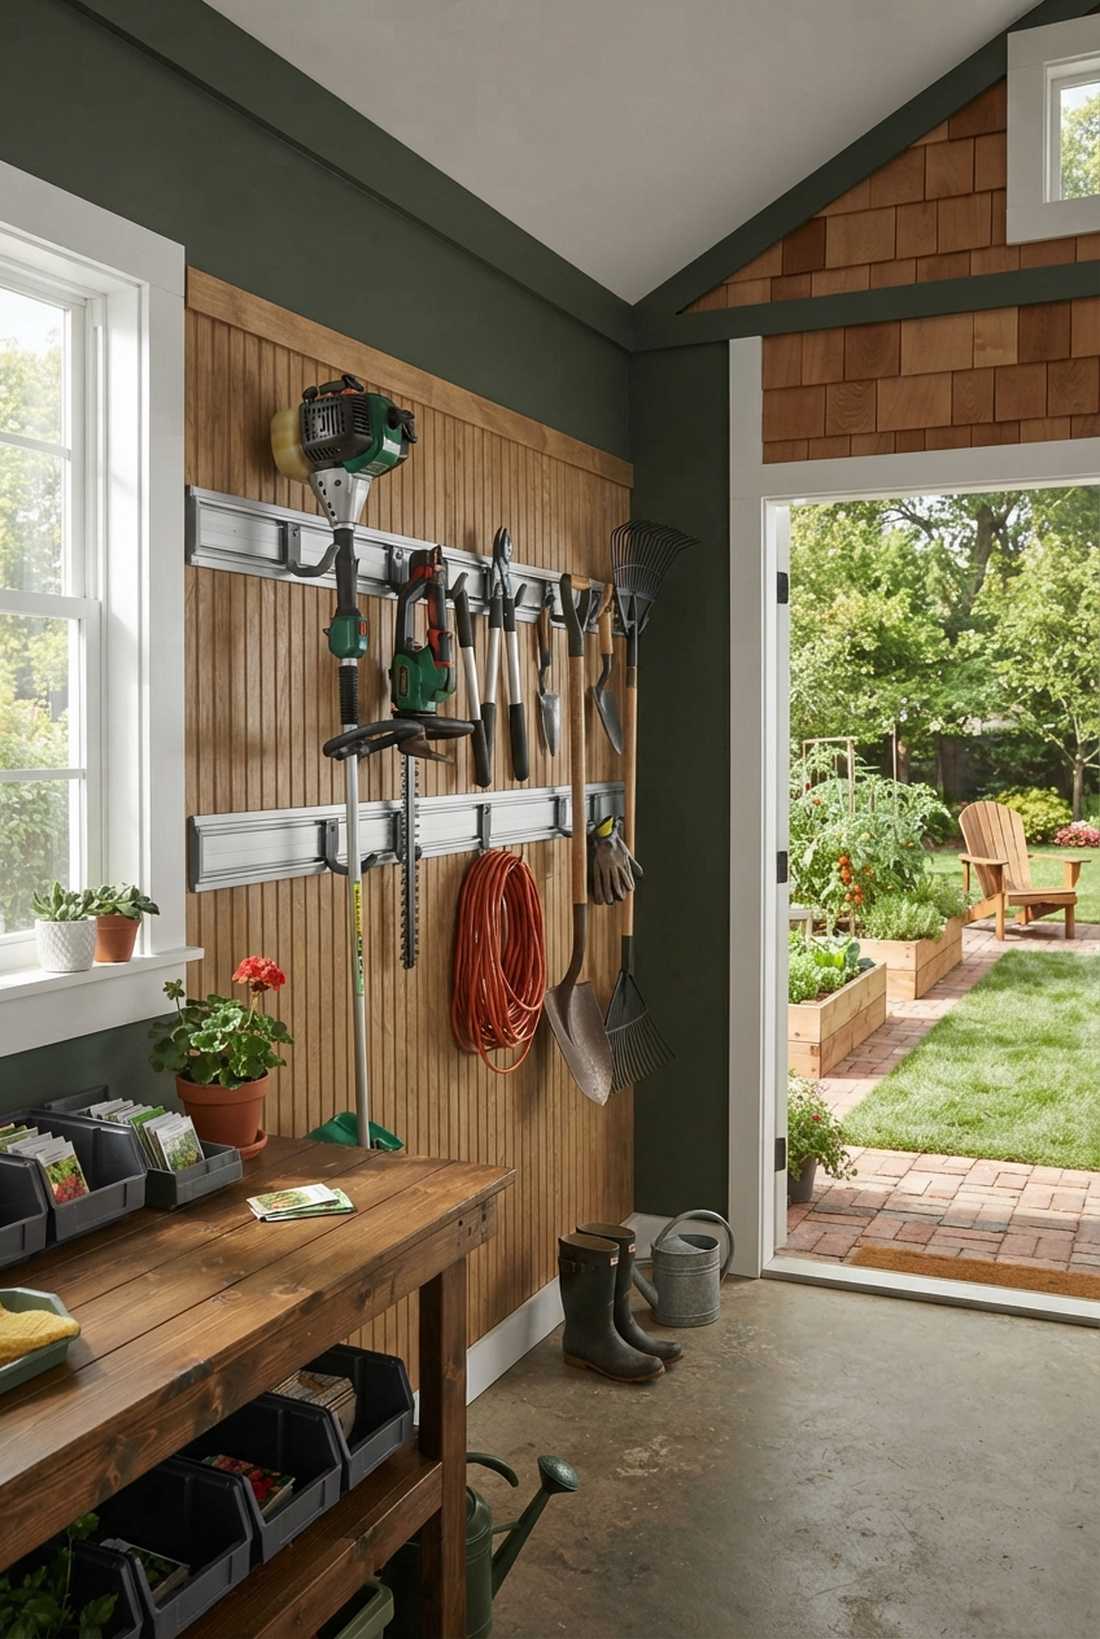
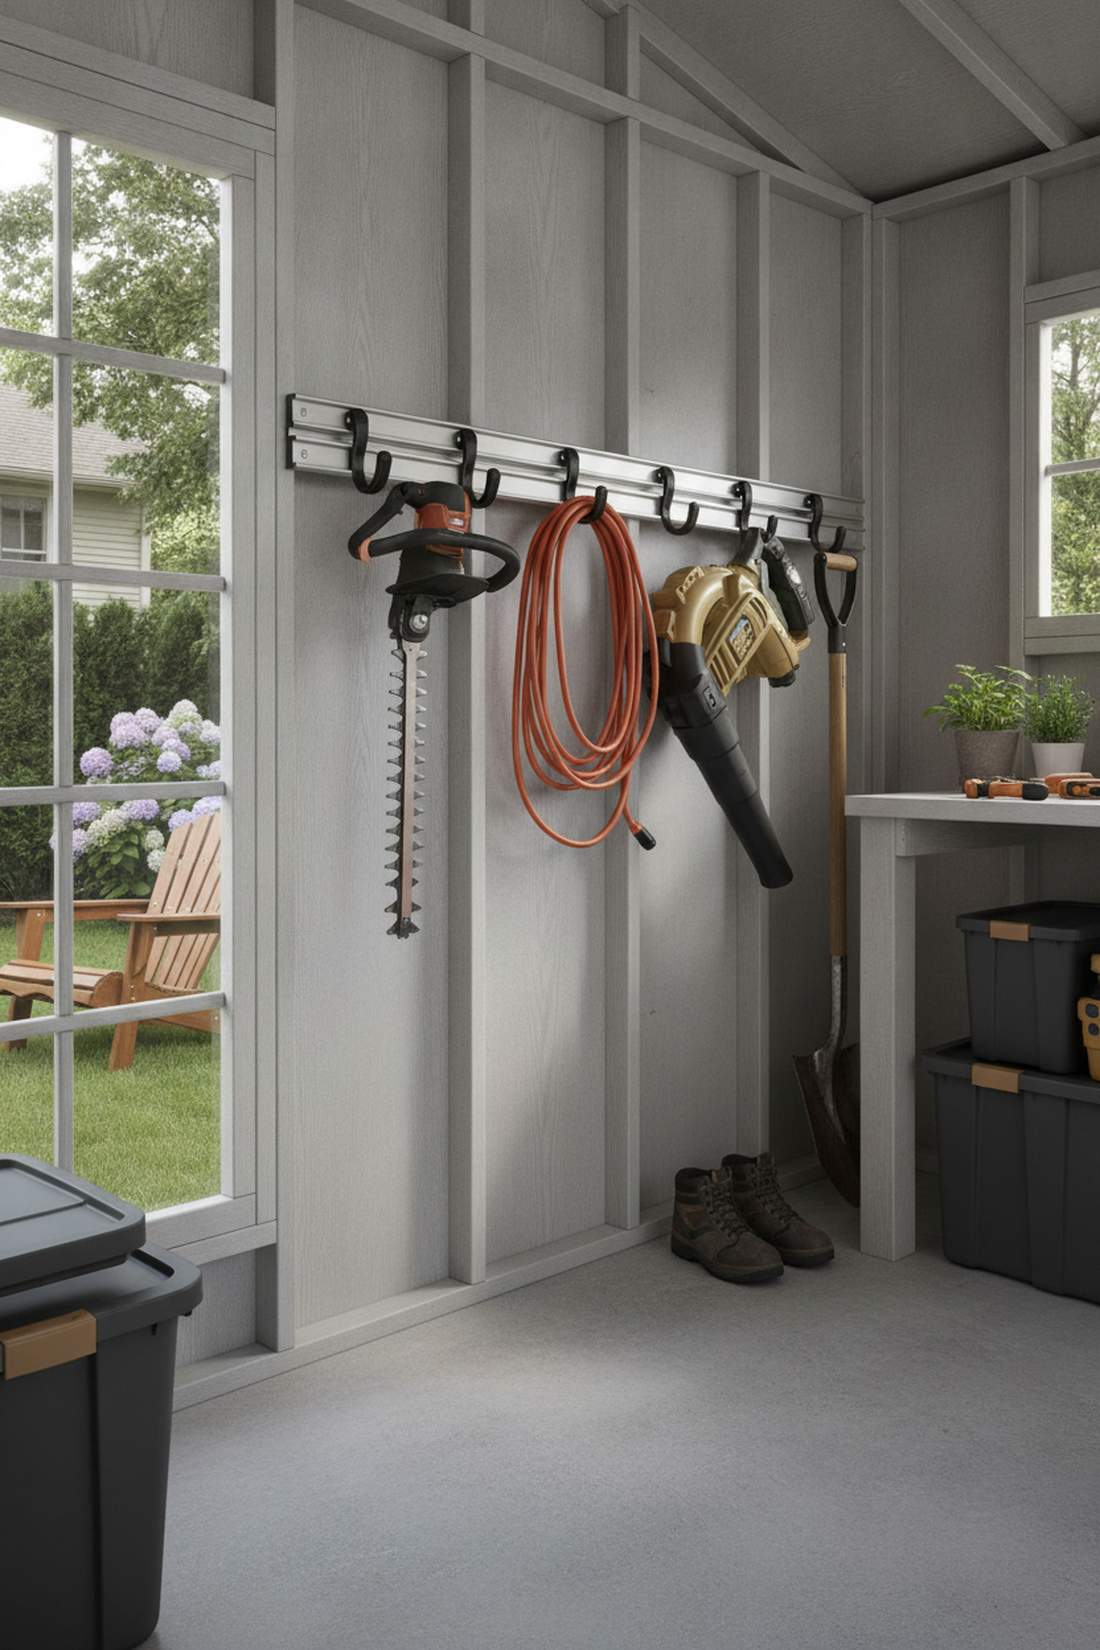
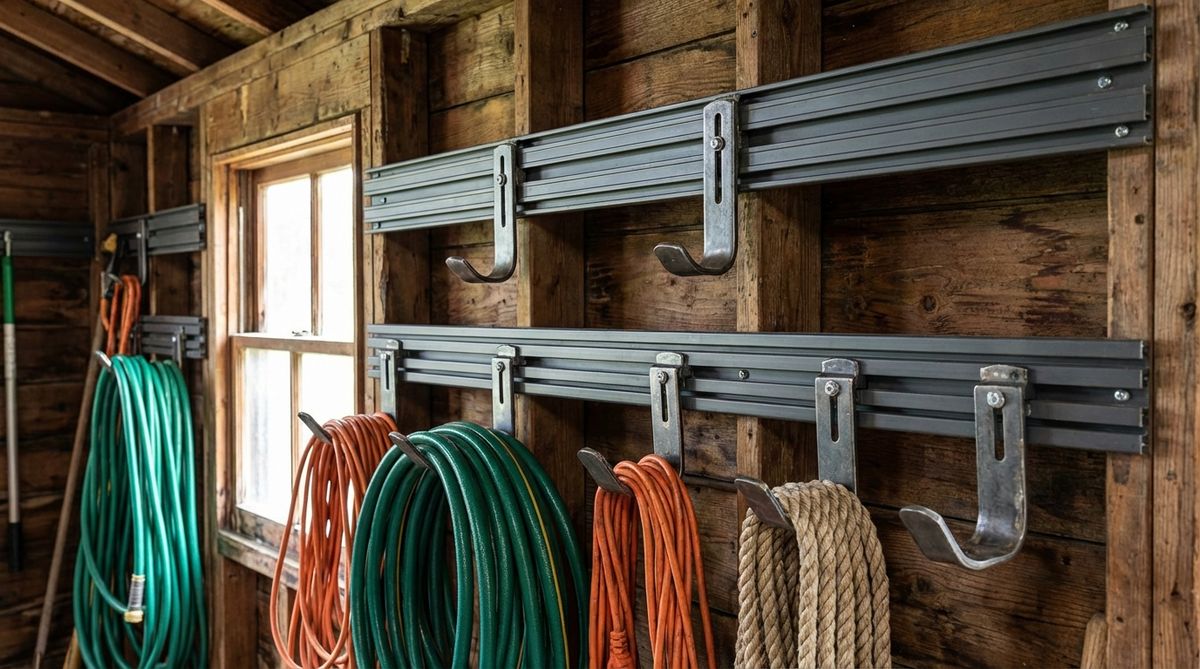
Brings a sleek, automotive-garage vibe to your garden space, this horizontal sliding track handles awkward tools with ease. It runs beautifully along the midpoint of your shed walls.
Fixed hooks always end up spaced wrong, but a sliding rail system adapts on the fly as your tool collection changes. Invest in premium aluminum extrusion rails that allow hooks to glide securely without snapping under pressure.
You can mount a 4-foot track for roughly $40. Save this if you own annoyingly shaped trimmers and bulky extension cords.
- Key Materials: Aluminum gear tracks, rubber-coated sliding hooks
- Vibe / Style: Pro-level adaptable
- Difficulty: Easy
- Budget Breakdown: Rail Kit: $35 | Extra Hooks: $15
- Creator’s Tip: Mount the rail at exactly 48 inches high to keep tool heads safely below eye level while hovering above the floor.
- Smart Sourcing: Heavy-duty wall track storage kits and rubber-dipped utility rail hooks (6-pack).
12. Stacked Crate Columns
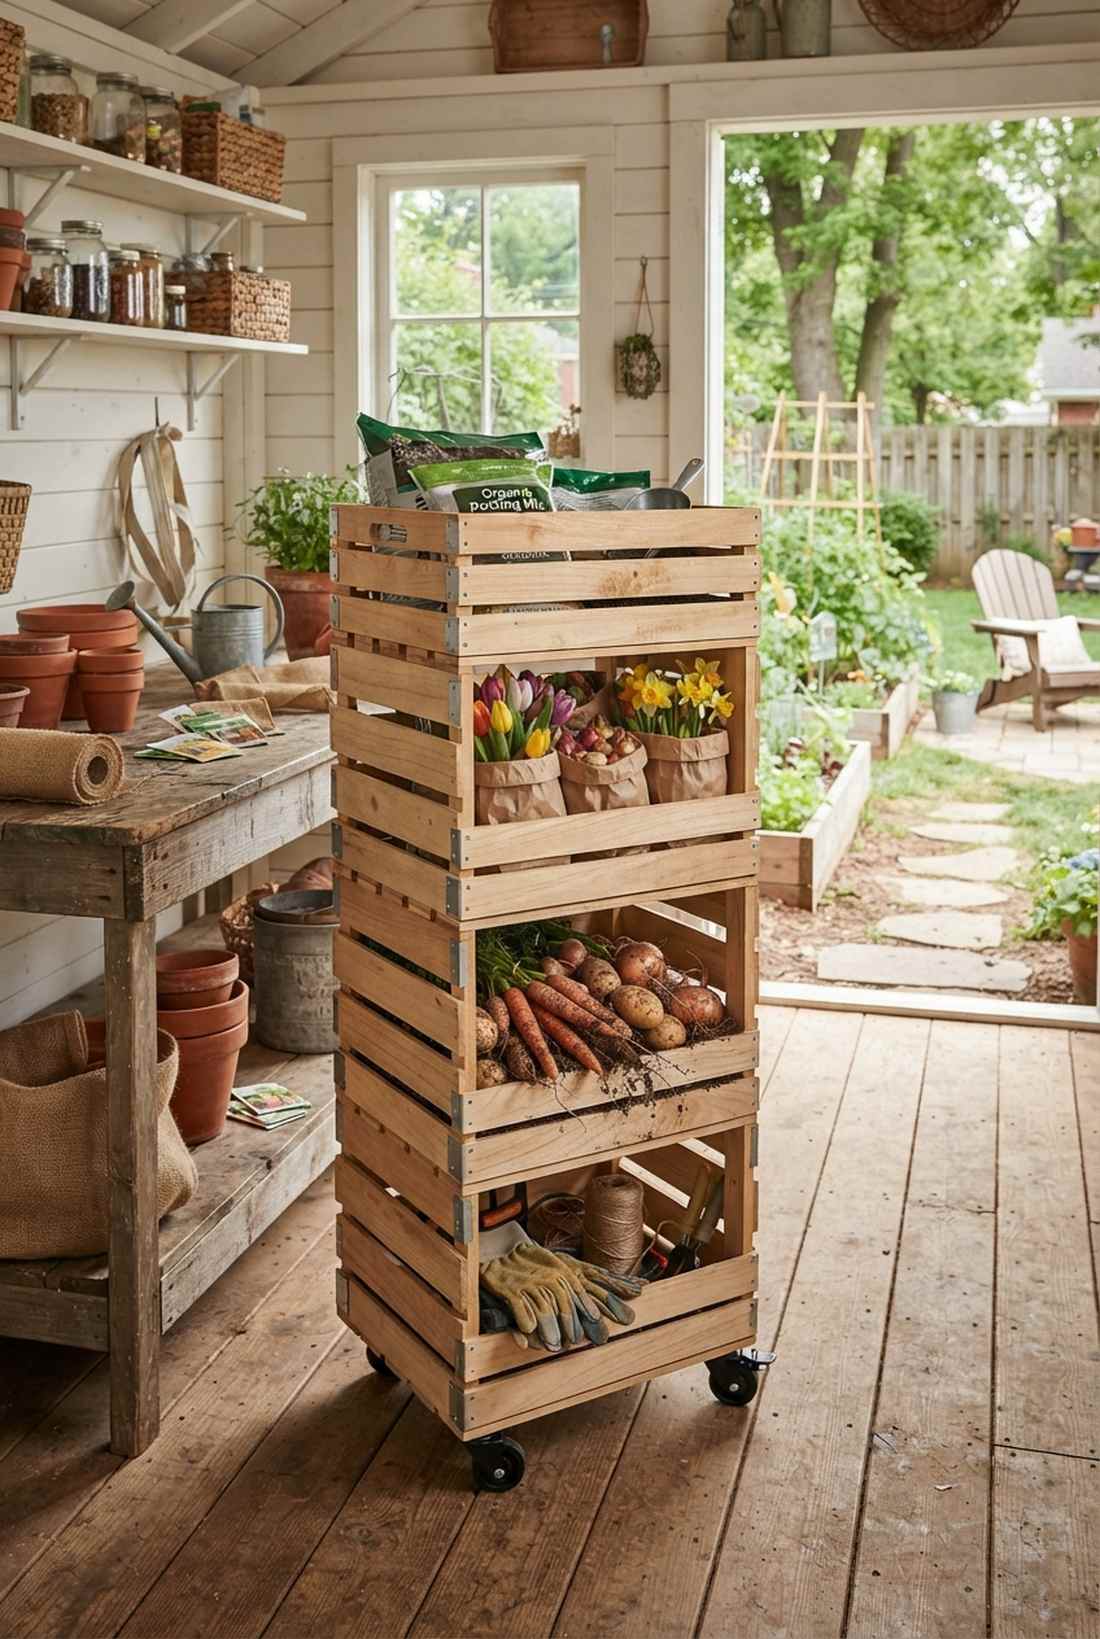
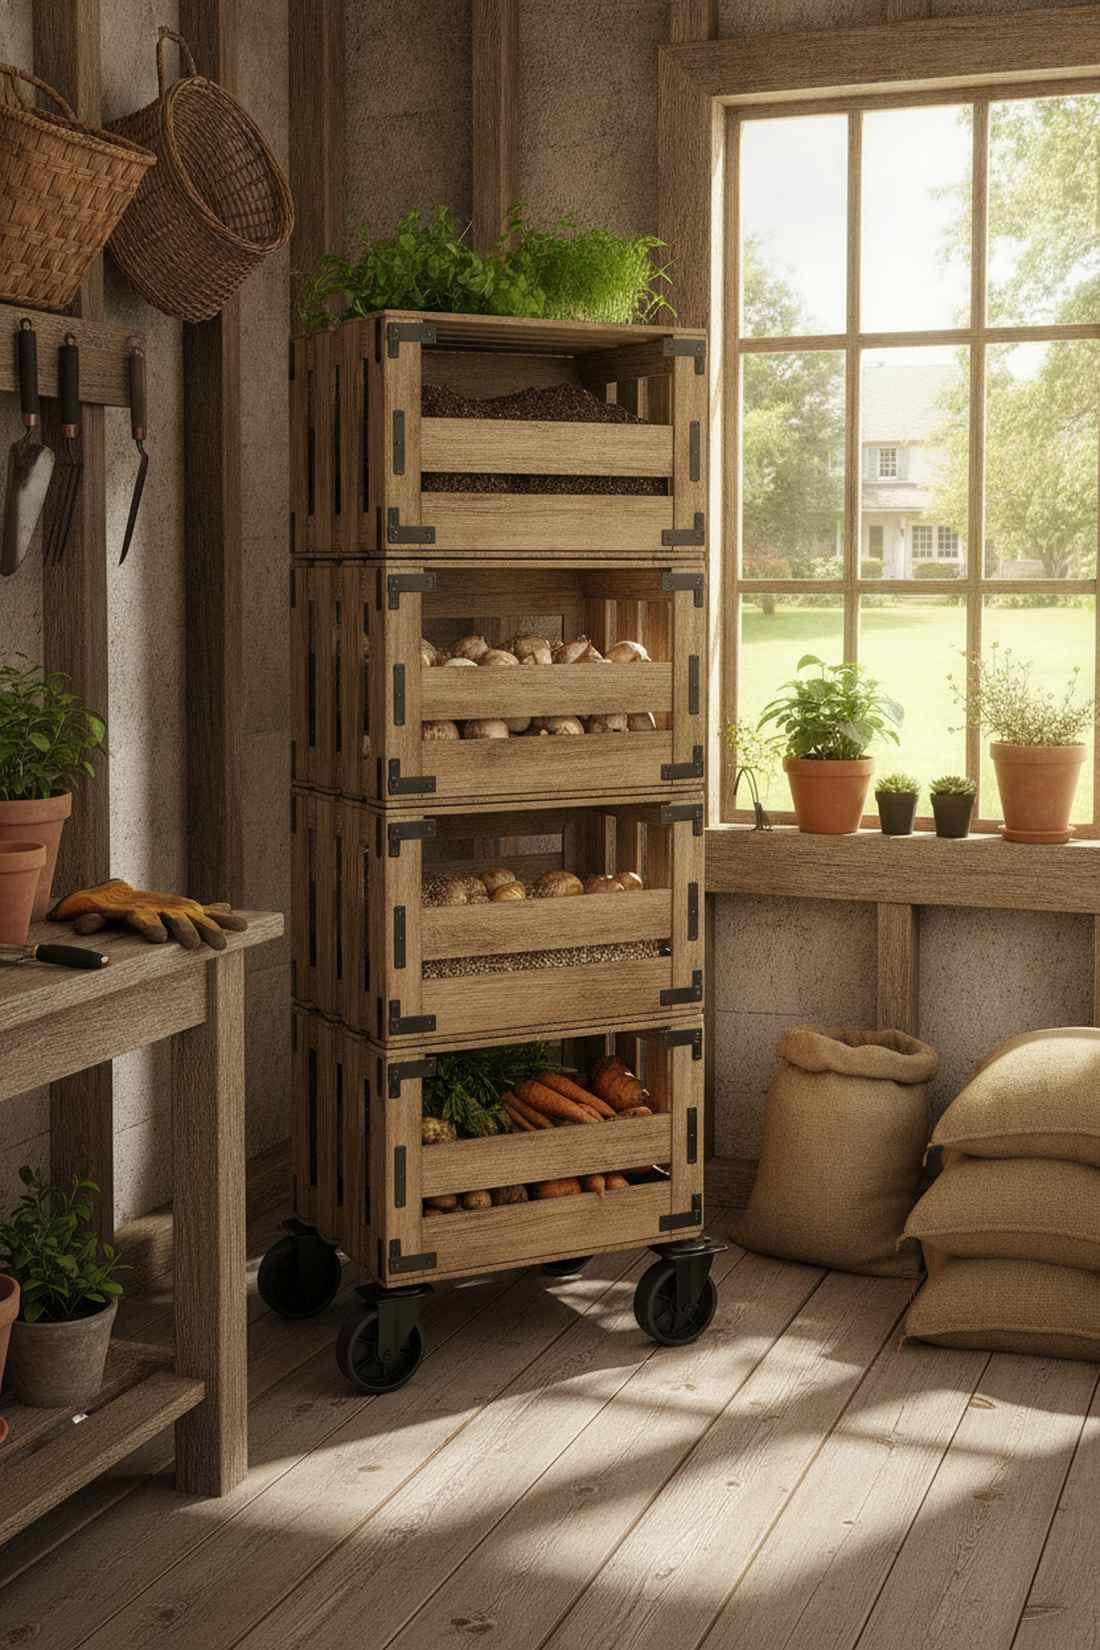
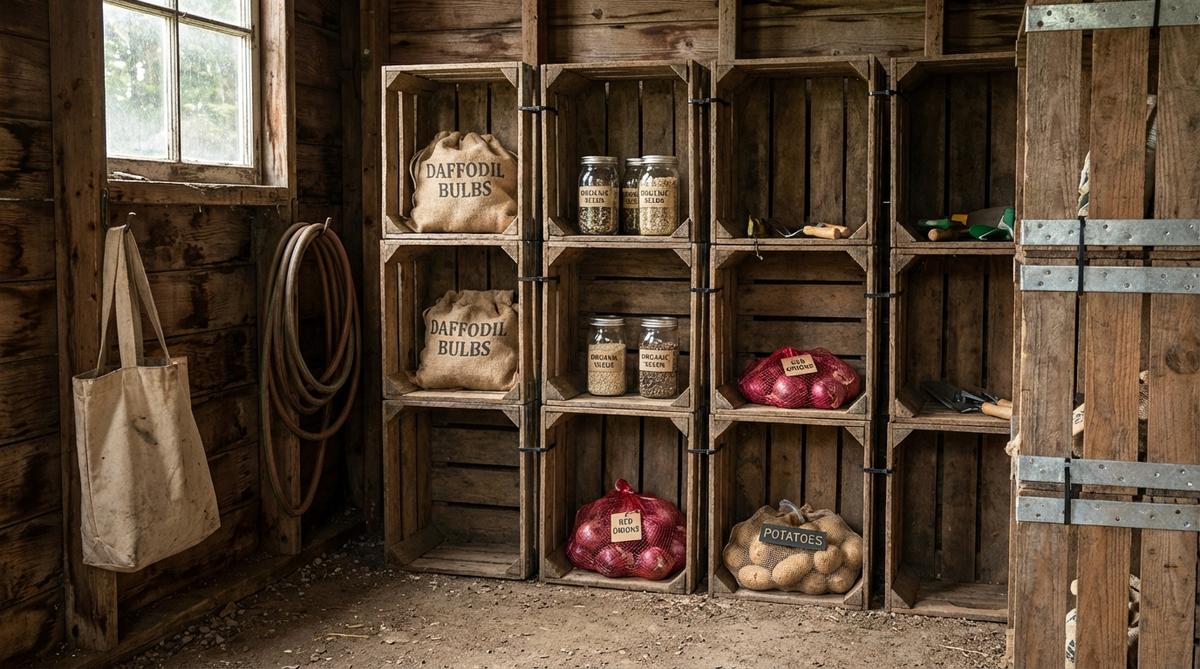
Vibes like a charming farmhouse harvest station, this modular wooden crate tower is visually stunning and highly practical. Perfect for organizing dirty root vegetables, loose bulbs, or potting mixes.
Plastic bins look sterile, but utilizing stained vintage-style crates delivers a surprisingly premium look with incredible airflow. Secure the crates together with discreet flat mending plates so they never topple over.
Building a 4-tier stack costs around $45 if you buy unfinished crates. A fantastic organic aesthetic for any rustic shed.
- Key Materials: Slatted wooden crates, metal mending plates
- Vibe / Style: Rustic farmhouse market
- Difficulty: Very easy
- Budget Breakdown: Crates: $40 | Hardware: $5
- Creator’s Tip: Mount caster wheels to the bottom crate to create a rolling storage tower you can pull out to your garden beds.
- Smart Sourcing: Unfinished wooden nesting crates (bulk pack) and heavy-duty locking caster wheels (4-pack).
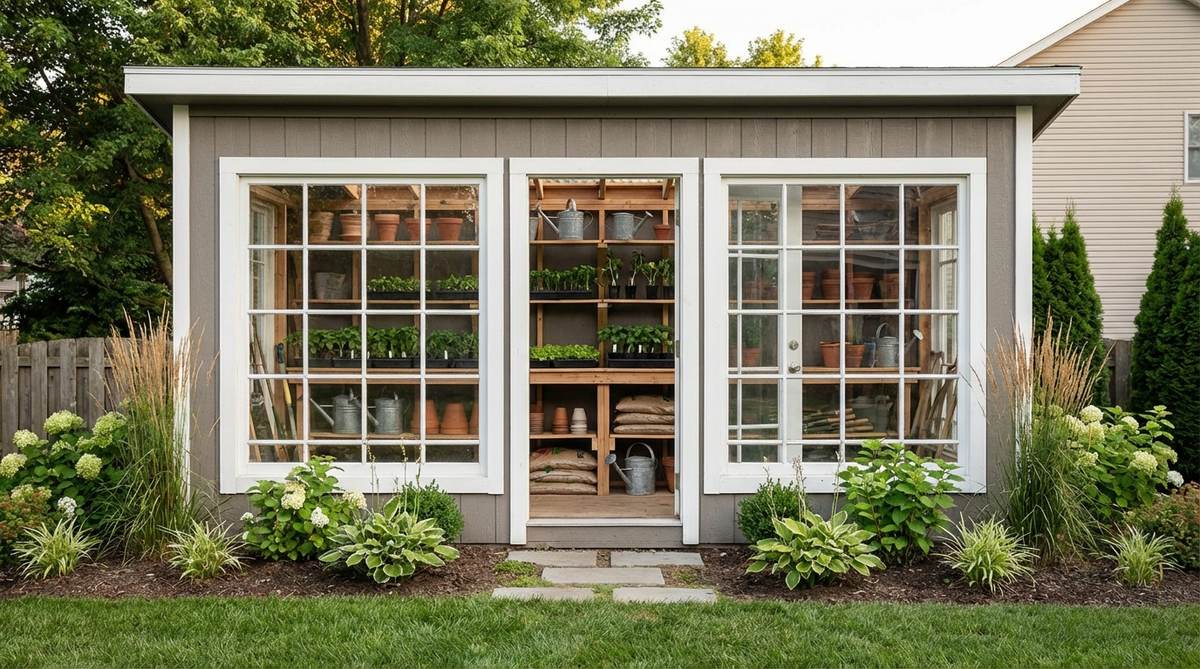
Small Garden House Studios
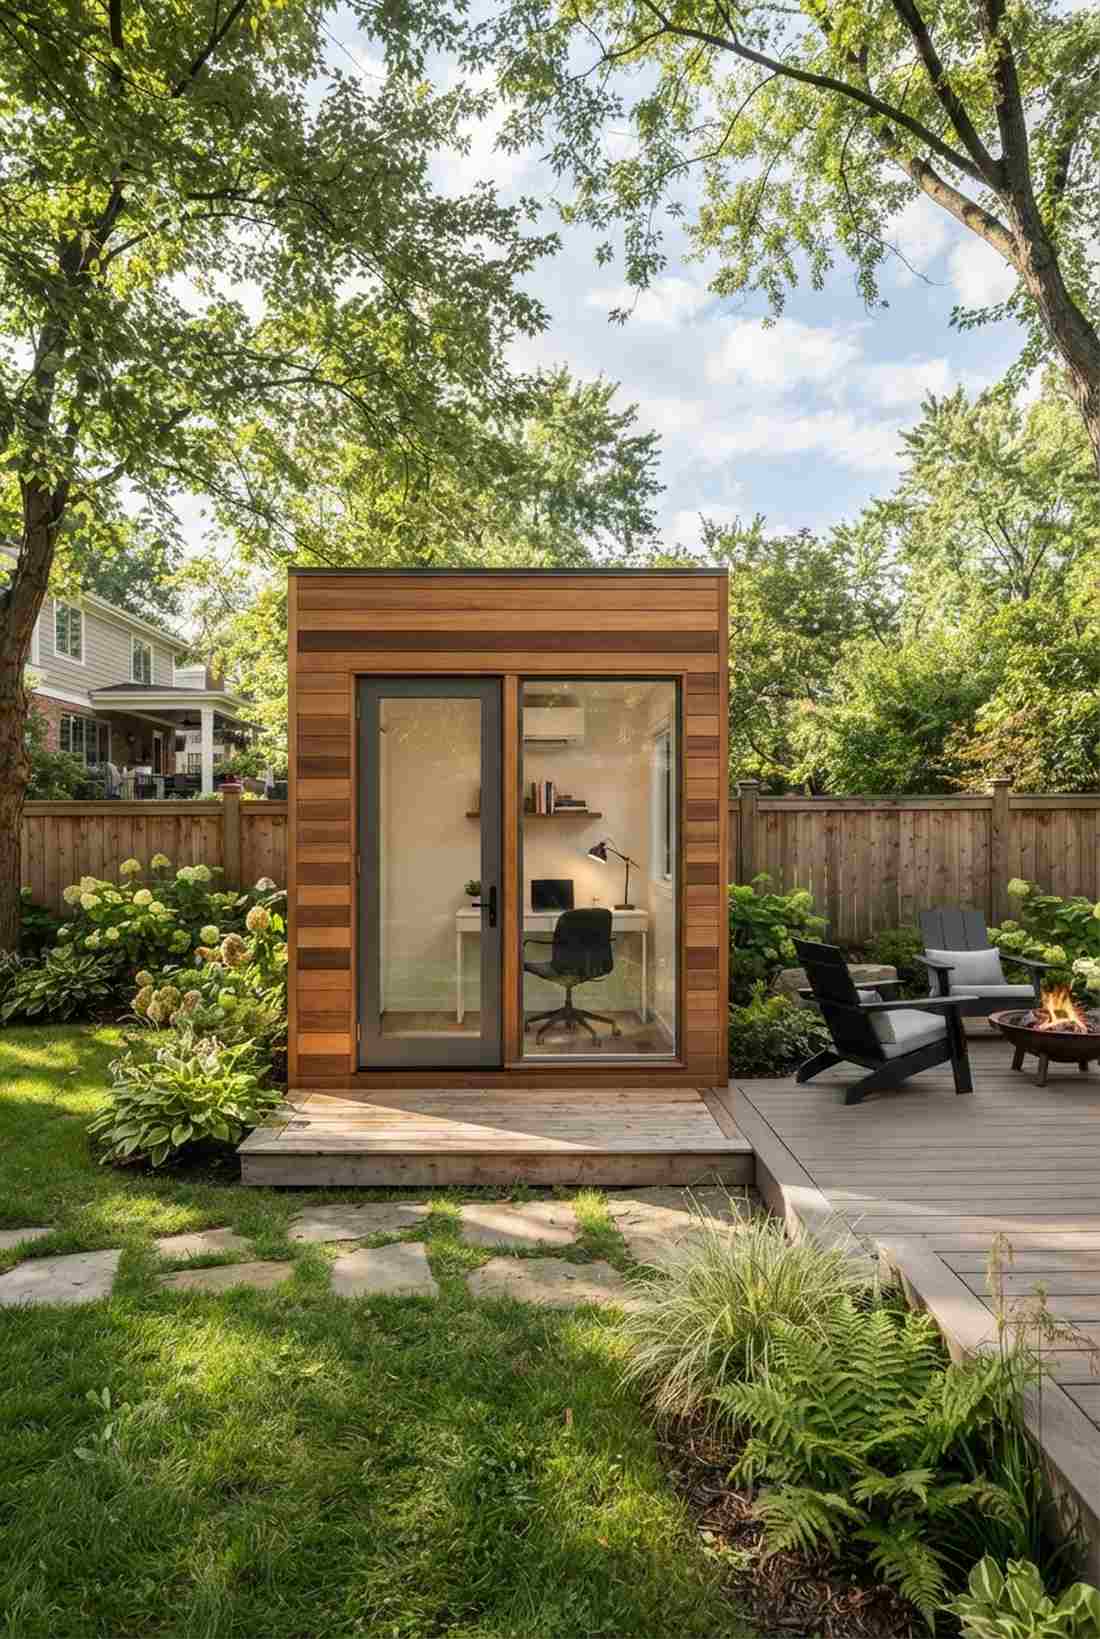
13. Home Office Pod
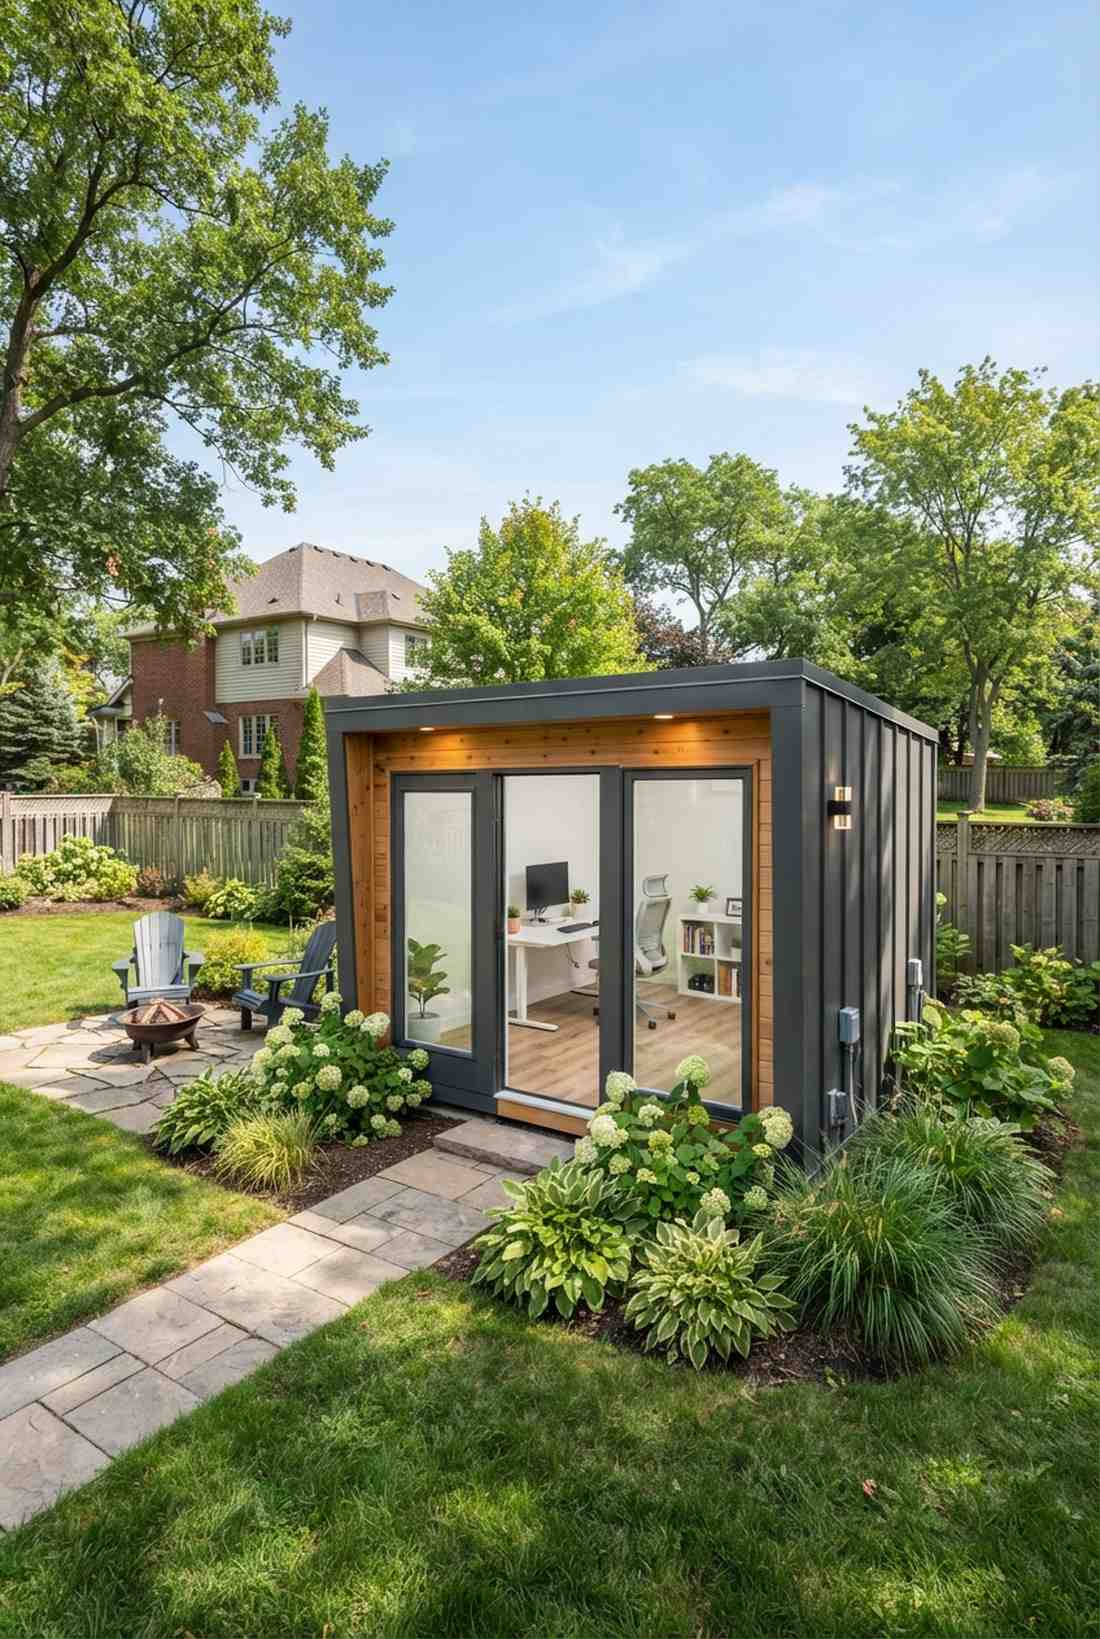

Feels like a serene executive escape, this insulated backyard workspace redefines the modern work-from-home lifestyle. This small garden house layout creates absolute boundary separation from noisy family living rooms.
Converting a shed into an office fails if you ignore climate control, but installing rigid foam insulation and double-glazing gives a designer-level finish and year-round comfort. Pre-wire the structure with armored ethernet cables to guarantee your Zoom calls never drop.
A full professional conversion ranges from $1,500 to $3,500. Pin this to your remote workspace dream board.
- Key Materials: Rigid foam board, double-pane windows, drywall
- Vibe / Style: Crisp professional sanctuary
- Difficulty: Advanced DIY / Professional help
- Budget Breakdown: Insulation: $300 | Electrical: $500 | Finishings: $800
- Creator’s Tip: Choose a light-colored laminate flooring to visually expand the tight interior dimensions.
- Smart Sourcing: Pre-cut rigid foam insulation panels (bulk pack) and weatherproof outdoor electrical conduit kits.
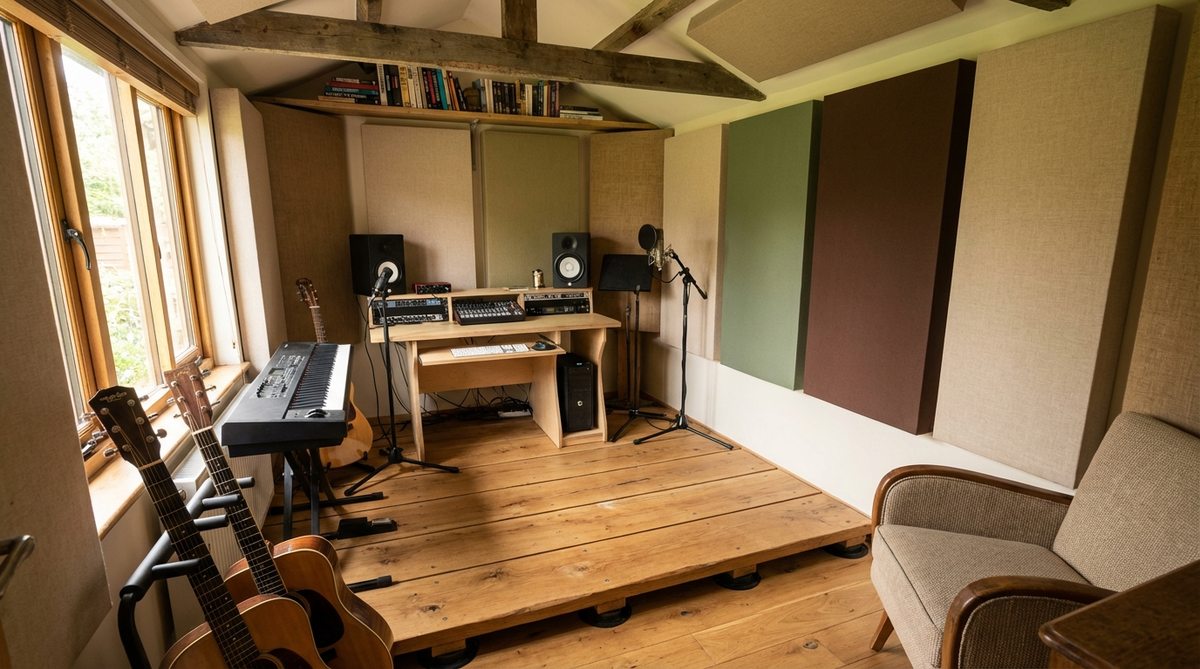
14. Art Studio Retreat
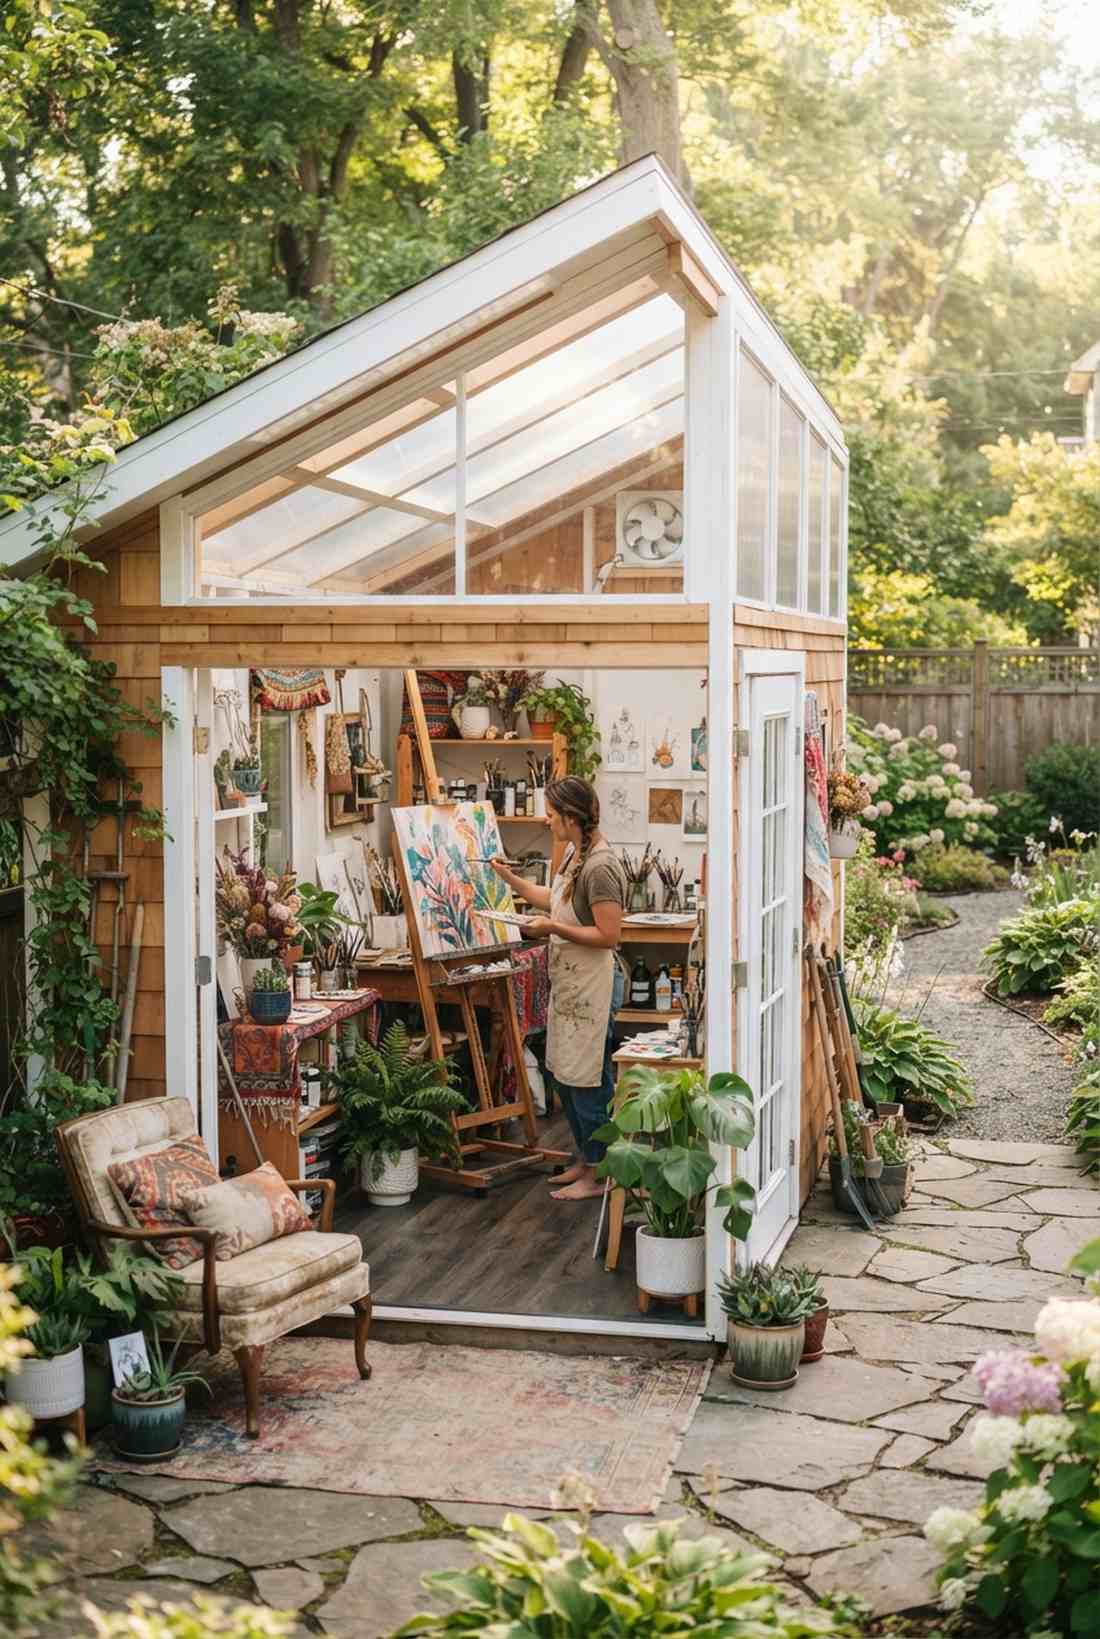
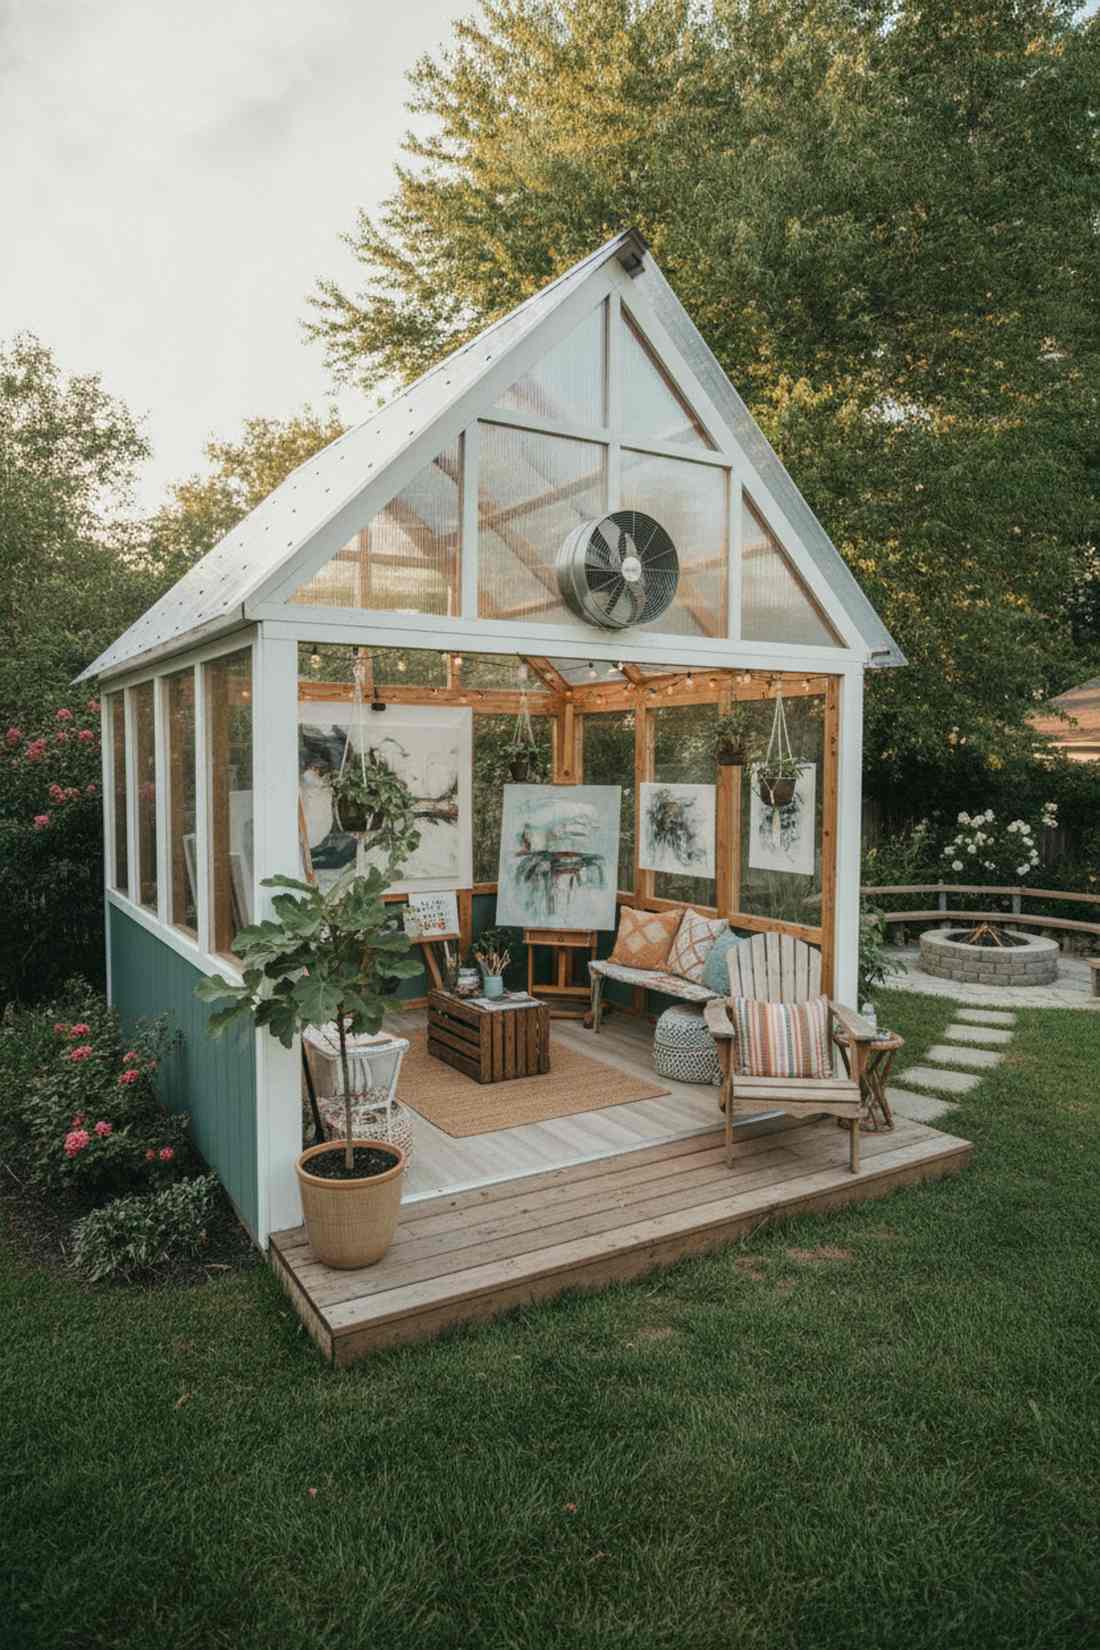
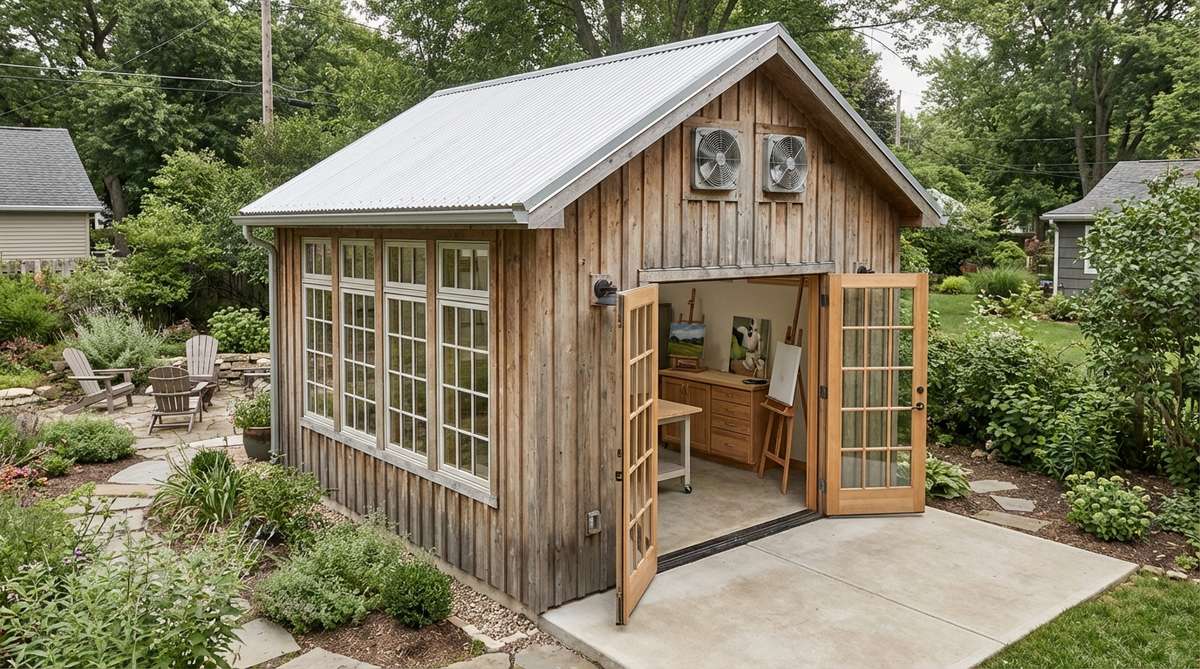
Straight out of a bohemian creator’s dream, this sun-drenched creative cabin makes painting a daily joy. Positioned with north-facing skylights, it bathes the interior in consistent, shadow-free illumination.
Standard tiny windows ruin the creative process, but swapping roof panels for clear polycarbonate transforms the space entirely. Install sealed luxury vinyl plank flooring so toxic paint spills wipe away instantly without staining.
You can retrofit a standard shed into an art hub for about $600. An incredibly rewarding transformation for dedicated hobbyists.
- Key Materials: Polycarbonate roof sheets, vinyl flooring, ventilation fan
- Vibe / Style: Bright bohemian workshop
- Difficulty: Intermediate
- Budget Breakdown: Skylights: $250 | Flooring: $150 | Vents: $100
- Creator’s Tip: Install a high-CFM exhaust fan on the upper wall to pull harmful solvent fumes out immediately.
- Smart Sourcing: UV-coated polycarbonate twin-wall sheets and commercial-grade vinyl plank flooring starter kits.
This next audio-focused setup is aggressively clever, turning a loud annoyance into a perfectly silent sanctuary…
15. Music Practice Space
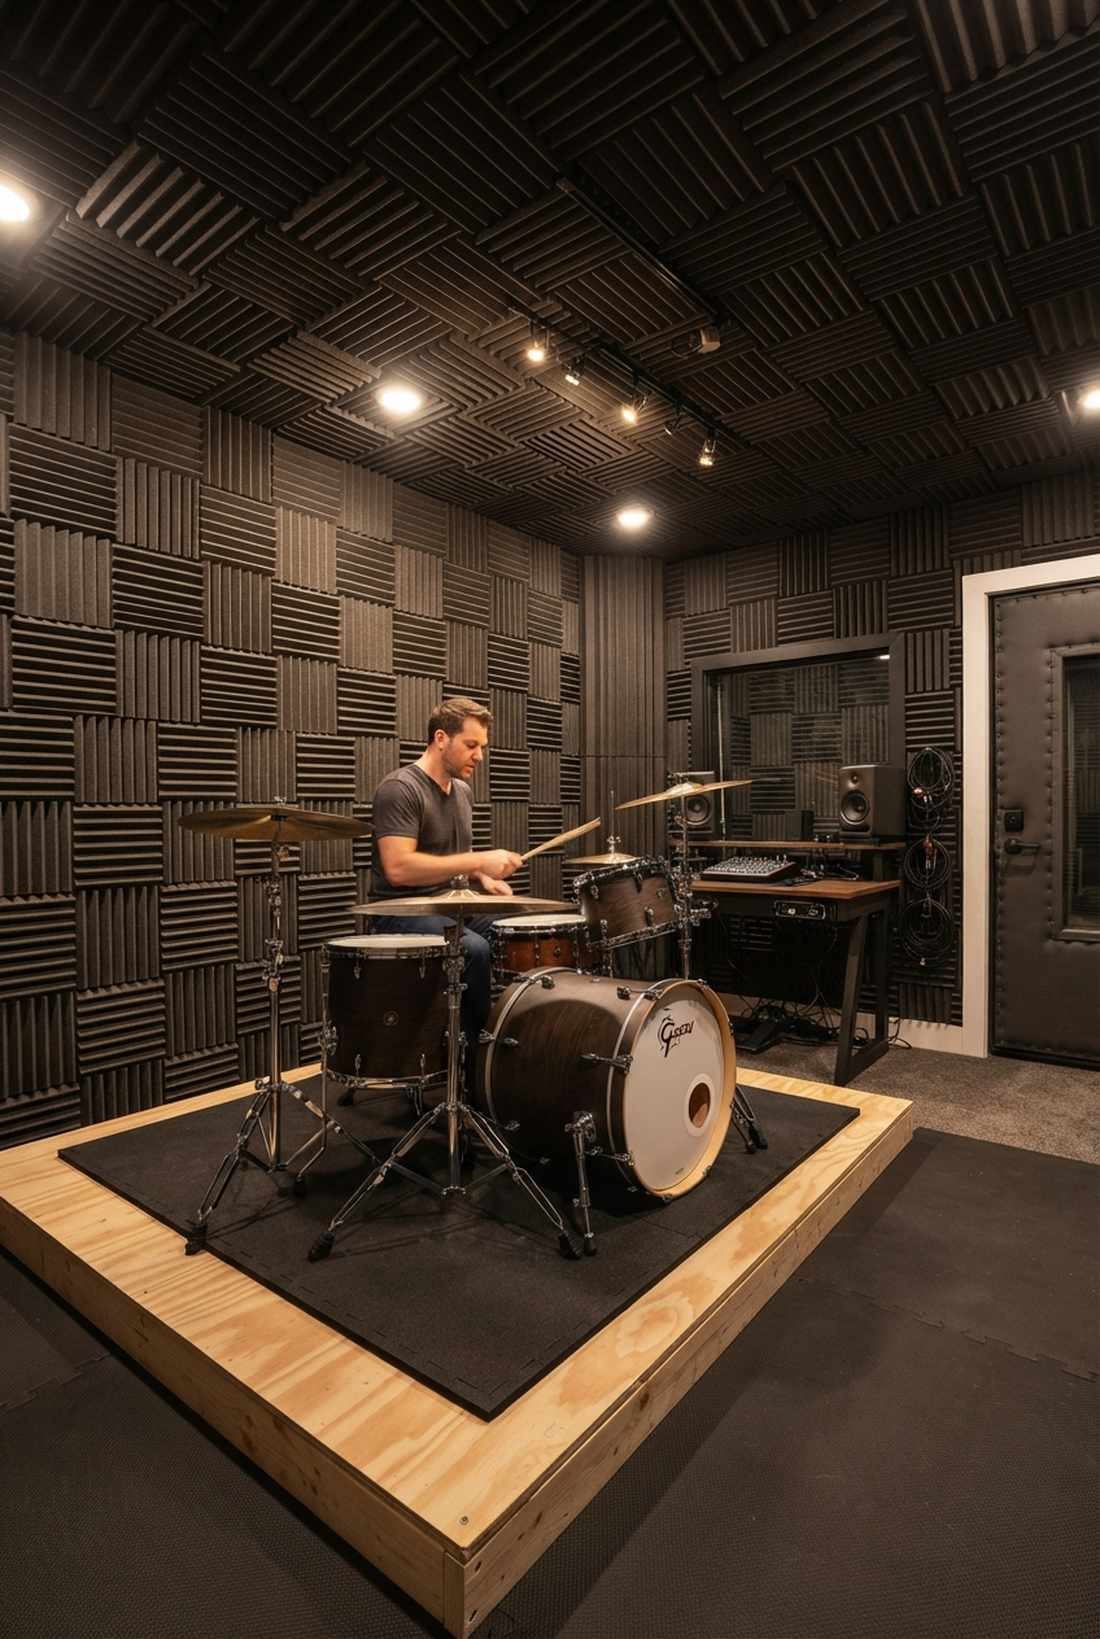
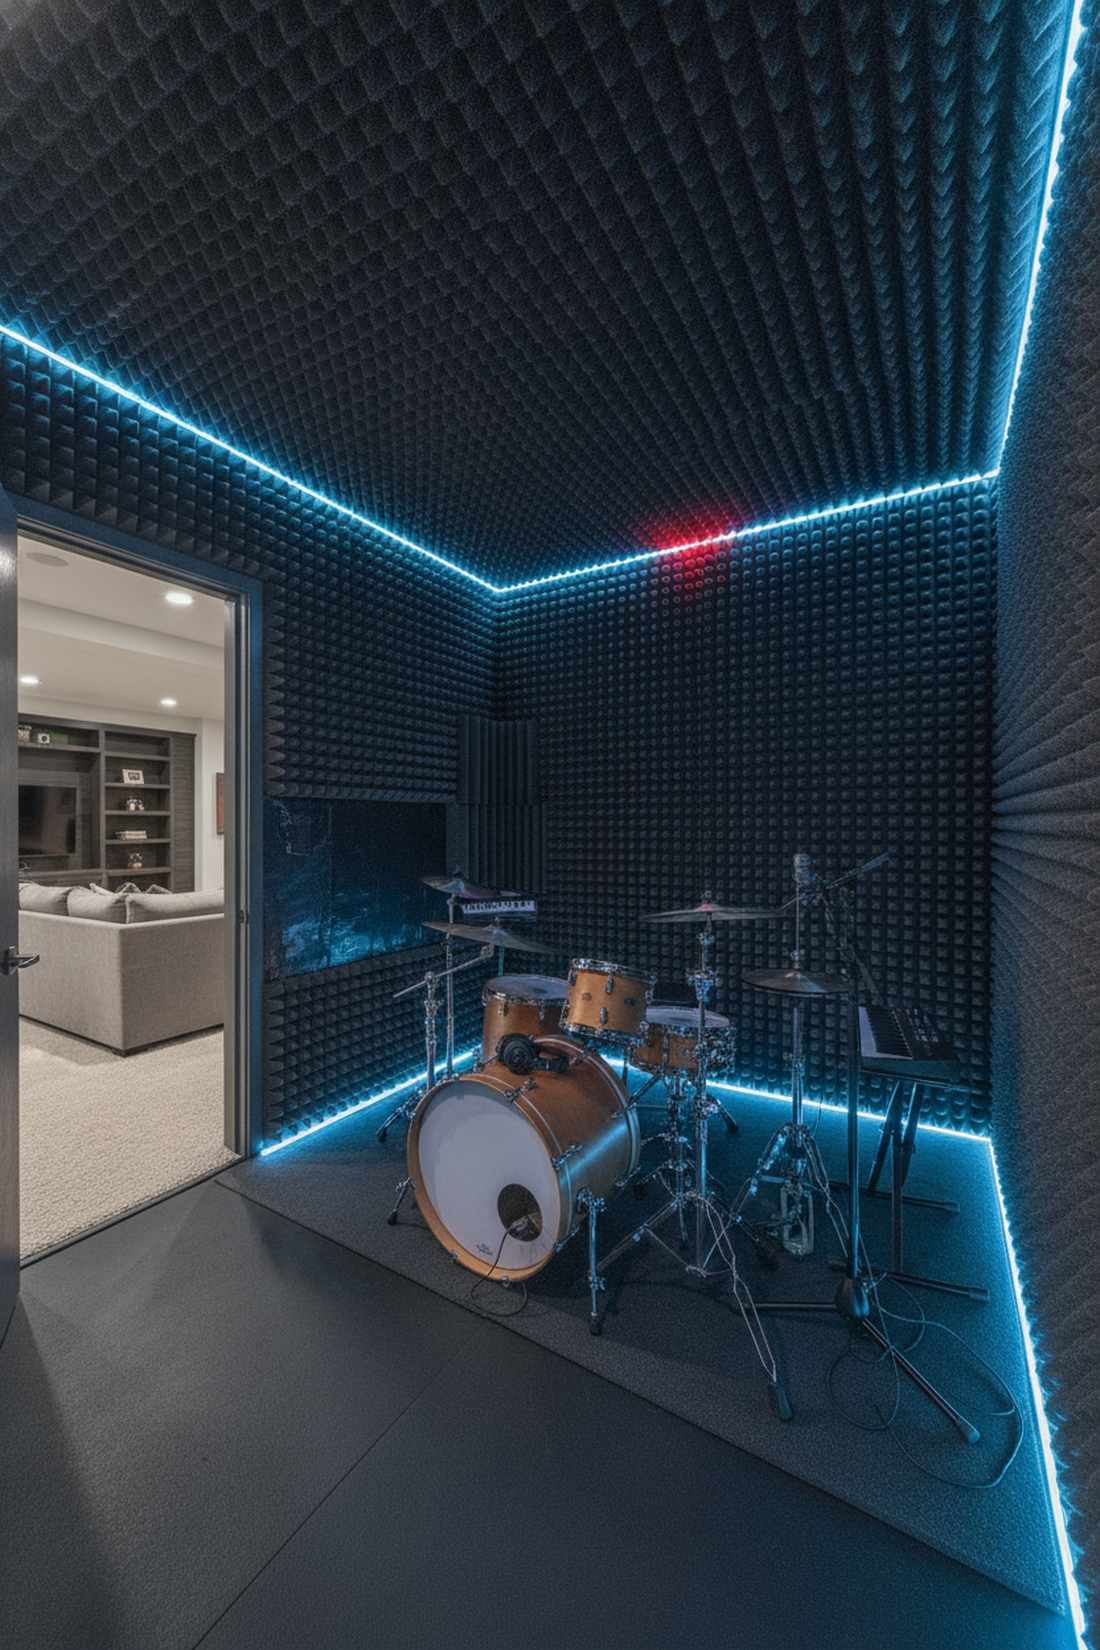
Emanates an underground recording studio energy, this sound-isolated practice room lets you play drums at midnight. It keeps the neighbors happy while giving you total sonic freedom.
Slapping egg cartons on the wall is a myth; authentic isolation requires dense mass-loaded vinyl and staggered stud construction. Line the interior with premium acoustic foam panels to kill harsh reverberations inside the tight box.
Proper soundproofing will cost around $800–$1,200 depending on the decibel drop required. Save this if you need a dedicated noise-friendly zone.
- Key Materials: Mass-loaded vinyl, acoustic foam wedges
- Vibe / Style: Professional audio bunker
- Difficulty: Advanced
- Budget Breakdown: Soundproofing Vinyl: $400 | Acoustic Panels: $250
- Creator’s Tip: Build a “floating floor” by laying thick rubber gym mats under your plywood base to absorb heavy bass kicks.
- Smart Sourcing: Premium acoustic foam panels (bulk pack) and heavy-duty mass-loaded vinyl rolls.
16. Reading Lounge Nook
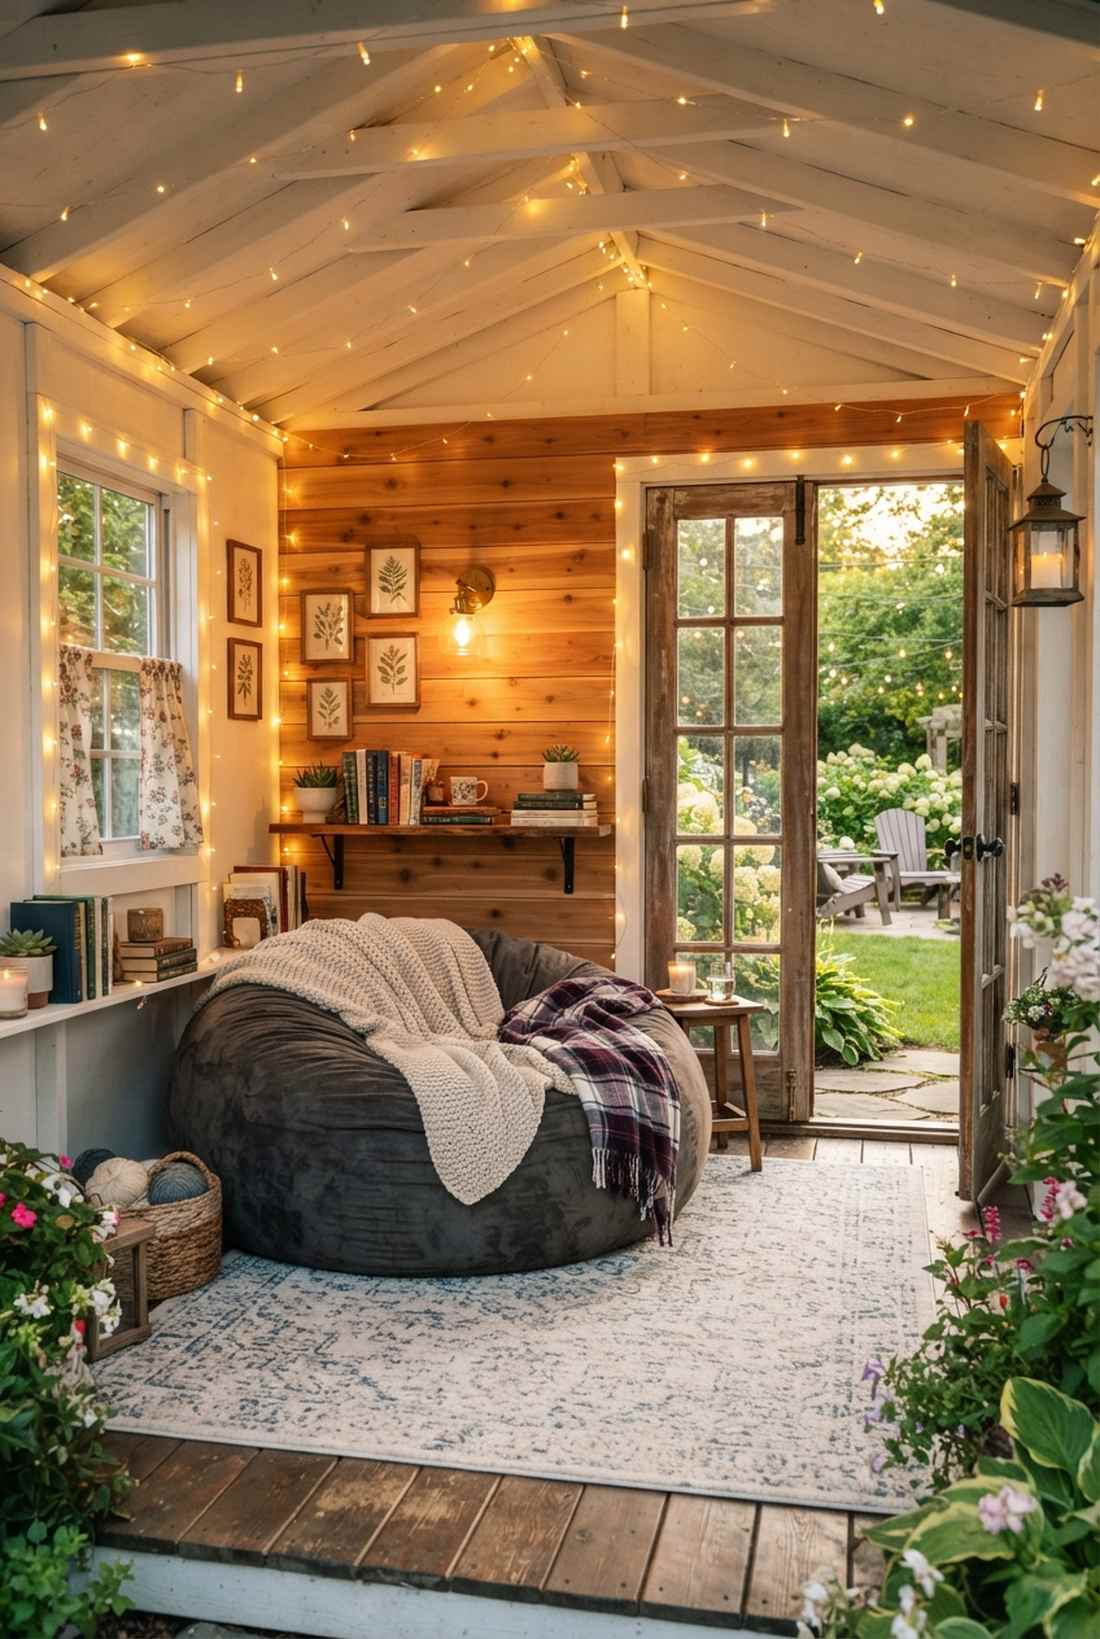
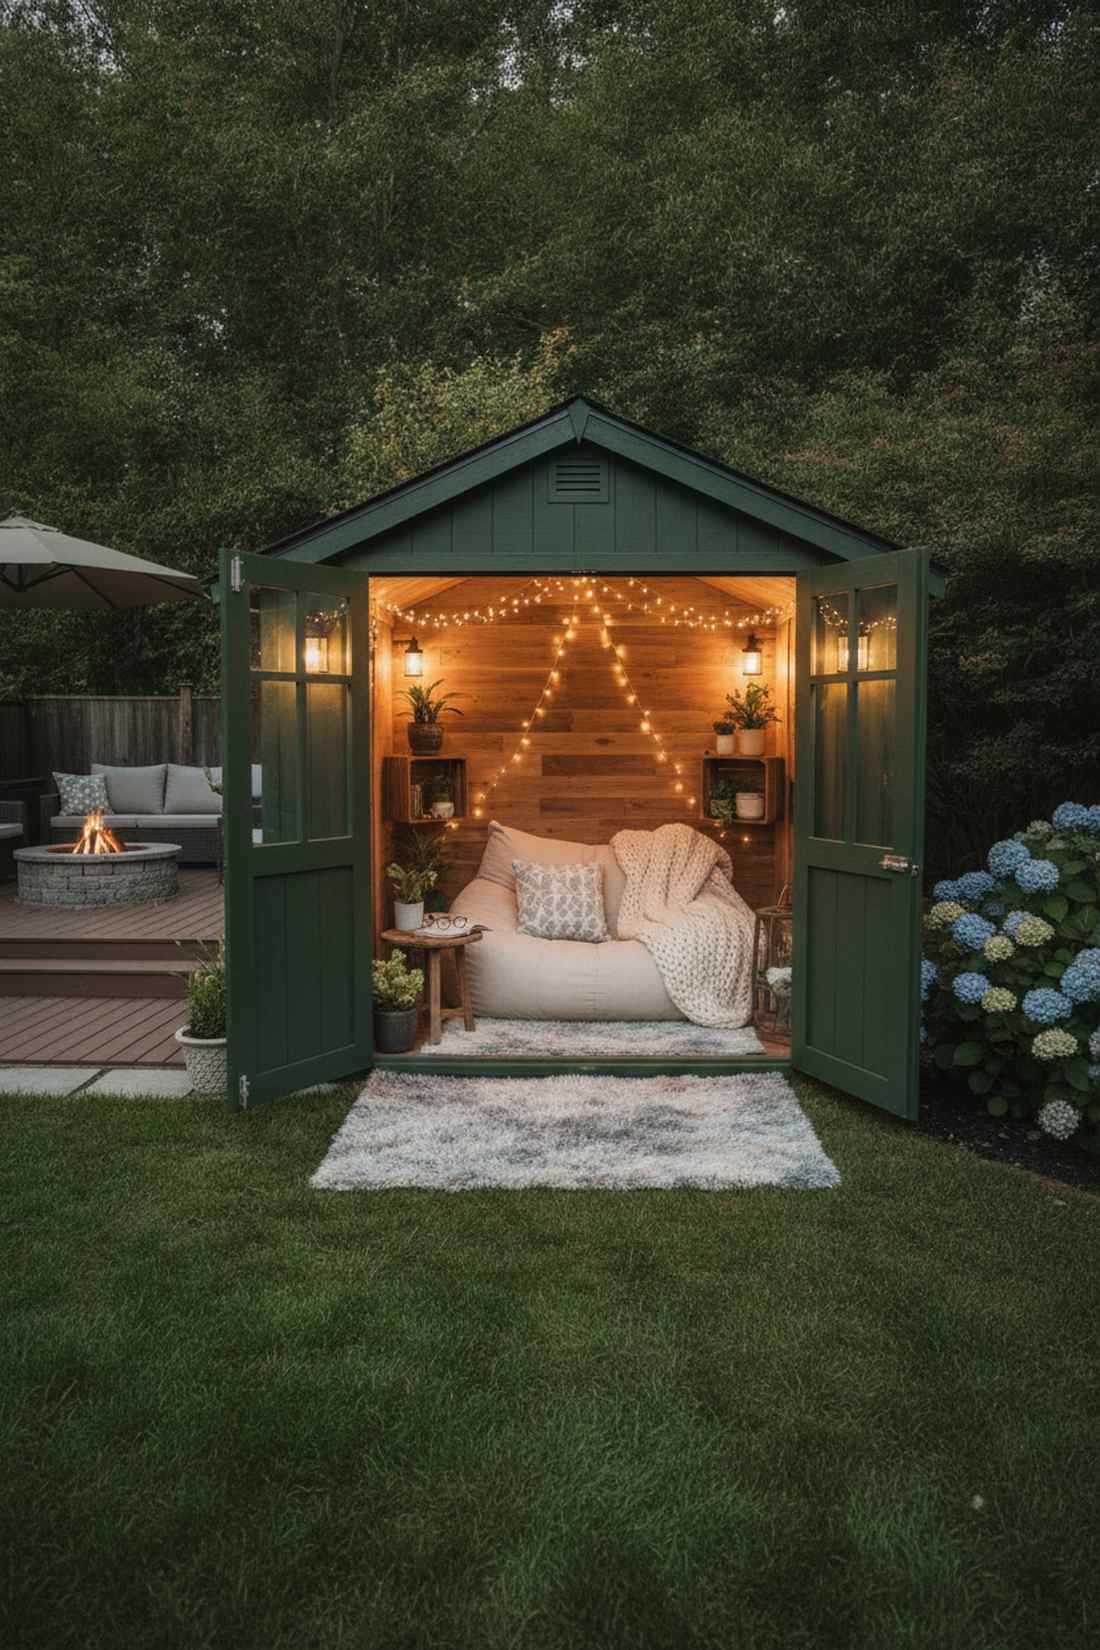
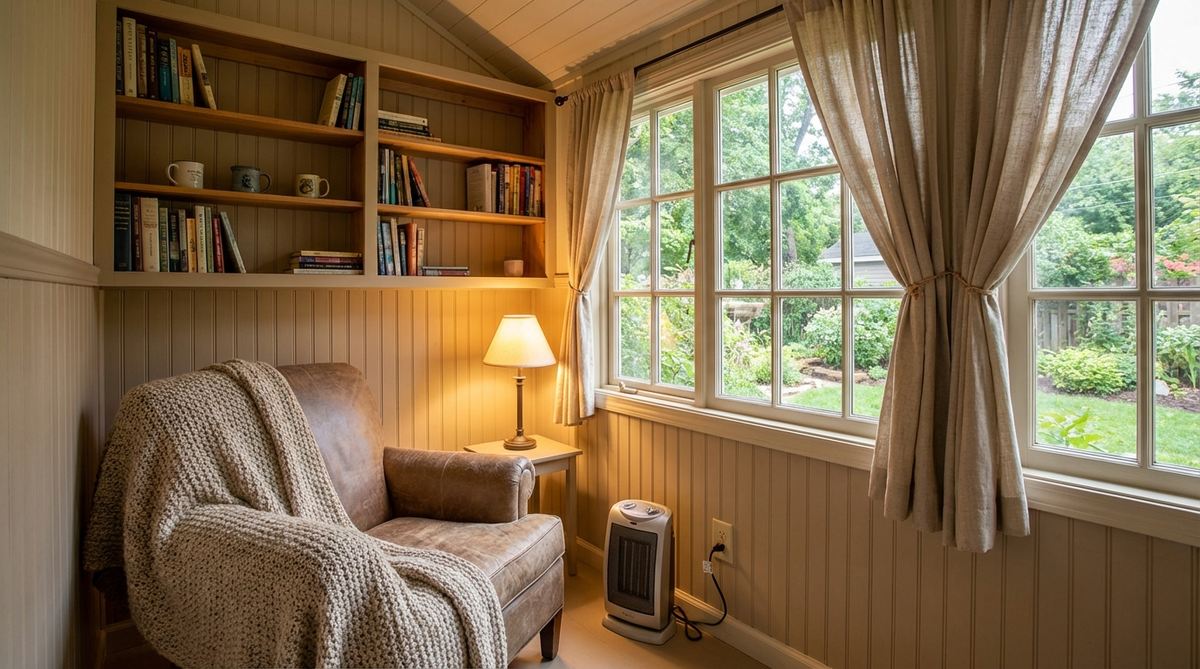
Feels like a hidden fairy tale corner, this cozy reading retreat begs you to curl up with a blanket and a book. It relies on soft textiles and warm ambient string lighting to set the mood.
Most sheds are strictly for shovels, but tossing in an oversized beanbag and a plush rug delivers a surprisingly premium look for a relaxation zone. Focus entirely on draft-proofing the doors and adding battery-powered sconces for a magical evening glow.
You can flip a 6×6 shed into this lounge for under $200. It is a wildly popular Pinterest aesthetic that takes one afternoon.
- Key Materials: Weather-stripping tape, outdoor rugs, battery LED lights
- Vibe / Style: Hygge-inspired comfort
- Difficulty: Very easy styling
- Budget Breakdown: Rug: $60 | Lighting: $40 | Decor: $80
- Creator’s Tip: Use cedar paneling on one accent wall to give the room an incredible, natural, calming scent.
- Smart Sourcing: Warm-white LED fairy string lights (waterproof) and plush washable outdoor rug kits.
17. Craft Workshop
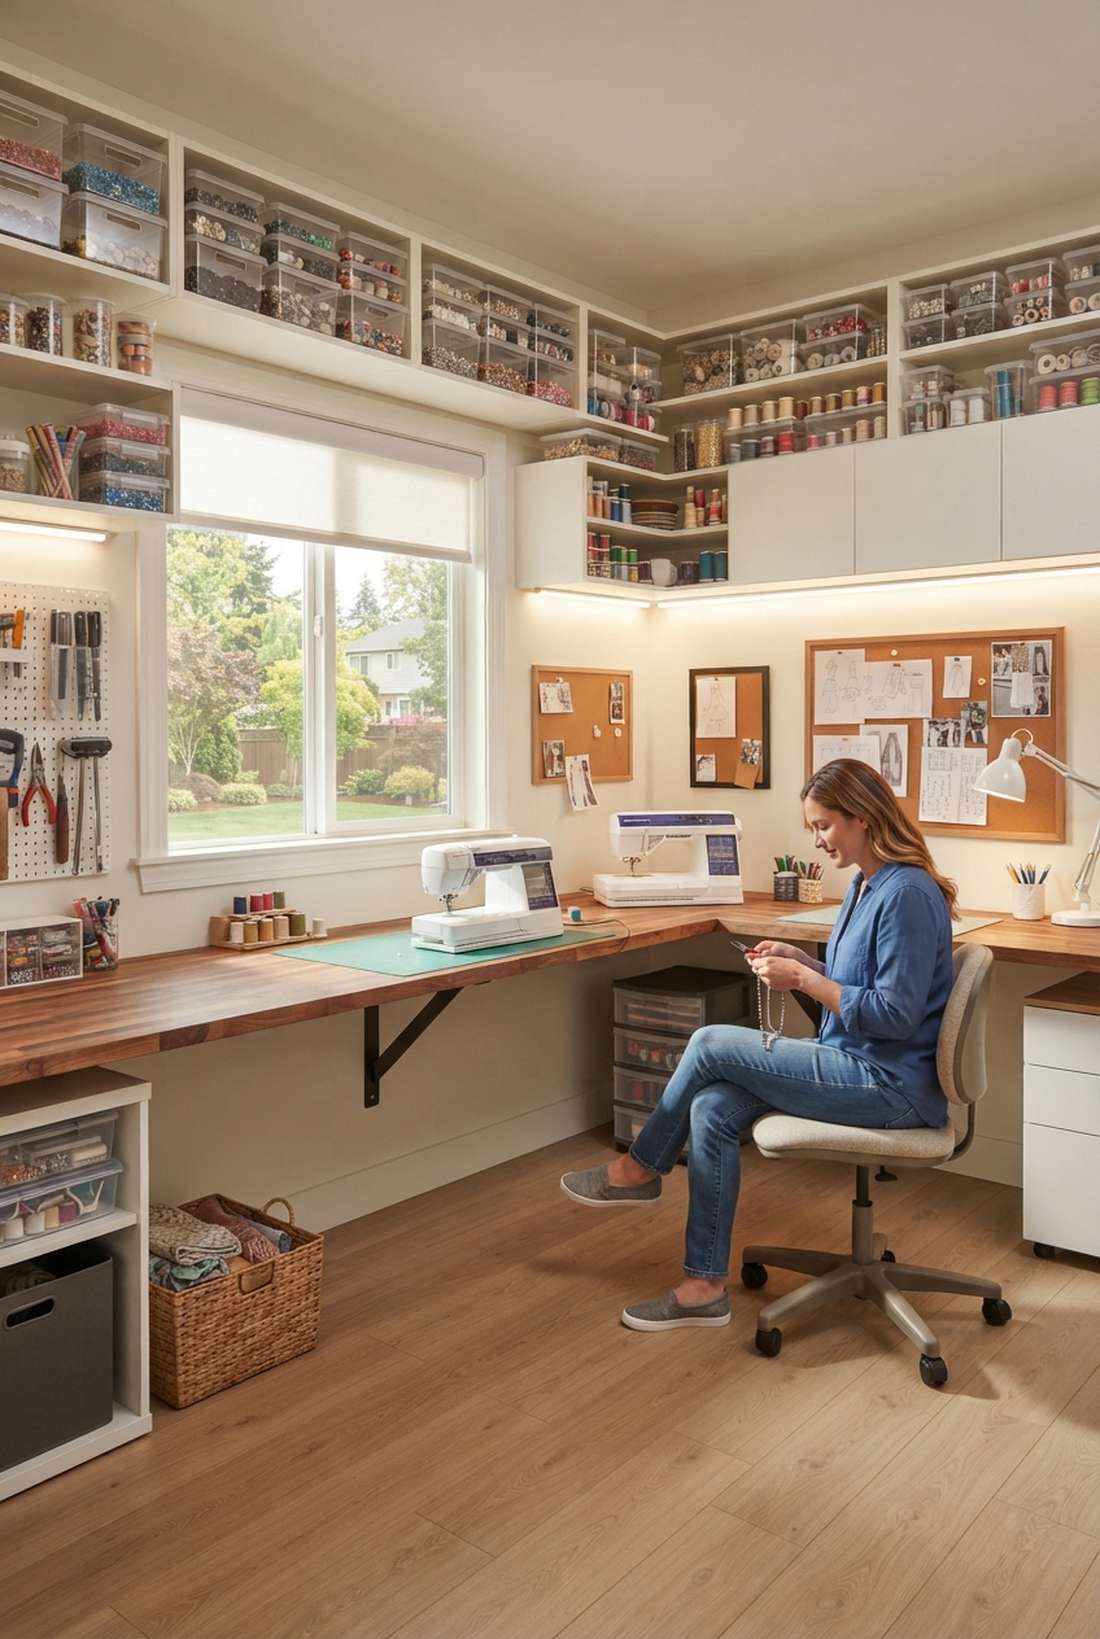
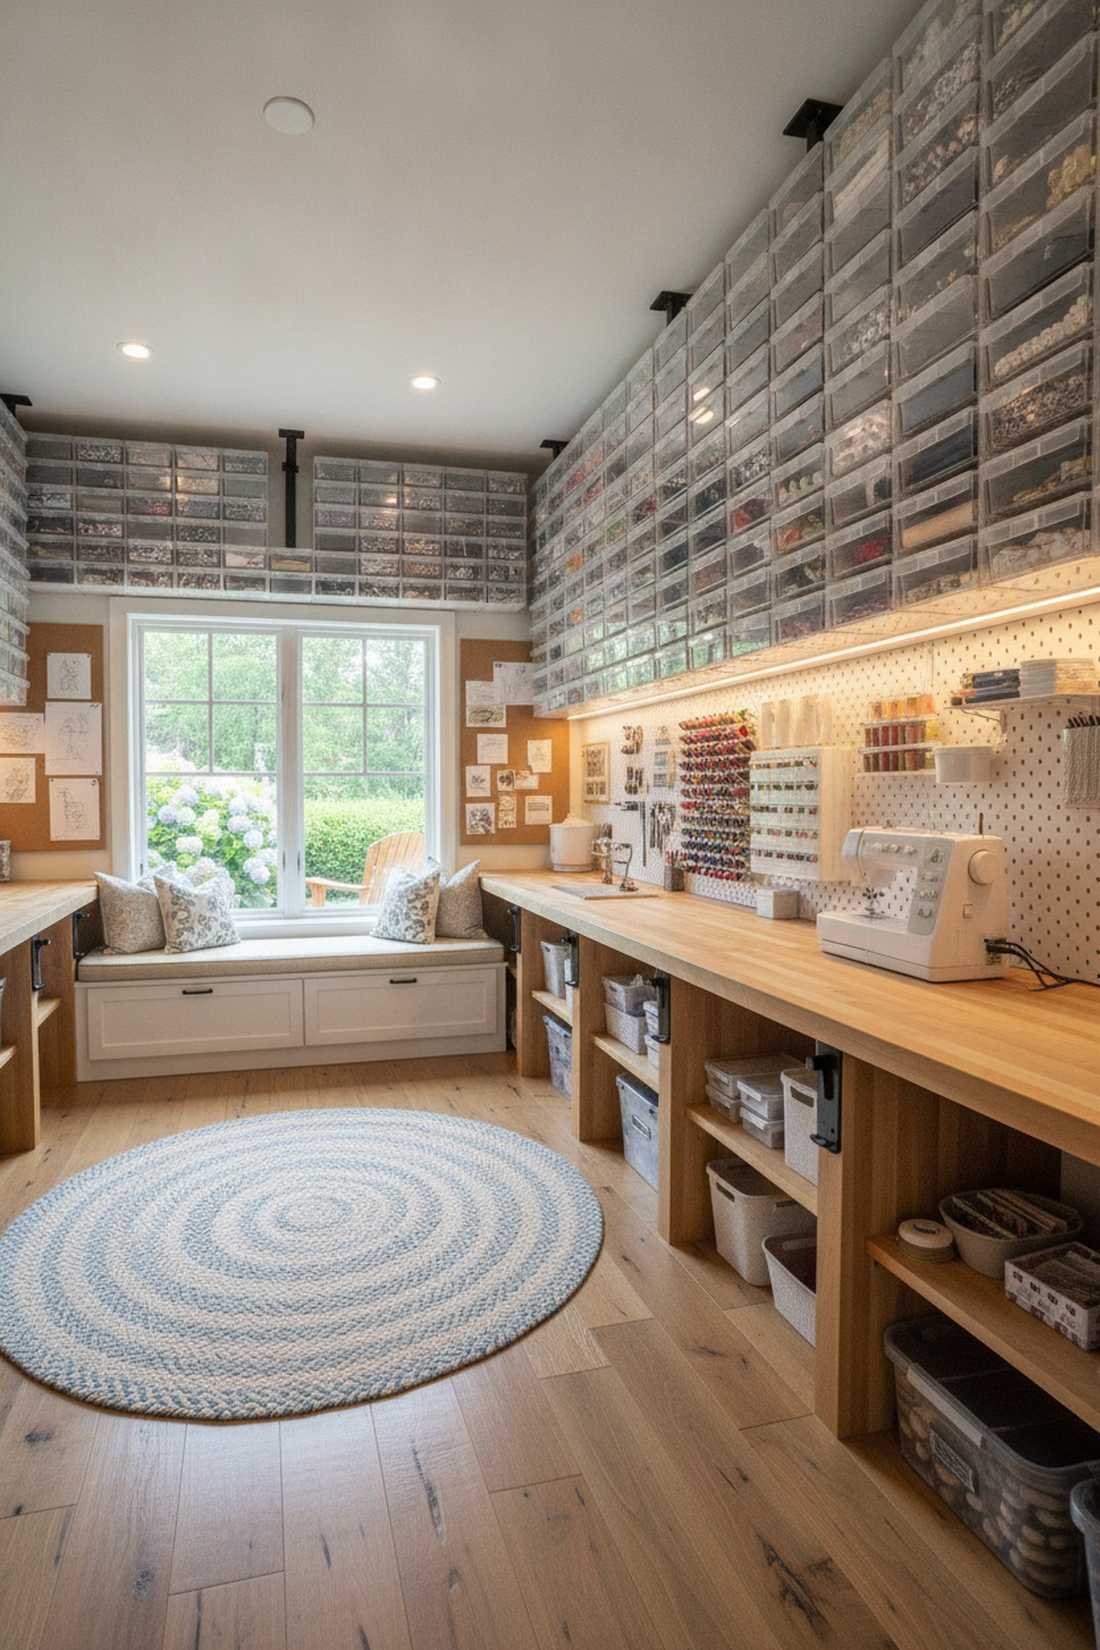
Captures the essence of organized productivity, this dedicated maker-space is built for sewing, jewelry making, and detailed crafts. A wraparound built-in desk maximizes every inch of the perimeter.
Working on a wobbly folding table kills your posture; anchoring a solid butcher-block counter directly to the wall studs gives a designer-level finish and zero shake. Load the upper walls with clear acrylic bins so every bead and thread spool is instantly visible.
Upfitting with sturdy counters and bins costs around $350. Pin this if your craft supplies have currently taken over your dining table.
- Key Materials: Butcher-block countertop, heavy-duty L-brackets
- Vibe / Style: Bright and meticulous
- Difficulty: Intermediate carpentry
- Budget Breakdown: Counters: $200 | Brackets: $60 | Bins: $50
- Creator’s Tip: Install bright LED under-cabinet strip lighting to completely eliminate shadows over your delicate handiwork.
- Smart Sourcing: Pre-cut butcher block workbench tops and clear acrylic craft storage bins (bulk pack).
18. Yoga Meditation Studio
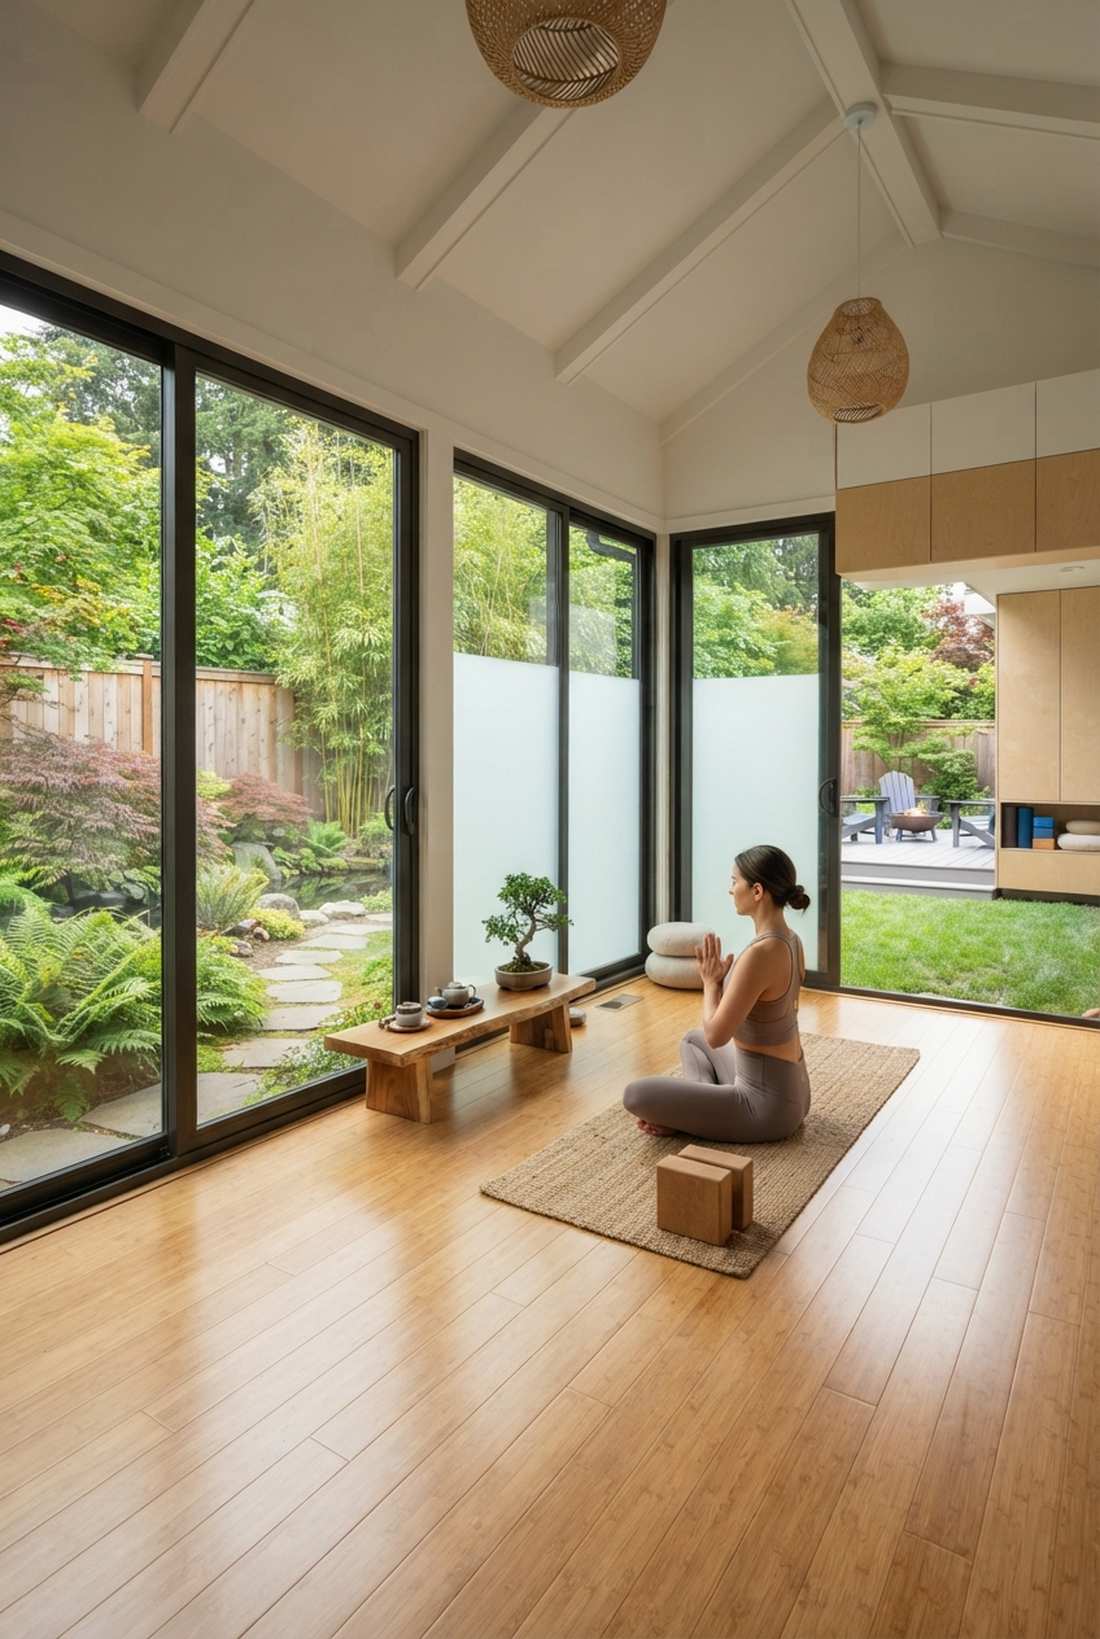
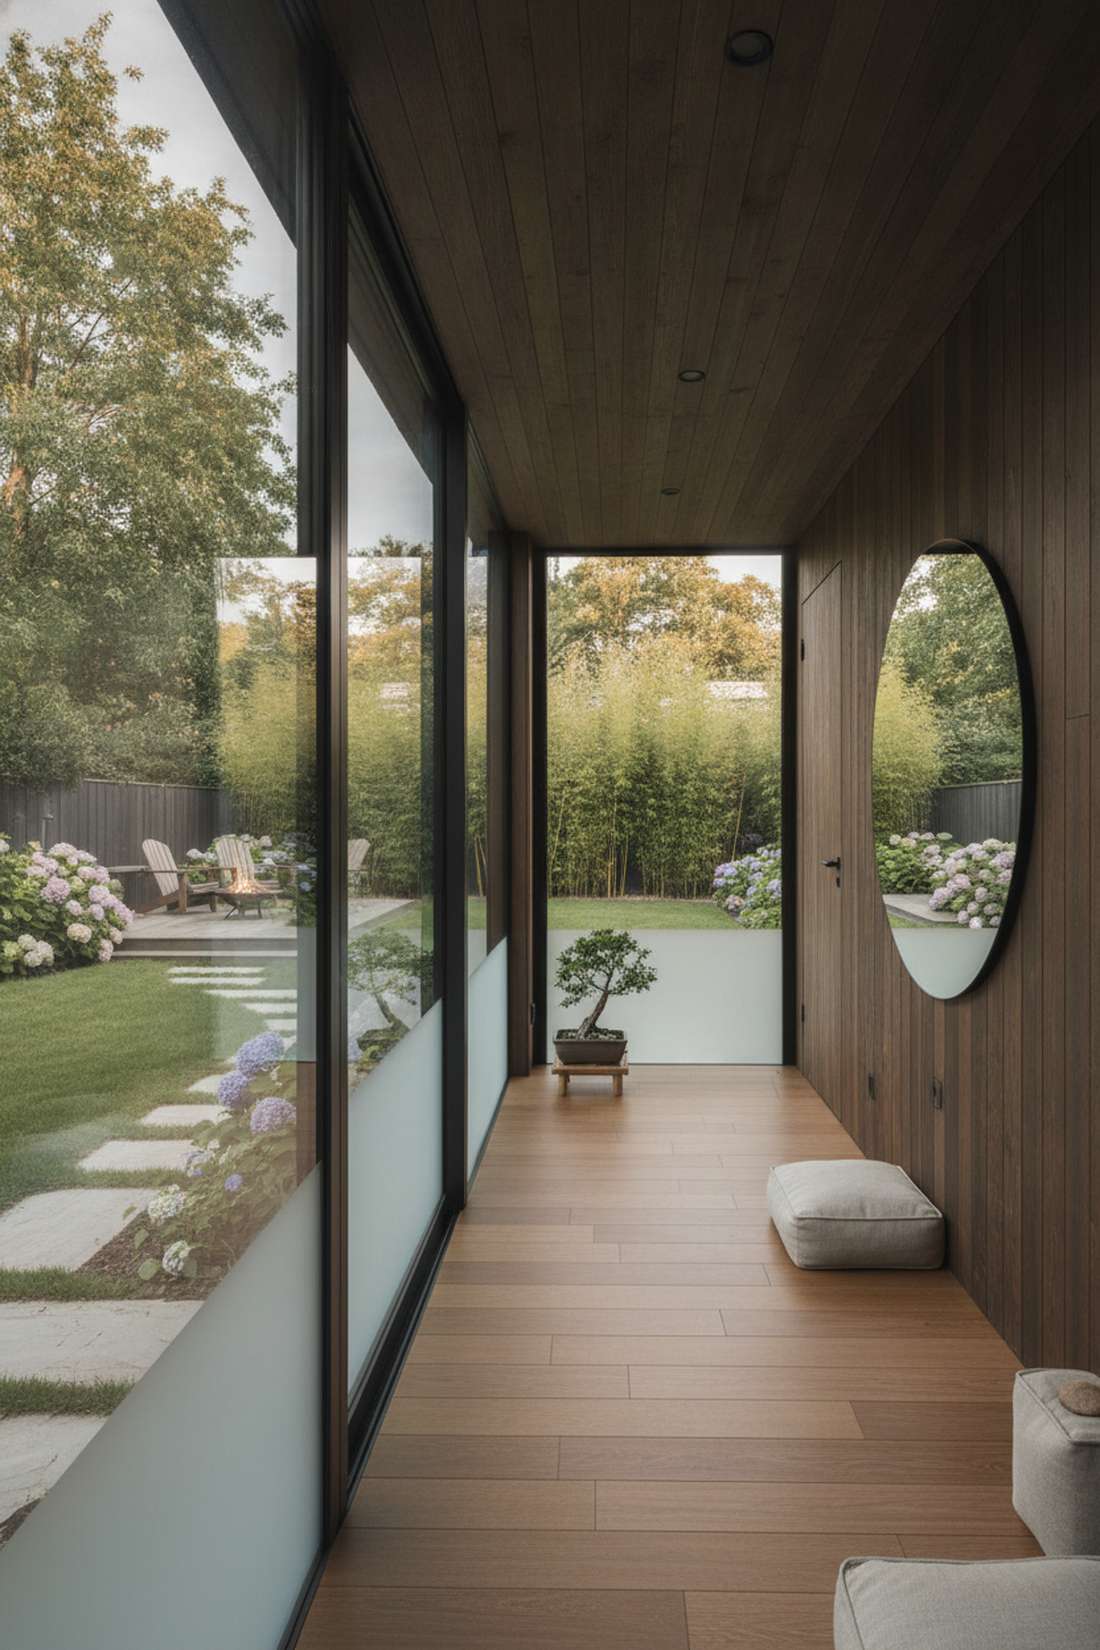
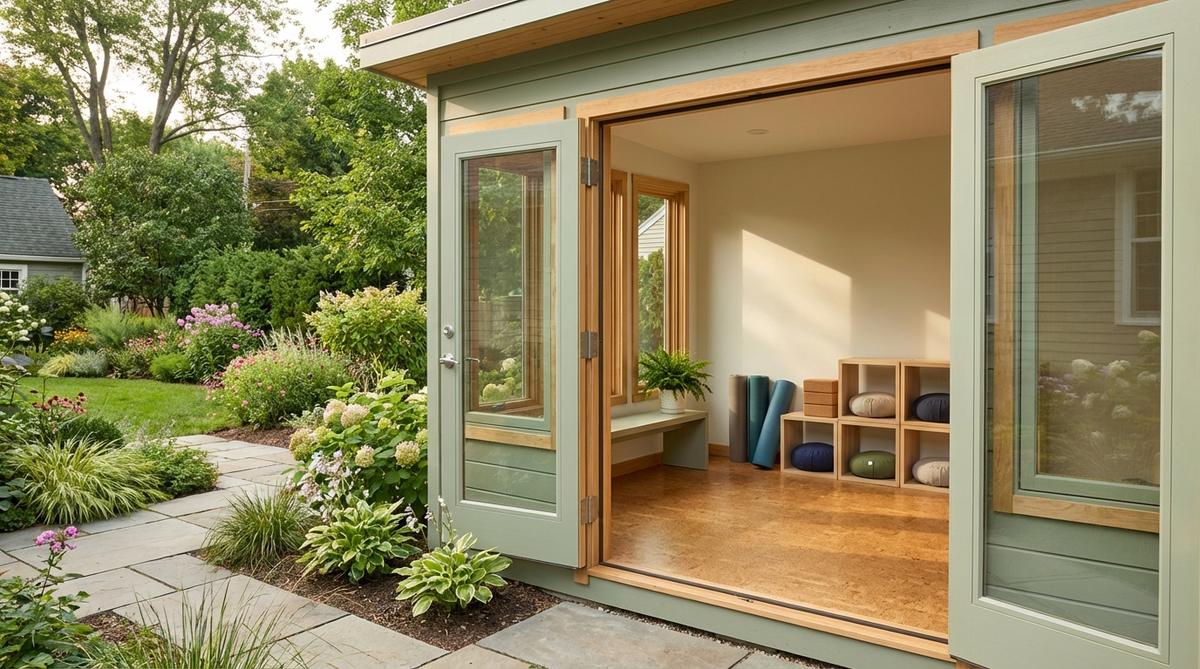
Vibes like a high-end wellness retreat, this minimalist zen cabin clears your mind the second you open the door. Large glass sliding doors connect your practice directly to the natural greenery outside.
Clutter is the enemy of meditation; installing hidden flush-mount storage keeps mats and blocks completely out of sight. Lay down sustainable interlocking bamboo flooring for a warm, barefoot-friendly surface that handles humidity.
Transforming the floor and doors will run about $500–$800. A beautiful, health-focused investment for your property.
- Key Materials: Bamboo click-flooring, frosted window films
- Vibe / Style: Organic minimalist zen
- Difficulty: Moderate
- Budget Breakdown: Flooring: $300 | Mirror Wall: $150 | Decor: $100
- Creator’s Tip: Apply a frosted privacy film to the bottom half of the windows so you get light without neighbors seeing you stretch.
- Smart Sourcing: Interlocking bamboo flooring starter kits and premium frosted window privacy films (roll).
19. Potting Shed Hybrid
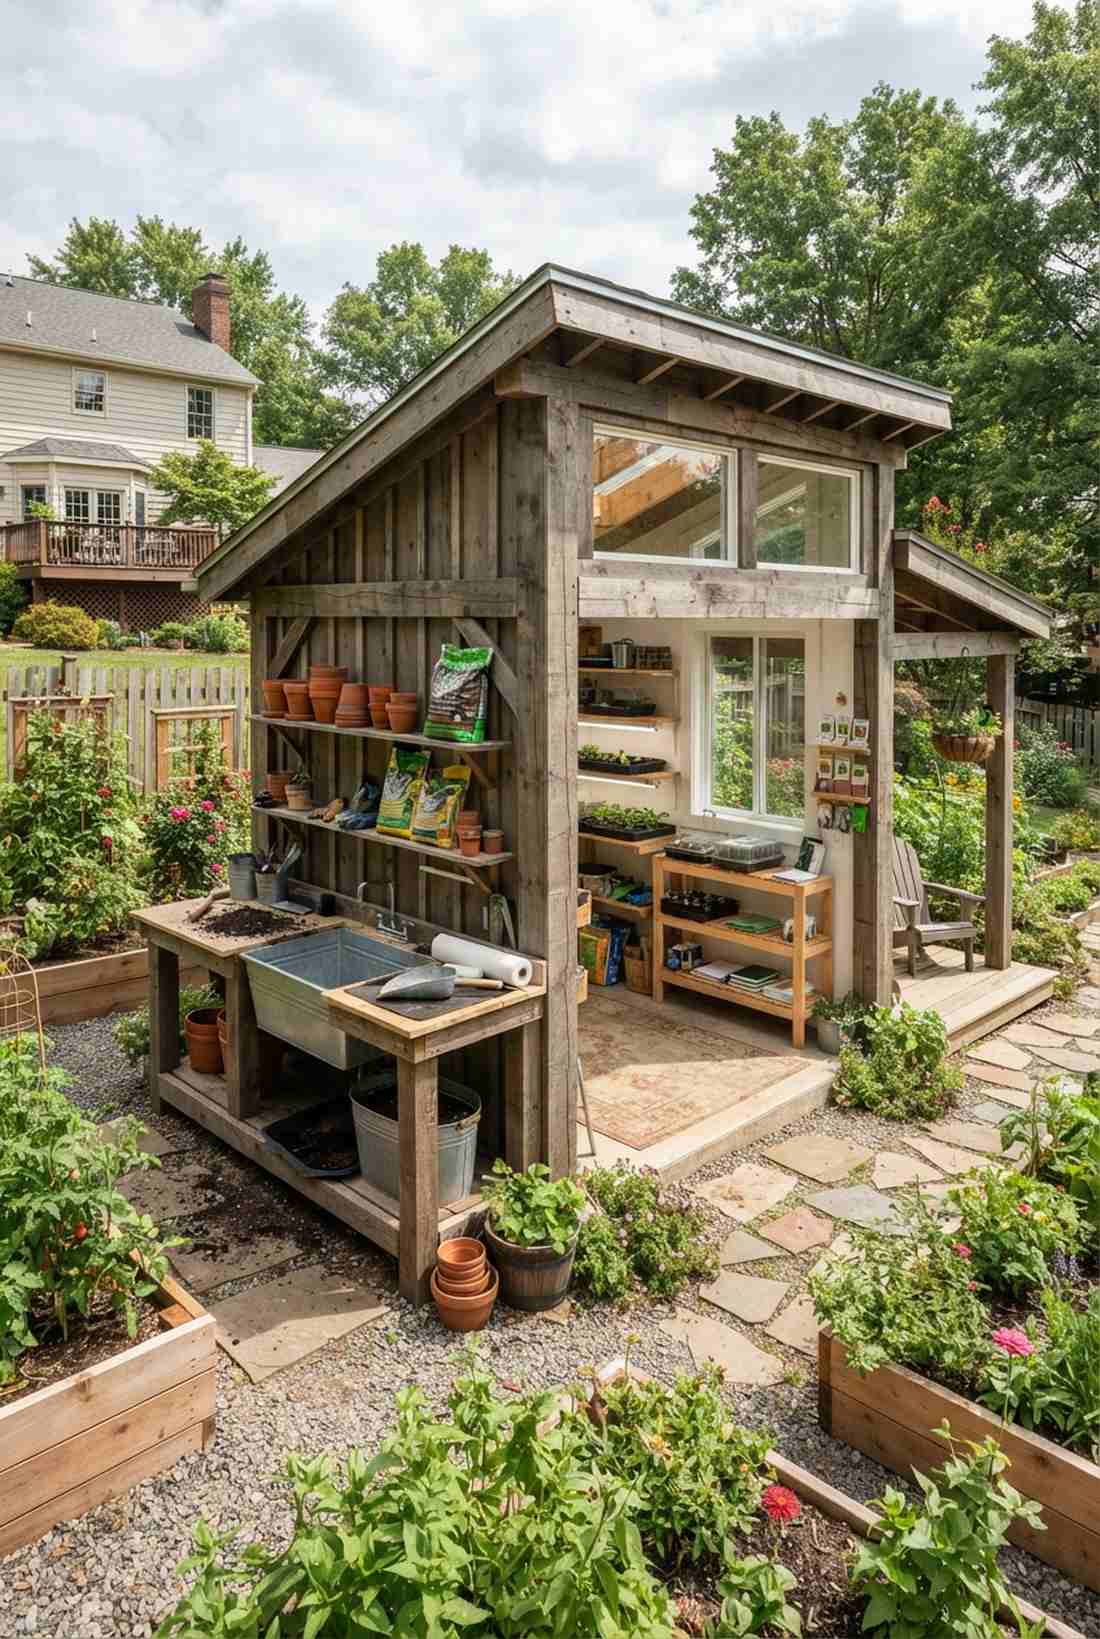
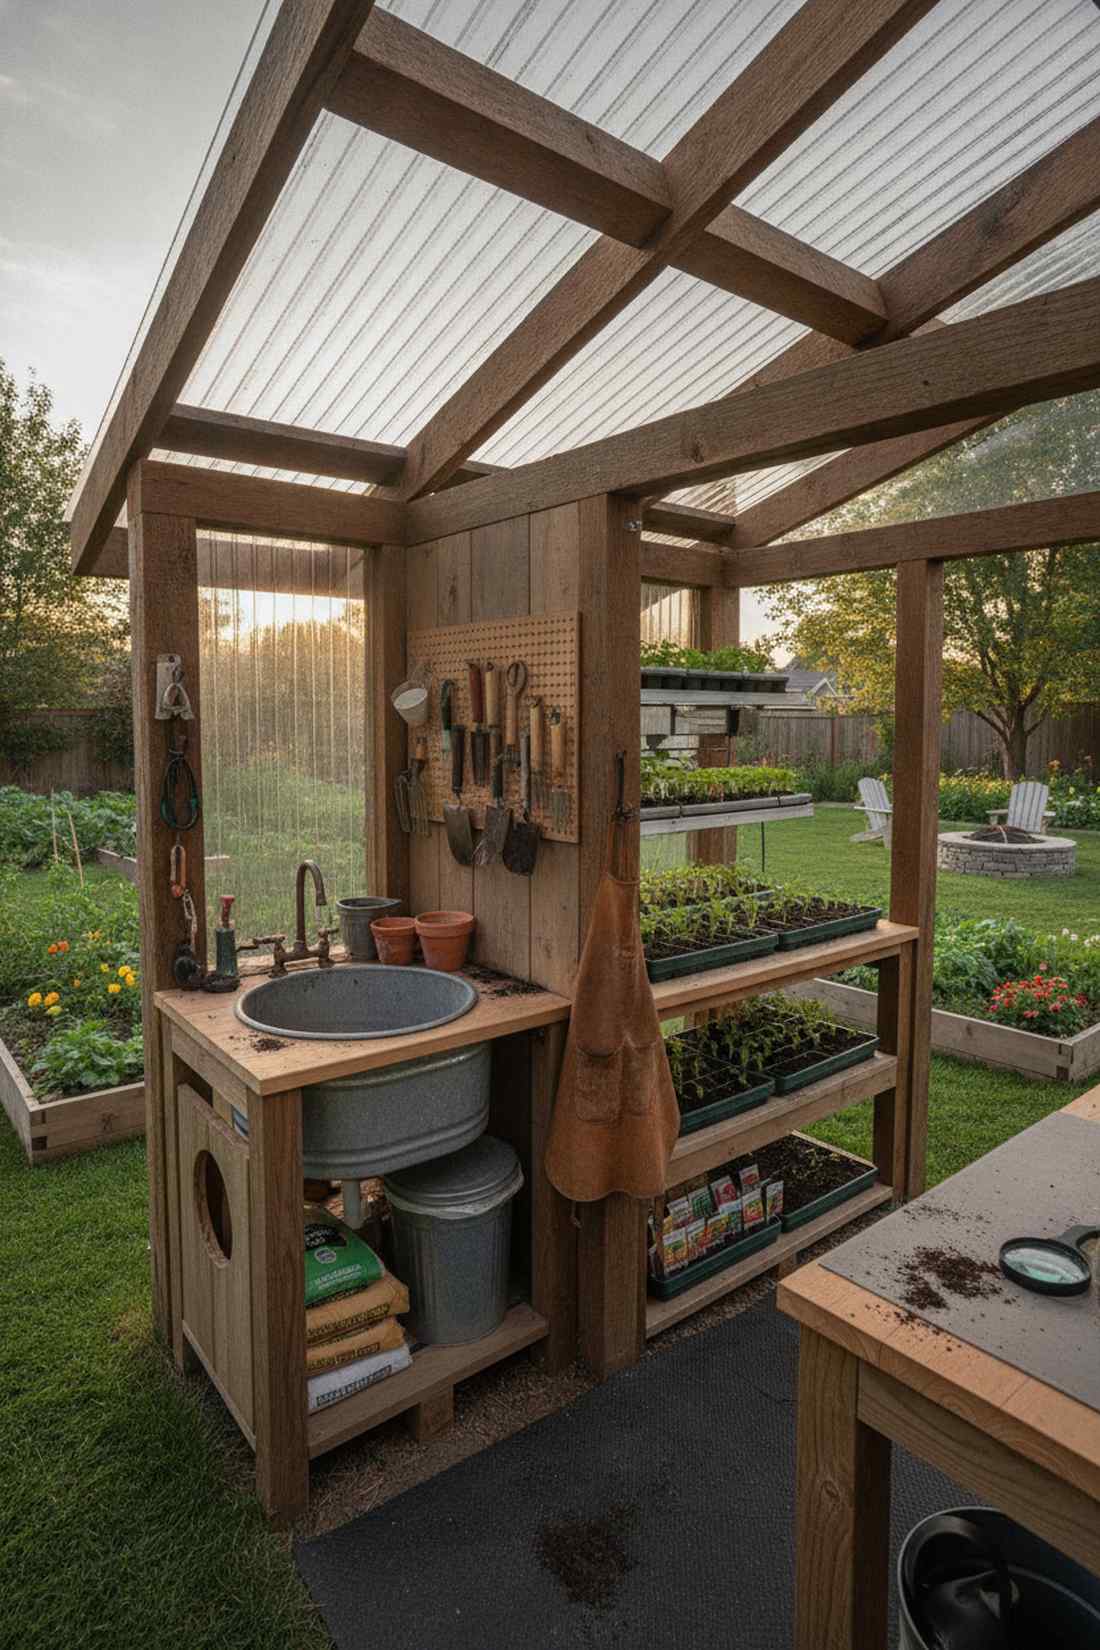

Feels like a master botanist’s field lab, this split-function structure handles messy soil work on one side and clean seed-starting on the other. It is the holy grail layout for serious gardeners.
Trying to cram dirty tools and delicate seedlings together always ends in disaster; building a physical half-wall separation solves the chaos entirely. Install a deep galvanized sink basin on the potting side to contain massive dirt spills and water overflows.
Adding the custom bench and sink setup costs roughly $250. Save this idea to your ultimate backyard farm board.
- Key Materials: Galvanized metal wash tubs, heavy timber framing
- Vibe / Style: Hardworking agrarian lab
- Difficulty: Intermediate
- Budget Breakdown: Metal Basin: $80 | Lumber: $120 | Shelving: $40
- Creator’s Tip: Cut a large hole in the potting bench and place a hidden trash bin underneath for instant soil sweeping.
- Smart Sourcing: Pre-cut galvanized metal utility sinks and heavy-duty waterproof potting mats.
Most backyard growers waste money on massive glass houses, but the incredibly smart attached design coming up next changes everything…
Small Garden Greenhouse Designs
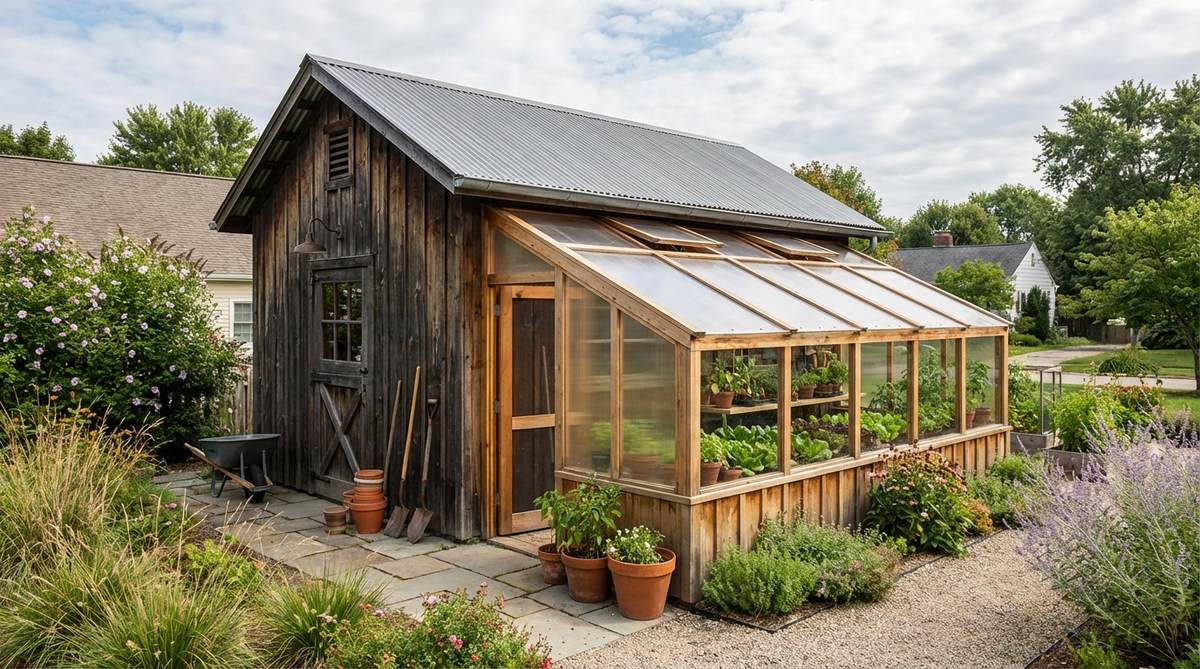
20. Lean-To Greenhouse
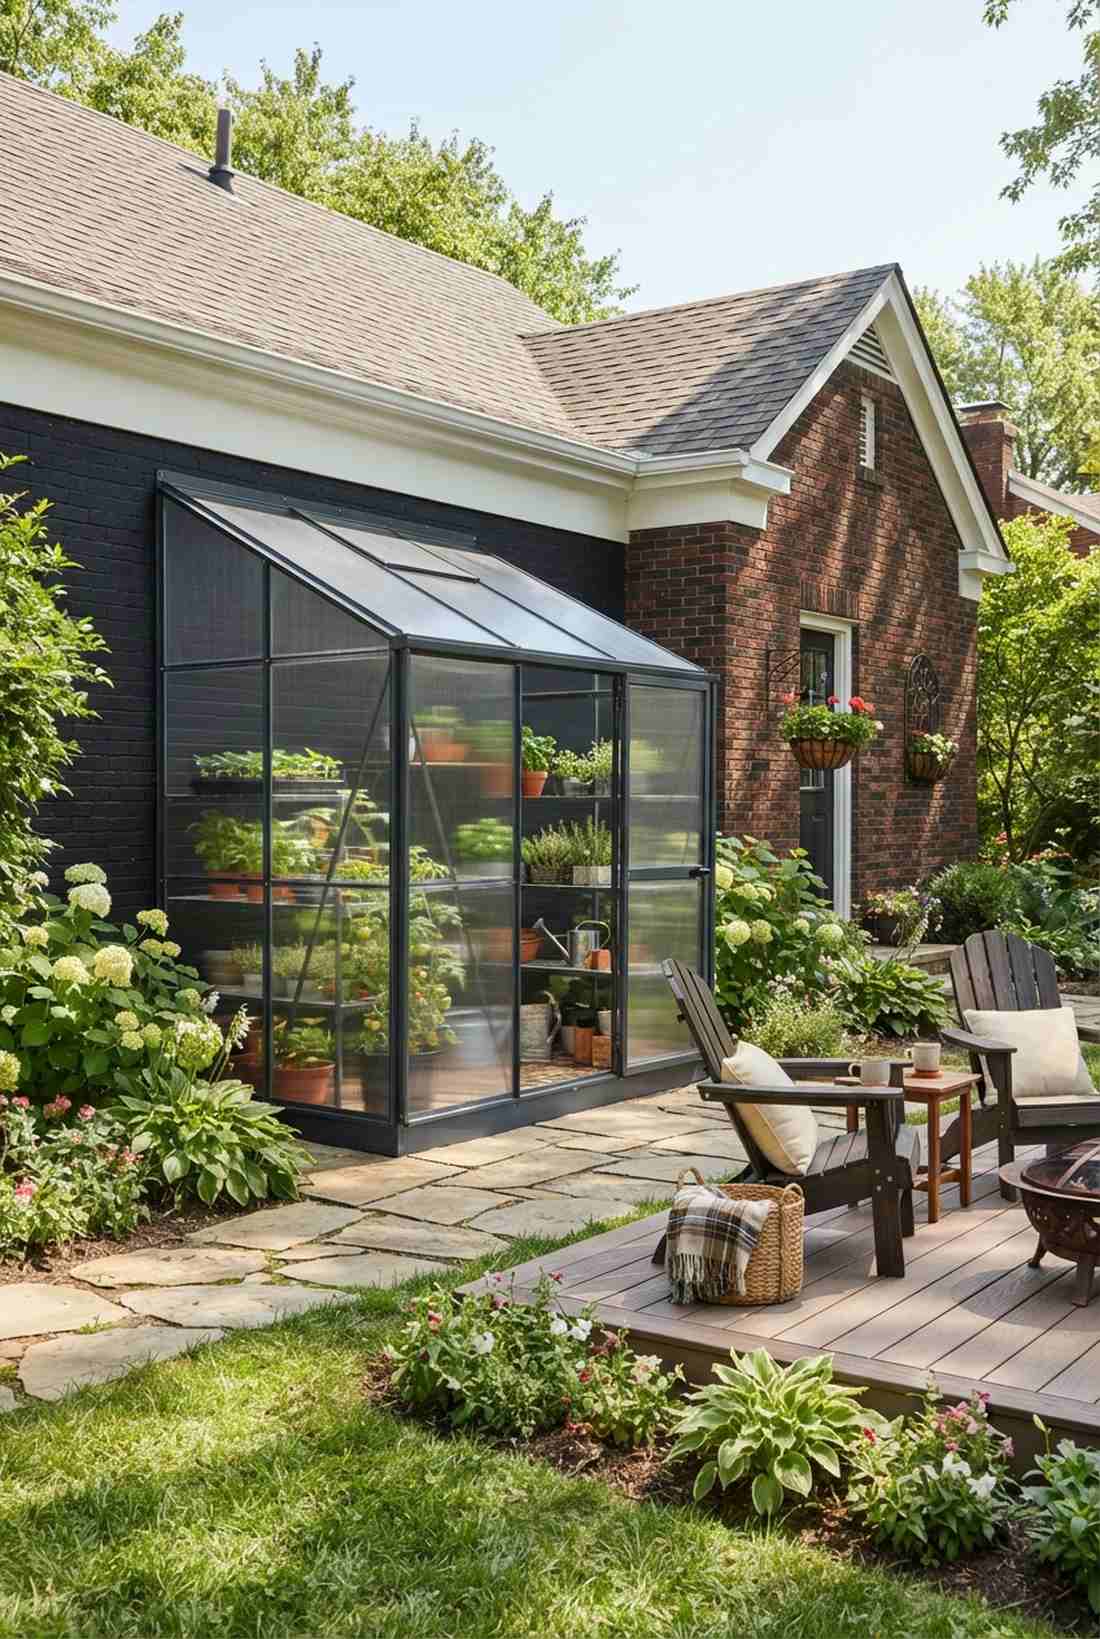
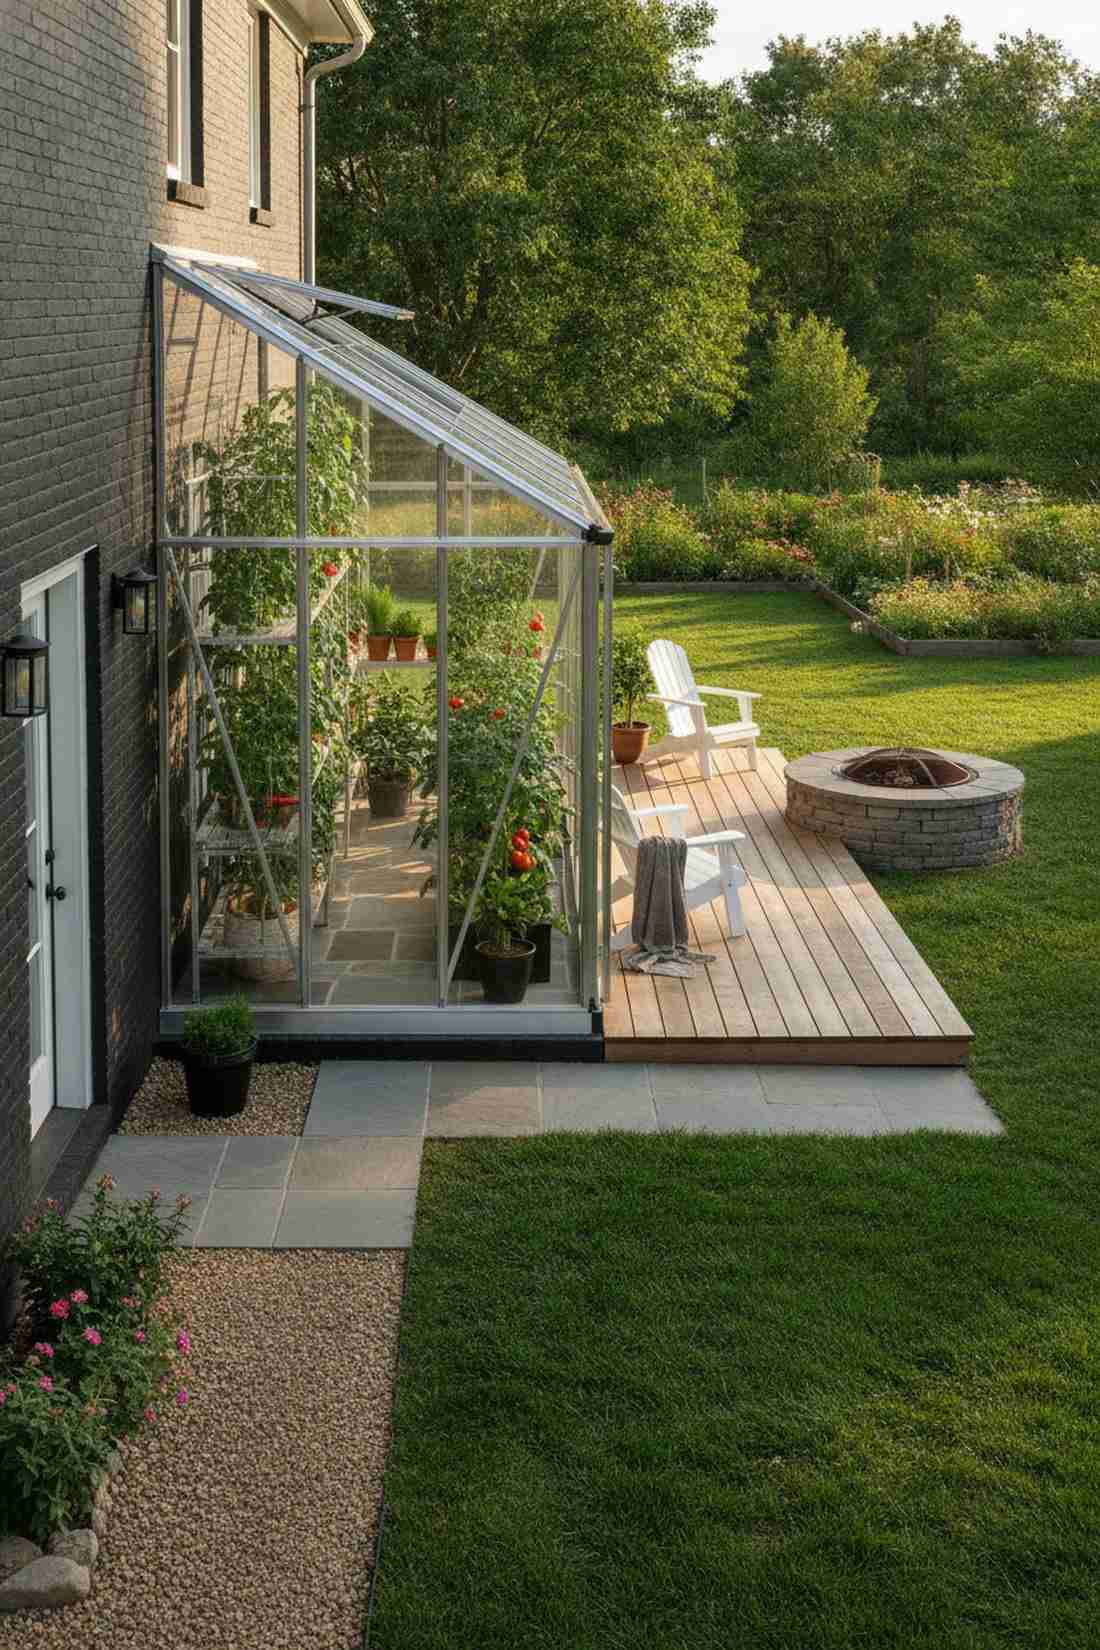
Straight out of a smart-living catalog, this attached sunroom hybrid absorbs ambient heat from your home’s exterior brick wall. This small garden greenhouse layout practically eliminates overnight frost threats.
Standalone glass boxes freeze fast, but leaching thermal mass from a shared wall looks far more expensive than it is and slashes heating bills. Utilize lightweight twin-wall polycarbonate sheets to construct a shatterproof, highly insulated growing zone.
A basic 6×4 lean-to kit costs between $300 and $600. It is a genius hack for extending your tomato growing season.
- Key Materials: Aluminum framing kits, twin-wall polycarbonate
- Vibe / Style: Modern attached conservatory
- Difficulty: Moderate assembly
- Budget Breakdown: Frame Kit: $350 | Wall Anchors: $30 | Sealant: $20
- Creator’s Tip: Paint the brick wall behind the greenhouse black to absorb massive amounts of solar radiation during the day.
- Smart Sourcing: Pre-drilled aluminum lean-to greenhouse kits and UV-coated weather sealants.
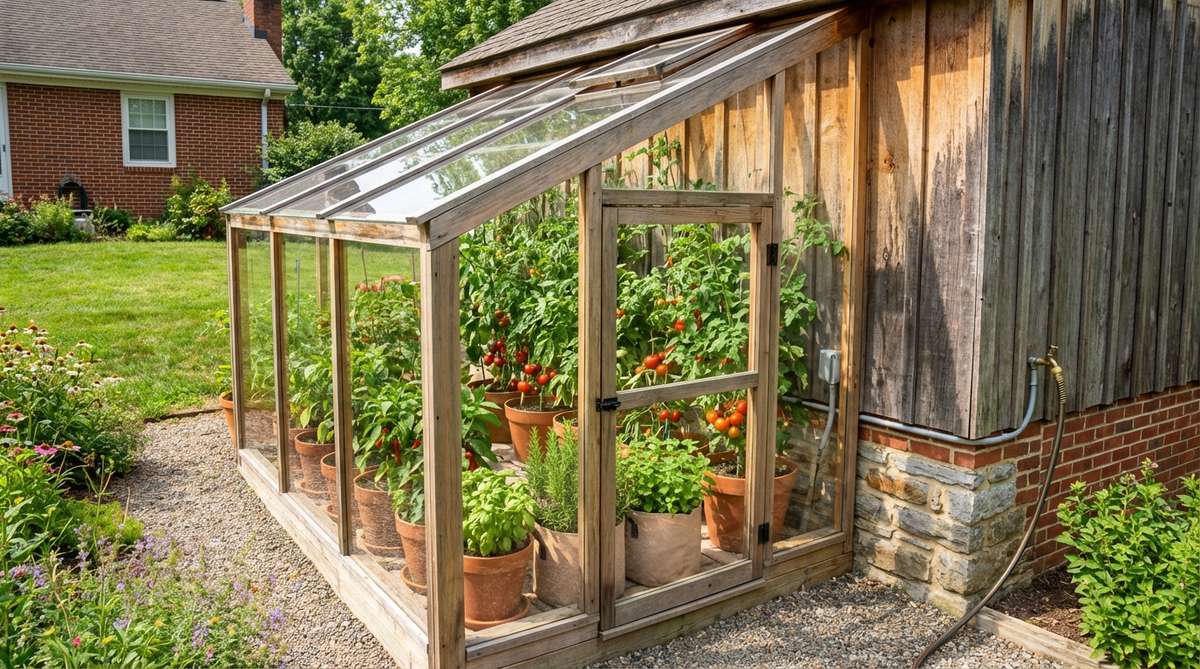
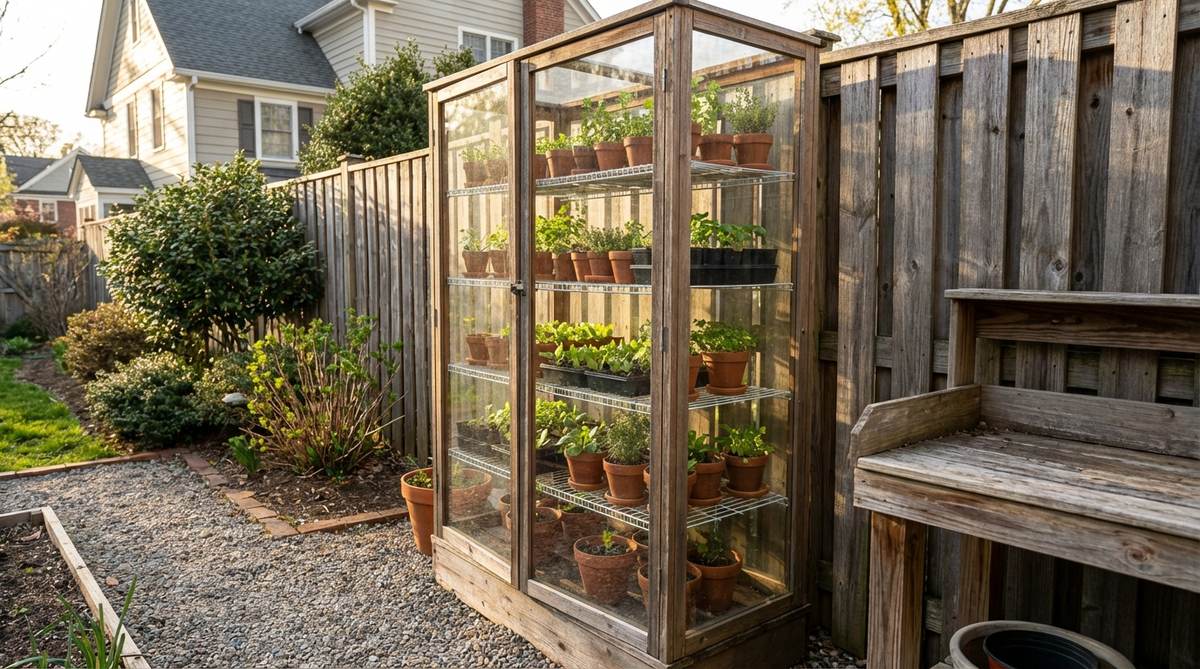
21. Cold Frame Storage Combo
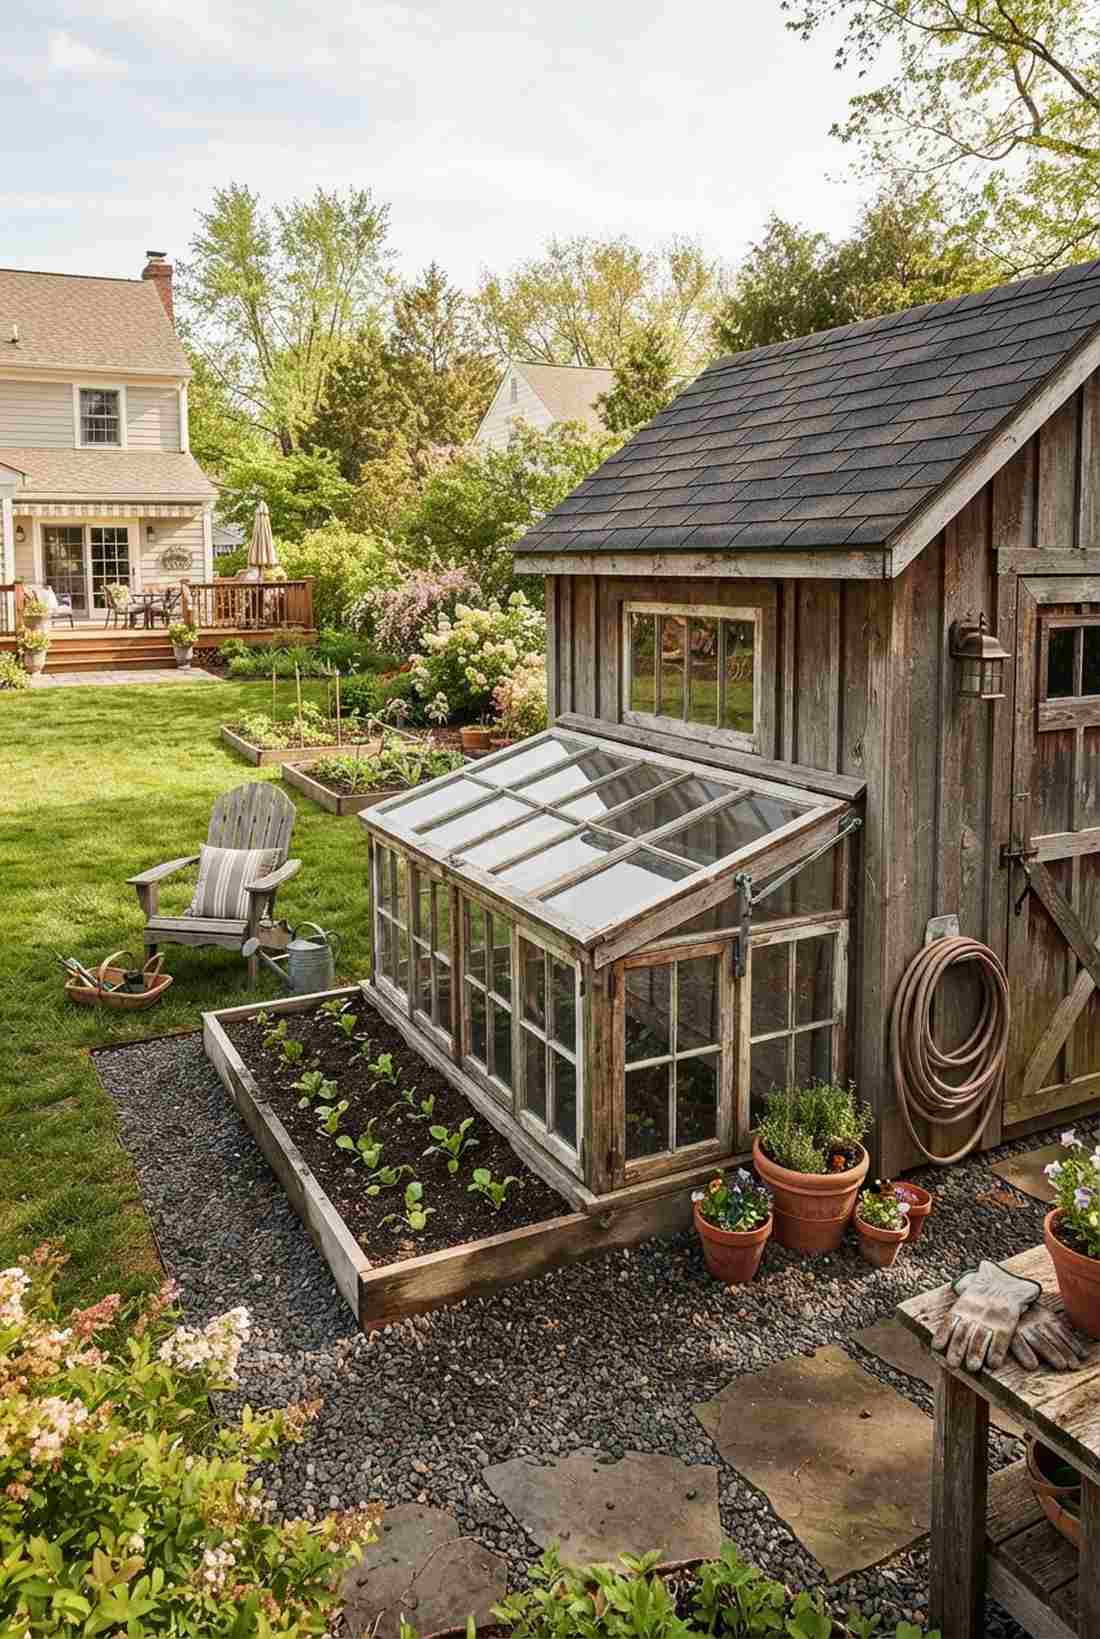
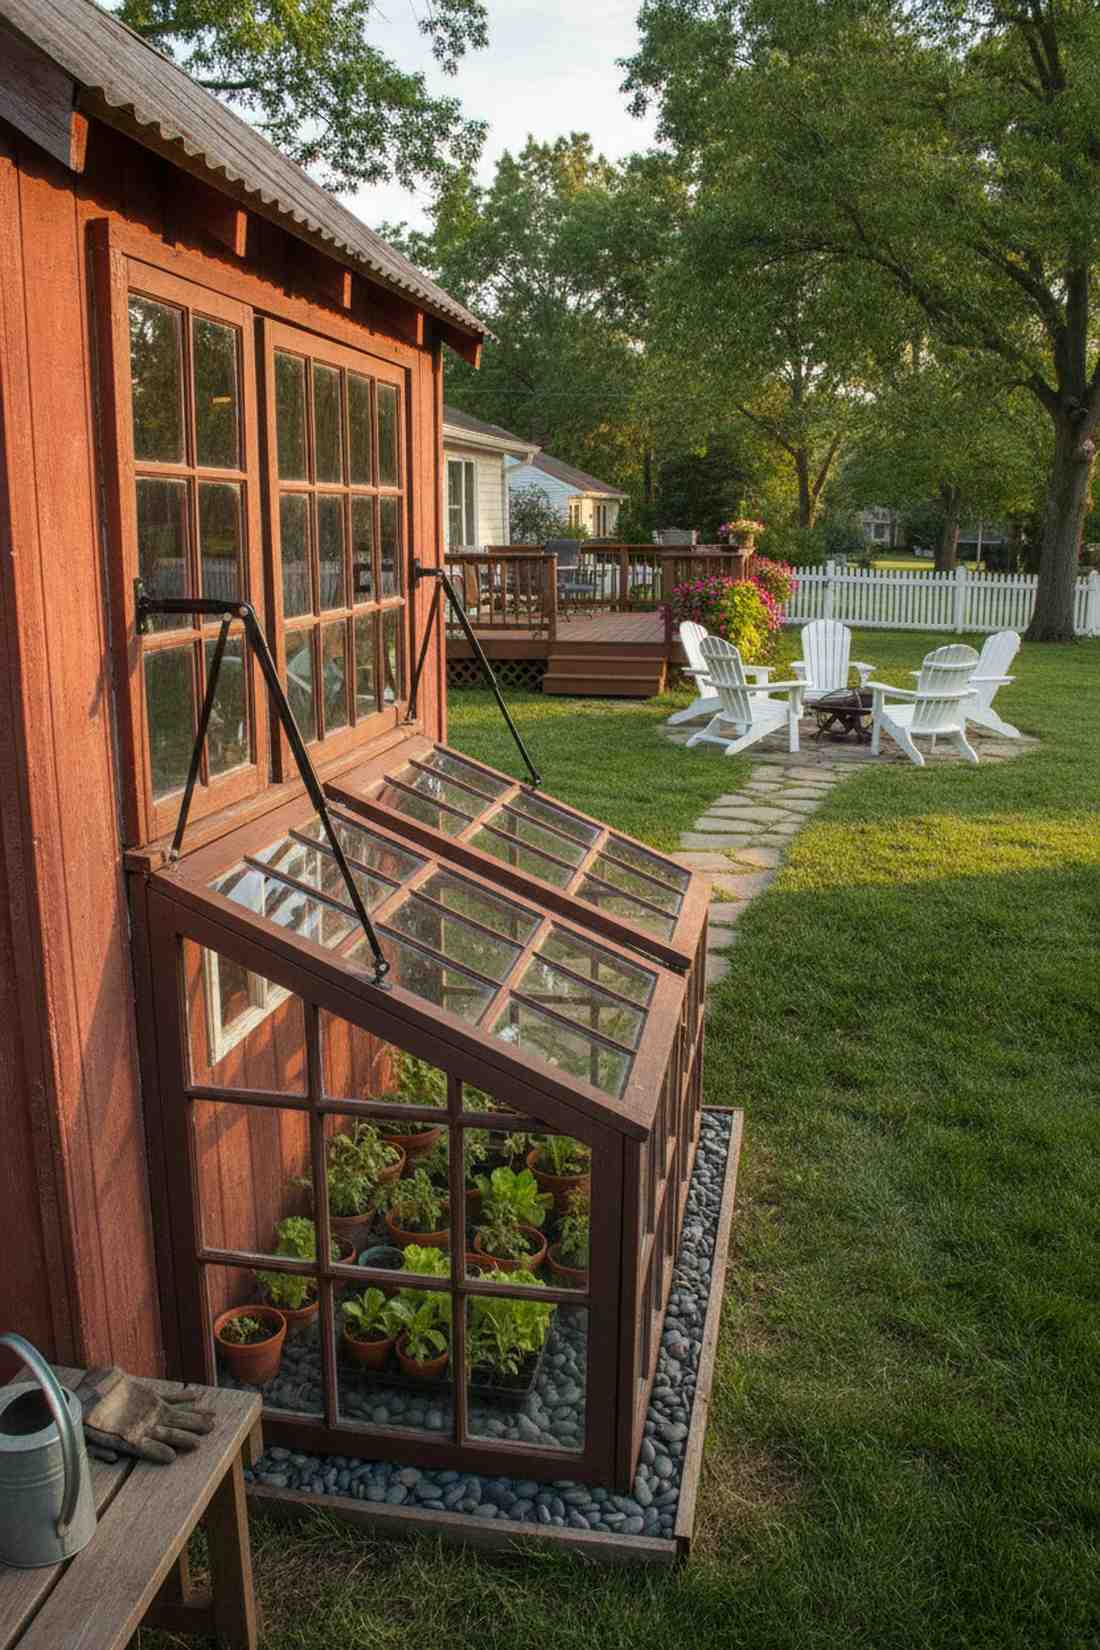
Captures a vintage homesteading vibe, this low-profile glass extension jutting from the shed base is brilliant for hardening off tender seedlings. It keeps your backyard visually uncluttered.
Don’t build a separate greenhouse if you don’t have to; bolting a pitched glass box to the sunny side of your existing shed saves massive space. Equip it with automatic thermal vent openers that pop the lid when temperatures spike while you are at work.
Constructing this add-on costs barely $100. Pin this if you want to kickstart your spring planting early.
- Key Materials: Old reclaimed windows, automatic vent arms
- Vibe / Style: Clever upcycled utility
- Difficulty: Easy beginner build
- Budget Breakdown: Windows: $0 (reclaimed) | Wood: $40 | Auto-Vent: $50
- Creator’s Tip: Line the bottom of the cold frame with dark gravel to hold heat and drain excess water away from delicate roots.
- Smart Sourcing: Heat-activated automatic greenhouse vent openers and pre-cut greenhouse plastic rolls.
22. Vertical Greenhouse Tower
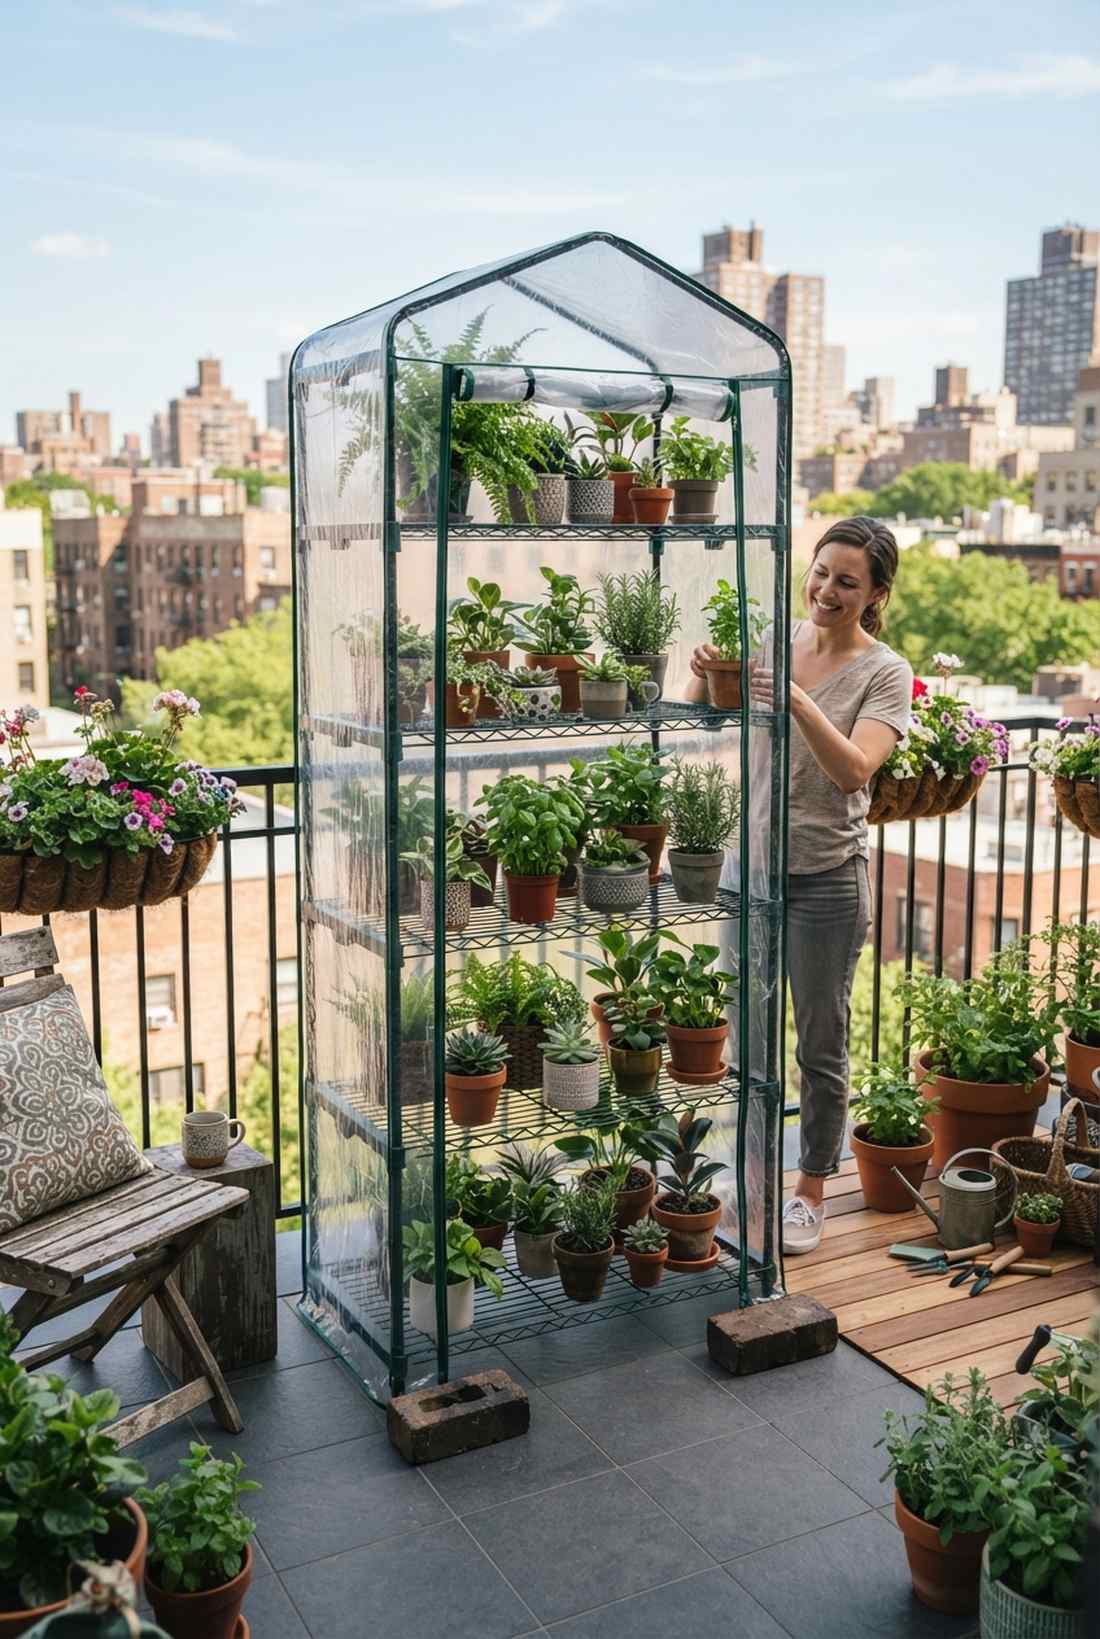
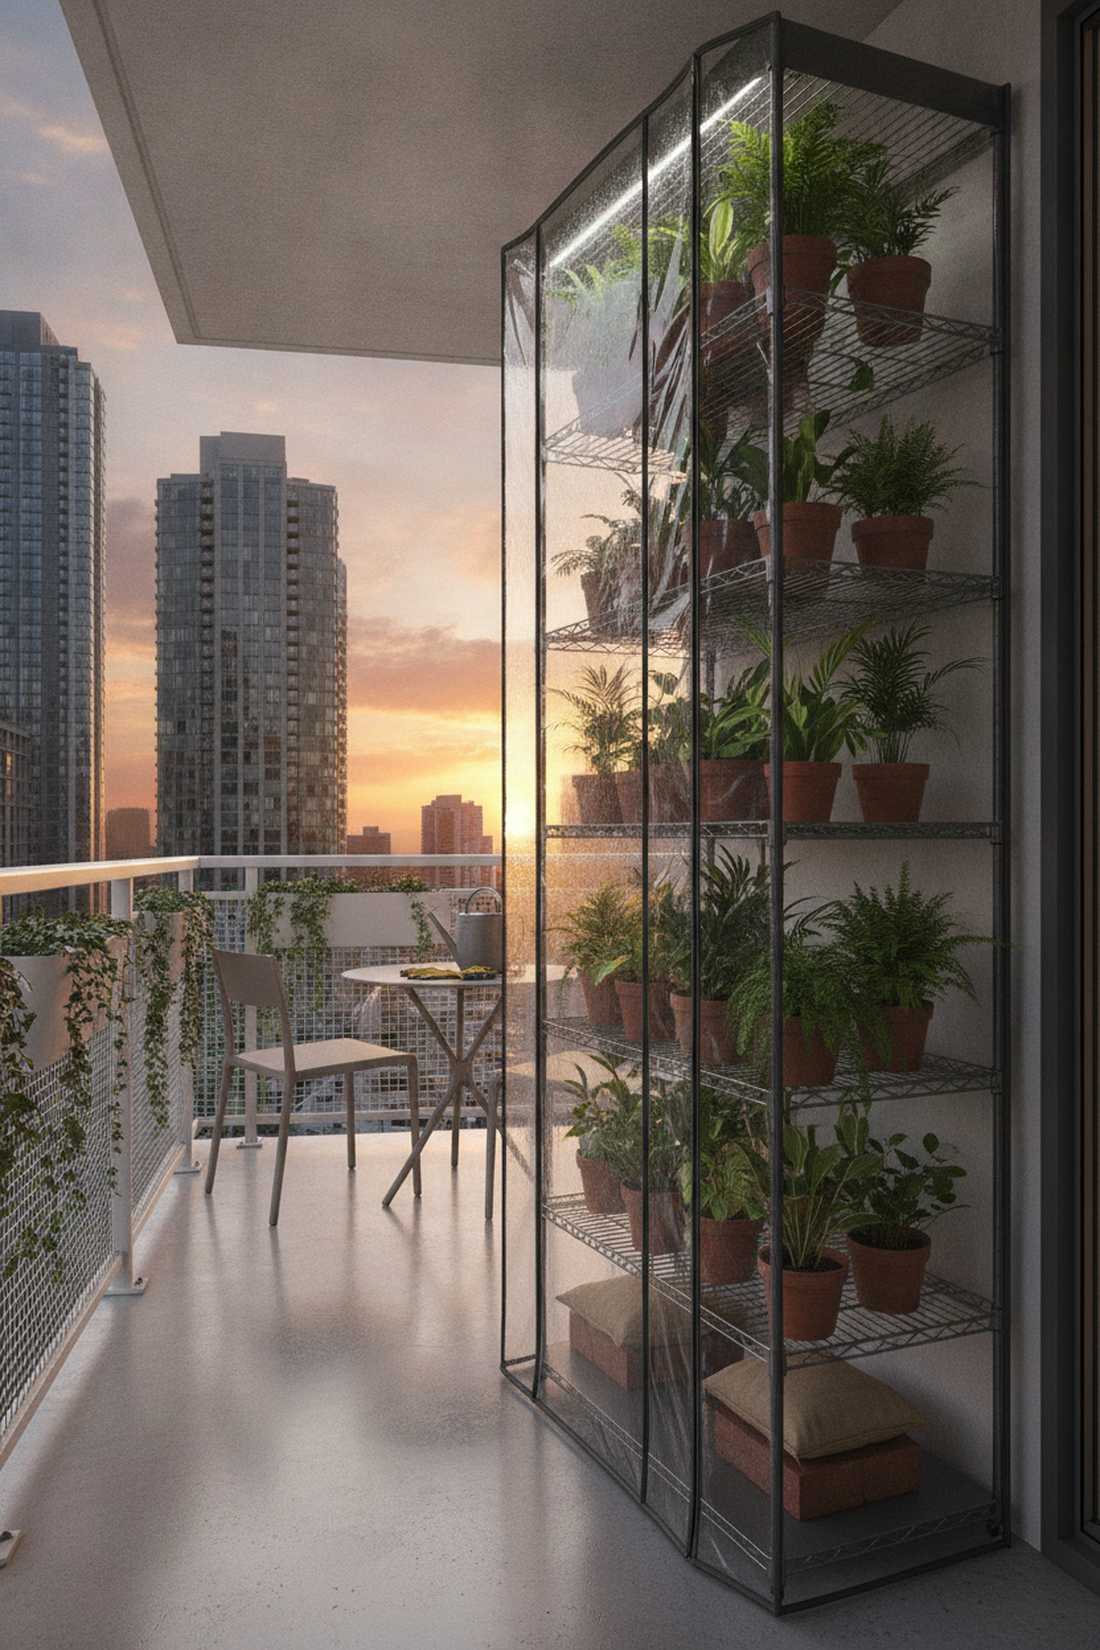
Feels like a modern urban oasis, this tall tiered growing cabinet fits snugly on a tiny apartment balcony. It maximizes sun exposure for dozens of pots in a mere 3×3 footprint.
Most miniature garden supplies get lost on the ground, but a tower design brings every delicate fern perfectly to eye level. Wrap a sturdy wire-rack tower in custom-fitted PVC zip-covers to create an instant, ultra-cheap micro-climate.
You can buy or build this complete setup for under $80. Highly recommended for city dwellers craving a tropical jungle.
- Key Materials: Wire shelving unit, heavy-duty clear PVC cover
- Vibe / Style: Vertical urban jungle
- Difficulty: Very easy
- Budget Breakdown: Wire Rack: $50 | Custom Cover: $25
- Creator’s Tip: Place heavy bricks or sandbags on the very bottom shelf to prevent the tall tower from blowing over in strong winds.
- Smart Sourcing: Heavy-duty 5-tier wire shelving units and reinforced clear PVC greenhouse replacement covers.
23. Greenhouse Lounge Space
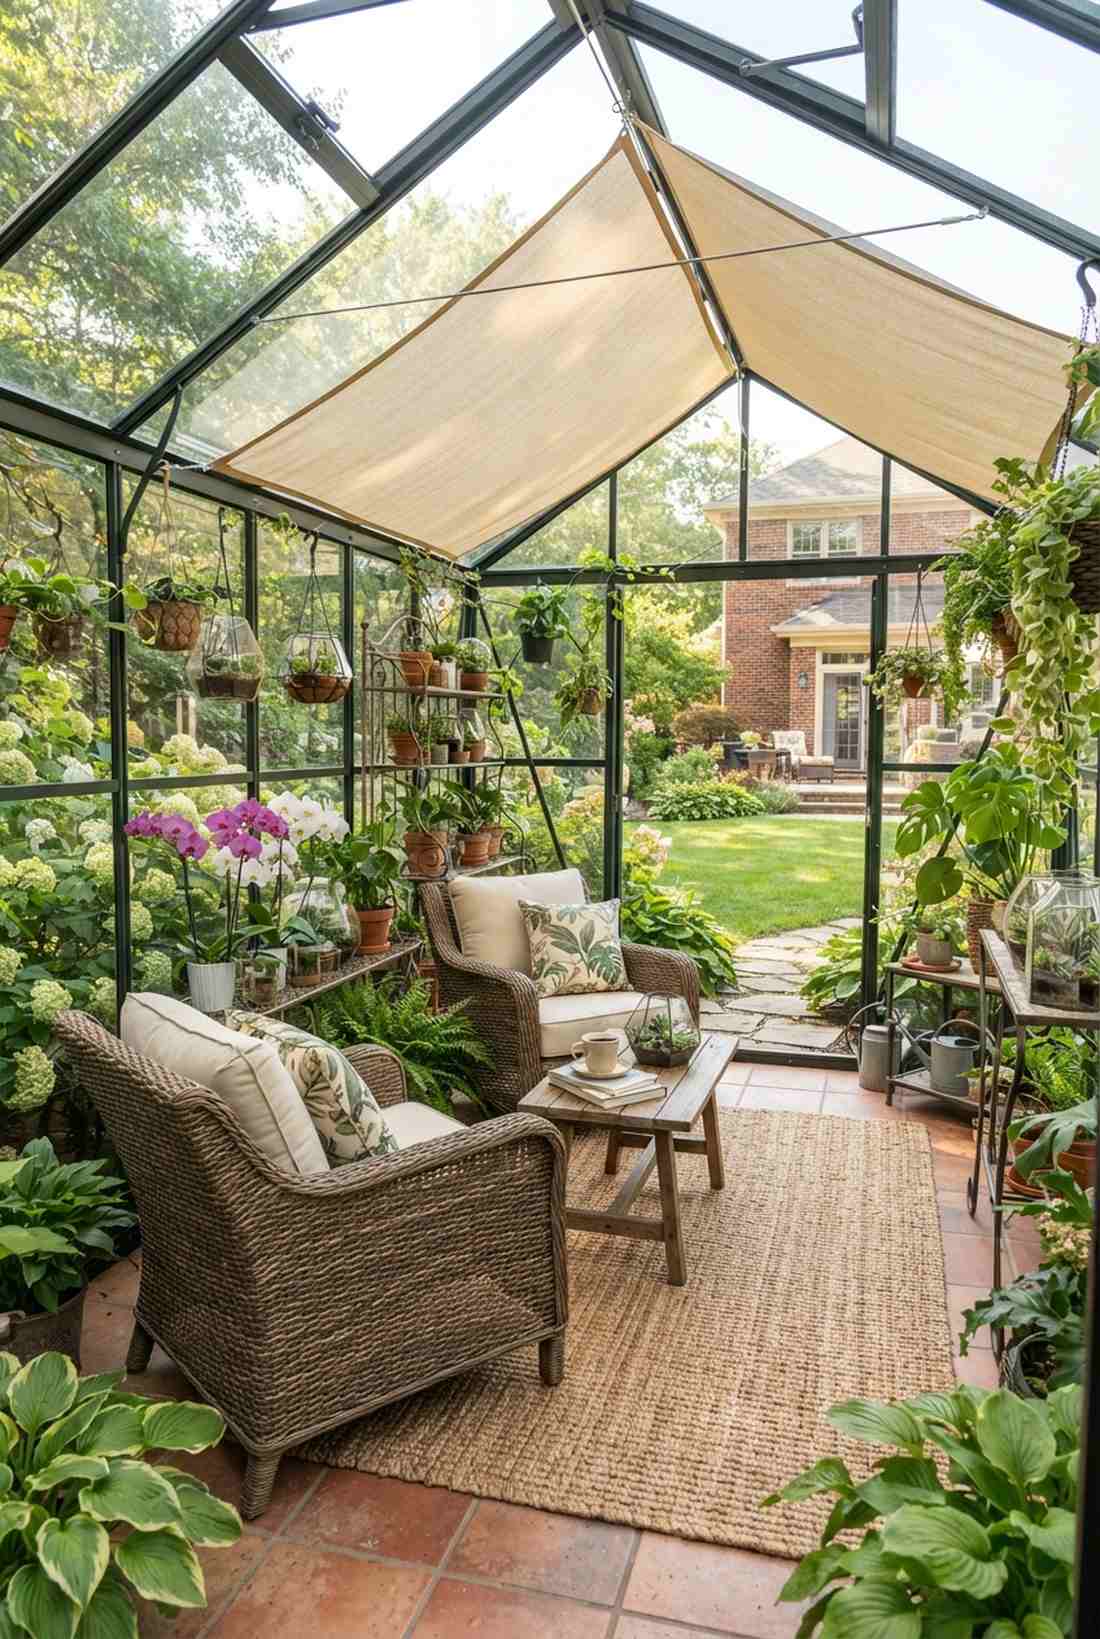
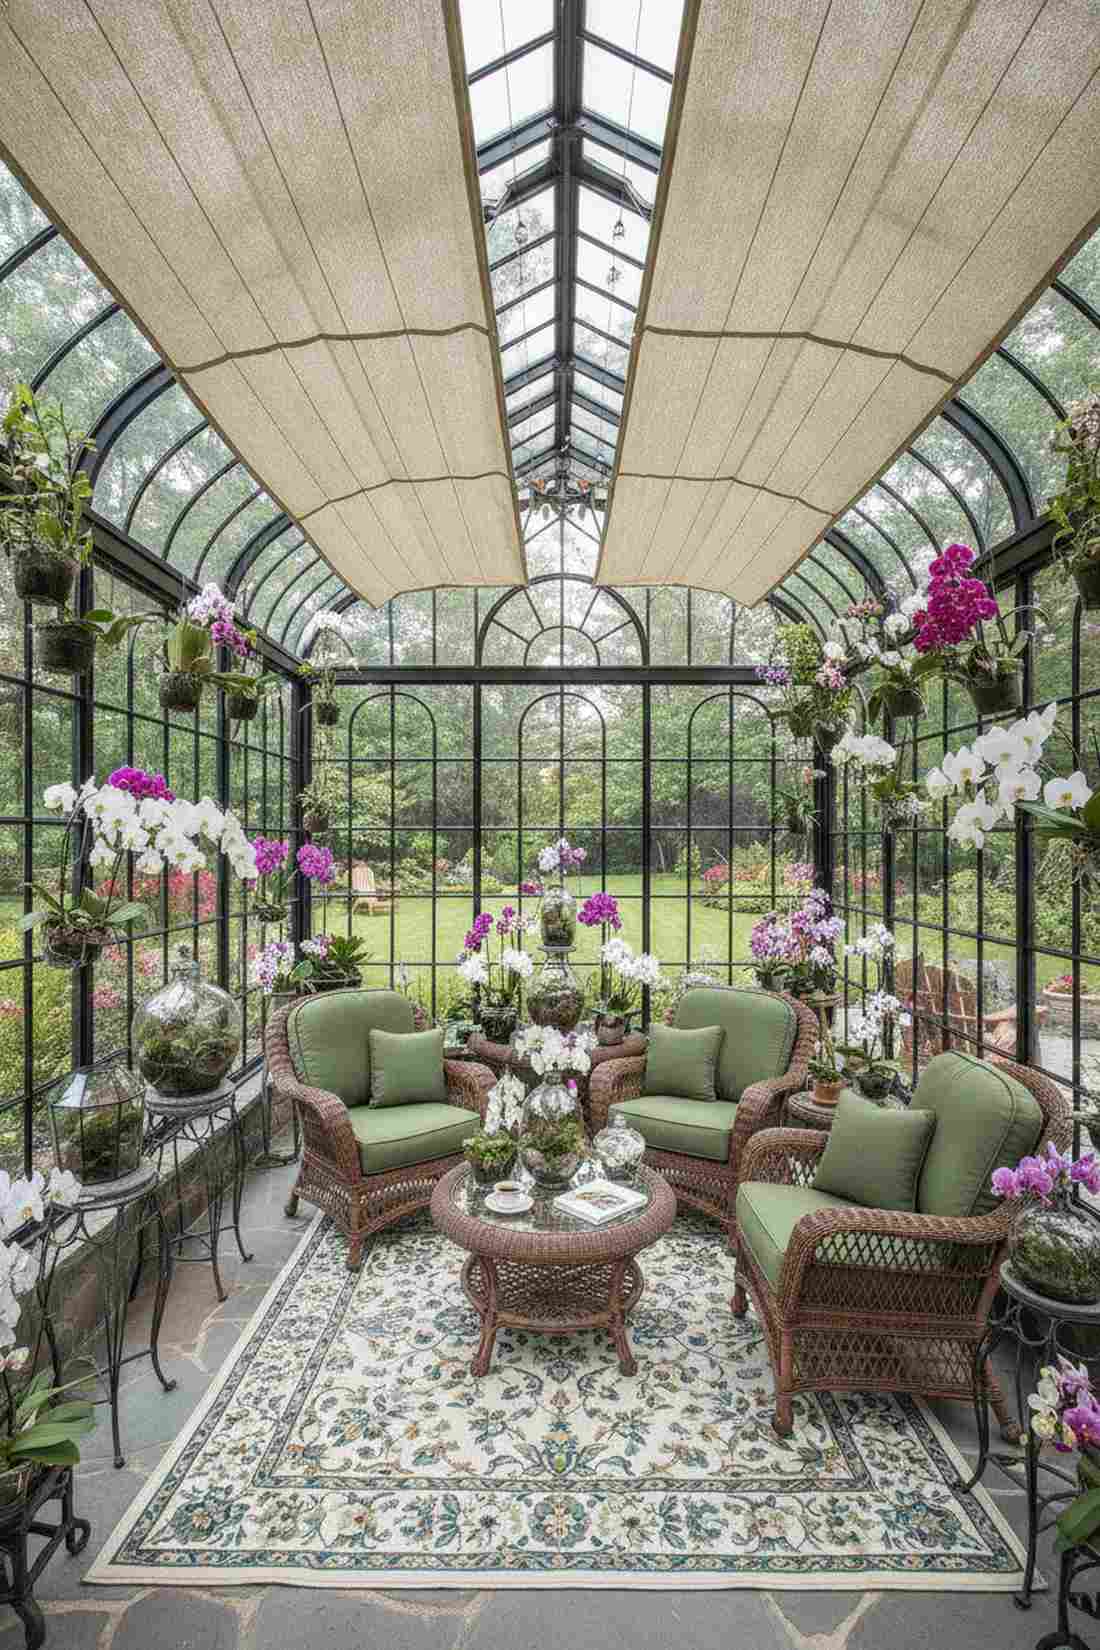
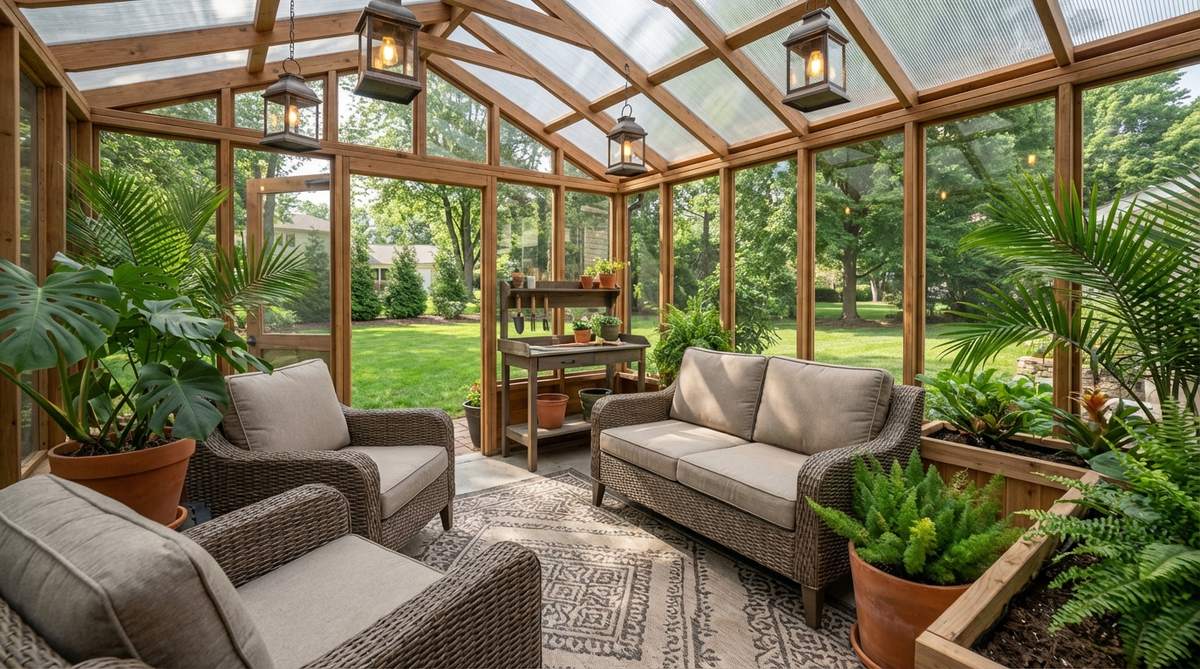
Emanates an intoxicating, lush conservatory energy, this glass-enclosed seating area immerses you completely in nature. It is the ultimate spot for morning coffee surrounded by blooming orchids.
The trick nobody tells you is that mixing wicker furniture directly with terrarium accessories gives a designer-level finish usually reserved for luxury botanical gardens. Install an overhead shade cloth on a sliding wire to prevent the afternoon sun from roasting your relaxation zone.
Dressing up an existing greenhouse into a lounge costs about $200 in decor. Save this to your outdoor entertaining dream board.
- Key Materials: Resin wicker chairs, sliding sun-shade cloth
- Vibe / Style: Victorian botanical lounge
- Difficulty: Easy styling
- Budget Breakdown: Shade Cloth: $60 | Furniture: $120 | Rug: $40
- Creator’s Tip: Use outdoor-rated, waterproof fabrics for all cushions since the ambient humidity inside will ruin standard indoor pillows quickly.
- Smart Sourcing: UV-resistant sliding shade cloth kits and waterproof outdoor patio cushion sets.
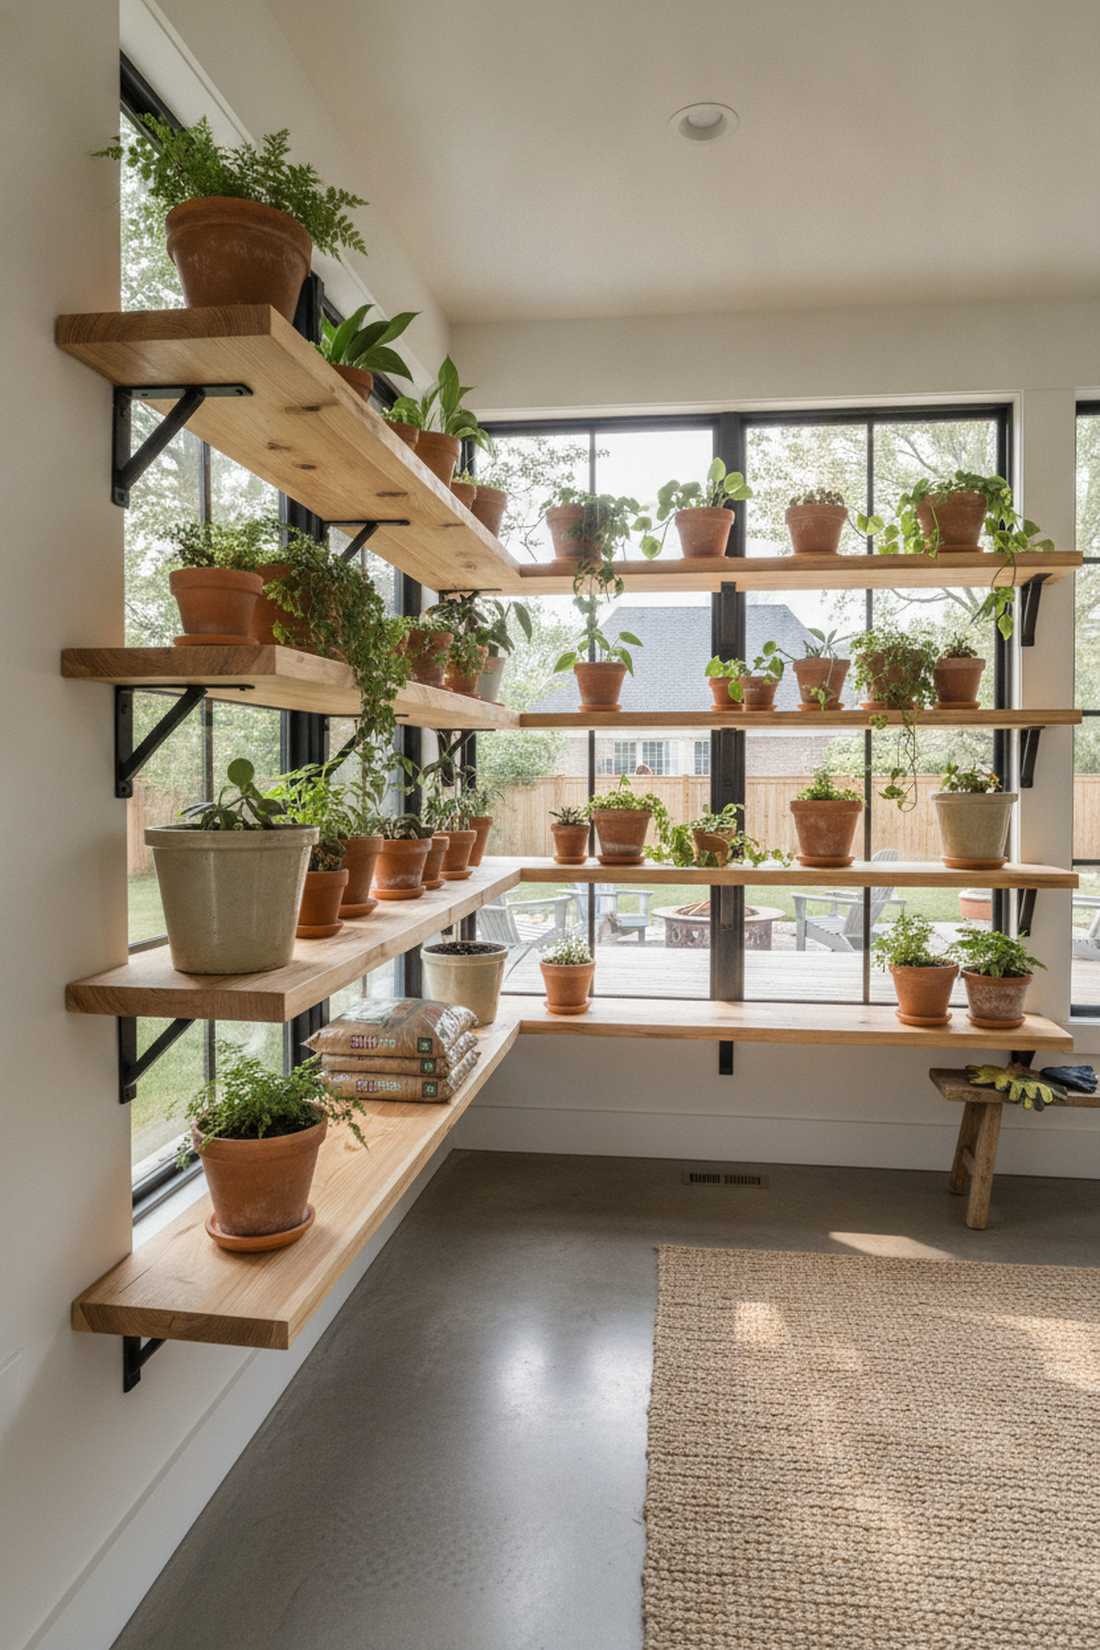
24. Windowsill Propagation Shed
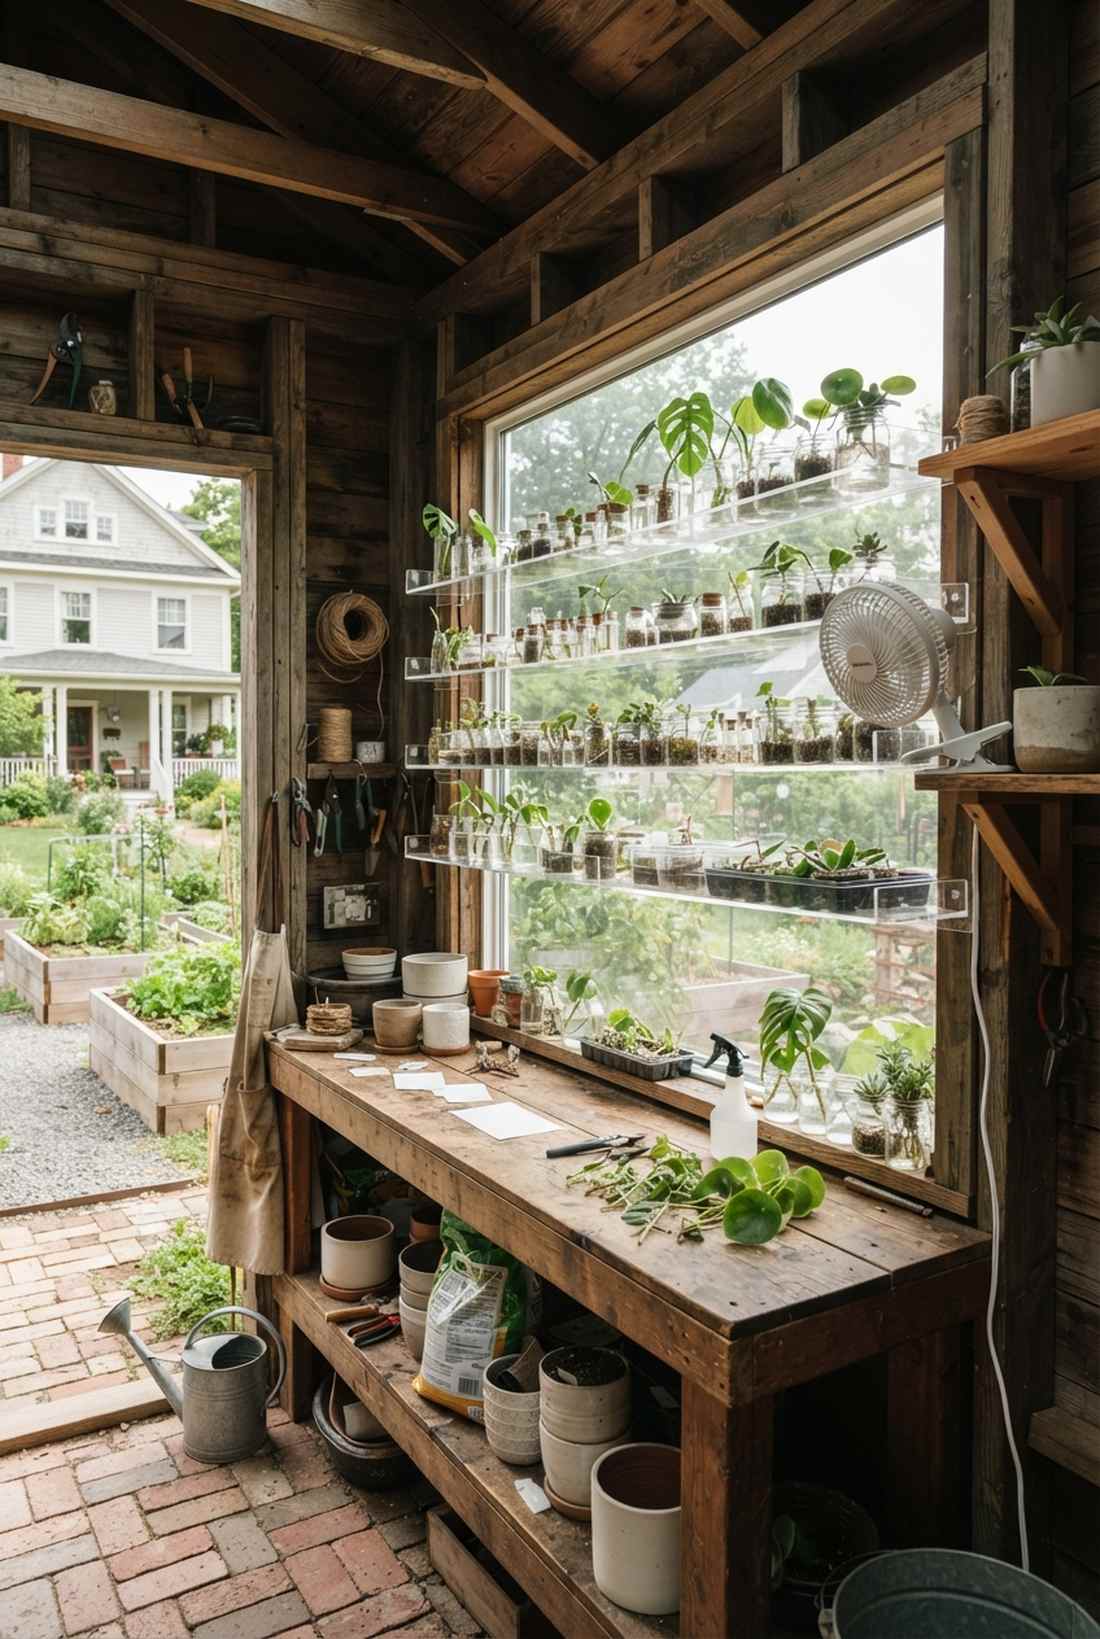
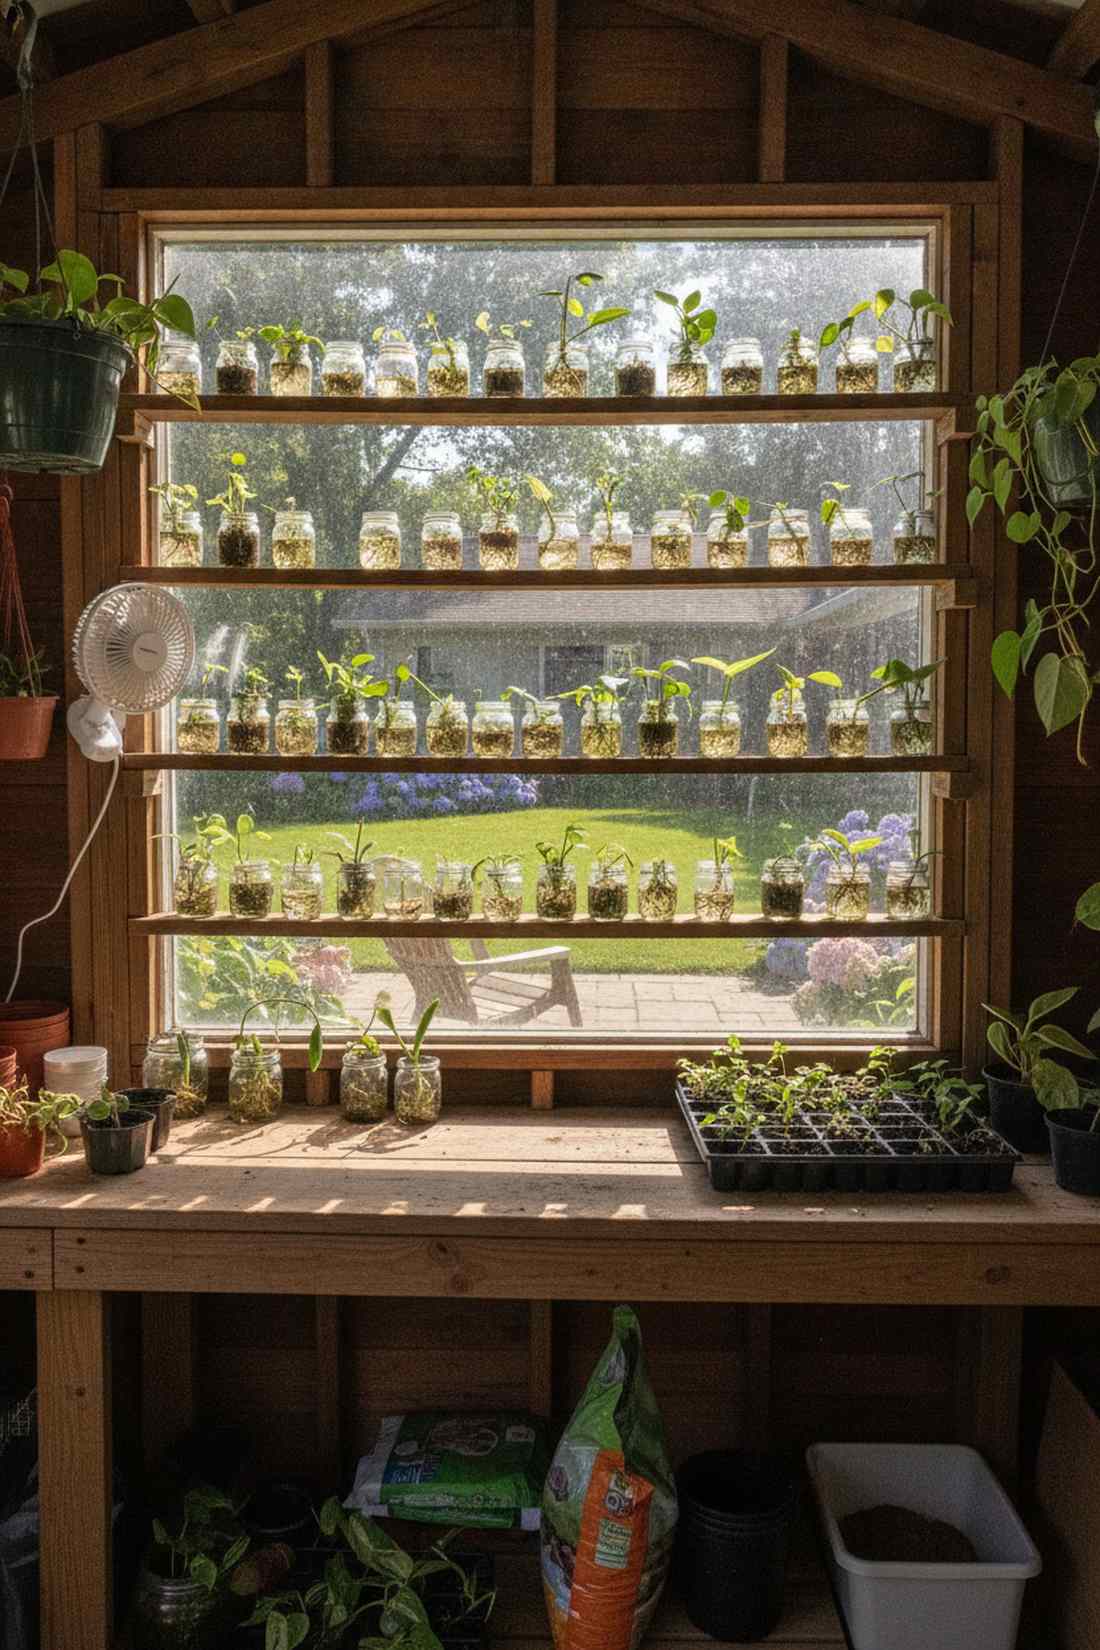
Feels like a dedicated botanical laboratory, this oversized window workbench transforms standard sunlight into an explosive growth zone. Perfectly suited for cloning rare houseplant cuttings.
Skip the expensive full-glass structures; simply retrofitting one giant south-facing window into your wooden shed delivers a surprisingly premium look and perfect propagation conditions. Add tiered acrylic shelves directly across the glass to triple your seedling capacity.
The window retrofit and shelving will cost around $150. A must-do upgrade for obsessive plant collectors.
- Key Materials: Reclaimed picture window, acrylic shelving strips
- Vibe / Style: Bright propagation lab
- Difficulty: Moderate window installation
- Budget Breakdown: Window: $80 | Acrylic Shelves: $45 | Caulk: $15
- Creator’s Tip: Mount a small, quiet oscillating fan nearby to strengthen seedling stems and prevent damp-off fungus from forming.
- Smart Sourcing: Pre-cut clear acrylic shelf brackets (bulk pack) and clip-on oscillating grow fans.
Before you run out and buy materials, reading this next quick comparison will save you from making a huge aesthetic mistake…
Material Guide: Cheap vs. Premium Aesthetic
Knowing exactly where to save and where to spend makes all the difference in achieving that “looks expensive but isn’t” vibe for your backyard structures.
- Standard vs. UV-Resistant/Premium: Cheap plastics shatter and fade yellow in one summer. Upgrading to UV-coated polycarbonate and weather-treated cedar stops fading and ensures your setup survives extreme winters.
- Pre-made Kits vs. Sourcing Locally: While buying raw lumber sounds cheaper, professional starter kits often save both time and money because they include pre-measured, specialized hardware that is impossible to find at local hardware stores.
Small Garden Gazebo Spaces
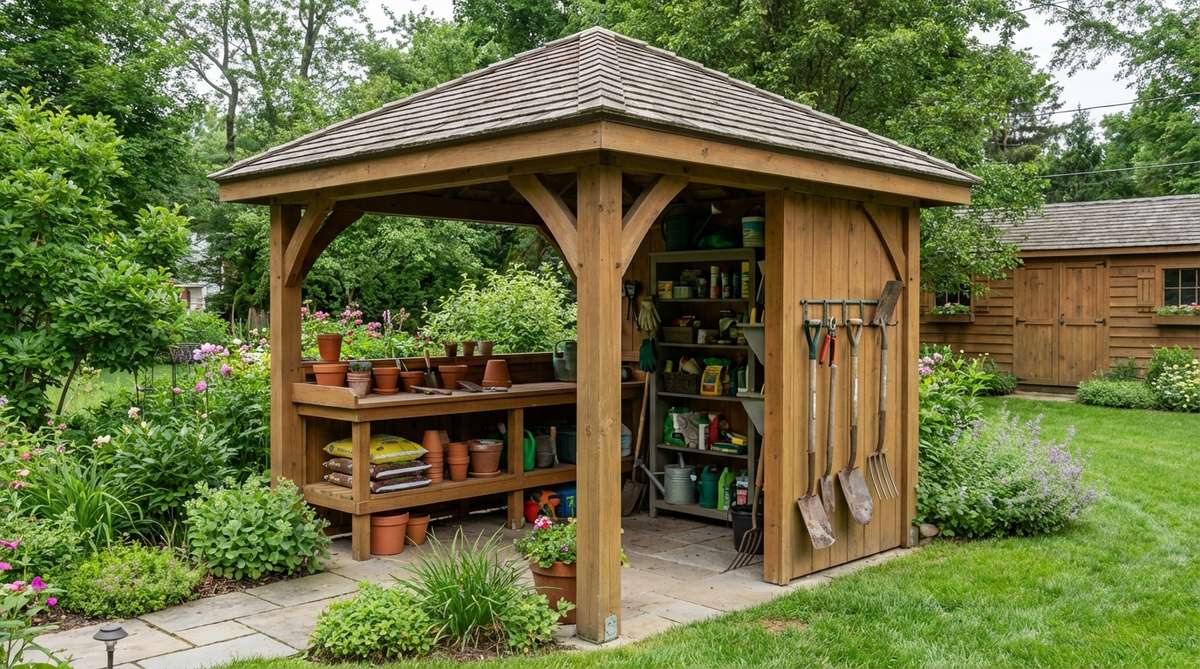
25. Storage Bench Gazebo
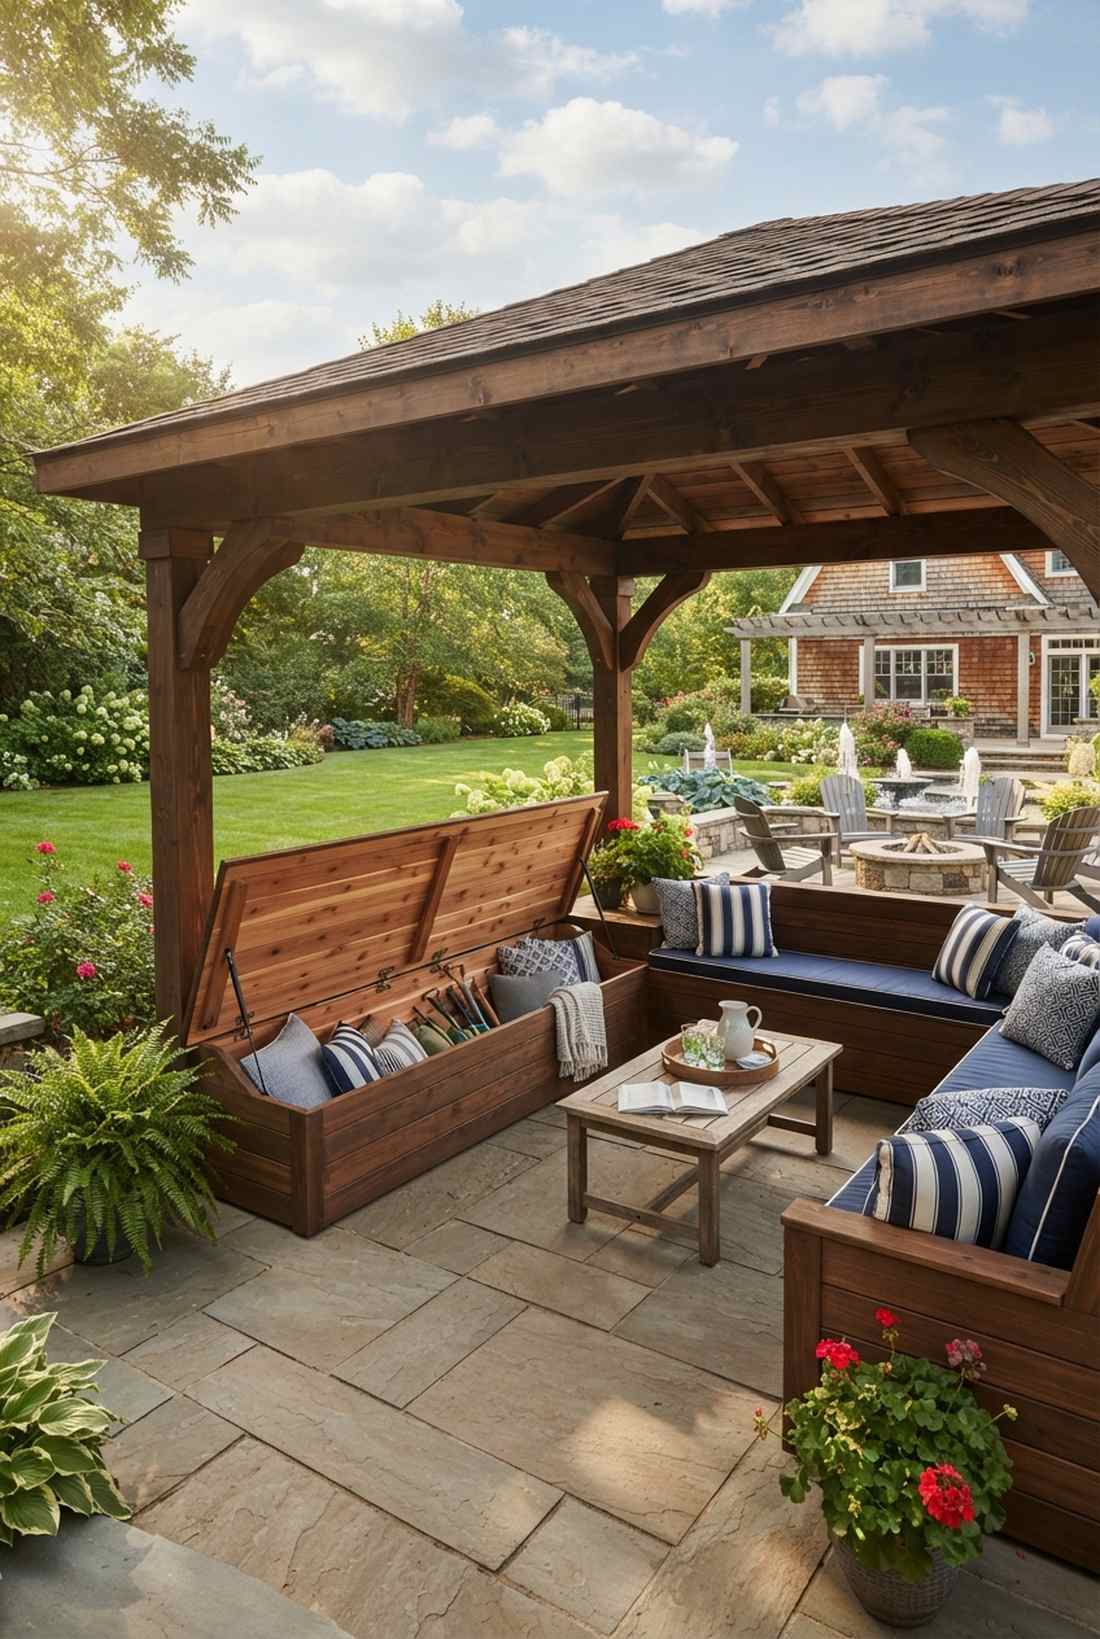
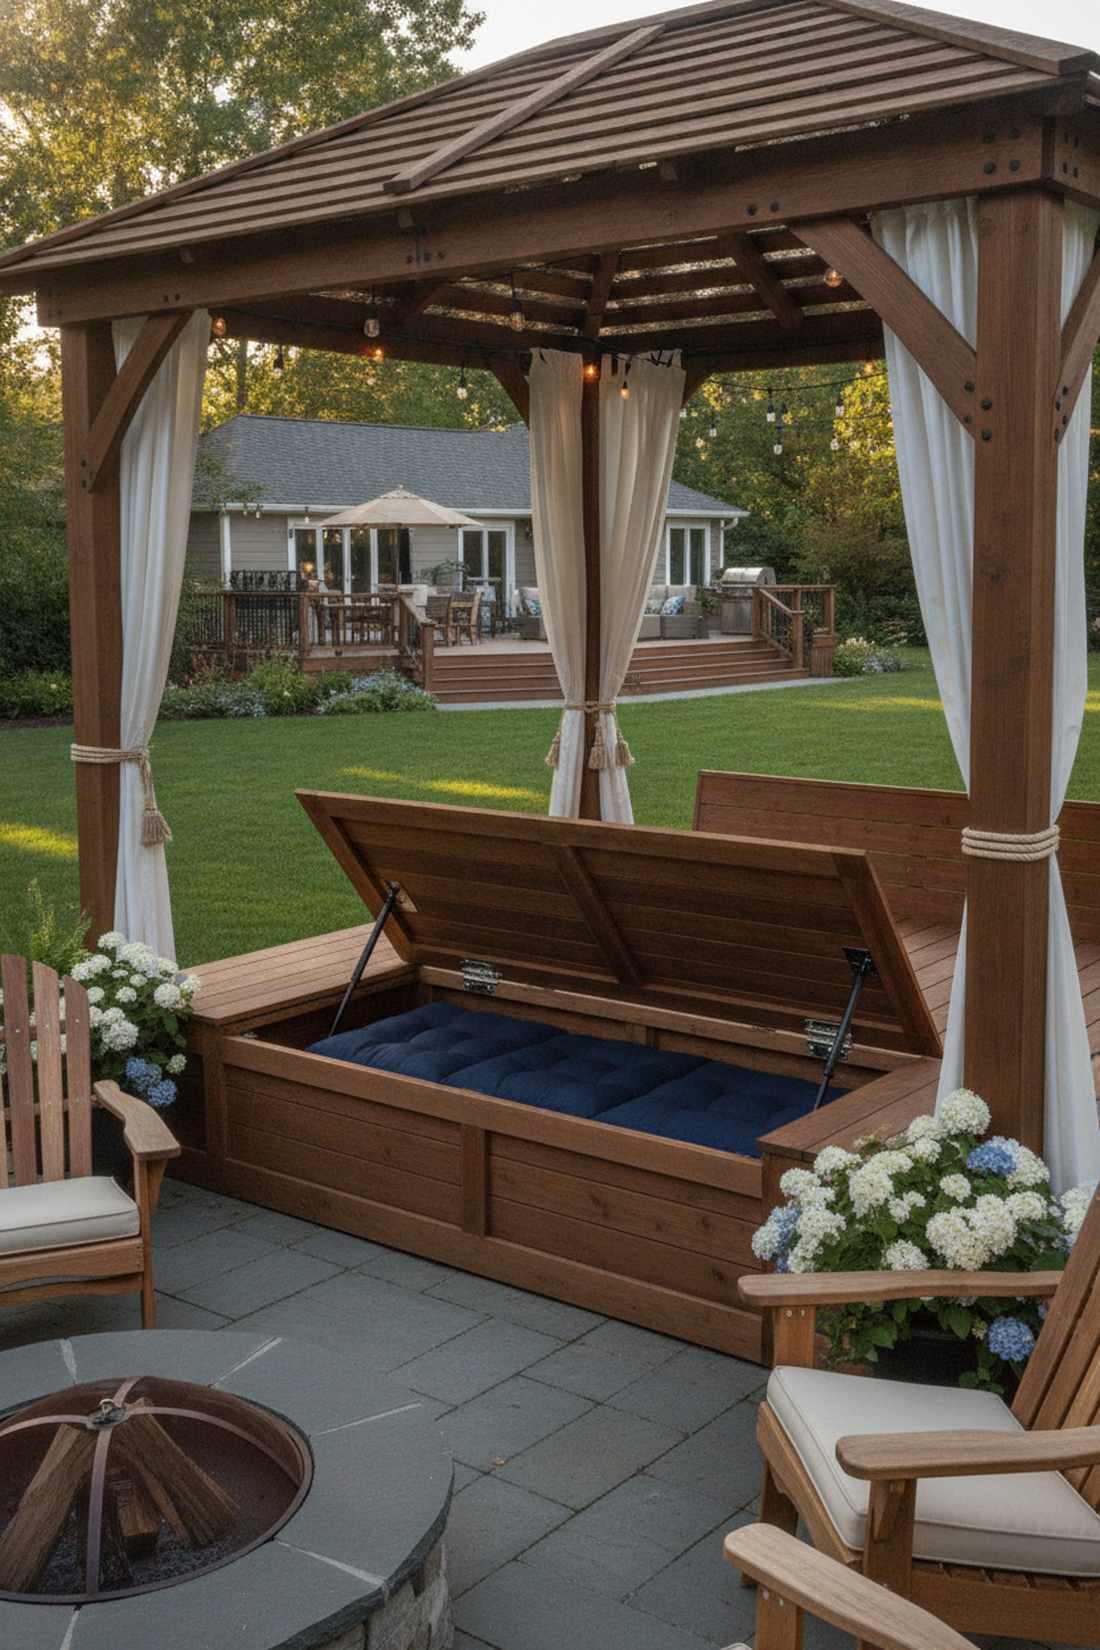
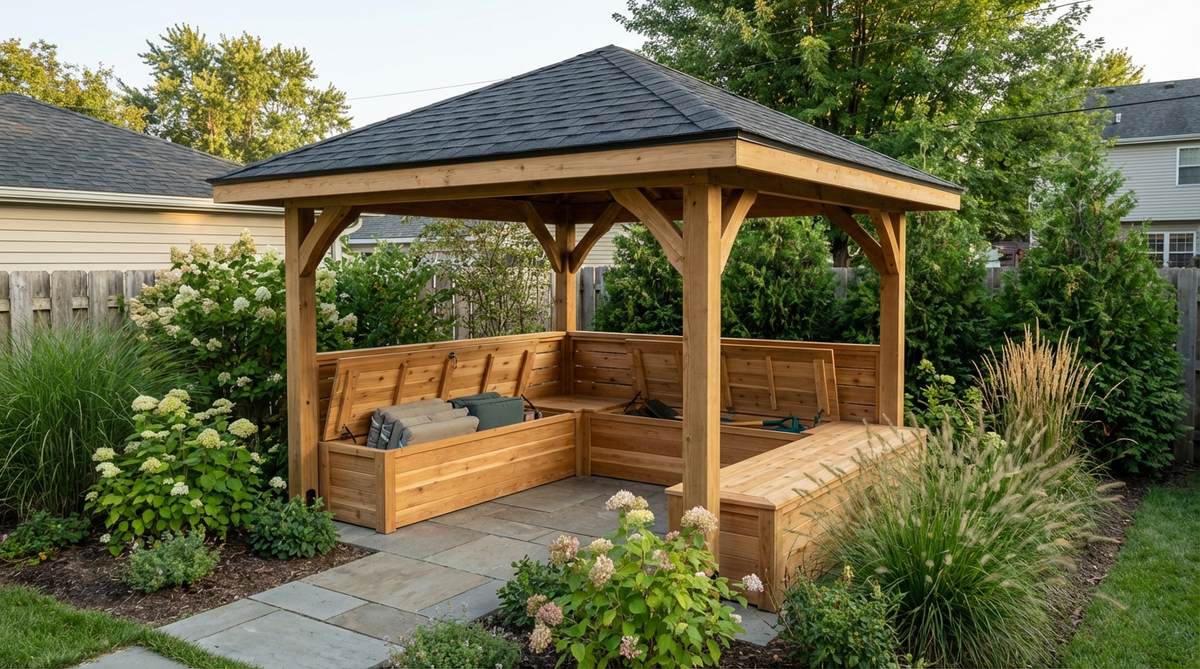
Vibes like a luxury resort cabana, this open-air seating pavilion hides massive amounts of clutter directly under your guests. This small garden gazebo layout merges outdoor entertaining with high-volume stash space.
Leaving ugly plastic deck boxes on your patio ruins the aesthetic, but integrating waterproof hinge-top benches into a wooden pavilion gives a designer-level finish. Line the interior compartments with heavy cedar planks to keep patio cushions smelling incredibly fresh.
Building the integrated benches into a gazebo costs around $300. Pin this to your backyard makeover blueprint.
- Key Materials: Heavy-duty piano hinges, marine-grade plywood
- Vibe / Style: Resort-style hidden utility
- Difficulty: Intermediate woodworking
- Budget Breakdown: Marine Wood: $180 | Hinges: $50 | Stain: $40
- Creator’s Tip: Install pneumatic gas struts on the bench lids so they open smoothly and never slam down on fingers.
- Smart Sourcing: Heavy-duty gas strut lid support kits and marine-grade wood sealant (gallon).
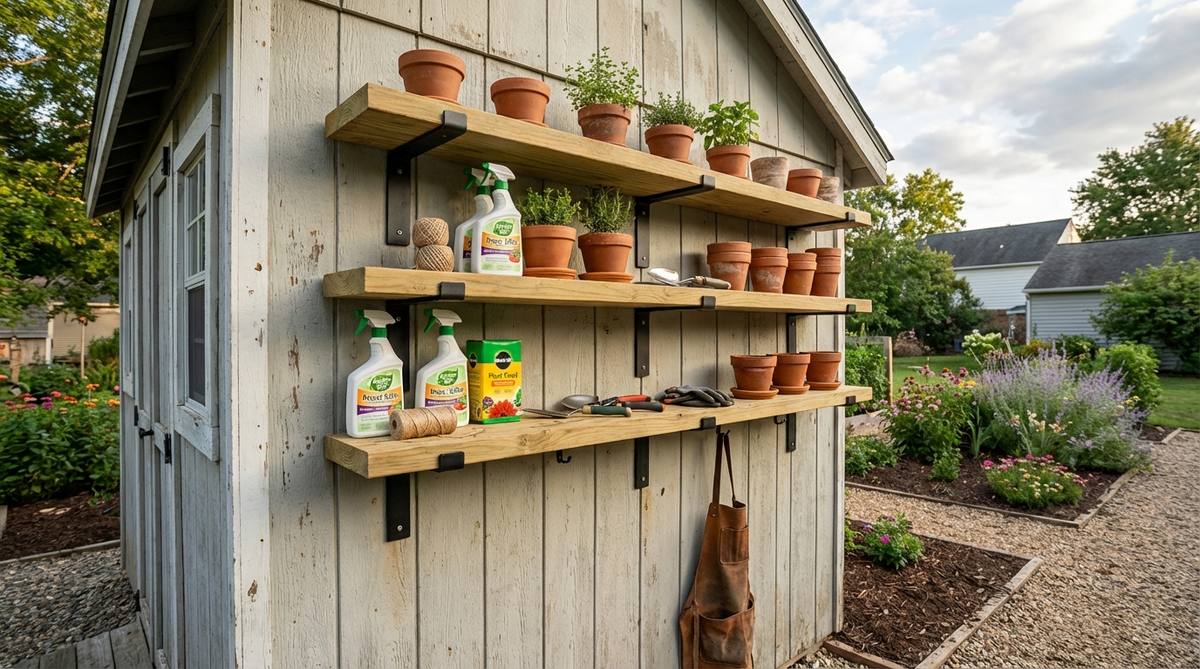
26. Tool Station Gazebo
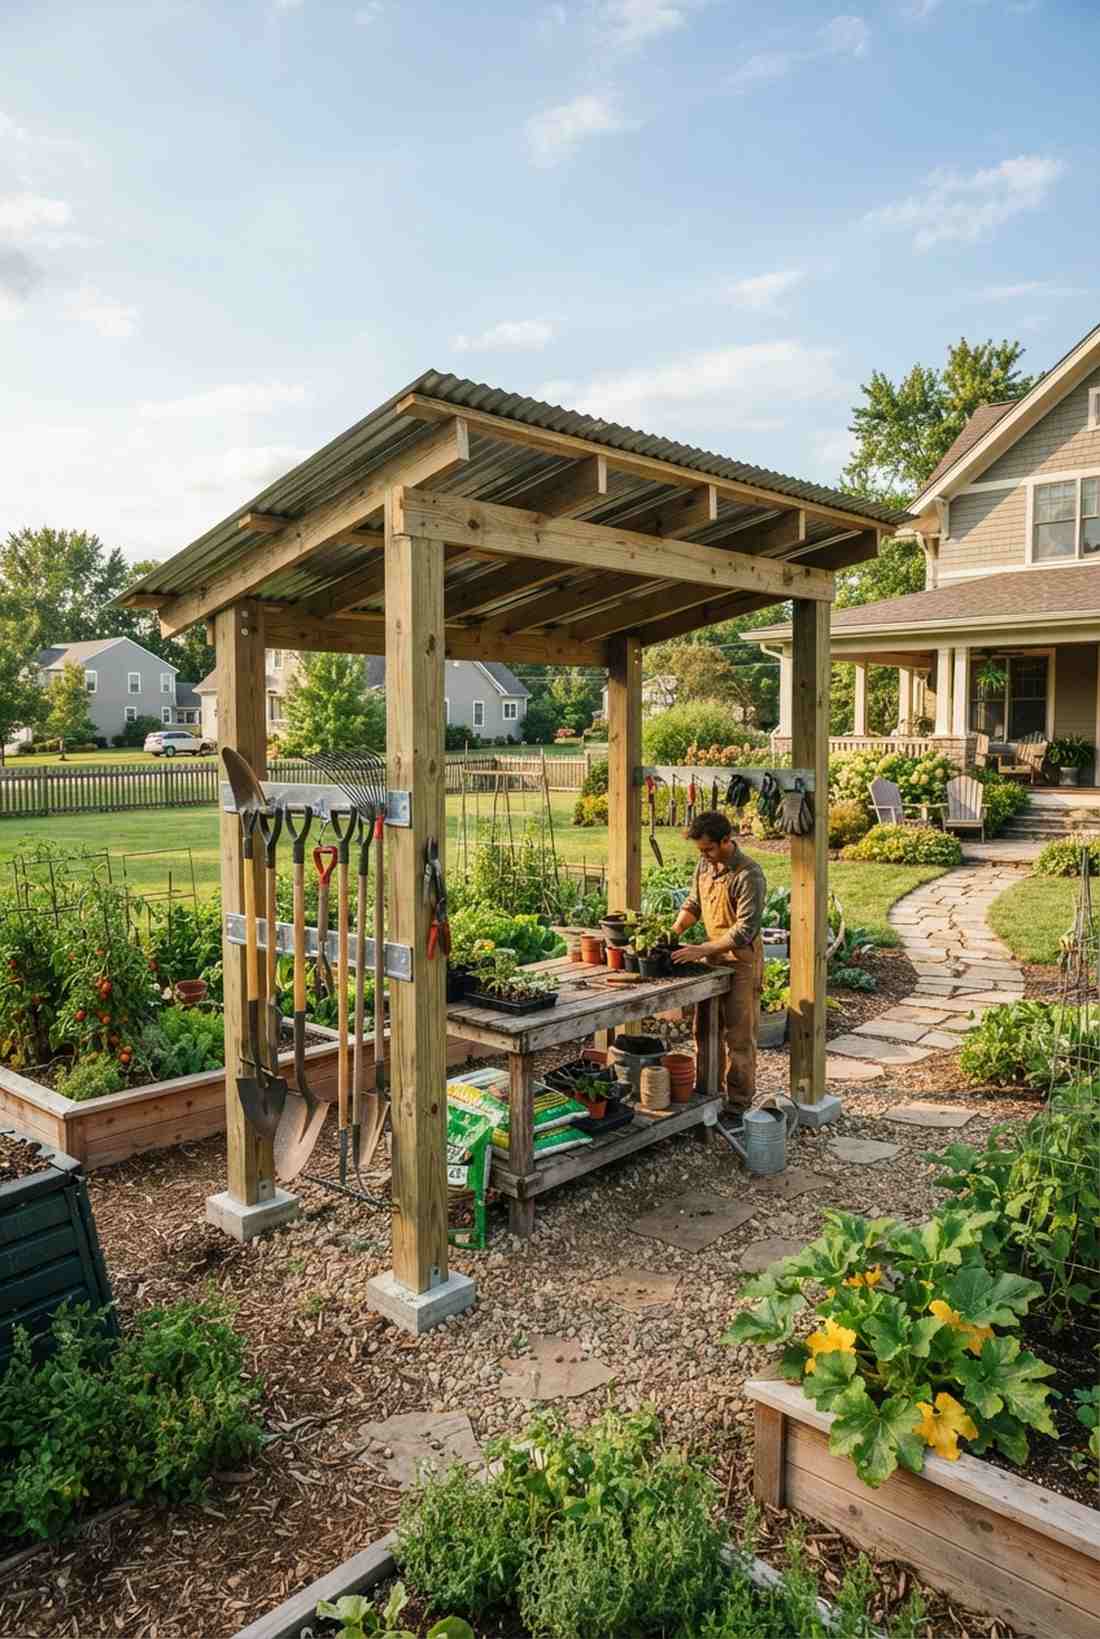
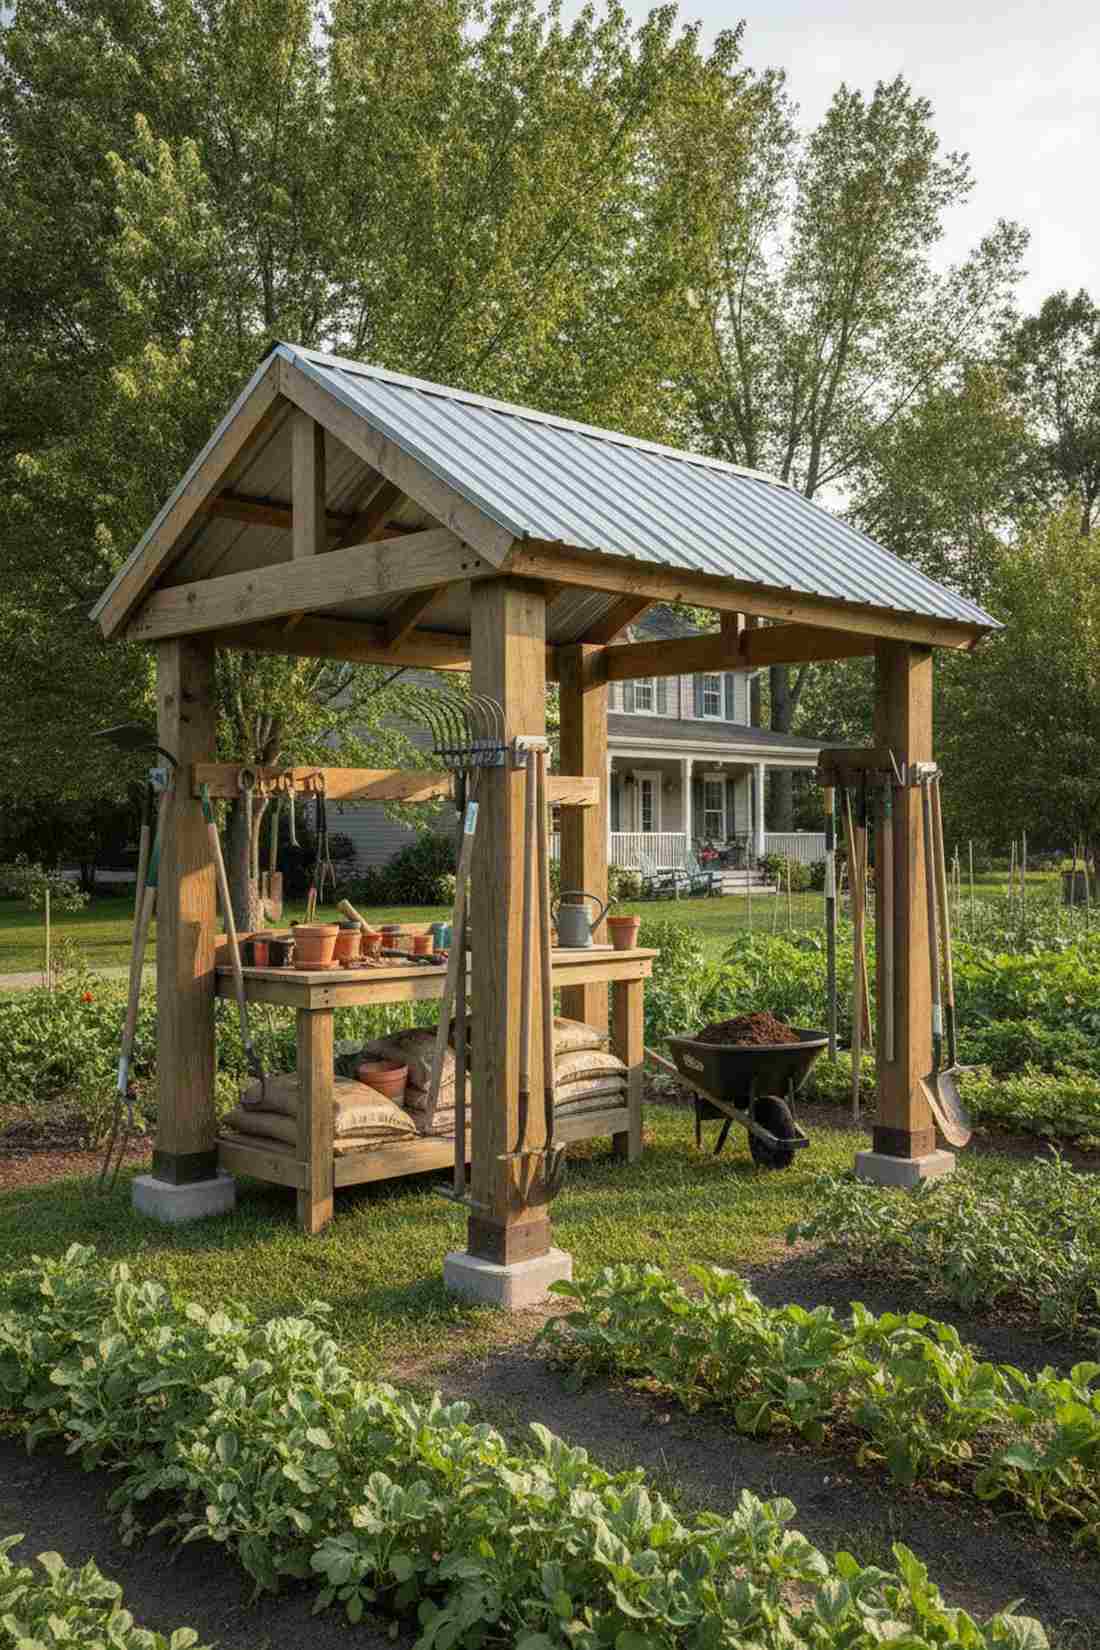
Feels like an elite groundskeeper’s command center, this covered open-wall workspace keeps you completely dry while you prep soil. Excellent for placing right next to your active vegetable beds.
Traditional enclosed sheds trap miserable heat during summer, but an open-sided roof structure provides massive shade while allowing cool cross-breezes to flow freely. Mount galvanized metal tool racks directly to the thick corner support beams for instant access.
Erecting this simple roofed station runs about $400. It is a fantastic alternative for regions with intense summer sun.
- Key Materials: 4×4 treated posts, corrugated metal roofing
- Vibe / Style: Rugged open-air workshop
- Difficulty: Intermediate framing
- Budget Breakdown: Posts: $120 | Roof: $150 | Hardware: $80
- Creator’s Tip: Sink the 4×4 support posts in concrete footings slightly above ground level to prevent the wood bases from rotting over time.
- Smart Sourcing: Pre-cut galvanized steel roofing sheets (bulk pack) and heavy-duty post anchor base brackets.
27. Dining Gazebo With Storage
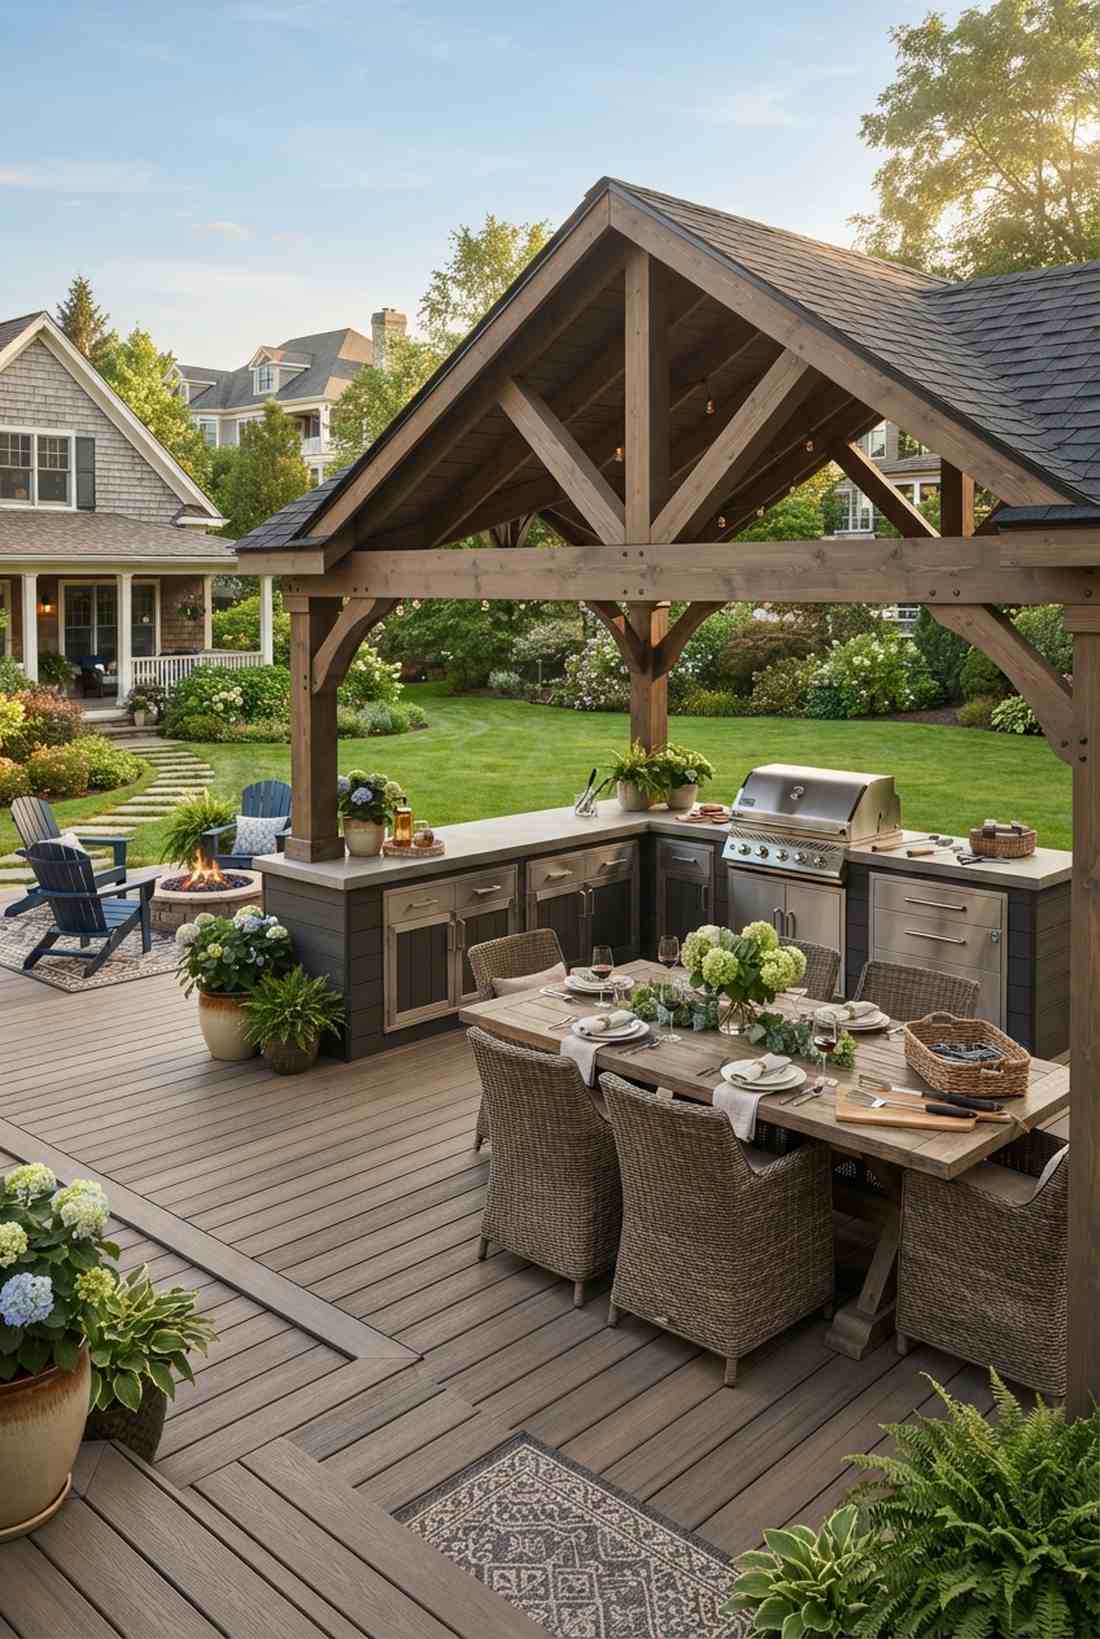
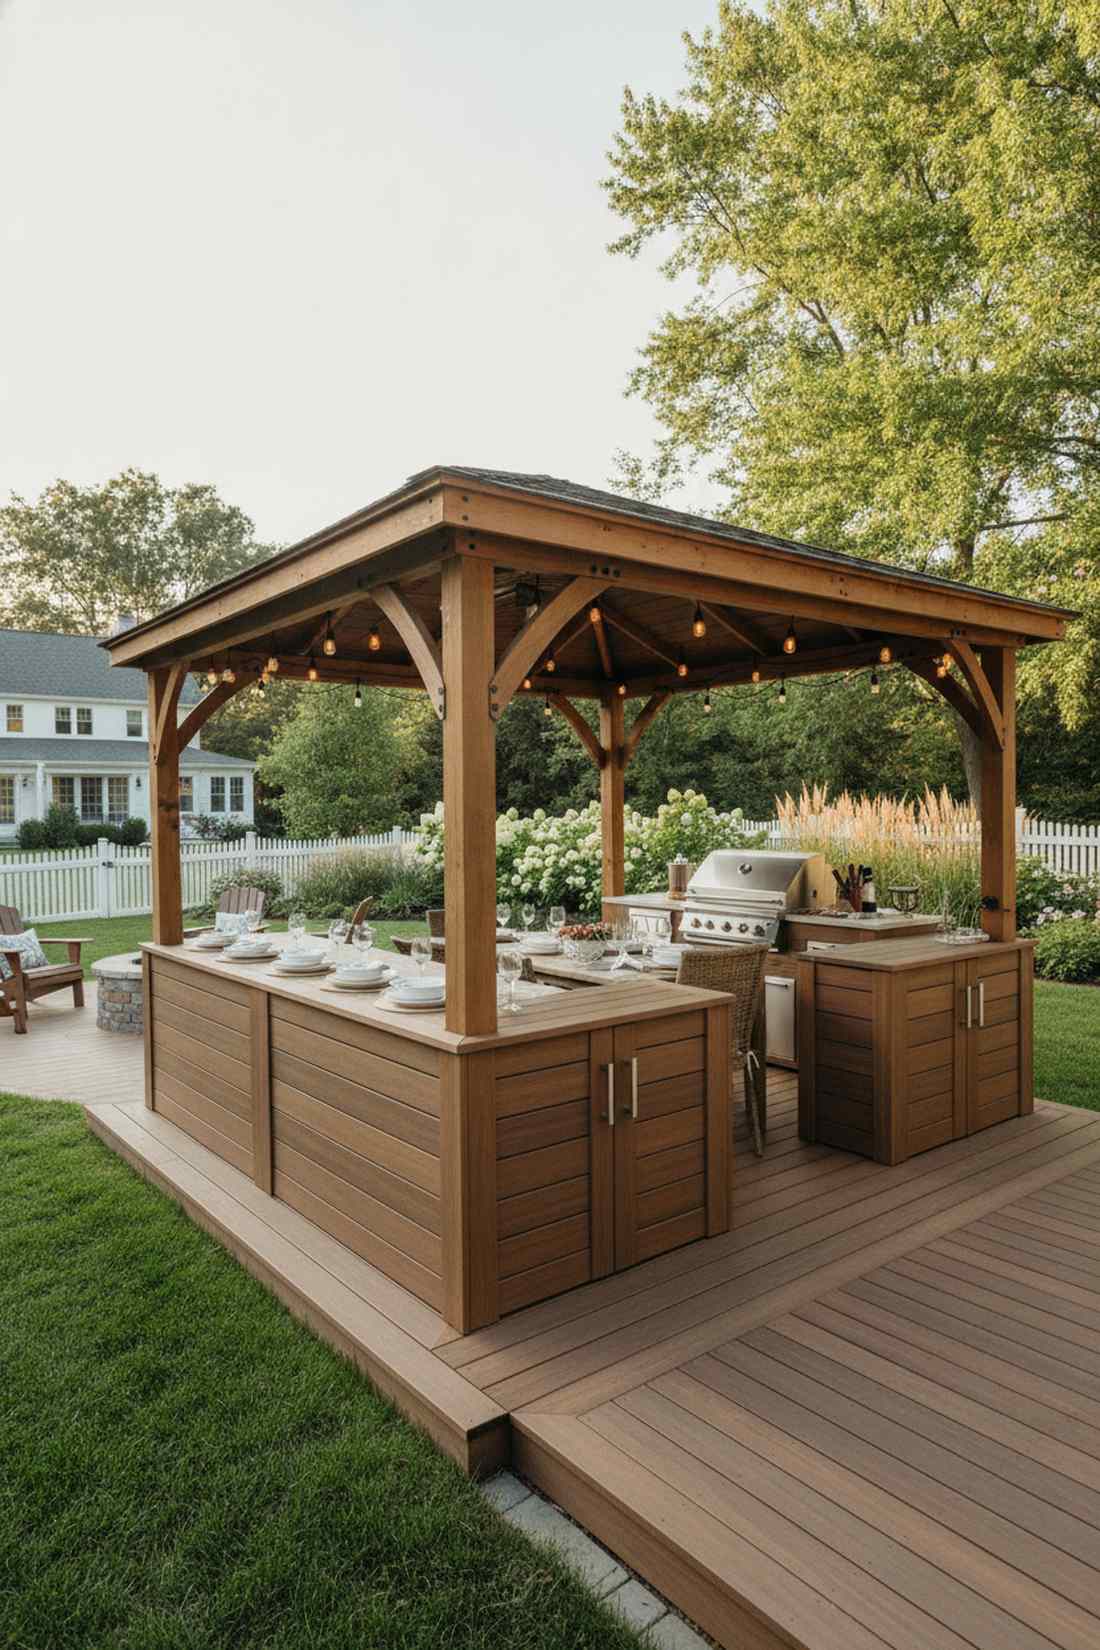
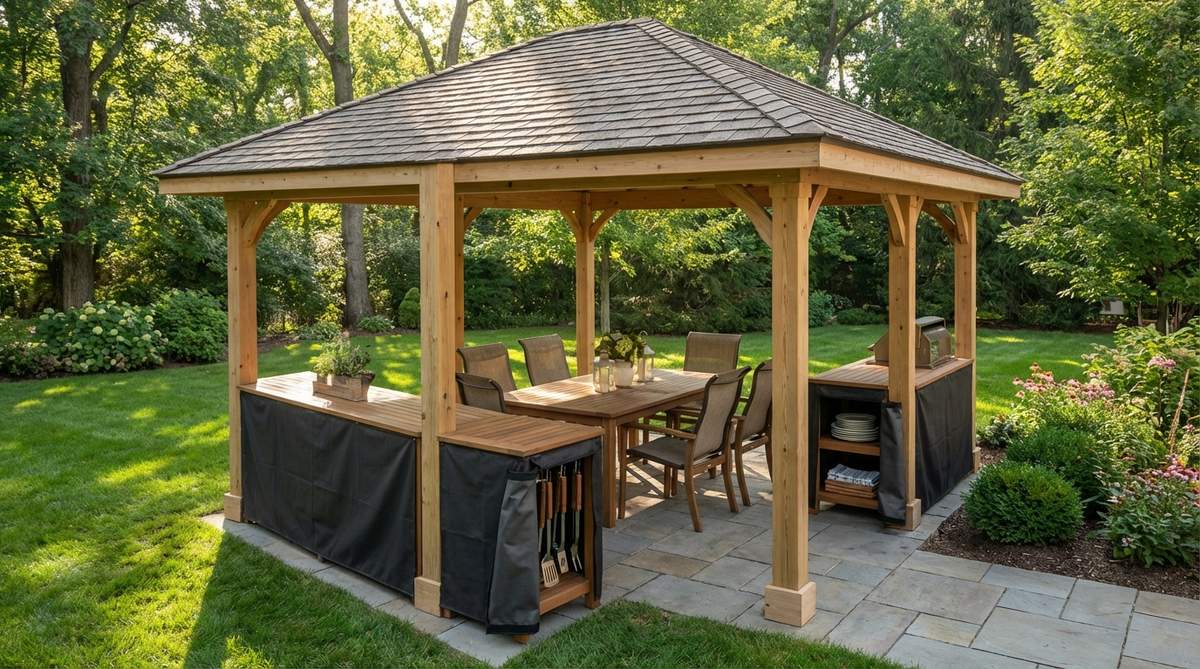
Straight out of a high-end entertaining magazine, this al fresco dining shelter features built-in perimeter cabinetry. It eliminates the annoying need to run back inside the house for grilling supplies.
Most outdoor kitchens cost a fortune, but wrapping the bottom half of a pavilion with waterproof cabinet skirts looks far more expensive than it is. Install stainless steel hardware and composite doors to ensure the unit withstands driving rain.
Upgrading a gazebo with custom skirts costs about $450. Save this if you love hosting massive summer BBQ parties.
- Key Materials: Composite fascia boards, stainless steel hinges
- Vibe / Style: Premium outdoor kitchen
- Difficulty: Advanced carpentry
- Budget Breakdown: Composite Boards: $250 | Hardware: $90 | Tops: $100
- Creator’s Tip: Add a lockable section to safely store expensive grilling thermometers and sharp carving knives away from children.
- Smart Sourcing: Weather-resistant composite decking boards (pre-cut) and rust-proof stainless steel cabinet hardware kits.
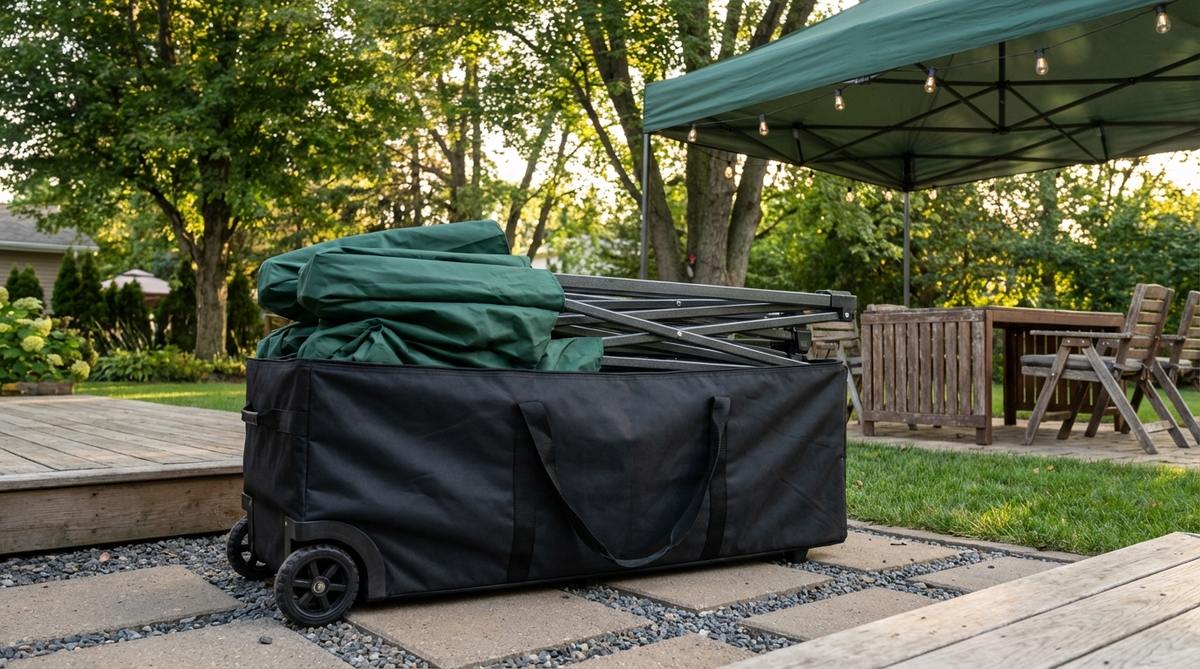
28. Portable Gazebo With Bag
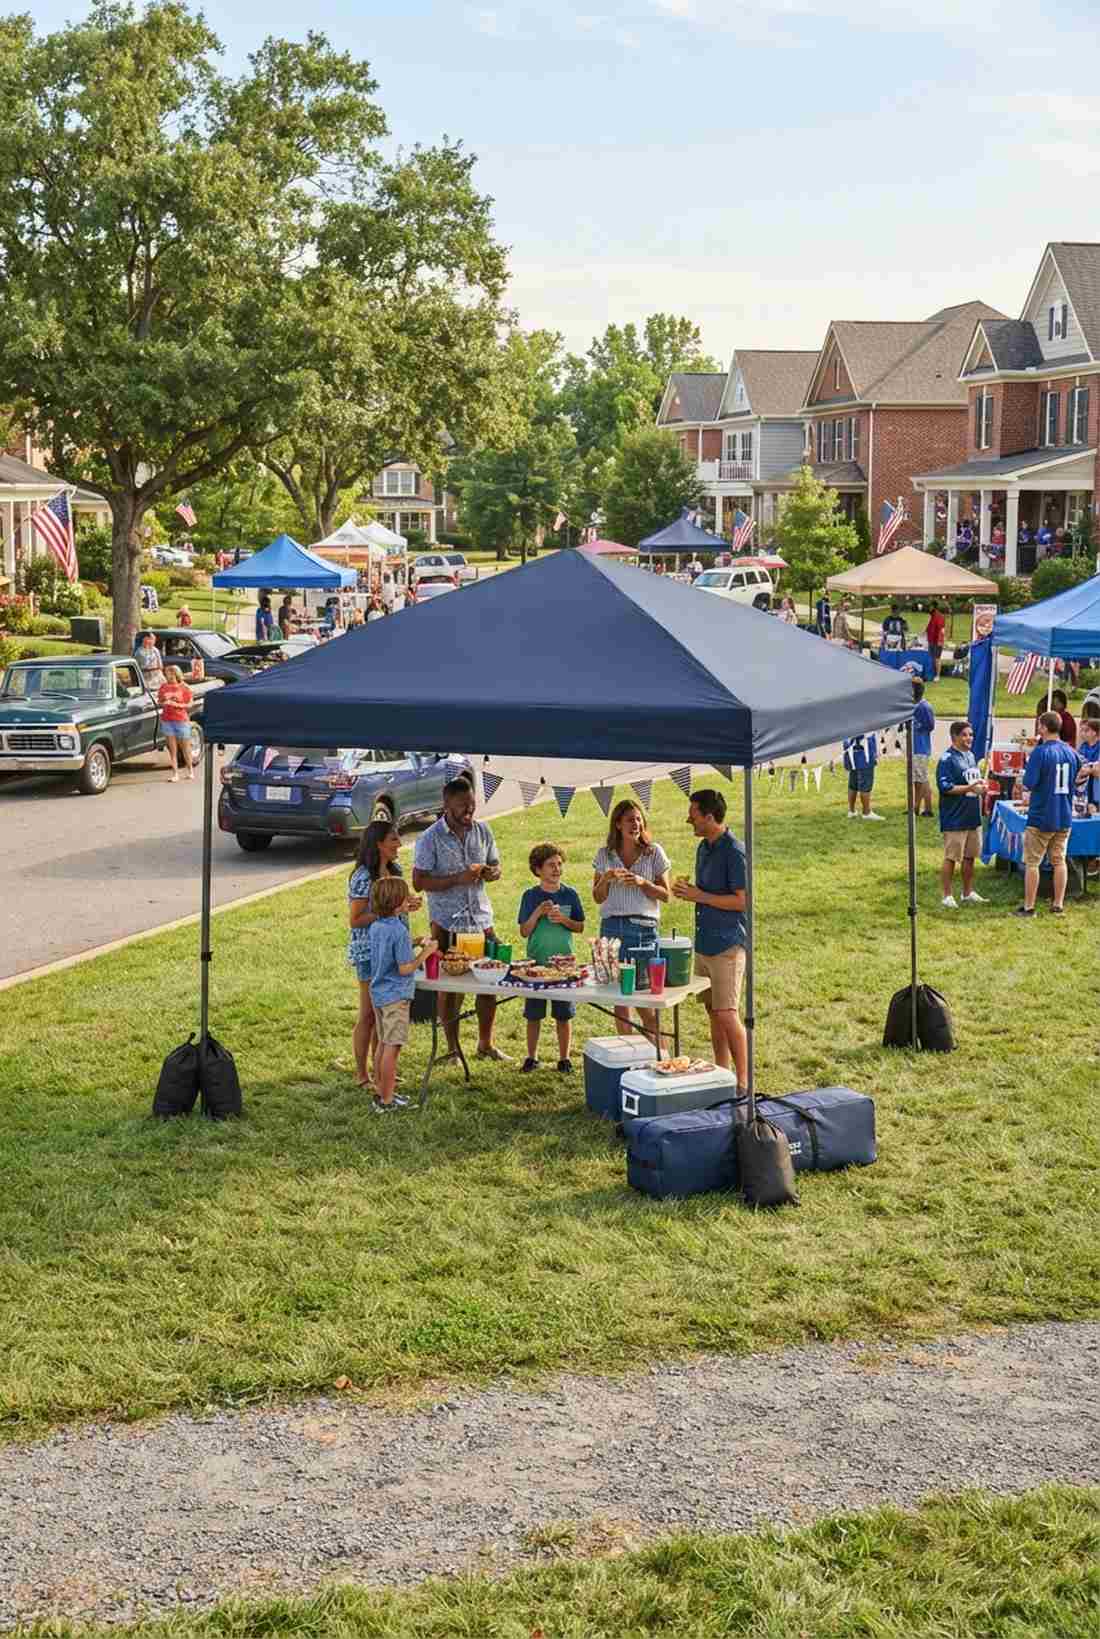
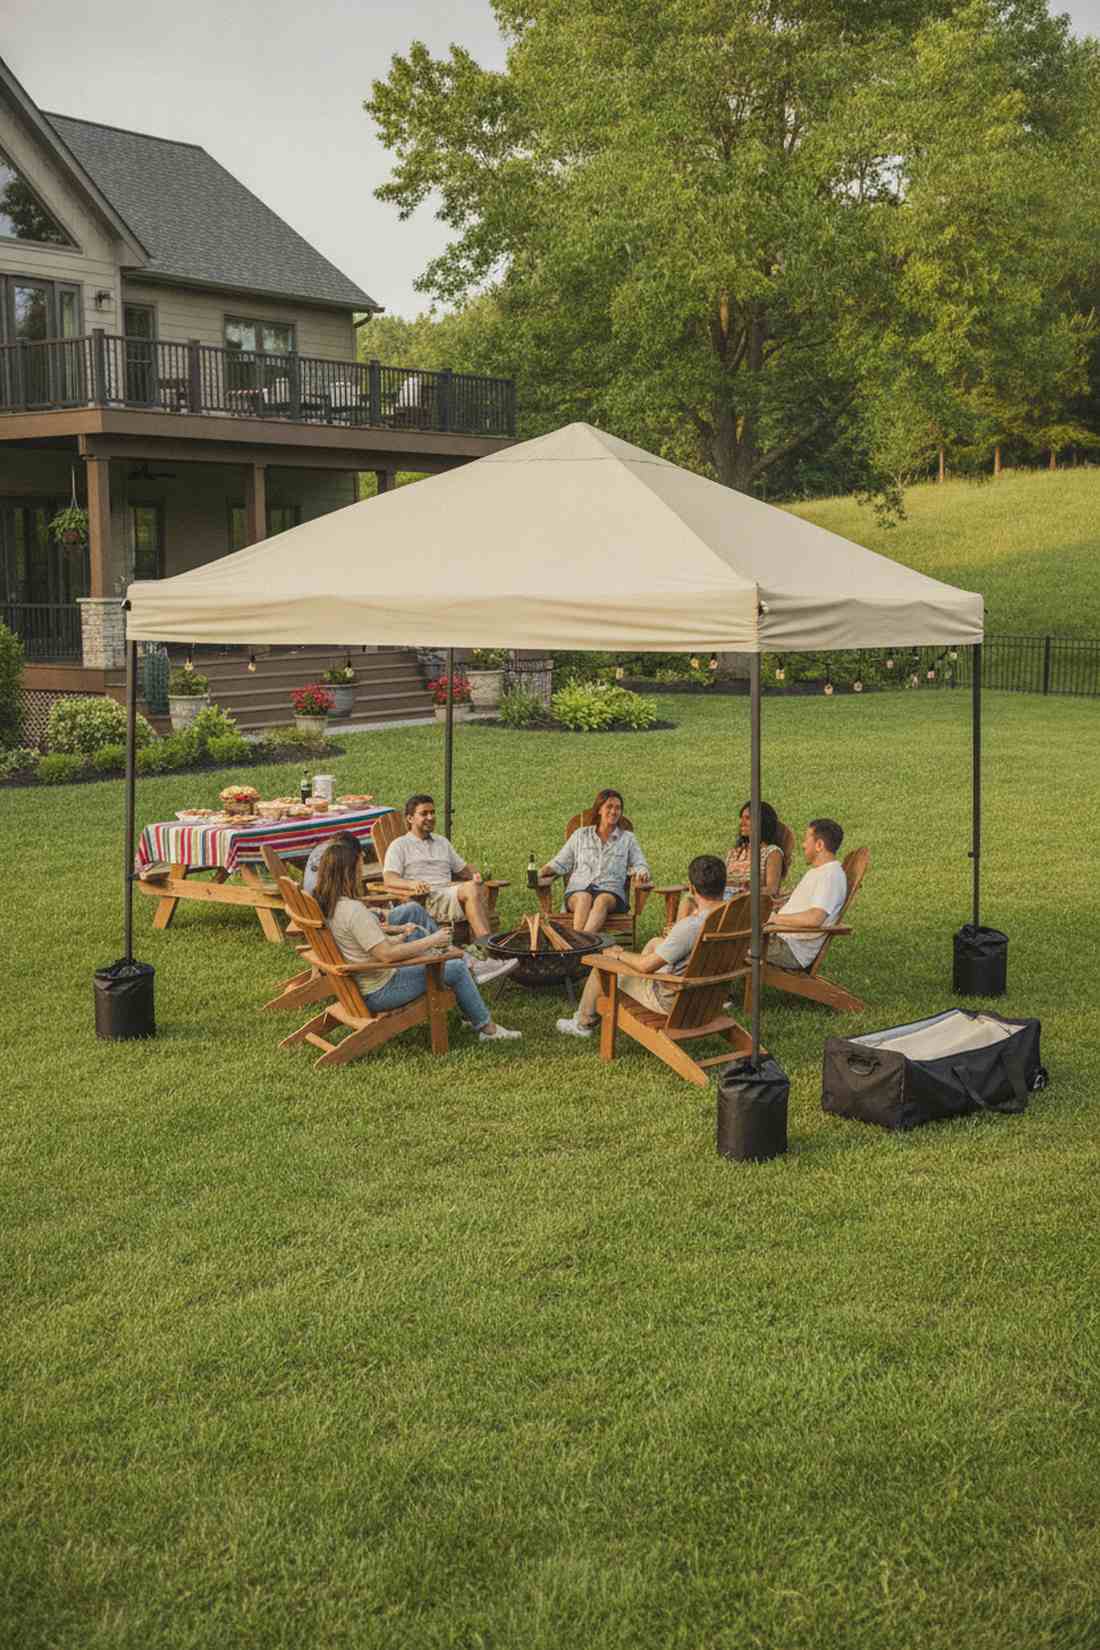
Emanates an instant-party energy, this heavy-duty pop-up canopy provides massive shade that packs away into a tiny rolling duffel. It is the absolute best solution for renters who cannot build permanent structures.
Flimsy beach tents snap in the wind, but investing in a commercial-grade steel frame with 1000-denier polyester delivers a surprisingly premium look that actually survives storms. Use weighted sandbag boots on the legs instead of relying on cheap metal ground pegs.
A top-tier portable unit will cost between $150 and $300. It is a brilliant, flexible purchase for weekend markets and tailgates.
- Key Materials: Commercial steel pop-up frame, heavy denier canvas
- Vibe / Style: Rugged event-ready shelter
- Difficulty: Zero build time
- Budget Breakdown: Canopy Kit: $200 | Sandbags: $35
- Creator’s Tip: Always completely dry the canvas canopy before packing it into the storage bag to prevent horrific mildew smells.
- Smart Sourcing: Commercial-grade pop-up gazebo starter kits and heavy-duty canopy leg weight bags (4-pack).
This next hyper-specialized storage solution is so clever, you will want to tear down your messy garage immediately…
Specialty Storage Solutions
29. Bike Storage Shed
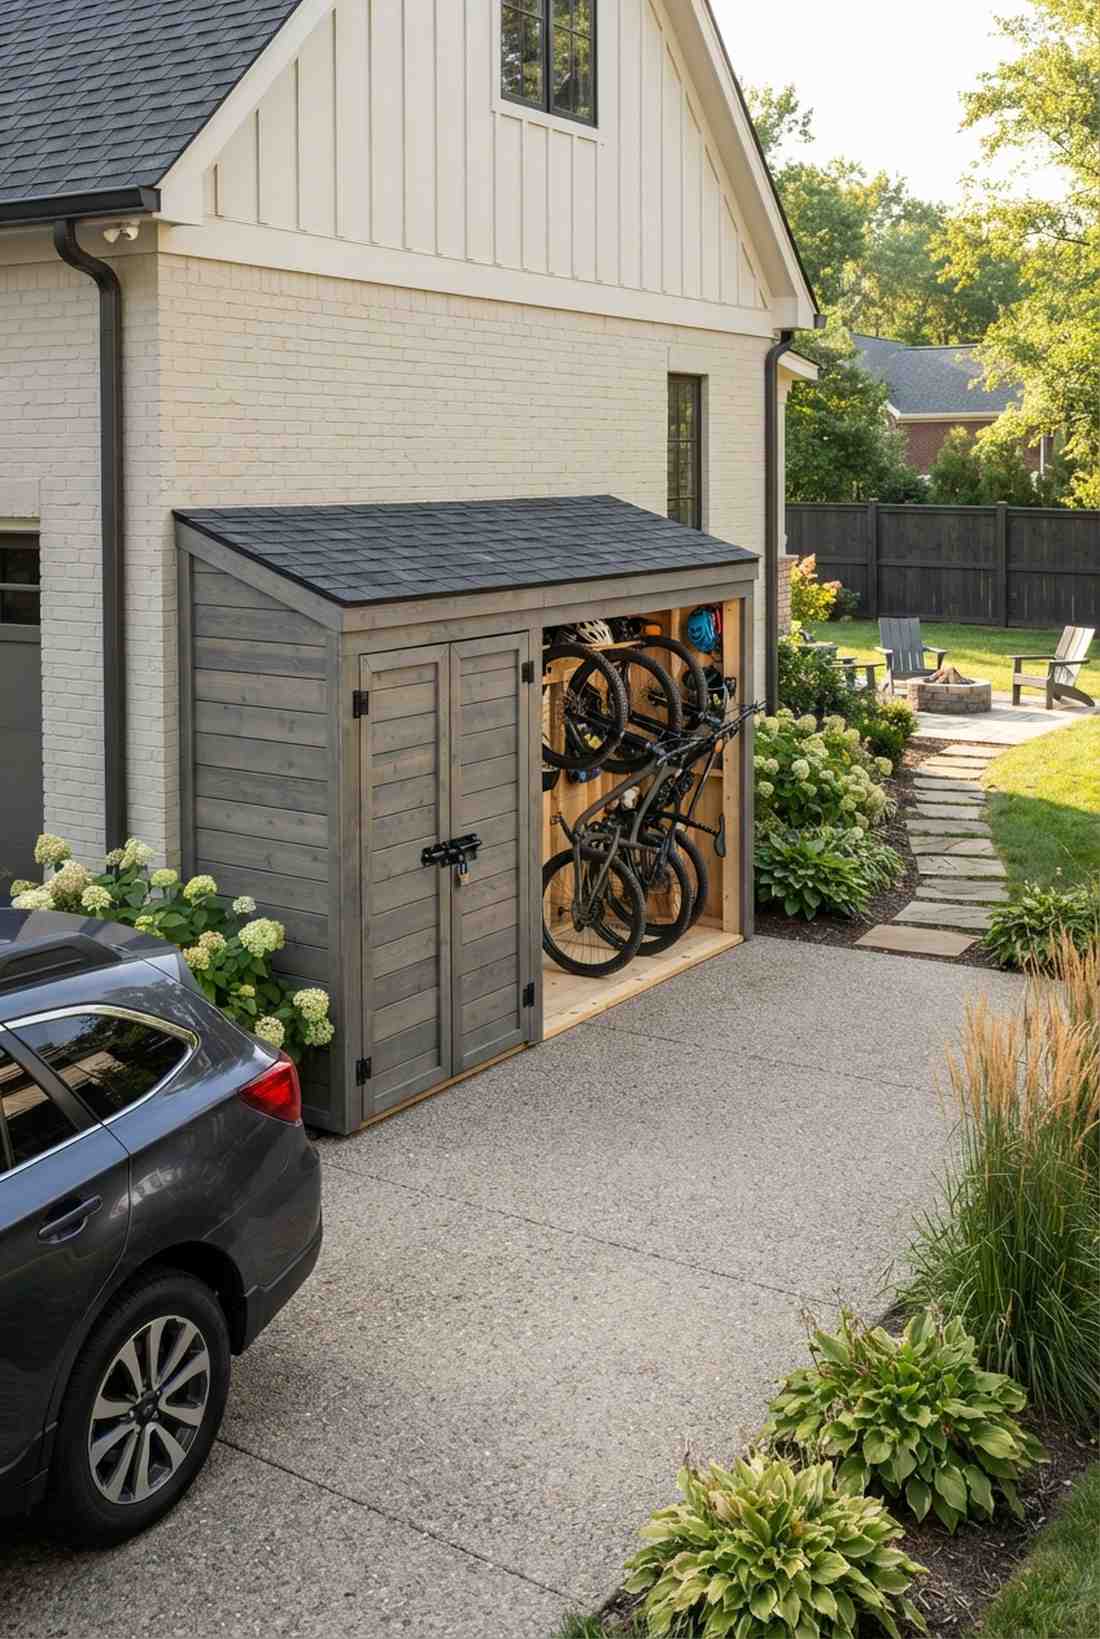
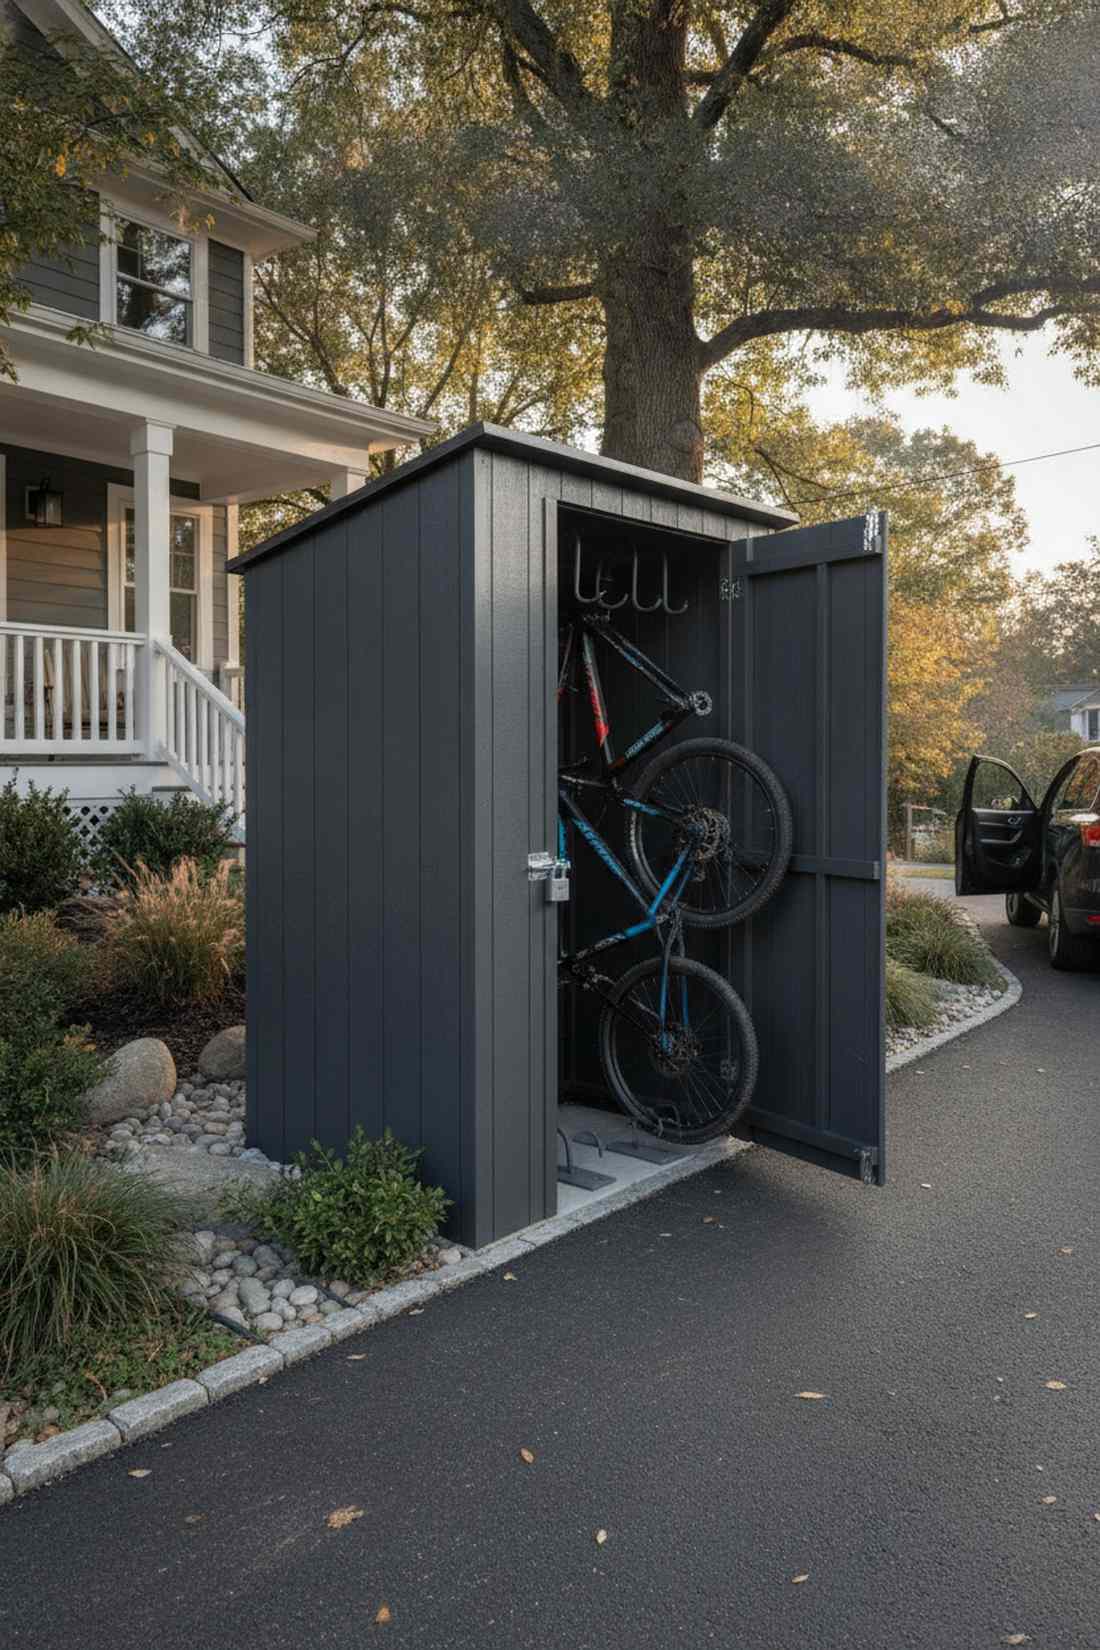
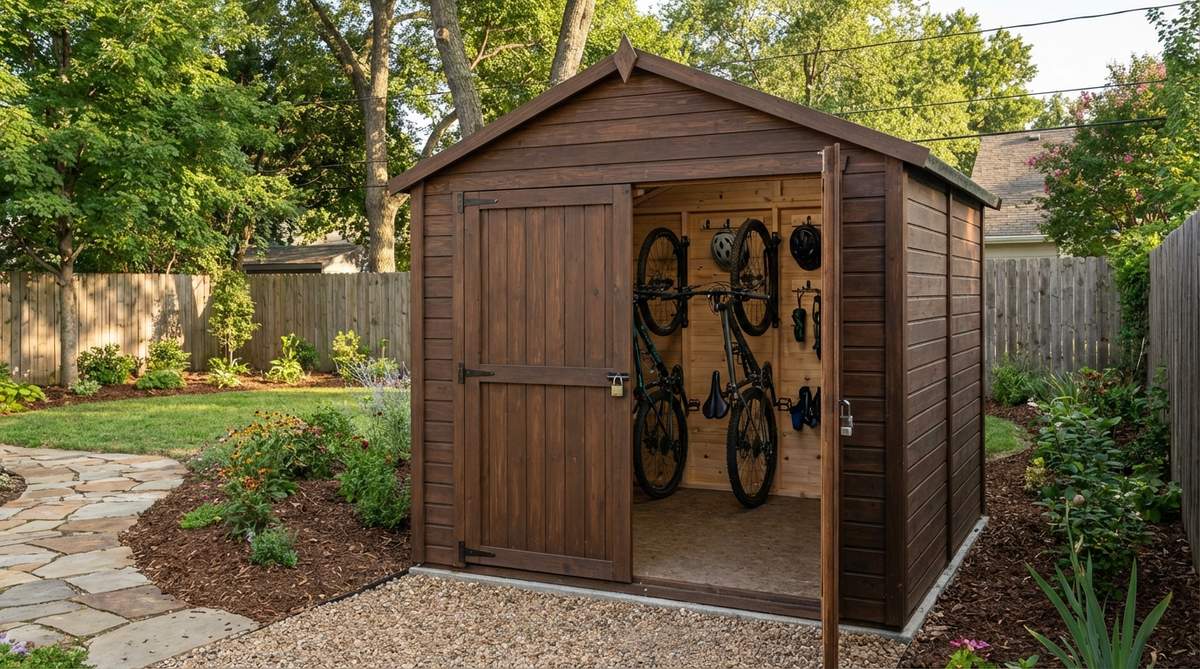
Feels like a high-security vault for your two-wheeled investments, this ultra-slim profile locker keeps expensive gear safe and dry. It tucks perfectly into narrow driveways without blocking car doors.
Leaning bikes against the wall is a recipe for scratched paint; installing heavy-duty vertical wheel hooks guarantees a lifetime of protected, highly accessible storage. Reinforce the double doors with a heavy steel tamper-proof hasp lock to deter thieves.
A specialized bike shed build costs roughly $300–$500. Pin this immediately if your mountain bikes are currently ruining your living room.
- Key Materials: Shiplap timber, steel anchor hooks, padlock hasps
- Vibe / Style: Secure urban gear-vault
- Difficulty: Intermediate
- Budget Breakdown: Wood Box: $250 | Hooks: $40 | Locks: $60
- Creator’s Tip: Stagger the height of your wall hooks so the bike handlebars do not crash into each other when hung side-by-side.
- Smart Sourcing: Heavy-duty vertical bike wall mount kits and tamper-proof steel padlock hasps.
30. Log Storage Shelter
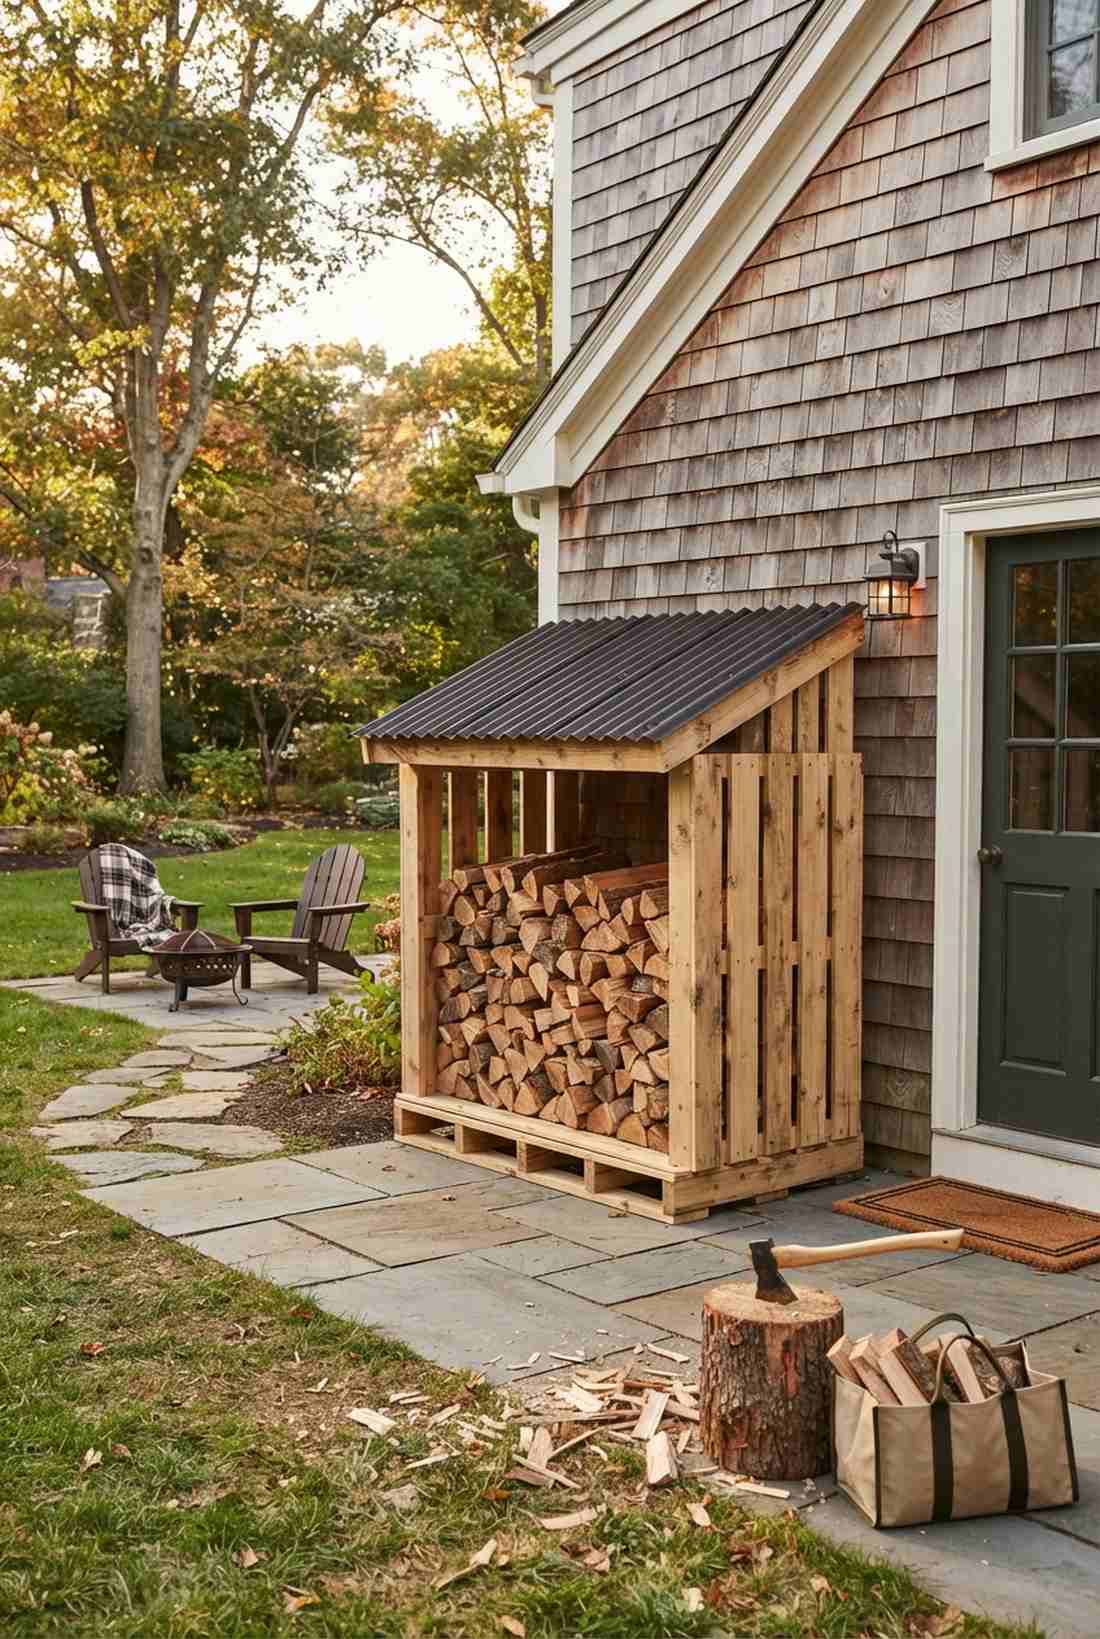
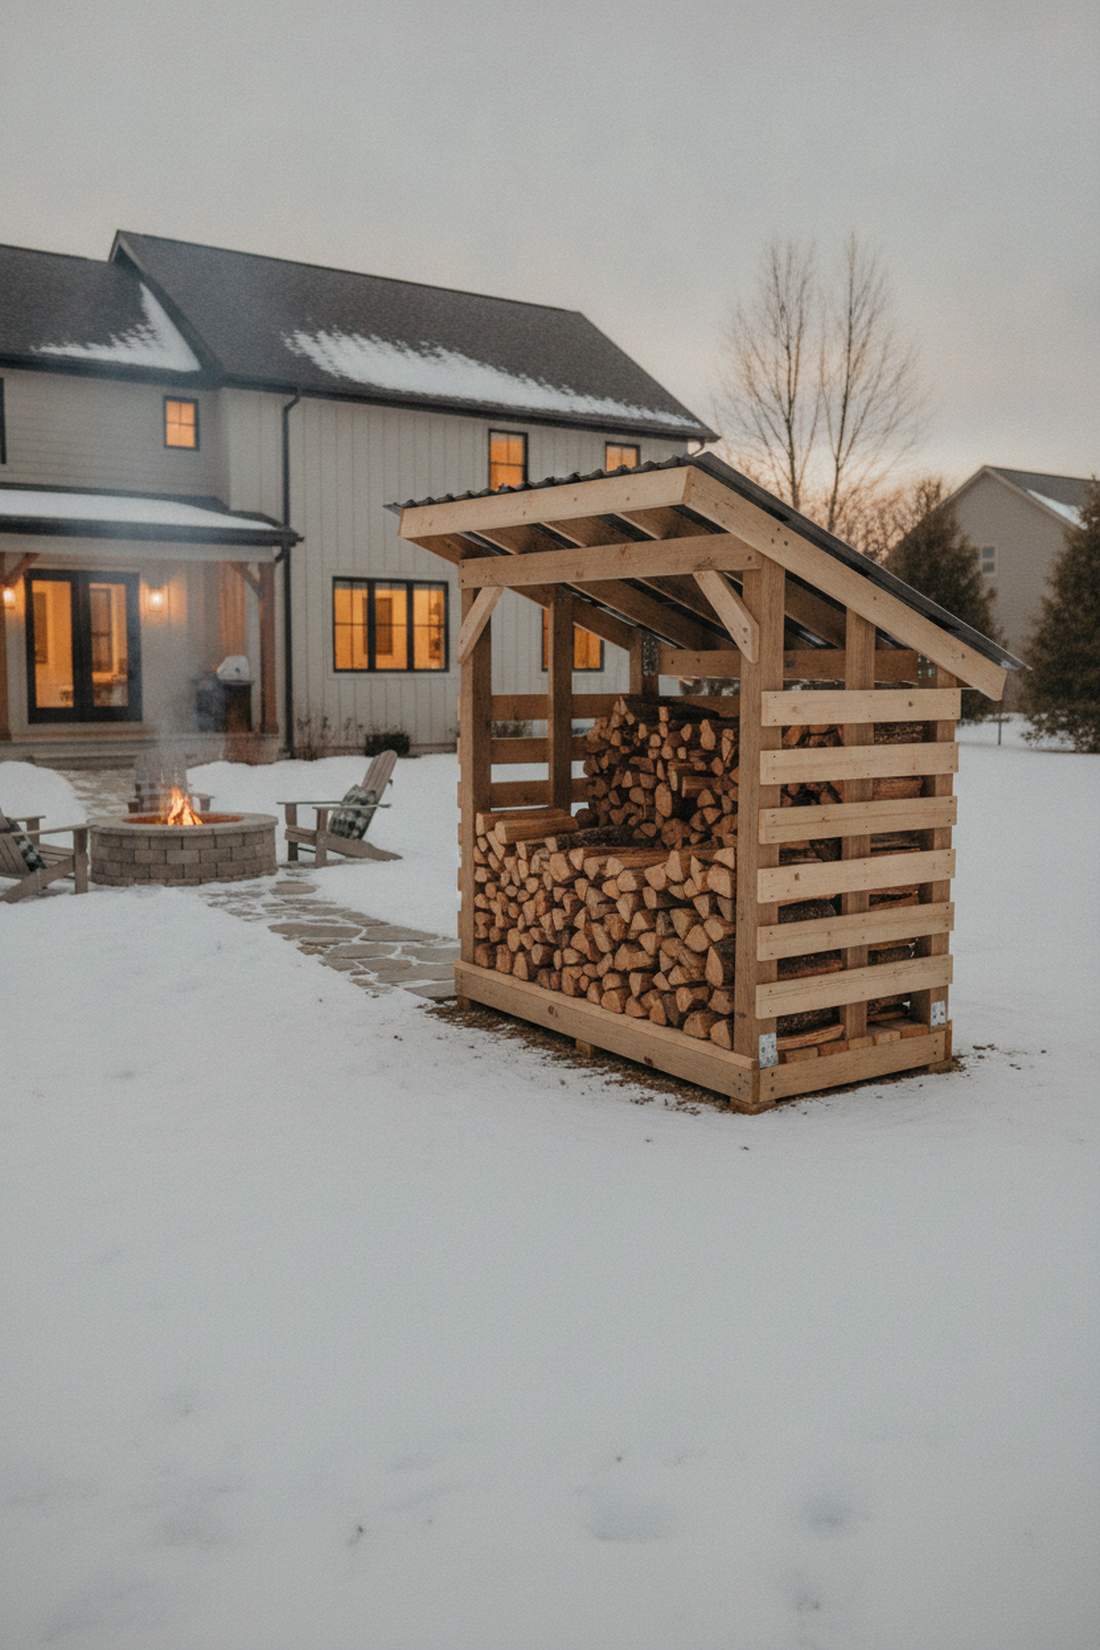
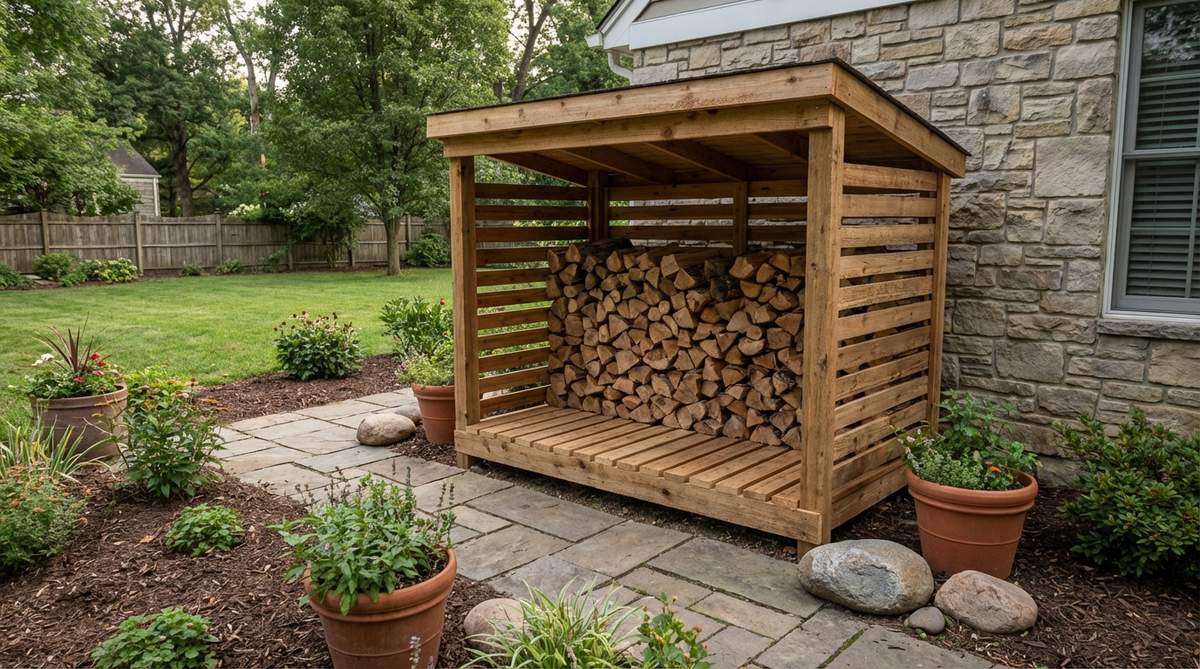
Captures the essence of a cozy alpine lodge, this slatted-wall woodstore aggressively cures your winter firewood while looking fantastic. Best placed near the back door for easy snowy night access.
Tossing a blue tarp over a woodpile traps moisture and breeds mold, but an open-front shed with a raised floor delivers a surprisingly premium look while forcing dry air through the stack. Slant the roof steeply away from the house to divert heavy rain.
Building a one-cord shelter costs about $100 in rough-sawn lumber. A highly satisfying, functional weekend build.
- Key Materials: Rough-sawn pine, corrugated asphalt roofing
- Vibe / Style: Classic alpine utility
- Difficulty: Easy framing
- Budget Breakdown: Lumber: $70 | Roofing: $30
- Creator’s Tip: Ensure the base pallet sits at least 4 inches off the dirt to prevent subterranean termites from invading your firewood.
- Smart Sourcing: Pre-cut corrugated asphalt roof panels (bulk pack) and heavy-duty galvanized structural screws.
31. Wheelie Bin Enclosure
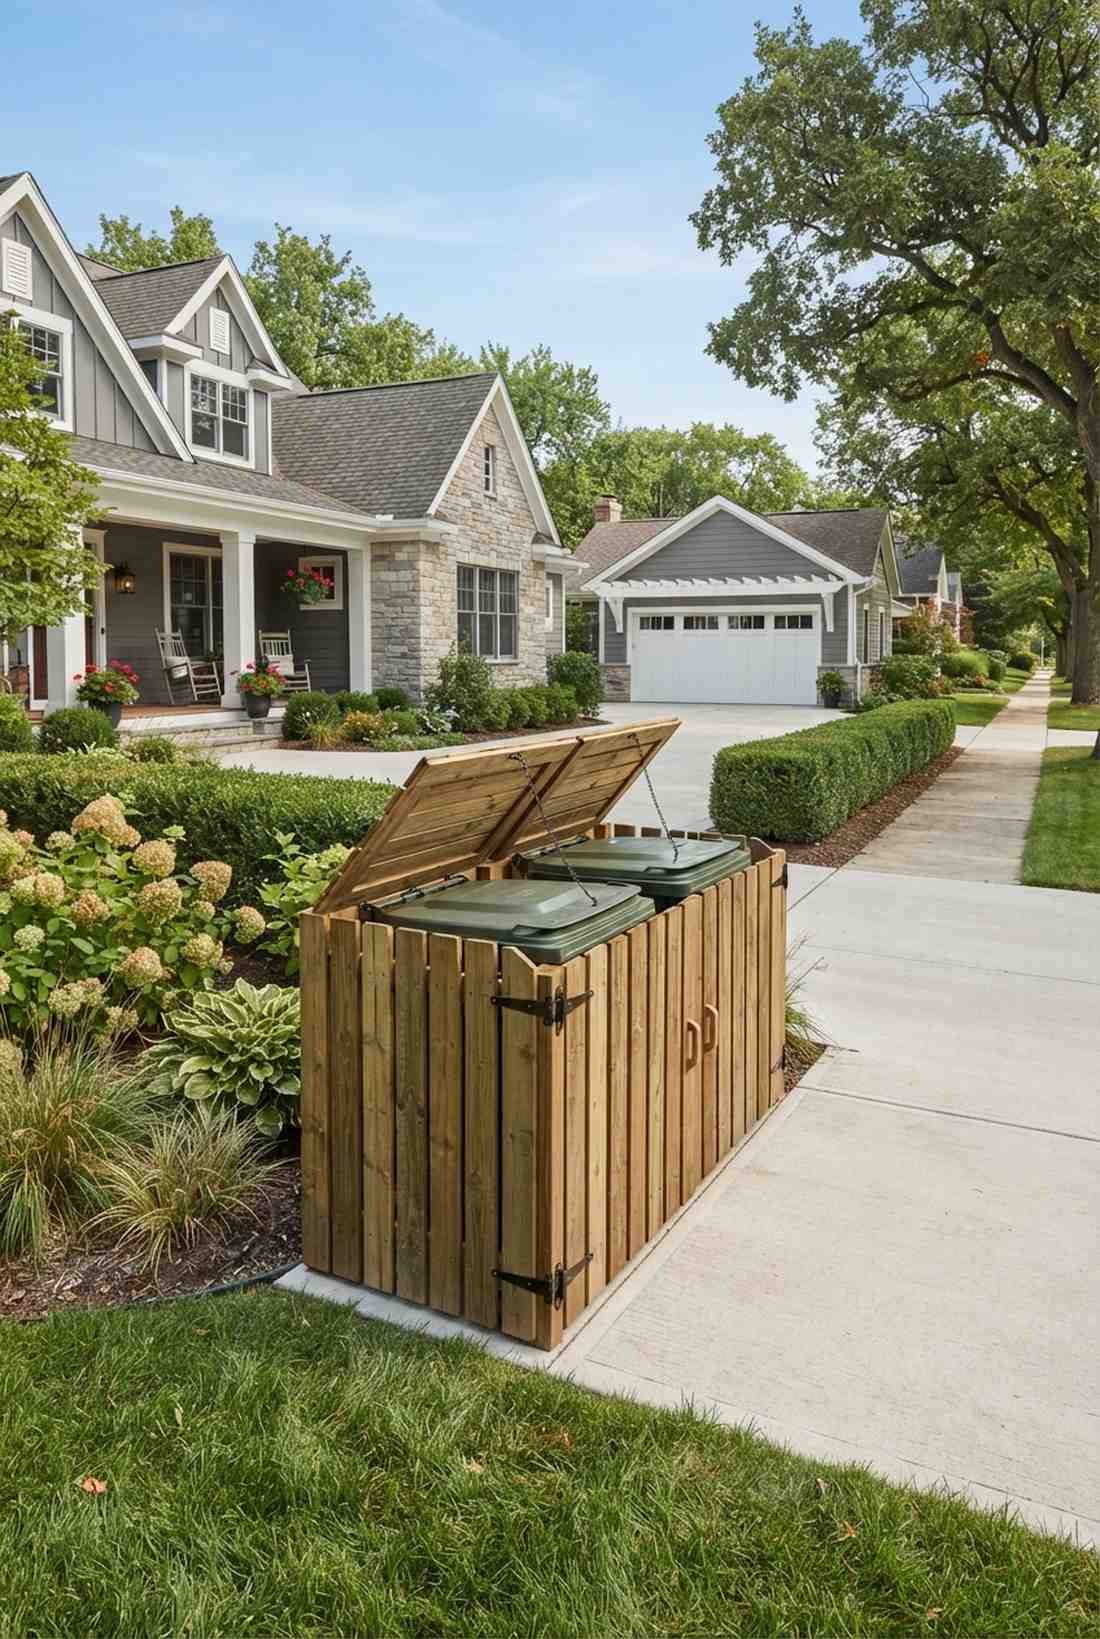
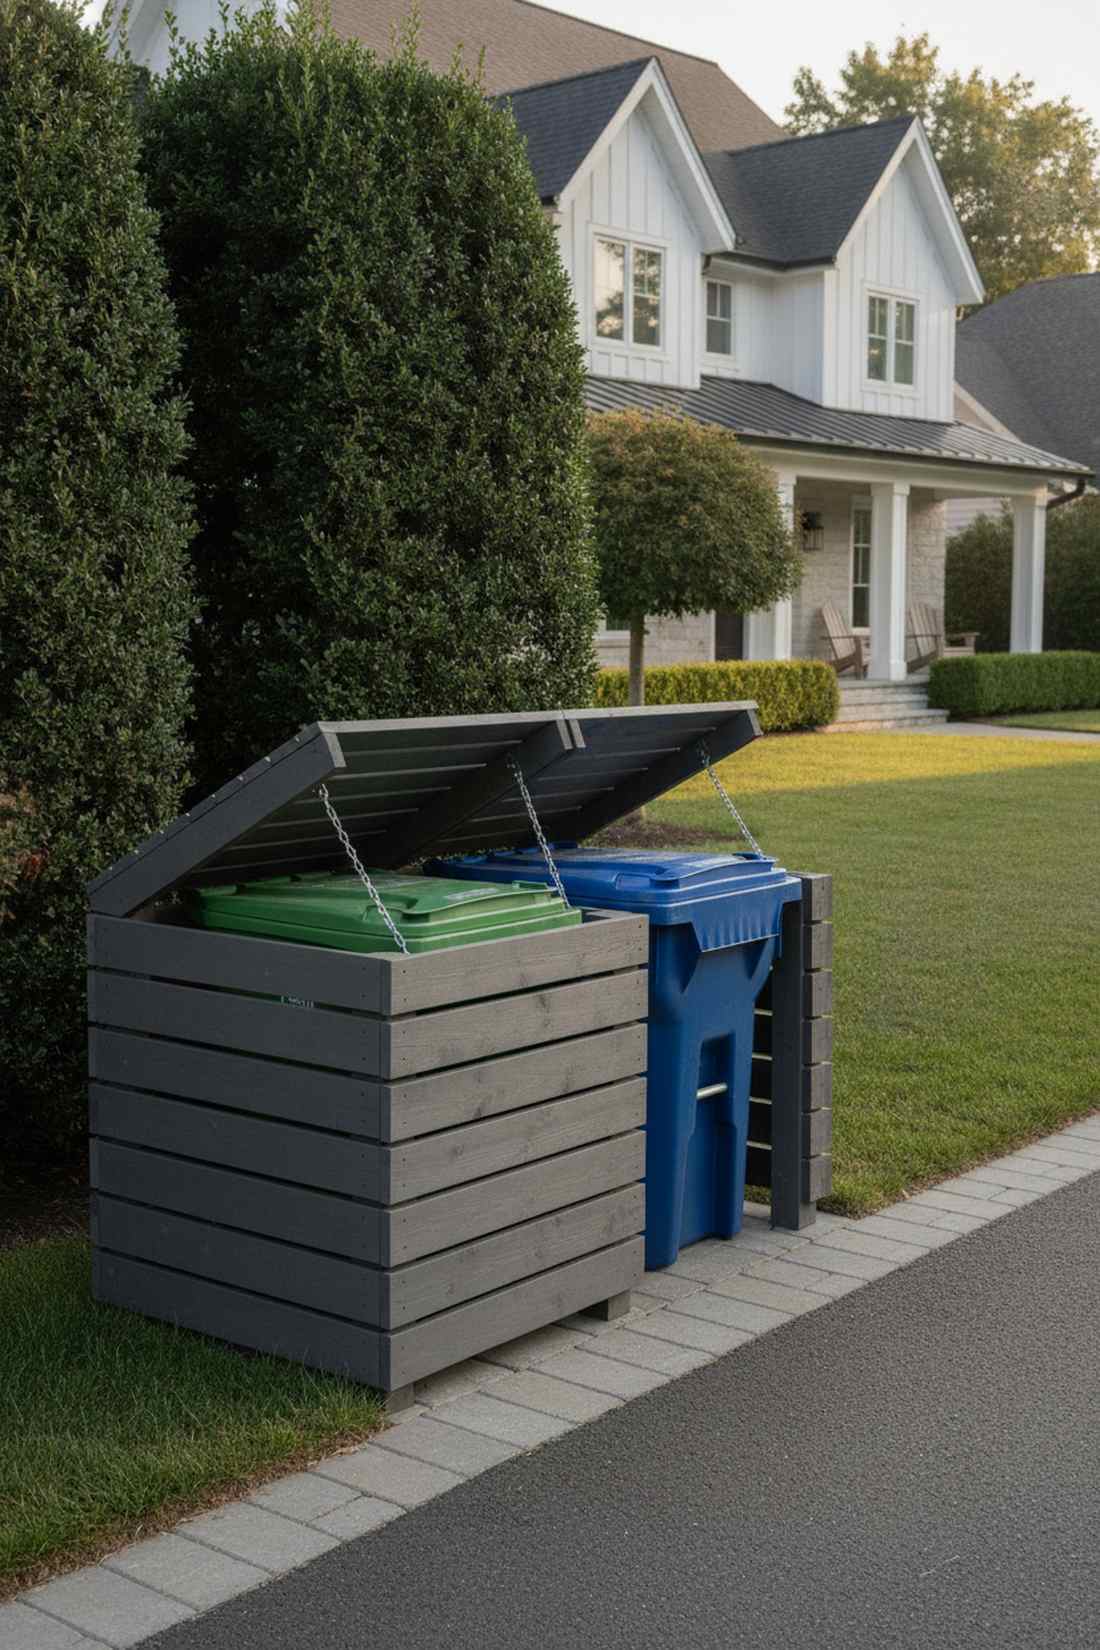
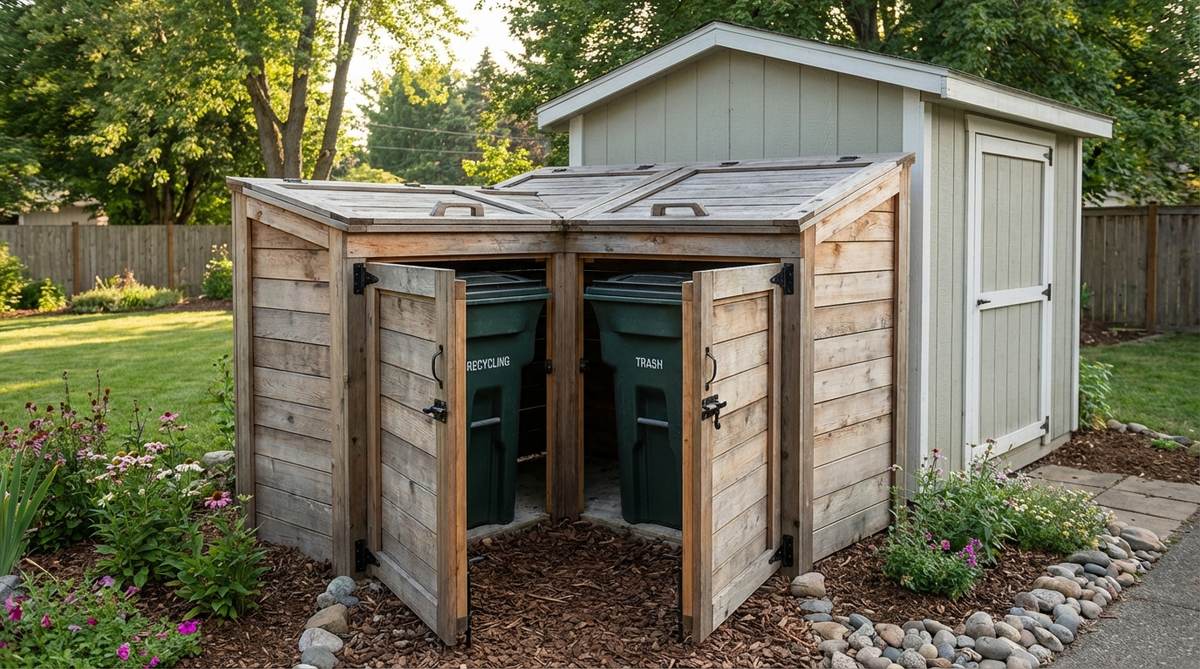
Vibes like a high-end neighborhood upgrade, this slatted camouflage box hides those neon plastic trash cans entirely. It instantly cleans up the curb appeal of your front driveway.
Nothing ruins a beautiful house faster than exposed garbage bins; building a flip-top enclosure gives a designer-level finish to your waste management. Connect a chain from the wooden lid to the plastic bin lid so they both open with one lift.
A double-bin enclosure costs around $150 to construct. Pin this if your HOA is complaining about visible trash cans.
- Key Materials: Treated fence pickets, lift-chains, exterior hinges
- Vibe / Style: Discreet property polish
- Difficulty: Intermediate
- Budget Breakdown: Pickets: $80 | Hardware/Chains: $40 | Frame: $30
- Creator’s Tip: Leave a half-inch gap between the wood slats to ensure garbage odors can escape and dry out in the breeze.
- Smart Sourcing: Pre-cut pressure-treated fence slats (bulk pack) and rust-proof exterior lid hinge kits.
32. Garden Hose Cabinet
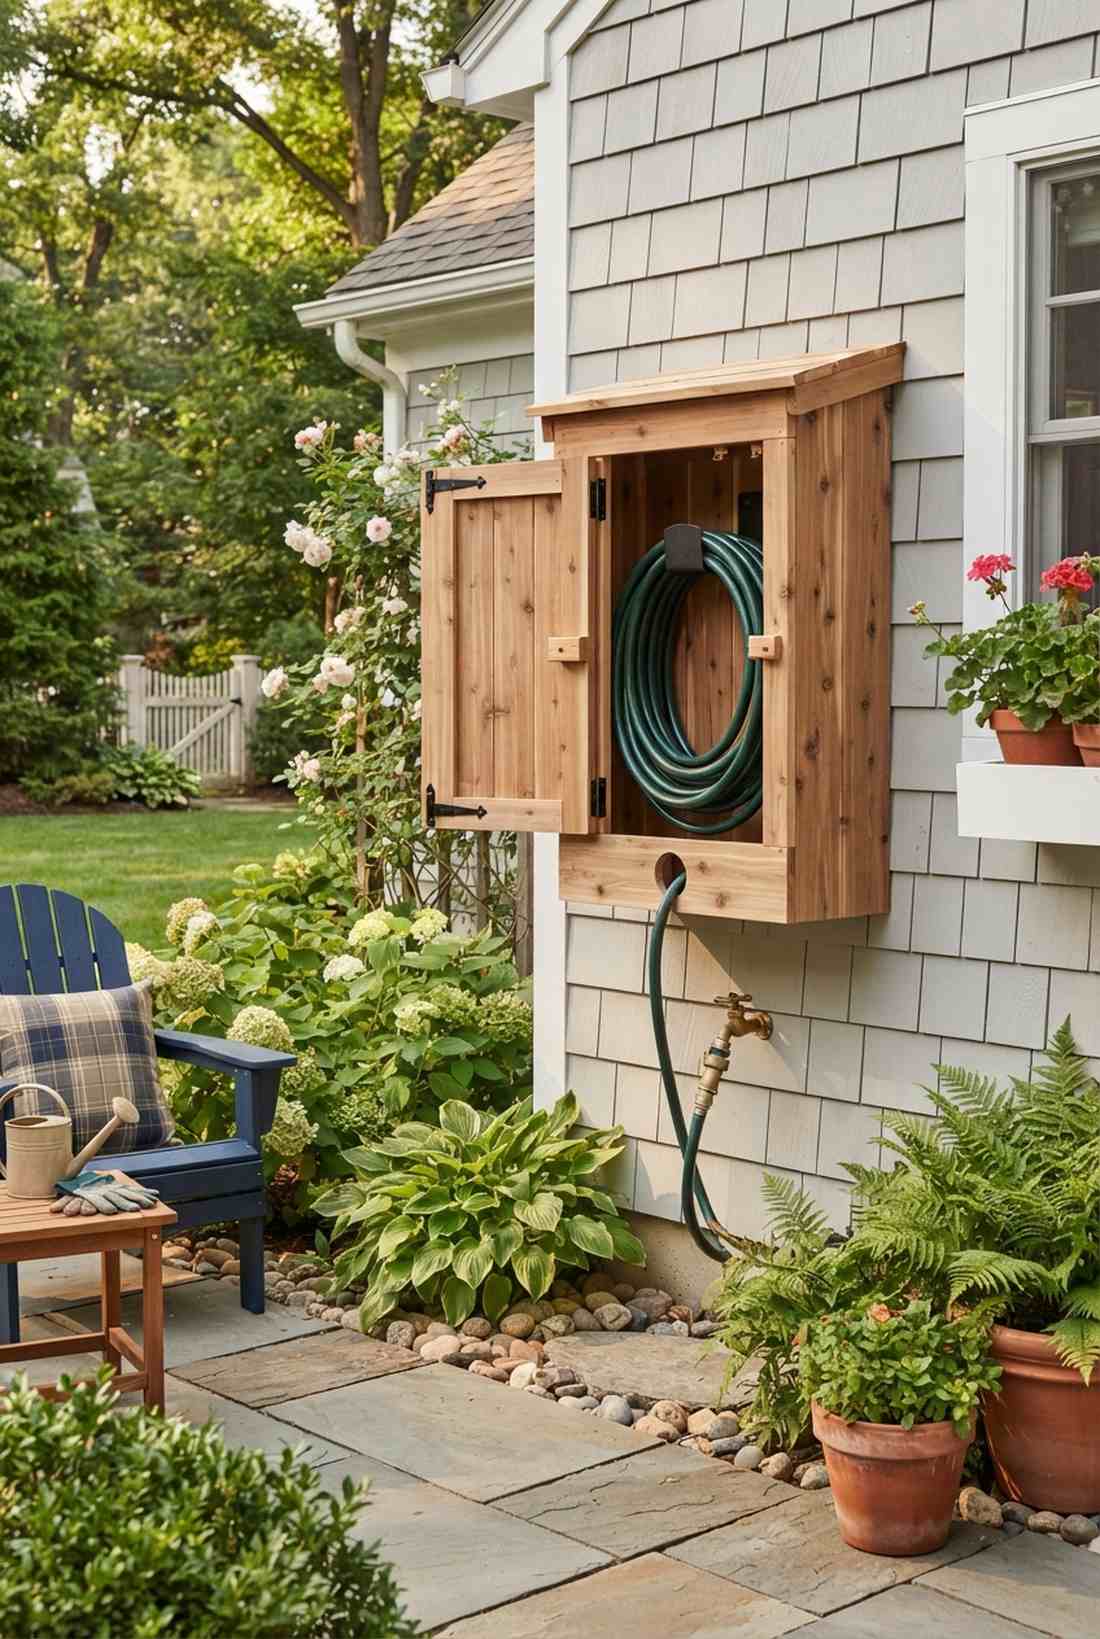
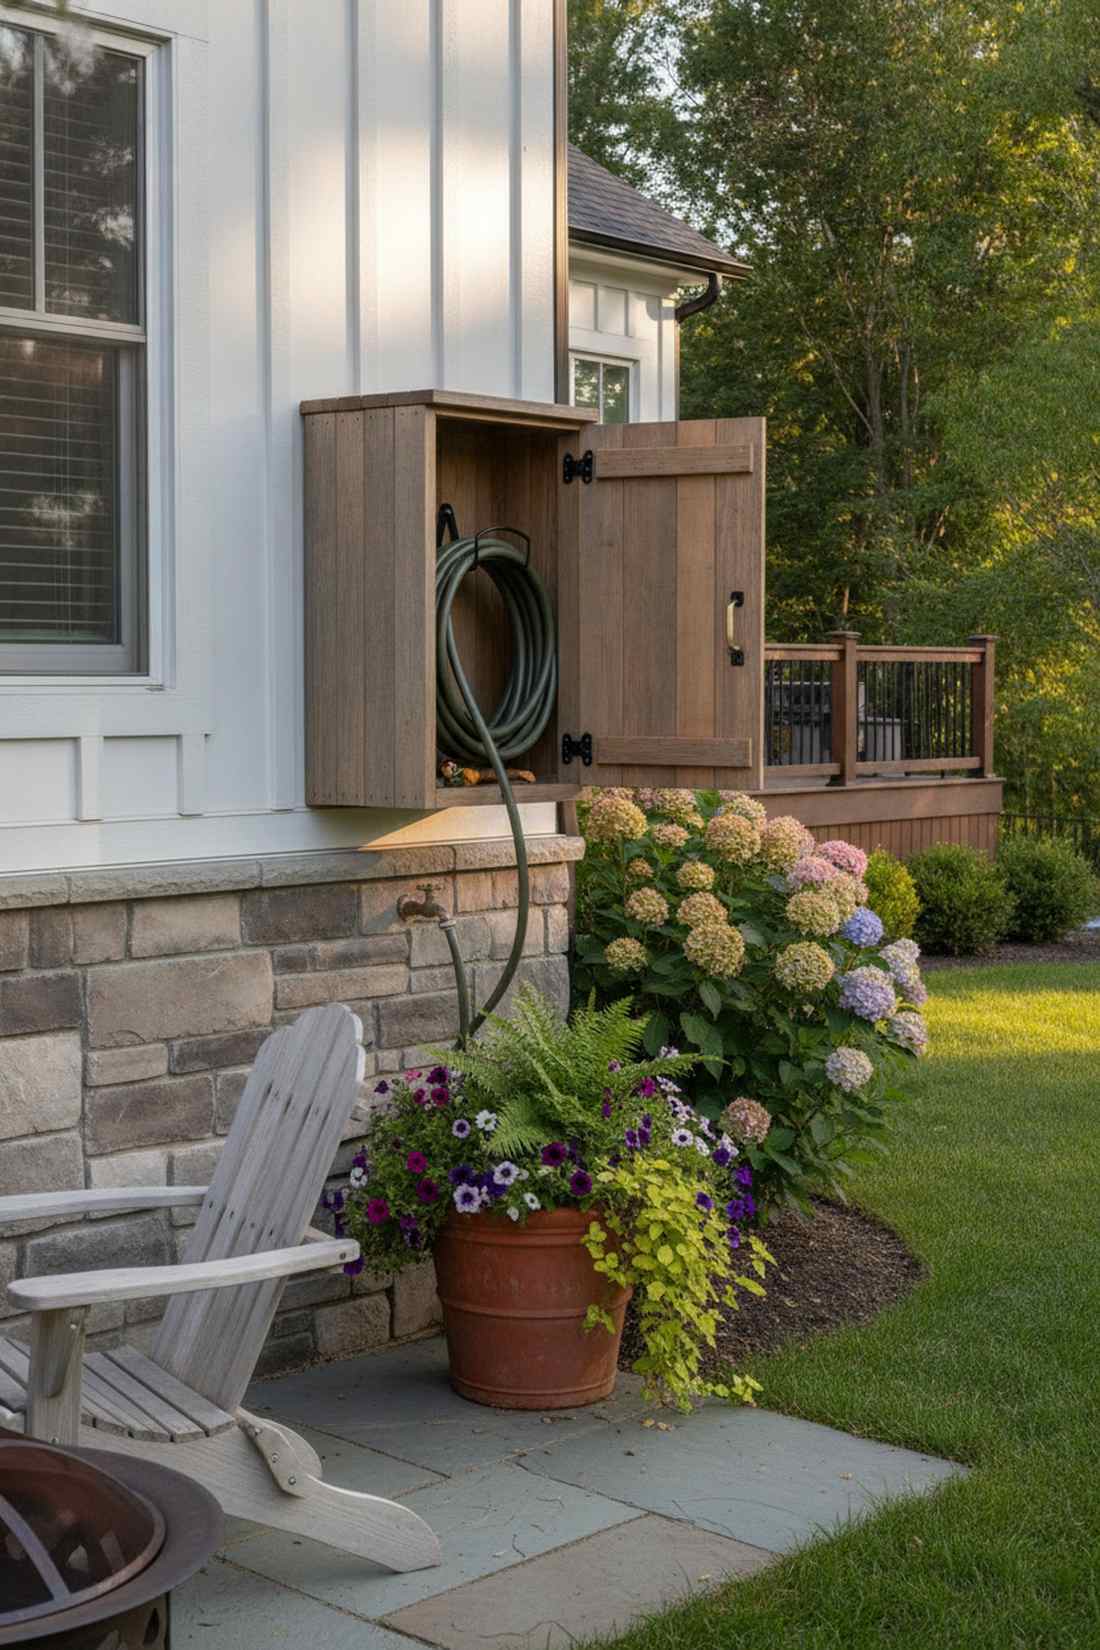
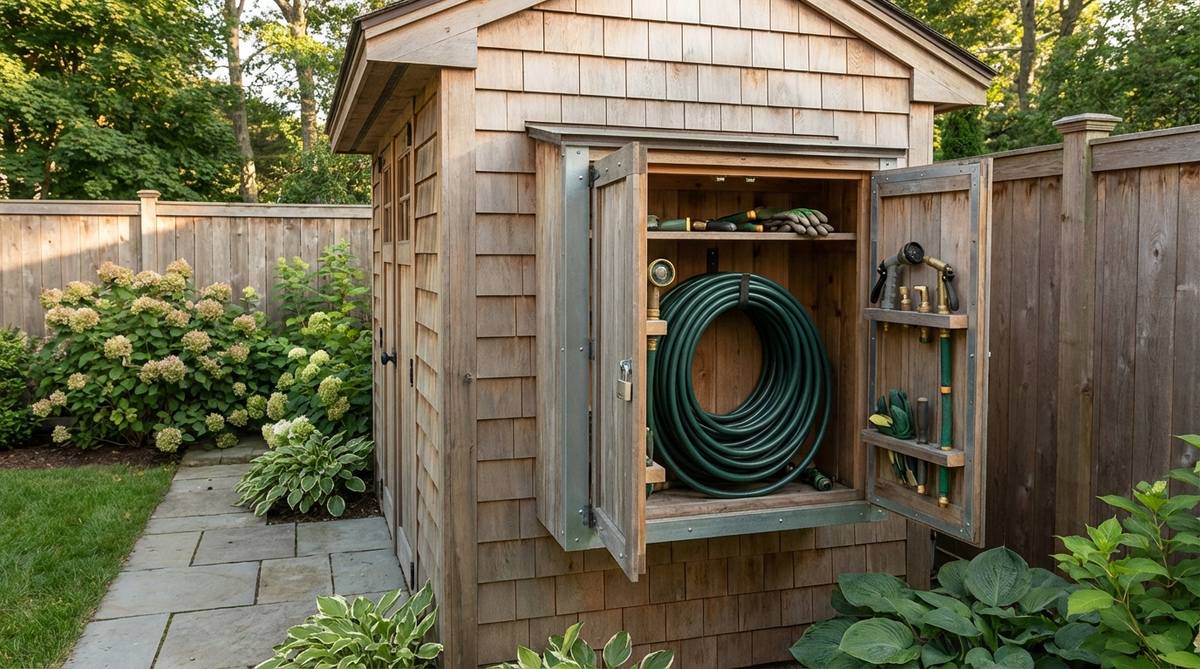
Feels like a charming custom carpentry detail, this wall-mounted mini-hutch hides your ugly neon green hoses in plain sight. It attaches directly to the exterior wall right above the spigot.
Leaving expensive brass nozzles baking in the dirt destroys them, but an enclosed wooden cabinet looks far more expensive than it is and protects your watering investments. Mount a heavy-duty steel looping bracket inside so the hose coils perfectly without kinking.
This micro-build costs barely $40 in scrap wood. A fast afternoon project that drastically cleans up the patio.
- Key Materials: Scrap cedar wood, internal metal hose hook
- Vibe / Style: Tidy cottage detail
- Difficulty: Very easy
- Budget Breakdown: Cedar: $25 | Hook: $10 | Hardware: $5
- Creator’s Tip: Drill a 2-inch hole in the bottom of the cabinet so you can keep the hose permanently connected to the water spigot outside.
- Smart Sourcing: Heavy-duty wall-mounted hose reel kits and UV-resistant exterior wood stains.
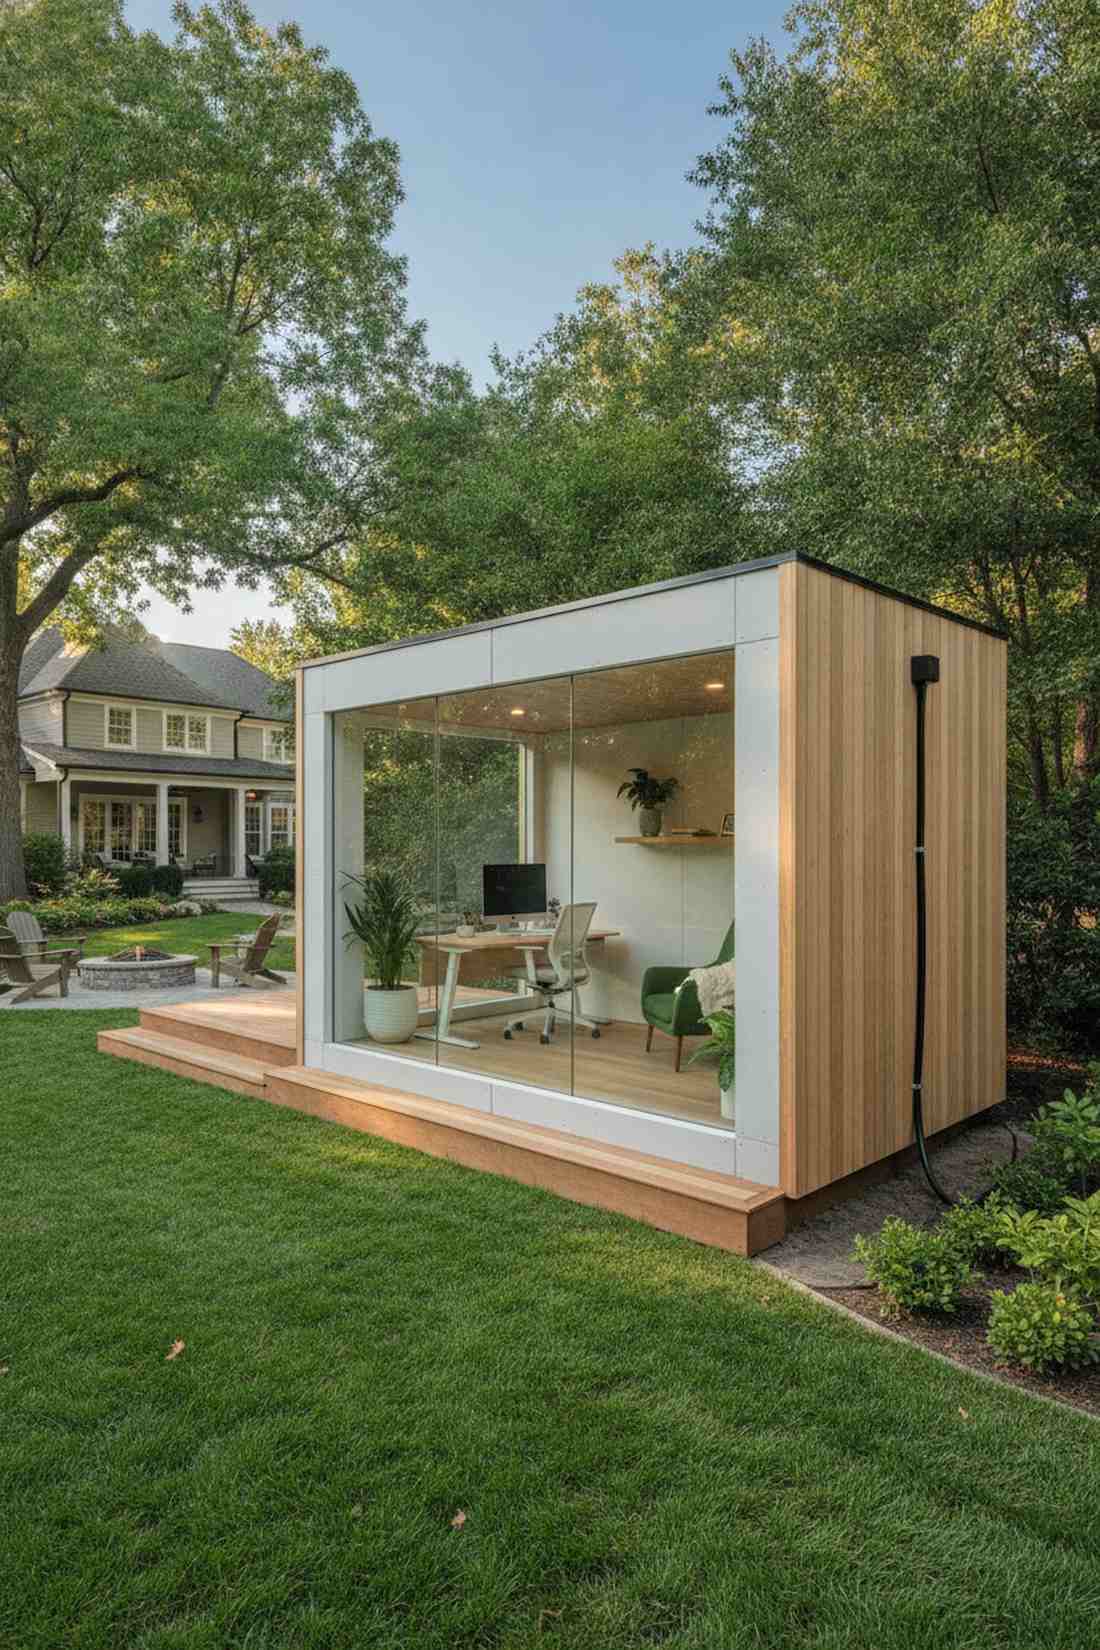
33. Micro Pod Workspace
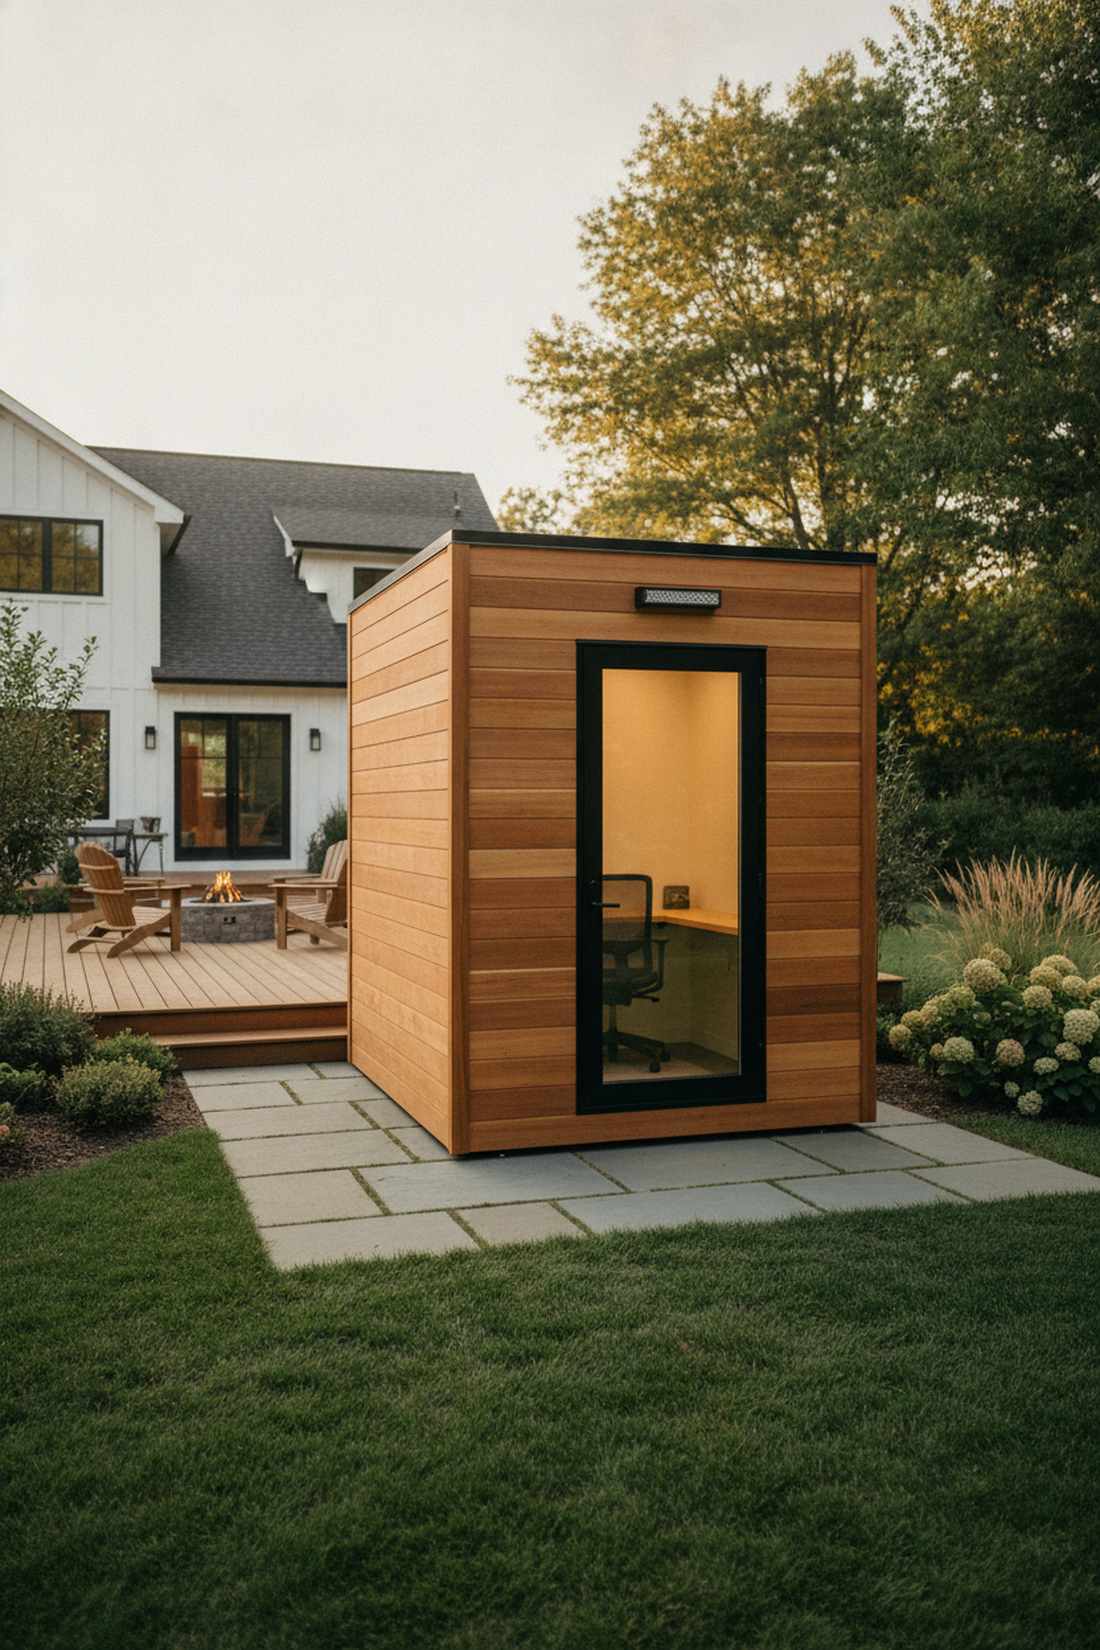
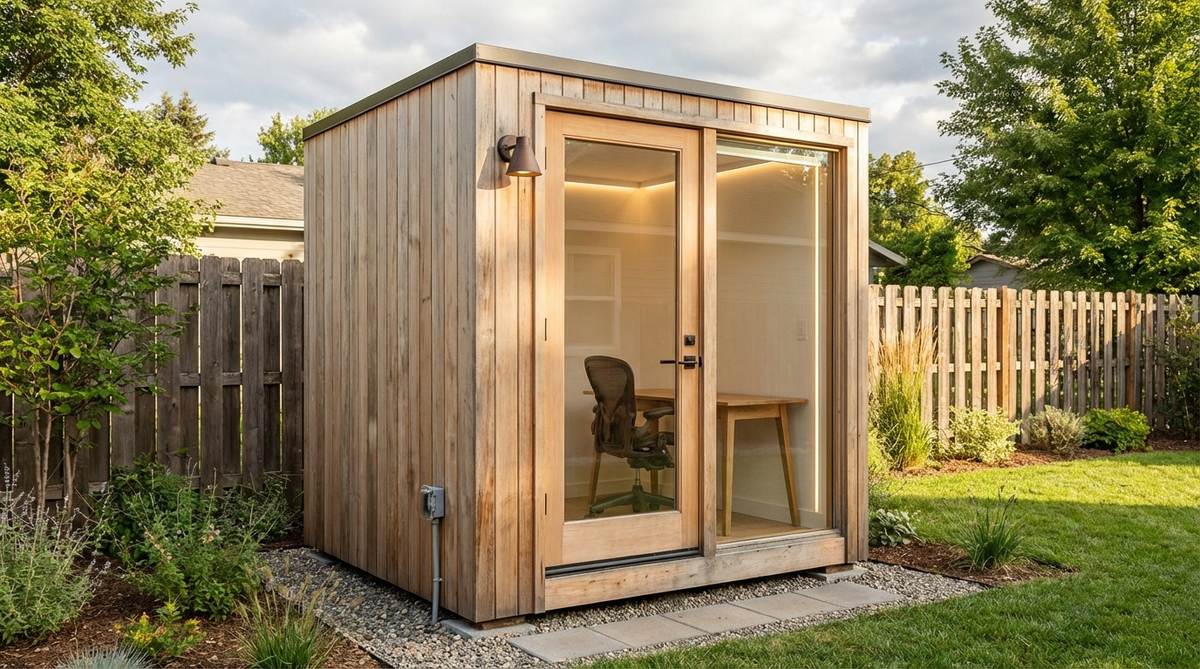
Emanates an ultra-modern tech-campus energy, this super-compact productivity cube is the absolute minimum viable space for deep focus. It requires almost zero square footage while delivering maximum isolation.
Massive outbuildings trigger zoning nightmares, but a 6×6 footprint slides perfectly under local permit radars while delivering a surprisingly premium look. Clad the exterior in horizontal Western Red Cedar to make it look like an expensive architectural feature.
This premium tiny-pod build costs $2,000–$4,000 depending on your luxury finishes. Save this to your ultimate modern living board.
- Key Materials: Western Red Cedar siding, modern glass door
- Vibe / Style: Hyper-modern focus pod
- Difficulty: Advanced DIY
- Budget Breakdown: Cedar Siding: $800 | Glass Door: $500 | Frame/Insulation: $1000
- Creator’s Tip: Install a ductless mini-split AC unit to maintain perfect room temperatures without taking up any precious floor space.
- Smart Sourcing: Pre-milled Western Red Cedar cladding packs and compact ductless mini-split AC starter kits.
Transform Limited Space Into Maximum Function
These exactly 33 premium small garden shed blueprints demonstrate that smart planning overcomes any outdoor space limitation, whether you need heavy-duty tool storage or a high-end creative workspace. Utilizing vertical organization kits, modular resin panels, and intelligent lean-to layouts allows you to extract massive utility without crowding your lawn. Focus heavily on smart sourcing—investing in UV-coated polycarbonate, heavy-duty brackets, and pre-cut kits ensures your build outlasts the harshest seasons. Implement these precise layouts to instantly elevate your property’s value and visual aesthetic.
Frequently Asked Questions
What is the best size for a small garden shed?
The optimal layout depends heavily on whether you are using basic storage or premium modular shed systems. A standard 6×4 foot footprint handles heavy-duty garage organization systems brilliantly for most suburban yards, while an ultra-narrow 4×3 foot lean-to is superior for urban balconies. Always invest in UV-resistant outdoor storage solutions and measure your largest items, like mowers or pre-assembled racks, before pouring your base foundation.
How do I maximize storage in a small garden shed?
Stop piling things on the floor and aggressively upgrade your vertical plane using heavy-duty galvanized steel pegboard kits and ceiling-mounted hoists. By locking long-handled tools into wall track systems and placing miniature garden supplies into clear acrylic organizer bins, you double your usable volume. Opt for modular shelving starter packs that adapt as your seasonal landscaping tools grow over the years.
Do I need planning permission for a small garden shed?
Most backyard builds under 120 square feet bypass heavy permit restrictions, making DIY prebuilt timber framing kits incredibly popular. However, you must maintain proper setback distances from property lines—usually 5 feet—and stick to low-profile pent roofs to avoid height violations. Always verify with local authorities, as installing commercial-grade electrical conduit kits for a micro-studio often triggers distinct inspection requirements.
What materials last longest for small garden sheds?
If you want a structure that survives a decade without rotting, skip cheap pine and heavily invest in weather-resistant resin storage kits or hot-dipped galvanized steel framing. For a luxury aesthetic, pre-cut Western Red Cedar siding paired with a high-end UV-protective marine sealant is the undisputed king of durability. While budget panels fade quickly, upgrading to premium twin-wall polycarbonate sheets guarantees shatterproof longevity.
Can a small garden shed be used as a home office?
Absolutely, retrofitting a standard unit into a premium productivity pod is one of the highest ROI backyard projects available. The secret to success lies in wrapping the interior with rigid foam insulation starter kits and installing double-pane thermal windows to block out neighborhood noise. Finish the space with moisture-proof vinyl plank flooring and proper ventilation to ensure your high-end electronics stay perfectly safe year-round.
How much does a small garden shed cost?
Basic weather-resistant resin pop-up kits start at an incredibly affordable $300, delivering fast, dry storage in a single afternoon. If you step up to pressure-treated heavy-duty timber designs, expect to spend $800 to $1,500 for materials, especially if you add premium architectural shingles. Full-scale insulated micro-studios with custom acoustic foam panels and professional wiring can range from $3,000 to $10,000, drastically increasing your property’s overall appeal.