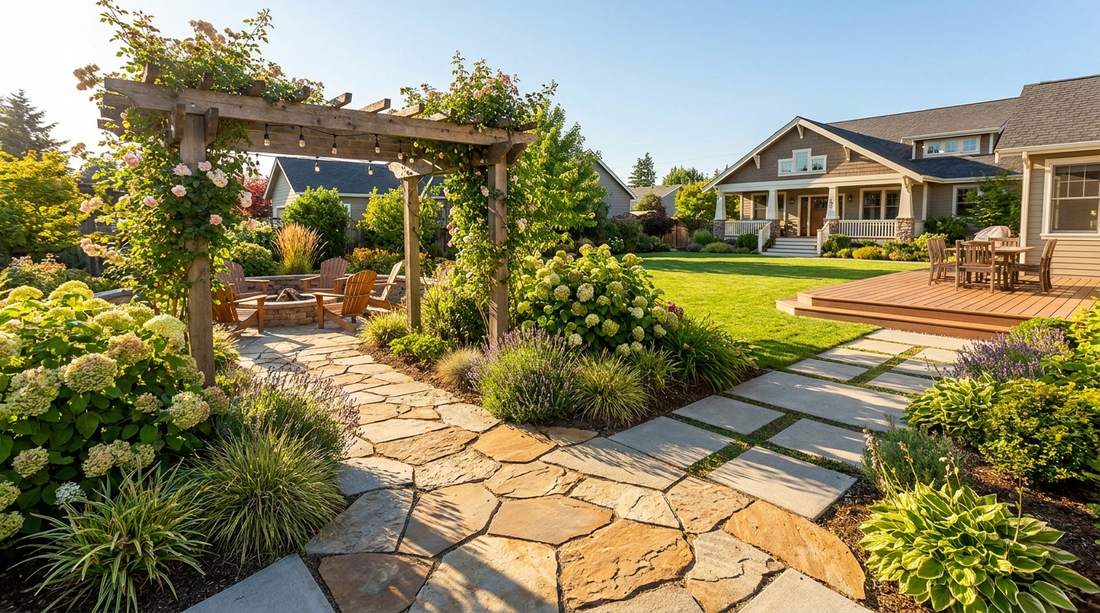
A well-planned stepping stones garden commands attention immediately. Uncover precise budget breakdowns and material sourcing secrets here. Expect a flawless designer-level finish for pennies.
Design Snapshot: Core Principles
- Height Matters: Set stones flush with grass for easy mowing; raise them slightly above gravel to prevent slipping on loose material
- Spacing Strategy: Position stones 18-24 inches apart for comfortable walking stride and natural flow through the garden
- Material Harmony: Match stone color and texture to existing hardscape elements while contrasting with ground cover for visual definition
- Drainage First: Install proper base layers of sand or gravel beneath stones to prevent settling and ensure long-term stability
Grass-Embedded Stepping Stone Layouts
Stepping stones set into lawn create subtle pathways that preserve the garden’s green expanse while directing foot traffic. These designs work exceptionally well in American yards where lawn culture dominates, offering both function and refined visual appeal.
1. Diagonal Square Pavers in Lawn
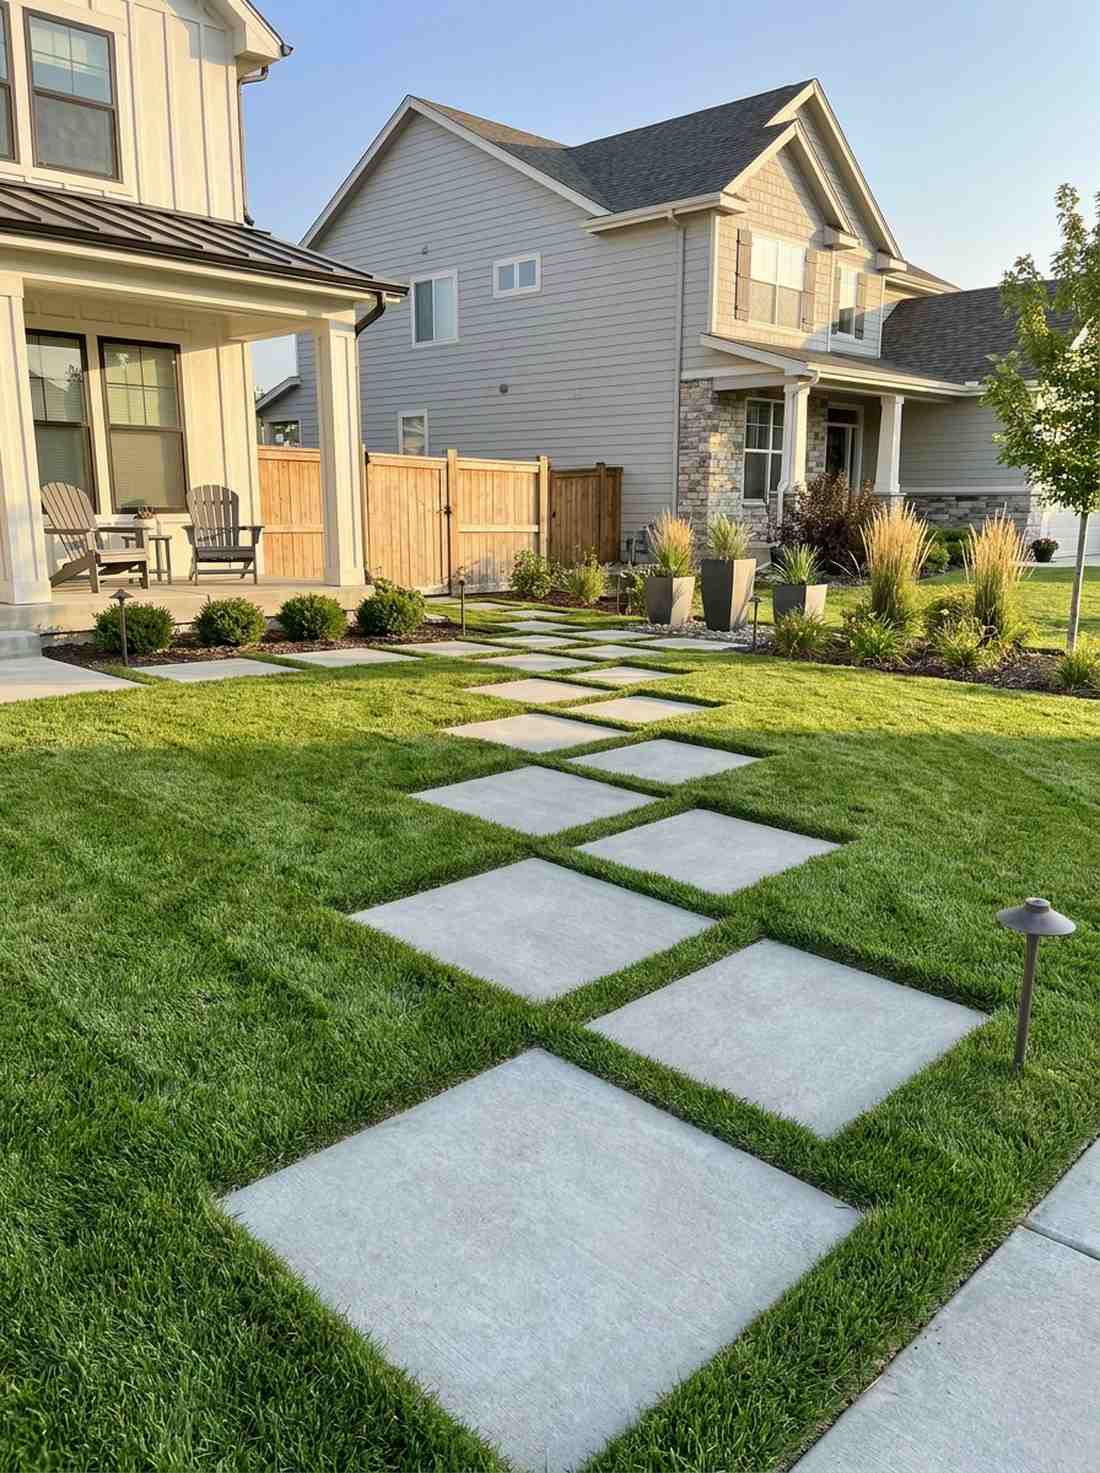
This layout feels like stepping into a modern art gallery right in your front yard. Geometric patio garden decor thrives here, making it exceptionally perfect for connecting front porches to side gates.
Rotating standard concrete 45 degrees delivers a surprisingly premium look without extra effort. Lock them down fast using heavy-duty miniature garden supplies and industrial-grade edgers to maintain razor-sharp grass lines.
You can easily pull this off for around $20–$40 per linear foot. Save this to your DIY weekend garden board to track your favorite high-end looks.
- Key Materials: 18-inch pre-cast concrete squares
- Vibe / Style: Clean suburban modernism
- Difficulty: Easy beginner setup
- Budget Breakdown: Pavers: $12 each | Base sand: $15 total.
- Creator’s Tip: Use a flat-spade edge trencher for zero-gap turf transitions.
- Smart Sourcing: commercial-grade heavy-duty weed barrier fabric and pre-mixed fast-setting paver base bags.
2. Circular Stepping Stones with Natural Spacing
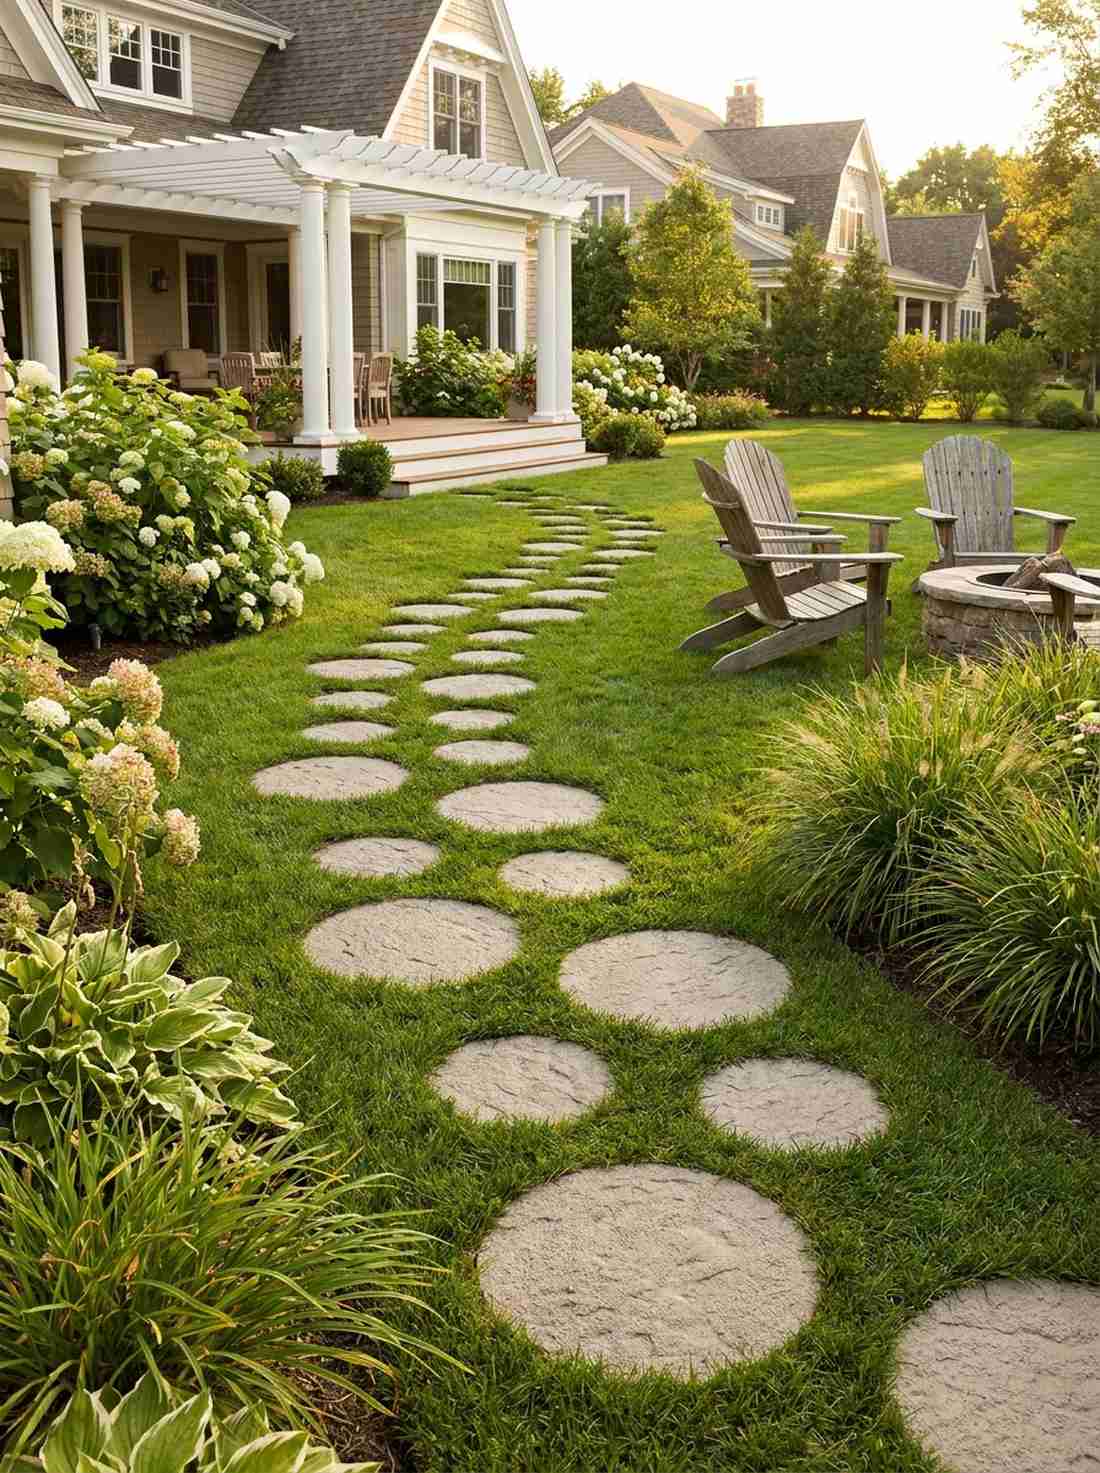
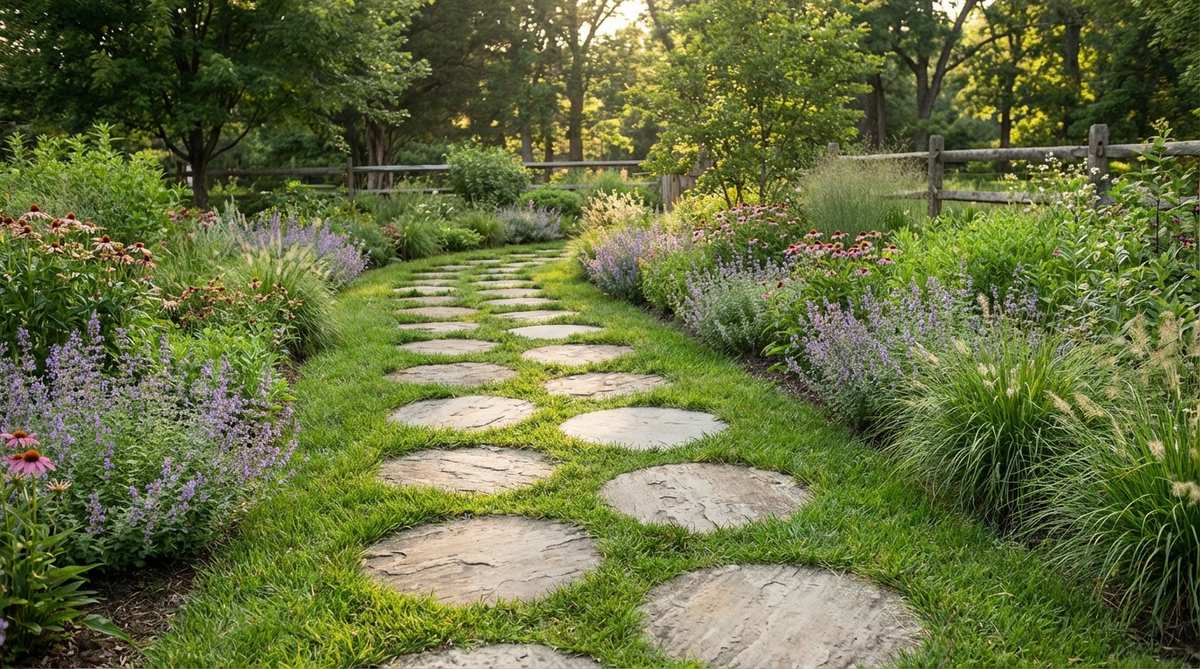
This curve-hugging design screams secret English cottage. The curved backyard lawn decor aesthetic softens aggressive property lines and works beautifully across wide-open grass expanses.
Ditching rigid grids completely ignores outdated landscaping norms and gives a designer-level finish. Upgrading to slightly textured stones guarantees maximum slip resistance during morning dew.
Expect to spend roughly $15–$30 for a short stretch. Pin this if you’re planning a small space upgrade before spring hits.
- Key Materials: Round cast-stone rounds
- Vibe / Style: Soft pastoral cottage
- Difficulty: Very low
- Budget Breakdown: Stones: $8 each | Leveling gravel: $10.
- Creator’s Tip: Walk the path naturally first, then place stones exactly where your feet land.
- Smart Sourcing: pre-cast non-slip circular stone molds (starter kit) and bulk lightweight leveling sand.
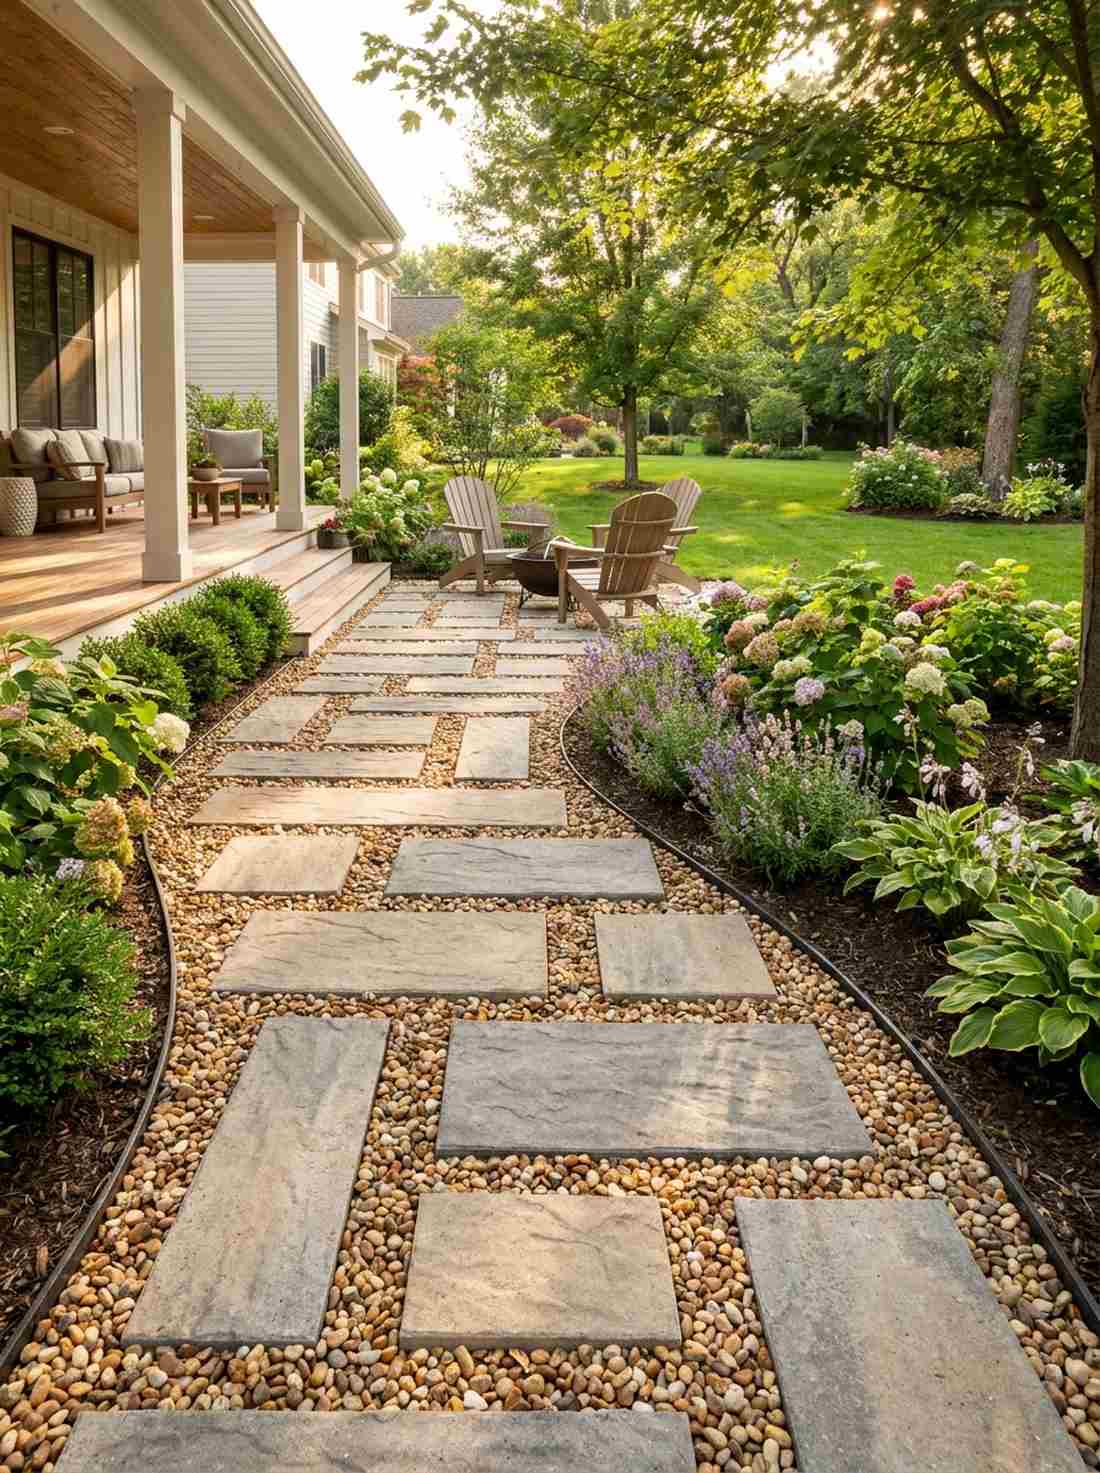
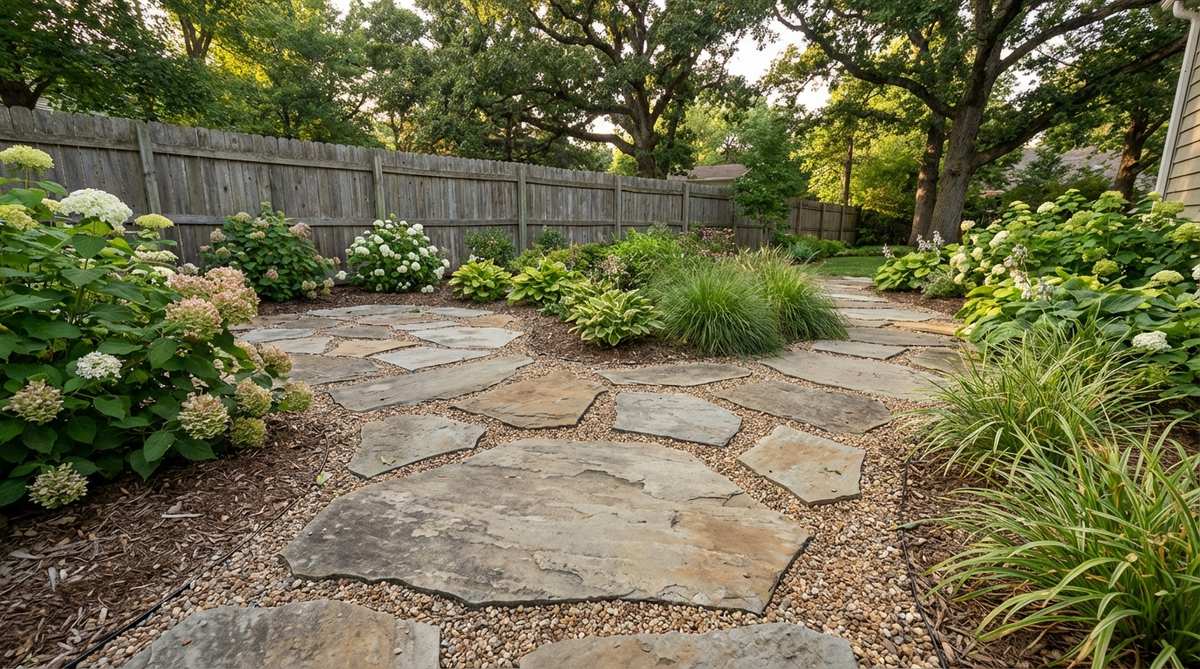
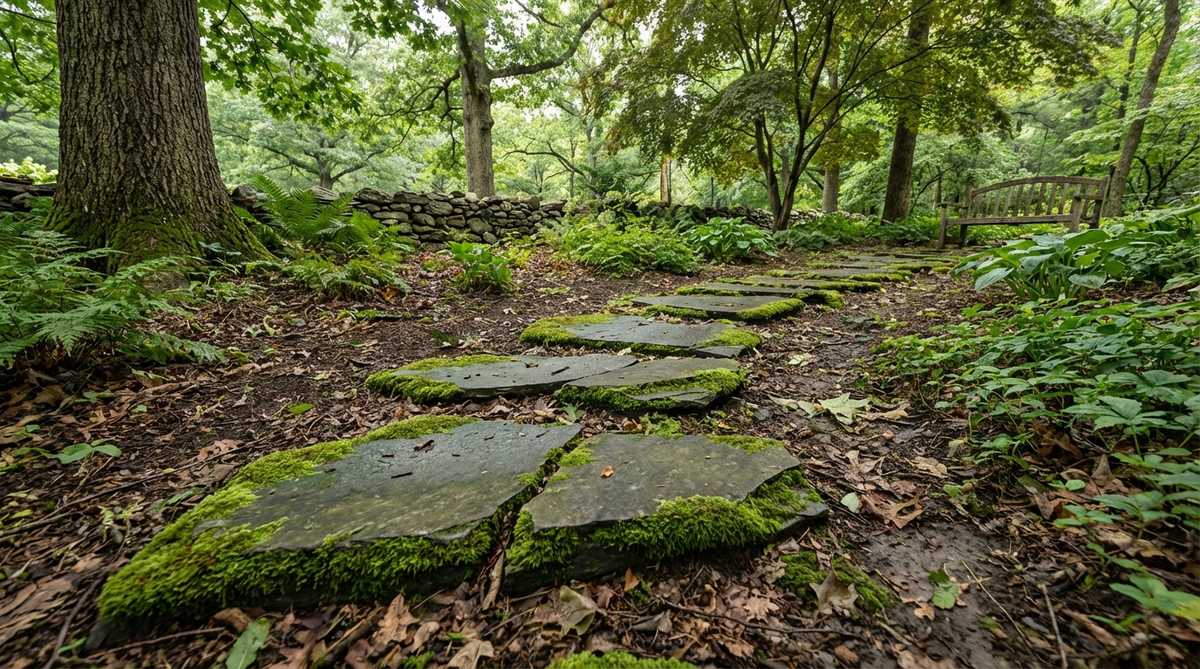
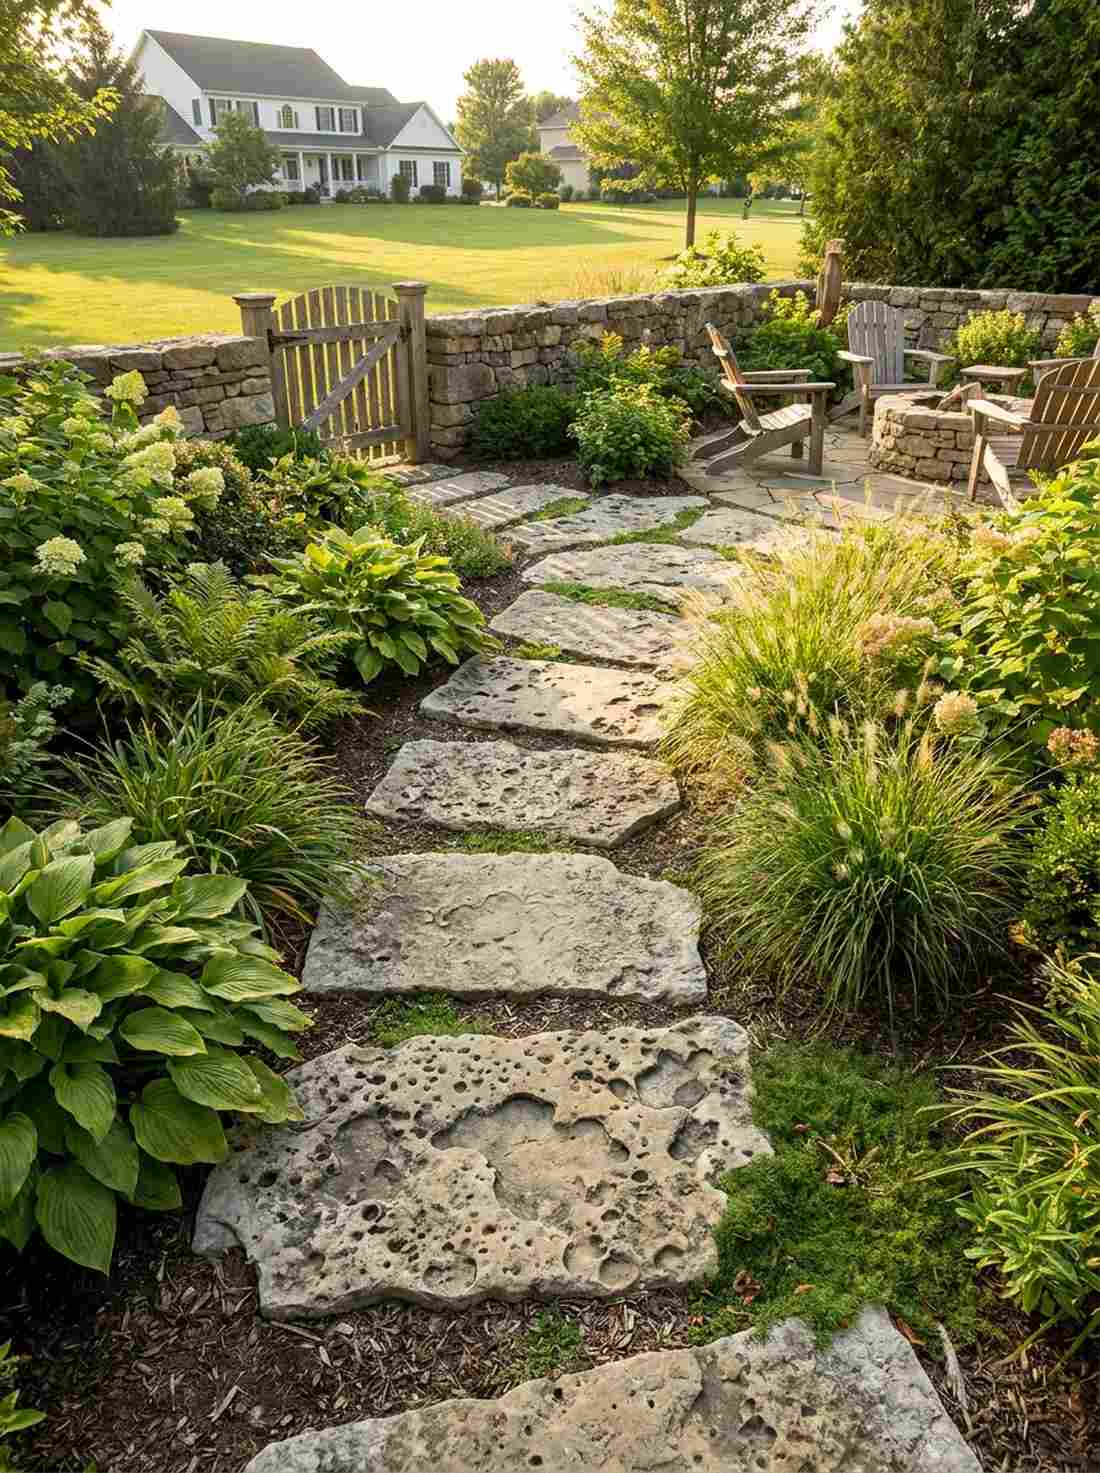
3. Irregular Flagstone Meandering Path
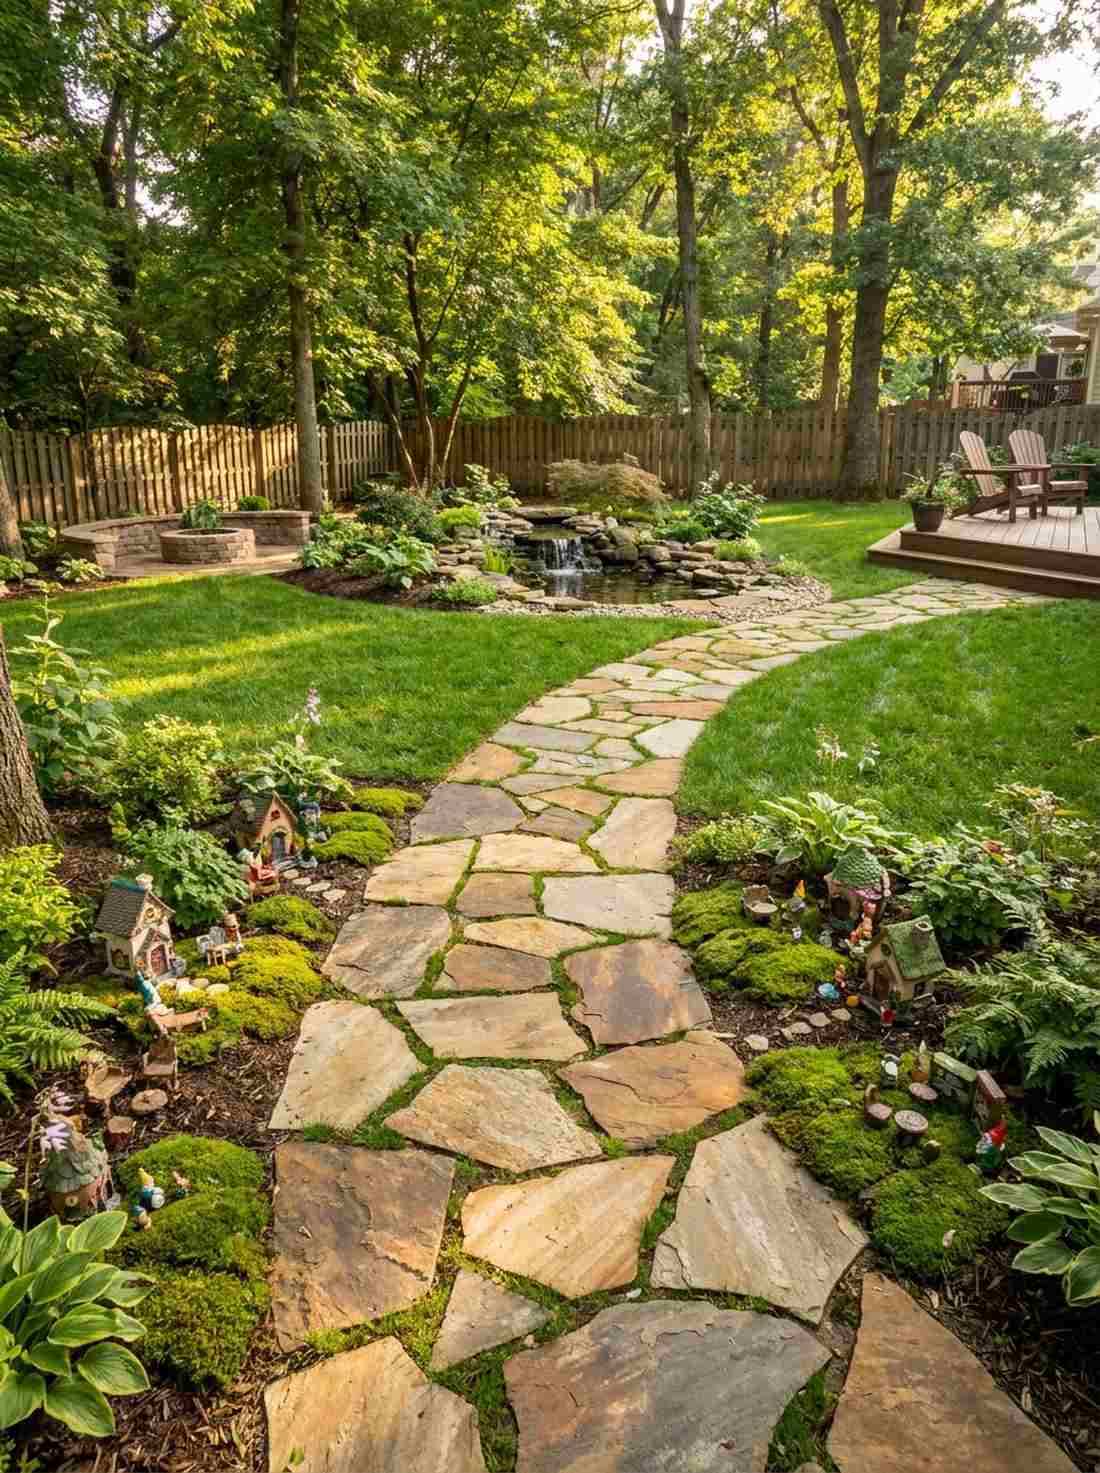
Walking this path feels like a tiny hidden forest you accidentally discovered. Rustic landscape pathways provide natural charm, working best as a quiet route to a backyard water feature.
Using jagged edges totally fakes a custom masonry job without the expensive contractor fees. Dropping in a few scattered fairy garden kits along the edges forces guests to slow down and admire the space.
This layout runs about $40–$60 depending on your local rock yard. It’s a fast upgrade that completely changes the vibe of a boring lawn.
- Key Materials: Natural slate or sandstone flagstones
- Vibe / Style: Organic woodland retreat
- Difficulty: Moderate heavy-lifting
- Budget Breakdown: Flagstone: $30 per pathway section | Soil amendment: $10.
- Creator’s Tip: Sink stones exactly 1/4 inch below the grass line so your mower glides over safely.
- Smart Sourcing: UV-coated resin fairy cottage kits and pre-cut organic moss sheets (bulk pack).
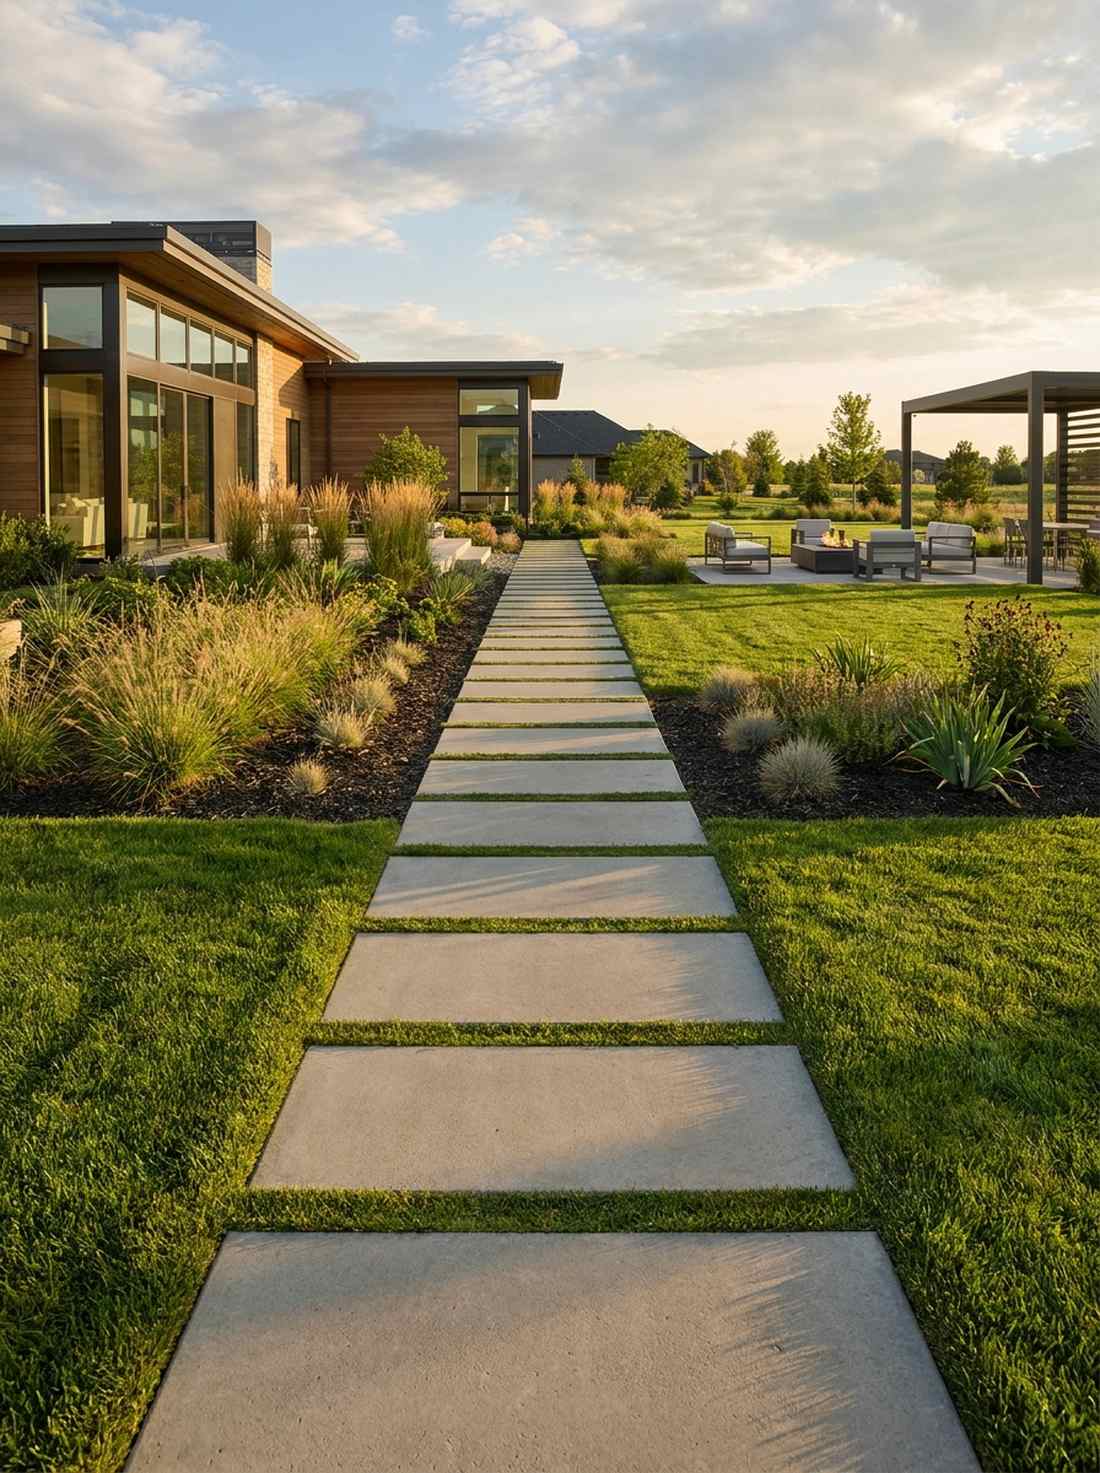
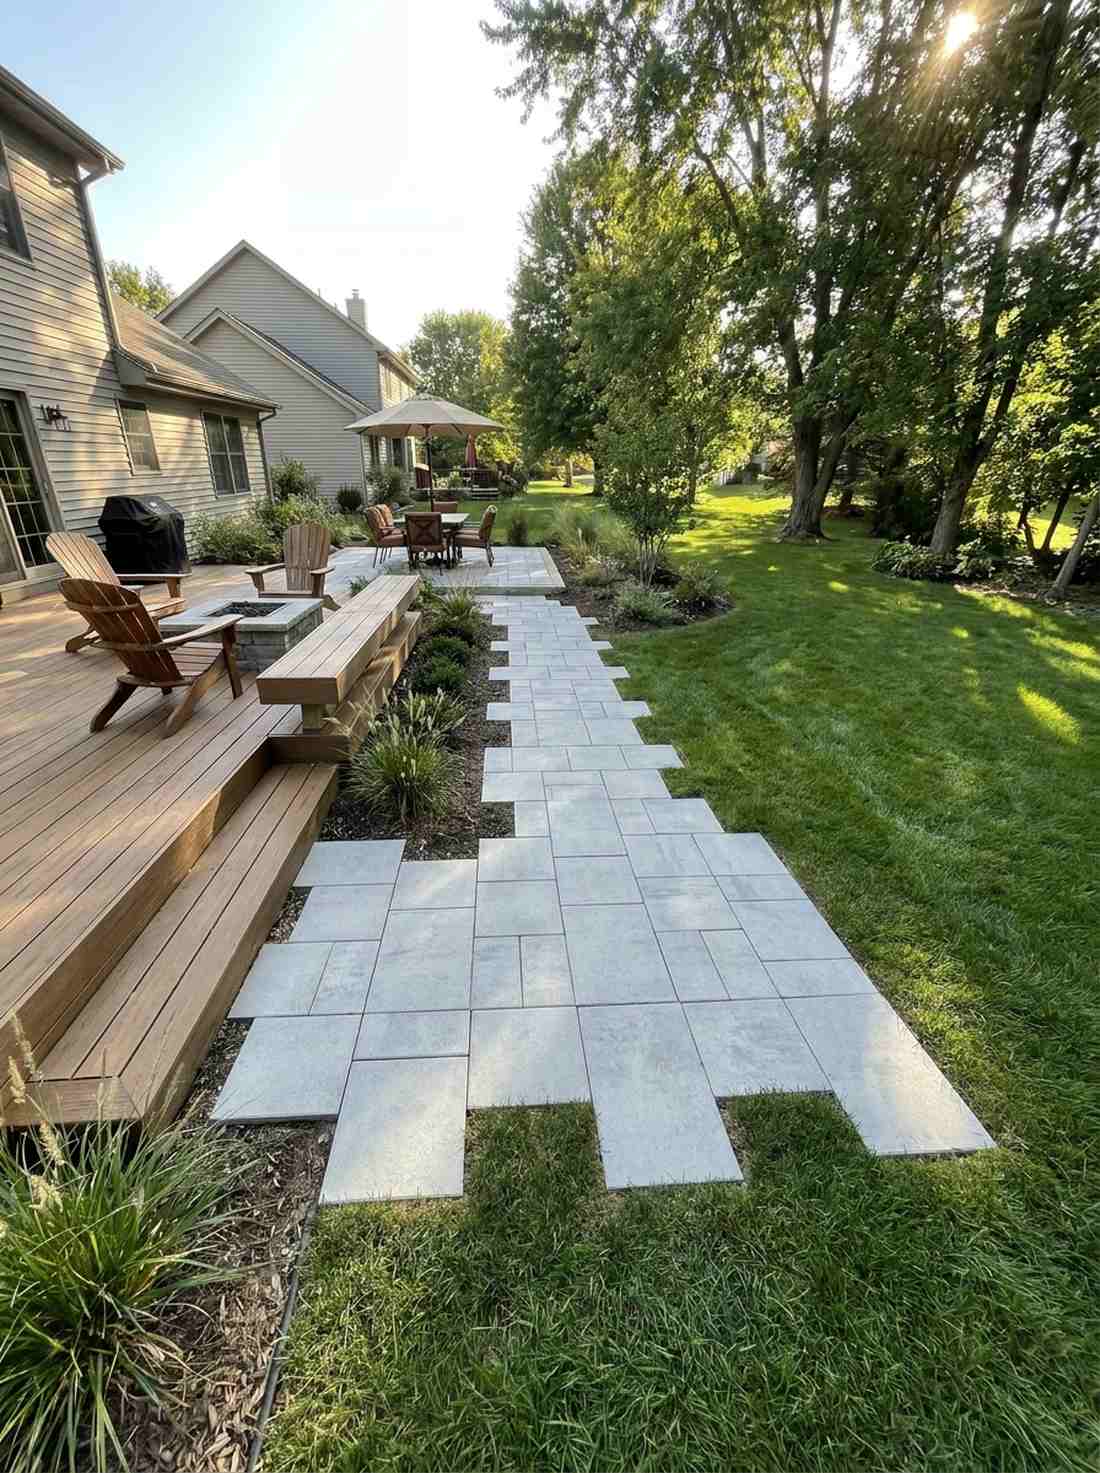
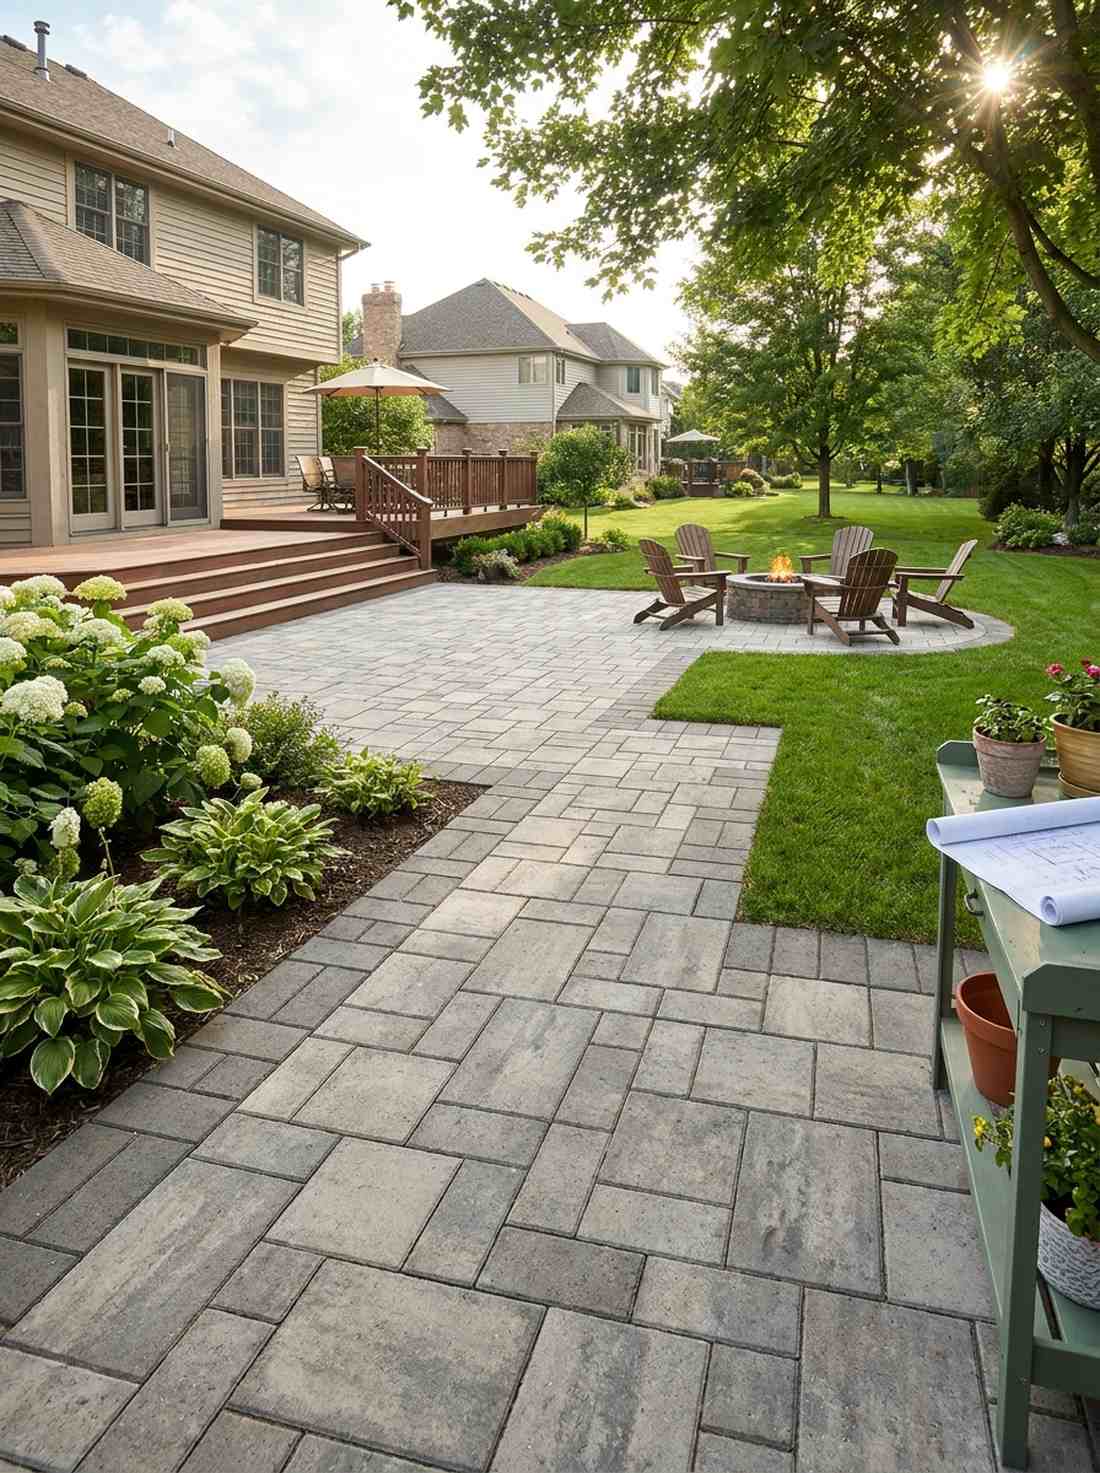
4. Rectangular Bluestone Offset Pattern
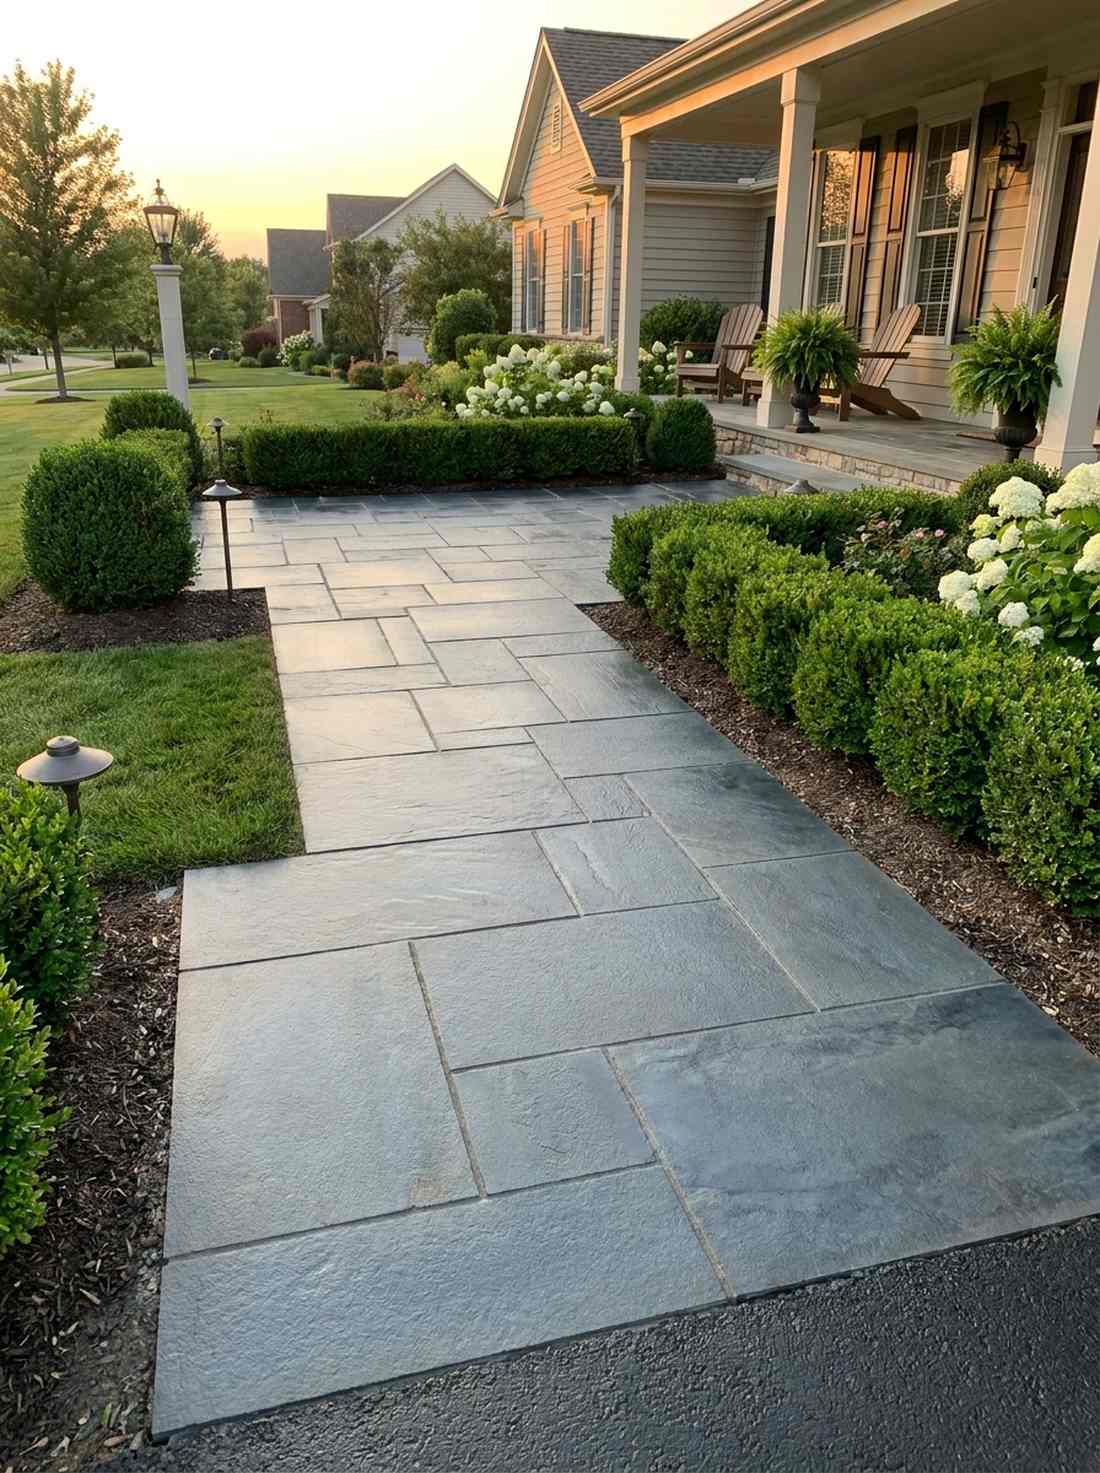

This setup radiates raw luxury resort energy from the first glance. A formal front yard hardscaping approach like this is the ultimate solution for upgrading standard builder-grade entryways.
Staggering the joints looks far more expensive than it is and creates visual rhythm. Treat the surface with a premium sealant to ensure the deep blue tones pop even when bone dry.
You are looking at a $50–$80 investment for high-quality rock. Save this layout for when you want maximum curb appeal impact.
- Key Materials: Sawn-edge thermal bluestone
- Vibe / Style: Refined traditional elegance
- Difficulty: Requires precise measuring
- Budget Breakdown: Bluestone: $15 per piece | Base rock: $20.
- Creator’s Tip: Use a taut string line to keep the offset perfectly parallel to the house foundation.
- Smart Sourcing: commercial-grade color-enhancing stone sealant and heavy-duty galvanized measuring spikes.
Most people get their walkway transitions completely wrong… until they try the exact layout coming up next.
5. Tree Trunk Slice Woodland Walkway
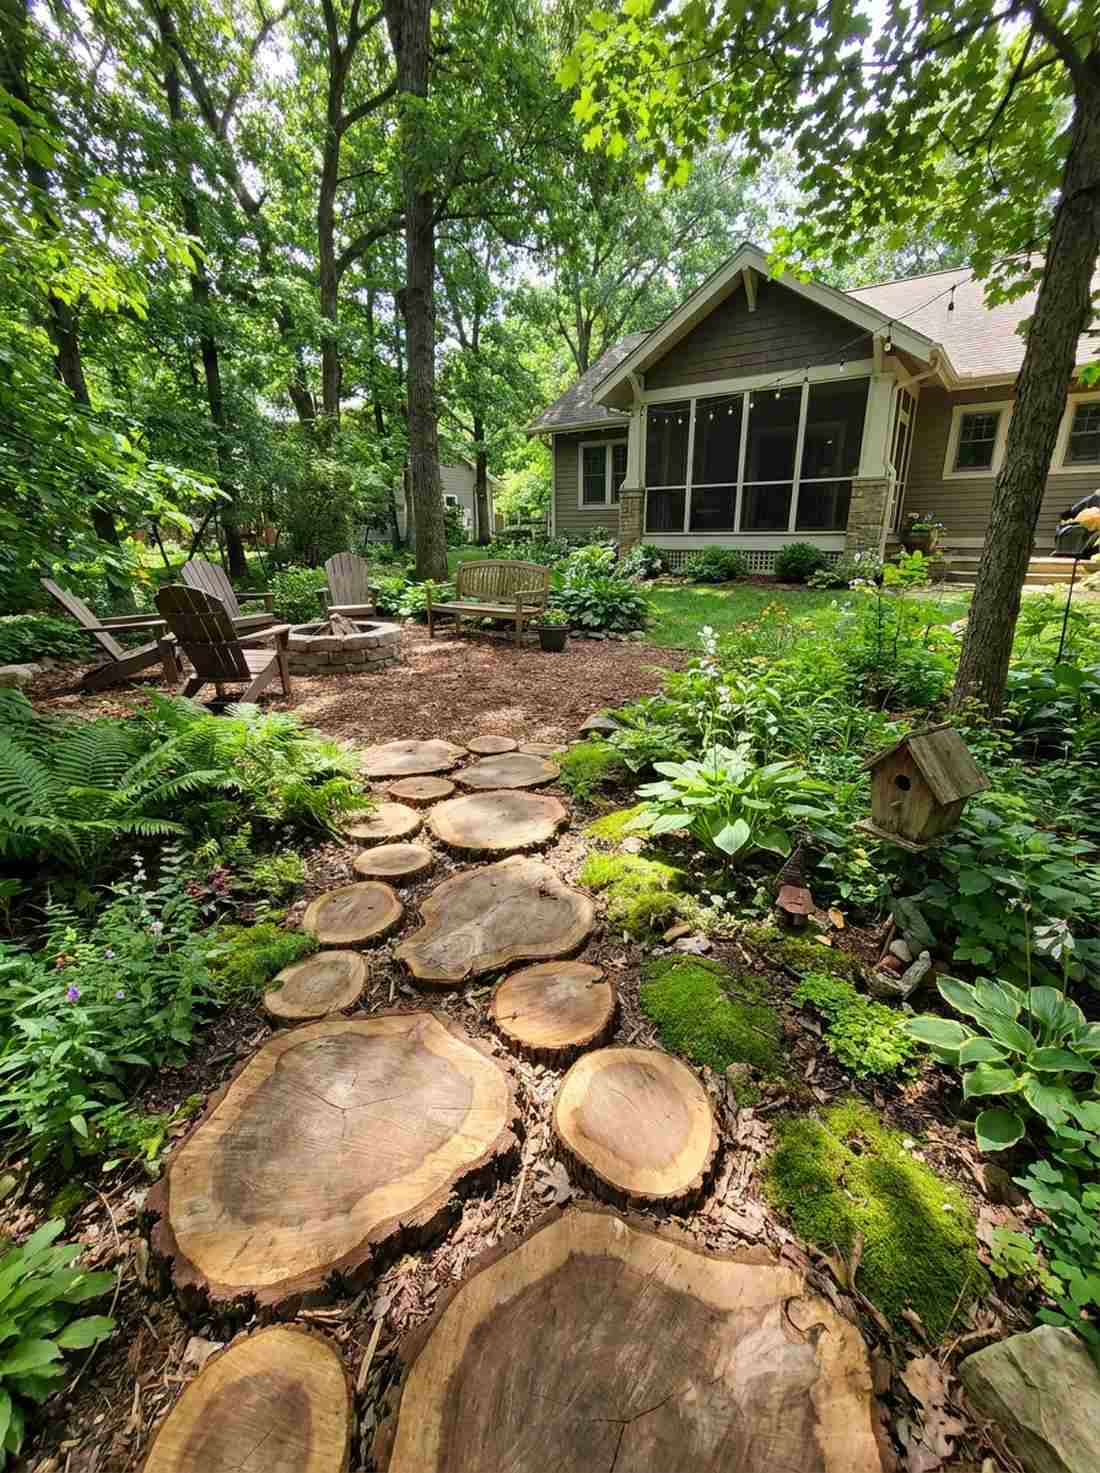
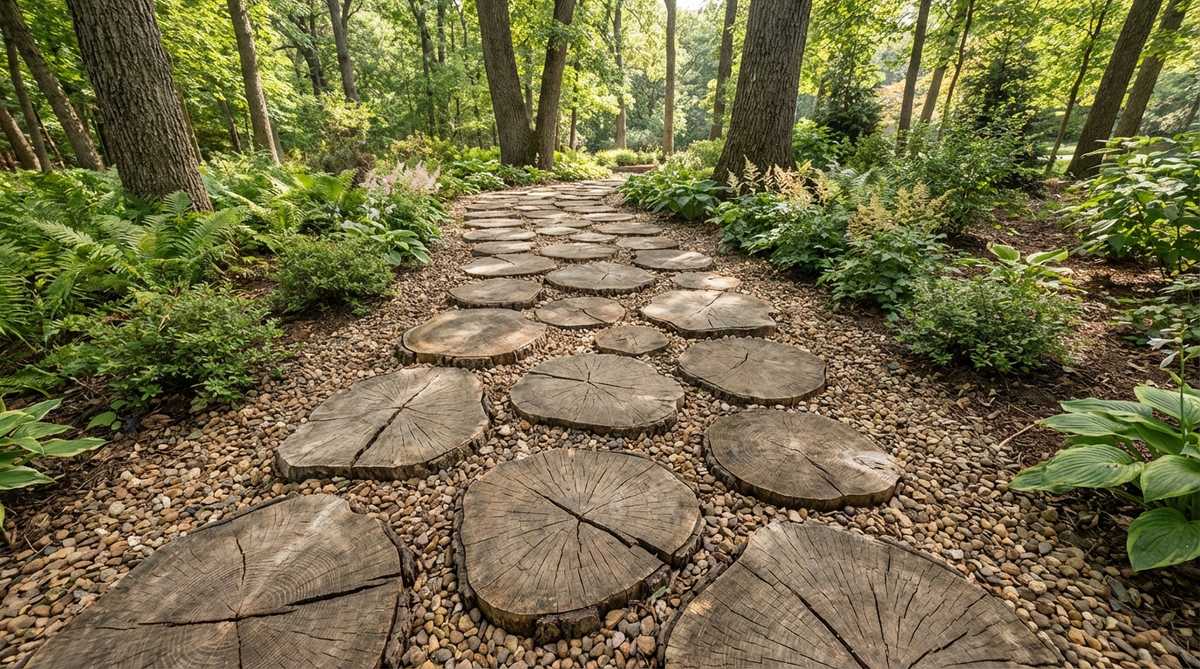
This organic aesthetic whispers quiet woodland retreat right in your backyard. Woodland fairy garden supplies blend effortlessly with this layout, making it the top choice for shaded, damp garden corners.
Repurposing natural wood rounds bypasses expensive contractor fees entirely and delivers rustic charm. Ensure you soak the bottoms in a heavy wood preserver to stop ground rot dead in its tracks.
This virtually free project costs under $15 if you source local fallen logs. Pin this to your zero-waste DIY board!
- Key Materials: Hardwood log slices (oak or cedar)
- Vibe / Style: Cabin-core rustic
- Difficulty: Easy but labor-intensive slicing
- Budget Breakdown: Wood slices: $0 | Wood preserver: $15.
- Creator’s Tip: Peel the bark off entirely to prevent insect nesting beneath the walking surface.
- Smart Sourcing: premium anti-rot timber sealant spray and bulk protective exterior deck oil.
6. Hexagonal Concrete Honeycomb Layout
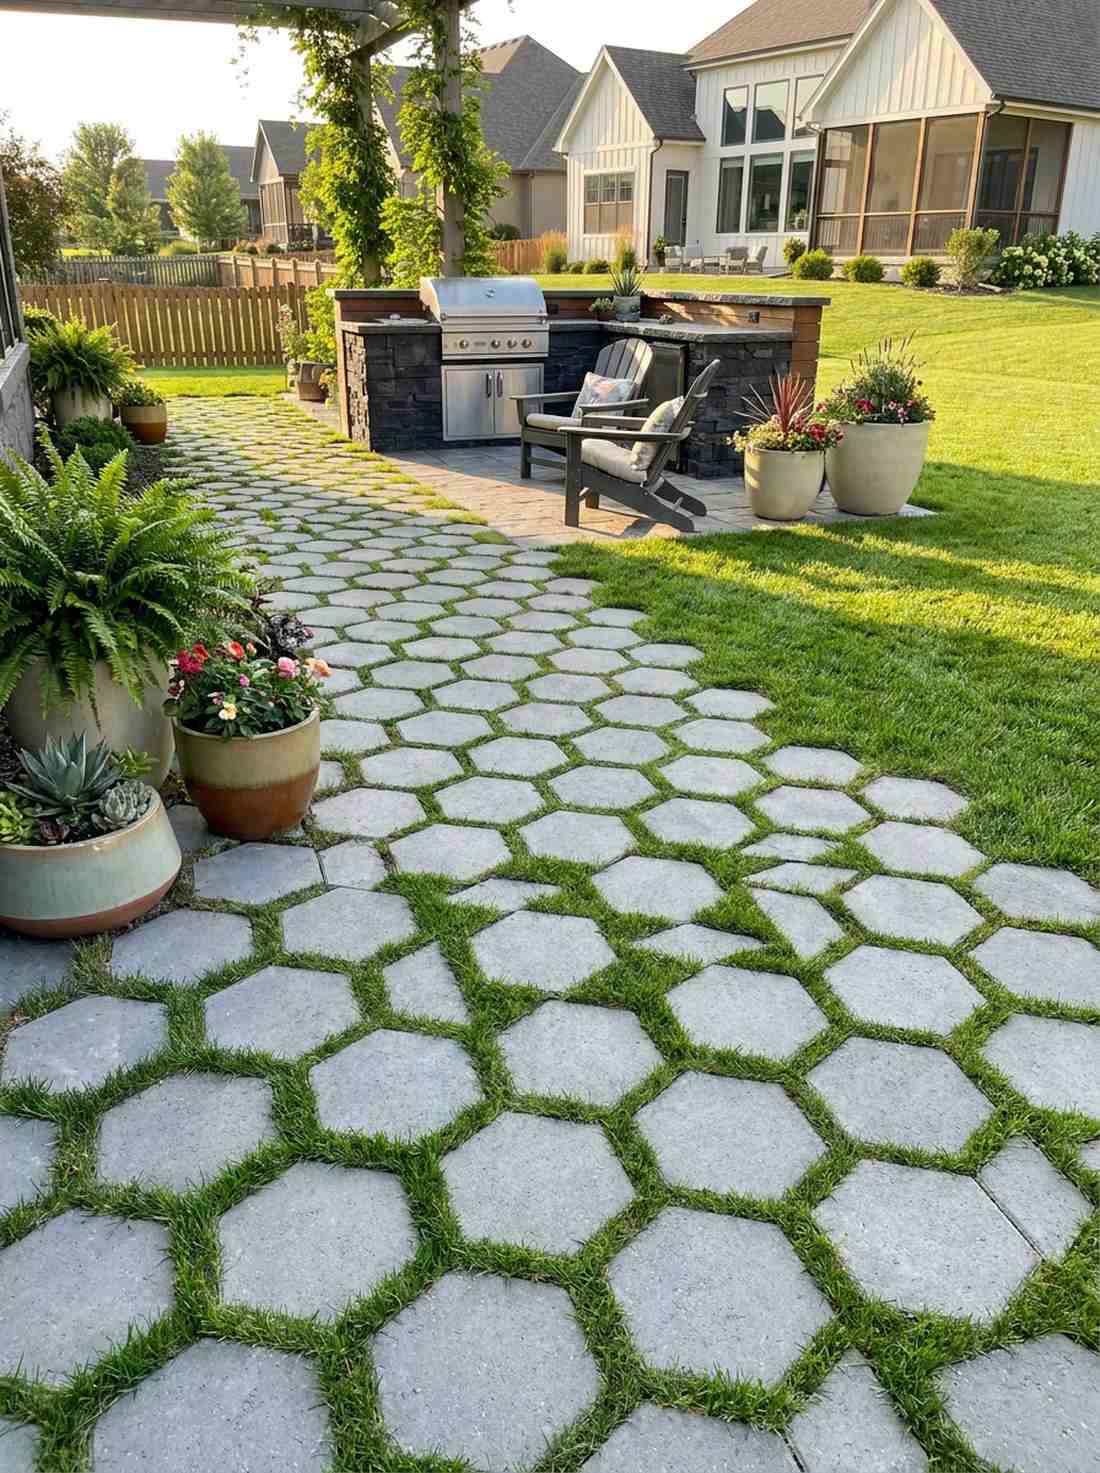
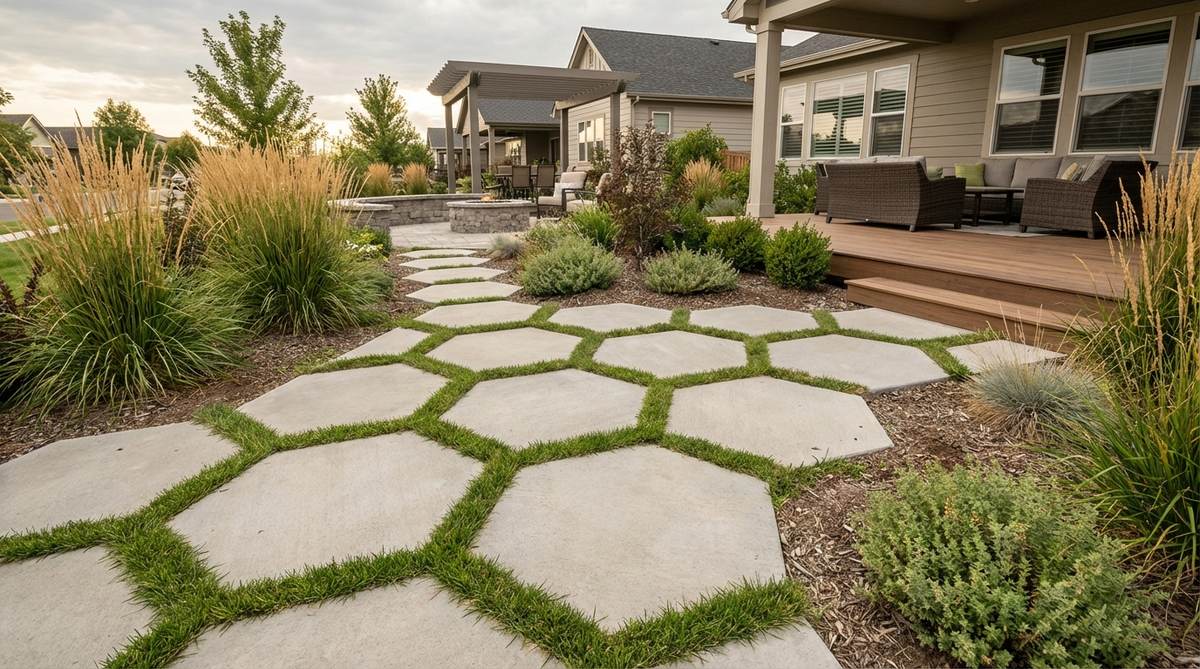
This dynamic tessellation feels like stepping into a modern botanical conservatory. Modern geometric pathway ideas like this are perfect for high-traffic grilling zones where grass constantly dies.
Locking these shapes together completely ignores standard grid rules while offering incredible structural support. Letting lush green grass burst through the tight joints provides a breathtaking organic contrast against the harsh concrete.
You can cast these yourself for roughly $30 in materials. Highly recommended for a quick weekend win that impresses guests.
- Key Materials: Hexagon concrete molds, rapid-set mix
- Vibe / Style: Mid-century botanical
- Difficulty: Moderate casting effort
- Budget Breakdown: Concrete mix: $15 | Reusable mold: $15.
- Creator’s Tip: Tap the mold sides with a rubber mallet to release trapped air bubbles before curing.
- Smart Sourcing: heavy-duty reusable honeycomb paver molds (starter kit) and pre-colored concrete pigment powders.
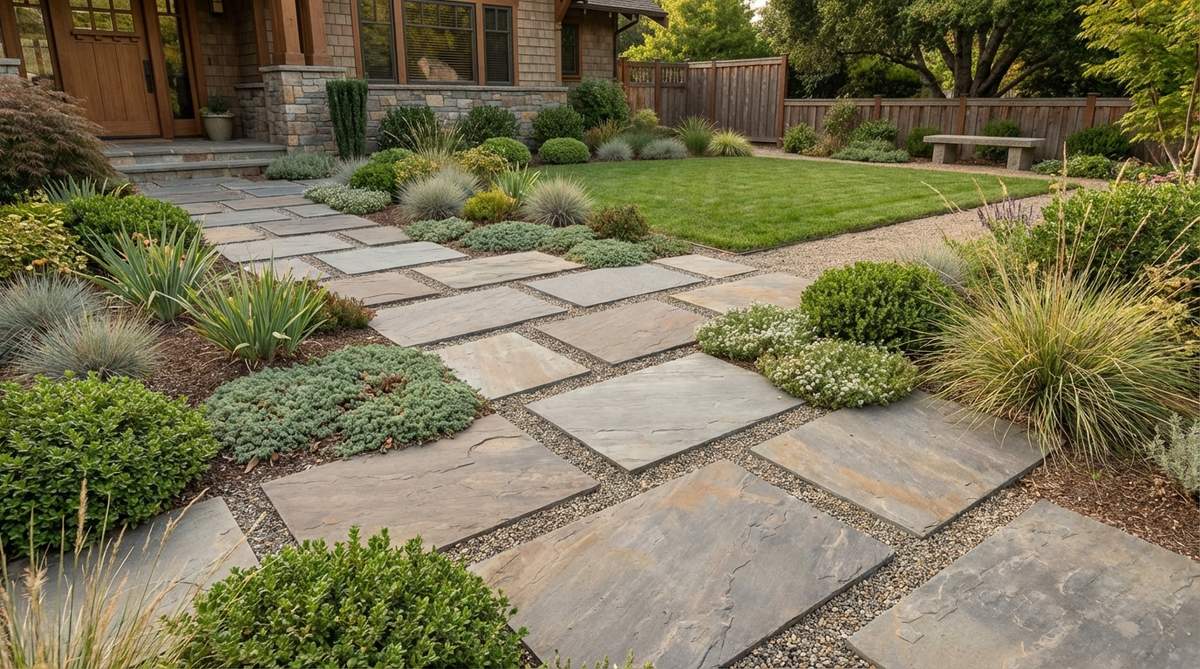
7. Alternating Size Random Placement
This spontaneous pattern feels like an ancient, well-trodden village path. Asymmetrical courtyard paving is an excellent hack for breaking up the monotony of long, narrow side yards.
Mixing large and tiny stones fools neighbors into thinking you hired a pro to design a custom hardscape. It visually expands the space and practically forces visitors to engage with the surrounding flower beds.
Mixing in budget stones drops the overall cost to about $25 per yard. Keep this pinned for your spring landscaping blitz.
- Key Materials: Assorted size pre-cast steppers
- Vibe / Style: Relaxed transitional
- Difficulty: Simple puzzle-matching
- Budget Breakdown: Primary stones: $30 | Filler stones: $10.
- Creator’s Tip: Maintain a consistent 4-inch gap regardless of stone size to keep the pattern visually cohesive.
- Smart Sourcing: UV-coated decorative filler pebbles (bulk) and pre-cut edging restraint strips.
Gravel-Bed Stepping Stone Designs
Gravel provides excellent drainage, weed suppression, and textural contrast for stepping stone pathways. These layouts leverage the visual interplay between solid stone surfaces and the fine texture of crushed or pea gravel.
8. Slate Slabs Over Pea Gravel
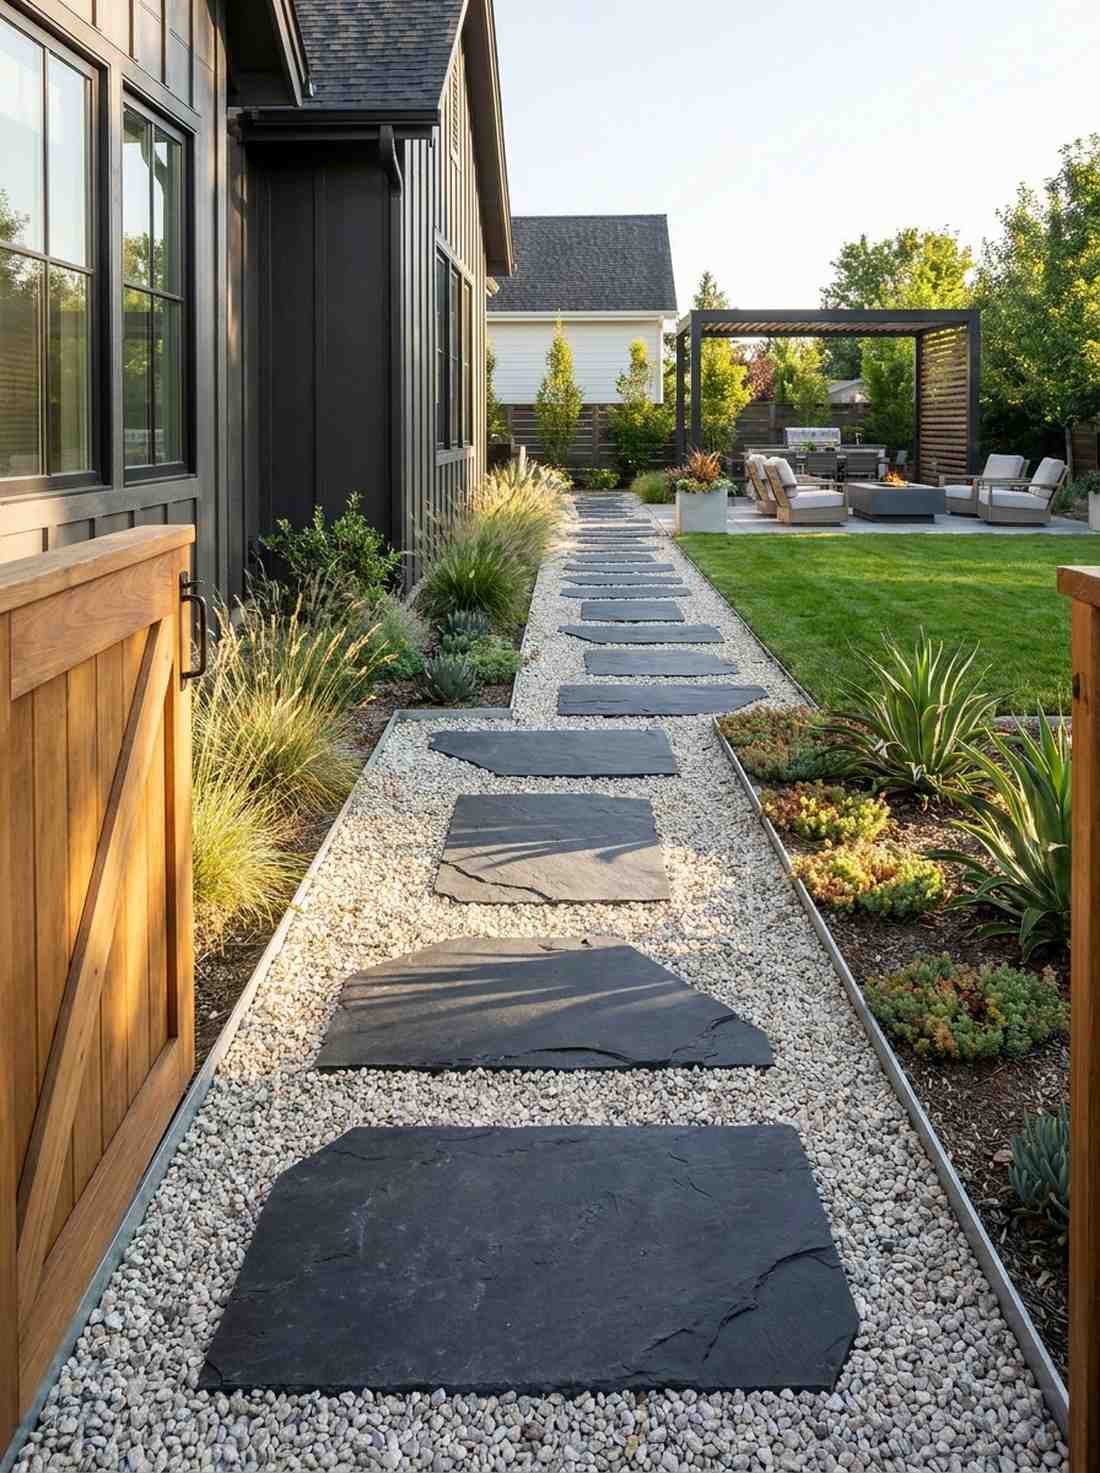
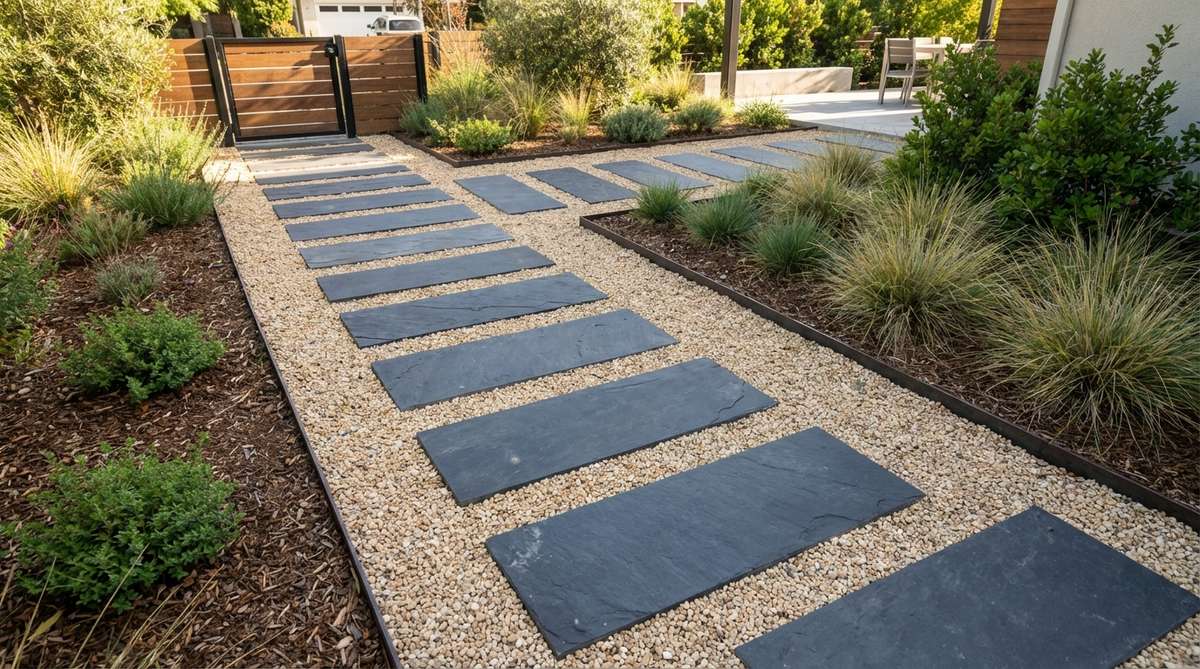
The intense dark-on-light contrast gives off undeniable luxury resort energy. This contemporary gravel garden design is the ultimate cheat code for transforming muddy side-alleys into high-end walkways.
Floating black slate over bright gravel gives a designer-level finish that looks meticulously planned. Laying down heavy-duty landscape fabric rolls underneath guarantees you won’t be pulling weeds through the rock next summer.
Expect a slightly higher setup cost of $60–$90 due to the gravel volume. Pin this to your modern architecture inspiration board.
- Key Materials: Black slate tiles, washed pea gravel
- Vibe / Style: Ultra-modern chic
- Difficulty: Moderate gravel hauling
- Budget Breakdown: Slate: $40 | Gravel bags: $30.
- Creator’s Tip: Use steel edging to keep the round pea gravel from spilling onto your lawn.
- Smart Sourcing: heavy-duty landscape fabric rolls (bulk pack) and commercial-grade galvanized steel edging kits.
This next setup completely eliminates muddy footprints forever, and it’s shockingly easy to install on a Saturday afternoon…
9. Large Format Sandstone Stepping Islands
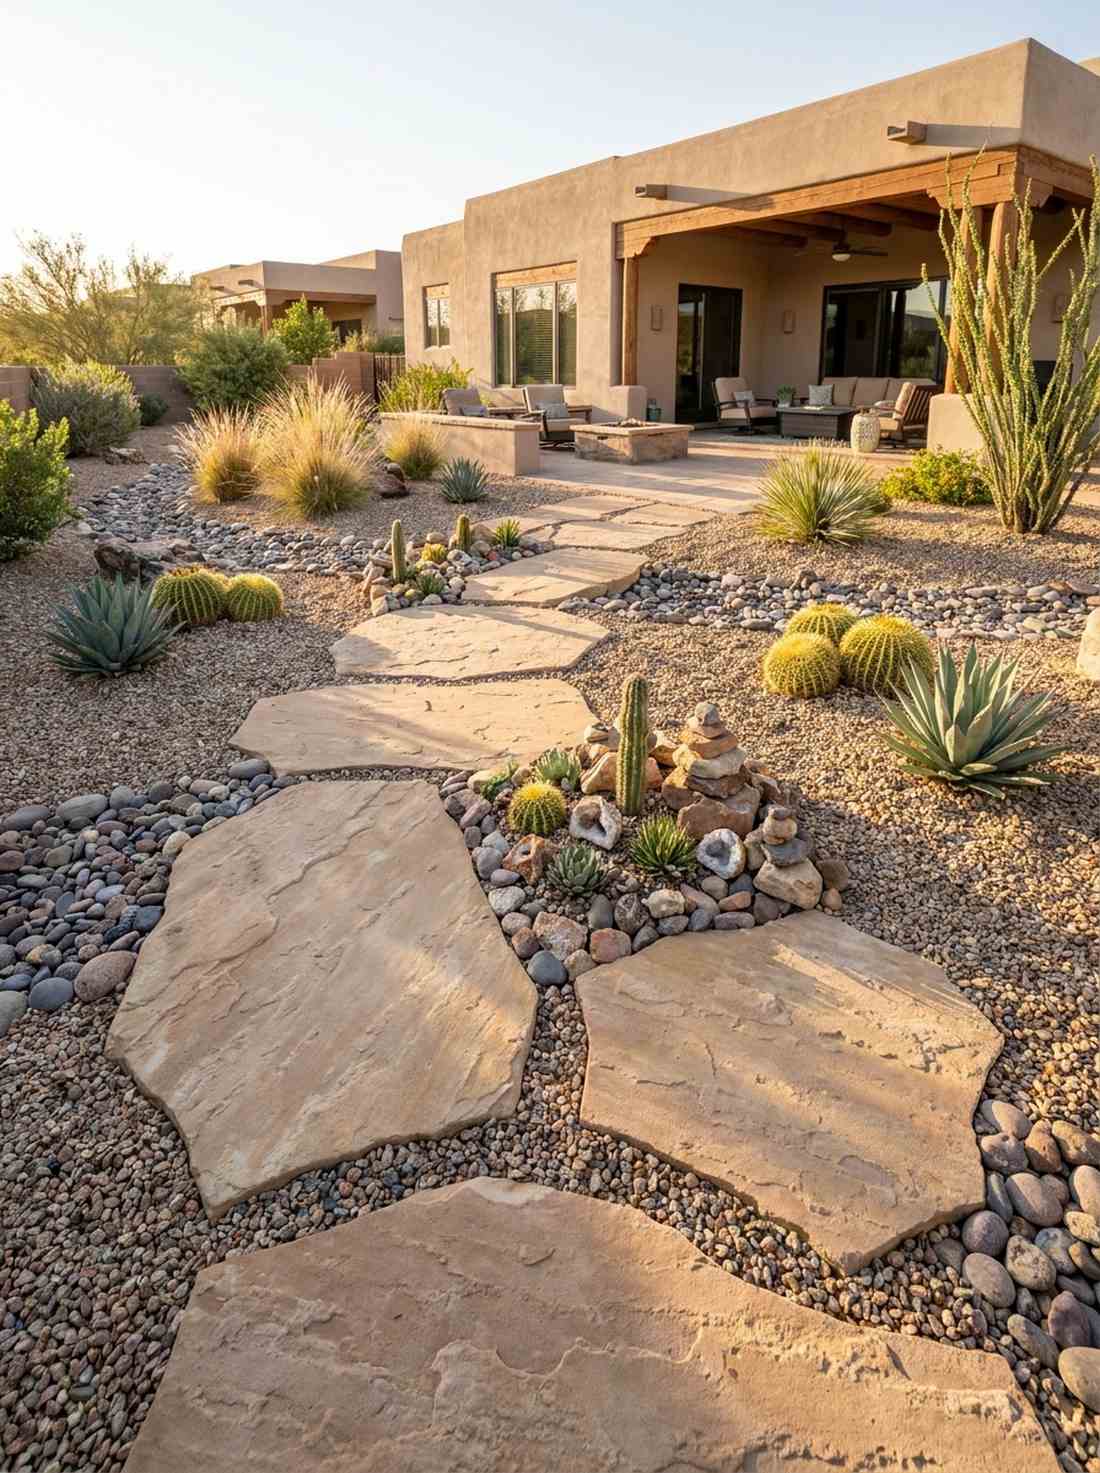
Stepping across these massive slabs feels like navigating a tranquil desert oasis. Xeriscape backyard stepping stones anchor massive gravel beds, making them ideal for drought-prone regional landscapes.
Using oversized pieces totally fakes a custom masonry job and prevents the yard from looking cluttered. Adding rugged terrarium accessories in the gravel pockets elevates the micro-landscape to a gallery-like presentation.
Sourcing large rocks costs around $80–$120 but saves heavily on plants. Save this to your water-wise garden board.
- Key Materials: 36-inch natural sandstone slabs
- Vibe / Style: Southwestern architectural
- Difficulty: Heavy lifting required
- Budget Breakdown: Slabs: $80 | Gravel filler: $40.
- Creator’s Tip: Bury the bottom third of the boulder to make it look naturally occurring rather than placed.
- Smart Sourcing: UV-resistant faux succulent plants (bulk pack) and heavy-duty leveling base mats.
💡 Must-Have Supplies for High-End Setups
To build these setups faster and ensure they last, skip the generic craft aisles and invest in the right foundational kits.
- Base & Support: premium high-density polymeric sand (bulk pack)
- Setup Tools: heavy-duty rubber mallet and leveling tool starter kits
- Weather/Durability Protection: commercial-grade UV-resistant stone sealant sprays
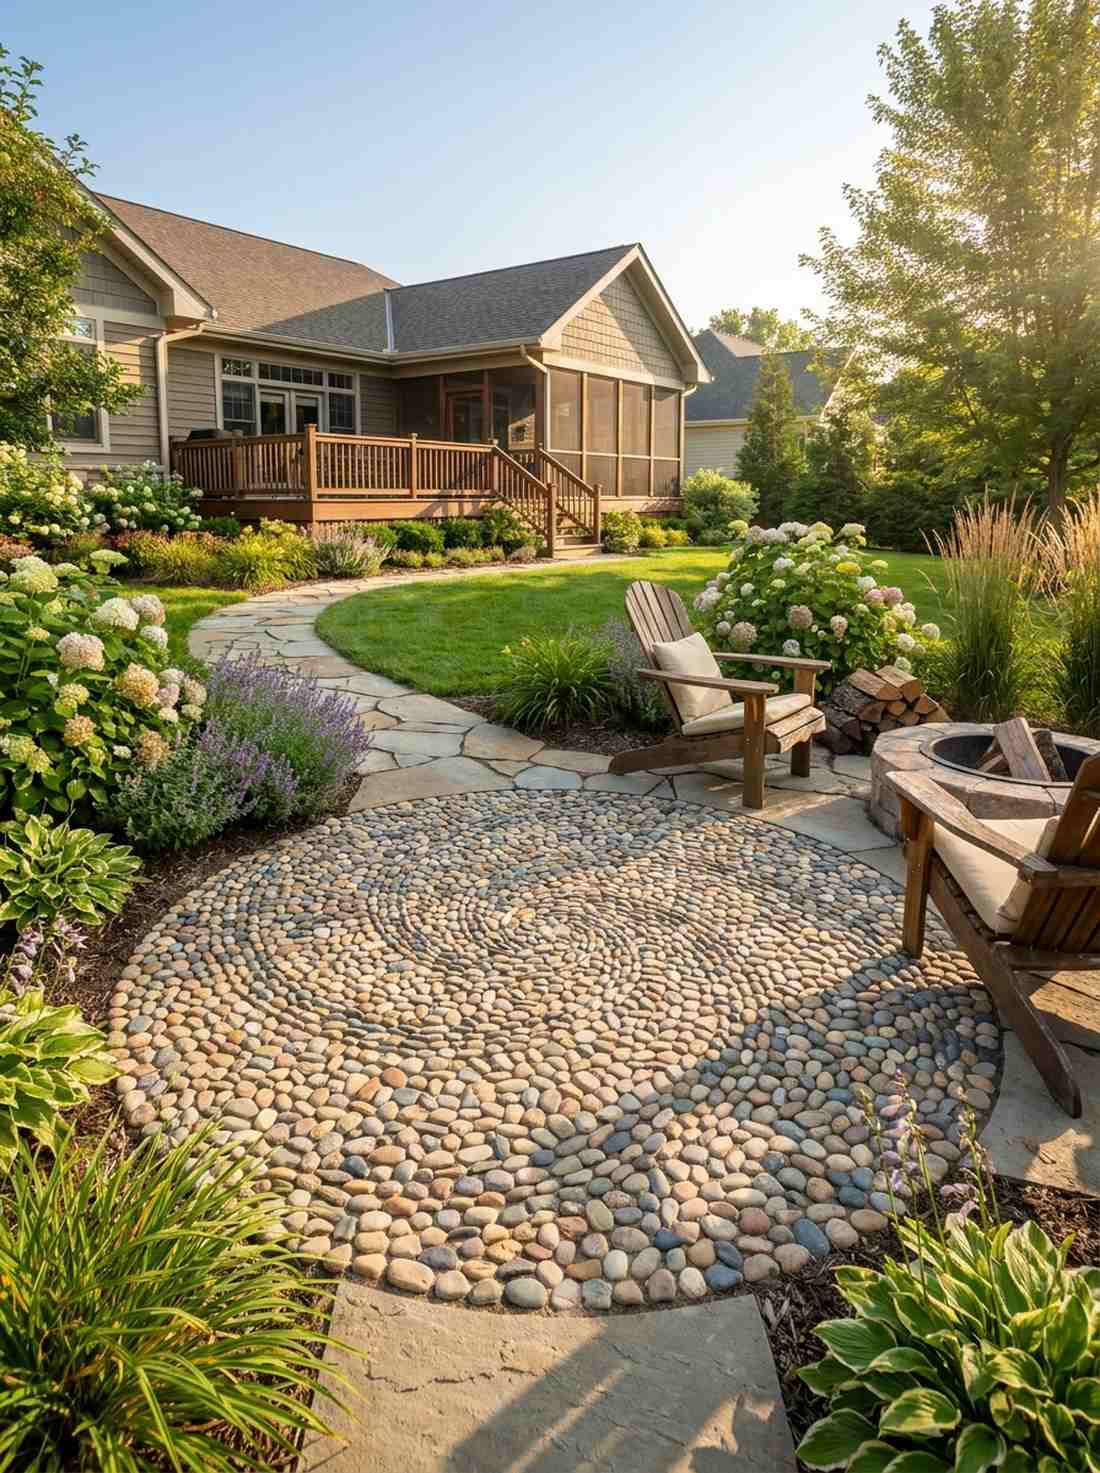
10. River Rock Mosaic Surround
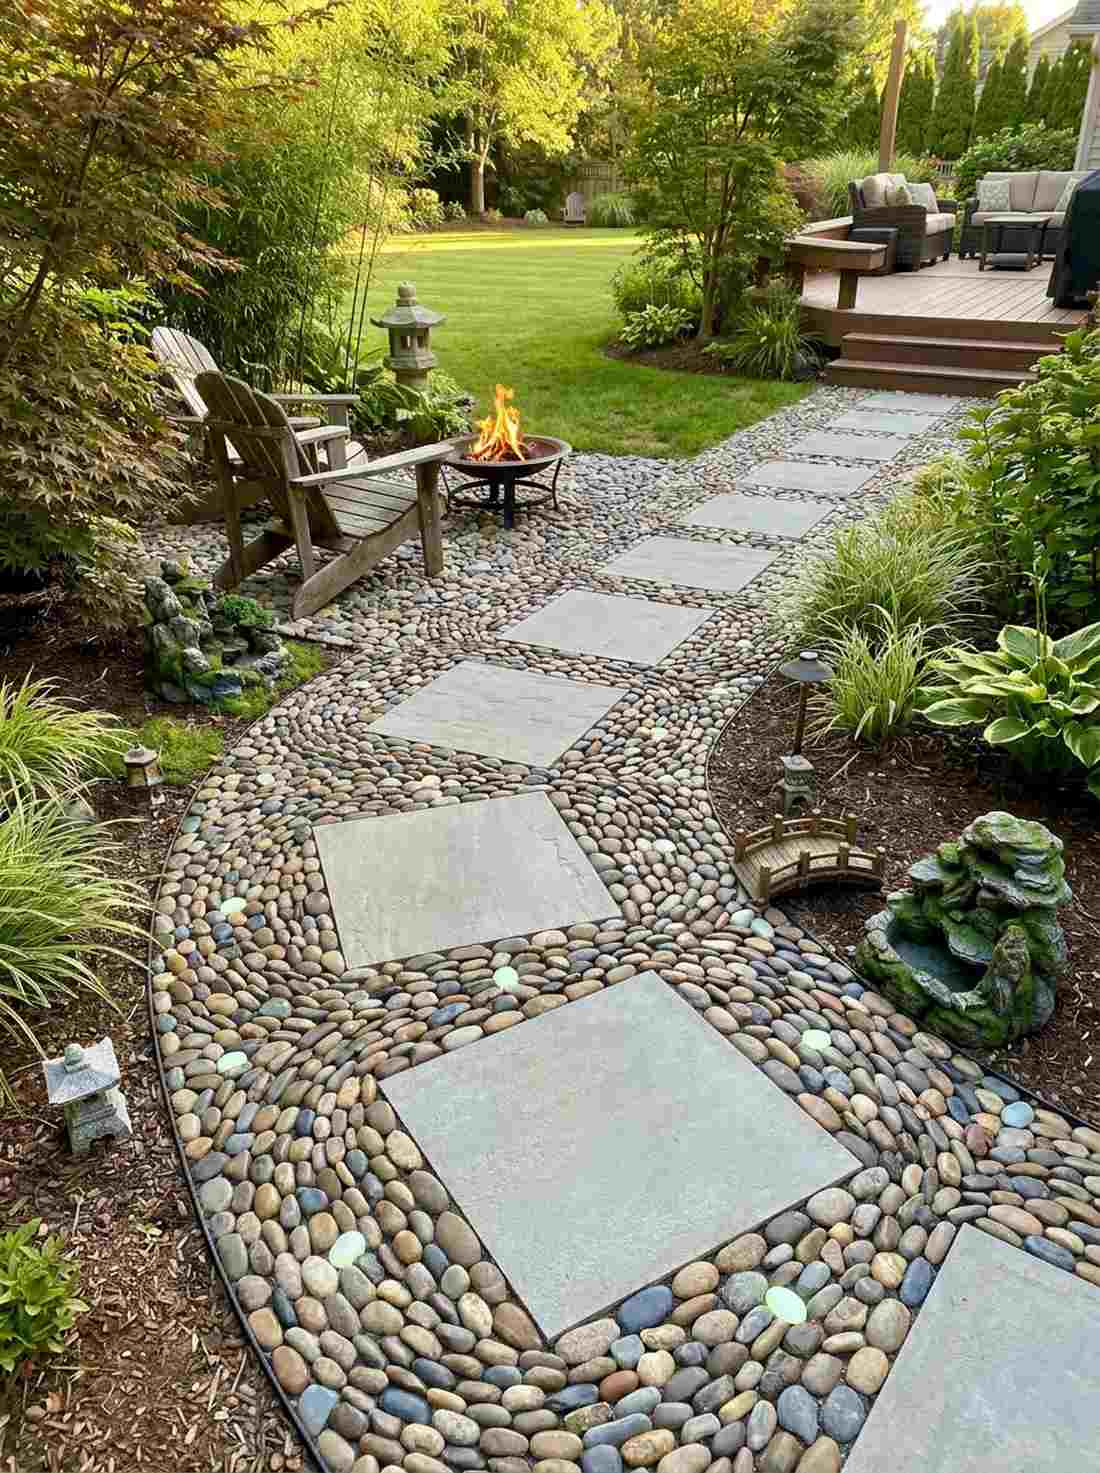
This textured pathway radiates raw Zen tranquility with every single step. A Zen garden meditation pathway fits perfectly in a quiet backyard corner dedicated to reading and relaxation.
Creating custom halos around each paver bypasses expensive contractor fees entirely while delivering stunning artisan detail. Nestling intricate miniature garden supplies along the border turns a simple walking route into an immersive visual experience.
You can create this masterpiece for under $40 if you hand-pick the river stones. It’s a therapeutic weekend project that pays off instantly.
- Key Materials: Square pavers, polished river stones
- Vibe / Style: Asian-inspired Zen
- Difficulty: Meticulous hand-placement
- Budget Breakdown: Center pavers: $15 | River rocks: $20.
- Creator’s Tip: Dry-fit your mosaic pattern completely before committing it to the final base layer.
- Smart Sourcing: pre-sorted tumbled river rocks (50lb bag) and weatherproof glow-in-the-dark pebbles (bulk).
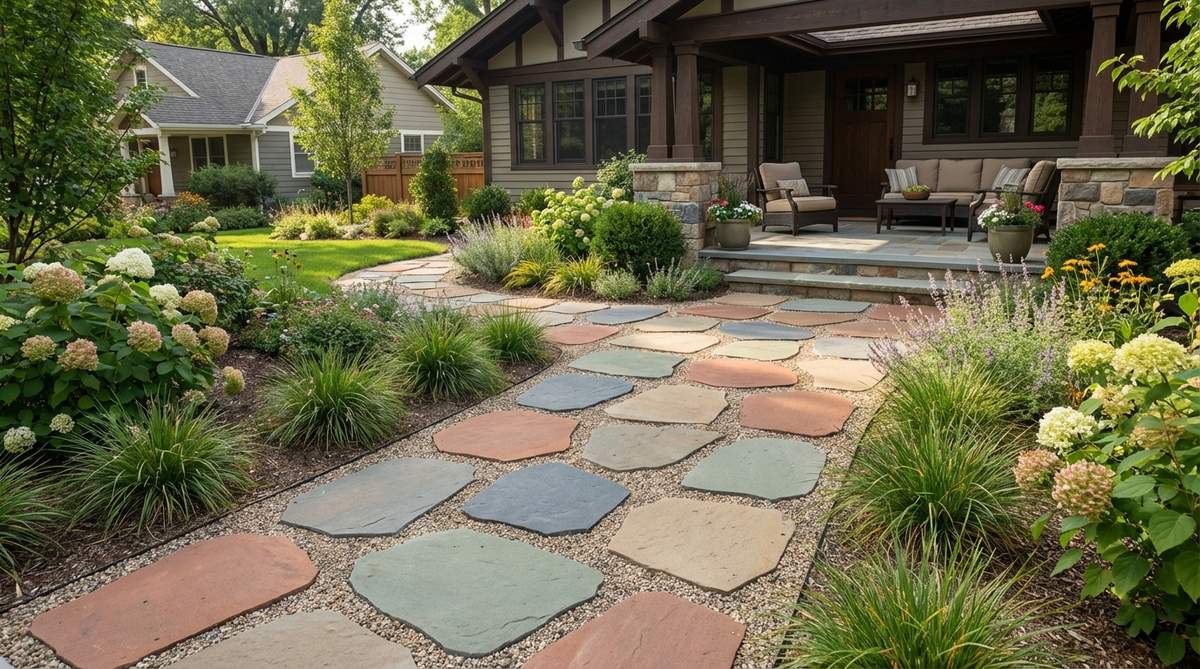
11. Limestone Squares on Crushed Granite
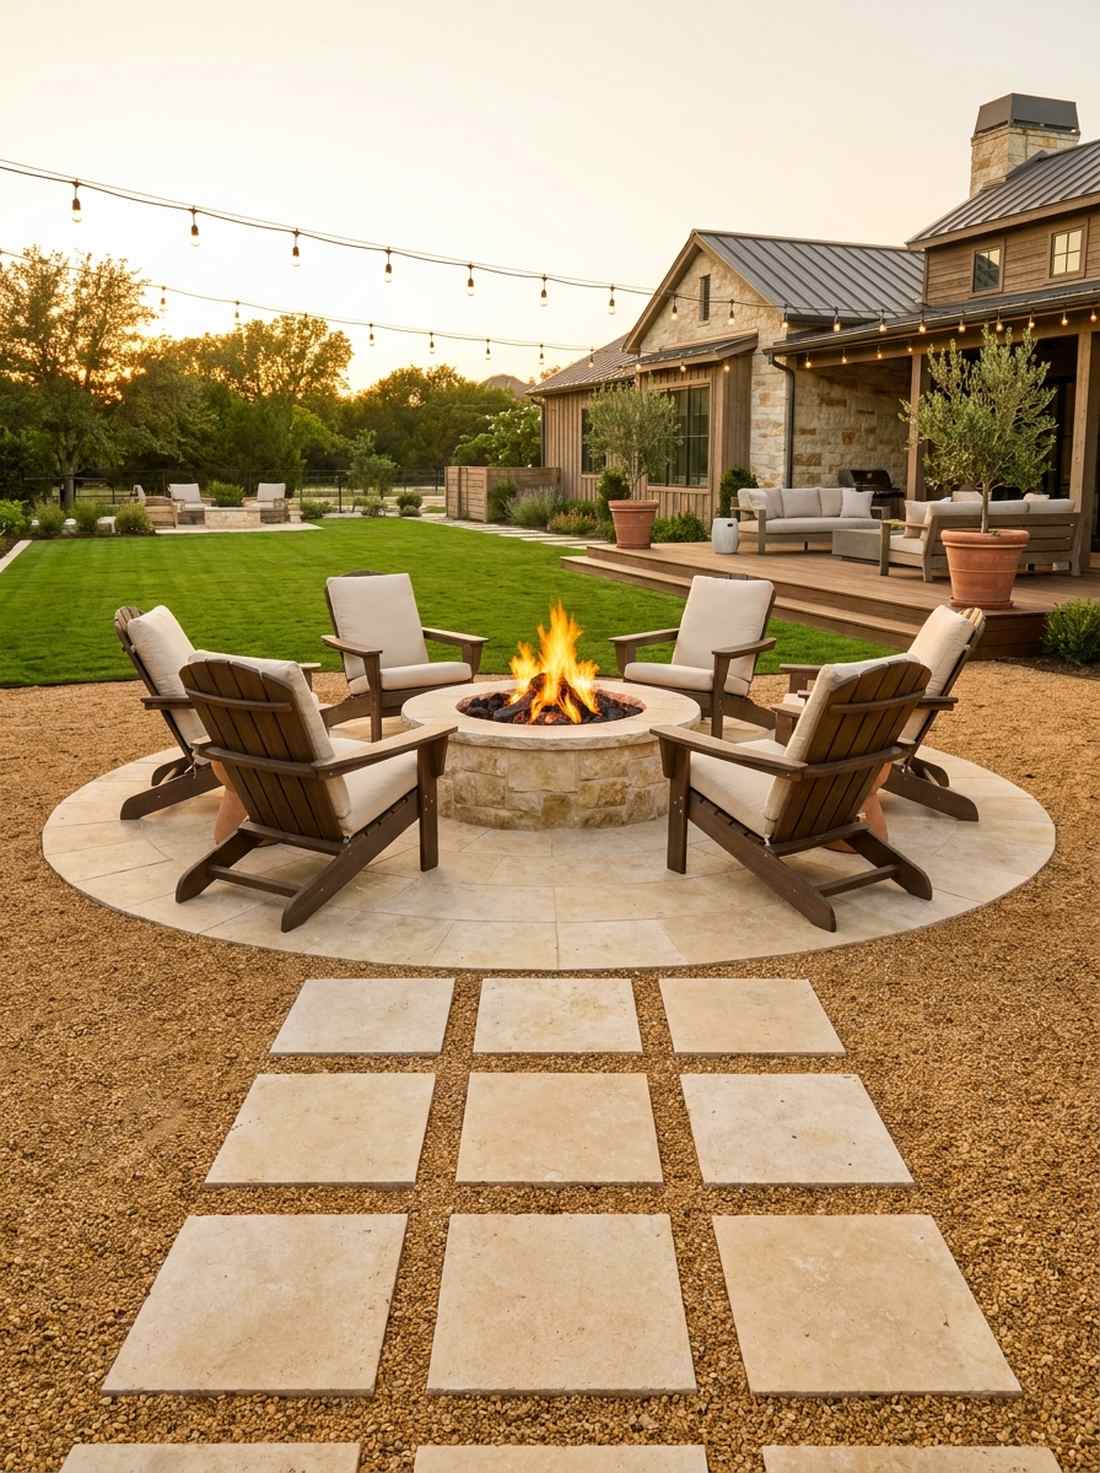
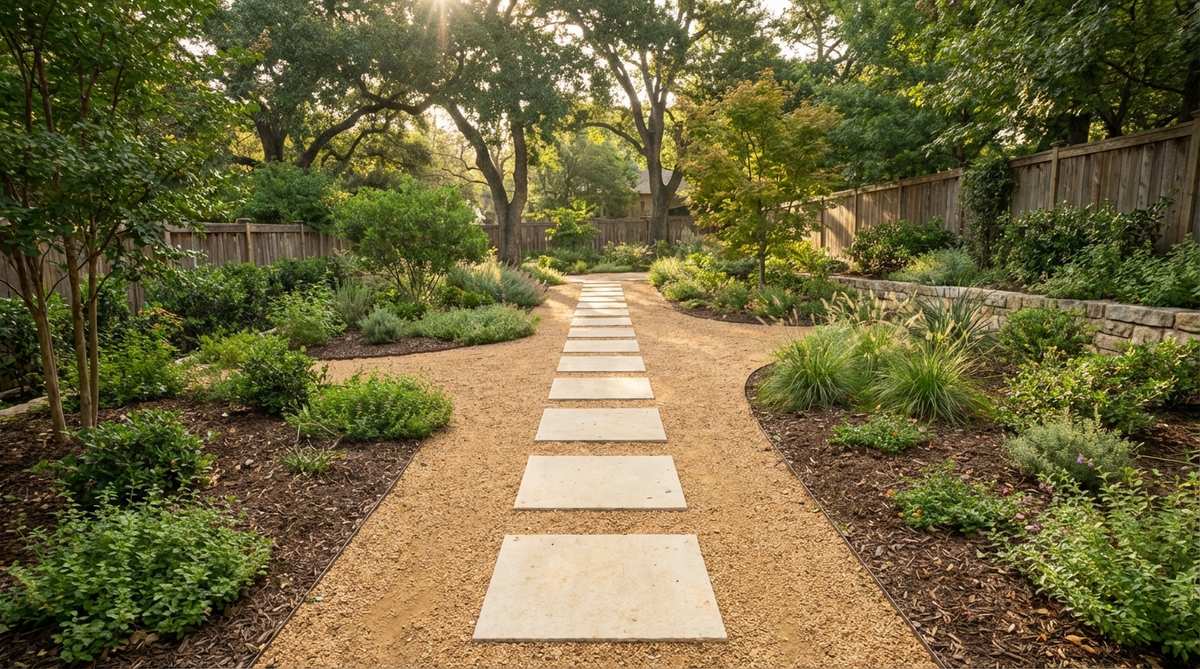
The warm cream tones against rough granite conjure memories of ancient Roman walkways. Crisp minimalist yard upgrades like this excel at drawing the eye directly toward a focal point, like a fire pit.
Contrasting perfect geometric cuts against raw crushed rock looks far more expensive than it is. Using sharp, angular granite means the gravel locks together instantly, preventing the stones from sinking over time.
Expect to invest around $50 for premium crushed base. Pin this if you’re planning a sophisticated fire pit lounge.
- Key Materials: Cut limestone, golden crushed granite
- Vibe / Style: Mediterranean modern
- Difficulty: Easy leveling
- Budget Breakdown: Limestone: $30 | Granite fines: $20.
- Creator’s Tip: Wet the crushed granite and tamp it down firmly to create a concrete-like solid base.
- Smart Sourcing: heavy-duty steel hand tamper tools and pre-cut weed blocking fabric panels.
12. Reclaimed Brick Pavers in Gray Stone
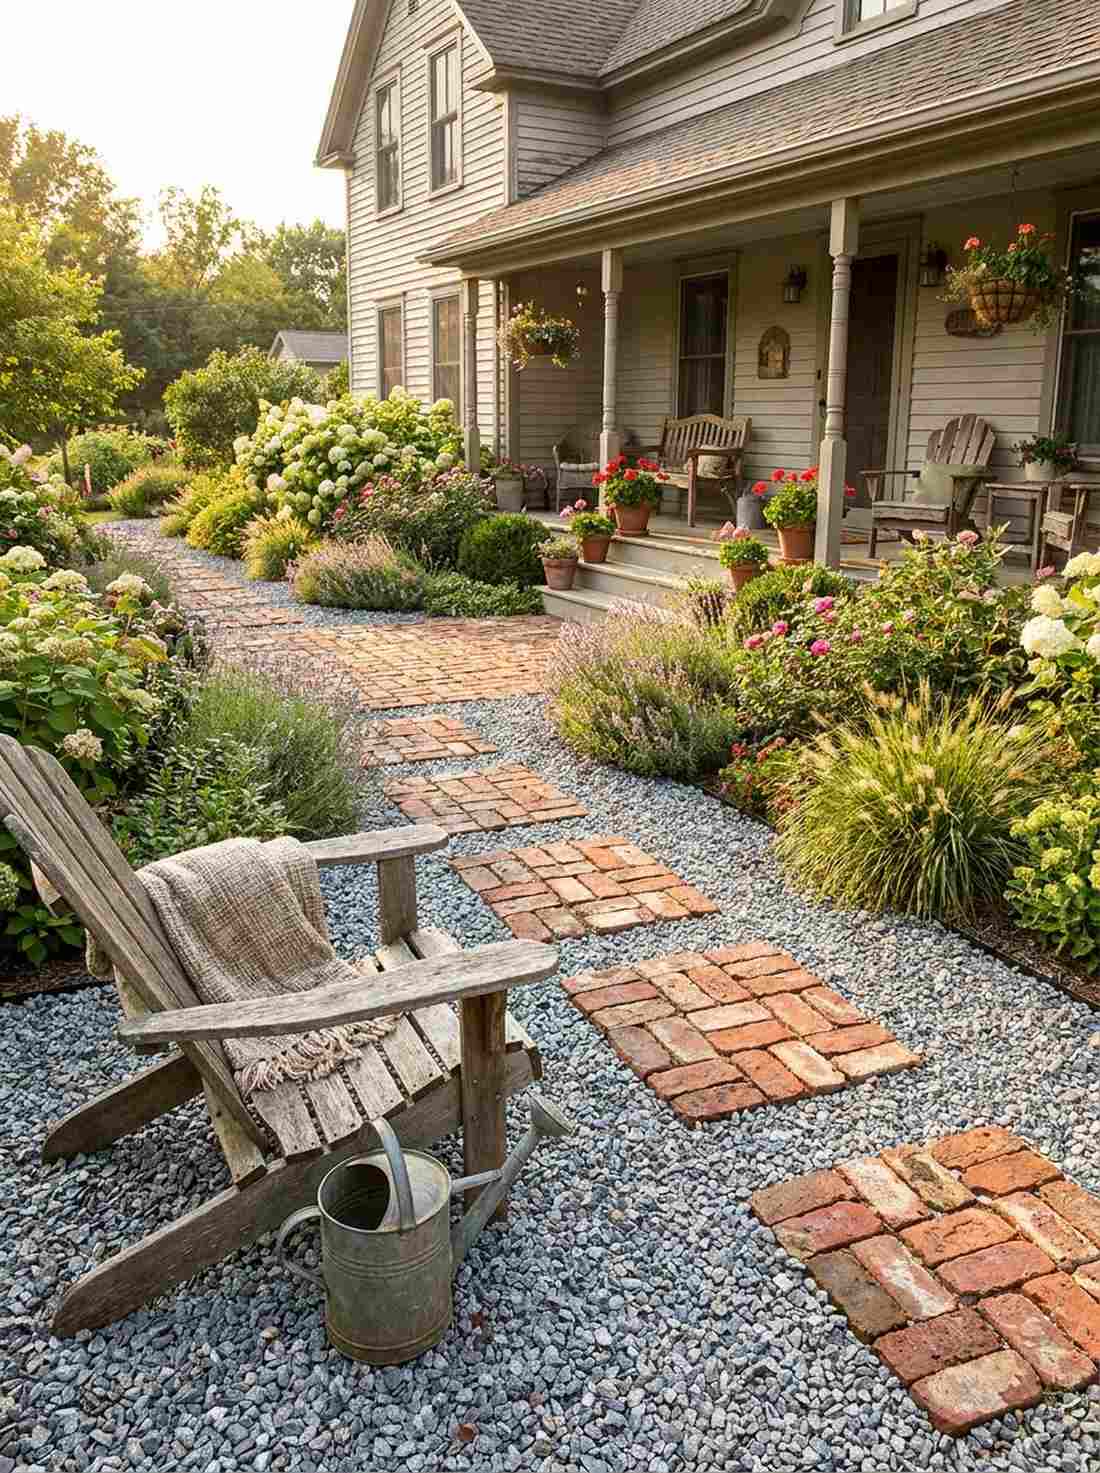
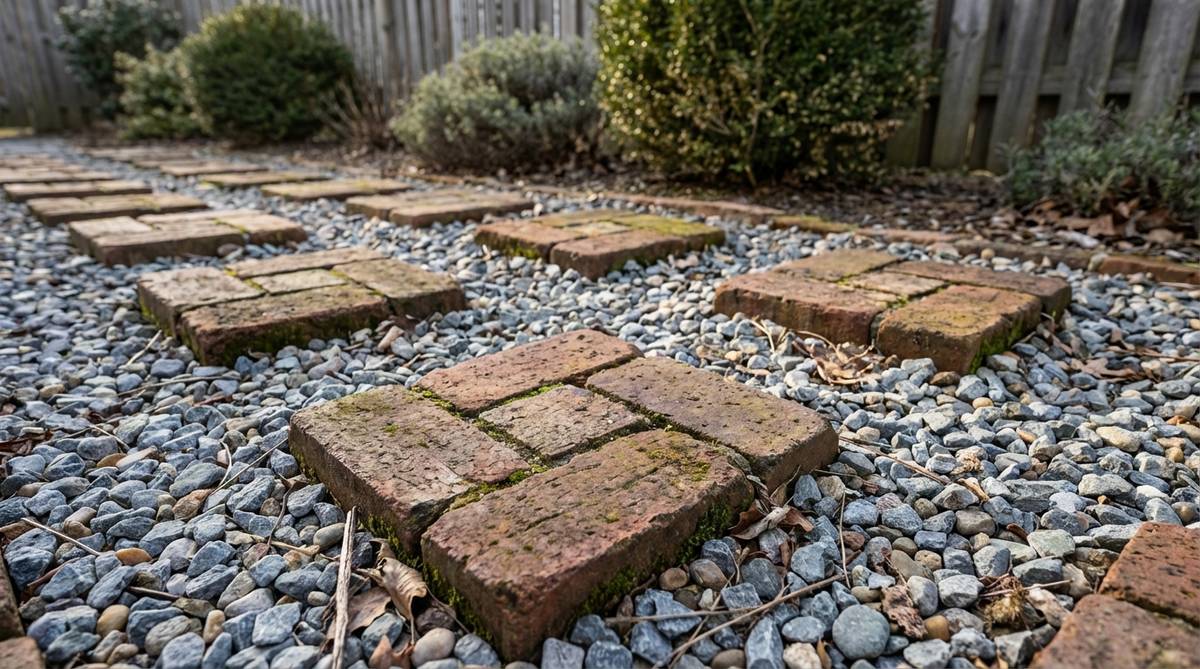
This weathered look feels like a nostalgic walk through a historical neighborhood. Using vintage cottage garden decor provides unparalleled warmth, making it the supreme choice for retrofitting older homes.
Salvaging old masonry completely ignores sterile modern trends and provides instant authentic patina. Setting the rich red clay against icy gray gravel forces a color contrast that demands attention all year long.
Sourcing salvage brick keeps this around $20 total. Save this to your sustainable upcycling inspiration board.
- Key Materials: Salvaged red bricks, gray utility gravel
- Vibe / Style: Historic vintage charm
- Difficulty: Easy puzzle assembly
- Budget Breakdown: Bricks: $10 (or free) | Gravel: $10.
- Creator’s Tip: Bind the trio of bricks together with construction adhesive before laying them in the gravel bed.
- Smart Sourcing: commercial-grade exterior masonry adhesive tubes and premium anti-fading brick sealers.
Stop scrolling. The next layout takes the cheapest material at the hardware store and forces it to look like a million bucks…
13. Granite Cobblestone Clusters
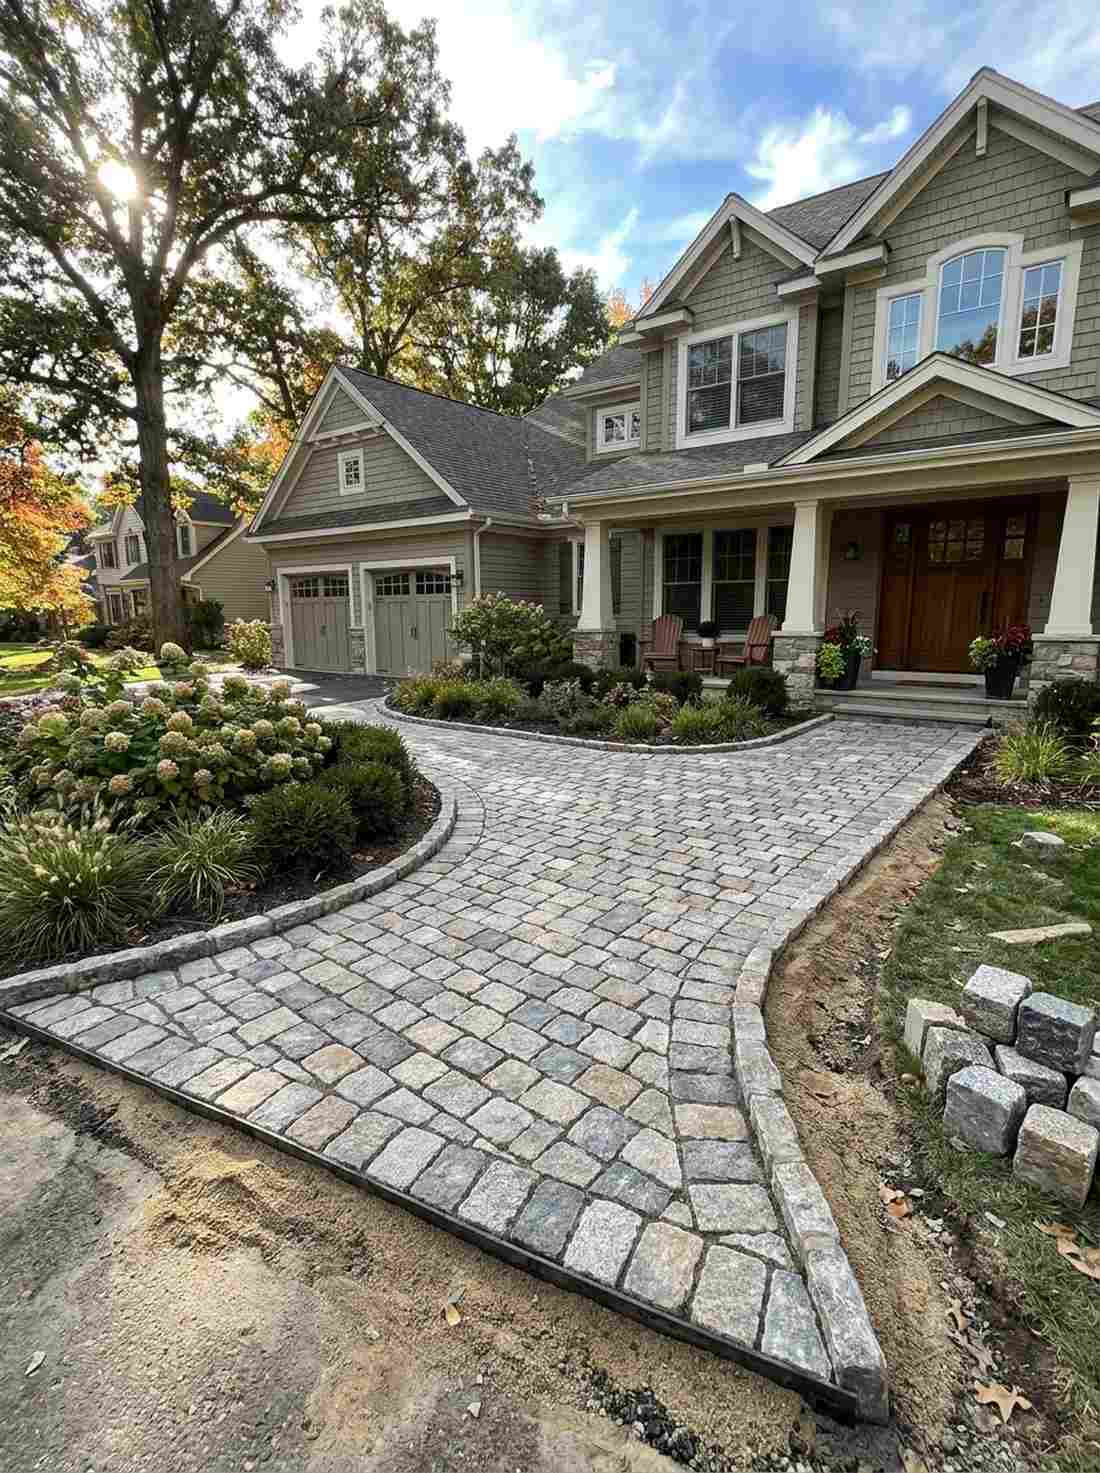
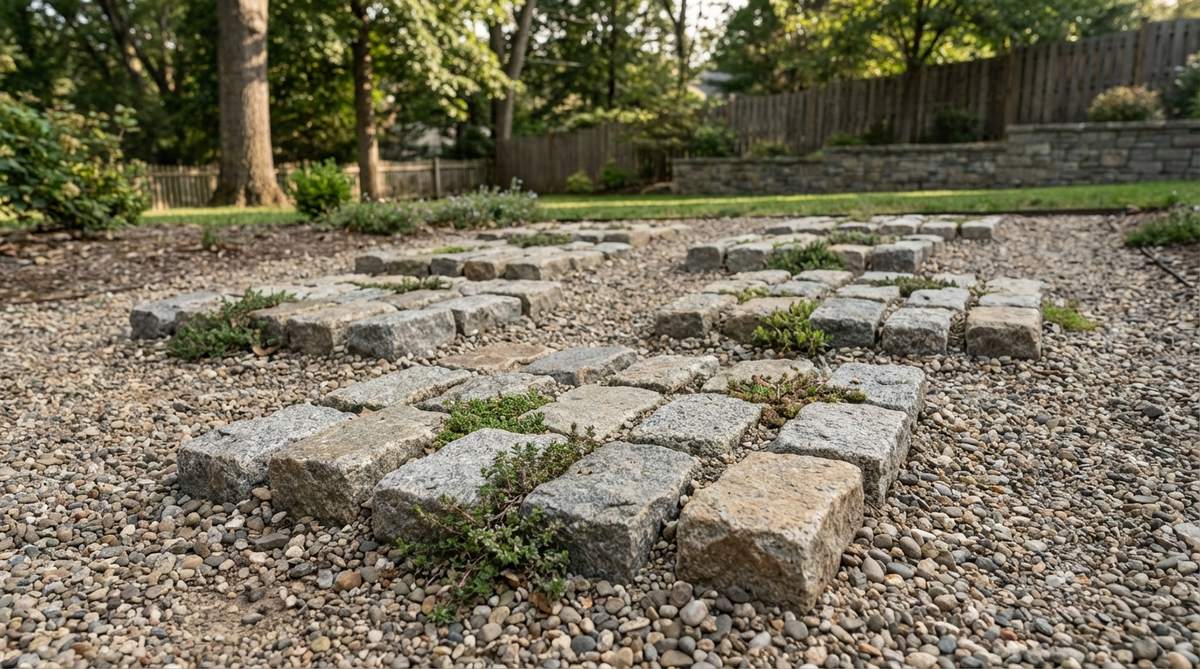
Clustering heavy stones gives off the unmistakable vibe of a rugged Scottish estate. Implementing European-style courtyard walks is the smartest way to manage intense foot traffic near garage entryways.
Grouping small cobblestones together delivers a surprisingly premium look that massive single slabs simply cannot match. This tightly packed arrangement survives extreme freeze-thaw cycles without cracking or shifting out of place.
A cluster path costs roughly $45–$65 for solid granite. Highly recommended for brutal, cold-weather climates.
- Key Materials: 4×8 granite setts
- Vibe / Style: Old World resilience
- Difficulty: Heavy but straightforward
- Budget Breakdown: Cobbles: $40 | Base sand: $15.
- Creator’s Tip: Over-excavate the base and pack it with extra coarse sand to keep the heavy clusters from sinking.
- Smart Sourcing: heavy-duty plastic paver edge restraints and bulk fast-draining coarse sand bags.
14. Concrete Rounds with Exposed Aggregate
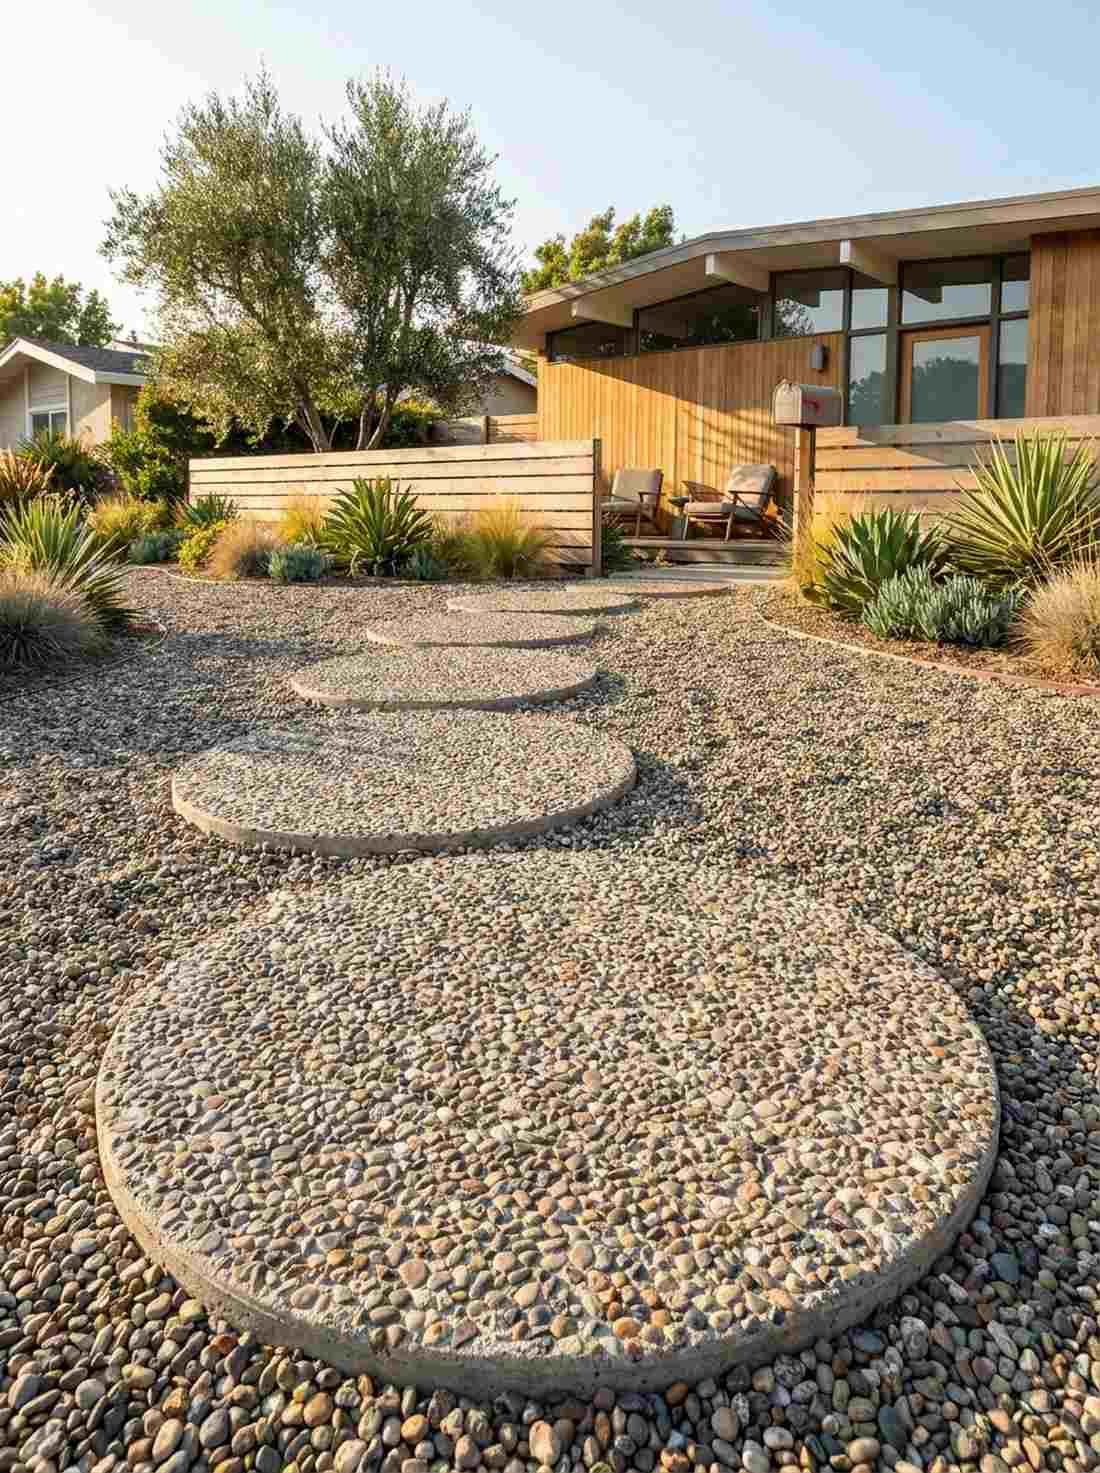
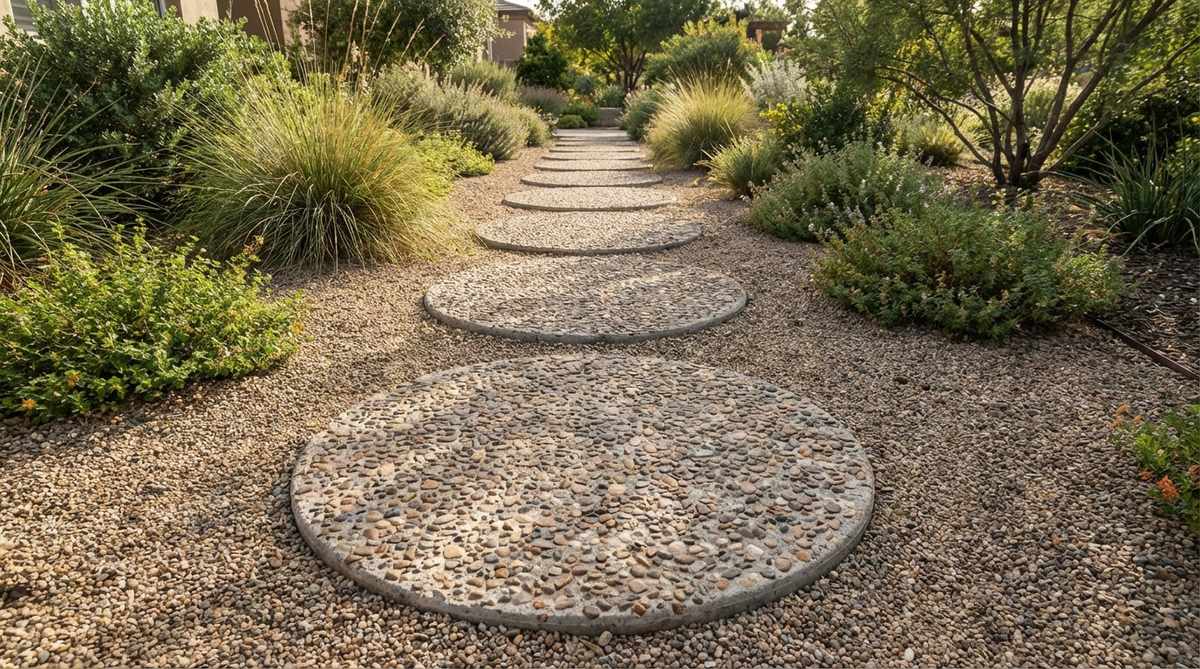
This textured layout feels incredibly nostalgic, echoing classic mid-century suburban design. Mid-century landscape accents shine in front yards that feature retro architecture or minimalist fencing.
Washing away the top cement layer reveals a designer-level finish that matches the surrounding gravel perfectly. Locking in the stones with commercial paver sealants ensures the exposed pebbles never pop out under pressure.
DIY casting keeps this project at a stunning $20. Pin this for a foolproof, budget-friendly weekend upgrade.
- Key Materials: Concrete mix, matching surface gravel
- Vibe / Style: Retro modernism
- Difficulty: Time-sensitive washing
- Budget Breakdown: Concrete: $10 | Seed gravel: $10.
- Creator’s Tip: Use a light misting from a garden hose exactly 2 hours after pouring to expose the top stones flawlessly.
- Smart Sourcing: commercial-grade exposed aggregate retarder sprays and UV-resistant glossy stone sealants.
Geometric and Modern Patterns
Contemporary gardens benefit from precise geometric layouts that emphasize clean lines and mathematical relationships. These patterns work equally well in grass or gravel settings when sharp edges are maintained.
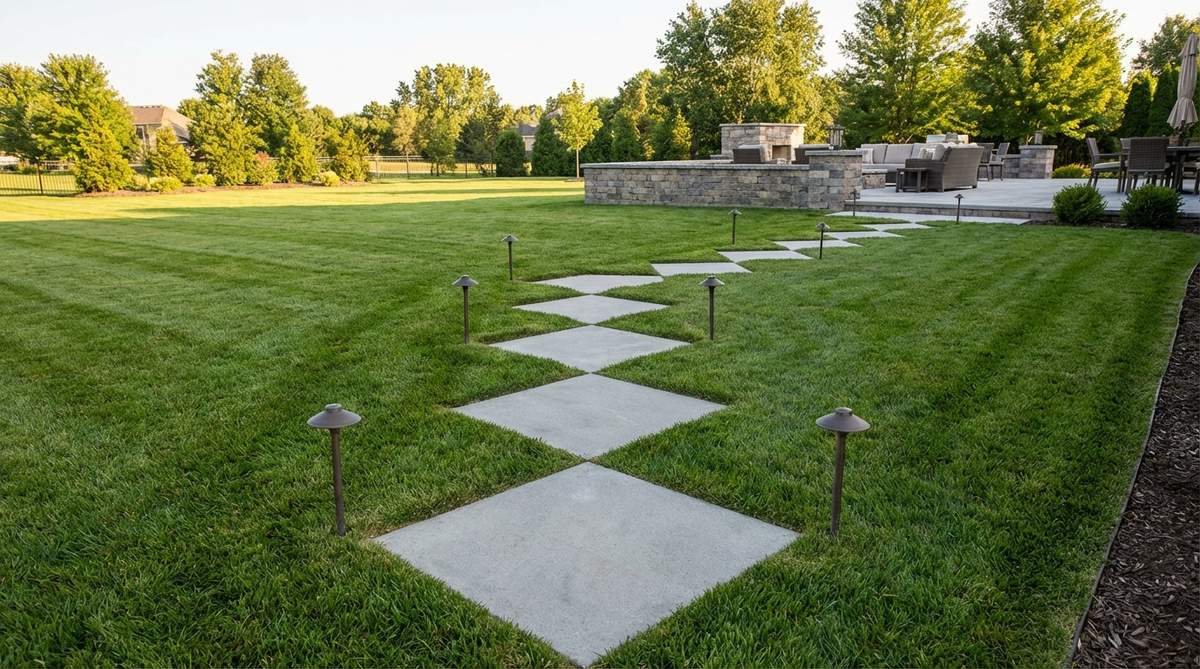
15. Linear Alignment Single File
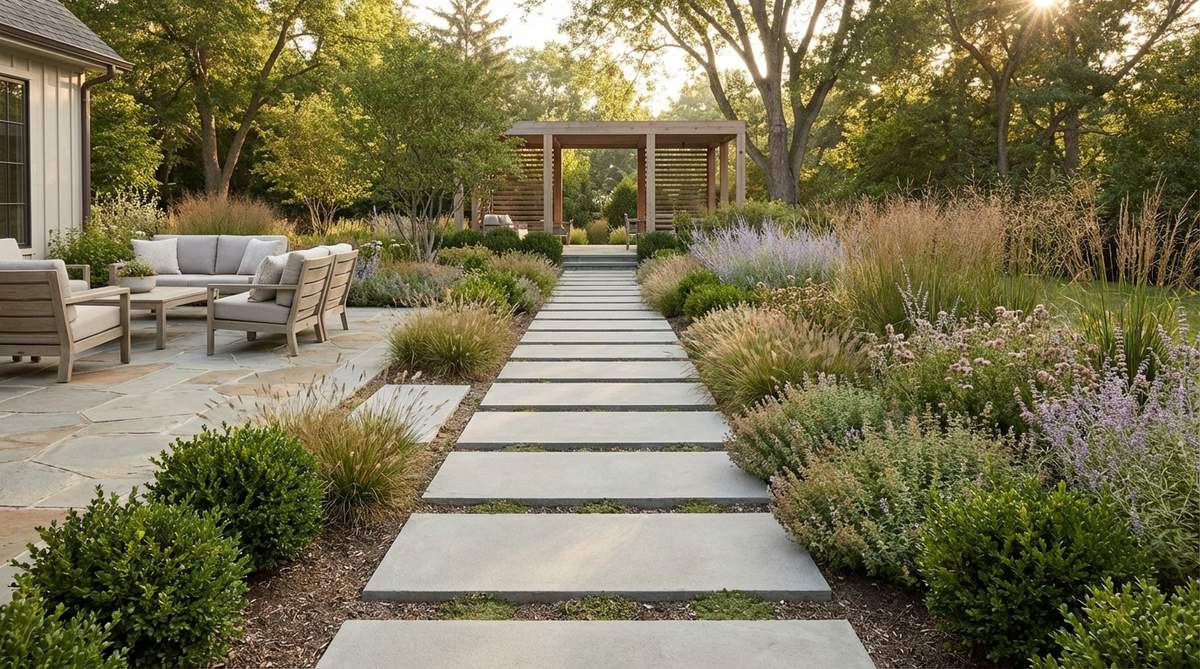
This rigid line feels like stepping down the runway of an exclusive boutique hotel. Using ultra-minimalist property lines creates an aggressive visual pull that naturally directs guests exactly where to walk.
Enforcing strict military-level alignment bypasses messy organic looks and delivers sharp, modern authority. Sinking the stones flawlessly level ensures a tripping-free zone that visually slices through overgrown gardens.
Priced around $30 for a minimalist stretch. Save this to your contemporary backyard layout board.
- Key Materials: Identical rectangular concrete slabs
- Vibe / Style: Strict architectural minimalism
- Difficulty: Precision string-lining required
- Budget Breakdown: Slabs: $20 | Base prep: $10.
- Creator’s Tip: Use a laser level at dusk to ensure every single stone sits at the exact same micro-elevation.
- Smart Sourcing: pre-cut synthetic leveling shims (bulk pack) and commercial laser level tool kits.
16. Double-Width Parallel Tracks
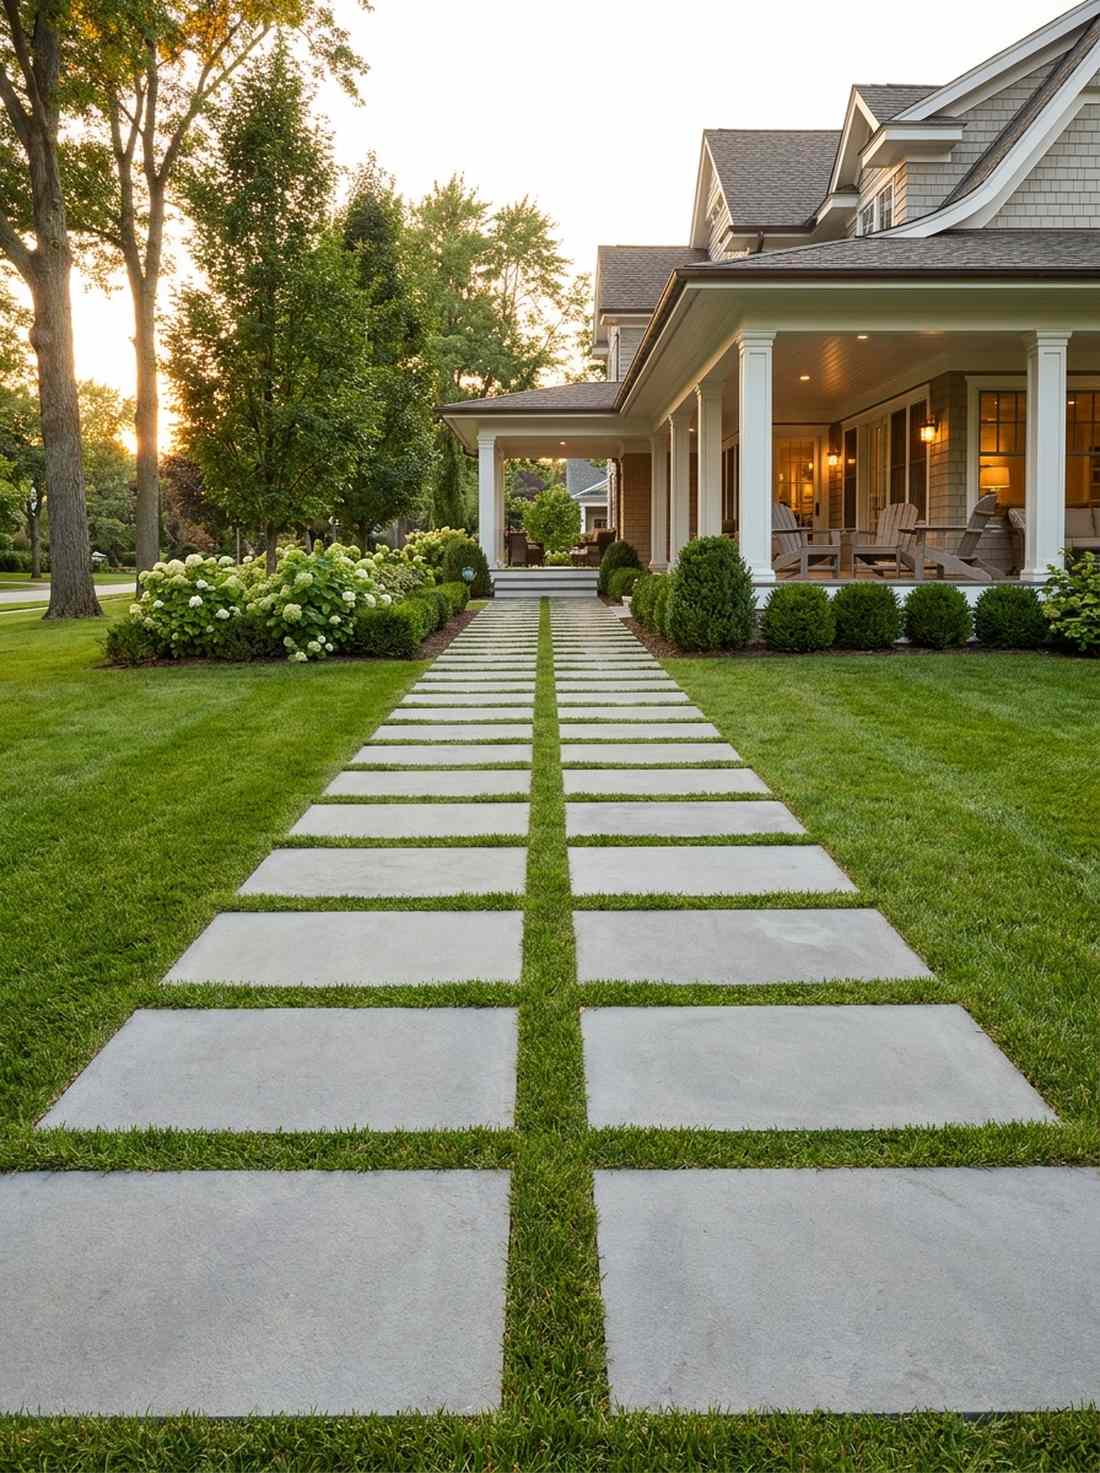
Walking this layout side-by-side radiates undeniable luxury and grand estate energy. These grand entryway stone paths are the ultimate upgrade for wide approach zones leading up to large porches.
Syncopating the rhythm between two rows looks far more expensive than it is and commands immediate attention. The deliberate gaps create tension that makes standard grey concrete look like custom-ordered masonry.
Double the stones means double the budget, landing around $60–$90. Pin this if you want to impress guests before they even knock.
- Key Materials: Uniform rectangular steppers
- Vibe / Style: Grand formal invitation
- Difficulty: Moderate alignment
- Budget Breakdown: Dual pavers: $60 | Trenching materials: $15.
- Creator’s Tip: Build a custom wooden spacer block to guarantee the gap between the parallel tracks never wavers.
- Smart Sourcing: heavy-duty path weed barrier panels and premium non-sag paver adhesive tubes.
You’re halfway there. Wait until you see the groundcover trick in item 19 that goes insanely viral every spring…
17. Staggered Offset Grid
This grid visually dances across the yard, feeling like an interactive outdoor puzzle. Utilizing transitional backyard patio flow bridges the awkward gap between a wooden deck and the raw lawn.
Stepping the blocks perfectly out of phase totally fakes a custom masonry job with basic hardware store materials. It traps the eye in a zigzag motion, visually widening tight, claustrophobic patio spaces.
You can execute this optical illusion for about $40. Keep this saved for tricky, narrow yard dimensions.
- Key Materials: Square concrete or porcelain pavers
- Vibe / Style: Playful modern grid
- Difficulty: High precision spacing
- Budget Breakdown: Pavers: $30 | Spacing tools: $10.
- Creator’s Tip: Lay the entire pattern out on top of the grass before digging a single hole to verify the offset math.
- Smart Sourcing: pre-measured plastic paver spacers (bulk pack) and commercial-grade leveling sand bags.
18. Chevron Directional Pattern
The aggressive zigzag of this path commands you to move forward like a guiding arrow. A directional landscape pathway decor layout injects intense kinetic energy into otherwise flat, boring grass zones.
Mastering this 45-degree interlock gives a designer-level finish that regular straight stones can never achieve. It practically forces visitors away from delicate flower beds by acting as a hypnotic visual rail.
Cutting the angles requires renting a saw, bringing costs to $70. Pin this to your advanced DIY weekend board.
- Key Materials: Rectangular brick or concrete blocks
- Vibe / Style: Dynamic kinetic energy
- Difficulty: Advanced cutting required
- Budget Breakdown: Stones: $40 | Saw rental: $30.
- Creator’s Tip: Cut all your corner pieces in one batch to ensure the exact same 45-degree angle across the board.
- Smart Sourcing: heavy-duty diamond blade masonry saw kits and premium high-strength jointing sand.
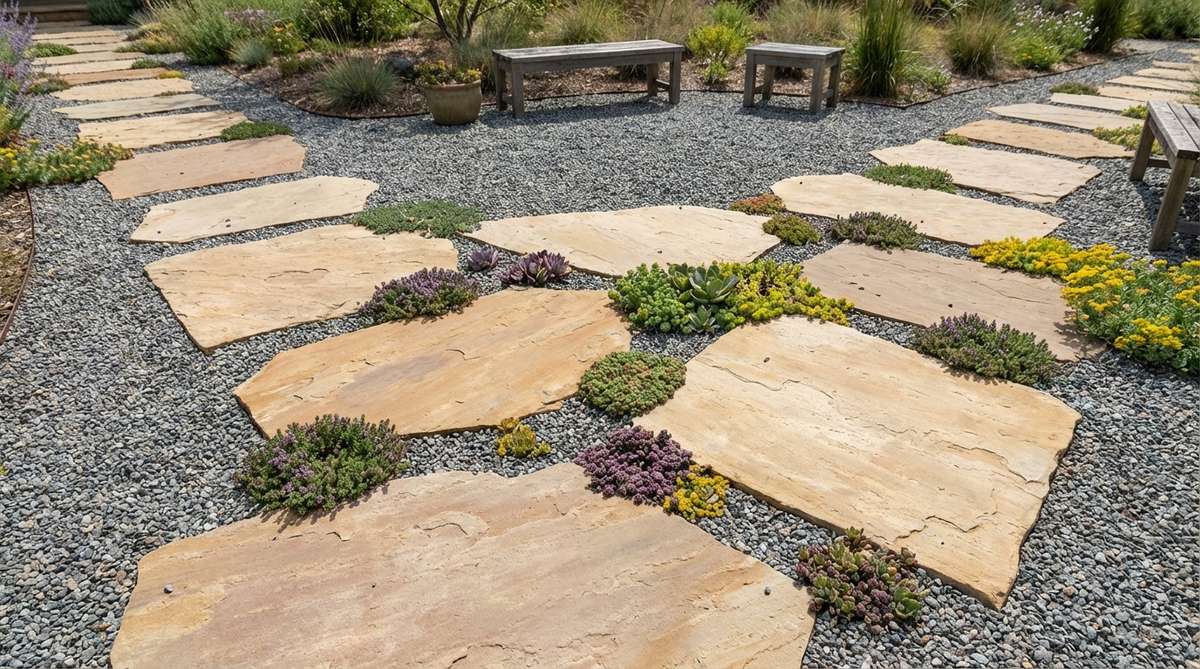
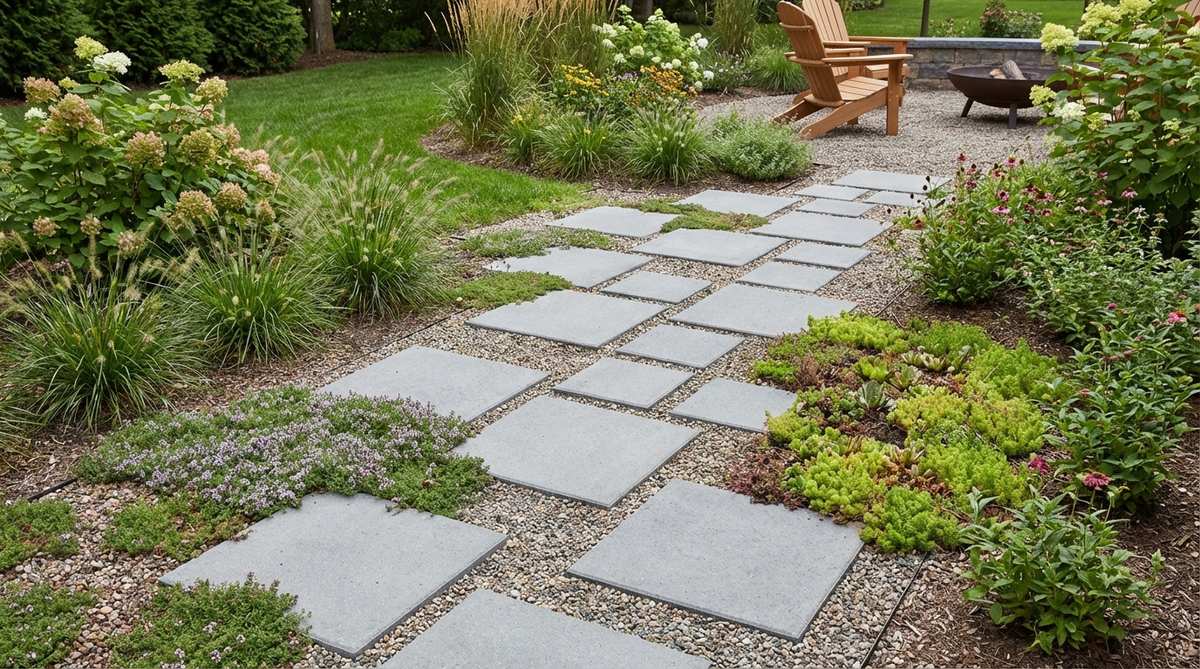
19. Square Grid with Planted Joints
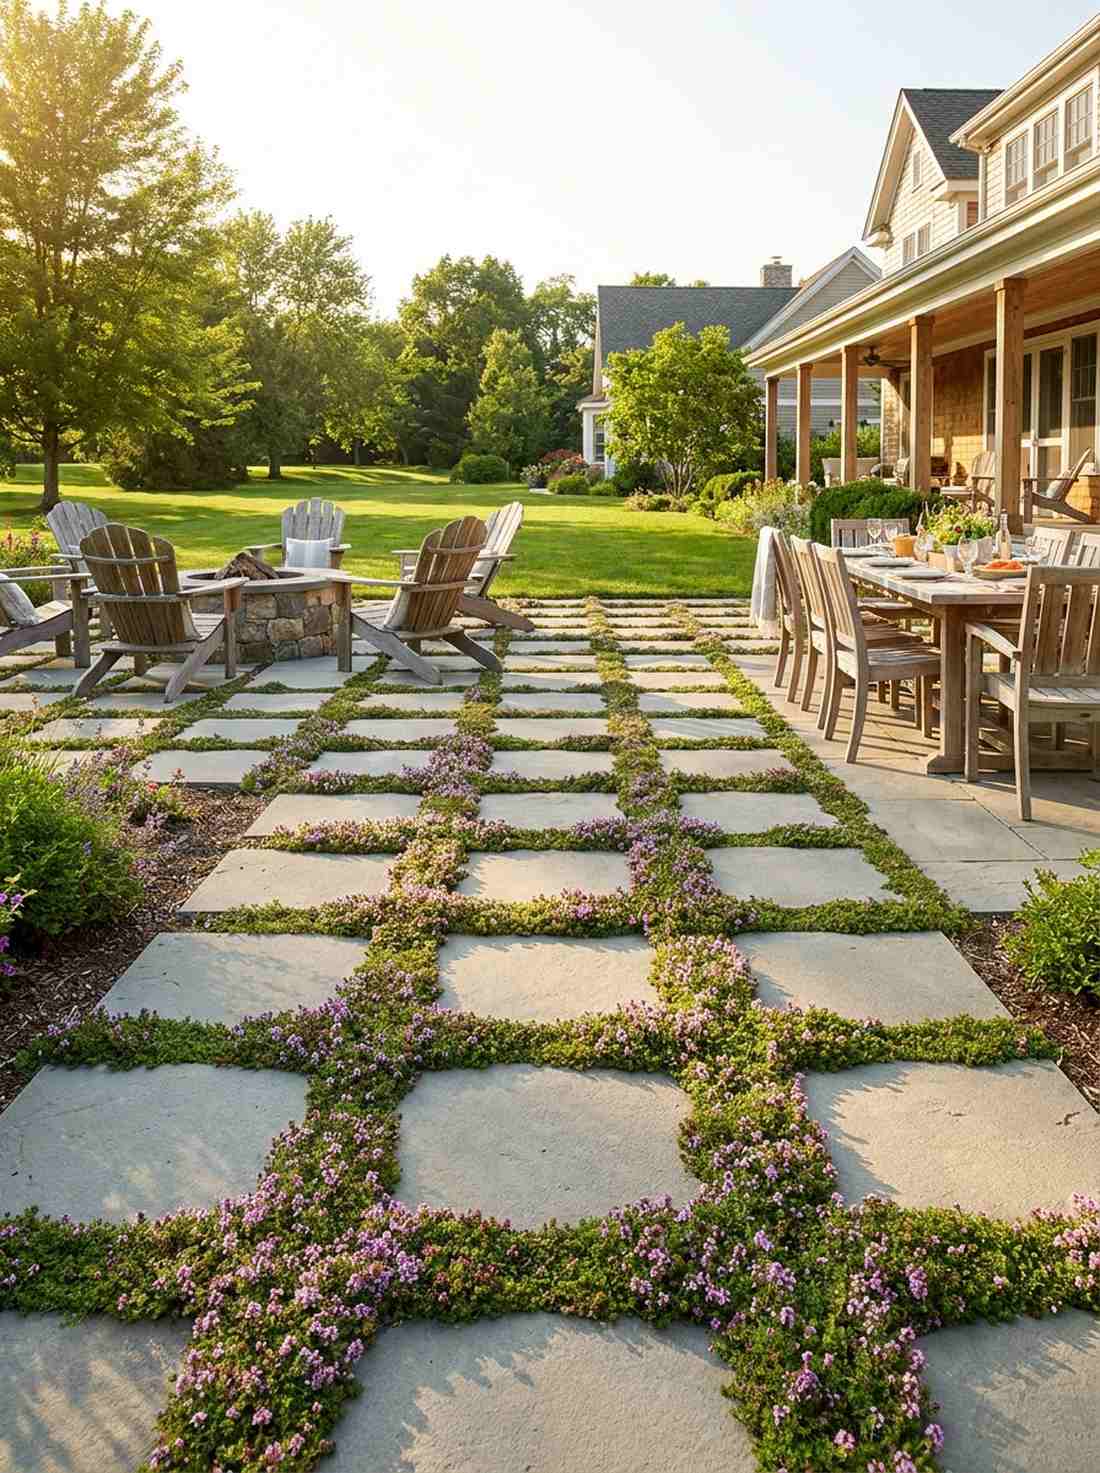
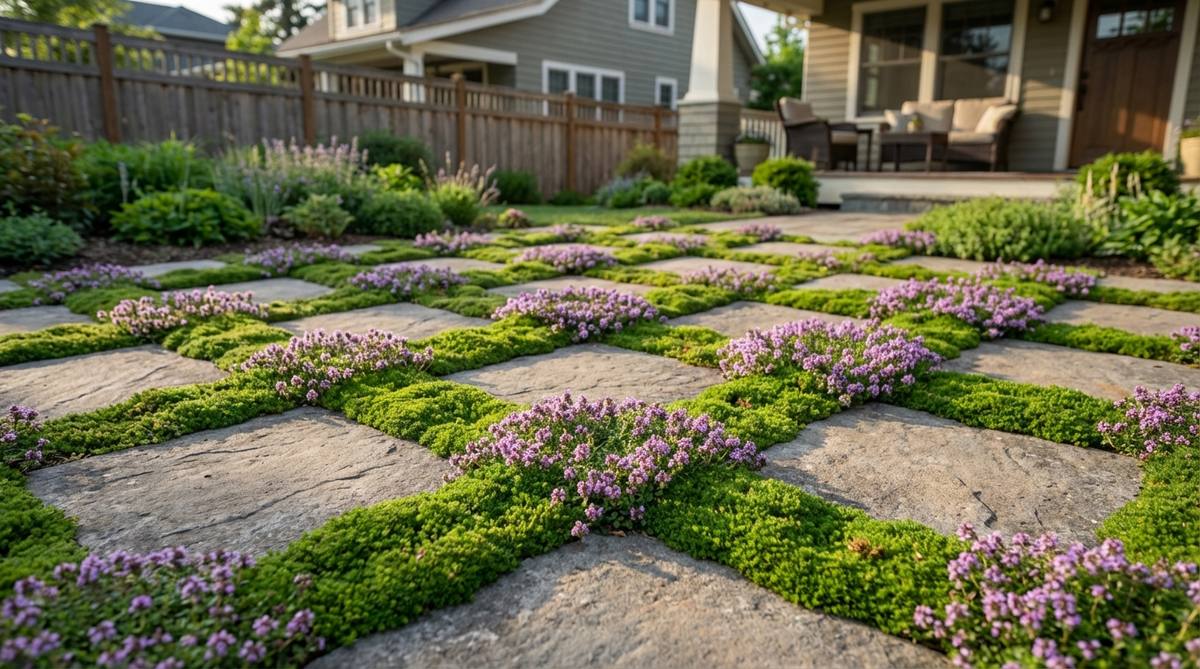
This living checkerboard feels like a lush, fragrant carpet beneath your feet. Integrating living pathway groundcover ideas is the ultimate cheat code for softening harsh, blazing-hot concrete patios.
Fusing hardscape with creeping thyme completely ignores sterile modern trends and builds a miniature ecosystem. The dense greenery actively cools the ambient temperature of the stone, acting as natural outdoor air conditioning.
Factoring in the plants, this project hovers around $50. A foolproof layout for high-traffic, sun-baked zones.
- Key Materials: Square pavers, creeping thyme plugs
- Vibe / Style: Softened botanical geometry
- Difficulty: Easy planting, moderate watering
- Budget Breakdown: Pavers: $25 | Groundcover plugs: $25.
- Creator’s Tip: Mix moisture-retaining gel into the joint soil so the plants survive the heat radiating from the stones.
- Smart Sourcing: pre-seeded creeping thyme starter kits and bulk water-storing soil crystals.
20. Modular Tile Pattern
Navigating this layout feels like exploring a high-end architectural plaza. Architectural patio paving solutions shine brilliantly when upgrading boring, monolithic concrete walkways.
Locking three different sizes together bypasses expensive contractor fees entirely and tricks the brain into seeing premium stonework. The complex interlocking geometry hides stains and wear infinitely better than a solid, single-color pour.
Sourcing multiple sizes brings the material cost to $60–$80. Pin this if you want maximum visual complexity on a budget.
- Key Materials: Mixed 12″, 18″, and 24″ concrete tiles
- Vibe / Style: Complex urban hardscape
- Difficulty: Requires a layout blueprint
- Budget Breakdown: Mixed tiles: $60 | Base prep: $20.
- Creator’s Tip: Draw the pattern on graph paper and color-code the sizes before heading to the hardware store.
- Smart Sourcing: pre-designed modular paver layout templates and heavy-duty rubber deadblow hammers.
Most backyard setups look identical. The upcoming organic designs destroy that trend by using materials you can probably find for free…
Natural and Organic Pathways
These designs embrace irregular forms and naturalistic placement that echo wilderness trails and forest paths. The informal aesthetic suits cottage gardens, native plantings, and woodland settings throughout American landscapes.
21. Fieldstone Scattered Arrangement
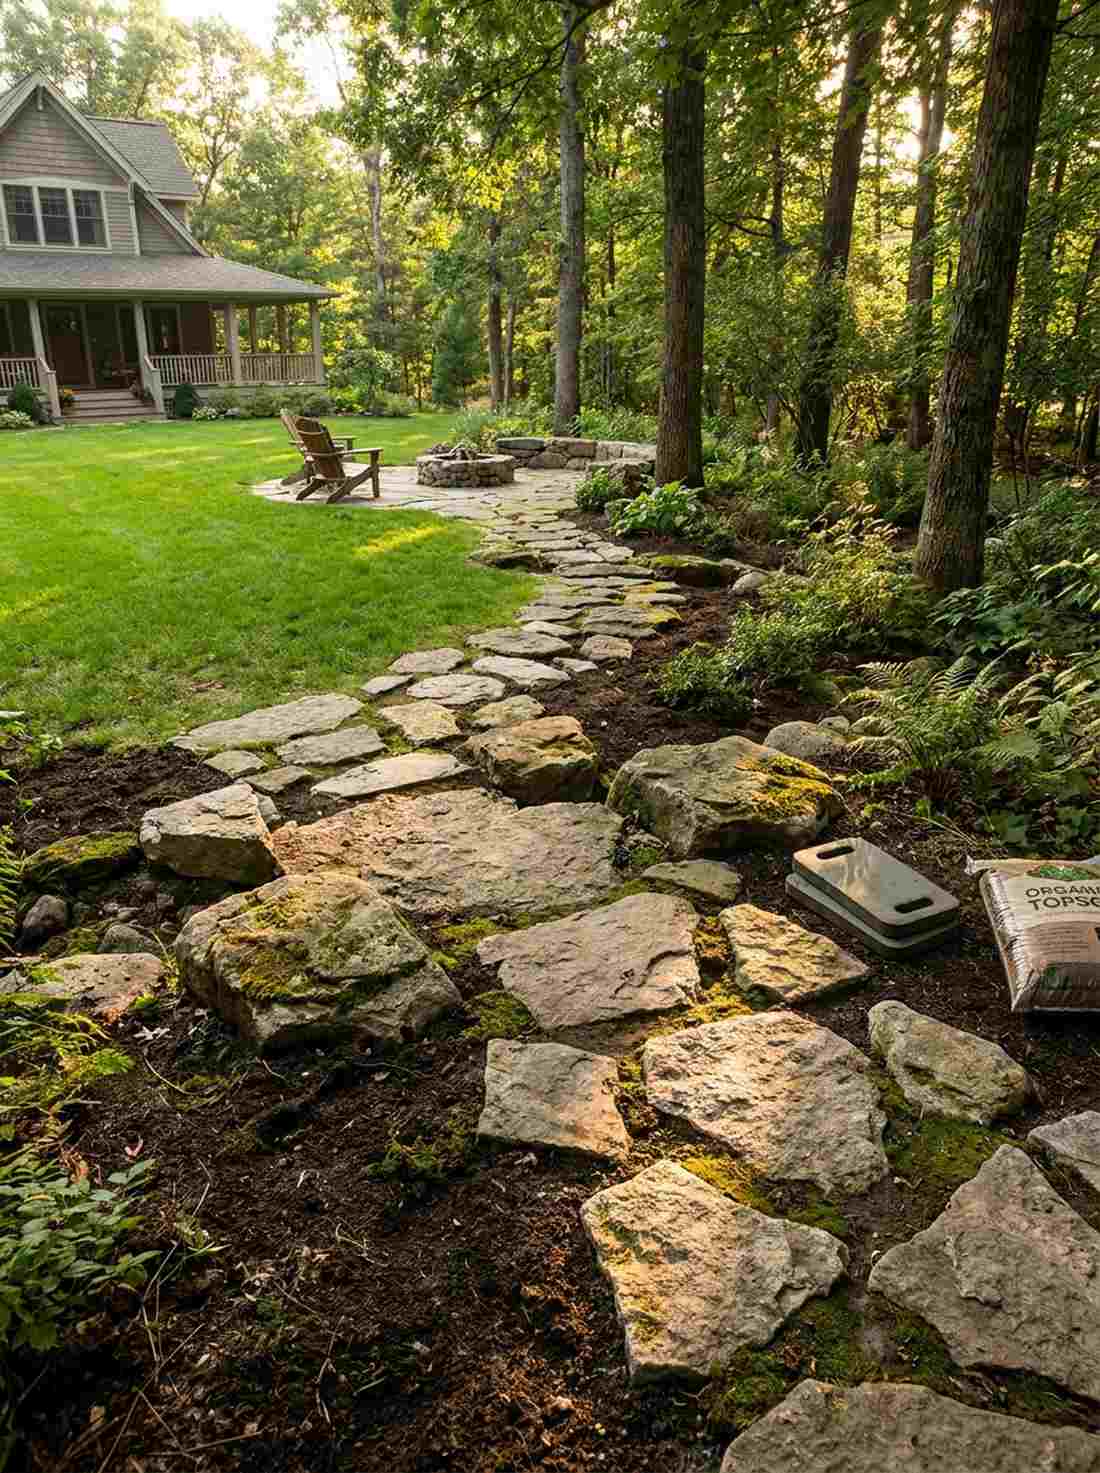
Wandering across these rough stones feels like tracking through a wild national park. A naturalistic woodland trail design creates the ultimate transition zone between a manicured lawn and untamed woods.
Scattering locally sourced rocks looks far more expensive than it is because it replicates Mother Nature’s randomness perfectly. Letting the stones sink naturally into the dirt over time only enhances the rugged, permanent aesthetic.
If you source local fieldstone, this is essentially a $10 project. Save this to your rustic wilderness garden board.
- Key Materials: Uneven local fieldstones
- Vibe / Style: Untamed wilderness
- Difficulty: Very easy, heavy lifting
- Budget Breakdown: Stones: Free-$20 | Topsoil filler: $10.
- Creator’s Tip: Dig the holes exactly to the shape of the rock’s underside to prevent dangerous wobbling.
- Smart Sourcing: heavy-duty landscape kneeling pads and bulk organic topsoil builder.
22. Moss-Edged Slate Fragments
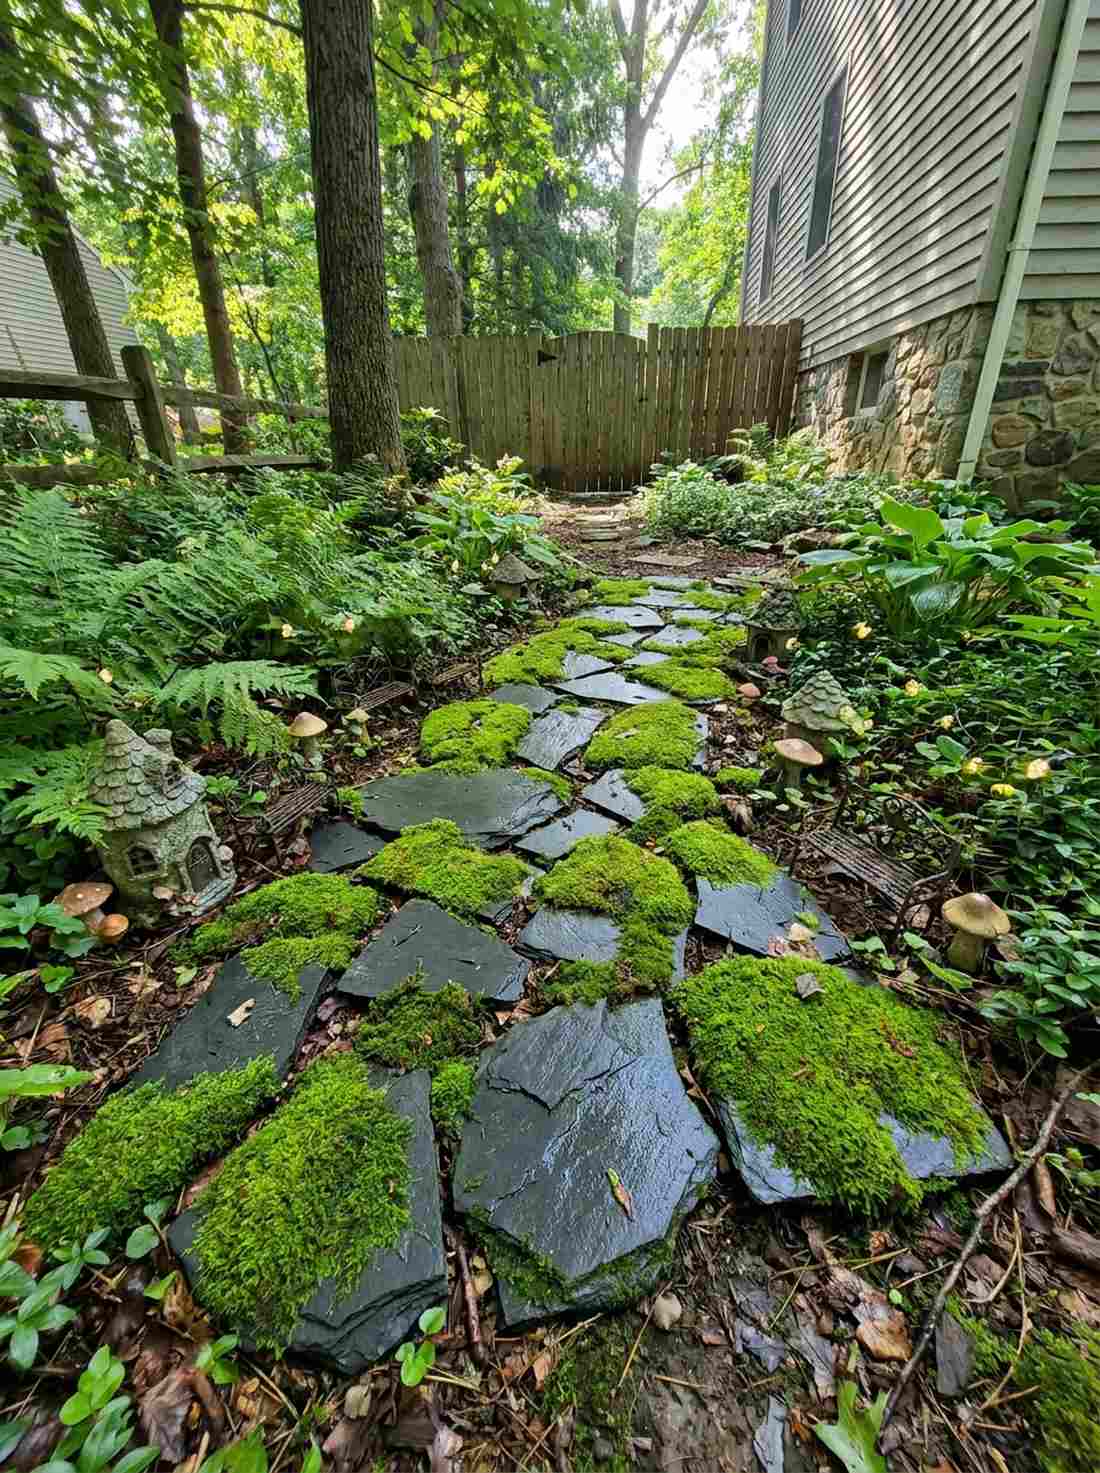
This damp, vivid green setup feels straight out of an ancient fairy tale. Utilizing shade garden pathway kits is the absolute smartest move for side-yards where standard grass refuses to grow.
Painting buttermilk on the jagged edges delivers a surprisingly premium look by rapidly accelerating moss colonization. Tucking in tiny, premium terrarium accessories along the slate edges completely transforms a dead corner into a miniature wonderland.
You can achieve this magical look for around $25. Pin this immediately if you struggle with deep yard shade.
- Key Materials: Broken slate pieces, live moss
- Vibe / Style: Enchanted woodland
- Difficulty: Requires daily misting initially
- Budget Breakdown: Slate fragments: $15 | Moss slurry ingredients: $10.
- Creator’s Tip: Mist the moss twice daily for the first two weeks until it firmly attaches to the rock pores.
- Smart Sourcing: pre-cut preserved moss sheets (bulk pack) and UV-resistant terrarium fairy kits.
Material Guide: Cheap vs. Premium Aesthetic
Knowing exactly where to save and where to spend makes all the difference in achieving that “looks expensive but isn’t” vibe.
- Standard vs. UV-Resistant/Premium: Sealing cheap concrete with a commercial-grade UV topcoat stops yellowing and mimics the deep color of high-end wet stone.
- Pre-made Kits vs. Sourcing Locally: While local rocks are cheap, buying pre-cut starter kits for things like moss or leveling bases saves hours of back-breaking frustration and ensures zero-wobble stability.
23. Boulders with Ground Cover Fill
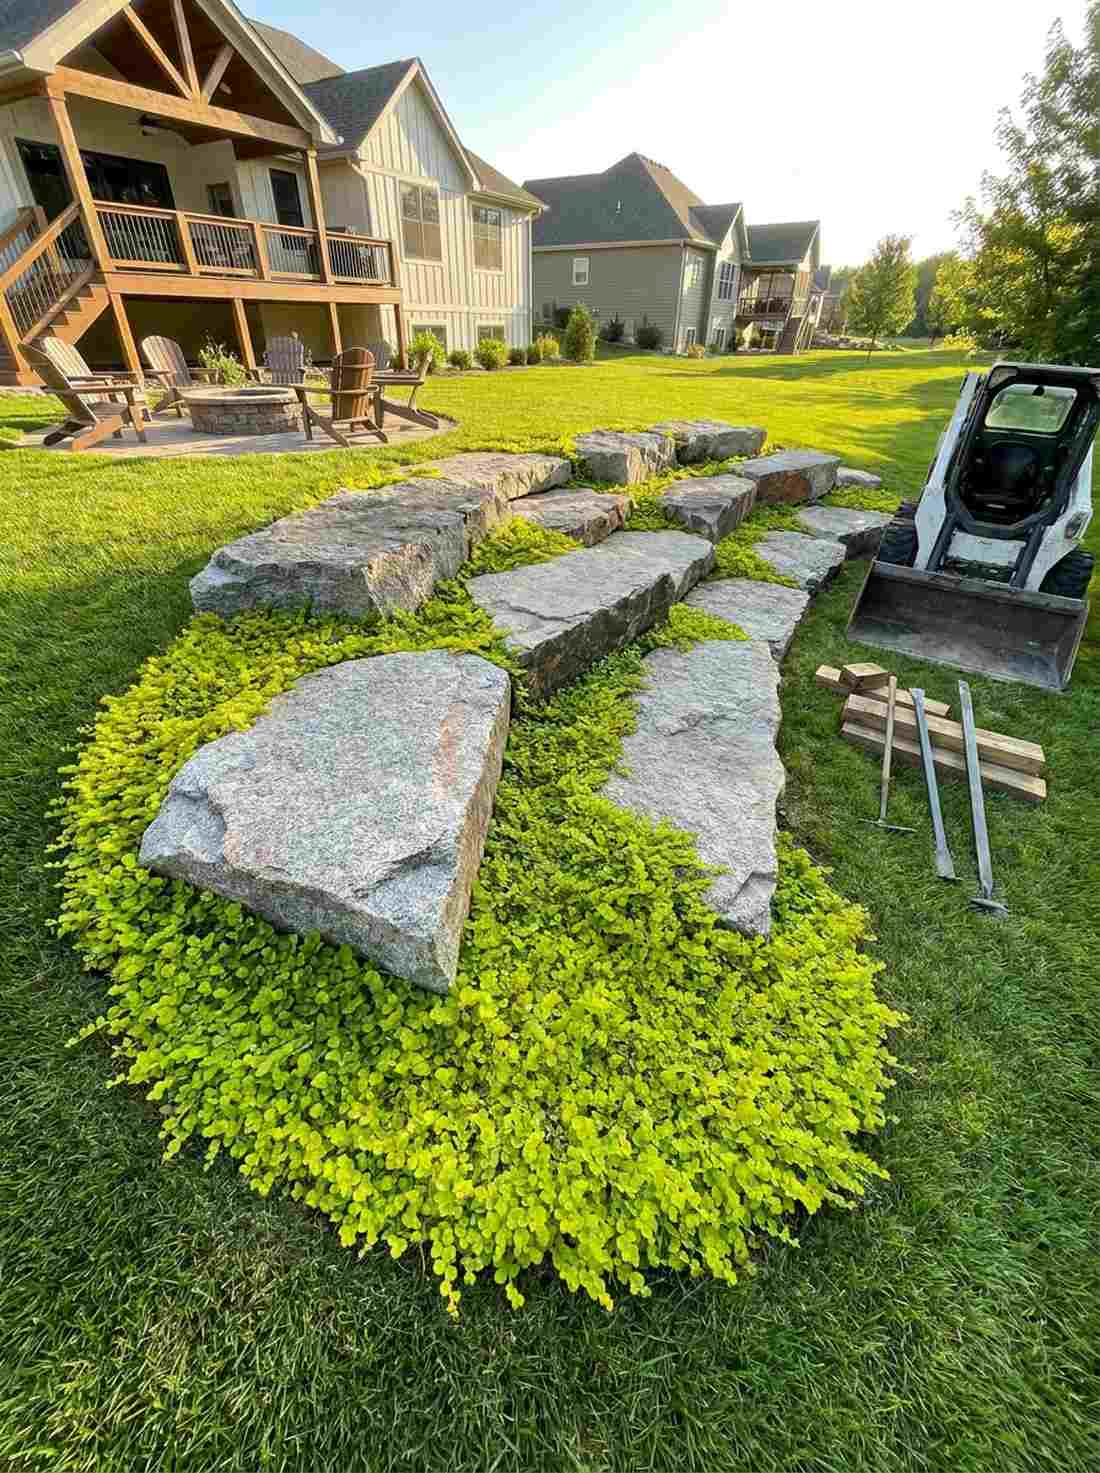
Leaping from boulder to boulder radiates raw, primal energy that kids and adults both love. Heavy-duty landscape anchor points like these flat-tops serve as stunning architectural focal points in massive yards.
Burying massive stones totally fakes a custom masonry job and gives the illusion of exposed bedrock. Surrounding them with aggressive creeping jenny creates a vibrant, neon-green moat that suffocates weeds automatically.
Due to the size, expect a $100+ price tag for delivery. Highly recommended if you want permanent, zero-maintenance architecture.
- Key Materials: Flat-top boulders, creeping jenny
- Vibe / Style: Bold sculptural landscape
- Difficulty: Requires mechanical lifting
- Budget Breakdown: Boulders: $80 | Delivery/Equipment: $50.
- Creator’s Tip: Use a crowbar and wooden blocks to make micro-adjustments once the boulder is dropped in the hole.
- Smart Sourcing: heavy-duty steel leverage pry bars and pre-rooted creeping groundcover flats.
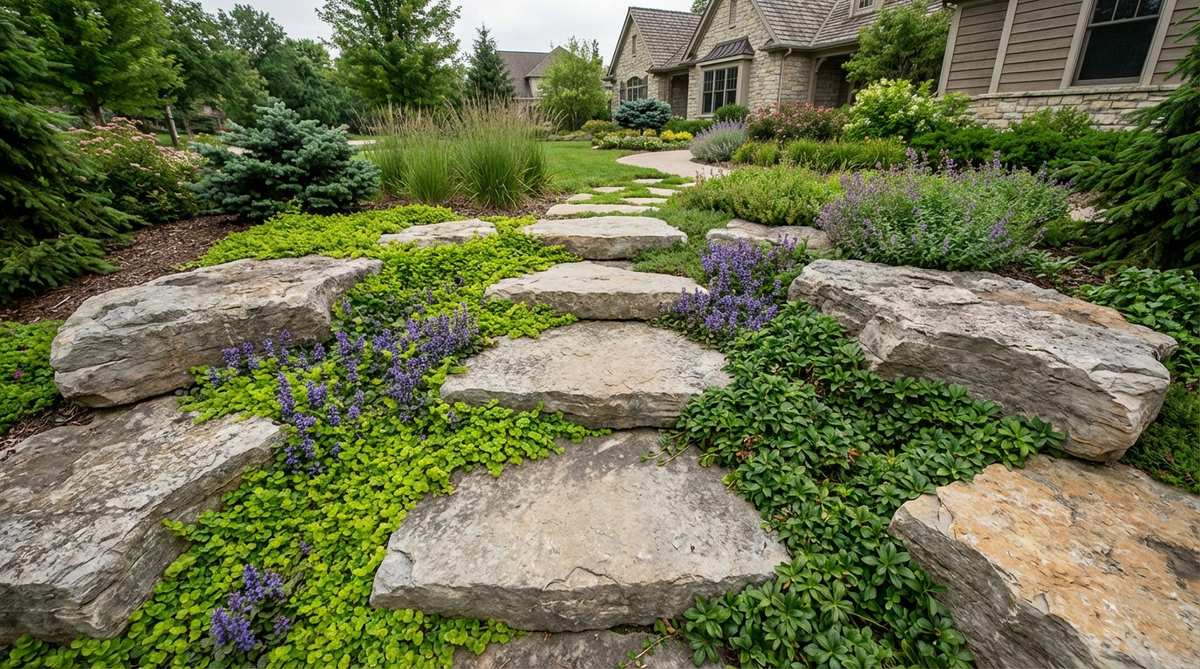
24. Weathered Limestone Irregular Spacing
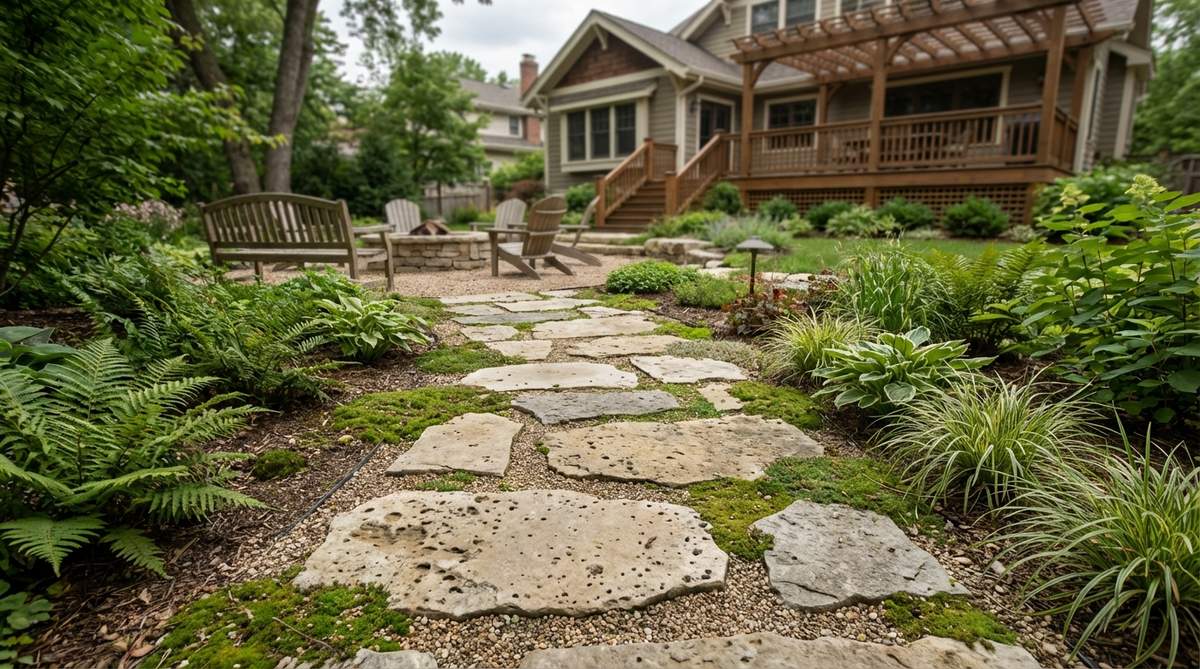
The pitted surfaces of this stone make it feel like walking through an ancient archaeological dig. An ancient ruin garden aesthetic elevates boring flowerbeds into deeply textured historical showcases.
Embracing the eroded holes and fossil textures completely ignores sterile modern trends and provides unmatched character. The chaotic spacing forces visitors to look down, practically demanding they admire your expensive surrounding plant choices.
Salvaged limestone runs roughly $40–$60 depending on thickness. Save this to your historical garden restoration board.
- Key Materials: Eroded salvage limestone
- Vibe / Style: Timeless antique ruin
- Difficulty: Simple leveling
- Budget Breakdown: Salvaged stone: $40 | Base prep: $10.
- Creator’s Tip: Do not pressure wash salvaged limestone; you will destroy the expensive, natural patina it took decades to build.
- Smart Sourcing: premium breathable stone sealer sprays and heavy-duty weed blocking geotextile.
You’re about to see the easiest trick for dealing with a sloped yard, and it involves completely ditching straight lines…
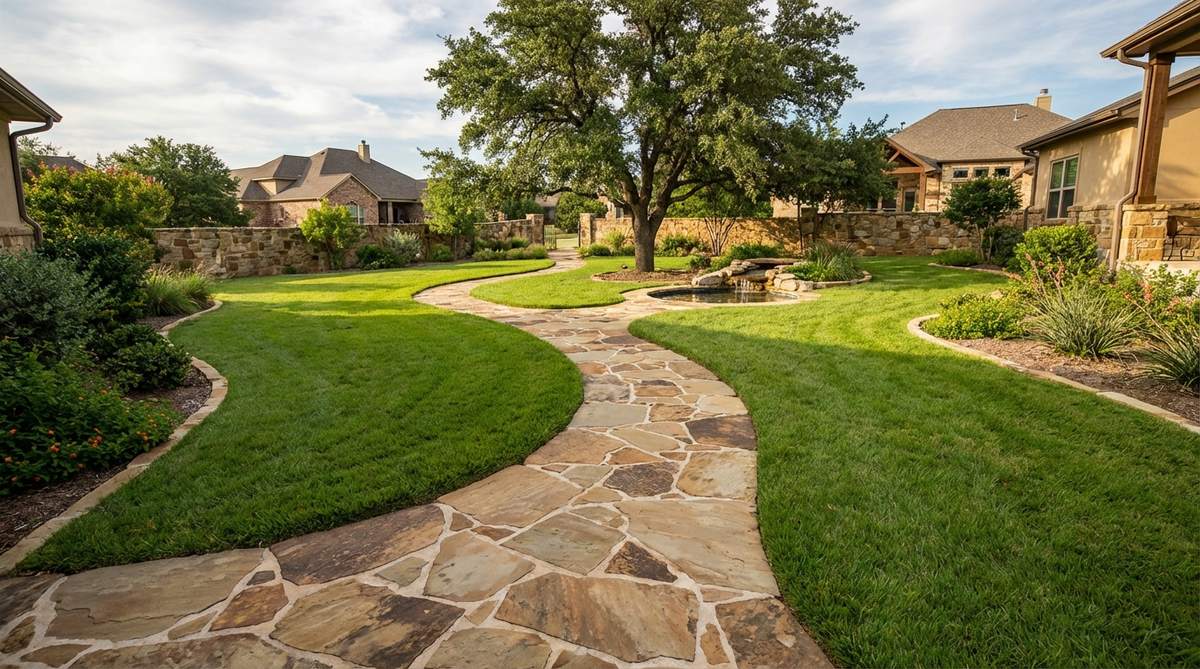
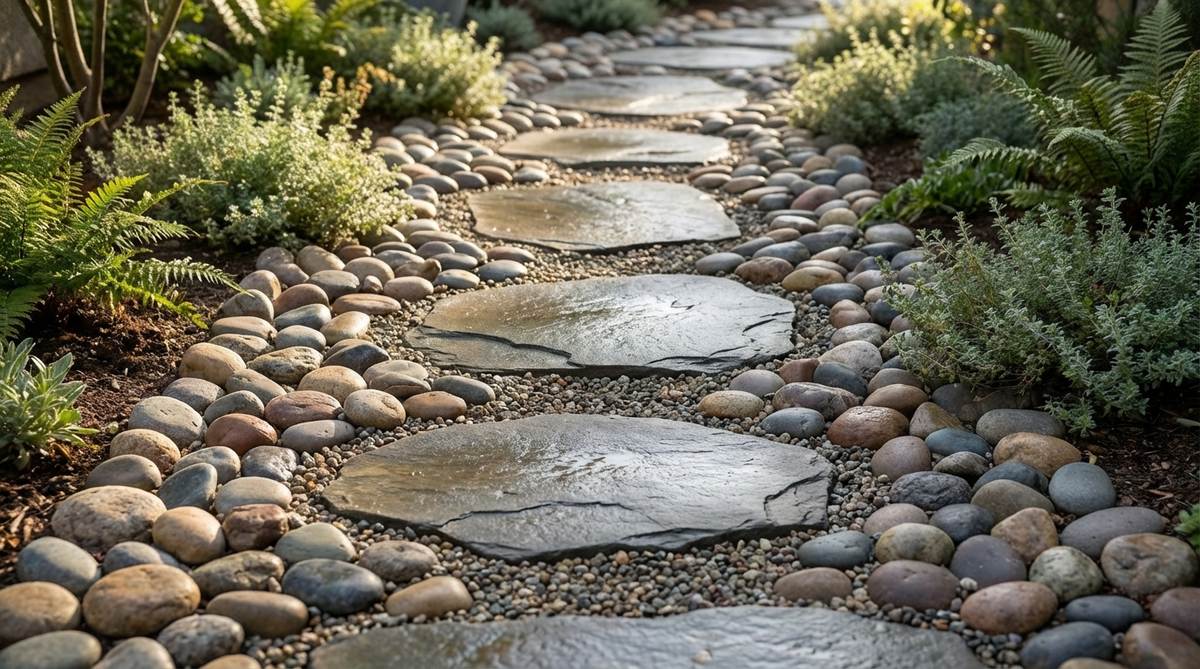
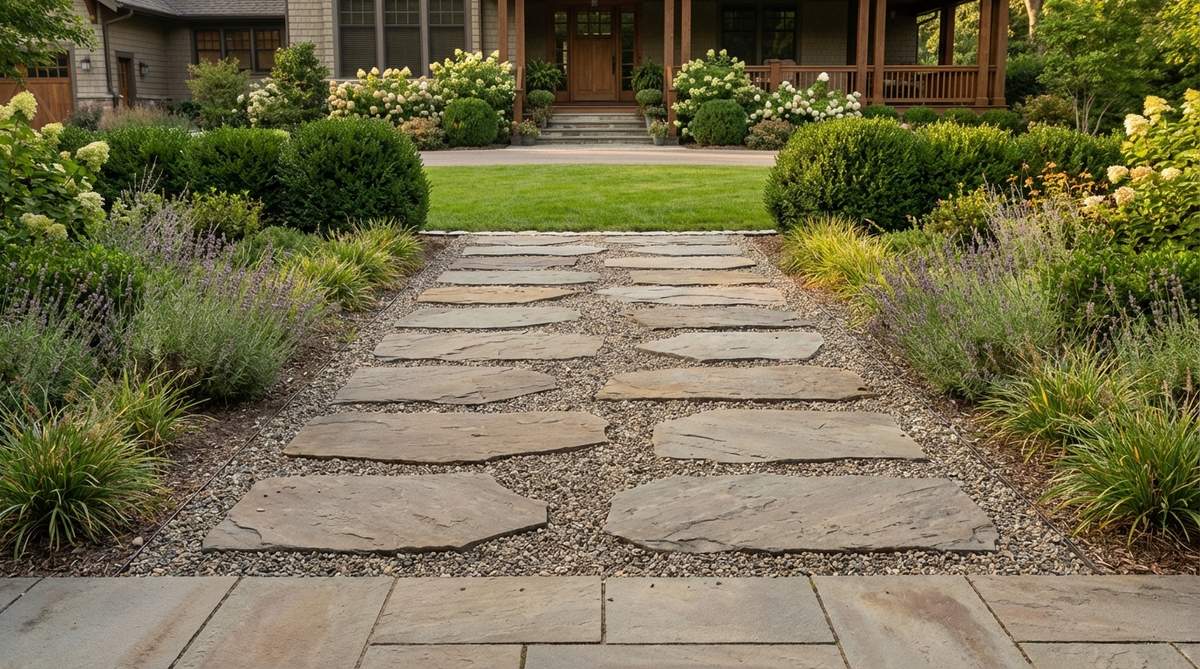
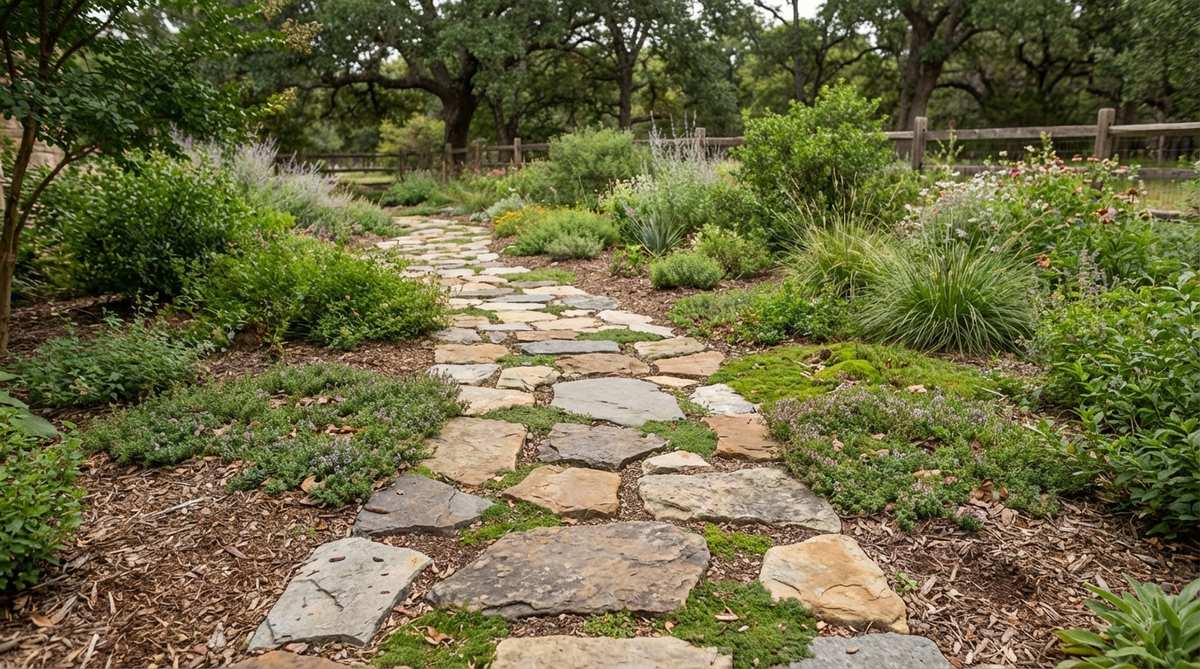
25. Curved Natural-Edge Flagstone
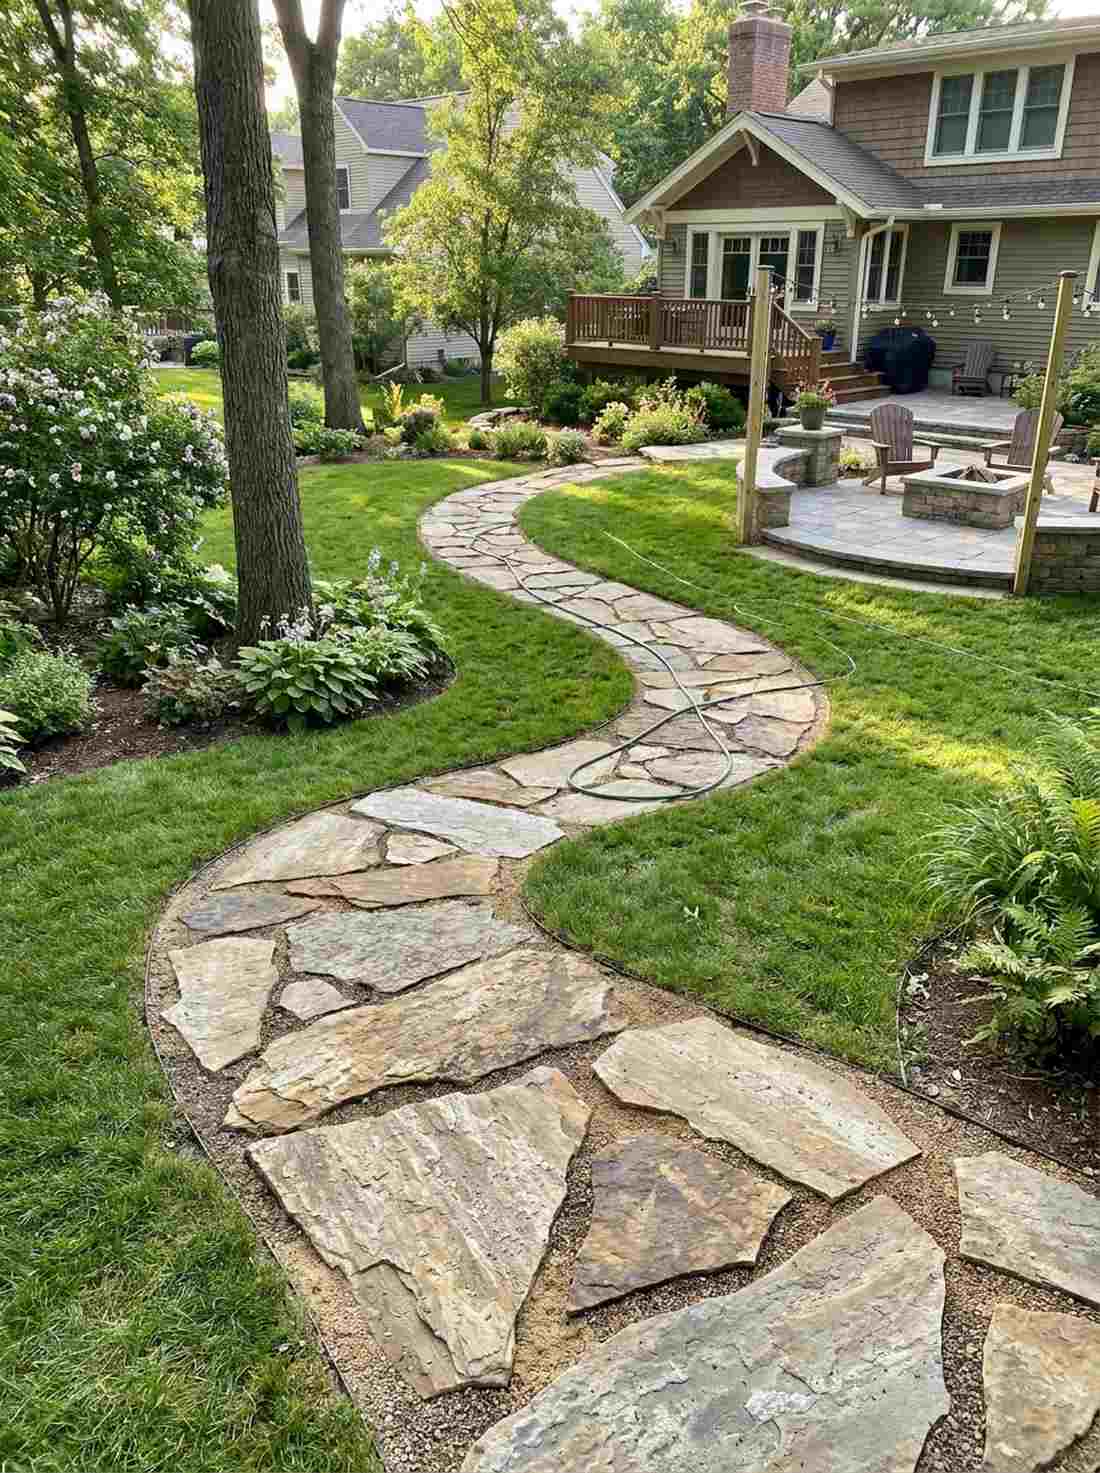
This winding river of stone feels incredibly relaxing and slows your heart rate instantly. Implementing flowing organic lawn walks is the master secret for navigating awkwardly sloped or uneven backyards.
Letting the raw rock dictate the path’s direction gives a designer-level finish without picking up a single saw. The gentle S-curve visually lengthens the yard, tricking the eye into thinking your property is much larger.
Expect around $50 for high-quality, uncut flagstone pieces. Keep this pinned for your spring landscaping blitz.
- Key Materials: Raw edge natural flagstone
- Vibe / Style: Flowing river organic
- Difficulty: Easy placement, zero cutting
- Budget Breakdown: Flagstone: $40 | Sand base: $10.
- Creator’s Tip: Lay out a garden hose first to perfect the curve before placing a single heavy stone.
- Smart Sourcing: flexible heavy-duty garden hoses (for layout) and bulk fast-setting jointing dust.
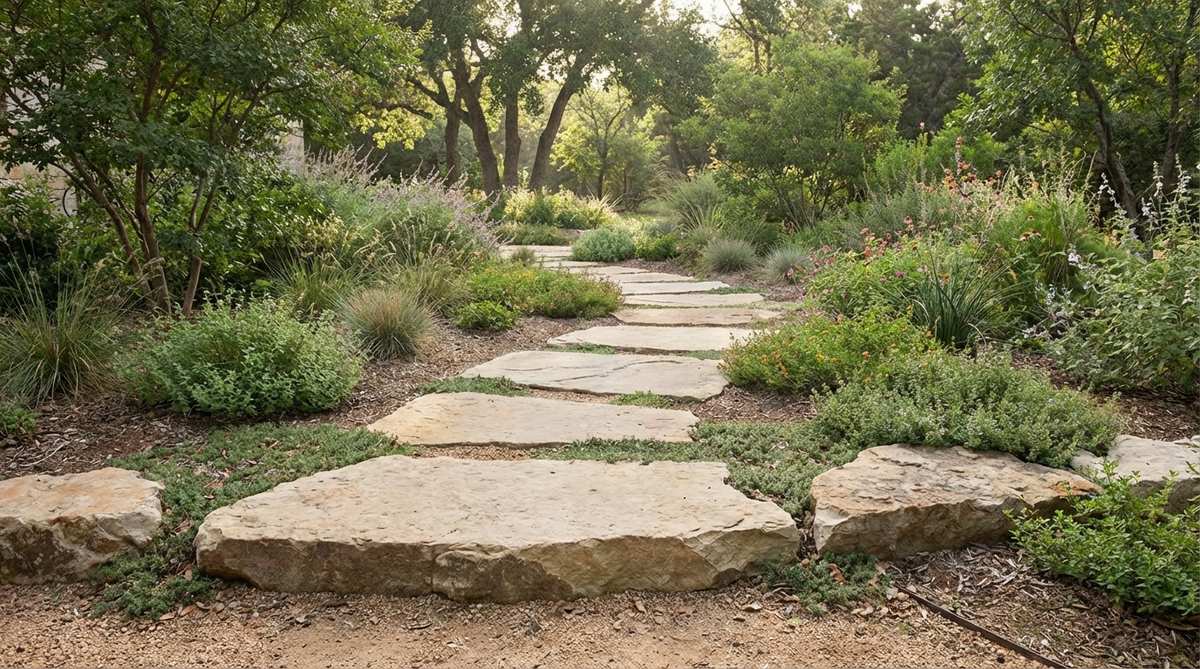
26. Sandstone with Native Grasses
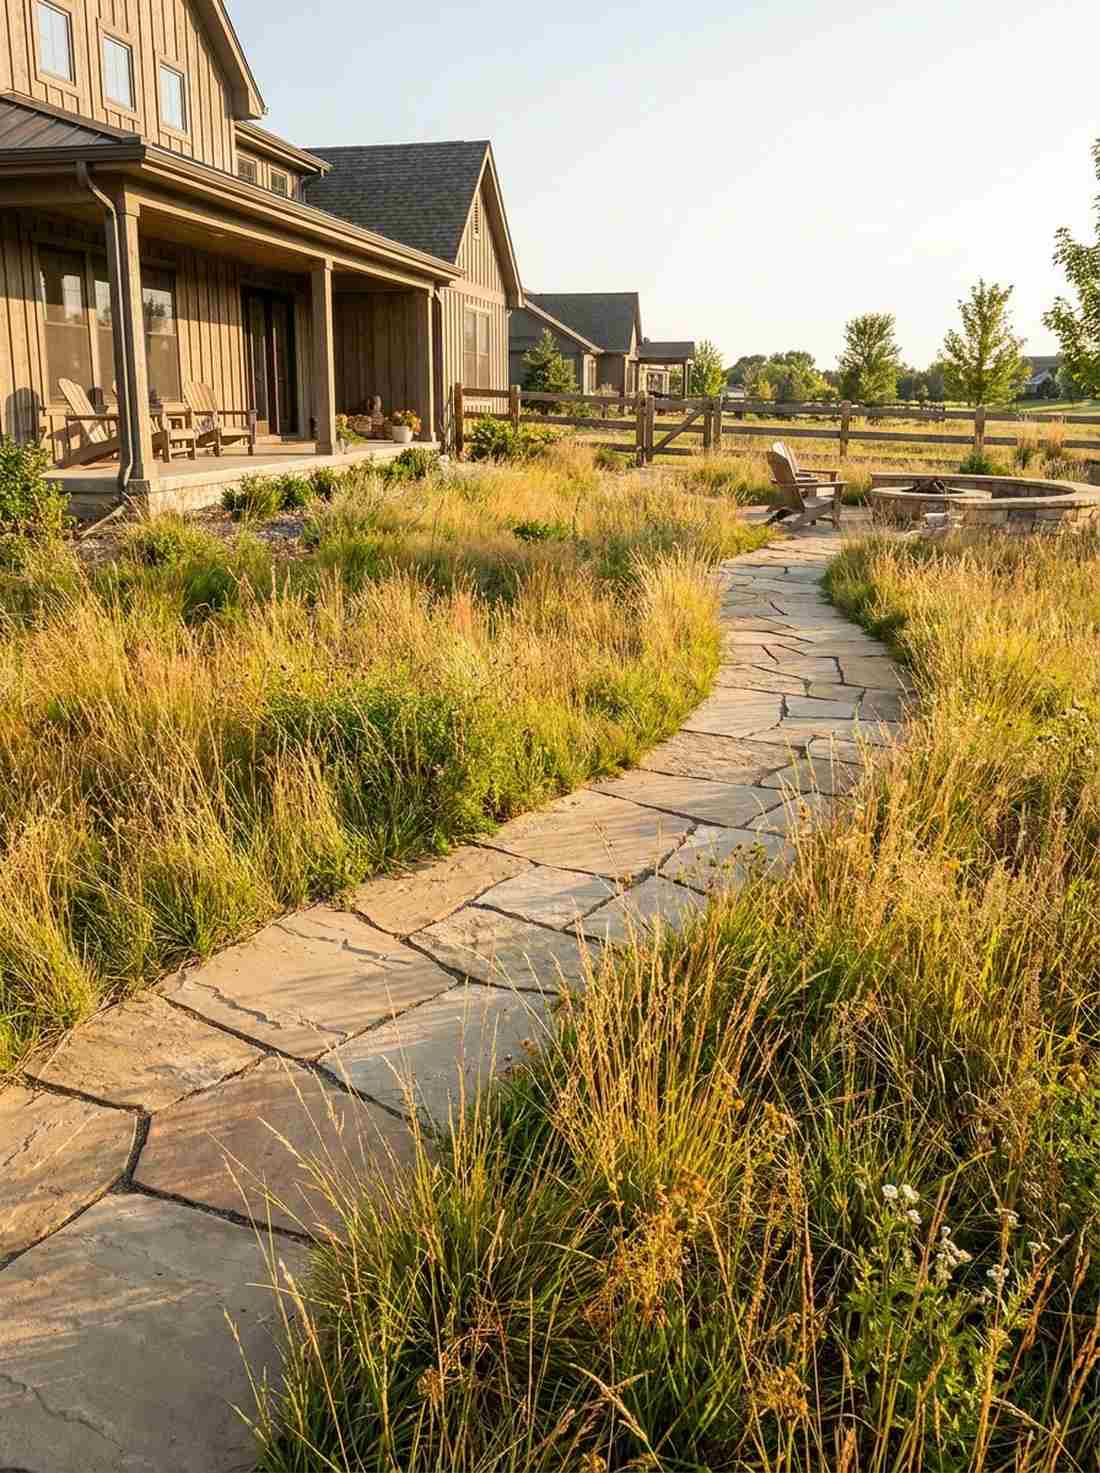
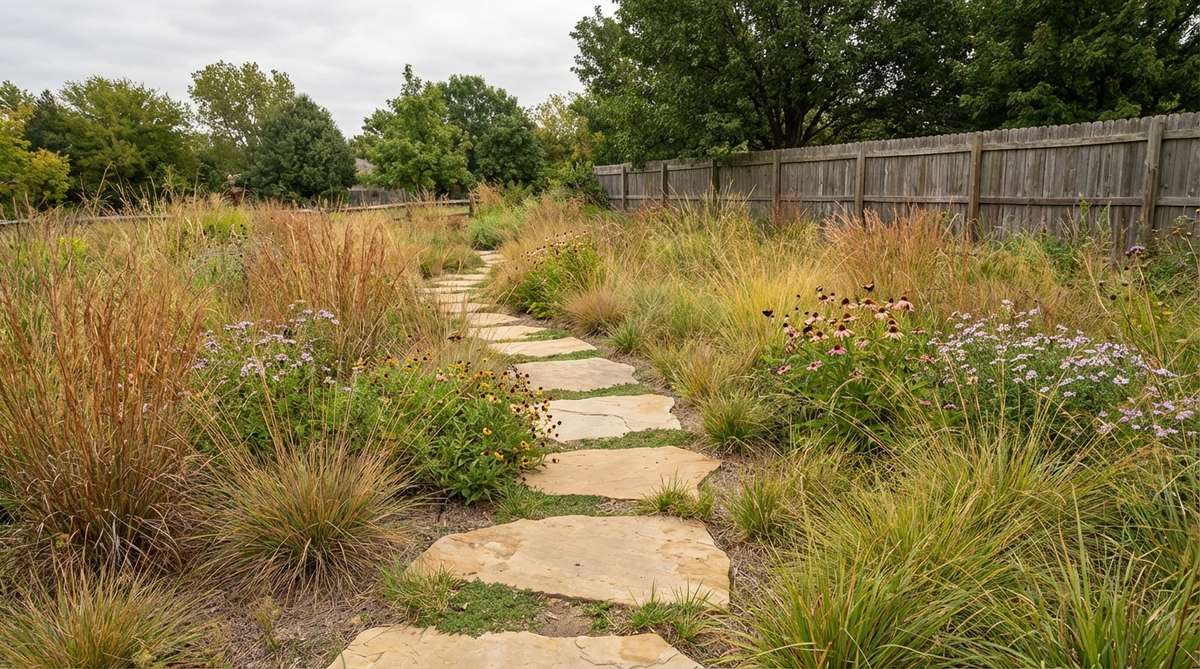
Walking through this layout feels like drifting through a breezy, golden prairie meadow. Drought-tolerant meadow paths are exploding in popularity as homeowners ditch water-guzzling turf lawns.
Sinking flat sandstone into tall native grass bypasses expensive contractor fees entirely and practically builds its own ecosystem. The heavy stones crush down weeds while the surrounding grasses hide the messy edges flawlessly.
Costing under $30 with native seed packets, this is a massive win. Save this to your eco-friendly zero-irrigation board.
- Key Materials: Flat sandstone, native fescue seeds
- Vibe / Style: Wild prairie ecology
- Difficulty: Very low
- Budget Breakdown: Sandstone pieces: $20 | Native seeds: $10.
- Creator’s Tip: Select stones at least 2 inches thick so they don’t get completely swallowed when the tall grass peaks in late summer.
- Smart Sourcing: premium drought-tolerant native grass seed blends and heavy-duty root barrier rolls.
Creative Mixed-Material Combinations
Combining different stone types, textures, and complementary materials expands design possibilities and creates unique visual statements. These innovative approaches push beyond traditional single-material pathways.
27. Stone with Brick Border Frames
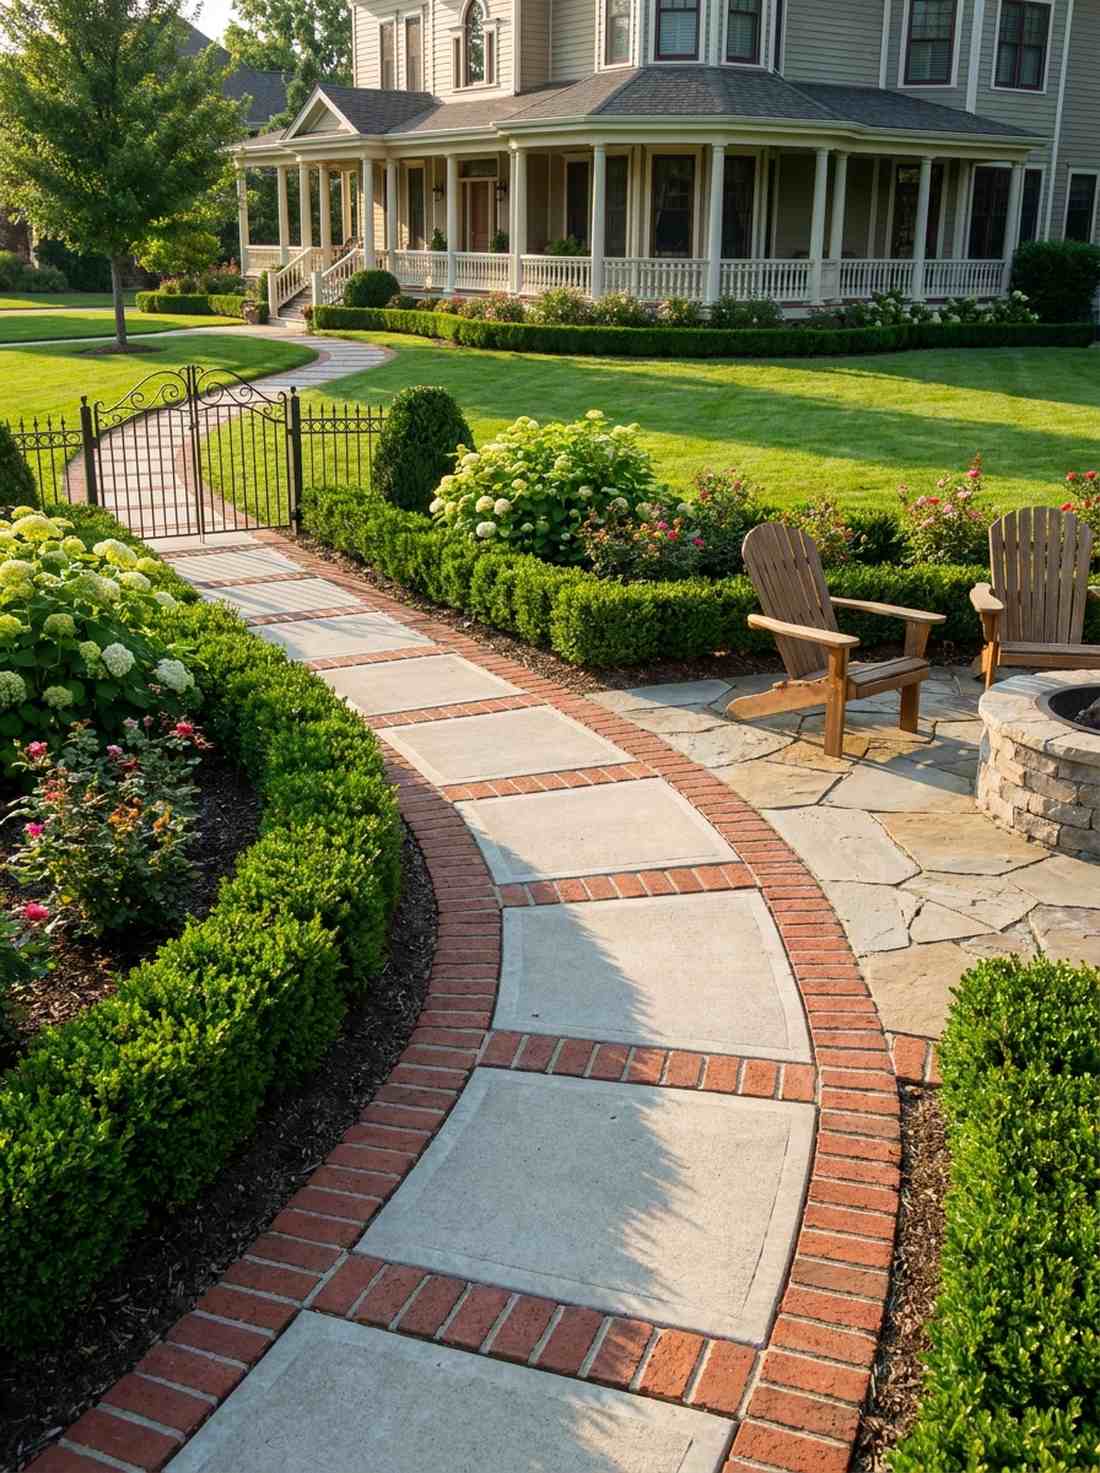
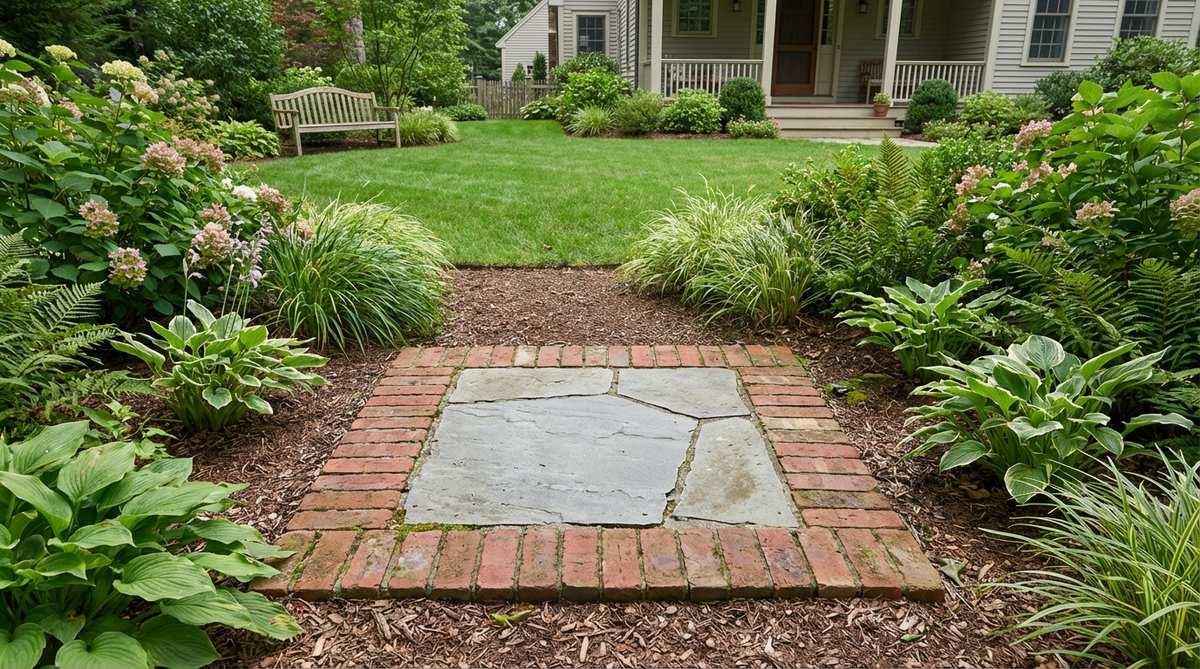
This framed aesthetic screams classic wealth and highly structured estate living. Utilizing Victorian-inspired garden borders is a brilliant tactic for elevating cheap concrete squares into focal masterpieces.
Wrapping basic steppers in a red clay halo looks far more expensive than it is and immediately defines the walking zone. The brick bumper also acts as a physical shield, stopping lawnmower wheels from chipping the delicate center stone.
Combining the two materials sets you back around $45. Pin this if you want to fake a high-end masonry budget.
- Key Materials: Concrete steppers, red clay bricks
- Vibe / Style: Structured Victorian elegance
- Difficulty: Moderate trenching required
- Budget Breakdown: Center stones: $20 | Border bricks: $25.
- Creator’s Tip: Set the bricks on edge (vertically) rather than flat to create a deeper, stronger retaining wall against the turf.
- Smart Sourcing: commercial-grade masonry bonding adhesive and heavy-duty rubber mallet starter kits.
28. Concrete with Glass Aggregate
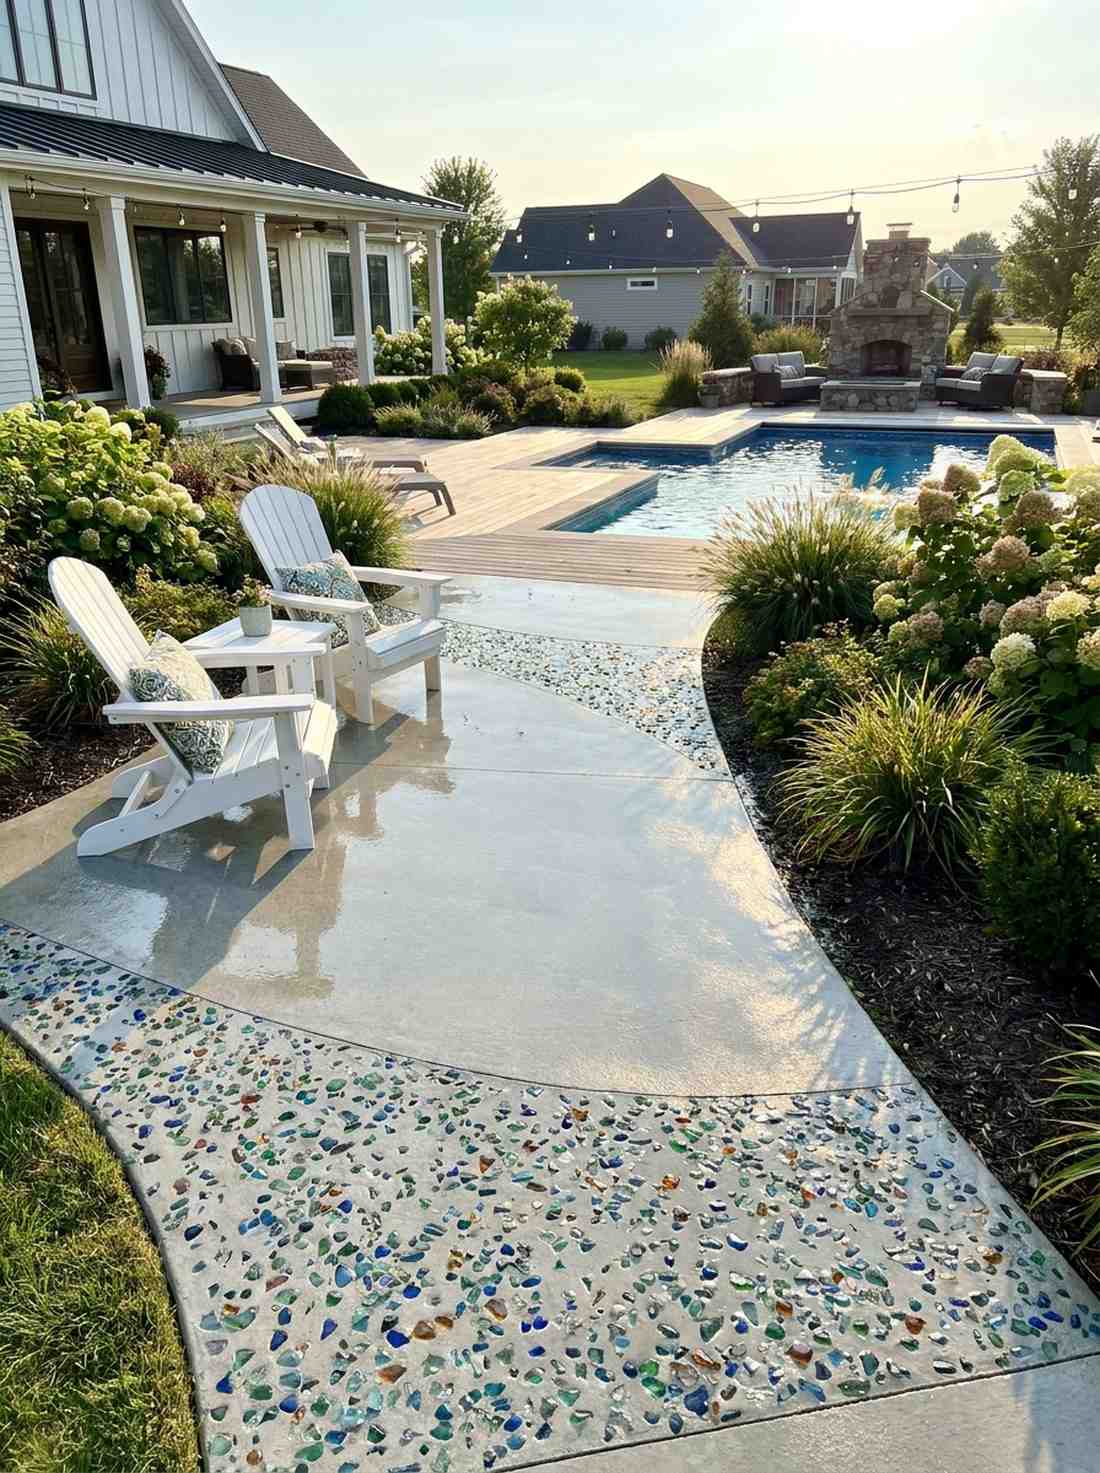
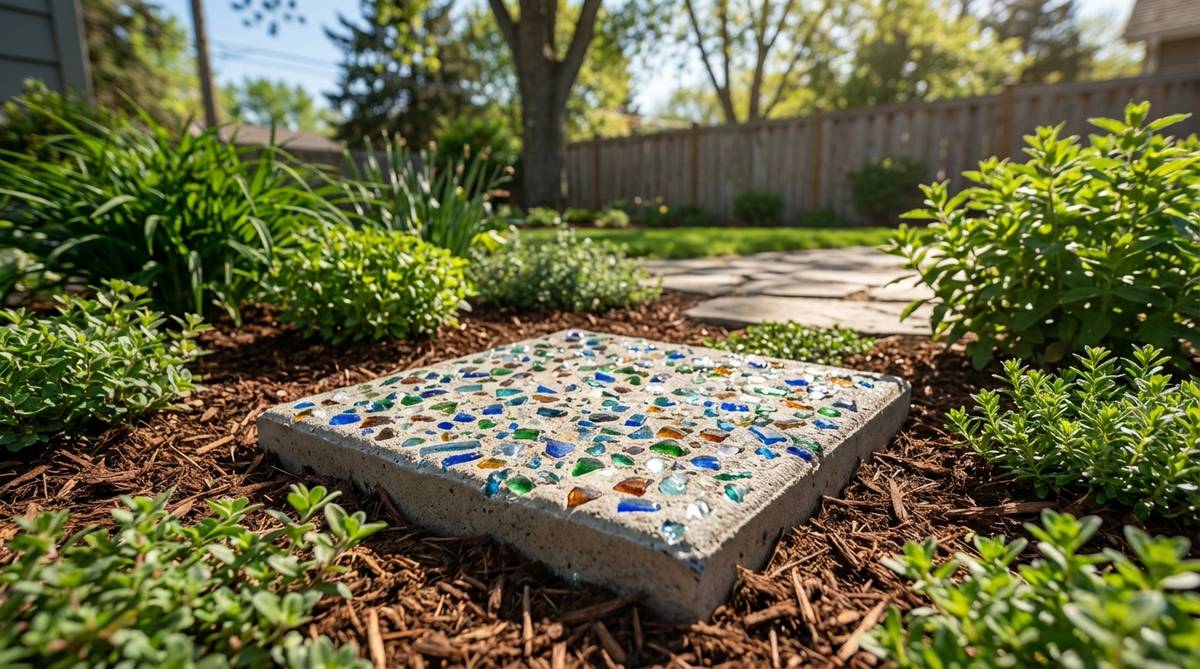
This sun-catching surface feels like walking on scattered diamonds when the afternoon light hits. Eco-friendly upcycled patio paths perfectly match vibrant, artsy garden spaces or poolside lounging areas.
Embedding tumbled ocean glass totally fakes a custom masonry job while recycling waste brilliantly. Sealing the entire surface with UV-resistant acrylic topcoats guarantees the glass never pops loose and shines brilliantly forever.
DIY casting with recycled glass costs a mere $20. Save this to your creative concrete upcycling board.
- Key Materials: Concrete mix, tumbled recycled glass
- Vibe / Style: Sparkling coastal artsy
- Difficulty: Messy DIY casting
- Budget Breakdown: Concrete: $5 | Bulk tumbled glass: $15.
- Creator’s Tip: Polish the cured surface with a diamond-grit sanding pad to make the glass pieces perfectly flush and blindingly shiny.
- Smart Sourcing: UV-resistant acrylic concrete topcoats and bulk tumbled decorative glass chips.
The next mixed-material concept is the ultimate bridge between your wooden deck and your stone patio. It’s genius…
29. Wood Plank and Stone Combination
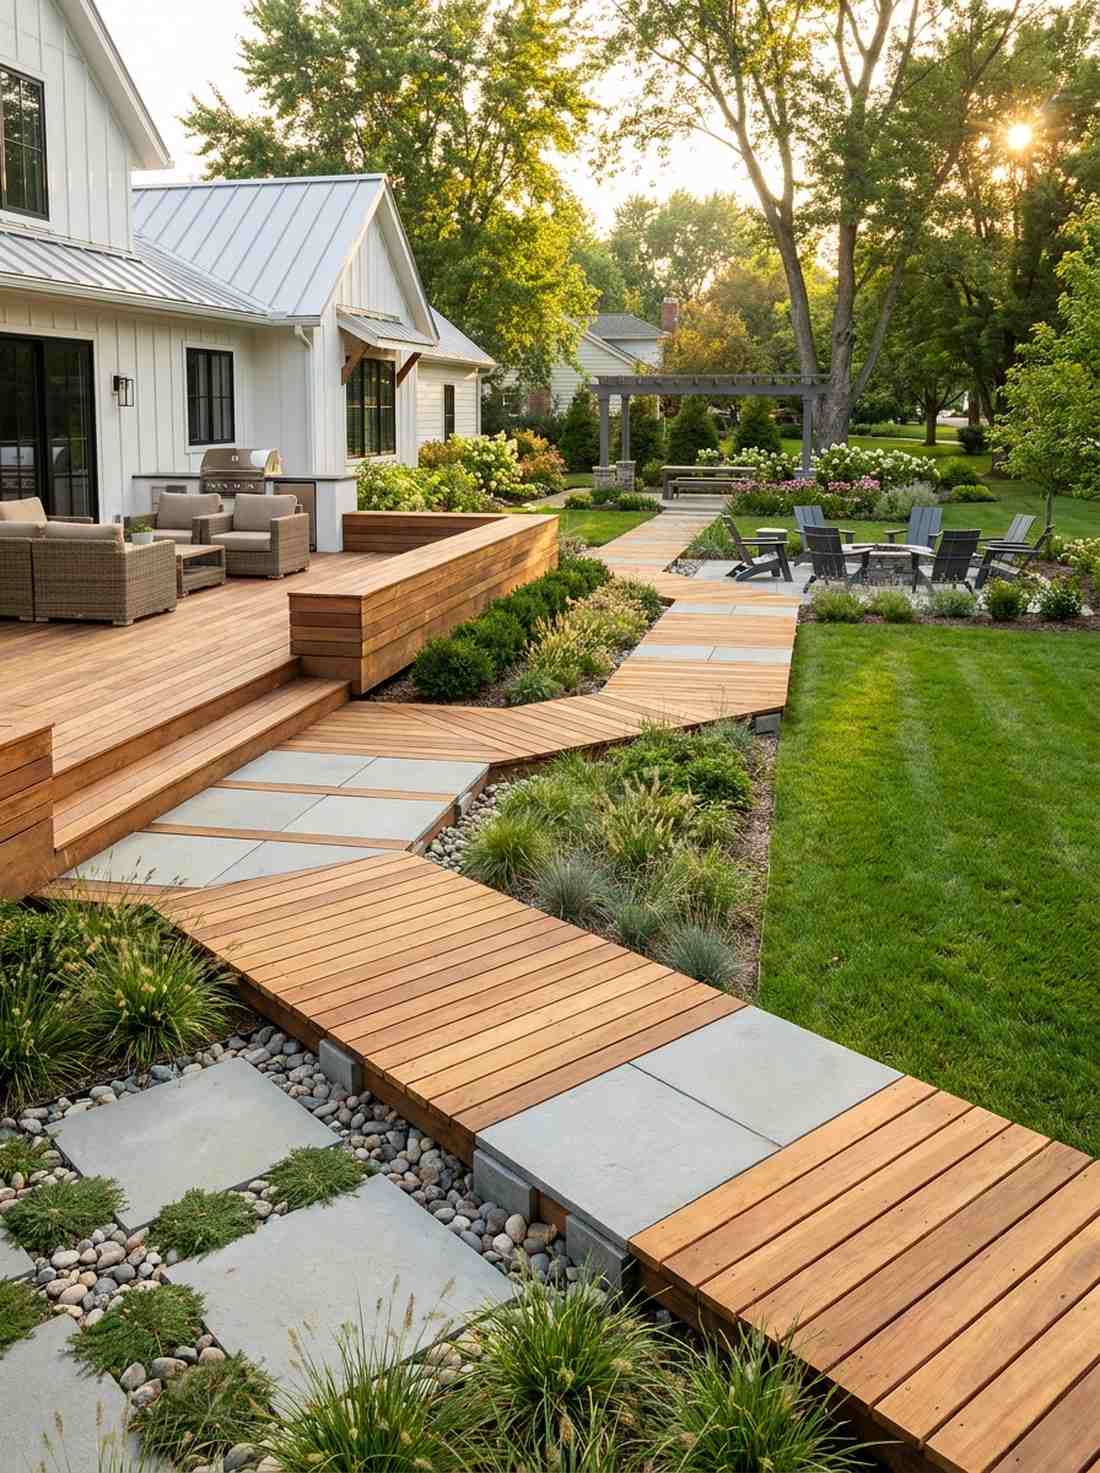
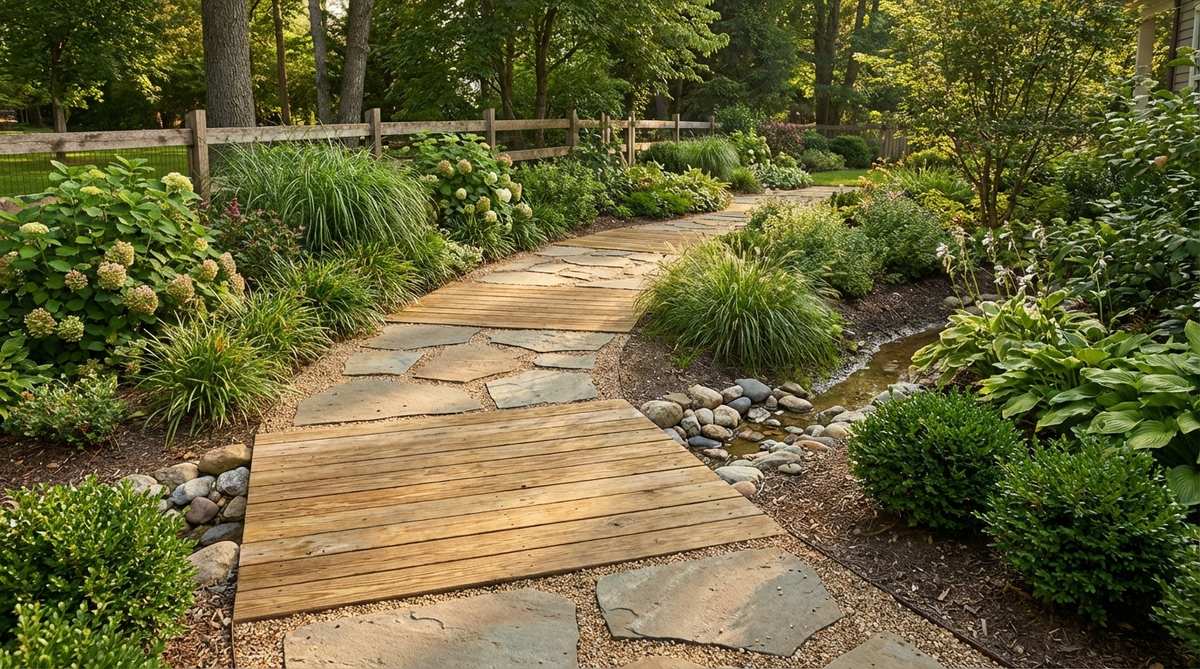
The rhythmic thud of wood mixed with the crunch of stone radiates modern architectural brilliance. Mixed-material boardwalk designs perfectly connect the sharp geometry of a wooden deck to the wild grass.
Fusing warm cedar planks with icy gray pavers delivers a surprisingly premium look that defies standard landscape categories. It naturally controls foot pacing, practically forcing guests to slow down and notice the material transitions.
Expect around $70 for high-quality cedar and stone. Pin this to your modern transitional patio board.
- Key Materials: Cedar deck cutoffs, square pavers
- Vibe / Style: Modern hybrid transitional
- Difficulty: Requires basic carpentry
- Budget Breakdown: Cedar wood: $40 | Pavers: $30.
- Creator’s Tip: Anchor the wood planks to buried cinderblocks so the timber never touches the damp, rotting soil directly.
- Smart Sourcing: premium exterior wood waterproofing sealers and heavy-duty galvanized timber screws.
30. Metal Grid with Stone Infill
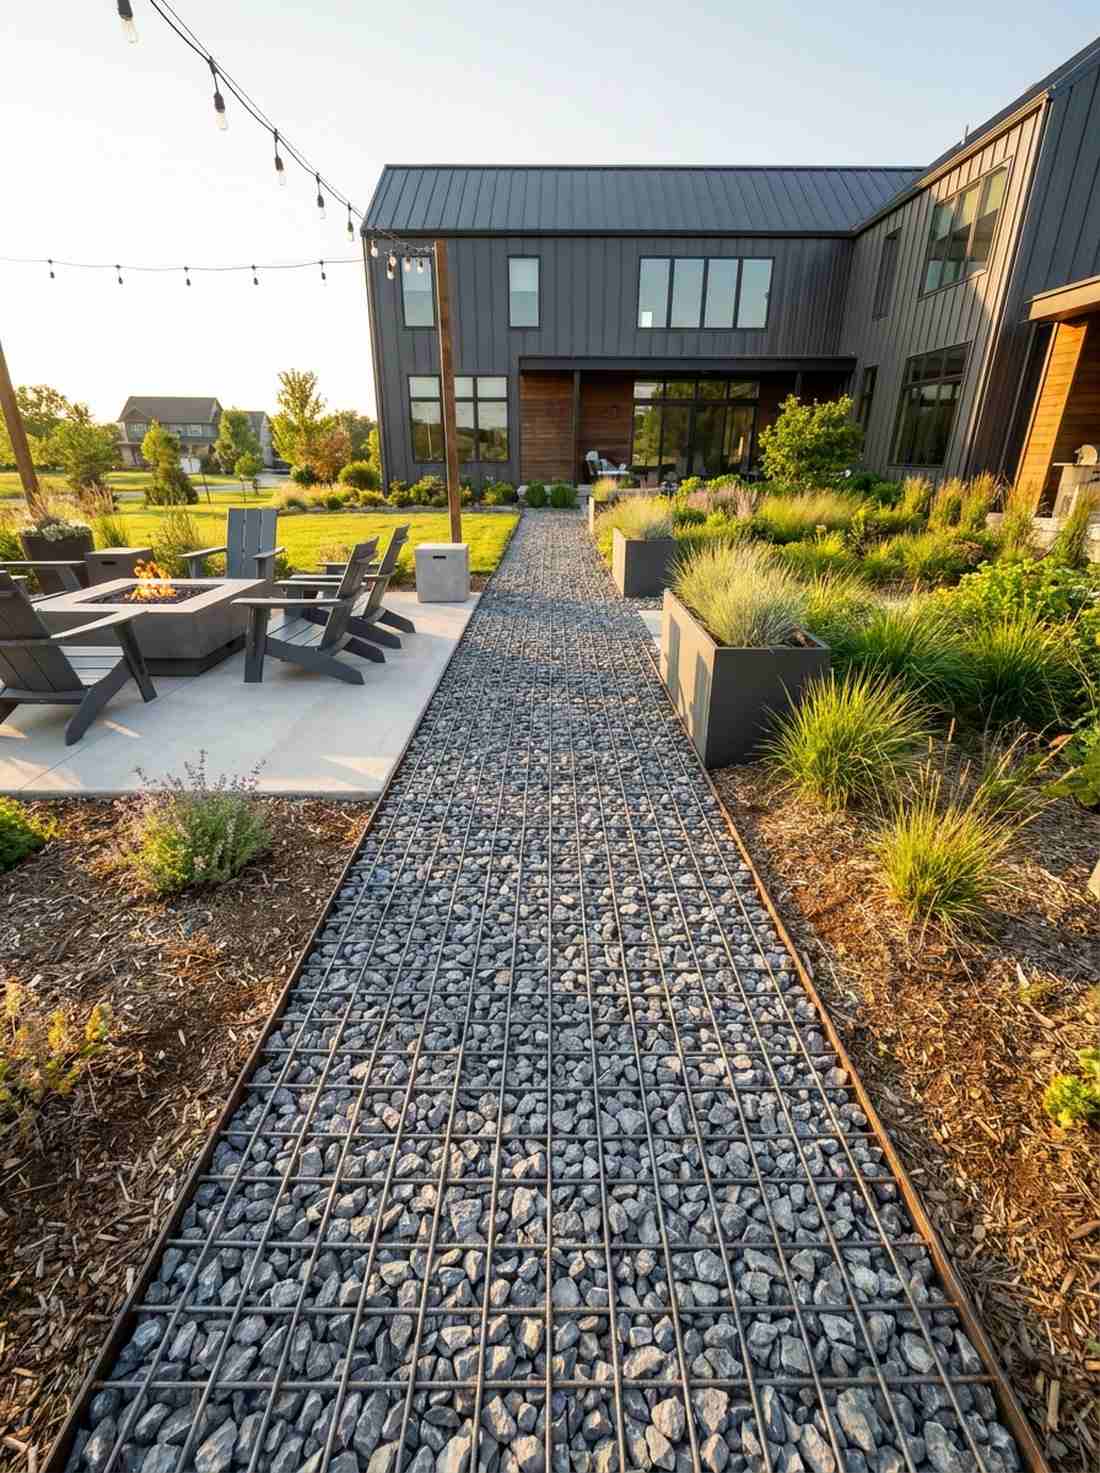
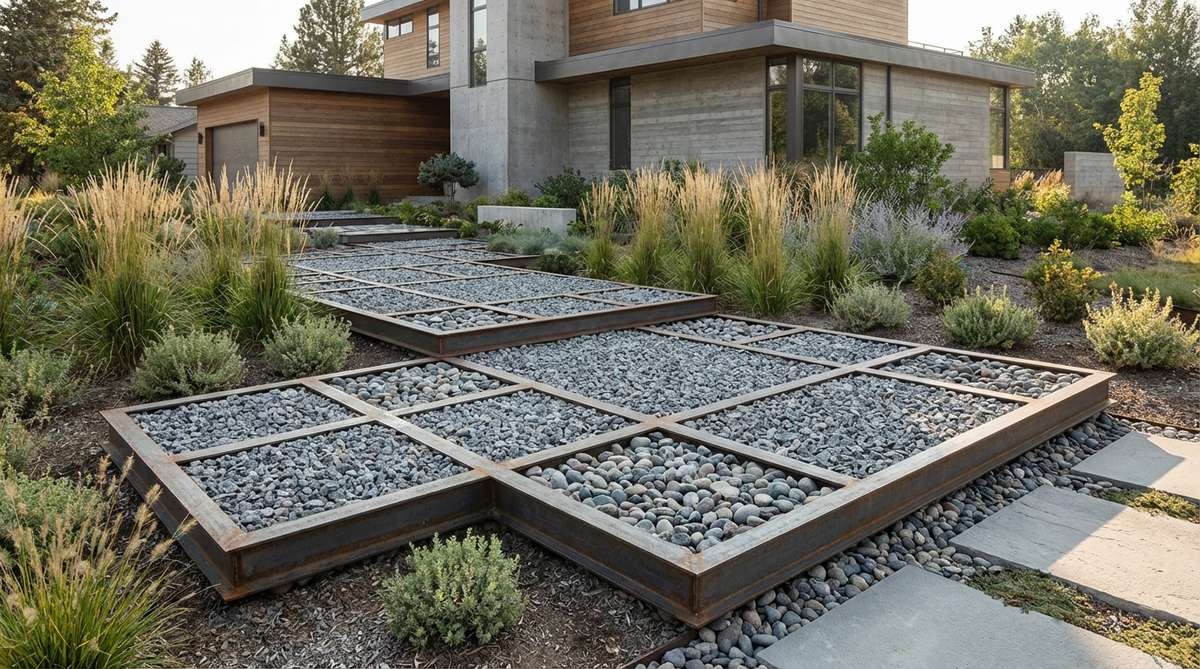
This hyper-structured layout feels like stepping outside a minimalist downtown loft. Implementing industrial-chic gravel walkways is the smartest engineering fix for mud-prone areas where traditional stones sink.
Trapping crushed rock inside steel frames completely ignores sterile modern trends and provides indestructible stability. The sharp metal grid acts like a skeleton, guaranteeing the pathway never spreads or loses its razor-sharp edges.
The metal framework pushes the cost to about $80. Keep this saved for solving brutal backyard drainage nightmares.
- Key Materials: Geo-grid or steel frames, crushed stone
- Vibe / Style: Industrial urban loft
- Difficulty: Easy grid snapping
- Budget Breakdown: Metal/Plastic grid: $50 | Stone infill: $30.
- Creator’s Tip: Overfill the grid cells slightly so you never actually step on the hard metal or plastic edges.
- Smart Sourcing: heavy-duty interlocking ground grid systems (starter kit) and bulk angular crushed limestone.
31. Pebble Mosaic Inlay Stones
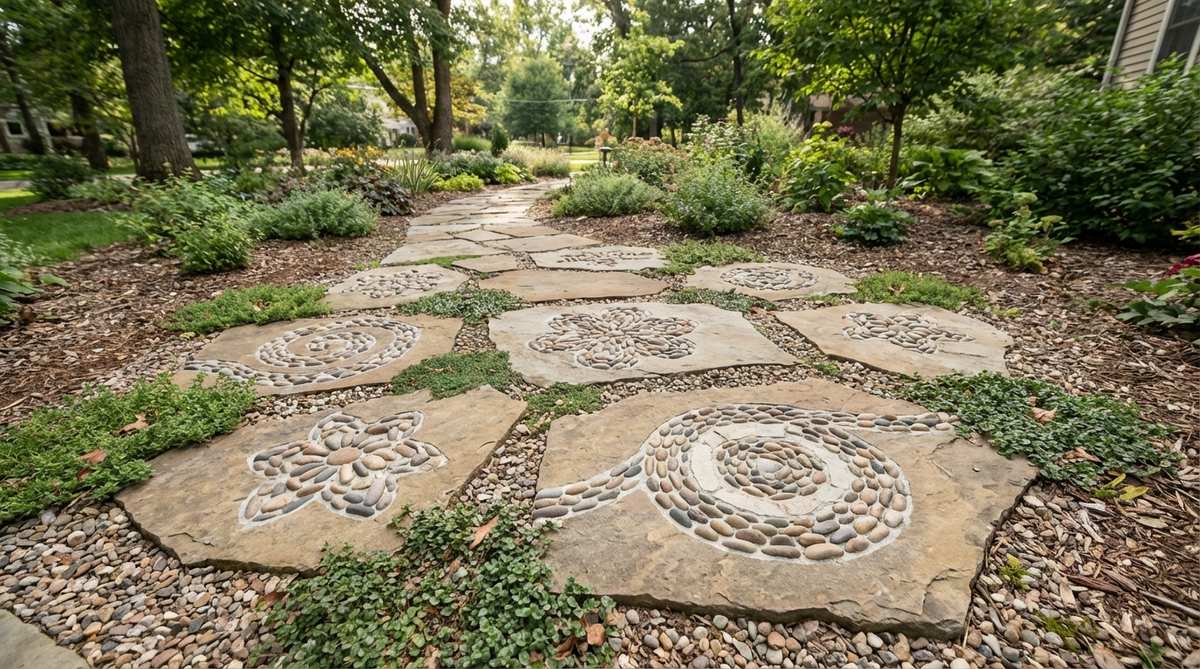
Walking over these hand-laid spirals feels like visiting an exotic, artisan-crafted sanctuary. Artisan crafted garden focal points like this demand attention and serve as the absolute crown jewel of a flower garden.
Setting intricate patterns in mortar looks far more expensive than it is and showcases massive personal dedication. Flooding the joints with premium polymeric sand ensures the tiny pebbles stay permanently locked against harsh weather.
Creating this costs under $30 but takes serious weekend hours. Pin this if you want a true show-stopping conversation piece.
- Key Materials: Concrete base, mixed color river pebbles
- Vibe / Style: Intricate artisan masterpiece
- Difficulty: High artistic patience required
- Budget Breakdown: Mortar base: $10 | Colored pebbles: $20.
- Creator’s Tip: Sort your pebbles by exact thickness before starting so the final walking surface is perfectly flat.
- Smart Sourcing: premium polymeric jointing sand (bulk pack) and high-strength exterior tile mortar kits.
32. Colored Concrete Mixed Palette
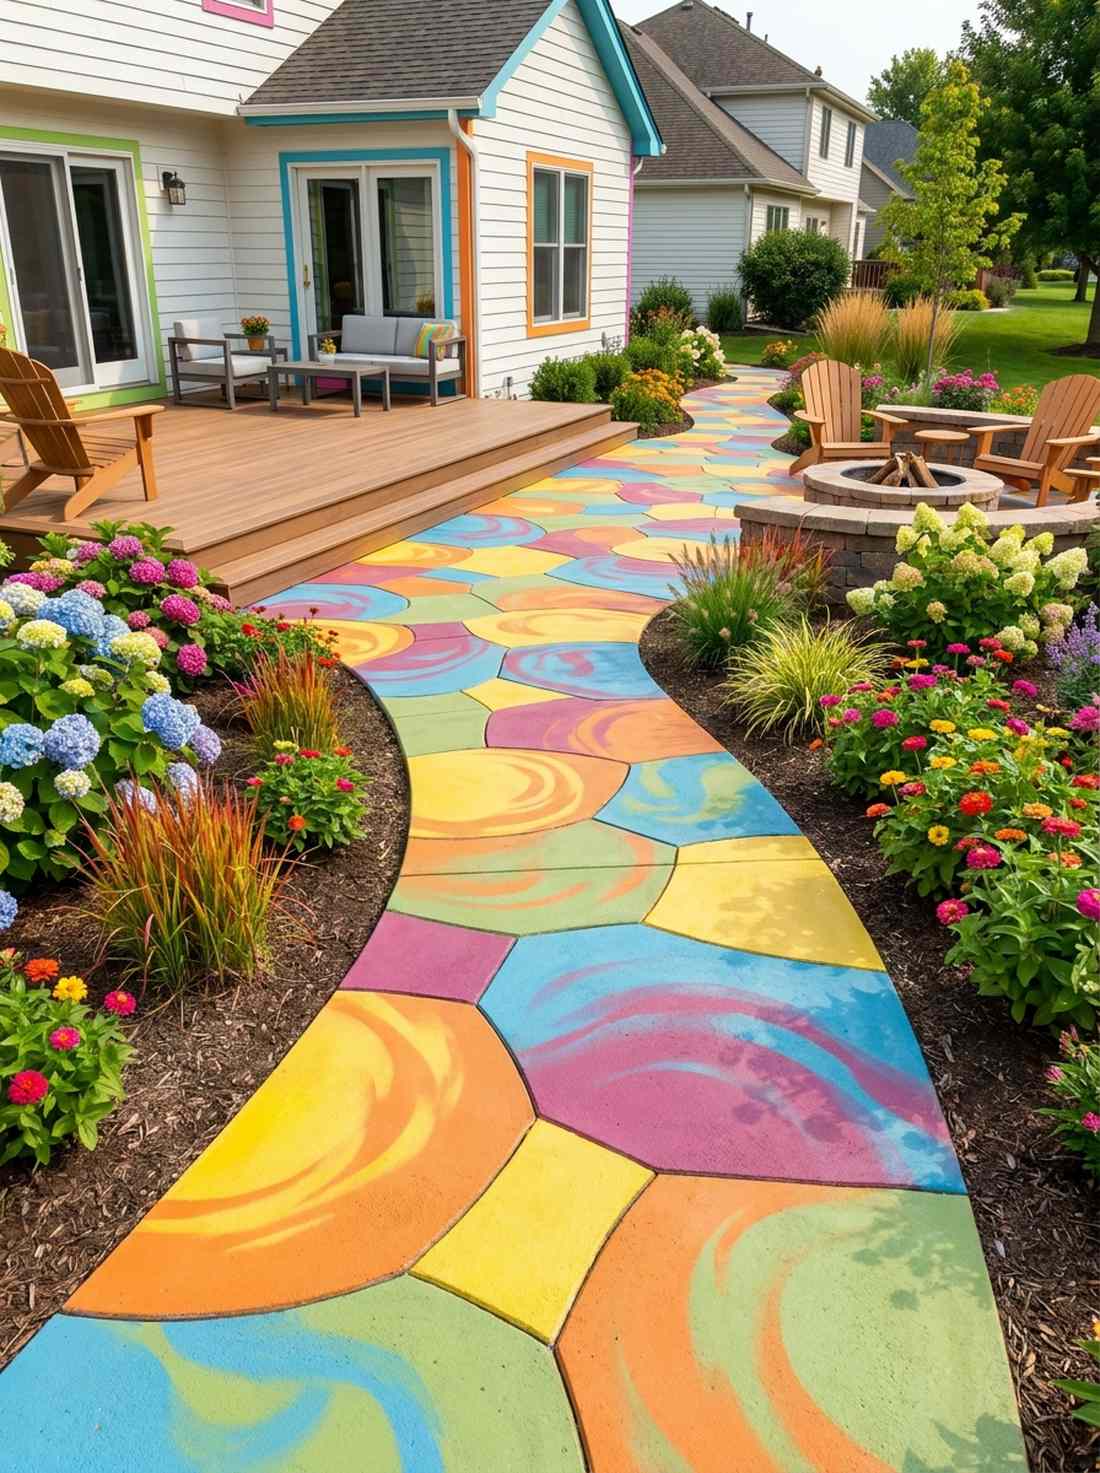
This playful layout bursts with energy, feeling like a vibrant candy-coated walkway. Custom tinted yard accents allow you to permanently match your hardscape to the color of your house trim or favorite flowers.
Swirling permanent oxide pigments into cheap mix gives a designer-level finish that plain grey cement can never touch. It instantly warms up shady, depressing yard corners by injecting permanent, fade-resistant summer color.
Pigments add about $15 to a standard concrete project. Save this to your bright and bold DIY outdoor board.
- Key Materials: White concrete mix, liquid oxide pigments
- Vibe / Style: Playful contemporary pop
- Difficulty: Fast mixing required
- Budget Breakdown: White cement: $15 | Pigment bottles: $15.
- Creator’s Tip: Always use white Portland cement as your base, standard grey mix will muddy the pigment colors instantly.
- Smart Sourcing: premium UV-stable liquid concrete colorants and heavy-duty reusable silicone paver molds.
Before you run to the hardware store, check out this brilliant coastal hack that drains massive amounts of water instantly…
33. Crushed Shell with Tropical Stone
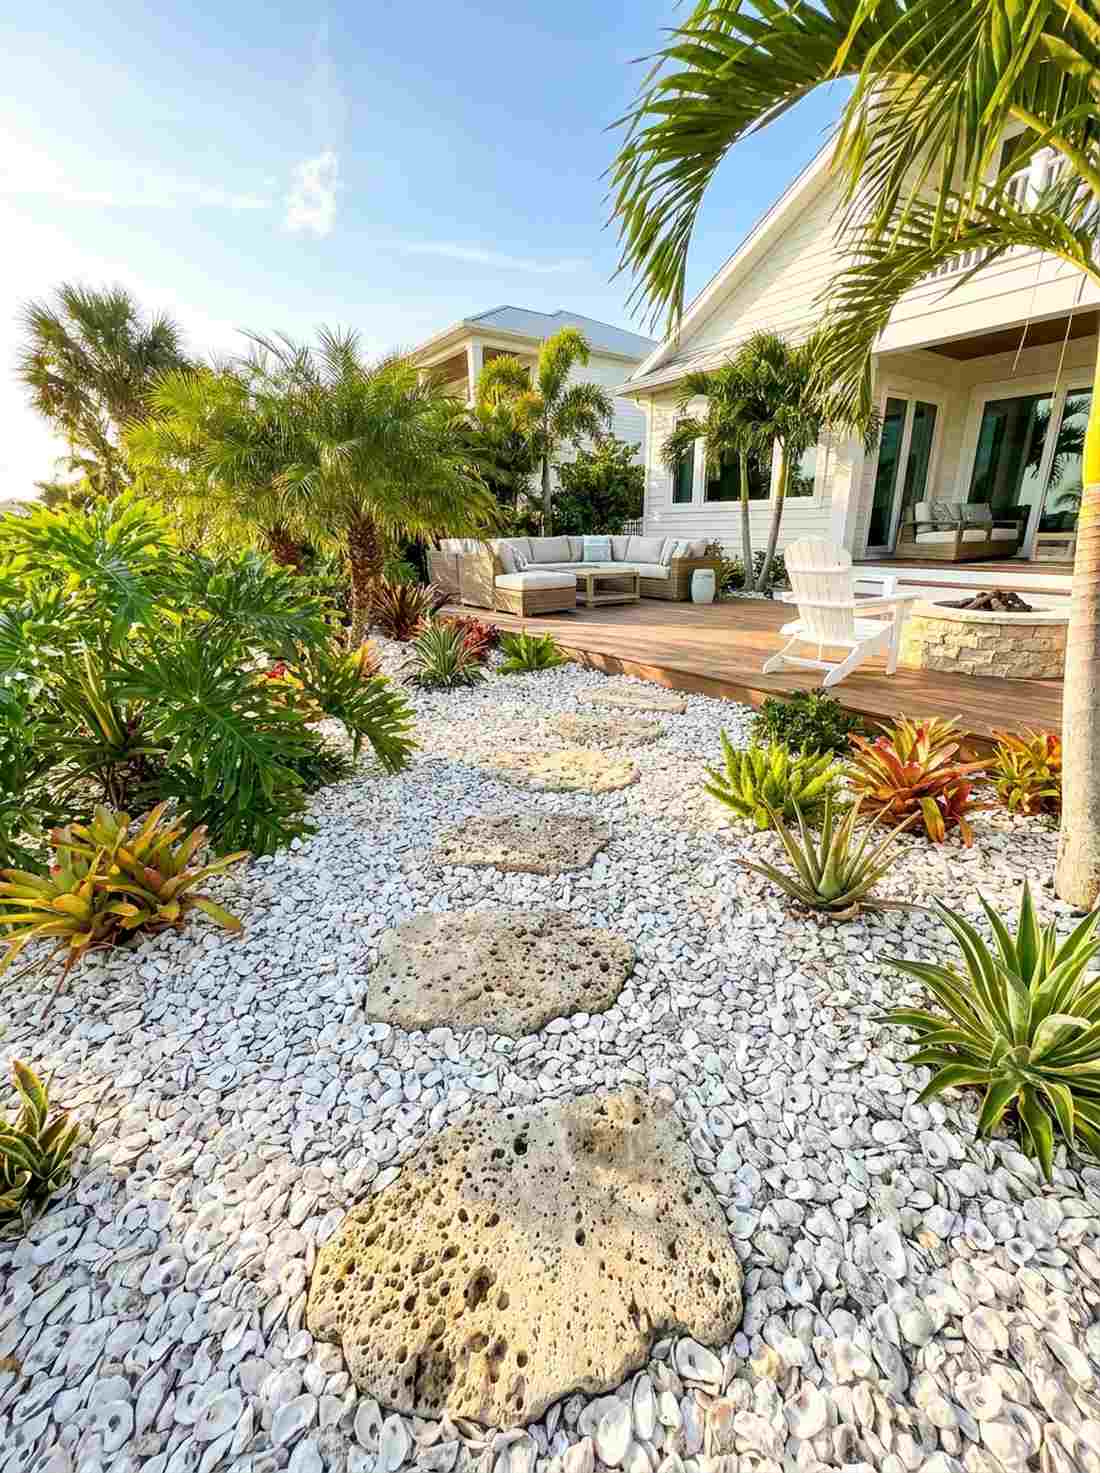
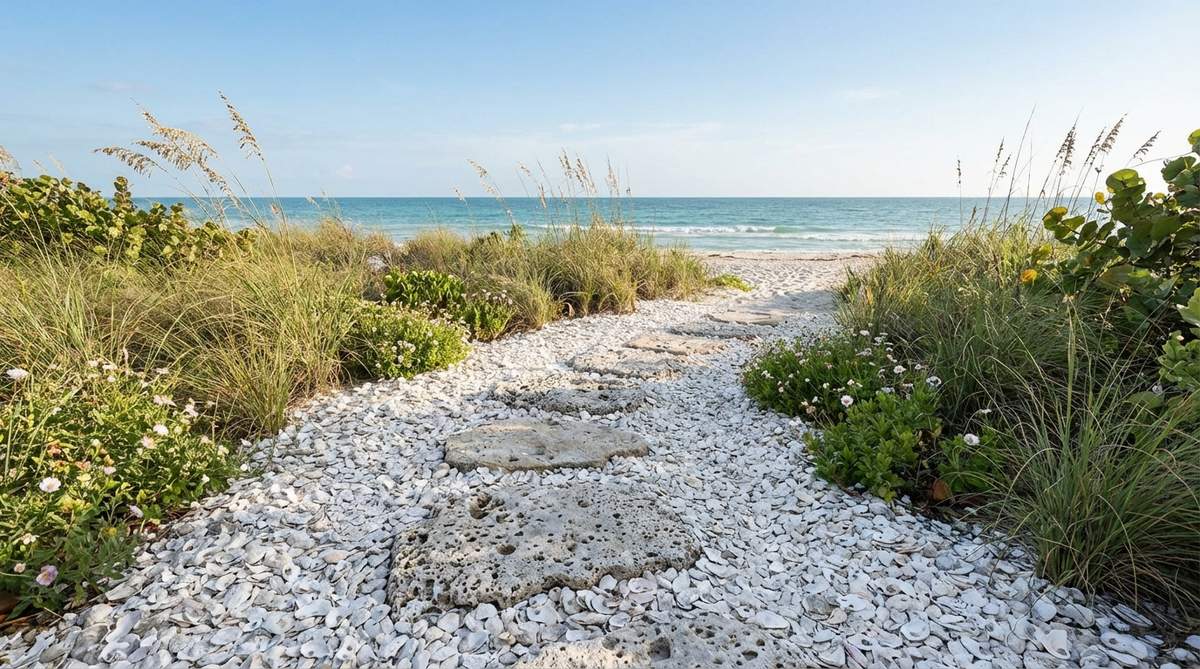
The brilliant white crunch beneath your feet echoes pure coastal vacation memories. Utilizing tropical coastal hardscape layouts is the absolute best way to manage sandy soil while maximizing intense sunlight reflection.
Bedding porous coral stone on crushed oysters completely ignores boring gravel trends and provides unmatched beachfront authenticity. The jagged shells lock together to stop weed growth while draining torrential rainflows instantly without pooling.
Sourcing shells brings this specialized project to around $60. Pin this if you are upgrading a beach house or tropical patio.
- Key Materials: Travertine/coral steppers, crushed oyster shell
- Vibe / Style: Bright coastal resort
- Difficulty: Easy raking
- Budget Breakdown: Tropical steppers: $40 | Crushed shells: $20.
- Creator’s Tip: Wash the crushed shell bags thoroughly before laying them to remove the salty dust that can harm nearby grass.
- Smart Sourcing: bulk crushed oyster shell landscaping bags and commercial-grade heavy-duty weed barrier fabric.
Bringing Your Stepping Stone Vision to Life
Whether you choose classic flagstone wrapped in heavy-duty landscape fabric rolls or cast your own geometric grids with UV-resistant sealants, your stepping stones garden defines the entire landscape experience. Successful installations balance breathtaking visual design with aggressive weed blocking and solid drainage bases. By applying these exact 33 blueprints and utilizing bulk premium materials, you can skip the expensive contractor fees entirely. Assess your traffic flow, grab a starter kit, and execute your favorite layout for a permanent, designer-level outdoor upgrade.
Frequently Asked Questions
How far apart should stepping stones be placed in grass or gravel?
Position stepping stones exactly 18-24 inches apart from center to center to match a comfortable adult stride. If you are building a path for children, tighten that gap to 16 inches and secure the base using premium polymeric sand to stop any dangerous wobbling. For an upscale look, maintain military-level consistency in your spacing using a pre-measured template board.
Should stepping stones sit above or below the surrounding surface?
In grass layouts, sink the stones exactly 1/4 inch below the soil line so your mower blades glide over them safely without shattering. In gravel beds, you must elevate the stones 1/2 inch above the rock layer using heavy-duty leveling base mats to prevent loose pebbles from spilling onto the slippery walking surface.
What base preparation is needed under stepping stones?
Never place stones on raw dirt. Dig down 4-6 inches, lay down commercial-grade heavy-duty weed barrier fabric, and fill with compacted gravel topped with coarse leveling sand. This foundational blueprint prevents the stones from sinking into mud pits during heavy rain and ensures a designer-level finish that lasts decades.
Which stone materials work best for stepping stone pathways?
Natural bluestone and slate offer massive durability, while concrete pavers provide the ultimate budget-friendly geometric uniformity. To make cheaper stones look high-end, treat them immediately with commercial-grade UV-resistant stone sealant sprays to lock out stains, prevent winter cracking, and deepen their natural color.
How do I prevent weeds between stepping stones?
The ultimate defense is installing heavy-duty landscape fabric rolls completely under the gravel or sand base before placing the stones. For exposed joints, sweep in premium polymeric sand that hardens like concrete when wet, totally suffocating weed seeds while keeping the stepping stones locked perfectly in place.