An outdoor patio kitchen dramatically boosts your backyard’s entertainment value instantly. Discover exact layout blueprints and smart material sourcing for rapid setups. Achieve a breathtaking designer finish without paying hefty contractor markups.
Design SnapshotKey Principles
- Work Triangle: Position grill, prep counter, and refrigeration within 4-9 feet of each other for efficient movement
- Bar Integration: Extend counters 12-15 inches with overhang for comfortable seating without blocking cook’s workflow
- Zoning: Separate hot cooking zones from guest seating areas using counter height or material transitions
- Ventilation: Allow 36 inches of clearance above built-in grills; consider overhead structures for smoke dispersion
Linear LayoutsSpace-Efficient Setups
Linear configurations run along a single axis, fitting tight patios, narrow decks, or against existing walls. These setups maximize function within minimal square footage while keeping all essentials within arm’s reach.
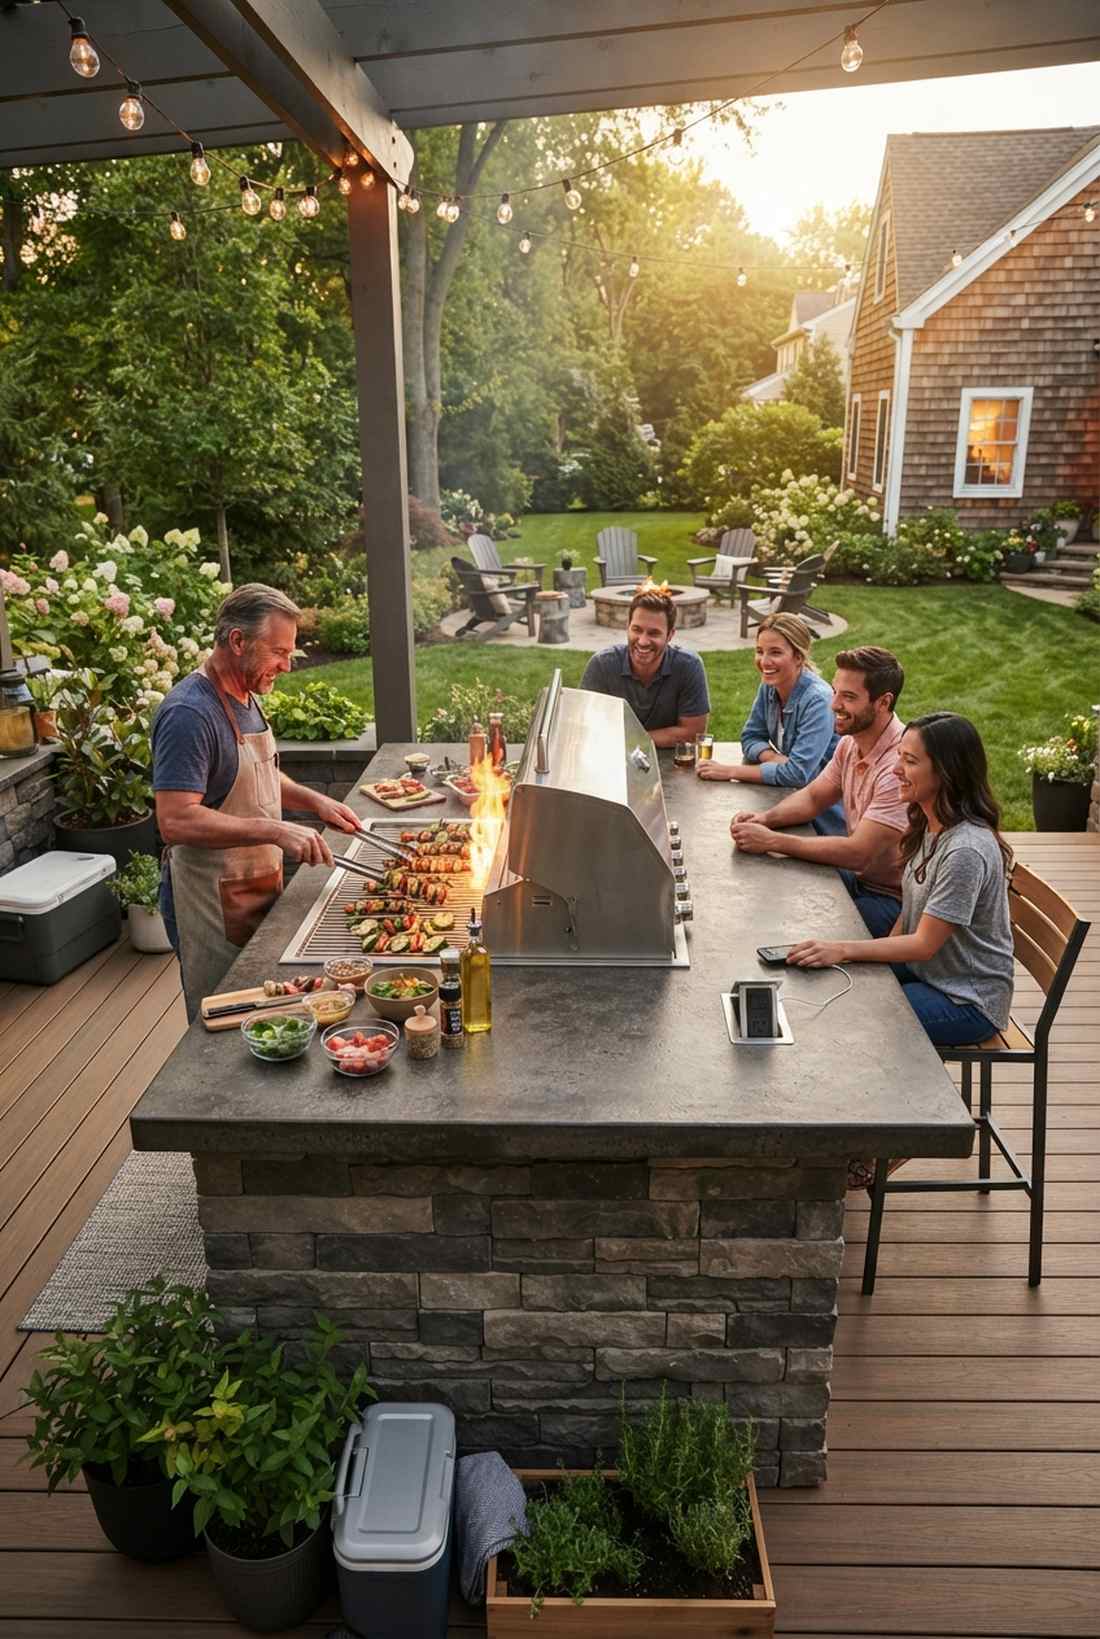
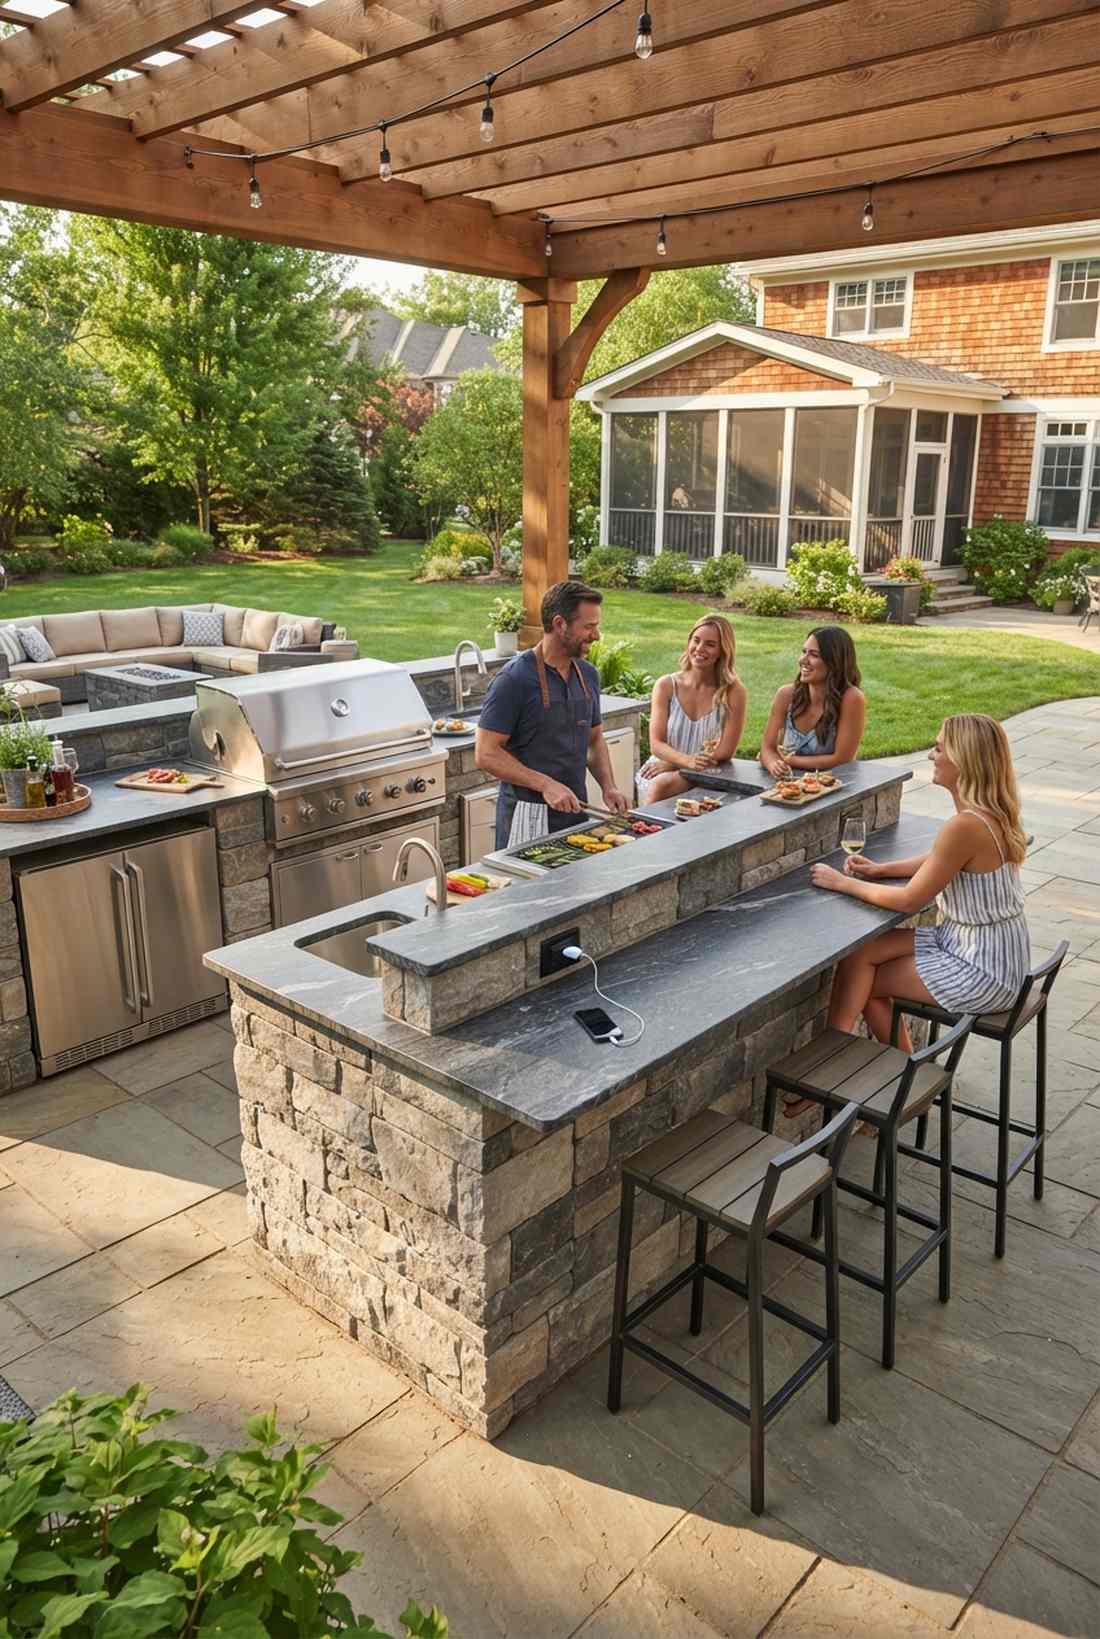
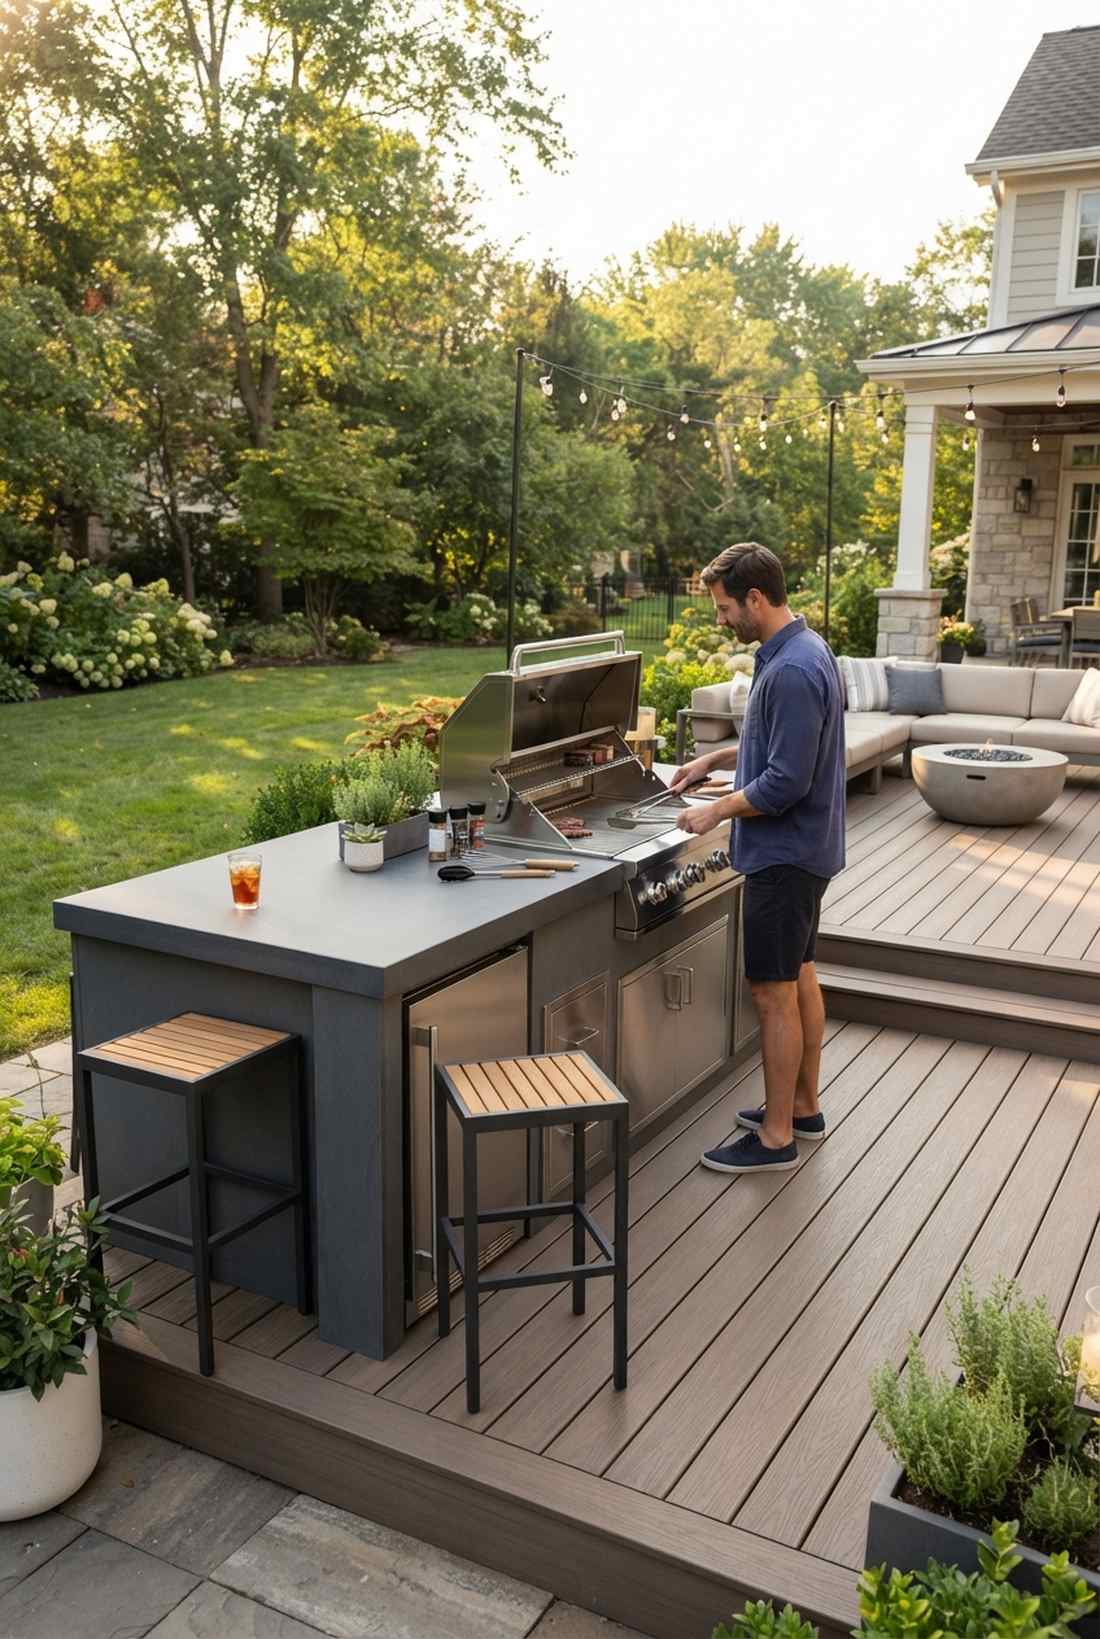
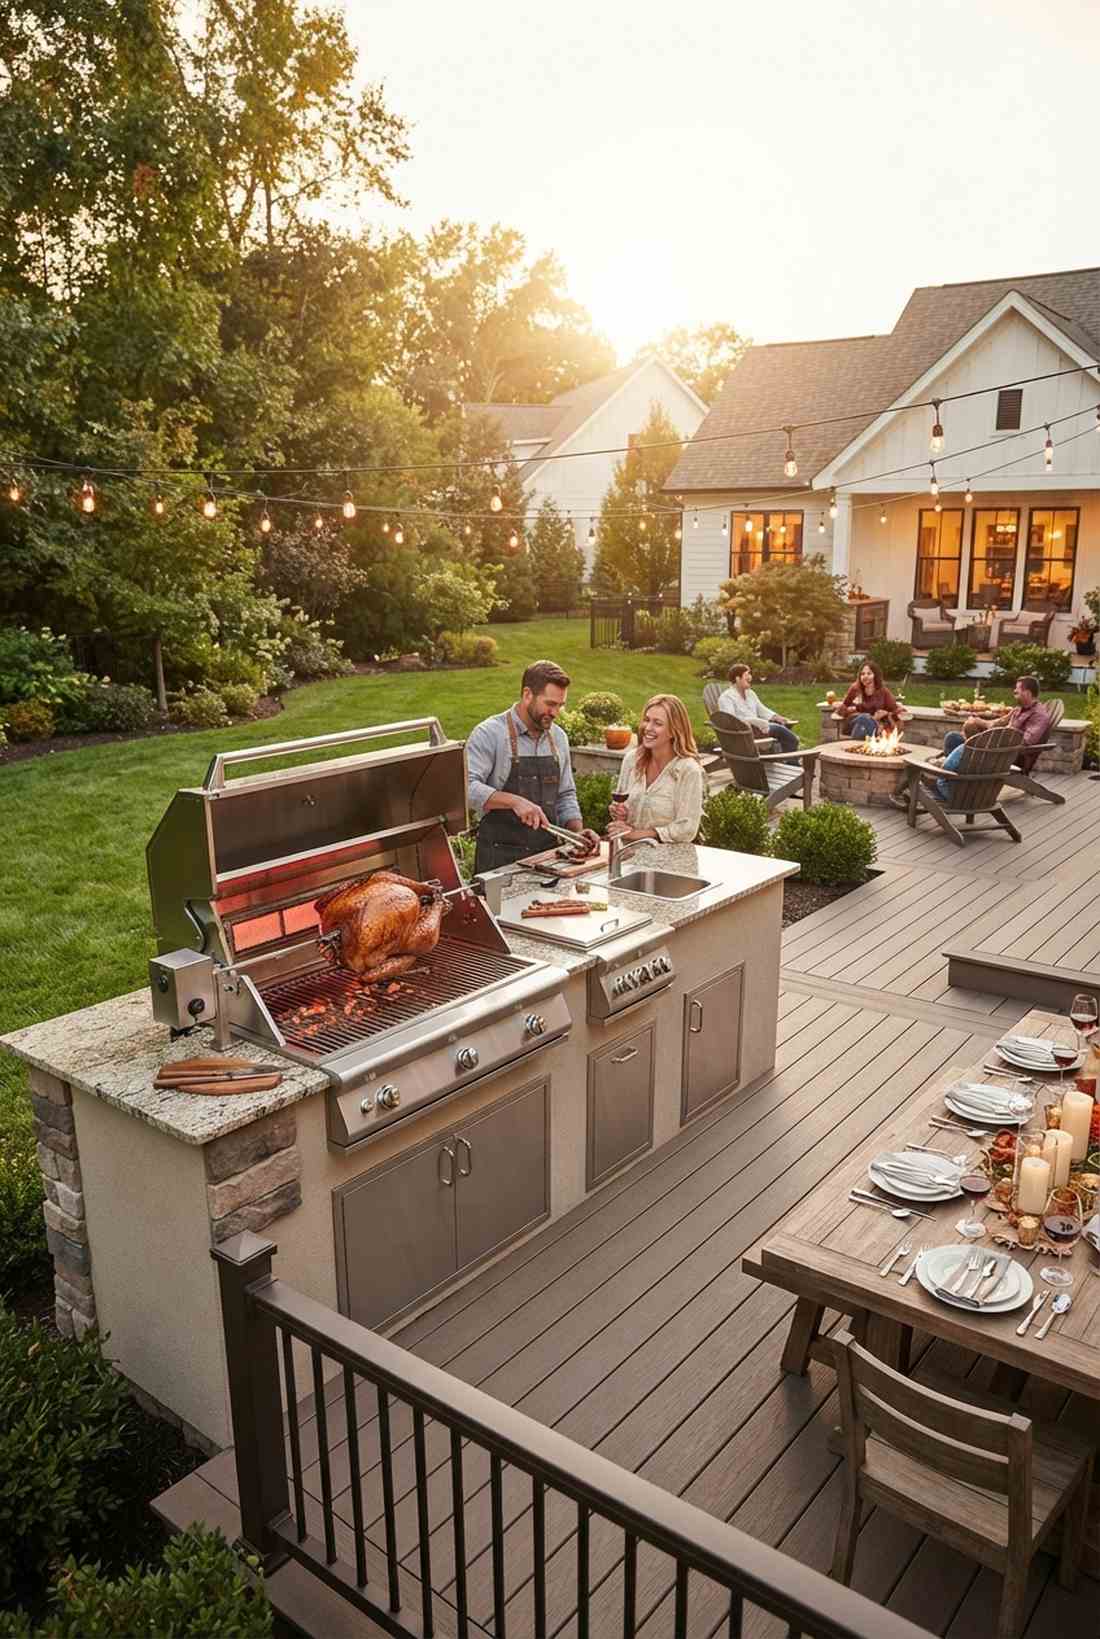
1. Straight-Run Grill and Bar Combo
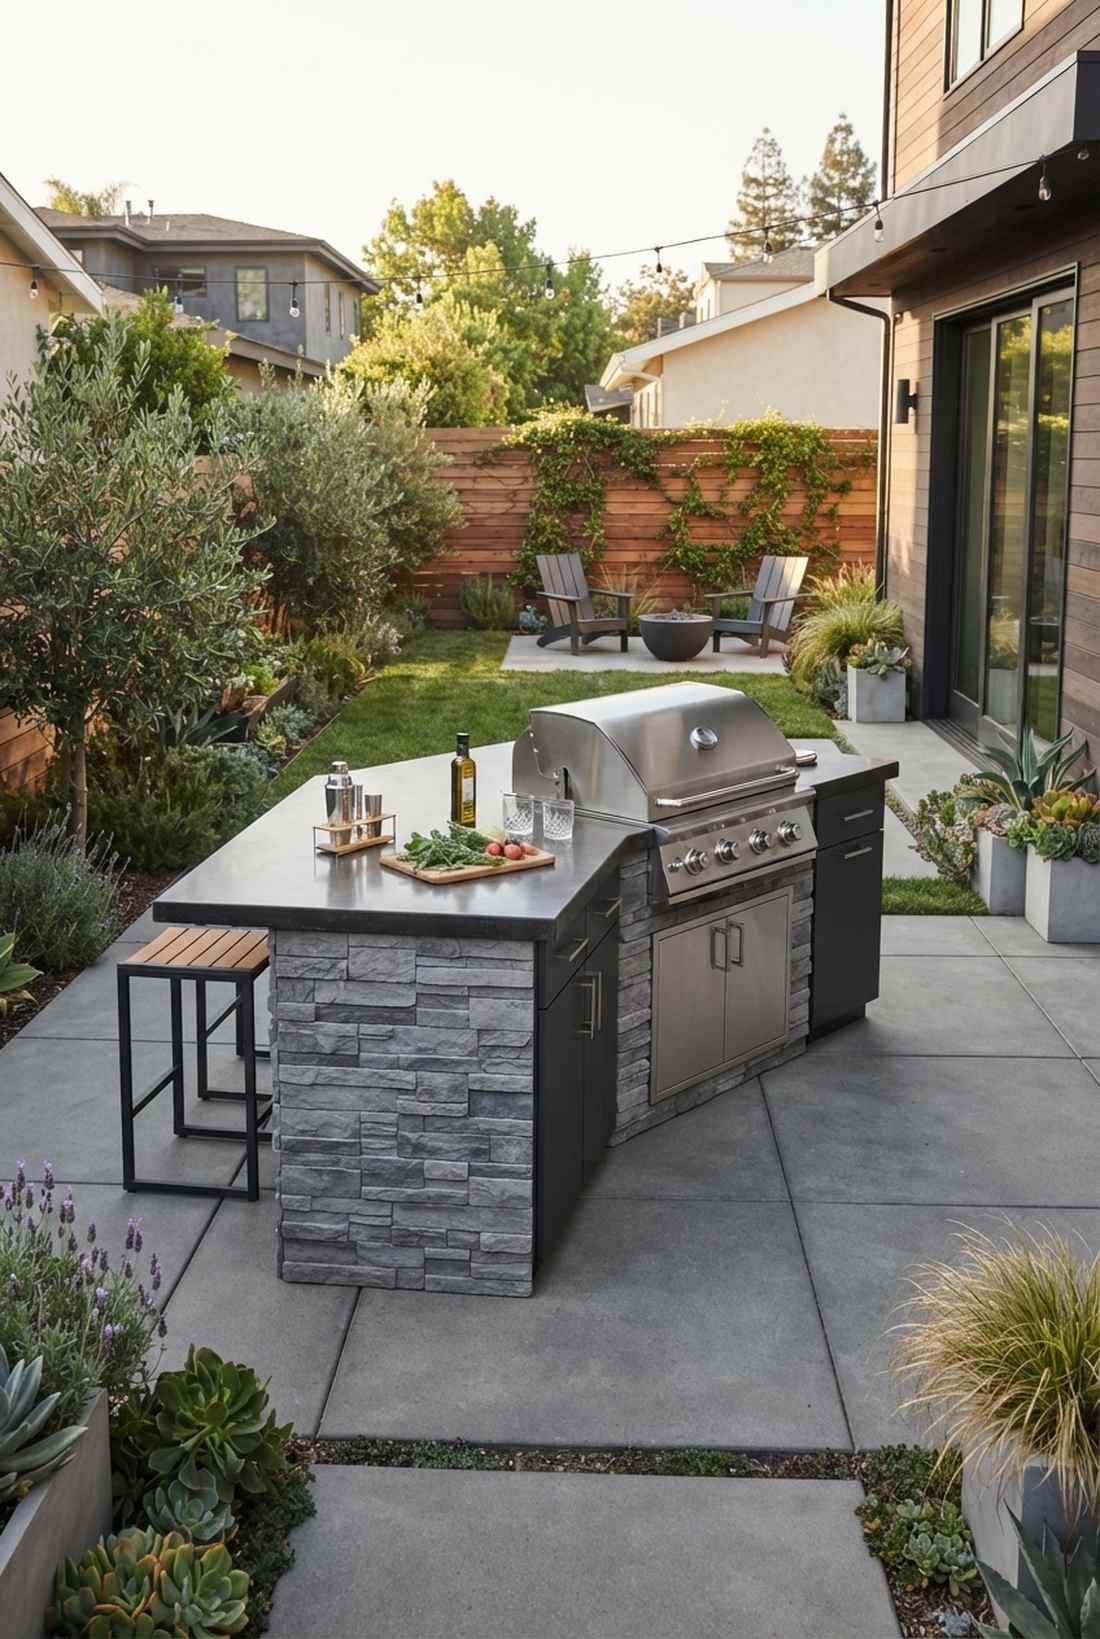
Feels like a chic urban bistro setting instantly right in your backyard. Compact outdoor patio kitchen styling works exceptionally well for narrow suburban plots looking to save space.
A straight-run counter delivers a surprisingly premium look by forcing a clean, minimalist aesthetic. Incorporating weatherproof outdoor cabinetry kits with UV-resistant finishes guarantees a sophisticated edge over basic contractor builds.
You can seamlessly pull off this functional stretch for around $1,500–$2,800. Save this to your weekend backyard transformation board!
- Key Materials: Pre-fabricated stainless steel grill frames
- Vibe / Style: Modern minimalist entertainer
- Difficulty: Very accessible weekend project
- Budget Breakdown: Materials: $1,200 | Appliances: $800+
- Creator’s Tip: Offset the grill slightly to create unequal zones, allowing a dedicated massive prep space.
- Smart Sourcing: Grab a pre-cut faux stone veneer panel pack and a drop-in 36-inch outdoor grill head.
2. Wall-Mounted Grill Station With Pass-Through Window
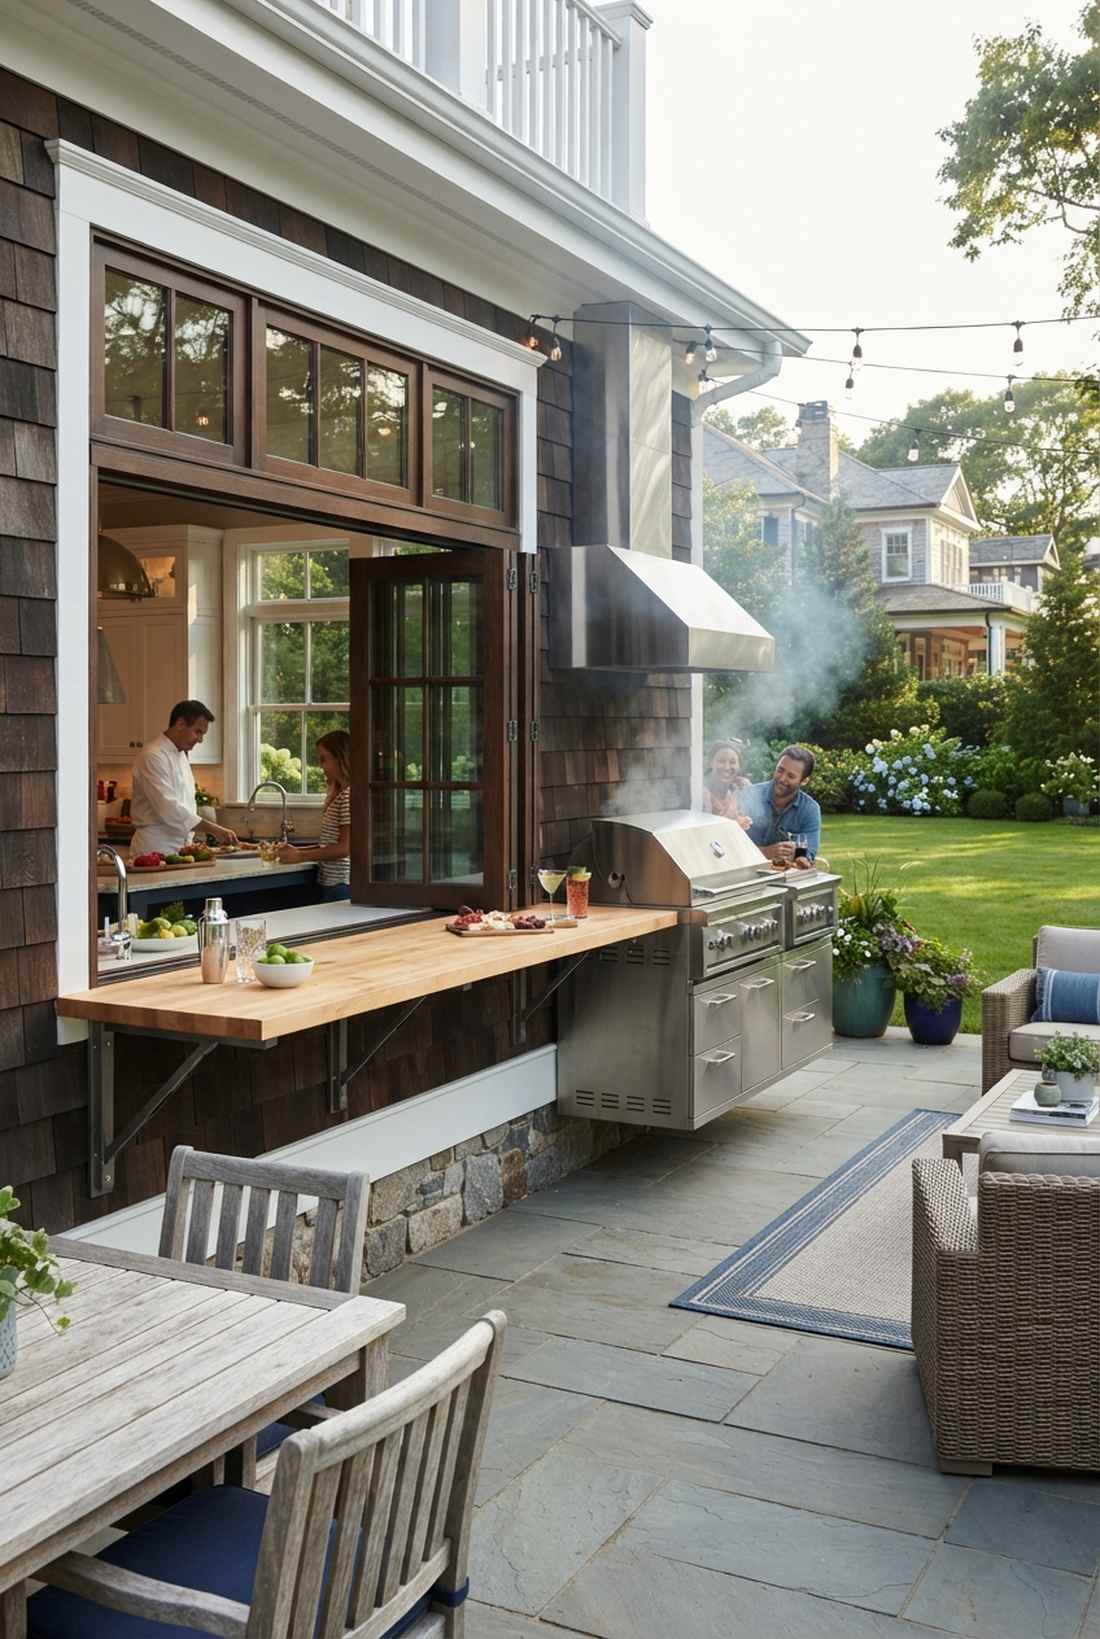
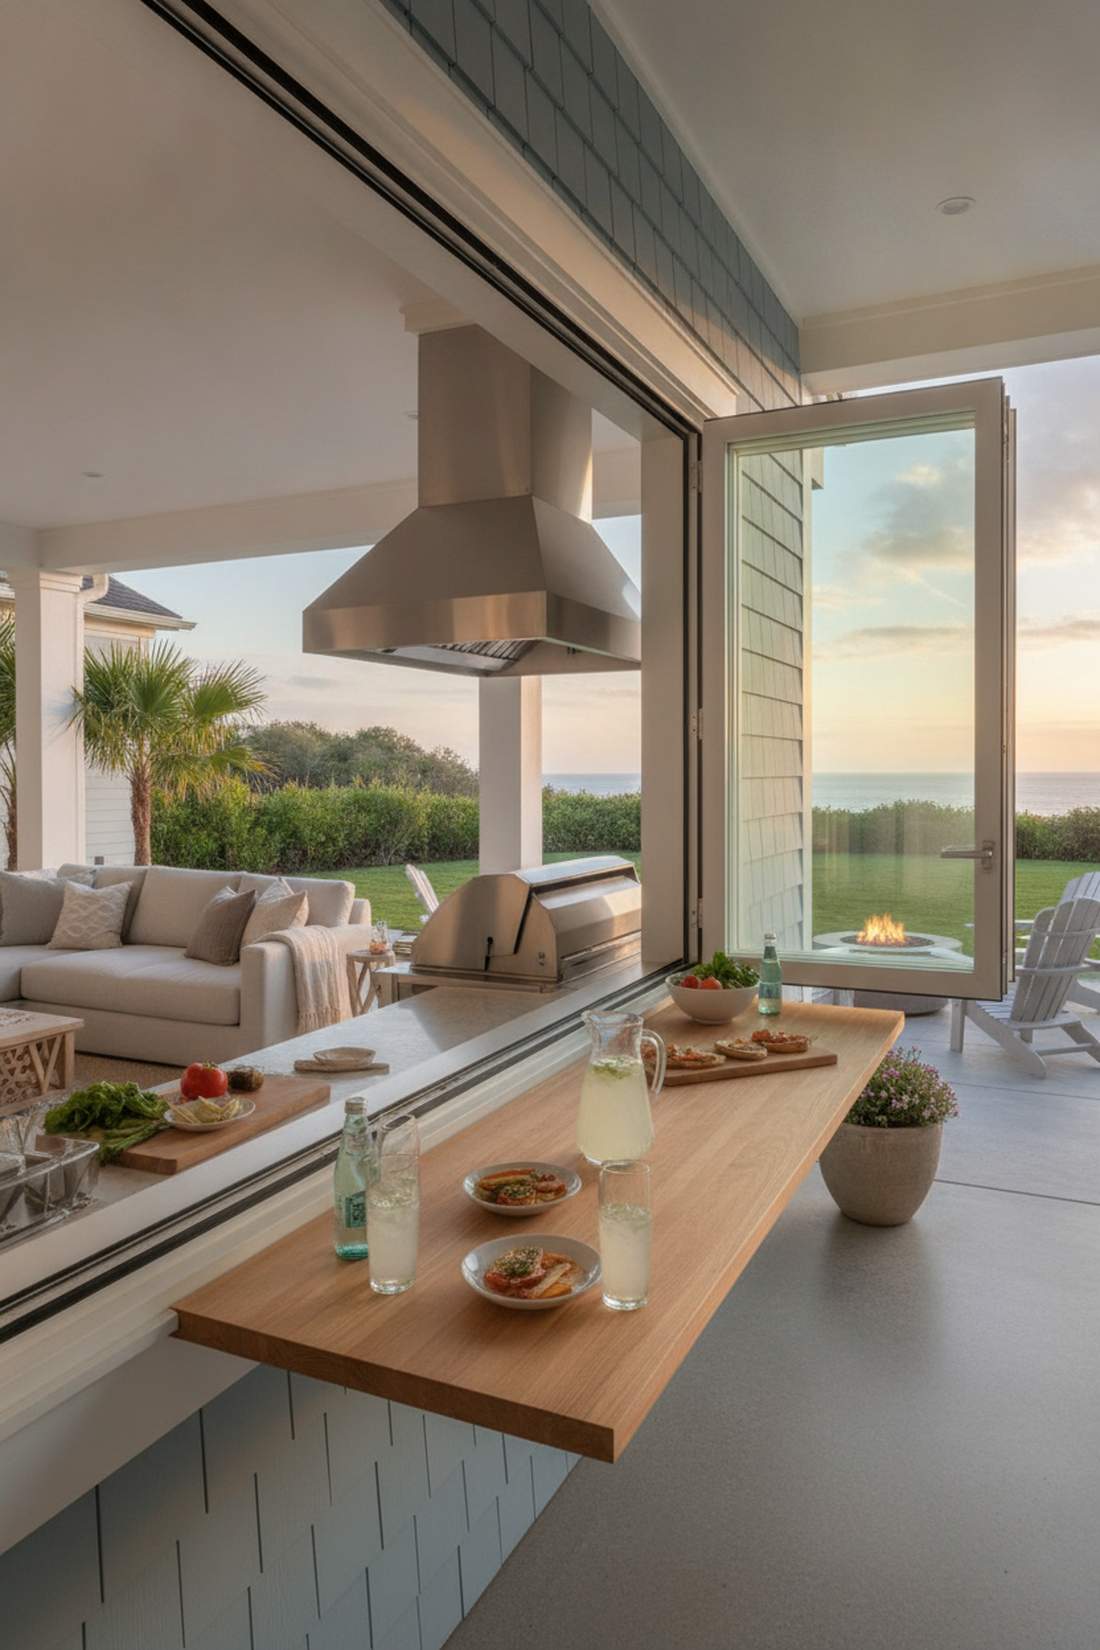
Gives off an inviting open-air cafe energy that effortlessly blends indoors and out. This seamless indoor-outdoor pass-through concept is perfect for connecting a main living area to the patio.
Hugging the home’s exterior mimics a high-end architectural addition rather than an afterthought. Upgrading with commercial-grade outdoor ventilation hoods ensures your home’s siding stays completely safe from smoke.
Expect to invest roughly $2,000–$4,500 depending on your window situation. It’s a highly functional upgrade that radically changes hosting.
- Key Materials: Exterior-grade butcher block ledges
- Vibe / Style: Breezy coastal tavern
- Difficulty: Moderate (requires window modification)
- Budget Breakdown: Window install: $800 | Counter & base: $1,200
- Creator’s Tip: Add a small exterior bar ledge strictly for staging drinks during heavy prep times.
- Smart Sourcing: Use an outdoor-rated retractable accordion window and heavy-duty fold-down shelf brackets.
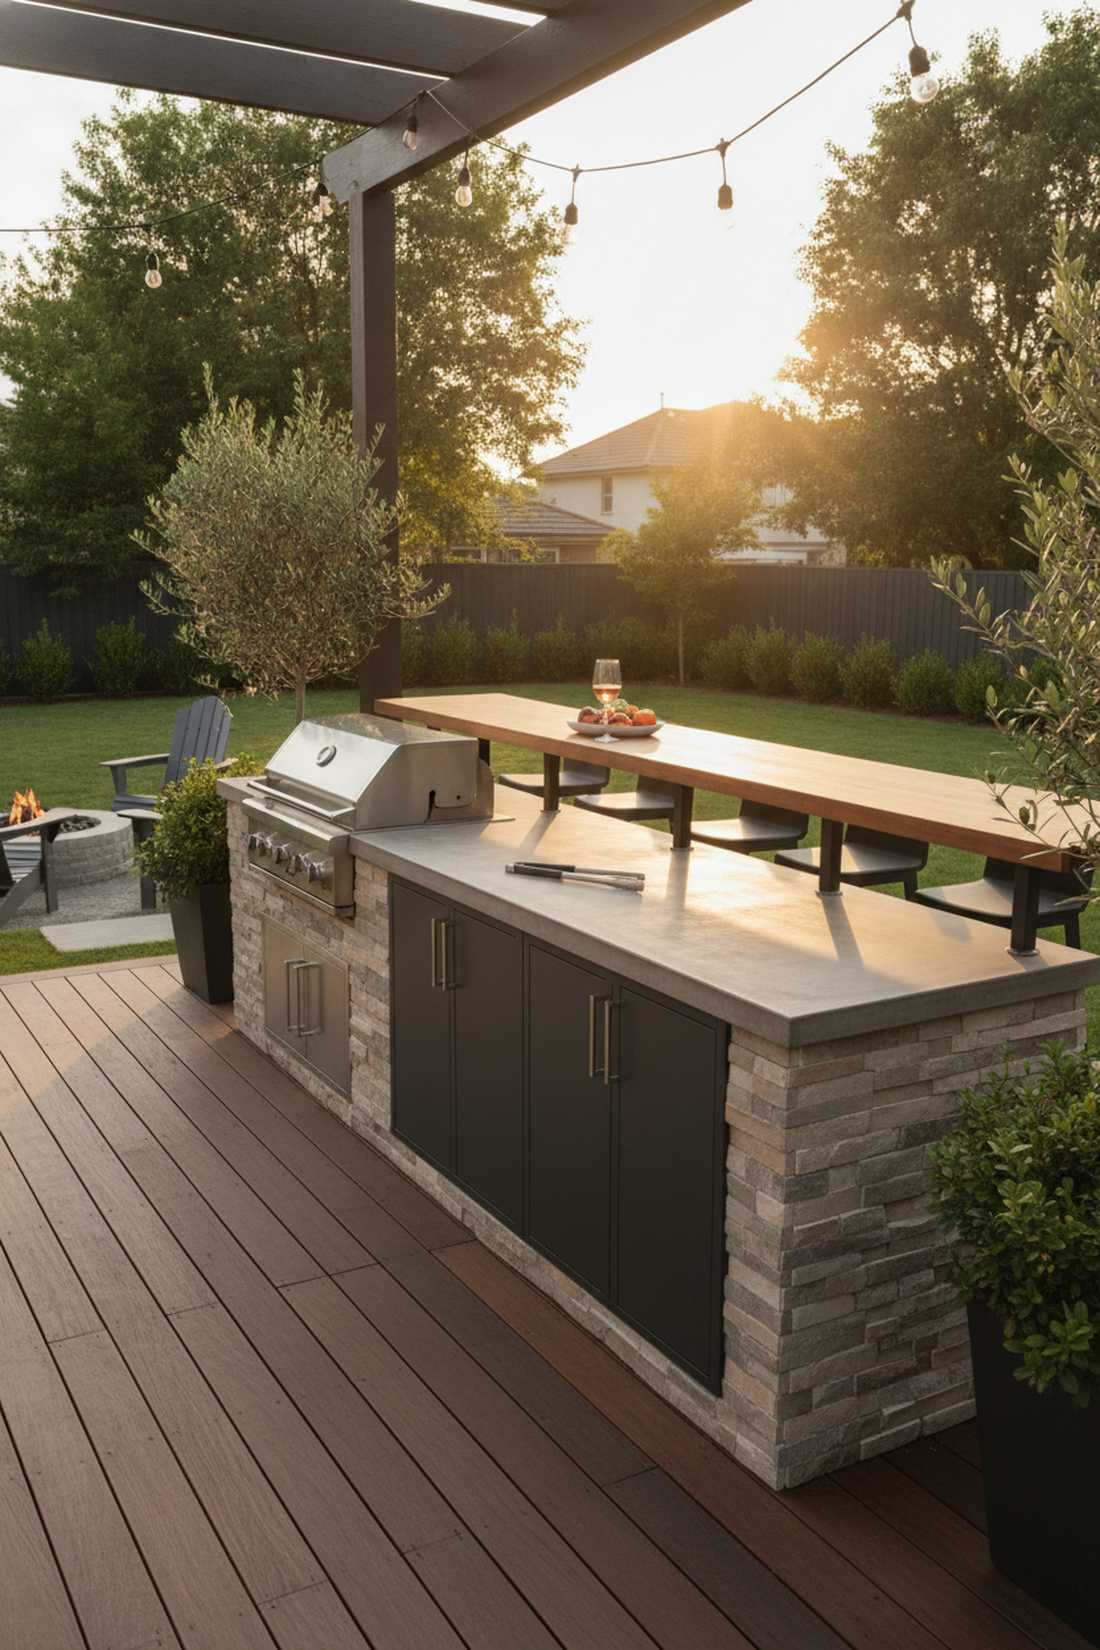
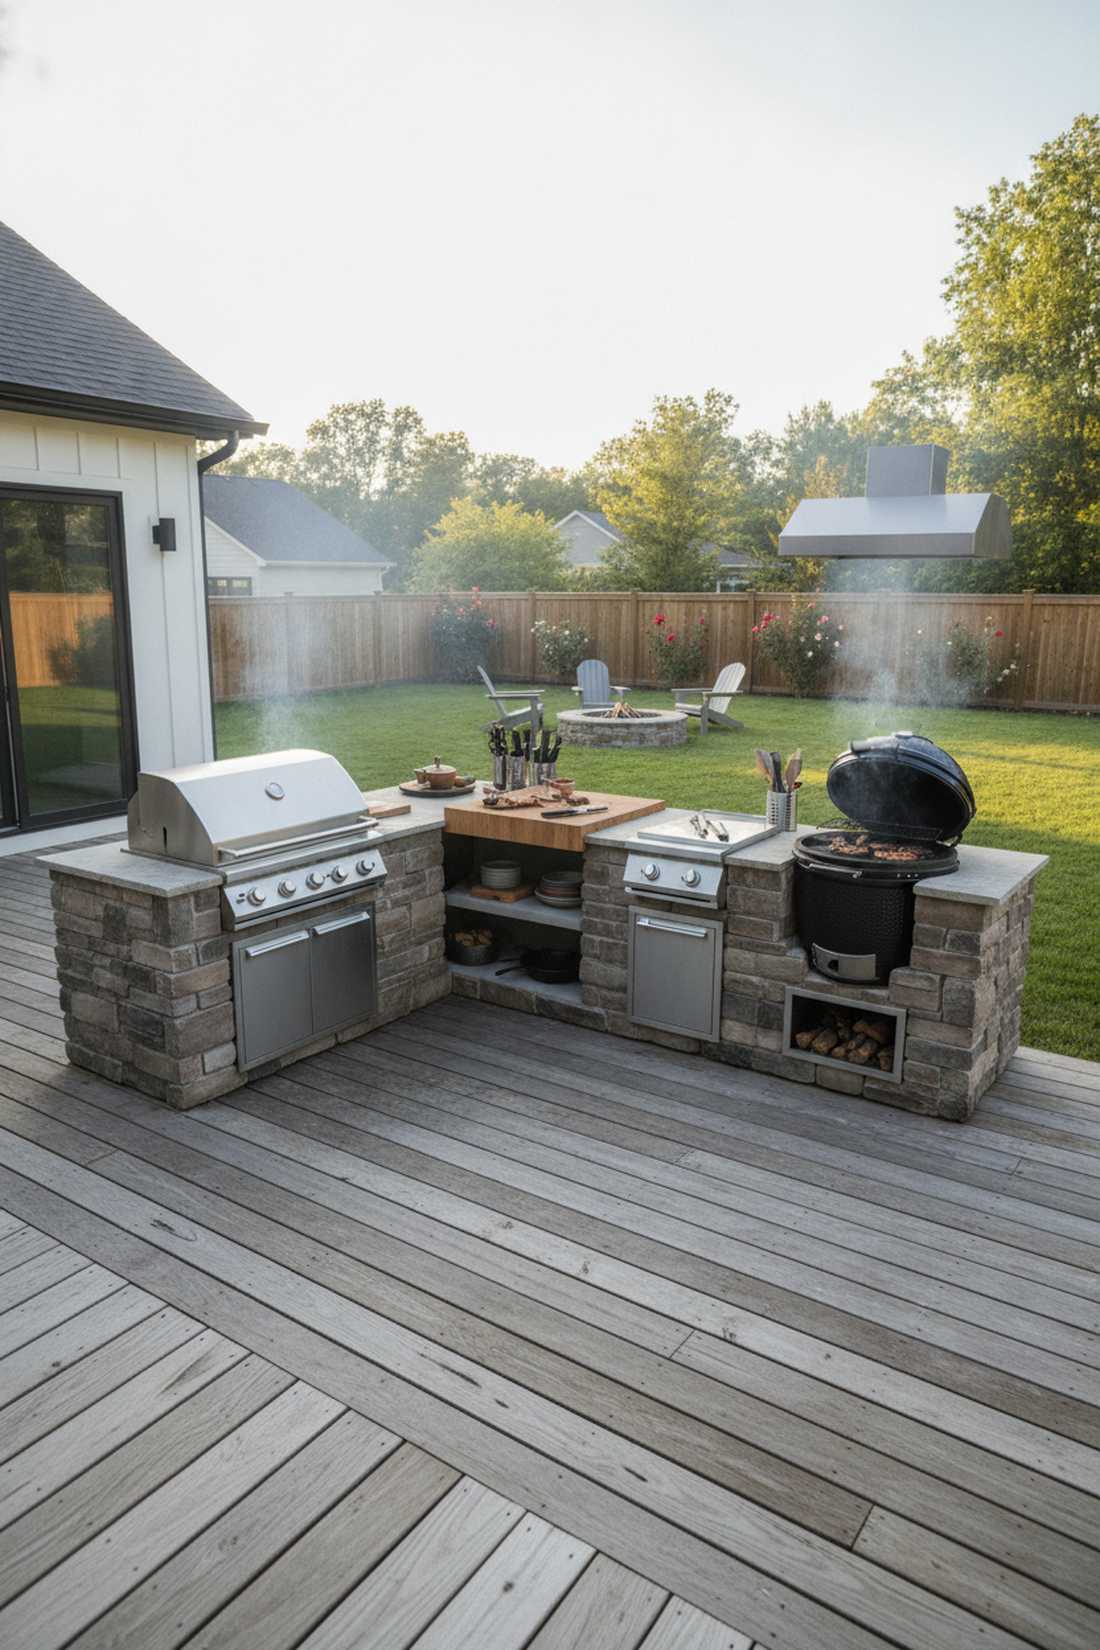
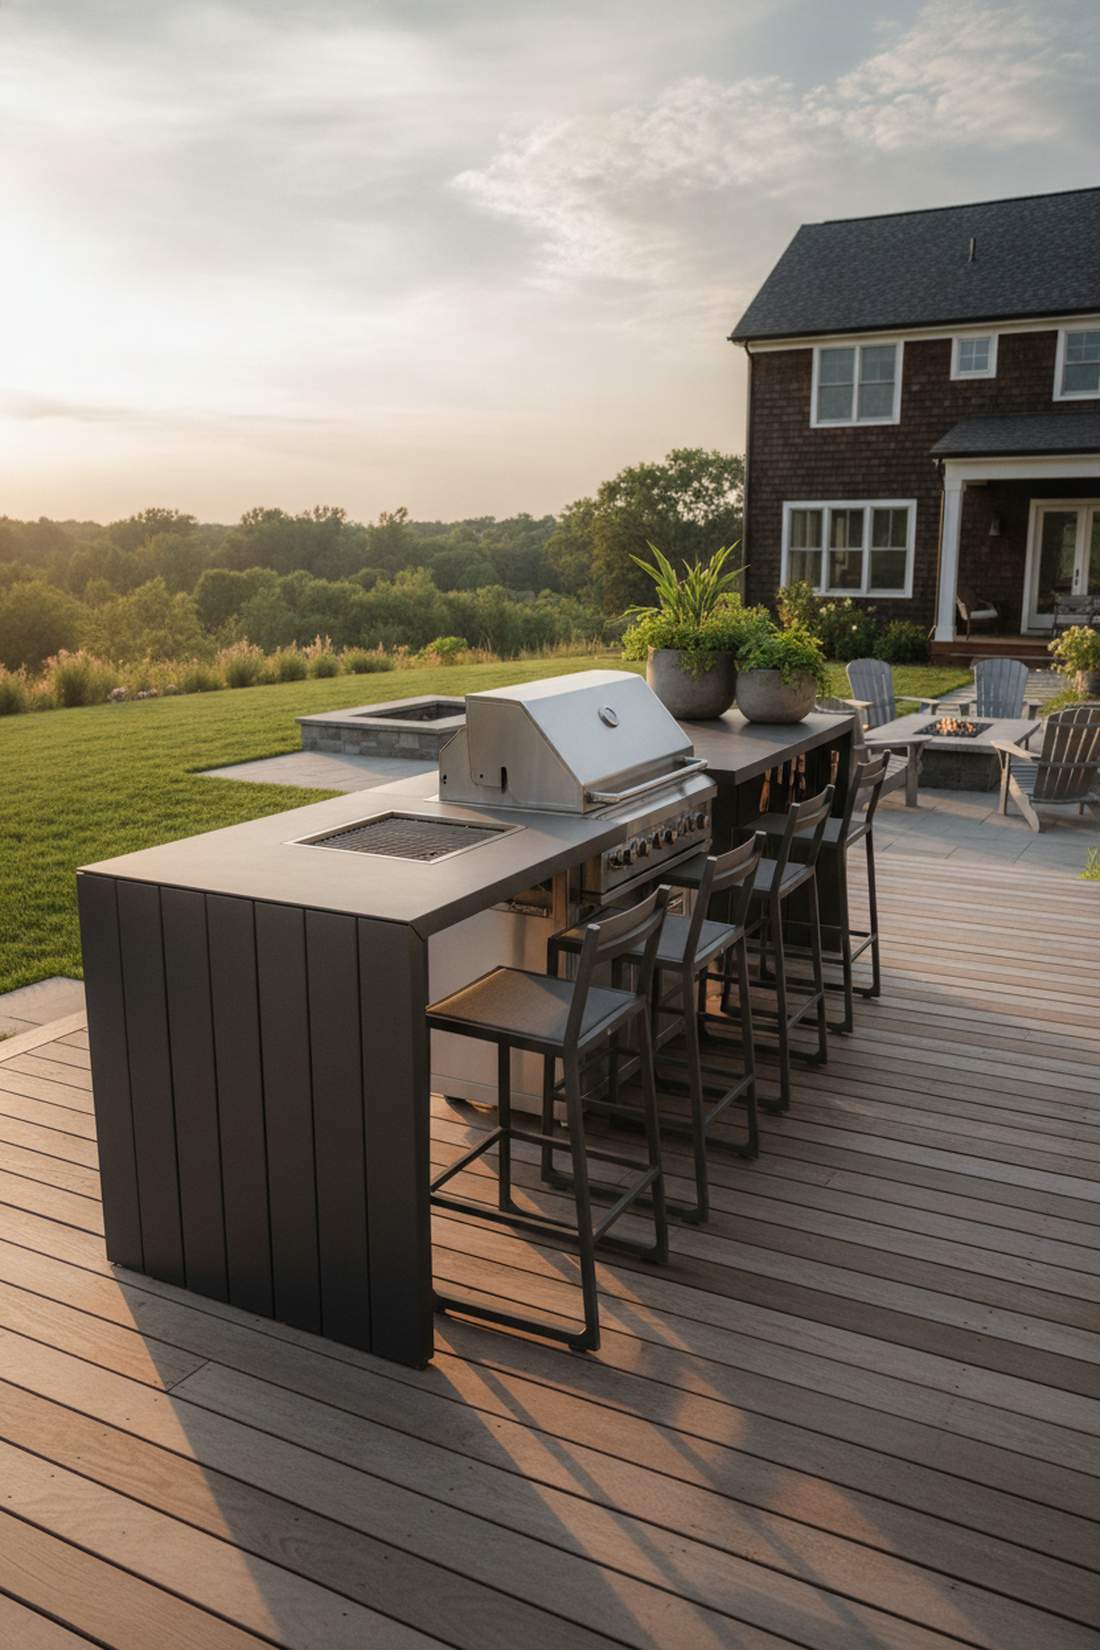
3. Deck-Rail Integrated Linear Kitchen
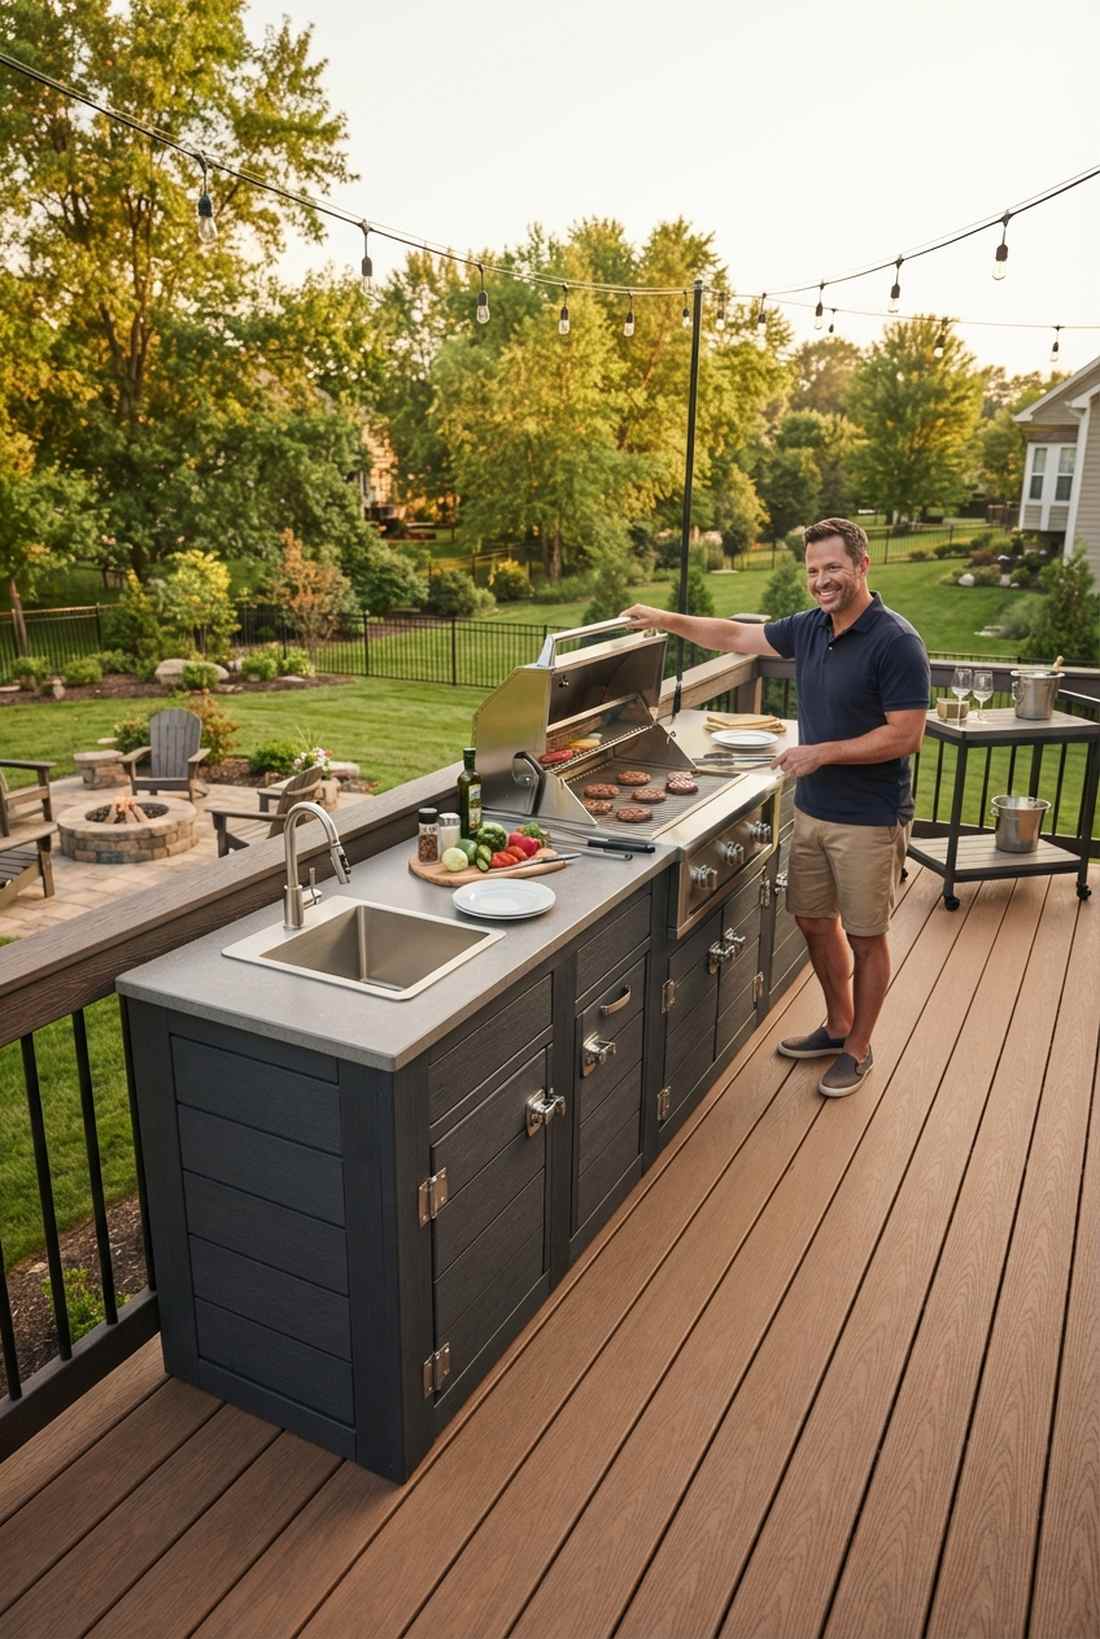
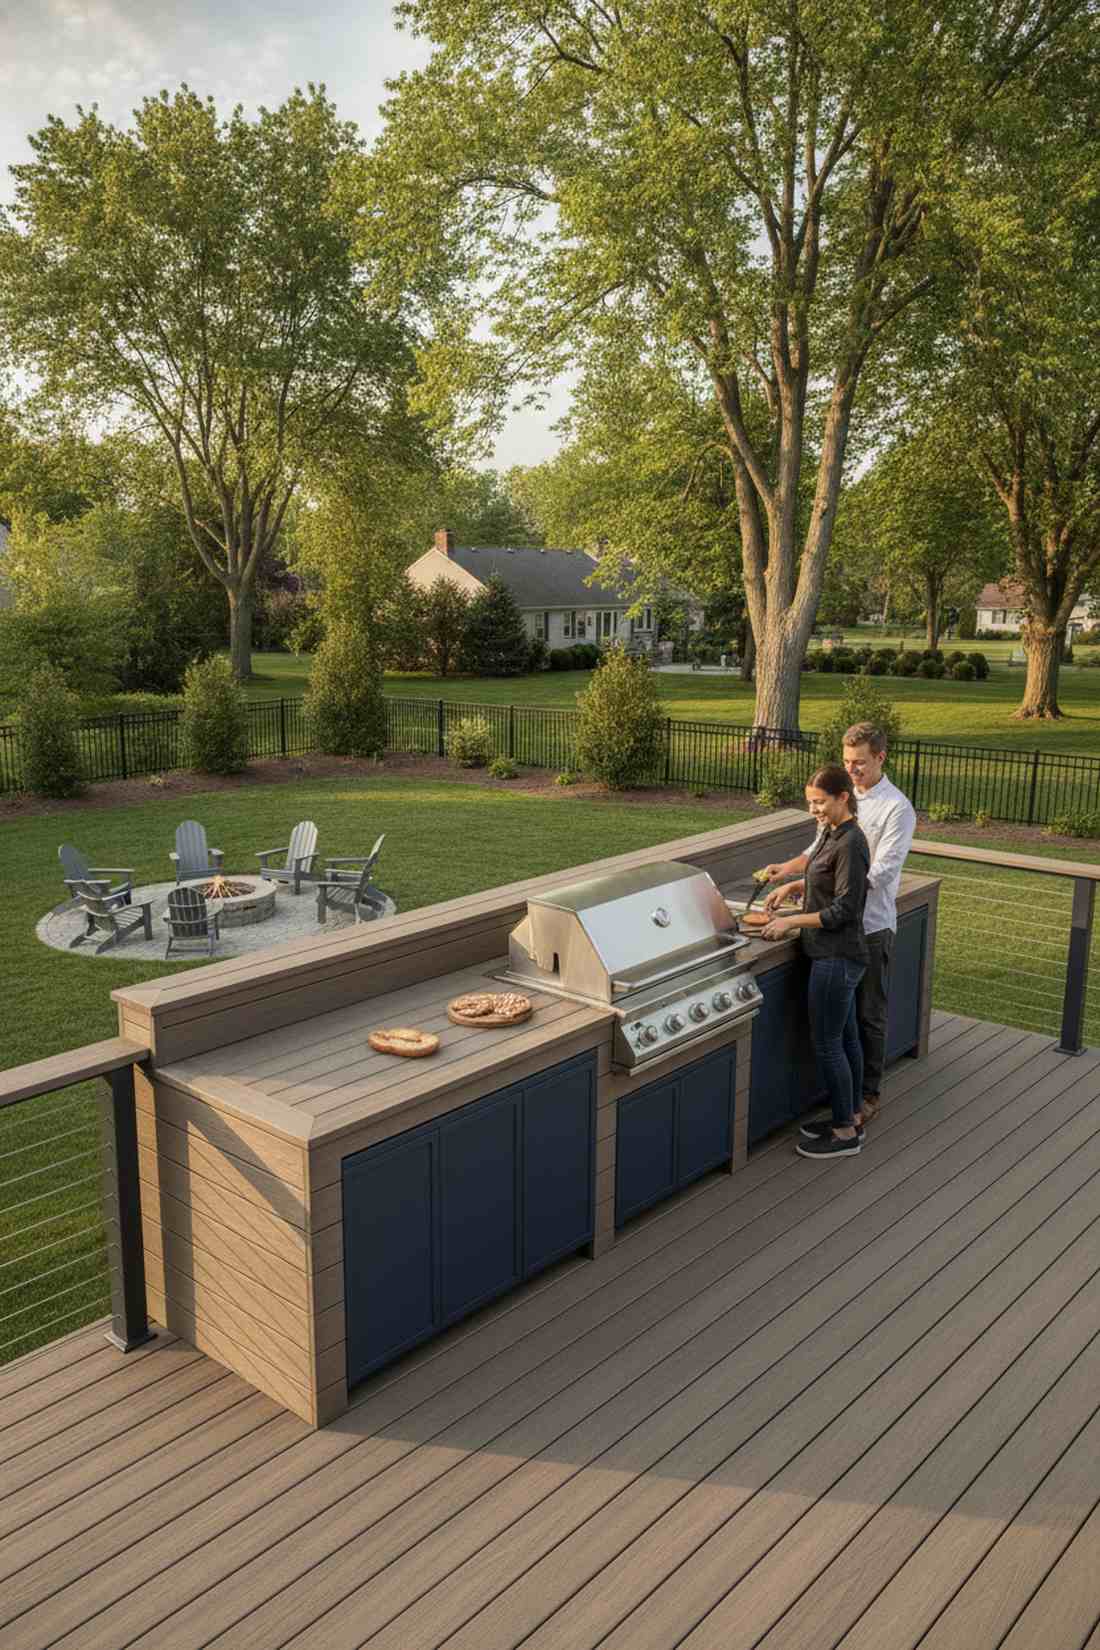
Feels like leaning over the rail of a luxury cruise ship while flipping burgers. Deck-integrated outdoor patio grill stations naturally fit elevated composite or wood deck perimeters.
Borrowing the existing railing profile completely eliminates the need for a massive standalone footprint. Sneaking in marine-grade polymer cabinet boxes prevents under-deck moisture from ruining your structural storage.
This space-saving hack typically runs $1,000–$2,200 for the base structure. Pin this if you have a raised deck begging for an upgrade!
- Key Materials: Elevated deck-rated moisture barriers
- Vibe / Style: Seamless floating cookhouse
- Difficulty: Beginner-friendly framework
- Budget Breakdown: Base framing: $300 | Finishing materials: $900
- Creator’s Tip: Ensure your deck joists are reinforced directly beneath the grill’s heavy footprint.
- Smart Sourcing: Invest in weather-resistant composite fascia boards and high-heat grill insulation jackets.
4. Single-Wall Outdoor Patio Grill With Overhead Storage
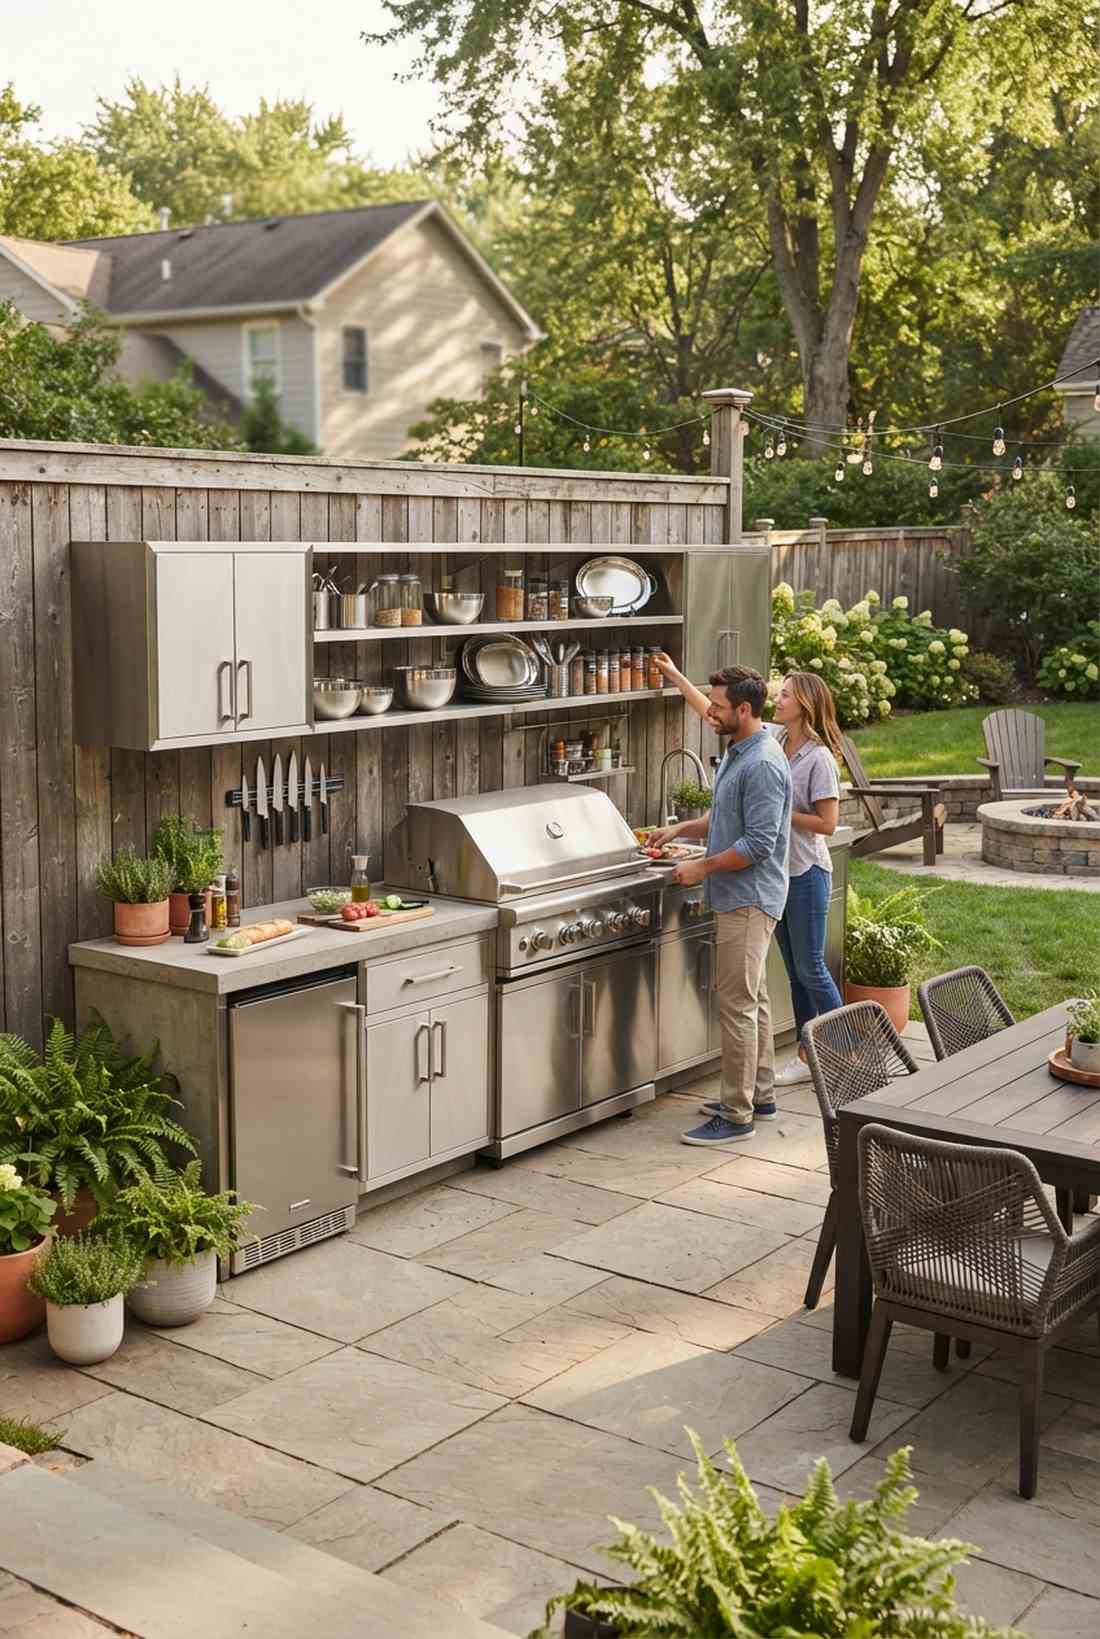
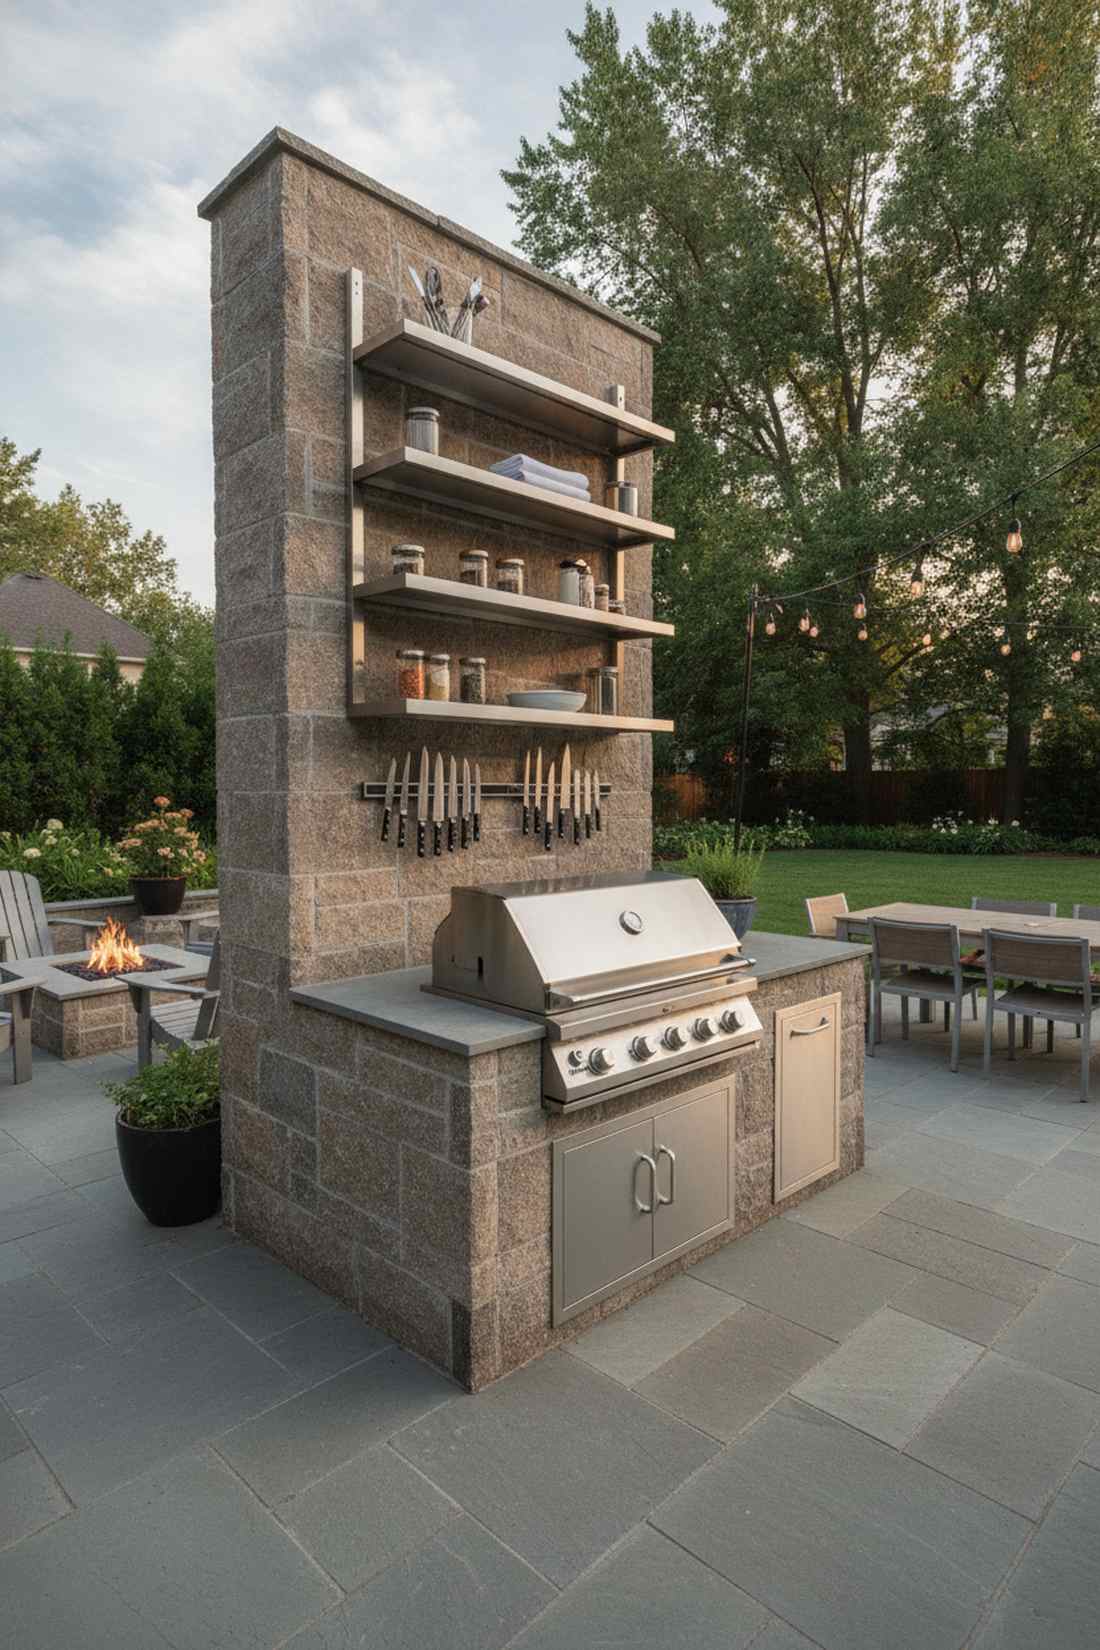
Captures the structured efficiency of a trendy food truck packed with flavor. An overhead vertical storage kitchen is exceptionally useful for patios squeezed between property lines.
Going vertical looks far more intentional and custom than leaving walls completely blank. Integrating stainless steel outdoor shelving units provides massive utility while resisting harsh weather elements.
A smart vertical layout usually sets you back $1,800–$3,000. It completely revolutionizes how you store outdoor cooking gear.
- Key Materials: Marine-grade steel floating shelves
- Vibe / Style: Chef-inspired utility wall
- Difficulty: Moderate framing required
- Budget Breakdown: Cabinetry: $1,000 | Wall mounting hardware: $250
- Creator’s Tip: Keep the grill strictly un-shelved above it to avoid melting or grease-staining your supplies.
- Smart Sourcing: Buy an outdoor patio and kitchen ideas starter cabinet kit alongside heavy-duty magnetic knife strips.
5. Fence-Backed Grill Bar
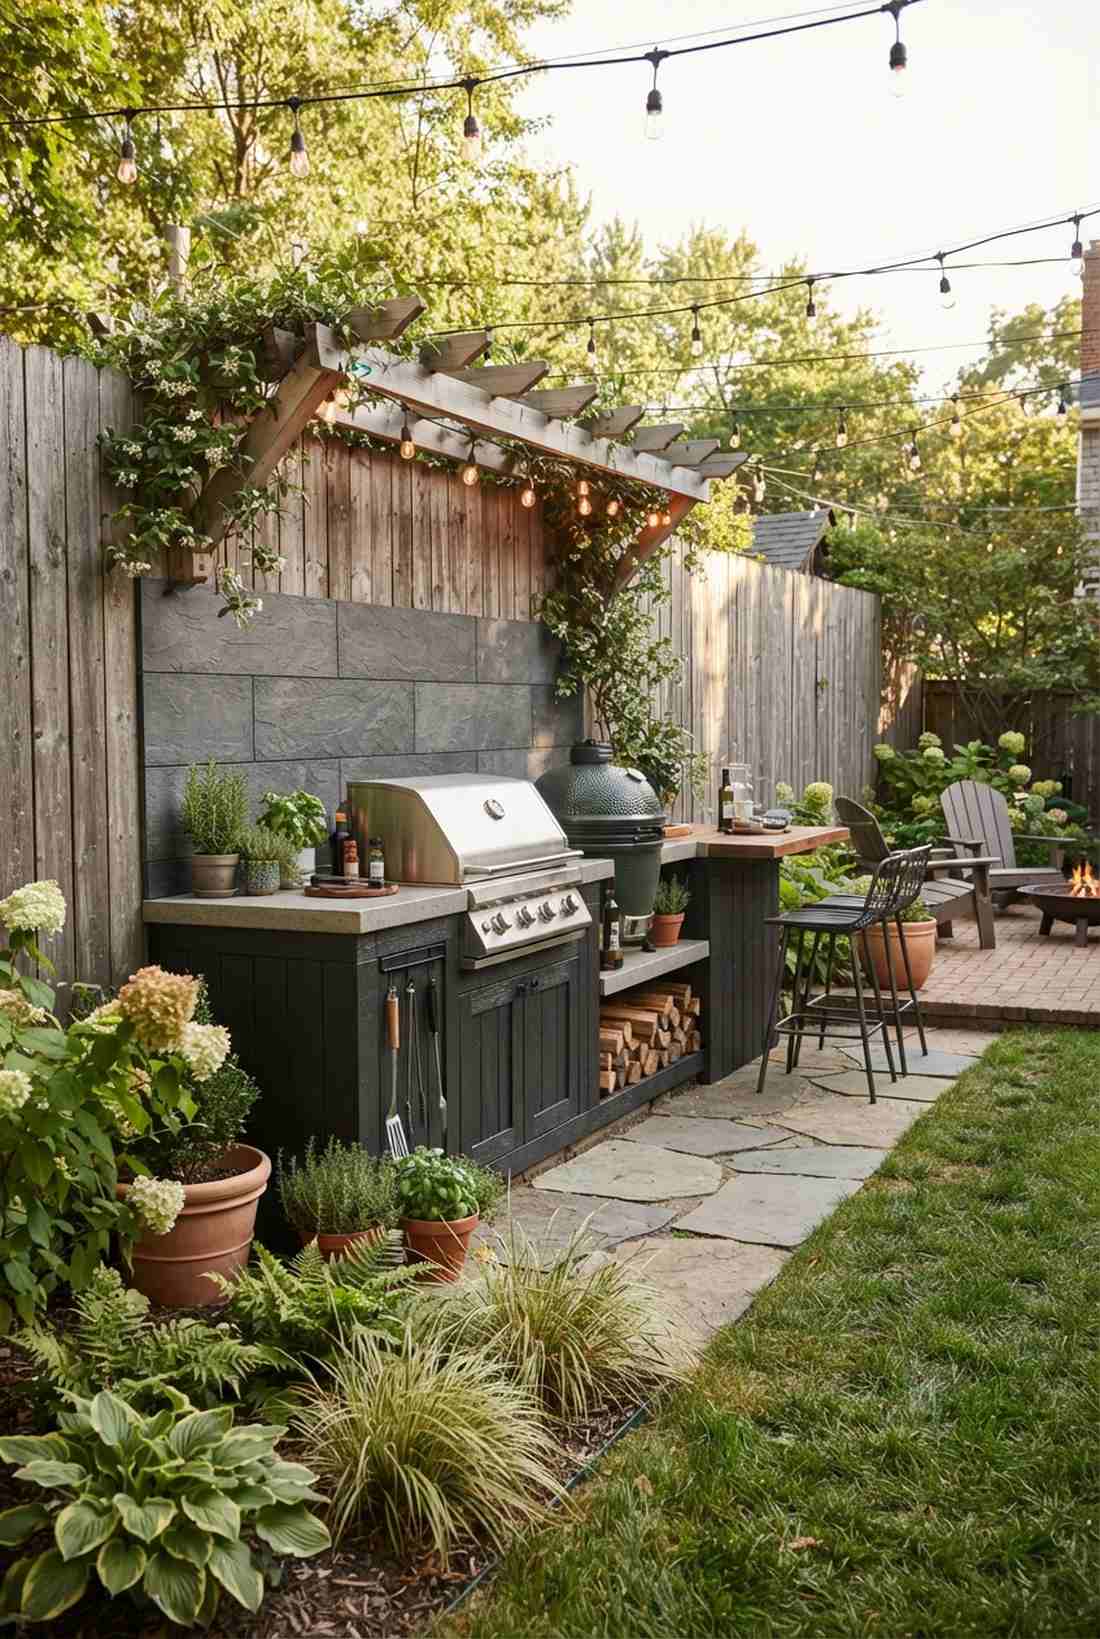
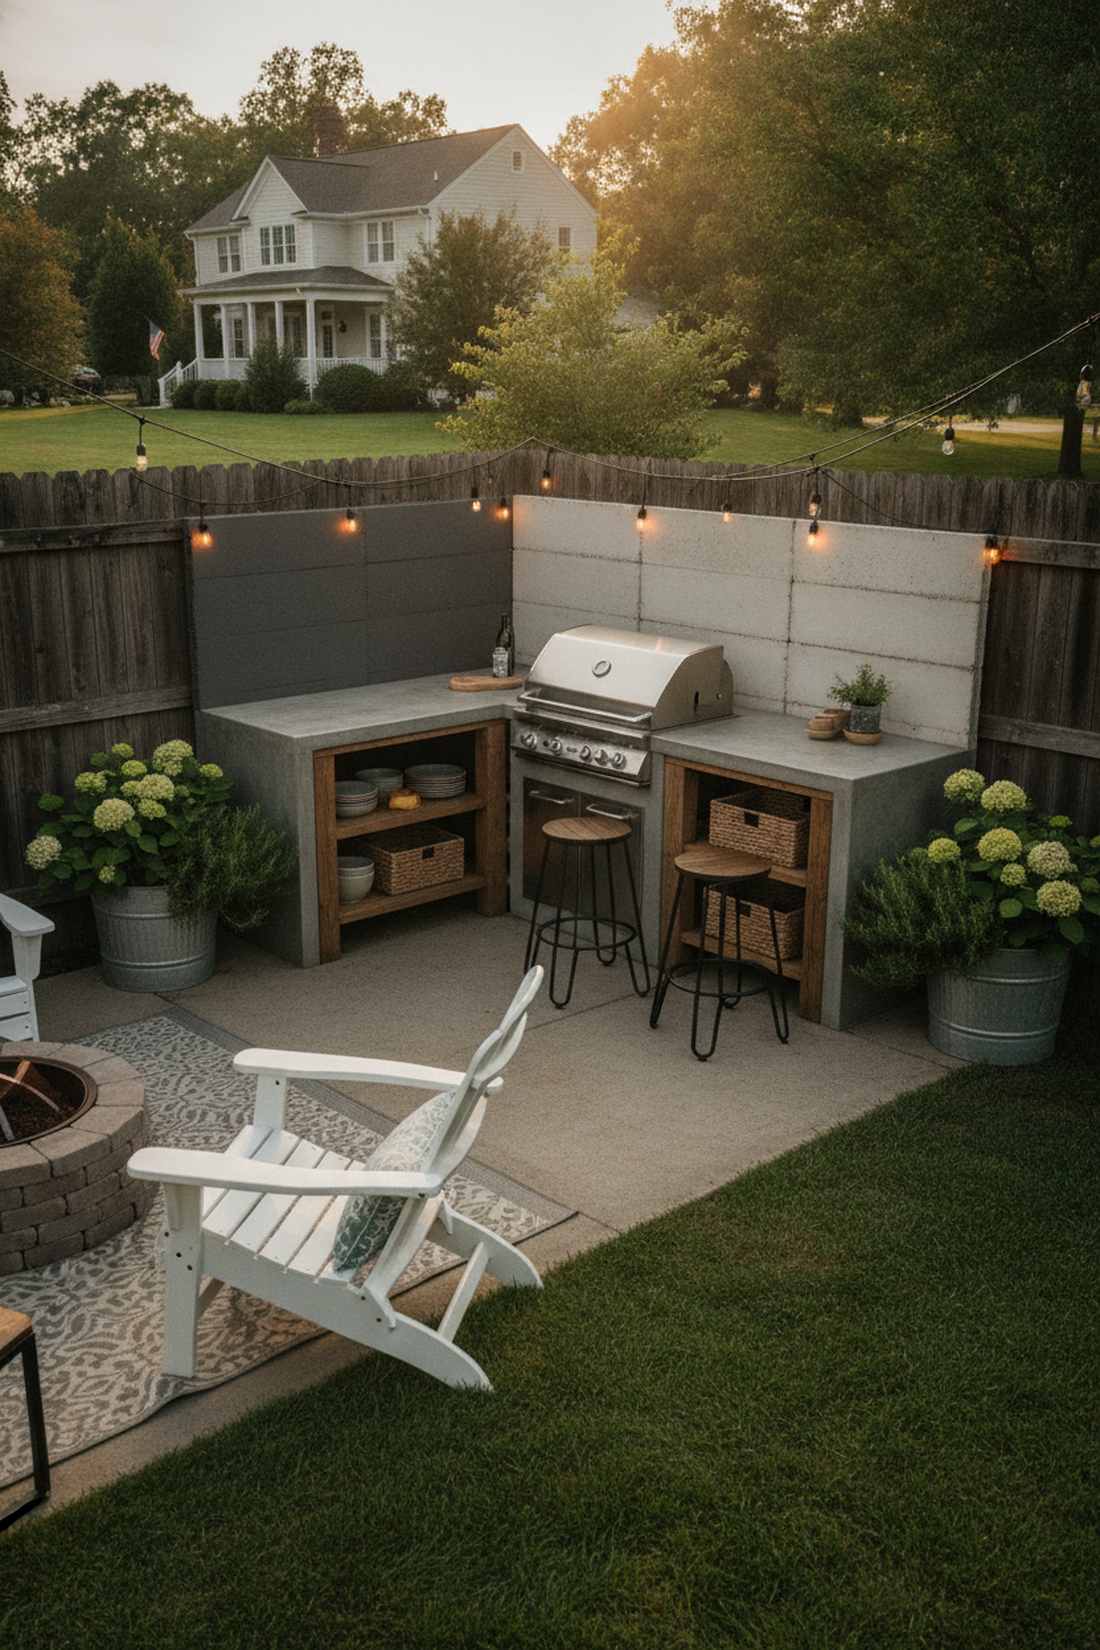
Feels like discovering a secret chef’s corner hidden away in an urban garden. This fence-line boundary layout is fantastic for maximizing dead zones at the edge of a yard.
Anchoring against a fence creates a cozy alcove that blocks wind without paying for new walls. Leveraging heat-resistant cement board panels behind the cooktop ensures ultimate safety while looking ruggedly stylish.
You can execute this boundary-pushing setup for $1,200–$2,500. Save this idea for transforming that useless lawn corner!
- Key Materials: Fiber cement backer boards
- Vibe / Style: Intimate backyard bistro
- Difficulty: Easy Saturday build
- Budget Breakdown: Fireproofing: $200 | Structure & counter: $1,100
- Creator’s Tip: Always confirm your local setback codes before building a permanent structure right on the property line.
- Smart Sourcing: Source pre-cut fiber cement panels and flame-retardant exterior paint (gallon size).
This next layout breaks every traditional design rule, yet it delivers a remarkably high-end look on a budget…
6. Poolside Linear Kitchen With Swim-Up Bar
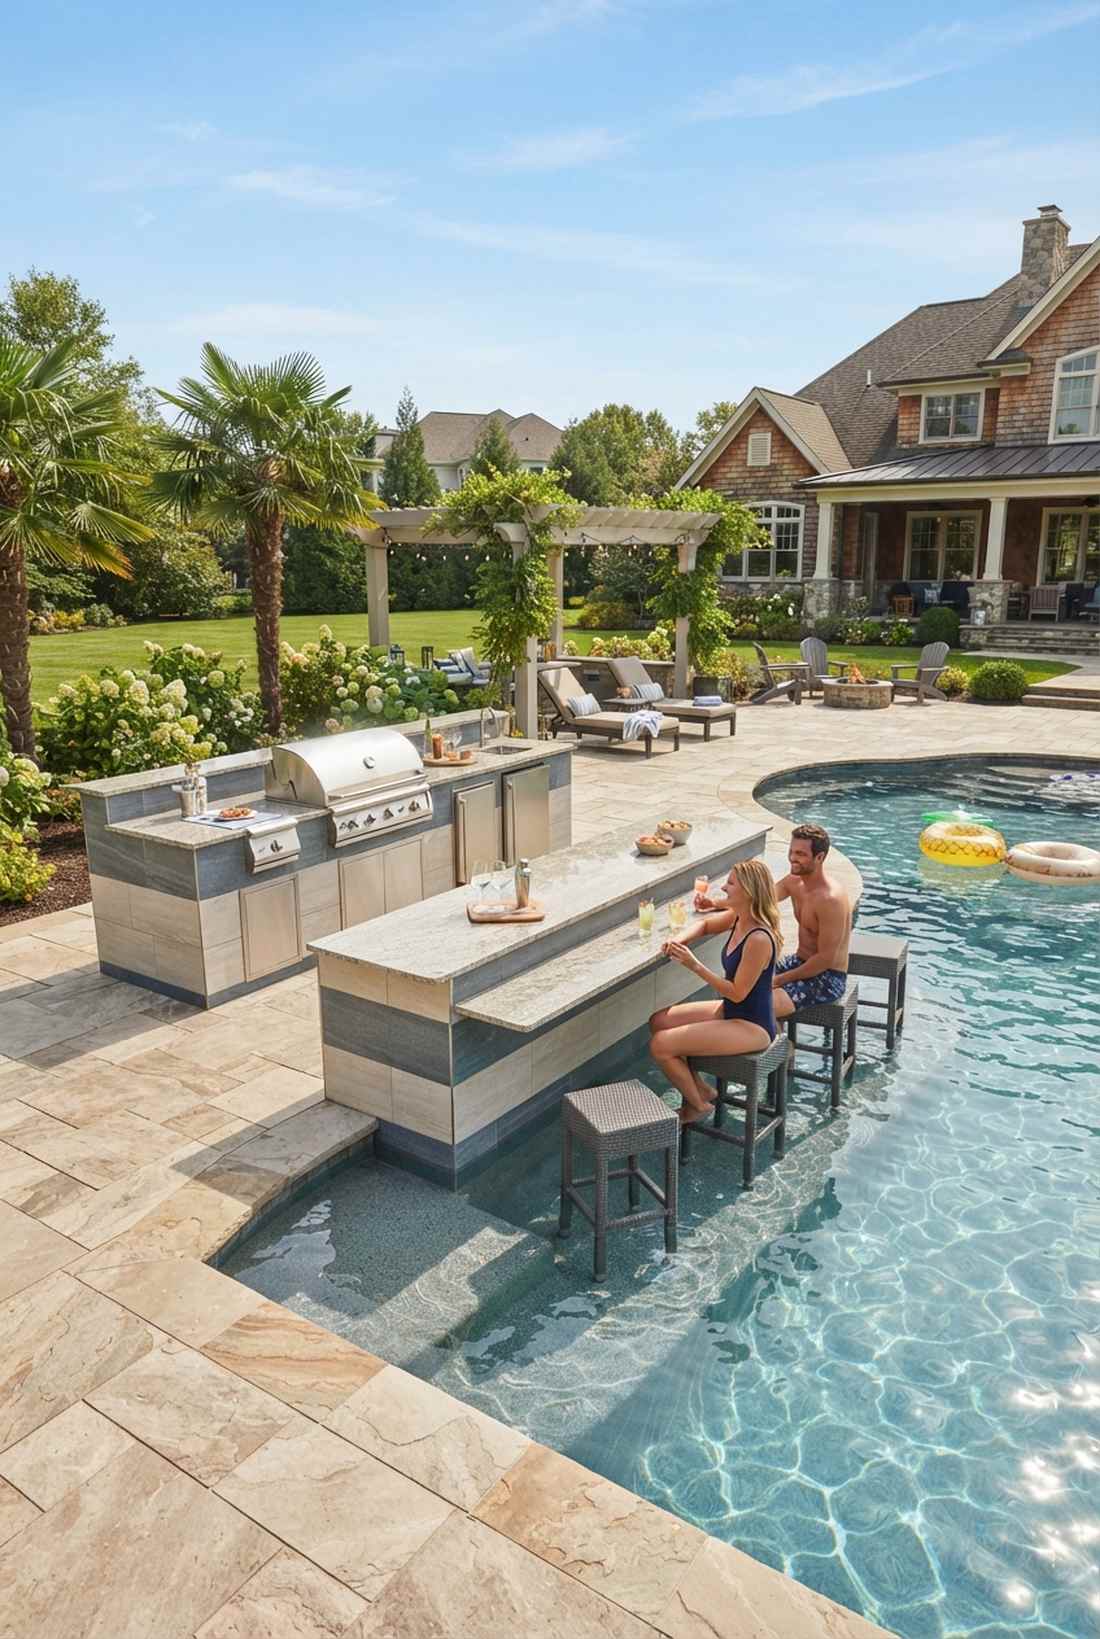
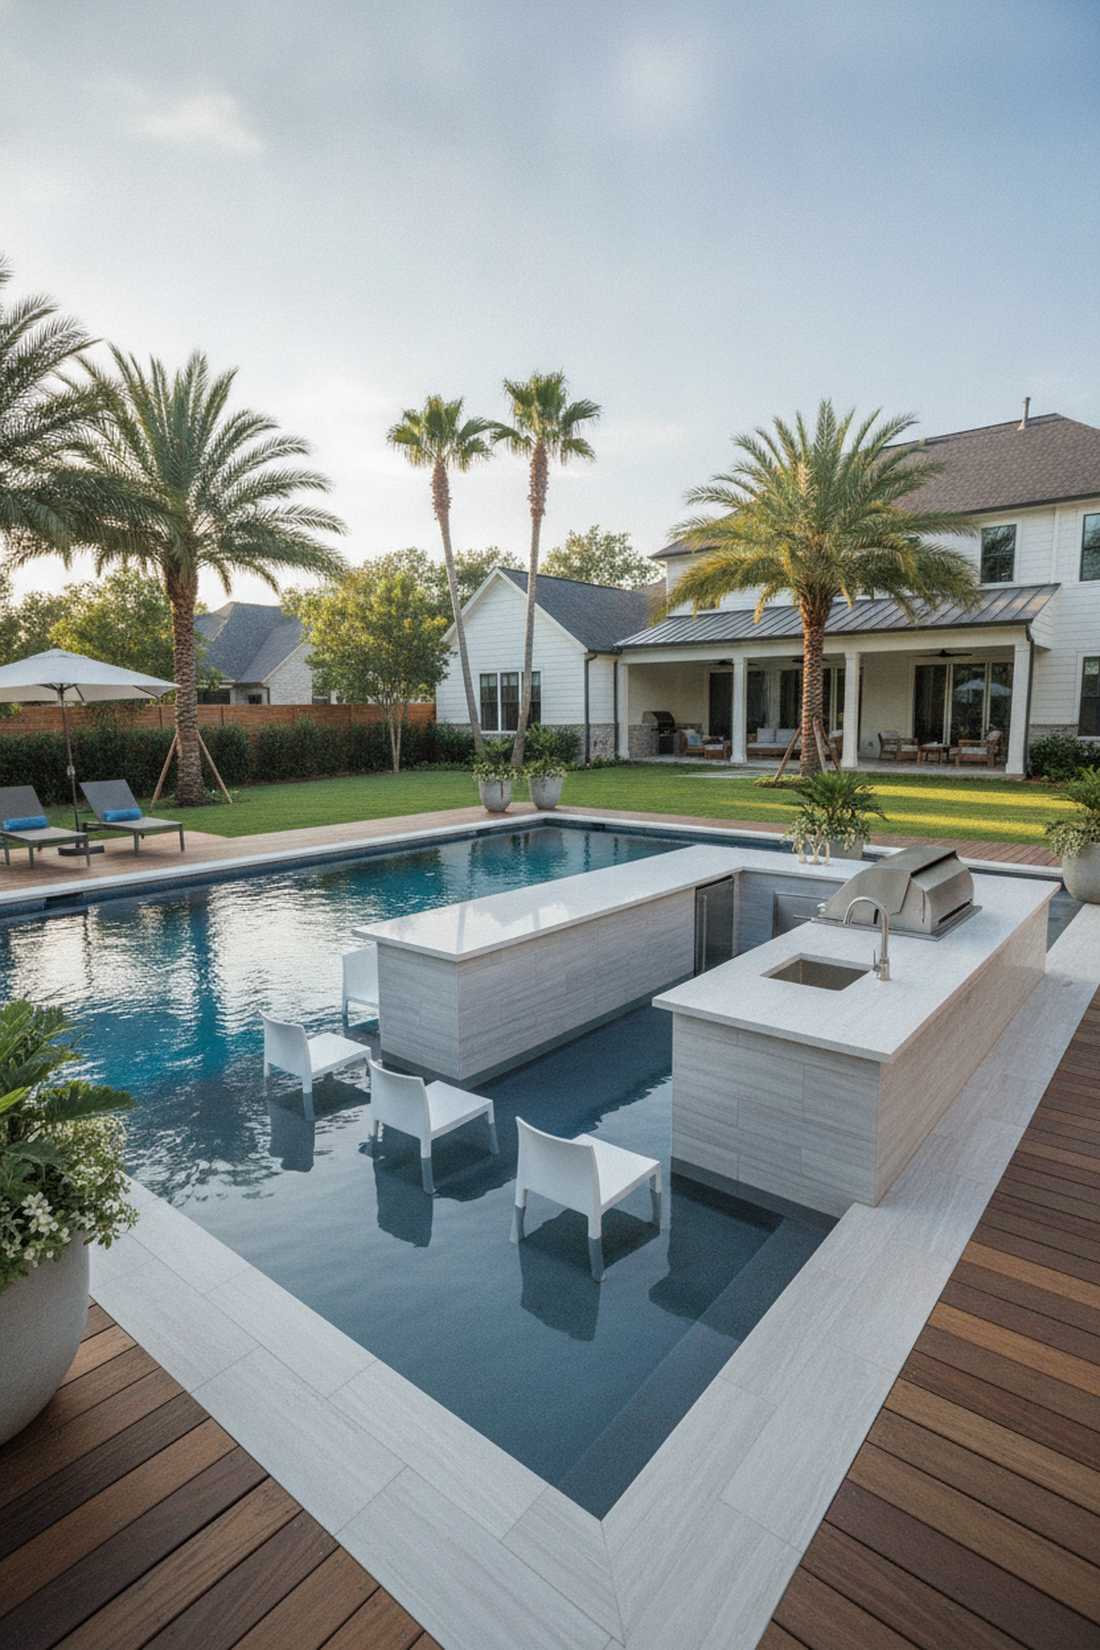
Radiates major five-star tropical resort energy directly from your backyard pool. A swim-up dual-zone bar is an absolute gamechanger for summer pool parties and aquatic lounging.
Lowering one side to water level creates a million-dollar aesthetic without an insane price tag. Utilizing slip-resistant porcelain exterior tiles ensures safety while reflecting a highly polished, premium resort finish.
Water-adjacent setups cost a bit more, hovering around $3,500–$6,000. Pin this if a luxury pool upgrade is on your vision board!
- Key Materials: Waterproof masonry block systems
- Vibe / Style: Exclusive resort cabana
- Difficulty: Advanced (drainage/waterproofing needed)
- Budget Breakdown: Waterproofing: $800 | Surfacing: $1,500+
- Creator’s Tip: Pitch the deck-side counter slightly so grease runoff flows away from the pristine pool water.
- Smart Sourcing: Use a poolside outdoor patio grill island kit and UV-coated resin bar stools (bulk pack).
L-Shaped Outdoor Patio and Kitchen Designs
L-shaped layouts turn corners into functional assets, creating natural work zones while maintaining open sightlines. This configuration suits corner patios and backyards where you want cooking and entertaining areas distinctly defined yet connected.
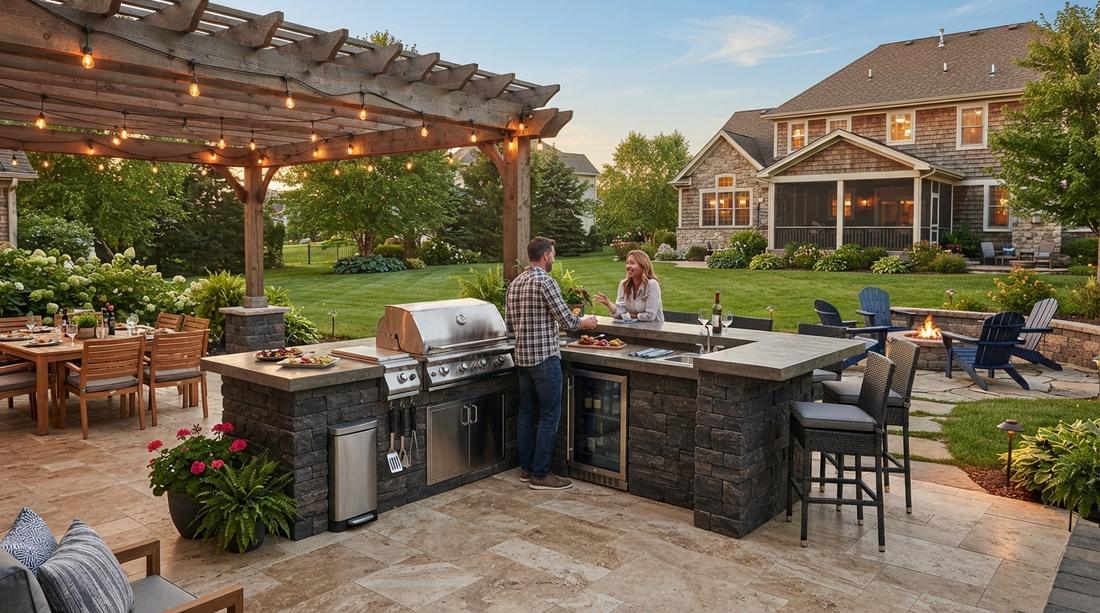
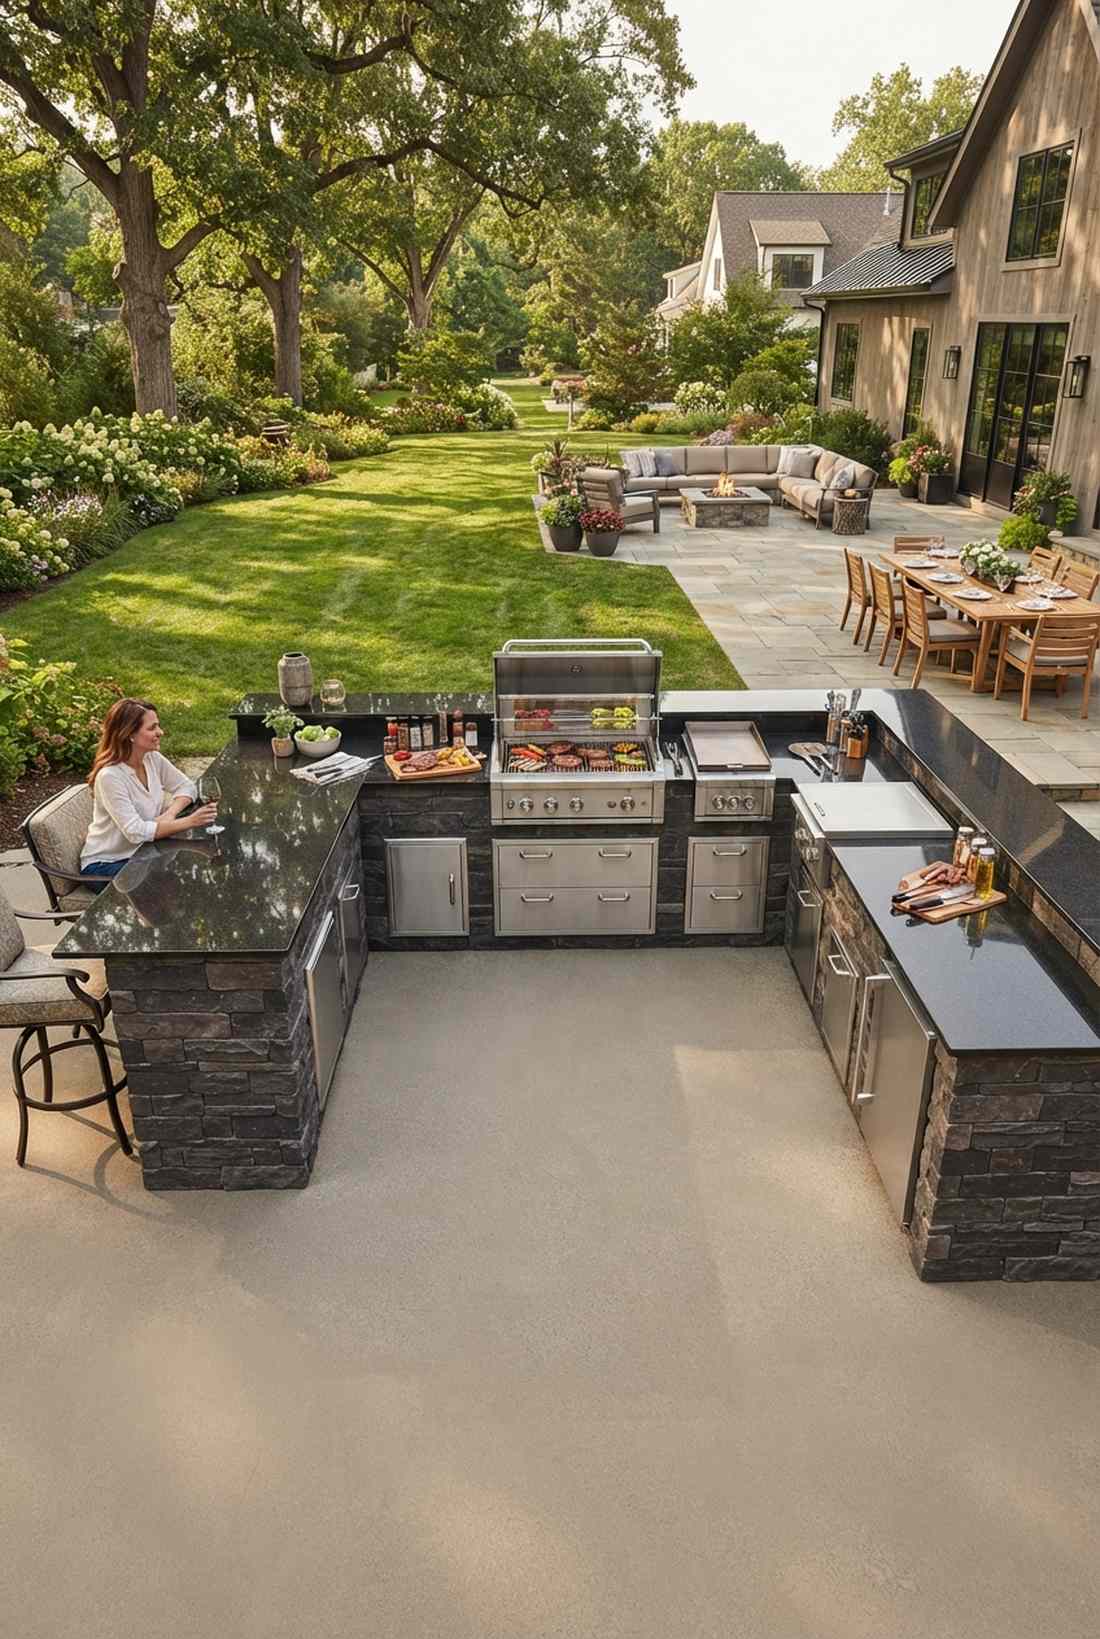
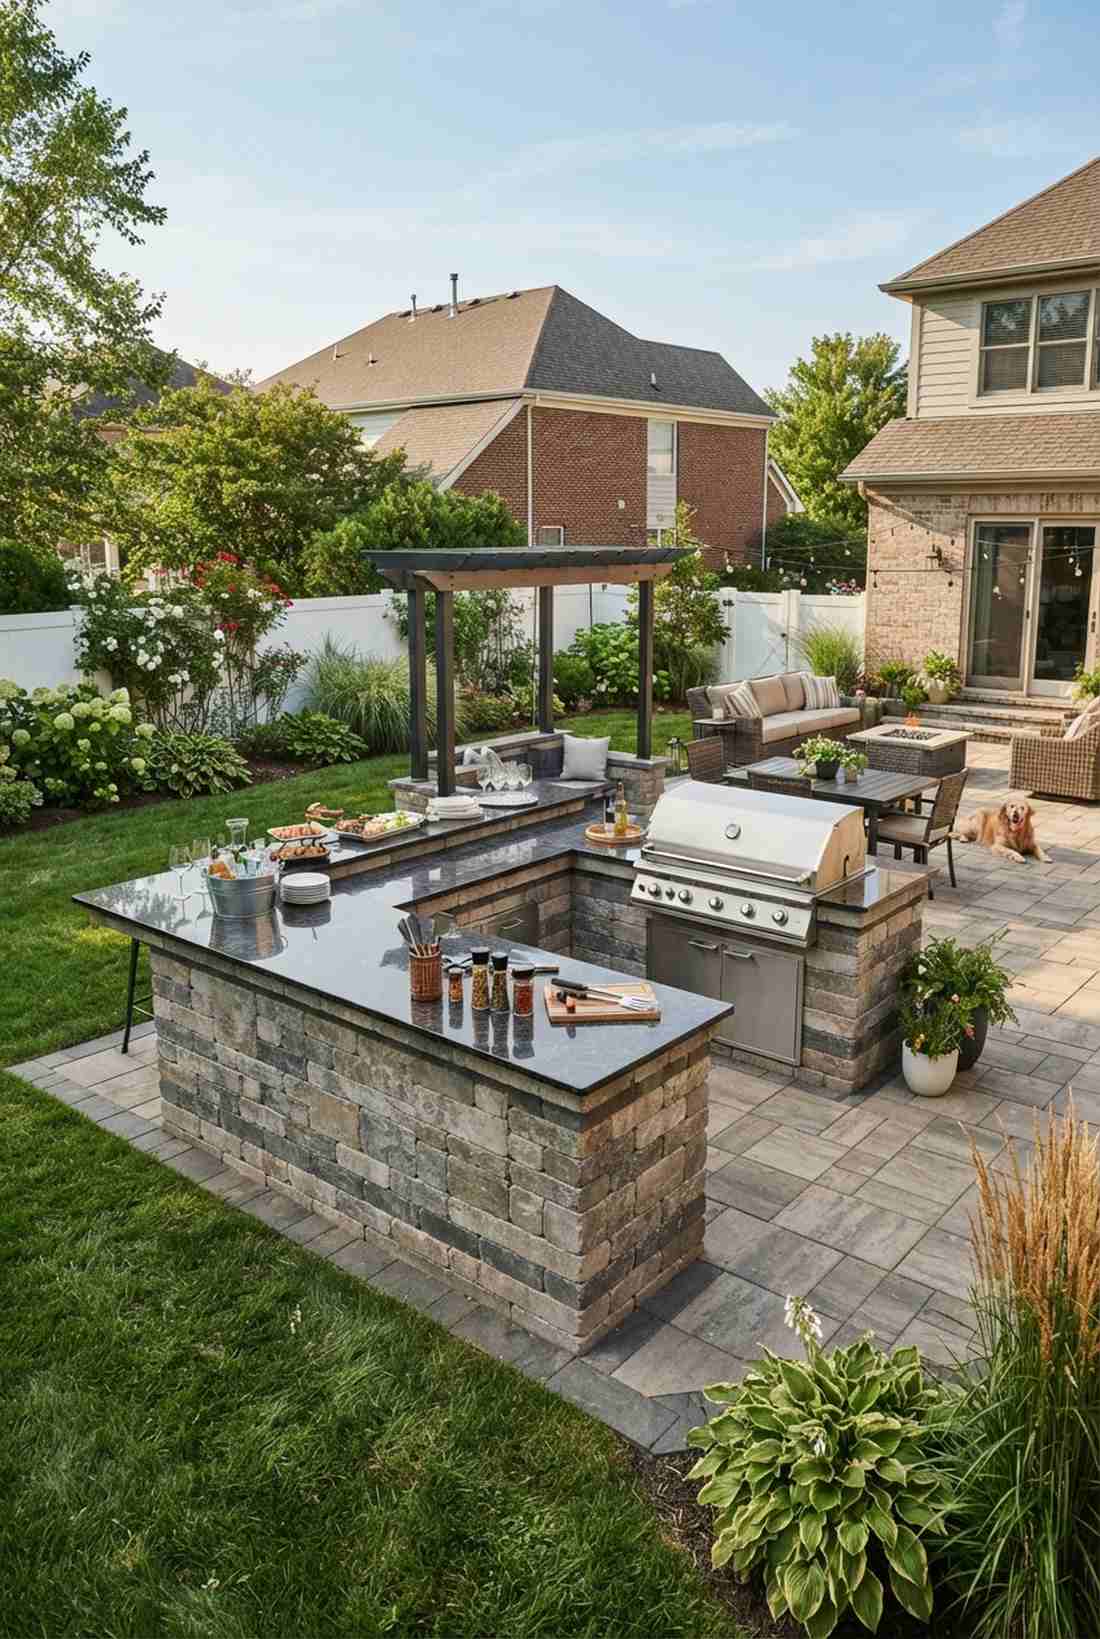
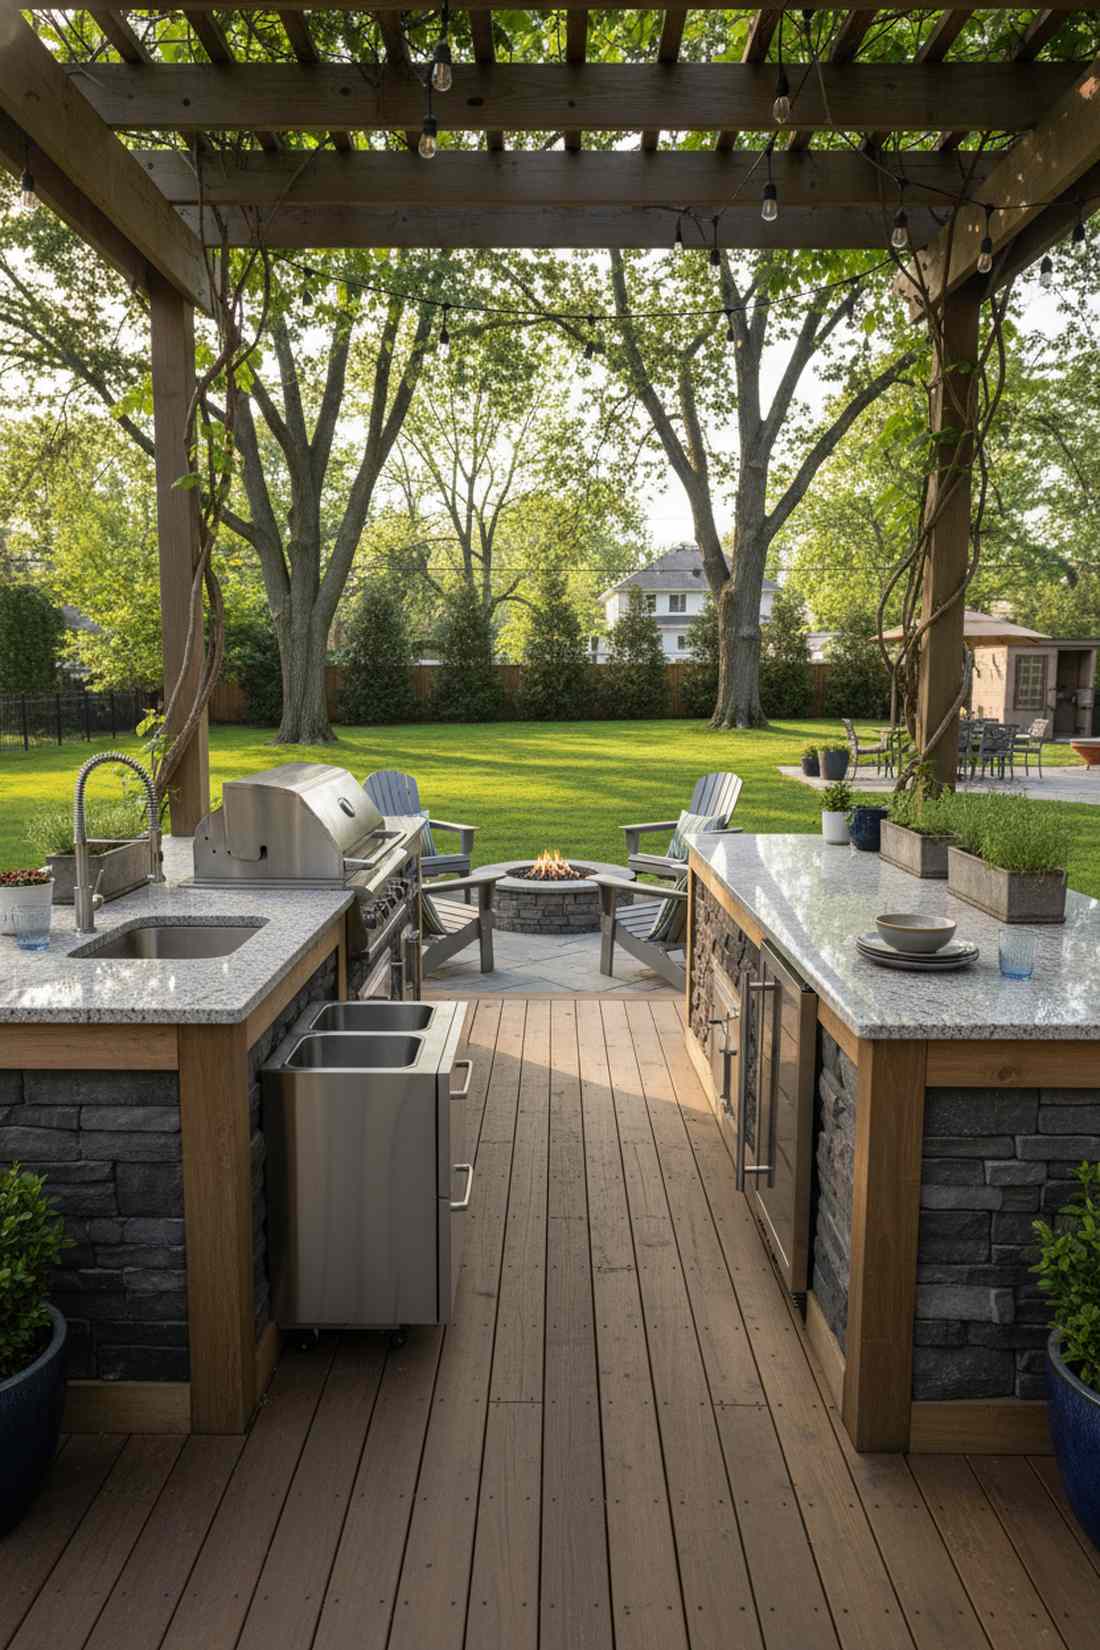
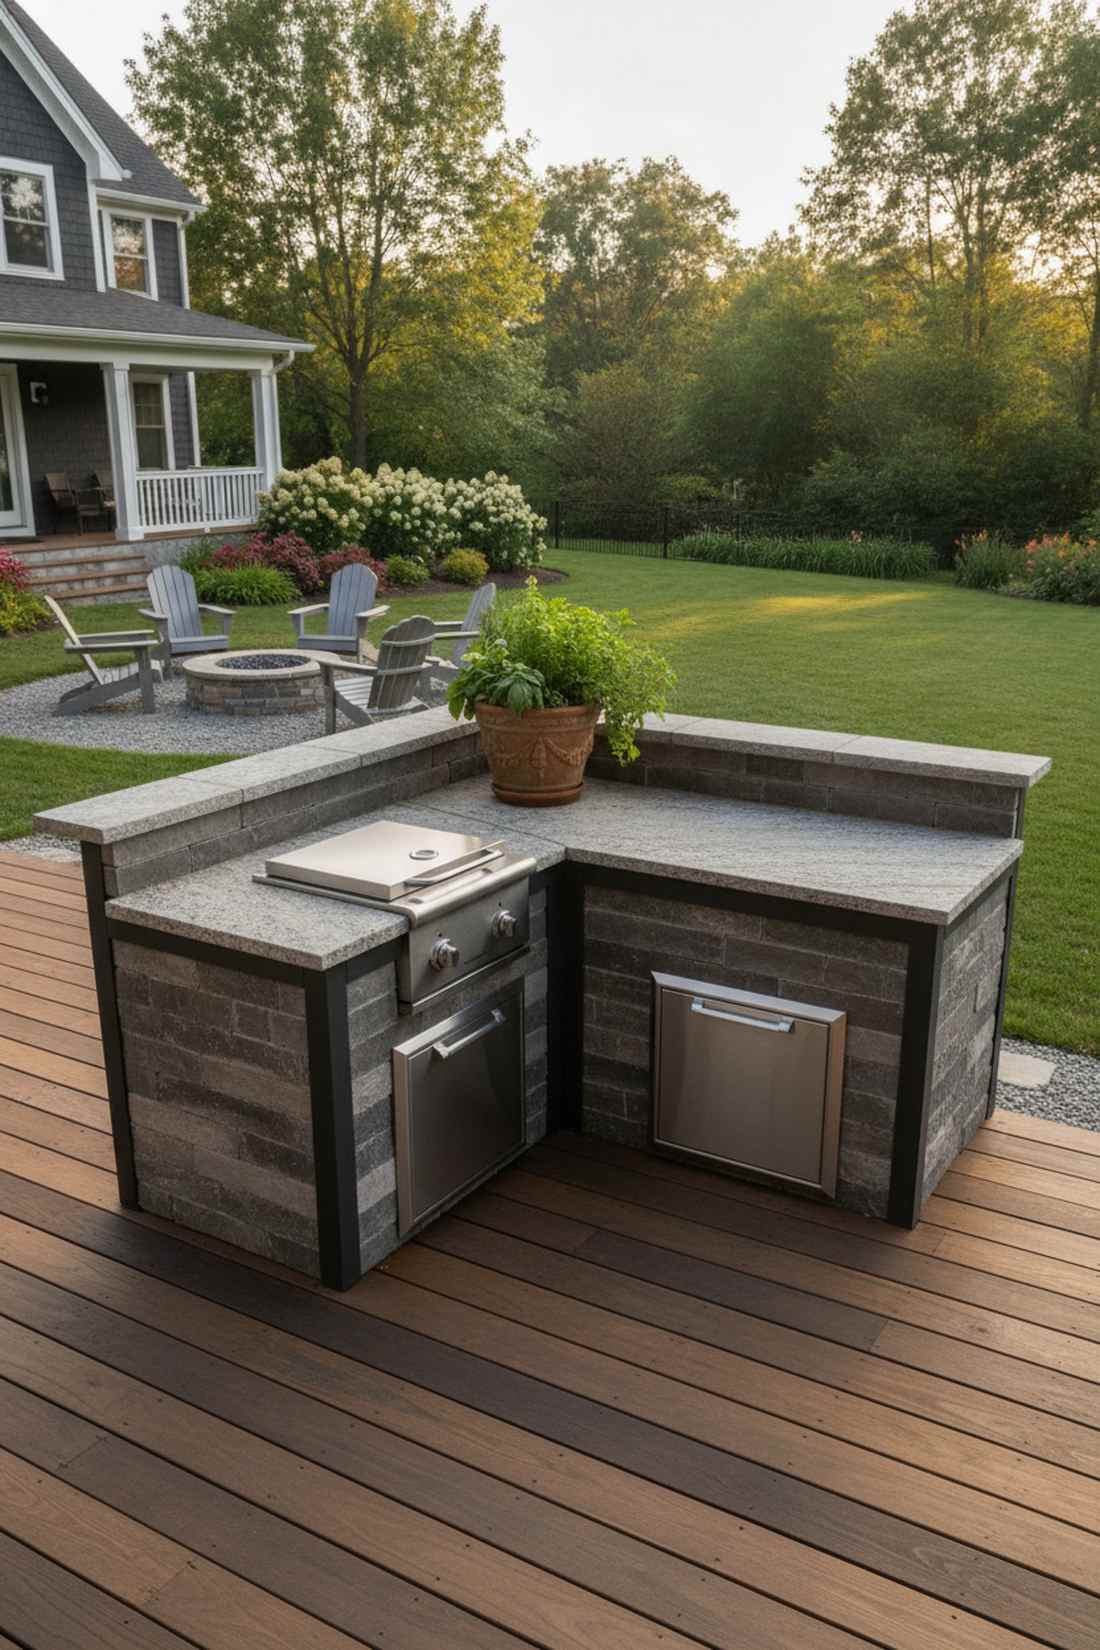
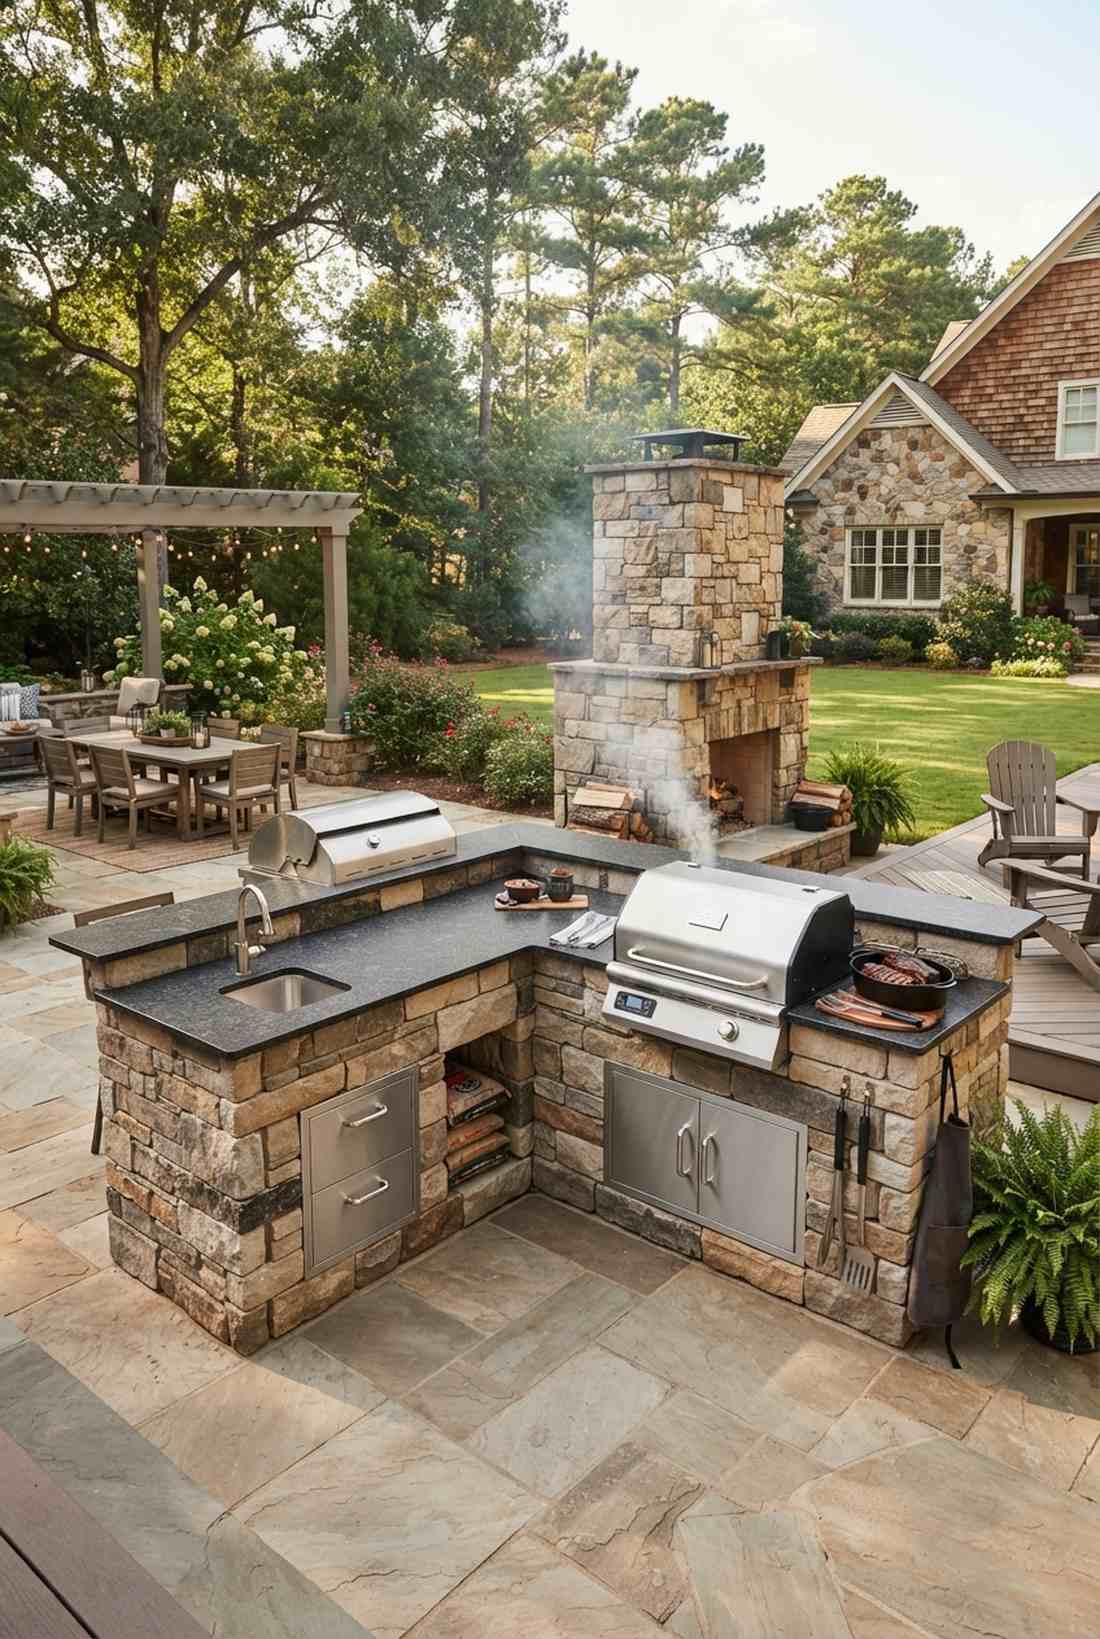
7. Corner-Anchor Grill With Wraparound Bar
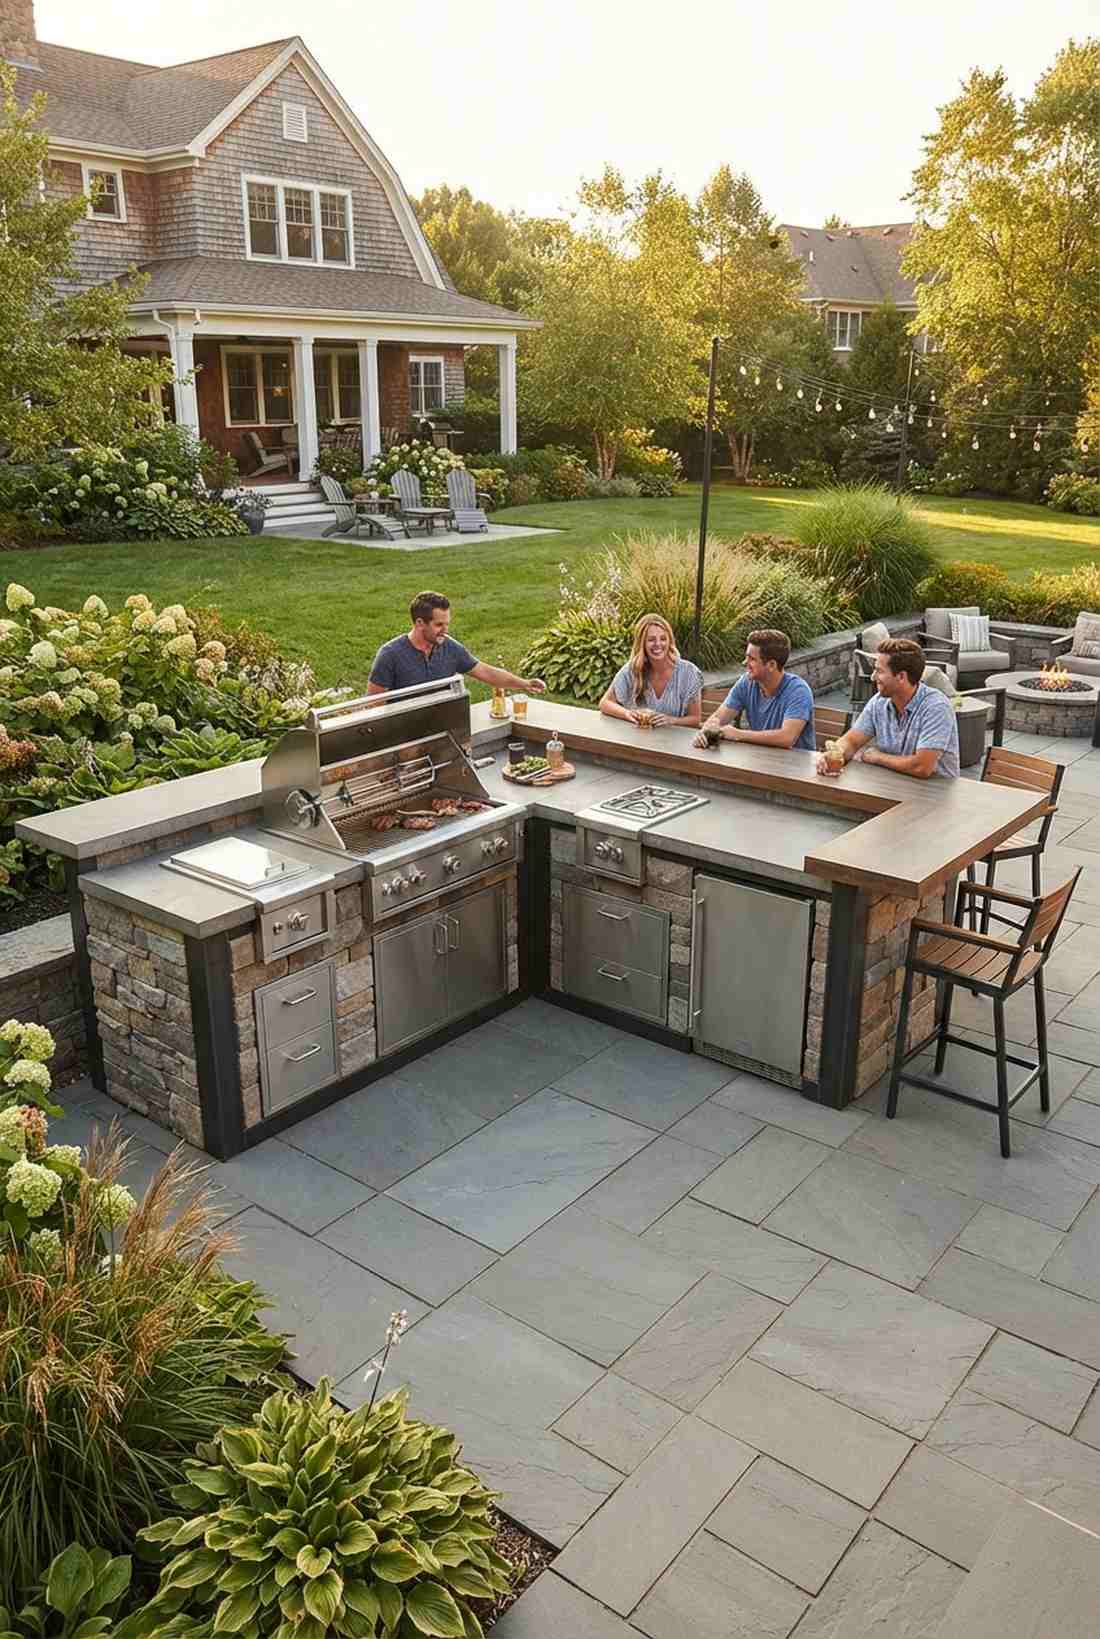
Feels like your own personal front-row ticket to a live cooking show. The L-shaped wraparound seating concept is ideal for keeping the chef engaged with mingling guests.
Tucking the grill into the exact vertex maximizes counter runs and establishes a commanding aesthetic. Upgrading to an outdoor patio kitchen design package allows for massive storage without overcrowding the patio floor.
This cornerstone of outdoor hosting runs between $2,500–$4,500. A legendary layout that never goes out of style.
- Key Materials: Custom-cut modular steel frames
- Vibe / Style: Interactive social hub
- Difficulty: Moderate corner measuring
- Budget Breakdown: Framework: $900 | Countertop spans: $1,400
- Creator’s Tip: Place the grill at a 45-degree angle in the corner so you have 270-degree access to your workflow.
- Smart Sourcing: Look for pre-configured L-shape island base kits and drop-in stainless side burners.
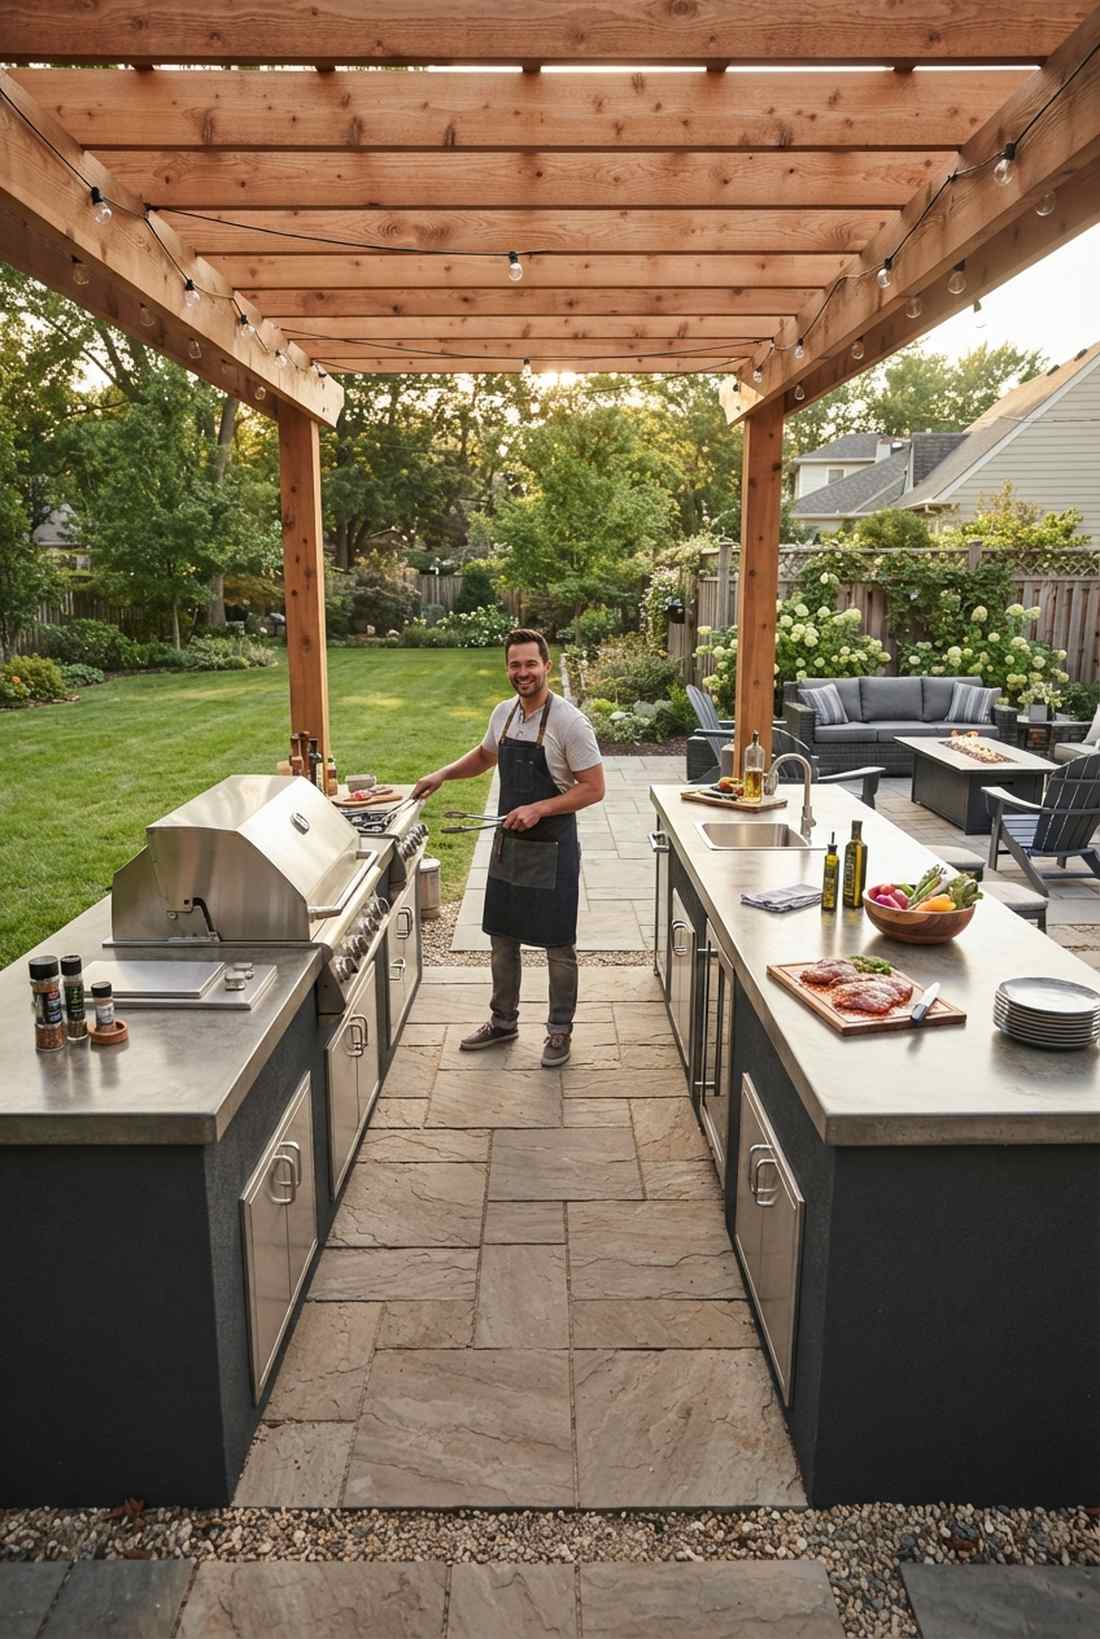
8. Pergola-Covered L-Kitchen
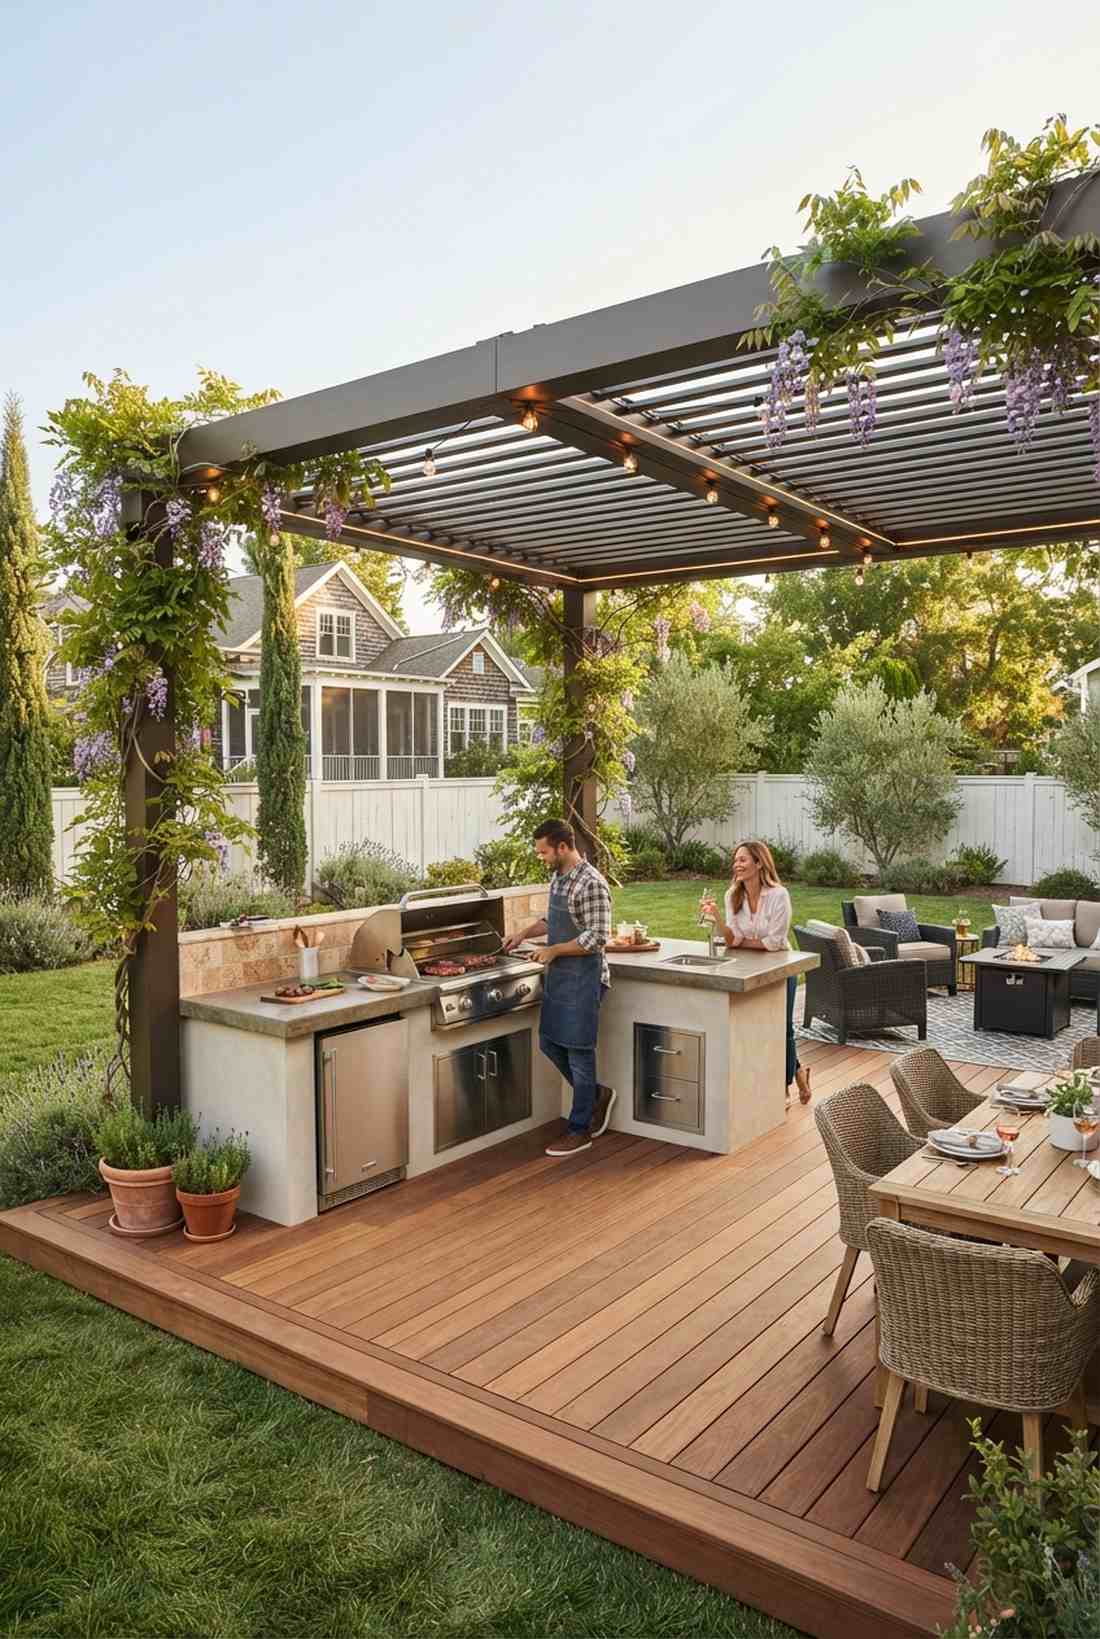
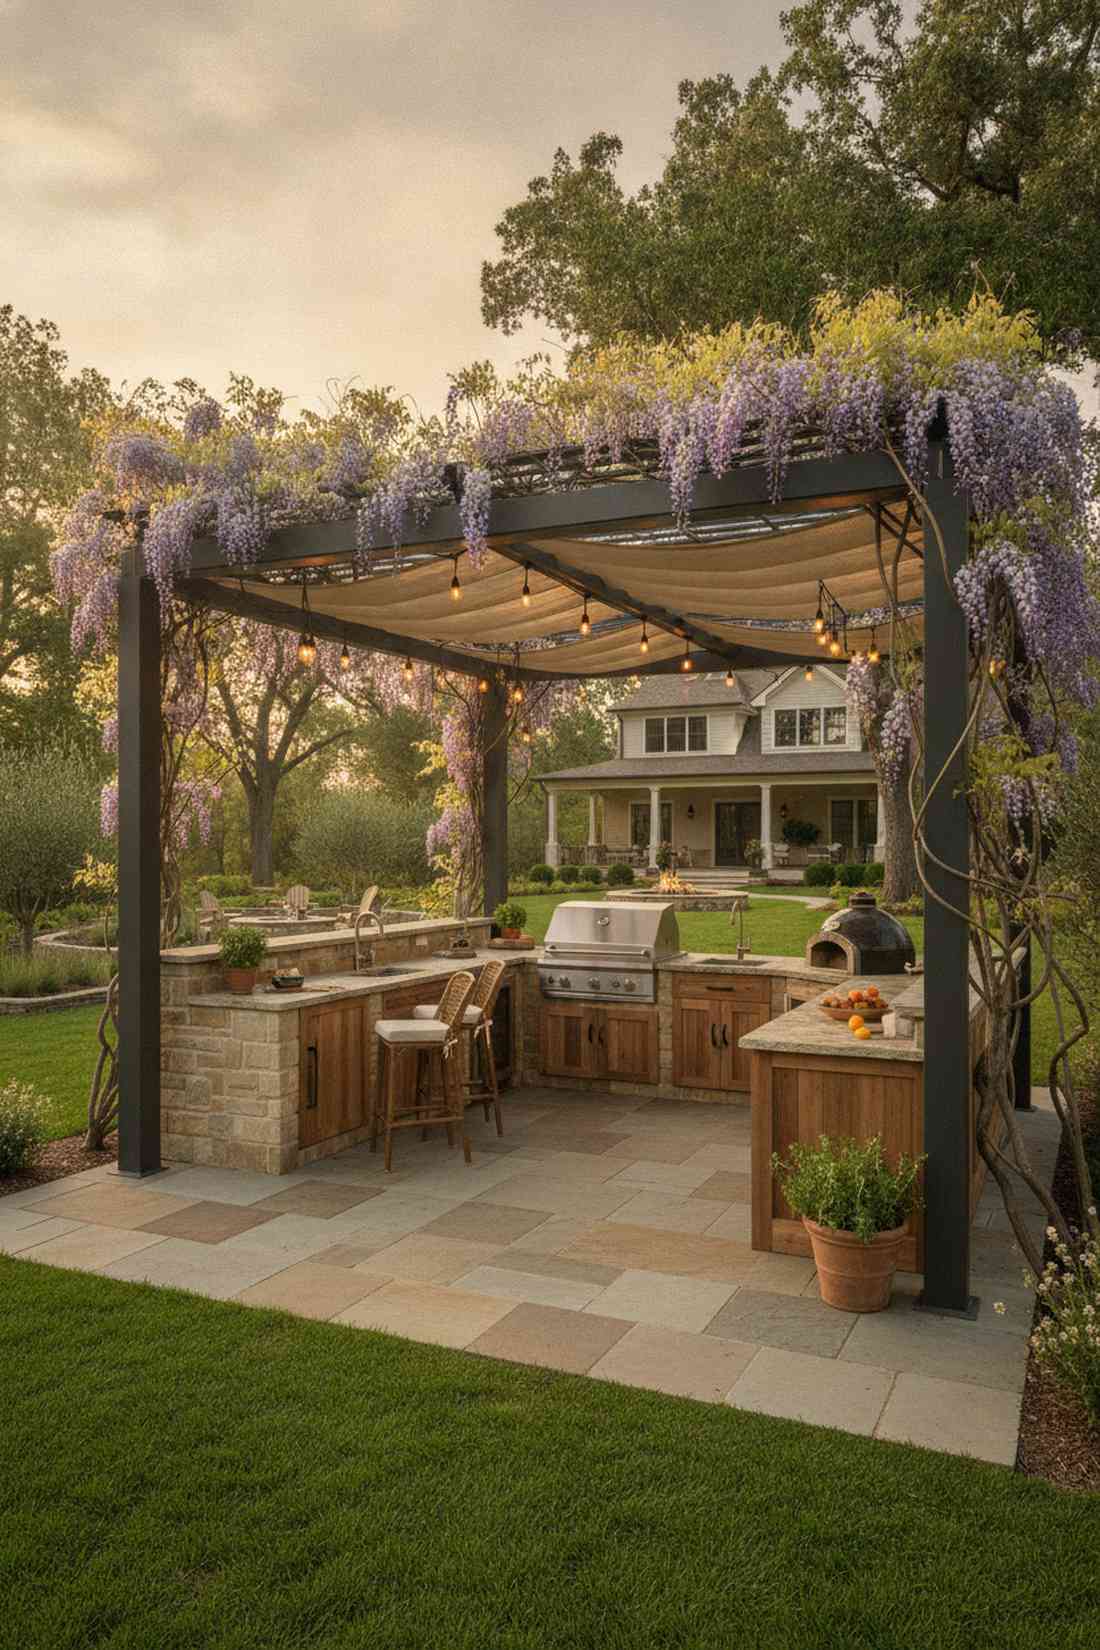
Gives off an enchanting, dappled-sunlight sanctuary vibe perfect for long afternoons. A pergola-shaded cooking alcove works beautifully to block intense midday sun without completely sealing the space.
Framing the kitchen with overhead beams visually anchors the cooking zone like a high-end pavilion. Adding retractable UV-blocking shade canopies turns a simple wooden structure into a highly functional, weather-adaptive room.
Adding the overhead element pushes this to $3,000–$5,500. Save this to your dream garden architecture board!
- Key Materials: Cedar or aluminum pergola kits
- Vibe / Style: Tuscan vineyard retreat
- Difficulty: Moderate assembly
- Budget Breakdown: Pergola kit: $1,200 | L-island: $2,000
- Creator’s Tip: Let climbing vines like wisteria take over the pergola for incredible natural scent and visual drama.
- Smart Sourcing: Grab a pre-cut aluminum louvered pergola kit and outdoor-rated string light bundles.
9. Split-Level L-Configuration
Feels like stepping up to an exclusive VIP bar at your favorite trendy lounge. A split-elevation prep and serve bar brilliantly separates messy cooking tools from the sleek dining surface.
Raising the guest side deliberately hides the chaos of grilling, resulting in a cleaner overall aesthetic. Hiding electrical and plumbing inside the 6-inch step-up is a secret premium patio kitchen blueprint used by pros.
This architectural flex usually costs $2,800–$4,200 depending on countertop choice. Pin this if you love a clutter-free hosting experience!
- Key Materials: Concrete blocks & mortar
- Vibe / Style: Sleek modern lounge
- Difficulty: Advanced masonry
- Budget Breakdown: Masonry: $1,200 | Dual-level counters: $1,800
- Creator’s Tip: Use the vertical riser between the two counters to install hidden ambient LED strip lighting.
- Smart Sourcing: Use waterproof LED strip light rolls and pre-cast concrete countertop mixes.
💡 Must-Have Supplies for High-End Setups
To build these setups faster and ensure they last, skip the generic craft aisles and invest in the right foundational kits.
- Base & Support: Pre-fabricated modular steel island framing kits
- Setup Tools: Outdoor masonry adhesive bulk packs
- Weather/Durability Protection: UV-resistant clear concrete sealers
10. Outdoor Patio and Kitchen With Fireplace Terminus
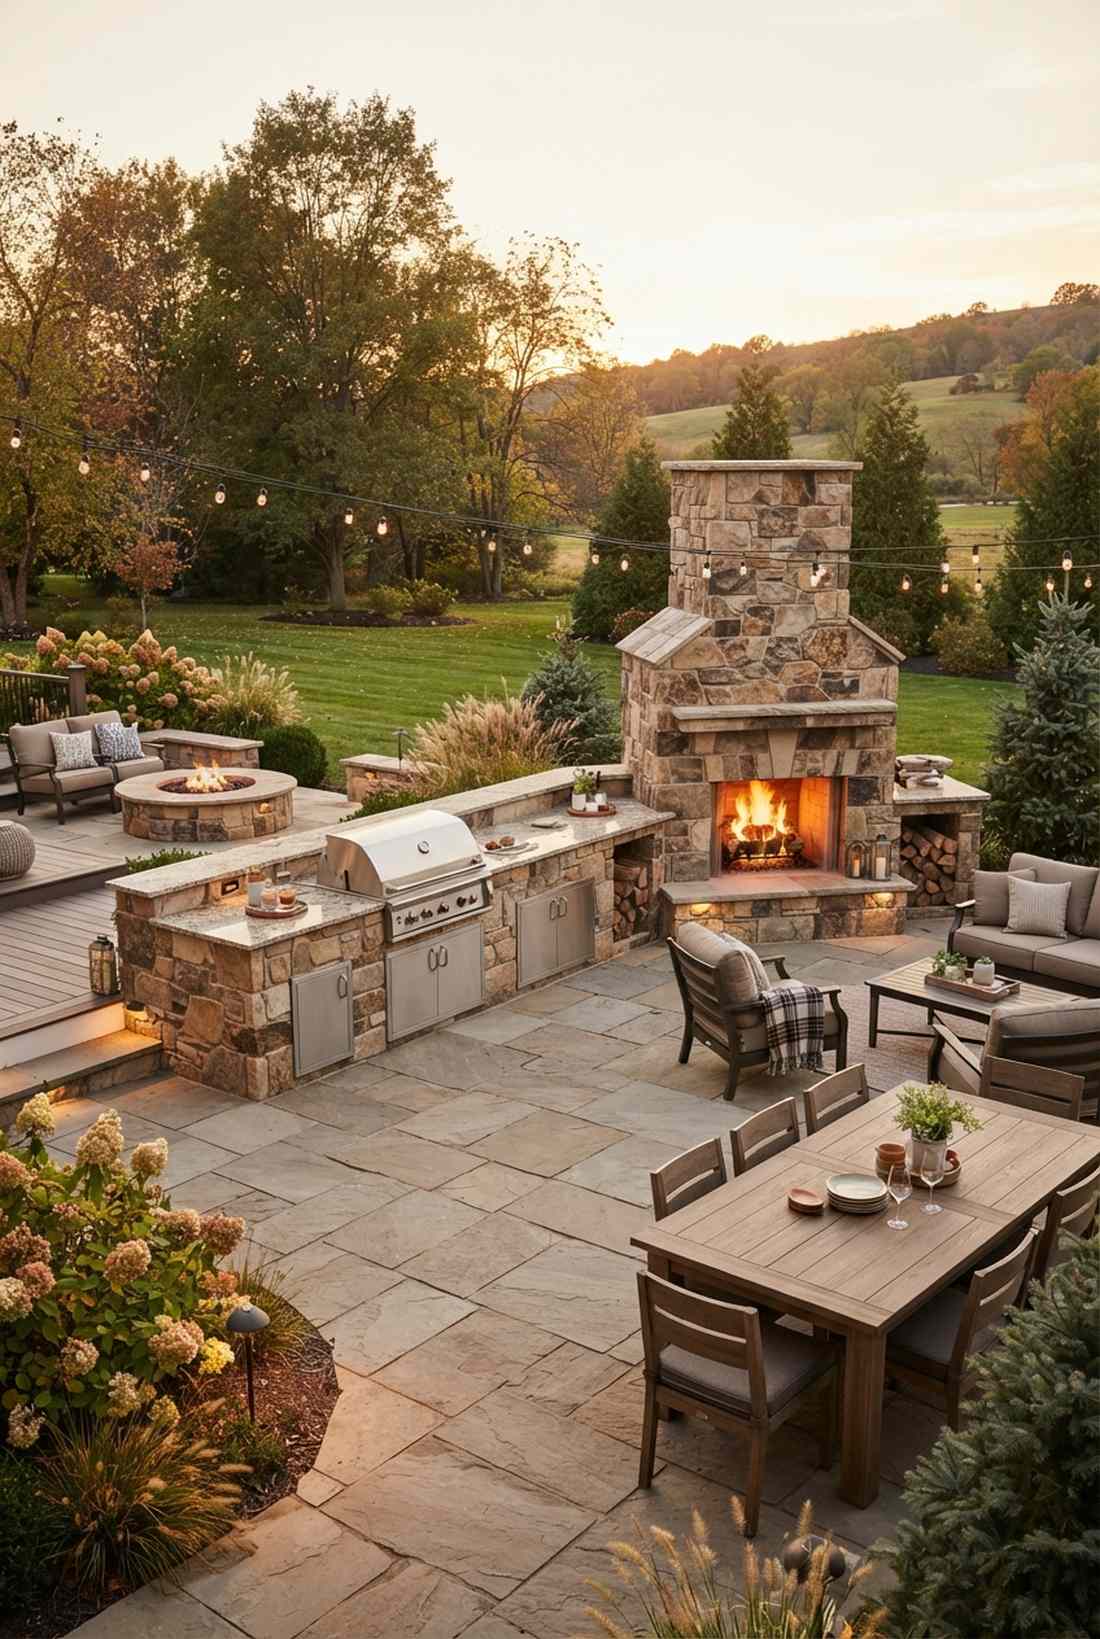
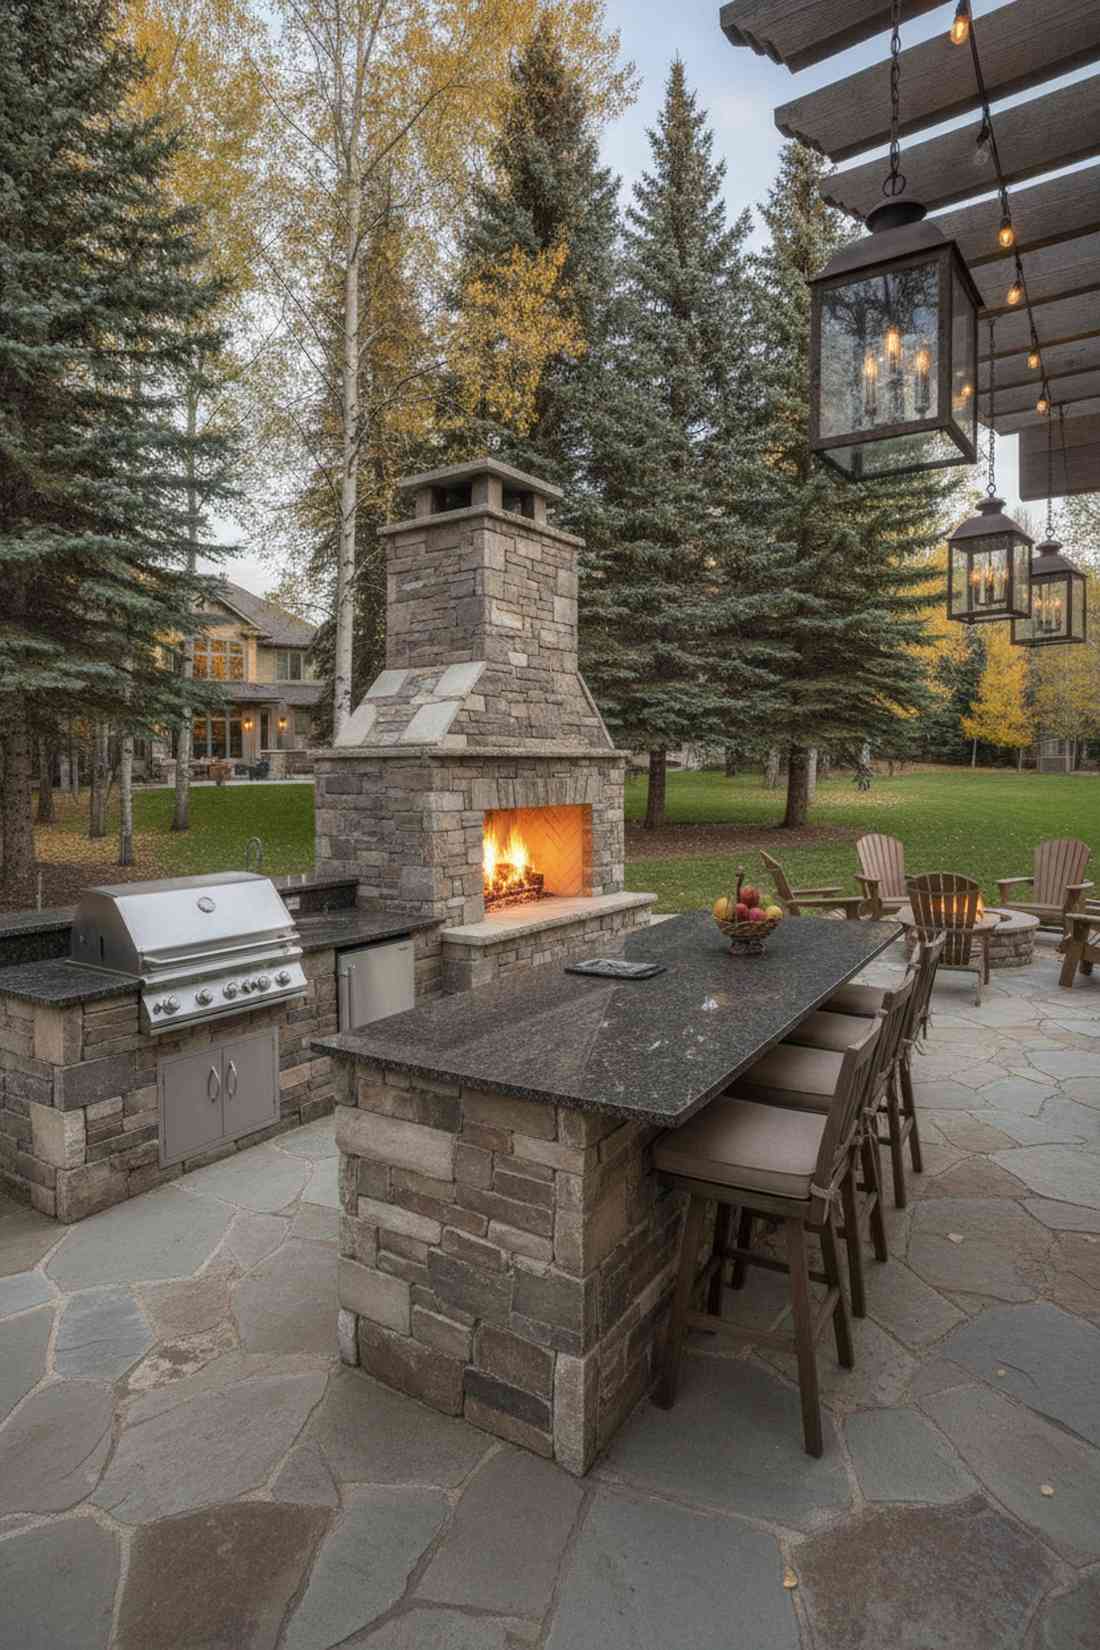
Embodies the rustic charm of a mountain lodge right in your own backyard. A fire-feature integrated kitchen extends your hosting capabilities deep into crisp autumn evenings.
Connecting the kitchen run directly into a roaring fireplace delivers an undeniably luxurious, custom-estate vibe. Injecting outdoor patio and kitchen ideas like natural stone cladding blends the heat zones flawlessly.
Due to fireplace masonry, expect this to run $4,500–$8,000. It is a stunning layout that guarantees year-round usage.
- Key Materials: Pre-cast outdoor fireplace kits
- Vibe / Style: Grand mountain estate
- Difficulty: Advanced (requires heavy lifting)
- Budget Breakdown: Fire feature: $2,500 | Kitchen extension: $2,000
- Creator’s Tip: Keep the grill and fireplace at least 8 feet apart so the chef doesn’t roast while cooking.
- Smart Sourcing: Source modular outdoor fireplace inserts and heat-deflecting stone veneers.
Stop wasting space! The upcoming configuration literally doubles your prep area without adding a single square foot to your deck…
11. Double-Grill L-Station
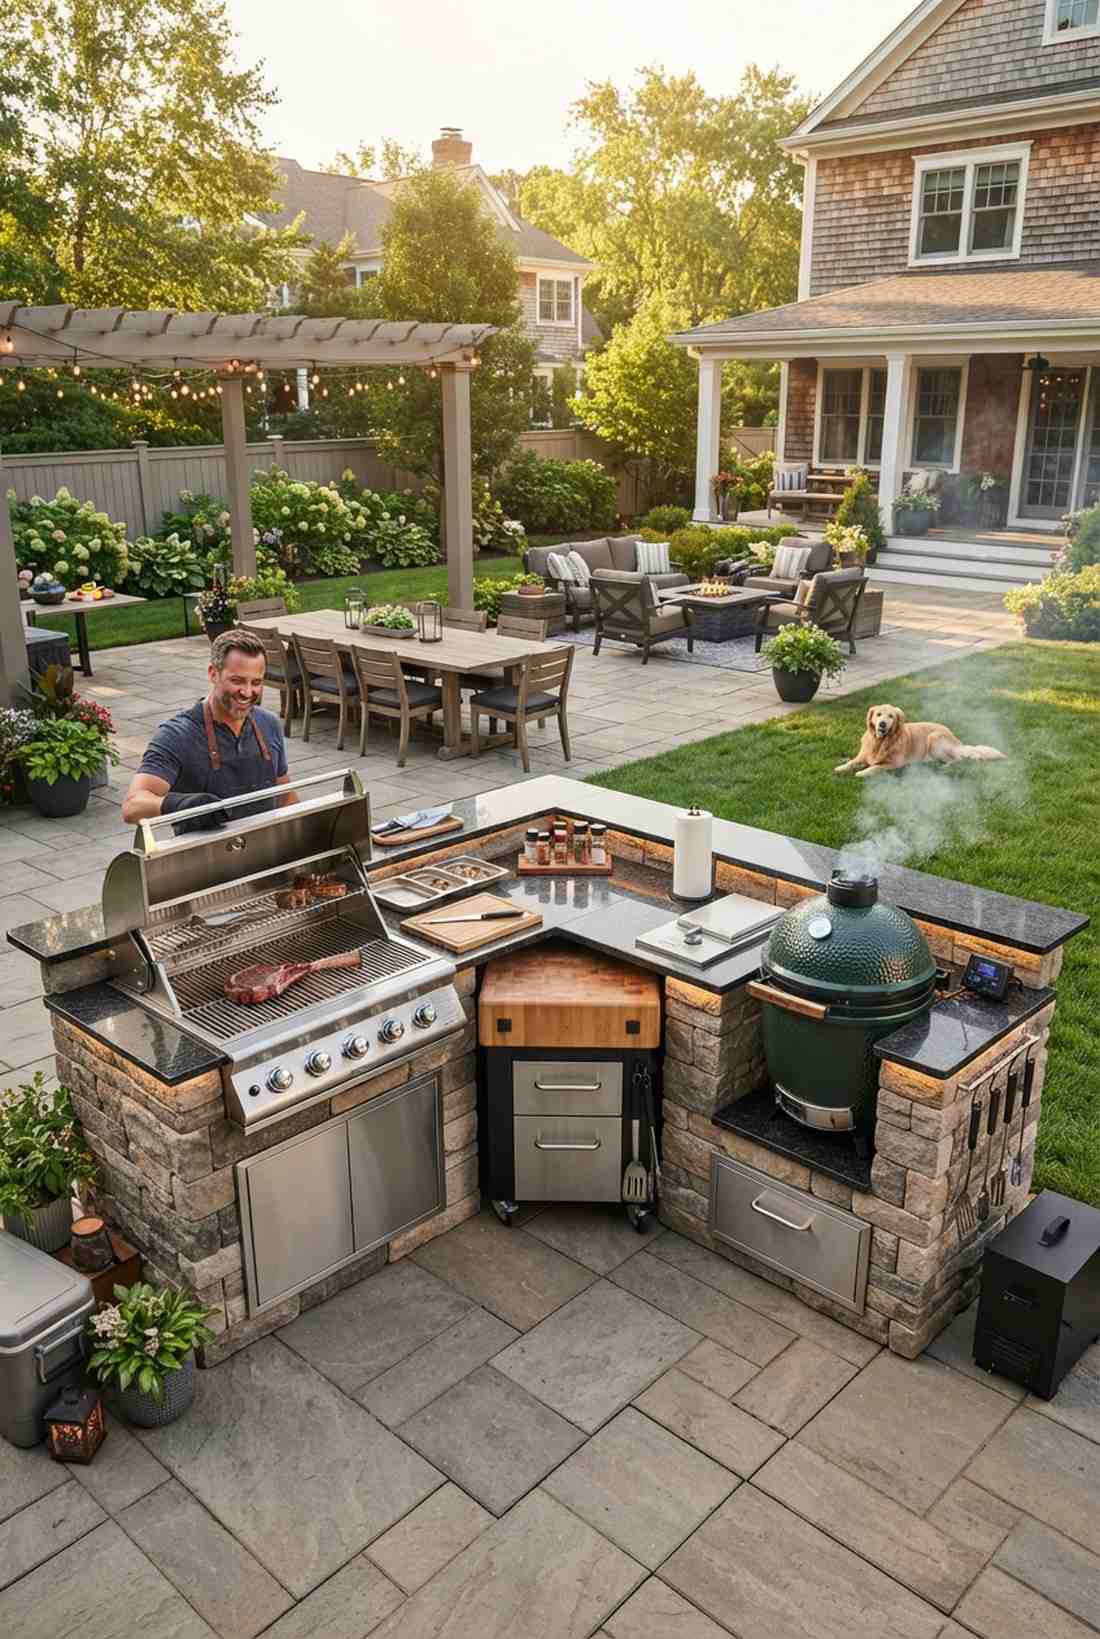
Feels like running a high-volume gourmet smokehouse from the comfort of home. A dual-fuel corner setup is the ultimate flex for serious pitmasters who refuse to compromise.
Having gas on one arm and charcoal on the other creates a hyper-functional workstation that looks intensely professional. Dedicating space for premium outdoor built-in smoker kits ensures you can sear and slow-roast simultaneously.
Equipping two high-end grills pushes the budget to $3,500–$6,500. Pin this if you take your BBQ weekends seriously!
- Key Materials: Dual-ventilation hoods or open-air placement
- Vibe / Style: Ultimate backyard pitmaster
- Difficulty: Moderate
- Budget Breakdown: Gas grill: $1,500 | Charcoal unit: $800 | Base: $1,200
- Creator’s Tip: Use the shared corner strictly for heavy-duty butcher block prep and tool storage.
- Smart Sourcing: Grab a built-in ceramic kamado grill base and a stainless steel gas drop-in unit.
12. Garden-View L-Bar
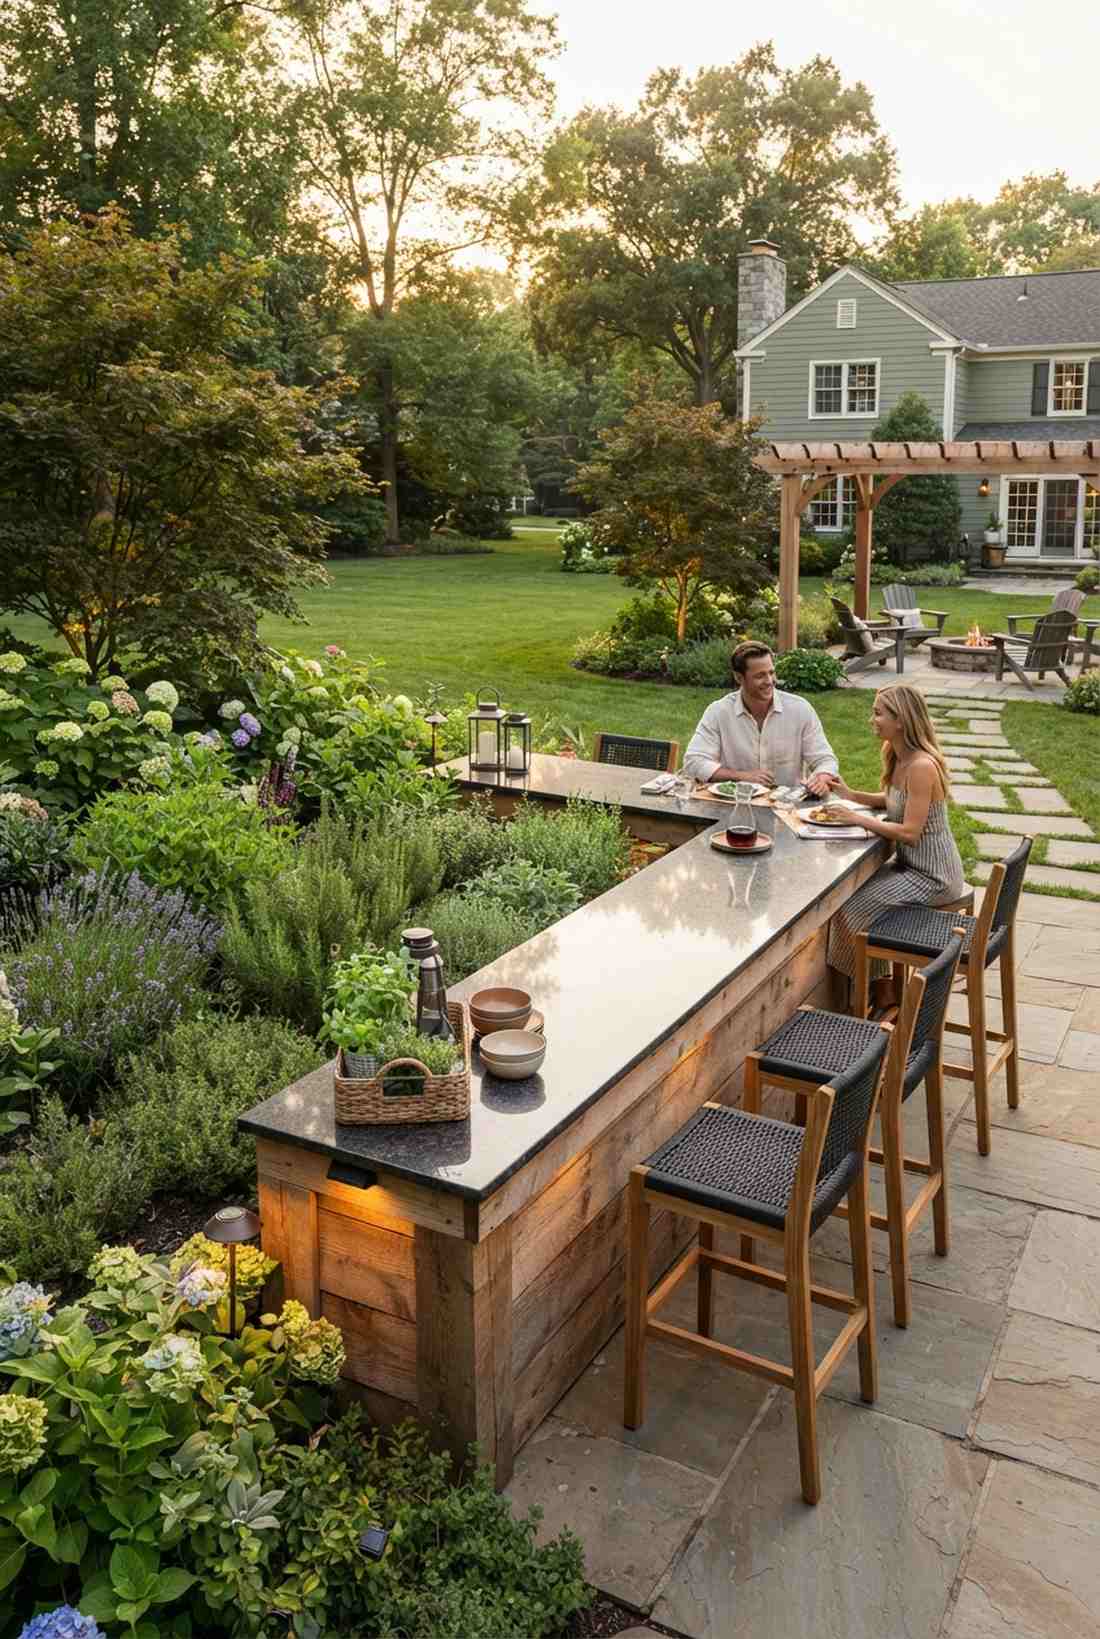
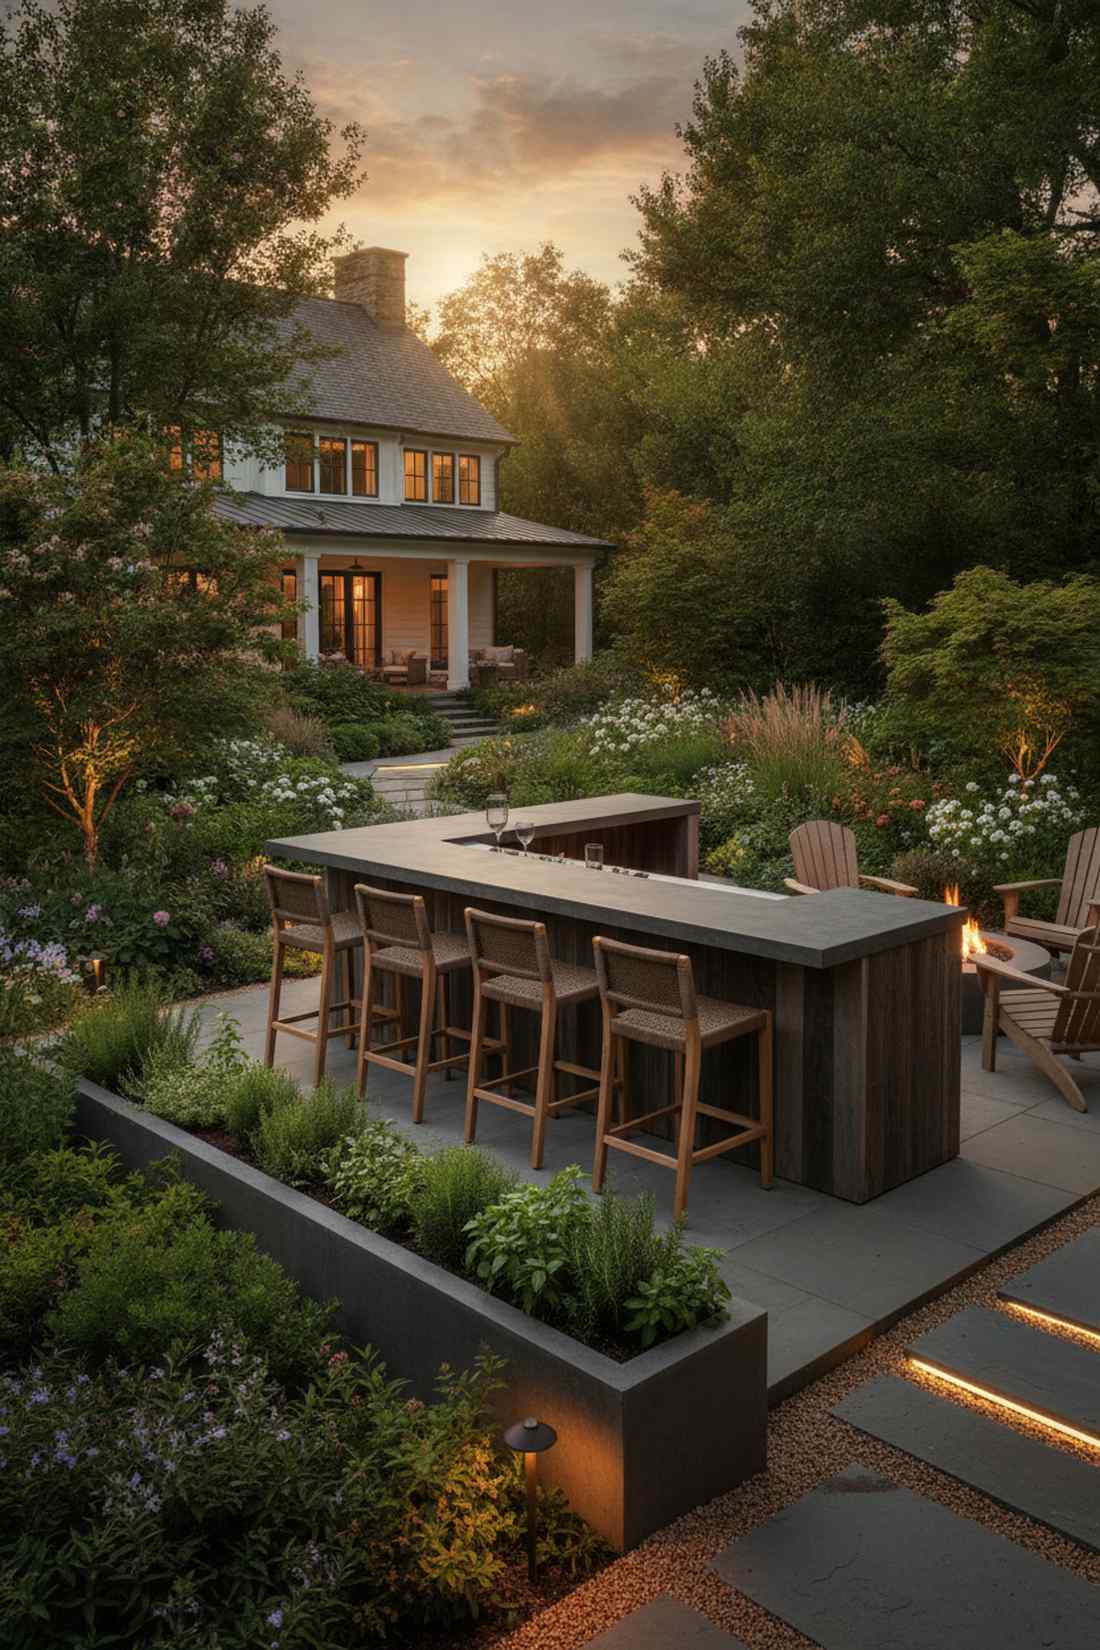
Captures the serenity of eating at a boutique botanical garden cafe. Positioning a landscape-facing dining counter completely changes the focal point away from the house to nature.
Orienting the bar outward maximizes natural aesthetics and makes simple gatherings feel remarkably elegant. Sourcing low-voltage landscape lighting kits to illuminate the garden edge keeps the magic alive after sunset.
This layout is extremely cost-effective, typically landing between $1,800–$3,200. Save this idea for yards with gorgeous foliage!
- Key Materials: Weatherproof bar-height stools
- Vibe / Style: Scenic botanical retreat
- Difficulty: Easy planning
- Budget Breakdown: Seating: $500 | L-structure: $1,500
- Creator’s Tip: Plant aromatic herbs directly behind the seating ledge so guests catch the scent while eating.
- Smart Sourcing: Snag UV-coated teak wood barstools (set of 4) and solar-powered garden spotlights.
U-Shaped Entertaining Powerhouses
U-shaped layouts deliver maximum counter space and storage by enclosing the cook on three sides. These setups function like professional kitchens, supporting multiple cooks and complex menus while keeping everything within a few steps.
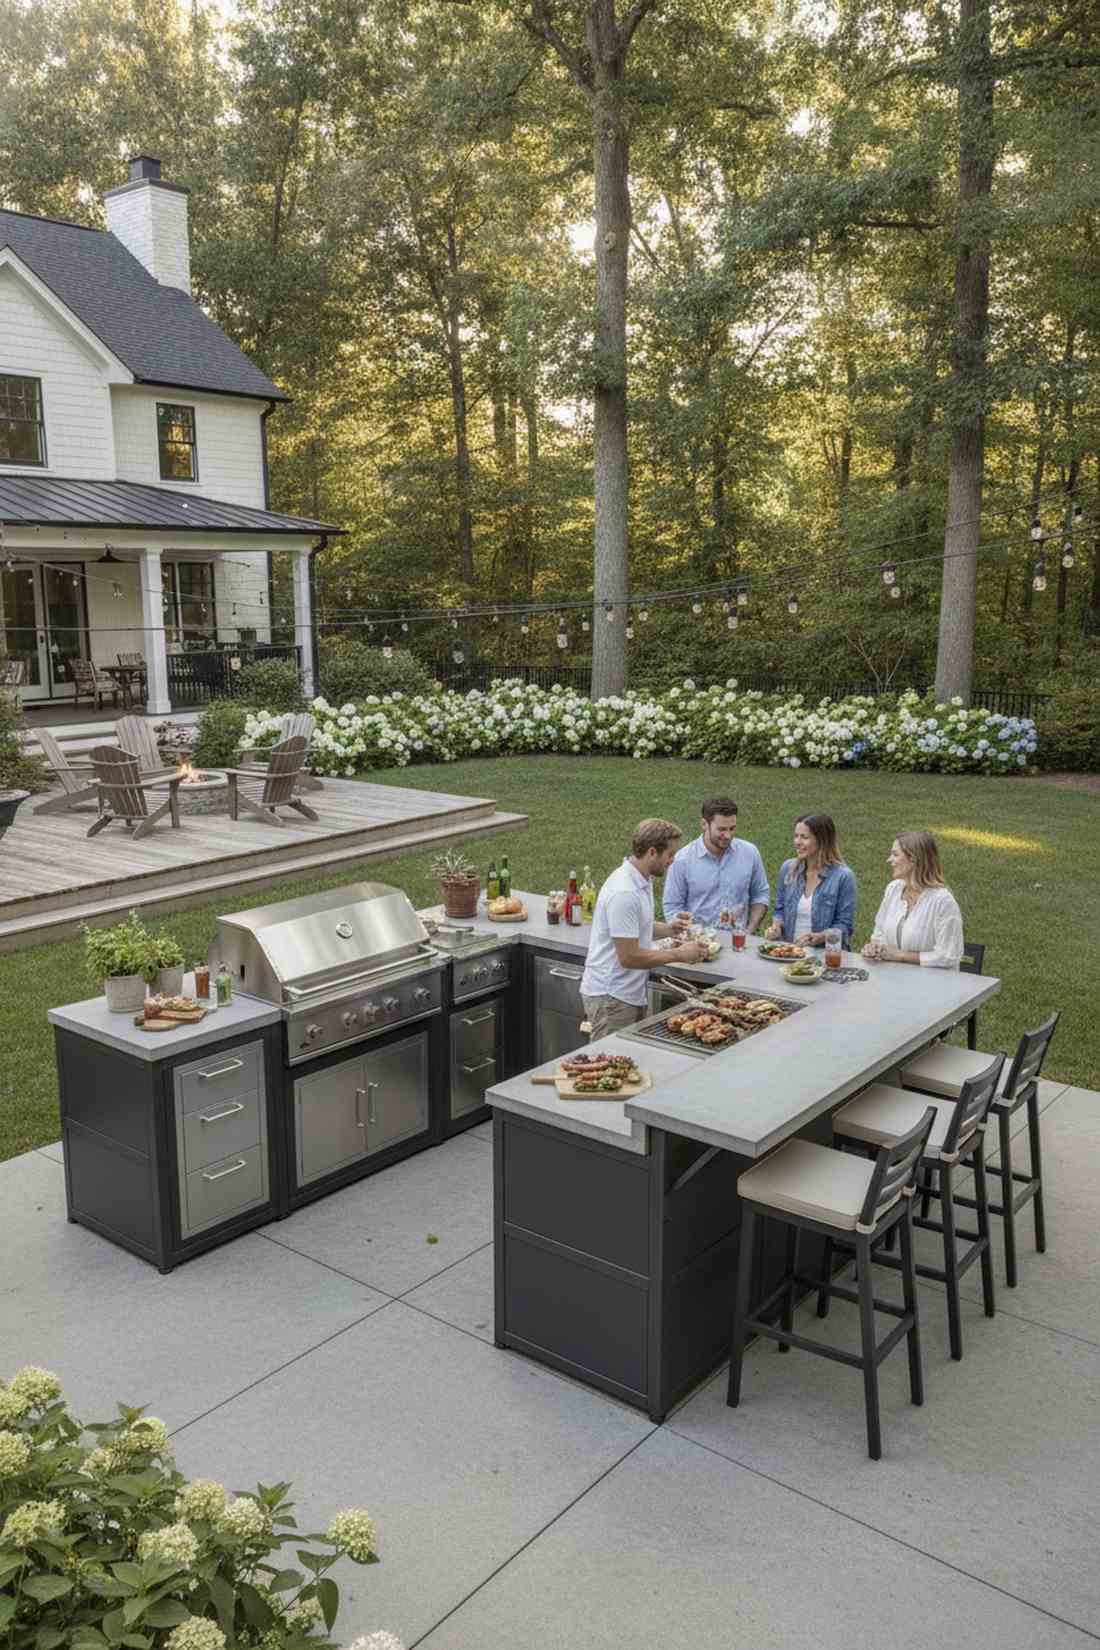
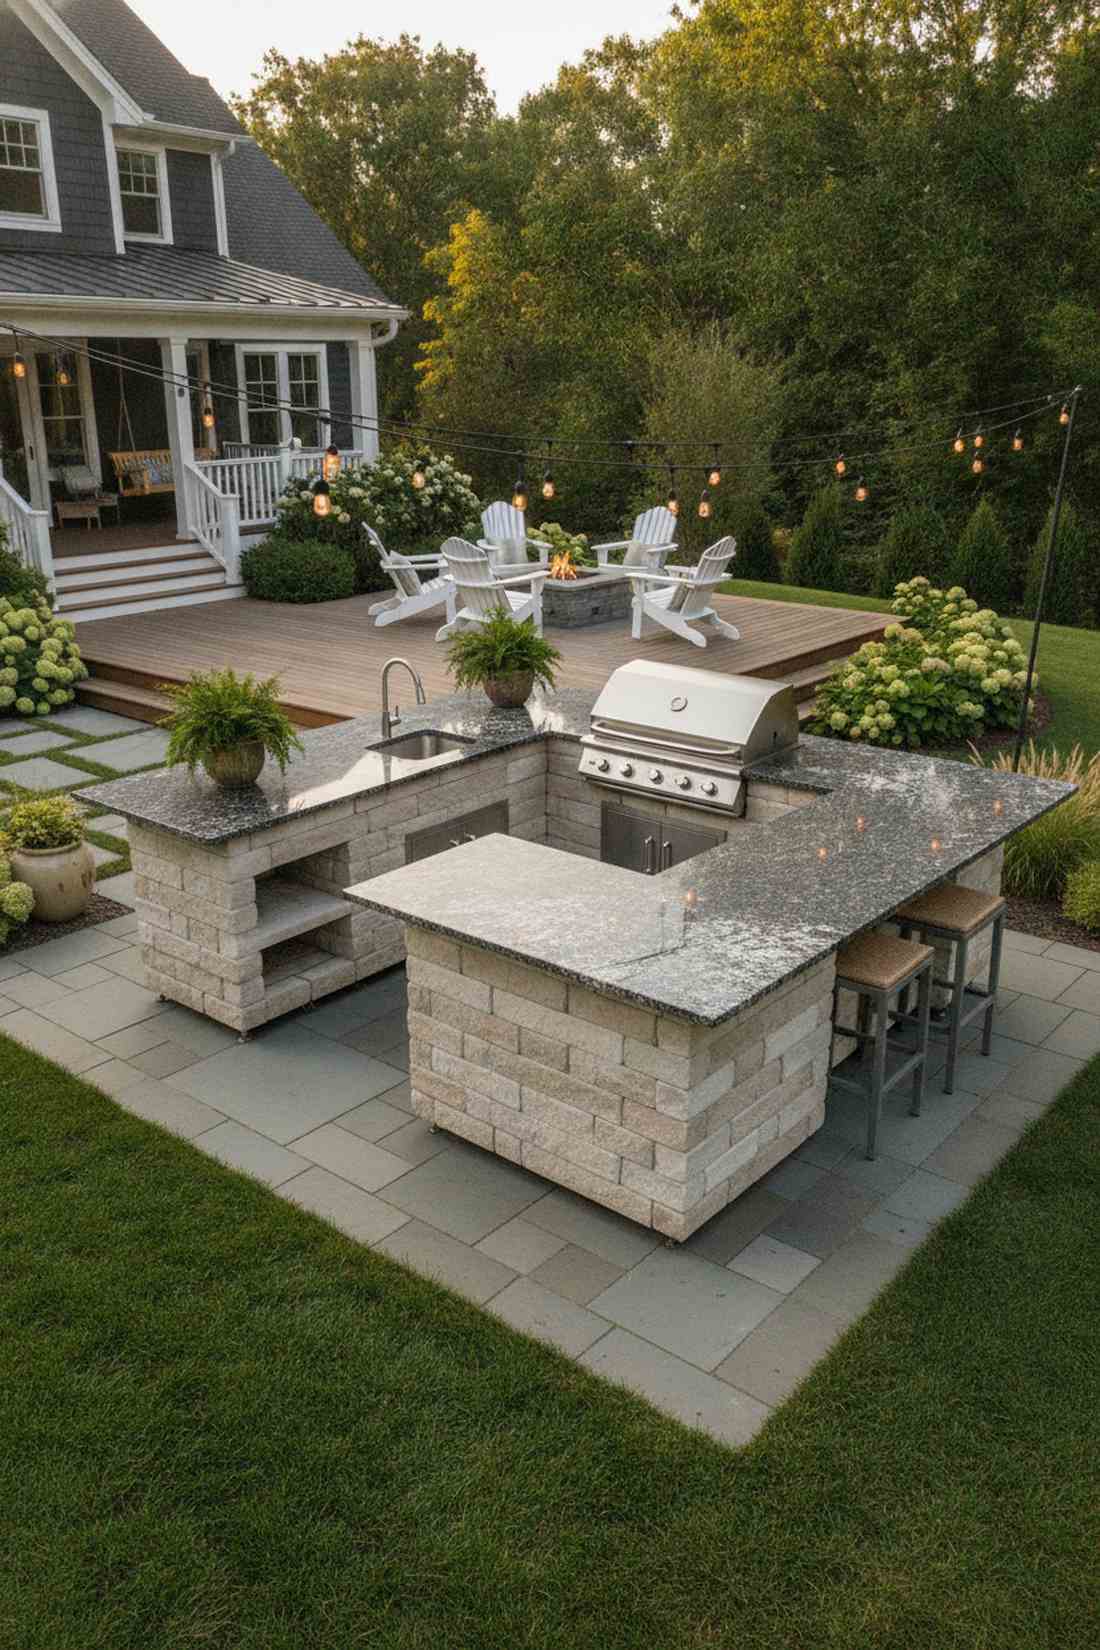
13. Classic Three-Sided Grill Bar
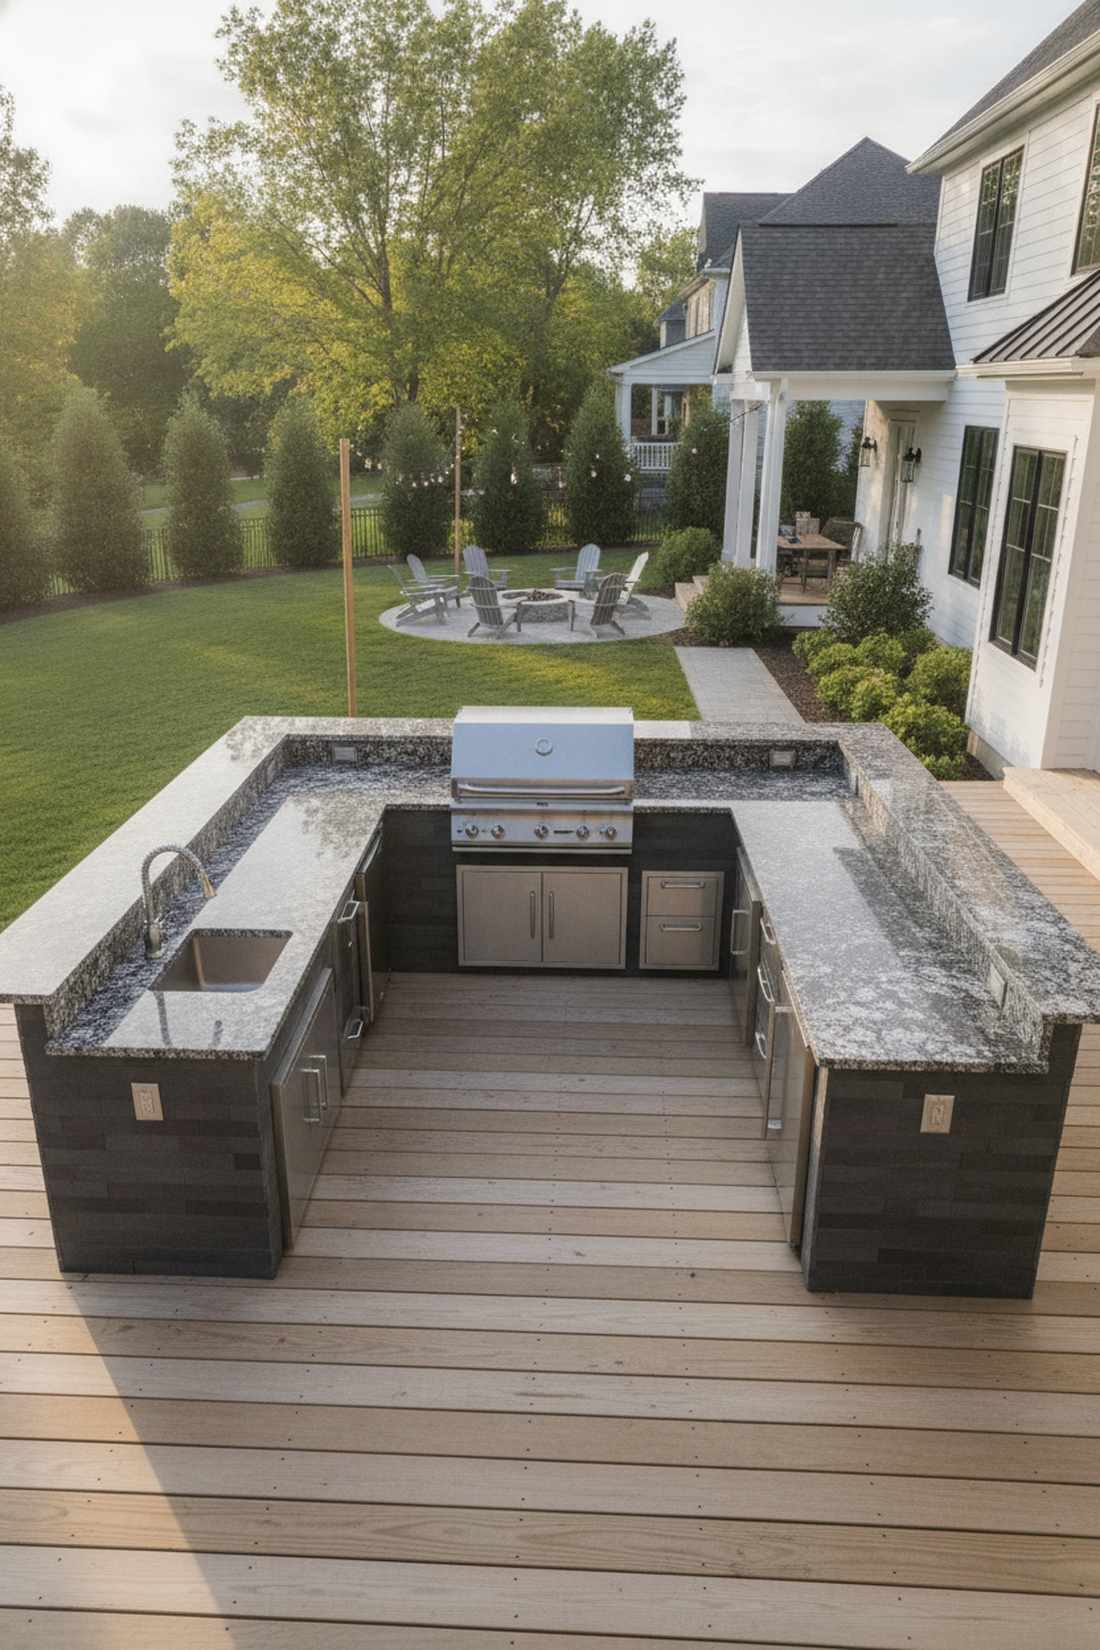
Radiates the commanding presence of a master chef’s private culinary arena. A classic U-shape enclosed layout is an absolute powerhouse for massive holiday gatherings and multi-course meals.
This layout dramatically boosts efficiency by placing every tool and appliance within a single pivot. Incorporating massive outdoor patio and kitchen built-in storage solutions completely eliminates the need to run inside for supplies.
Due to the footprint, this heavy-hitter costs $4,000–$7,500. Pin this if you host the entire extended family!
- Key Materials: Expansive granite or quartz slabs
- Vibe / Style: Executive culinary command center
- Difficulty: Advanced footprint planning
- Budget Breakdown: Cabinetry: $2,500 | Counters: $2,500
- Creator’s Tip: Ensure the interior walkway is at least 48 inches wide so two people can move freely.
- Smart Sourcing: Pick up an all-in-one U-shape modular frame kit and outdoor-rated stainless drawer sets.
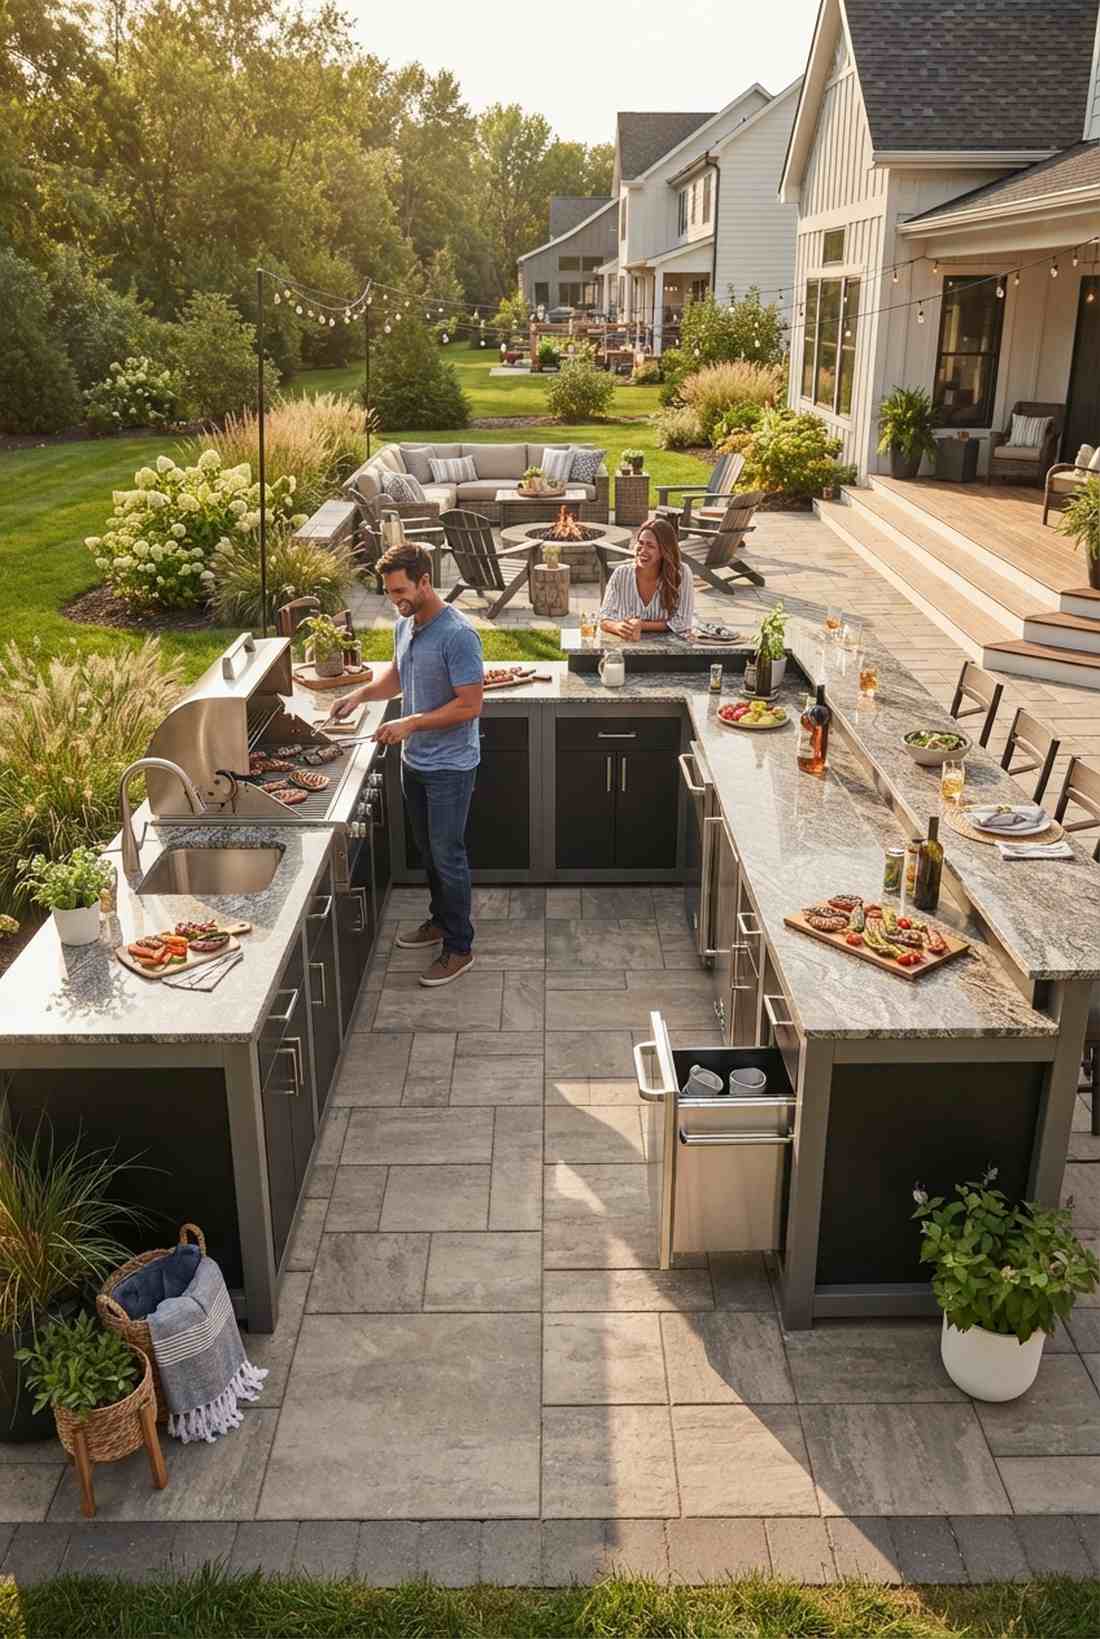
14. Dual-Access U-Kitchen
Feels like a breezy, open-concept beach bar where everyone is part of the action. A walk-through access kitchen solves the claustrophobia often found in massive U-shaped designs.
Leaving one leg partially open creates a brilliant flow that looks custom-tailored for high foot traffic. Integrating an outdoor patio grill precisely opposite the opening ensures smoke ventilates beautifully without trapping the cook.
This layout modification keeps costs comparable at $3,800–$7,000. It’s a fantastic hack for seamless backyard movement.
- Key Materials: Continuous floor pavers
- Vibe / Style: Flowing open-air lounge
- Difficulty: Moderate
- Budget Breakdown: Structure: $2,000 | Finishes: $2,200
- Creator’s Tip: Make the walk-through gap exactly 4 feet wide to accommodate large serving trays and coolers.
- Smart Sourcing: Use a drop-in heavy-duty outdoor sink unit and commercial-style pull-down faucets.
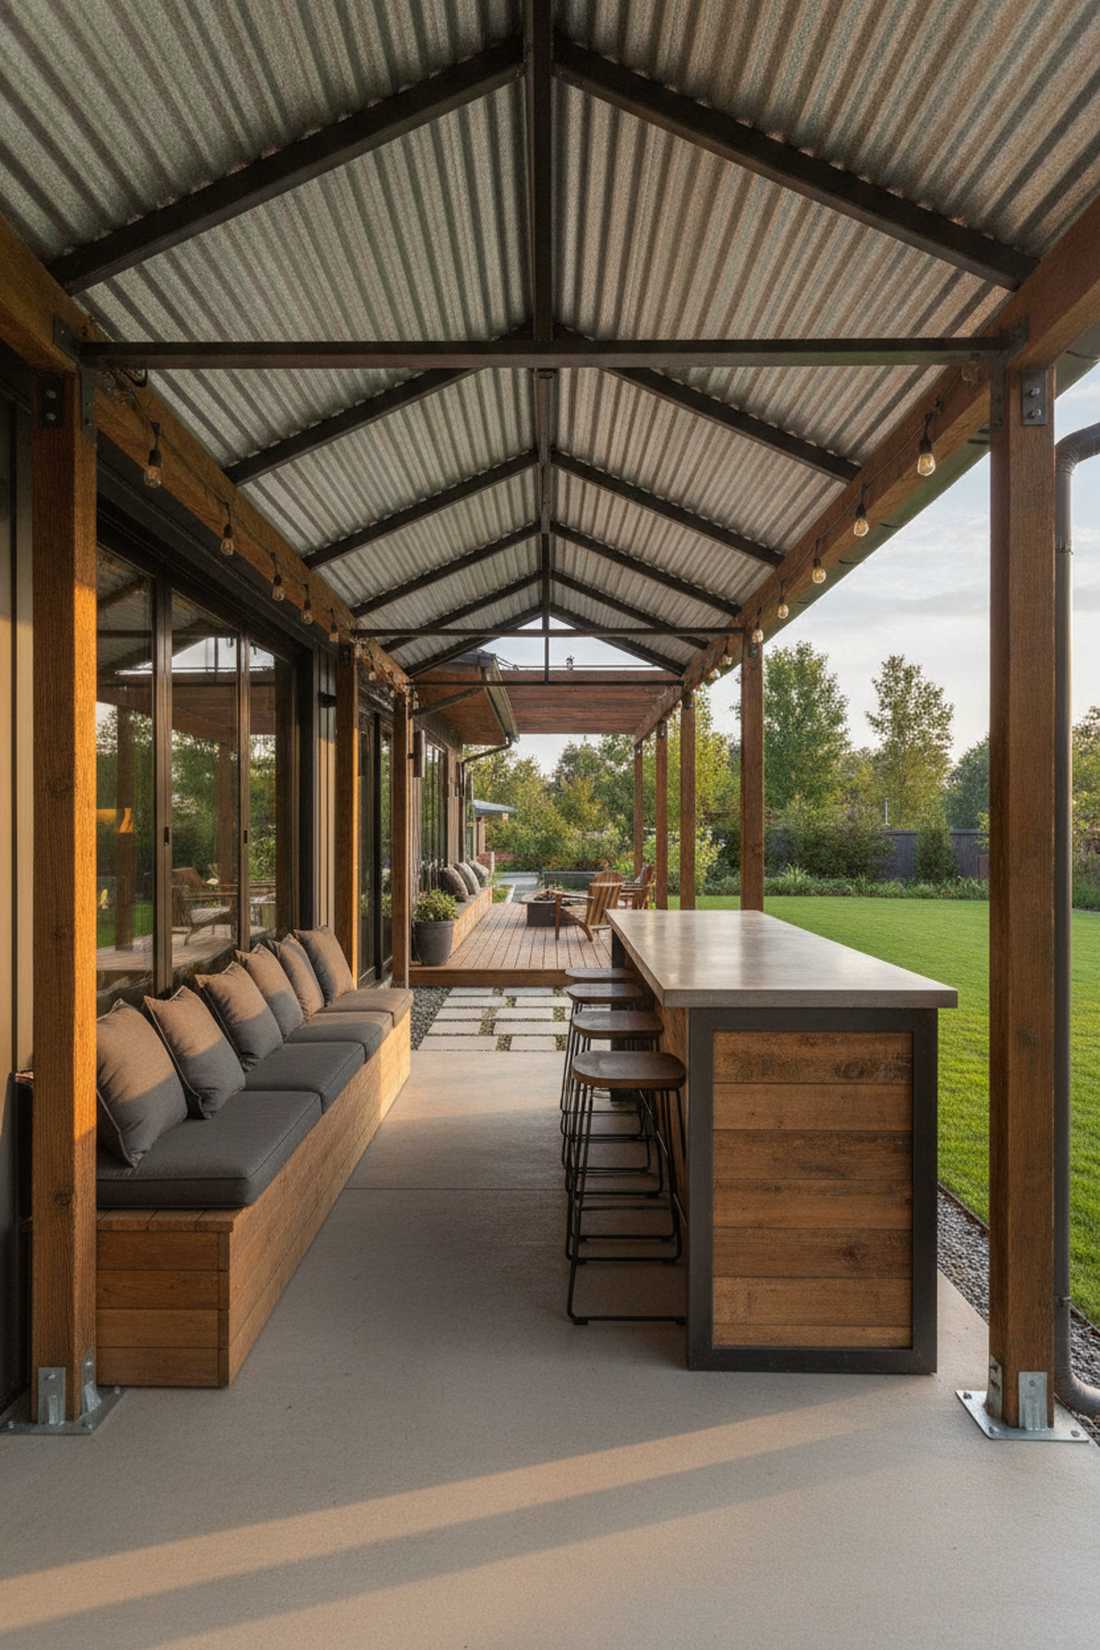
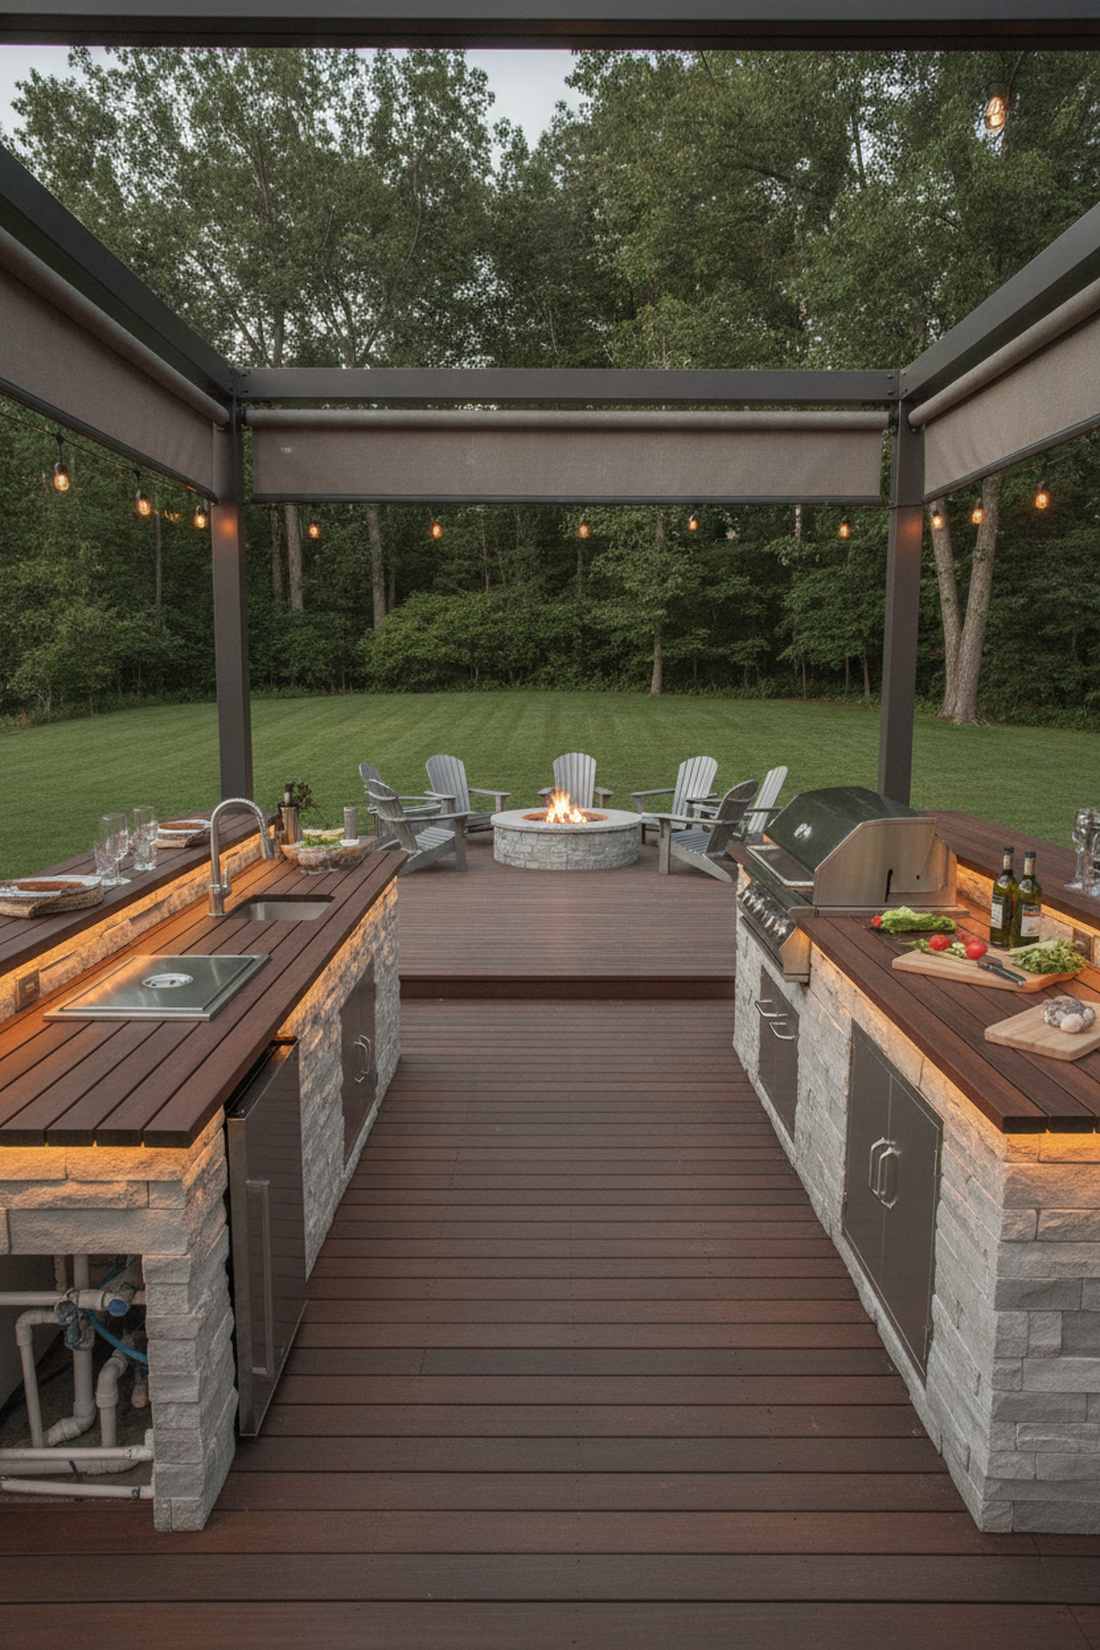
15. Covered U-Shaped Outdoor Patio Kitchen Design
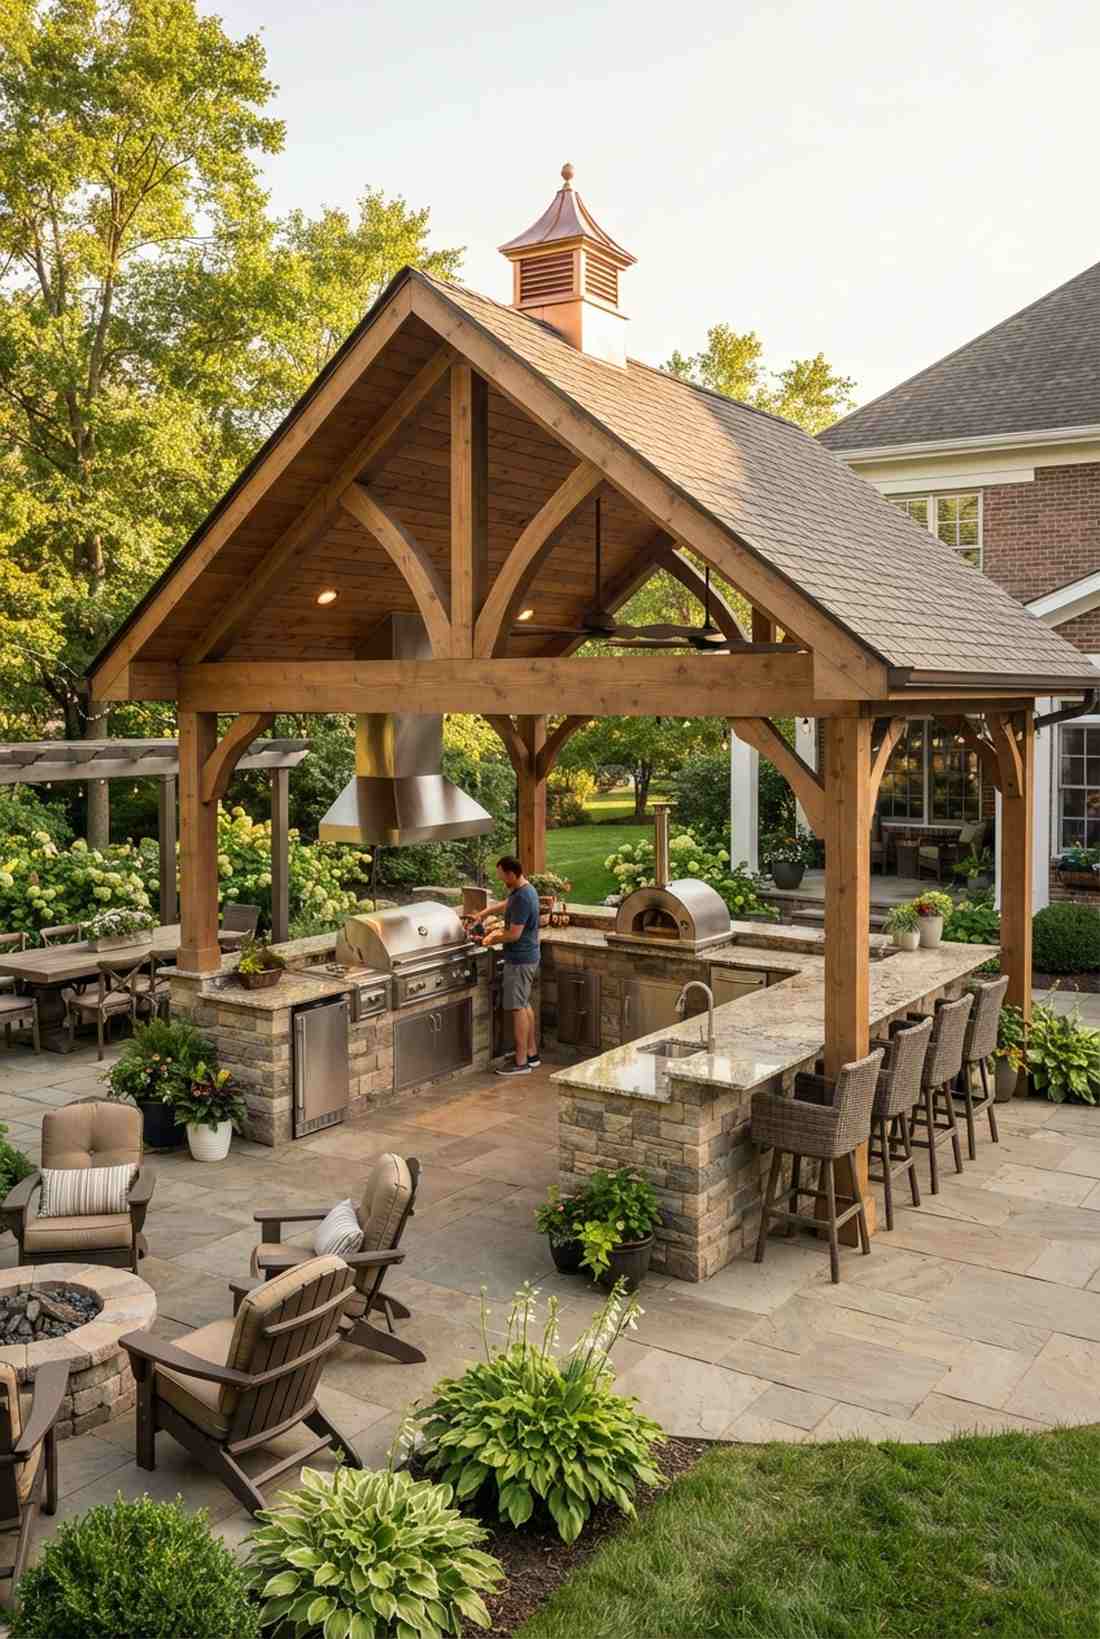
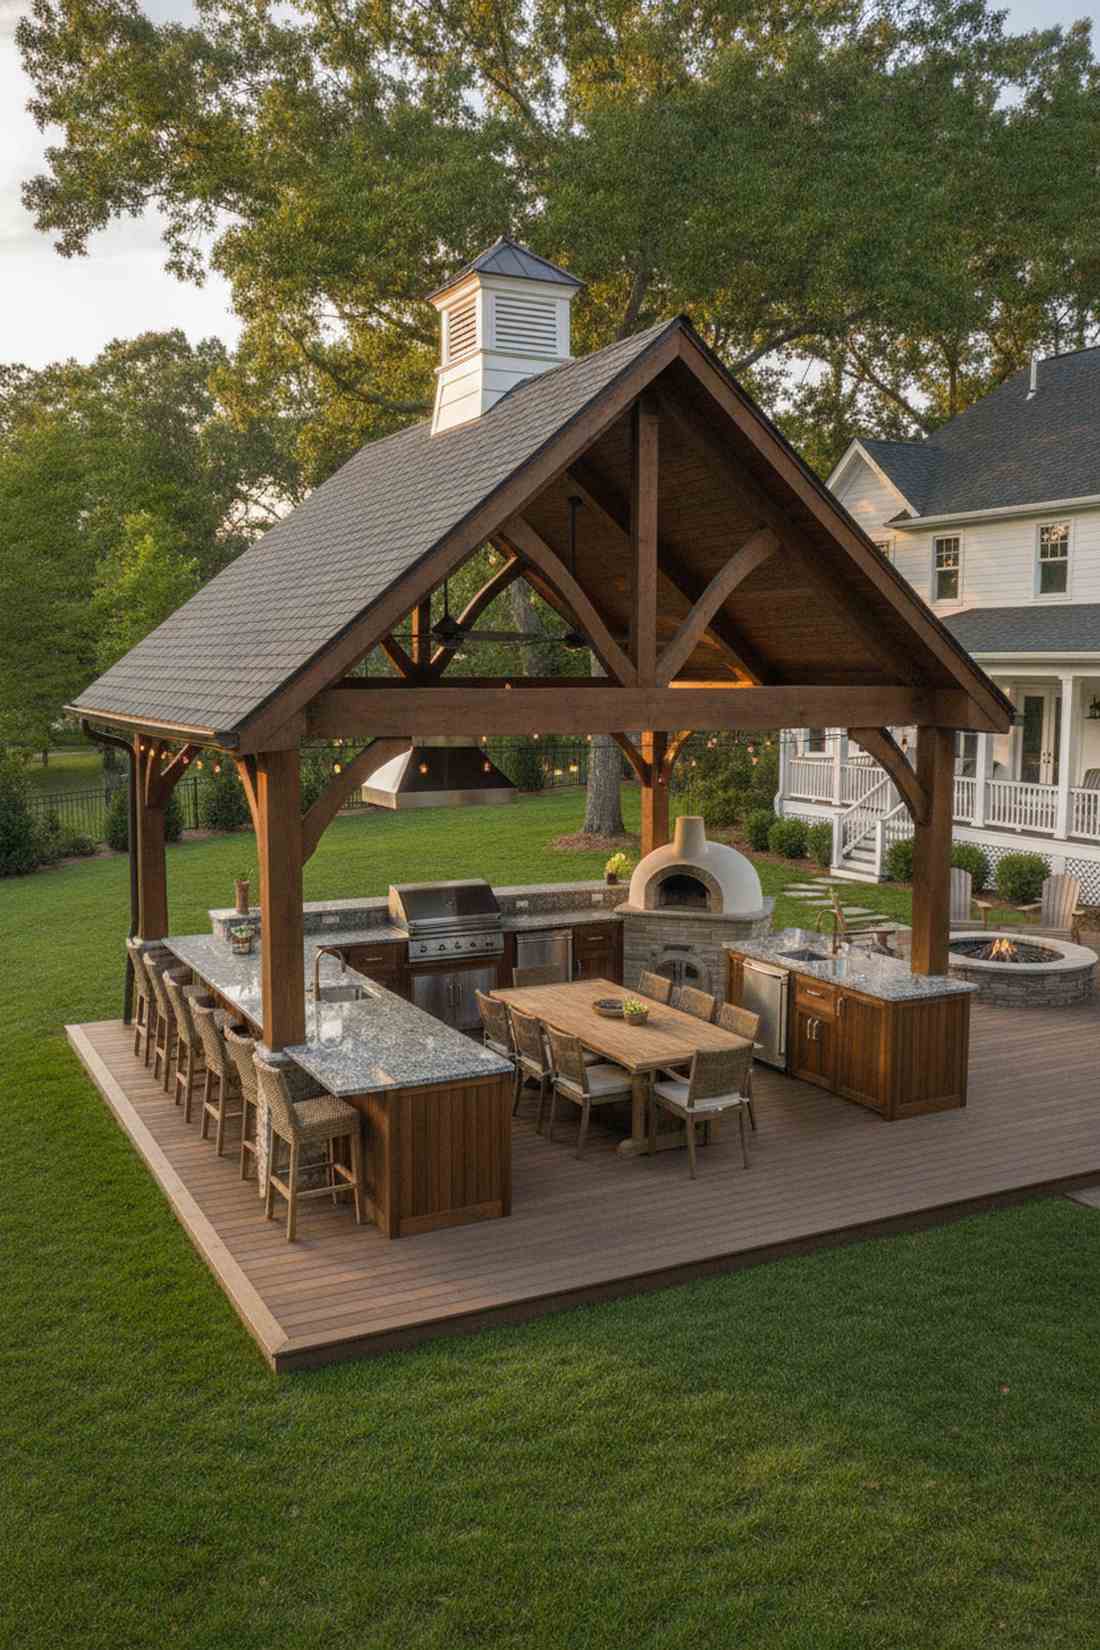
Emits the ultimate staycation luxury of a year-round outdoor dining pavilion. An all-weather roofed kitchen setup turns a seasonal hobby into an everyday cooking lifestyle.
Building an overhead gable transforms the space into a true architectural extension of your home. Snagging premium outdoor kitchen design ventilation systems guarantees the ceiling won’t become stained with smoke and grease.
With roofing costs, this ranges from $7,000–$12,000+. Save this for a serious permanent property upgrade!
- Key Materials: Timber trusses & roofing shingles
- Vibe / Style: Year-round luxury pavilion
- Difficulty: Pro-level contracting
- Budget Breakdown: Roof structure: $4,000 | Kitchen elements: $4,500
- Creator’s Tip: Install a decorative cupola at the peak to passively vent heat during the peak of summer.
- Smart Sourcing: Look for a high-CFM outdoor exhaust hood and weatherproof outdoor ceiling fans.
Most homeowners get corner setups entirely wrong until they see the clever zoning trick in this next blueprint…
16. Pro-Style U-Kitchen With Double Islands
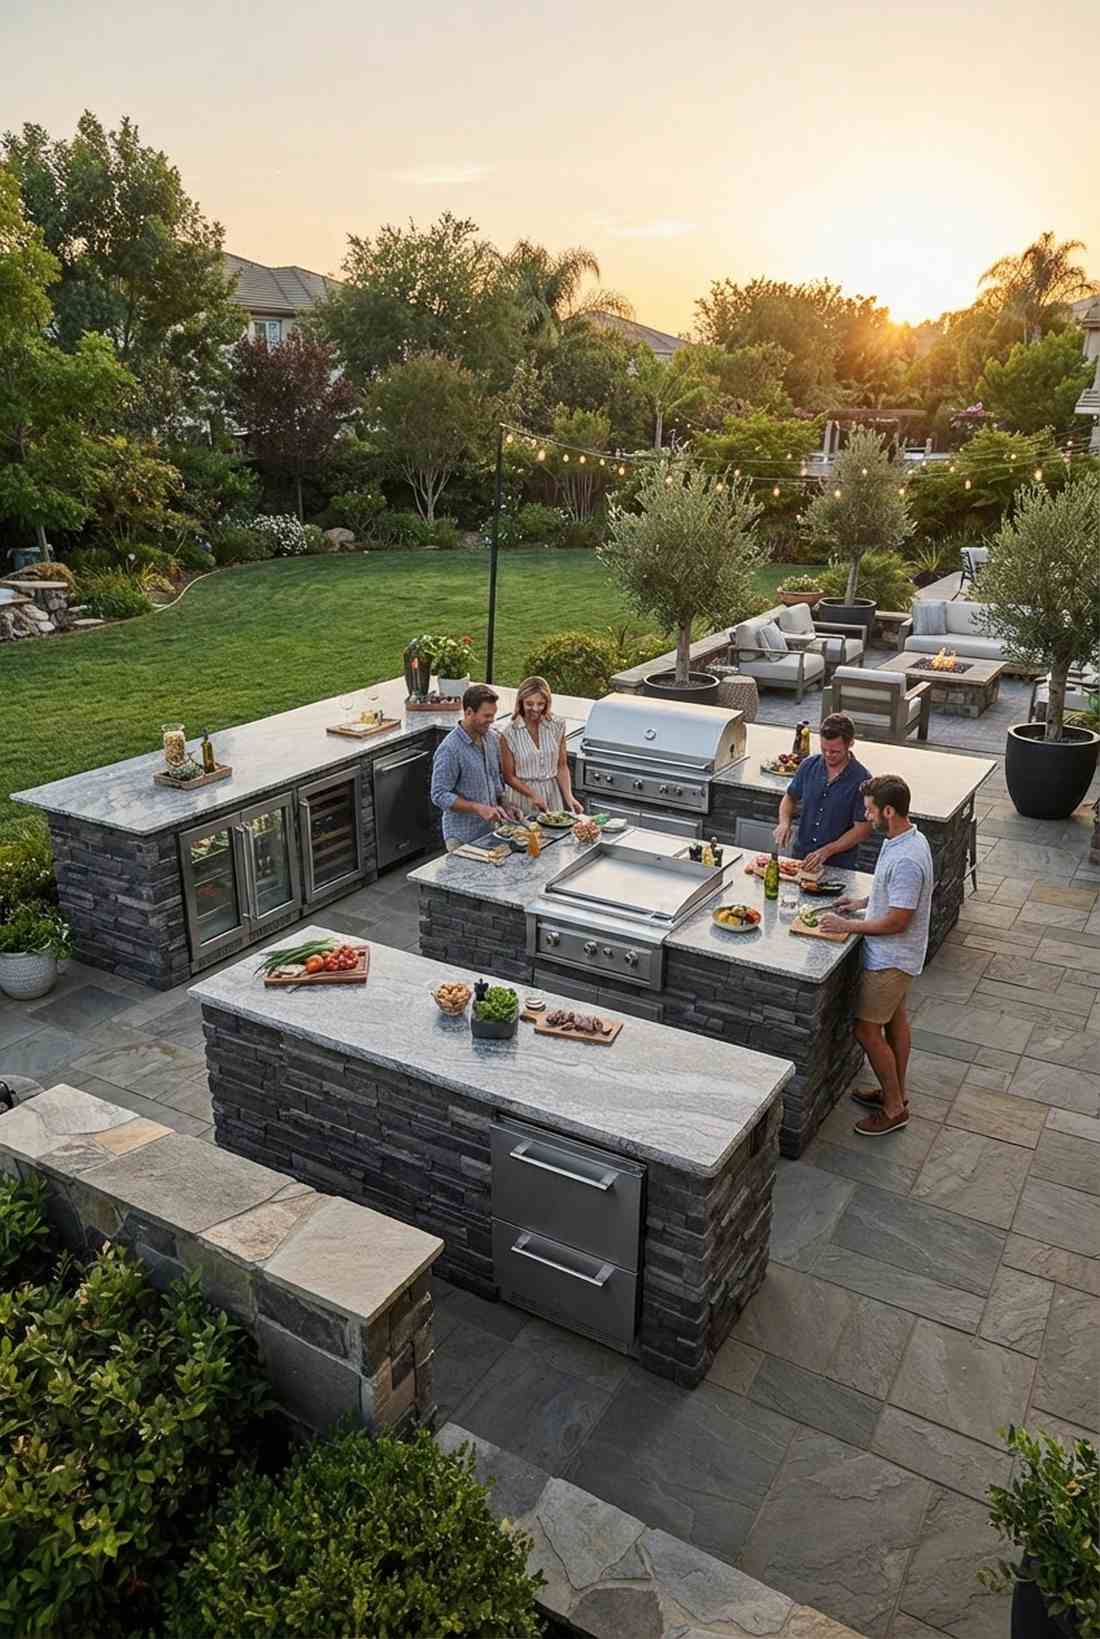
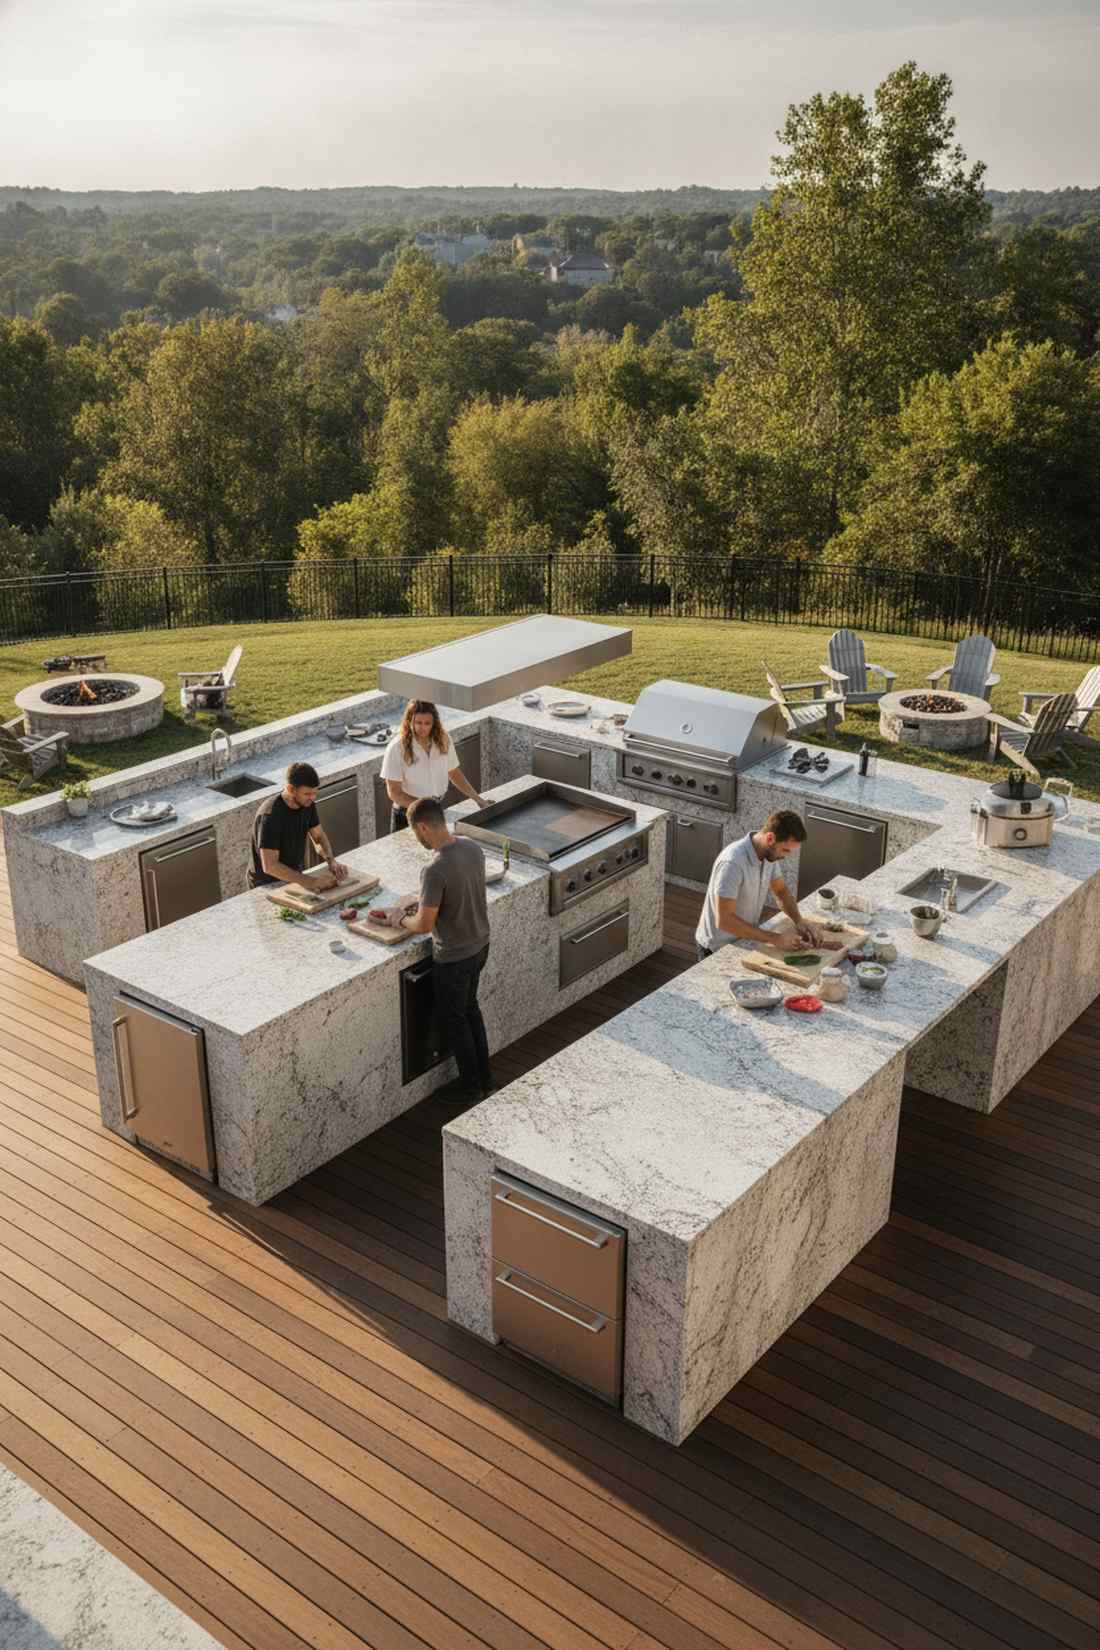
Feels like stepping onto the set of an elite cooking competition show. The perimeter wrap with a floating center island is the absolute apex of outdoor culinary setups.
This layout delivers a breathtaking, highly commercial aesthetic that allows four people to prep at once. Utilizing high-end outdoor patio kitchen refrigeration suites around the perimeter keeps drinks miles away from the hot zone.
This massive blueprint is an investment, easily hitting $8,000–$15,000. Pin this to your luxury mega-mansion board!
- Key Materials: Multiple stone slab deliveries
- Vibe / Style: Commercial catering masterclass
- Difficulty: Advanced (requires massive space)
- Budget Breakdown: Double islands: $5,000 | Appliances: $4,000+
- Creator’s Tip: Put the main grill on the center island to naturally direct smoke away from perimeter walls.
- Smart Sourcing: Invest in a double-drawer outdoor refrigerator kit and a drop-in commercial griddle plate.
17. Waterfall Edge U-Bar
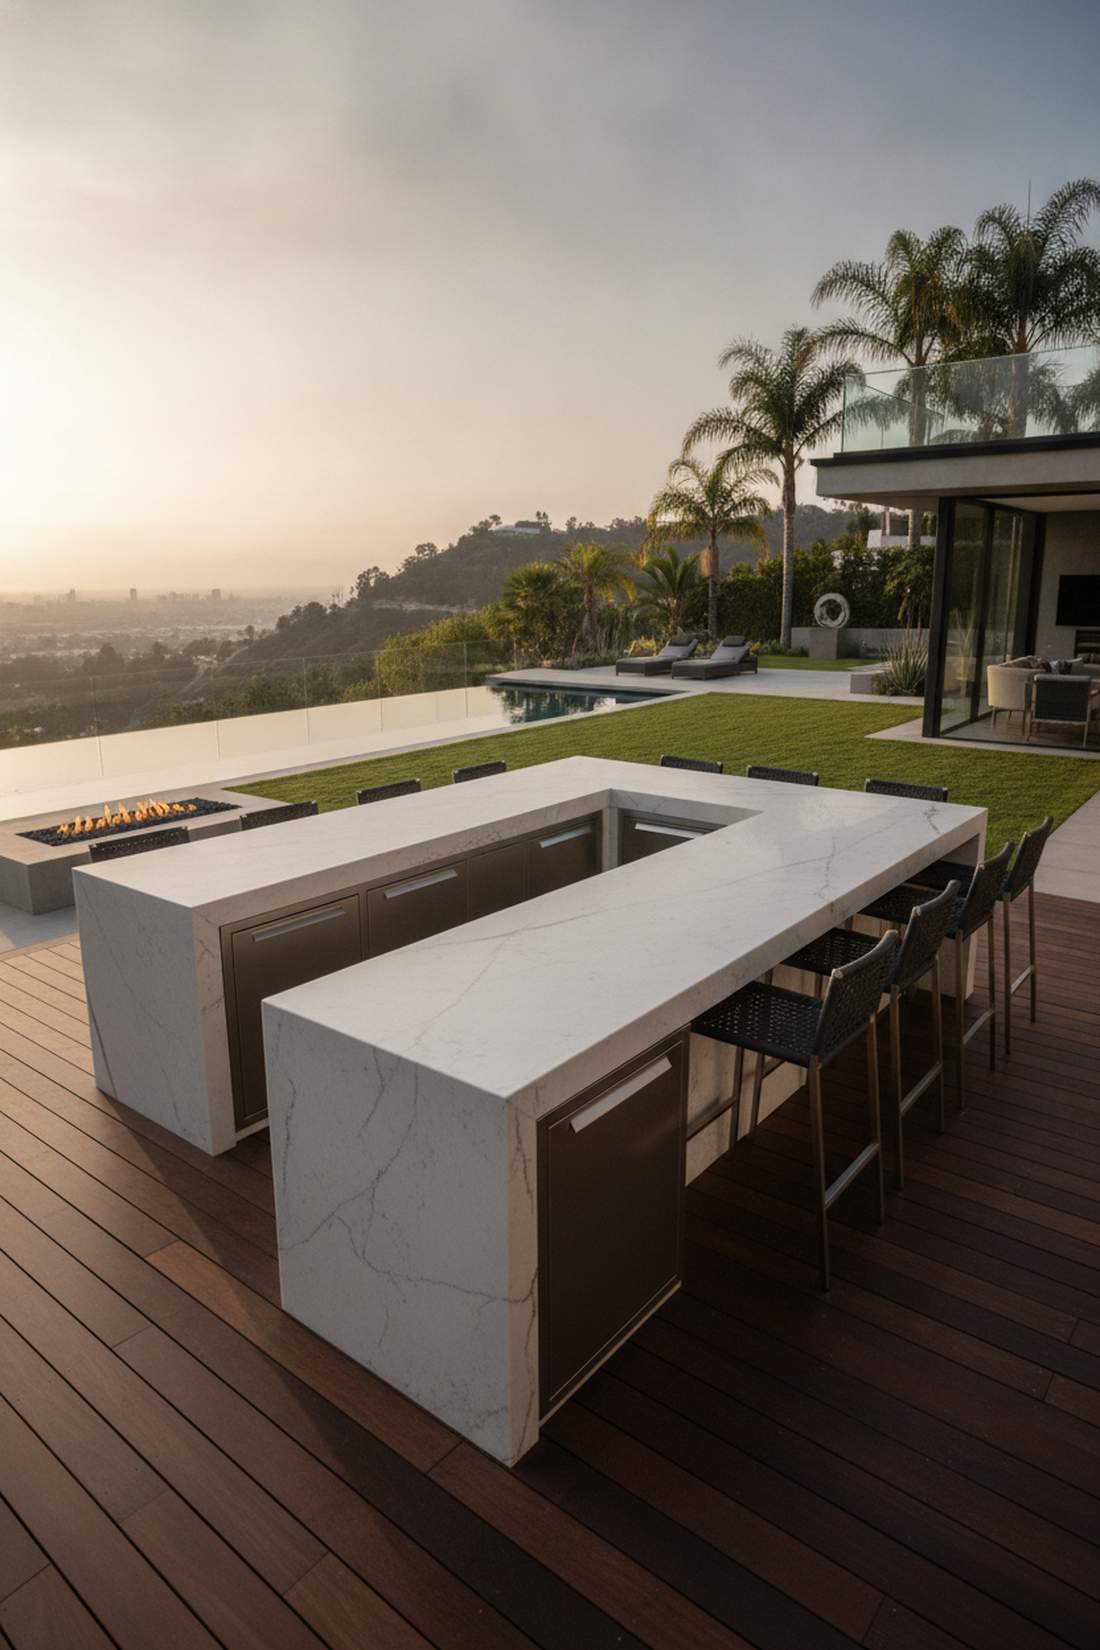
Screams ultra-modern Hollywood Hills mansion with its sleek, unbroken geometric lines. The solid surface waterfall edge drop is a profound visual statement for contemporary backyards.
Wrapping the stone completely down the sides gives a designer-level finish that protects cabinetry from side rain. Utilizing large-format UV-resistant porcelain slabs ensures the striking monolithic look won’t ever fade in the sun.
The extra stone fabrication pushes this to $5,000–$9,000. It completely dominates visually—worth every penny.
- Key Materials: Large-format porcelain or quartz
- Vibe / Style: Ultra-sleek modern luxury
- Difficulty: Pro stone fabrication needed
- Budget Breakdown: Waterfall stone cutting: $3,500 | Base structure: $2,000
- Creator’s Tip: Hide a completely seamless push-to-open trash drawer flush against the waterfall side.
- Smart Sourcing: Use pre-fabricated porcelain slab panels (UV-rated) and flush-mount stainless access doors.
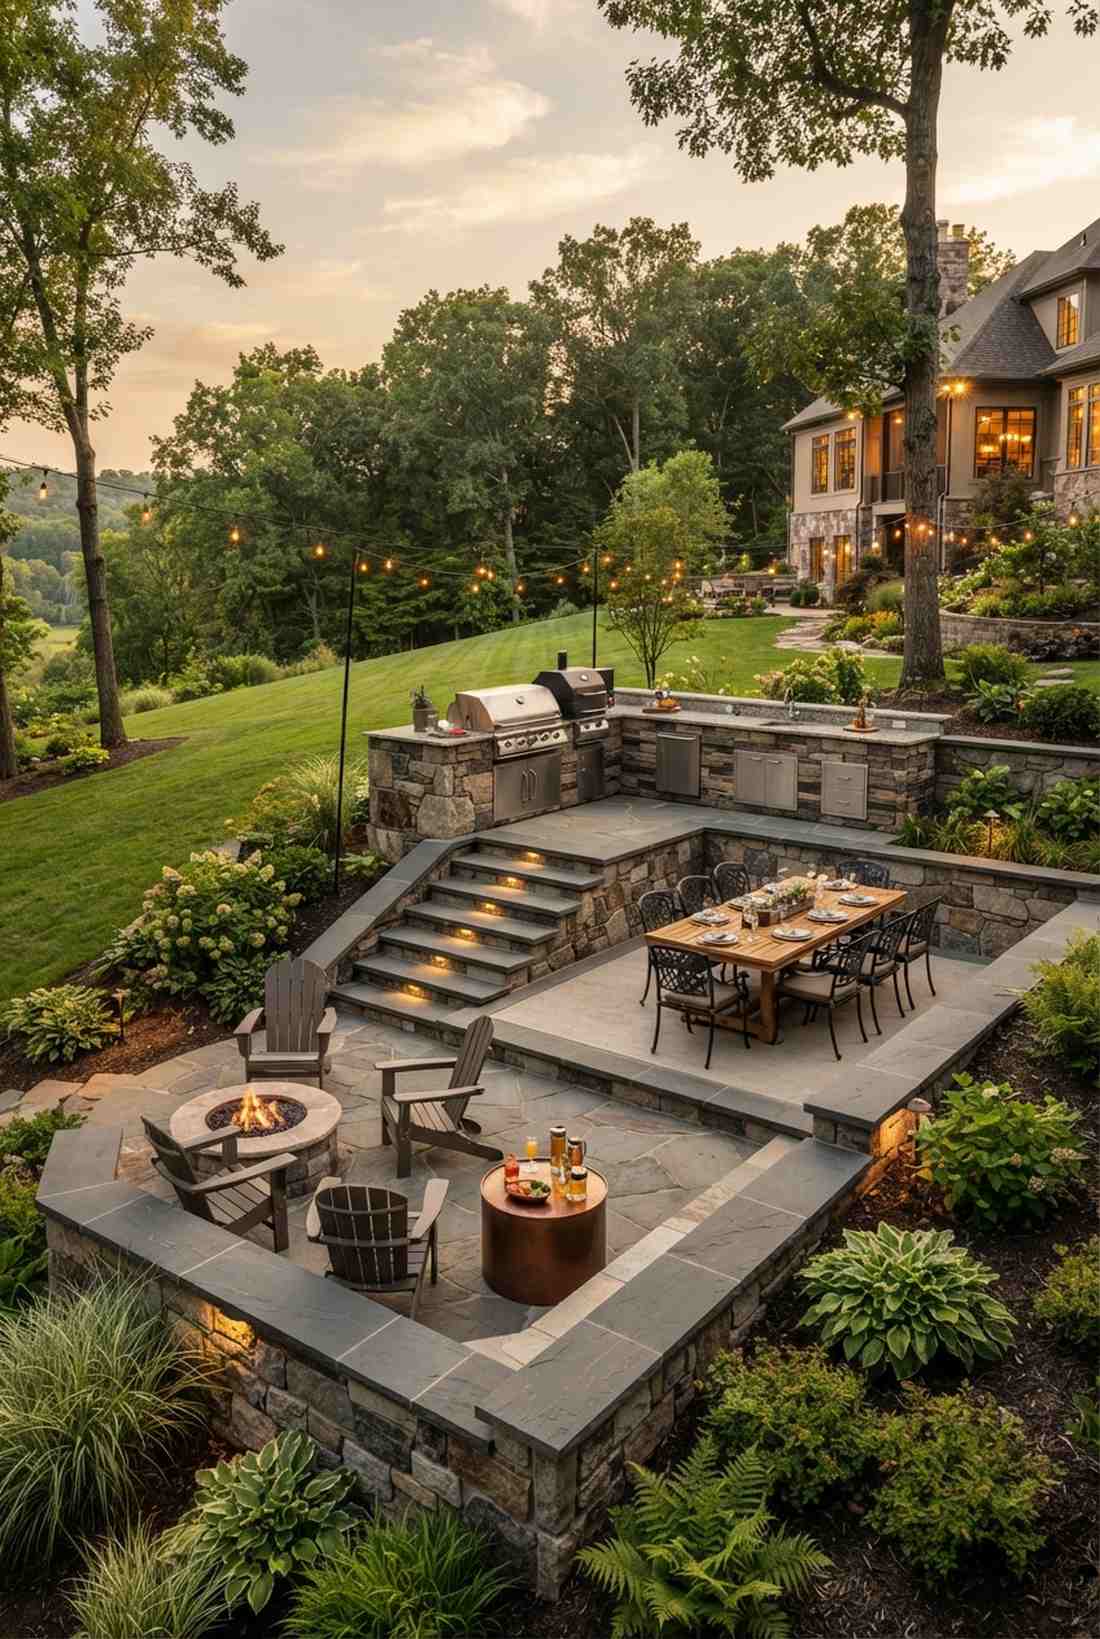
18. Sunken U-Kitchen With Raised Bar
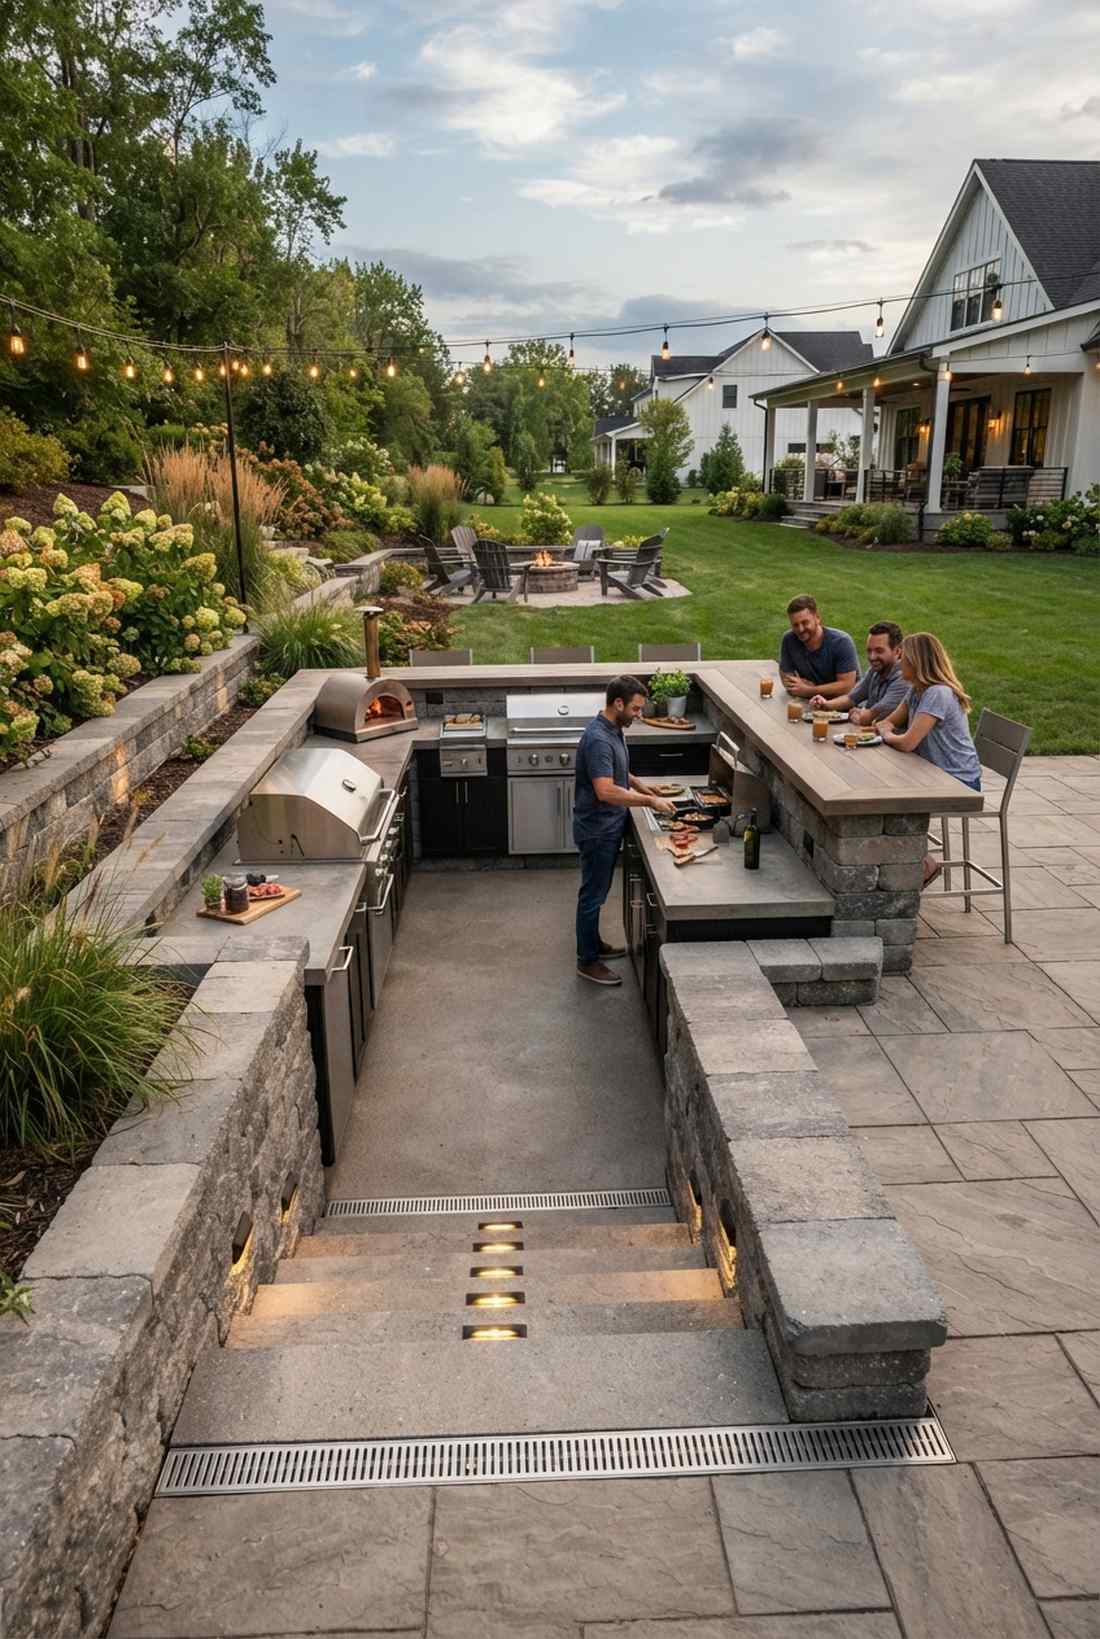
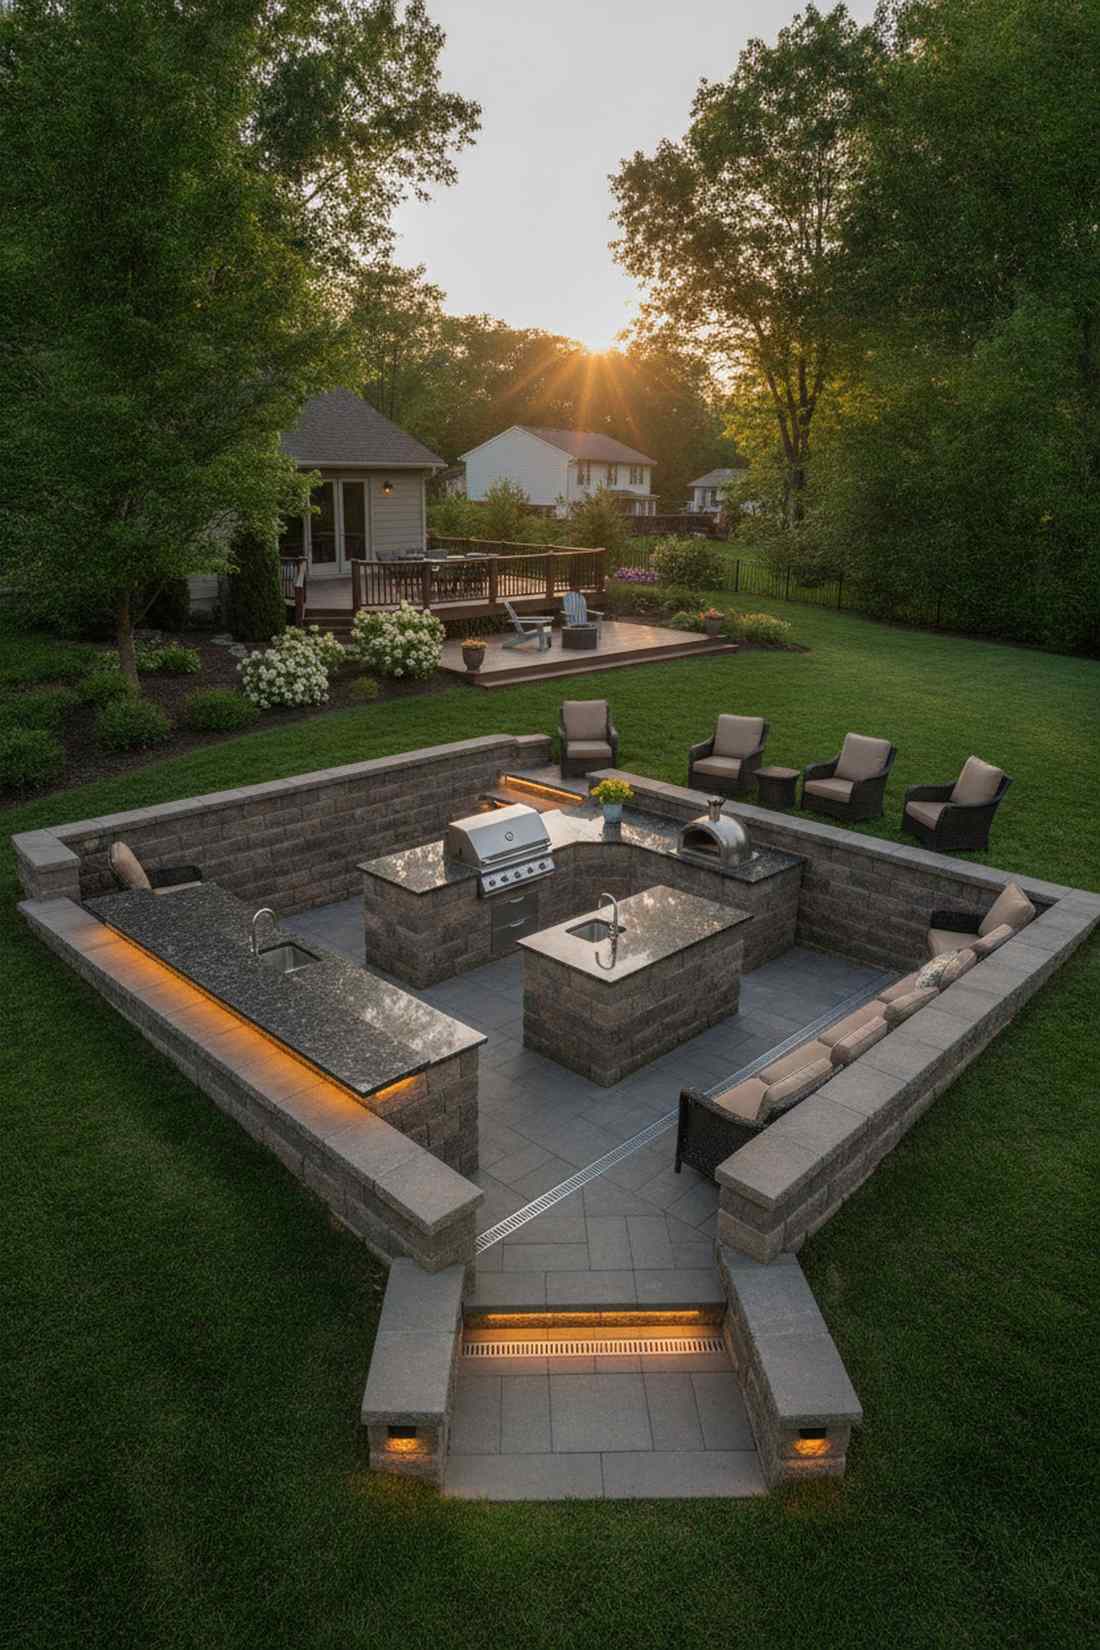
Embodies the retro-chic sunken living room vibe but completely modernized for outdoor hosting. A lowered pit cooking zone naturally creates an incredibly intimate, defined space on a sloped lot.
Dropping the floor creates a theatrical dynamic where seated guests look down at the culinary action. Incorporating premium outdoor patio and kitchen drainage systems is critical so your sunken prep area doesn’t flood.
Excavation makes this a $5,500–$10,000 endeavor. Pin this if you are battling a difficult hillside yard!
- Key Materials: Retaining wall blocks & drains
- Vibe / Style: Intimate sunken amphitheater
- Difficulty: Advanced excavation
- Budget Breakdown: Digging/Drainage: $2,500 | Kitchen setup: $4,500
- Creator’s Tip: Add discrete step lights on the interior drop-down so nobody trips while holding hot food.
- Smart Sourcing: Pick up a linear channel drain kit and low-voltage LED step light multipacks.
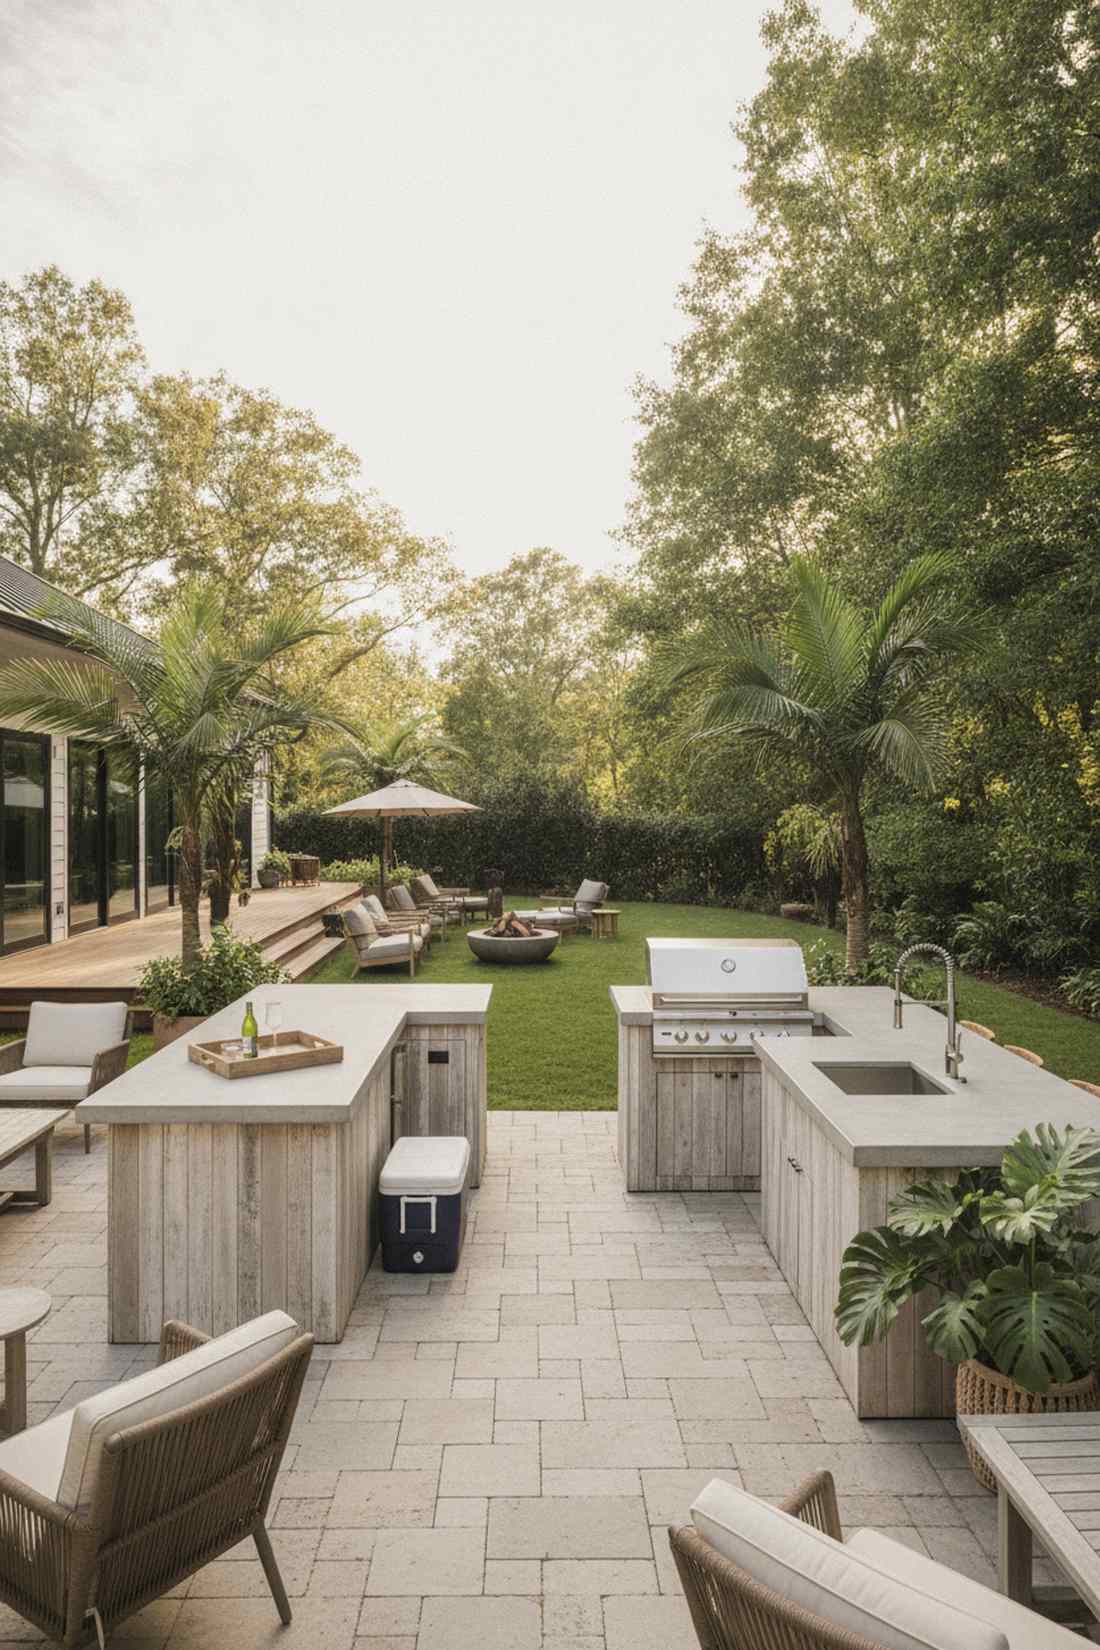
Island Layouts With Bar Seating
Freestanding islands place the grill and bar at the patio’s center, creating 360-degree access and social transparency. These designs work best in large yards where the island floats without crowding perimeter features.
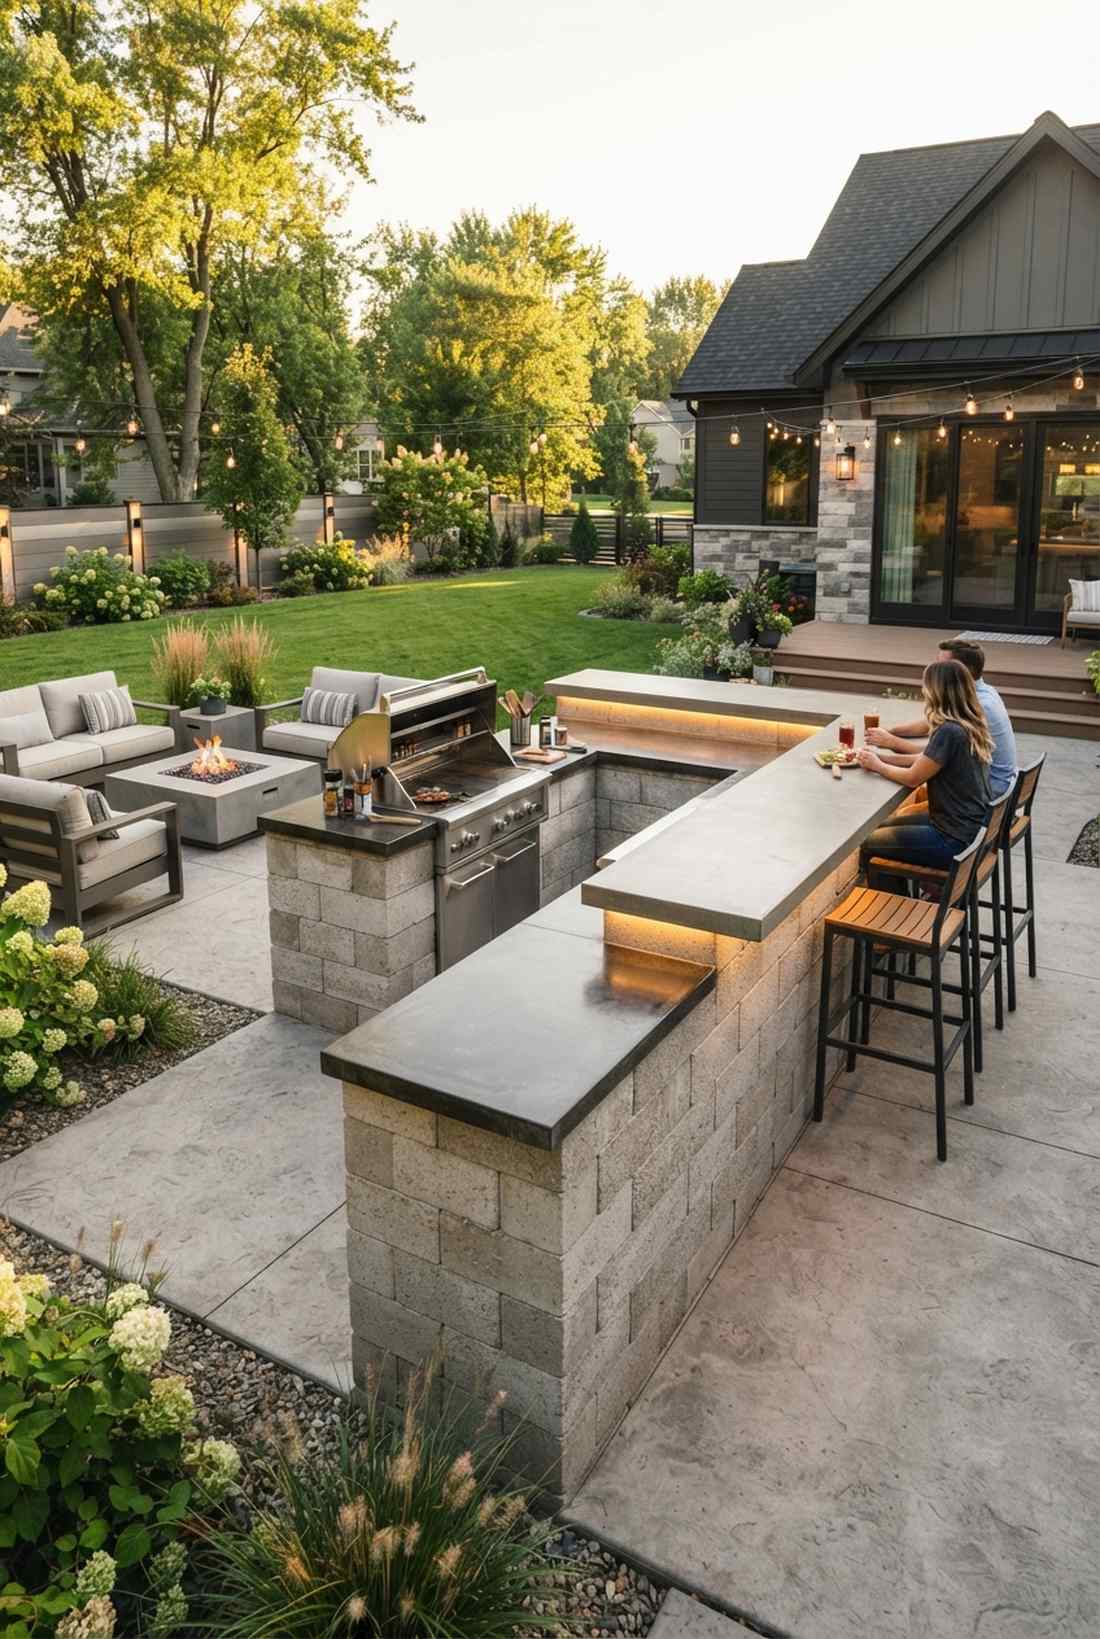
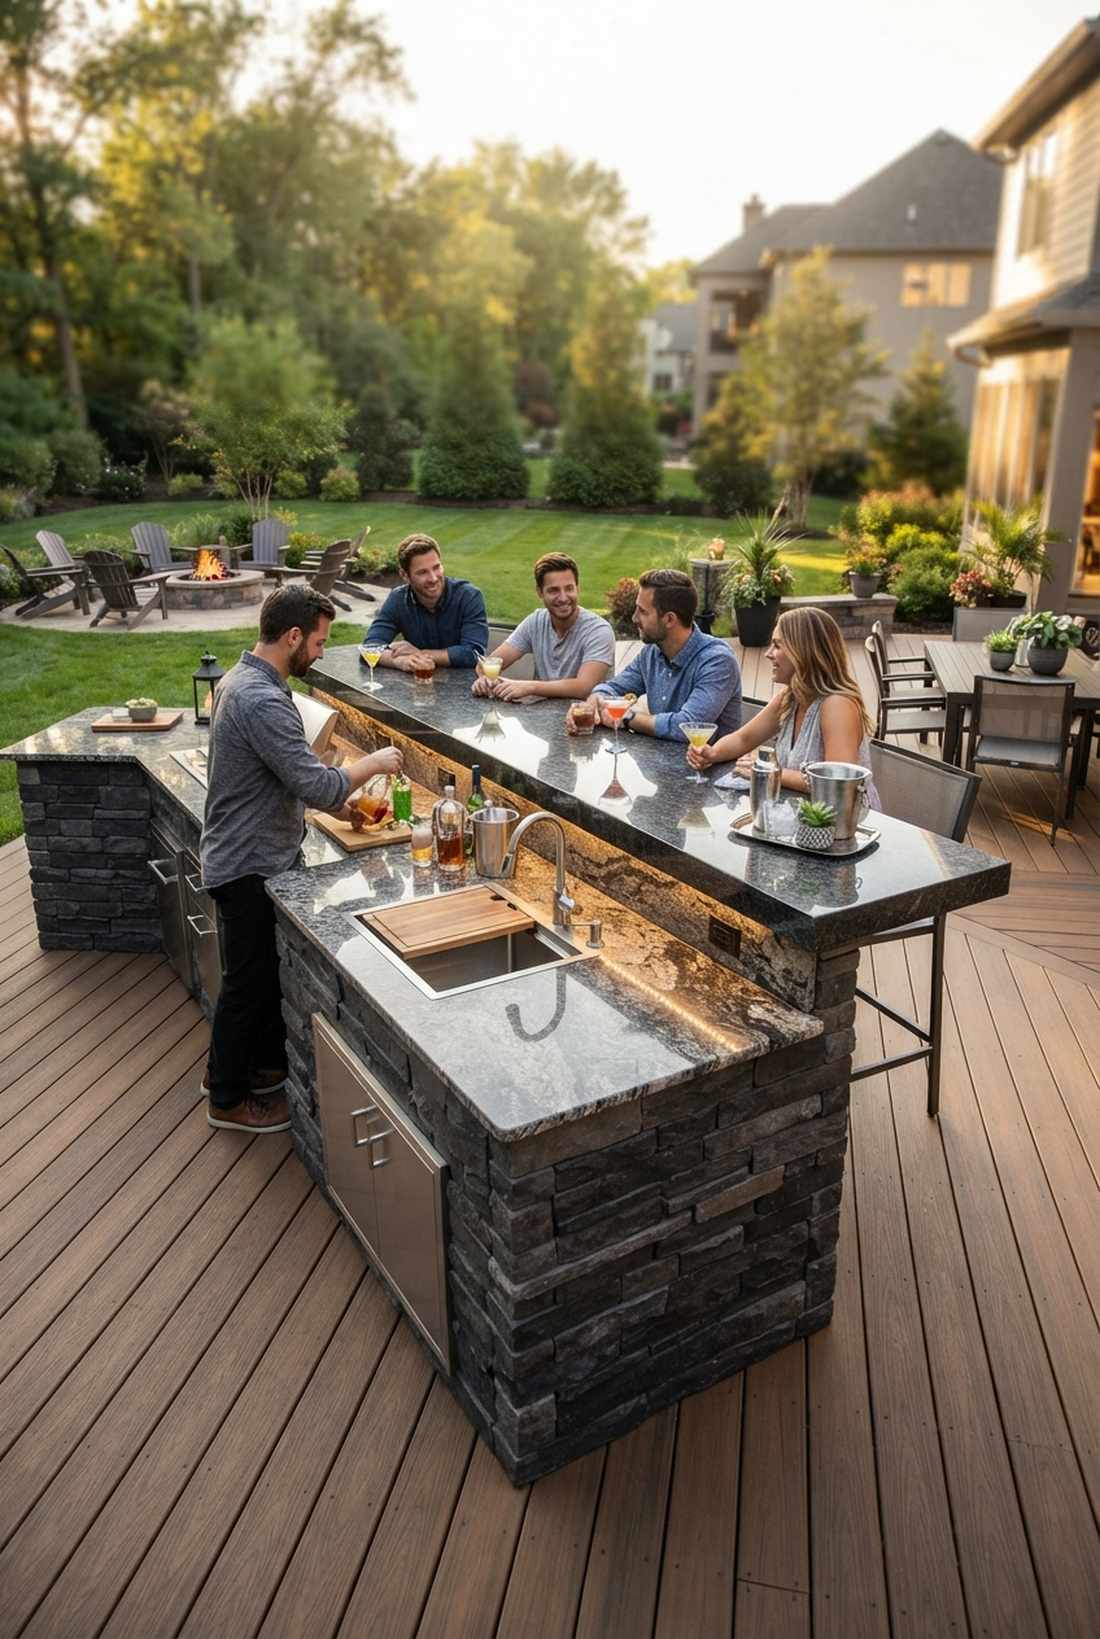
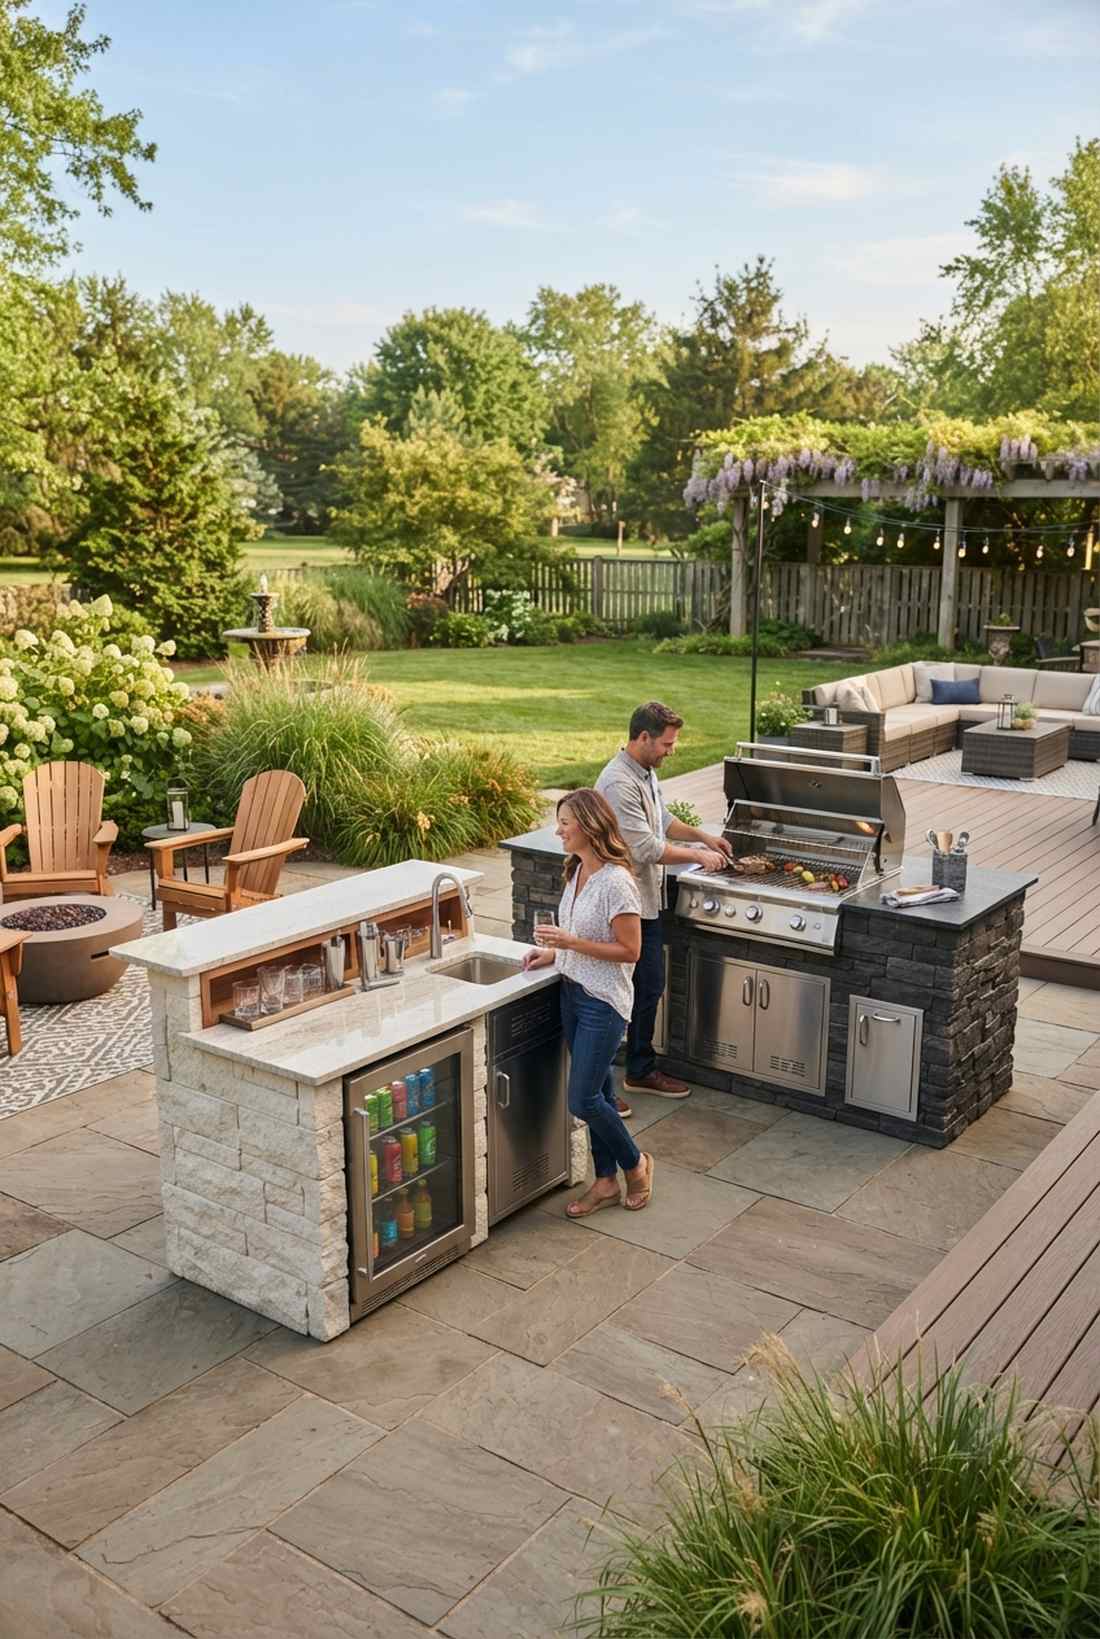
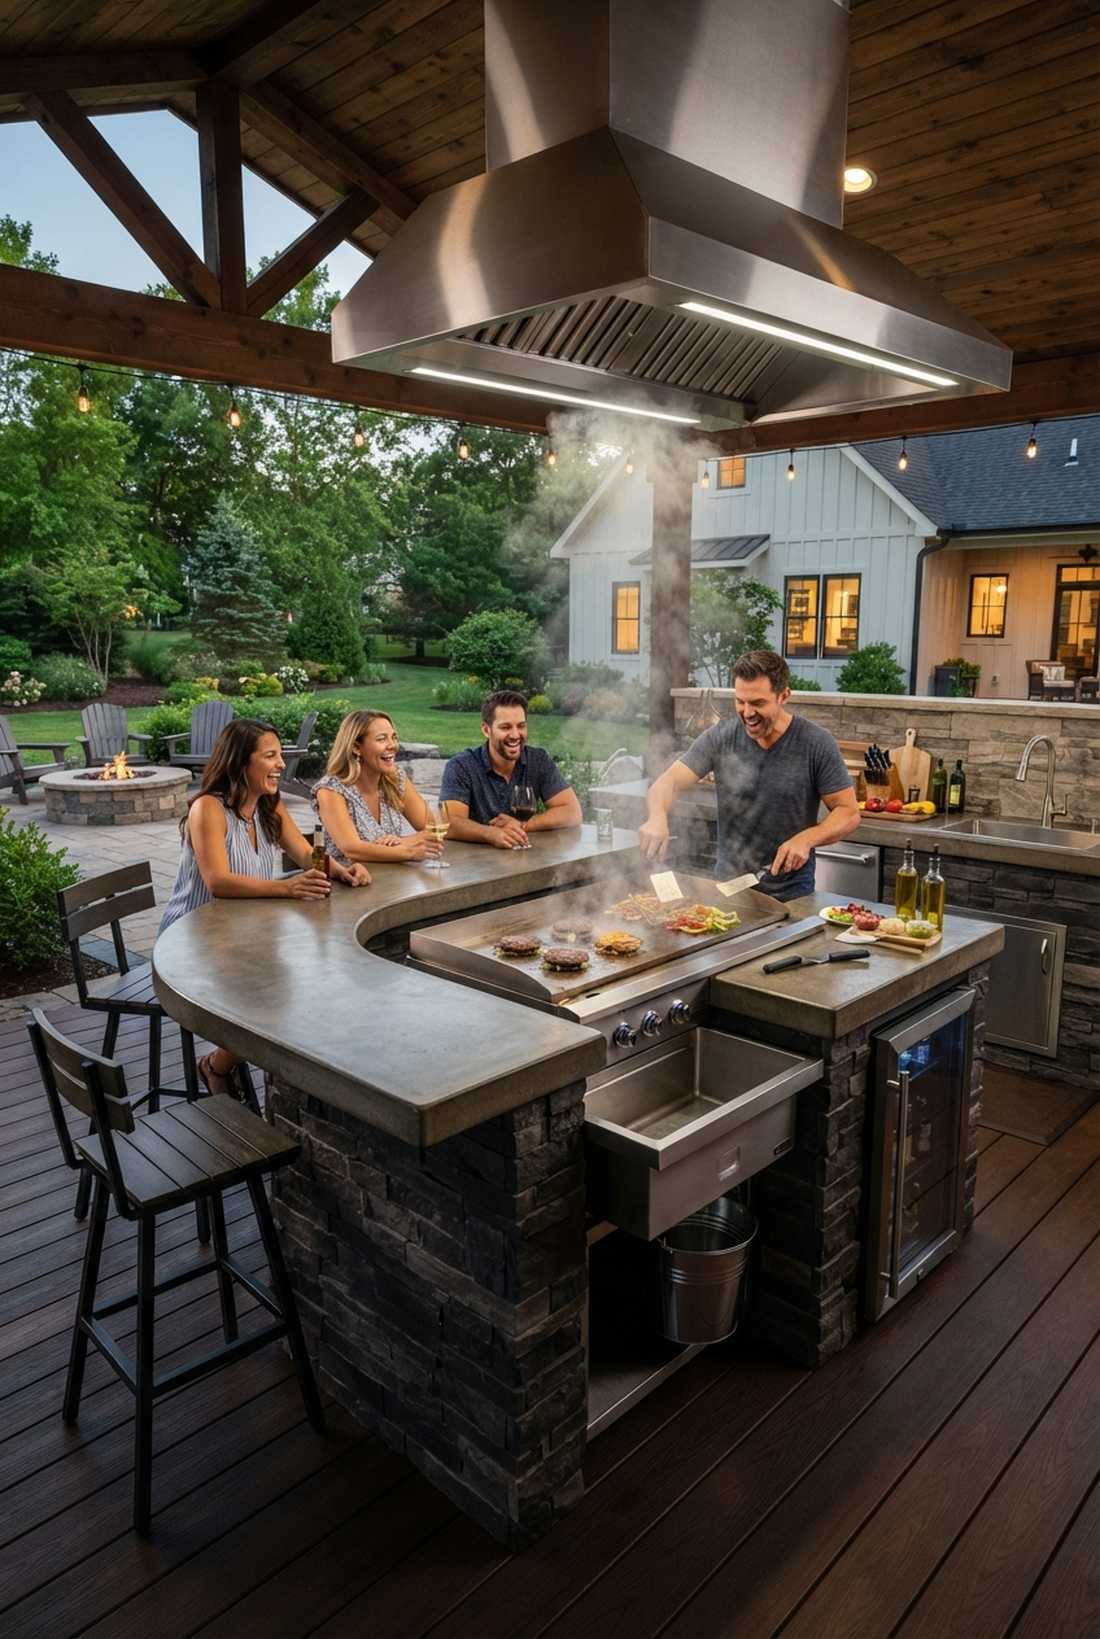
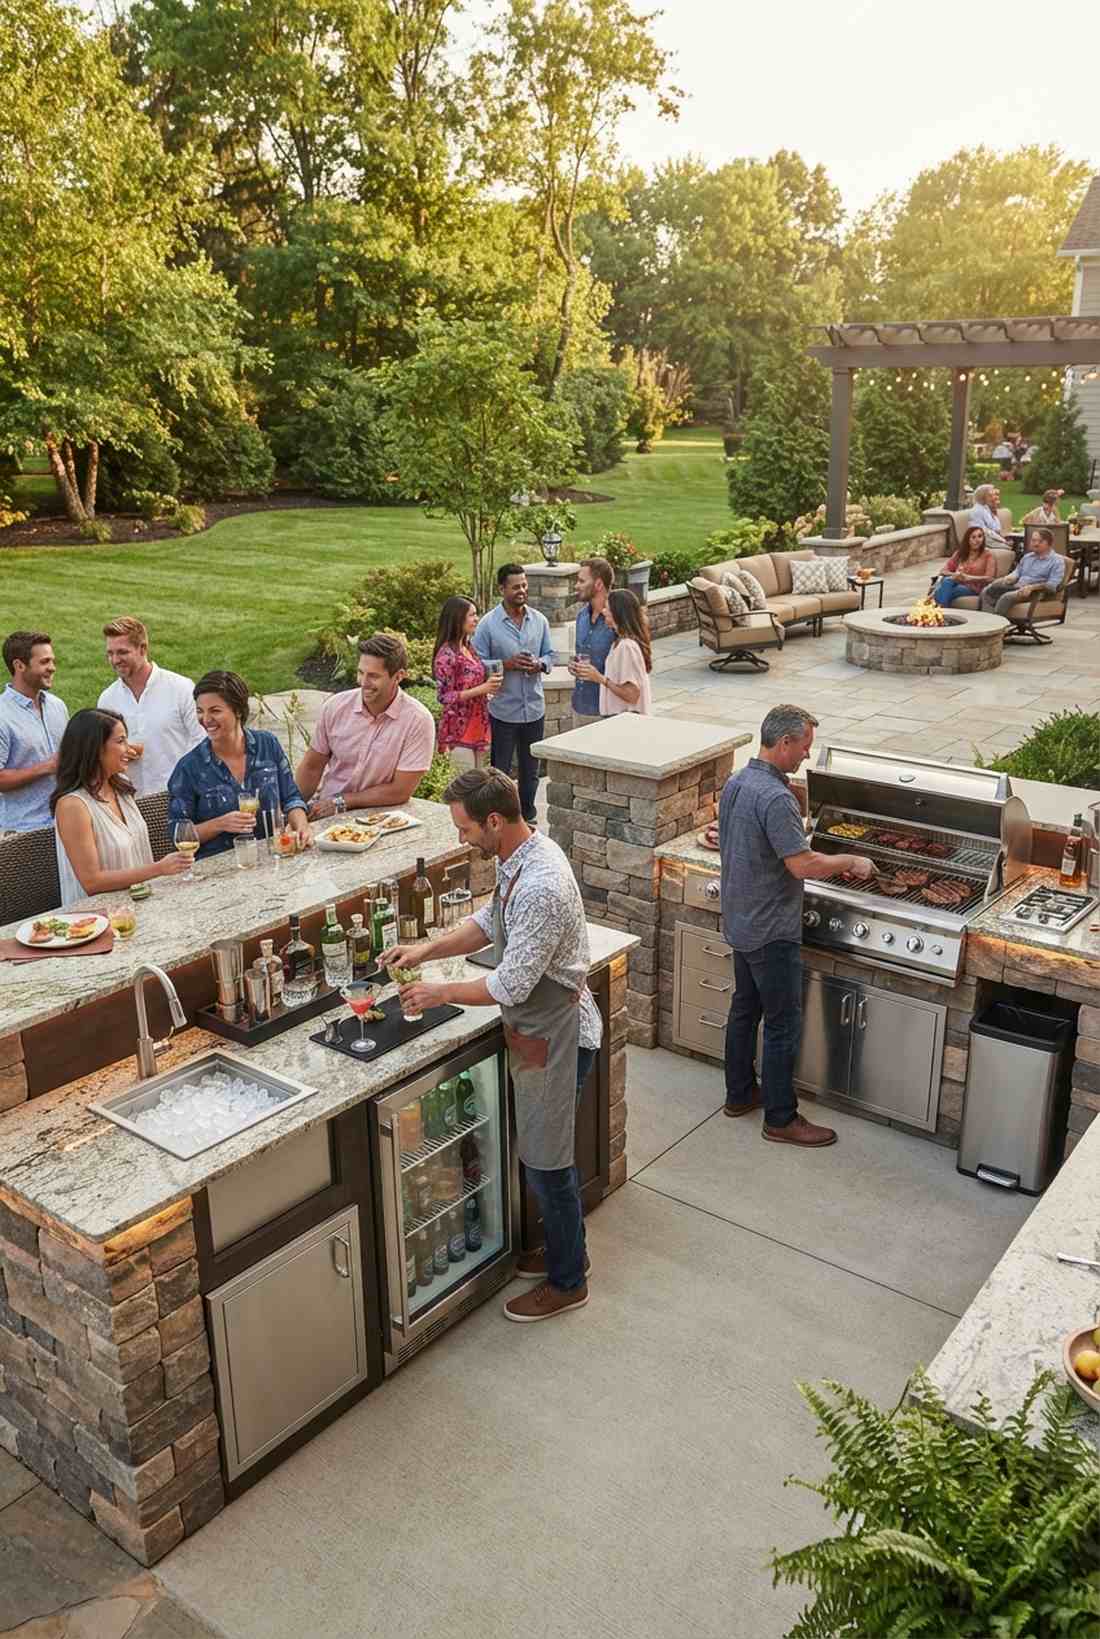
19. Central Grill Island With Perimeter Bar
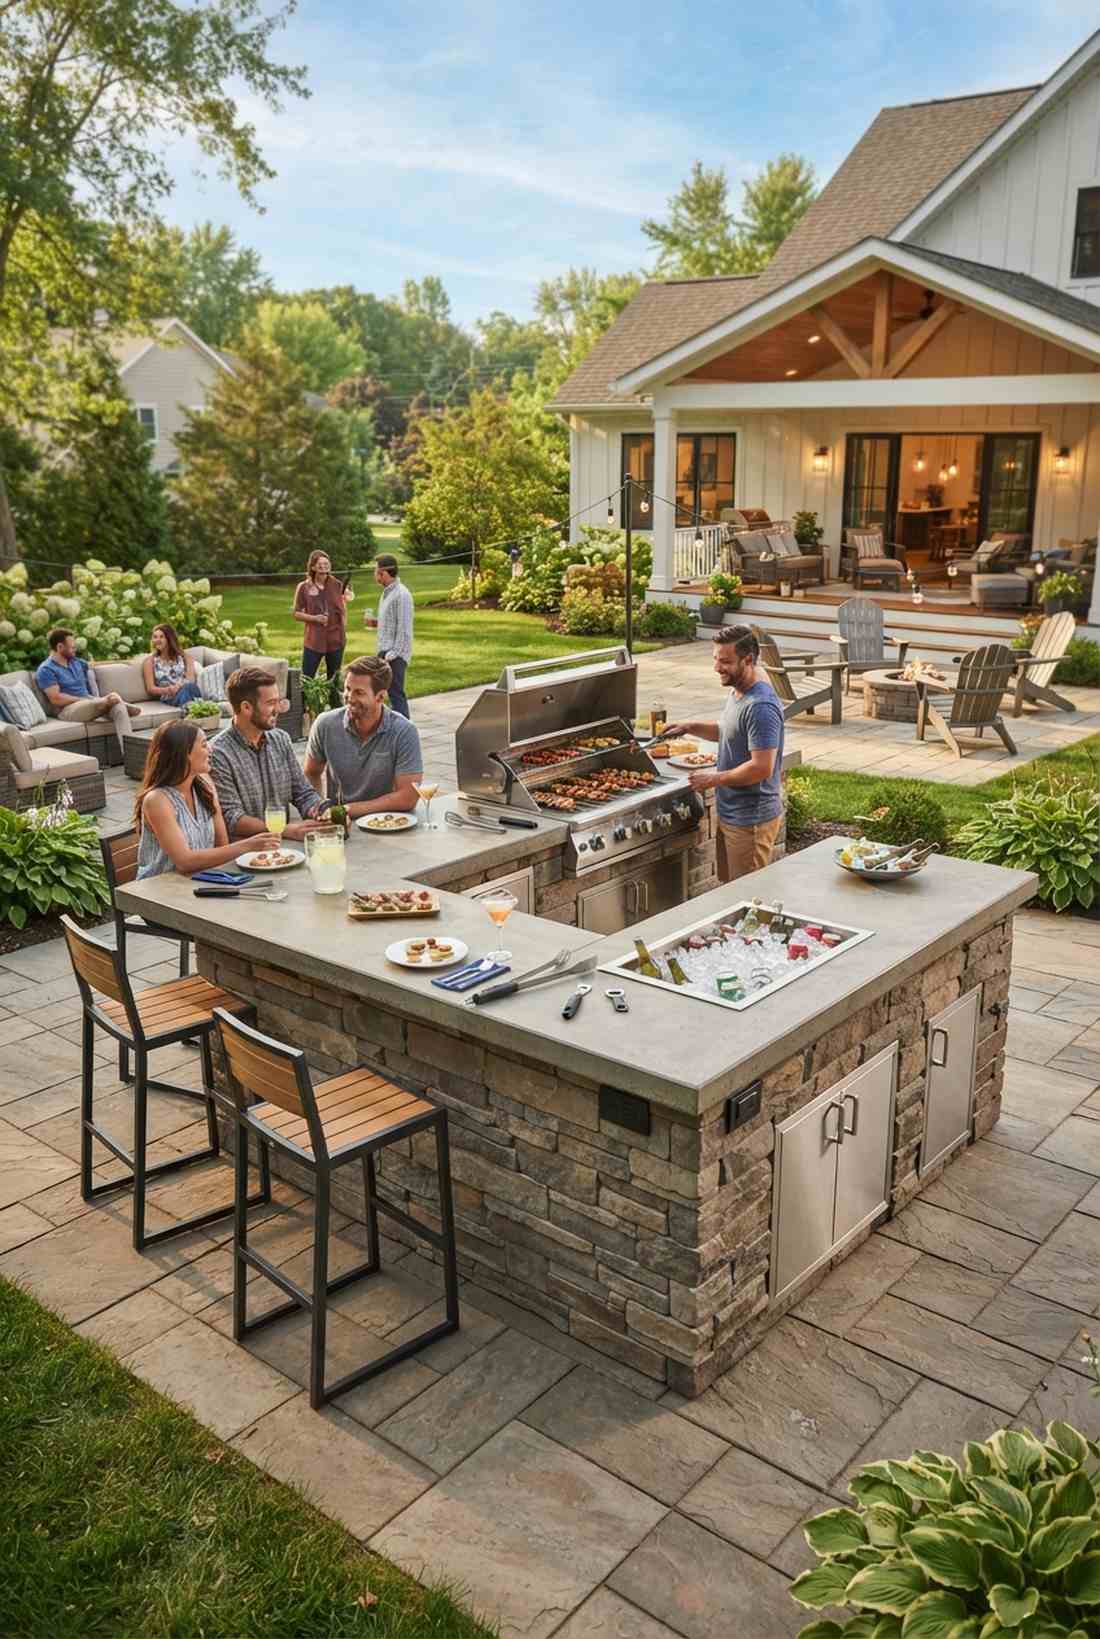
Feels like the magnetic center of gravity for every single backyard party. A standalone floating kitchen island is the ultimate social hub where cooking and chatting seamlessly collide.
Placing everything in the dead center looks far more expensive than shoving cabinets against a wall. Upgrading with prebuilt outdoor patio kitchen island kits saves thousands on custom masonry while delivering incredible aesthetics.
You can execute a stunning central island for $2,500–$5,000. Save this for your upcoming open-concept patio overhaul!
- Key Materials: Modular concrete island kits
- Vibe / Style: Engaging 360-degree hub
- Difficulty: Moderate
- Budget Breakdown: Island shell: $1,200 | Appliances: $1,500
- Creator’s Tip: Leave a minimum of 4 feet of walking space all the way around the island to prevent bottlenecks.
- Smart Sourcing: Order an unfinished ready-to-veneer island frame kit and a drop-in ice bin cooler.
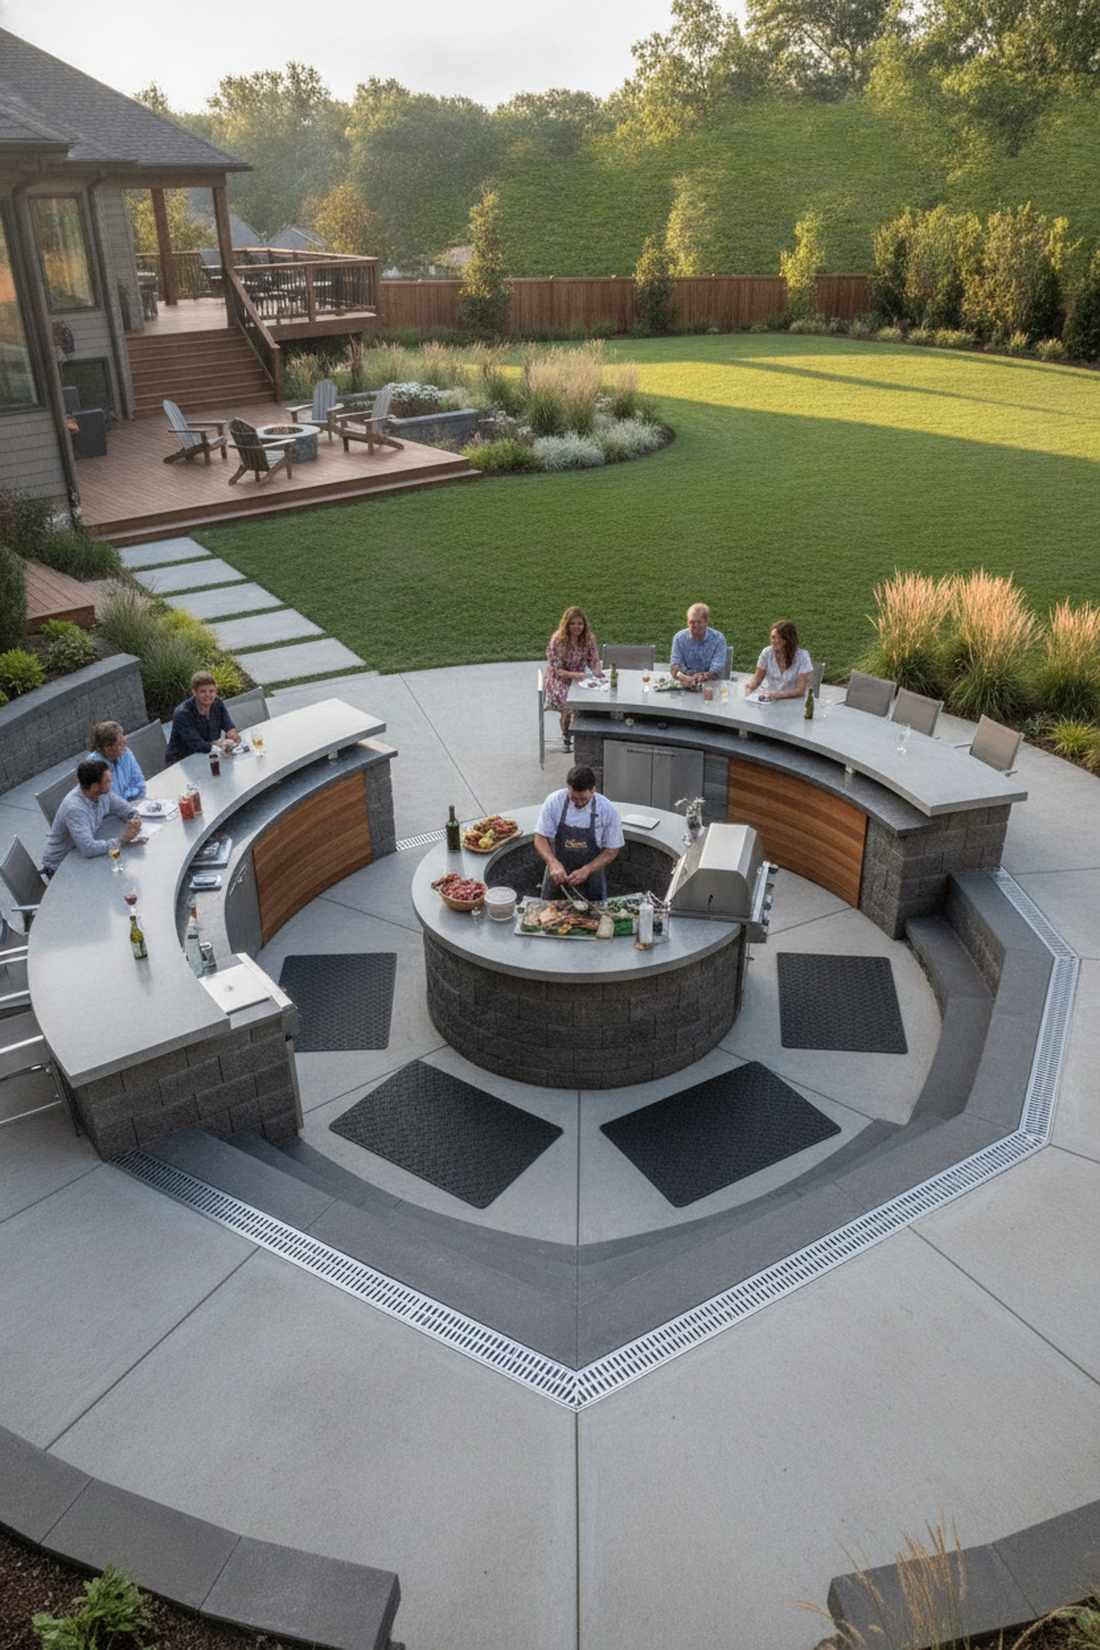
20. Circular Grill Bar Island

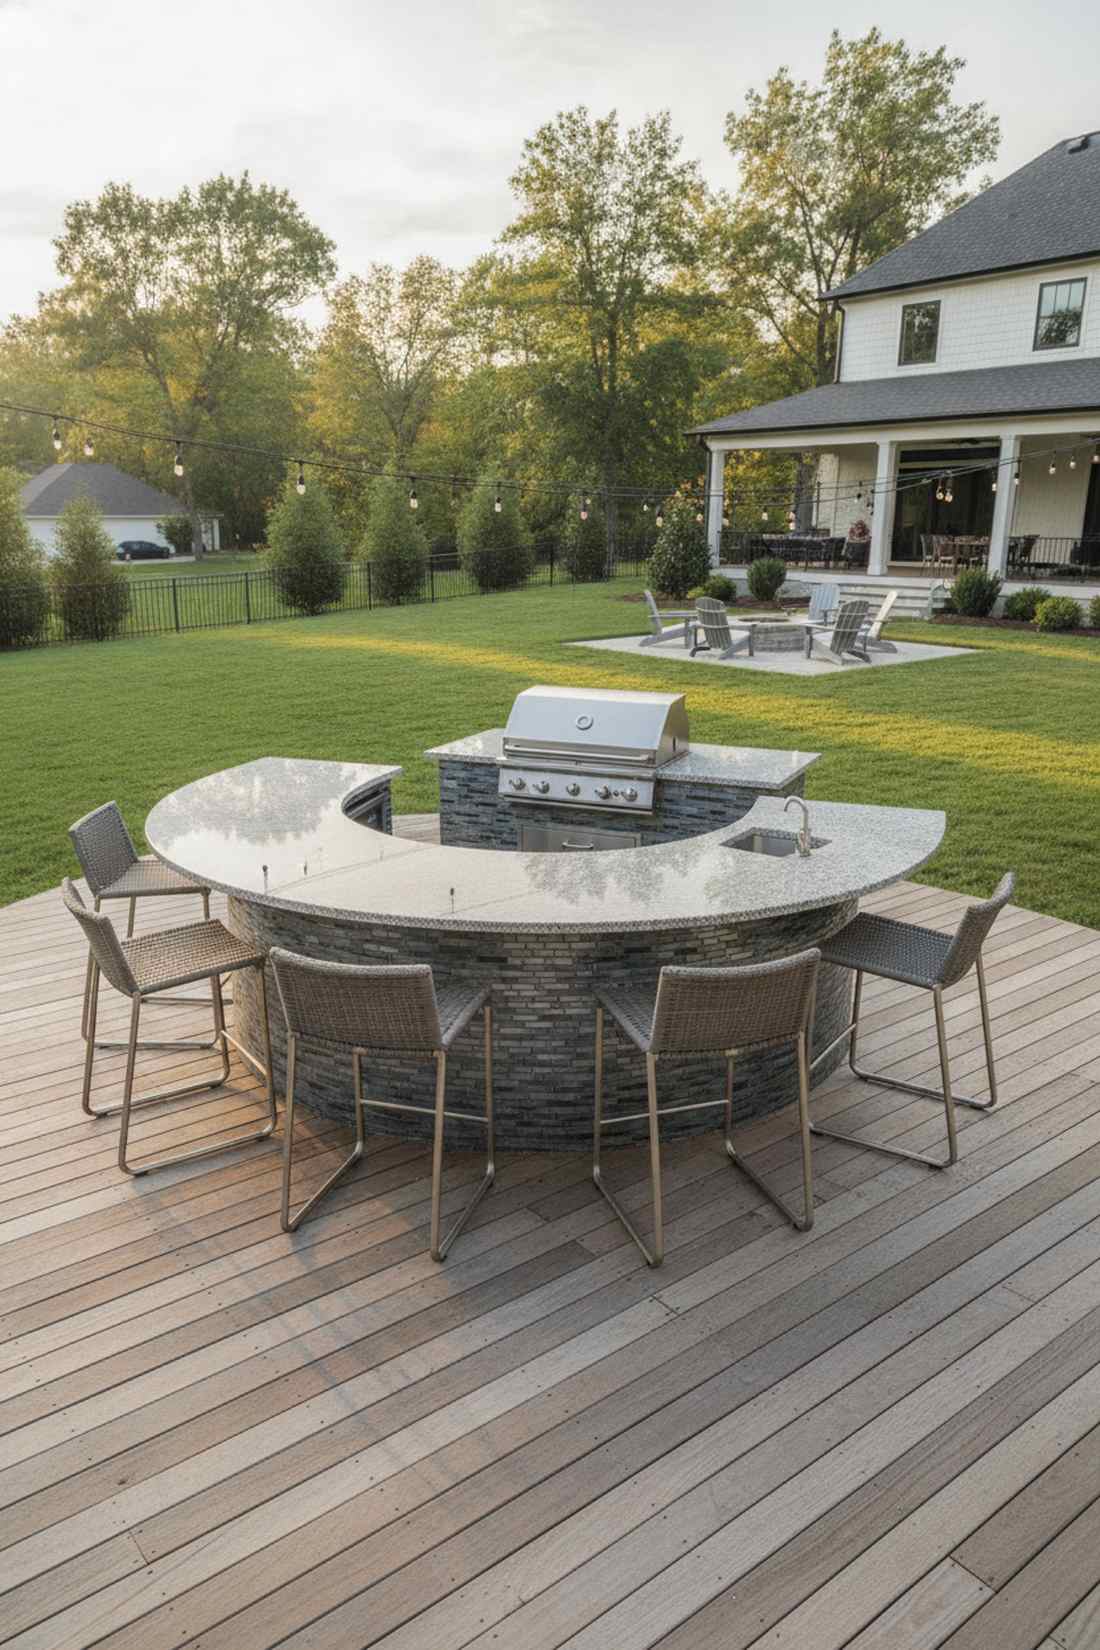
Radiates a modern architectural flair that completely breaks away from boring rectangles. A curved 360-degree dining island softens the backyard and naturally encourages group conversations.
Curved structures instantly scream custom-built luxury since they eliminate hard, aggressive corners. Although trickier to build, using flexible cement board backer materials makes forming those smooth radiuses surprisingly DIY-friendly.
Due to custom cuts, this typically runs $3,000–$6,000. Pin this if you want an absolute showstopper piece!
- Key Materials: Bendable metal studs & flex-board
- Vibe / Style: Flowing organic modernism
- Difficulty: Advanced shaping
- Budget Breakdown: Curved framing: $1,500 | Custom cut stone: $2,000
- Creator’s Tip: Use small-format mosaic tiles on the base; they wrap around curved surfaces infinitely better than large tiles.
- Smart Sourcing: Get a flexible track metal framing bundle and exterior-grade glass mosaic tile sheets.
If you thought freestanding islands were out of your budget, the next hack will completely change your mind…
21. Double-Sided Grill and Bar
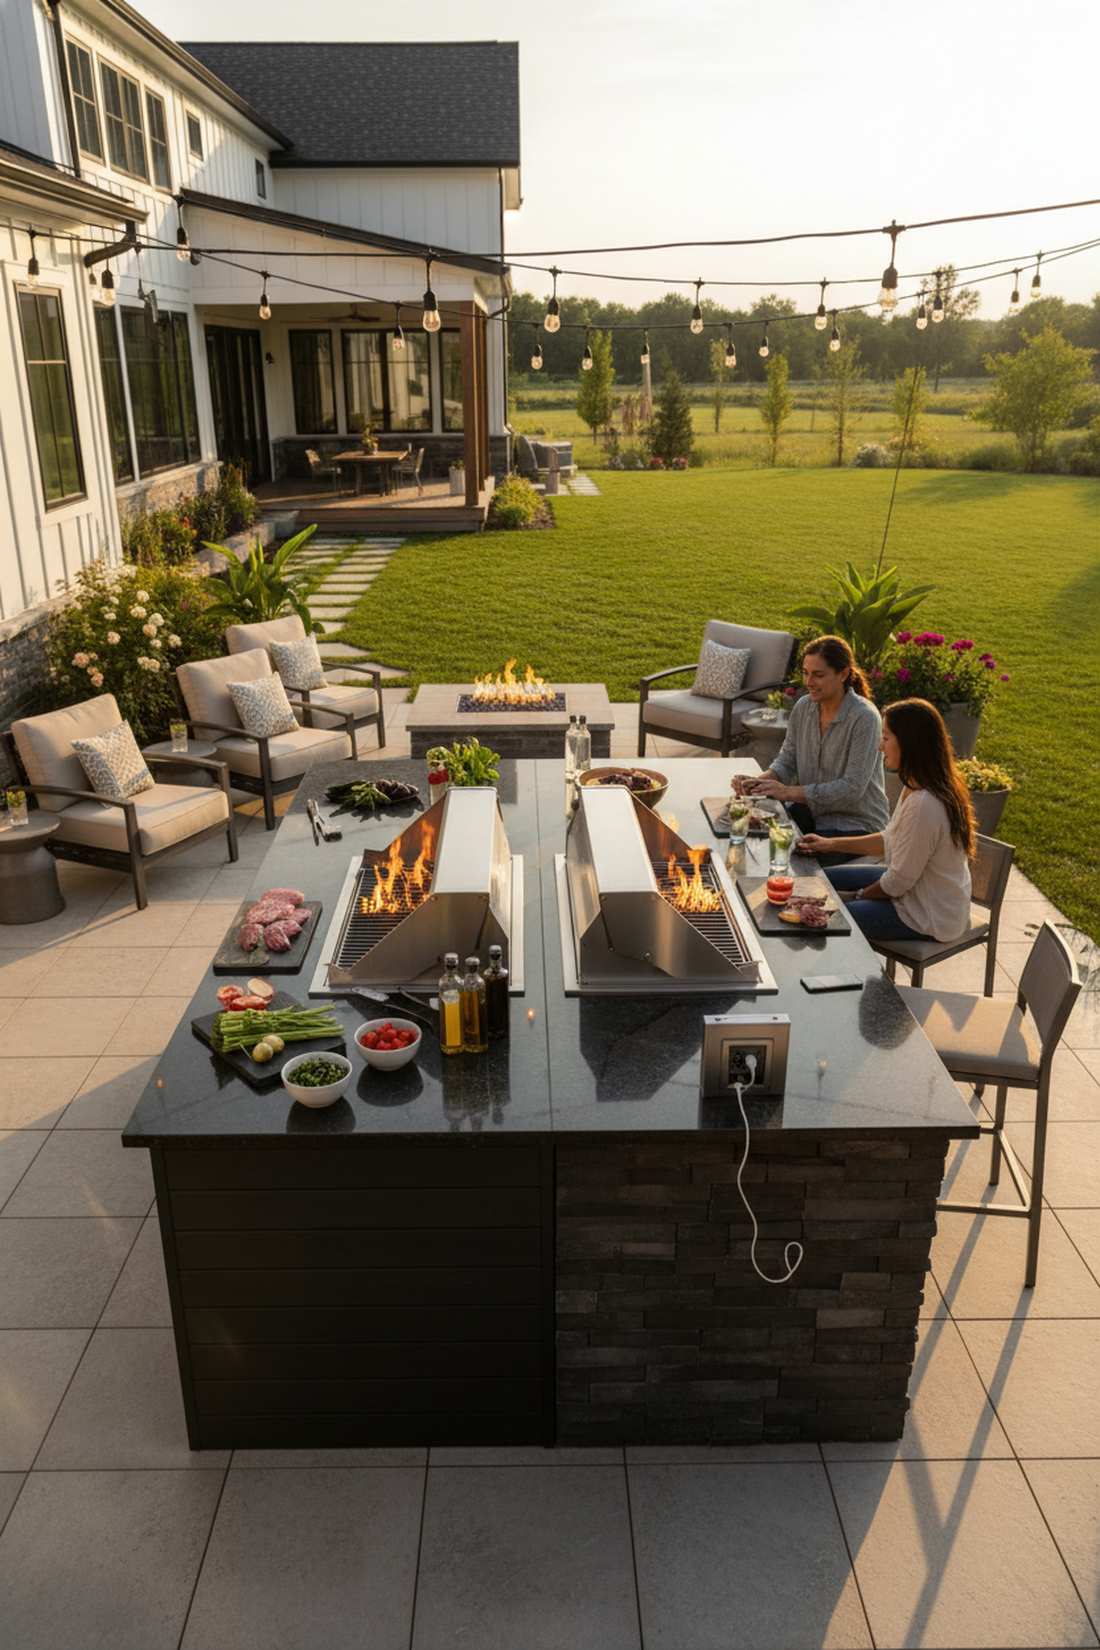
Embodies the slick efficiency of a high-end hibachi restaurant where the chef is the star. A dual-access central grilling hub destroys the barrier between the host and the hungry guests.
This layout looks incredibly professional by letting you prep on one side and serve directly across the fire. Specifying an outdoor patio grill with double-sided controls ensures you never have to awkwardly reach over open flames.
A dual-sided setup normally sits around $2,800–$5,500. It is a fantastic layout for high-energy weekend parties.
- Key Materials: Deep-set heavy duty countertops
- Vibe / Style: Theatrical hibachi station
- Difficulty: Moderate
- Budget Breakdown: Specialty grill: $2,000 | Deep island base: $1,400
- Creator’s Tip: Install a pop-up power outlet on the bar side so guests can charge phones while you cook.
- Smart Sourcing: Snag a retractable outdoor countertop outlet and a double-sided grill head insert.
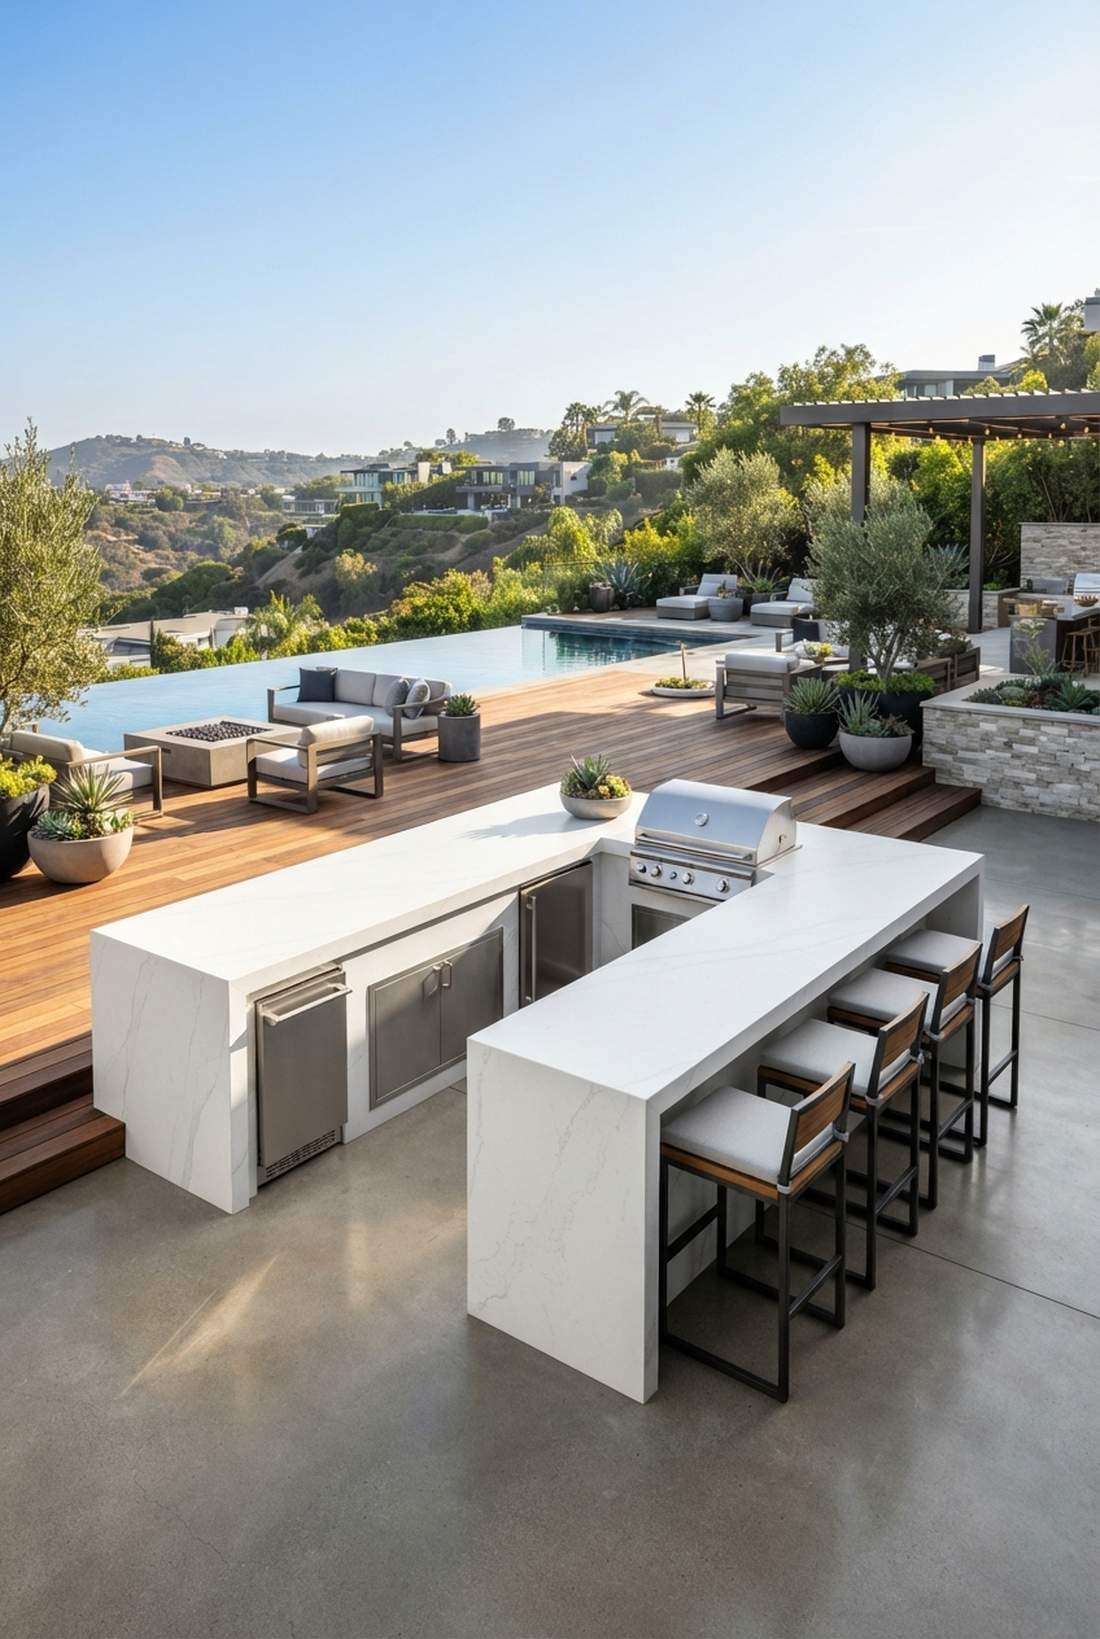
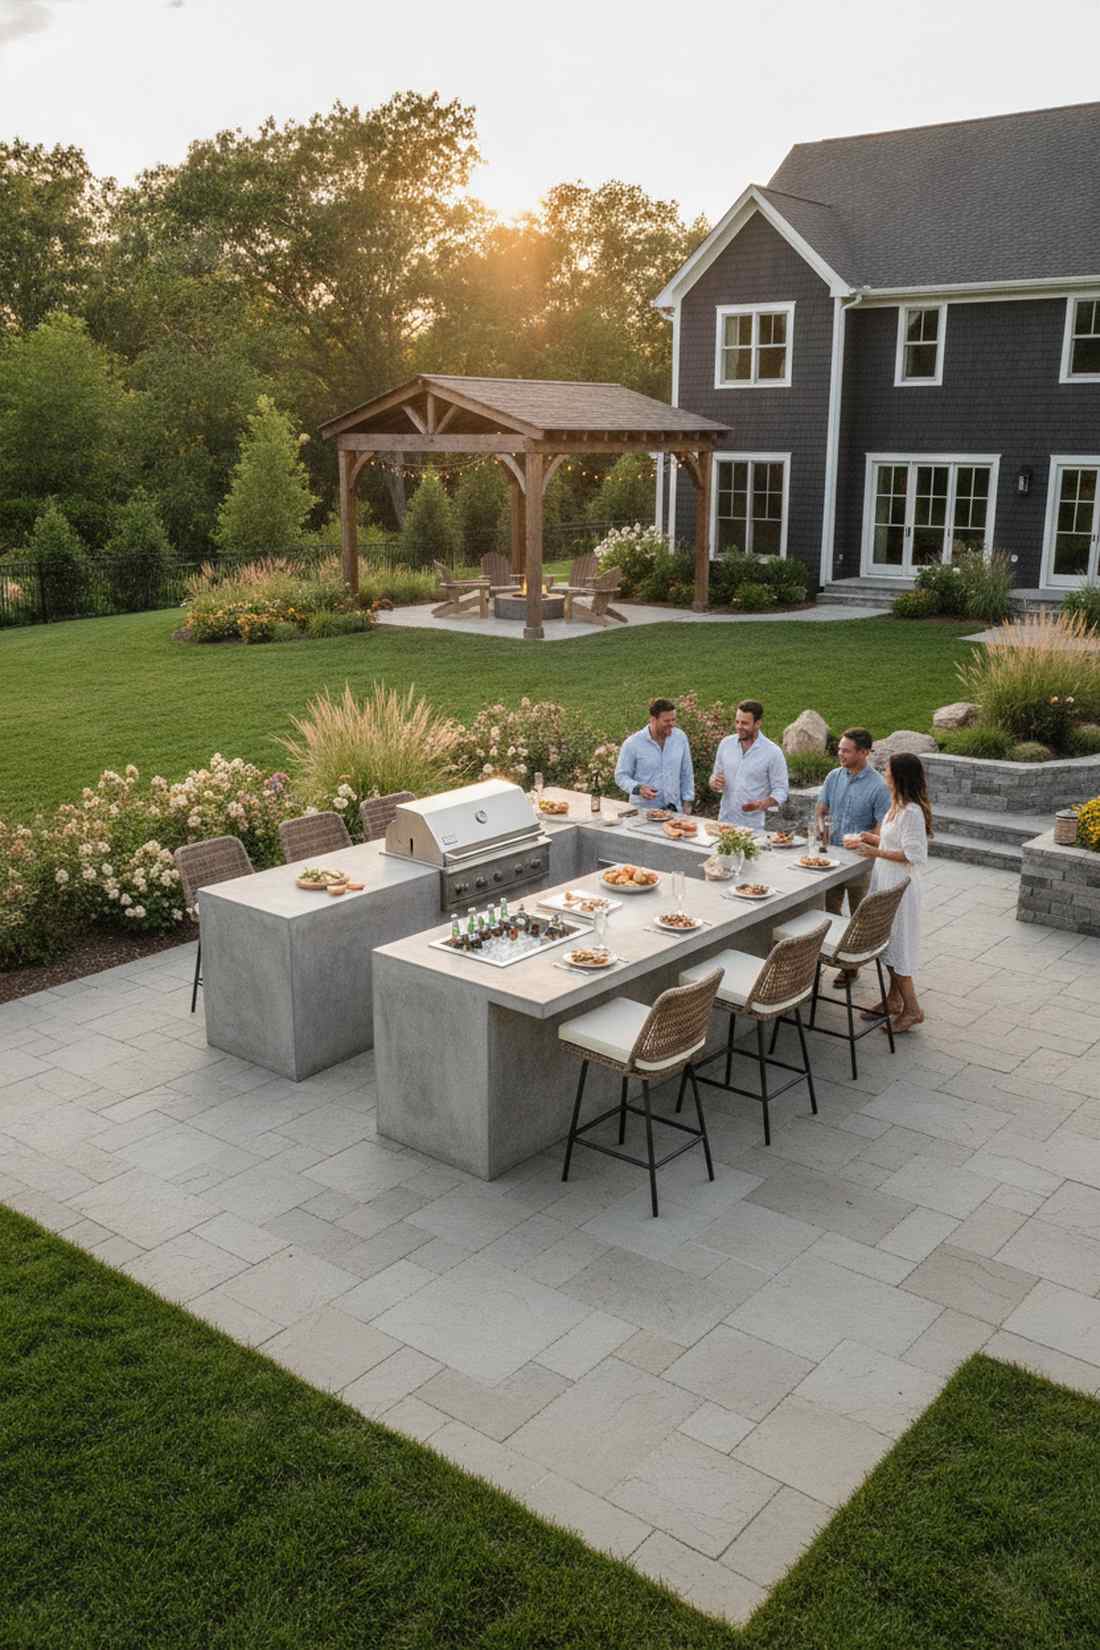
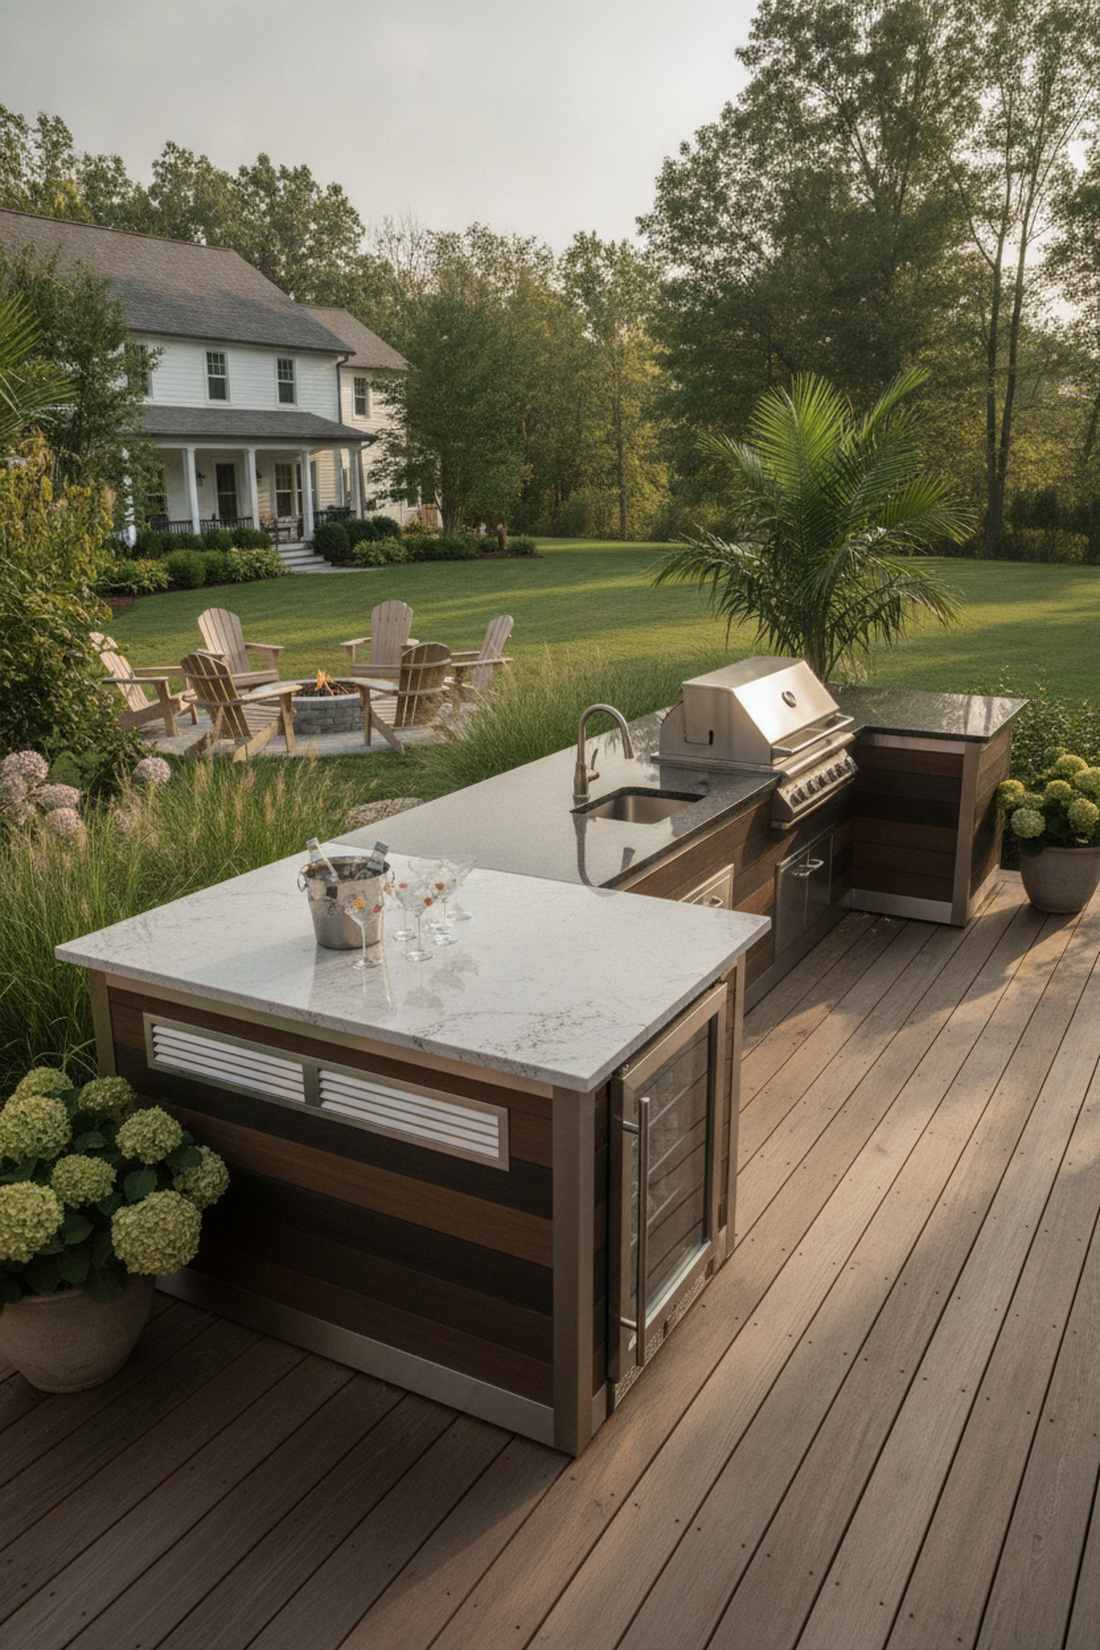
22. L-Shaped Island Outdoor Patio Grill
Feels like the perfect sweet spot between a massive kitchen and a cozy cocktail bar. The hybrid floating L-shape dominates medium-sized patios without swallowing all the floor space.
This design gives a designer-level finish by providing an efficient work triangle right in the middle of the yard. Incorporating premium outdoor patio and kitchen ideas like contrasting stone countertops elevates the custom look instantly.
This highly practical setup averages $2,500–$4,500. Save this if you need massive function in a moderate space!
- Key Materials: Interlocking base panel kits
- Vibe / Style: Versatile suburban classic
- Difficulty: Beginner to Moderate
- Budget Breakdown: Structure: $1,200 | Tops & Finish: $1,600
- Creator’s Tip: Place the grill on the shorter leg to keep the entire long leg pristine for a massive buffet spread.
- Smart Sourcing: Use a quick-assemble L-island block kit and pre-sealed granite remnants.
23. Tiered Island With Upper Bar Shelf
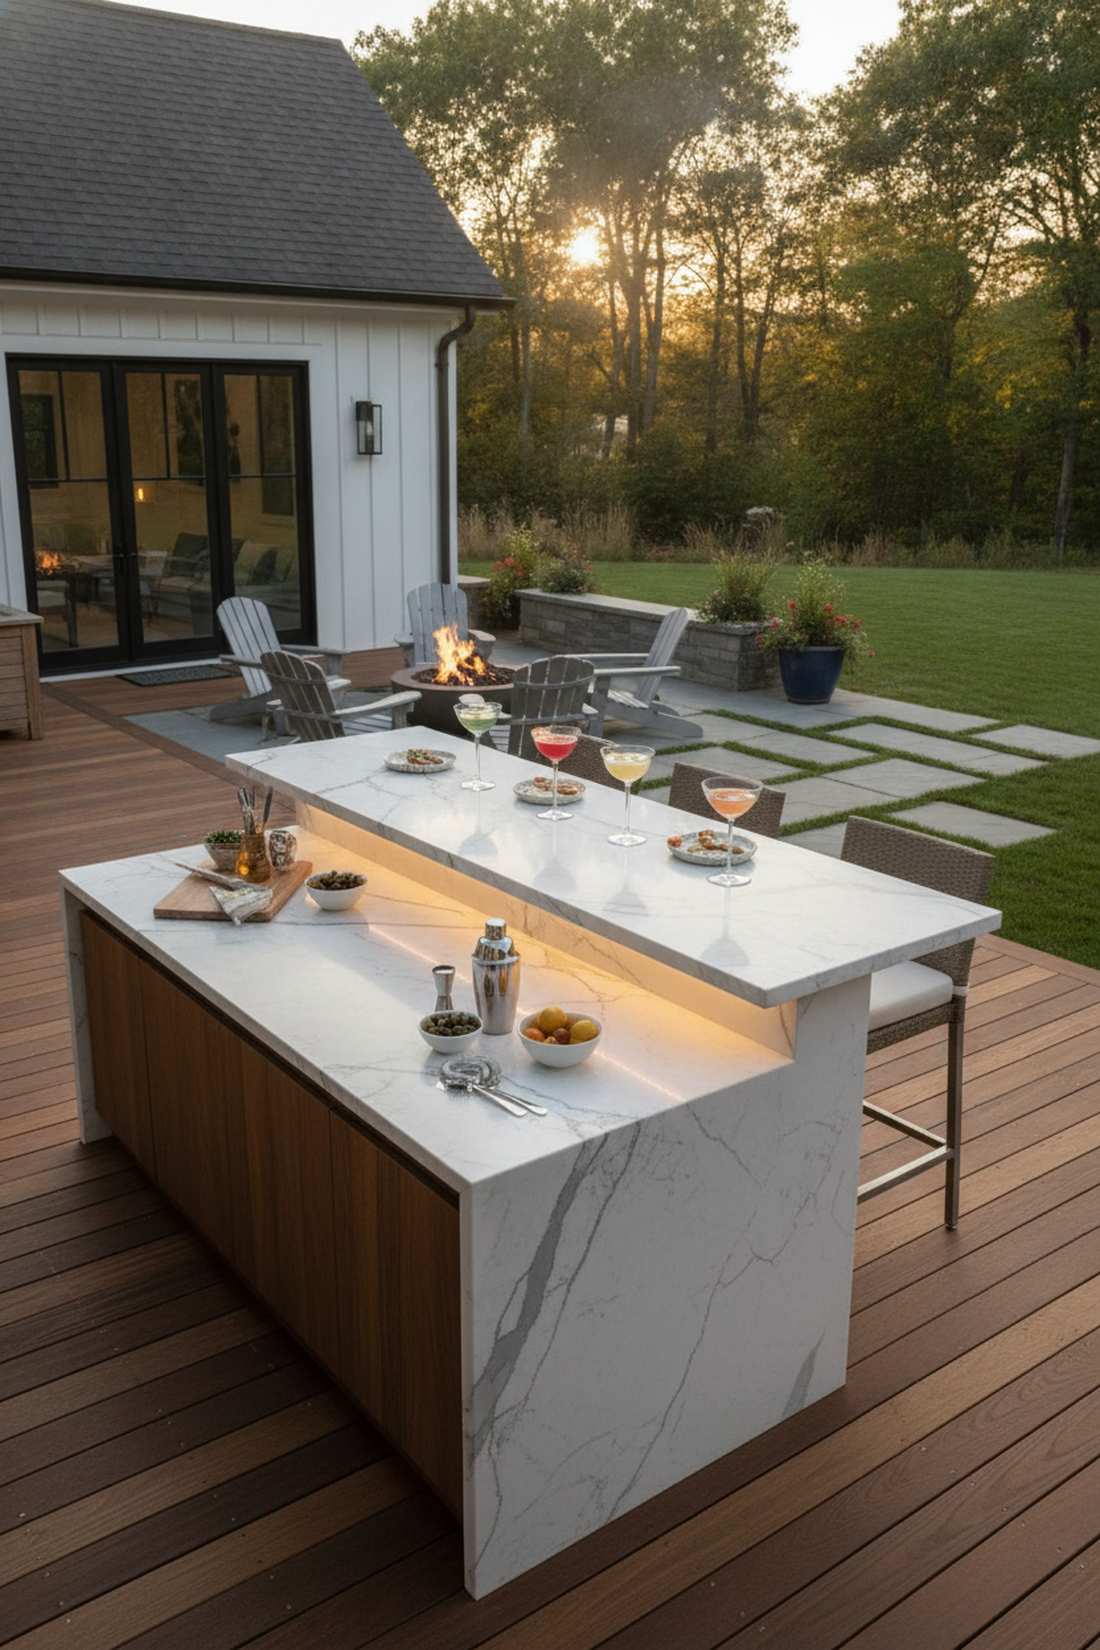
Provides the perfect visual shield that hides your messy prep station from sipping guests. A cantilevered upper bar tier is the ultimate hack for keeping the party looking flawless.
Adding a floating 12-inch shelf looks far more expensive than it is while offering a brilliant staging area for cocktails. Installing heavy-duty hidden steel countertop brackets ensures that heavy stone shelf won’t budge under pressure.
The extra tier adds about $500–$900 to a standard island build. Pin this layout for a ridiculously clean aesthetic!
- Key Materials: Concealed steel supports
- Vibe / Style: Polished cocktail hour
- Difficulty: Moderate
- Budget Breakdown: Supports: $200 | Extra stone tier: $600
- Creator’s Tip: Tuck an LED light strip tightly under the overhang of the top shelf to wash the prep area in bright light.
- Smart Sourcing: Buy heavy-duty flat steel corbels (pack of 4) and low-profile waterproof LED bars.
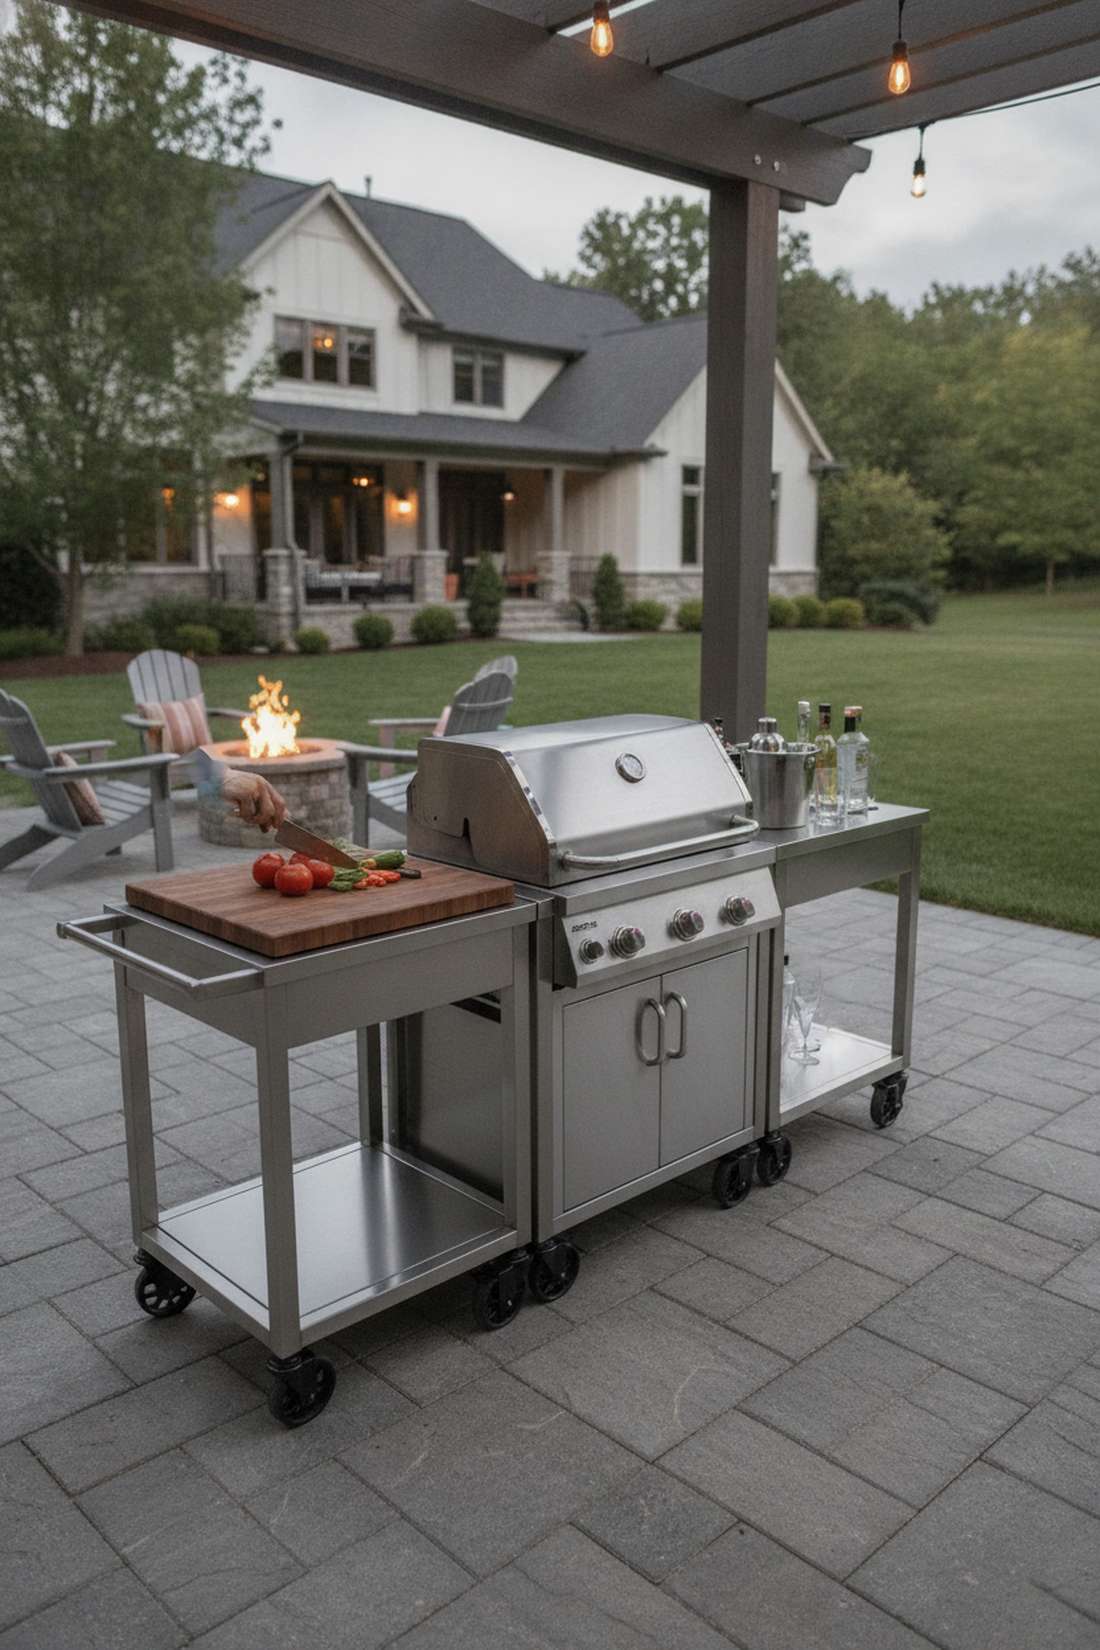
24. Mobile Grill Island With Fixed Bar
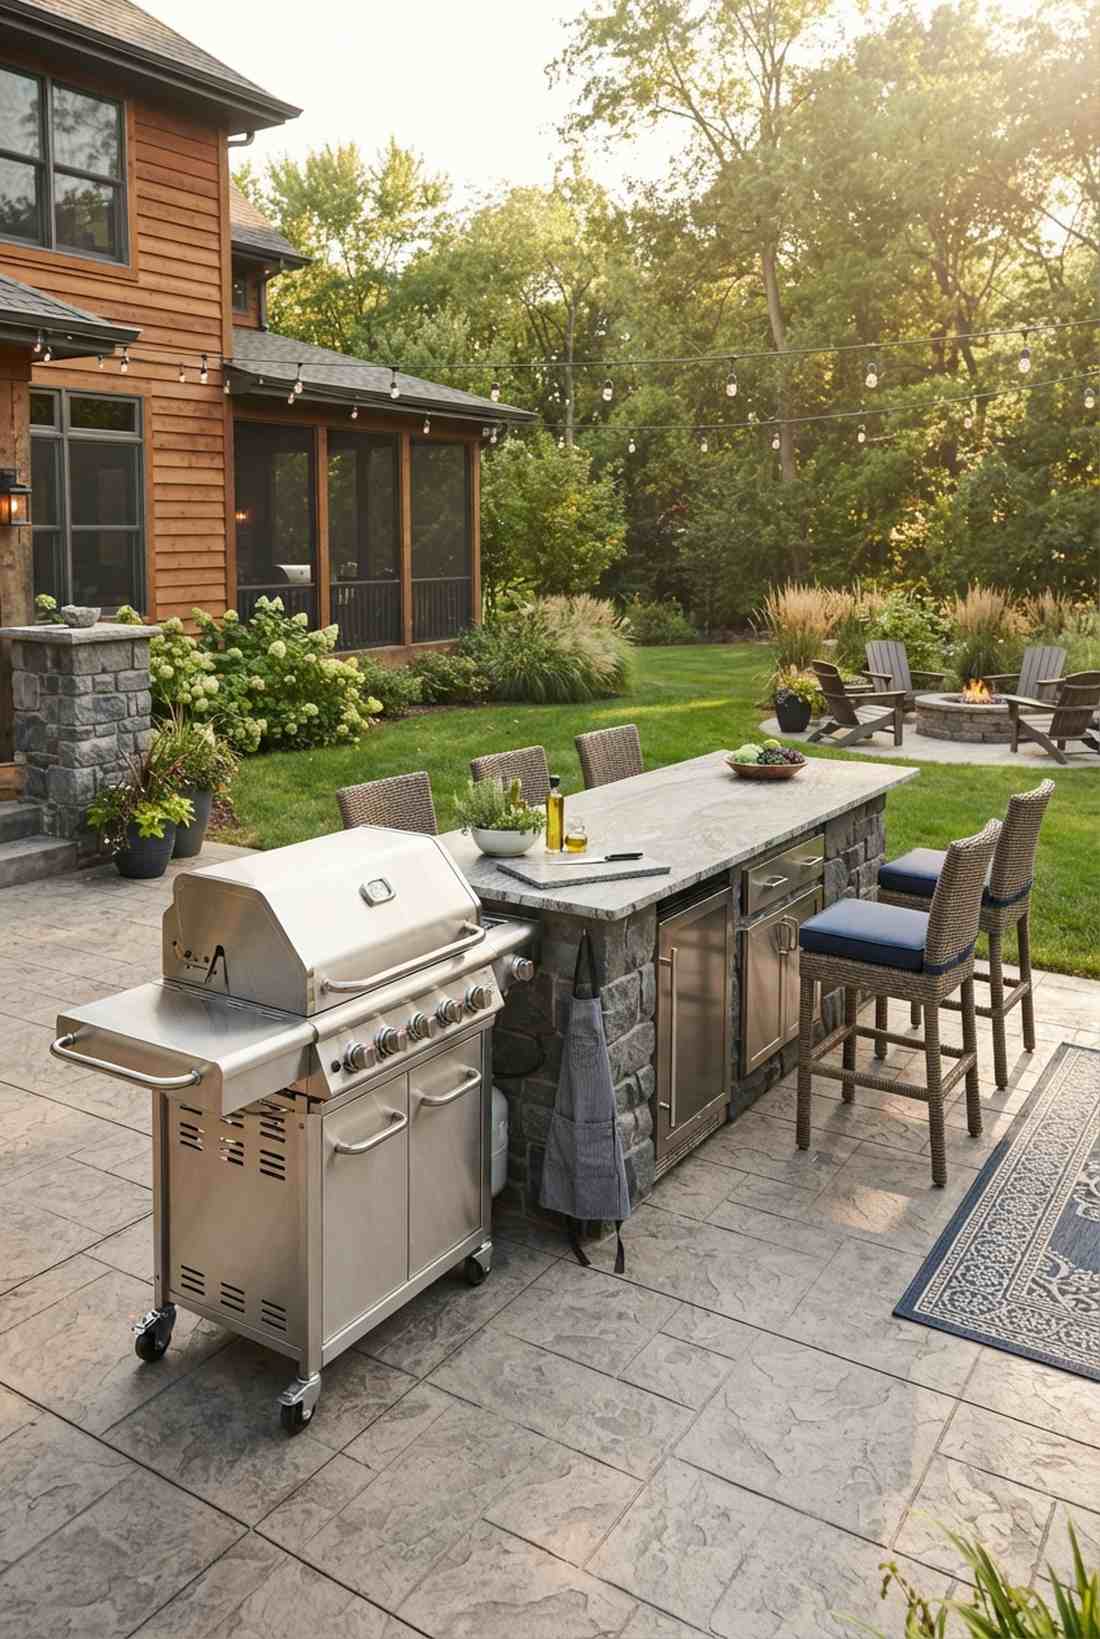
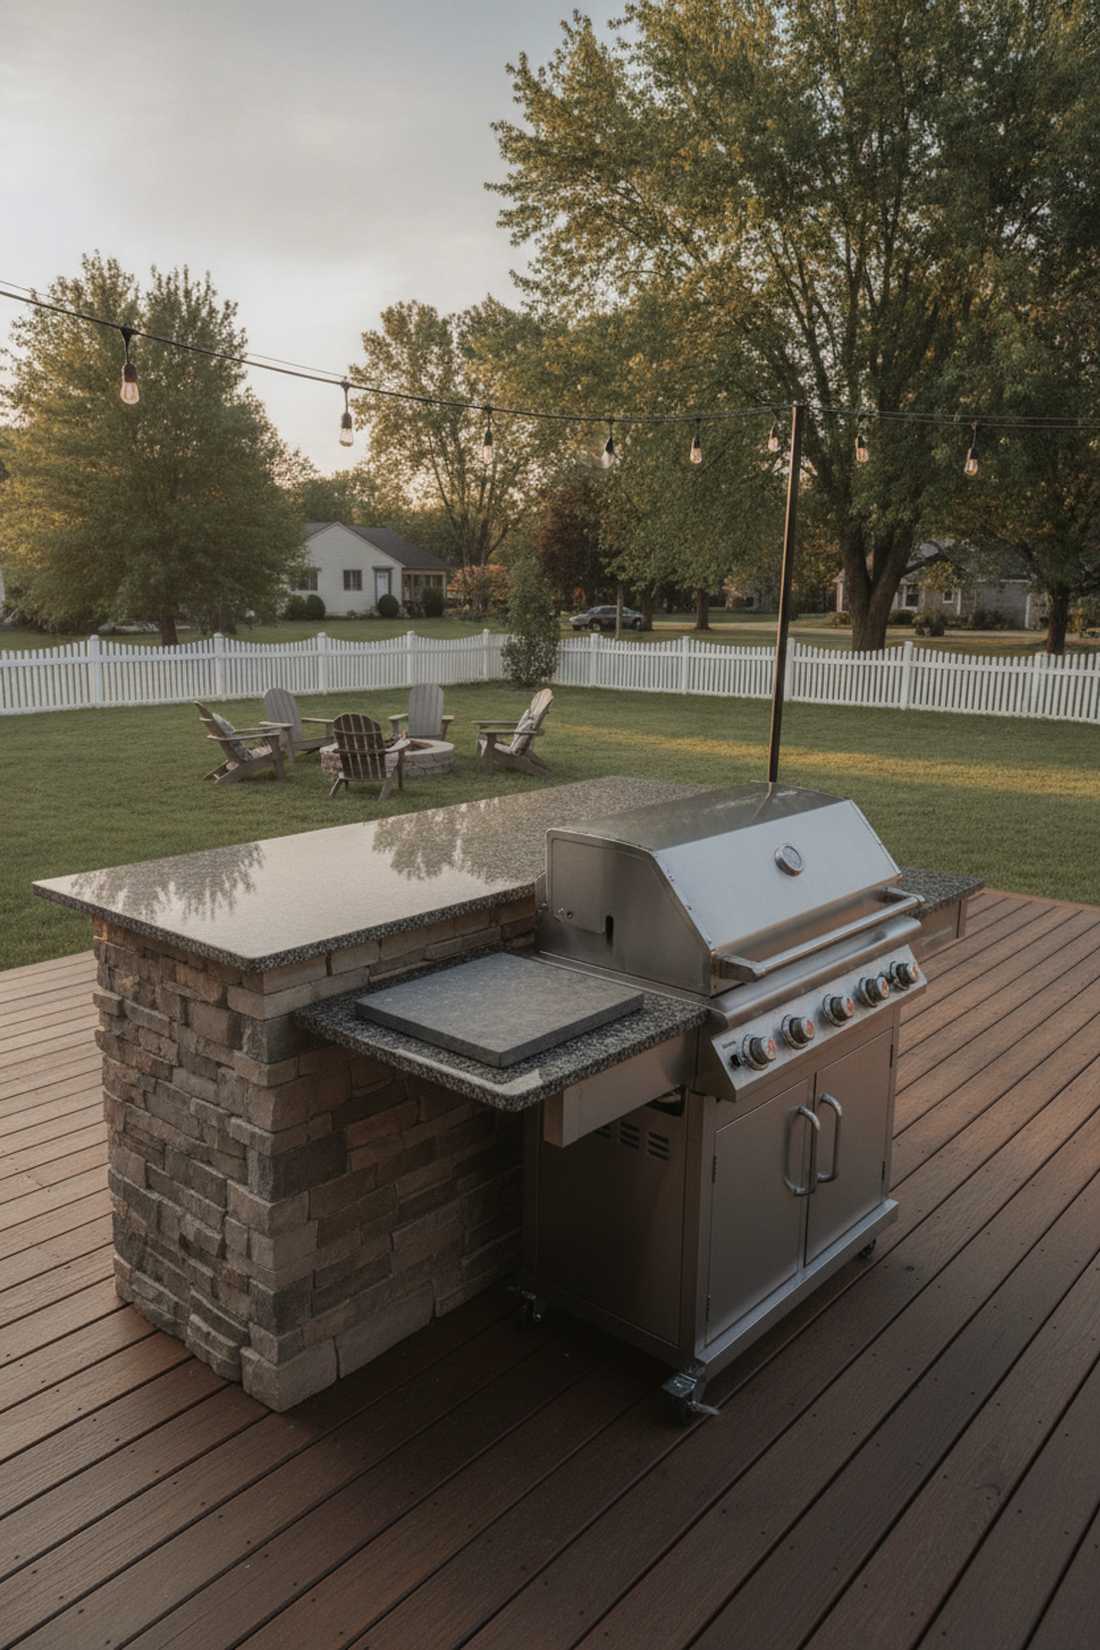
Delivers incredible flexibility for homeowners who want premium looks without strict permanence. The hybrid fixed-bar mobile-grill concept completely changes how you utilize seasonal space.
Docking a high-end rolling cart next to a permanent stone bar delivers a surprisingly premium look while cutting installation costs. Utilizing heavy-duty outdoor grill carts allows you to wheel the grease trap away during off-seasons.
You can easily pull this off for around $1,500–$2,800 total. Highly recommended for a quick weekend win that skirts zoning permits.
- Key Materials: Premium stainless rolling carts
- Vibe / Style: Smart adaptive utility
- Difficulty: Very Easy
- Budget Breakdown: Fixed bar side: $1,000 | Premium rolling grill: $1,200
- Creator’s Tip: Match the rolling cart’s side shelves to the fixed bar’s countertop material so they look totally unified.
- Smart Sourcing: Invest in a pro-style stainless grill cart with locking casters and matching stone cutting boards.
Galley Outdoor Patio Grill Configurations
Galley layouts position two parallel counter runs facing each other, creating an efficient corridor for cooking. This design suits narrow side yards and maximizes counter space in tight widths.
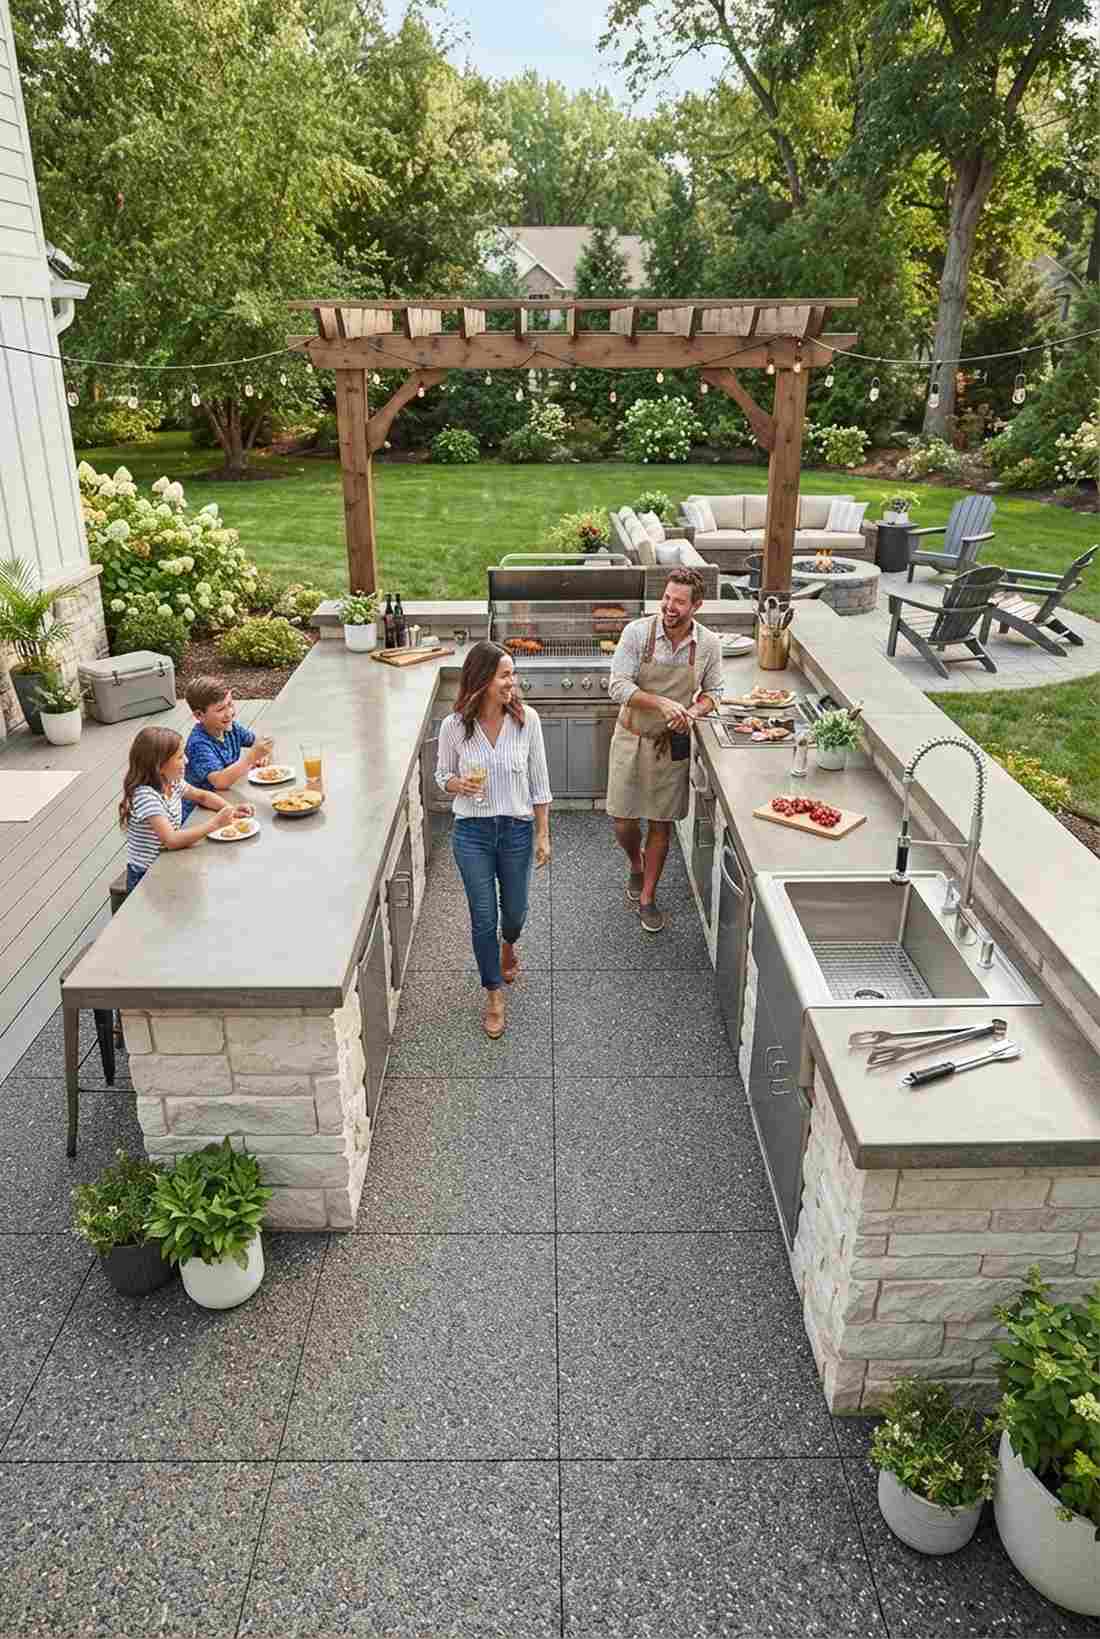
25. Parallel Grill and Bar Galley

Channels the hyper-efficient workflow of an elite commercial ship kitchen. A parallel twin-counter corridor creates intense focus by sandwiching the chef between prep and fire.
This layout absolutely maximizes utility in tight footprints while giving a designer-level finish of symmetry. Utilizing outdoor patio kitchen design storage kits on both sides means you never lack space for platters and tools.
Building twin lines usually costs $3,000–$5,500. Save this to your master planning board for extreme efficiency!
- Key Materials: Matching dual island frames
- Vibe / Style: High-speed culinary corridor
- Difficulty: Moderate
- Budget Breakdown: Twin structures: $2,200 | Surfaces: $1,800
- Creator’s Tip: Keep the walking aisle exactly 42 to 48 inches wide—anything less is a hazard, anything more breaks the flow.
- Smart Sourcing: Get a dual-pack modular island kit and matching stainless access doors (bulk pack).
Don’t finalize any side yard plans before seeing how this narrow configuration pulls off a full resort vibe…
26. Side-Yard Galley Kitchen
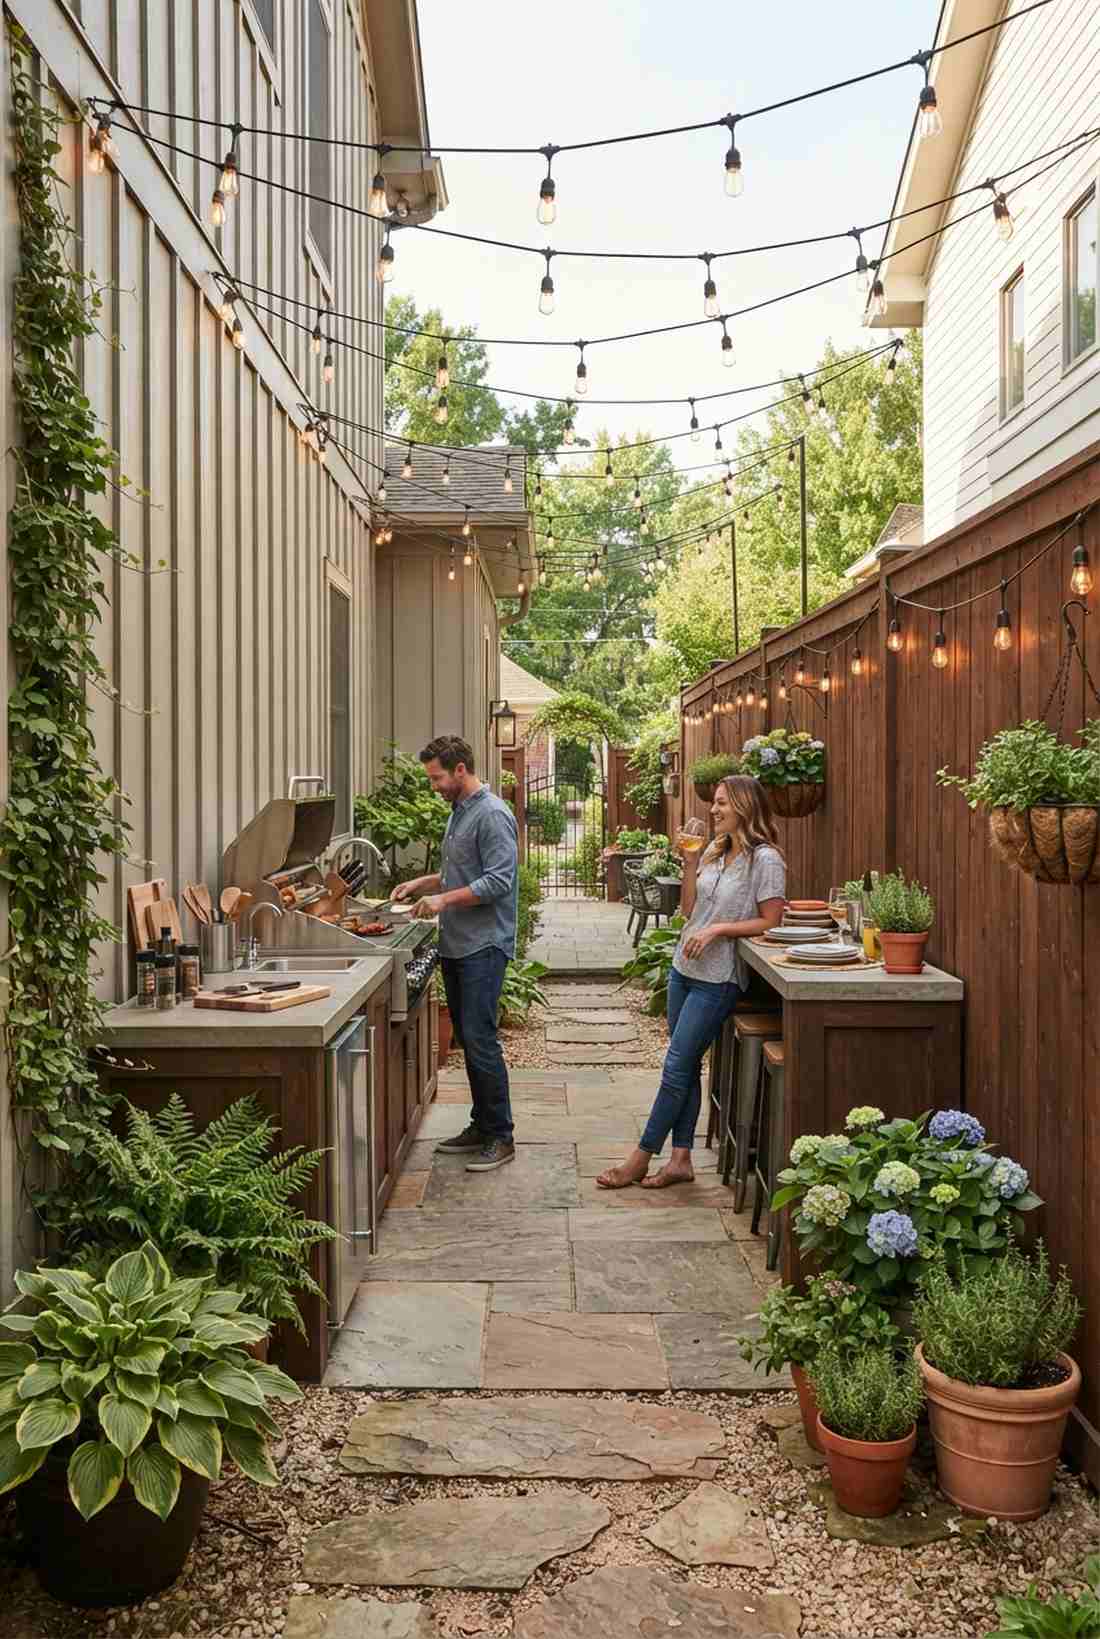
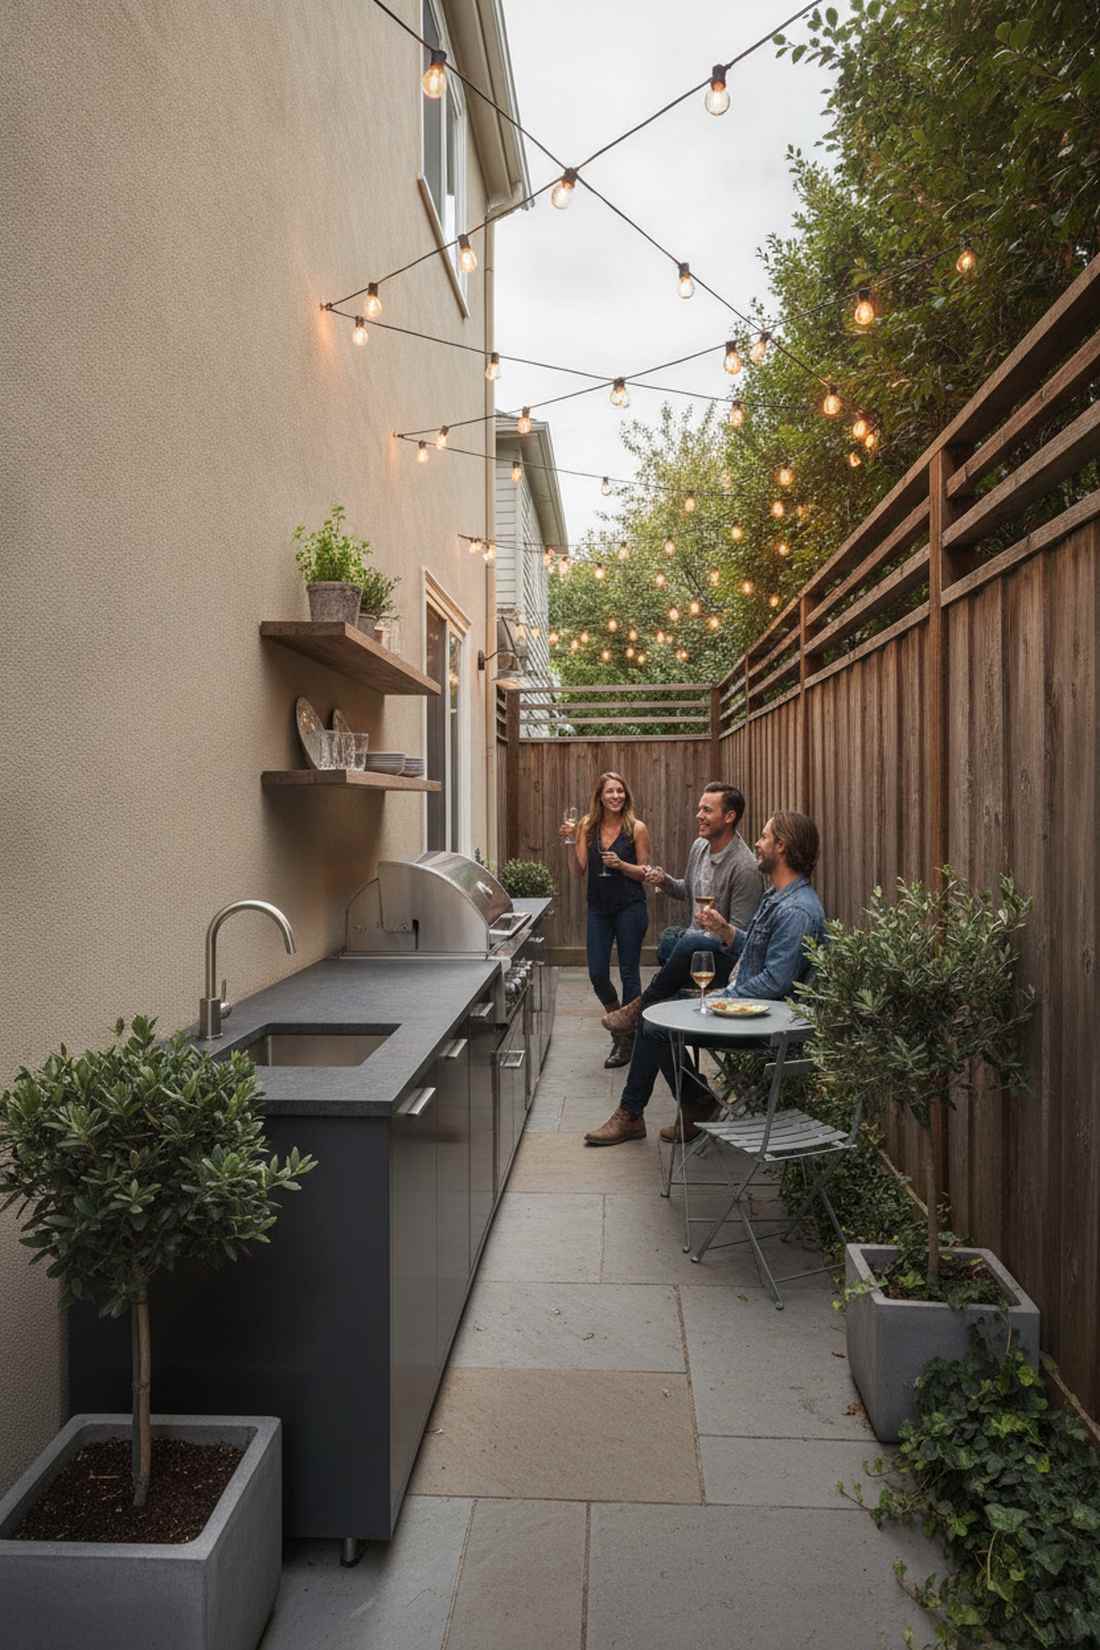
Turns that neglected, weed-filled alley beside your house into a buzzing social hotspot. The narrow property-line kitchen layout reclaims dead space with incredible brilliance.
Hugging the home’s siding and the fence line creates a cozy, tunnel-like bistro effect. Injecting narrow-depth outdoor patio grill modules ensures you get full cooking power without choking the precious walkway.
This space-saving miracle runs roughly $2,500–$4,500. It completely revolutionizes useless side yard real estate.
- Key Materials: Slim-profile appliances
- Vibe / Style: Secret alleyway bistro
- Difficulty: Moderate
- Budget Breakdown: Slim base units: $1,500 | Lighting & finishes: $1,200
- Creator’s Tip: Suspend heavy-duty string lights back and forth overhead to create a faux ceiling that makes the narrow space feel intentional.
- Smart Sourcing: Use slimline 24-inch drop-in grills and commercial grade outdoor festoon lights.
27. Covered Galley With End Bar
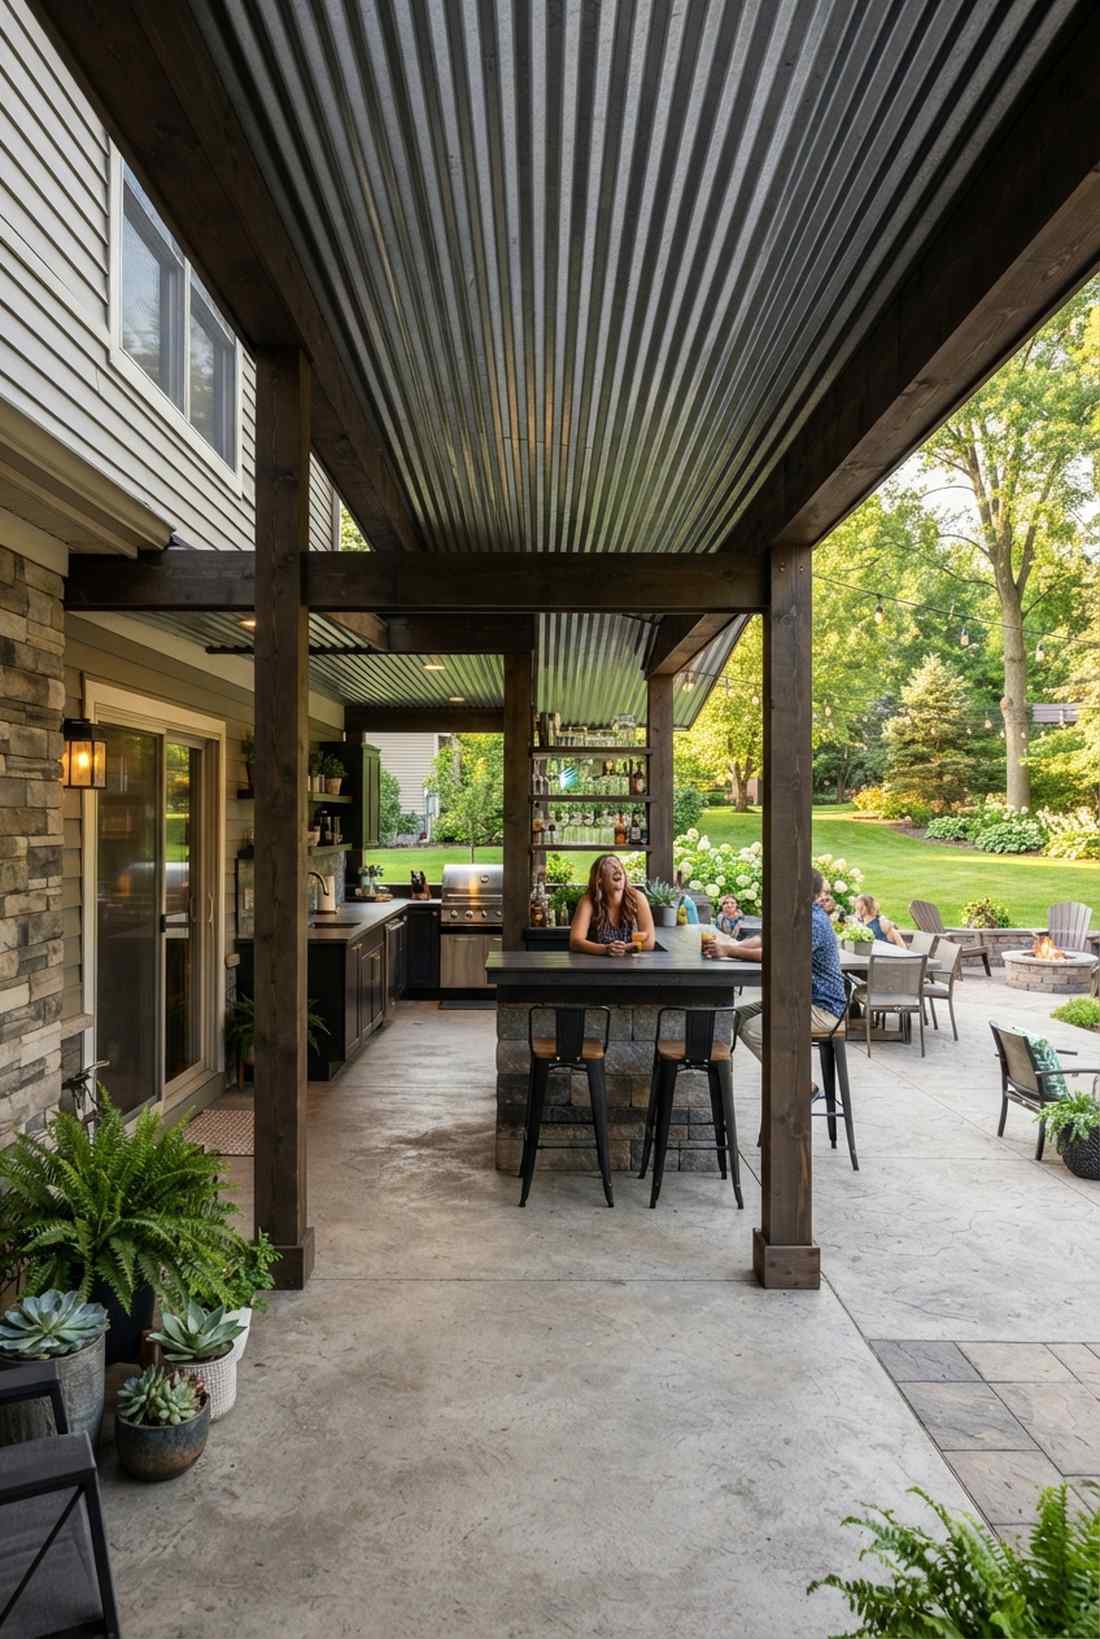
Feels like entering a VIP tunnel that perfectly leads to an open-air party. The roofed corridor with a perpendicular bar acts as the ultimate transition zone between house and yard.
Capping the end of a galley with seating looks far more expensive than it is while drawing guests out into the open. Sourcing corrugated metal roofing kits for the cover adds an industrial-chic layer of weather protection.
With overhead shelter, expect to spend $3,500–$6,500. Pin this layout if you love an indoor-outdoor flow!
- Key Materials: Lean-to roof framing
- Vibe / Style: Industrial chic breezeway
- Difficulty: Advanced framing
- Budget Breakdown: Roof extension: $1,500 | Galley & Bar: $2,800
- Creator’s Tip: Make the end bar slightly higher (42 inches) to block the view of the cooking corridor from the yard.
- Smart Sourcing: Look for galvanized corrugated roof panels and post-base mounting brackets (4-pack).
28. Asymmetric Galley Layout
Exudes a playful, dynamic energy that breaks away from rigid, boring box designs. An offset staggered counter layout prevents your patio from feeling like a claustrophobic bowling alley.
Sliding one counter further down than the other delivers a surprisingly premium look by creating natural entry points. Adding an outdoor-rated glass door beverage center on the shorter leg instantly creates a self-serve drink station.
This staggered aesthetic costs about $2,800–$5,000. It’s a fast layout swap that completely changes the vibe.
- Key Materials: Contrasting counter materials
- Vibe / Style: Dynamic modern flow
- Difficulty: Moderate
- Budget Breakdown: Base framing: $1,400 | Appliances: $2,000
- Creator’s Tip: Use a lighter stone on the shorter drink side and a dark, stain-resistant stone on the longer grill side.
- Smart Sourcing: Buy an outdoor-rated undercounter beverage fridge and weatherproof cabinet vent panels.
29. Galley With Pass-Through Access
Flows beautifully like a smartly designed restaurant line that never traps the chef. The split-corridor walk-through design prevents annoying dead-end traffic jams during busy parties.
Breaking a long run into two smaller segments gives a designer-level finish while adding massive functional convenience. Hiding slide-out outdoor trash bin kits inside that central gap is exactly what professional patio designers do.
This layout is super practical and runs $2,500–$4,800. Save this to your DIY weekend garden board!
- Key Materials: Segmented base frames
- Vibe / Style: Fluid entertainer’s dream
- Difficulty: Easy to Moderate
- Budget Breakdown: Three island units: $1,800 | Accessories: $1,000
- Creator’s Tip: Place your built-in trash and recycling pull-outs directly adjacent to the gap so guests can toss plates without entering the kitchen.
- Smart Sourcing: Pick up a stainless steel double trash pull-out drawer and weather-sealed dry storage pantries.
Compact Outdoor Patio Kitchen Design Solutions
Small patios and balconies still accommodate functional setups through careful space planning and multi-purpose elements. These compact layouts prove you don’t need sprawling square footage to grill and entertain outdoors.
Wait until you see how the next layout completely hides the cooking mess while still keeping guests engaged…
30. Apartment Balcony Mini-Kitchen
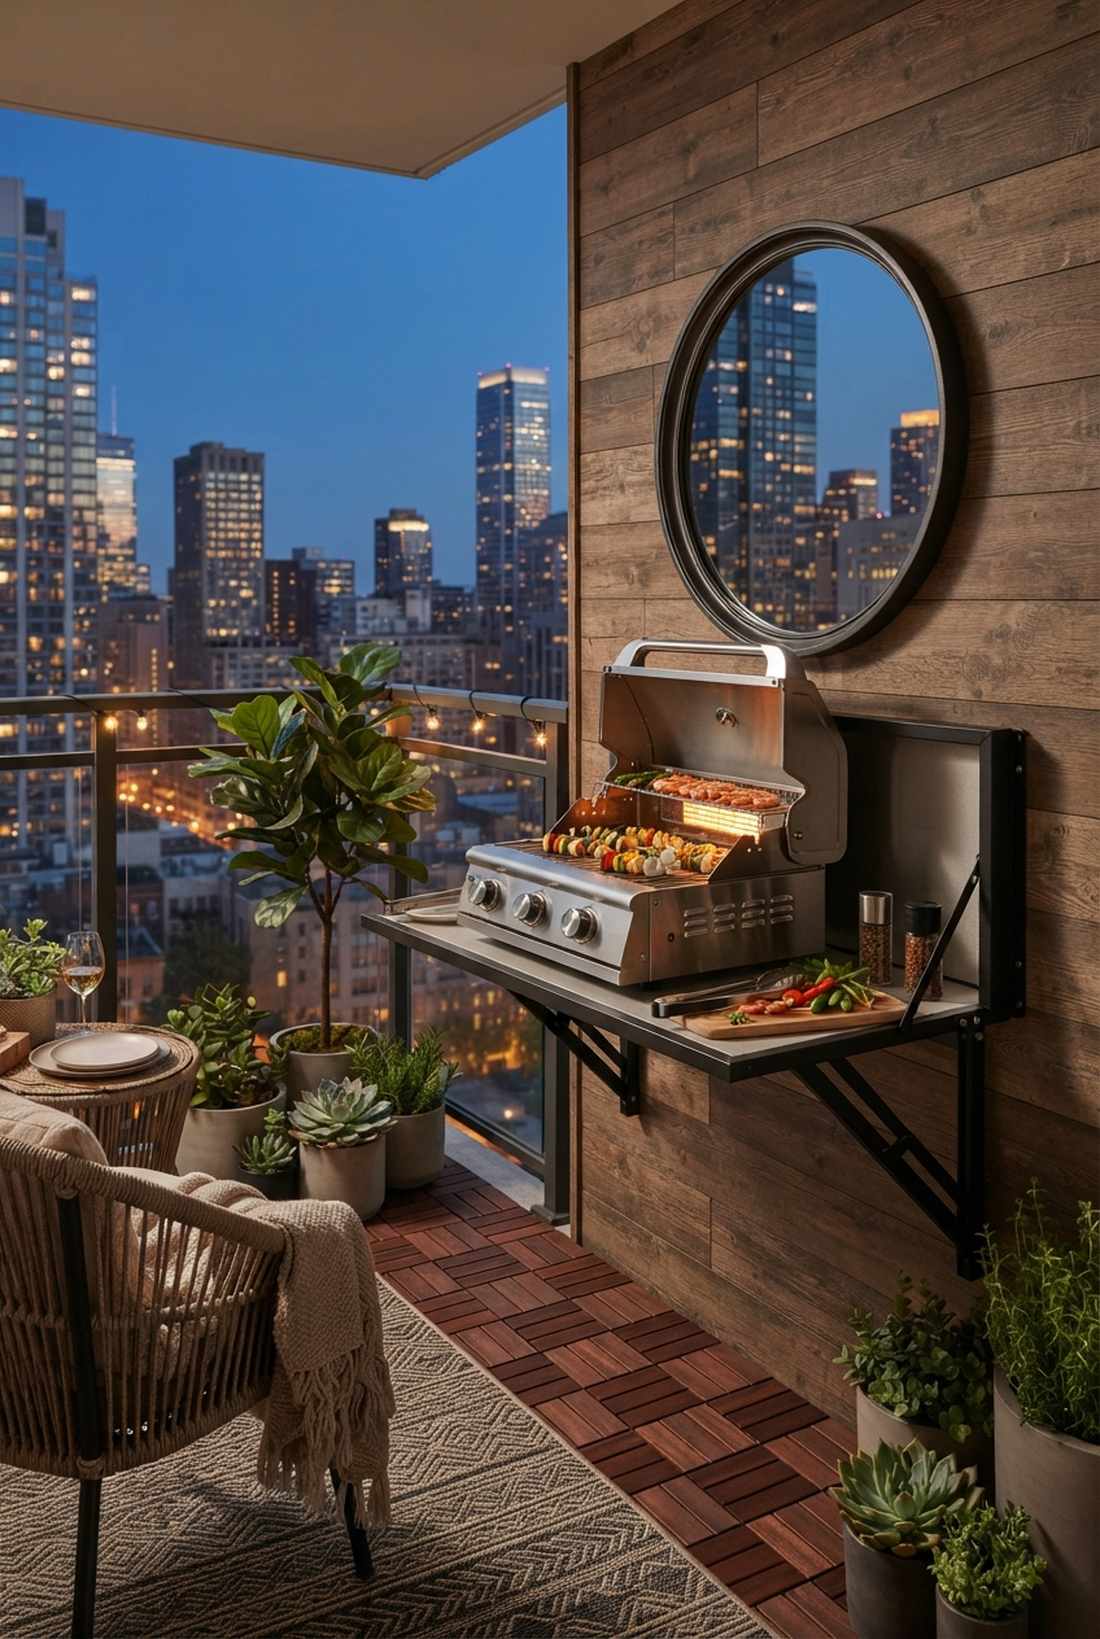
Captures the magic of big-city rooftop dining in a radically small footprint. A fold-down micro balcony kitchen proves you don’t need an acre of grass to host an epic dinner.
Using collapsible elements looks far more expensive than it is while staying strictly compliant with condo rules. Opting for a high-heat outdoor electric grill ensures you get a perfect sear without violating open-flame balcony bans.
You can easily pull this off for around $800–$1,500. Perfect for a quick, space-saving weekend win.
- Key Materials: Folding marine-grade brackets
- Vibe / Style: Urban penthouse micro-lounge
- Difficulty: Easy apartment DIY
- Budget Breakdown: Electric grill: $400 | Folding hardware: $150 | Shelf: $200
- Creator’s Tip: Mount a gorgeous mirror behind the folding shelf to visually double the size of your balcony when the kitchen is open.
- Smart Sourcing: Get a premium electric outdoor balcony grill and heavy-duty drop-leaf folding brackets (pair).
31. Corner Wedge Grill Station
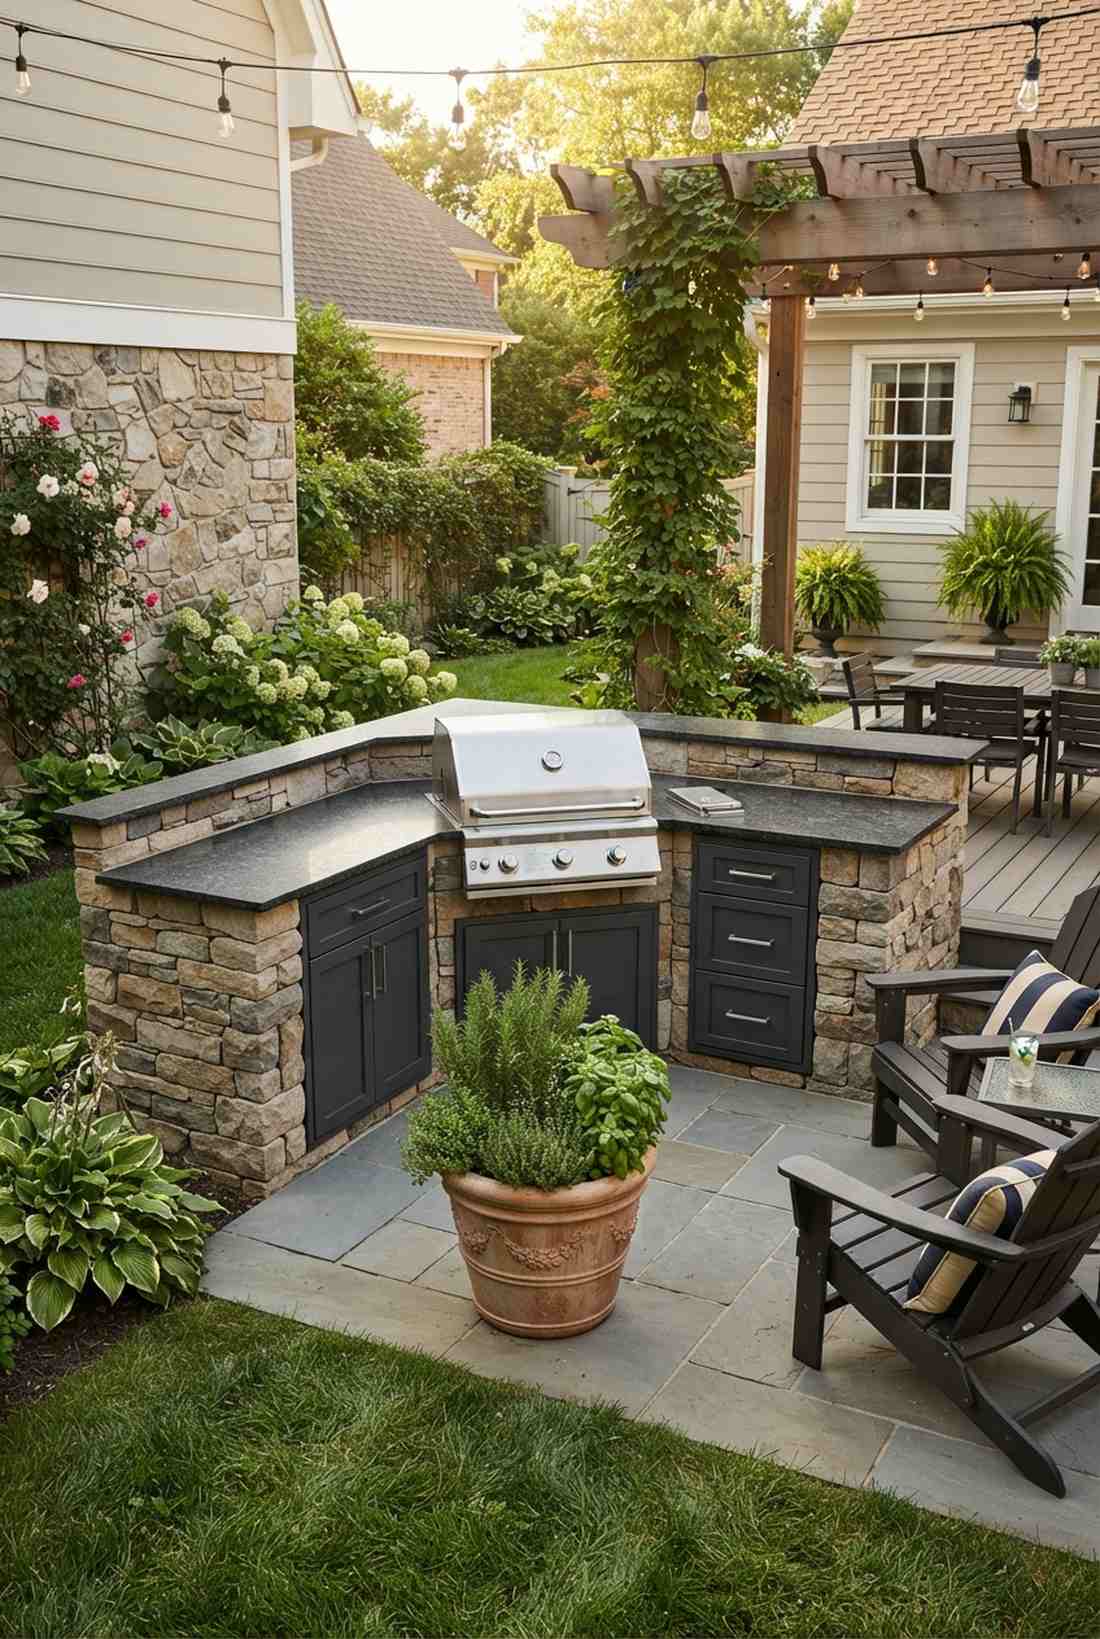
Slips perfectly into dead space like a custom-tailored piece of architectural furniture. The triangular corner wedge setup is an absolute lifesaver for cramped 90-degree patio corners.
This layout maximizes usable counter space while maintaining a surprisingly premium look that doesn’t block foot traffic. Installing custom angled outdoor patio kitchen cabinets turns a useless corner into a high-functioning prep zone.
Custom wedge cuts push this slightly to $1,800–$3,200. Pin this if you’re planning a small space upgrade!
- Key Materials: Custom-cut masonry or steel framing
- Vibe / Style: Clever compact geometry
- Difficulty: Moderate (angled cuts)
- Budget Breakdown: Base frame: $800 | Custom stone cut: $1,200
- Creator’s Tip: Because the deep back corner is hard to reach, use it to house a gorgeous oversized potted plant or herb garden.
- Smart Sourcing: Look for adjustable angle corner brackets and a compact 28-inch drop-in grill.
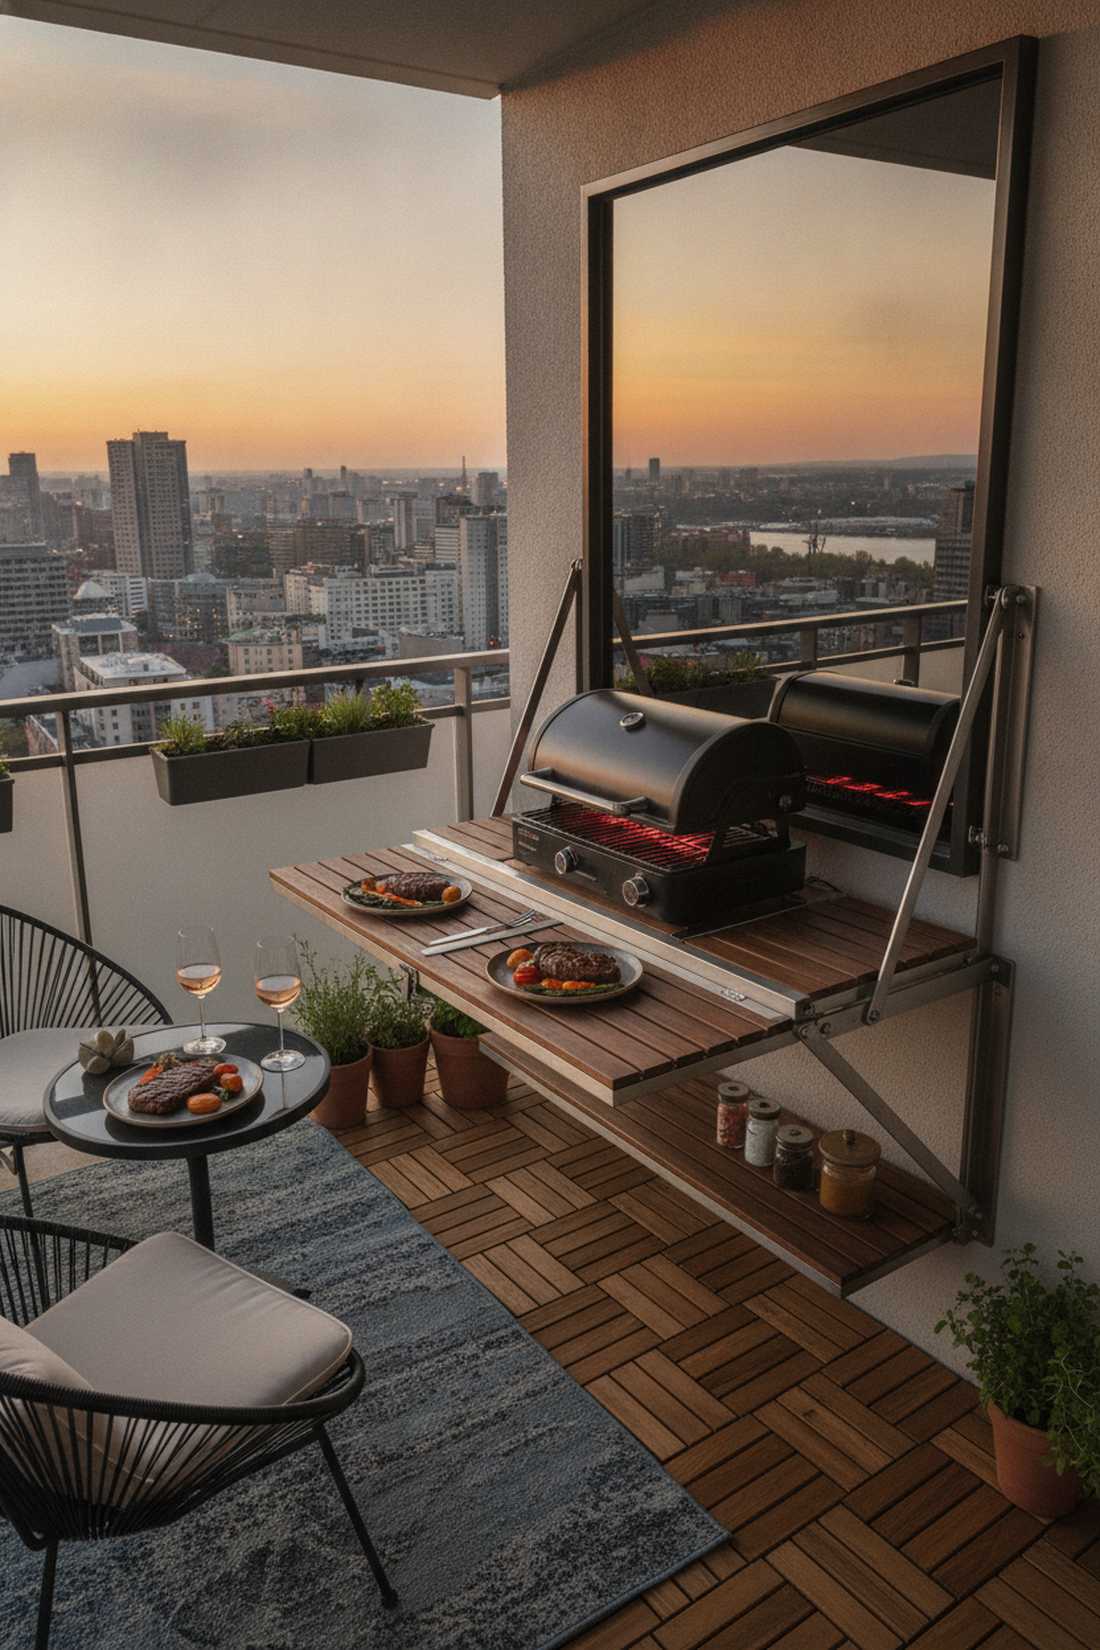
32. Wall-Mounted Fold-Out Grill Bar
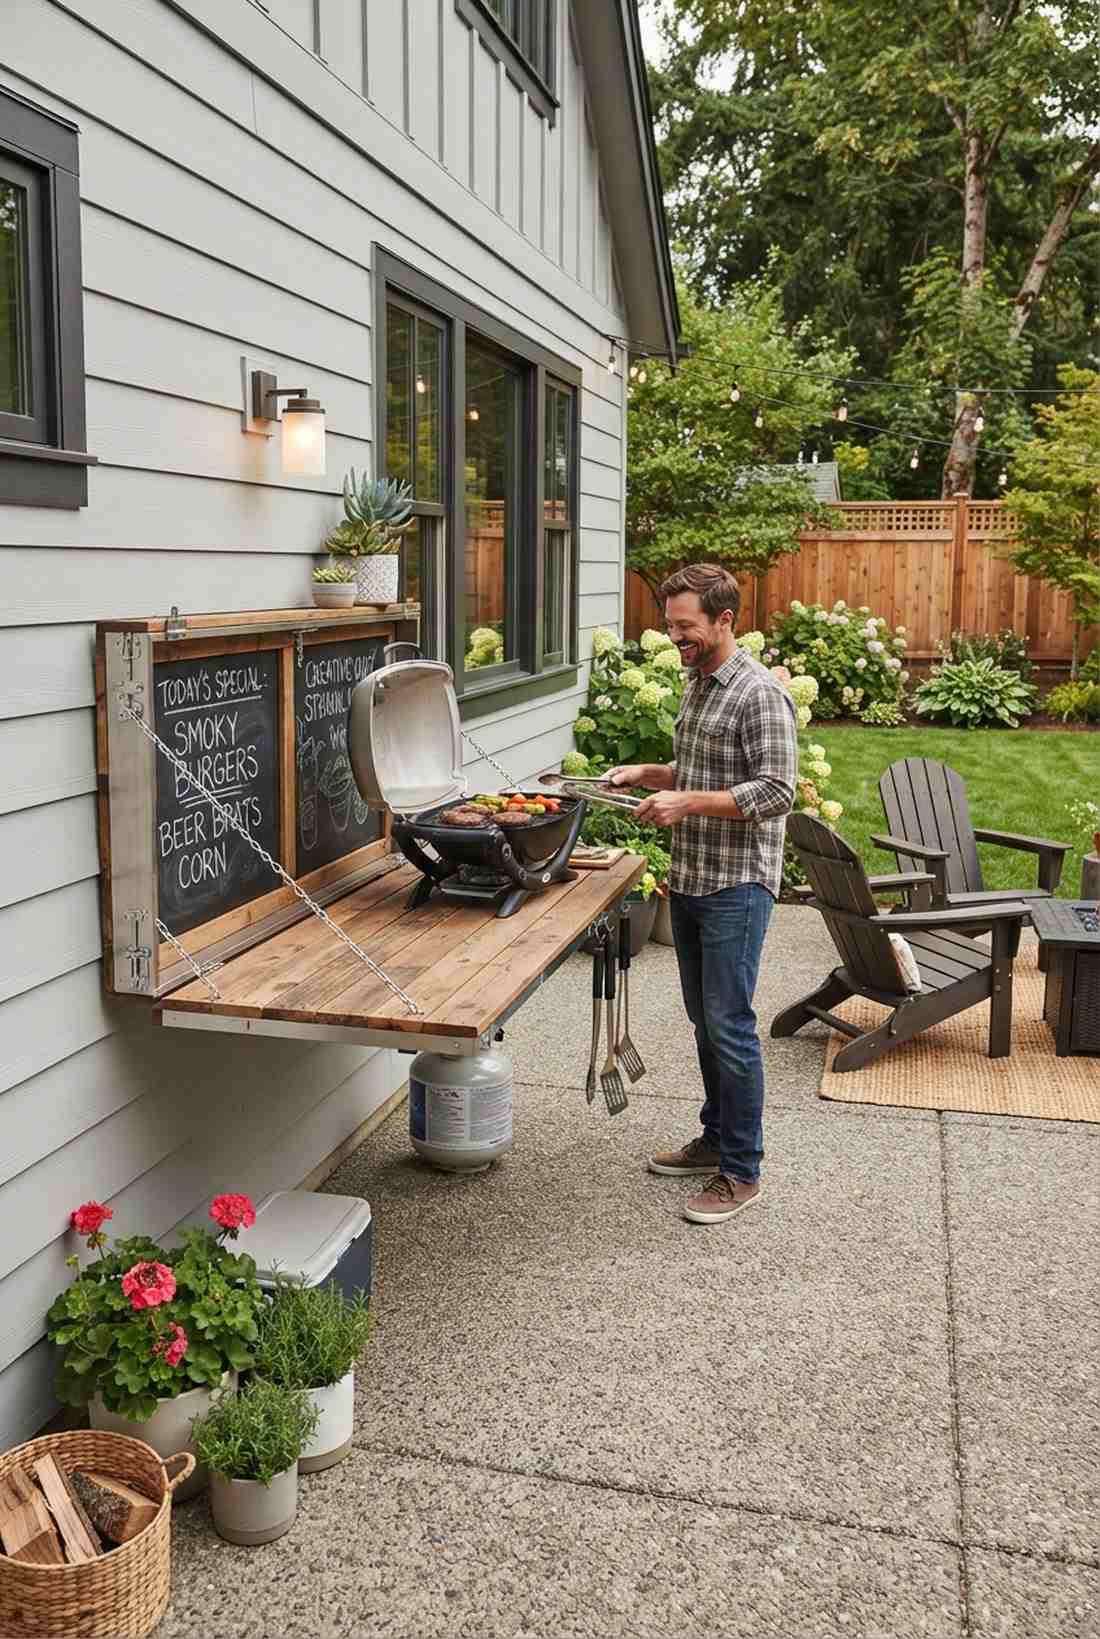
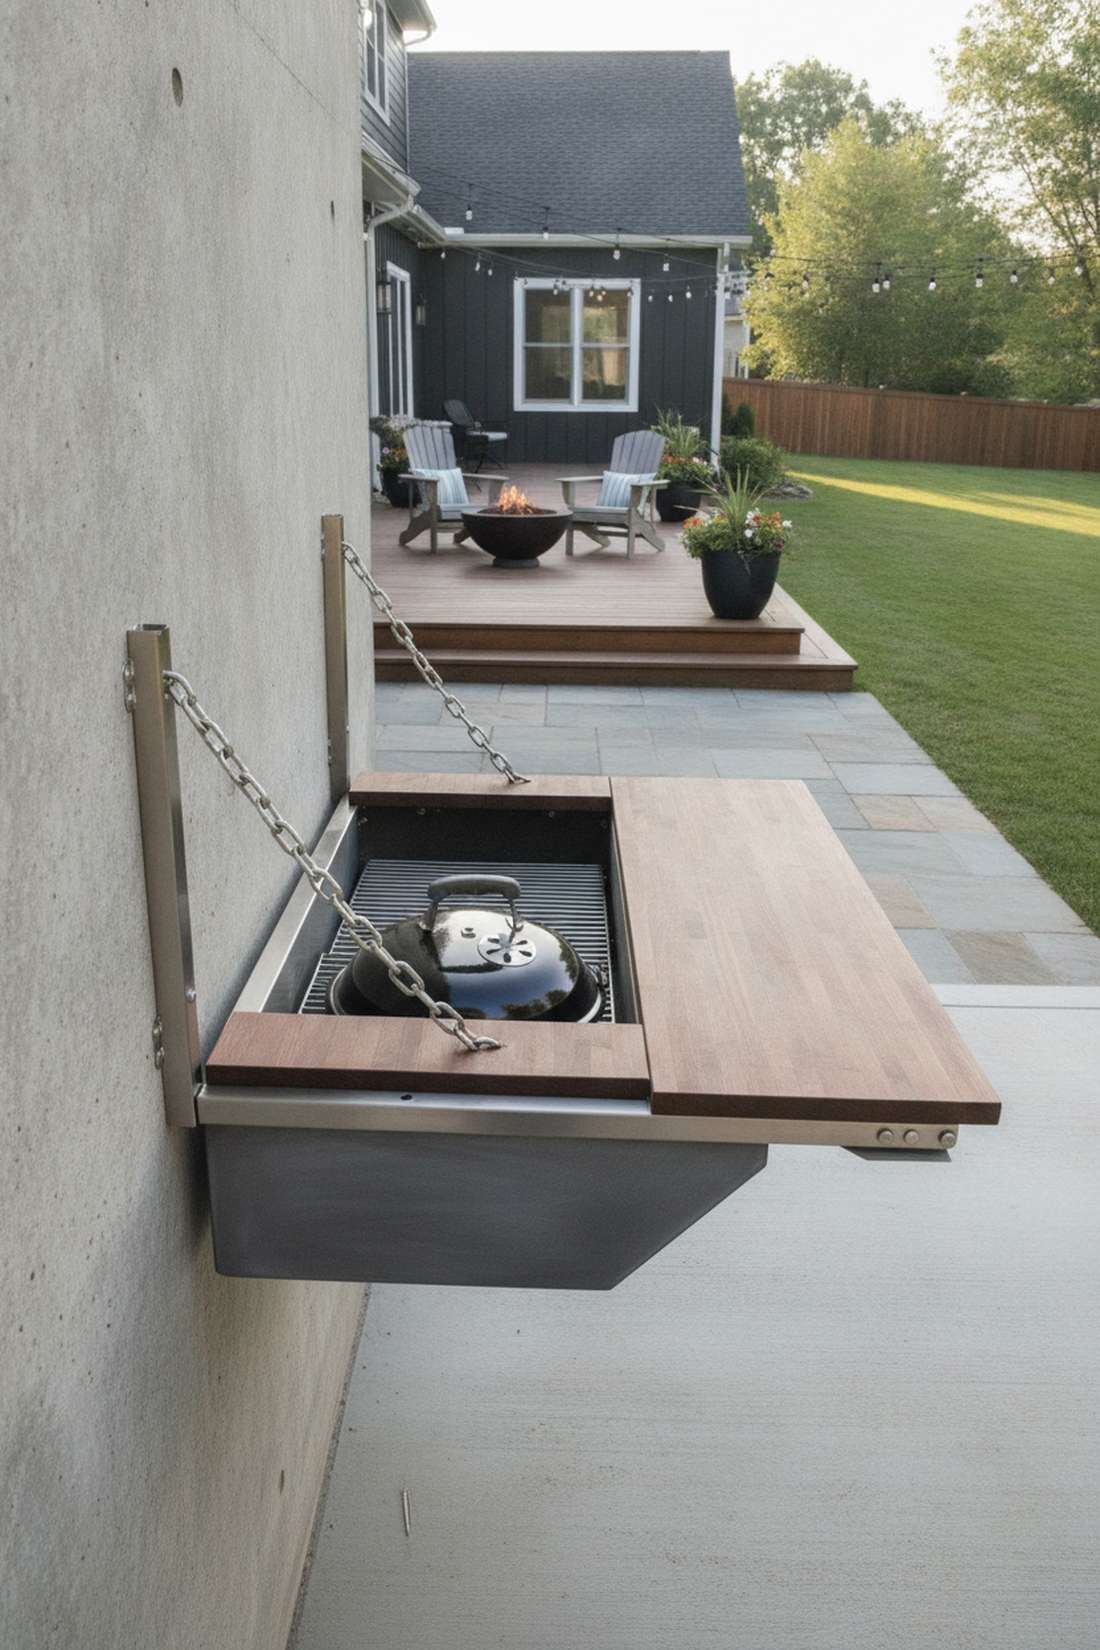
Feels like a brilliant tiny-house hack that magically appears only when you need it. A wall-hinged deployable cooking station is the ultimate solution for multi-use concrete slabs.
Folding completely flat against the exterior wall gives a designer-level finish of utter minimalism. Securing the rig with industrial stainless steel locking pins guarantees your burgers won’t suddenly crash to the ground.
This genius space-saver usually costs $600–$1,200. It’s a fast upgrade that completely changes the vibe of a tiny yard.
- Key Materials: Heavy-duty piano hinges & chains
- Vibe / Style: Stealthy minimalist pop-up
- Difficulty: Moderate wall anchoring
- Budget Breakdown: Hardware: $150 | Portable grill insert: $300 | Lumber: $200
- Creator’s Tip: Treat the underside of the folding table with exterior chalk paint so it acts as a menu board when folded up against the wall.
- Smart Sourcing: Buy marine-grade stainless piano hinges and heavy-duty locking quick-release pins.
33. Vertical Storage Compact Kitchen
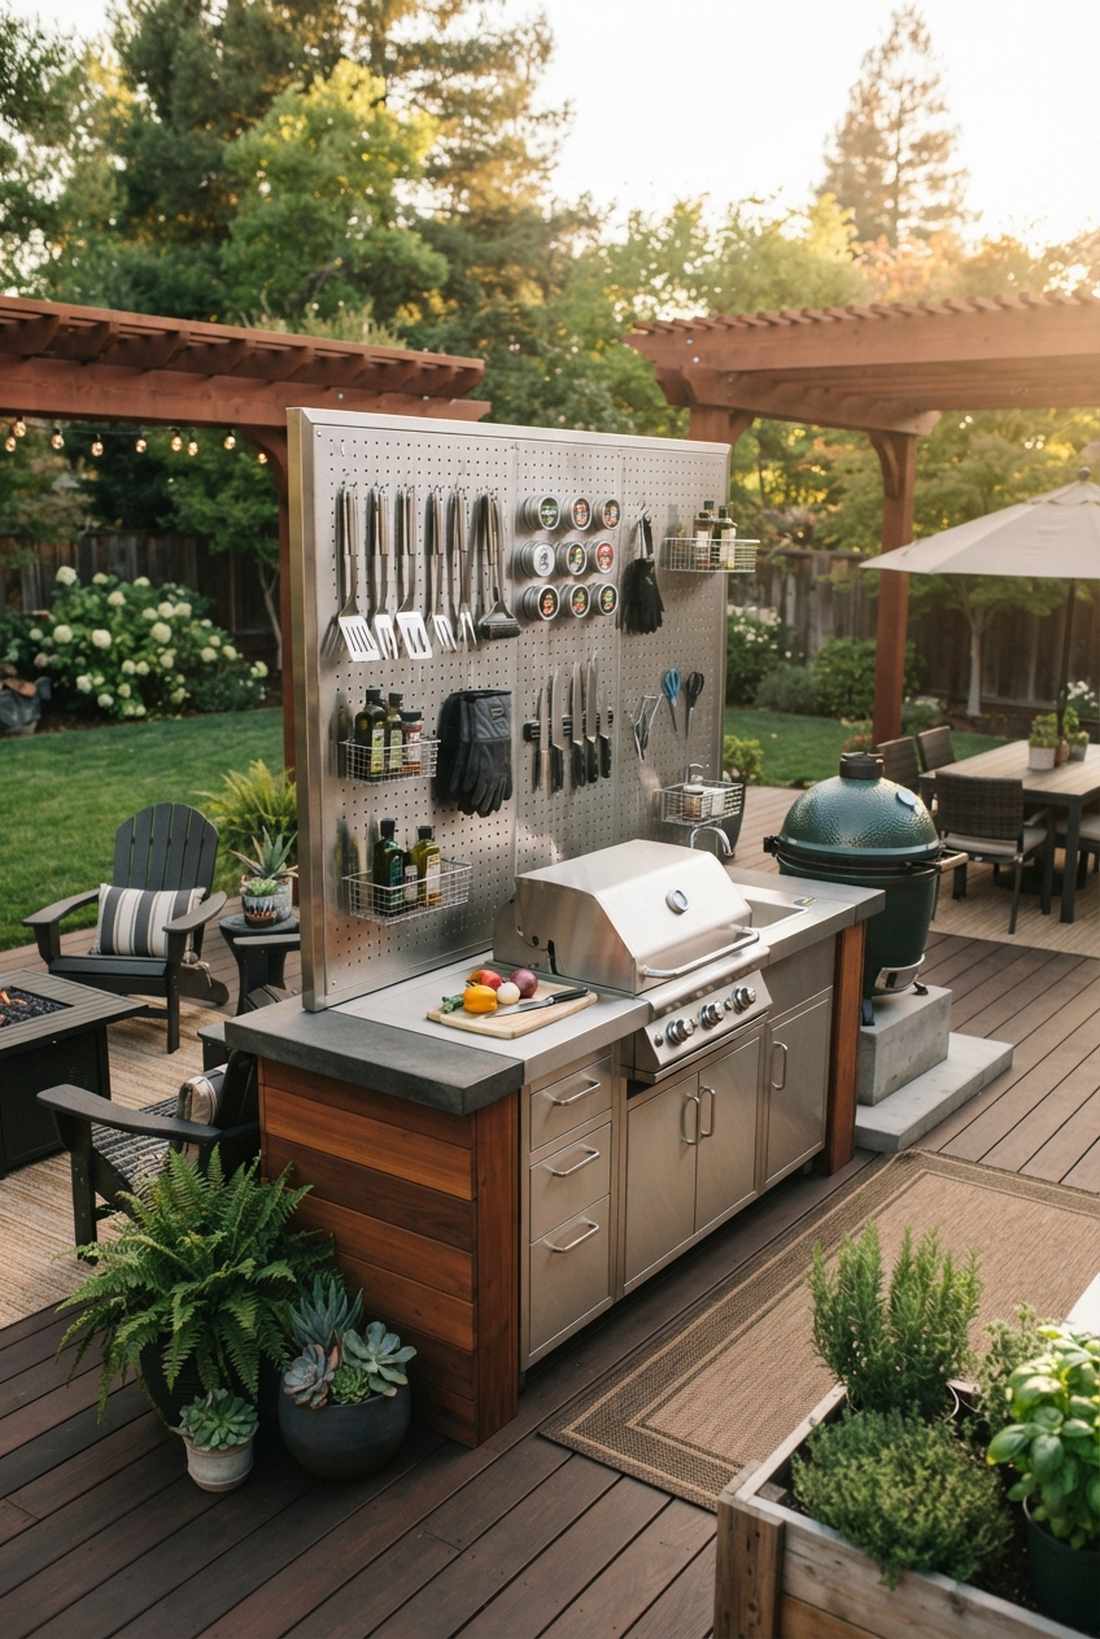
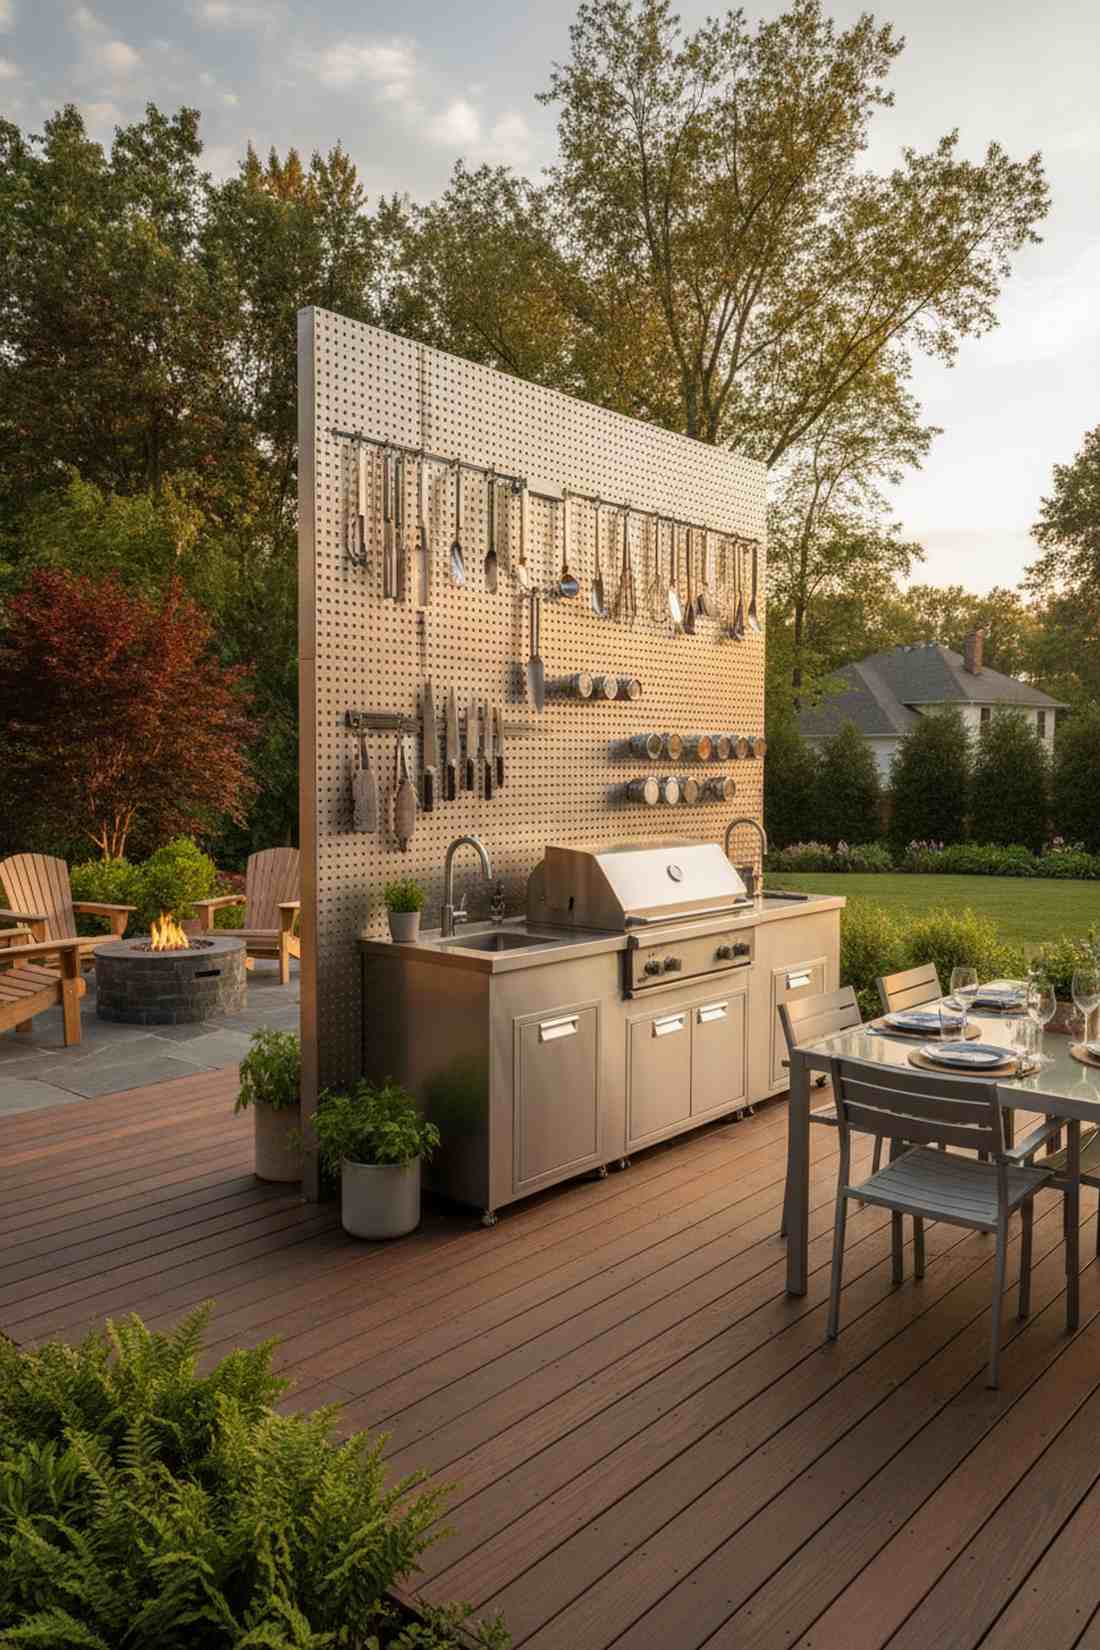
Radiates the hyper-organized charm of a master tool wall in a high-end workshop. A pegboard-backed vertical cooking hub reclaims precious counter space by throwing everything upward.
Storing gear vertically delivers a surprisingly premium look when done with sleek metal instead of cheap wood. Hanging outdoor patio and kitchen ideas like magnetic spice tins and sleek tongs turns tools into actual visual decor.
You can execute this vertical masterpiece for $900–$1,600. Save this to your ultimate outdoor organization board!
- Key Materials: Stainless steel pegboards
- Vibe / Style: Utilitarian chef’s rack
- Difficulty: Easy
- Budget Breakdown: Base unit: $600 | Metal pegboard: $250
- Creator’s Tip: Outline your favorite tools on the pegboard with a silver sharpie so everything always goes back to its perfect spot.
- Smart Sourcing: Source stainless steel galvanized pegboard panels and heavy-duty magnetic tool hooks.
34. Rolling Cart System
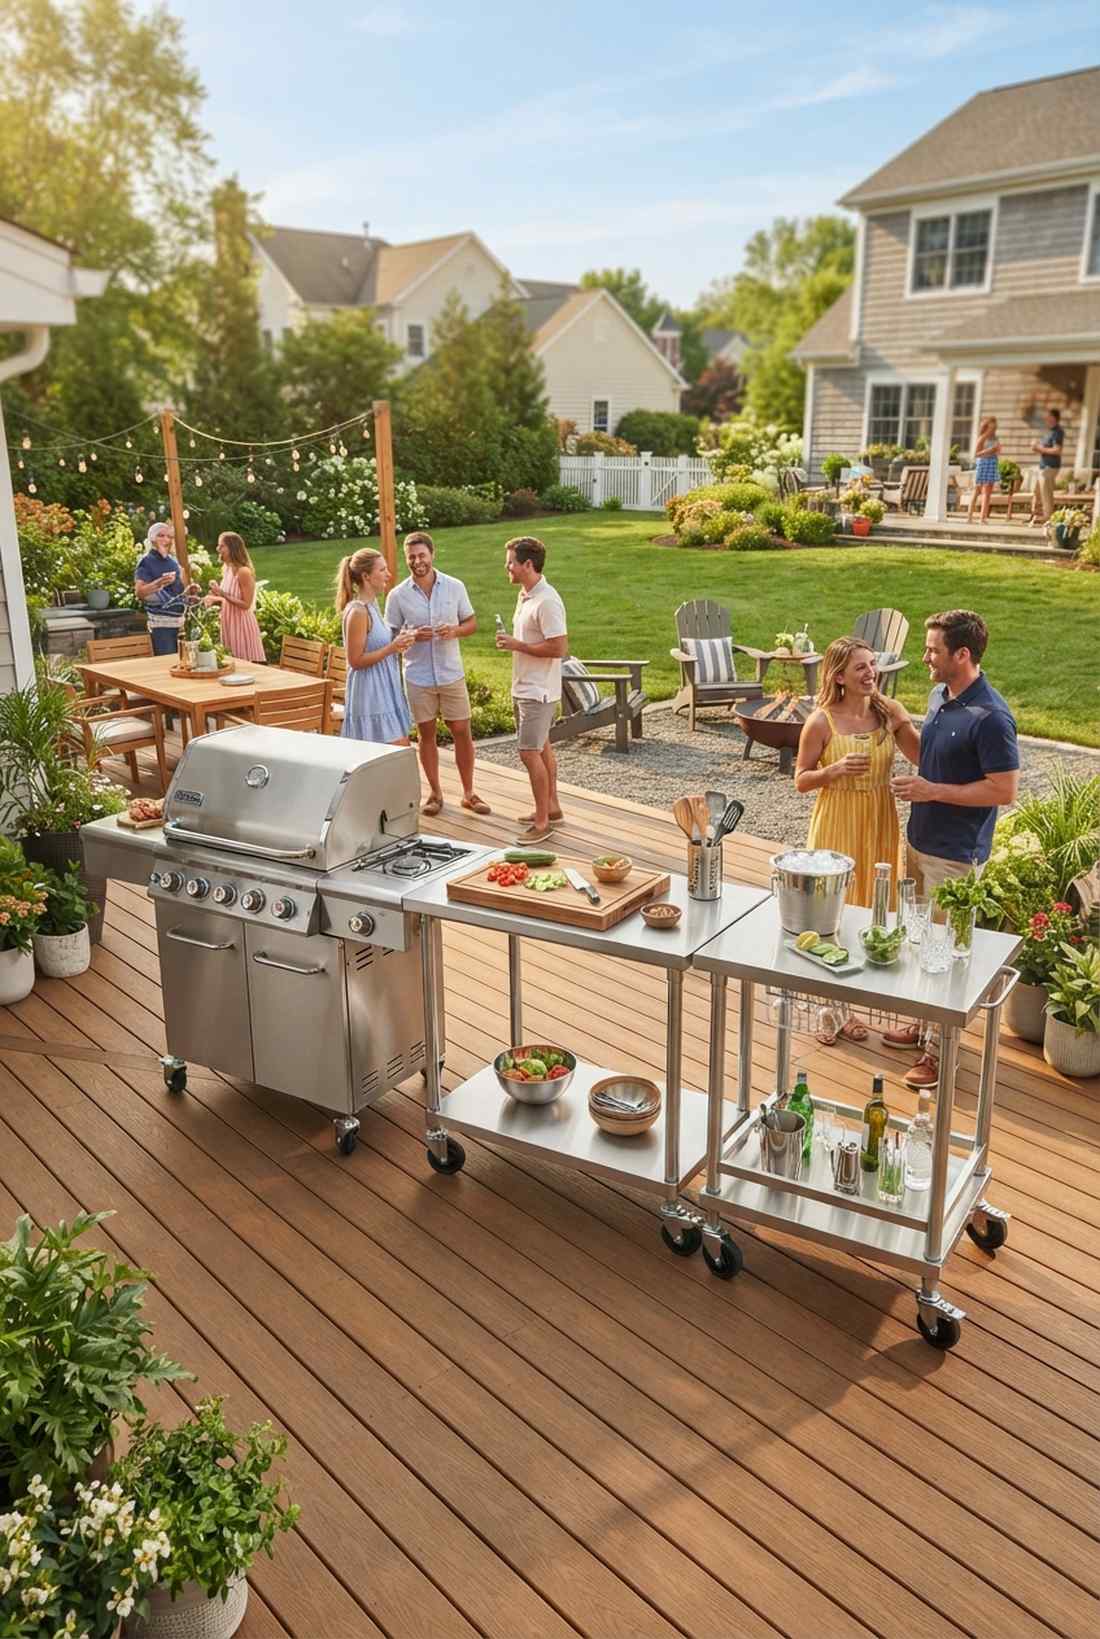
Embraces total modular freedom, letting you redesign your party layout every single weekend. A three-piece nesting cart fleet is perfect for renters or homeowners who refuse to commit.
Pushing high-end carts together looks far more expensive than it is while skipping the nightmare of poured concrete. Investing in commercial-grade locking caster wheels ensures your makeshift kitchen stays rock-solid while you chop.
A premium cart system will set you back $1,000–$2,000. Pin this if you love adaptable, commitment-free setups!
- Key Materials: Modular stainless steel islands
- Vibe / Style: Flexible catering pop-up
- Difficulty: Very Easy (Zero build)
- Budget Breakdown: Grill cart: $800 | Prep cart: $400 | Bar cart: $300
- Creator’s Tip: Buy carts from the exact same manufacturer line so the counter heights match perfectly when pushed together.
- Smart Sourcing: Pick up a stainless steel outdoor prep table with casters and a matching modular bar cart.
The multi-tier strategy coming up is secretly what high-end landscape architects use to justify massive price tags…
35. Built-In Bench With Hidden Grill
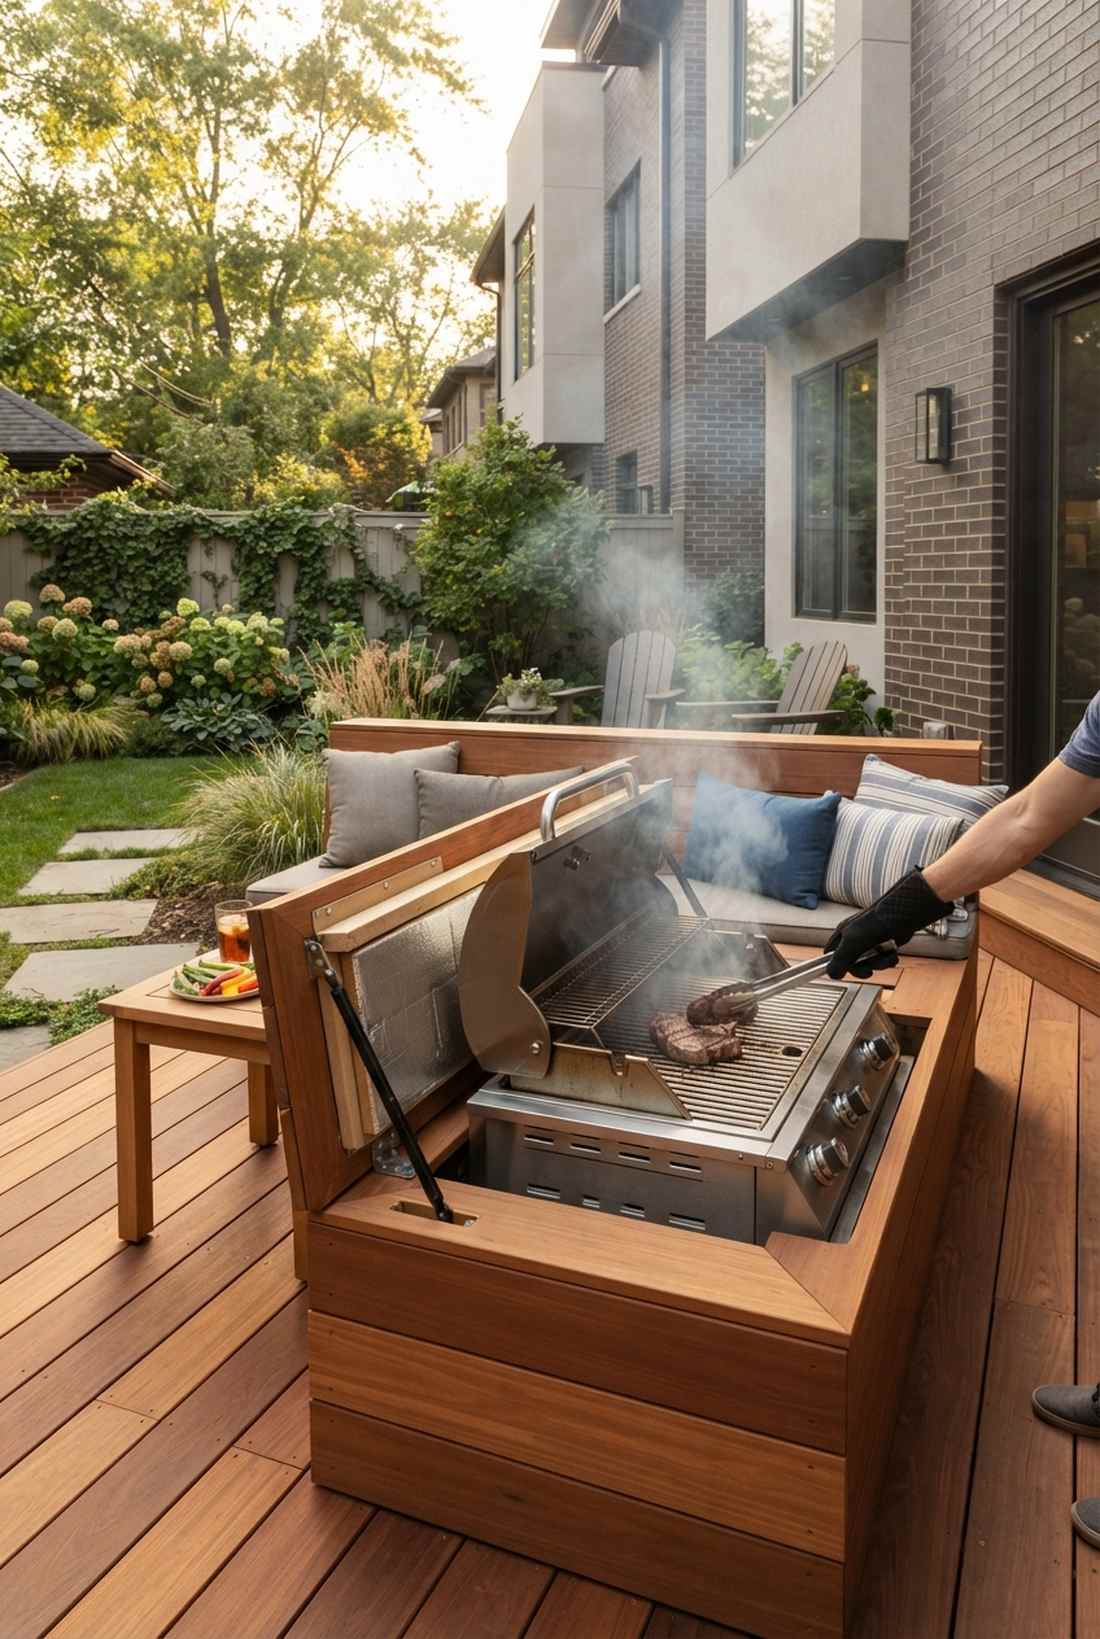

Feels straight out of a futuristic spy movie where furniture holds brilliant secrets. A dual-purpose bench-to-grill conversion redefines what is possible in microscopic patio spaces.
Hiding appliances inside seating gives a designer-level finish that cleans up the yard instantly. Using extreme heat-shielding insulation boards inside the bench is a mandatory hack to keep stored cushions from melting.
This custom carpentry trick costs $1,200–$2,500. It’s an absolute game-changer for tiny townhouse yards.
- Key Materials: Cedar decking & fireboard
- Vibe / Style: Stealthy transformer deck
- Difficulty: Advanced carpentry
- Budget Breakdown: Lumber: $400 | Insulation: $200 | Drop-in grill: $800
- Creator’s Tip: Put the bench lid on heavy-duty gas struts so it opens effortlessly and stays locked open while you cook.
- Smart Sourcing: Grab heavy-duty gas strut lift supports and ceramic fiber insulation blanket rolls.
Material Guide: Cheap vs. Premium Aesthetic
Knowing exactly where to save and where to spend makes all the difference in achieving that “looks expensive but isn’t” vibe.
- Standard Wood vs. UV-Resistant Polymer Panels: Standard wood warps and peels near grill heat within two seasons. Upgrading to outdoor-rated polymer base panels guarantees zero rot and zero painting.
- Pre-made Metal Frame Kits vs. Cinder Blocks: While cinder blocks are cheap, pre-fab galvanized steel frames assemble in hours, keep the structure lightweight, and guarantee perfect 90-degree corners for stone mounting.
Multi-Level Bar and Prep Stations
Varying counter heights within a single layout improves ergonomics, defines functional zones, and adds visual interest. These ideas use elevation changes strategically.
36. Two-Tier Island With 36-Inch and 42-Inch Levels
Delivers the ultimate splash-guard protection so your guests never get sprayed by sizzling fat. A classic bi-level prep and serve split is the gold standard for clean entertaining.
This 6-inch elevation shift delivers a surprisingly premium look that naturally dictates where guests should sit. Slipping outdoor patio kitchen design pop-up outlets into the riser wall provides invisible power for blenders and phone chargers.
This layout pushes costs to $3,000–$5,500 due to dual countertops. Save this to your pro-level entertaining board!
- Key Materials: Split-level steel framing
- Vibe / Style: Flawless host’s command post
- Difficulty: Moderate
- Budget Breakdown: Tiered framing: $1,200 | Dual stone slabs: $2,200
- Creator’s Tip: Make the 42-inch bar ledge exactly 15 inches deep to provide ample knee room for guests sitting on tall stools.
- Smart Sourcing: Use pre-cut split-level island kits and a waterproof pop-up electrical outlet.
37. Sunken Prep Zone With Grade-Level Bar
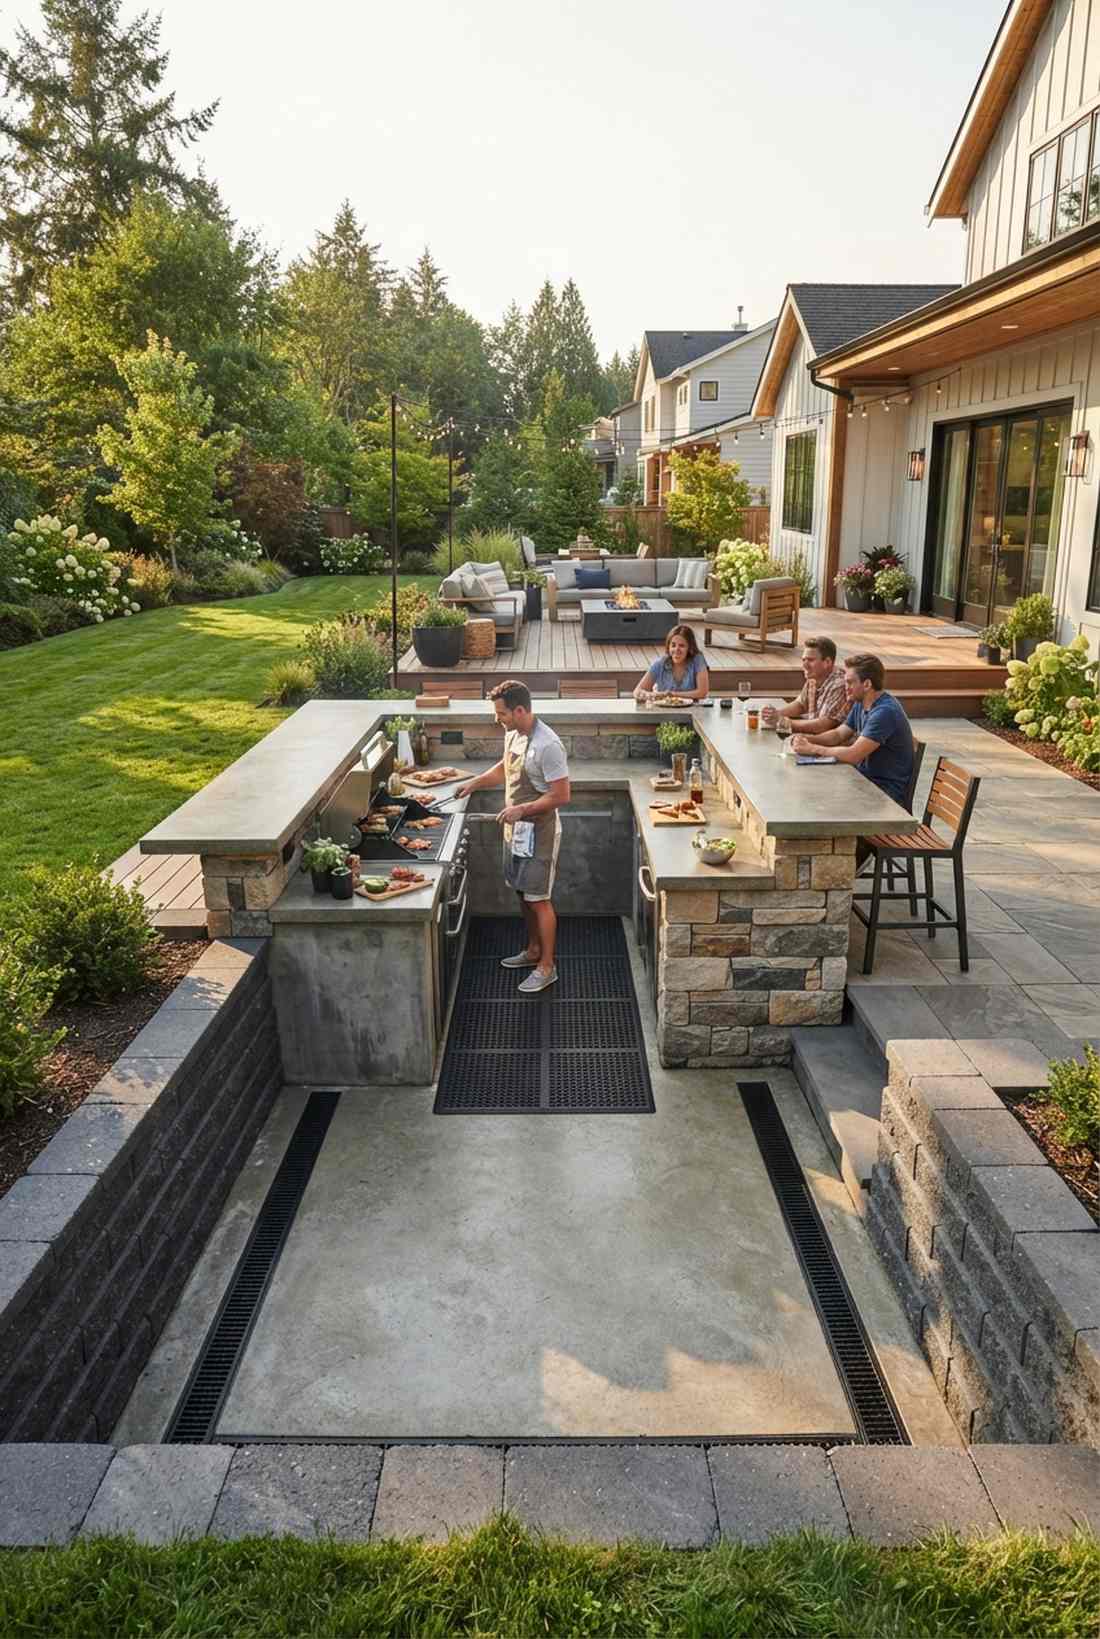
Exudes a groovy, architectural coolness that makes the chef the center of attention. A reverse-tier lowered cooking pit flips the script on traditional raised bars.
Dropping the cook down looks far more expensive than it is and prevents tall guests from looming over the food. Integrating high-capacity trench drain systems is absolutely crucial so your prep zone doesn’t turn into a swimming pool.
Digging a pit makes this a $4,500–$8,000 job. Pin this if you want a patio that drops jaws!
- Key Materials: Sub-grade retaining blocks
- Vibe / Style: Modern architectural amphitheater
- Difficulty: Advanced digging/drainage
- Budget Breakdown: Excavation: $1,500 | Waterproofing/Drainage: $1,000
- Creator’s Tip: Lay anti-fatigue rubber mats in the sunken zone since standing on sub-grade concrete will destroy your back.
- Smart Sourcing: Pick up a heavy-duty commercial trench drain and outdoor anti-fatigue kitchen mats.
38. Cascading Three-Level Station
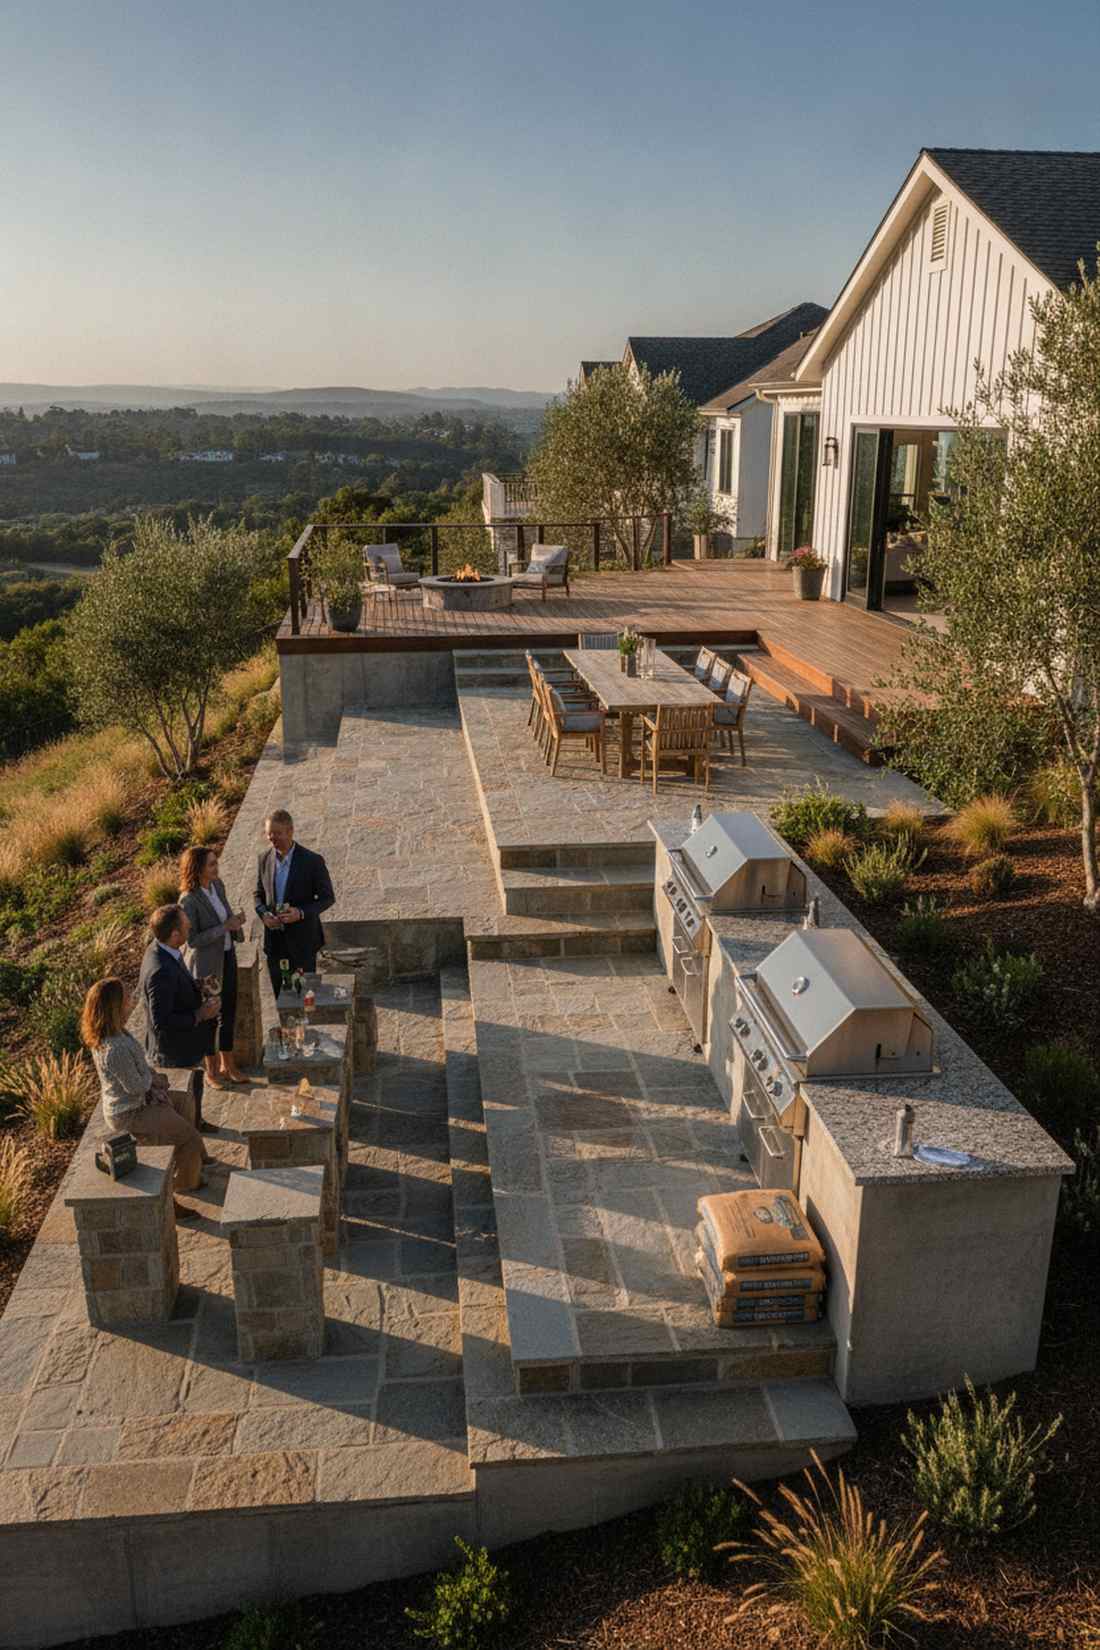
Flows effortlessly down a sloped yard like a gorgeous man-made waterfall of stone and fire. The triple-tier cascading landscape layout is the ultimate solution for aggressively sloped properties.
Stepping down in 4-inch increments gives a designer-level finish that works with nature instead of fighting it. Adding massive outdoor patio grill leveling bases ensures your cooking surfaces remain perfectly flat while the architecture drops.
Triple tiers demand precise stonework, running $6,000–$10,000. A legendary solution for hillside homes!
- Key Materials: Poured concrete footings
- Vibe / Style: Hillside luxury estate
- Difficulty: Pro-level engineering
- Budget Breakdown: Stepped footings: $3,000 | Triple stone cuts: $3,500
- Creator’s Tip: Dedicate the absolute lowest tier strictly for standing cocktail rests and the middle tier for seated dining.
- Smart Sourcing: Use adjustable heavy-duty leveling feet (bulk pack) and pre-mixed structural concrete bags.
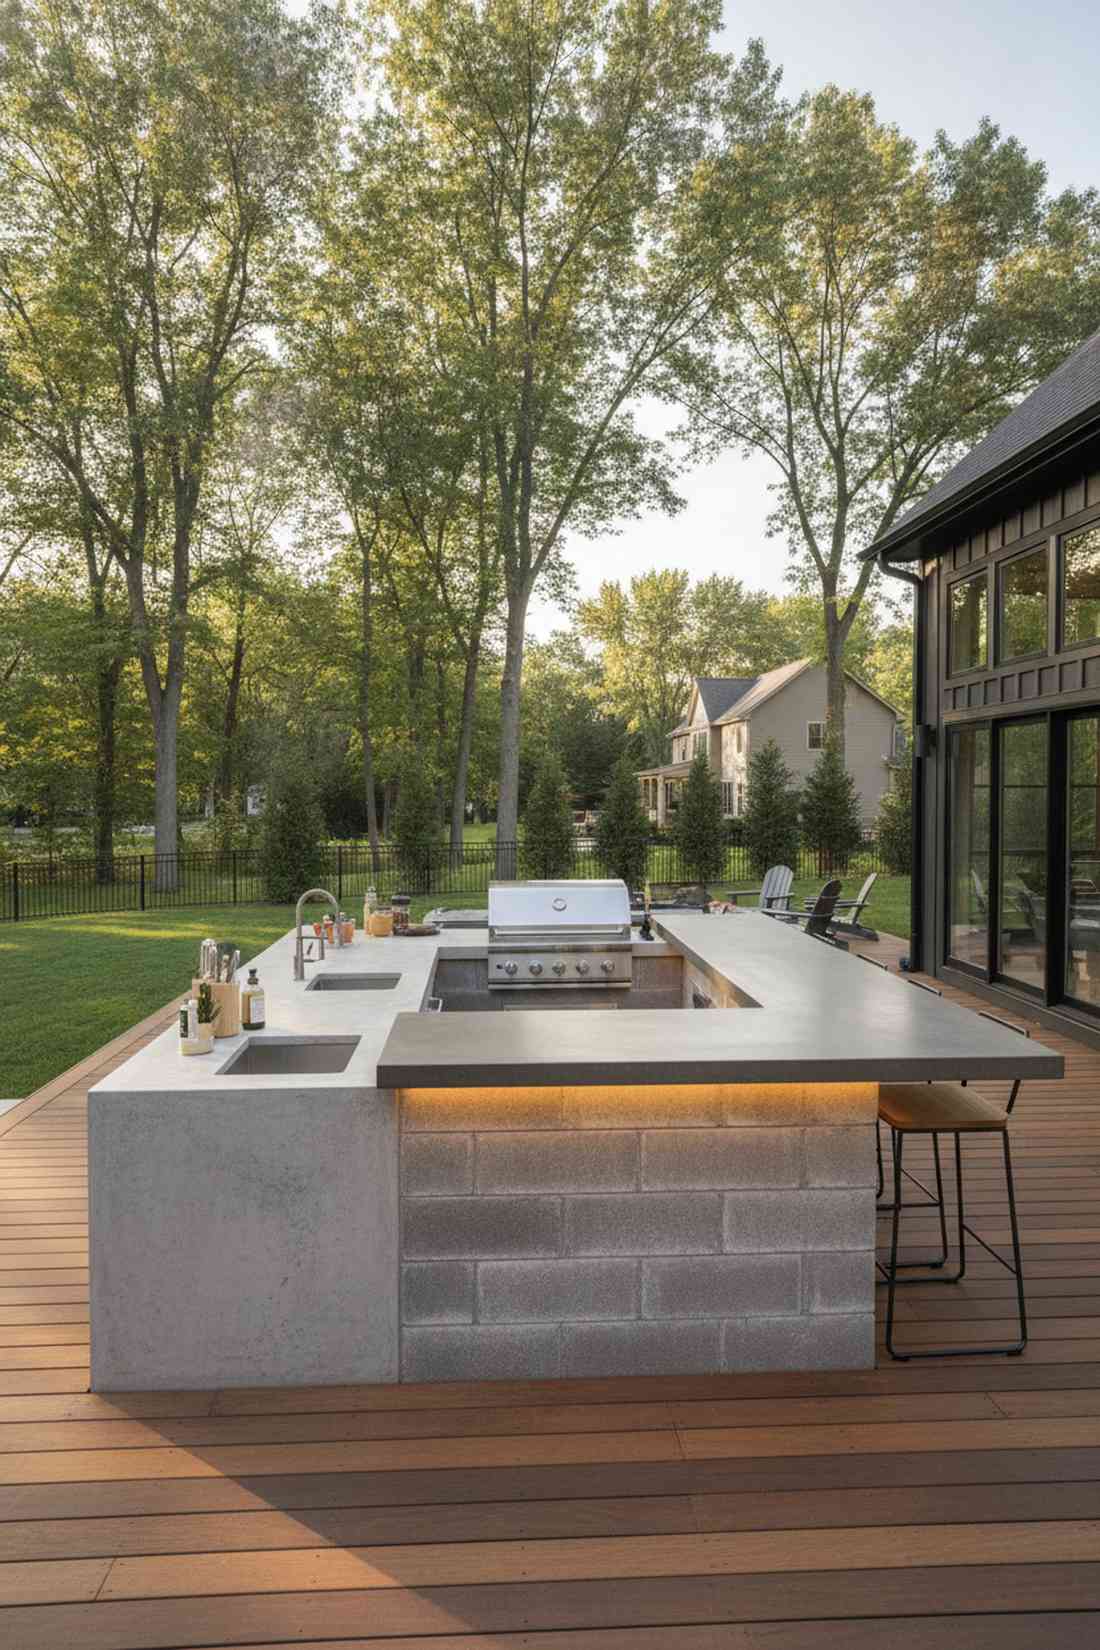
39. Elevated Grill Deck With Lower Bar Patio
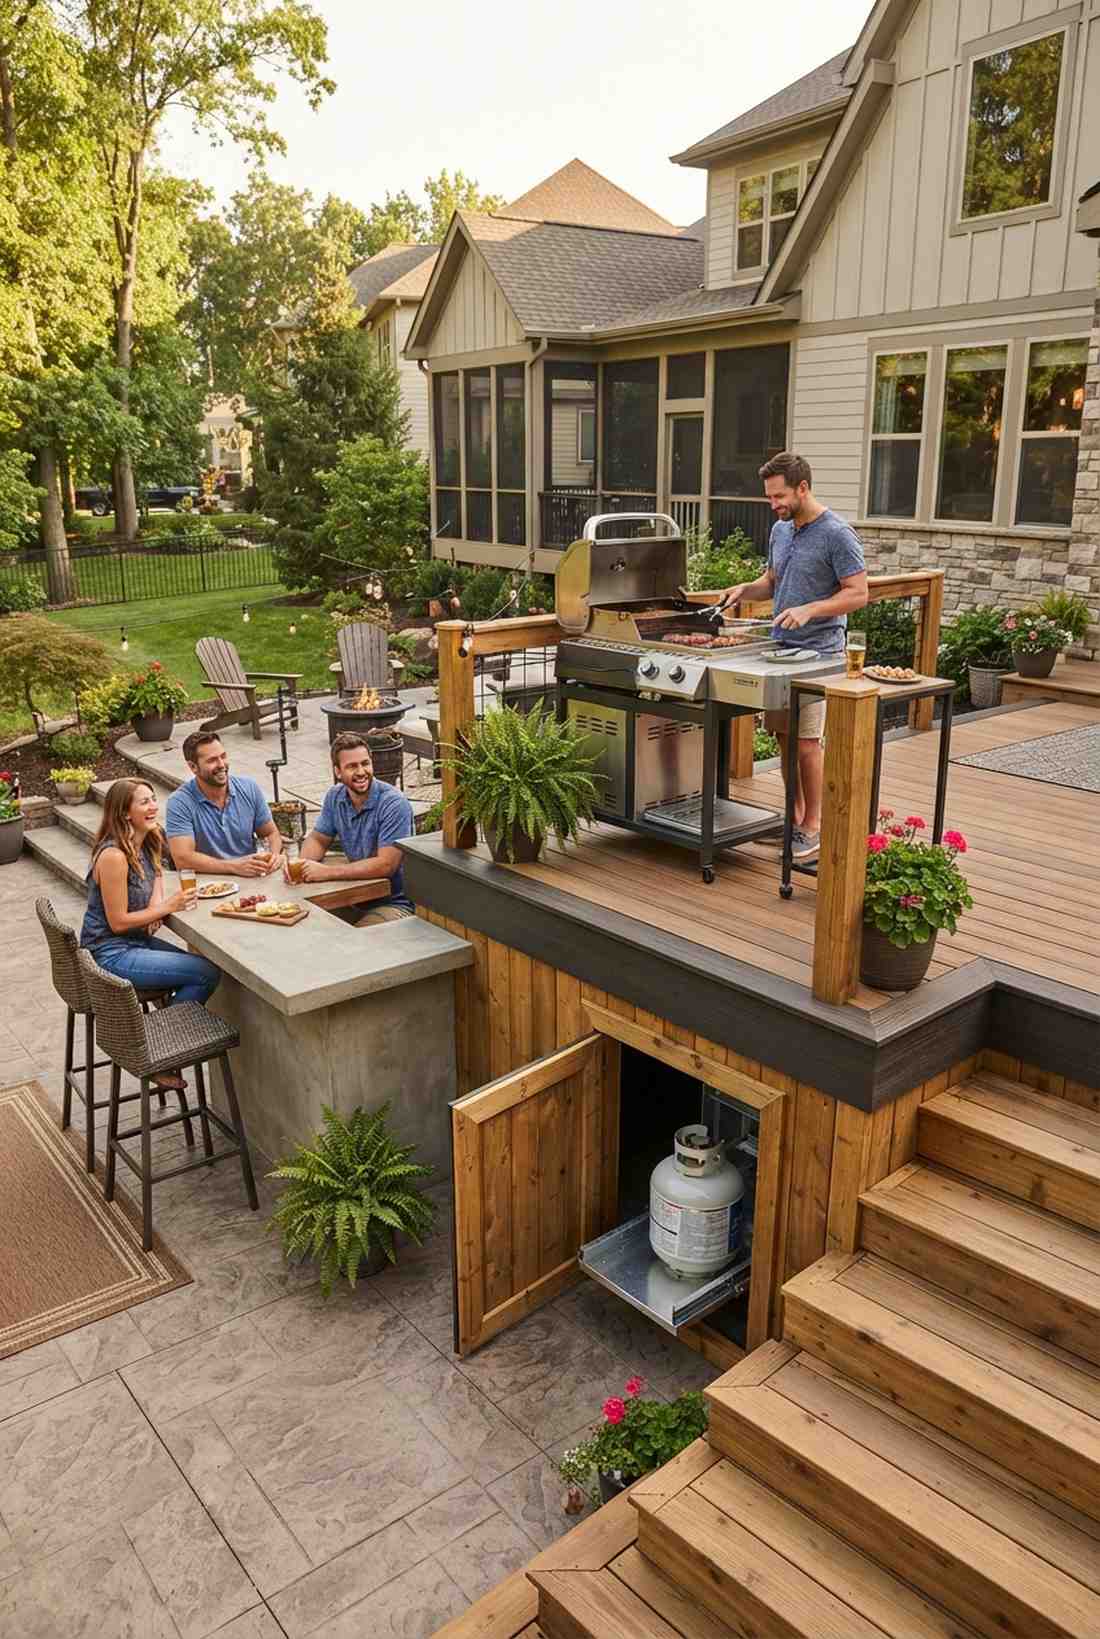
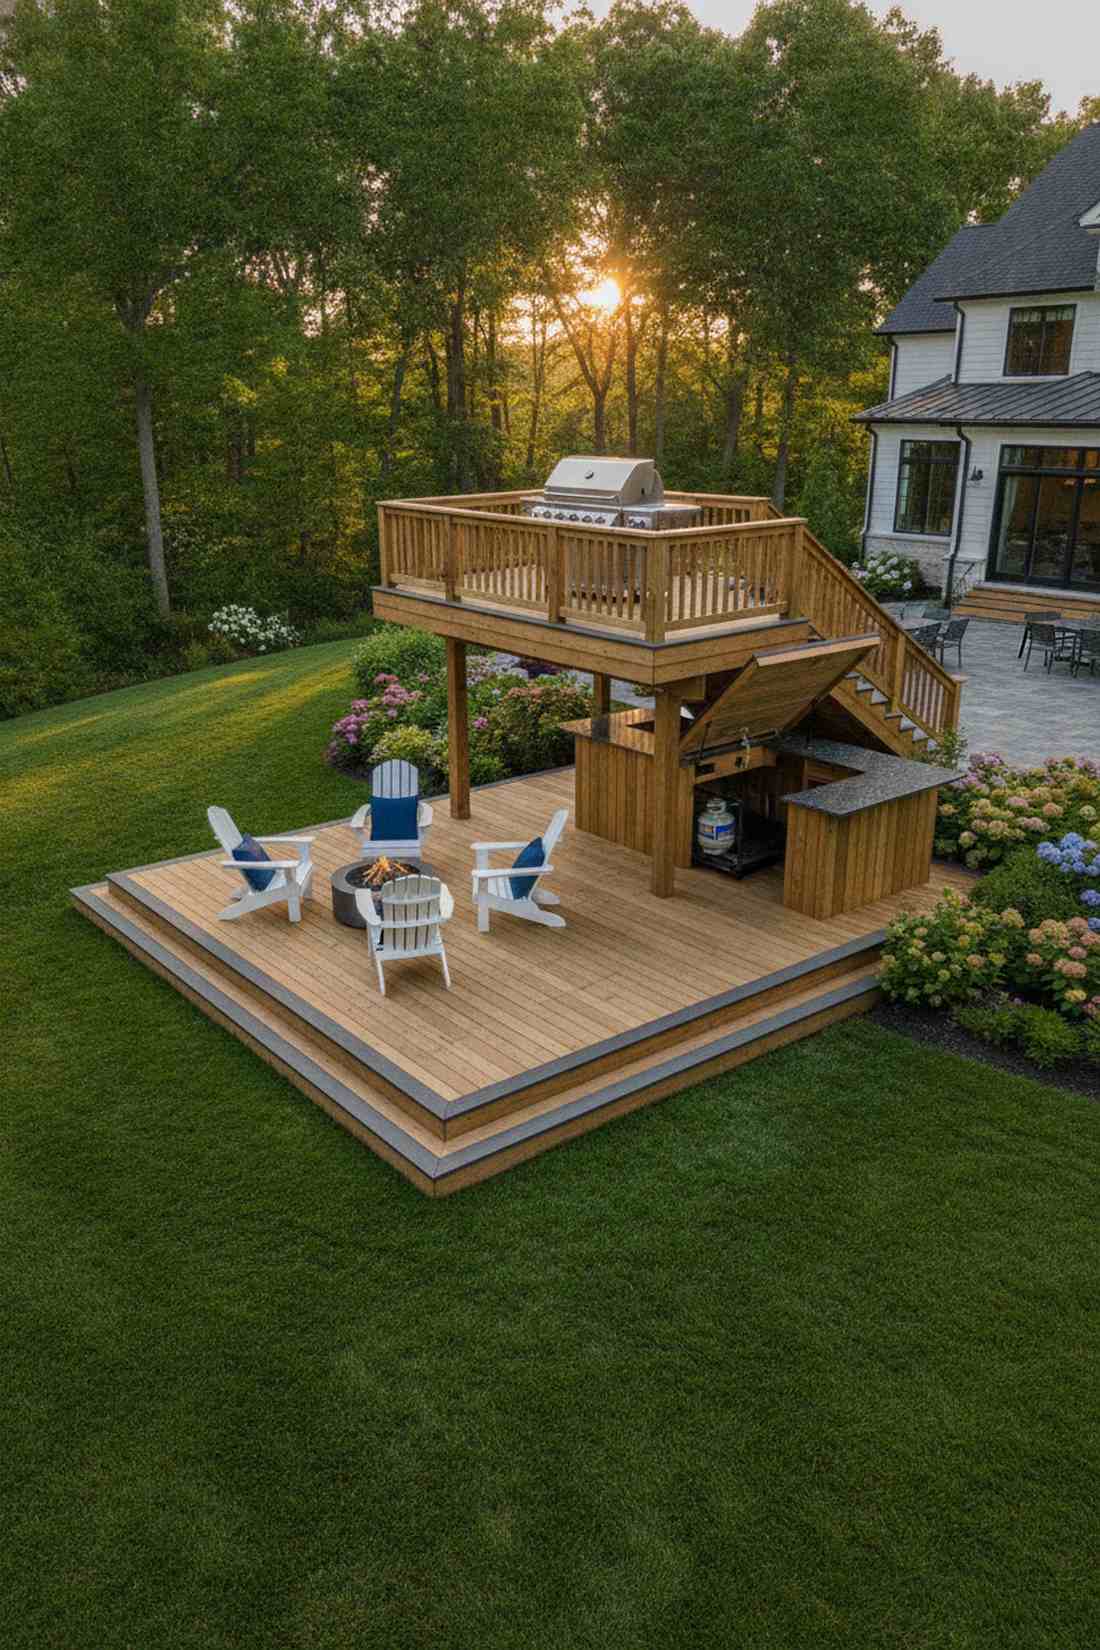
Feels like commanding a ship from the bridge while the crew relaxes on the lower deck. The raised platform staging approach physically distances the extreme heat from lounging guests.
Creating elevation separation delivers a surprisingly premium look that naturally breaks up a massive, boring flat yard. Using the hollow space underneath for hidden propane tank slide-out storage is a brilliantly practical space hack.
Building a secondary deck adds $2,000–$4,500. Save this to your ultimate yard zoning board!
- Key Materials: Treated lumber framing
- Vibe / Style: Captain’s elevated cookhouse
- Difficulty: Moderate decking
- Budget Breakdown: Raised platform: $1,000 | Lower bar structure: $1,800
- Creator’s Tip: Cap the edge of the raised deck with high-contrast composite boards so people visually register the step down.
- Smart Sourcing: Grab a sliding propane tank tray bracket and high-contrast composite decking boards.
Skip the standard grill—this next specialty station is exactly what turns a basic backyard into a neighborhood hotspot…
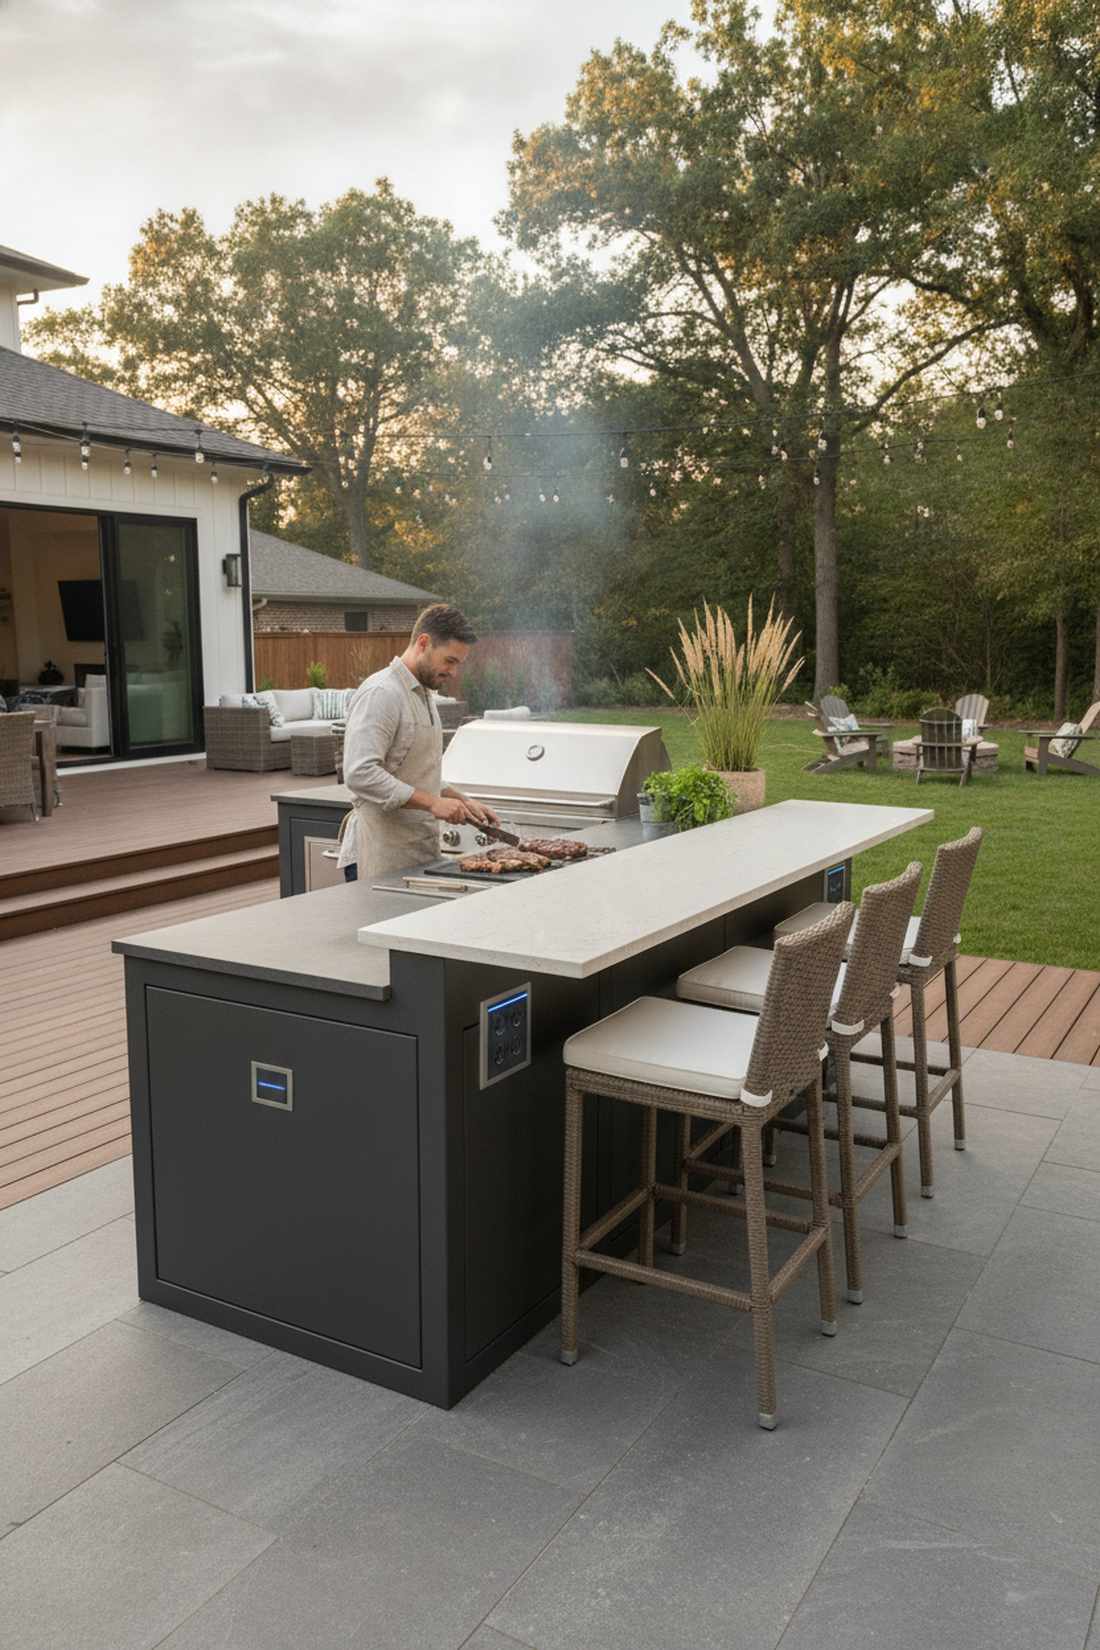
40. Bar-Height Grill Counter
Eliminates the dreaded chef’s slouch by pulling the work surface up to standing height. A uniform 42-inch monolithic setup is an absolute dream for taller cooks who hate bending over.
Running a single continuous high line gives a designer-level finish of sleek, unbroken modernism. Checking that your premium outdoor built-in grill has a lowered mounting bracket ensures the lid isn’t dangerously high when opened.
This layout is extremely budget-friendly, costing around $2,000–$3,500. Pin this if you value flawless cooking ergonomics!
- Key Materials: Extended vertical steel frames
- Vibe / Style: Sleek monolithic modernism
- Difficulty: Easy
- Budget Breakdown: Taller framing: $1,000 | Bar stools: $600
- Creator’s Tip: Ensure your drop-in grill model allows for a dropped chassis installation so the grates sit flush with the 42-inch top.
- Smart Sourcing: Snag extra-tall modular island frame extensions and all-weather 30-inch bar stools.
Specialty Outdoor Patio and Kitchen Ideas
These distinctive layouts incorporate unique features beyond standard grill-and-bar configurations, addressing specific cooking styles, entertaining preferences, or architectural opportunities.
41. Pizza Oven and Grill Dual-Station
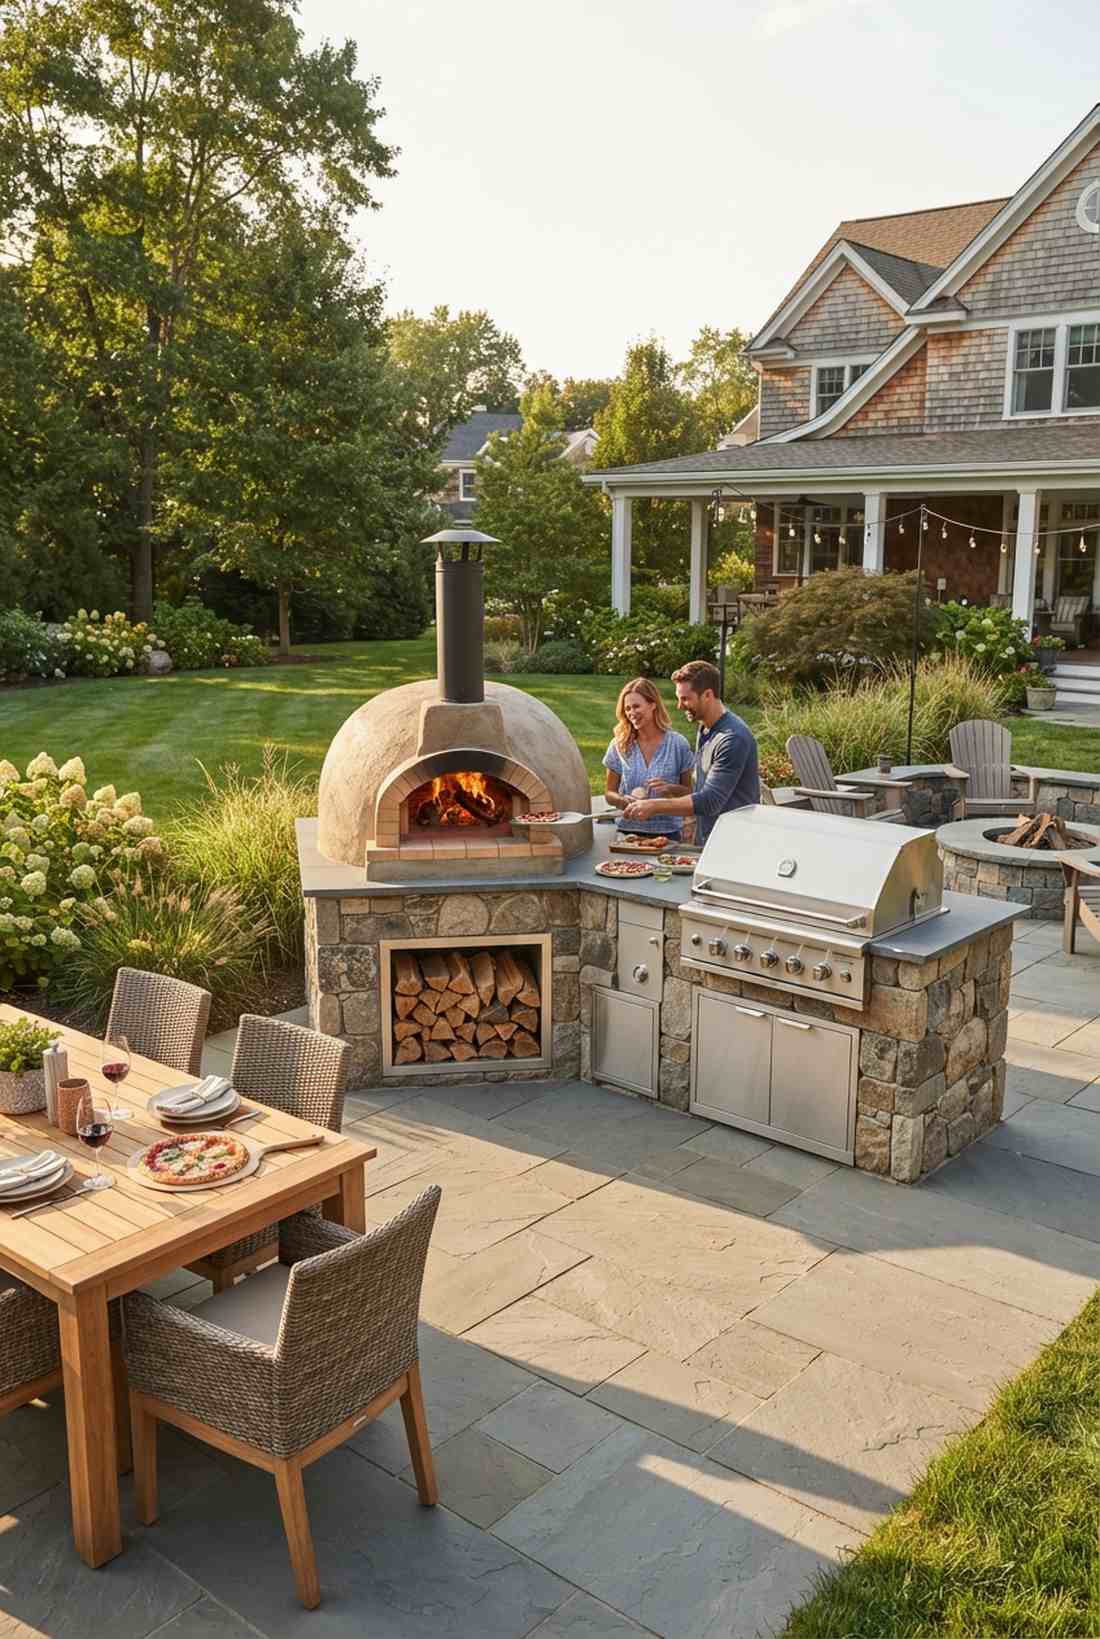
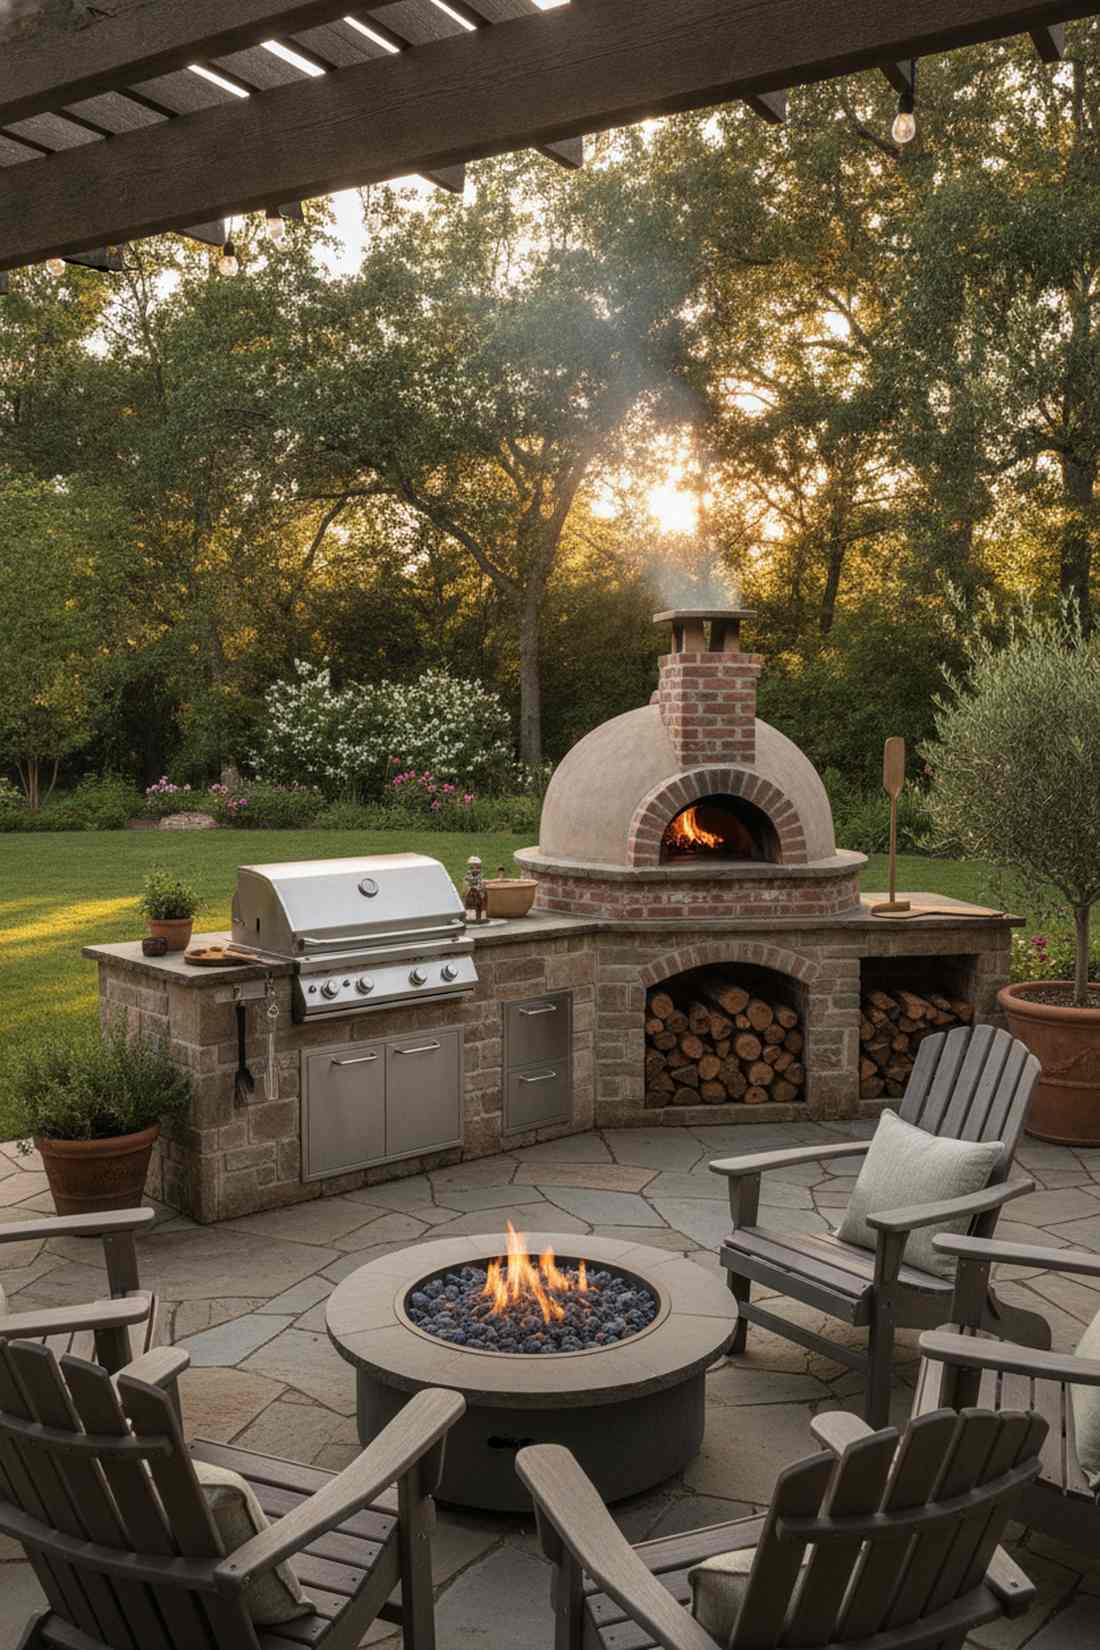
Emits the mouthwatering aroma of a rustic Neapolitan pizzeria right on your patio. A wood-fired dome and gas grill combo expands your menu capabilities to absolute professional limits.
Adding a massive dome oven delivers a surprisingly premium look that instantly becomes the visual anchor of the yard. Stocking up on outdoor patio and kitchen ideas like built-in firewood storage niches completes the authentic rustic aesthetic.
Brick ovens are pricey, pushing this to $5,000–$9,000. Save this to your ultimate outdoor entertaining board!
- Key Materials: Refractory cement & firebrick
- Vibe / Style: Authentic Italian villa
- Difficulty: Advanced masonry
- Budget Breakdown: Oven kit: $2,500 | Grill side: $1,800
- Creator’s Tip: Keep the oven and gas grill at least 3 feet apart so the intense wood heat doesn’t warp the stainless steel grill hood.
- Smart Sourcing: Invest in a pre-cast refractory wood-fired oven kit and a stainless steel flush-mount wood box insert.
42. Teppanyaki-Style Flat-Top Bar
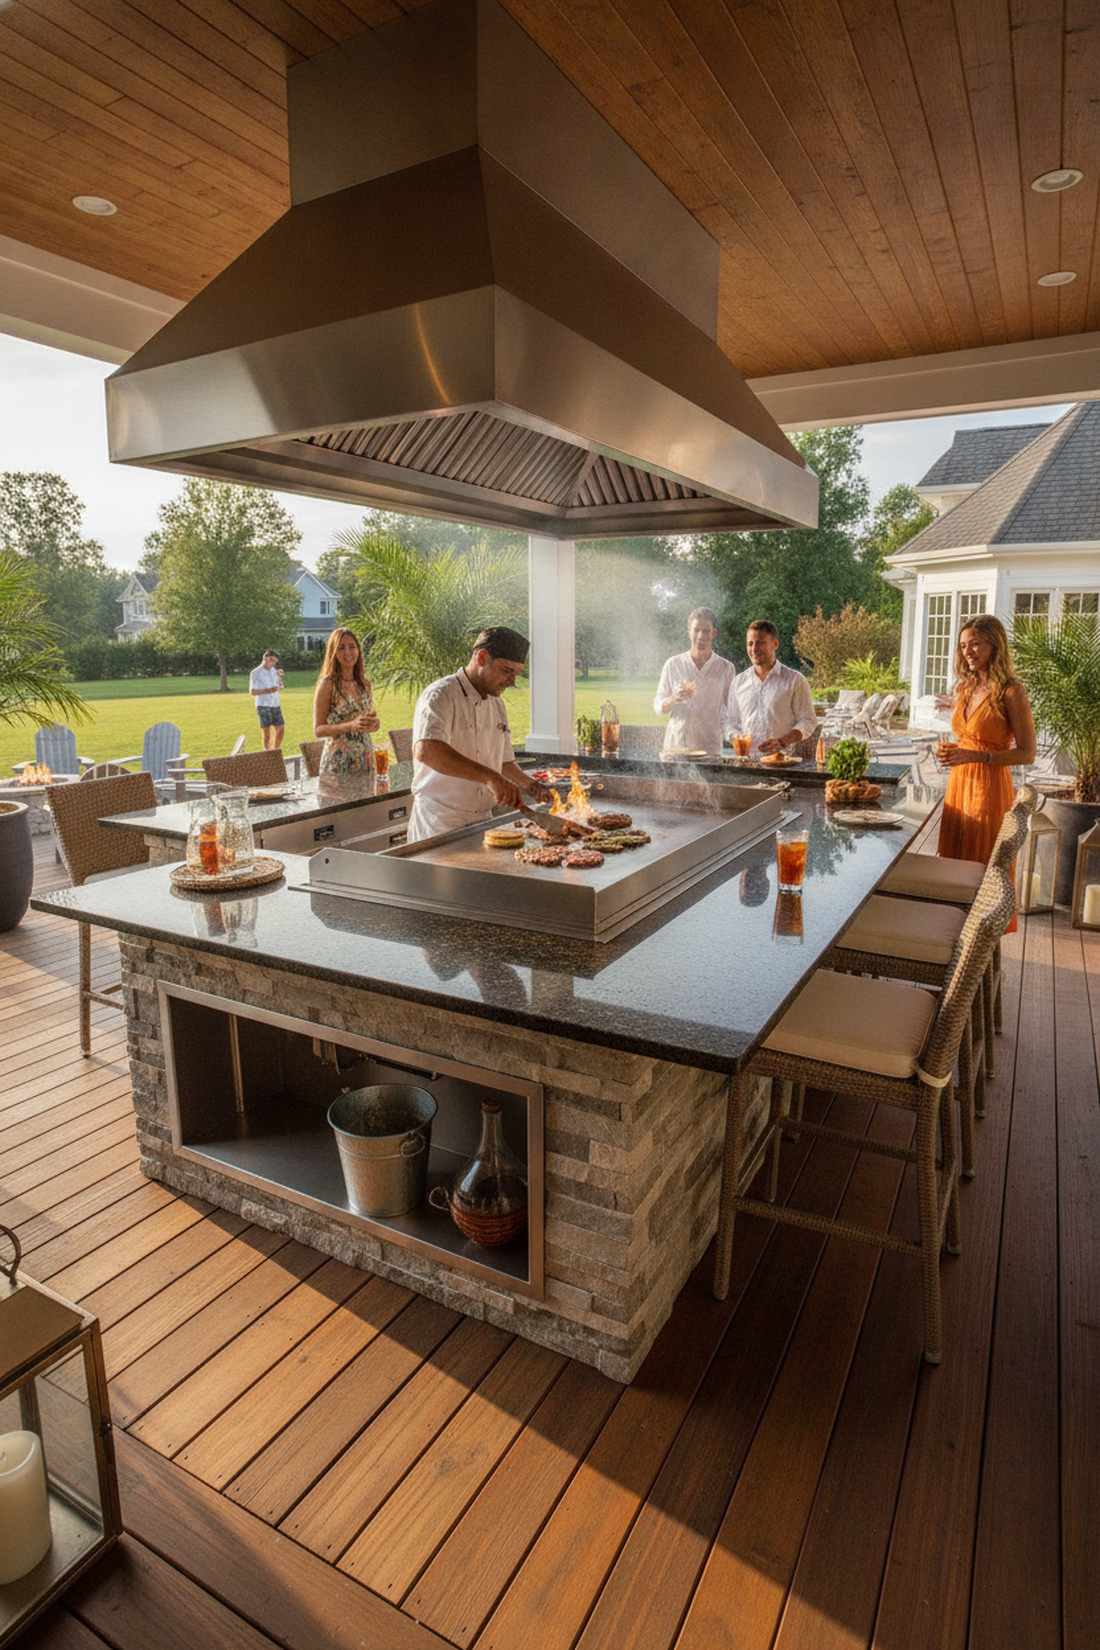
Turns dinner into an explosive, high-energy theatrical performance for your guests. The U-shaped flat-top griddle bar makes cooking incredibly social and interactive.
Ditching the traditional grates for a massive griddle gives a designer-level finish perfect for smash burgers and fajitas. Because flat tops generate insane smoke, mounting a commercial outdoor ventilation canopy is an absolute requirement for covered patios.
This specialty setup runs $3,500–$6,500. It completely revolutionizes how you throw a summer party.
- Key Materials: Heavy-gauge stainless griddle insert
- Vibe / Style: High-energy hibachi lounge
- Difficulty: Moderate
- Budget Breakdown: Flat-top unit: $1,800 | Surrounding bar: $2,000
- Creator’s Tip: Install a massive grease trough on the griddle that drains directly into an easily accessible lower pull-out bucket.
- Smart Sourcing: Use a drop-in teppanyaki flat-top grill and an overhead high-velocity exhaust fan kit.
43. Smoker Integration Layout
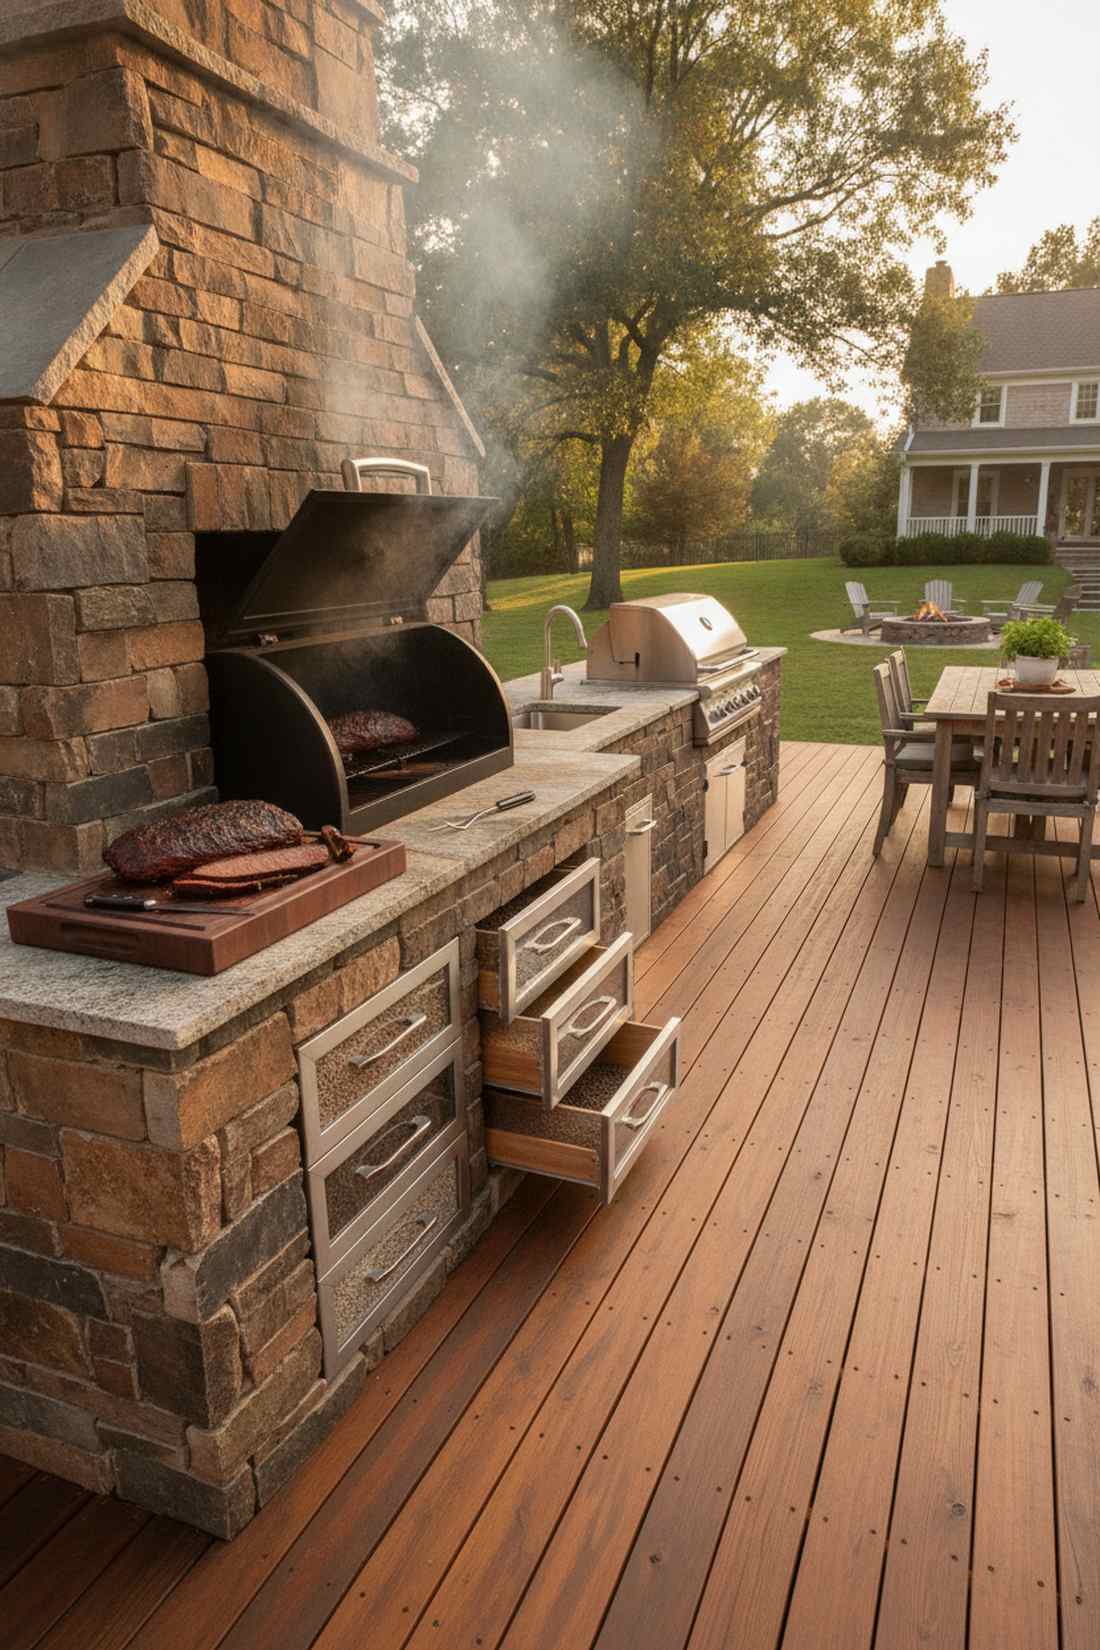
Radiates the low-and-slow, mouthwatering energy of a legendary Texas barbecue joint. A dedicated built-in pellet smoker wing is mandatory for true meat enthusiasts.
Integrating the smoker seamlessly into the masonry looks far more expensive than it is and hides ugly power cords. Slipping in weatherproof dry storage cabinets specifically for different wood pellet flavors keeps everything highly organized.
Smoker integrations cost around $2,800–$5,000. Pin this if you take brisket and ribs seriously!
- Key Materials: Heat-deflecting stone surrounds
- Vibe / Style: Premium backyard smokehouse
- Difficulty: Moderate
- Budget Breakdown: Smoker unit: $1,500 | Island extension: $1,200
- Creator’s Tip: Always position the smoker strictly downwind from your main dining table so guests aren’t choking on hickory smoke for 12 hours.
- Smart Sourcing: Source a built-in pellet smoker head unit and sealed dry-storage drawer kits.
44. Wet Bar and Grill Combo
Splits the party perfectly so the bartender and the chef never cross swords. The independent wet bar and prep zone is the ultimate hack for controlling massive crowds.
Dedicating a separate plumbing zone delivers a surprisingly premium look that keeps guests completely out of the cooking lane. Dropping in a pro-level outdoor patio kitchen ice maker kit guarantees you never have to do a mid-party gas station run.
Extra plumbing pushes this to $4,000–$7,500. Save this layout for throwing massive neighborhood bashes!
- Key Materials: PEX piping & outdoor drainage lines
- Vibe / Style: Luxury resort service lines
- Difficulty: Advanced plumbing required
- Budget Breakdown: Plumbing/Sink: $1,200 | Ice/Fridge: $1,800
- Creator’s Tip: Run a completely separate drainage line for the wet bar so greasy sink water from the grill side doesn’t clog the bar pipes.
- Smart Sourcing: Buy an outdoor-rated stainless drop-in ice bin and an exterior-grade mini fridge.
This final batch includes a seasonal hybrid setup that extends your grilling time by months. You won’t want to miss it…
45. Greenhouse-Kitchen Hybrid
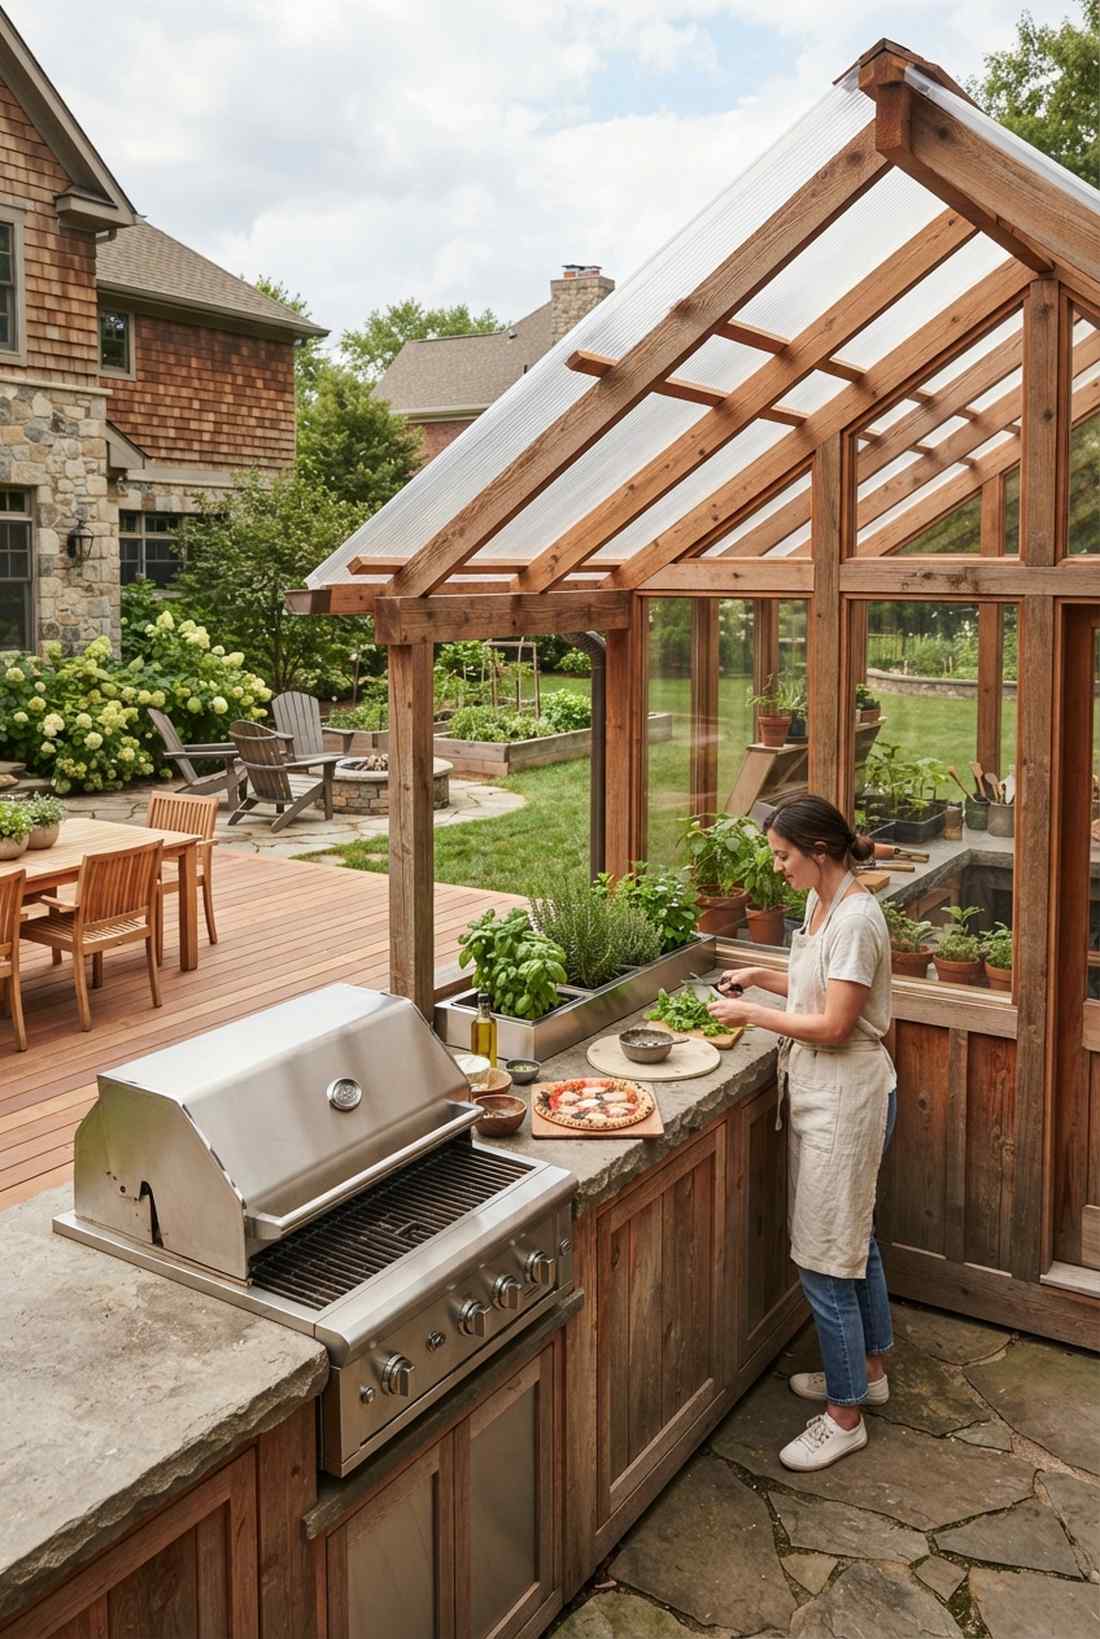
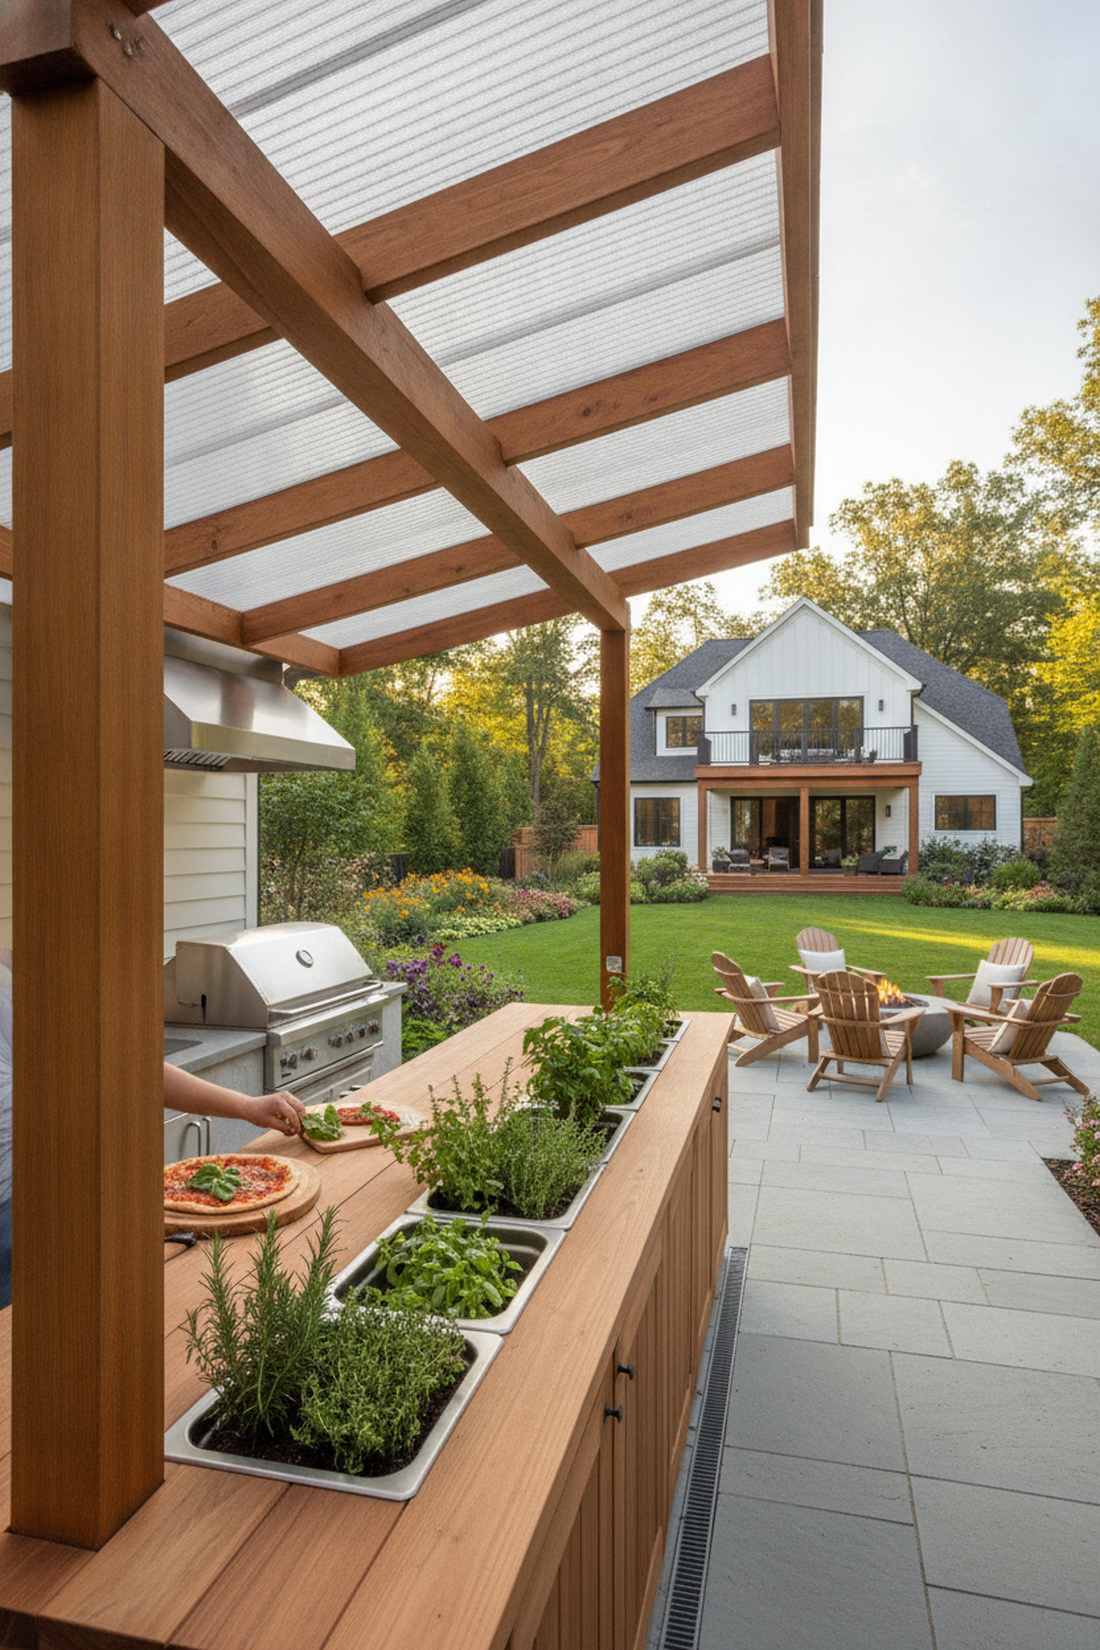
Embodies the ultimate farm-to-table fantasy right in your own backyard. An attached culinary greenhouse prep station lets you snip fresh basil literally seconds before tossing it on a pizza.
Merging gardening with cooking gives a designer-level finish that screams organic, bespoke living. Installing heavy-duty polycarbonate clear roofing panels over the herb section harnesses the grill’s waste heat to extend your growing season.
This highly unique build runs roughly $3,000–$5,500. Pin this to your dream homesteader board!
- Key Materials: Cedar framing & clear polycarbonate
- Vibe / Style: Organic farm-to-grill oasis
- Difficulty: Moderate framing
- Budget Breakdown: Glass/Poly enclosure: $1,200 | Planters & Base: $1,500
- Creator’s Tip: Build a slight slope into the counter so watering the built-in herb trays naturally drains away from your grill’s electrical components.
- Smart Sourcing: Get UV-blocking polycarbonate greenhouse panels and stainless steel drop-in planter boxes.
46. Rotisserie and Spit Station
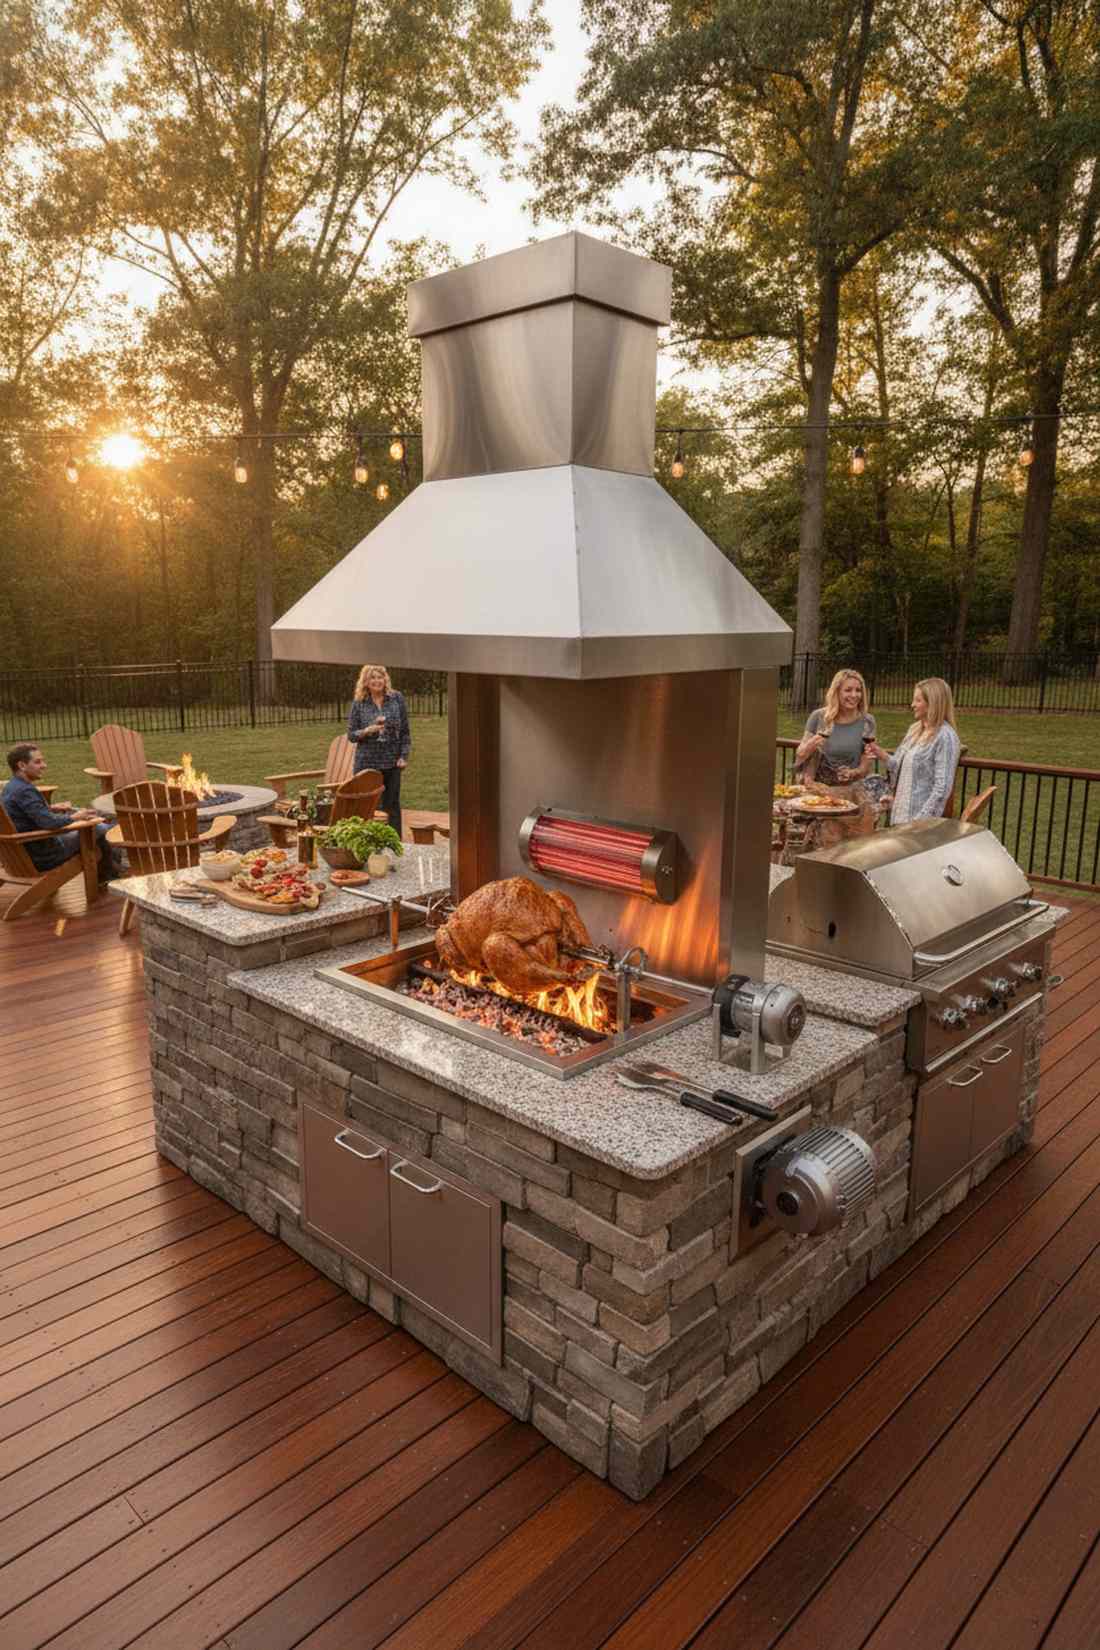
Captures the primal, mesmerizing energy of a massive roast spinning slowly over open fire. A dedicated high-clearance rotisserie bay is a legendary showpiece for holiday entertaining.
Leaving massive vertical clearance for a spinning spit looks incredibly professional and highly specialized. Adding an infrared rear burner patio grill attachment ensures the meat crusts perfectly without burning from bottom flare-ups.
Specialty hardware puts this setup at $3,200–$6,000. It’s an unforgettable layout for serious carnivores.
- Key Materials: High-clearance stainless hoods
- Vibe / Style: Primal feast command center
- Difficulty: Moderate
- Budget Breakdown: Spit/Motor kit: $800 | Deep island build: $2,000
- Creator’s Tip: Allocate at least 30 inches of vertical height above the grates so you can easily spin a massive Thanksgiving turkey.
- Smart Sourcing: Use a heavy-duty commercial rotisserie motor kit and a drop-in grill with rear infrared burners.
47. Outdoor Wok Station
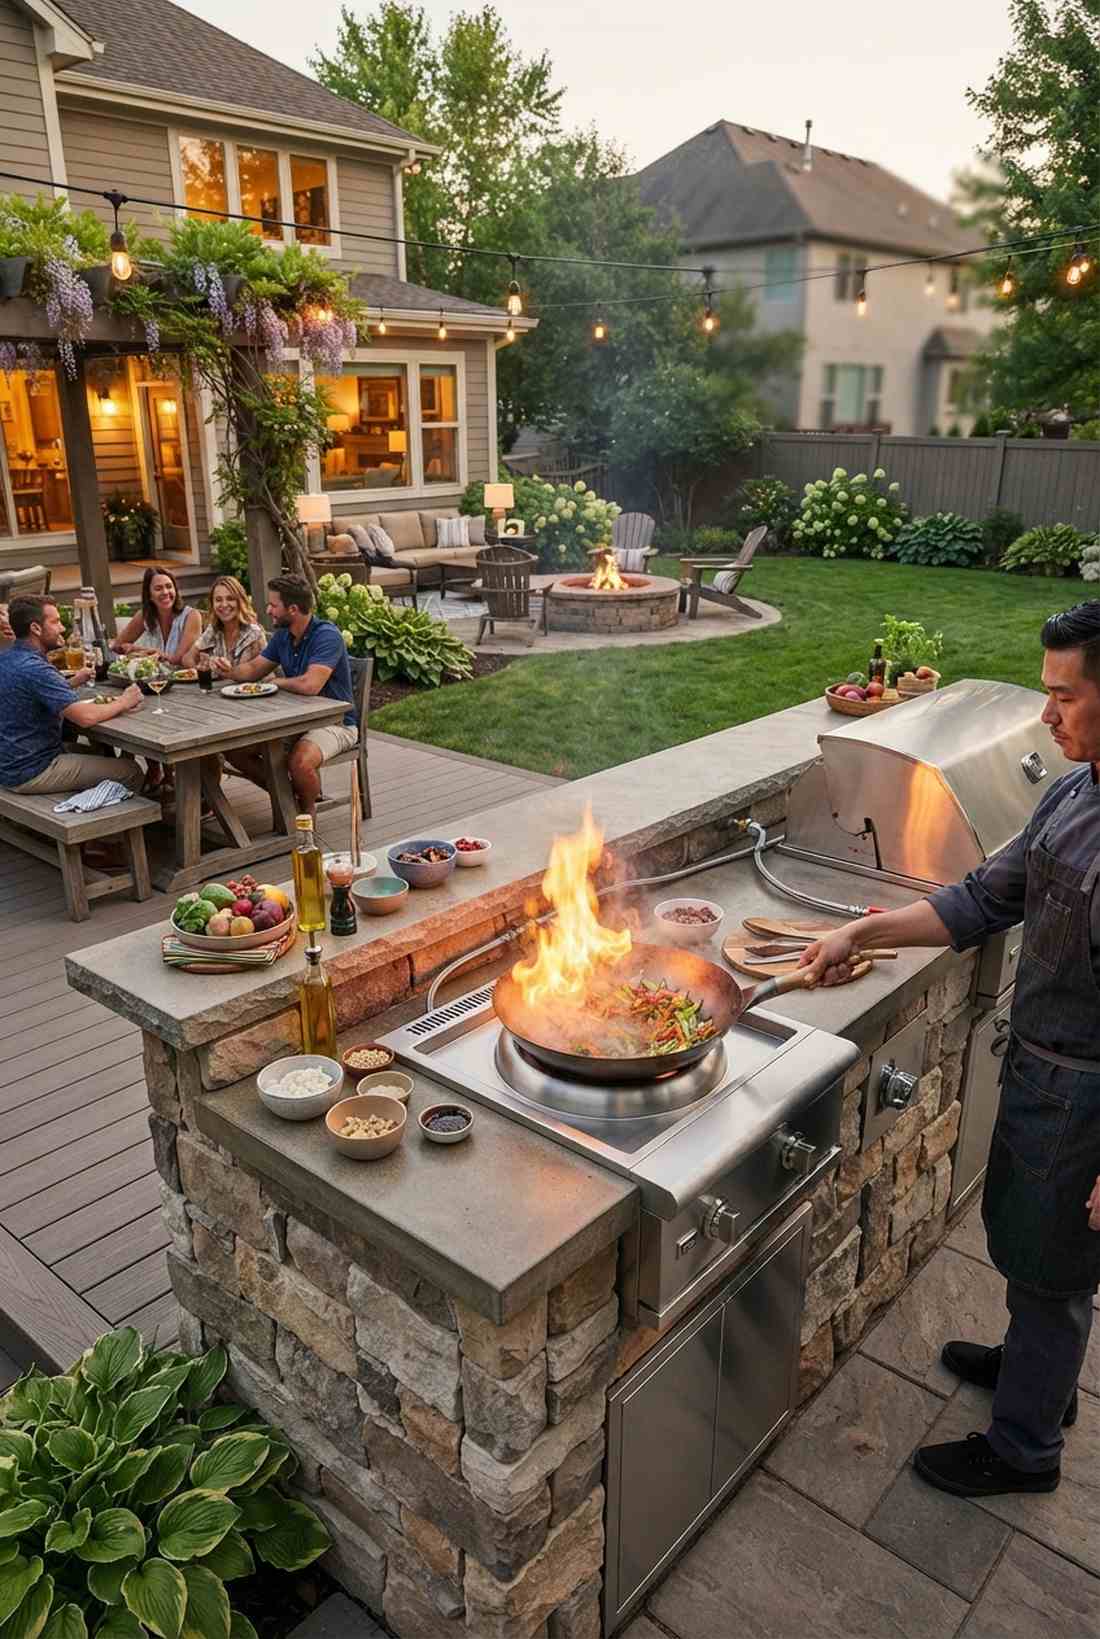

Emits the roaring, intense heat and crackle of an authentic Asian street food stall. Dropping a high-BTU recessed wok burner next to the grill unlocks explosive stir-fry capabilities.
Recessing the burner gives a designer-level finish while protecting the extreme flames from backyard wind. Because a wok requires insane heat, upgrading to high-capacity braided gas lines is mandatory to fuel both the wok and grill simultaneously.
This high-heat addition costs about $2,500–$4,500. Save this if you love lightning-fast, high-heat cooking!
- Key Materials: High-BTU brass burner jets
- Vibe / Style: High-speed street market
- Difficulty: Advanced gas plumbing
- Budget Breakdown: Wok burner unit: $1,000 | Gas line upgrade: $600
- Creator’s Tip: Make sure the wok burner is recessed at least 4 inches below the main counter to shield the massive flame from wind blowouts.
- Smart Sourcing: Snag a 60,000 BTU drop-in power burner and high-flow outdoor gas connection hoses.
48. Convertible-Season Kitchen
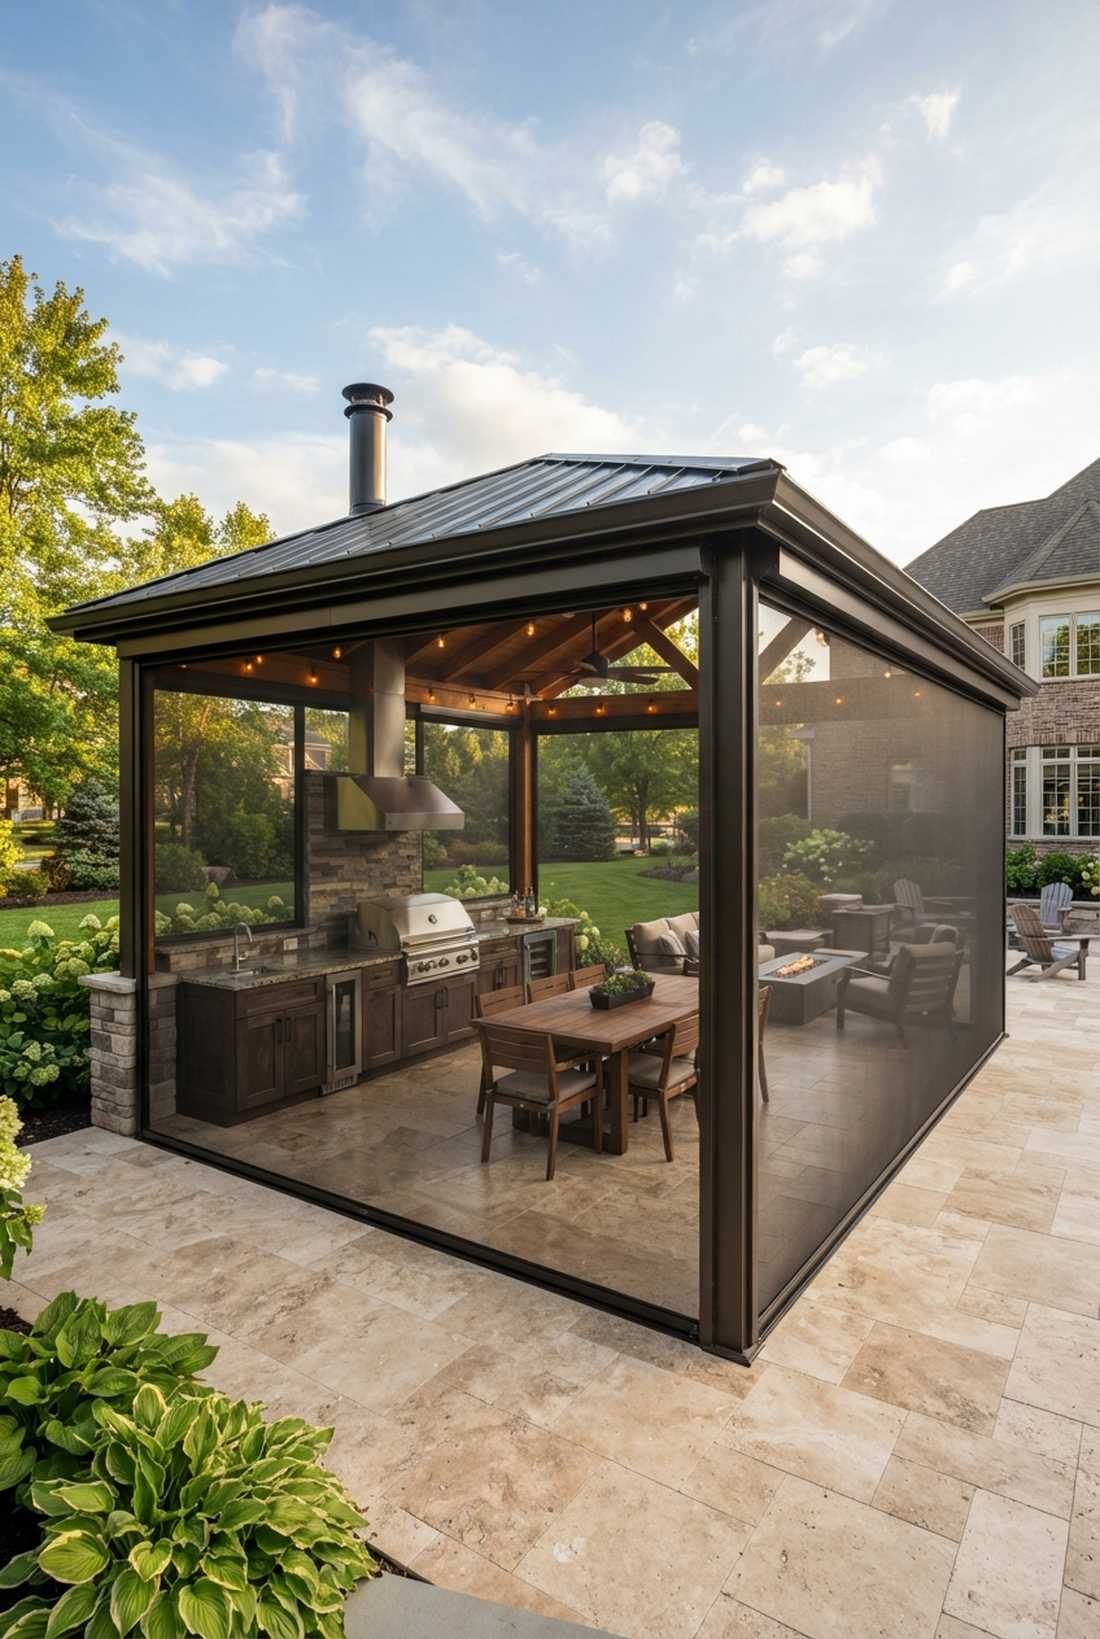
Feels like a brilliant magic trick that morphs your patio to match the changing weather. A three-season screened roll-down pavilion completely eliminates the nightmare of mosquito season.
Using deployable walls delivers a surprisingly premium look that makes the space usable nine months out of the year. Installing marine-grade motorized zip screens lets you enclose the entire kitchen with the literal push of a button.
The motorized screens push this to $6,000–$12,000. Pin this to your luxury backyard remodeling board!
- Key Materials: Motorized screen tracks
- Vibe / Style: Adaptive luxury sunroom
- Difficulty: Pro-level installation
- Budget Breakdown: Zip-screens: $3,500 | Pavilion frame: $3,000
- Creator’s Tip: Ensure the grill exhaust hood vents *outside* the screen perimeter, or your enclosed room will instantly fill with blinding smoke.
- Smart Sourcing: Look for motorized patio sun-shade screen kits and weather-sealed track systems.
Conclusion
Successful outdoor patio kitchen layouts absolutely depend on blending premium aesthetics with smart, cost-effective sourcing. Whether you utilize a space-saving linear setup or go massive with one of our U-shaped commercial blueprints, these 48 exact setups prove you can achieve a staggeringly high-end designer finish without suffering insane contractor markups. Start by identifying your ideal prep zones, utilize pre-fabricated island kits to save thousands on labor, and always prioritize UV-resistant and marine-grade materials to guarantee your backyard hosting hub survives the elements for decades.
Frequently Asked Questions
What is the ideal distance between a built-in grill and bar seating?
To keep guests safe while still feeling engaged, strictly maintain 36 to 48 inches of clearance. If you are battling a tiny footprint, installing a 6-inch raised counter tier or investing in commercial-grade tempered glass splash guards creates a premium barrier that blocks grease while allowing closer seating. This layout tweak ensures the chef has zero bottleneck issues when pivoting between prep and fire.
How much counter space do I need on each side of a built-in grill?
Never shortchange your prep zone—allocate an absolute minimum of 18 inches per side, though 24 to 30 inches is the true sweet spot for a luxury setup. Utilizing pre-fab outdoor kitchen island kits makes it incredibly easy to hit these numbers without custom masonry. Dropping an oversized cutting board on a massive 36-inch continuous slab instantly creates a high-end buffet serving line directly off the grill.
Can I install an outdoor kitchen on a wooden deck?
Yes, absolutely, but you must prioritize weight distribution and fire safety. Use lightweight modular aluminum framing kits rather than pouring thousands of pounds of concrete blocks on your joists. Furthermore, you must install heat-shielding cement board panels and maintain strict 6 to 12-inch clearances from any combustible materials to guarantee the deck stays completely secure.
What outdoor kitchen layout works best for small patios under 150 square feet?
For tight spaces, a straight linear run or a compact L-shape boundary layout is your greatest asset. By anchoring slim-profile 24-inch drop-in grills and narrow-depth outdoor-rated mini fridges directly against a fence or wall, you reclaim the entire center of the patio. This strategy drastically maximizes functionality while keeping the yard feeling entirely open and expansive.
Should the bar seating face toward or away from the grill?
Facing the grill delivers an incredibly fun, interactive hibachi-style experience perfect for highly social hosts. However, if your yard boasts a stunning pool or garden, pushing the seating to face outward prioritizes the premium scenery. The ultimate pro-designer hack is utilizing a 45-degree angle curved bar using flexible outdoor track framing, which flawlessly provides sightlines to both the chef and the landscape.
How do I choose between a built-in grill and a freestanding grill for my outdoor kitchen?
Built-in grills scream luxury, heavily increase property value, and lock in a seamless custom aesthetic using high-end stone. Conversely, rolling a premium stainless steel cart grill next to a fixed bar cuts installation costs dramatically and allows for seasonal storage. Choose built-in for a permanent forever-home upgrade, and go freestanding if you want a budget-friendly setup with absolute layout flexibility.