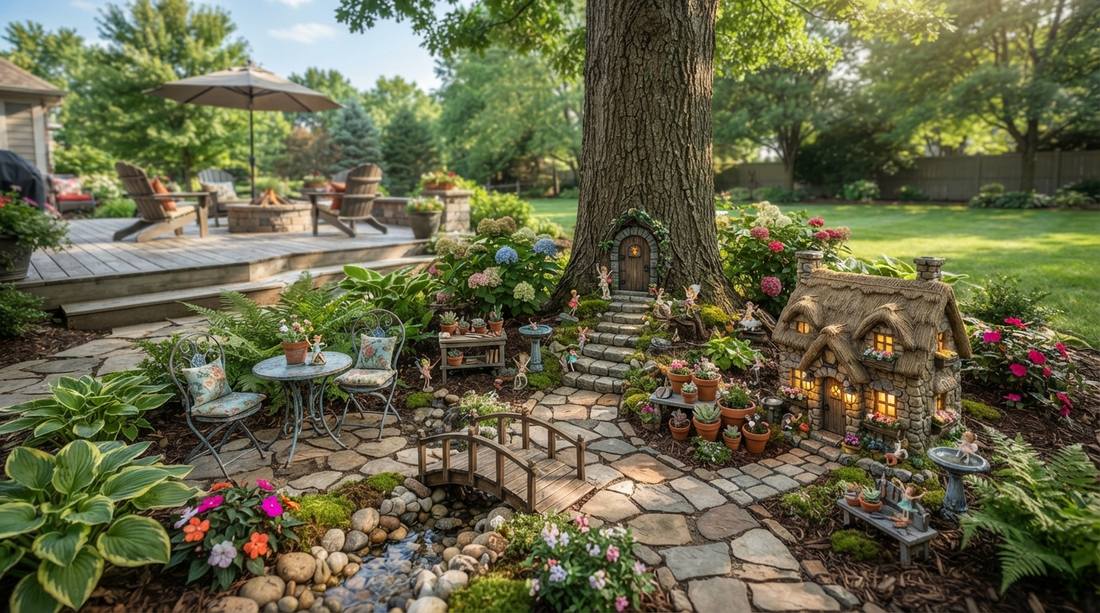
Upgrading basic setups with premium fairy garden furniture instantly creates a display that commands attention. Here are the exact blueprints and smart sourcing tricks for high-end miniature layouts. These professional-grade designs look expensive but cost almost nothing.
Design Snapshot Key Principles
- Scale Matters: Maintain 1:12 or 1:24 scale proportions for realistic miniature scenes.
- Natural Integration: Use found materials like twigs, stones, and moss to blend furniture with surroundings.
- Weather Durability: Select polymer clay or treated materials that withstand outdoor conditions.
- Focal Points: Position statement pieces like wishing wells or gazebos as centerpieces.
Rustic Seating Essentials for Unique Garden Furniture
Seating furniture forms the foundation of any premium fairy garden layout. By upgrading to weather-resistant materials and smart sourcing, you can establish an authentic, high-end resting spot for your miniature inhabitants that won’t rot after the first rainstorm.
1. Twig Benches with Moss Cushions
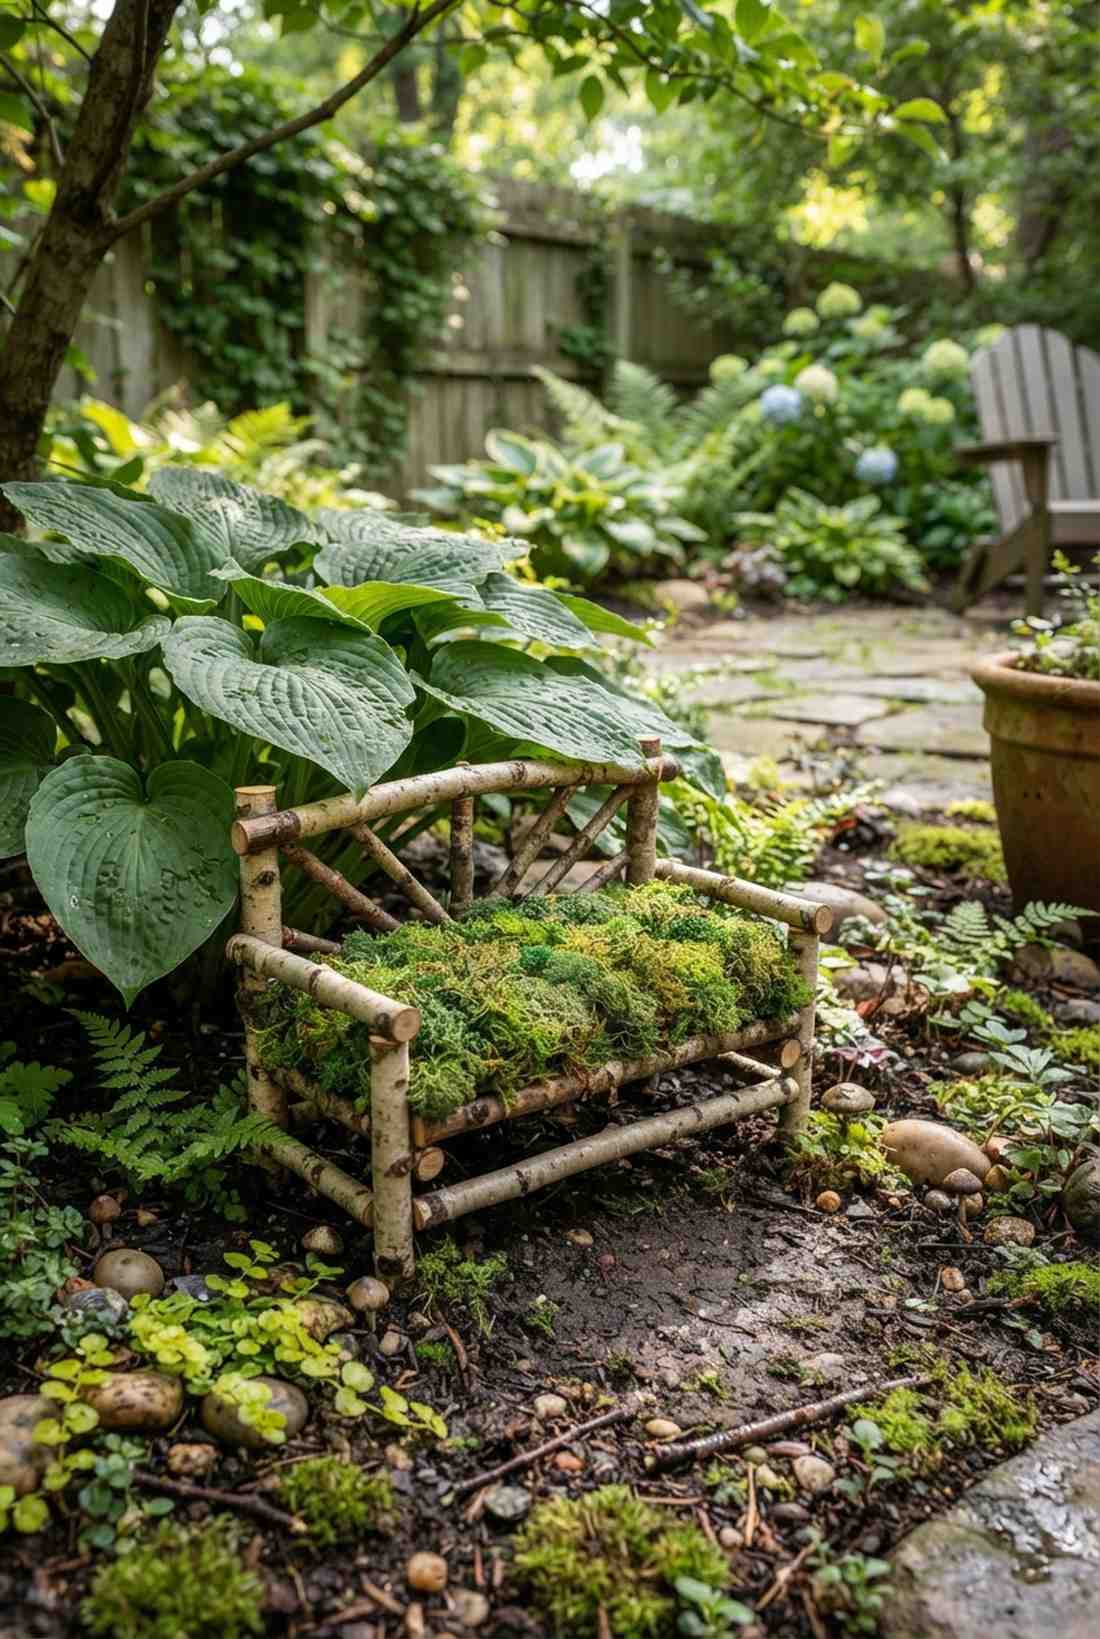
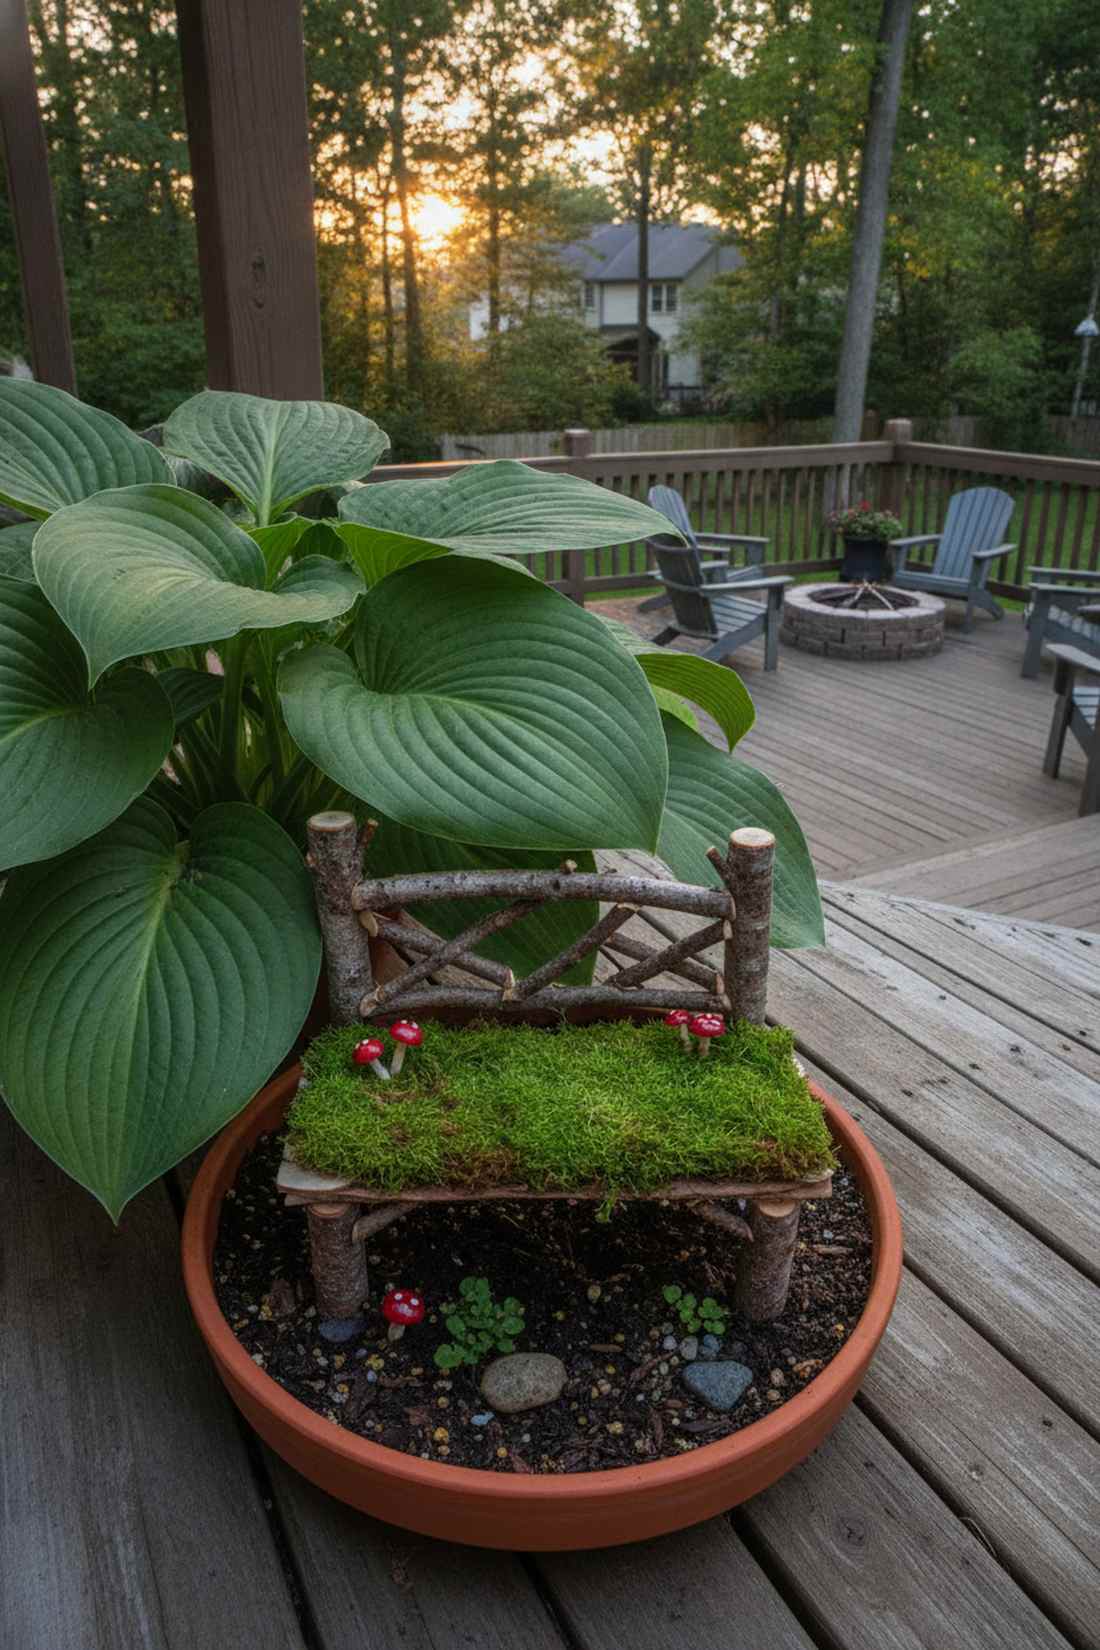
This setup feels like a tiny hidden forest you accidentally stumbled upon during a morning walk. A miniature rustic woodland bench provides brilliant textural contrast, and it works exceptionally well tucked under the broad leaves of a hosta plant or shaded balcony planter.
Most beginners ruin this by using standard hot glue that snaps in the cold, but locking everything together with exterior-grade adhesive delivers a surprisingly premium look. To take it to the next level, incorporating professional miniature garden supplies like color-fast moss prevents that faded, dead look halfway through the summer.
You can easily pull this off for around $10–$15 depending on your base. Save this to your DIY weekend garden board for your next miniature build!
- Key Materials: Pre-cut hardwood craft twigs, exterior wood glue, preserved moss.
- Vibe / Style: Sleepy forest retreat.
- Difficulty: Beginner-friendly weekend project.
- Budget Breakdown: Adhesives: $5 | Seating materials: $8.
- Creator’s Tip: Dip the ends of your twigs in a clear silicone sealant before planting them in the dirt to stop ground rot.
- Smart Sourcing: Pre-cut birch craft twigs (bulk pack) and color-treated preserved reindeer moss (starter bag).
2. Bottle Cap Bistro Sets
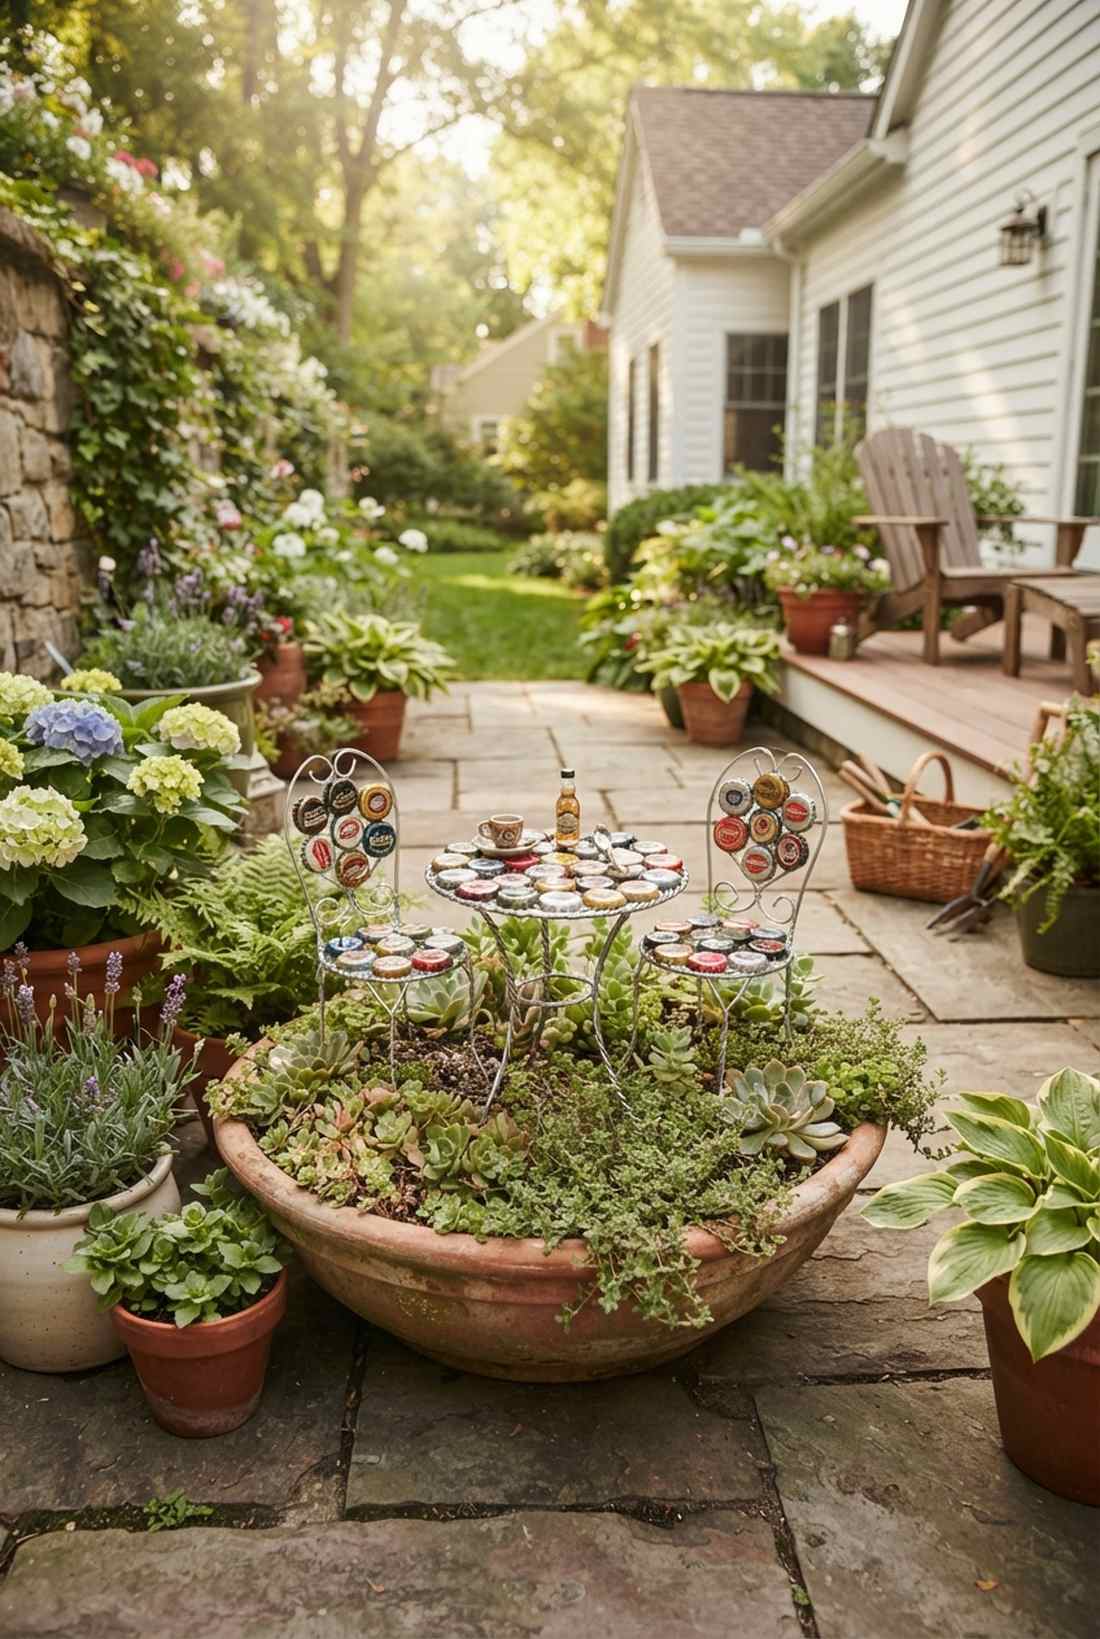
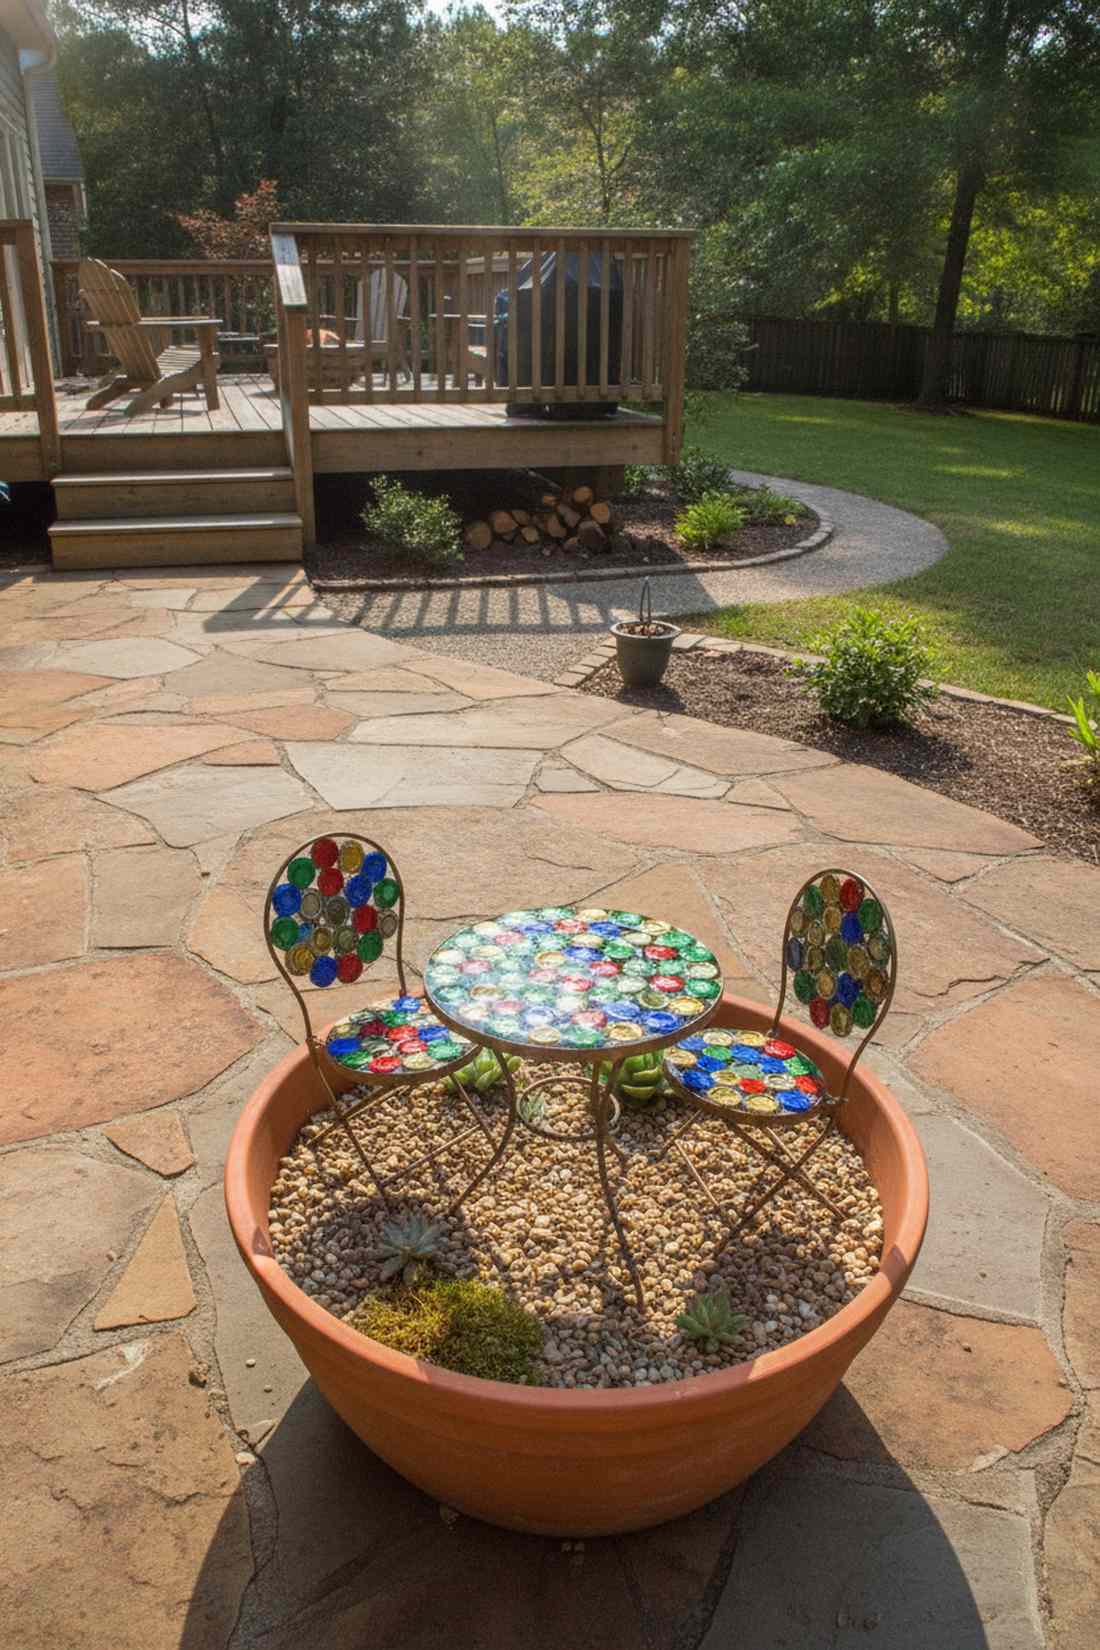
This design gives off major European cafe vibes straight out of a storybook. The upcycled bottle cap bistro table is incredibly charming, working perfectly for a tiny stone-paved patio setup in a wide, shallow terracotta pot.
Skipping the generic plastic doll furniture and crafting your own metal seating looks far more expensive than it actually is. By coating the caps in a thick, glossy enamel, you create a waterproof, designer-level finish that rivals high-end terrarium accessories sold at boutique nurseries.
Expect to spend a mere $5–$12 on the high-gloss paint and wire. It’s a fast upgrade that completely changes the vibe of any plain container garden.
- Key Materials: Metal bottle caps, jewelry wire, enamel spray paint.
- Vibe / Style: Parisian miniature cafe.
- Difficulty: Easy, requires basic wire bending.
- Budget Breakdown: Upcycled caps: $0 | Wire & Paint: $10.
- Creator’s Tip: Use a tiny dab of epoxy putty under the cap before attaching the wire legs to ensure they never wobble.
- Smart Sourcing: 16-gauge tarnish-resistant craft wire (spool) and UV-resistant clear coat enamel spray.
3. Polymer Clay Garden Chairs

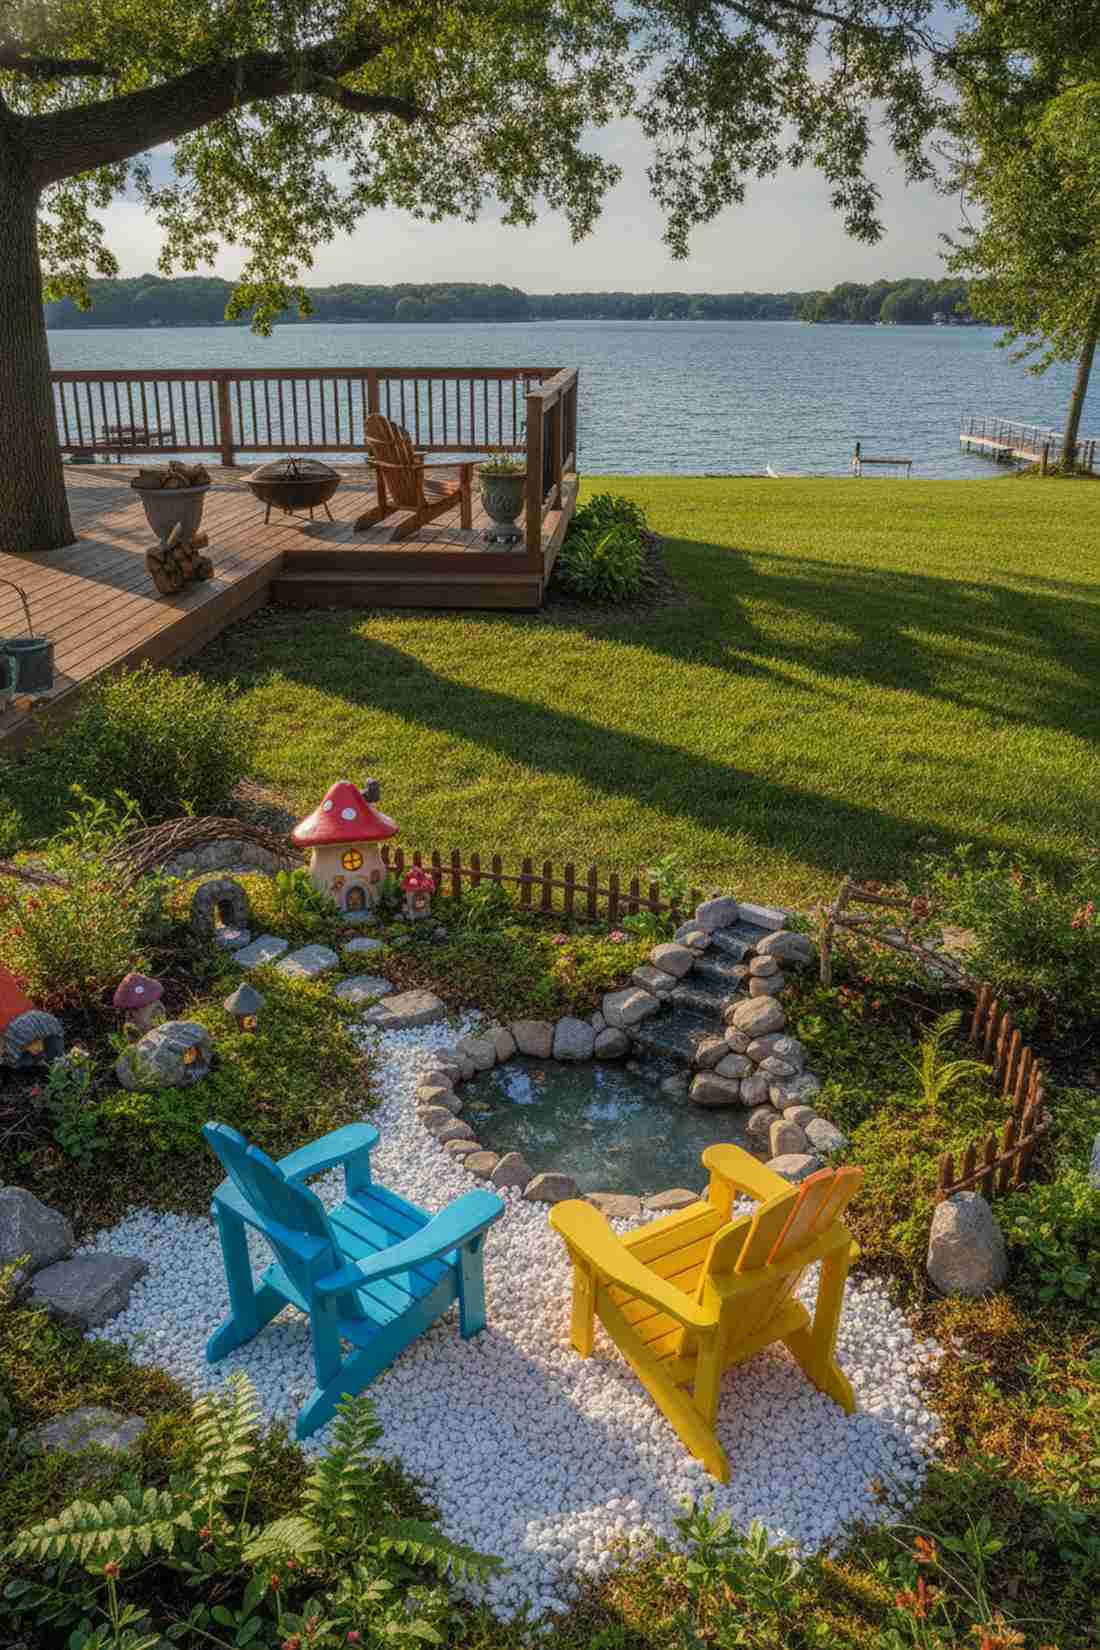
Creating this piece feels like you are sculpting magic right into your backyard. A set of customized polymer clay adirondack chairs adds a pop of intentional color, looking spectacular when placed on fine white gravel near a tiny water feature.
People often overcomplicate seating by trying to carve wood, but moldable compounds guarantee a perfect 1:12 scale fit without the splintering. Injecting commercial-grade fairy garden kits with your own hand-sculpted additions is the ultimate secret to a dynamic, high-CPC aesthetic that grabs immediate attention.
The materials for this will run you about $15–$25 for a solid starter pack of clay. Pin this if you’re planning to upgrade your small space outdoor decor this spring!
- Key Materials: Oven-bake polymer clay, liquid clay adhesive, sculpting tools.
- Vibe / Style: Vibrant lakeside retreat.
- Difficulty: Moderate, requires basic sculpting patience.
- Budget Breakdown: Clay blocks: $15 | Sealer: $8.
- Creator’s Tip: Bake the clay pieces around a crumpled ball of aluminum foil to save material and reduce the overall weight of the chair.
- Smart Sourcing: Professional outdoor polymer clay (multipack) and high-gloss waterproof clay glaze.
4. Tree Stump Seating Circles
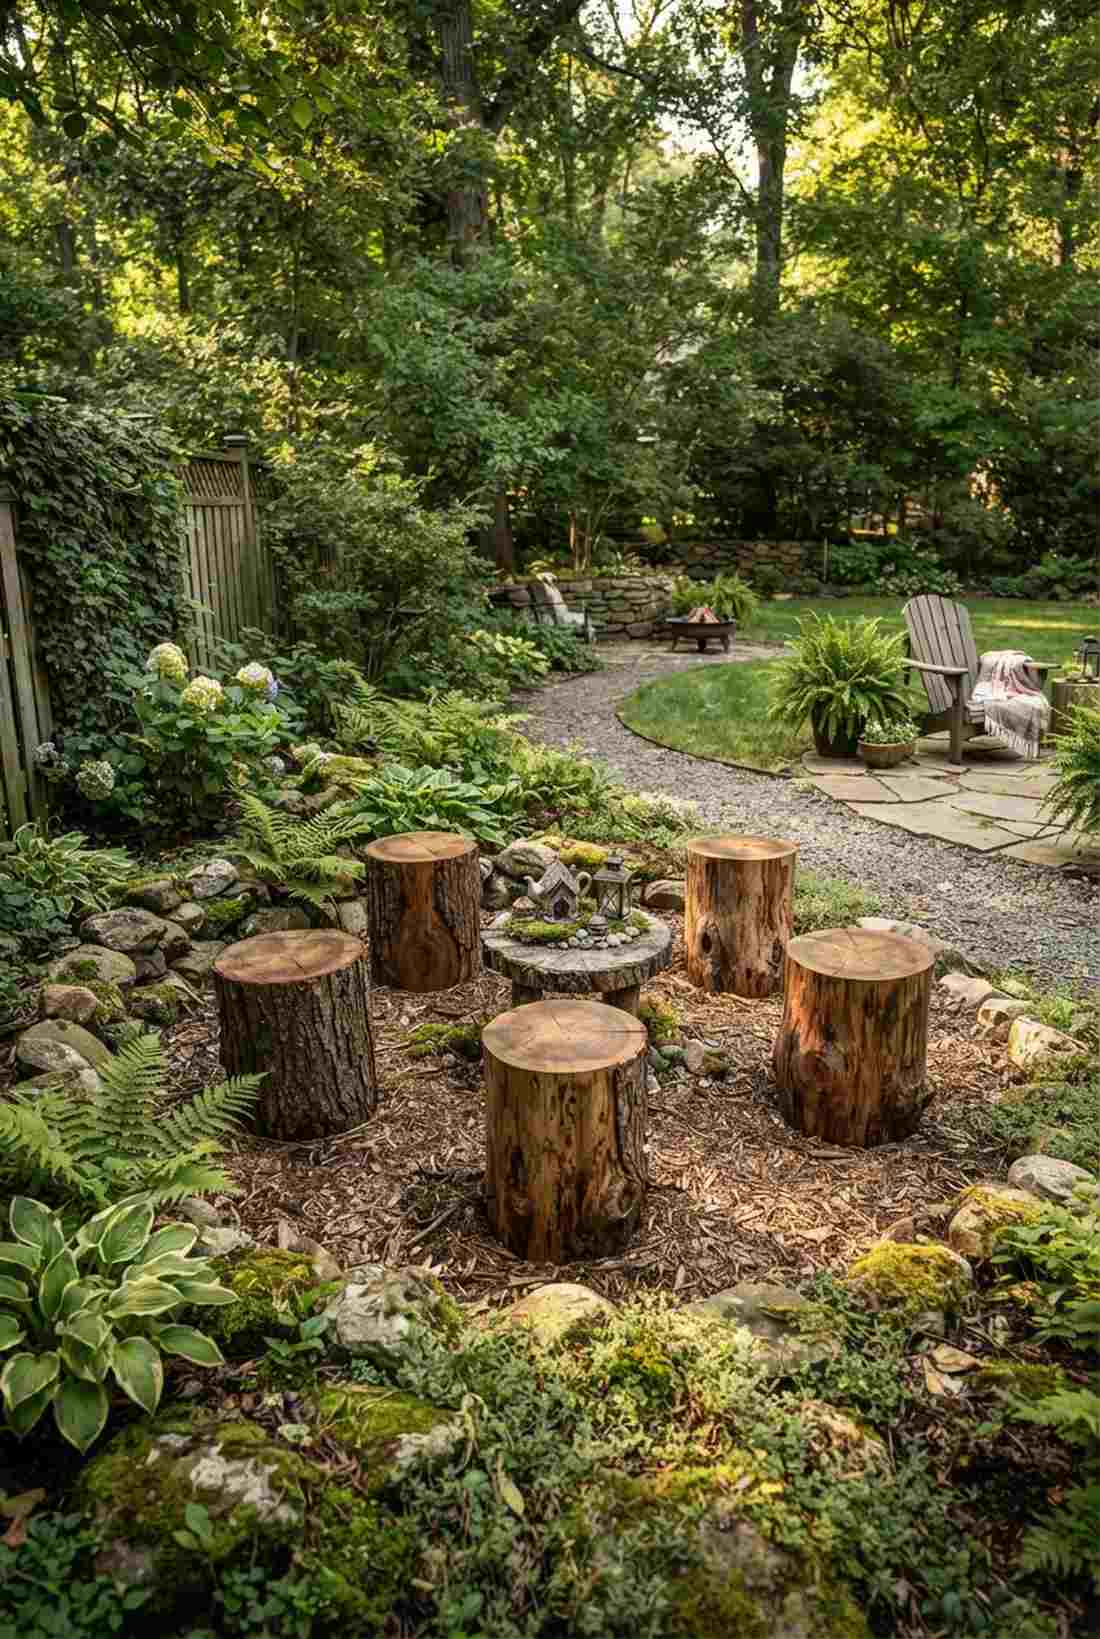
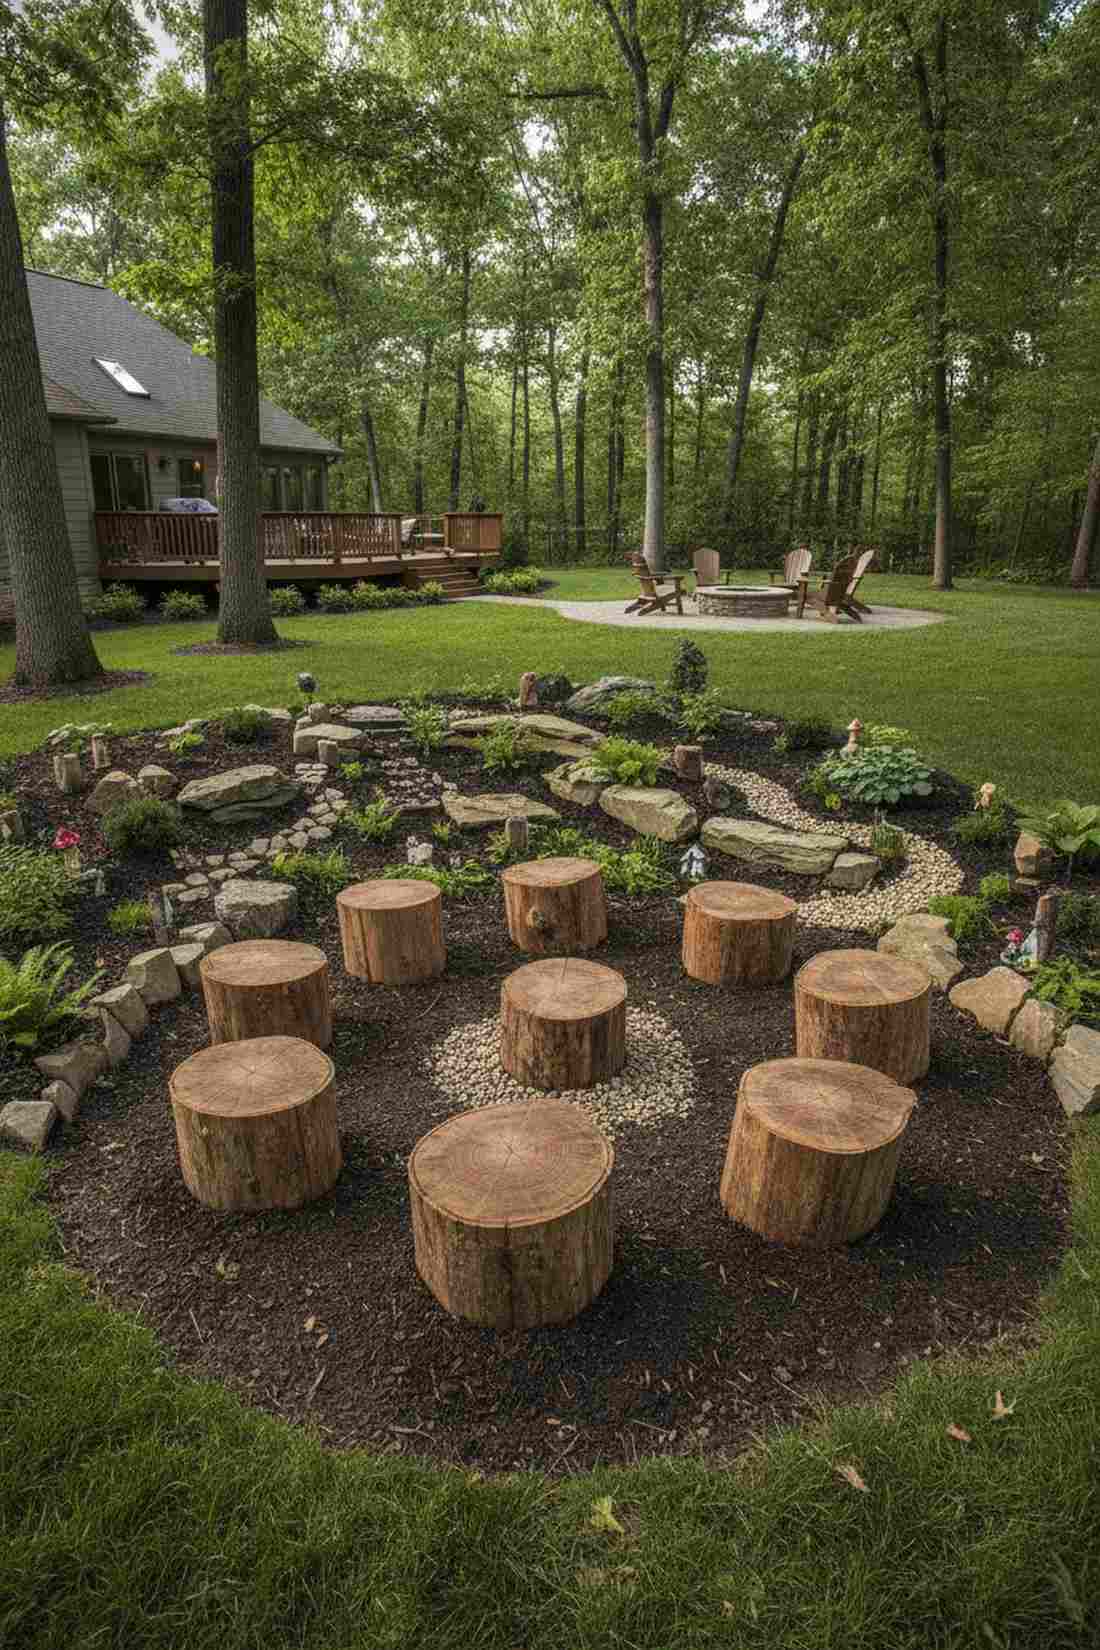
This aesthetic feels like an ancient gathering ground for tiny forest dwellers. The woodland stump seating circle brings raw, earthy textures to the forefront, ideal for a centerpiece layout in a shaded outdoor rockery.
Using raw untreated wood straight from the yard usually leads to bug infestations, but sourcing properly kiln-dried slices entirely solves this problem. It’s a brilliant way to achieve a high-end natural look while secretly utilizing heavily durable, pre-treated fairy garden landscaping elements.
You can set this entire gathering space up for under $10. Highly recommended if you want maximum visual impact with almost zero actual construction time.
- Key Materials: Kiln-dried wood slices, exterior polyurethane.
- Vibe / Style: Wild, untamed woodland.
- Difficulty: Extremely easy.
- Budget Breakdown: Wood slices: $8 | Sealer: $0 (use leftover).
- Creator’s Tip: Bury the bottom quarter of the stump directly into the soil to make it look like an aged tree that was cut down decades ago.
- Smart Sourcing: Pre-sanded hardwood slices (bulk pack) and brush-on marine-grade wood sealer.
This next setup is ridiculously cheap but looks like a $100 custom display you’d buy at a high-end garden boutique…
Architectural Focal Pieces as Unique Garden Furniture
To truly elevate a miniature landscape, you must introduce vertical height. These architectural structures act as visual anchors, pulling the entire scene together and giving your garden a sense of established permanence.
5. Miniature Gazebos
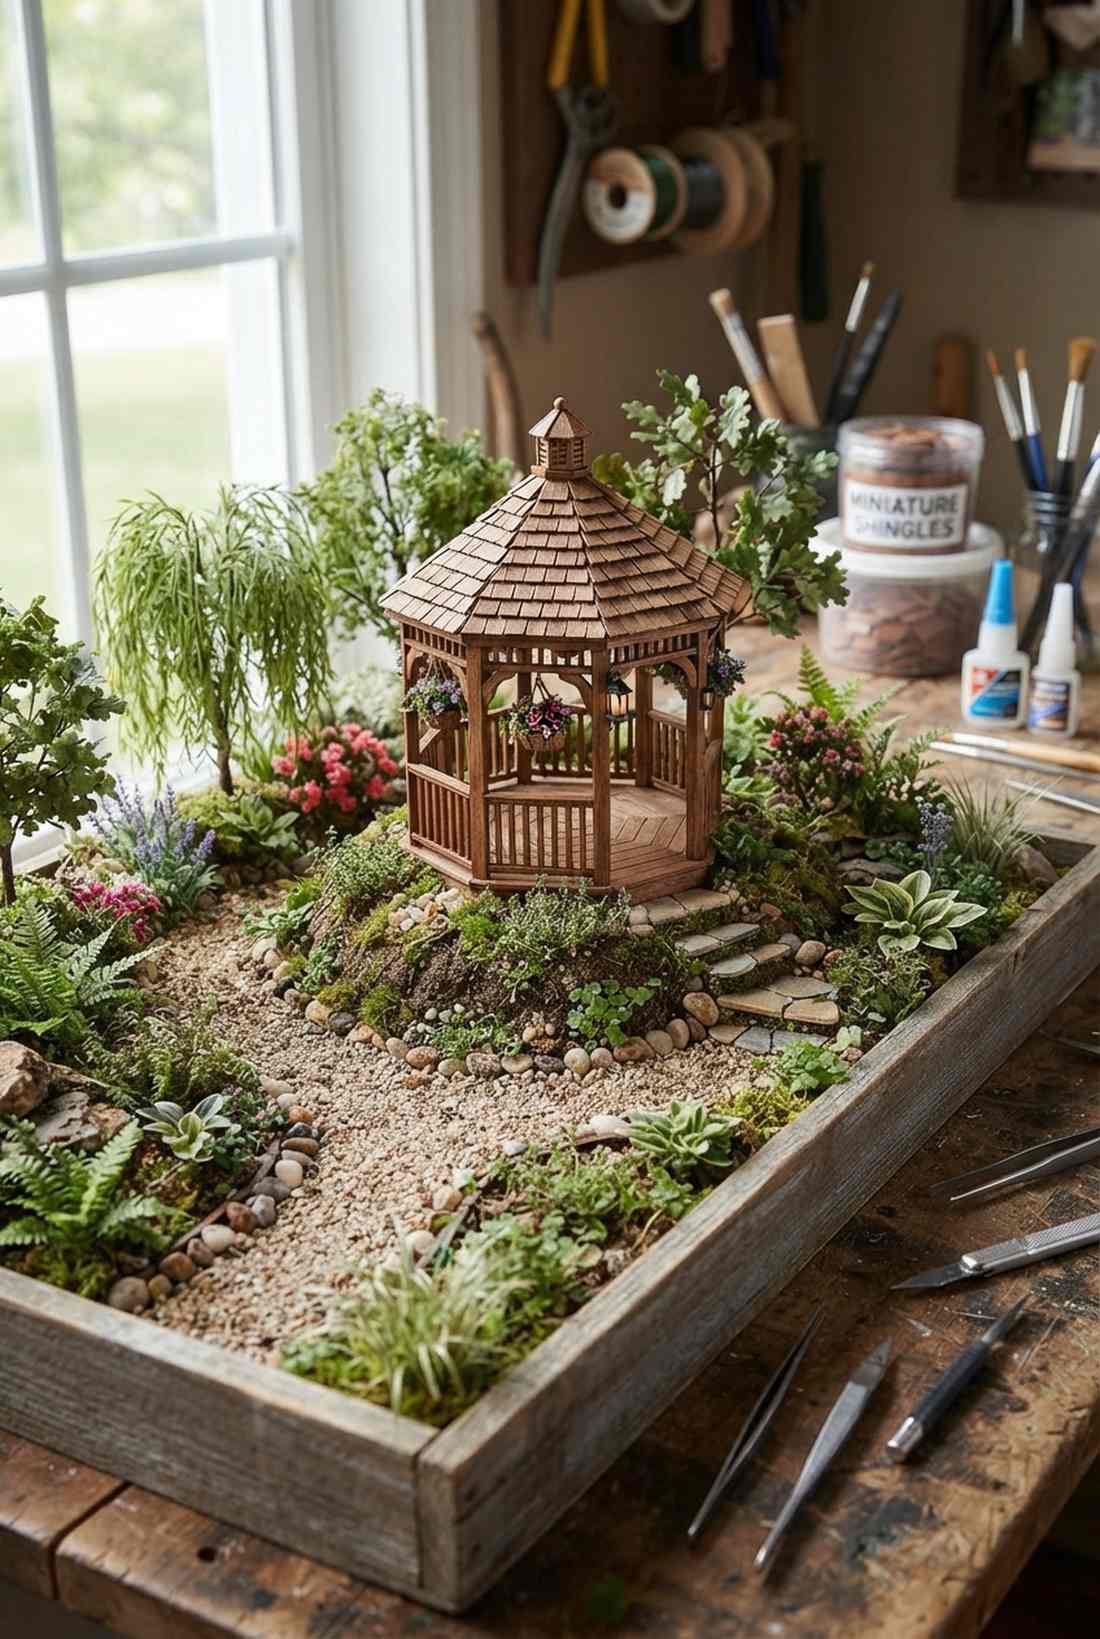
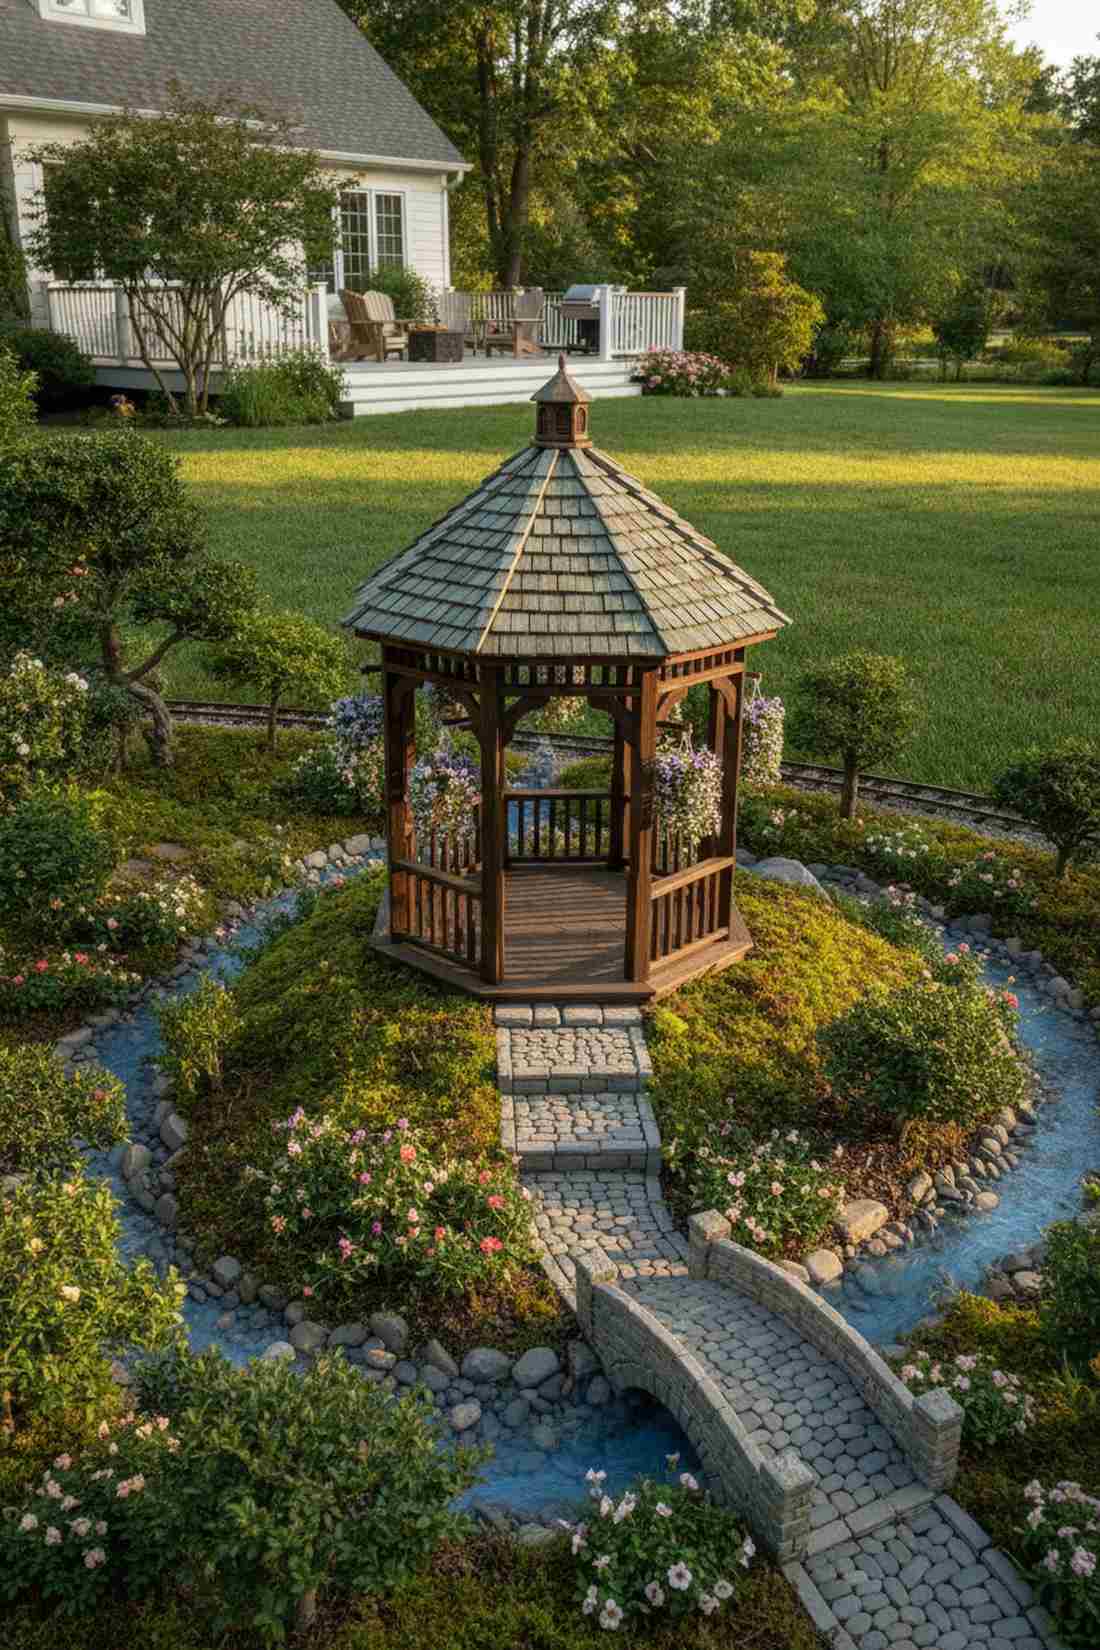
This imposing structure gives off an air of tiny royal elegance. A well-placed miniature wooden gazebo instantly becomes the undisputed hero of the layout, perfect for resting on top of a mossy hill or at the center of a miniature crossroad.
Store-bought wooden bases often warp, but reinforcing your structure with commercial-grade adhesives gives a designer-level finish that lasts for years. By blending raw architectural shapes with premium miniature outdoor decor accents like tiny hanging flower baskets, the entire scene commands luxury.
Building a robust gazebo from scratch costs roughly $20–$35. Save this blueprint to your favorite landscape architecture board!
- Key Materials: Hardwood craft sticks, wood stain, mini shingles.
- Vibe / Style: Classic botanical garden.
- Difficulty: Advanced, requires precise measuring.
- Budget Breakdown: Wood supplies: $12 | Roofing: $15.
- Creator’s Tip: Use a protractor to get the octagonal base angles exactly right before gluing; a crooked base ruins the entire illusion.
- Smart Sourcing: Pre-cut wooden miniature shingles (bulk pack) and cyanoacrylate wood adhesive (starter kit).
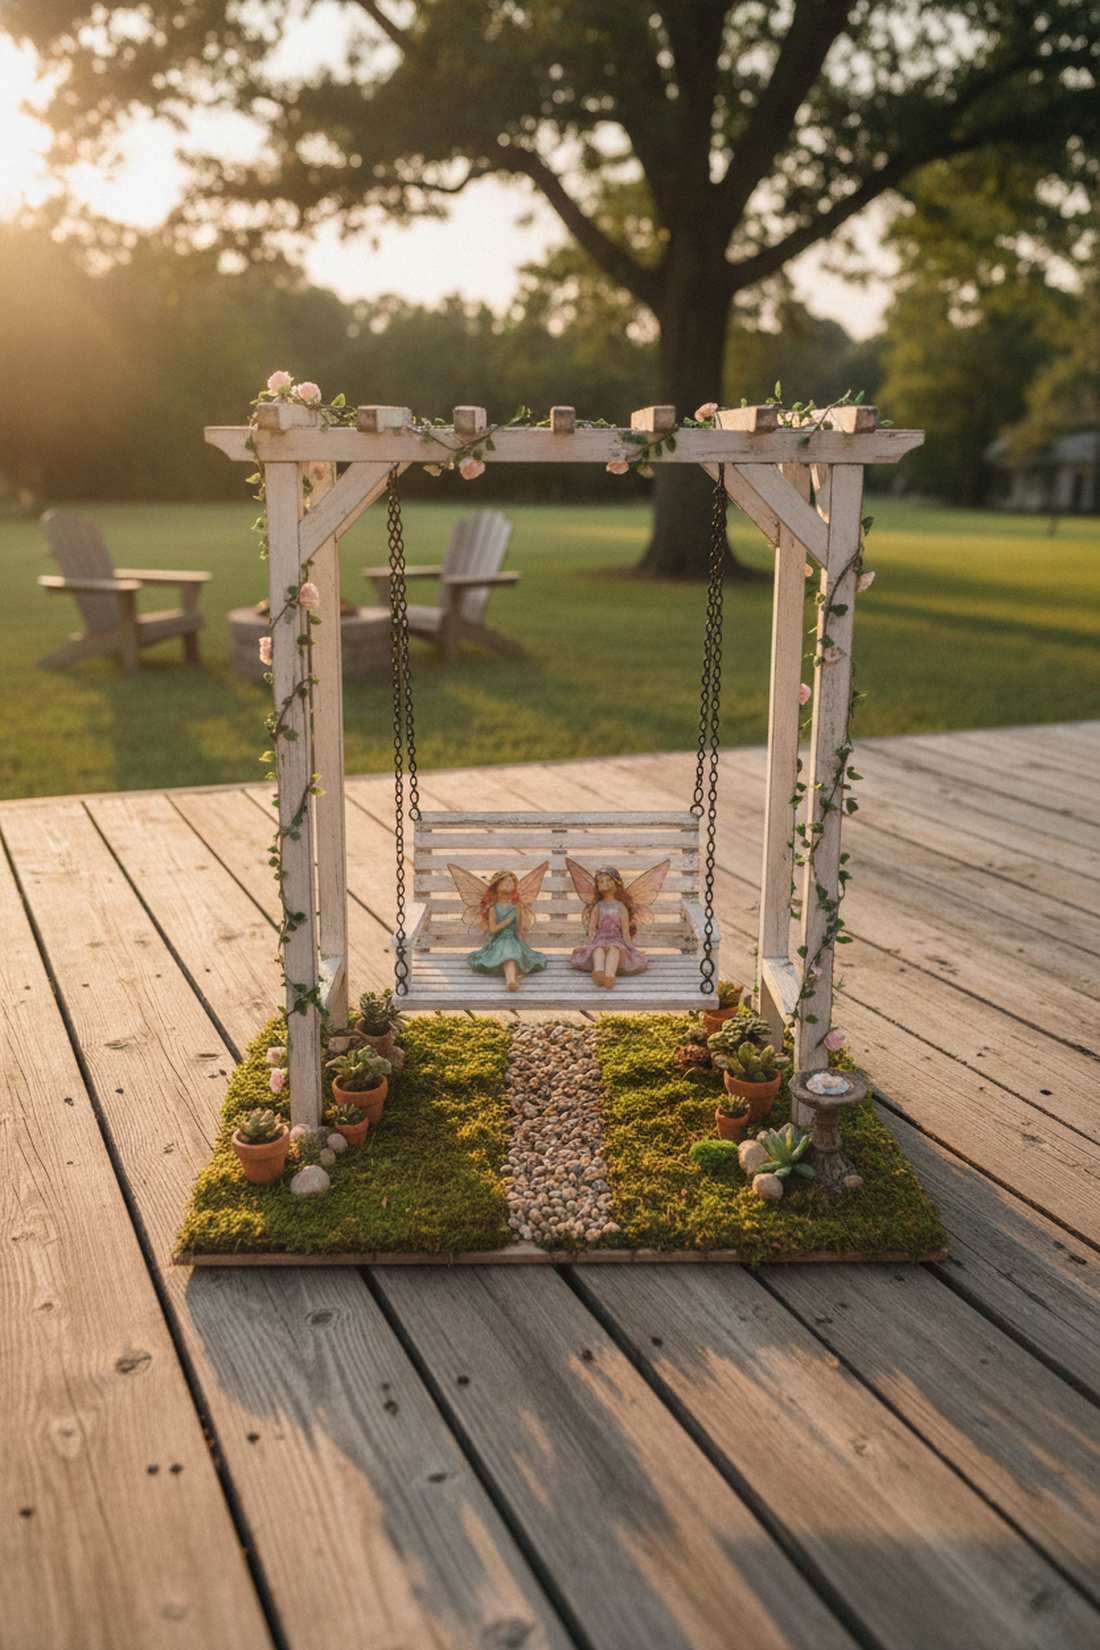
6. Wooden Pergolas with Climbing Vines
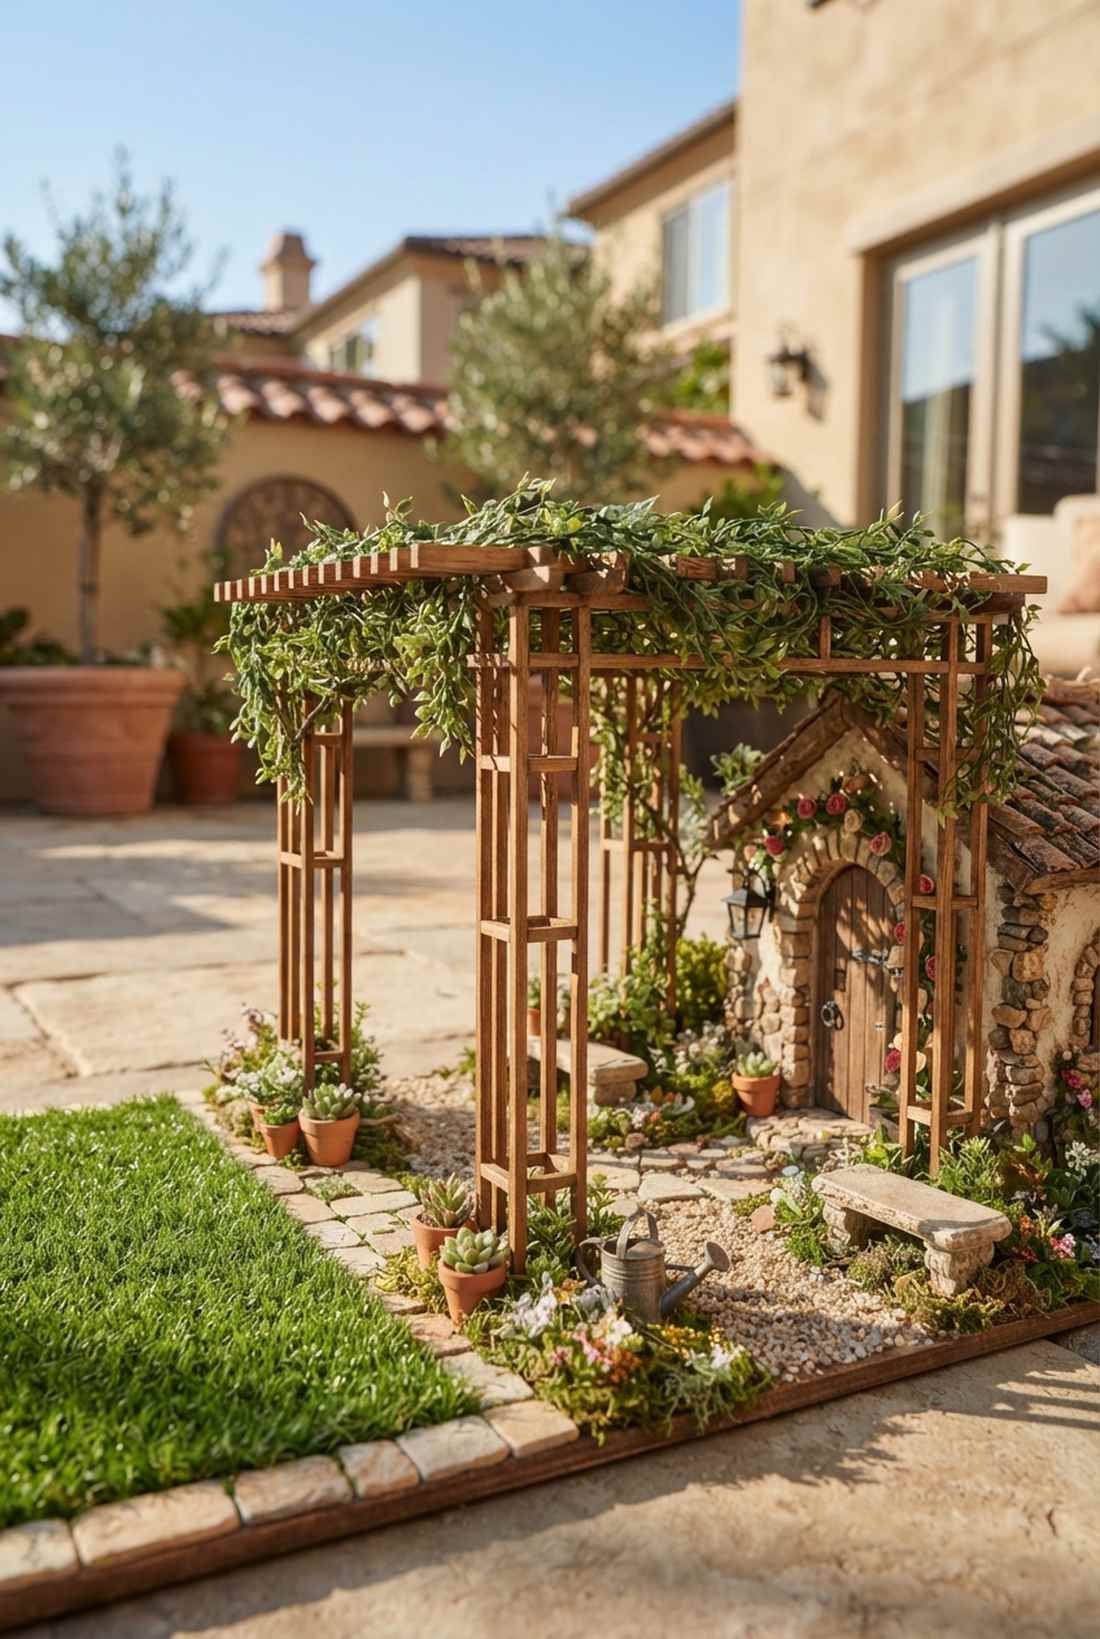
The gentle dappled shade of this setup feels incredibly relaxing and inviting. Implementing a slatted miniature pergola provides stunning overhead geometry, making it the perfect transition piece between a tiny lawn and a fairy house entrance.
Most DIYers leave their structures bare, but weaving hyper-realistic UV-resistant foliage through the top slats completely transforms the visual weight of the piece. It’s an expert-level styling trick that makes standard miniature garden supplies look like a professionally commissioned landscape installation.
Pulling off this detailed canopy effect will set you back about $18–$25. The added vertical drama makes it worth every penny.
- Key Materials: Square balsa wood dowels, artificial micro-vines.
- Vibe / Style: Mediterranean villa courtyard.
- Difficulty: Moderate.
- Budget Breakdown: Dowels: $10 | Micro-foliage: $12.
- Creator’s Tip: Wrap the vines tightly around the base pillars first, then let them drape loosely over the top beams for a natural growth pattern.
- Smart Sourcing: UV-coated artificial micro-vines (multi-strand) and weatherproof square dowel packs.
7. Wishing Wells
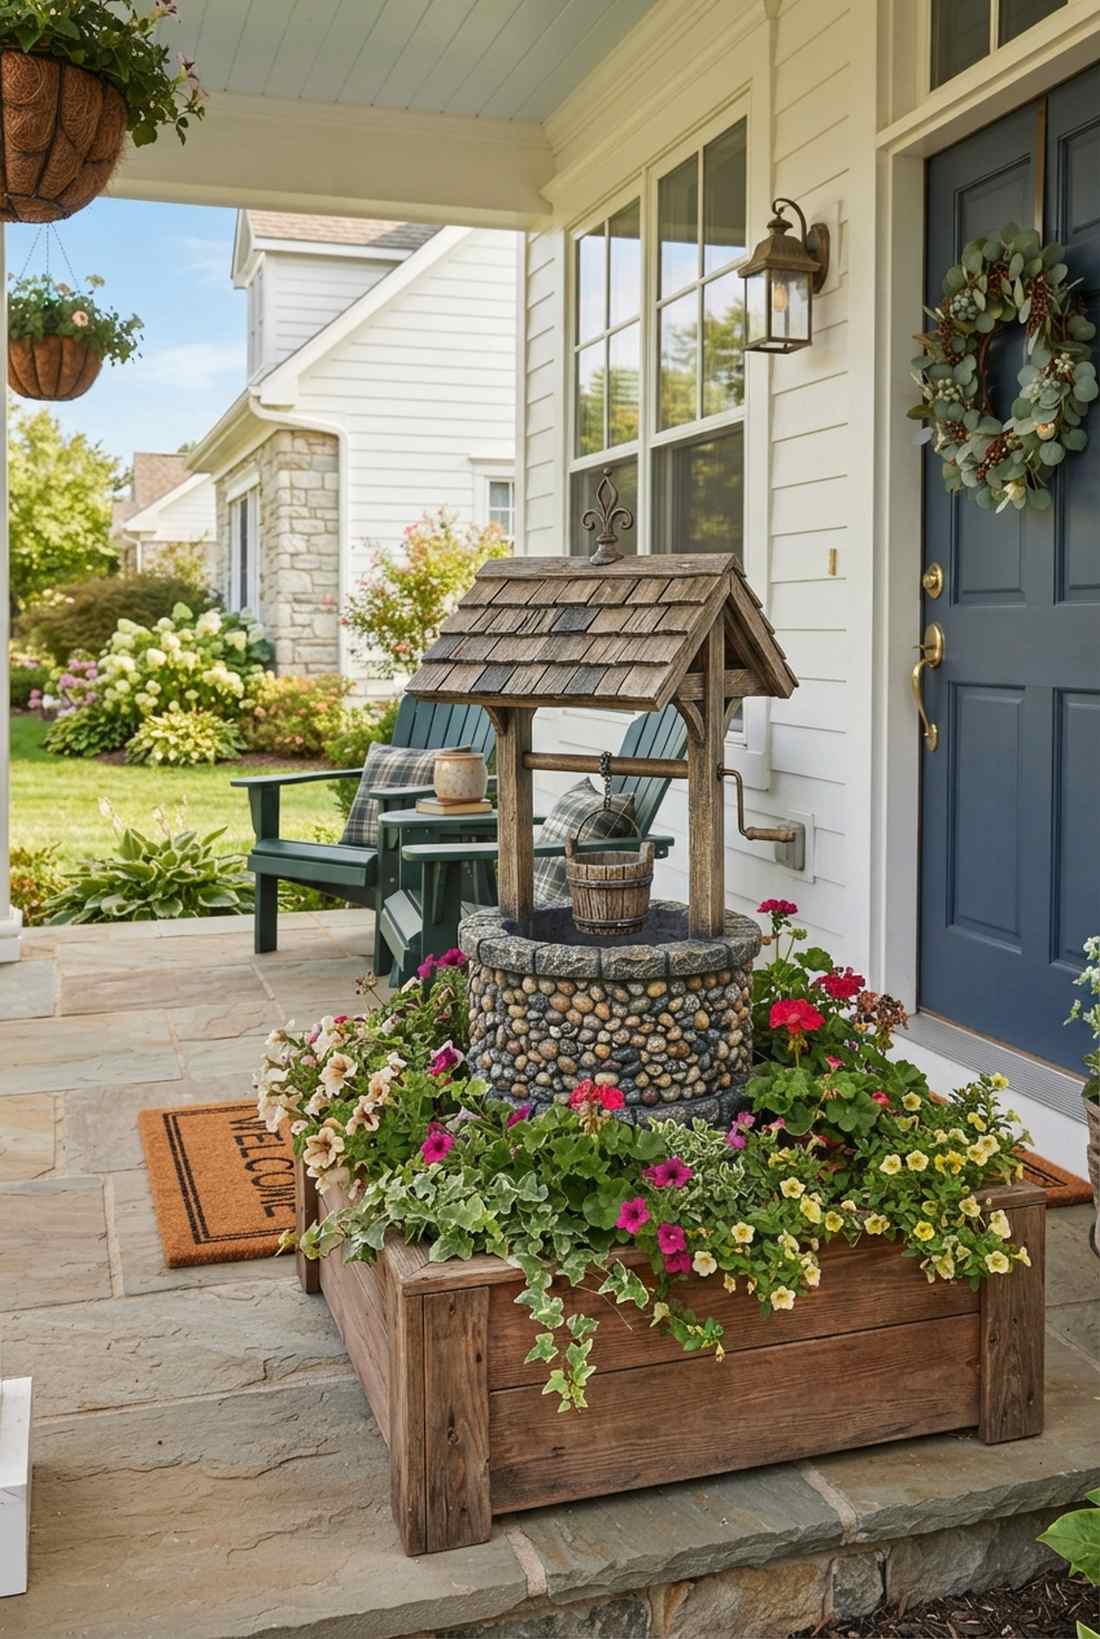

Staring at this piece feels like you are about to uncover a centuries-old secret. A stone-textured wishing well injects pure nostalgia into the layout, acting as an incredible standalone piece for a front porch planter box.
Using real heavy stones often collapses the surrounding soil, but utilizing a high-quality resin core beneath your pebble facade eliminates the sinking issue entirely. Integrating durable, pre-molded fairy garden kits for the base structure while customizing the exterior delivers the absolute best of both worlds.
A high-quality well setup generally costs around $25–$40. Pin this clever structural hack for your next big garden overhaul!
- Key Materials: Resin cylinder base, micro-river pebbles, thin chain.
- Vibe / Style: Antique rustic charm.
- Difficulty: Moderate, somewhat messy with the stone glue.
- Budget Breakdown: Base kit: $15 | Pebbles & Chain: $12.
- Creator’s Tip: Use a dark grey tinted grout between the pebbles instead of glue to make it look like actual historic masonry.
- Smart Sourcing: Pre-mixed miniature stone grout and acrylic wishing well starter bases.
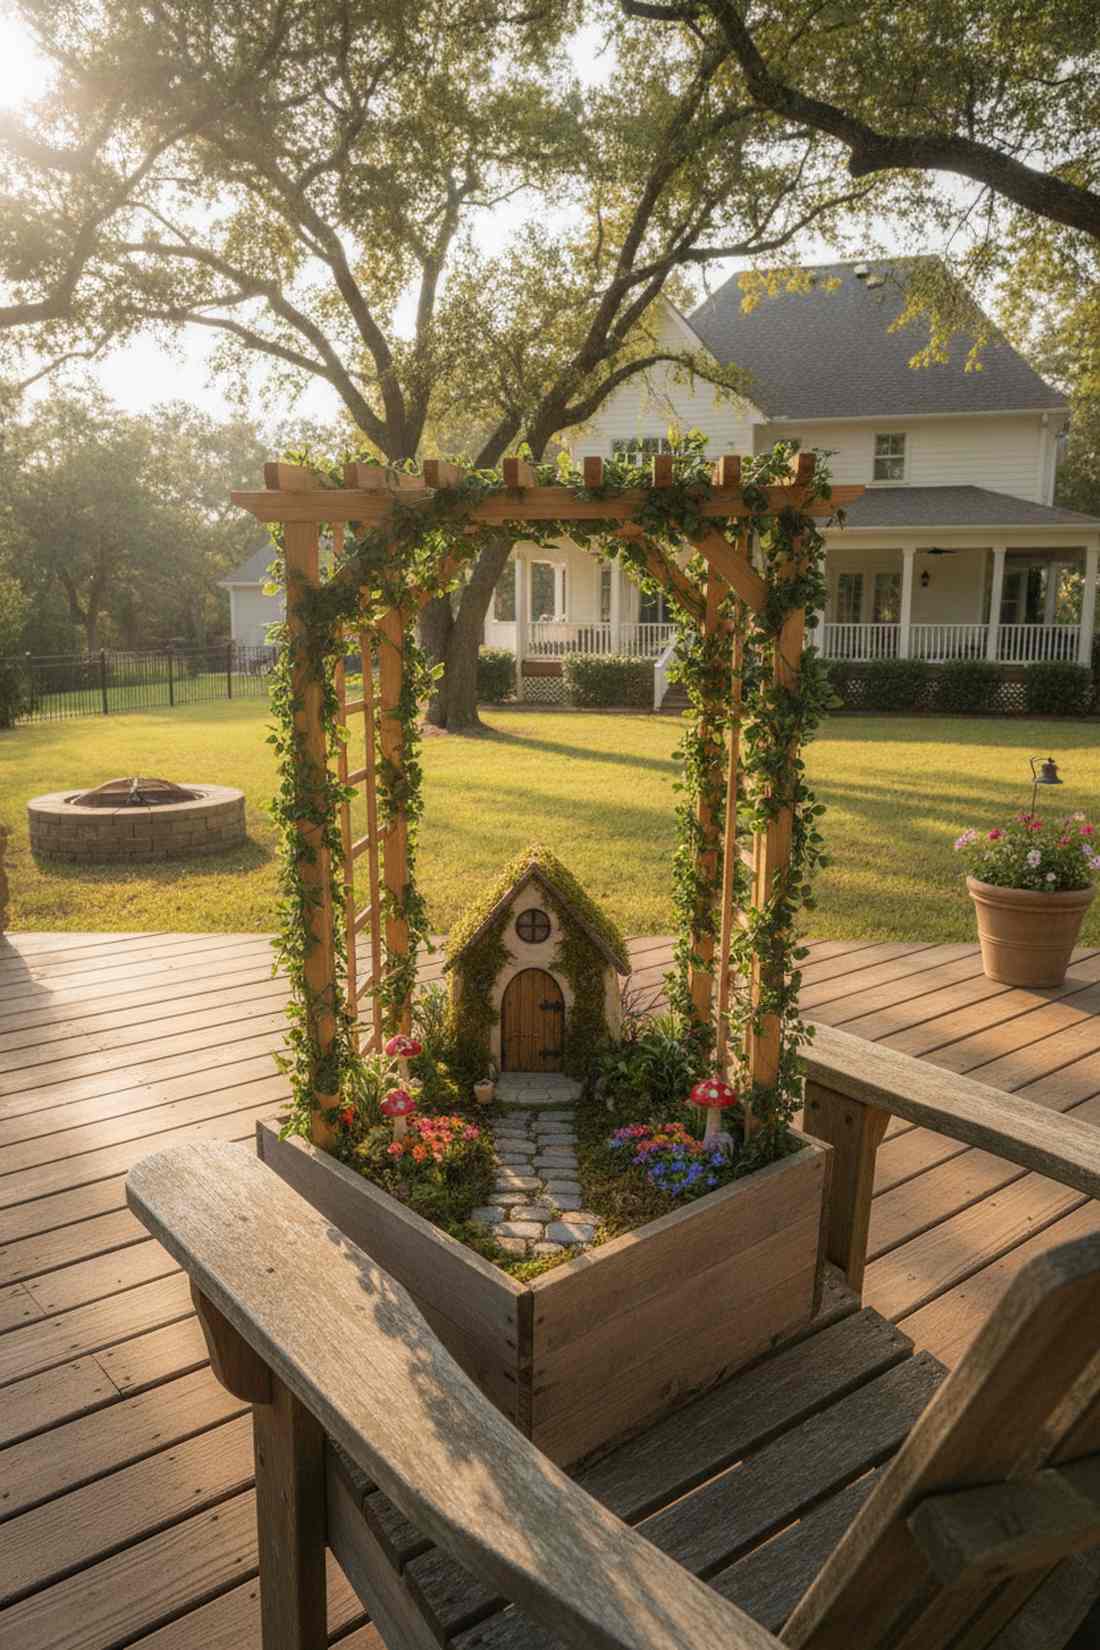
8. Arched Trellises
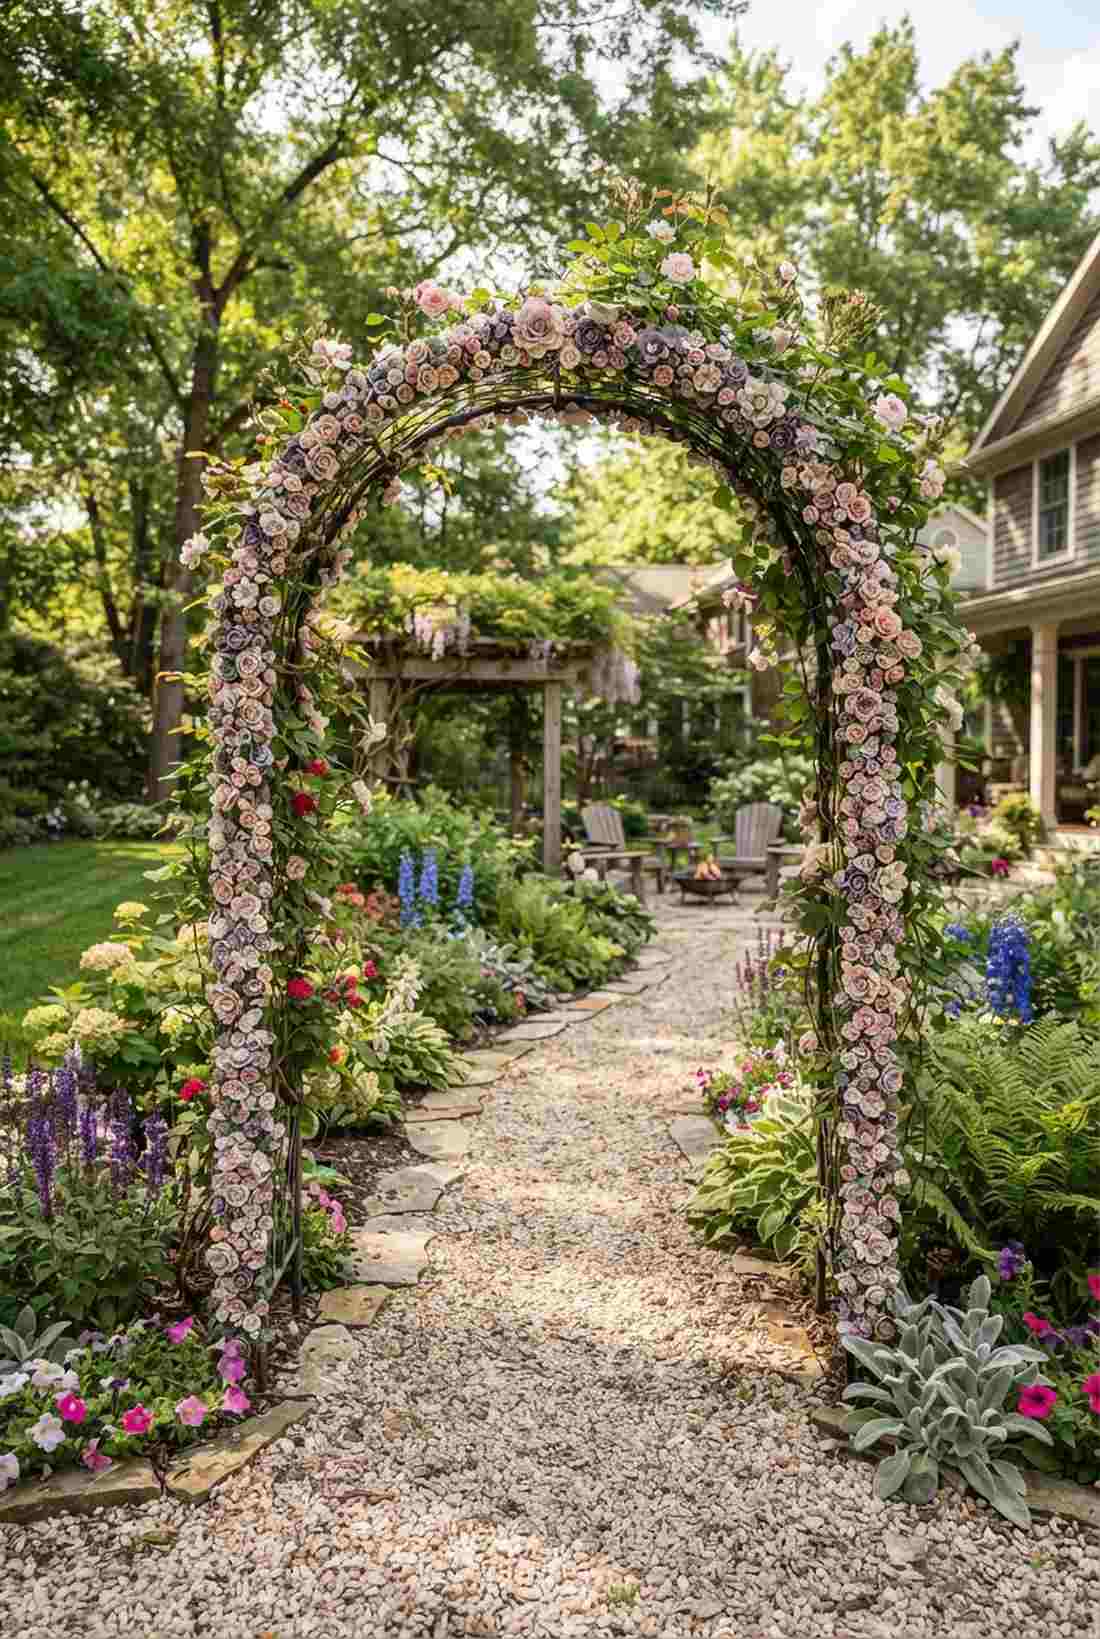
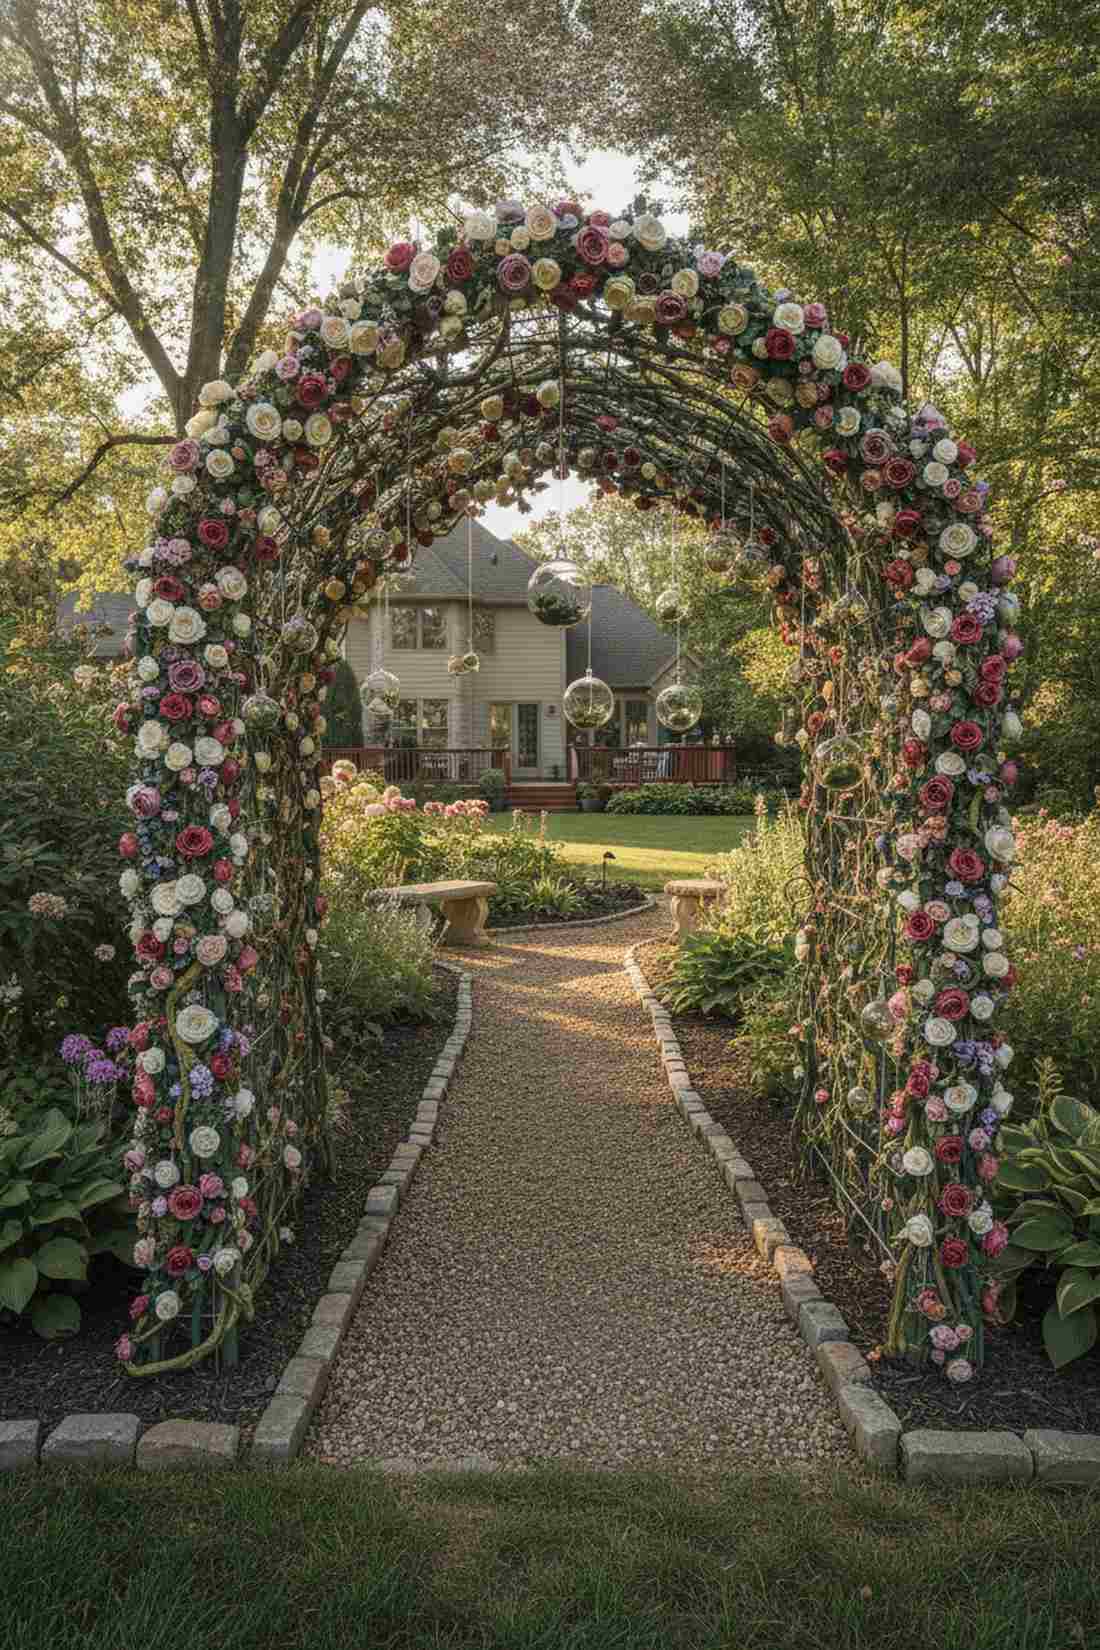
Walking your fingers through this setup feels like entering a secret botanical gateway. A beautifully draped floral arched trellis establishes clear boundaries in your design, perfectly framing the entrance of a tiny gravel pathway.
Cardboard bases turn to mush overnight, which is why forming your arch over a solid aluminum core ensures it survives heavy rainstorms intact. This rigid skeletal structure allows you to pile on heavy premium terrarium accessories without the dreaded mid-season sag.
You can craft an incredibly durable archway for under $15. It’s an essential framing technique that immediately draws the viewer’s eye exactly where you want it.
- Key Materials: Thick aluminum wire, polymer clay, tiny fabric flowers.
- Vibe / Style: Enchanted garden gate.
- Difficulty: Easy, very forgiving shape.
- Budget Breakdown: Wire core: $5 | Clay & Florals: $10.
- Creator’s Tip: Bake the clay directly on the wire in a slight C-shape, then gently bend it into the final U-shape while it is still warm from the oven.
- Smart Sourcing: Heavy-duty armature wire (spool) and waterproof mini fabric rosettes (bulk pack).
Most people get their vertical layouts completely wrong… until they try the exact high-impact trick coming up next.
💡 Must-Have Supplies for High-End Setups
To build these setups faster and ensure they last, skip the generic craft aisles and invest in the right foundational kits.
- Base & Support: Pre-cut acrylic structural bases (bulk pack)
- Setup Tools: Miniature masonry and exterior adhesive starter kits
- Weather/Durability Protection: UV-resistant clear marine spray sealant
Playful Interactive Elements for Whimsical Spaces
A static garden is beautiful, but a dynamic garden is mesmerizing. Adding elements that can physically move or suggest recent activity tricks the brain into feeling the space is genuinely lived-in.
9. Twig Tire Swings
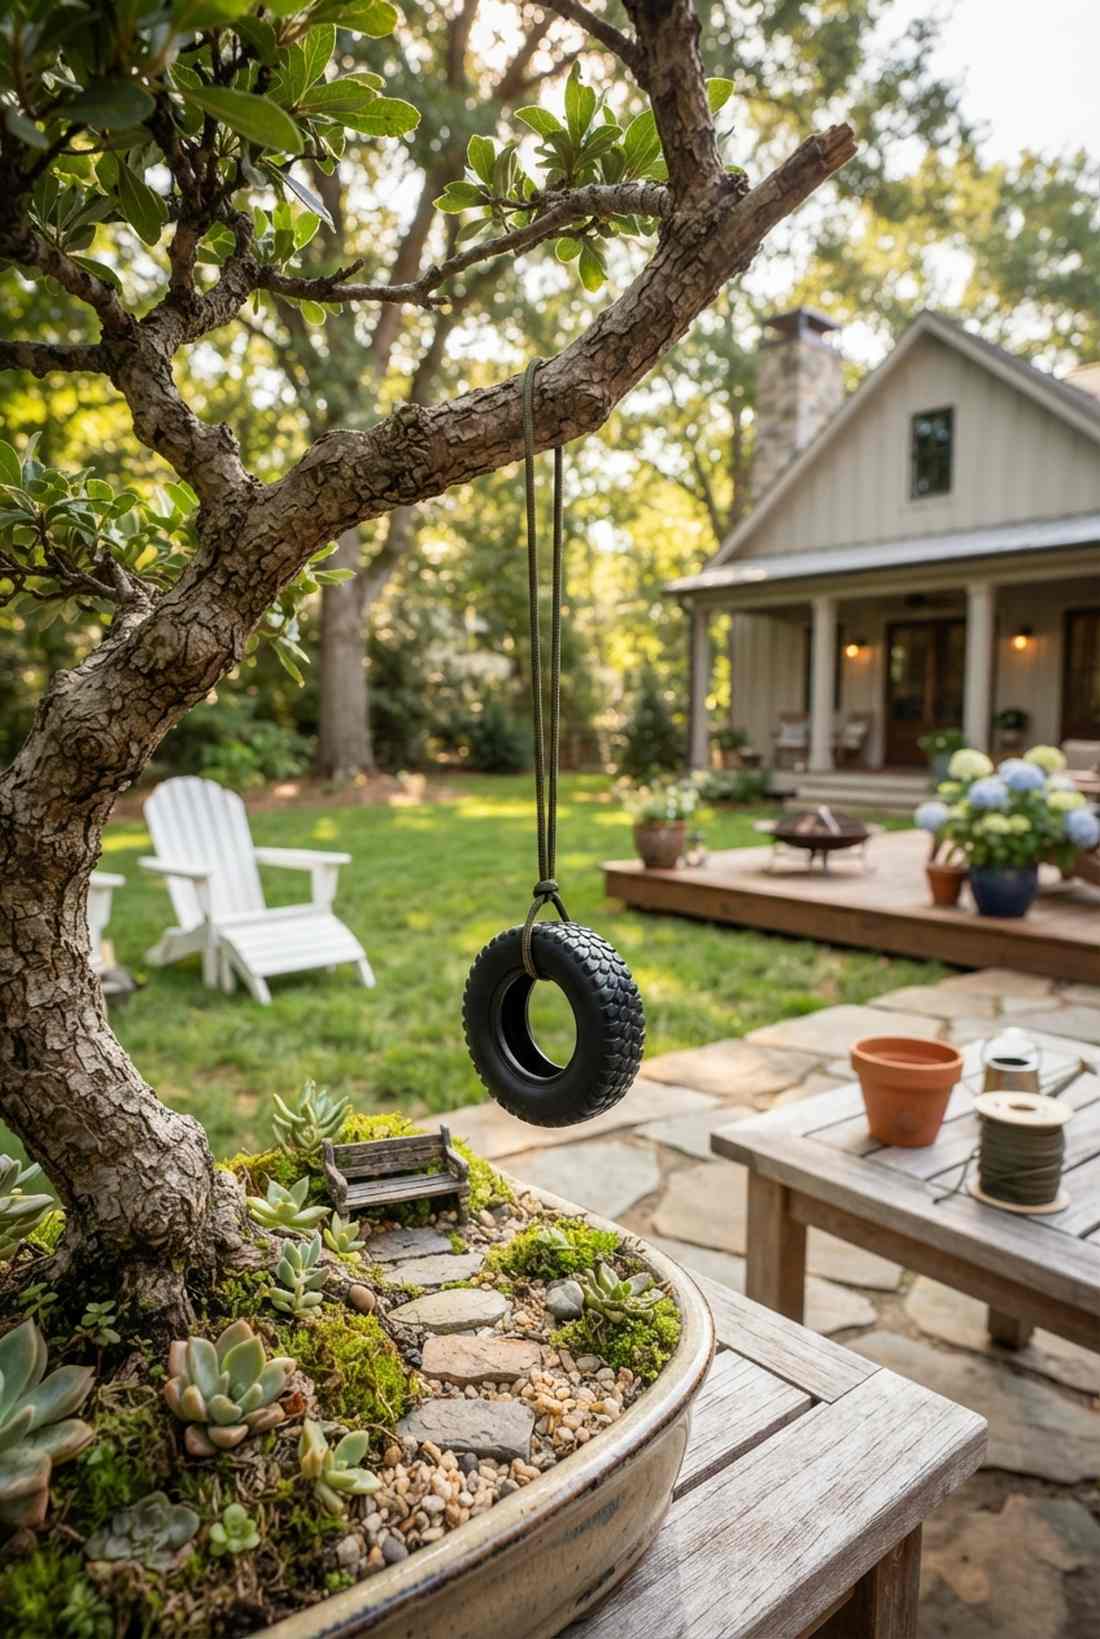
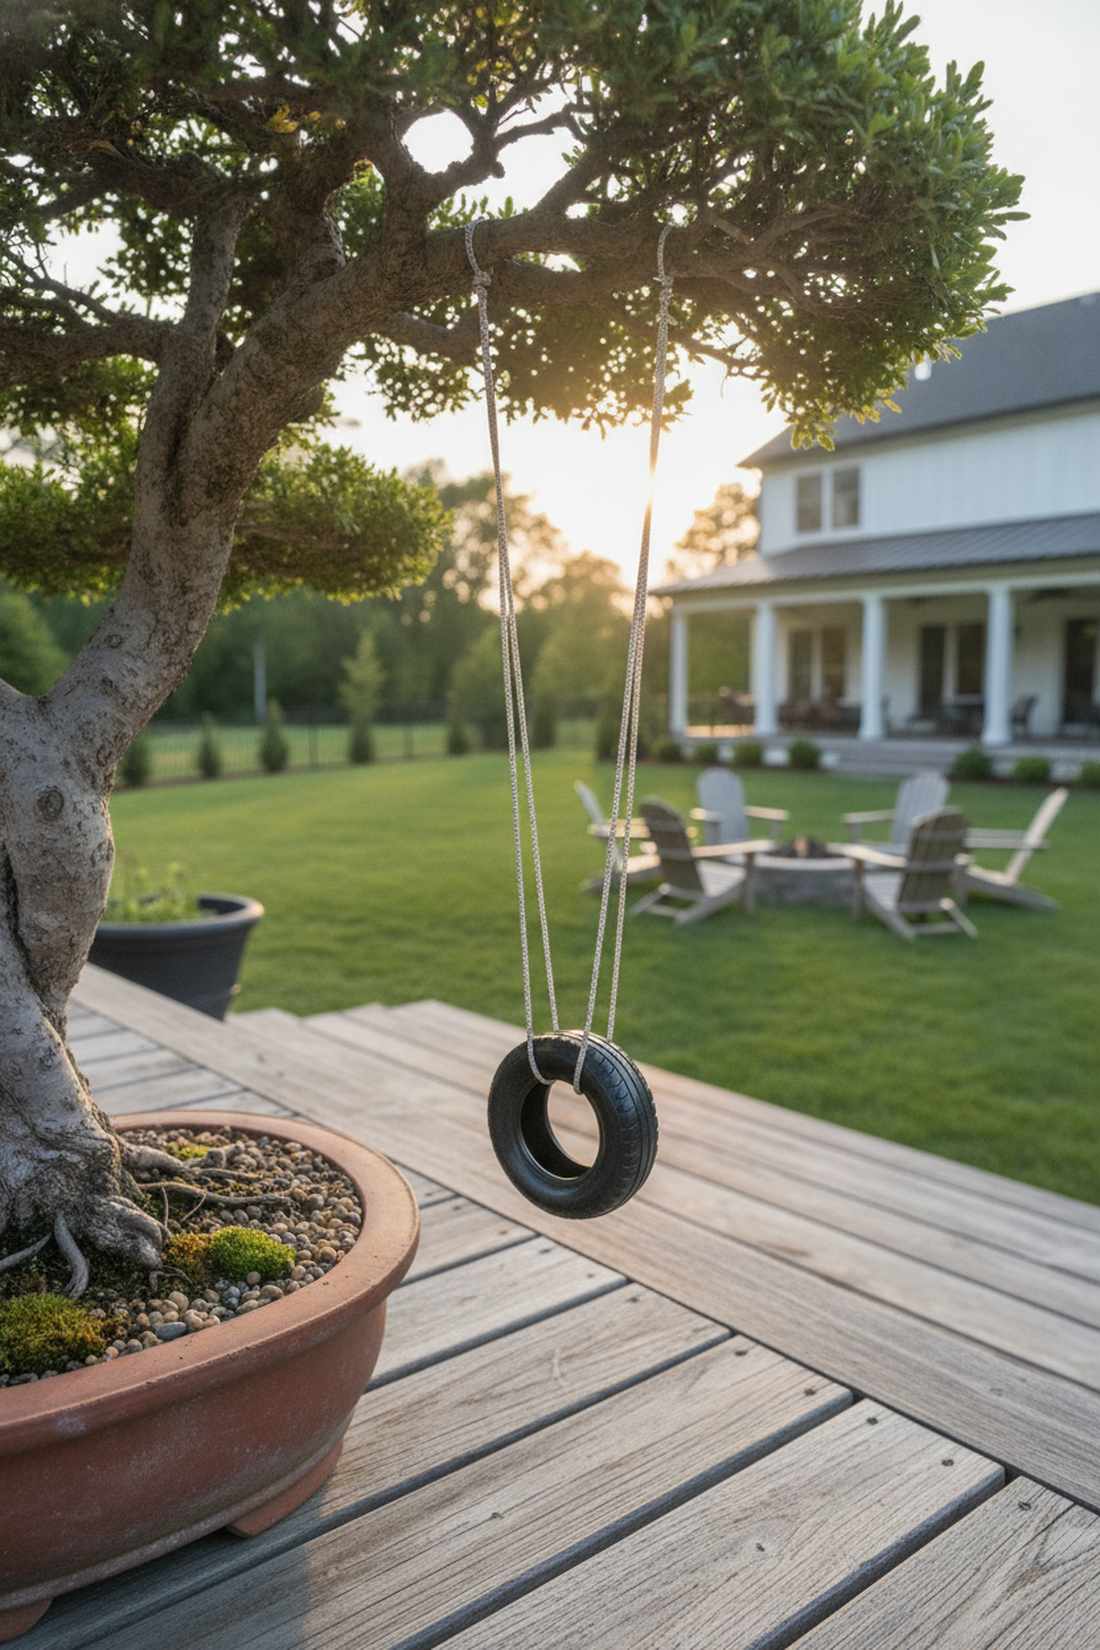
This tiny detail bursts with the carefree energy of a summer afternoon. A miniature suspended tire swing provides incredible movement and nostalgia, looking absolutely perfect dangling from a sturdy bonsai tree branch.
Flimsy cotton strings rot out in a matter of weeks, so upgrading to a micro-braided nylon cord keeps your pieces safely suspended year-round. It is a tiny architectural flex that upgrades standard miniature garden supplies into a hyper-realistic childhood diorama.
This micro-project costs less than $10 to fully implement. Save this idea if you love creating scenes with an interactive twist!
- Key Materials: Toy rubber tire, micro-paracord, thick branch.
- Vibe / Style: Playful backyard nostalgia.
- Difficulty: Extremely easy.
- Budget Breakdown: Mini tires: $5 | Cord: $4.
- Creator’s Tip: Burn the ends of the nylon cord with a lighter before tying the knot so it never frays in the wind.
- Smart Sourcing: Rubber miniature dollhouse tires (multipack) and UV-coated micro paracord (spool).
10. Porch-Style Hanging Swings
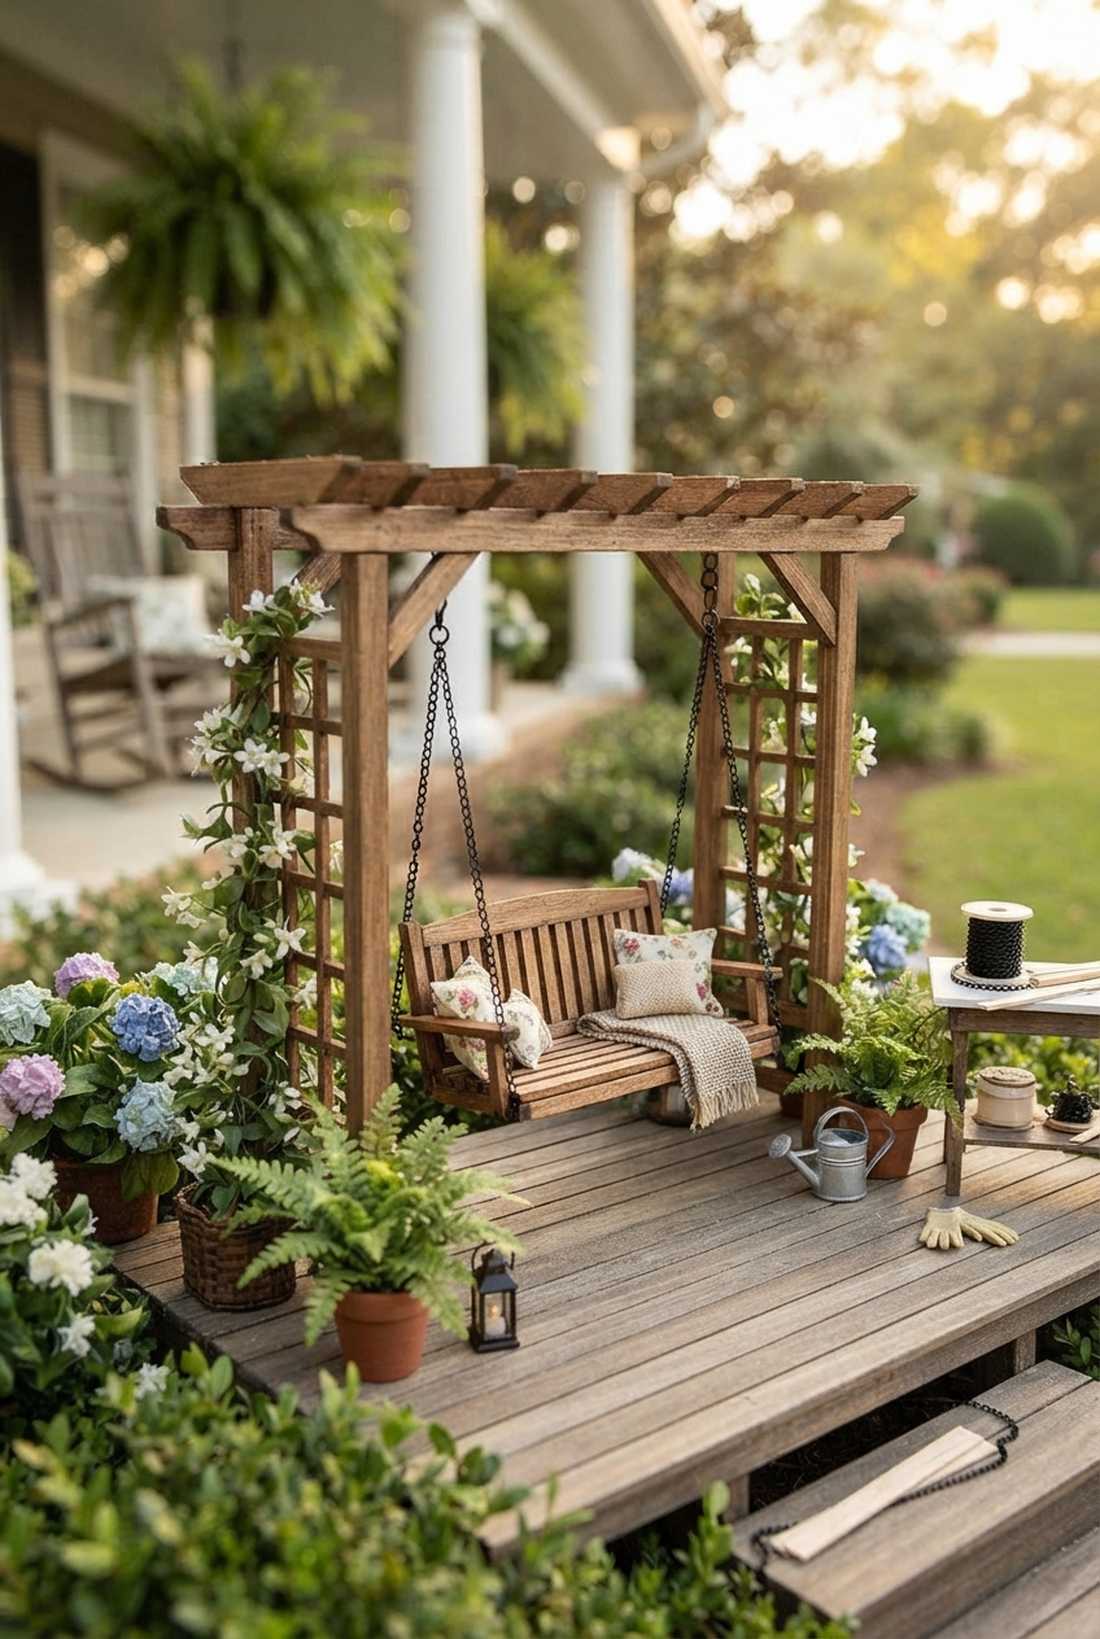
The lazy, sway-in-the-breeze aesthetic of this piece is impossible to ignore. A miniature slatted porch swing brings massive Southern charm, functioning brilliantly when hung from the rafters of a tiny wooden pergola.
While many hobbyists struggle to balance hanging pieces, utilizing uniform jewelry hardware ensures the bench sits perfectly level every single time. It completely bypasses the clumsy glued-string look, replacing it with the polished finish of premium fairy garden kits.
Sourcing the right hardware and wood costs roughly $15–$20. It’s an upgrade that fundamentally changes how professional your space looks.
- Key Materials: Thin balsa wood, jewelry jump rings, fine hobby chain.
- Vibe / Style: Cozy Southern porch.
- Difficulty: Moderate, needs tiny pliers.
- Budget Breakdown: Wood slats: $8 | Chain & Rings: $10.
- Creator’s Tip: Paint the chain with a light coat of matte black primer to make it look like heavy wrought iron instead of shiny jewelry.
- Smart Sourcing: Tarnish-proof hobby chain (bulk spool) and pre-cut balsa wood strips.
11. Picnic Tables with Umbrellas
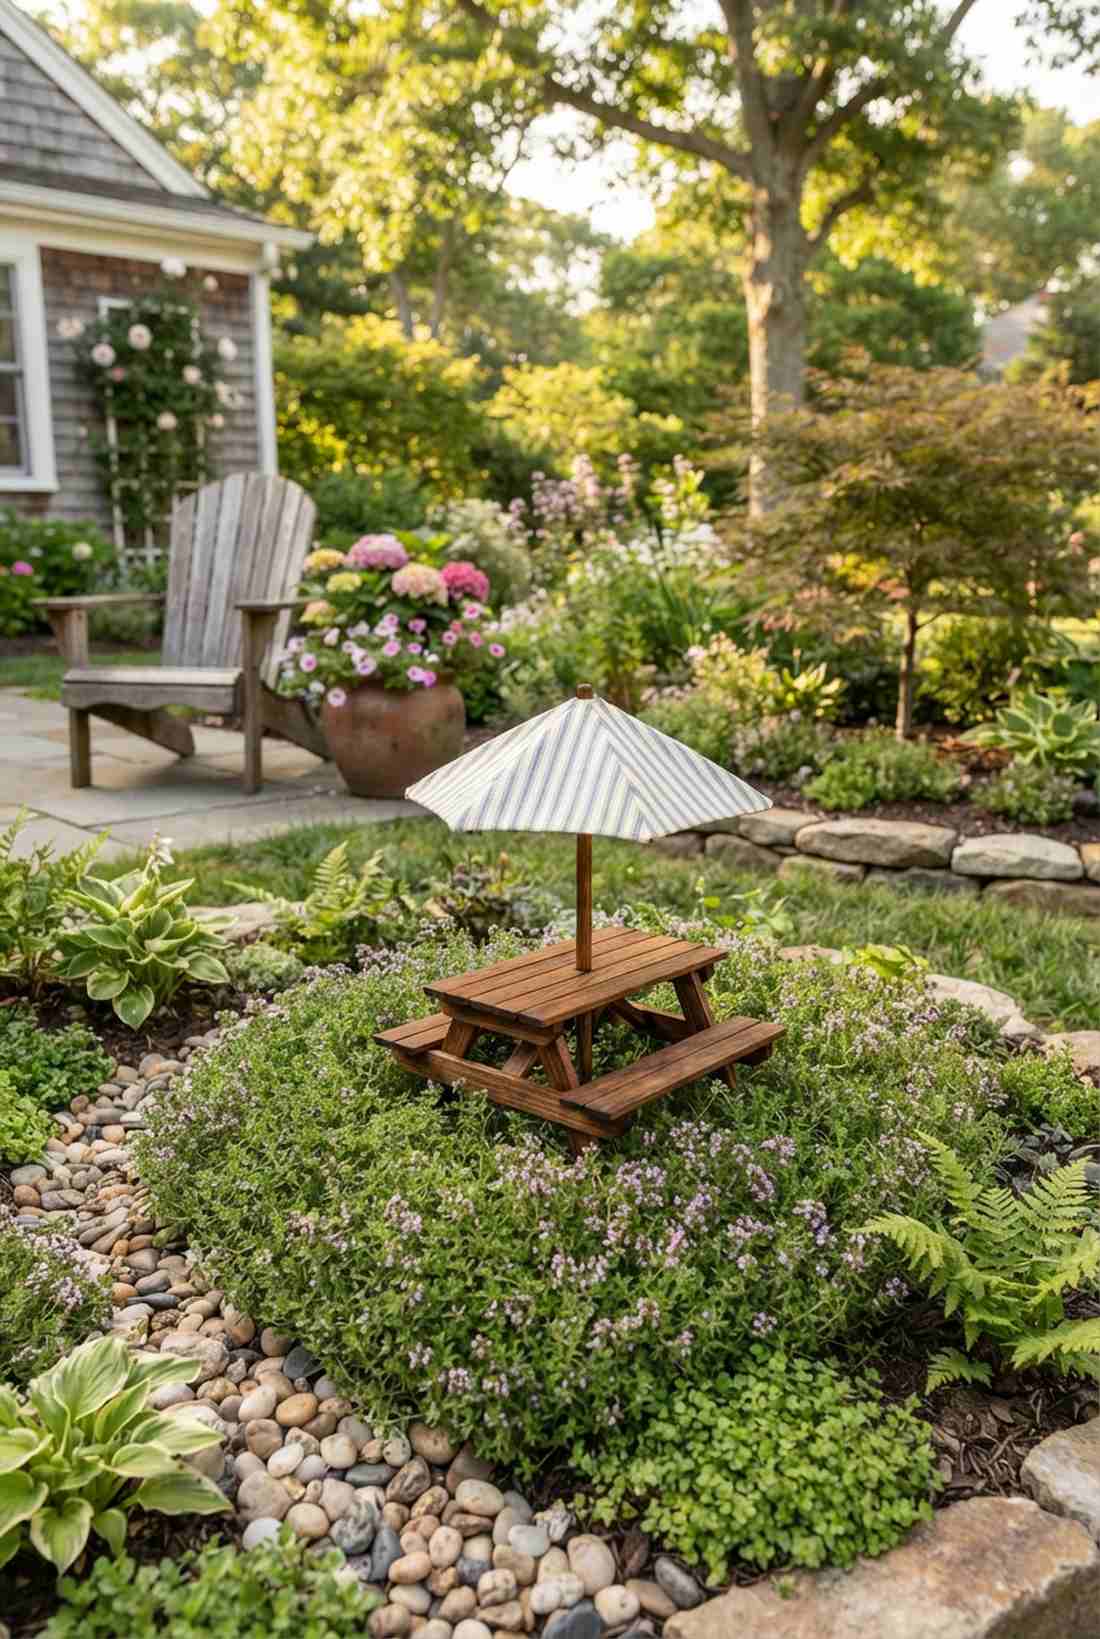
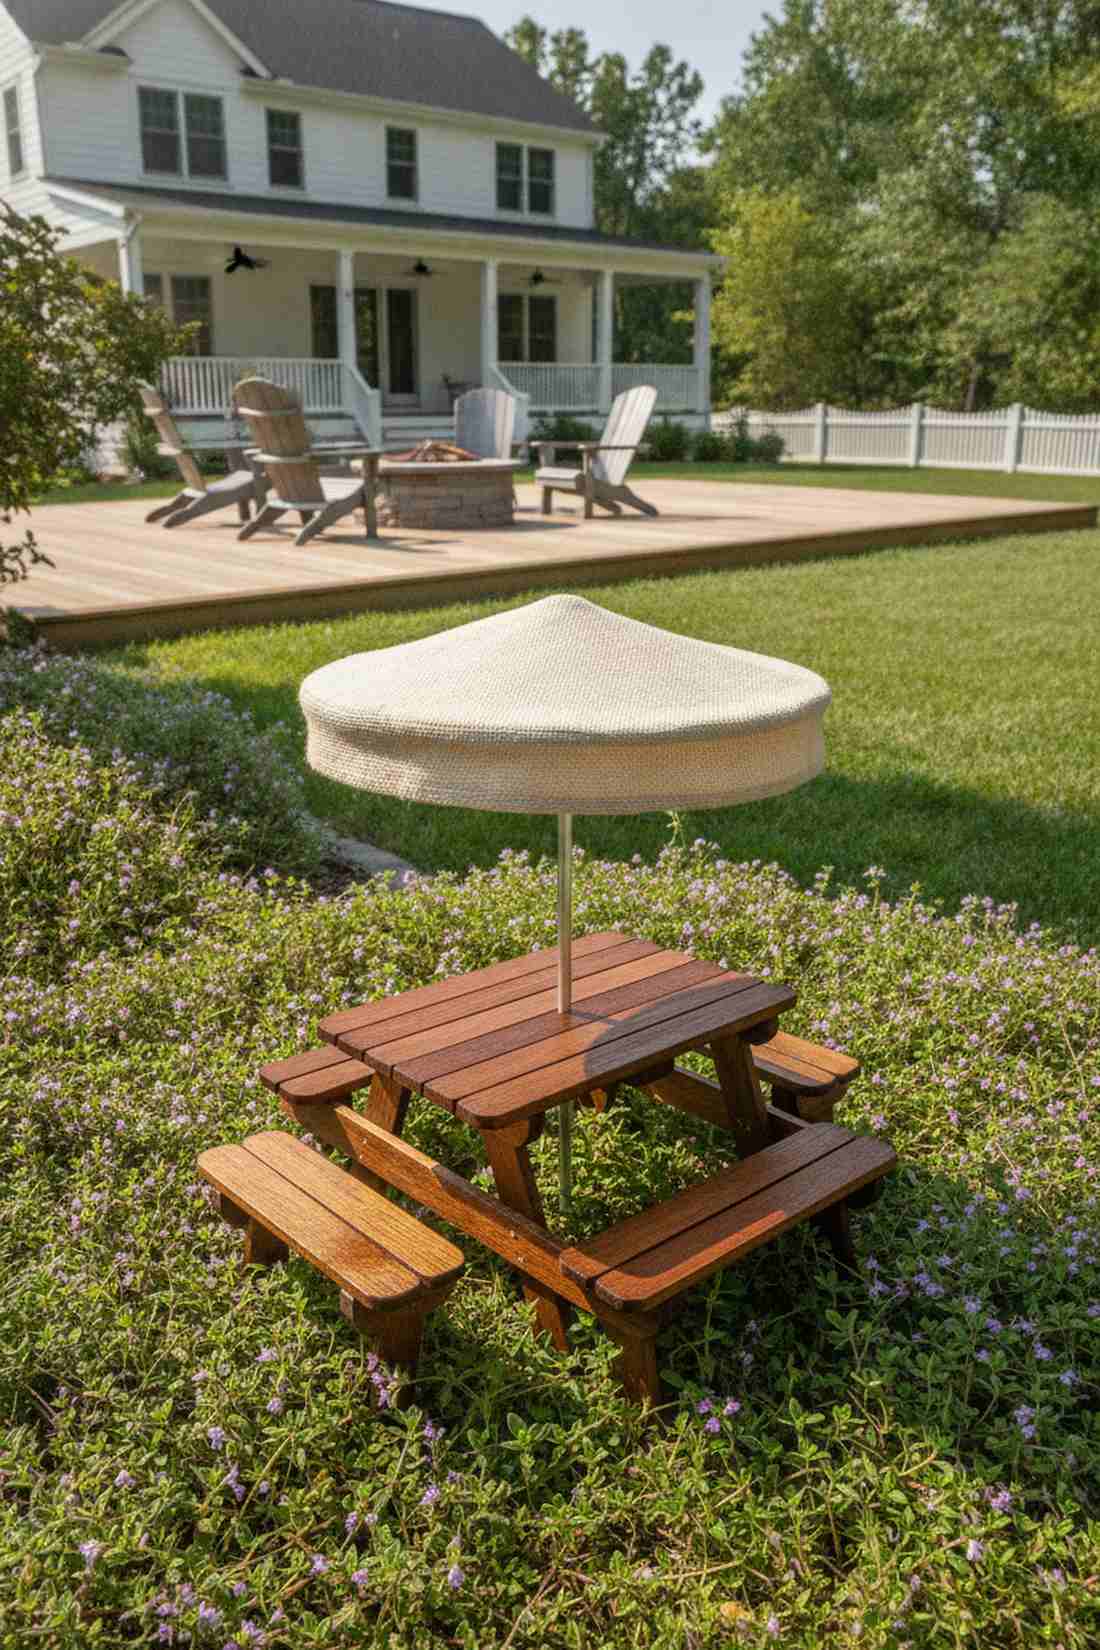
You can almost hear tiny conversations happening around this setup. A classic miniature picnic table injects instant community vibes, making it the ideal centerpiece for a bright, sunny patch of creeping thyme.
Instead of leaving the wood bare to warp in the sun, sealing it under a thick waterproof stain gives a surprisingly premium look that mimics real park furniture. Sneaking a weather-treated fabric canopy on top upgrades generic miniature outdoor decor into a high-end luxury resort scene.
A sturdy table and canopy combo runs about $18–$30 to build properly. Pin this layout to your summer garden inspiration board!
- Key Materials: Flat craft sticks, outdoor stain, mini cocktail umbrella base, sealed fabric.
- Vibe / Style: Sunny community park.
- Difficulty: Moderate, requires precision cutting.
- Budget Breakdown: Lumber sticks: $5 | Stain & Fabric: $15.
- Creator’s Tip: Coat the paper umbrella in a clear silicone waterproofing spray so it behaves like real outdoor canvas.
- Smart Sourcing: Pre-sanded jumbo craft sticks (bulk pack) and waterproofing fabric spray.
12. Rope Ladders
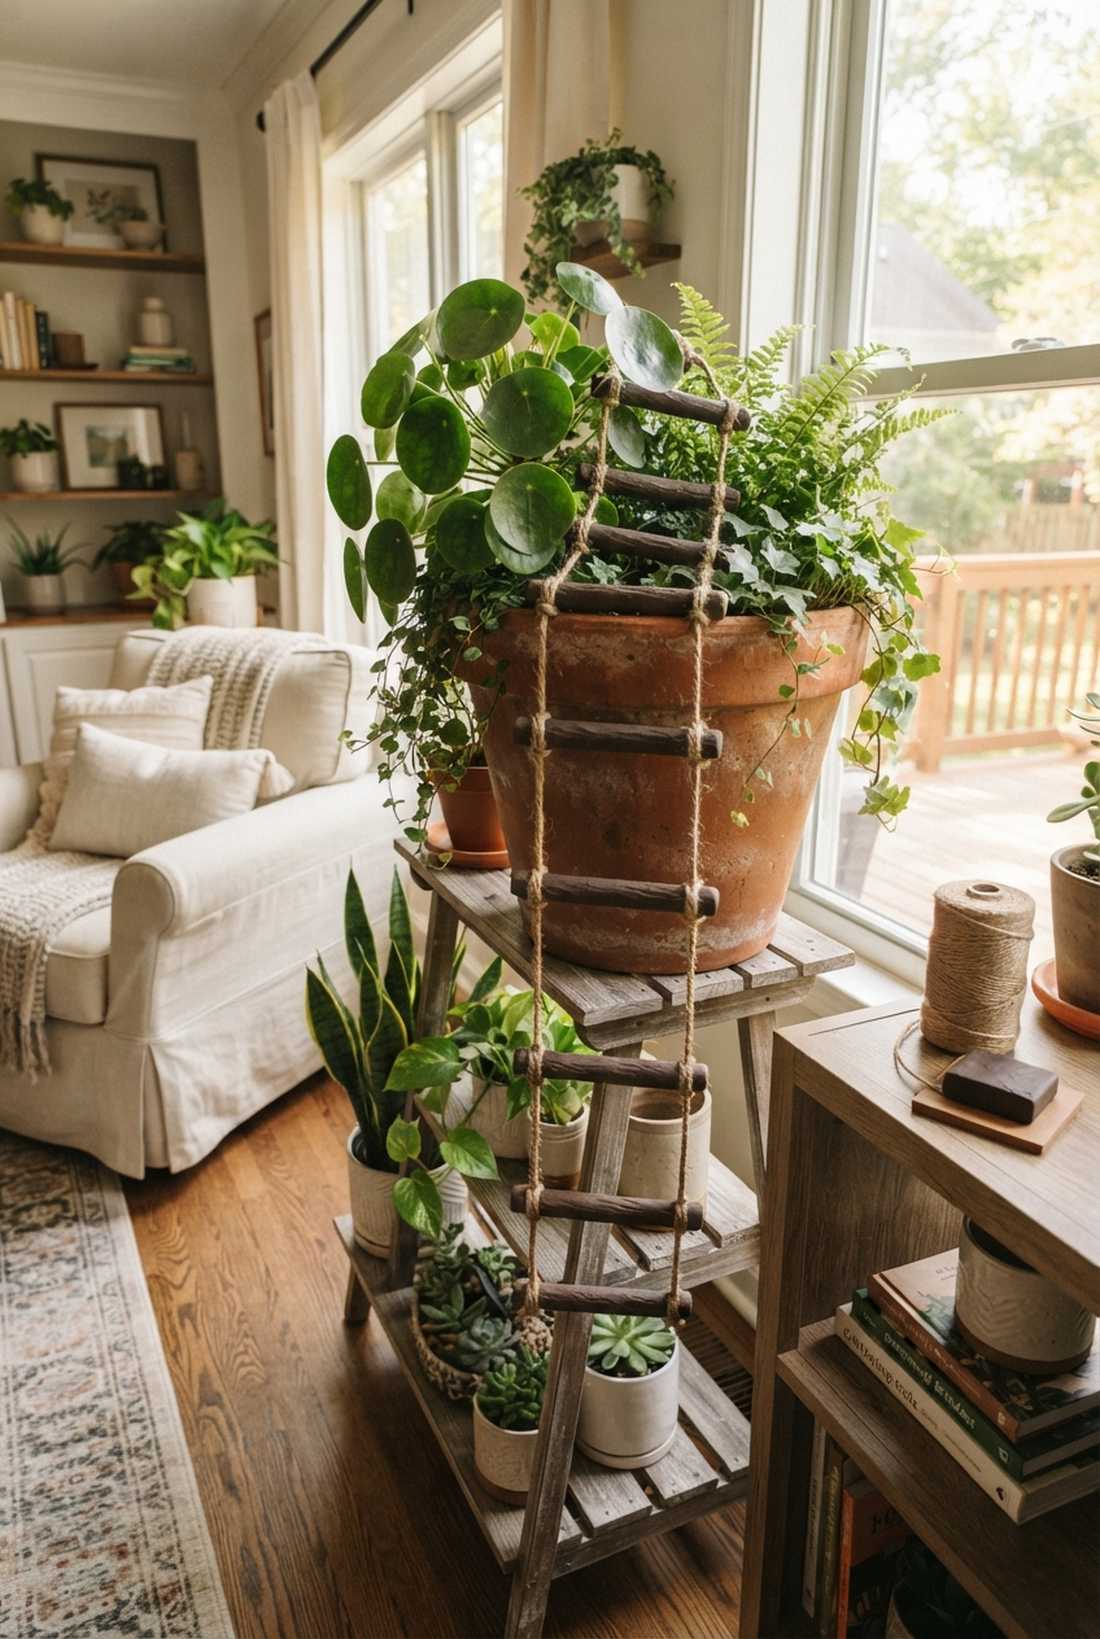
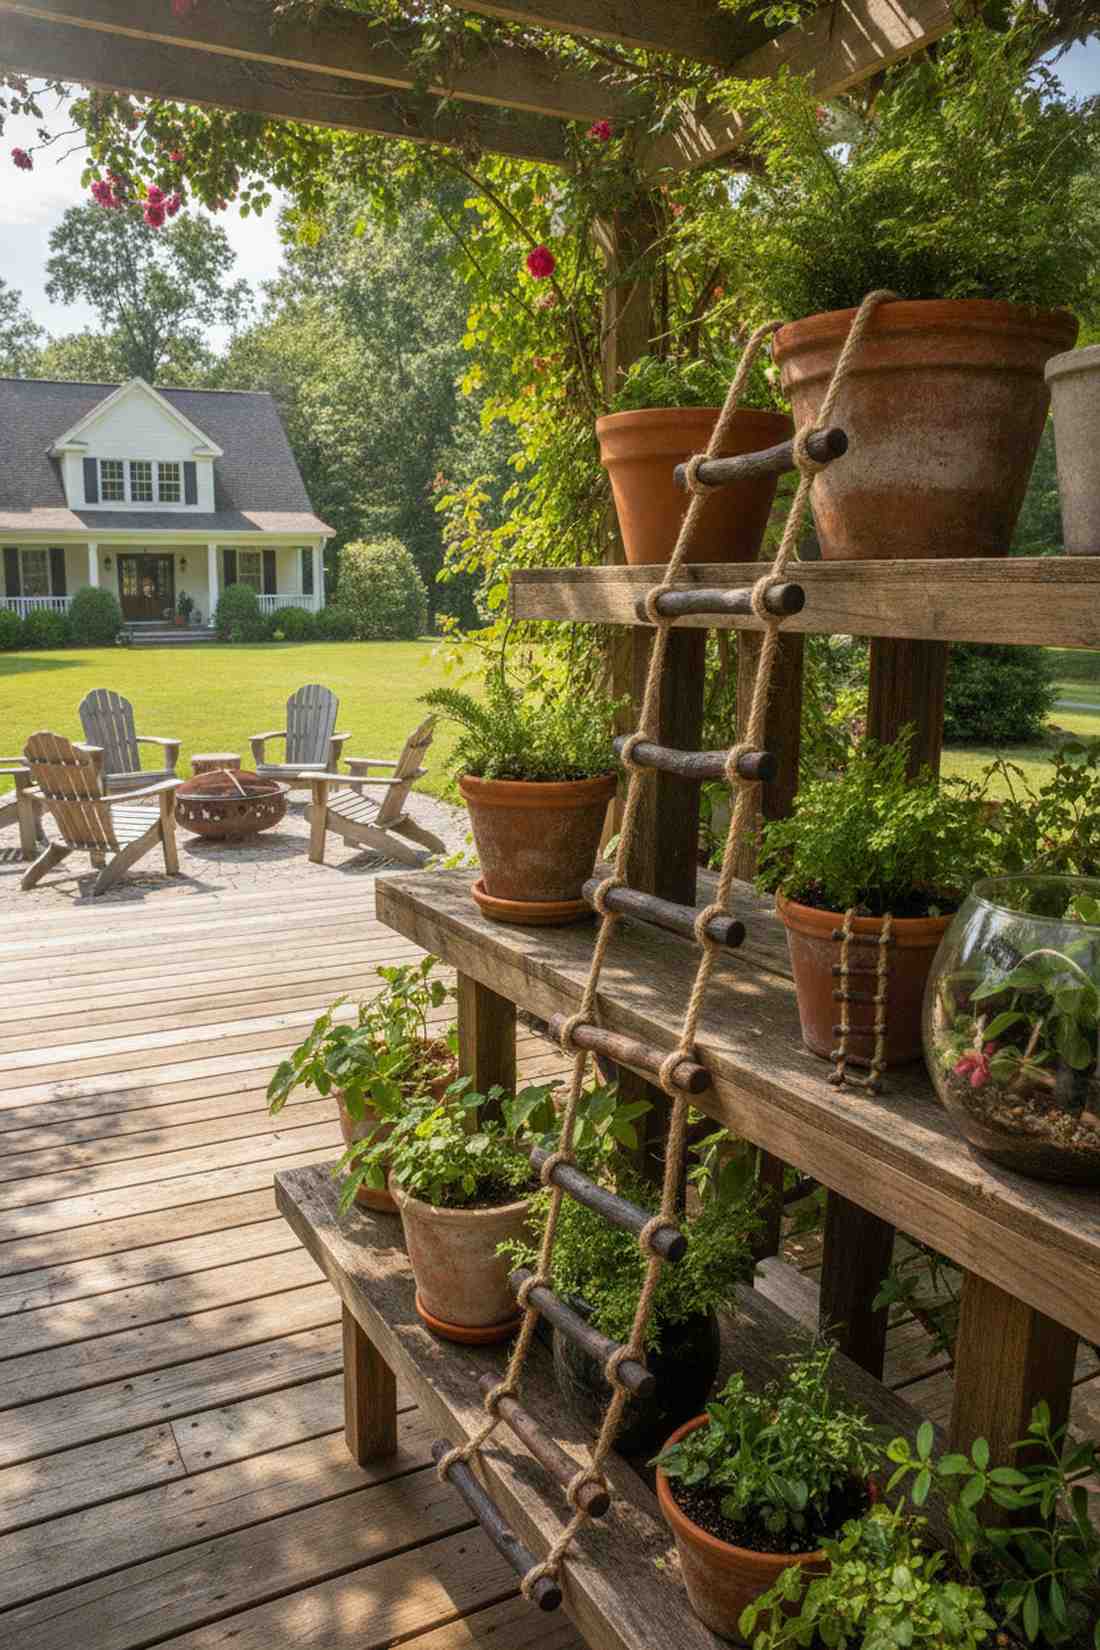
This rugged accent feels like the start of a wild wilderness adventure. A climbing rope ladder naturally draws the eye upward, serving as the perfect transition piece spilling over the side of a large terracotta pot.
Using real twigs adds too much inconsistent weight, but sculpting rigid polymer rungs delivers a flawless, lightweight climbing aesthetic. This climbing illusion is one of the smartest ways to blend vertical terrarium accessories seamlessly into multi-tiered plant stands.
Creating custom ladders is incredibly budget-friendly, usually under $12 for plenty of supplies. It’s a fantastic afternoon project with massive visual payoff.
- Key Materials: Jute twine, dark polymer clay.
- Vibe / Style: Treehouse adventure.
- Difficulty: Easy.
- Budget Breakdown: Clay: $8 | Twine: $4.
- Creator’s Tip: Poke holes through the unbaked clay rungs and thread the twine through before baking to ensure they never slide out of place.
- Smart Sourcing: Weather-resistant jute twine (spool) and earth-tone polymer clay (starter kit).
If you think those were detailed, the next tiny addition forces anyone walking by to immediately stop, lean in, and stare…
Material Guide: Cheap vs. Premium Aesthetic
Knowing exactly where to save and where to spend makes all the difference in achieving that “looks expensive but isn’t” vibe for your setup.
- Standard vs. UV-Resistant/Premium: Standard paints and glues crack and fade within three weeks outside. Upgrading to UV-resistant marine-grade sealants completely stops fading and breaking, saving you from rebuilding everything next season.
- Pre-made Kits vs. Sourcing Locally: Scavenging for perfect twigs takes hours, but grabbing pre-cut bulk starter kits saves both time and money while guaranteeing a uniform, professional scale across your entire landscape.
Decorative Finishing Touches for Complete Scenes
The magic is always in the macro details. These final decorative touches are what separate a disjointed collection of tiny objects from a cohesive, believable world.
13. Miniature Lanterns and Lampposts
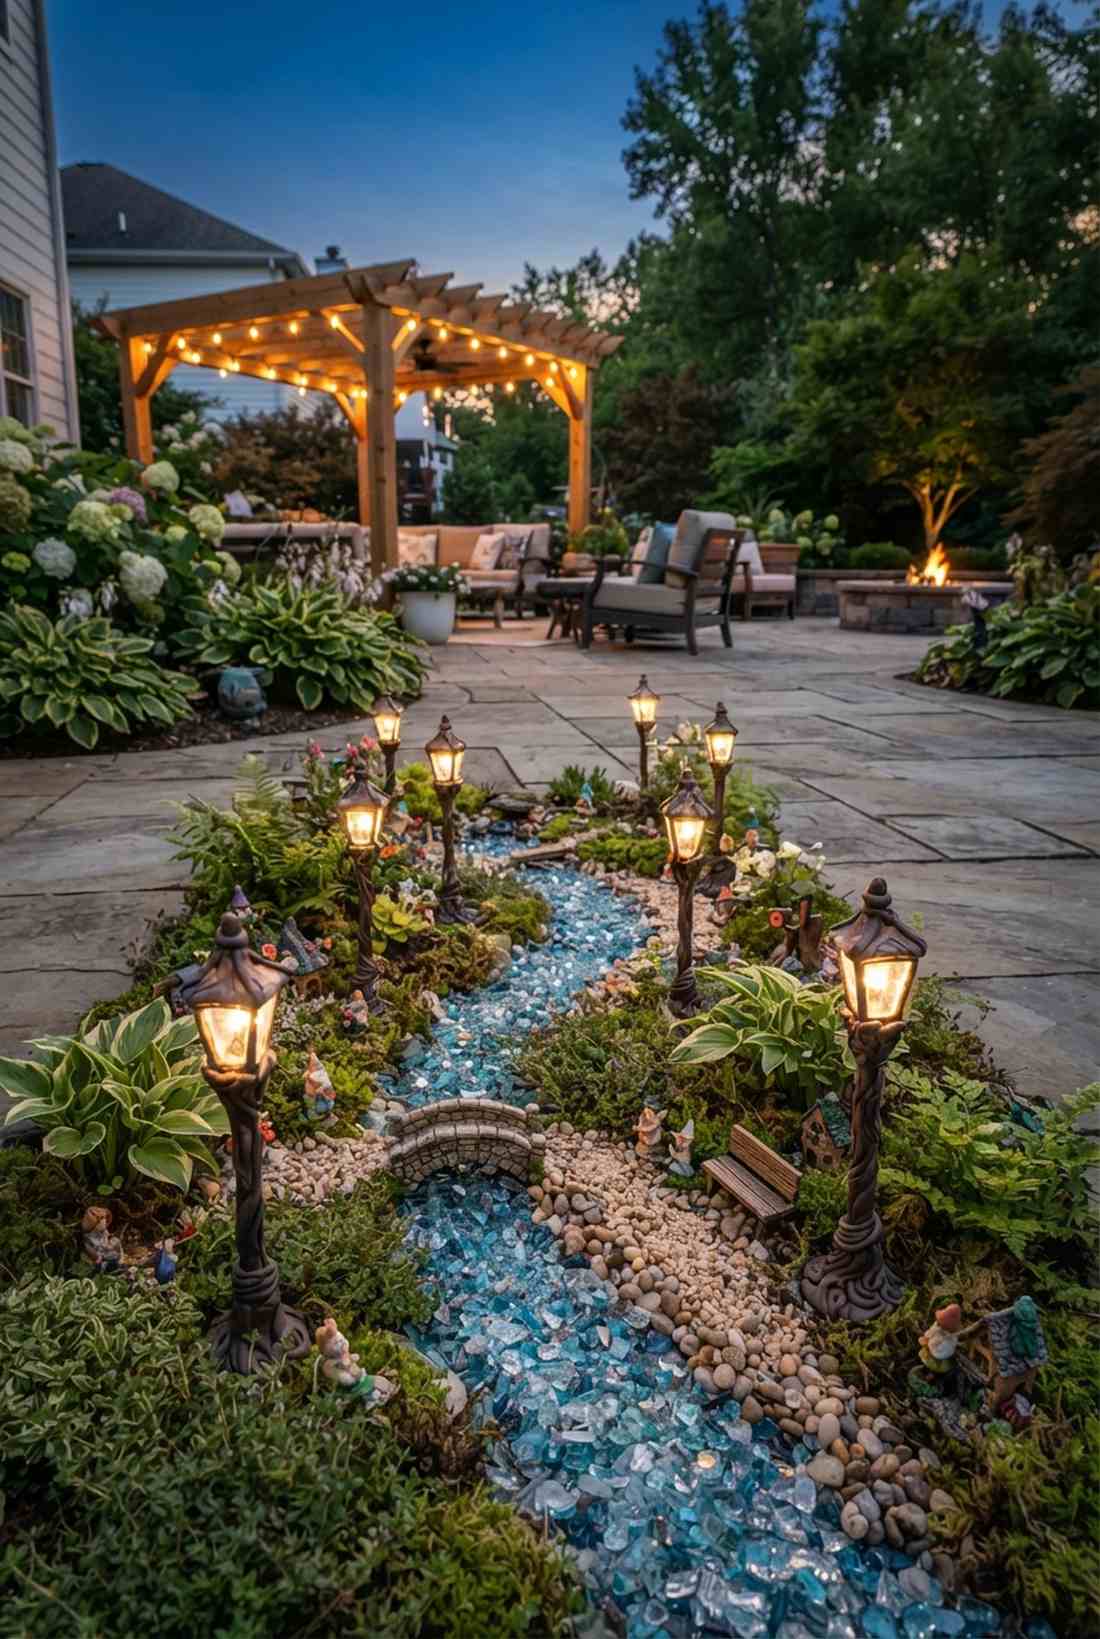
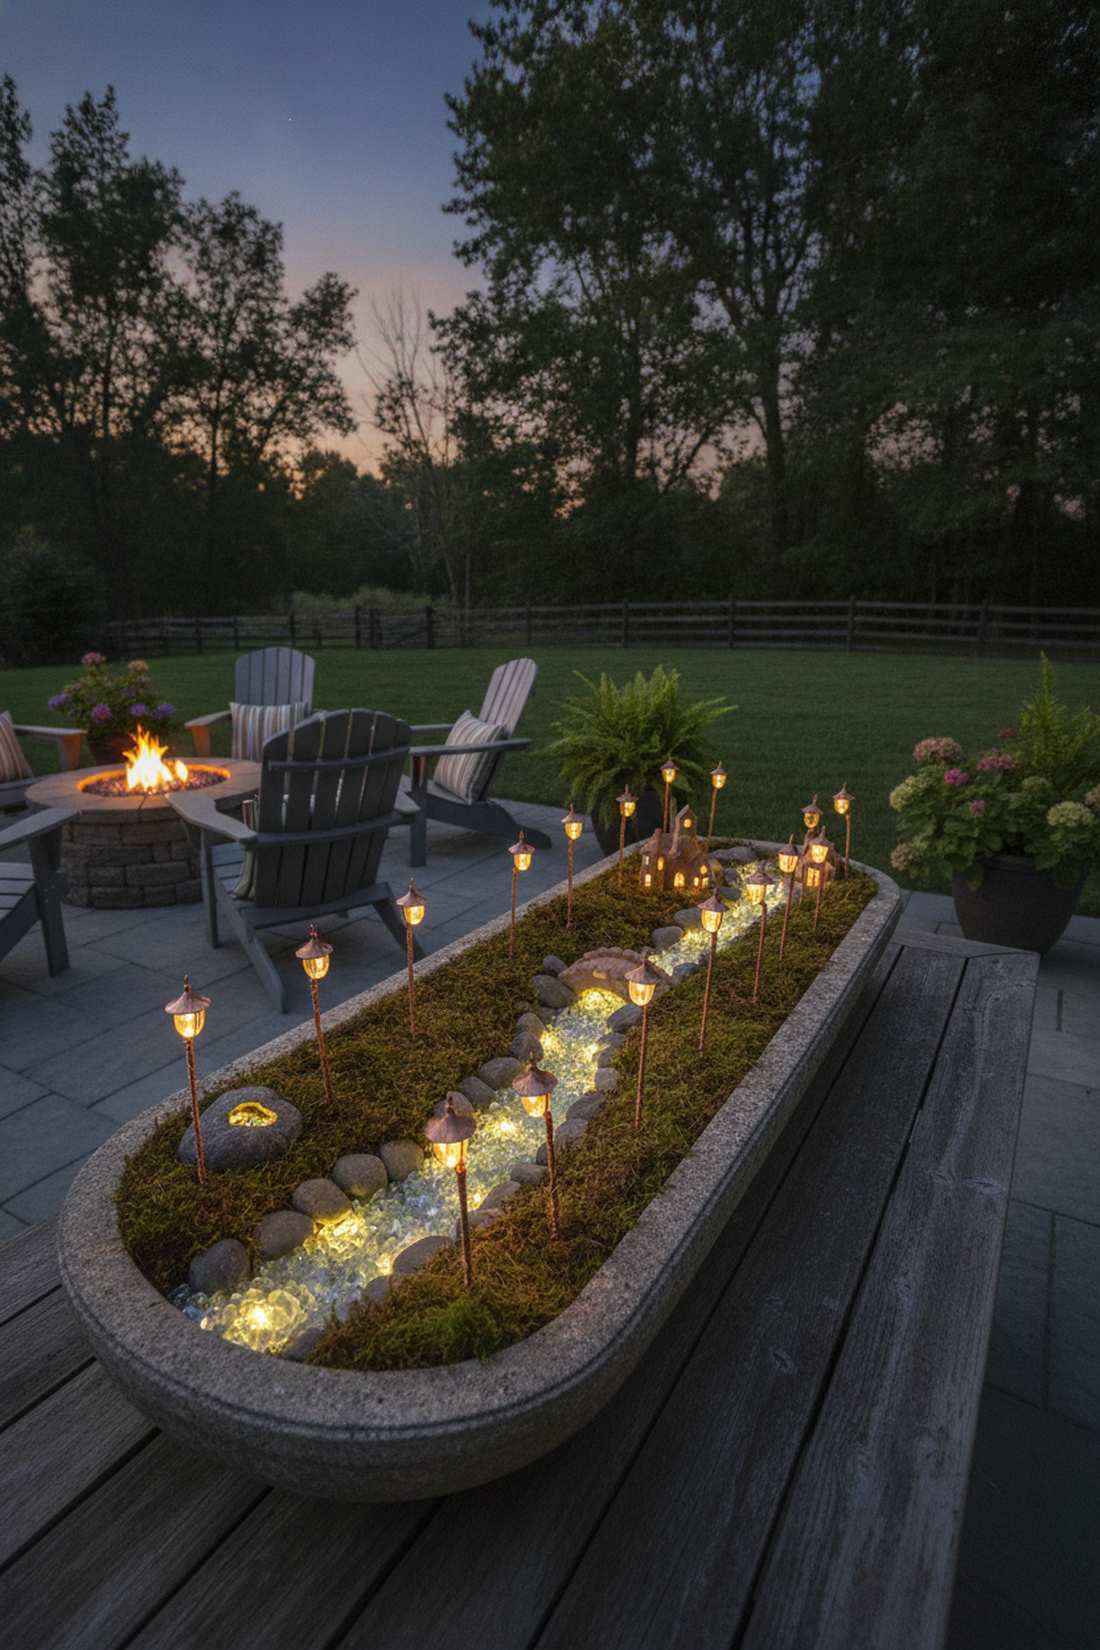
This glowing detail creates an overwhelmingly magical twilight atmosphere. Strategically placing illuminated miniature lampposts brings your setup to life at night, looking spectacular lining a tiny crushed glass river.
Relying on fake, unlit plastic lamps is a missed opportunity, but wiring tiny LED micro-lights gives a designer-level finish that blows people away. It transforms standard daytime fairy garden landscaping into a premium 24-hour display.
A multi-pack of micro LEDs and clay will cost around $20–$25. Save this brilliant lighting hack to completely transform your evening patio vibe!
- Key Materials: Copper wire micro-LEDs, translucent clay, watch batteries.
- Vibe / Style: Magical evening stroll.
- Difficulty: Advanced, requires basic wiring patience.
- Budget Breakdown: LED strings: $12 | Clay/Posts: $10.
- Creator’s Tip: Hide the battery pack inside a hollowed-out fake rock or under a dense patch of real moss right next to the lamppost.
- Smart Sourcing: Waterproof micro LED wire lights (battery pack) and translucent liquid polymer clay.
14. Wooden Bridges

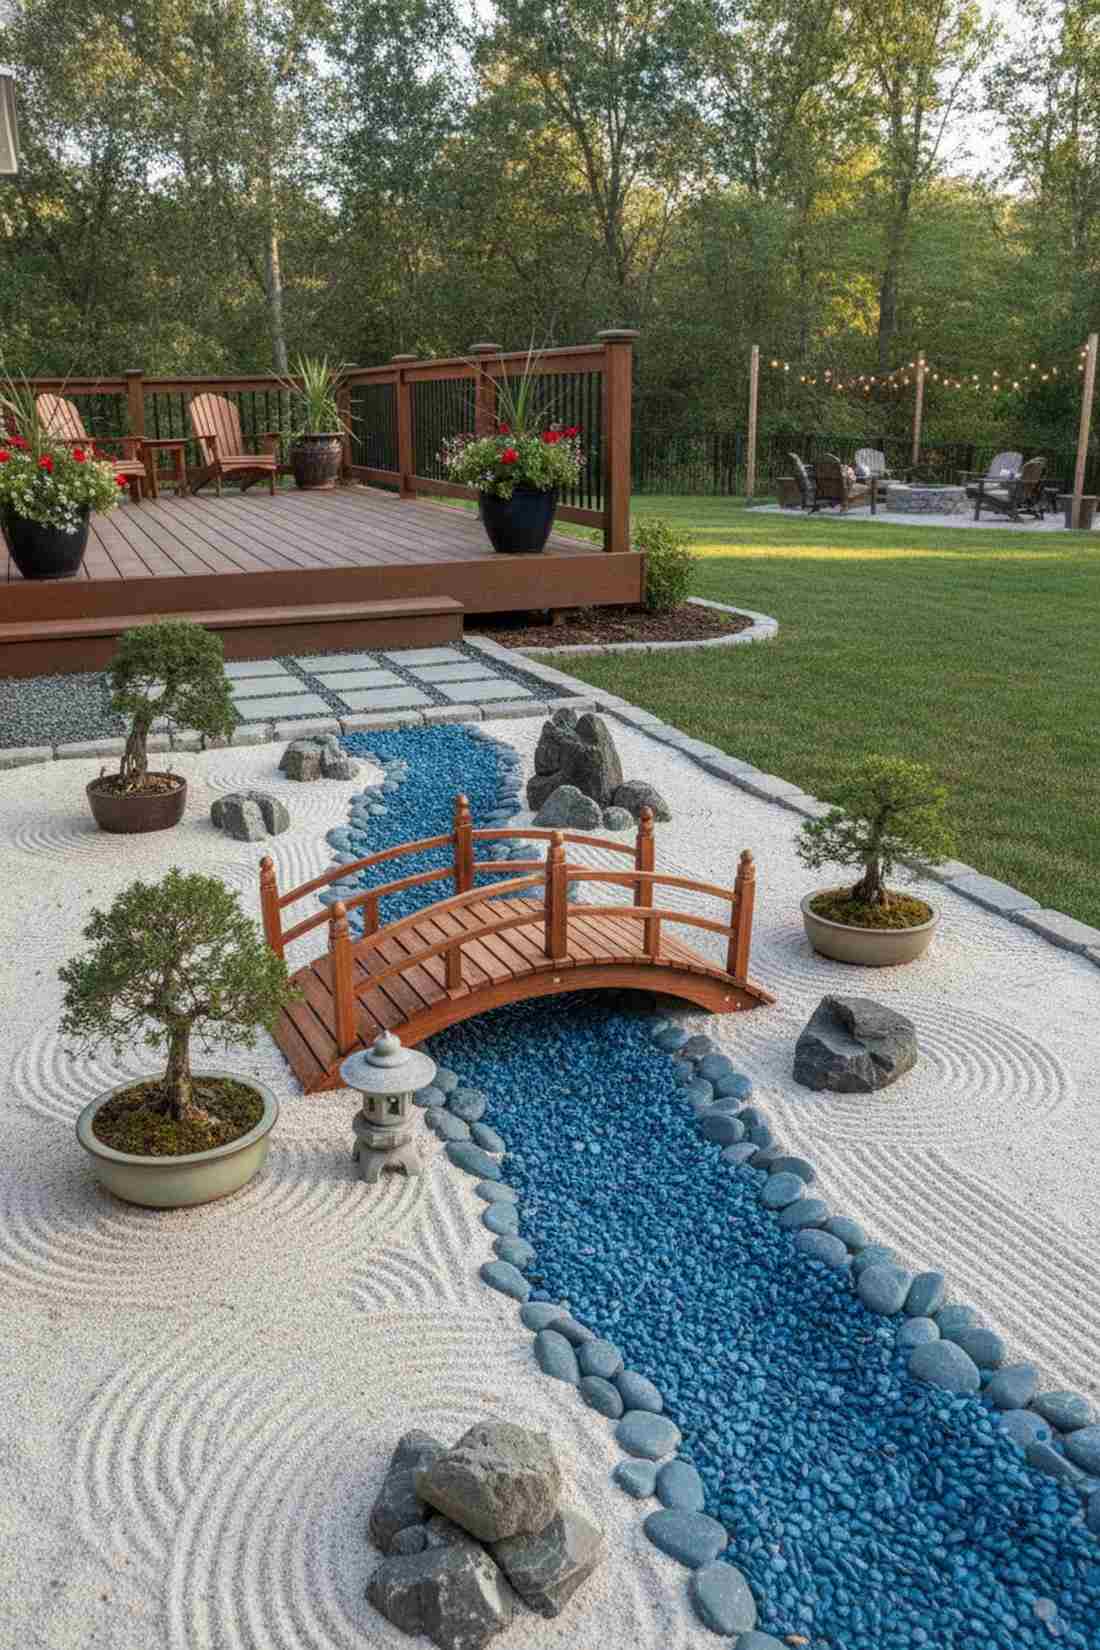
Crossing this structure feels like stepping entirely out of reality and into a fairy tale. A curved miniature footbridge is the ultimate transitional piece, working wonders when positioned directly over a dry riverbed of blue pebbles.
Flat bridges look incredibly amateur, but steaming and bending your wood to create a true arch elevates the entire architectural landscape. Pairing this custom carpentry with high-end miniature garden supplies creates a focal point that demands attention.
You can construct a breathtaking arched bridge for about $15–$25. It is absolutely essential if you want to create depth and dimension.
- Key Materials: Bendable balsa wood, strong wood glue, miniature railings.
- Vibe / Style: Japanese zen garden crossing.
- Difficulty: Moderate to Advanced.
- Budget Breakdown: Balsa wood: $10 | Exterior Glue: $8.
- Creator’s Tip: Soak the balsa wood strips in boiling water for 10 minutes, then tape them around a large coffee can to dry into a perfect curve.
- Smart Sourcing: Flexible balsa wood strips (bulk pack) and exterior-grade cyanoacrylate glue.
15. Miniature Flowerpots
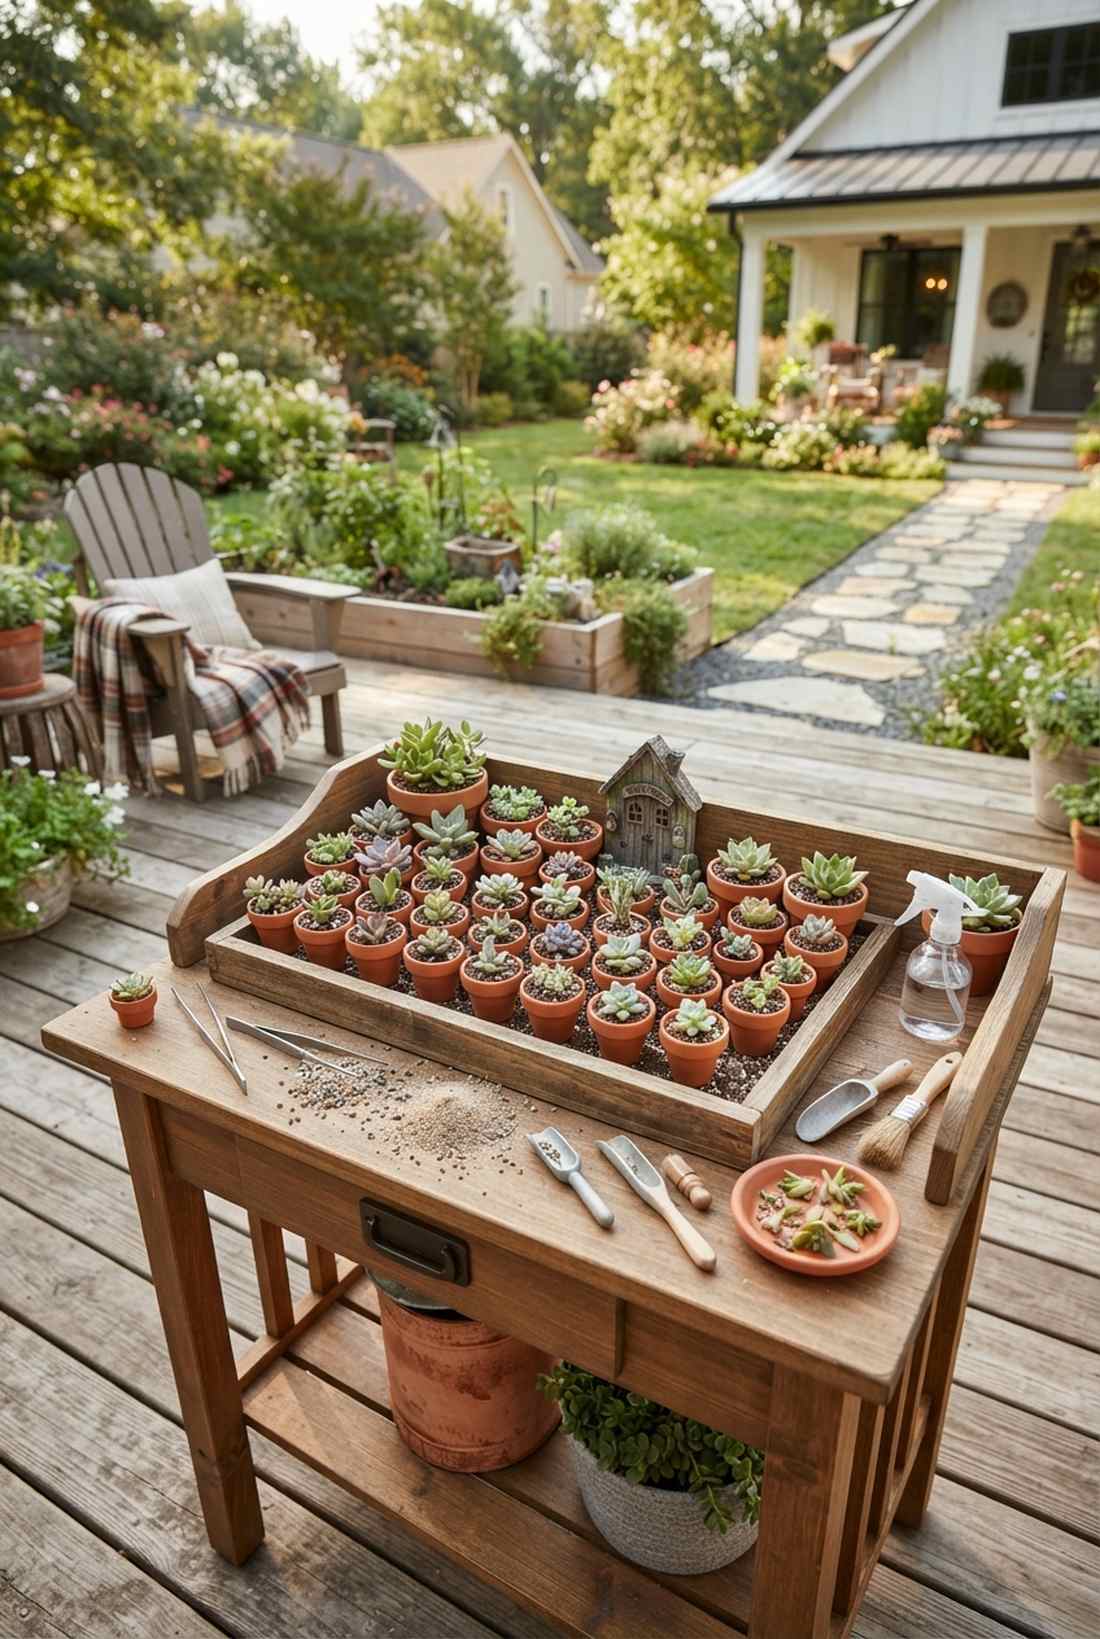
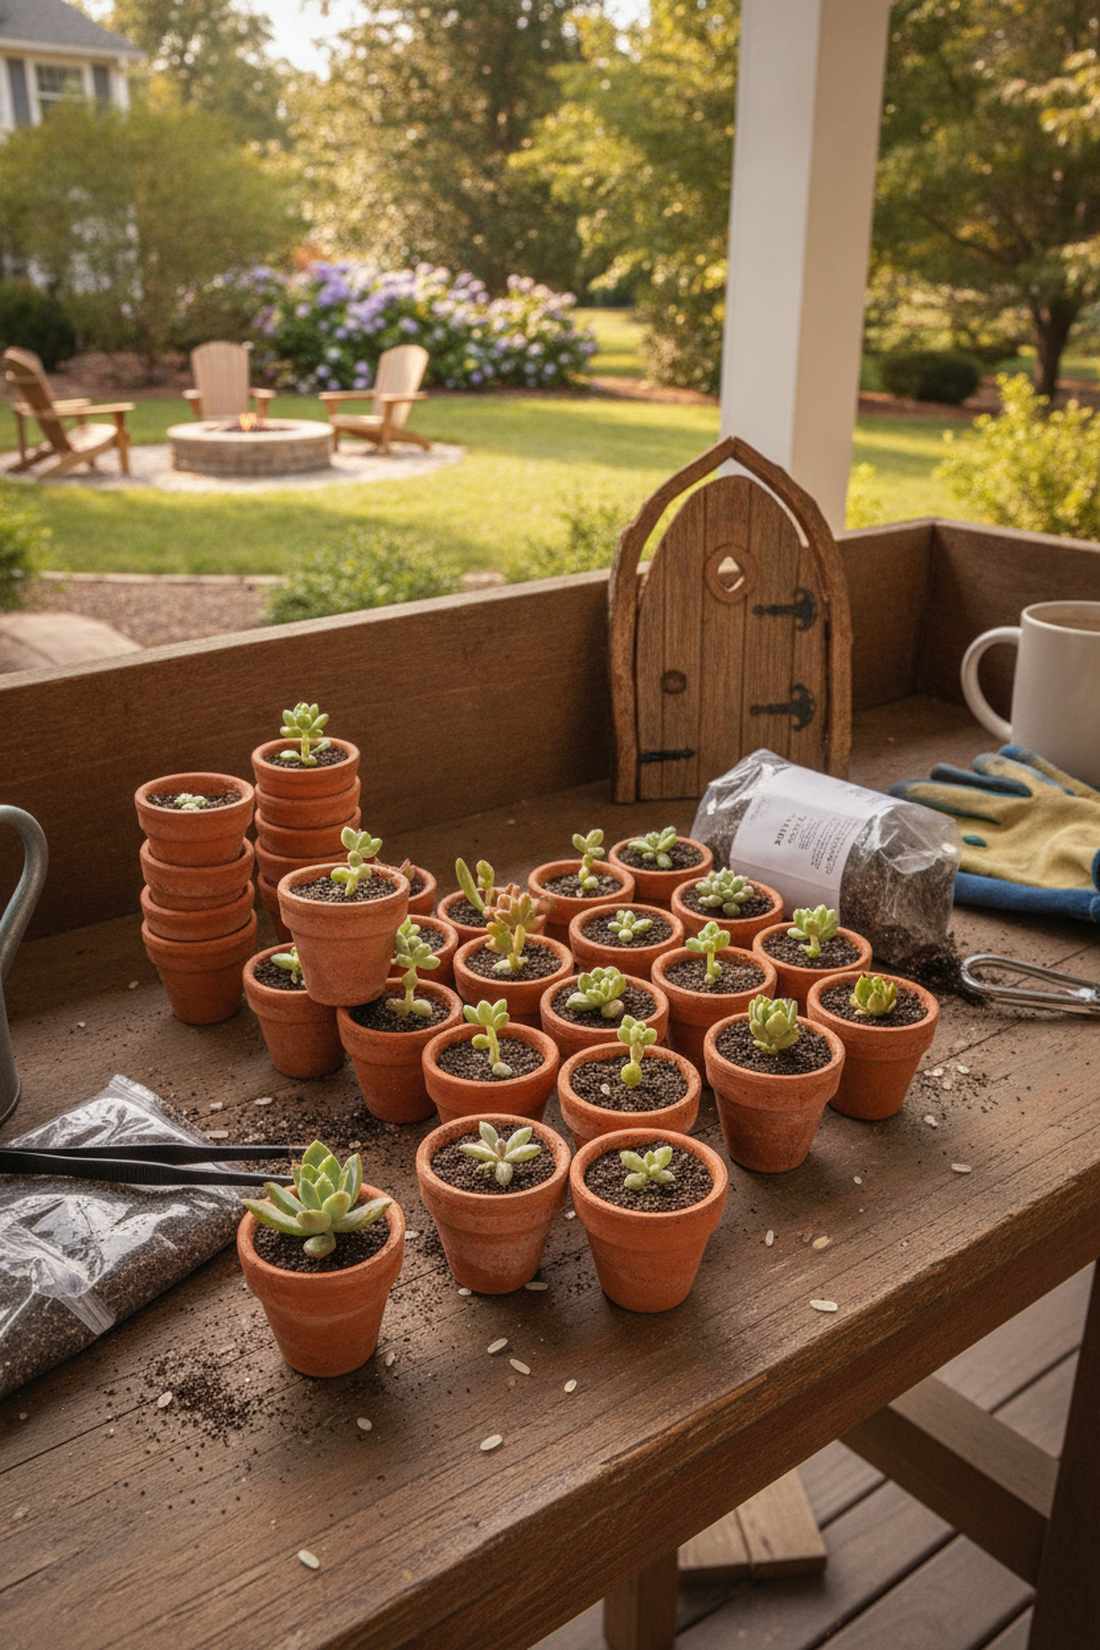
This detail feels like stepping into a dedicated botanist’s tiny greenhouse. Clustered micro terracotta flowerpots bring immense horticultural realism, looking perfectly at home stacked near a fairy front door.
Leaving tiny pots empty shatters the illusion, but packing them with real micro-succulent cuttings delivers a surprisingly premium look. It’s a genius method for combining artificial fairy garden kits with genuine, living nature.
A bulk sleeve of these tiny pots costs practically nothing, usually under $10. Pin this micro-gardening trick to impress your houseguests!
- Key Materials: Real micro-terracotta, fine potting sand, succulent pups.
- Vibe / Style: Busy gardener’s workbench.
- Difficulty: Easy.
- Budget Breakdown: Mini pots: $8 | Plants: $0 (use clippings).
- Creator’s Tip: Plug the drainage hole of the tiny pot with a grain of rice to stop dirt from washing out, while still allowing water to seep through.
- Smart Sourcing: 1-inch micro terracotta pots (bulk pack) and miniature garden tweezers.
Wait until you see this final fabric detail—it is the ultimate cheat code for making any miniature scene look professionally staged.
16. Toadstool Mushroom Seating
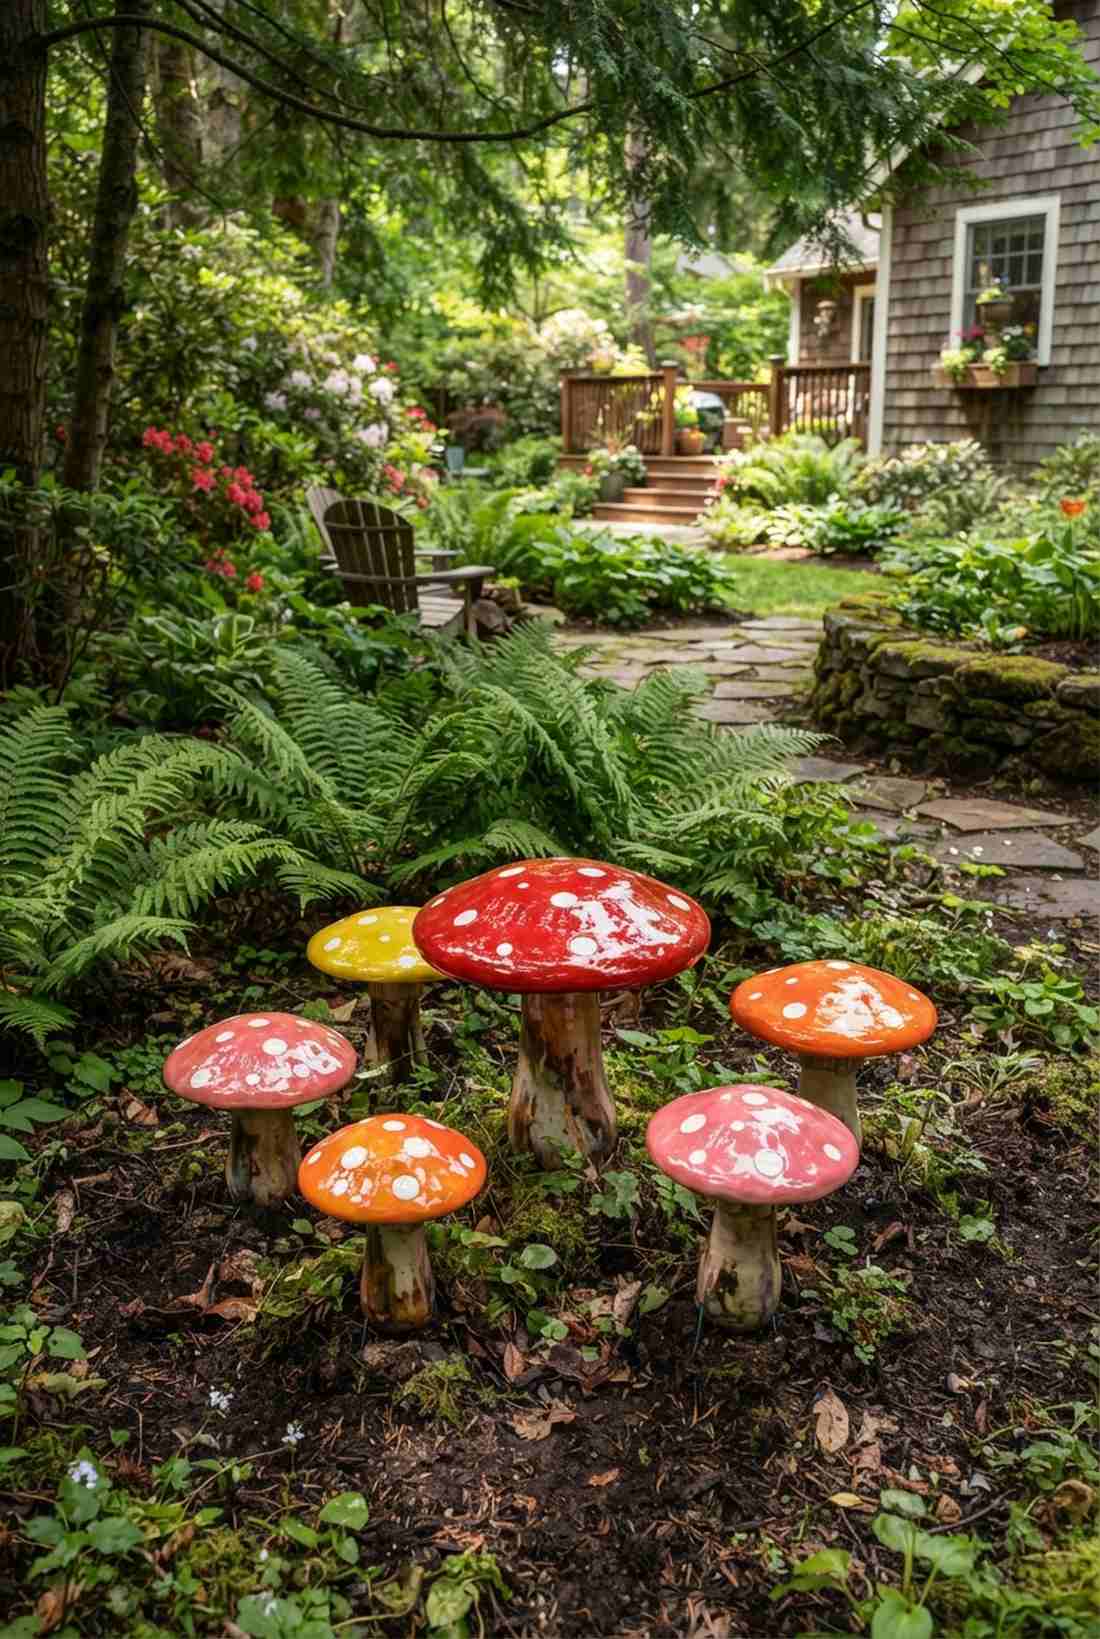
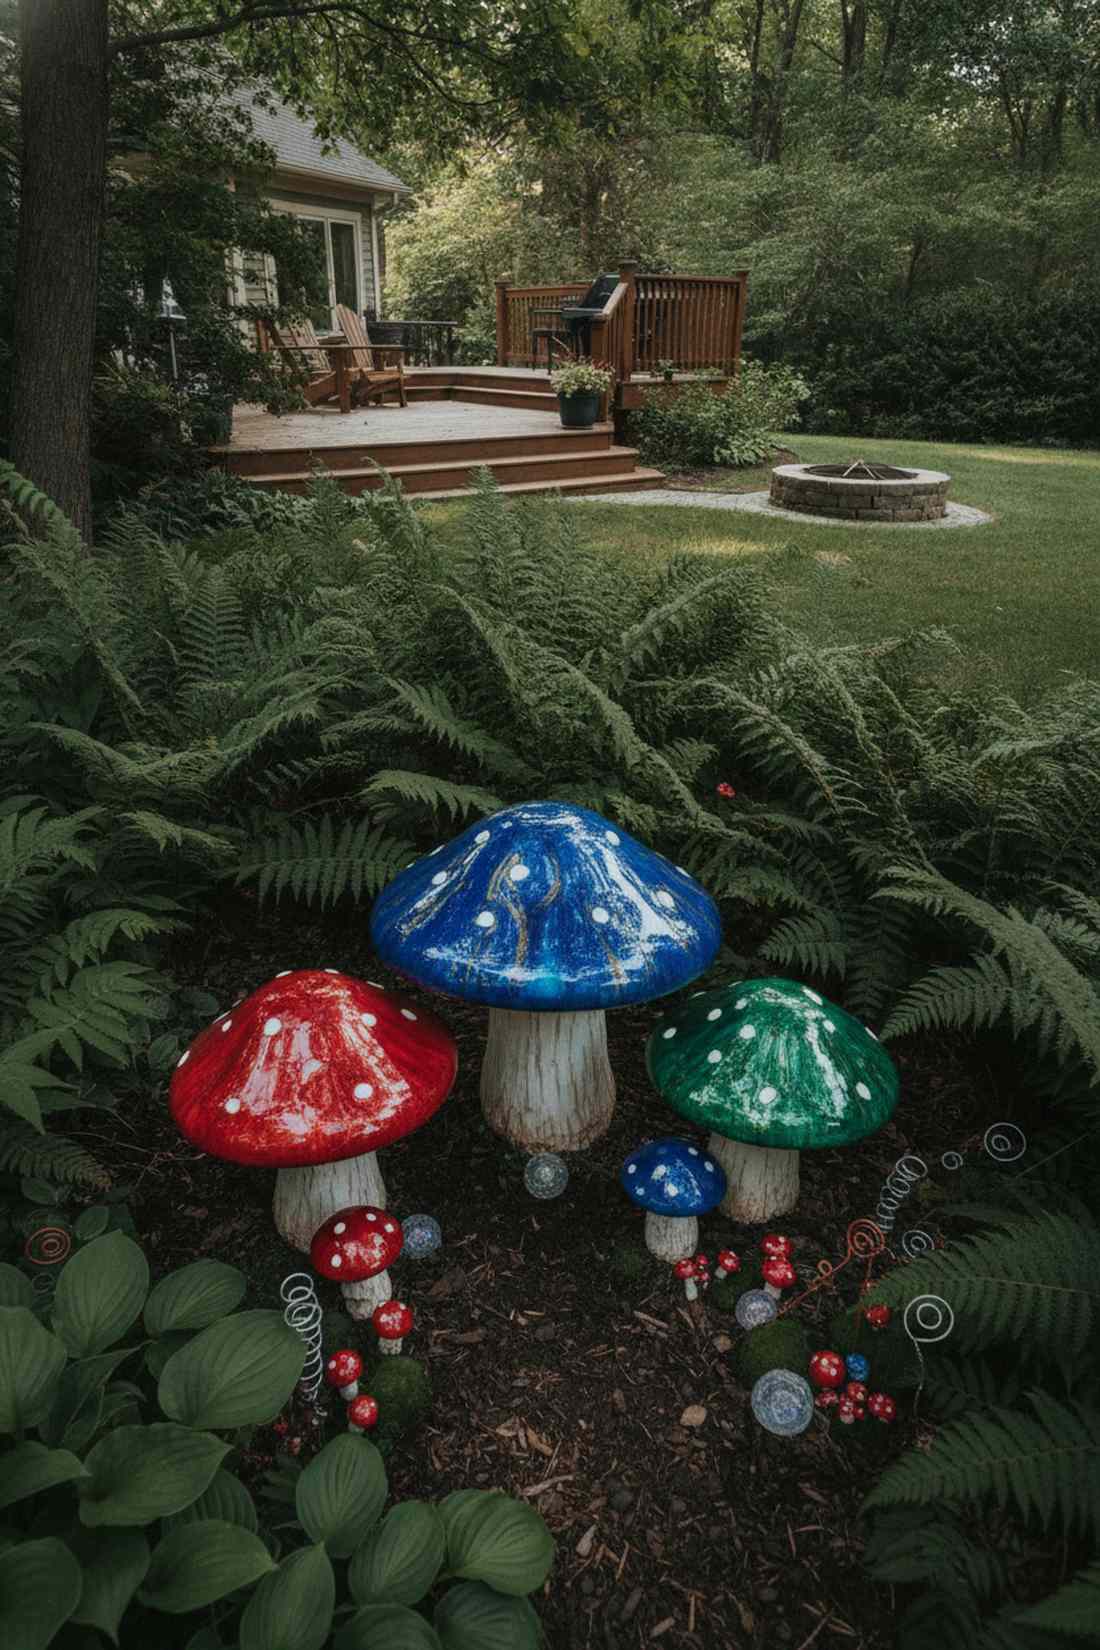
This vibrant setup screams classic fantasy magic. Brightly colored toadstool mushroom seats provide incredible visual contrast, popping beautifully when clustered in a dark, shaded corner under dense ferns.
Flimsy foam mushrooms melt in the rain, but solid, oven-baked clay caps sealed with high-gloss resin look far more expensive than they are. This vibrant pop of color is exactly why high-CPC terrarium accessories feature bold, glossy fungi so prominently.
A batch of heavy-duty mushroom seats costs about $15 to craft. It’s a classic motif that instantly validates the fantasy theme of your setup.
- Key Materials: Bright polymer clay, thick wire stakes, gloss glaze.
- Vibe / Style: Classic woodland fantasy.
- Difficulty: Easy.
- Budget Breakdown: Colored clay: $10 | Glaze: $6.
- Creator’s Tip: Insert a 2-inch piece of floral wire into the mushroom stem before baking so you have a built-in spike to anchor it into the dirt.
- Smart Sourcing: Vibrant color polymer clay (starter set) and high-gloss UV resin coat.
17. Crochet Welcome Mats
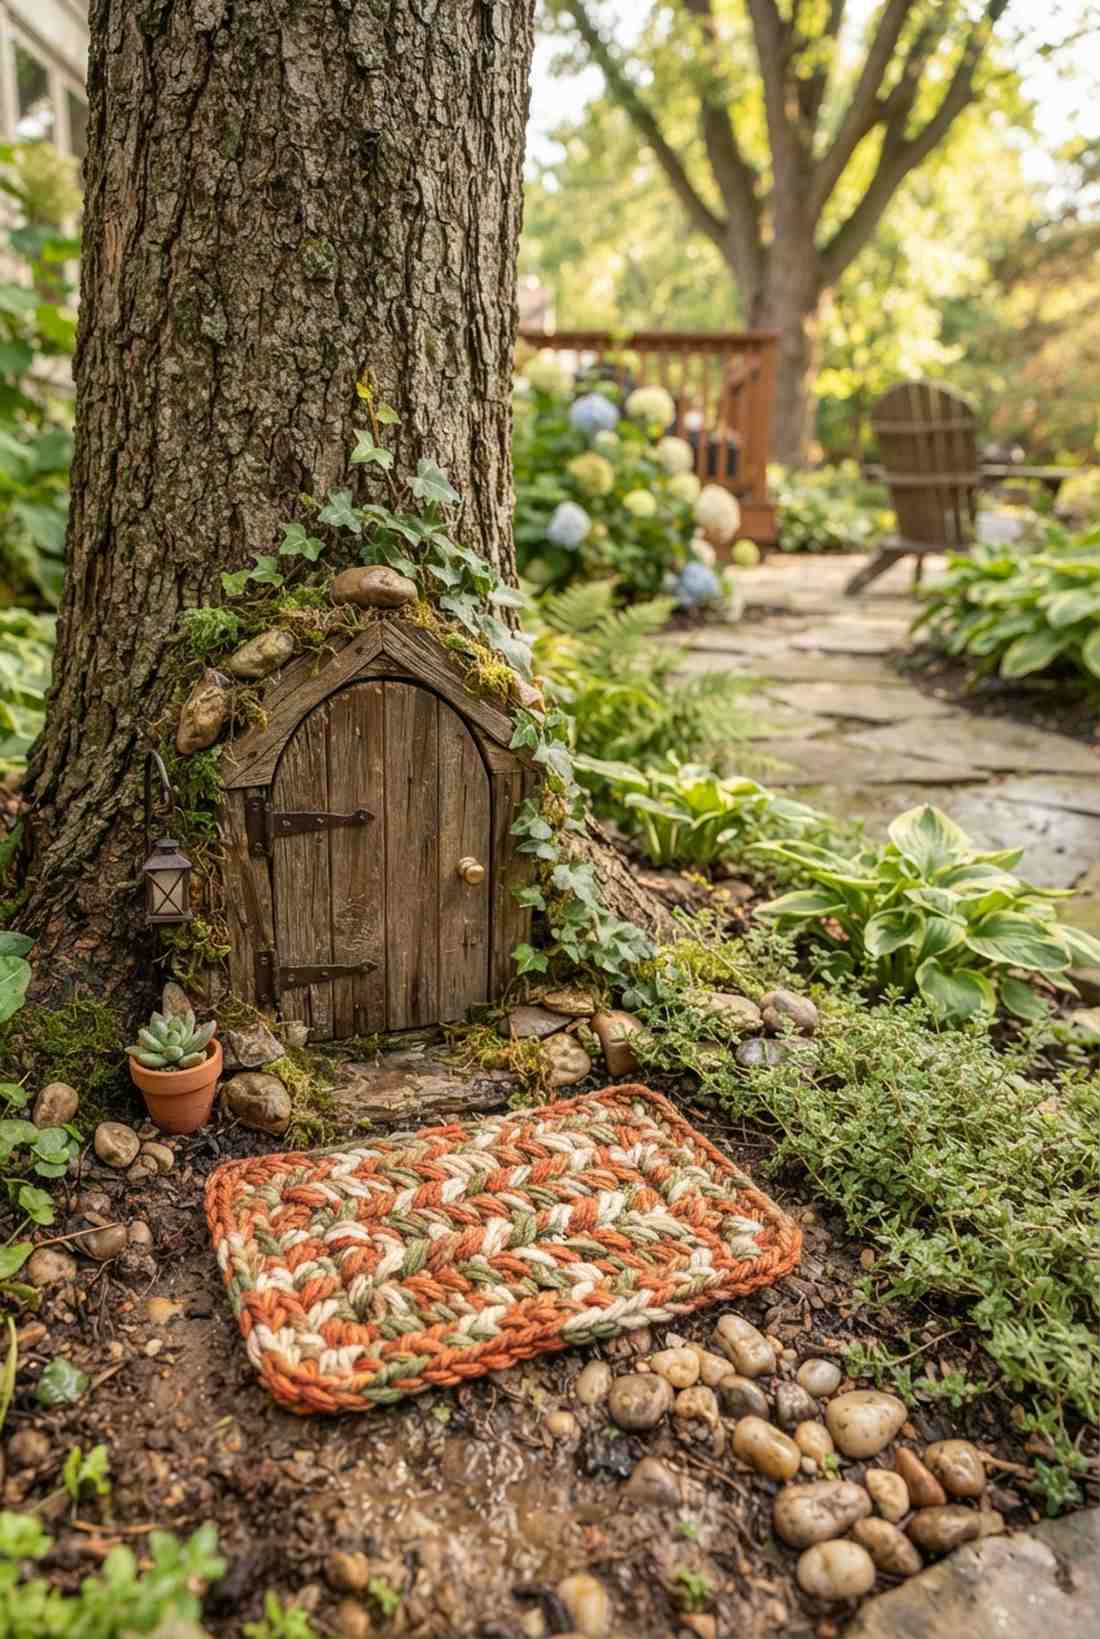
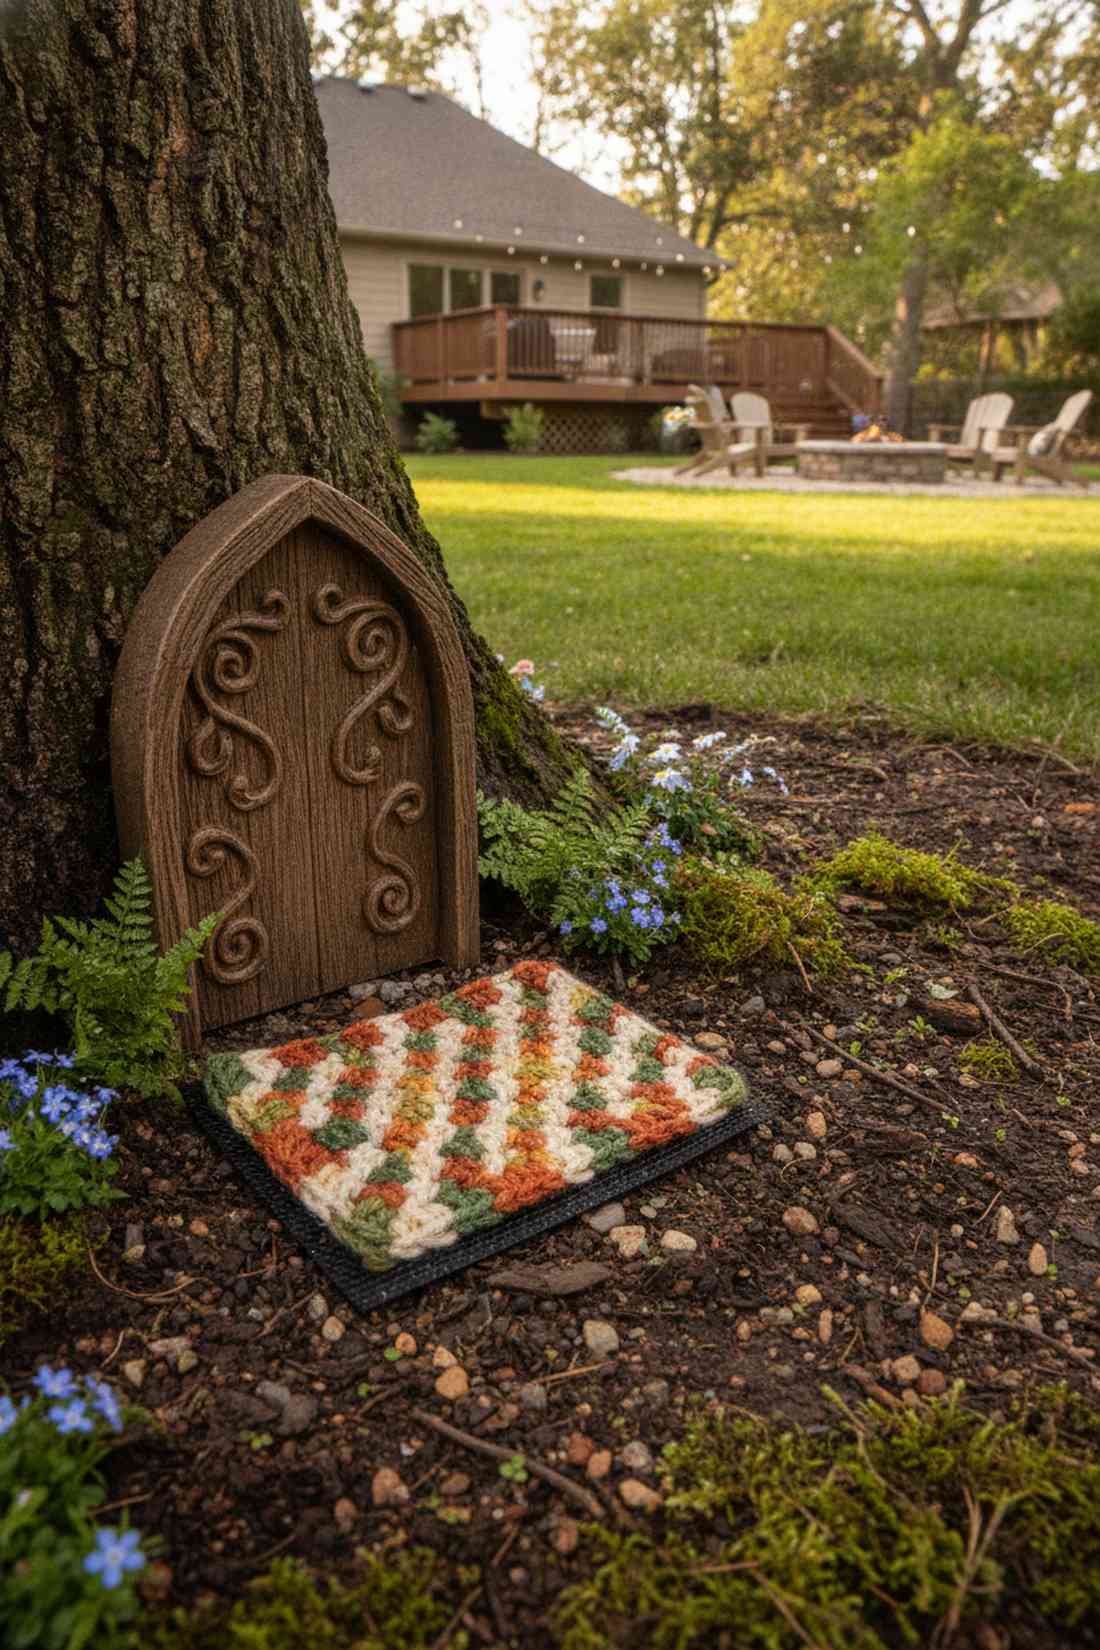
This tiny textile piece makes the entire miniature house feel incredibly welcoming and warm. A micro-crocheted entry mat is the ultimate finishing touch, looking exceptionally cozy placed right in front of a heavy wooden fairy door.
Most people completely ignore soft textures outdoors, but treating fabric with a stiffening waterproofing agent gives a designer-level finish that survives the damp soil. Sneaking in these hyper-specific, weather-treated miniature outdoor decor items bridges the gap between a simple craft project and a lived-in world.
You can weave or repurpose these for literally pennies. It is the perfect, low-cost weekend win to cap off your build.
- Key Materials: Thick embroidery floss, fabric stiffener, clear sealant.
- Vibe / Style: Warm rustic cottage.
- Difficulty: Easy to Moderate (if crocheting from scratch).
- Budget Breakdown: Floss: $3 | Stiffener spray: $7.
- Creator’s Tip: Cut out a tiny piece of non-slip shelf liner and glue it to the bottom of the mat to keep it from blowing away in the wind.
- Smart Sourcing: Heavy-duty outdoor fabric stiffener and multi-color embroidery floss (bulk pack).
Creating Your Enchanted Space
Selecting the right 17 fairy garden furniture elements transforms basic outdoor spaces into high-end, whimsical miniature worlds that command attention and spark total imagination. Combine premium rustic seating, architectural focal pieces, smart interactive elements, and durable decorative accessories to build cohesive scenes that look highly professional. Start with foundational, weather-treated kits like bases or gazebos, then layer in specialized items that reflect your personal style while surviving the elements. By leveraging smart sourcing and commercial-grade materials, you ensure your unique displays maintain their expensive aesthetic and evolve beautifully with the seasons.
Frequently Asked Questions
What materials work best for outdoor fairy garden furniture?
If you want a high-end look that lasts, skip basic craft glue and opt for polymer clay sealed with marine-grade weatherproof varnish, pre-treated natural hardwoods, and commercial resin. These heavy-duty miniature garden supplies withstand moisture, harsh temperature fluctuations, and UV exposure, ensuring you don’t have to rebuild your expensive-looking fairy garden kits every single spring.
What scale should fairy garden furniture be?
To keep everything looking professionally staged, stick strictly to a 1:12 scale (one inch equals one foot) or 1:24 scale for tighter spaces. Mixing and matching random sizes ruins the illusion, which is why buying pre-scaled terrarium accessories in bulk packs is the smartest way to guarantee perfect compatibility across your entire miniature outdoor decor layout.
Can I make fairy garden furniture from natural materials?
Yes, utilizing kiln-dried twigs, treated bark, river stones, and preserved moss creates a highly authentic, premium aesthetic for pennies. The secret to making DIY vs prebuilt look equally expensive is treating all your found natural materials with a thick coat of UV-resistant sealant to stop dry rot and bug infestations before placing them in the dirt.
How do I protect miniature furniture from weather damage?
The number one reason most miniature setups fail is water damage. You must apply outdoor-grade acrylic sealers or clear polyurethane sprays to all wooden and clay pieces before they ever touch the soil. Investing in a good weatherproof starter kit saves you massive amounts of money long-term and keeps the colors vibrant.
Where should I place focal furniture pieces in fairy gardens?
To make your layout look like a professionally designed landscape, anchor your premium architectural pieces—like gazebos or wishing wells—at clear pathway intersections or elevated mounds. Arrange your seating elements in tight, conversational clusters using stable acrylic bases to stop them from sinking into the mud after heavy watering.