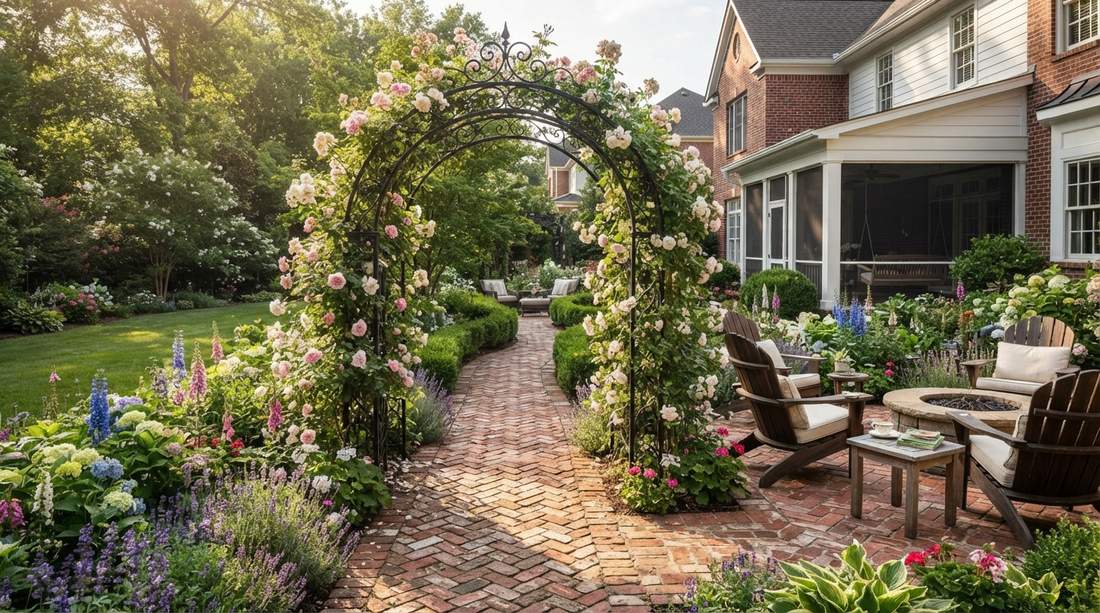
Upgrade your english garden patio using these high-end visual blueprints. We reveal the exact material combinations to make classic brick and climbing roses look incredibly expensive. Stop guessing and start building your premium outdoor retreat.
Design Snapshot Key Principles
- Structural Balance: Rose arches provide vertical interest while brick grounds the space with horizontal stability
- Material Harmony: Natural brick, weathered wood, and wrought iron create authentic English cottage character
- Layered Planting: Climbing roses on arches paired with border perennials maximize bloom and fragrance
- Pattern Selection: Herringbone and basket weave brick layouts add visual texture without overwhelming the space
Rose Arch Entrance Designs
Garden arches frame transitions between spaces while supporting climbing roses that create cascading blooms overhead. These structures define entrances and pathways with architectural elegance that improves each season as roses mature.
1. Romantic Red Climbing Rose Gateway
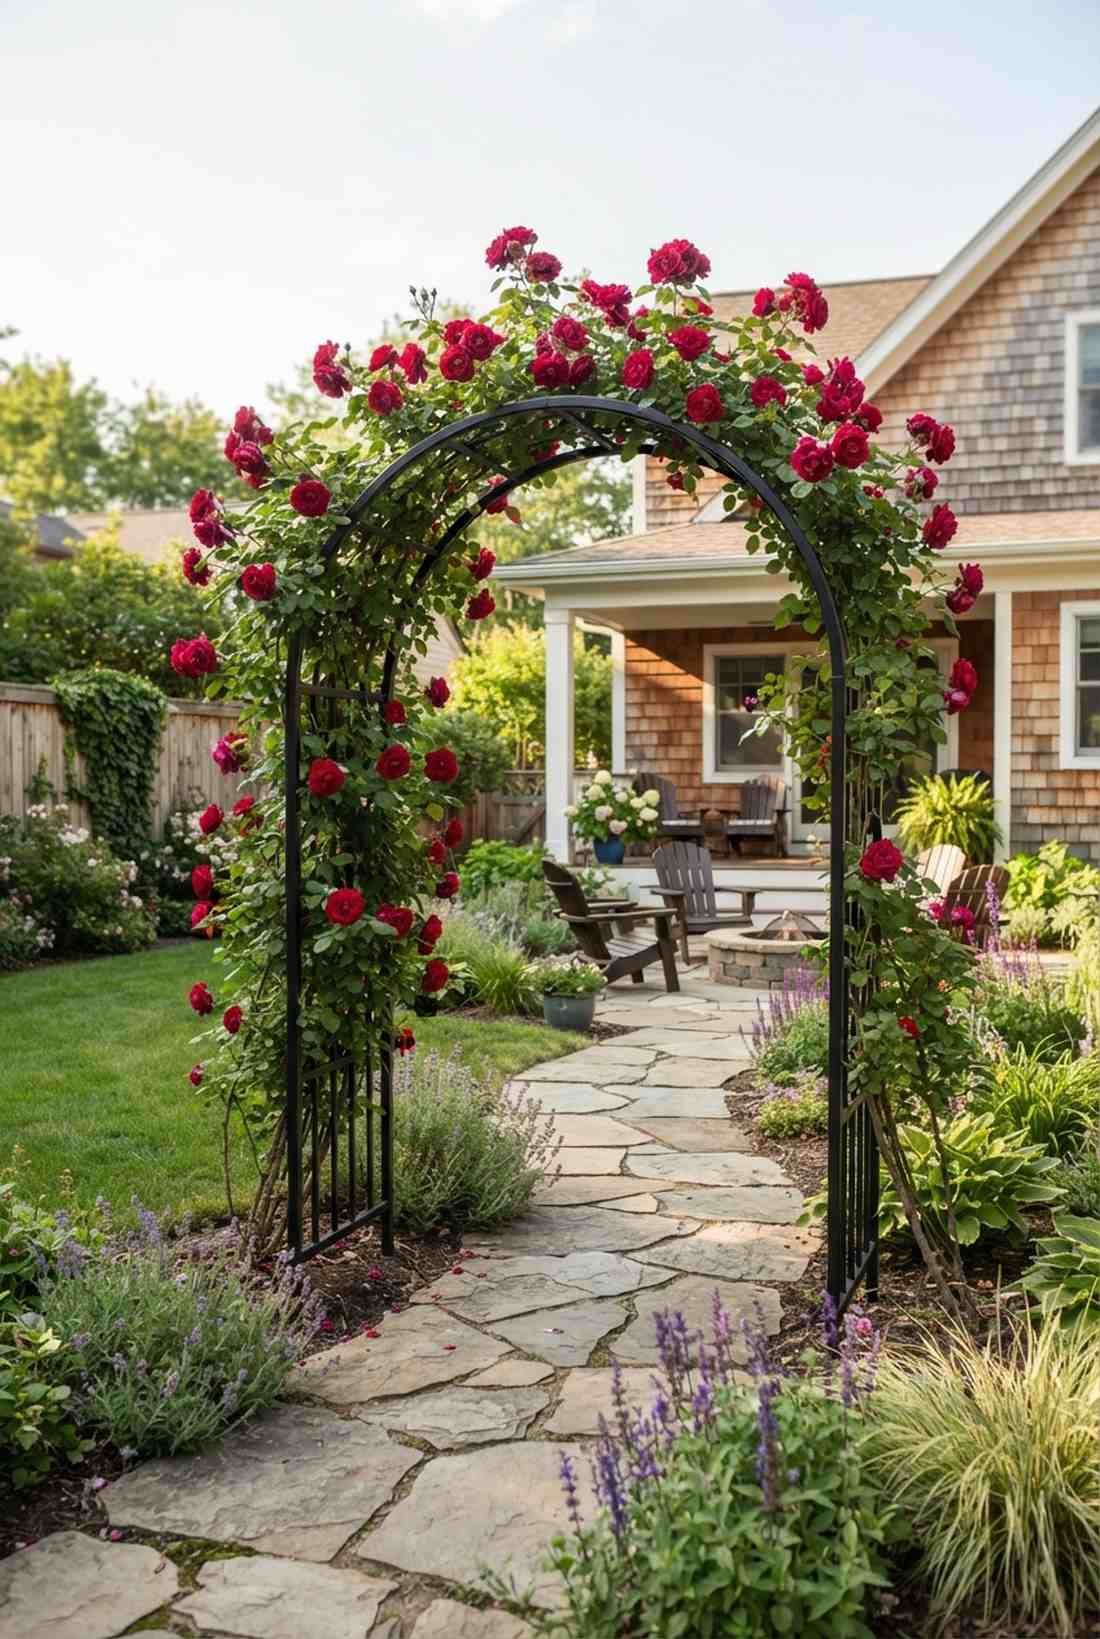
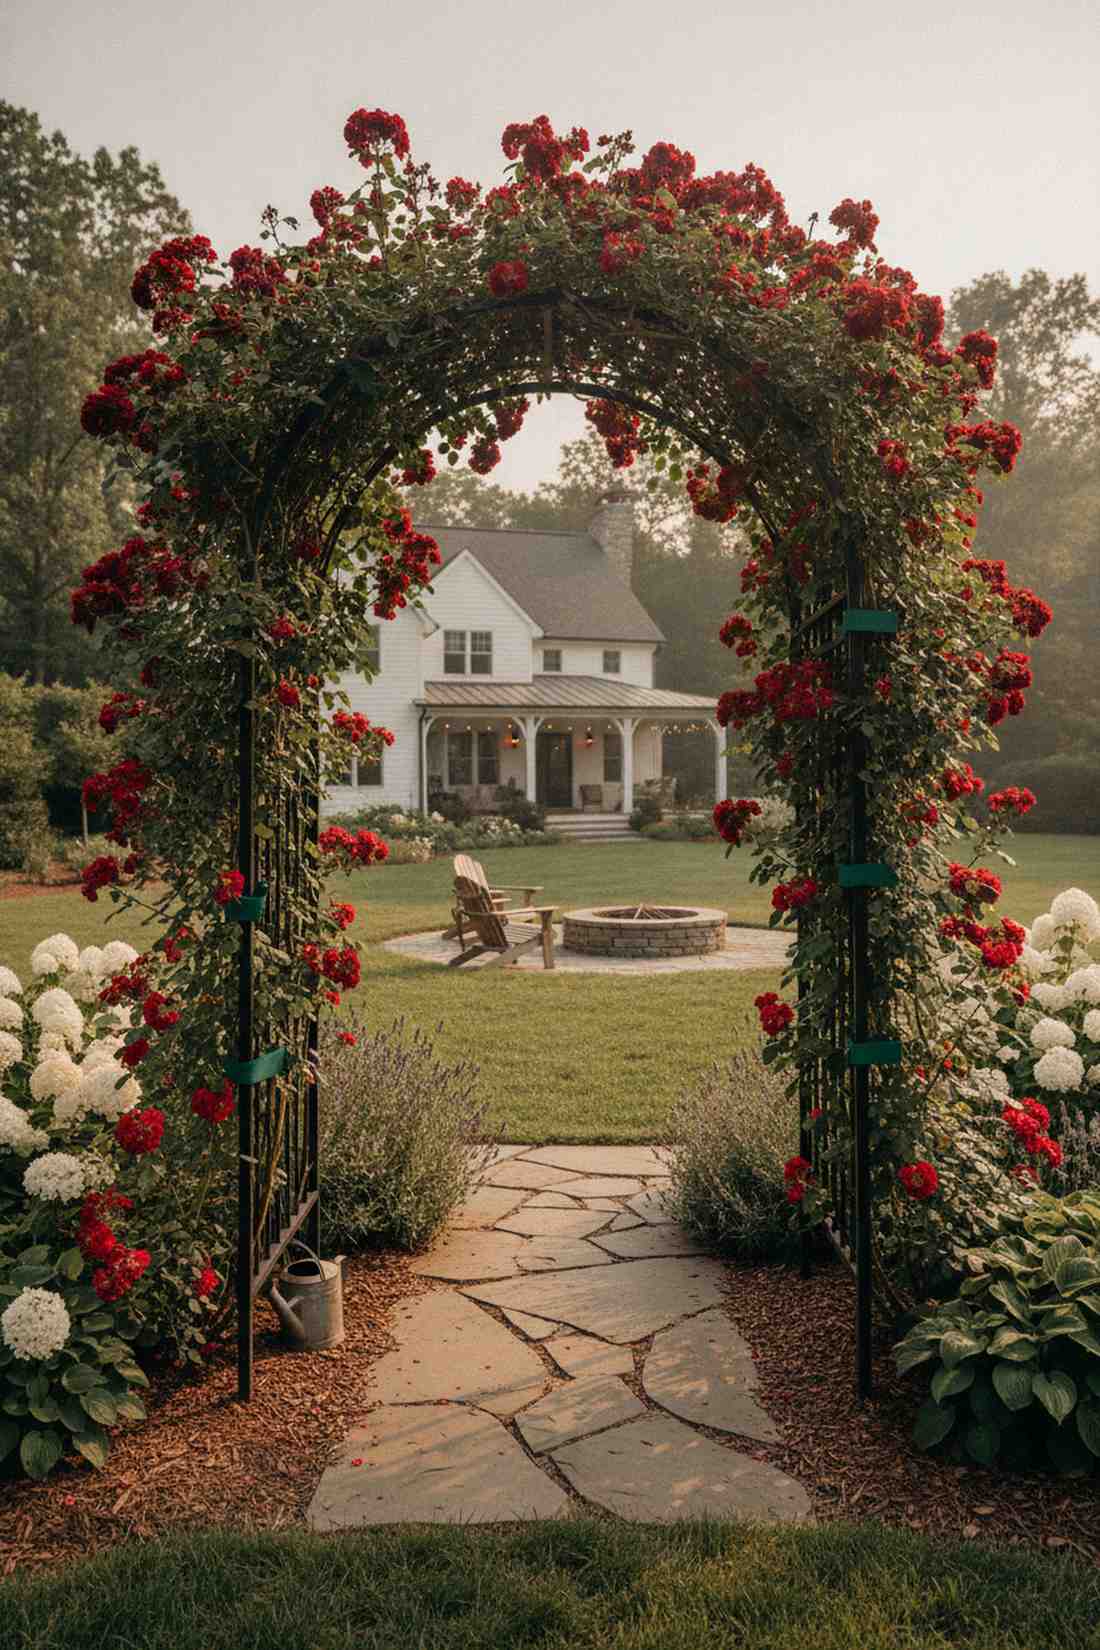
This crimson rose entrance feels like stepping into a romantic period drama. Works exceptionally well framing a narrow backyard pathway.
Most beginners ruin this by using flimsy supports, but a solid iron frame delivers a surprisingly premium look. Secure Dublin Bay roses using heavy-duty garden supports to prevent stem damage.
You can easily pull this off for around $80–$150 depending on the frame. Save this to your DIY weekend garden board for spring planning.
- Key Materials: Heavy-duty iron arch, climbing roses
- Vibe / Style: Dramatic botanical romance
- Difficulty: Intermediate planting
- Budget Breakdown: Arch: $100 | Roses: $40.
- Creator’s Tip: Plant one rose on each side to ensure balanced overhead coverage.
- Smart Sourcing: rust-proof powder-coated metal arches and premium organic rose fertilizer (bulk pack).
2. Double Arch Garden Room Divider
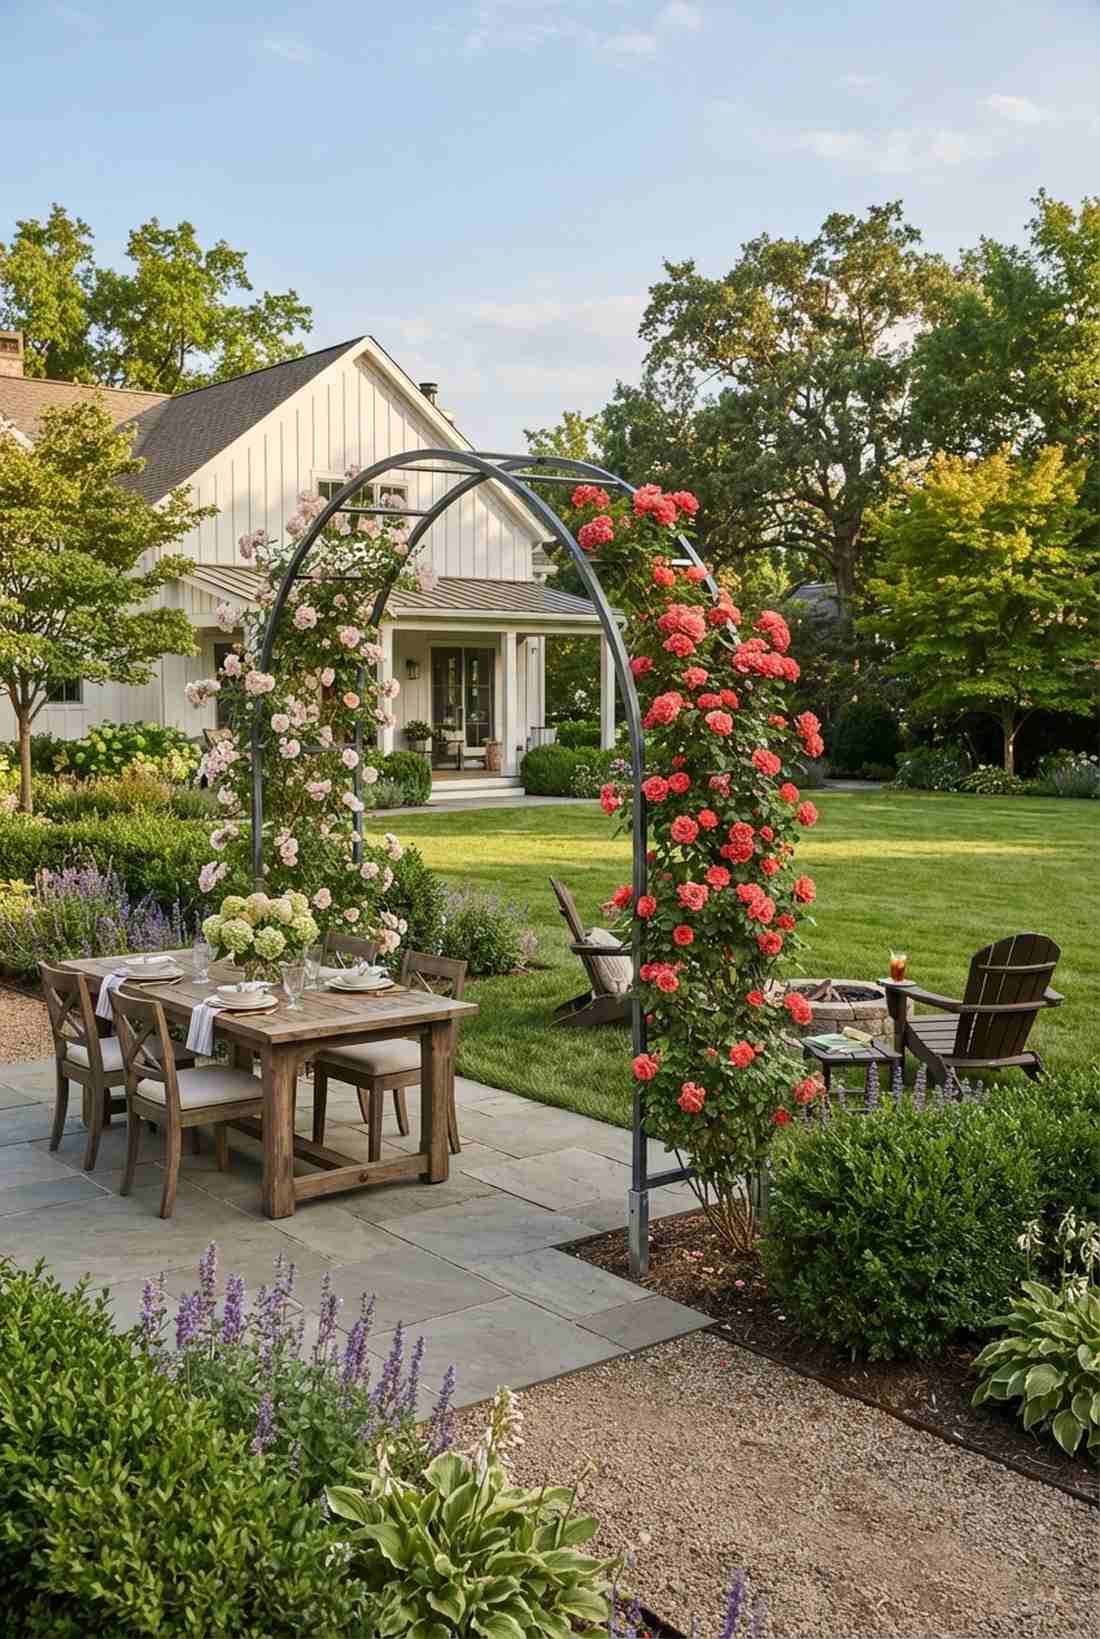
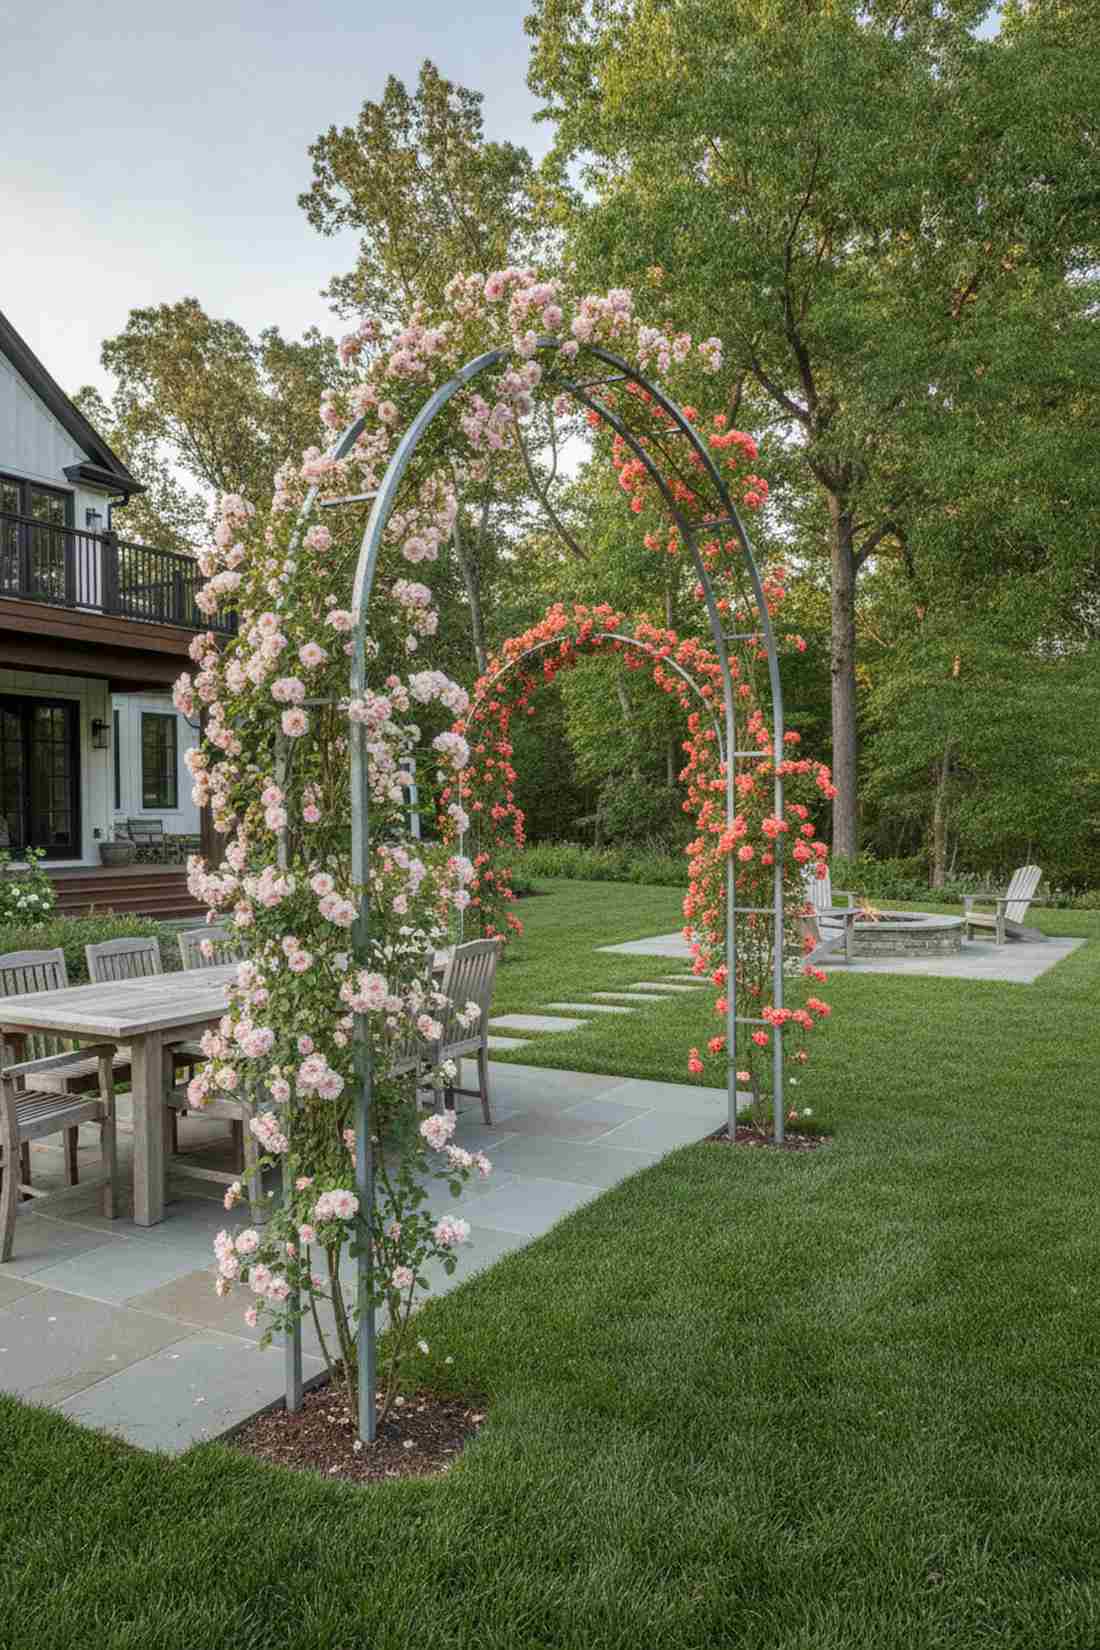
Creating a dual-arch divider feels like unlocking a secret garden courtyard. Ideal for separating a dining patio from an open lawn.
It’s easy to overcomplicate zoning, but this layered structure gives a designer-level finish instantly. Using a mix of heavy-duty landscape anchors ensures the arches remain perfectly aligned during high winds.
Expect to spend roughly $120–$200 for a stable setup. It is a fast upgrade that completely changes the yard’s spatial vibe.
- Key Materials: Twin structural arches, contrasting rose varieties
- Vibe / Style: Structured estate garden
- Difficulty: Easy layout, medium maintenance
- Budget Breakdown: Twin Arches: $150 | Base Anchors: $30.
- Creator’s Tip: Use pale pink on the first arch and deep coral on the second to create optical depth.
- Smart Sourcing: galvanized steel garden arch kits and commercial-grade ground stakes (multi-pack).
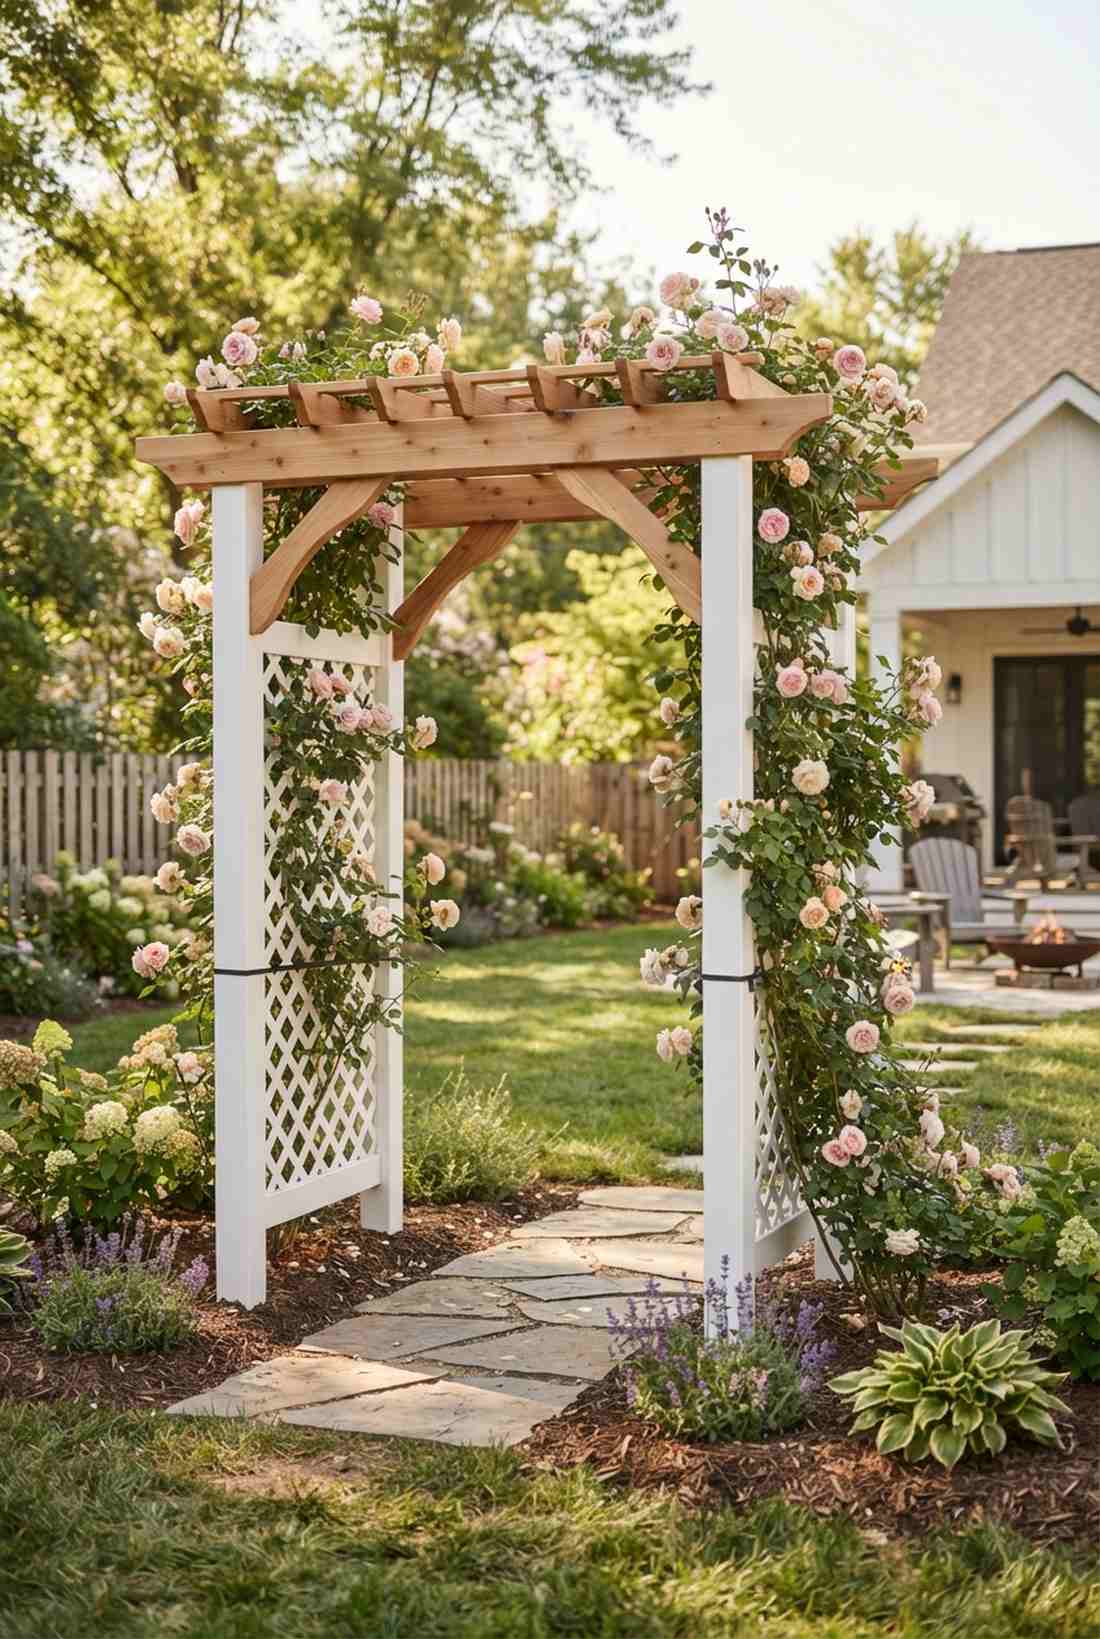
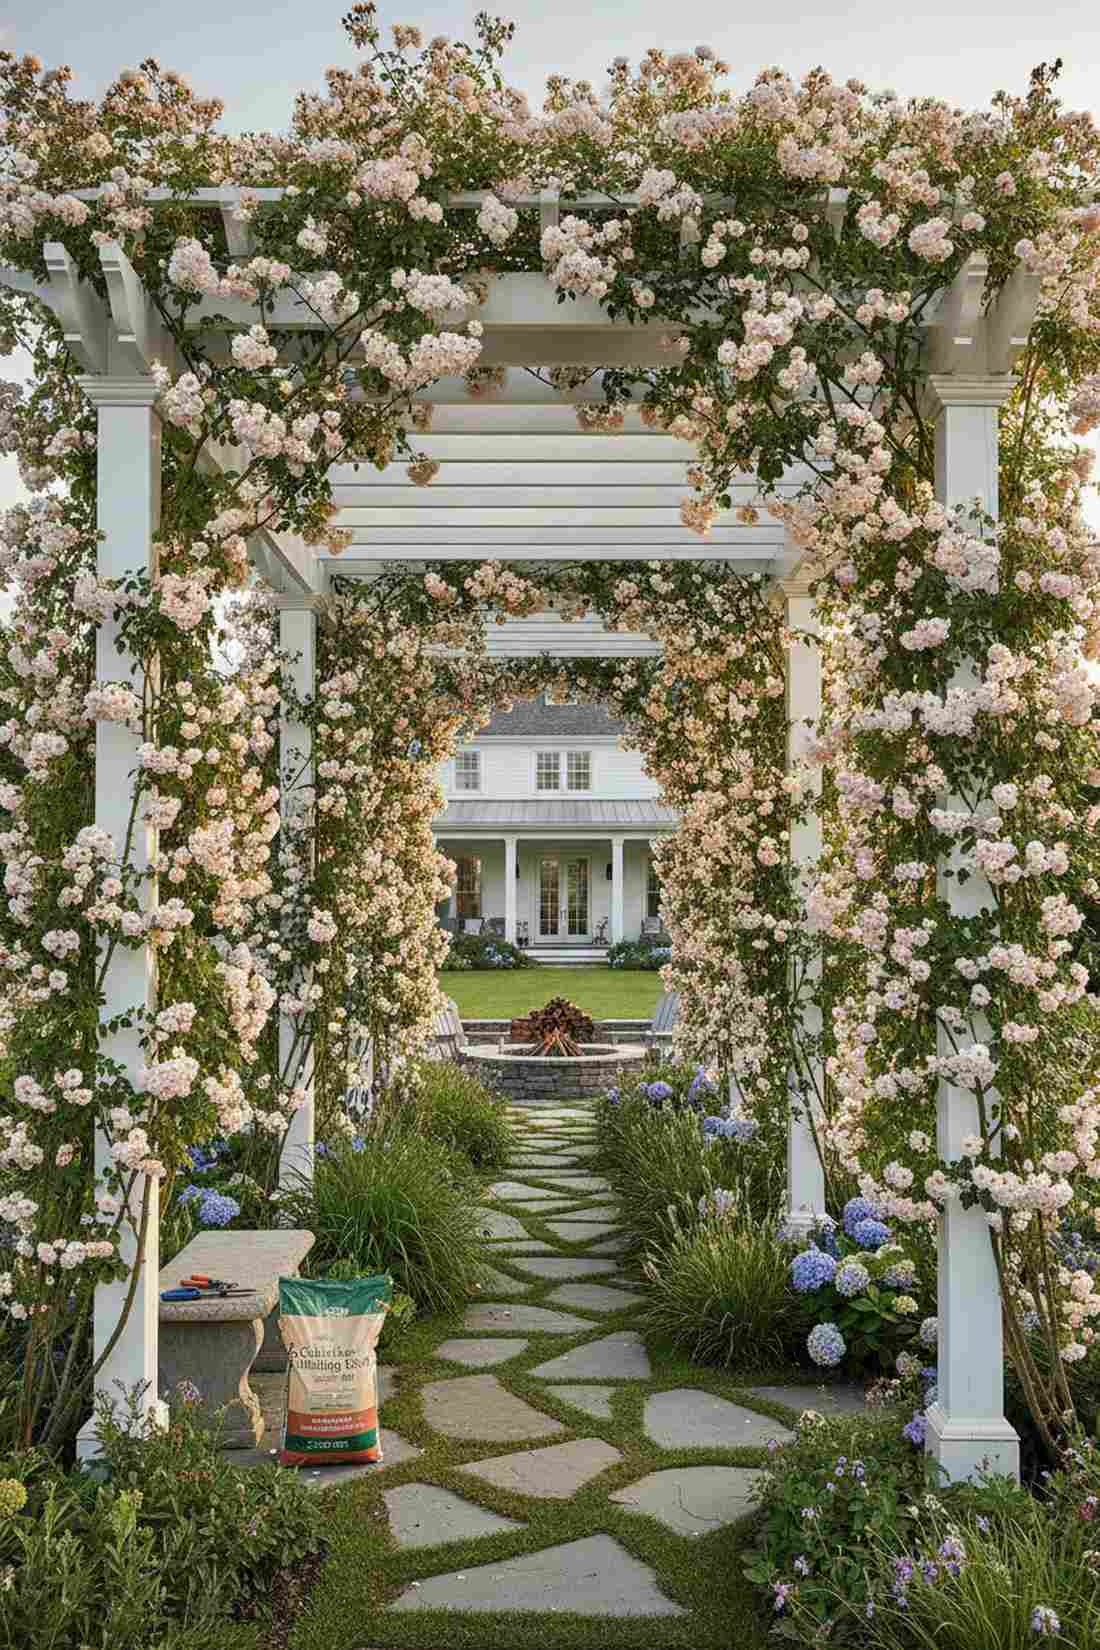
3. White Painted Cottage Arch
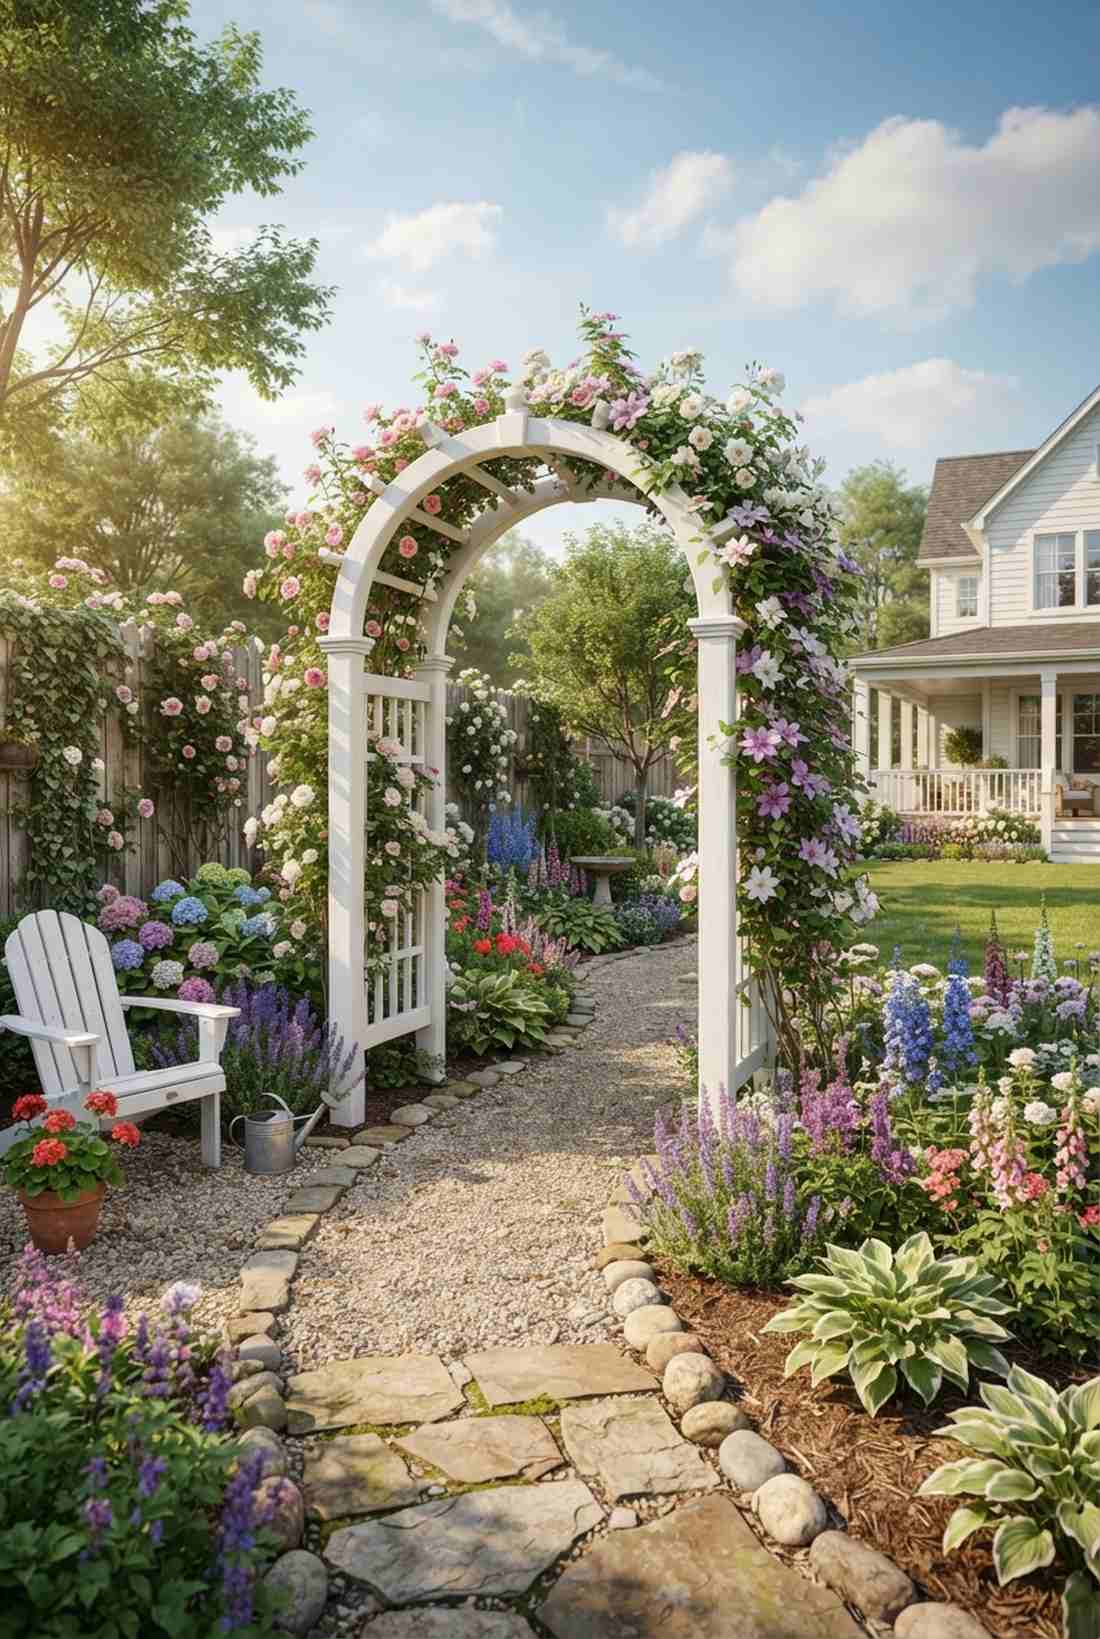
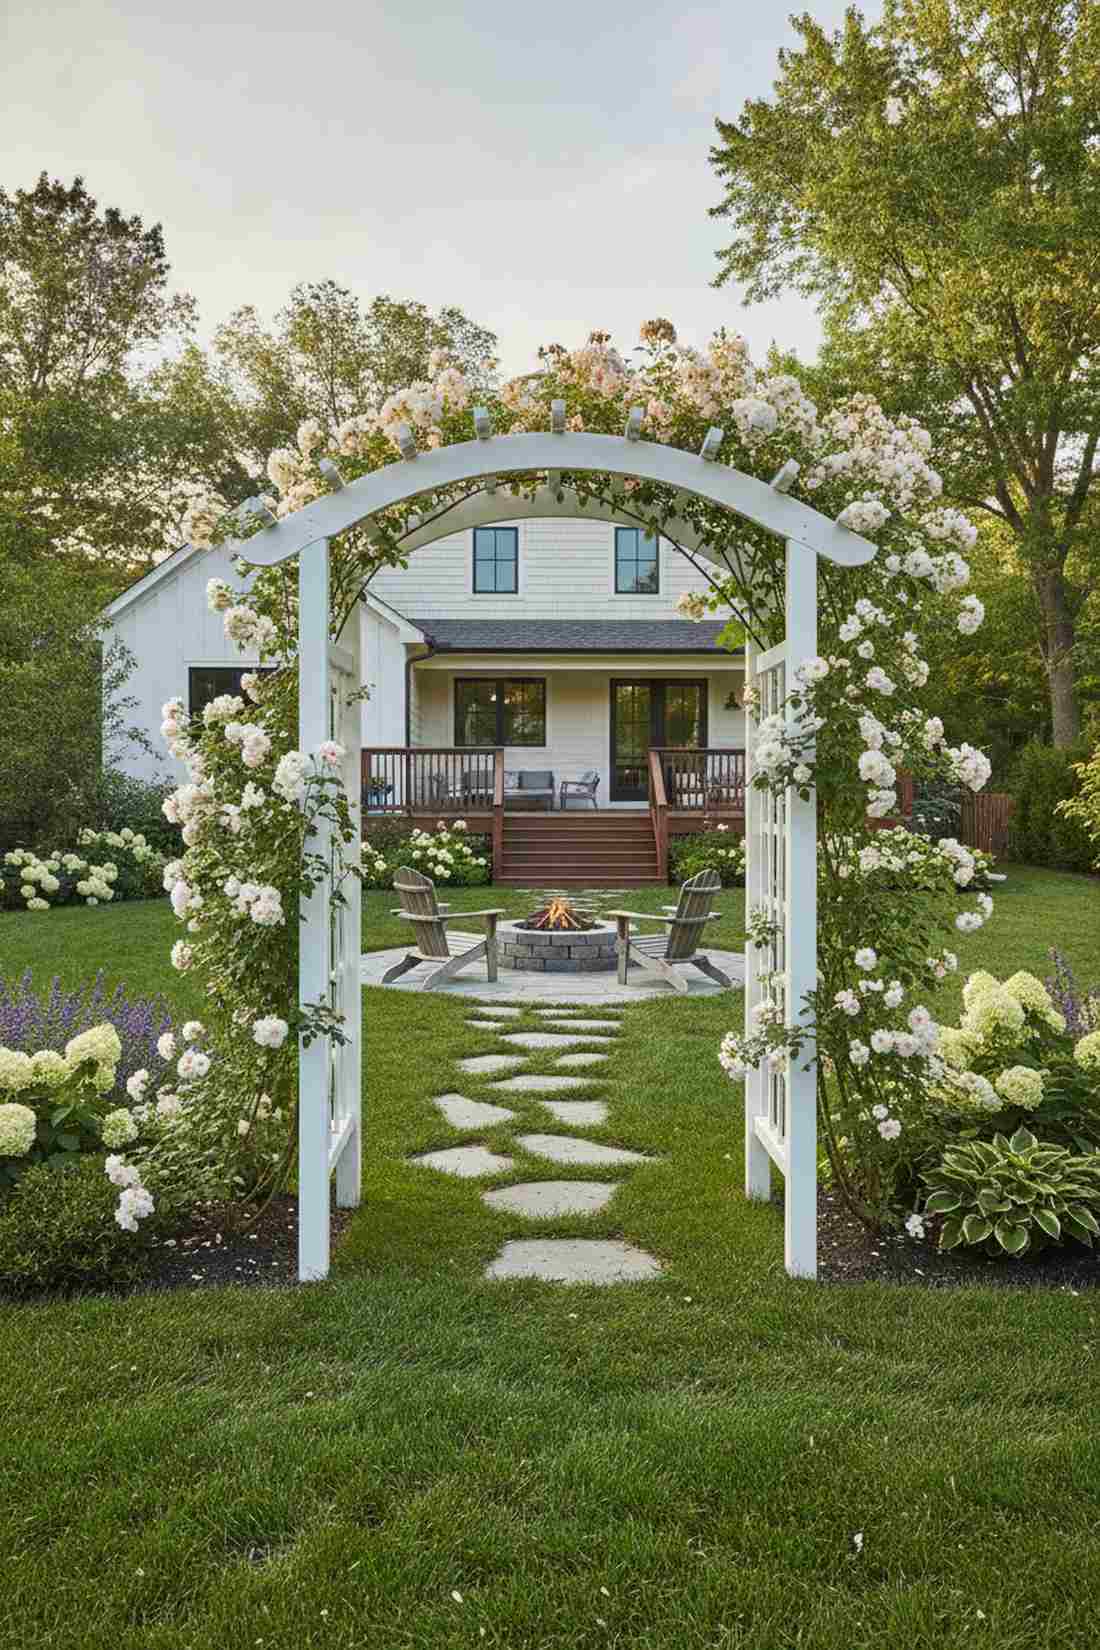
A crisp white wooden archway feels like a nostalgic slice of the British countryside. Perfect for blending rustic charm with refined garden spaces.
Bare wood can look unkempt, yet this painted finish elevates the space far beyond its cost. Apply a layer of UV-resistant exterior primer to keep the white paint from yellowing under harsh summer sunlight.
Building this from scratch costs just $40–$75 in lumber and paint. Pin this if you’re planning a bright cottage-style upgrade.
- Key Materials: Treated lumber, exterior white paint
- Vibe / Style: Bright rustic cottage
- Difficulty: Weekend DIY project
- Budget Breakdown: Lumber: $45 | Paint/Primer: $25.
- Creator’s Tip: Contrast the white frame with rambling varieties like Francis E. Lester for massive visual pop.
- Smart Sourcing: pre-cut cedar arch kits and UV-coated exterior wood sealant.
4. Wrought Iron Formal Entryway
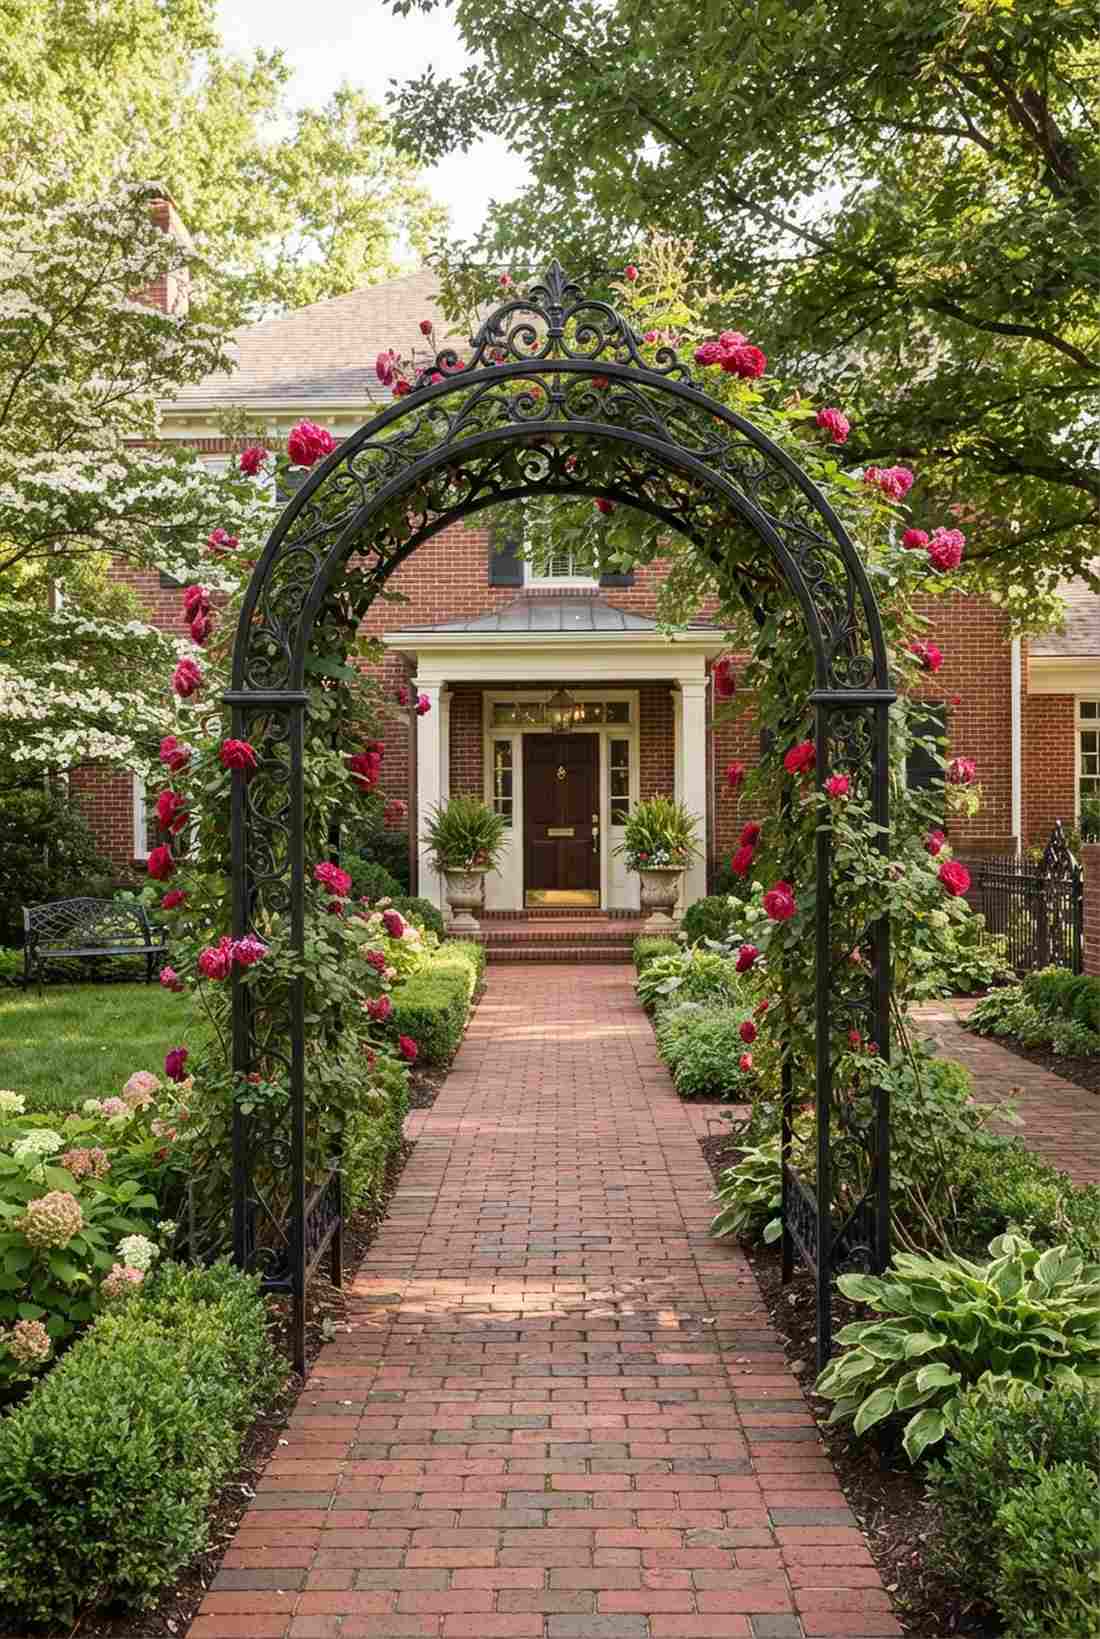
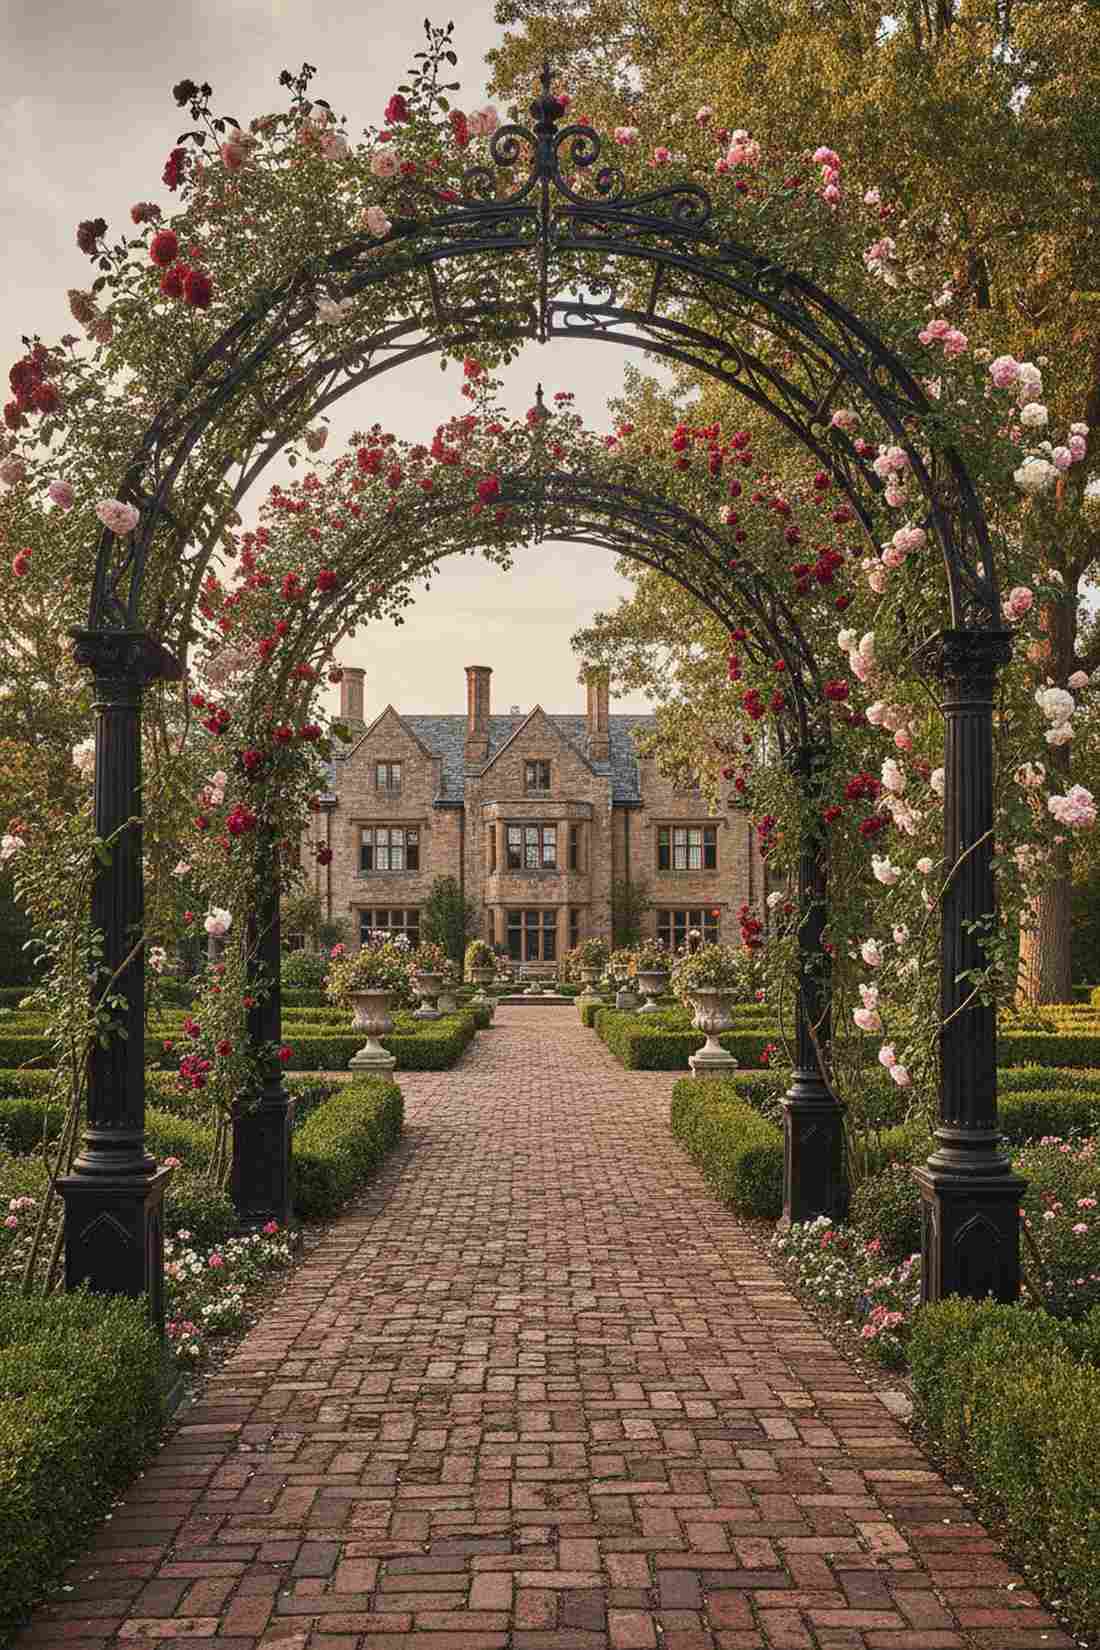
This black iron arch design feels like stepping onto the grounds of a historic manor. Phenomenal for defining formal brick walkways.
Many homeowners settle for plastic, but true wrought iron creates an instant high-end estate feel. Weaving the climbing roses in an upward spiral maximizes the commercial climbing plant supports and hides the structure’s rigid lines.
Sourcing real iron runs $200–$400, but lasts generations. Highly recommended for a permanent landscape investment.
- Key Materials: Cast or wrought iron framework
- Vibe / Style: Traditional formal elegance
- Difficulty: Heavy lifting required
- Budget Breakdown: Iron Frame: $300 | Roses: $50.
- Creator’s Tip: Train stems horizontally across the iron bars to encourage more lateral blooming shoots.
- Smart Sourcing: heavy-duty decorative iron archways and weatherproof garden tying wire (spool).
This next setup is ridiculously cheap but looks like a $500 custom architectural display…
5. Trellis Integrated Rose Archway
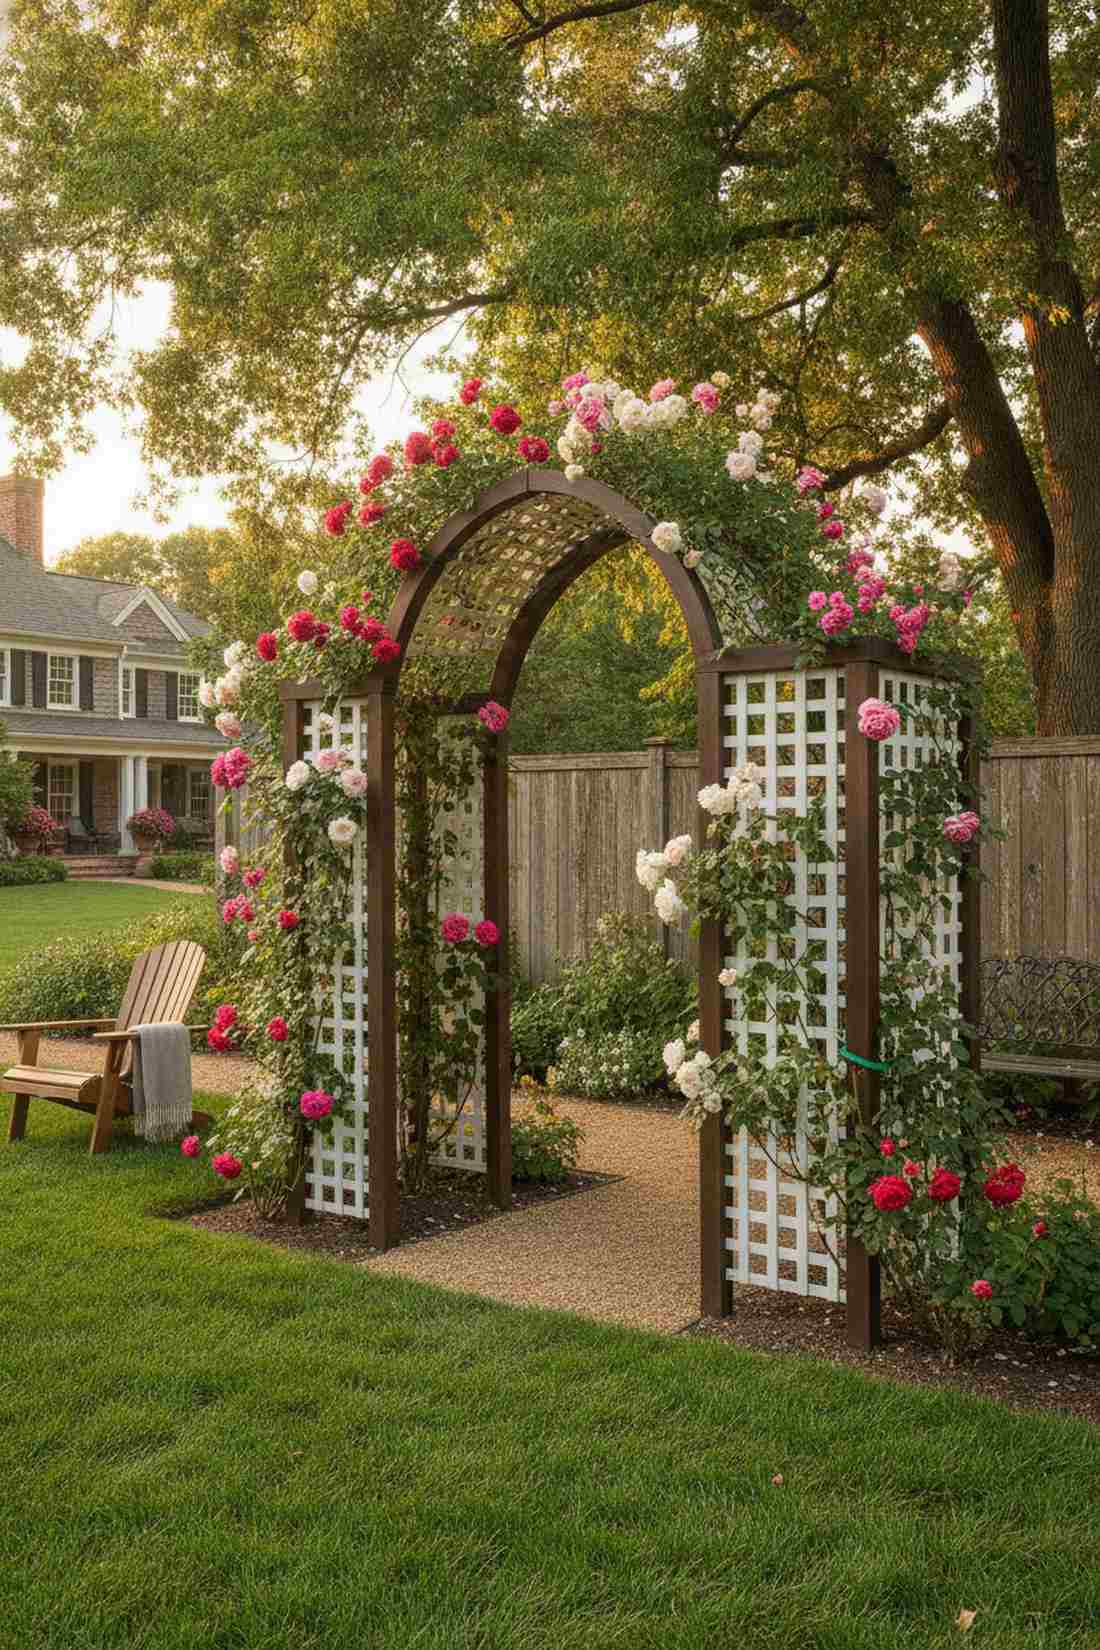
A lattice-paneled archway feels like a cozy, shaded outdoor hallway. Absolutely brilliant for hiding unsightly fences or neighboring walls.
Standard open arches leave young roses unsupported, but this grid layout looks incredibly expensive while doing all the heavy lifting. Integrate premium vinyl privacy lattice to prevent wood rot at the base.
You can construct this hybrid structure for $90–$130. Save this idea for a smart vertical privacy screen.
- Key Materials: Wood framework, lattice panels
- Vibe / Style: Enclosed garden intimacy
- Difficulty: Moderate assembly
- Budget Breakdown: Frame: $70 | Lattice: $40.
- Creator’s Tip: Secure stems loosely so the roses can sway; tight binding causes stem damage.
- Smart Sourcing: pre-cut trellis side panels and heavy-duty zip tie assortments.
6. Natural Cedar Rustic Arch

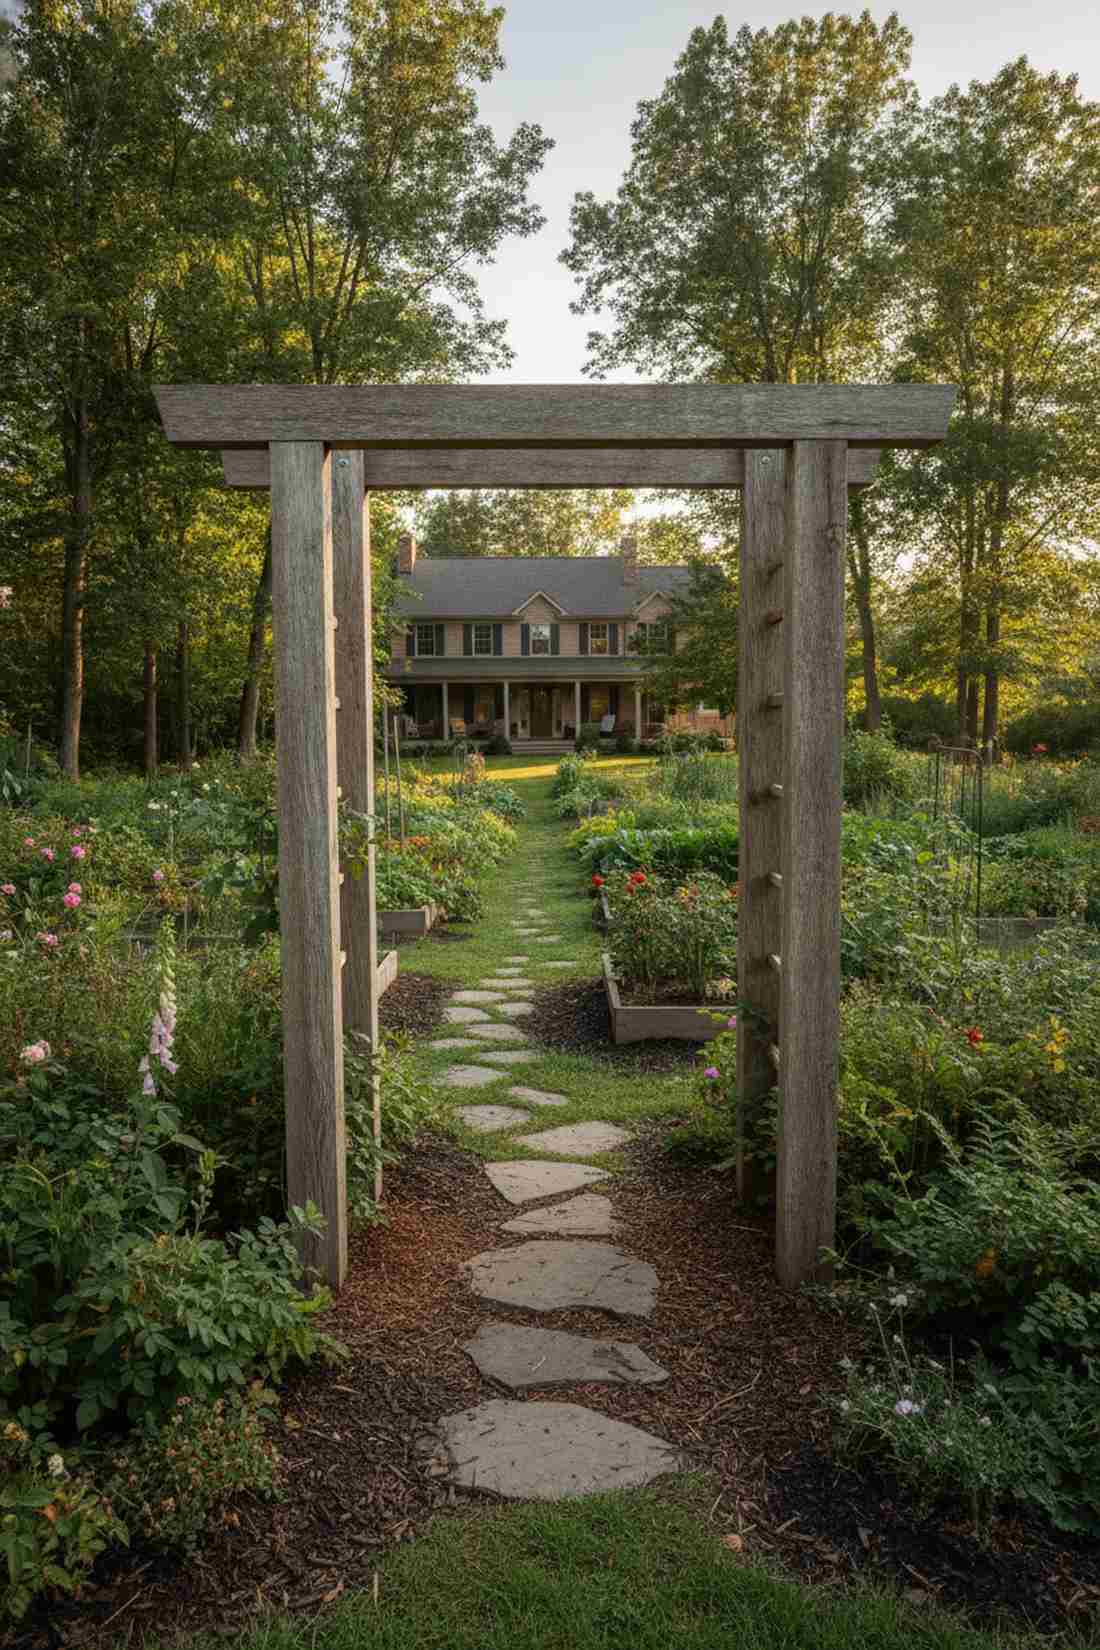
The weathered cedar entryway feels completely grounded and at one with a wild forest. Best utilized in highly organic, naturalistic garden borders.
Polished metals clash with wild planting, but this raw material ages gracefully and blends right in. Cedar’s innate rot resistance eliminates the need for toxic treatments near your organic garden soil amendments.
Quality cedar runs about $100–$150 for the build. It’s a gorgeous organic focal point that requires zero upkeep.
- Key Materials: Unfinished cedar posts
- Vibe / Style: Organic woodland charm
- Difficulty: Basic woodworking
- Budget Breakdown: Cedar Wood: $120 | Hardware: $20.
- Creator’s Tip: Let the wood naturally silver over a year before deciding if you want to seal it.
- Smart Sourcing: unfinished cedar archway sets and stainless steel lag screws (bulk pack).
Brick Pattern Foundations
Classic brick patterns provide durable, textured surfaces that define english garden patio character. These time-tested layouts offer both visual interest and structural stability for outdoor entertaining spaces.
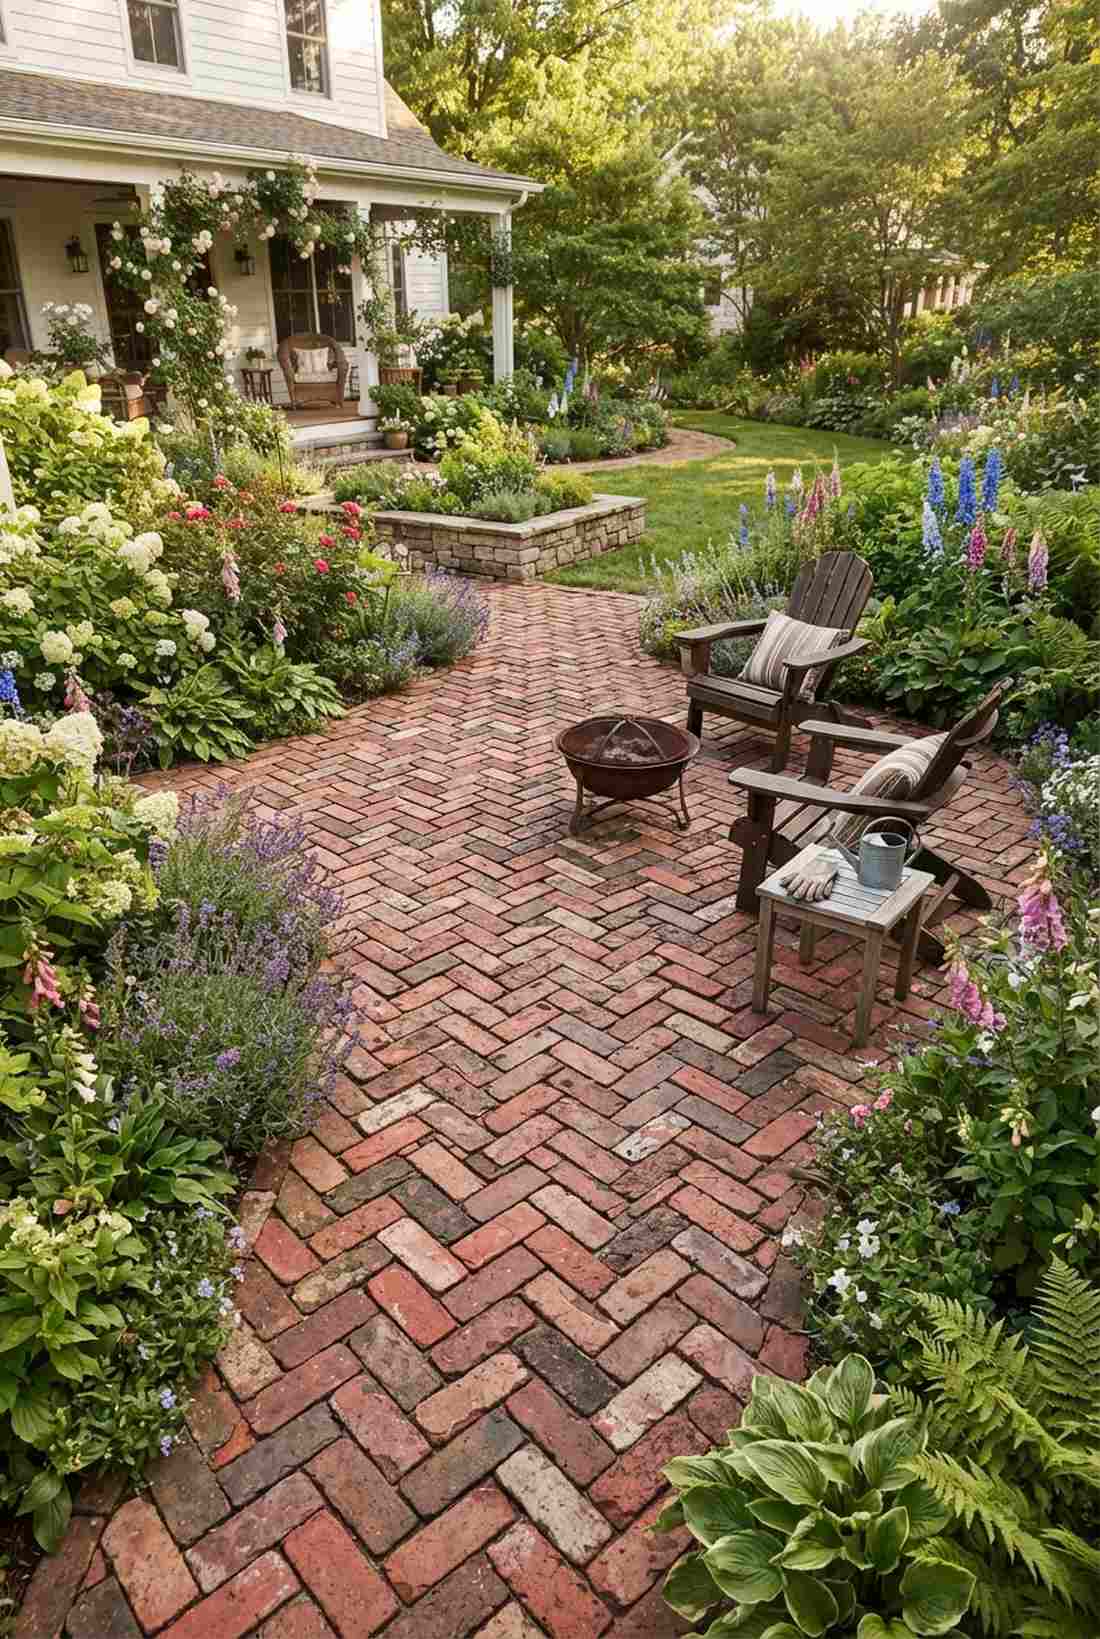
7. Herringbone Pattern Main Patio
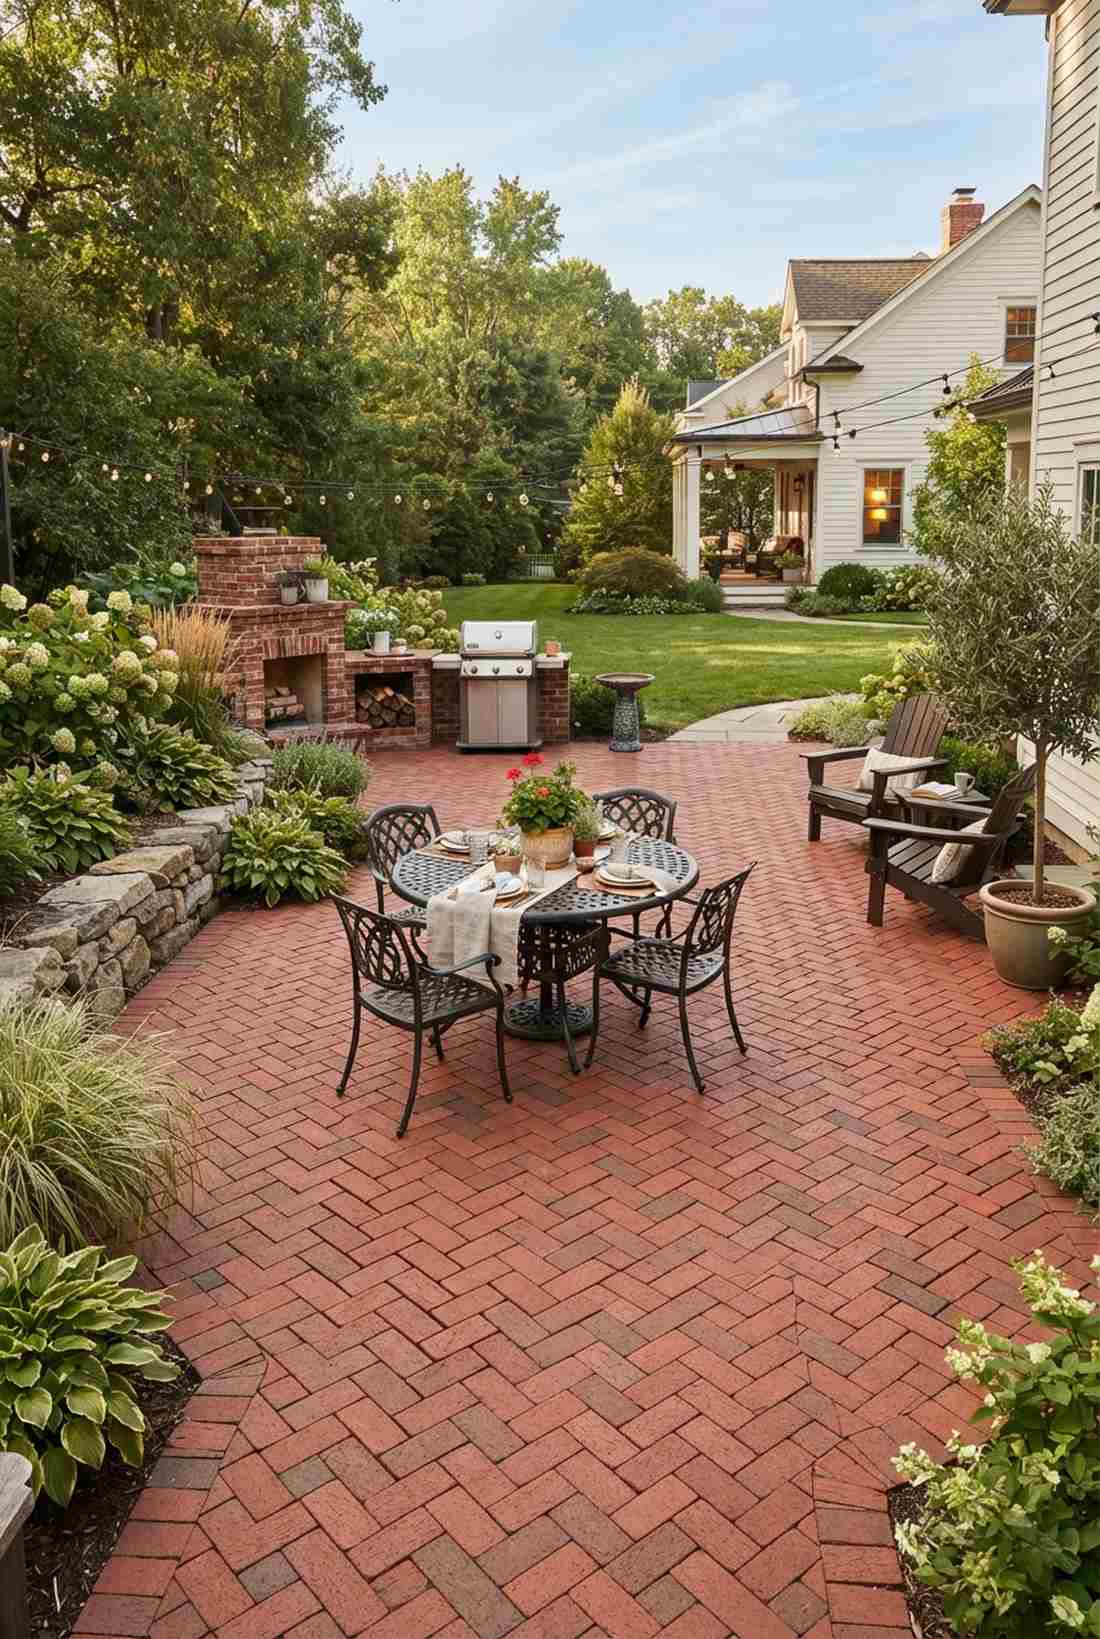

A diagonal brick surface feels like a historic town square right in your backyard. Essential for high-traffic central dining areas.
Laying bricks straight is boring, but this 45-degree interlock delivers a surprisingly premium look. Using a commercial-grade polymeric sand between joints stops weeds and locks the pattern permanently.
Materials cost roughly $4–$7 per square foot. Pin this if you want a patio that never shifts or sinks.
- Key Materials: Clay pavers, crushed rock base
- Vibe / Style: Dynamic classic heritage
- Difficulty: Advanced paving
- Budget Breakdown: Bricks: $300 | Base/Sand: $80.
- Creator’s Tip: Always start your 45-degree angle from the exact center of the patio and work outward.
- Smart Sourcing: weed-blocking polymeric sand (bulk bags) and heavy-duty rubber paving mallets.
8. Basket Weave Entertaining Area

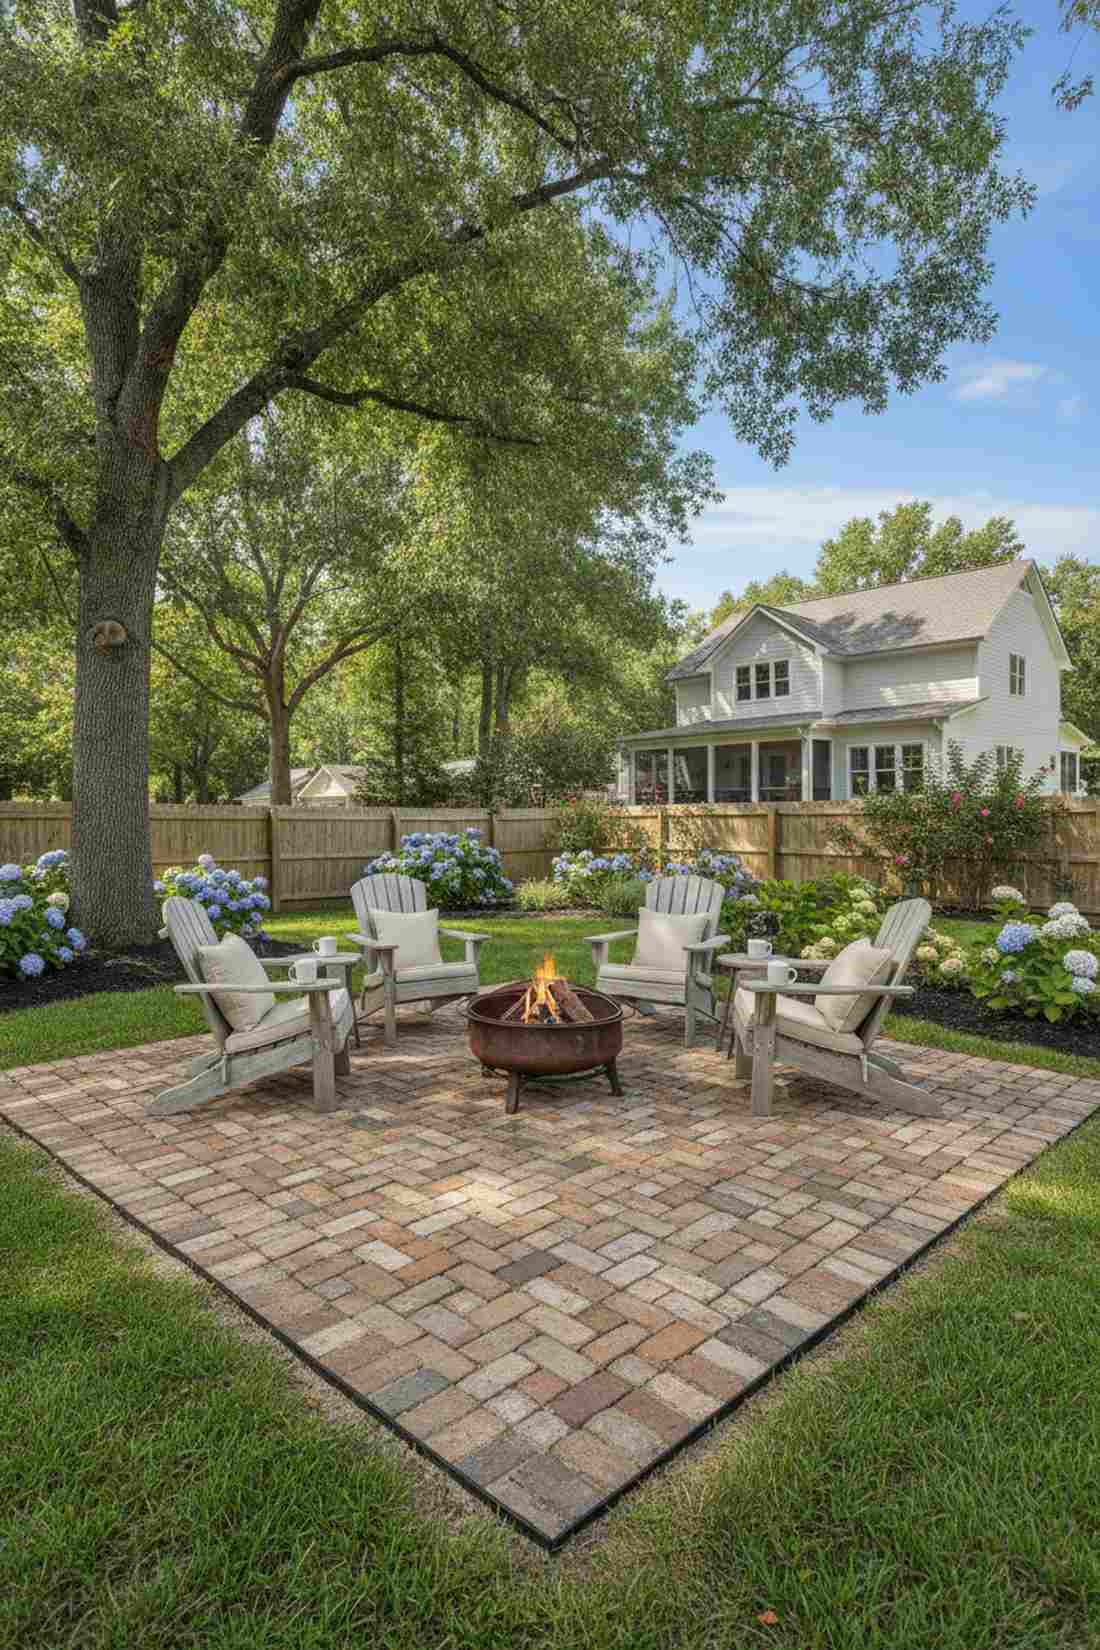
This woven brick texture feels incredibly warm and nostalgically inviting. Perfect for casual fire pit zones or morning coffee spots.
Complex geometry can overwhelm a small yard, yet this simple pairing looks far more expensive than it is. It utilizes full bricks mostly, reducing the need for an expensive wet tile saw setup.
Expect to pay $3–$5 per square foot for this setup. A highly satisfying weekend hardscaping win.
- Key Materials: Reclaimed or antiqued brick
- Vibe / Style: Casual cottage warmth
- Difficulty: Beginner-friendly layout
- Budget Breakdown: Bricks: $200 | Edging: $40.
- Creator’s Tip: Mix bricks from different pallets to ensure the color variation looks perfectly randomized.
- Smart Sourcing: commercial landscape edging kits and pre-mixed leveling sand.
9. Running Bond Pathway Border
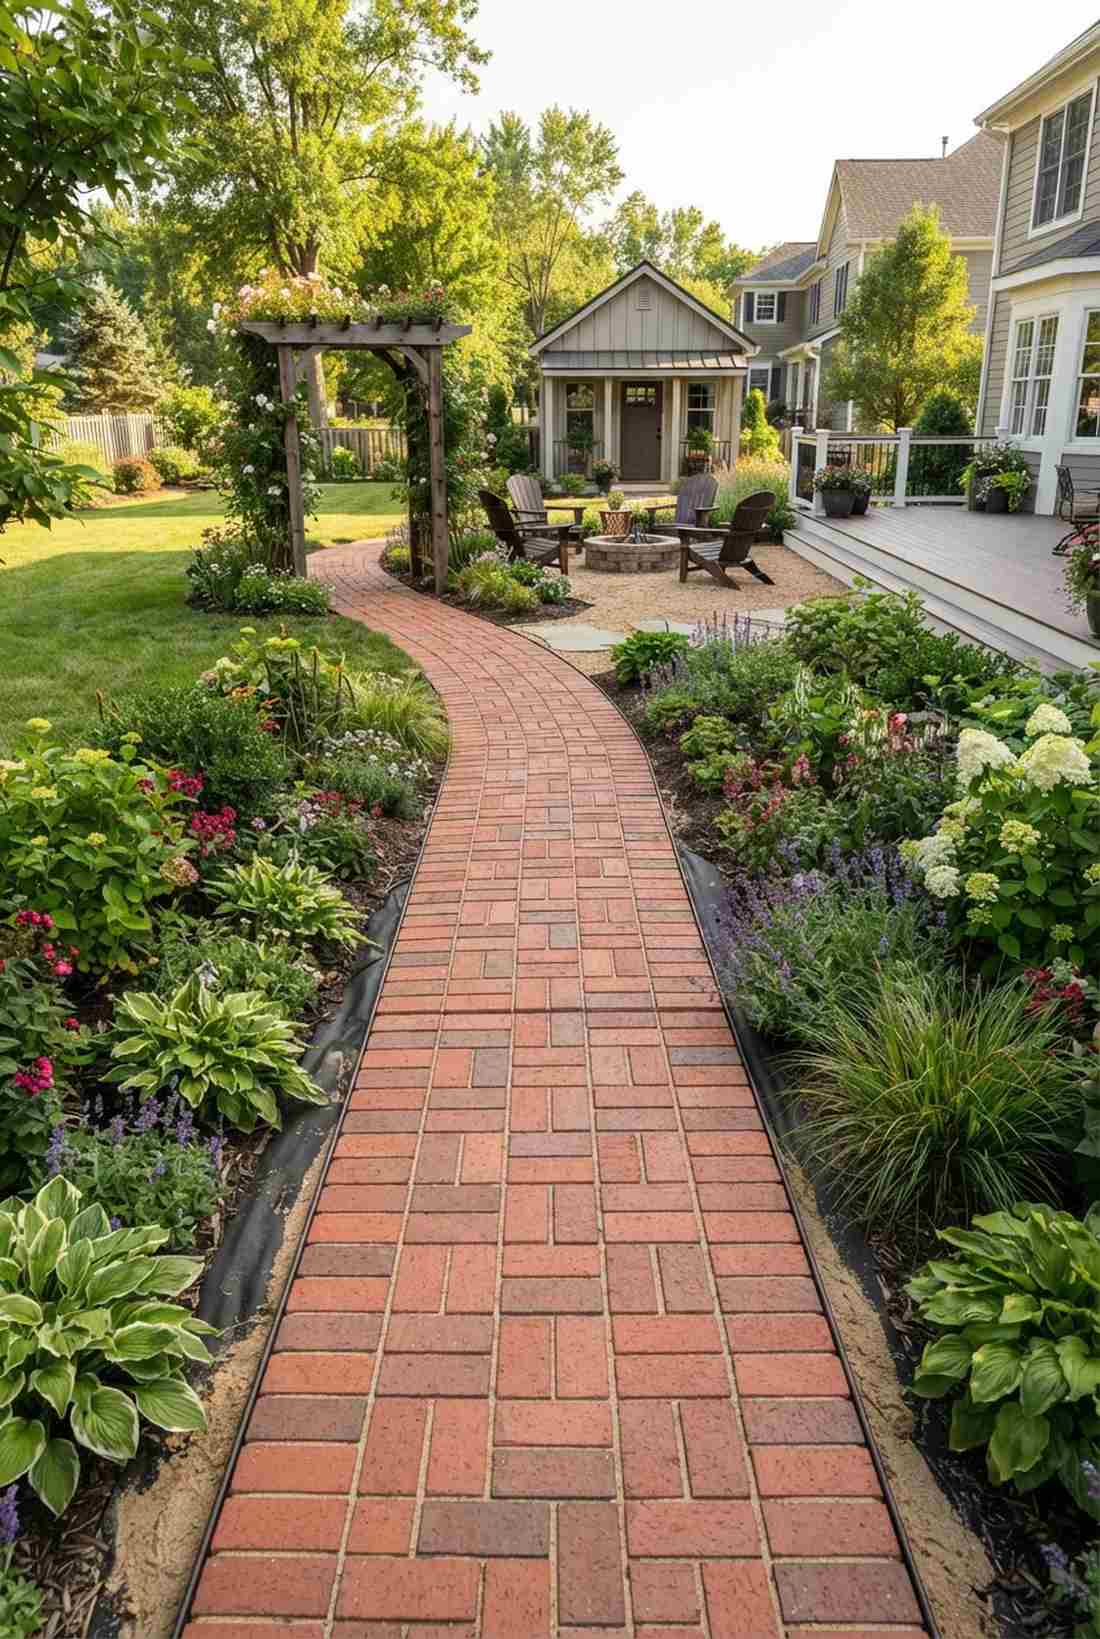
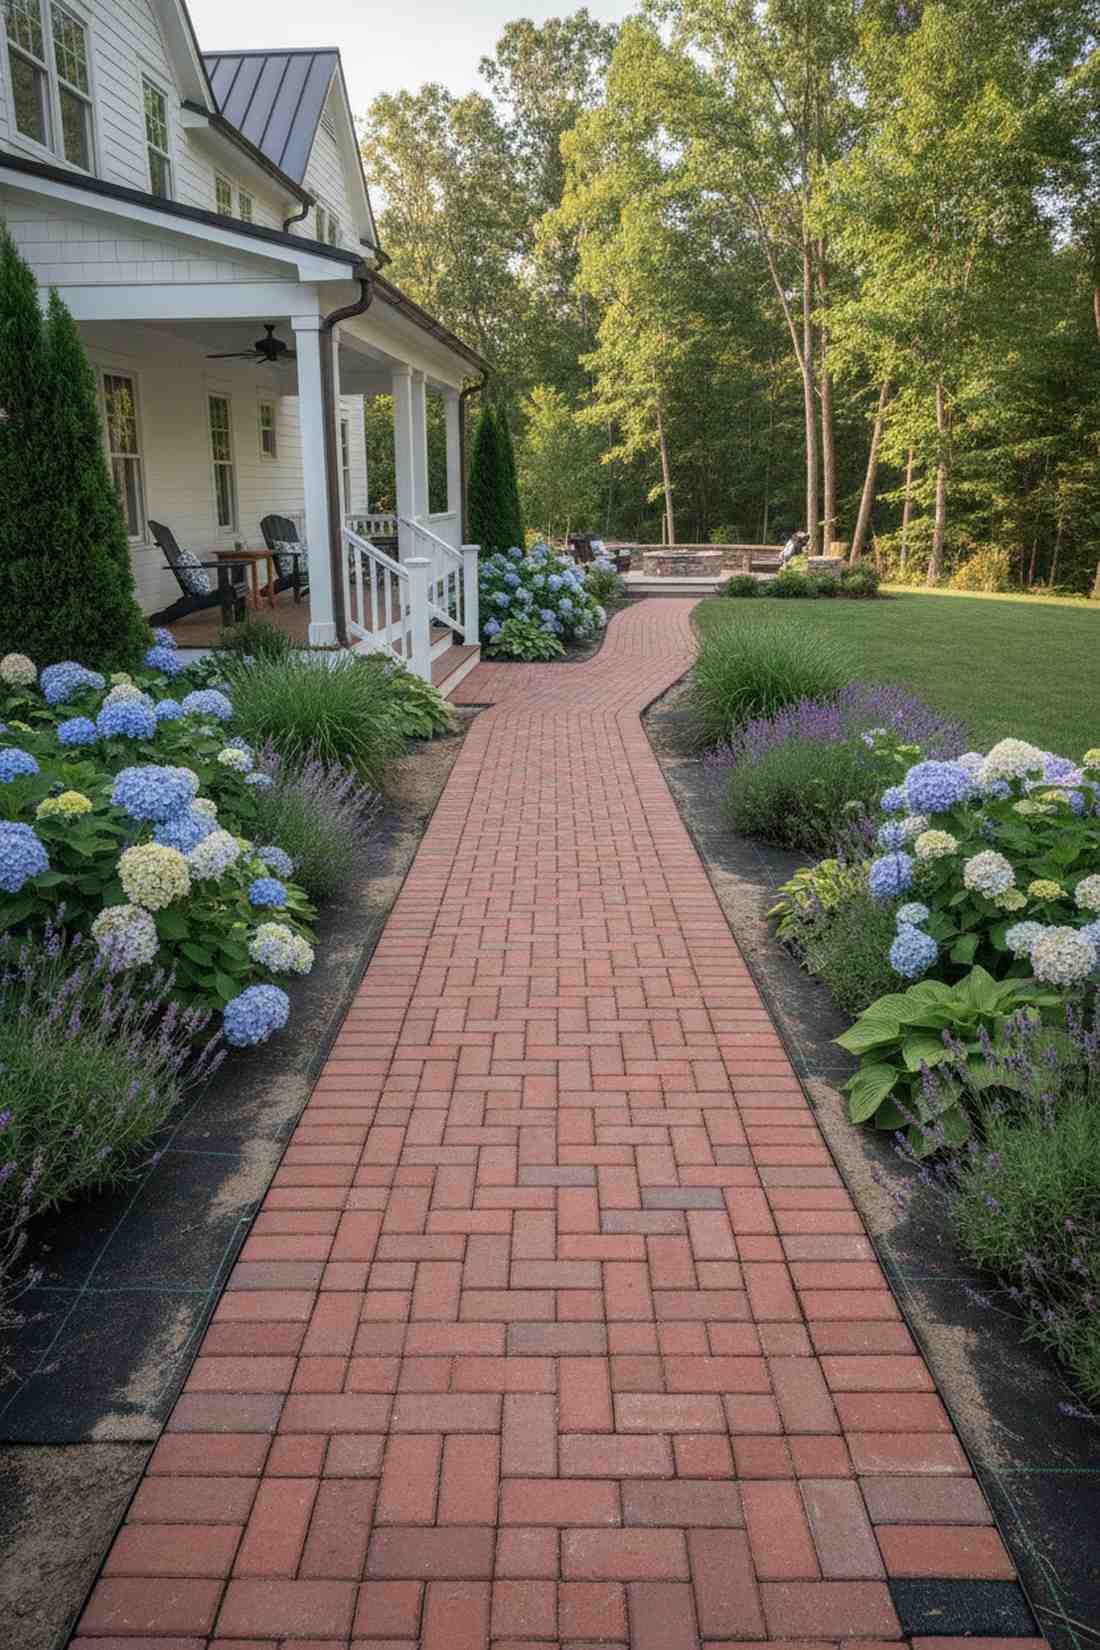
A linear brick pathway feels like a clean, guided journey through blooming foliage. Ideal for transitional spaces and garden borders.
Overly busy paths distract the eye, but this straightforward offset layout gives a designer-level finish. Utilizing professional-grade landscape fabric beneath the base prevents the path from drowning in mud.
This layout is extremely budget-friendly at $2–$4 per square foot. Save this to your DIY outdoor walkways board.
- Key Materials: Standard red brick, edge restraints
- Vibe / Style: Clean and directional
- Difficulty: Very easy installation
- Budget Breakdown: Bricks: $100 | Fabric: $30.
- Creator’s Tip: Install an invisible plastic edge restraint before laying the outer bricks to keep lines sharp.
- Smart Sourcing: heavy-duty weed barrier fabric (commercial rolls) and invisible paver edging systems.
Most people get their brick layouts completely wrong… until they try the timeless aesthetic coming up next.
💡 Must-Have Supplies for High-End Setups
To build these setups faster and ensure they last, skip the generic craft aisles and invest in the right foundational kits.
- Base & Support: commercial-grade galvanized steel arch kits
- Setup Tools: heavy-duty masonry tool starter sets
- Weather/Durability Protection: UV-blocking matte exterior brick sealant
10. Mixed Brick and Stone Patchwork
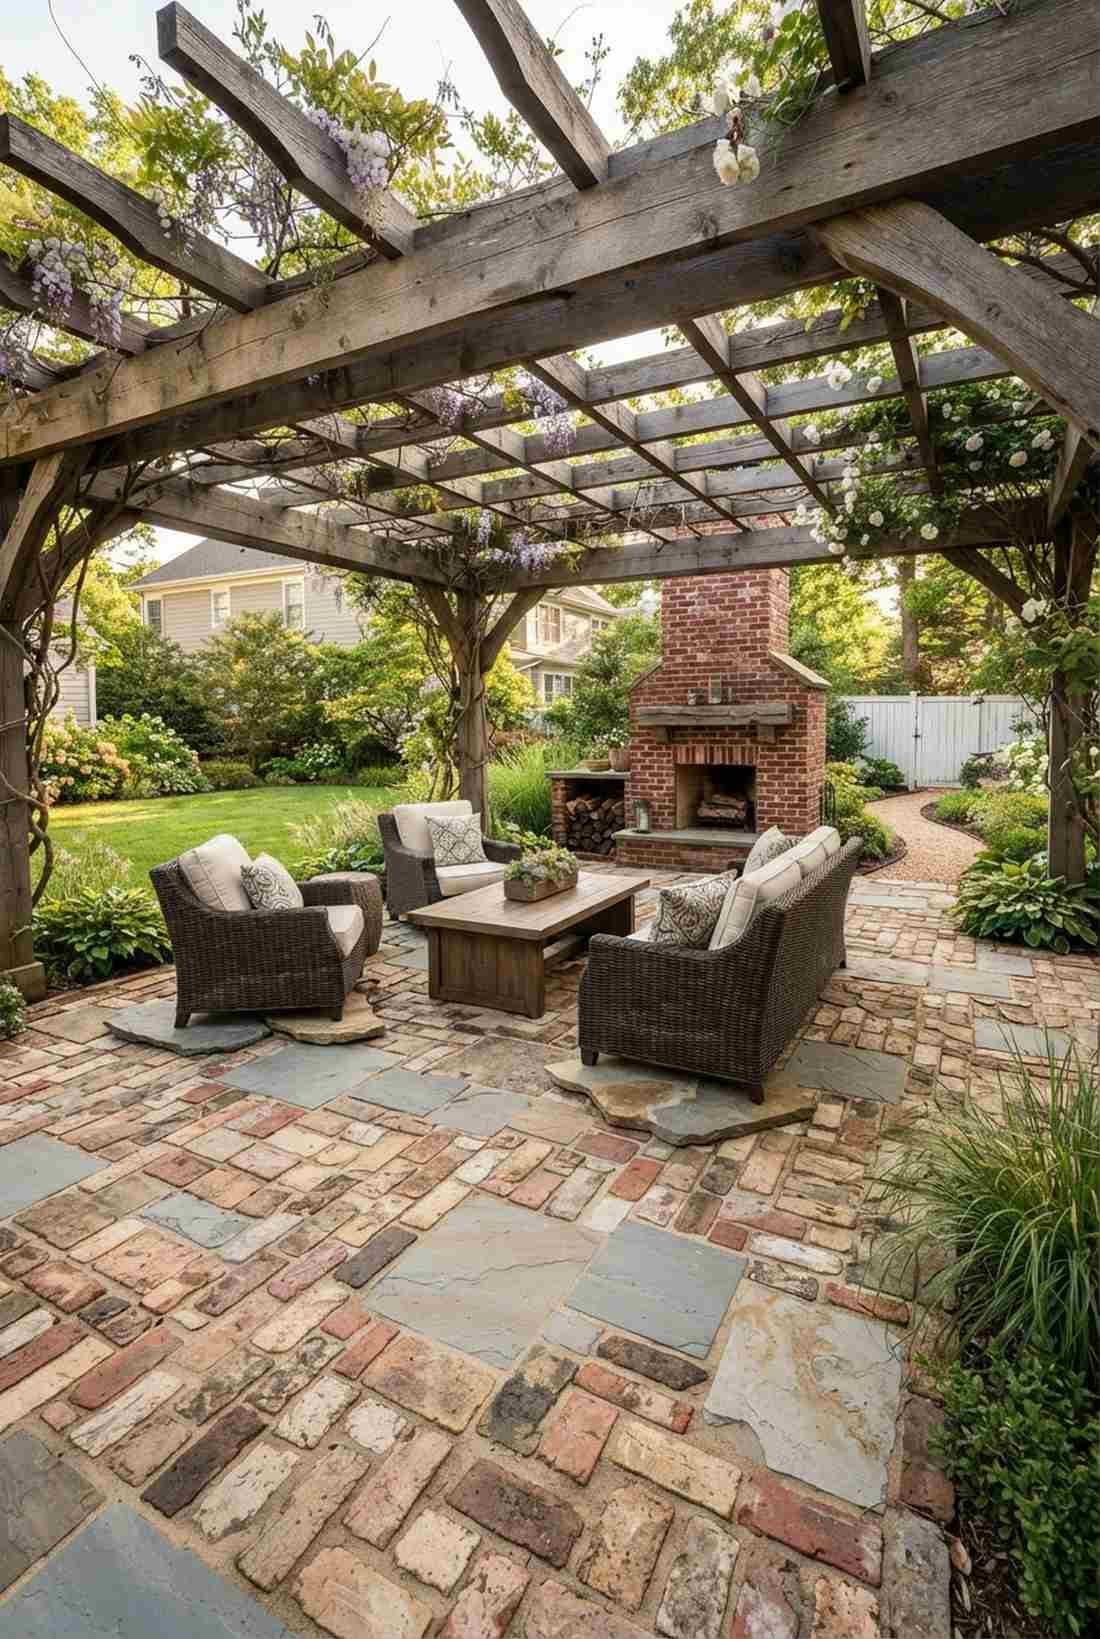
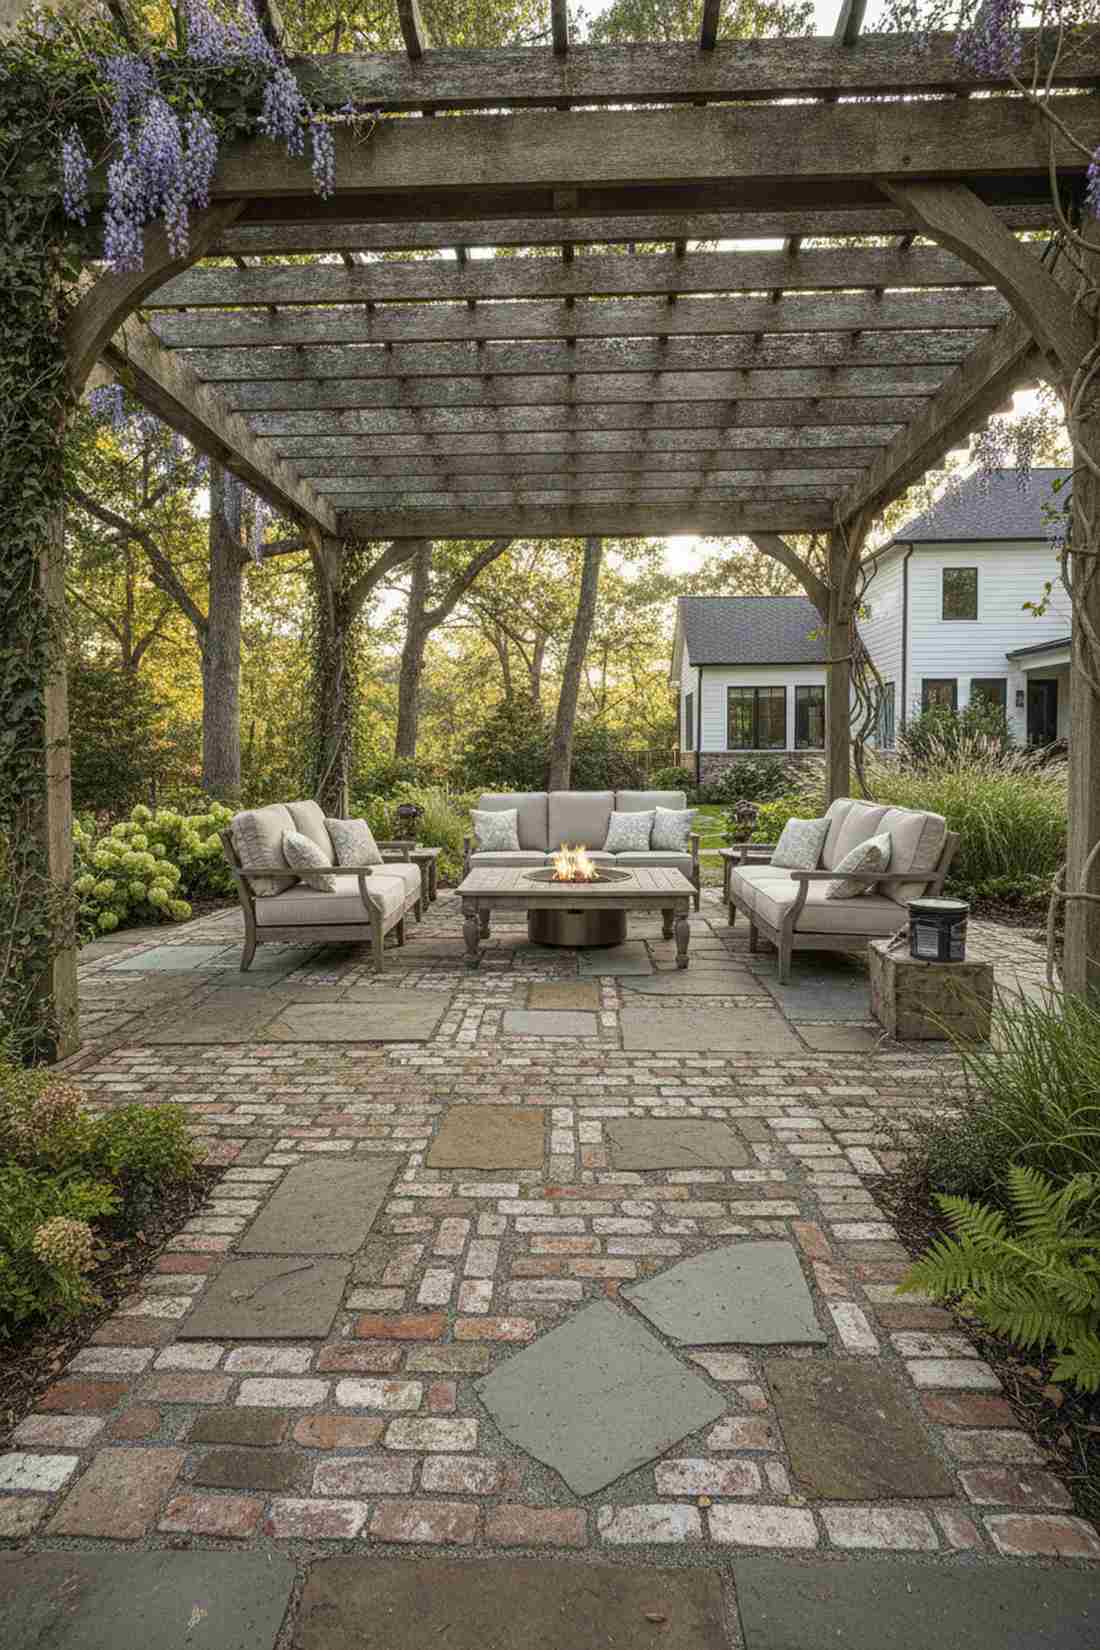
This hybrid stone and brick layout feels like ruins reclaimed by nature. Stunning when used under a sprawling wooden pergola.
Perfect uniformity is overrated; mixing textures creates an instant high-end estate feel. Seamlessly sneaking in weatherproof resin gap fillers mimics ancient mortar while keeping modern stability intact.
Combining materials usually averages $6–$10 per square foot. A spectacular choice for an evolved, historic aesthetic.
- Key Materials: Flagstone, aged brick, stone dust
- Vibe / Style: Eclectic historical ruin
- Difficulty: Time-consuming fitting
- Budget Breakdown: Stone/Brick Mix: $350 | Base: $60.
- Creator’s Tip: Place large stones where chair legs will sit to ensure furniture stability.
- Smart Sourcing: permeable jointing compound (ready-to-use) and premium stone masonry chisels.
11. Circular Brick Focal Point
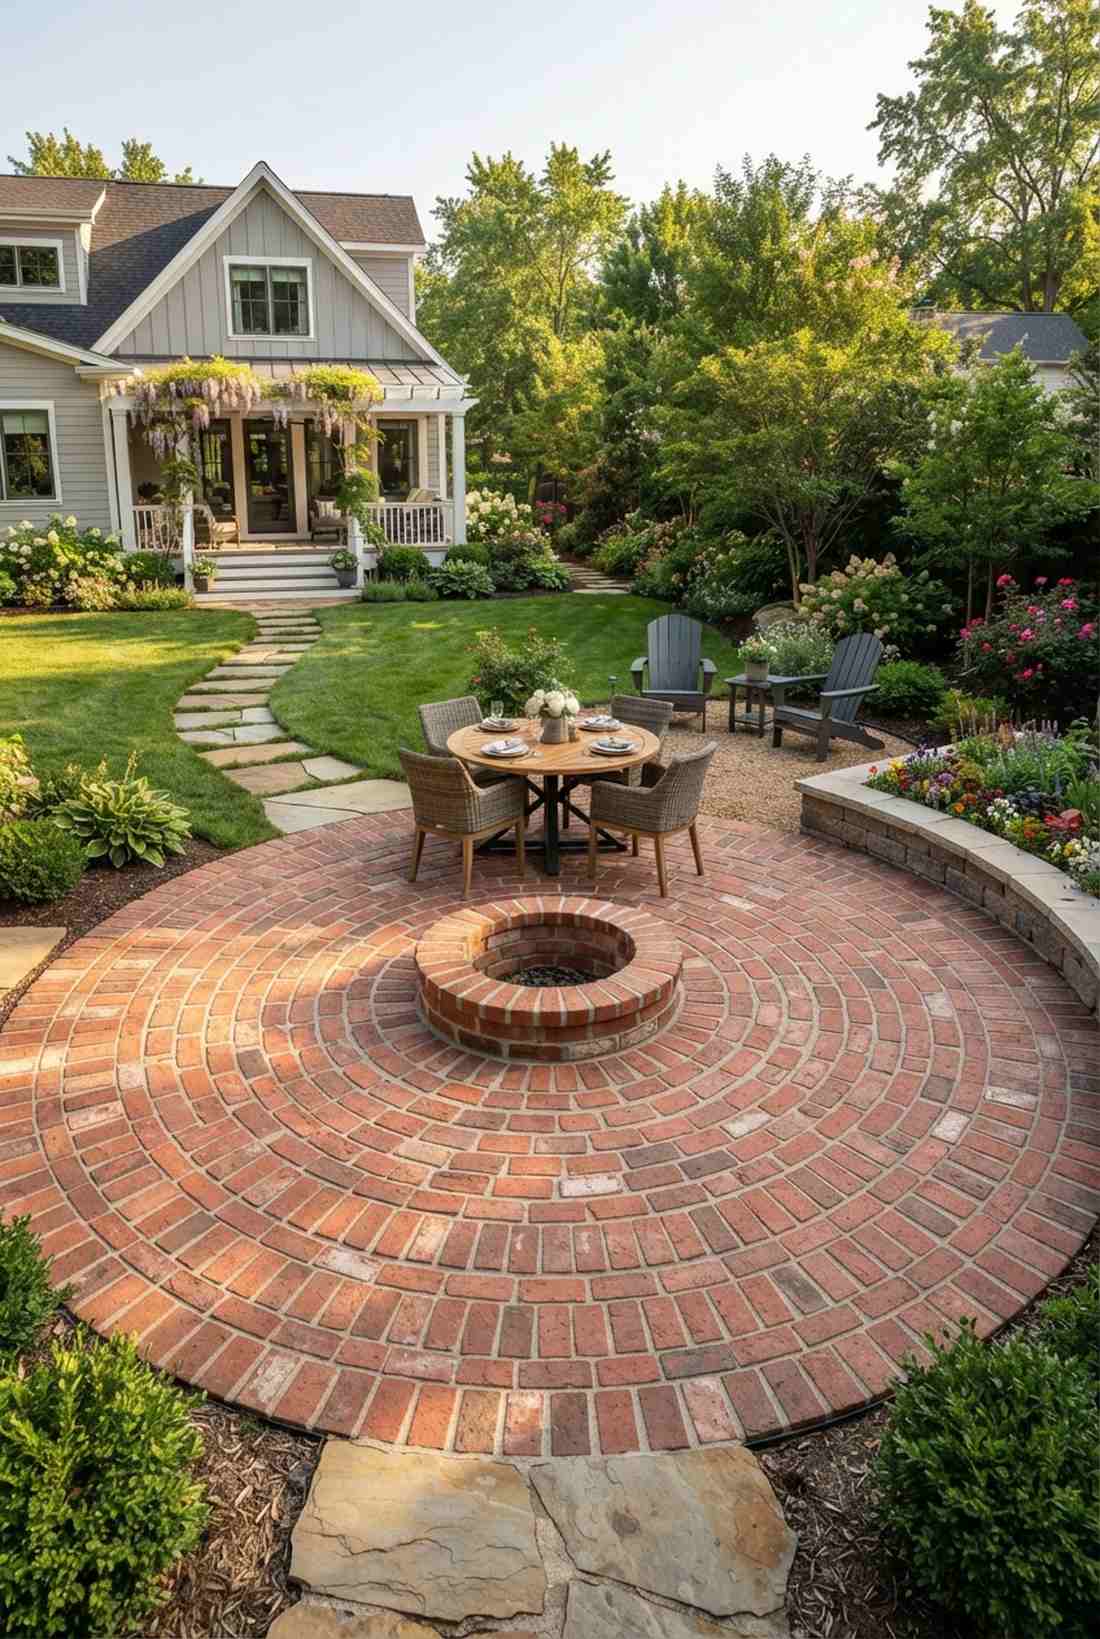
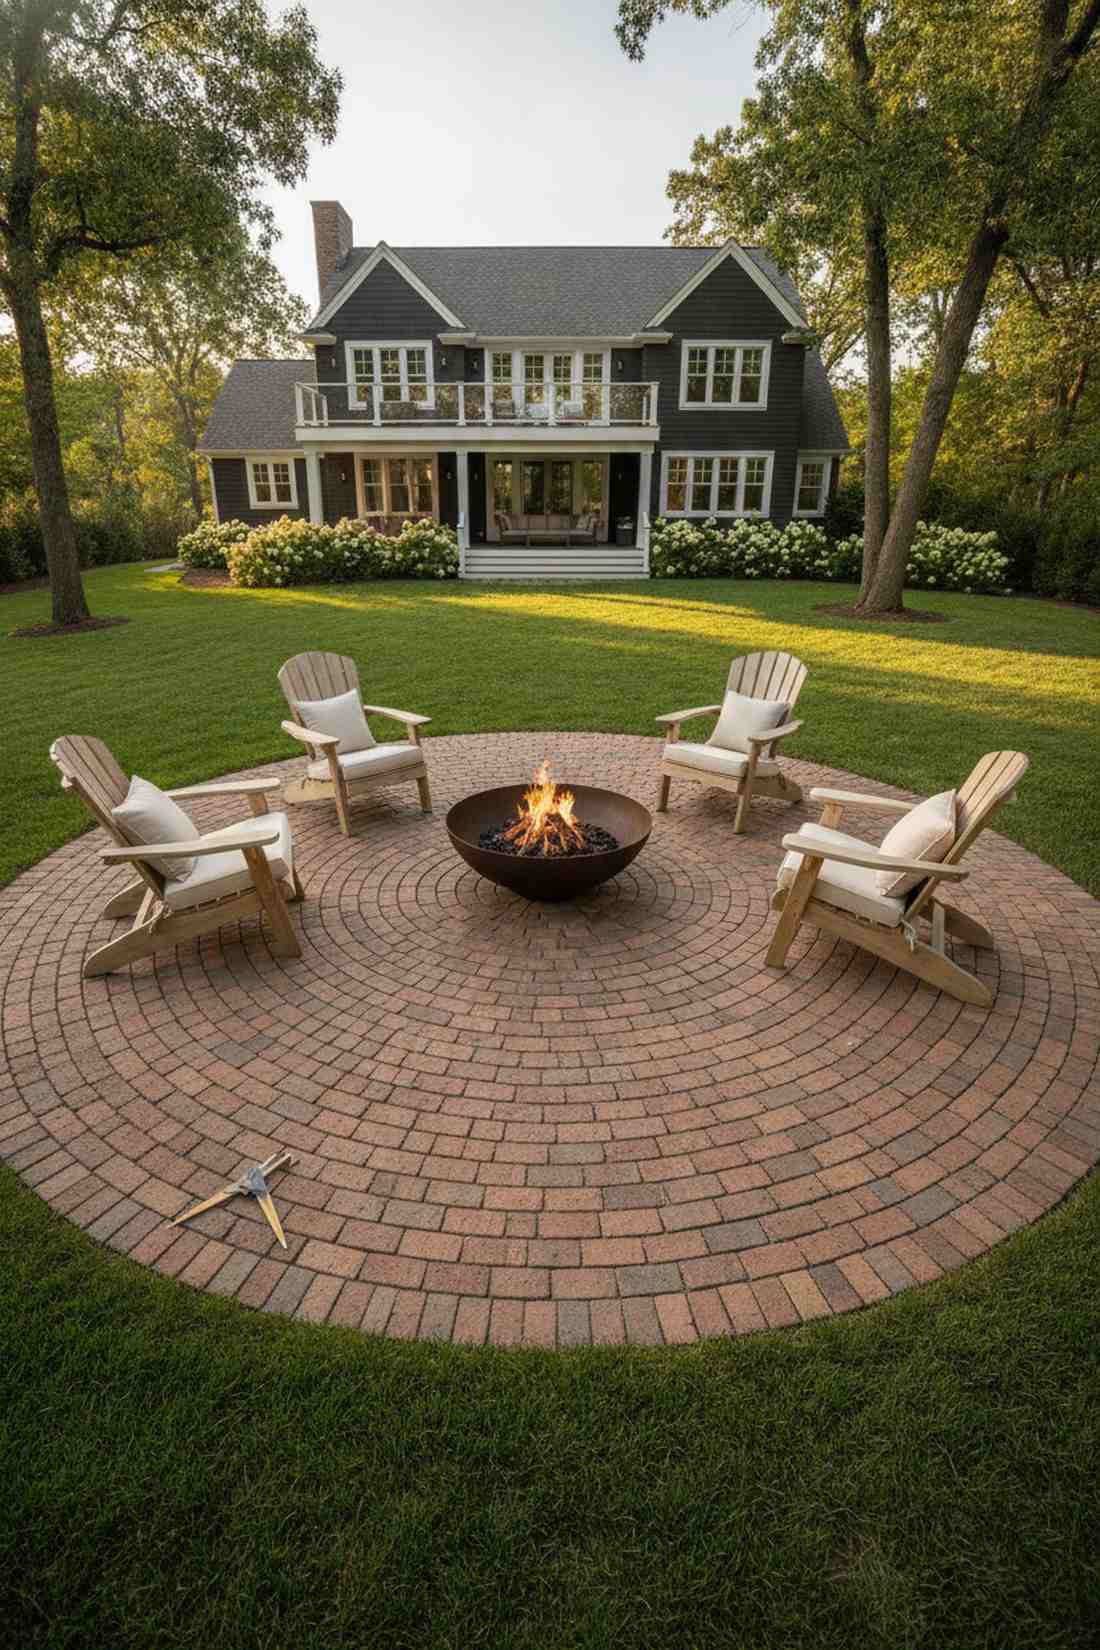
A radiating patio circle feels like an exclusive, intimate gathering stage. Flawless for centering a round dining table or fire bowl.
Square patios can feel rigid, but this sweeping geometry looks incredibly expensive and custom-built. Employing a specialty masonry compass tool guarantees perfect arcs without sloppy gaps.
The intricate cuts raise the cost to about $8–$12 per square foot. Pin this if you want a breathtaking backyard centerpiece.
- Key Materials: Half-bricks, circular layout templates
- Vibe / Style: Formal architectural focus
- Difficulty: High precision cutting
- Budget Breakdown: Bricks: $250 | Tools/Blades: $80.
- Creator’s Tip: Start absolutely dead-center; even a quarter-inch mistake will ruin the outer rings.
- Smart Sourcing: diamond-tipped masonry saw blades and pre-cut circular paver center kits.
12. Reclaimed Brick Vintage Surface
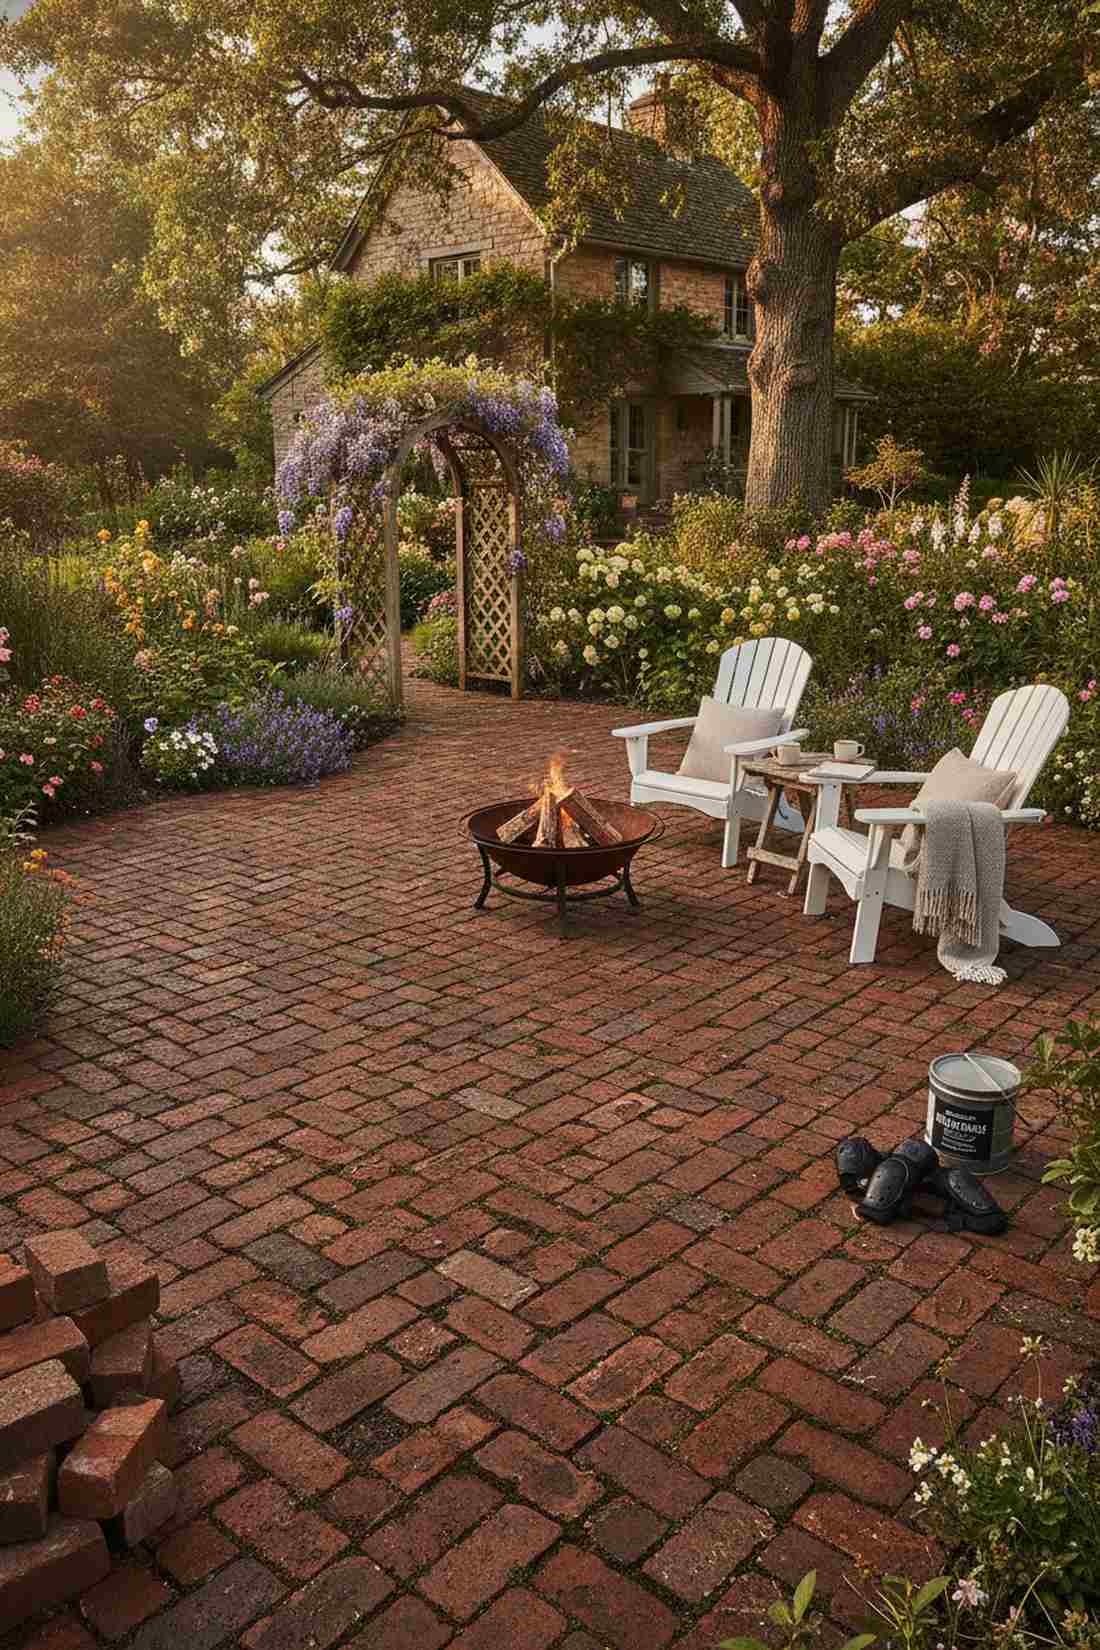
An authentic salvaged brick deck feels like it has been there for a hundred years. The ultimate foundation for a true cottage garden.
New bricks look too sterile, yet sourcing antique materials delivers a surprisingly premium look immediately. Applying a breathable matte penetrating brick sealer protects the delicate aged faces from winter frost damage.
Salvaged bricks fetch a premium, usually $7–$15 per square foot. It is an investment that defines the entire landscape.
- Key Materials: Century-old reclaimed brick
- Vibe / Style: Authentic aged heritage
- Difficulty: Heavy manual labor
- Budget Breakdown: Antique Bricks: $400 | Sealer: $50.
- Creator’s Tip: Inspect reclaimed batches closely; avoid overly crumbly bricks that won’t survive freezing weather.
- Smart Sourcing: breathable exterior masonry sealant (gallon) and heavy-duty knee protection pads.
Intimate Seating Arrangements
Furniture placement defines how an english garden patio functions for relaxation and entertaining. Strategic positioning maximizes views of rose arches while creating comfortable conversation zones.
13. Bistro Set Beneath Rose Arch
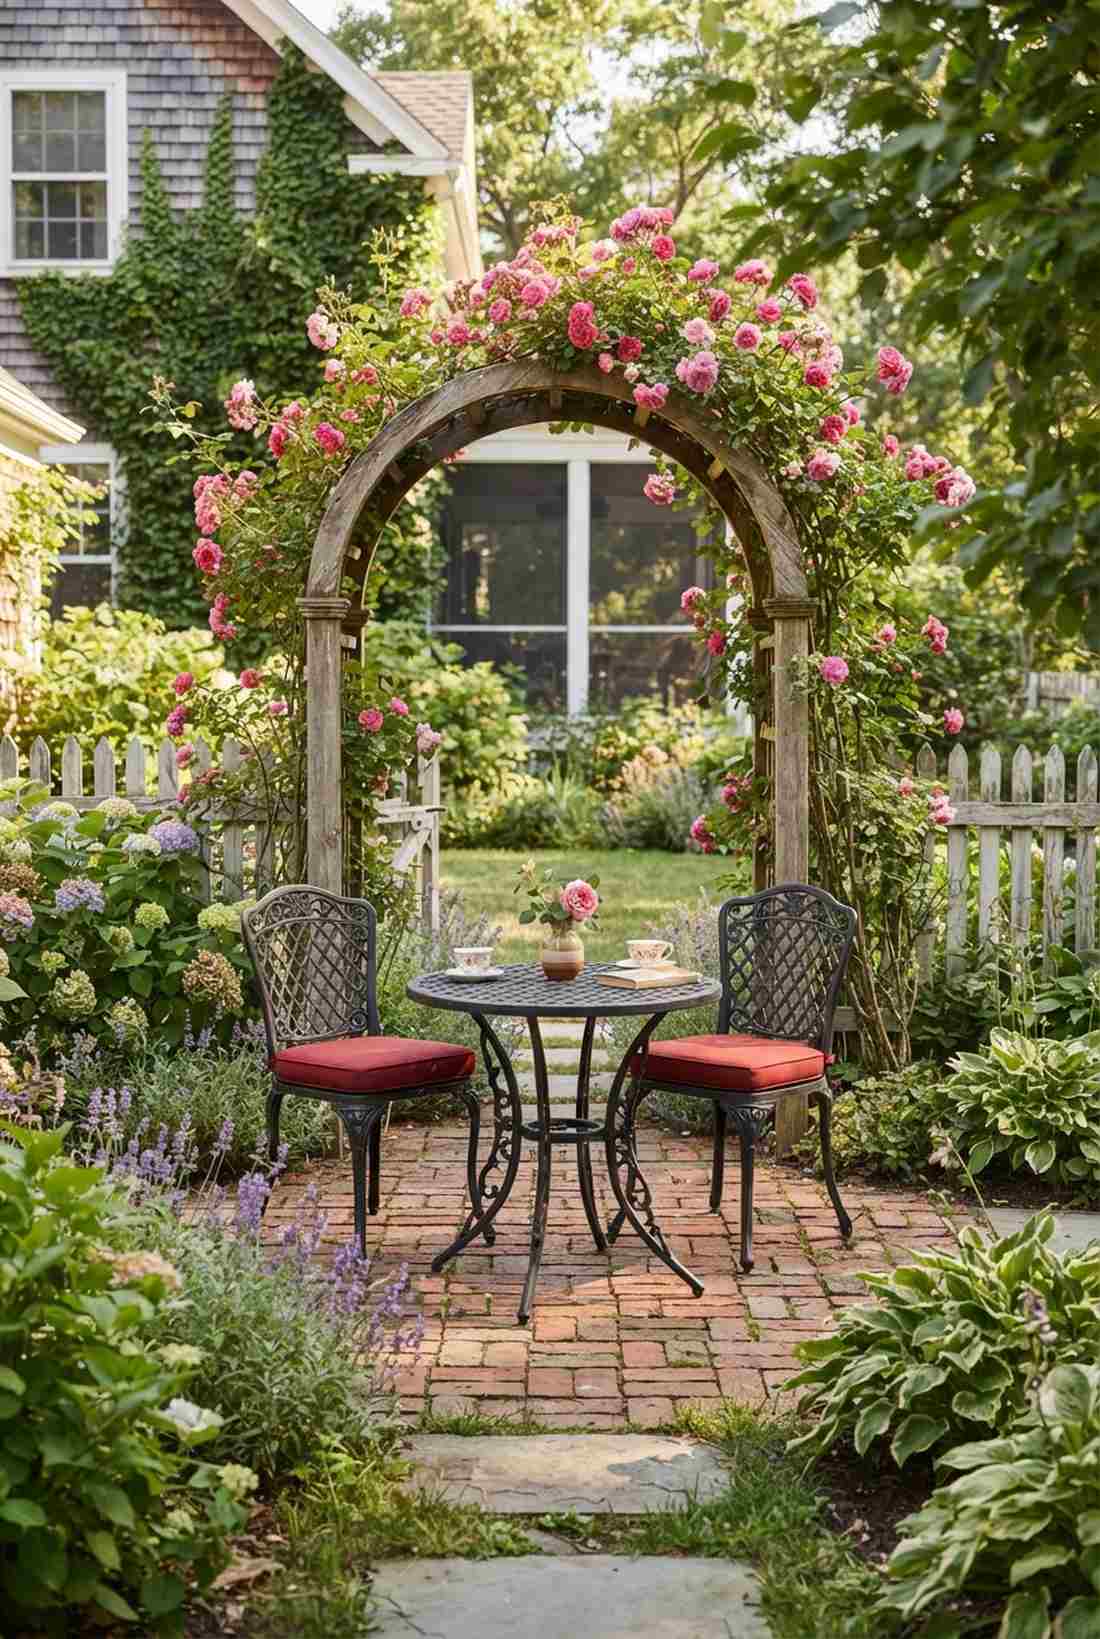

A tiny wrought iron table setup feels like a secret Parisian cafe hidden in the vines. Outstanding for tight side-yard courtyards.
Massive furniture suffocates small spaces, but this minimalist approach looks far more expensive than it is. Investing in fade-resistant outdoor cushions ensures the setup pops against the red brick floor year-round.
You can create this intimate escape for $150–$300 total. Save this to your small patio styling board.
- Key Materials: Cast aluminum/iron bistro set
- Vibe / Style: Romantic intimate cafe
- Difficulty: Zero installation
- Budget Breakdown: Bistro Set: $150 | Cushions: $40.
- Creator’s Tip: Ensure the arch is wide enough (at least 5 feet) so roses don’t snag your clothes while sitting.
- Smart Sourcing: rust-proof cast aluminum bistro sets and UV-resistant outdoor patio cushions.
14. Sofa and Chairs Conversation Grouping
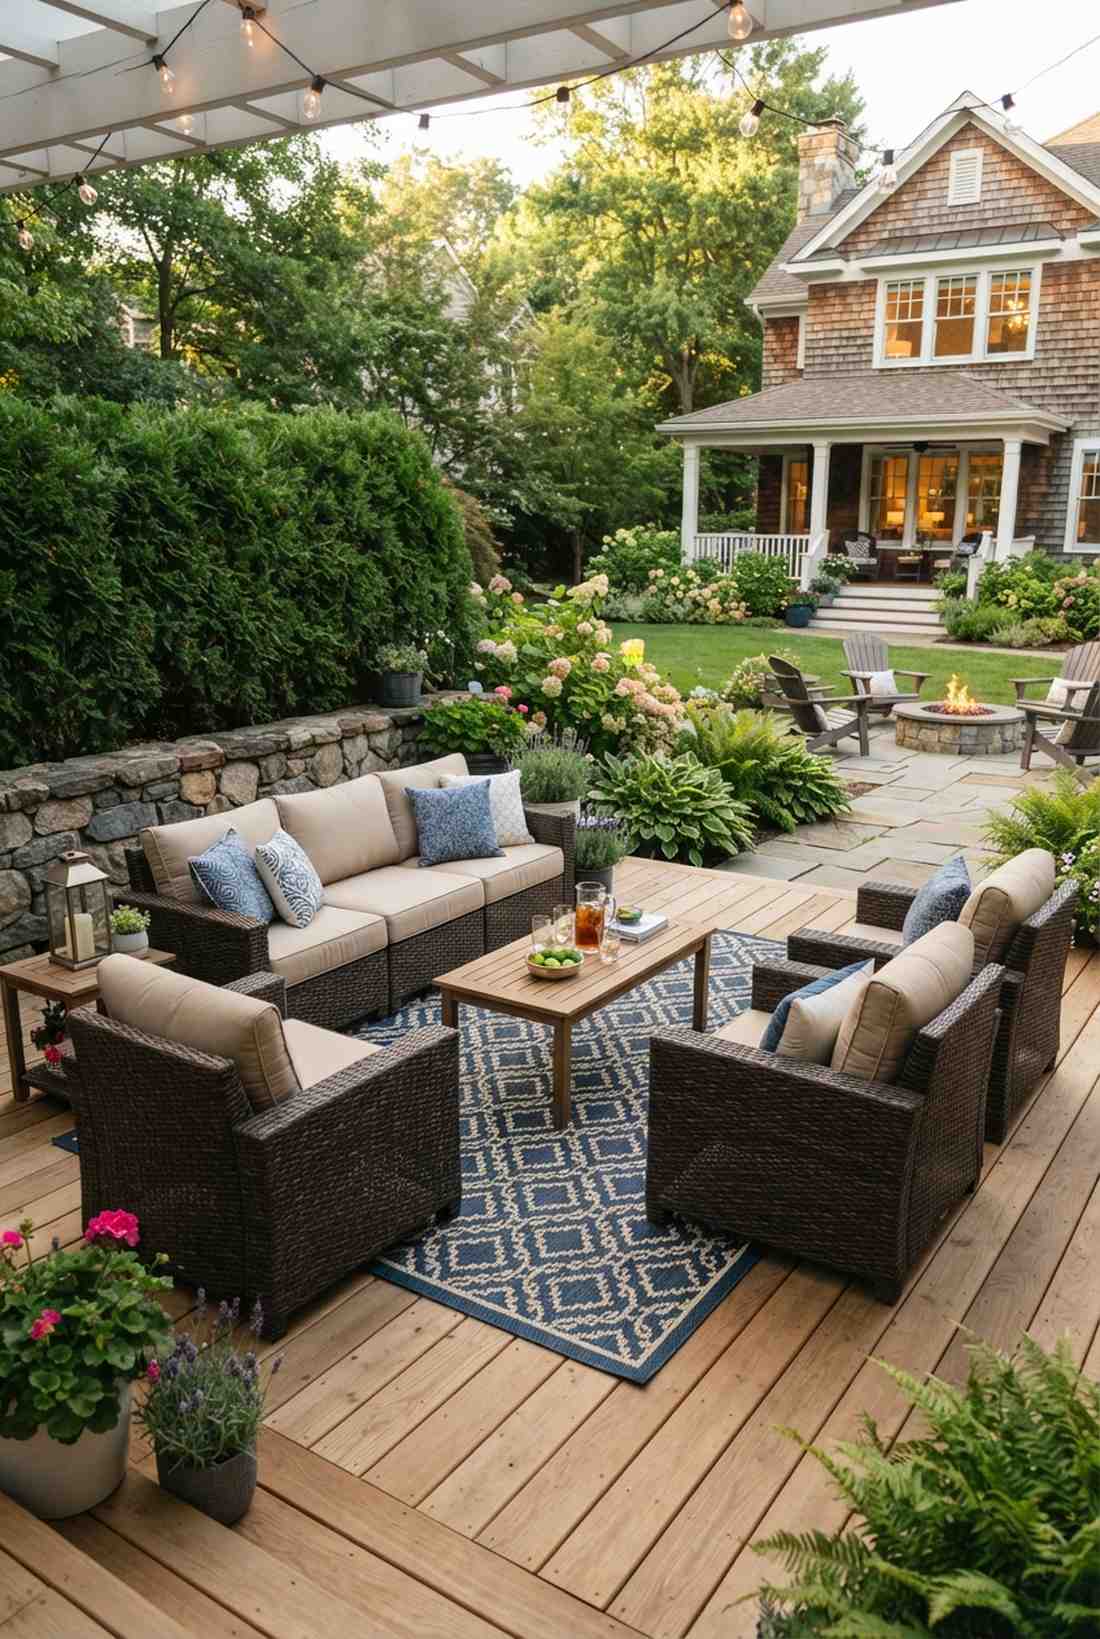
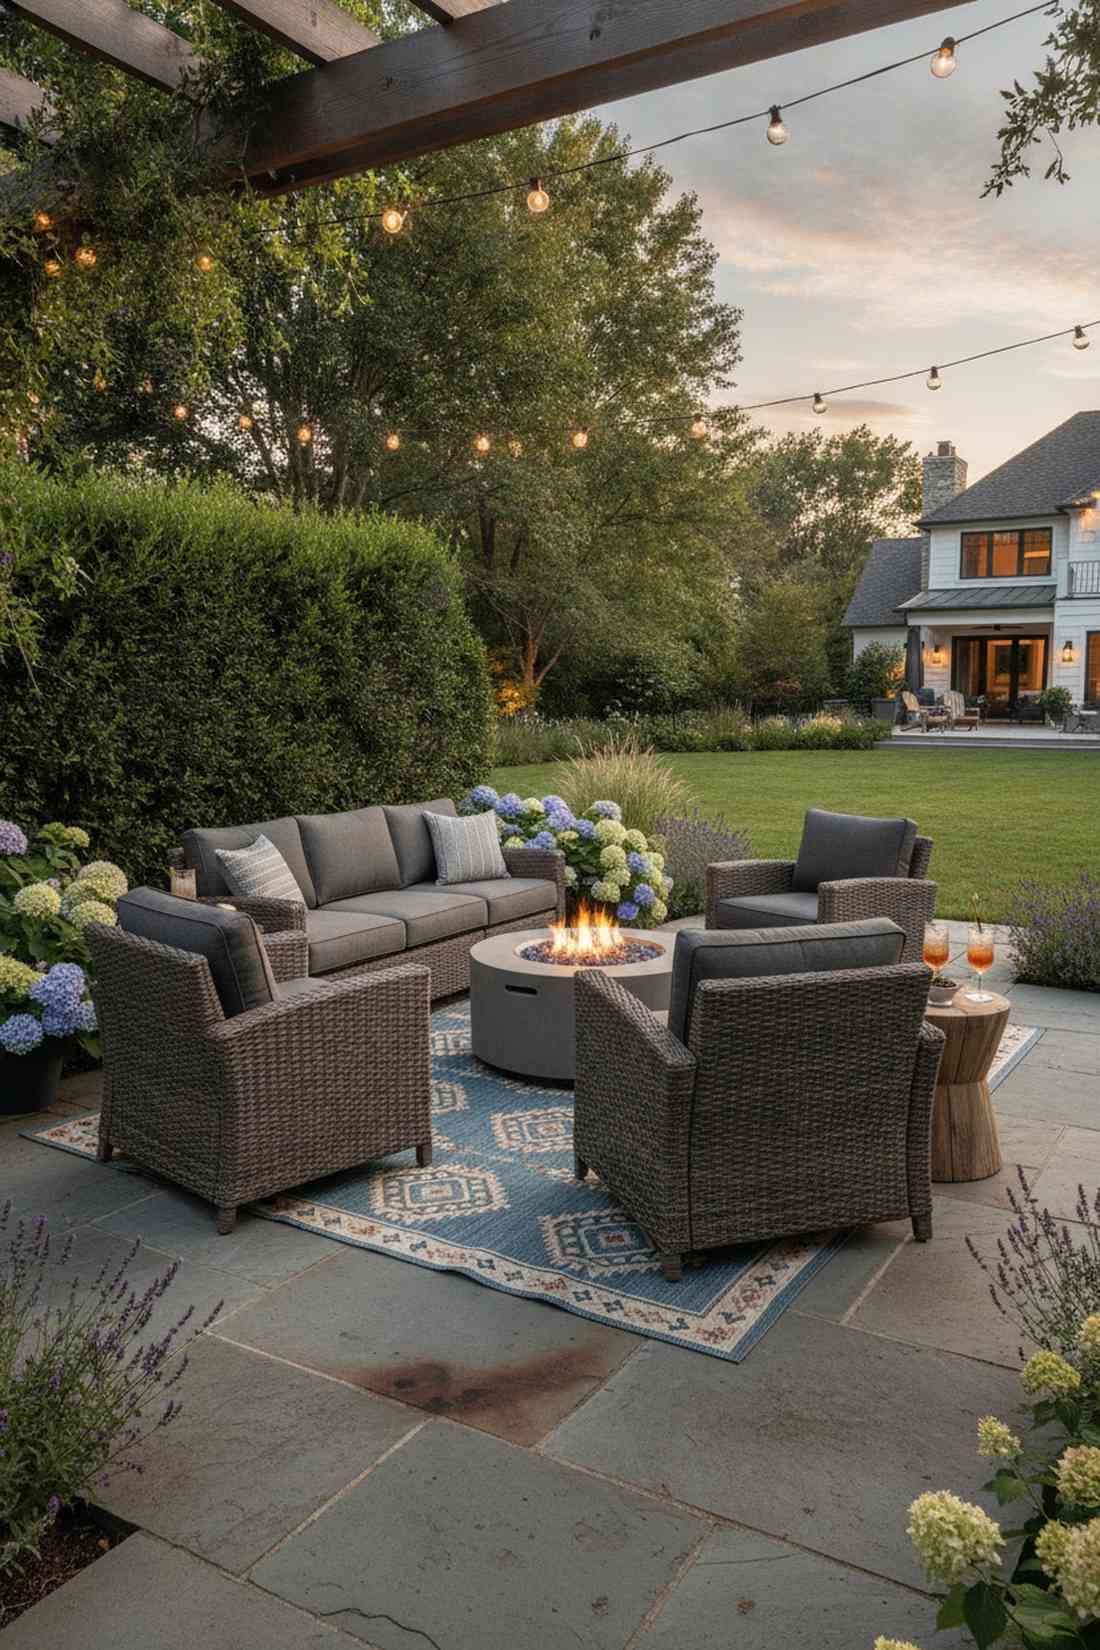
An outdoor living room layout feels like a luxurious extension of your home’s interior. Incredible for hosting evening cocktails near the garden.
Randomly scattered chairs feel cheap, but a cohesive face-to-face grouping gives a designer-level finish. Laying down a waterproof woven outdoor rug immediately anchors the space and hides stained patio sections.
A quality seating group runs $400–$800. Highly recommended for turning a patio into a true living space.
- Key Materials: Weatherproof sofa, matching chairs
- Vibe / Style: Luxurious outdoor lounge
- Difficulty: Simple arrangement
- Budget Breakdown: Furniture Set: $600 | Rug: $80.
- Creator’s Tip: Keep the sofa back facing a wall or hedge to make the area feel mentally secure and cozy.
- Smart Sourcing: waterproof geometric outdoor rugs and modular resin wicker patio sets.
If you think your space is too small, this next furniture arrangement will completely change your mind…
15. Dual Loveseat Flexible Layout
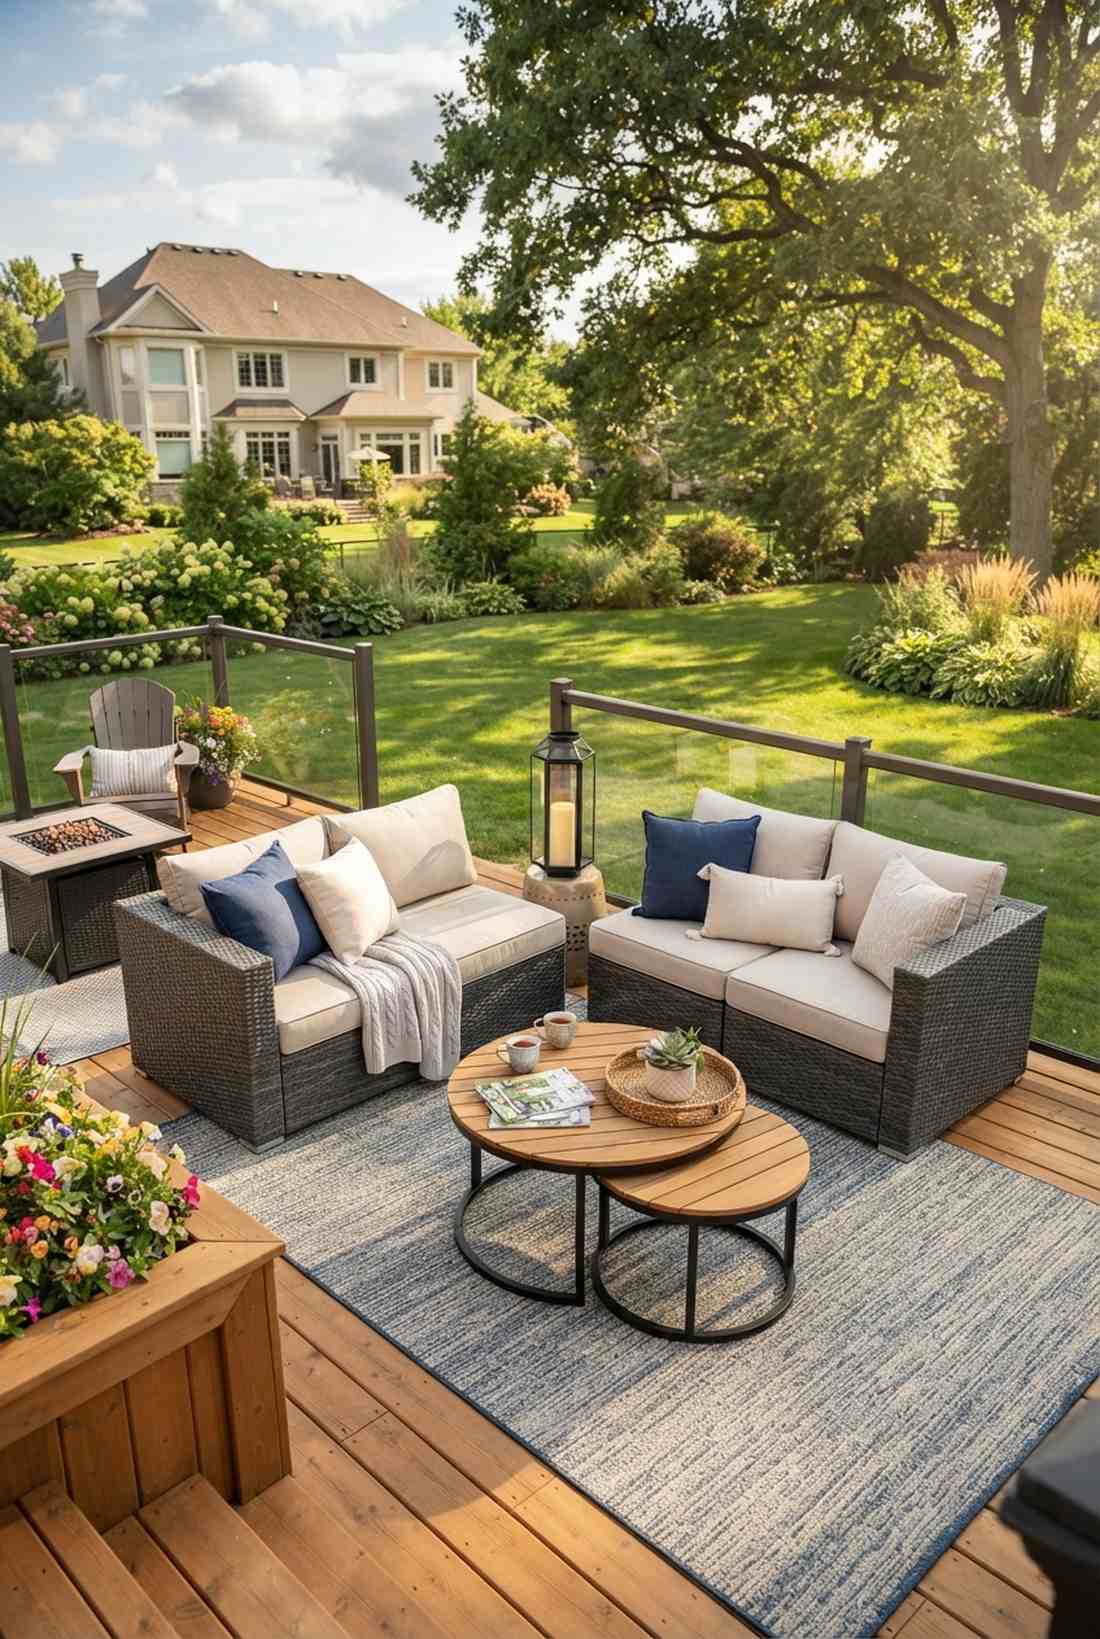
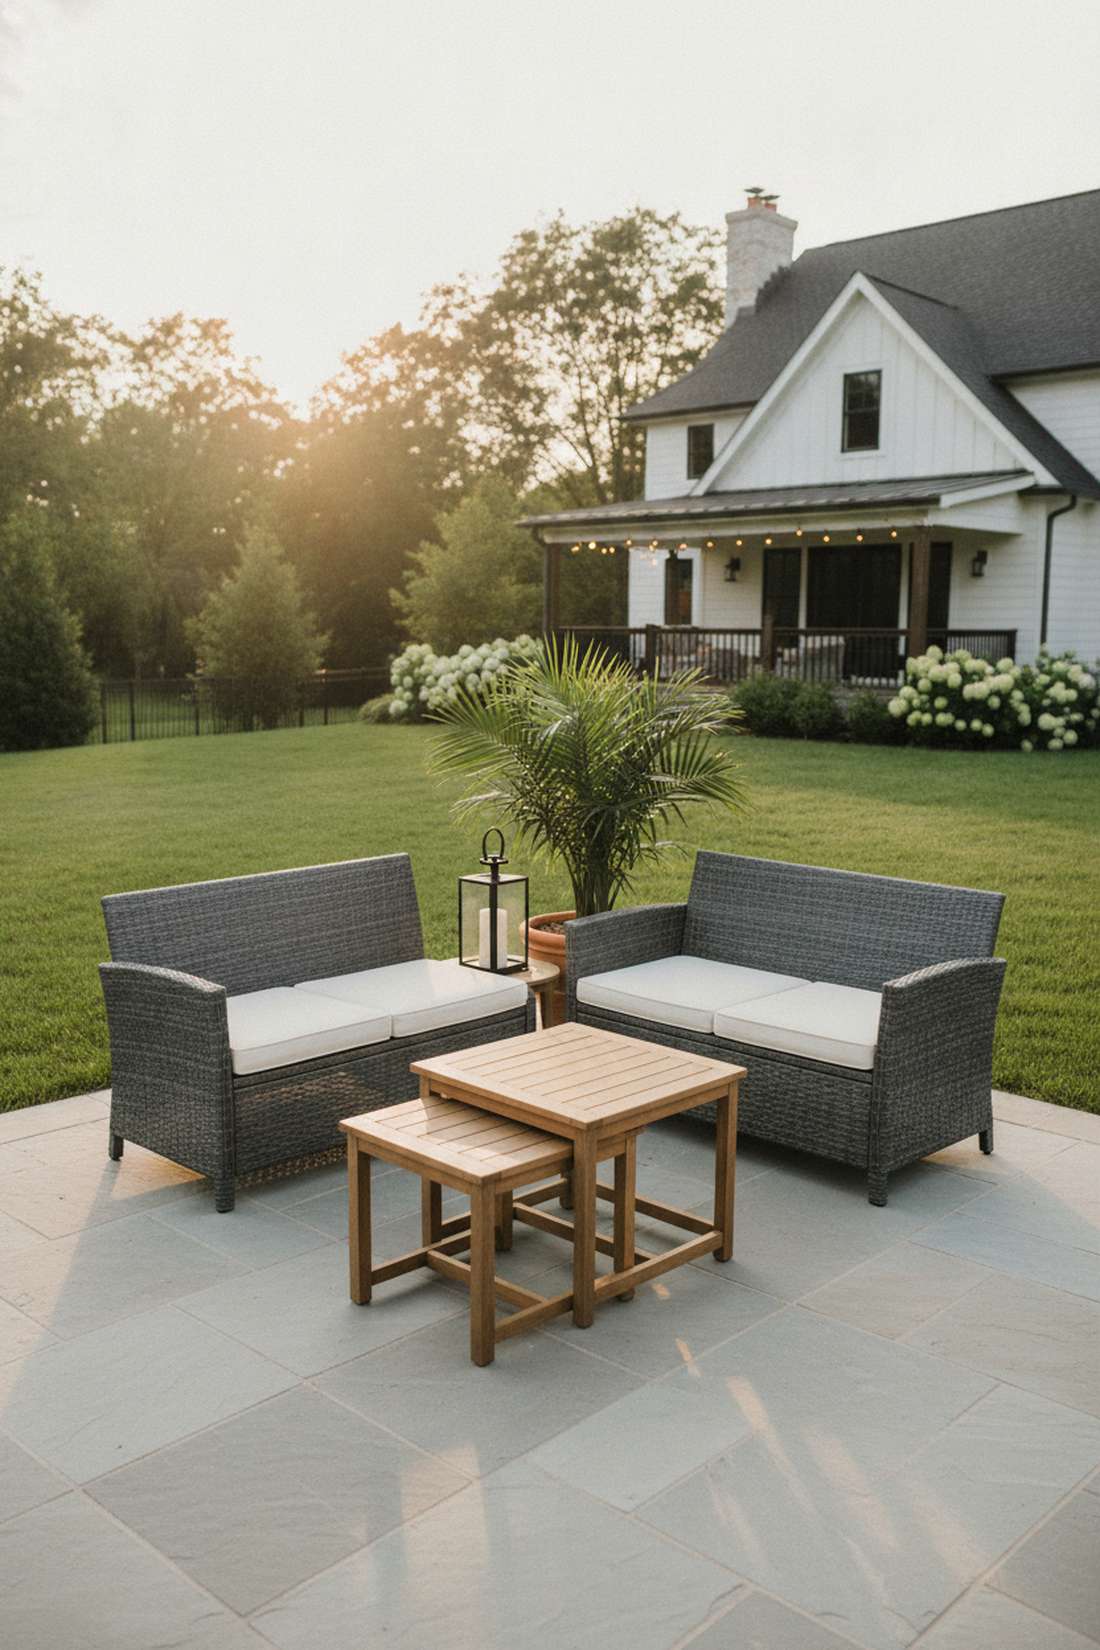
A corner loveseat configuration feels exceptionally cozy and socially inviting. The smartest hack for square patios with limited depth.
Long sofas block walking paths, yet this right-angle trick creates an instant high-end estate feel while maximizing flow. Pair it with a weather-resistant nesting coffee table that tucks away when you need extra legroom.
This layout costs around $300–$600 depending on the brand. Pin this if you love hosting but hate feeling cramped.
- Key Materials: Two compact loveseats
- Vibe / Style: Smart flexible hosting
- Difficulty: Easy styling
- Budget Breakdown: Loveseats: $400 | Table: $100.
- Creator’s Tip: Leave a 2-foot gap at the corner intersection to place a tall potted plant or lantern.
- Smart Sourcing: compact outdoor loveseat sets and space-saving nesting patio tables.
16. Bench Seating Along Wall
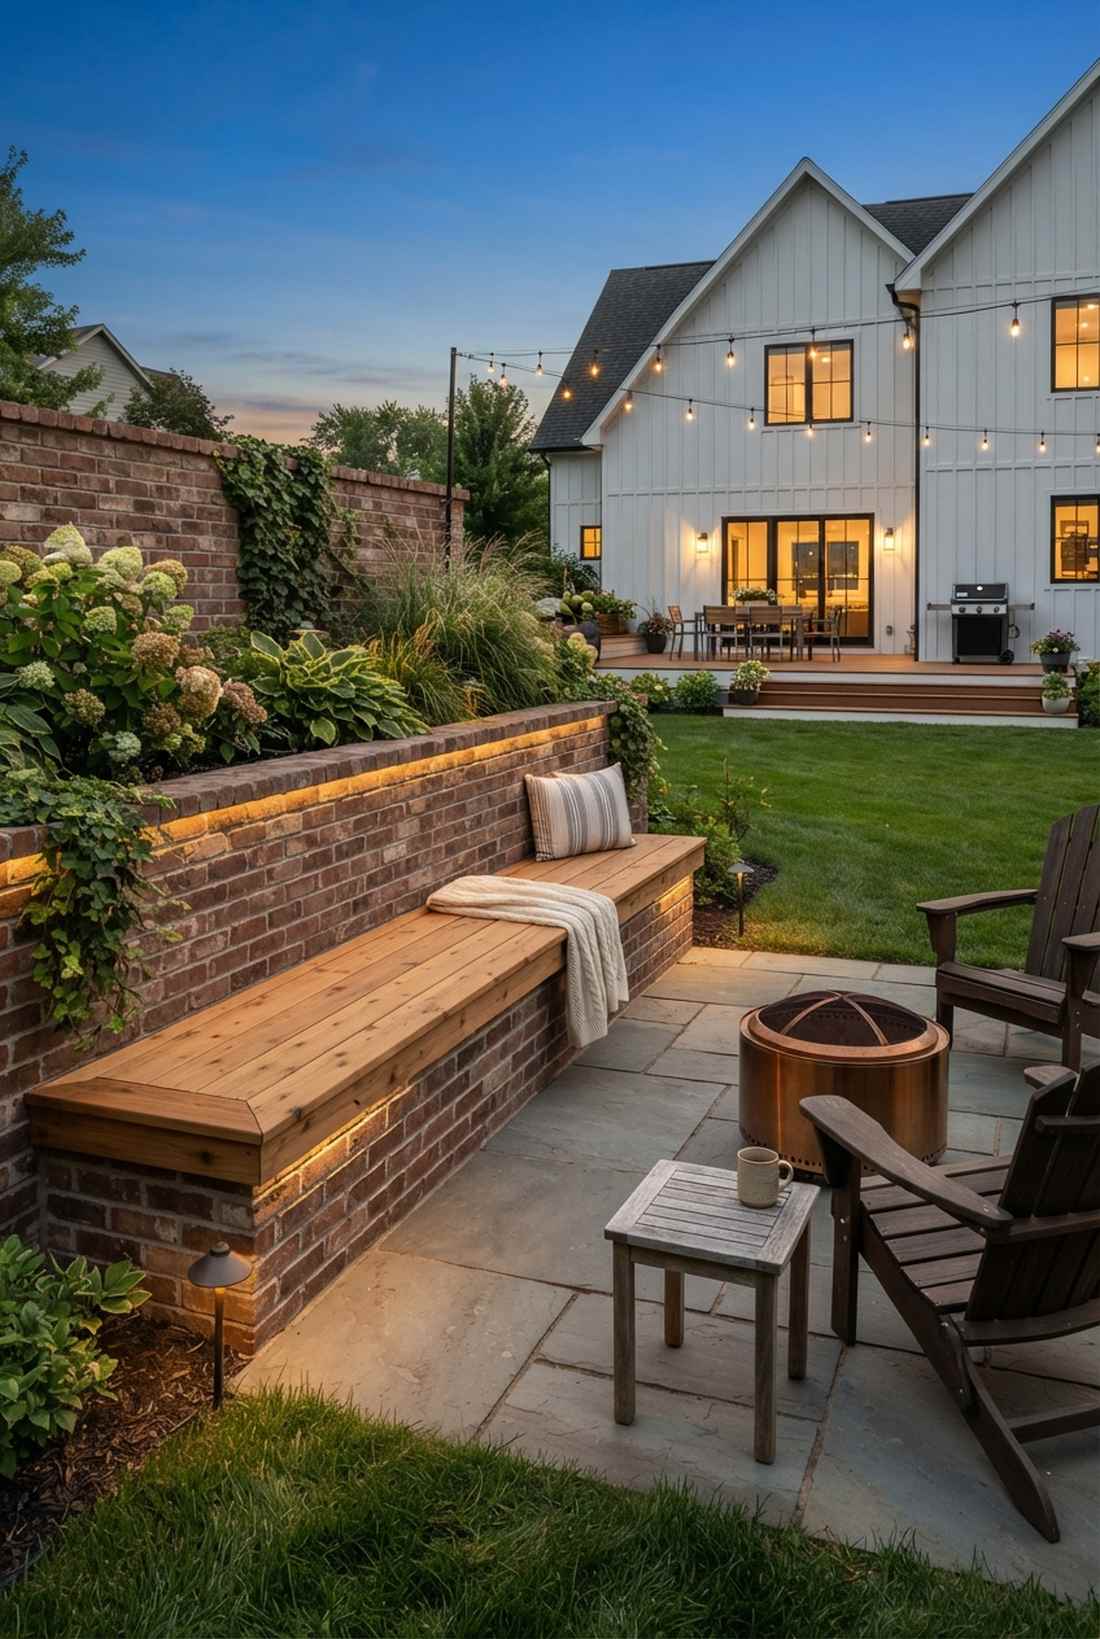
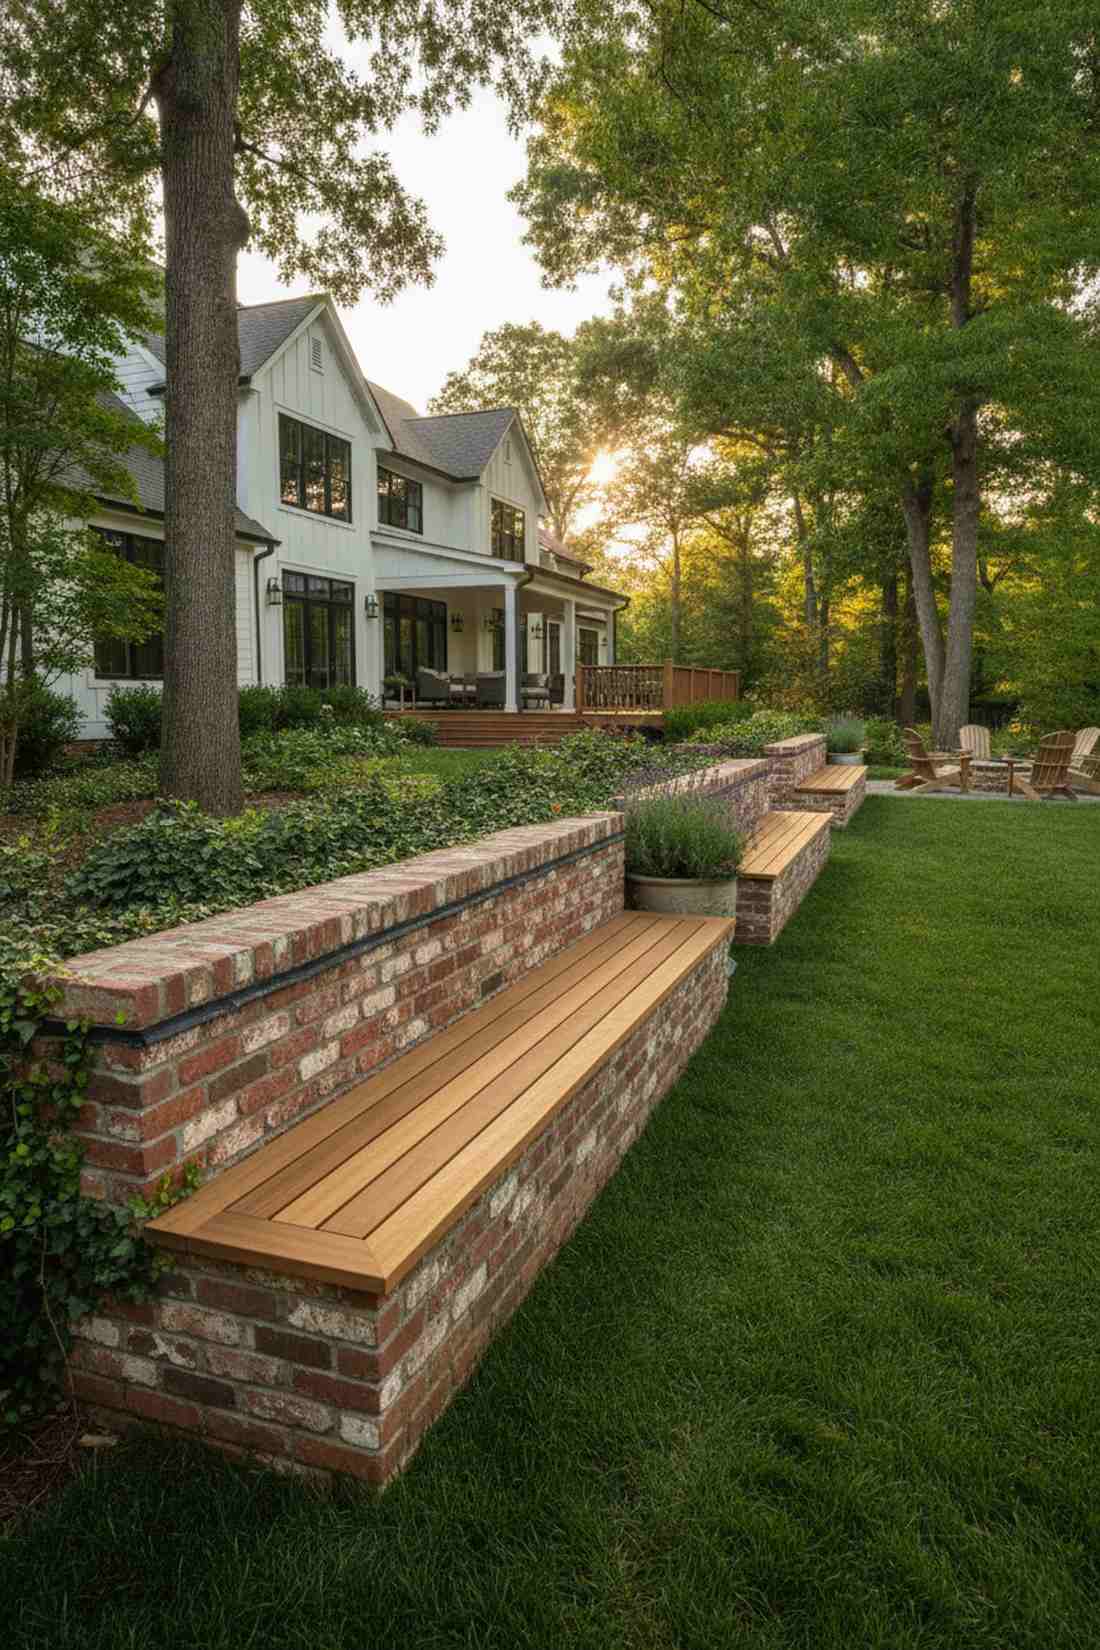
A built-in garden wall bench feels like a permanent architectural masterpiece. Flawless for pushing seating to the perimeter of a busy yard.
Cluttered chairs blow away in storms, but massive built-ins look incredibly expensive and indestructible. Utilizing marine-grade structural adhesive alongside masonry bolts ensures the wooden top never warps or detaches.
Materials for a custom bench average $150–$300. It’s a highly functional feature that saves massive amounts of space.
- Key Materials: Brick base, treated wood top
- Vibe / Style: Sleek architectural utility
- Difficulty: Intermediate construction
- Budget Breakdown: Blocks/Brick: $120 | Timber Top: $80.
- Creator’s Tip: Build the seat exactly 18 inches high for optimal ergonomic comfort without needing thick cushions.
- Smart Sourcing: heavy-duty masonry wall anchors and marine-grade construction adhesive (multi-pack).
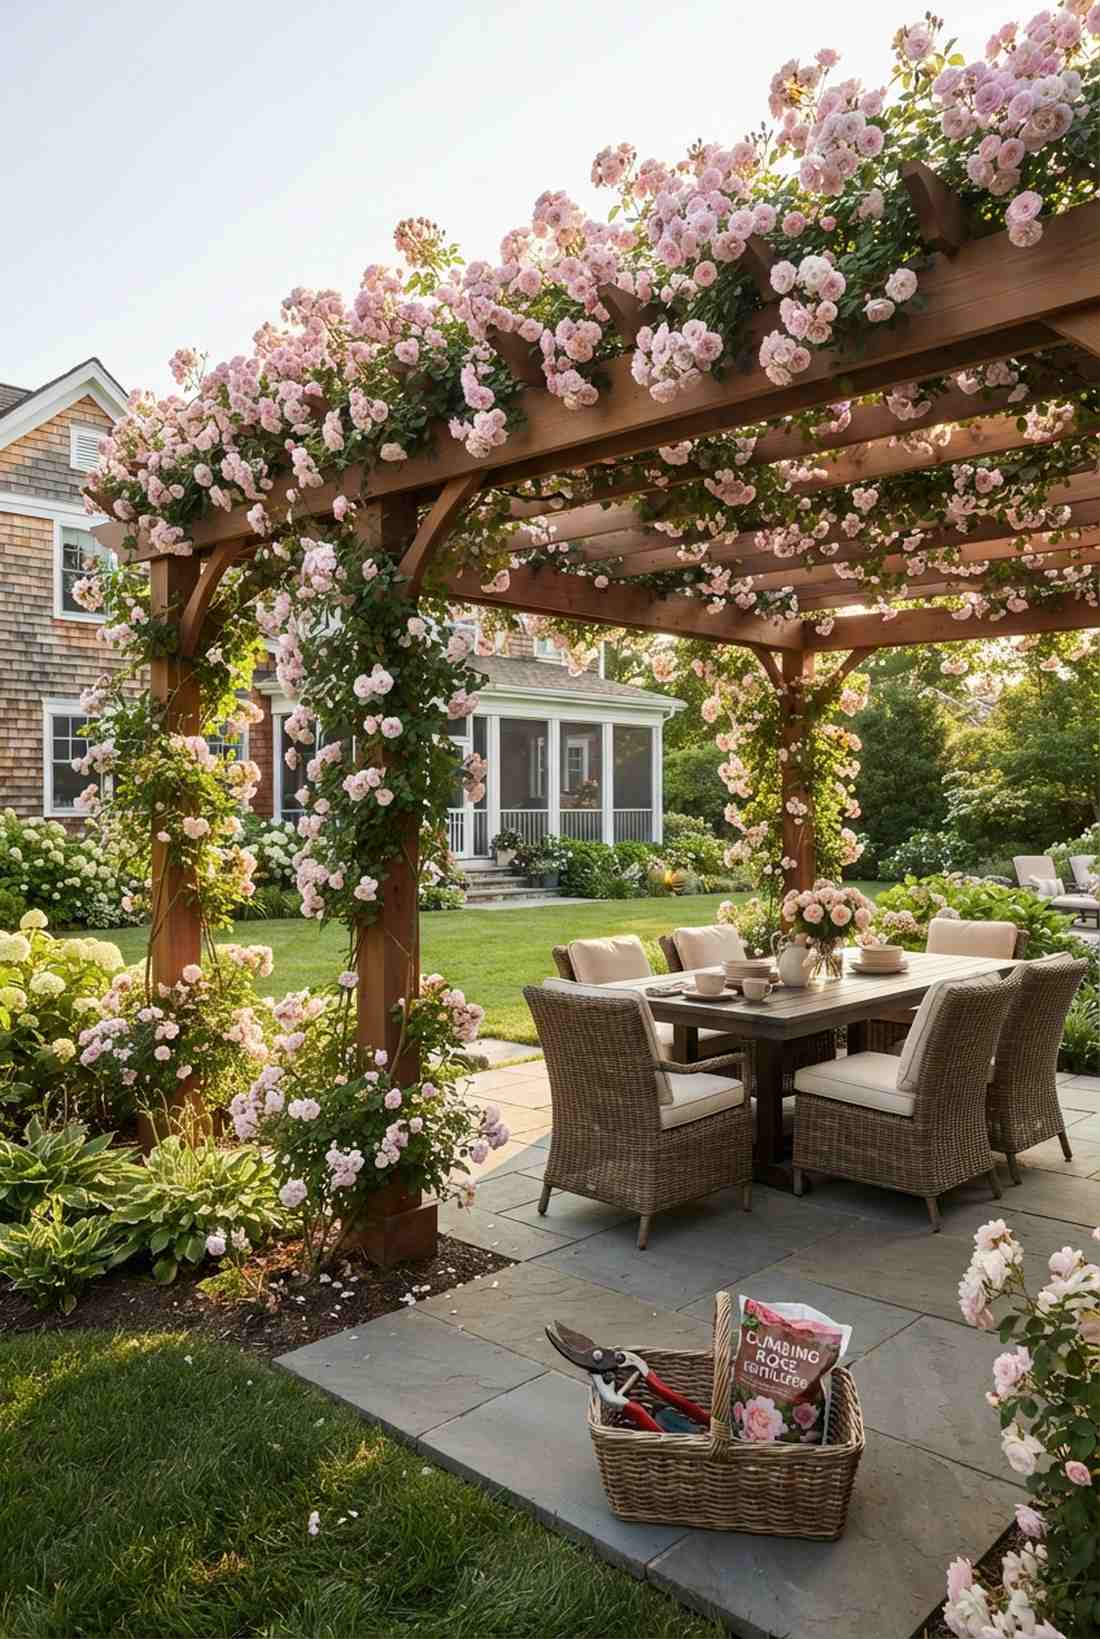
17. Dining Table Under Pergola
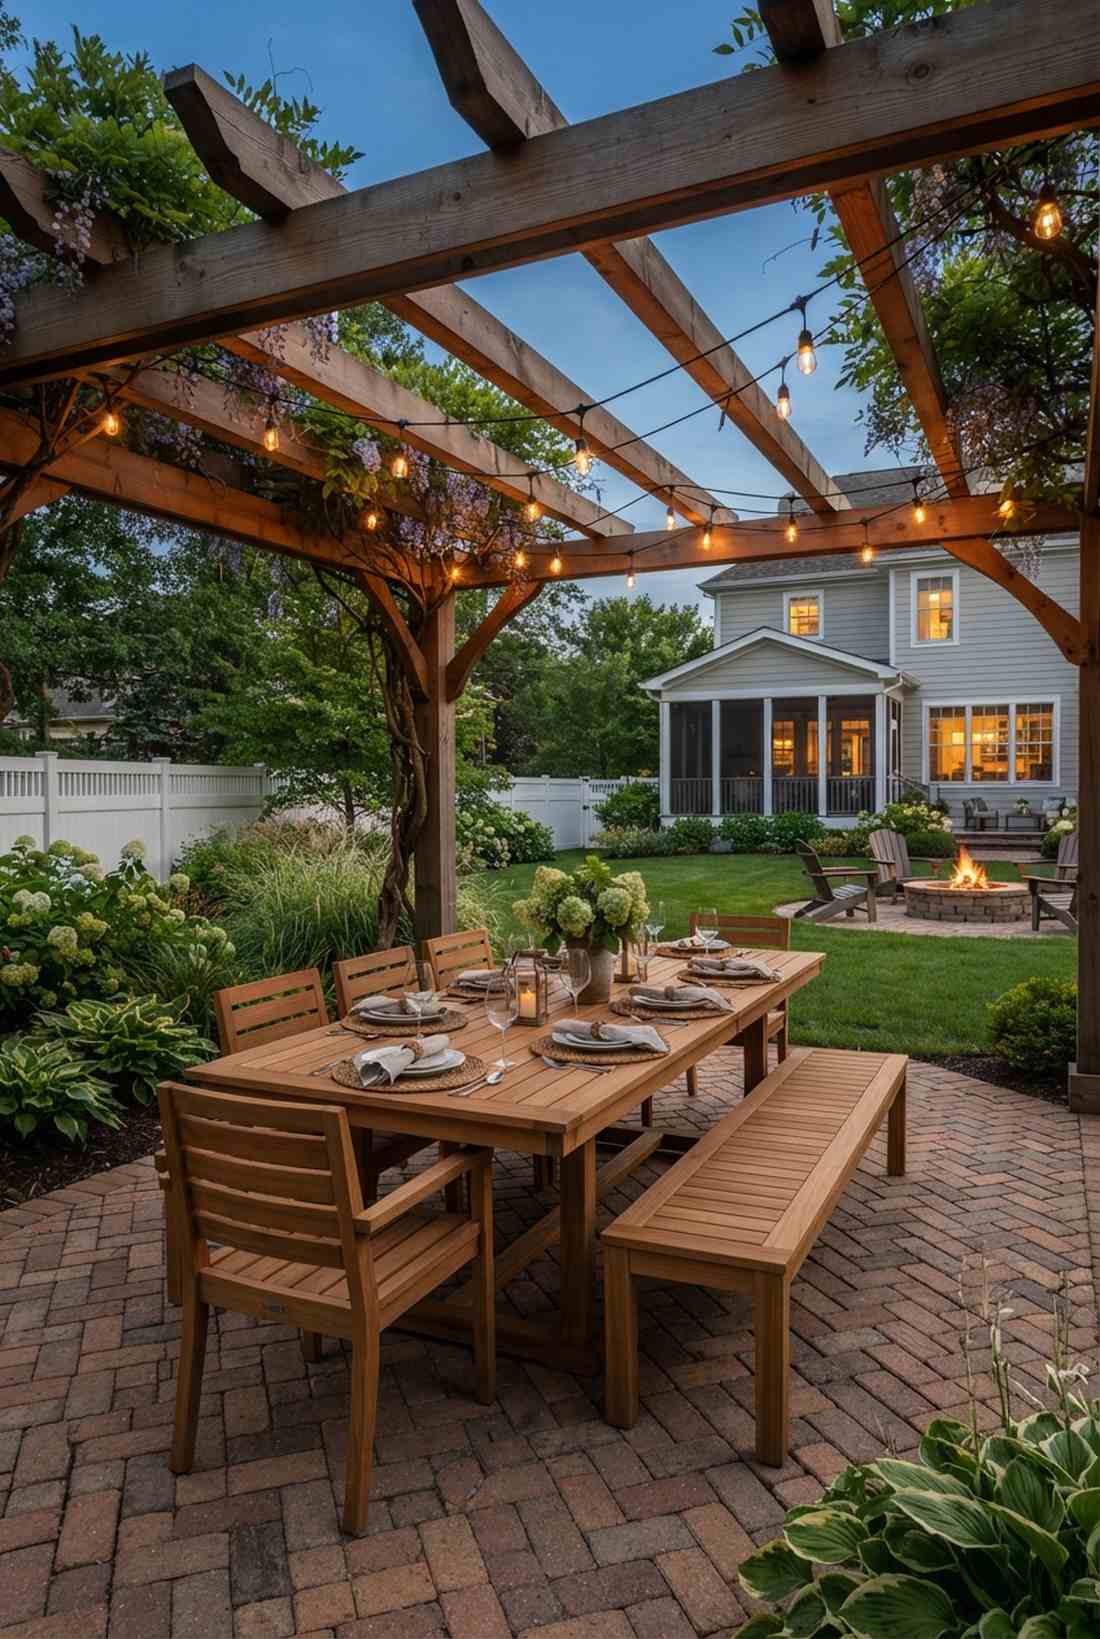
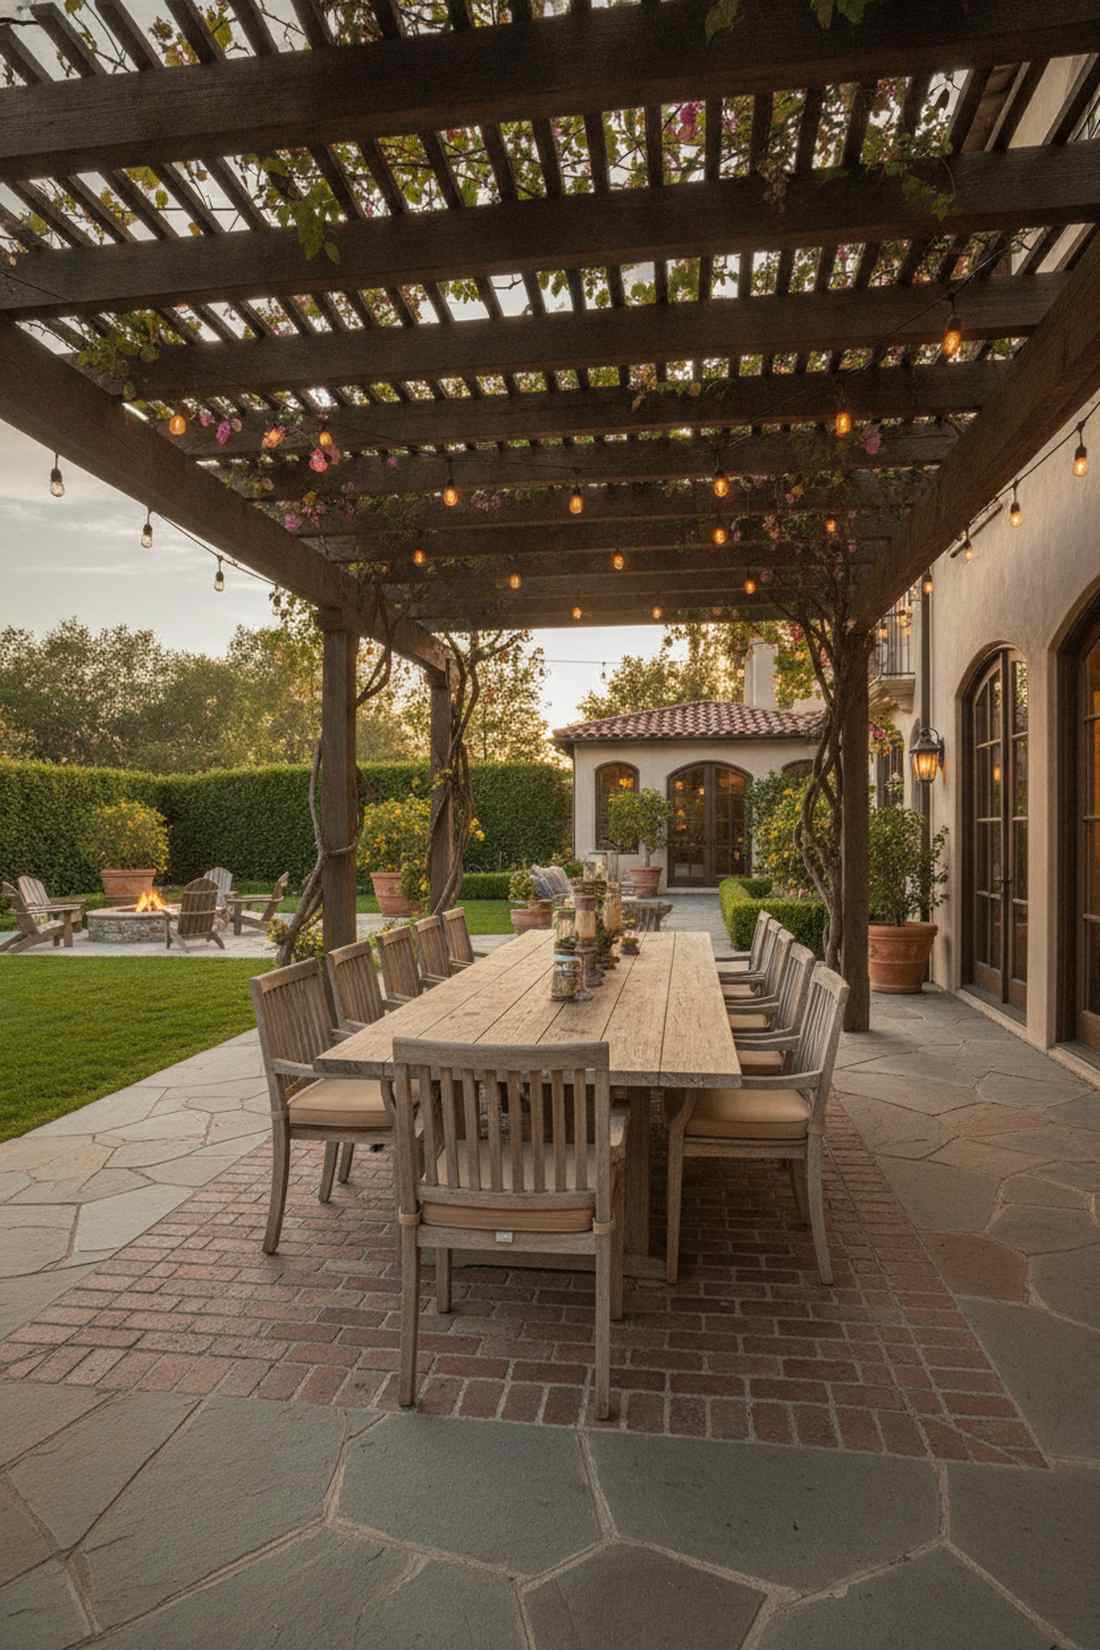
A shaded alfresco dining zone feels like an exclusive Mediterranean villa experience. The ultimate centerpiece for large family gatherings.
Exposed tables are miserable in August, yet this overhead canopy delivers a surprisingly premium look and practical shade. Rigging up commercial outdoor string lights above the table transforms the space completely at dusk.
A solid table and pergola overhead ranges from $500–$1200. Save this idea for creating a magical dinner party setting.
- Key Materials: Wooden dining set, overhead structure
- Vibe / Style: Grand alfresco dining
- Difficulty: Heavy furniture placement
- Budget Breakdown: Table Set: $500 | Lighting: $60.
- Creator’s Tip: Ensure table legs sit entirely on a flat section of brick, avoiding uneven mortar joints.
- Smart Sourcing: shatterproof outdoor string lighting kits and weatherproof teak oil sealants.
18. Swing Bench Near Rose Pillar
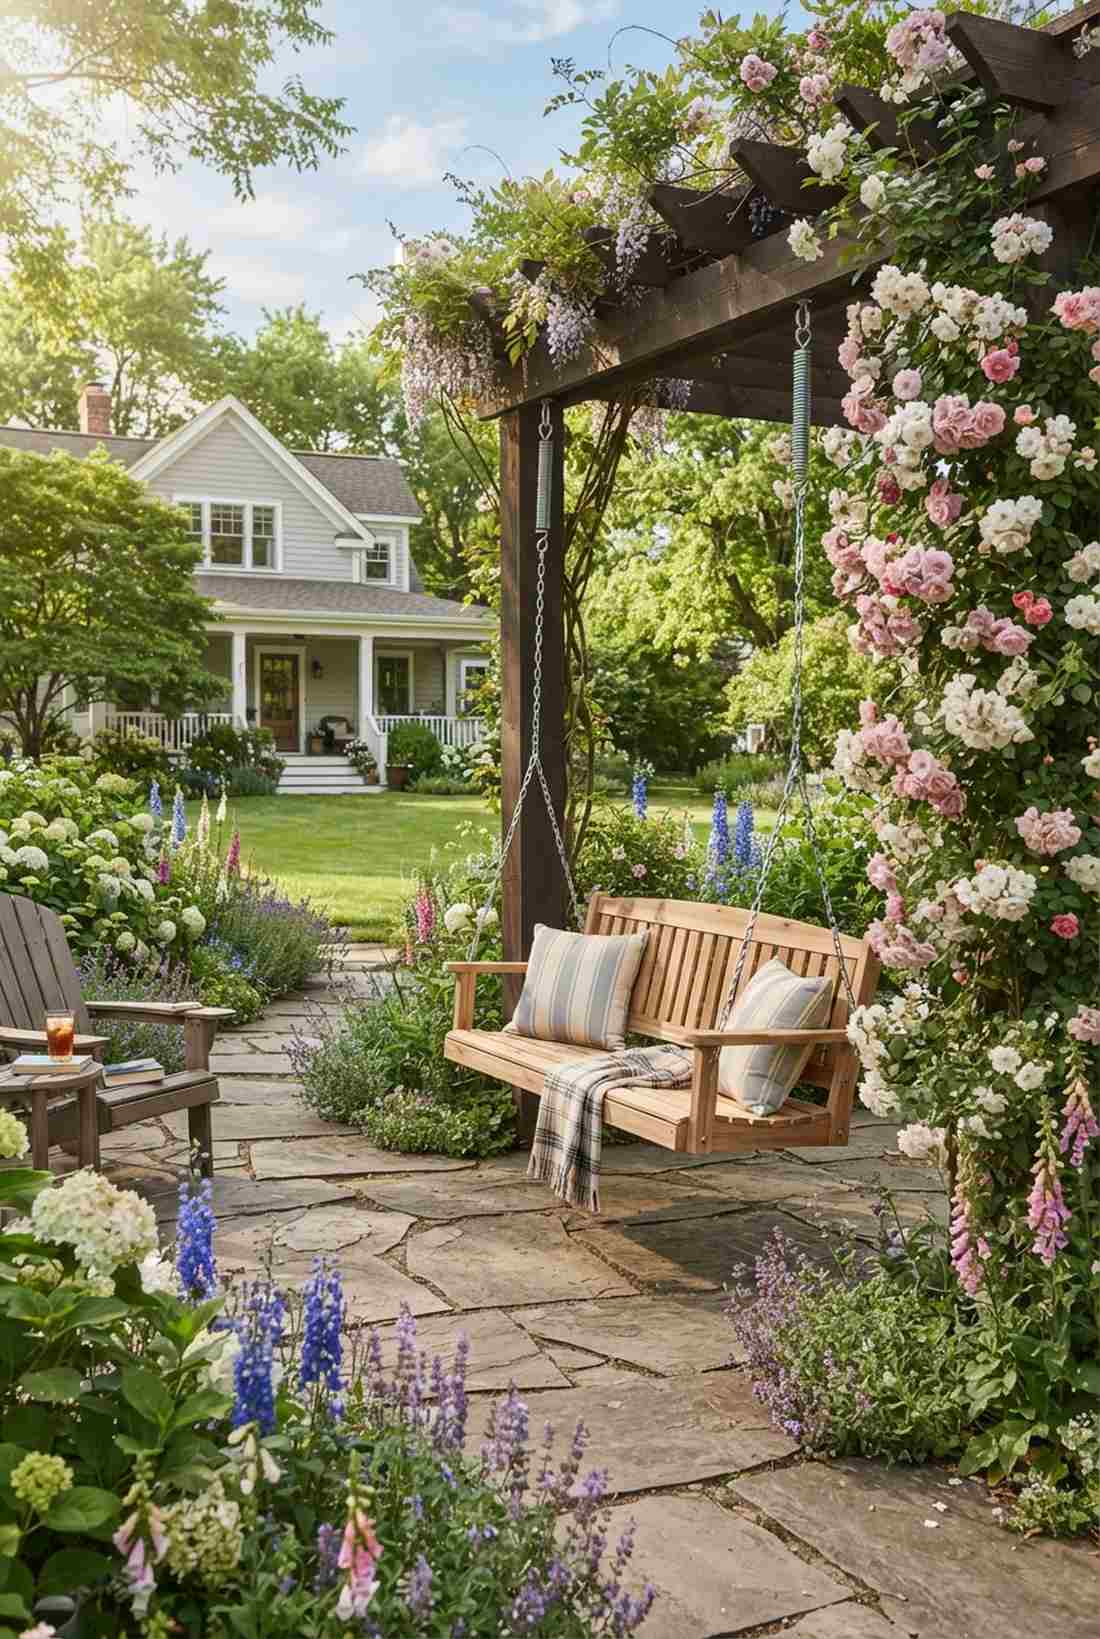
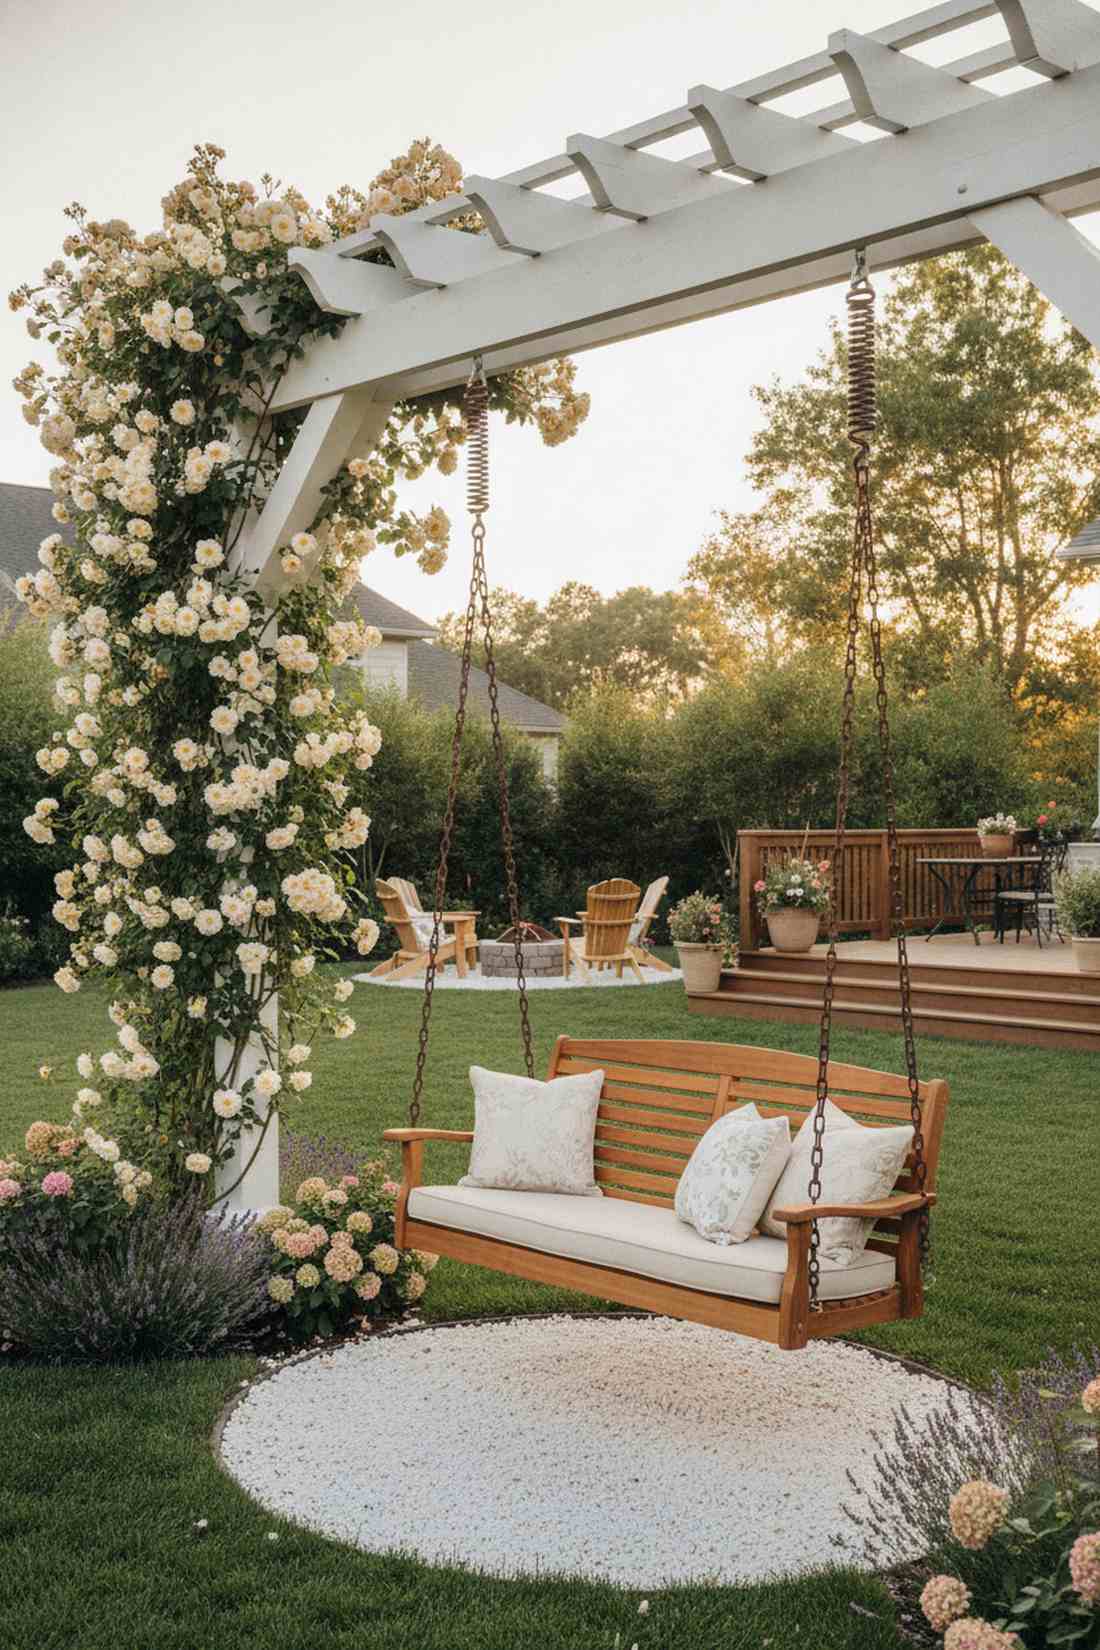
A hanging wooden patio swing feels incredibly whimsical and stress-relieving. Incredible for adding motion and fun to a static garden.
Basic benches are a dime a dozen, but a suspended seat gives a designer-level finish that guests fight over. Using heavy-duty suspension springs softens the swinging motion and protects the overhead beams from jerking.
A sturdy swing setup costs roughly $150–$350. Highly recommended for creating a playful yet elegant focal point.
- Key Materials: Hanging porch swing, robust chains
- Vibe / Style: Relaxed whimsical cottage
- Difficulty: Careful structural mounting
- Budget Breakdown: Swing: $180 | Hardware: $40.
- Creator’s Tip: Mount the chains slightly wider at the top than at the swing base to prevent side-to-side swaying.
- Smart Sourcing: heavy-duty porch swing suspension kits and pre-assembled cedar swing benches.
Stop overpaying for garden decorators and steal this next vertical trick immediately…
Pergola Walkway Features
Extended pergola structures transform pathways into spectacular covered promenades when trained with climbing roses. These features create architectural drama while connecting different patio zones.
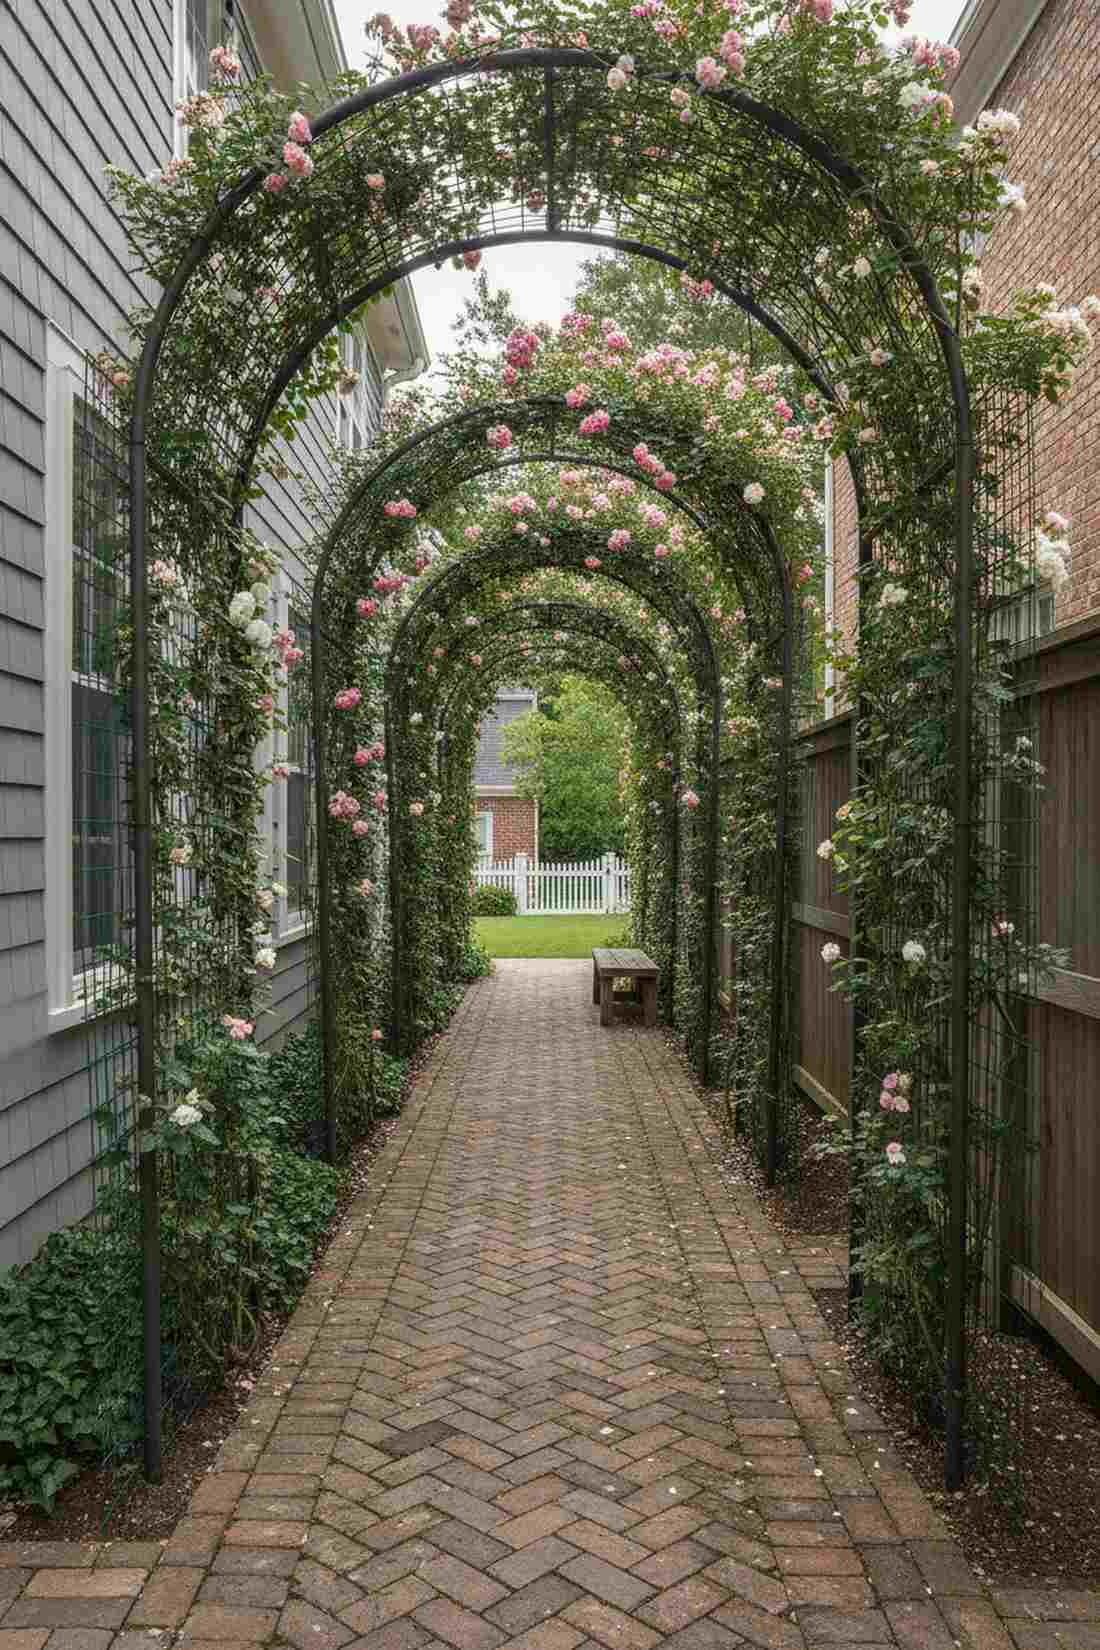
19. Rose Covered Pergola Corridor
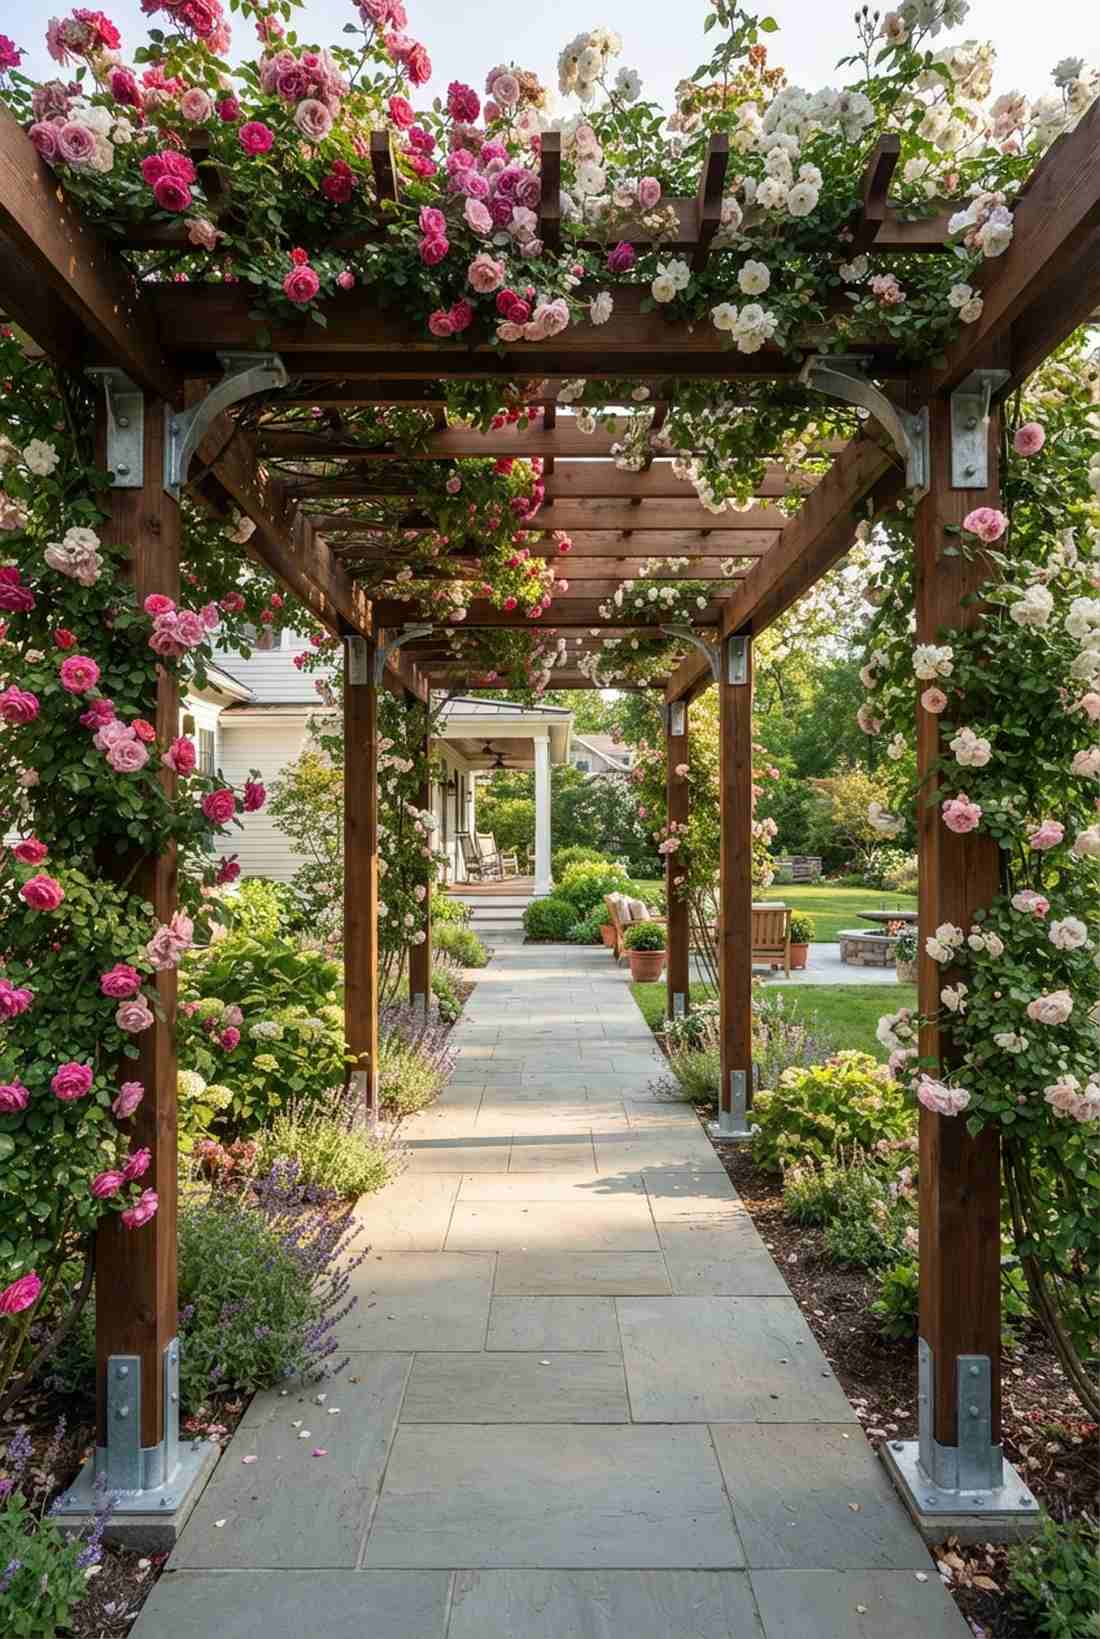
A floral covered walkway feels like wandering through a royal botanical garden. Perfect for long, straight paths connecting the house to a rear patio.
Leaving walkways open is a wasted opportunity; this overhead tunnel creates an instant high-end estate feel. Bolting the posts with galvanized steel pergola brackets ensures the massive weight of mature roses won’t cause leaning.
Constructing a tunnel runs $400–$800 depending on length. Pin this to your dream garden architecture board.
- Key Materials: Multiple pergola frames, deep-rooted roses
- Vibe / Style: Majestic floral tunnel
- Difficulty: Advanced building
- Budget Breakdown: Lumber/Brackets: $500 | Plants: $120.
- Creator’s Tip: Train the roses strictly to the outside of the posts so the interior walking space stays clear of thorns.
- Smart Sourcing: heavy-duty steel pergola bracket kits and commercial-grade post base anchors.
20. Pergola With Repeating Climbers
A monochromatic rose canopy feels beautifully rhythmic and intentionally curated. Excellent for tying a messy, eclectic garden together.
Mismatched plants look chaotic, but repeating one specific rose variety looks incredibly expensive and tailored. Utilizing a slow-release climbing plant fertilizer ensures every pillar blooms at the exact same time for maximum impact.
Sourcing matching mature roses costs $100–$250. It’s a landscaping secret that guarantees a cohesive, striking visual.
- Key Materials: 4-6 identical rose bushes
- Vibe / Style: Curated designer rhythm
- Difficulty: Requires diligent pruning
- Budget Breakdown: Roses (Bulk): $150 | Fertilizer: $25.
- Creator’s Tip: Choose repeat-flowering climbers like ‘New Dawn’ to keep the pergola colorful all summer long.
- Smart Sourcing: slow-release climbing rose fertilizer (bulk) and heavy-duty pruning shear sets.
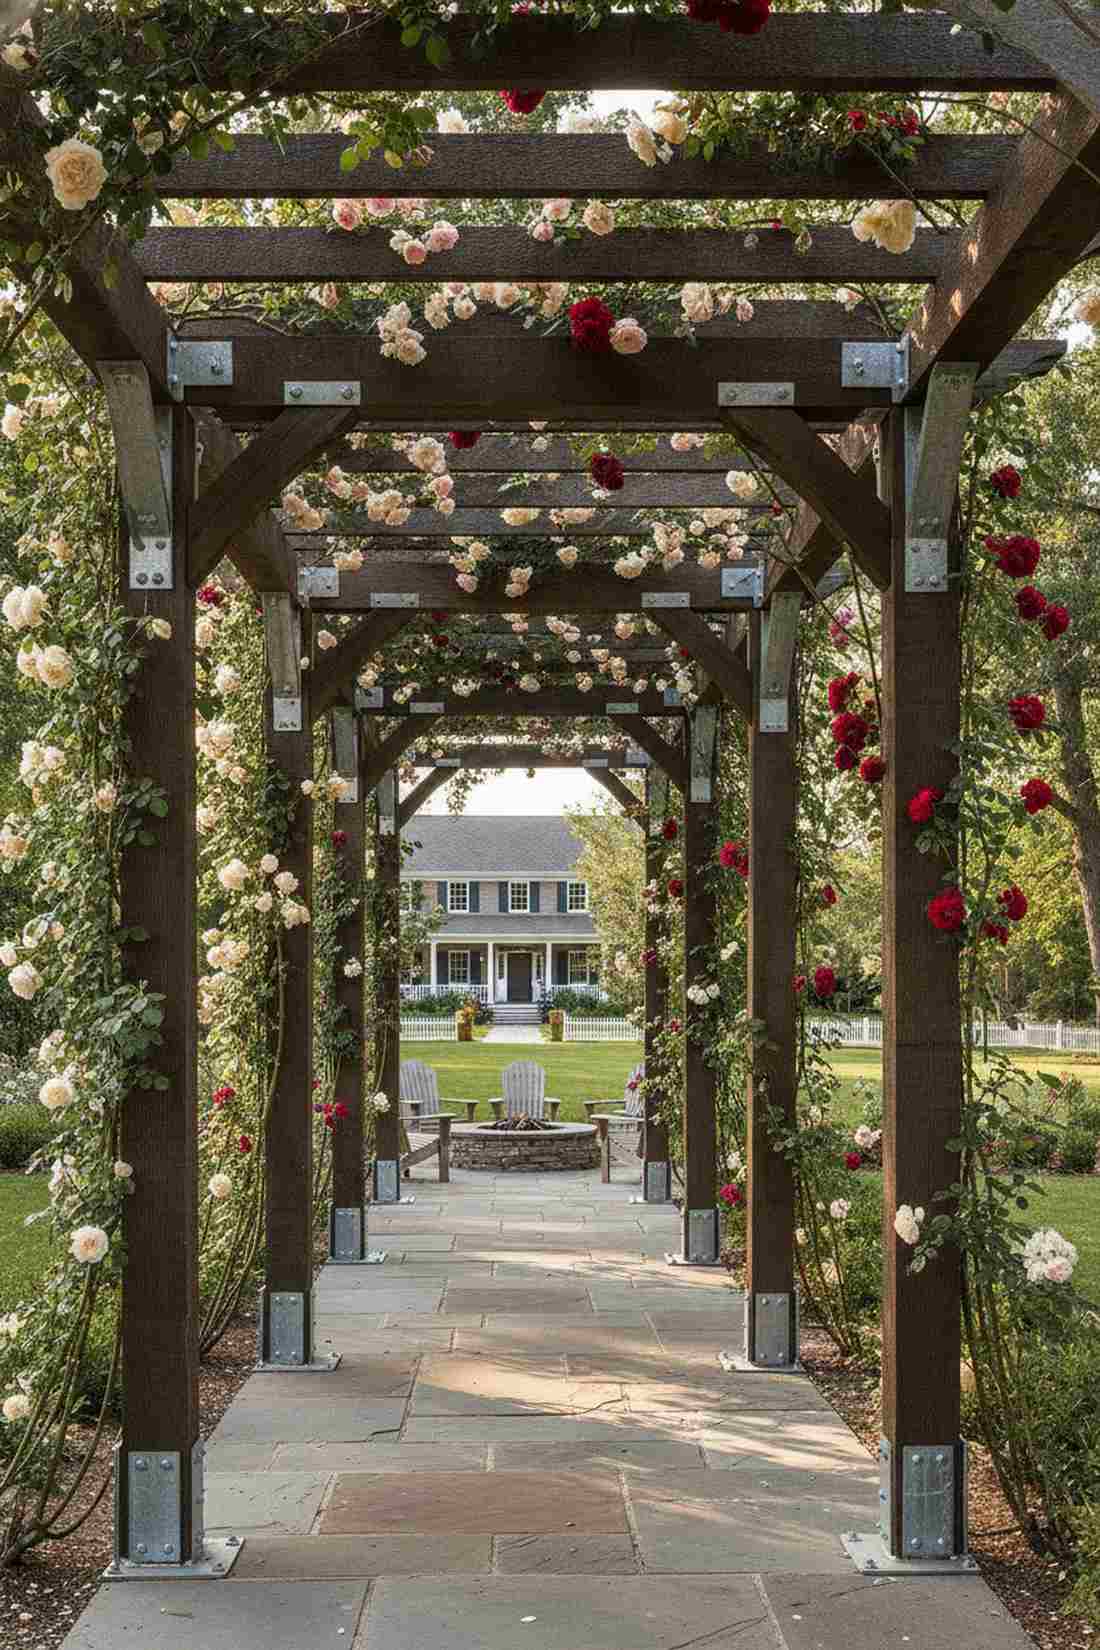
21. Mixed Color Pergola Display
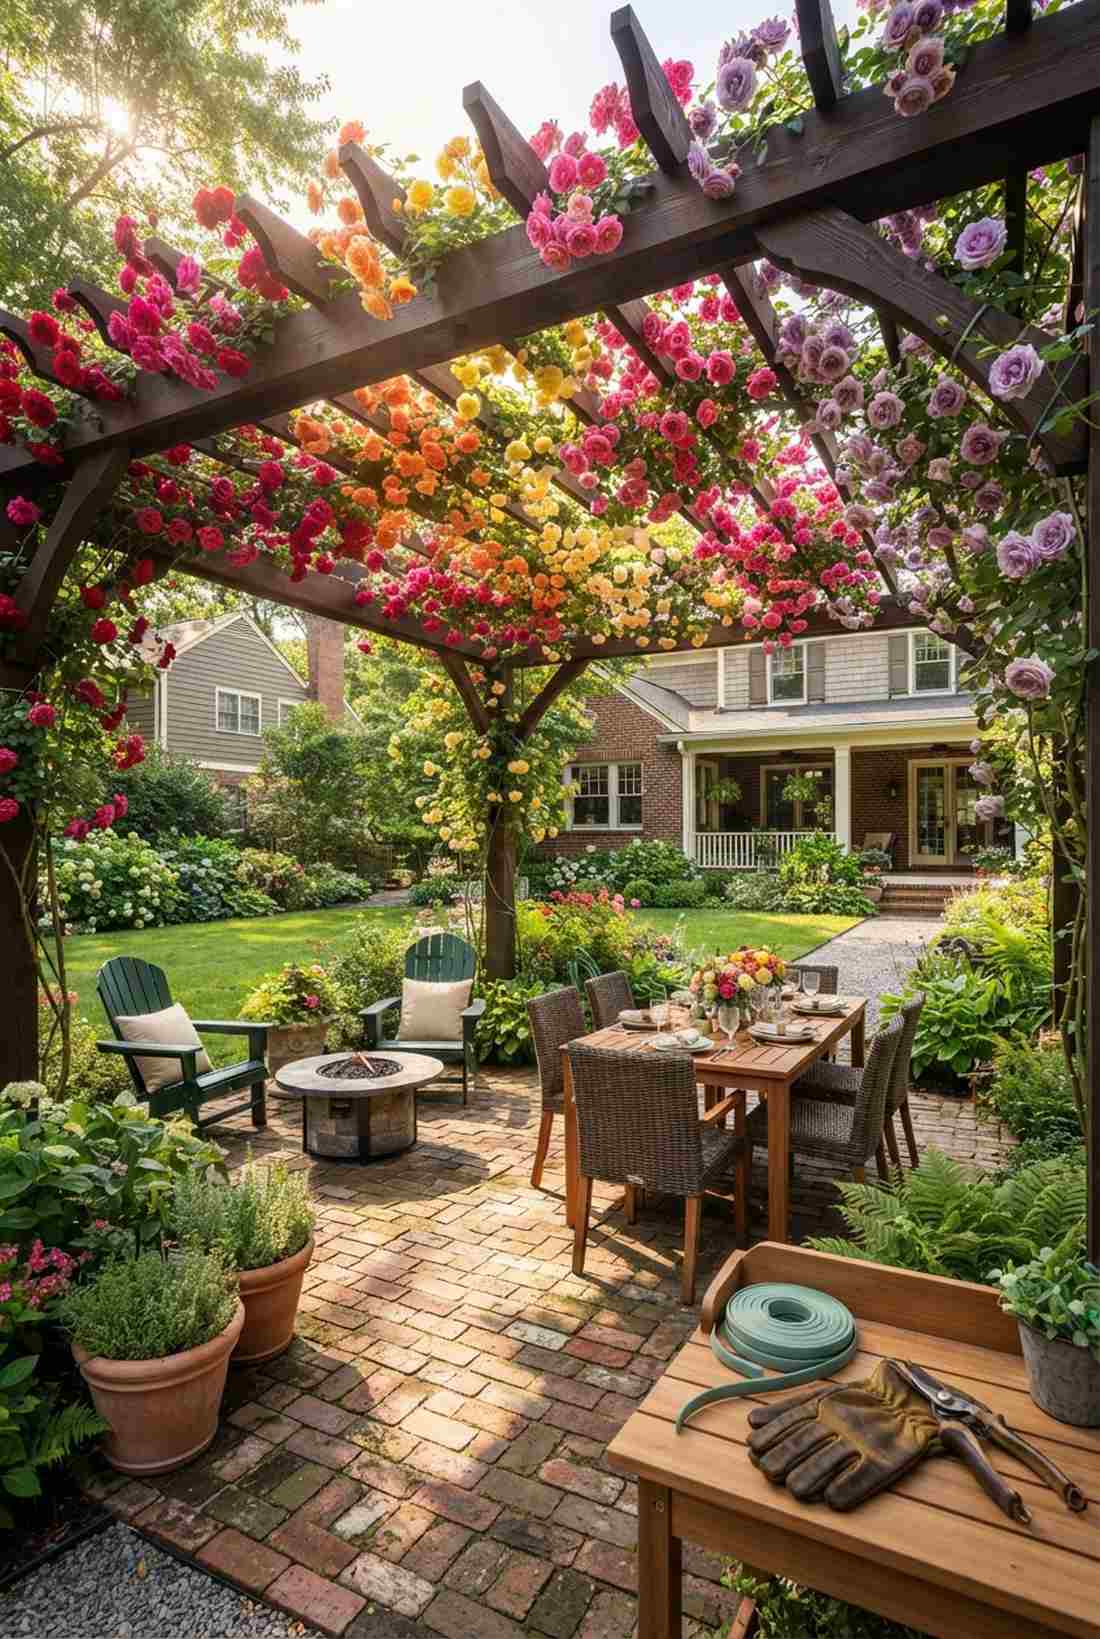
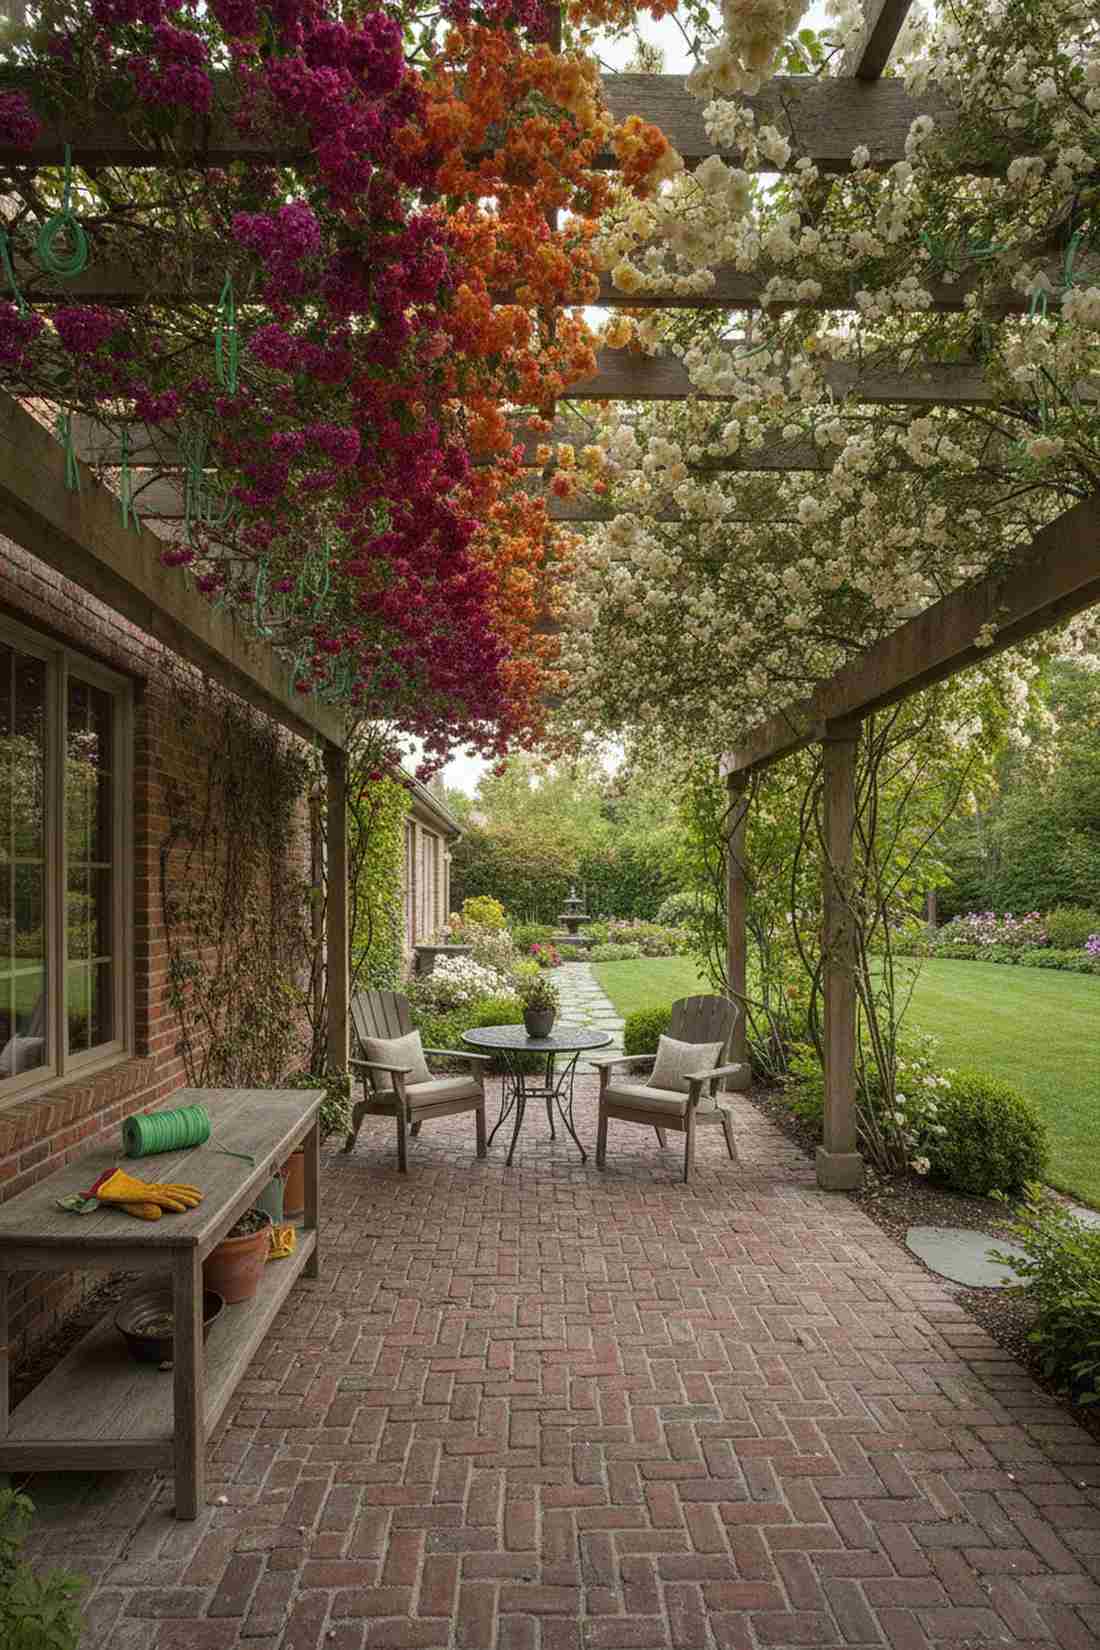
A gradient floral overhead display feels like a vibrant, magical rainbow of petals. Ideal for brightening up heavily shaded brick patios.
Single colors can be dull, yet this ombré planting effect delivers a surprisingly premium look. You must use premium climbing plant ties to rigorously guide the different varieties so aggressive growers don’t smother the slower ones.
Expect to spend $120–$200 on diverse rose species. Save this if you want a show-stopping, colorful canopy.
- Key Materials: Contrasting climbing roses
- Vibe / Style: Vibrant chromatic burst
- Difficulty: High maintenance training
- Budget Breakdown: Varied Roses: $160 | Ties: $15.
- Creator’s Tip: Plant the most vigorous variety on the shadiest corner to balance the overall growth rate.
- Smart Sourcing: soft rubber plant tie rolls and heavy-duty gardening gauntlet gloves.
22. Pergola Connecting Patio Sections
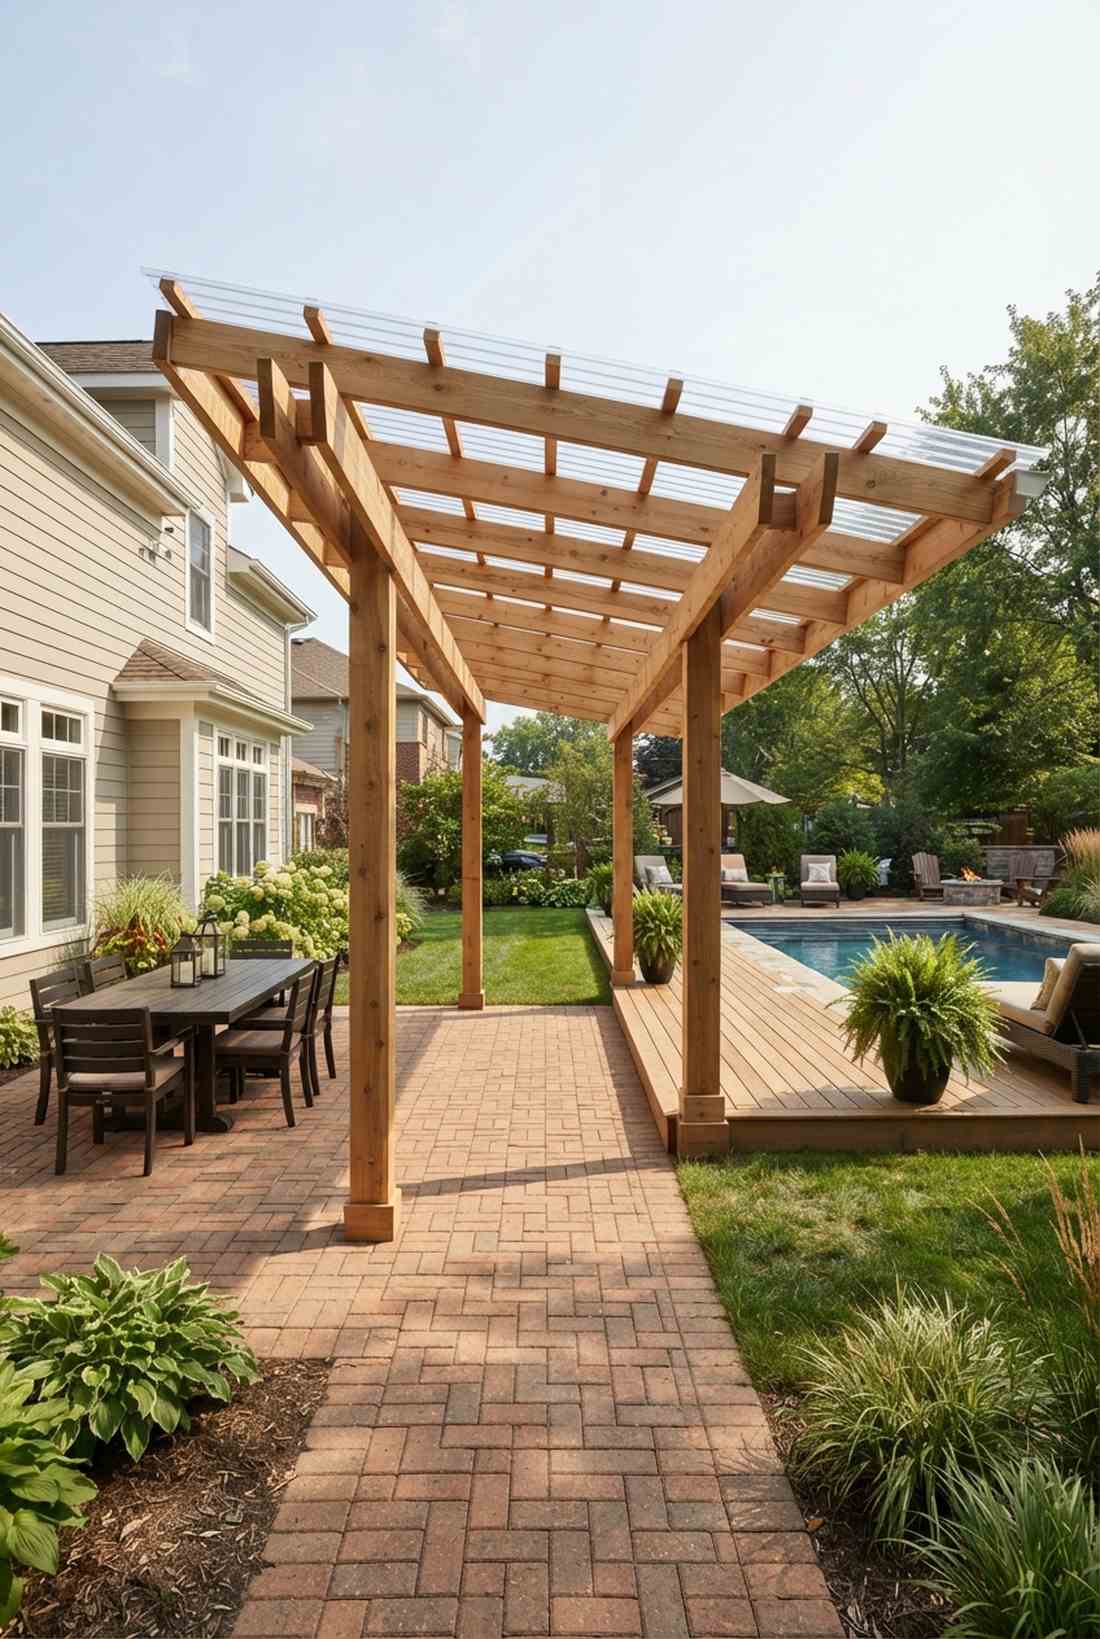
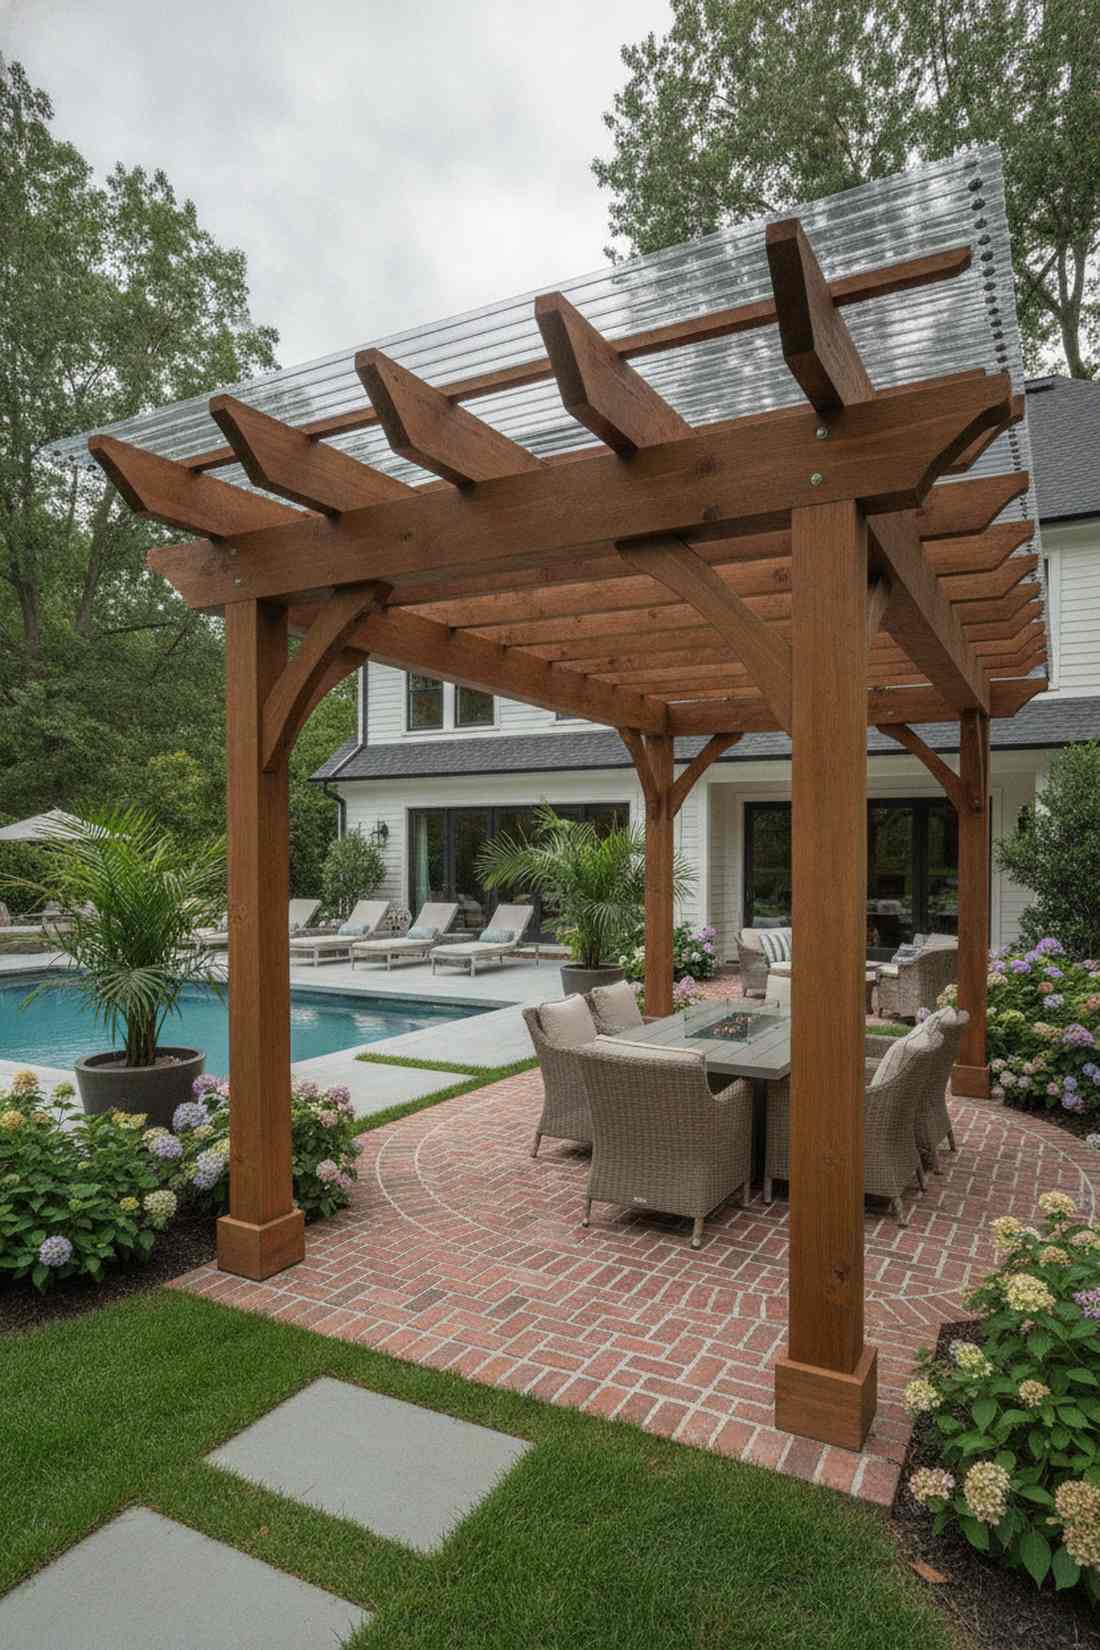
A bridging pergola structure feels like a seamless hallway between outdoor rooms. The perfect architectural solution for joining a pool deck to a dining patio.
Disconnected concrete slabs look cheap, but this overhead visual link gives a designer-level finish. Integrating clear corrugated polycarbonate roofing over the structure allows light in while keeping rain off the brick transition.
A linking roof costs roughly $300–$600 to build. Highly recommended for making disjointed yards flow beautifully.
- Key Materials: Bridging timbers, clear roofing
- Vibe / Style: Unified architectural flow
- Difficulty: Precise measuring required
- Budget Breakdown: Lumber: $250 | Roofing: $150.
- Creator’s Tip: Make sure the pergola roof height matches the home’s eaves for a cohesive, built-in appearance.
- Smart Sourcing: clear UV-resistant polycarbonate roofing panels and leak-proof roofing screw kits.
23. Side Yard Pergola Passage
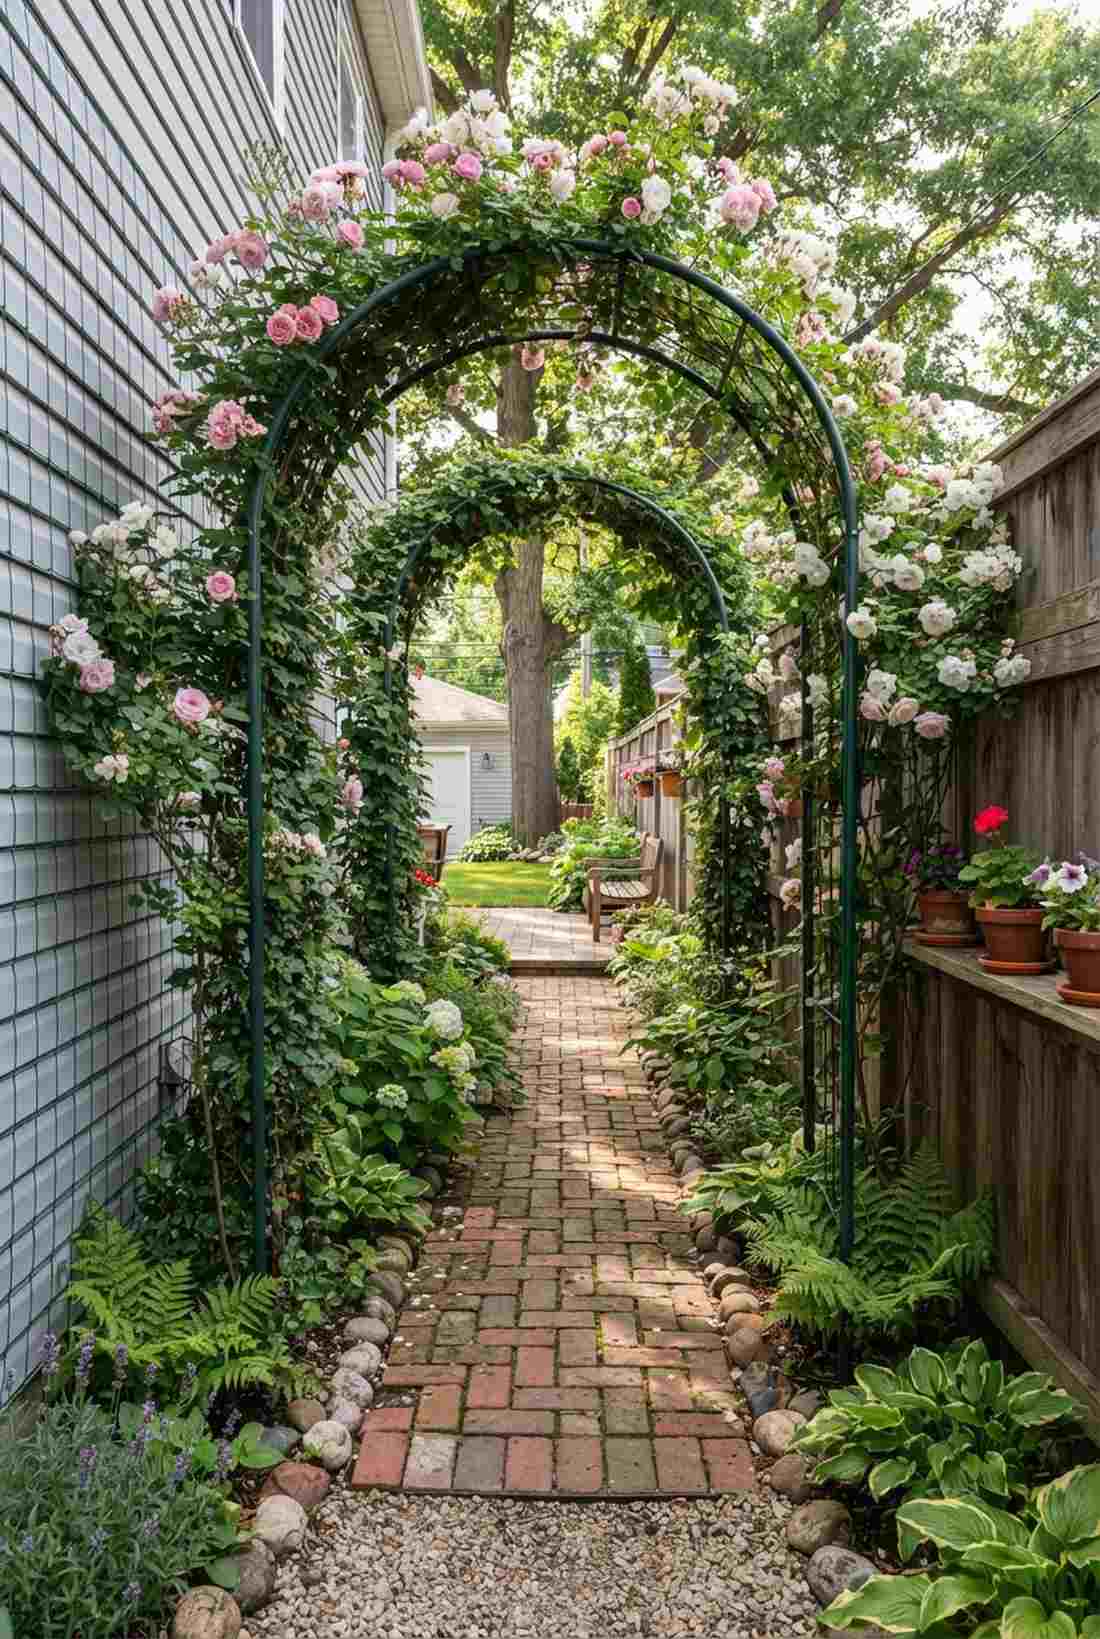
This narrow pergola corridor feels like a lush, hidden escape tunnel. Brilliant for transforming dead, ugly side-yards into premium features.
Side yards usually collect trash, but this overhead transformation creates an instant high-end estate feel. Employing compact wall-hugging trellis nets ensures the vines don’t scrape against the siding or block the narrow walkway.
Transforming a side yard costs around $250–$500. Pin this to turn wasted space into your favorite garden spot.
- Key Materials: Narrow archways, brick pavers
- Vibe / Style: Enchanted secret passage
- Difficulty: Working in tight spaces
- Budget Breakdown: Frames: $200 | Pavers: $150.
- Creator’s Tip: Use fragrant roses here; the narrow walls trap the perfume and make the passage smell incredible.
- Smart Sourcing: narrow steel garden arch kits and heavy-duty nylon trellis netting.
Material Guide: Cheap vs. Premium Aesthetic
Knowing exactly where to save and where to spend makes all the difference in achieving that “looks expensive but isn’t” vibe.
- Standard vs. Commercial-Grade Arches: Flimsy tubular metal snaps under the weight of mature roses, whereas heavy-duty galvanized steel prevents catastrophic collapses during summer storms.
- Salvaged Brick vs. Concrete Pavers: Authentic old red brick brings immediate historical texture, elevating the space much faster than flat concrete alternatives.
This upcoming vintage hack takes five minutes but completely transforms the entire yard’s aesthetic…
Cottage Style Accents
Authentic English cottage details enhance brick patios with collected, informal charm. These accents soften hard surfaces and integrate the patio into surrounding garden planting.
24. Planting Pockets In Brick
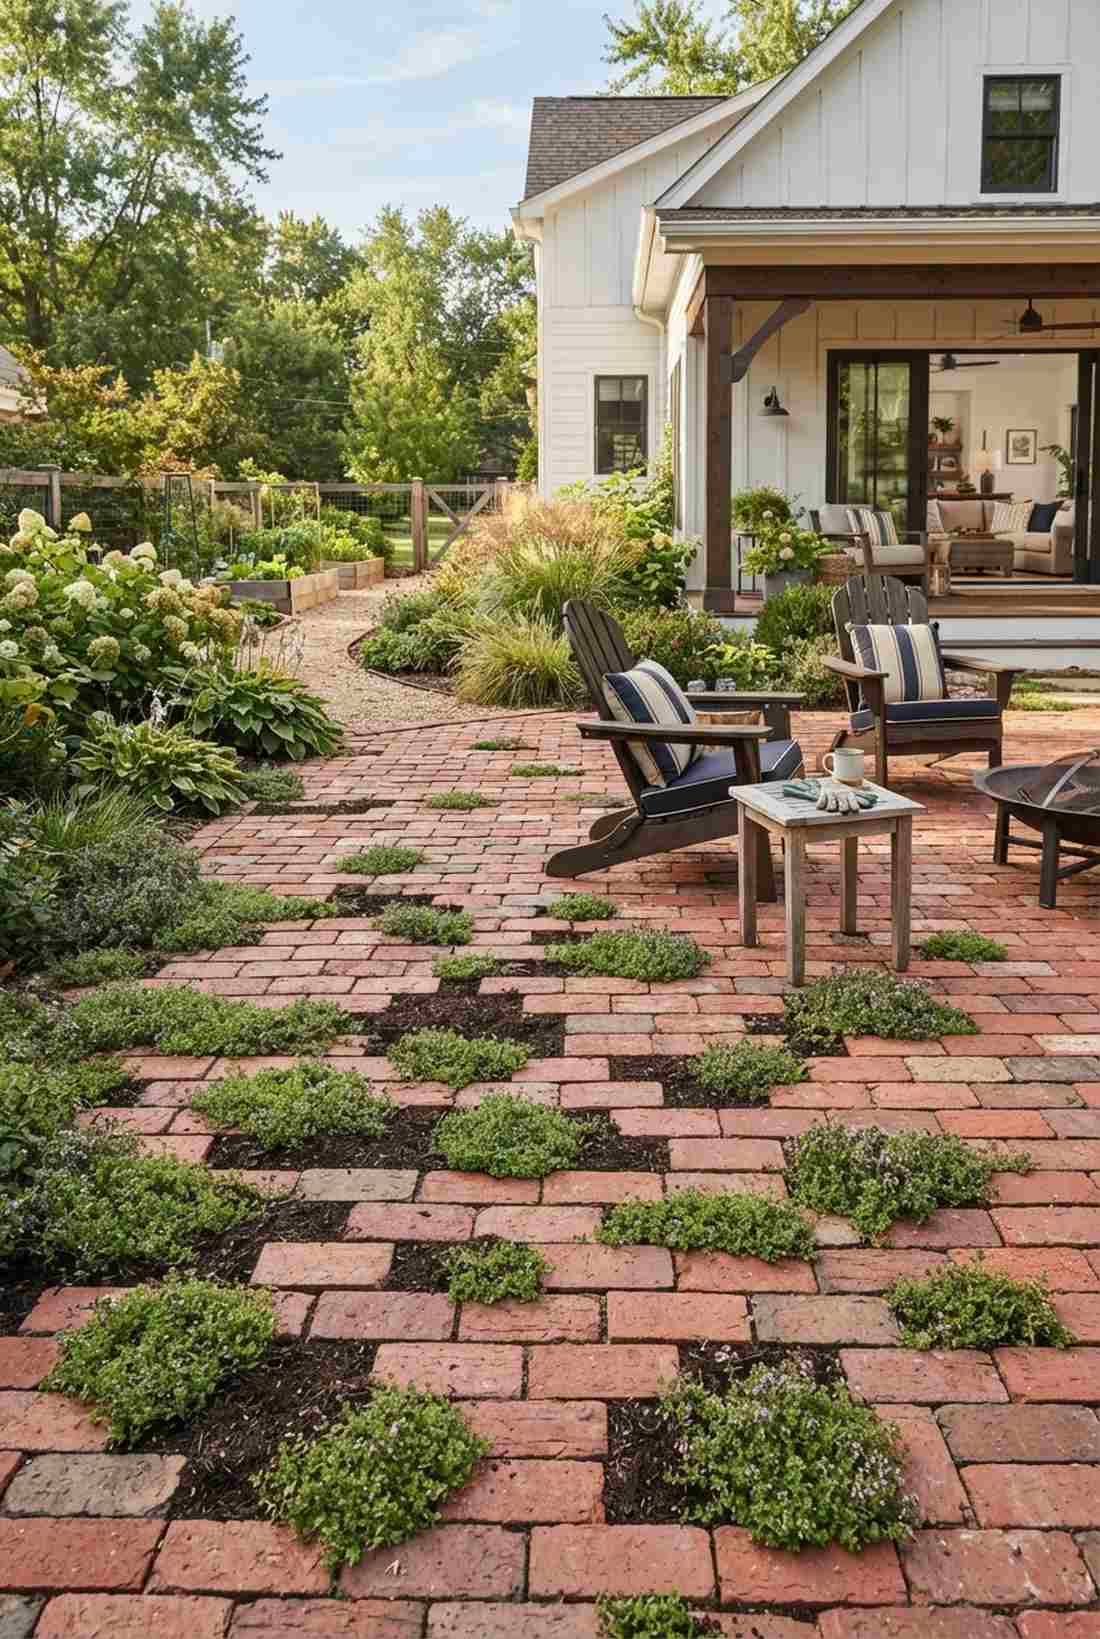
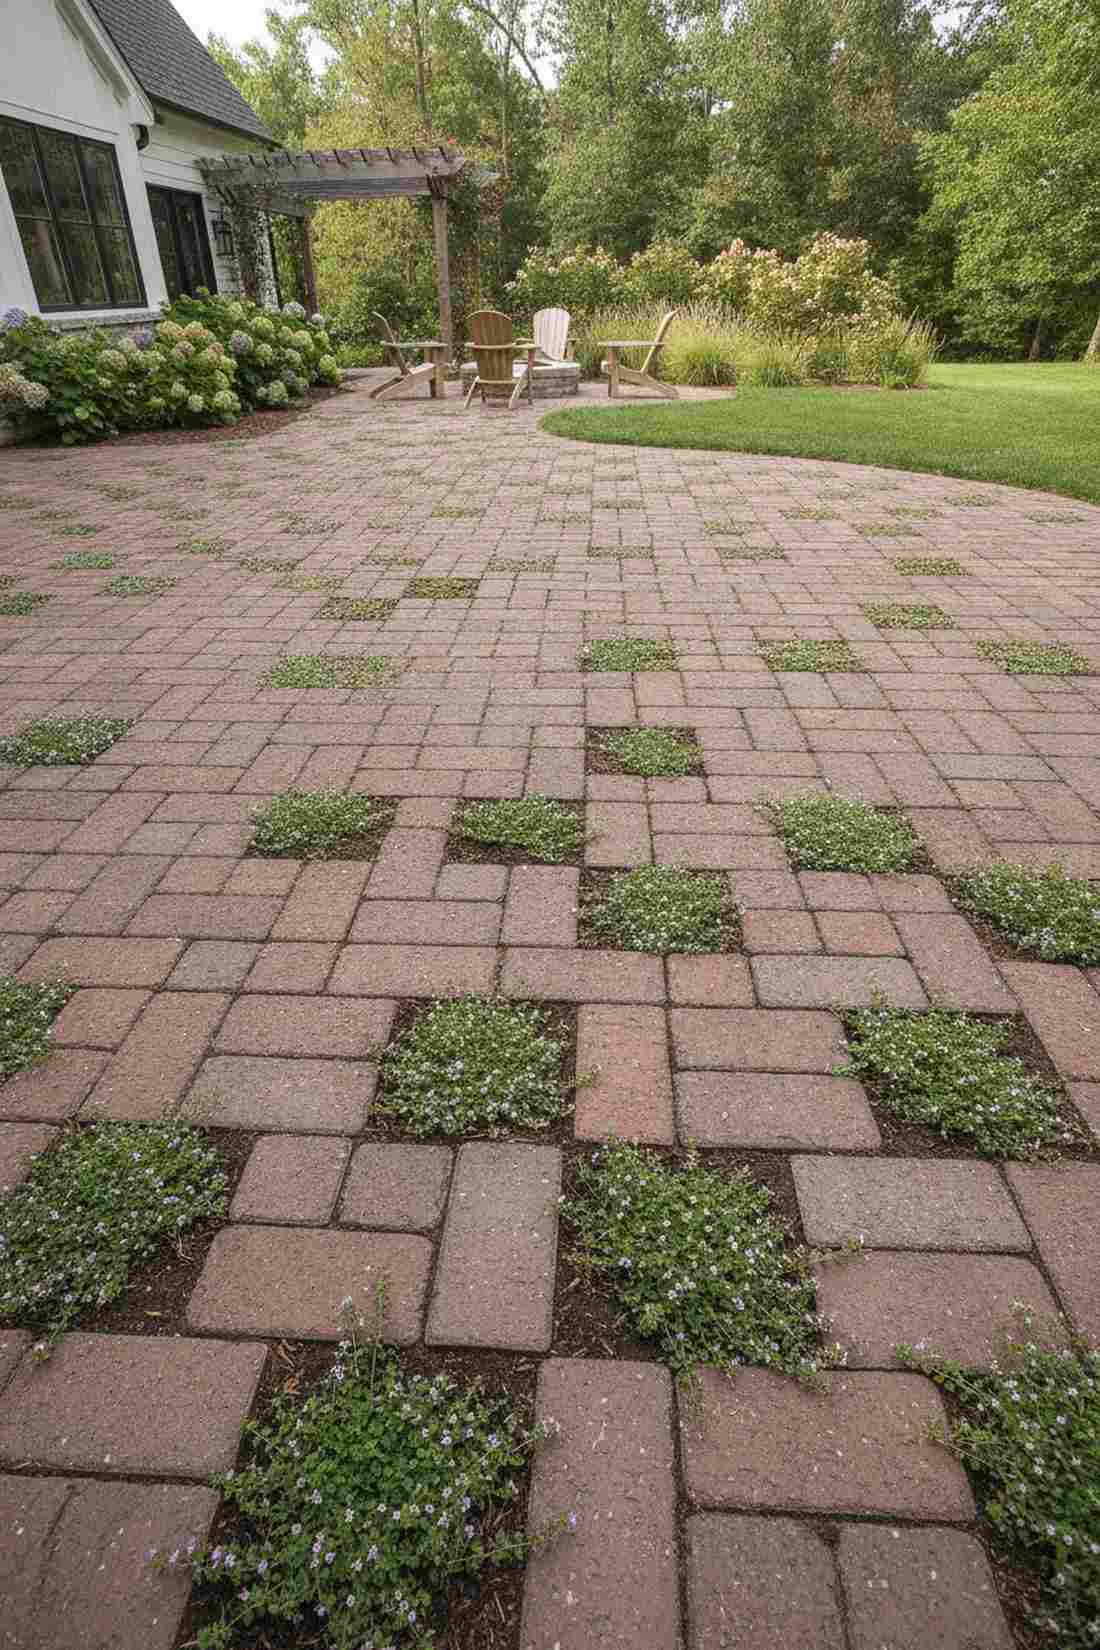
These creeping thyme brick gaps feel like nature is softly reclaiming the stone. A magical touch for softening the hard, rigid edges of a brand-new patio.
A massive expanse of brick can feel like a parking lot, but omitting pavers for green pockets looks incredibly expensive and intentional. Using a premium organic moisture-retaining soil in these tiny gaps ensures the herbs survive summer heatwaves.
This trick costs literally $10–$20 in seeds and soil. Save this for an immediate, budget-friendly cottage upgrade.
- Key Materials: Groundcover plants, specialized soil
- Vibe / Style: Soft organic integration
- Difficulty: Very easy
- Budget Breakdown: Plants: $15 | Soil: $5.
- Creator’s Tip: Only remove bricks in low-traffic corners so nobody trips on the sunken dirt pockets.
- Smart Sourcing: creeping thyme seed starter kits and moisture-control potting mix (bulk).
25. Reclaimed Container Gardens
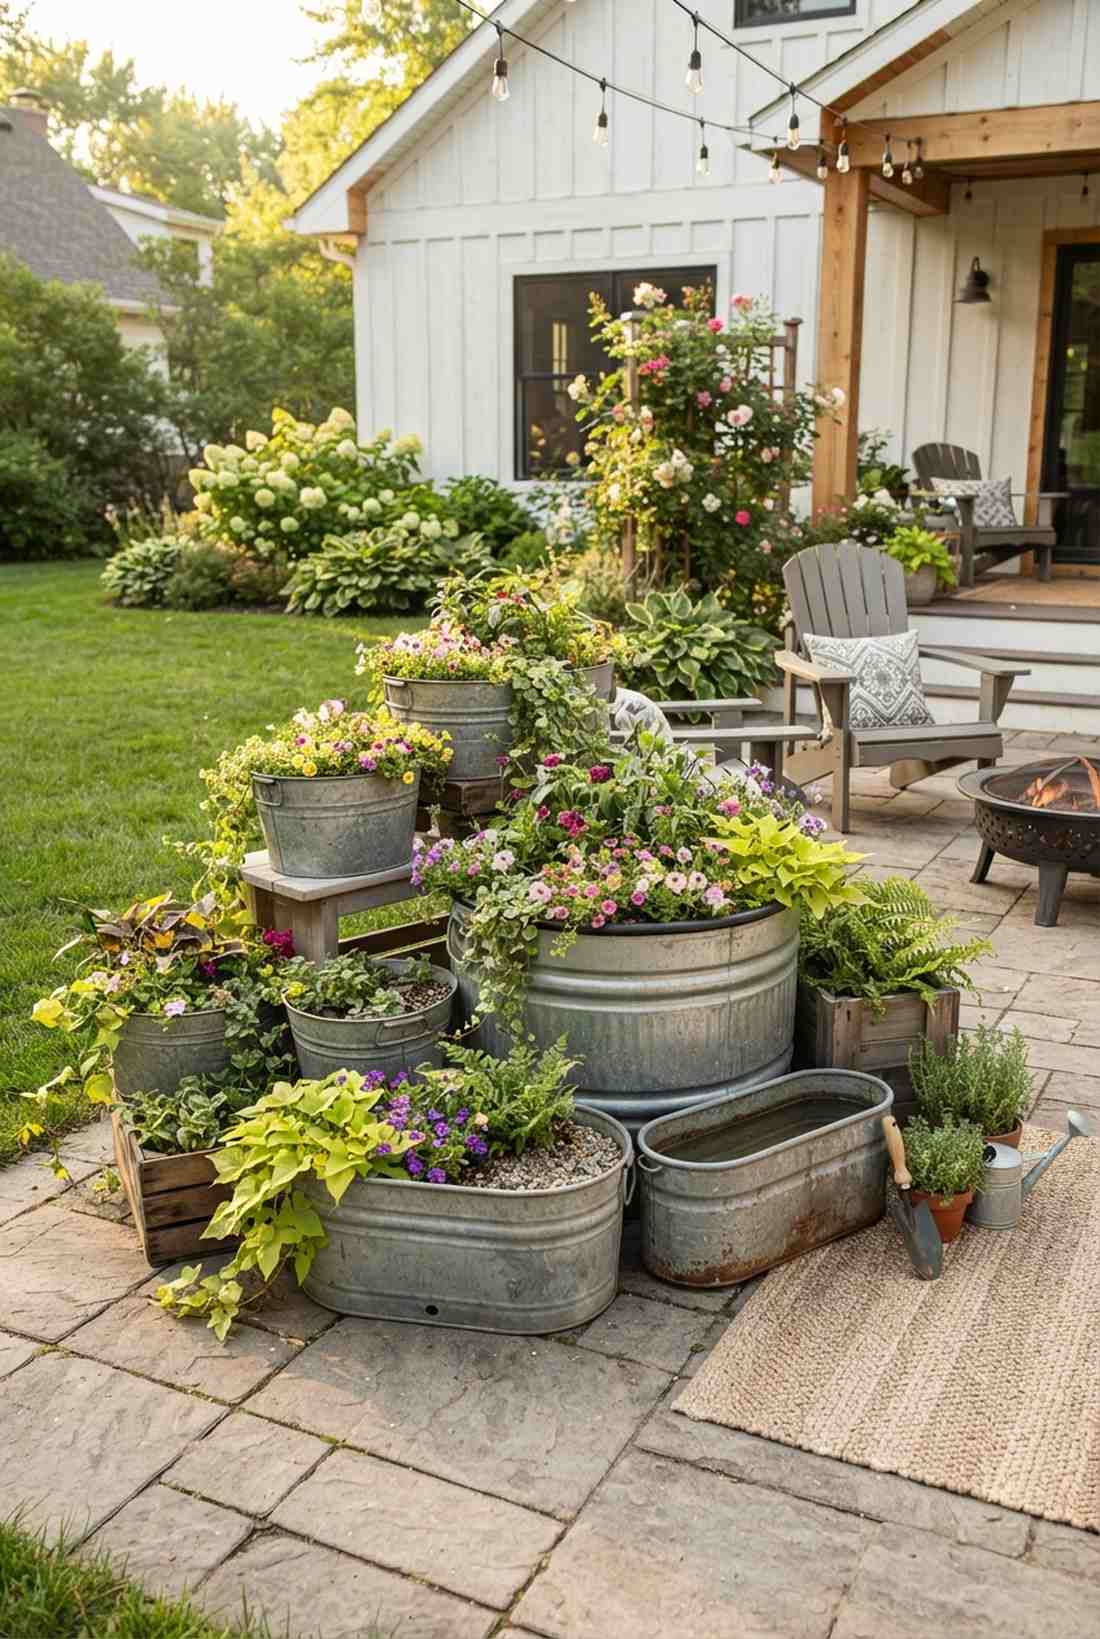
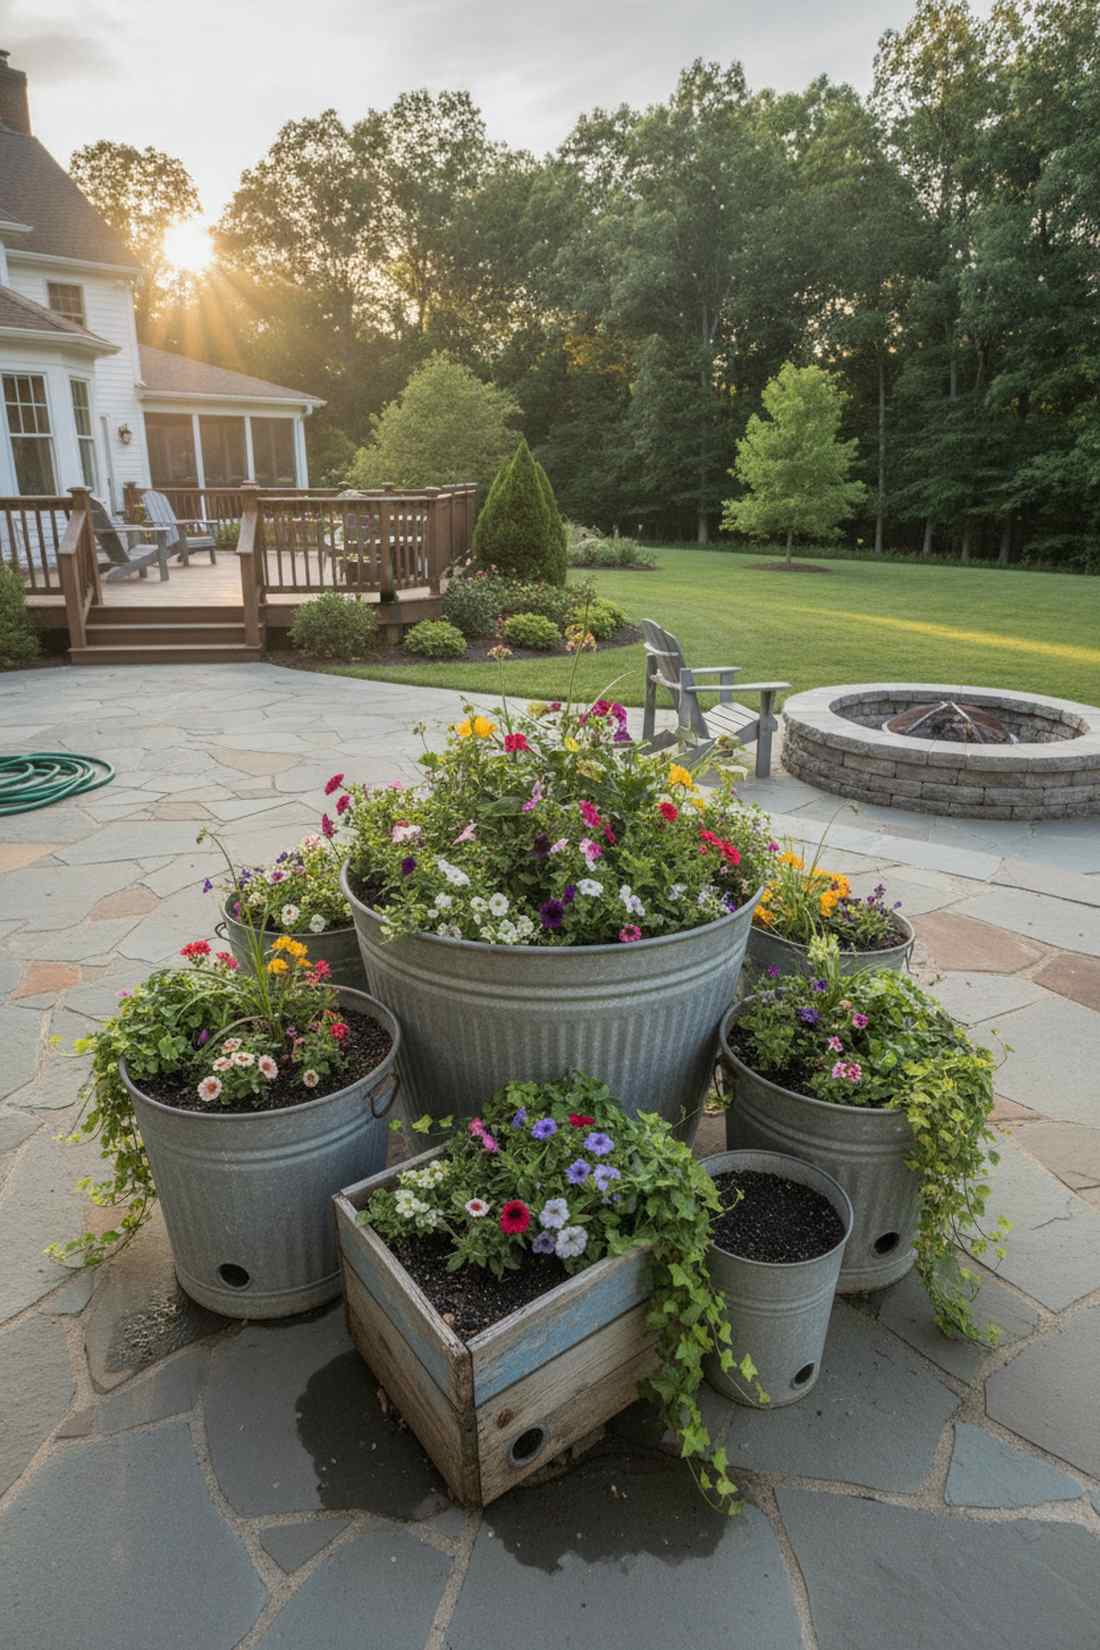
A cluster of vintage planters feels delightfully eclectic and rich with history. Perfect for adding height to flat patio corners.
Plastic pots ruin a classic vibe instantly, yet repurposed galvanized tubs deliver a surprisingly premium look. Coating the interior with a waterproof rubberized sealant spray prevents the old metal from rusting out the bottom.
Sourcing thrifted tubs costs $20–$50. It’s a gorgeous way to display spilling annuals and trailing vines.
- Key Materials: Vintage metal/wood tubs, drainage gravel
- Vibe / Style: Rustic collected charm
- Difficulty: Easy arranging
- Budget Breakdown: Tubs: $30 | Sealant: $15.
- Creator’s Tip: Always drill 5-6 drainage holes in the bottom, then layer two inches of gravel before adding soil.
- Smart Sourcing: waterproof rubberized sealant sprays and rustic galvanized tub sets.
26. Weathered Wood Furniture Pieces
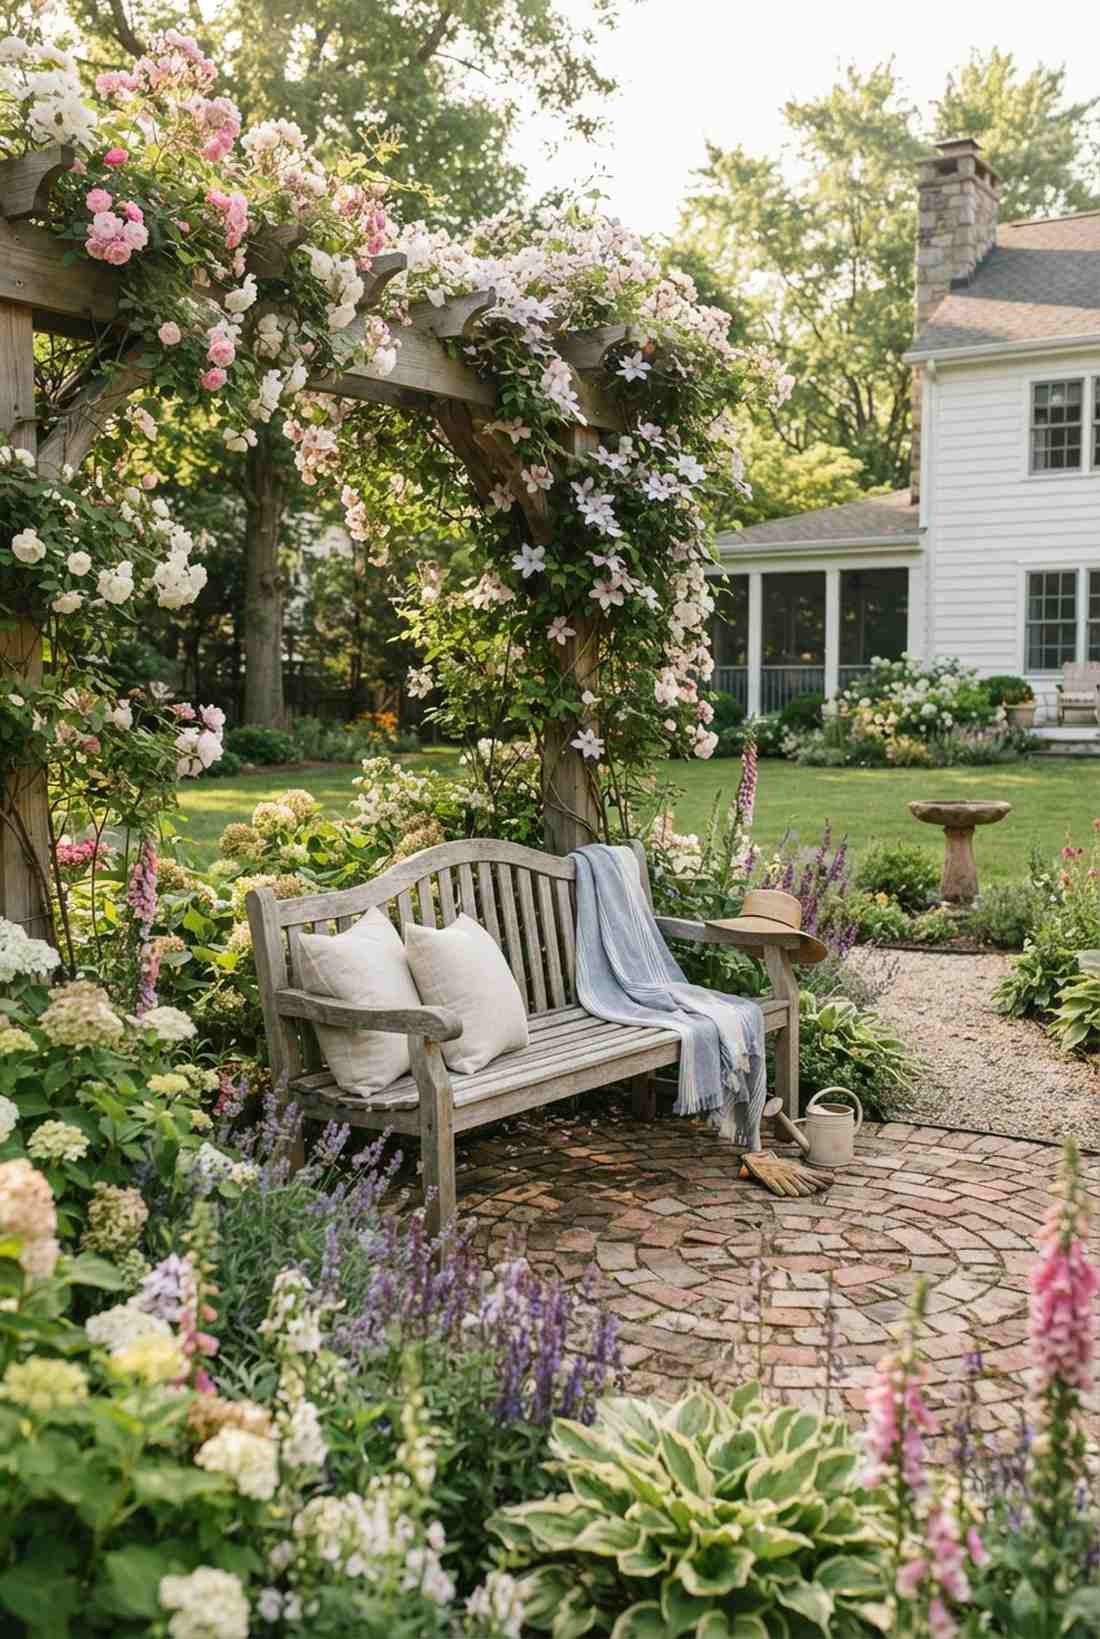
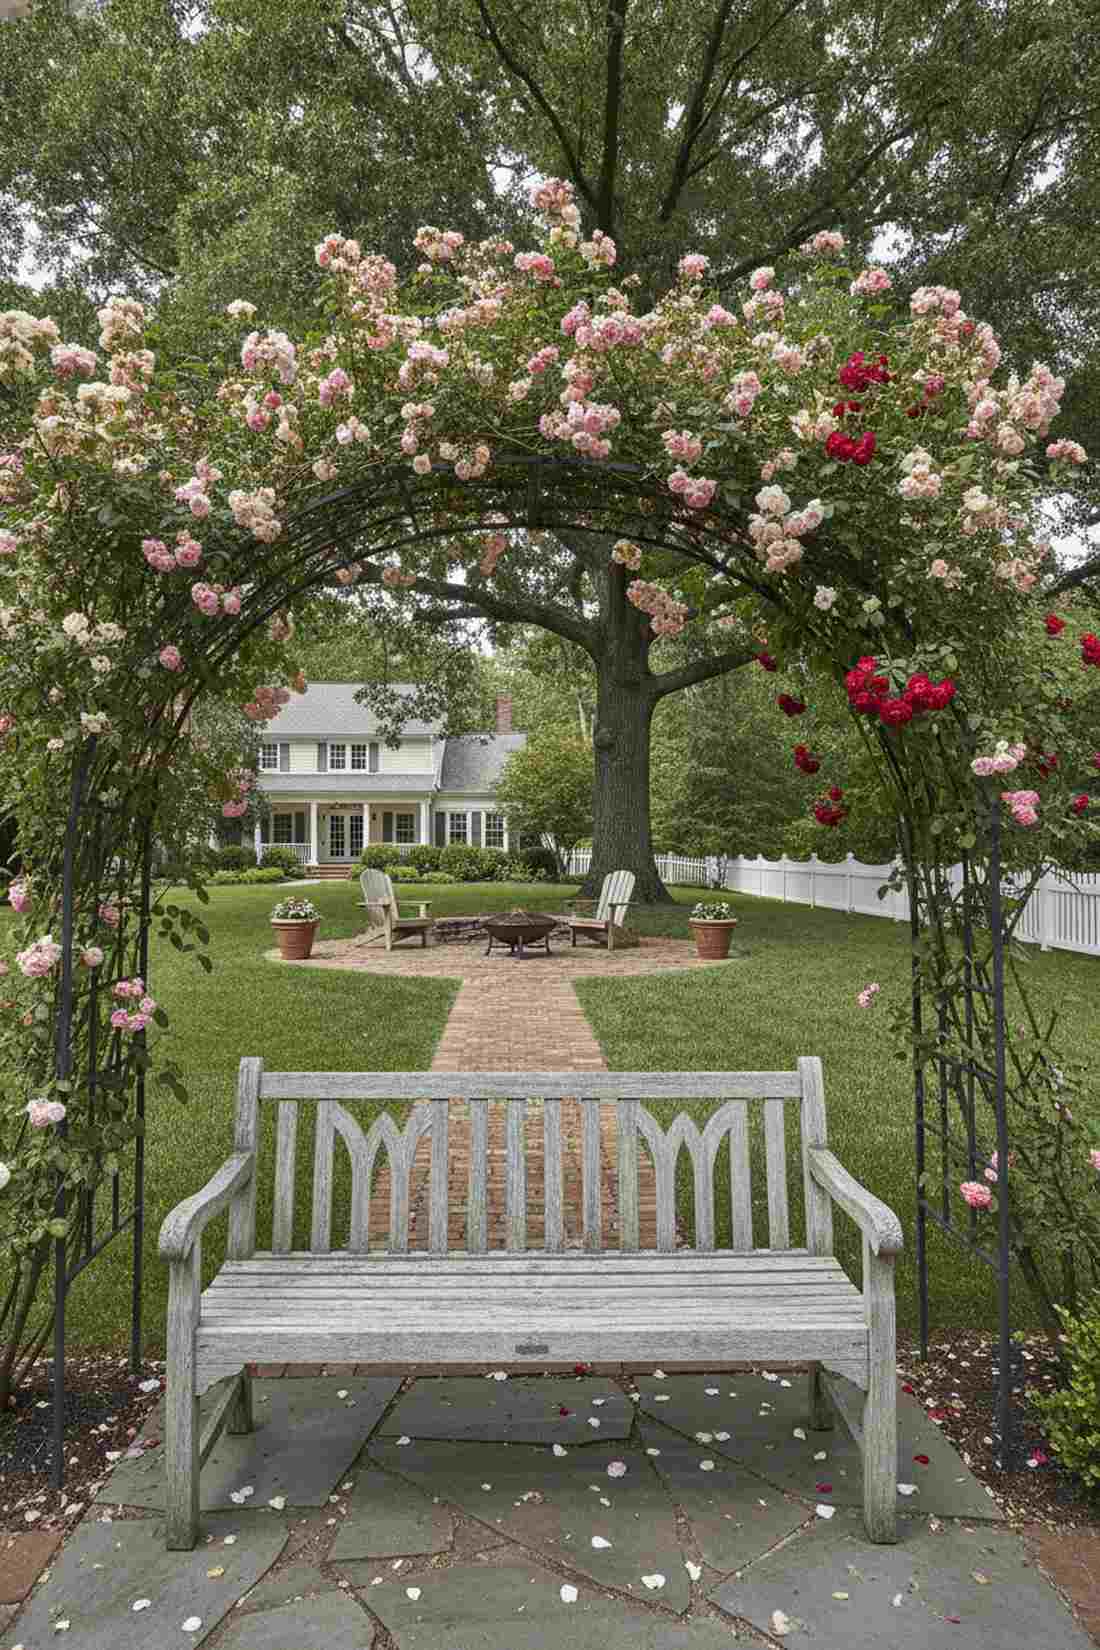
A silvered teak garden bench feels timeless, noble, and deeply calming. The ultimate rest stop positioned beneath a blooming rose canopy.
Glossy modern furniture clashes with brick, but naturally aged wood gives a designer-level finish that screams luxury. If you want to accelerate the aging process, apply a specialty wood weathering wash to turn fresh wood silvery-gray overnight.
A good wooden bench ranges from $150–$400. Pin this to your outdoor seating inspiration board.
- Key Materials: Teak or cedar furniture
- Vibe / Style: Timeless noble comfort
- Difficulty: Zero setup
- Budget Breakdown: Bench: $250 | Wash: $20.
- Creator’s Tip: Avoid pine; it rots quickly outdoors even if painted. Stick to cedar, teak, or white oak.
- Smart Sourcing: premium wood weathering wash accelerators and solid cedar garden benches.
27. Mixed Border Planting Around Edges
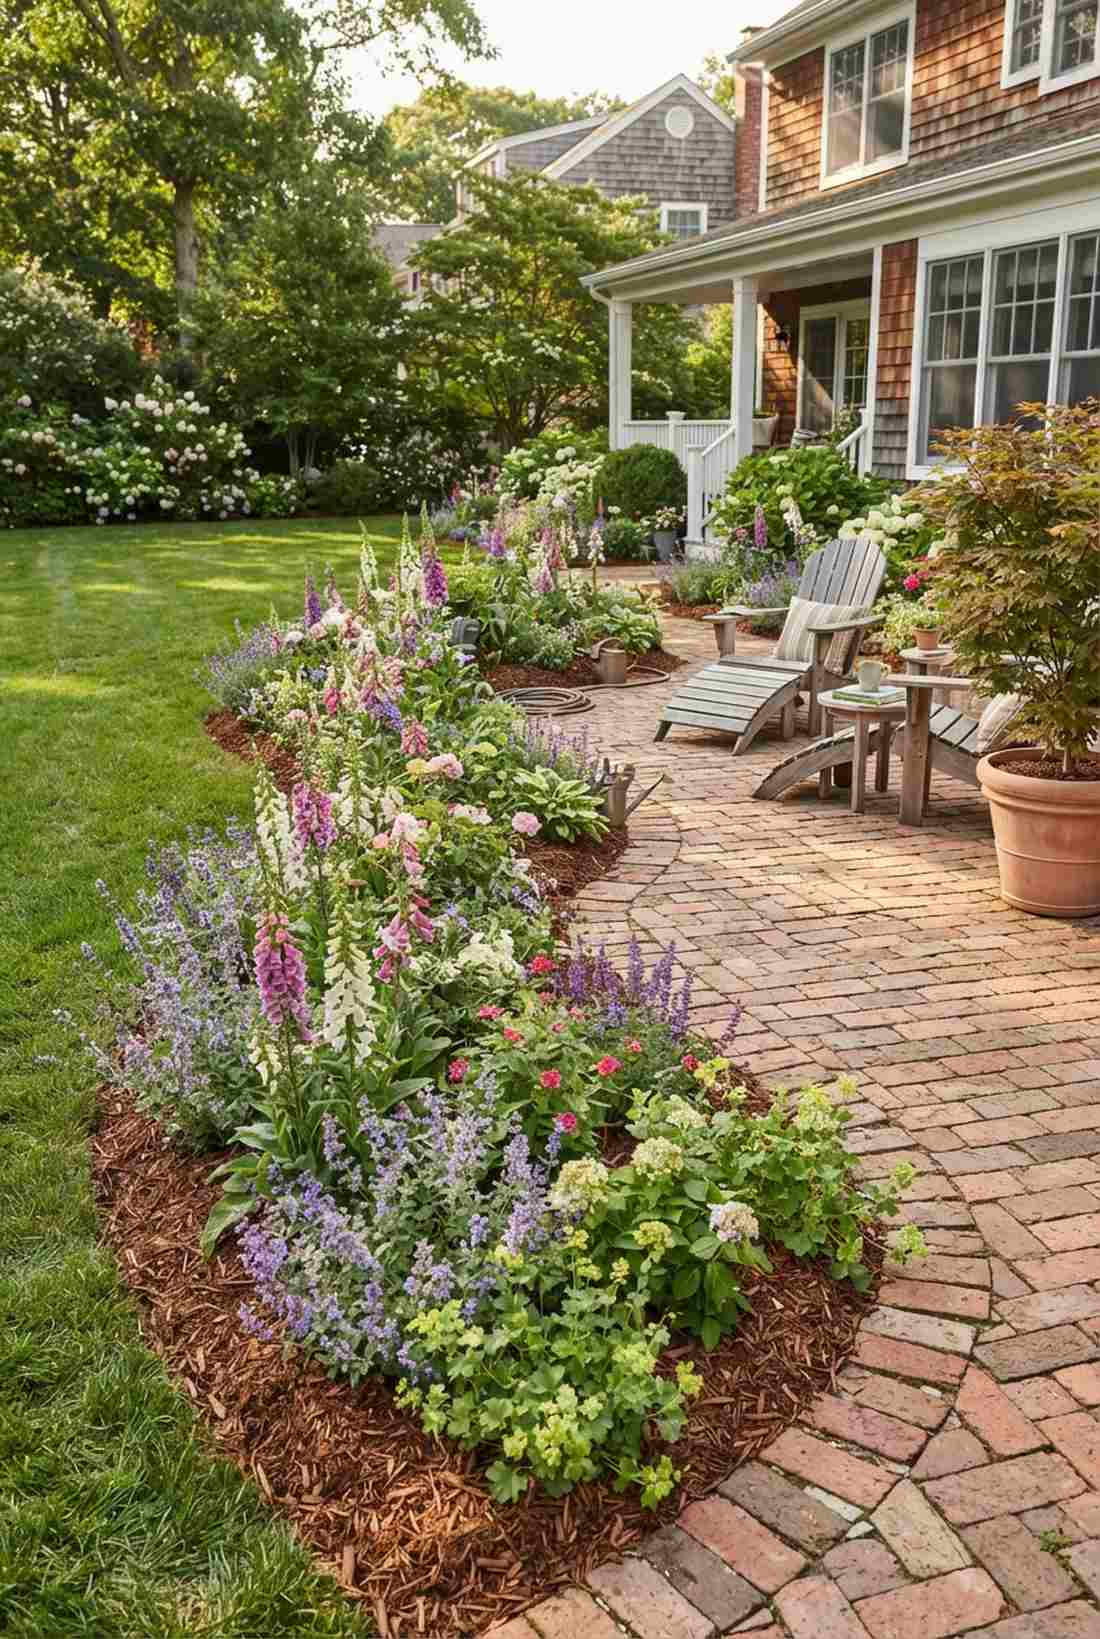
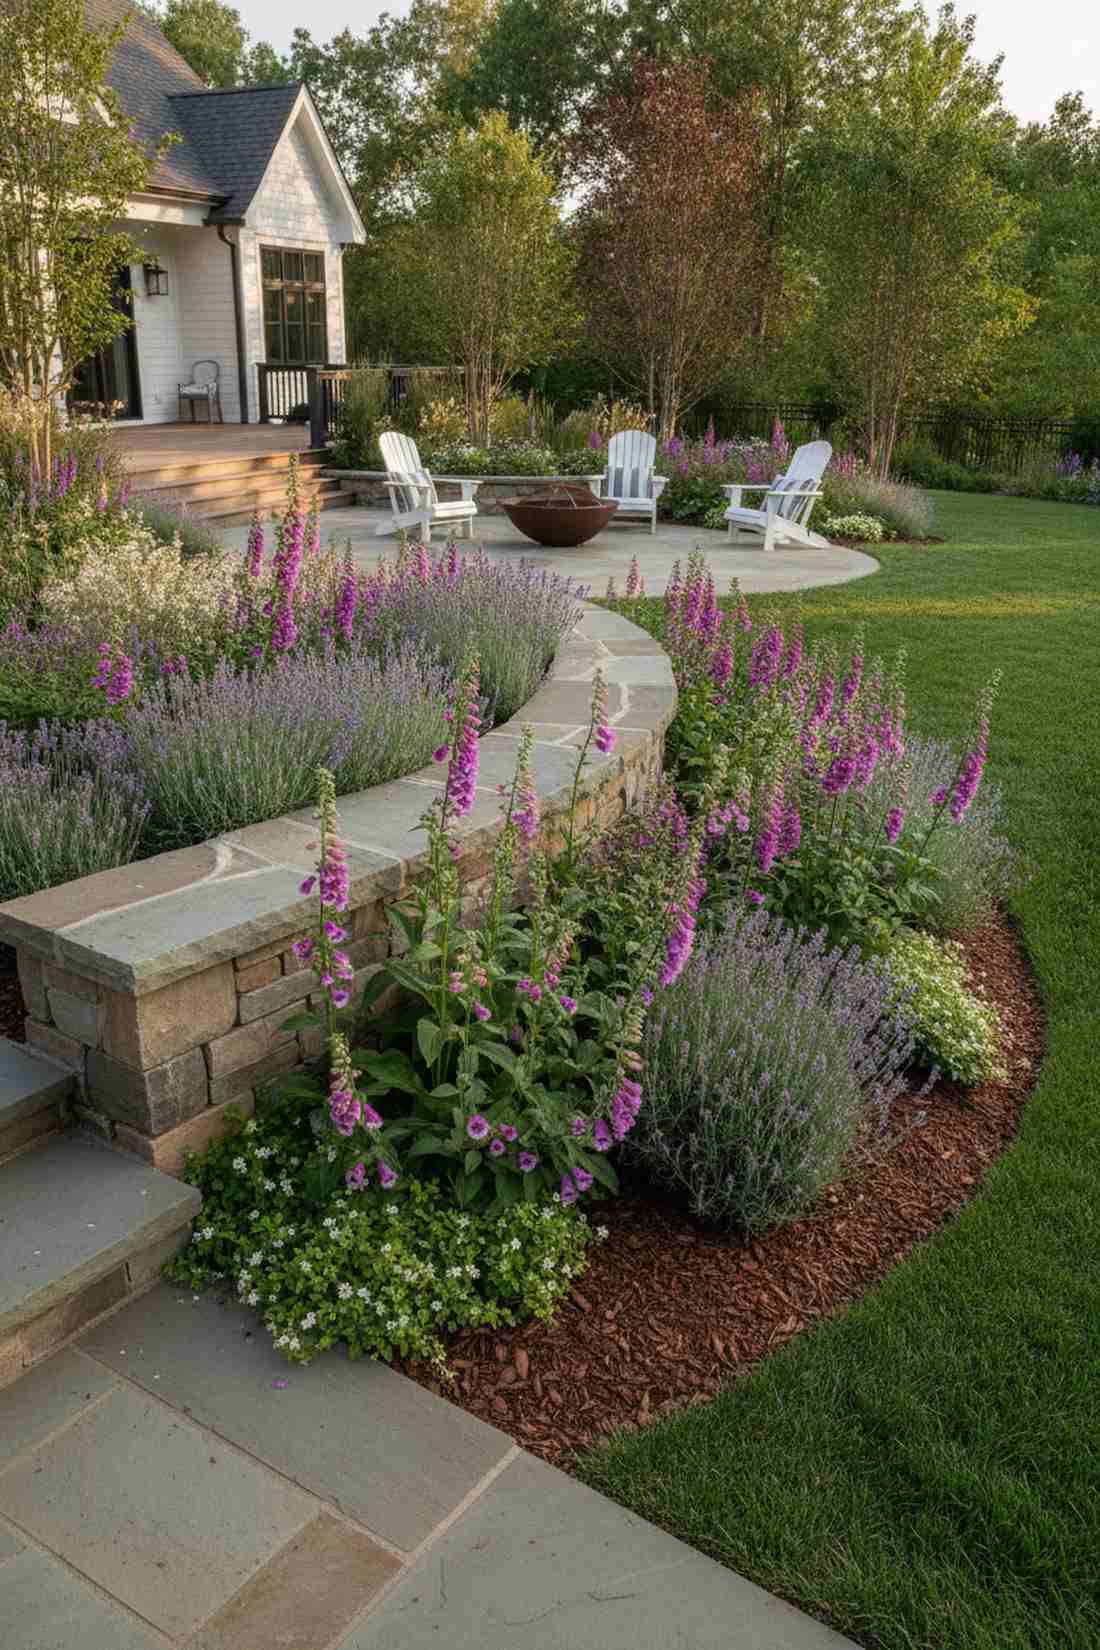
A spilling perennial border feels like a lush, blooming frame hugging the stonework. Necessary for blurring the stark transition between lawn and brick.
Rigidly trimmed hedges feel corporate, but a chaotic mix of foxgloves and lavender creates an instant high-end estate feel. Laying down a thick layer of premium natural cedar mulch keeps the weeds down while the perennials establish.
Planting a thick border averages $100–$200 in initial nursery stock. Highly recommended for grounding the patio in nature.
- Key Materials: Foxgloves, lavender, mulch
- Vibe / Style: Abundant cottage spill
- Difficulty: Digging and planting
- Budget Breakdown: Perennials: $150 | Mulch: $40.
- Creator’s Tip: Plant the tallest flowers in the back and cascading plants right against the brick edge.
- Smart Sourcing: bulk natural cedar mulch bags and premium perennial border plant collections.
28. Vintage Lighting Fixtures
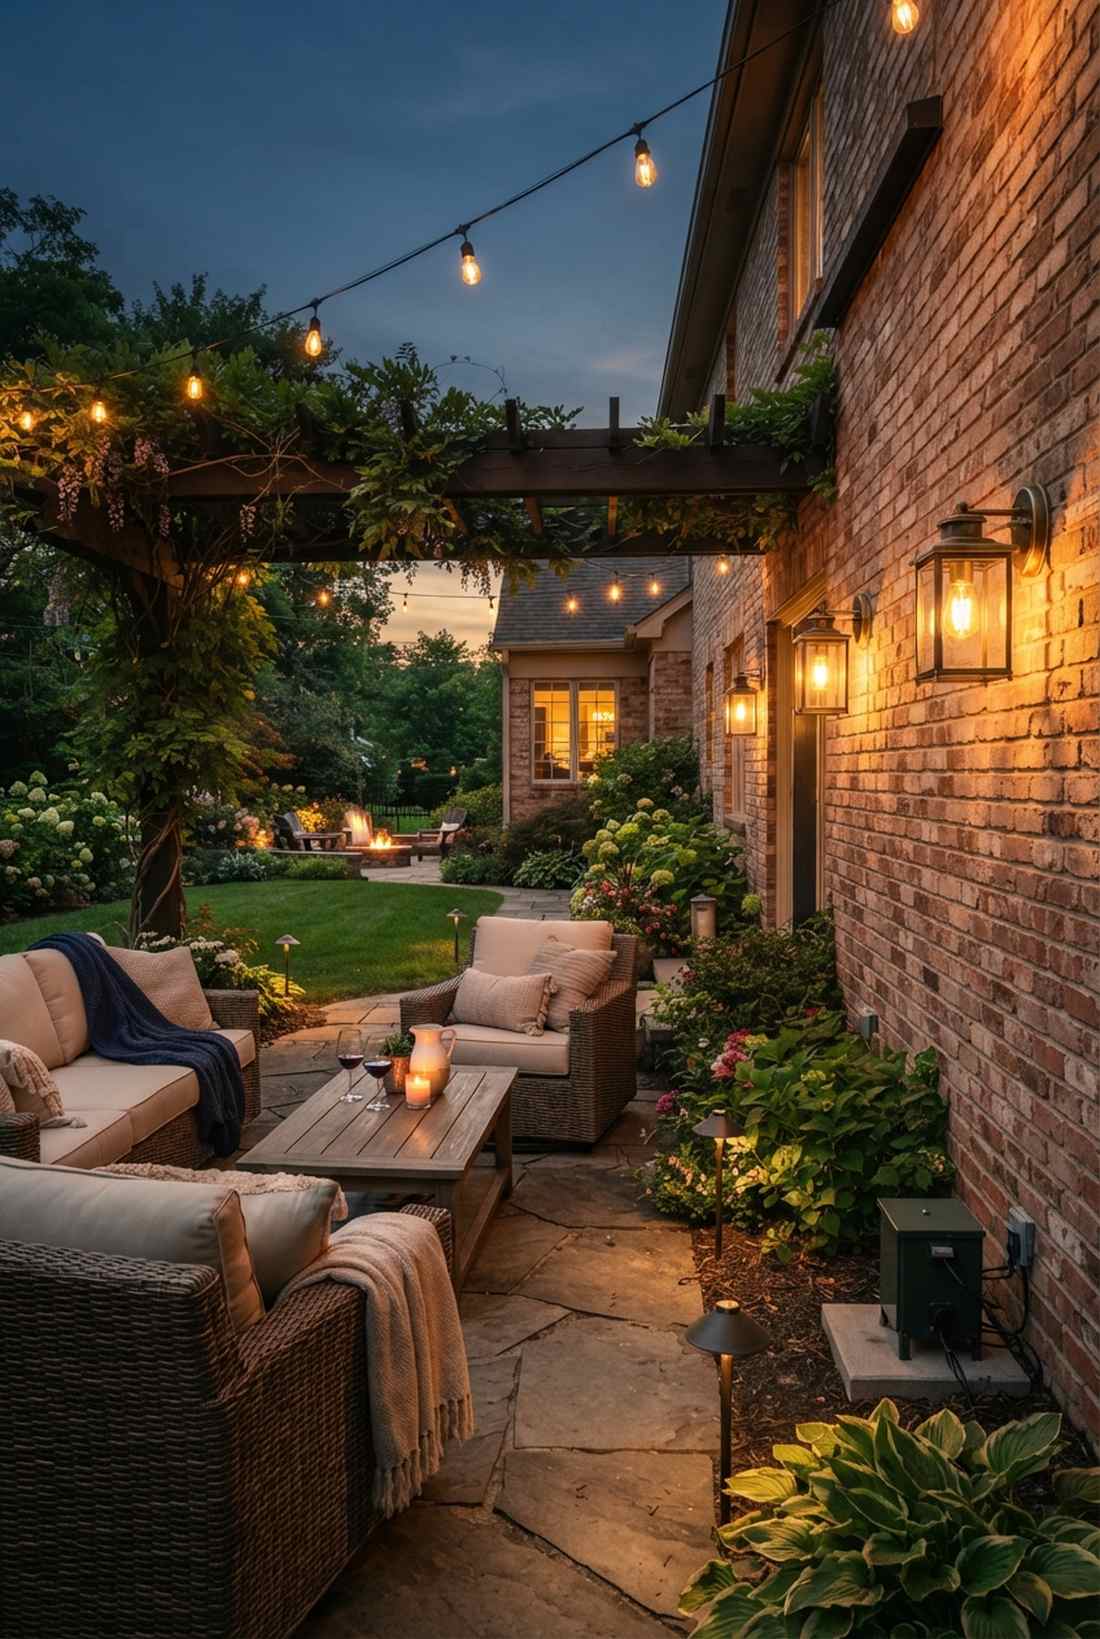
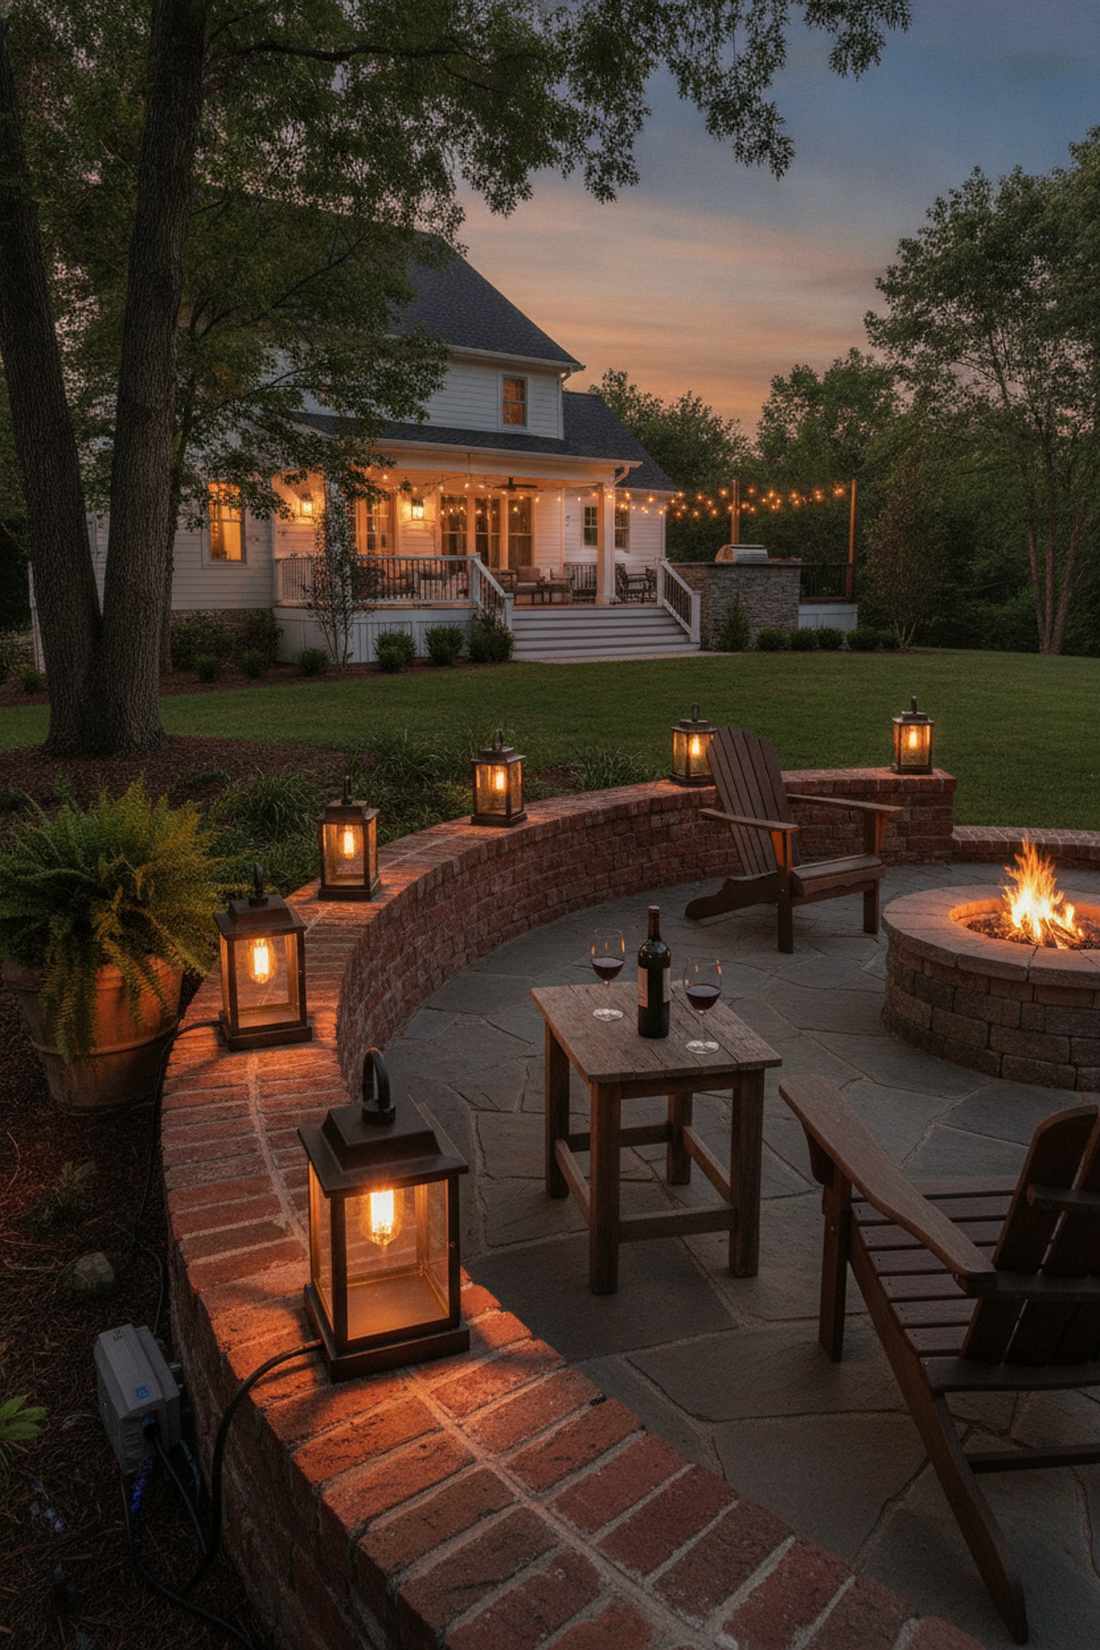
An exposed bulb lantern display feels incredibly warm, romantic, and inviting at night. Essential for illuminating the brick textures after sunset.
Harsh LED floodlights ruin the mood, yet warm vintage lighting looks incredibly expensive and atmospheric. Installing an outdoor smart lighting transformer lets you automate the dimming schedule to perfectly match sunset.
Quality fixtures and wiring cost roughly $100–$250. Save this if you plan on hosting evening wine nights.
- Key Materials: Brass/black lanterns, warm bulbs
- Vibe / Style: Romantic evening glow
- Difficulty: Safe electrical routing
- Budget Breakdown: Lanterns: $120 | Wiring: $50.
- Creator’s Tip: Use bulbs with a color temperature of 2700K or lower to mimic the glow of candlelight.
- Smart Sourcing: waterproof vintage outdoor lanterns and low-voltage smart landscape transformers.
Wait until you see how affordable this next vertical garden illusion actually is…
Vertical Garden Elements
Additional vertical structures beyond arches multiply opportunities for climbing roses while adding architectural layers to english garden patios. These elements increase planting capacity without consuming ground space.
29. Rose Obelisk Accent Features
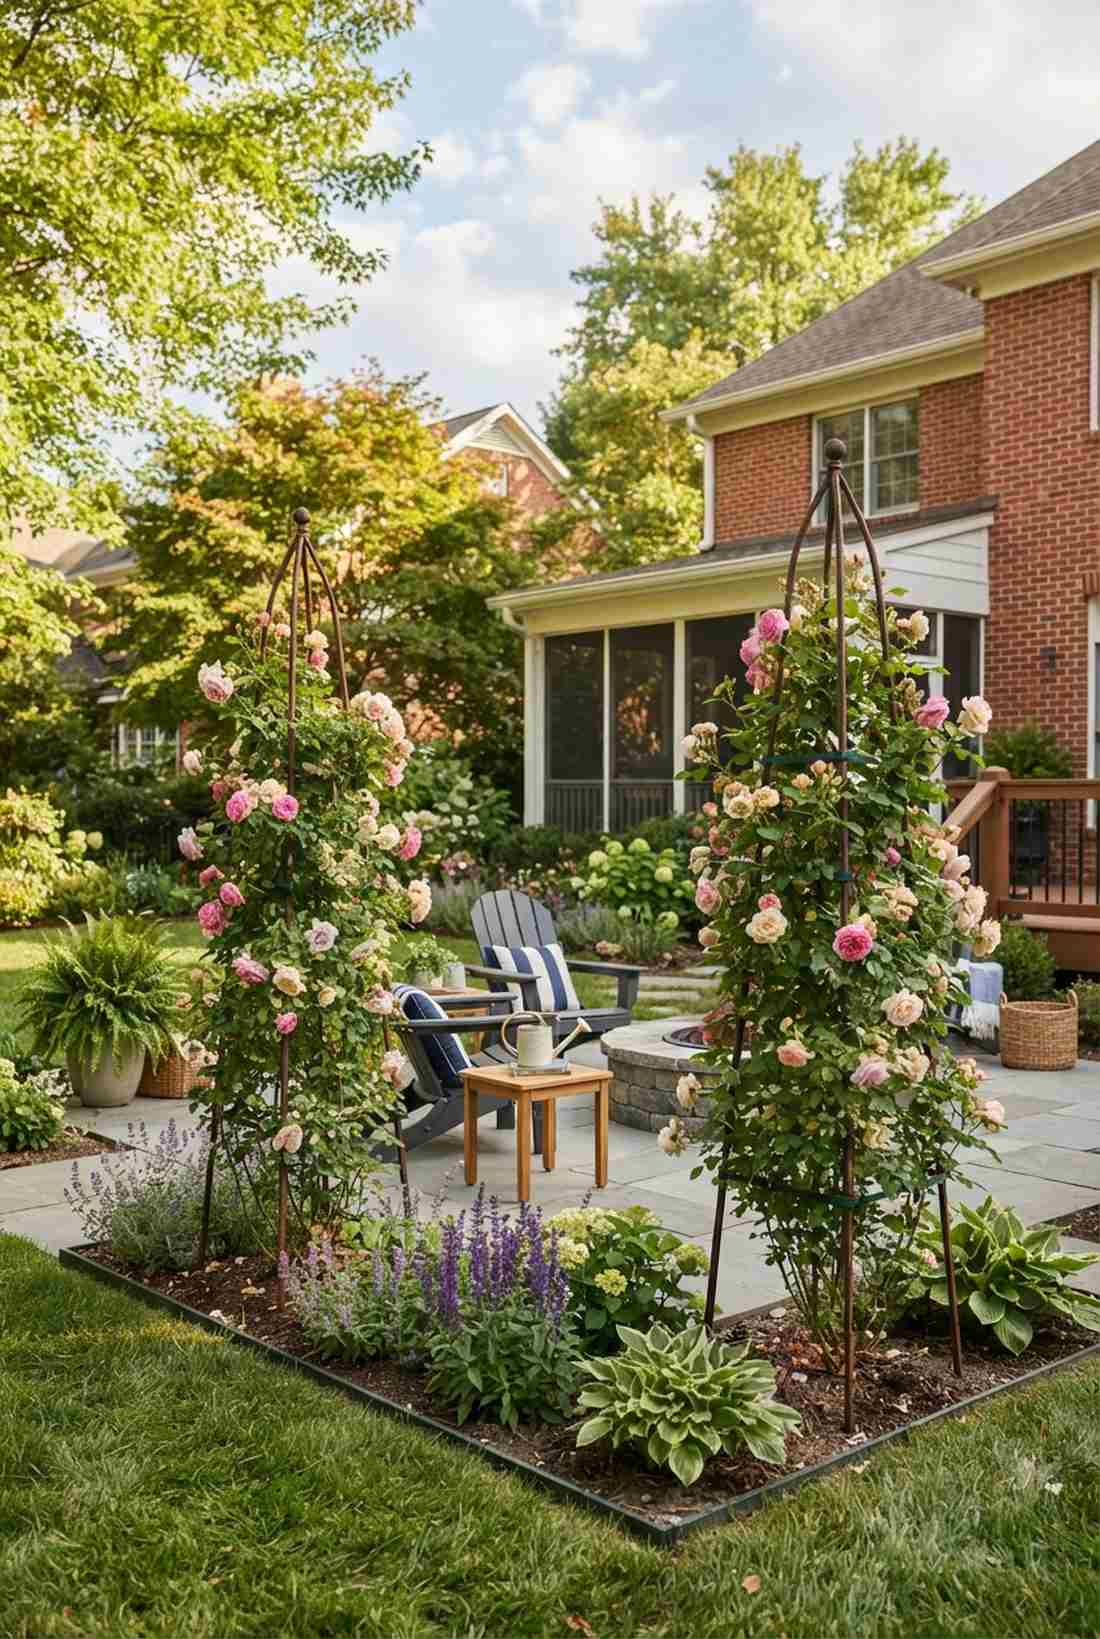
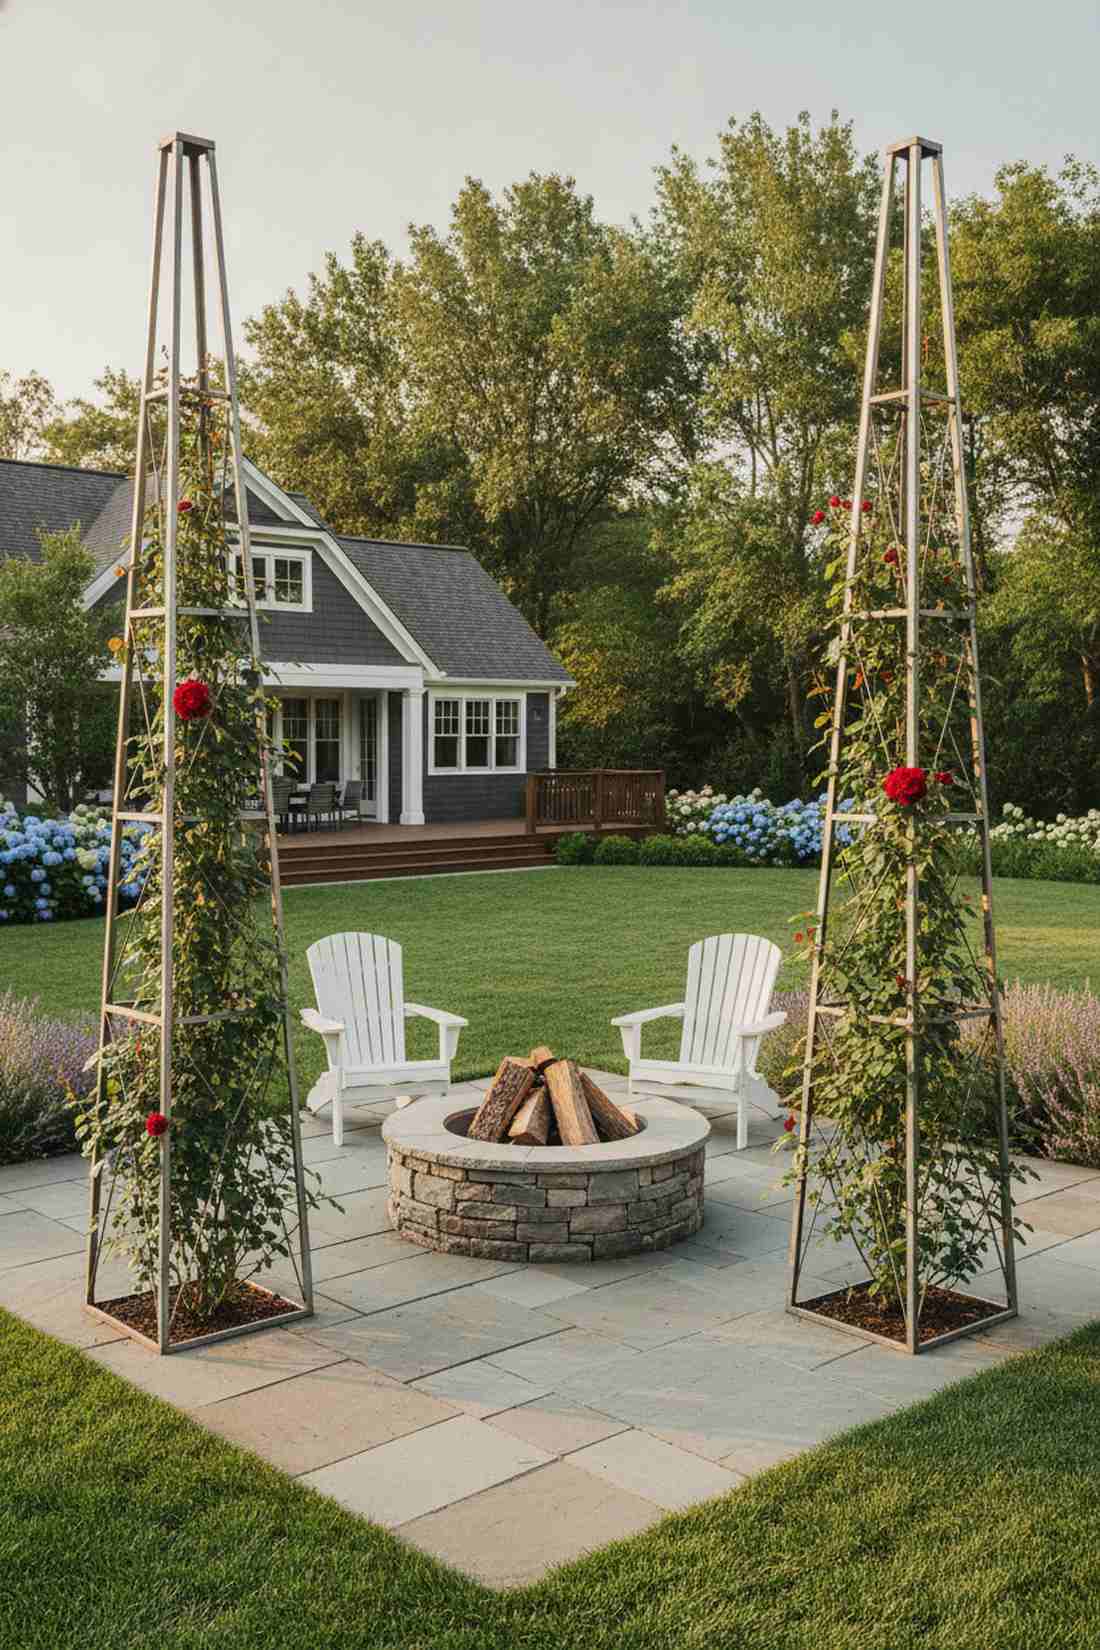
A towering garden obelisk feels like a regal sculptural monument breaking up the flat landscape. Fantastic for punctuating the corners of a square patio.
Small plants get lost against brick walls, but these vertical towers deliver a surprisingly premium look with minimal ground space. Purchasing rust-resistant galvanized obelisk towers guarantees they won’t snap under heavy winter snow loads.
A pair of obelisks costs $80–$160. It is a striking visual trick that draws the eye upward immediately.
- Key Materials: Metal/wood obelisks, climbing vines
- Vibe / Style: Regal vertical punctuation
- Difficulty: Simple positioning
- Budget Breakdown: Obelisks: $100 | Vines: $40.
- Creator’s Tip: Plant the rose 10 inches away from the base, angling the root ball slightly toward the tower.
- Smart Sourcing: rust-resistant steel obelisk towers (2-pack) and flexible plant support clips.
30. Wall Mounted Trellis Panels
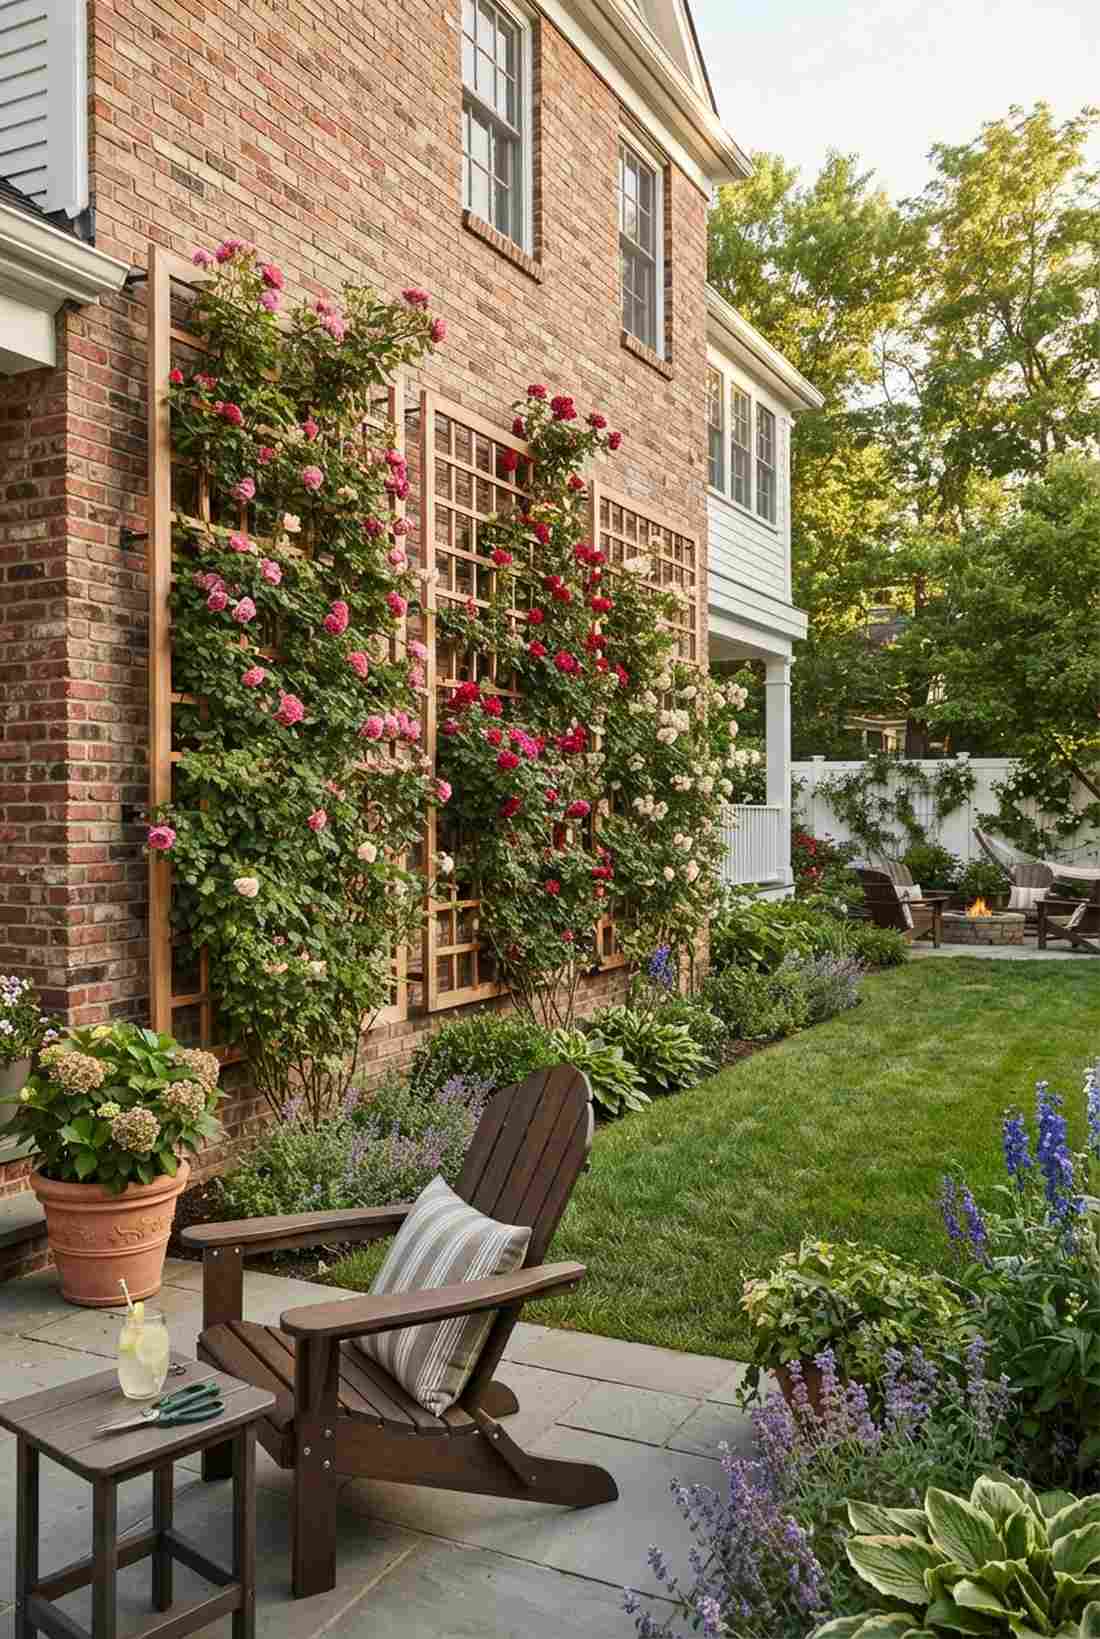
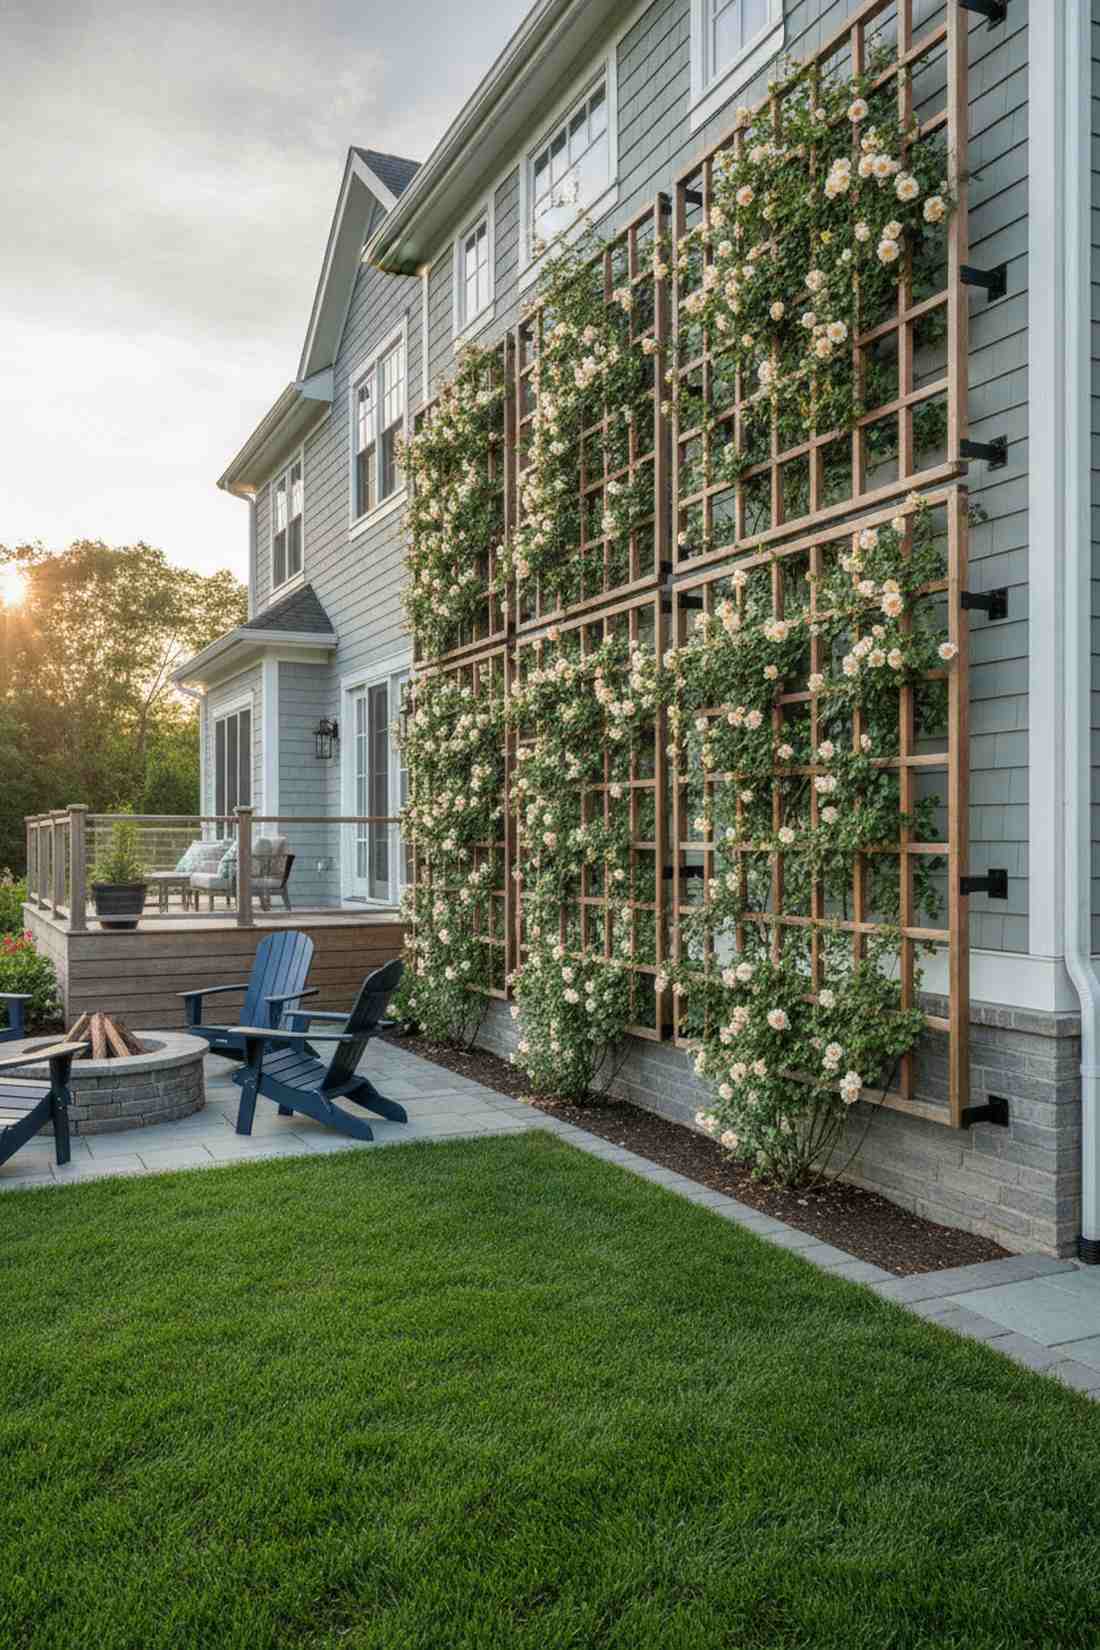
A rose-covered wall grid feels like an ancient castle wall blanketed in nature. The smartest way to hide ugly siding or a boring privacy fence.
Nailing vines directly to the house causes rot, yet a spaced trellis gives a designer-level finish while protecting your architecture. Using heavy-duty masonry standoff brackets ensures a 2-inch air gap for proper ventilation behind the leaves.
Installing wall grids runs $60–$120. Pin this to your vertical gardening strategy board.
- Key Materials: Trellis panels, standoff spacers
- Vibe / Style: Grand architectural blanket
- Difficulty: Drilling into masonry/wood
- Budget Breakdown: Panels: $70 | Brackets: $25.
- Creator’s Tip: Never mount a trellis flush to the wall; roses need air circulation to prevent powdery mildew.
- Smart Sourcing: heavy-duty cedar trellis panels and metal standoff mounting bracket kits.
31. Rose Pillar Border Punctuation
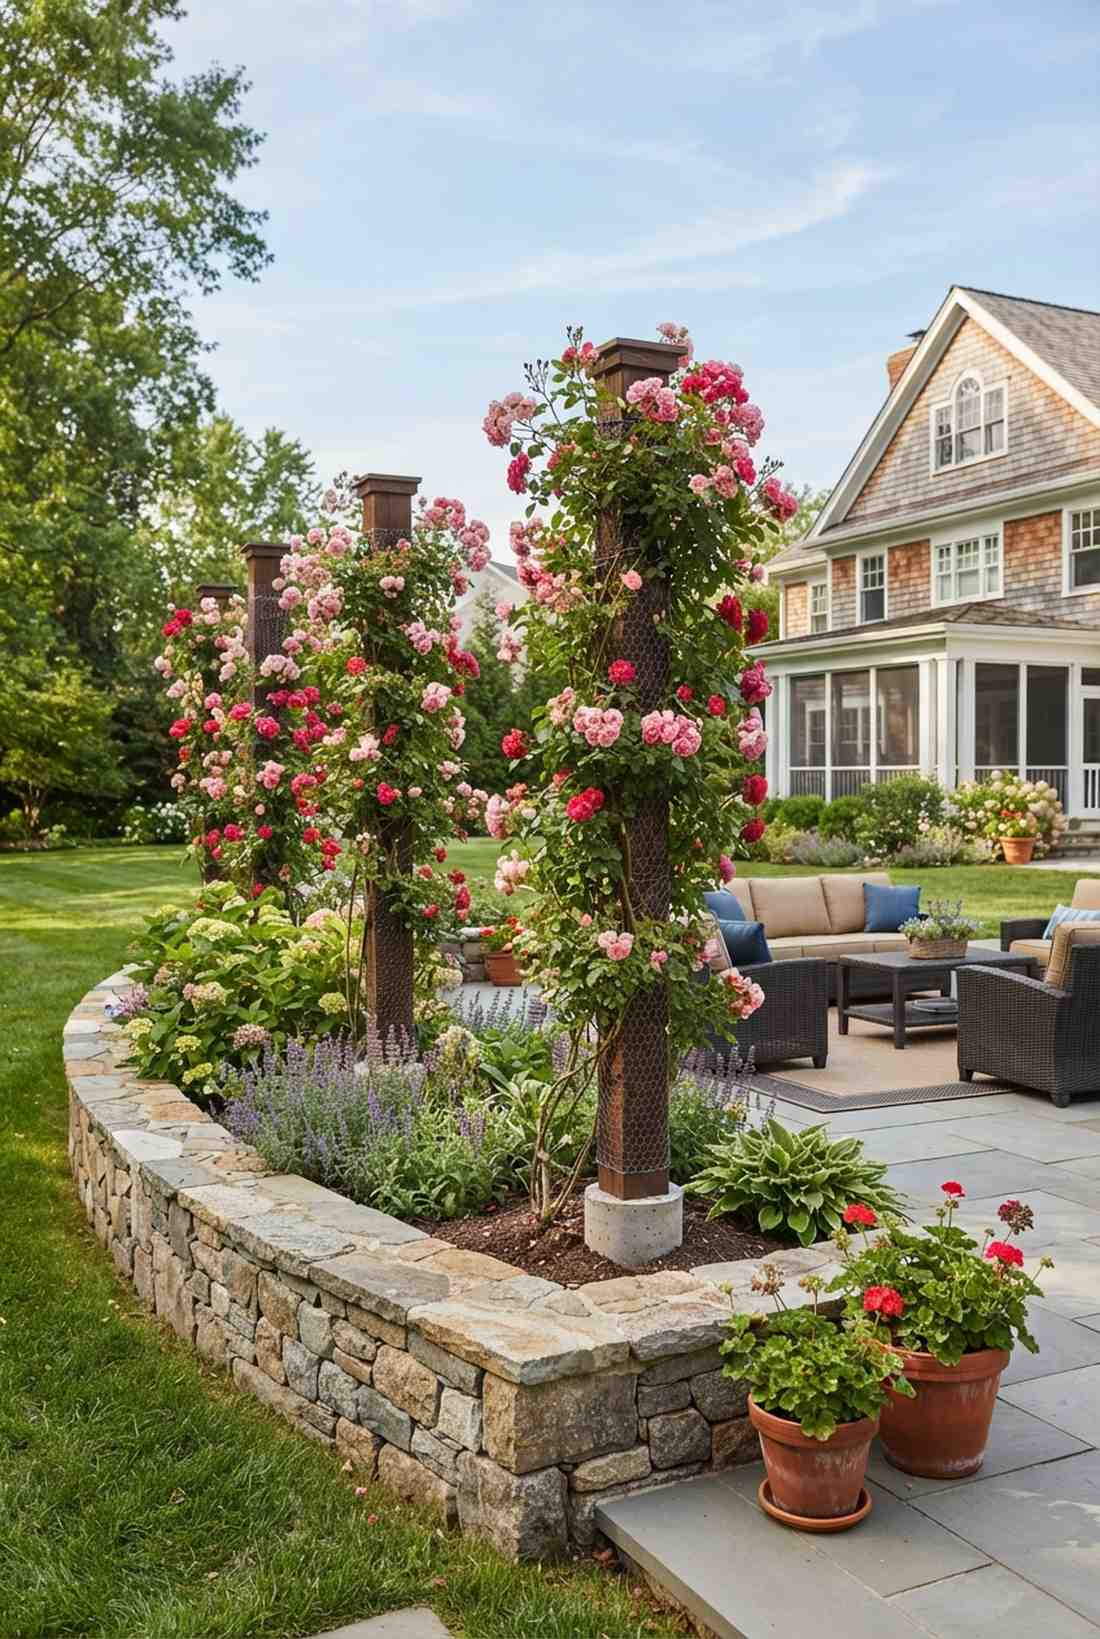
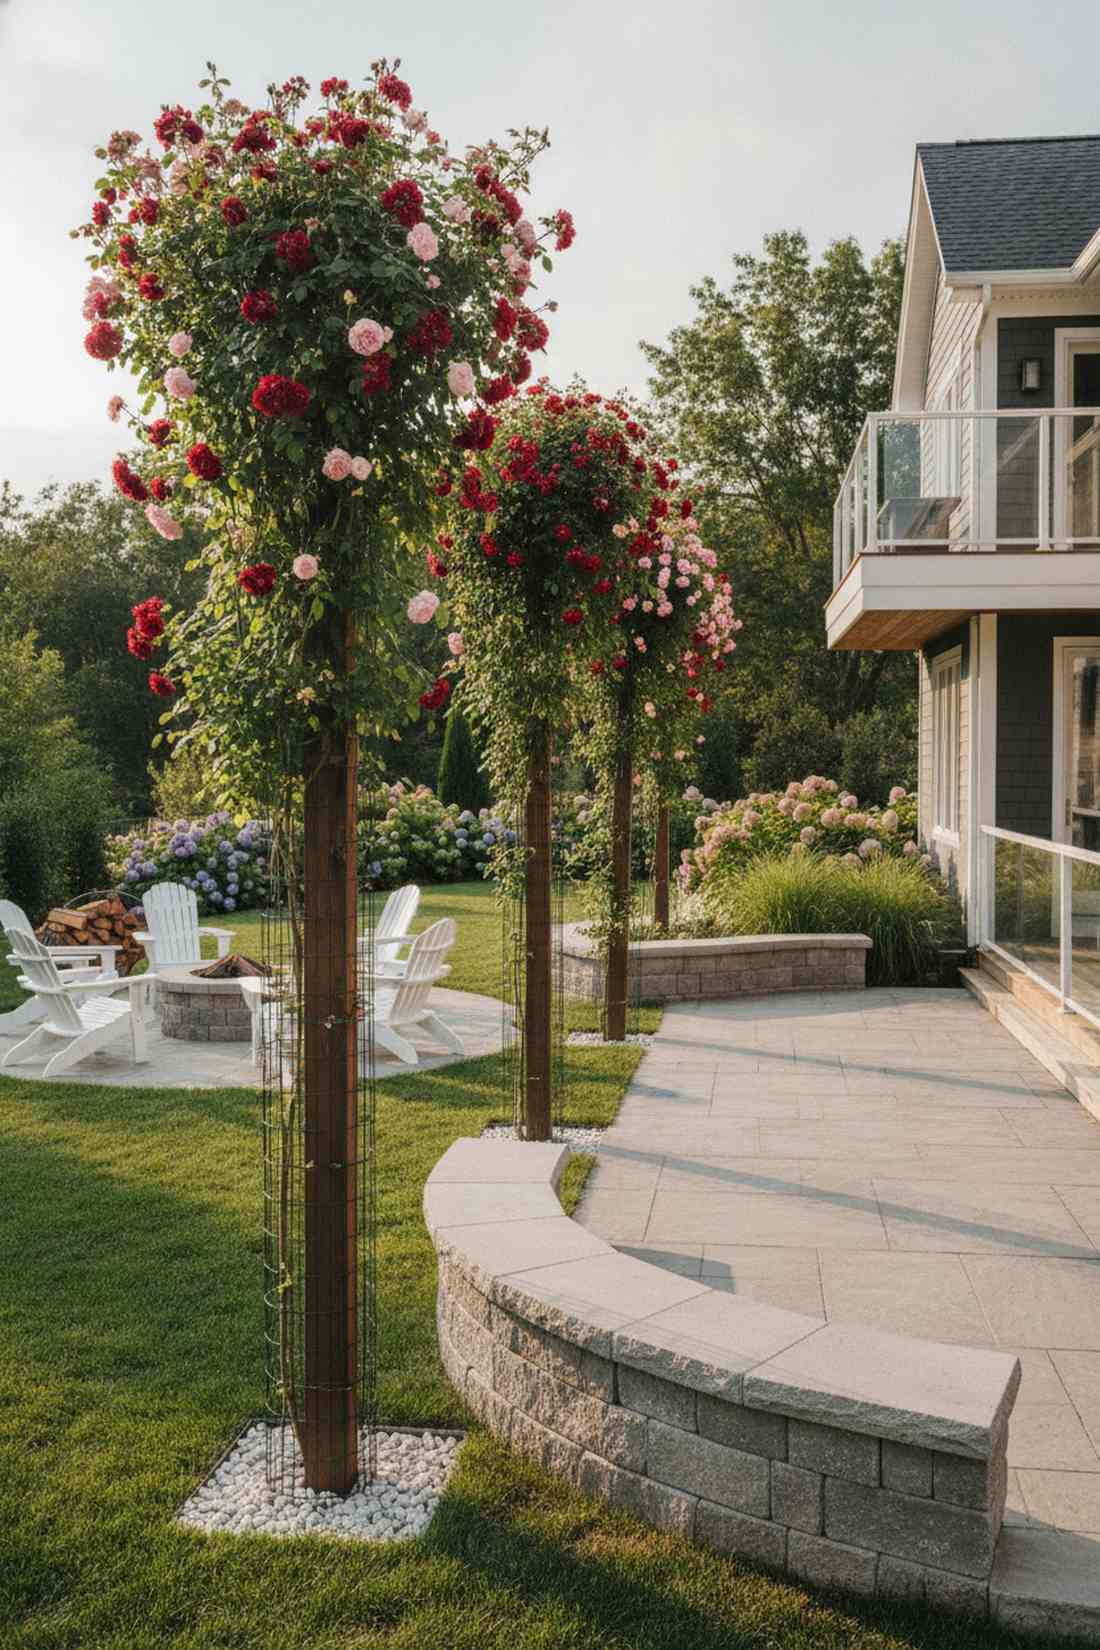
These freestanding floral columns feel like majestic sentinels guarding the patio border. Excellent for adding rhythm and height behind low seating walls.
A flat border lacks drama, but spaced floral pillars create an instant high-end estate feel. Securing them deep with quick-setting concrete post bases stops the heavy top-canopy from toppling over in strong winds.
Setting up 3-4 pillars costs roughly $150–$250. Highly recommended for adding architectural scale to flat yards.
- Key Materials: Wooden posts, concrete base
- Vibe / Style: Rhythmic grand sentinels
- Difficulty: Digging and pouring concrete
- Budget Breakdown: Posts: $100 | Concrete: $30.
- Creator’s Tip: Wrap the post in chicken wire before planting to give the rose tendrils infinite gripping points.
- Smart Sourcing: quick-setting structural post concrete (bags) and vinyl-coated garden fencing wire.
32. Gazebo With Rose Canopy

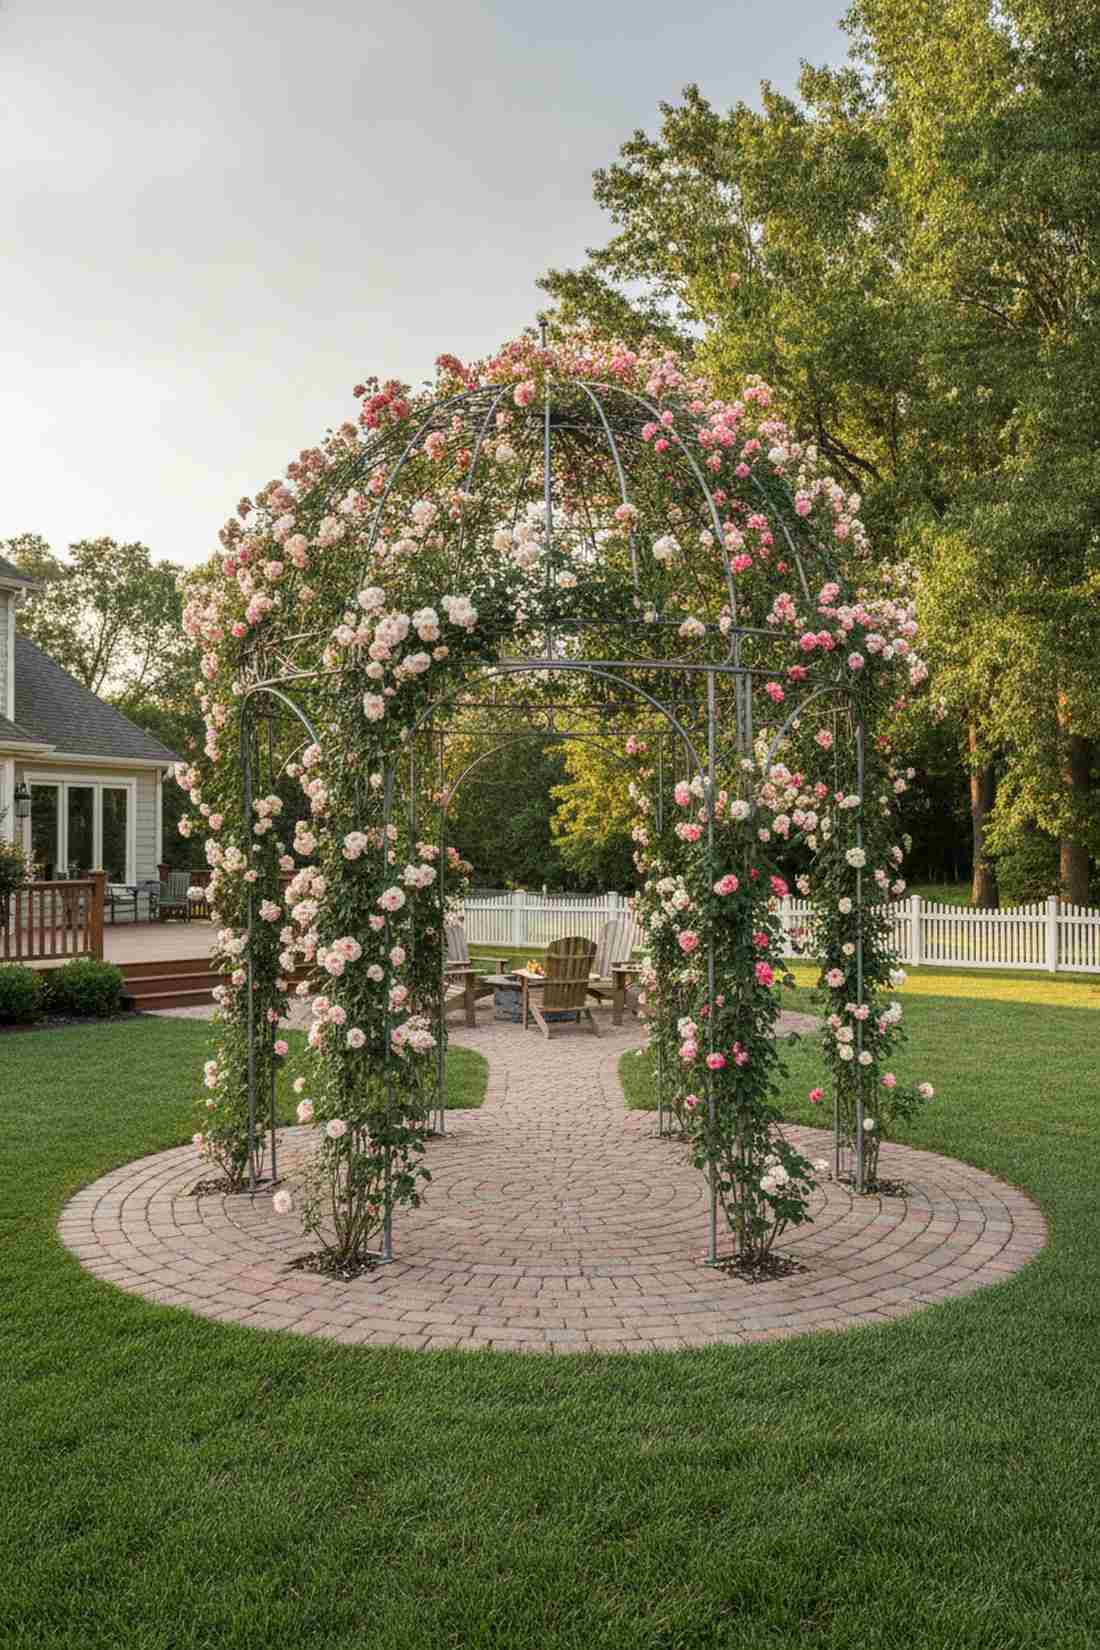
A domed rose gazebo feels like the ultimate fairytale escape room. A breathtaking centerpiece for large circular brick foundations.
Basic pop-up tents look temporary, but a metal gazebo smothered in blooms looks incredibly expensive and permanent. Spraying the entire frame with a clear UV-protective metal enamel before planting ensures zero rust stains bleed onto your patio.
A structural gazebo frame ranges from $300–$800. Save this if you want the ultimate backyard showstopper.
- Key Materials: Steel gazebo frame, multiple climbers
- Vibe / Style: Magical fairytale pavilion
- Difficulty: Large scale assembly
- Budget Breakdown: Gazebo: $400 | Enamel: $30.
- Creator’s Tip: Train the stems in spirals up the legs to force blooming at the bottom, not just on the roof.
- Smart Sourcing: heavy-duty steel garden gazebo kits and clear rust-preventative enamel sprays.
33. Downspout Trellis Vertical Garden
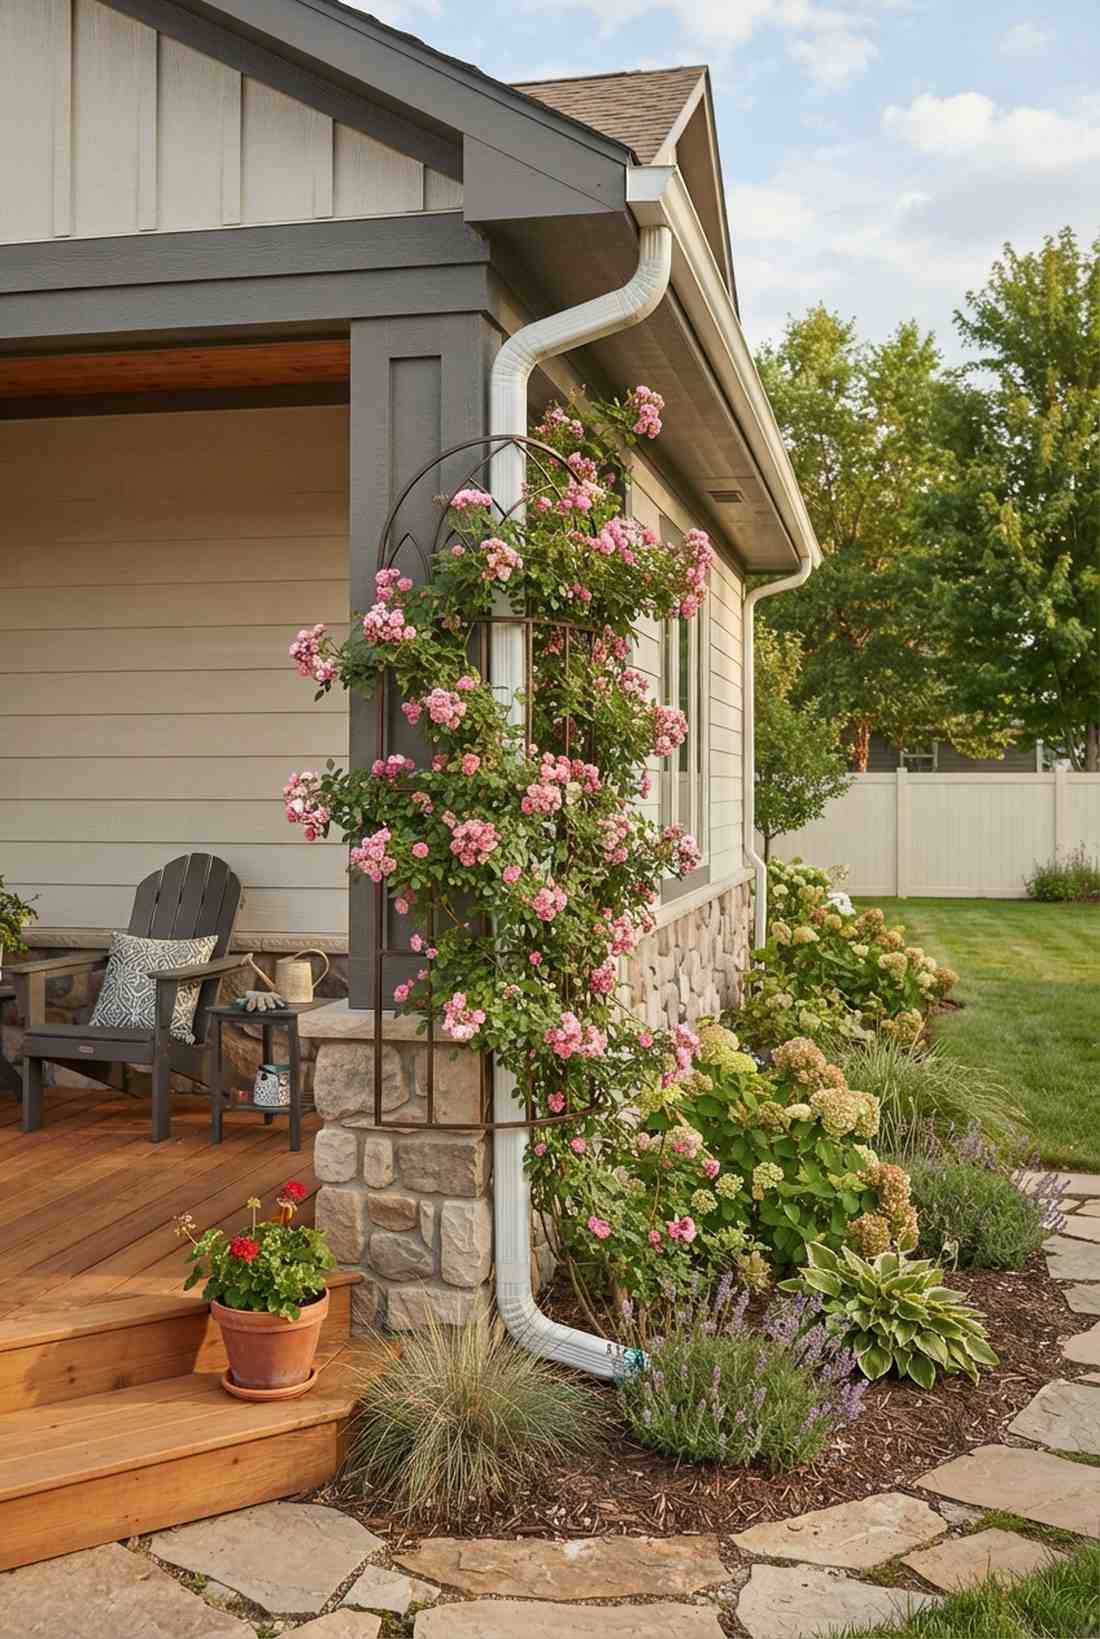
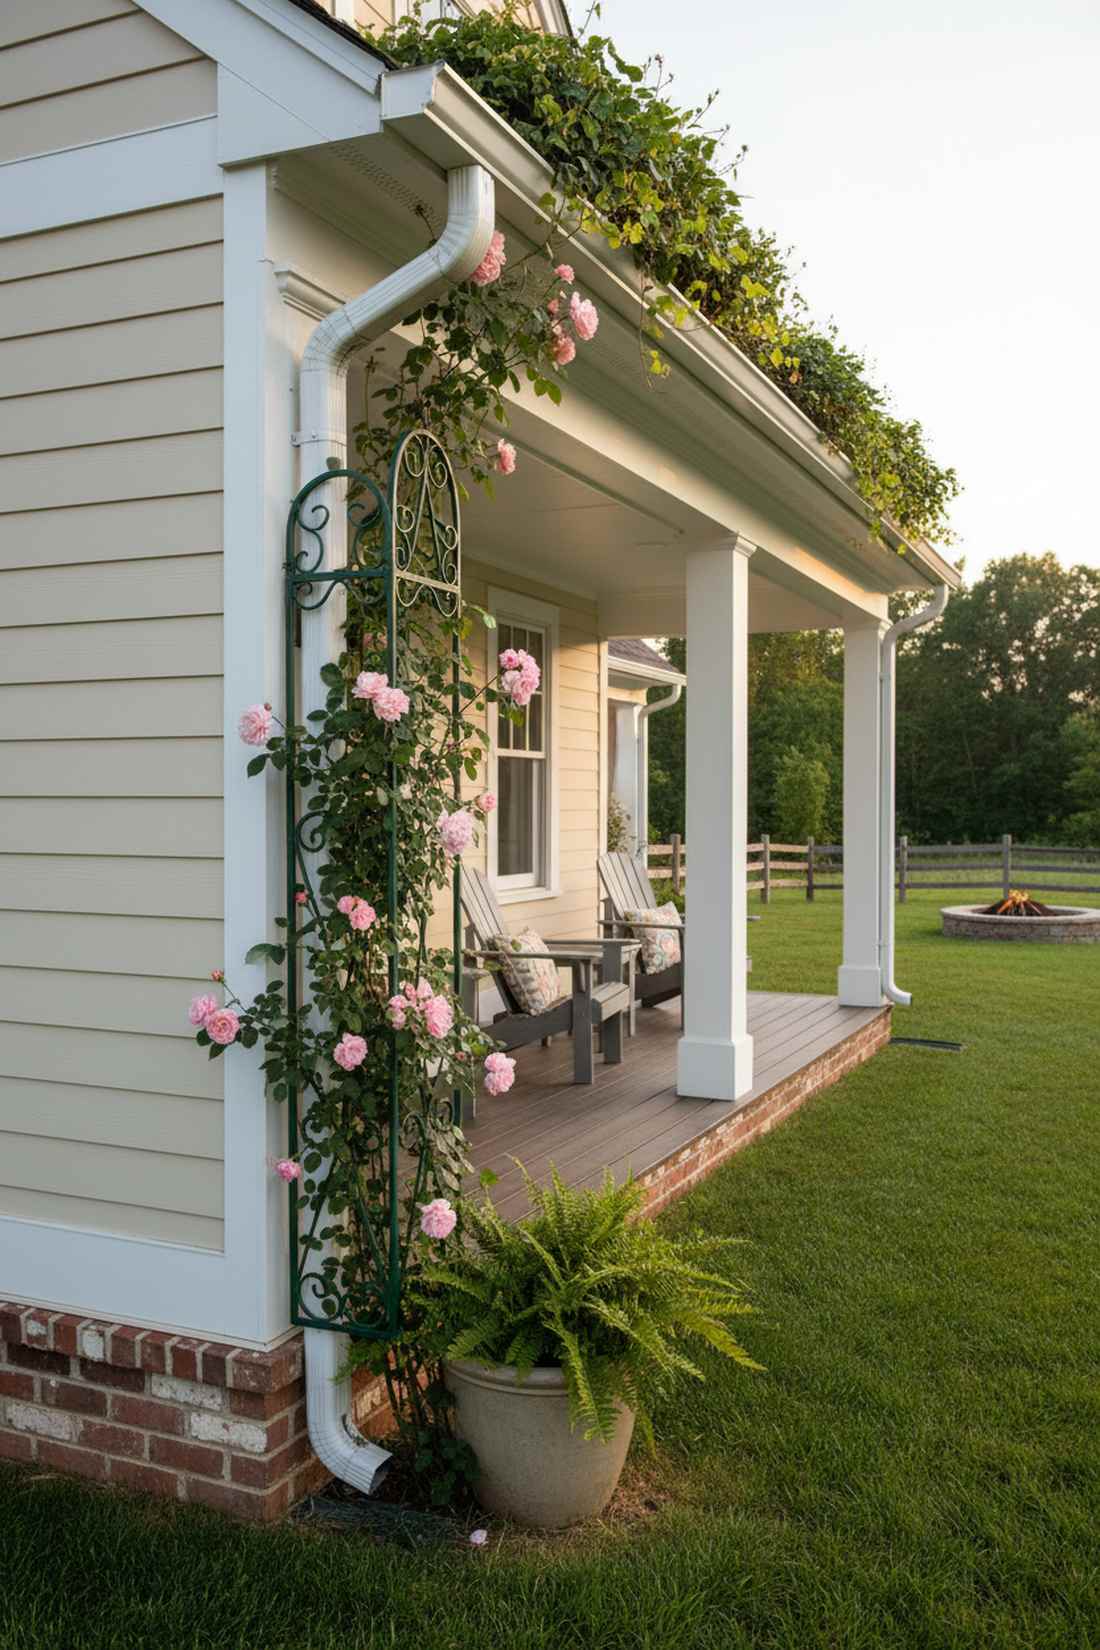
A gutter-hugging vine display feels like a brilliant fusion of utility and beauty. The absolute best hack for disguising ugly aluminum drainpipes.
Exposed downspouts ruin exterior photos, yet this camouflaging trick delivers a surprisingly premium look for pennies. Installing a rust-proof half-round trellis sleeve lets the plant grow upward without crushing the actual drainage pipe.
This ingenious upgrade costs only $30–$60. Pin this brilliant idea to hide your home’s eyesores instantly.
- Key Materials: Pipe-mounting trellis, compact climber
- Vibe / Style: Clever aesthetic camouflage
- Difficulty: Quick bolt-on installation
- Budget Breakdown: Trellis Sleeve: $40 | Hardware: $10.
- Creator’s Tip: Choose a thornless rose variety here so you can easily access the downspout for fall cleaning.
- Smart Sourcing: rust-proof downspout trellis kits and thornless climbing rose starter plants.
Conclusion
An english garden patio achieves a shockingly premium aesthetic when you combine structural rose arches with durable brick frameworks. By implementing all 33 of these exact blueprints—from the commercial-grade double arches to the smart downspout camouflage—you can build an outdoor room that looks incredibly expensive while tightly managing your material budget. Skip the flimsy craft-store supplies, invest in UV-resistant resins, heavy-duty sealants, and robust metal kits, and transform your basic yard into a majestic, high-end landscape that will last for generations.
Frequently Asked Questions
Which roses work best for garden arches?
For a setup that looks expensive and blooms reliably, choose robust climbing roses like Dublin Bay or New Dawn over delicate, high-maintenance shrubs. To maximize their growth on structures, always use premium organic rose fertilizer (bulk pack) and tie them up with weatherproof garden tying wire. Climbers produce massive individual blooms that cover heavy-duty galvanized arches perfectly, while vigorous ramblers are ideal for fully consuming massive pergola kits.
What is the most durable brick pattern for patios?
The herringbone pattern provides ultimate commercial-grade structural stability. Its interlocking 45-degree angle completely resists shifting under foot traffic and heavy patio furniture sets. To make it last forever, lock the joints using a weed-blocking polymeric sand and prep the base with professional-grade landscape fabric. Basket weave is a cheaper, faster alternative for low-traffic fire pit zones.
How do I maintain roses on arches and pergolas?
To keep the display looking like a high-end estate, aggressively prune climbers in late autumn using heavy-duty pruning shear sets to promote thicker blooming stems. Water deeply at the base to avoid mildew, and feed them with a slow-release climbing rose fertilizer every month. Secure wild stems to your arch kits using soft rubber ties so the metal doesn’t slice into the growing canes.
Can I use reclaimed brick for an english garden patio?
Absolutely, reclaimed brick is the ultimate secret for achieving an authentic, expensive cottage aesthetic on a budget. Salvaged antique bricks offer incredible historic texture, but you must protect them. Always seal porous old bricks with a breathable exterior masonry sealant so they don’t shatter during freeze-thaw cycles. Sourcing them by the pallet locally saves massive shipping costs.
How much sun do rose arches need?
For a dense, designer-level floral canopy, position your arches to receive at least six hours of direct sunlight. If your arch kits are placed in partial shade, opt for shade-tolerant varieties like ‘New Dawn’, though you will need to boost their nutrient uptake with a premium climbing plant fertilizer. Keep the structures out from under heavy tree canopies to prevent falling branches from smashing your rust-proof metal archways.