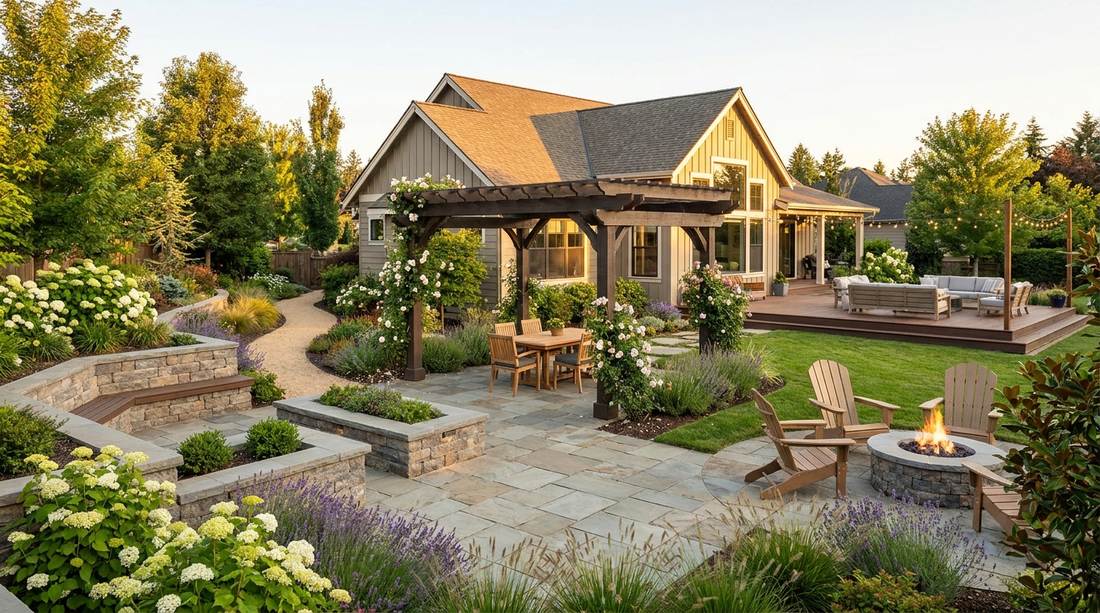
Transform your bare backyard into a breathtaking botanical sanctuary with premium garden designs that look straight out of a high-end architectural digest. Navigating your garden design landscape makeover doesn’t require a luxury landscape architect when you master the art of layered hardscaping, strategic plant placement, and bulk-sourced materials that mimic bespoke installations. This comprehensive visual setup guide reveals the smart product sourcing hacks, practical cost breakdowns, and structural secrets needed to achieve a lush, expensive-looking outdoor oasis using highly accessible supplies.
Design Snapshot: Key Principles
- Layered Spatial Depth: Combine ground-cover flora, mid-level shrubs, and overhead canopies to create immersive dimension across your yard.
- Architectural Integration: Frame existing landscape features with premium climbing vines and structural hardscaping that enhance natural forms.
- Scale and Proportion: Balance oversized focal points like water features or specimen trees with transitional pathways that guide the eye naturally.
- Perennial Color Theory: Transition chaotic flower beds into contemporary sophistication perfectly suited to any modern garden design layout.
Illuminated Landscape Architecture
Strategic lighting completely redefines your spatial aesthetic after sunset. Discover how to layer warm LED tones for a high-end designer glow year-round.
1. Cascading Architectural Ambient Lighting
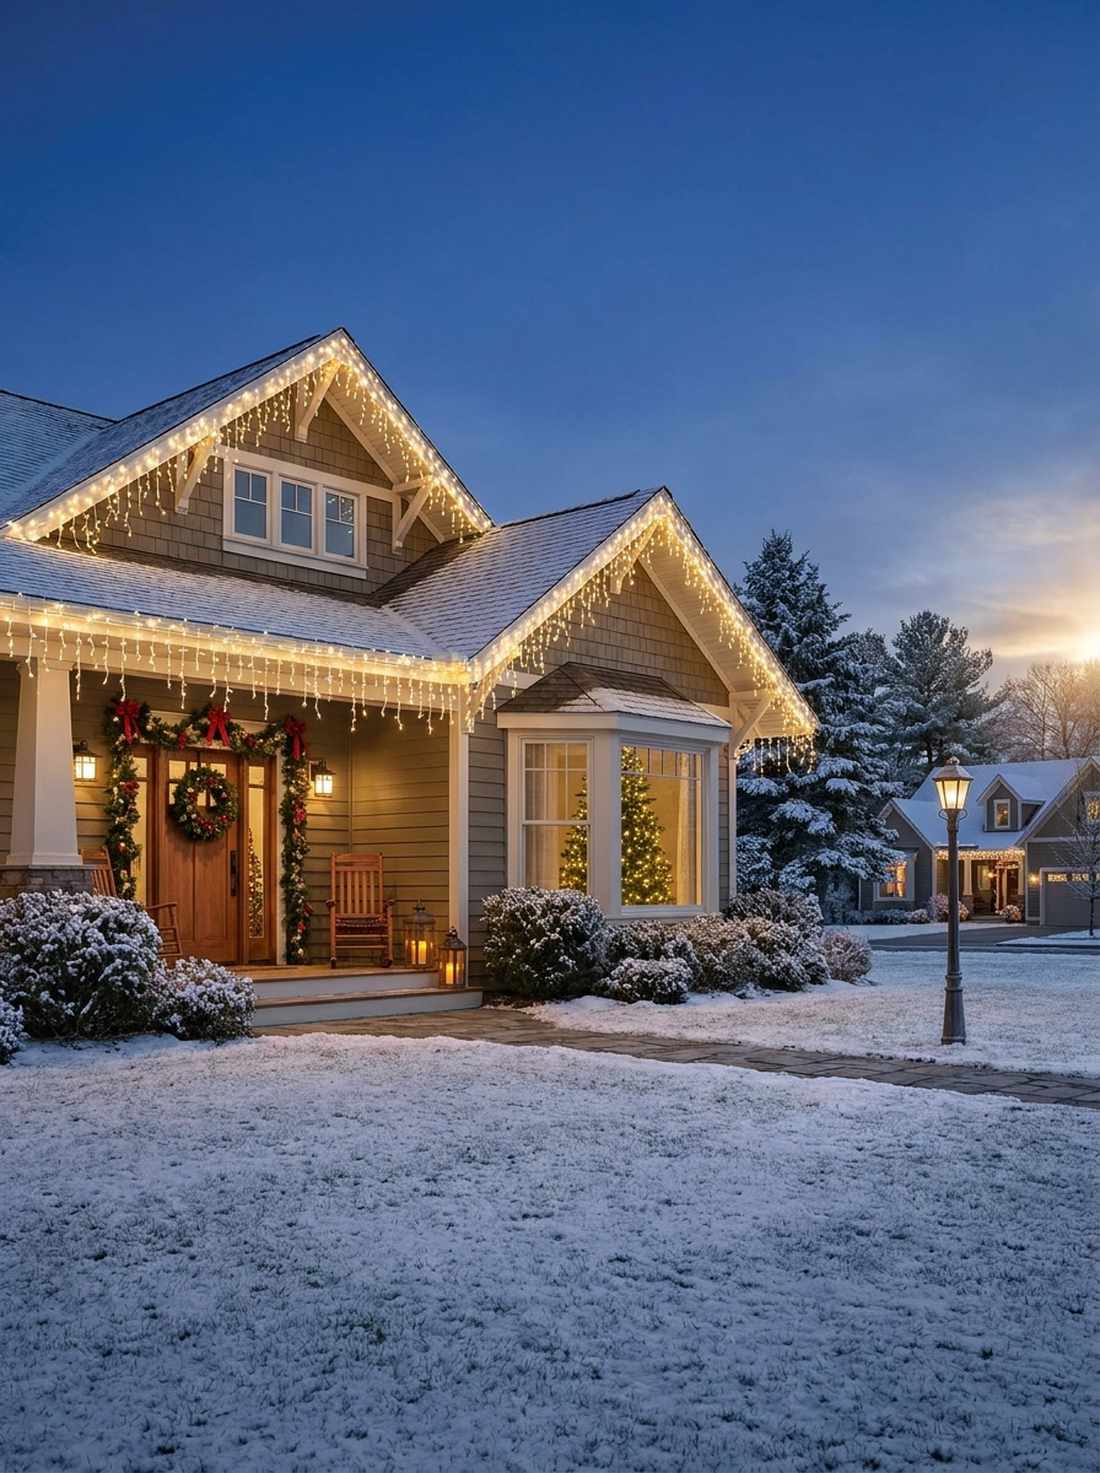
This setup feels like a glittering, luxurious Mediterranean villa patio. Implementing this illuminated outdoor boundary decor works exceptionally well for framing traditional pergolas or the sharp rooflines of a modern back porch.
Most homeowners settle for harsh floodlights, but utilizing professional-grade, warm-wash downlights gives a designer-level finish that transforms your entire exterior. Integrating top-tier garden design outdoor materials guarantees an expensive silhouette against the night sky.
You can easily pull this off for around $40–$80 per section. Pin this to your exterior renovation board if you are planning a high-impact structural upgrade!
- Key Materials: Pro-grade warm LED wash lights
- Vibe / Style: Elegant Mediterranean villa
- Difficulty: Intermediate ladder work
- Budget Breakdown: Lights: $50 | Mounting Tracks: $15
- Creator’s Tip: Hide the wiring inside architectural trim so the light source feels completely built-in.
- Smart Sourcing: shatterproof LED architectural downlights and heavy-duty hidden wire channels
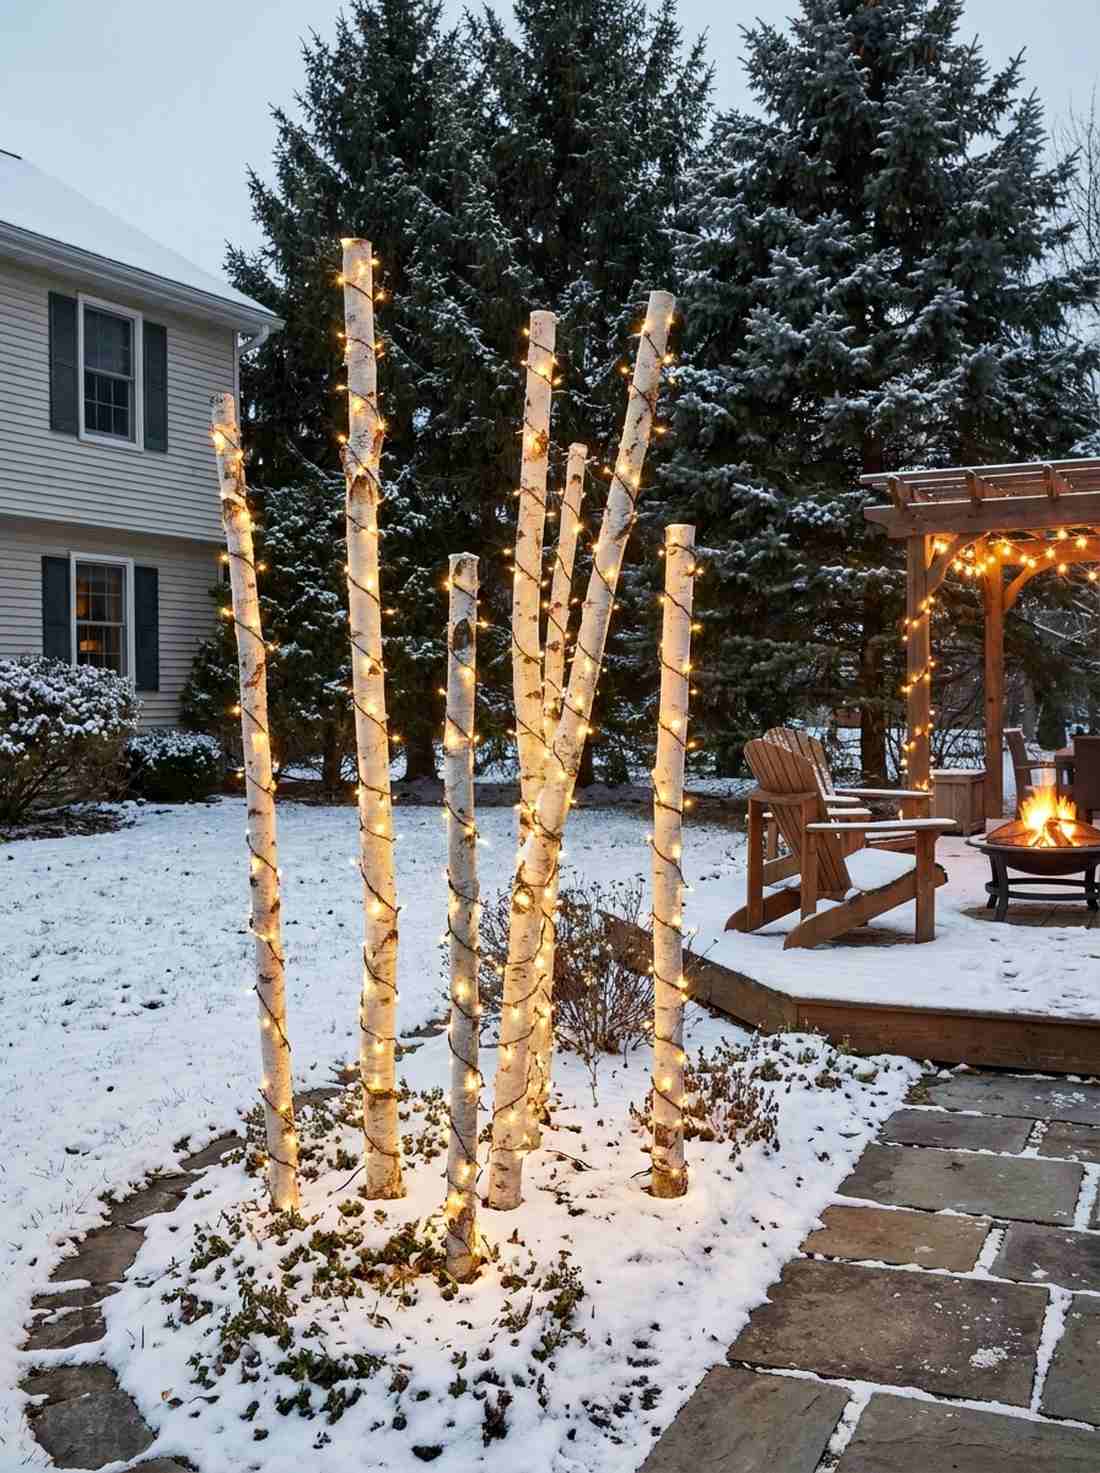
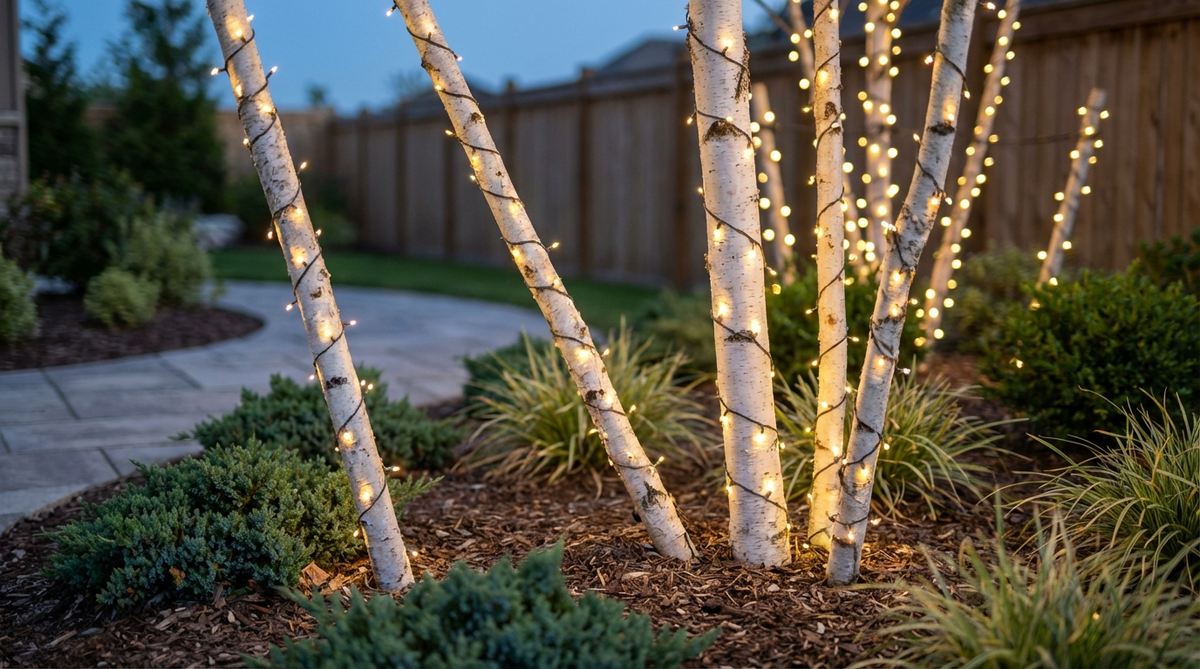
2. Specimen Tree Fairy Light Wrapping
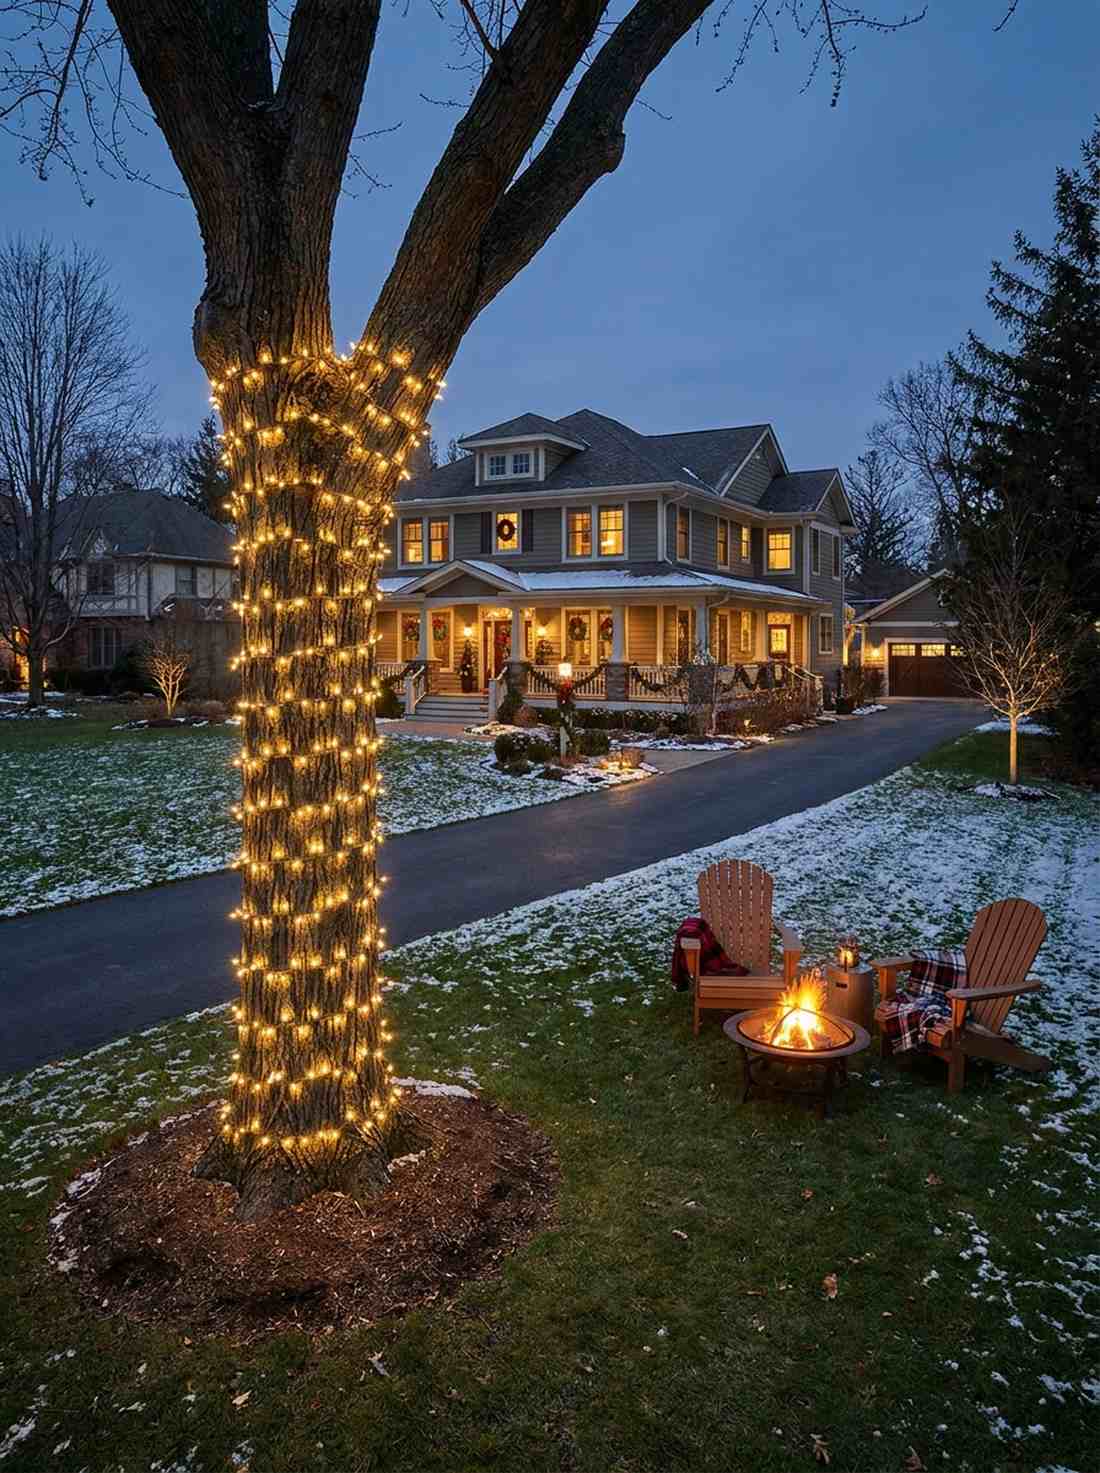

Wrapping mature tree branches feels like stumbling upon a magical enchanted forest. This vertical illuminated tree wrap is the perfect use-case for highlighting large oak, maple, or olive specimens in your courtyard.
Amateurs often leave wide, messy gaps, but keeping your wrap incredibly tight delivers a surprisingly premium look that demands attention. Utilizing commercial-grade wire ensures these garden design simple setups endure severe summer storms without flickering.
You can execute this glowing canopy for roughly $30–$50 per trunk. It’s a fast upgrade that completely changes the vibe after sunset.
- Key Materials: Brown-wire micro LEDs
- Vibe / Style: Enchanted evening courtyard
- Difficulty: Easy beginner setup
- Budget Breakdown: Micro Lights: $30 | Timers: $10
- Creator’s Tip: Keep light rotations exactly two inches apart for a dense, glowing pillar effect along the main branches.
- Smart Sourcing: commercial-grade warm LED spools and outdoor weatherproof smart plugs
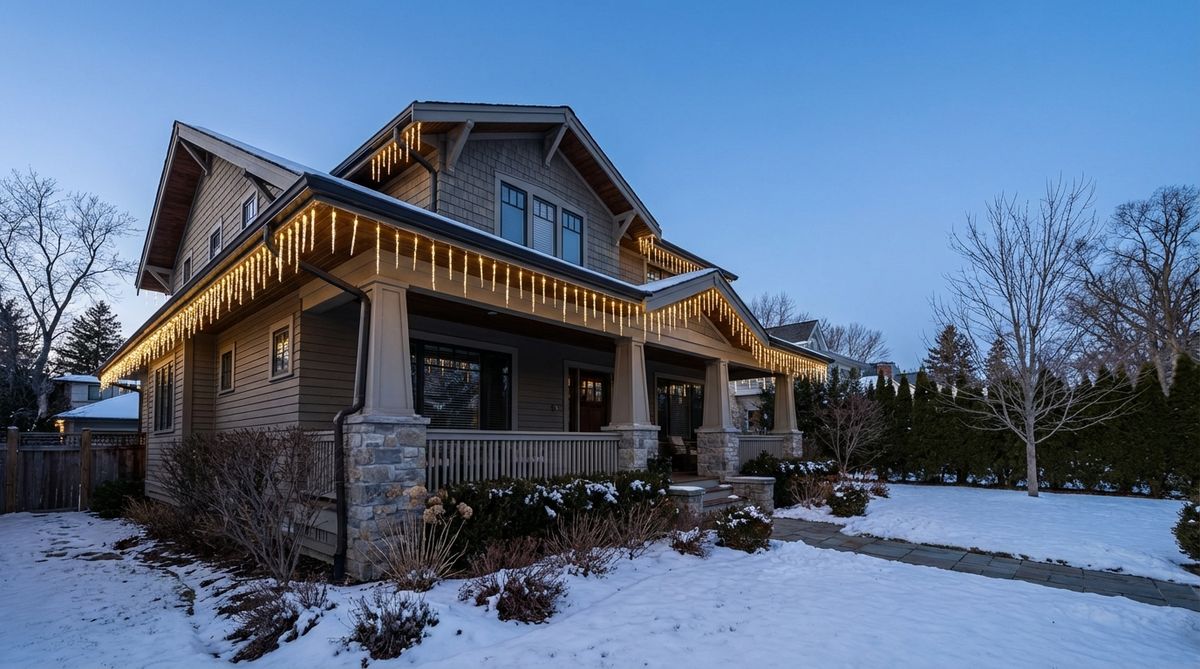
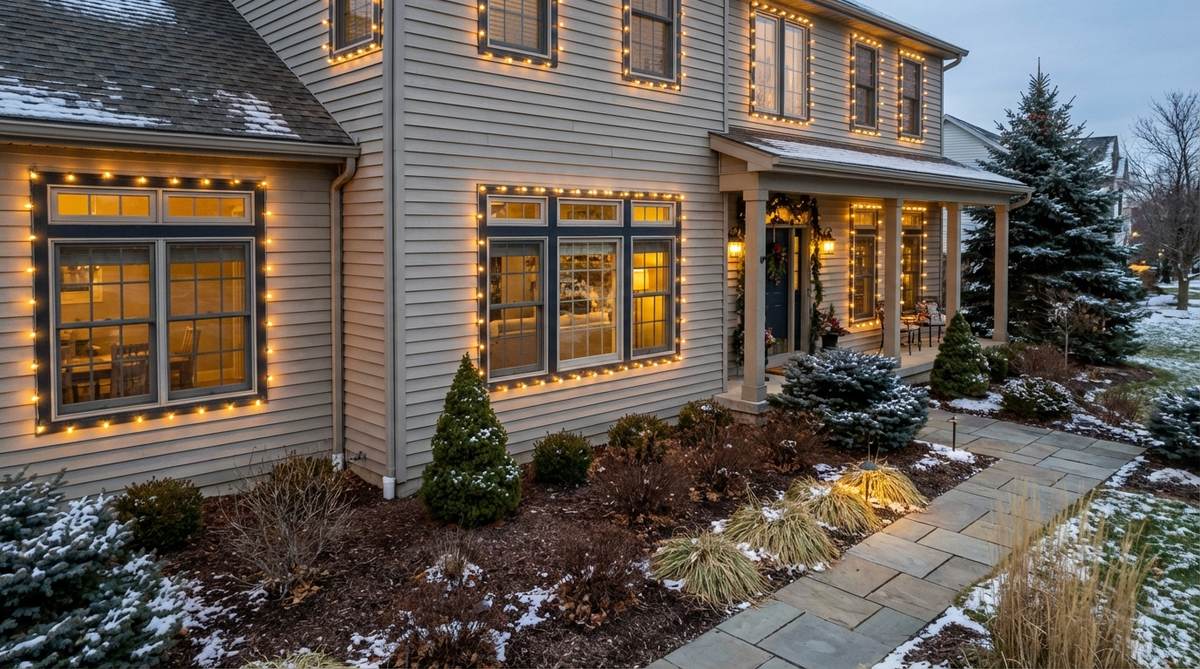
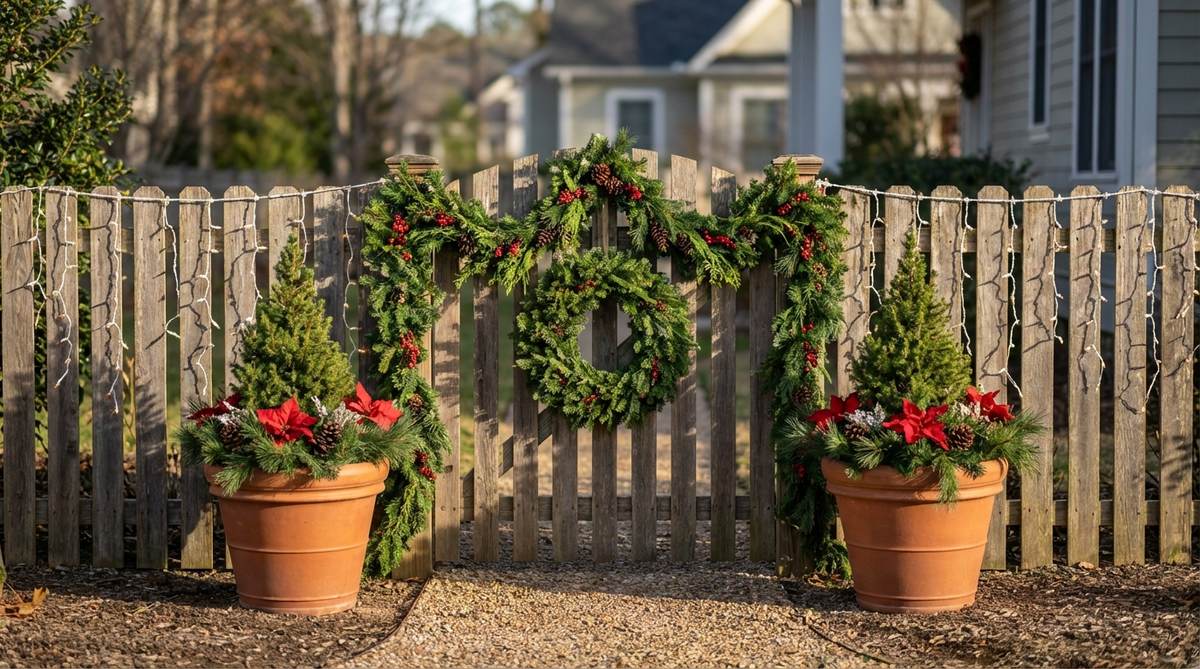
3. Perimeter Fence Line Wash Lighting
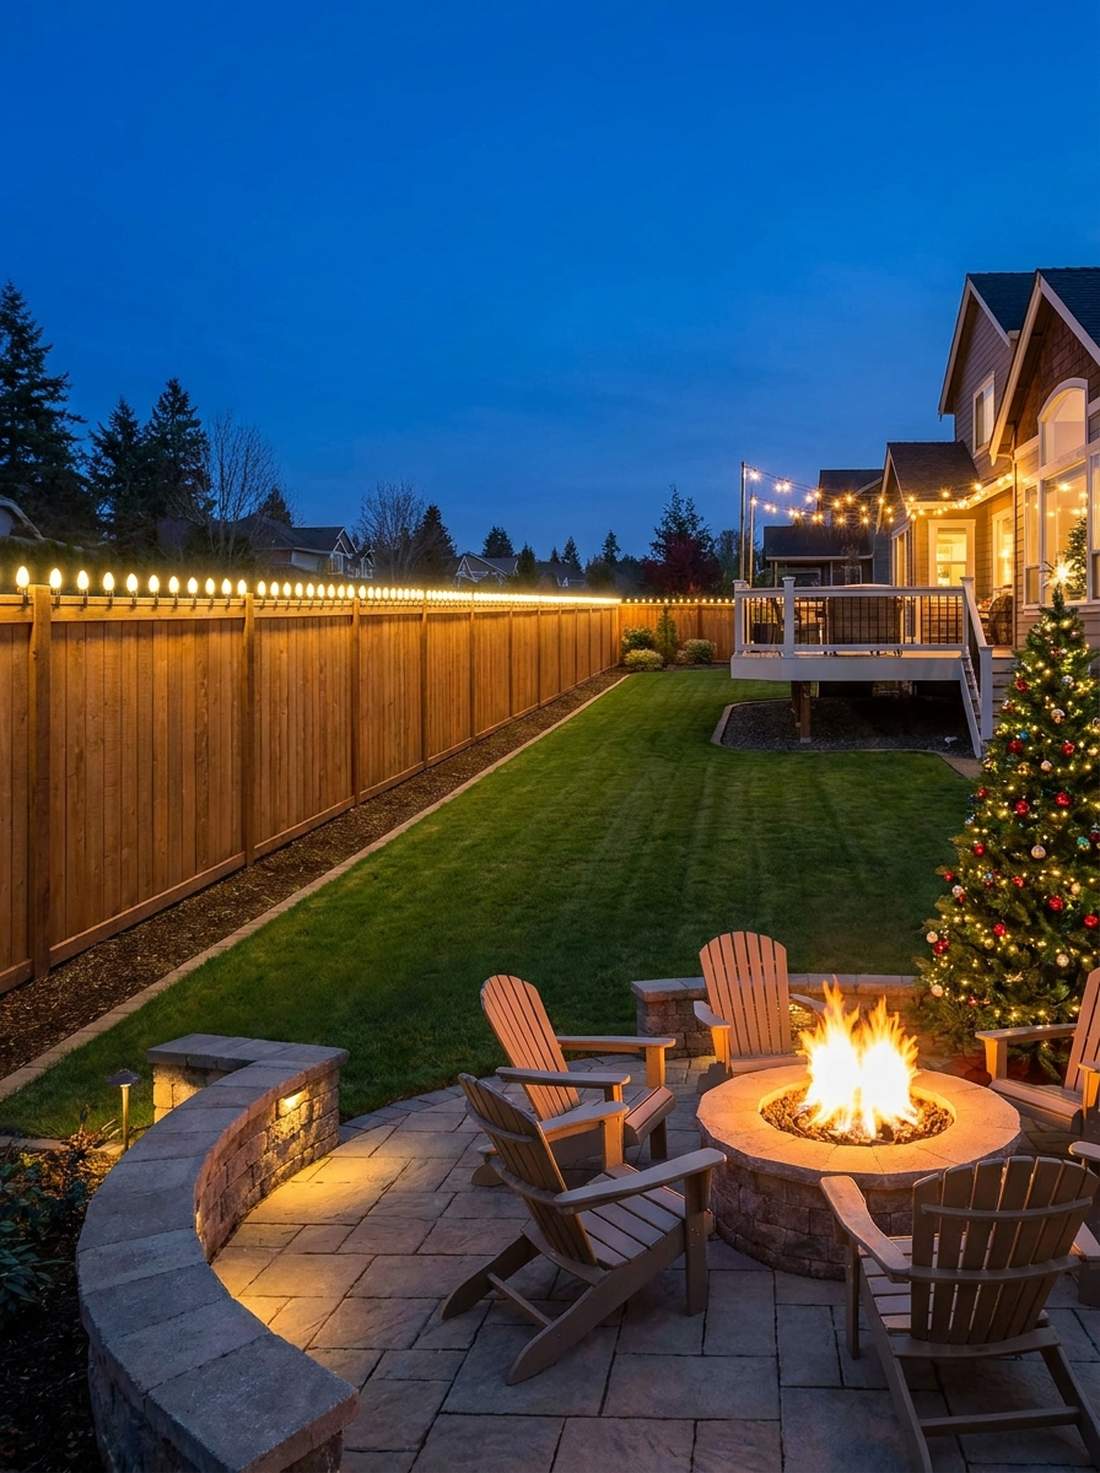
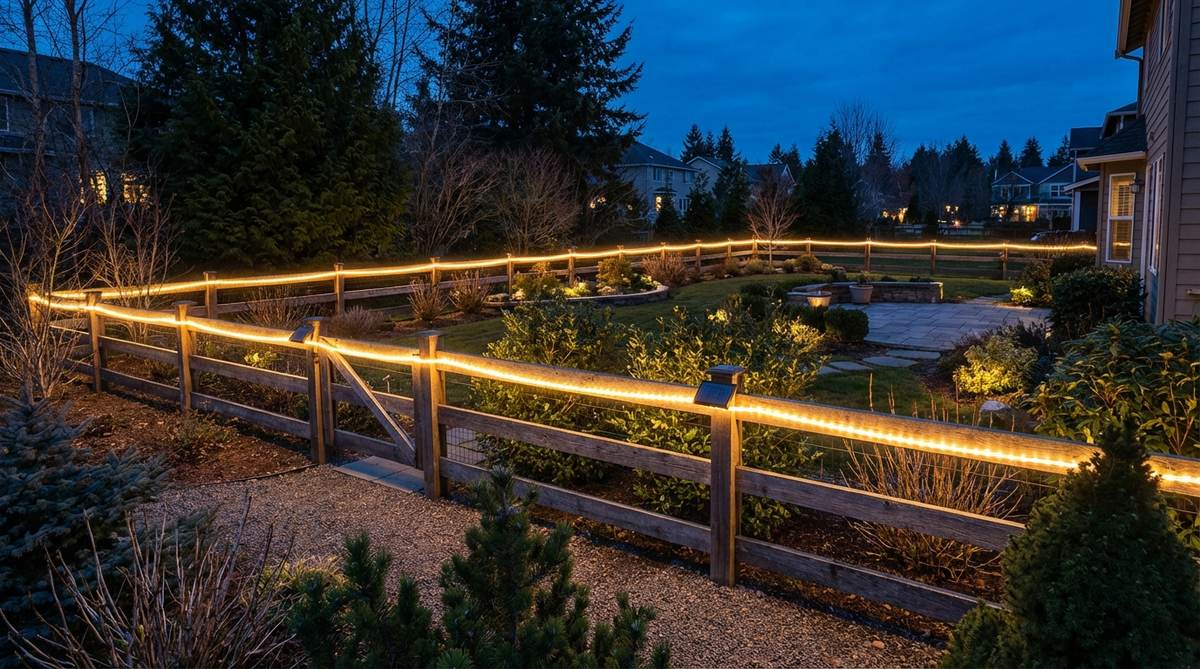
This boundary glow feels like a protective, luxurious halo surrounding a cozy secret garden. It works beautifully as a perimeter landscape lighting solution for horizontal slat boundaries or modern retaining walls.
Skipping traditional floodlights and upgrading to seamless linear channels looks far more expensive than it is. This is a critical component for tying together diverse garden design pictures into a cohesive, structured property line.
Expect to spend around $50–$90 depending on your fence length. Save this to your DIY weekend garden board!
- Key Materials: LED neon flex or linear wall washers
- Vibe / Style: Structured estate elegance
- Difficulty: Fast and easy
- Budget Breakdown: Linear Lights: $60 | Tracks: $20
- Creator’s Tip: Point the light slightly downward to graze the texture of the wood or stone rather than blinding your neighbors.
- Smart Sourcing: UV-resistant flexible LED neon rope and acrylic mounting channel bulk kits
4. Specimen Shrub & Statue Uplighting
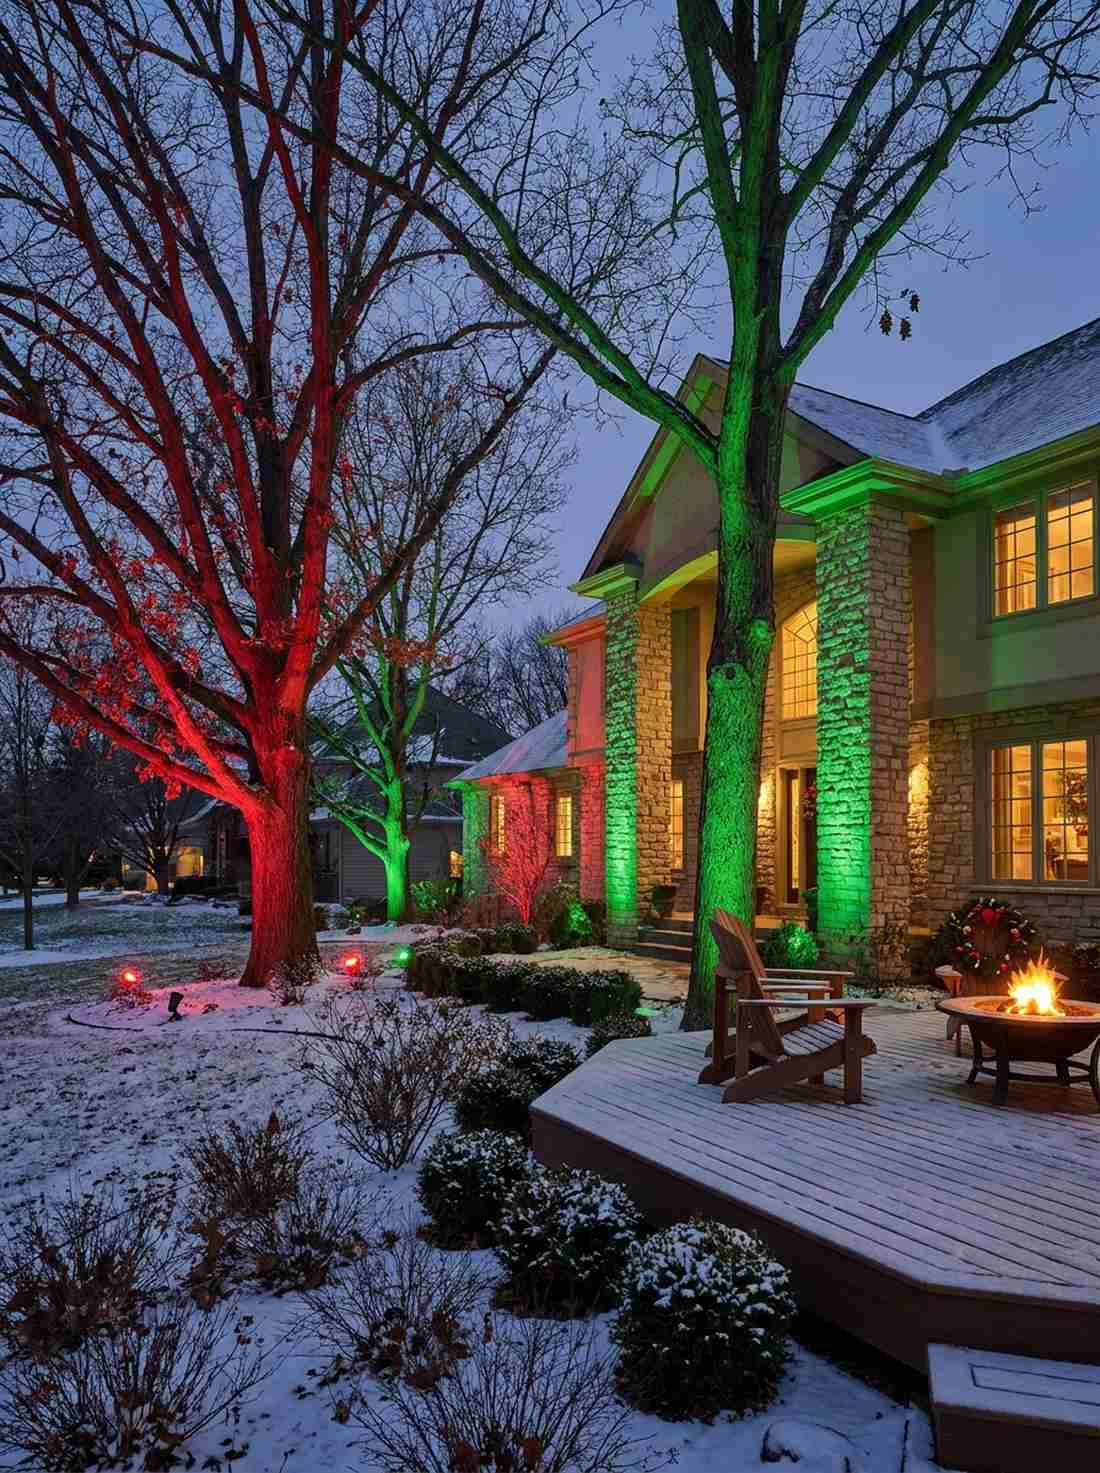
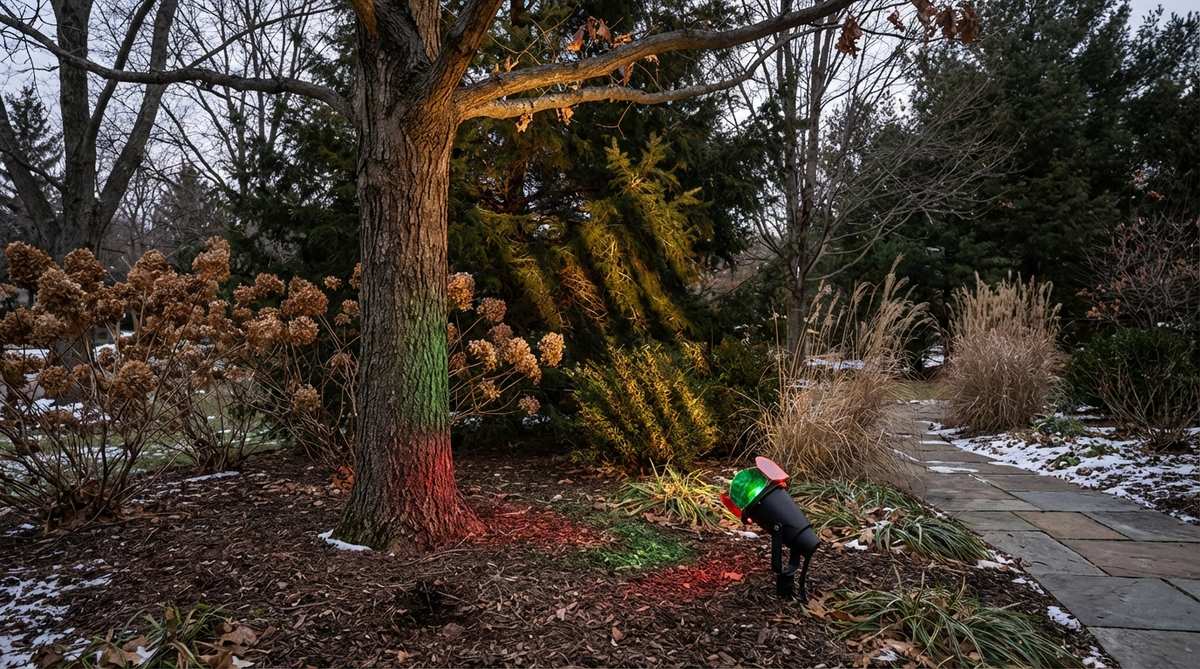
Casting light upward makes your foliage feel like dramatic, theatrical shadow-art. This architectural ground uplighting layout is brilliant for illuminating entry columns, Japanese maples, or stone statuary.
Most rely on weak plastic solar spikes, but hardwiring low-voltage brass fixtures delivers a high-end designer finish instantly. Focusing on key structural plants completely modernizes standard garden designs.
This aesthetic enhancement runs around $60–$120 for a quality starter kit. Highly recommended for a quick weekend win.
- Key Materials: Low-voltage brass spotlights
- Vibe / Style: Dramatic theatrical landscaping
- Difficulty: Moderate wiring
- Budget Breakdown: Transformer: $40 | Spotlights: $50
- Creator’s Tip: Angle beams at exactly 45 degrees to avoid blinding visitors while maximizing the silhouette of the leaves.
- Smart Sourcing: low-voltage brass uplight kits and waterproof direct-bury wire connectors
Wait! Don’t scroll past this next layout—it’s ridiculously cheap but looks like a custom $500 luxury patio installation…
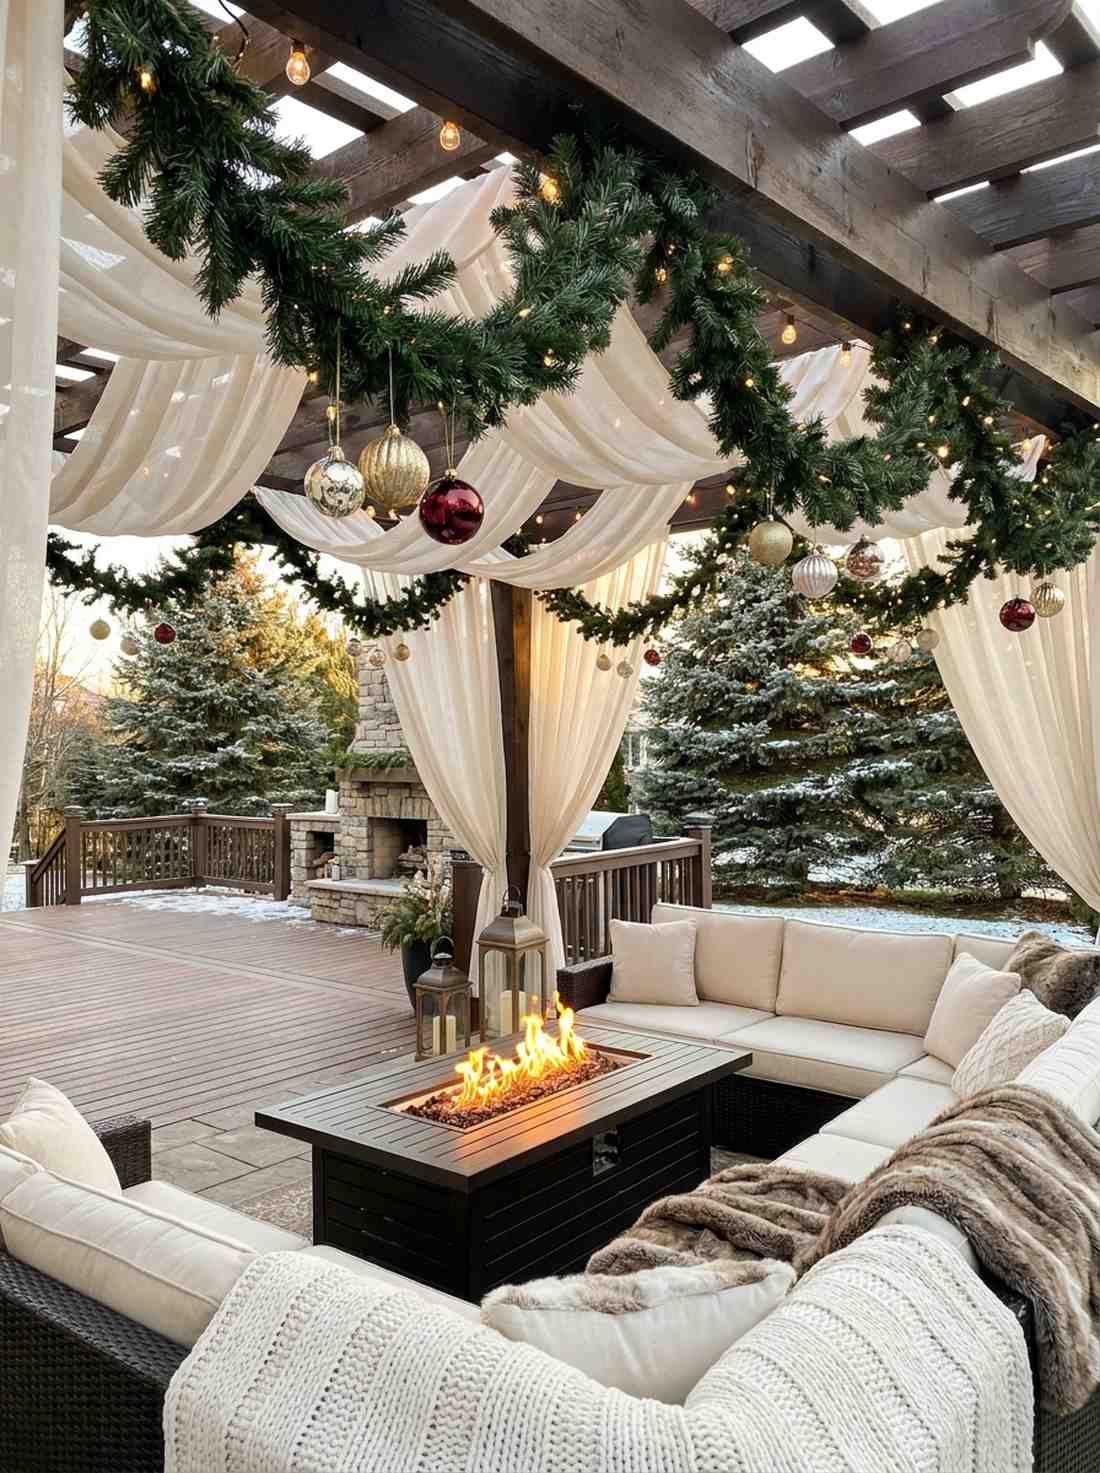
5. Pergola Canopy Bistro Lighting
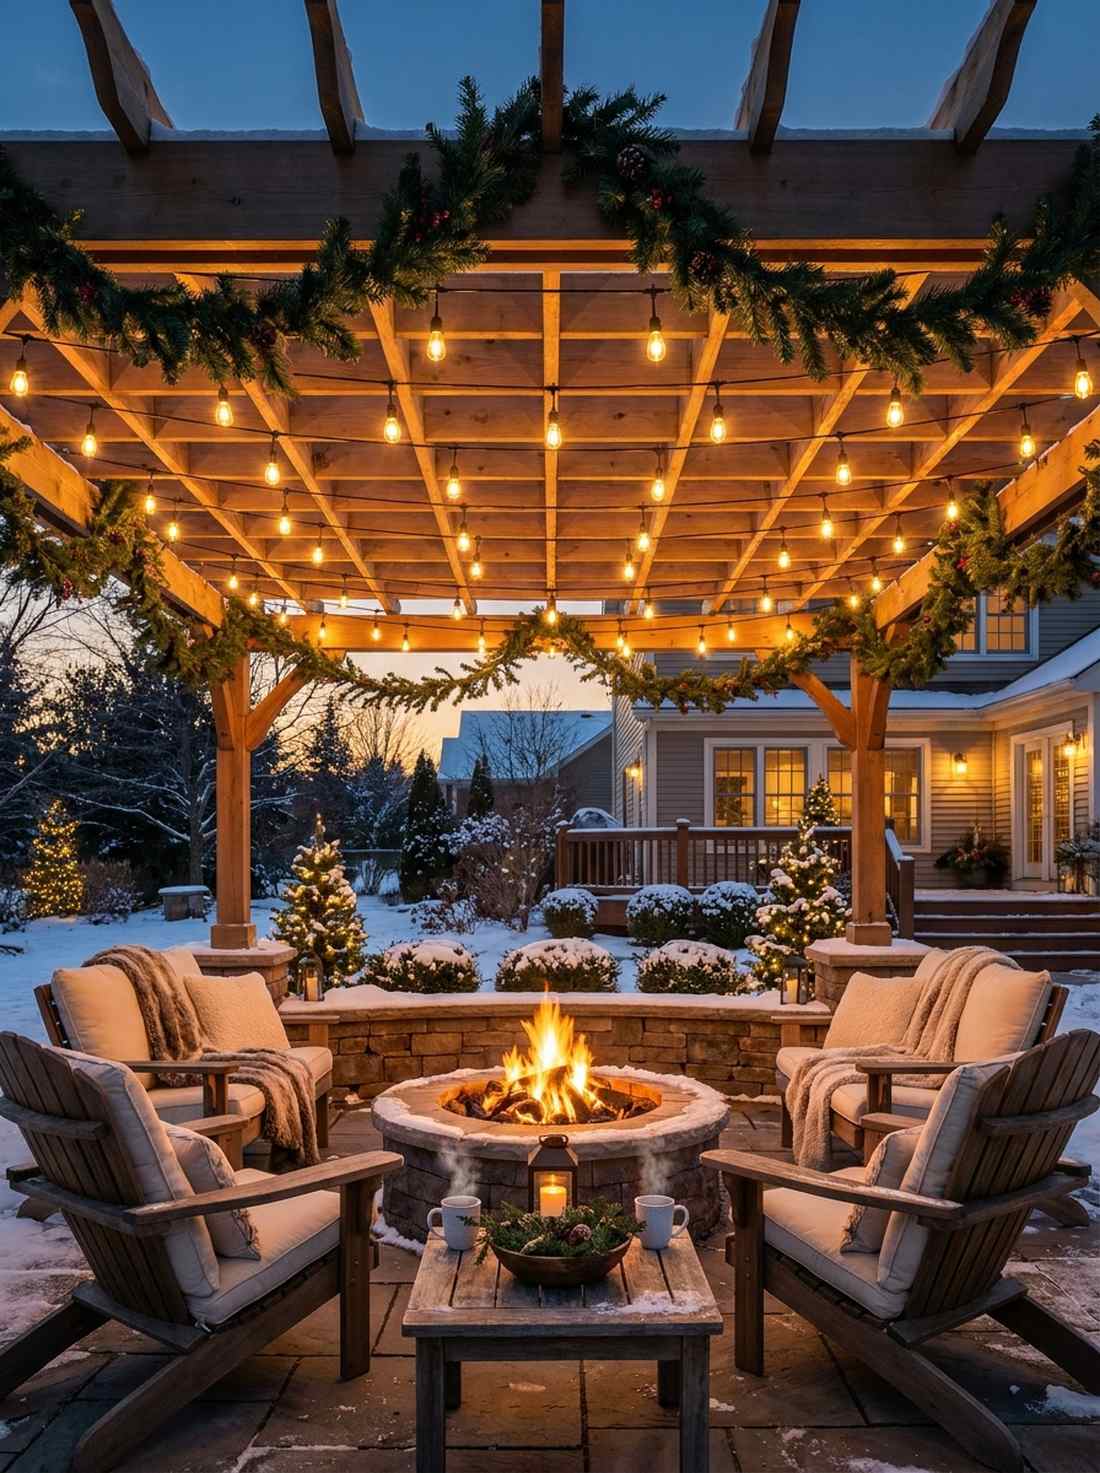
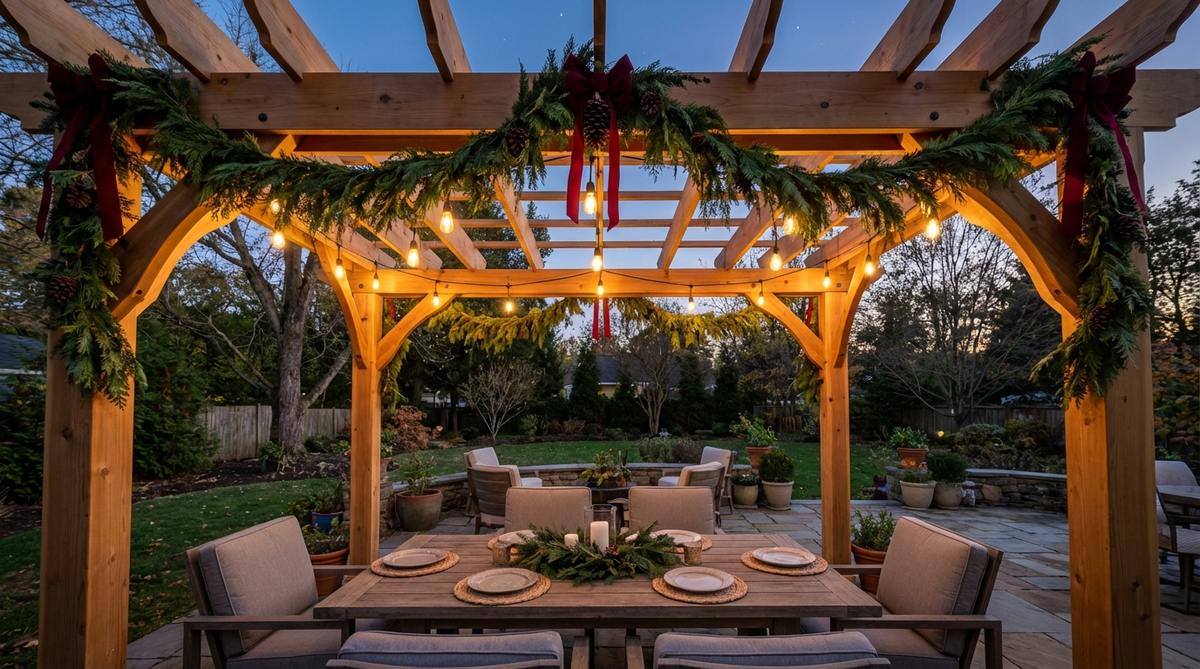
Dining underneath this canopy feels like a romantic European bistro at midnight. This overhead bistro lighting setup is the ultimate addition for backyard pergolas, dining patios, and deck lounge spaces.
Draping standard cords often looks sloppy, but installing proper tension guide wires gives a designer-level finish that prevents sagging. Sourcing commercial shatterproof bulbs prevents constant maintenance in your garden design layout.
You can easily assemble this overhead oasis for $70–$110. Pin this if you’re planning an outdoor entertaining upgrade!
- Key Materials: Edison bulb bistro lights, steel cable
- Vibe / Style: Romantic alfresco cafe
- Difficulty: Intermediate hardware installation
- Budget Breakdown: Lights: $50 | Tension Kit: $25
- Creator’s Tip: Thread the lights onto a stainless steel aircraft cable so the wire bears the weight, not the electrical cord.
- Smart Sourcing: shatterproof commercial Edison stringers and stainless steel wire tension kits
6. Ambient Shrubbery Glow Nets
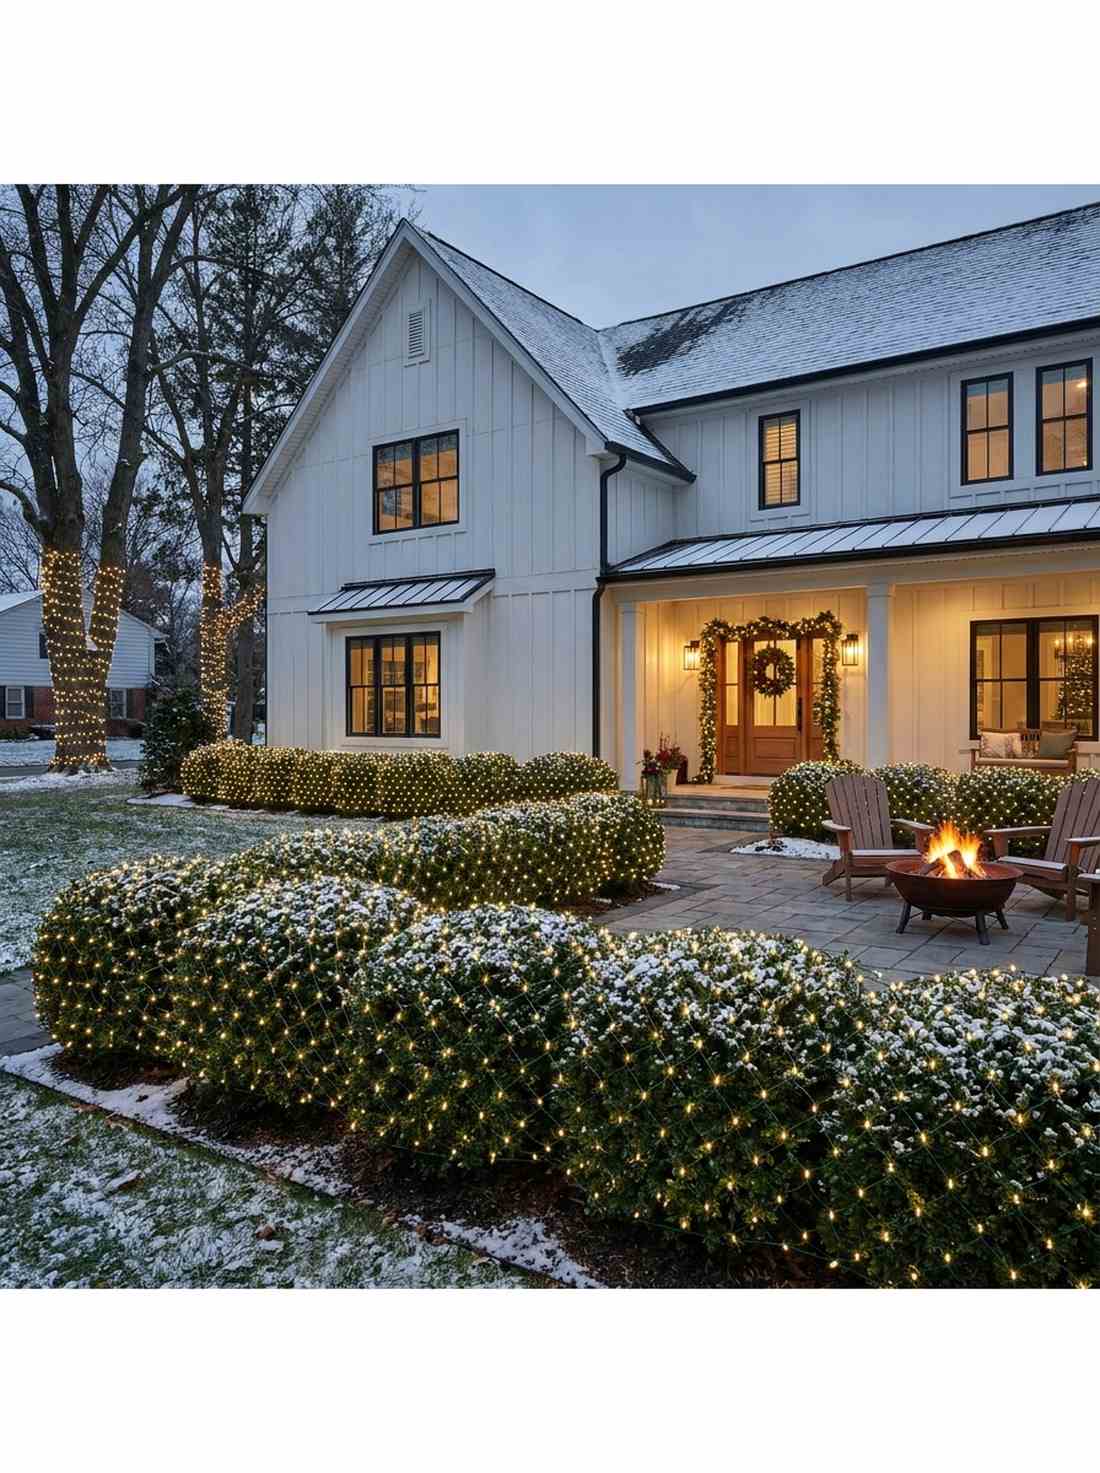

Covering your manicured hedges this way feels like dropping a blanket of brilliant glowing fireflies over your yard. Implementing a shrub illumination net is ideal for dense boxwoods and geometric foundation plantings.
Wrapping bushes manually is a nightmare, but snapping pre-spaced geometric nets over them delivers a surprisingly premium, uniform look in minutes. It instantly upgrades your home’s garden design ideas with zero tangled frustration.
A quick net lighting setup costs just $20–$40 per large bush. It’s an effortless swap that pays off immediately.
- Key Materials: LED mesh nets (warm white)
- Vibe / Style: Perfectly manicured glow
- Difficulty: Absolute beginner
- Budget Breakdown: Net Lights: $25 | Anchors: $5
- Creator’s Tip: Tuck the wiring slightly under the top layer of leaves so only the bulbs peek through during the day.
- Smart Sourcing: heavy-duty 4×6 LED mesh nets and discreet green zip tie bulk packs
7. Outdoor Water-Ripple Projectors
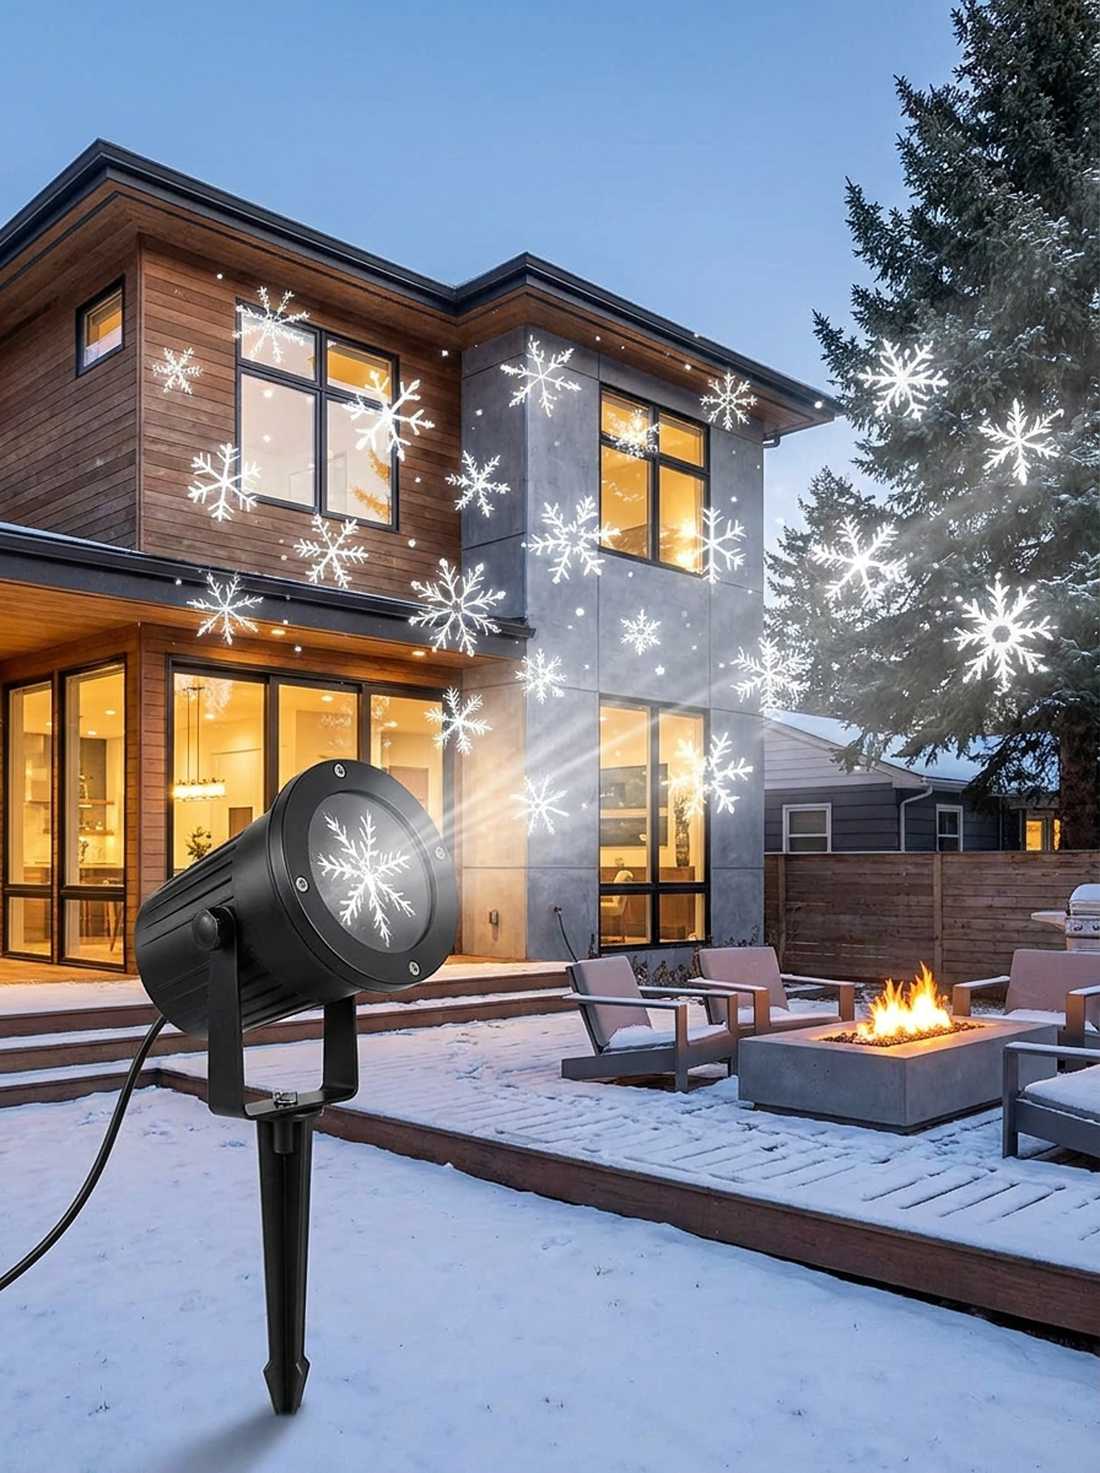
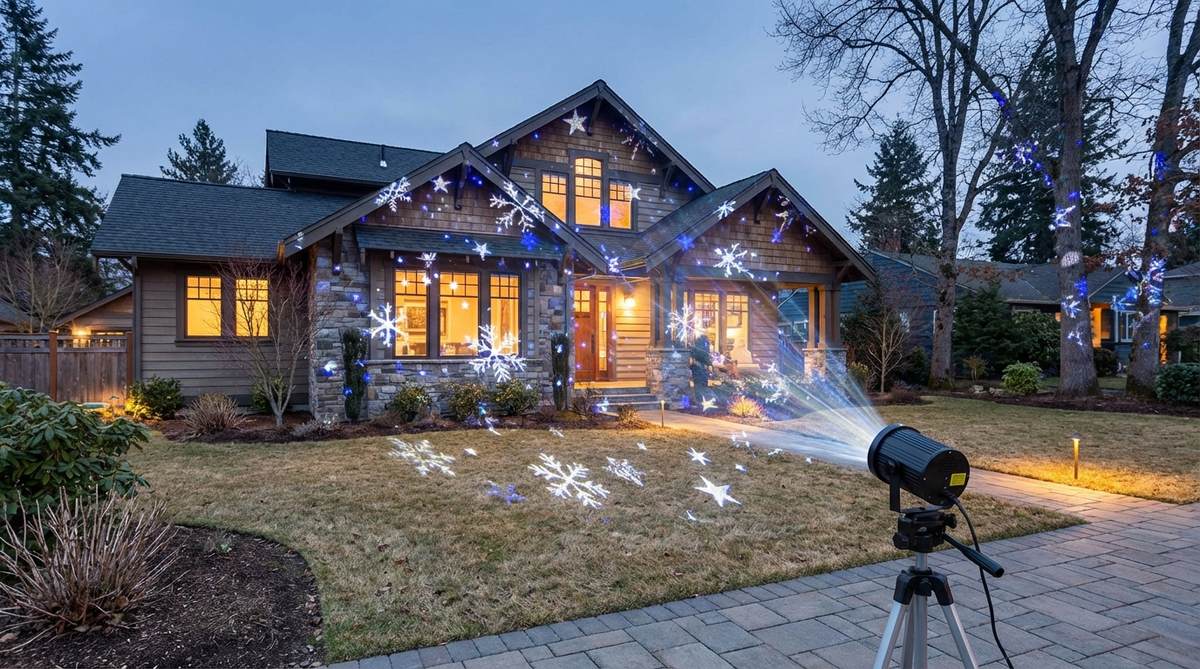
This kinetic display feels like an immersive, high-tech tranquil spa you can step right into. Utilizing a dynamic water-ripple projector is perfect for blank exterior walls or shooting up into the canopy of a large weeping willow.
Cheap projectors look blurry, but investing in a crisp, slow-moving aquatic lens looks far more expensive than it is. It’s the ultimate hack for expansive garden design landscape areas where physical water features are too expensive to build.
You can grab a high-quality projector for $50–$90. Pin this to your fast-backyard-hacks Pinterest board!
- Key Materials: Outdoor ripple effect projector
- Vibe / Style: Kinetic modern tranquility
- Difficulty: Plug-and-play
- Budget Breakdown: Projector Unit: $70 | Extension Cord: $15
- Creator’s Tip: Hide the projector unit inside a hollow artificial landscape rock to keep the source totally invisible.
- Smart Sourcing: weatherproof kinetic ripple projectors and heavy-duty outdoor landscape extension cords
8. Architectural Window Box Lighting
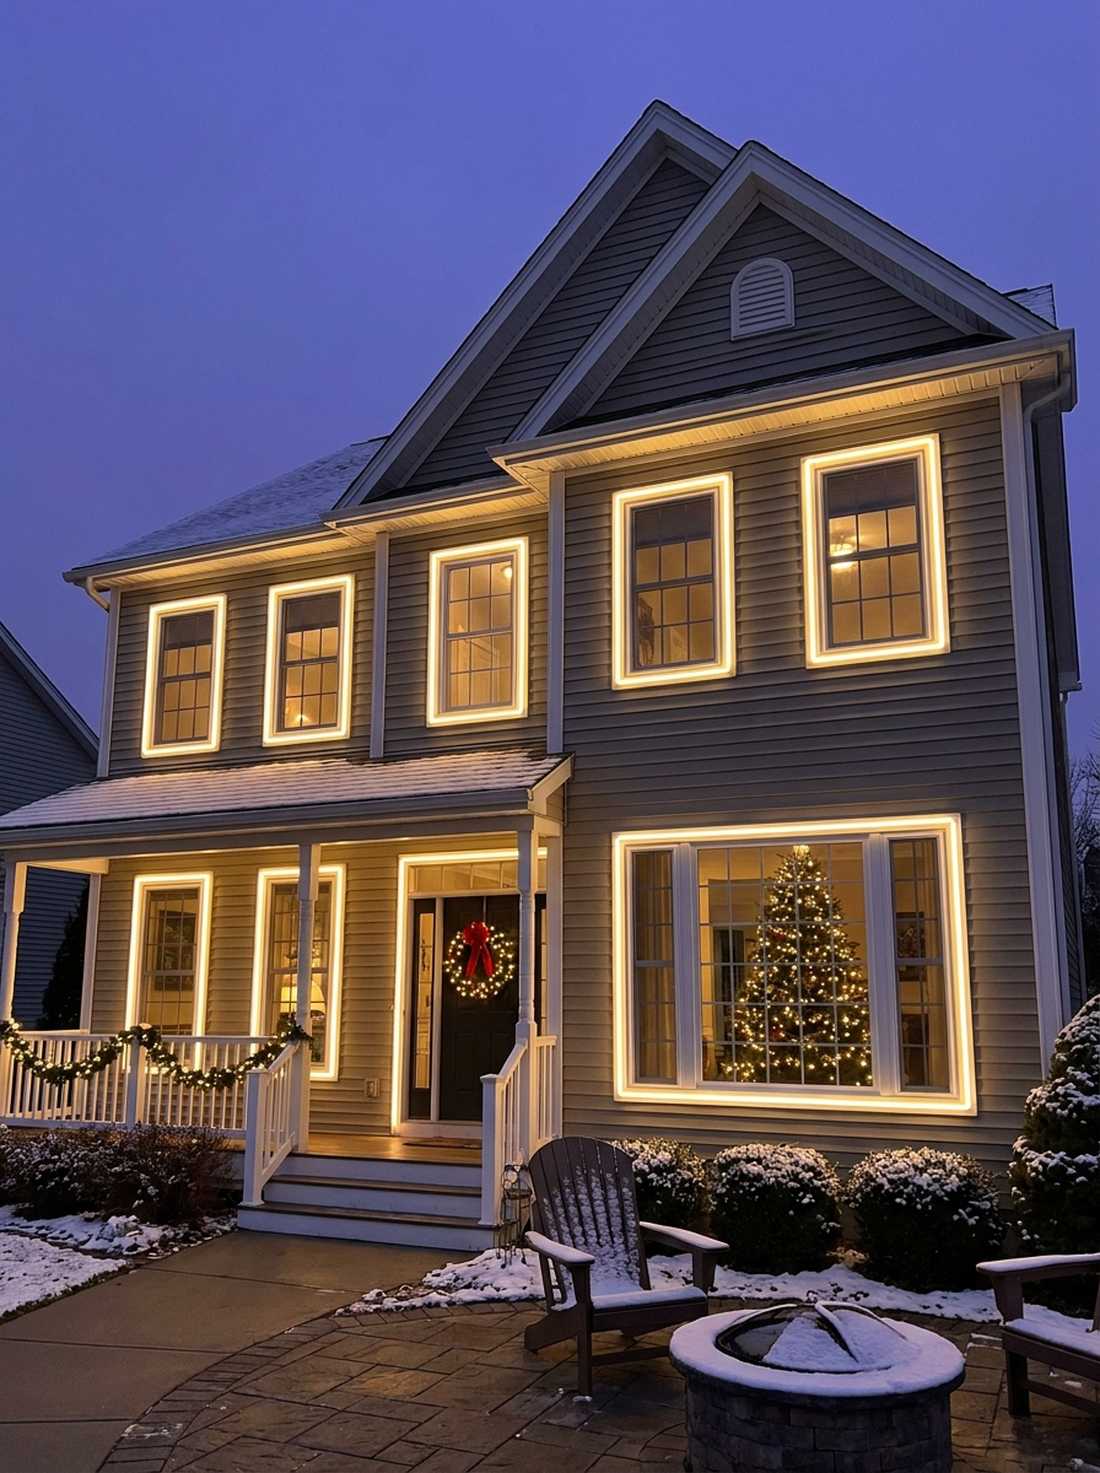
Illuminating your flower boxes makes the property feel like a vibrant, glowing architectural model at dusk. This floral box under-lighting design is phenomenal for accentuating cascading vines and bright summer blooms.
Using bulky spotlights washes out the flowers, but hiding waterproof LED strips right under the lip of the box delivers a flawless, damage-free finish that screams luxury. It’s an essential detail for those curating elegant garden design pictures.
You can achieve this crisp glowing flora for $15–$30 per window. Save this clever curb-appeal hack!
- Key Materials: Waterproof LED strip lights
- Vibe / Style: Crisp architectural modernism
- Difficulty: Easy precision work
- Budget Breakdown: LED Strips: $20 | Clips: $5
- Creator’s Tip: Point the LED strip downwards toward the cascading plants so you see the illuminated leaves, not the harsh bulbs.
- Smart Sourcing: cut-to-length outdoor LED strips and damage-free exterior adhesive tape
Hold on! The next pathway hack transforms basic driveways into high-end estate entrances for pennies…
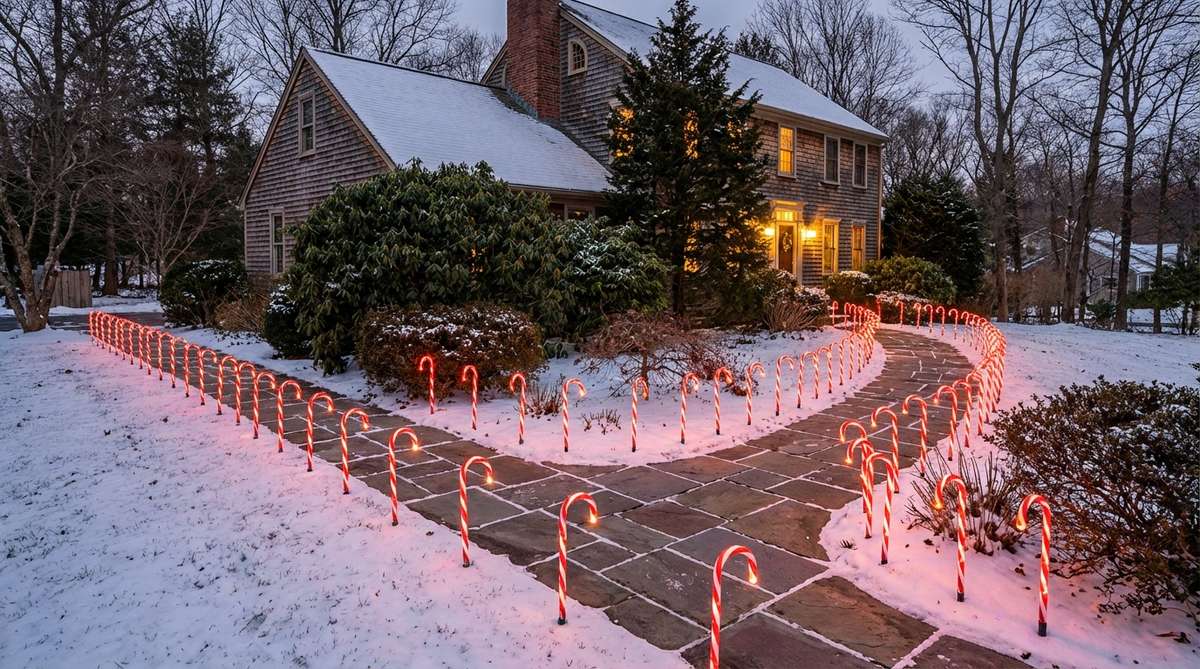
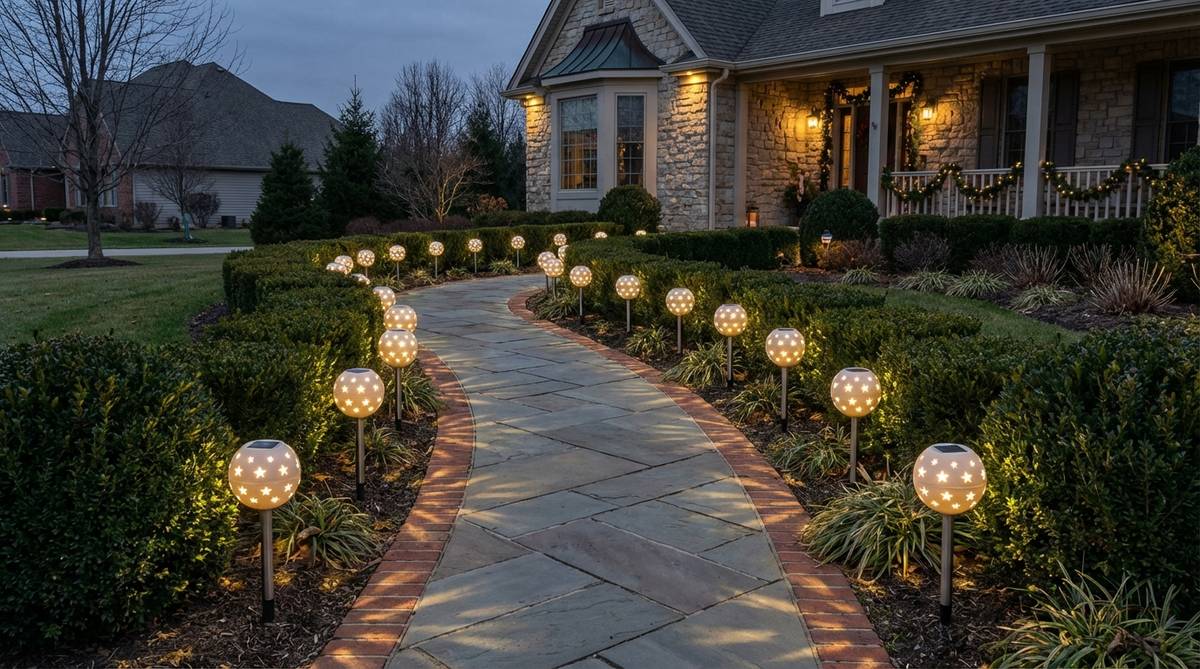
9. Driveway & Border Pathway Stakes
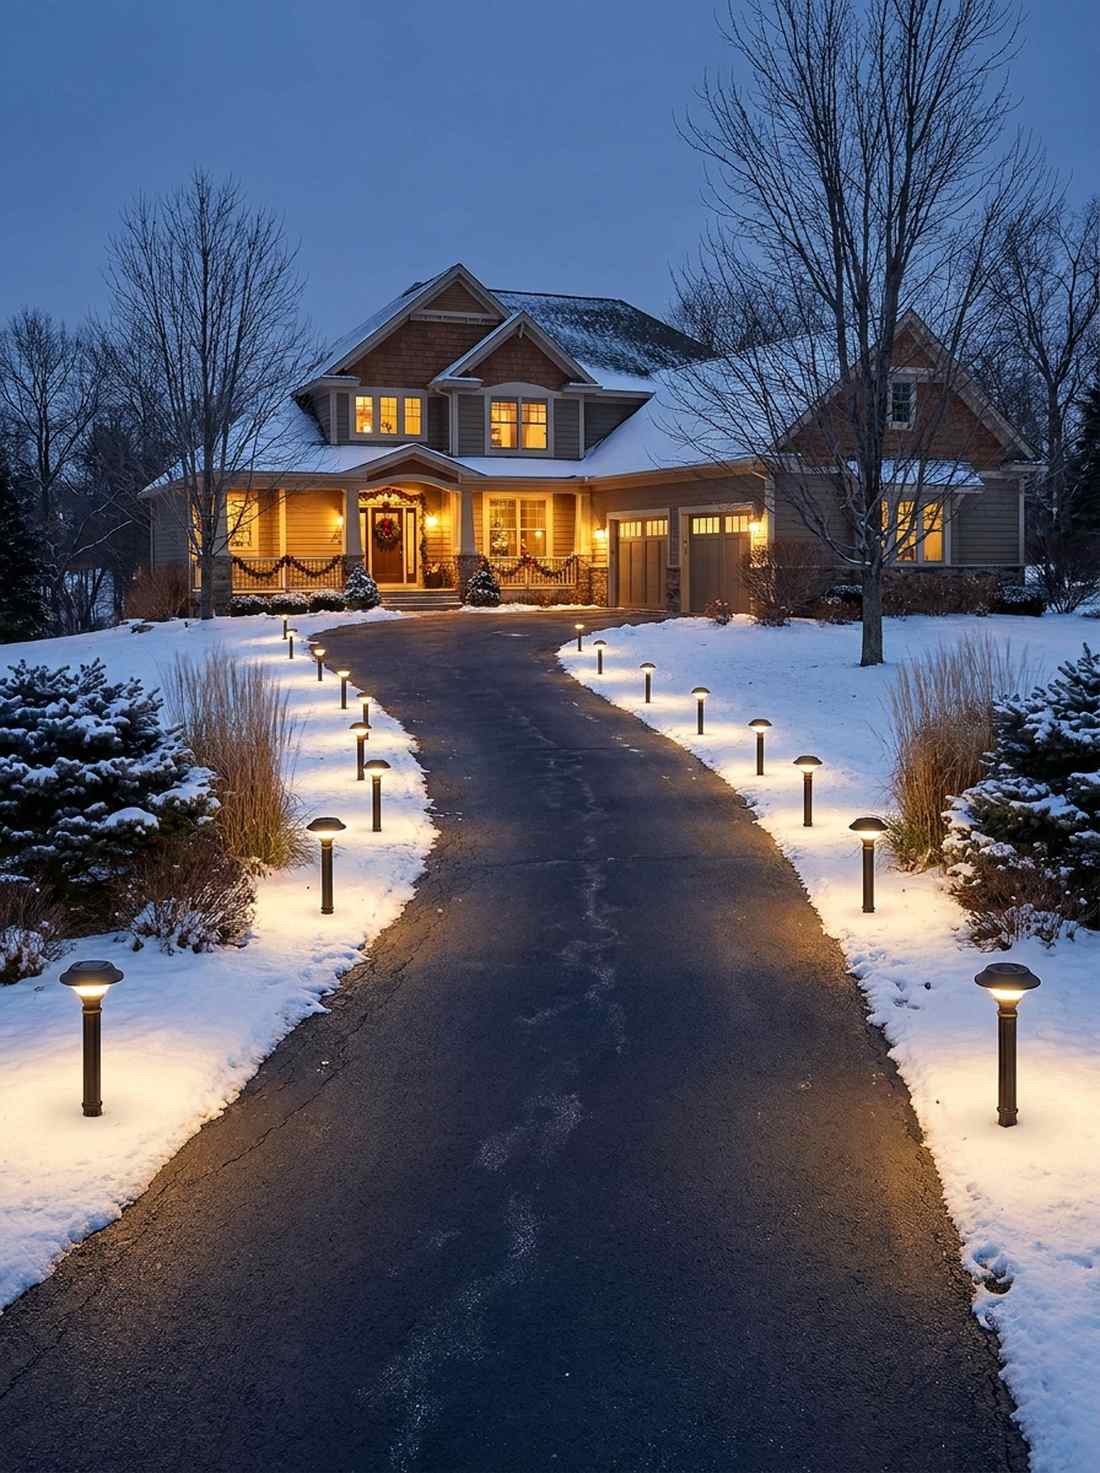
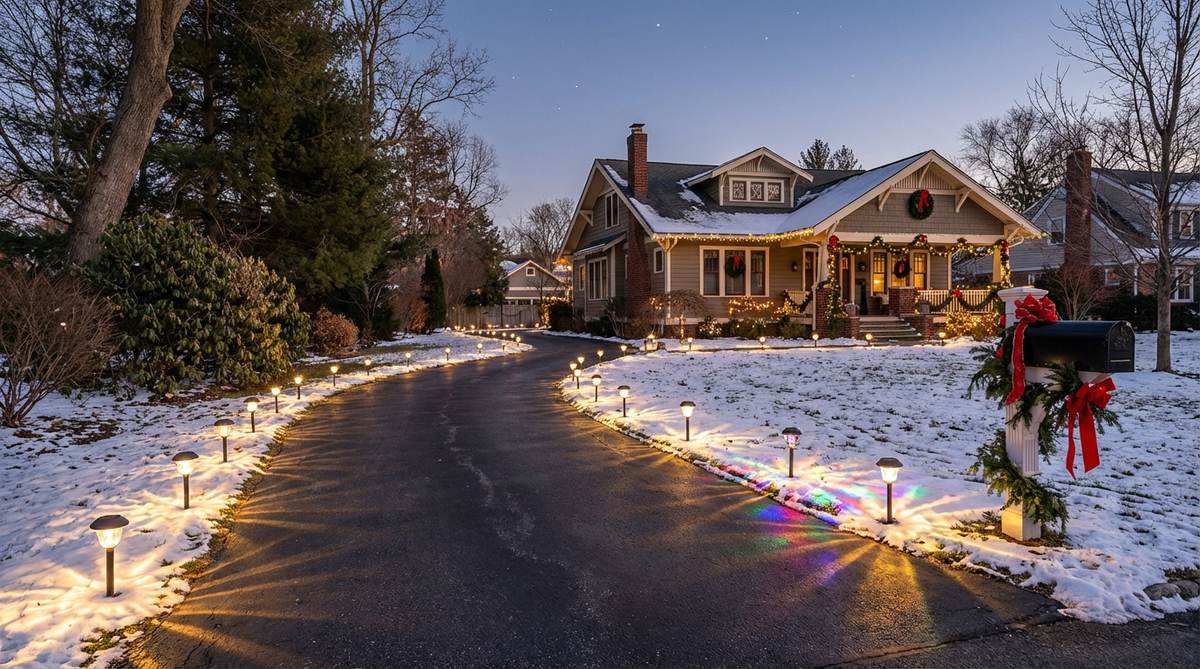
Pulling into this driveway feels like rolling down the runway of an exclusive private resort. A linear driveway illumination setup is the ultimate use-case for long asphalt approaches or sweeping gravel paths.
Flimsy plastic spikes snap instantly, but upgrading to metal-staked architectural fixtures delivers a designer-level finish that withstands weed whackers. It integrates functional safety seamlessly into your overarching garden designs.
A full driveway perimeter will run you about $40–$80. Highly recommended to boost your nightly curb appeal.
- Key Materials: Metal architectural stake lights
- Vibe / Style: Exclusive resort entry
- Difficulty: Beginner push-in
- Budget Breakdown: Metal Stakes: $60 | Base Gravel: $10
- Creator’s Tip: Use a rubber mallet and a pilot spike to pre-drill holes in hard summer clay so you don’t crack the stems.
- Smart Sourcing: stainless steel solar path lights (multi-pack) and heavy-duty ground anchoring spikes
10. Submersible Pond & Fountain Lighting
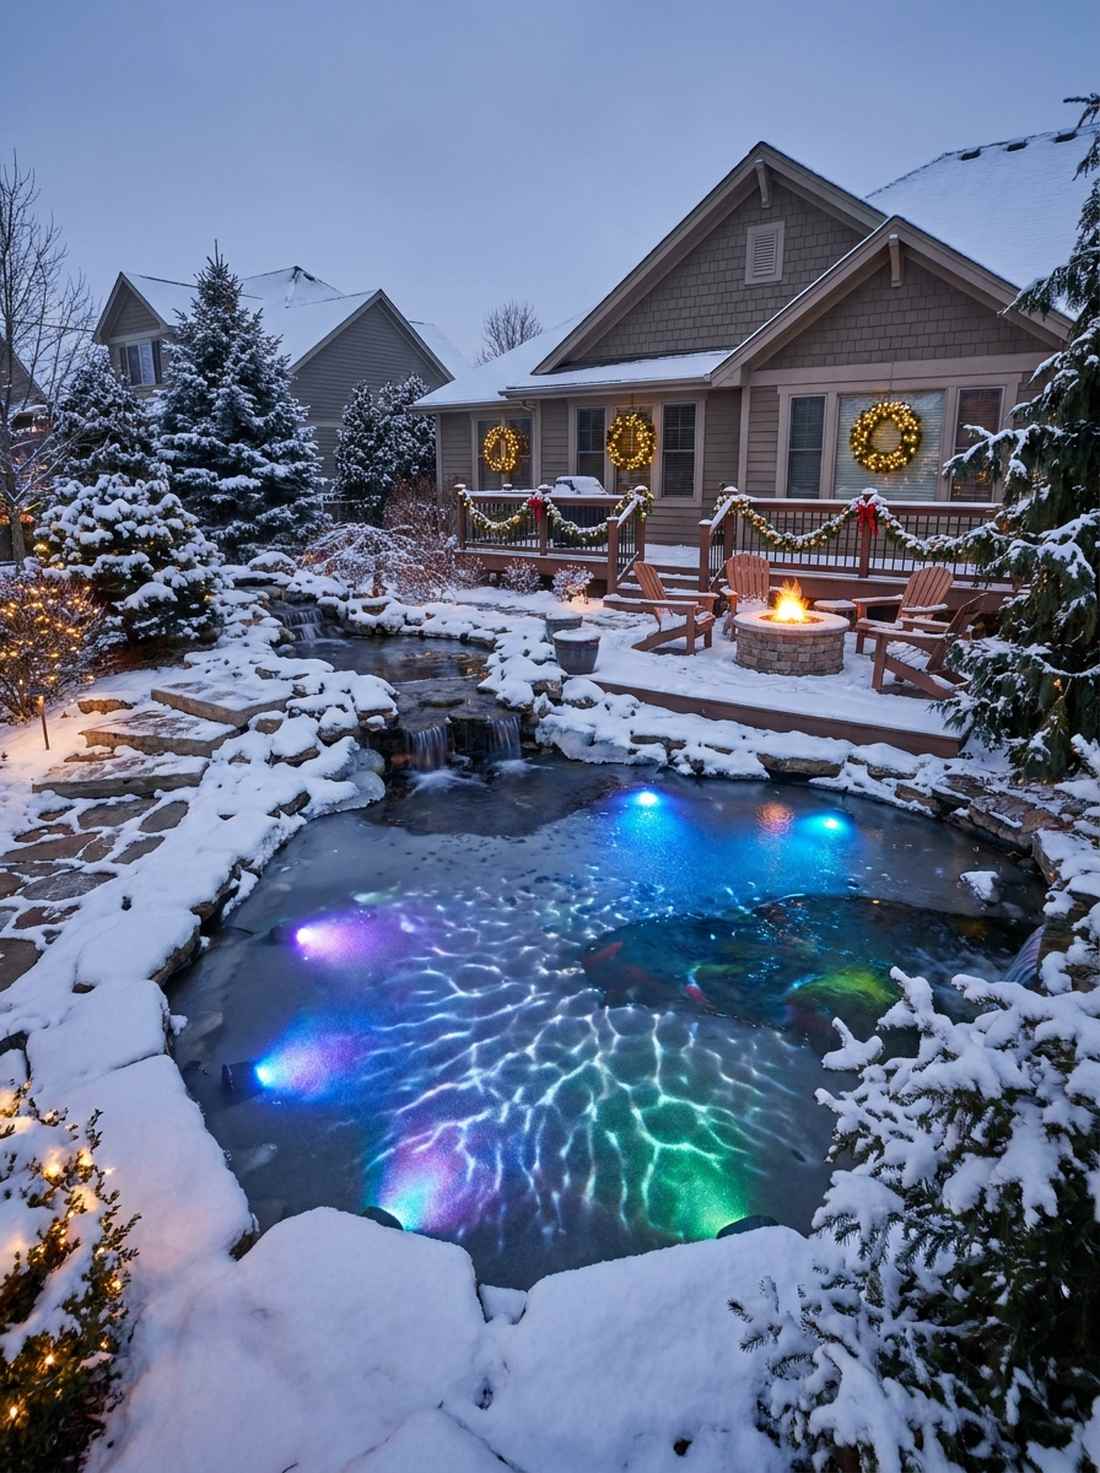
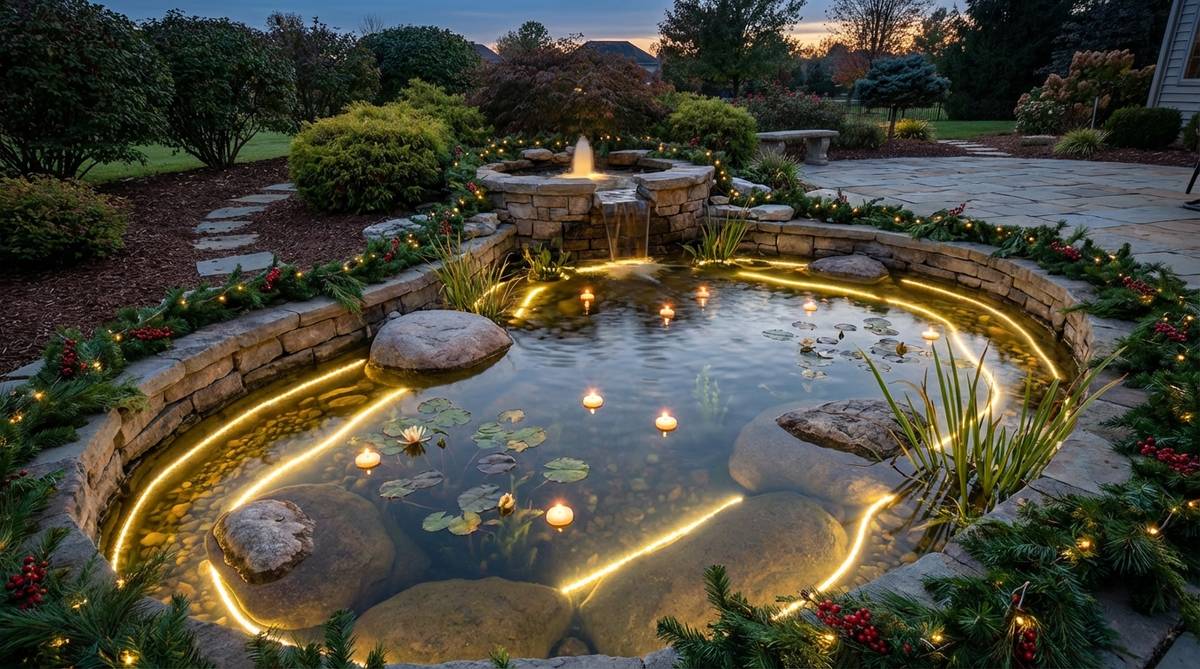
Watching light dance under the water feels like observing a glowing, ethereal magic potion. Adding submersible aquatic lighting is an absolute must for backyard koi ponds, birdbaths, or tiered stone fountains.
Standard landscape lights fail near moisture, but dropping fully weighted waterproof pucks gives a surprisingly premium look with zero electrical hazard. They add intense dramatic flair to otherwise static garden design outdoor installations.
You can effortlessly sink these lights for $25–$45. Save this to your backyard water feature inspiration board!
- Key Materials: Weighted LED waterproof pucks
- Vibe / Style: Glowing aquatic magic
- Difficulty: Drop-and-go
- Budget Breakdown: Waterproof Pucks: $30 | Batteries: $5
- Creator’s Tip: Tuck the pucks just behind miniature underwater rock ledges so you see the glow, not the glaring bulb.
- Smart Sourcing: remote-controlled submersible LED puck packs and UV-coated underwater wire weights
💡 Must-Have Supplies for High-End Setups
To build these stunning landscape setups faster and ensure they actually survive heavy rain and harsh sun, skip the generic hardware aisles and invest in the right foundational kits right away.
- Base & Support: heavy-duty landscape fabric rolls (bulk)
- Setup Tools: weatherproof outdoor smart plug timers
- Weather/Durability Protection: UV-resistant clear wood sealant sprays
Pathway Garden Design Ideas
Guide your guests with breathtaking walkway borders that blend structural artistry with lush ground cover.
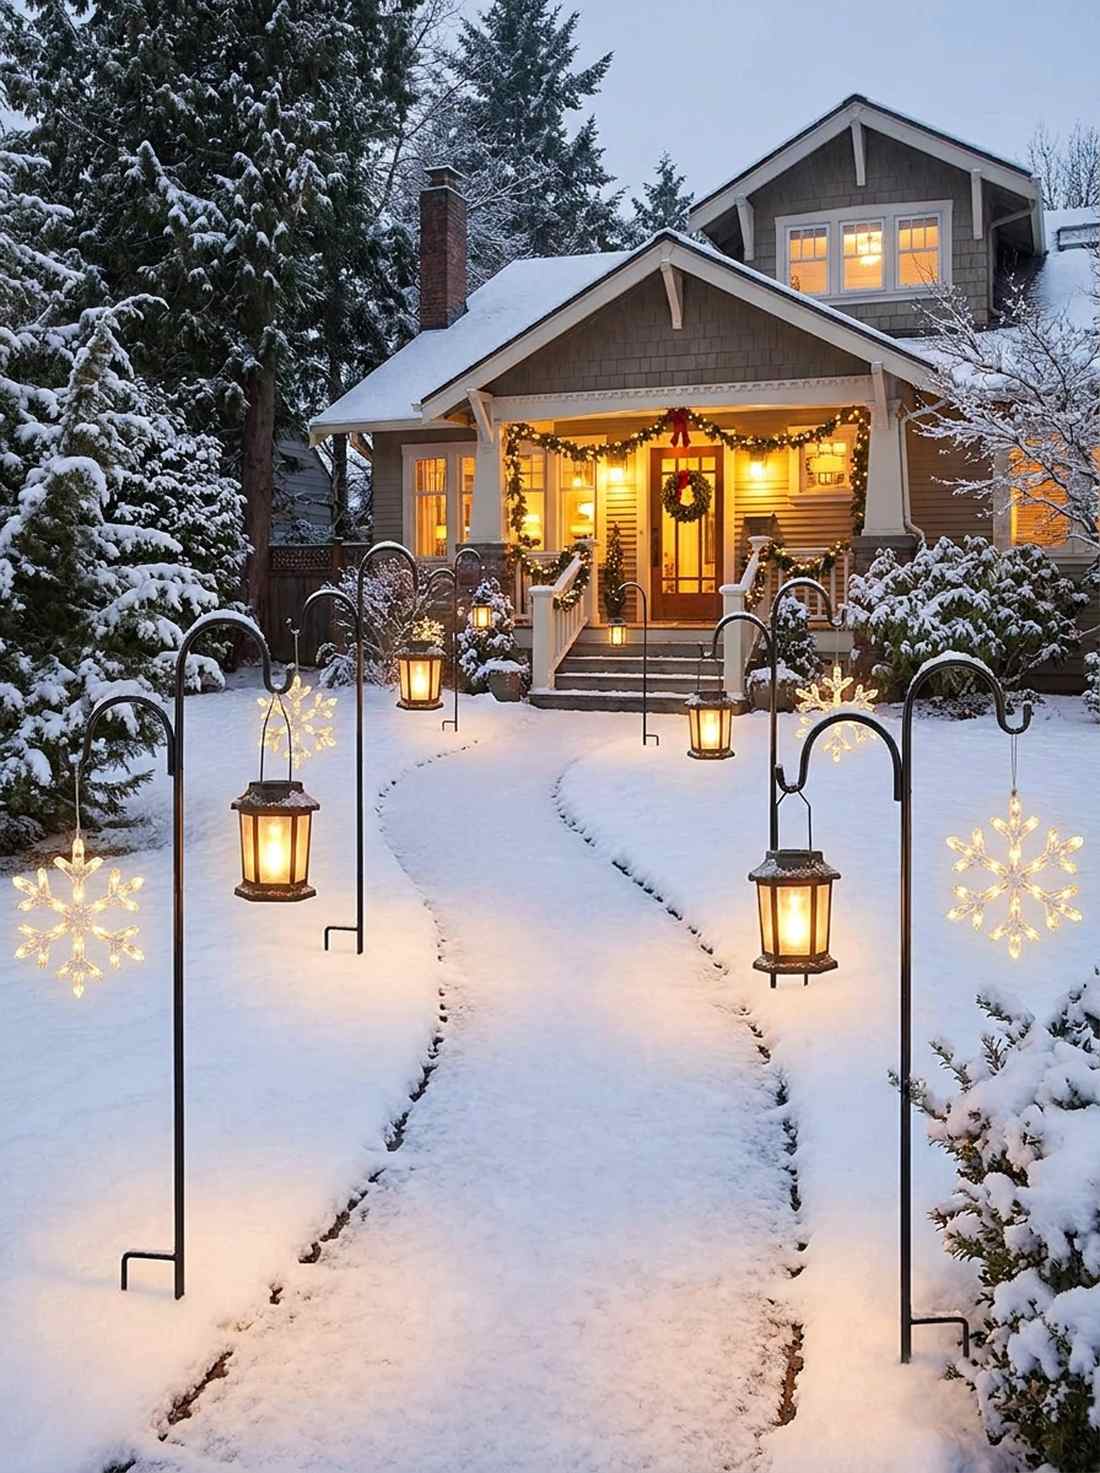
11. Curved Shepherd’s Hook Pathway Borders
Strolling down this path feels like tiptoeing straight through a whimsical botanical conservatory. This elegant hanging floral walkway border is perfect for lining curved front yard sidewalks with trailing petunias or creeping jenny.
Spacing them too far apart looks sparse, but packing them tightly at three-foot intervals looks far more expensive than it is. It injects a punch of joyful vertical height into your garden design simple landscape.
You can recreate this lush floral lane for $30–$50. Pin this if you want a classic, vibrant yard upgrade!
- Key Materials: Heavy-duty curved shepherd’s hooks, hanging baskets
- Vibe / Style: Botanical wonderland
- Difficulty: Beginner friendly
- Budget Breakdown: Iron Hooks: $35 | Coco Liners: $15
- Creator’s Tip: Alternate colorful flowering plants with draping green ivies to create a dynamic visual rhythm.
- Smart Sourcing: solid steel curved shepherd hook multi-packs and pre-molded coco coir basket liners
12. Japanese Stone & Iron Walkway Lanterns
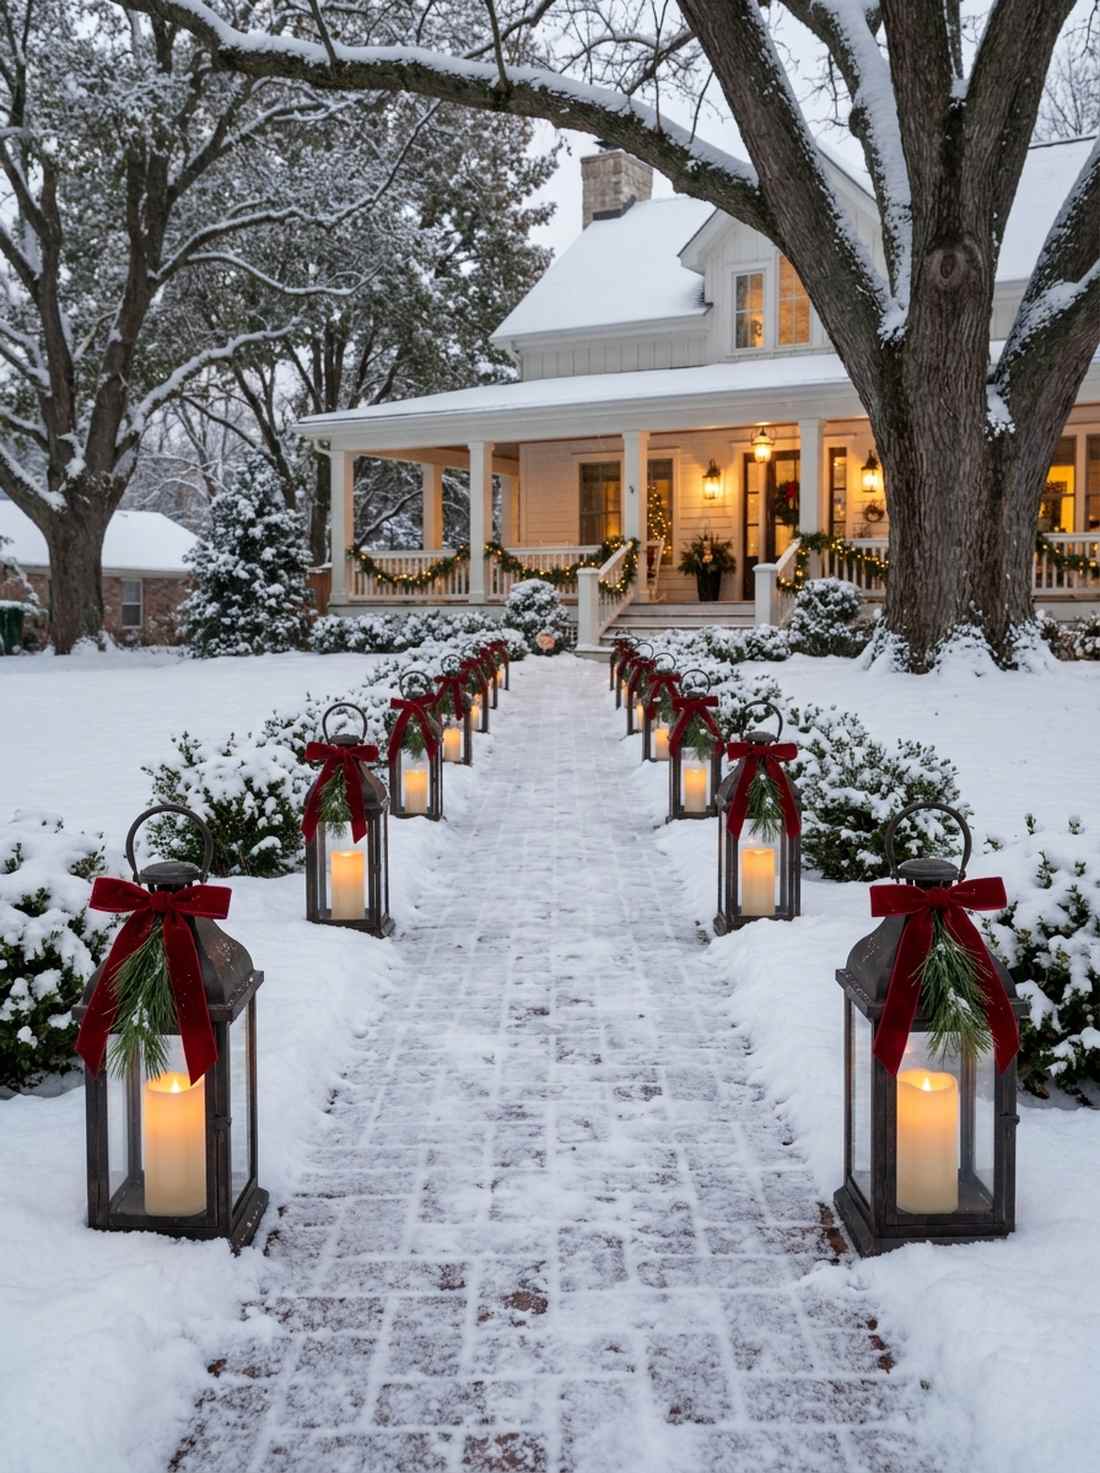

This layout feels like a quiet, zen-like stroll through a historic Kyoto estate. Utilizing a pagoda lantern pathway is an incredibly chic addition for mossy, cobblestone, or flagstone approaches.
Cheap plastic lanterns blow away, but investing in heavy cast iron or resin stone replicas delivers a designer-level finish that lasts for decades. These timeless pieces effortlessly bridge the gap between hardscaping and permanent garden design ideas.
Achieve this historic aesthetic for $60–$100. It’s a gorgeous aesthetic that commands instant architectural respect.
- Key Materials: Pagoda lanterns, LED pillar candles
- Vibe / Style: Zen heritage elegance
- Difficulty: Placement only
- Budget Breakdown: Lanterns: $70 | LED Candles: $20
- Creator’s Tip: Bury the base of the lantern slightly into the surrounding moss or mulch so it looks like it has been there for centuries.
- Smart Sourcing: cast-resin pagoda lantern replicas and resin waterproof flickering LED pillars
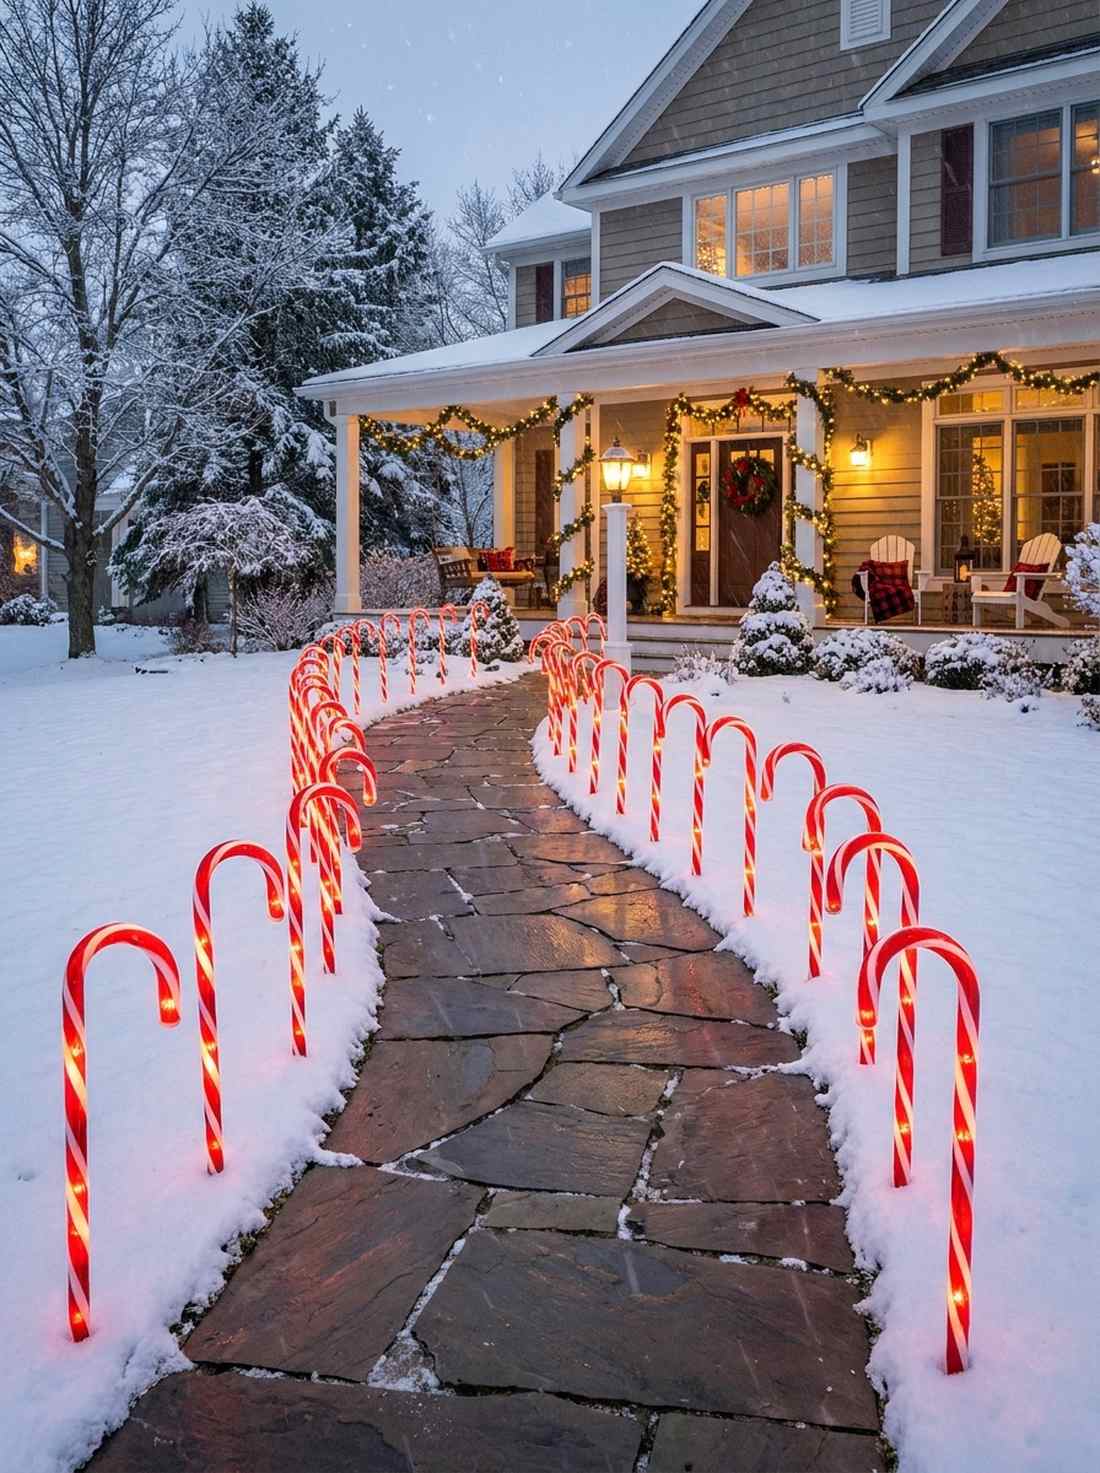
13. Frosted Resin Pathway Markers
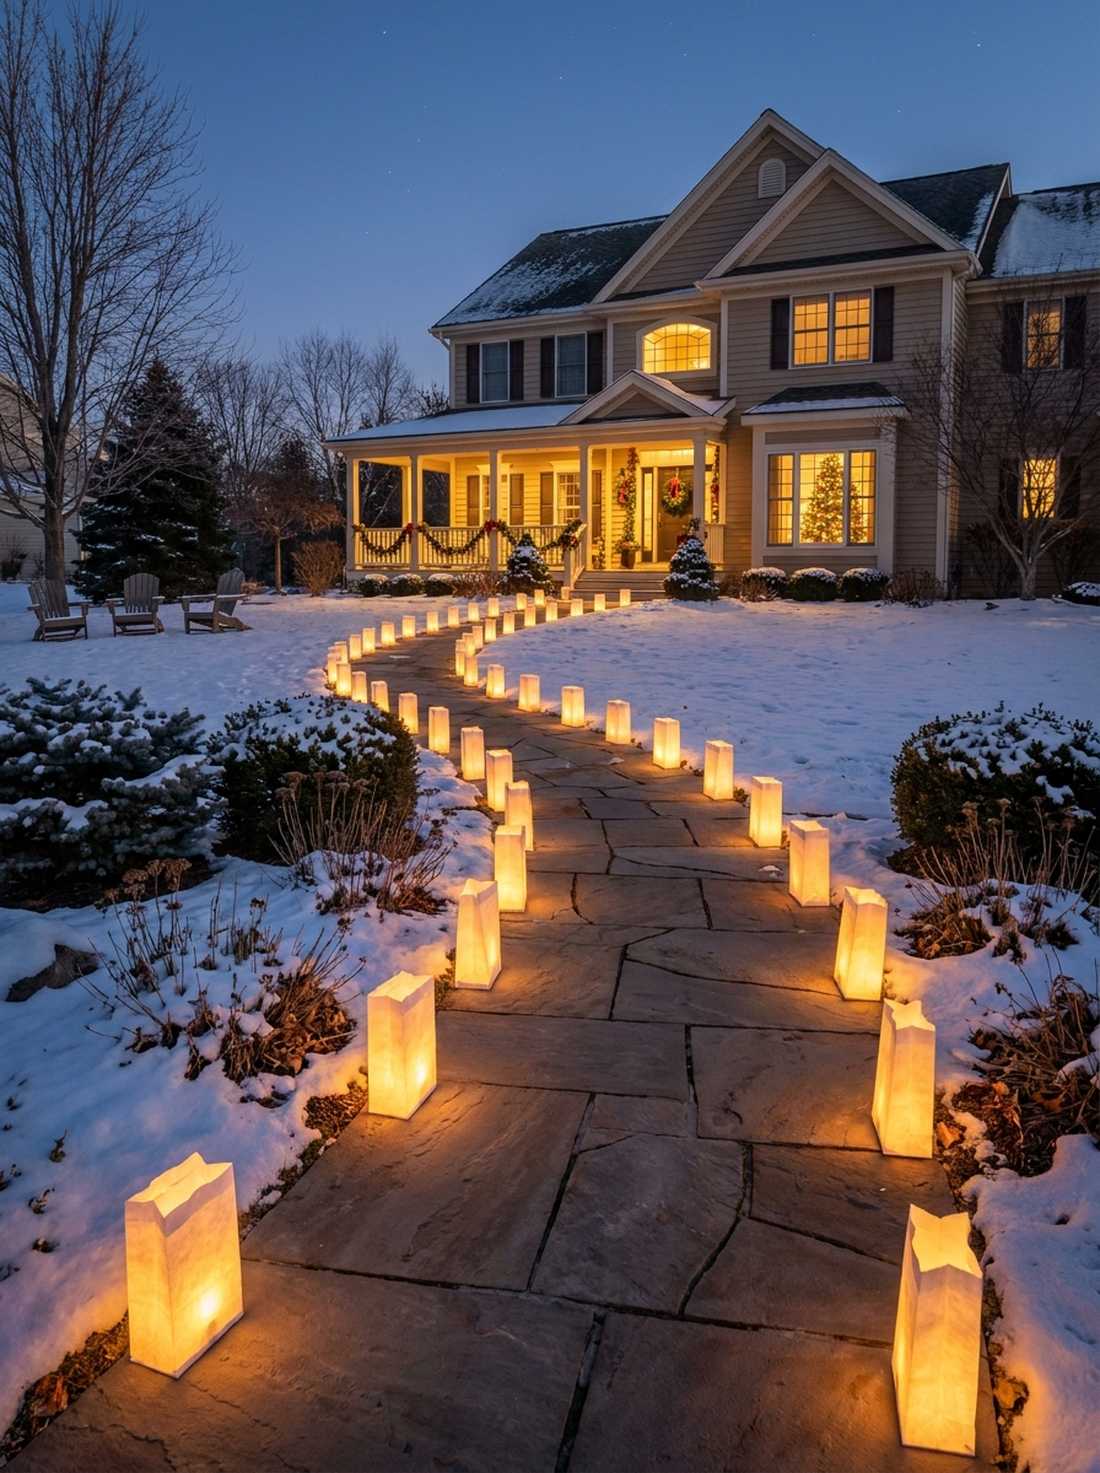
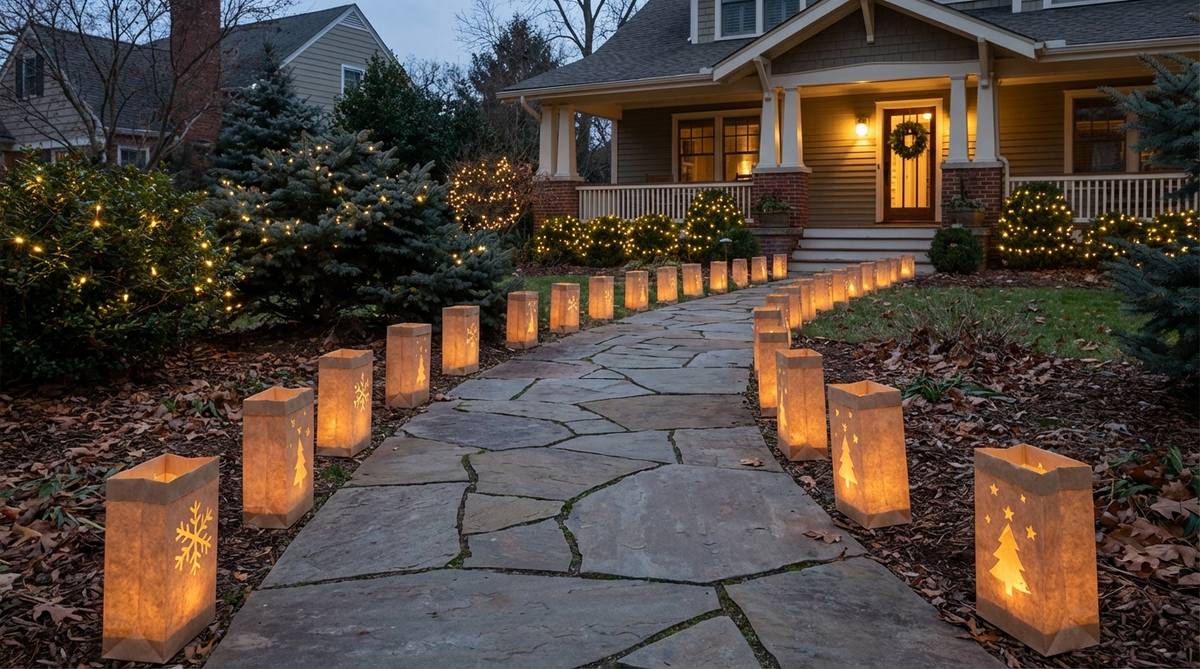
The soft glow from these geometric cubes feels like a modern, intimate welcoming ceremony just for you. Setting up a frosted cube sequence works beautifully for guiding guests along sleek concrete driveway edges.
Flimsy paper tears in the rain, but utilizing heavy, weather-resistant frosted polymer boxes gives a surprisingly premium look that survives the elements. They bring a deeply contemporary, warm glow to your modern garden design layout.
You can light up the night for around $40–$60. Save this to your modern landscaping planning board!
- Key Materials: Frosted acrylic cubes, solar bases
- Vibe / Style: Warm contemporary welcome
- Difficulty: Easy placement
- Budget Breakdown: Acrylic Cubes: $45 | Solar Pucks: $15
- Creator’s Tip: Set the cubes directly into a bed of dark river rock to create massive visual contrast during the daytime.
- Smart Sourcing: weatherproof frosted acrylic pathway cubes and flush-mount solar LED pucks
14. Giant Gazing Ball Pathway
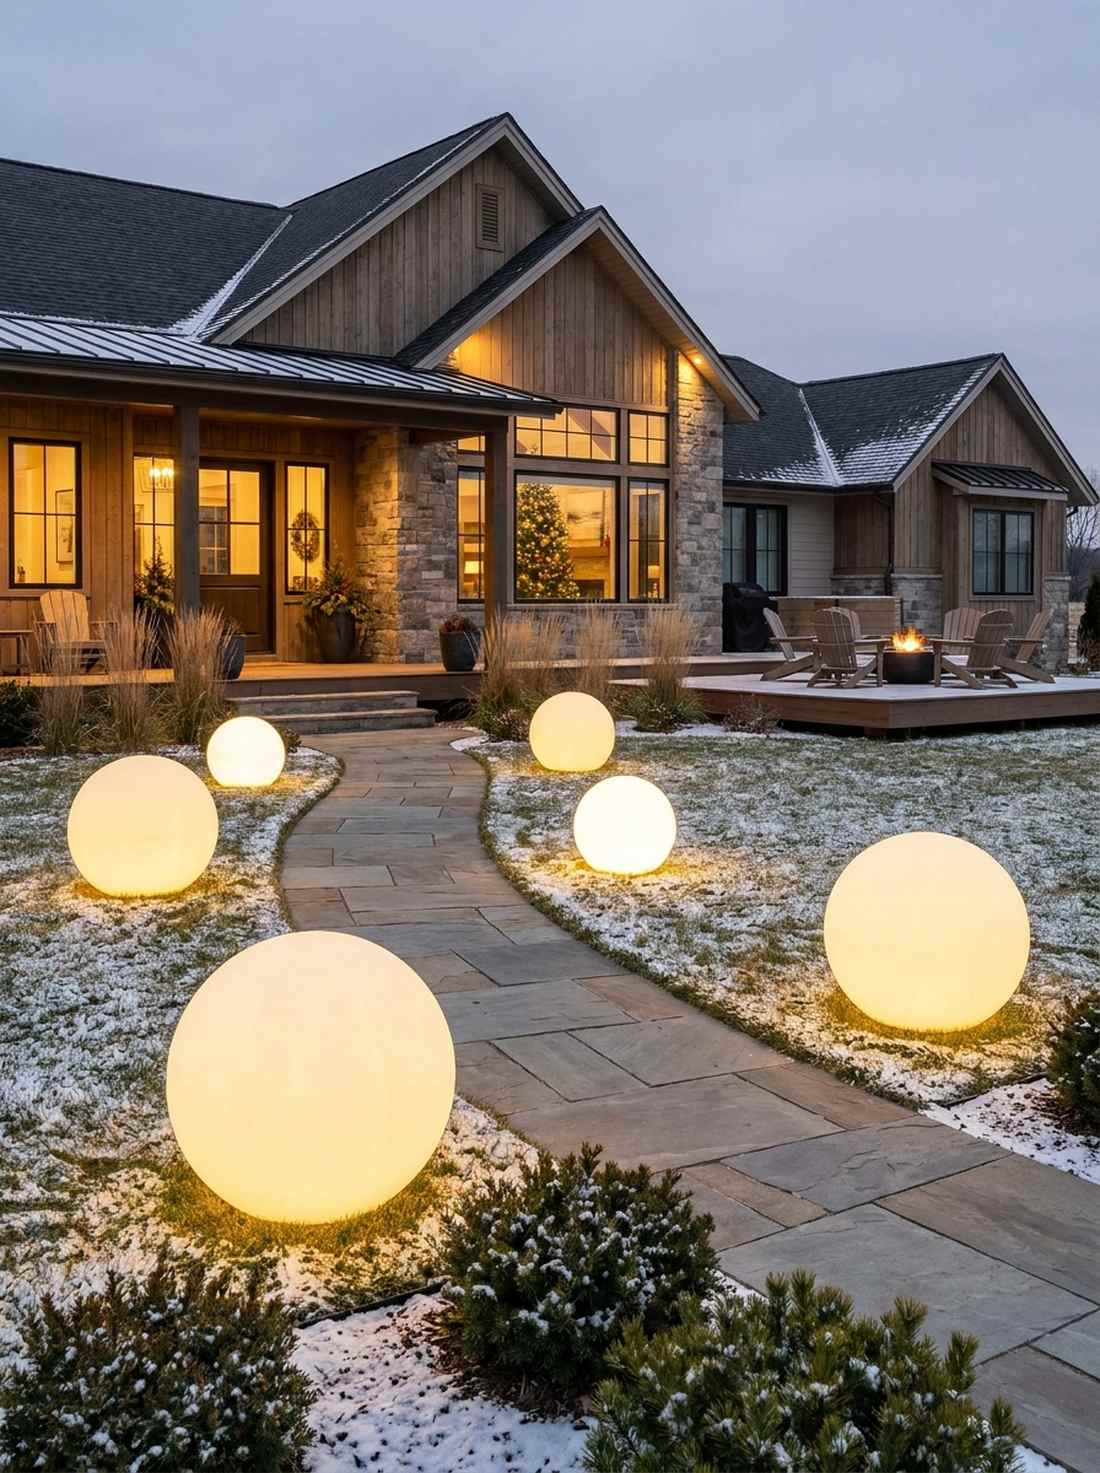
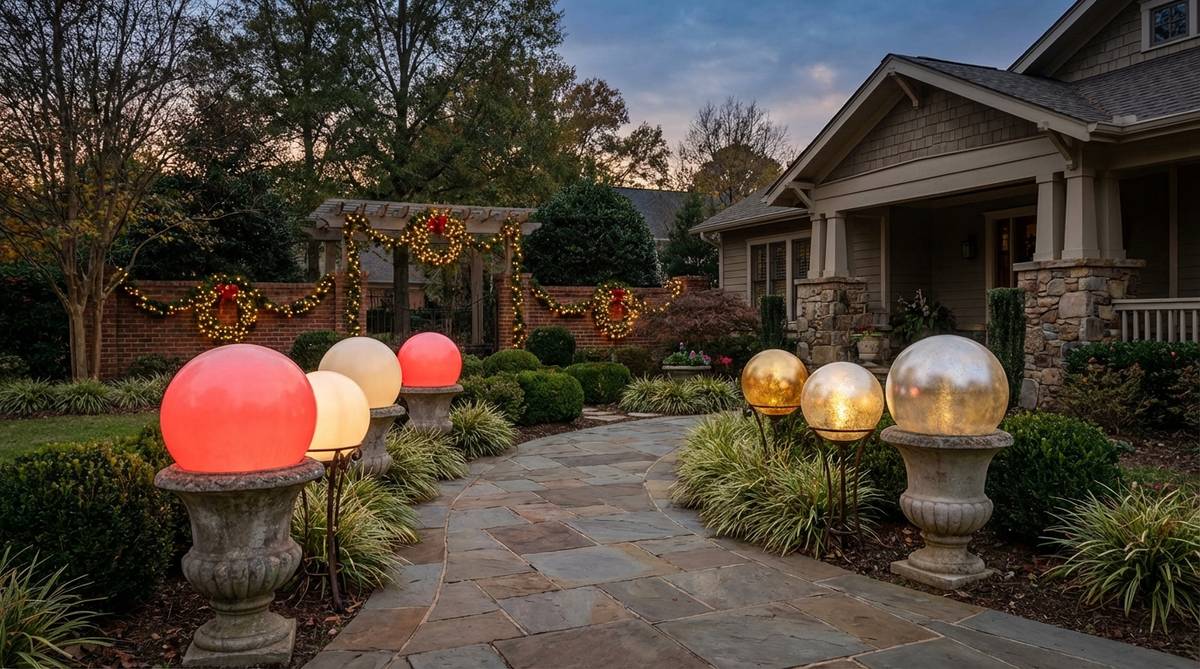
Walking past these massive reflective spheres feels like you’ve stepped into a modern art museum’s outdoor courtyard. A supersized gazing sphere border is a phenomenal modern application for sleek, minimalist garden walkways.
Scattering them randomly feels messy, but placing them symmetrically on cast-iron urns delivers a high-end designer finish. It’s an aggressive, photogenic approach to contemporary garden designs.
You can source these giant beauties for $80–$150. Pin this if you love bold, modern exterior statements!
- Key Materials: 24-inch stainless steel gazing spheres
- Vibe / Style: Modern art whimsy
- Difficulty: Easy placement
- Budget Breakdown: Steel Spheres: $120 | Iron Bases: $30
- Creator’s Tip: Wipe the spheres down with automotive ceramic coating to prevent water spots from sprinklers and keep them mirror-shiny.
- Smart Sourcing: shatterproof stainless steel gazing globes and heavy-weight cast iron display urns
Warning! Don’t miss this next pathway secret. It replaces expensive concrete edging with an organic, natural alternative…
15. Geometric Starburst Garden Stakes
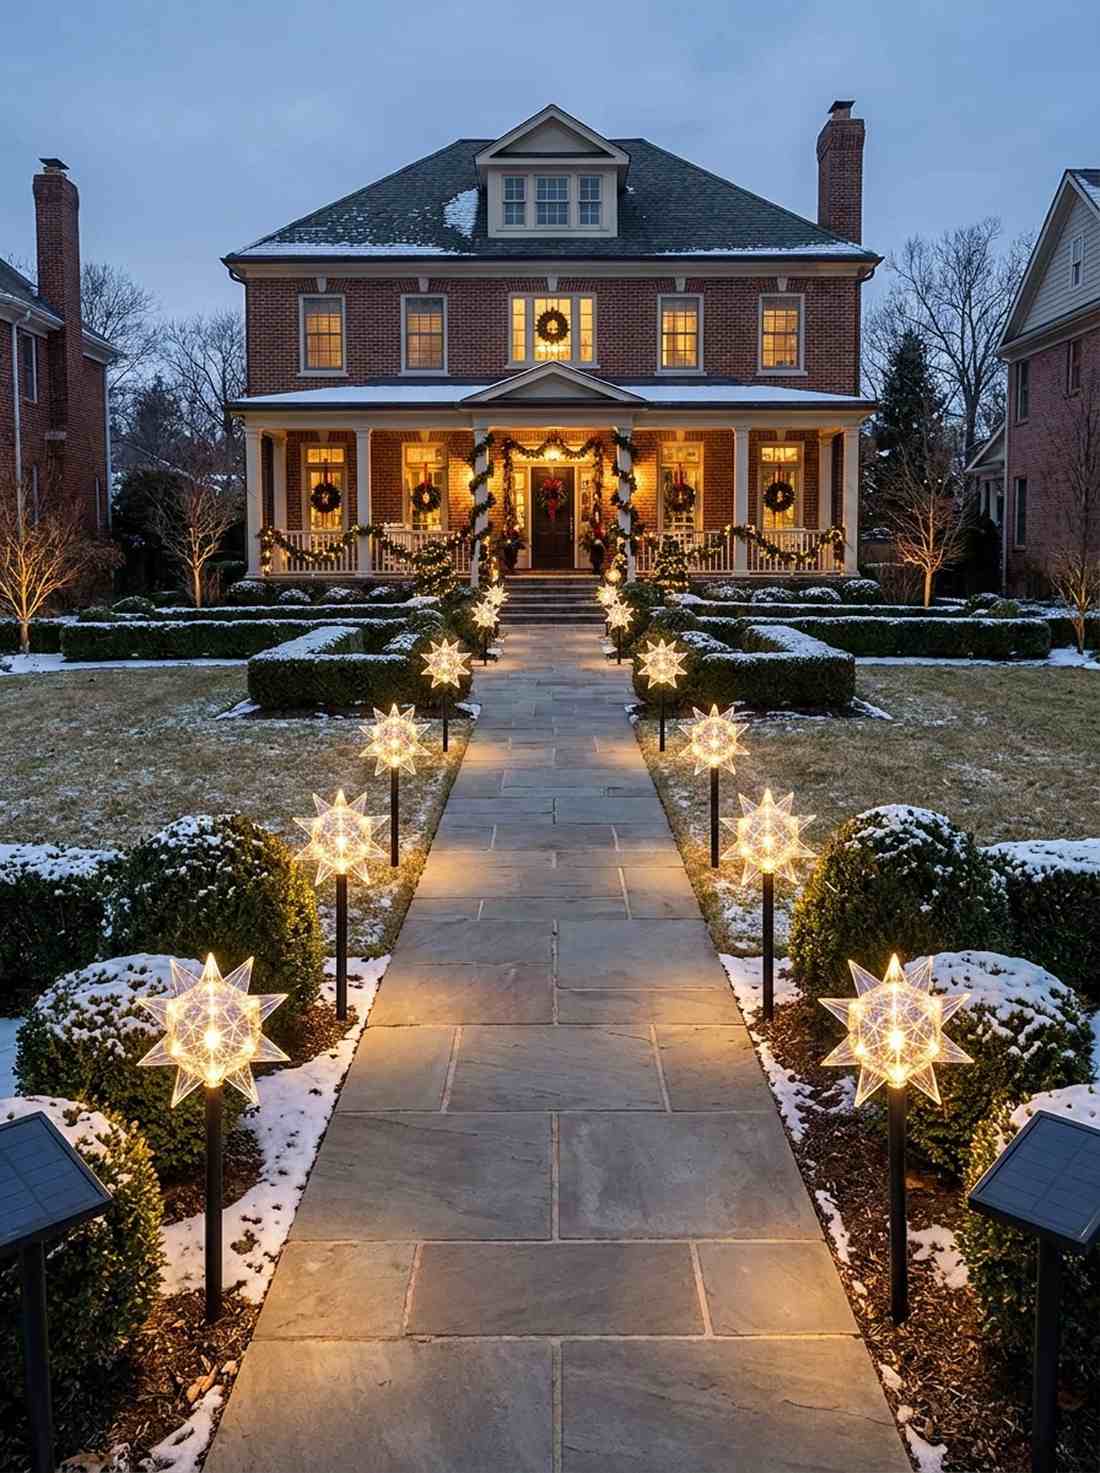
Hovering just above the ferns, these geometric sculptures feel like you captured abstract art and tethered it to your lawn. Utilizing an elevated star-burst border creates dramatic visual interest alongside flat hosta or groundcover beds.
Most pathway lights are too short, but mounting these metal sculptures on 18-inch risers looks far more expensive than it is. The hovering effect adds stunning verticality to a flat garden design landscape.
Assemble this stellar pathway for $40–$75. It’s a fast upgrade that completely changes the visual hierarchy of your plants.
- Key Materials: Metal starburst spheres, iron risers
- Vibe / Style: Sculptural geometric elegance
- Difficulty: Beginner setup
- Budget Breakdown: Metal Spheres: $50 | Risers: $20
- Creator’s Tip: Use a tape measure to space them exactly 36 inches apart—perfect symmetry is the secret to a luxury landscape look.
- Smart Sourcing: kinetic metal wind-spinner stakes and powder-coated steel pathway risers
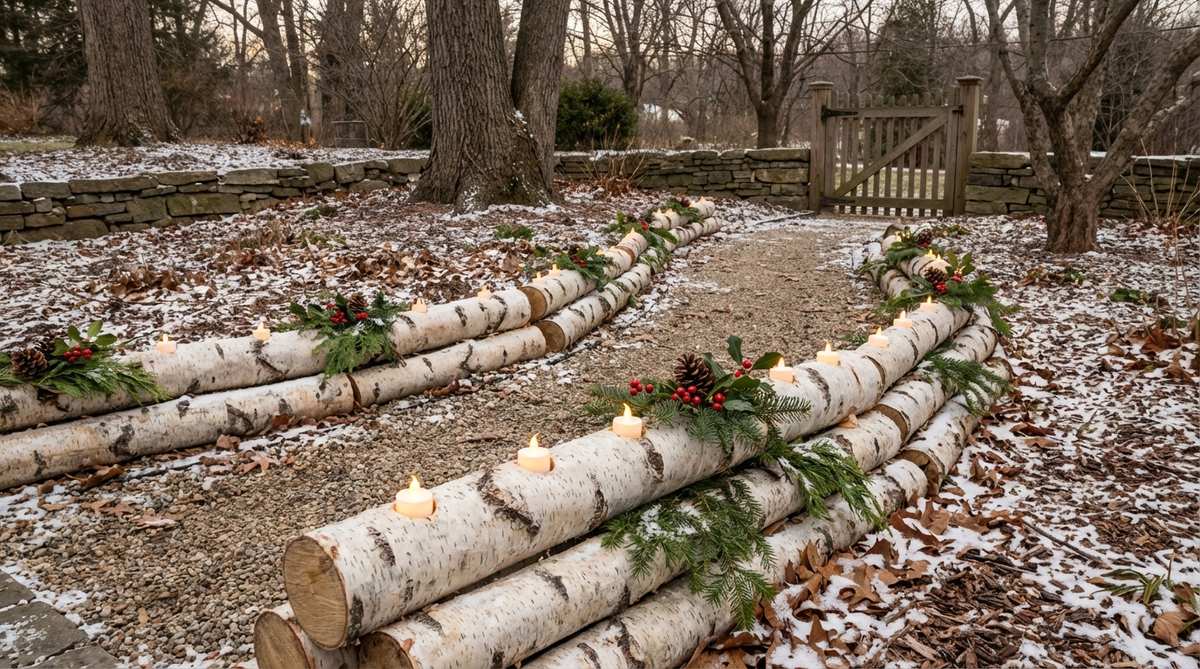
16. Natural Birch Log Pathway Borders
This organic wood setup feels like an untouched Scandinavian forest right in your backyard. A natural birch log edging is the ideal eco-friendly use-case for rustic stone or heavily mulched woodland pathways.
Using fake plastic logs looks cheap, but lining paths with genuine cut birch gives a designer-level finish that blends flawlessly with nature. It seamlessly marries structured edging with authentic garden design outdoor materials.
You can build these organic borders for around $25–$45. Save this to your rustic DIY Pinterest board!
- Key Materials: Cut birch branches, ground spikes
- Vibe / Style: Scandinavian organic structure
- Difficulty: DIY Intermediate
- Budget Breakdown: Birch Logs: $30 | Spikes: $15
- Creator’s Tip: Bury the bottom 2 inches of the log to prevent them from rolling when accidentally kicked by visitors.
- Smart Sourcing: kiln-dried natural birch branch bundles and galvanized steel landscape spikes
17. Flush Smart Paver Lighting
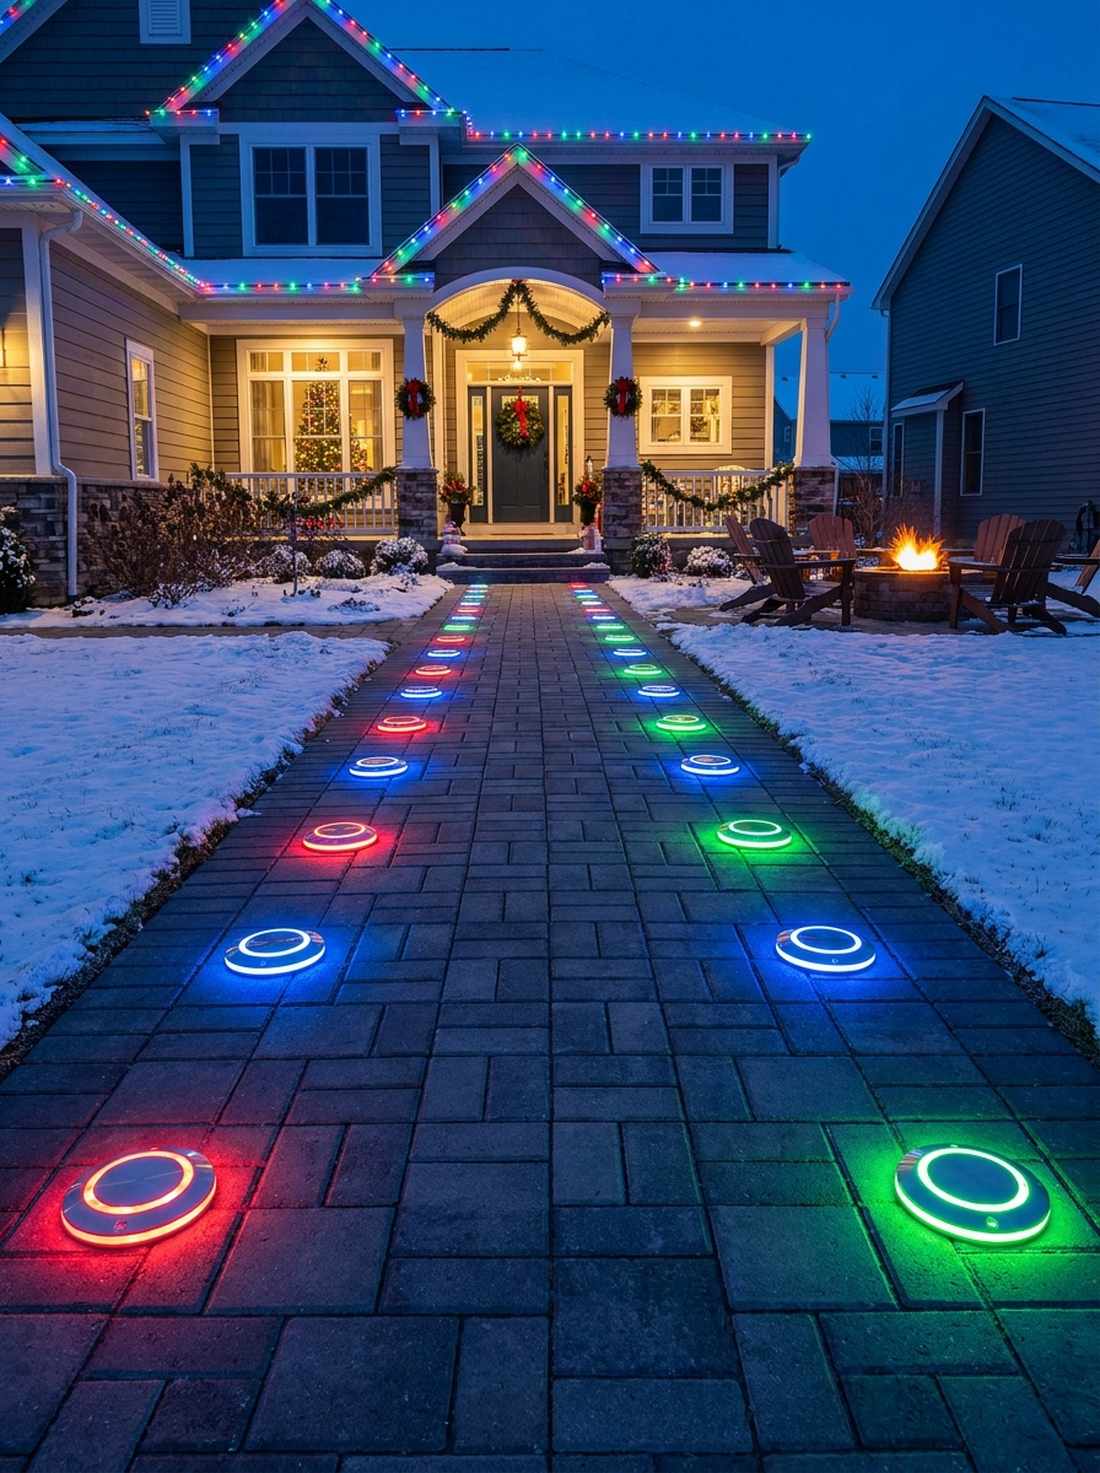
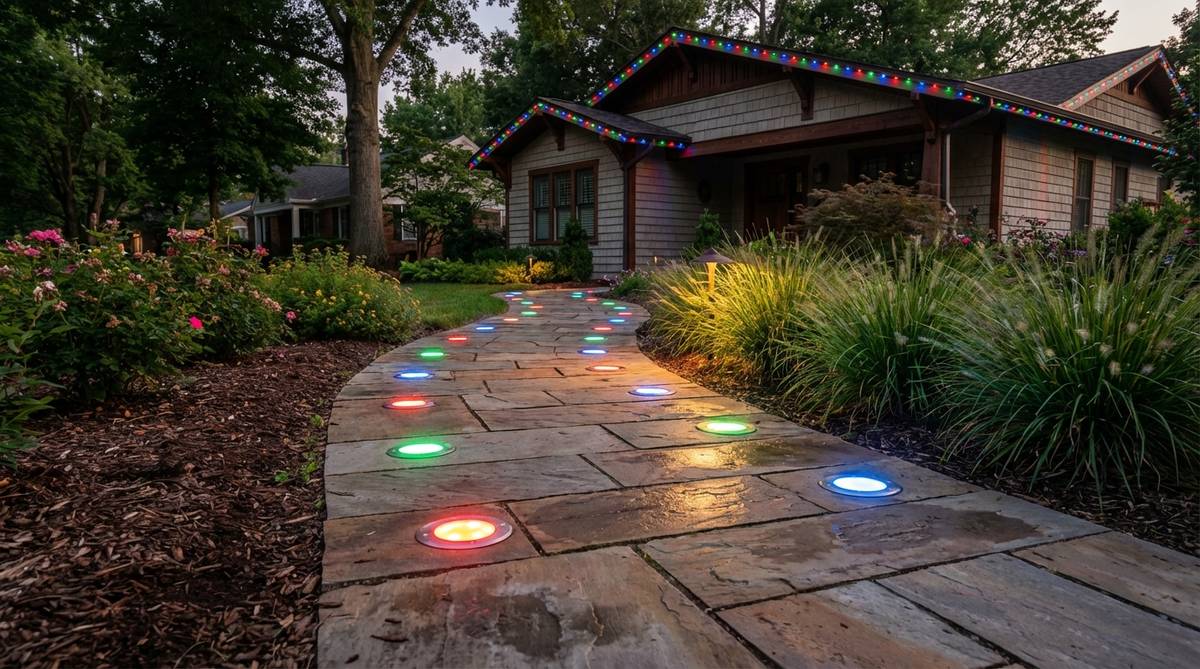
Stepping over these flush discs feels like walking through a futuristic sci-fi courtyard. Embedding a smart-controlled flush border is perfect for sleek, modern poured-concrete walkways or sleek wooden decking.
Bulky raised lights pose a tripping hazard, but hammering these ultra-flat reinforced discs flush to the grass delivers a surprisingly premium look. Syncing them via WiFi completely elevates your high-tech garden design simple landscape.
Install these flush markers for $50–$90. Pin this if you love controlling your yard aesthetics from your smartphone!
- Key Materials: Heavy-duty RGB flat discs
- Vibe / Style: High-tech minimalist futuristic
- Difficulty: Easy hammer-in
- Budget Breakdown: Disc Kits: $70 | Base Sand: $5
- Creator’s Tip: Dig a shallow half-inch divot for each light so a lawnmower can safely pass right over them without shattering the lens.
- Smart Sourcing: smart WiFi RGB pathway disc kits and reinforced drive-over solar pucks
18. Floating Lantern & Trailing Vine Stations
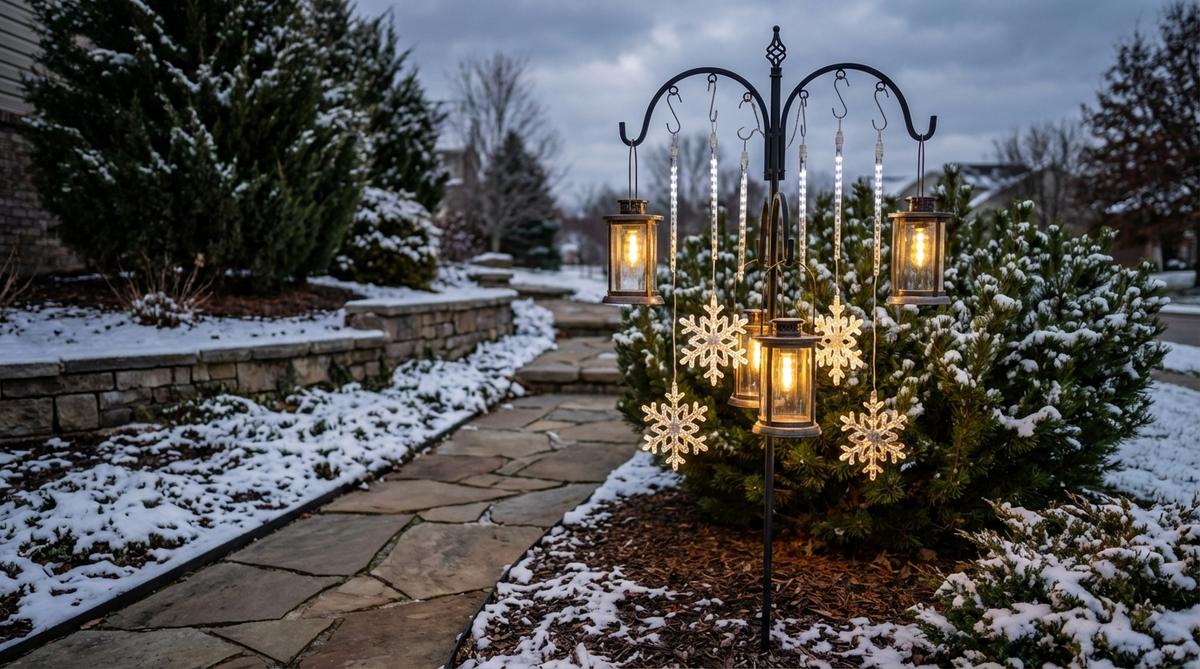
These gently swaying baskets feel like delicate botanical jewelry draped across your front lawn. A suspended pathway display is exceptionally versatile for walkways that transition frequently between lawn and dense flower beds.
Hanging cheap plastic pots ruins the vibe, but suspending heavy forged metal lanterns or trailing ivy looks far more expensive than it is. It’s an adaptable, modular approach favored by professional garden designs.
You can set up these hanging stations for $40–$70. Highly recommended for adding vertical thrillers to a flat path.
- Key Materials: Forged shepherd hooks, trailing plants
- Vibe / Style: Floating botanical jewelry
- Difficulty: Beginner friendly
- Budget Breakdown: Hooks: $40 | Plants/Lanterns: $25
- Creator’s Tip: Alternate between a glowing solar lantern and a basket of cascading “String of Pearls” to break up visual monotony.
- Smart Sourcing: heavy-duty forged steel shepherd hooks and weatherproof hanging solar lanterns
19. Flexible LED Pathway Edging
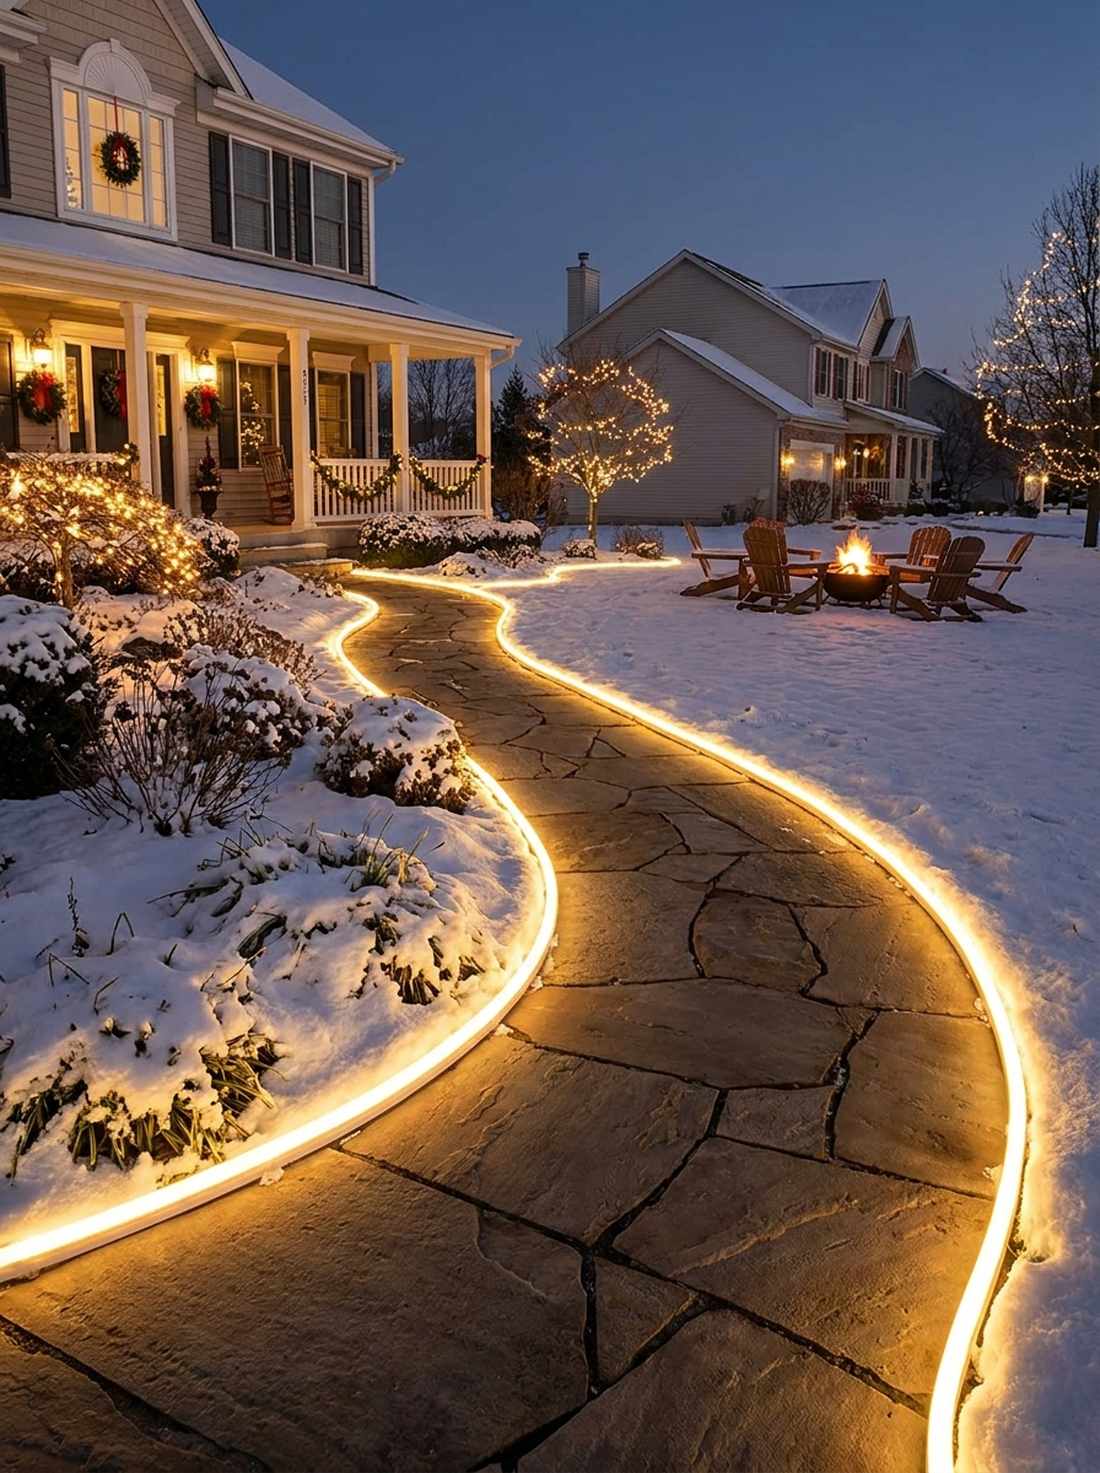
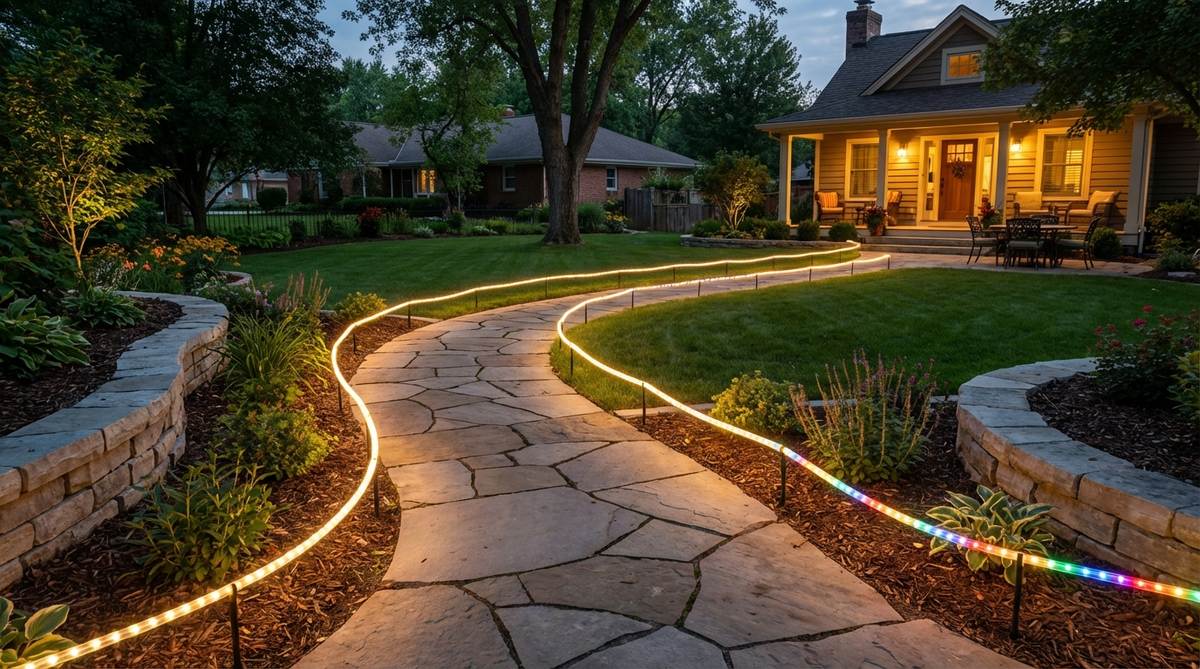
This continuous ribbon of light feels like a glowing runway guiding you safely through a lush garden. A flexible luminous edge works perfectly for outlining organic, heavily curved flower beds where rigid landscape timbers fail.
Crooked, wavy placement looks amateurish, but using rigid mounting stakes every 12 inches delivers a flawless, designer-level finish. It defines the fluid geometry of your sweeping garden design layout beautifully.
You can outline your pathways for $30–$60. Save this for an easy, high-impact weekend structural project!
- Key Materials: LED rope lights, mounting stakes
- Vibe / Style: Fluid neon modernism
- Difficulty: Fast unrolling
- Budget Breakdown: Rope Spool: $40 | Stakes: $15
- Creator’s Tip: Unroll the rope light in the sun for an hour before installation to make the plastic tube incredibly flexible and easy to bend around corners.
- Smart Sourcing: UV-coated flexible LED rope light spools and acrylic U-channel ground stakes
Stop scrolling! The next container display turns cheap store-bought planters into towering luxury architecture…
20. Firefly Mason Jar Pathway Lights
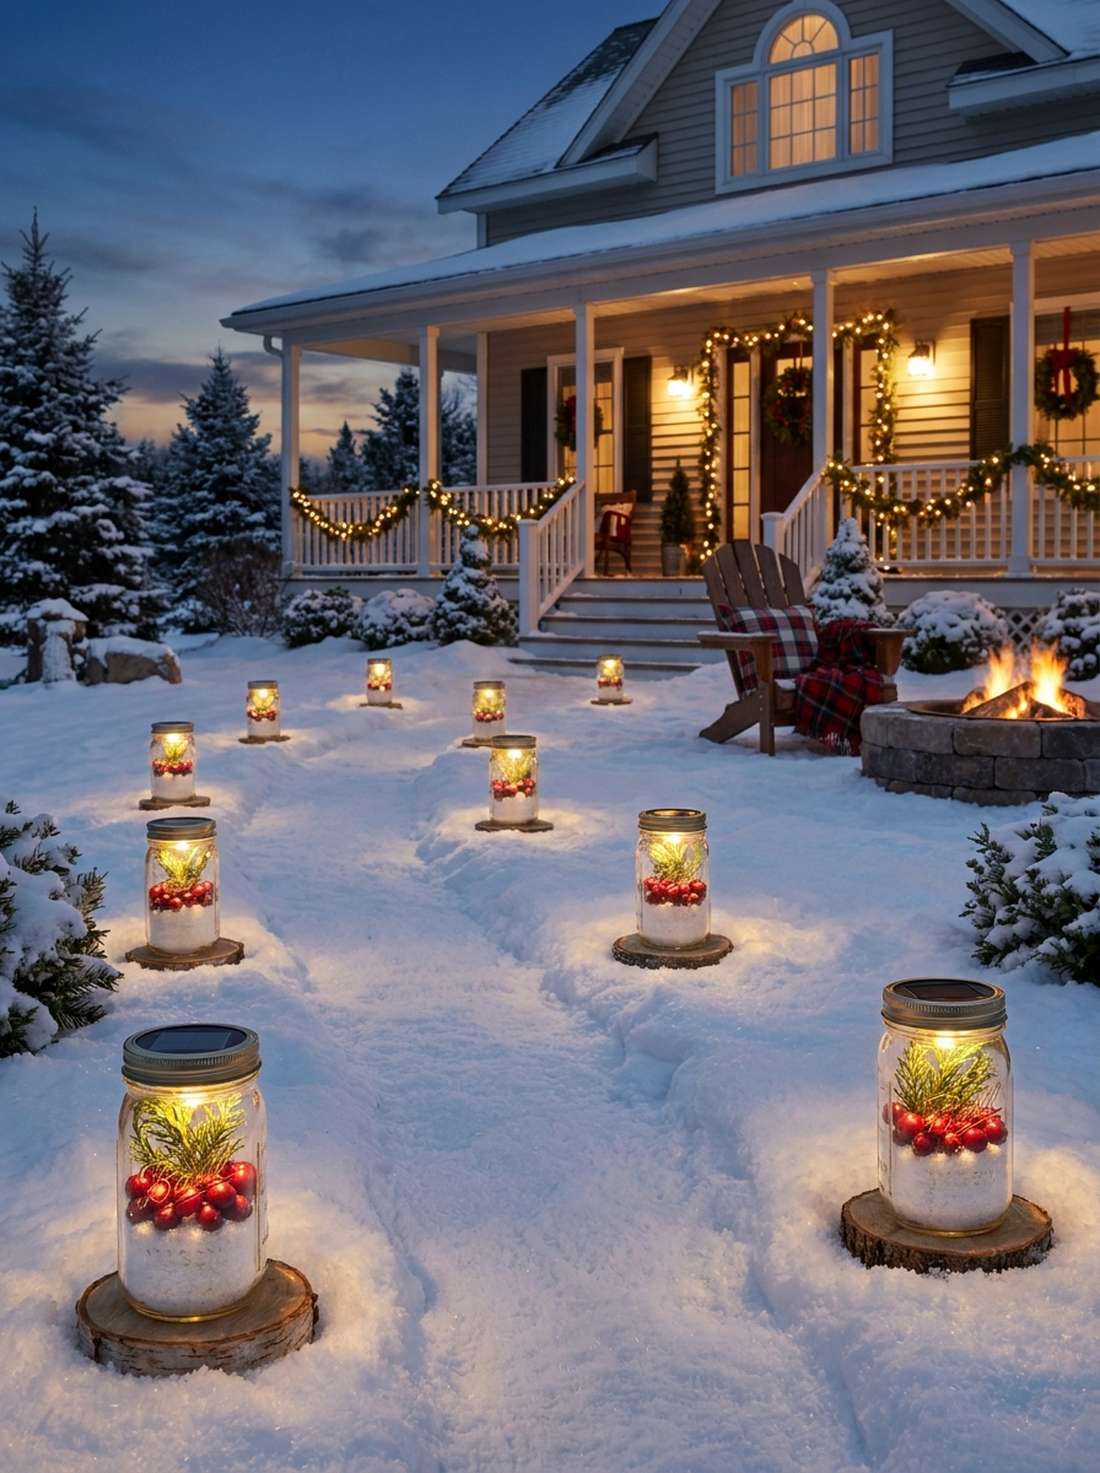
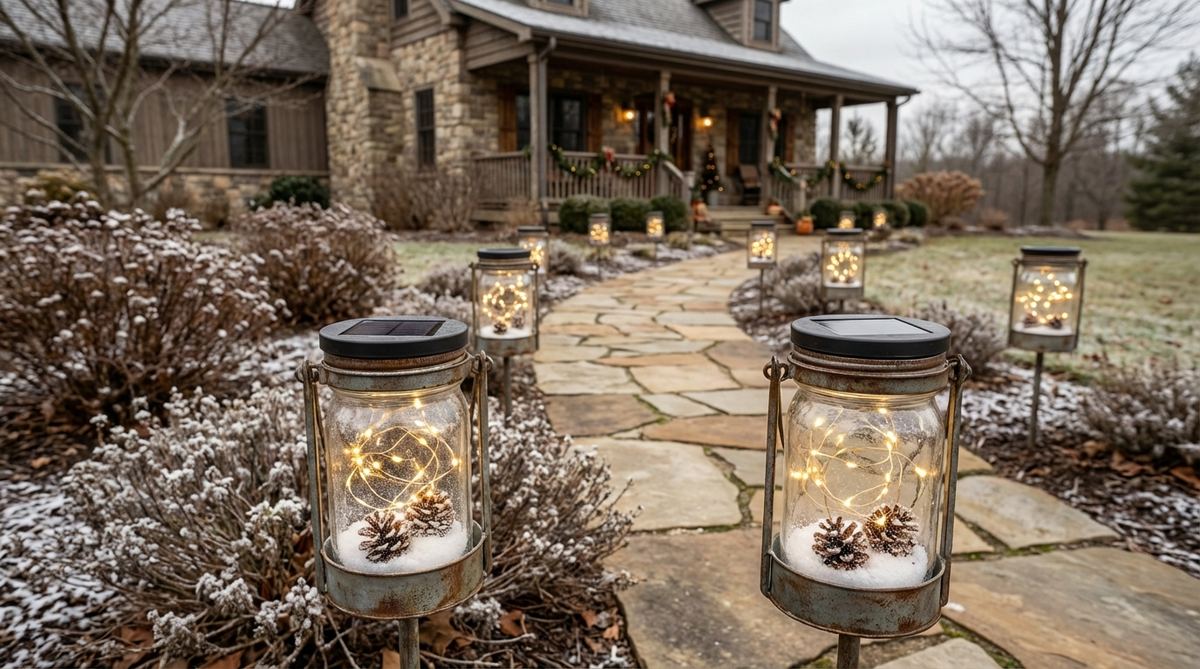
The warm glow from these jars feels like capturing a jar full of summer fireflies in a fairy tale. A rustic glass jar border is an incredibly charming addition for farmhouse porches or quaint cottage garden paths.
Using standard clear glass is boring, but filling them with copper fairy lights gives a surprisingly premium look that diffuses perfectly. Utilizing miniature garden supplies inside turns them into tiny illuminated terrariums in your garden design outdoor space.
You can craft a dozen of these for under $25. Pin this to your budget-friendly DIY outdoor craft board!
- Key Materials: Glass jars, solar lids, copper fairy lights
- Vibe / Style: Charming country fireflies
- Difficulty: Fun DIY crafting
- Budget Breakdown: Jars: $10 | Solar Lids: $15
- Creator’s Tip: Fill the bottom inch with river pebbles and a sprig of dried lavender to create a miniature botanical diorama inside the glass.
- Smart Sourcing: waterproof solar mason jar lid kits and copper wire micro LED strands (bulk)
Elevated Container and Planter Displays
Transform standard garden pots into majestic botanical sculptures that anchor your entryways using the thriller-filler-spiller method.
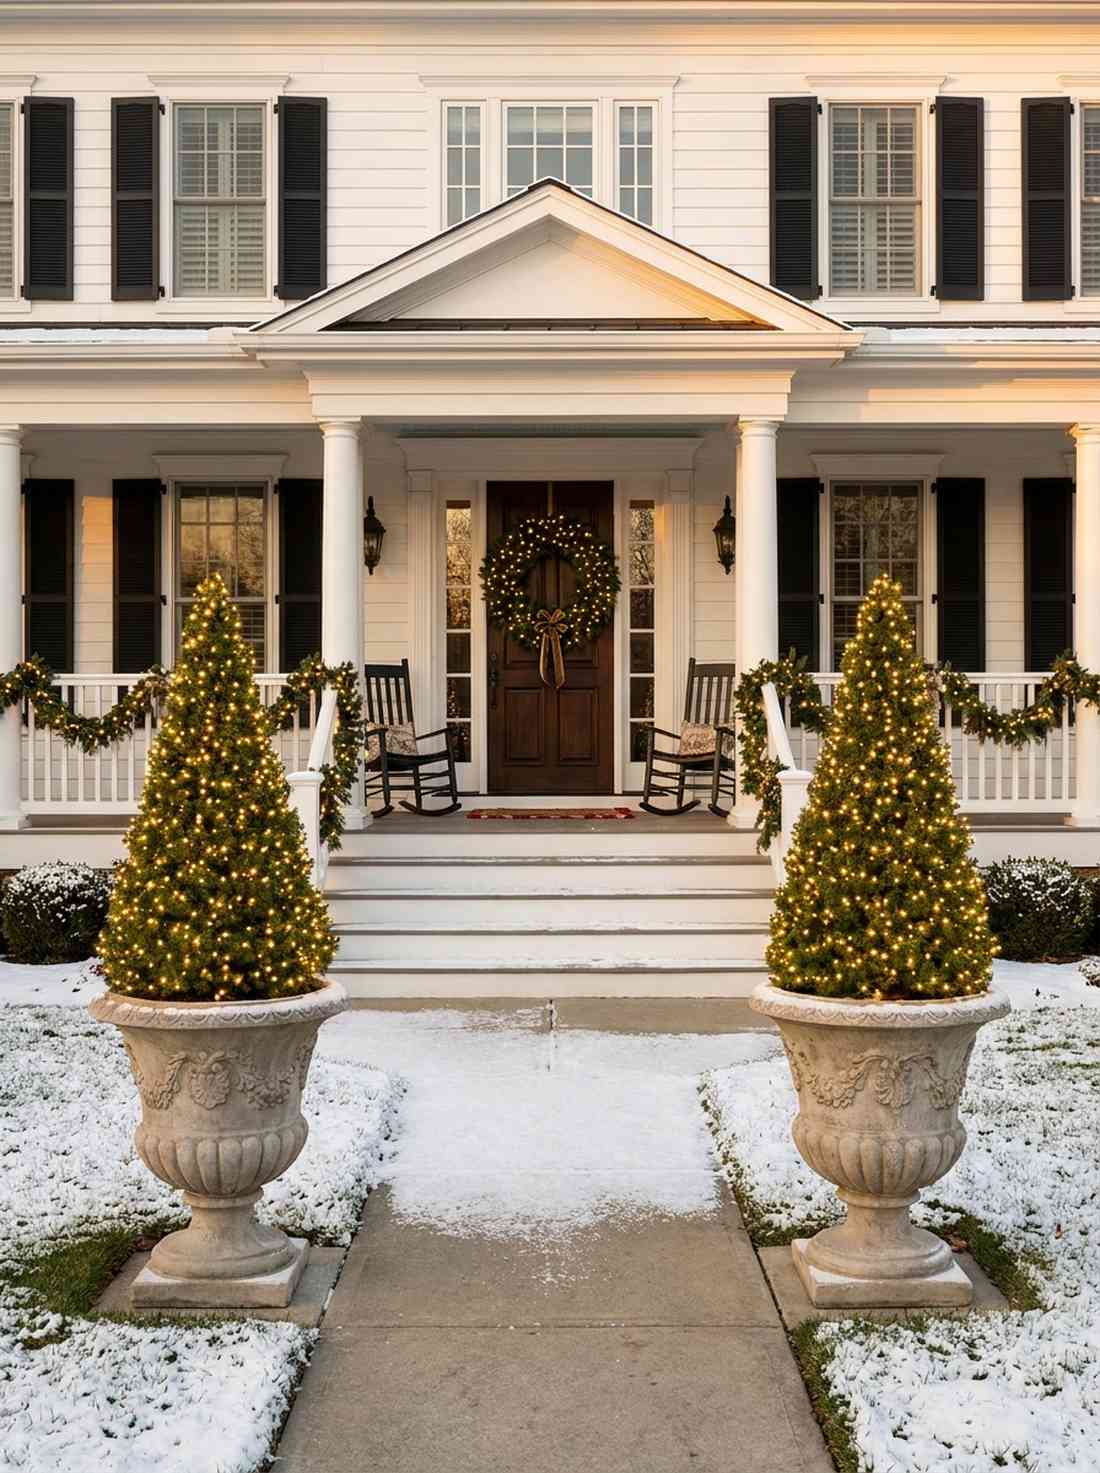
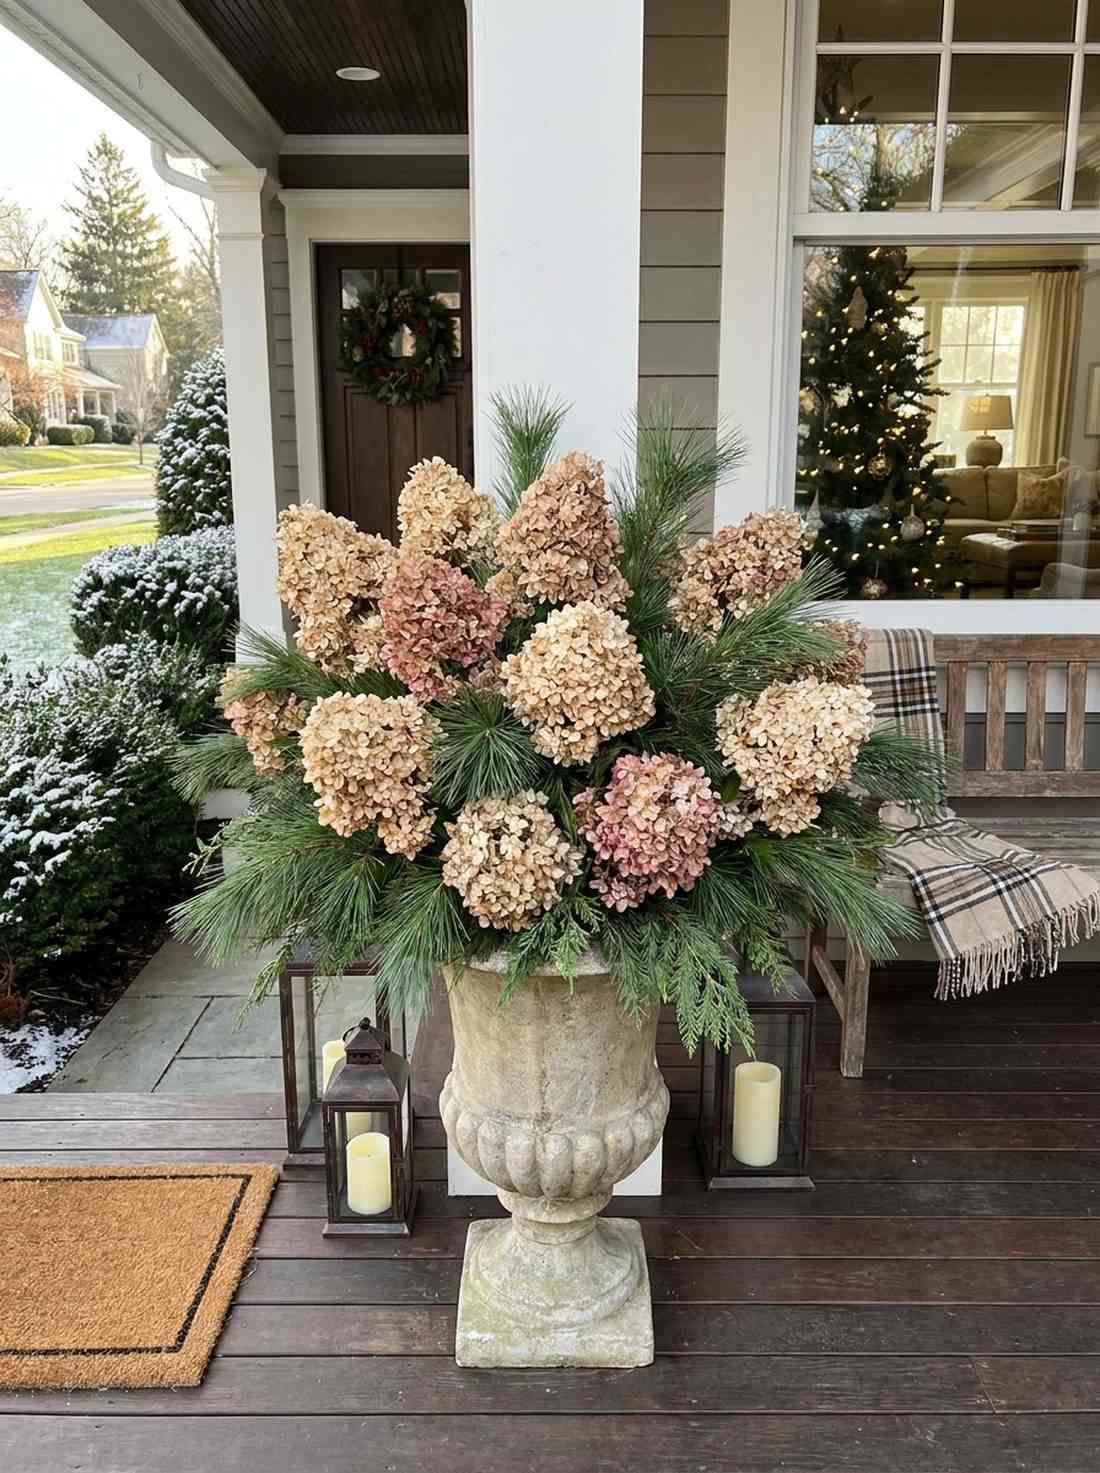
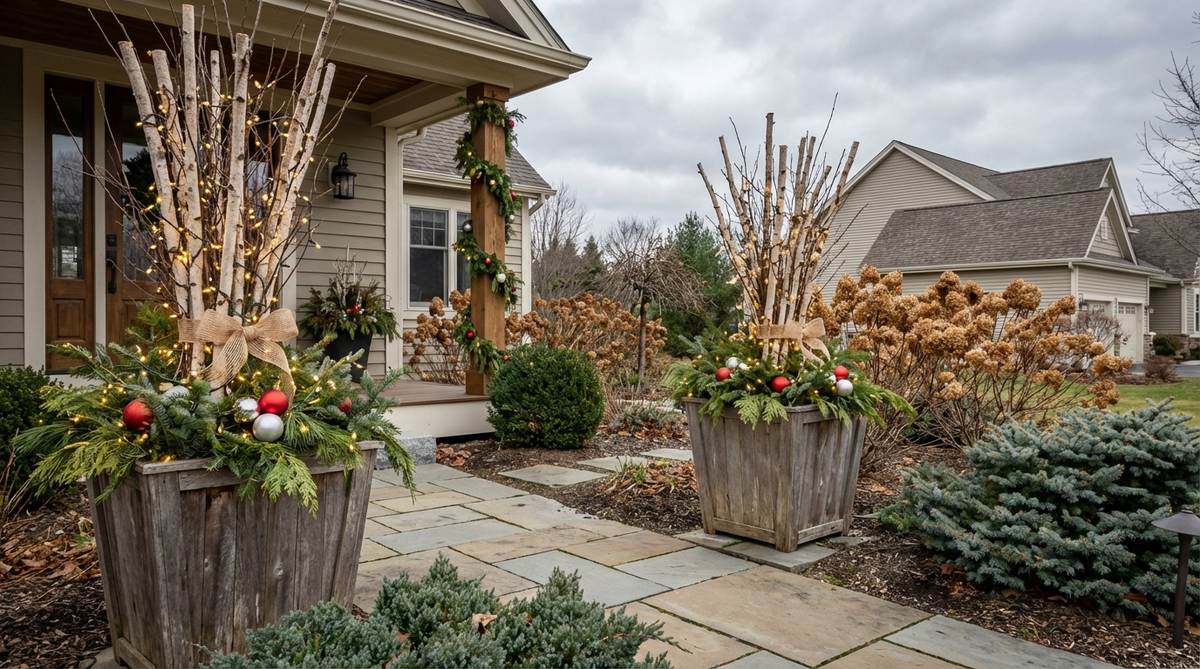
21. Architectural Arborvitae Urns
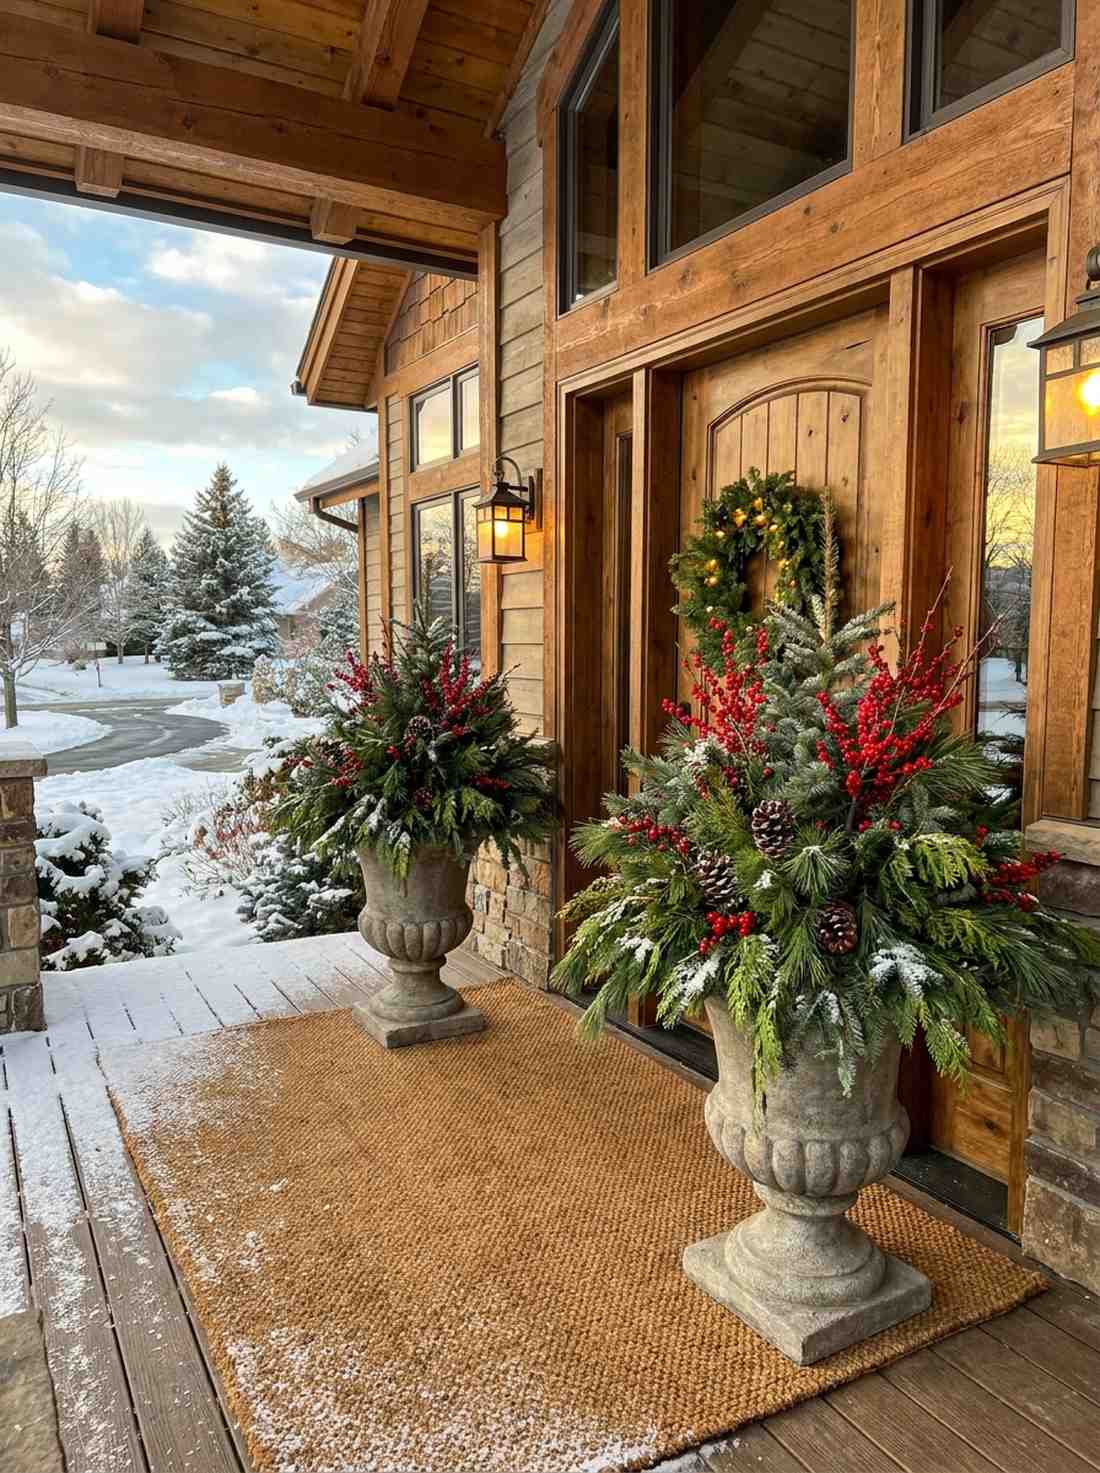
Flanking your door with these massive green towers feels like stepping into a grand, five-star Italian villa. An architectural topiary urn setup works exceptionally well for commanding attention at large main entryways.
Most just stick a tiny bush in a pot, but packing a heavy cast-resin urn with towering Arborvitae or Boxwood delivers a high-end designer finish. The soaring vertical height aggressively anchors the visual weight of your garden design landscape.
Build these massive towers for about $60–$100 a pair. It’s a fast upgrade that completely changes the curb appeal.
- Key Materials: Tall urns, premium potting soil, conical evergreens
- Vibe / Style: Grand villa luxury
- Difficulty: Intermediate planting
- Budget Breakdown: Urns: $50 | Live Trees: $40
- Creator’s Tip: Plant trailing white alyssum around the base of the tree to spill over the edge and soften the hard lines of the urn.
- Smart Sourcing: weather-resistant tall resin urn planters and moisture-control premium potting mix
22. Rustic Hollowed Log Succulent Planters
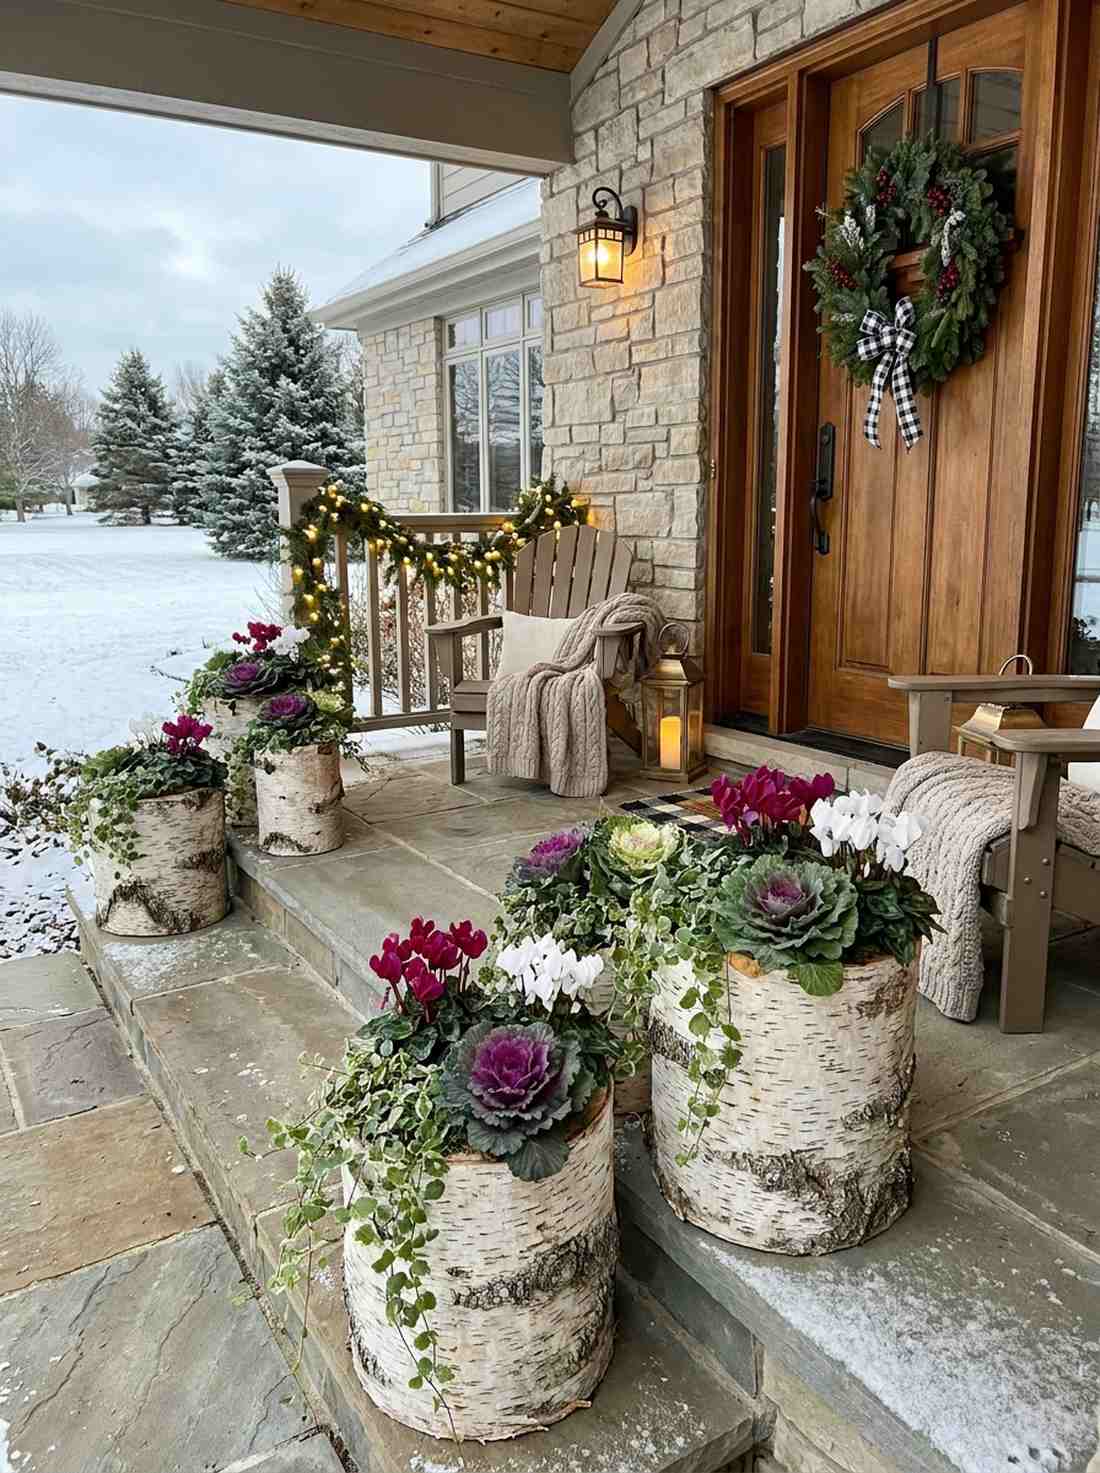
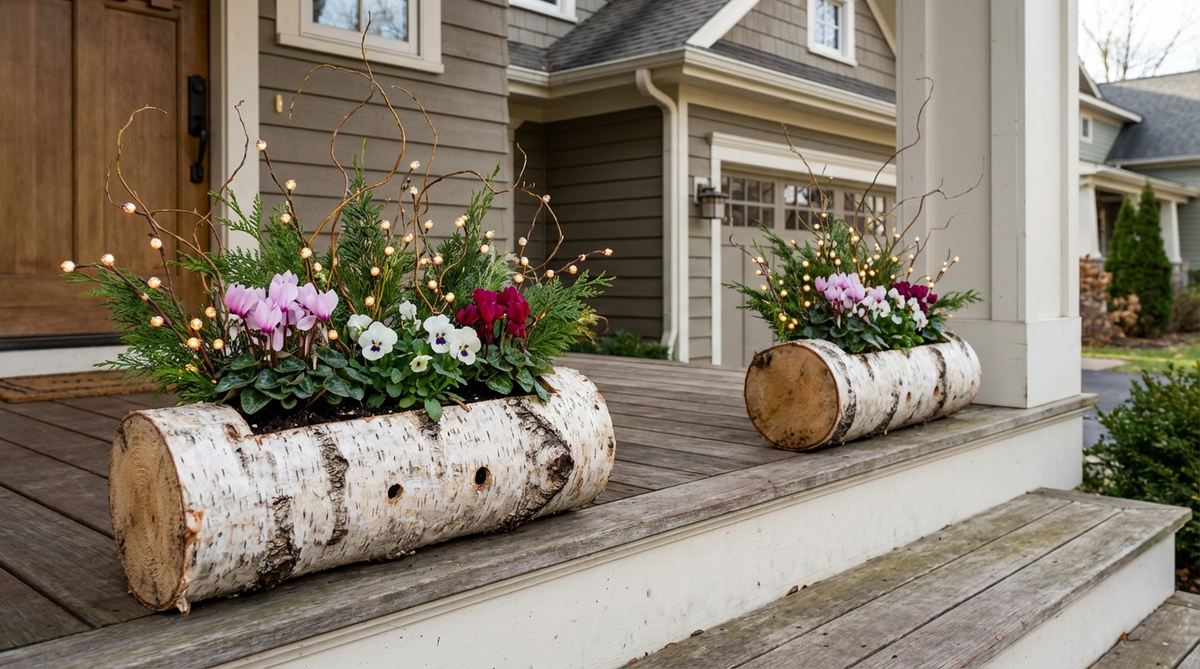
This raw, bark-wrapped planter feels like a cozy slice of a wild, untouched forest floor. Utilizing a hollowed log vessel is the perfect textural use-case for flanking rustic wooden steps or displaying drought-tolerant succulents.
Plastic fake wood pots look tacky, but sourcing authentic hollowed kiln-dried logs looks far more expensive than it is. It injects a highly tactile, organic element into your otherwise sleek garden design pictures.
You can create these stunning rustic pots for $30–$60. Pin this if you love bringing natural woodland textures to your patio!
- Key Materials: Hollow logs, cactus soil, mixed succulents
- Vibe / Style: Authentic woodland botanical
- Difficulty: Easy planting
- Budget Breakdown: Hollow Logs: $40 | Soil/Plants: $15
- Creator’s Tip: Always drop a cheap plastic nursery pot inside the log to prevent damp soil from rotting the natural bark.
- Smart Sourcing: kiln-dried hollowed log planters and fast-draining succulent soil bulk bags
23. Coco-Coir Hanging Vine Baskets
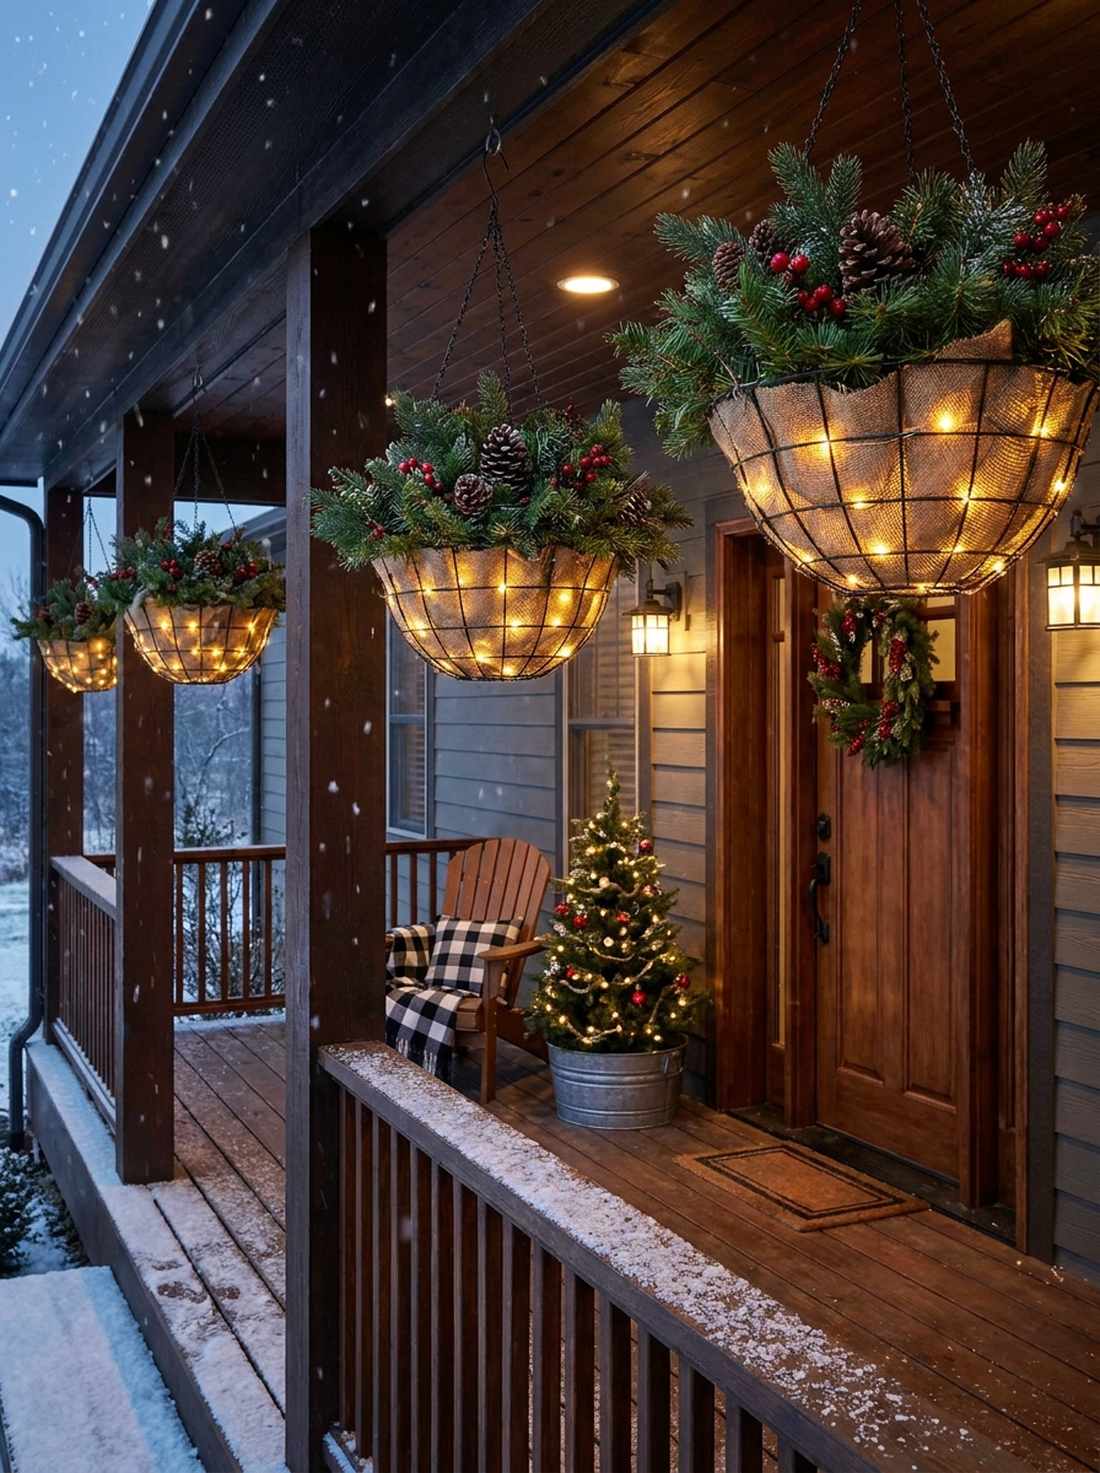

Spilling over with lush greens, these baskets feel like suspended nests of vibrant jungle foliage. A coco-lined wire hanging display is an exceptionally lush addition for sheltered porch overhangs and pergolas.
Standard plastic hanging baskets look cheap, but using iron wire frames packed with trailing ivy and sweet potato vine gives a surprisingly premium look. Utilizing heavy-duty liners turns them into a suspended wonderland in your garden designs.
You can pull this off for around $25–$40 per basket. Save this to your porch styling Pinterest board!
- Key Materials: Iron wire baskets, coco coir liners, trailing plants
- Vibe / Style: Suspended jungle nests
- Difficulty: Beginner planting
- Budget Breakdown: Baskets: $20 | Liners/Plants: $15
- Creator’s Tip: Add water-retaining polymer crystals to the soil before planting so these aerial baskets don’t dry out in the hot summer sun.
- Smart Sourcing: rust-resistant wire hanging basket multi-packs and pre-formed thick coco coir liners
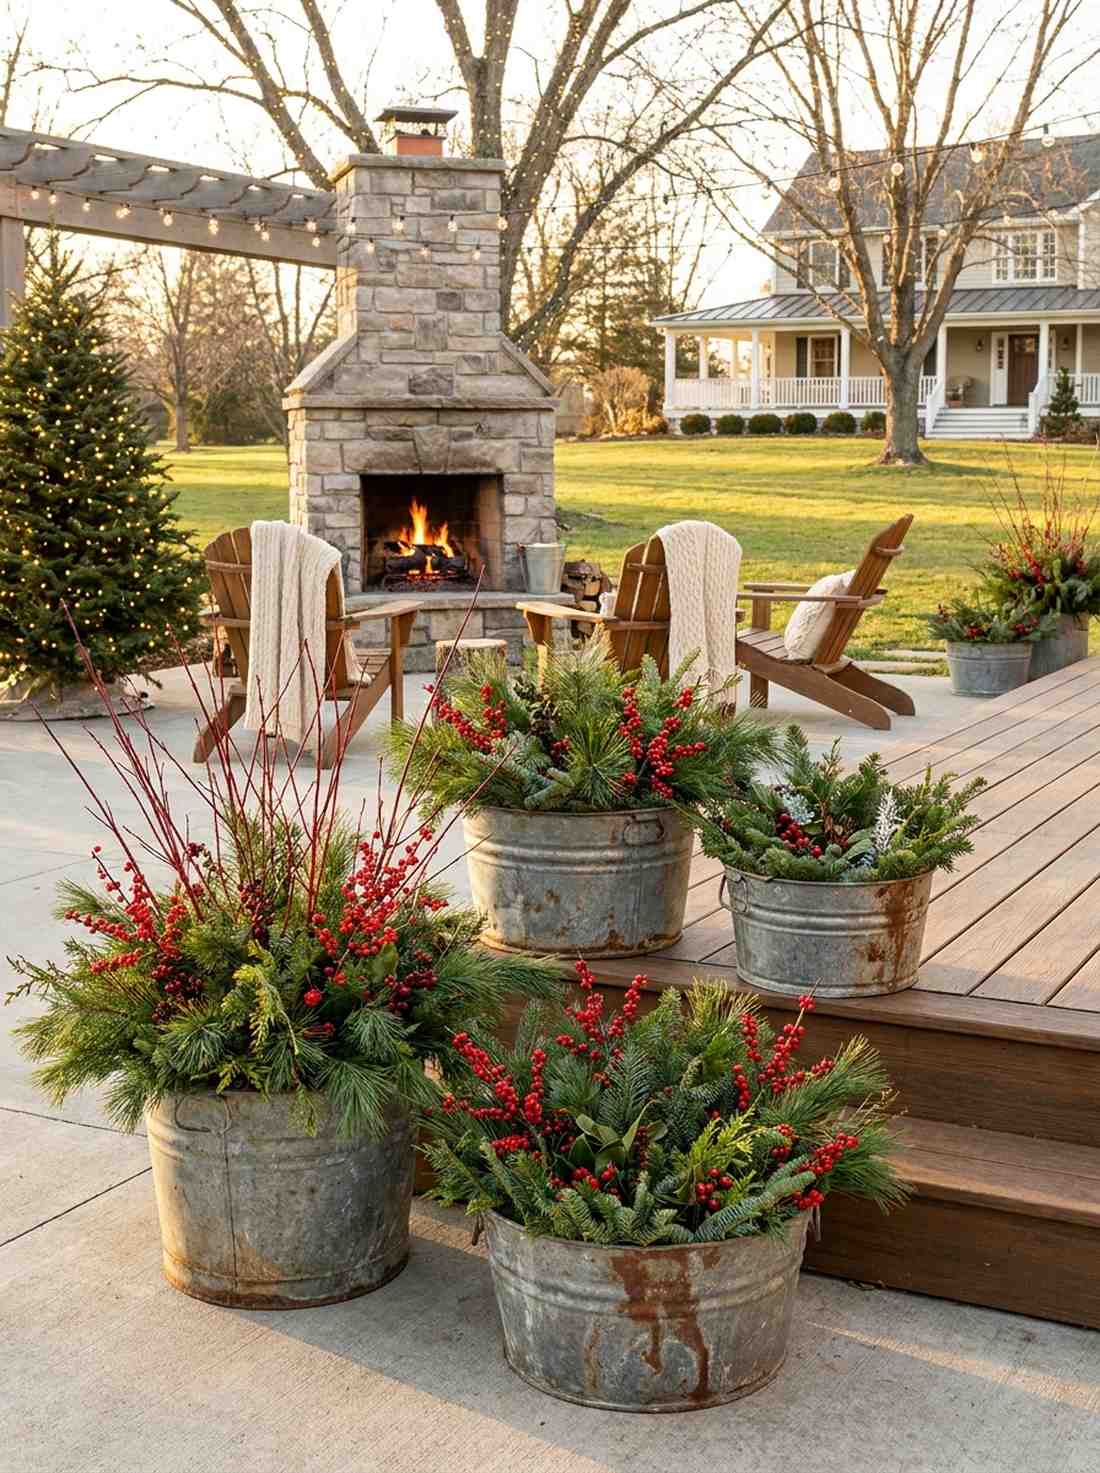
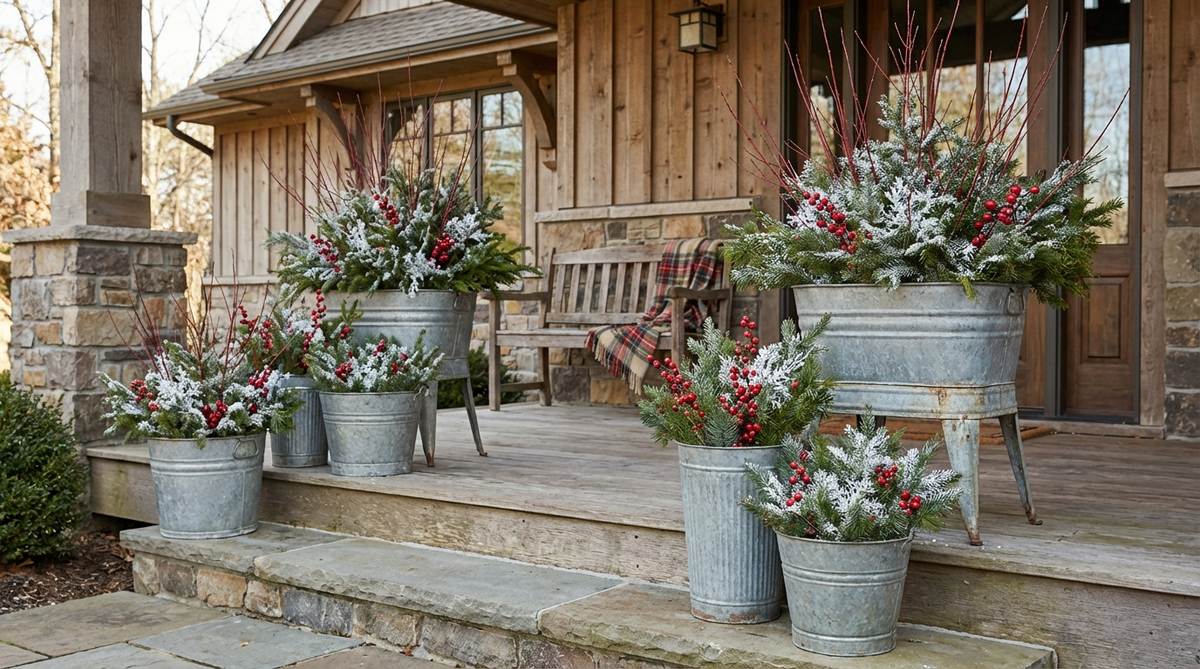
24. Farmhouse Container Clusters
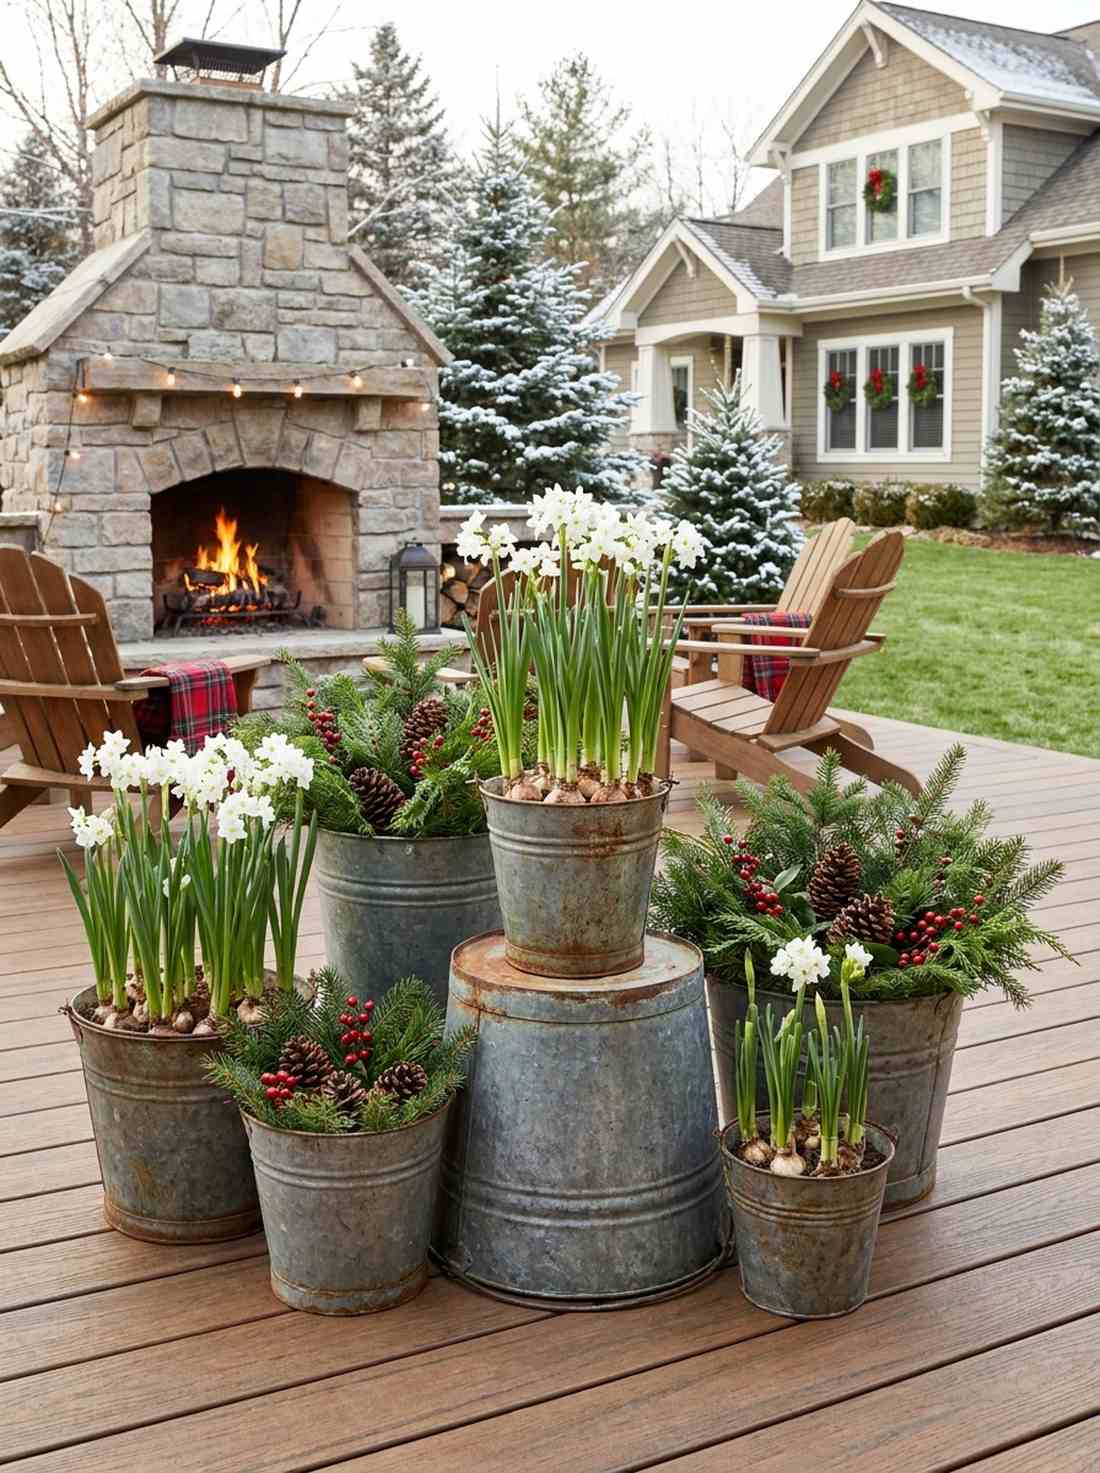
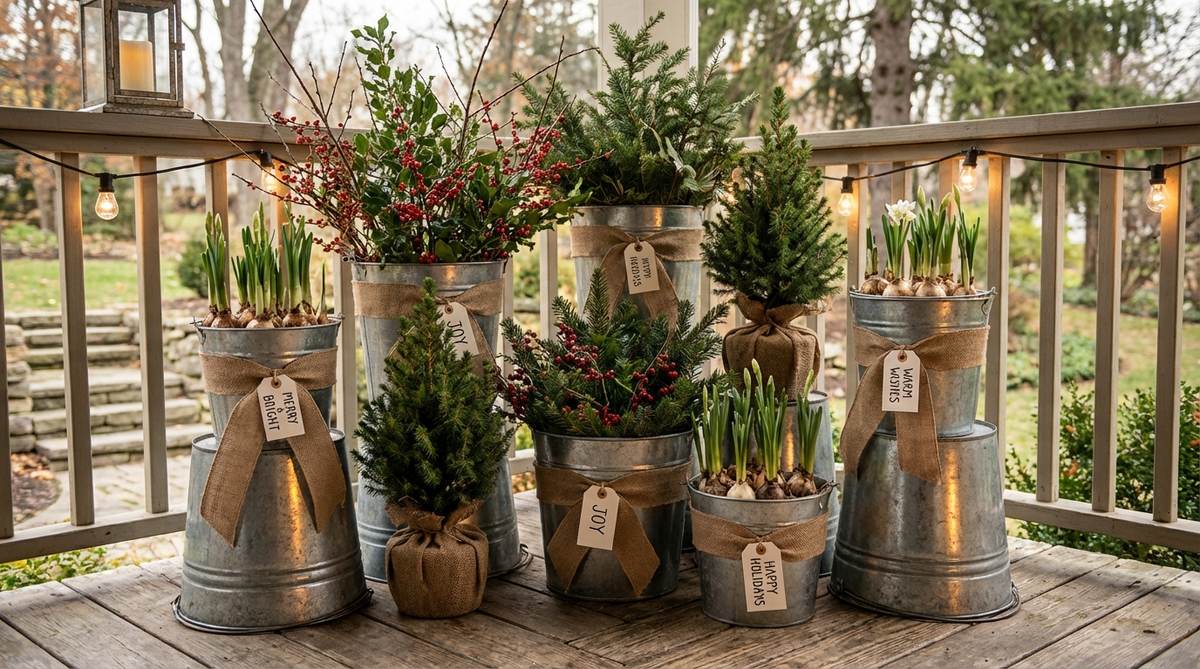
This clustered arrangement feels like an authentic vintage find from an old-world botanical market. A galvanized tub trio works beautifully for filling awkward, empty corners on large wraparound decks or patios.
A single bucket looks lonely, but grouping three varied sizes in an asymmetrical triangle delivers a designer-level finish. It’s an incredibly affordable way to add industrial farmhouse charm to a garden design layout.
Assemble this chic farmhouse trio for $35–$60. Highly recommended for a quick, impactful spatial filler.
- Key Materials: 3 varied galvanized buckets, thriller/filler plants
- Vibe / Style: Industrial farmhouse market
- Difficulty: Simple stacking & planting
- Budget Breakdown: Bucket Set: $40 | Greenery: $15
- Creator’s Tip: Plant tall ornamental grasses in the largest back bucket to act as the “thriller” that anchors the whole cluster.
- Smart Sourcing: nested galvanized metal bucket sets and titanium drill bits (for drainage holes)
Wait! This next window box trick stops root rot while looking completely professionally landscaped…
25. Year-Round Trailing Window Boxes
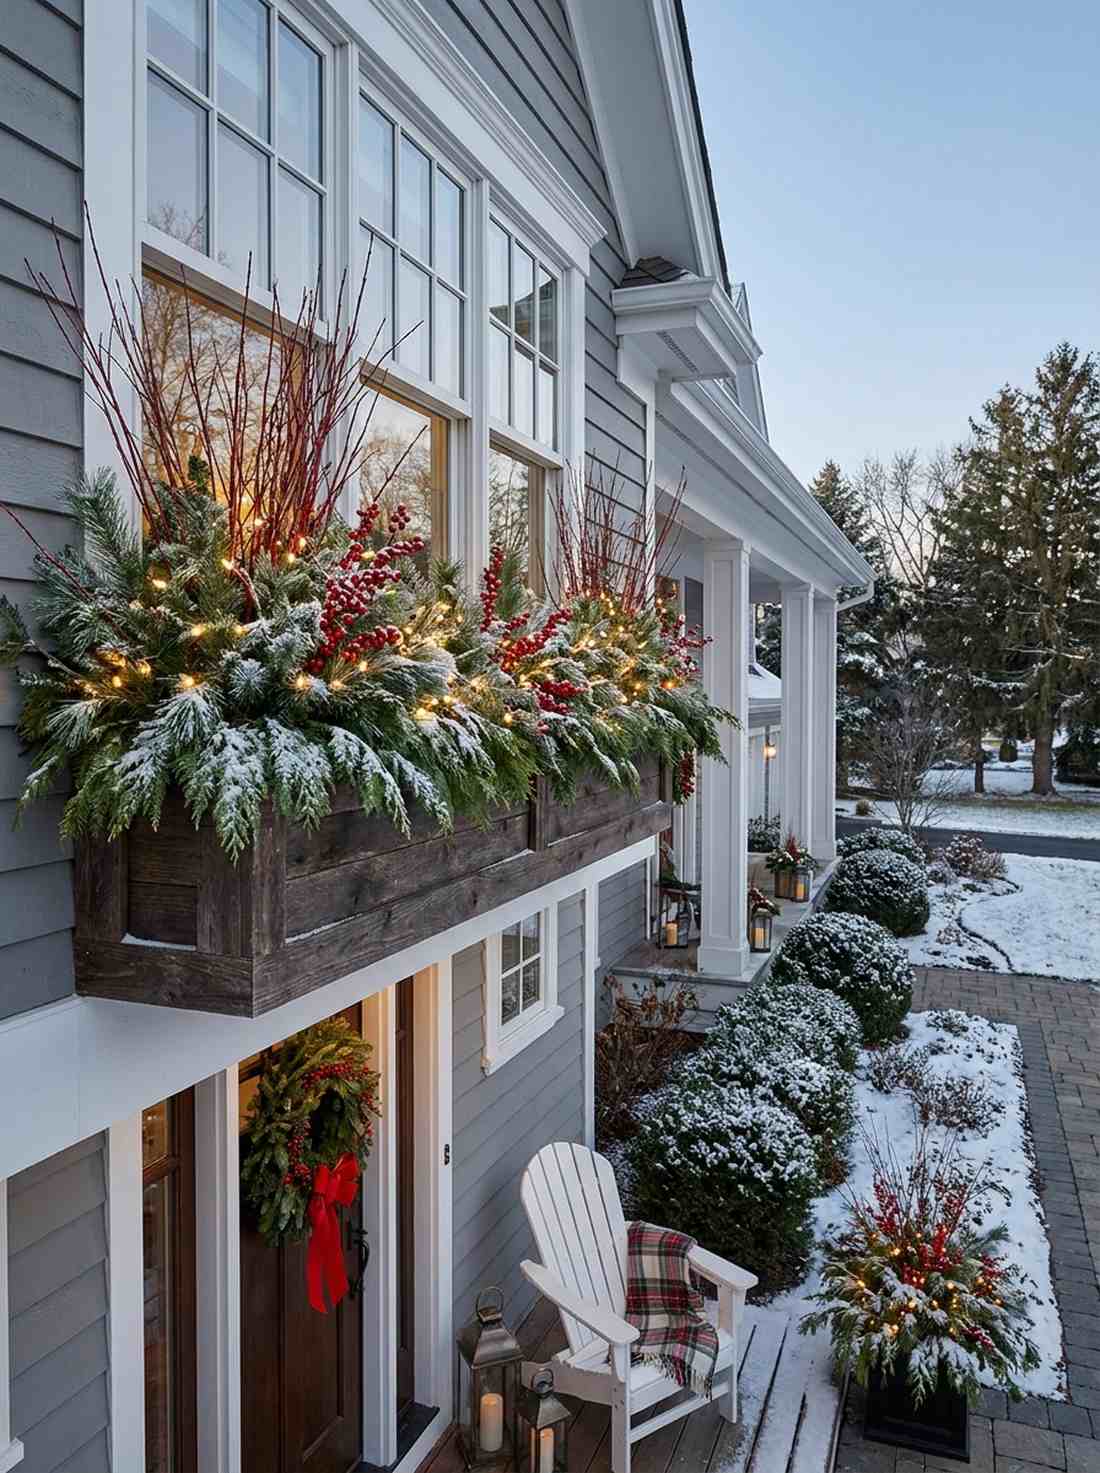
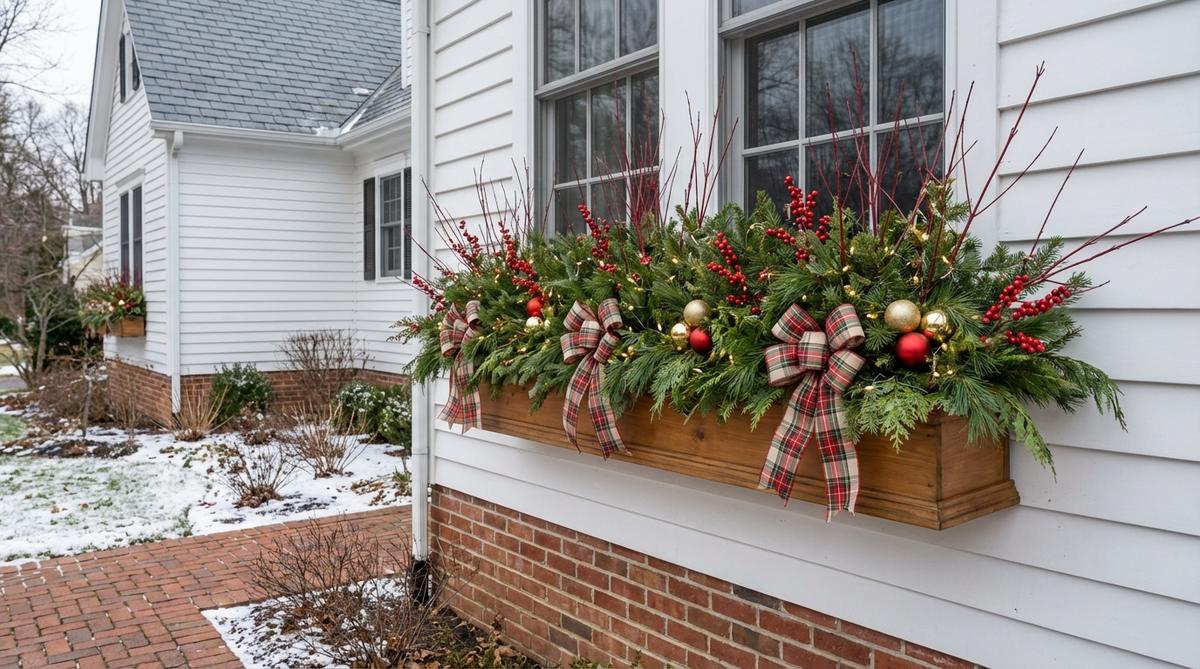
Looking out through this framed greenery feels like peering through the window of a lush English cottage. Upgrading a seasonal window trough is the smartest use-case for utilizing existing architectural hardware.
Filling boxes with plain dirt is a recipe for rot, but utilizing a false bottom with dense creeping fig looks far more expensive than it is. It creates a stunning, continuous visual ribbon across your garden design simple facade.
You can refresh an existing box for under $20. Pin this to your instant curb-appeal hacks board!
- Key Materials: Window troughs, creeping fig, bright annuals
- Vibe / Style: English cottage charm
- Difficulty: Fast arranging
- Budget Breakdown: Plants: $15 | Coconut Coir: $5
- Creator’s Tip: Place empty crushed water bottles at the bottom of the box before adding soil—it creates perfect drainage and keeps the heavy box incredibly light.
- Smart Sourcing: wrought iron window box frames and expanding coconut coir soil blocks
26. Vertical Herb Garden Crates
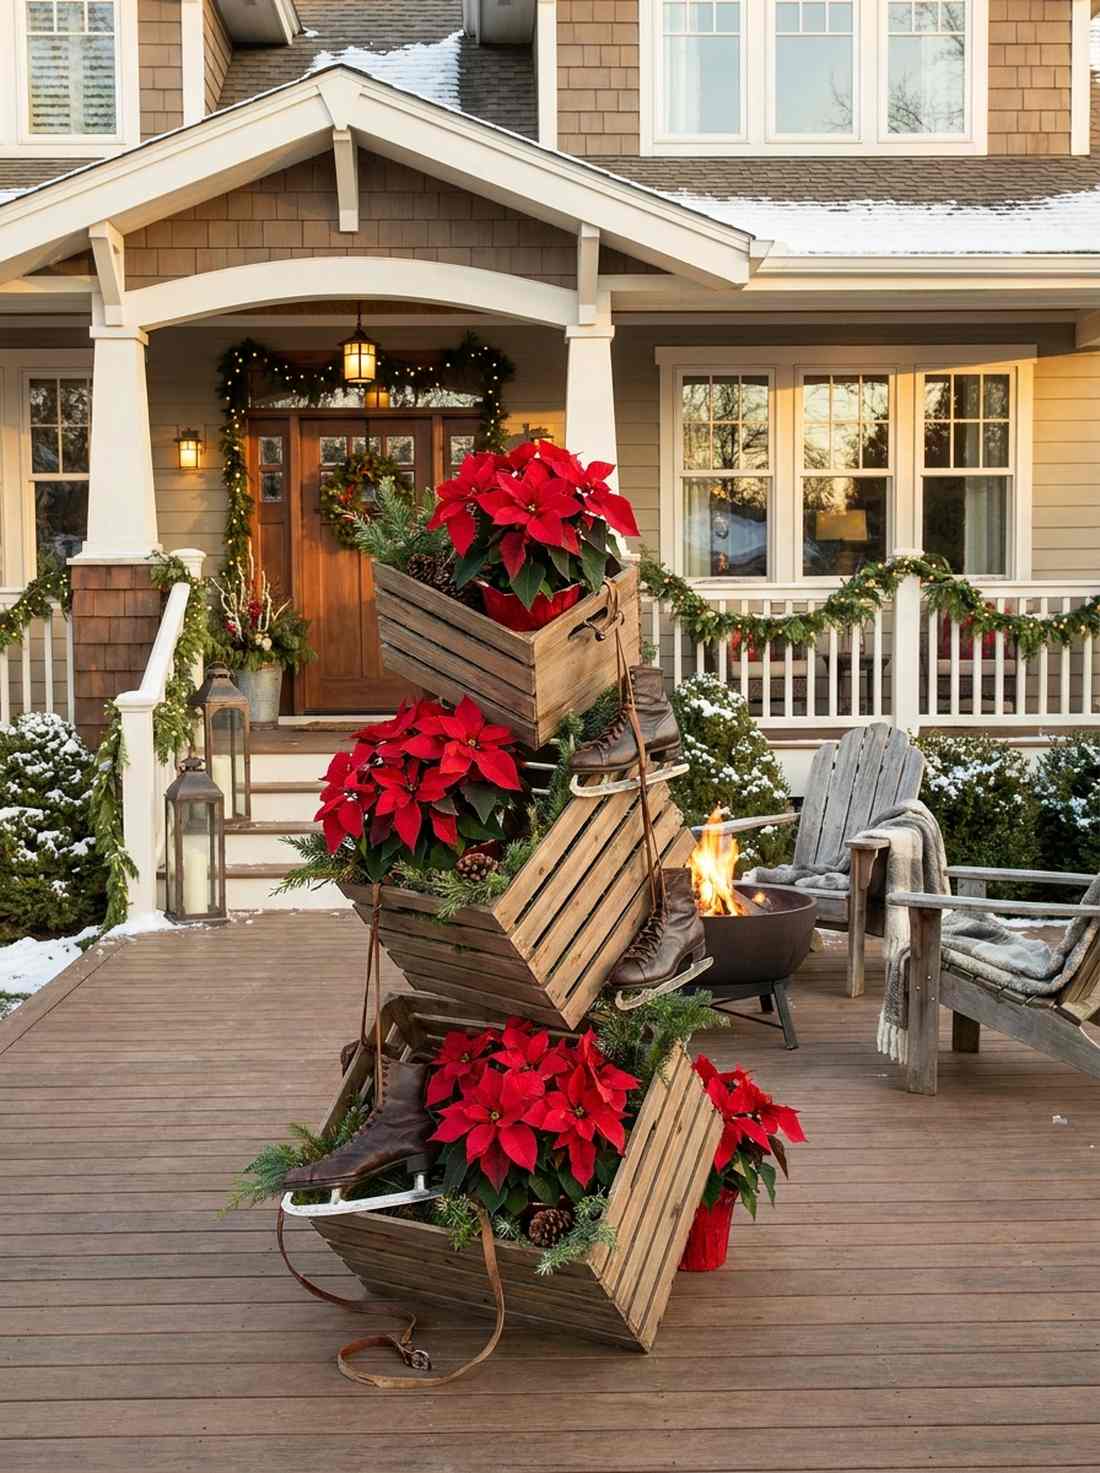
This modular wooden tower feels like a charming pop-up farmer’s market stall right on your patio. A vertical crate shelving unit is an exceptional solution for tight condo balconies or narrow back steps.
Stacking them perfectly straight looks rigid, but tilting them at deliberate, asymmetrical angles to hold basil and mint gives a surprisingly premium look. This trick maximizes vertical real estate in tight garden design outdoor footprints.
You can build this entire shelving unit for $40–$70. Save this if you are decorating a small apartment space!
- Key Materials: Wooden apple crates, wood screws, herb pots
- Vibe / Style: Charming farmer’s market
- Difficulty: Intermediate drilling
- Budget Breakdown: Crates: $45 | Hardware/Herbs: $20
- Creator’s Tip: Screw the crates together at the back seams so the unit doesn’t topple over when loaded with heavy watered terracotta pots.
- Smart Sourcing: unfinished rustic wooden crate bulk packs and weatherproof outdoor wood screws
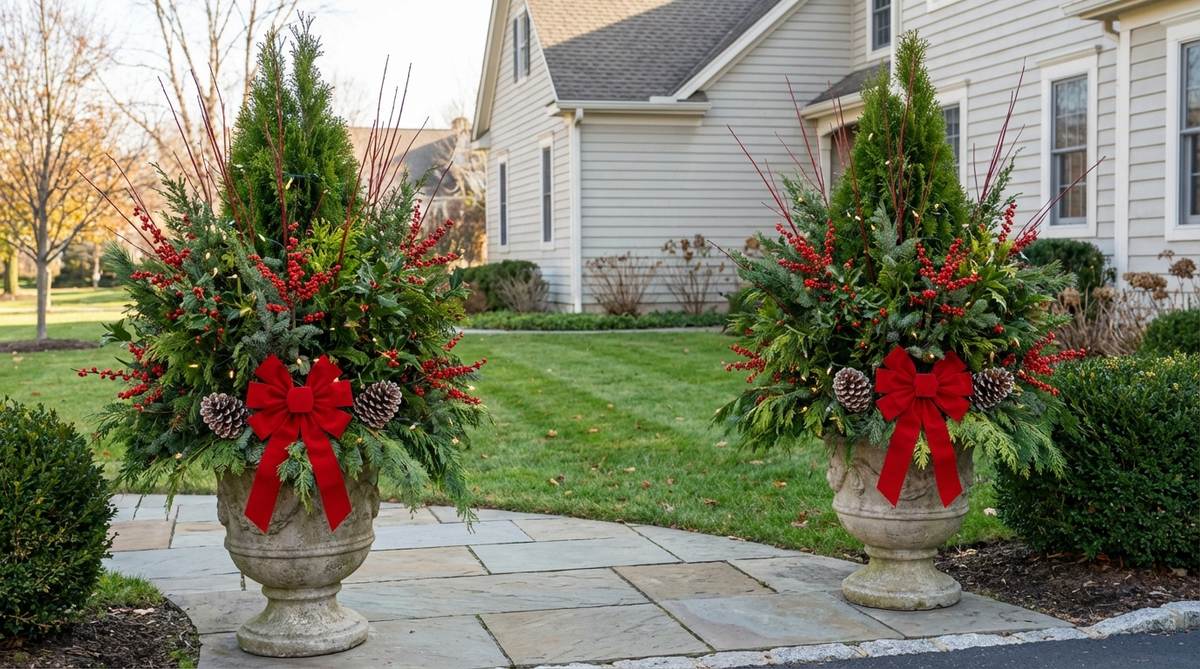
27. Formal Clipped Topiary Urns
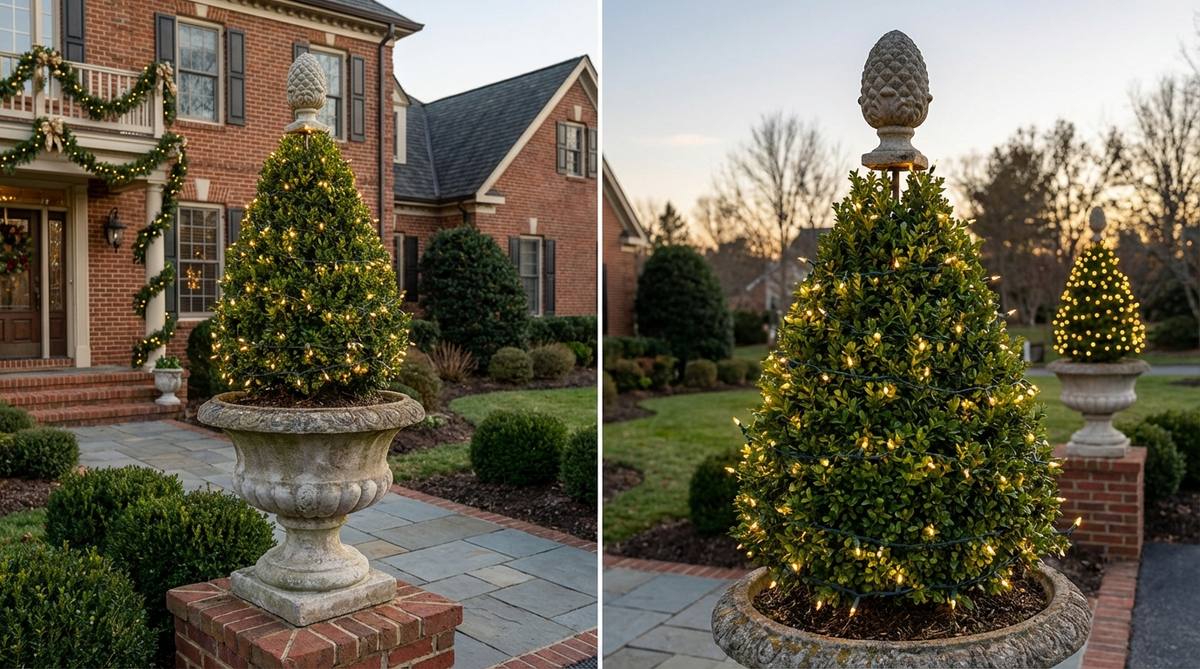
The razor-sharp geometry of these plants feels like the manicured entrance of a high-society estate. A formal geometric topiary layout is the absolute best use-case for flanking classic colonial, stucco, or brick architectures.
Untrimmed bushes look wild, but investing in perfectly spherical dwarf boxwoods delivers a high-end designer finish that commands respect. These permanent fixtures heavily elevate your baseline garden design ideas year-round.
Invest in these regal planters for $80–$150 a pair. It’s a permanent upgrade that completely changes the entrance vibe.
- Key Materials: Concrete or resin urns, clipped boxwoods
- Vibe / Style: High-society formal estate
- Difficulty: Heavy lifting
- Budget Breakdown: Urns: $80 | Live Topiaries: $60
- Creator’s Tip: Set the nursery pot inside the urn and surround it with gravel rather than planting directly—it makes swapping out dead plants infinitely easier.
- Smart Sourcing: lightweight faux-concrete resin urns and sharp bypass pruning shears
28. Vintage Garden Cart & Trolley Planters
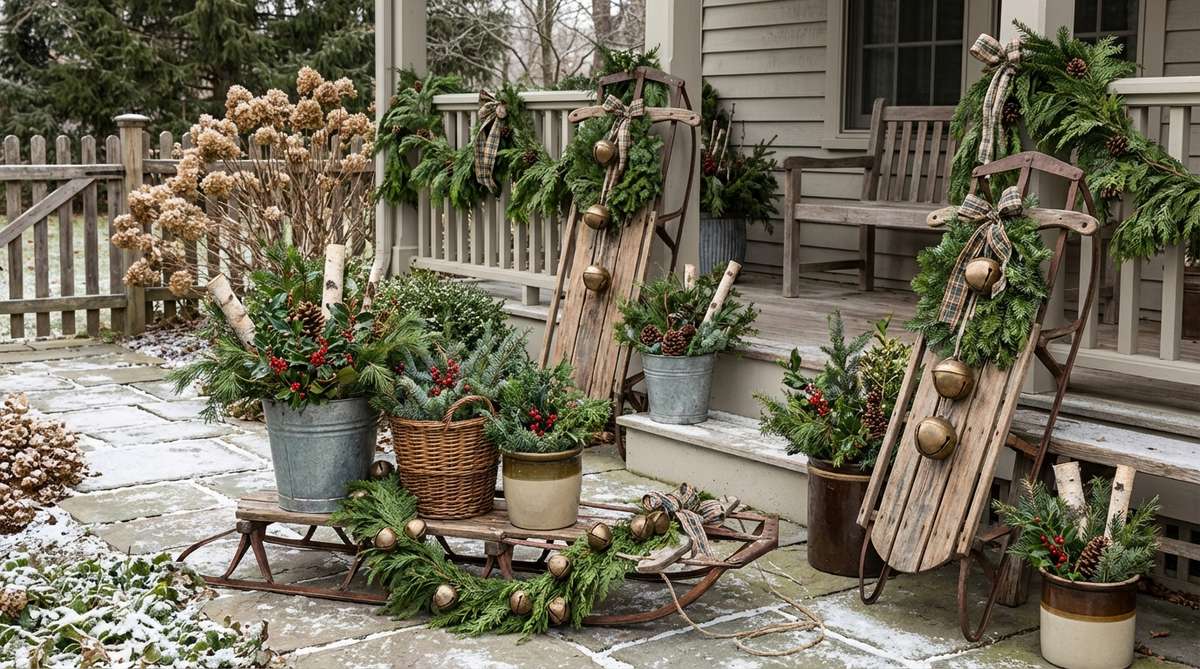
Resting your plants on this antique iron cart feels like an invitation to a secret, historical botanical society. Utilizing an antique iron plant trolley is a phenomenally creative way to elevate floor-level planters off hot concrete.
Just setting pots on the ground is a cliché, but placing them on a wheeled vintage runner looks far more expensive than it is. It injects historical narrative directly into your otherwise standard garden designs.
You can execute this vintage platform for $40–$80 depending on the cart. Pin this to your vintage upcycling Pinterest board!
- Key Materials: Vintage garden cart/trolley, terracotta pots
- Vibe / Style: Secret historical society
- Difficulty: Easy placement
- Budget Breakdown: Thrifted Cart: $40 | Pots: $20
- Creator’s Tip: Spray the metal wheels with a clear rust-inhibitor so they don’t stain your concrete porch when you water the plants.
- Smart Sourcing: clear matte rust-oleum protective spray and aged terracotta planter pots
29. Cascading Succulent Tiers
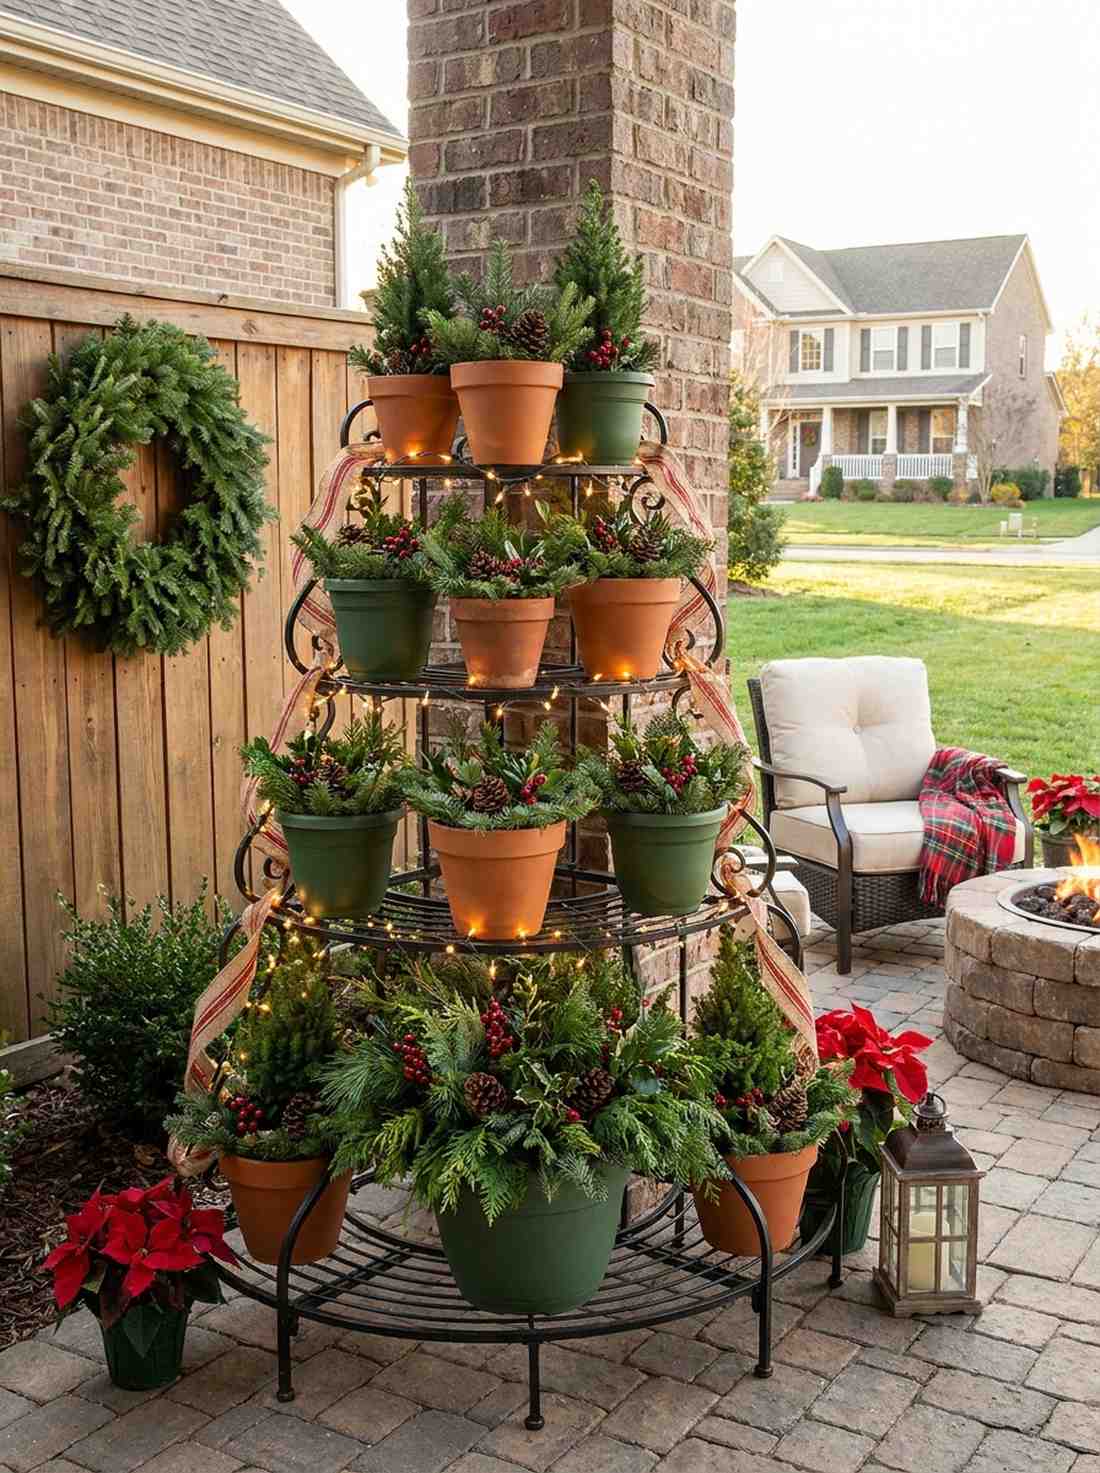
This cascading botanical staircase feels like a lush, overgrown desert conservatory. A multi-level iron plant stand is a genius use-case for utilizing empty vertical wall space on sun-baked decks.
Placing tiny succulent pots flat on the floor wastes space, but lifting them onto graduated iron tiers gives a surprisingly premium look that organizes the chaos. Layering terrarium accessories on the lower shelves maximizes high-CPC garden design pictures aesthetics.
You can set up this cascading corner for $50–$90. Highly recommended to maximize a tiny patio footprint.
- Key Materials: 3-tier metal stand, mixed succulent bowls
- Vibe / Style: Lush desert conservatory
- Difficulty: Easy assembly
- Budget Breakdown: Iron Stand: $45 | Succulents: $20
- Creator’s Tip: Place the heaviest, largest aloe plant on the absolute bottom tier to anchor the stand against high summer winds.
- Smart Sourcing: rust-resistant tiered iron plant stands and shallow terracotta succulent bowls
Warning! Do NOT throw away old wine barrels before trying this massive, commanding landscape centerpiece…
30. Oak Barrel Statement Trees
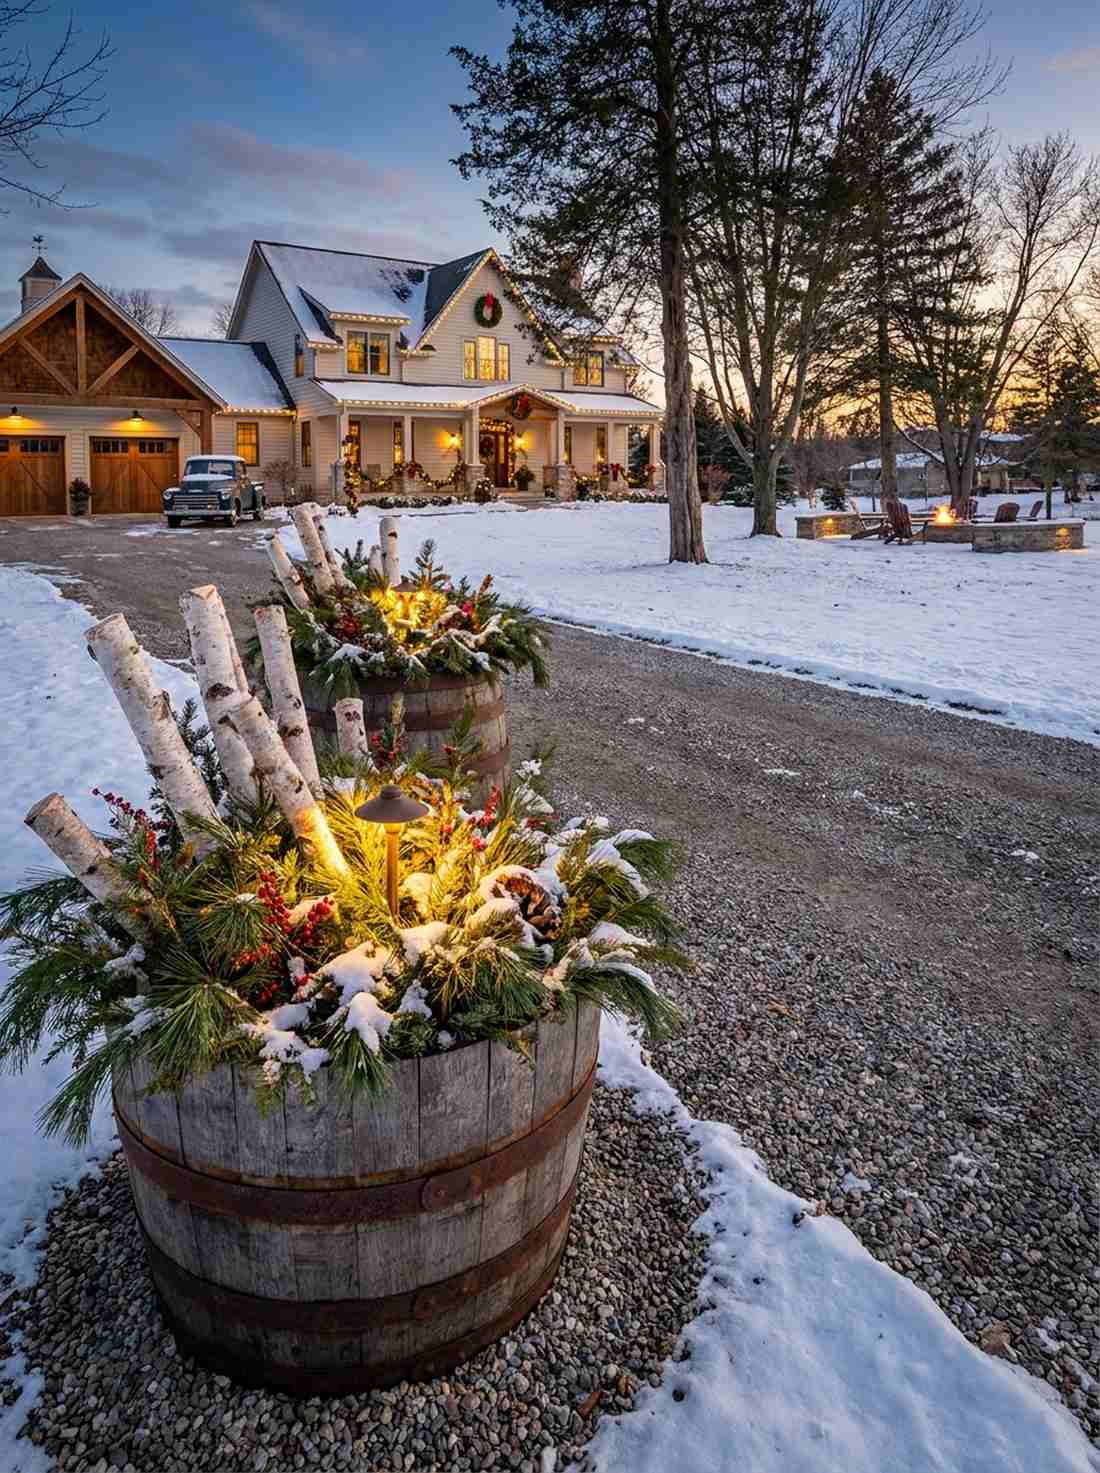
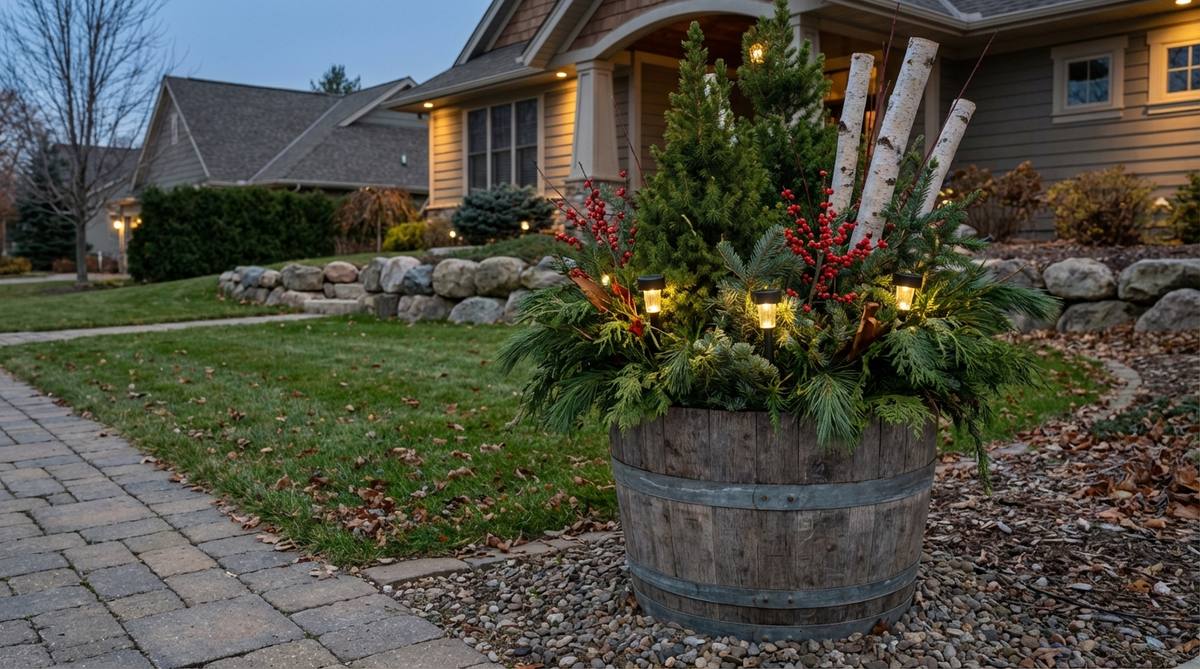
This massive wooden basin feels like a rugged, heavy-duty fixture straight from a Napa Valley vineyard. An oak barrel specimen planter is the ultimate use-case for anchoring the wide-open corners of sweeping driveways with a Japanese Maple or Dwarf Citrus tree.
Flimsy plastic tubs crack in the sun, but utilizing authentic oak half-barrels delivers a high-end designer finish that survives extreme weather. Their massive scale is required to visually ground expansive garden design landscape properties.
You can secure these massive planters for $60–$100. Save this to your heavy-duty landscaping board!
- Key Materials: Authentic oak half-barrels, bulk soil, dwarf tree
- Vibe / Style: Rugged Napa vineyard
- Difficulty: Heavy lifting
- Budget Breakdown: Barrel: $60 | Bulk Soil: $20
- Creator’s Tip: Drill five large 1-inch holes in the absolute bottom of the wood; without massive drainage, the barrel will become a swamp and drown your tree.
- Smart Sourcing: authentic oak half-barrel planters and heavy-duty landscape fabric rolls
Structural Garden Layout Features
Enhance the permanent bones of your property by wrapping, draping, and framing existing architectural features with dynamic vines and florals.
31. Climbing Clematis Column Wraps
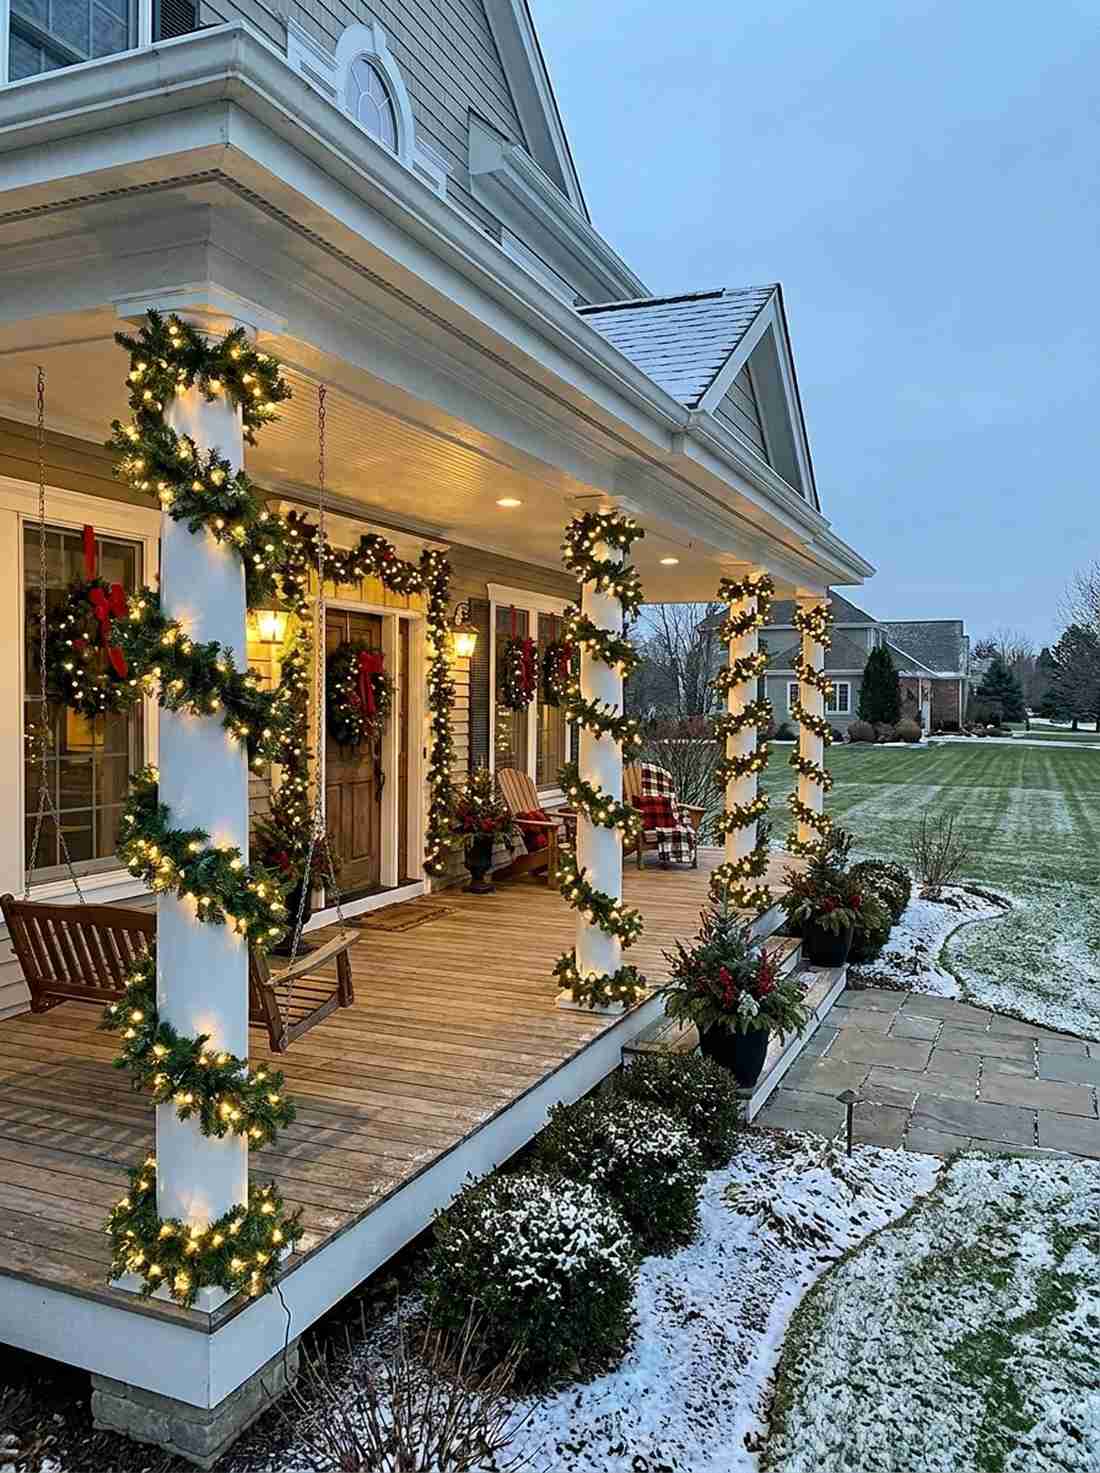
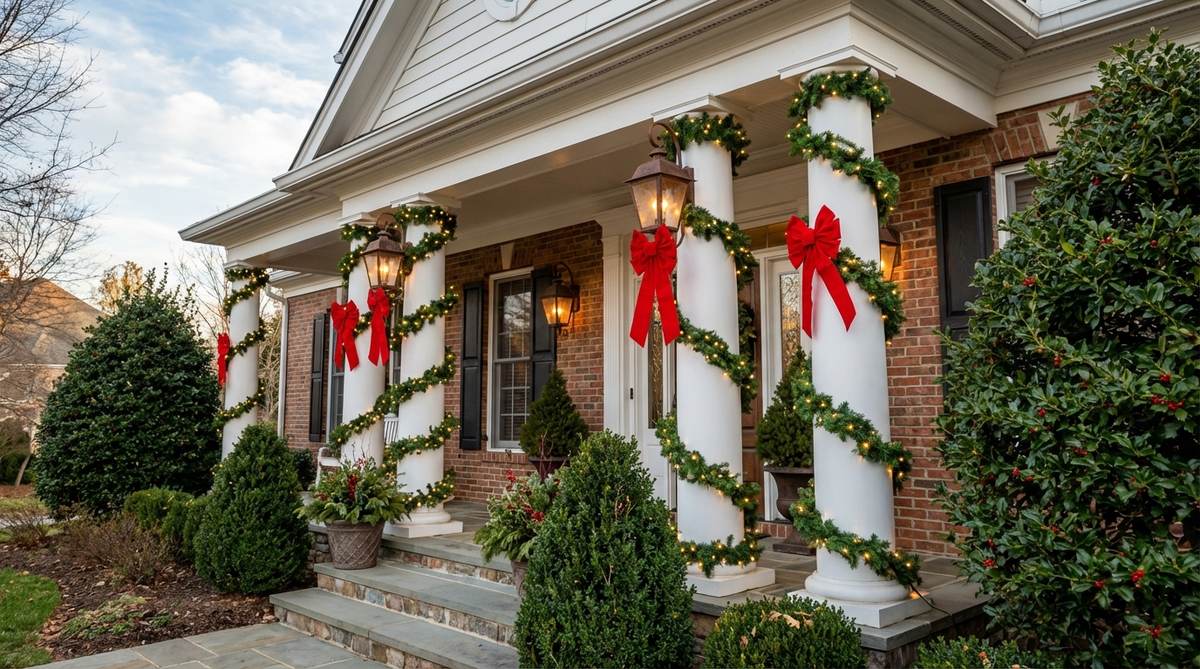
Wrapping these pillars with blooming vines feels like tying a luxurious floral ribbon around your home’s architecture. A spiral climbing vine wrap works exceptionally well for thick craftsman posts or classic southern porch pillars.
Letting vines grow wild damages wood, but using a hidden wire trellis system looks far more expensive than it is. It creates a bold, structural frame that immediately defines your garden design simple boundaries with bursts of purple or white blooms.
You can wrap a set of columns for $50–$90. Pin this if you want an instant injection of classic heritage charm!
- Key Materials: Invisible wire trellis kits, climbing clematis
- Vibe / Style: Classic heritage botanical
- Difficulty: Intermediate installation
- Budget Breakdown: Wire Kit: $40 | Live Vines: $30
- Creator’s Tip: Keep the wire two inches off the wood using standoffs to ensure proper airflow and prevent the column from rotting.
- Smart Sourcing: stainless steel invisible vine wire kits and heavy-duty wall standoffs
32. Wisteria Draped Arbors
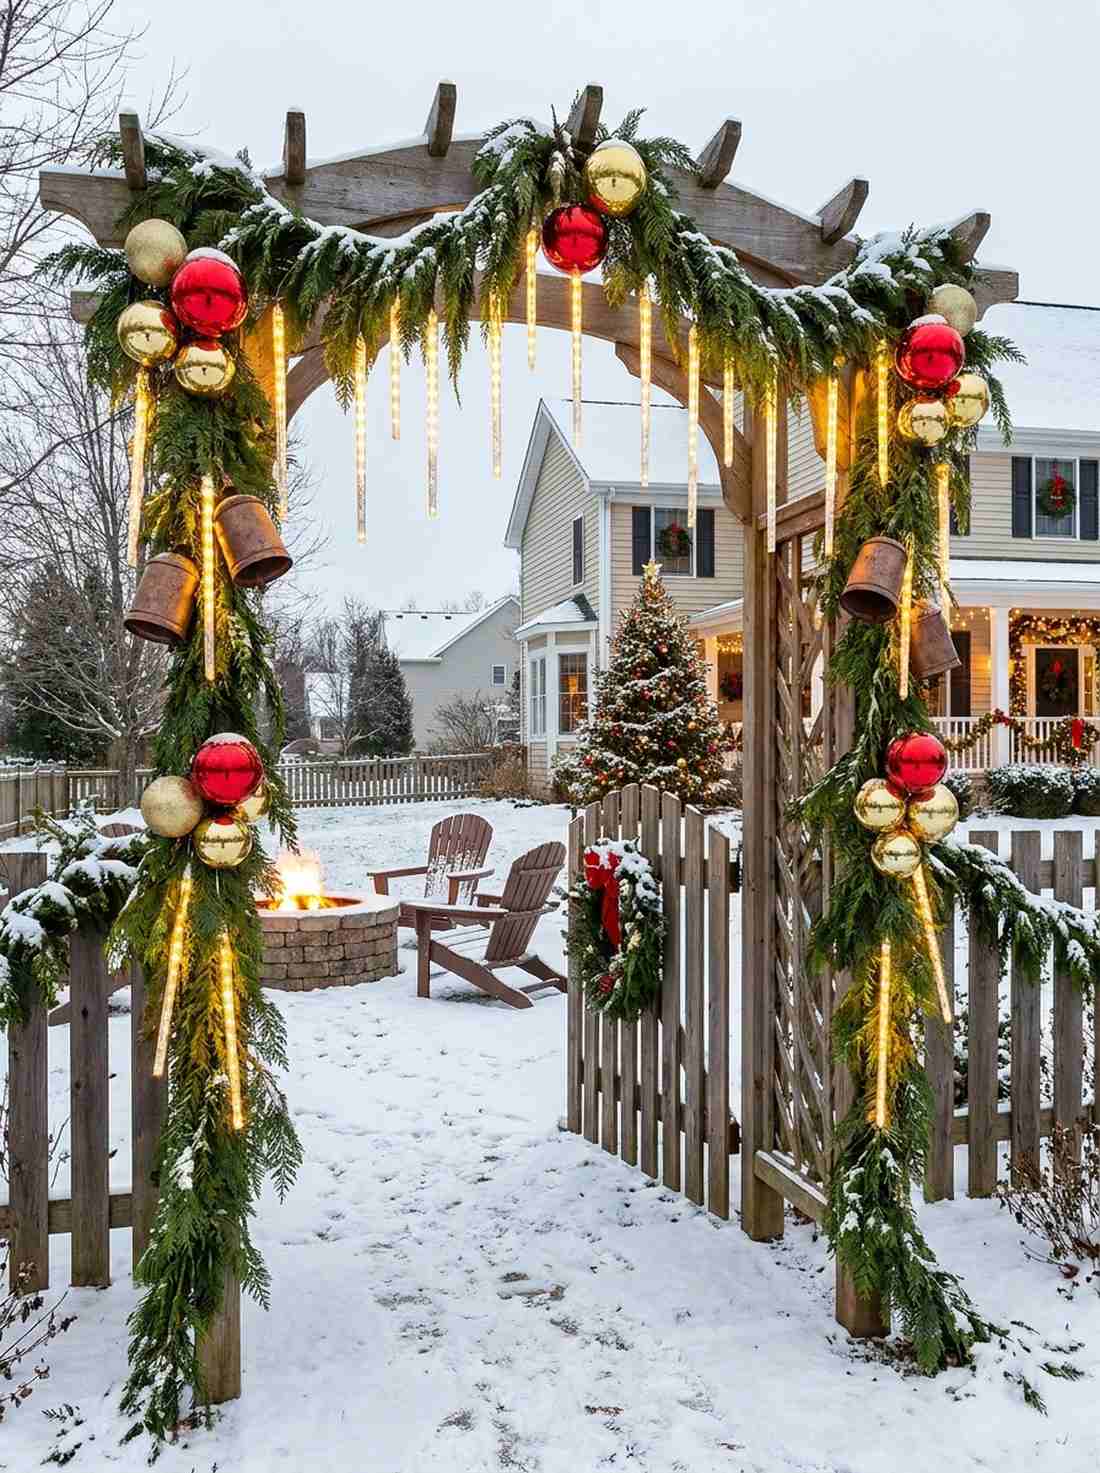
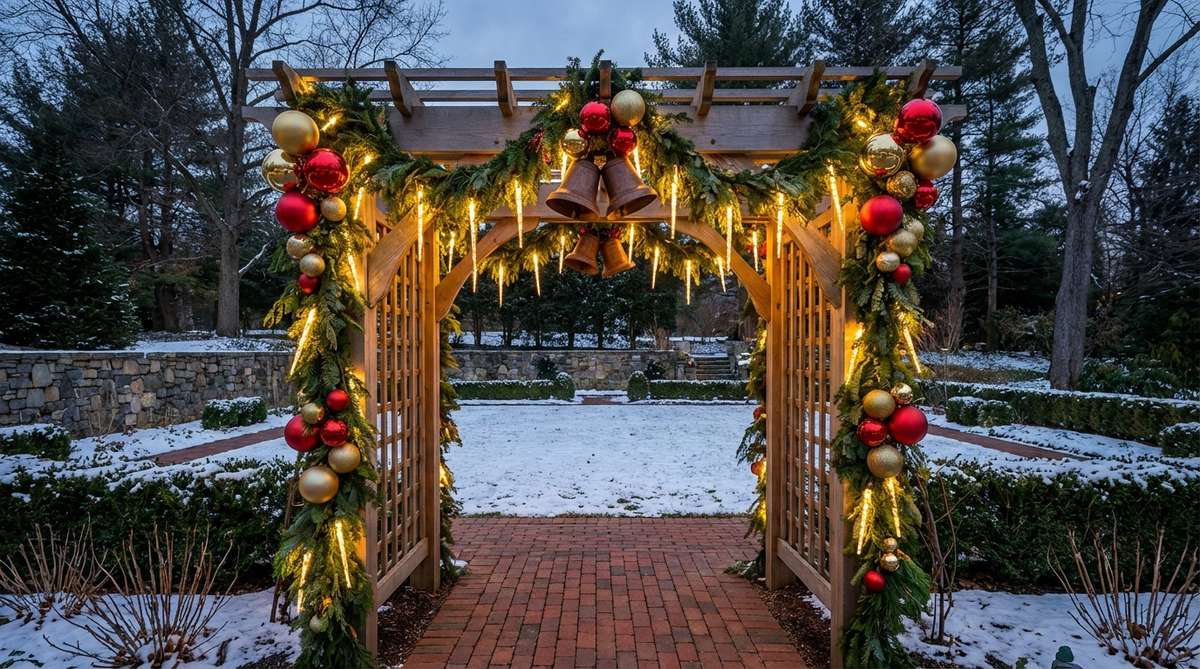
Walking beneath this floral arch feels like crossing the threshold into a secret enchanted kingdom. A draped floral entrance is the absolute perfect use-case for marking the transition from a mundane driveway to a private, lush backyard.
Leaving garden gates bare is a missed opportunity, but loading the canopy with heavy, cascading wisteria or climbing roses gives a surprisingly premium look. This overhead treatment creates intense spatial depth in your garden design layout.
You can start a draped arch for $40–$75. It’s a structural upgrade that completely changes the vibe of your walkway over time.
- Key Materials: Heavy-duty metal arbor, climbing vines
- Vibe / Style: Enchanted kingdom threshold
- Difficulty: Easy planting, requires patience
- Budget Breakdown: Arbor Base: $60 | Vines: $25
- Creator’s Tip: Tie the young vines to the structure using soft, stretchy nylon fabric strips so they don’t get choked as the stems thicken.
- Smart Sourcing: powder-coated steel garden arbors and soft stretch tie tape for plants
33. Clematis Mailbox Wraps & Base Planting
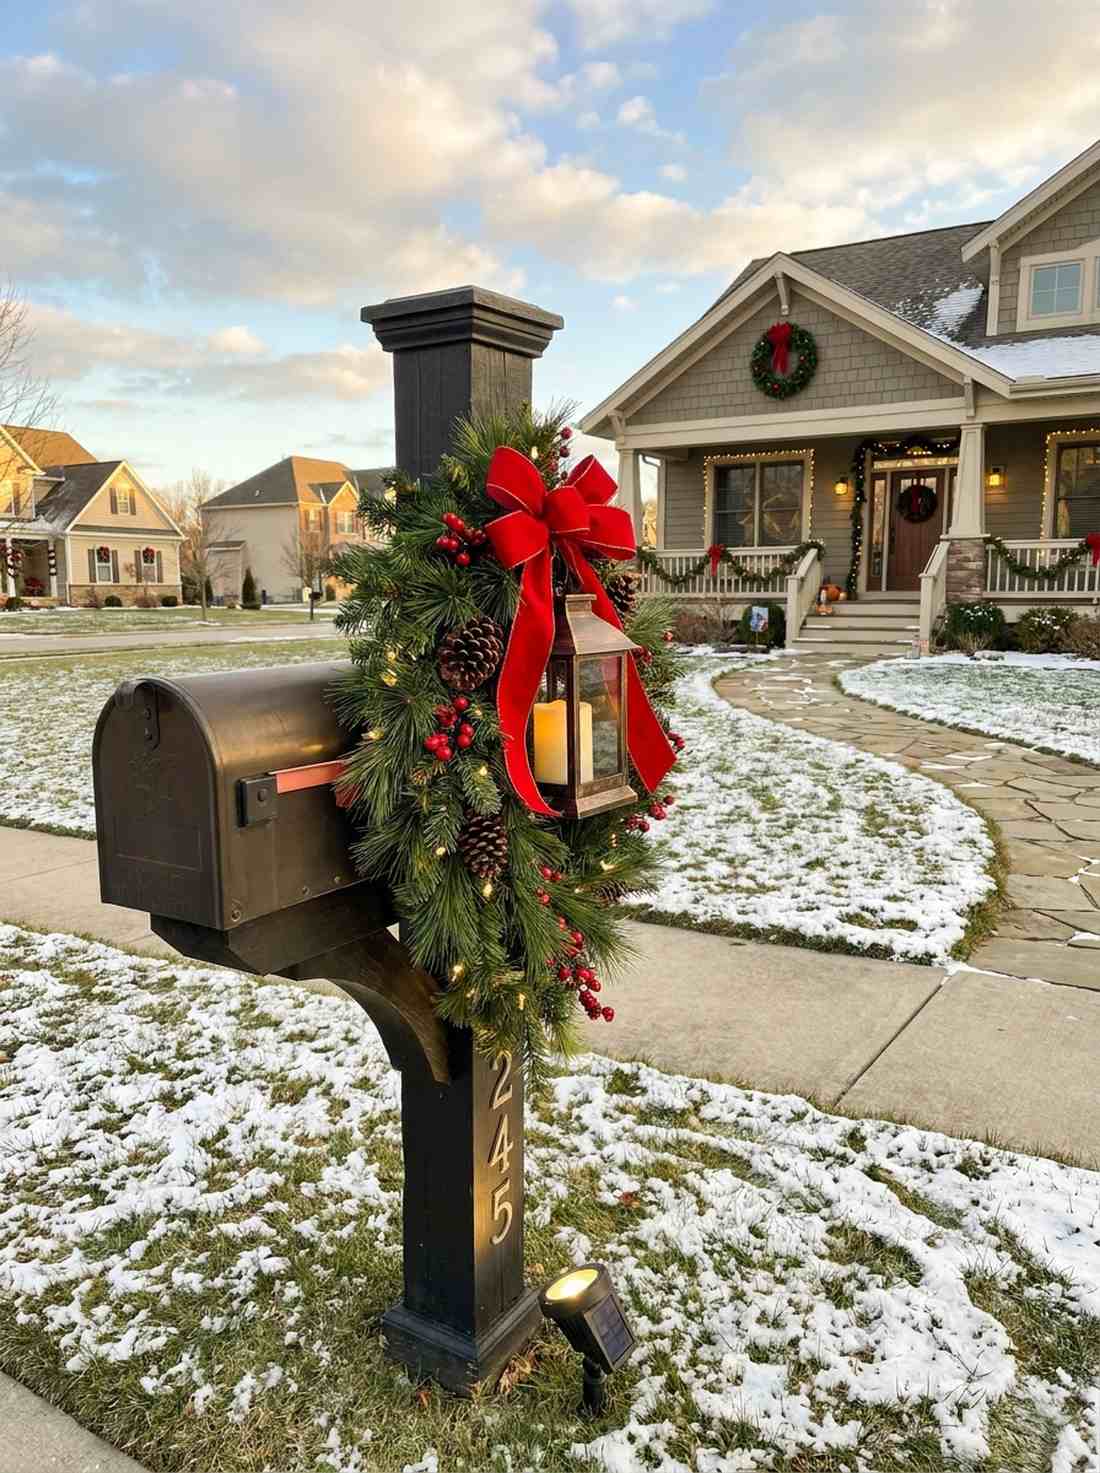
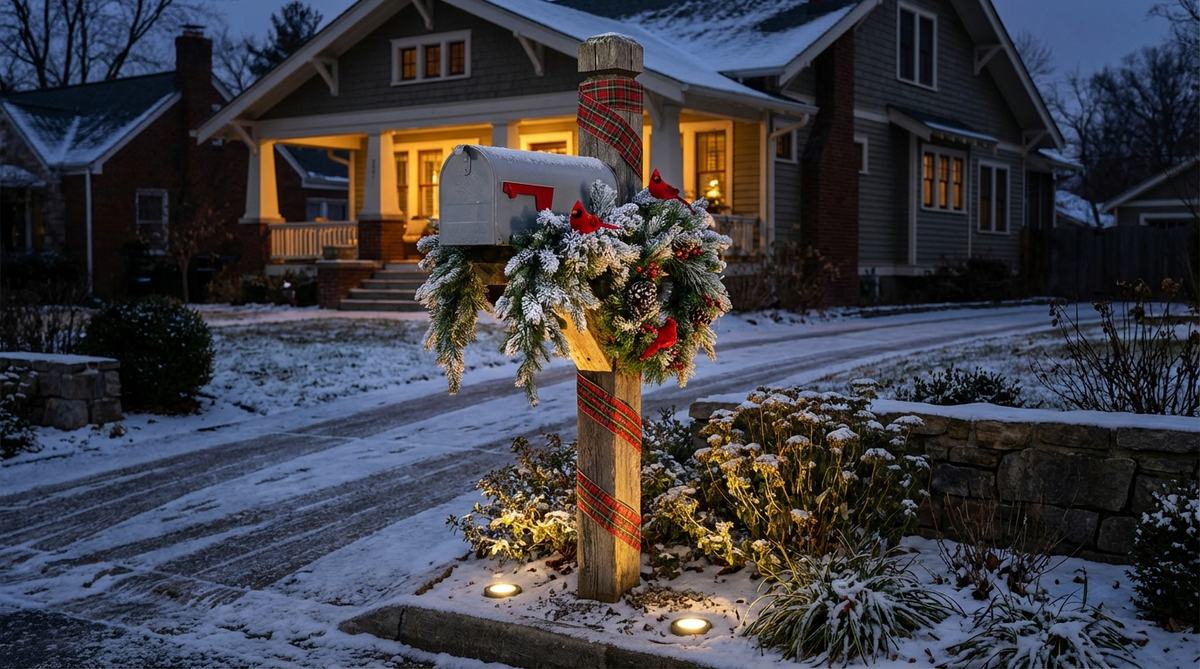
This tiny streetside floral display feels like a welcoming miniature monument greeting the neighborhood. A mailbox pillar vine wrap is an incredibly smart use-case for maximizing curb appeal right at the street level.
Most ignore the street completely, but planting a vigorous climber with a lush base of hostas delivers a designer-level finish that sets the tone for the rest of the property. It acts as the visual appetizer for your grander garden design ideas.
Upgrade your post for under $30. Save this to your curb-appeal quick-fixes board!
- Key Materials: Chicken wire, climbing plant, base hostas
- Vibe / Style: Welcoming neighborhood monument
- Difficulty: Fast DIY
- Budget Breakdown: Plants: $25 | Wire: $5
- Creator’s Tip: Wrap standard chicken wire tightly around the wooden post—it gives the vine tendrils the perfect invisible grid to grab onto.
- Smart Sourcing: galvanized poultry netting (chicken wire) and moisture-retaining cedar mulch
34. Welcoming Gate Floral Archways
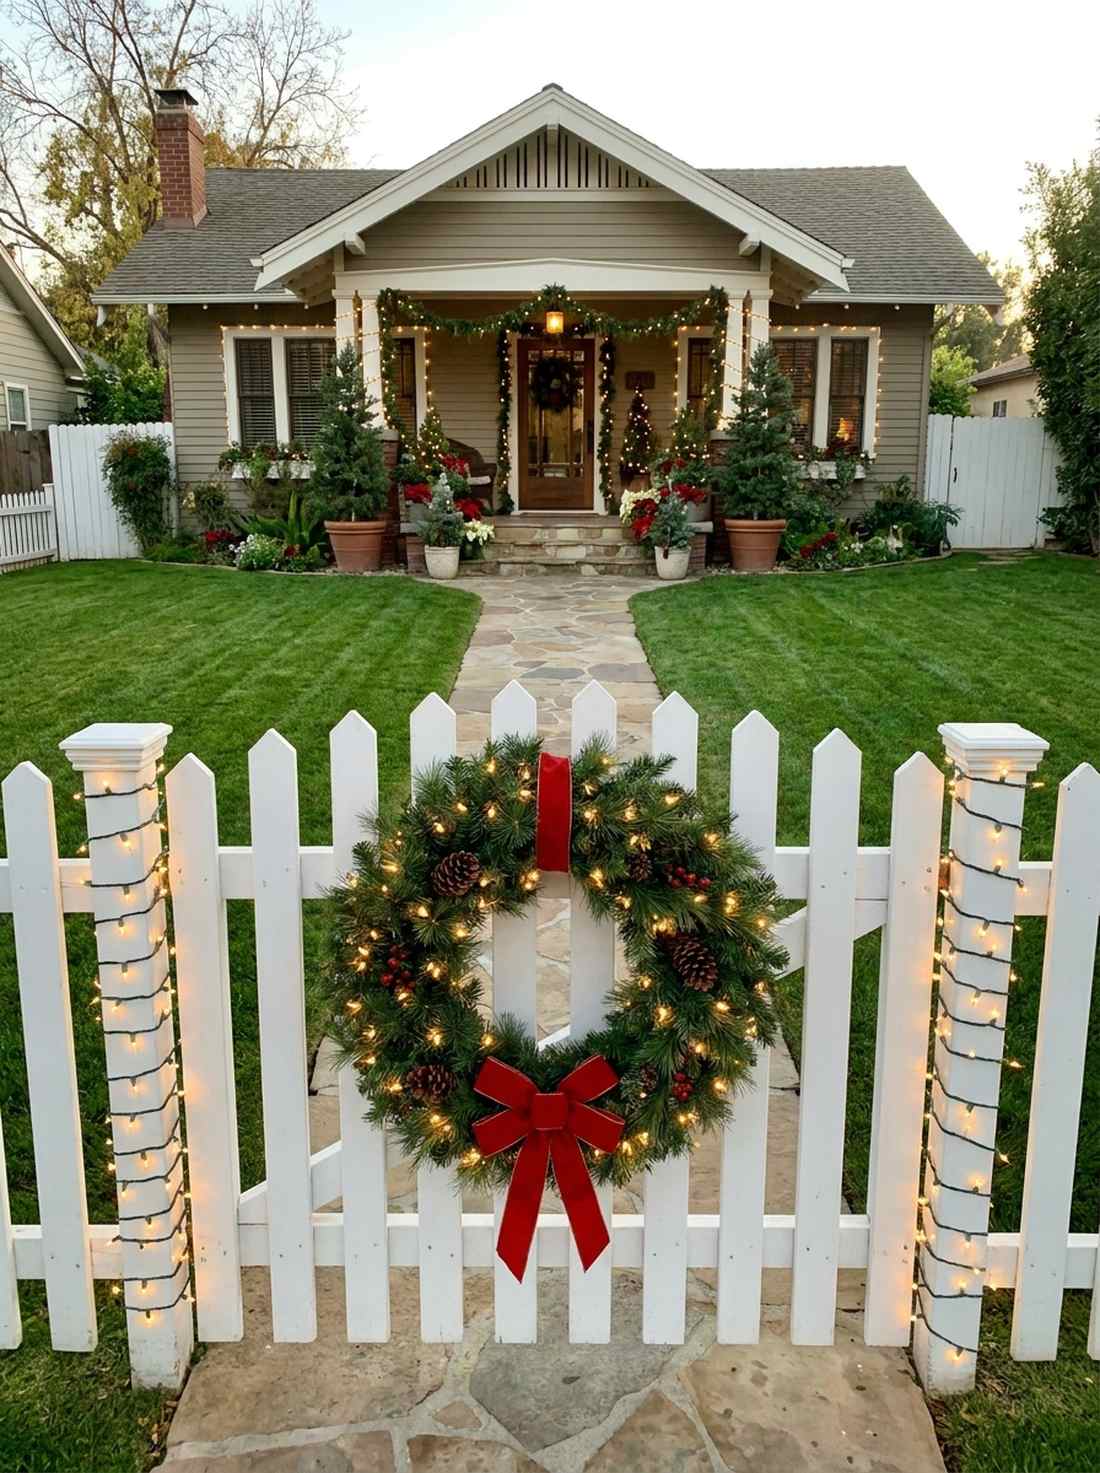
Pushing this gate open feels like unlocking the door to a private, blooming estate. An over-gate floral arch works beautifully for breaking up long, monotonous stretches of wooden privacy fencing.
A plain gate vanishes visually, but crowning it with a symmetrical climbing rose arrangement looks far more expensive than it is. It creates a distinct, high-impact focal point in your exterior garden designs.
You can crown your gate for $40–$70. Highly recommended to create a clear, welcoming entry point.
- Key Materials: Metal arch attachment, climbing roses
- Vibe / Style: Private blooming estate
- Difficulty: Easy attachment
- Budget Breakdown: Arch Kit: $40 | Plants: $20
- Creator’s Tip: Plant identical roses on both the inside and outside of the gate so it looks luxurious whether you are entering or leaving.
- Smart Sourcing: heavy-duty over-the-fence metal arches and slow-release rose fertilizer spikes
Hold up! Most people leave their patios baking in the summer sun… until they discover this insane pergola shade hack…
35. Shade Sail & Trailing Vine Canopies
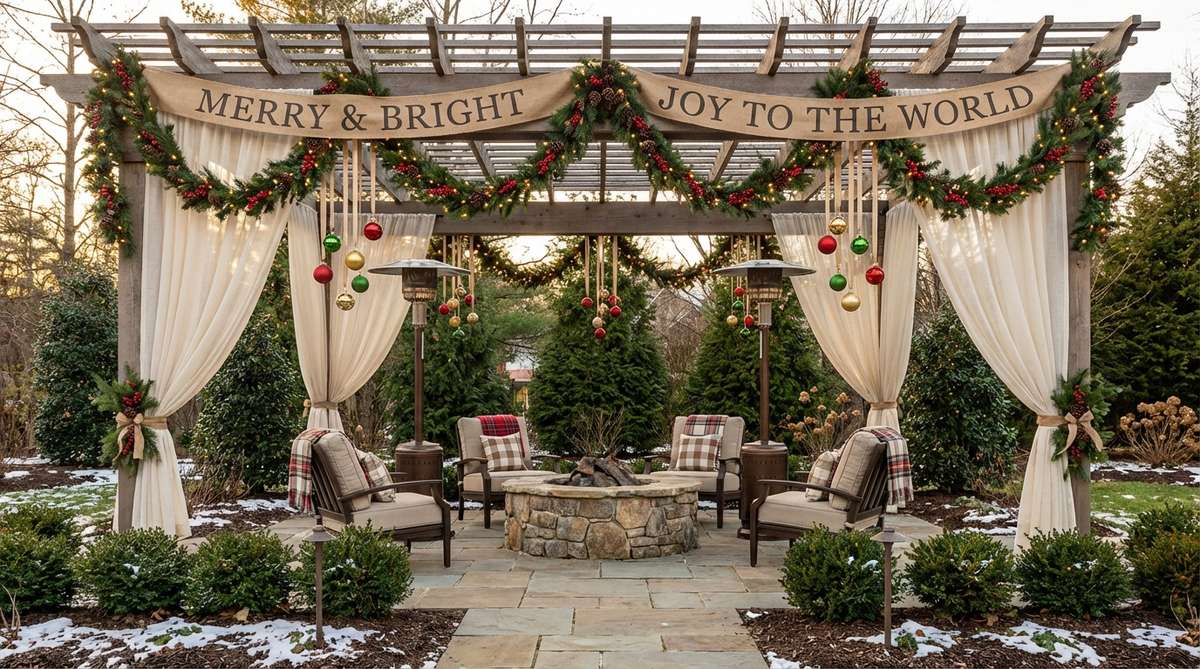
Sitting under this draped fabric canopy feels like lounging inside an exclusive, breezy VIP outdoor cabana. A scalloped shade overhead is the ultimate luxurious use-case for open-slat backyard pergolas.
Leaving the roof open lets the patio bake, but weaving heavy UV-resistant canvas through the rafters gives a surprisingly premium look that drops the temperature by 15 degrees. Sourcing weatherproof textiles completely elevates this cozy garden design outdoor room.
You can drape a standard pergola for $60–$120. Pin this if you love entertaining outdoors in the summer!
- Key Materials: UV-resistant canvas, staple gun, tension cords
- Vibe / Style: Exclusive VIP cabana
- Difficulty: Intermediate ladder work
- Budget Breakdown: Canvas Fabric: $80 | Hardware: $20
- Creator’s Tip: Pull the fabric tight, but allow exactly 6 inches of slack between each rafter to create perfect, elegant swooping scallops.
- Smart Sourcing: bulk rolls of UV-resistant outdoor canvas and heavy-duty stainless steel staple guns
36. Lamppost Base Planting & Vines
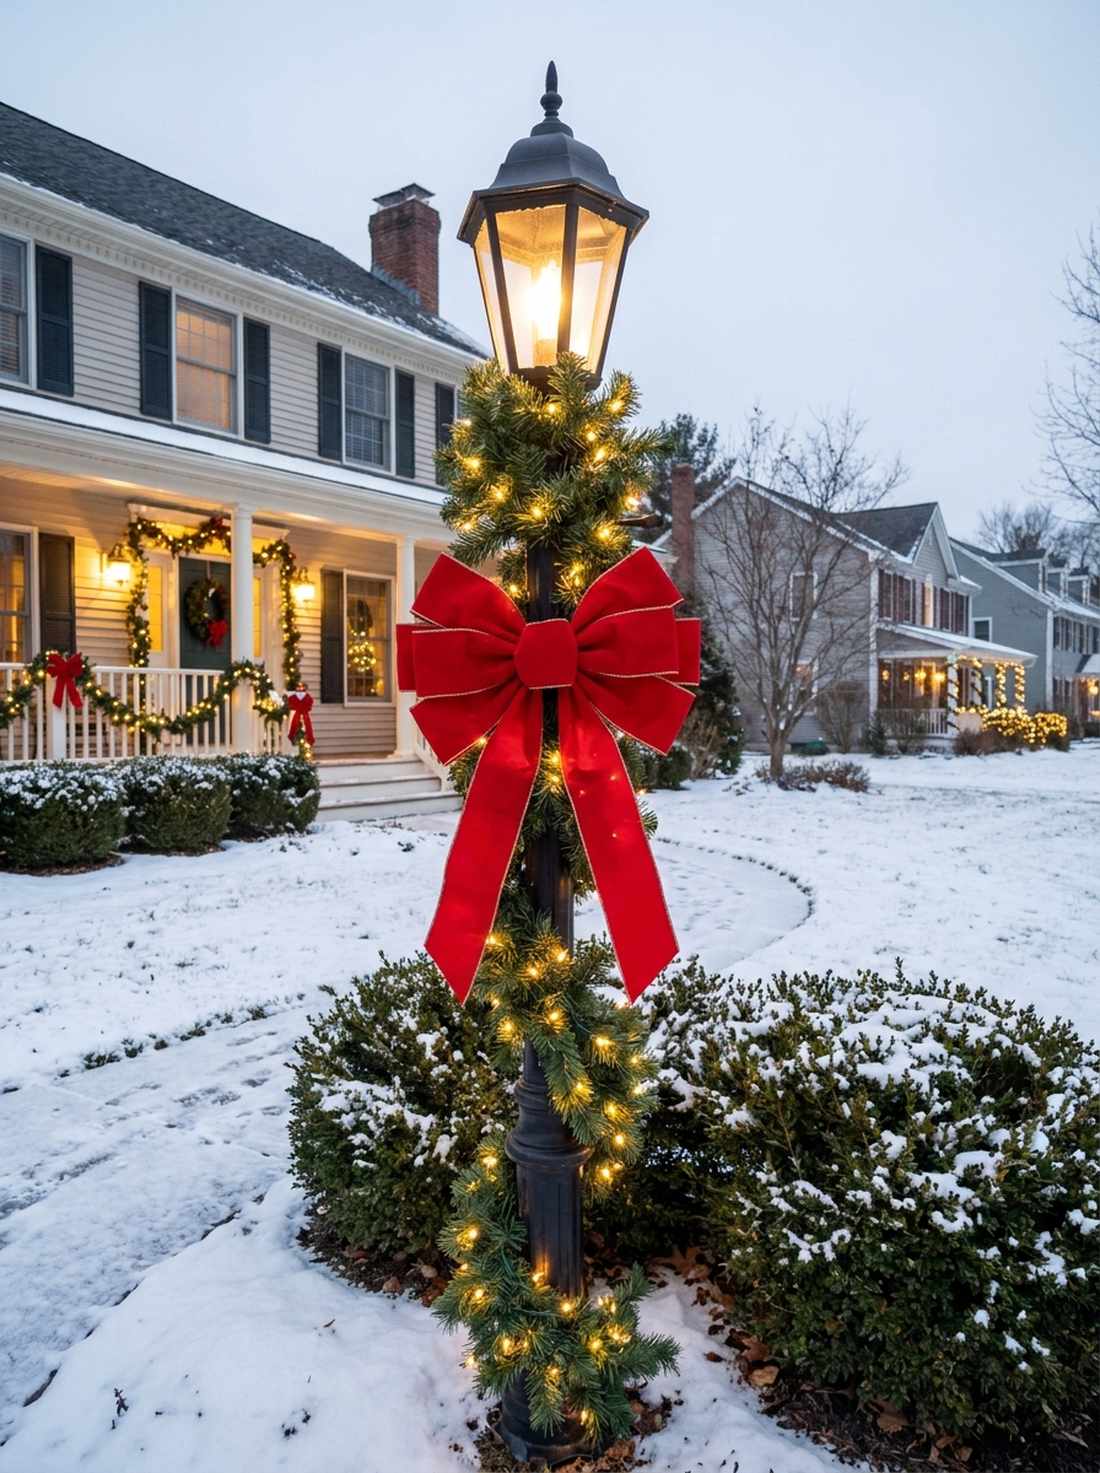
This glowing pillar surrounded by flowers feels exactly like a scene from a classic, manicured public park. A Victorian lamppost floral base is an essential design move if you have existing front-yard illumination posts.
Leaving a post sticking out of bare dirt is harsh, but planting a dense mound of calibrachoa and a spiraling morning glory delivers a high-end designer finish that grounds the structure. It’s a classic touch that ties into traditional garden design pictures perfectly.
You can dress up a lamppost for $25–$45. Save this to your vintage exterior styling board!
- Key Materials: Base annuals, climbing morning glory seeds
- Vibe / Style: Classic manicured park
- Difficulty: Easy planting
- Budget Breakdown: Plants/Seeds: $20 | Soil: $10
- Creator’s Tip: Wind a thin, invisible fishing line up the post for the morning glory to climb, making it look like the vine is floating.
- Smart Sourcing: clear high-test fishing line and premium blooming annuals fertilizer
37. Modern Illuminated Espalier Trellis
This trained tree against a glowing wall feels like a high-end living art tapestry hung against your home. An illuminated geometric espalier is an incredibly clever use-case for plain, windowless garage walls or side-yard fencing.
Empty walls look dead, but training a fruit tree flat against a wire grid while backlighting it looks far more expensive than it is. It injects a stark, modern architectural element into your contemporary garden design simple layout.
You can build this living wall art for $60–$100. It’s a fast upgrade that completely changes a boring wall.
- Key Materials: Wire espalier kit, young fruit tree, LED wash light
- Vibe / Style: Modern living tapestry
- Difficulty: Advanced pruning/training
- Budget Breakdown: Tree: $50 | Wire Kit: $30
- Creator’s Tip: Paint the wire grid black before installing so it completely disappears against the wall, making the tree branches pop.
- Smart Sourcing: stainless steel espalier wire kits and flush-mount LED wall washer lights
38. Trailing Balcony Railing Planters
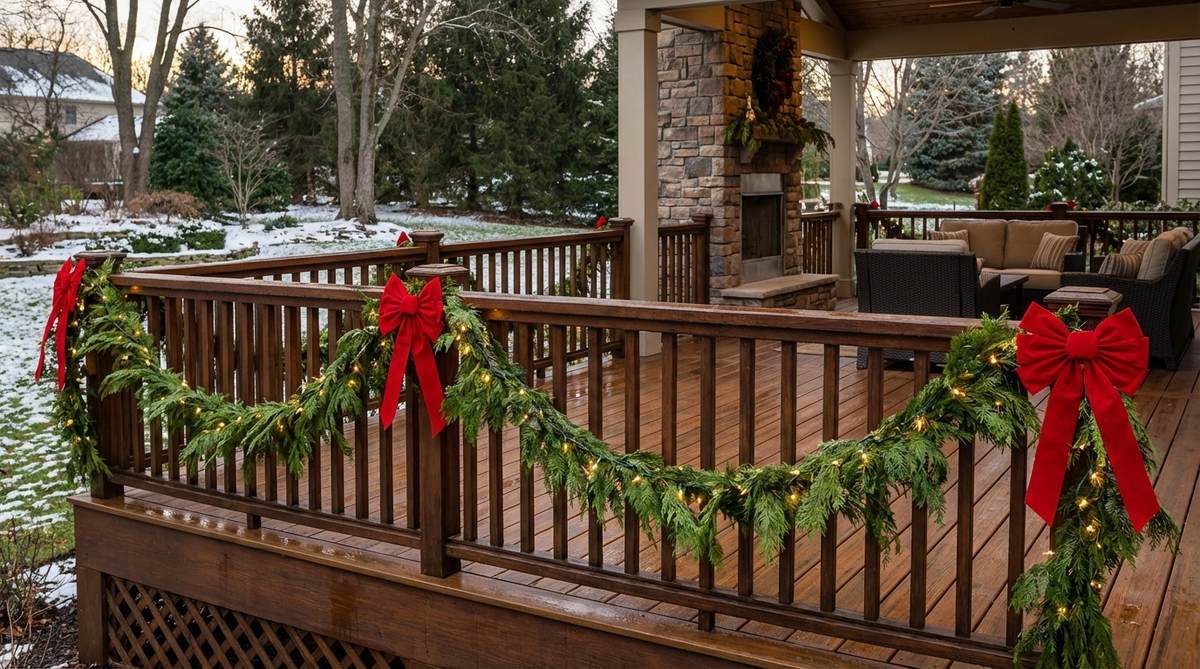
Tracing your deck with these deep green cascading plants feels like adding a luxurious living crown molding to your home’s exterior. A trailing balcony border works exceptionally well for long, elevated wrap-around porches.
Leaving railings bare is a missed opportunity, but hanging specialized saddle planters filled with overflowing creeping jenny delivers a surprisingly premium look. This sweeping horizontal rhythm instantly maximizes the perceived width of your garden design layout.
You can line your railings for $50–$90 depending on length. Pin this to your luxury porch styling board!
- Key Materials: Railing saddle planters, trailing vines
- Vibe / Style: Luxurious living crown molding
- Difficulty: Easy spacing
- Budget Breakdown: Saddle Planters: $60 | Plants: $20
- Creator’s Tip: Mix a slow-release fertilizer directly into the soil when planting—saddle planters dry out fast and need heavy nutrients to cascade properly.
- Smart Sourcing: heavy-duty plastic railing saddle planters and water-retaining soil polymers
39. Styling the Potting Shed
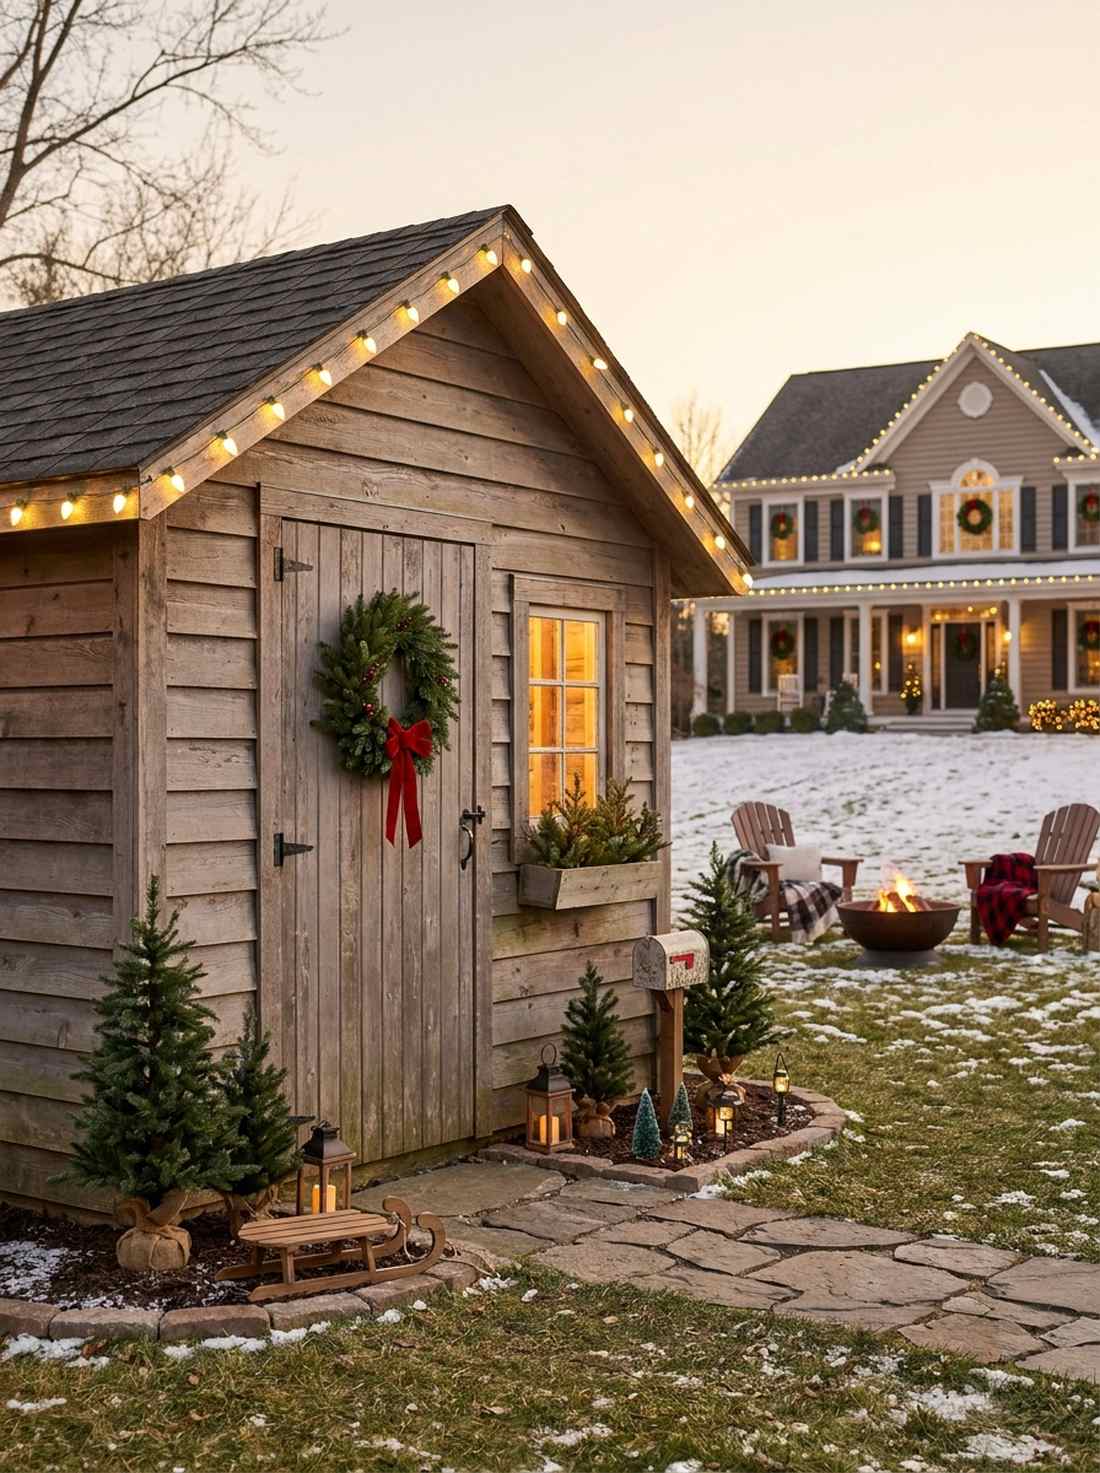
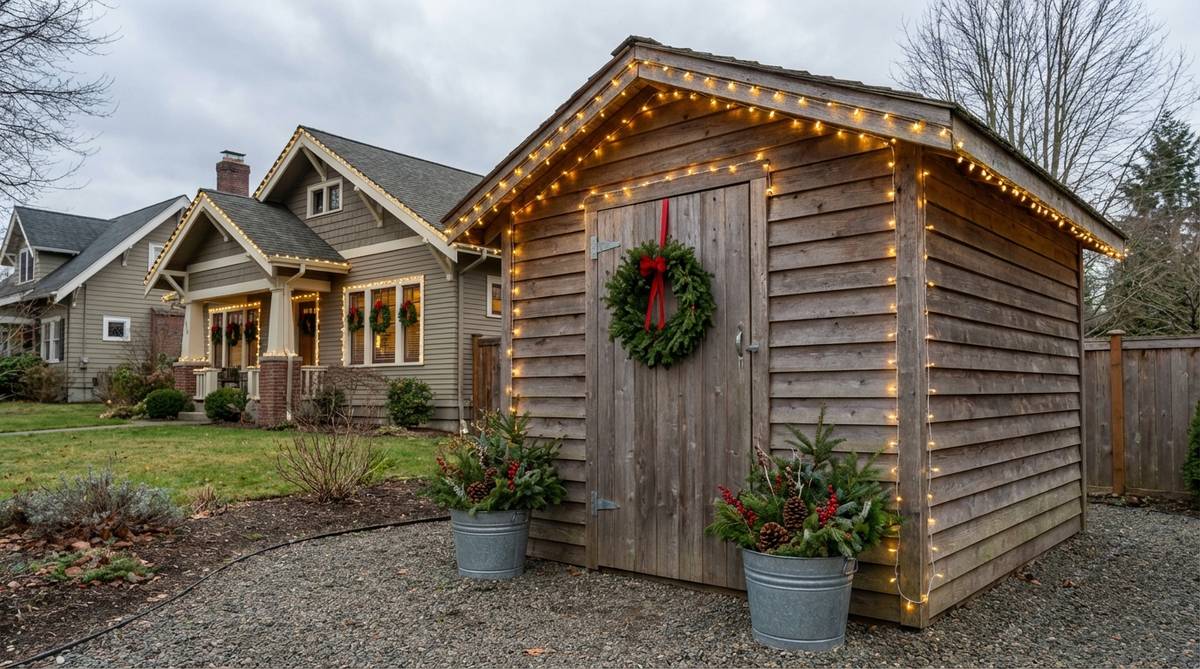
Styling the garden shed makes it feel like a cozy, inhabited little gingerbread cottage at the edge of the property. A scaled-down outbuilding treatment is perfect for drawing the eye deep into the backyard during the day.
Ignoring secondary buildings shrinks your yard’s visual depth, but echoing the main house’s window boxes on a smaller scale delivers a designer-level finish. It creates massive spatial continuity across your sweeping garden design landscape.
You can style a small shed for $30–$50. Highly recommended to make your whole property feel larger.
- Key Materials: Mini window box, antique tools, side trellis
- Vibe / Style: Cozy botanical cottage
- Difficulty: Fast setup
- Budget Breakdown: Mini Box: $20 | Tools/Plants: $15
- Creator’s Tip: Hang a pair of antique, rusted gardening shears directly on the shed door to create a distinct, rustic focal point.
- Smart Sourcing: miniature wrought iron window boxes and decorative antique garden tools
Wait! Have you ever seen a massive blank chimney that looks completely empty? This next trick solves that instantly…
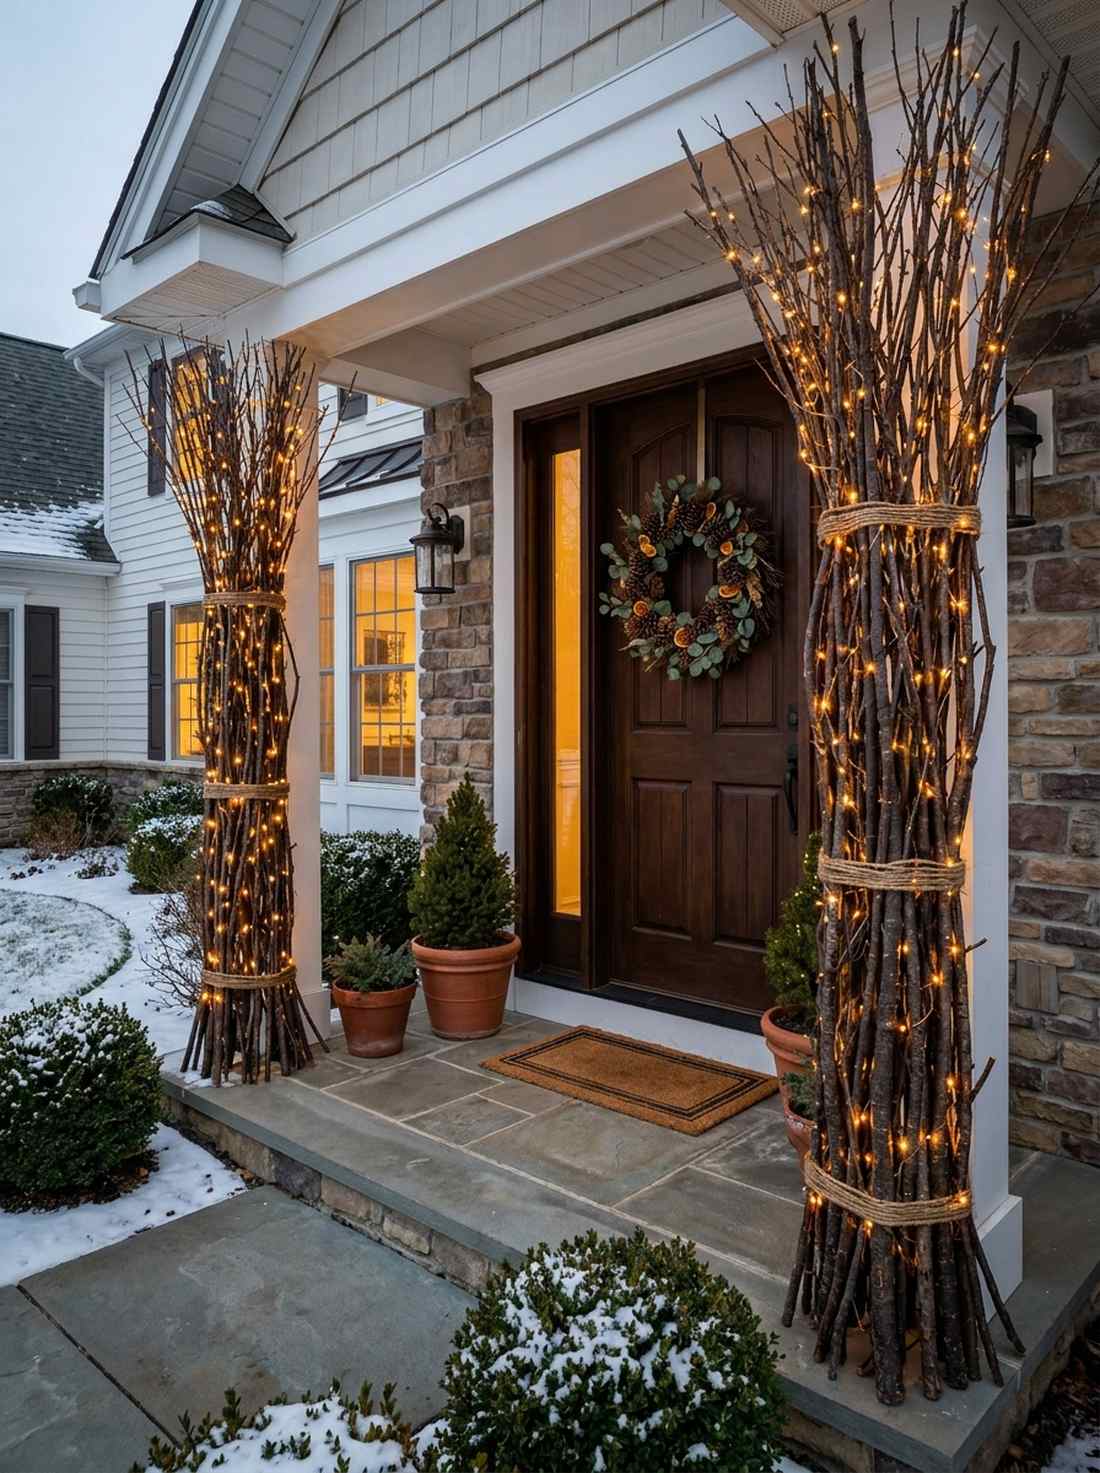
40. High-Elevation Climbing Vines
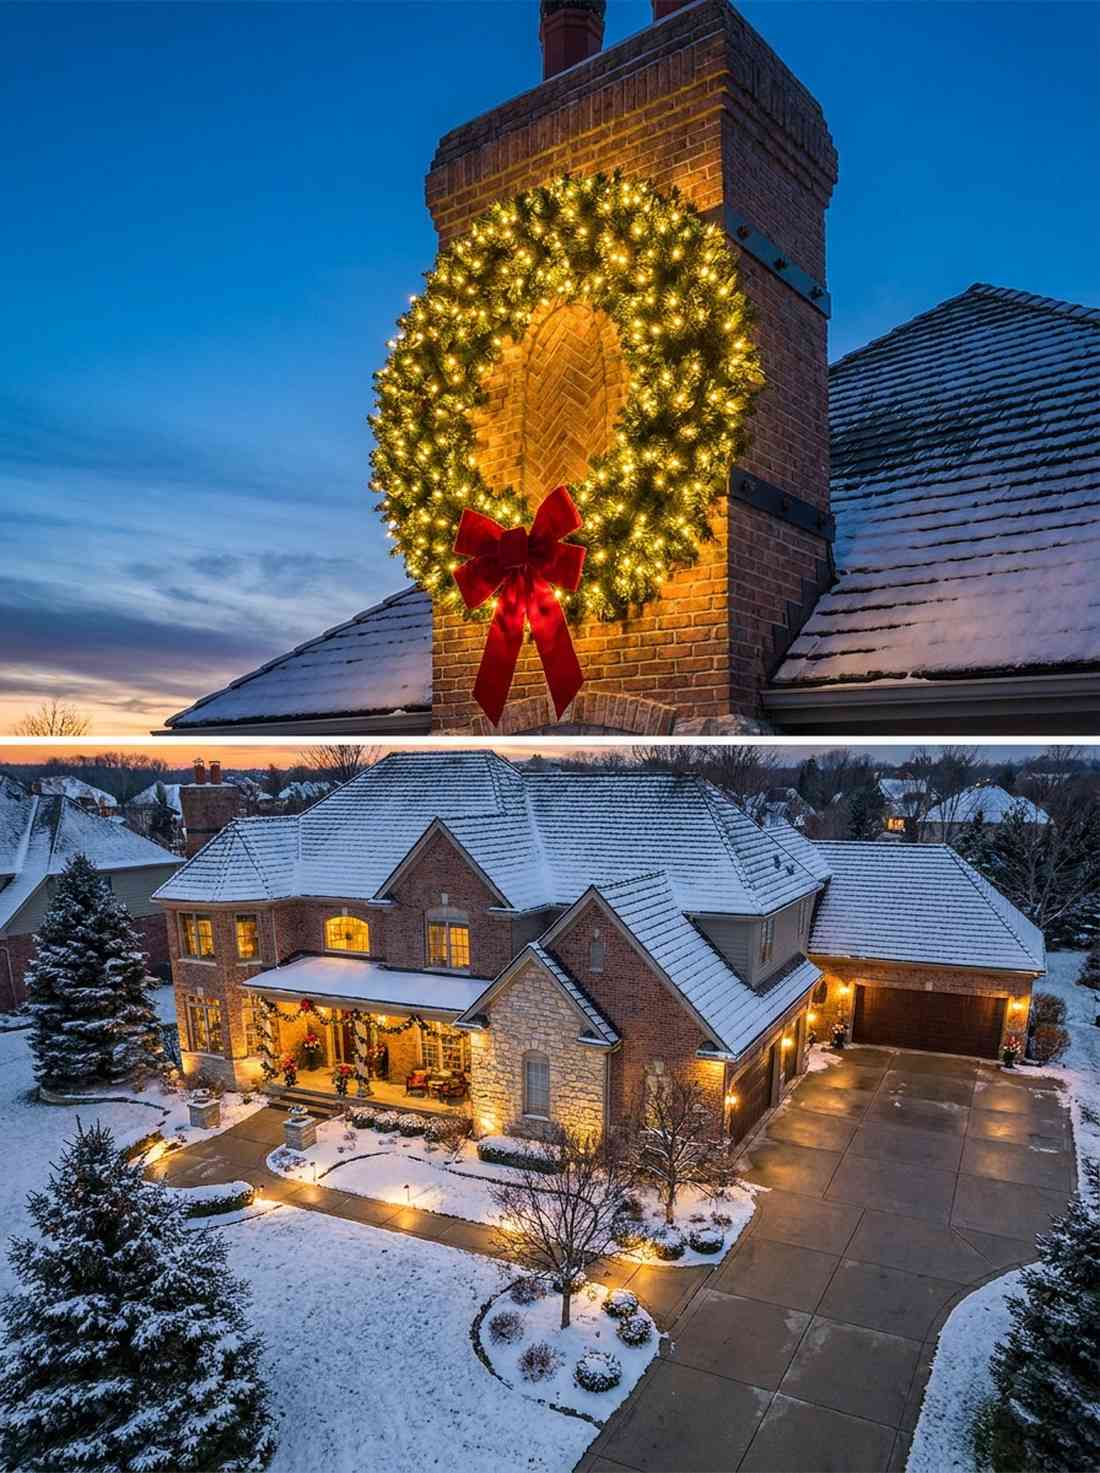
Crowning your tall masonry with reaching ivy feels like dropping a regal, ancient tiara on top of your home’s architecture. A high-elevation structural vine accent is a dramatic use-case for homes with wide, prominent brick chimneys.
Standard foundation plants disappear, but encouraging Boston Ivy to scale the chimney looks far more expensive than it is. It aggressively forces the eye upward, maximizing your vertical garden designs.
Establishing this vine costs under $30, but the impact over time is unmatched. Save this if you want absolute neighborhood domination!
- Key Materials: Boston Ivy or Virginia Creeper, masonry clips
- Vibe / Style: Regal architectural antiquity
- Difficulty: Requires patience and occasional pruning
- Budget Breakdown: Ivy Plant: $20 | Clips: $10
- Creator’s Tip: Use specialized masonry adhesive clips to guide the vine exactly where you want it to grow, keeping it away from the actual flue.
- Smart Sourcing: damage-free brick masonry vine clips and fast-growing Boston Ivy starters
Material Guide: Cheap vs. Premium Aesthetic
Knowing exactly where to save pennies and where to drop cash makes all the difference in achieving that “looks incredibly expensive but isn’t” botanical vibe.
- Standard vs. UV-Resistant/Premium: Standard plastic pots crack and fade in one summer. Upgrading to UV-coated resins and heavy terracotta prevents your layout from looking trashy by August.
- Pre-made Kits vs. Sourcing Locally: Bulk purchasing heavy-duty hardscaping elements (like landscape fabric or iron shepherd’s hooks) usually costs 30% less than buying flimsy individual packs at a local nursery.
Artistic Focal Points and Statuary
Inject narrative, movement, and artistic charm into your yard without crossing the line into cluttered chaos.
41. Large-Scale Kinetic Wind Sculptures
This towering metal structure feels like a mesmerizing, giant kinetic art piece guarding your landscape. Utilizing a massive wind spinner centerpiece is the smartest use-case for filling vast, empty central lawns quickly.
Clustering ten small lawn ornaments looks incredibly tacky, but isolating one massive 6-foot kinetic spinner delivers a surprisingly premium look of deliberate scale. It provides an immediate, bold anchor to an otherwise flat garden design outdoor space.
You can secure a giant centerpiece for $80–$150. Pin this to your modern yard art board!
- Key Materials: Large kinetic wind spinner, heavy ground stakes
- Vibe / Style: Bold kinetic museum piece
- Difficulty: Easy assembly
- Budget Breakdown: Metal Spinner: $100 | Concrete Base: $15
- Creator’s Tip: Dig a small hole and set the spinner’s base pole in quick-set concrete to ensure it never blows over in severe summer storms.
- Smart Sourcing: heavy-duty dual-direction kinetic wind spinners and fast-setting post hole concrete
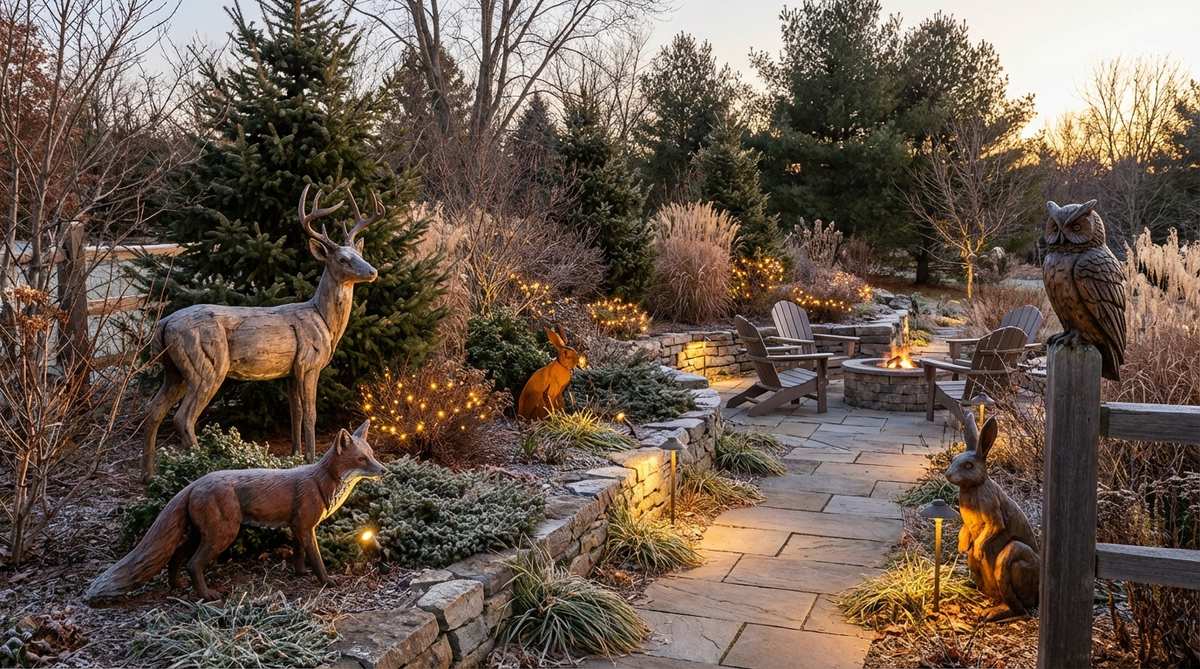
42. Bronze Wildlife Garden Sculptures
This serene metal deer feels like you’ve frozen a moment of majestic wildlife right in your front yard. An elegant bronze wildlife layout is exceptionally striking when placed “grazing” near tall ornamental grasses.
Mixing cheap plastic gnomes with high-end plants causes visual chaos, but sticking strictly to elegant faux-bronze animal silhouettes gives a designer-level finish. This sophisticated approach elevates standard garden design layout plans into chic art installations.
You can place a stunning sculpture for $100–$200. It’s a gorgeous aesthetic that commands respect.
- Key Materials: Resin faux-bronze deer/cranes
- Vibe / Style: Majestic wildlife art
- Difficulty: Easy placement
- Budget Breakdown: Statue: $150 | Base Paver: $10
- Creator’s Tip: Set the statue on a hidden flat patio paver covered with mulch to keep it level and prevent it from sinking into the mud over time.
- Smart Sourcing: faux-bronze weatherproof yard statues and flat concrete stepping pavers
43. Classical Concrete Busts & Pedestals

The weathered texture of these statues feels like stepping into an ancient, overgrown Roman courtyard. Curating a classical statuary cluster is an amazing use-case for tucked-away garden corners or flanking ivy-covered walls.
Modern shiny resin figures lack soul, but utilizing heavy concrete busts with a faux-moss patina looks far more expensive than it is. Integrating these classical artifacts adds incredible high-CPC value to your garden design pictures.
You can thrift or faux-paint these treasures for $50–$100 a piece. Save this to your classical landscaping collecting board!
- Key Materials: Concrete busts, pedestal bases, buttermilk/moss mixture
- Vibe / Style: Ancient Roman courtyard
- Difficulty: Heavy lifting
- Budget Breakdown: Statue: $80 | Pedestal: $40
- Creator’s Tip: Paint the concrete with a mixture of plain yogurt and gathered moss to rapidly encourage real moss to grow on the statue’s details.
- Smart Sourcing: cast-stone classical bust replicas and live moss starter spores
44. Tall Classical Entrance Obelisks
Standing at attention, these massive iron pyramids make your front door feel like the entrance to a grand European botanical garden. A flanking sentry obelisk layout is the absolute best way to frame highly symmetrical brick entryways with climbing vines.
Tiny tabletop trellises look ridiculous outside, but investing in towering 6-foot wrought iron obelisks delivers a high-end designer finish that is impossible to ignore. They aggressively establish a formal boundary in your garden design simple plans.
These massive sentries run about $100–$200 each. Pin this if you love formal, imposing symmetrical design!
- Key Materials: 6-foot iron obelisks, climbing ivy
- Vibe / Style: Grand European conservatory
- Difficulty: Easy assembly
- Budget Breakdown: Iron Obelisks: $150 | Vines: $30
- Creator’s Tip: Place a dedicated mini-spotlight directly at the base pointing straight up through the ironwork to cast massive, intimidating grid shadows on the wall behind them.
- Smart Sourcing: heavy-duty wrought iron garden obelisks and micro LED uplight kits
Stop! If you have a boring concrete wall, this next water feature hack is an absolute game-changer…
45. Wall-Mounted Lion Head Fountains
Listening to the cascading water feels like relaxing in a tranquil, historic Italian piazza. A wall-mounted recirculating fountain setup is the ultimate use-case for dressing up dull brick walls or narrow side-yard corridors.
Digging a massive pond is too expensive, but hanging a self-contained fiberglass wall fountain gives a surprisingly premium look with zero plumbing required. It brings aggressive, dynamic acoustic movement to static garden designs.
You can hang this tranquil feature for $150–$250. Highly recommended for adding auditory luxury to a small patio!
- Key Materials: Fiberglass wall fountain, water pump, masonry screws
- Vibe / Style: Historic Italian piazza
- Difficulty: Intermediate hanging
- Budget Breakdown: Fountain Kit: $180 | Hardware: $10
- Creator’s Tip: Add a few drops of algaecide to the water reservoir weekly to keep the water crystal clear and prevent the pump from clogging.
- Smart Sourcing: lightweight fiberglass wall fountain kits and heavy-duty masonry anchors
46. Clustered Zen Garden Pagodas
This quiet gathering of stone lanterns feels like a charming, meditative sanctuary designed just for you. A clustered zen focal point is a fantastic use-case for nestling deep into heavily mulched or gravel-raked garden beds.
Spacing them out individually ruins the effect, but clustering a tall pagoda, a low water basin, and a bamboo scoop looks far more expensive than it is. It adds a deeply traditional, cultural narrative to your garden design landscape.
You can curate a small zen cluster for $100–$200. Save this to your meditation garden Pinterest board!
- Key Materials: Stone pagoda, Tsukubai (water basin), bamboo dipper
- Vibe / Style: Charming meditative sanctuary
- Difficulty: Easy placement
- Budget Breakdown: Stone Set: $150 | Bamboo/Gravel: $20
- Creator’s Tip: Surround the base of the stone basin with dark, polished river rocks to contrast sharply against white raked sand or green moss.
- Smart Sourcing: cast-resin japanese pagoda statues and polished black river stones (bulk)
47. Central Tiered Birdbath Dioramas
This serene water feature feels like a glowing, lively centerpiece commanding bird activity across the entire lawn. A central tiered birdbath is the most prominent use-case for utilizing a sweeping, open front yard space.
Throwing cheap plastic bowls on the grass looks messy, but constructing a tiered stone basin surrounded by pollinator-friendly flowers delivers a high-end designer finish. The architectural framing makes this traditional garden design ideas layout incredibly poignant.
You can build the basin and plant the base for $150–$300. Pin this for a deeply lively, nature-focused yard display!
- Key Materials: Concrete birdbath, solar fountain pump, pollinator plants
- Vibe / Style: Serene lively centerpiece
- Difficulty: Intermediate lifting
- Budget Breakdown: Birdbath: $100 | Solar Pump/Plants: $60
- Creator’s Tip: Drop a floating solar-powered bubbler into the basin; moving water attracts ten times more birds than still water.
- Smart Sourcing: heavy-weight concrete tiered birdbaths and floating solar fountain pump kits
48. Staggered Boulder & Rock-Balancing
This rugged stone arrangement feels like a natural, mountainous outcropping greeting every visitor. A graduated scale boulder grouping works exceptionally well for adding height variation and texture near flat driveway entrances.
Placing three identical rocks looks unnatural, but staggering large, medium, and small boulders gives a surprisingly premium look that implies a natural geological narrative. Softening the edges with creeping thyme ties them perfectly into your home’s overarching garden design outdoor palette.
You can source a beautiful rock trio for $80–$140. It’s a fast hardscaping upgrade that completely changes the curb appeal.
- Key Materials: 3 varied landscape boulders, creeping thyme
- Vibe / Style: Rugged mountainous outcropping
- Difficulty: Very heavy lifting
- Budget Breakdown: Boulder Delivery: $100 | Groundcover: $30
- Creator’s Tip: Bury the bottom third of every boulder beneath the soil so they appear to be massive icebergs emerging directly out of the ground.
- Smart Sourcing: local bulk landscape boulder delivery and creeping thyme live groundcover flats
49. Hidden Fairy Garden Resin Displays

Spotting these tiny details feels like you’ve gently intruded on a magical, peaceful miniature forest gathering. An organic fairy-scape layout is the smartest use-case for integrating decor into the base of large, old shade trees.
Slapping bright plastic toys on the mulch is jarring, but tucking moss-covered resin cottages and tiny stone paths peeking out from behind roots looks far more expensive than it is. It seamlessly bridges whimsical flair with naturalistic garden design simple habitats.
You can scatter a woodland gathering for $60–$120. Save this to your miniature landscape styling board!
- Key Materials: Resin fairy houses, mini pebbles, moss
- Vibe / Style: Magical miniature forest
- Difficulty: Easy hiding & styling
- Budget Breakdown: Miniatures: $50 | Pebbles/Moss: $25
- Creator’s Tip: Use a broken terracotta pot laid on its side as the “cave entrance” to your fairy village to recycle broken garden materials beautifully.
- Smart Sourcing: UV-coated resin fairy cottage kits and miniature garden supplies (bulk packs)
Warning! Do NOT attempt to build a massive floral display until you read the exact staging secret below…
50. Massive Antique Flower Cart Focal Point
This sprawling installation feels like a lush botanical exhibit has landed directly on your property. A full-scale floral cart diorama is the absolute pinnacle use-case for massive, unobstructed estate lawns.
Setting pots flat on the ground looks heavy, but elevating them in an antique wooden vendor’s cart gives a high-end designer finish that simulates a cascading waterfall of blooms. It’s the ultimate, show-stopping focal point for luxury garden designs.
You can stage this cinematic floral scene for $300–$600. Pin this if you are planning the ultimate neighborhood showstopper!
- Key Materials: Life-size wooden cart, massive trailing petunias, spotlighting
- Vibe / Style: Lush botanical exhibit
- Difficulty: Advanced staging
- Budget Breakdown: Cart Replica: $200 | Flowers: $250
- Creator’s Tip: Fill the deep bed of the cart with upside-down empty nursery pots to take up space, then set your flower pots on top to save massive amounts of soil.
- Smart Sourcing: life-size wooden ornamental garden carts and premium trailing petunia flats
Vintage and Rustic Hardscaping Concepts
Ground your modern layout with authentic, tactile heritage pieces that whisper of cozy country farmhouses.
51. Antique Garden Gates as Wall Art
Leaning this weathered iron against the brick feels like a rugged, cozy secret garden entrance just waiting to be opened. A vertical antique iron accent works exceptionally well for softening the harsh corners of modern stucco walls.
Buying cheap plastic trellises ruins the aesthetic, but sourcing authentic rusted iron gates delivers a surprisingly premium look. The heavy patina contrasts beautifully against the fresh greenery of your garden design pictures.
You can score a vintage iron piece for $40–$100. Save this to your farmhouse aesthetic mood board!
- Key Materials: Authentic vintage iron gate, climbing ivy
- Vibe / Style: Rugged secret garden
- Difficulty: Easy leaning
- Budget Breakdown: Thrifted Gate: $70 | Ivy Pot: $20
- Creator’s Tip: Lean the gate at a slight angle and secure it to the wall with a single heavy hook at the top so it doesn’t crush your plants in a windstorm.
- Smart Sourcing: heavy-duty masonry wall hooks and fast-growing English Ivy
52. Corrugated Metal Raised Beds
This rigid metal display feels like a tough, resilient farmstead producing beautiful summer harvests. Utilizing an industrial corrugated container is an incredibly smart use-case for growing deep-rooted vegetables on exposed patios.
Delicate wood rots in wet soil, but heavy corrugated steel looks far more expensive than it is while being virtually indestructible. It’s a core foundational element for any rugged garden design landscape.
You can build these tough planters for $40–$80. It’s a fast upgrade that completely changes your container durability.
- Key Materials: Galvanized raised bed kits, organic soil
- Vibe / Style: Resilient summer farmstead
- Difficulty: Intermediate assembly
- Budget Breakdown: Metal Bed: $50 | Soil: $30
- Creator’s Tip: Line the bottom of the metal bed with thick cardboard and broken branches (hugelkultur) to take up space and feed the soil slowly over time.
- Smart Sourcing: galvanized steel raised garden bed kits and bulk organic raised bed soil mix
53. Vertical Potting Station Grids

This rough-hewn wooden pyramid feels like a bustling, old-world greenhouse workspace. An asymmetrical crate shelving layout is the absolute best use-case for displaying dozens of small terracotta pots cohesively.
Lining small pots on the floor looks cluttered, but stacking them dynamically in wooden grids delivers a designer-level finish that draws the eye upward. Sourcing miniature garden supplies to fill the cubbies elevates your vertical garden design layout immensely.
You can construct this modular grid for $45–$75. Pin this if you love organizing cluttered patio decor!
- Key Materials: 5-7 wooden fruit crates, terracotta pots
- Vibe / Style: Old-world greenhouse
- Difficulty: Easy stacking
- Budget Breakdown: Crate Bulk Pack: $50 | Terracotta: $20
- Creator’s Tip: Treat the raw wood crates with boiled linseed oil to protect them from water damage without using toxic chemical sealants.
- Smart Sourcing: unfinished rustic wooden apple crates (bulk) and 100% natural boiled linseed oil
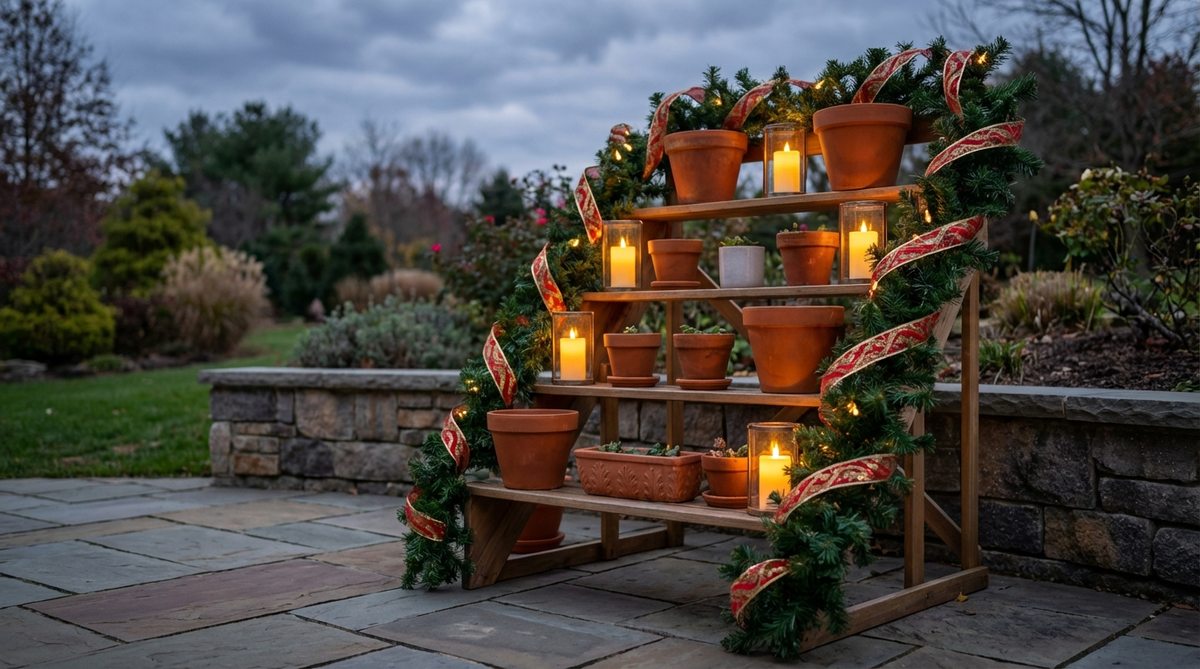
54. Ladder Plant Stand Displays

Leaning this weathered ladder against the wall feels like discovering a brilliant botanical hack in a designer loft. A repurposed vertical riser is an exceptional use-case for utilizing totally blank exterior siding.
Buying pre-made shelves is boring, but turning an old painter’s ladder into a tiered plant stand looks far more expensive than it is. It’s a brilliant upcycling trick favored by cutting-edge garden design outdoor stylists.
You can create this shelving masterpiece for $20–$50. Save this to your brilliant upcycling hacks board!
- Key Materials: Vintage wooden ladder, flat wooden planks, potted ferns
- Vibe / Style: Designer loft upcycling
- Difficulty: Beginner DIY
- Budget Breakdown: Thrifted Ladder: $20 | Shelving Planks: $15
- Creator’s Tip: Lay flat, rough-cut cedar planks across the rungs to instantly create wider, stable shelves for larger, heavier pots.
- Smart Sourcing: rough-sawn cedar planking boards and heavy-duty outdoor wood glue
Hold up! You don’t need a massive yard for this next trick… it turns a tiny patio corner into a massive water garden statement…
55. Lotus & Water Lily Tub Gardens
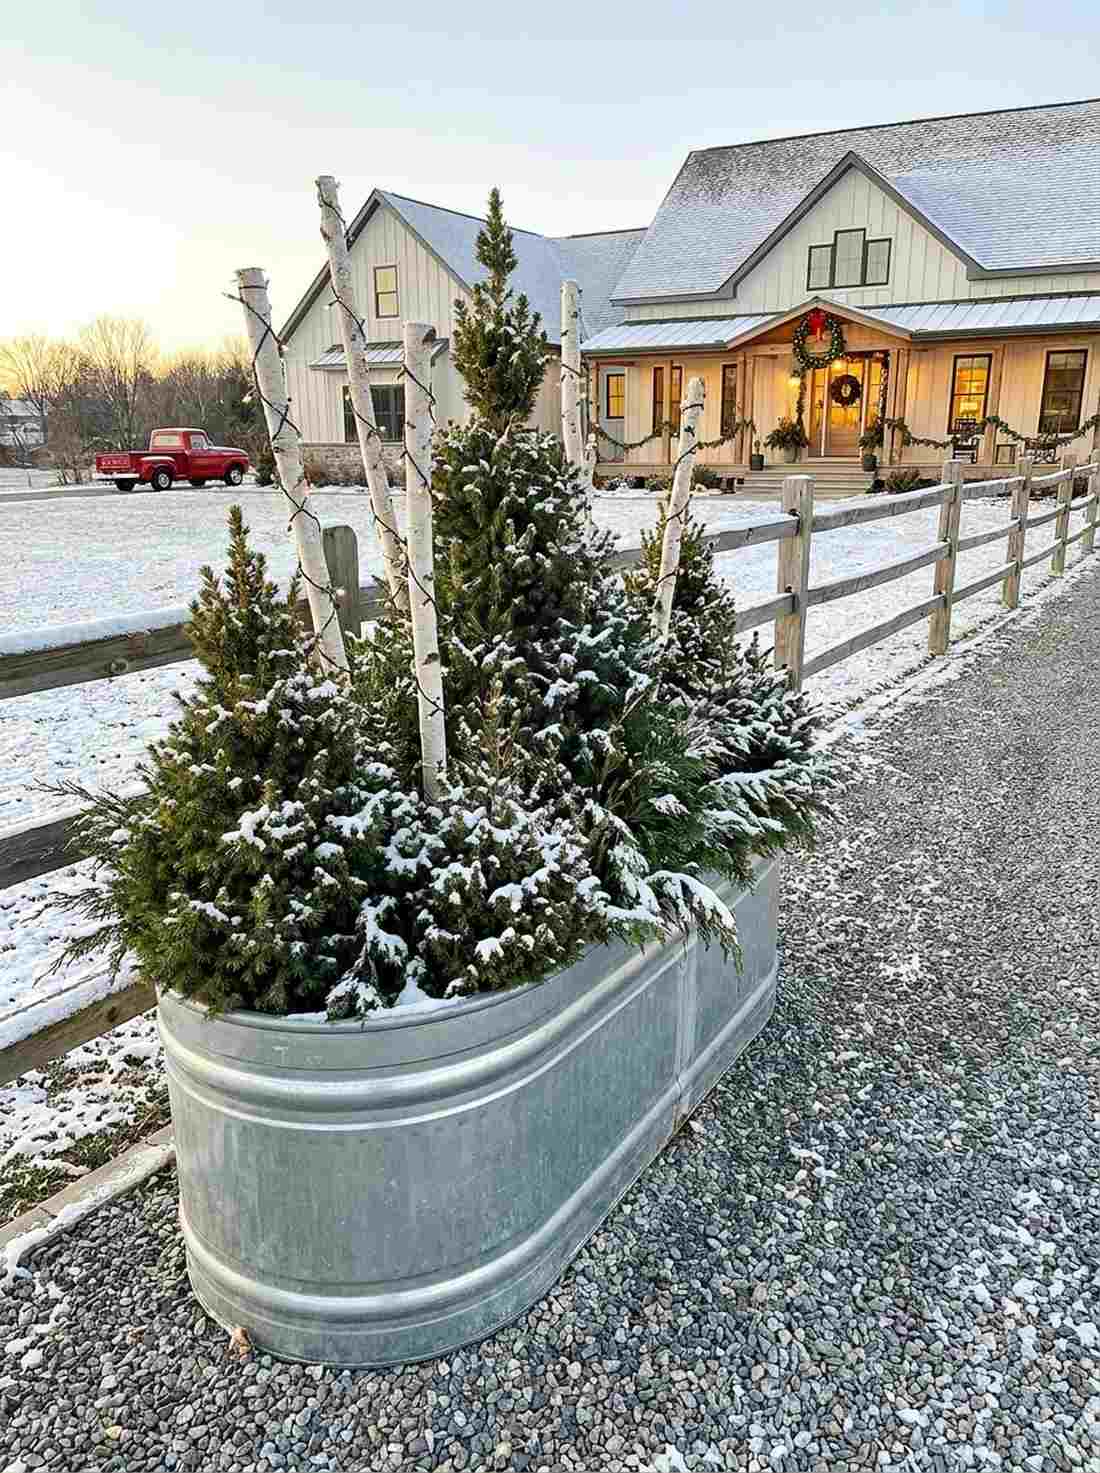
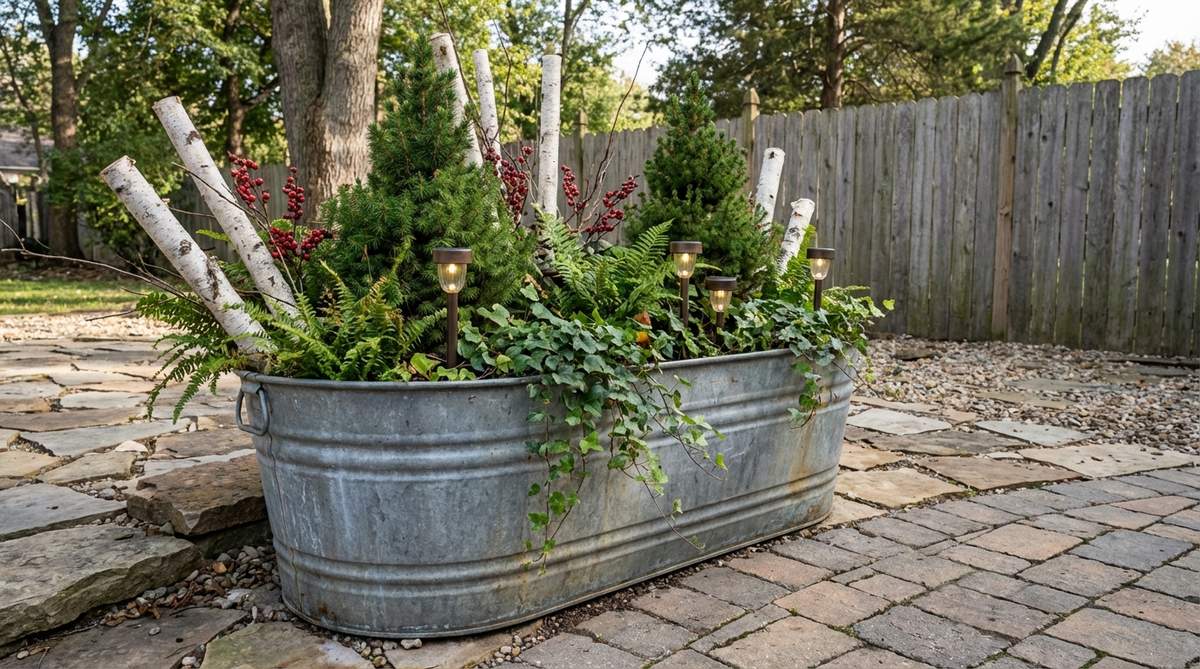
This massive steel basin feels like a rugged, heavy-duty oasis that refuses to be ignored. A low-profile aquatic mega planter works beautifully for anchoring the corners of expansive, flat concrete patios.
Using tiny pots makes the space feel empty, but dropping a massive galvanized tub filled with water and floating lotuses delivers a surprisingly premium look of overwhelming scale. It grounds your contemporary garden design simple aesthetic immediately.
You can build this mega-pond for $70–$120. Highly recommended for adding massive visual weight instantly.
- Key Materials: 20-gallon galvanized tub, aquatic soil, water lilies
- Vibe / Style: Massive rugged oasis
- Difficulty: Heavy lifting & filling
- Budget Breakdown: Mega Tub: $45 | Lilies/Soil: $40
- Creator’s Tip: Toss in a few “Mosquito Dunks” (safe BTI bacteria) into the water to ensure your beautiful pond doesn’t become a breeding ground for pests.
- Smart Sourcing: 20-gallon galvanized steel livestock tanks and natural mosquito control dunks (BTI)
56. Antique Watering Cans as Wall Art
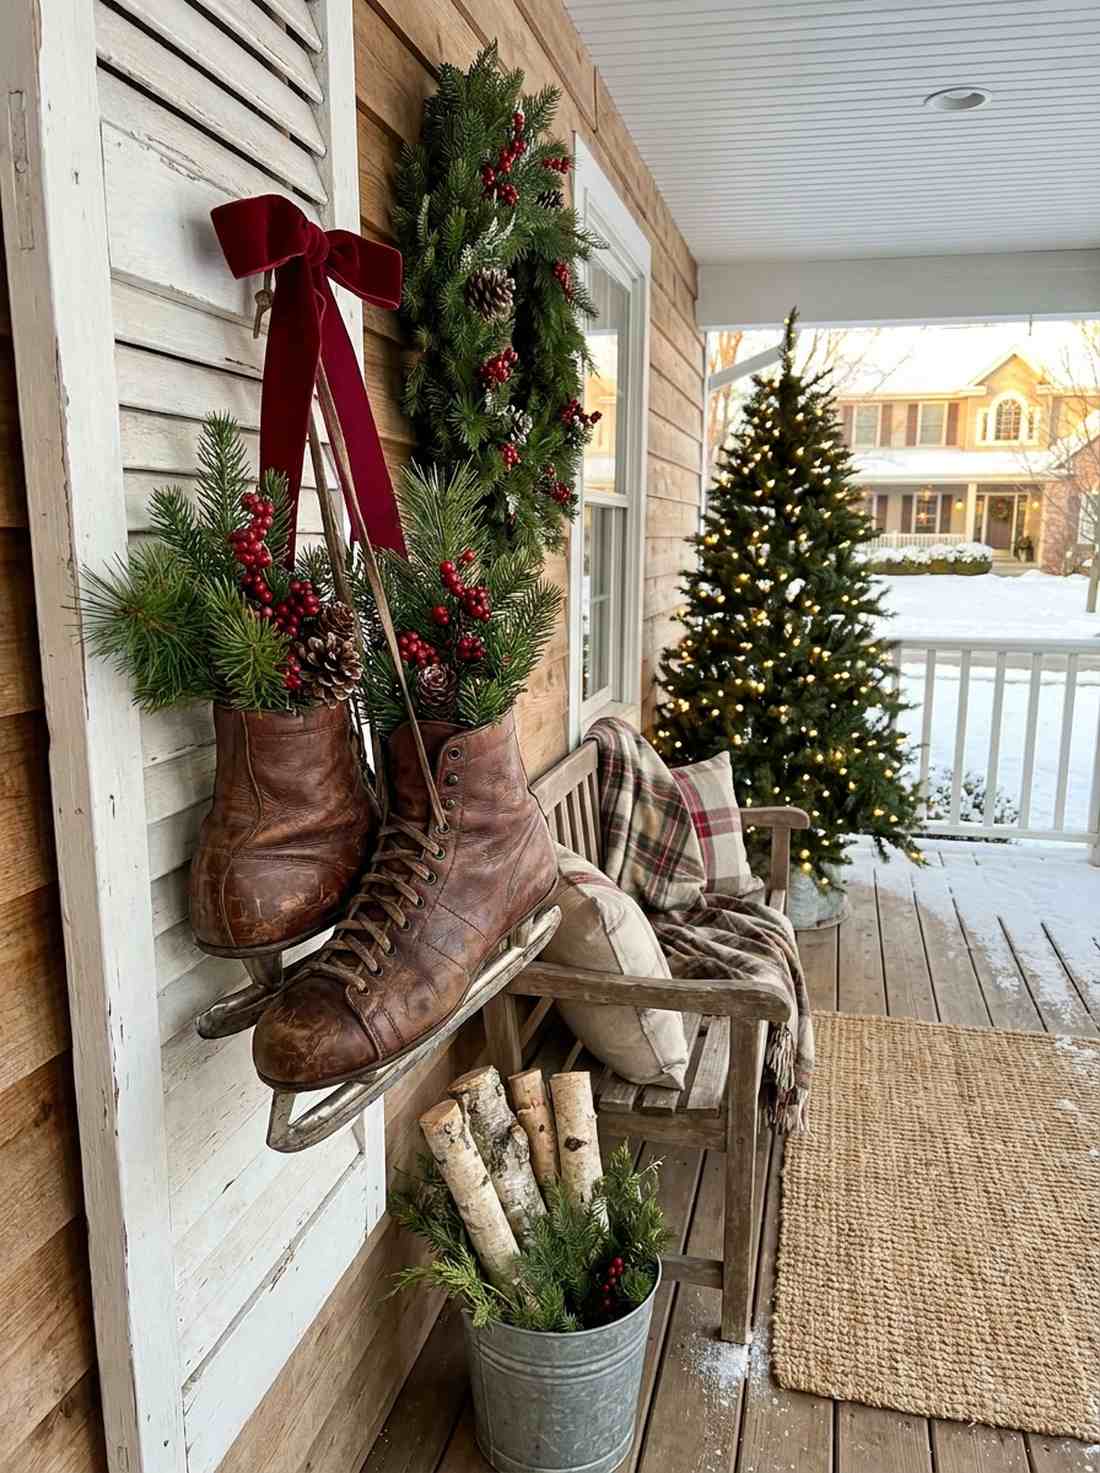
Hanging these worn galvanized cans feels like leaving a subtle, romantic whisper of rustic gardening days past. A suspended textural accent is a highly creative use-case for dressing up bare porch shutters or garden fences.
A standard hanging basket gets boring, but tipping an antique watering can so trailing succulents spill out the spout gives a high-end designer finish that drips with nostalgia. It’s an incredibly photogenic addition to your garden design ideas.
You can craft this romantic hanger for $25–$45. Pin this to your alternative fence-decor Pinterest board!
- Key Materials: Vintage watering can, trailing “String of Pearls”, wire
- Vibe / Style: Romantic nostalgic whisper
- Difficulty: Easy hanging & planting
- Budget Breakdown: Thrifted Can: $20 | Plants: $15
- Creator’s Tip: Punch a small hole in the very bottom of the can before hanging it so rainwater can drain out and not drown your succulents.
- Smart Sourcing: heavy-duty outdoor command hooks and trailing succulent live plant bundles
57. Overflowing Floral Wheelbarrows
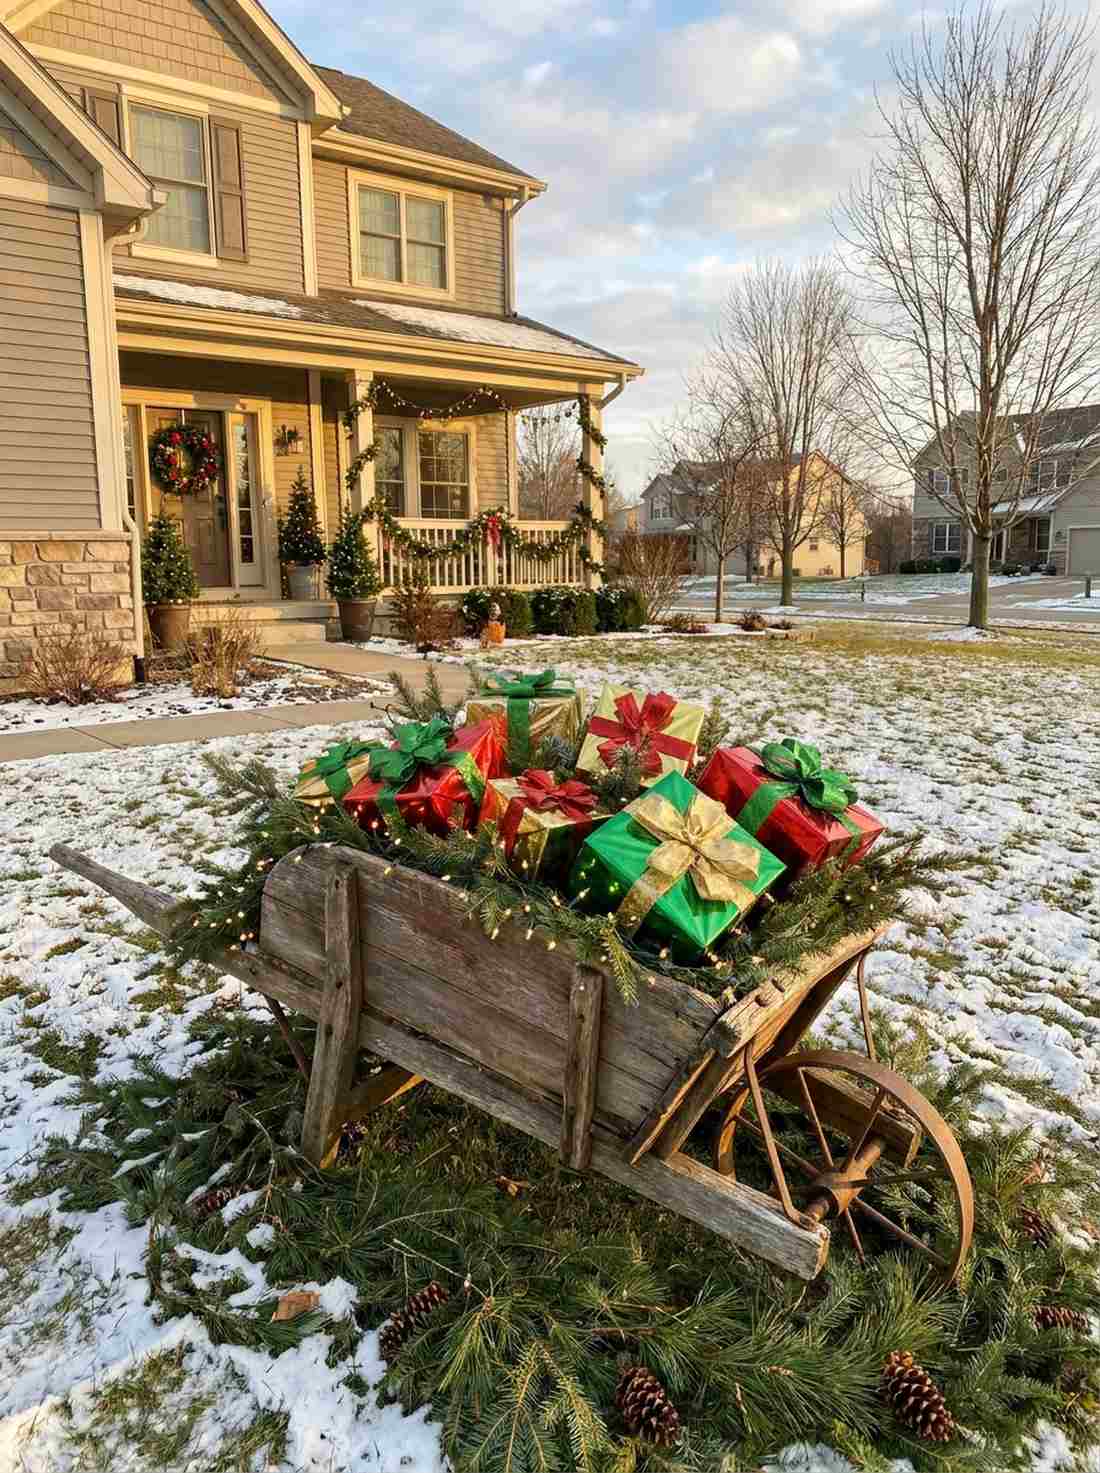
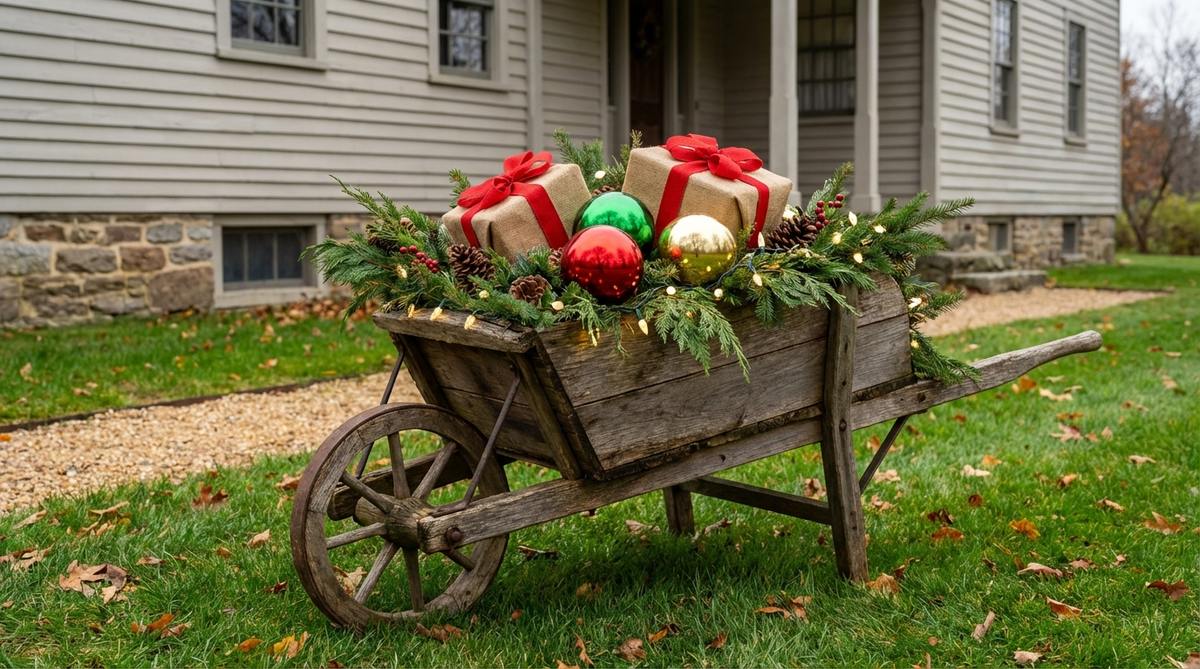
This overflowing cart feels like a magical harvest of summer greenery has just been wheeled out of the greenhouse. A mobile landscape focal point is an incredibly clever use-case for easily shifting decor around your yard to follow the sun.
Static displays bake in harsh weather, but utilizing a raised, wheeled wooden bed looks far more expensive than it is and can be moved instantly. It adds dynamic, mobile charm to a static garden designs blueprint.
You can plant this mobile cart for $60–$120. Save this if you need flexible, movable yard art!
- Key Materials: Rustic wheelbarrow, mixed annuals, potting soil
- Vibe / Style: Magical summer harvest
- Difficulty: Beginner friendly
- Budget Breakdown: Wheelbarrow: $80 | Greens: $30
- Creator’s Tip: Line the wooden bed with heavy black plastic before adding wet soil and plants to prevent the wood from rotting out in one season.
- Smart Sourcing: rustic wooden ornamental wheelbarrows and heavy-duty thick plastic liner sheeting
Nature-Inspired Organic Edging
Harness the raw, untamed beauty of the outdoors to build zero-waste, sustainable landscape architecture.
58. Moss & Grapevine Wrapped Accents

Draping these heavy vines feels like you’ve accidentally discovered a woodland fairy hideaway deep in the woods. A heavy organic texture chain works phenomenally well for wrapping thick wooden deck railings or twisting up lampposts.
Store-bought plastic ivy looks pathetic, but wrapping thick, authentic grapevine interwoven with preserved moss delivers a surprisingly premium look. This zero-waste approach deeply enhances naturalistic garden design landscape plans.
You can handcraft this massive garland for under $20. Pin this to your zero-waste eco-crafting board!
- Key Materials: Foraged grapevine, preserved moss, floral wire
- Vibe / Style: Woodland fairy hideaway
- Difficulty: Tedious wire wrapping
- Budget Breakdown: Grapevine: $10 | Moss/Wire: $15
- Creator’s Tip: Soak the thick grapevines in warm water for an hour before wrapping; it makes the stiff wood incredibly pliable and easy to bend around posts.
- Smart Sourcing: pre-cut preserved moss sheets (bulk pack) and heavy-gauge floral binding wire
59. Natural Hugelkultur Bed Edging

This low wooden wall feels like a rustic, protective barricade built by clever forest sprites. A stacked log edging layout is an incredible, permanent use-case for defining mulch beds that constantly wash away in heavy rainstorms.
Flimsy plastic edging snaps in the sun, but stacking heavy, authentic logs looks far more expensive than it is while holding back tons of soil. This structural barrier solves a massive garden design outdoor problem beautifully as it slowly feeds the soil.
You can line a bed for $40–$80 depending on the length. Highly recommended for a permanent, eco-friendly boundary.
- Key Materials: Cut hardwood logs, rebar spikes
- Vibe / Style: Protective rustic barricade
- Difficulty: Moderate sledgehammering
- Budget Breakdown: Log Bundles: $50 | Rebar: $20
- Creator’s Tip: Drill a hole through the logs and pound a piece of steel rebar completely through them into the dirt so they never shift during floods.
- Smart Sourcing: bulk authentic cut hardwood logs and 12-inch steel rebar ground stakes
Warning! Don’t pay $100 for pre-made privacy fencing when you can weave this next idea from free branches…
60. Living Privacy Screens & Woven Wattle Fences
Binding these fresh cuts feels like you’ve wrapped your property in a fragrant, living green hug. A foraged woven branch fence is the absolute smartest use-case for dressing up ugly chainlink or creating a short garden partition.
Buying hundreds of feet of vinyl fencing is wildly expensive, but weaving free, flexible willow branches horizontally between vertical stakes delivers a designer-level finish for pennies. It’s the ultimate budget hack for rustic garden design simple borders.
You can dress an entire garden zone for the cost of a few stakes. Save this ultimate budget landscaping hack!
- Key Materials: Foraged willow or hazel branches, wooden stakes
- Vibe / Style: Fragrant living boundary
- Difficulty: Repetitive weaving
- Budget Breakdown: Branches: FREE | Stakes: $15
- Creator’s Tip: Weave the branches while they are still “green” and fresh. Once they dry out, they lock into place and become as strong as a solid wood fence.
- Smart Sourcing: heavy-duty wooden boundary stakes and high-leverage branch pruning shears
61. Ornamental Grasses & Structural Winter Interest
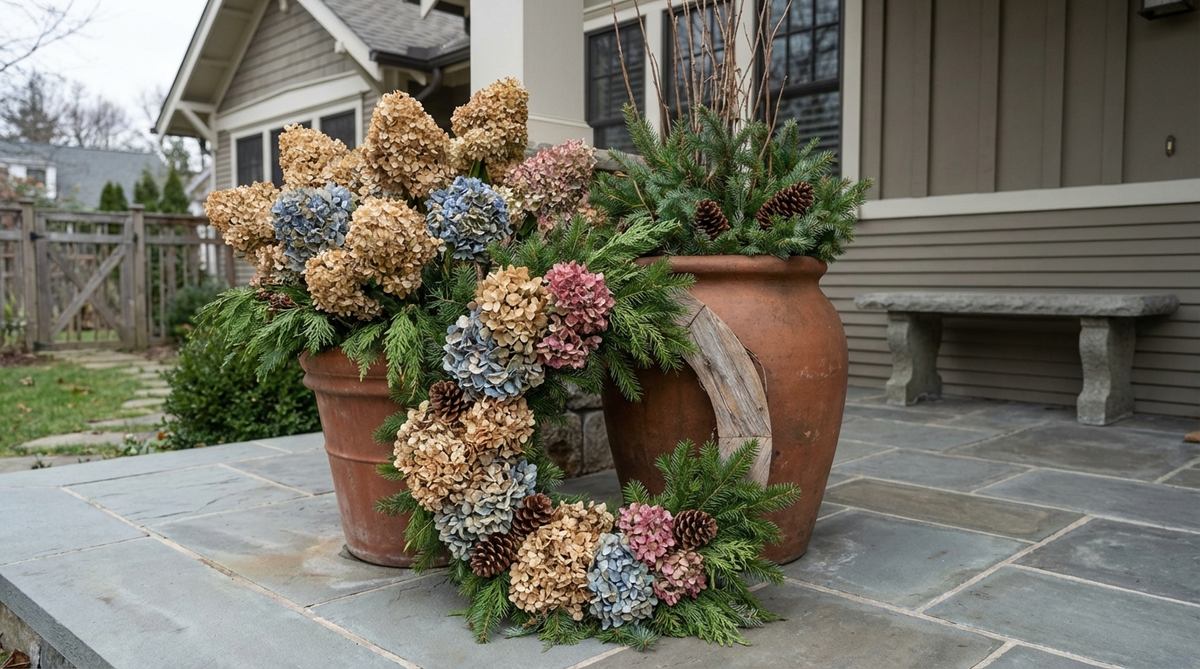
These papery, fading blooms feel like delicate antique lace frozen perfectly in time during the dormant season. A preserved botanical centerpiece is an incredibly chic use-case for utilizing tall ornamental grasses when flowers die back.
Cutting everything to the dirt in autumn is a waste, but leaving tall Maiden Grass and dried Allium heads standing looks far more expensive than it is. It injects sophisticated, muted organic tones and movement into your stark garden design pictures.
You can create these stunning antique textures by simply putting your pruners away. Pin this to your sustainable garden planning board!
- Key Materials: Tall ornamental grasses, dried seed heads
- Vibe / Style: Frozen antique lace
- Difficulty: Requires self-restraint (no cutting)
- Budget Breakdown: Plants: FREE (Leave them standing) | Twine: $5
- Creator’s Tip: Tie floppy grass clumps together loosely with twine at the waist to keep them standing tall like architectural pillars through high winds.
- Smart Sourcing: natural jute garden twine and long-stem floral wire supports
62. Woven Willow Obelisks & Bamboo Teepees
These tied sculptural bundles feel like avant-garde organic art installations standing tall in the vegetable patch. An upright structural twig pillar is an excellent use-case for adding stark verticality to flat beds to support climbing peas or beans.
Using bright plastic tomato cages looks sad, but tying a tight bundle of tall bamboo branches into a rustic teepee delivers a surprisingly premium look. These stark, architectural lines appeal heavily to modern, minimalist garden designs.
You can build these sculptural pillars for $10–$20. It’s a fast upgrade that completely changes raised bed architecture.
- Key Materials: Tall straight bamboo or willow twigs, thick twine
- Vibe / Style: Avant-garde organic sculpture
- Difficulty: Easy bundling
- Budget Breakdown: Twigs: $15 | Twine: $5
- Creator’s Tip: Bind the top of the bundle extremely tightly, then spread the base out into a wide circle and push them into the dirt to create a rock-solid tripod.
- Smart Sourcing: bulk natural bamboo garden stakes and weatherproof natural sisal binding twine
63. Creeping Thyme & Flagstone Pathways
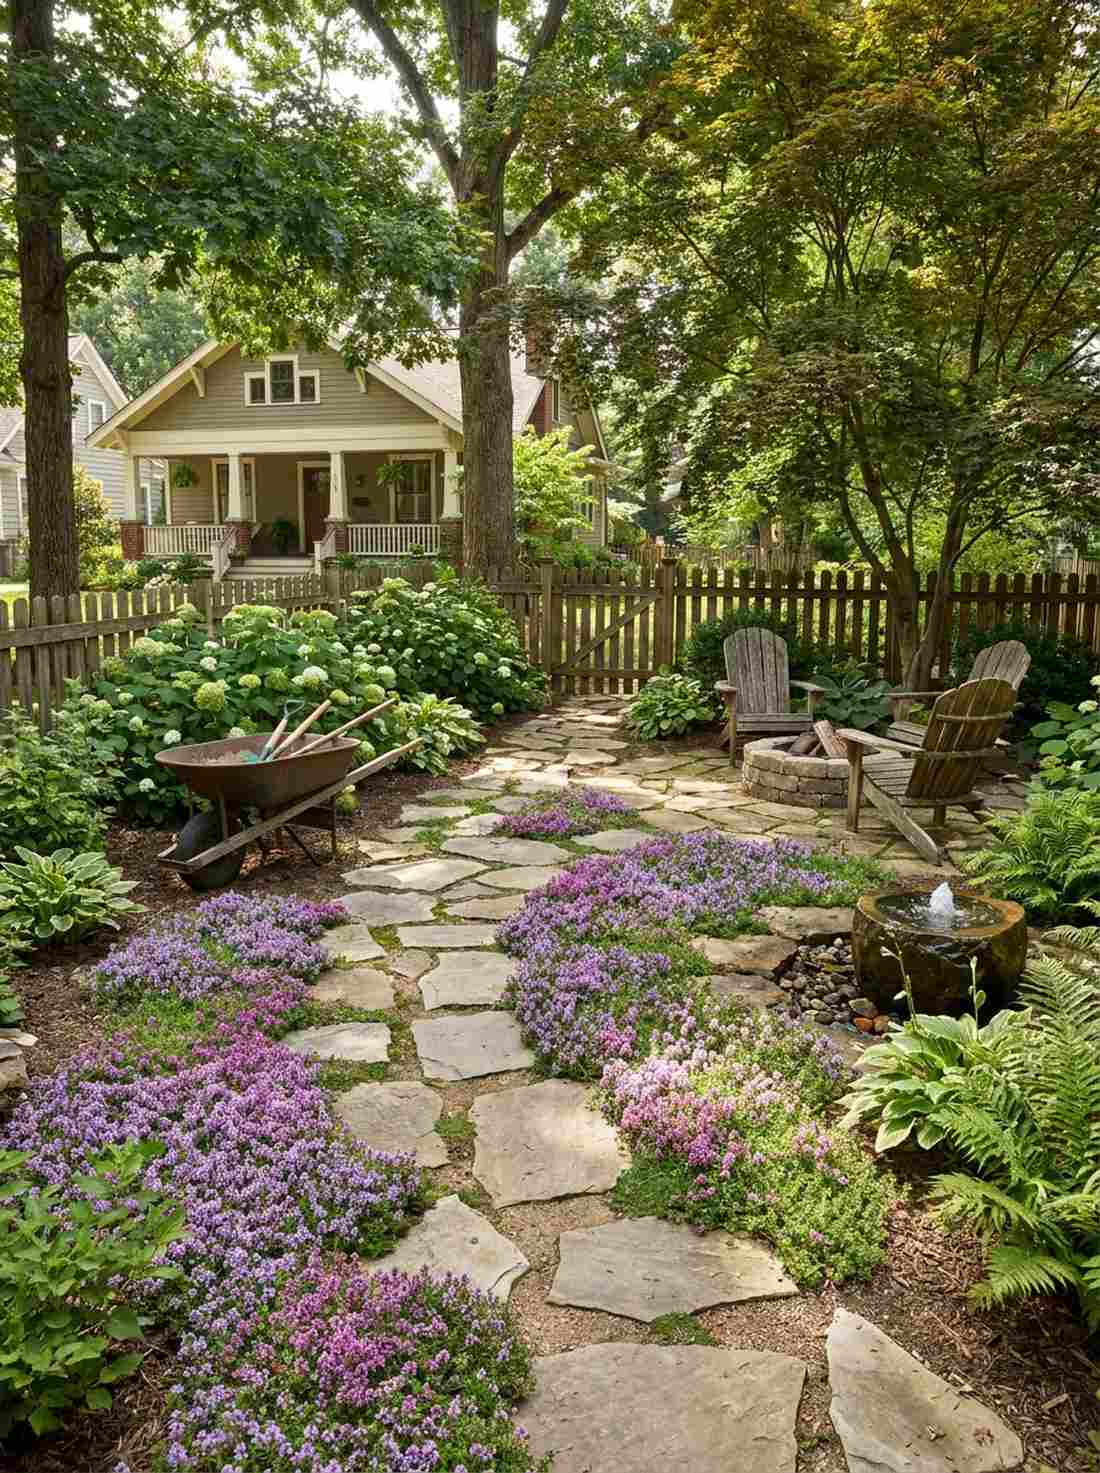
Stepping across these stones feels like wandering through a fragrant, ancient Celtic meadow. Utilizing a creeping thyme stone pathway is a phenomenal use-case for replacing high-maintenance grass in heavily shaded side yards or narrow garden corridors.
Pouring solid concrete looks cold and commercial, but laying raw flagstone interspersed with live, blooming groundcover looks far more expensive than it is. It injects a deeply organic, tactile element into your garden design landscape while naturally solving muddy drainage issues.
You can lay this fragrant path for $60–$120. Pin this to your low-maintenance lawn replacement board!
- Key Materials: Raw flagstone pavers, creeping thyme flats
- Vibe / Style: Ancient Celtic meadow
- Difficulty: Heavy lifting
- Budget Breakdown: Stone: $80 | Plants: $40
- Creator’s Tip: Mix a blend of coarse sand and rich compost between the stones before planting to ensure rapid root establishment and zero weed growth.
- Smart Sourcing: bulk pallet raw flagstone stepping stones and live creeping thyme groundcover flats
64. Copper Rain Chains & River Rock Basins
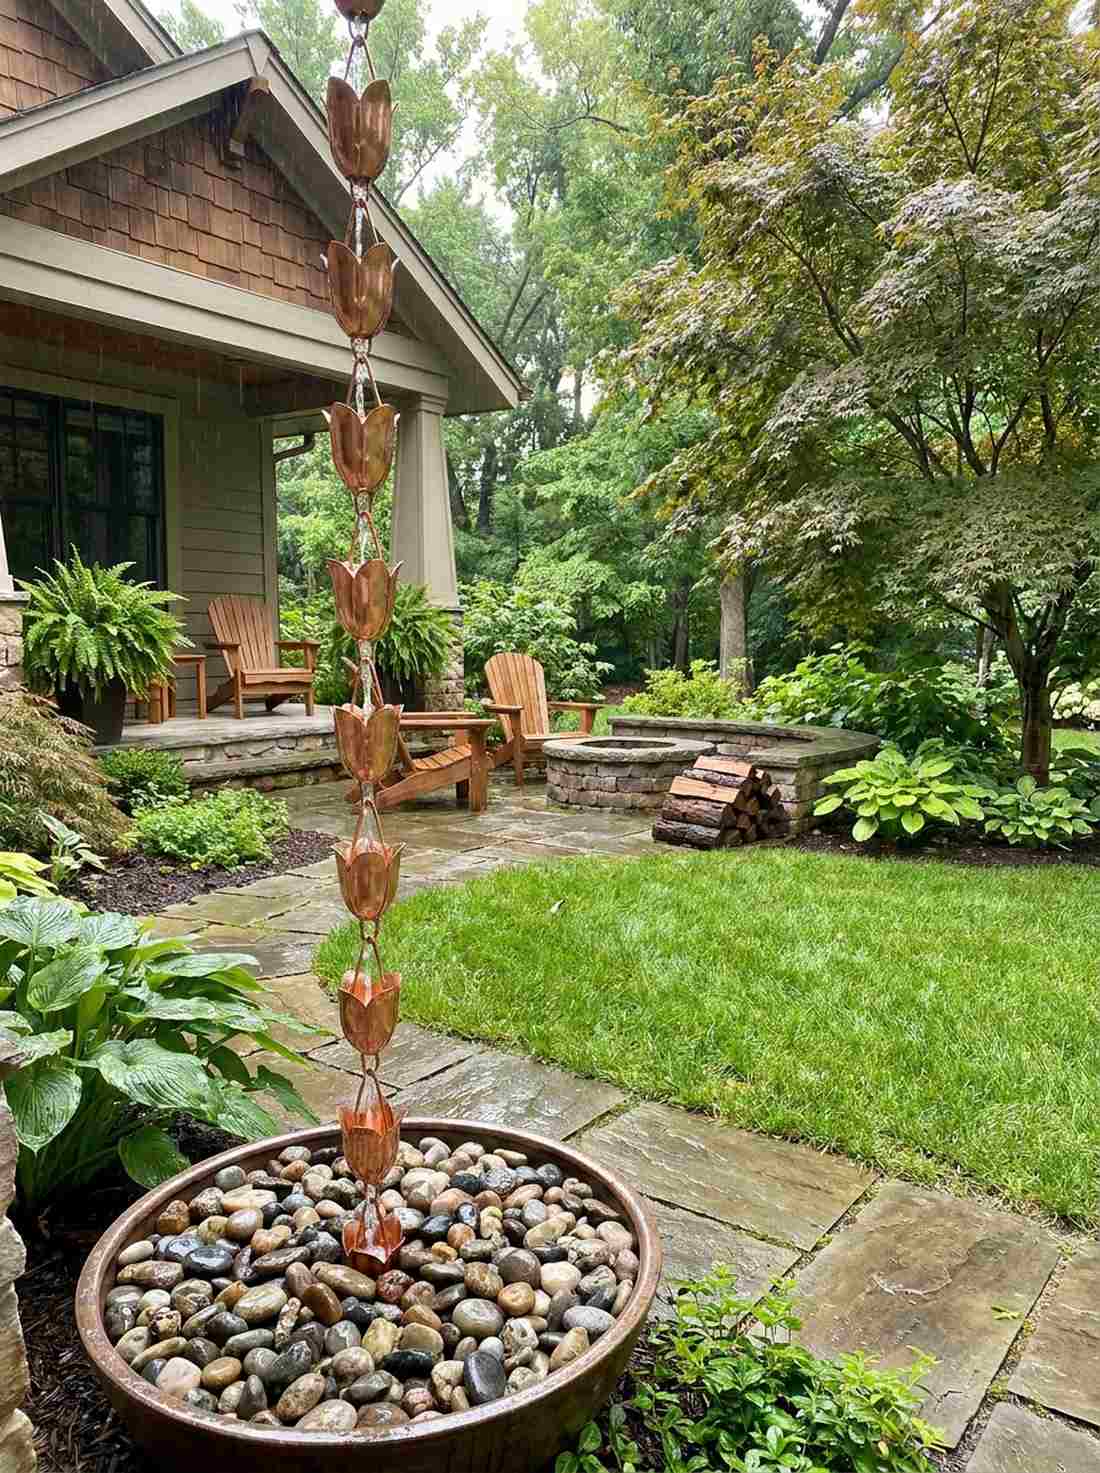
Listening to the water cascade down feels like standing in a tranquil, secluded Zen monastery during a summer shower. Installing a copper rain chain drainage system works exceptionally well for upgrading ugly aluminum downspouts near front entryways or patio corners.
Standard gutters ruin a home’s architectural vibe, but swapping them for a sculptural, kinetic water feature gives a designer-level finish that turns rain into an asset. This functional art piece heavily elevates your baseline garden design ideas without requiring expensive plumbing.
You can hang this kinetic sculpture for $50–$90. Save this for an easy, high-impact rainy day upgrade!
- Key Materials: Copper rain chain, polished river rock, catch basin
- Vibe / Style: Tranquil Zen monastery
- Difficulty: Easy hanging
- Budget Breakdown: Chain: $60 | Rocks: $15
- Creator’s Tip: Bury a perforated plastic catch basin under the river rocks at the bottom to direct heavy water flows safely away from your home’s foundation.
- Smart Sourcing: heavy-duty pure copper tulip rain chains and polished river rock drainage stones (bulk)
65. Dry Creek Bed Drainage Solutions
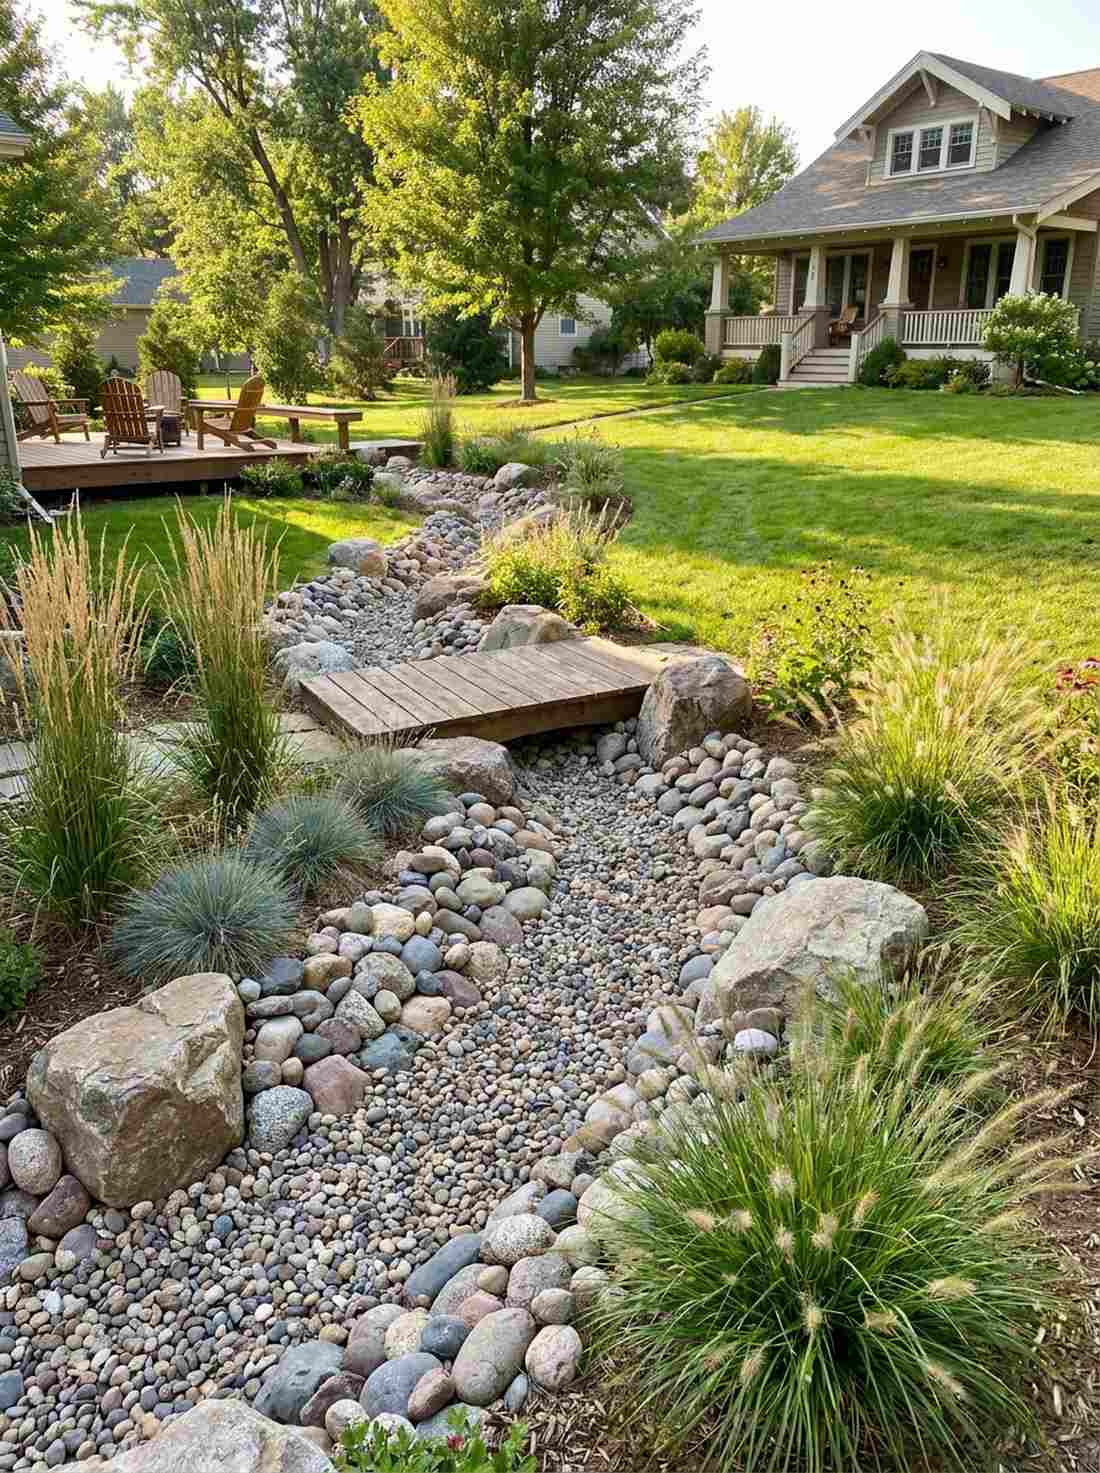
Tracing the curves of this rocky channel feels like discovering a dried riverbed in a rugged alpine valley. Building a dry creek bed layout is the absolute smartest use-case for managing heavy rainwater runoff on sloped properties or soggy backyard dips.
Digging an ugly dirt trench looks terrible, but lining a winding swale with varied river stones and bordering it with ornamental grasses gives a surprisingly premium look. This zero-maintenance solution anchors your naturalistic garden design simple blueprint beautifully.
You can construct this functional riverbed for $100–$200. Pin this if you need a gorgeous, permanent solution to backyard flooding!
- Key Materials: Landscape fabric, mixed cobble, large boulders
- Vibe / Style: Rugged alpine valley
- Difficulty: Moderate digging
- Budget Breakdown: Stone: $150 | Fabric: $30
- Creator’s Tip: Use at least three different sizes of stone (pea gravel for the base, cobble for the edges, and boulders for curves) to make the dry creek look naturally formed by water.
- Smart Sourcing: heavy-duty woven landscape fabric rolls and mixed-size natural river cobble
66. Living Green Roofs on Garden Structures
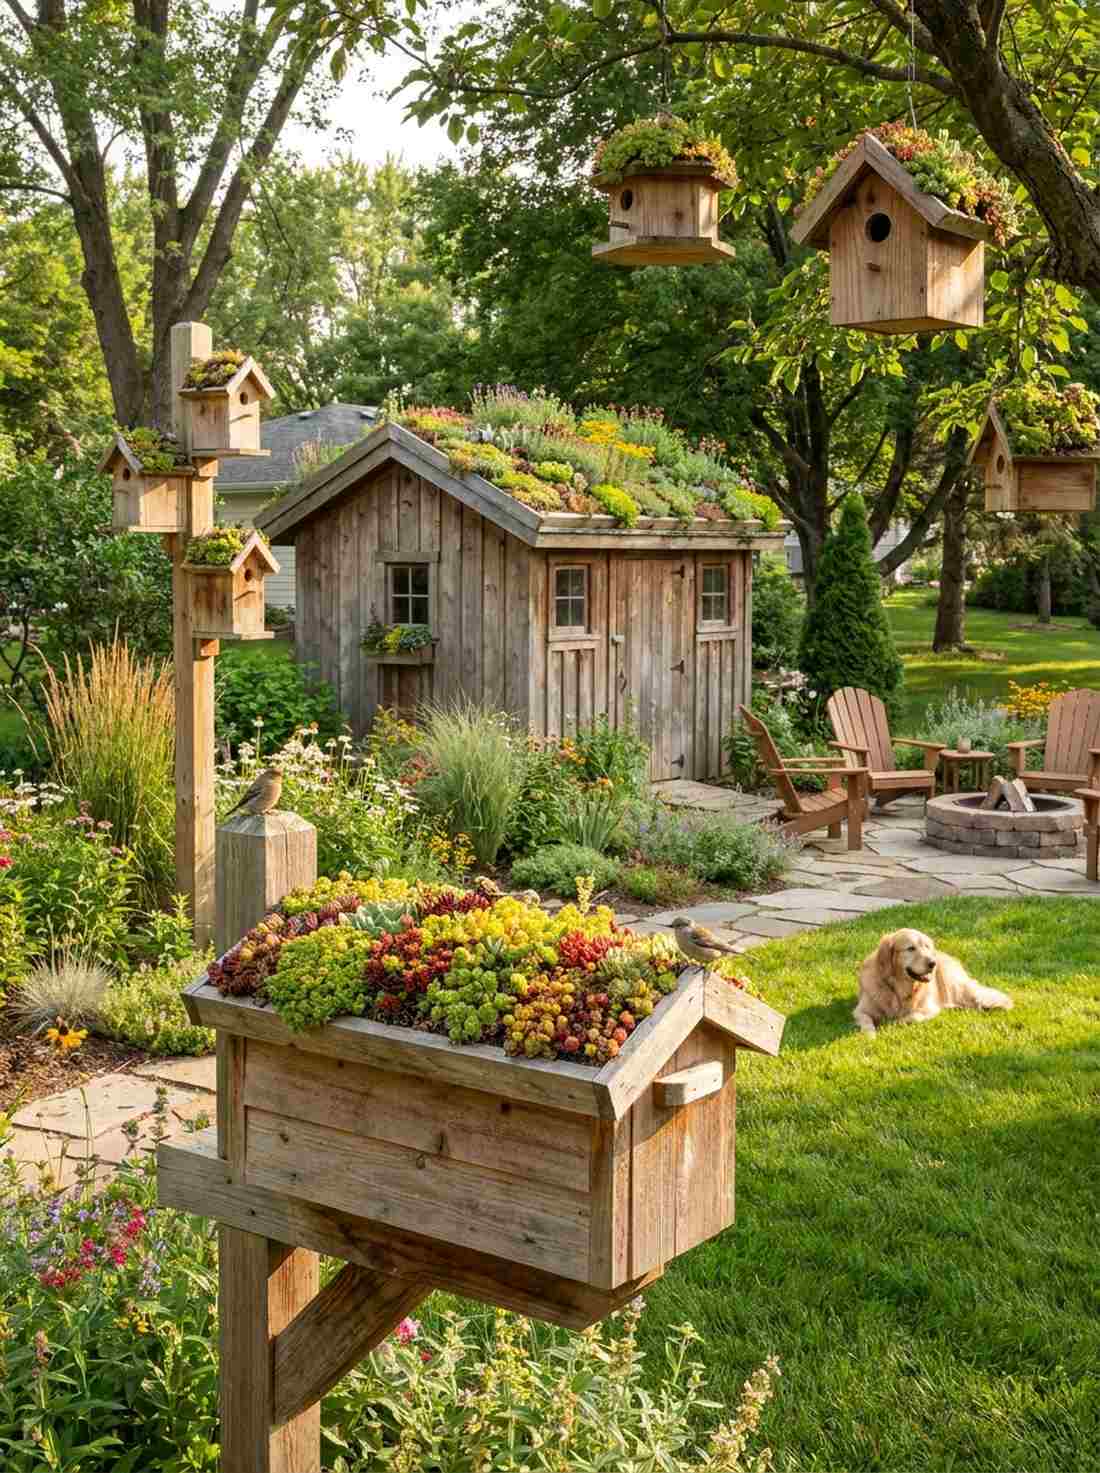
Watching birds flock to these tiny blooming structures feels like you’ve cultivated a miniature, thriving eco-village in the trees. Implementing a living succulent green roof is an incredibly charming use-case for upgrading basic birdhouses, wooden mailboxes, or small garden sheds.
Leaving tiny roofs bare is a wasted opportunity, but planting a shallow bed of drought-tolerant sedums looks far more expensive than it is. It seamlessly integrates artificial wooden structures into your overarching garden design layout, blurring the lines between architecture and nature.
You can craft this miniature eco-roof for under $25. Highly recommended for adding vertical whimsy to your yard!
- Key Materials: Cedar structure, shallow mesh mat, sedum cuttings
- Vibe / Style: Miniature thriving eco-village
- Difficulty: Beginner crafting
- Budget Breakdown: Structure: $15 | Succulents: $10
- Creator’s Tip: Staple a layer of coconut coir matting directly to the wooden roof before adding soil so the succulents have a vertical, moisture-retaining matrix to root into.
- Smart Sourcing: untreated cedar wooden garden birdhouses and live sedum succulent starter trays
Creating Your Signature Botanical Oasis
Successful outdoor presentations balance personal aesthetic expression with architectural compatibility, creating living, breathing installations that enhance rather than overwhelm your existing property. Begin with three foundational elements—strategic pathway illumination, a lush front entrance focal point, and one structural hardscaping accent. Expand gradually across subsequent seasons as your confidence and plant inventory develop. Be sure to photograph your completed beds from multiple angles at different times of day to document how the sunlight interacts with your garden design pictures, allowing you to build a personal design library that reflects your evolving tastes and landscape maturity.
Frequently Asked Questions
What is the real cost to recreate a high-end garden design layout?
While hiring a professional landscape architect can cost upwards of $5,000, building these setups yourself drops the cost by 70%. By utilizing the smart sourcing hacks mentioned above—such as buying commercial-grade landscape fabric rolls and bulk starter plant trays instead of pre-potted mature plants—you can easily achieve a luxury aesthetic for $200–$500 per zone.
Where is the best place to use these specific landscaping ideas?
To maximize your return on investment and curb appeal, focus your budget strictly on high-traffic visual anchors. The front door approach, the driveway entrance, and the primary patio seating area are the most critical zones. Upgrading these three areas creates the illusion of an expensive, cohesive garden design landscape without requiring you to meticulously decorate every corner of your backyard.
How do I plan a garden design simple layout for a very small backyard?
In tight spaces like urban courtyards or condo balconies, verticality is your best friend. Utilize heavy-duty tiered plant stands, espalier wire kits for flat-growing trees, and hanging coco-coir baskets to draw the eye upward. This prevents floor clutter while immersing you in a 360-degree botanical experience, making the footprint feel twice as large.
What are the most durable materials for a low-maintenance garden?
If you want a “plant-it-and-forget-it” yard, you must swap fragile plastics for premium commercial materials. Always invest in UV-resistant resin planters, galvanized steel raised beds, and authentic stone edging. Coupling these indestructible hardscaping elements with drought-tolerant native perennials guarantees your garden designs look immaculate year-round with virtually zero weekly maintenance.