Effective small garden decking ideas transform cramped outdoor spaces into functional zones that accommodate dining, lounging, and entertaining without sacrificing style or comfort. Designers use strategic layouts, built-in features, and vertical elements to create defined seating areas that feel spacious and purposeful. Fresh Garden Ideas delivers practical solutions backed by proven techniques that homeowners trust for maximizing compact gardens.
Design SnapshotKey Principles
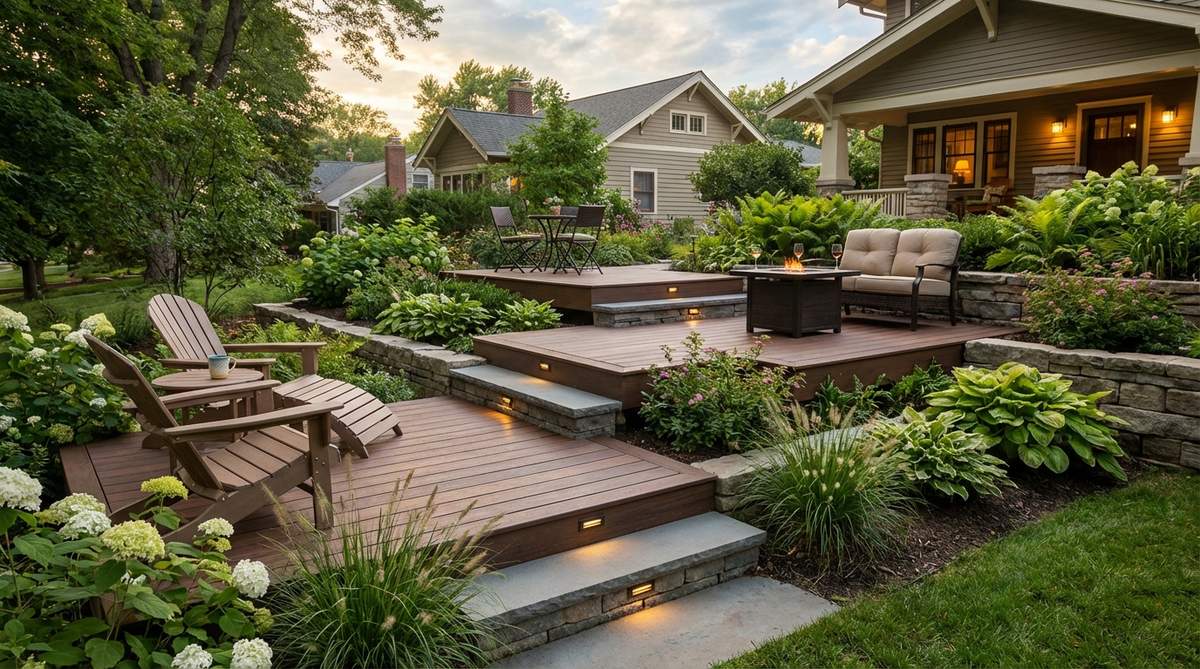
- Zoning Through Levels: Multi-height decking creates natural boundaries between dining, lounging, and circulation areas without physical barriers
- Built-In Efficiency: Integrated seating and storage eliminate furniture footprints while providing dual-purpose functionality
- Vertical Layering: Pergolas, trellises, and wall-mounted planters add depth and greenery without consuming floor space
- Material Psychology: Light-toned composite decking reflects brightness to visually expand tight areas, while darker tones add intimacy
Compact Layouts That Work
Strategic deck shapes and configurations establish clear seating zones while maintaining flow in gardens where every square foot counts. Professional designers optimize layouts by analyzing sight lines, access points, and functional requirements before installation begins.
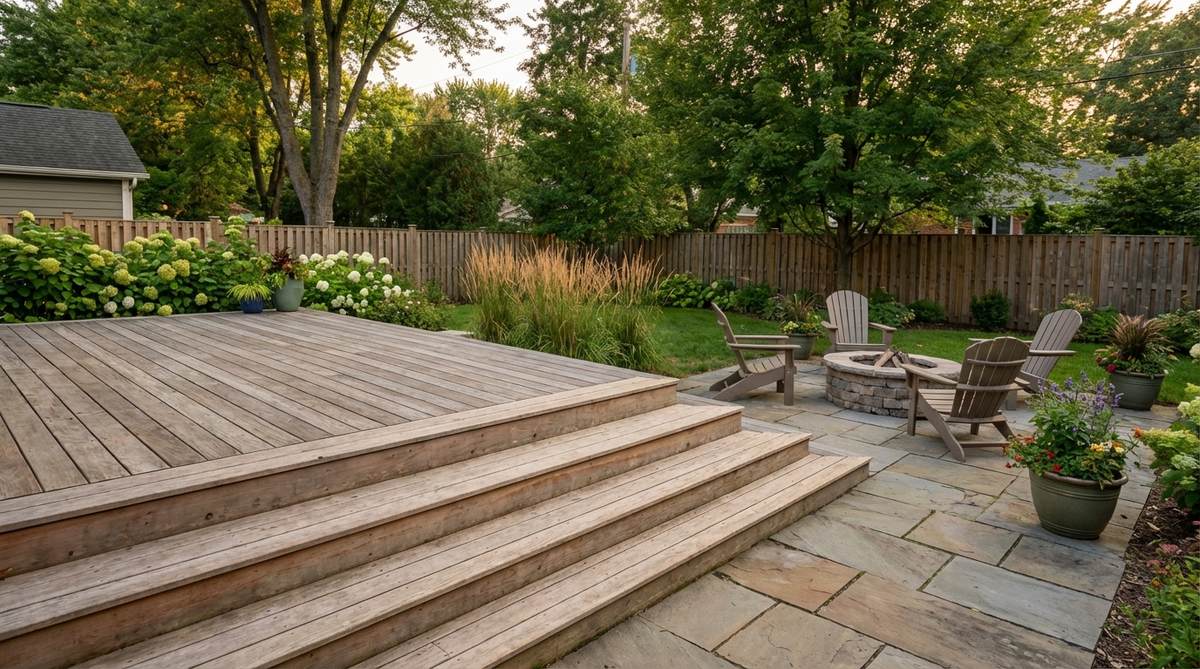
1. Corner Platform Deck
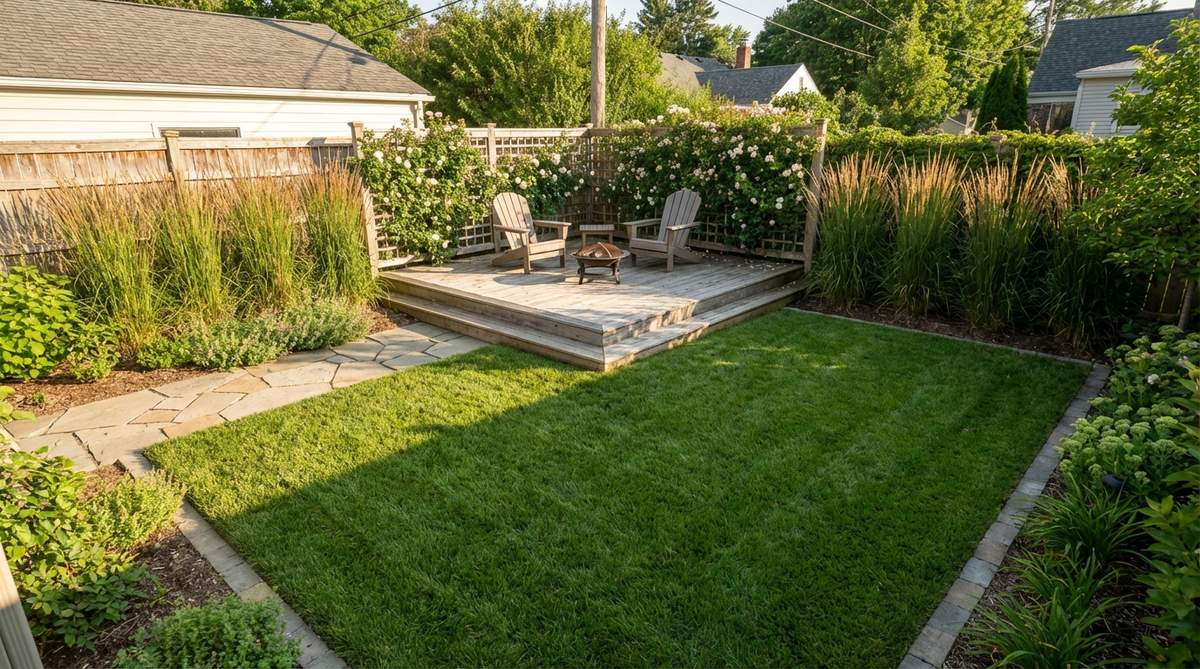
Position your deck in the garden corner farthest from the house to create a destination seating zone that draws visitors through the space. This layout establishes a sense of journey and discovery while keeping the central lawn or pathway open.
Install the platform at ground level or slightly raised to define the boundary without overwhelming sightlines. Frame the corner with vertical planting or a low trellis to enhance the enclosed feeling.
Corner decks work exceptionally well in rectangular gardens where the far end often becomes underutilized dead space.
2. Floating Deck Island
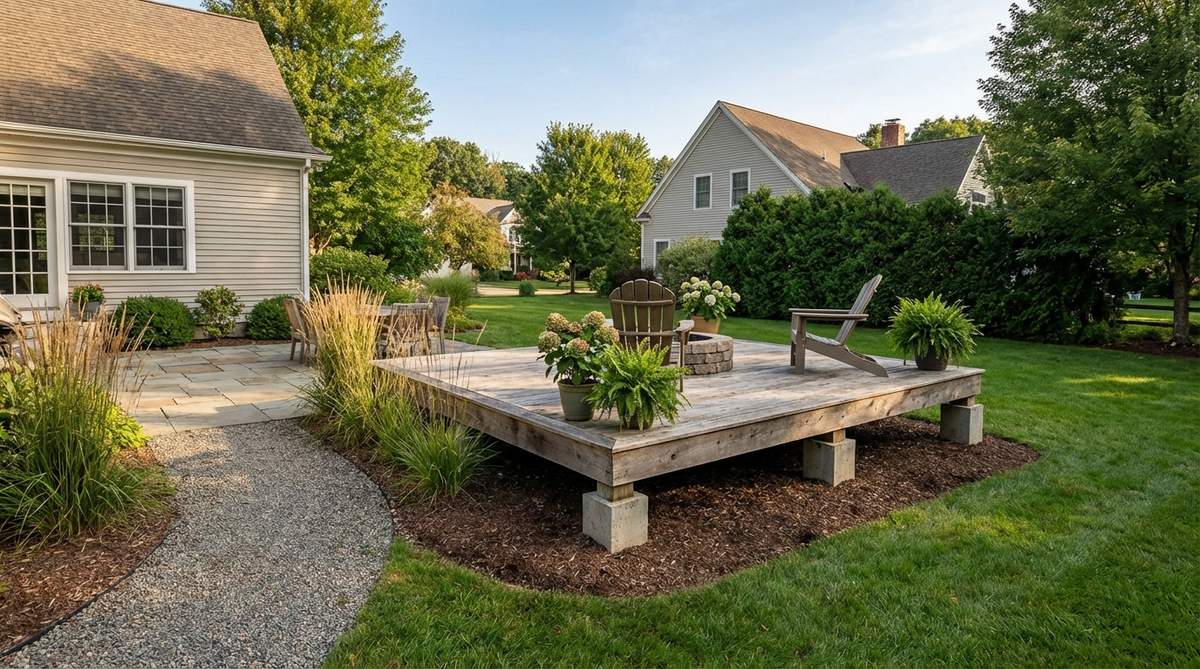
Create a freestanding deck platform set slightly away from the house walls to establish an independent lounging zone. The gap between structure and decking generates visual separation that defines the seating area without physical barriers.
Build the frame on concrete piers or adjustable pedestals to maintain the floating effect while ensuring stability. Leave 12 to 18 inches of clearance around all edges to emphasize the island concept.
This approach works best in gardens with existing patio areas, adding a distinct relaxation zone separate from dining spaces.
3. L-Shaped Wrap Around

Extend decking along two perpendicular walls to create connected but distinct zones for dining and lounging. The L-configuration naturally divides functions while maintaining visual continuity through consistent materials.
Allocate the longer section for dining with adequate table clearance, and dedicate the shorter leg to low seating or a reading nook. Position built-in benches along the outer edges to maximize usable floor area.
4. Narrow Side Access Strip
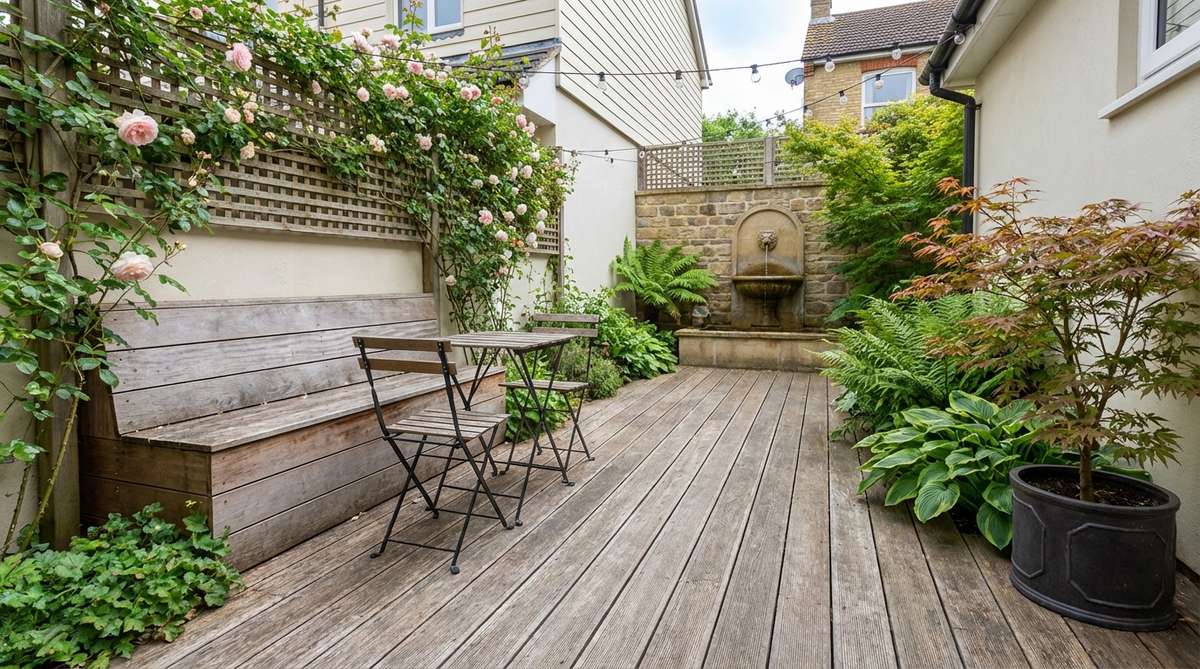
Transform neglected side passages into functional decking corridors that serve as intimate seating alcoves. These slim zones typically measure 4 to 6 feet wide, sufficient for a bench and small bistro table.
Install decking lengthwise to visually extend the space and draw the eye toward a focal point like a wall fountain or specimen plant. Use consistent lighting along the strip to enhance usability during evening hours.
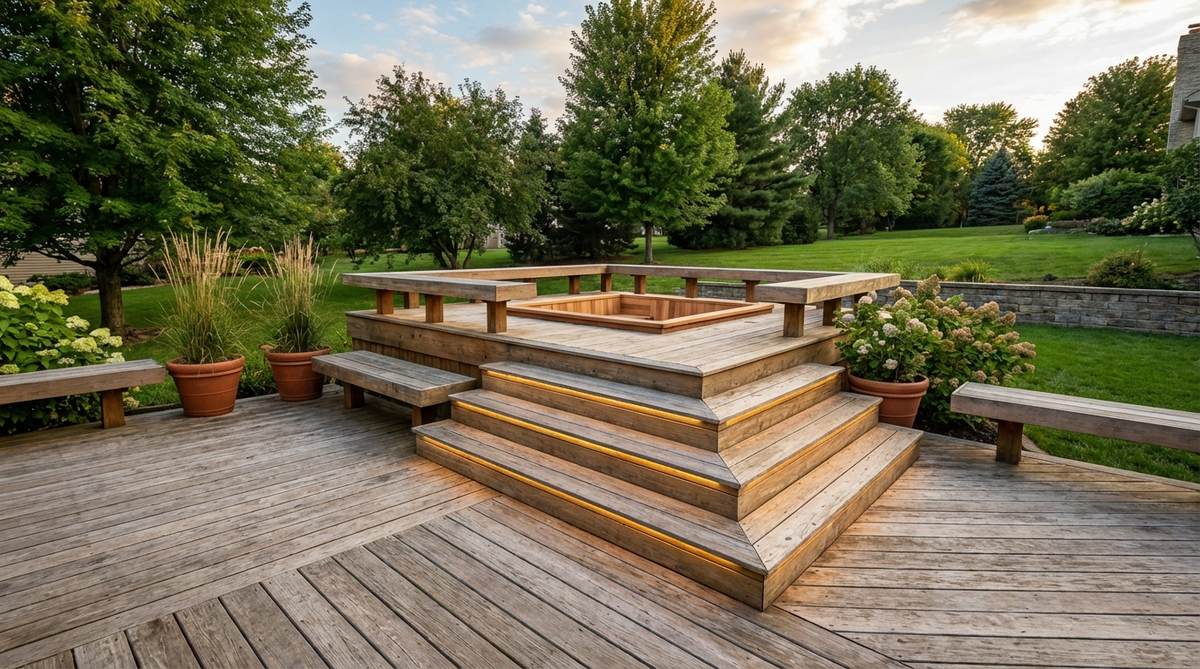
5. Modular Square Sections
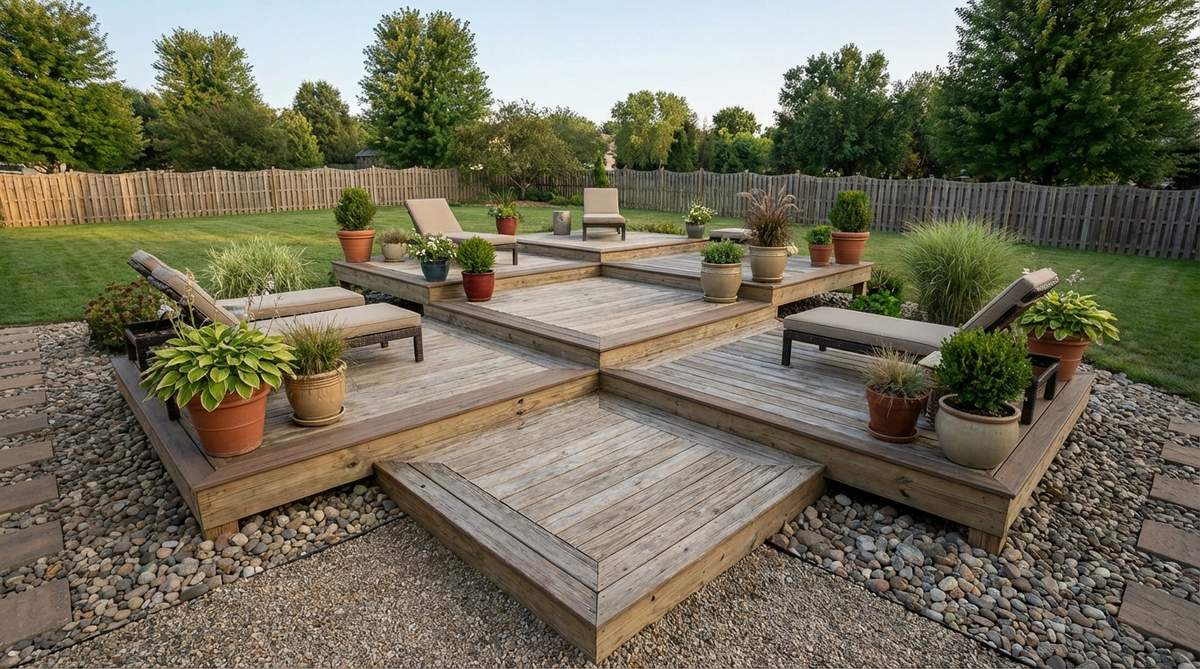
Arrange multiple square deck platforms in a stepped or staggered pattern to create distinct zones that feel connected yet separate. Each module typically measures 6×6 or 8×8 feet, providing enough space for a specific function.
Vary the height by 4 to 6 inches between sections to define boundaries without requiring railings or planters. Connect modules with single-step transitions that guide movement between zones naturally.
6. Curved Edge Softening
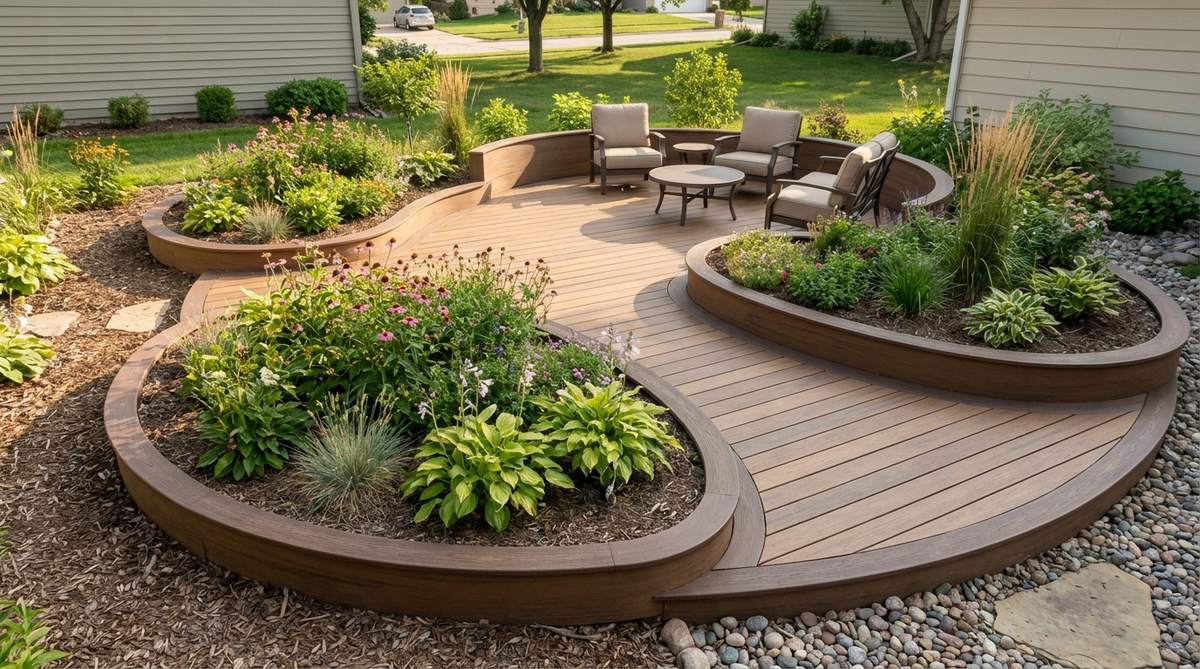
Replace traditional straight decking perimeters with gentle curves that follow natural garden contours and create organic seating zones. Curved edges soften the transition between hard landscaping and planting beds.
Frame curved sections with flexible composite trim boards that bend smoothly without kinking. The sinuous edge requires more complex joist framing but delivers visual interest that makes small spaces feel less boxy.
Built-In Solutions for Maximum Efficiency
Integrated features eliminate the need for standalone furniture, freeing up floor area while creating cohesive design elements that define seating zones clearly. Built-in solutions deliver dual functionality without visual clutter.
7. Perimeter Bench Seating
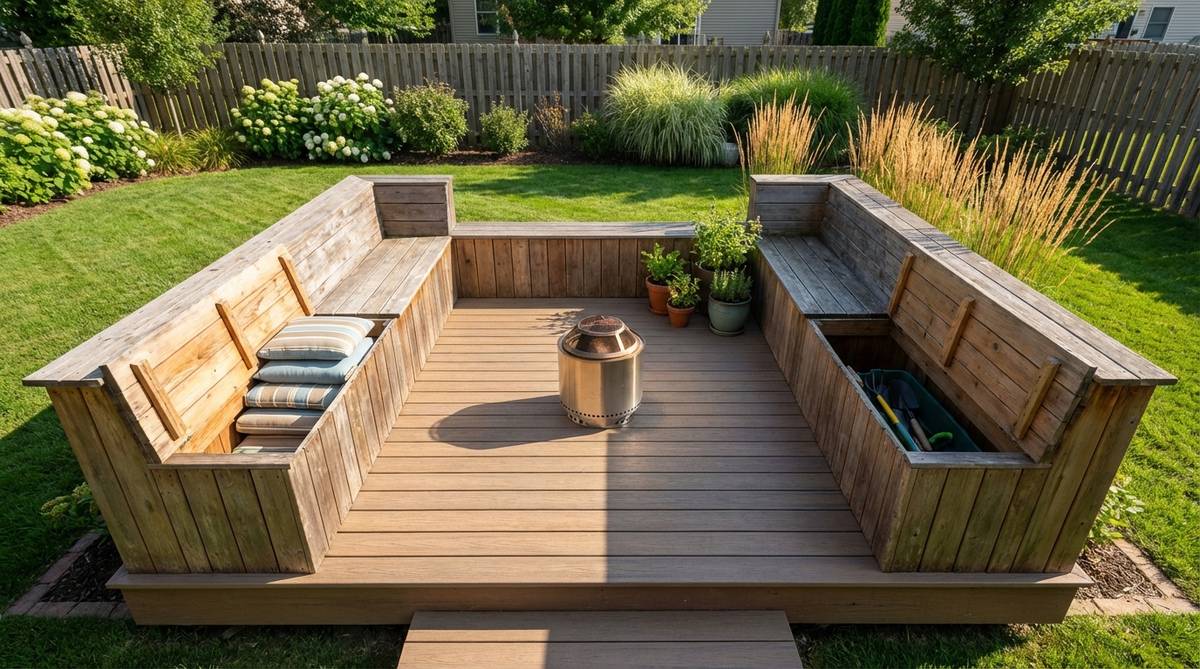
Install continuous benches along the deck edge to provide abundant seating without consuming central floor space. Benches built at 16 to 18 inches high double as casual seating and safety railings on raised decks.
Construct bench frames from the same joists that support the decking, tying the structure together for enhanced stability. Add hinged lids to convert bench tops into storage compartments for cushions and garden tools.
Perimeter seating keeps the deck center open for circulation or a central feature like a fire pit.
8. Corner Bench with Table
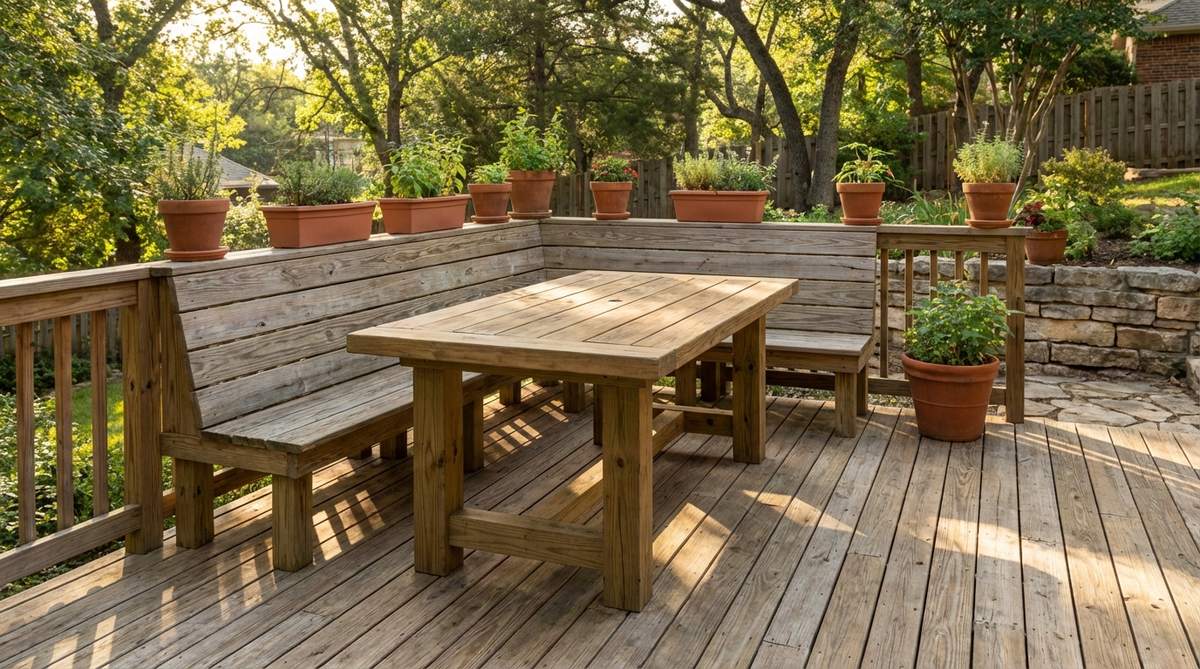
Build an L-shaped bench into one corner and position a fixed table in front to create a dedicated dining zone that seats four to six people. This configuration uses corner space efficiently while establishing a clear functional area.
Attach the benches to the deck frame and perimeter joists for stability, eliminating wobble that portable furniture often develops. Leave 24 inches between bench edge and table for comfortable entry and exit.
9. Stair-Integrated Seating
Widen stair treads to 12 to 14 inches and extend their length beyond standard dimensions to create casual perch spots between levels. These expanded steps function as informal seating during gatherings without requiring dedicated furniture.
Position stair seating near conversation areas or viewing points where guests naturally pause. The stepped arrangement provides varied seating heights that accommodate different preferences and activities.
10. Built-In Planter Dividers
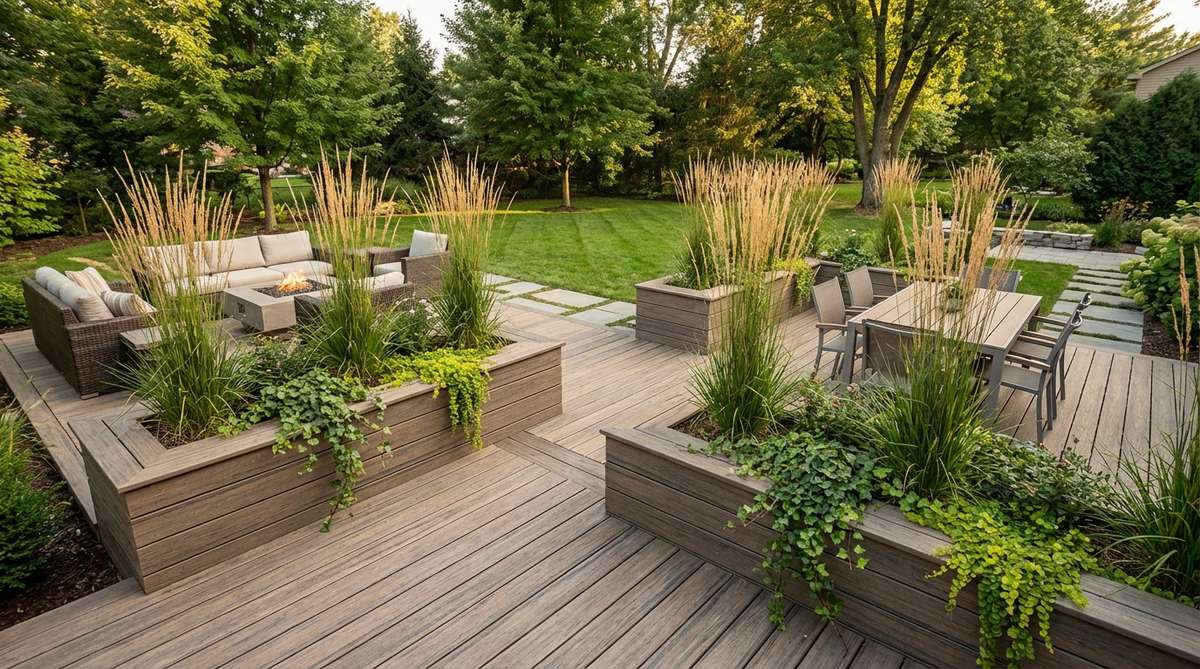
Construct raised planters between seating zones to create soft boundaries filled with ornamental grasses or trailing plants. Planter walls establish privacy and definition without the visual weight of solid screens.
Build planters 18 to 24 inches high using the same decking material for visual continuity, and line interiors with waterproof membranes. Fill with lightweight growing media to minimize structural load on the deck frame.
Strategic planting screens the dining area from lounging zones while maintaining airflow and partial sightlines.
11. Storage Bench Dual Purpose

Design benches with lift-up seats that reveal weatherproof storage for cushions, garden games, and outdoor textiles. Dual-purpose benches eliminate the need for separate storage sheds in compact gardens.
Install gas struts or safety hinges to hold lids open during access and prevent accidental closure. Drill drainage holes in the base to prevent water accumulation from rain or condensation.
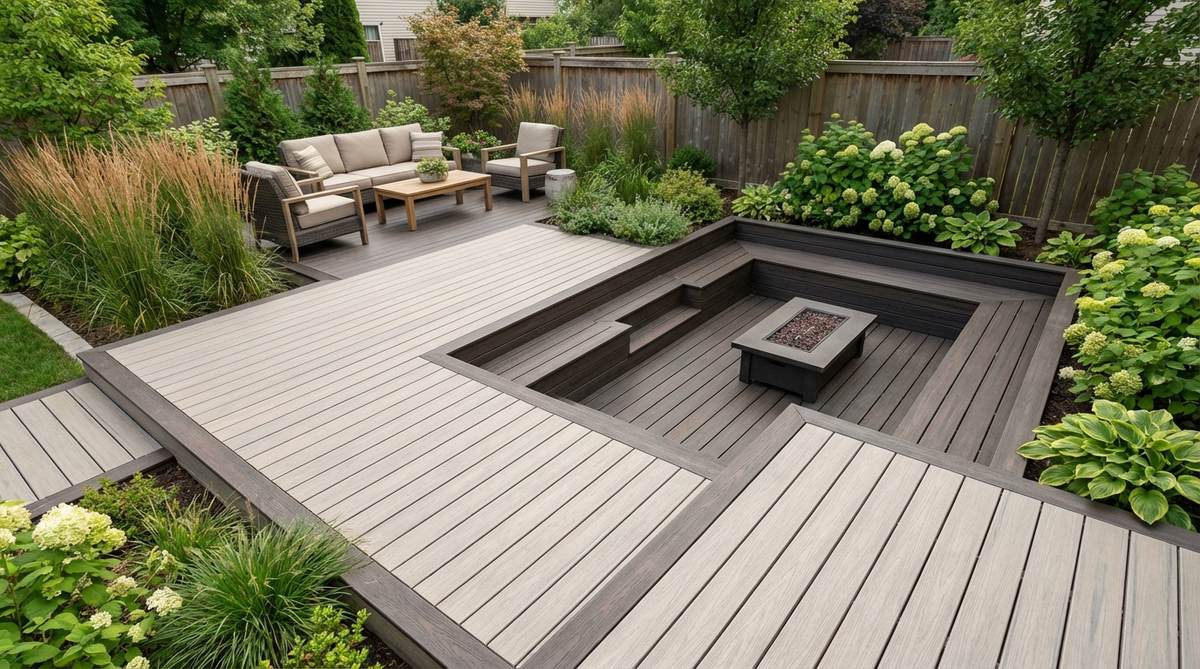
12. Sunken Seating Pit
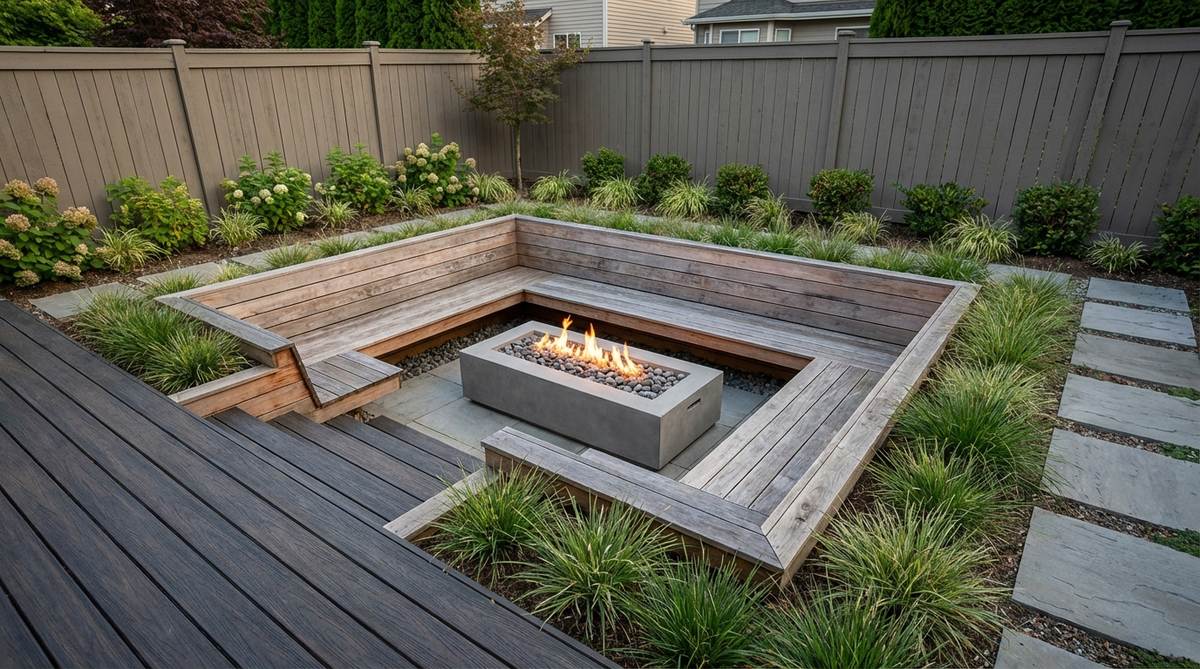
Lower one section of decking by 12 to 18 inches and surround it with built-in benches facing inward to create a conversation pit. This design naturally draws people together and defines the zone through elevation change.
Frame the sunken area with perimeter benches topped with weather-resistant cushions for comfort during extended gatherings. Position a central fire feature or low table to anchor the space and provide a focal point.
Sunken zones work best in larger gardens where the elevation drop enhances rather than restricts sightlines.
Multi-Level Designs for Natural Zoning
Elevated and lowered deck sections create automatic boundaries between functional areas without requiring furniture placement or screening. Height variations add architectural interest while accommodating sloped sites efficiently.
13. Two-Tier Dining and Lounging
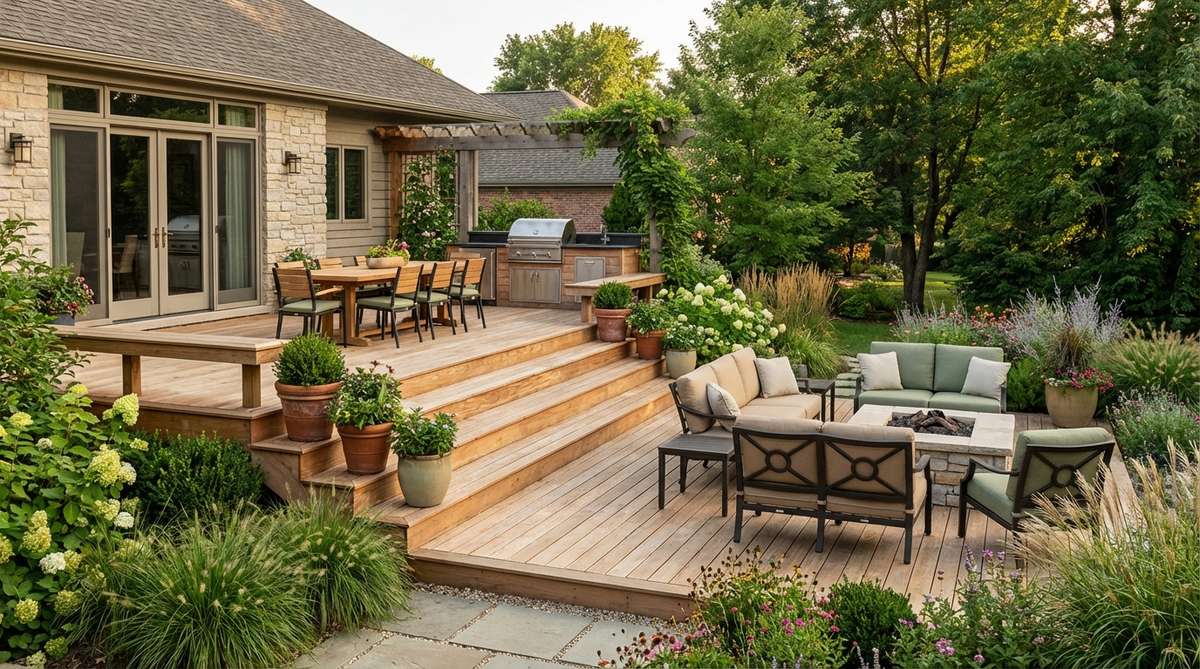
Position the dining area on the upper level adjacent to the house for convenient kitchen access, and place the lower lounging deck further into the garden. The 8 to 12-inch height difference naturally separates active dining from relaxed seating.
Connect levels with wide steps that double as casual seating or display areas for container plants. This configuration follows the natural flow from indoor to outdoor spaces while creating distinct activity zones.
14. Stepped Terraces for Slopes
Build multiple narrow deck platforms that follow the natural slope, creating terraced seating zones at different elevations. Each terrace accommodates a specific function like morning coffee, afternoon reading, or evening cocktails.
Limit each terrace to 6 to 8 feet deep to maintain manageable step heights of 6 to 8 inches between levels. Use consistent riser heights throughout to ensure safe navigation and establish visual rhythm.
Terraced decking transforms challenging slopes into desirable multi-zone outdoor rooms.
15. Raised Platform Focal Point
Elevate a central or corner section 12 to 18 inches above the main deck to create a highlighted zone for feature seating or a hot tub. The raised platform draws attention and establishes hierarchy among different areas.
Surround the elevated section with integrated benches or wide steps that provide auxiliary seating while serving as access points. Install perimeter lighting in risers to enhance visibility and create ambiance after dark.
16. Split-Level with Landing
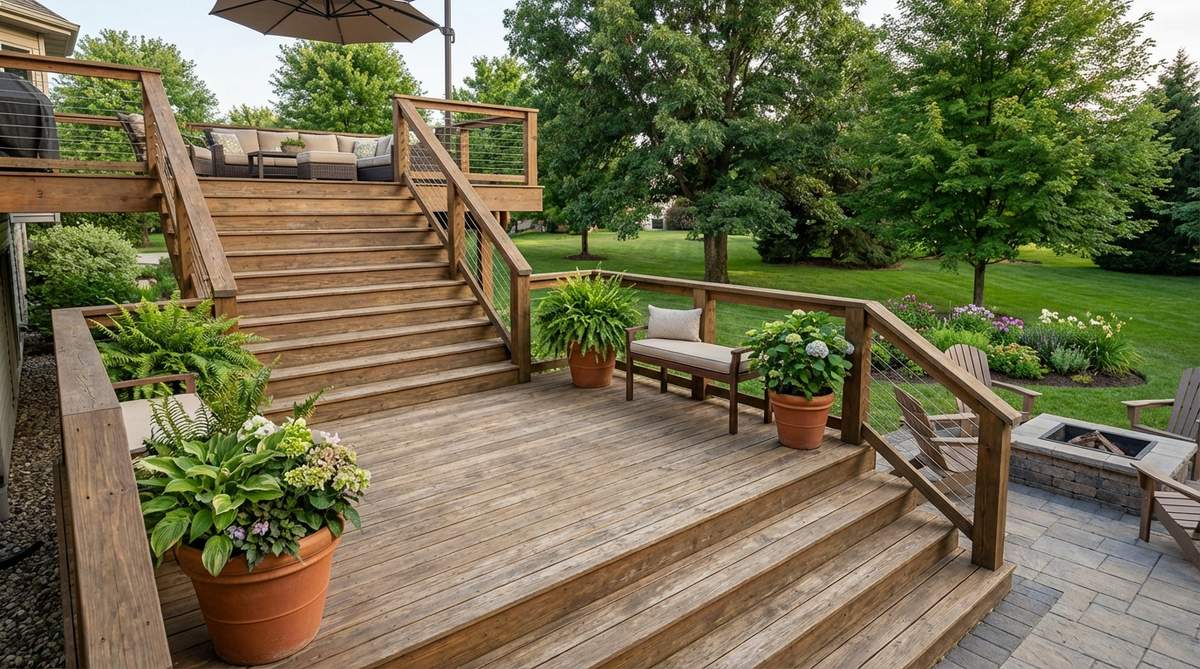
Insert a mid-level landing between upper and lower decks to create a transitional zone that functions as a reading nook or plant display area. The landing breaks up long stair runs while adding usable square footage.
Size the landing at minimum 4×4 feet to accommodate a small chair and side table comfortably. Position the landing where it captures favorable sun exposure or views that differ from adjacent levels.
17. Wraparound Tiered Perimeter
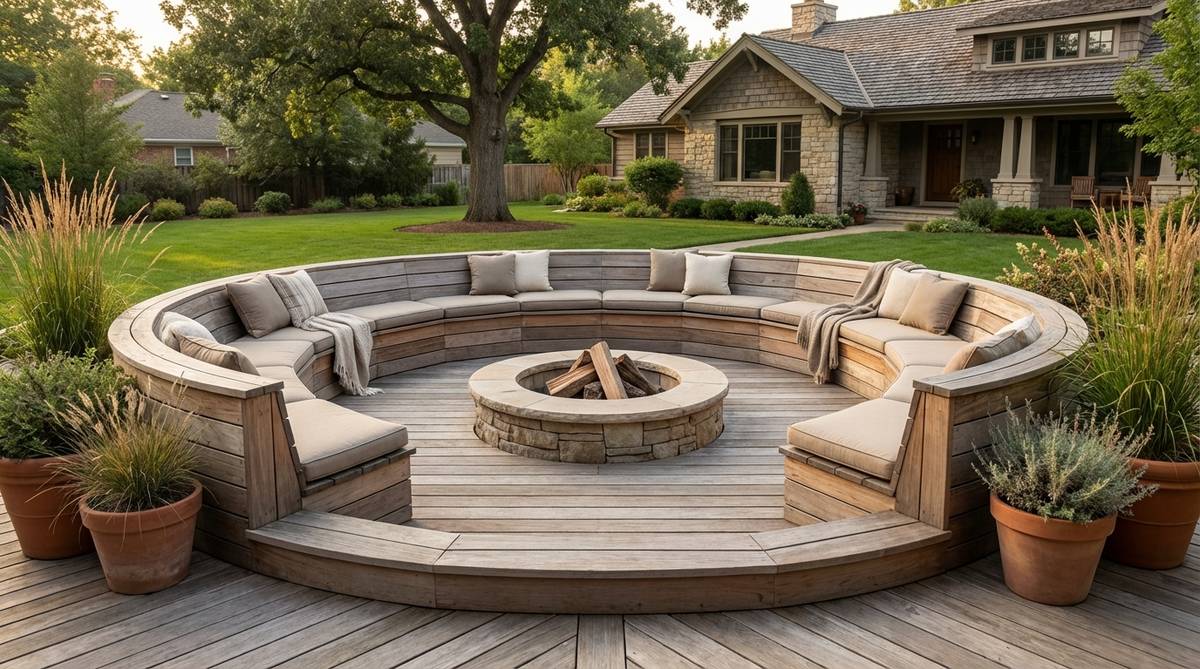
Create stadium-style seating by building concentric deck levels that step down toward a central focal point like a fire pit or water feature. Each tier provides continuous bench seating while maintaining clear views to the center.
Keep tiers relatively shallow at 18 to 24 inches deep to maximize capacity without excessive diameter. This amphitheater layout works exceptionally well for entertainment-focused gardens where group gatherings occur frequently.
Material and Pattern Strategies
Board arrangement patterns and material choices influence perceived space dimensions and define zones through visual texture changes. Strategic pattern placement guides the eye and establishes boundaries without physical structures.
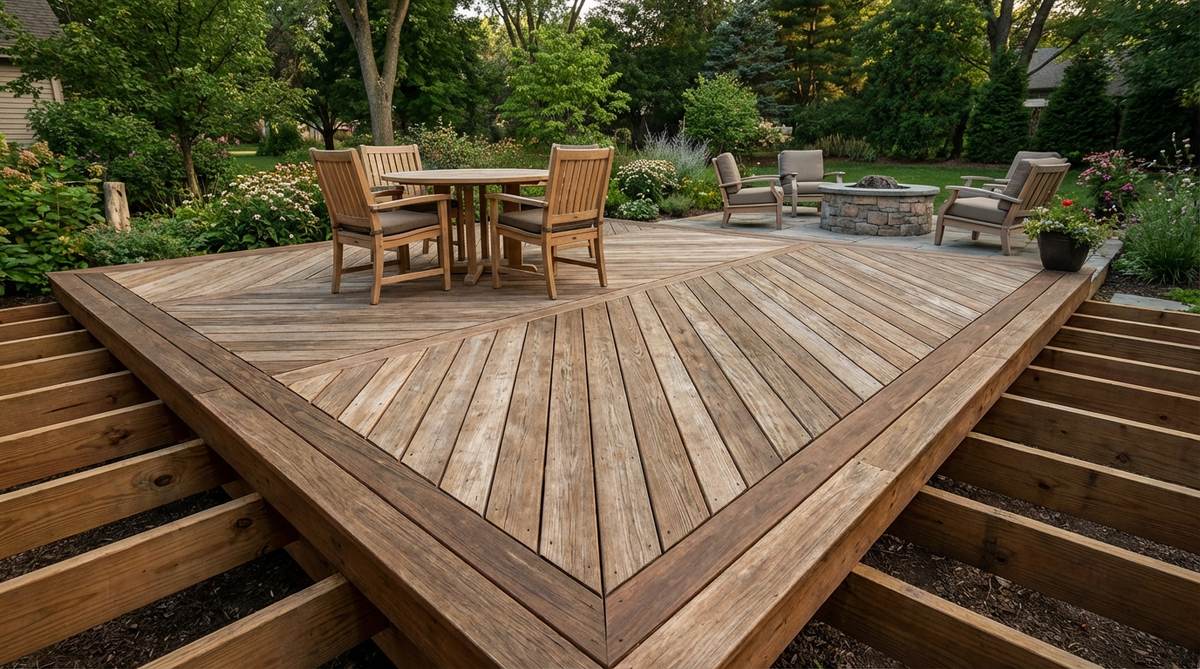
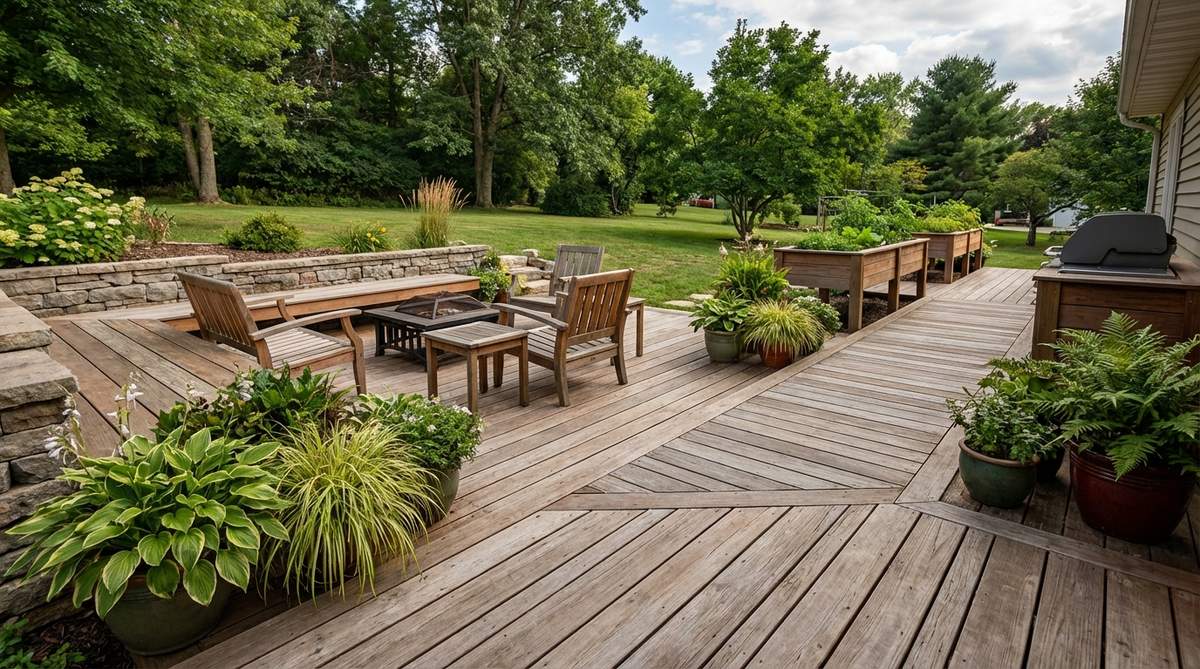
18. Diagonal Board Layout
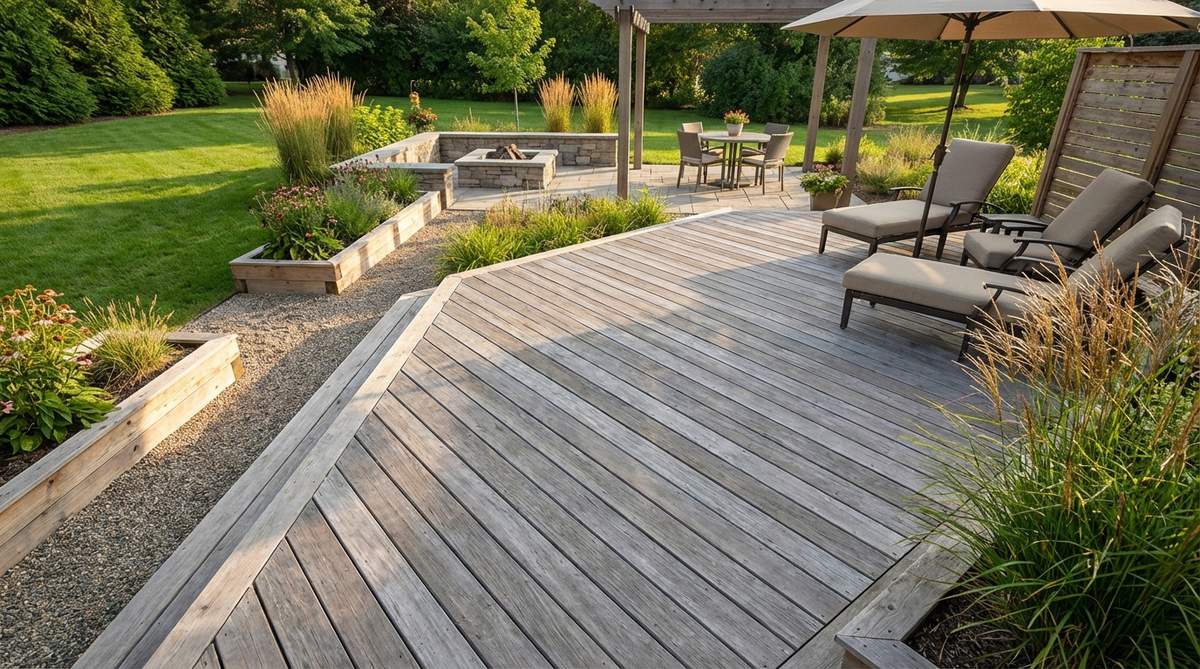
Install decking boards at 45-degree angles to the house to create dynamic visual movement that makes narrow spaces appear wider. Diagonal patterns draw attention away from tight dimensions while adding contemporary sophistication.
Double up joists where diagonal boards meet at perimeter edges to provide adequate nailing surface and prevent sagging. Calculate material waste at approximately 15 percent higher than standard perpendicular layouts.
The angular lines naturally separate distinct zones when different areas use opposing diagonal directions.
19. Herringbone Feature Zone
Create a herringbone pattern within a specific seating area to visually distinguish it from surrounding standard-laid decking. The intricate V-pattern immediately signals a special-use zone like outdoor dining or a lounge area.
Frame herringbone sections with picture-frame borders using contrasting board directions to emphasize the pattern change. Install additional blocking between joists to support the complex board angles and prevent movement.
20. Mixed-Width Planking
Combine different board widths within the same deck to create visual texture that defines zones through subtle pattern changes. Alternate between standard 5.5-inch boards and wider 7.25-inch planks to establish distinct areas.
Use wider boards in primary seating zones to convey stability and importance, and reserve narrower widths for circulation paths. The variation adds depth perception that makes small decks feel more expansive.
21. Contrasting Color Blocks
Install lighter composite decking in high-traffic circulation zones and darker tones in dedicated seating areas to create clear visual boundaries. The color shift naturally guides movement patterns while defining functional spaces.
Choose colors within the same product line to ensure consistent texture and wear characteristics across different zones. Border color transitions with trim boards or inset accent strips to create intentional rather than arbitrary changes.
22. Picture Frame Borders
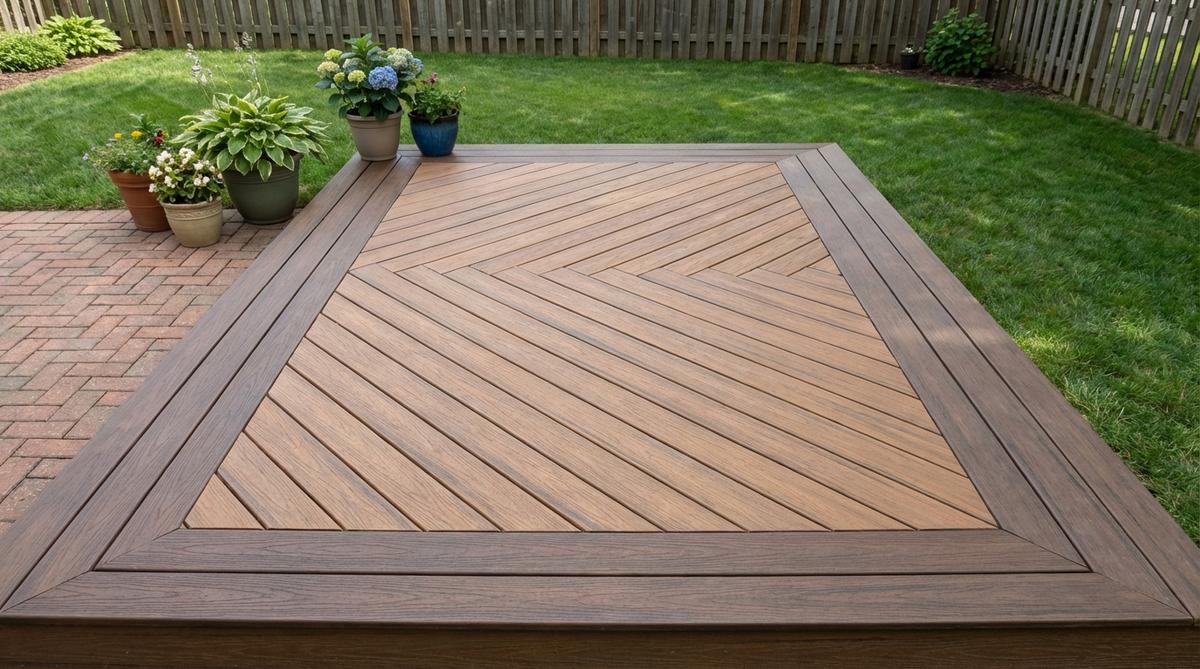
Surround the perimeter with boards running perpendicular to the main field direction to create a framing effect that defines the deck edge. Picture frames polish the appearance while naturally establishing the seating zone boundary.
Extend the frame inward by 8 to 12 inches around the entire perimeter to create visual weight that anchors the design. The border technique works particularly well when the main field uses diagonal or herringbone patterns.
23. Chevron Pattern Centerpiece
Install a chevron pattern in the deck center to create a visual anchor that naturally becomes the seating focal point. The V-shaped configuration generates movement and energy that draws people to the central zone.
Align the chevron point toward the best garden view or architectural feature to create intentional sightlines. This pattern requires precise cutting and substantial additional framing but delivers dramatic impact in small spaces.
Vertical Elements to Expand Space
Overhead structures and wall-mounted features add height dimension that expands perceived space without consuming precious floor area. Vertical elements define seating zones through shadow patterns and visual containment.
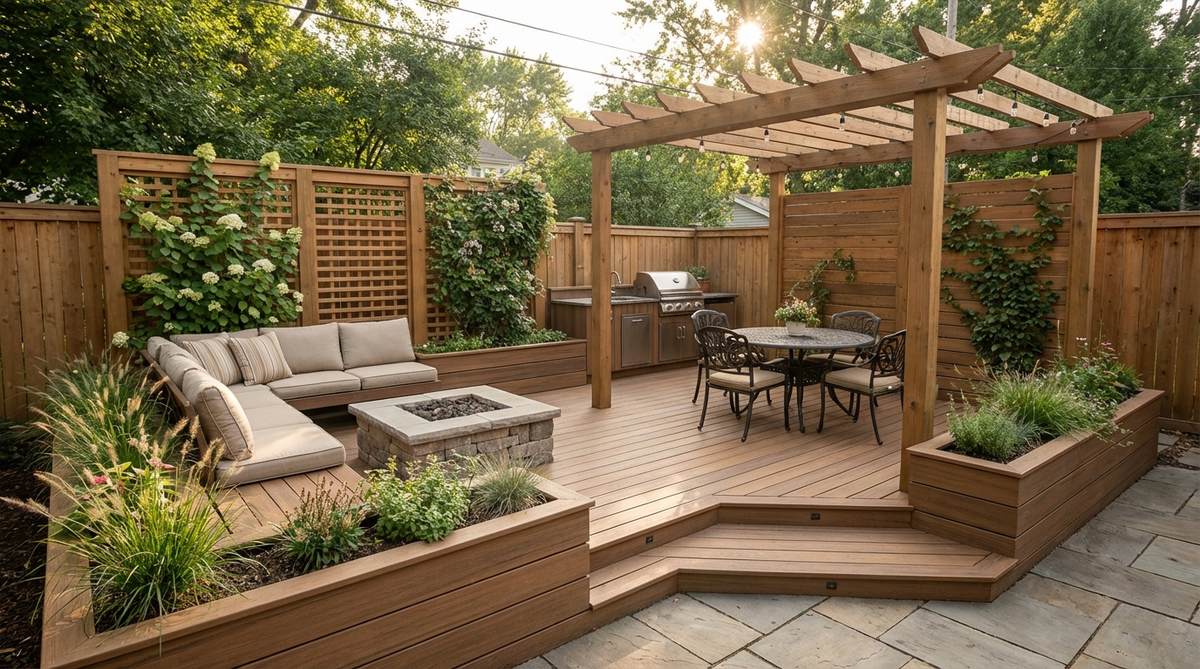
24. Corner Pergola Canopy

Install a pergola over one deck corner to create a shaded seating zone that feels enclosed yet airy. The overhead beams establish a room-like boundary without solid walls that would restrict views or airflow.
Position posts at the deck perimeter rather than interior locations to keep floor space completely open. Train climbing vines like clematis or wisteria over the pergola to add seasonal shade and vertical greenery.
Corner pergolas transform undefined deck areas into destination seating spots that provide shelter from afternoon sun.
25. Trellis Privacy Wall
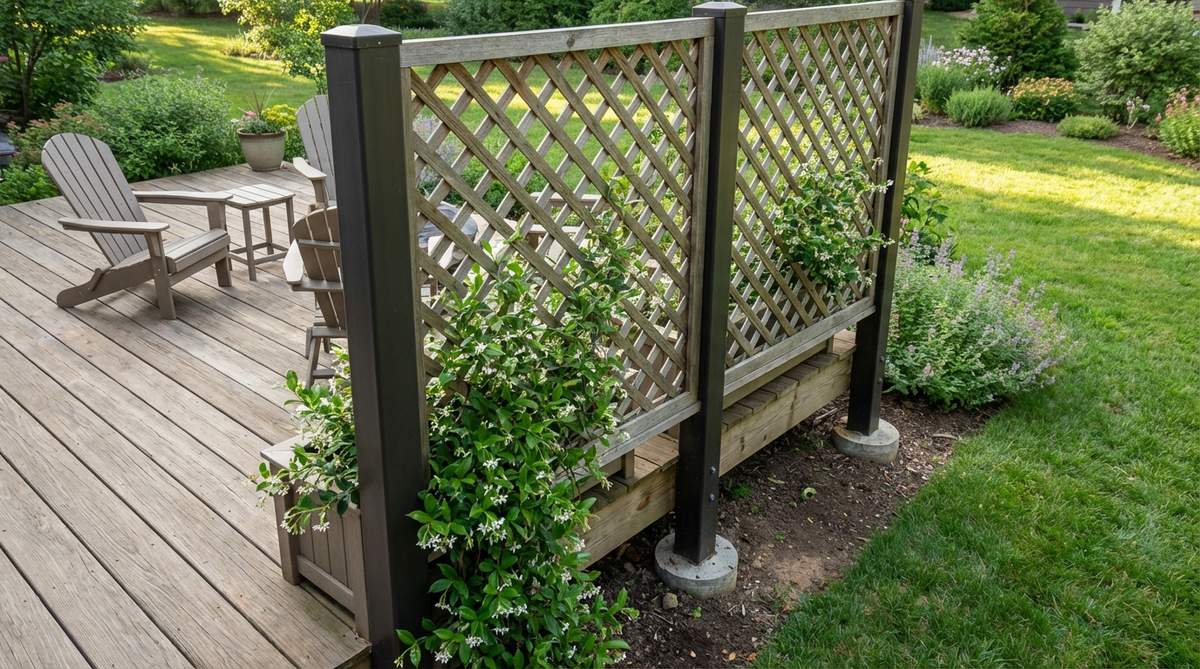
Mount vertical trellis panels along one side of the deck to screen the seating zone from neighboring views while maintaining light penetration. Open lattice patterns provide privacy without creating dark, enclosed feelings.
Anchor trellis panels to sturdy posts set in concrete footings for wind resistance and long-term stability. Plant fast-growing climbers like jasmine or honeysuckle at the base to create living privacy screens.
26. Wall-Mounted Planters
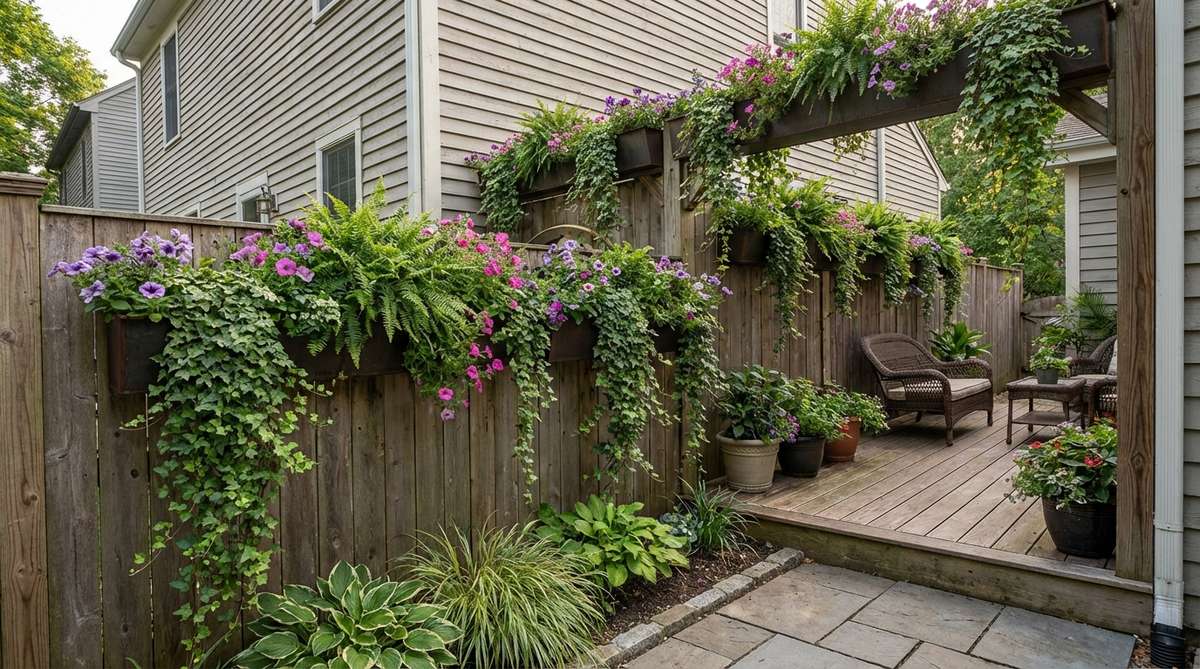
Attach planter boxes to adjacent building walls or fence panels to introduce greenery at eye level without using deck floor space. Vertical planting creates a garden atmosphere that softens hard surfaces and defines seating zones.
Select lightweight planters with built-in irrigation reservoirs to simplify watering and reduce maintenance. Fill with trailing plants like ivy or petunias that cascade downward to create vertical interest.
Wall planters work exceptionally well in side passages and narrow decks where floor space is severely limited.
27. Retractable Shade Canopy
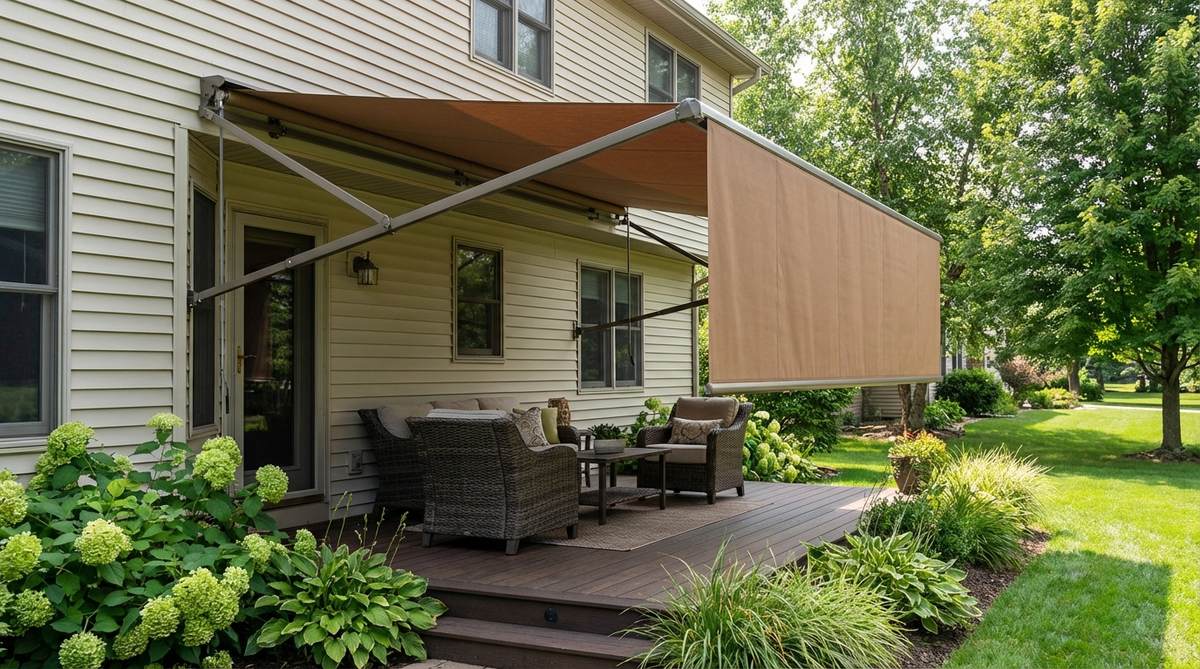
Install a retractable awning over the primary seating zone to provide adjustable shade and weather protection. Extendable canopies define the seating area when deployed while disappearing when full sun exposure is desired.
Mount the awning to the house wall above the deck or to freestanding posts at the deck perimeter. Choose water-resistant fabrics in colors that complement the decking material to maintain design continuity.
28. String Light Ceiling
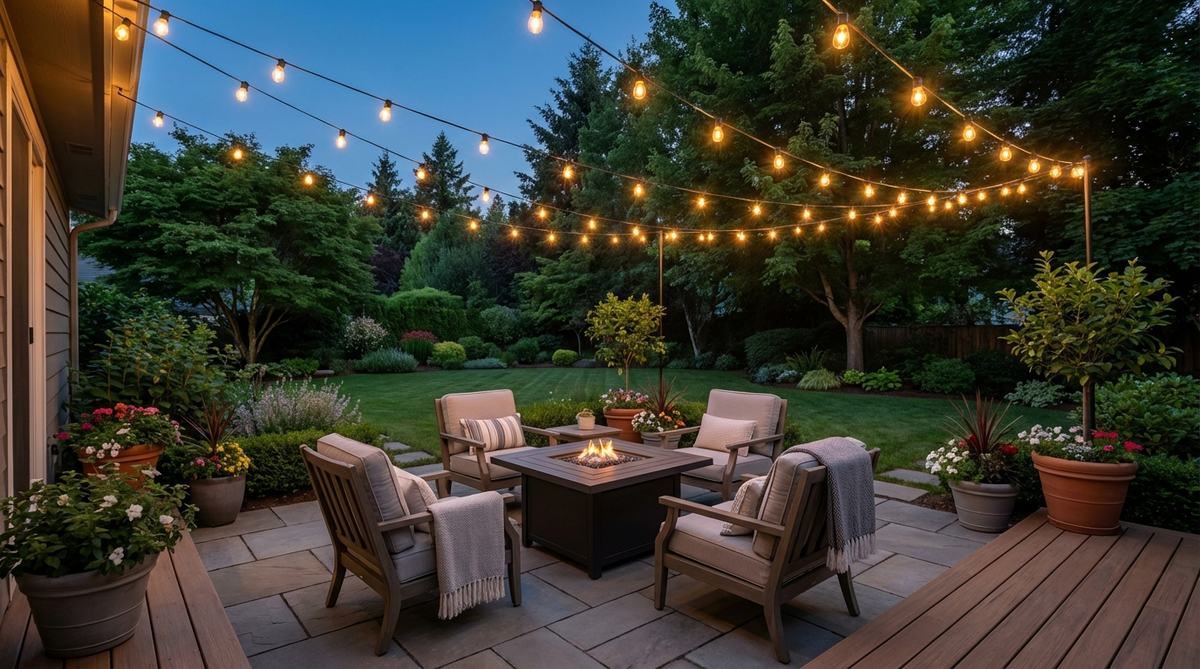
Suspend string lights in a grid pattern above the seating zone to create an illuminated ceiling that defines the space after dark. The light canopy establishes boundaries while providing functional illumination for evening gatherings.
Attach lights to surrounding structures or install dedicated support posts at the deck perimeter to create anchor points. Use LED bulbs to minimize energy consumption and reduce heat generation during summer months.
29. Vertical Garden Wall
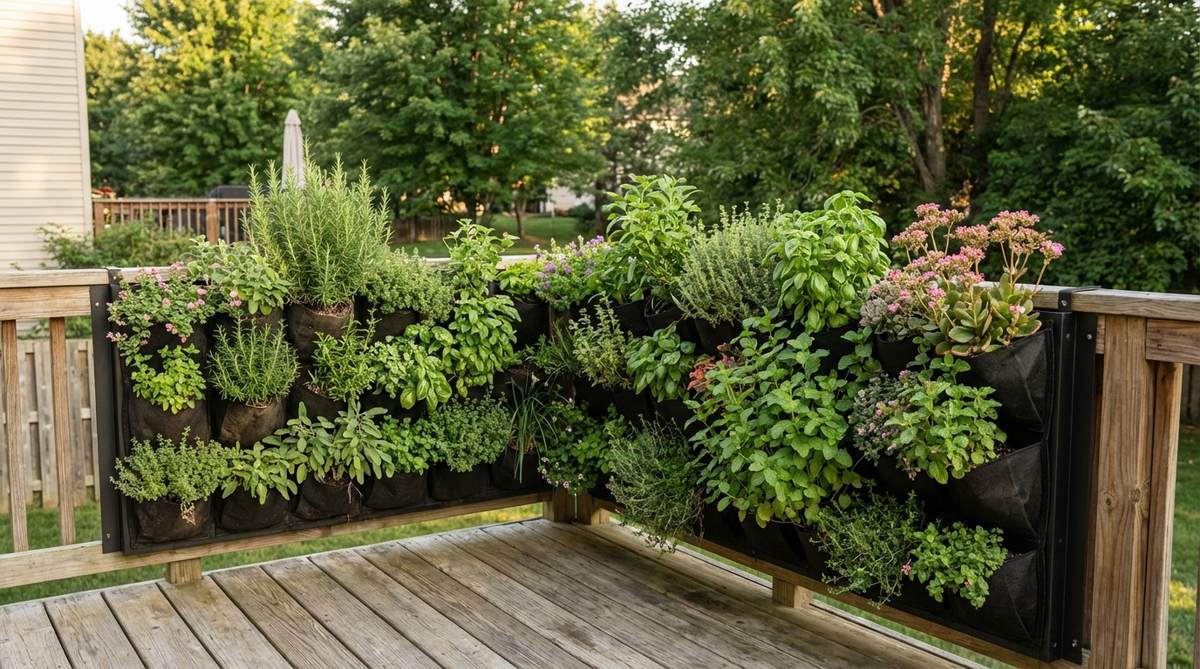
Install a modular vertical garden system on one edge of the deck to create a living wall that screens views and absorbs sound. Pocket planters mounted to a backing frame support herbs, succulents, or ornamental plants in dense vertical arrangements.
Choose self-contained systems with integrated irrigation to simplify maintenance and ensure consistent plant health. Position the garden wall where it receives appropriate sun exposure for the selected plant species.
Furniture and Finishing Touches
Strategic furniture selection and placement enhance defined seating zones through scale, function, and visual weight. Finishing elements reinforce boundaries and add comfort without cluttering limited space.
30. Transparent Furniture Selection
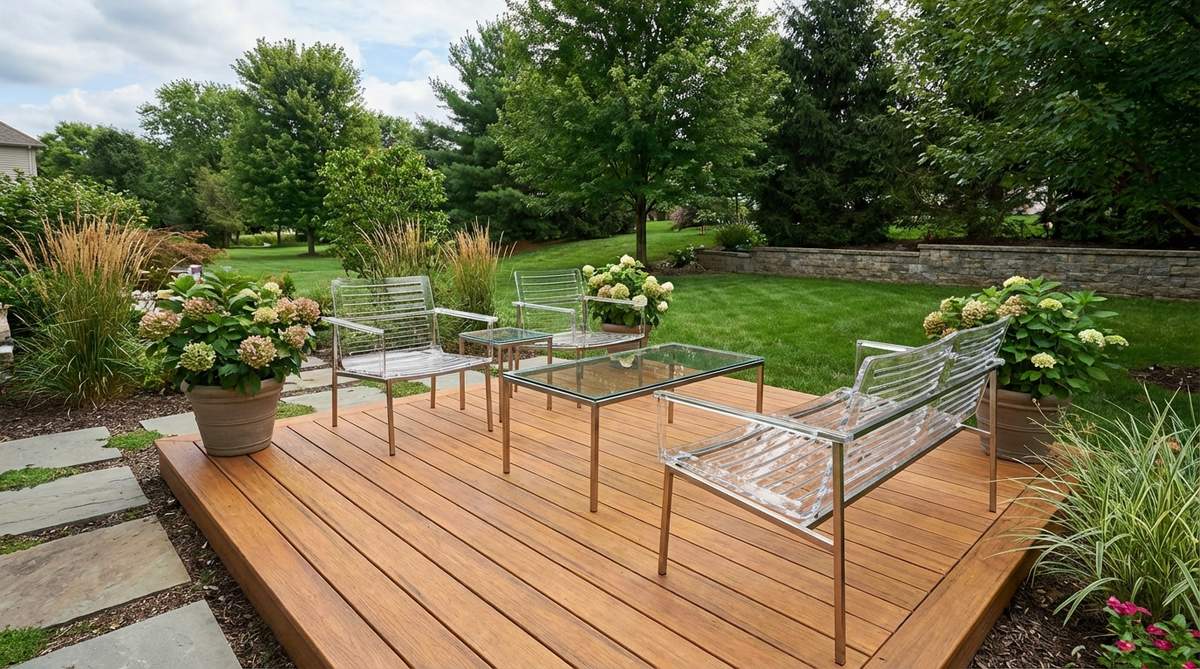
Choose chairs and tables with slatted designs or glass tops that allow visual flow through and beneath furniture pieces. Transparent elements reduce visual bulk and help small decks feel less crowded.
Select furniture with slim profiles and elevated legs that reveal decking underneath to maintain continuity. Avoid bulky solid furniture that creates visual barriers and makes spaces feel cramped.
31. Folding Bistro Set
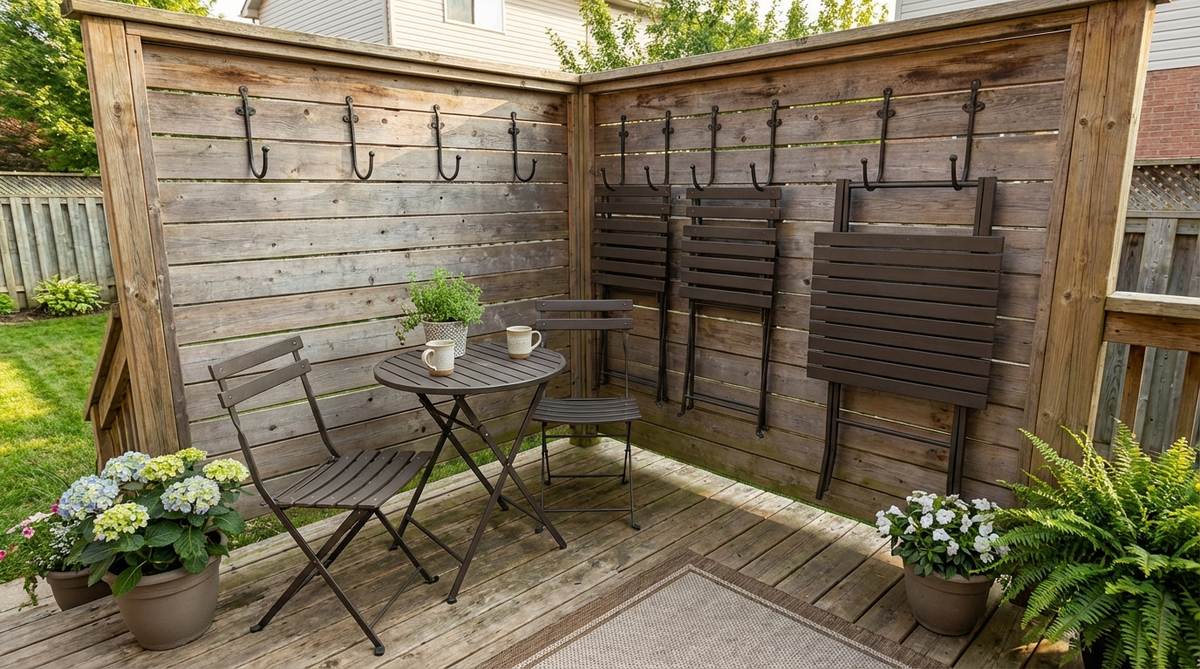
Install a compact folding table and chairs in a corner zone to create flexible dining space that collapses when not in use. Bistro sets occupy minimal square footage while providing functional seating for two.
Mount wall hooks nearby to hang folded furniture vertically, completely clearing the deck for other activities. This approach suits decks that serve multiple functions throughout the day.
32. Outdoor Rug Definition
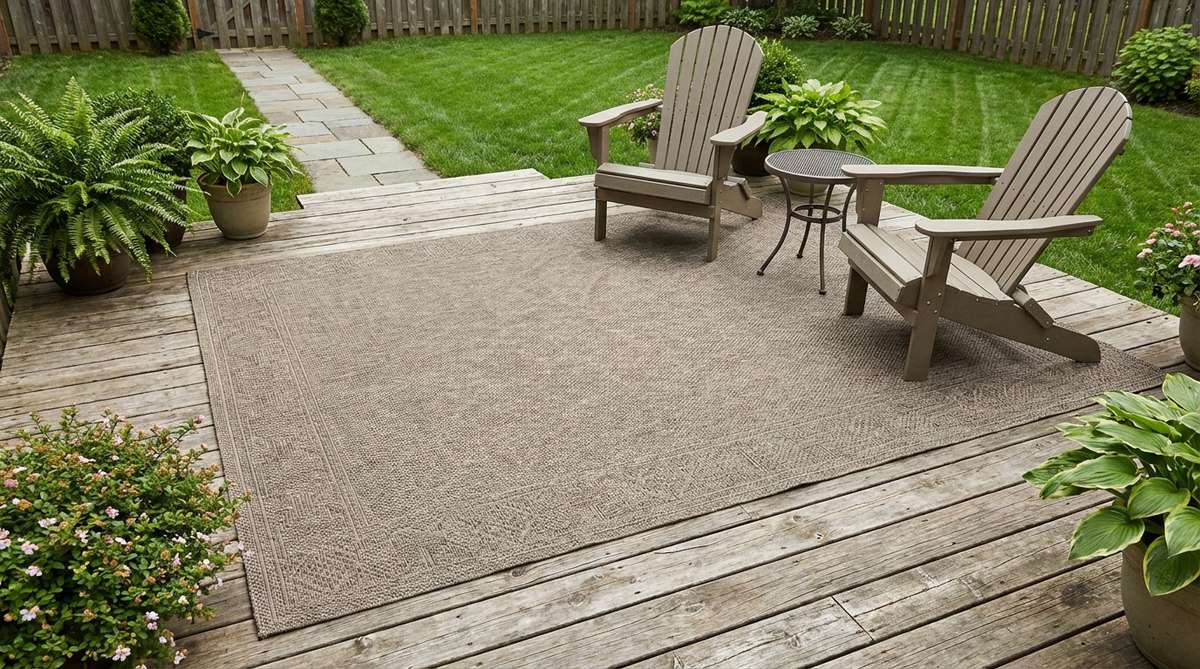
Place a weather-resistant outdoor rug beneath the seating zone to create visual boundaries and add texture that softens the hard decking surface. Rugs instantly define areas while introducing color and pattern.
Choose rugs sized to extend 12 to 18 inches beyond furniture perimeters to ensure pieces sit completely on the textile surface. Secure corners with double-sided outdoor tape to prevent shifting and tripping hazards.
33. Riser Lighting Installation

Mount low-voltage LED lights in step risers between deck levels to illuminate zone transitions while creating ambient evening atmosphere. Recessed lighting enhances safety without cluttering horizontal surfaces.
Space lights at 3 to 4-foot intervals along each riser for even illumination that guides movement between zones. Select warm white color temperatures around 2700K to create inviting rather than harsh lighting.
34. Fire Feature Focal Point
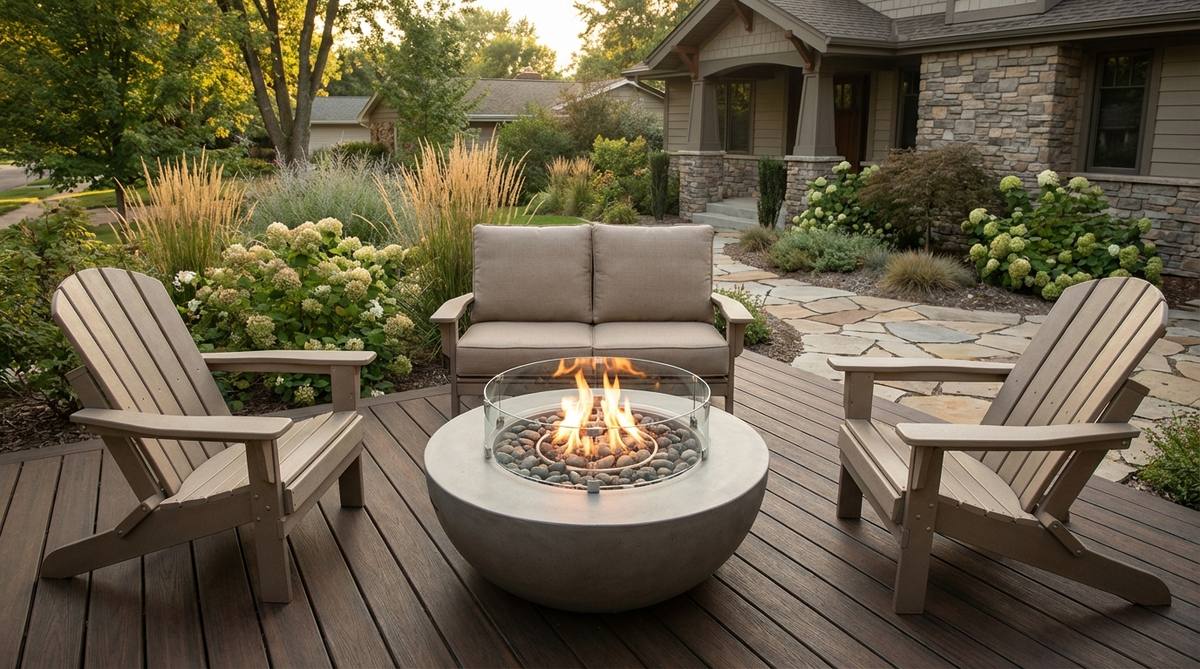
Position a propane fire pit or tabletop fire bowl in the primary seating zone to create a natural gathering point that anchors the space. Fire features define areas through light and warmth while extending usability into cooler months.
Maintain minimum clearances of 3 feet between fire features and combustible surfaces including furniture and plantings. Choose portable units that allow seasonal repositioning based on sun patterns and prevailing winds.
Bringing Your Seating Zones to Life
Effective small garden decking ideas combine strategic layouts, integrated features, and vertical elements to create distinct seating zones that maximize function and style within limited square footage. Start by selecting one or two primary concepts that address your specific space constraints and functional priorities, then layer additional elements gradually as the design evolves. Measure carefully, plan thoroughly, and focus on quality materials that deliver durability alongside aesthetic appeal for outdoor living spaces that serve your household for years to come.
Frequently Asked Questions
What is the minimum deck size needed to create separate seating zones?
A deck measuring at least 10×12 feet can accommodate two distinct zones with one dedicated to dining and another to lounging. Smaller decks of 8×10 feet can still establish single defined seating areas with built-in benches and compact furniture. Multi-level designs create effective zoning in spaces as small as 8×8 feet by using elevation changes rather than square footage to separate functions.
How do built-in benches save space compared to portable furniture?
Built-in benches eliminate the clearance space required behind and beside freestanding furniture, typically saving 18 to 24 inches per side. A perimeter bench seating six people occupies only the 16-inch depth of the bench itself, whereas six individual chairs require approximately 36 inches including access space. Integrated seating also eliminates furniture legs that create visual clutter and obstacles in compact areas.
What deck material works best for small gardens?
Light-colored composite decking in shades of gray or tan reflects more light and makes small spaces feel larger than dark wood tones. Composite materials require less maintenance than natural wood, keeping narrow decks accessible without frequent staining or sealing equipment. Choose boards with minimal texture variation to create visual continuity that helps small decks appear more expansive.
How much height difference should exist between deck levels?
Effective level changes range from 6 to 12 inches, providing clear zone definition without requiring handrails or creating accessibility barriers. Single steps of 7 to 8 inches work best for casual transitions between spaces, while 10 to 12-inch drops create more pronounced separation for distinct functional areas. Maintain consistent riser heights throughout multi-level designs to ensure safe navigation.
Can decking patterns really make small spaces feel larger?
Diagonal board layouts create visual movement that draws attention away from constrained dimensions and makes narrow decks appear wider. Picture-frame borders define edges clearly, creating the psychological impression of intentional space rather than leftover area. Contrasting patterns between zones add depth perception that generates the illusion of larger square footage through visual complexity.