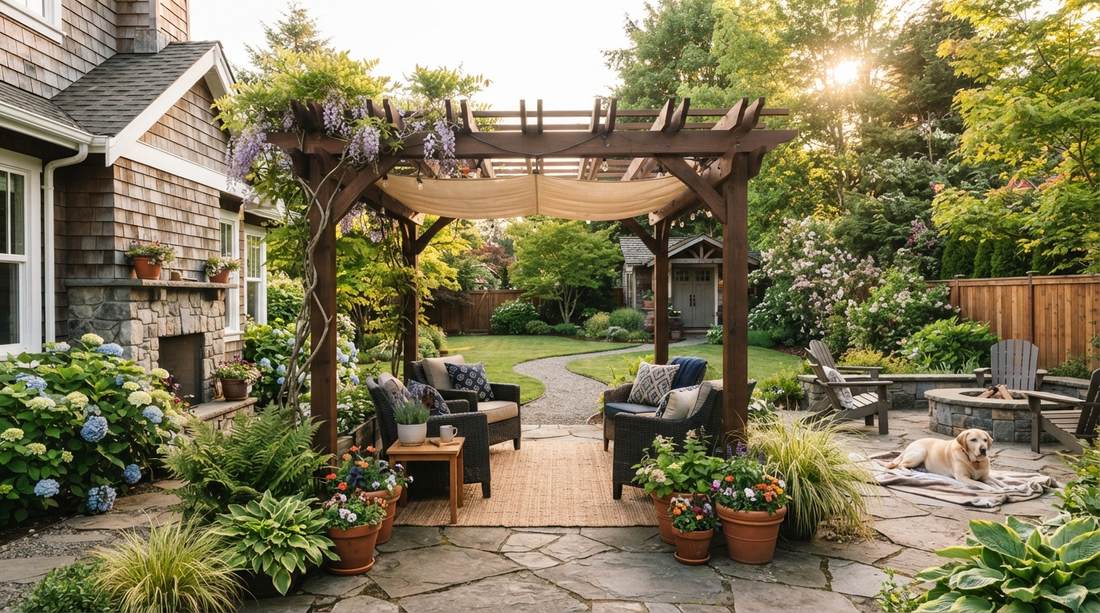
A small garden pergola instantly elevates cramped patios into high-end architectural retreats. This smart DIY upgrade maximizes vertical space and delivers premium, customizable shade control. Strategic positioning with structural hardware creates functional luxury without sacrificing ground clearance.
Design Snapshot Key Principles
- Scale Appropriately: Choose pergola dimensions between 6×6 and 10×10 feet for tight spaces to maintain proportion without overwhelming the area
- Maximize Vertical Space: Use climbing plants, hanging containers, and vertical trellis elements to create lushness without consuming ground space
- Consider Attachment Points: Attached pergolas save space by anchoring to existing structures, reducing post count and freeing up floor area
- Layer Shade Solutions: Combine structural elements with retractable canopies, fabric panels, or louvers for flexible light control throughout the day
Space-Saving Structural Designs
These structural approaches optimize footprint efficiency while maintaining premium functionality. Each design addresses specific spatial constraints common in compact outdoor real estate.
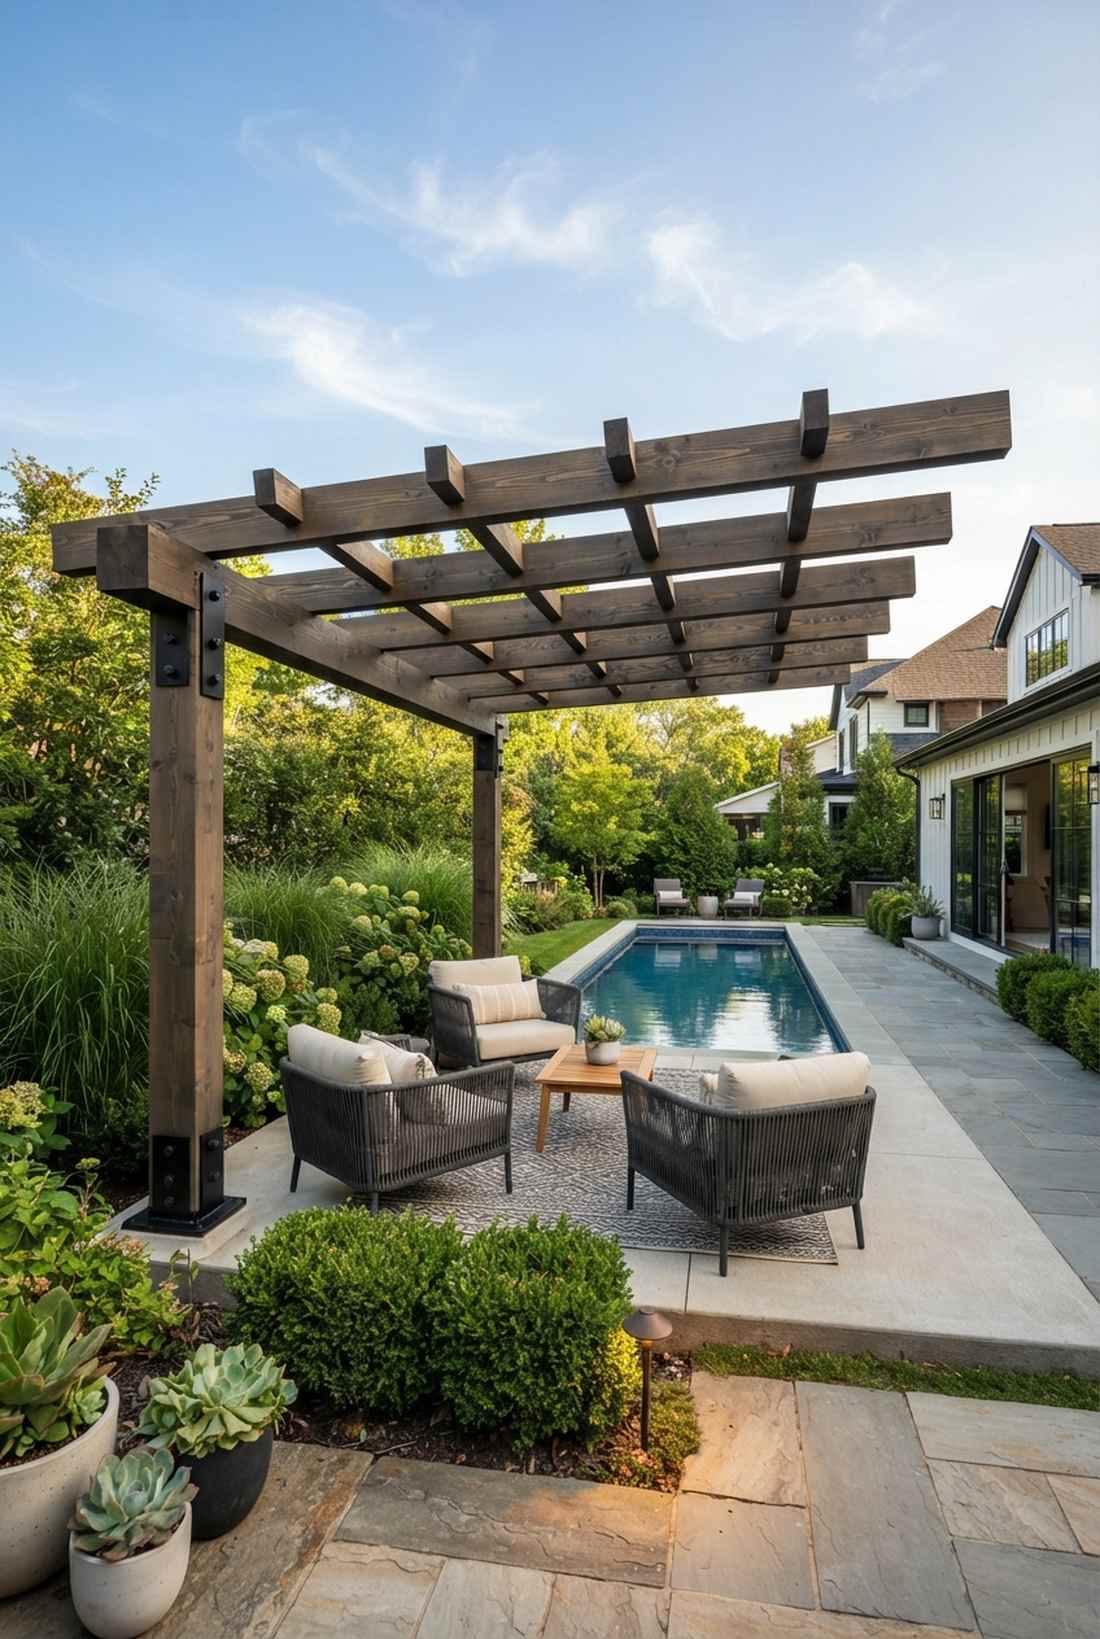
1. Three-Post Corner Pergola
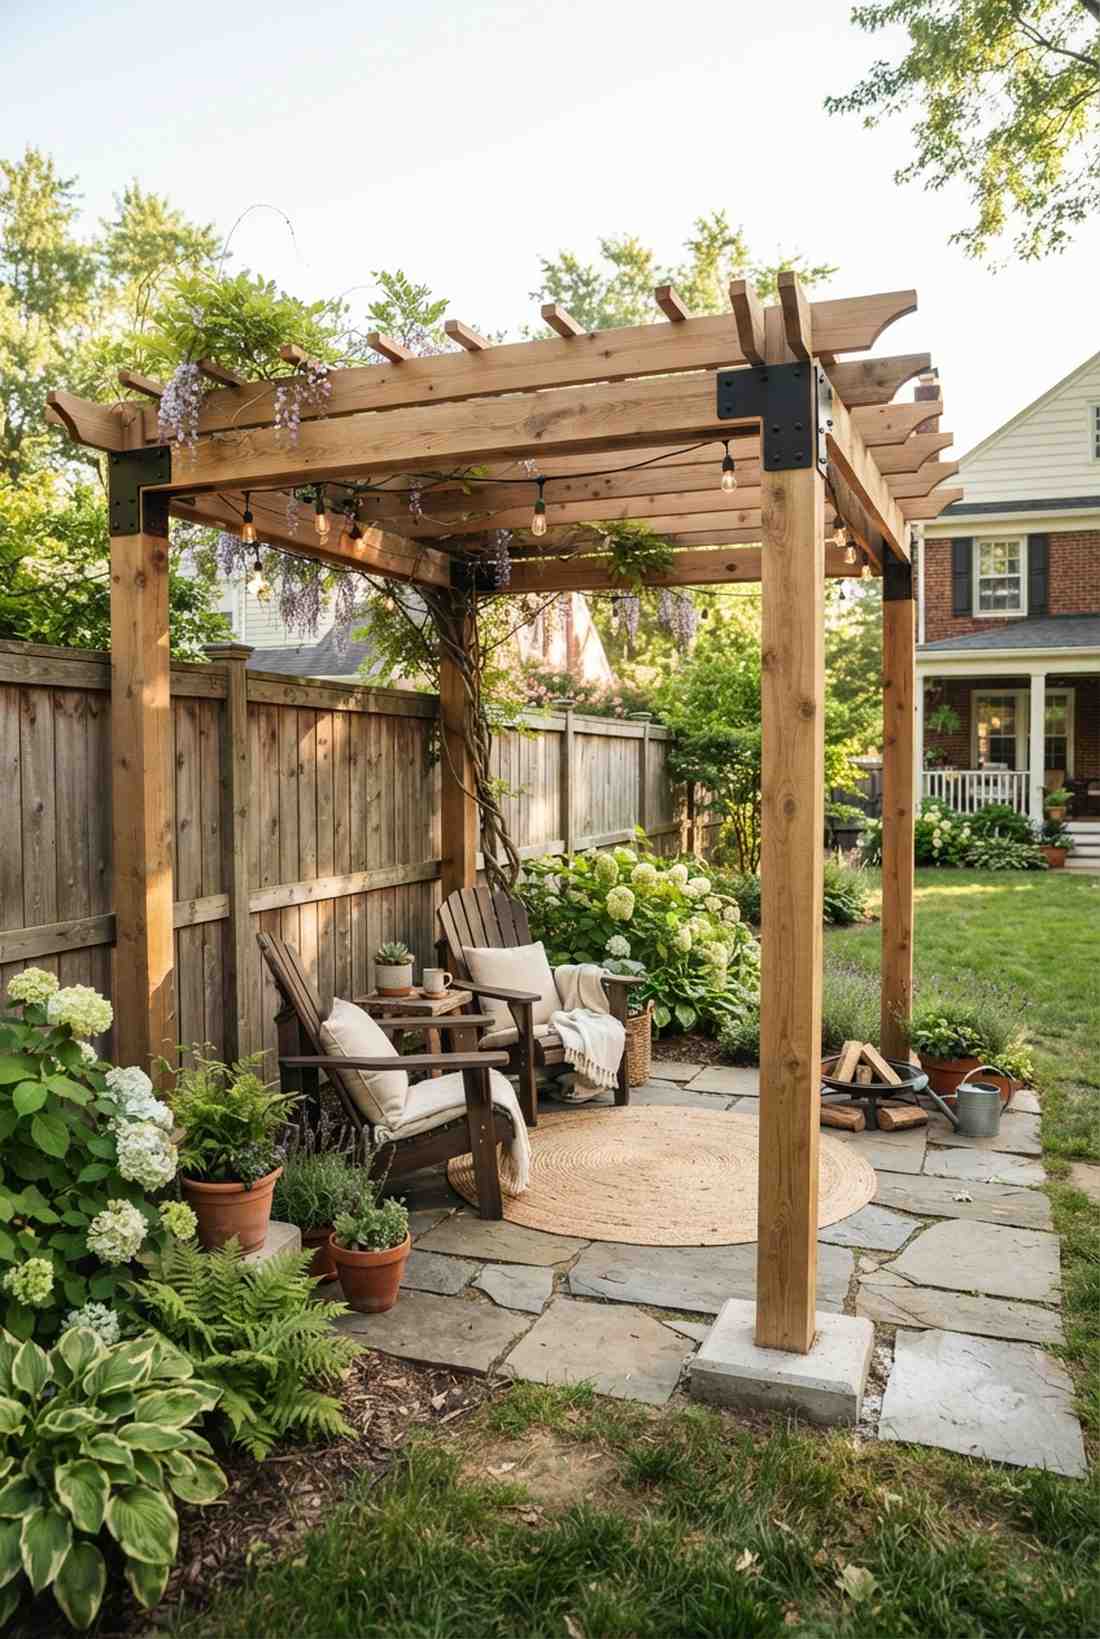
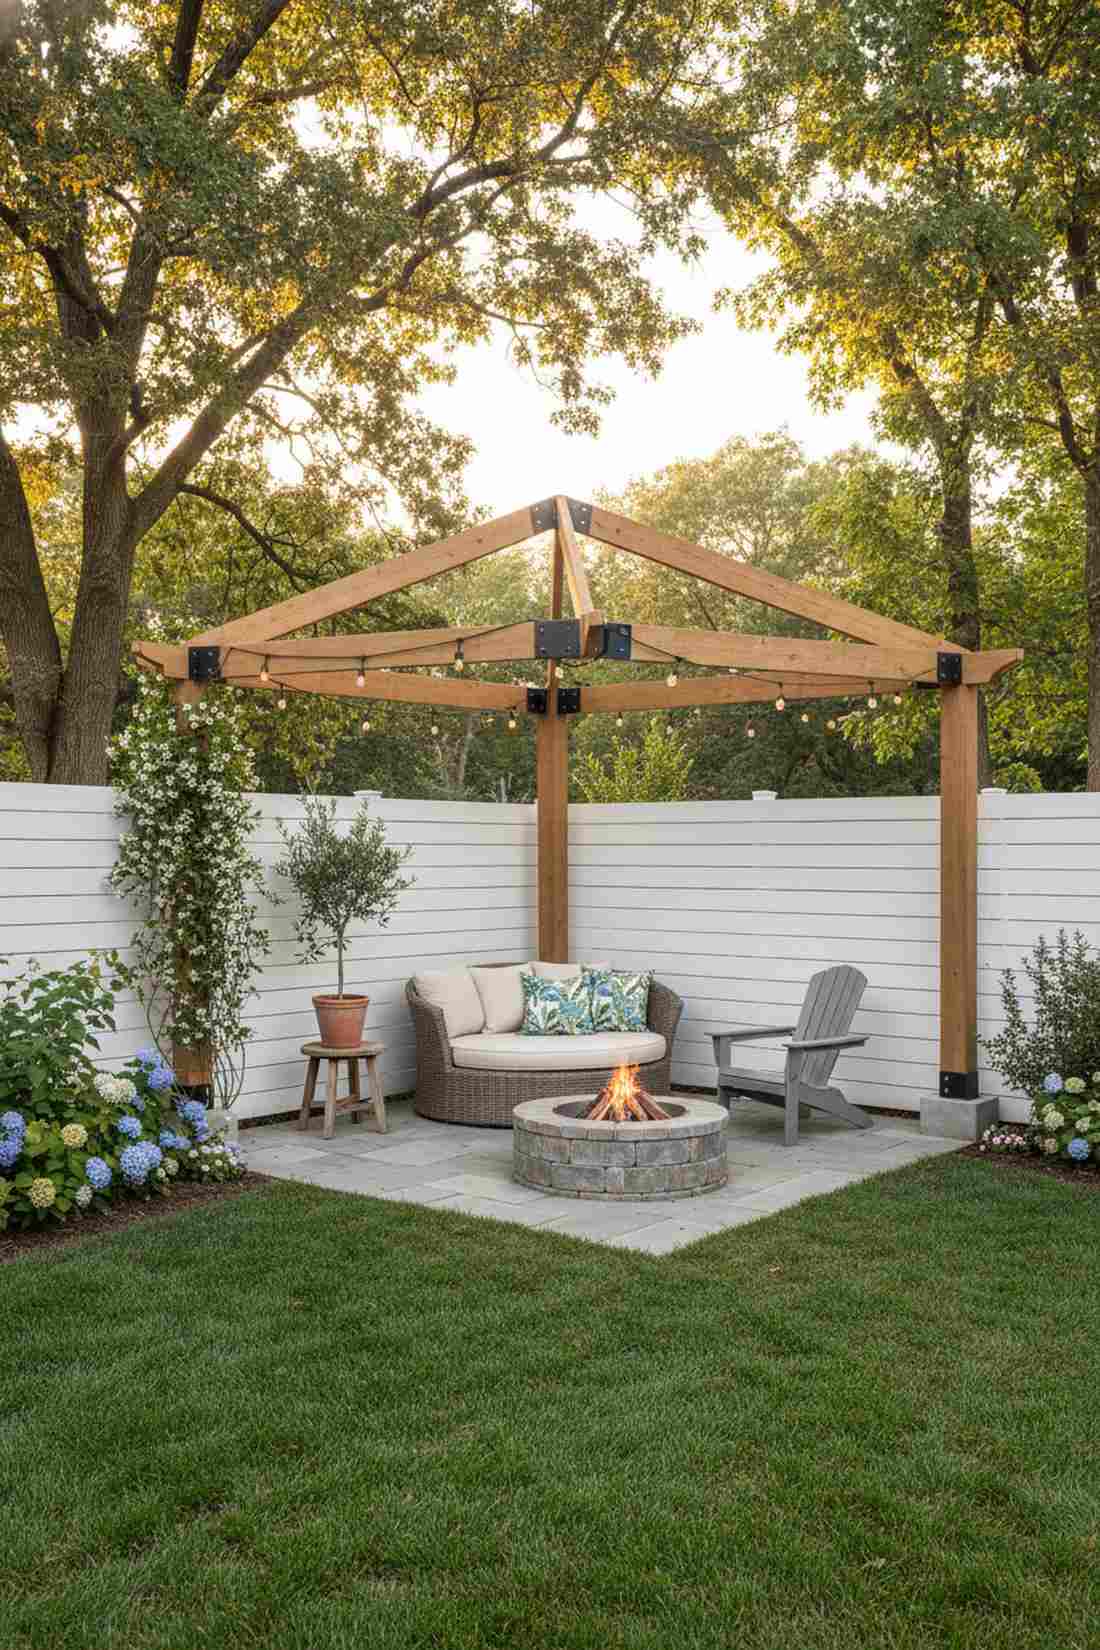
This layout feels like a hidden backyard oasis you accidentally stumbled upon. A compact corner patio design works exceptionally well for L-shaped boundary walls, transforming an awkward dead zone into a highly utilized, shaded seating nook.
Anchoring directly into existing fence lines delivers a surprisingly premium look while cutting lumber costs in half. Instead of forcing a traditional four-post footprint, this triangular blueprint utilizes heavy-duty corner bracket kits to suspend the canopy and open up the yard’s sightlines.
You can easily pull this off for around $250–$400 depending on lumber choices. Save this to your DIY weekend garden board for your next exterior upgrade.
- Key Materials: Heavy-duty steel corner pergola brackets, 4×4 treated posts
- Vibe / Style: Intimate wrap-around sanctuary
- Difficulty: Intermediate structural build
- Budget Breakdown: Lumber: $180 | Hardware: $120.
- Creator’s Tip: Anchor the single freestanding post with quick-setting concrete to prevent long-term leaning.
- Smart Sourcing: Grab a powder-coated steel 3-way pergola bracket kit and pre-drilled masonry anchors.
2. Cantilever Pergola with Minimal Posts
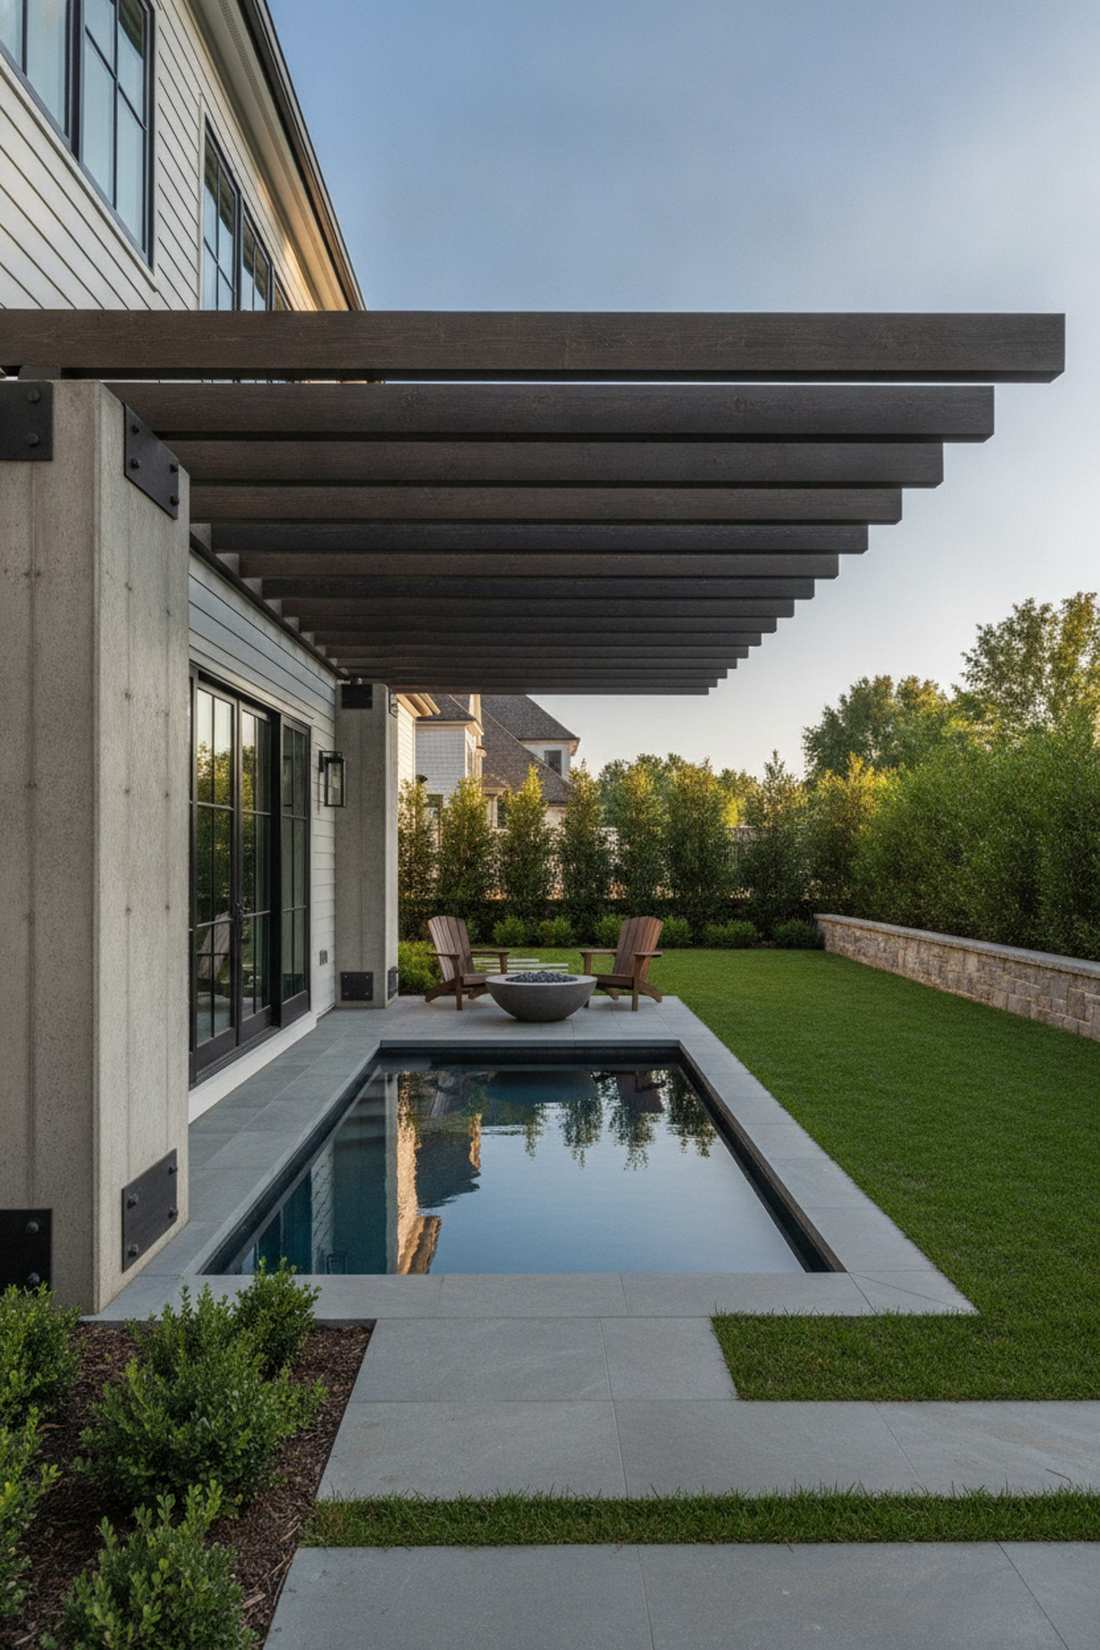
This striking profile gives off serious floating resort cabana energy. A modern cantilevered shade structure is perfect for narrow side yards or alongside tight plunge pools where extra posts would create an unbearable bottleneck.
Eliminating front support beams completely changes the spatial dynamic of the area. By utilizing high-tensile structural hardware and heavy rear footings, the overhead rafters extend like a sleek awning without interrupting your walking path.
Expect to invest roughly $600–$900 for the heavy-gauge support columns needed here. It’s a highly recommended blueprint if you want a designer-level finish.
- Key Materials: High-gauge steel base plates, oversized structural timber
- Vibe / Style: Unobstructed modern minimalist
- Difficulty: Advanced engineering required
- Budget Breakdown: Base Plates: $200 | Timbers: $500.
- Creator’s Tip: Use deep 3-foot concrete footings in the rear to perfectly counter-balance the overhanging roof weight.
- Smart Sourcing: Invest in heavy-duty cantilever post bases and weather-sealed structural lag bolts (bulk pack).
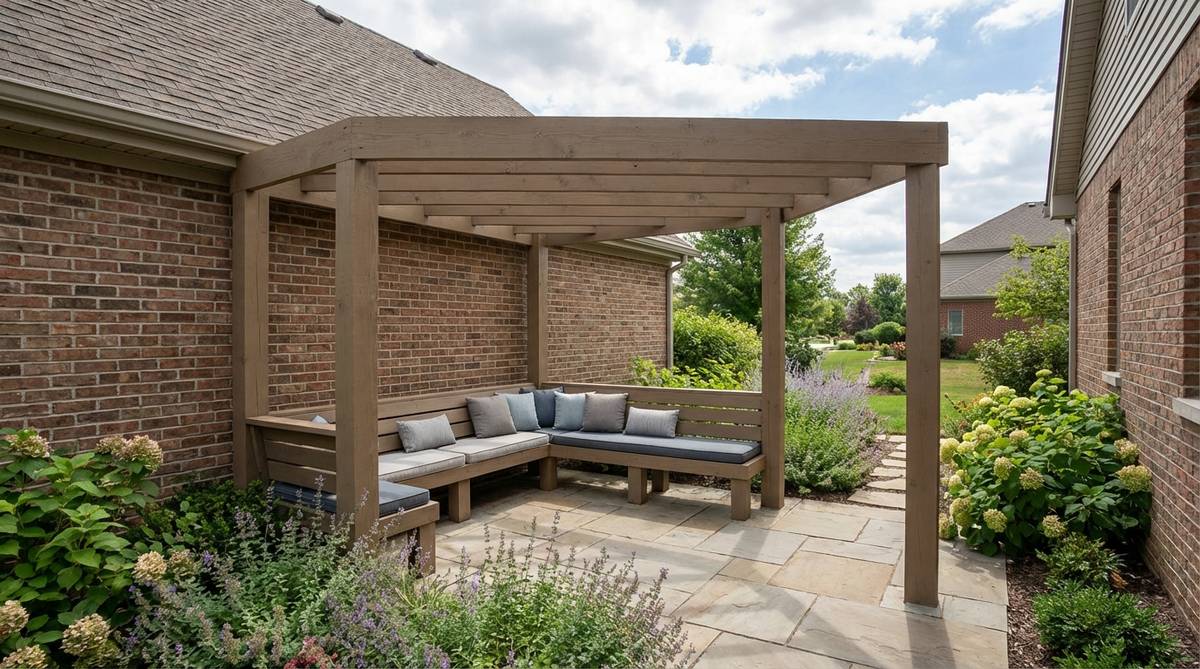
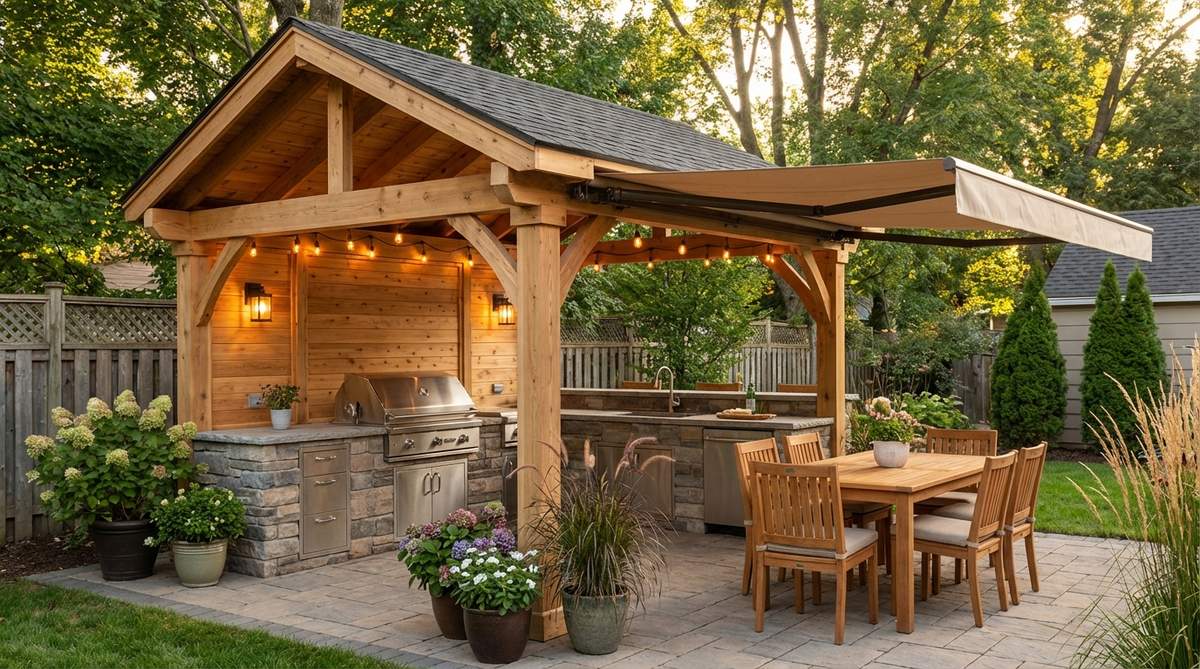
3. Wall-Attached Lean-To Pergola

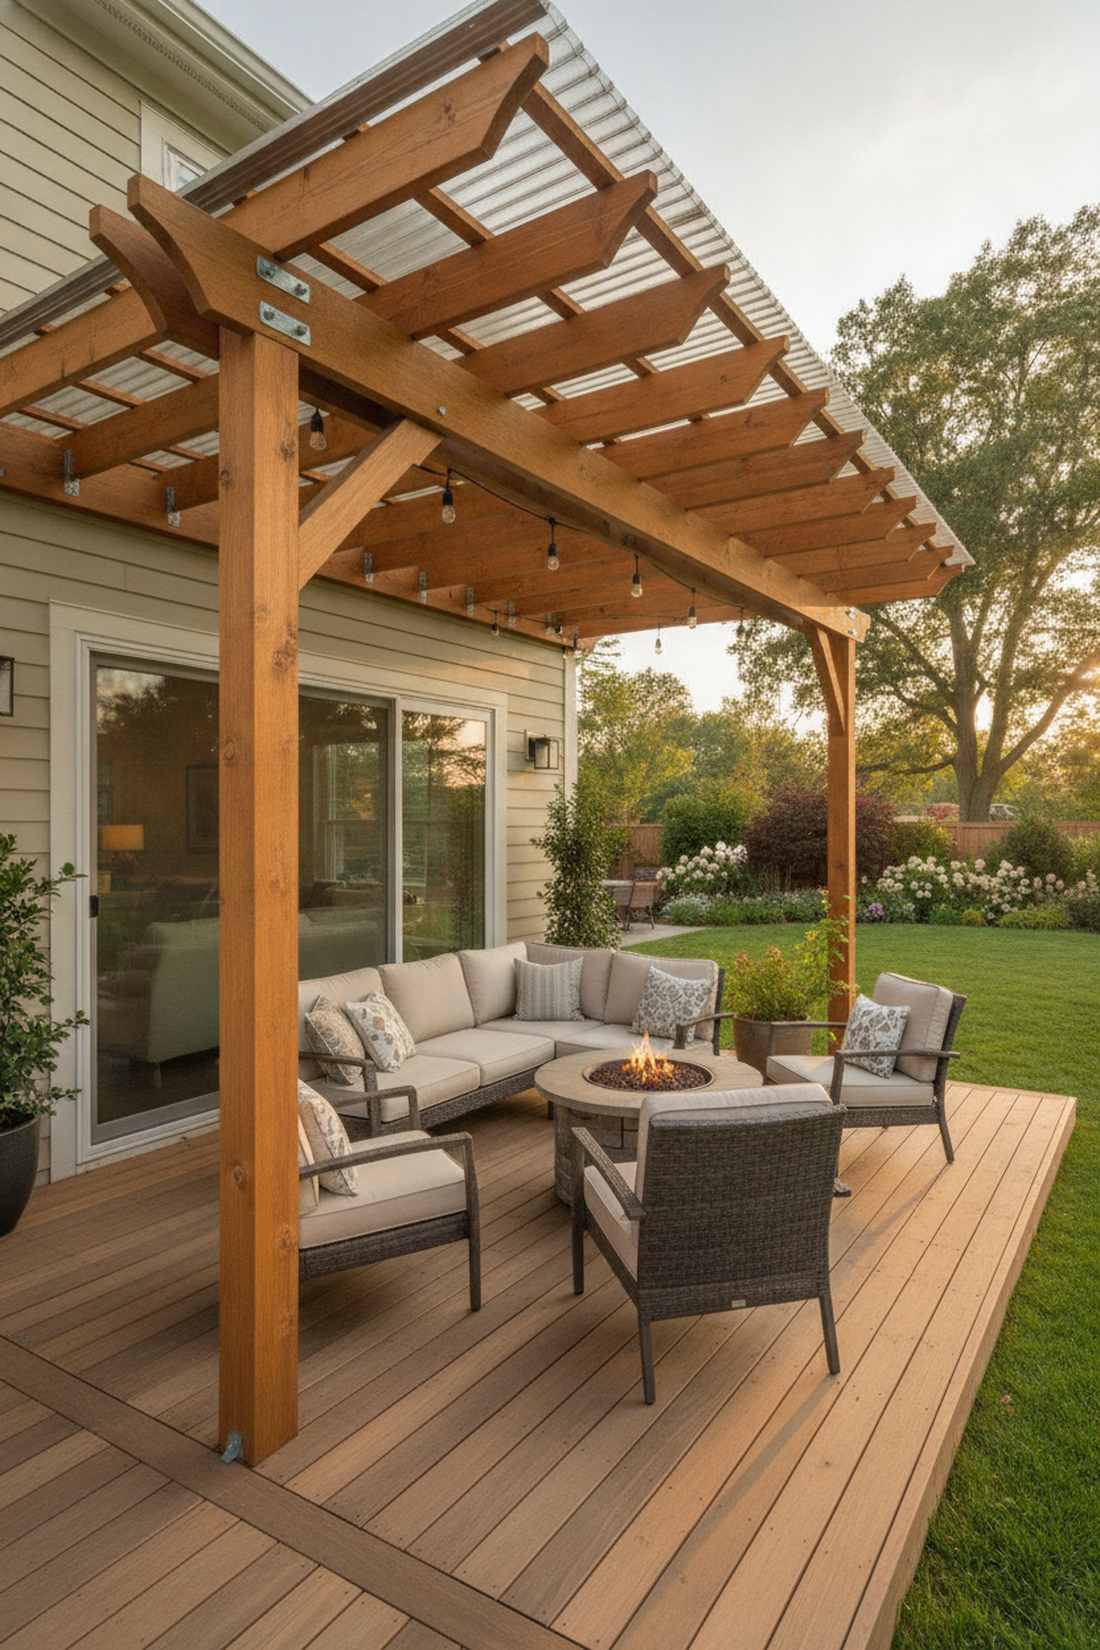
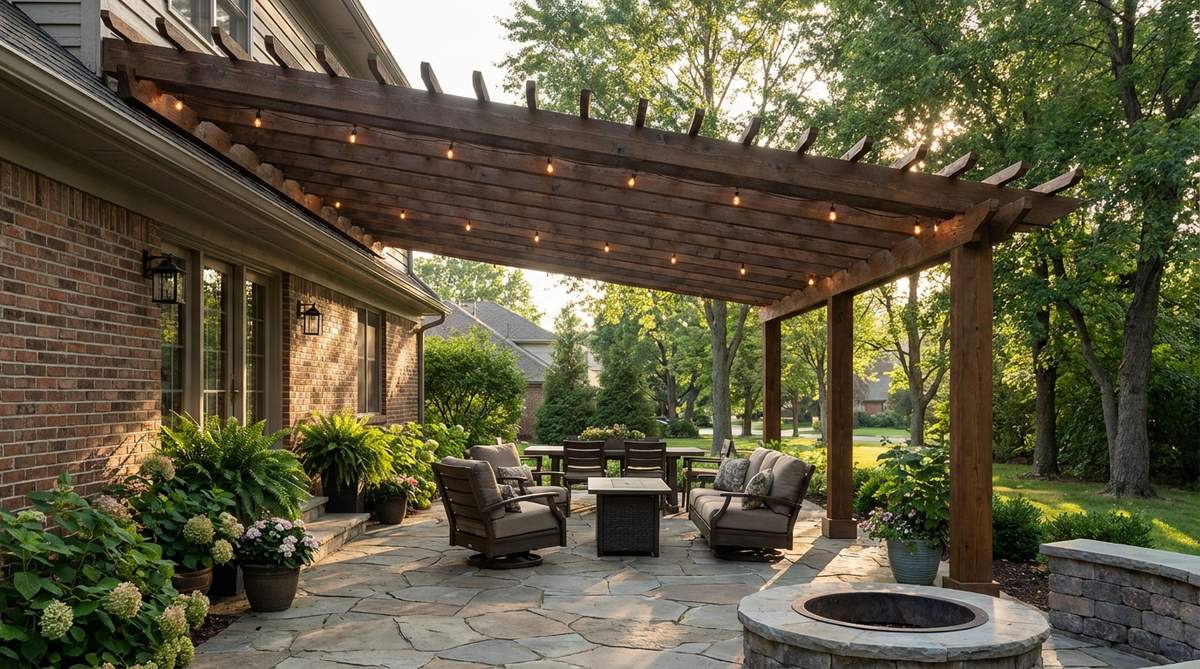
This seamless indoor-outdoor cafe aesthetic feels incredibly cozy and intentional. An attached patio extension roof is ideal for covering a sliding glass door transition, turning a harsh sunbaked deck into a naturally shaded living room.
Most beginners avoid attaching ledgers to their homes, but doing so instantly slashes your material footprint. Securing a sturdy ledger board directly to your exterior studs provides unmatched wind resistance and instantly creates architectural continuity.
You can construct this lean-to frame for about $300–$500. Pin this if you’re planning a small space upgrade that maximizes your property line.
- Key Materials: Galvanized ledger-lok fasteners, 2×8 joist hangers
- Vibe / Style: Transitional patio extension
- Difficulty: Intermediate DIY
- Budget Breakdown: Ledger & Hardware: $80 | Rafters: $250.
- Creator’s Tip: Always install a galvanized drip edge above the ledger board to prevent water from rotting your home’s siding.
- Smart Sourcing: Buy exterior-grade structural timber screws and pre-bent galvanized flashing rolls.
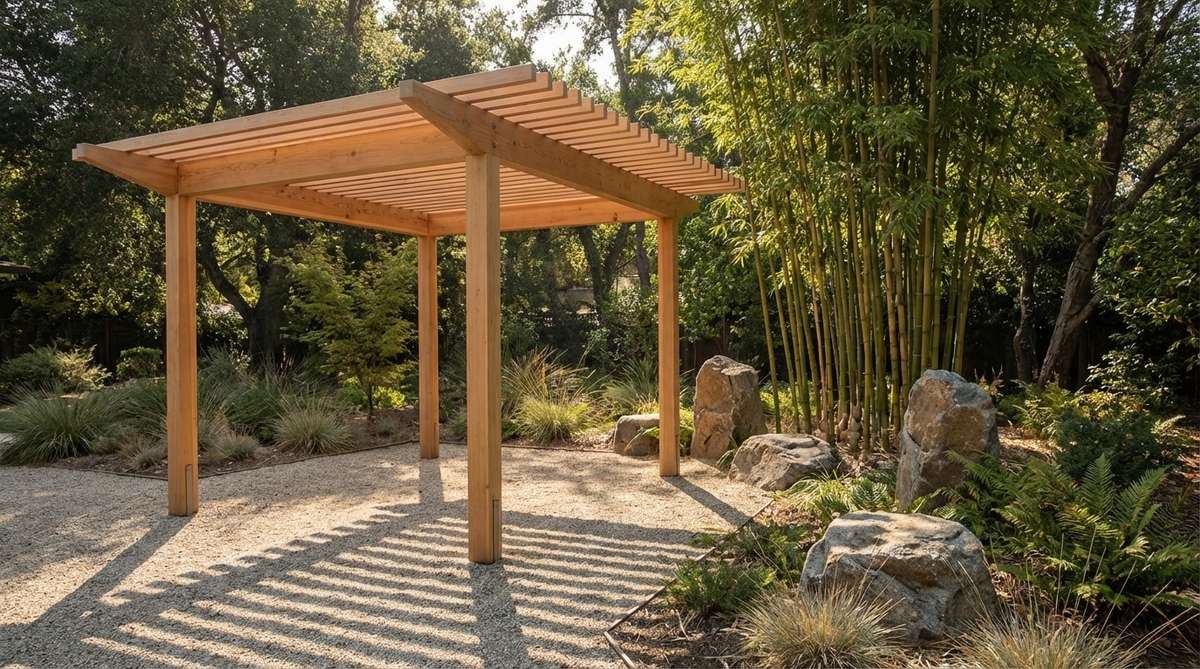
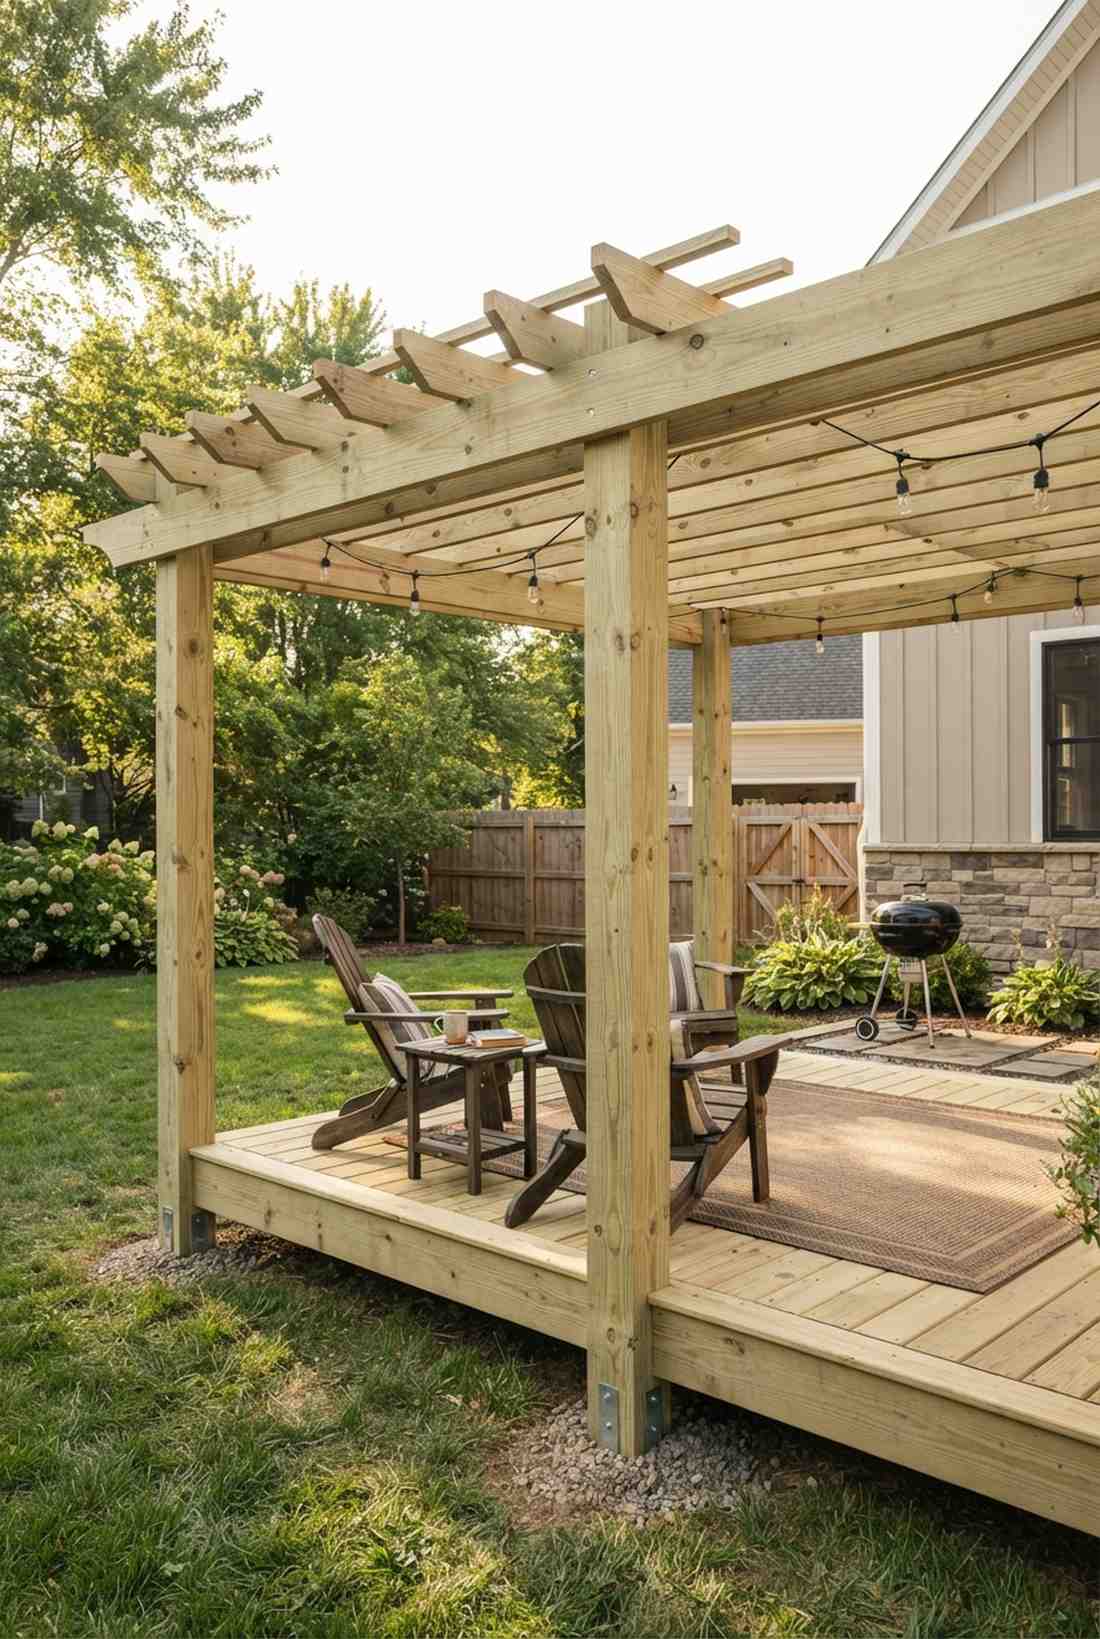
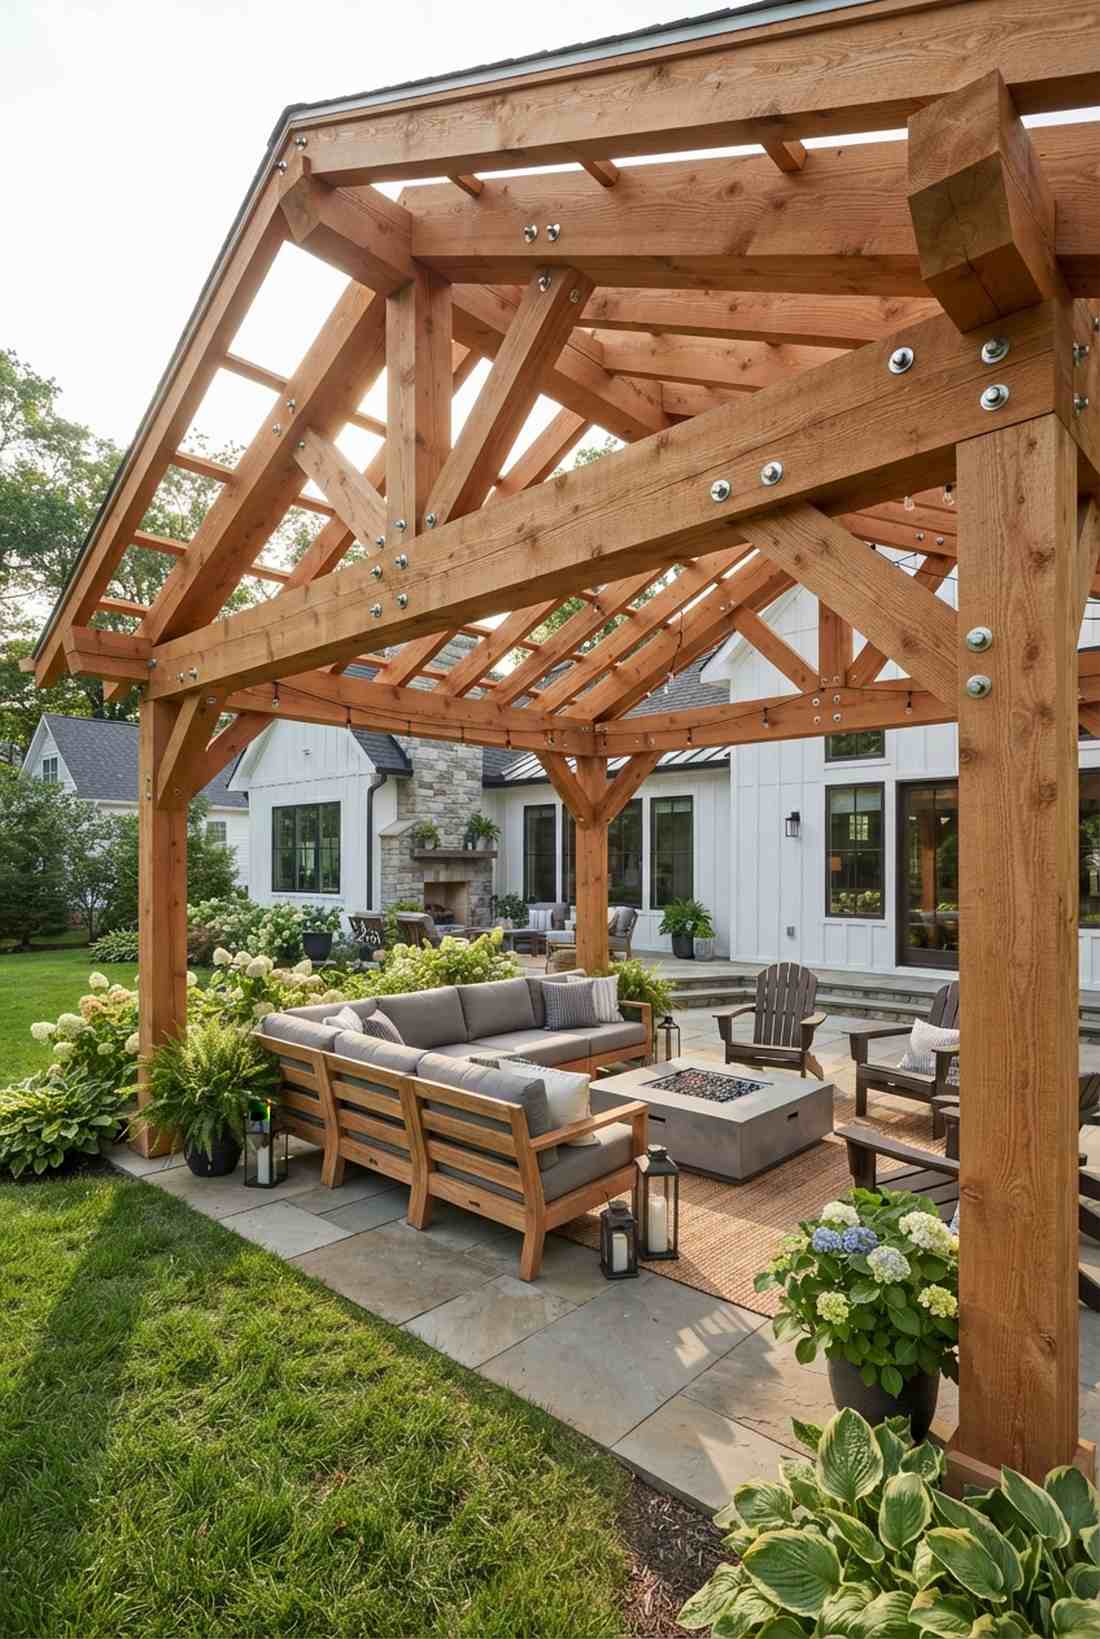
4. Compact Freestanding Square Design
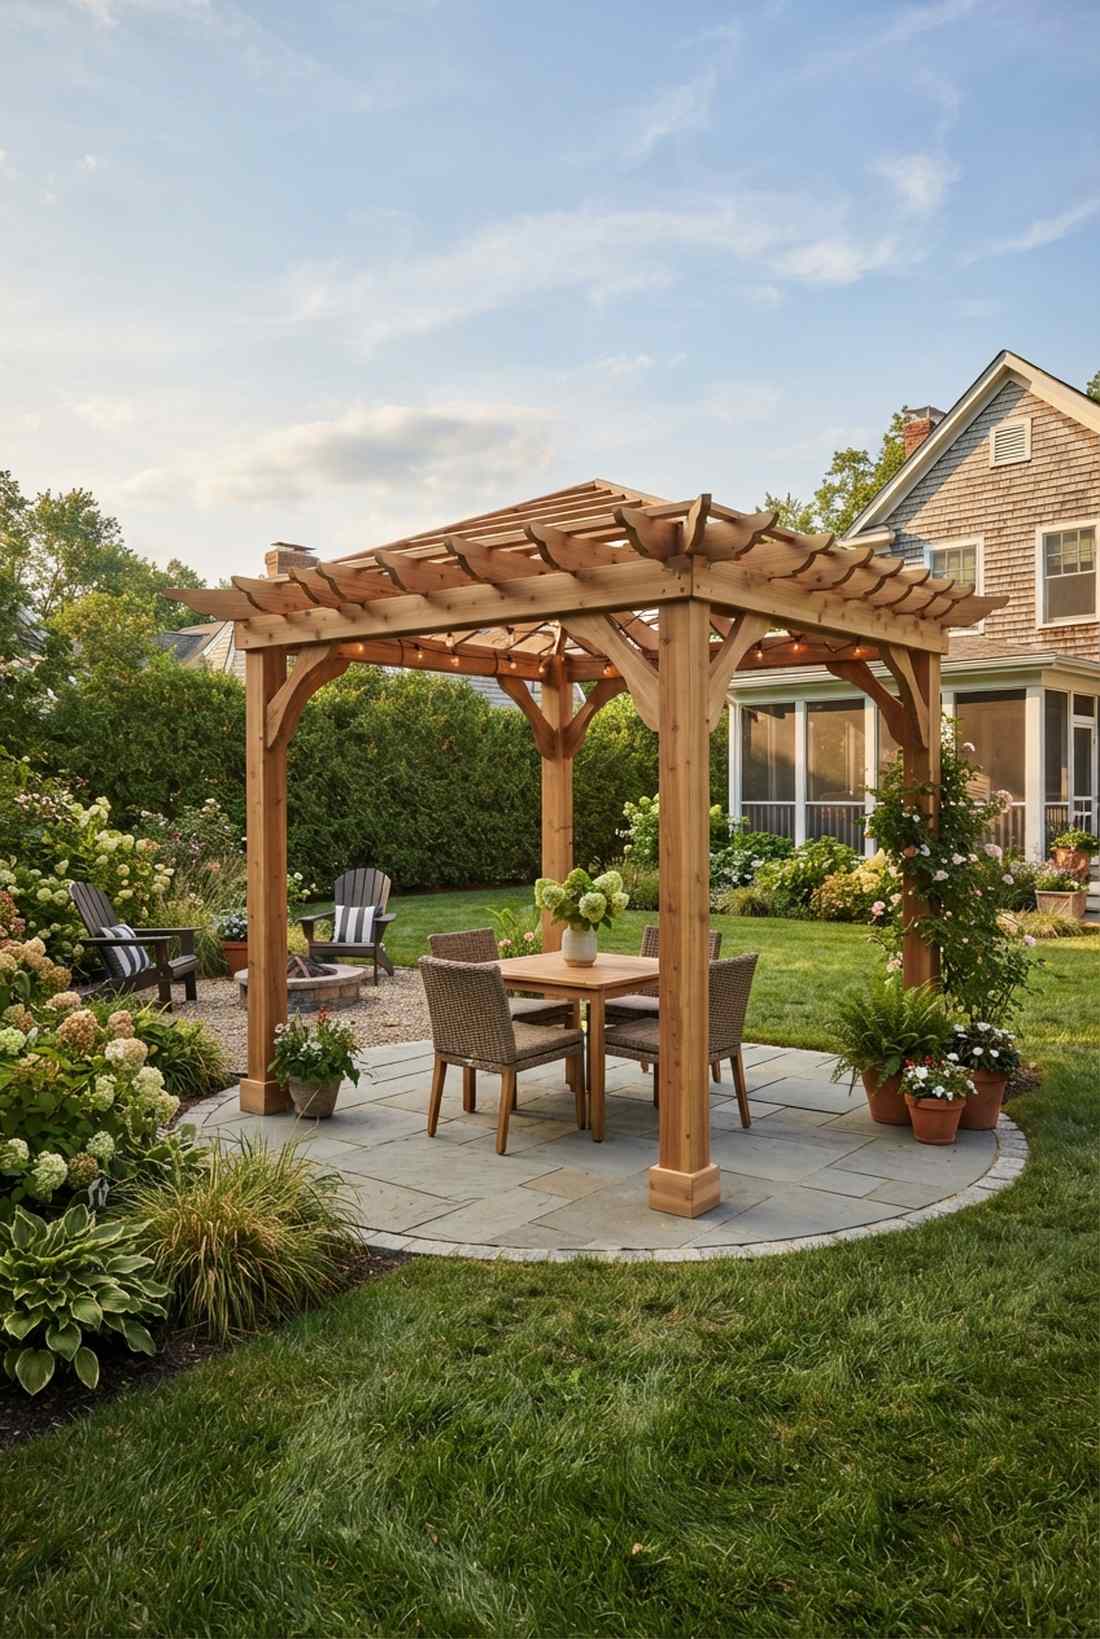
This exact setup looks straight out of a boutique hotel courtyard. A freestanding square garden pavilion provides a distinct, defined zone that works perfectly placed in the center of a lush lawn or over a small dining set.
Keeping the dimensions to a strict 8×8 footprint creates an intimate room-like enclosure rather than a sprawling deck. This symmetrical setup naturally draws the eye and acts as a stunning geometric anchor when paired with premium hardscaping.
Building this essential cube structure generally costs between $400–$700. It’s a fast weekend win that completely alters your backyard’s visual hierarchy.
- Key Materials: 6×6 base posts, decorative rafter tails
- Vibe / Style: Symmetrical focal point
- Difficulty: Beginner-friendly
- Budget Breakdown: Posts: $150 | Top Beams: $250.
- Creator’s Tip: Pre-cut all your rafter tails with a jigsaw template on the ground before lifting them into place.
- Smart Sourcing: Pick up a pre-cut DIY pergola bracket system and premium wood end-grain sealer.
Most people get this completely wrong… until they discover the exact narrow-space layout coming up next.
5. Narrow Rectangle Pathway Pergola
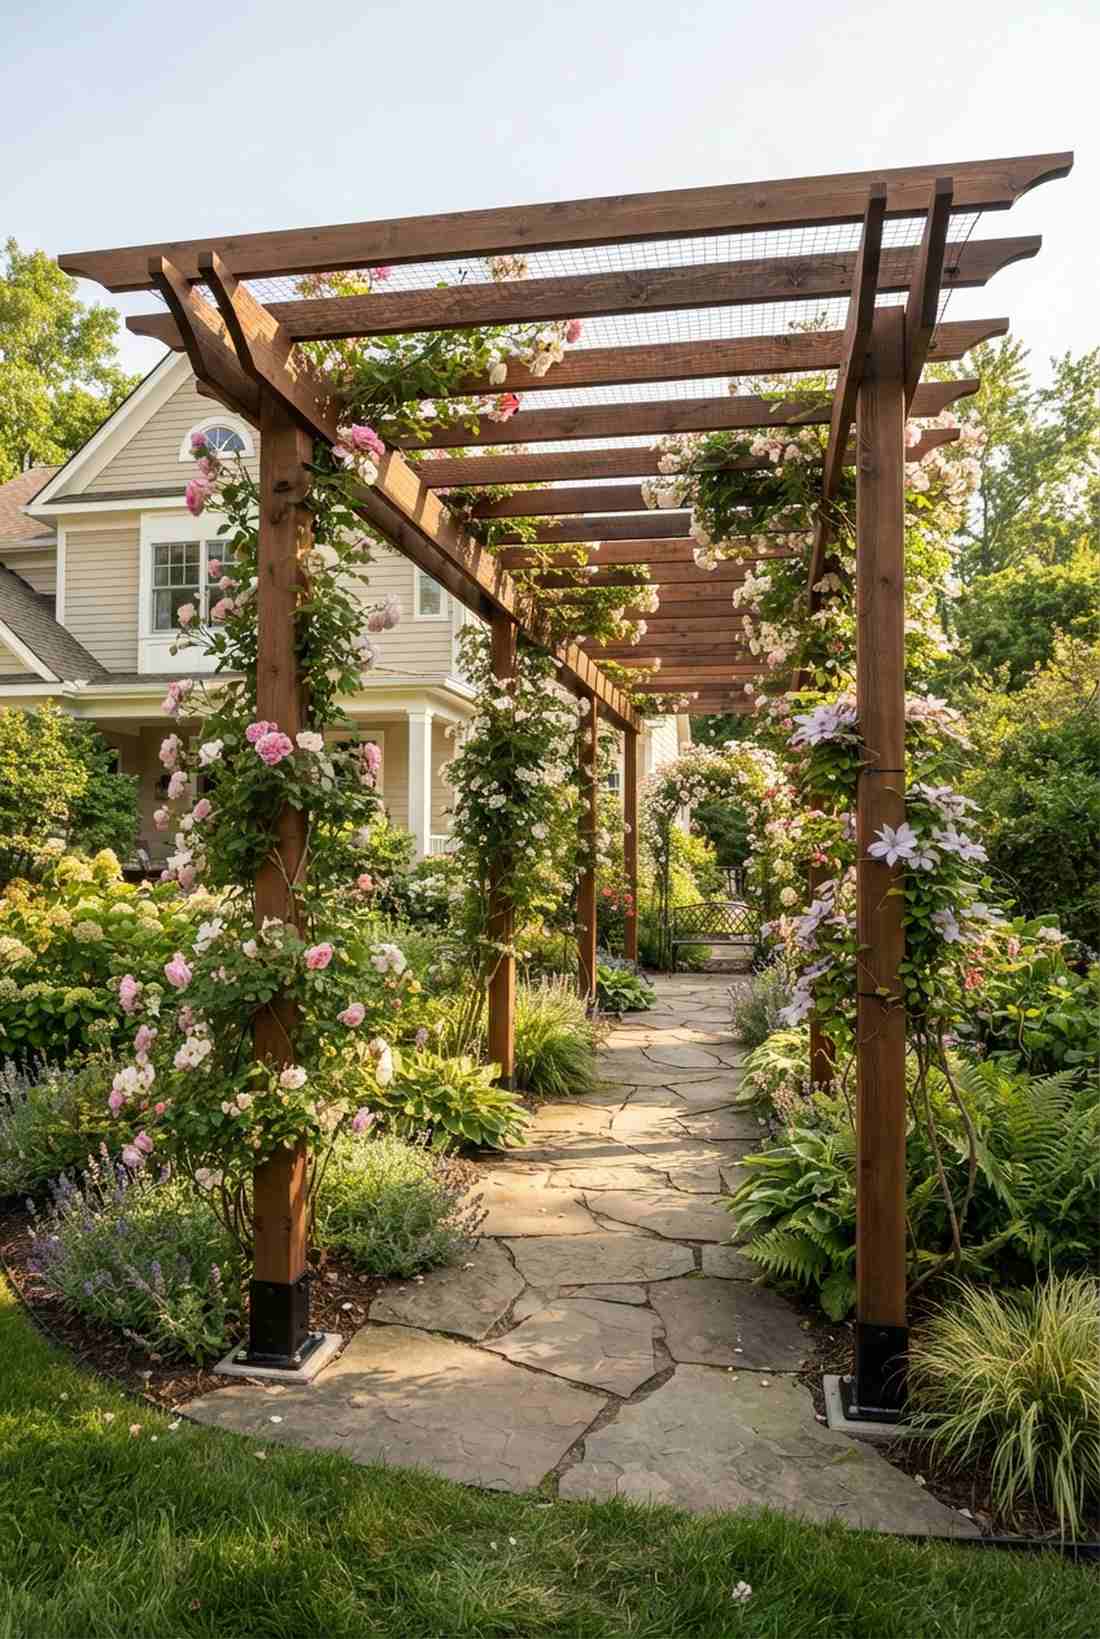
Walking through this space feels like stepping into a storybook garden tunnel. A linear pathway shade canopy shines brightest in long, narrow side yards, transforming a forgotten walkway into a majestic transitional corridor.
Instead of building a wide square that chokes the space, elongating the rafters creates a brilliant rhythm that guides the eye forward. Planting climbing roses along the support columns turns this functional walkway into a high-end landscape feature.
This linear setup runs approximately $350–$600 depending on total length. Save this to your landscape architecture board for narrow lot solutions.
- Key Materials: Narrow cross-beams, post-base anchors
- Vibe / Style: Romantic shaded promenade
- Difficulty: Intermediate repetitive build
- Budget Breakdown: Hardware: $100 | Long Beams: $300.
- Creator’s Tip: Lower the overall height to 7.5 feet to enhance the feeling of intimate enclosure as you walk through.
- Smart Sourcing: Use heavy-duty surface mount post bases and UV-resistant climbing plant netting.
Shade Enhancement Solutions
Basic rafter patterns rarely block enough midday sun. These targeted enhancements guarantee high-level comfort during peak summer hours while maintaining aesthetics.
6. Retractable Canopy System
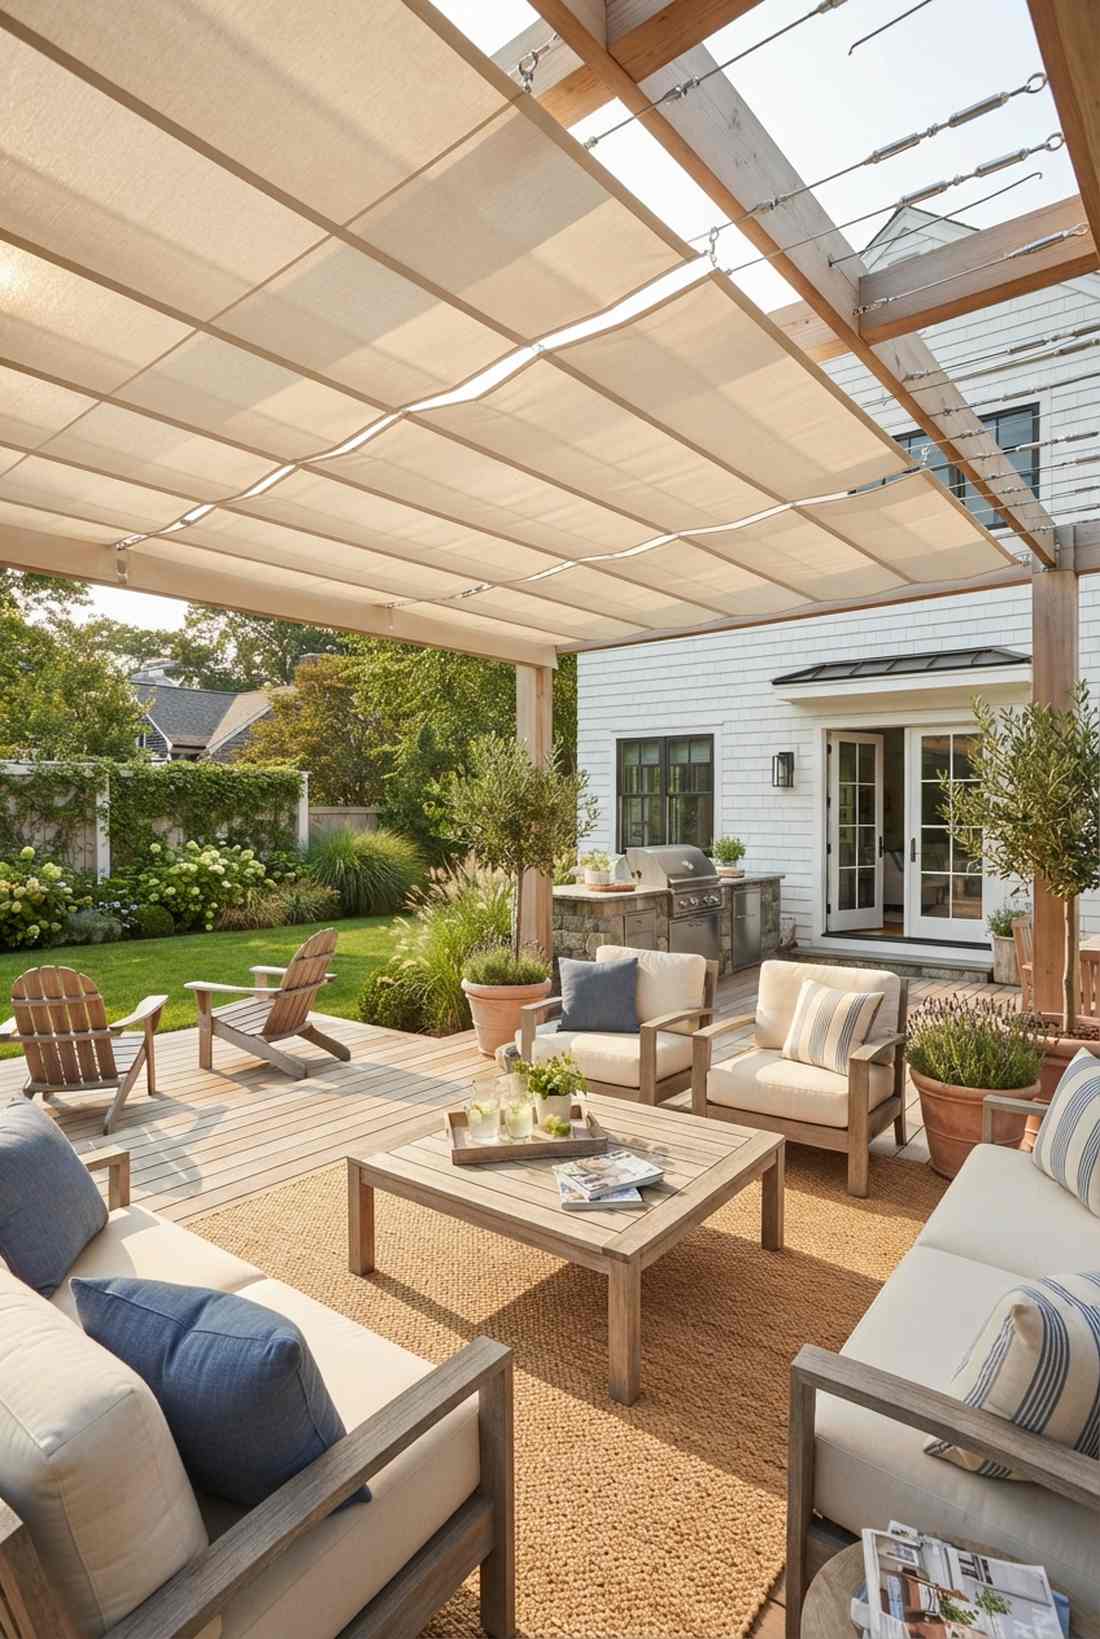
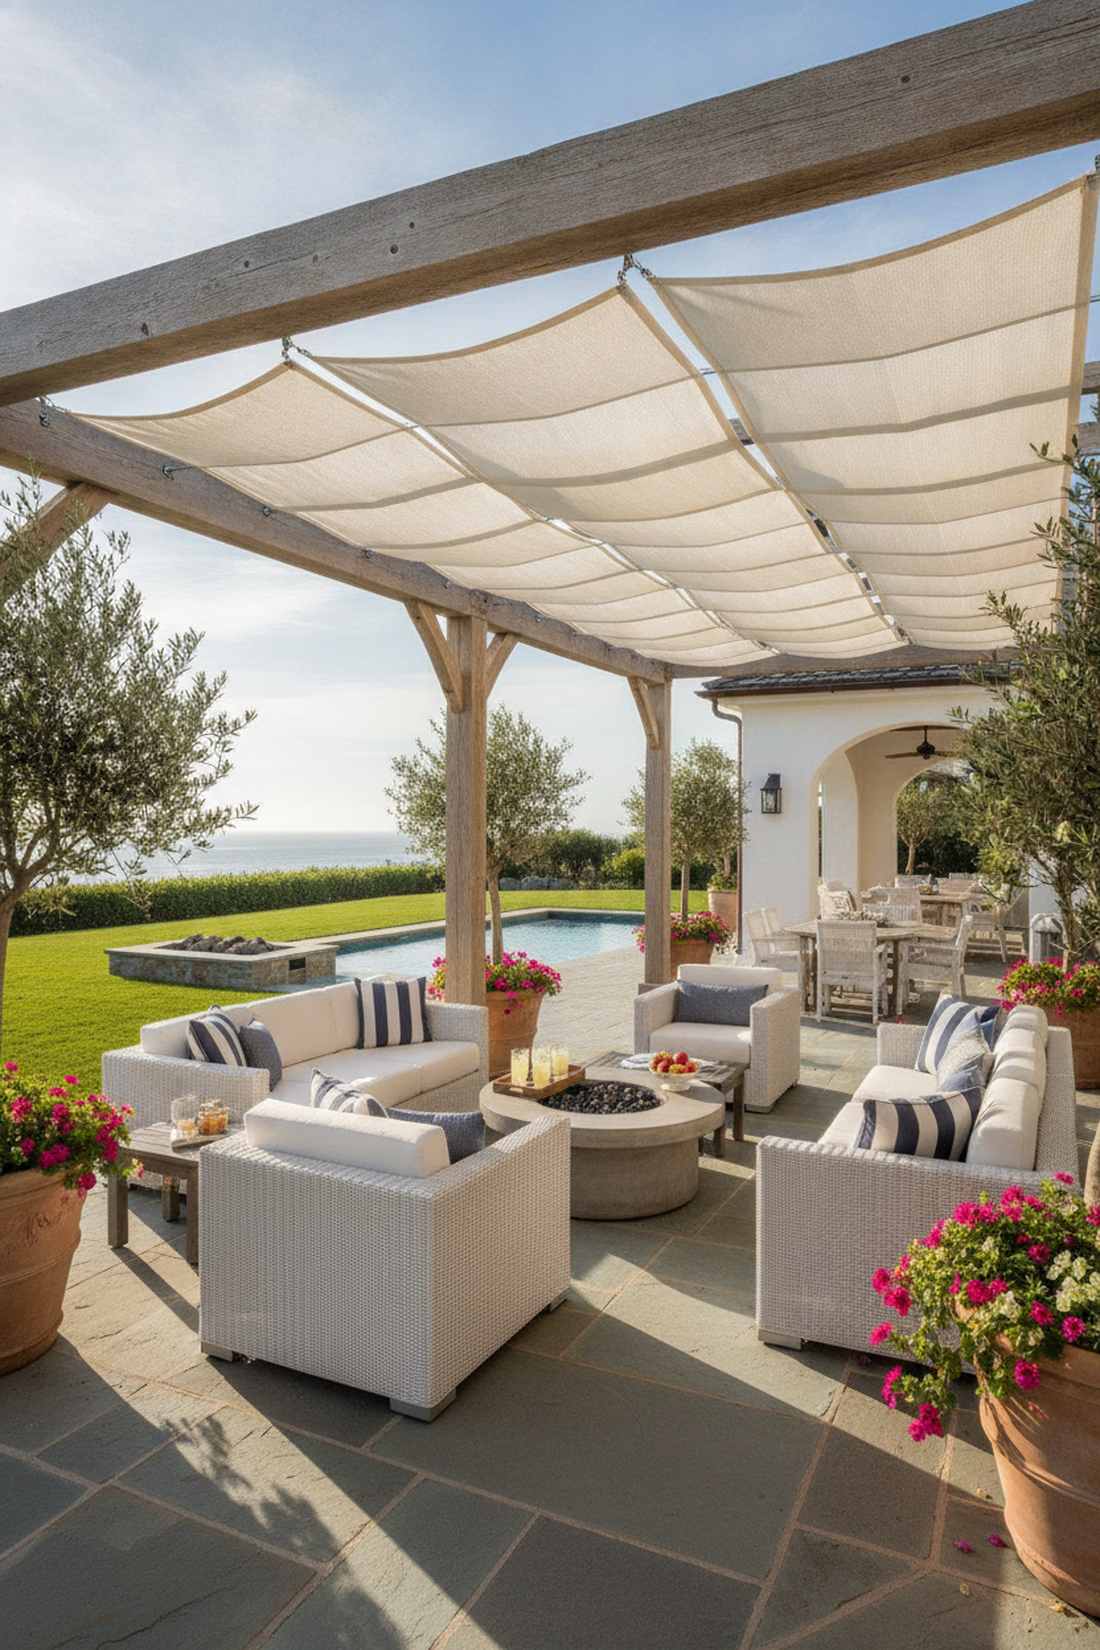
This dynamic setup gives off a luxurious, Mediterranean beach club atmosphere. A sliding track shade canopy is highly functional for south-facing patios where you want full morning sun but desperate relief by the afternoon.
Adding movable fabric panels looks far more expensive than it actually is and completely solves the static shade problem. Slipping high-grade acrylic fabric along stainless steel wire cables offers instant climate control with a quick manual pull.
You can retrofit your structure for about $150–$300 using aftermarket kits. Pin this if you’re tired of sweating on your outdoor furniture.
- Key Materials: Stainless steel wire rope, acrylic fabric panels
- Vibe / Style: Breezy coastal resort
- Difficulty: Easy afternoon retrofit
- Budget Breakdown: Track Hardware: $80 | Fabric: $120.
- Creator’s Tip: Mount the wire cables with turnbuckles so you can re-tension the tracks if they sag during summer heat.
- Smart Sourcing: Order a UV-blocking retractable wave canopy kit and marine-grade stainless turnbuckles.
7. Adjustable Louver Roof
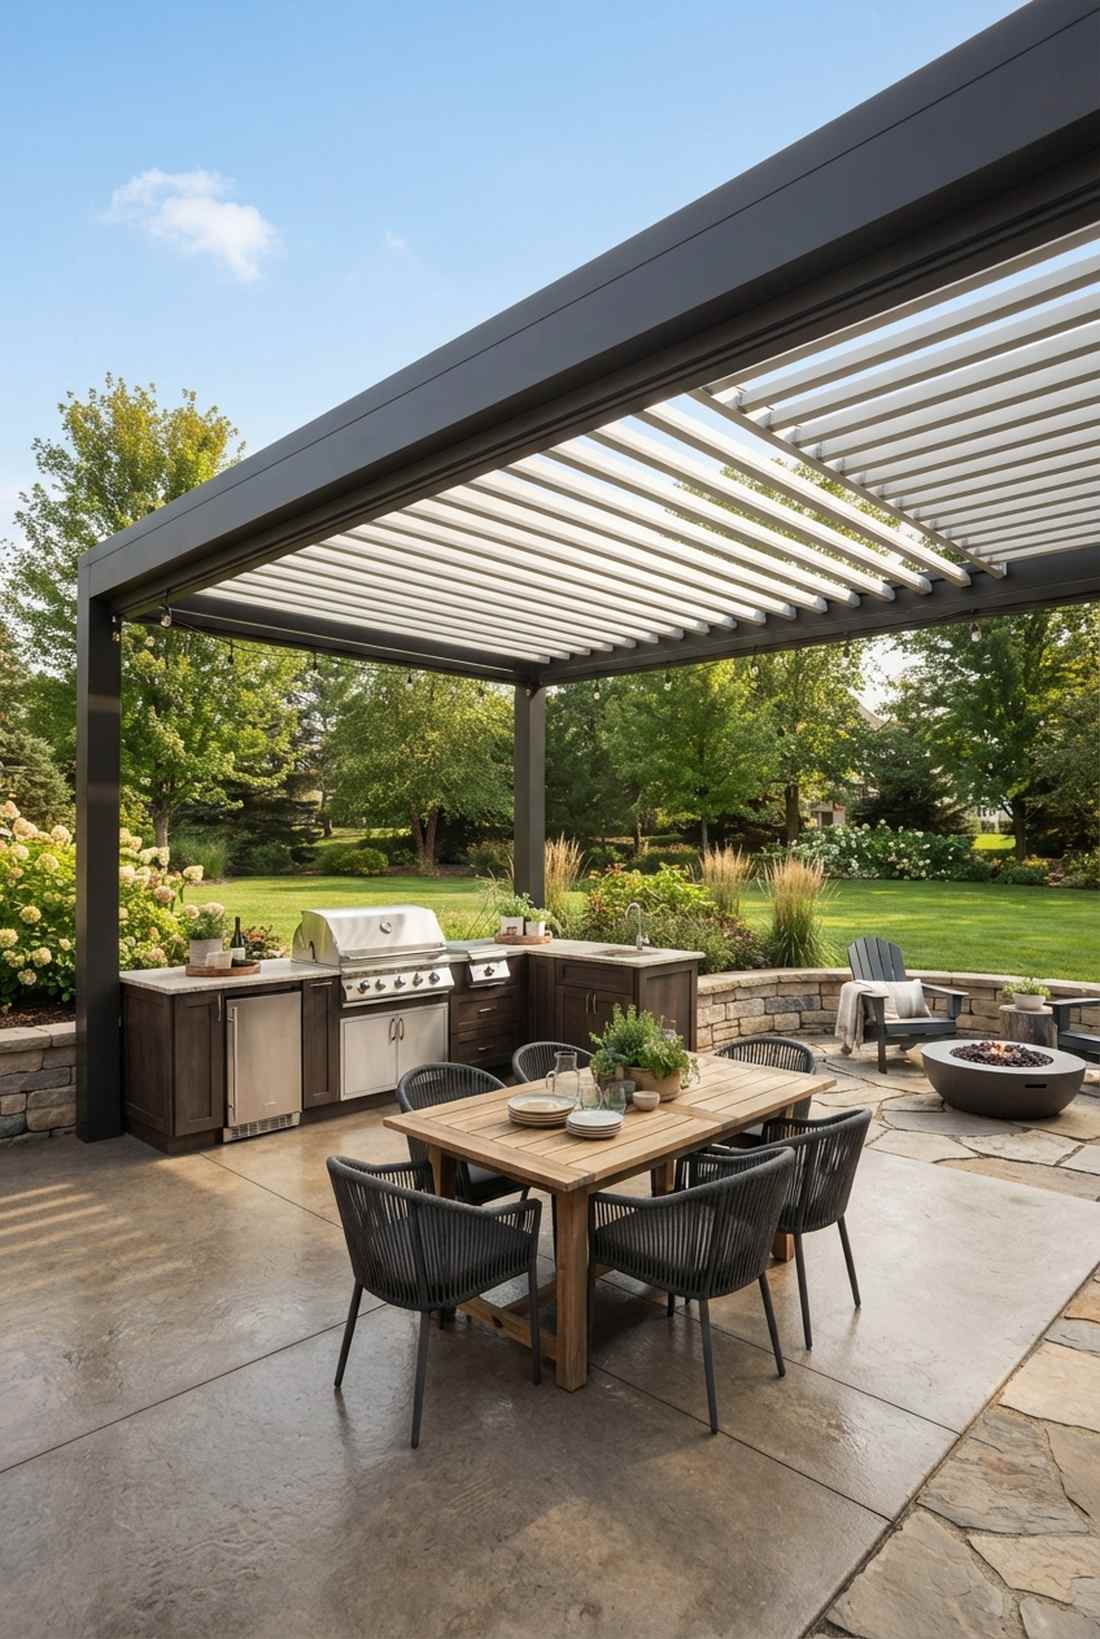
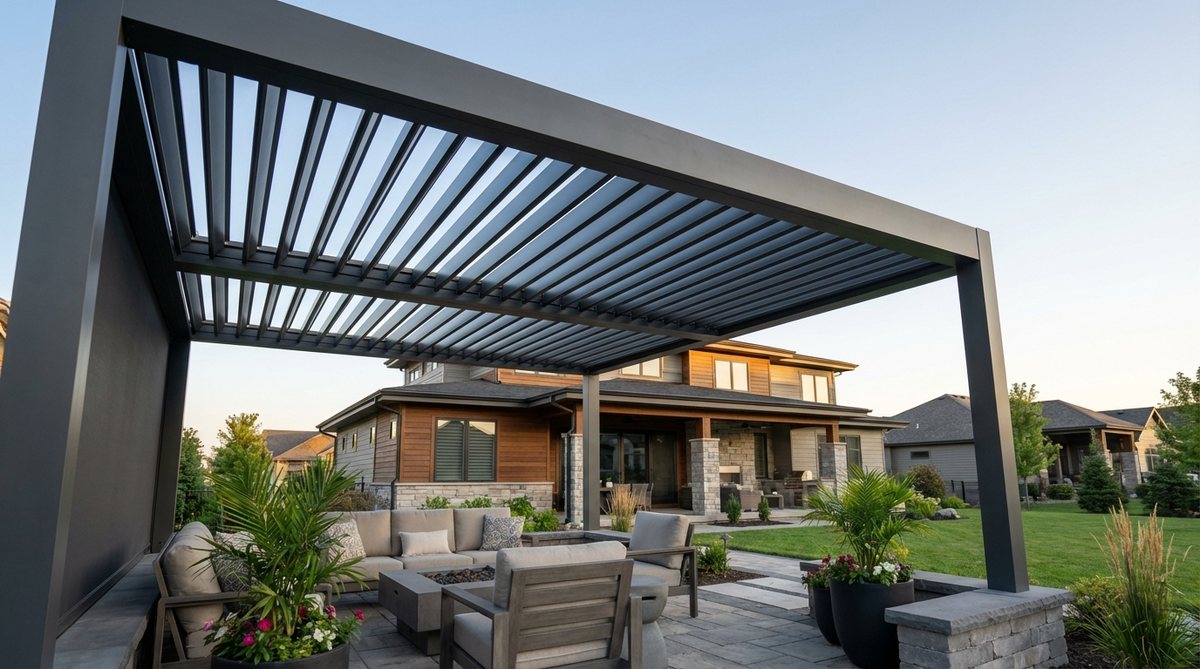
This sleek upgrade feels like a high-tech smart-home weather shield. A motorized aluminum louver system transforms any basic wooden frame into a true four-season room, perfect for guarding expensive outdoor kitchens against sudden rain.
Many homeowners assume automated roofs are strictly for million-dollar estates, but modular louver inserts are changing the game. With the push of a button, interlocking slats rotate completely shut to create a 100% waterproof ceiling over your tight space.
These premium inserts start around $800–$2,000 for compact sections. It’s an aggressive investment that fundamentally upgrades your property value.
- Key Materials: Aluminum louver panels, low-voltage motor kits
- Vibe / Style: Ultra-modern functional luxury
- Difficulty: Advanced installation
- Budget Breakdown: Louver Kit: $1,200 | Wiring: $150.
- Creator’s Tip: Ensure your underlying pergola beams are perfectly level, or the waterproof interlocking slats will leak.
- Smart Sourcing: Invest in a manual adjustable louver pergola roof kit or weatherproof outdoor smart switches.
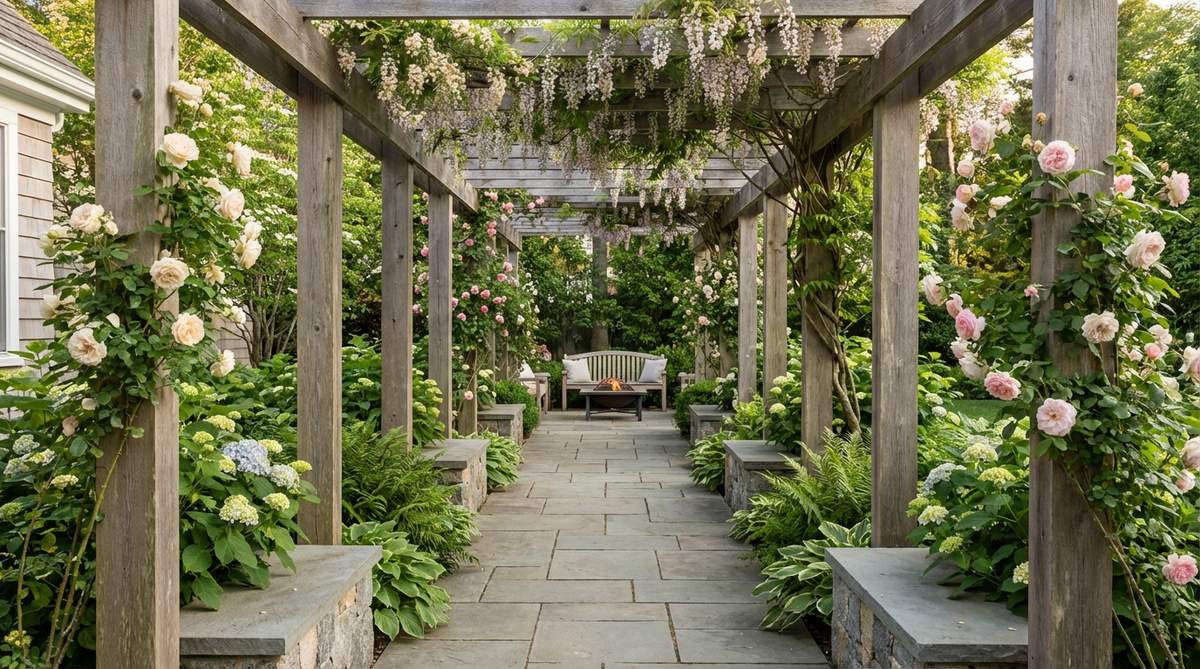
8. Climbing Vine Coverage
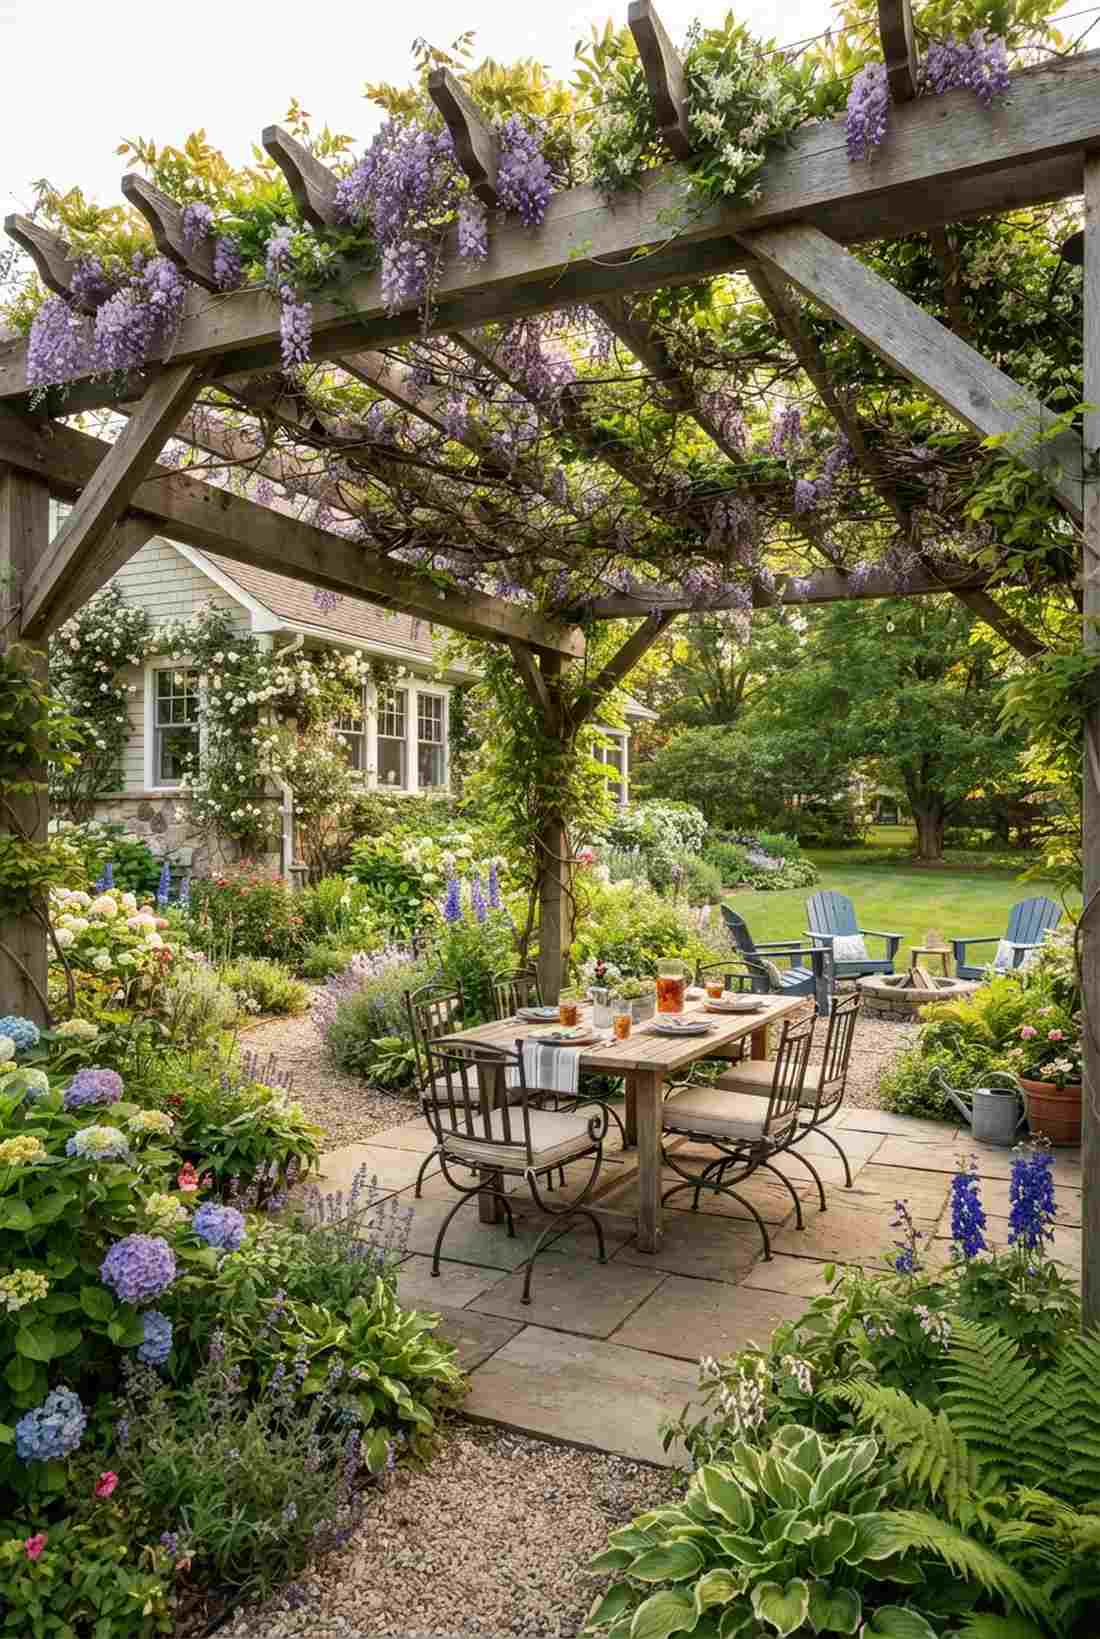
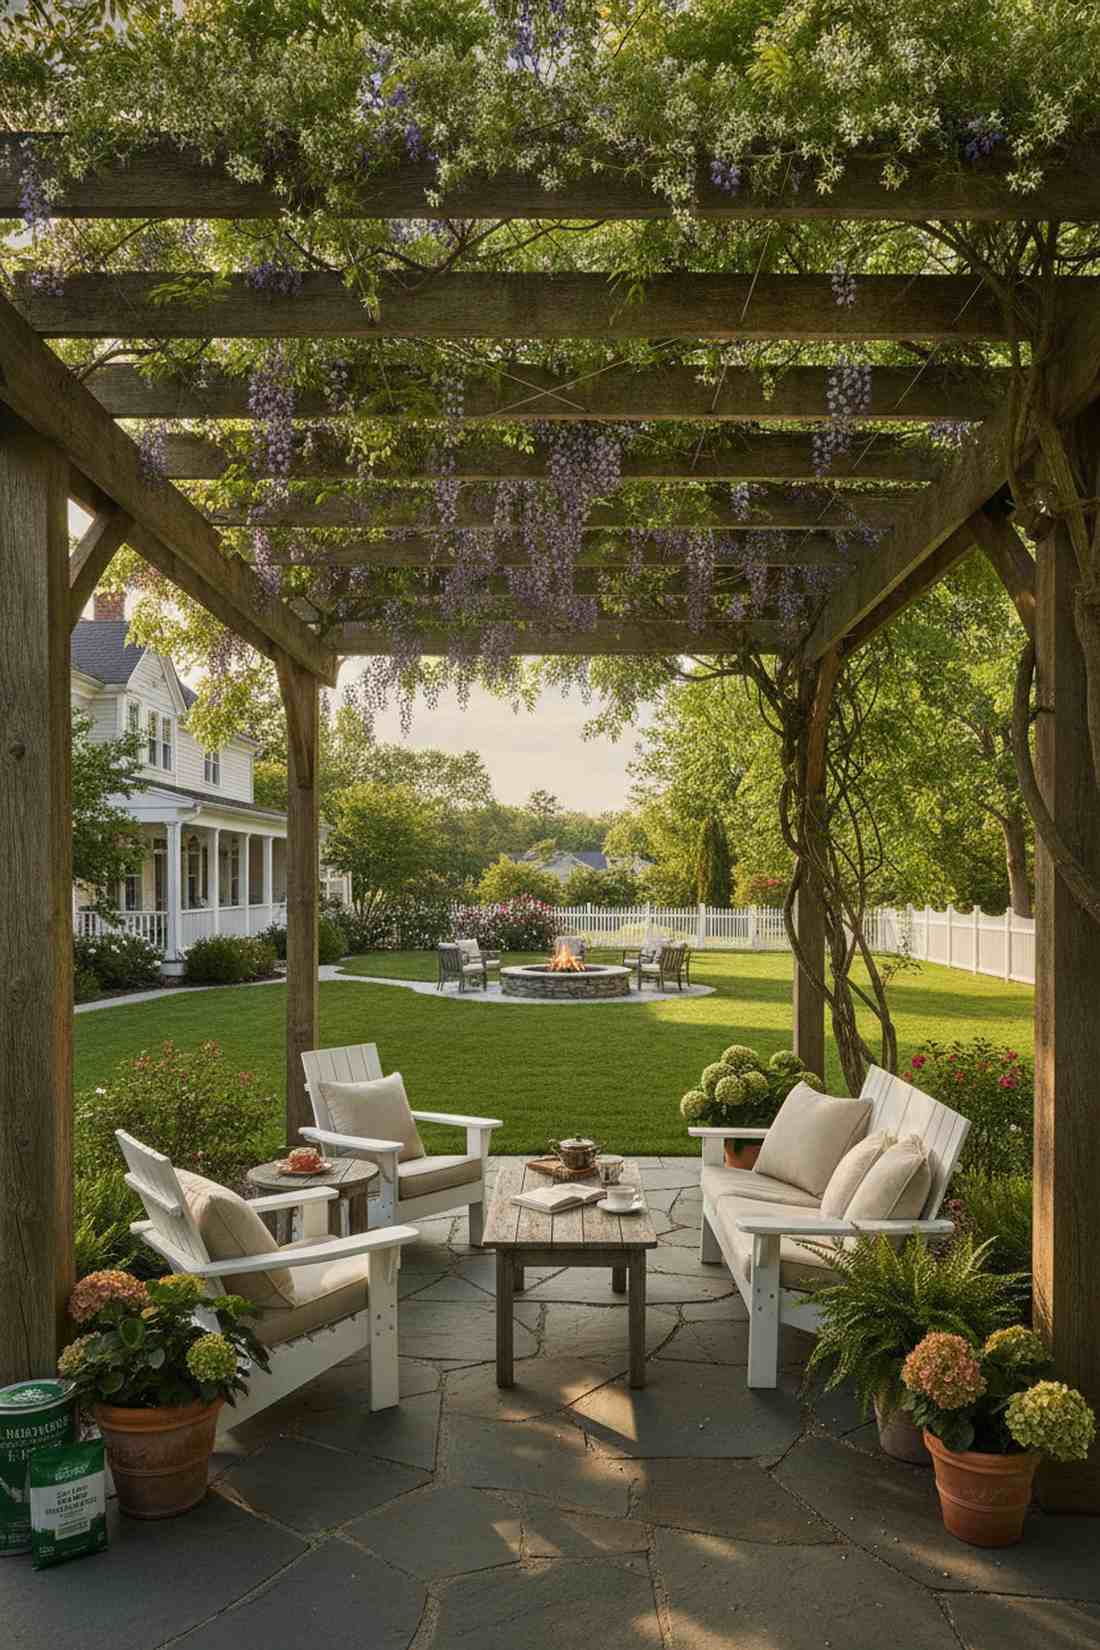
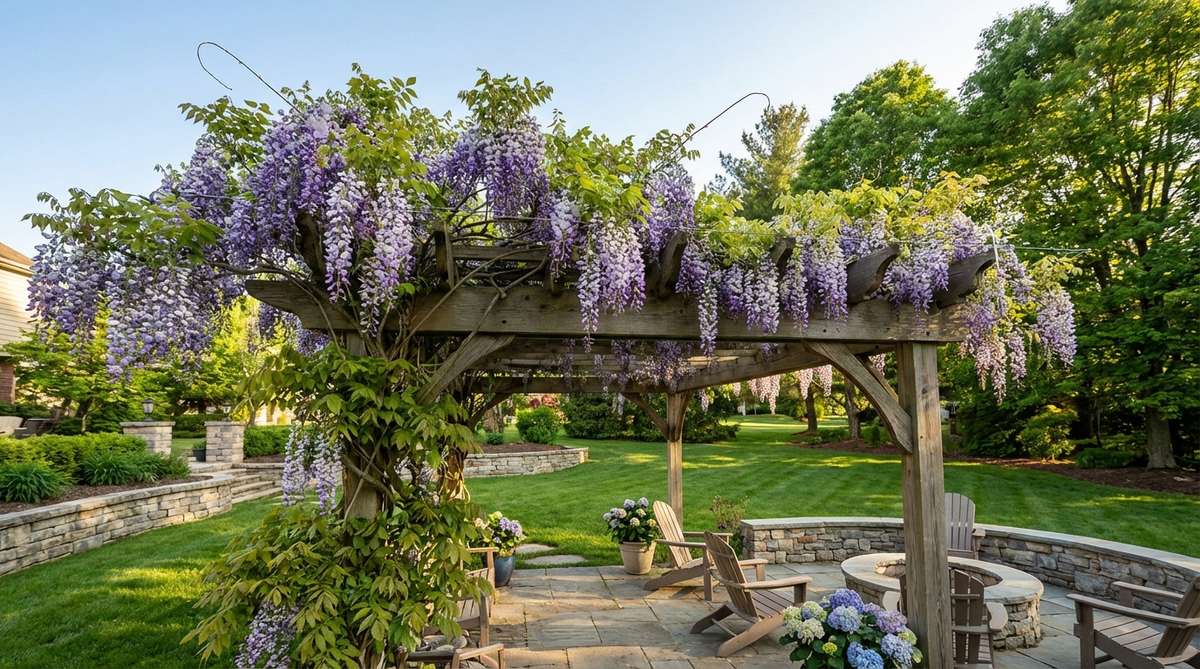
This natural canopy feels like a vibrant, living green roof suspended in the air. A botanical shaded structure is the absolute best choice for a cottage-style garden, providing deep, cooling shade through natural plant transpiration.
Integrating organic architecture requires patience but delivers a wildly premium aesthetic that synthetic fabrics can never match. Running thin tension wires across the rafters encourages fast-growing jasmine or wisteria to weave a dense, fragrant ceiling.
This living upgrade costs less than $50 in initial seeds and wire. Save this if you prefer organic, lush landscaping over modern metal finishes.
- Key Materials: Coated training wire, fast-climbing vines
- Vibe / Style: Whimsical secret garden
- Difficulty: Easy but requires patience
- Budget Breakdown: Tension Wire: $20 | Plant Starts: $30.
- Creator’s Tip: Avoid aggressive woody vines like English Ivy which can physically tear apart wooden joints over time.
- Smart Sourcing: Pick up a stainless steel wire trellis kit and bulk organic vine fertilizer spikes.
💡 Must-Have Supplies for High-End Setups
To build these setups faster and ensure they last, skip the generic craft aisles and invest in the right foundational kits.
- Base & Support: Modular heavy-duty steel corner brackets (4-pack)
- Setup Tools: Magnetic post-leveling starter kits
- Weather/Durability Protection: Clear UV-blocking marine wood sealant
9. Polycarbonate Panel Inserts
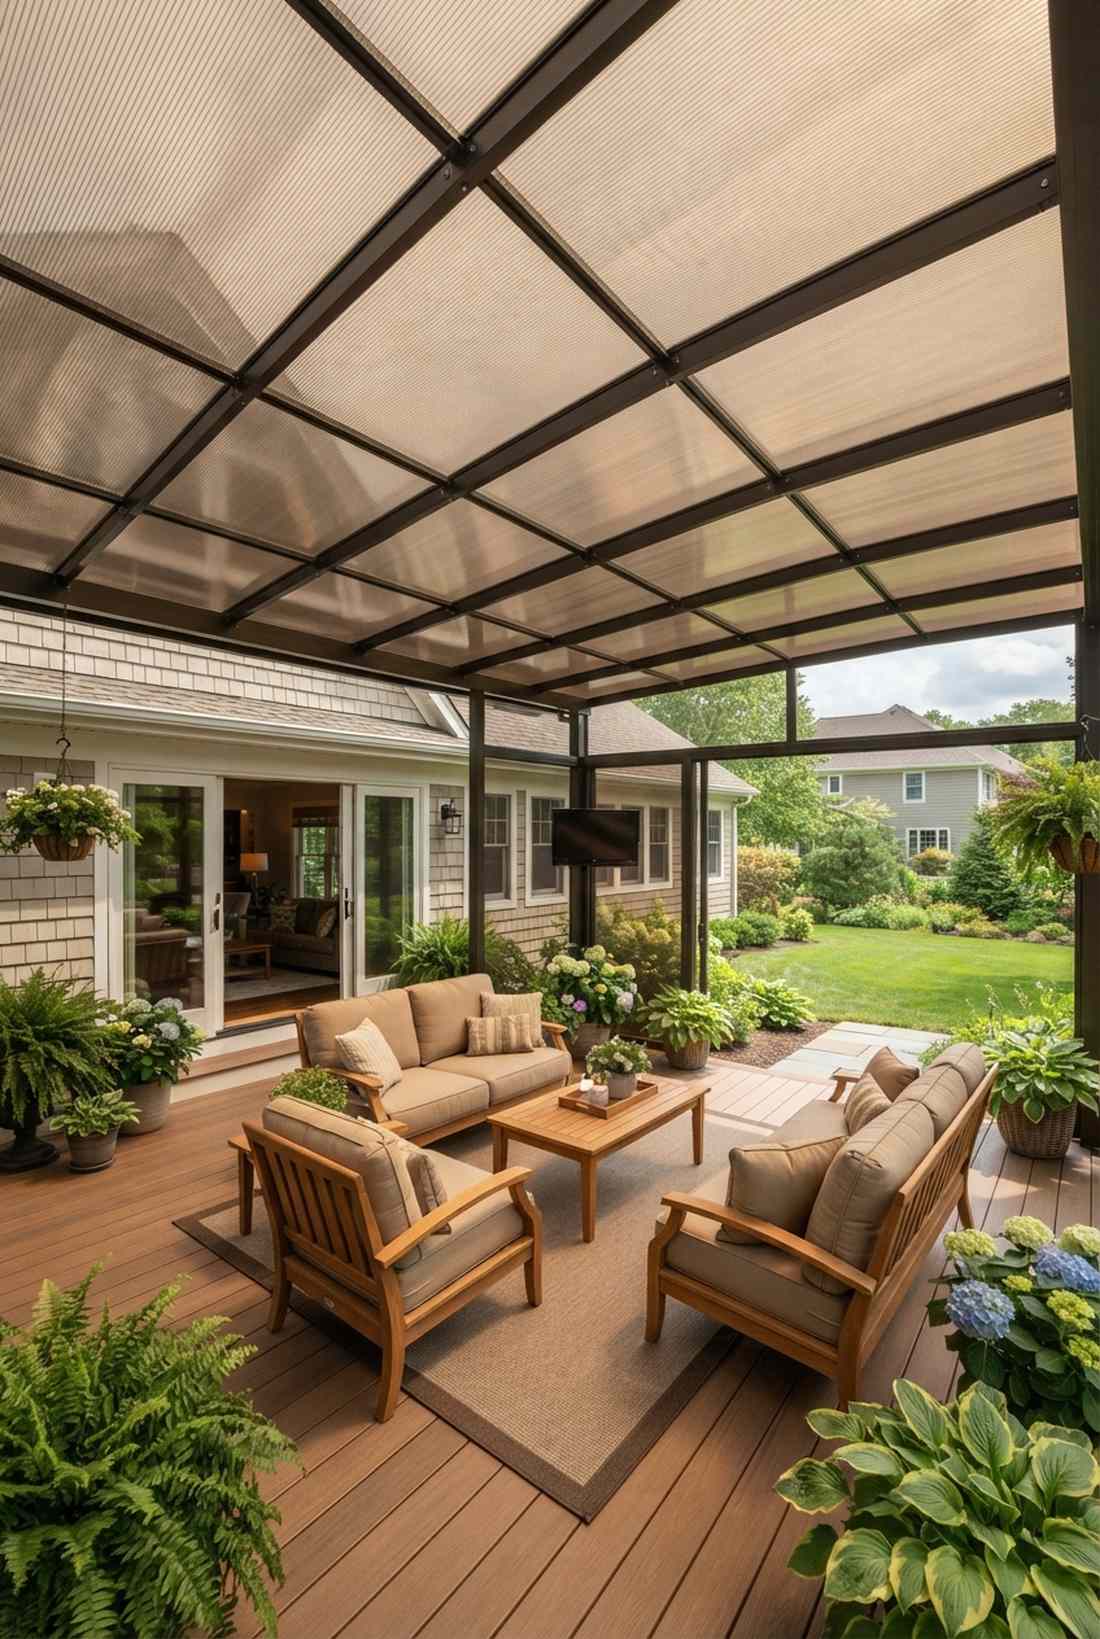
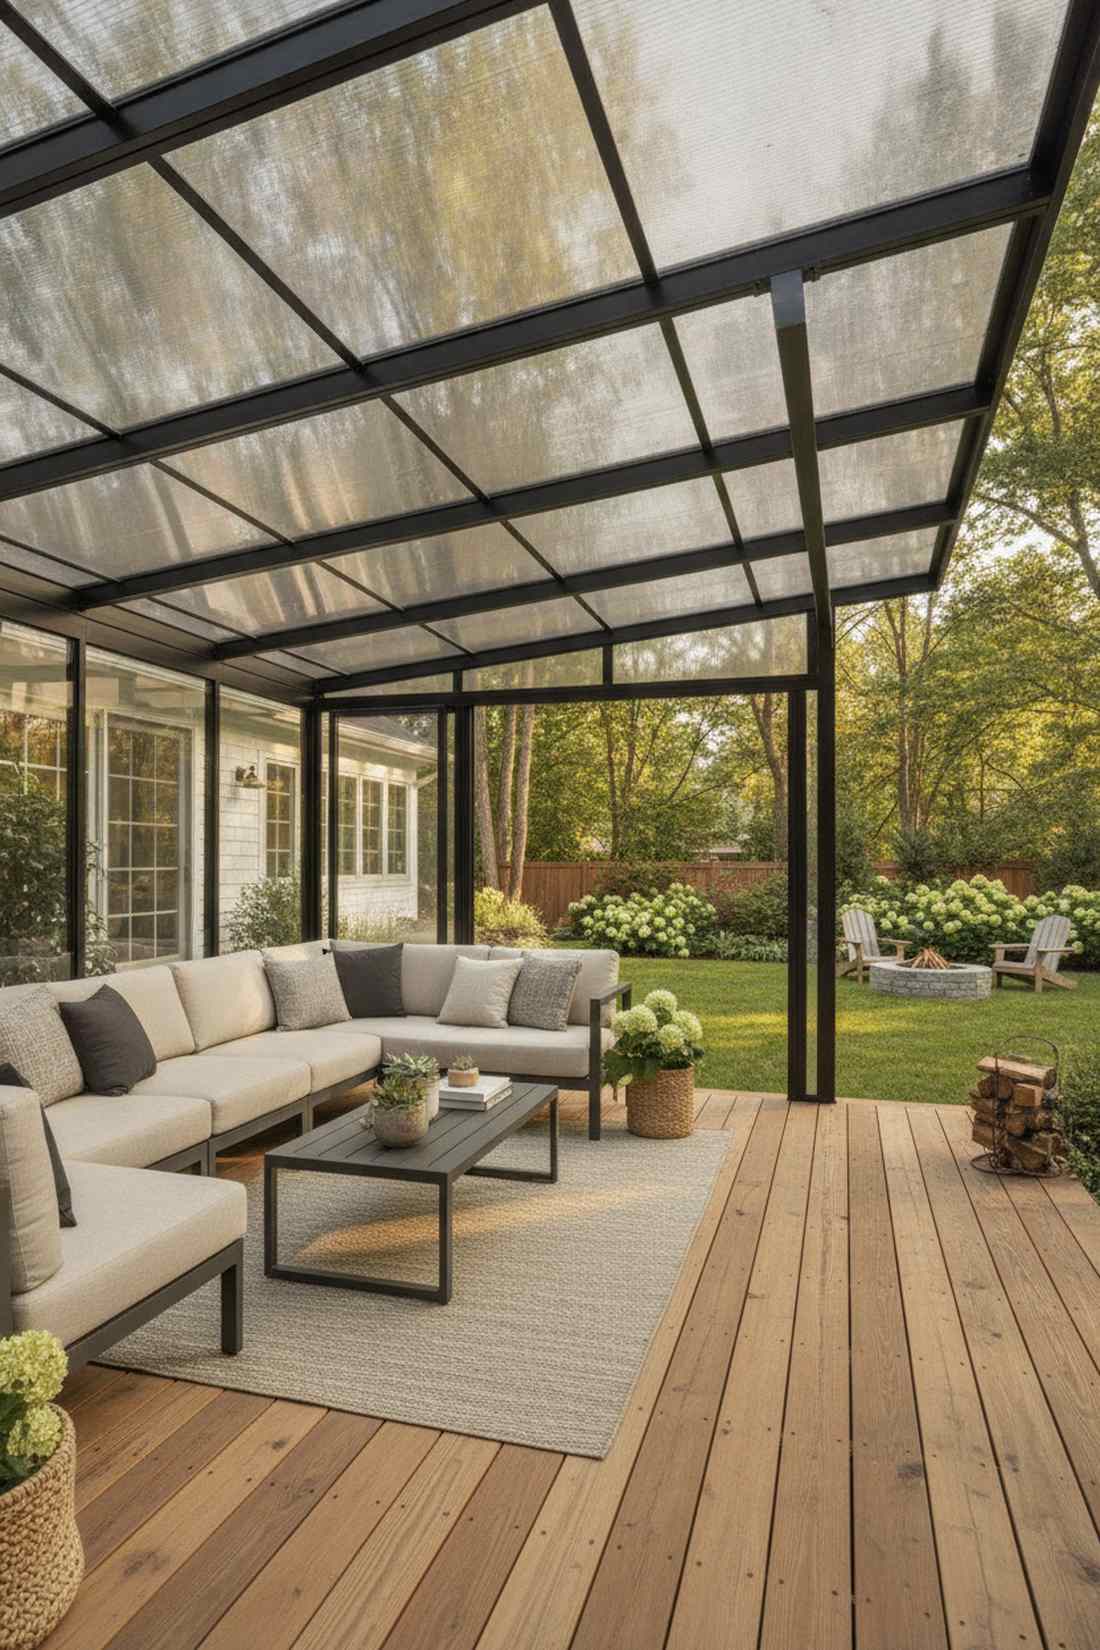
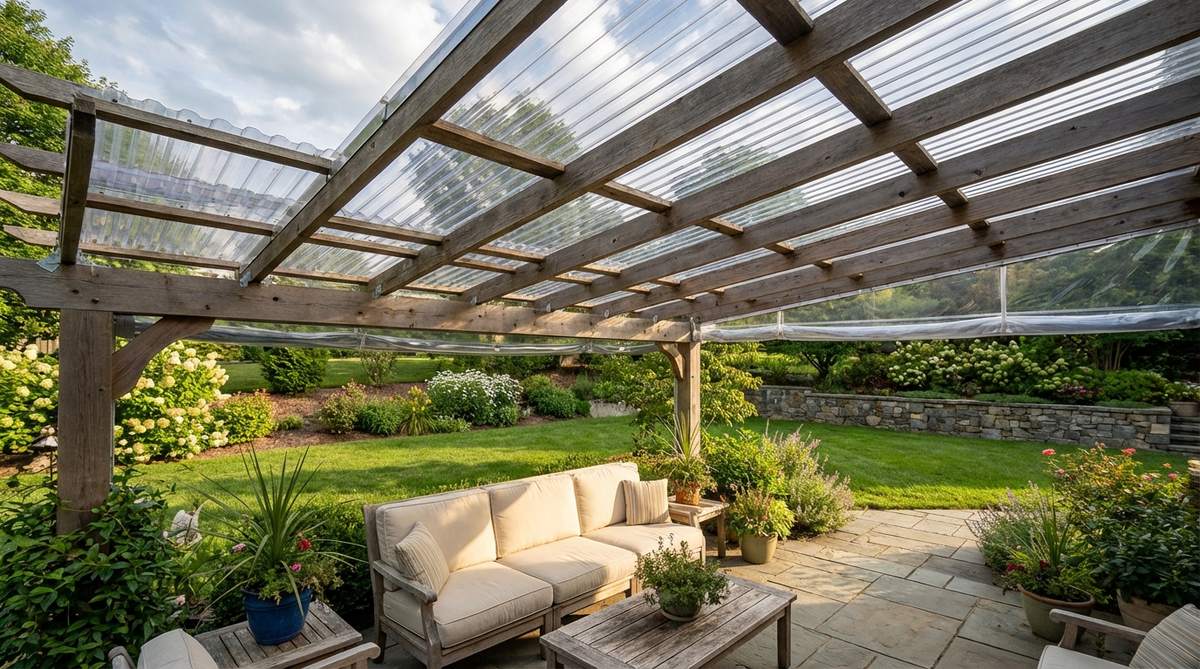
This bright setup gives the illusion of a brilliant glass sunroom. A clear waterproof roof panel system is ideal for covering outdoor electronics or plush seating areas that need constant protection from unpredictable downpours.
While corrugated plastic gets a bad reputation, using flat, tinted multi-wall sheets gives a designer-level finish. These shatterproof panels let 80% of ambient light pour through while physically blocking harmful UV rays and heavy rain.
You can cover a small 8×8 area for about $200–$400. Highly recommended if you want to keep your outdoor cushions dry year-round.
- Key Materials: Twin-wall polycarbonate sheets, H-channel connectors
- Vibe / Style: All-weather greenhouse chic
- Difficulty: Moderate cutting & sealing
- Budget Breakdown: Panels: $250 | Joining Channels: $80.
- Creator’s Tip: Use special foam closure strips at the ends of the panels to stop bugs and condensation from getting trapped inside.
- Smart Sourcing: Grab bronze-tinted polycarbonate roofing sheets (bulk pack) and UV-resistant roofing screws with neoprene washers.
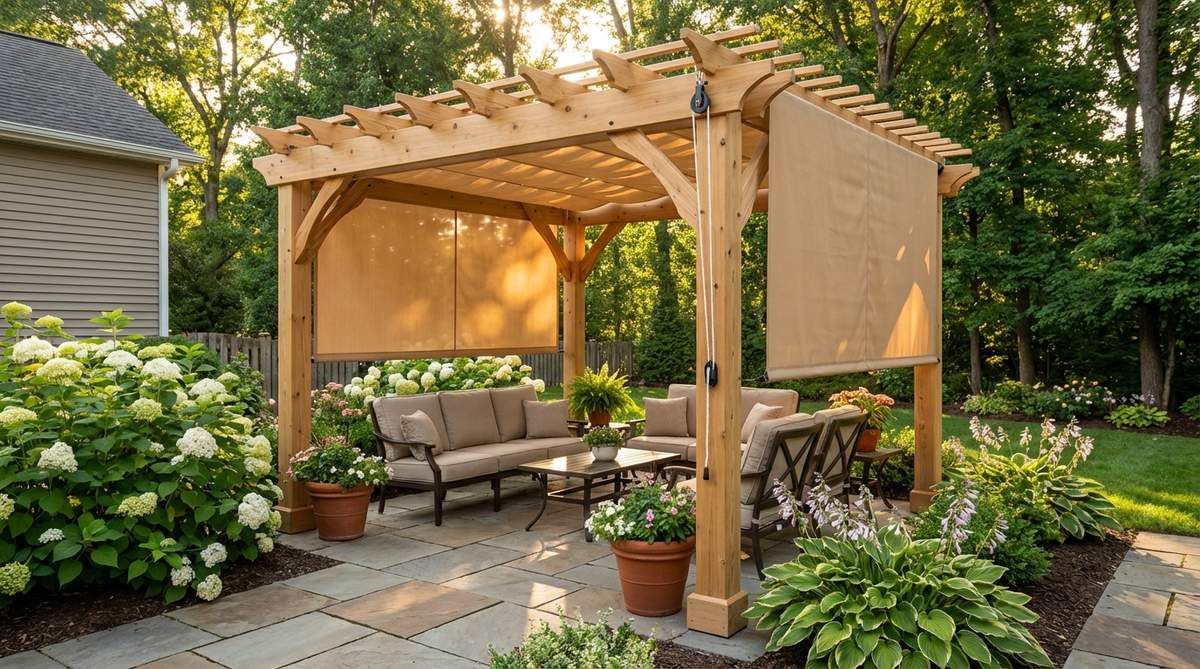
10. Outdoor Curtain Panels
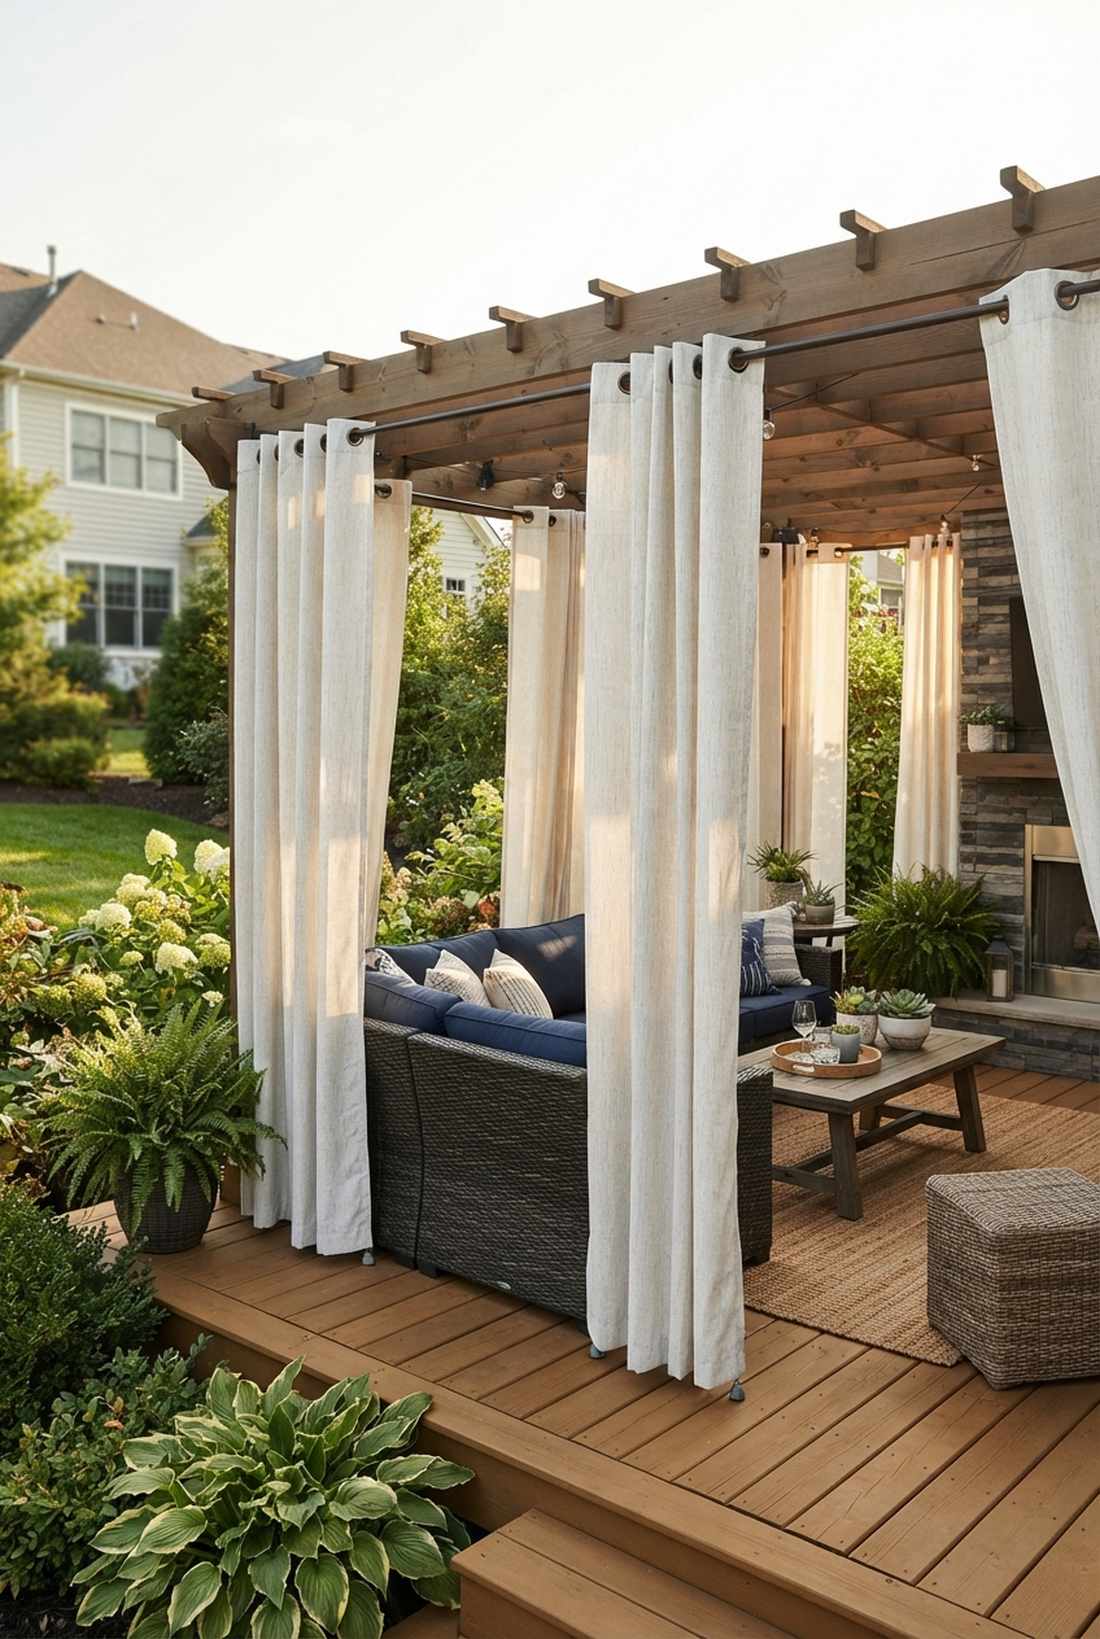
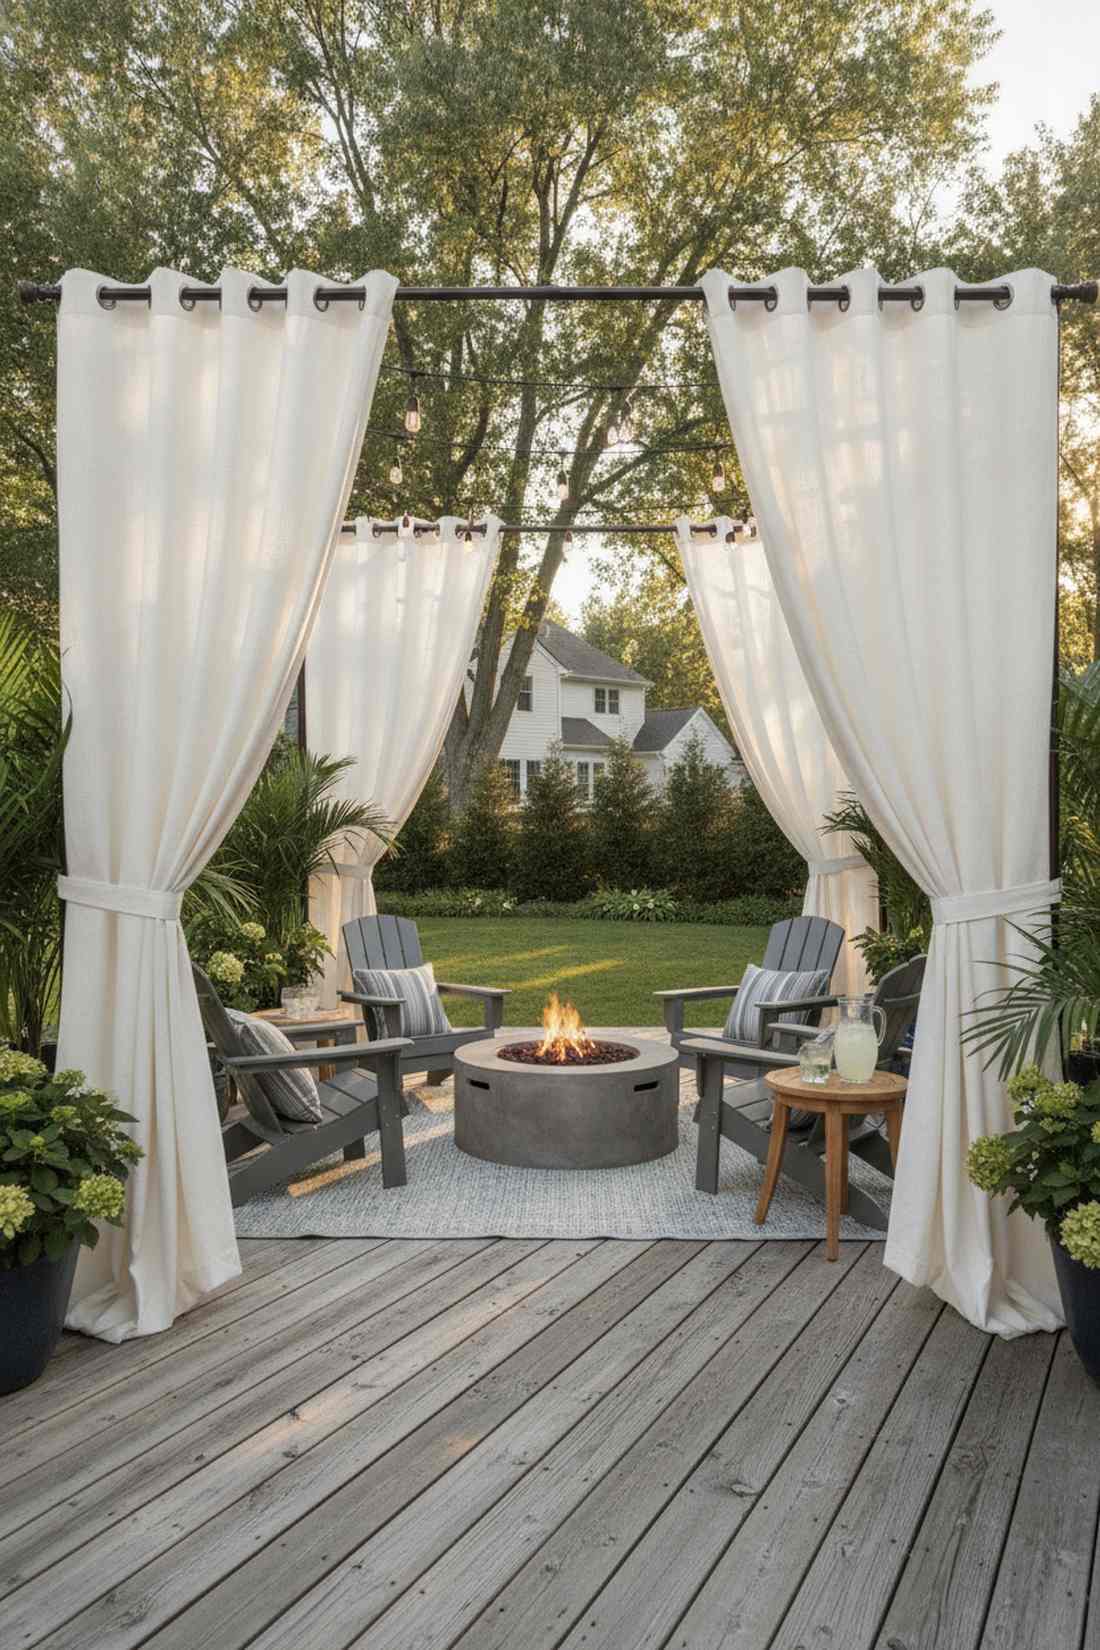
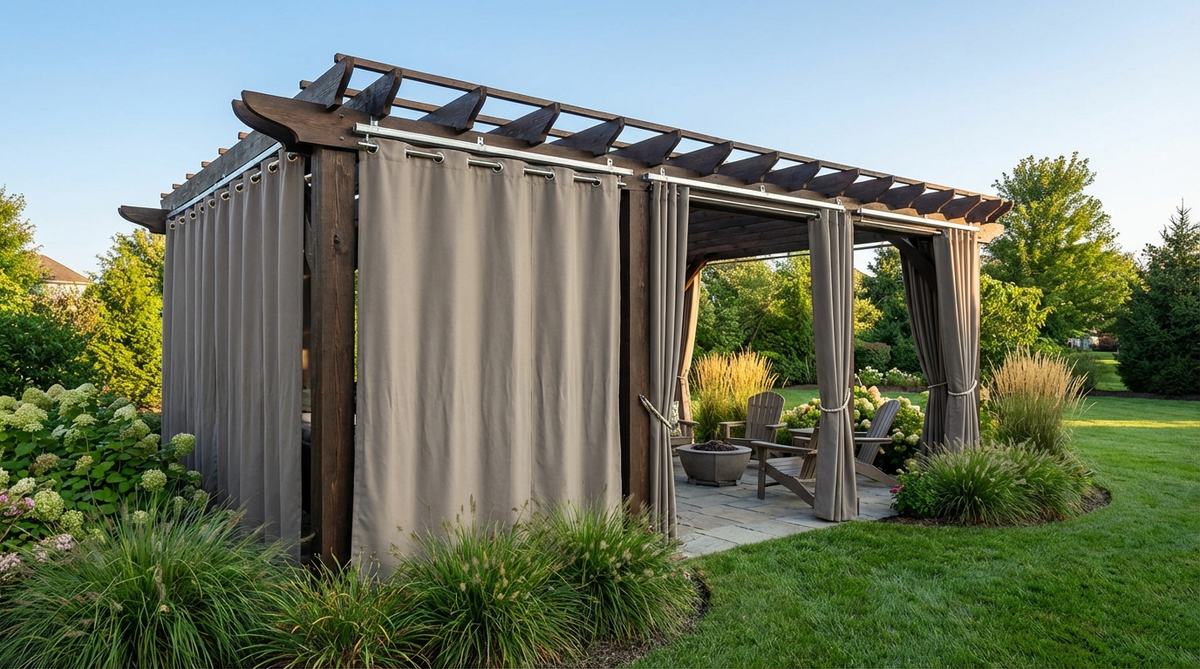
This layout creates an ultra-private cabana-style escape right in your backyard. Heavy-duty weather curtains work beautifully for cramped suburban lots where your neighbor’s windows look directly down into your outdoor living space.
Adding soft textiles instantly blurs the lines between indoor and outdoor living, making the structure feel incredibly cozy. Hanging grommeted marine-grade fabric from rust-proof tension rods offers adjustable wind-blocking and intense afternoon sun relief.
This rapid aesthetic transformation costs just $80–$150. Pin this to your outdoor decorating board for an instant privacy hack.
- Key Materials: Marine-grade fabric panels, outdoor curtain tracks
- Vibe / Style: Flowing luxury cabana
- Difficulty: Extremely easy add-on
- Budget Breakdown: Track Hardware: $40 | Fabric Panels: $90.
- Creator’s Tip: Sew small lead fishing weights into the bottom hem of the curtains to prevent them from blowing wildly in strong winds.
- Smart Sourcing: Buy waterproof outdoor grommet curtains (2-panel set) and a rust-proof ceiling mount curtain track.
Style-Focused Pergola Designs
Material choices directly dictate the architectural vibe of your yard. These specific styling blueprints guarantee a cohesive, high-end appearance even on a tiny footprint.
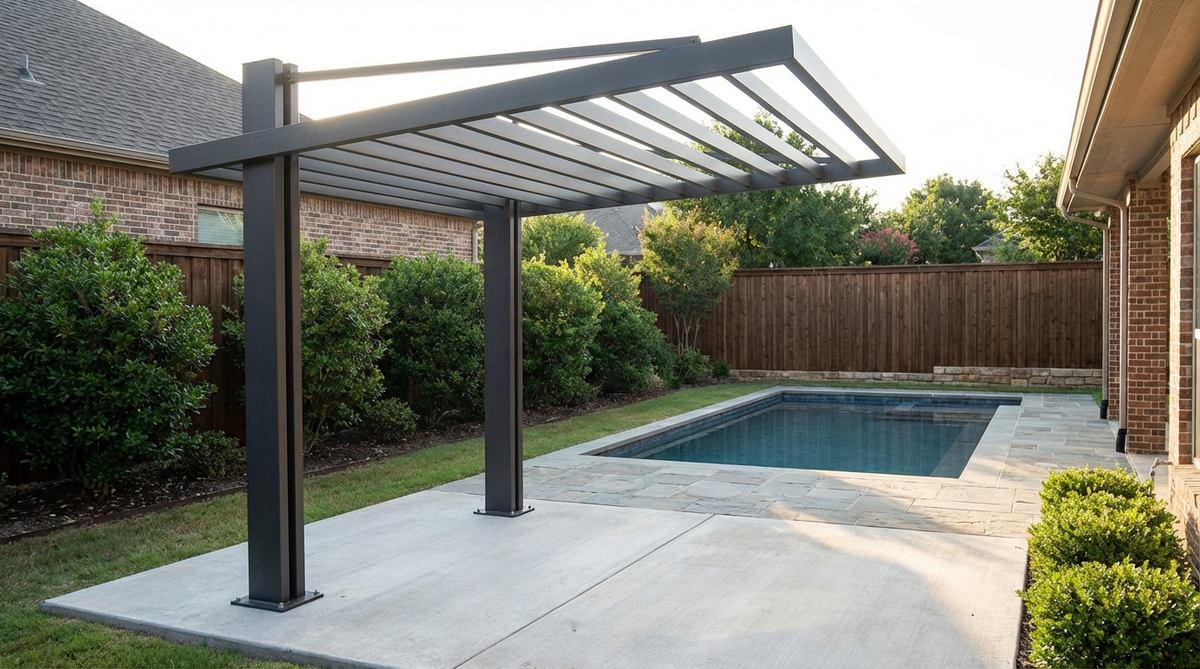
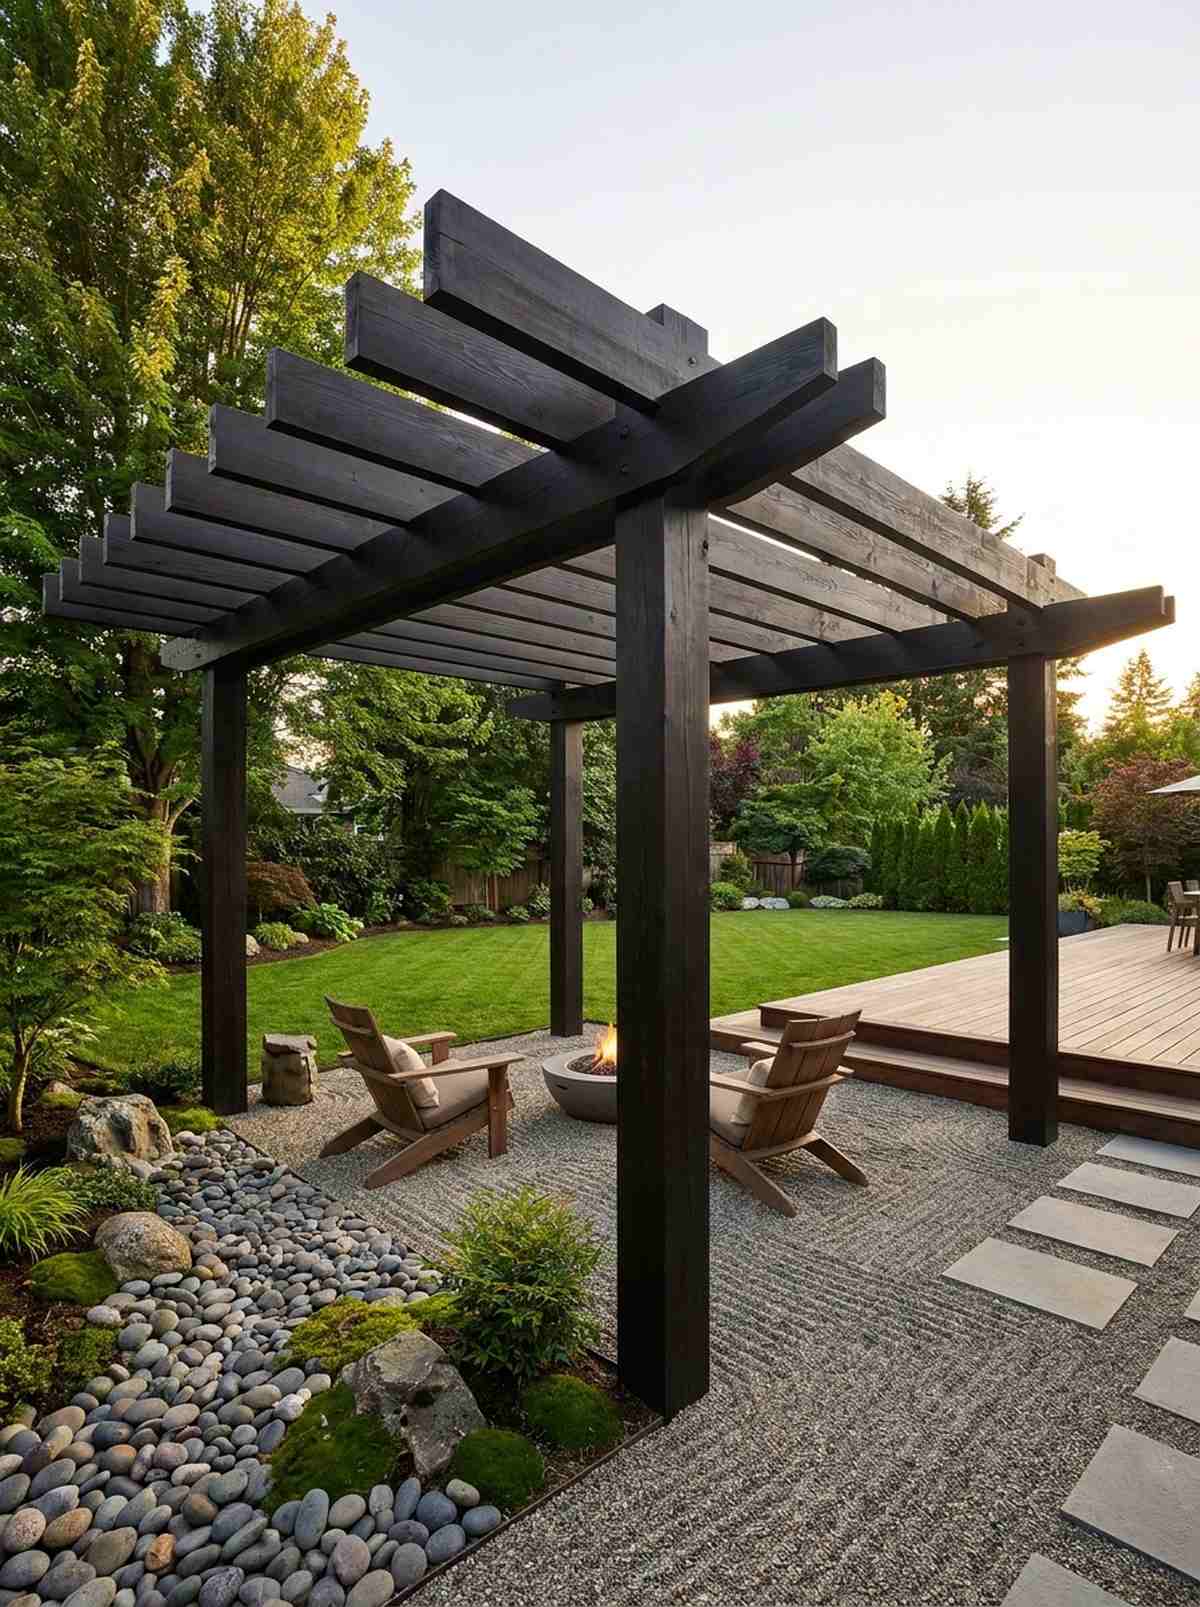
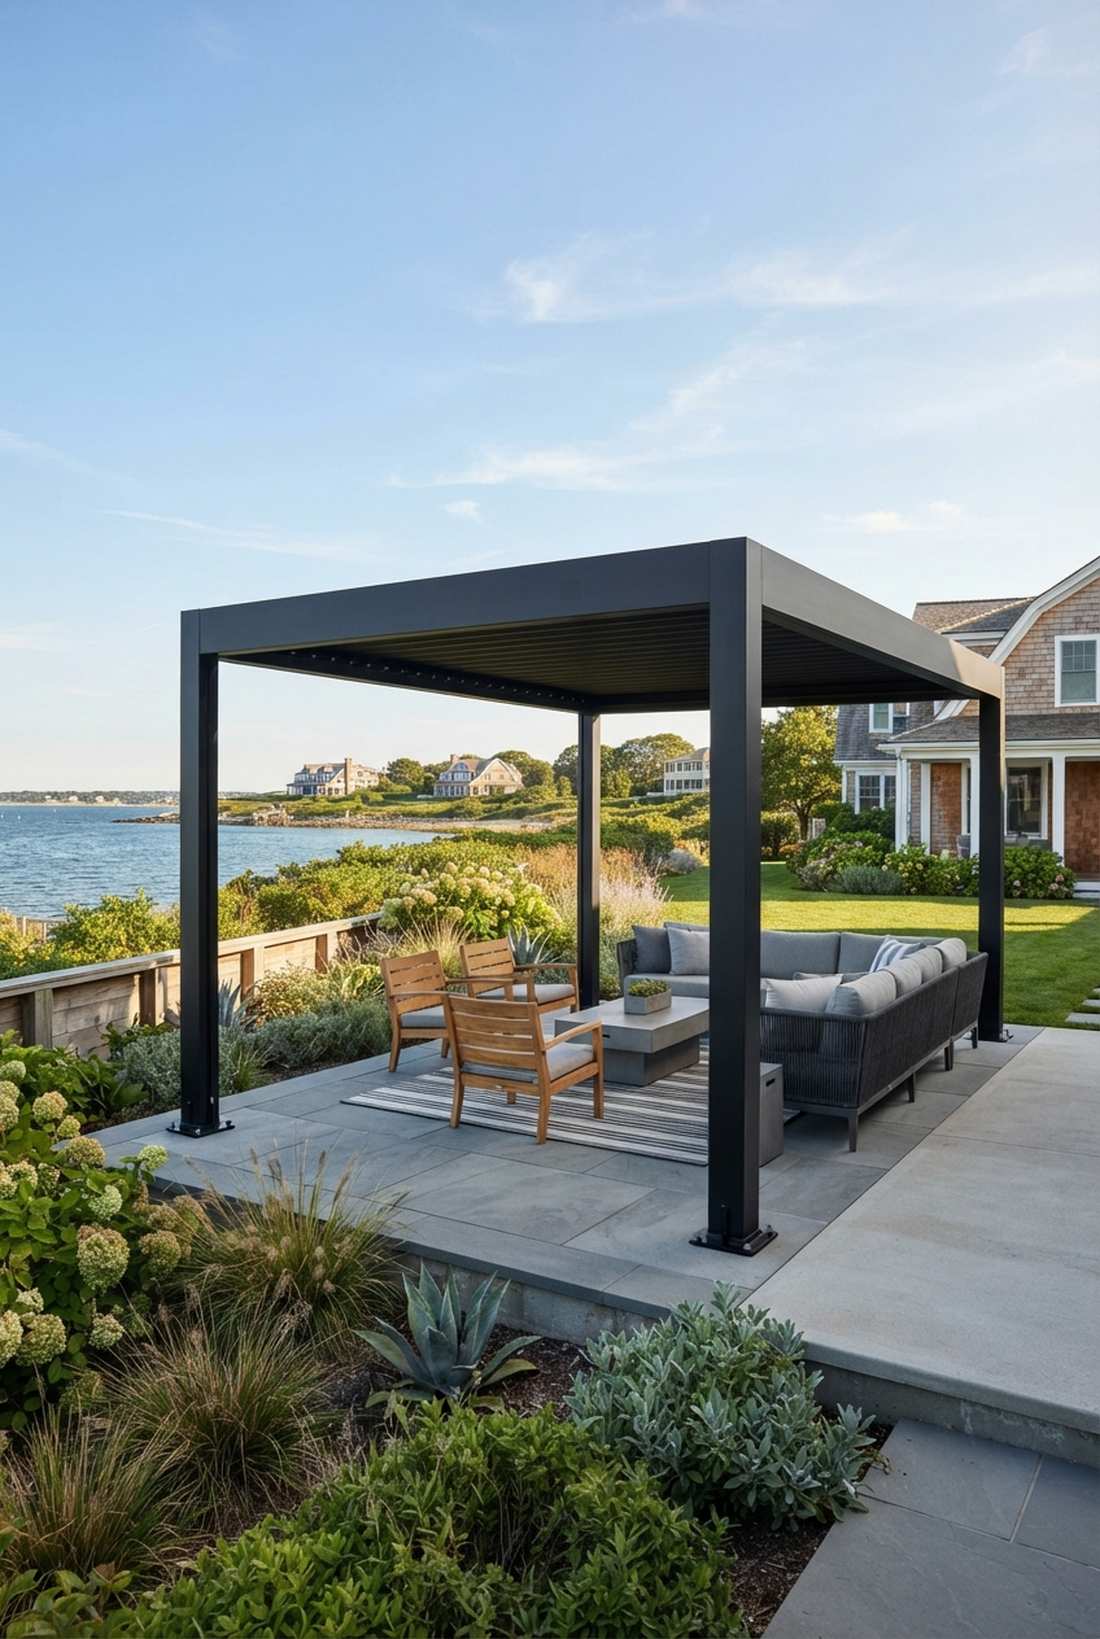
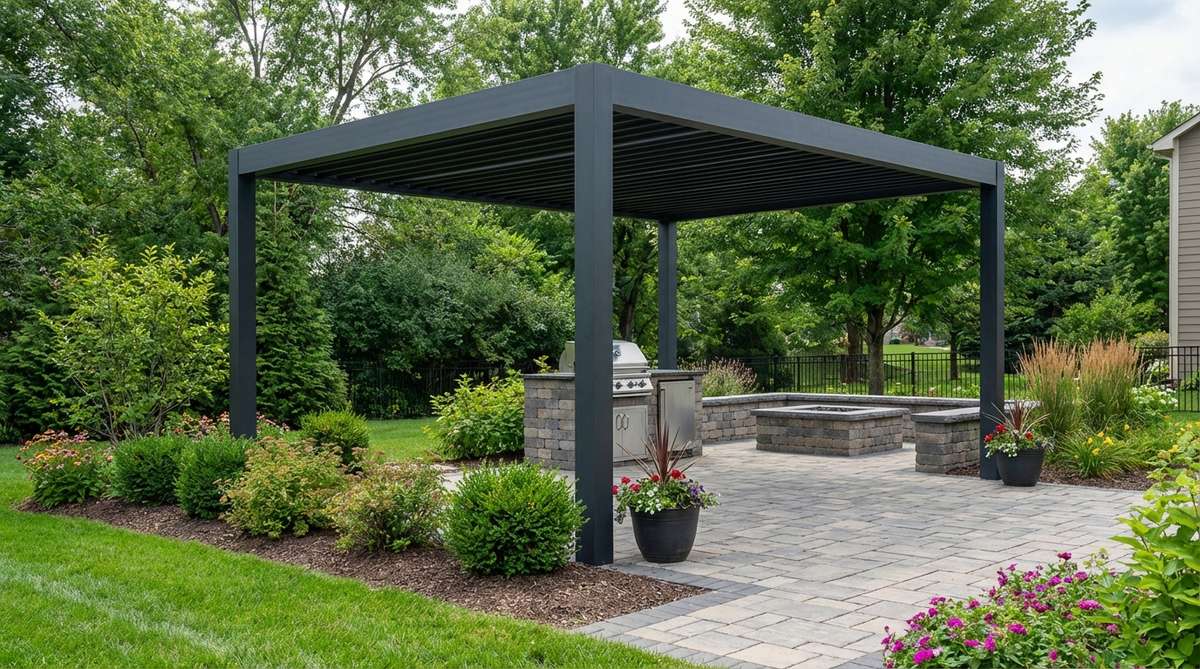
11. Modern Minimalist Steel Frame
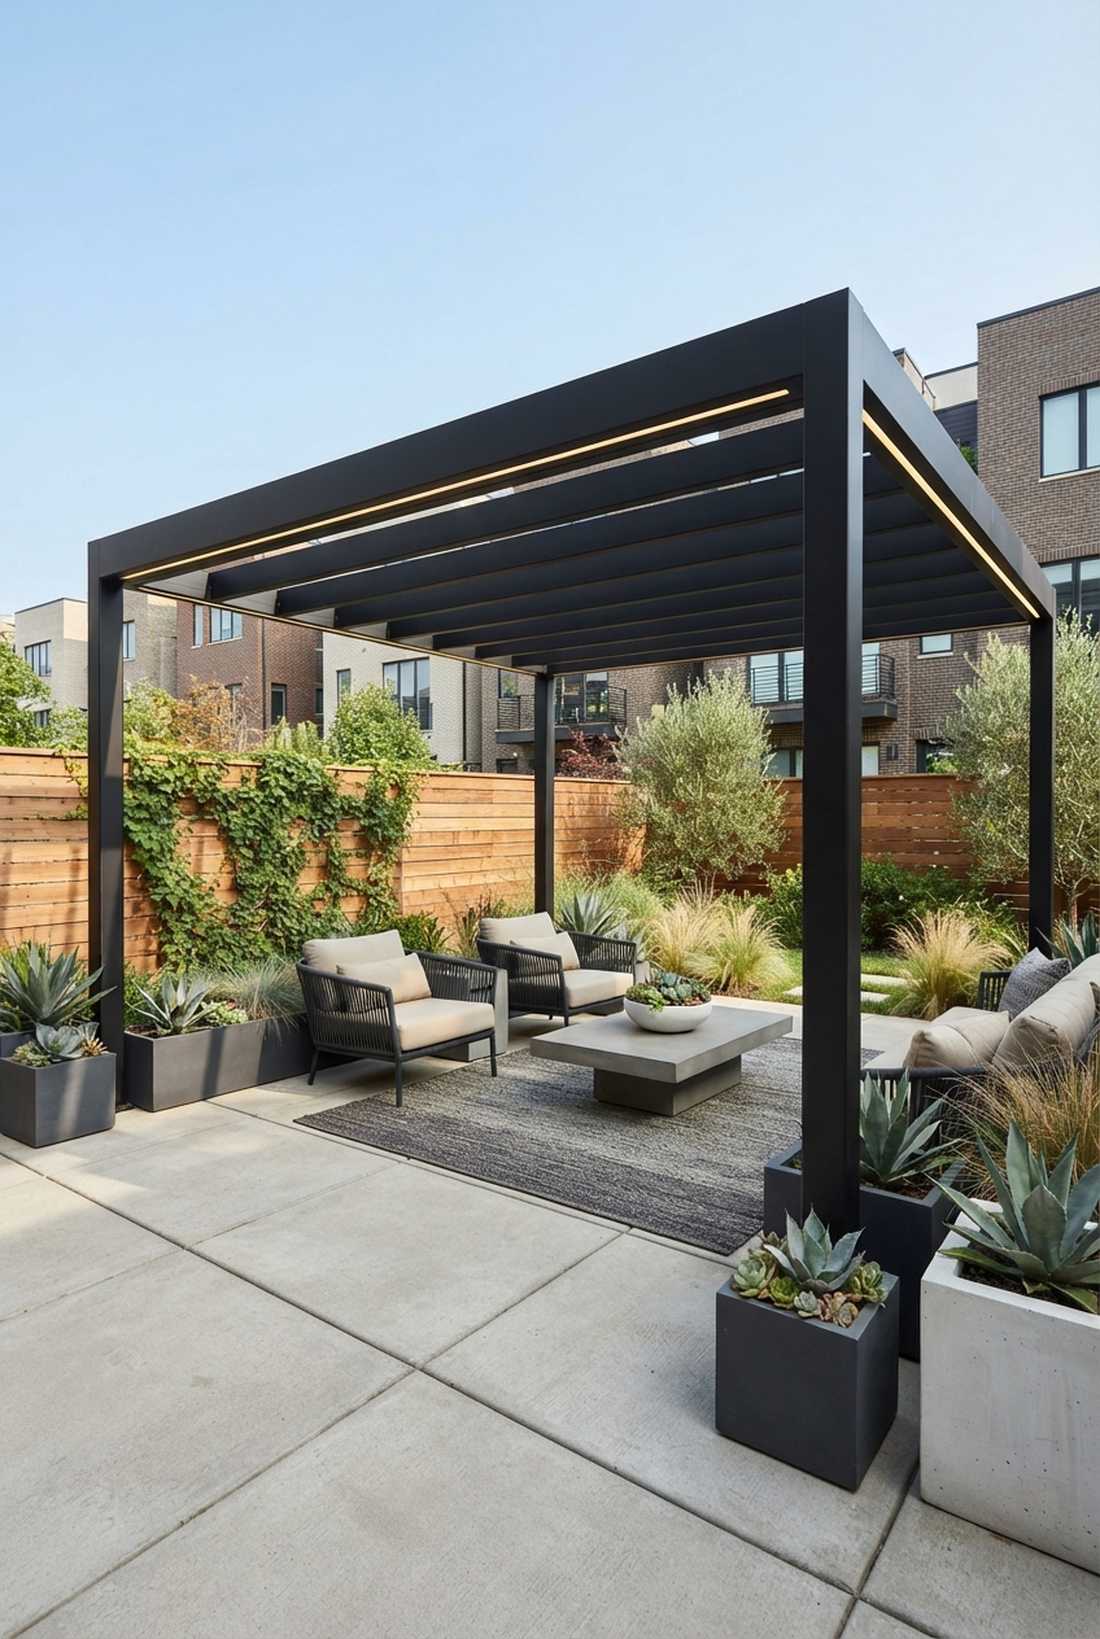
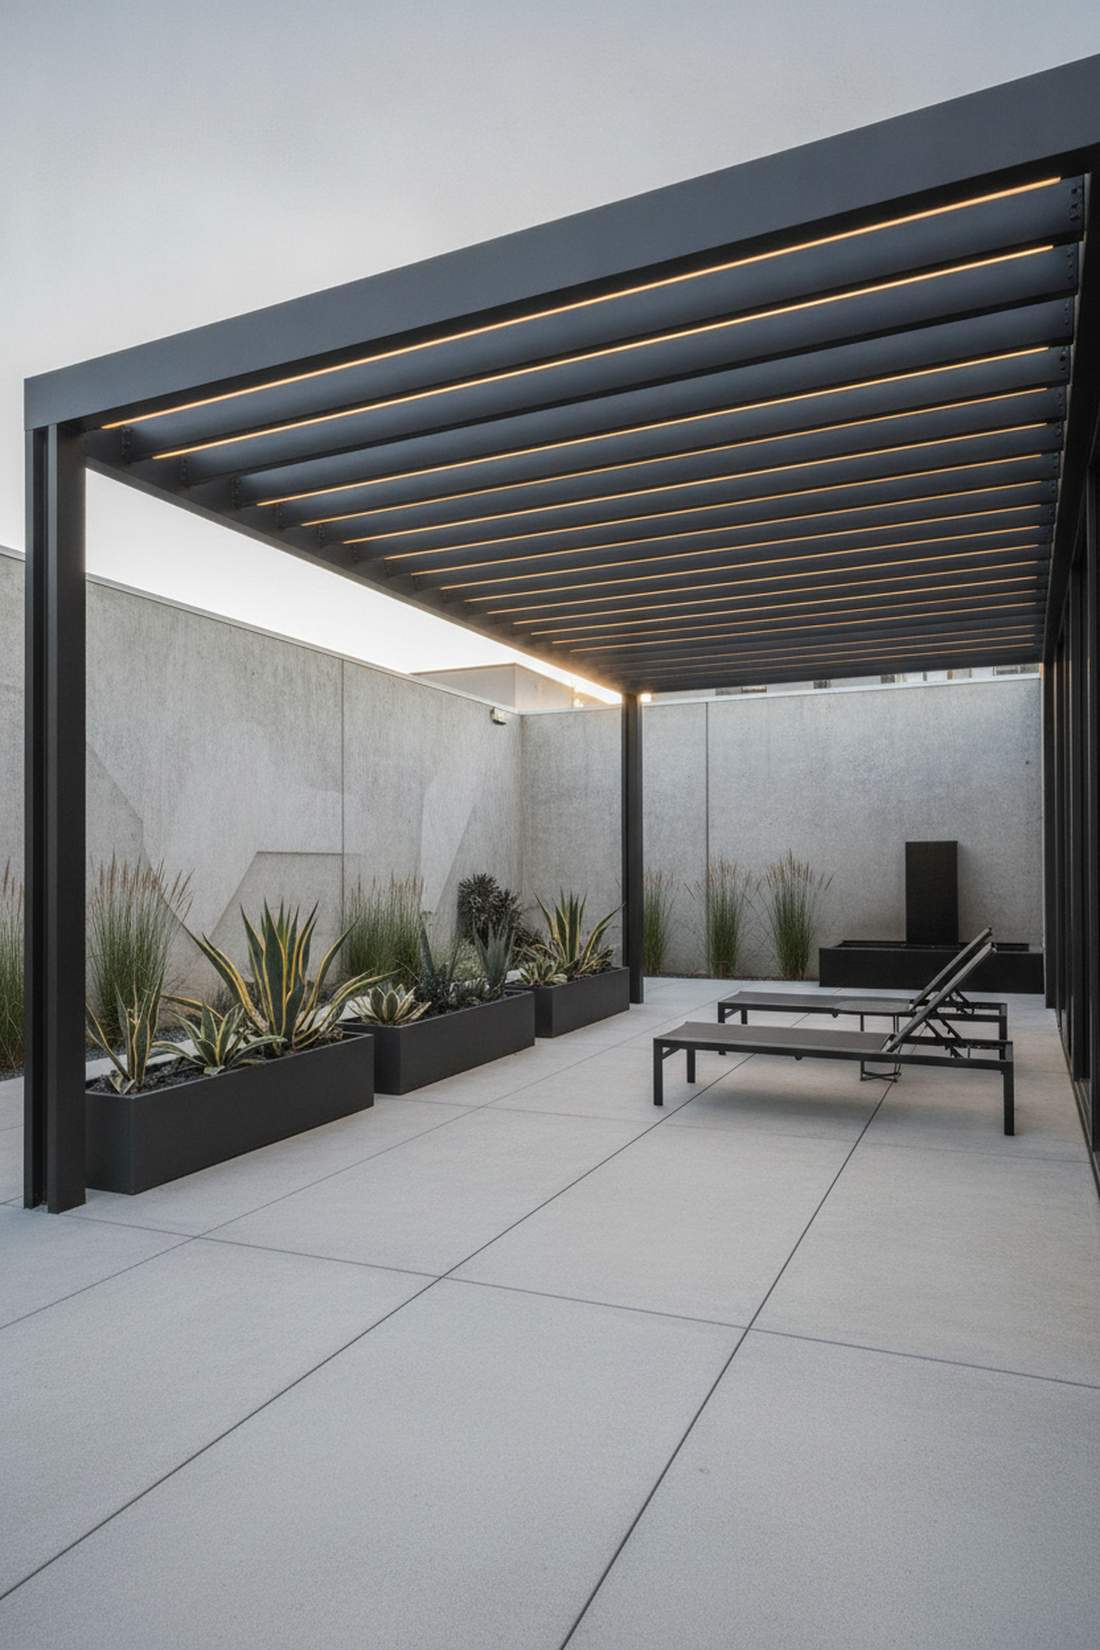

This sharp design acts as an aggressive industrial chic focal point. A matte black metal shade structure dominates contemporary urban patios, pairing perfectly with poured concrete pavers and minimalist succulent planters.
Steel frameworks deliver a surprisingly premium look while taking up a fraction of the visual bulk of thick timber. By utilizing flat, parallel roof beams, you achieve clean horizontal lines that make a tiny backyard look significantly wider and more intentionally designed.
A pre-fabricated steel kit generally runs $900–$1,500. It’s a zero-maintenance investment that stands up to severe weather.
- Key Materials: Powder-coated steel tubing, hidden internal fasteners
- Vibe / Style: Sleek urban industrial
- Difficulty: Heavy lifting required
- Budget Breakdown: Metal Frame Kit: $1,100 | Assembly Gear: $50.
- Creator’s Tip: Run waterproof LED strip lighting through the hollow metal beams before final assembly to hide all wiring.
- Smart Sourcing: Look for a rust-proof aluminum pergola starter kit and matte black touch-up spray paint for scratches.
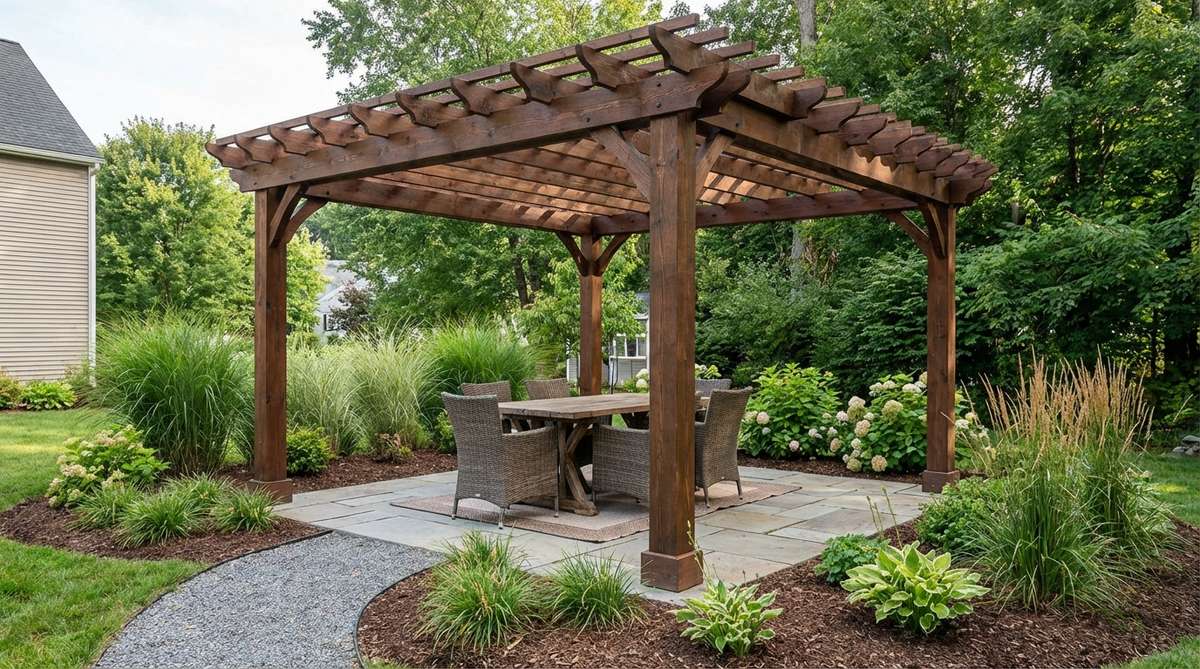
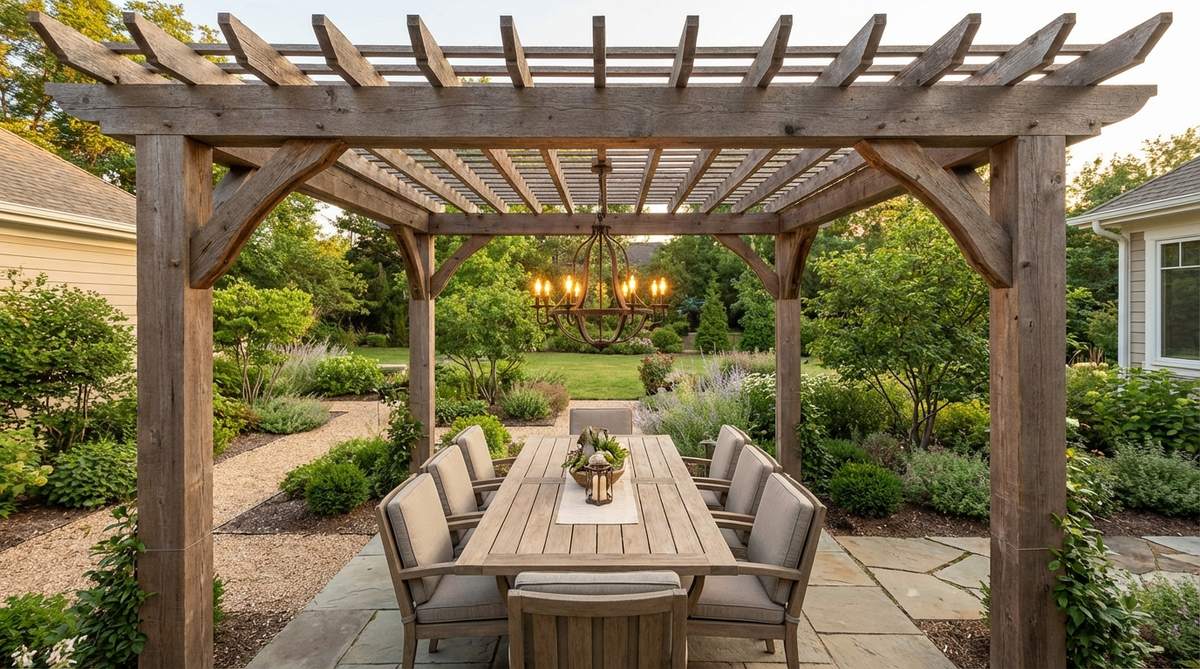
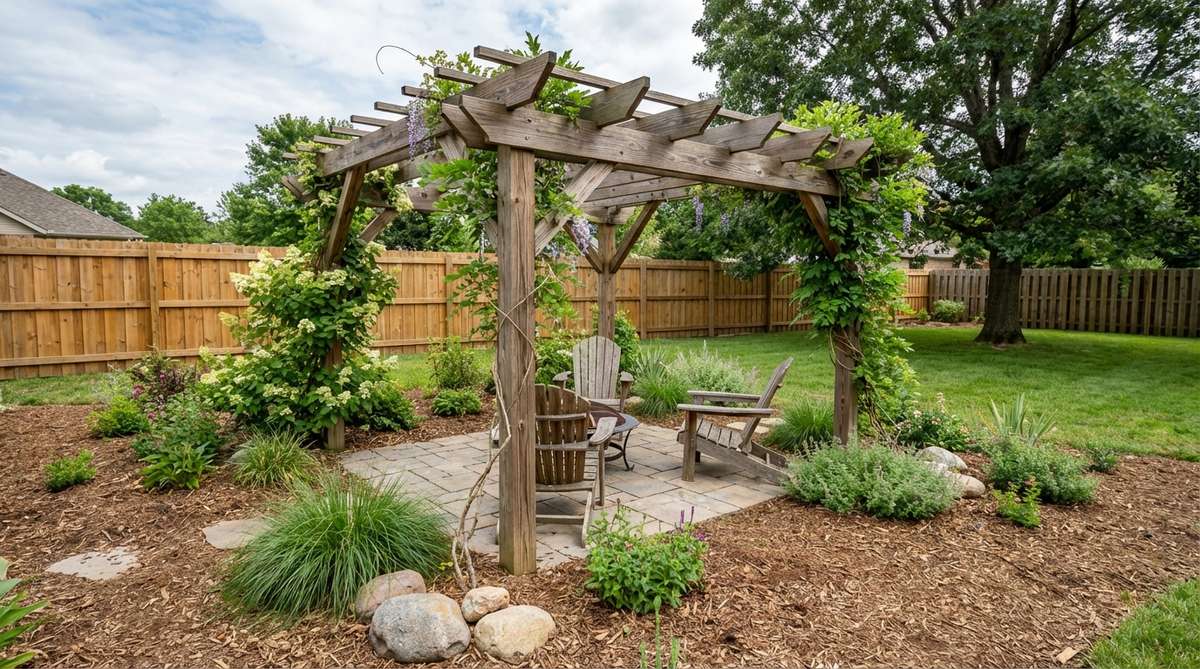
12. Rustic Weathered Timber Design

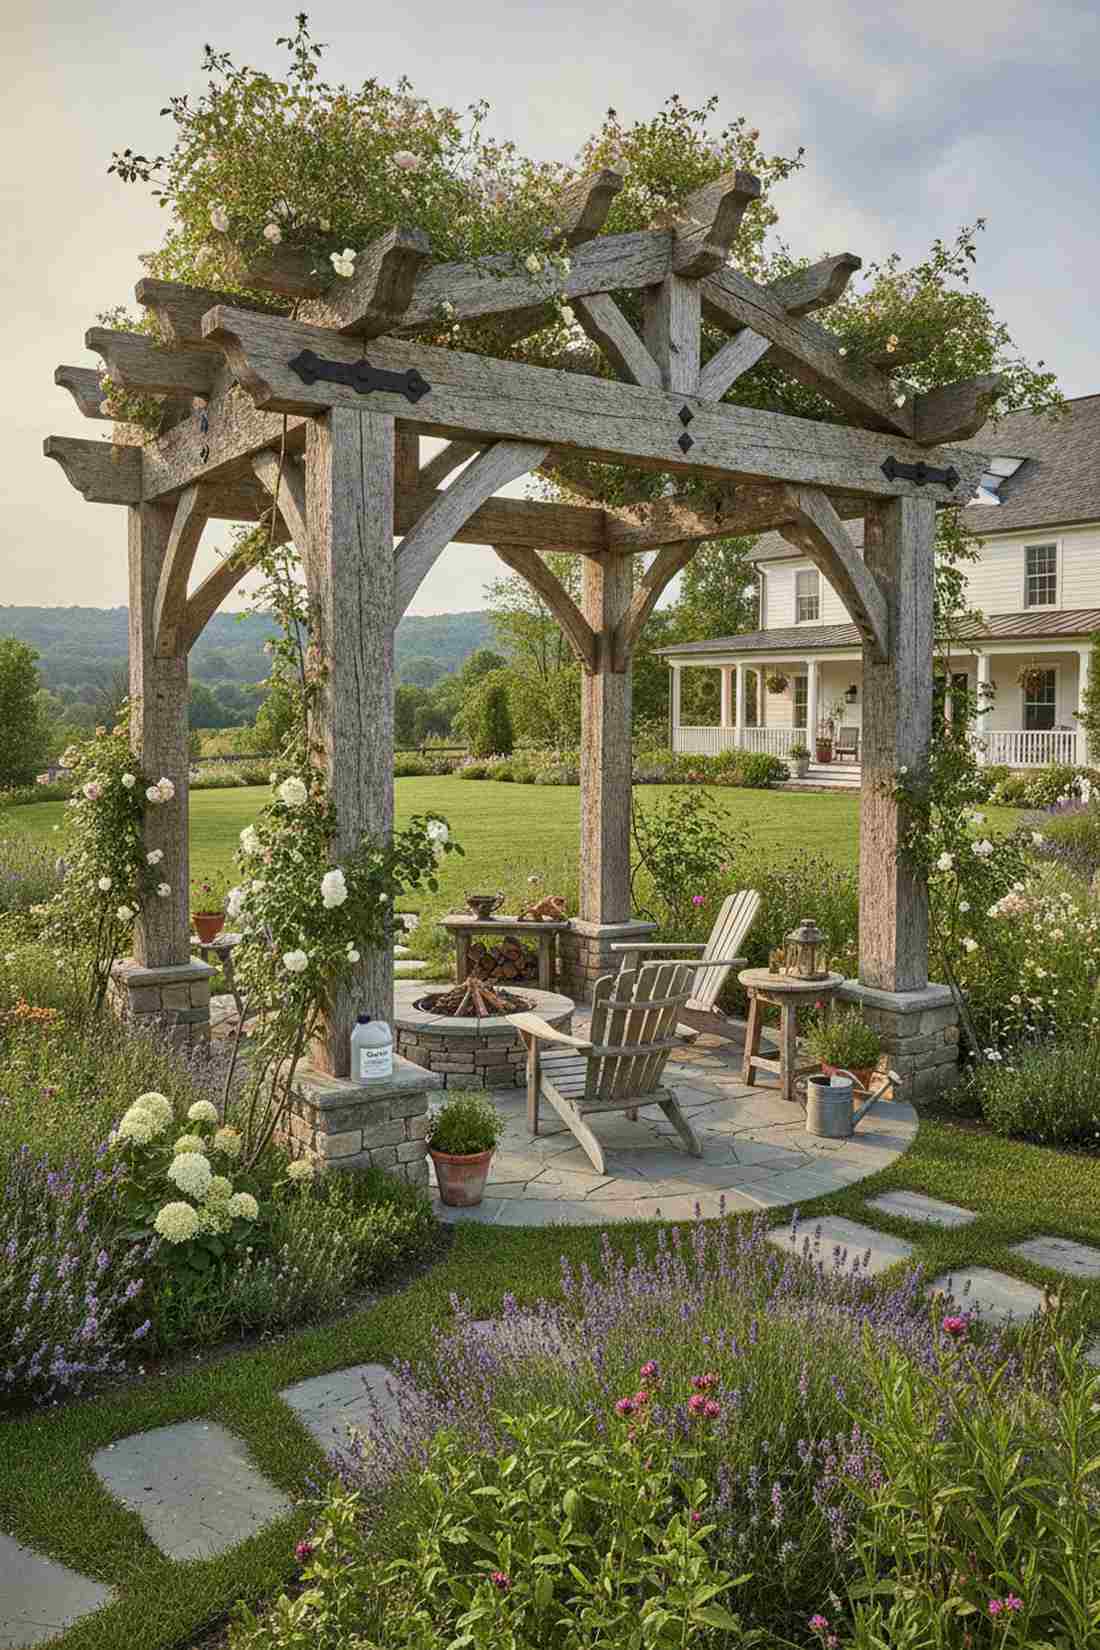
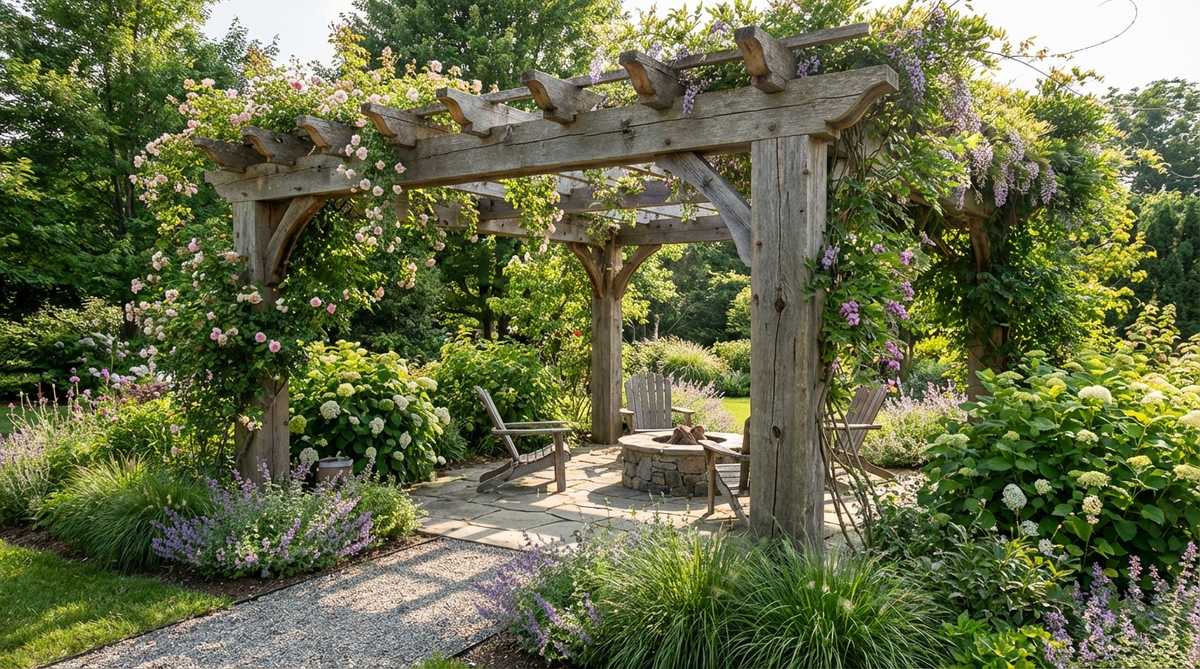
This rugged setup feels like a peaceful aged woodland sanctuary. A rough-sawn chunky wood pergola fits seamlessly into a lush, informal farmhouse garden, anchoring the space with serious visual weight and organic texture.
Skipping the ultra-smooth sanded lumber in favor of reclaimed or rough-hewn beams gives an immediate sense of history and craftsmanship. Leaving the timber unpainted to develop a natural silver-gray patina completely eliminates seasonal maintenance while boosting the earthy aesthetic.
Sourcing thick rustic timbers will cost around $500–$800. Save this idea if you love the charm of authentic, raw materials.
- Key Materials: Rough-sawn cedar 6x6s, heavy iron brackets
- Vibe / Style: Heritage farmhouse retreat
- Difficulty: Moderate woodworking
- Budget Breakdown: Reclaimed Timbers: $600 | Iron Hardware: $150.
- Creator’s Tip: Use oversized black carriage bolts instead of standard screws to heavily emphasize the traditional timber-framing look.
- Smart Sourcing: Order decorative forged iron wood ties and clear penetrating wood oil (gallon jug).
This next setup is ridiculously cheap but looks like a custom installation imported straight from Europe…
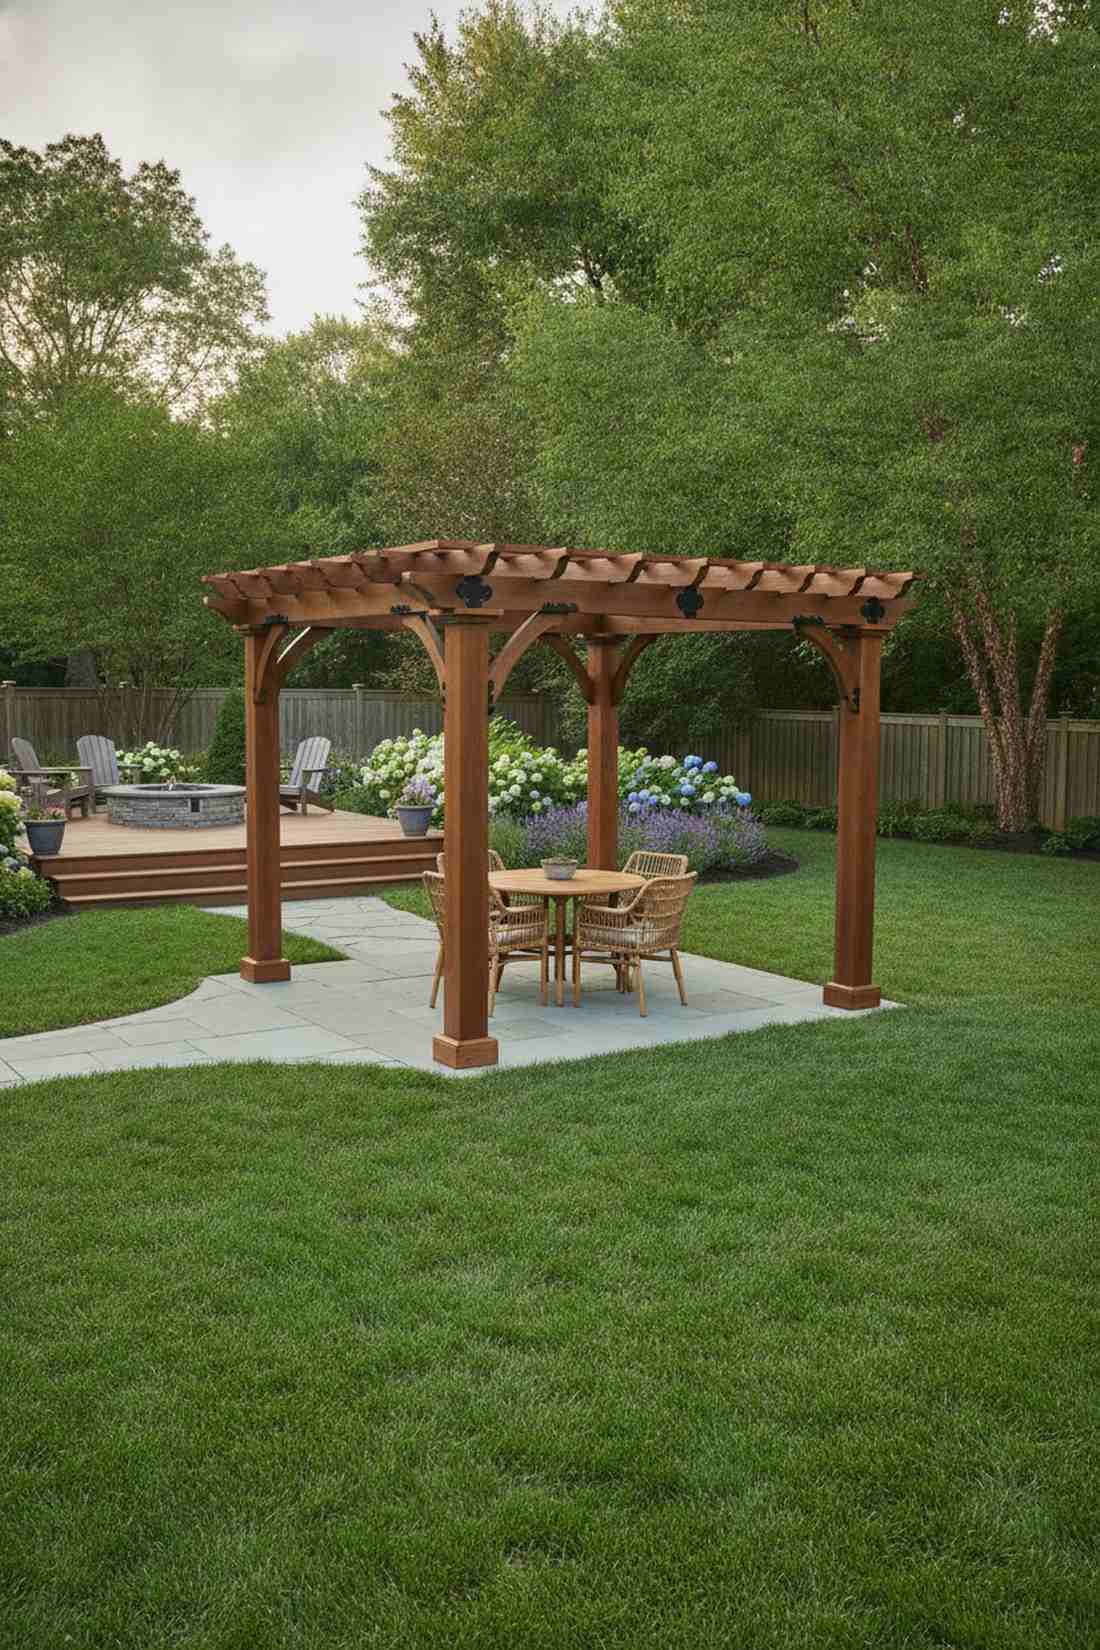
13. Mediterranean Arched Pergola
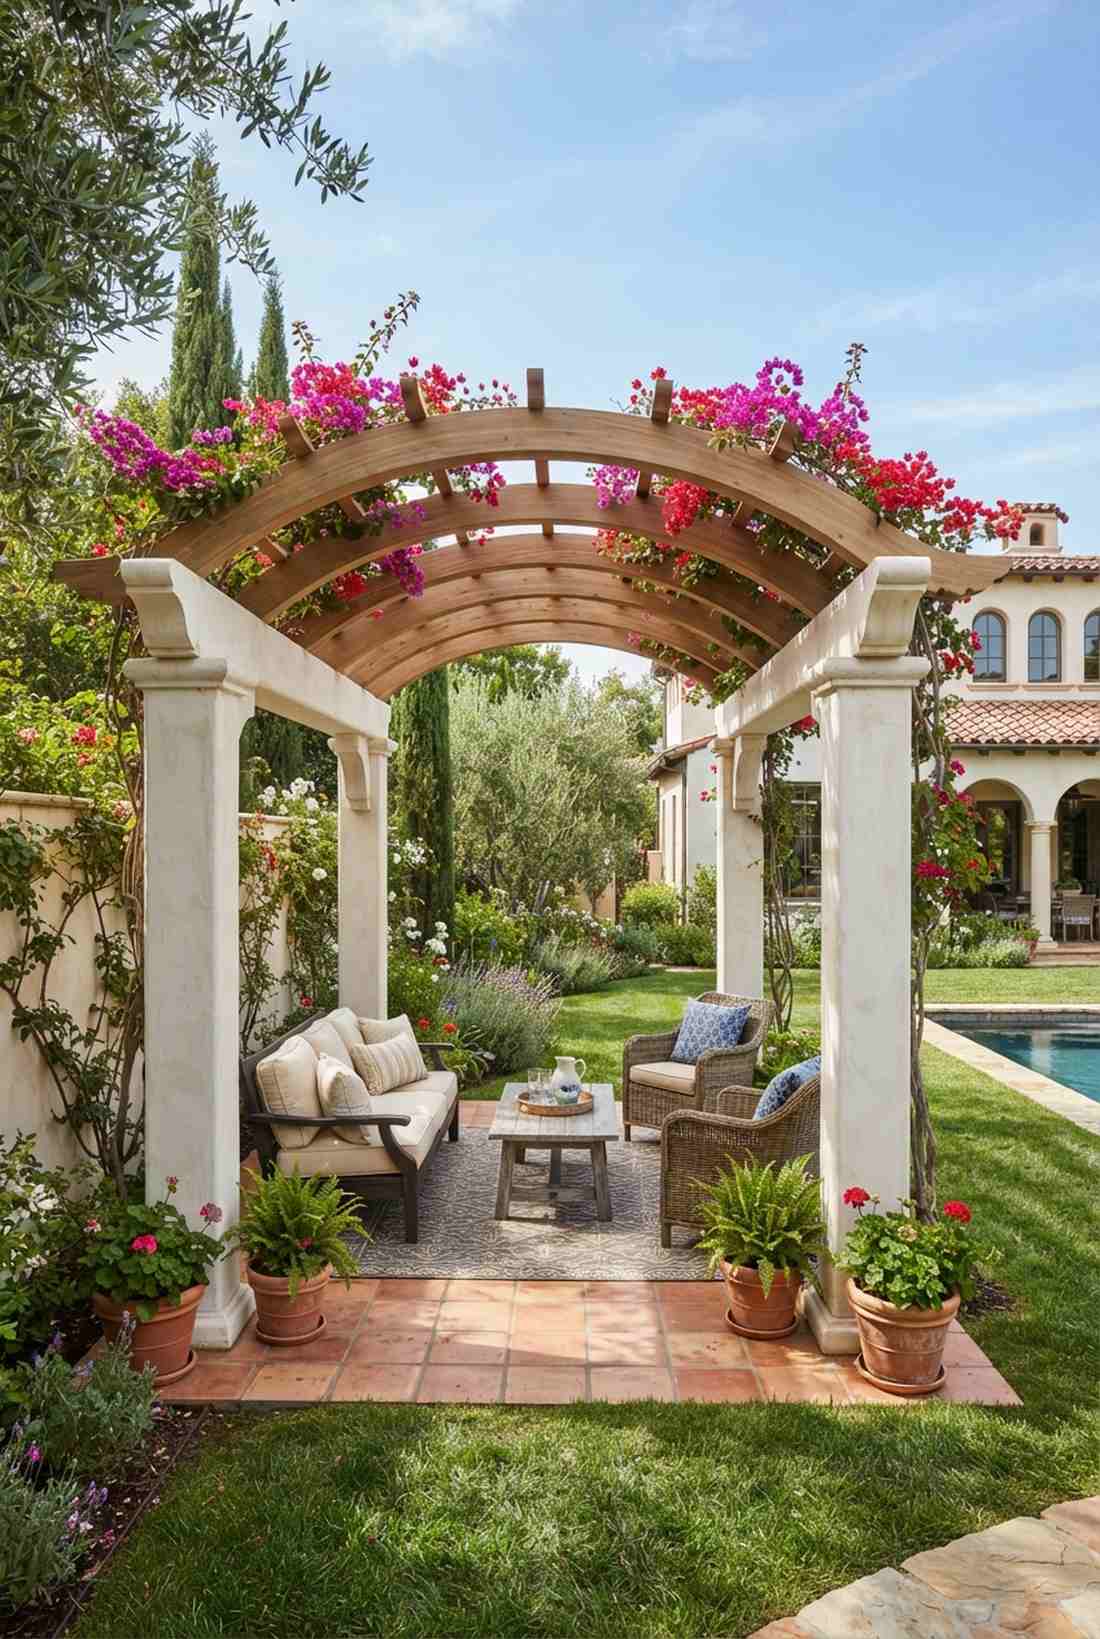
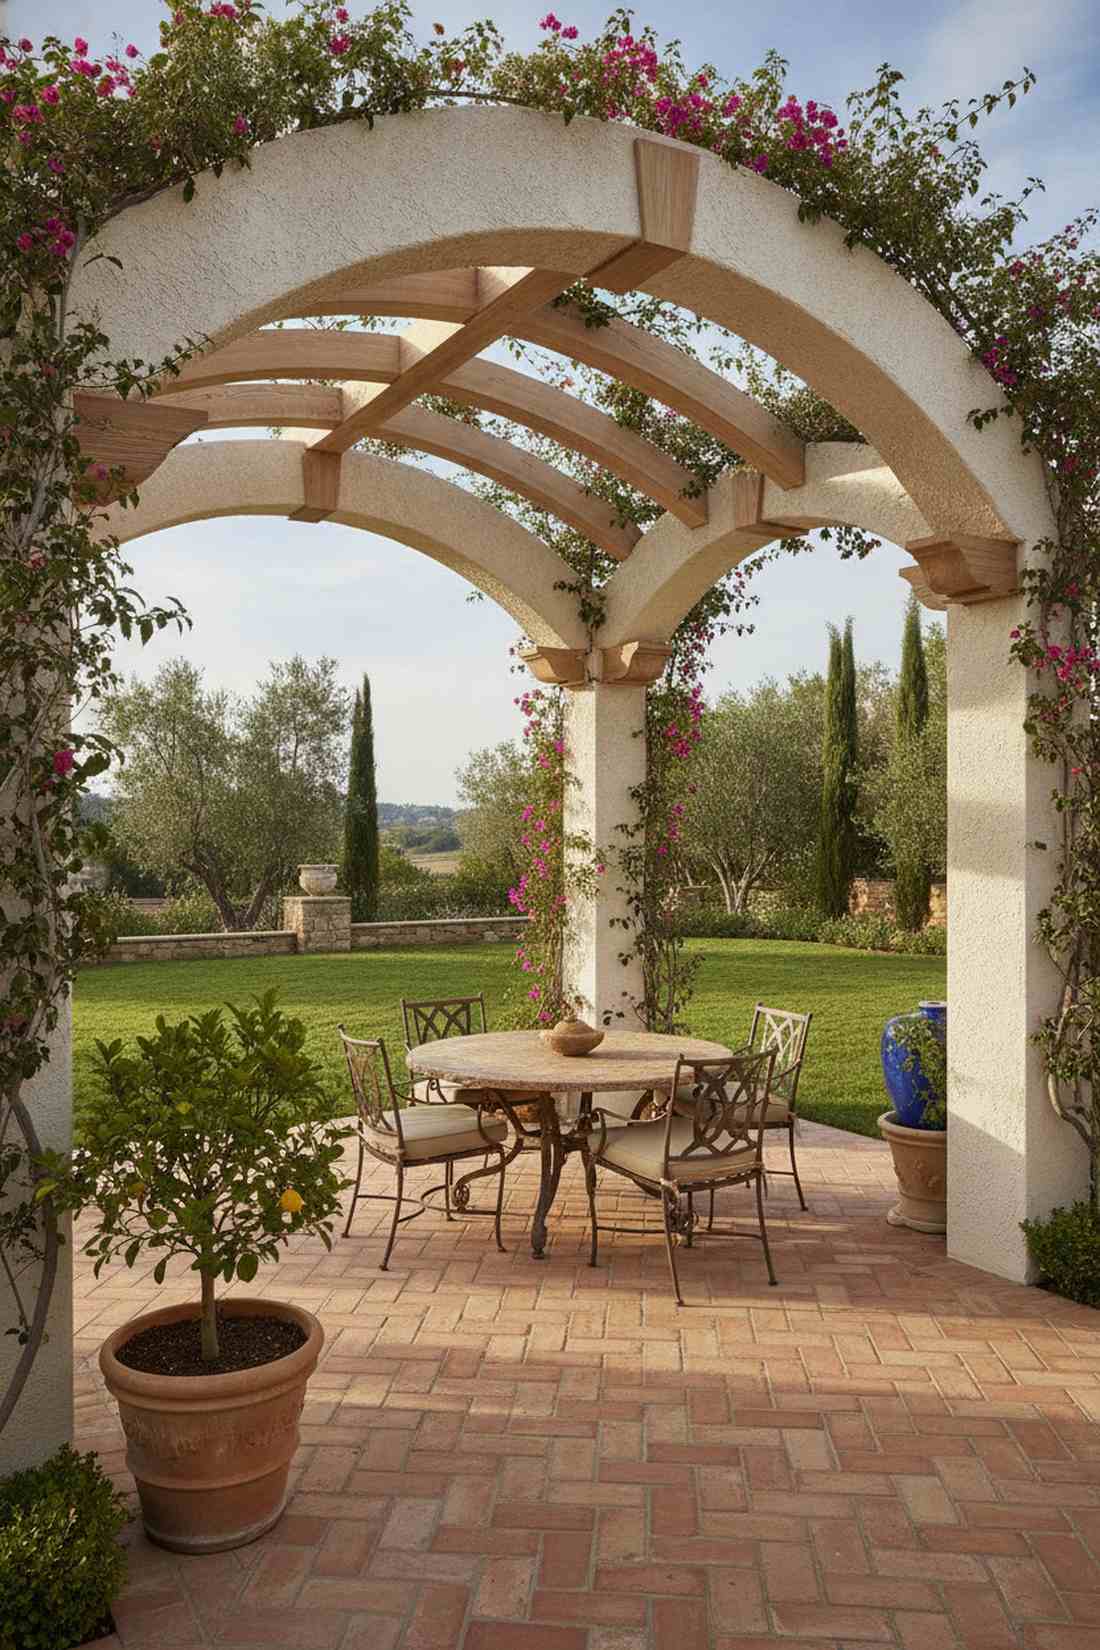

This romantic profile transports you straight to a Tuscan villa courtyard. A curved roof timber canopy is absolutely magnificent for warm-climate patios adorned with terracotta tiles and creeping bougainvillea.
Swapping out flat, rigid rafters for gently sweeping arched crossbeams softens the entire yard’s rigid geometry. Painting the structure in warm ochre or crisp stucco-white elevates the architectural charm and frames your seating area like a true European retreat.
Custom arched glulam beams push this build into the $800–$1,200 range. Highly recommended for injecting serious architectural character.
- Key Materials: Curved glulam beams, decorative corbels
- Vibe / Style: Elegant coastal European
- Difficulty: Advanced custom carpentry
- Budget Breakdown: Arched Beams: $800 | Support Posts: $200.
- Creator’s Tip: Trace and cut your own arched profiles from extra-wide 2×12 lumber if buying pre-bent glulam beams is out of budget.
- Smart Sourcing: Grab pre-cut wooden corbel brackets (4-pack) and exterior stucco-textured paint.
14. Japanese-Inspired Timber Pergola
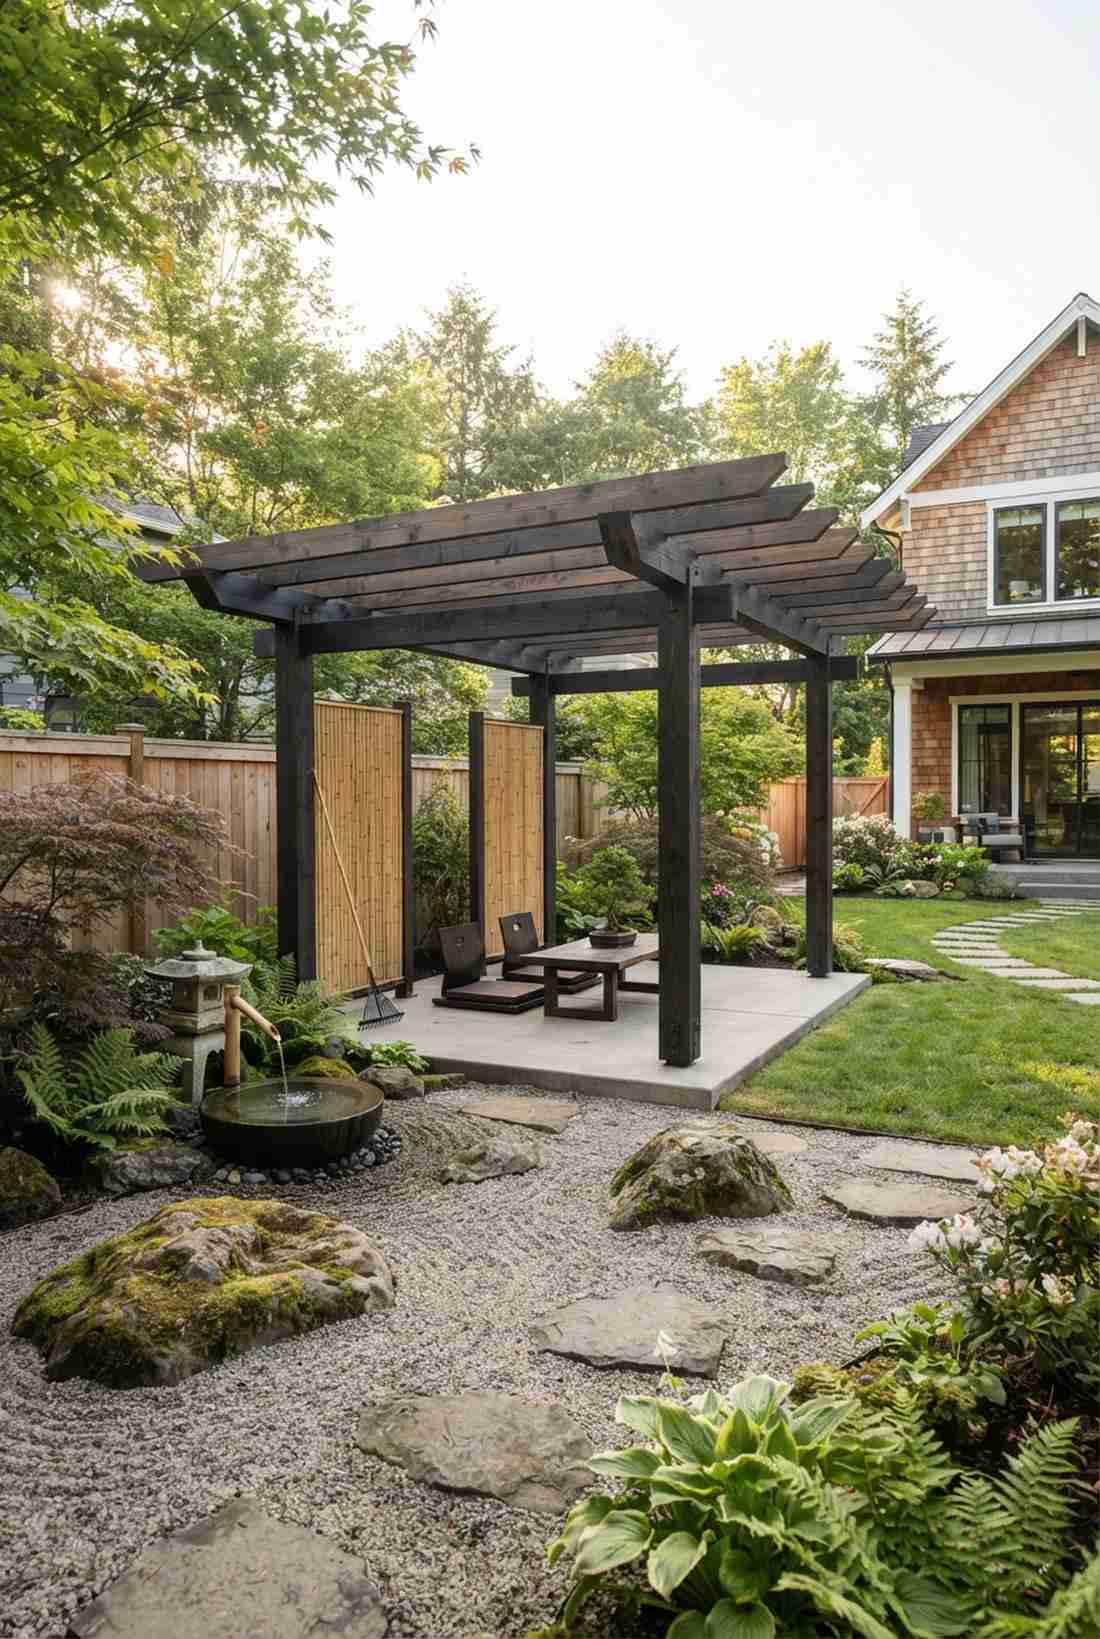
This quiet space functions as a tranquil meditation pavilion. A minimalist zen garden shade structure pairs impeccably with bamboo privacy screens, raked gravel beds, and a soothing low-profile water feature.
True beauty lies in restraint, and this layout avoids heavy cross-hatching in favor of clean, extended beam overhangs. Emphasizing the natural beauty of the wood grain with interlocking joinery looks far more expensive than it is and commands profound visual respect.
Expect to spend $400–$700 on premium, knot-free lumber. Pin this to your peaceful backyard sanctuary board.
- Key Materials: Clear cedar lumber, hidden tension ties
- Vibe / Style: Harmonious minimal zen
- Difficulty: Precision joinery focus
- Budget Breakdown: Premium Cedar: $550 | Hardware: $80.
- Creator’s Tip: Apply a dark fire-charred “Shou Sugi Ban” finish to the wood for ultimate weather resistance and a striking charcoal aesthetic.
- Smart Sourcing: Invest in a Japanese pull saw for flush cuts and natural tung oil wood finish.
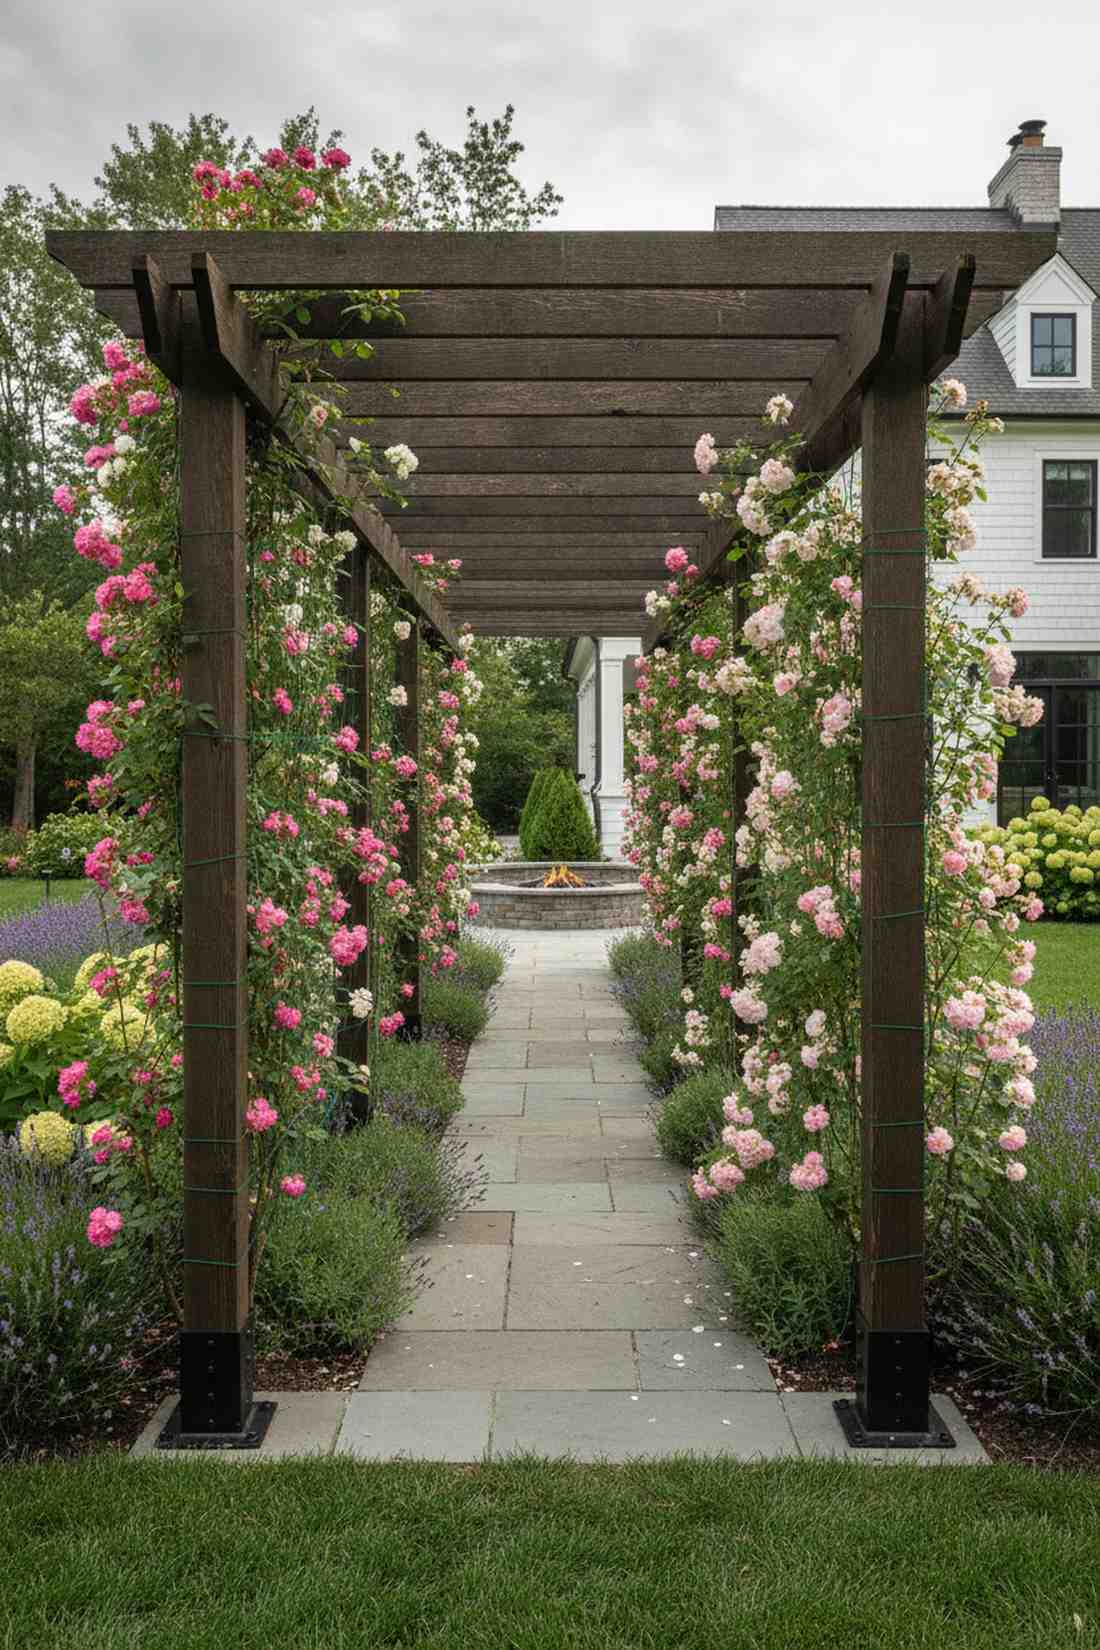
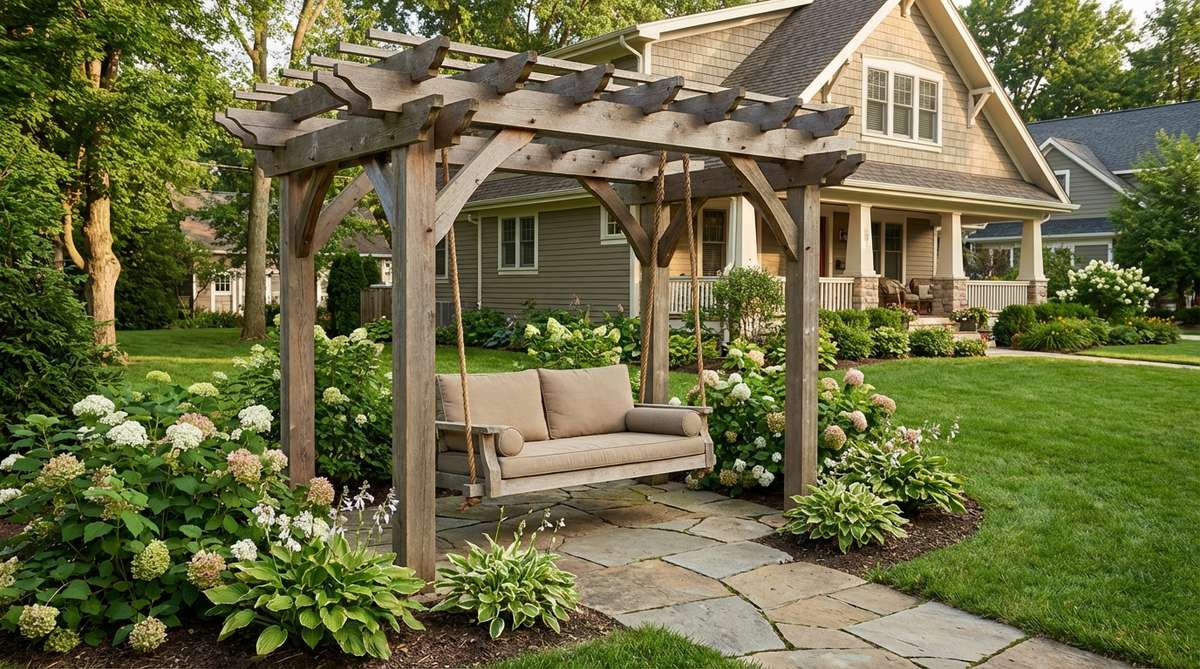
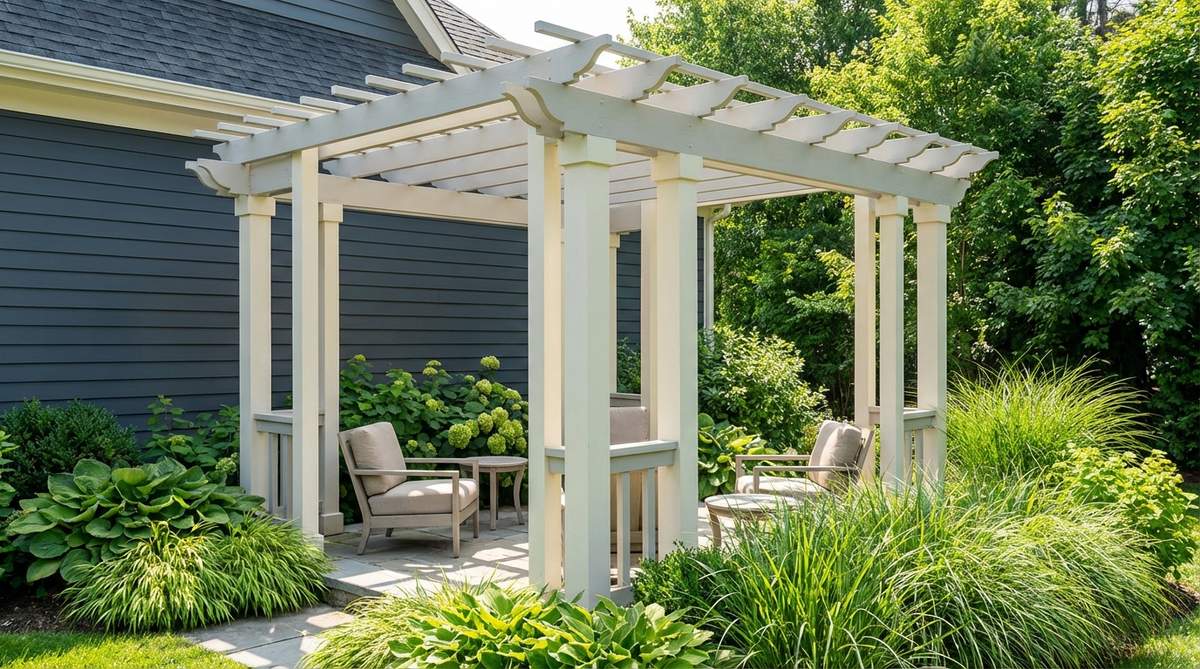
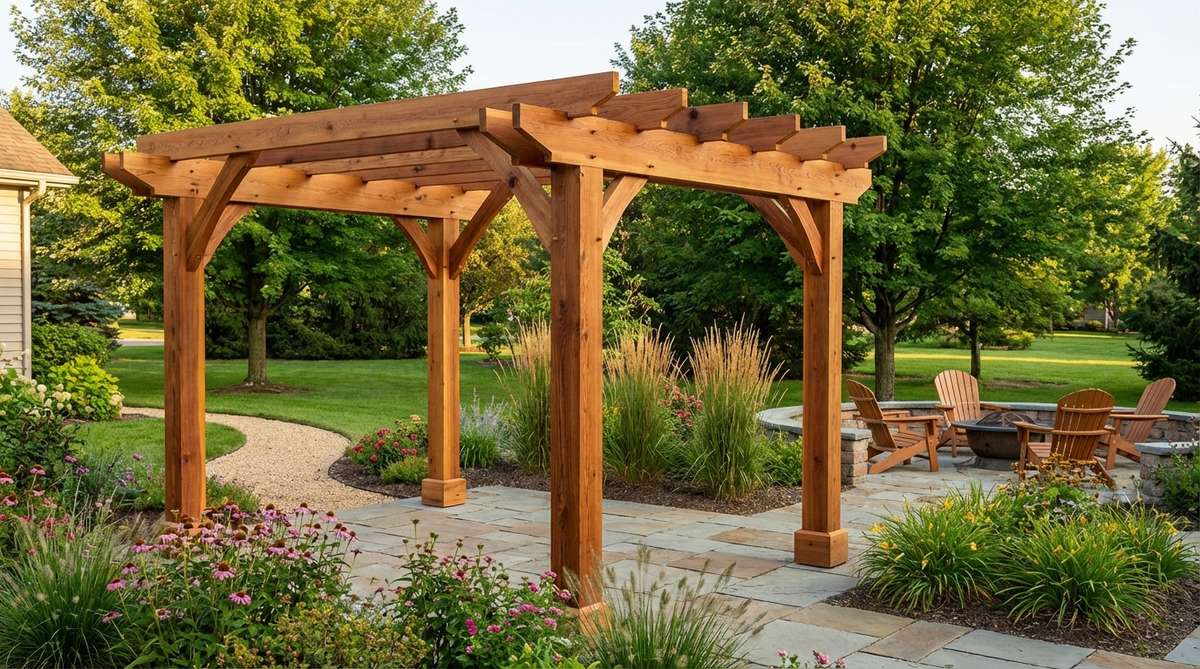
15. Cottage Garden White Painted Pergola
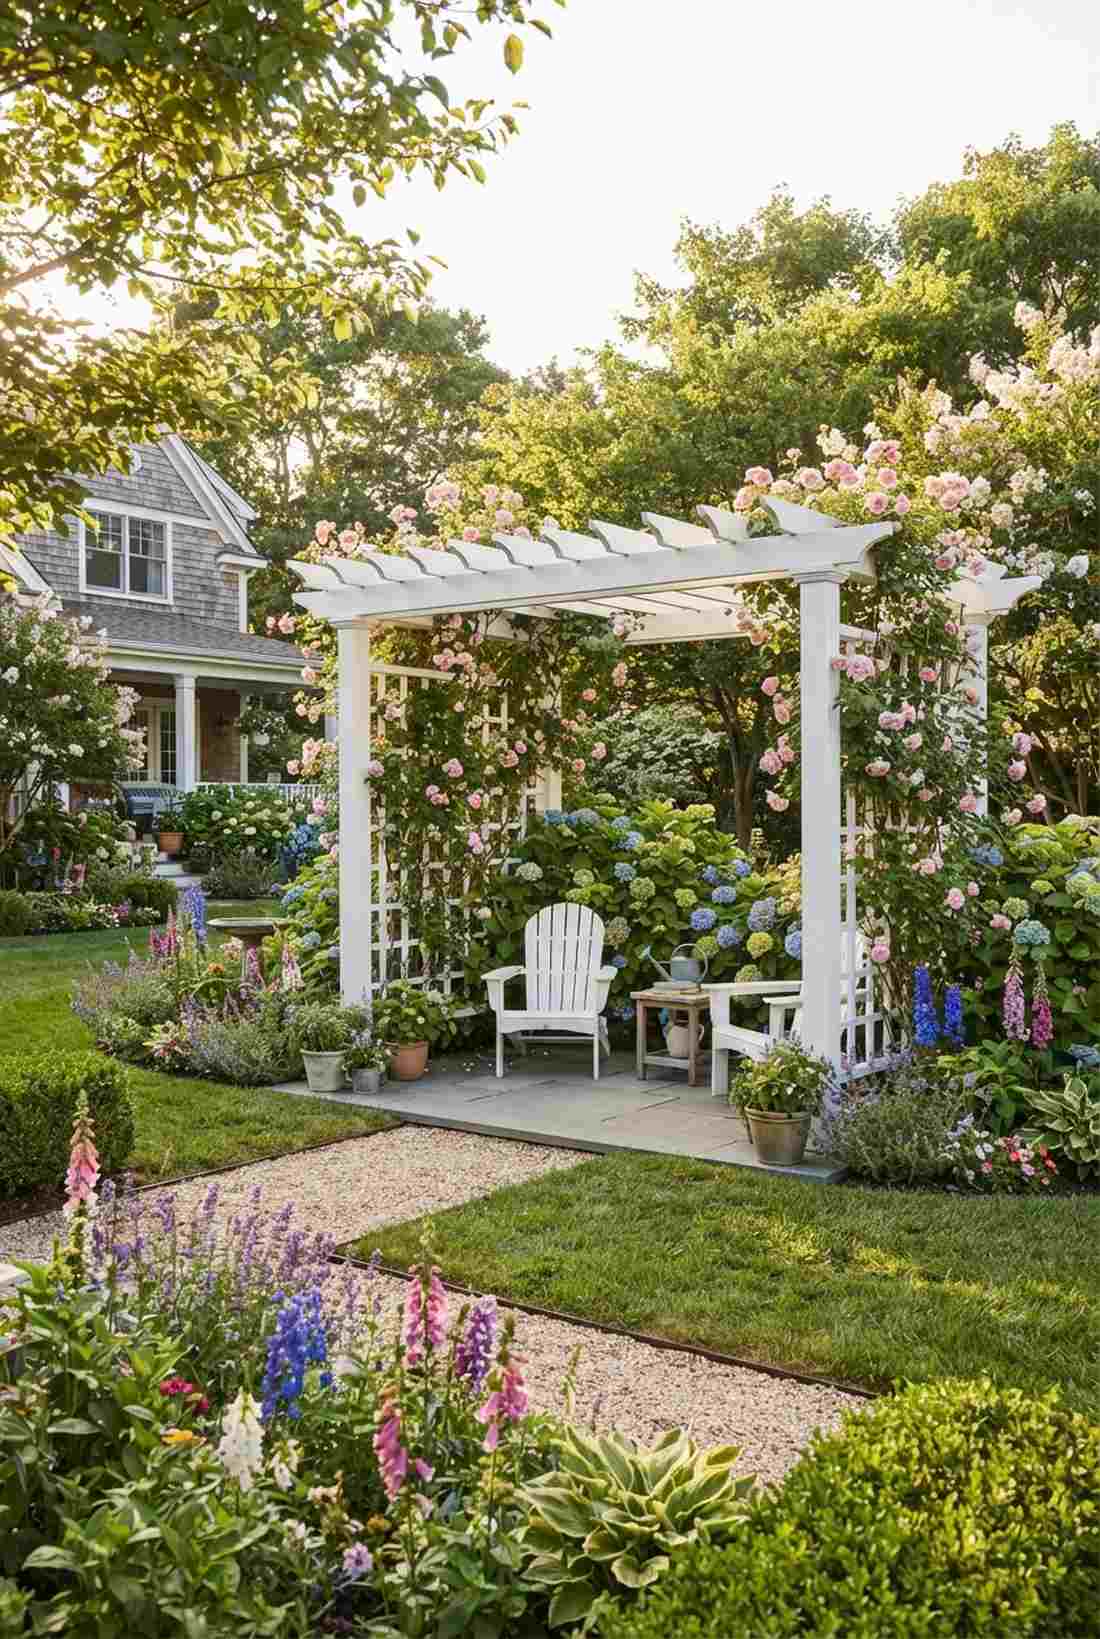
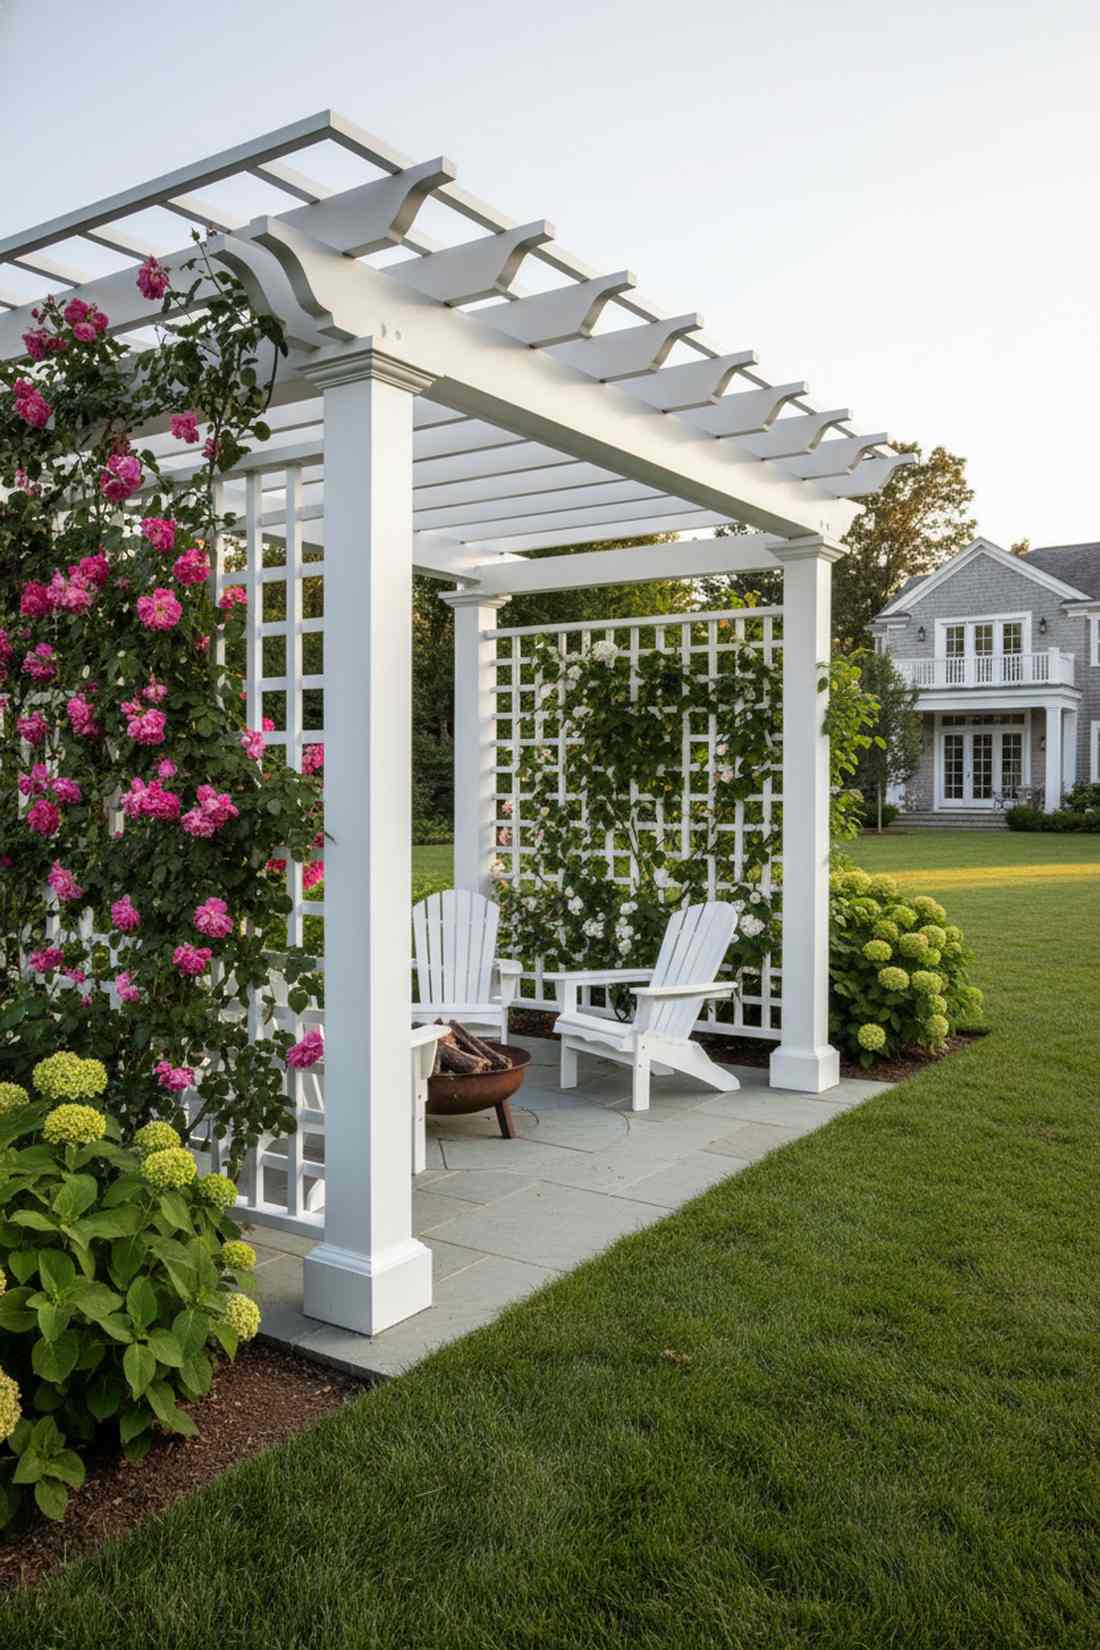
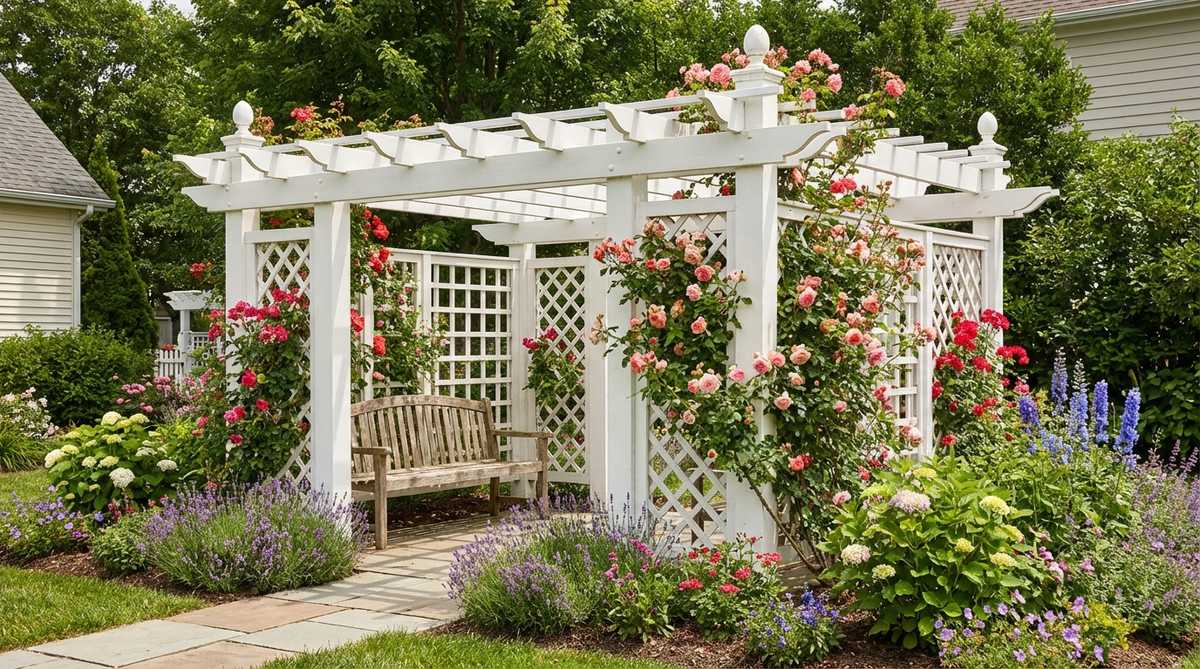
This pristine layout gives off a classic Hamptons estate vibe. A crisp white slatted arbor serves as the ultimate high-contrast backdrop for vibrant pink climbing roses or lush green hydrangea bushes.
While natural wood absorbs light, slathering the frame in brilliant white exterior paint visually expands a cramped, shadowed corner. Adding traditional lattice side-panels turns the structure into a charming blooming wall that forces onlookers to admire the floral display.
The lumber and premium paint run about $350–$550. It’s a classic upgrade that dramatically brightens dark yard corners.
- Key Materials: Pressure-treated pine, premium exterior enamel
- Vibe / Style: Timeless botanical estate
- Difficulty: Easy but paint-intensive
- Budget Breakdown: Lumber: $300 | Primer/Paint: $120.
- Creator’s Tip: Always use an oil-based stain-blocking primer on pine knots, or yellow sap rings will bleed through your white paint within weeks.
- Smart Sourcing: Pick up pre-assembled white vinyl lattice panels and self-priming extreme weather exterior paint.
Multi-Functional Pergola Features
Don’t just build a roof; build an outdoor room. These clever functional add-ons multiply the usability of your shaded footprint without requiring extra square footage.
16. Built-In Corner Bench Seating
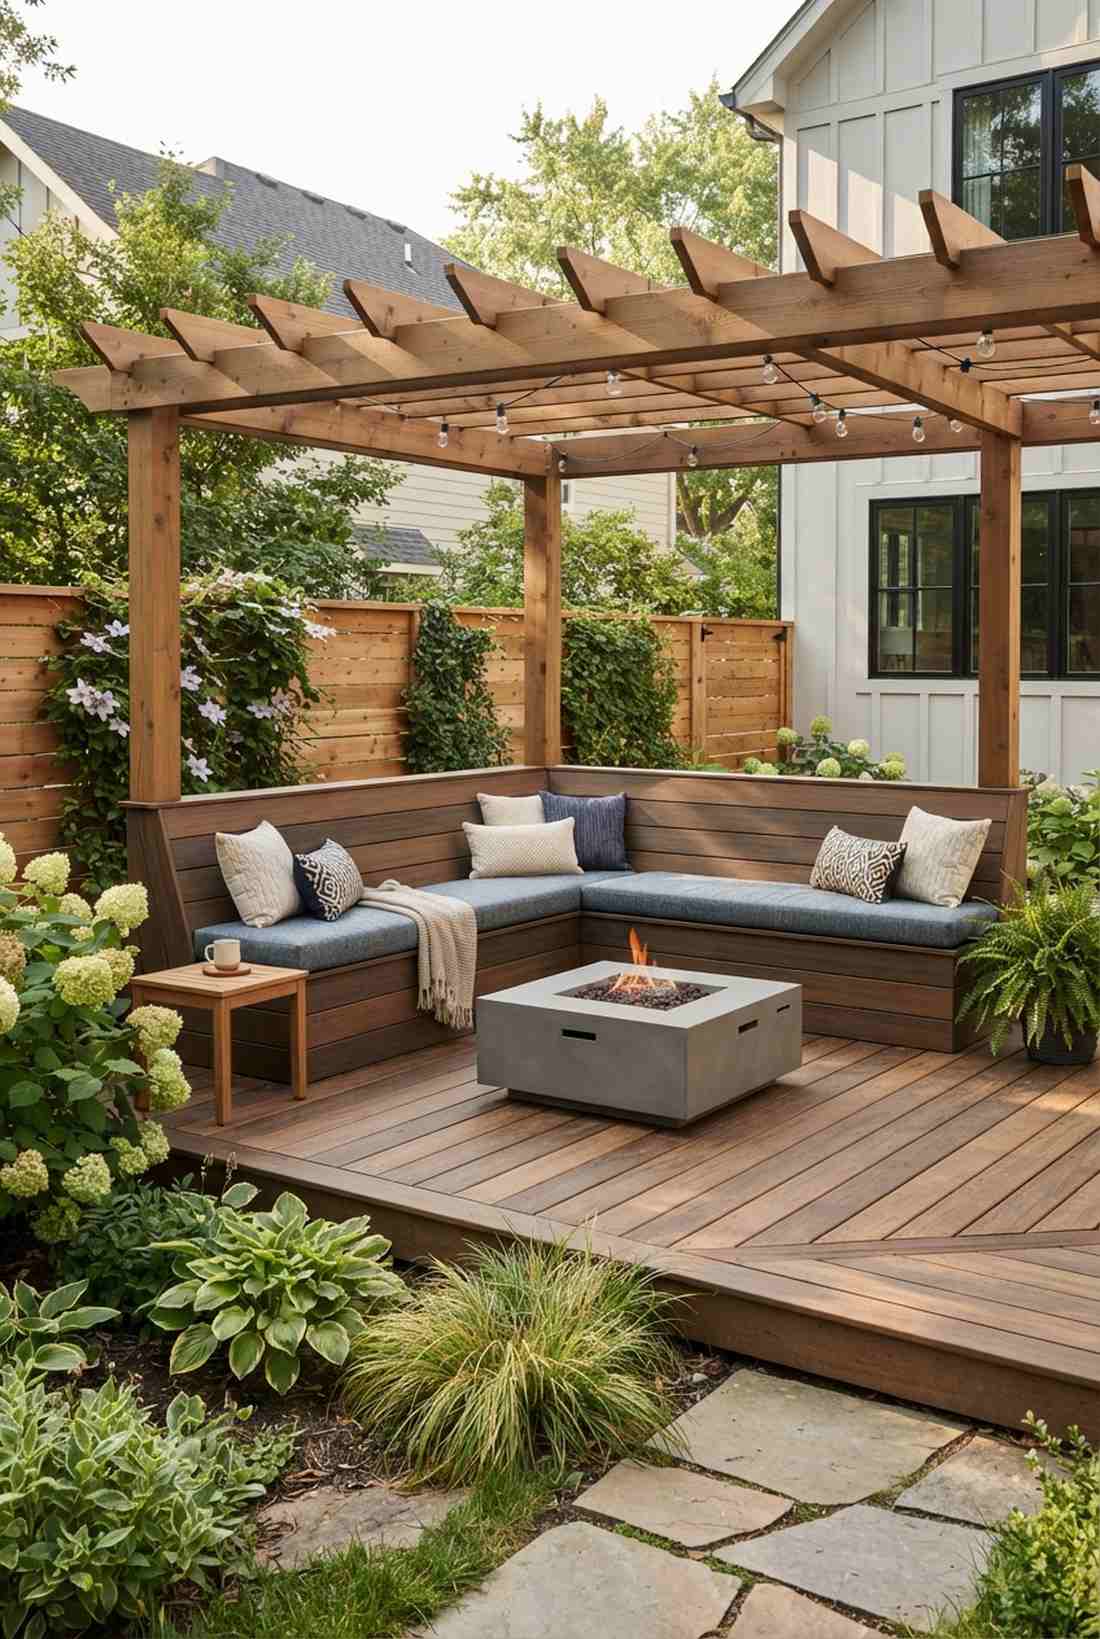
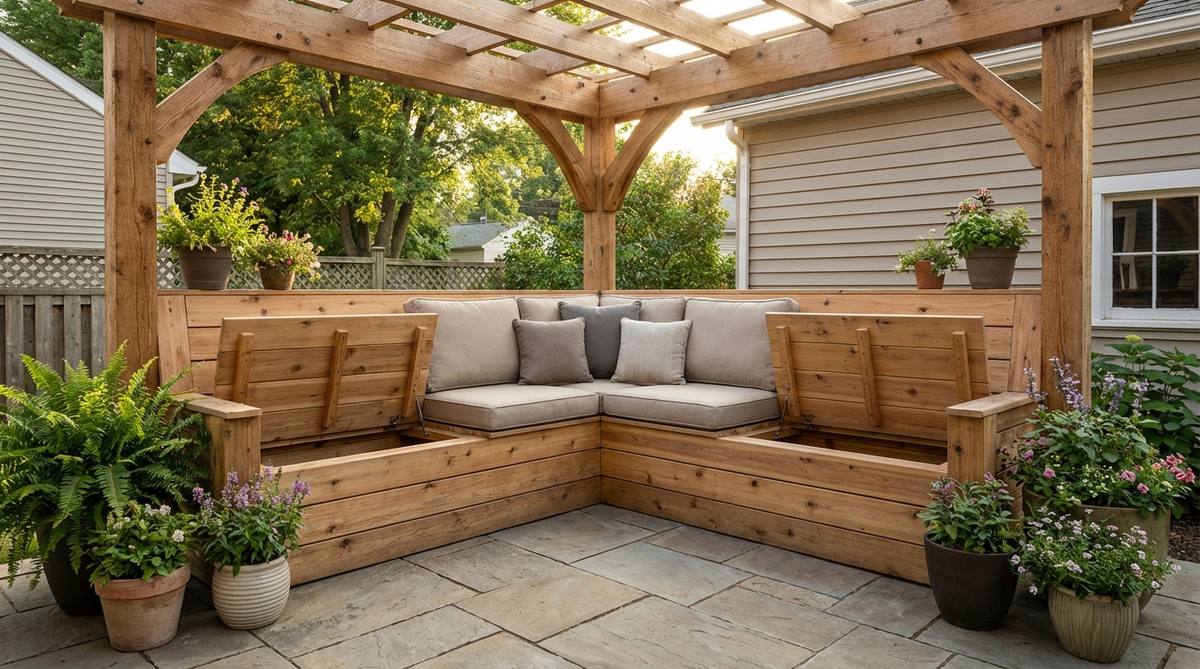
This brilliant hack creates a permanent, built-in conversation pit. An integrated bench seating frame completely eliminates the need for bulky patio furniture, making it the smartest choice for a micro-courtyard.
Building benches directly into the structural posts securely anchors the entire pergola while hiding valuable storage space underneath. Tying the woodwork of the seating into the roof above gives a highly cohesive, designer-level finish that free-floating chairs just can’t match.
Adding built-in benches adds roughly $150–$250 to your overall build. Save this if you are desperate to maximize every square inch of your deck.
- Key Materials: 2×4 framing studs, composite decking boards
- Vibe / Style: Streamlined custom deck-lounge
- Difficulty: Intermediate framing
- Budget Breakdown: Framing: $80 | Top Boards: $120.
- Creator’s Tip: Angle the bench backrest back at a subtle 15-degree tilt; perfectly straight 90-degree backs are miserable to sit on.
- Smart Sourcing: Grab a hidden deck fastener starter kit and custom-sized waterproof outdoor bench cushions.
Most backyard dinner parties end early due to bad lighting… until you see this entertaining setup.
17. Dining Pergola with Hanging Chandelier
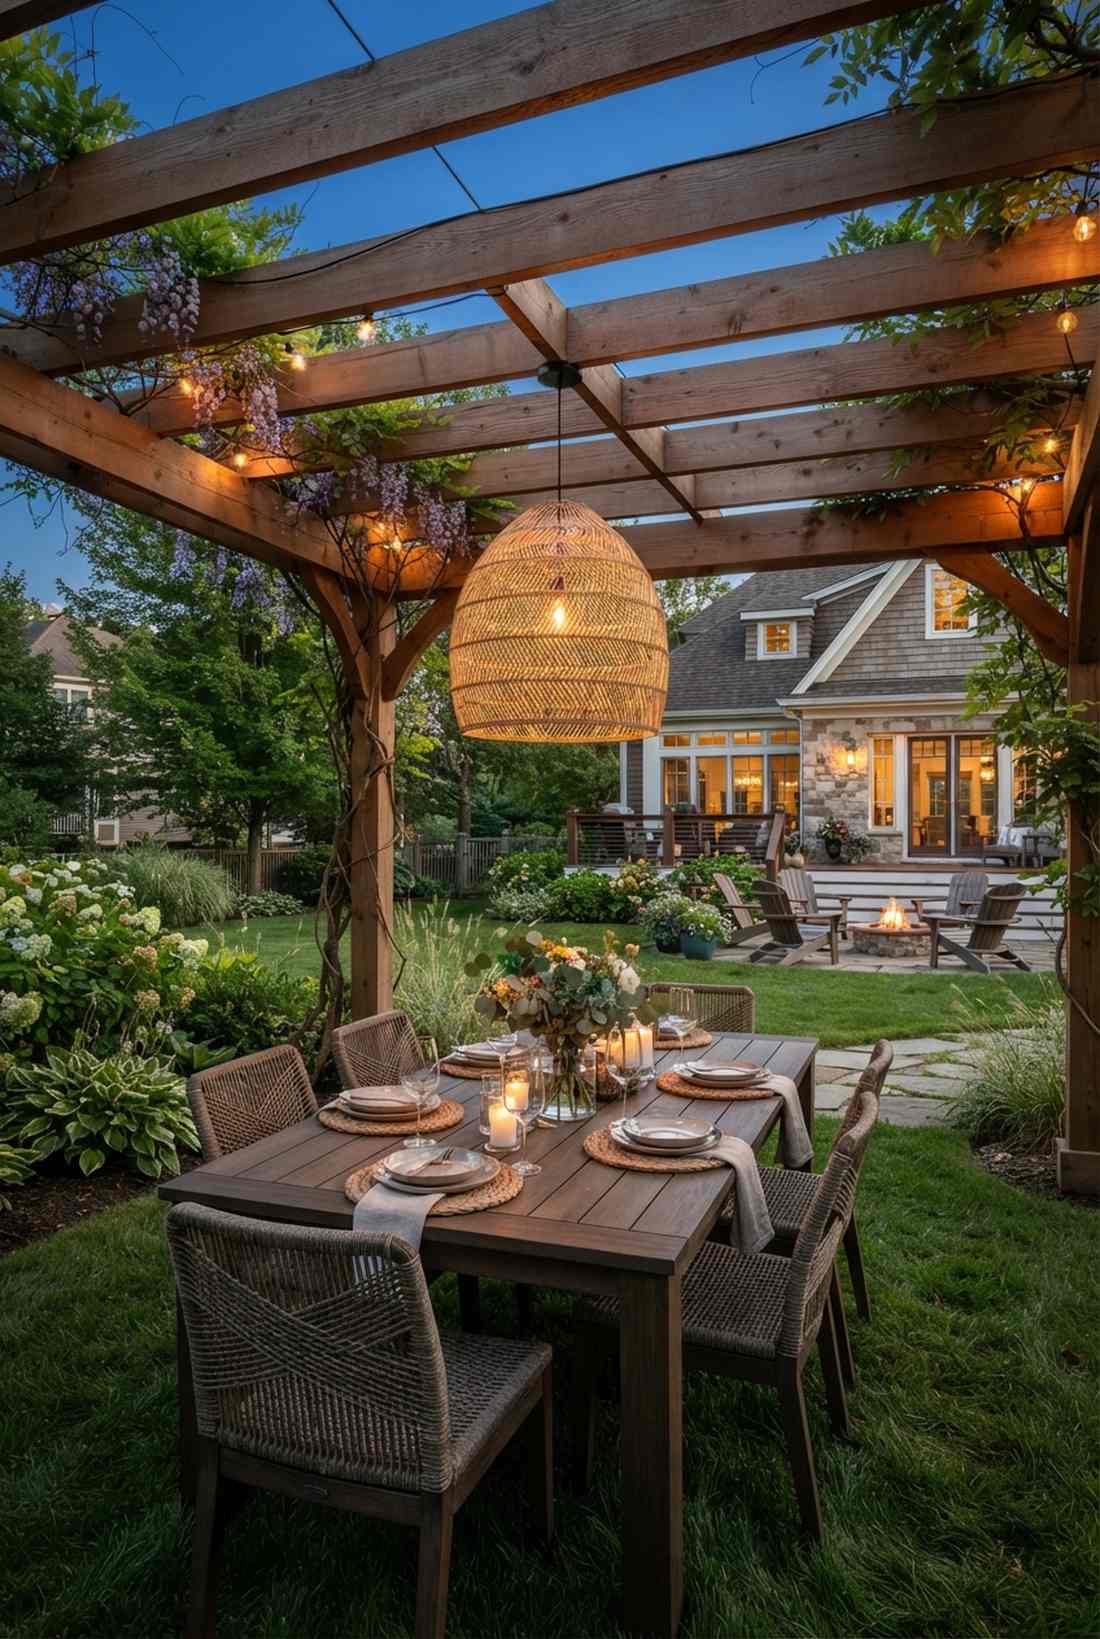
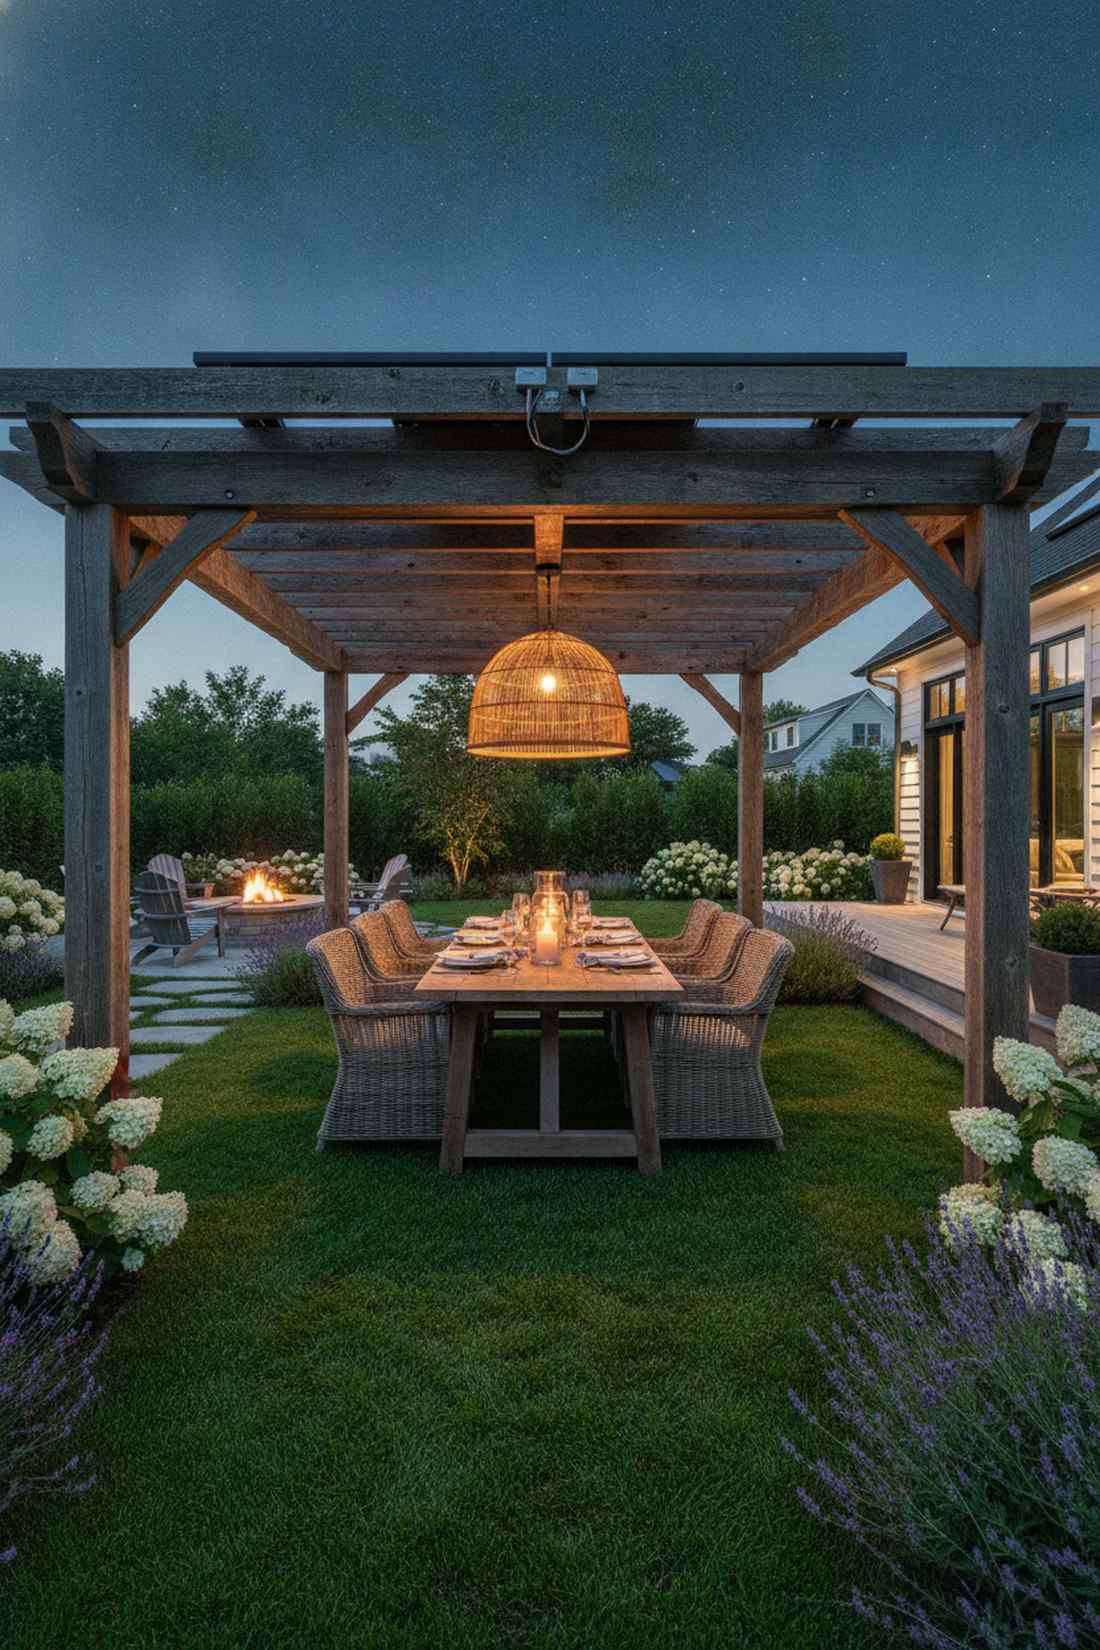
This layout creates a fiercely romantic starlit dining room right on the grass. A central overhead lighting structure anchors an outdoor dining table, transforming a basic backyard dinner into a premium alfresco experience.
Running discreet low-voltage wiring down the tops of the rafters to suspend a dramatic fixture fundamentally changes the evening vibe. An oversized woven rattan or industrial metal pendant draws the eyes upward, making the roof feel much taller and more imposing.
A safe, weather-rated lighting installation costs about $100–$250. Pin this to your outdoor entertaining board immediately.
- Key Materials: Outdoor-rated pendant light, low-voltage wire
- Vibe / Style: Twilight luxury dining
- Difficulty: Moderate electrical routing
- Budget Breakdown: Lighting Fixture: $150 | Outdoor Wiring: $40.
- Creator’s Tip: Put the chandelier on a smart outdoor dimmer switch so you can dial down the glare during late-night drinks.
- Smart Sourcing: Order a waterproof solar pendant chandelier and weather-sealed wire junction boxes.
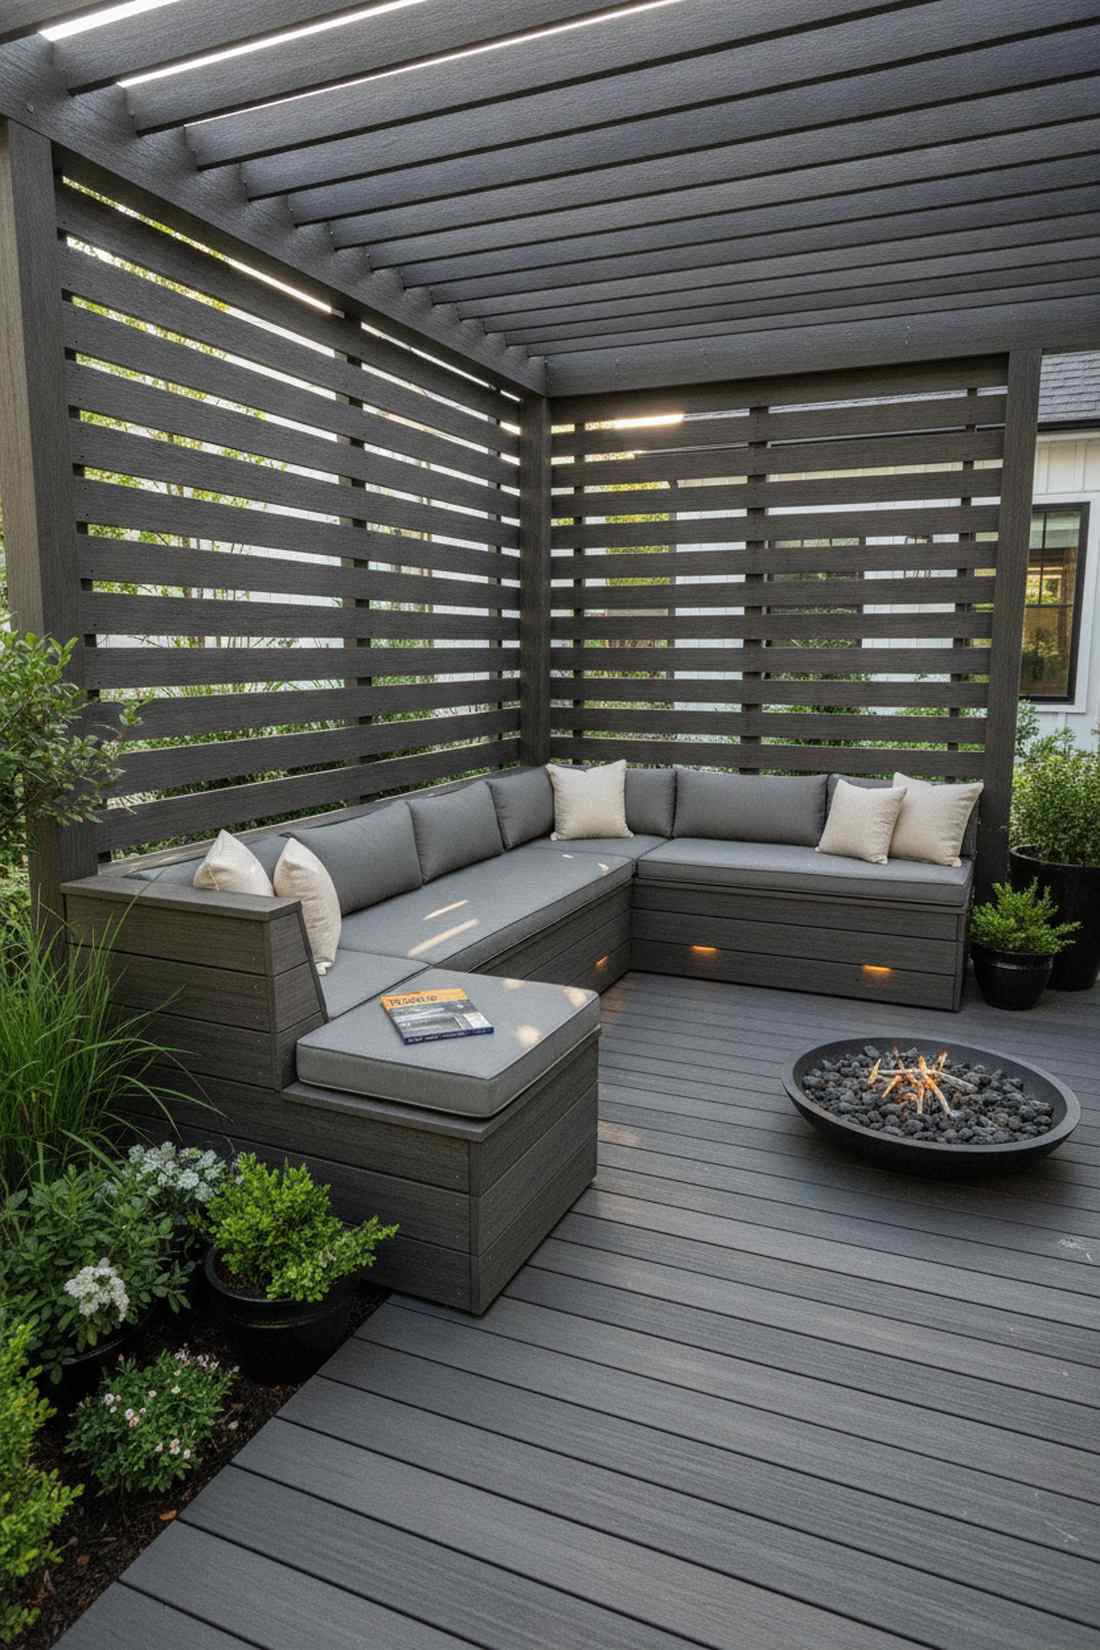
18. Pergola with Privacy Screen Walls
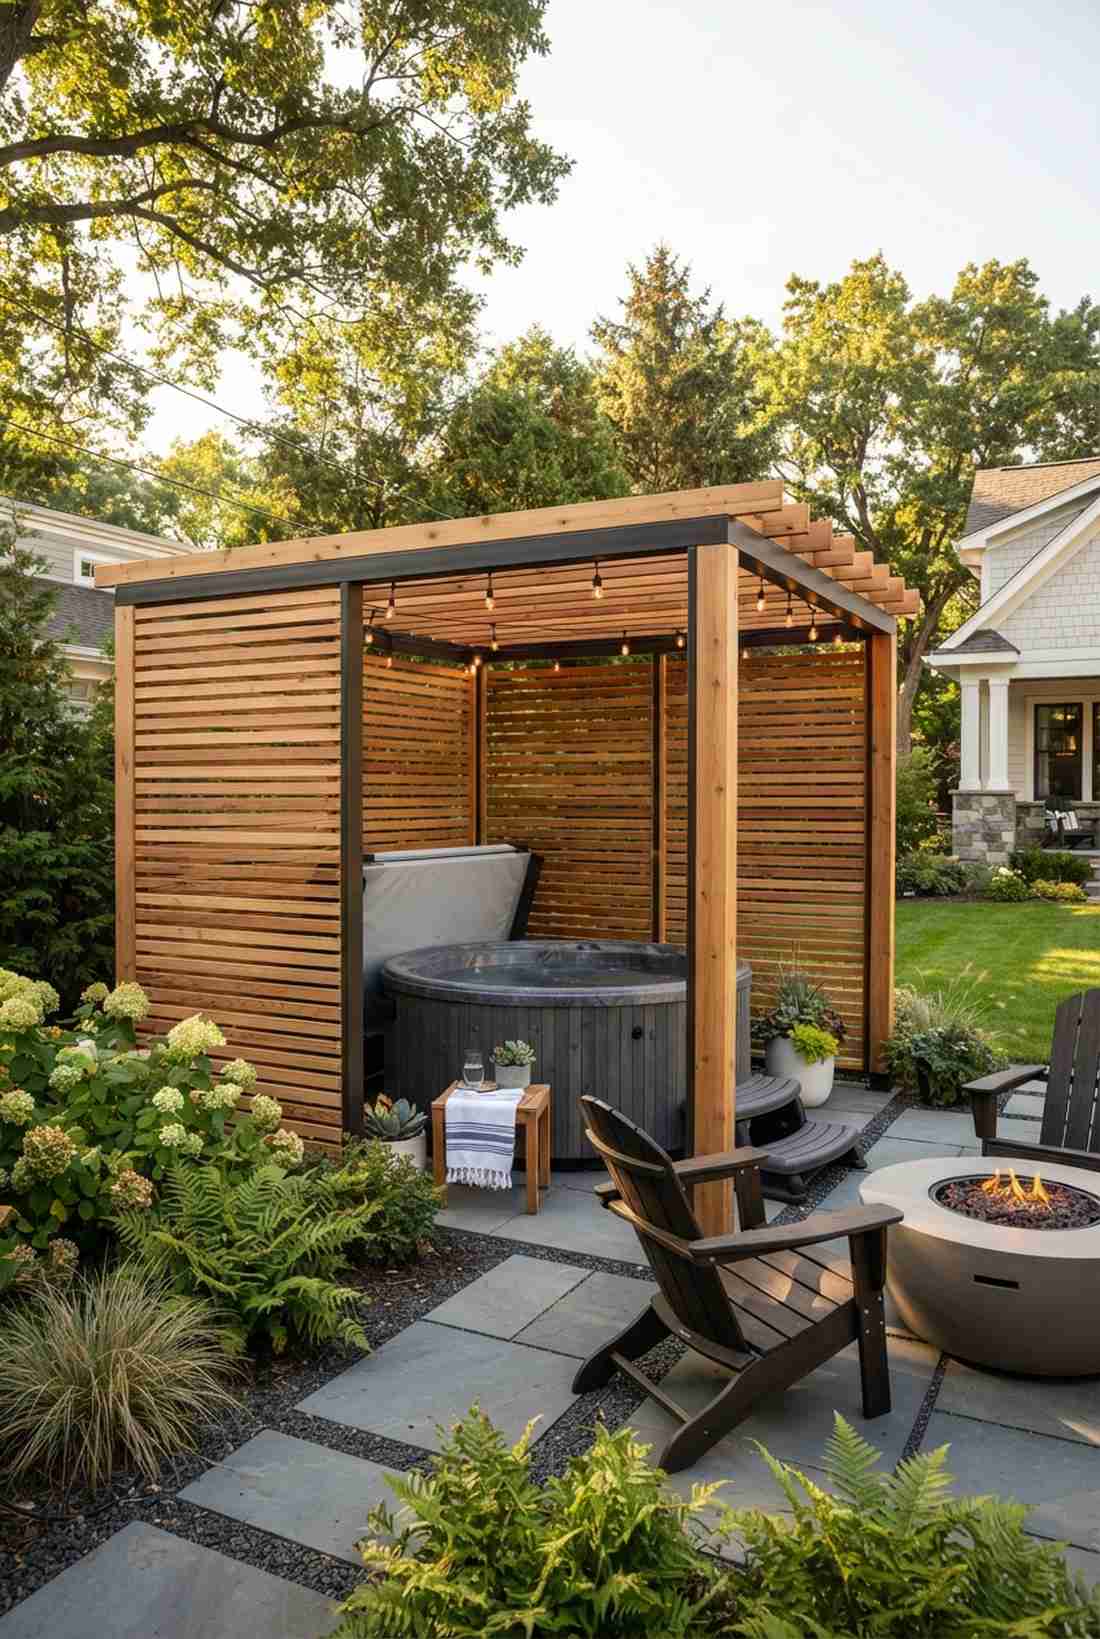
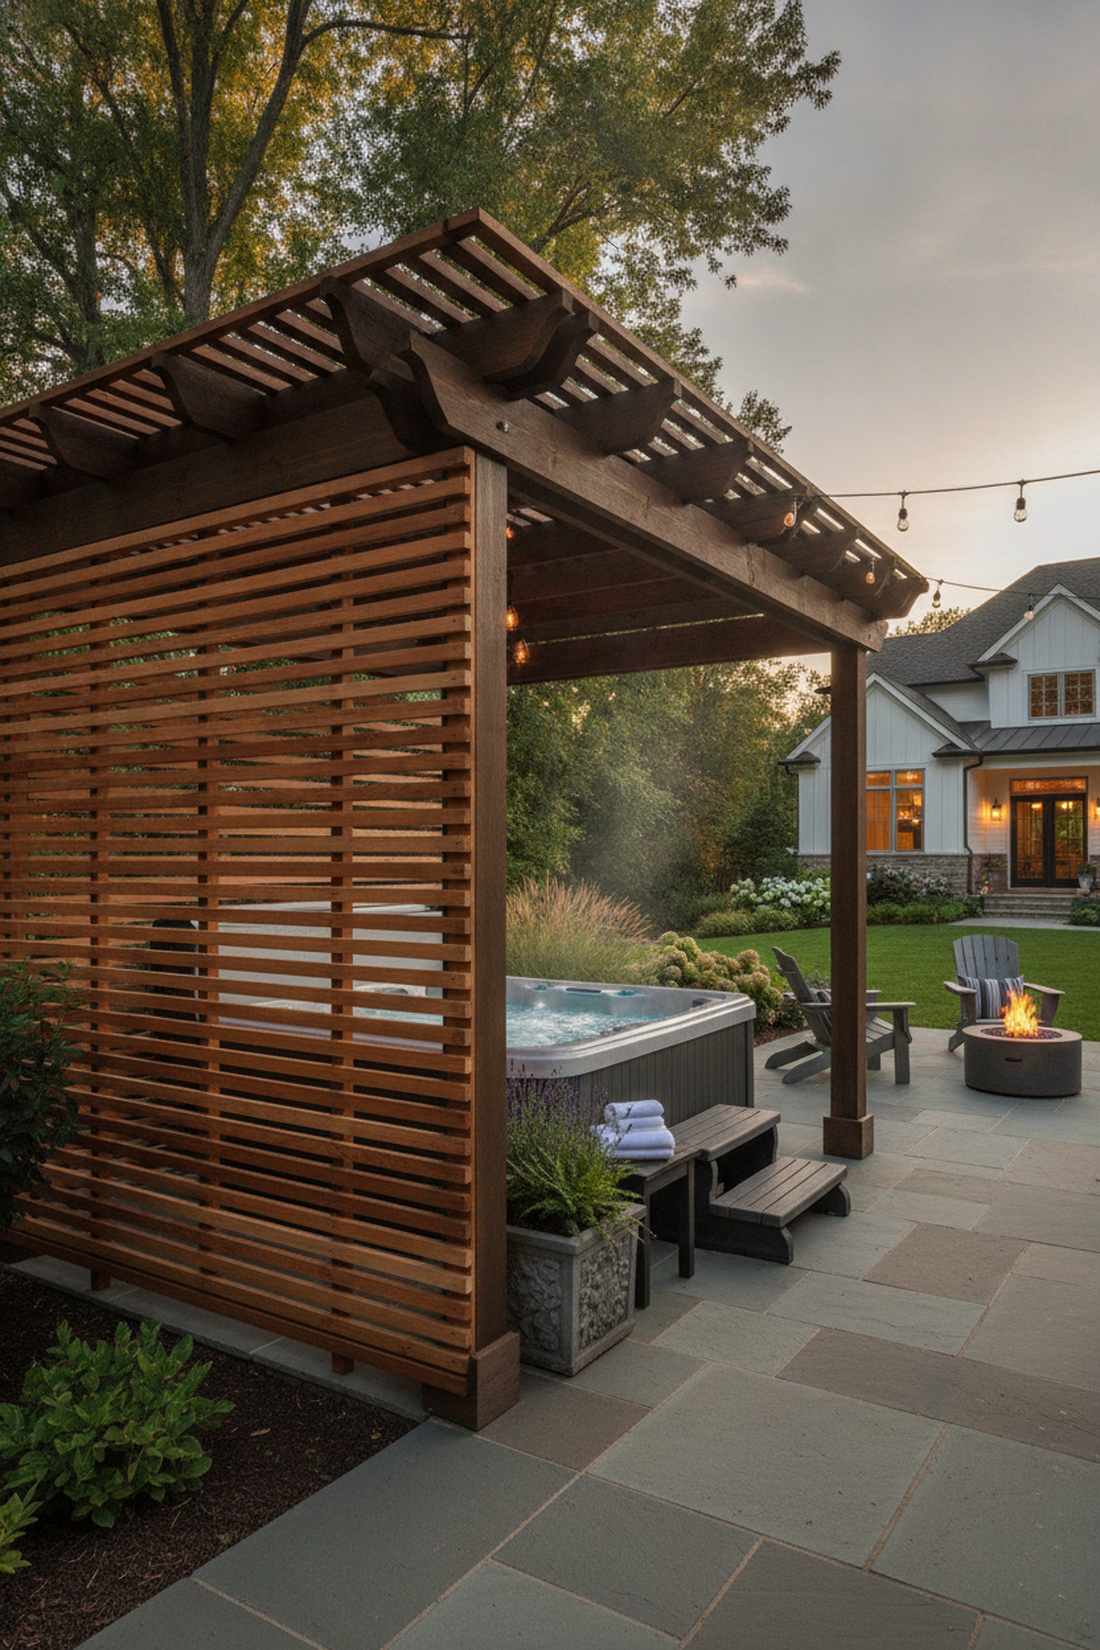
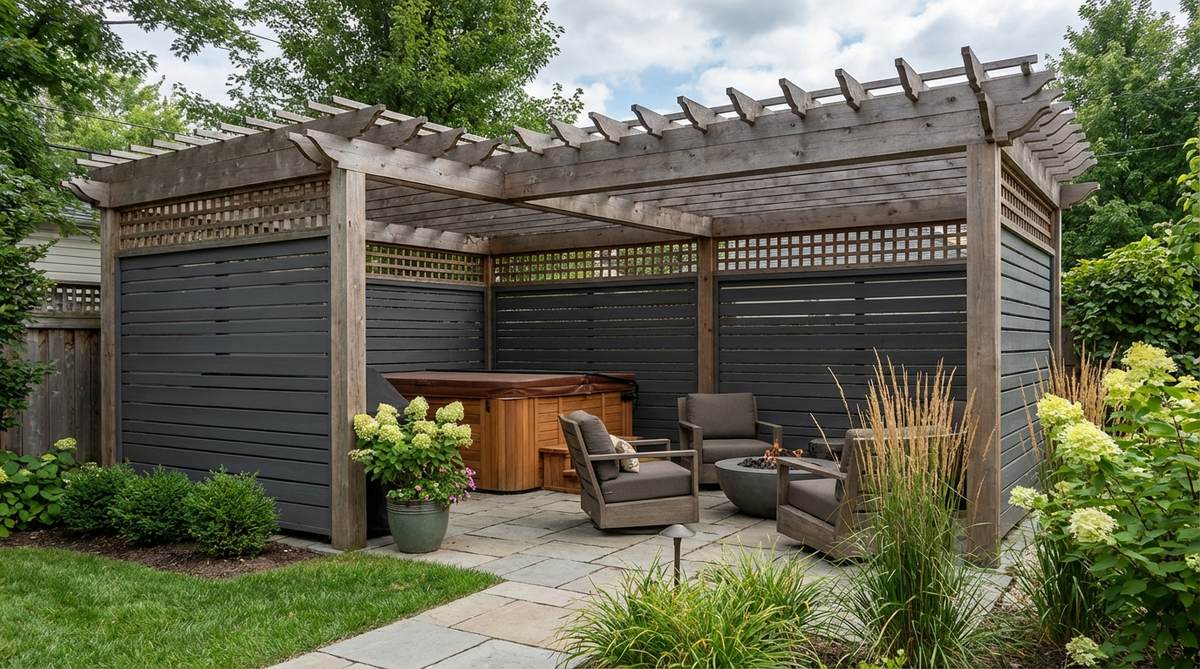
This heavily shielded design acts as a secluded urban hideaway. Adding horizontal slatted privacy walls to one or two sides blocks out nosy neighbors and creates an intimate, protected hot tub enclosure.
Instead of building a massive, oppressive fence, installing 1×2 cedar slats with tight spacing allows a cooling breeze to flow while destroying sightlines. The warm, linear wood texture dramatically upgrades the modern aesthetic of any basic frame.
Slatted side walls will cost roughly $150–$300 per side. Highly recommended if your yard backs up directly to an alley or sidewalk.
- Key Materials: 1×2 cedar battens, finishing nailer
- Vibe / Style: Exclusive boutique spa
- Difficulty: Easy but repetitive
- Budget Breakdown: Cedar Slats: $200 | Fasteners: $30.
- Creator’s Tip: Use a spare 1/2-inch block of wood as a physical spacer between each slat to guarantee perfectly uniform gaps without measuring.
- Smart Sourcing: Purchase stainless steel brad nails (bulk pack) and pre-cut wood slat privacy panels.
Material Guide: Cheap vs. Premium Aesthetic
Knowing exactly where to save and where to spend makes all the difference in achieving that “looks expensive but isn’t” vibe in small gardens.
- Standard Pine vs. UV-Resistant Cedar: Pressure-treated pine saves 40% upfront but inevitably warps. Upgrading to natural cedar stops twisting and provides a high-end aroma and rich color palette.
- Pre-made Bracket Kits vs. Bare Sourcing: While buying raw brackets locally is cheap, heavy-duty modular steel corner kits guarantee perfect 90-degree angles and save hours of frustrating leveling.
19. Vertical Garden Wall Pergola

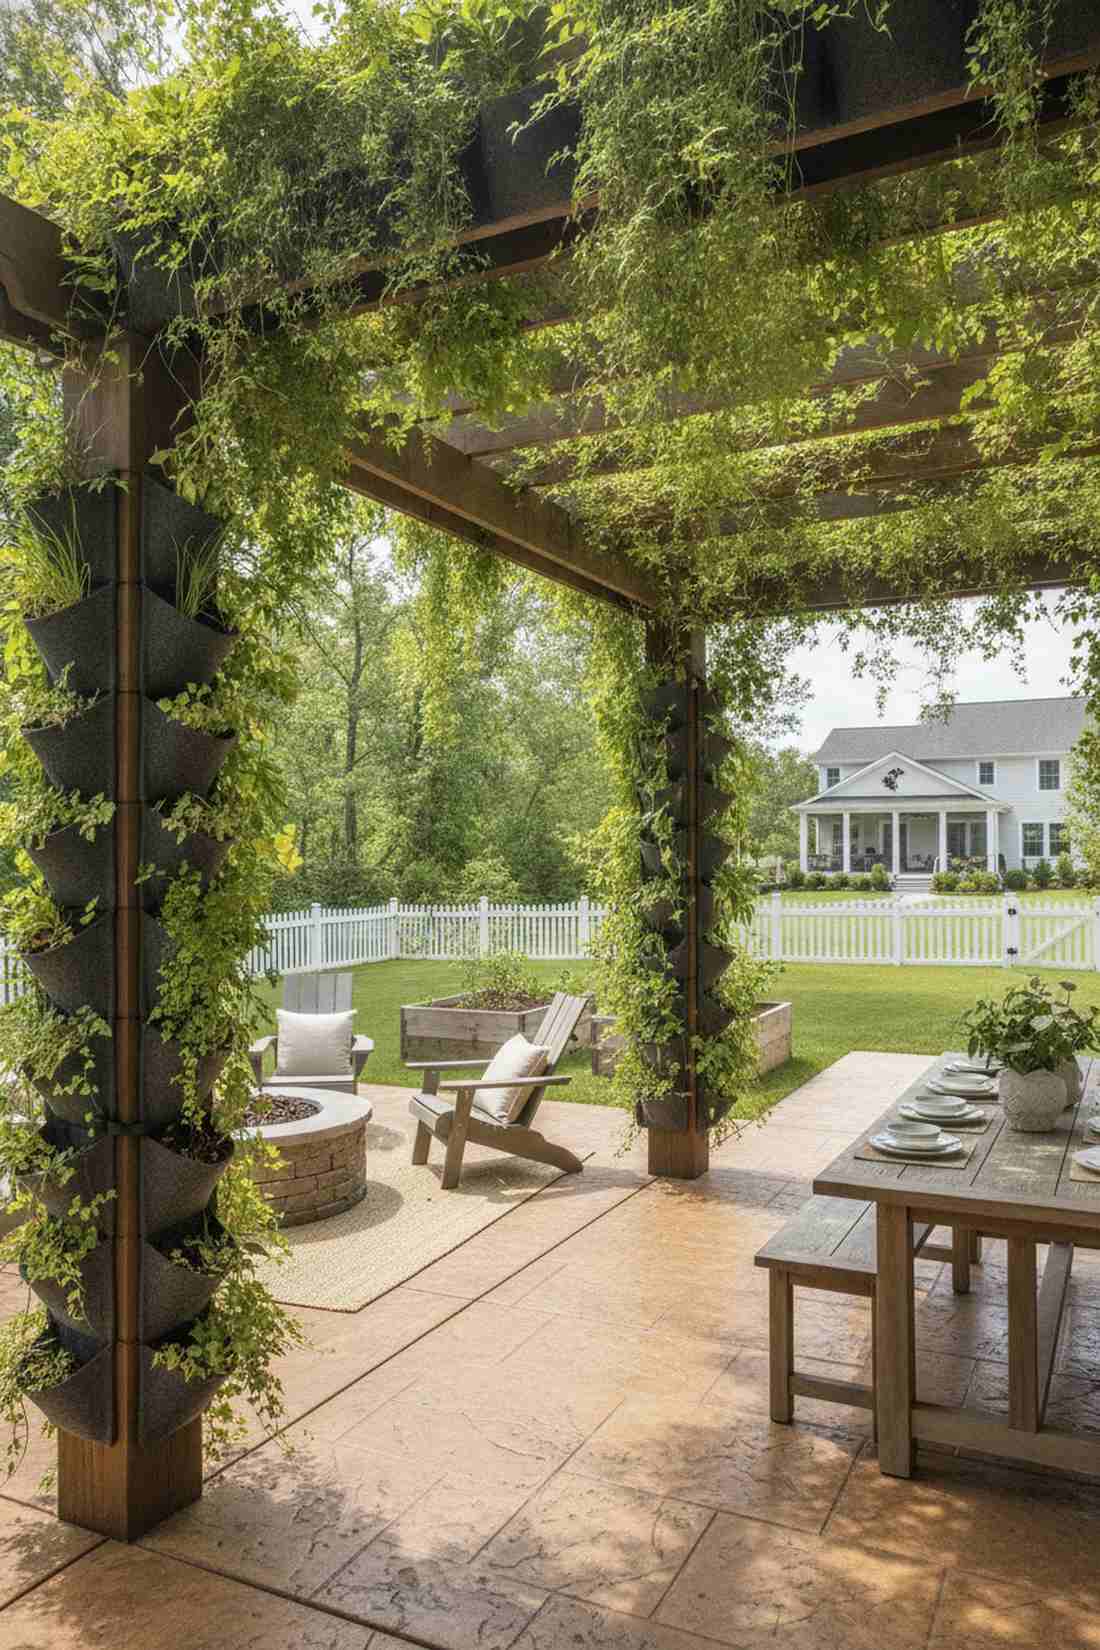
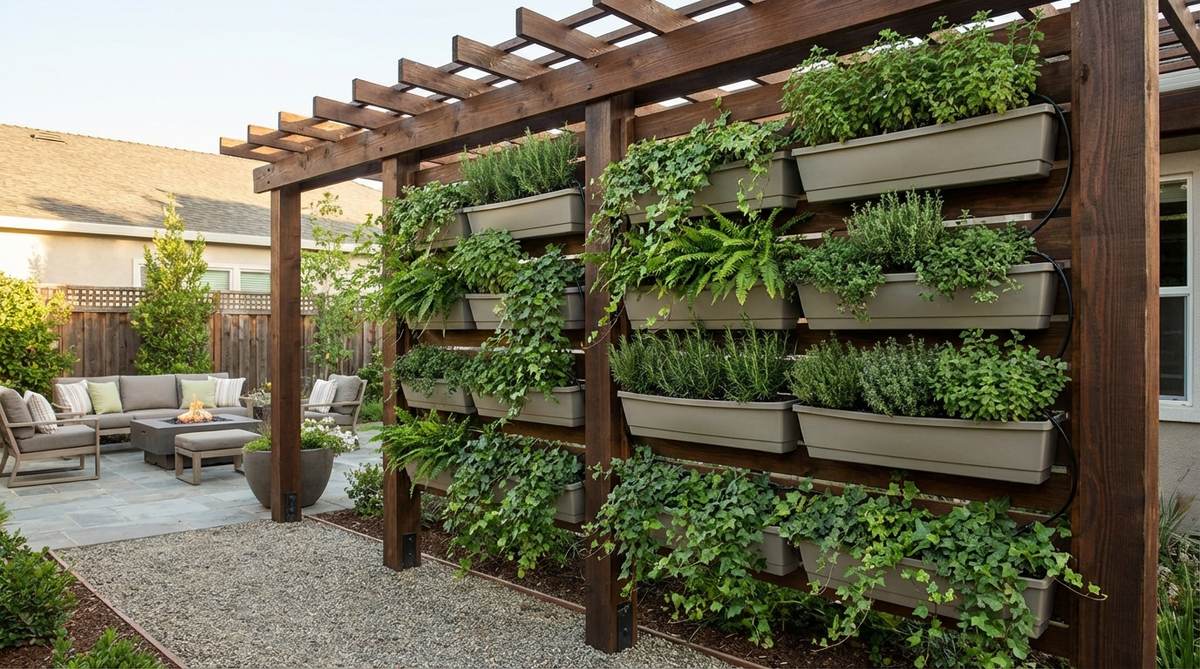
This heavily planted framework looks like a lush cascading jungle wall. A living vertical planter screen is the ultimate solution for a concrete patio where you physically cannot dig into the ground.
Using the structural posts to mount modular dirt pockets delivers a surprisingly premium look that literally brings your walls to life. Cascading ferns and trailing ivy instantly soften the harsh, rigid lines of the wooden frame while filtering out harsh sunlight.
Setting up an automated vertical wall runs about $100–$250. Save this to your small balcony garden board for maximum greenery.
- Key Materials: Felt pocket planters, micro-drip irrigation lines
- Vibe / Style: Overgrown botanical retreat
- Difficulty: Easy planting & plumbing
- Budget Breakdown: Planter Pockets: $60 | Drip System: $40.
- Creator’s Tip: Never install a living wall without a cheap battery-operated drip timer, or the high-exposure plants will dry out and die in days.
- Smart Sourcing: Snag a heavy-duty felt vertical garden pocket kit and an automatic micro-drip irrigation starter kit.
20. Pergola with Swing Seat
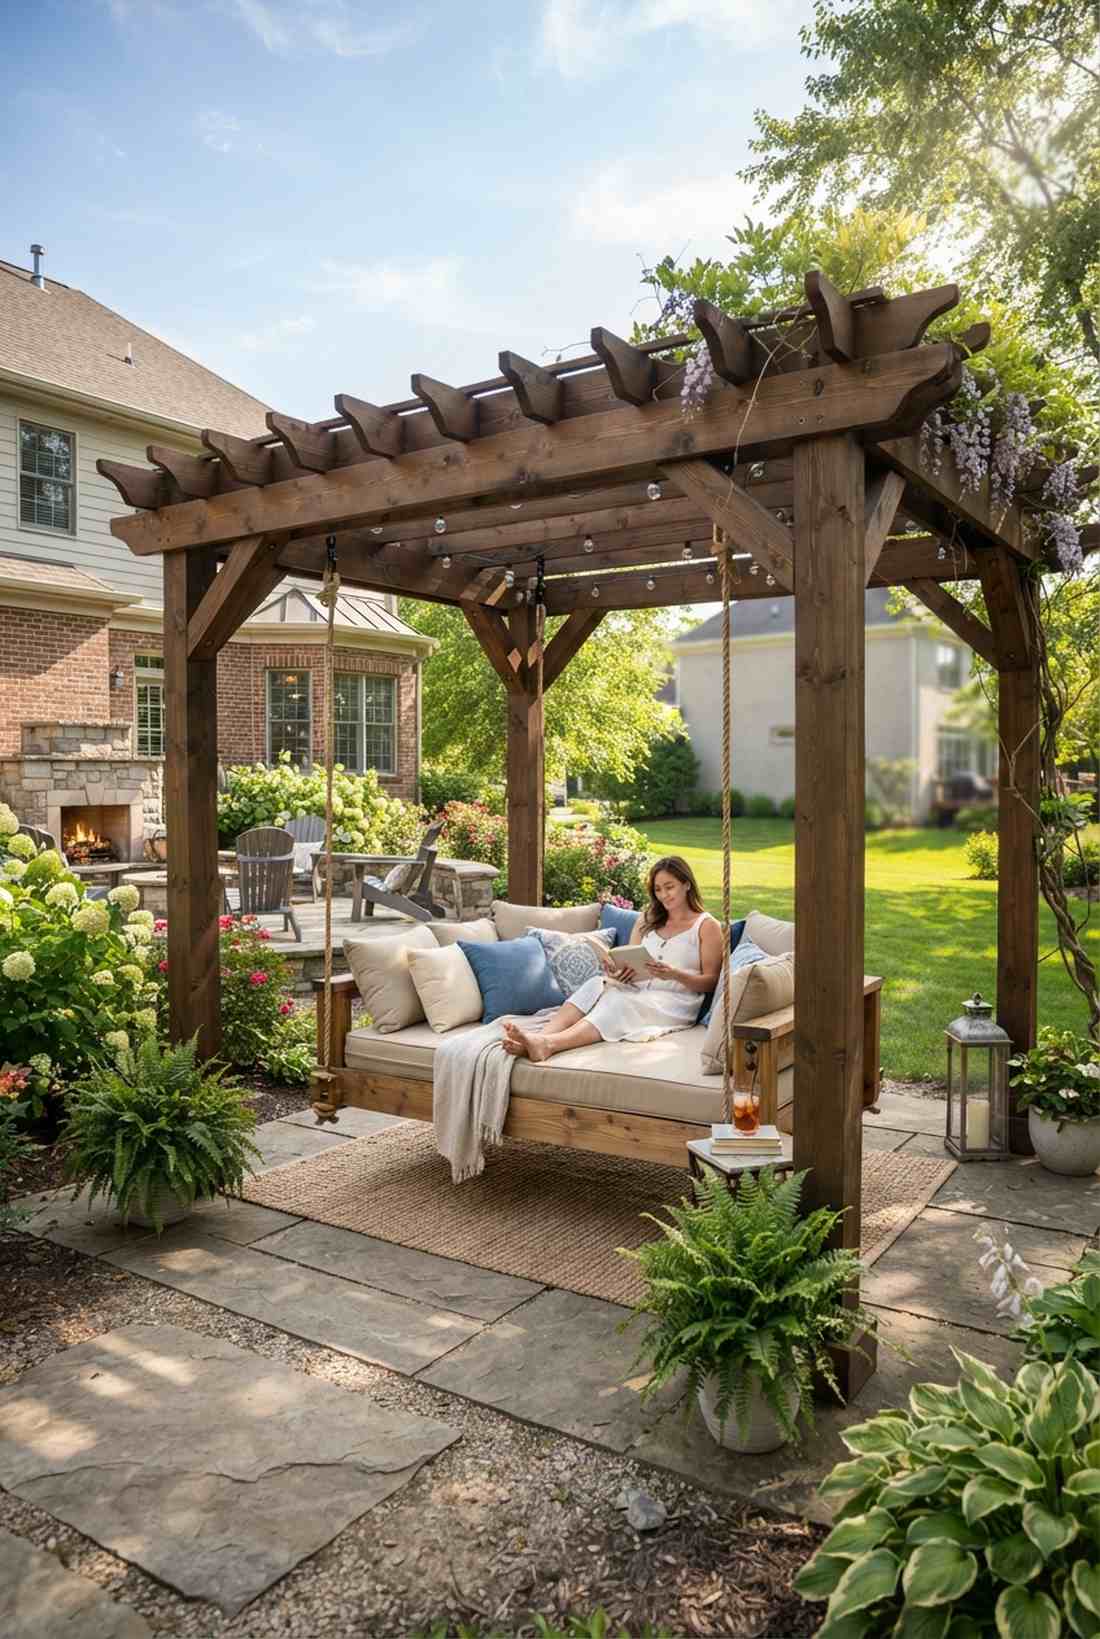
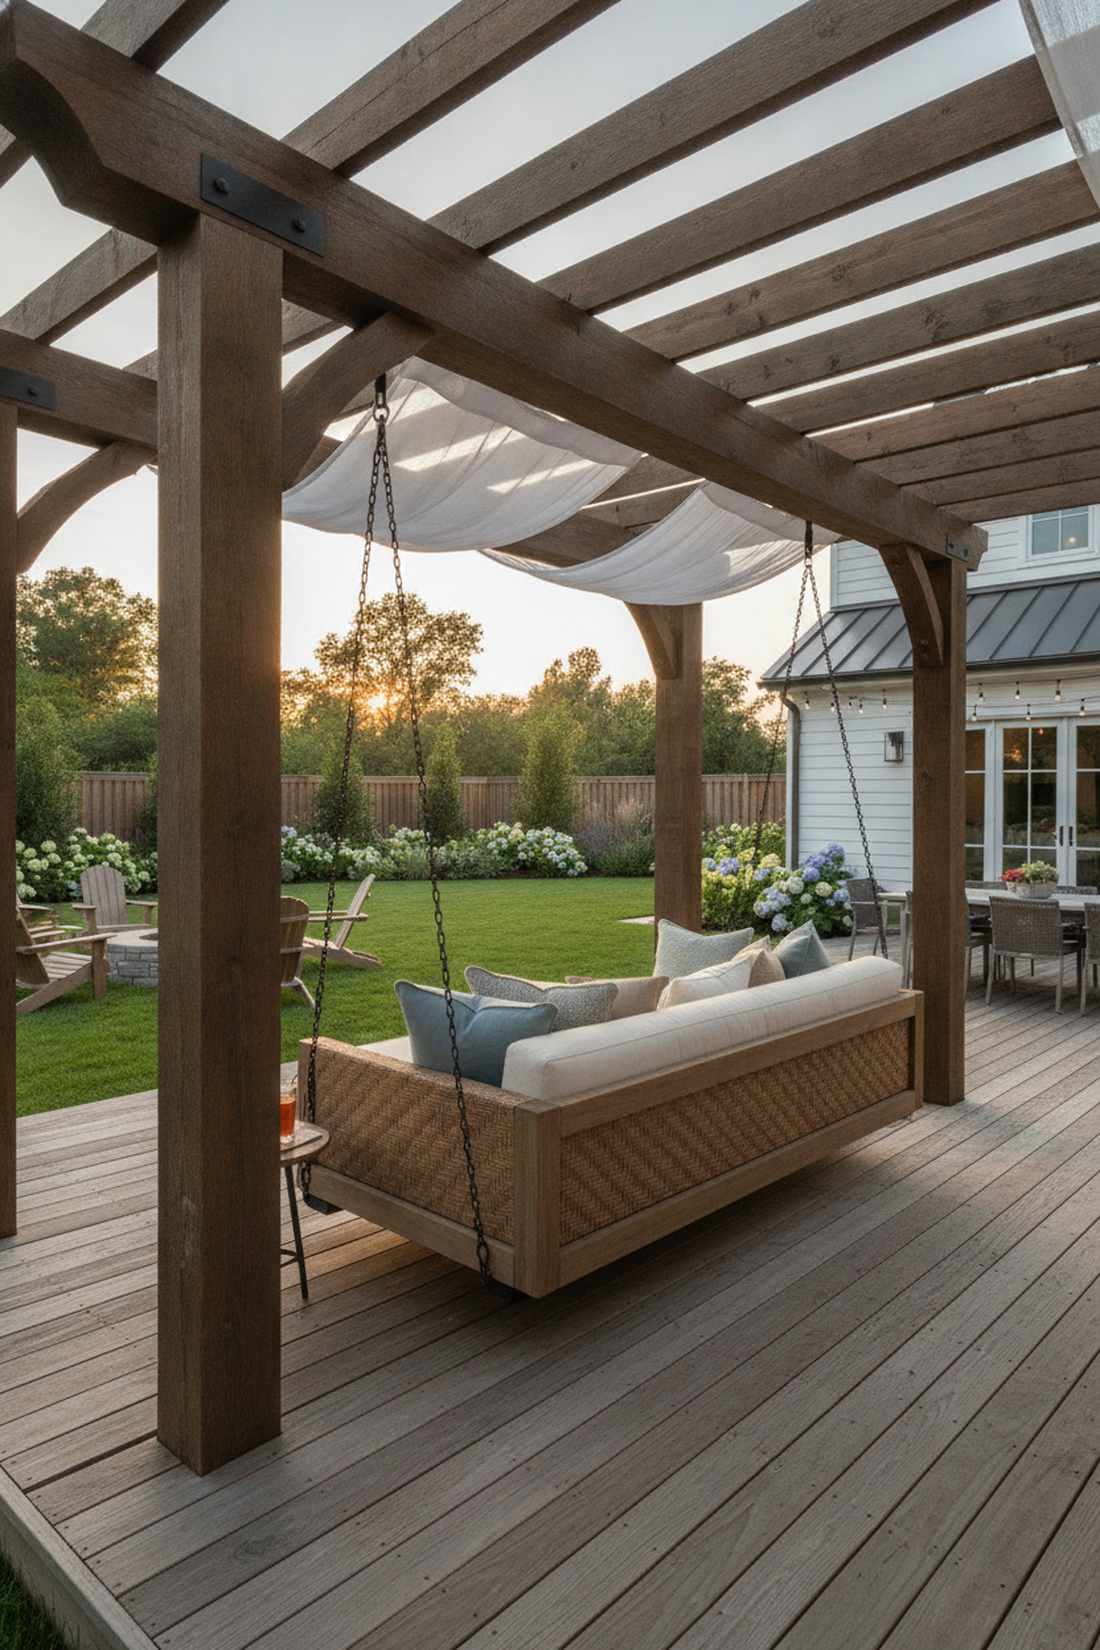
This charming addition serves as a playful, relaxing breeze spot. Suspending a heavy-duty floating daybed from oversized center beams completely revolutionizes how your family interacts with the yard.
Bolting a thick wooden swing into upgraded joists gives a designer-level finish that dominates the space. Rocking gently under a canopy of shade adds sensory movement and makes the patio feel like a luxurious southern porch.
Adding the hardware and swing costs around $200–$400. Pin this if you want a magazine-worthy reading nook.
- Key Materials: 2×8 reinforced beams, heavy-duty swing hangers
- Vibe / Style: Lazy Sunday relaxation
- Difficulty: Requires structural reinforcement
- Budget Breakdown: Swing Seat: $250 | Hardware: $50.
- Creator’s Tip: You MUST upsize the support beam holding the swing to at least a 2×8 or 4×6, as dynamic swinging force will crack standard 2x4s.
- Smart Sourcing: Buy 360-degree silent swing hanger brackets and a waterproof outdoor daybed cushion.
If you love cooking outside, this next weather-proof blueprint is an absolute game changer…
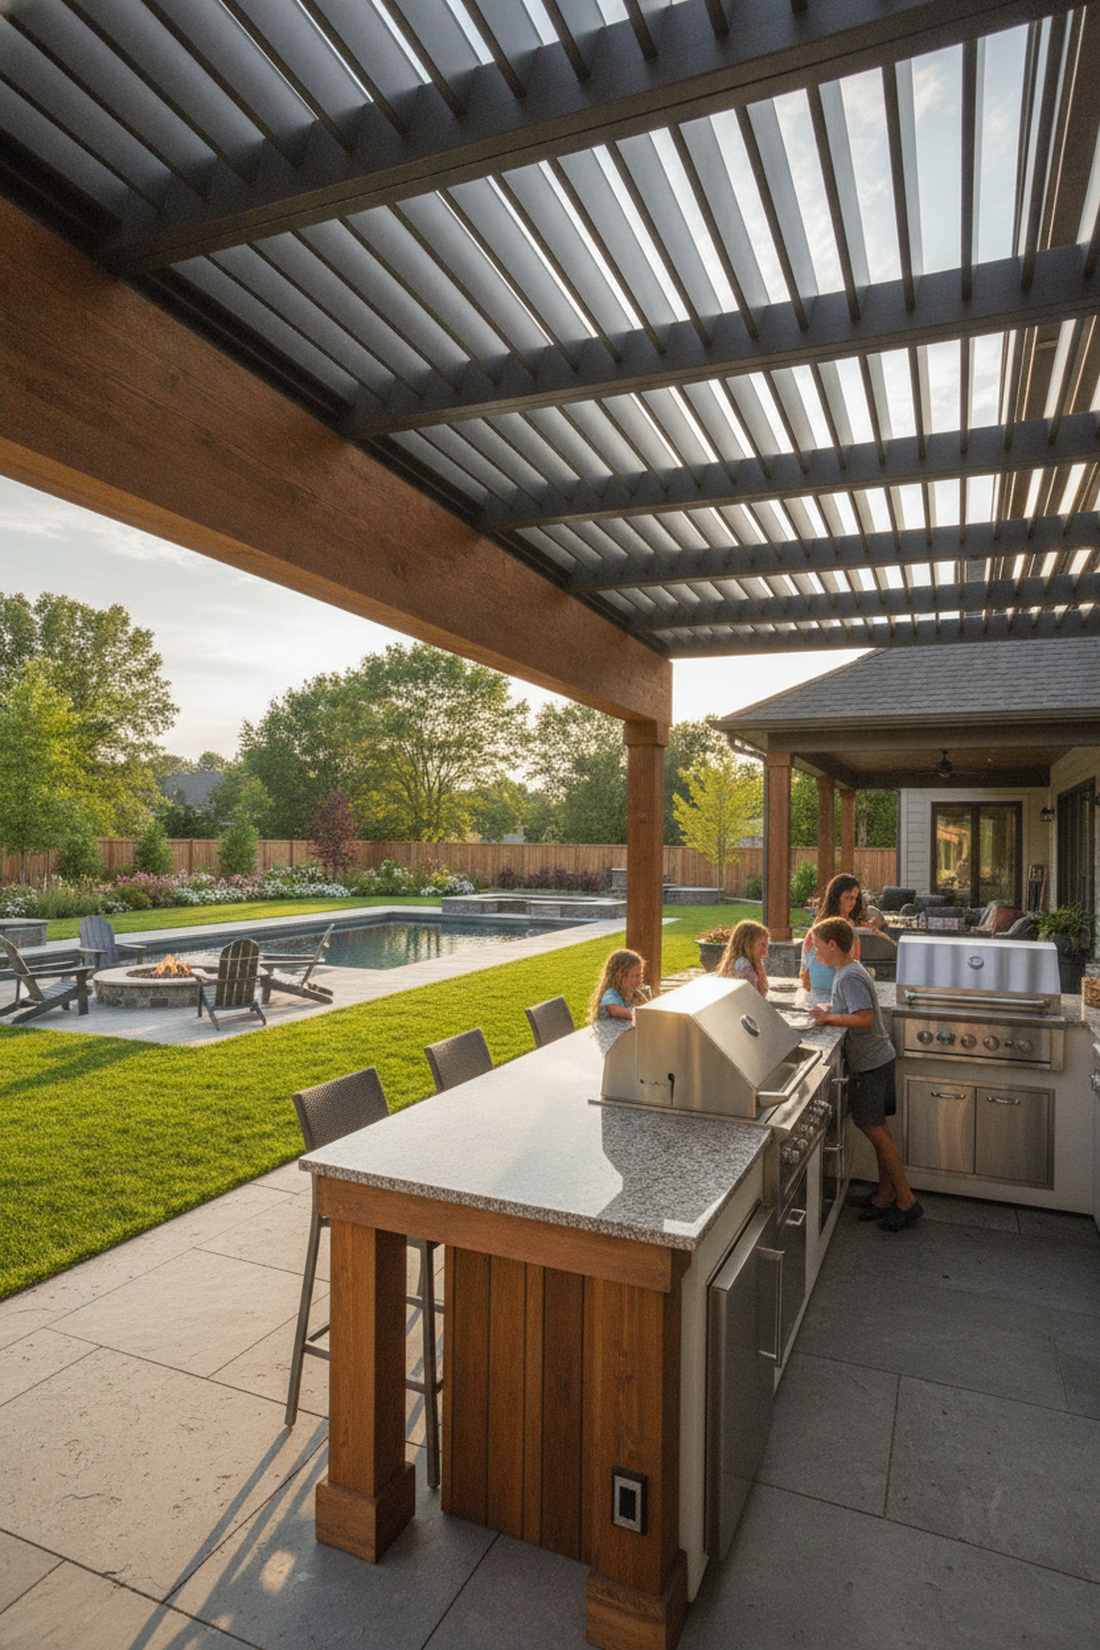
21. Outdoor Kitchen Pergola Shelter
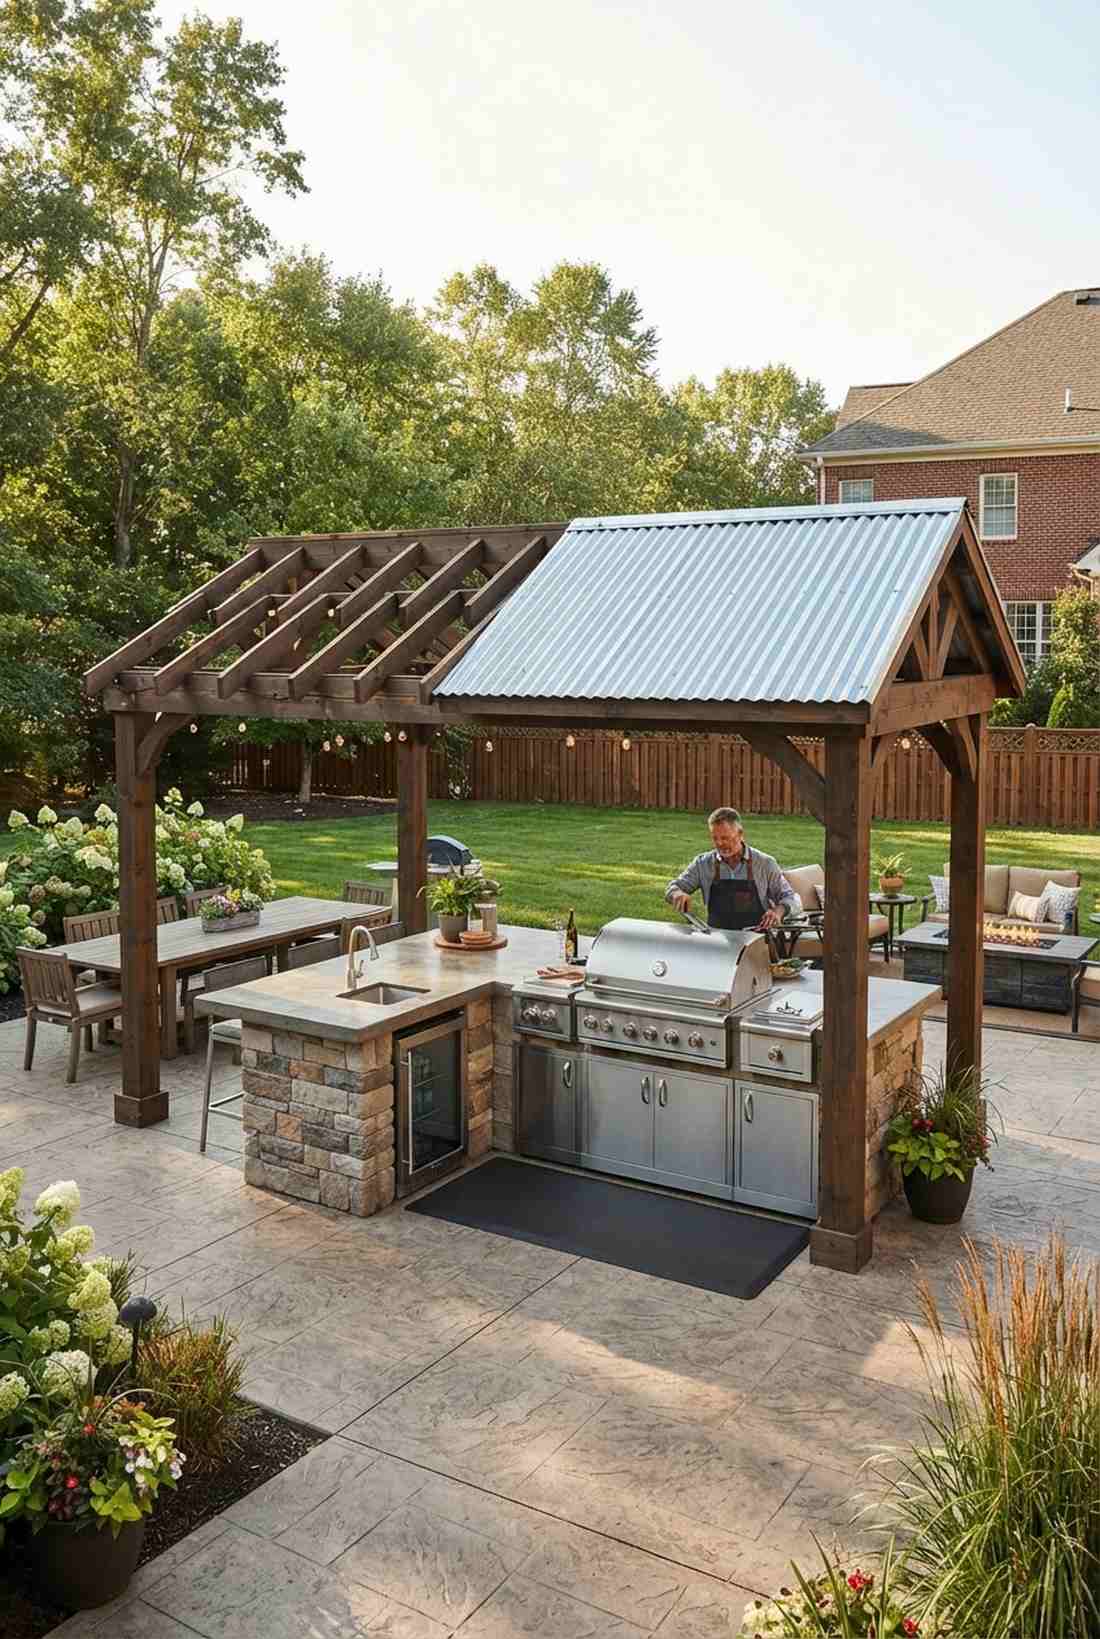
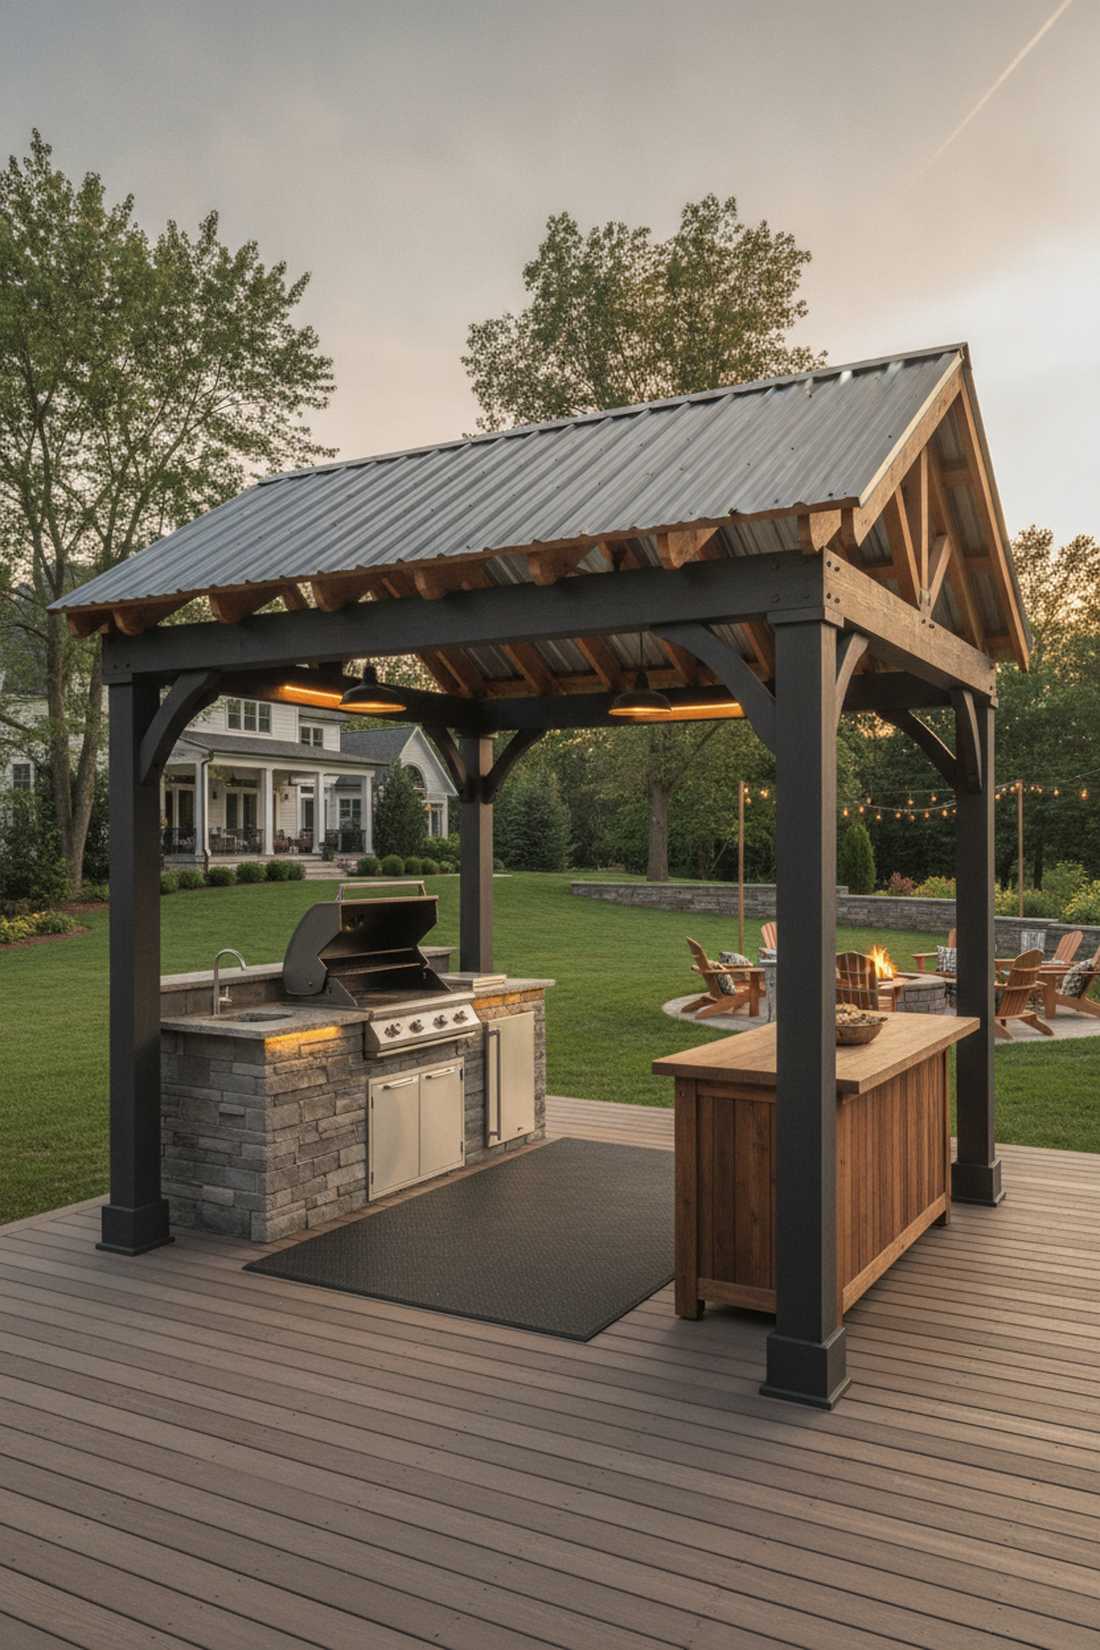
This robust frame serves as a heavily guarded covered culinary station. An over-grill shade structure protects your expensive stainless steel BBQ from torrential rain while keeping the chef out of the blistering sun.
Integrating a solid metal roof section directly over the grill station looks highly custom and solves the massive issue of weather-ruined outdoor appliances. Leaving the front half open while shielding the prep area creates a brilliantly functional micro-kitchen.
A heavy-duty fire-safe shelter costs roughly $600–$1,000. It’s a mandatory upgrade for serious backyard pitmasters.
- Key Materials: Corrugated metal roofing, fire-resistant treatments
- Vibe / Style: High-end grilling pavilion
- Difficulty: Moderate building & roofing
- Budget Breakdown: Roofing Panels: $150 | Lumber Base: $400.
- Creator’s Tip: Ensure a minimum of 36 inches of vertical clearance between the top of your grill exhaust and the wooden rafters to prevent fire hazards.
- Smart Sourcing: Pick up galvanized corrugated metal roof panels (bulk pack) and high-heat protective grill mats.
22. Pergola with Ceiling Fan
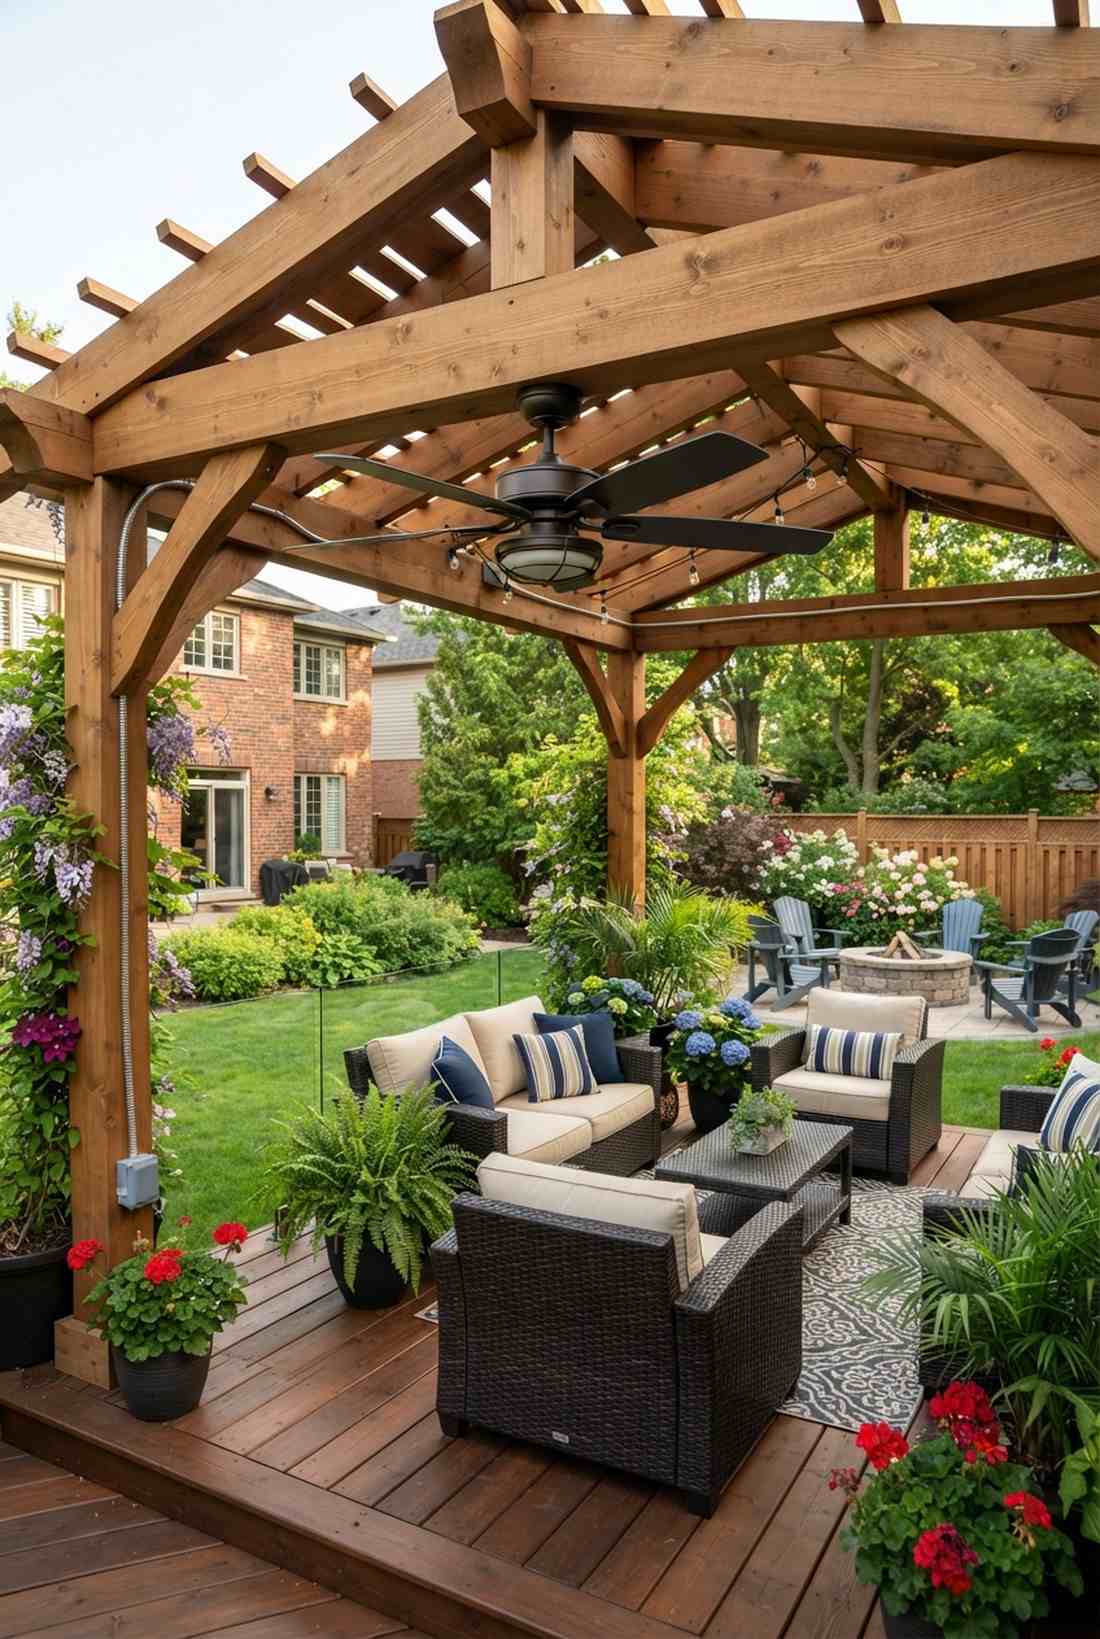
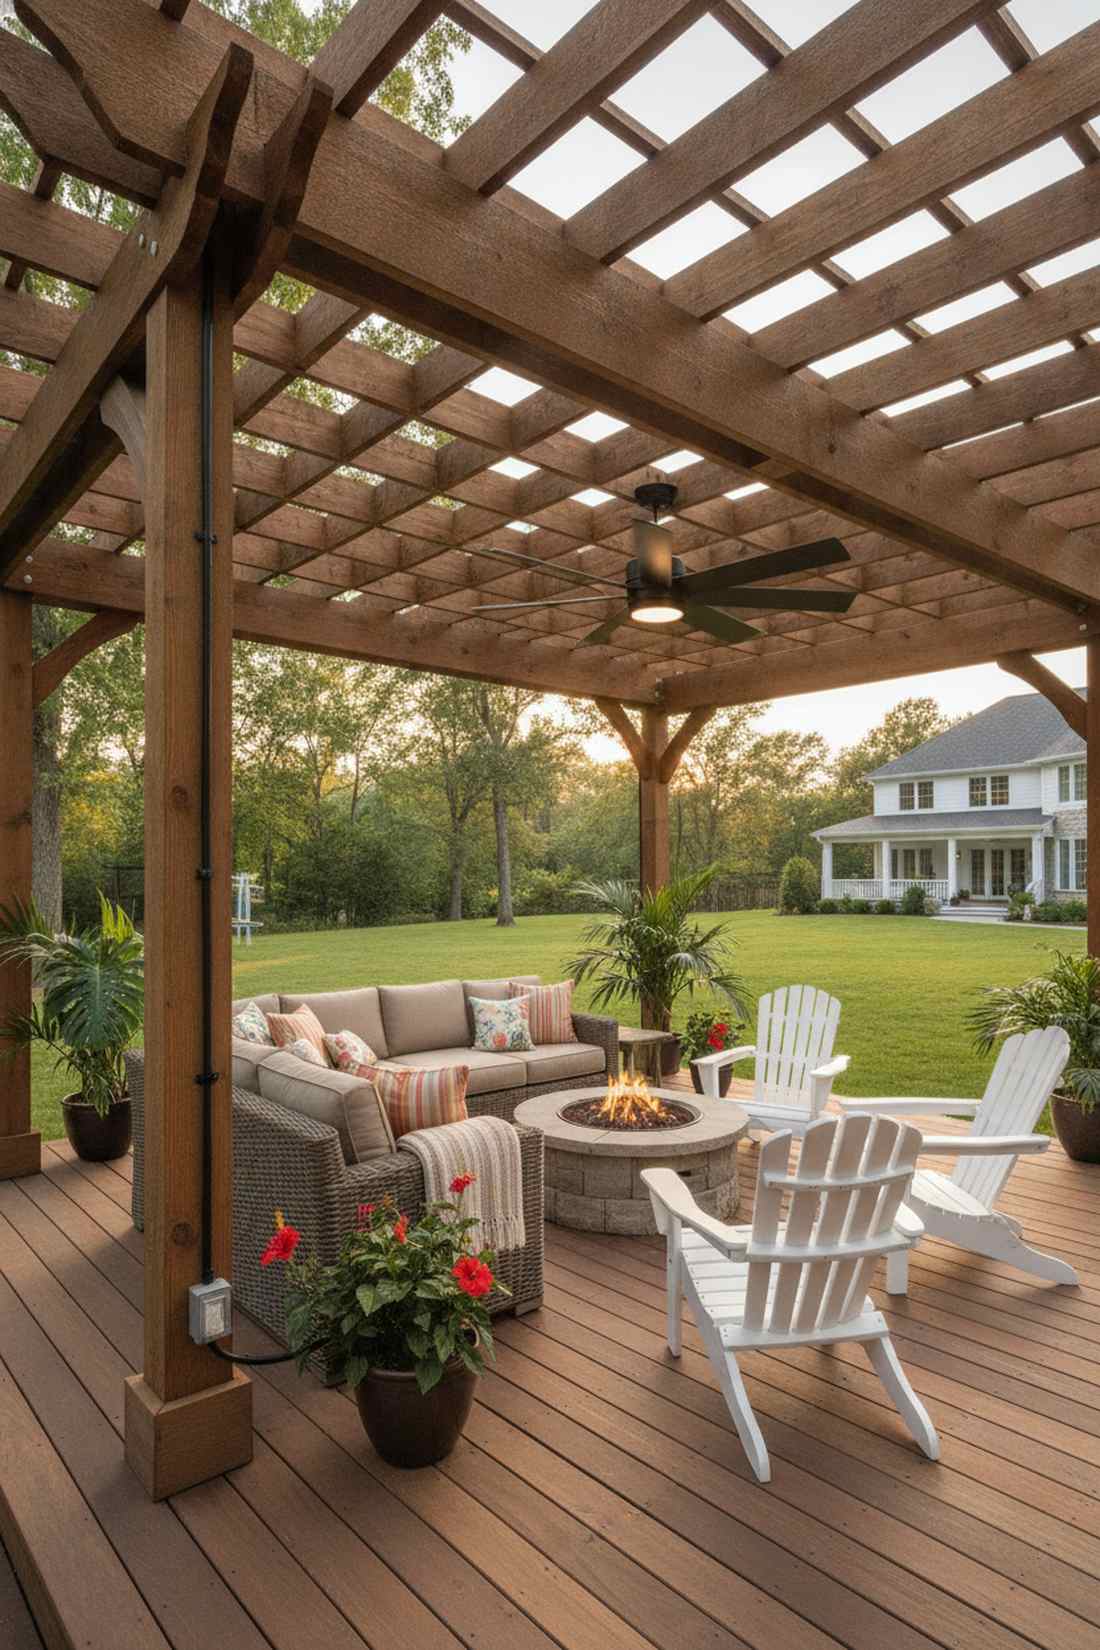
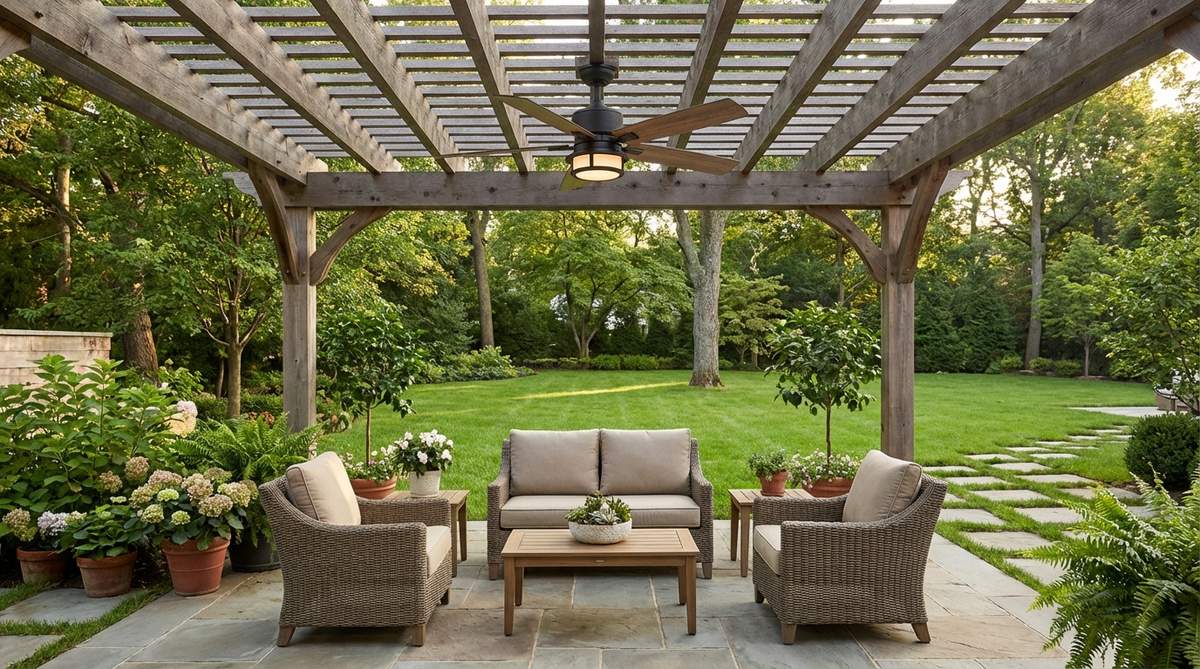
This cooling upgrade creates a breezy tropical terrace vibe instantly. Hanging a wet-rated outdoor ceiling fan under your rafter beams actively pushes down stifling heat and keeps aggressive mosquitoes completely away from your guests.
Moving thick, humid air delivers a surprisingly premium level of comfort during the dead of summer. By running electrical conduit down an inconspicuous corner post, you bring interior-level cooling directly to your outdoor seating zone.
This life-saving airflow upgrade runs about $150–$300. Save this idea if you live in a notoriously muggy, bug-heavy climate.
- Key Materials: Outdoor wet-rated fan, waterproof electrical boxes
- Vibe / Style: Climate-controlled comfort
- Difficulty: Intermediate electrical work
- Budget Breakdown: Outdoor Fan: $180 | Wiring/Boxes: $50.
- Creator’s Tip: Only purchase fans explicitly labeled “Wet-Rated” (not just Damp-Rated) so they can survive direct blasts of blowing rain.
- Smart Sourcing: Invest in an industrial wet-rated outdoor ceiling fan and liquid-tight electrical conduit tubing.
Material and Color Choices for Small Spaces
Strategic finish choices directly manipulate visual perception. Applying the right textures forces a cramped footprint to feel expansive and luxurious.
23. Light-Colored Finishes
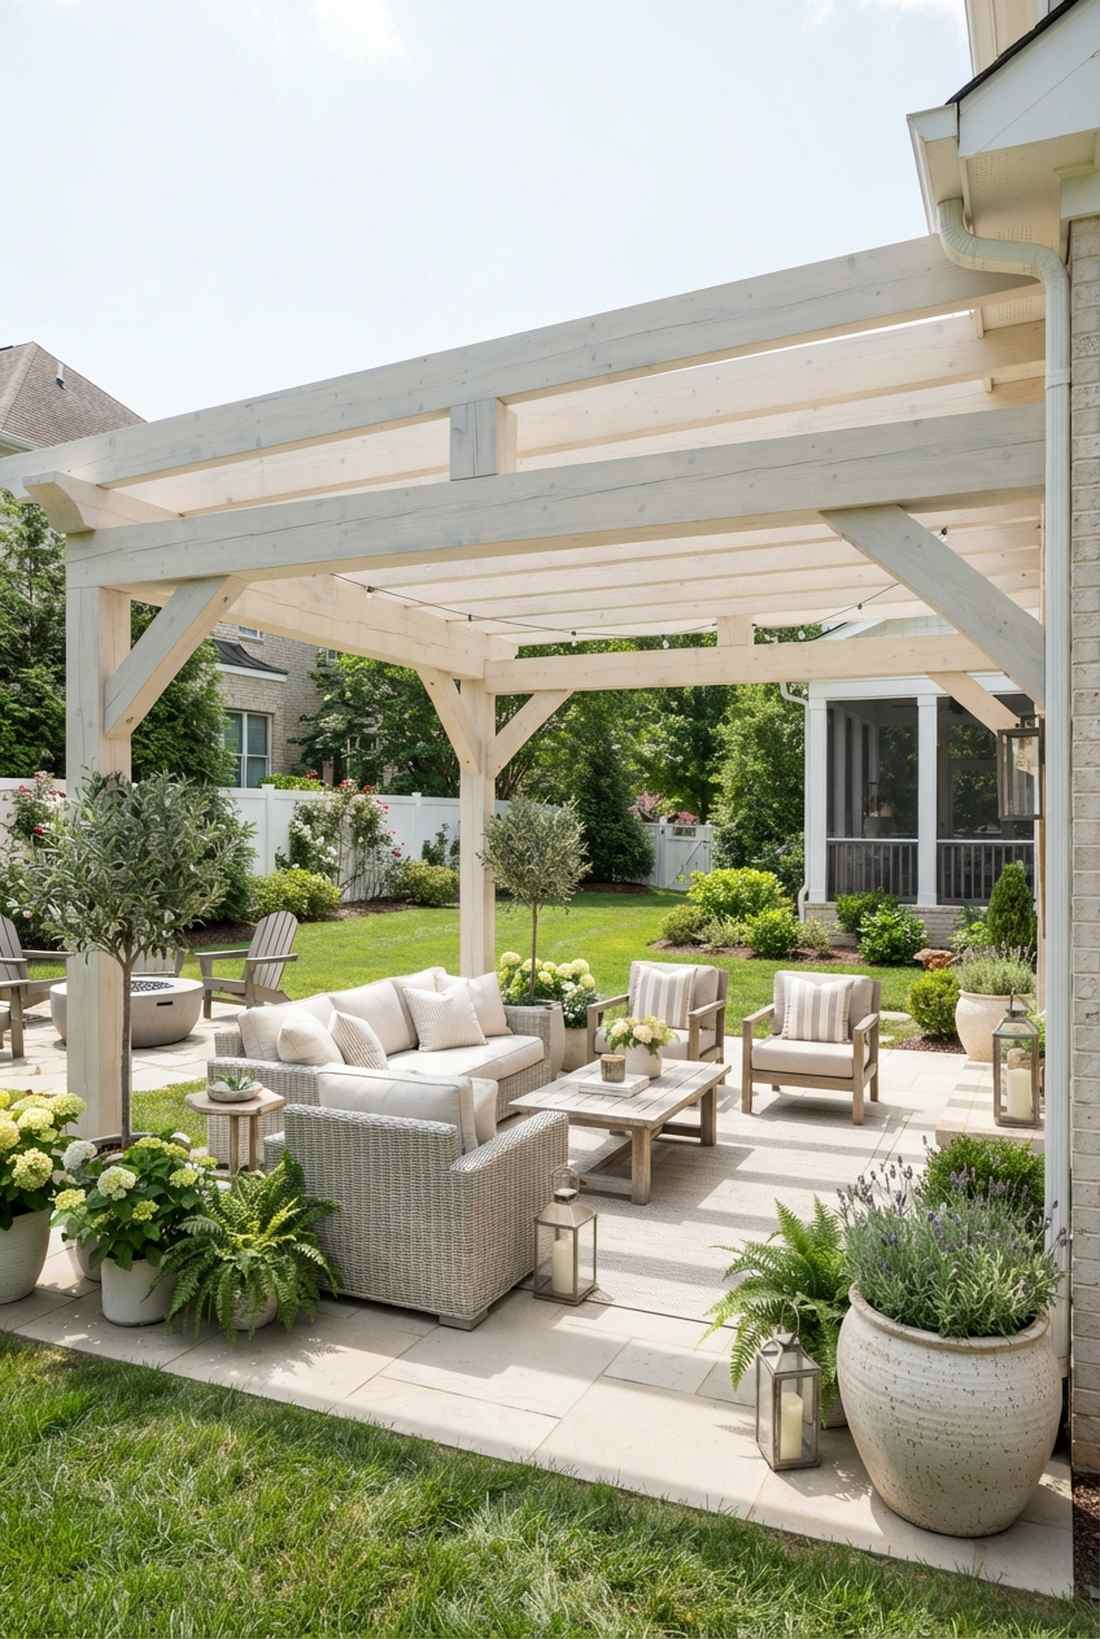
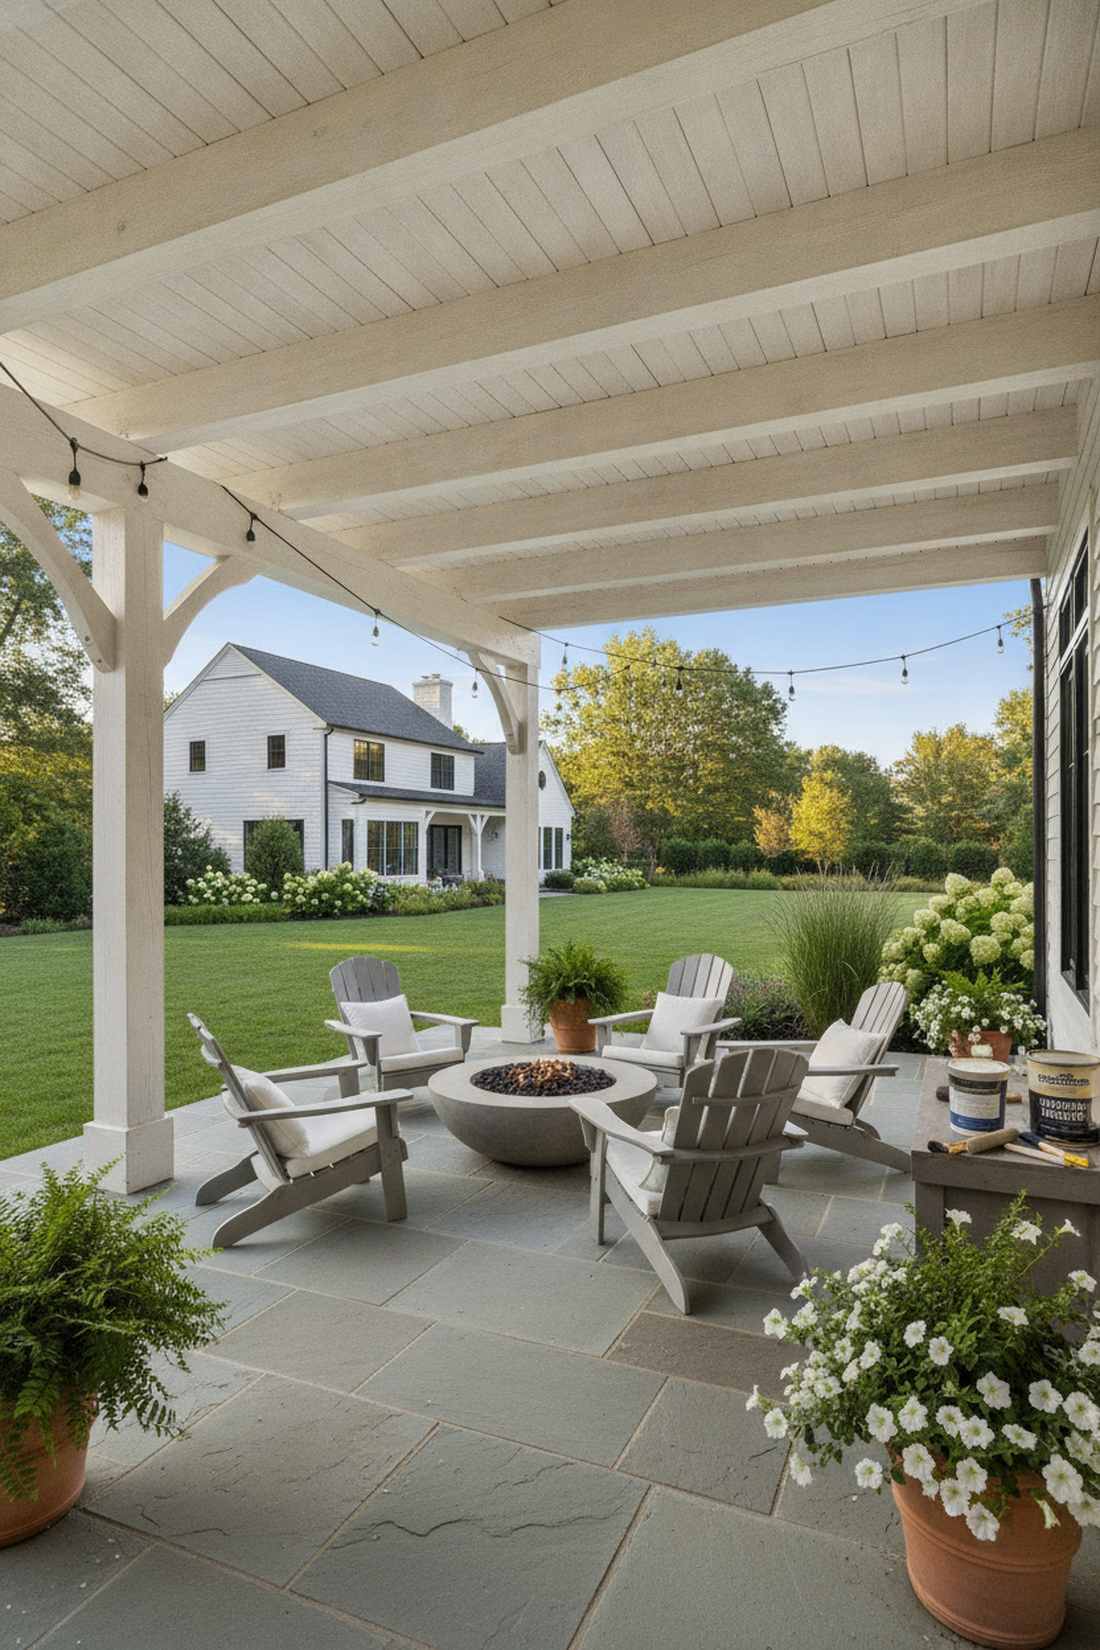
This airy palette generates a vastly expanded architectural illusion. A pale-washed timber frame is a fantastic strategy for tight, walled-in patios because light tones fiercely reflect natural sunlight rather than absorbing it.
Coating your raw lumber in soft creams or pale grays looks far more expensive than standard brown stains and prevents the structure from feeling top-heavy. The bright overhead lines draw the eye up, convincing the brain that the ceiling is much higher than reality.
Premium opaque stains will cost around $80–$120. Pin this to your exterior color palette board for an instant space-expanding hack.
- Key Materials: Solid color exterior stain, UV-blocking topcoat
- Vibe / Style: Open, airy, and expansive
- Difficulty: Easy surface prep
- Budget Breakdown: Premium Stain: $70 | Brushes/Rollers: $30.
- Creator’s Tip: Use a solid-color acrylic stain instead of paint; stain penetrates the wood fibers and won’t peel off in large flakes after a freezing winter.
- Smart Sourcing: Grab UV-resistant solid exterior wood stain (gallon) and heavy-duty wood filler for seamless joints.
24. Pressure-Treated Pine
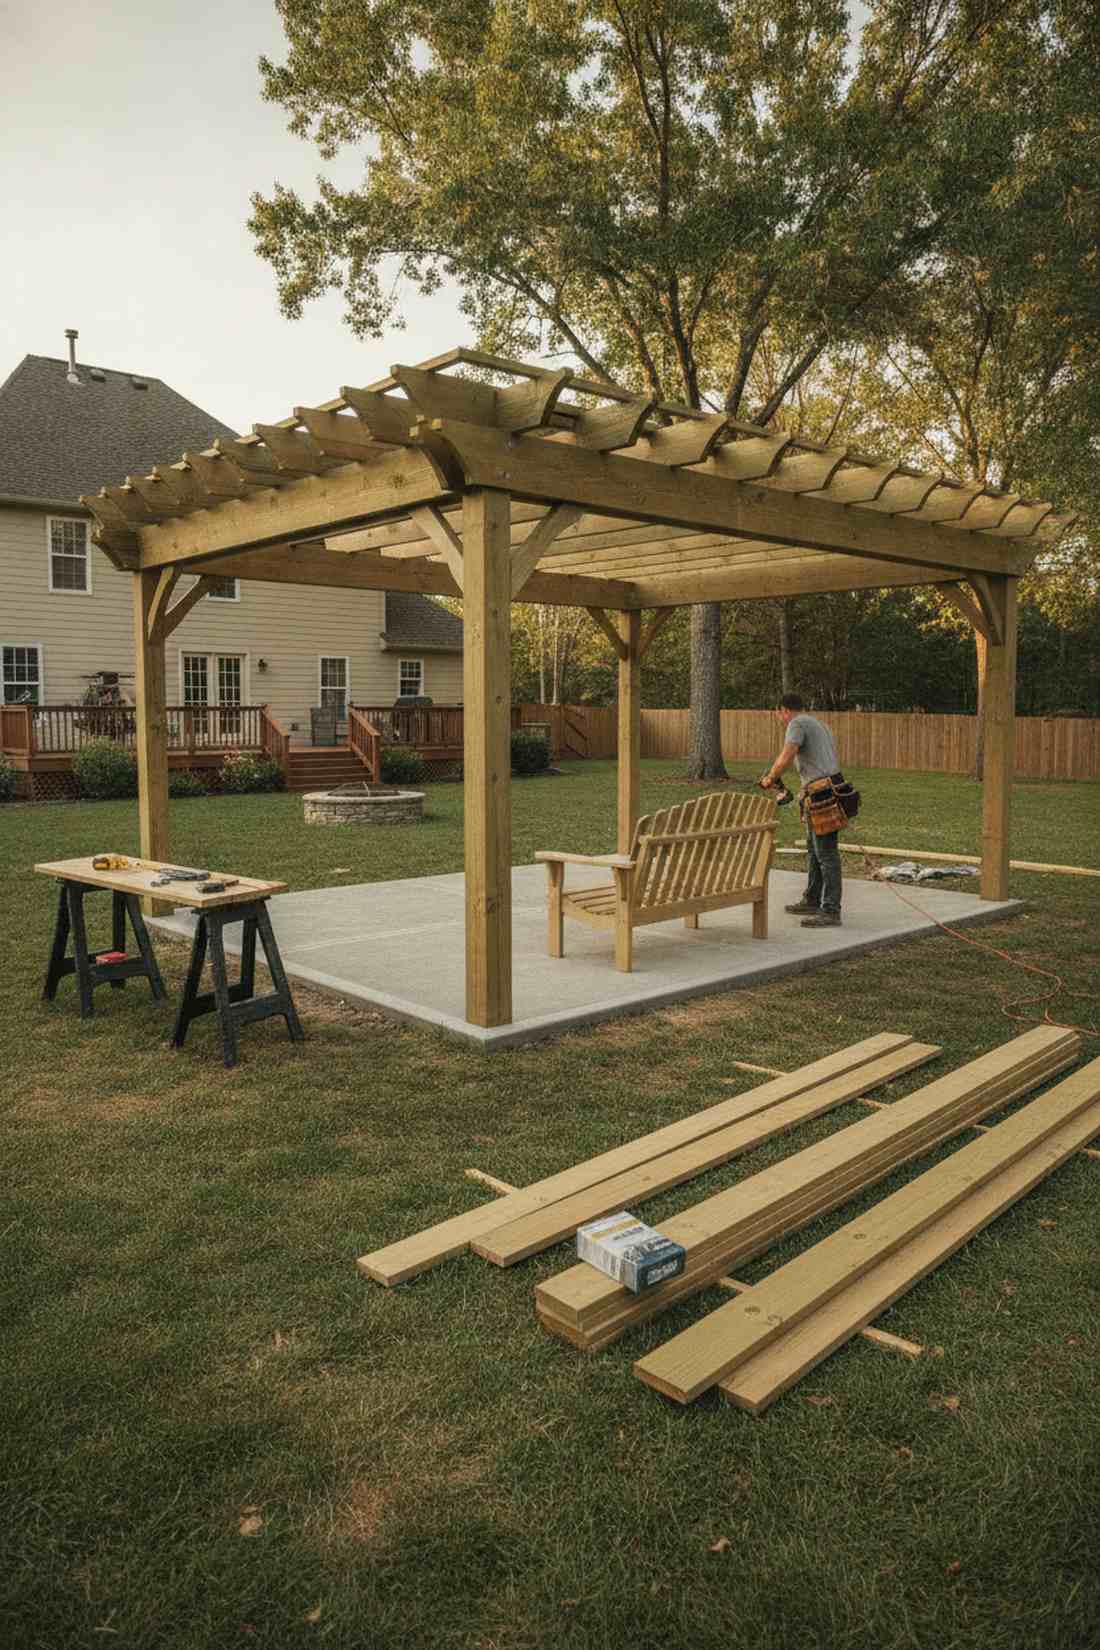
This accessible material ensures custom-crafted affordability without sacrificing safety. Chemically treated structural pine is the absolute backbone for budget-conscious DIYers looking to maximize their backyard footprint.
Using standard yard lumber allows you to build massive shade profiles for a fraction of the cost of exotic hardwoods. Once the green chemical tint bakes off in the sun, it readily accepts deep chocolate or rich cedar stains to mimic top-tier timber.
You can frame a complete base for under $300 using PT pine. Highly recommended for your first major outdoor carpentry project.
- Key Materials: Ground-contact rated posts, ACQ-approved screws
- Vibe / Style: Rugged, cost-effective practicality
- Difficulty: Accessible beginner lumber
- Budget Breakdown: PT Posts & Beams: $250 | Fasteners: $40.
- Creator’s Tip: Wait a minimum of 3 to 6 months for the wet pressure-treated chemicals to completely dry out before you attempt to stain or seal it.
- Smart Sourcing: Use only ACQ-approved polymer-coated decking screws (bulk pack) to prevent the treated wood chemicals from eating your hardware.
If you want to skip the DIY maintenance completely, this next premium material is the ultimate hack…
25. Natural Cedar Timber
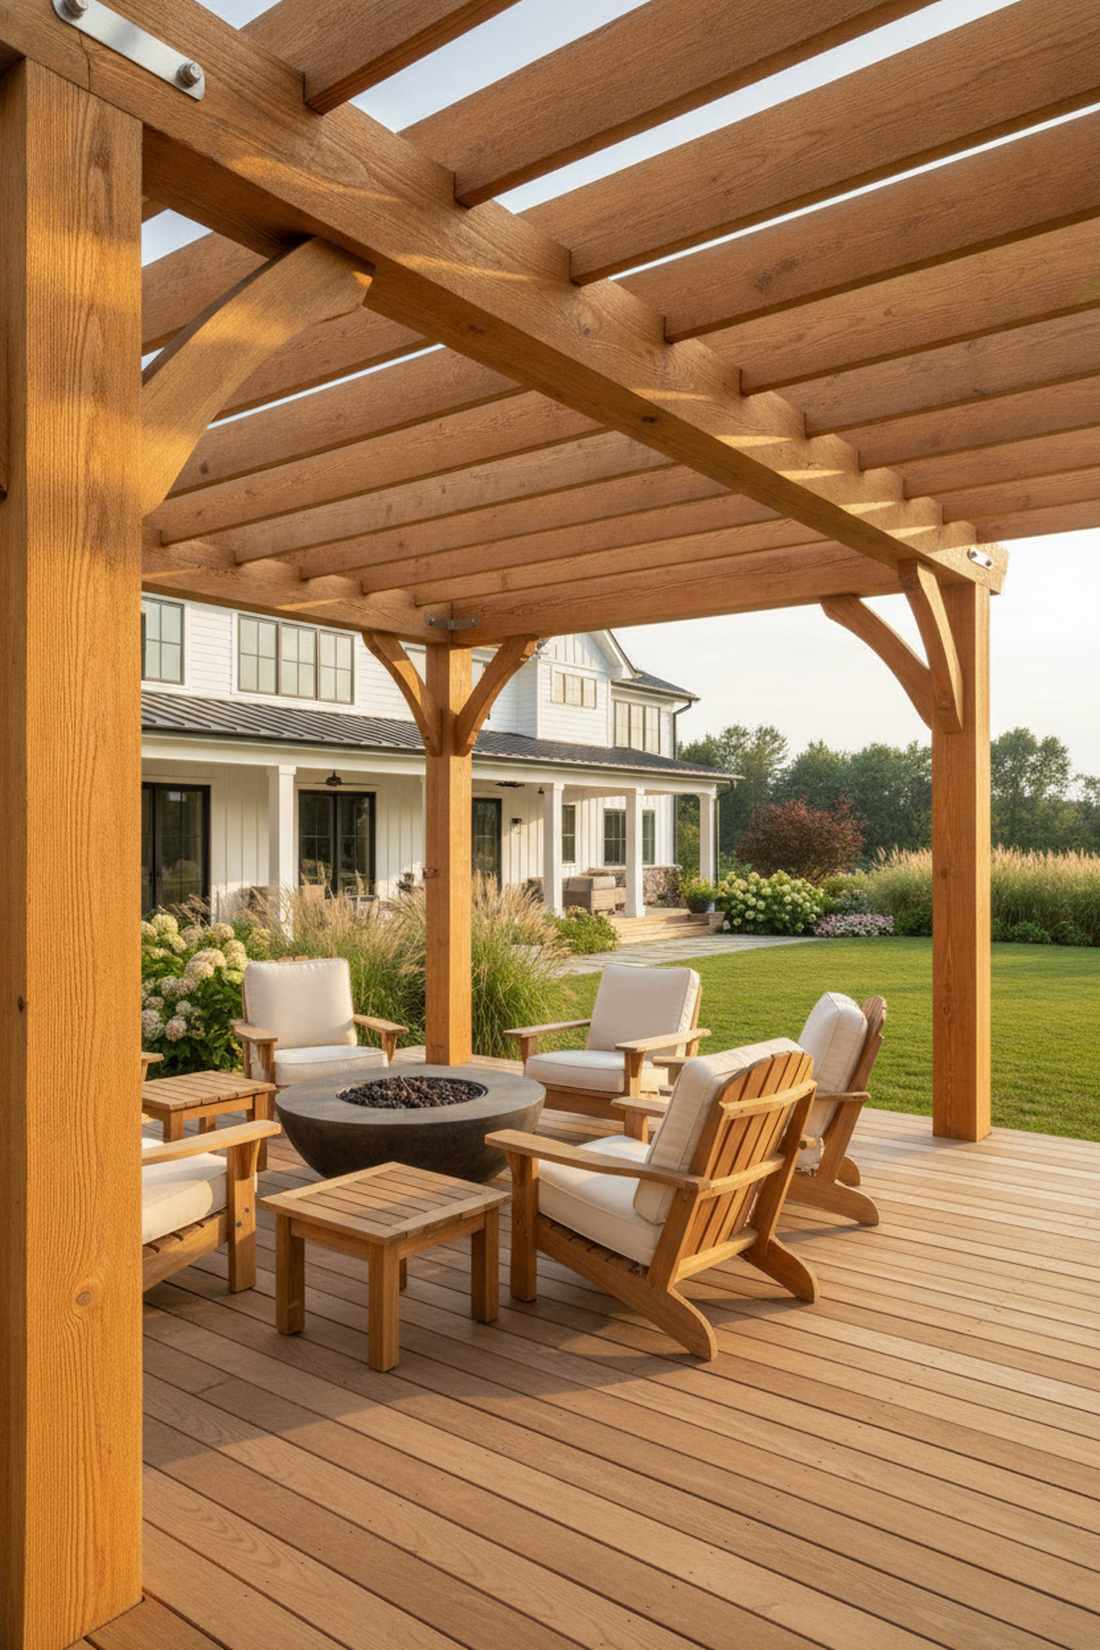
This premium lumber provides a rich, aromatic timber frame aesthetic. Western Red Cedar construction stands out as the ultimate upgrade for homeowners who demand raw, breathtaking natural wood grain.
Working with naturally rot-resistant wood gives a designer-level finish and removes the need to constantly battle chemical warping. Its ultra-lightweight cellular structure makes hoisting massive overhead crossbeams significantly safer and easier for a one-man build team.
Expect a cedar material bill to hover around $700–$1,200. Save this if you value flawless natural aesthetics over budget shortcuts.
- Key Materials: Rough or smooth-sawn Western Red Cedar, stainless hardware
- Vibe / Style: Top-tier organic warmth
- Difficulty: Easy to cut and handle
- Budget Breakdown: Cedar Timbers: $900 | Stainless Fasteners: $80.
- Creator’s Tip: You MUST use stainless steel or hot-dipped galvanized bolts; standard steel will immediately cause massive black streaks on cedar wood.
- Smart Sourcing: Order marine-grade stainless steel lag bolts and a clear UV-protective cedar wood sealant.
26. Aluminum Powder-Coated Frames

This sleek kit produces a completely maintenance-free modern structure. A hollow-core aluminum pergola is the absolute pinnacle of coastal outdoor design, laughing off salt spray that would destroy steel or wood.
Snapping together a precision-machined metal kit totally eliminates the nightmare of warped lumber and complex saw cuts. The durable baked-on finish ensures you will never have to spend a single weekend scraping, sanding, or repainting peeling beams ever again.
Pre-fab kits range wildly from $1,200 to $3,500. It’s the ultimate “buy it once and forget it” upgrade for a luxury patio.
- Key Materials: Extruded aluminum profiles, hidden connection sleeves
- Vibe / Style: Flawless contemporary ease
- Difficulty: Simple bolt-together assembly
- Budget Breakdown: Aluminum Kit: $1,800 | Footing Hardware: $60.
- Creator’s Tip: Since aluminum is so lightweight, double-check your concrete footing depth; the wind uplift force is much higher than on a heavy wood frame.
- Smart Sourcing: Invest in a powder-coated aluminum pergola starter kit and heavy-duty wedge anchors for concrete.
Bringing Your Small Garden Pergola Vision to Life
Even the tightest outdoor spaces can accommodate these 26 beautiful, functional small garden pergola designs that deliver high-end shade, privacy, and massive architectural interest. By selecting space-efficient structures like corner, cantilever, or attached layouts and enhancing them with UV-blocking retractable canopies or living plant walls, you instantly multiply your home’s living area. Start with accurate hardware measurements, grab the right budget-friendly pre-cut starter kits, and build a cohesive outdoor room that dramatically boosts both daily function and overall property value.
Frequently Asked Questions
What is the smallest practical size for a garden pergola?
The smallest functional setup measures approximately 6×6 feet, which provides just enough overhead coverage for a bistro table while maintaining a premium aesthetic. Anything smaller feels cramped and loses its high-end architectural impact. If you are extremely tight on space, utilizing a 6×8 foot lean-to frame alongside a wall gives you extra breathing room. Using pre-cut DIY pergola bracket systems makes framing these micro-footprints incredibly fast and perfectly square.
Do small pergolas provide enough shade for hot climates?
Basic wooden crossbeams only block about 30% of the sun, which is rarely enough for intense summer heat. To drastically upgrade your cooling, you should immediately invest in a UV-blocking retractable wave canopy kit that boosts shade coverage to 90%. Alternatively, planting fast-growing vines creates a lush living canopy, or bolting on an adjustable louver roof offers 100% waterproof protection against afternoon heat.
Can I install a pergola without concrete footings?
Yes, but only for micro-sized structures under 8×8 feet located in zero-wind areas, using heavy-duty surface mount post bases bolted directly into thick concrete slabs or sturdy decking. However, if you are building a freestanding premium structure or a cantilever layout, you must pour proper concrete footings below the frost line to prevent the wind from ripping the frame apart. Always skip cheap plastic anchors and use heavy masonry wedge anchors.
What maintenance do small pergolas require?
Standard pressure-treated or pine frames require washing and a fresh coat of clear UV-protective wood sealant every 2 to 3 years to stop splitting and graying. If you hate maintenance, upgrading to a powder-coated aluminum pergola starter kit eliminates staining forever. For all builds, you should check your corner brackets and lag bolts every spring to ensure shifting ground hasn’t loosened your structural joints.
How much does a small garden pergola cost?
Budget DIY builds using pressure-treated pine and basic screws can easily be completed for $300 to $600. If you step up to premium Western Red Cedar and use heavy-duty steel corner brackets (4-pack), expect to spend $800 to $1,500. High-end aluminum kits or motorized louvered setups push the $2,000 to $4,000 range. You can drastically cut costs by choosing a wall-attached lean-to design, which cuts your lumber and post requirements entirely in half.