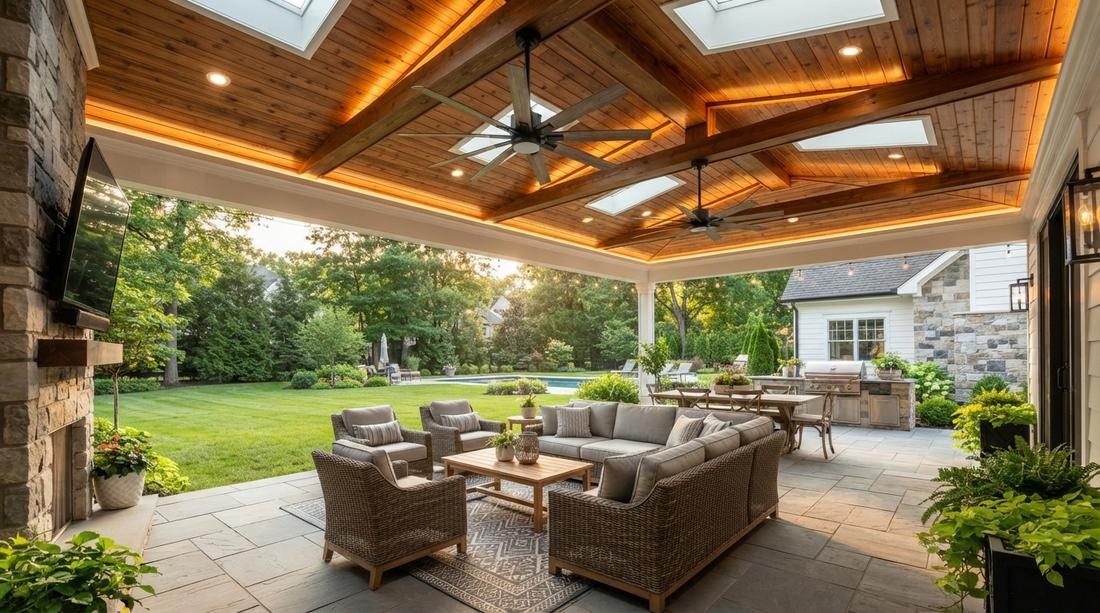
A striking outdoor patio ceiling instantly upgrades your backyard into a luxury retreat. These architect-approved layouts reveal the secret to achieving a premium designer look using easily sourced materials. Time to build your ultimate overhead oasis.
Design SnapshotKey Principles
- Weather Resistance: Outdoor ceilings must withstand moisture, temperature fluctuations, and UV exposure without warping or deteriorating
- Visual Continuity: Ceiling finish should complement your home’s architectural style while creating cohesion with outdoor hardscape elements
- Installation Efficiency: Panel sizing and tongue-and-groove systems dramatically reduce labor time and material waste on overhead applications
- Maintenance Cycle: Factor in re-staining, painting, or cleaning schedules when selecting materials—some finishes require attention every 2-3 years while others last decades
Classic Wood Ceiling Finishes That Deliver Timeless Appeal
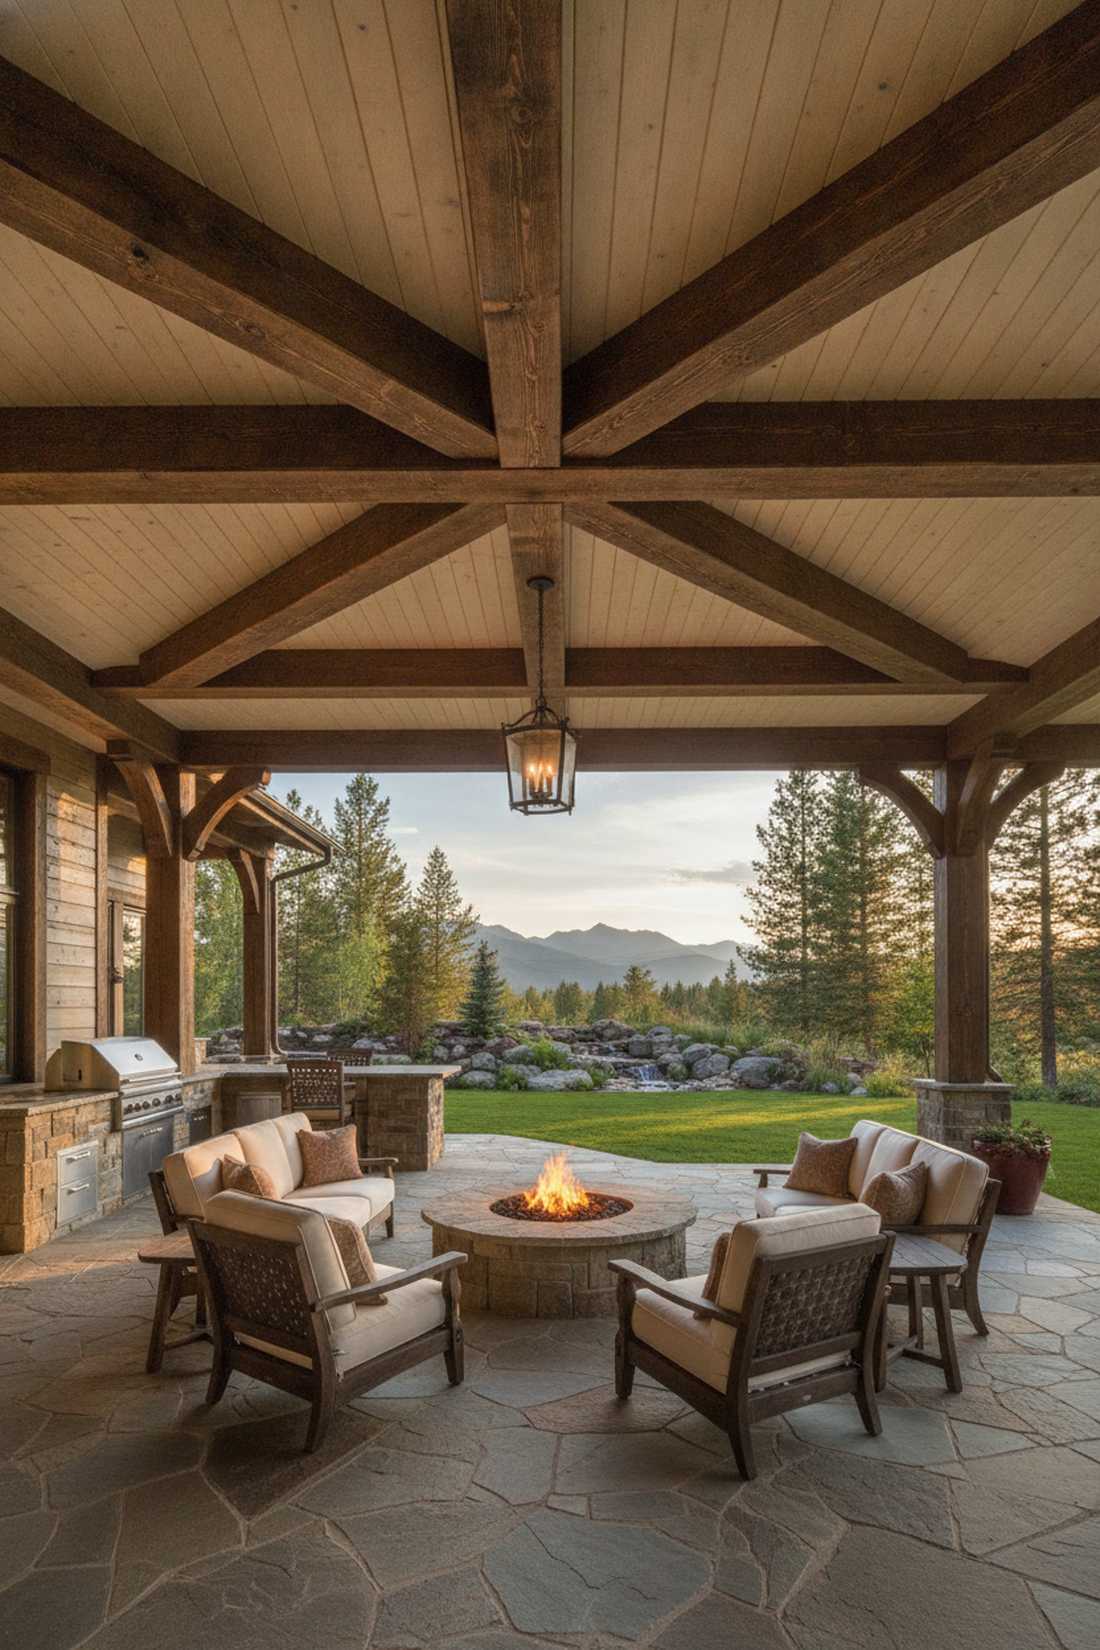
1. Tongue and Groove Cedar
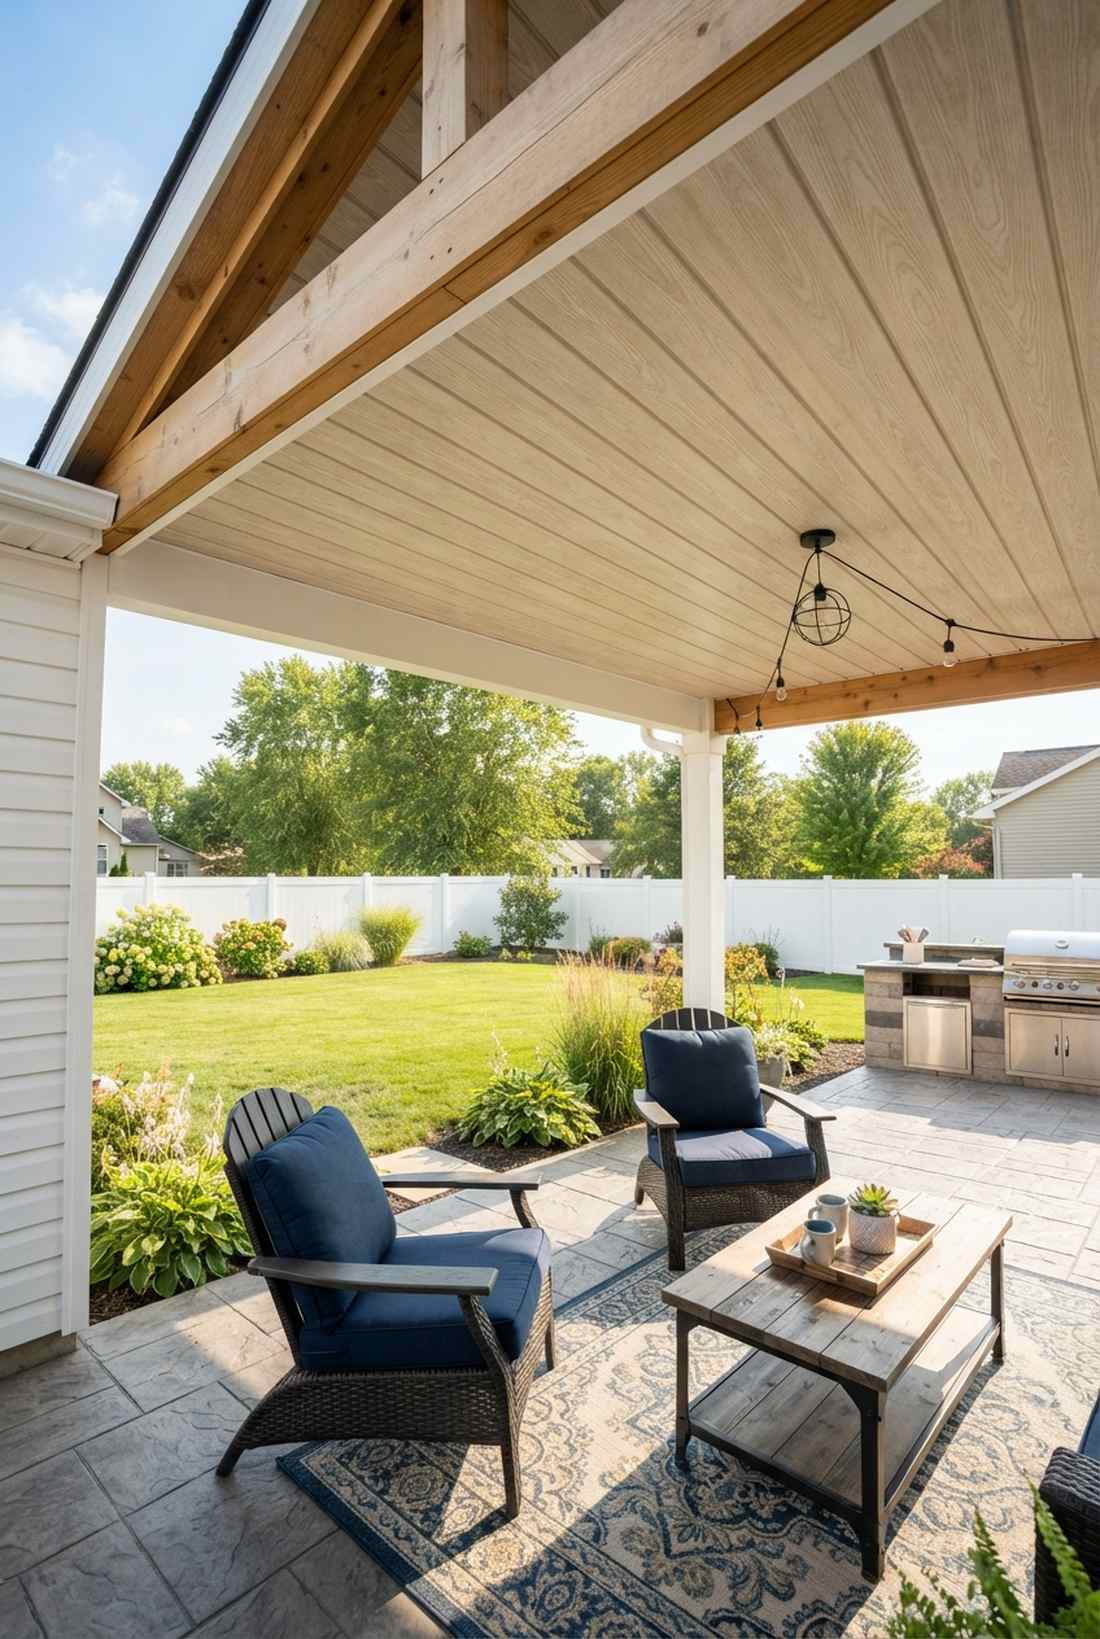
Feels like a luxury mountain lodge cabin overhead. This rustic tongue-and-groove porch ceiling works exceptionally well for a deeply shaded backyard pavilion.
Most DIYers overcomplicate installation, but end-matched boards deliver a surprisingly premium look with zero visible seams. Snagging a heavy-duty UV-protective exterior wood sealant locks in those rich honey tones before weather hits.
You can easily pull this off for around $25–$45 per square foot. Highly recommended for a classic weekend win that adds serious equity.
- Key Materials: Pre-milled cedar planks, exterior sealant
- Vibe / Style: Mountain retreat elegance
- Difficulty: Moderate DIY setup
- Budget Breakdown: Lumber: $20/sq ft | Sealant & Fasteners: $5/sq ft.
- Creator’s Tip: Space the boards slightly to allow for seasonal expansion without buckling.
- Smart Sourcing: pre-cut end-matched cedar bundles and UV-blocking penetrating timber oils.
2. Beadboard Panels
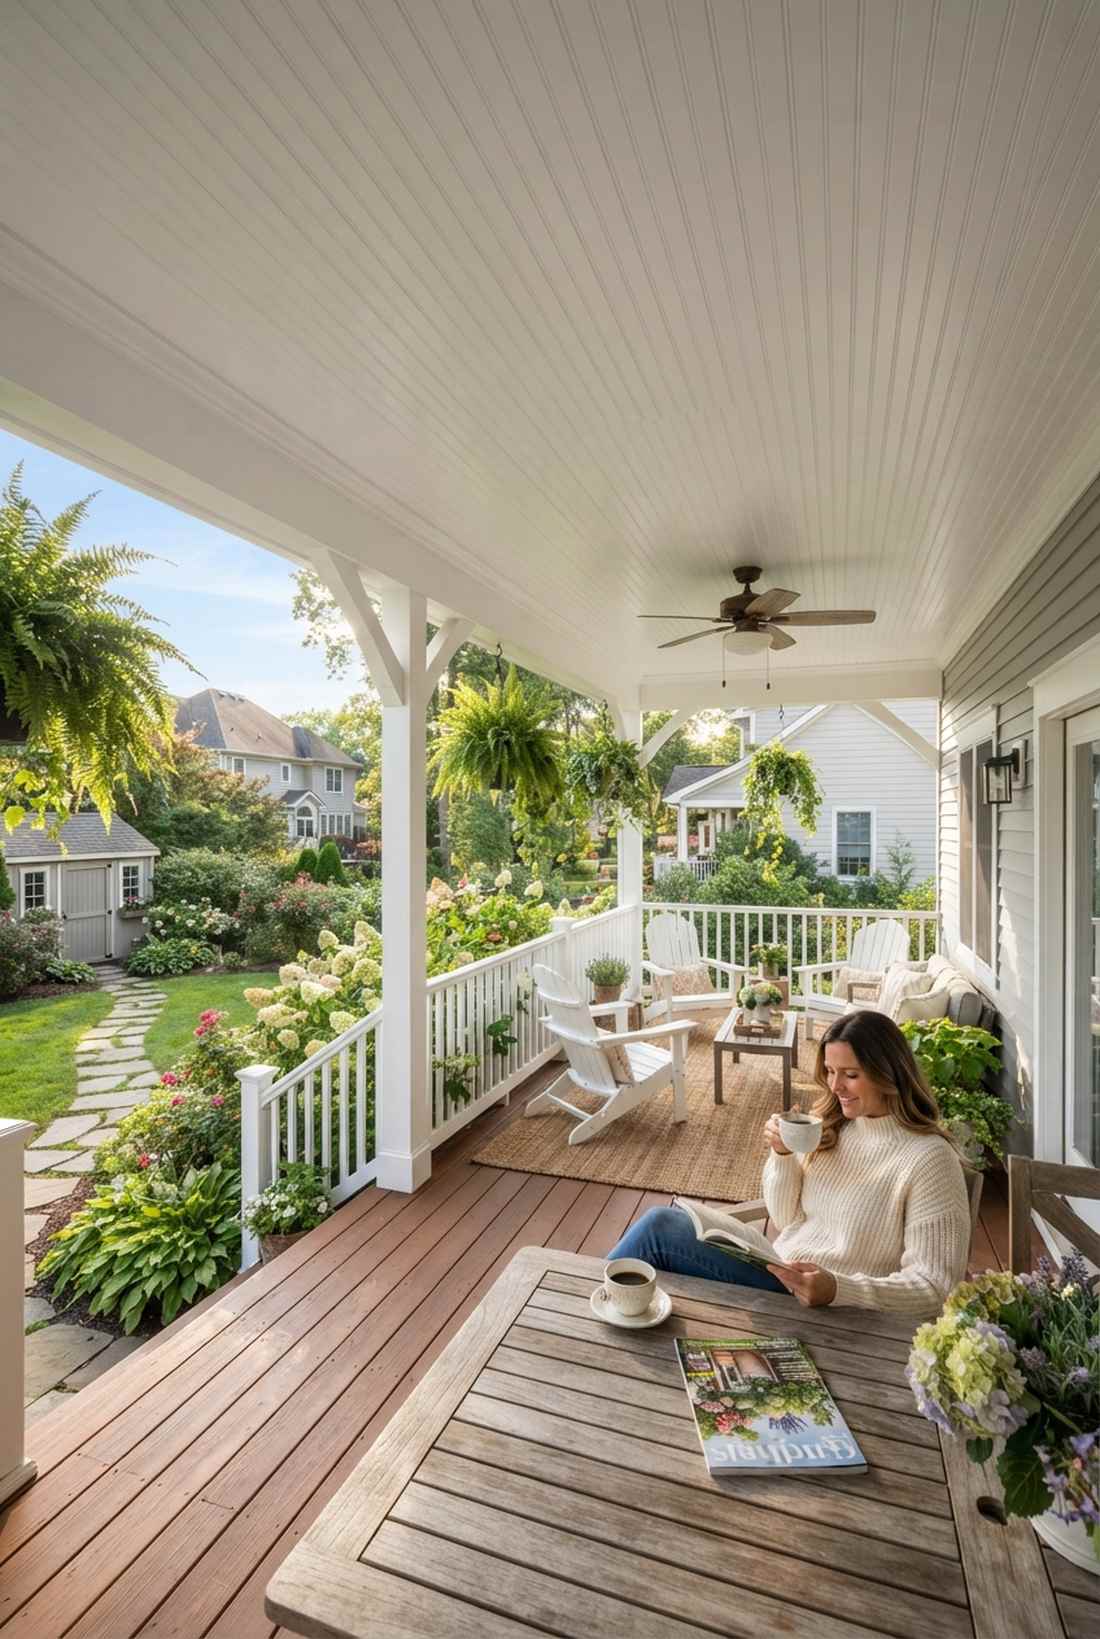
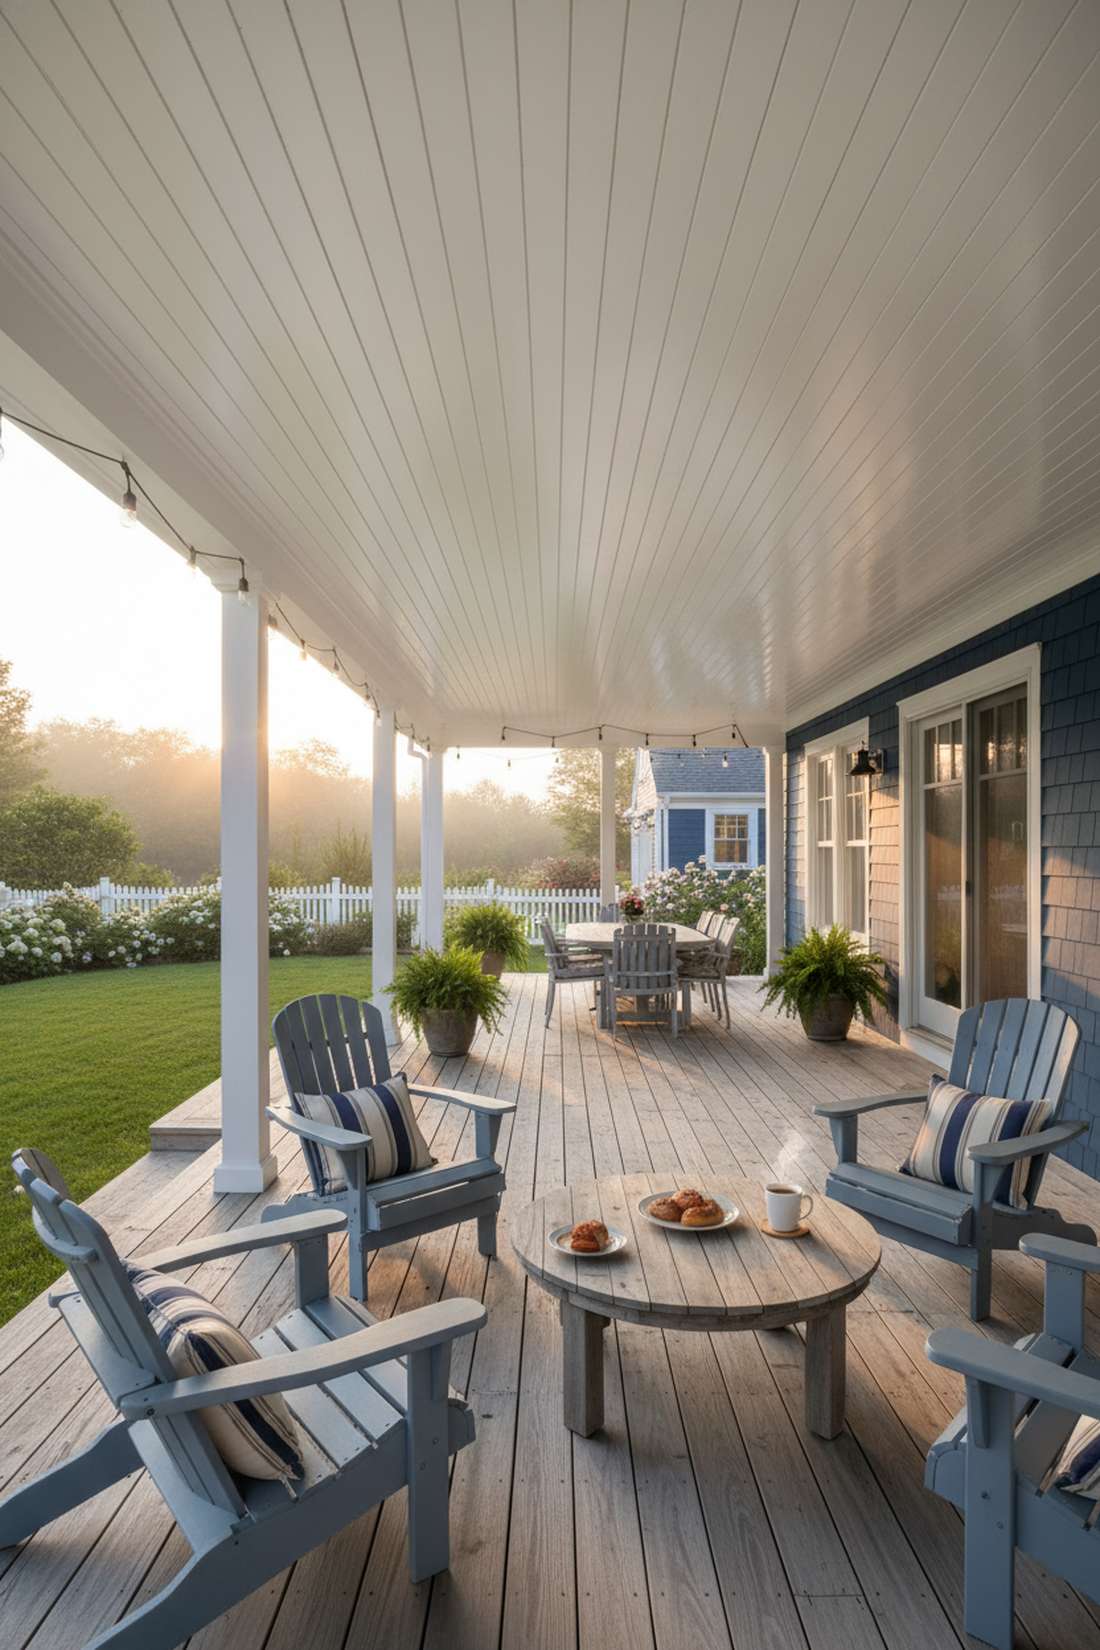
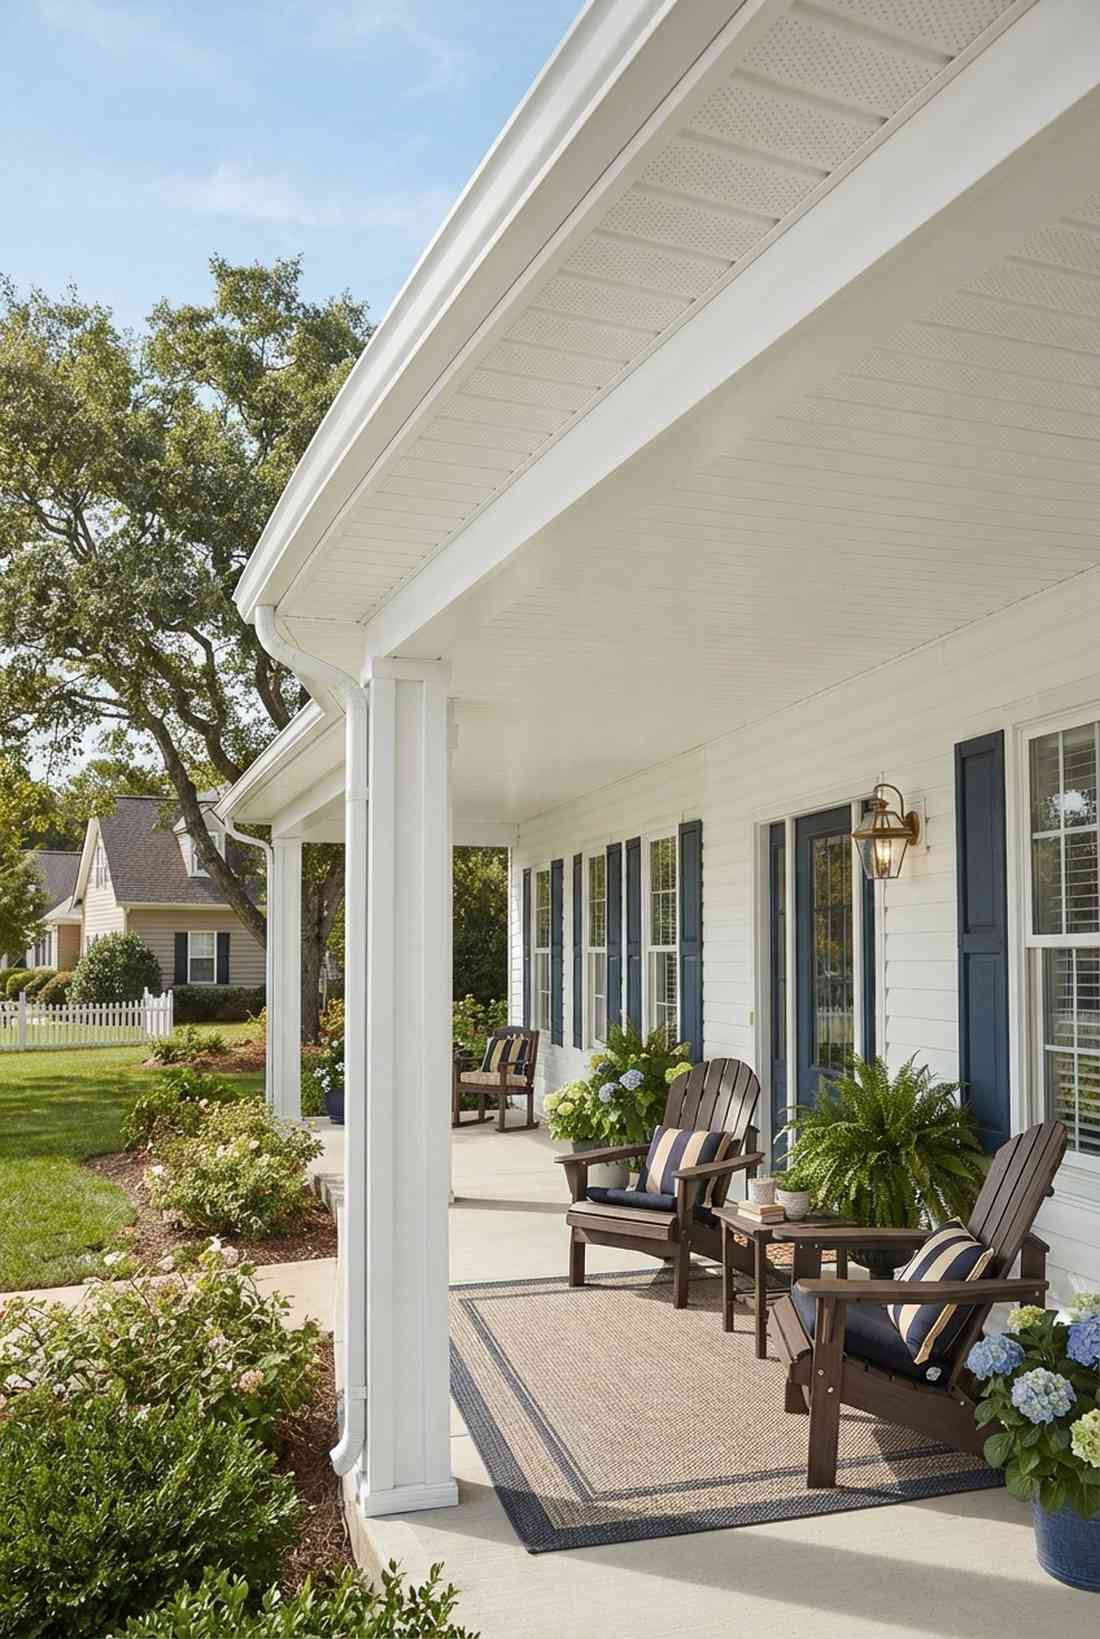
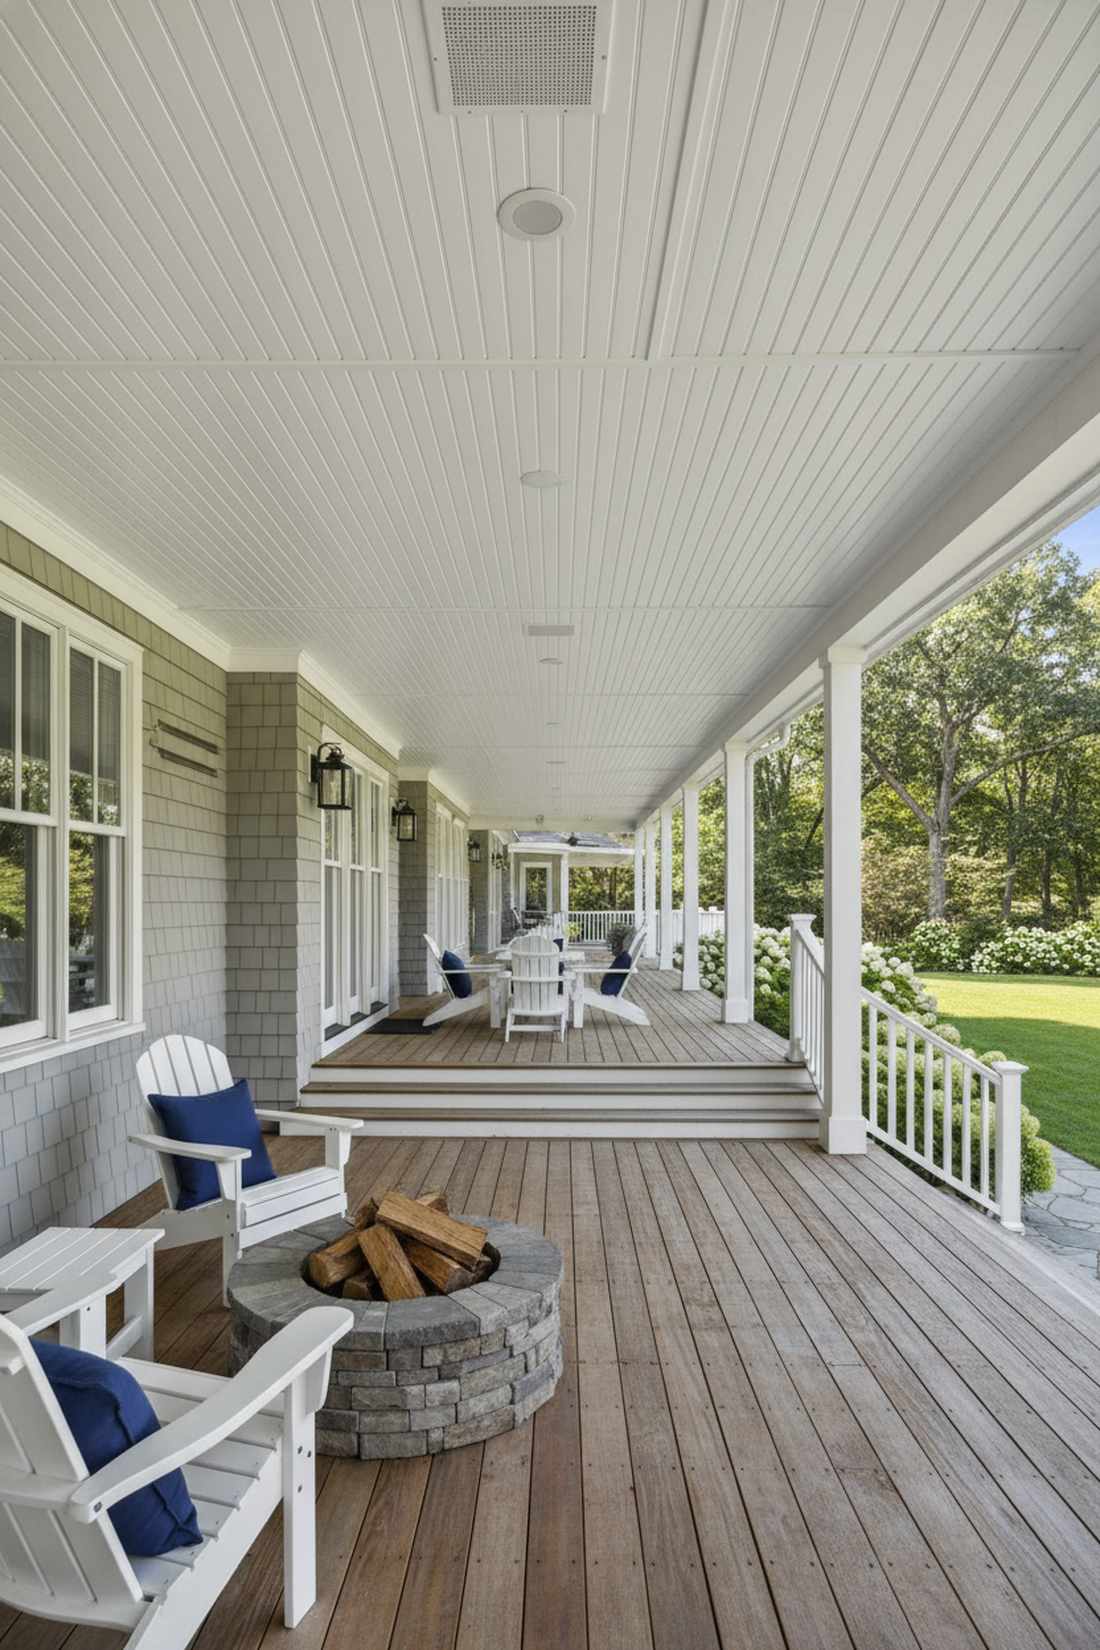
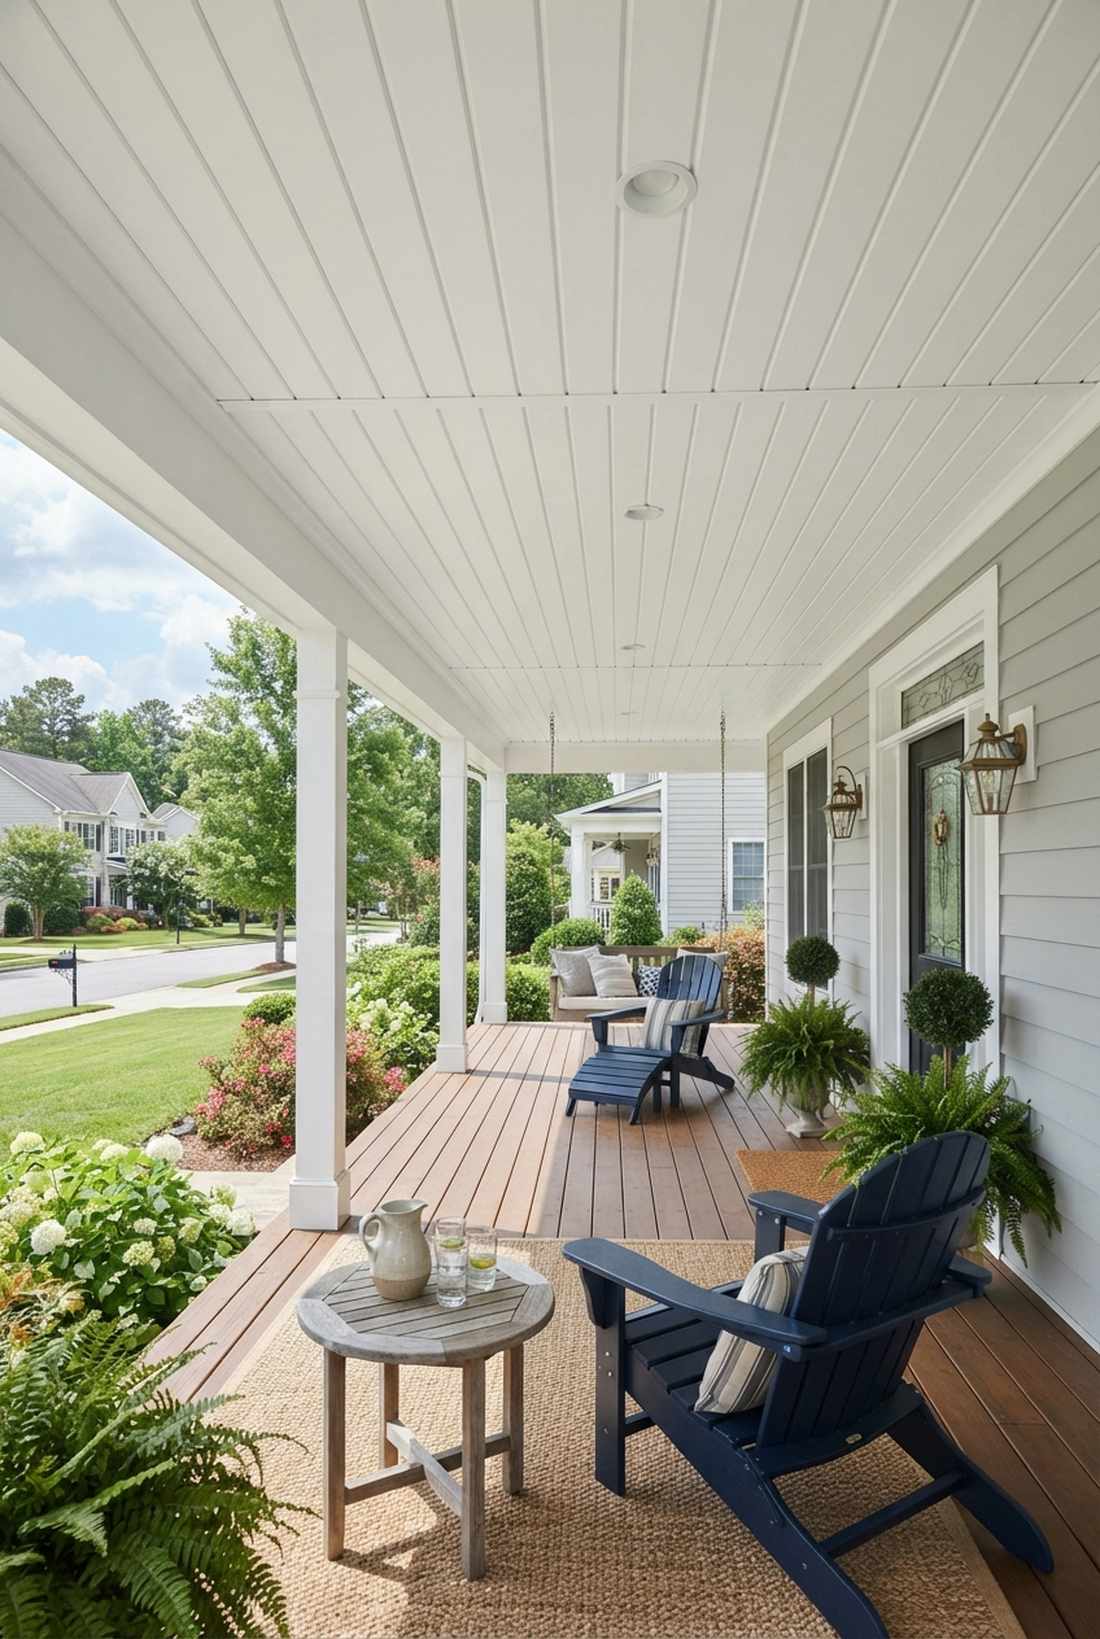
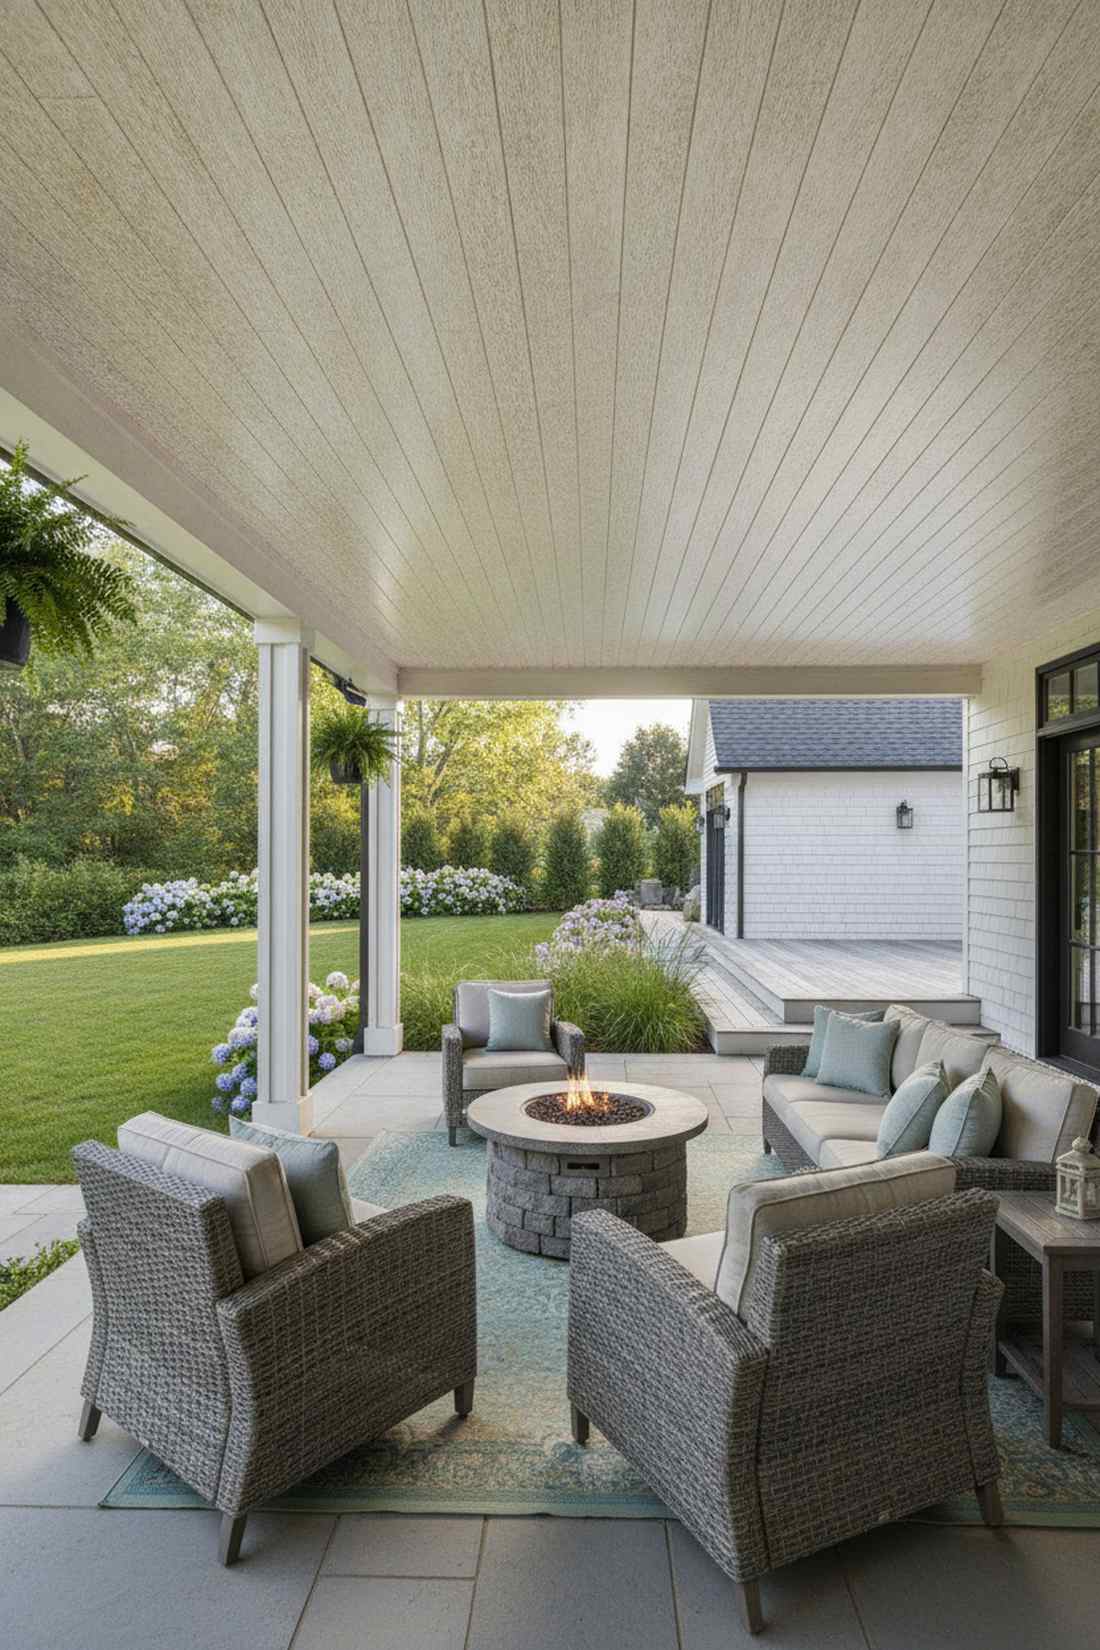
Brings a charming, slow-living morning coffee atmosphere. A classic white beadboard canopy is perfectly suited for a wrap-around farmhouse deck.
Contractors often push expensive individual planks, but utilizing large faux-paneled sheets looks far more expensive than it actually is. Slapping on premium acrylic waterproof coatings completely masks the panel joints for a seamless finish.
Expect to budget around $15–$30 per square foot. Save this to your DIY weekend garden board if you need a quick transformation.
- Key Materials: Fiber cement beadboard sheets, acrylic paint
- Vibe / Style: Coastal cottage charm
- Difficulty: Beginner friendly
- Budget Breakdown: Panels: $10/sq ft | Paint & Caulk: $5/sq ft.
- Creator’s Tip: Caulk all seams before painting to create a flawless, uniform ceiling.
- Smart Sourcing: bulk pack fiber-cement sheets and exterior-grade moisture resistant caulking.
3. Vertical Grain Hemlock
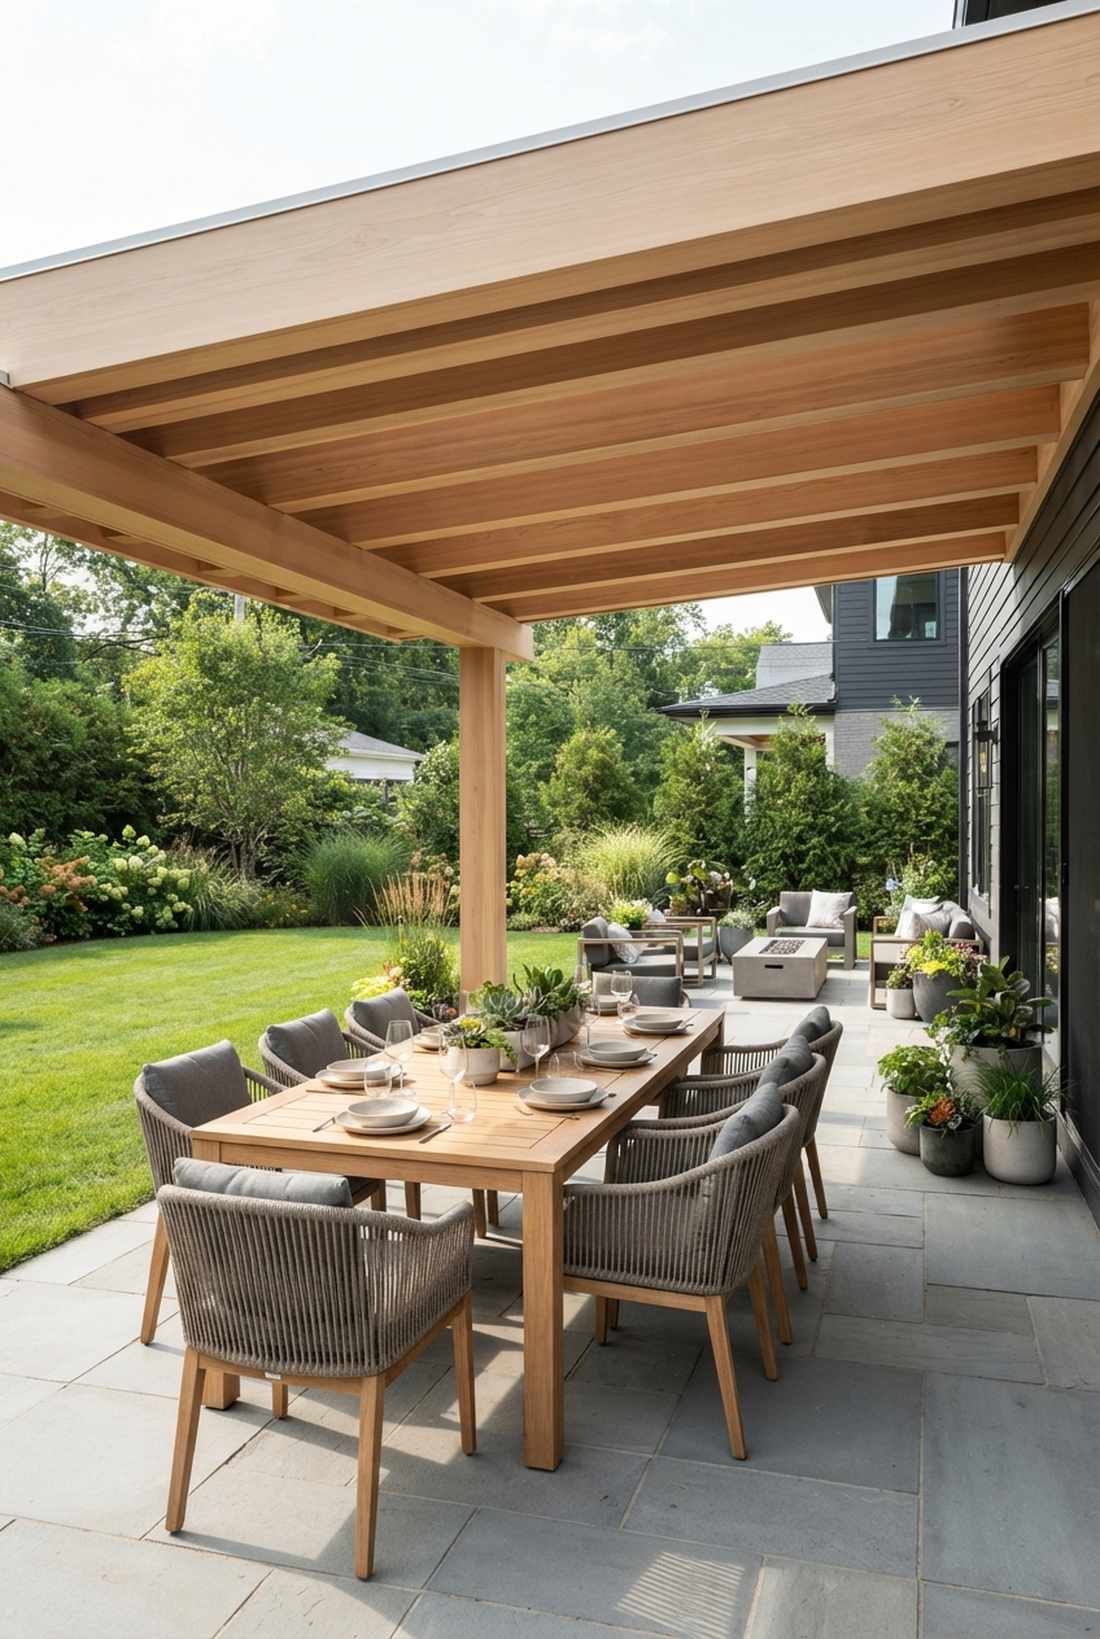
Feels straight out of a modern architectural magazine. This sleek contemporary wood canopy is brilliant for minimalist outdoor dining terraces.
Many homeowners skip over hemlock, yet this alternative gives a designer-level finish for a fraction of the cost of teak. Grabbing bulk marine-grade sealants ensures the straight grain withstands heavy humidity without bowing.
This streamlined upgrade runs about $18–$35 per square foot. Pin this if you’re planning a small space upgrade that punches above its weight!
- Key Materials: Hemlock boards, marine sealant
- Vibe / Style: Minimalist luxury
- Difficulty: Intermediate carpentry
- Budget Breakdown: Wood: $15/sq ft | Finish: $4/sq ft.
- Creator’s Tip: Apply the exterior-grade sealer immediately after hanging to stop moisture absorption.
- Smart Sourcing: clear vertical grain lumber packs and marine-grade clear protective coats.
4. Exterior Grade Plywood
Giving off trendy industrial loft vibes instantly. A painted geometric plywood ceiling works flawlessly for budget-conscious breezeways needing a fast face-lift.
It’s highly debated among purists, but scoring deep faux-plank lines into the sheets delivers a brilliant faux-wood aesthetic. Relying on professional-grade exterior primers transforms the raw utility texture into a clean canvas.
You can execute this clever trick for an unbeatable $8–$15 per square foot.
- Key Materials: ACX plywood sheets, primer
- Vibe / Style: Modern industrial utility
- Difficulty: Easy weekend project
- Budget Breakdown: Plywood: $6/sq ft | Paint: $3/sq ft.
- Creator’s Tip: Use a router to cut V-grooves into the plywood to mimic individual expensive boards.
- Smart Sourcing: exterior-rated plywood bulk sheets and heavy-duty acrylic latex paints.
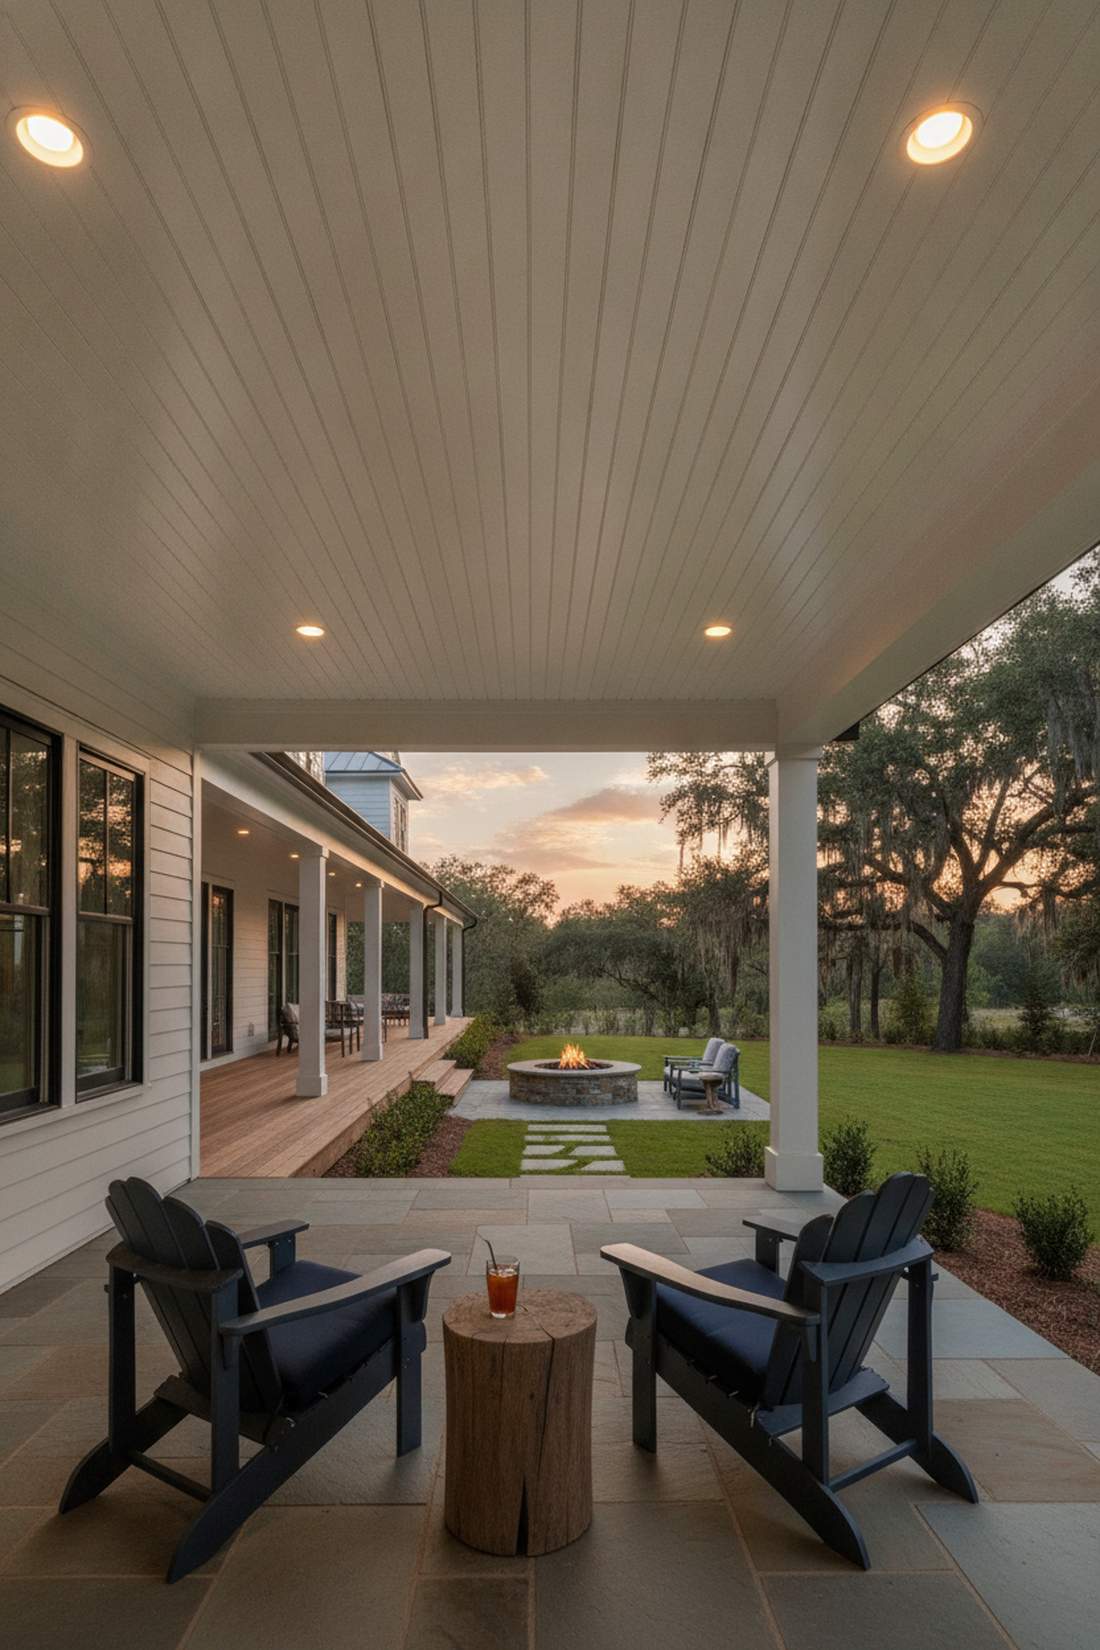
This next setup is ridiculously cheap but looks like a $100 custom display once the sunset lighting hits it right…
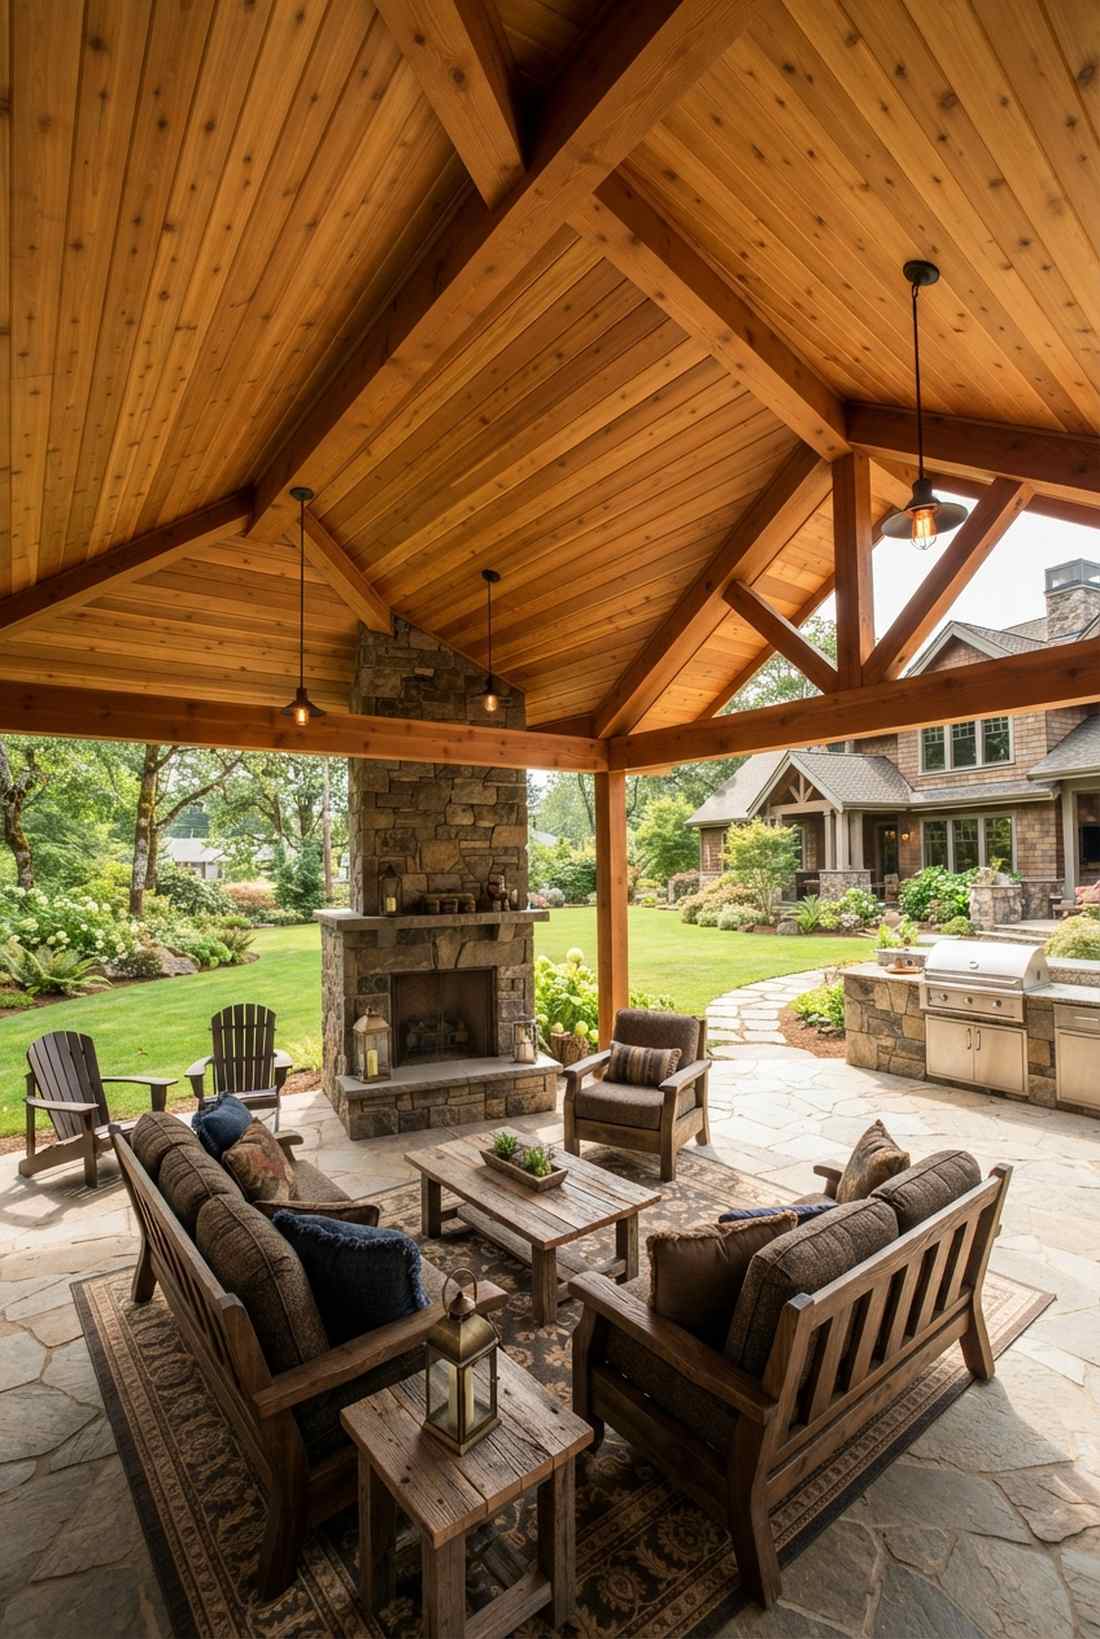
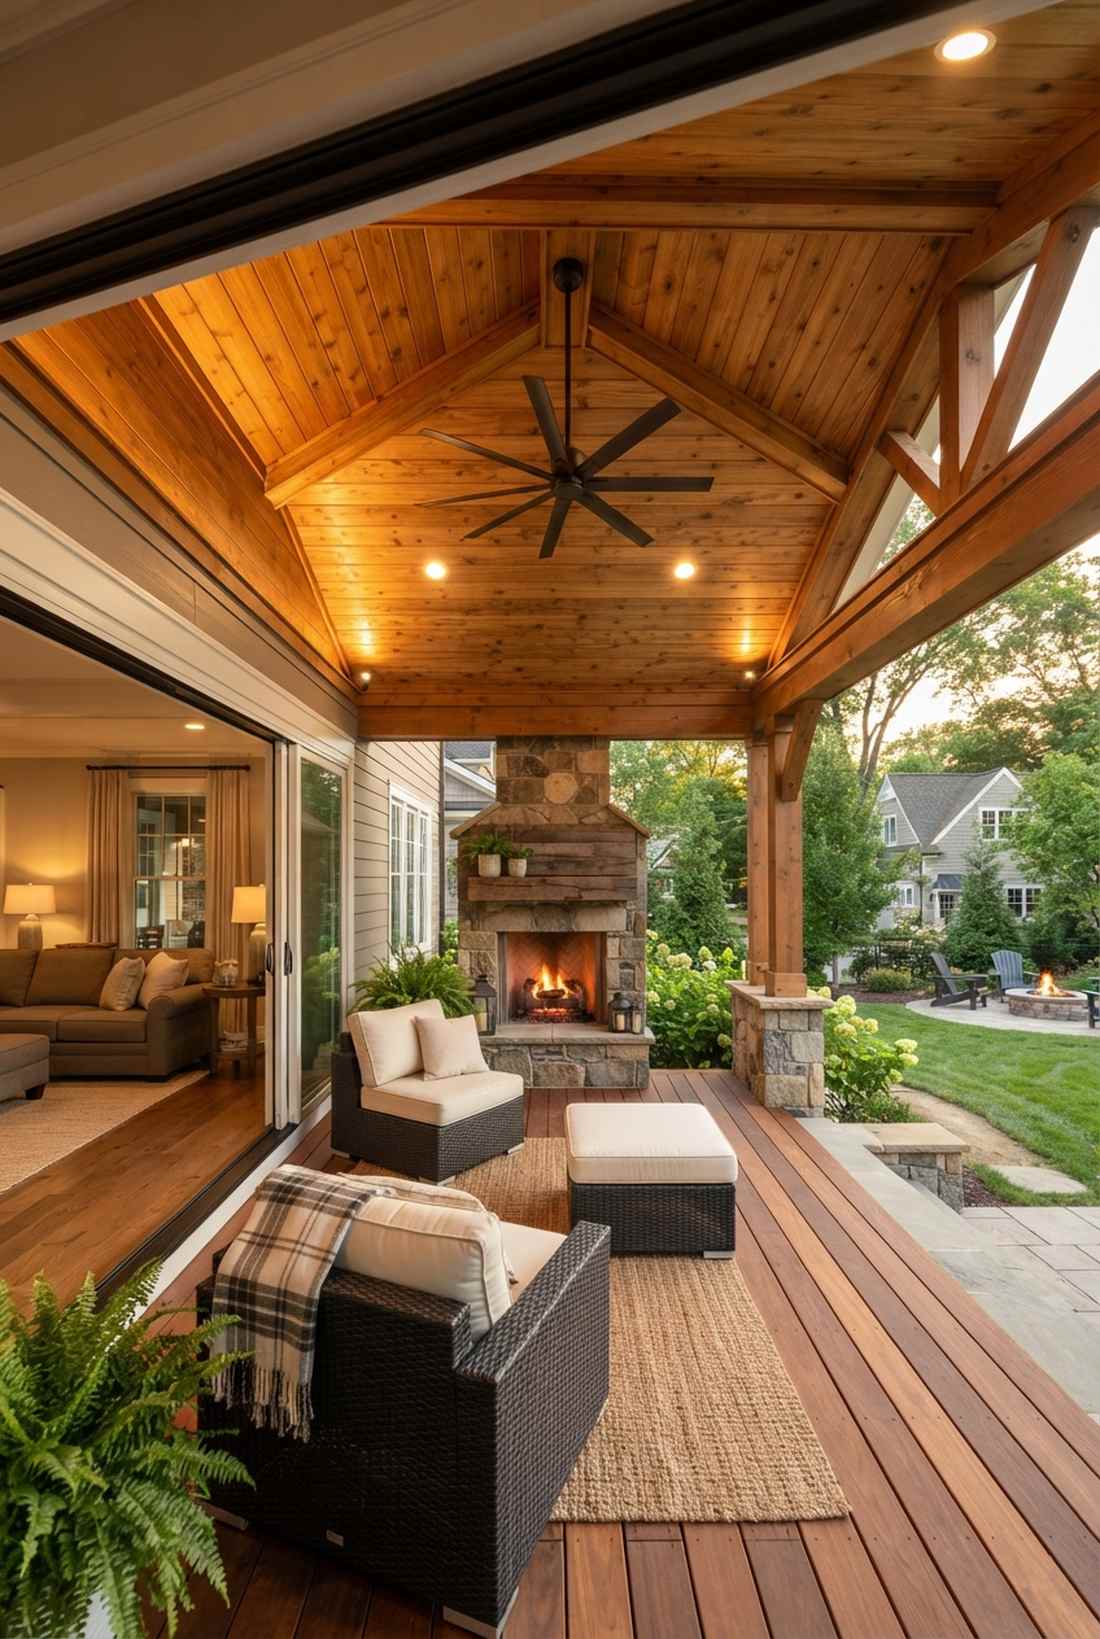
5. Rough Sawn Western Red Cedar
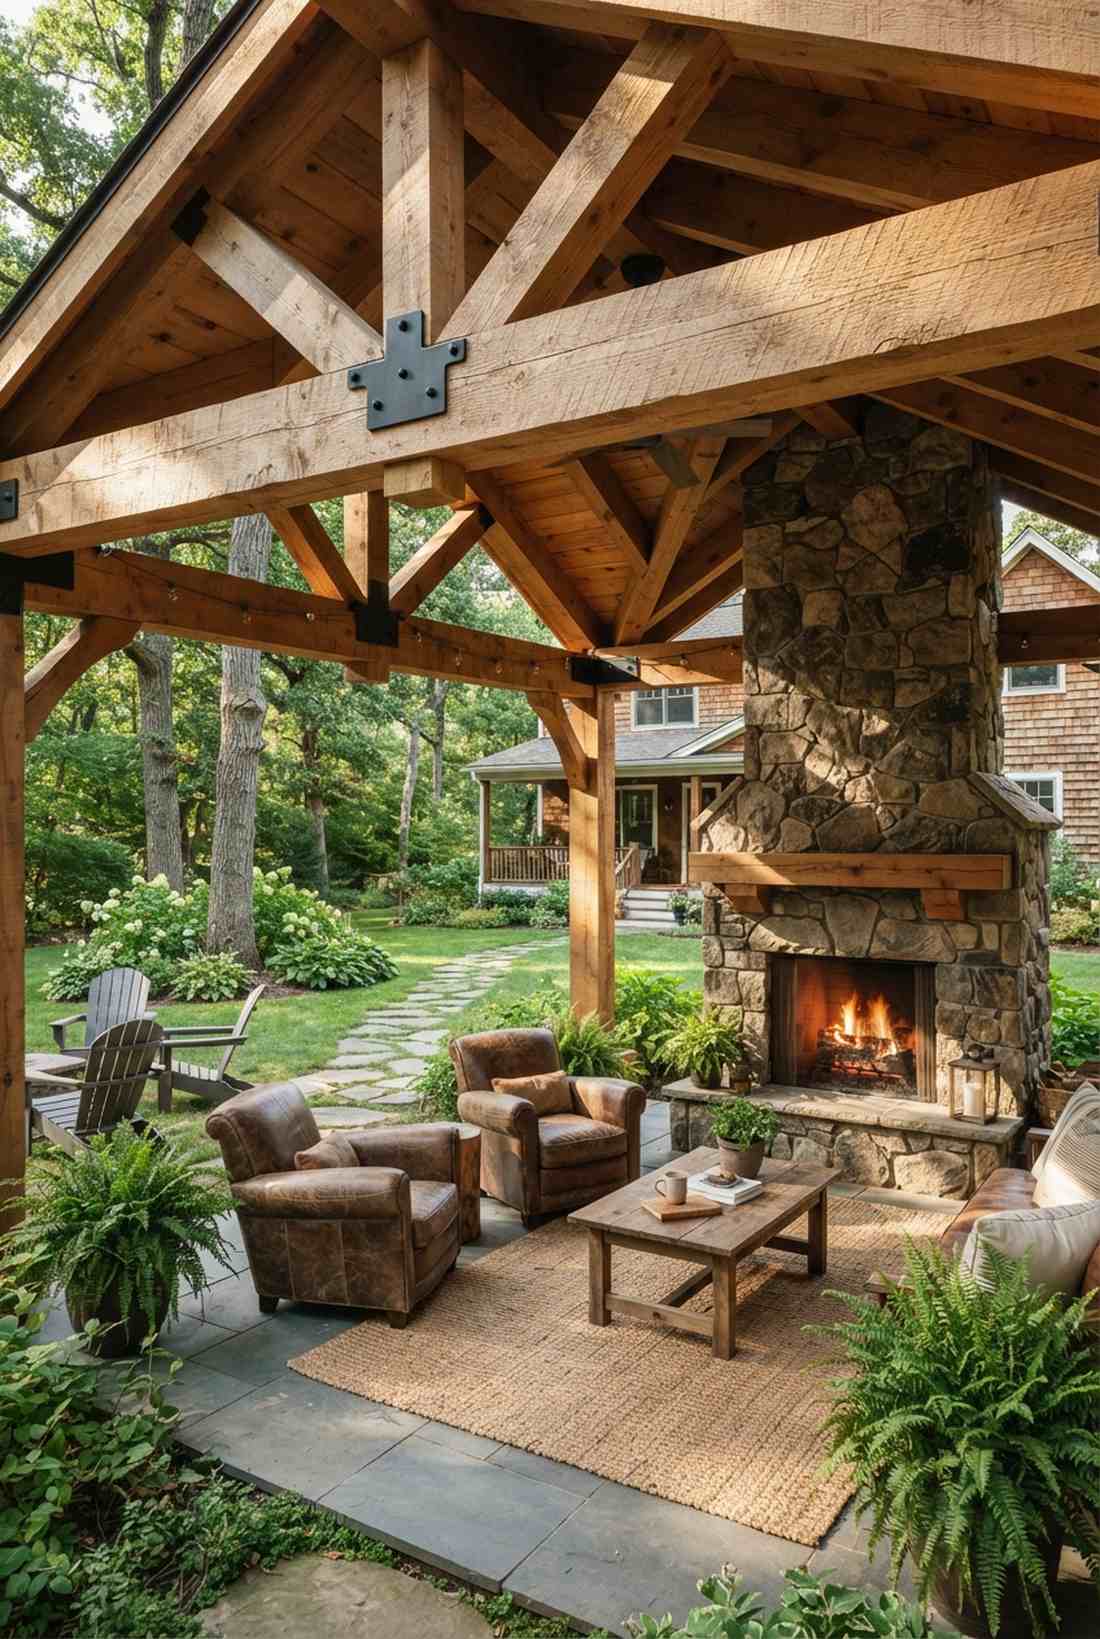
Feels like a hidden woodland retreat you accidentally discovered. This textured rustic patio overhang is perfect for framing large stone outdoor fireplaces.
The secret nobody tells you is that leaving the raw texture exposed creates incredible shadow play all afternoon. Pairing it with heavy-duty timber structural brackets guarantees a rugged, legacy-built aesthetic.
Total investment lands near $30–$50 per square foot. Save this layout for when you want to make your space feel completely grounded.
- Key Materials: Rough-cut cedar lumber, penetrating oil
- Vibe / Style: Rugged timber-frame
- Difficulty: Heavy lifting required
- Budget Breakdown: Lumber: $25/sq ft | Heavy Hardware: $8/sq ft.
- Creator’s Tip: Rough wood needs twice as much stain, so budget for extra gallons of penetrating oil.
- Smart Sourcing: rough-sawn cedar bundles and deep-penetrating timber oil starter kits.
6. Pressure-Treated Pine
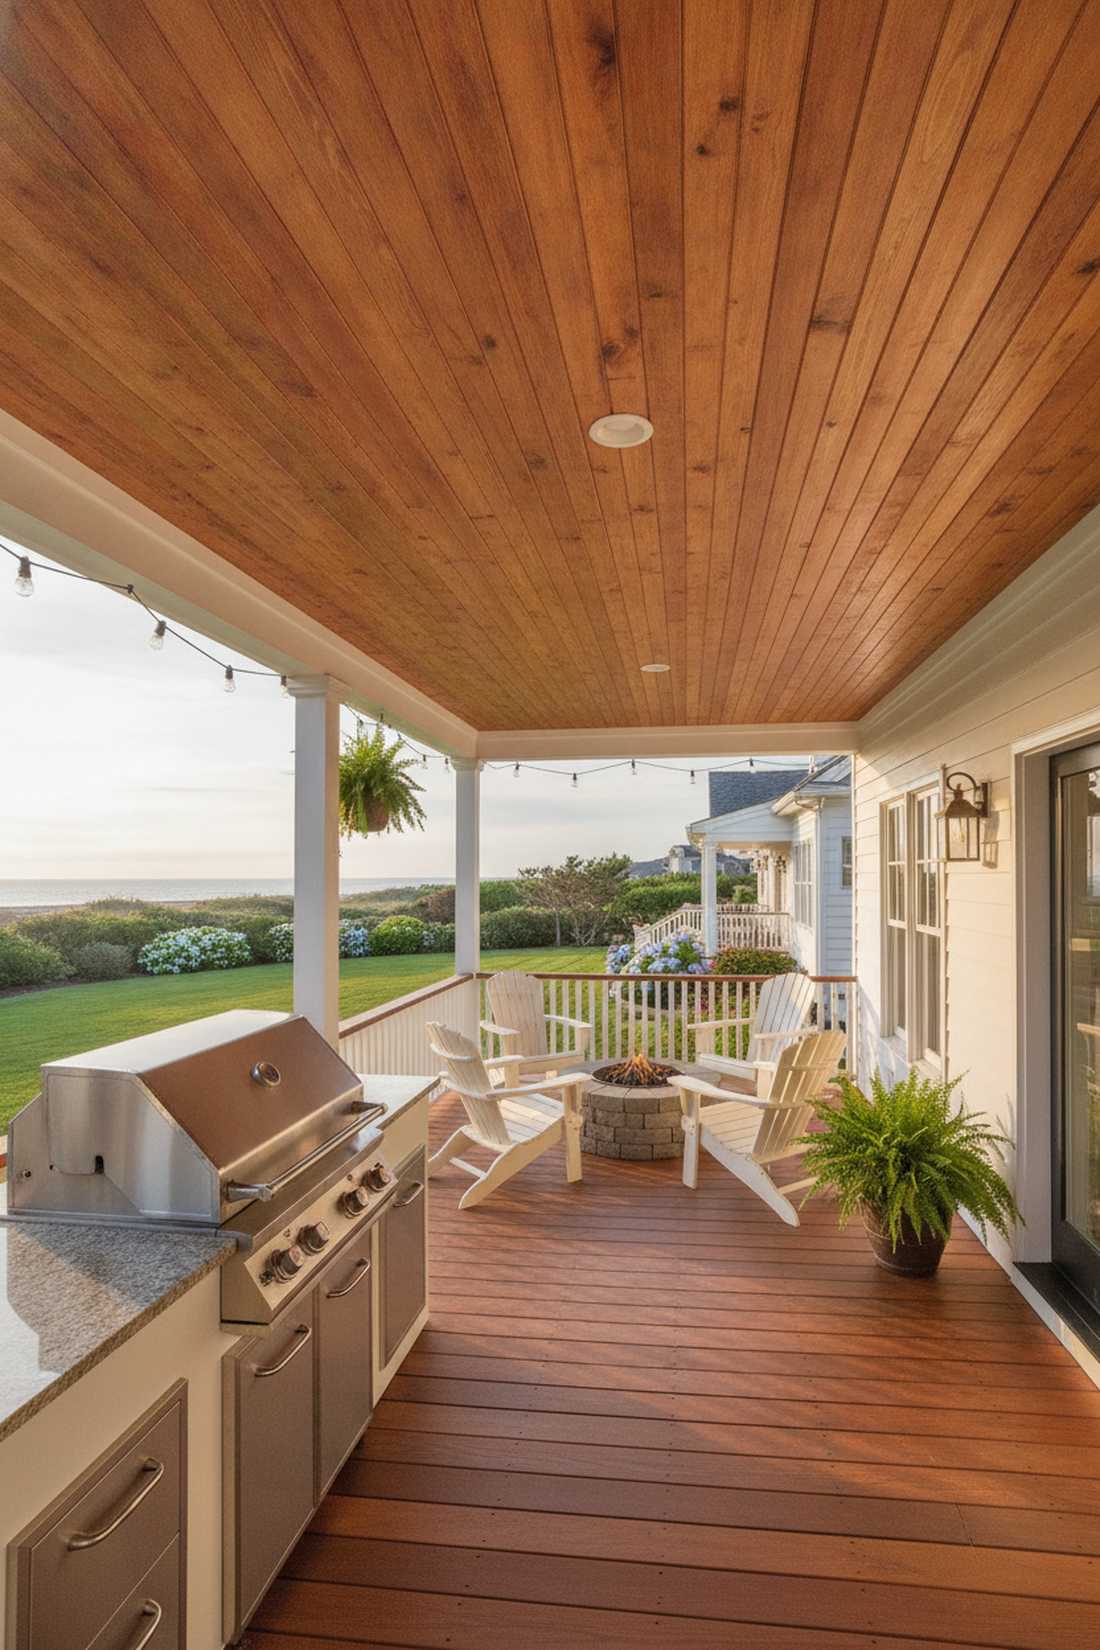
Emanates a cozy, sun-drenched coastal porch energy. A warm stained pine ceiling fits perfectly over an expansive family grilling deck.
Standard lumber yards overlook this trick, but drying KDAT lumber before installation completely eliminates those notorious warping issues. Incorporating high-grade semi-transparent patio stains turns basic green boards into rich mahogany look-alikes.
Expect to budget around $12–$22 per square foot. It’s a fast upgrade that completely changes the vibe without draining your wallet.
- Key Materials: KDAT pine boards, stain
- Vibe / Style: Classic suburban comfort
- Difficulty: Beginner DIY
- Budget Breakdown: Treated Pine: $8/sq ft | Stain: $4/sq ft.
- Creator’s Tip: Wait at least two months for standard treated pine to dry before adding stain to avoid peeling.
- Smart Sourcing: kiln-dried treated lumber packs and premium semi-transparent wood stains.
7. Reclaimed Barn Wood
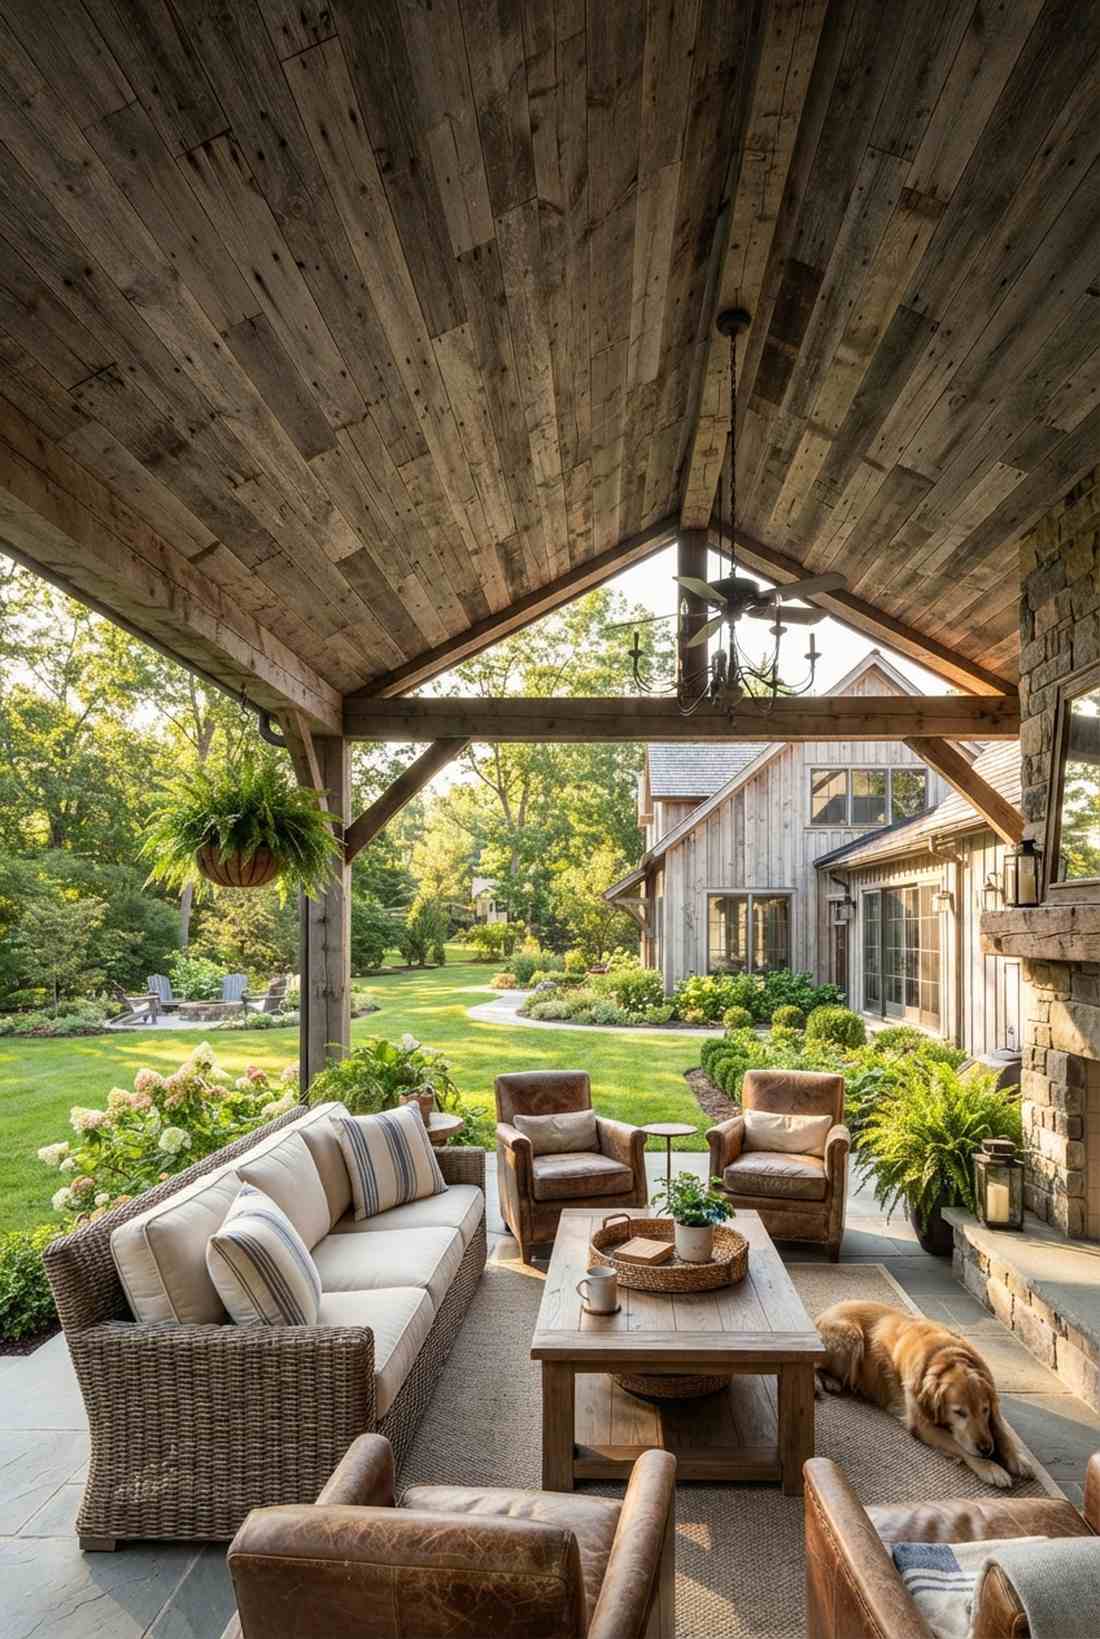
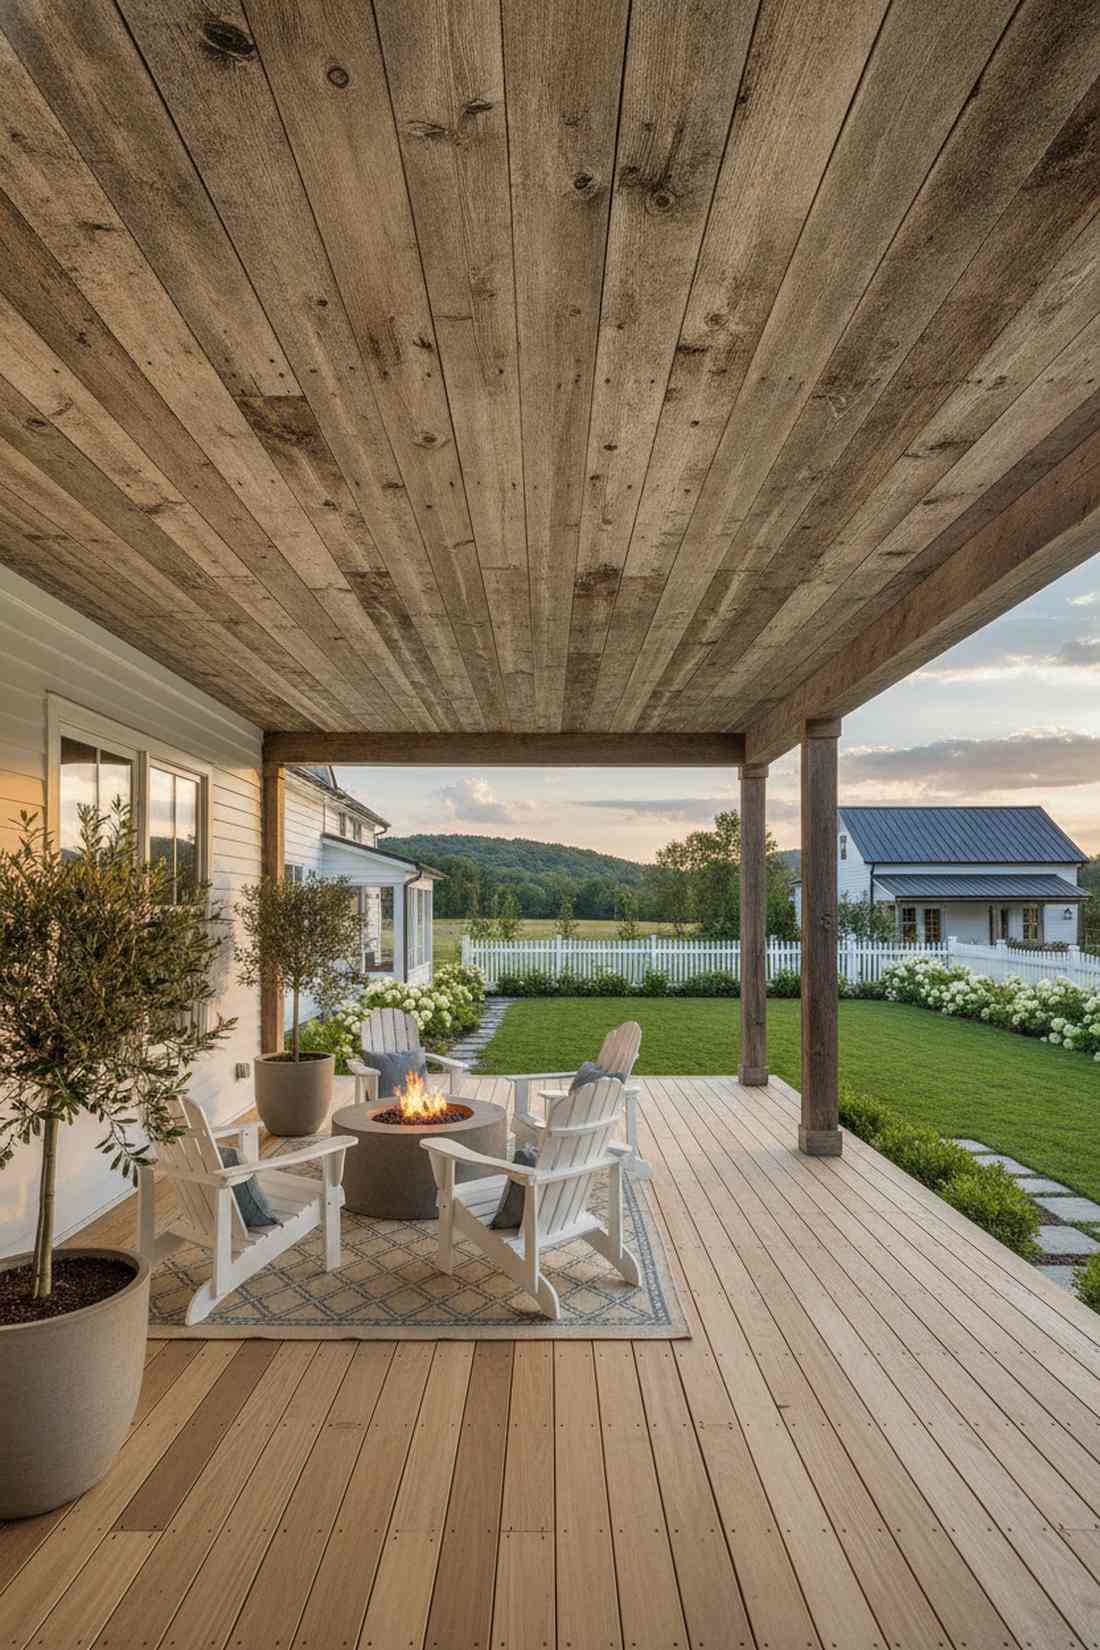
Feels like a slice of nostalgic Americana history right in your backyard. This weathered vintage wood ceiling is the ultimate crown jewel for a modern farmhouse veranda.
Achieving true patina takes decades, making authentic salvaged planks highly sought after by top-tier designers. Treating the boards with clear matte exterior polyurethanes locks in the gray-brown character while preventing further splintering.
Sourcing typically runs $20–$40 per square foot depending on local demolition yards.
- Key Materials: Salvaged barn siding, matte poly
- Vibe / Style: Authentic historical farmhouse
- Difficulty: Intermediate custom fitting
- Budget Breakdown: Salvaged Wood: $25/sq ft | Sealer: $5/sq ft.
- Creator’s Tip: Use a wire brush to clean the wood gently before sealing to keep the original saw marks visible.
- Smart Sourcing: pre-cleaned reclaimed wood bundles and UV-coated matte finish sealants.
Modern Metal & Industrial Outdoor Patio Ceiling Options
8. Stamped Copper Tiles
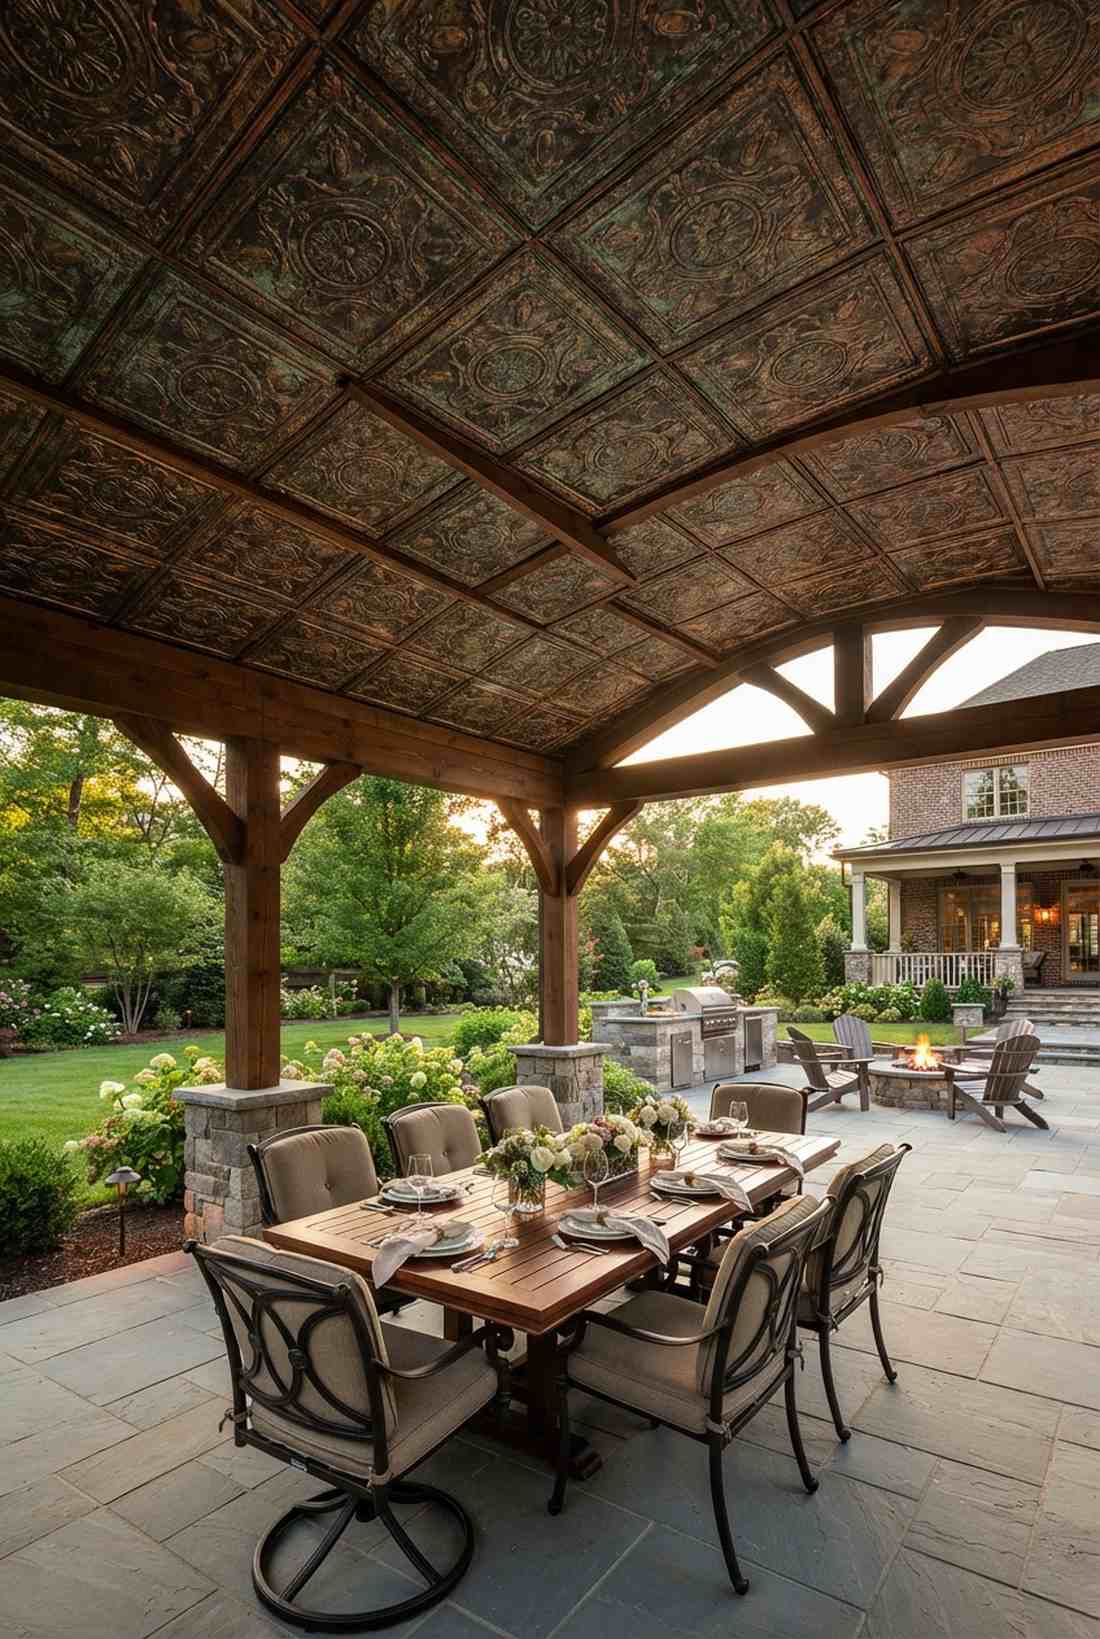
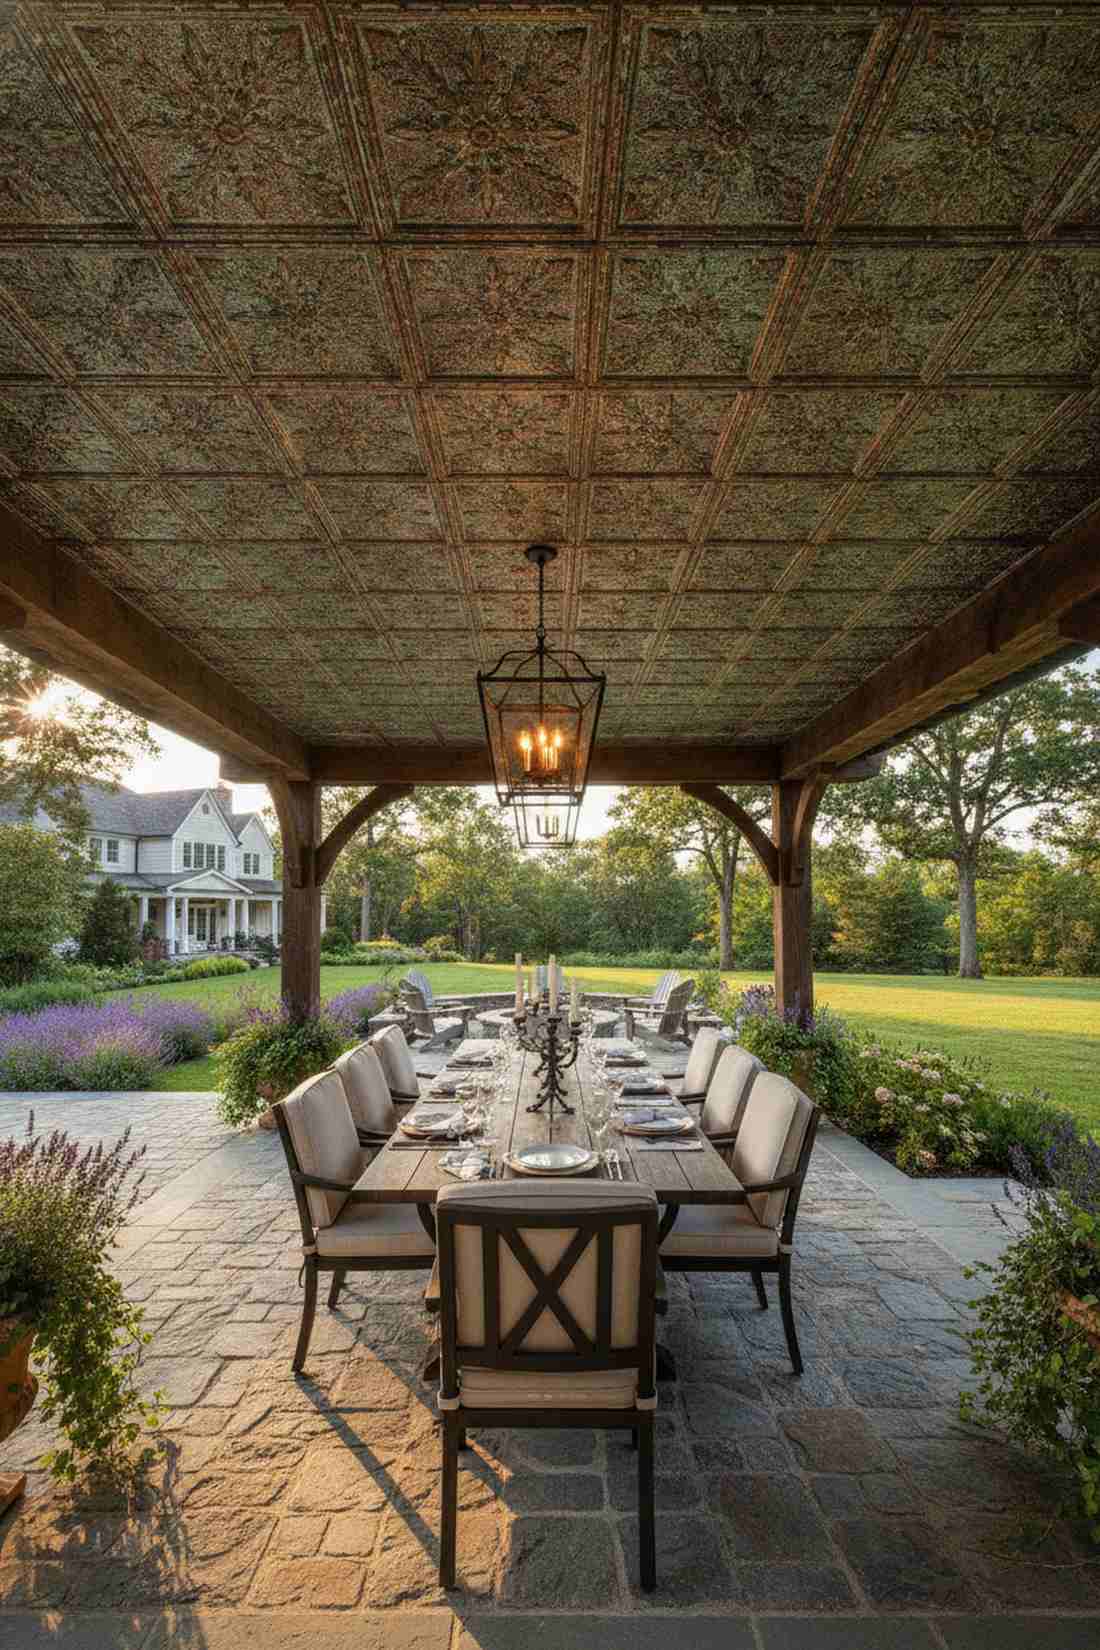
Delivers the gravitas of a historic European courtyard. This patinated metal ceiling grid brings unmatched elegance to formal outdoor dining pavilions.
Homeowners often fear metal oxidation, but letting the surface age naturally creates a living, breathable masterpiece. Utilizing snap-in metallic ceiling grids makes overhead installation a surprisingly straightforward afternoon project.
Premium installations run $45–$80 per square foot, but the visual impact is permanent. Pin this layout if you want to remember true high-end inspiration.
- Key Materials: Embossed copper tiles, furring strips
- Vibe / Style: Old-world luxury
- Difficulty: Precision alignment needed
- Budget Breakdown: Copper Tiles: $40/sq ft | Furring/Nails: $5/sq ft.
- Creator’s Tip: Use copper-coated nails so the fasteners completely vanish into the ceiling design.
- Smart Sourcing: pre-cut stamped metal tiles and copper fastening hardware kits.
💡 Must-Have Supplies for High-End Setups
To build these setups faster and ensure they last, skip the generic craft aisles and invest in the right foundational kits.
- Base & Support: Heavy-duty galvanized structural tracks
- Setup Tools: Overhead panel hoist starter kits
- Weather/Durability Protection: UV-coated exterior marine-grade sealants
9. Corrugated Metal Panels
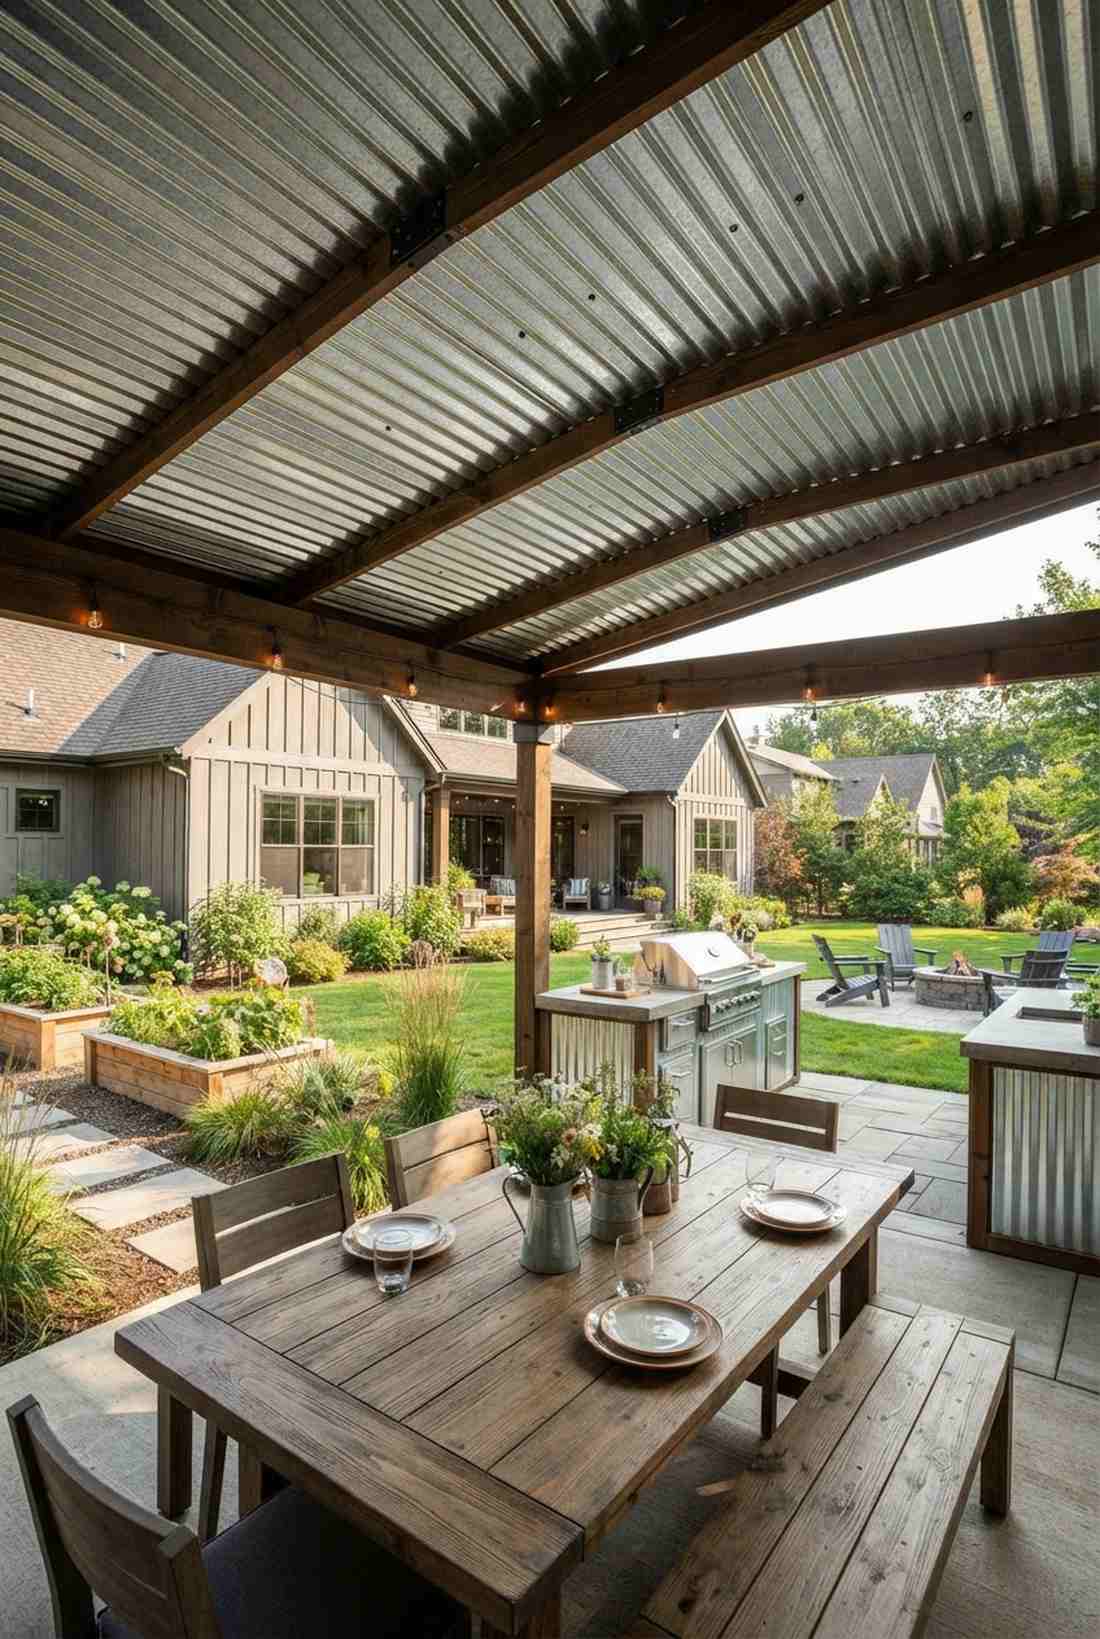

Projects a sharp, edgy modern-industrial aesthetic. A galvanized ribbed ceiling structure serves incredibly well for rain-heavy regions needing serious water diversion.
Most DIY tutorials ignore thermal dynamics, but pairing these sheets with proper venting prevents the dreaded summer heat-trap effect. Fastening them down with powder-coated exterior metal screws ensures rusty streaks never ruin your walls.
You can execute this heavy-duty barrier for just $10–$20 per square foot.
- Key Materials: Corrugated steel sheets, metal screws
- Vibe / Style: Edgy modern farmhouse
- Difficulty: Easy modular installation
- Budget Breakdown: Metal Panels: $8/sq ft | Fasteners: $2/sq ft.
- Creator’s Tip: Overlap the corrugation ridges to guarantee a completely waterproof overhead seal.
- Smart Sourcing: galvanized corrugated sheet bulk packs and powder-coated rust-proof screws.
Most people get their outdoor styling completely wrong… until they try the exact layout coming up next.
10. SpeedLap Steel Panels
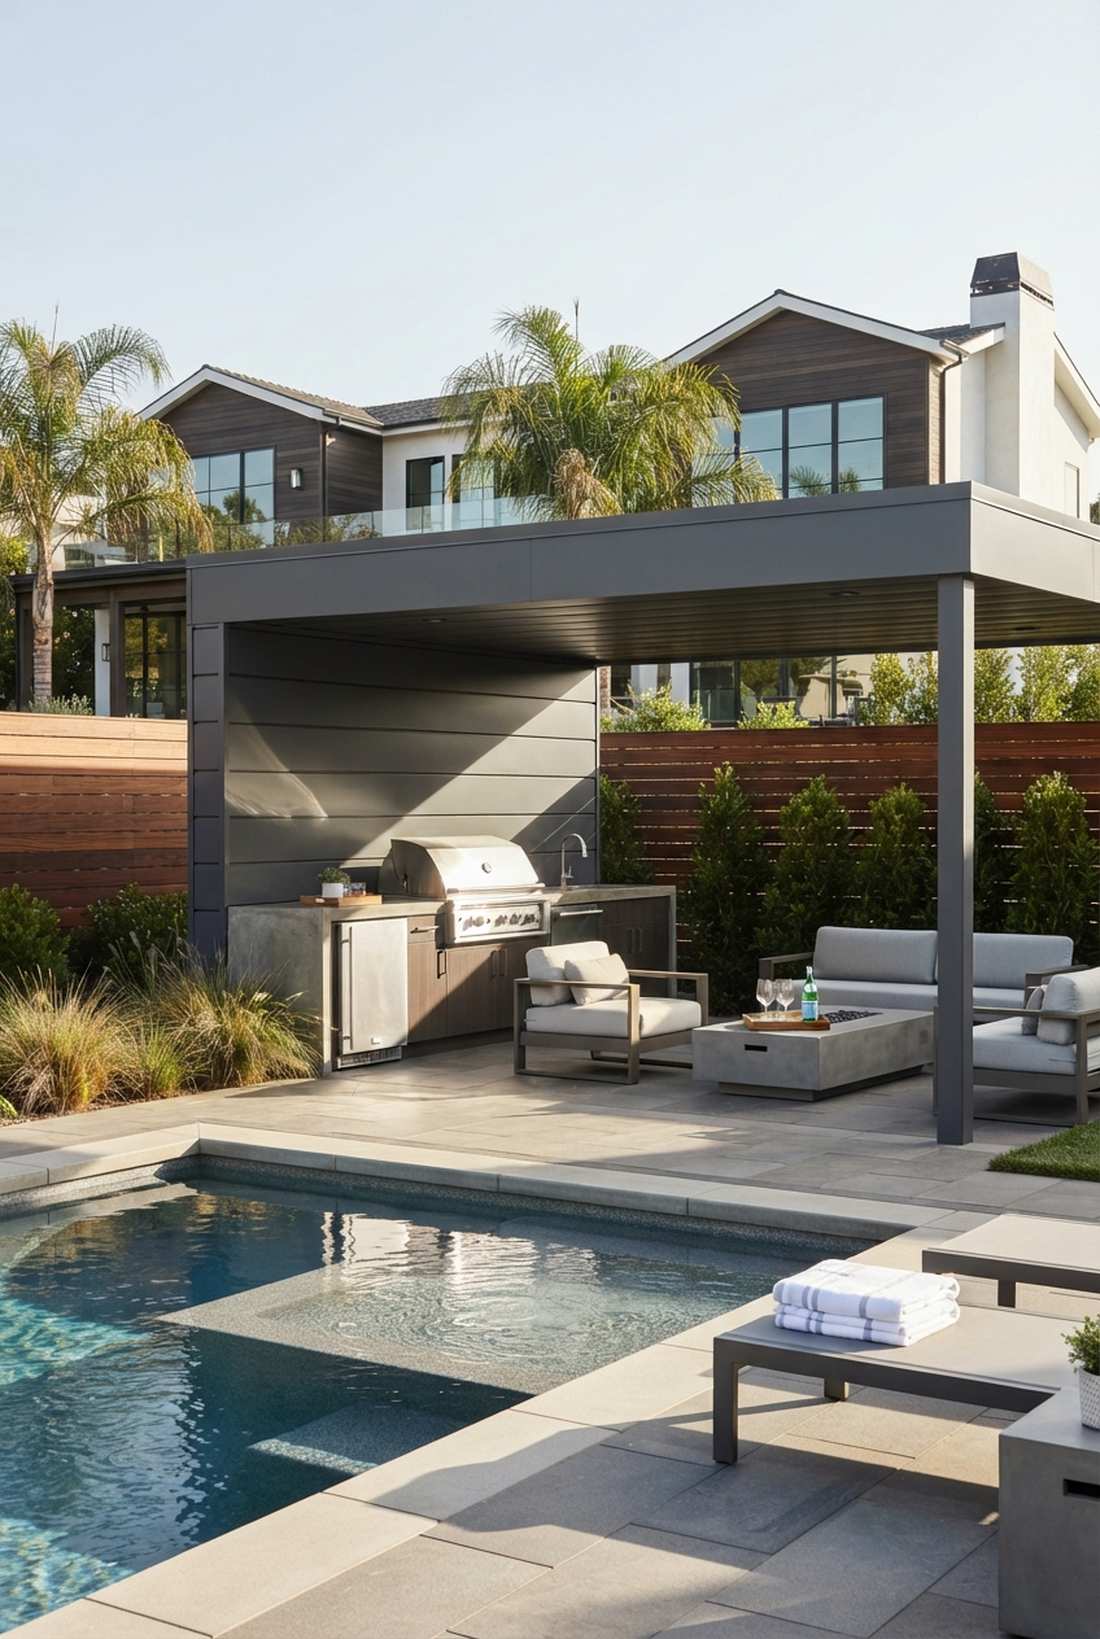
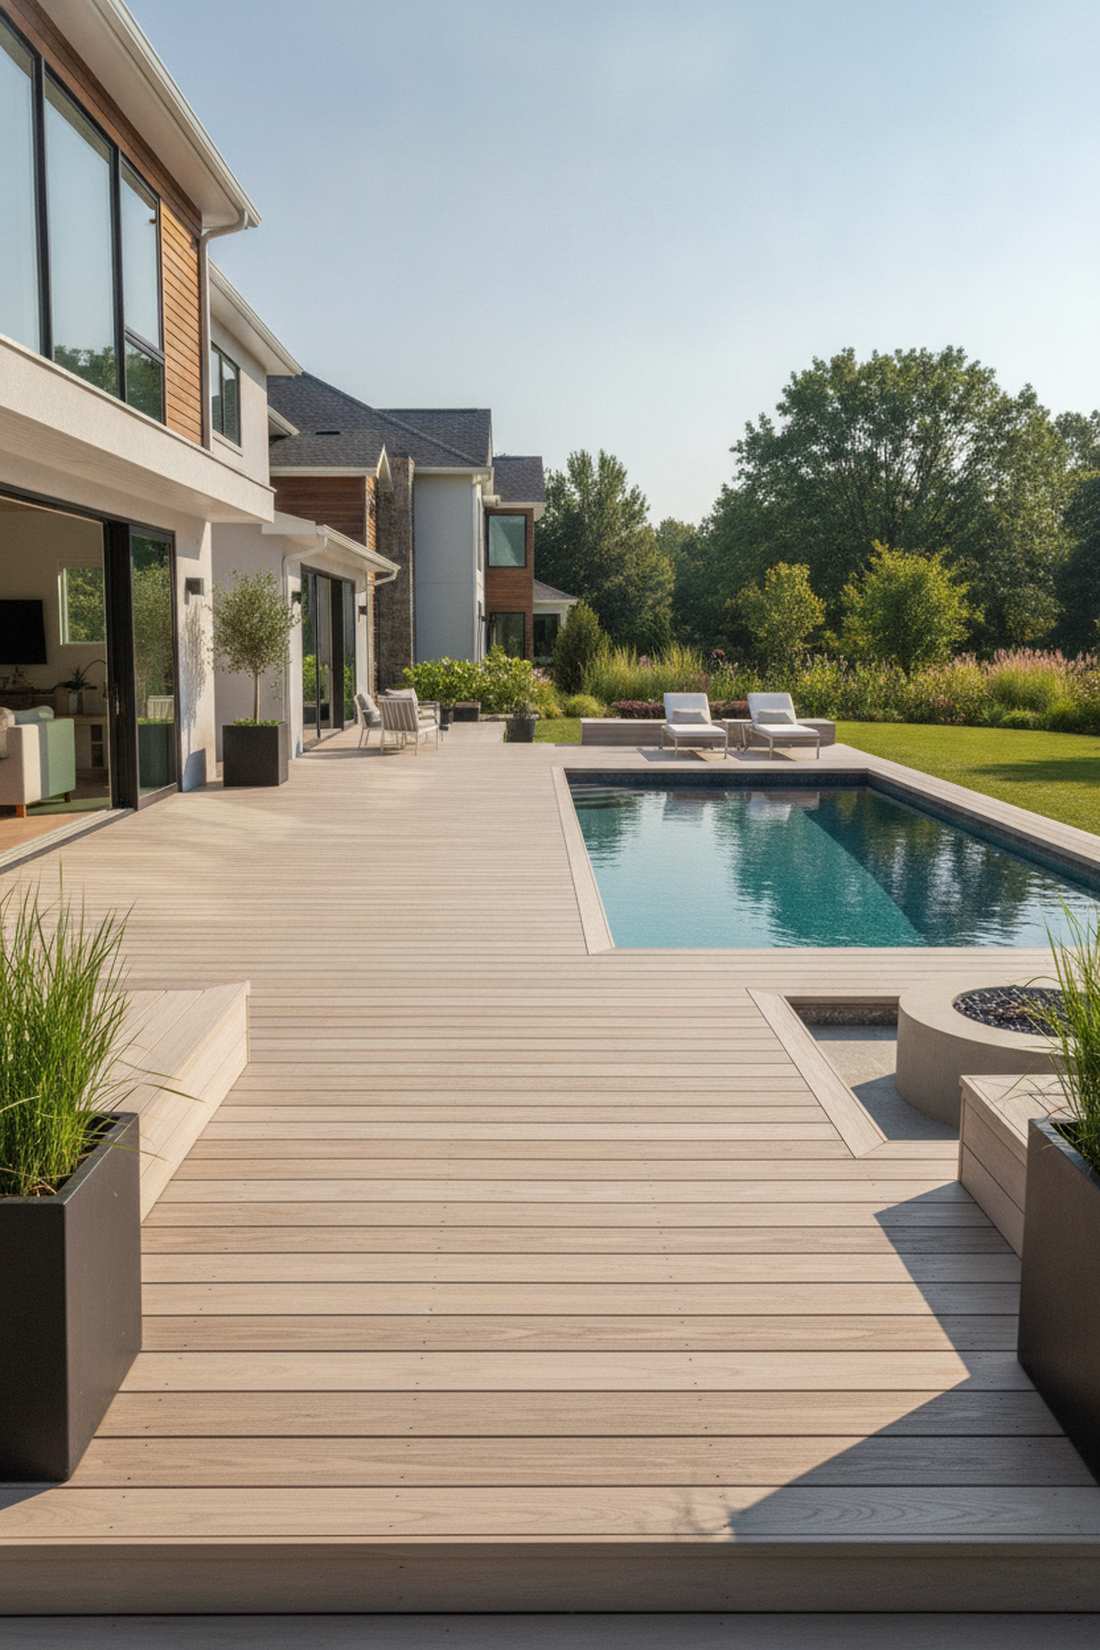
Showcases a flawlessly smooth, ultra-modern luxury vibe. This hidden-fastener steel canopy is the ultimate match for sleek pool houses or outdoor kitchens.
Exposed screws scream amateur, whereas these interlocking systems provide a flawlessly flush architectural barrier. Grabbing pre-cut modular steel kits eliminates dangerous metal-cutting tasks and speeds up the entire build.
This premium barrier usually costs between $25–$55 per square foot. Highly recommended if you want zero maintenance for the next thirty years.
- Key Materials: Concealed-fastener steel panels
- Vibe / Style: Ultra-sleek contemporary
- Difficulty: Advanced tracking setup
- Budget Breakdown: Steel System: $30/sq ft | Track Hardware: $10/sq ft.
- Creator’s Tip: Order cut-to-length panels directly from the manufacturer to avoid slicing steel on site.
- Smart Sourcing: pre-cut interlocking steel panel kits and concealed metal fastening tracks.
11. Aluminum Soffit Panels
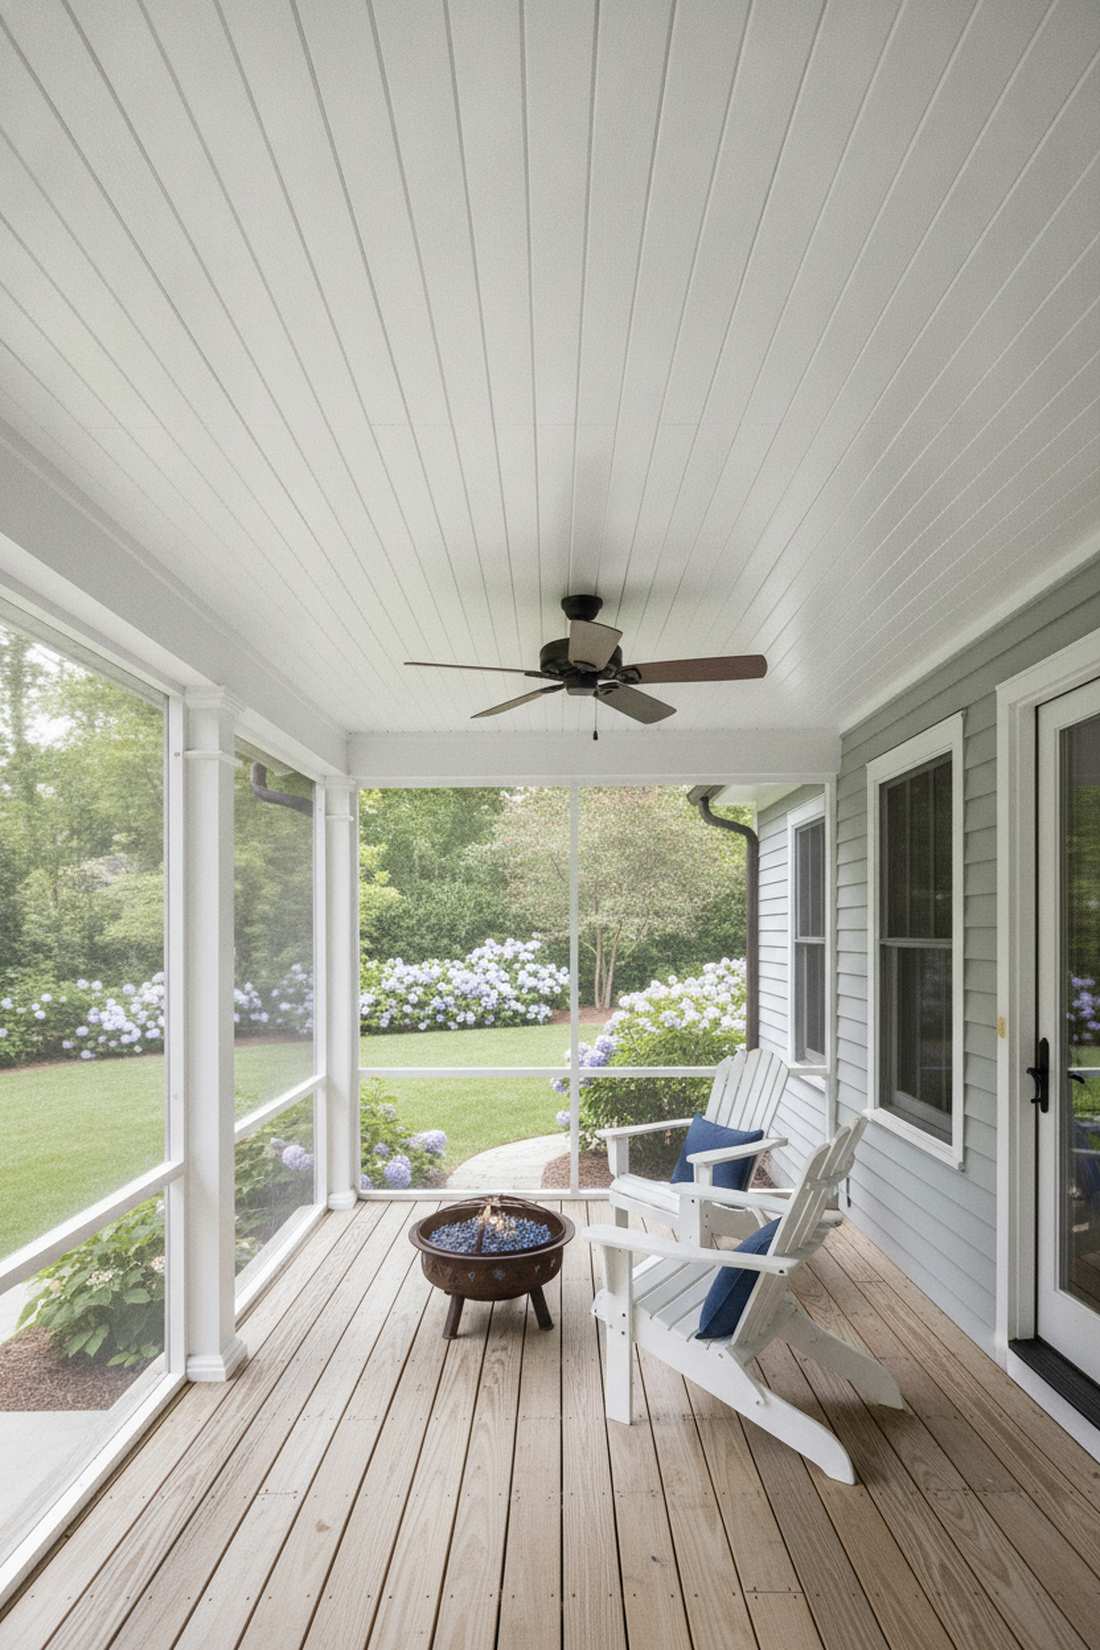
Brings a crisp, incredibly clean suburban elegance. A vented white metal ceiling works beautifully for large wraparound porches needing maximum airflow.
Wood purists might complain, but this moisture-proof setup is practically bulletproof in aggressive coastal salt air. Leveraging pre-finished vented soffit channels totally eradicates the threat of trapped attic-space mold.
It is an incredibly cost-effective strategy at $12–$25 per square foot. Save this pin if you need a zero-paint solution!
- Key Materials: Perforated aluminum soffits, J-channels
- Vibe / Style: Clean traditional suburban
- Difficulty: Easy lightweight install
- Budget Breakdown: Aluminum Soffits: $10/sq ft | Trim: $3/sq ft.
- Creator’s Tip: Alternate solid and vented panels to balance aesthetics with required structural airflow.
- Smart Sourcing: vented aluminum bulk panels and pre-painted metal J-channel kits.
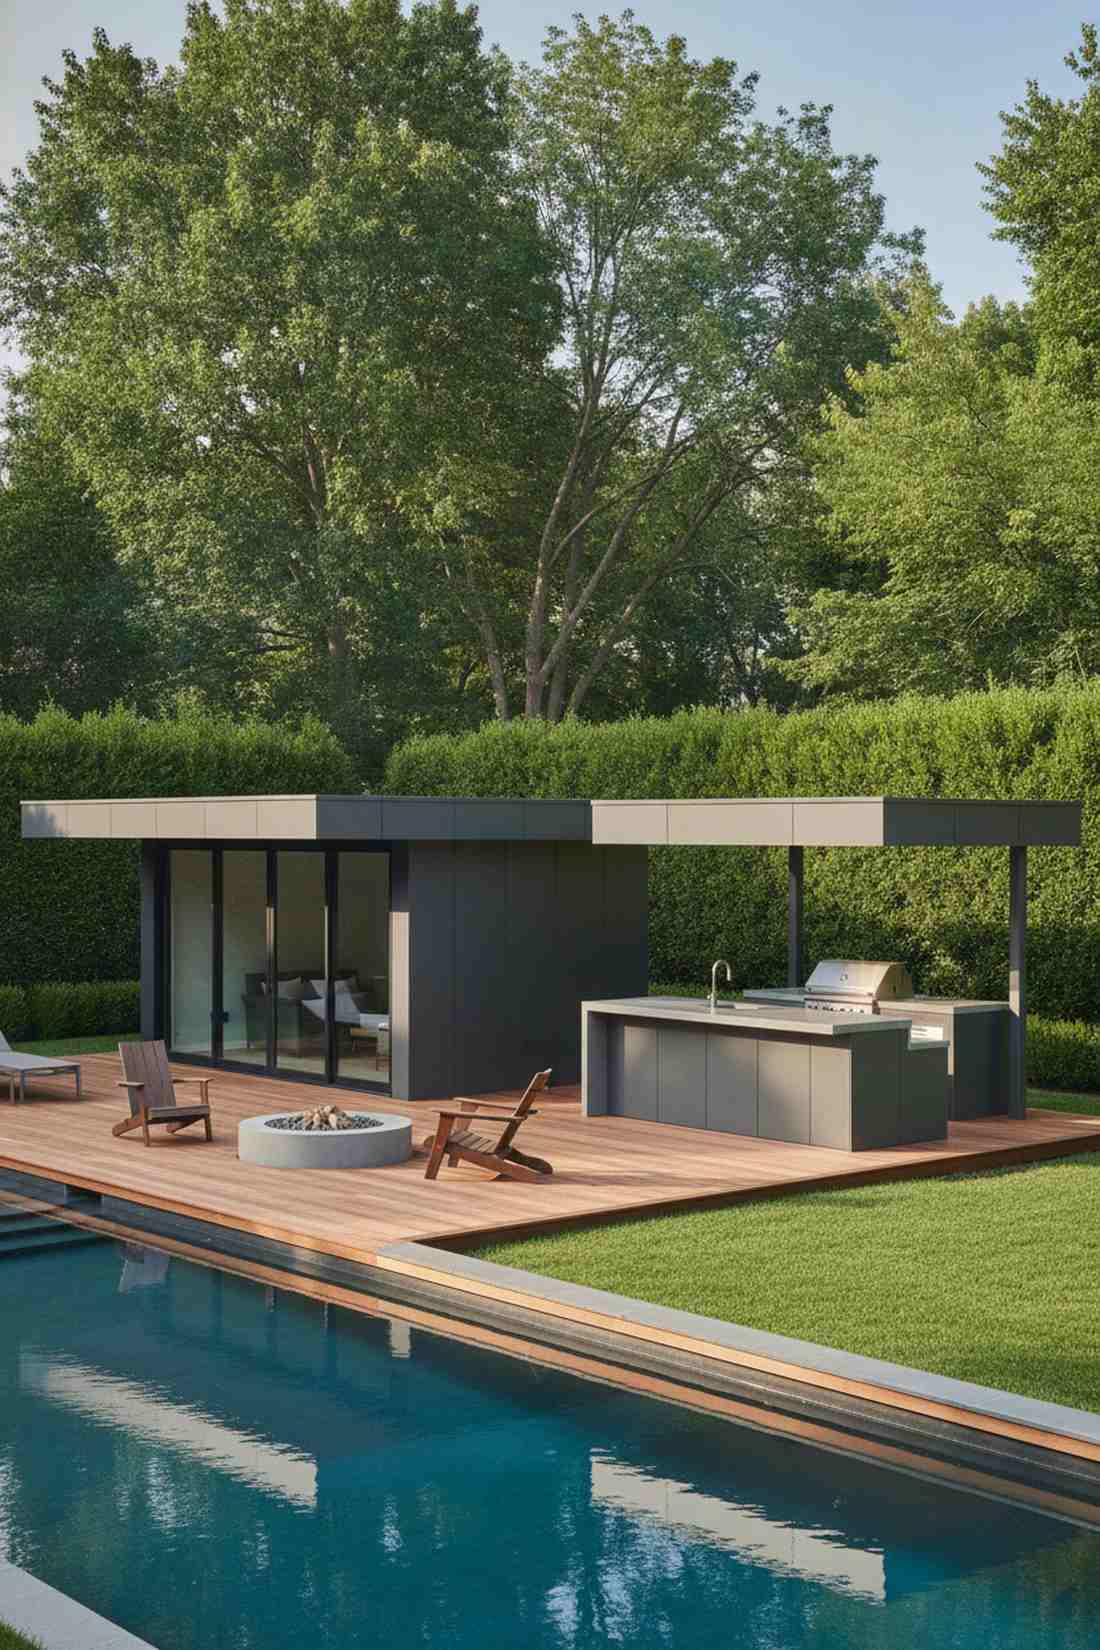
12. Standing Seam Metal
Gives off serious bespoke architectural presence. A bold linear metal ceiling perfectly completes transitional or contemporary backyard builds.
It’s a polarizing choice for residential ceilings, yet the dramatic shadow lines instantly command attention. Using floating heavy-duty clip systems ensures the metal expands smoothly under direct sunlight without buckling or oil-canning.
Professional metal kits demand about $35–$65 per square foot.
- Key Materials: Standing seam roof panels, floating clips
- Vibe / Style: Bold architectural modernism
- Difficulty: Professional skills recommended
- Budget Breakdown: Metal Panels: $30/sq ft | Clip System: $10/sq ft.
- Creator’s Tip: Never screw these down tight; they need room to shift when the temperature changes.
- Smart Sourcing: standing seam panel starter kits and floating thermal expansion clips.
13. Brushed Stainless Steel
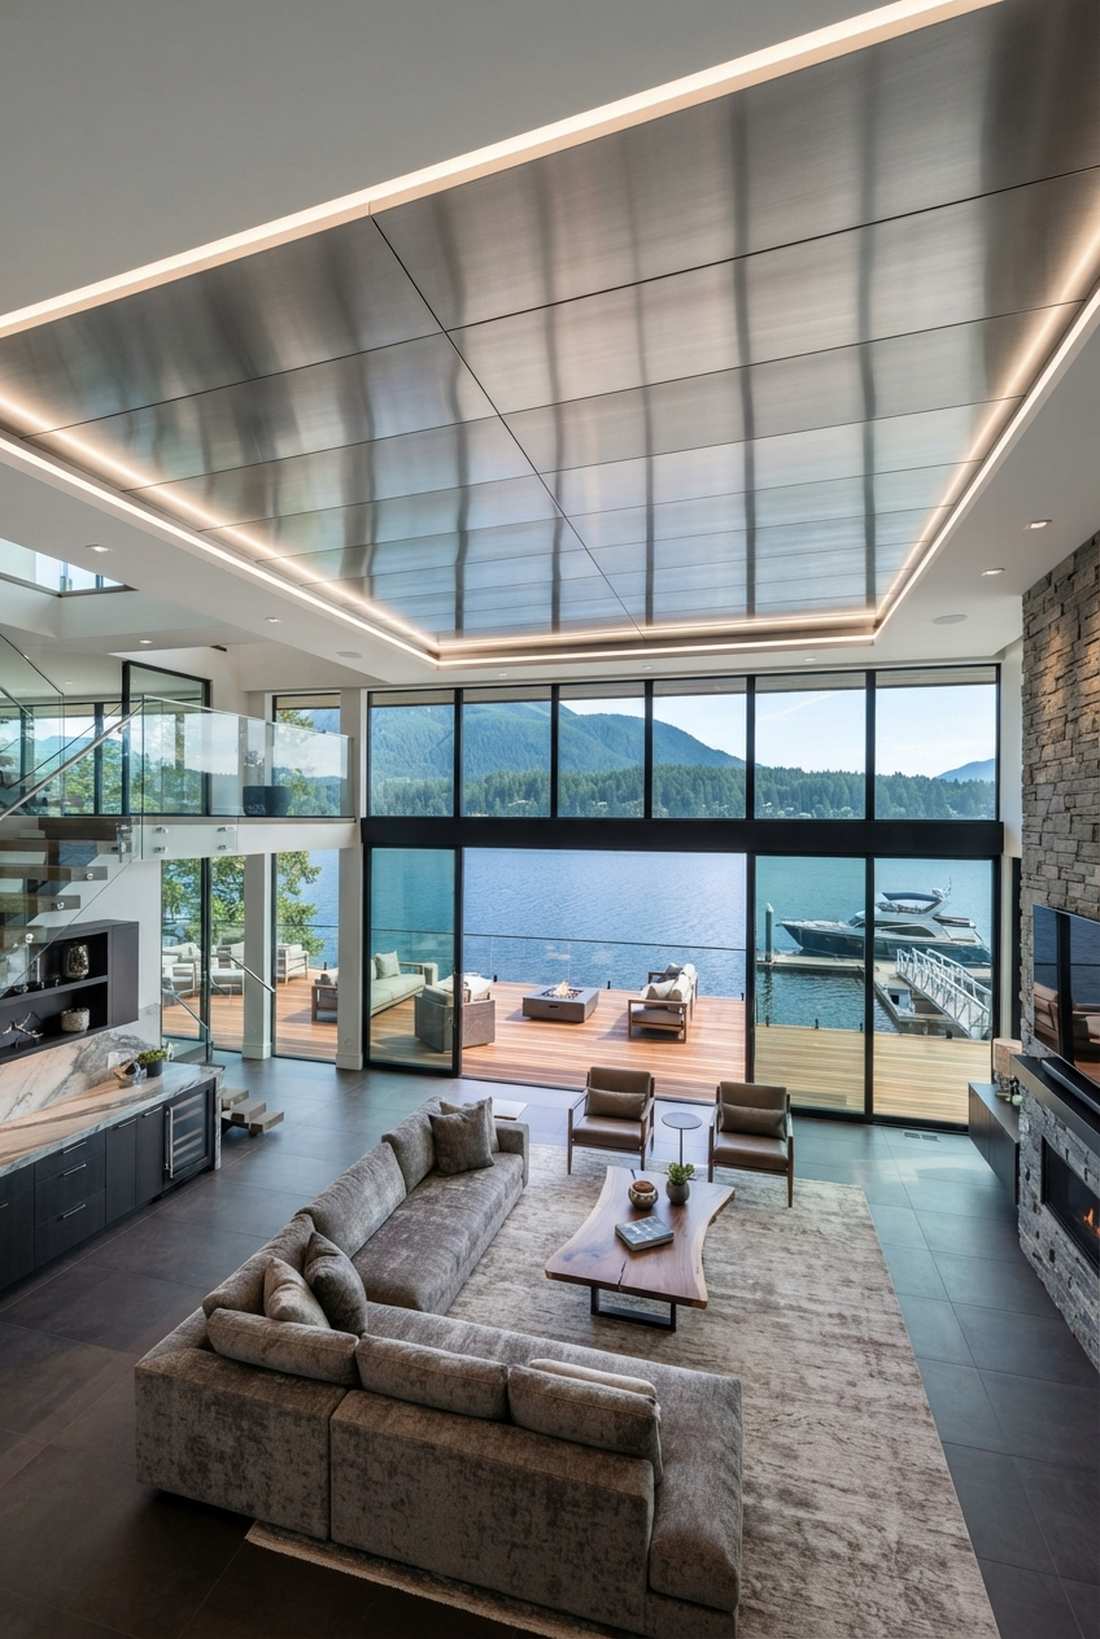
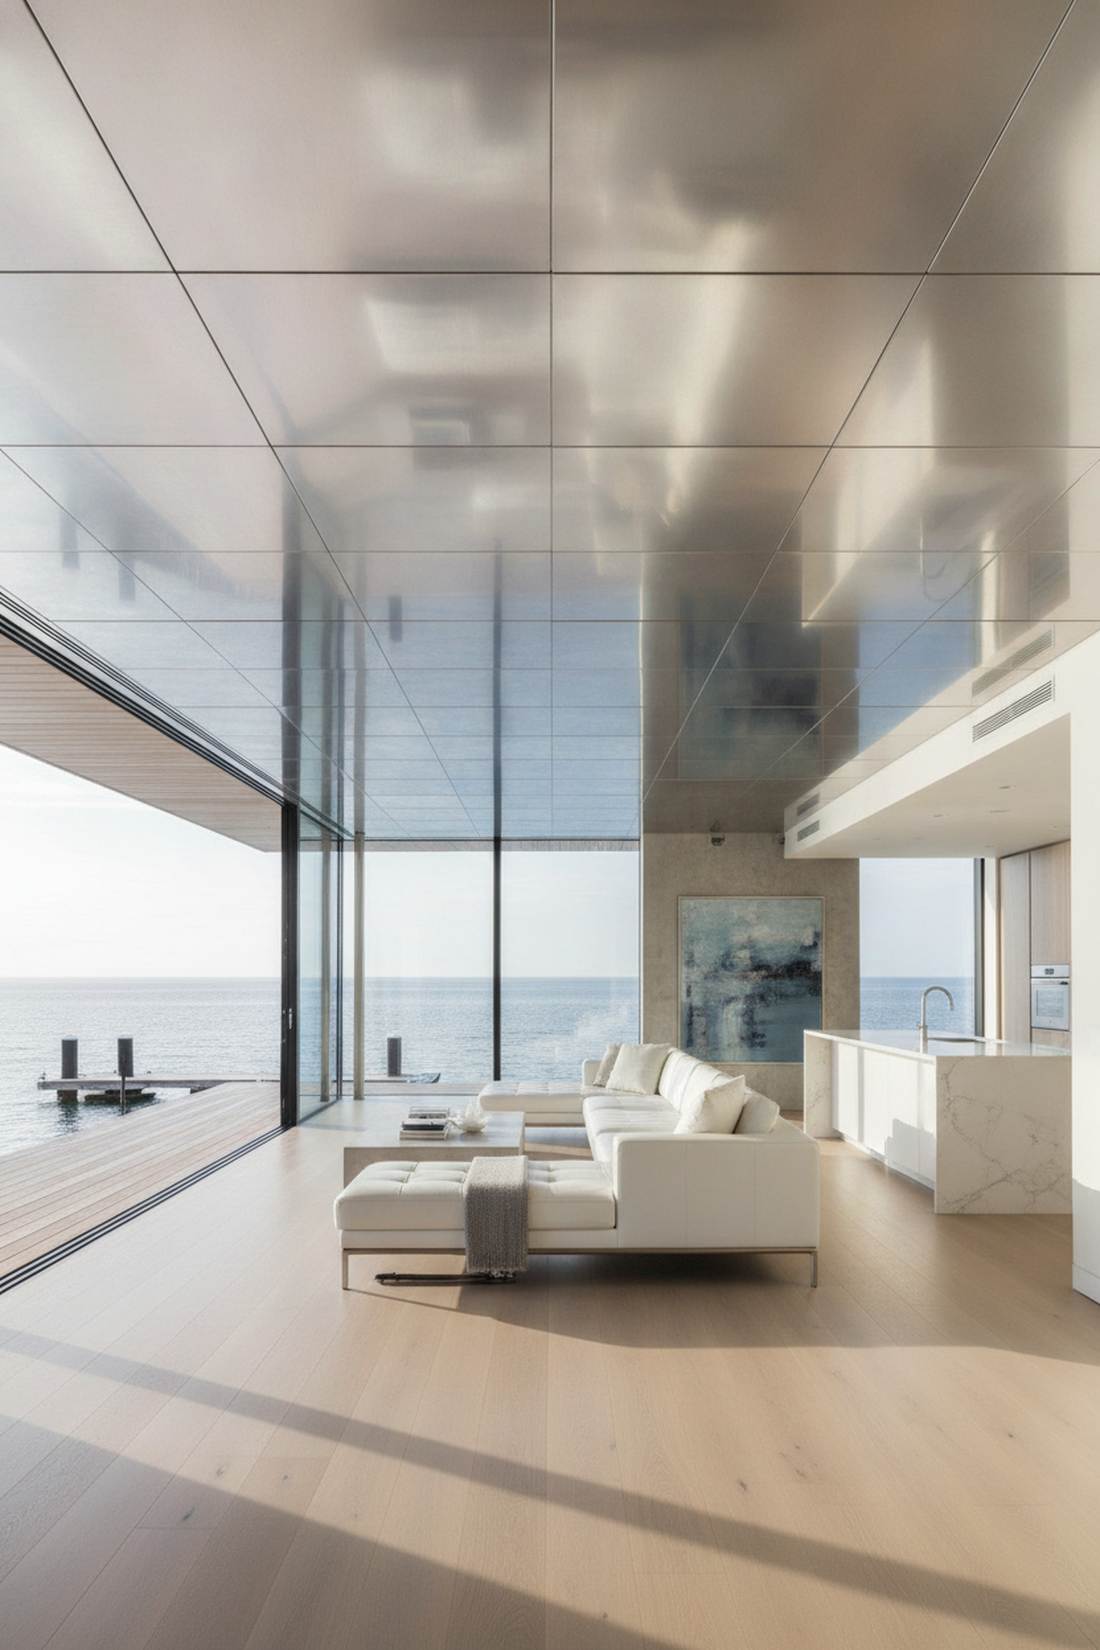
Feels like stepping onto a multimillion-dollar luxury yacht. A reflective marine-grade steel ceiling is the pinnacle of high-end waterfront property design.
Many try to fake this look with cheap aluminum, but true brushed stainless diffuses light with an unmistakable premium glow. Integrating commercial-grade concealed track frameworks makes the entire ceiling appear like a floating metallic cloud.
This top-tier investment will set you back $60–$100+ per square foot. Save this for your absolute dream home vision board.
- Key Materials: Marine-grade stainless steel panels
- Vibe / Style: High-end luxury waterfront
- Difficulty: Expert fabrication needed
- Budget Breakdown: Steel Sheets: $70/sq ft | Concealed Tracks: $15/sq ft.
- Creator’s Tip: Always wipe down stainless steel following the brushed grain to prevent micro-scratches.
- Smart Sourcing: marine-grade stainless steel sheets and commercial ceiling track systems.
14. Perforated Metal Screens
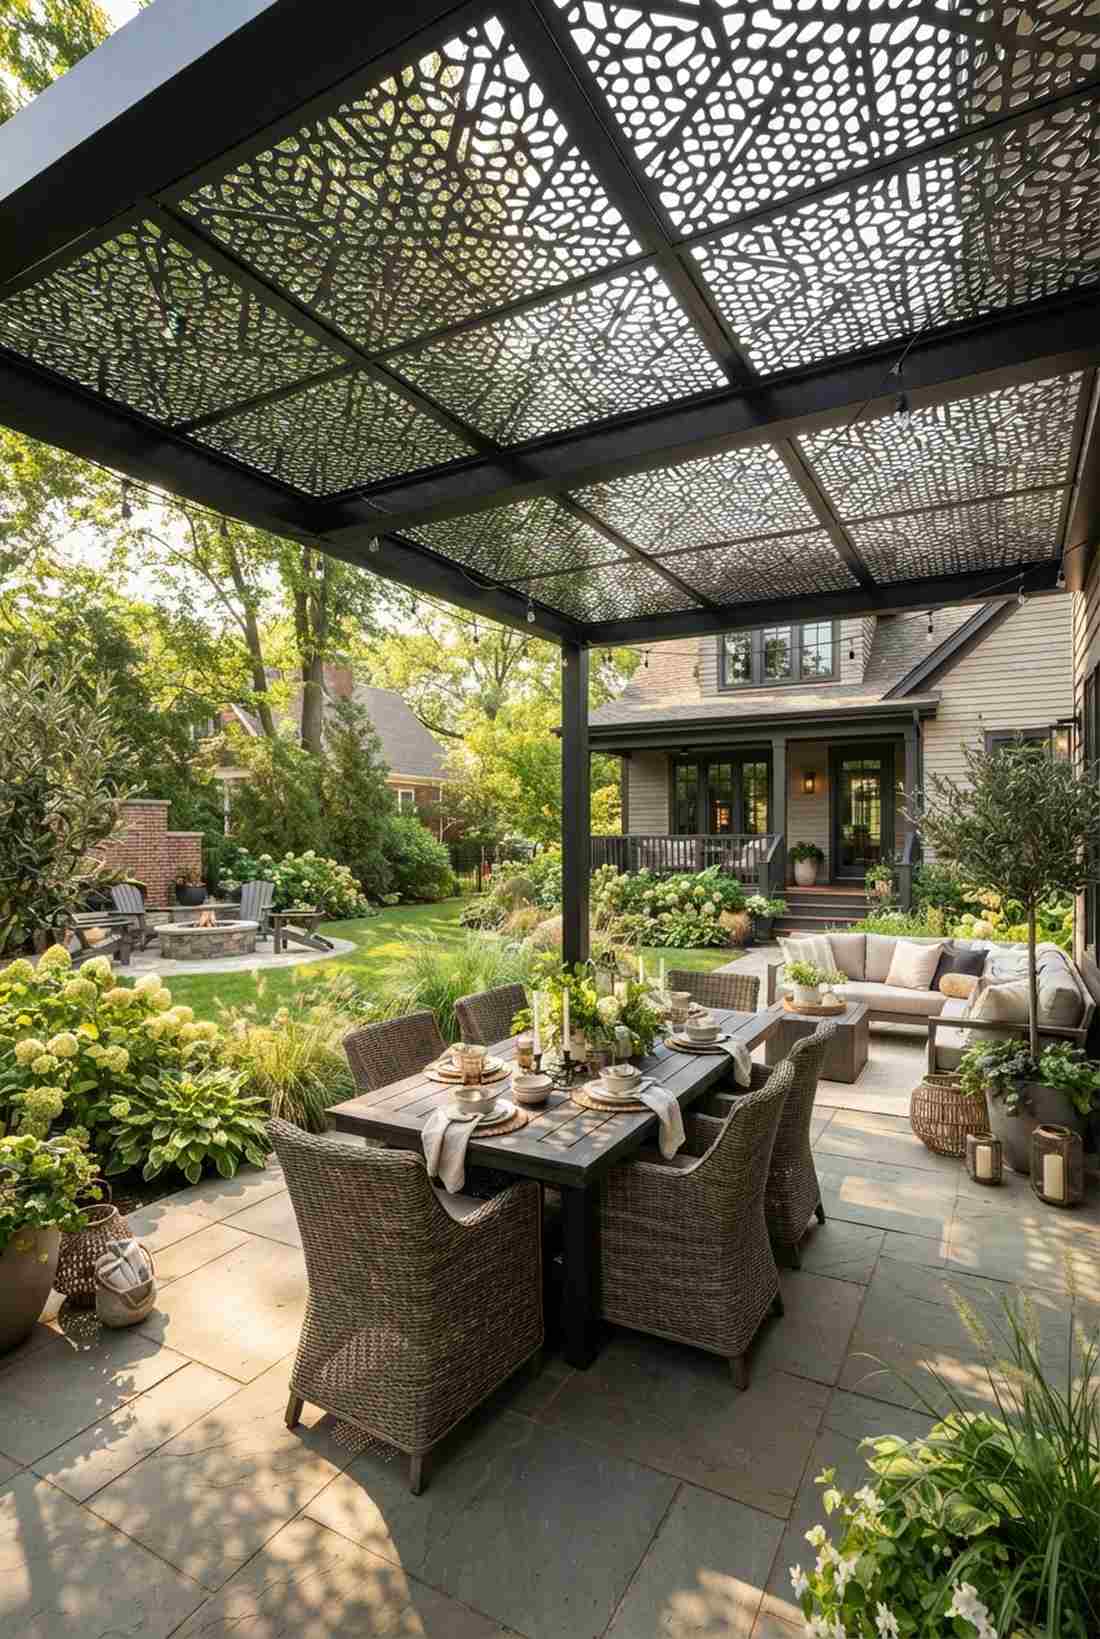
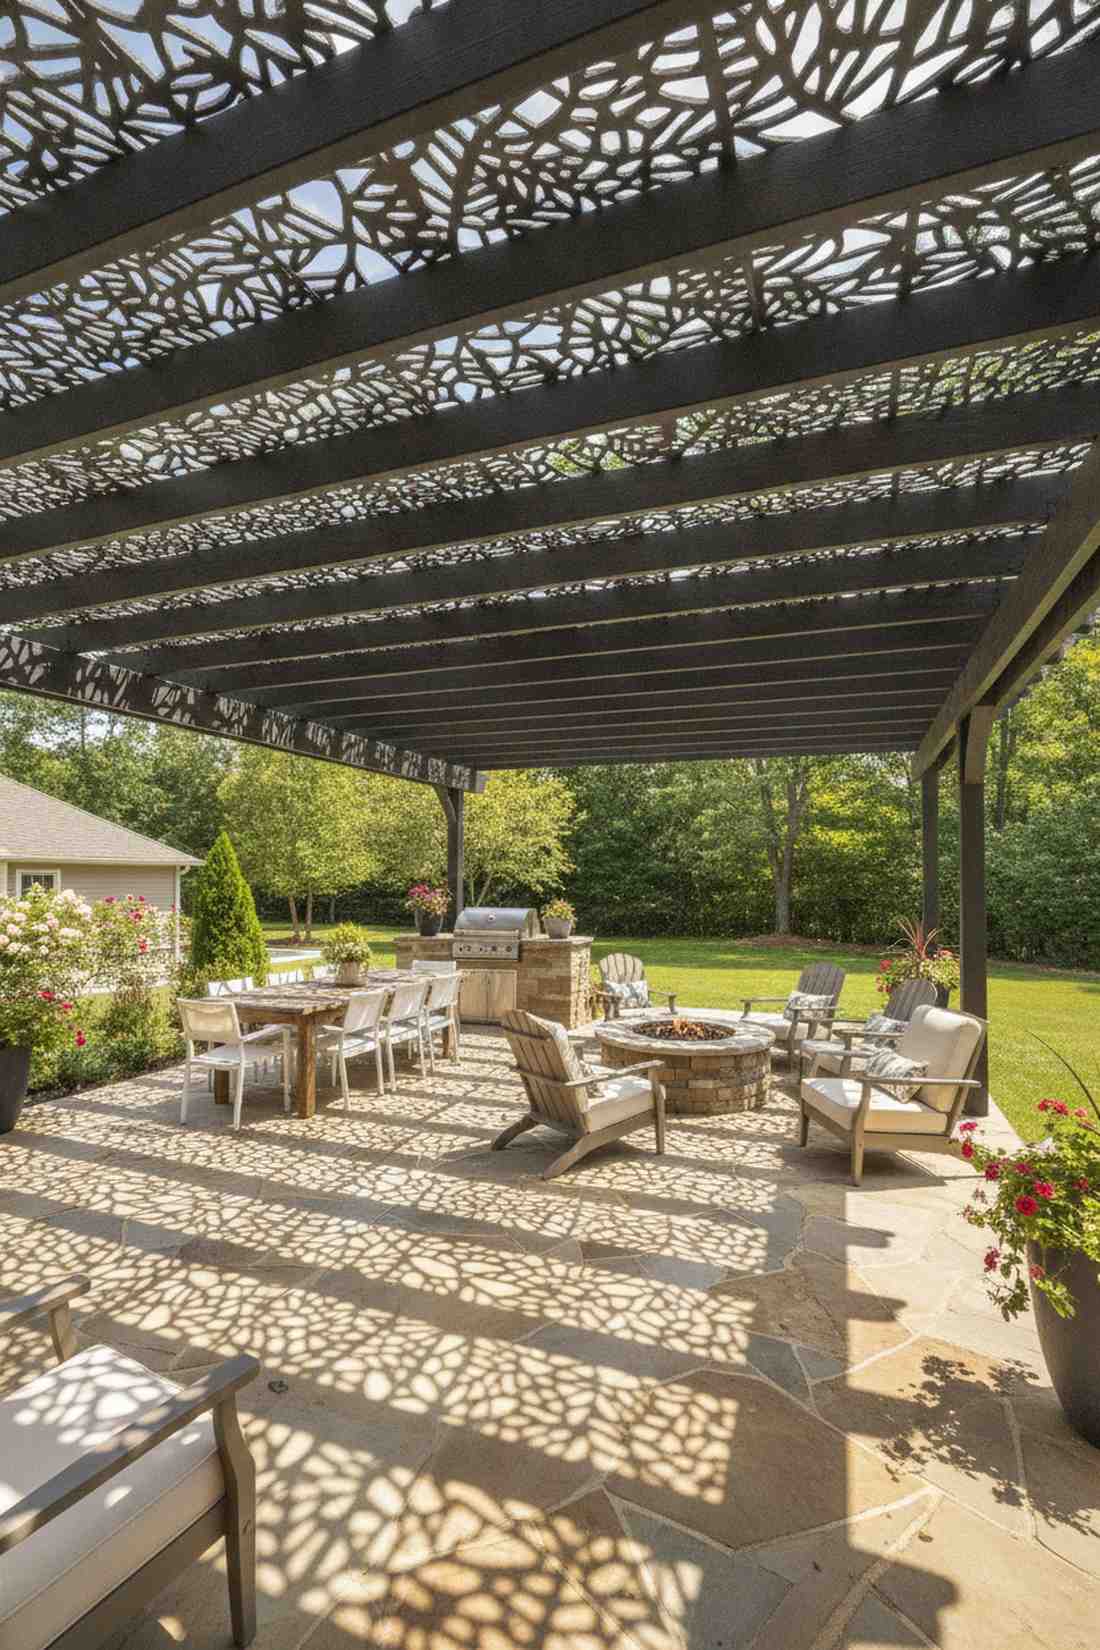
Creates a magical, ever-shifting shadow theater. This laser-cut architectural ceiling filter is absolutely phenomenal for pergolas needing partial shade.
Solid roofs can make small spaces feel claustrophobic, so this dappled-light approach changes the entire spatial dynamic. Investing in UV-coated custom perforation panels guarantees long-term rust protection while looking like modern art.
Artistic overheads like this range from $40–$75 per square foot.
- Key Materials: Laser-cut metal sheets, powder coating
- Vibe / Style: Artistic contemporary shade
- Difficulty: Moderate panel mounting
- Budget Breakdown: Perforated Panels: $45/sq ft | Hardware: $5/sq ft.
- Creator’s Tip: Paint the support beams flat black so they disappear behind the metallic screen design.
- Smart Sourcing: UV-coated perforated metal screens and powder-coated hanging hardware.
If you think those metal options were cool, wait until you see the genius low-maintenance shortcuts I’m dropping next…
Low-Maintenance Synthetic Materials for Outdoor Patio Ceilings
15. PVC Planks
Exudes a flawless, freshly-painted cottage charm every single day. A weatherproof faux-wood ceiling is a total lifesaver for humid, swampy Southern climates.
Traditionalists hate admitting it, but this engineered layout looks identical to real timber without any of the agonizing rot. Upgrading to advanced UV-resistant hollow-core extrusions prevents sagging and fading during brutal summer heatwaves.
You can easily install these for around $18–$30 per square foot. Pin this layout if you are sick and tired of repainting your porch!
- Key Materials: Interlocking PVC extrusions
- Vibe / Style: Crisp zero-maintenance cottage
- Difficulty: Easy snap-together setup
- Budget Breakdown: PVC Planks: $20/sq ft | Fasteners: $3/sq ft.
- Creator’s Tip: Use a mild soap and water hose attachment to clean the ceiling once a year.
- Smart Sourcing: UV-resistant PVC plank bulk packs and concealed snap-fastener kits.
16. Fiber Cement Beadboard
Projects a timeless historical aesthetic with modern muscle. This heavy-duty coastal beadboard ceiling seamlessly matches traditional colonial or farmhouse exteriors.
Flimsy wood sheets warp wildly over time, but these rigid composite boards stay perfectly flat through extreme temperature swings. A quick coat of premium exterior latex paint makes the material virtually indistinguishable from authentic millwork.
Total materials hover around $15–$25 per square foot.
- Key Materials: Fiber-cement composite panels
- Vibe / Style: Indestructible heritage
- Difficulty: Requires heavy lifting
- Budget Breakdown: Cement Boards: $15/sq ft | Paint: $4/sq ft.
- Creator’s Tip: You must use diamond-tipped saw blades when cutting fiber cement to avoid destroying your tools.
- Smart Sourcing: pre-primed fiber cement beadboard and heavy-duty exterior latex formulations.
17. Vinyl Soffit Panels
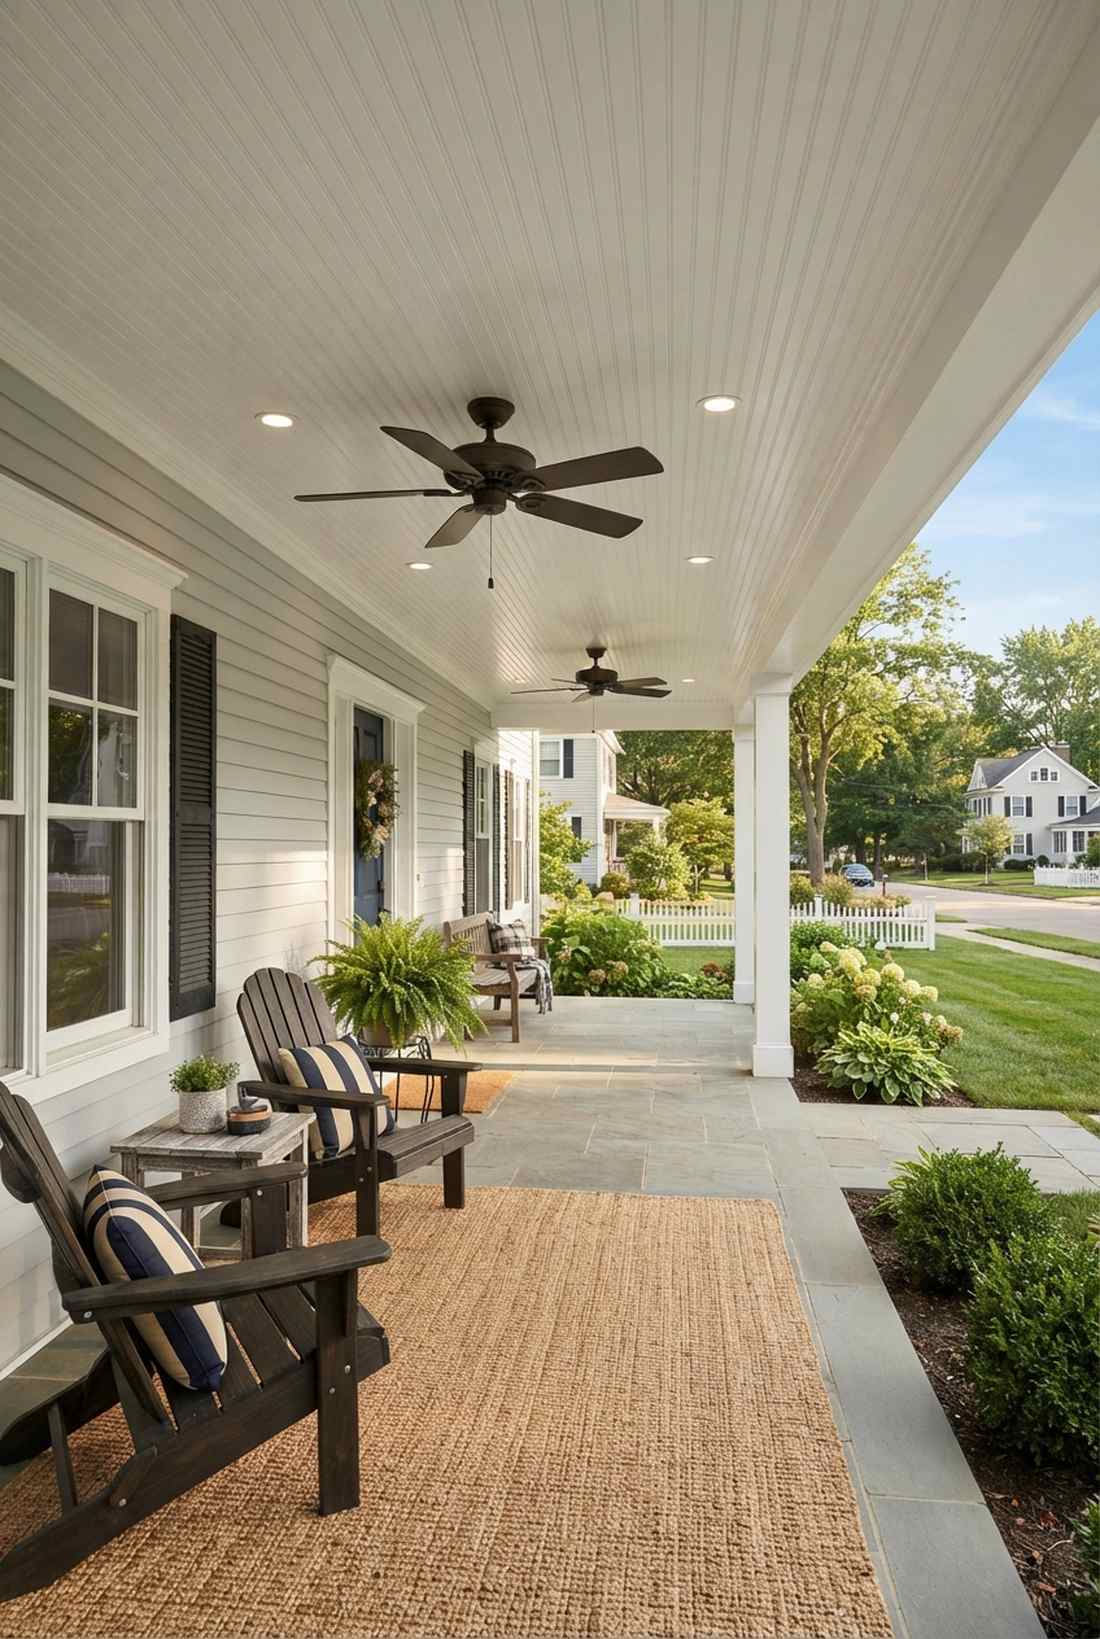
Clean, bright, and wonderfully simple. A low-maintenance vinyl overhead system is the absolute workhorse for standard suburban patio covers.
It gets a bad rap as a budget material, but utilizing hidden J-channel framing techniques elevates the final presentation dramatically. Buying bulk packs of wood-grain textured vinyl gives that sought-after organic feel without the sanding.
This super-saver project costs a mere $8–$15 per square foot. It’s a fast upgrade that completely changes the vibe!
- Key Materials: Extruded vinyl soffits
- Vibe / Style: Simple, bright functionality
- Difficulty: Very easy beginner project
- Budget Breakdown: Vinyl Panels: $6/sq ft | J-Channels: $3/sq ft.
- Creator’s Tip: Leave a quarter-inch gap inside the J-channel to allow the vinyl to expand on hot days.
- Smart Sourcing: wood-grain vinyl soffit bulk packs and pre-cut J-channel framing kits.
18. Composite Decking Boards
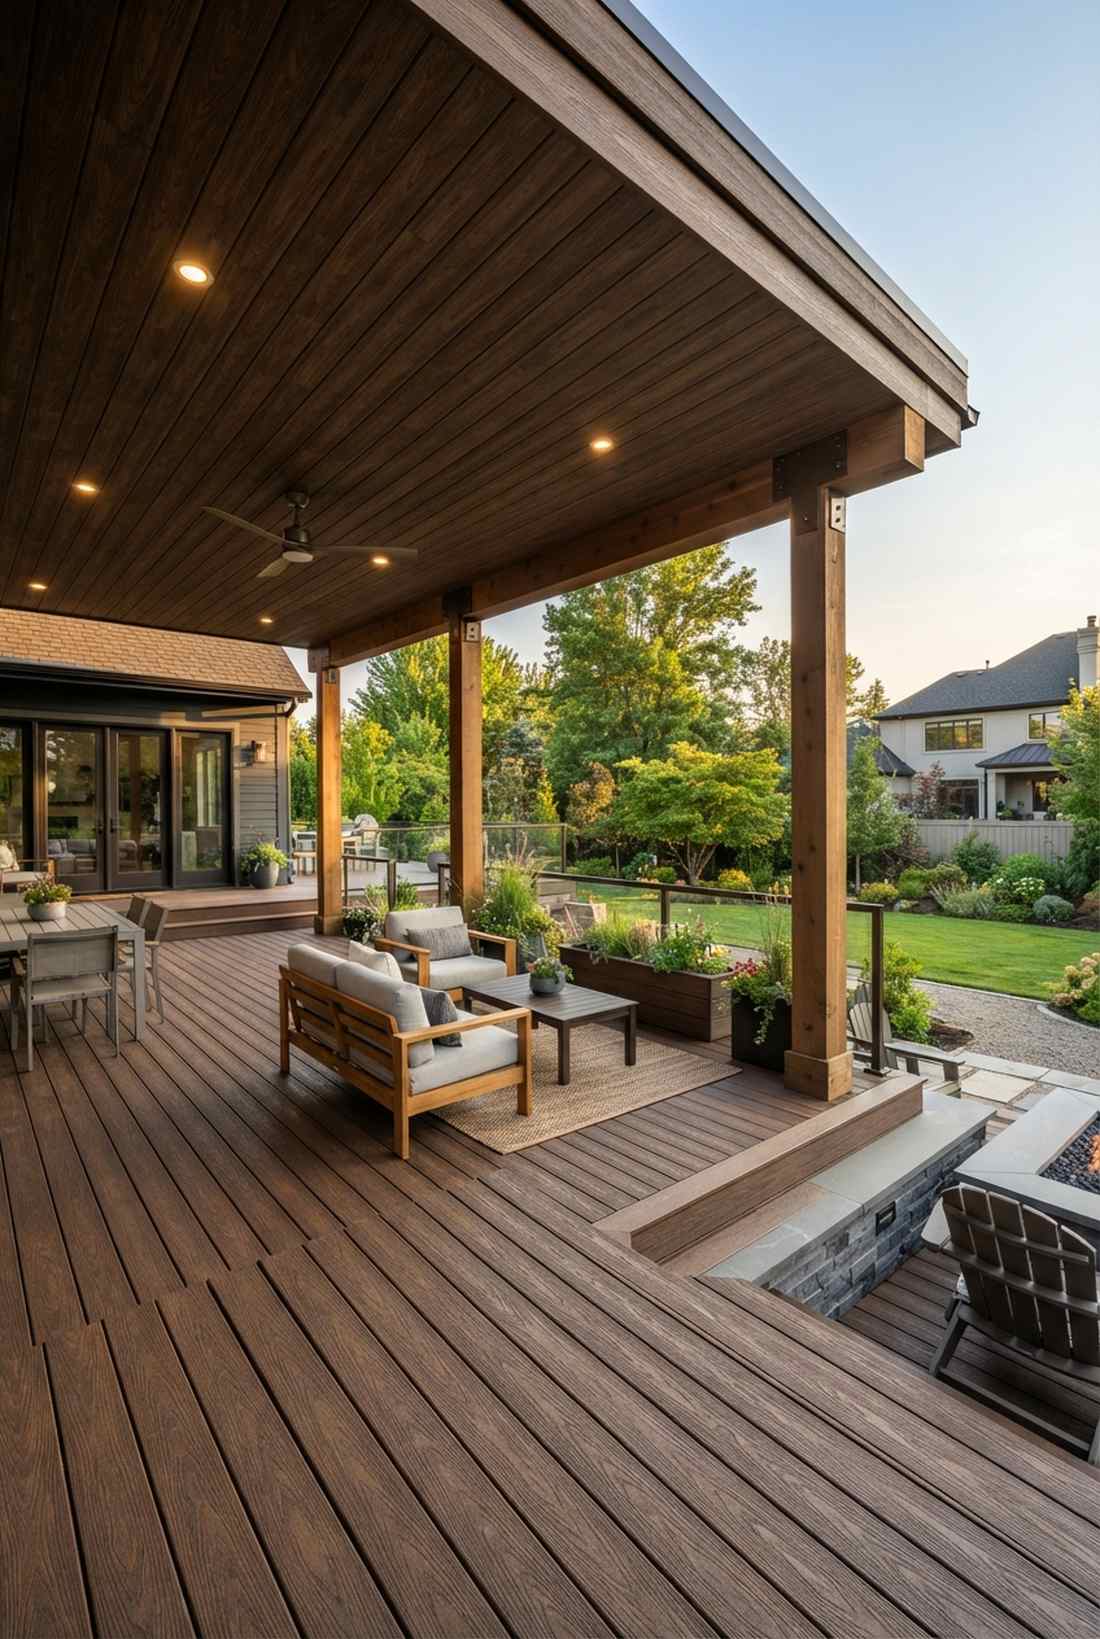
Emits a deeply modern, high-contrast visual punch. A heavy composite plank ceiling ties overhead structures beautifully to the deck below.
Repurposing floor materials for the roof is highly controversial, but the waterproof durability is totally unmatched. Because of the extreme weight, you must secure these with heavy-duty structural joist hangers to ensure safety.
Premium composite spans run $30–$60 per square foot.
- Key Materials: Wood-plastic composite boards
- Vibe / Style: Cohesive modern decking
- Difficulty: Advanced structural blocking needed
- Budget Breakdown: Decking Boards: $40/sq ft | Heavy Fasteners: $10/sq ft.
- Creator’s Tip: Match the ceiling board color exactly to your deck flooring to create a massive cohesive outdoor room.
- Smart Sourcing: bulk pack composite decking planks and heavy-duty ceiling structural fasteners.
Material Guide: Cheap vs. Premium Aesthetic
Knowing exactly where to save and where to spend makes all the difference in achieving that “looks expensive but isn’t” vibe.
- Standard vs. UV-Resistant/Premium: Upgrading to UV-coated PVC or composite prevents the notorious yellowing and fading that ruins cheap plastic setups within two summers.
- Pre-made Kits vs. Sourcing Locally: While local lumber yards are great for raw wood, hidden-fastener metal starter kits save you hours of dangerous cutting and drastically reduce installation errors.
19. Cellular PVC Trim Boards
Radiates pristine, custom-milled architectural luxury. This solid engineered trim ceiling is brilliant for creating intricate curves or coffered designs.
Real wood coffers are an absolute nightmare to maintain outdoors, whereas this closed-cell material literally laughs at rainstorms. Using vinyl-safe acrylic paint formulations lets you customize the color without risking peeling down the road.
Custom details like this generally cost $25–$50 per square foot. Save this idea if you want a truly bespoke overhead layout.
- Key Materials: Cellular PVC trim, vinyl-safe paint
- Vibe / Style: High-end custom millwork
- Difficulty: Advanced carpentry shaping
- Budget Breakdown: PVC Trim: $30/sq ft | Specialty Paint: $5/sq ft.
- Creator’s Tip: This material bends easily with gentle heat, allowing you to create stunning arched entryways.
- Smart Sourcing: solid cellular PVC trim packs and vinyl-safe exterior acrylic paints.
The next technique completely tricks the eye, making your patio ceiling look twice as tall as it actually is…
Decorative & Specialty Treatments for Unique Outdoor Patio Ceilings
20. Haint Blue Painted Ceilings

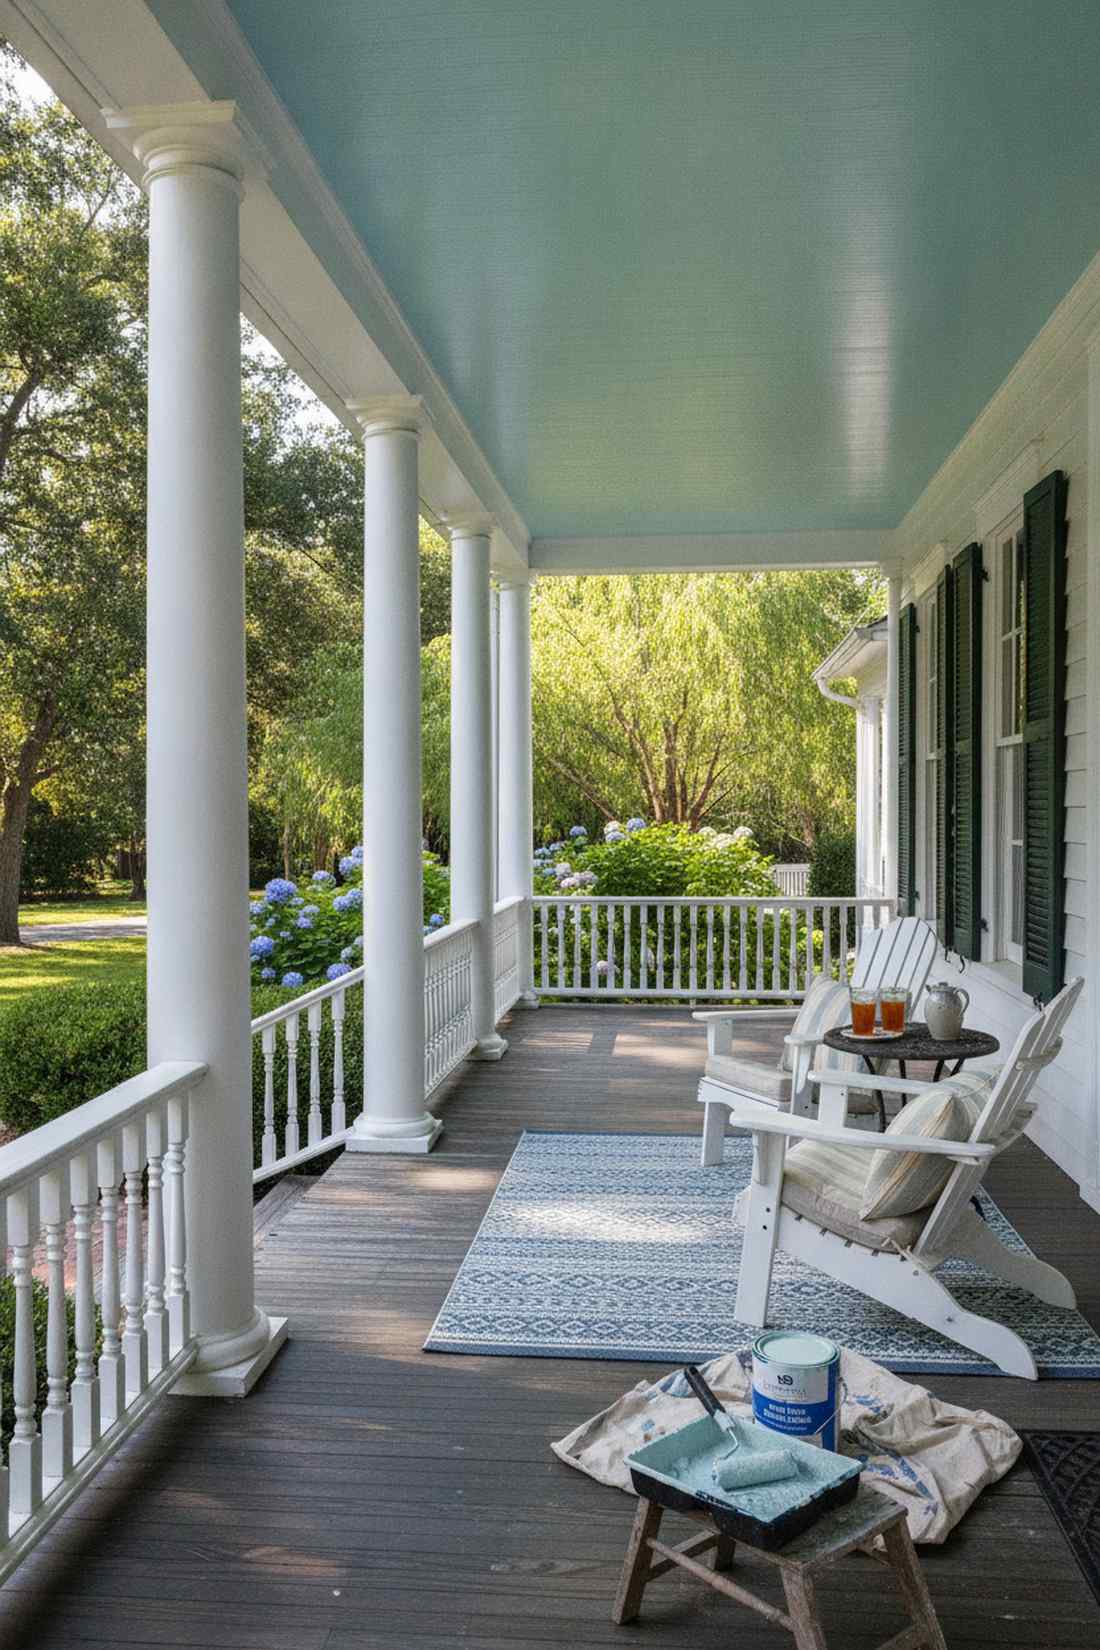
Conjures deep Southern comfort and gentle breezes. A classic aqua painted ceiling works magic on historic porches and breezy verandas.
The age-old legend claims it repels insects, but modern design proves it actually visually extends your space into the sky. Prepping the surface with high-adhesion exterior primers ensures this historic color pops vibrantly for years.
A simple paint makeover only costs $2–$5 per square foot.
- Key Materials: Haint blue exterior paint, primer
- Vibe / Style: Classic Southern heritage
- Difficulty: Very easy painting task
- Budget Breakdown: Primer: $1/sq ft | Paint: $2/sq ft.
- Creator’s Tip: Test three different blue-green swatches outside, as natural light drastically changes the hue.
- Smart Sourcing: high-adhesion exterior bonding primers and premium weather-resistant patio paints.
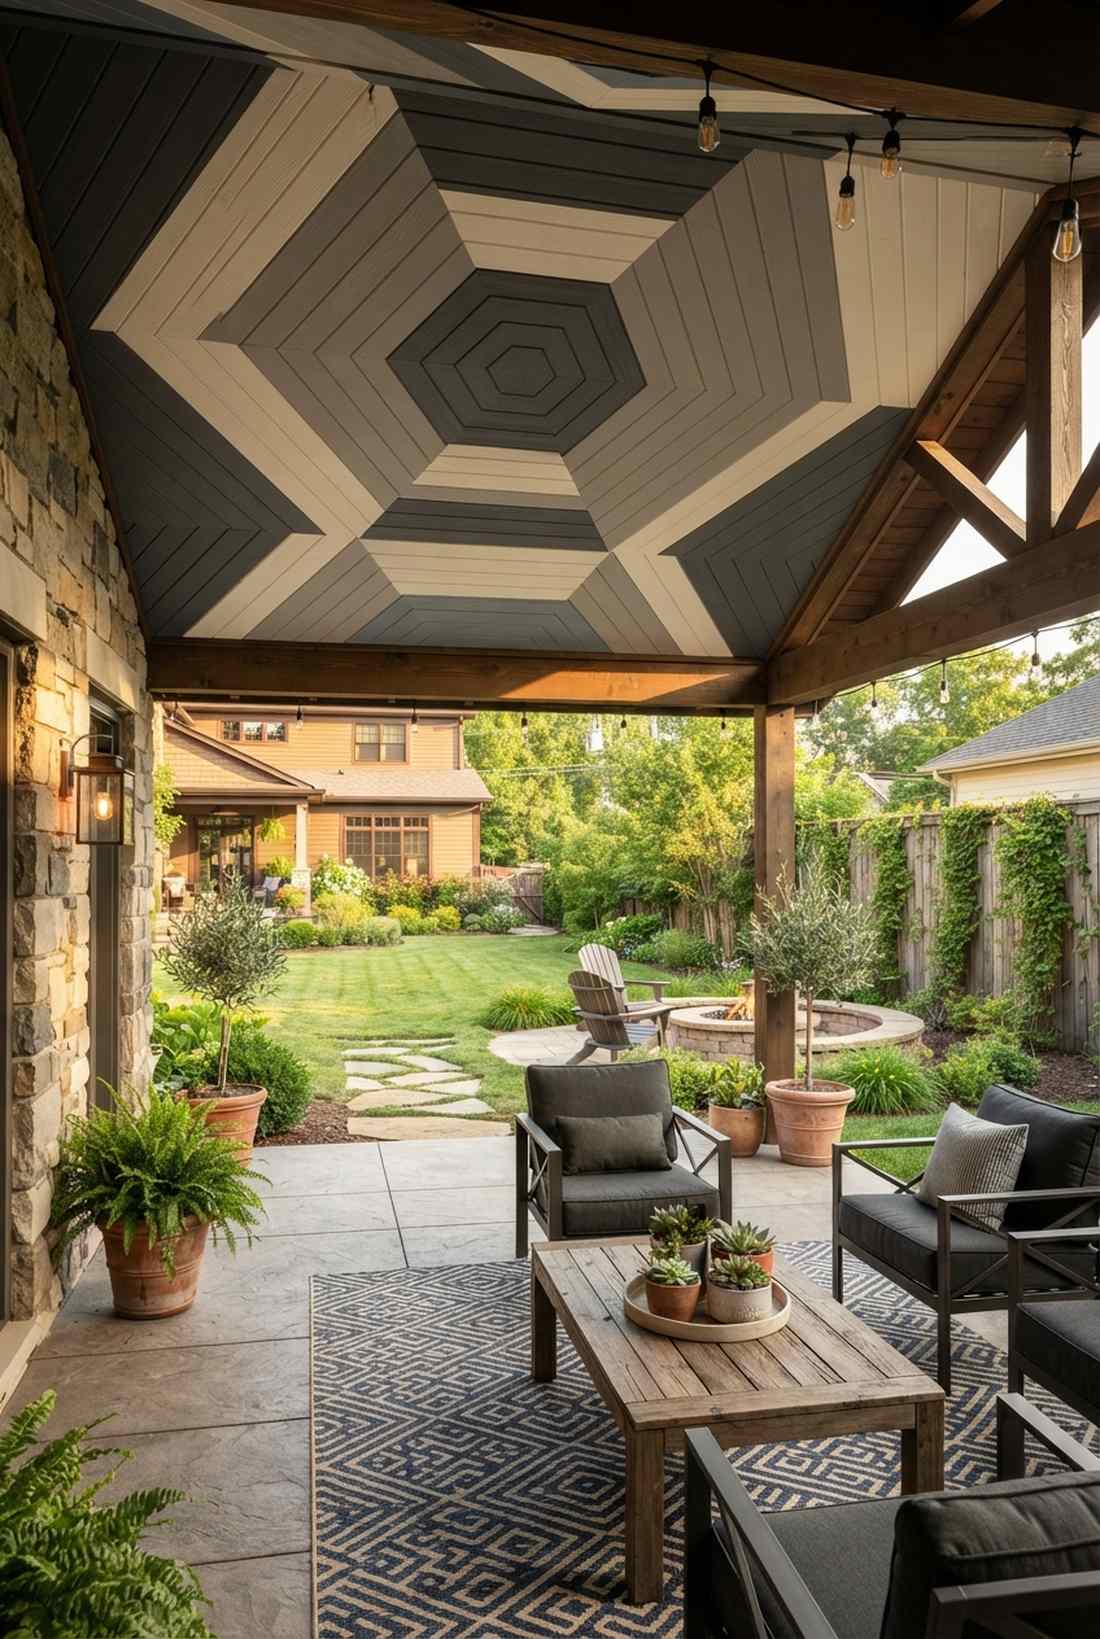
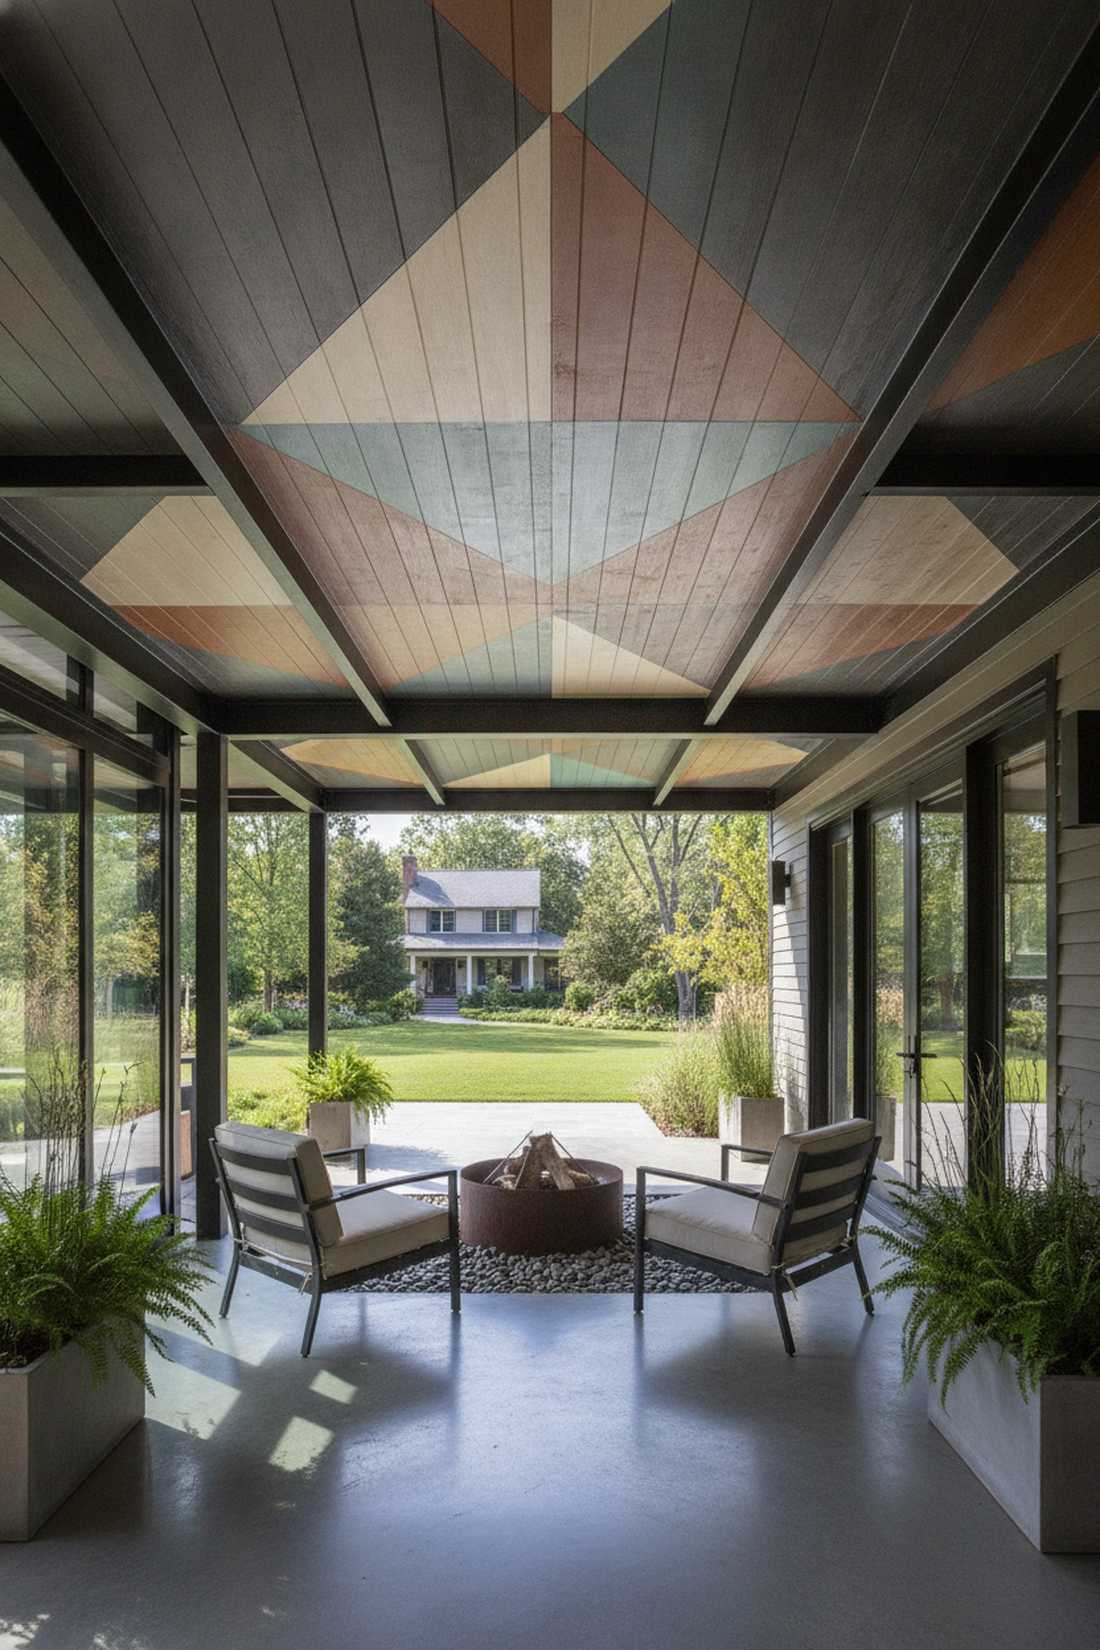
21. Two-Tone Painted Patterns
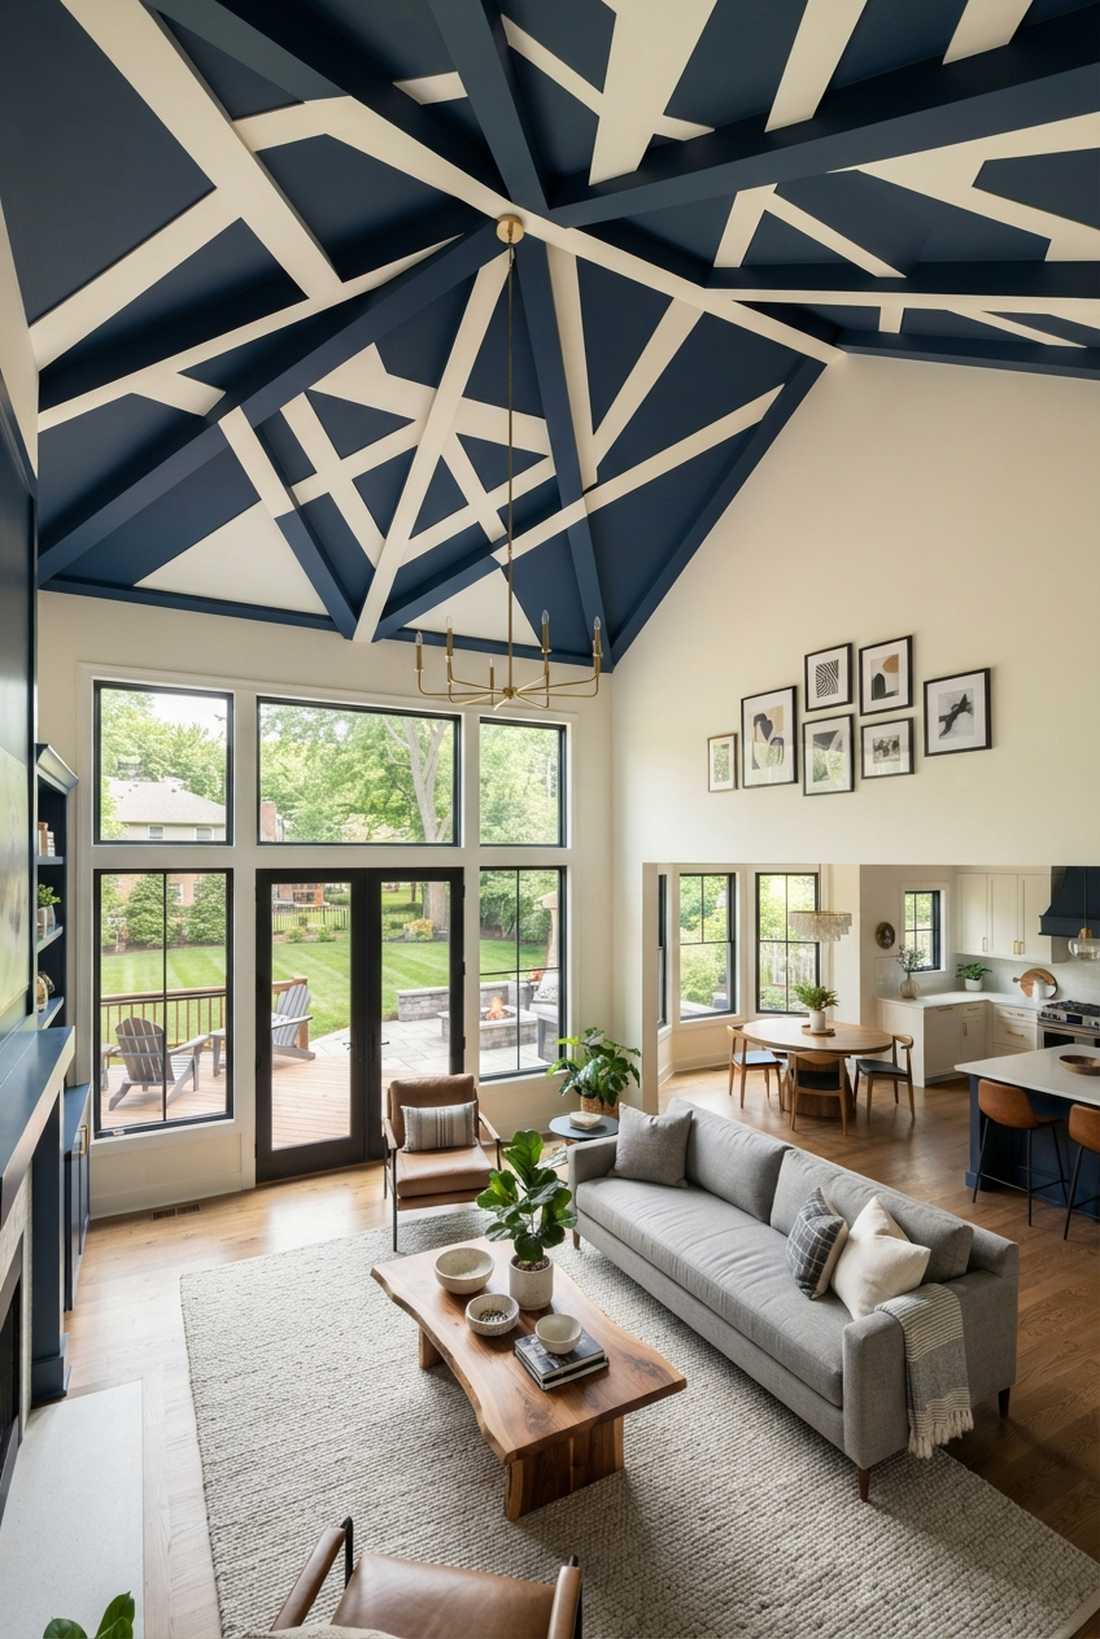

Feels like a high-energy, custom designer space. A contrasting geometric painted ceiling immediately draws the eye upward, highlighting beautiful architectural volume.
Painting everything one solid color is a massive missed opportunity; breaking up the grid creates a stunning optical illusion of depth. Relying on professional-grade exterior painter’s tape is mandatory to achieve those razor-sharp lines between tones.
Grab some premium paint for about $5–$10 per square foot. Pin this trick to instantly elevate a boring flat roof!
- Key Materials: Contrasting paints, edge tape
- Vibe / Style: Bold customized geometry
- Difficulty: Requires meticulous taping
- Budget Breakdown: Dual Paints: $6/sq ft | Taping Supplies: $2/sq ft.
- Creator’s Tip: Paint the darker shade in the recessed areas to make the ceiling appear significantly taller.
- Smart Sourcing: professional-grade edge-lock painter’s tape and high-contrast exterior paint kits.
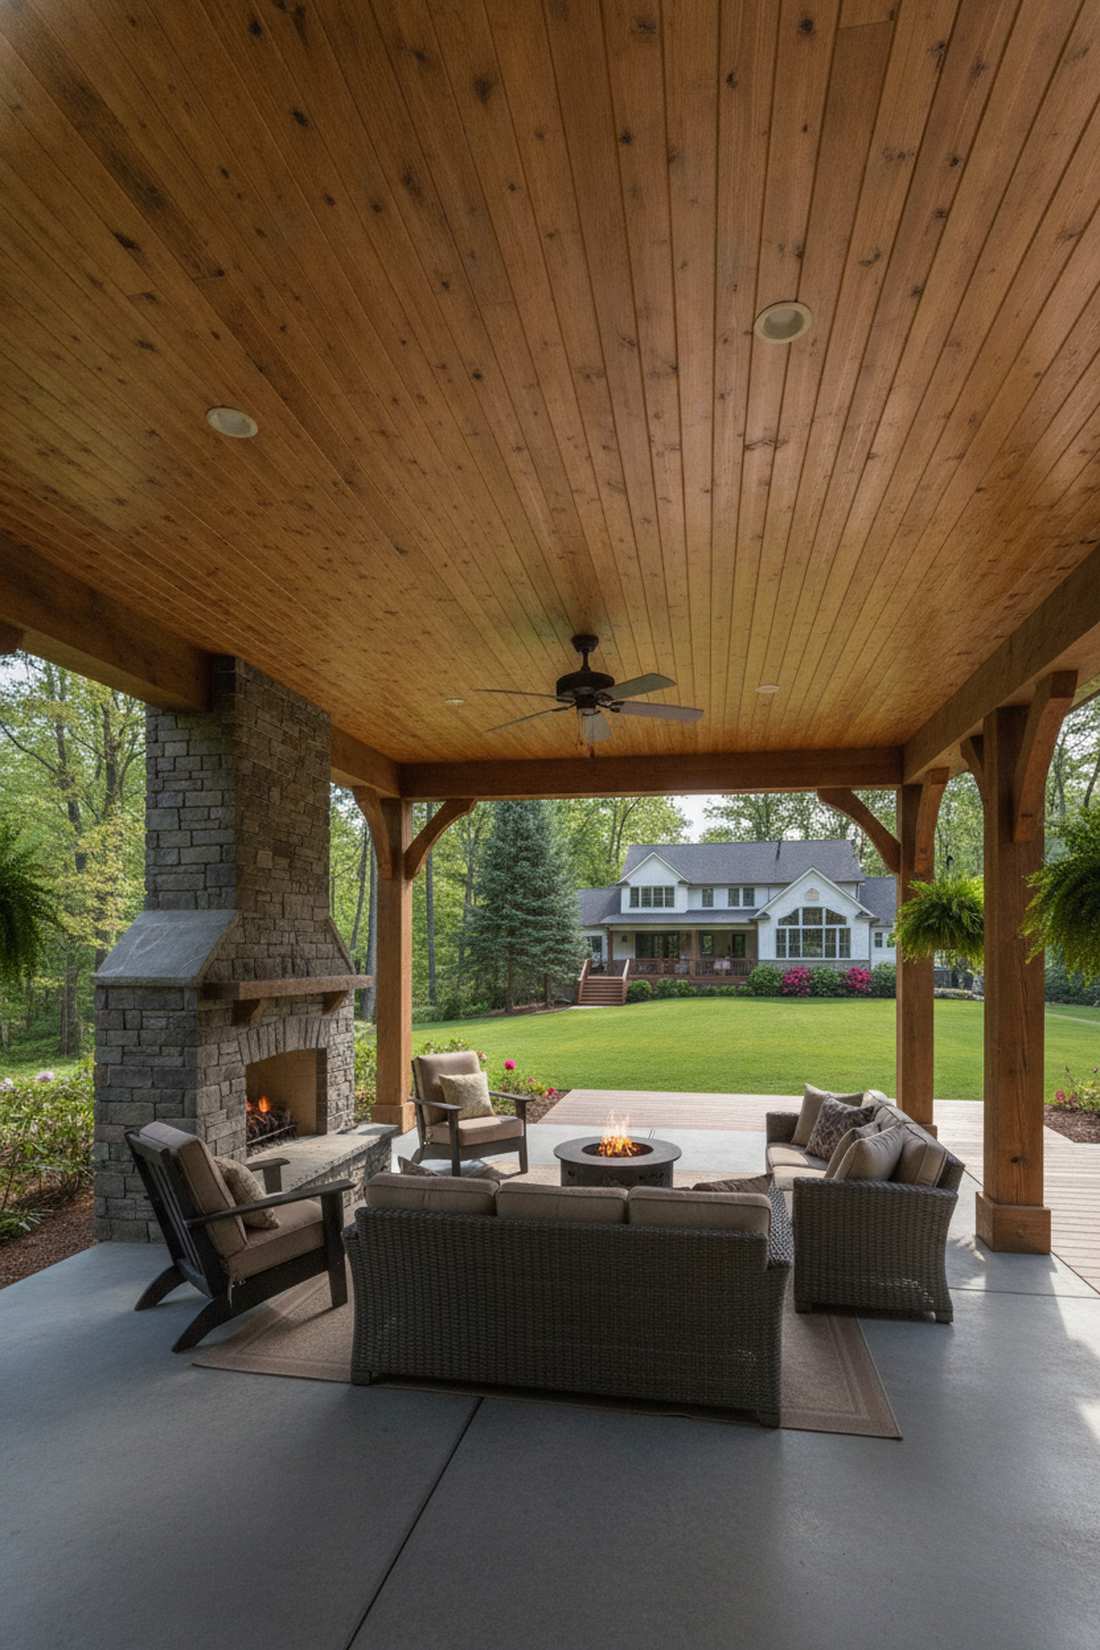
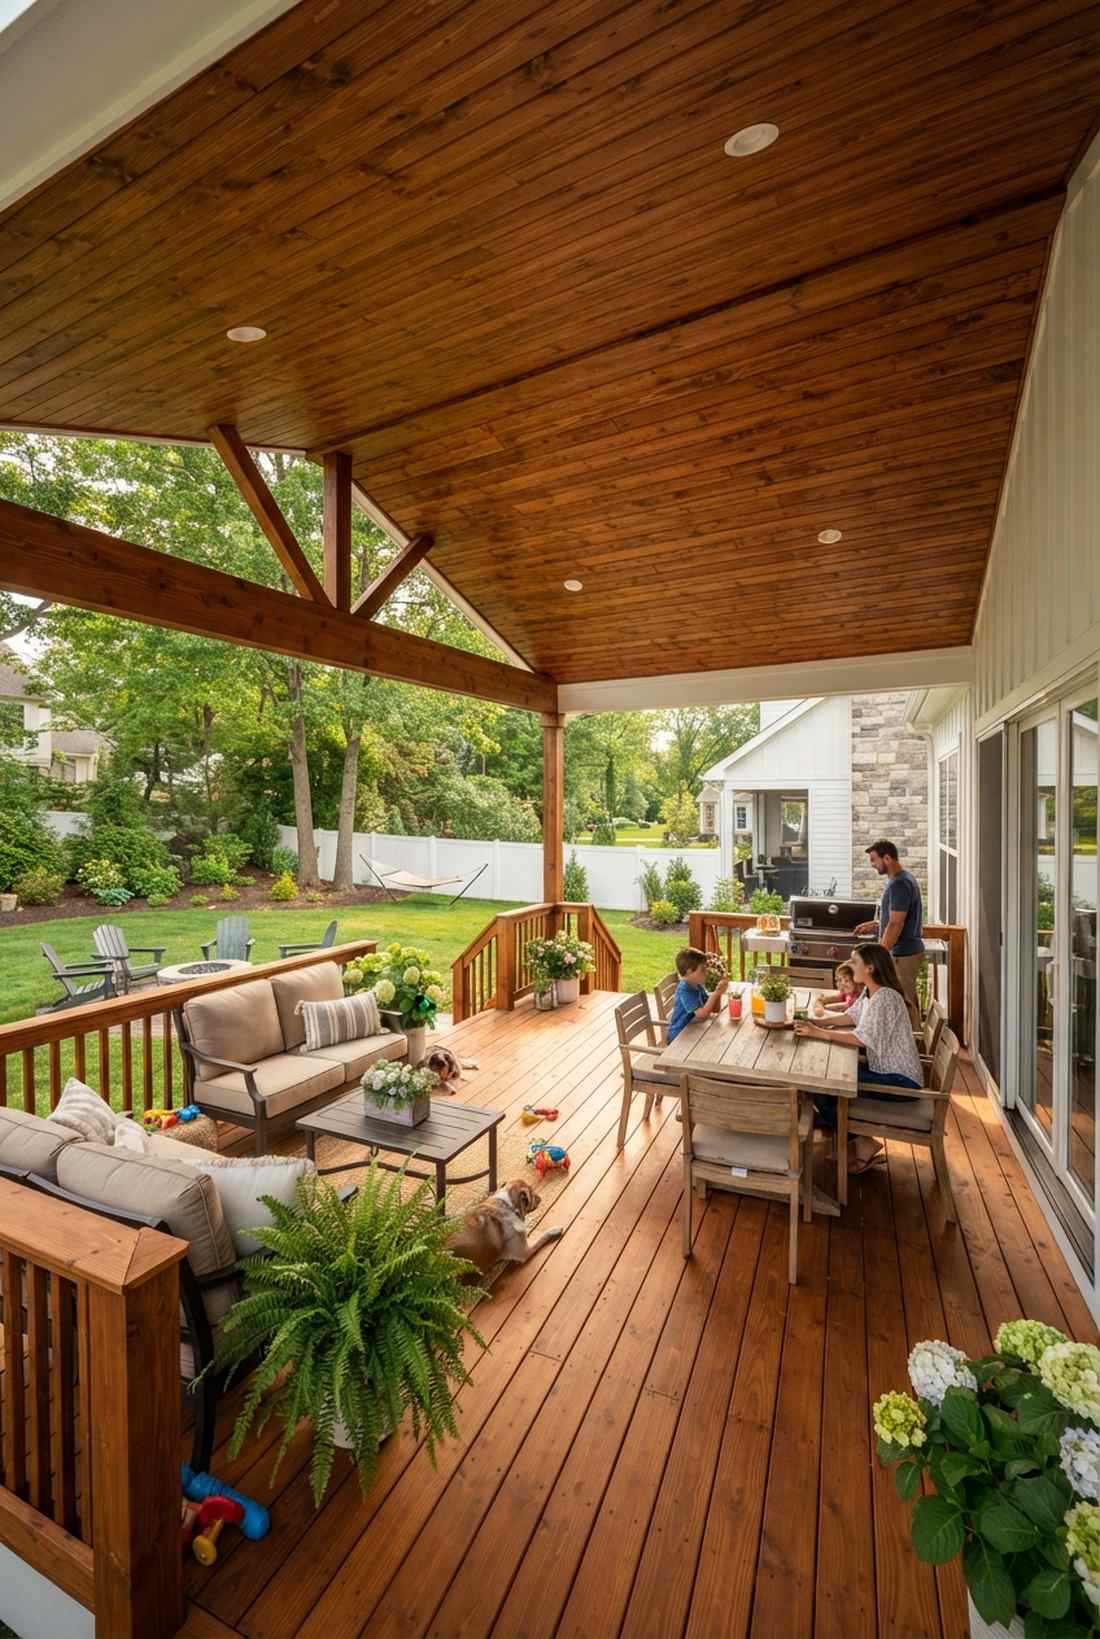
22. Stained Wood with Natural Finish
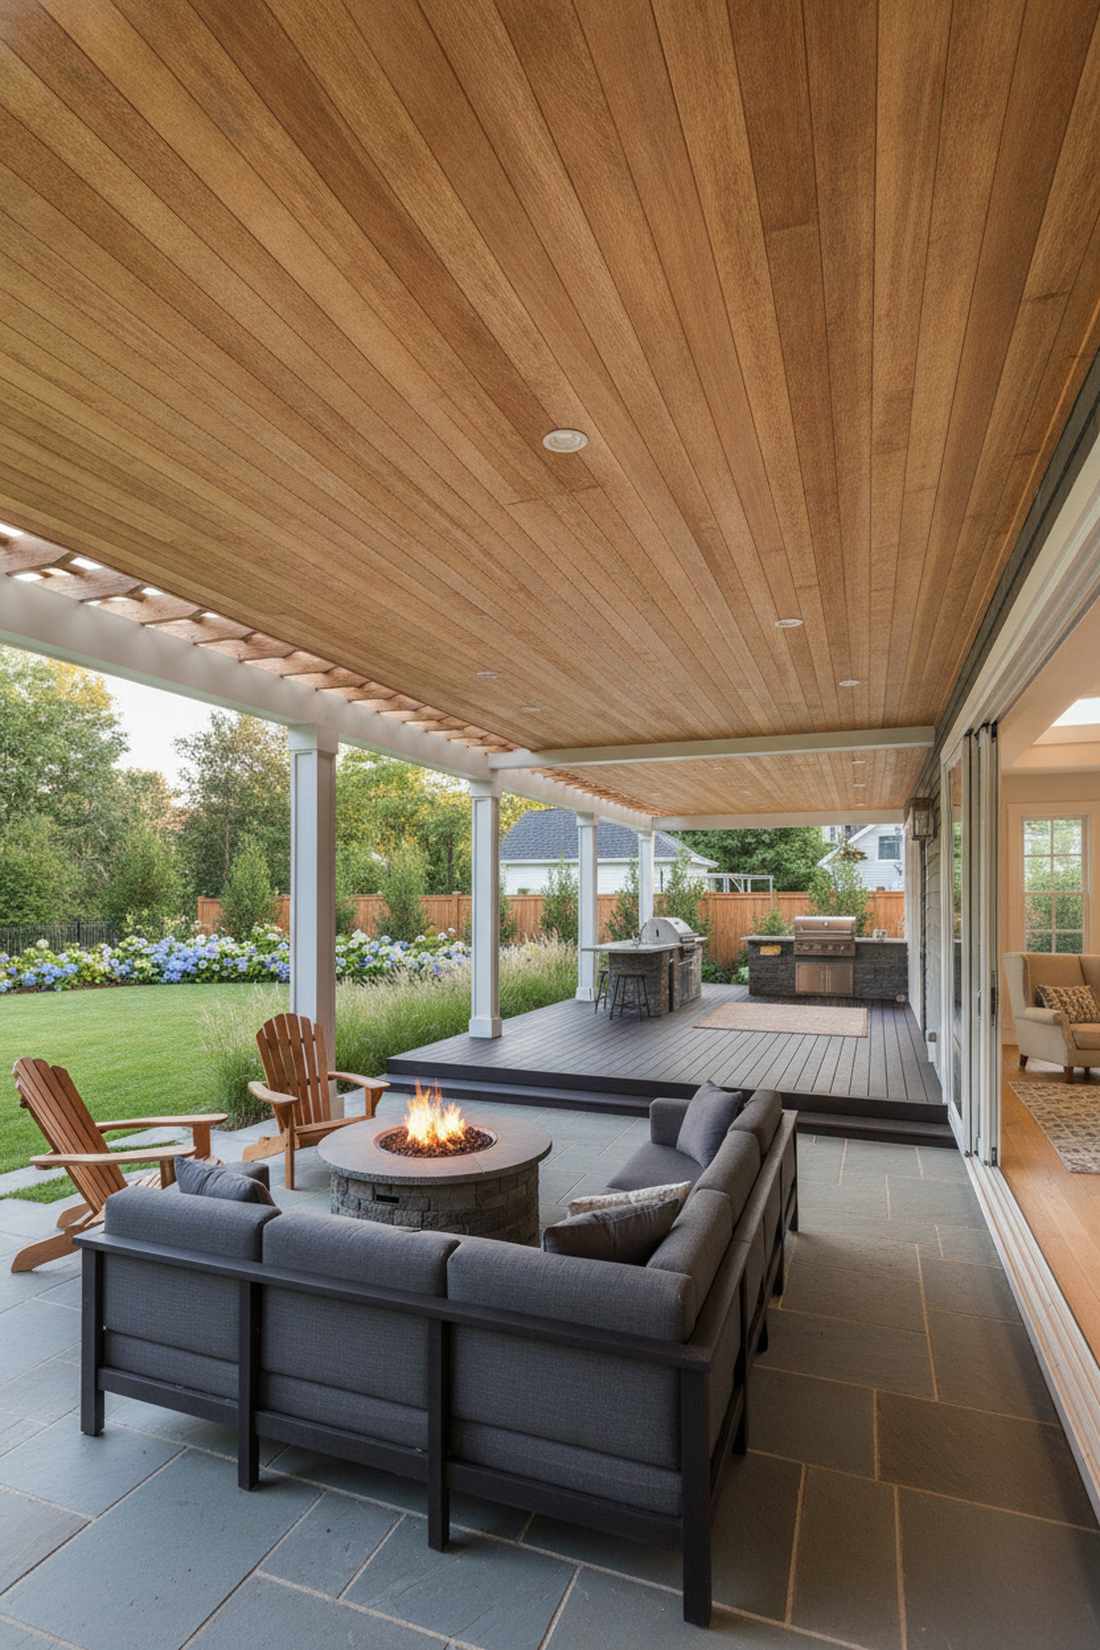
Emanates a rich, sophisticated organic warmth. A glowing natural wood patio ceiling seamlessly blends indoor living spaces with the rugged outdoors.
Hiding gorgeous wood grain behind solid paint is a crime, which is why penetrating oils deliver such a jaw-dropping result. Applying UV-blocking tinted wood sealers prevents that heartbreaking silver-gray weathering from destroying your hard work.
Expect to spend $15–$35 per square foot for the wood and stain combo.
- Key Materials: Quality lumber, semi-transparent stain
- Vibe / Style: Sophisticated organic transition
- Difficulty: Moderate staining effort
- Budget Breakdown: Wood: $20/sq ft | Stain: $5/sq ft.
- Creator’s Tip: Always apply the stain in the direction of the grain to avoid ugly lap marks.
- Smart Sourcing: premium exterior semi-transparent stains and UV-blocking wood finishing kits.
23. Whitewashed Wood Planks
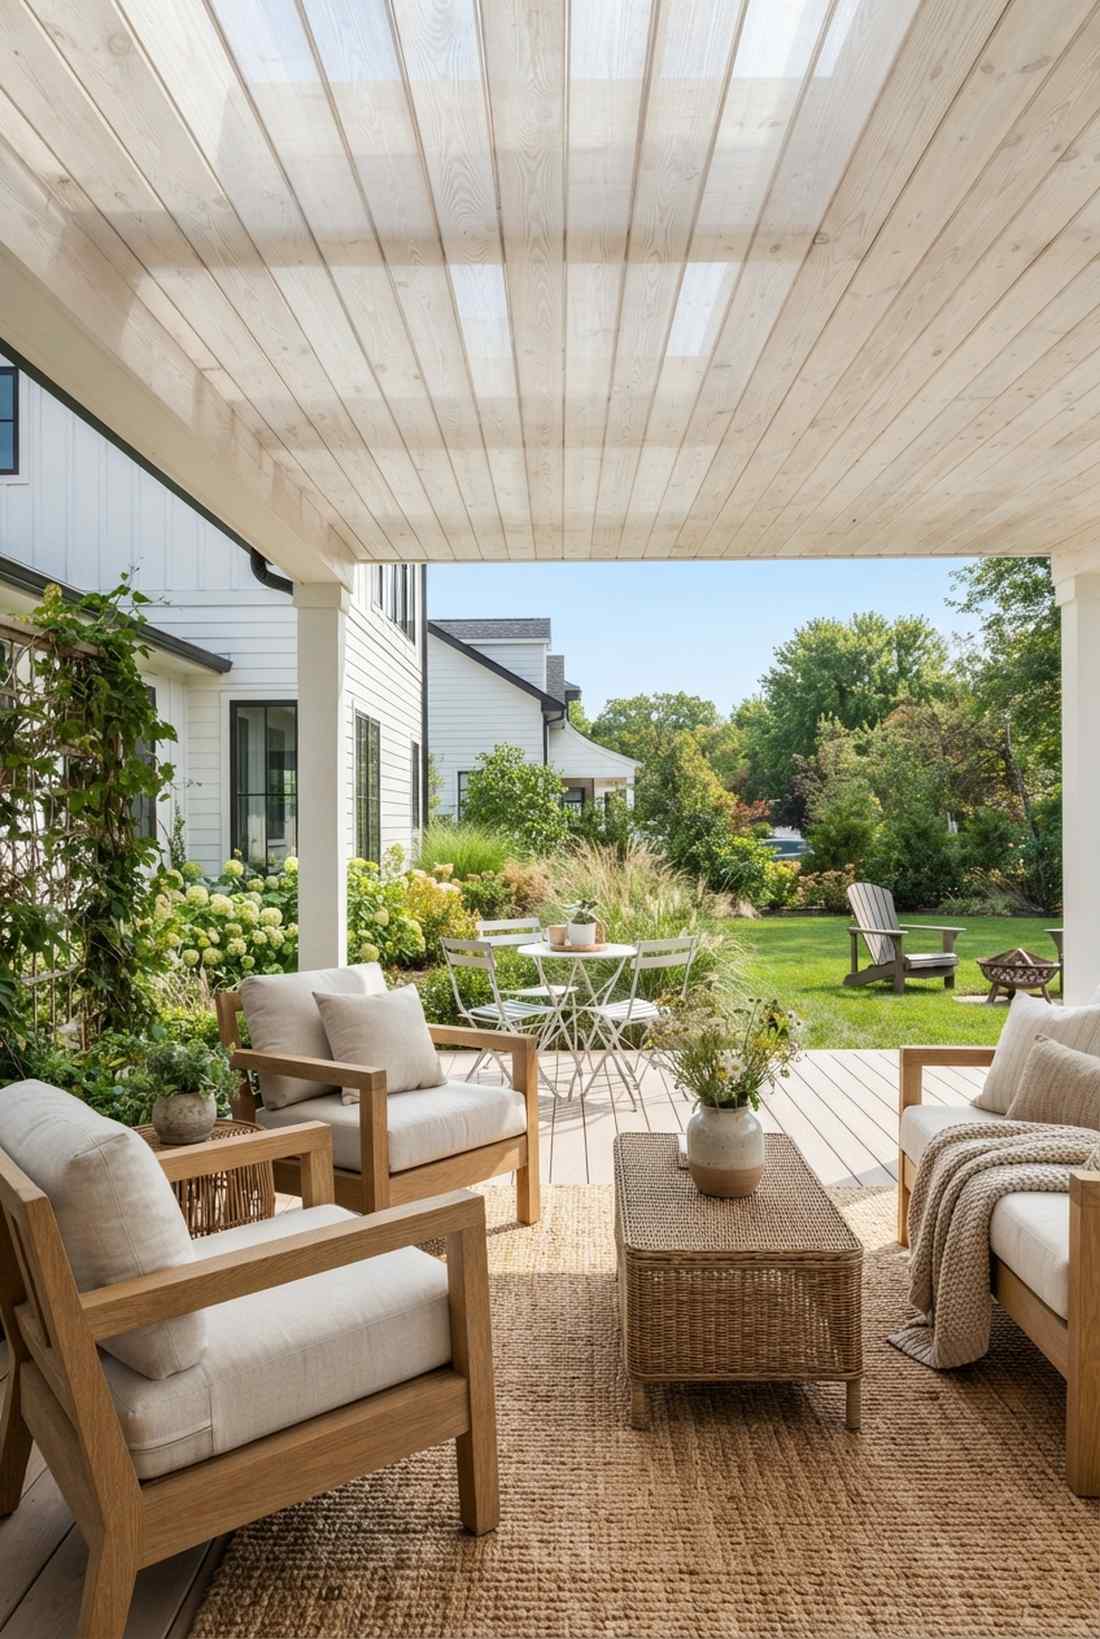
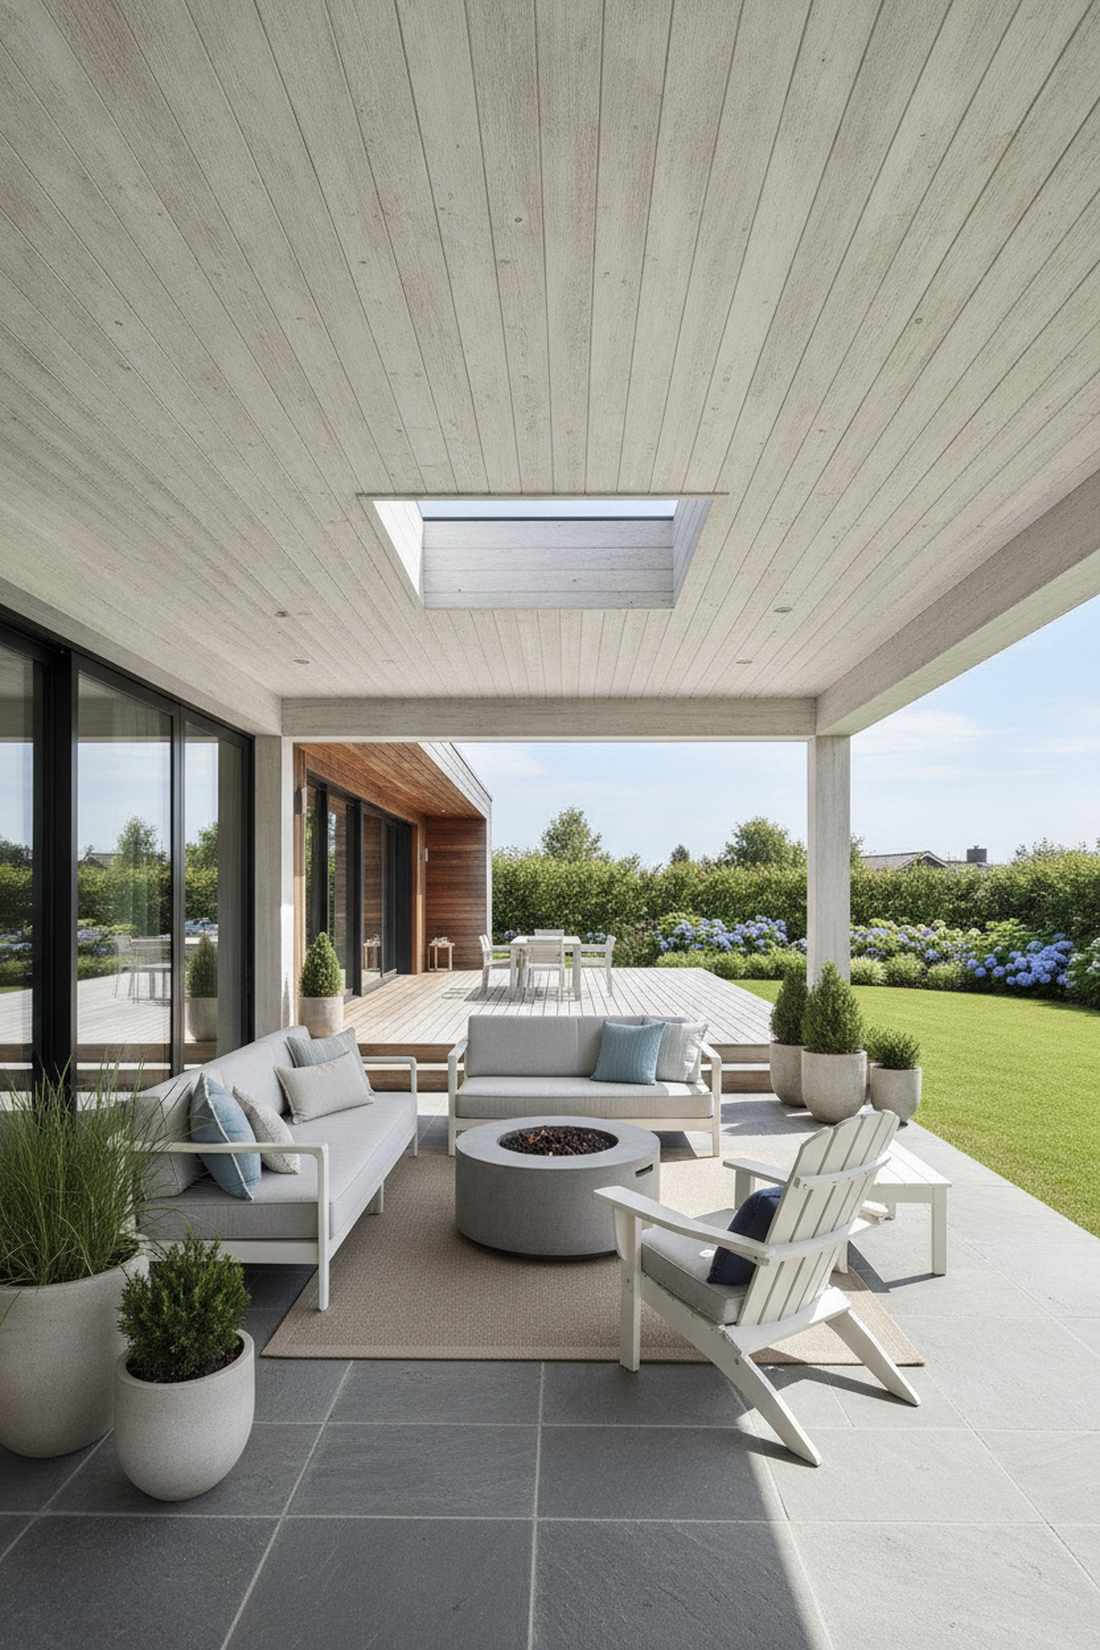
Carries a breezy, sun-bleached coastal aesthetic. This translucent white wooden ceiling is the absolute perfect touch for a Scandinavian-inspired patio.
Heavy solid paint feels incredibly oppressive, but this diluted wash brightens the whole area while keeping the rustic grain visible. Using pre-mixed pickling stains takes all the messy guesswork out of the dilution ratios.
This airy finishing technique runs about $12–$28 per square foot. Save this pin if you love light, bright outdoor spaces.
- Key Materials: Wood planks, whitewash stain
- Vibe / Style: Airy Scandinavian coastal
- Difficulty: Beginner brushing technique
- Budget Breakdown: Wood: $15/sq ft | Whitewash: $3/sq ft.
- Creator’s Tip: Wipe the wash off with a rag immediately after brushing to control the exact level of transparency.
- Smart Sourcing: pre-mixed pickling stain kits and bulk pack whitewash applicator rags.
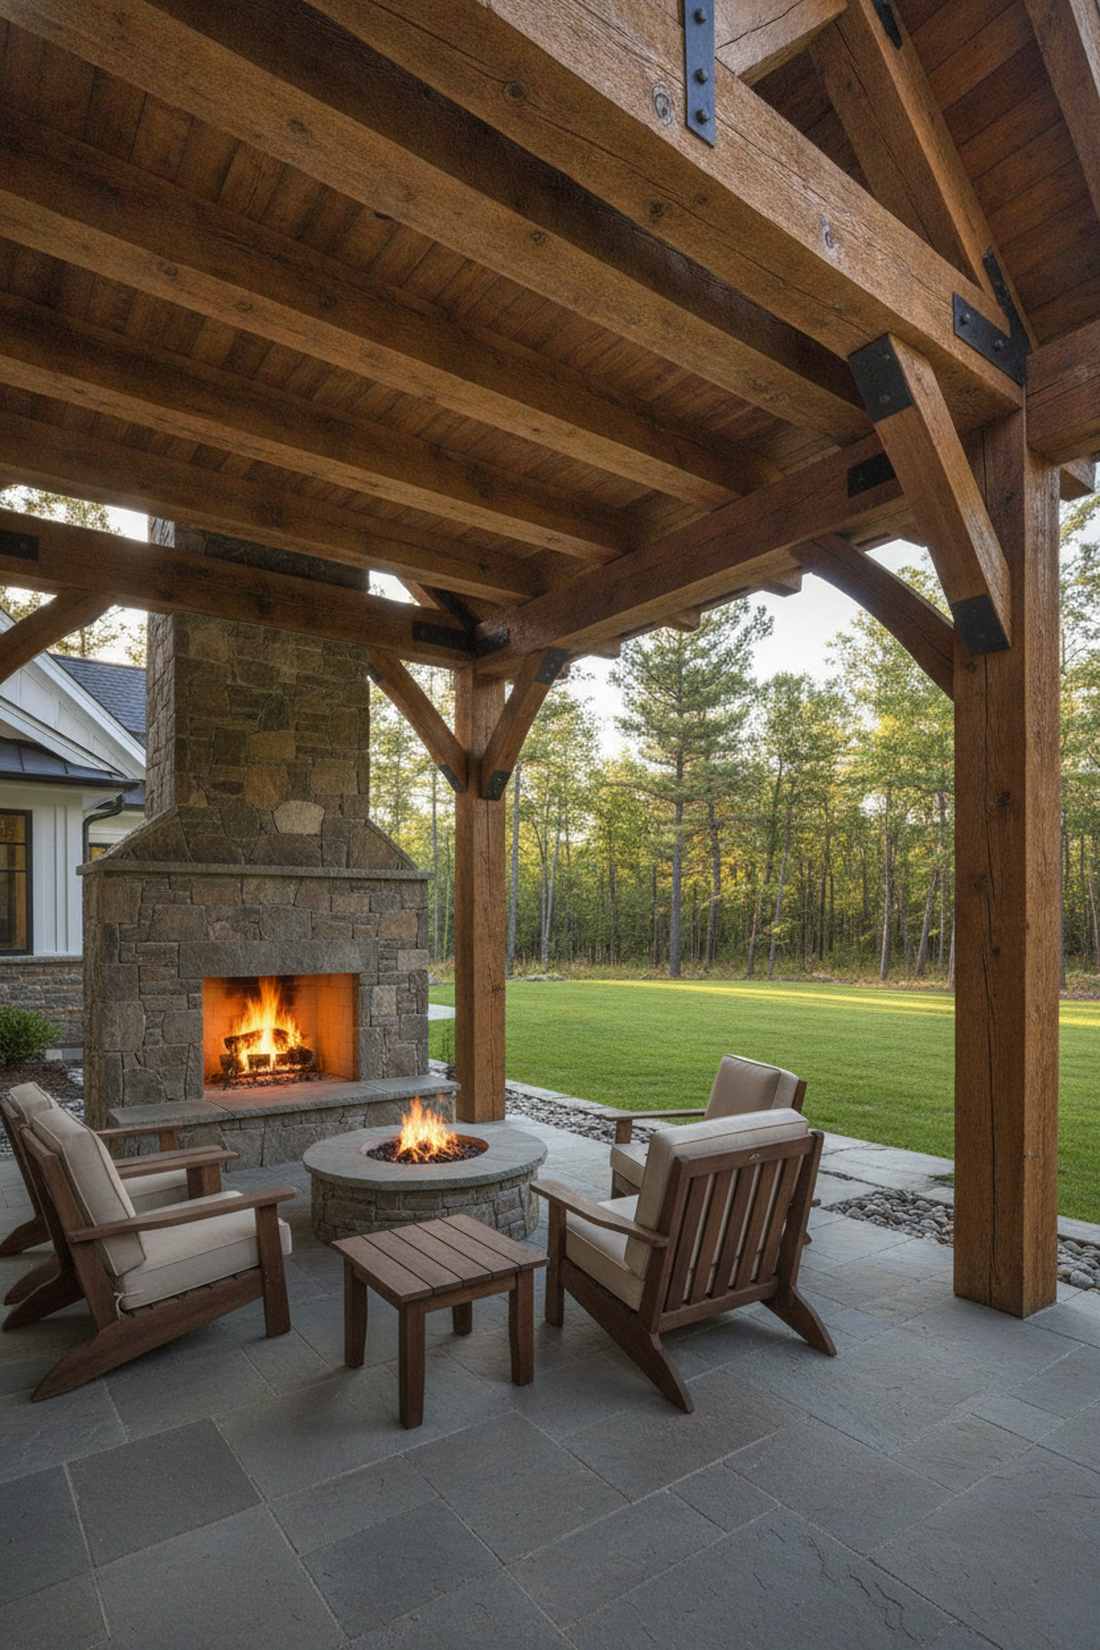
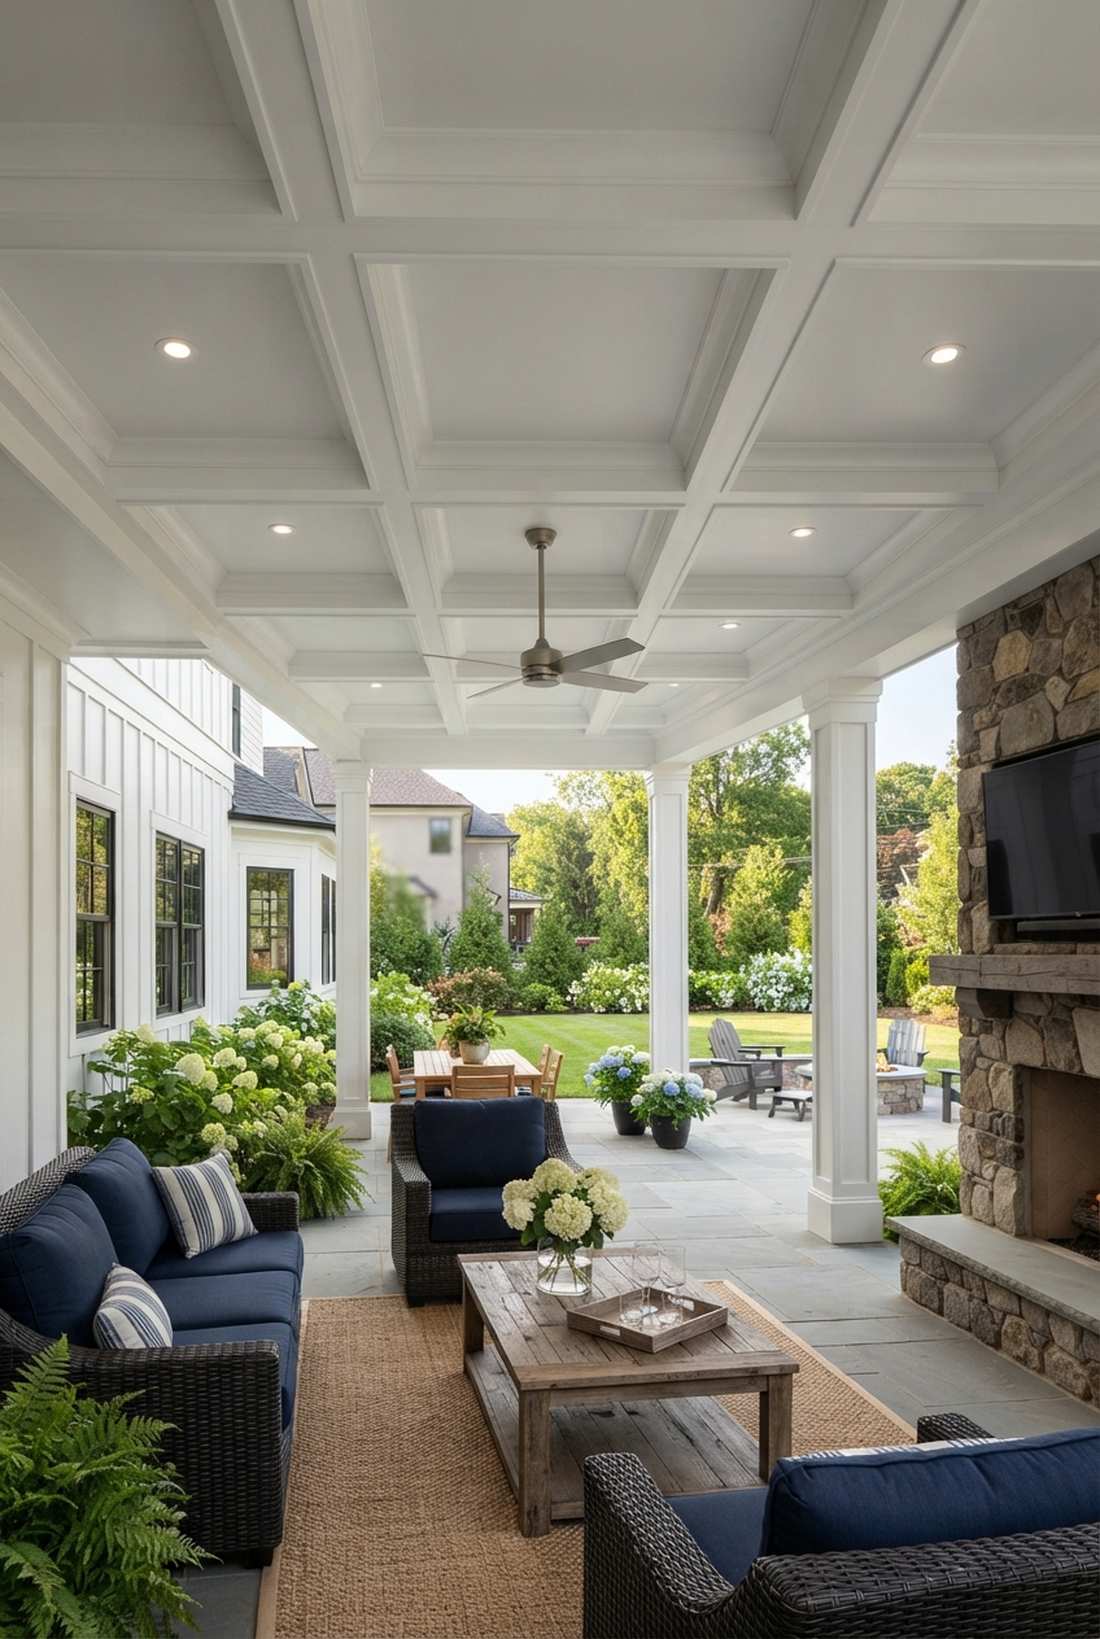
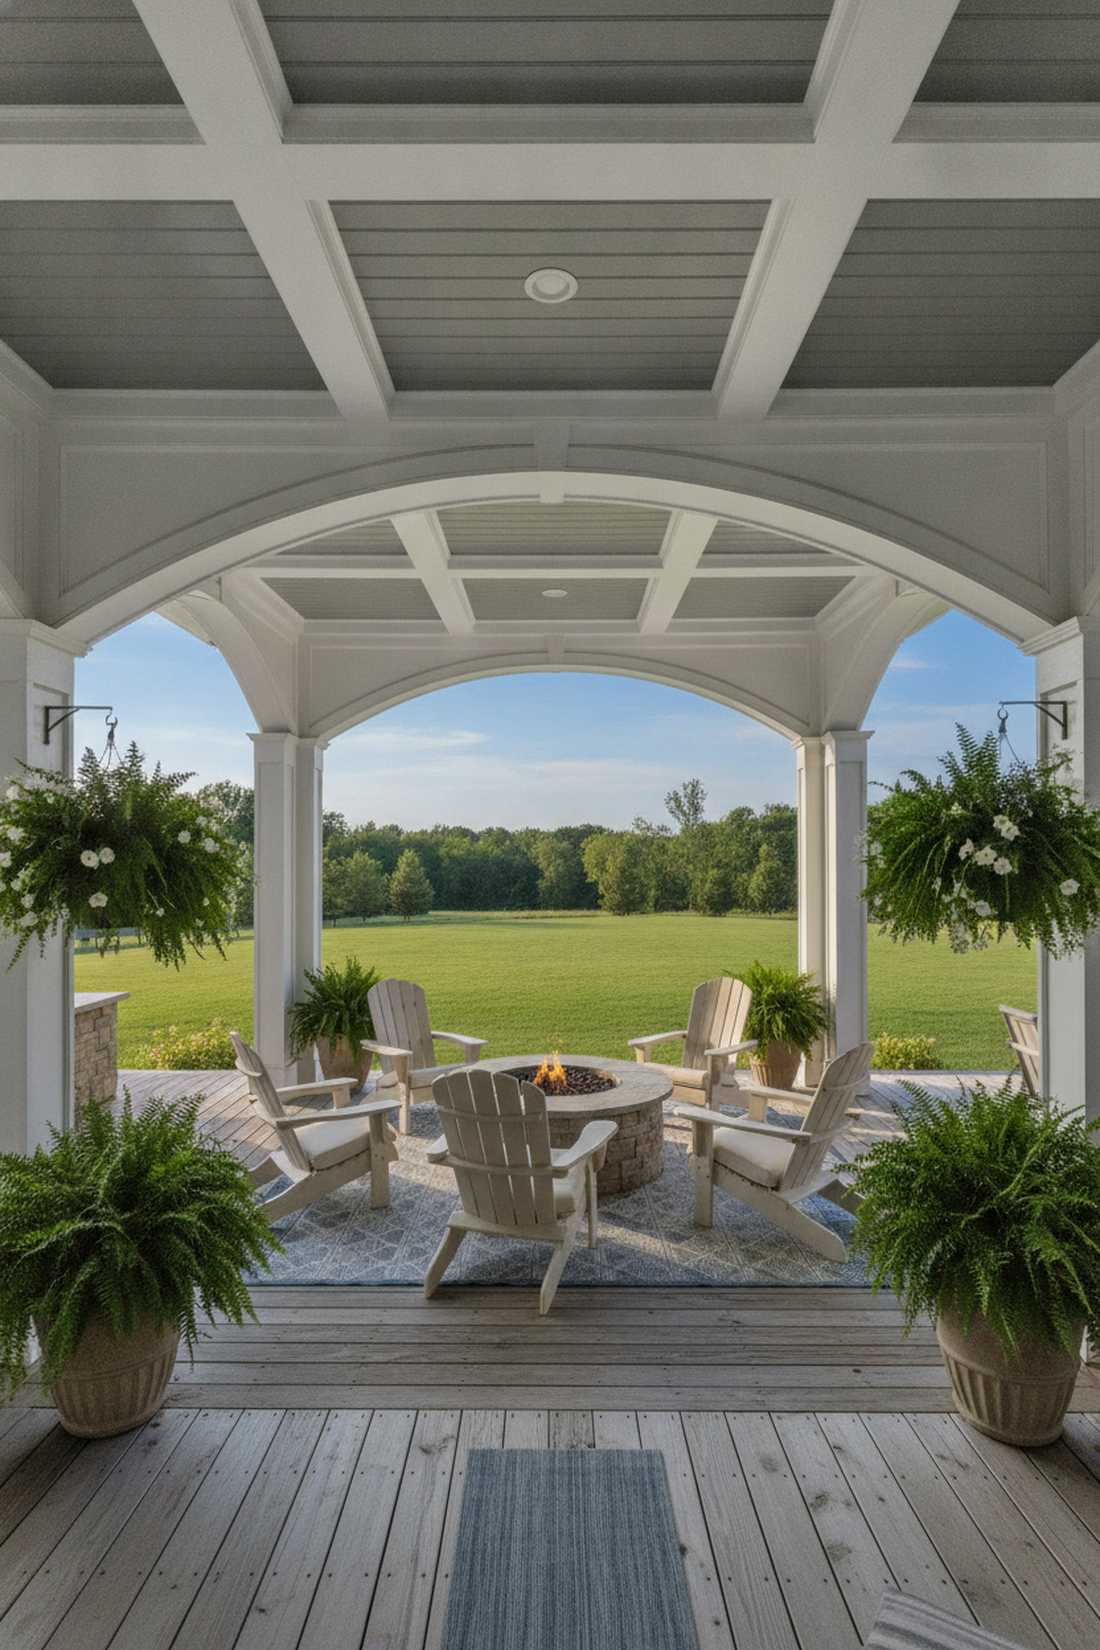
24. Tongue and Groove with Contrasting Beams
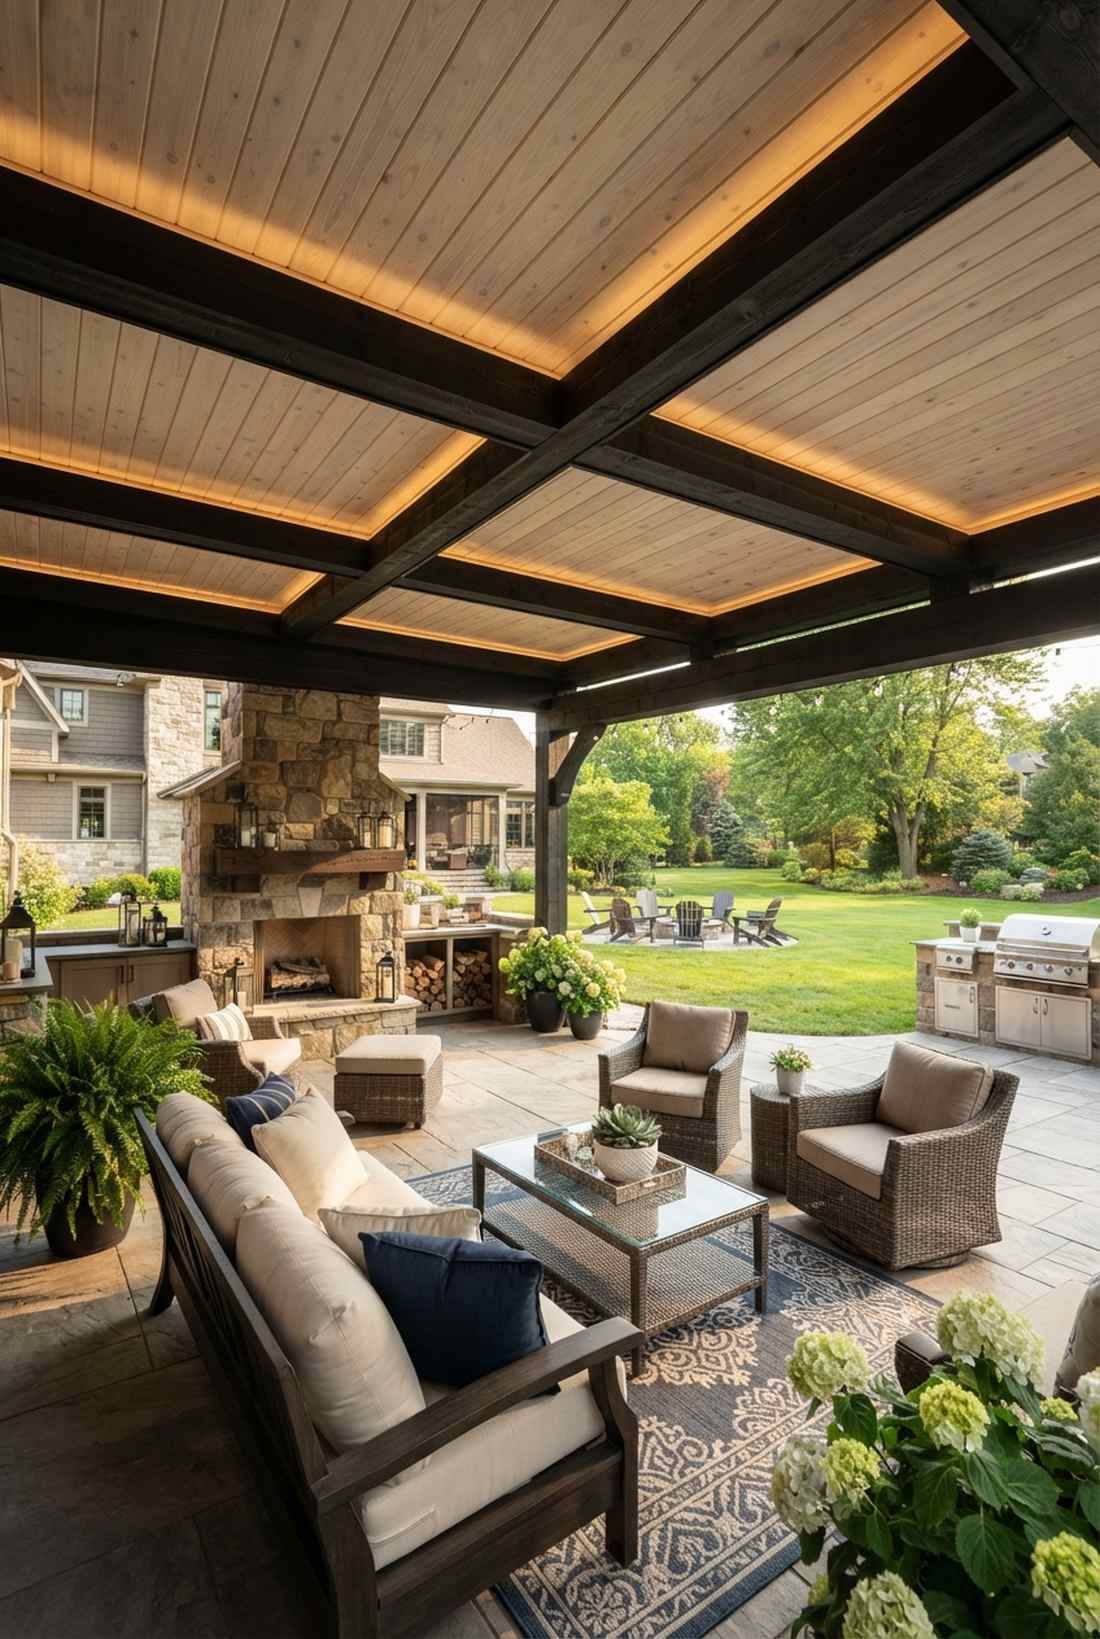
Delivers major timber-frame lodge drama. A light ceiling with dark structural beams grounds expansive outdoor rooms with incredible architectural weight.
Flat ceilings lack character, but dropping thick faux beams creates a spectacular multi-dimensional grid overhead. Securing hollow lightweight faux-wood beams gives you the massive structural look without the back-breaking installation.
Adding faux beams bumps the cost to $35–$60 per square foot. Highly recommended for a high-end estate feel.
- Key Materials: Planks, lightweight faux beams
- Vibe / Style: Grand timber estate
- Difficulty: Intermediate structural grid
- Budget Breakdown: Base Ceiling: $20/sq ft | Faux Beams: $25/sq ft.
- Creator’s Tip: Run the beams perpendicular to your house walls to draw the eye outward into the landscape.
- Smart Sourcing: hollow high-density faux-wood beams and premium architectural beam mounting kits.
You are about to discover the most ingenious way to filter harsh sunlight without blocking the breeze…
25. Lattice Panel Inserts
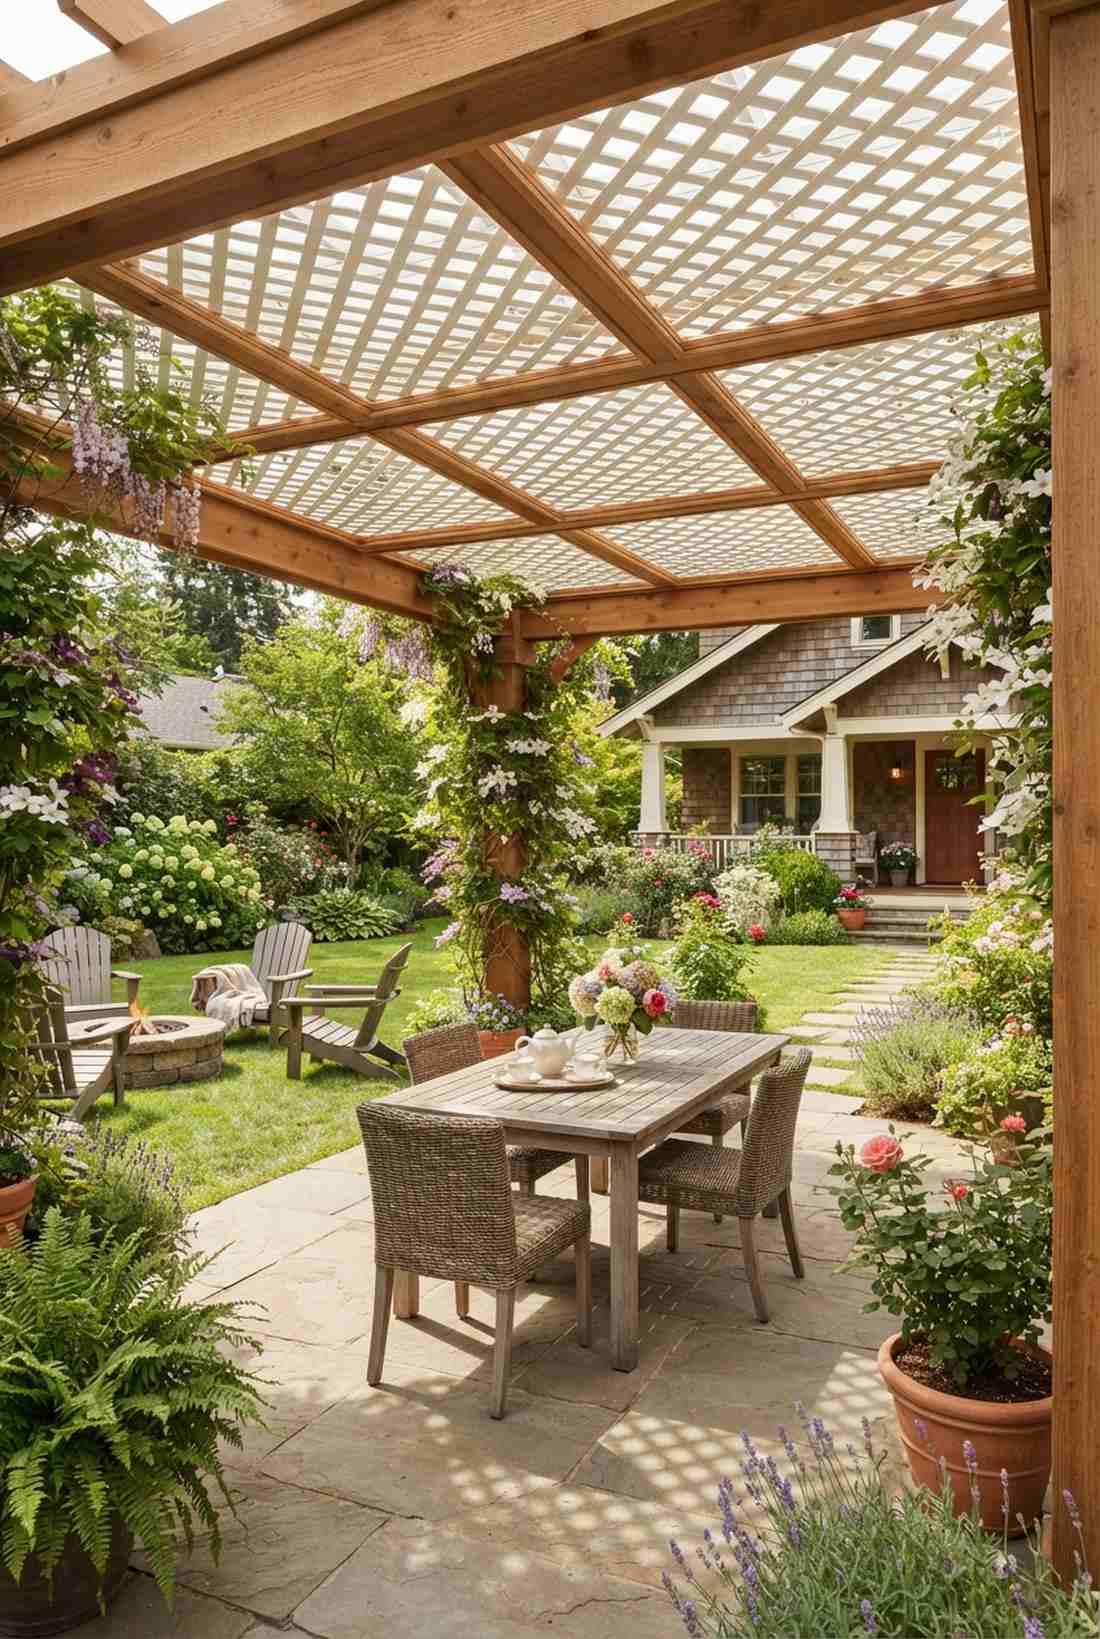
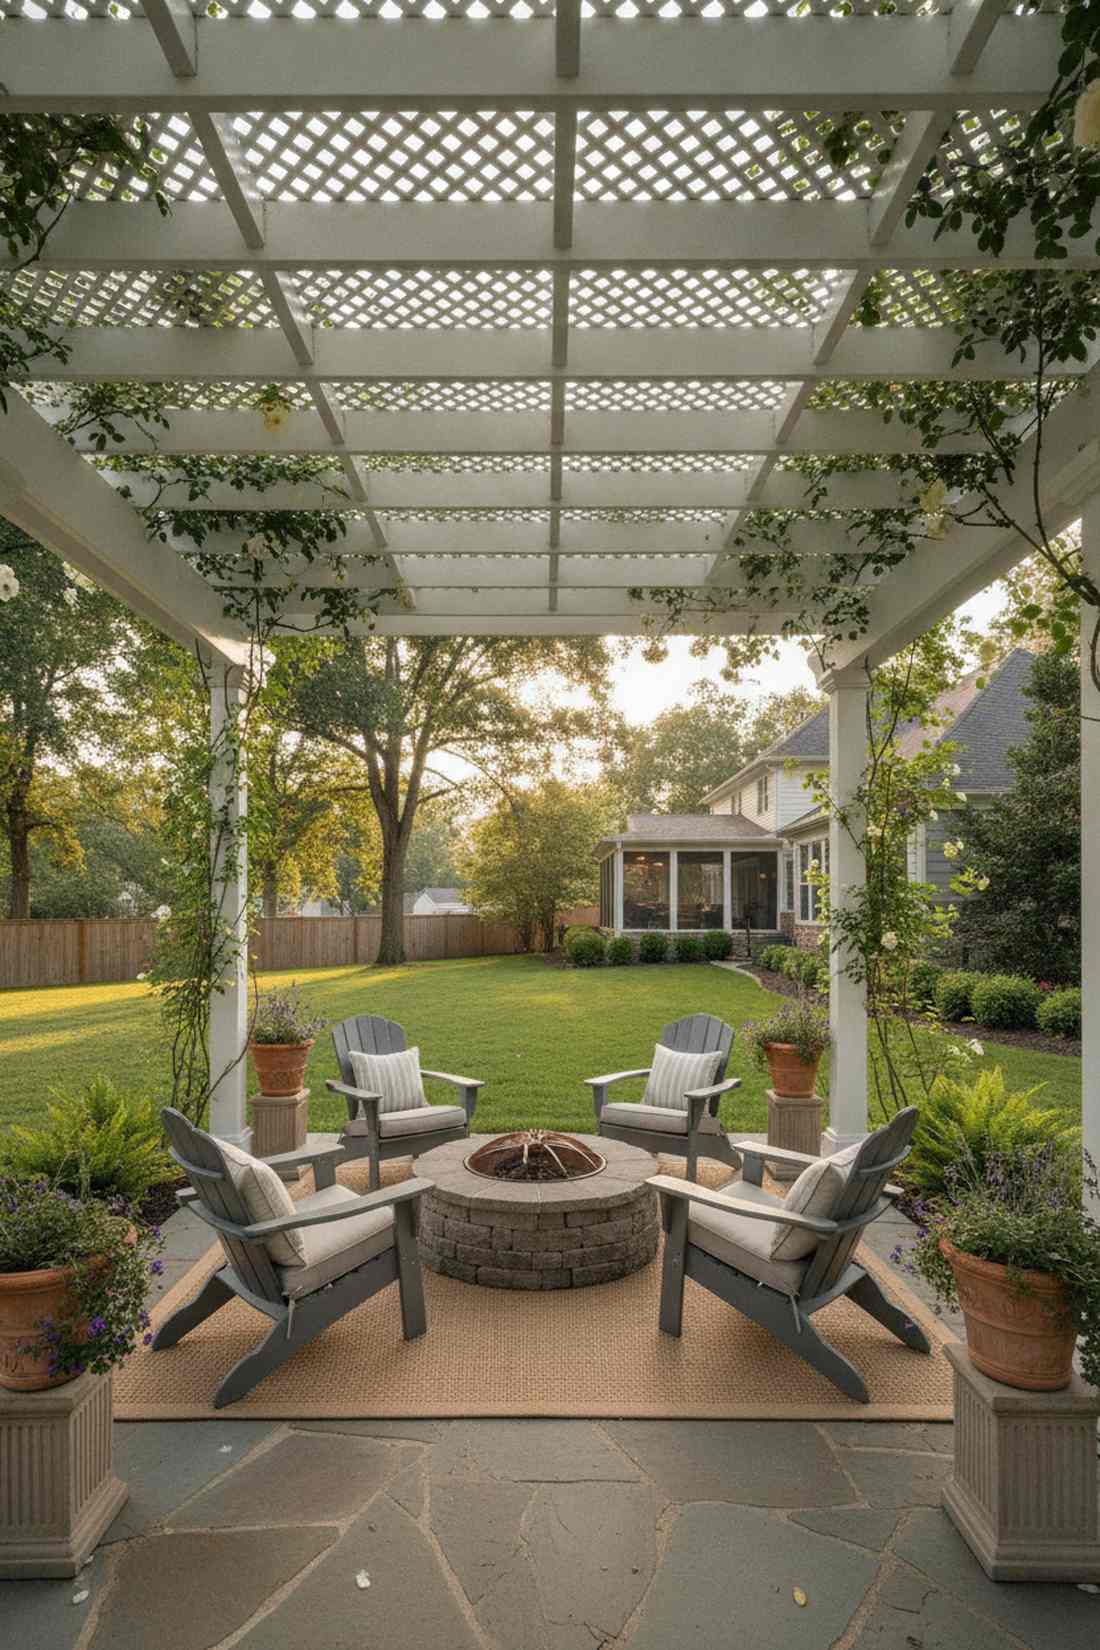
Creates a romantic, dappled garden ambiance. A semi-open decorative lattice ceiling provides magical afternoon shade for standalone pergolas.
Solid roofs turn patios into ovens, but this breathable grid allows rising heat to escape effortlessly. Upgrading to heavy-duty vinyl lattice panels ensures climbing vines won’t rot your overhead structure apart.
A highly budget-friendly option at $10–$20 per square foot.
- Key Materials: Vinyl lattice sheets, framing timber
- Vibe / Style: Romantic garden enclosure
- Difficulty: Easy panel inserts
- Budget Breakdown: Lattice Sheets: $8/sq ft | Framing: $4/sq ft.
- Creator’s Tip: Sandwich the lattice between two thin pieces of trim to create a finished, professional edge.
- Smart Sourcing: heavy-duty vinyl lattice bulk packs and pre-cut lattice framing trim kits.
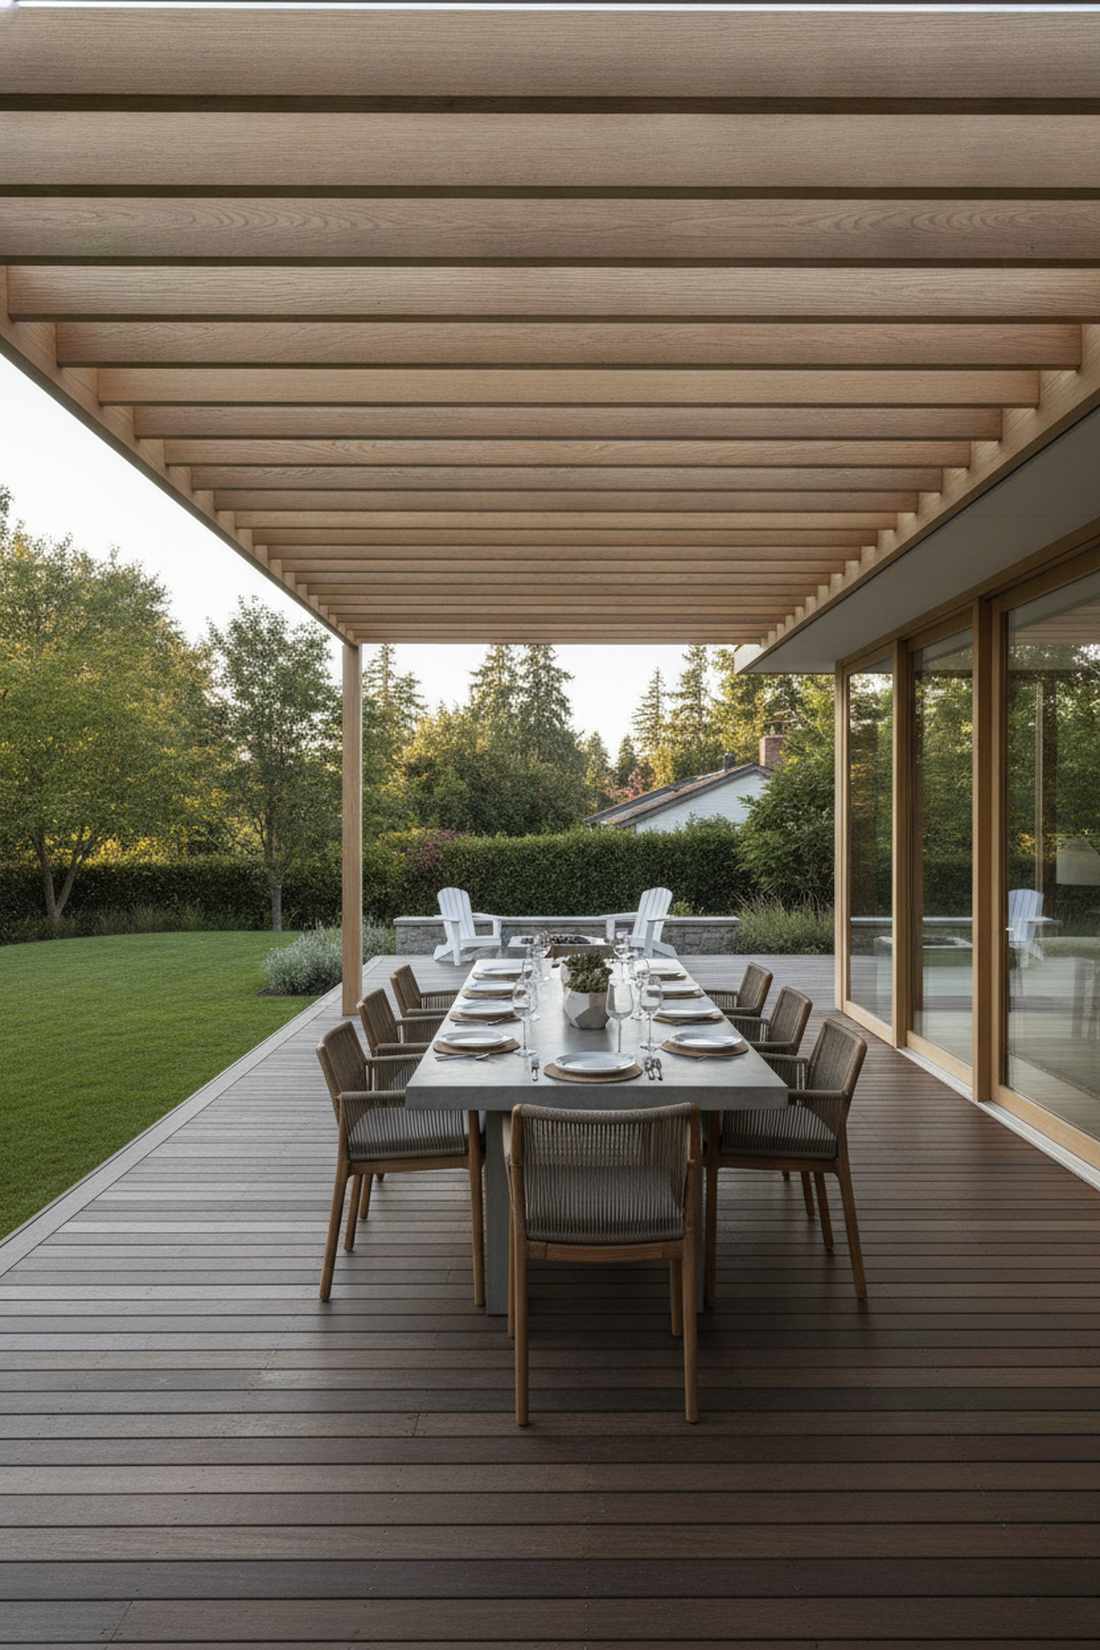
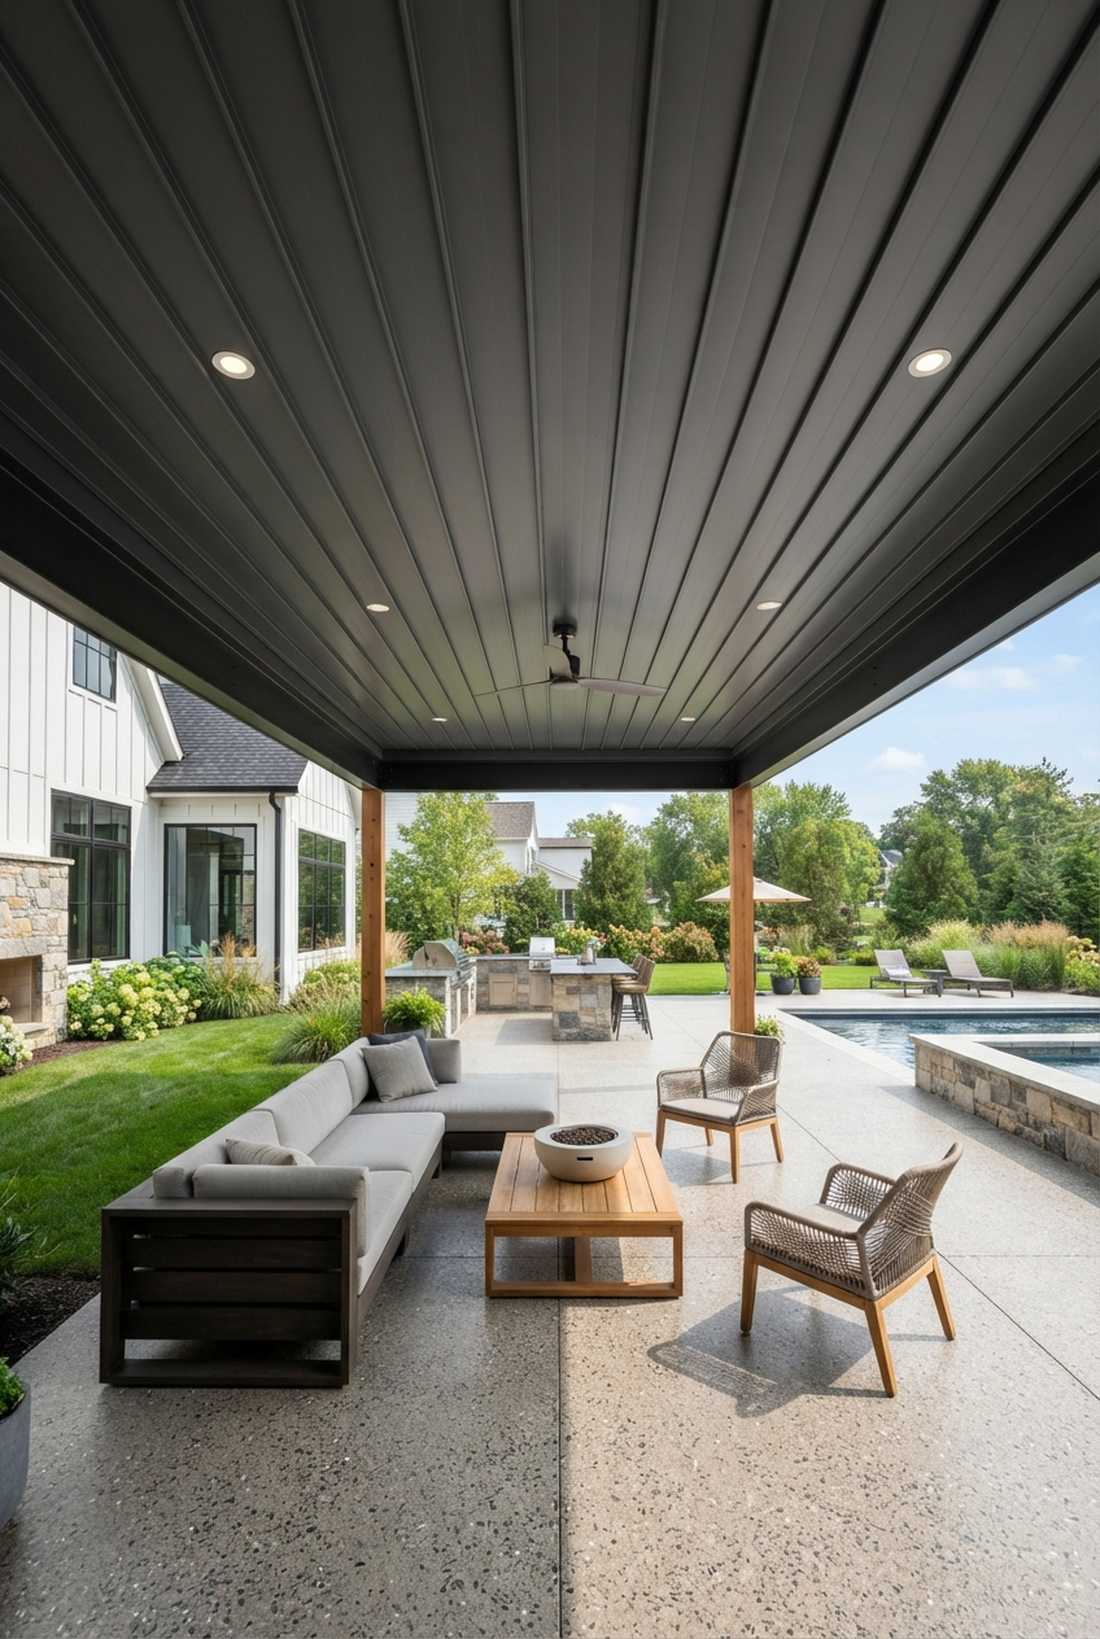
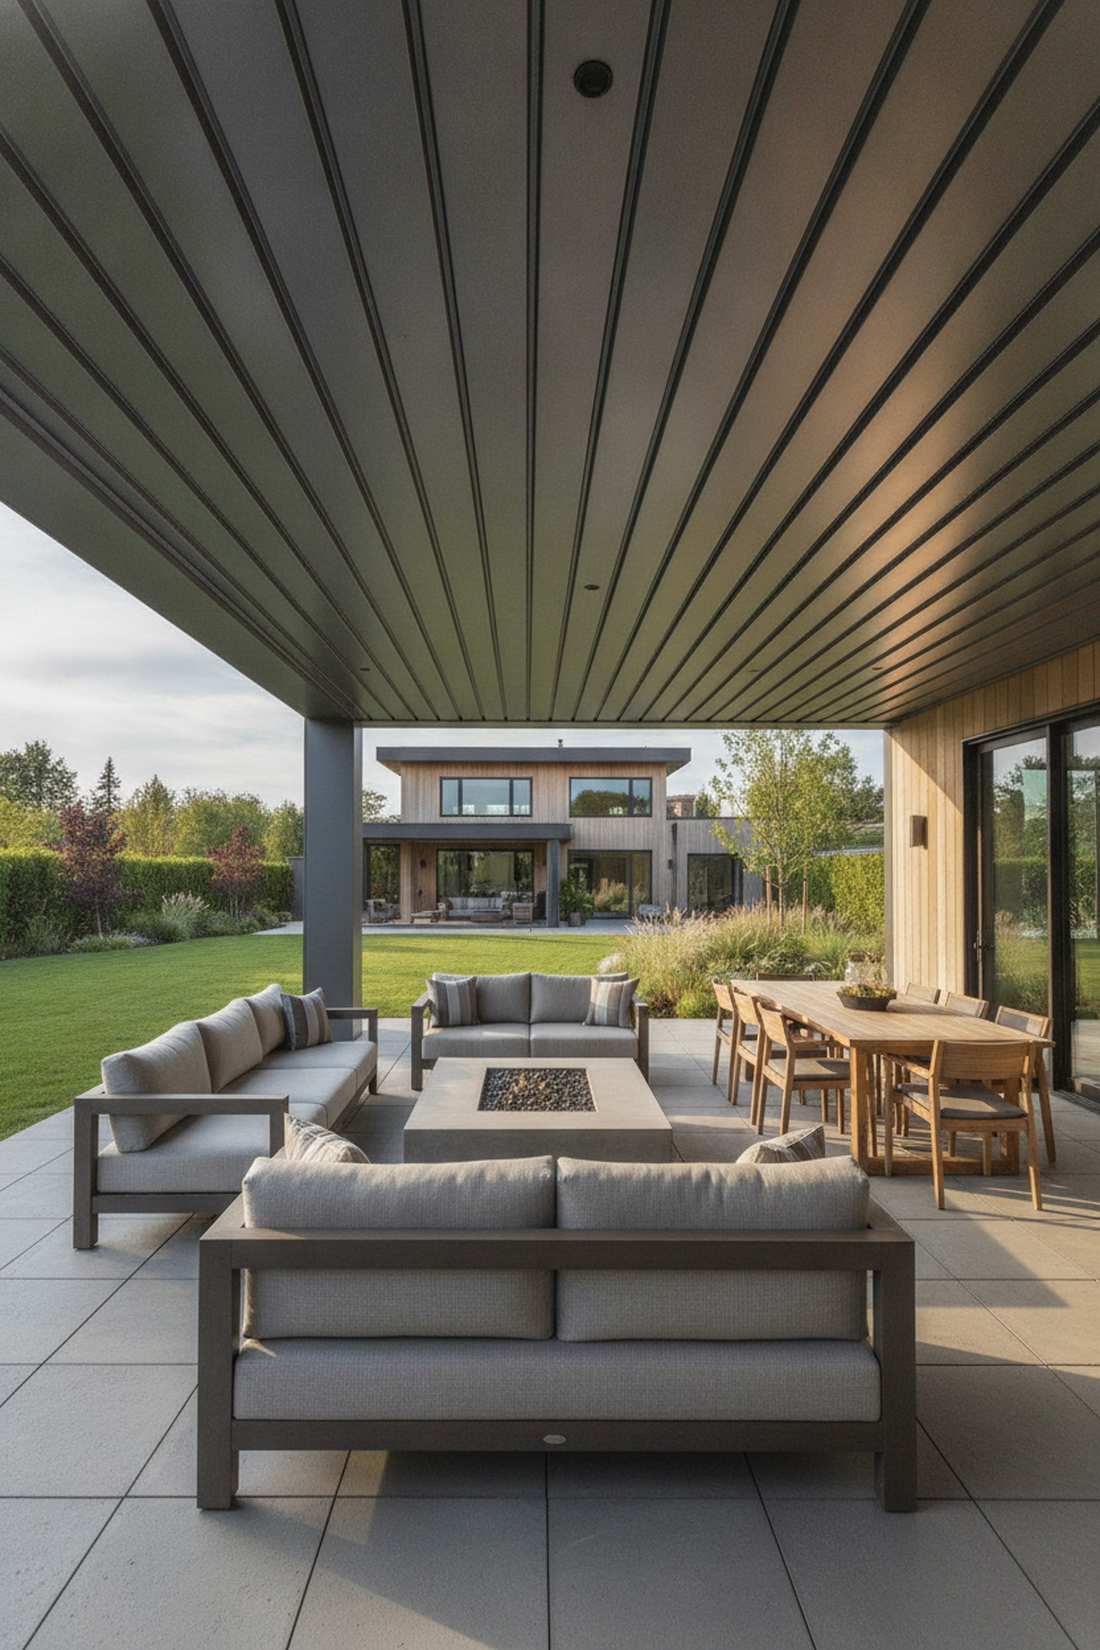
26. Slatted Wood with Spacing
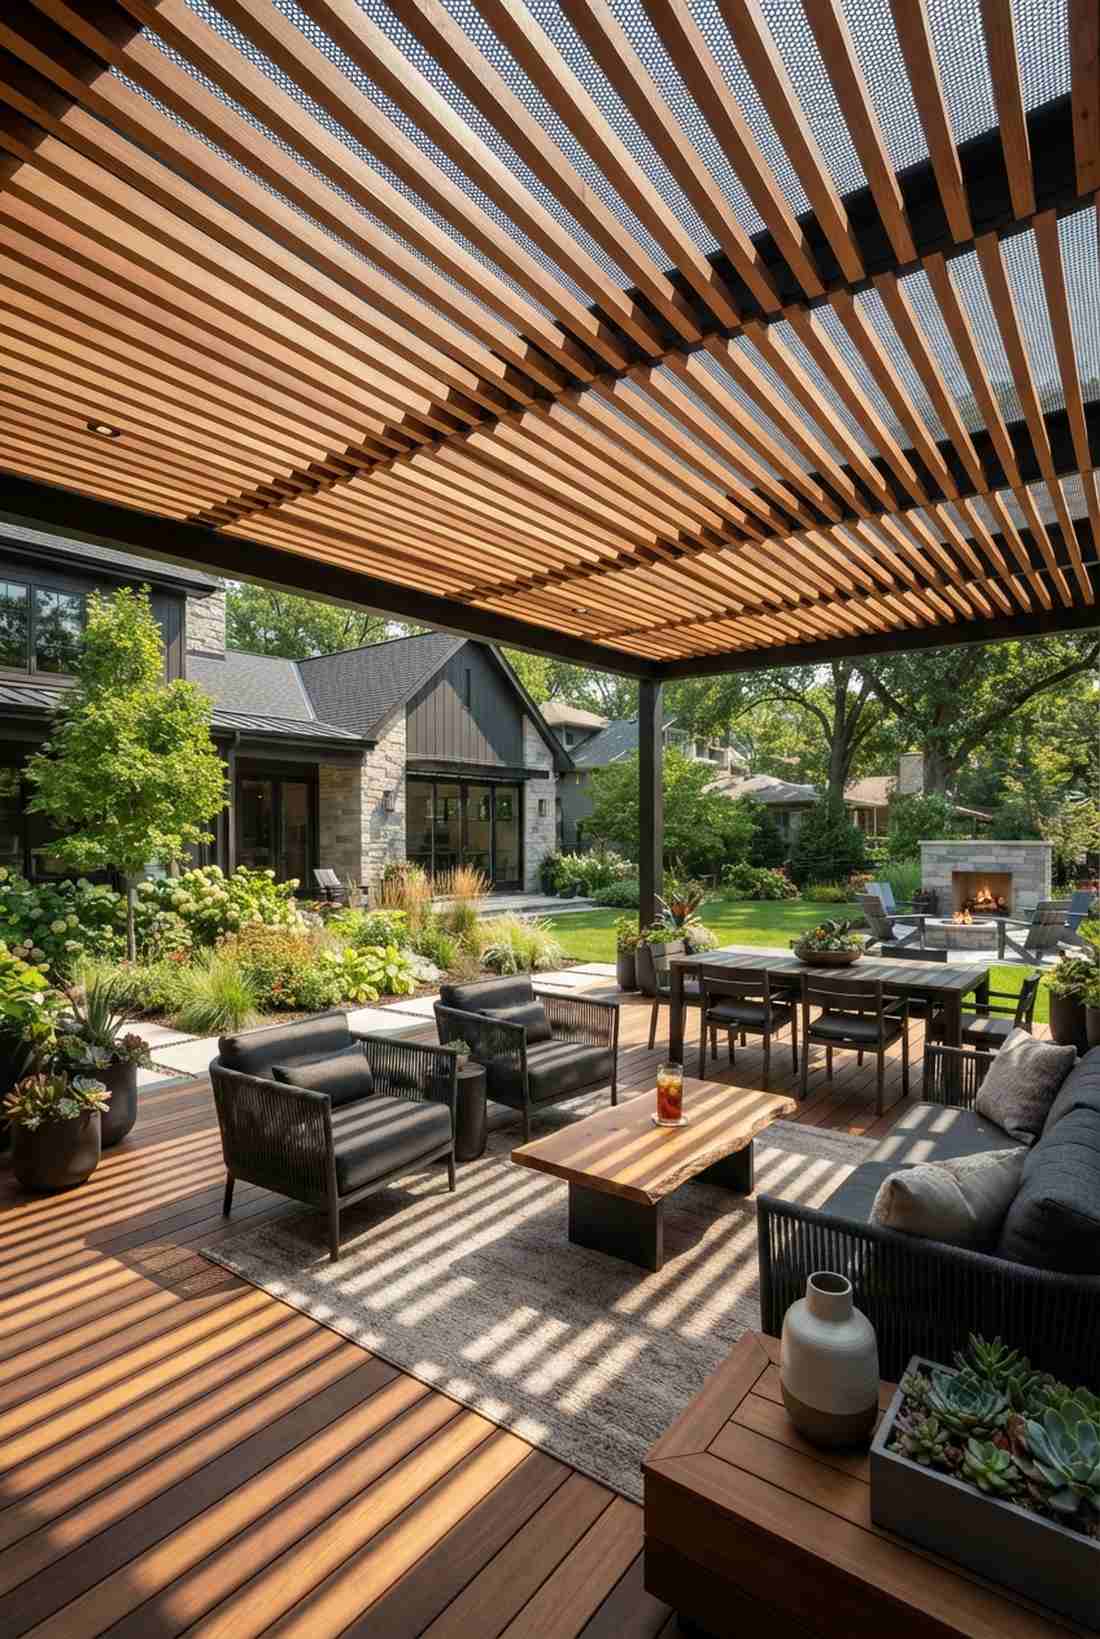
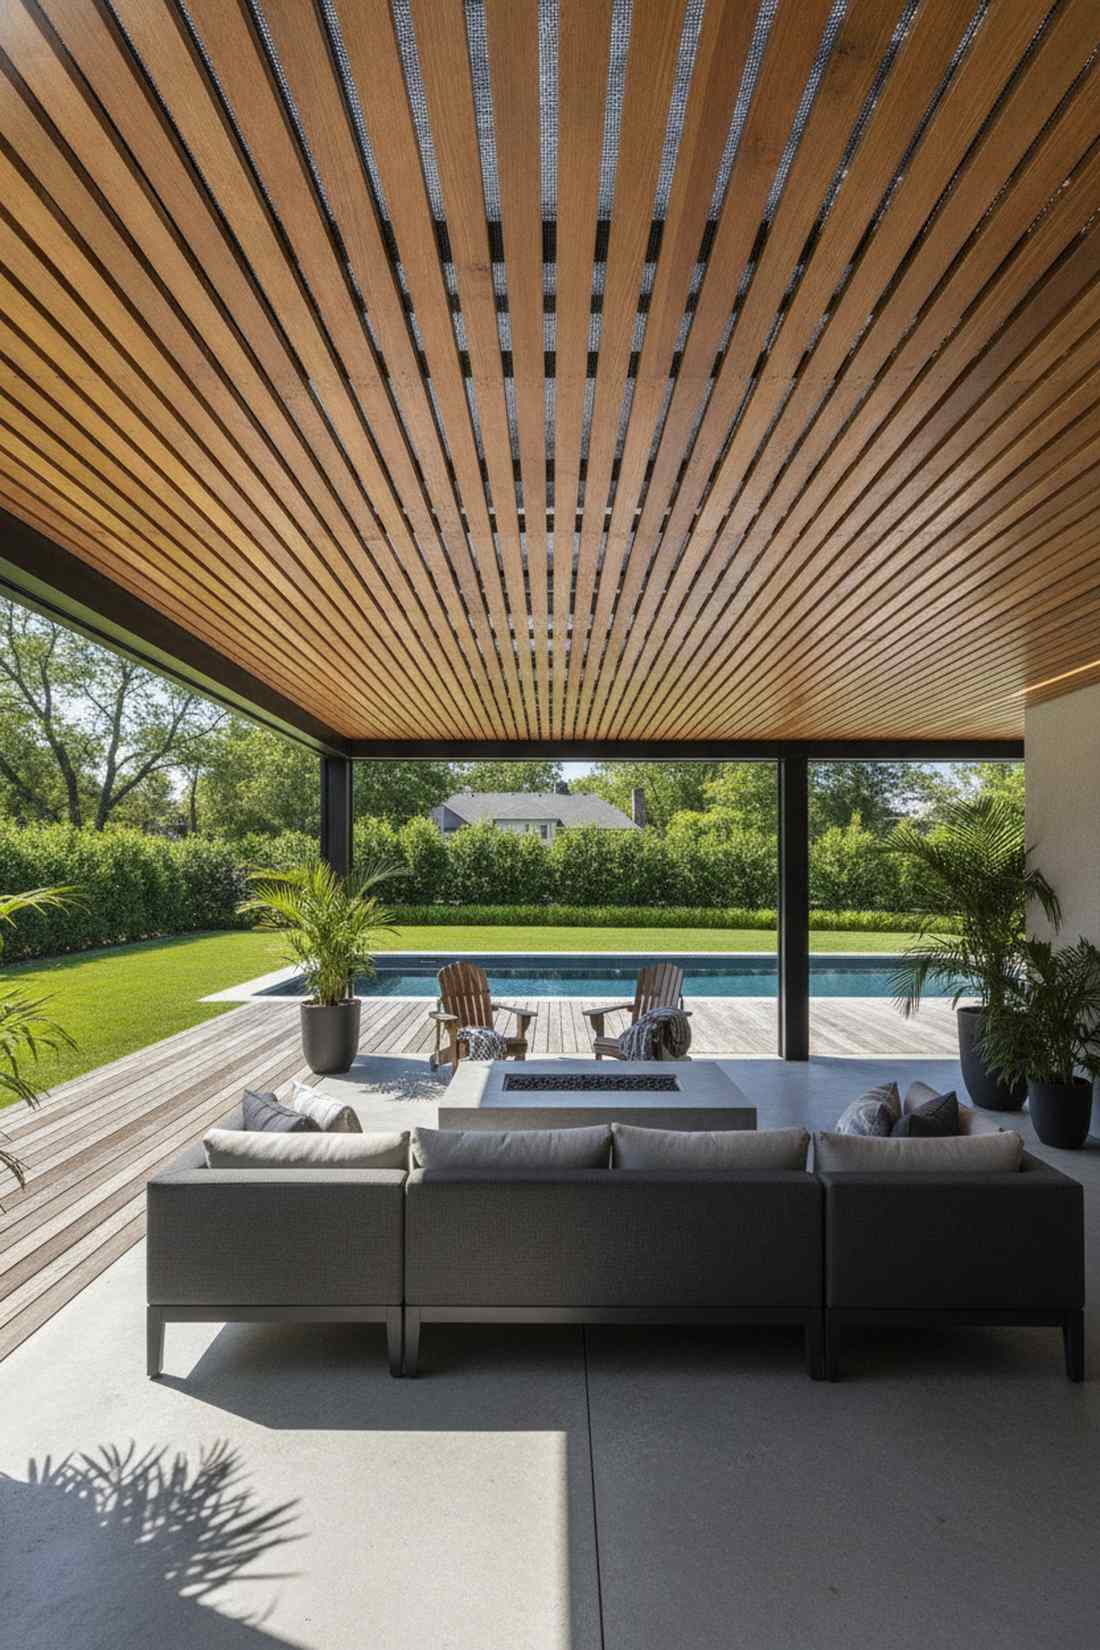
Projects a sharp, ultra-modern resort vibe. This contemporary gapped slat ceiling introduces dynamic, shifting shadows across your outdoor furniture.
Sealing boards tight is the old way; leaving exact mathematical gaps creates a breathtaking modern architectural feature. Snagging pre-finished bulk timber slats drastically cuts down the painstaking staining process on a ladder.
You can achieve this designer look for roughly $20–$40 per square foot. Pin this if you love minimalist backyard luxury!
- Key Materials: Milled wood slats, dark background fabric
- Vibe / Style: Five-star modern resort
- Difficulty: Precision spacing required
- Budget Breakdown: Slats: $25/sq ft | Hardware: $5/sq ft.
- Creator’s Tip: Paint the ceiling joists black before installing the slats to give the illusion of infinite depth.
- Smart Sourcing: pre-finished bulk timber slats and black weather-resistant background mesh.
27. Retractable Fabric Panels

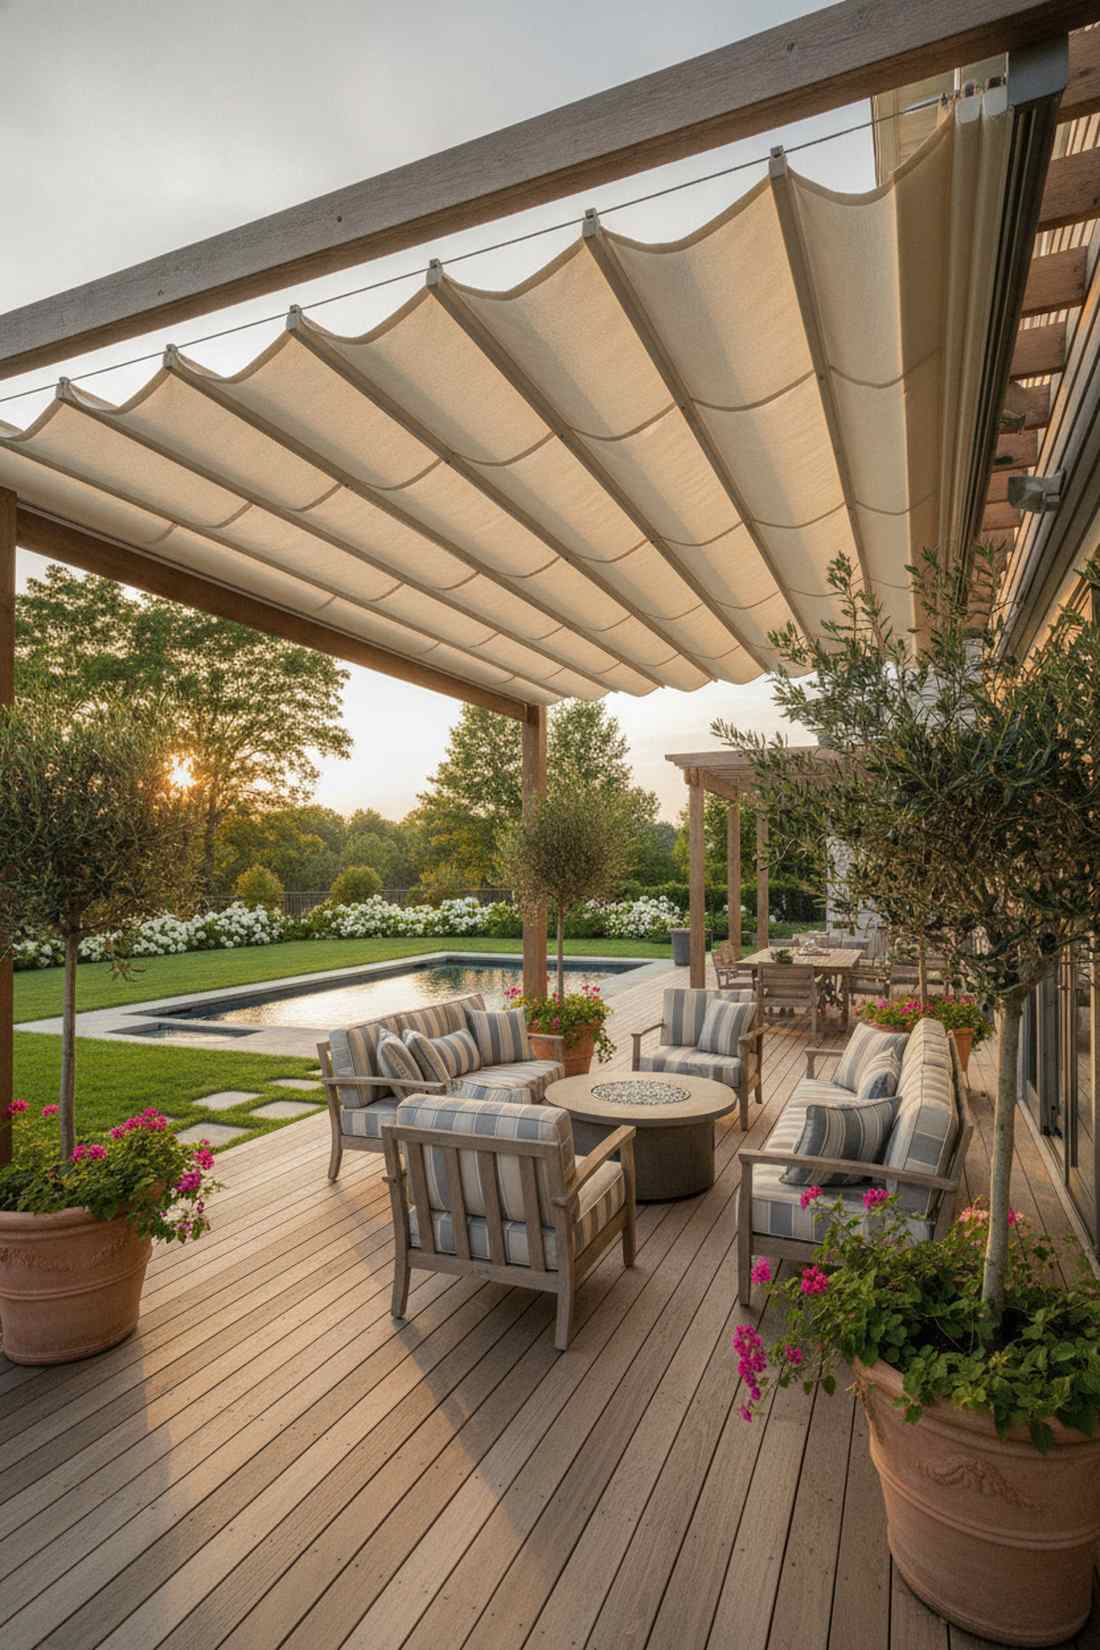
Feels like a five-star Mediterranean cabana. A tensioned motorized fabric canopy offers the ultimate flexible defense against unpredictable weather.
Permanent roofs limit your stargazing, making this on-demand convertible system an absolute game changer. Sourcing premium UV-resistant acrylic canvas kits ensures your beautiful canopy won’t fade or mold after one rainy season.
Motorized systems are an investment at $45–$90+ per square foot.
- Key Materials: Tension cables, outdoor canvas
- Vibe / Style: Flexible Mediterranean luxury
- Difficulty: Advanced hardware mounting
- Budget Breakdown: Canvas System: $50/sq ft | Tracks/Motors: $20/sq ft.
- Creator’s Tip: Pitch the cables on a slight angle so heavy rain rolls off instead of pooling in the center.
- Smart Sourcing: UV-resistant acrylic canvas canopy kits and heavy-duty stainless tension hardware.
Conclusion
Selecting the ideal outdoor patio ceiling requires balancing your luxury aesthetic vision with smart, practical sourcing. Whether you choose the rugged beauty of tongue-and-groove wood or the zero-maintenance appeal of interlocking metal starter kits, these 27 high-end blueprints offer a path to architectural perfection. Start by evaluating your climate’s demands, lock in your budget using our productized material guides, and transform that bare overhead space into a stunning backyard centerpiece that adds serious property value.
Frequently Asked Questions
What is the most durable outdoor patio ceiling material?
Metal panels and marine-grade stainless steel easily dominate the durability charts, requiring practically zero upkeep. If you prefer a traditional look, investing in UV-coated PVC planks or pre-primed fiber cement beadboard bulk packs gives you maximum lifespan without the threat of rot or termite damage.
How often does a wood patio ceiling need to be refinished?
Natural wood ceilings typically demand resealing every two to three years to prevent graying. You can stretch this timeline by sourcing premium UV-blocking timber oils or deep-penetrating exterior stains that aggressively repel moisture and block harsh sunlight from destroying the grain.
Can you install outdoor ceiling materials yourself?
Absolutely, especially if you leverage pre-cut material bundles like snap-together PVC kits or exterior-grade plywood layouts. For heavier setups like standing seam metal or large composite decking boards, grabbing an overhead panel hoist starter kit and a helper will save your back and speed up the DIY process.
What ceiling finish works best in humid climates?
In swampy, high-humidity zones, you must avoid porous materials. Engineered solutions like heavy-duty vinyl soffit kits, cellular PVC trim boards, and fiber-cement panels laugh at moisture. These materials never warp or breed mold, making them the ultimate smart sourcing choice for Southern backyards.
Should outdoor patio ceilings be vented or solid?
If your ceiling acts as the floor to a closed roof above, you absolutely need ventilation to prevent trapped heat and mold. Using vented aluminum soffit bulk panels is the easiest way to guarantee airflow. If you have an open pergola structure, solid materials or gapped timber slats work perfectly fine.