Planning a visually stunning home garden party requires more than scattered chairs. This blueprint reveals exact designer-level zoning layouts, premium material sourcing, and low-cost aesthetic upgrades. Transform your backyard into a high-end social venue today.
Design SnapshotKey Principles
- Zone Definition: Separate areas for dining, lounging, and activities prevent crowding and establish natural circulation patterns
- Furniture Proportions: Scale pieces to garden dimensions—oversized furniture overwhelms small yards while undersized pieces disappear in large spaces
- Transition Planning: Create seamless indoor-outdoor connections with aligned flooring materials and clear pathways
- Flexibility Built In: Design modular arrangements that adapt to different guest counts and weather conditions
Foundation Layouts for Entertaining Zones
Professional designers structure outdoor spaces around three core zonespreparation, dining, and relaxation. This triadic approach prevents bottlenecks and allows guests to move naturally between activities without crossing active service areas.
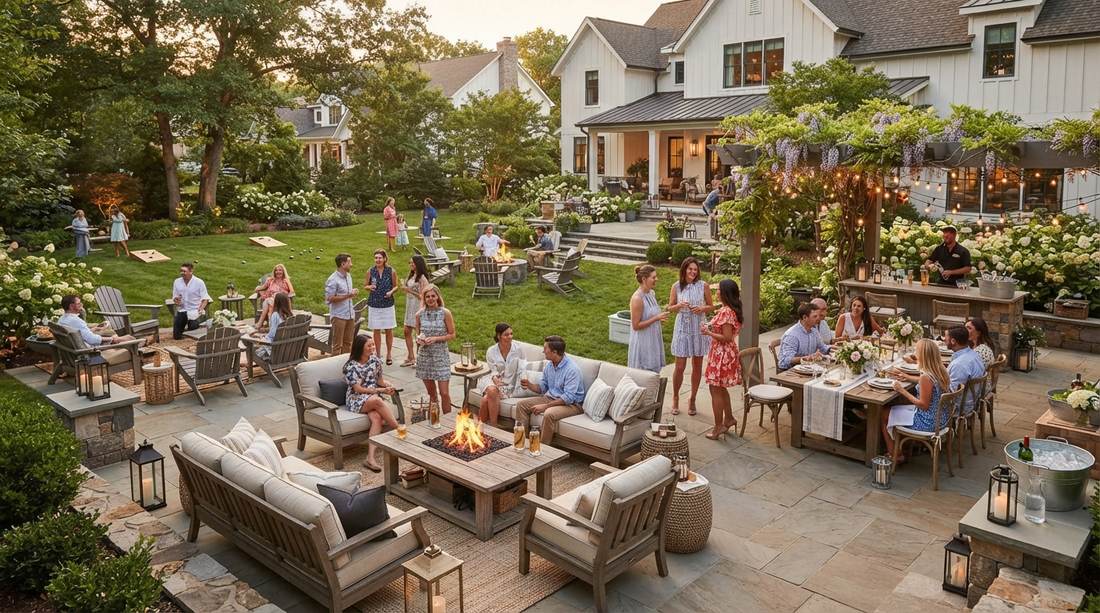
1. Triple-Zone Anchor Layout
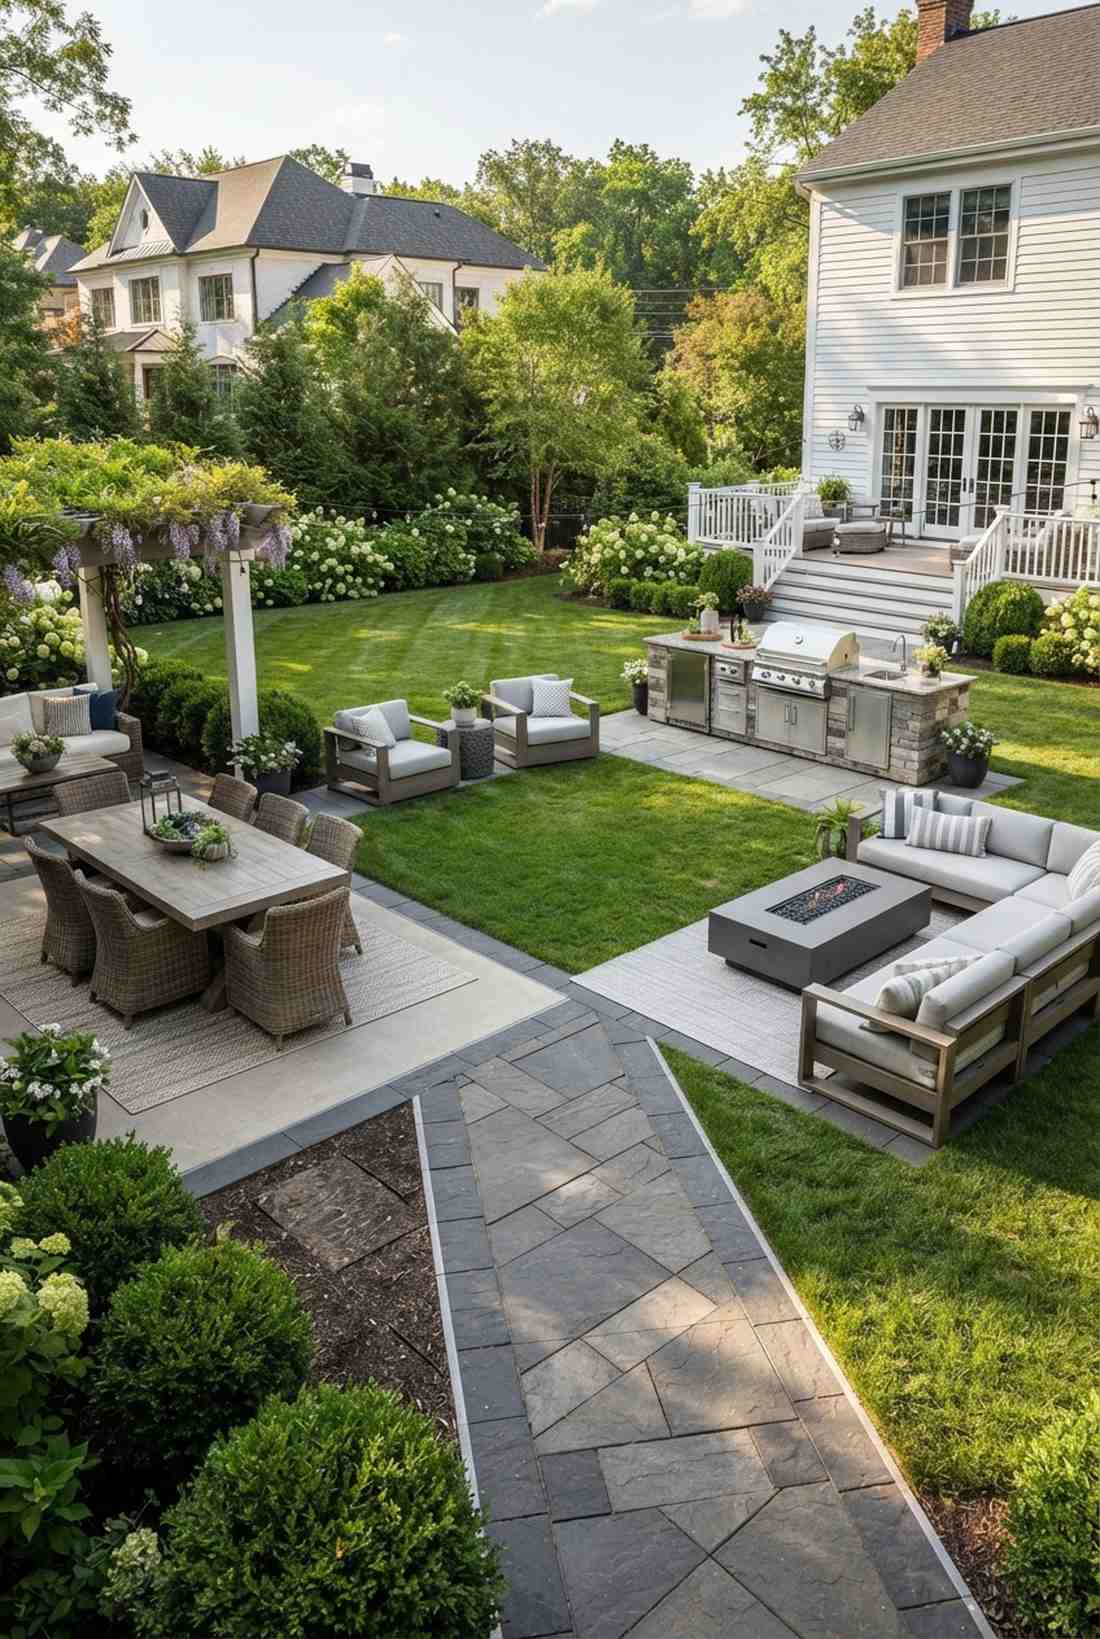
Feels like an exclusive outdoor country club you just got a VIP pass to. Triangular spatial flow design prevents awkward crowding perfectly. Works exceptionally well for standard rectangular backyards needing serious structure.
Instead of randomly placing furniture, anchoring three distinct zones delivers a surprisingly premium look. Using a pre-fabricated modular outdoor kitchen kit opposite your lounging area forces guests to mingle naturally without creating bottlenecks.
You can easily map this out for under $40 using ground-marking tape before buying furniture. Save this to your DIY weekend garden board!
- Key Materials: Weather-resistant zone markers, modular seating units
- Vibe / Style: Structured resort elegance
- Difficulty: Moderate spatial planning
- Budget Breakdown: Planning tools: $20 | Base setup: Variable.
- Creator’s Tip: Keep pathways exactly 48 inches wide to prevent guests from bumping shoulders.
- Smart Sourcing: Heavy-duty patio layout stencil kits and pre-cut faux grass turf rolls.
2. Hub-and-Spoke Radial Design
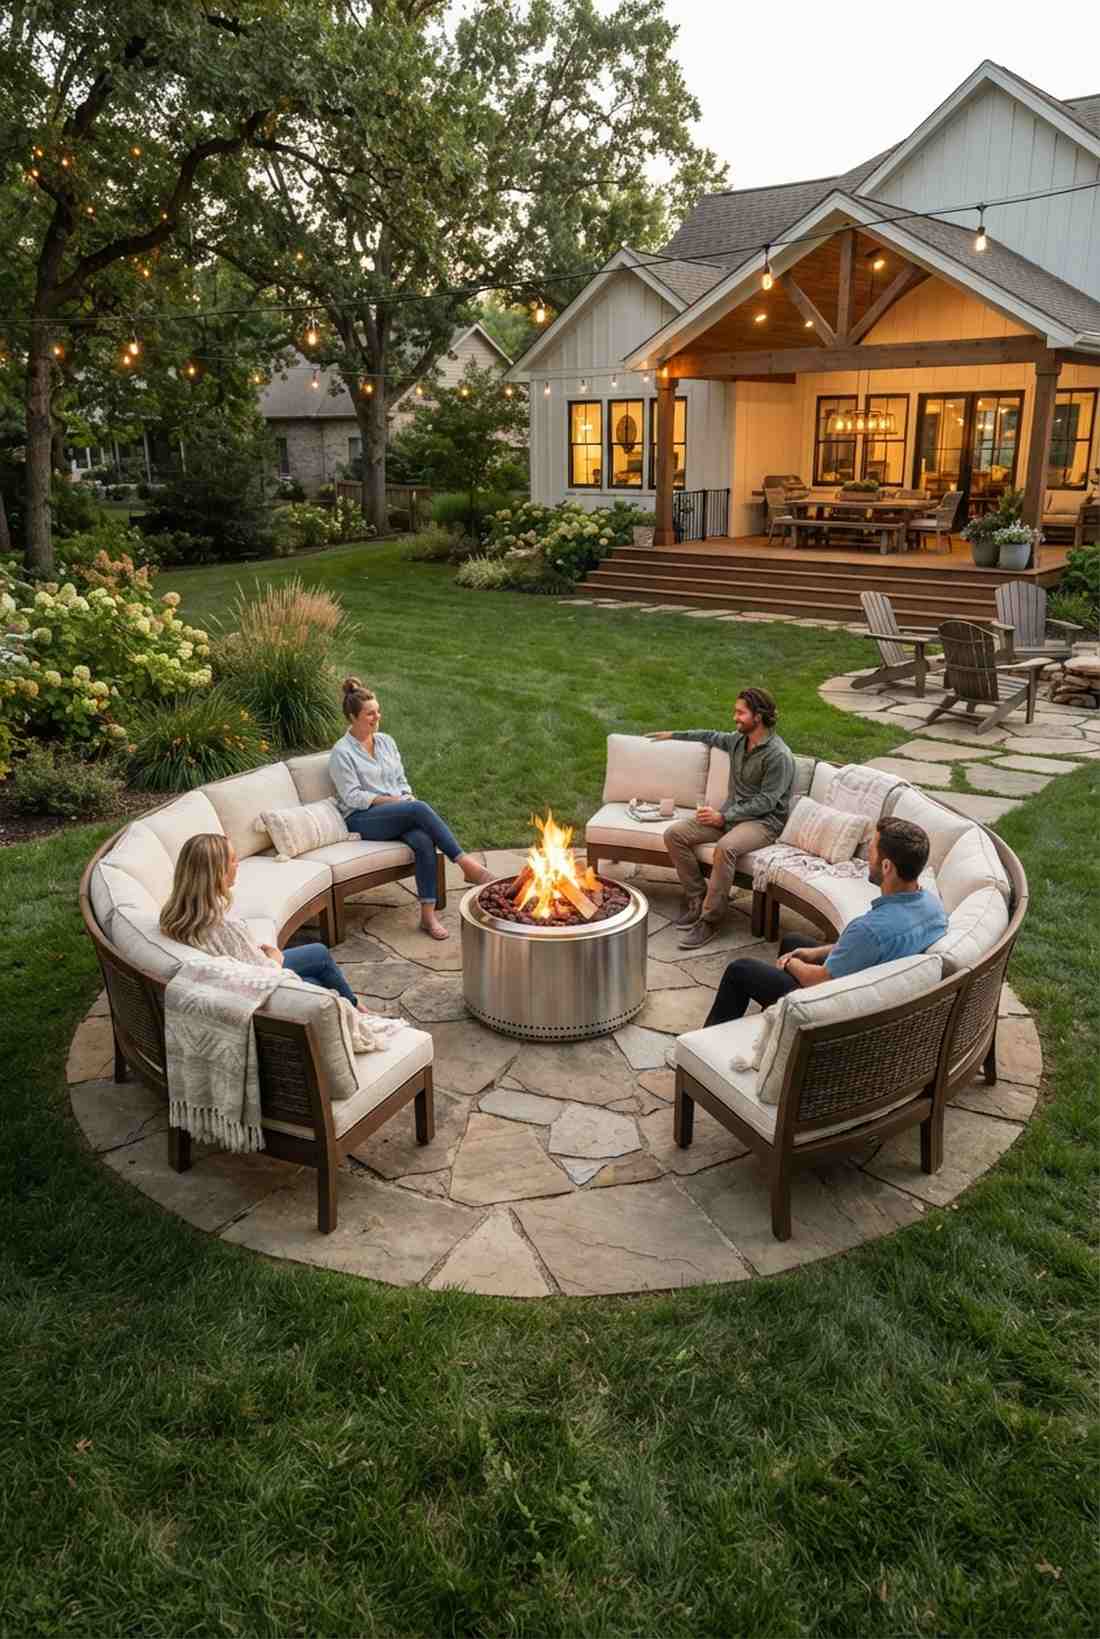
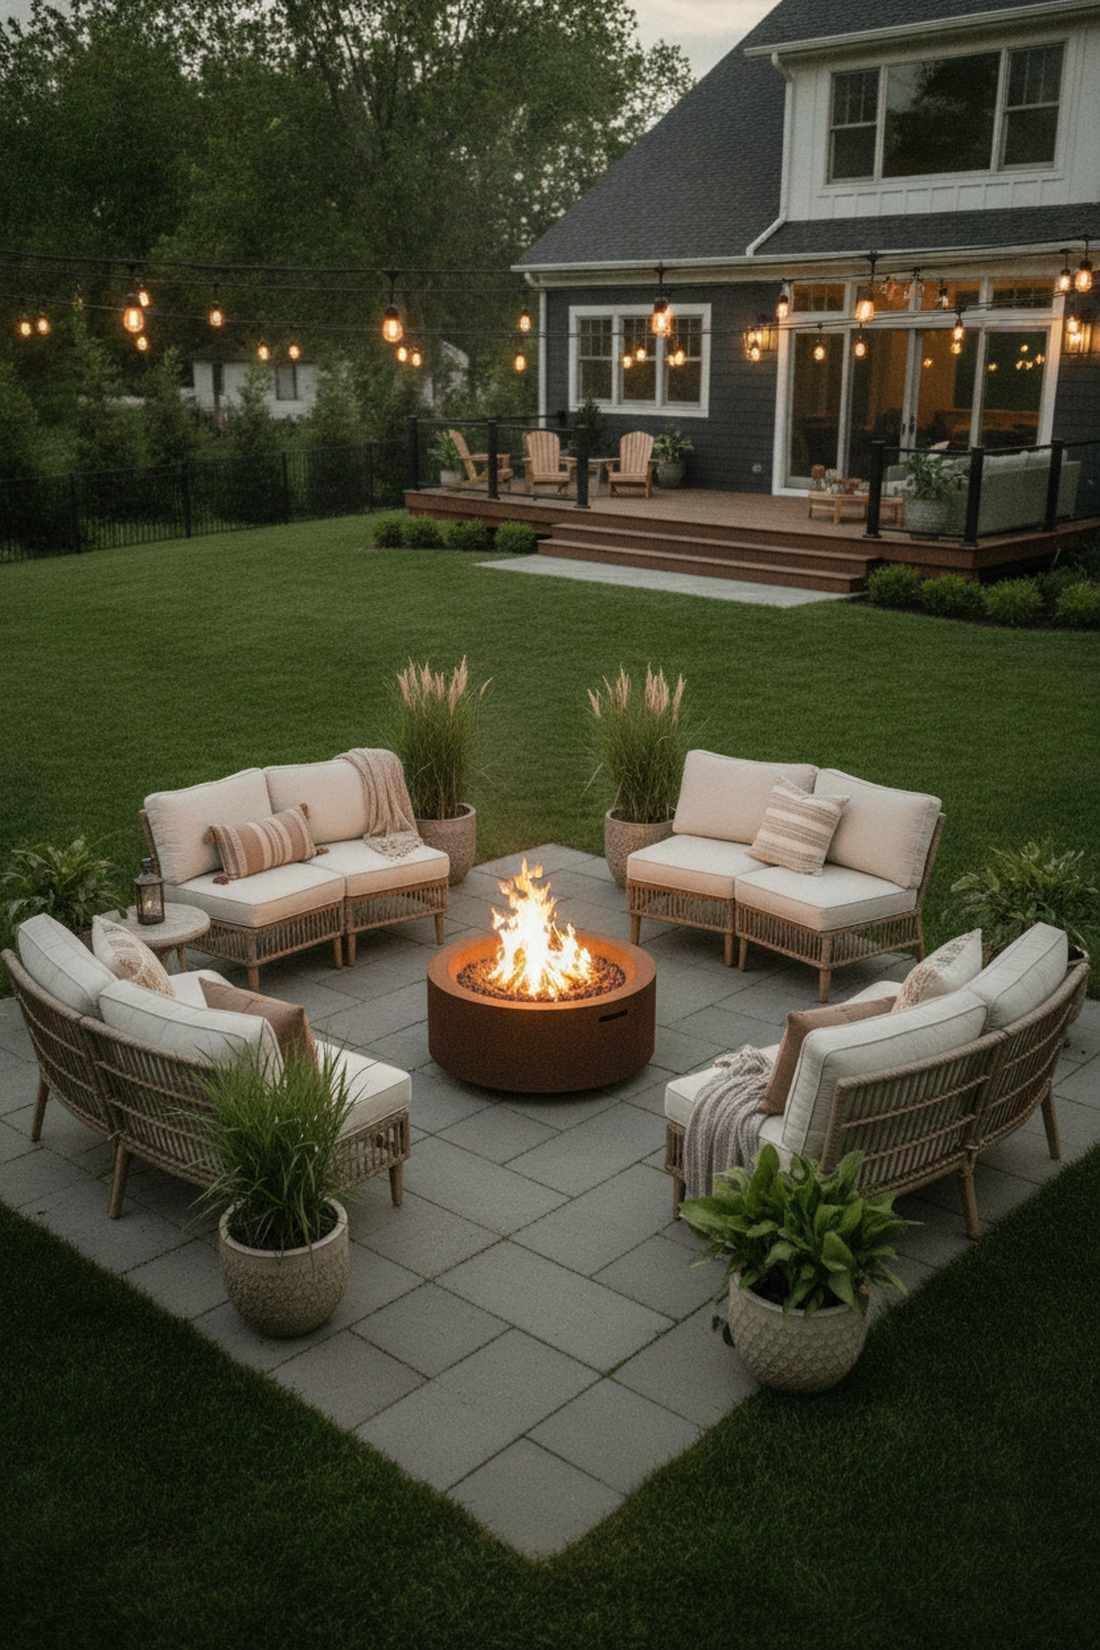
Feels like a magnetic campfire gathering straight out of a luxury glamping retreat. Centralized focal point layout draws everyone naturally to the middle. Ideal for square patios or open lawn spaces.
Most hosts push furniture against the fences, but pulling everything toward a central hub looks far more expensive than it is. Integrating commercial-grade fire pit accessories instantly turns a basic backyard into a high-end social magnet.
Creating the center hub starts at roughly $60 for a basic setup. It’s a fast upgrade that completely changes the social vibe.
- Key Materials: Smokeless fire pit, circular seating benches
- Vibe / Style: Intimate boho luxury
- Difficulty: Easy beginner setup
- Budget Breakdown: Hub feature: $60-$150 | Seating anchors: $100.
- Creator’s Tip: Angle seating at 120-degree intervals to maximize eye contact across the circle.
- Smart Sourcing: Rust-proof steel smokeless fire rings and UV-coated curved patio benches.
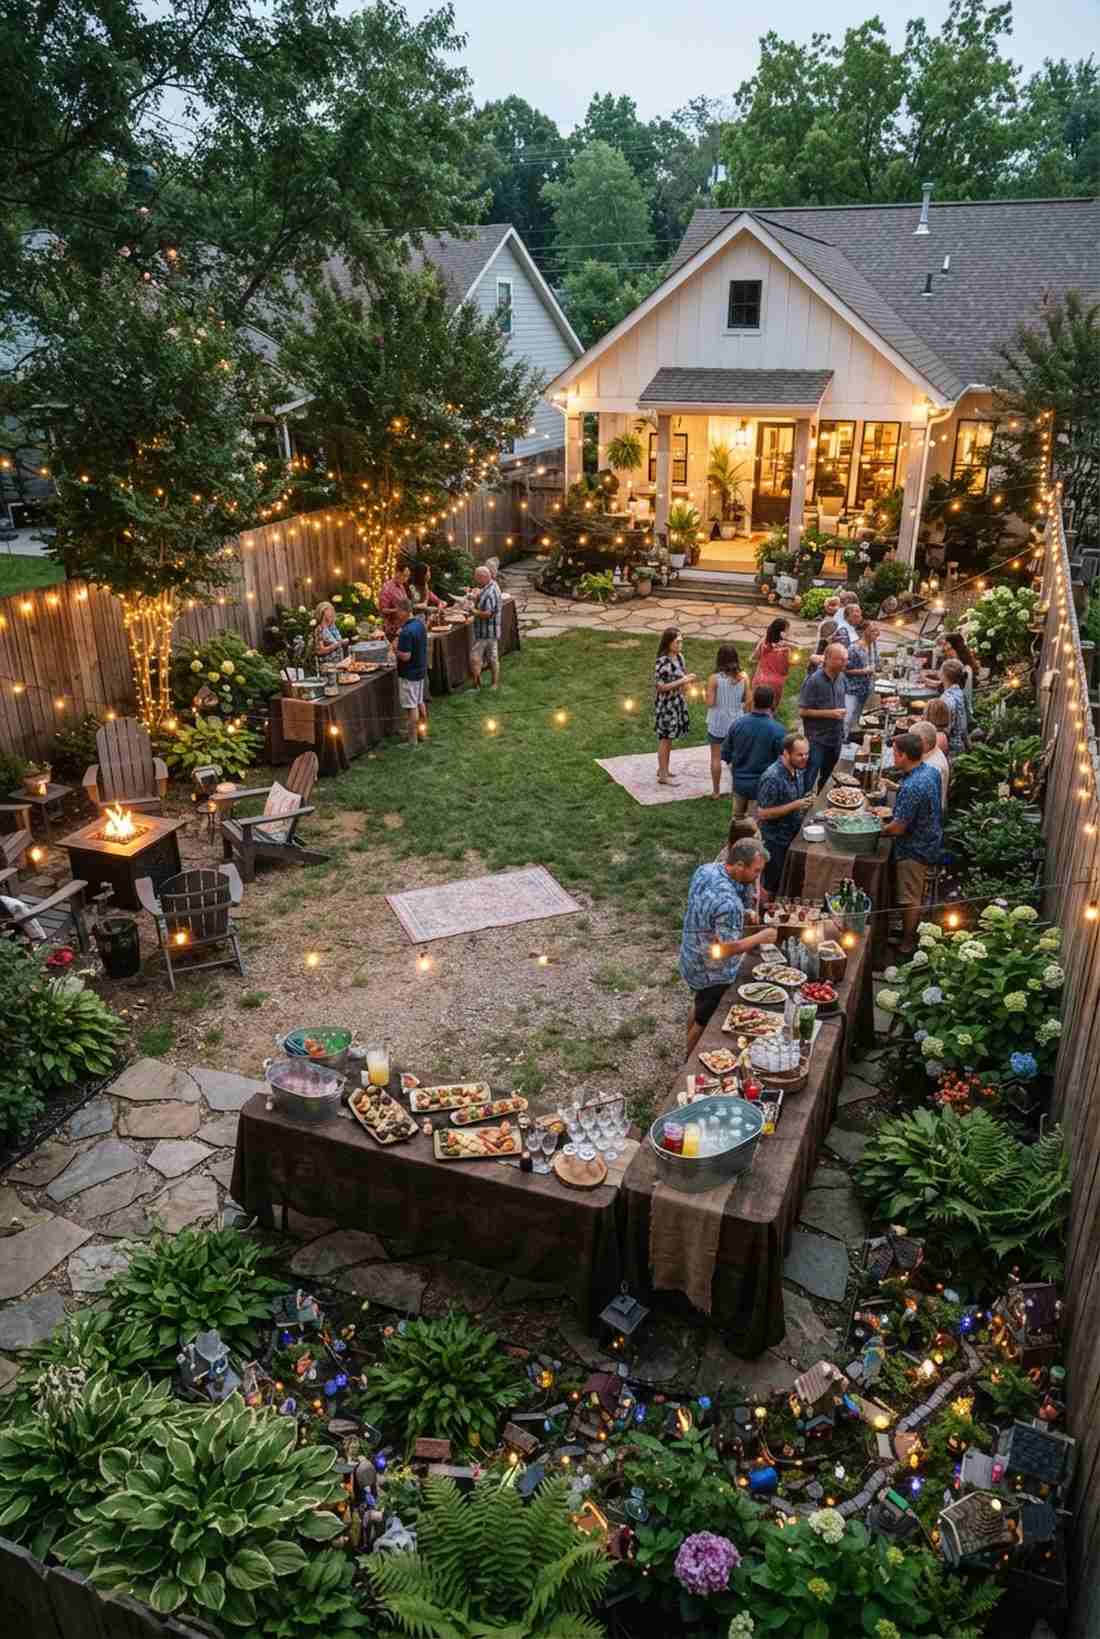
3. Linear Progression Layout
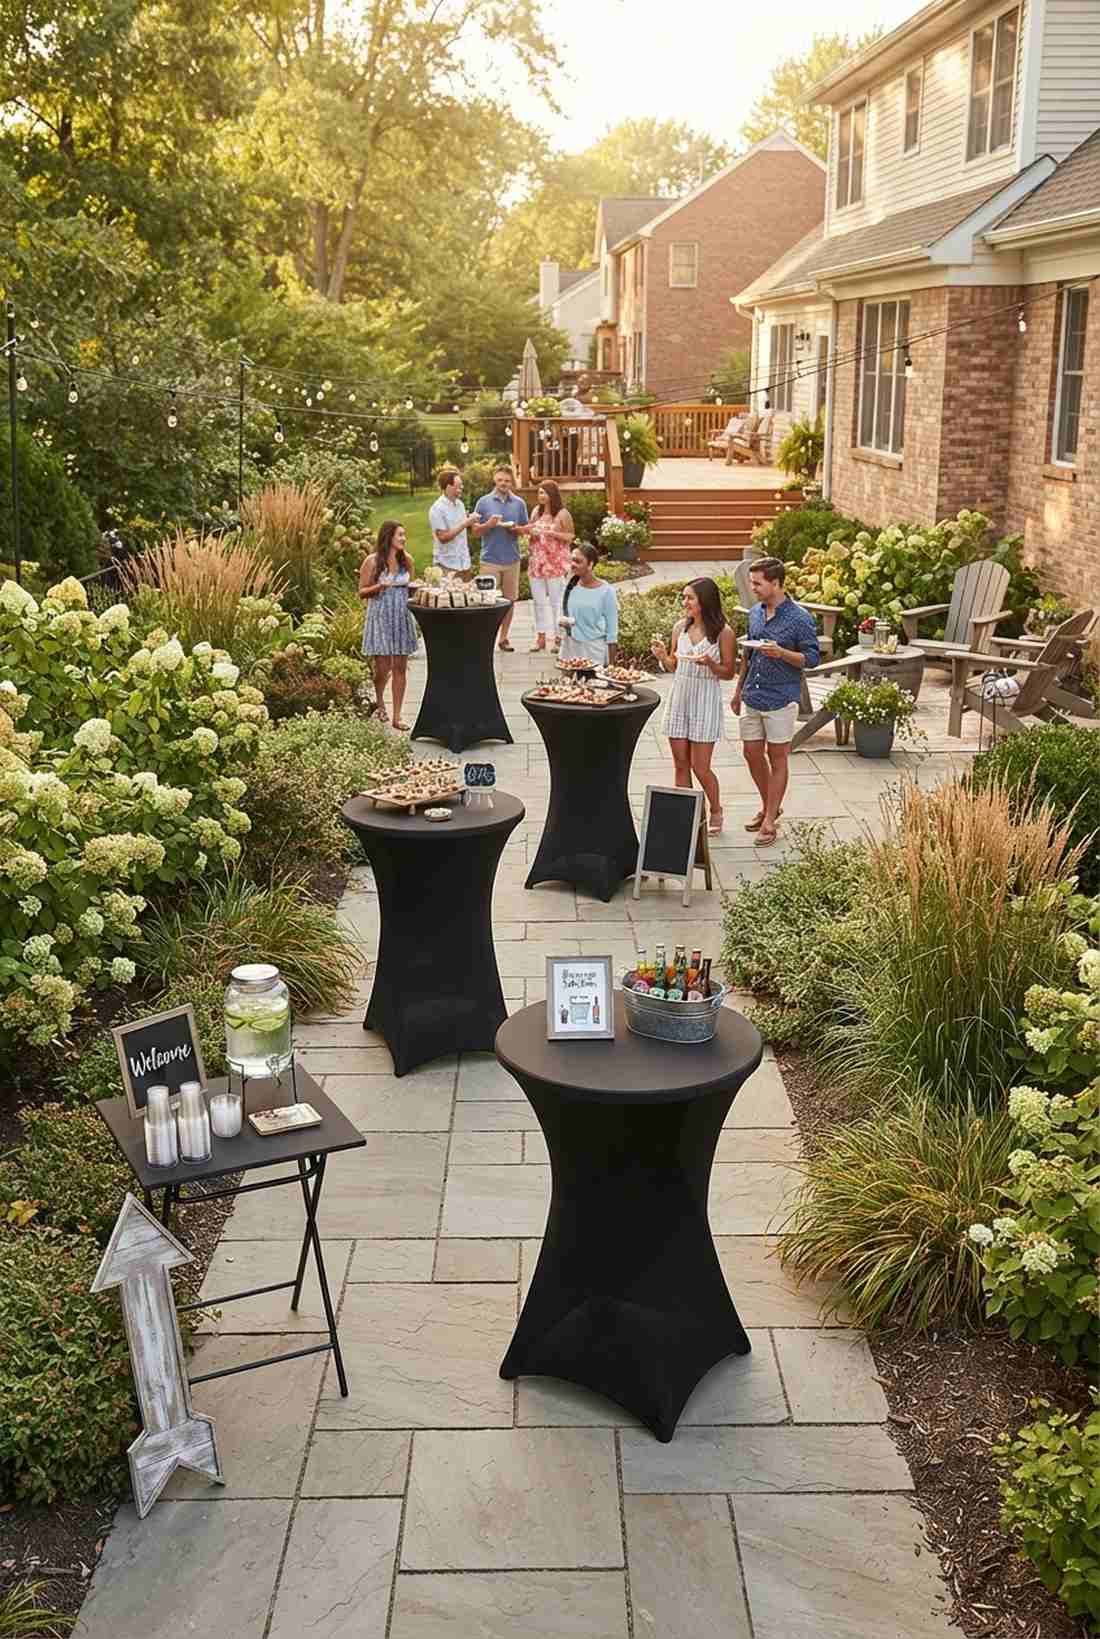
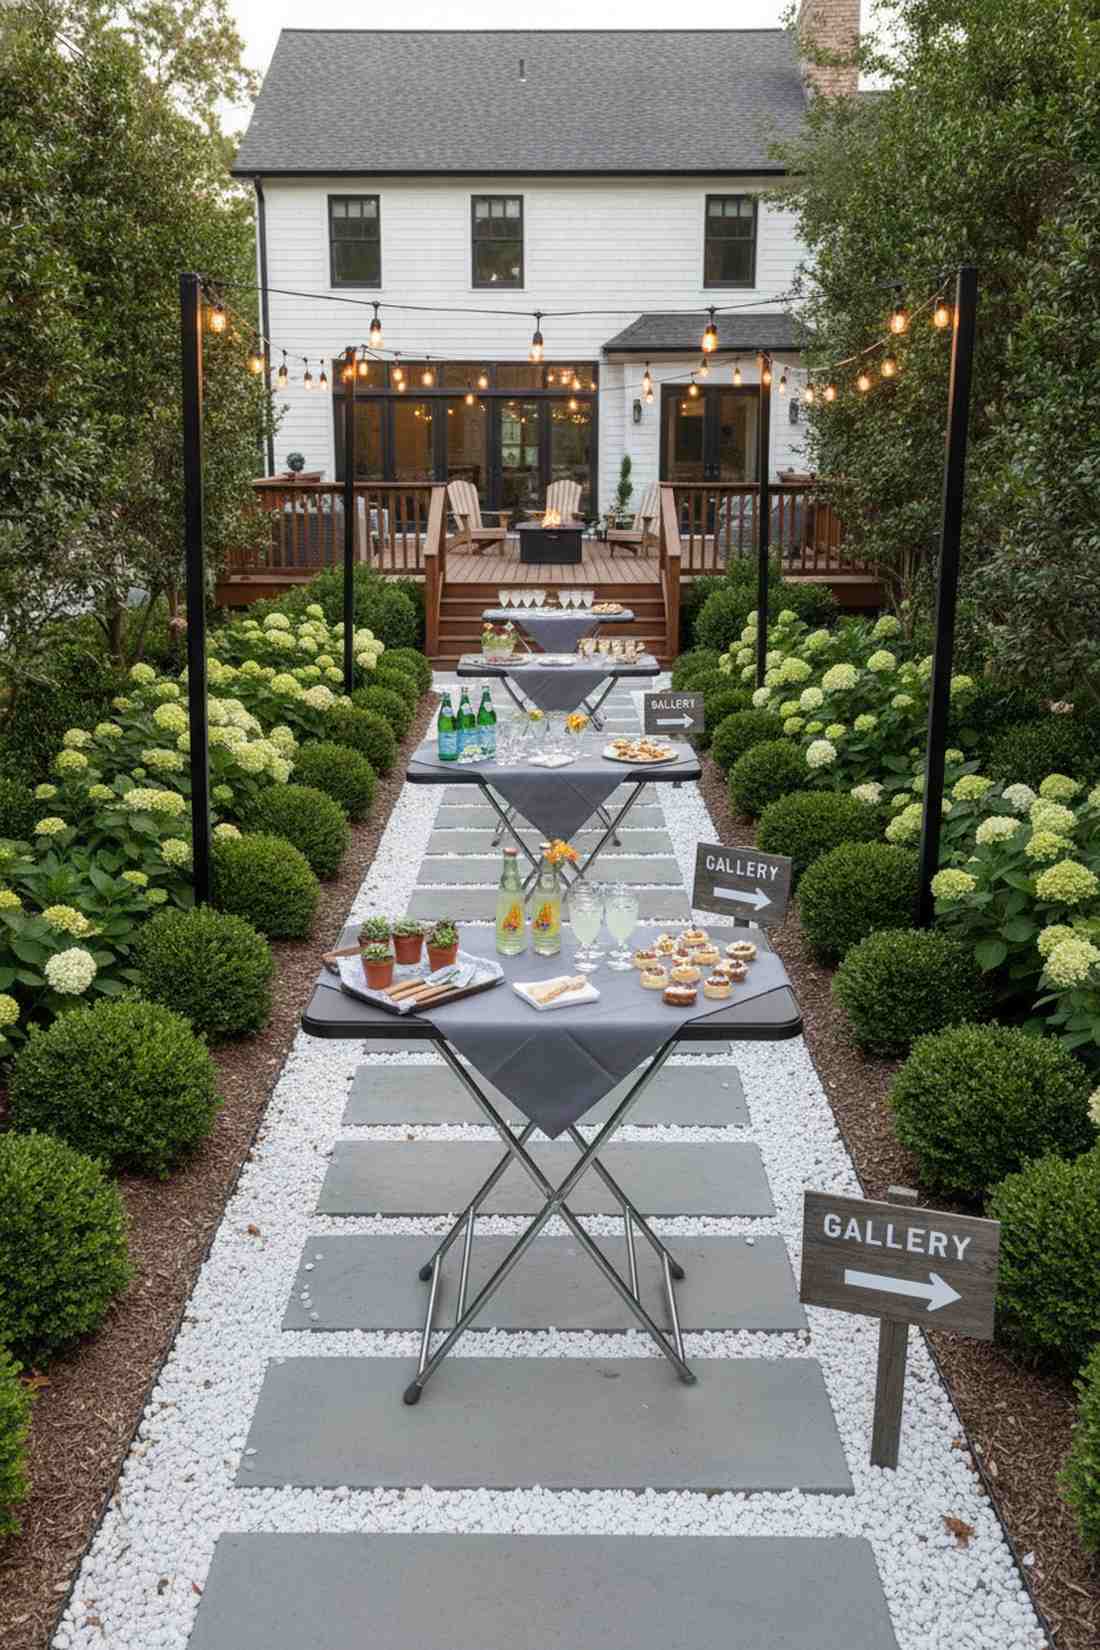
Feels like an interactive gallery walk curated just for your guests. Sequential event staging moves people flawlessly through different experiences. Perfect for narrow side yards or long, awkward property lines.
Creating stations in a straight line completely eliminates the chaotic buffet line crunch. Upgrading your stations with portable folding bar kits and miniature garden supplies gives a designer-level finish to an otherwise plain walkway.
You can easily pull this off for around $40 per station. Pin this if you’re planning a small space upgrade!
- Key Materials: Pop-up cocktail tables, directional signage
- Vibe / Style: Modern tasting-tour chic
- Difficulty: Very easy
- Budget Breakdown: Tables: $40 each | Signage: $15.
- Creator’s Tip: Offset each station slightly from the center path so guests waiting don’t block traffic.
- Smart Sourcing: Commercial-grade folding high-top tables and pre-printed weatherproof party signs.
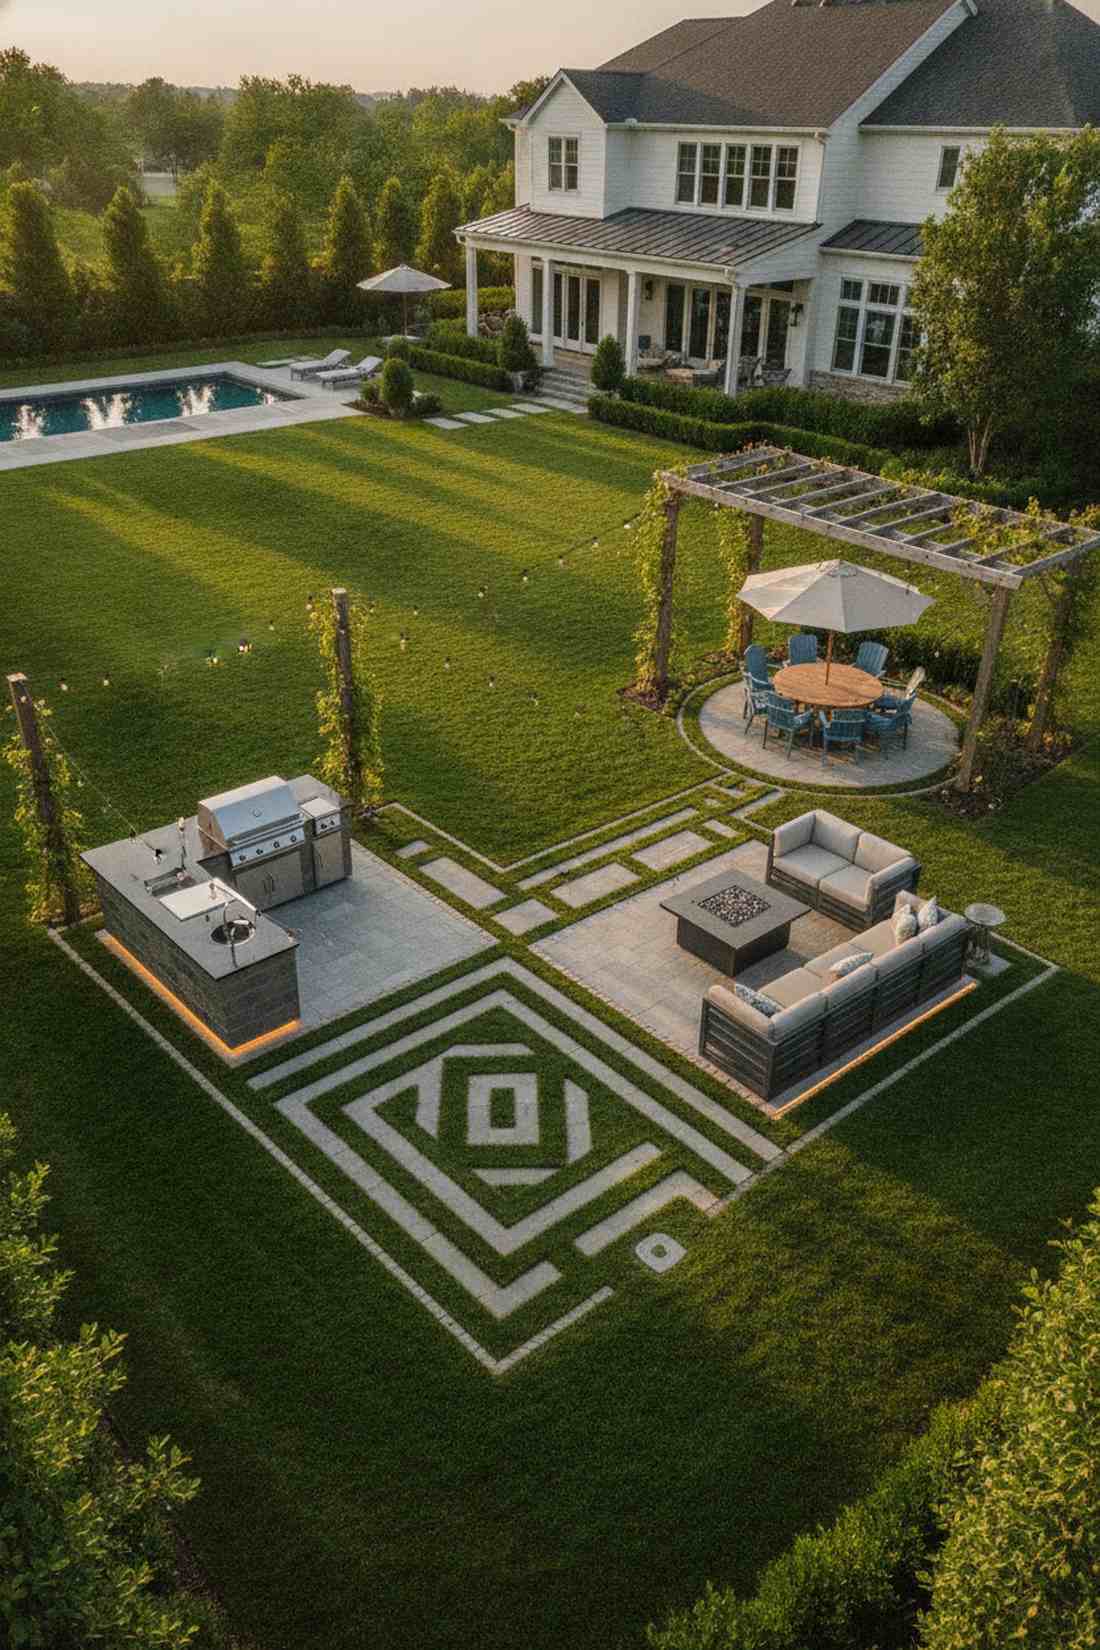
4. Multi-Level Terraced Configuration
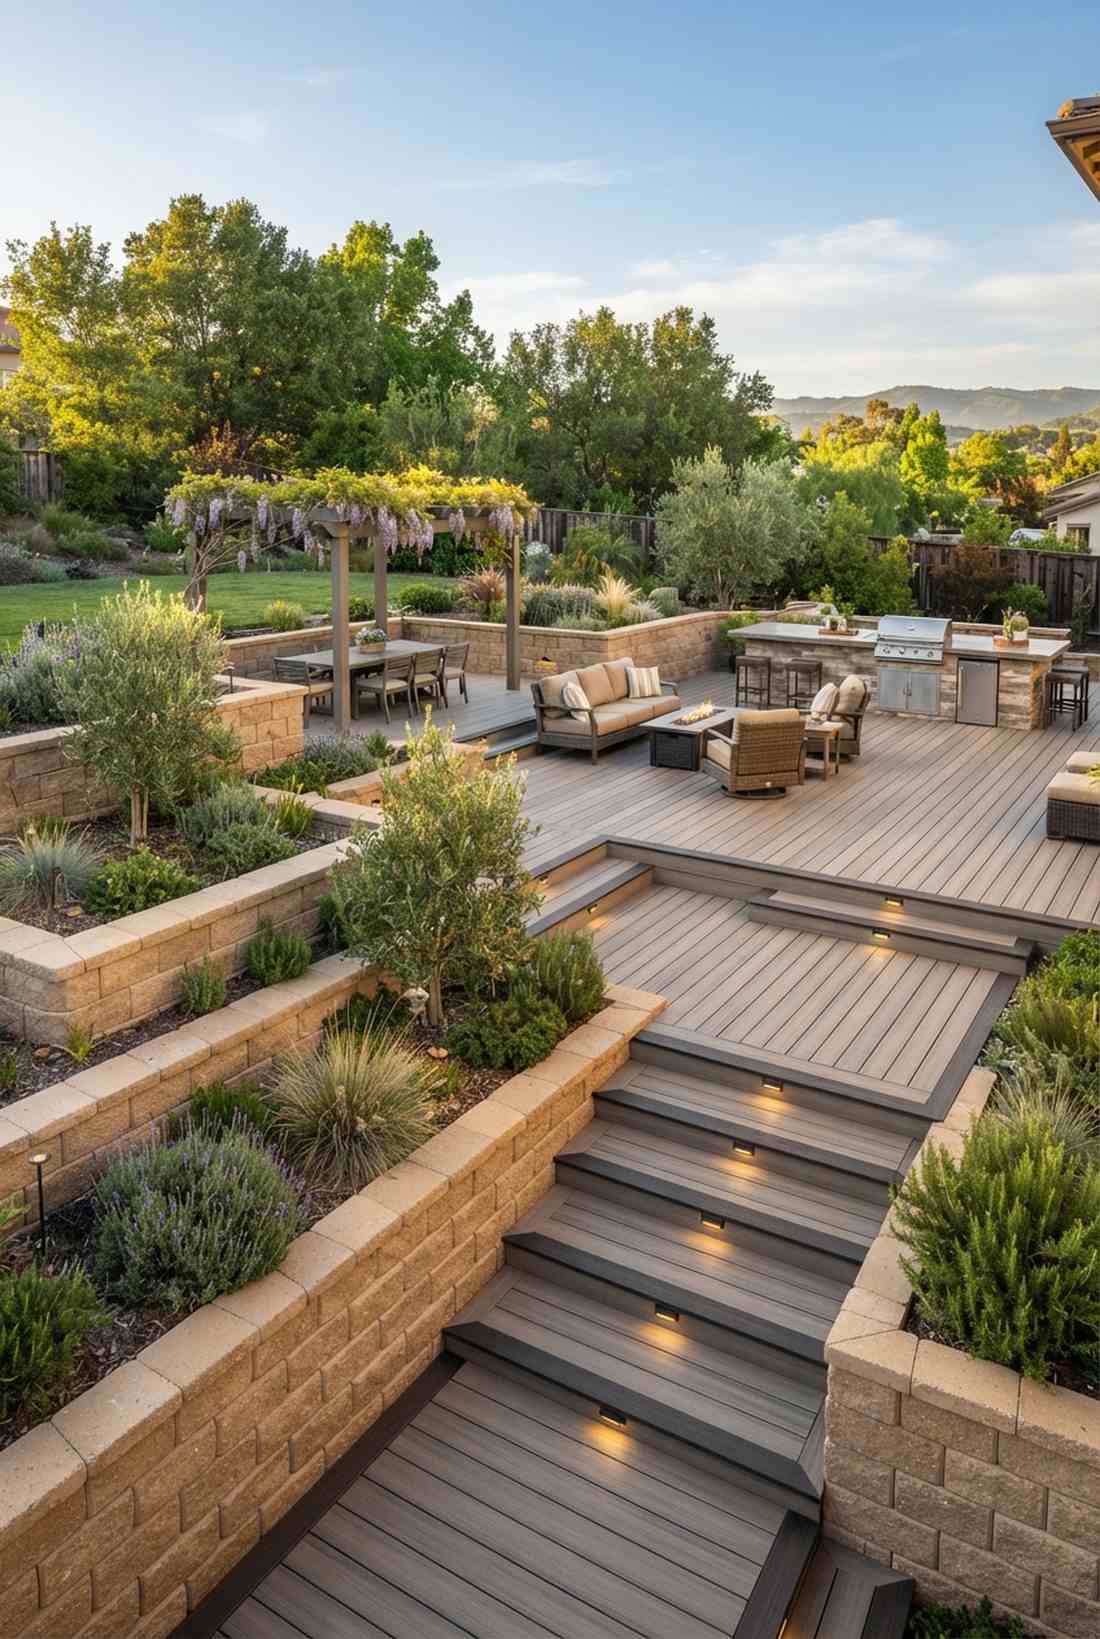
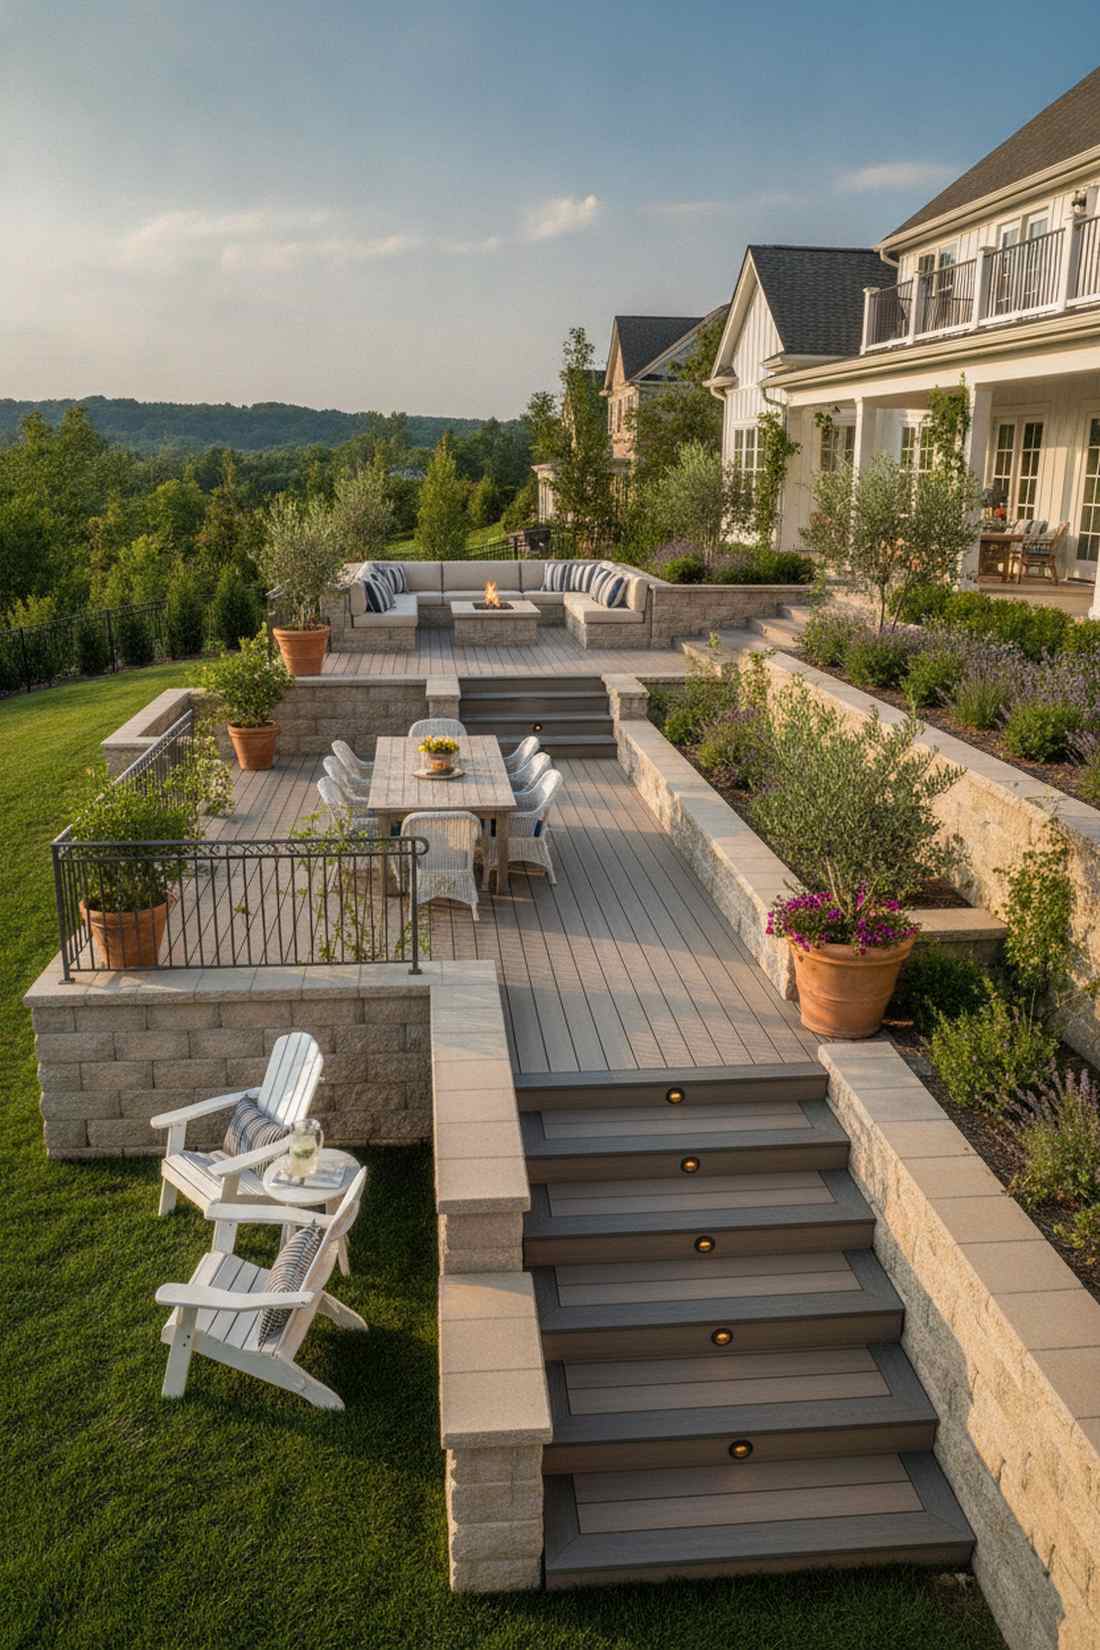
Feels like a sprawling Mediterranean villa cascading down a hillside. Tiered elevation zoning visually multiplies your usable square footage. Works brilliantly for sloped yards or elevated deck transitions.
Instead of fighting a sloped yard, exploiting the height differences creates an ultra-premium multi-room illusion outdoors. Utilizing heavy-duty retaining wall blocks and non-slip decking materials ensures the space is as safe as it is stunning.
Building basic step-down tiers starts around $200 with DIY materials. Highly recommended for a high-impact property upgrade.
- Key Materials: Composite decking boards, retaining blocks
- Vibe / Style: Architecturally dramatic
- Difficulty: Advanced weekend project
- Budget Breakdown: Step blocks: $80 | Non-slip treads: $120.
- Creator’s Tip: Use contrasting colors on the step edges so guests don’t trip during evening events.
- Smart Sourcing: Pre-cut composite step treads (bulk pack) and solar-powered deck stair lights.
This next setup completely breaks the traditional backyard rules but somehow looks like a $500 custom display…
5. Perimeter Zone with Open Center
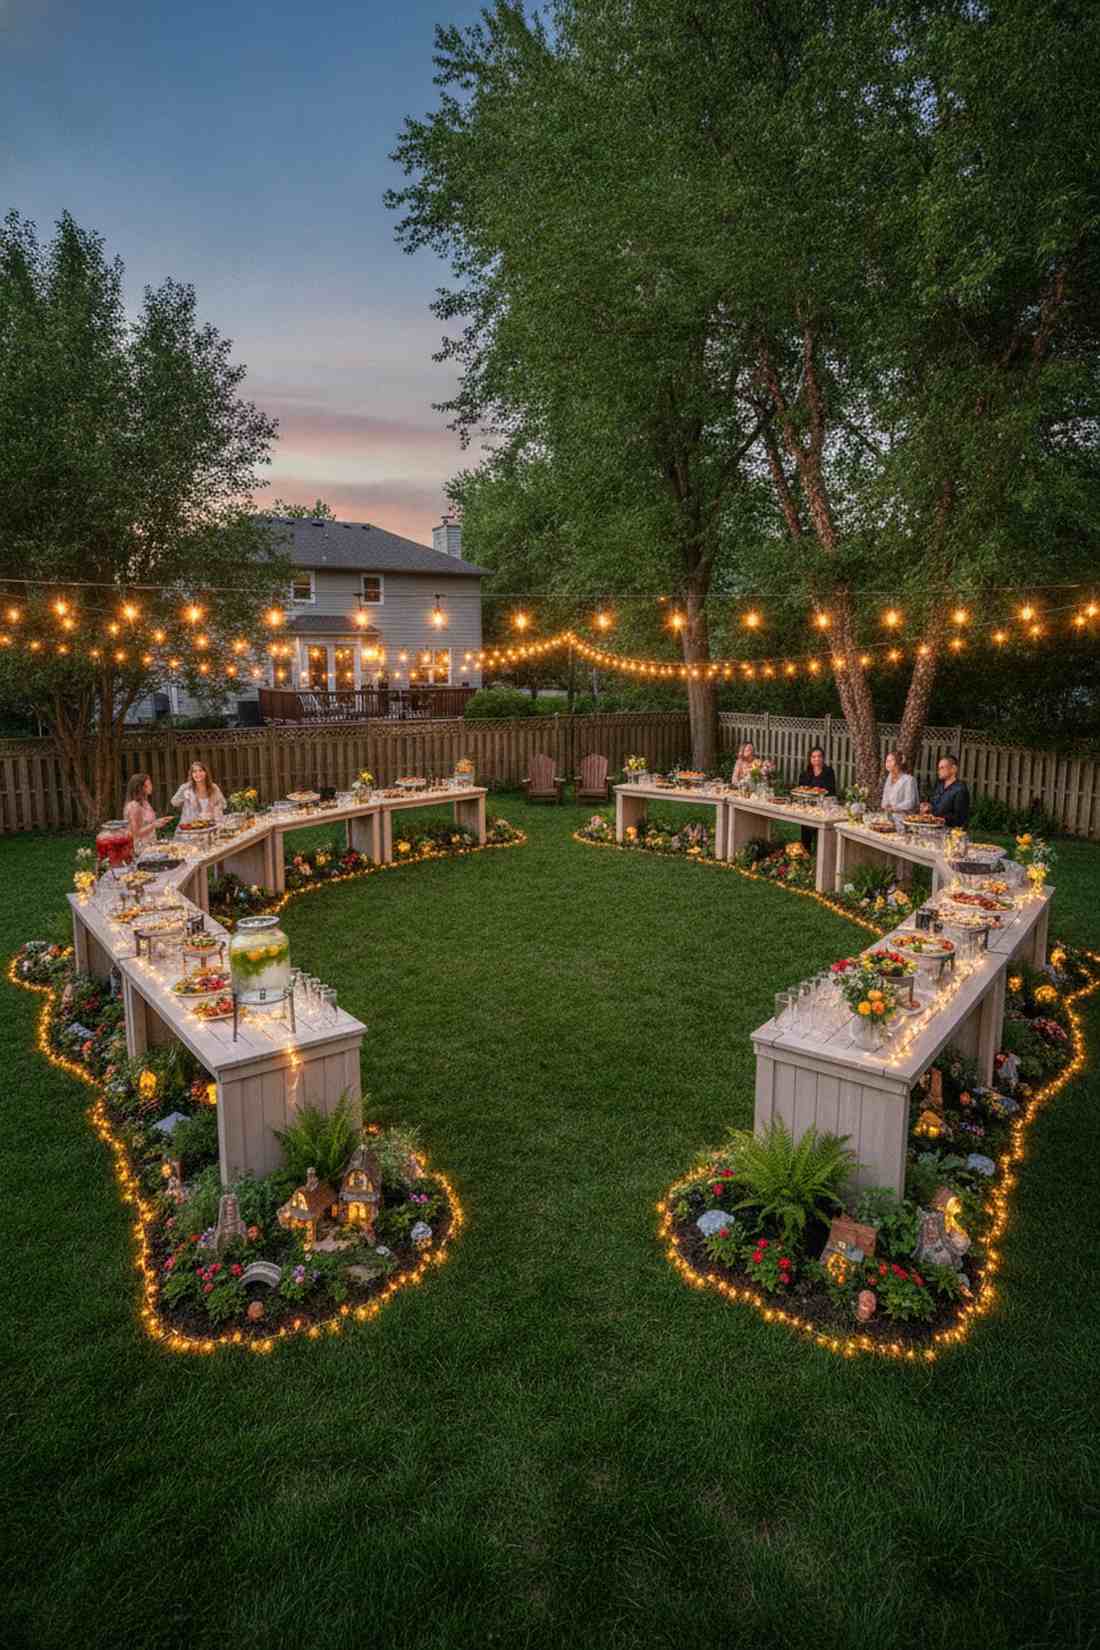
Feels like an exclusive private courtyard waiting for a summer night dance party. Boundary-hugging service design maximizes the center floor. A flawless strategy for medium-sized yards wanting maximum guest capacity.
Filling the center of a yard makes it feel tiny, but pushing functionality to the edges totally transforms the perceived scale. Upgrading the perimeter with commercial outdoor bar tops and fairy garden kits scattered in the borders creates hidden gems for guests to discover.
You can line your edges beautifully for about $80. Save this layout to your garden party planning board.
- Key Materials: Narrow console tables, boundary planters
- Vibe / Style: Open-air festival energy
- Difficulty: Easy layout shift
- Budget Breakdown: Console tables: $60 | Accent lighting: $20.
- Creator’s Tip: Keep all perimeter tables exactly counter-height to double as both food service and leaning posts.
- Smart Sourcing: Weatherproof folding buffet tables and bulk pack outdoor fairy string lights.
Strategic Home Garden Decor Configurations
Effective decor serves dual purposesestablishing visual hierarchy and guiding guest behavior. Landscape architects use intentional placement to define territories, create focal points, and enhance the perceived size of outdoor spaces.
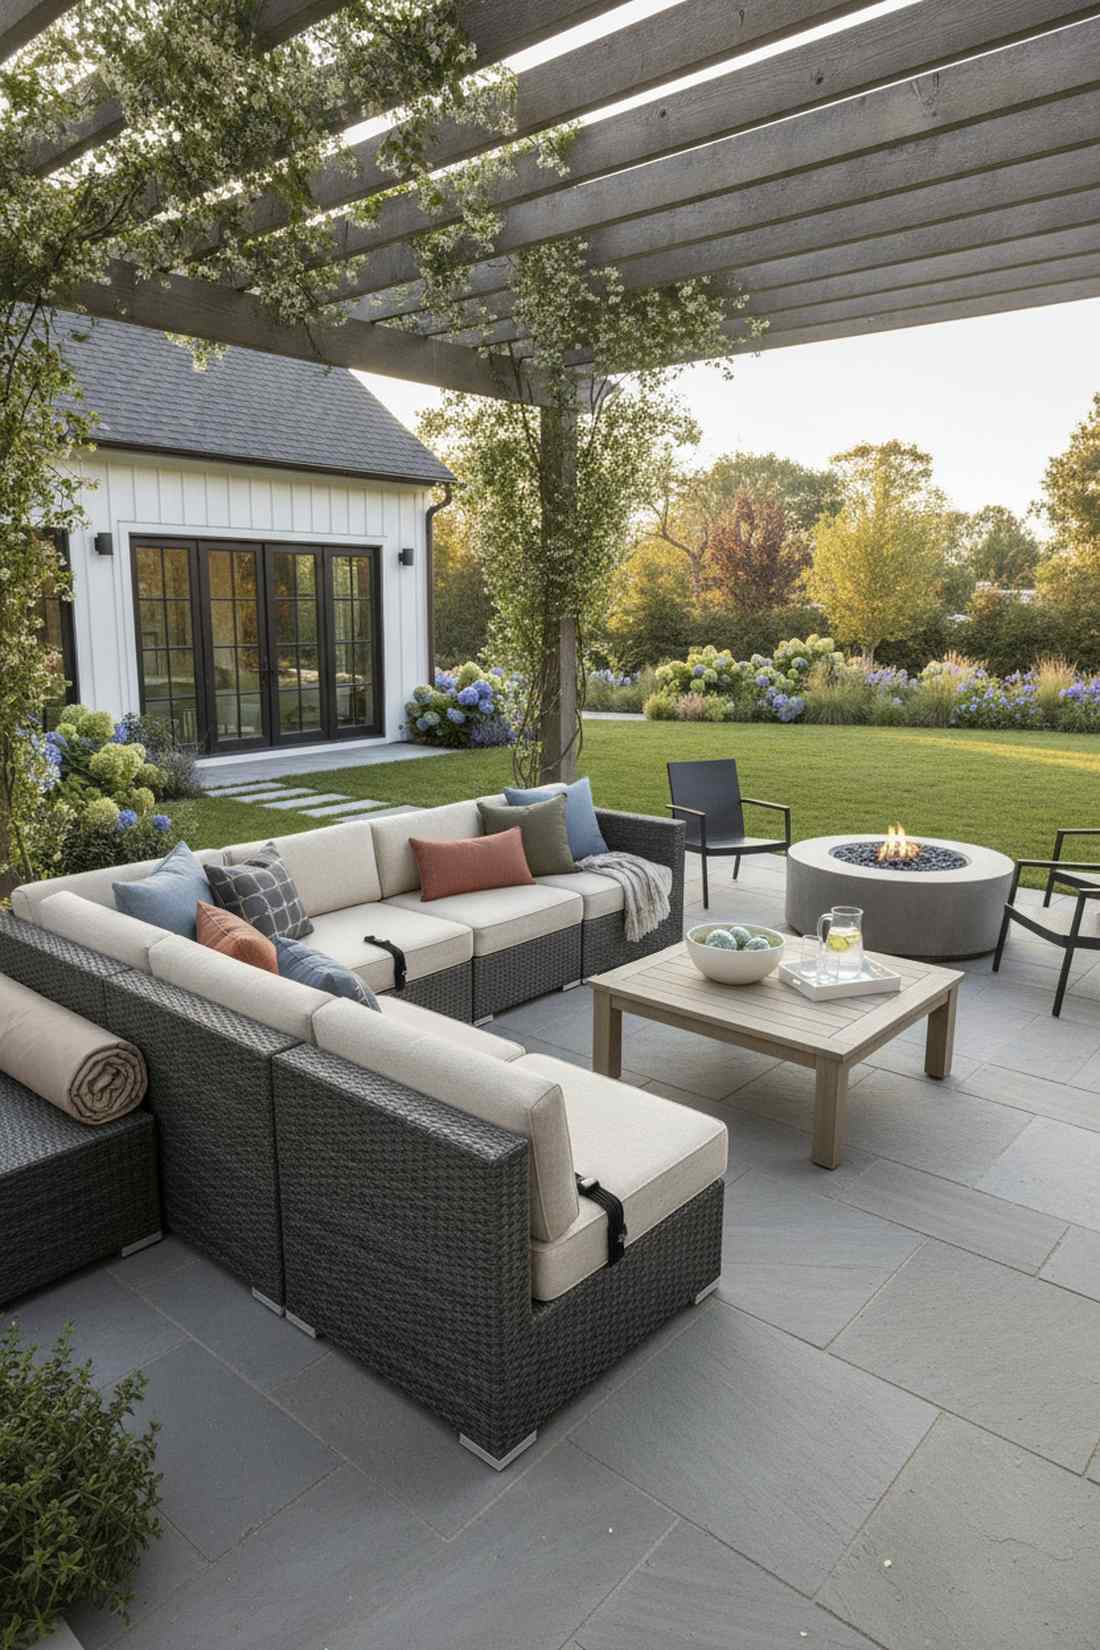
6. Pergola Canopy for Overhead Definition
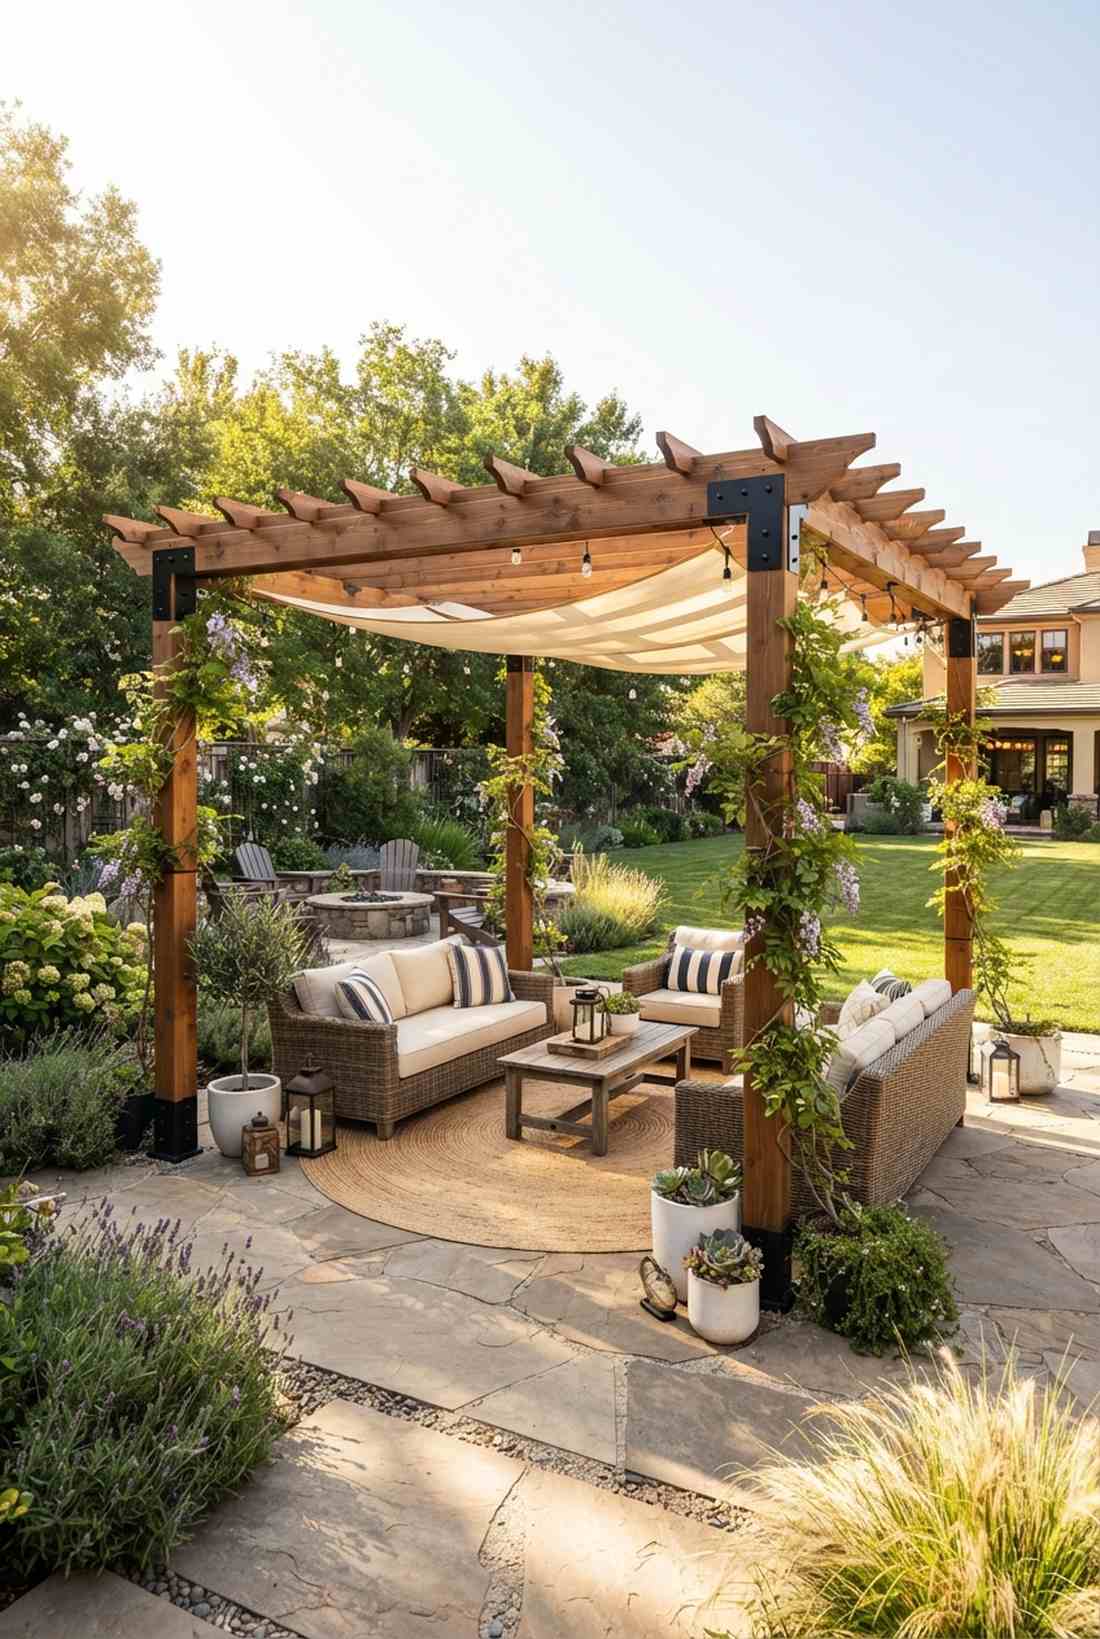
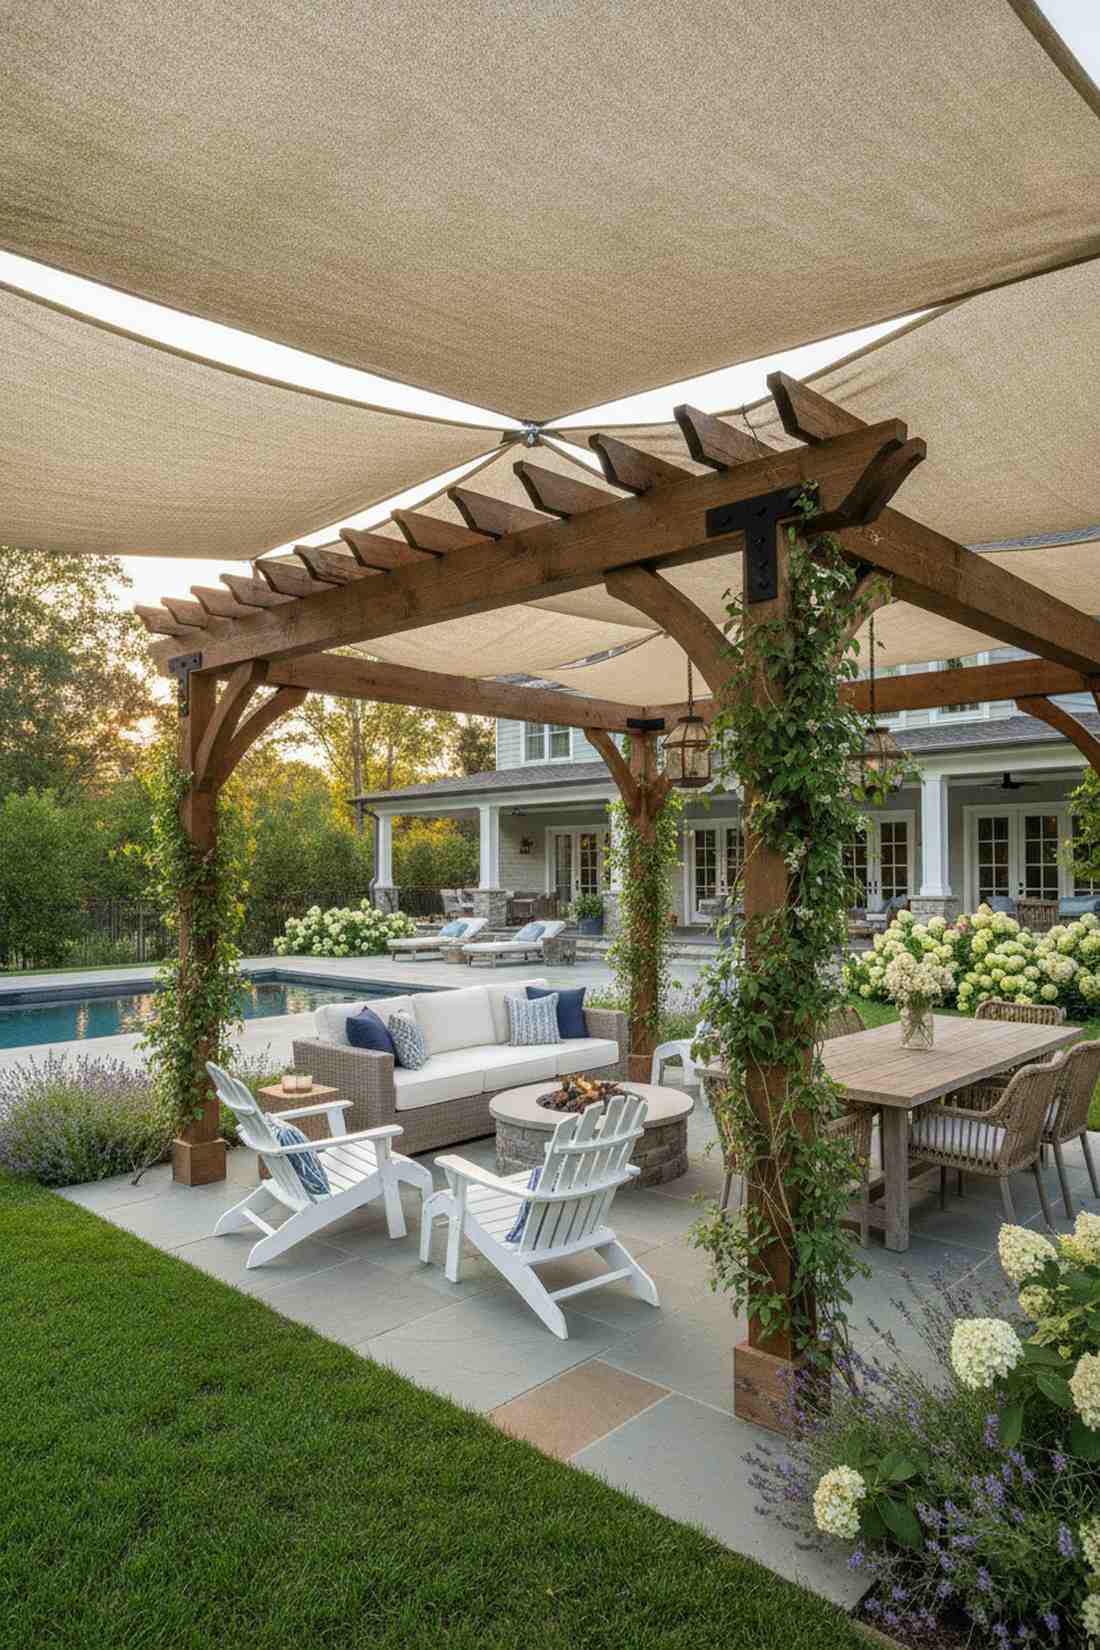
Feels like a romantic VIP cabana at a luxury beach club. Architectural overhead framing instantly turns empty air into an intimate room. Absolutely perfect for vast, open backyards lacking natural shade.
While an empty yard feels exposed, adding a canopy structure creates a shockingly cozy, protected psychological space. Draping UV-resistant canopy fabrics and integrating premium home garden decor accents makes standard hardware store lumber look custom-built.
A basic structural kit runs about $150–$300. It is a defining investment that anchors the entire party aesthetic.
- Key Materials: 4×4 structural brackets, shade sails
- Vibe / Style: Breezy resort sanctuary
- Difficulty: Intermediate structural build
- Budget Breakdown: Hardware kit: $120 | Shade fabric: $40.
- Creator’s Tip: Weave climbing vines up the posts to soften the wooden edges instantly.
- Smart Sourcing: Heavy-duty steel pergola corner brackets and UV-blocking waterproof sun shade sails.
7. Outdoor Rug Territory Markers
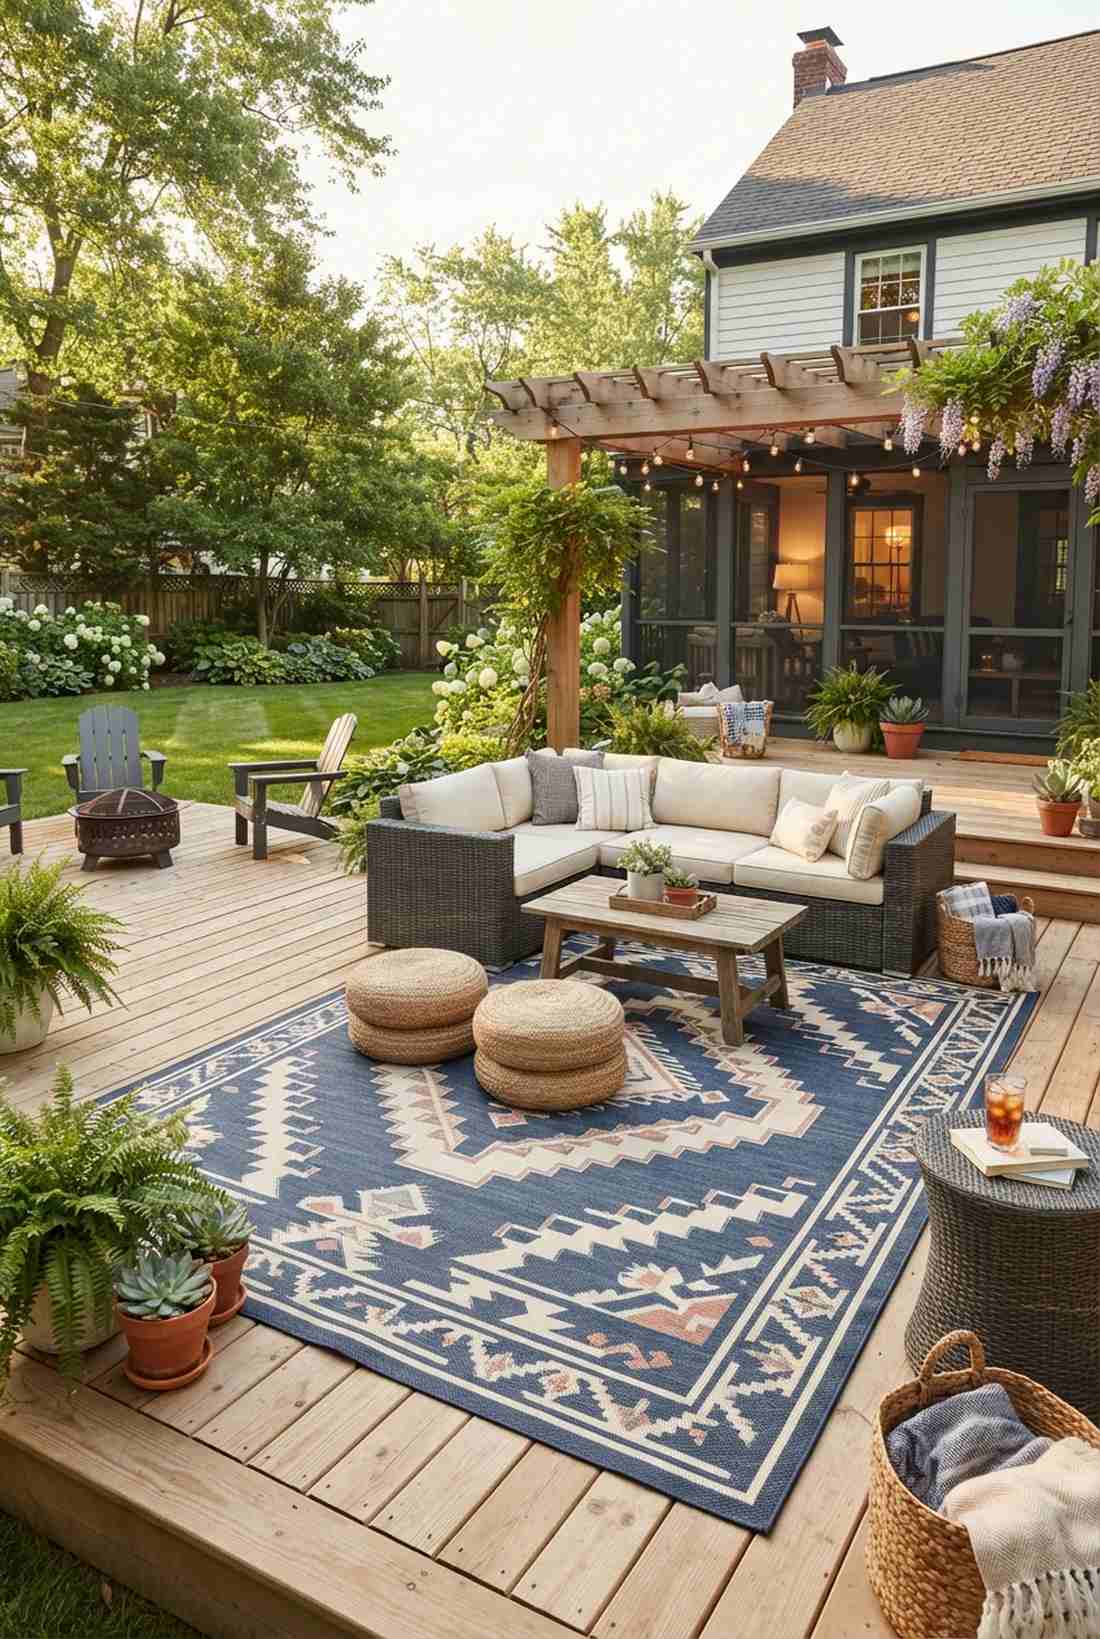
Feels like a chic indoor living room effortlessly teleported outside. Textile ground zoning defines spaces without building actual walls. The ultimate hack for bland concrete patios or tired wooden decks.
Many ignore the ground entirely, but laying down bold patterns gives a designer-level finish that ties scattered furniture together. Utilizing mold-resistant recycled plastic rugs ensures the setup survives sudden summer rainstorms without getting ruined.
Expect to spend $40–$70 per large area rug. Pin this trick if you hate your current patio flooring!
- Key Materials: Polypropylene outdoor rugs, rug tape
- Vibe / Style: Cozy curated lounge
- Difficulty: Instant setup
- Budget Breakdown: 8×10 Rug: $55 | Double-sided outdoor tape: $15.
- Creator’s Tip: Overlap two cheaper, smaller rugs to create a massive custom-sized floor covering.
- Smart Sourcing: Reversible waterproof patio rugs (bulk size) and commercial-grade outdoor rug gripper pads.
8. Textile Layering for Softness
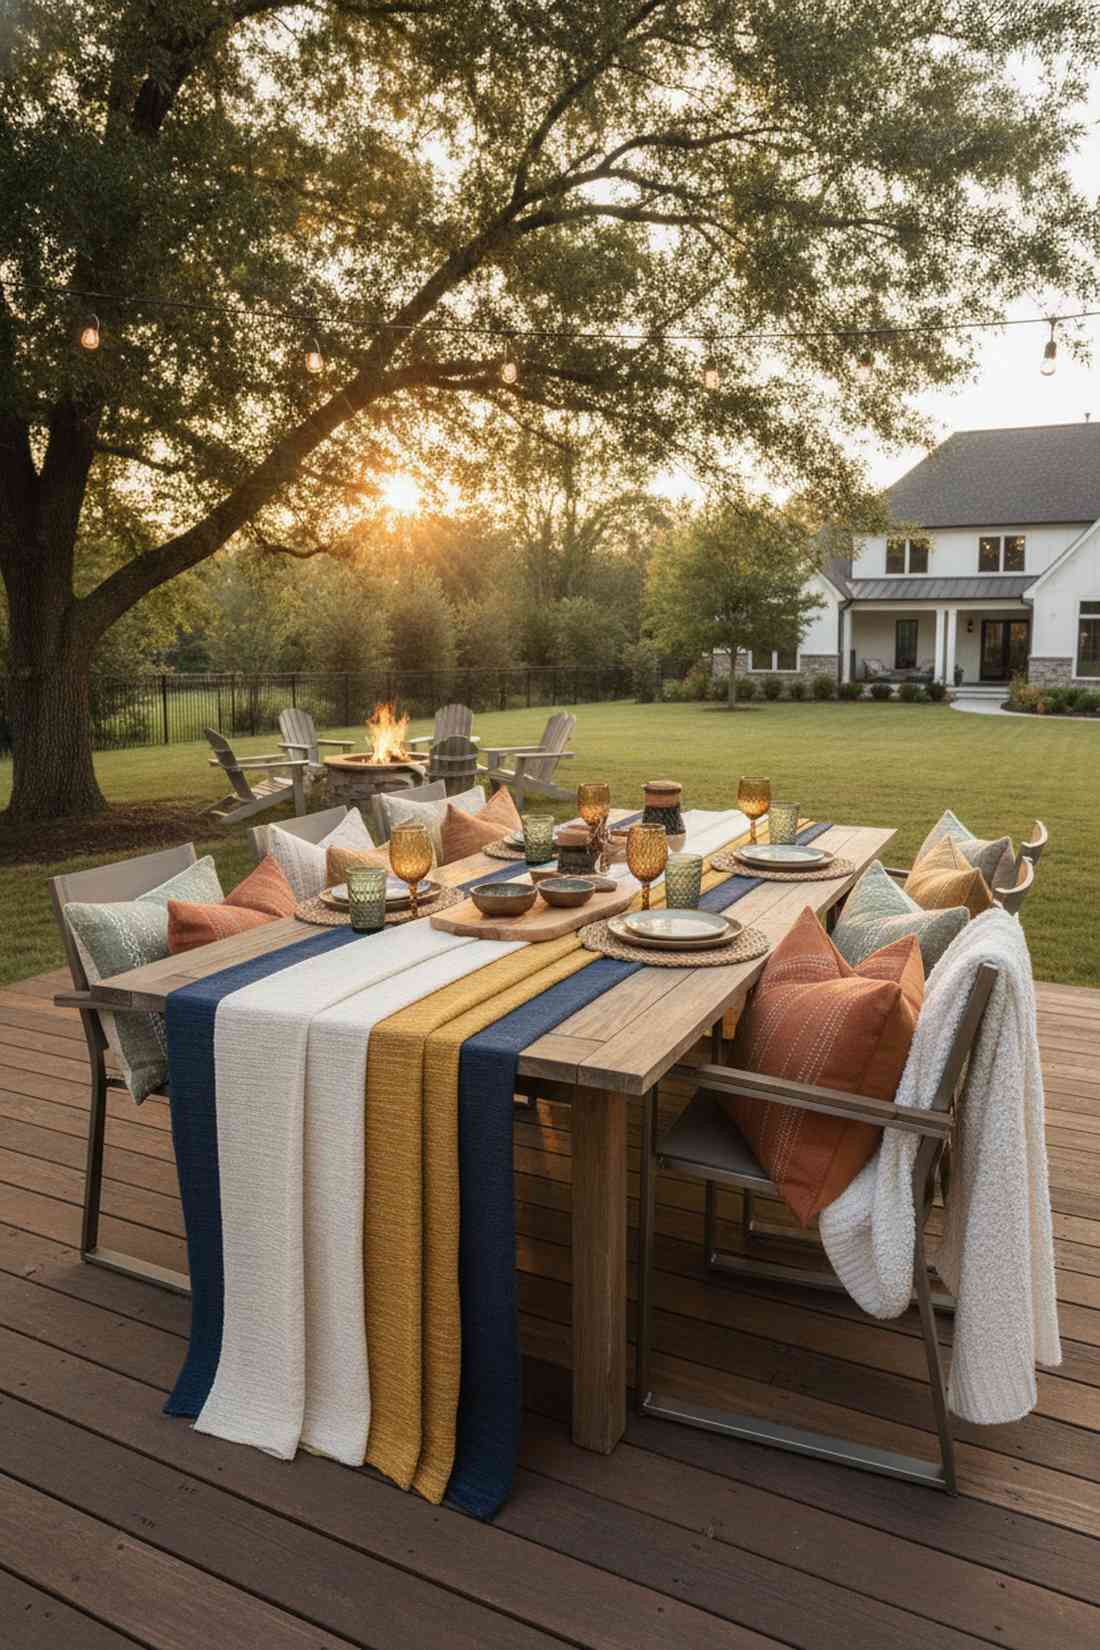
Feels like a plush, bohemian picnic straight out of a glossy magazine. Multi-dimensional fabric draping turns stiff patio furniture into irresistible lounging spots. Best utilized for intimate dinner parties and sunset cocktails.
Serving dinner on bare plastic or metal tables is a missed opportunity, but aggressively layering linens delivers a highly expensive textural aesthetic. Using bulk waterproof pillow inserts covered in chic linen shams elevates the entire home garden decor vibe effortlessly.
You can entirely revamp your seating textures for under $50. Save this to your outdoor styling inspiration board.
- Key Materials: Table runners, outdoor-rated throw pillows
- Vibe / Style: Textural boho elegance
- Difficulty: Zero-tool styling
- Budget Breakdown: Linens: $20 | Pillow covers: $30.
- Creator’s Tip: Always use the odd-number rule when arranging pillows—groups of three look naturally unstaged.
- Smart Sourcing: Water-resistant outdoor throw pillow covers (4-pack) and stain-proof woven table runners.
9. Vertical Backdrop Installations
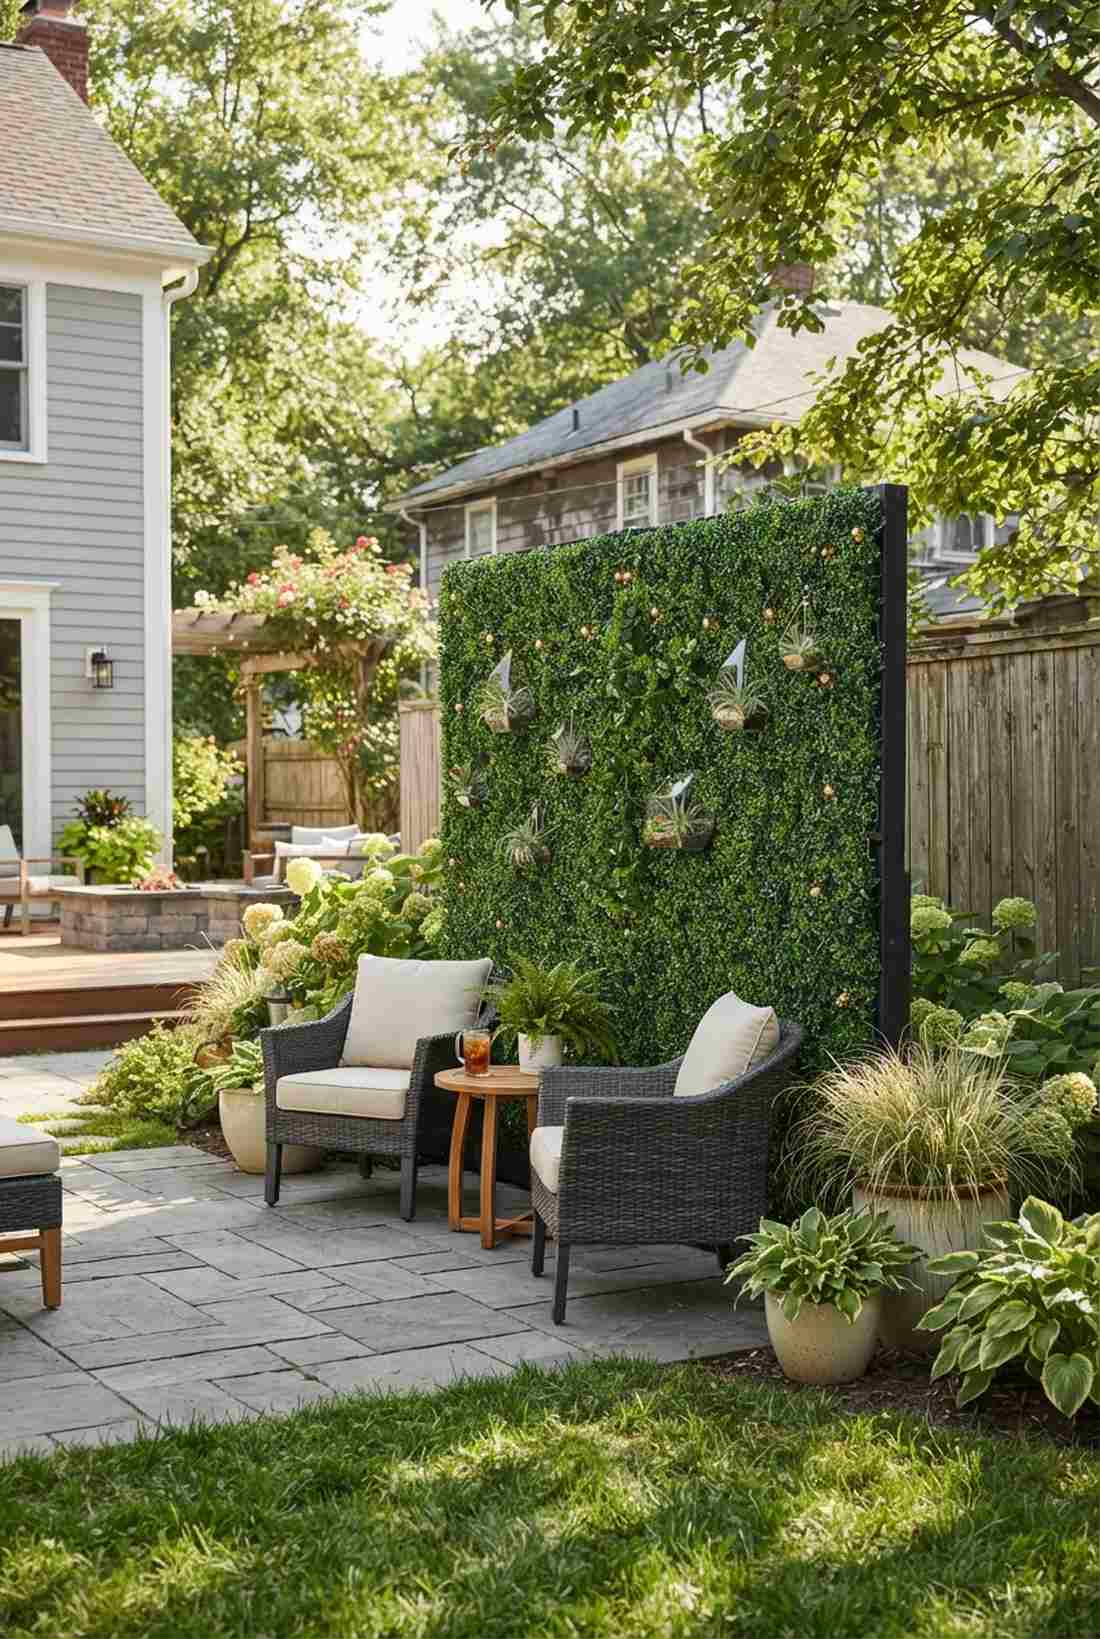
Feels like a secret garden wall you stumbled upon by accident. Freestanding visual screens hide ugly fences while providing a massive photo moment. Works magic for renters or those with intrusive neighbors.
Leaving an ugly utility wall exposed ruins the aesthetic, but throwing up a quick lattice screen hides the mess completely. Attaching pre-cut faux ivy panels or high-end terrarium accessories into a living wall display forces guests to pull out their cameras.
Creating an 8-foot backdrop wall costs about $60–$90. It’s a weekend win that radically boosts privacy.
- Key Materials: PVC pipe frame, faux foliage panels
- Vibe / Style: Lush botanical studio
- Difficulty: Easy DIY assembly
- Budget Breakdown: Frame: $25 | Foliage panels: $45.
- Creator’s Tip: Zip-tie the panels to the frame so you can easily roll them up and store them post-party.
- Smart Sourcing: UV-coated artificial boxwood hedge panels (bulk pack) and heavy-duty black zip ties.
Most hosts get this next part completely wrong… until they try the exact layout coming up next.
💡 Must-Have Supplies for High-End Setups
To build these setups faster and ensure they last, skip the generic craft aisles and invest in the right foundational kits.
- Base & Support: Commercial-grade waterproof patio layout tapes
- Setup Tools: Heavy-duty event staging starter kits
- Weather/Durability Protection: UV-resistant clear acrylic fabric sealants
10. Station Styling with Height Variation
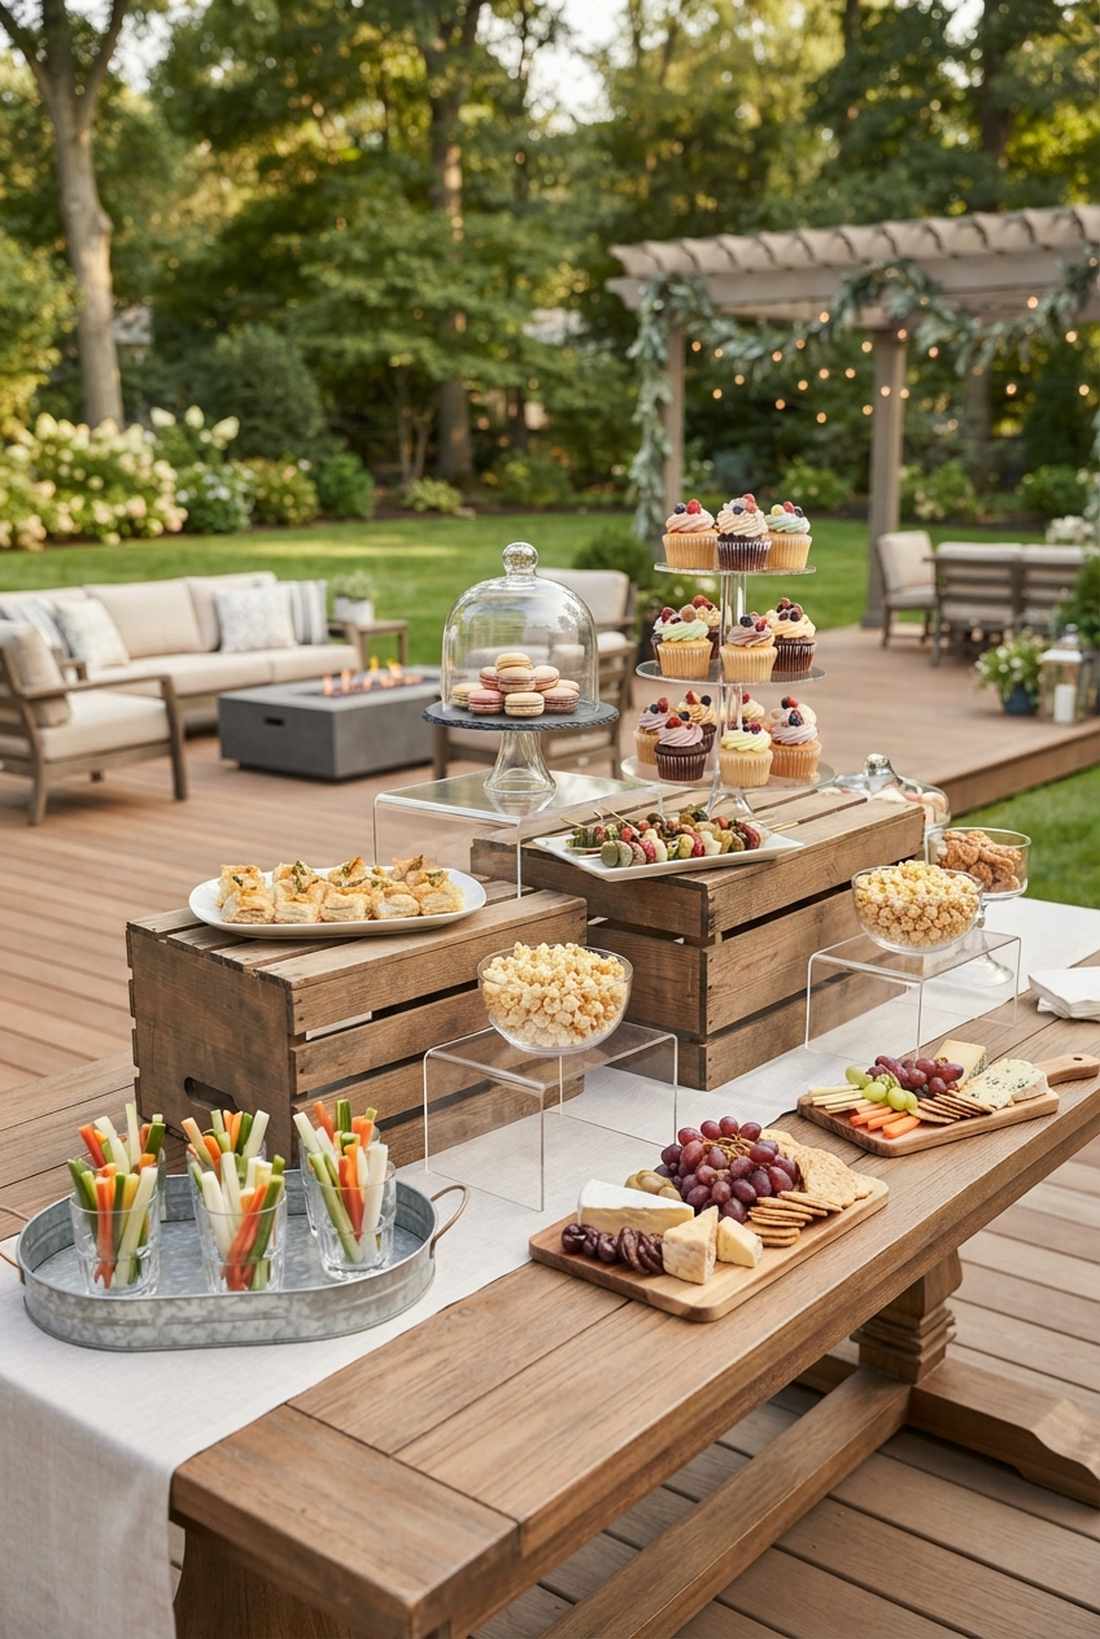
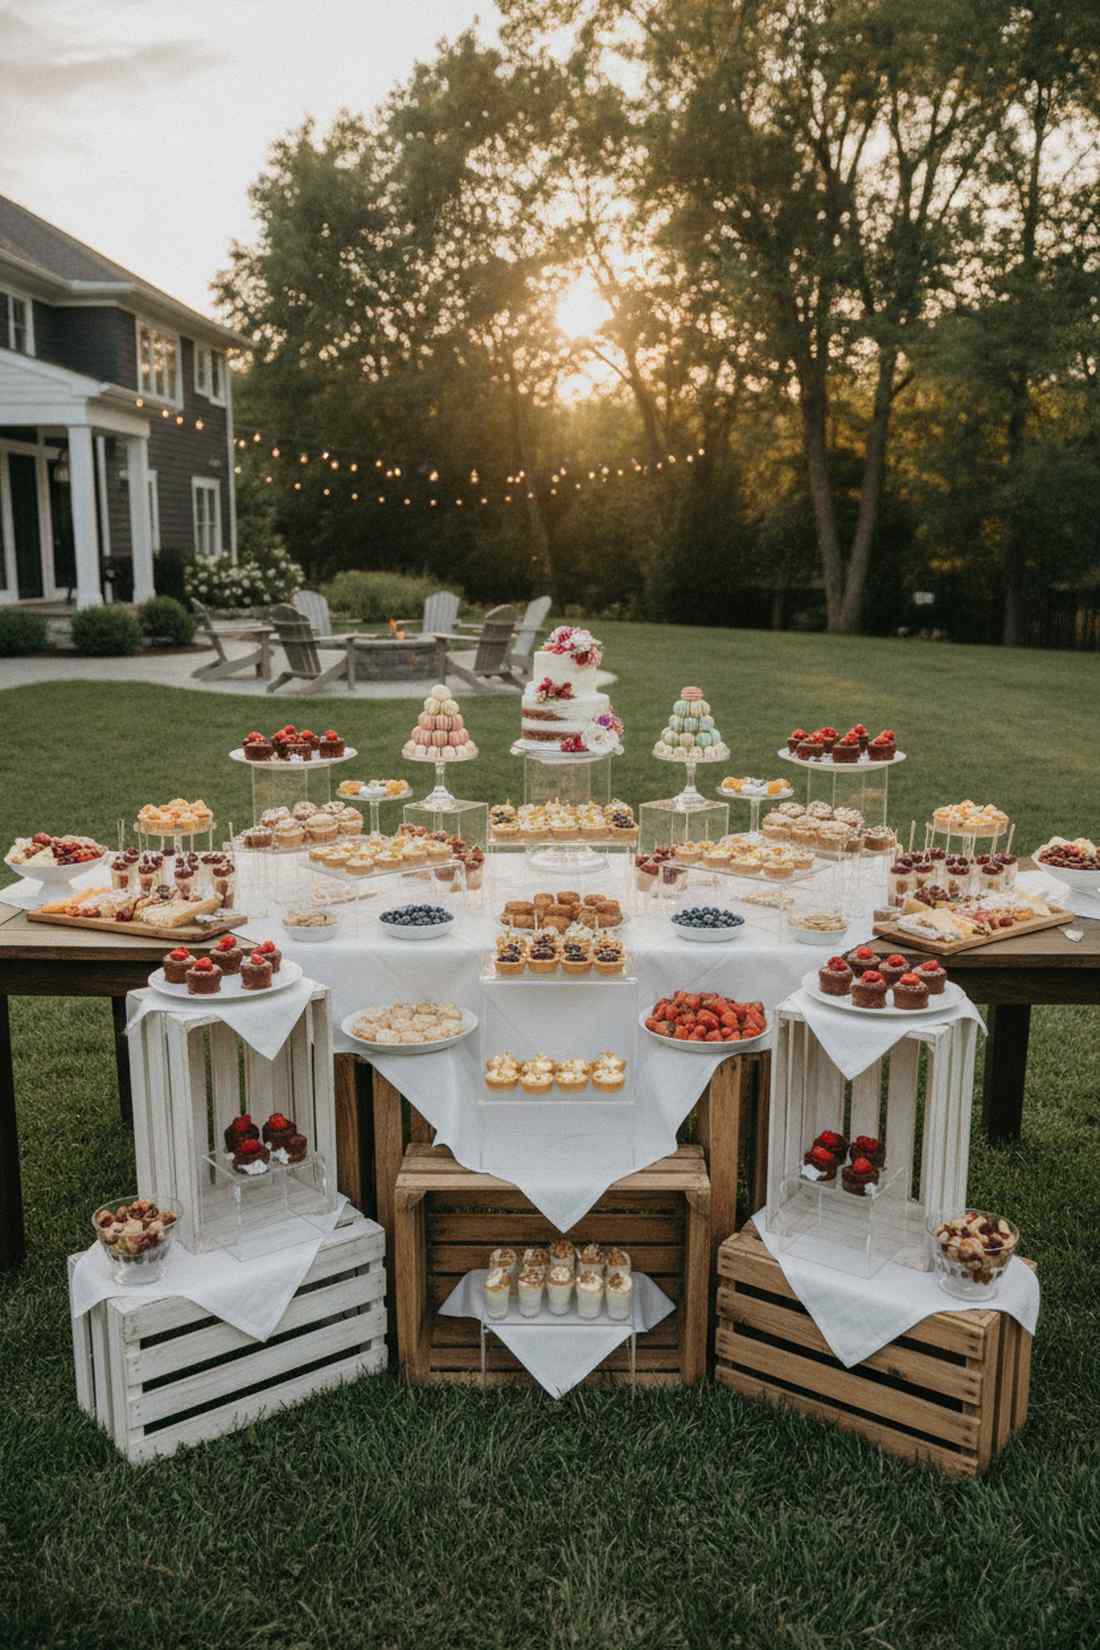
Feels like an extravagant boutique catering display designed by professionals. Three-dimensional tiered staging makes simple snacks look incredibly expensive. Essential for dessert tables or self-serve bars.
Placing all plates flat on a table looks like a boring potluck, but utilizing vertical risers creates dynamic visual magnetism. Sliding acrylic display stands or painted wooden crates under your linens instantly tricks the eye into seeing absolute luxury.
You can hack this look using household items or buy a riser kit for $25. Pin this for your next birthday bash setup!
- Key Materials: Acrylic risers, wooden display crates
- Vibe / Style: High-end catered visual
- Difficulty: Simple table styling
- Budget Breakdown: Risers: $20 | Decorative boxes: $15.
- Creator’s Tip: Put the tallest items in the absolute back so guests don’t knock things over reaching across.
- Smart Sourcing: Clear acrylic display riser starter kits and nesting rustic wooden crates.
Seating Arrangements and Circulation Patterns
Guest comfort hinges on proper seating density and arrangement geometry. Calculate 24 to 30 inches of seating width per person and position chairs to facilitate conversation while maintaining traffic flow.
11. Conversation Circle Groupings
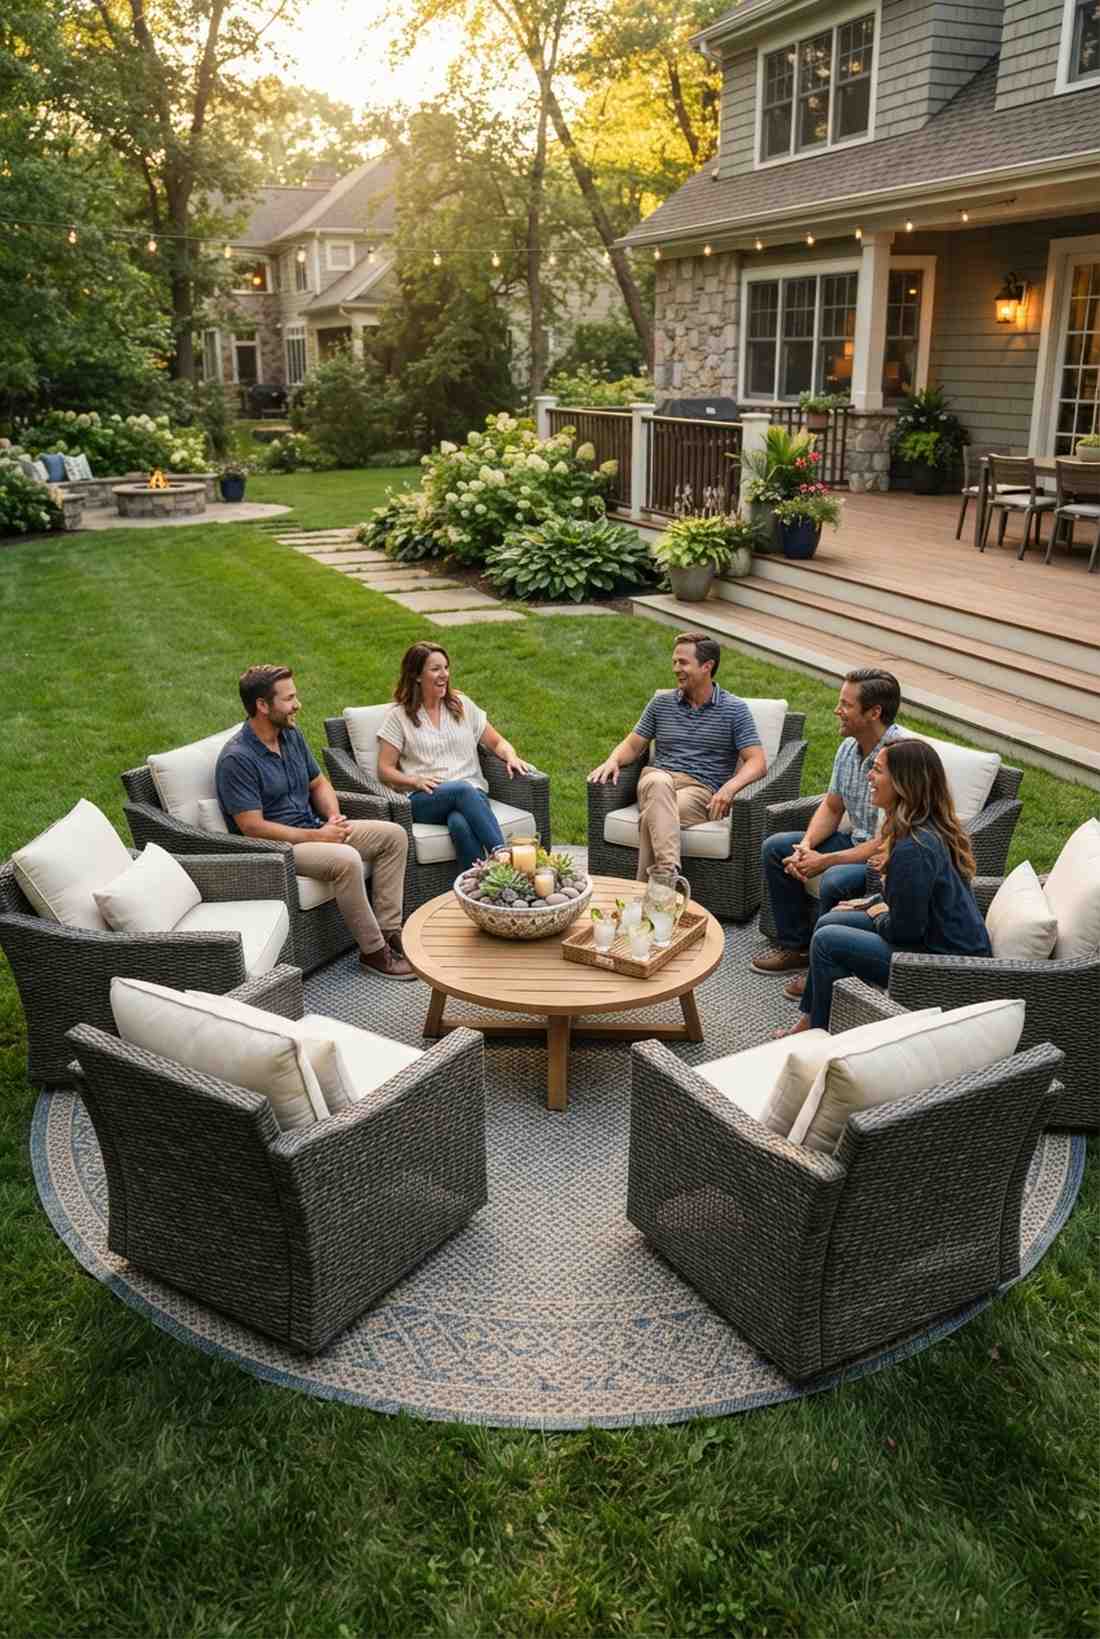

Feels like an intimate fireside chat where the best gossip happens. Closed-loop seating geometry traps conversational energy beautifully. Perfect for pre-dinner cocktail hour on a flat lawn.
Lining chairs up in a straight line kills conversation, but pulling them into a tight 6-foot circle forces engaging eye contact. Adding a high-end centerpiece or outdoor rug into the middle ties the whole grouping together into a deliberate, cozy pod.
Optimizing your existing chairs into this layout is literally free. Highly recommended for a quick social dynamic shift.
- Key Materials: Existing patio chairs, central anchor table
- Vibe / Style: Warm and engaging
- Difficulty: Just moving furniture
- Budget Breakdown: Furniture rearranging: $0.
- Creator’s Tip: Leave exactly one chair-width gap open facing the main party to visually invite newcomers in.
- Smart Sourcing: Weatherproof low-profile round coffee tables and heavy-duty furniture sliders.
12. Sectional Modular Flexibility
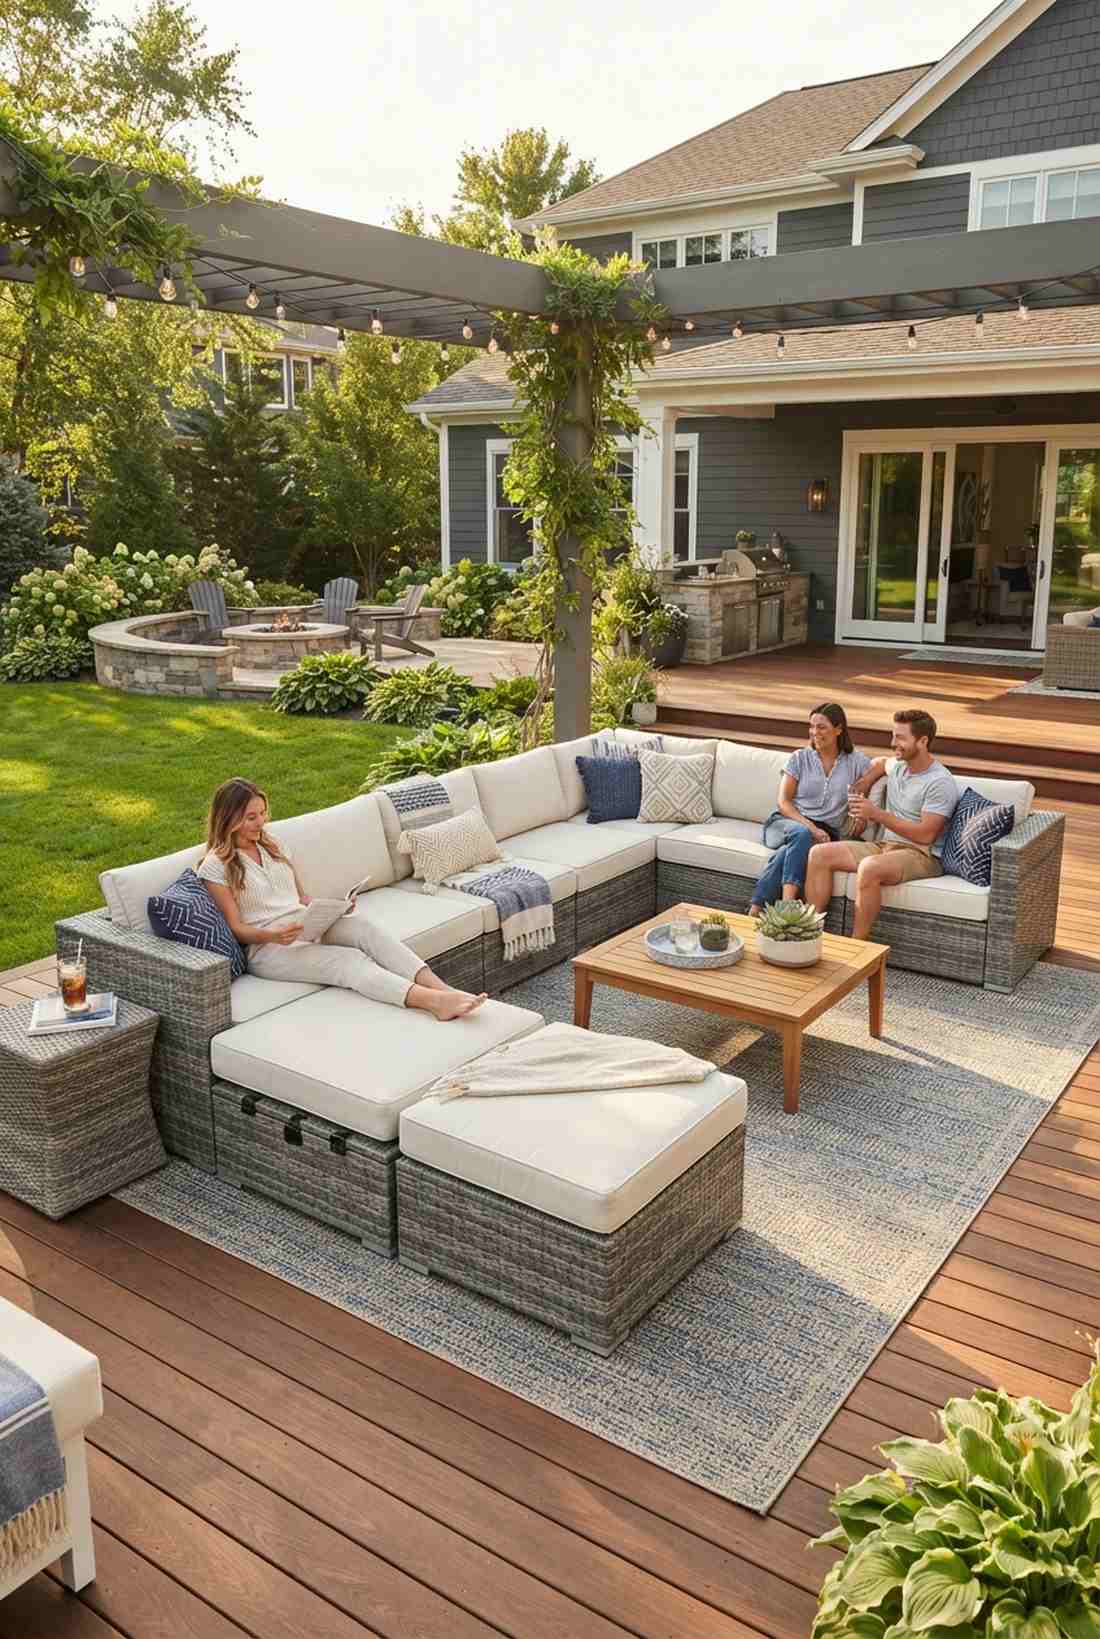
Feels like a luxury VIP lounge that morphs to fit your exact crowd. Adaptable L-shaped zoning provides maximum seating with minimal footprint. The ultimate choice for deep, spacious patios.
Rigid iron patio sets are outdated; modular pieces deliver a highly versatile, designer-level finish that adapts to shifting guest counts. Investing in all-weather resin wicker kits ensures you aren’t dragging heavy furniture inside every time it drizzles.
A good modular base starts around $250 but pays for itself in utility. Save this to your patio remodel board!
- Key Materials: Modular outdoor sofa segments, connector clips
- Vibe / Style: Contemporary resort chic
- Difficulty: Moderate furniture assembly
- Budget Breakdown: Sofa sections: $250 | Clips: $15.
- Creator’s Tip: Always buy sectional clips; otherwise, the pieces will slide apart instantly when guests sit down.
- Smart Sourcing: Universal outdoor furniture connector clips (bulk pack) and waterproof sectional cover kits.
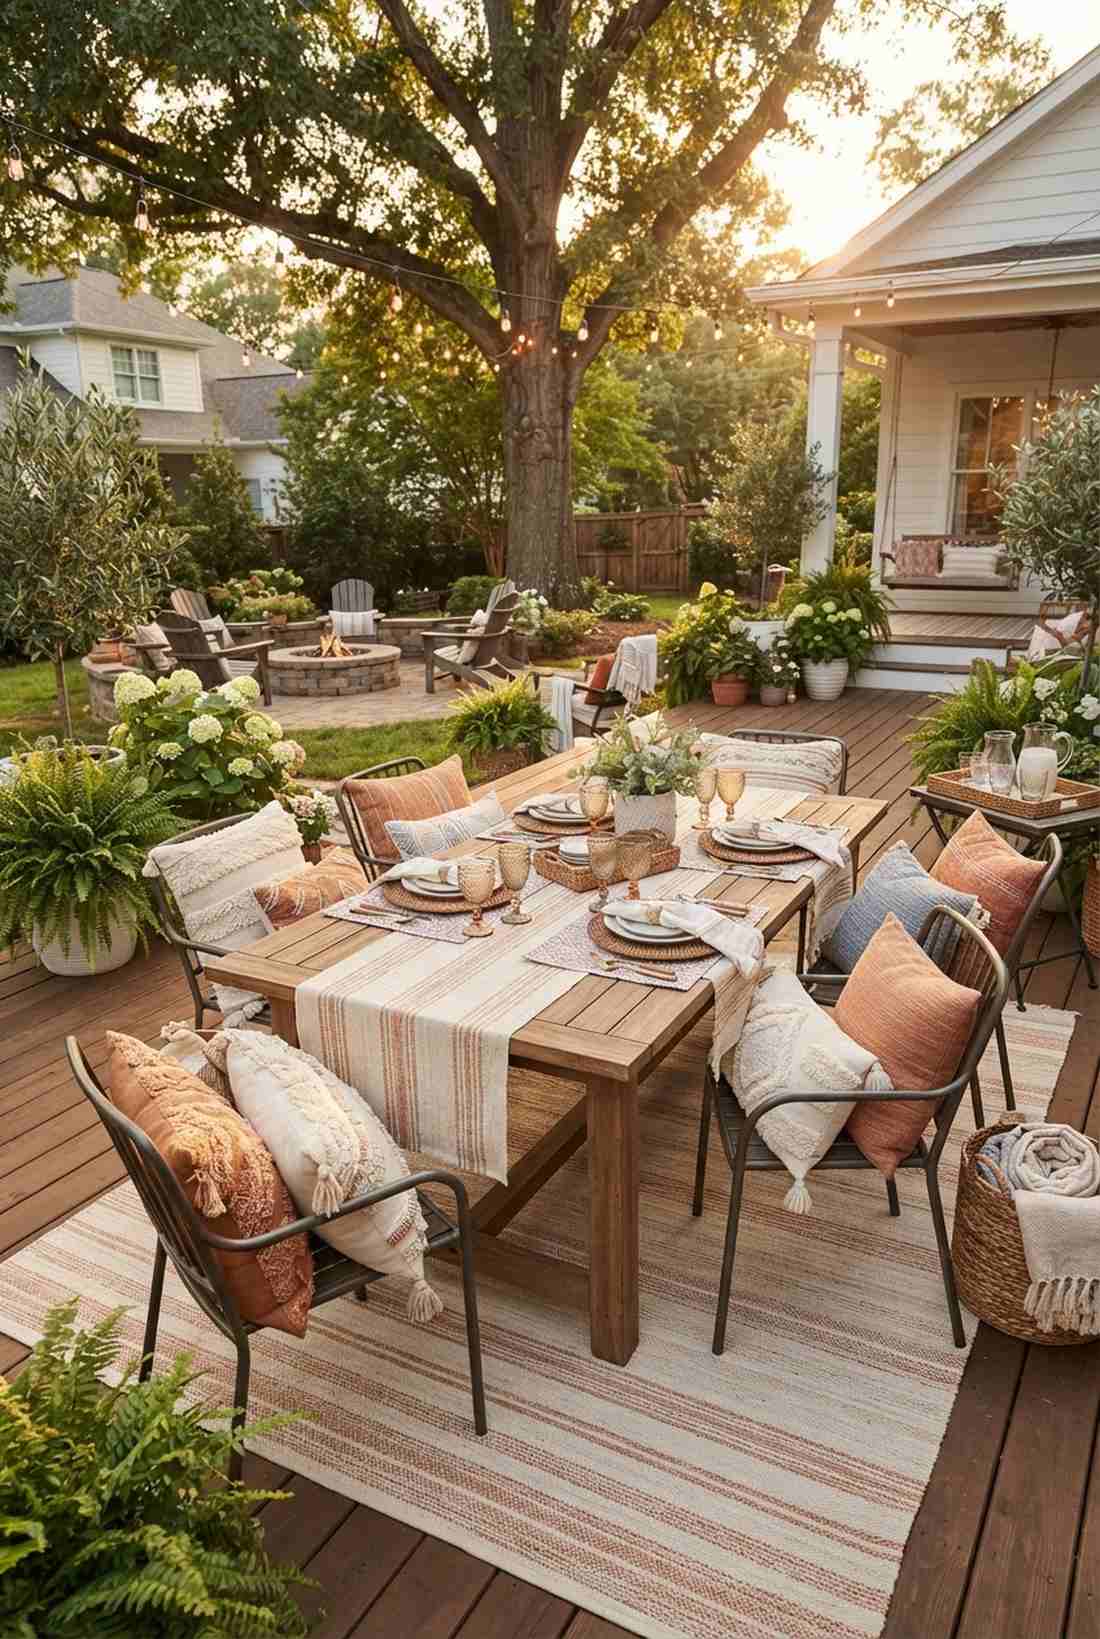
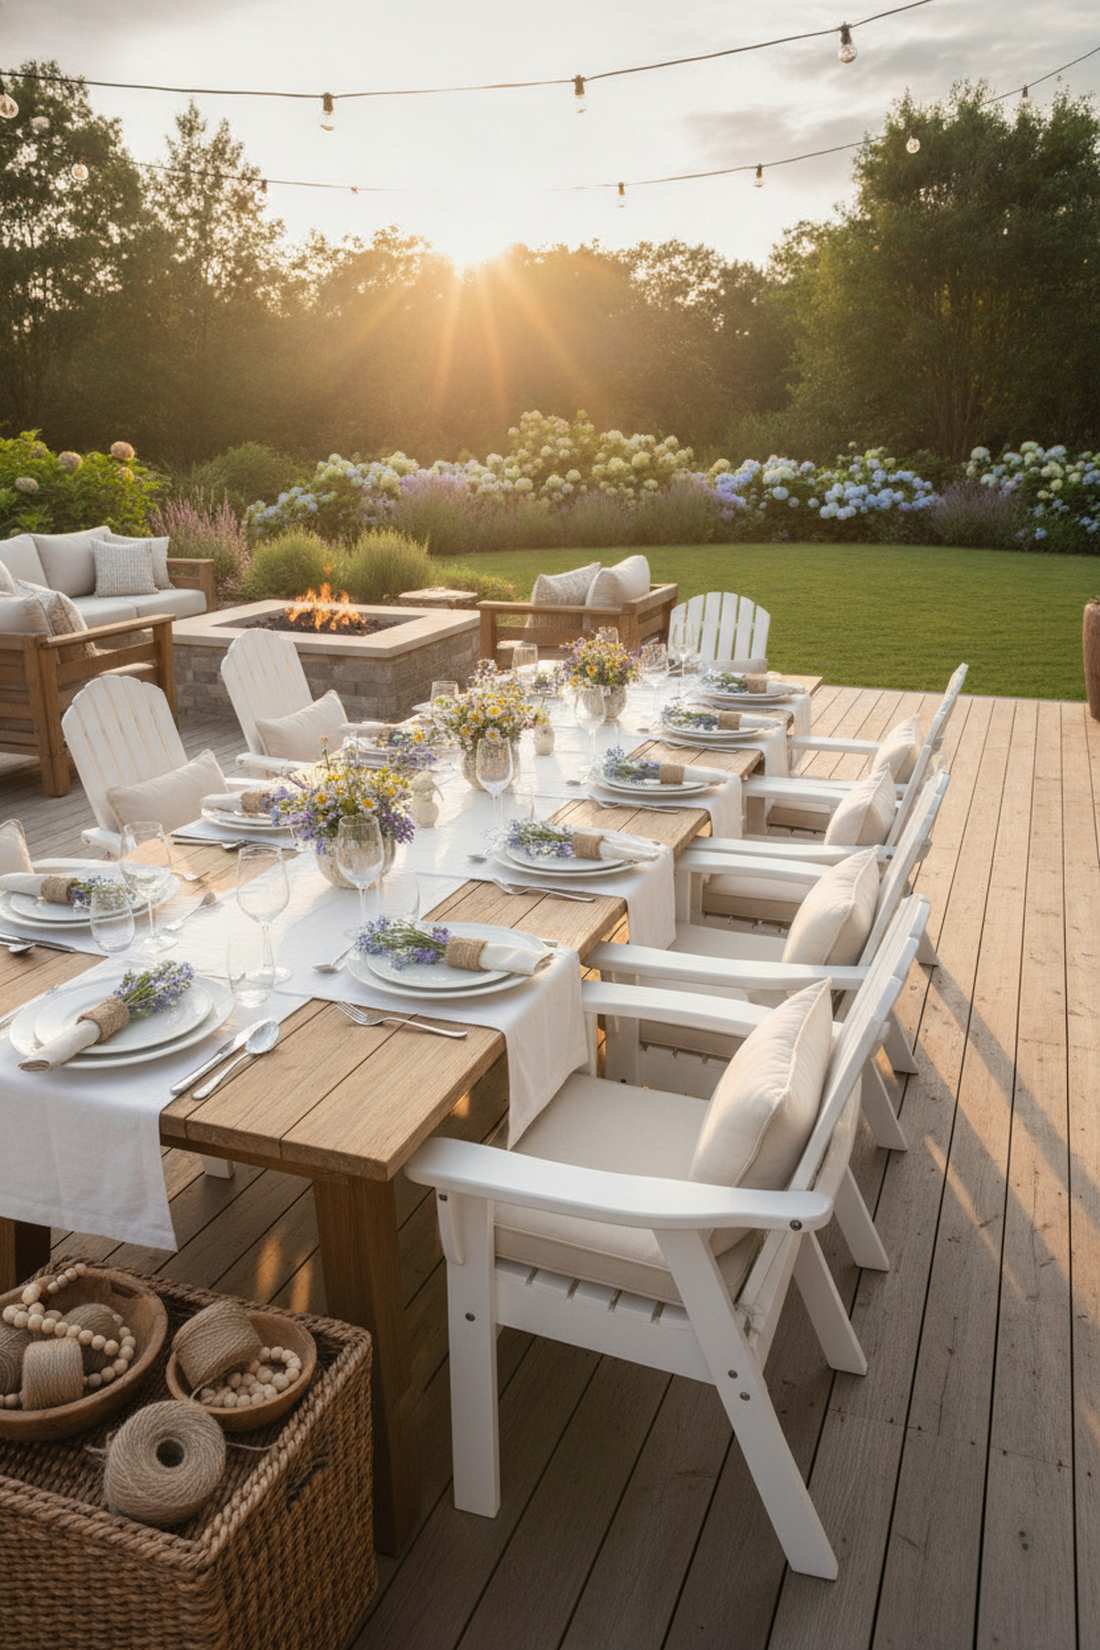
13. Long Table Communal Dining
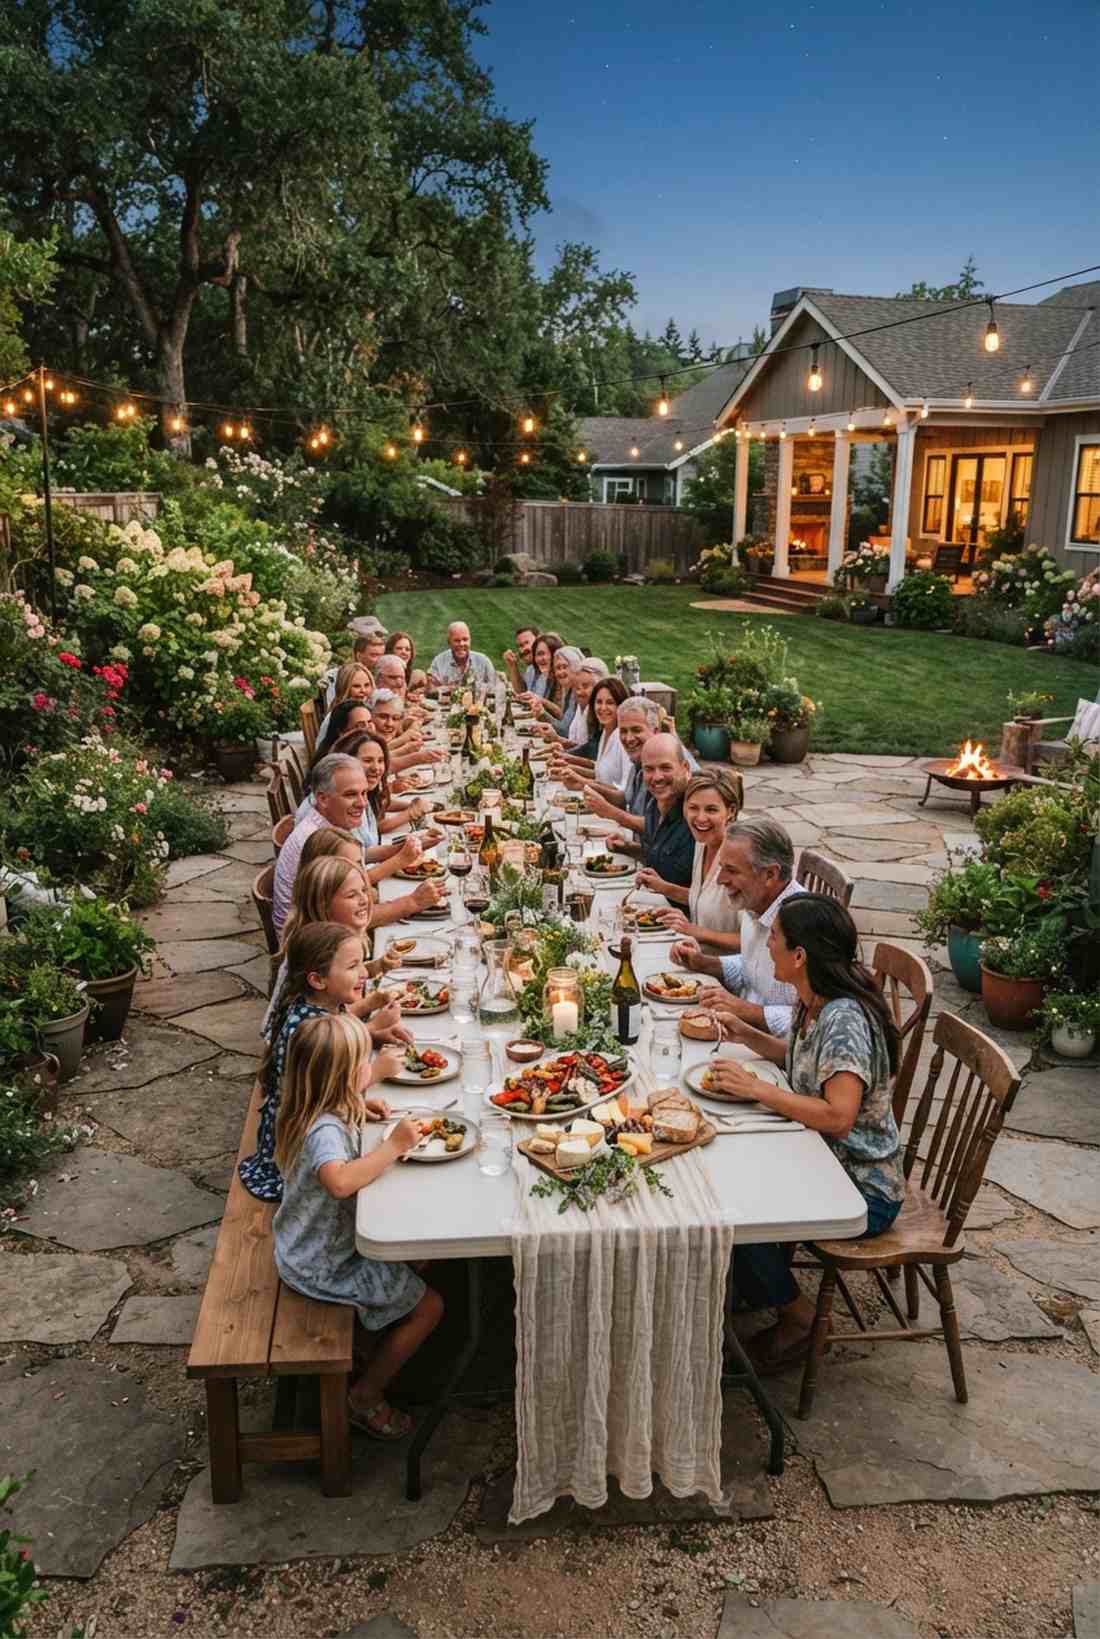
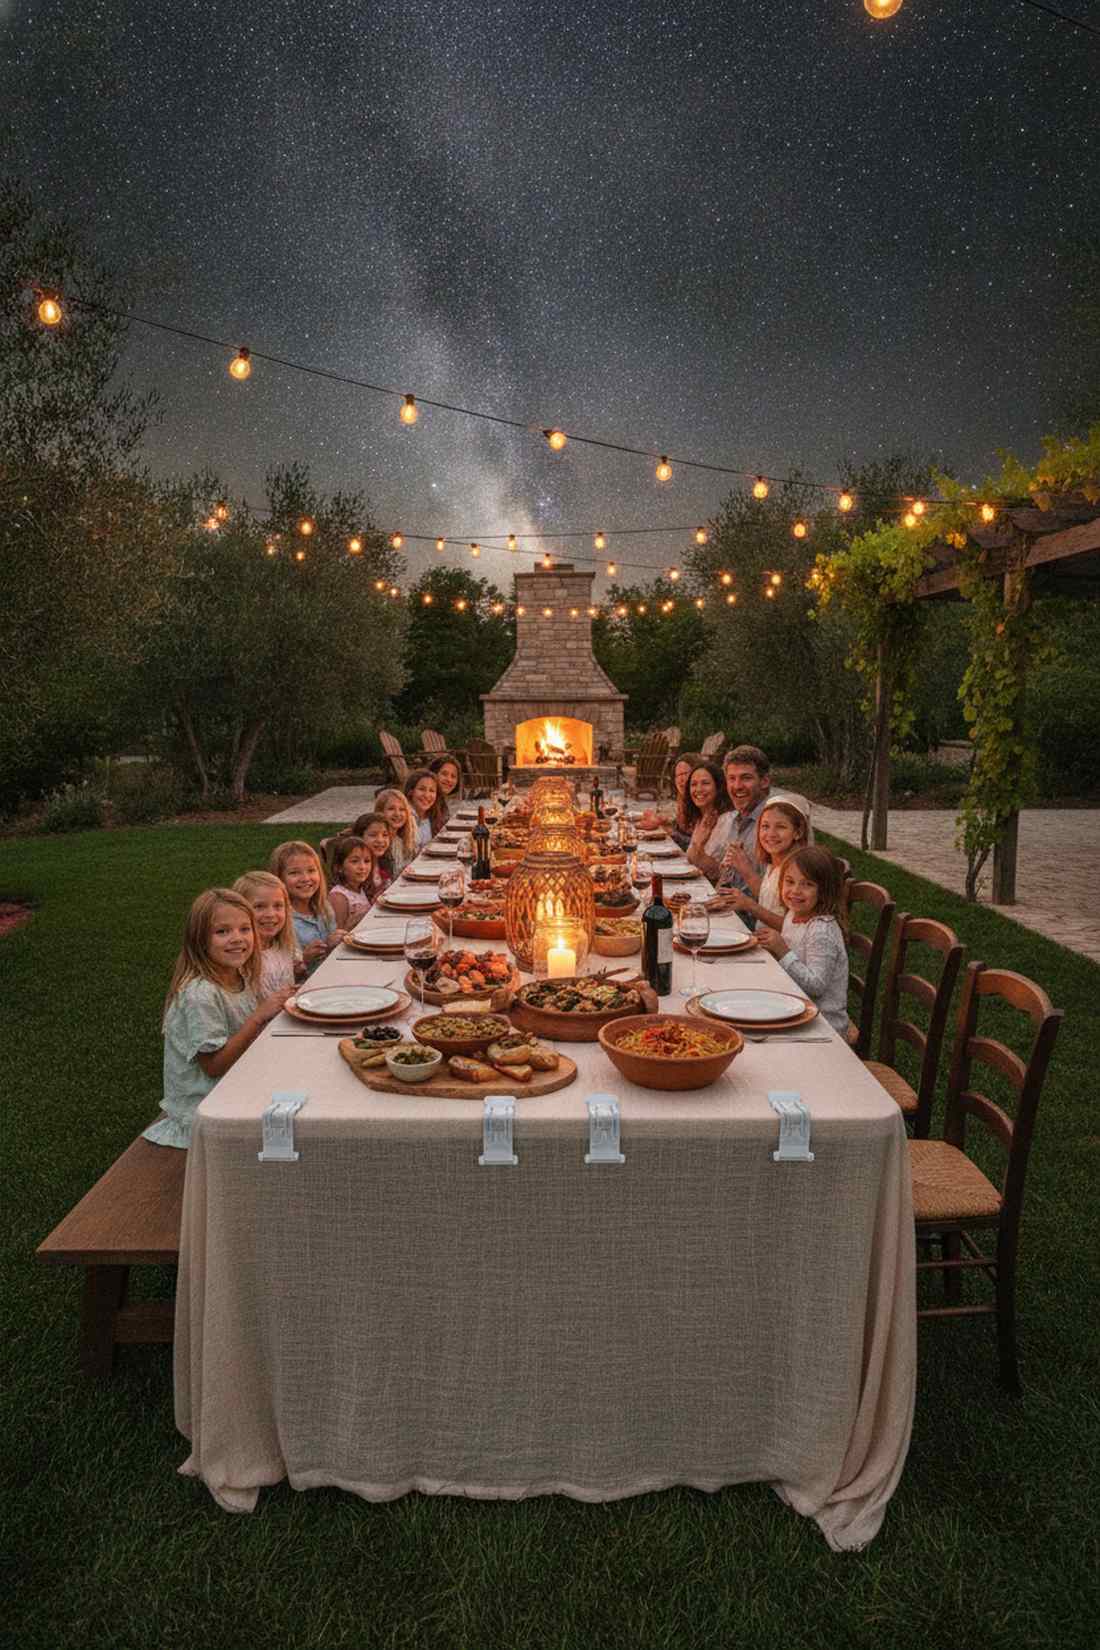
Feels like a rustic Italian vineyard feast under the stars. Unified continuous table staging brings everyone together for a massive shared experience. Brilliant for milestone birthdays or large family reunions.
Pushing separate small tables together often leaves awkward gaps, but laying down one massive continuous runner hides the seams seamlessly. Utilizing bulk catering table clips and long flowing linens delivers a highly photogenic, expensive banquet look.
Renting or hacking long tables costs about $50. It completely dominates the yard’s aesthetic in the best way possible.
- Key Materials: 8-foot folding tables, continuous runner cloth
- Vibe / Style: Tuscan family feast
- Difficulty: Heavy lifting required
- Budget Breakdown: Tables (rented): $30 | Bulk runner: $20.
- Creator’s Tip: Mix bench seating on one side to squeeze in more kids, leaving individual chairs for the adults.
- Smart Sourcing: Pre-cut cheesecloth table runners (bulk pack) and heavy-duty plastic table clips.
14. Scattered Pod Seating
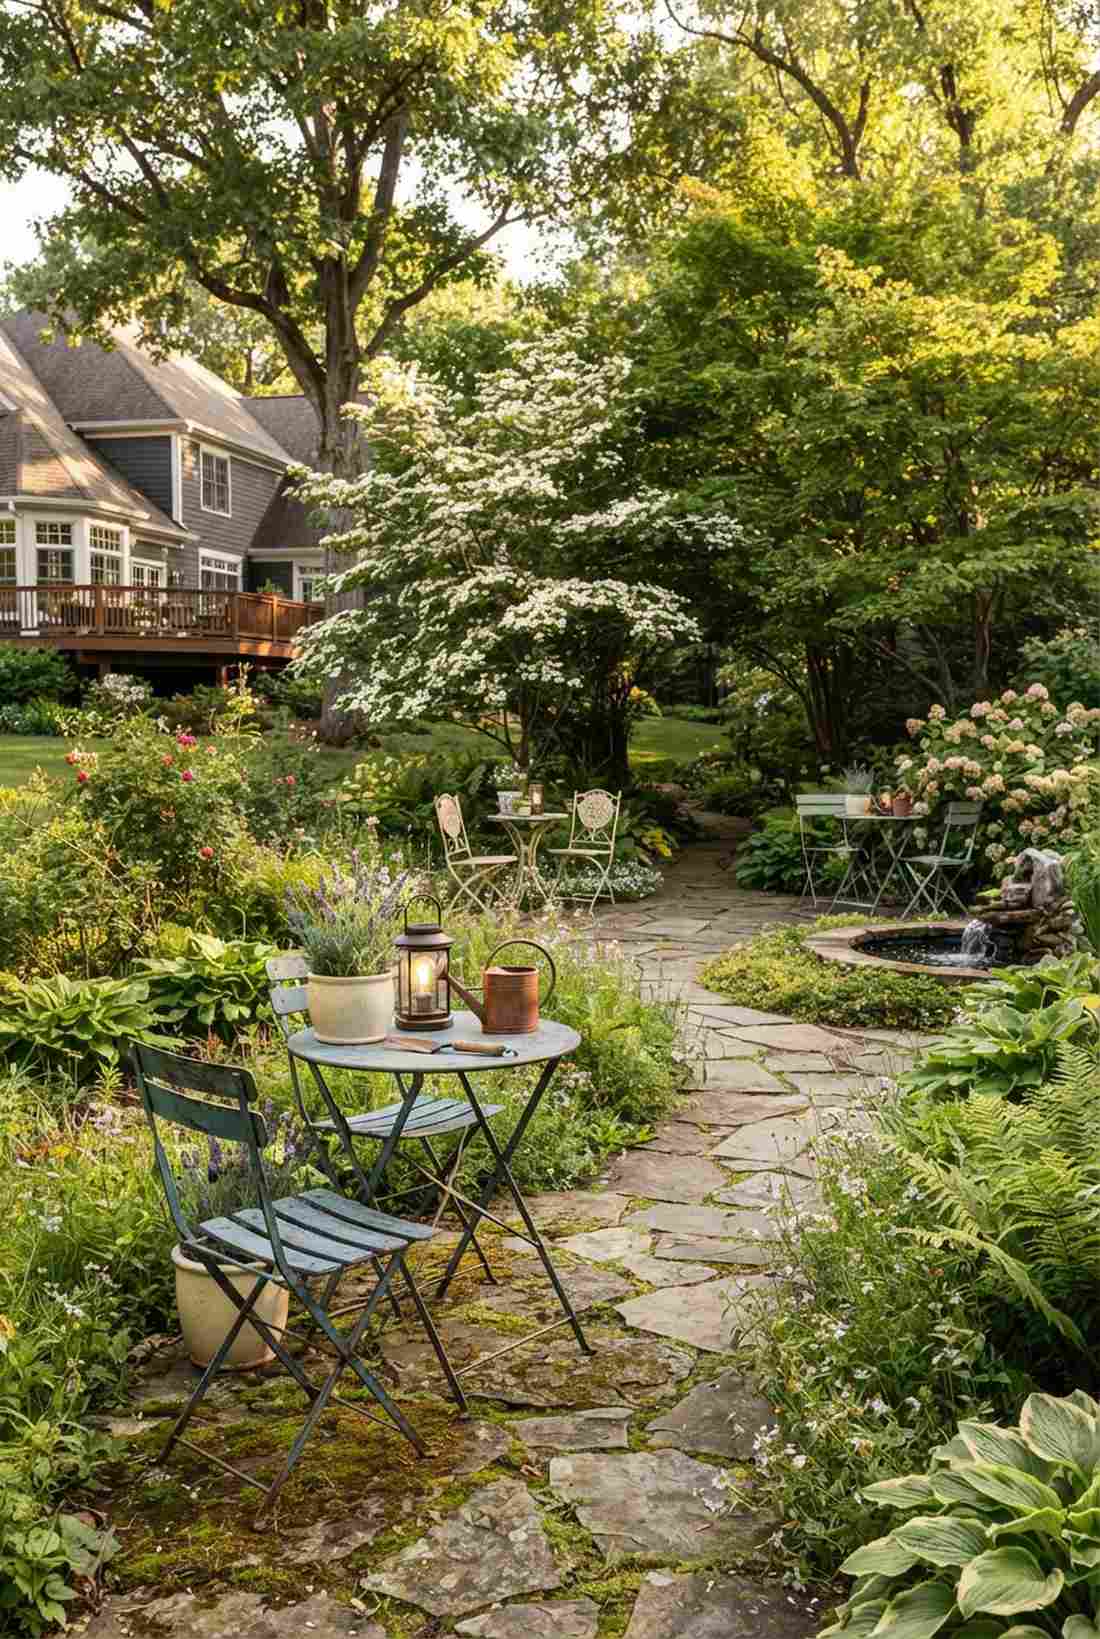
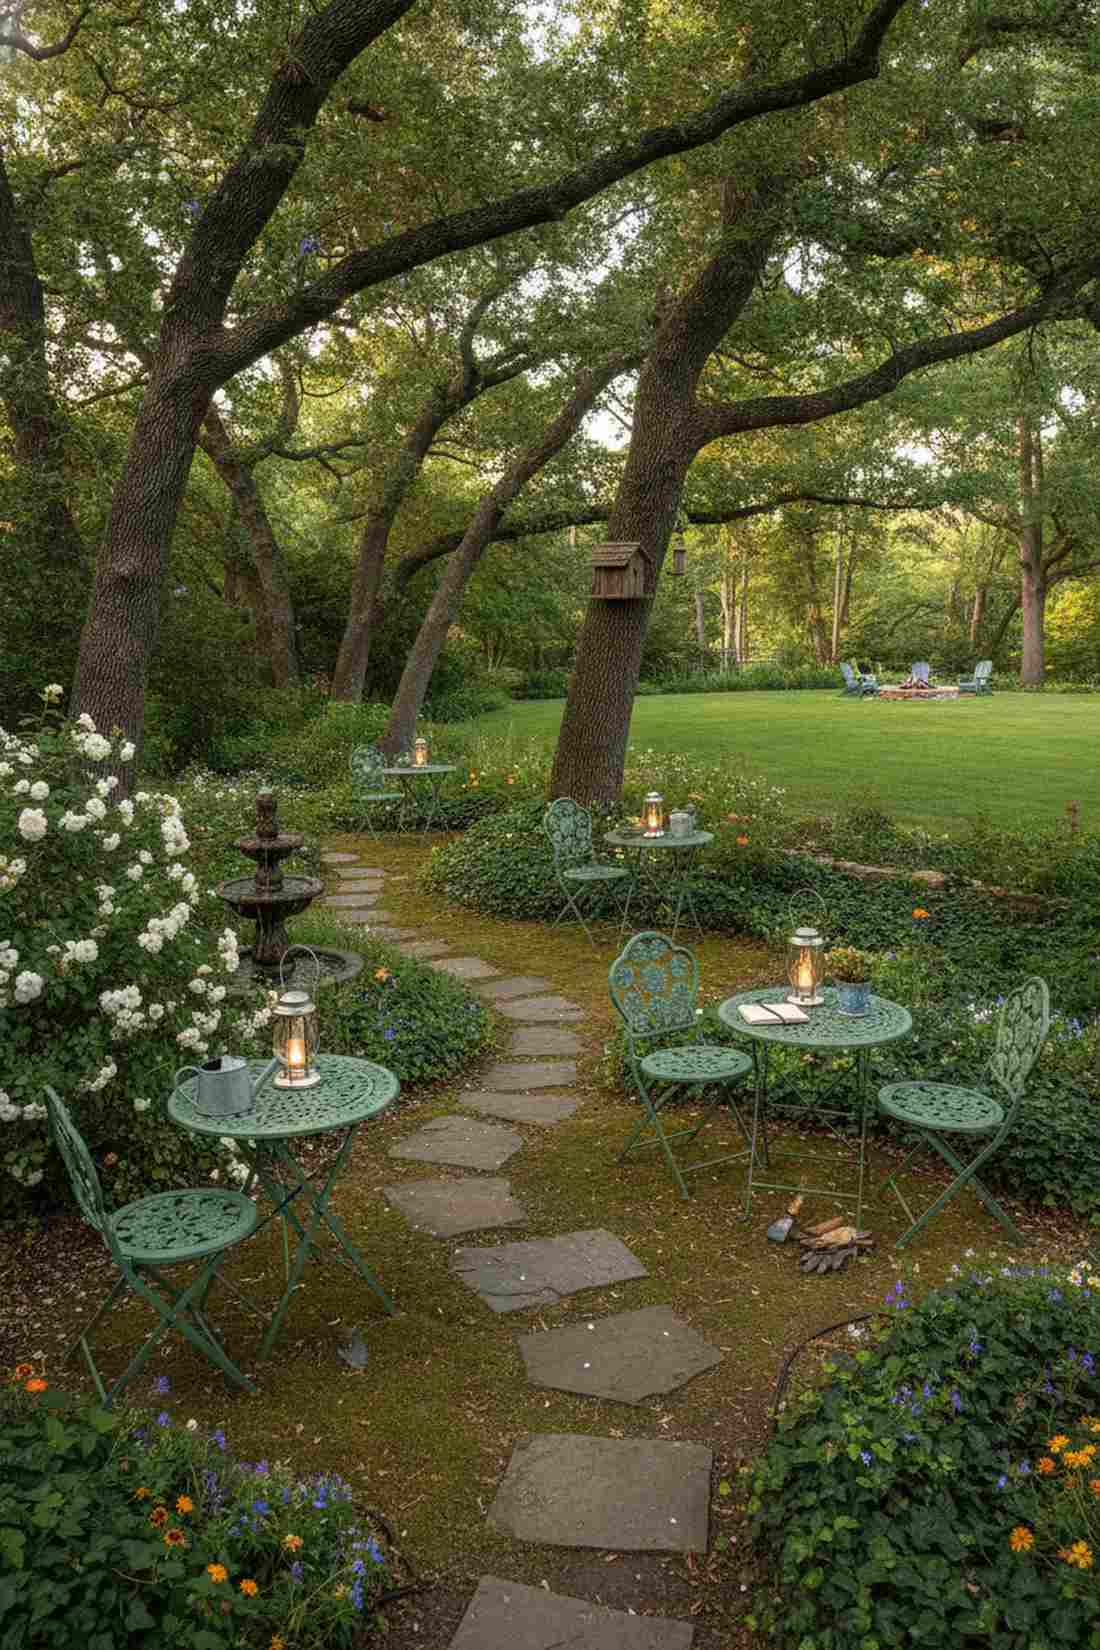
Feels like discovering hidden VIP corners throughout an enchanted estate. Decentralized micro-lounges encourage guests to explore the entire property. Ideal for gardens with lots of mature trees or winding paths.
Keeping everyone on the main deck creates gridlock, but scattering mini-seating pods naturally disperses the crowd. Tucking miniature garden supplies and tiny lanterns near these pods rewards guests who wander away from the main hub.
Set up three pods using cheap thrifted chairs for under $60. Pin this layout if you have a massive, underutilized yard.
- Key Materials: Bistro chairs, small side tables
- Vibe / Style: Secret garden discovery
- Difficulty: Fun and creative
- Budget Breakdown: Bistro set: $45 | Lantern: $15.
- Creator’s Tip: Place each pod near a specific sensory feature—like a fragrant bush, a water fountain, or a great view.
- Smart Sourcing: Foldable steel bistro patio sets and solar-powered outdoor tabletop lanterns.
This next seating trick is ridiculously cheap but completely eliminates the need to buy more bulky outdoor chairs…
15. Built-In Perimeter Seating
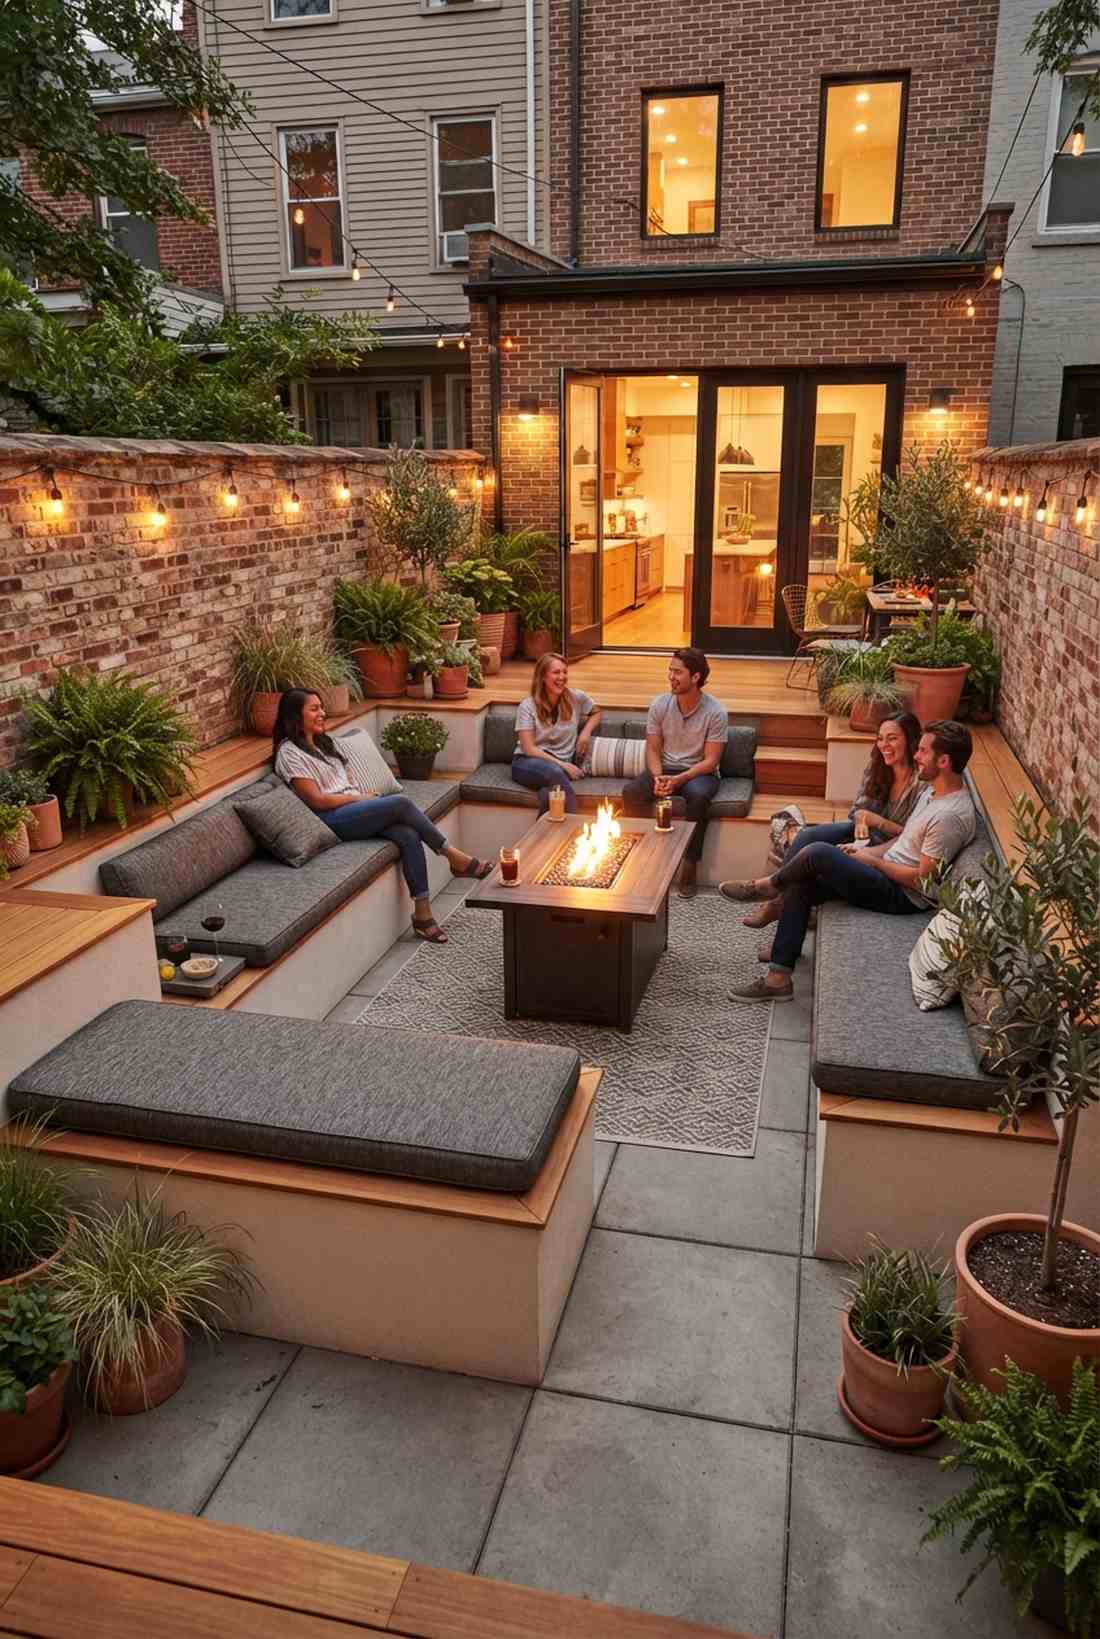
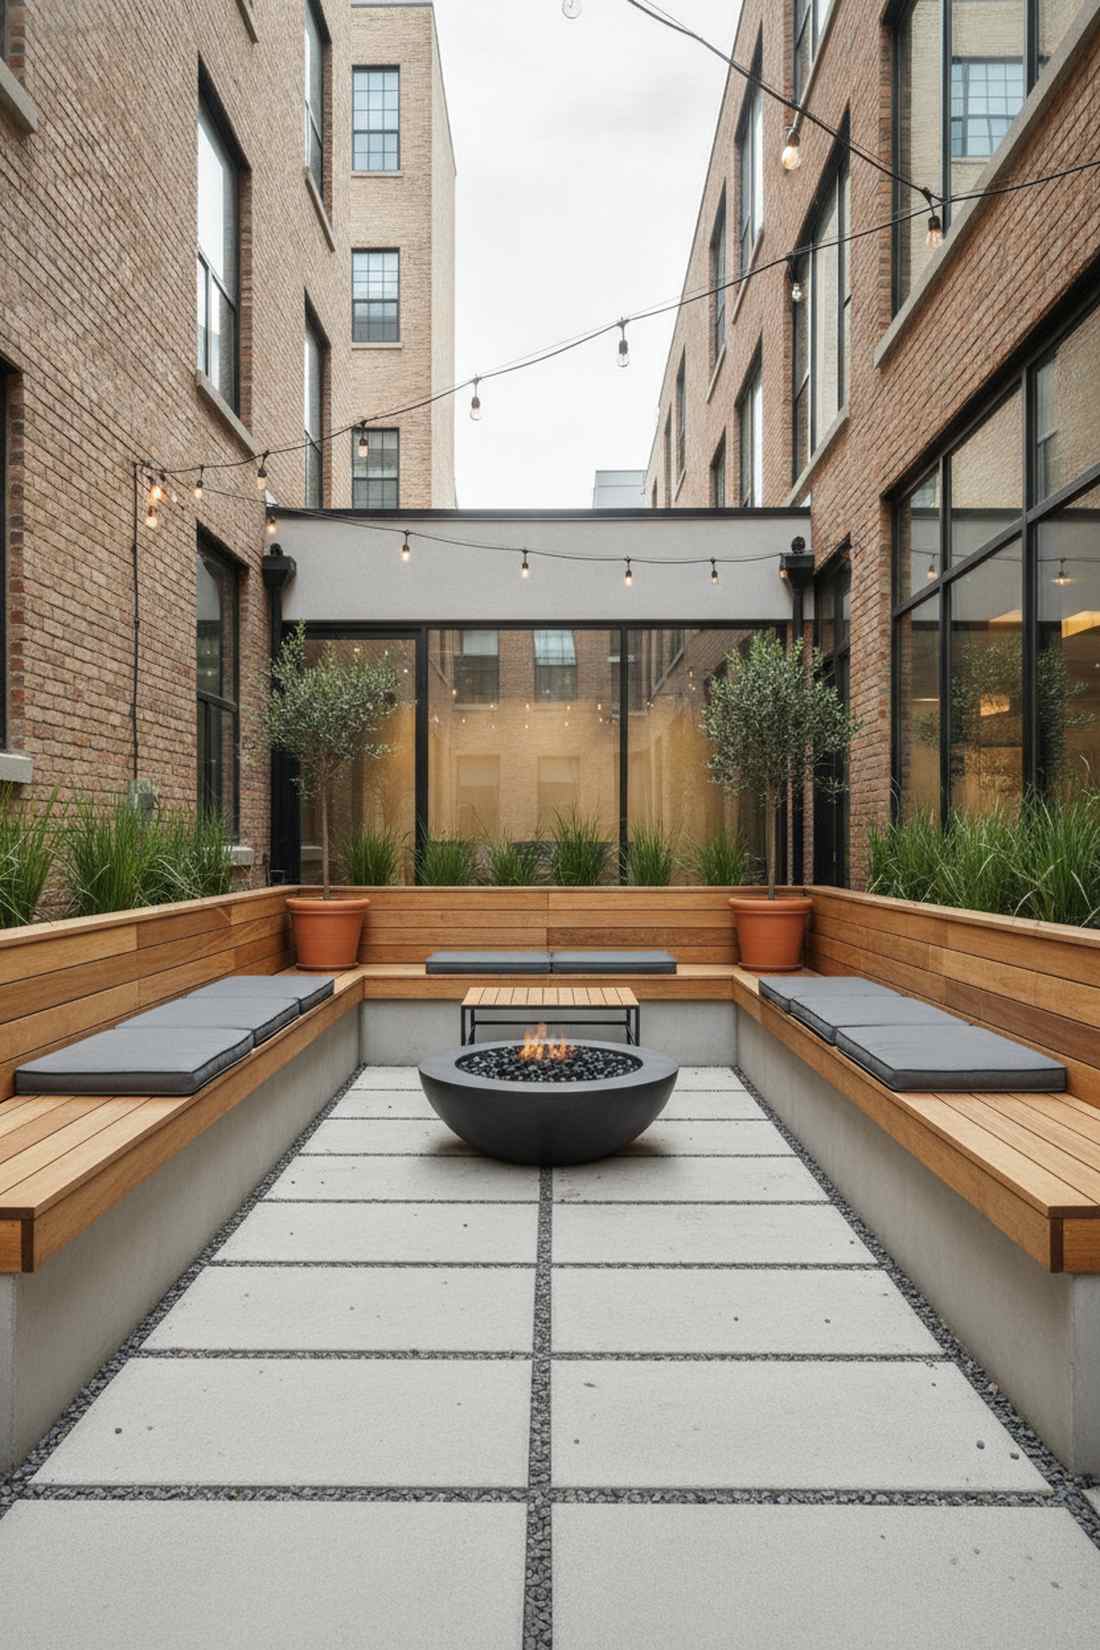
Feels like a custom architectural amphitheater designed just for your friends. Integrated wall benches create invisible seating that doesn’t eat up your floor space. An absolute lifesaver for ultra-tiny urban courtyards.
Filling a small patio with bulky chairs ruins the flow, but capping your retaining walls with smooth wood gives a completely custom designer-level finish. Utilizing weatherproof marine-grade foam cushions turns hard stone into luxurious all-night lounging spots.
Capping a wall costs about $75 in lumber. It is the smartest space-saving hack you will ever do.
- Key Materials: Treated lumber planks, concrete anchors
- Vibe / Style: Sleek urban minimalist
- Difficulty: Intermediate carpentry
- Budget Breakdown: Lumber cap: $45 | Hardware: $20.
- Creator’s Tip: Ensure the bench height hits exactly 18 inches off the ground—the universal standard for dining comfort.
- Smart Sourcing: Pre-cut marine grade upholstery foam (bulk pack) and heavy-duty concrete masonry anchors.
16. Mixed-Height Seating Variety
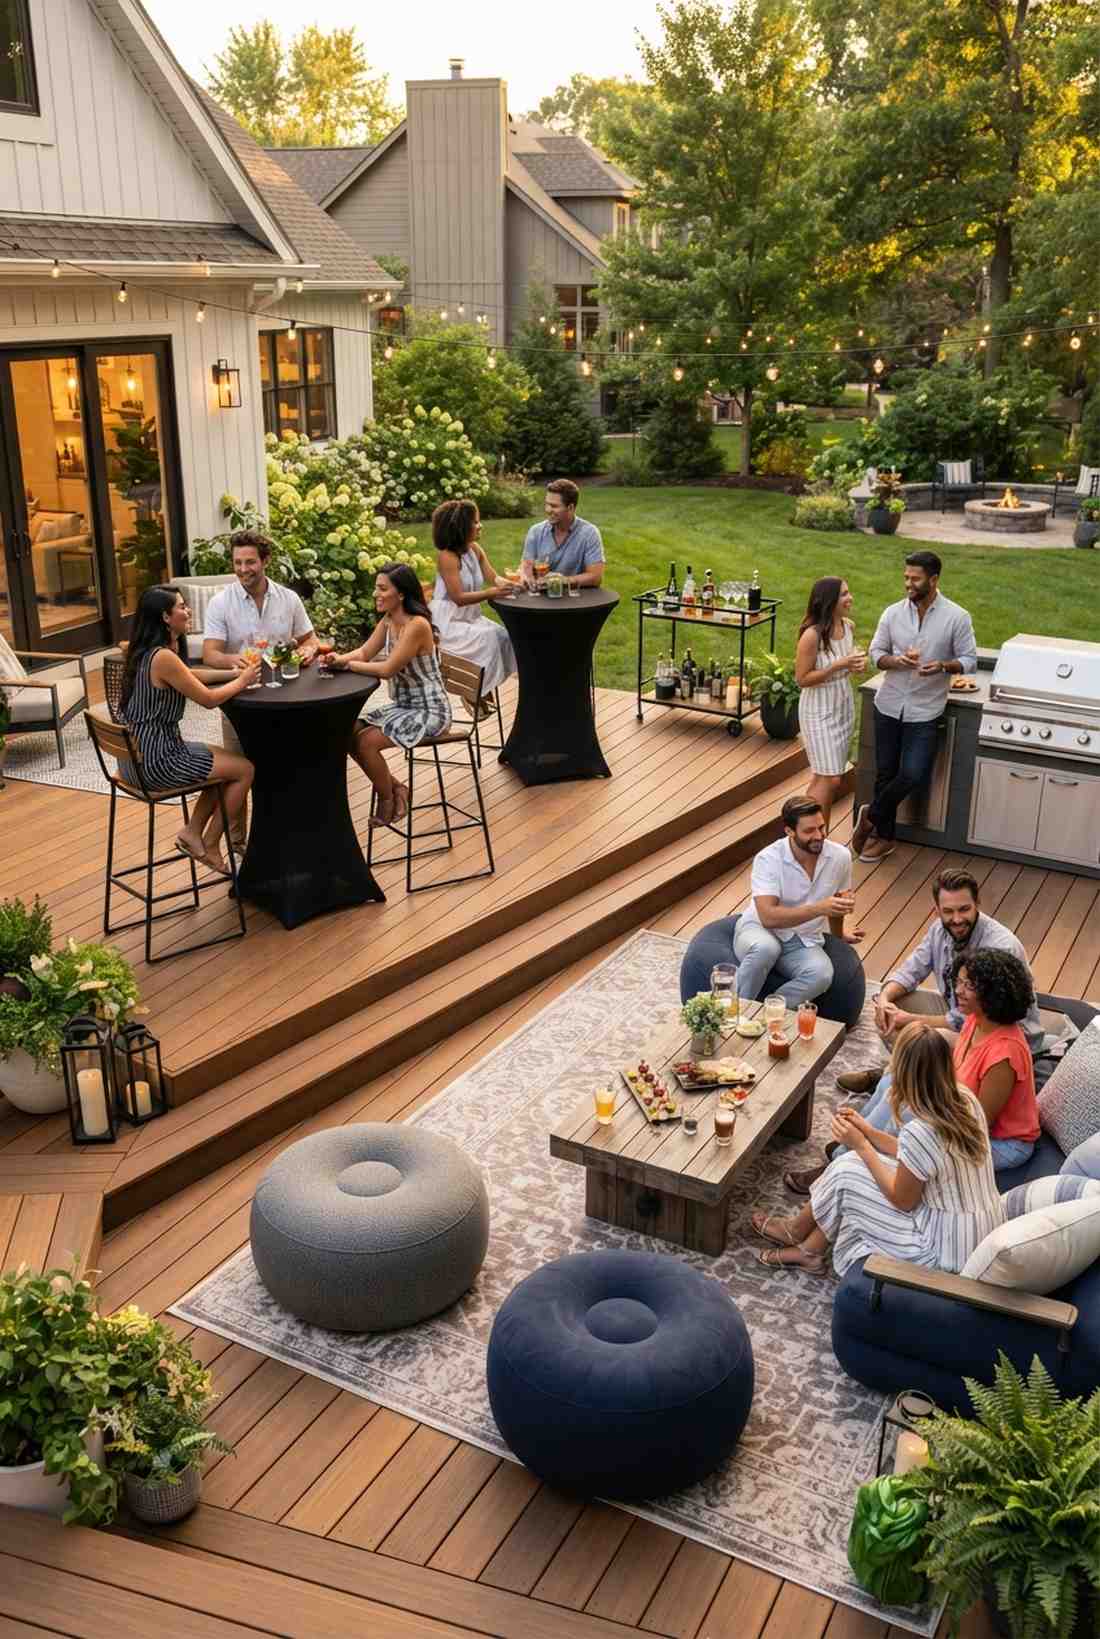
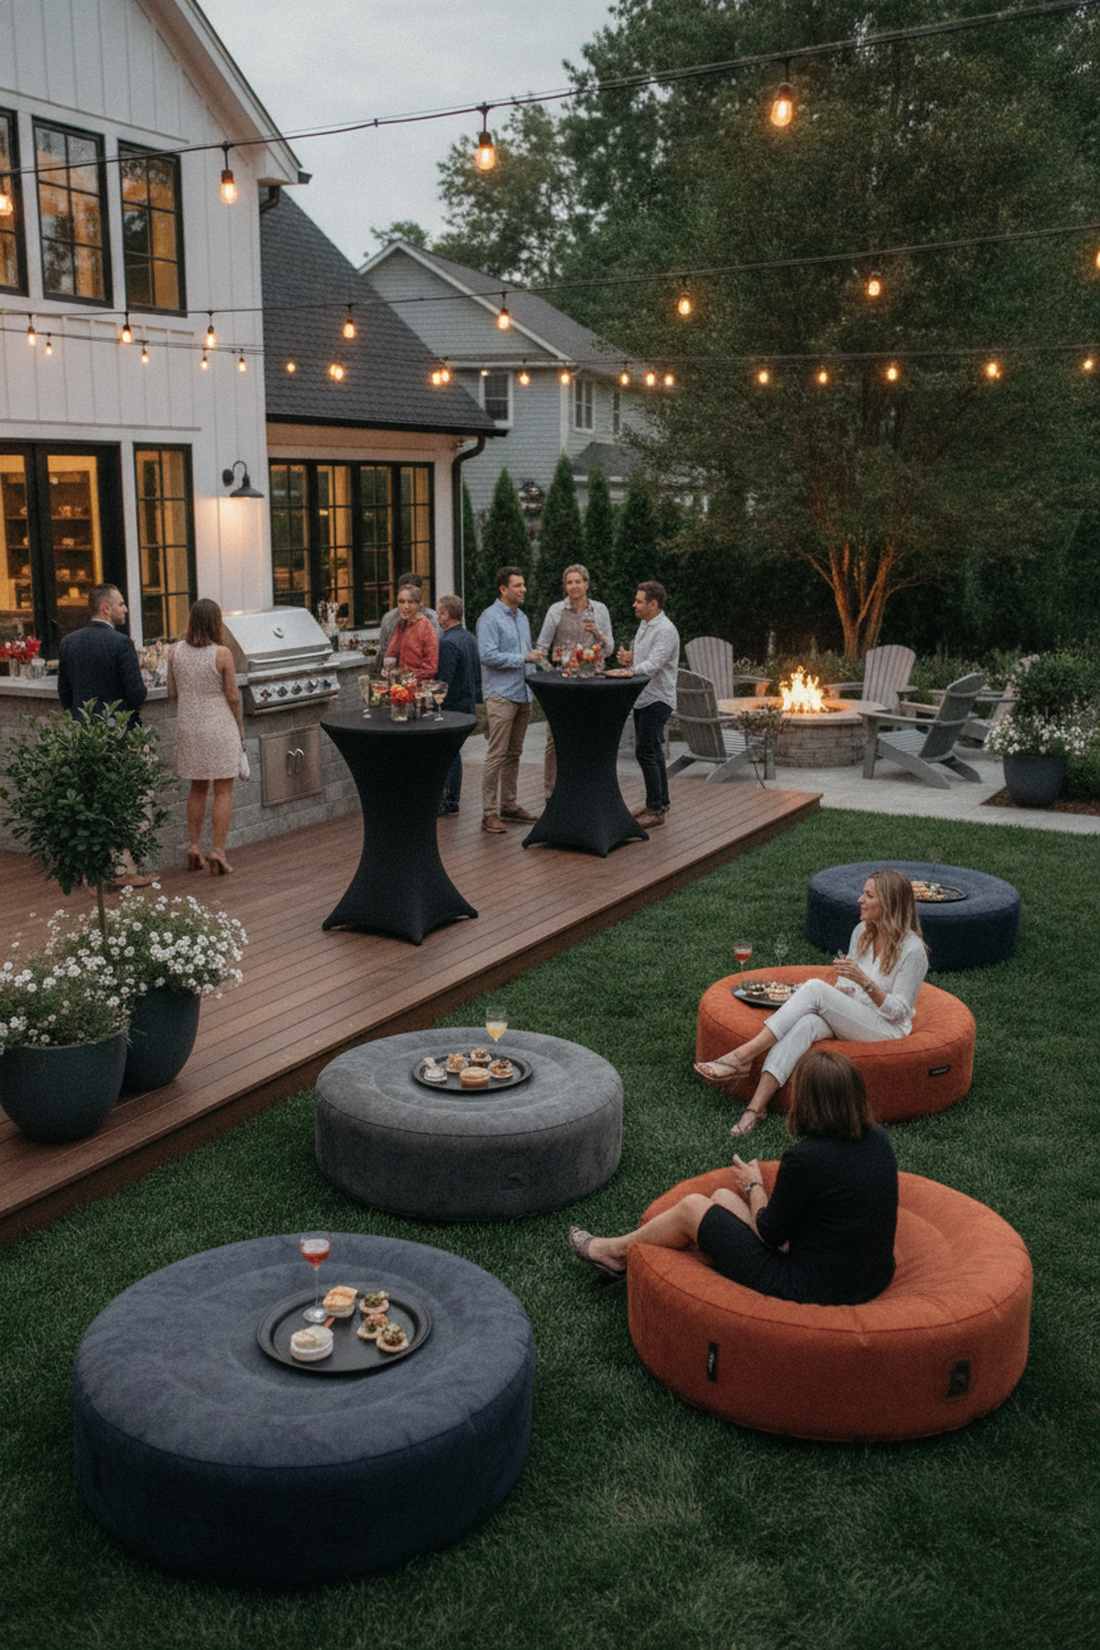
Feels like a trendy rooftop bar with sweeping, dynamic sight lines. Vertical seating stratification breaks up the boring, flat sea of heads. Excellent for casual mingling events and cocktail hours.
When everyone sits at the exact same height, the yard looks incredibly flat, but mixing bar stools with low-slung floor cushions adds instant architectural depth. Distributing outdoor dining supplies across these varied elevations makes your backyard feel like an expensive commercial venue.
Mixing in just two high-top tables can be done for under $80. Save this for your next cocktail party blueprint!
- Key Materials: Bar-height stools, floor poufs
- Vibe / Style: Dynamic club lounge
- Difficulty: Quick staging
- Budget Breakdown: High-top table: $60 | Poufs: $30.
- Creator’s Tip: Keep the high-tops near the bar or grill so people can easily chat with the host while standing.
- Smart Sourcing: Waterproof inflatable outdoor floor poufs and spandex high-top table covers.
Home Garden Flowers and Display Stations
Floral elements define the aesthetic tone of outdoor events. Strategic placement of cut flowers and blooming plants guides guest attention, marks entrances, and reinforces your design theme through color and texture repetition.
17. Entry Statement Arrangements
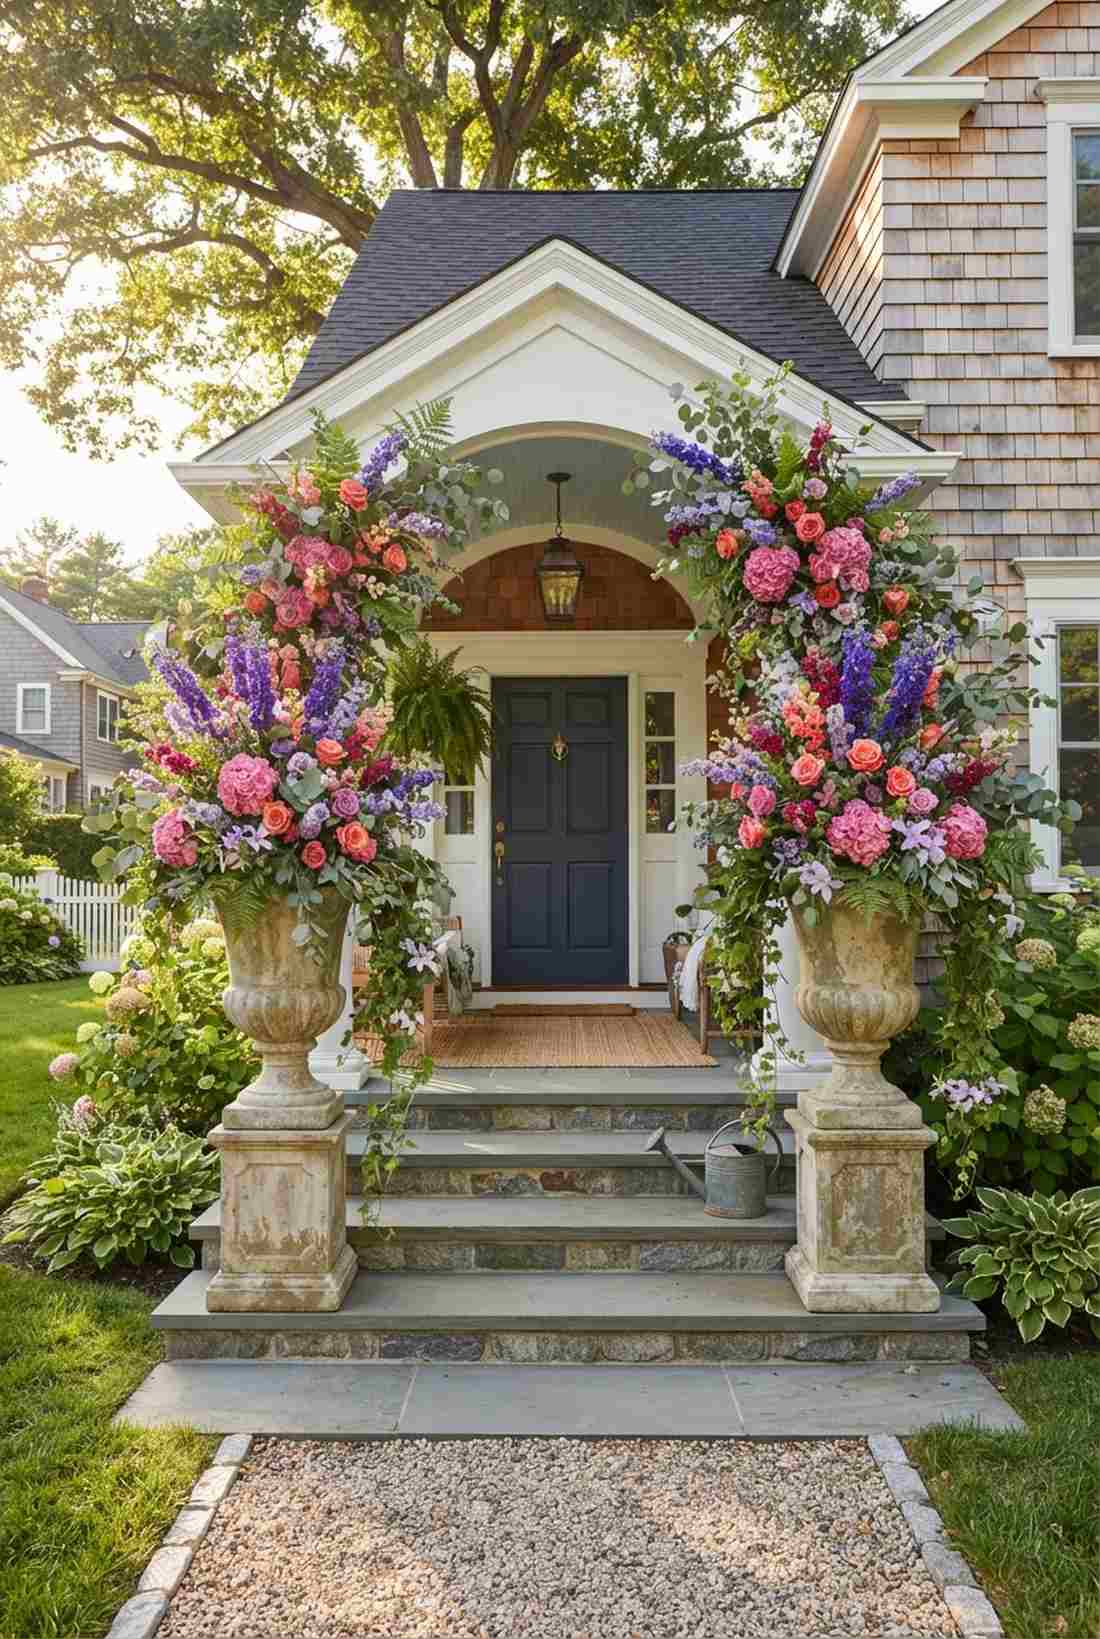

Feels like walking into a botanical wonderland right off the street. Oversized floral gateway framing creates a dramatic, unforgettable first impression. Perfect for front gates or the top of patio steps.
Skipping basic nursery pots for towering vintage urns instantly delivers a shockingly premium aesthetic. Use commercial-grade floral foam blocks to anchor vibrant home garden flowers securely so heavy summer winds won’t ruin your arrangement.
Expect to spend $40–$75 depending on seasonal bloom availability. Pin this visual to your summer entertaining board for easy reference!
- Key Materials: Large urn planters, floral anchor foam
- Vibe / Style: Grand estate welcome
- Difficulty: Moderate floral arranging
- Budget Breakdown: Urns (plastic faux-stone): $40 | Foam: $10.
- Creator’s Tip: Forage thick green branches from your own yard to fill the base, saving money on expensive filler flowers.
- Smart Sourcing: Pre-cut floral foam blocks (bulk pack) and lightweight faux-concrete urns.
18. Floating Centerpiece Clusters
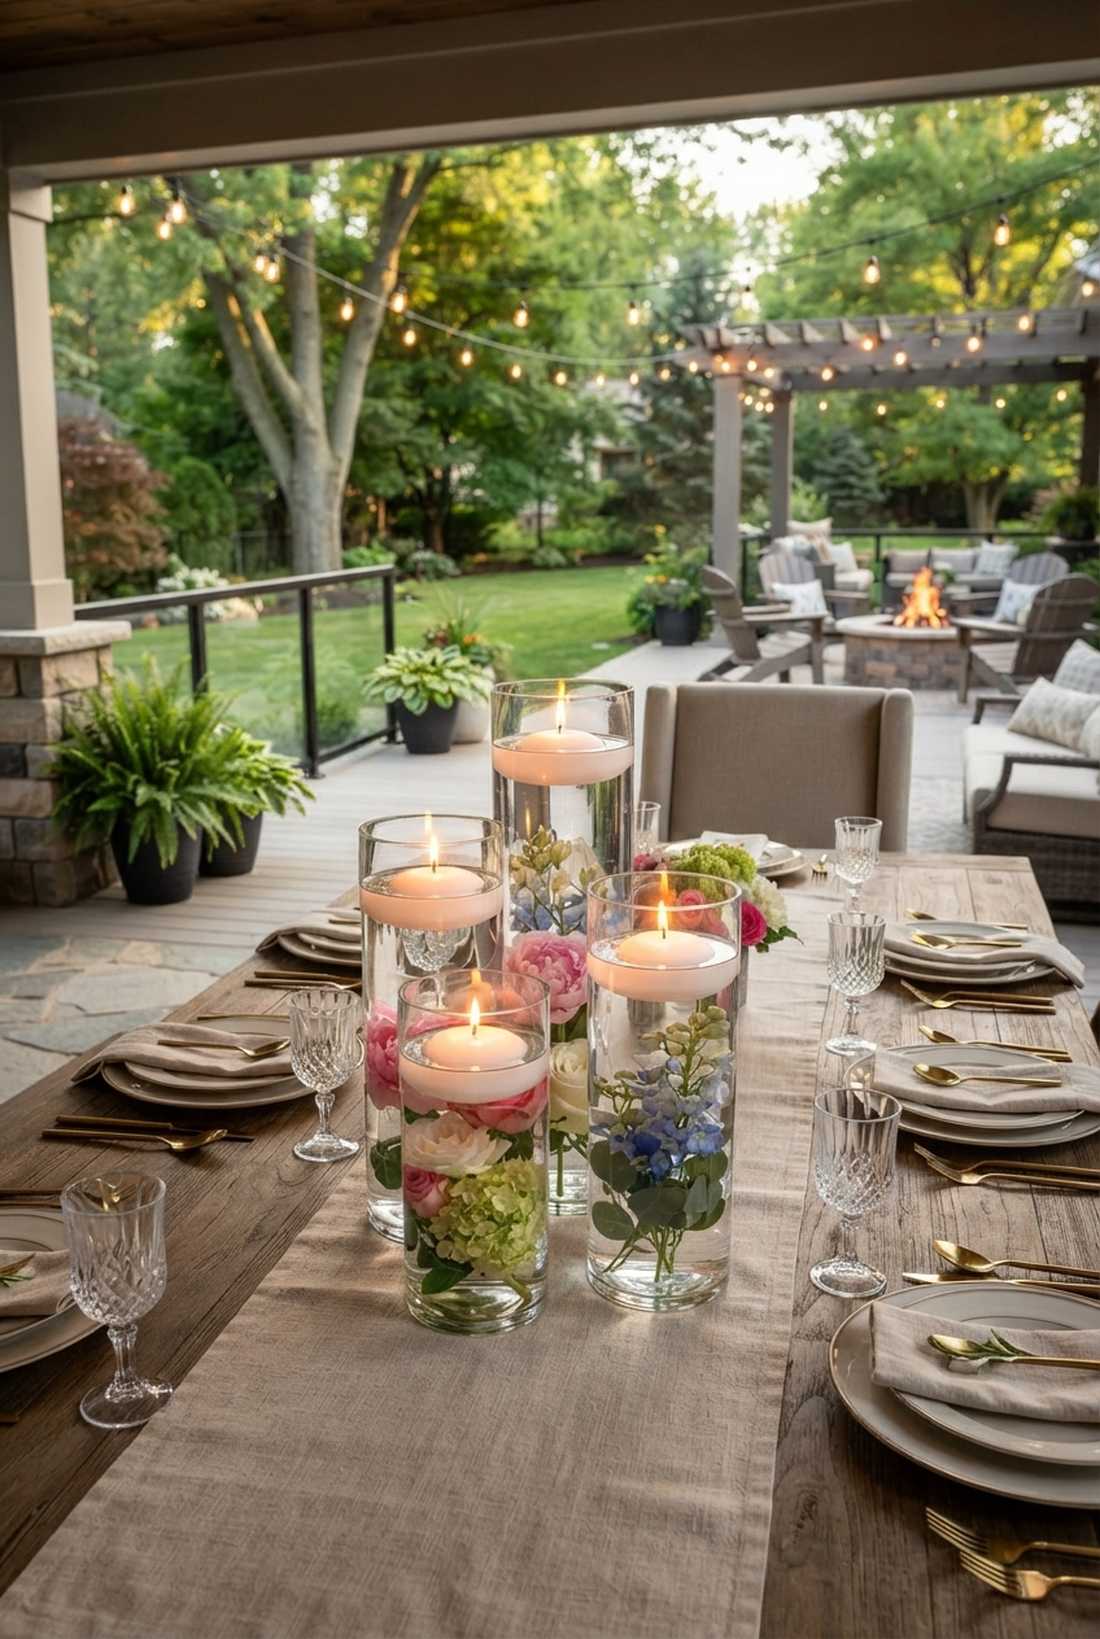
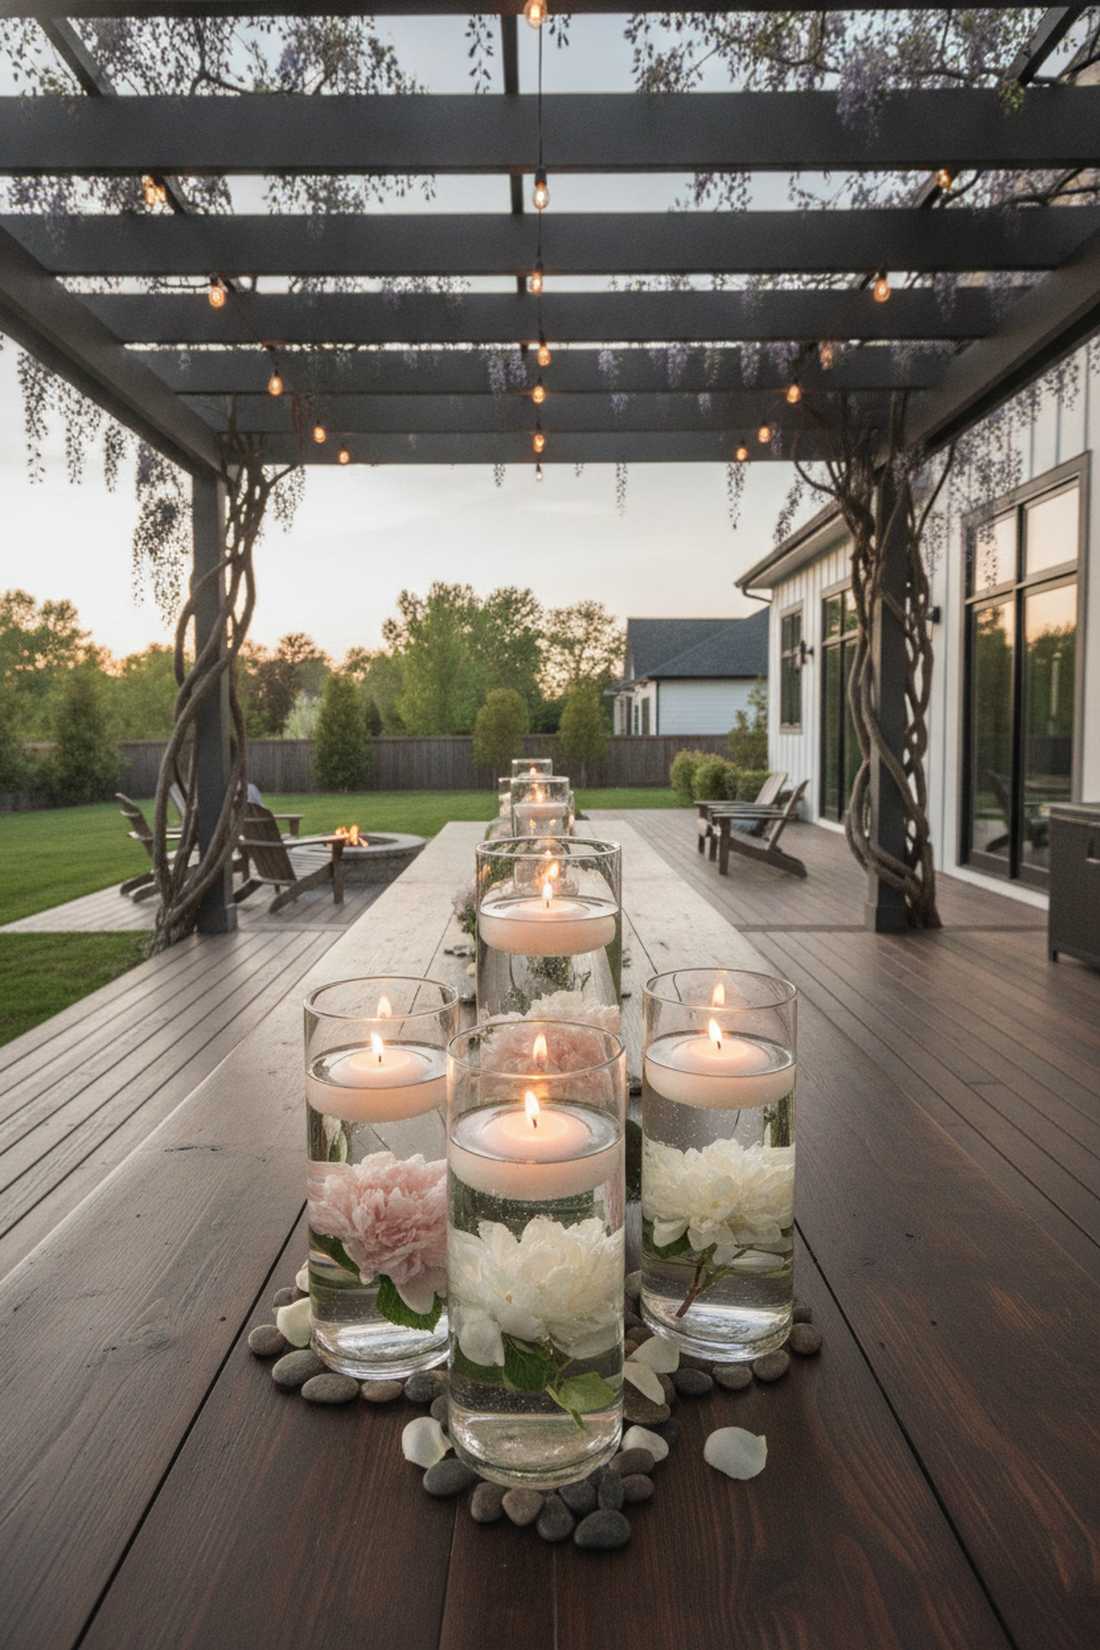
Feels like elegant floating orbs of light and color resting on your tables. Submerged botanical cylinder displays offer luxury aesthetics with zero arranging skills needed. Highly effective for long communal dining tables.
Massive floral centerpieces block people from talking across the table, but low transparent water elements look far more expensive while keeping sightlines totally clear. Dropping heavy home garden flowers into distilled water with floating candles gives a designer-level finish in minutes.
You can create a cluster of three for roughly $15. It’s a gorgeous, low-stress centerpiece hack.
- Key Materials: Glass cylinder vases, floating disc candles
- Vibe / Style: Modern minimalist romance
- Difficulty: Very easy
- Budget Breakdown: Vases: $10 | Candles: $5.
- Creator’s Tip: Use distilled water instead of tap water to prevent ugly bubble clinging to the inside of the glass.
- Smart Sourcing: Clear glass cylinder vase sets (bulk pack) and long-burn floating disc candles.
19. Overhead Floral Installations
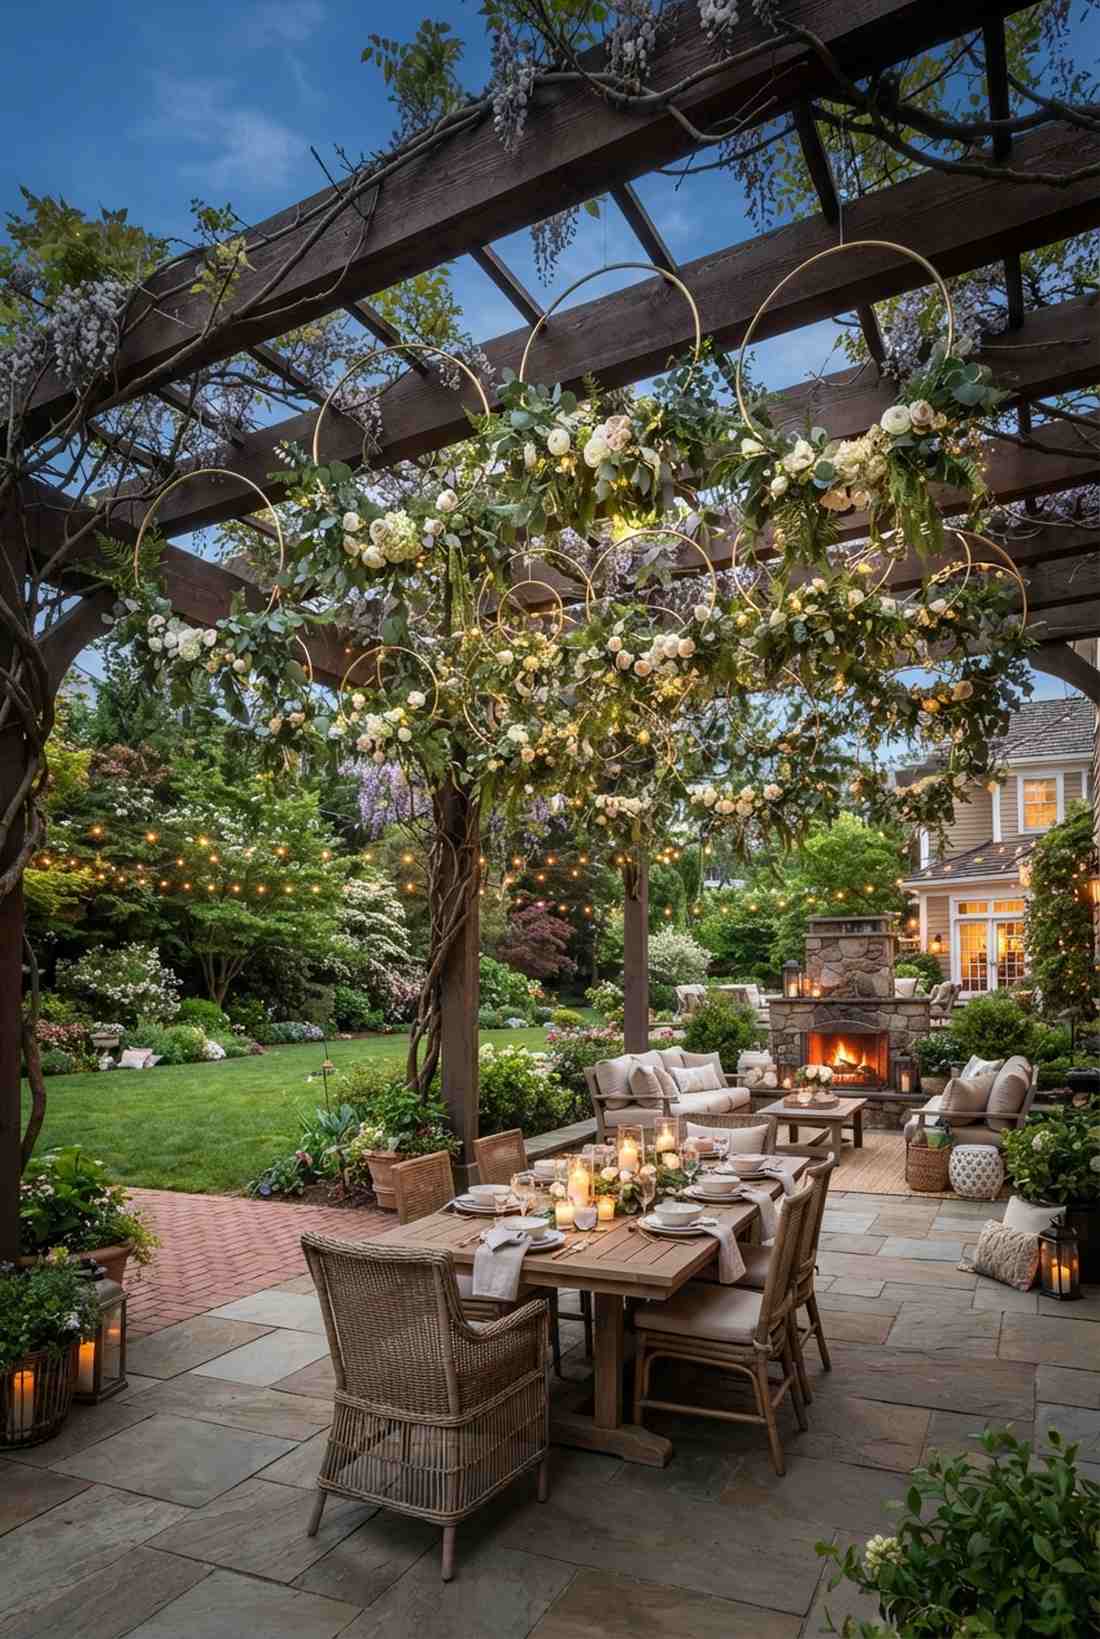
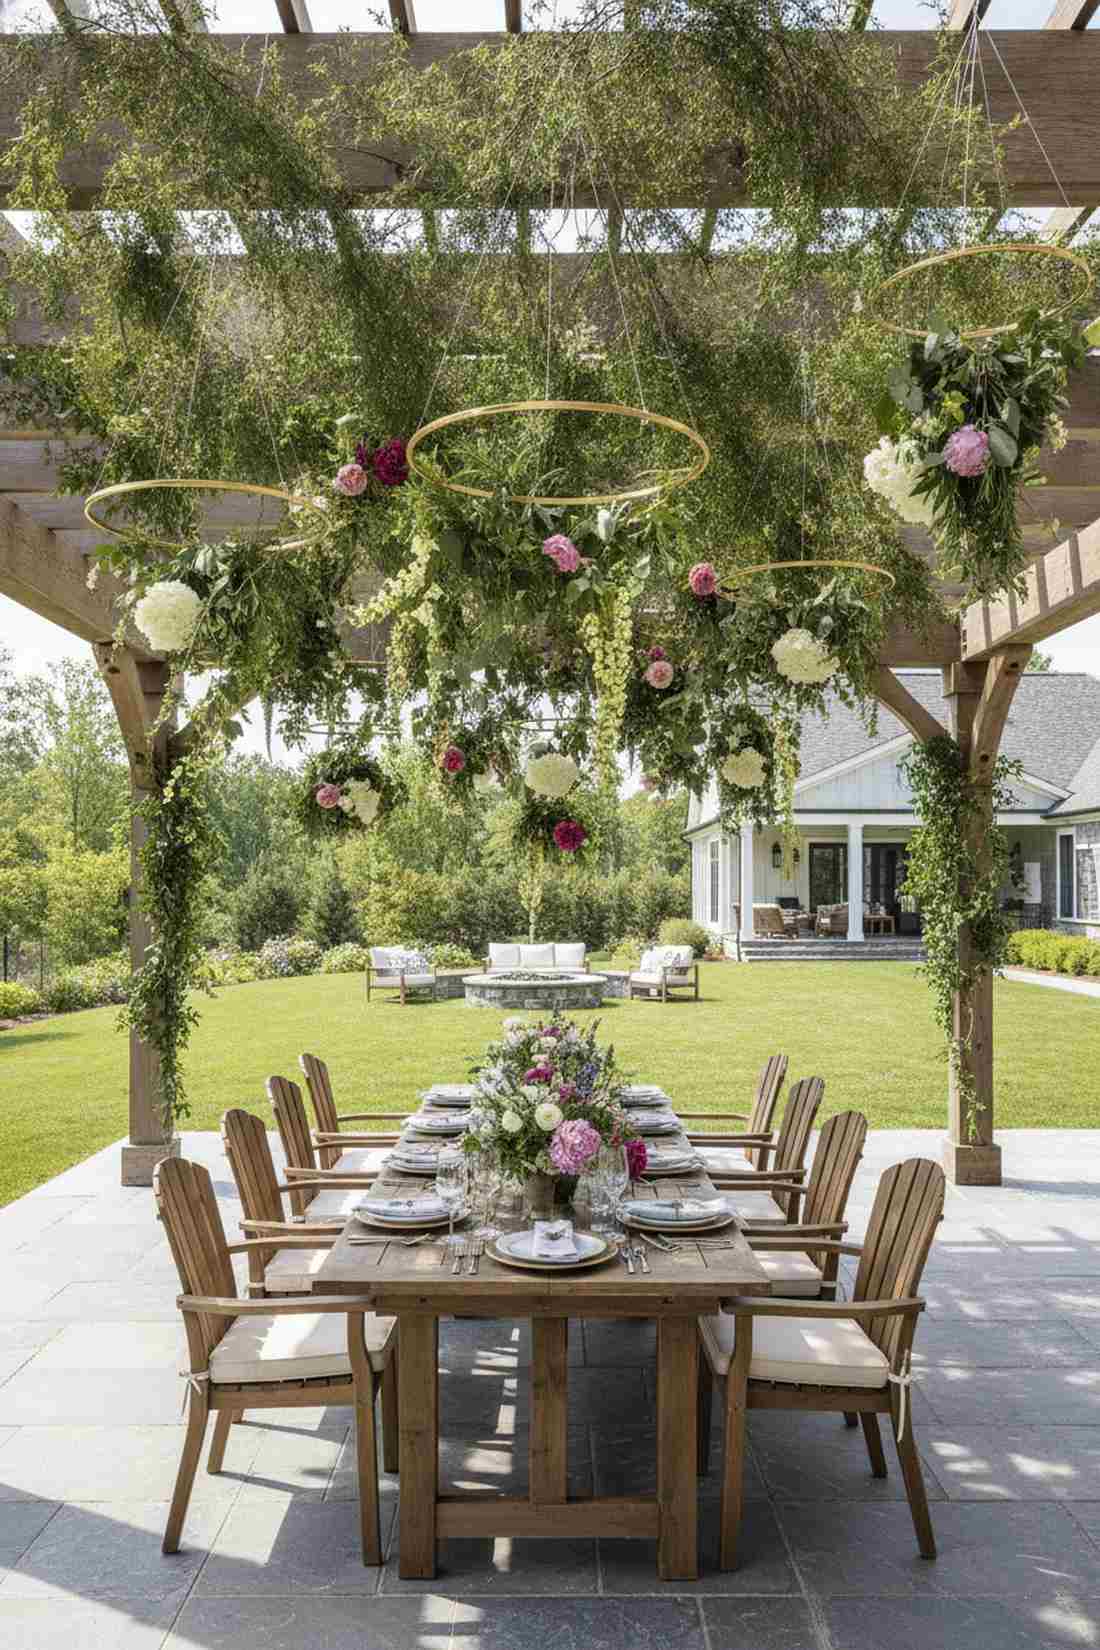
Feels like an enchanted fairy canopy blooming right above your head. Suspended botanical ceiling styling draws the eyes up and creates insane vertical drama. Best used under pergolas, sturdy tree branches, or patio roofs.
Keeping all flowers on the table is expected, but hanging greenery upside down looks wildly bespoke and expensive. Utilizing invisible fishing line and lightweight floral hoops infused with lush home garden decor accents completely transforms dead overhead space.
Constructing a hanging hoop costs around $25. Save this idea if you want a guaranteed viral photo backdrop.
- Key Materials: Floral hoops, clear monofilament wire
- Vibe / Style: Whimsical secret garden
- Difficulty: Needs a ladder and patience
- Budget Breakdown: Hoops: $10 | Wire/Hooks: $5 | Greenery: $10.
- Creator’s Tip: Hang them at varying heights between 6.5 and 8 feet to create massive 3D depth without hitting tall guests.
- Smart Sourcing: Gold metal floral hoop macrame rings and heavy-duty invisible hanging wire.
Most backyard parties feel completely disjointed until you implement this ridiculously simple table binding trick…
20. Floral Runner Table Treatment
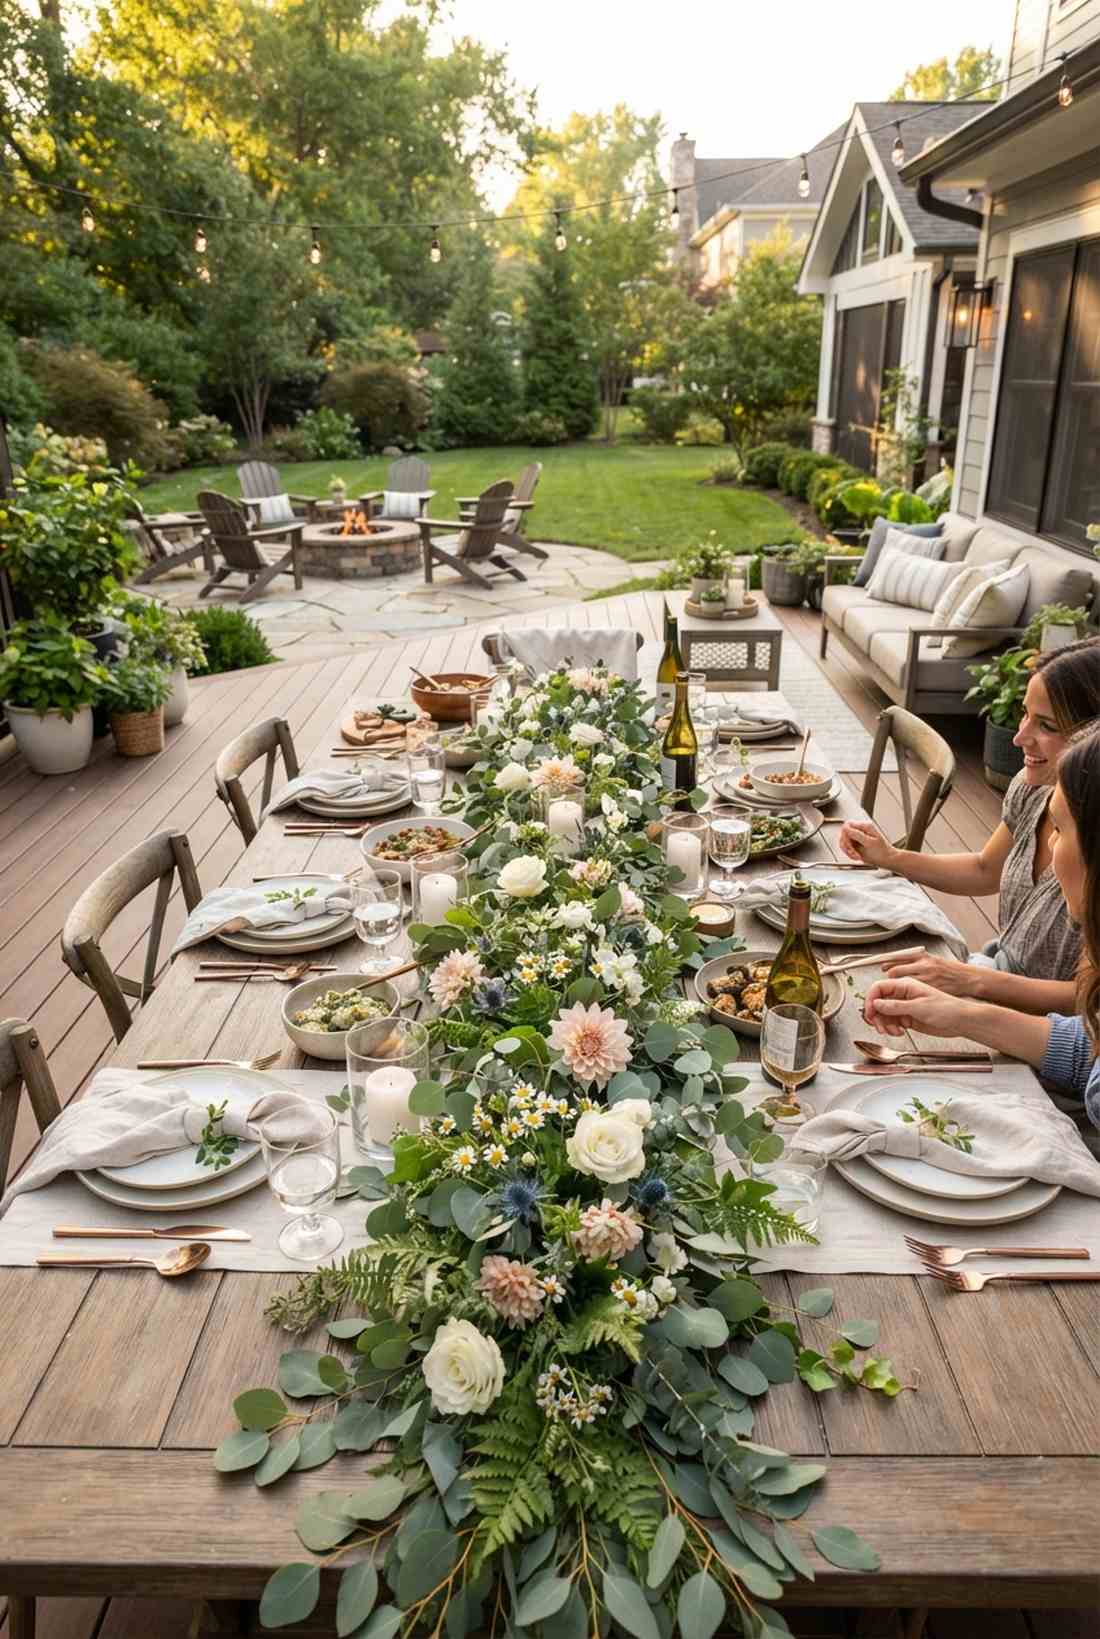
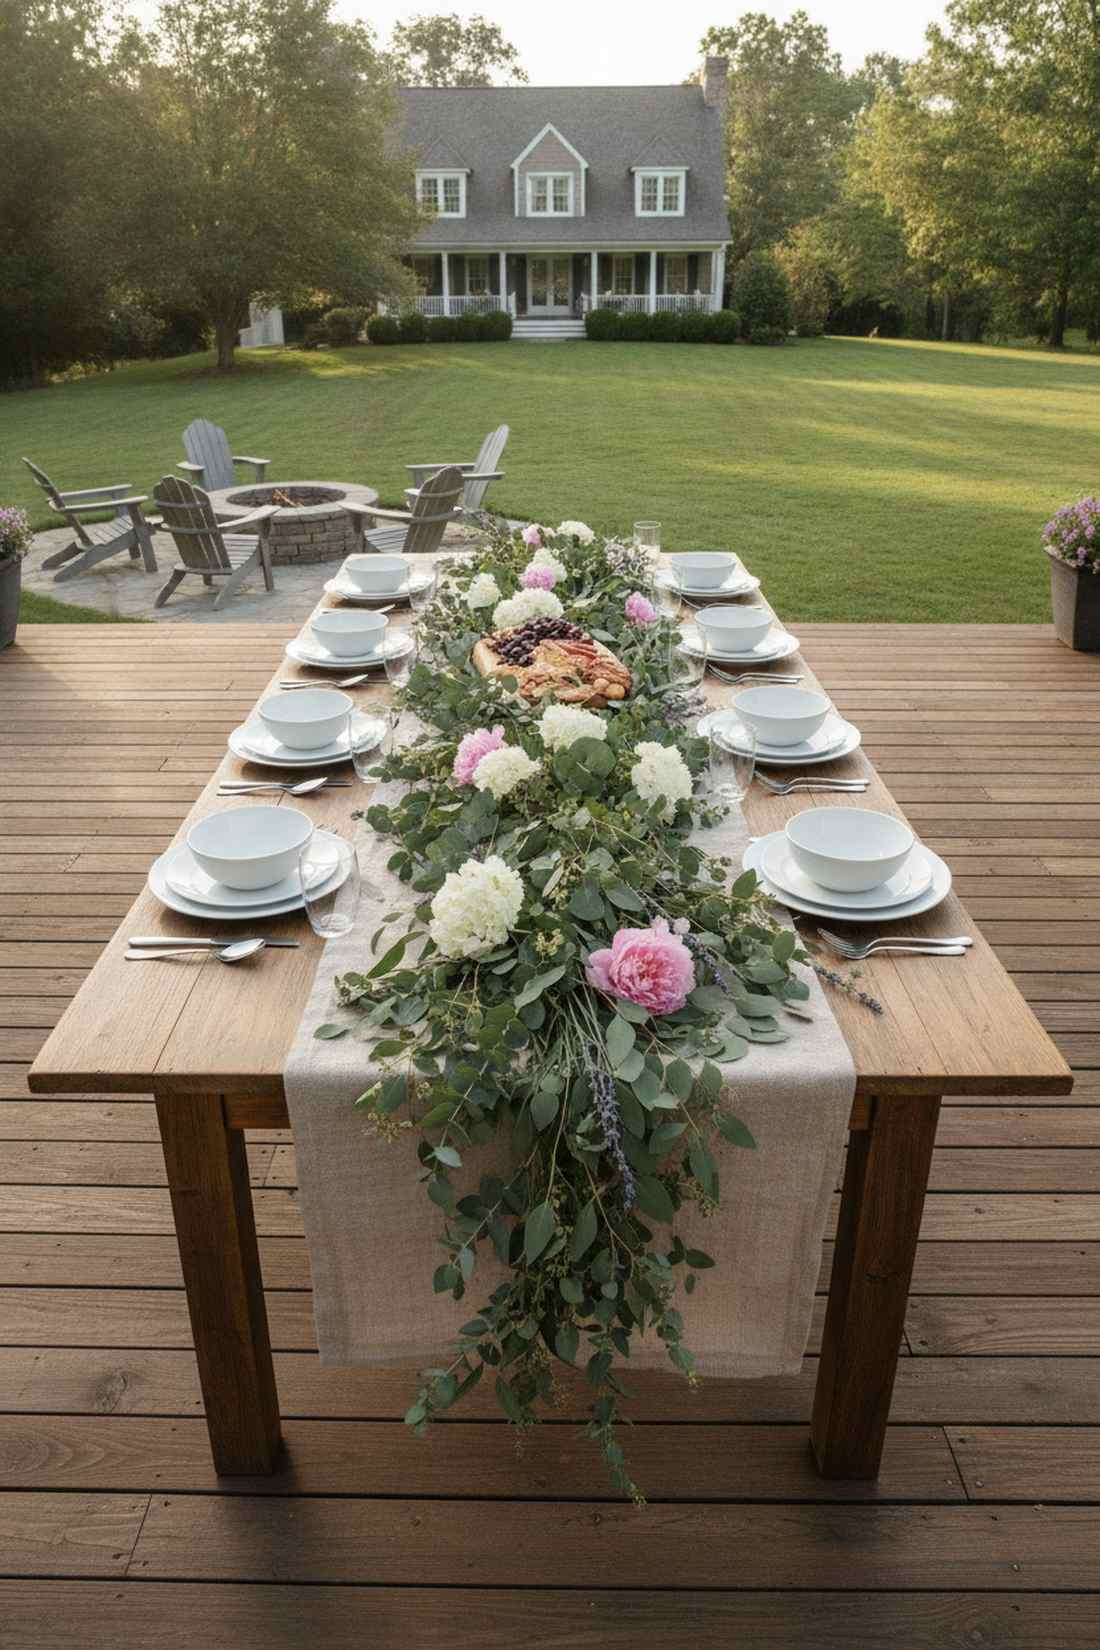
Feels like a wild, organic forest floor spilling across your dinner spread. Deconstructed continuous greenery lining feels wonderfully unstructured and alive. The absolute best way to decorate family-style rectangular tables.
Rigid vases take up too much precious food space, but laying loose foliage directly on the fabric looks far more expensive and natural. Blending clipped eucalyptus with fresh home garden flowers creates a stunning, low-profile barrier that weaves around plates.
You can layer a lush 6-foot runner for about $20 using grocery store greens. Highly recommended for effortless elegance.
- Key Materials: Loose greenery stems, floral wire
- Vibe / Style: Earthy organic feast
- Difficulty: Fast and messy-chic
- Budget Breakdown: Base greenery: $15 | Accent blooms: $5.
- Creator’s Tip: Soak the greenery stems in a bathtub for 2 hours before the party so they don’t crisp up in the sun.
- Smart Sourcing: Preserved eucalyptus branch bundles (bulk pack) and green floral binding wire.
21. Individual Place Setting Blooms
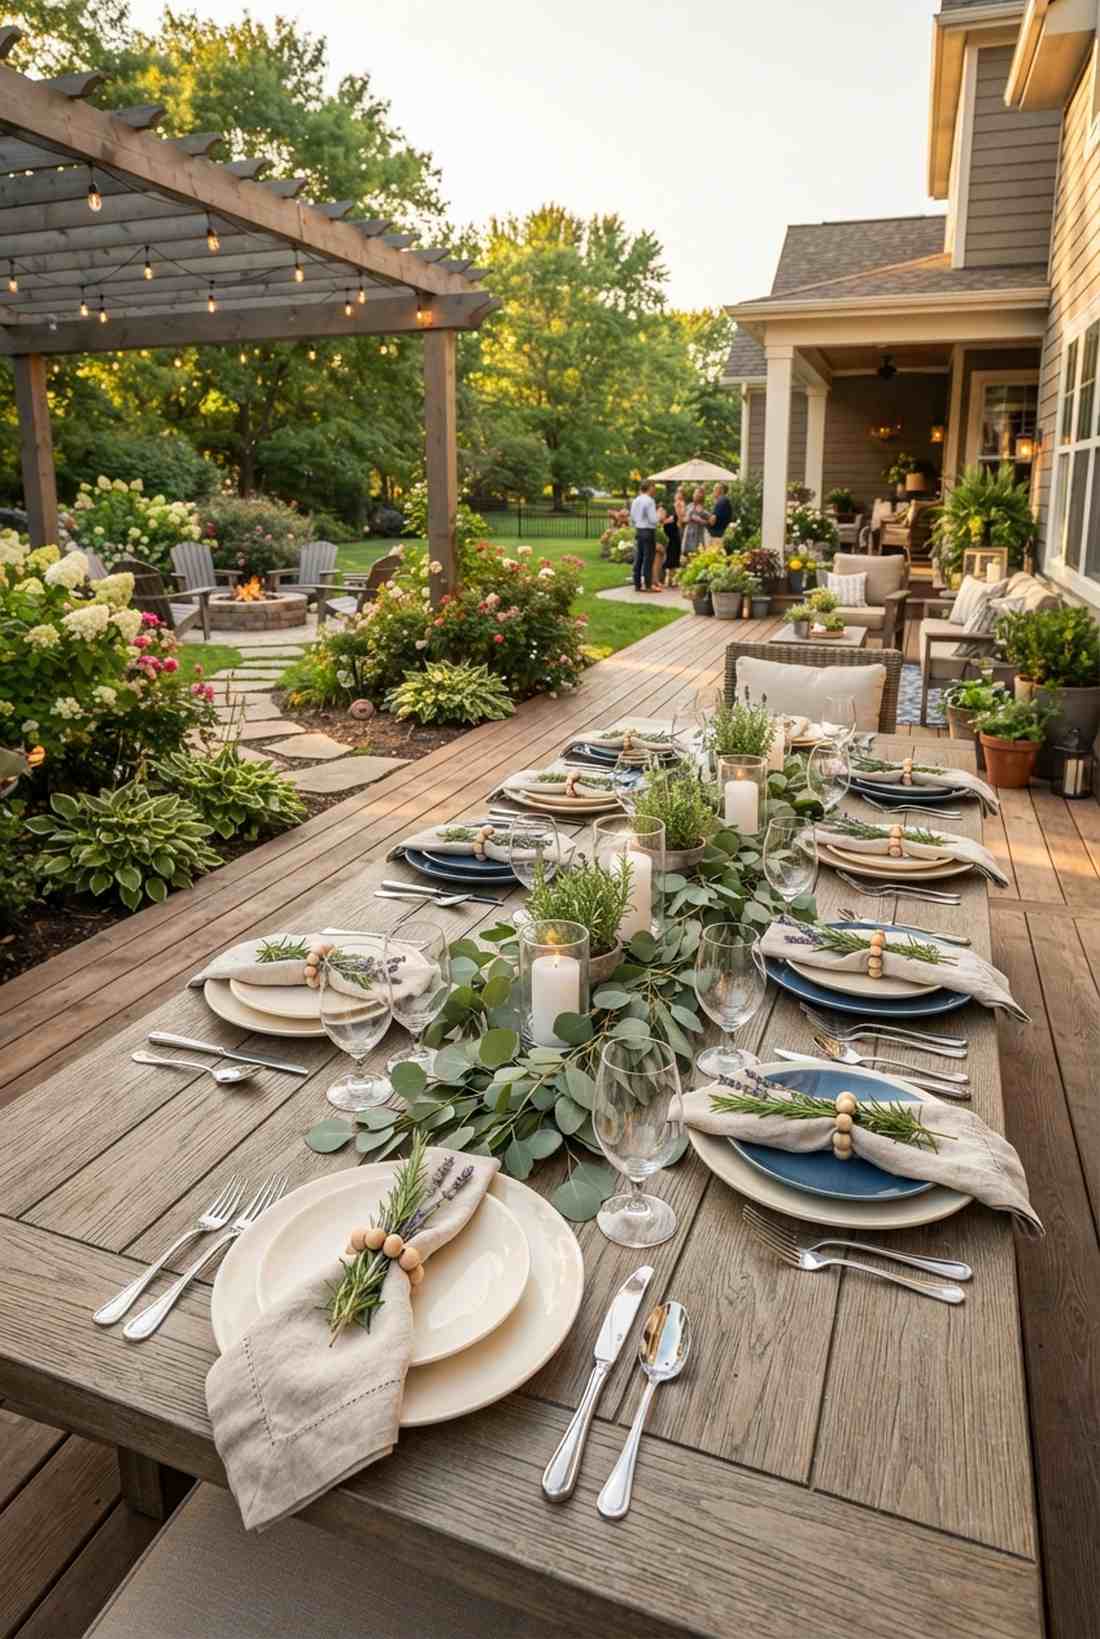
Feels like a hyper-personalized touch at a five-star dining event. Micro-botanical plate styling makes every single guest feel incredibly special. Perfect for formal sit-down dinners or wedding-style outdoor events.
A bare napkin looks boring, but tucking a single fragrant sprig into the napkin ring gives a totally bespoke designer-level finish. Sniping tiny herbs or baby home garden flowers costs literally nothing but elevates the entire table’s perceived value tenfold.
This layout trick is essentially free if you own a garden. Pin this to remember for your next dinner party!
- Key Materials: Fresh herb sprigs, twine or napkin rings
- Vibe / Style: Thoughtful fine-dining
- Difficulty: Just takes 5 extra minutes
- Budget Breakdown: Jute twine: $5 | Sprigs: Free.
- Creator’s Tip: Use rosemary or lavender—the warmth of the plates will release their oils and make the table smell amazing.
- Smart Sourcing: Natural jute twine rolls (bulk pack) and wooden bead napkin rings.
Home Garden Plants for Functional Design
Living plants serve structural roles beyond decoration. Designers use strategic plant placement to screen utilities, direct foot traffic, define boundaries, and provide natural shade—all while contributing to your garden’s permanent landscape.
22. Potted Plant Pathway Guides
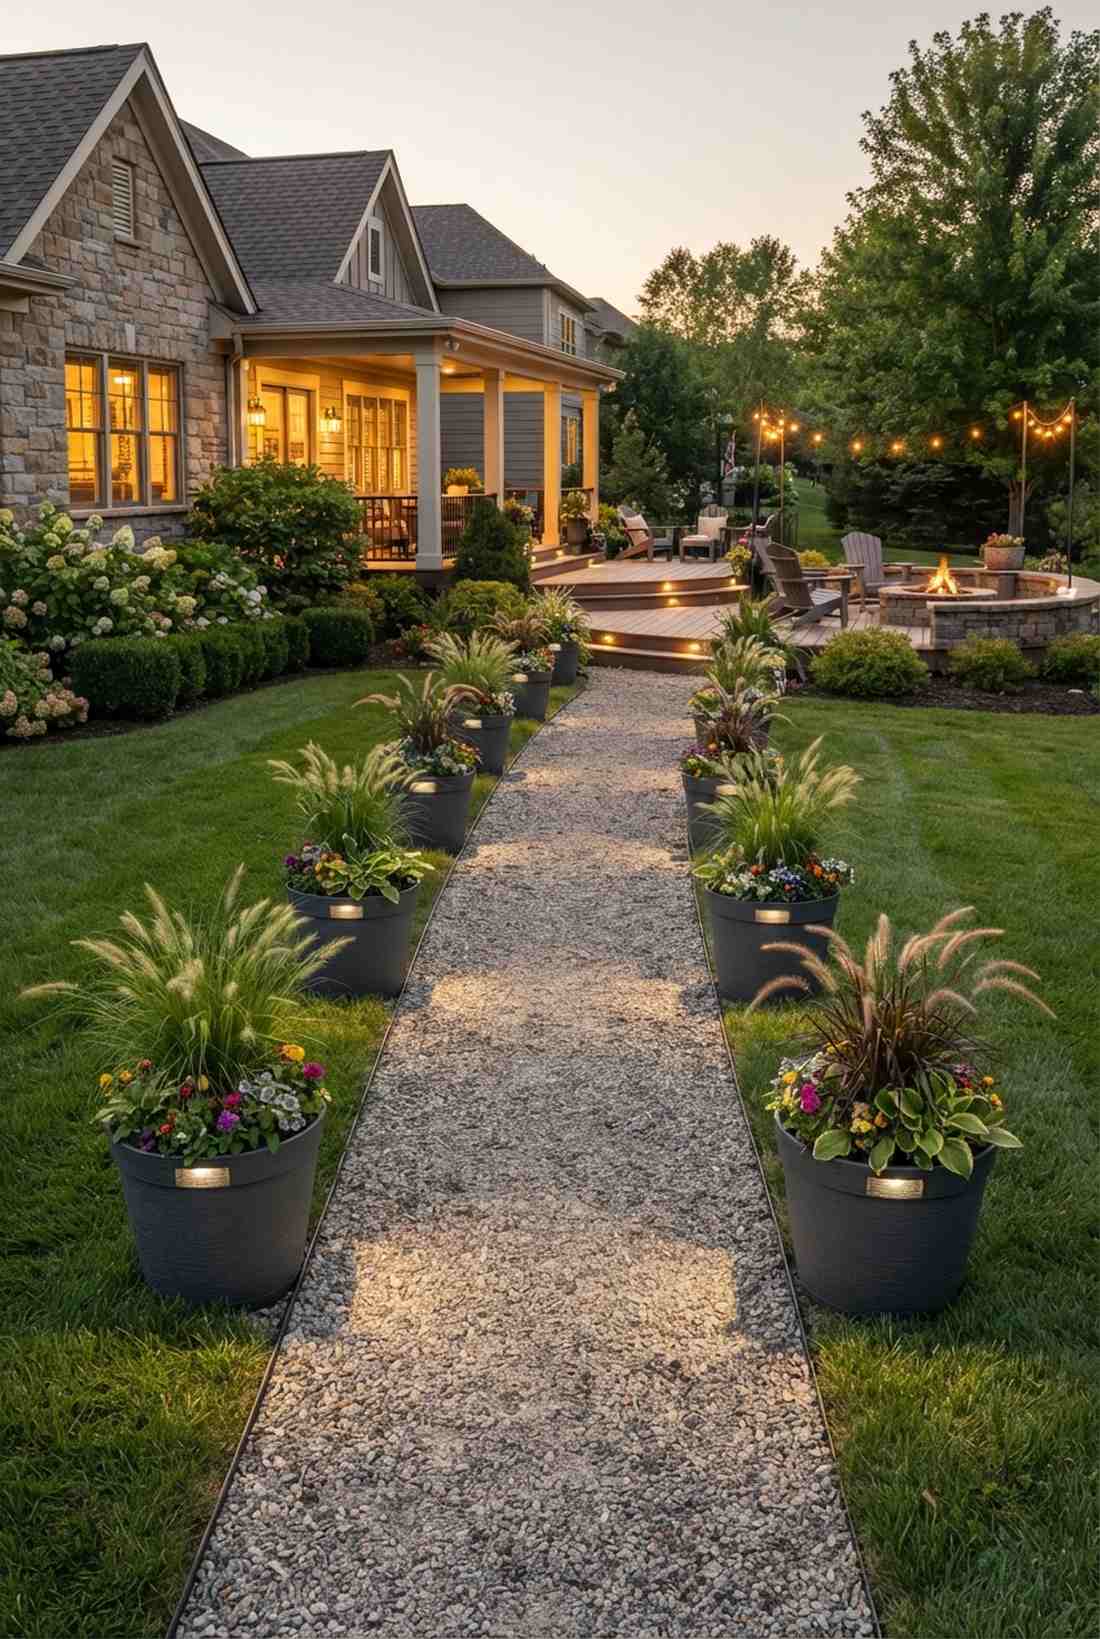
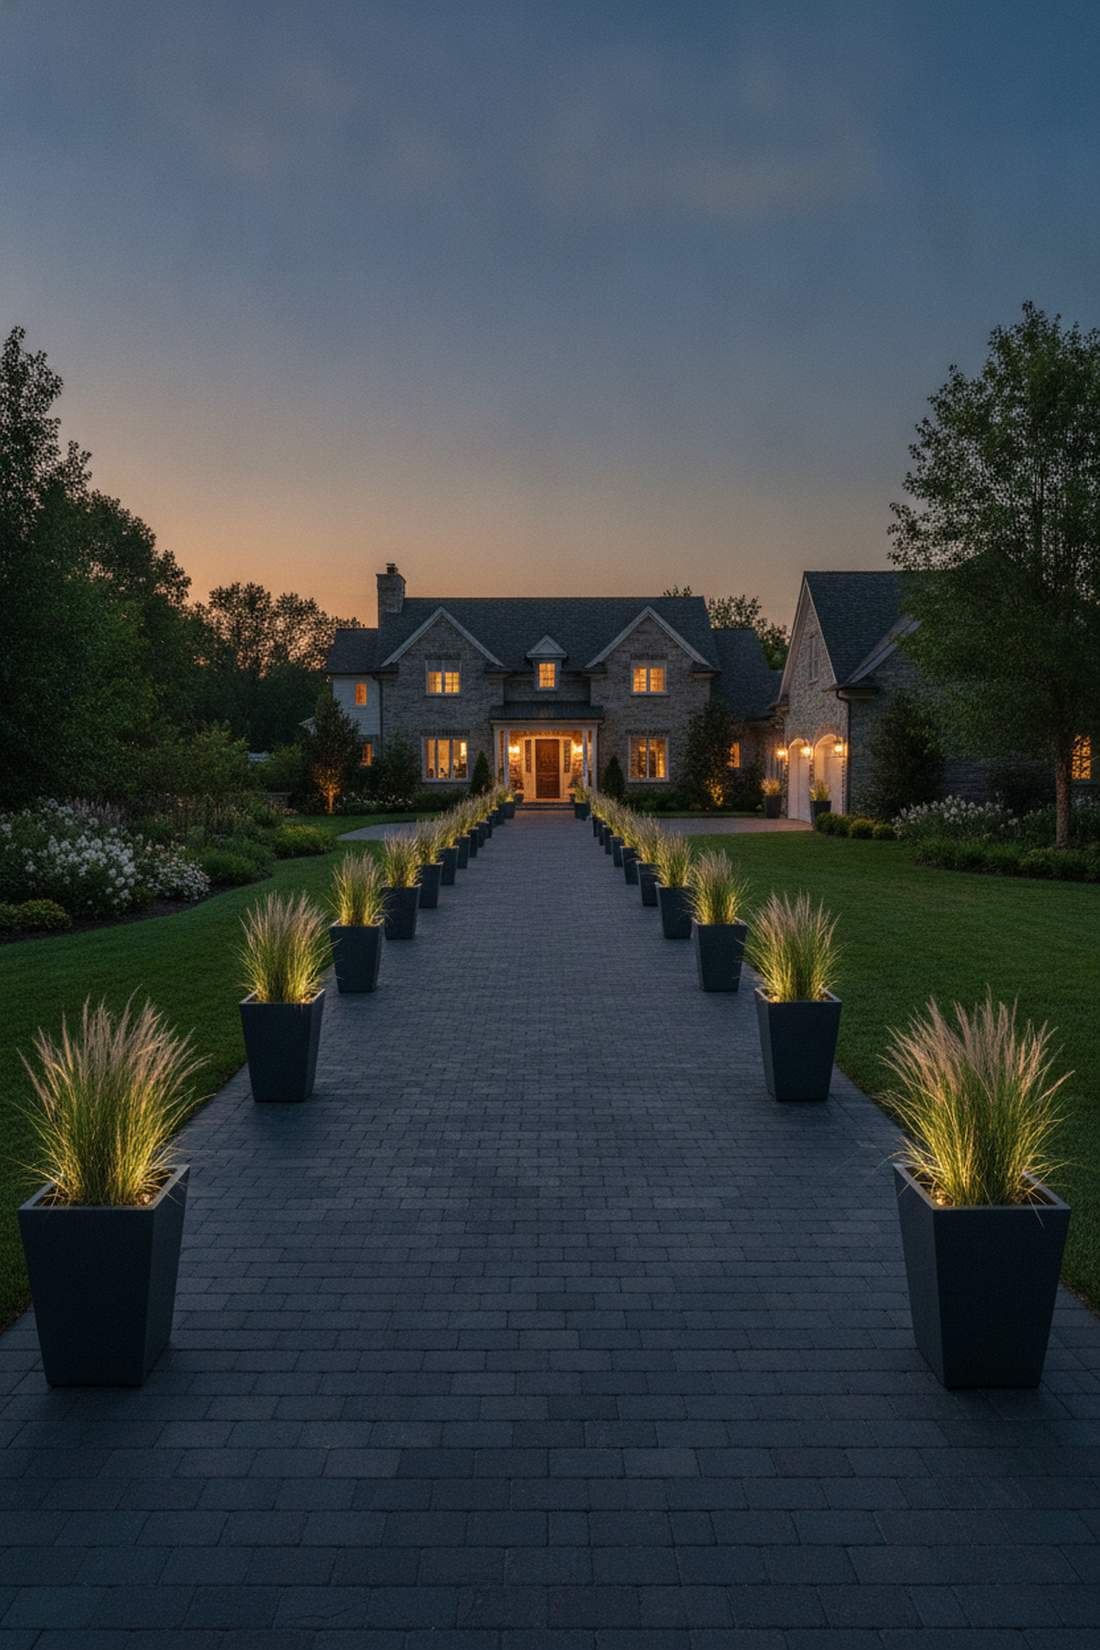
Feels like a guided botanical stroll through a royal estate. Illuminated structural container lining establishes instant boundary logic. Works exceptionally well for long, dark driveways or side yard entrances.
While most people just use basic solar stakes, alternating heavy-duty planters delivers a far more expensive architectural look. Integrate lush home garden plants inside UV-protected commercial planters to create a permanent, high-end landscape feature.
Pull this off for about $25 per container segment. It is a highly practical upgrade that totally changes yard navigation.
- Key Materials: Matching 16-inch planters, ornamental grasses
- Vibe / Style: Formal estate procession
- Difficulty: Basic potting
- Budget Breakdown: Planters: $15 each | Plants: $10 each.
- Creator’s Tip: Space them exactly 3 to 4 feet apart—any closer feels like a barricade, any further loses the visual rhythm.
- Smart Sourcing: UV-resistant resin outdoor planters (bulk pack) and heavy-duty potting soil mix.
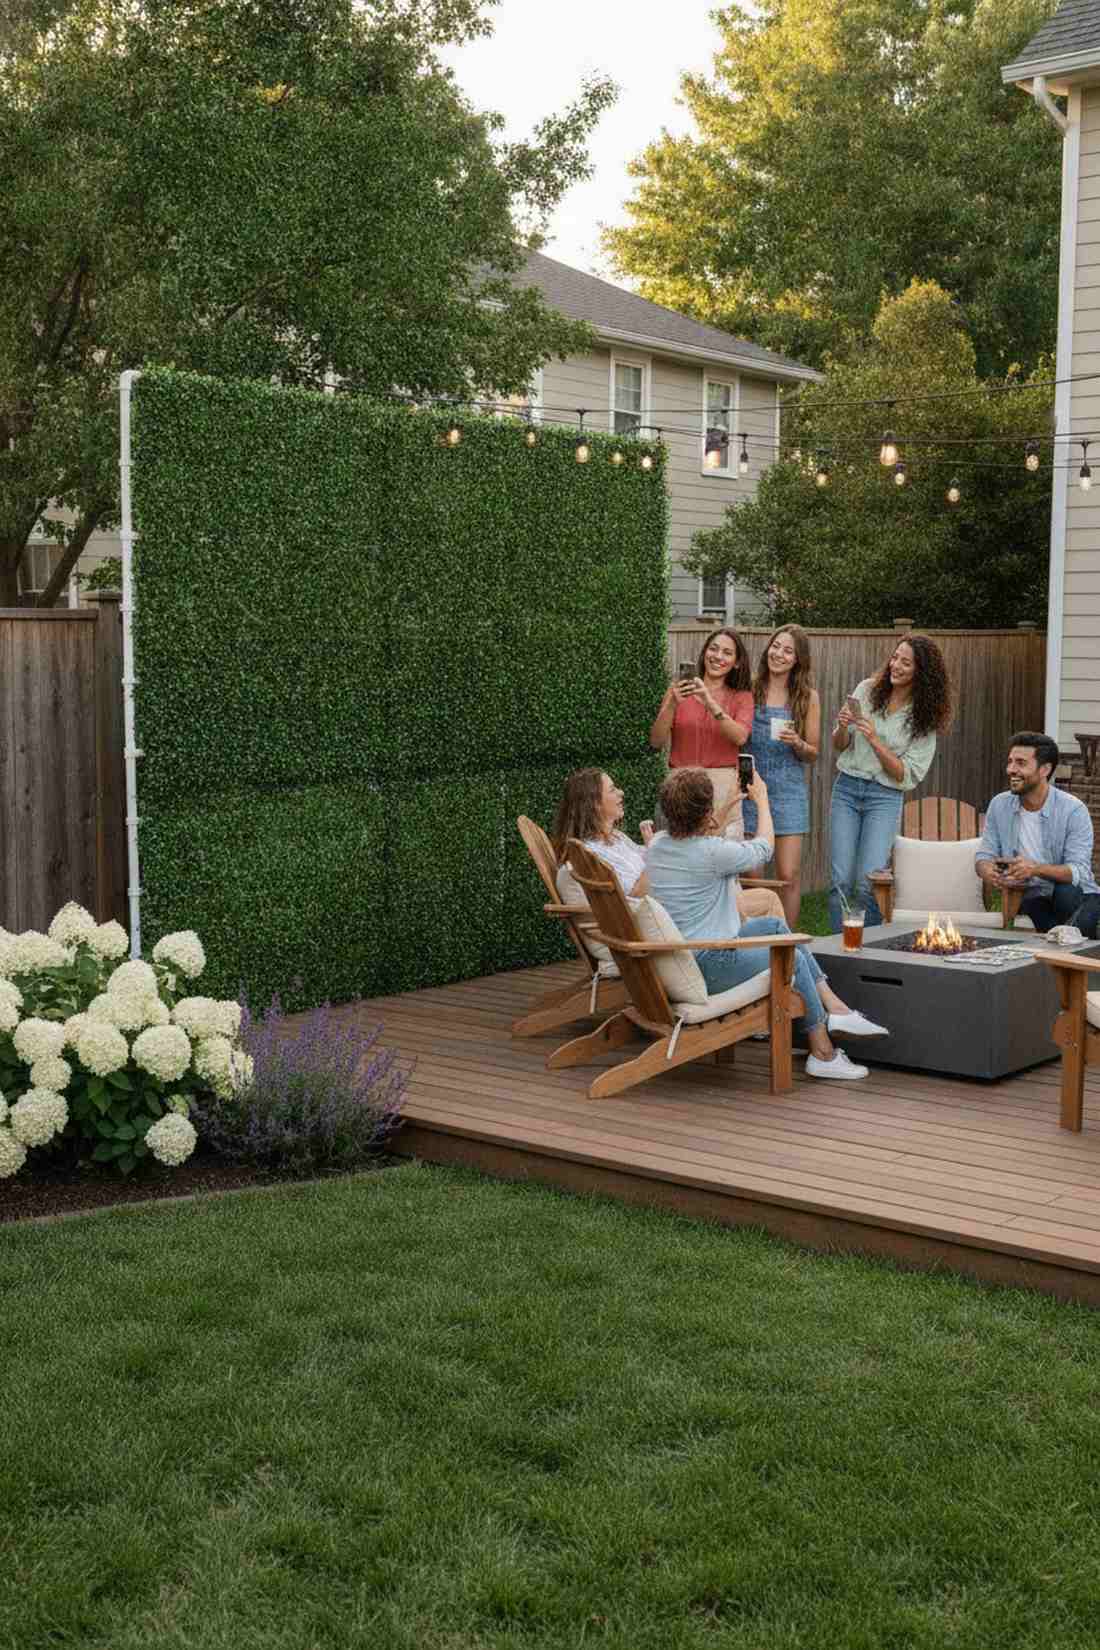
23. Privacy Screen Hedge Panels
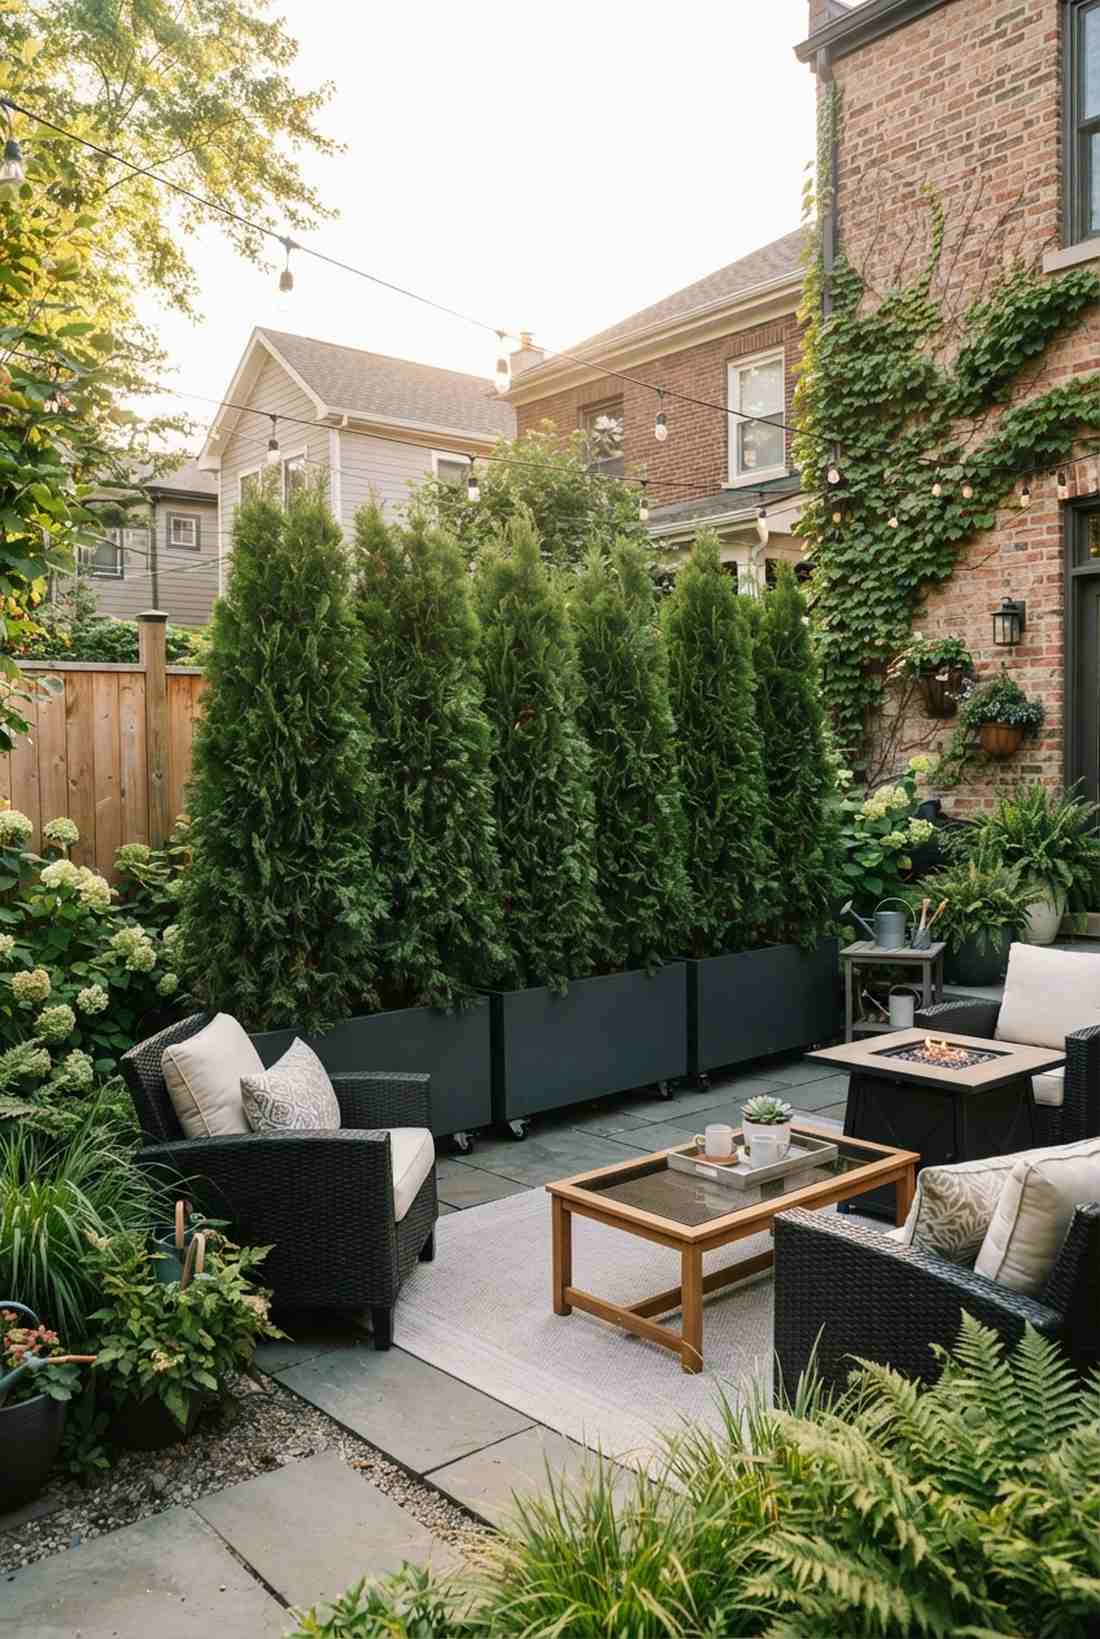

Feels like a secluded VIP cabana hidden from the outside world. Tall vertical botanical shielding blocks ugly views and nosy neighbors instantly. A mandatory hack for urban patios or townhome backyards.
Waiting years for real hedges to grow is frustrating, but utilizing portable bamboo screens or tall planters looks far more expensive and acts immediately. Dropping dense home garden plants like Arborvitae into sleek modern troughs gives a designer-level finish.
Building a solid 6-foot screen starts around $150. Save this if you desperately need backyard privacy!
- Key Materials: Tall trough planters, columnar evergreens
- Vibe / Style: Modern secluded oasis
- Difficulty: Heavy lifting involved
- Budget Breakdown: Trough planter: $90 | Tall shrubs: $60.
- Creator’s Tip: Put the heavy planters on hidden heavy-duty caster wheels so you can roll the wall around as the party moves.
- Smart Sourcing: Commercial-grade tall rectangular trough planters and heavy-duty invisible caster wheels.
24. Shade Tree Canopy Positioning
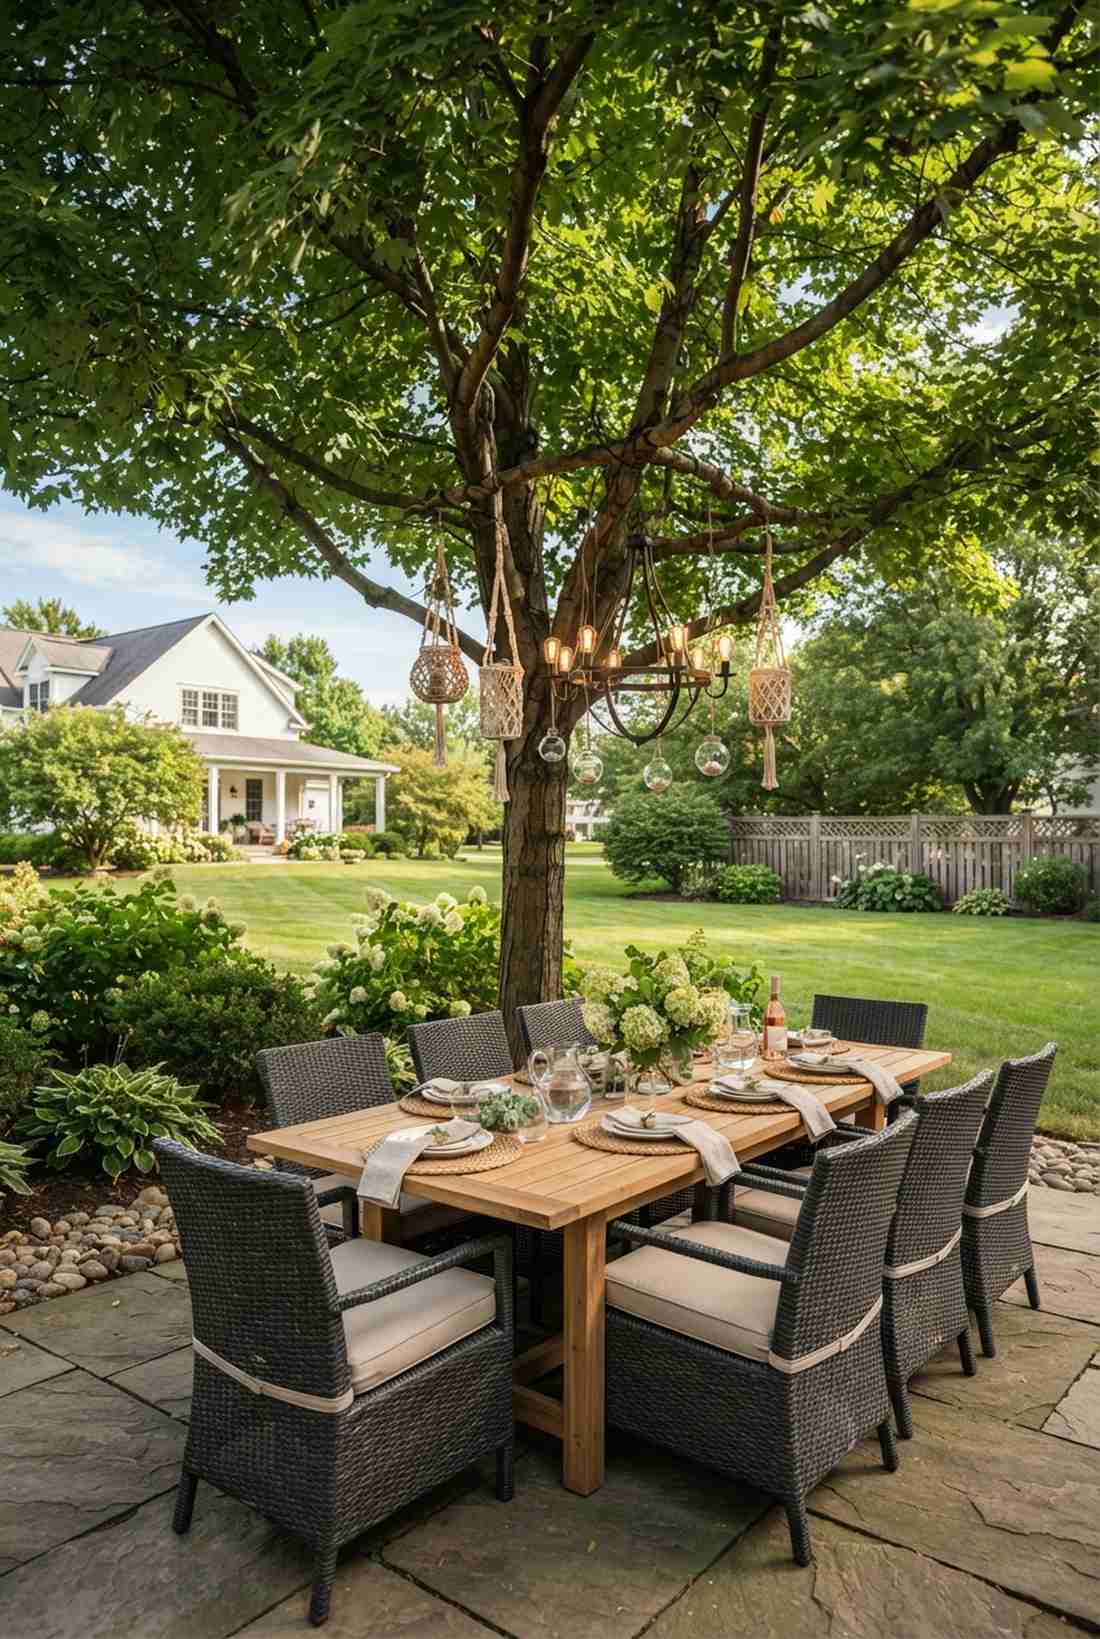
Feels like lounging in a cool, dappled forest clearing on a hot day. Strategic natural canopy leveraging provides massive shade without building a roof. The absolute smartest move for afternoon summer gatherings.
Buying expensive pop-up tents looks tacky, but orienting your main lounge directly under existing mature trees looks totally organic and expensive. Pruning the lower branches and hanging premium outdoor dining supplies from the limbs creates an enchanting focal point.
This layout shift is completely free if you have a big tree. Highly recommended to keep guests from sweating.
- Key Materials: Pole pruner, existing mature tree
- Vibe / Style: Shady botanical retreat
- Difficulty: Light landscaping
- Budget Breakdown: Pruning tools: $30.
- Creator’s Tip: Prune lower branches to a strict 7-foot minimum to ensure tall guests don’t scrape their heads when standing up.
- Smart Sourcing: Telescoping tree pole pruners and tree-safe strap hanging kits.
You can easily waste hundreds of dollars on cheap plastic decor, or you can check out this ultimate aesthetic breakdown…
Material Guide: Cheap vs. Premium Aesthetic
Knowing exactly where to save and where to spend makes all the difference in achieving that “looks expensive but isn’t” vibe.
- Standard vs. UV-Resistant/Premium: Standard plastics crack and fade in one summer. Upgrading to UV-coated resins or marine-grade fabrics ensures your setup survives for years.
- Pre-made Kits vs. Sourcing Locally: While thrift stores are great, grabbing commercial starter kits (like bulk fairy garden accessories or layout tapes) often saves both time and prevents mismatched, chaotic designs.
25. Edible Garden Conversation Starters
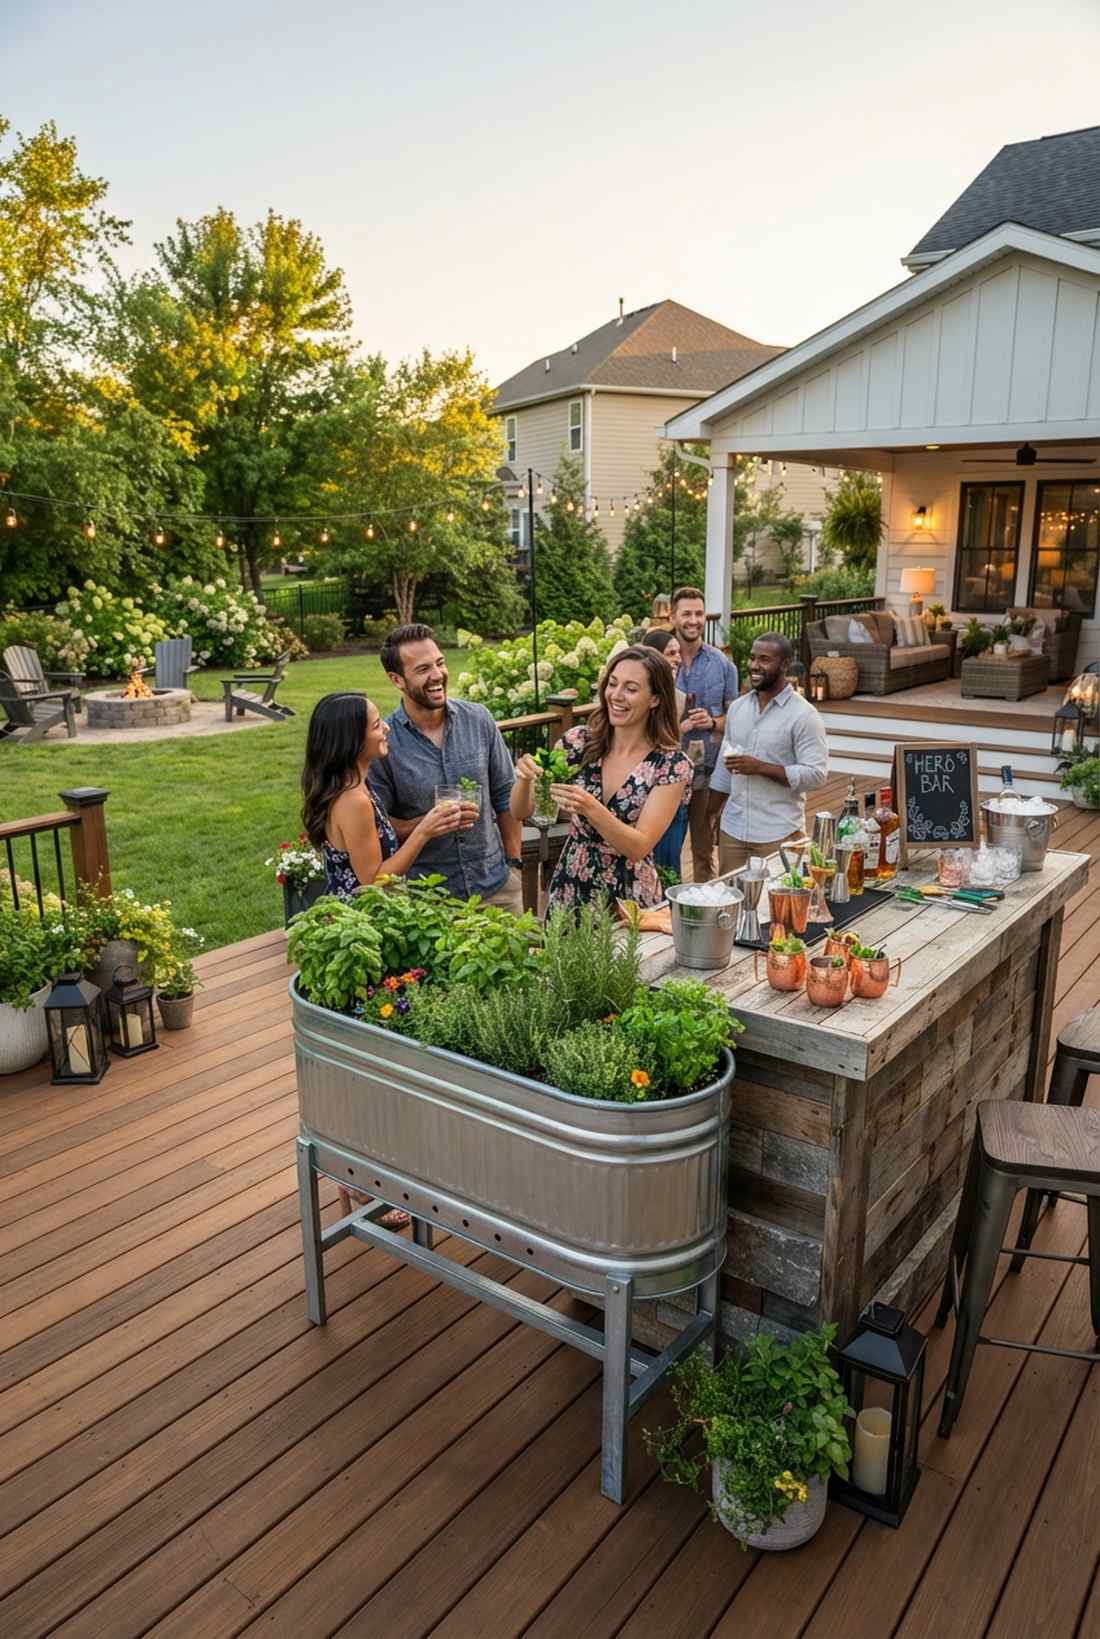
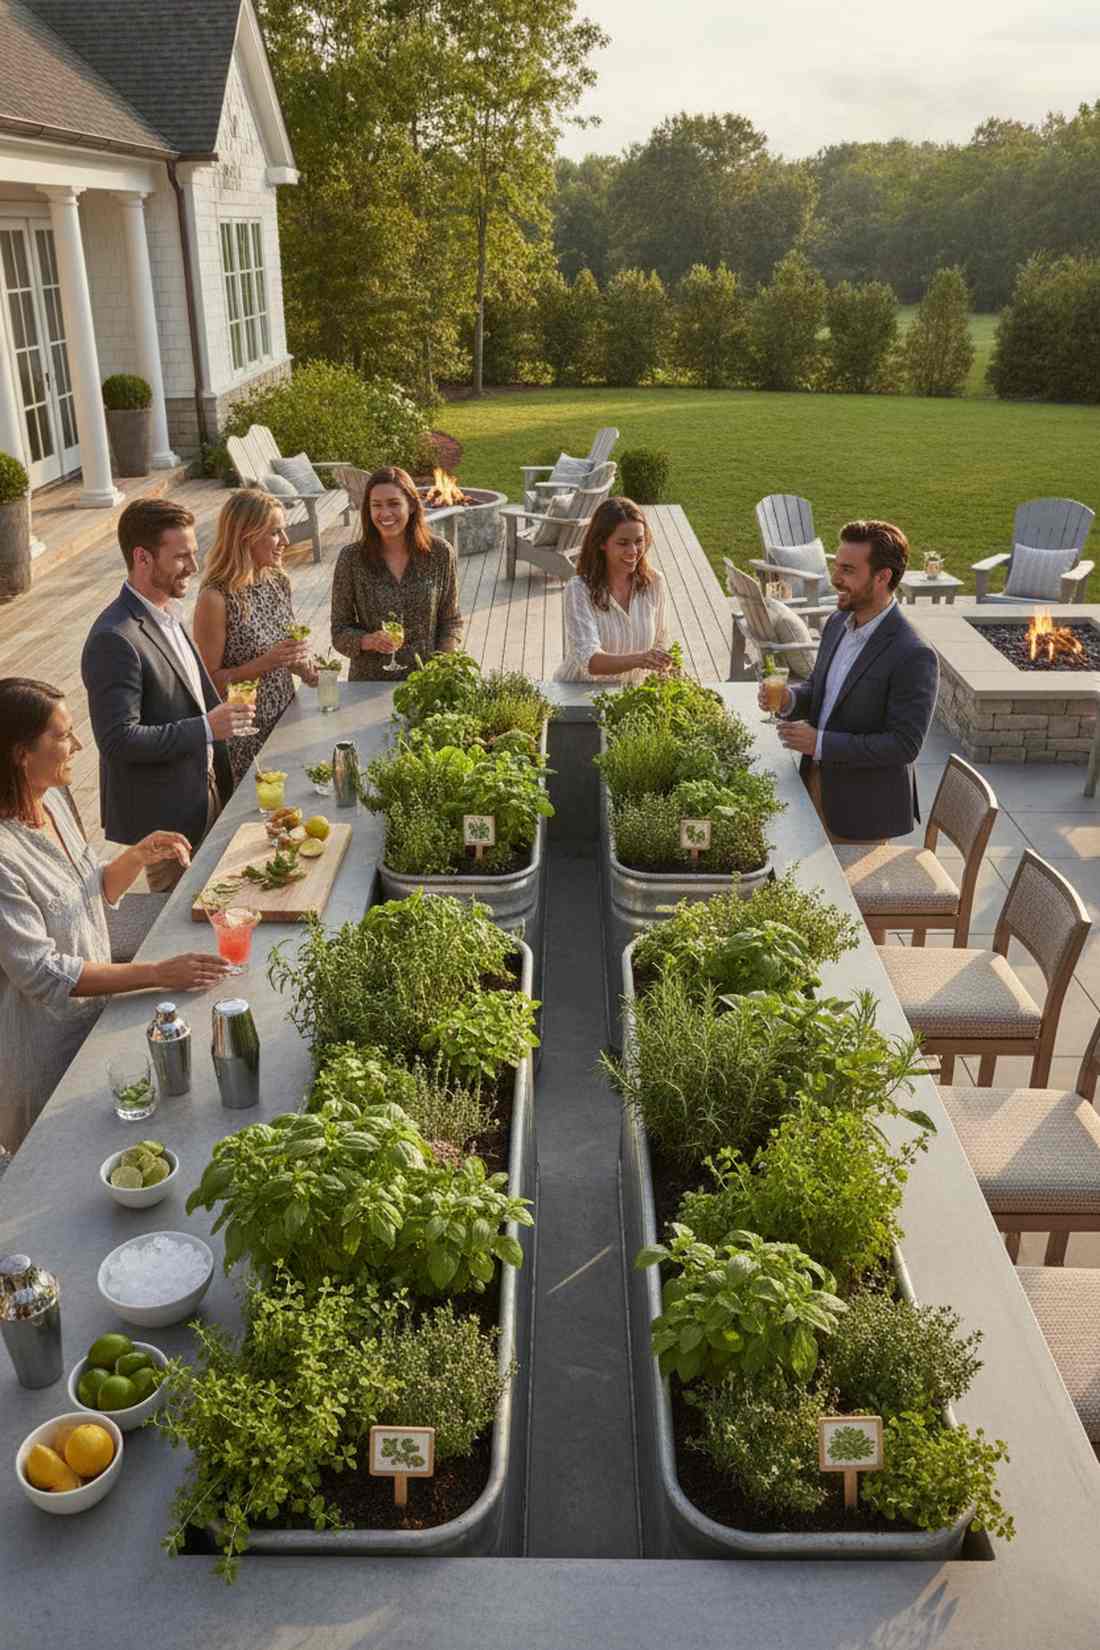
Feels like an interactive farm-to-table experience right on your patio. Integrated culinary harvesting stations blur the line between landscaping and food prep. Incredible for foodie gatherings or cocktail mixing parties.
Hiding your vegetable garden in the back corner is a waste, but bringing raised beds right next to the bar delivers a surprisingly premium look. Encouraging guests to pluck fresh home garden plants like mint and basil directly into their drinks is a brilliant conversational hook.
Setting up a bar-side herb trough costs about $35. Pin this idea for your next outdoor cocktail night!
- Key Materials: Elevated raised beds, fresh culinary herbs
- Vibe / Style: Interactive agrarian chic
- Difficulty: Easy planting project
- Budget Breakdown: Trough bed: $25 | Herb starts: $10.
- Creator’s Tip: Keep the edible planters strictly at waist height so guests don’t have to bend down in nice clothes to pick herbs.
- Smart Sourcing: Galvanized steel elevated planter boxes and organic culinary herb seed starter kits.
26. Flowering Shrub Zone Dividers
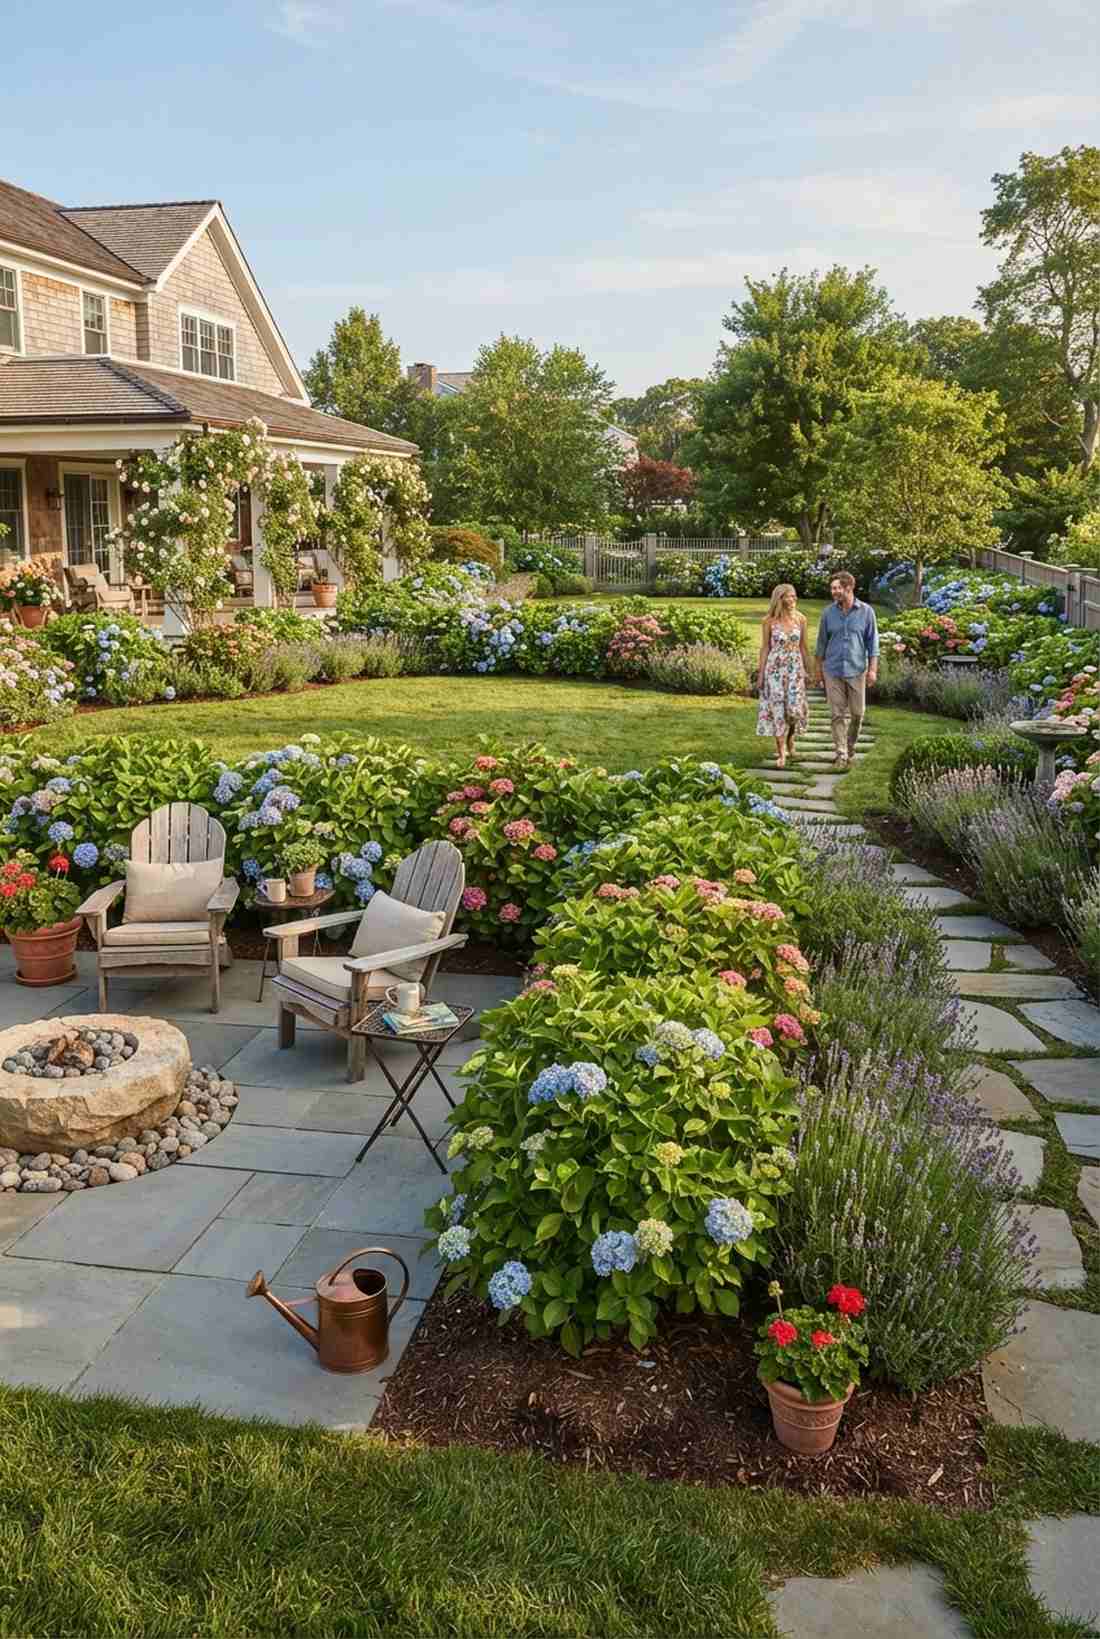

Feels like a classic European maze garden guiding you through different rooms. Low-profile living architectural walls separate spaces without isolating people. Perfect for massive, unstructured grass lawns.
Using wooden fences inside a yard feels claustrophobic, but planting waist-high blooming hedges looks far more expensive and elegant. Utilizing dense home garden flowers like hydrangea or lavender to softly direct foot traffic creates a wildly bespoke designer-level finish.
Planting a 10-foot dividing hedge runs roughly $100. It is a long-term investment that radically upgrades the property.
- Key Materials: Small blooming shrubs, mulch
- Vibe / Style: Soft English garden
- Difficulty: Weekend digging project
- Budget Breakdown: Shrubs: $80 | Soil/Mulch: $20.
- Creator’s Tip: Maintain these living dividers at exactly 30 to 42 inches high—any taller and it ruins the sightlines across the party.
- Smart Sourcing: Pre-formulated blooming shrub fertilizer (bulk pack) and heavy-duty landscape weed barrier fabric.
Lighting and Ambiance Zones
Illumination strategy transforms functional spaces into atmospheric venues as daylight fades. Layer ambient, task, and accent lighting at different heights and intensities to create depth and extend usable hours into evening.
27. String Light Overhead Canopy

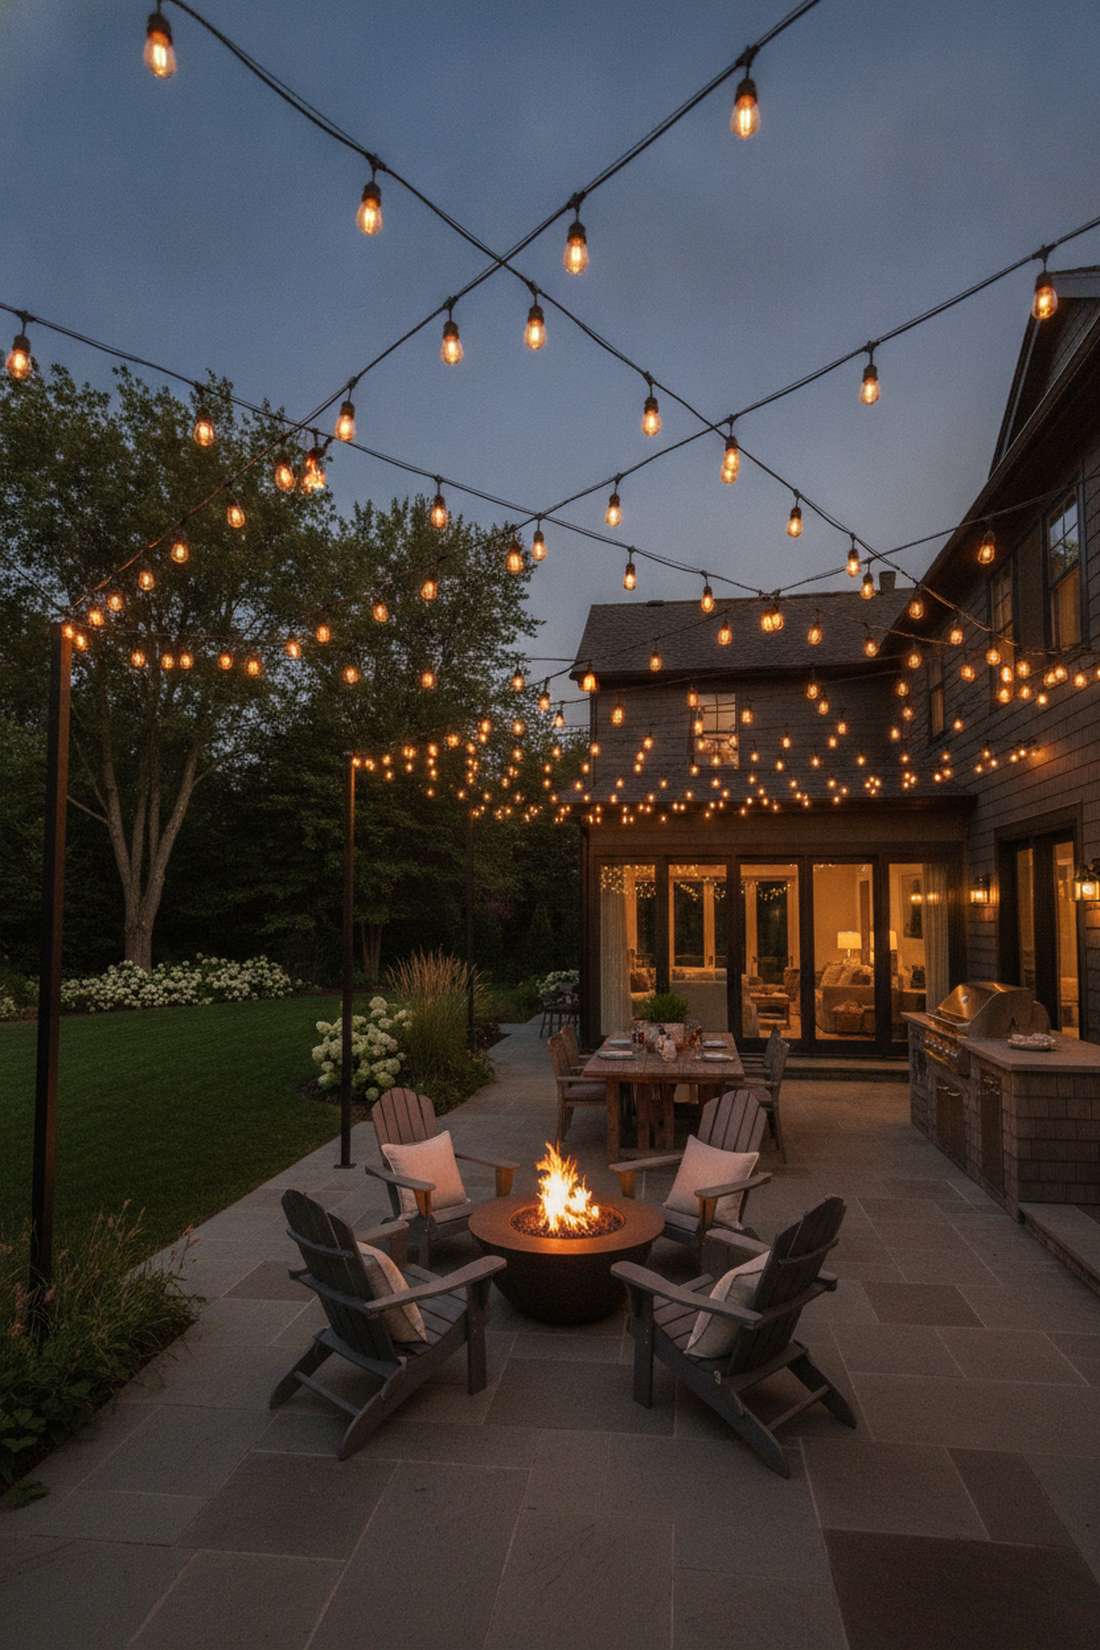
Feels like a starry night trapped perfectly above your patio space. Suspended geometric bistro illumination is the ultimate outdoor mood setter. Mandatory for any party lasting past sunset.
A single harsh porch light ruins the vibe, but zig-zagging warm bulbs overhead delivers a shockingly premium commercial-venue look. Upgrading from flimsy wires to commercial-grade string lights and heavy-duty event setup kits prevents sagging and shattered glass.
A massive 100-foot canopy setup costs roughly $60–$80. Pin this to your night-time backyard upgrade board!
- Key Materials: Bistro string lights, mounting poles or hooks
- Vibe / Style: Warm café ambiance
- Difficulty: Intermediate ladder work
- Budget Breakdown: Lights: $45 | Suspension wire: $20.
- Creator’s Tip: Never hang lights by their own wire; always string a steel guide wire first, then zip-tie the lights to it to prevent drooping.
- Smart Sourcing: Commercial-grade shatterproof outdoor string lights and stainless steel wire rope suspension kits.
28. Pathway Luminaria Sequence
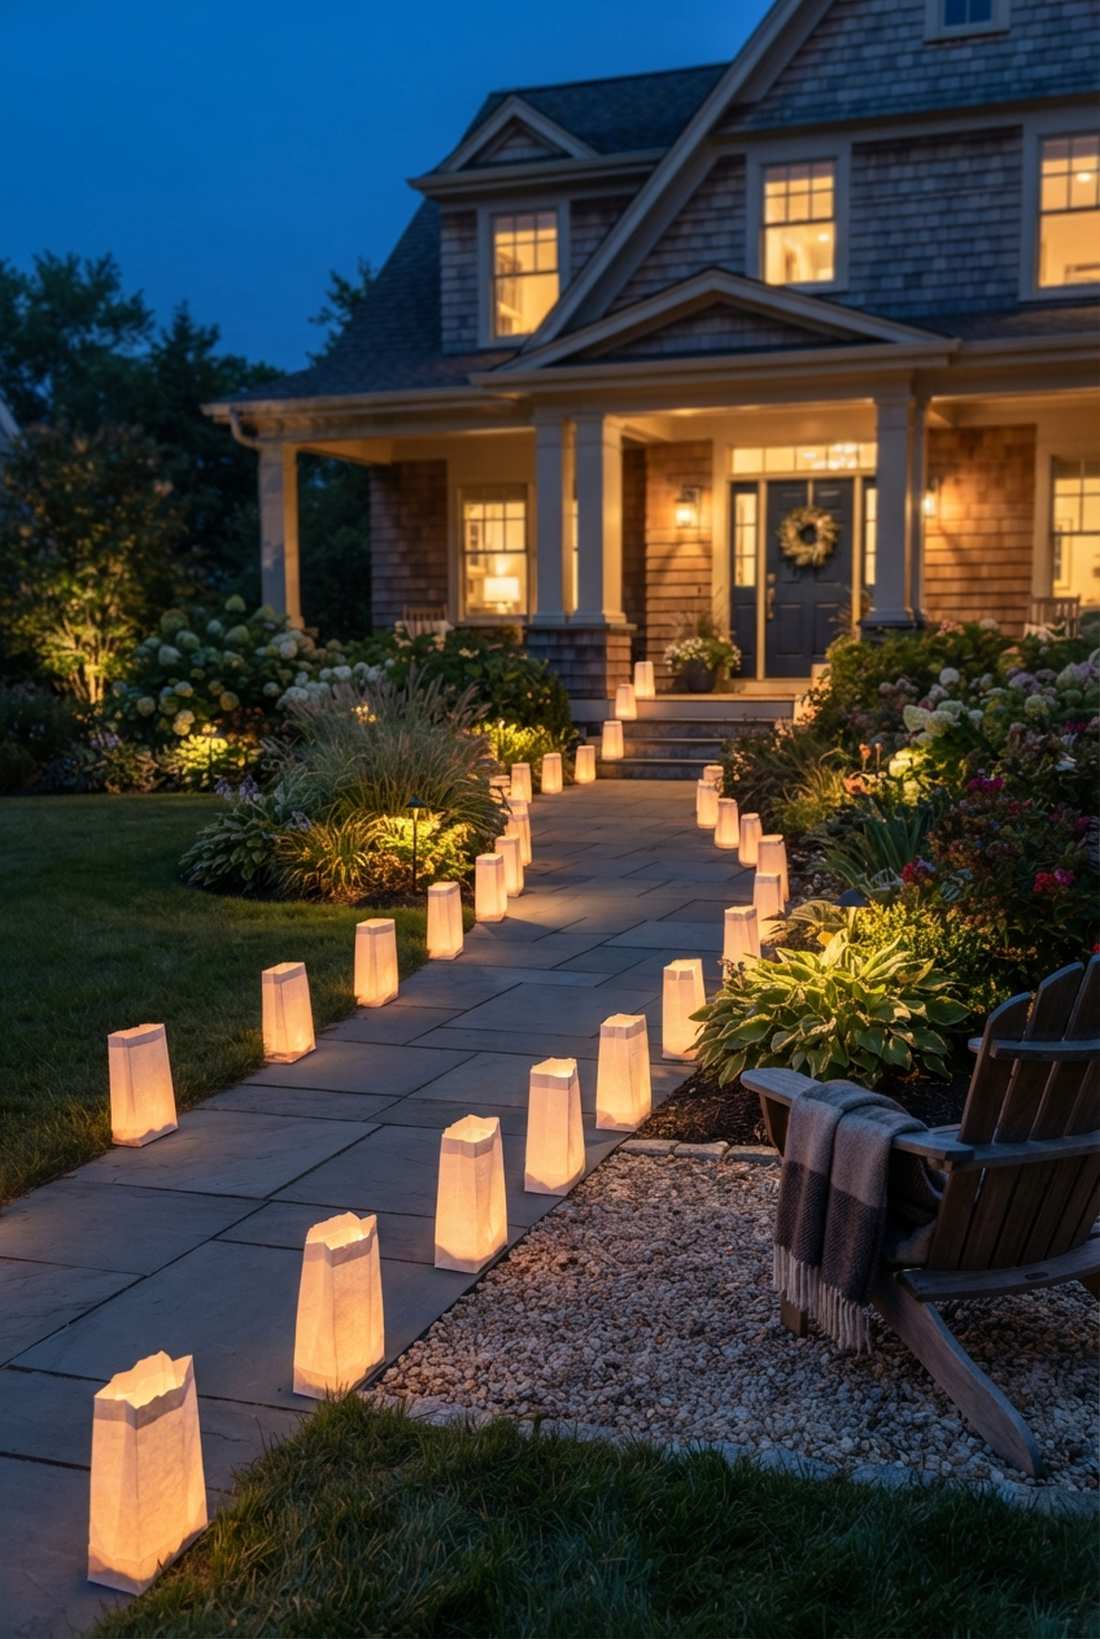
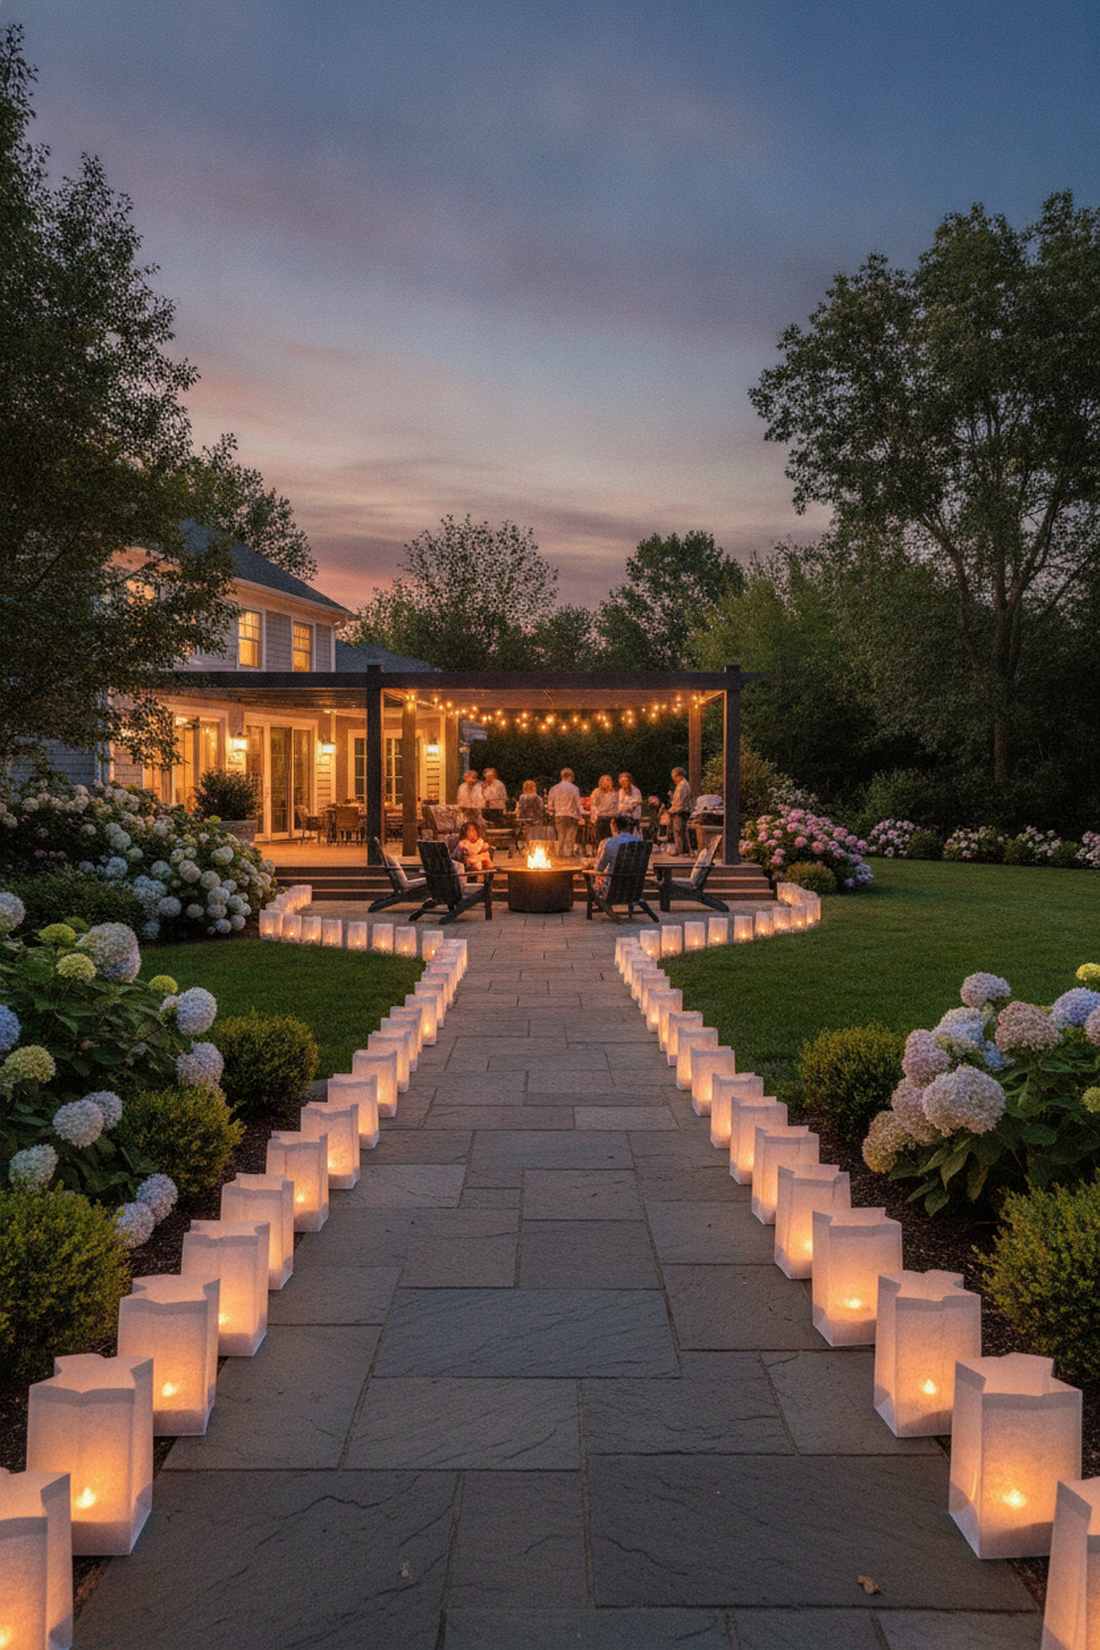
Feels like a magical glowing runway guiding you to the main event. Ground-level directional uplighting prevents tripping while looking incredibly romantic. Excellent for front walkways leading to the backyard.
Dark pathways are dangerous, but lining the edges with cheap plastic stakes looks tacky; instead, using paper luminarias looks wildly expensive and thoughtful. Sneaking in LED miniature garden supplies inside weighed-down bags creates a flickering, gorgeous processional route.
You can line an entire 30-foot walkway for under $20. Highly recommended for instant curb appeal.
- Key Materials: Paper bags, sand, LED tea lights
- Vibe / Style: Magical twilight procession
- Difficulty: Fast and easy
- Budget Breakdown: Bags: $5 | LED lights: $15.
- Creator’s Tip: Put a handful of sand or kitty litter in the bottom of each bag so the wind doesn’t blow your runway away.
- Smart Sourcing: Flame-retardant paper luminaria bags (bulk pack) and warm-white flickering LED tea lights.
29. Uplighting for Architectural Drama
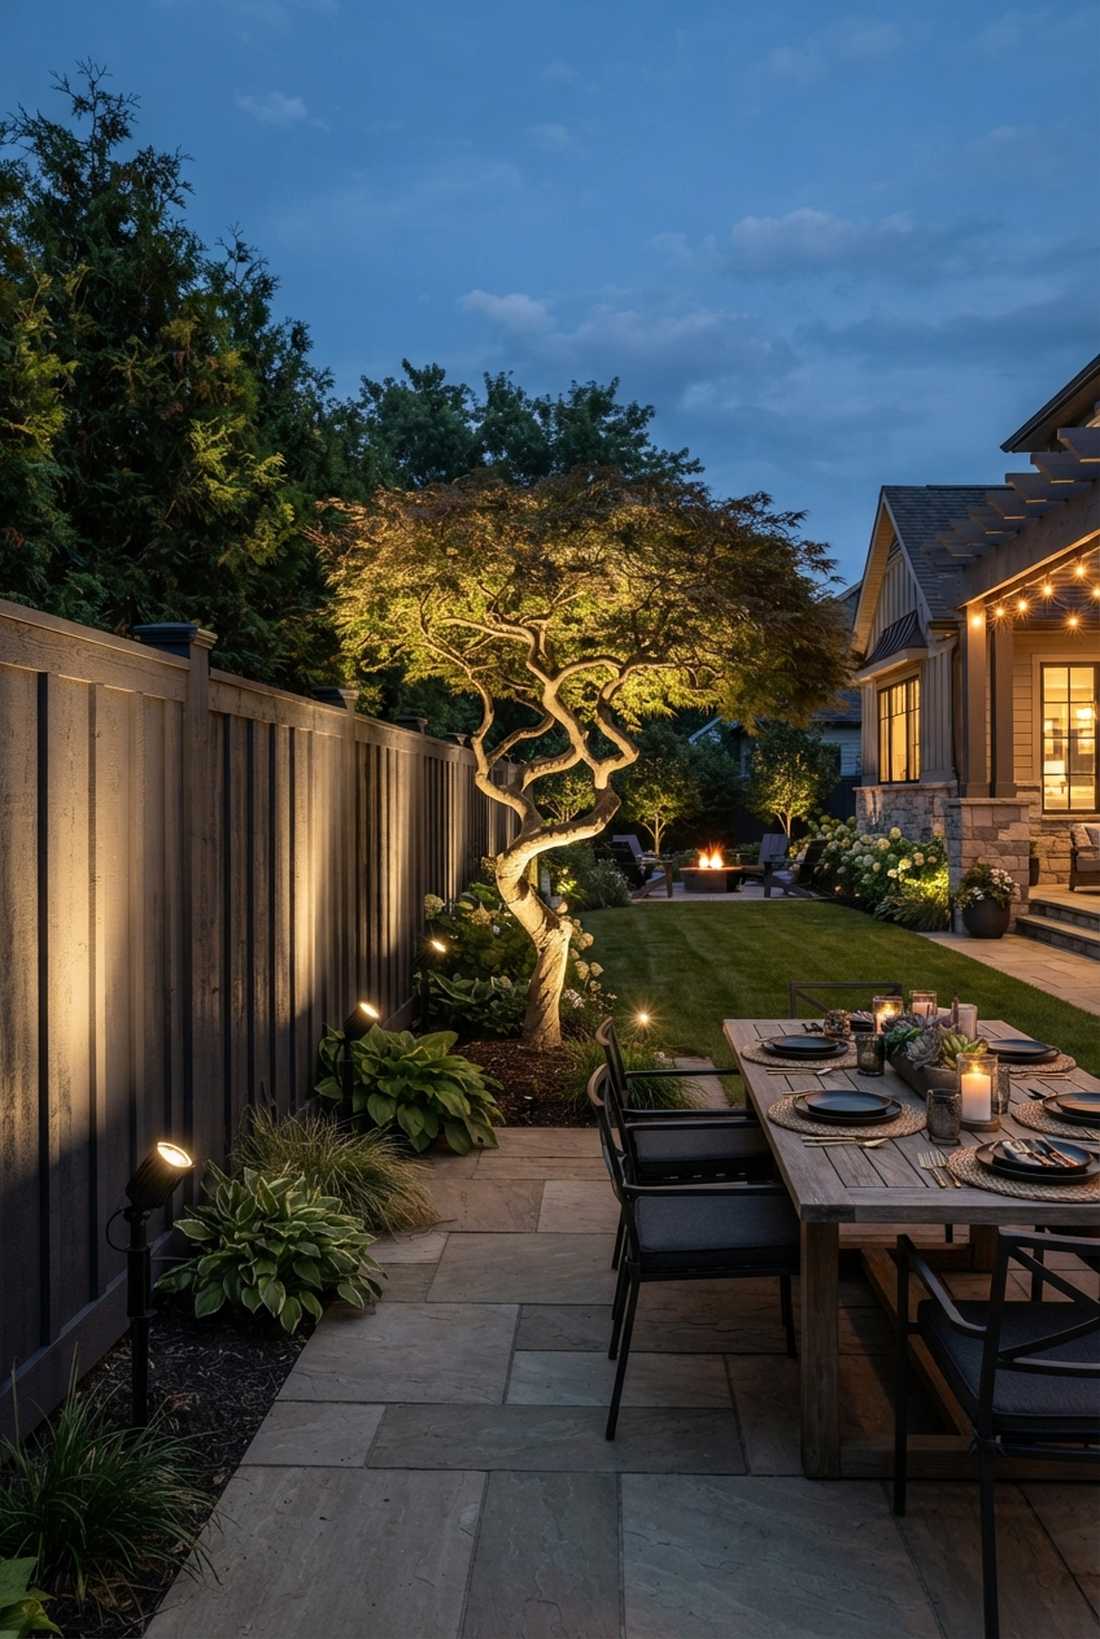
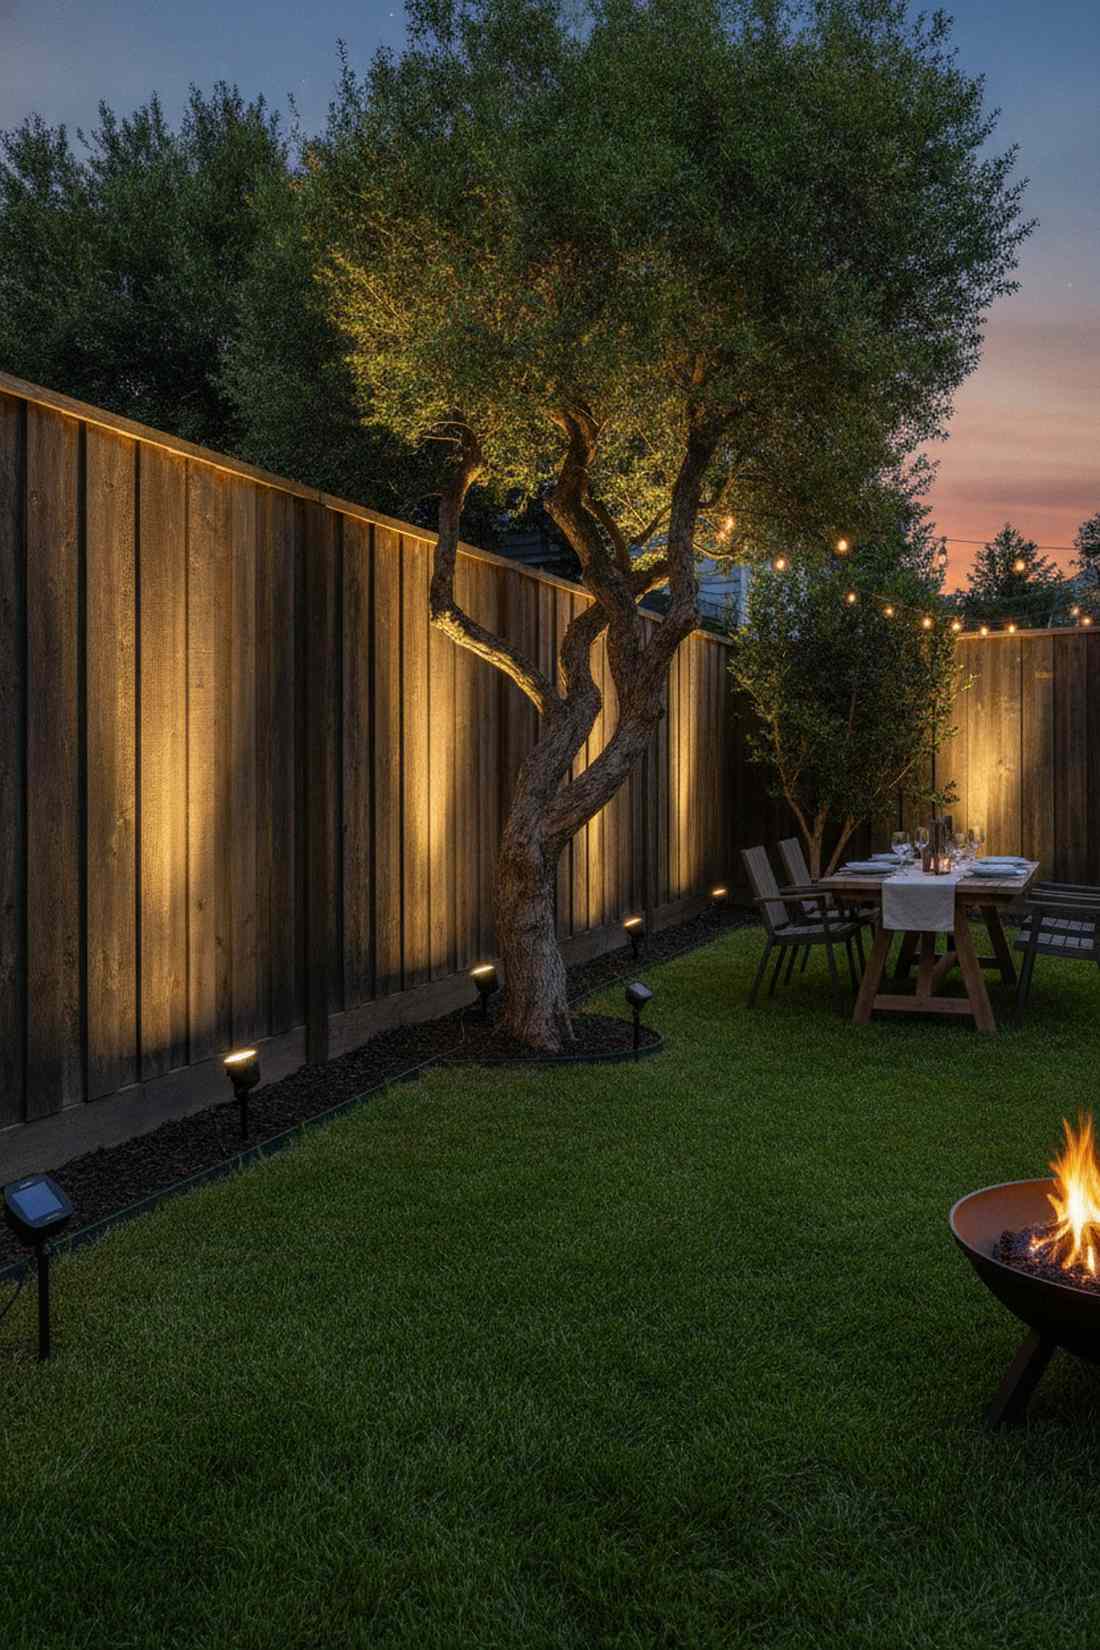
Feels like a high-end art museum exhibit displaying nature. Vertical shadow-casting illumination creates massive 3D depth against fences and trees. The best trick to make small yards feel incredibly deep.
Lighting everything from the top down makes a yard look flat, but aiming adjustable spotlights upward gives a totally custom designer-level finish. Targeting a cool twisted tree or textured wall with premium outdoor dining supplies and landscape lights adds pure luxury.
Grabbing a 4-pack of solar spotlights costs about $40. Save this trick to completely change your yard’s night profile.
- Key Materials: Adjustable solar spotlights
- Vibe / Style: Dramatic landscape architecture
- Difficulty: Zero tools needed
- Budget Breakdown: Solar spotlight kit: $40.
- Creator’s Tip: Use narrow 15-degree beam angles to highlight specific trunks without flooding the whole yard with annoying glare.
- Smart Sourcing: Adjustable warm-white solar landscape spotlights (4-pack) and heavy-duty ground mounting stakes.
This next lighting hack takes 30 seconds to set up but makes your dinner table look like a cinematic movie scene…
30. Candle Cluster Table Lighting
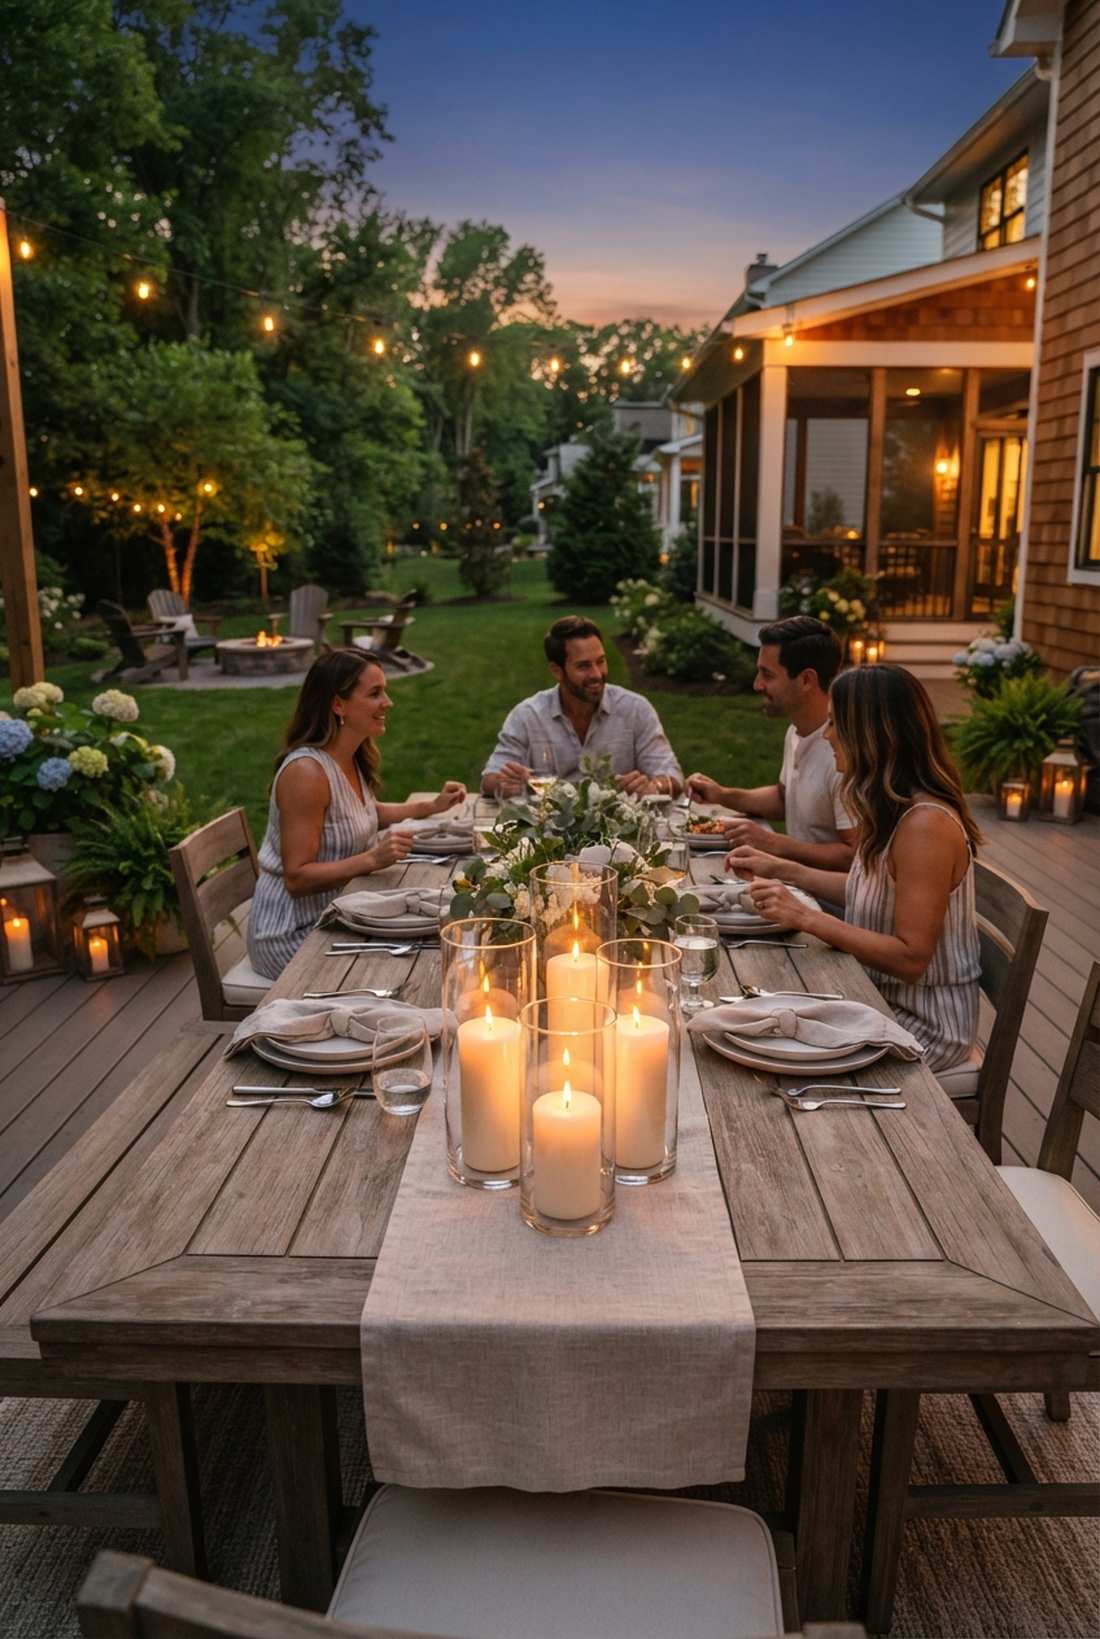
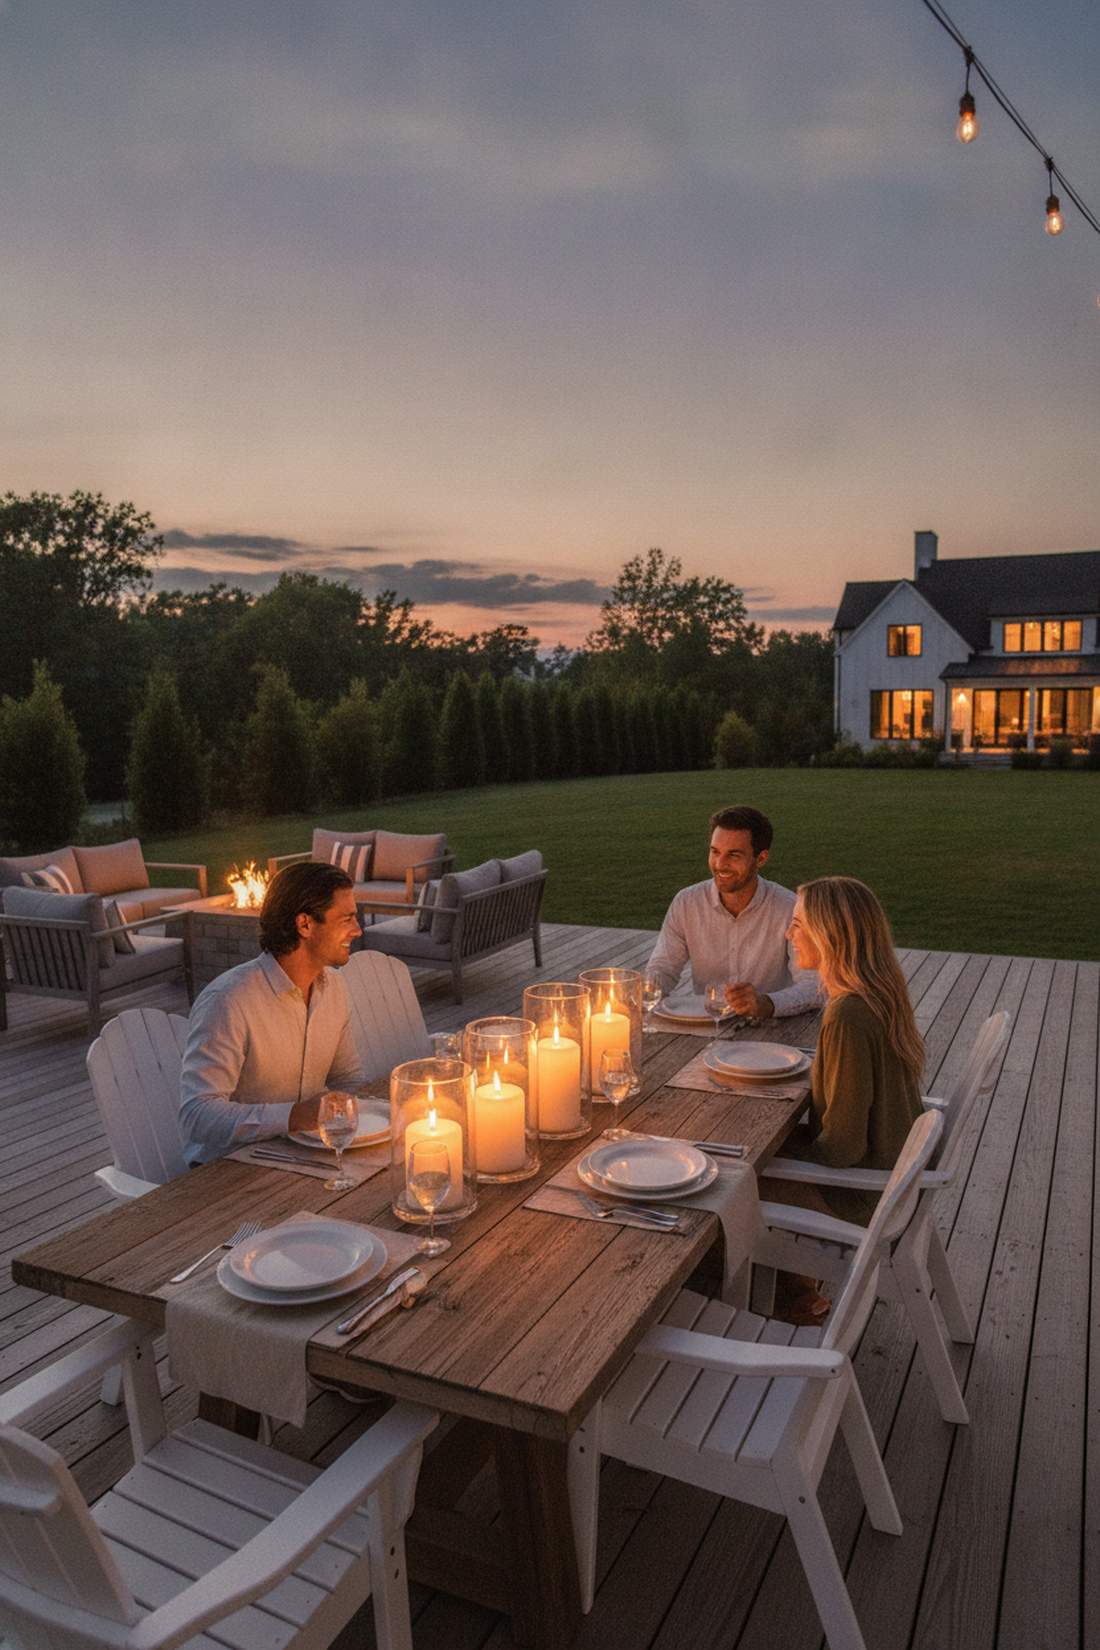
Feels like an intimate, flickering romance straight out of a historic tavern. Concentrated hurricane glass illumination flatters everyone’s faces beautifully. Essential for sit-down dinners where harsh overhead lights are banned.
Relying on bug zappers for table light is awful, but clustering pillar candles of varying heights looks far more expensive and intentional. Dropping thick candles into clear glass sleeves prevents wind blowouts while elevating your basic outdoor setup accessories into art.
A stunning cluster of 5 candles costs about $35. Pin this for the perfect twilight dining aesthetic!
- Key Materials: Pillar candles, glass hurricane cylinders
- Vibe / Style: Flickering cinematic romance
- Difficulty: Simple tabletop styling
- Budget Breakdown: Glass cylinders: $20 | Pillar candles: $15.
- Creator’s Tip: Calculate exactly one candle grouping per 3 to 4 linear feet of table length to keep the lighting even.
- Smart Sourcing: Clear glass hurricane candle holders (bulk pack) and unscented dripless pillar candles.
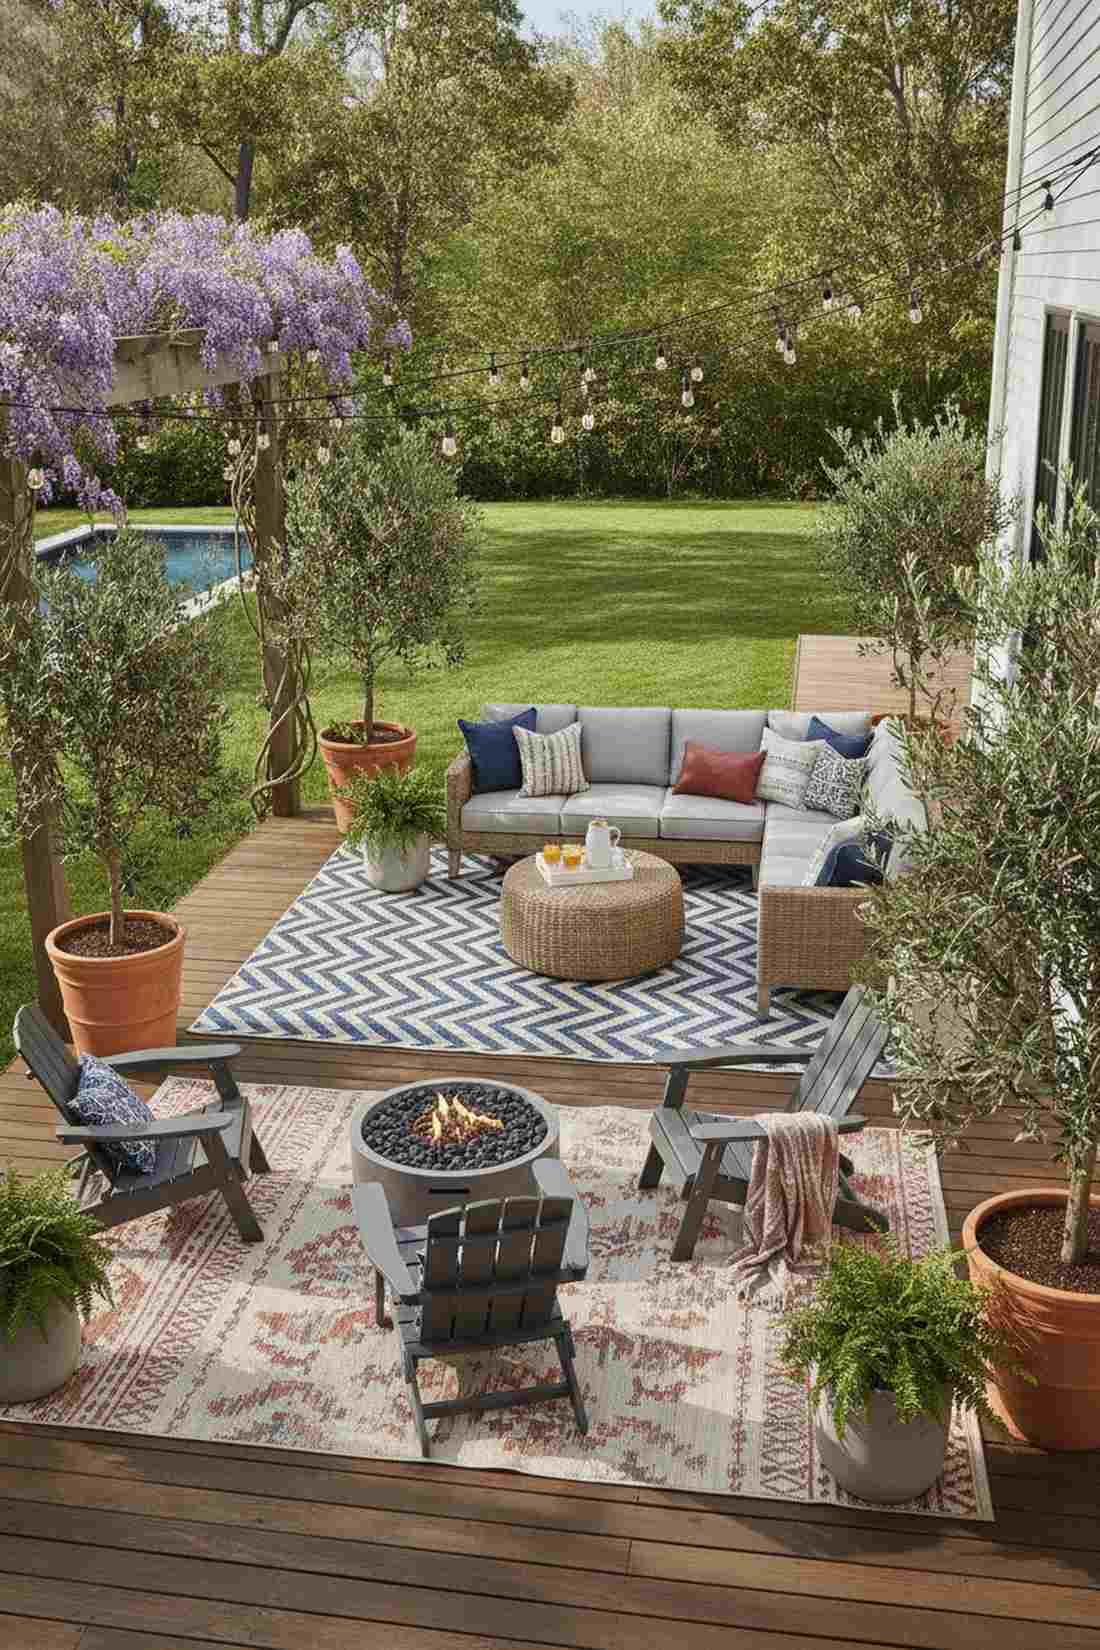
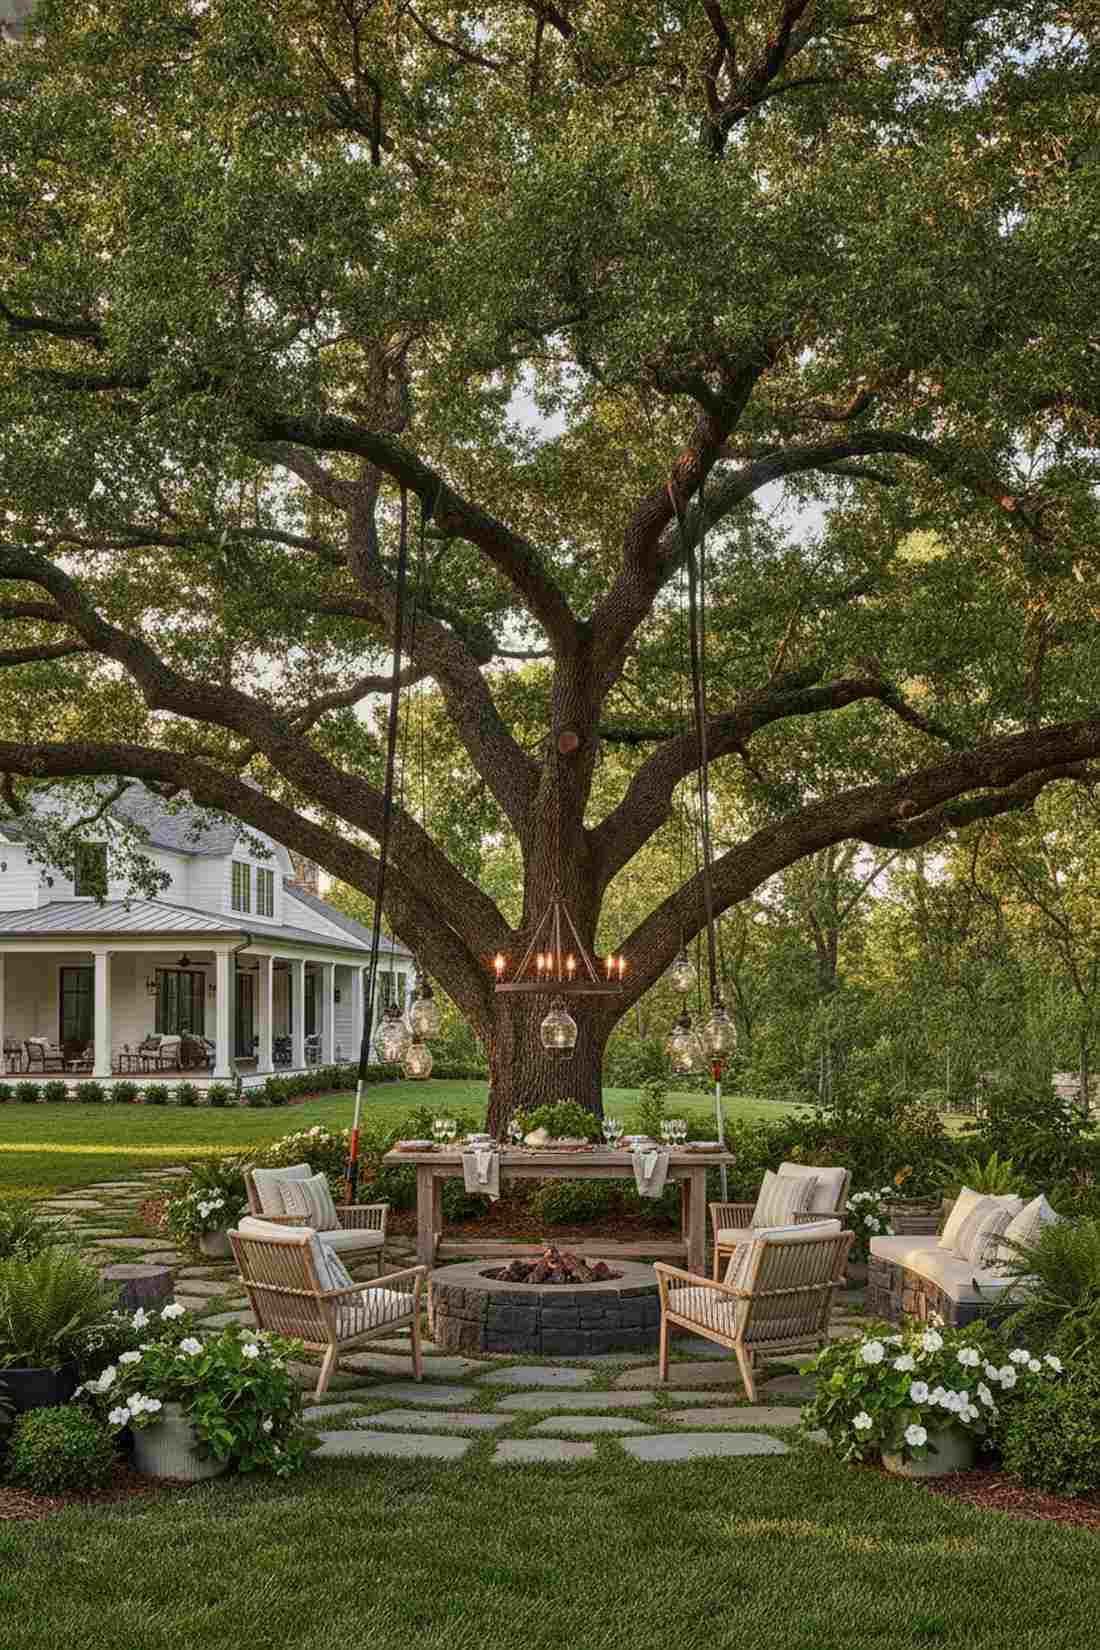
31. Fire Feature as Focal Point
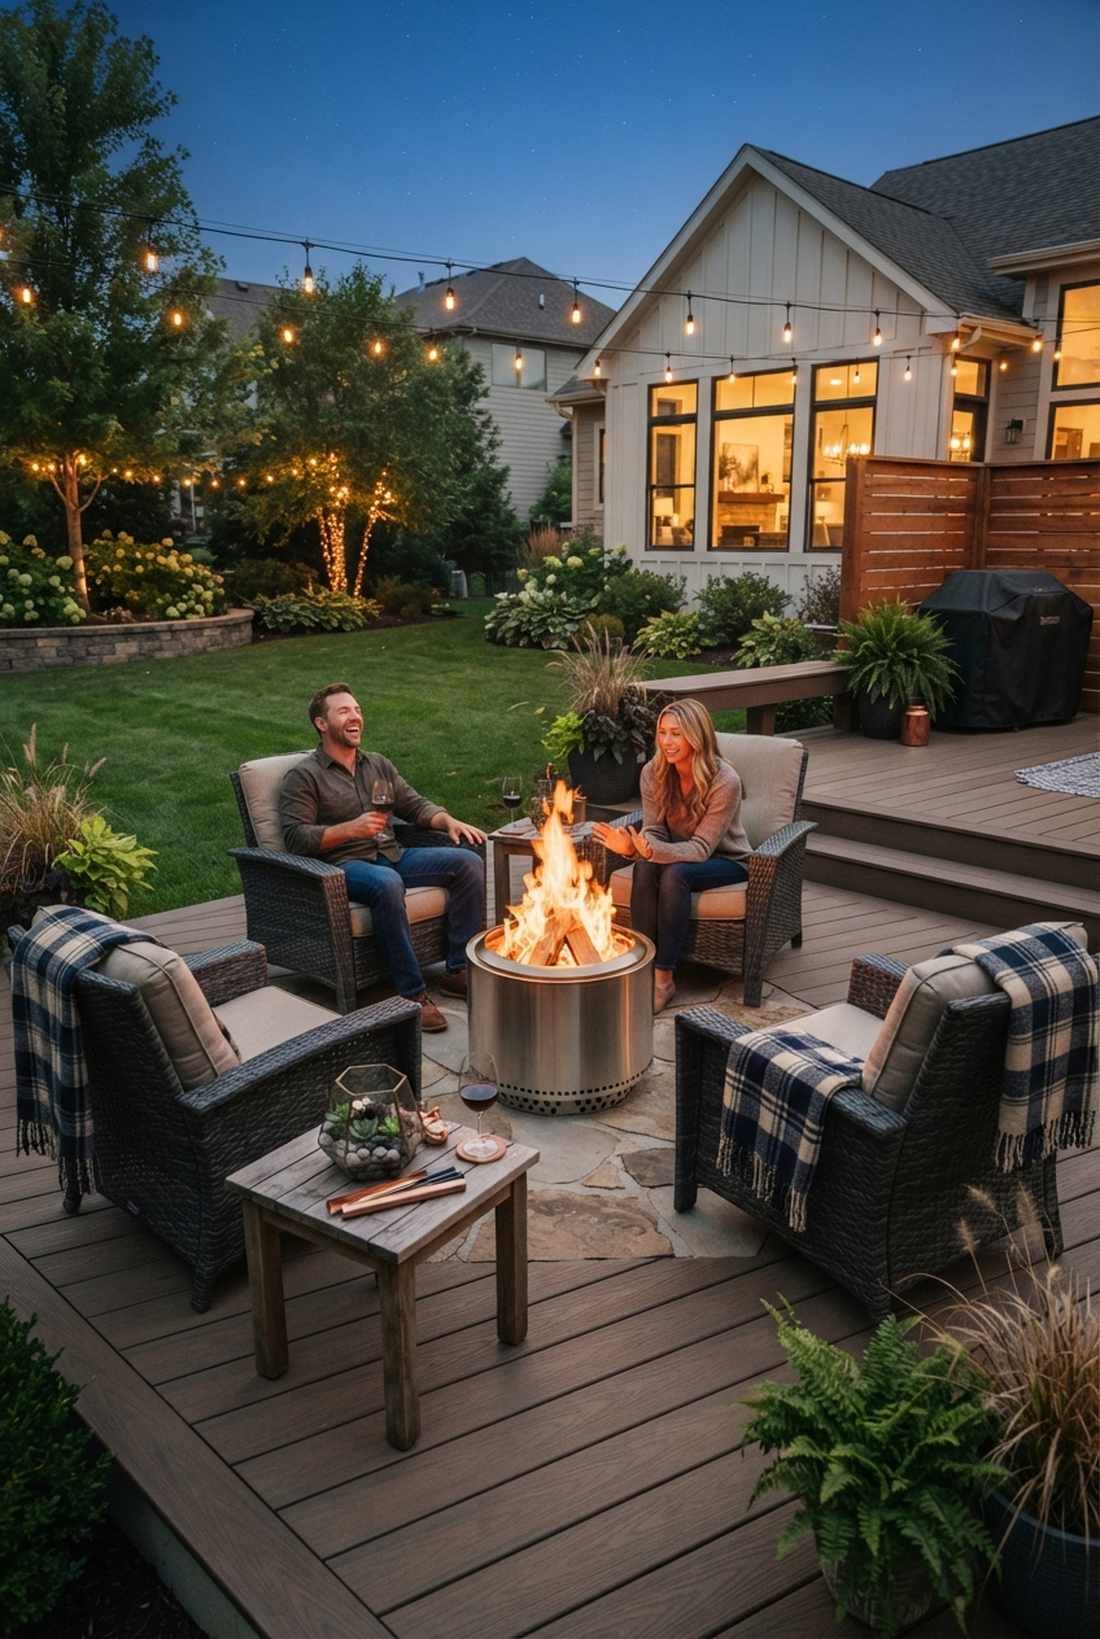
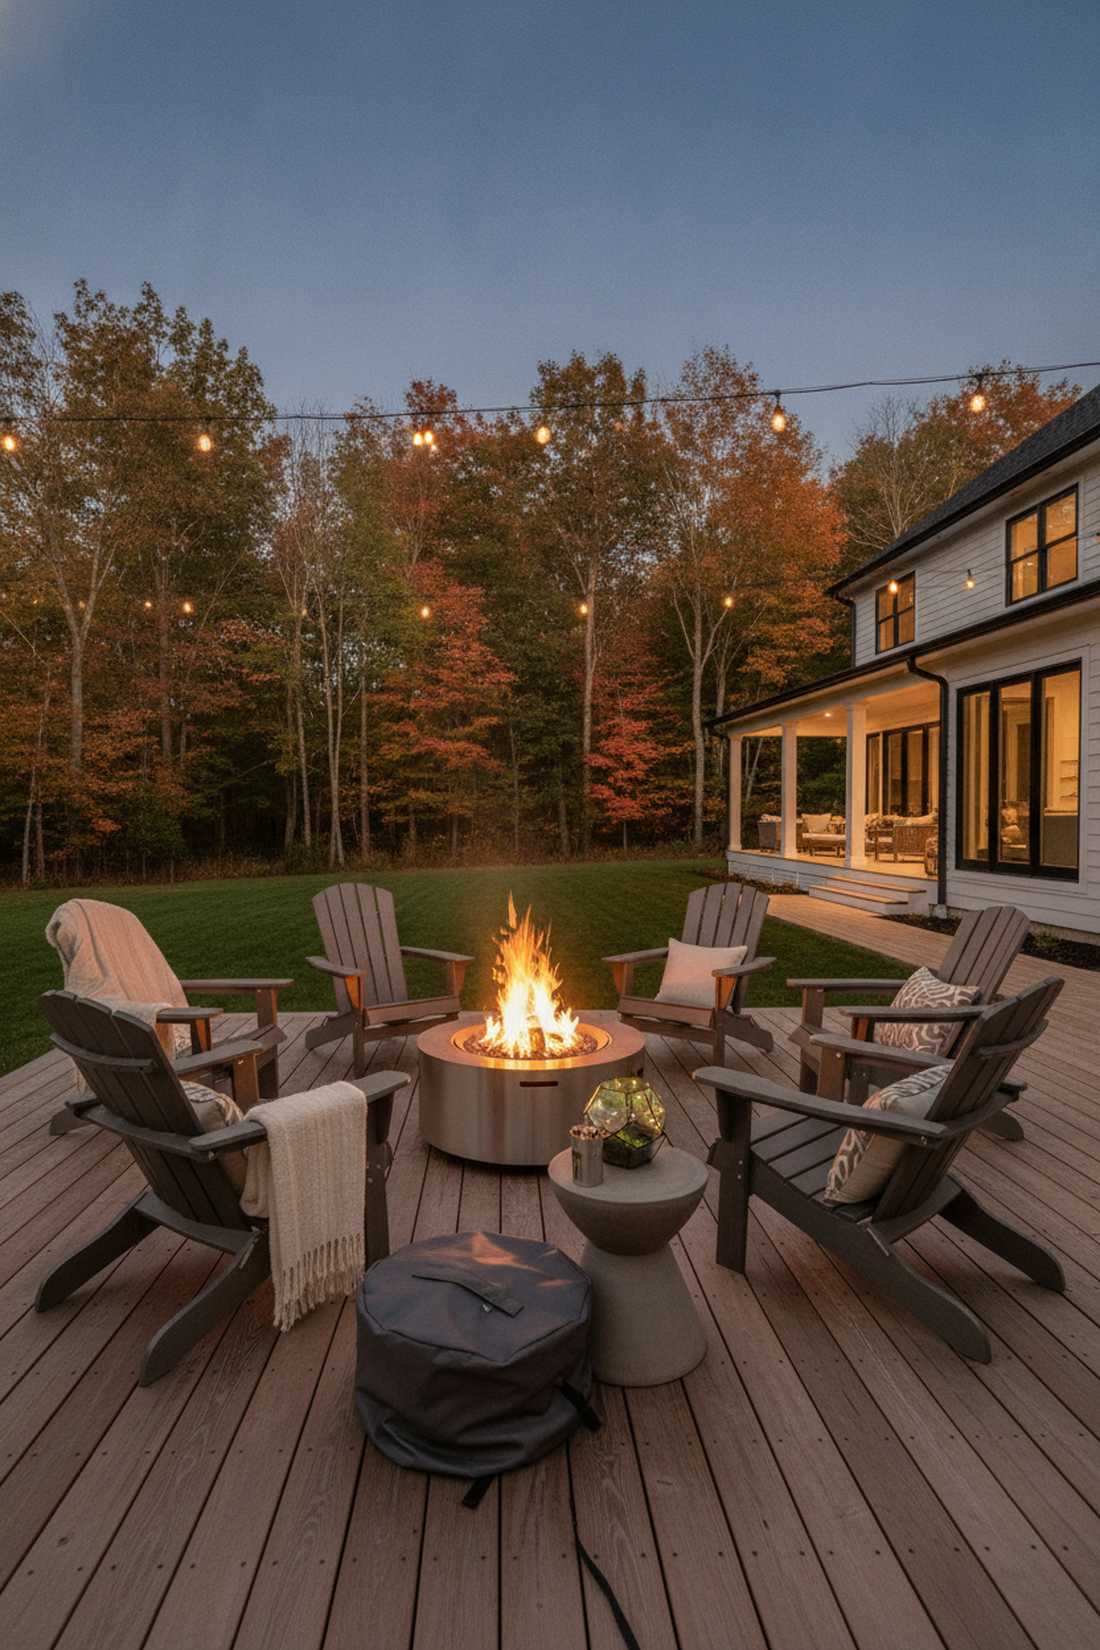
Feels like a primal, hypnotic gathering space that keeps the party alive till 2 AM. Centralized kinetic heat styling is the ultimate yard anchor. Absolutely necessary for crisp spring or autumn evenings.
A dark yard sends people home early, but a roaring fire pit delivers a surprisingly premium reason to stay outside. Using modern smokeless fire rings paired with durable terrarium accessories scattered on side tables ensures the area feels curated, not like a campsite.
Upgrading to a smokeless pit runs about $100–$250. It is a defining investment for extended entertaining.
- Key Materials: Smokeless fire pit, long matches
- Vibe / Style: Hypnotic modern campfire
- Difficulty: Easy out-of-box setup
- Budget Breakdown: Fire feature: $150 | Firewood: $20.
- Creator’s Tip: Keep seating exactly 6 to 8 feet back from the rim—close enough for warmth, far enough to avoid smoke in the eyes.
- Smart Sourcing: Stainless steel smokeless outdoor fire pits and heavy-duty waterproof fire pit covers.
Specialized Activity Spaces
Thoughtfully planned activity zones give guests interactive options beyond eating and conversing. These specialized areas accommodate different energy levels and social preferences while preventing congregation in single locations.
32. Lawn Game Tournament Zone
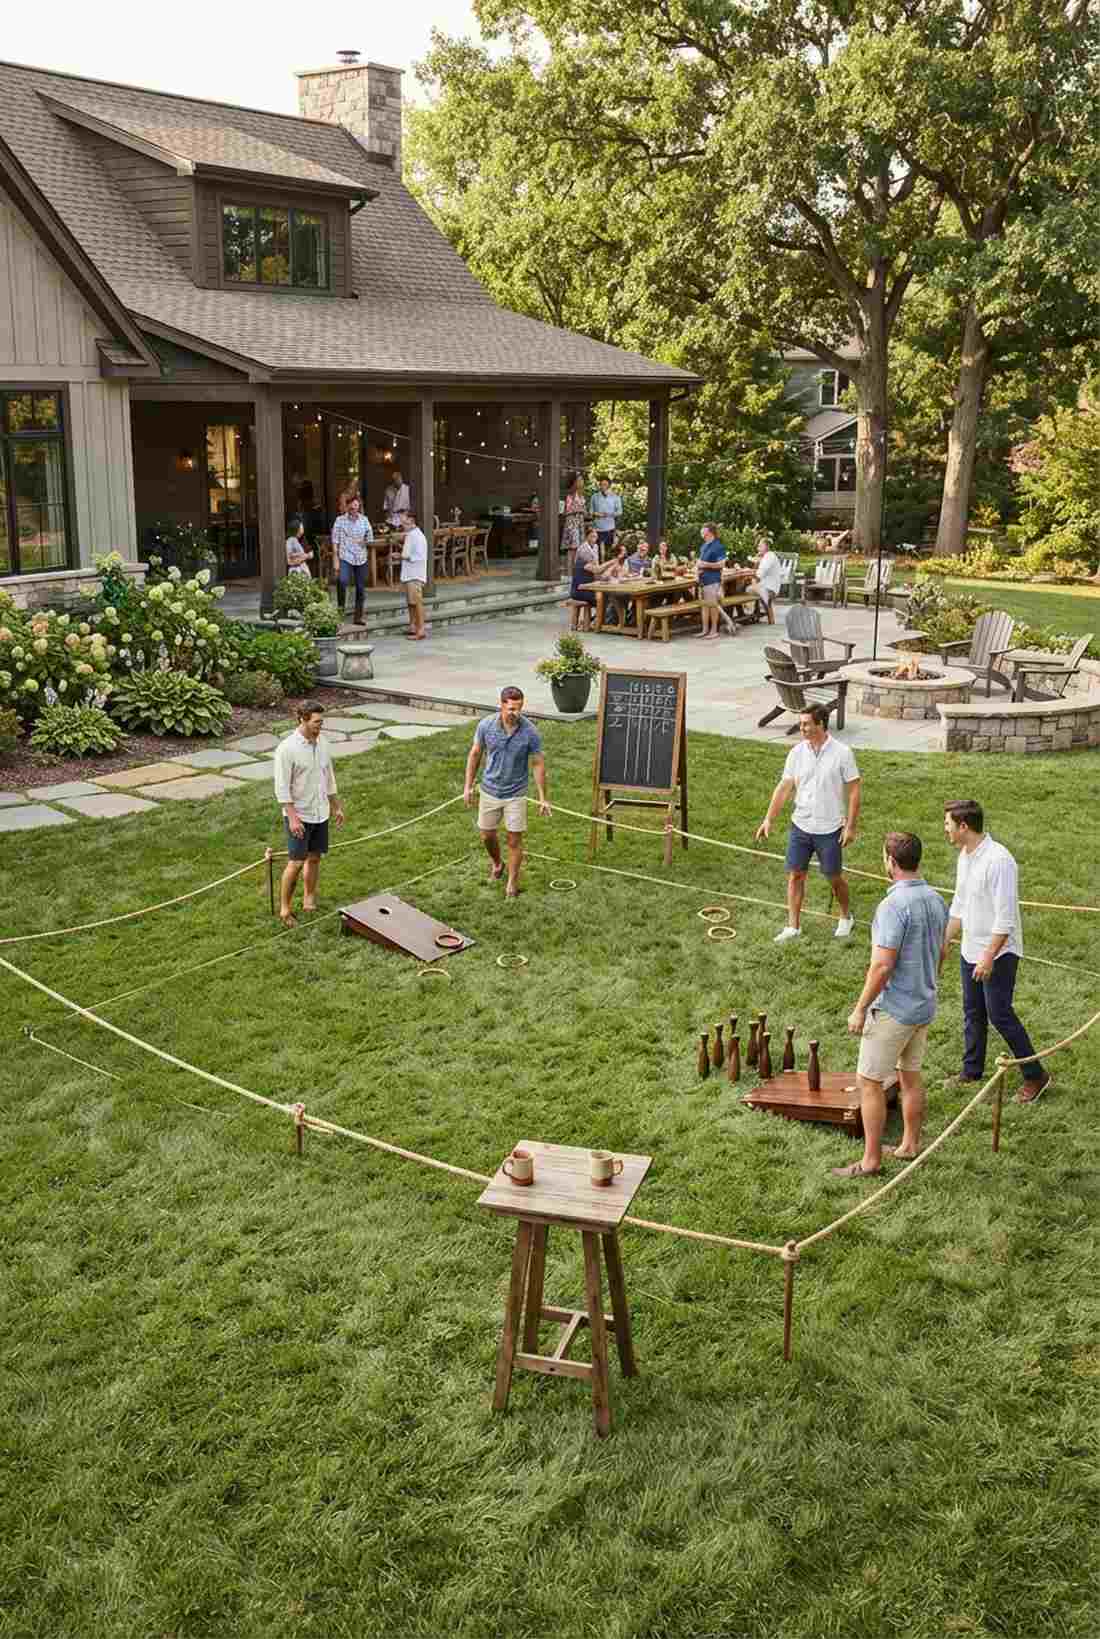

Feels like a classy country club tournament right in your own grass. Dedicated interactive recreation spacing keeps the energy high and competitive. Perfect for large, flat grassy areas away from the dining tables.
Throwing games directly next to the food creates chaos, but roping off a dedicated flat zone looks wildly intentional and expensive. Integrating premium wooden lawn games and specialized event staging supplies totally elevates the typical backyard barbecue vibe.
You can set up a beautiful game zone for under $50. Save this layout to keep your guests actively entertained!
- Key Materials: Premium wooden lawn games, boundary rope
- Vibe / Style: Upscale vintage recreation
- Difficulty: Fast staging
- Budget Breakdown: Vintage games: $40 | Boundary markers: $10.
- Creator’s Tip: Place a small cocktail leaning table right next to the game zone so players have a safe spot to rest their drinks.
- Smart Sourcing: Solid wood outdoor yard game kits and weatherproof outdoor scoreboards.
33. Beverage Service Bar Station
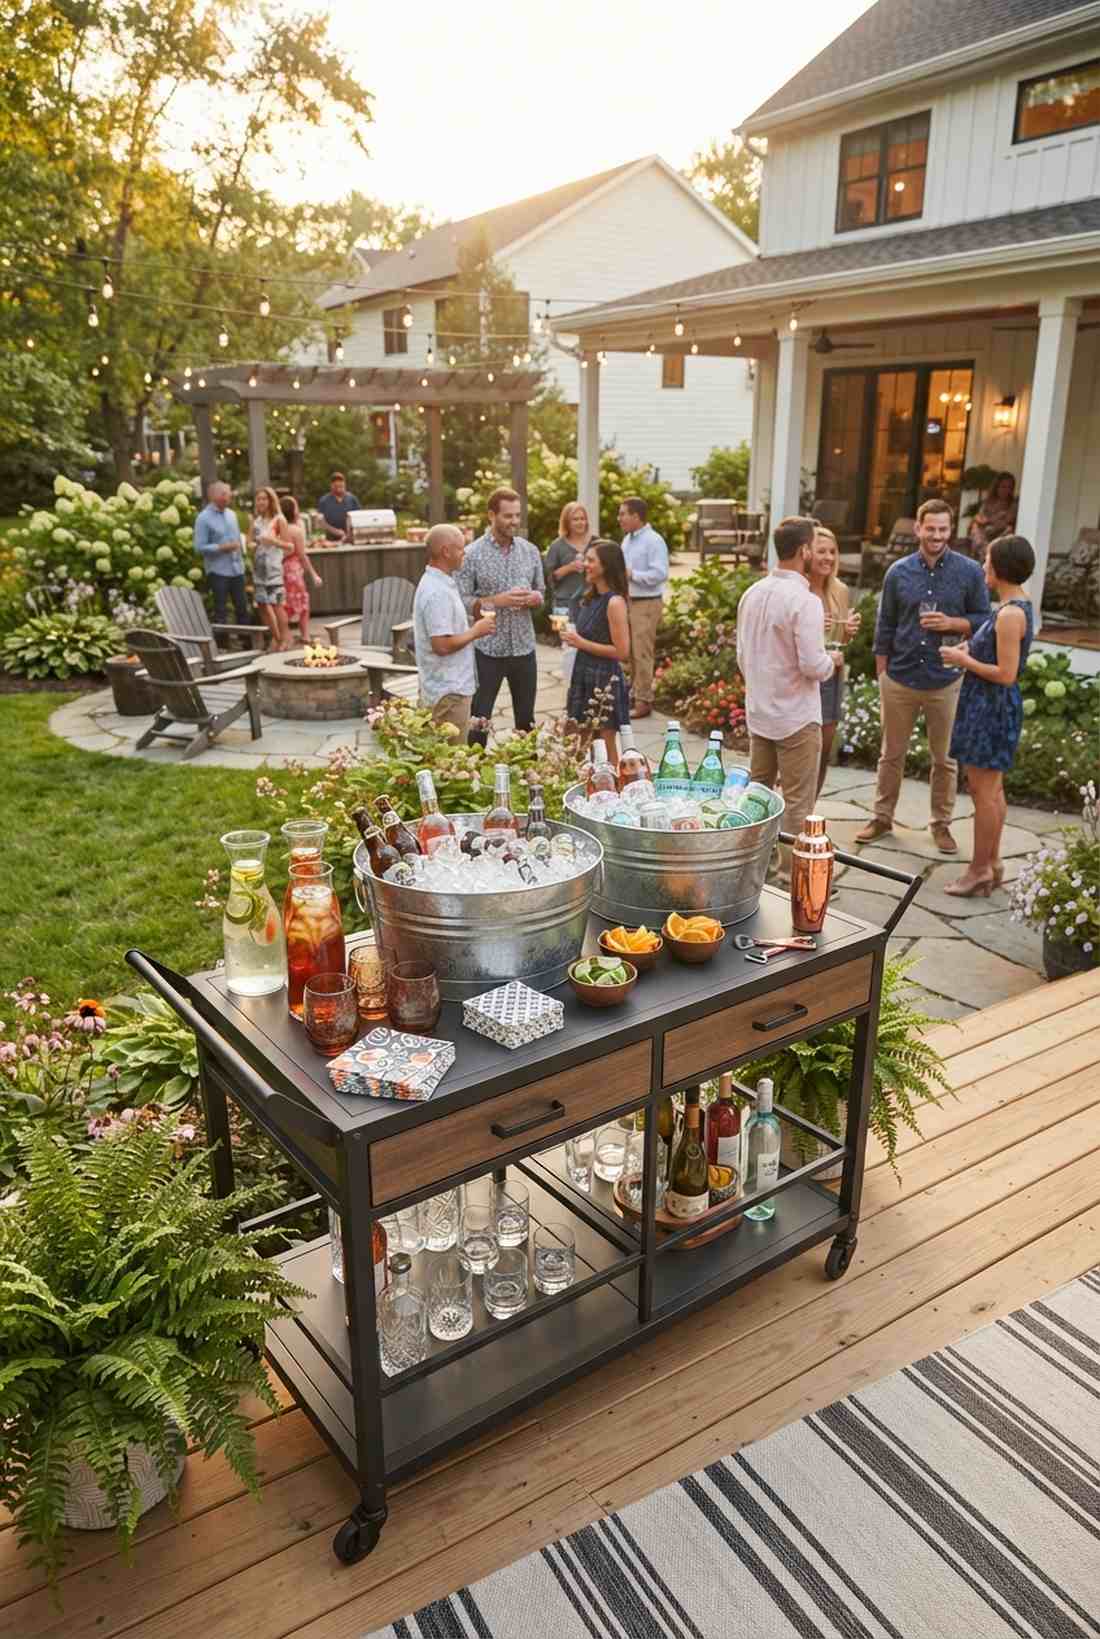

Feels like a trendy pop-up speakeasy hidden in the garden. Decentralized liquid catering stations completely eliminate the infamous kitchen bottleneck. Mandatory for parties with more than 15 guests.
Making everyone walk inside for a drink ruins the outdoor vibe, but setting up an independent hydration cart gives a totally custom designer-level finish. Utilizing rolling outdoor bar carts stocked with premium party starter kits forces guests to circulate properly.
A basic folding bar station costs around $40 to set up beautifully. Highly recommended for seamless hosting flow.
- Key Materials: Rolling cart or high table, galvanized ice buckets
- Vibe / Style: Chic self-serve oasis
- Difficulty: Easy organization
- Budget Breakdown: Bar cart: $60 | Ice tubs: $20.
- Creator’s Tip: Always place the bar station as far away from the food buffet as possible to split the crowd into two distinct areas.
- Smart Sourcing: Weather-resistant rolling outdoor bar carts and galvanized steel large capacity ice tubs.
34. Photo Opportunity Vignette
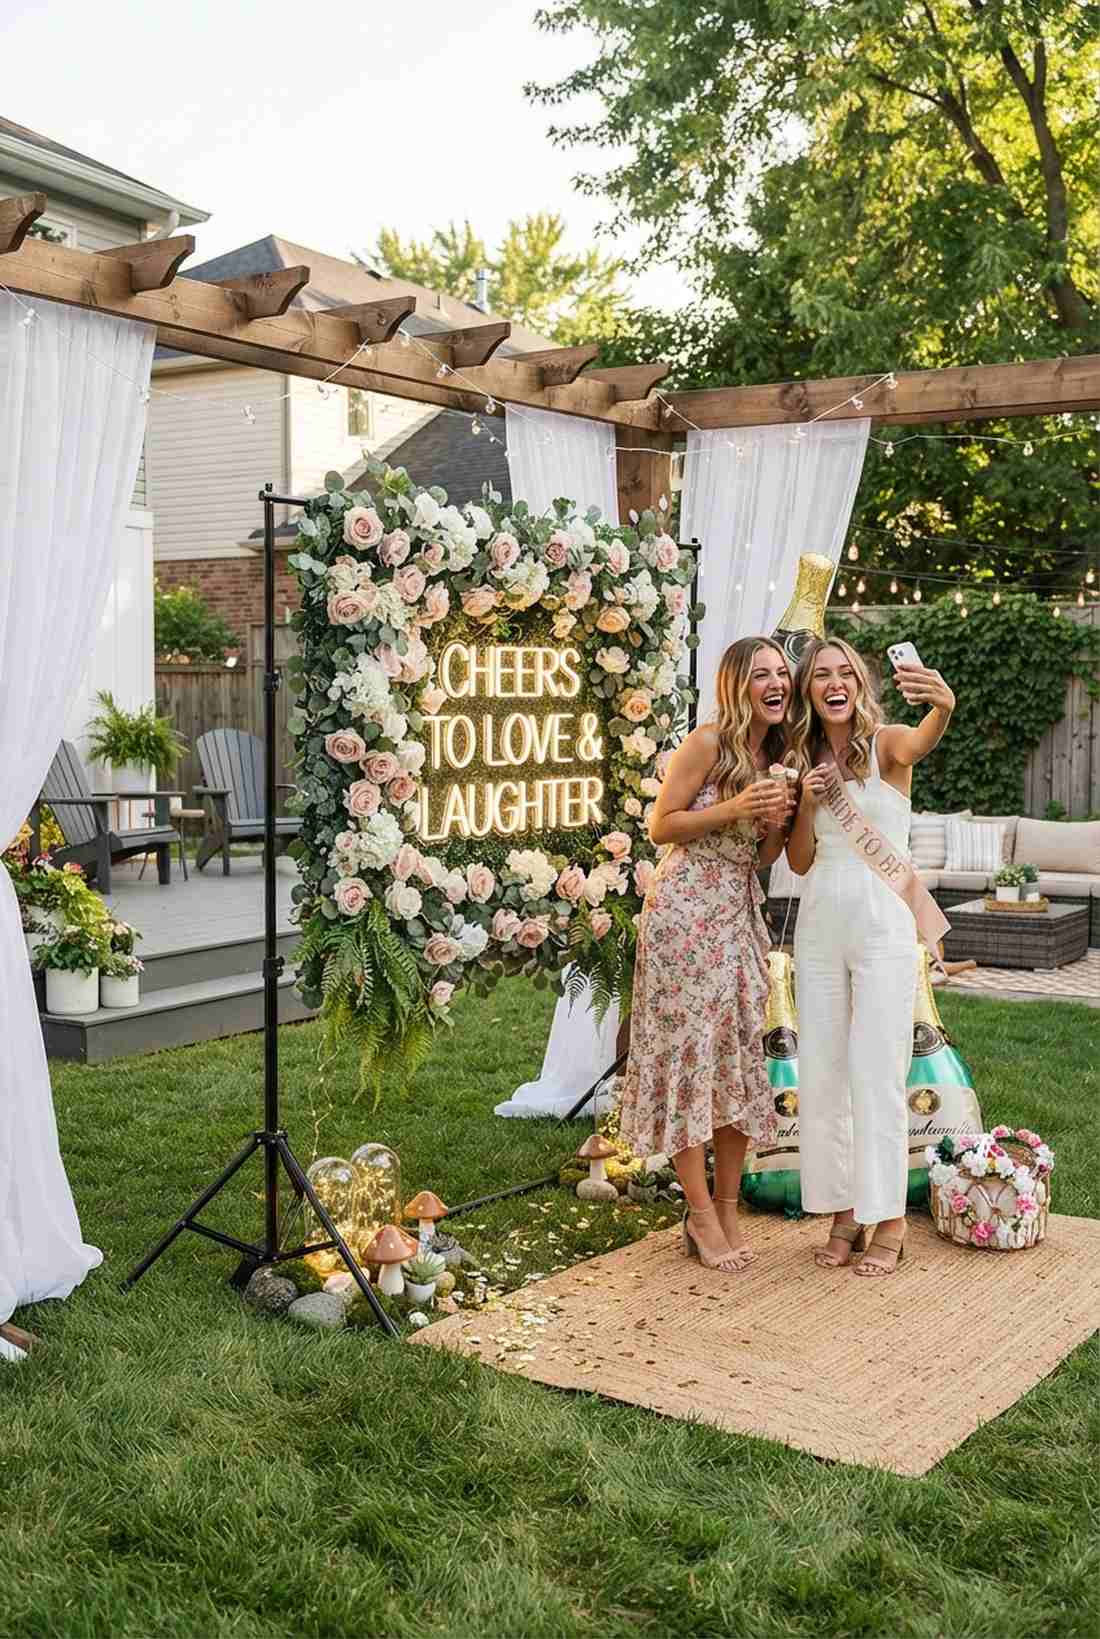
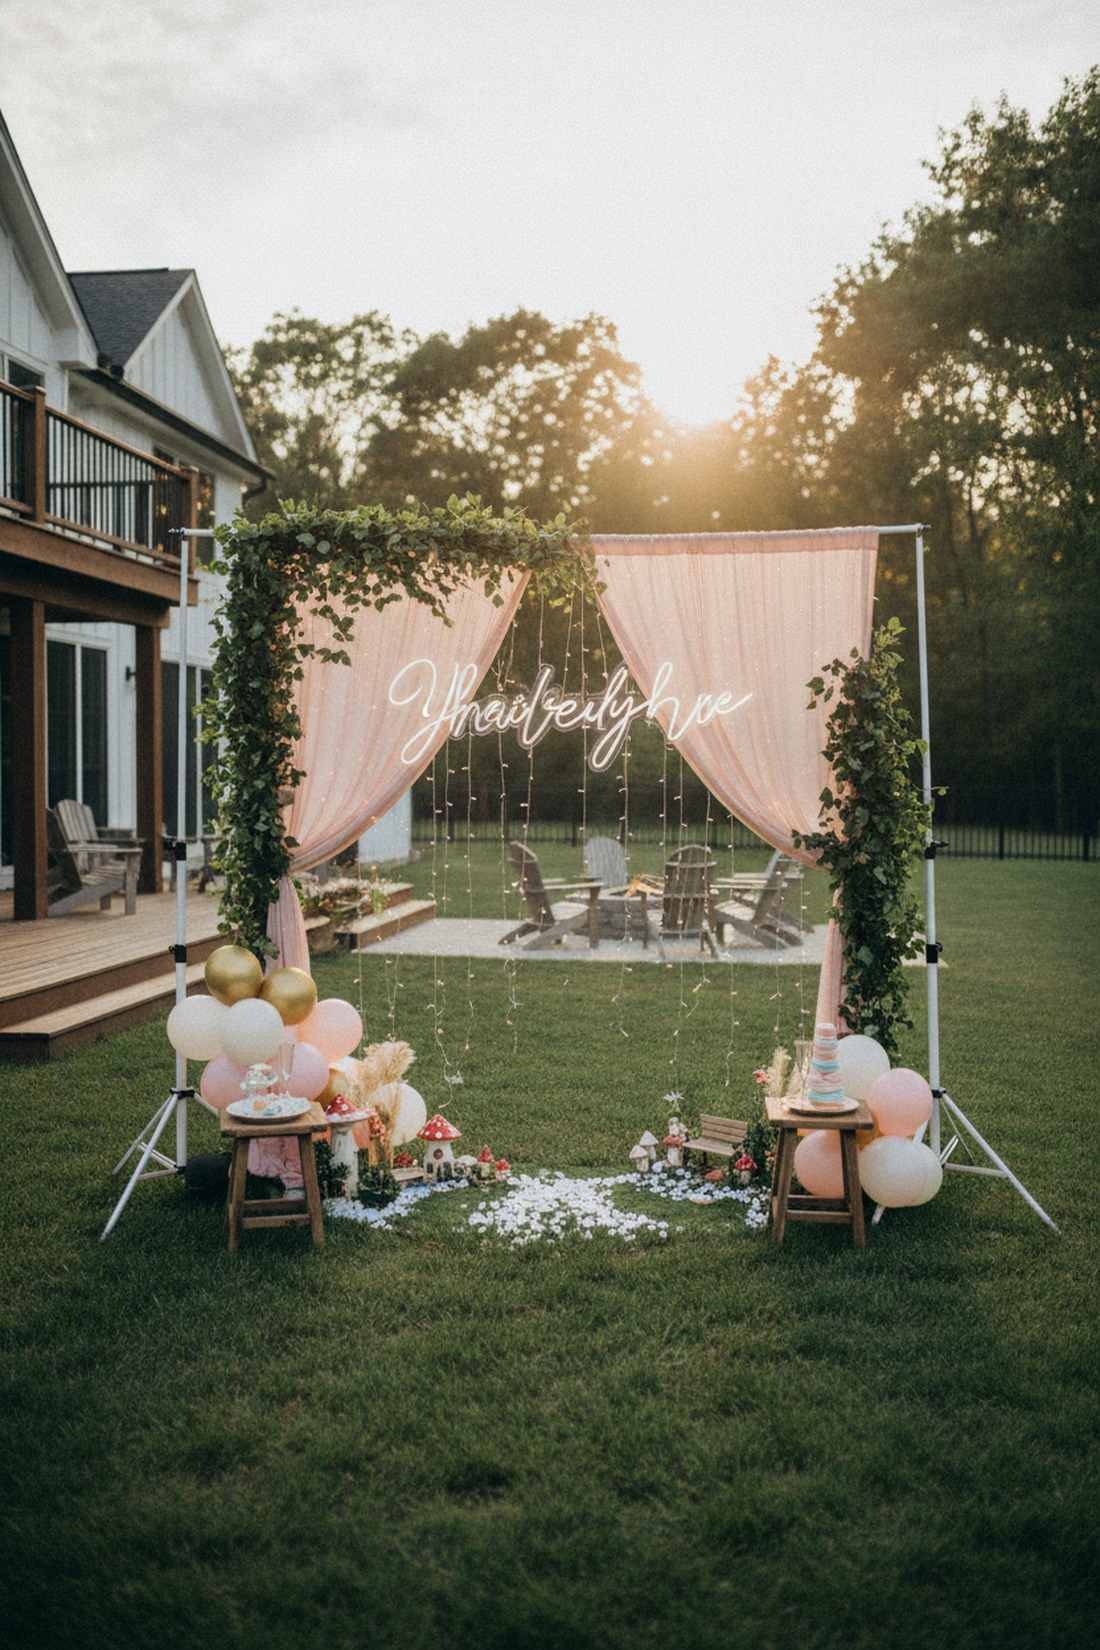
Feels like an exclusive influencer launch party backdrop. Curated interactive social media framing guarantees your party gets remembered online. An absolute must-have for birthdays, bridal showers, or grad parties.
Telling people to take pictures against the vinyl siding is awful, but dedicating a 6×6 corner with props looks wildly bespoke and expensive. Hanging neon signs and utilizing bulk fairy garden accessories around the frame makes the spot totally irresistible.
You can build a viral-worthy backdrop for roughly $70. Pin this to your event planning board right now!
- Key Materials: Hanging backdrop frame, LED neon sign
- Vibe / Style: Viral boutique aesthetic
- Difficulty: Creative assembly
- Budget Breakdown: Backdrop stand: $30 | Neon sign: $40.
- Creator’s Tip: Face the photo wall so the sun acts as natural front-lighting, avoiding terrible backlit silhouettes.
- Smart Sourcing: Adjustable heavy-duty photography backdrop stands and customizable LED neon party signs.
This final zone is the ultimate secret weapon for hosts who actually want to relax while the adults talk…
35. Kids Activity Corner
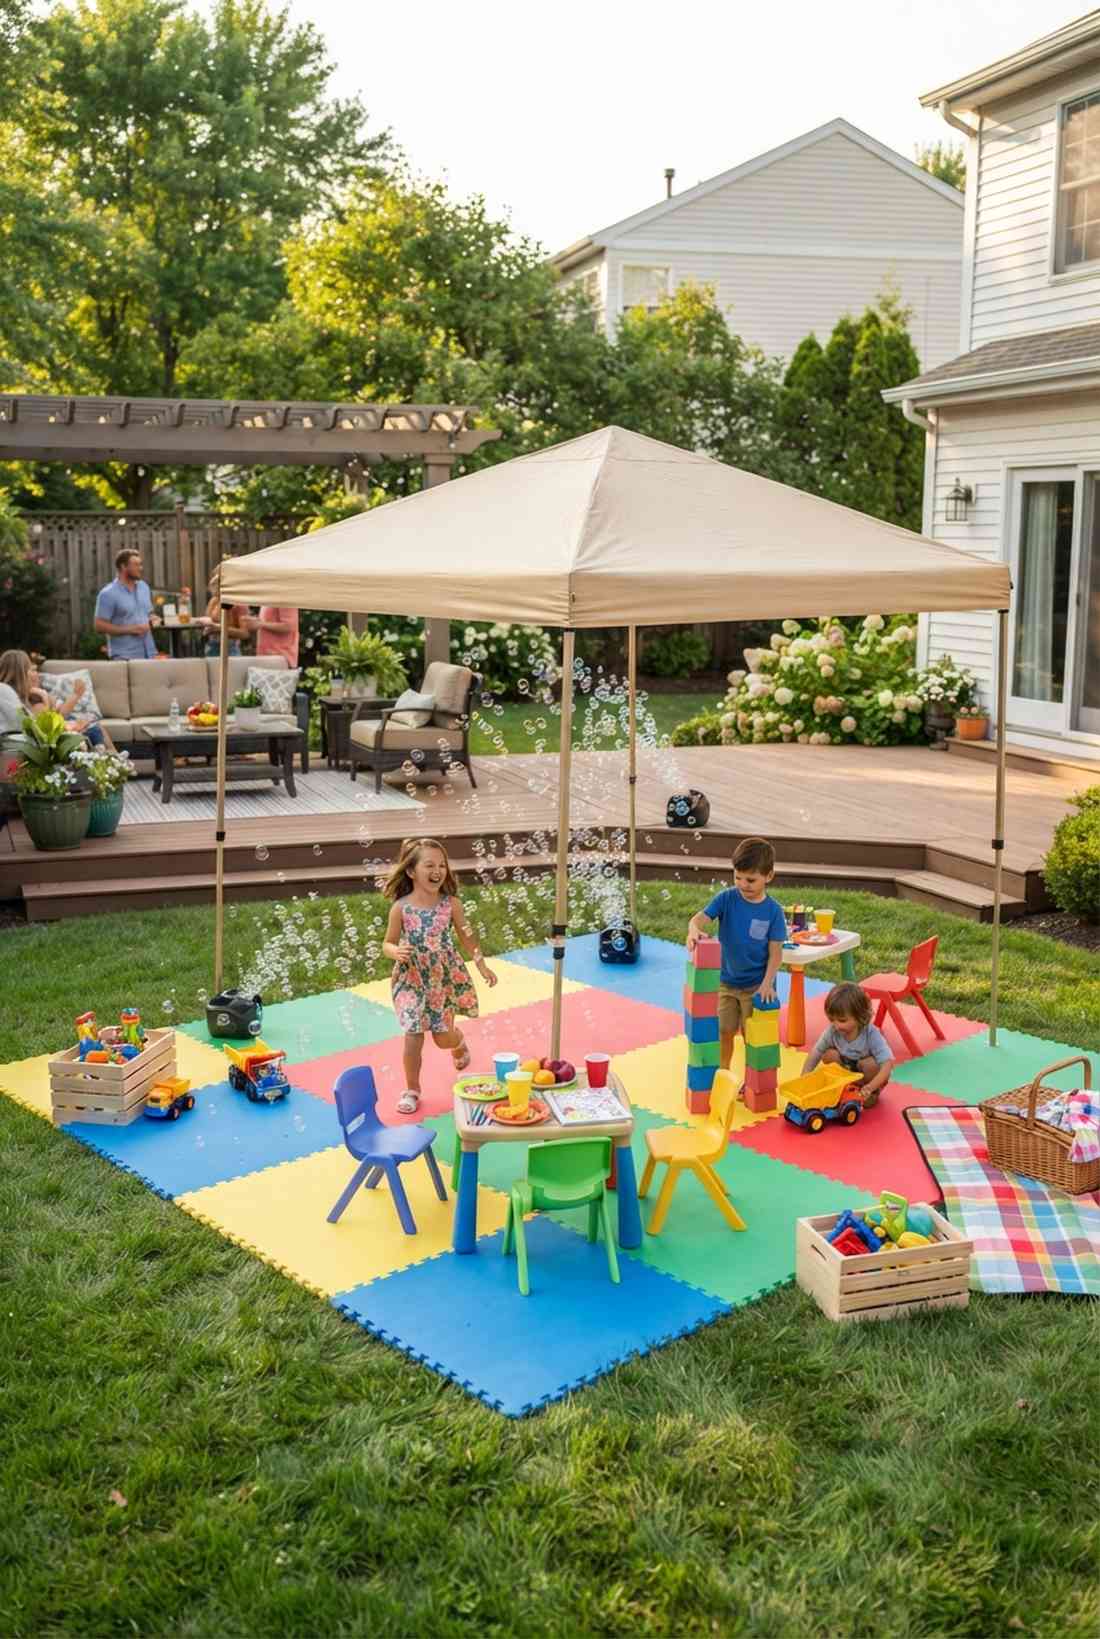
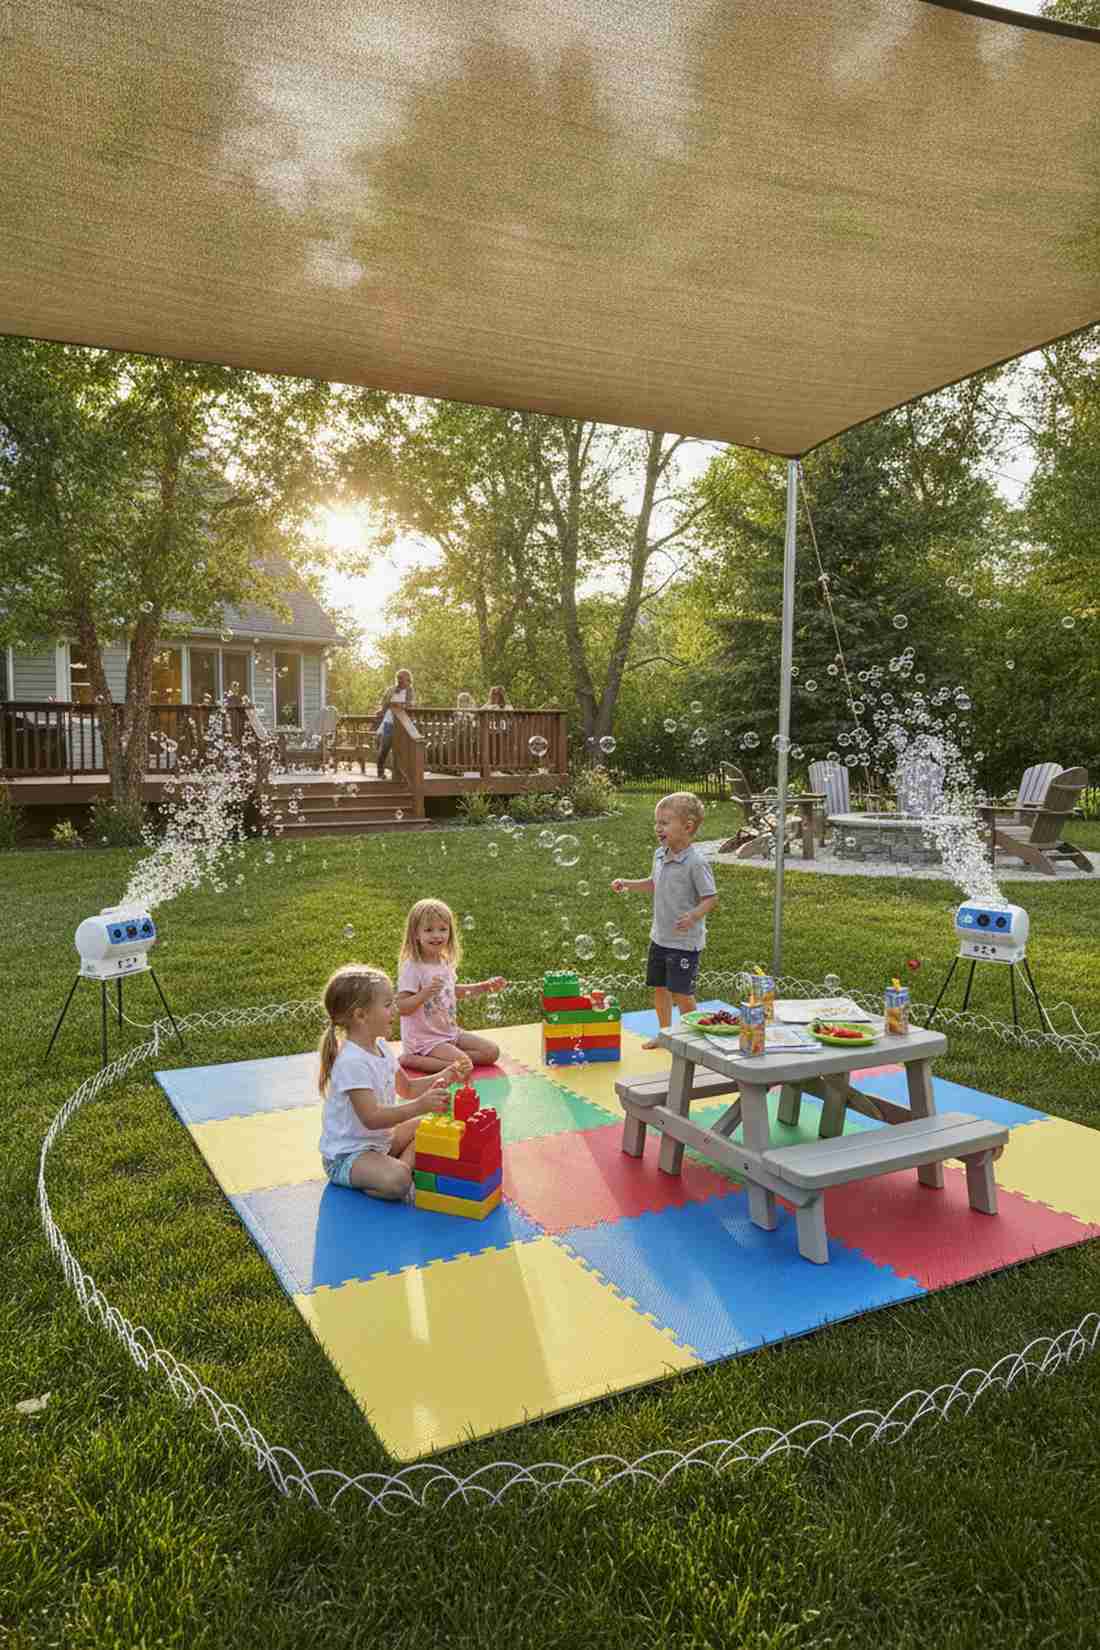
Feels like a magical mini-camp that keeps the little ones safely occupied for hours. Contained peripheral entertainment zoning is the savior of adult conversation. Essential if your guest list includes multiple families.
Letting kids run through the cocktail area is a disaster, but building a heavily shaded, soft-floor boundary looks incredibly thoughtful and premium. Utilizing UV-coated outdoor play mats and dedicated outdoor dining supplies for snacks keeps the mess contained in one spot.
Setting up this sanity-saving zone costs about $40. It is a highly practical weekend layout addition.
- Key Materials: Foam play mats, shade canopy, bubble machines
- Vibe / Style: Safe and vibrant play-space
- Difficulty: Fast containment setup
- Budget Breakdown: Ground mats: $25 | Bubble machine: $15.
- Creator’s Tip: Keep this zone in clear line of sight from the main adult seating, but far enough away that the noise doesn’t overpower conversation.
- Smart Sourcing: Interlocking waterproof foam floor mats (bulk pack) and high-output automatic bubble maker machines.
Transform Your Home Garden Party Experience
Strategic layout planning transforms ordinary backyards into sophisticated entertainment venues that function as seamlessly as expensive indoor spaces. By implementing these exactly 35 high-end home garden party configurations—from tri-zone flow foundations to UV-resistant material hacks—you create environments where guests naturally circulate and aesthetic perfection emerges. Stop wasting money on cheap plastic decor and invest in these premium, productized starter kits and layout blueprints to completely upgrade your property’s social value.
Frequently Asked Questions
How much space do I need per guest for a home garden party?
Allocate 15 to 20 square feet per guest to ensure premium circulation without crowding. Seated dinner layouts require 20 to 25 square feet to allow servers and guests to navigate past heavy outdoor dining supplies and chairs comfortably. If you have a small 400-square-foot patio, focus on multi-level terraced setups and modular furniture kits to maximize the 20-person capacity without feeling cheap.
What is the best layout for small garden parties with limited space?
The perimeter zone configuration is the absolute best layout for tight patios. By pushing sleek, weatherproof console tables and tall trough planters to the edges, you save the center for movement. Avoid bulky chairs and instead invest in built-in perimeter seating and heavy-duty folding bar kits that completely eliminate a cluttered, cheap aesthetic in compact spaces.
How do I create natural traffic flow at outdoor parties?
You must force movement using the Linear Progression or Hub-and-Spoke layout. Never put the food and the bar next to each other; separate them completely using pre-cut commercial pathway guides. Keep main walkways strictly 48 inches wide and utilize high-end event staging starter kits to visually pull guests through the yard so they never bottleneck near the back door.
What home garden decor elements have the biggest visual impact?
Overhead architectural structures offer the highest ROI for your aesthetic budget. Installing a pergola frame with UV-blocking waterproof sun shade sails instantly creates a high-end “outdoor room” illusion. Pair this with towering, heavy-duty entryway planters and aggressive textile layering on your seating to achieve a ridiculously expensive, designer-level finish for under a few hundred dollars.
How can I incorporate home garden plants into my party layout year-round?
Skip planting directly in the ground for parties and rely heavily on commercial-grade, UV-resistant resin outdoor planters on hidden caster wheels. This modular approach lets you roll massive evergreens to block ugly sights or frame entryways instantly. Utilizing bulk pack fertilizer and premium soil ensures these portable living walls look incredibly lush and expensive all year round.
What lighting ratio should I use between different garden party zones?
Master the 3-to-1 contrast ratio to make your yard look like a luxury resort. Your main dining table should be glowing via shatterproof outdoor string lights and glass hurricane candle clusters, while pathways rely on subtle, warm-white LED luminarias. Flooding the whole yard with bright floodlights looks incredibly cheap, so use adjustable solar landscape spotlights strictly on architectural features to build massive 3D depth.