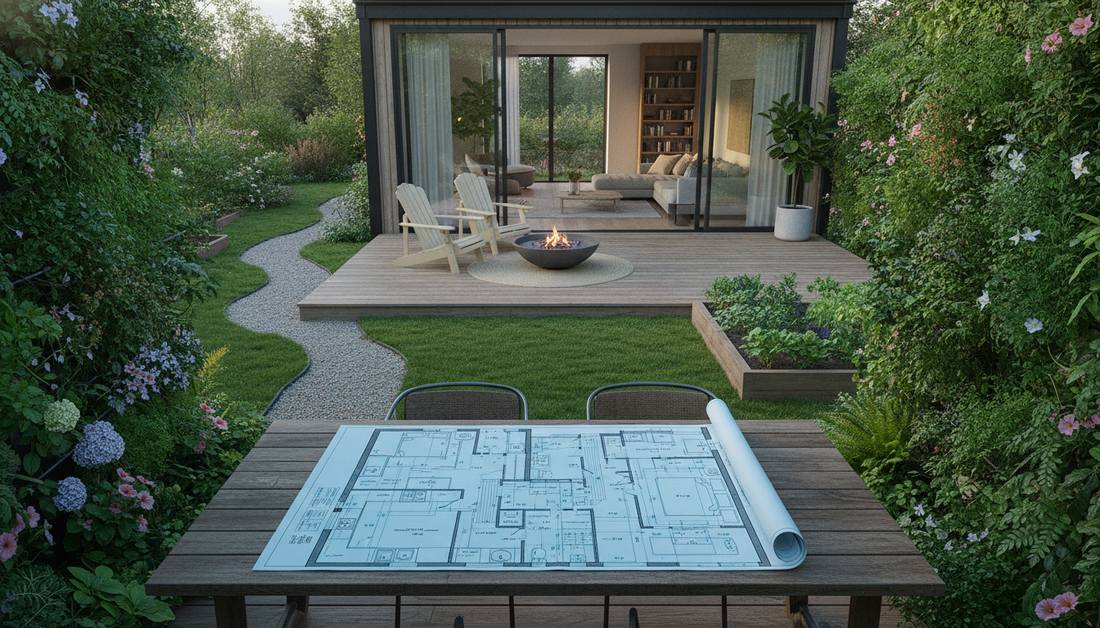
Transforming a home garden apartment shouldn’t require compromising on style or budget. Master your compact space using smart structural blueprints and premium materials. Secure a breathtaking designer aesthetic instantly without the luxury price tag.
Design SnapshotKey Principles
- Vertical Density: Wall-mounted systems and trellises multiply planting area without consuming floor space
- Material Echo: Repeating interior flooring textures outdoors creates visual continuity between zones
- Compartmental Zoning: Distinct functional areas (dining, planting, lounging) prevent spatial confusion in tight footprints
- Lightweight Modularity: Foldable and wheeled furniture adapts to shifting needs while maintaining circulation flow
Vertical Systems for Compact WallsHome Garden Pictures That Climb
1. Modular Pocket Planters
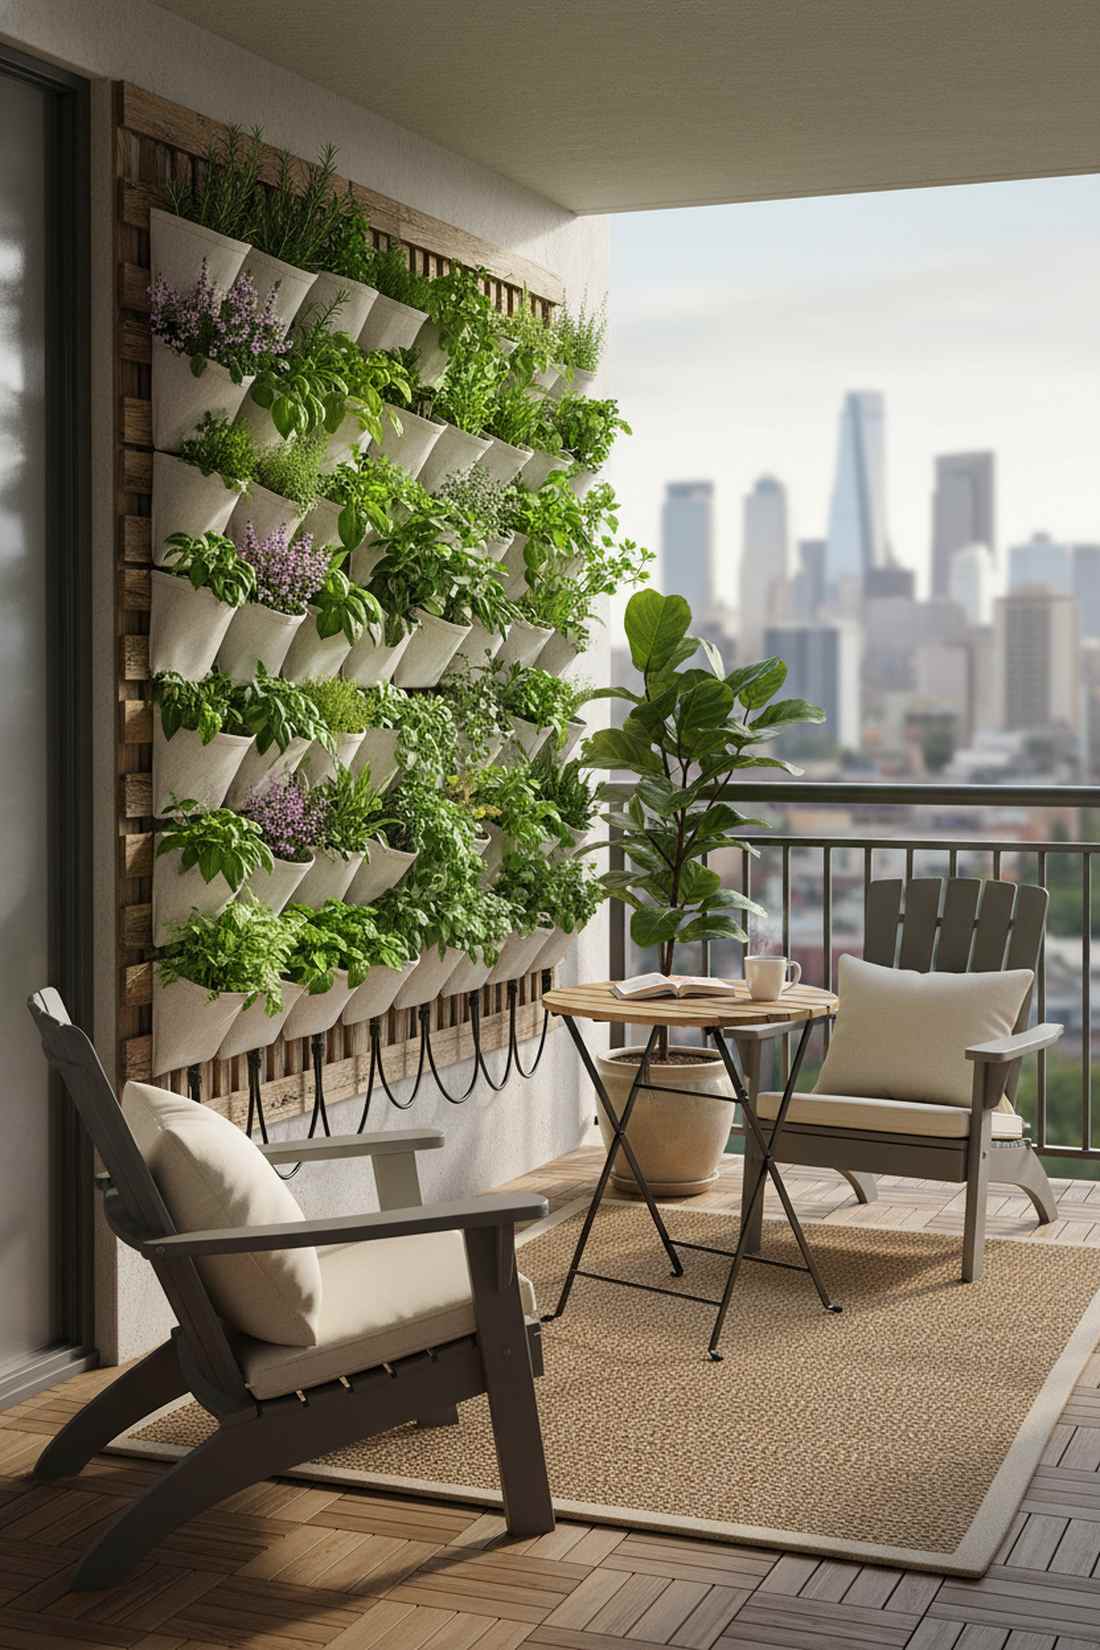
Feels like a cascading green waterfall right outside your glass door. This vertical balcony wall decor works exceptionally well for renters needing an immediate botanical impact without drilling permanent holes.
Ditching the traditional floor pots for a wall-mounted grid gives a designer-level finish. Slip high-yield herbs into synthetic fabric pockets, adding premium potting soil and smart garden kit nutrients for explosive growth.
You can easily pull this off for around $25–$45 depending on the pocket count. Pin this if you’re planning a small space upgrade!
- Key Materials: UV-treated felt planting grids, heavy-duty suction hooks
- Vibe / Style: Urban jungle oasis
- Difficulty: Easy beginner setup
- Budget Breakdown: Pockets: $20 | Soil & Plants: $25.
- Creator’s Tip: Add water-retaining hydrogels to the soil mix so vertical pockets never dry out during high heat.
- Smart Sourcing: Grab a 36-pocket UV-coated vertical planter (bulk pack) and a premium moisture-control potting starter kit.
2. Ladder Shelf Cascades
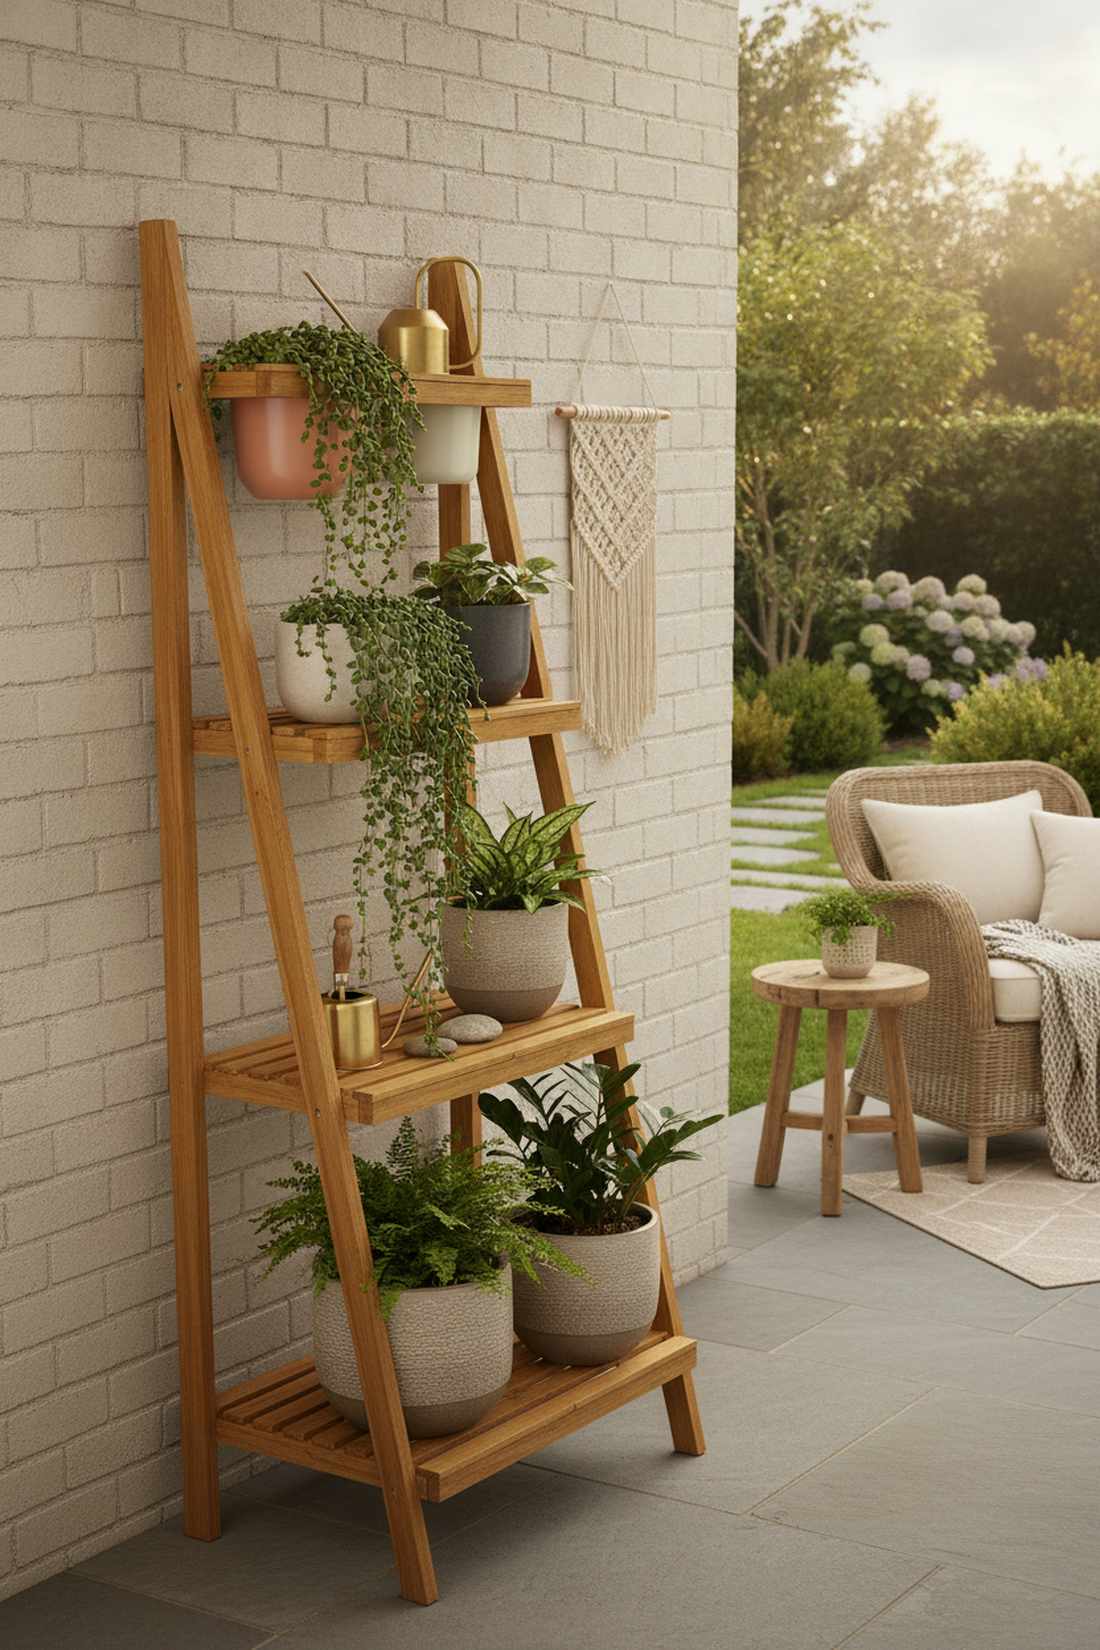
Straight out of a chic botanical café. This tiered plant display stand is the perfect use-case for narrow patio corners that need a boost in height and texture.
Going vertical with angled structures forces the eye upward, making cramped balconies look significantly taller. Stagger trailing vines over the edges and incorporate miniature garden supplies like tiny brass watering cans for a styled aesthetic.
Expect to spend about $40–$60 for a solid wooden frame and fresh greenery. It’s a fast upgrade that completely changes the vibe.
- Key Materials: Weatherproof leaning ladder, assorted ceramic pots
- Vibe / Style: Cozy modern bohemian
- Difficulty: Zero-tool assembly
- Budget Breakdown: Ladder: $35 | Trailing Plants: $25.
- Creator’s Tip: Place heavier statement plants on the bottom rung to anchor the shelf against high winds.
- Smart Sourcing: Invest in a pre-treated acacia wood ladder shelf and shatterproof resin hanging pots (multipack).
3. Trellis Screen Partitions
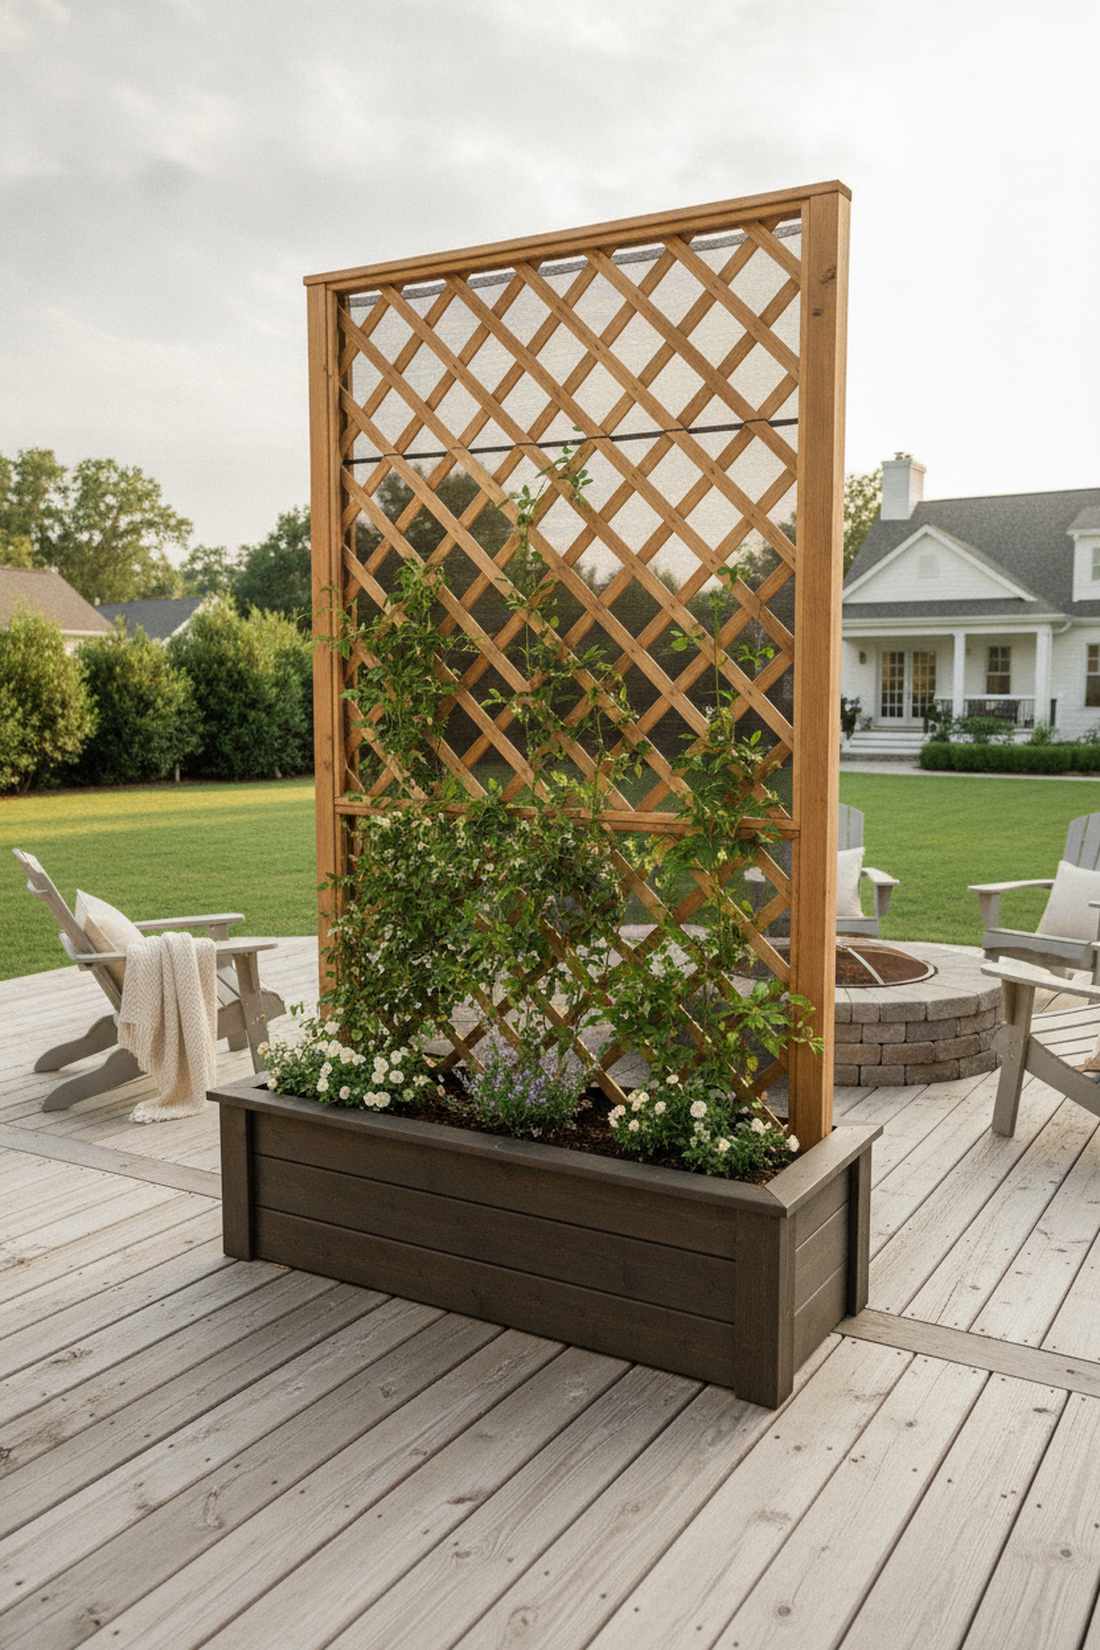
Breathes life into the space while feeling like a secret VIP lounge. Utilizing a freestanding privacy planter is highly effective for blocking nosy neighbors while maximizing foliage.
A partial obstruction actually creates depth, tricking the brain into perceiving a larger footprint. Weave fast-growing climbers through a diamond grid and treat the base box with heavy-duty outdoor sealant.
Setting up a sturdy screen will run you approximately $75–$100. Save this to your DIY weekend garden board!
- Key Materials: Framed wooden lattice, climbing vine starters
- Vibe / Style: Secluded courtyard luxury
- Difficulty: Moderate weekend project
- Budget Breakdown: Trellis Box: $60 | Climbers: $30.
- Creator’s Tip: Use zip ties to train young vines horizontally before letting them climb up for thicker coverage.
- Smart Sourcing: Look for a pre-assembled cedar planter with trellis and UV-coated privacy screen kits.
4. Wall-Mounted Rail Systems
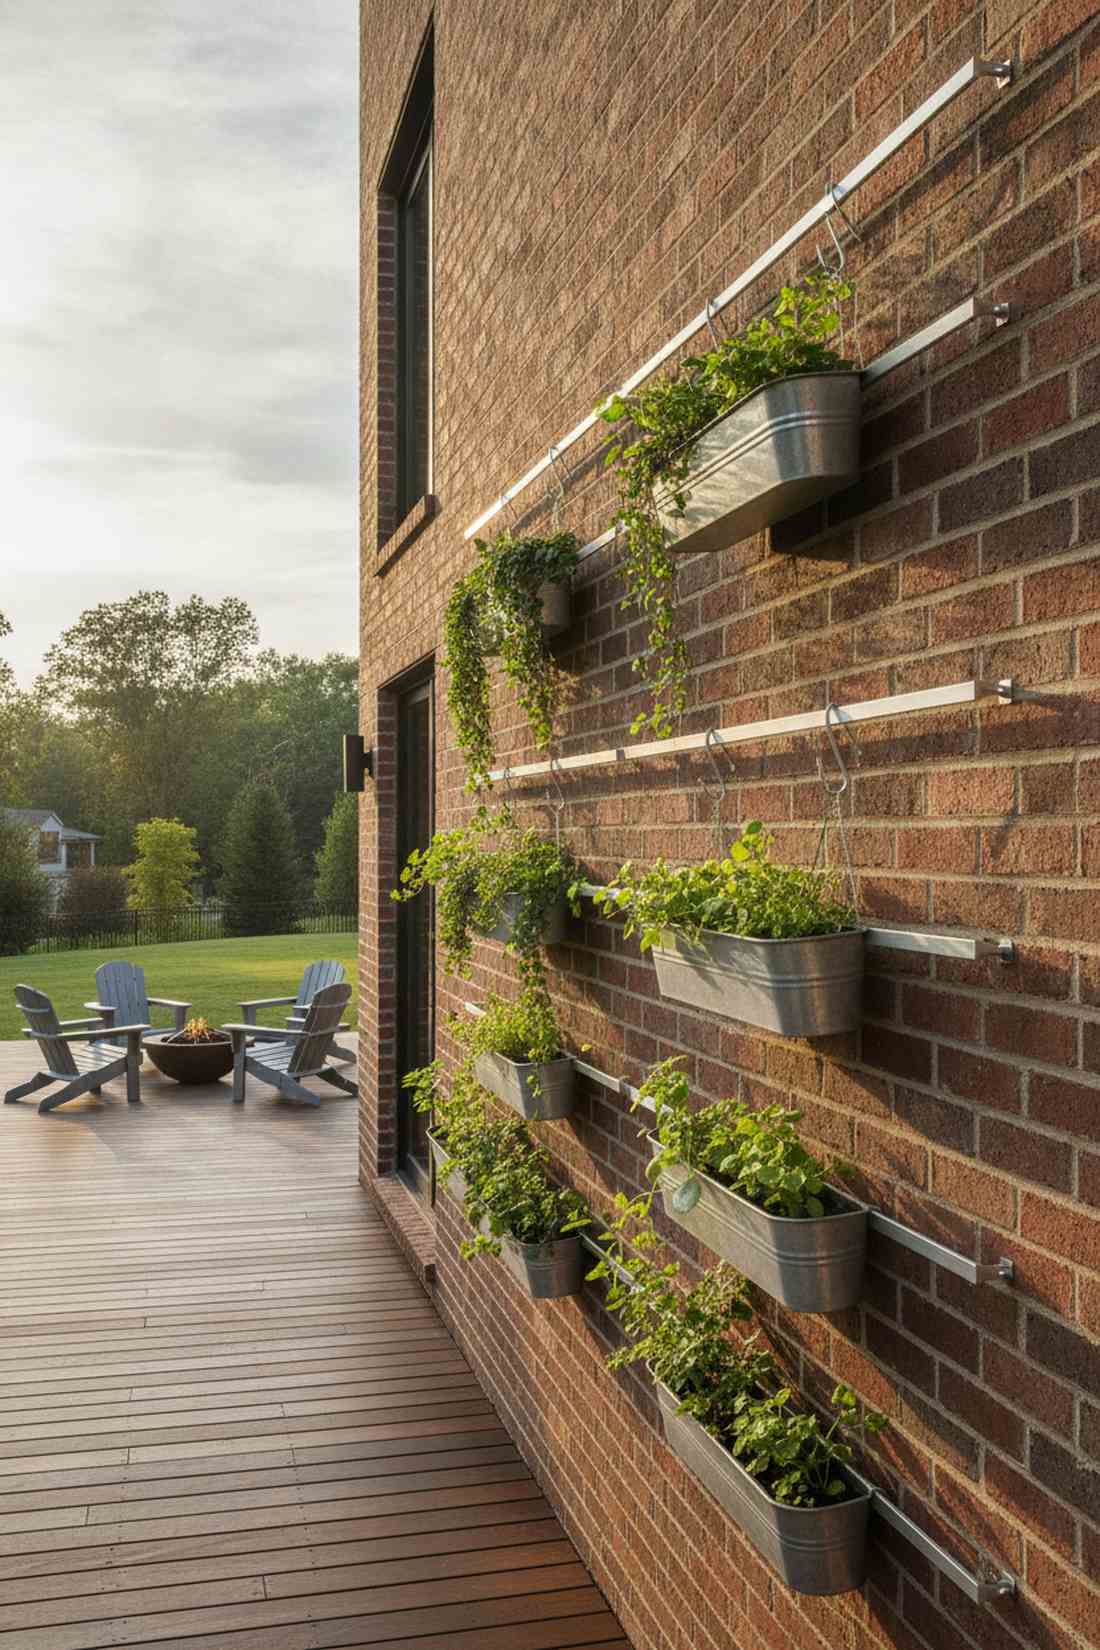
Feels like a highly curated modern art gallery, but for plants. This adjustable floating rail garden fits beautifully on bare exterior brick or siding.
Ditching static shelves for sliding horizontal tracks delivers a surprisingly premium look that adapts to changing sunlight. Hook on sleek aluminum pots and drop in some smart garden seed pods to guarantee a flawless yield.
Total materials cost roughly $50 for a multi-tier track system. Highly recommended for a quick weekend win.
- Key Materials: Aluminum rail tracks, sliding S-hooks
- Vibe / Style: Minimalist industrial green
- Difficulty: Requires a drill and masonry bits
- Budget Breakdown: Rail Kit: $30 | Pots: $20.
- Creator’s Tip: Space the rails at least 14 inches apart so taller foliage doesn’t get crushed by the tier above.
- Smart Sourcing: Order an anti-rust aluminum wall rail kit and clip-on galvanized planters (bulk pack).
Most people get this completely wrong… until they try the exact layout coming up next which looks effortlessly expensive.
5. Hanging Macrame Clusters
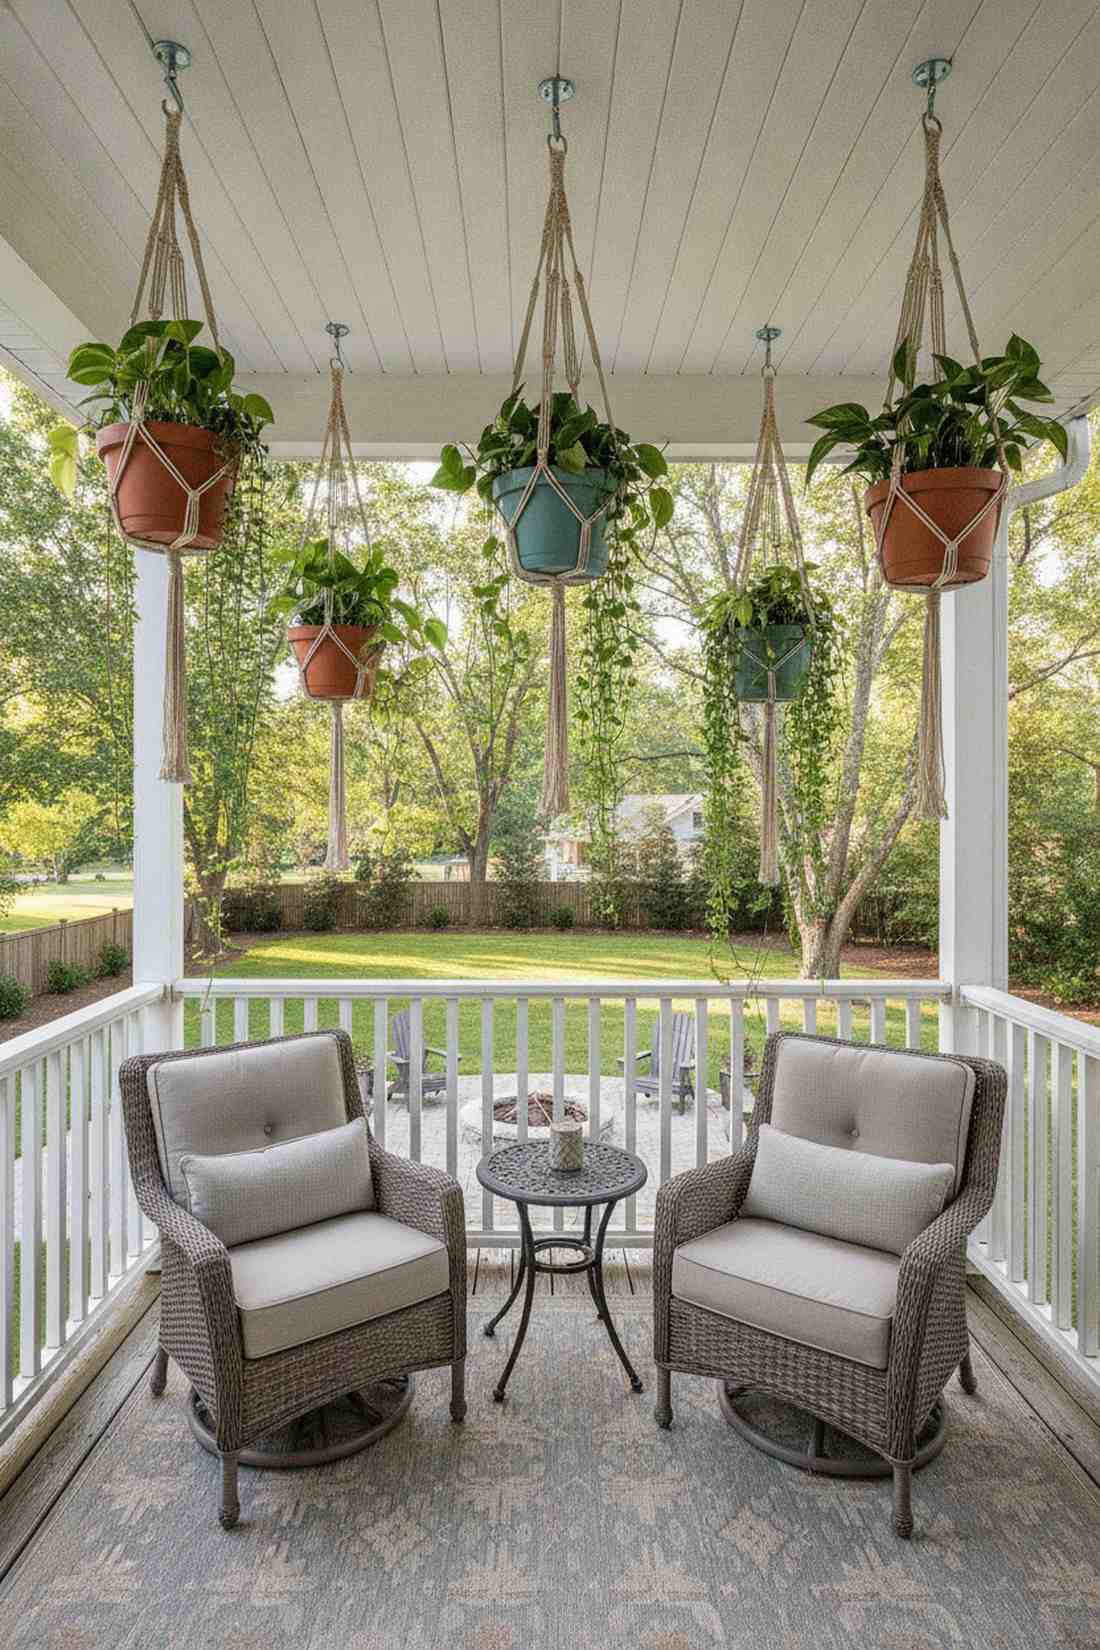
Evokes the feeling of a floating rainforest canopy overhead. The suspended ceiling planter concept is ideal for covered balconies where floor space is virtually non-existent.
Grouping multiple heights together completely distracts from narrow square footage and looks far more expensive than it is. Thread durable poly-cord macrame around deep-drainage pots to avoid messy water drips on your outdoor rugs.
You can bundle three to five hangers for just $20–$35. Pin this idea to remember the clustered look!
- Key Materials: Braided weather-resistant cord, ceiling toggle bolts
- Vibe / Style: Airy retro canopy
- Difficulty: Easy installation
- Budget Breakdown: Hangers: $15 | Anchor Hardware: $10.
- Creator’s Tip: Always use closed-bottom cachepots with hidden plastic nursery pots inside for easy watering.
- Smart Sourcing: Buy a 5-piece indoor/outdoor macrame hanger set and heavy-duty ceiling swag hooks.
Floor Continuity StrategiesHome Garden Photos Showcasing Material Flow
6. Decking-to-Hardwood Transition
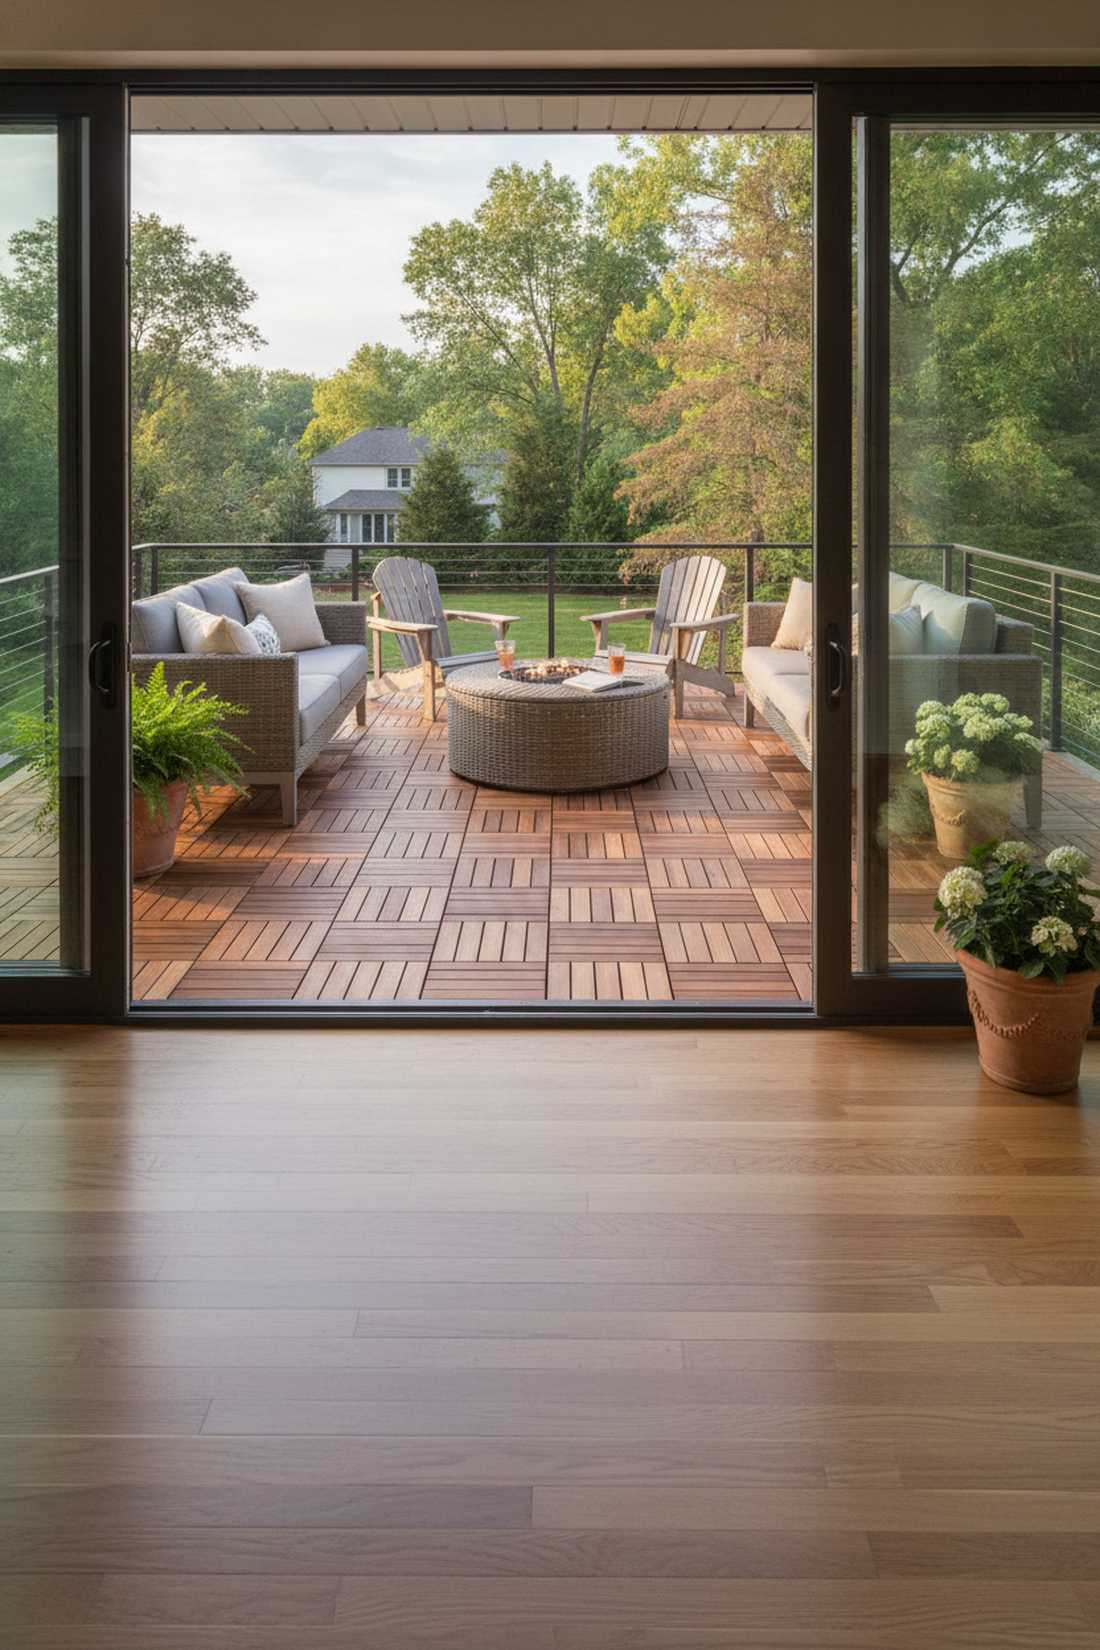
Feels like your living room just magically extended outdoors. Applying interlocking wood deck tiles is the ultimate hack for seamless indoor-outdoor visual flow.
By matching the plank direction of your interior floors, you instantly blur the threshold line. Lock down pre-treated acacia squares to cover ugly concrete and elevate the entire property value perception.
A standard 5×10 balcony floor costs around $80–$120. It’s a stunning upgrade that completely changes the vibe.
- Key Materials: Snap-together wooden tiles, edge framing strips
- Vibe / Style: High-end resort extension
- Difficulty: Tool-free snapping
- Budget Breakdown: Decking Boxes: $100 | Edging: $15.
- Creator’s Tip: Stagger the joints in a brick-lay pattern if your interior floors use the same layout.
- Smart Sourcing: Snag a 27-pack interlocking acacia wood tile kit and a clear waterproof sealant spray.
7. Polished Concrete Extension
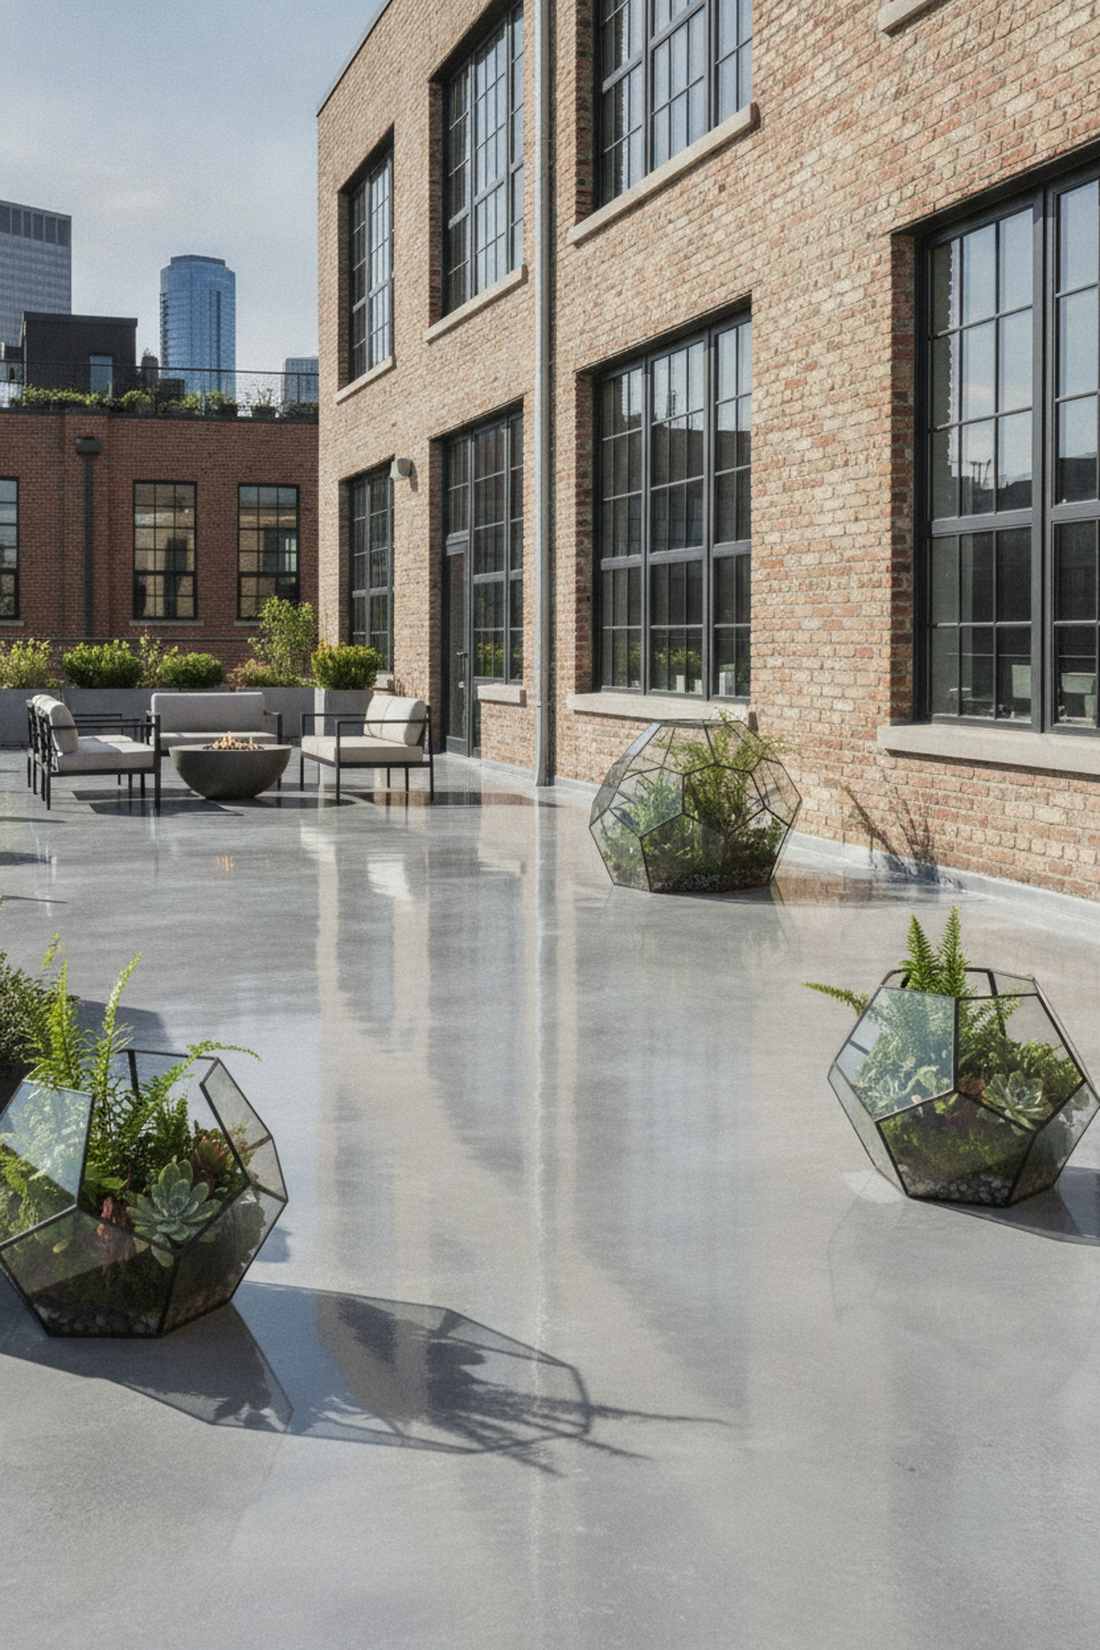
Radiates the raw, unpolished energy of a high-end Brooklyn loft. This seamless concrete patio finish is perfect for minimalist setups where less is definitely more.
Coating raw exterior slabs with a high-gloss protective finish rivals a $500 custom installation. Use an industrial-grade epoxy clear coat to match the interior sheen while adding terrarium accessories to soften the hard edges.
Sealing materials will cost roughly $40–$60. Save this if you love the raw industrial aesthetic!
- Key Materials: Outdoor masonry sealer, lambswool applicator
- Vibe / Style: Modern industrial seamless
- Difficulty: Moderate (requires surface prep)
- Budget Breakdown: Sealer: $45 | Cleaning Acid: $15.
- Creator’s Tip: Acid-wash the balcony floor twice before applying the sealer to ensure zero peeling over time.
- Smart Sourcing: Get a high-gloss concrete wet-look sealer (1 gallon) and a heavy-duty etching starter kit.
8. Large-Format Tile Repetition
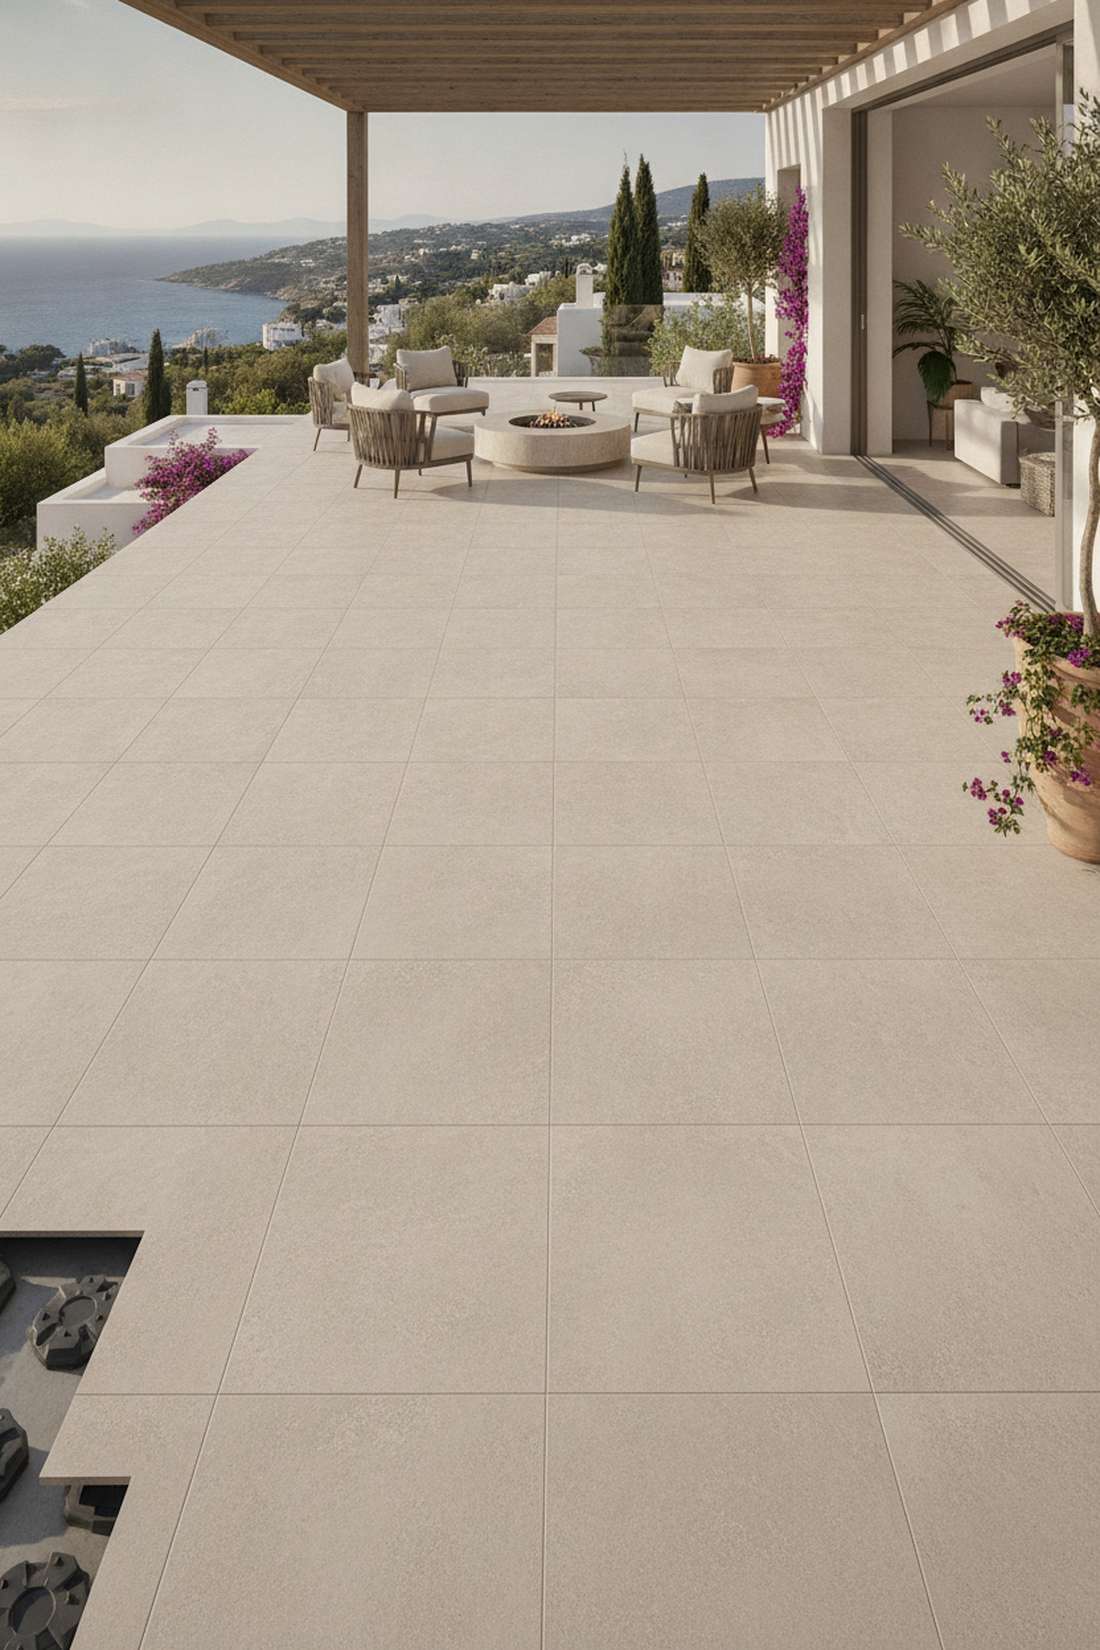
Provides the vast, sweeping illusion of a luxury villa terrace. Dropping down oversized outdoor porcelain tiles works exceptionally well for making tight balconies feel double their size.
Eliminating busy grout lines is a massive secret that gives a designer-level finish to any compact space. Opt for R11 slip-resistant slabs that perfectly mirror your indoor kitchen or living room flooring.
Premium tiles and floating pedestals average $150–$250 for a small area. Highly recommended for a permanent luxury upgrade.
- Key Materials: 24×24 outdoor porcelain, adjustable tile pedestals
- Vibe / Style: Expansive Mediterranean
- Difficulty: Advanced (requires level measuring)
- Budget Breakdown: Tiles: $120 | Pedestal Supports: $80.
- Creator’s Tip: Use a pedestal suspension system so you don’t have to permanently mortar the tiles to the balcony slab.
- Smart Sourcing: Invest in adjustable height tile pedestals (bulk pack) and pre-cut rubber acoustic shims.
9. Raised Boardwalk Connectors
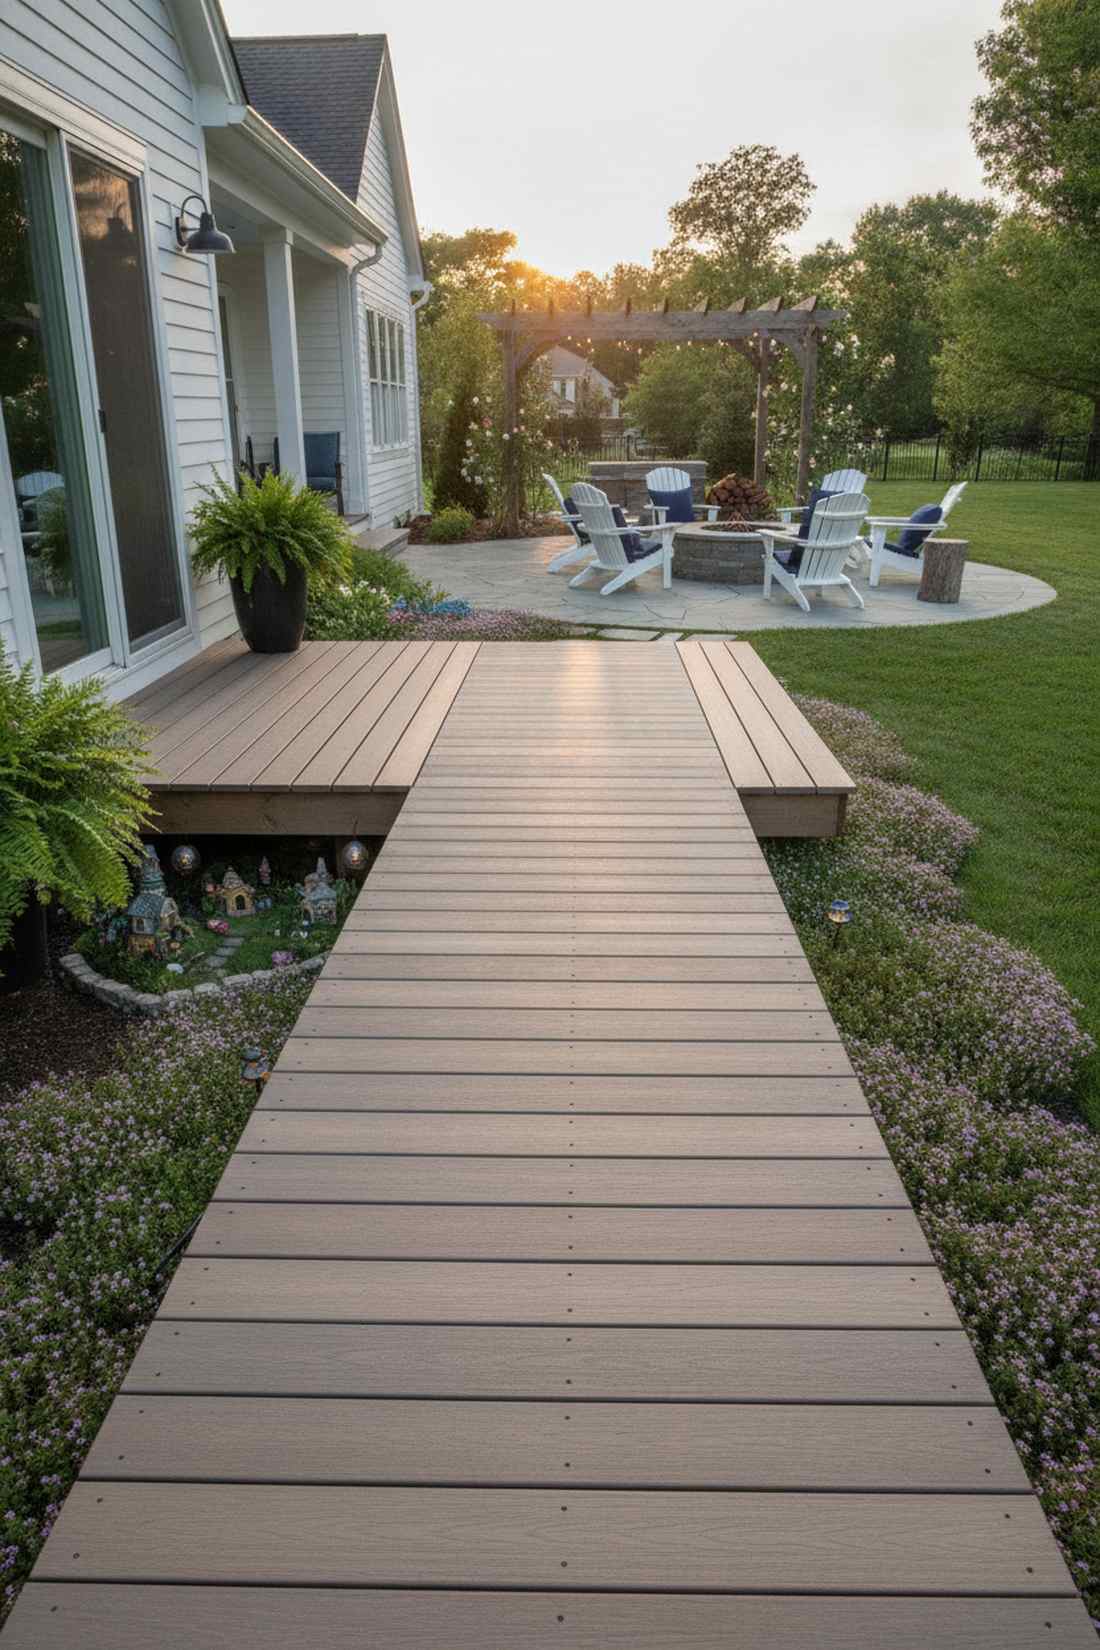
Feels like stepping onto a serene coastal boardwalk right from your sofa. This elevated wooden pathway is brilliant for navigating deep thresholds while adding architectural flair.
Most standard setups ignore the step-down, but bridging it with a custom runway delivers a surprisingly premium look. Flank the timber boards with creeping thyme and sneak in some fairy garden kits underneath for a magical hidden detail.
Lumber and brackets for a short connector will run around $30–$50. Pin this to your outdoor living board!
- Key Materials: Treated 2×4 joists, weather-resistant decking boards
- Vibe / Style: Coastal nature trail
- Difficulty: Basic carpentry required
- Budget Breakdown: Wood: $35 | Screws: $10.
- Creator’s Tip: Leave a 1/4-inch gap between boards so rainwater drains instantly to the concrete below.
- Smart Sourcing: Order pre-cut composite decking planks and rust-proof hidden fastener kits.
This next setup is ridiculously cheap but creates a custom 3D display that rivals a $500 installation…
💡 Must-Have Supplies for High-End Setups
To build these setups faster and ensure they last, skip the generic craft aisles and invest in the right foundational kits.
- Base & Support: Interlocking all-weather deck tiles (bulk pack)
- Setup Tools: Balcony-safe drill and masonry anchor starter kits
- Weather/Durability Protection: UV-blocking clear resin sealant sprays
Balcony Zone ArchitectureHome Garden Pic Collections Demonstrating Spatial Division
10. Botanical Bento Layout
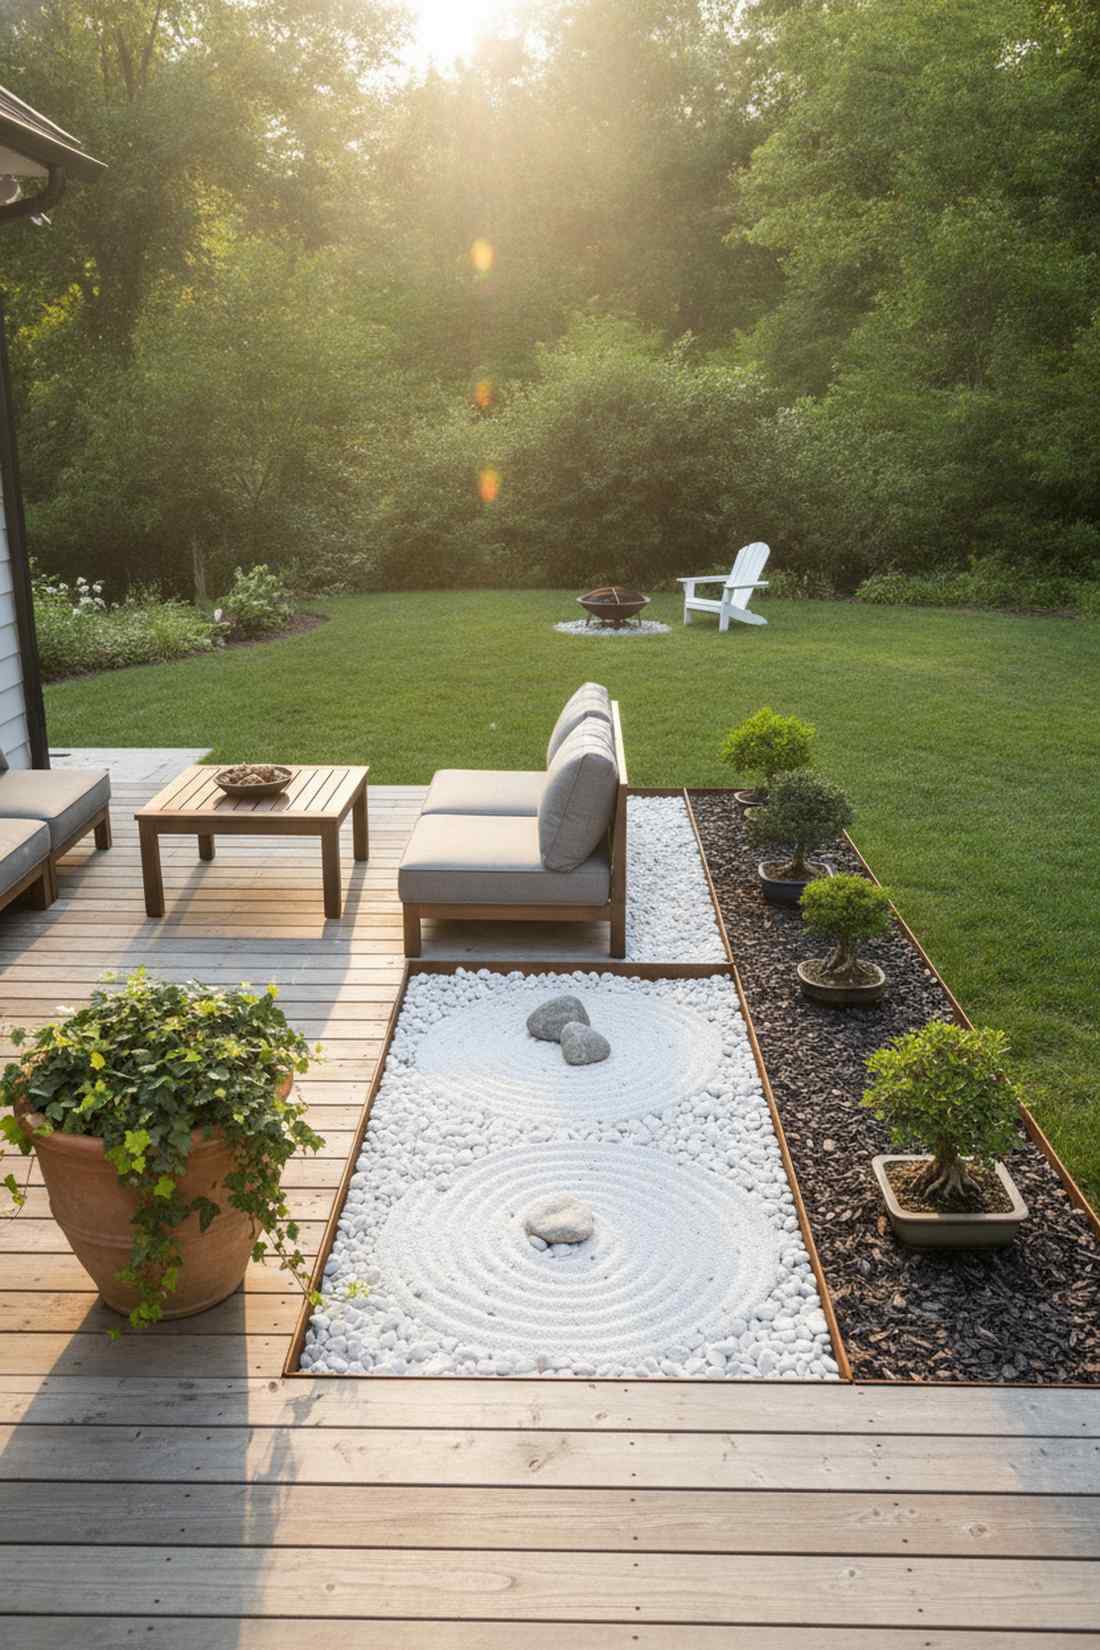
Organizes chaotic corners into a perfectly engineered Japanese garden box. The micro-zoning border concept is exactly what tiny 100-square-foot patios need to stop feeling like a storage closet.
Using strict physical boundaries to separate lounging from growing completely elevates the space. Lay down flexible steel edging to block out a Zen rock garden packed with premium miniature garden supplies next to your seating.
Creating these mini zones costs an easy $40–$60. Save this if you crave absolute visual organization!
- Key Materials: Cor-ten steel landscape edging, distinct mulch types
- Vibe / Style: Structured Zen harmony
- Difficulty: Fast weekend layout
- Budget Breakdown: Edging: $30 | River Rocks/Mulch: $25.
- Creator’s Tip: Use drastically different textures (like smooth white pebbles vs dark wood chips) to make the zones pop.
- Smart Sourcing: Grab a flexible no-dig landscape edging kit and polished decorative river stones (bulk pack).
11. Corner Seating Alcove
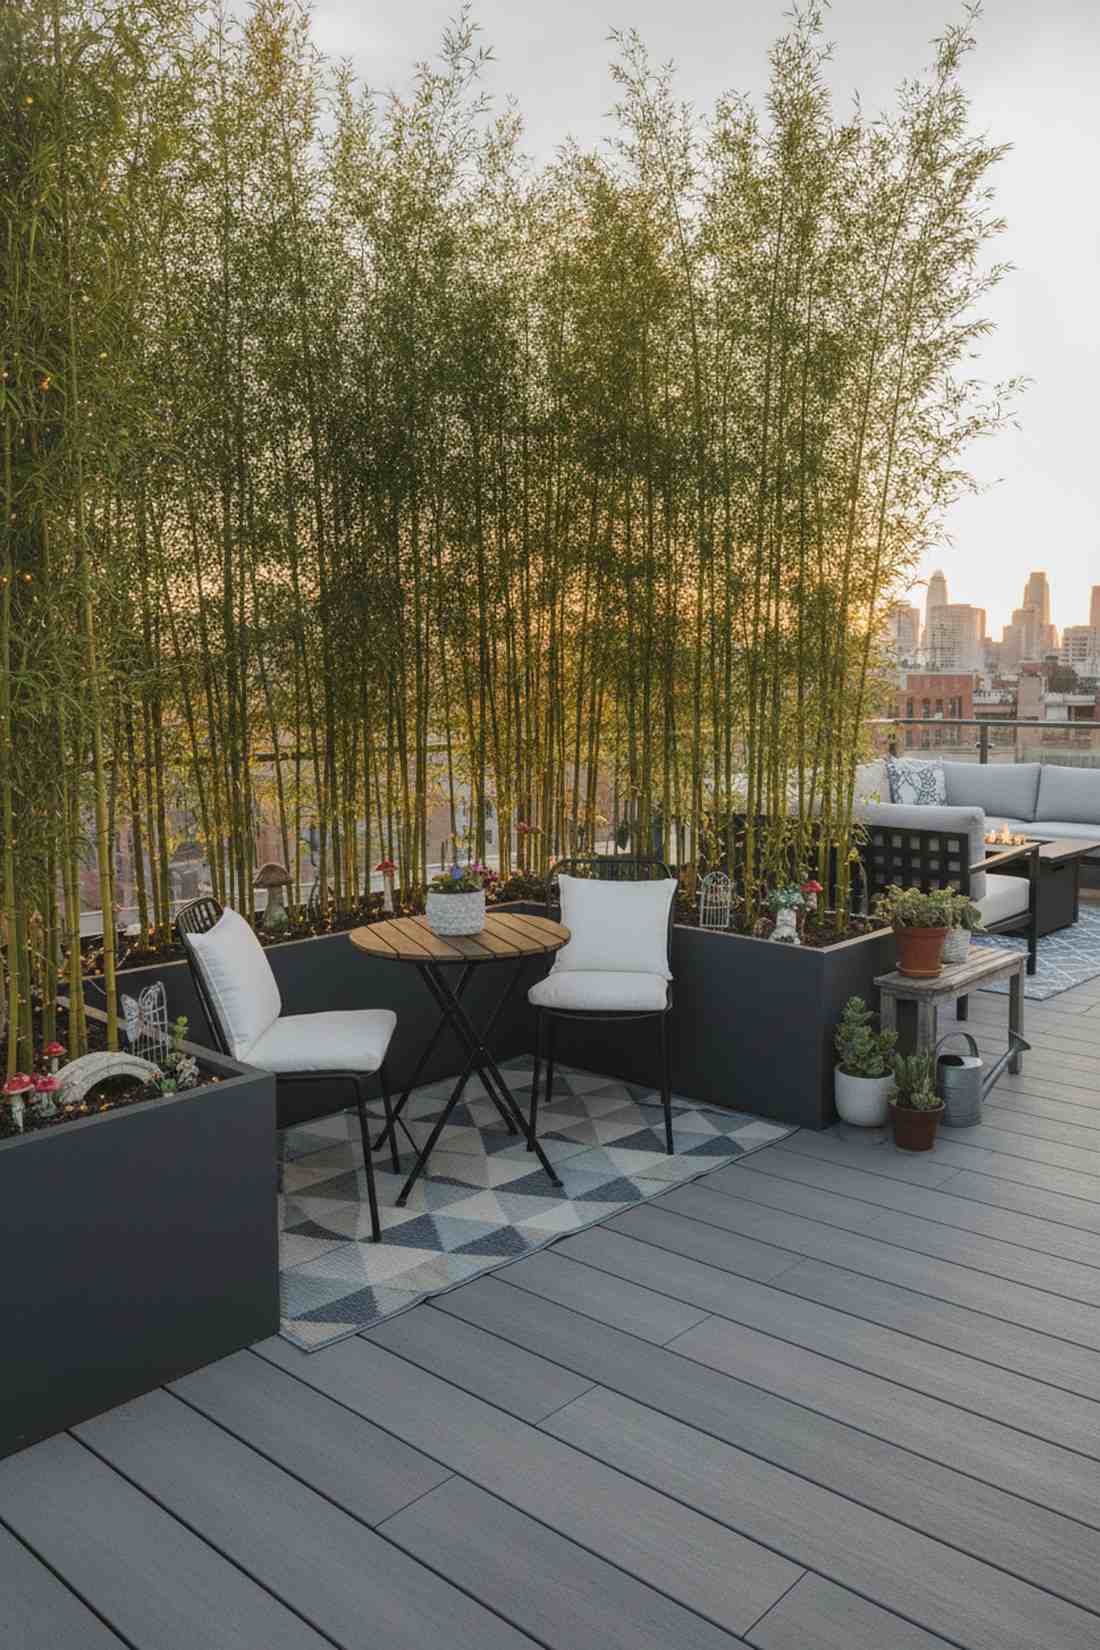
Feels like a hidden VIP booth at a trendy rooftop bar. Setting up a plant-screened reading nook at the furthest edge draws guests outside immediately.
Boxing in a bistro set with towering ornamental grasses creates psychological privacy that solid walls simply can’t match. Throw in a weather-proof rug and some high-end fairy garden accessories tucked into the planters for an interactive vibe.
A basic tall planter and grass starter combo comes in around $70–$90. It’s a fast upgrade that completely changes the vibe.
- Key Materials: Tall rectangular fiberglass planter, clumping bamboo
- Vibe / Style: Secluded urban sanctuary
- Difficulty: Heavy lifting for dirt, easy assembly
- Budget Breakdown: Tall Planter: $60 | Soil & Bamboo: $30.
- Creator’s Tip: Fill the bottom third of deep planters with empty plastic bottles to save money on soil and reduce weight.
- Smart Sourcing: Buy a UV-coated tall fiberglass planter box and fast-growing privacy bamboo starter kits.
12. Pathway Circulation Corridor
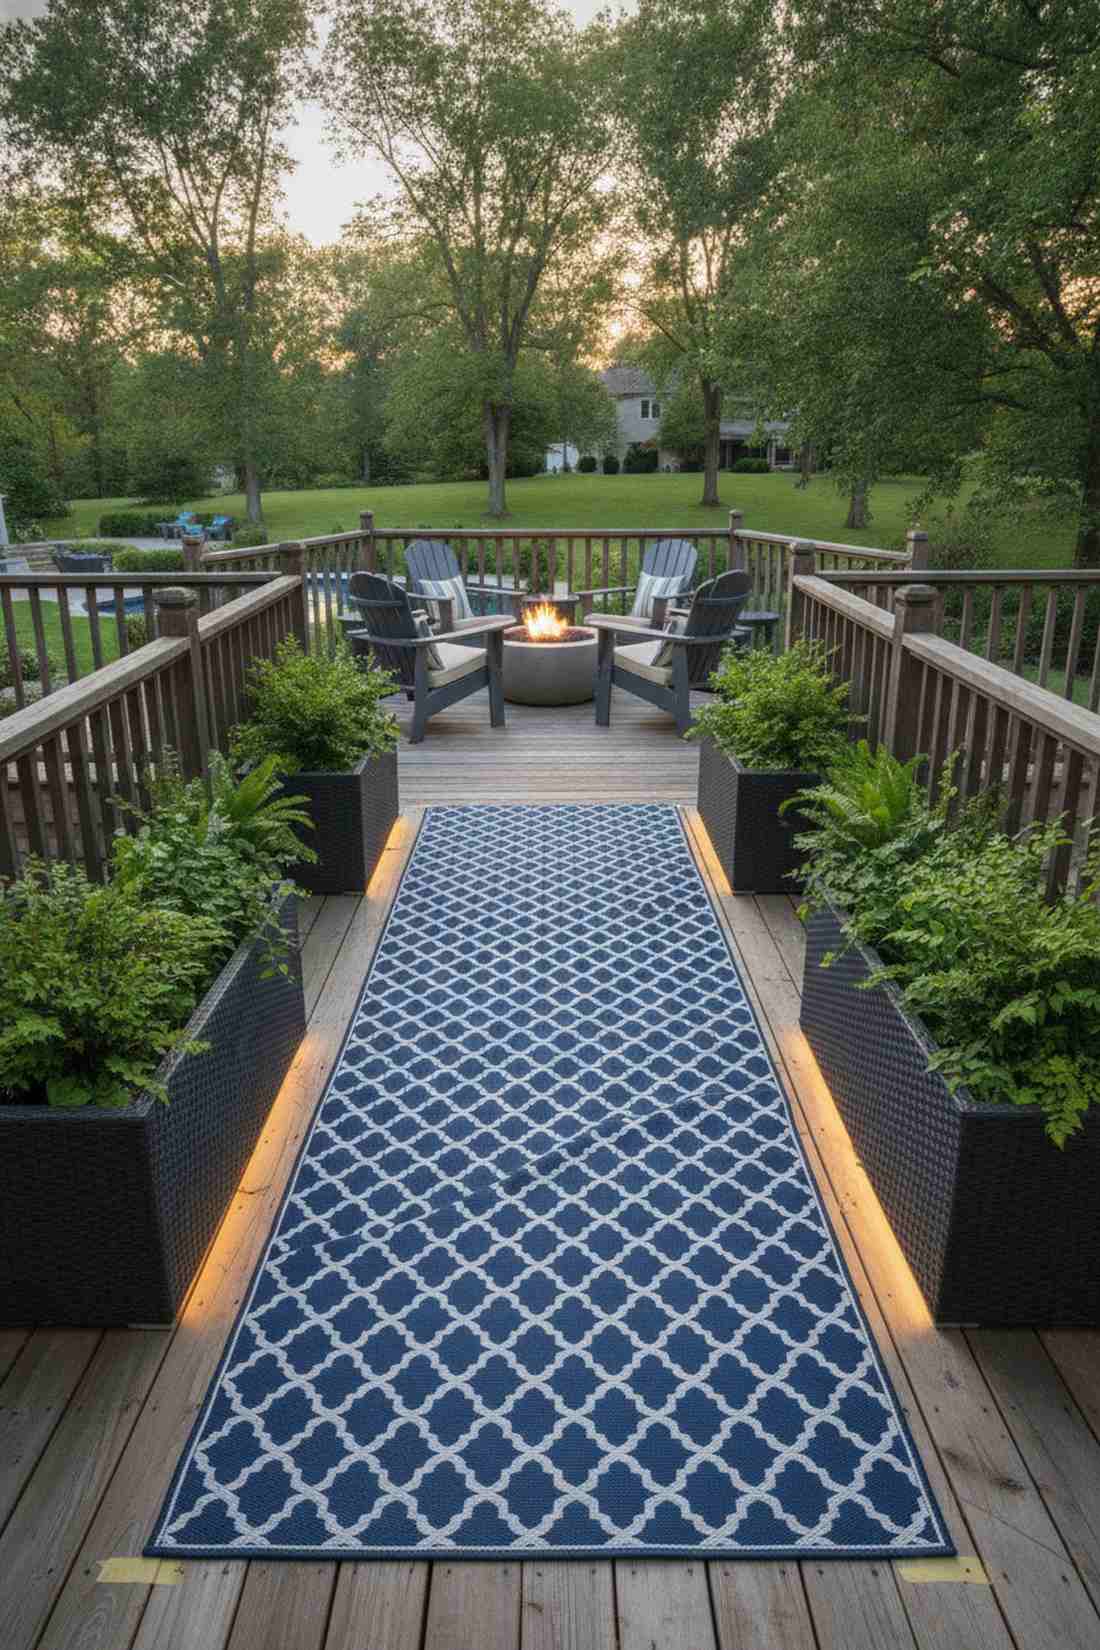
Acts like an invisible red carpet guiding you through an urban jungle. Establishing a clear visual walkway pattern prevents your balcony from feeling like a cluttered greenhouse.
Dedicating a strict 28-inch walking lane opposite of your main foliage delivers a surprisingly premium look. Highlight this corridor with a contrasting runner rug and line the edges with low-profile LED strips.
Marking this flow requires about $30–$50 for rugs and lighting. Pin this if you want to fix cramped layouts!
- Key Materials: Outdoor polypropylene runner rug, low border planters
- Vibe / Style: Purposeful resort pathway
- Difficulty: 5-minute styling
- Budget Breakdown: Runner Rug: $35 | Grip Tape: $10.
- Creator’s Tip: Secure the outdoor rug with heavy-duty double-sided exterior tape to prevent tripping hazards.
- Smart Sourcing: Get an all-weather geometric outdoor runner and waterproof carpet binding tape.
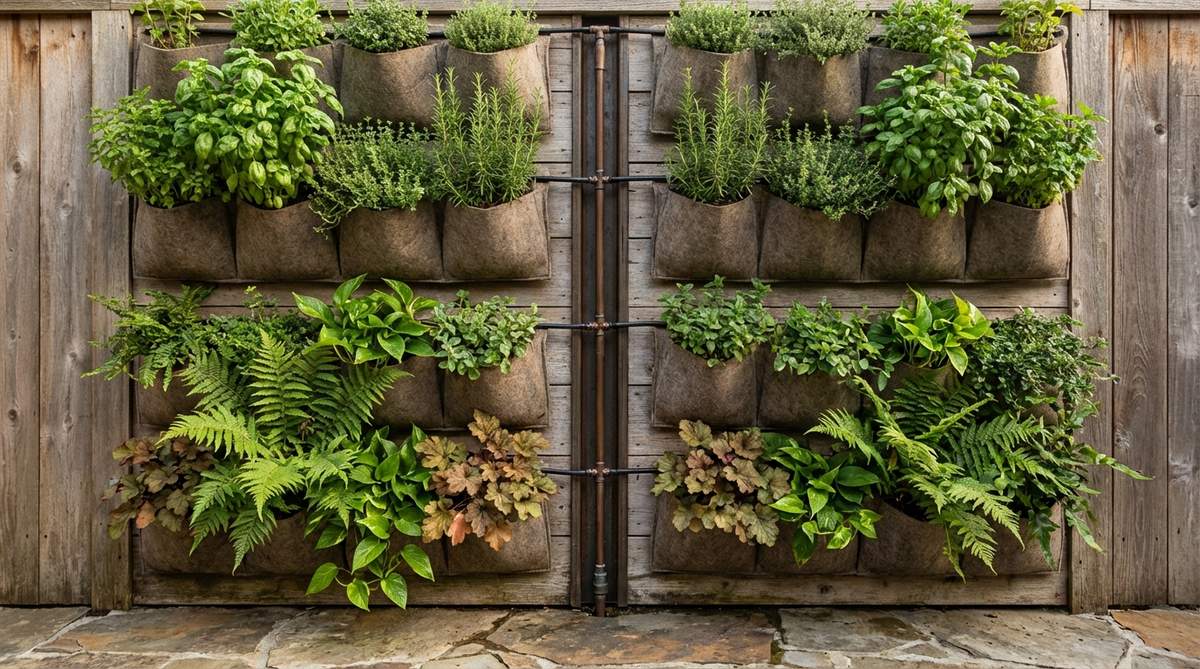
13. Vertical Herb Wall Zone
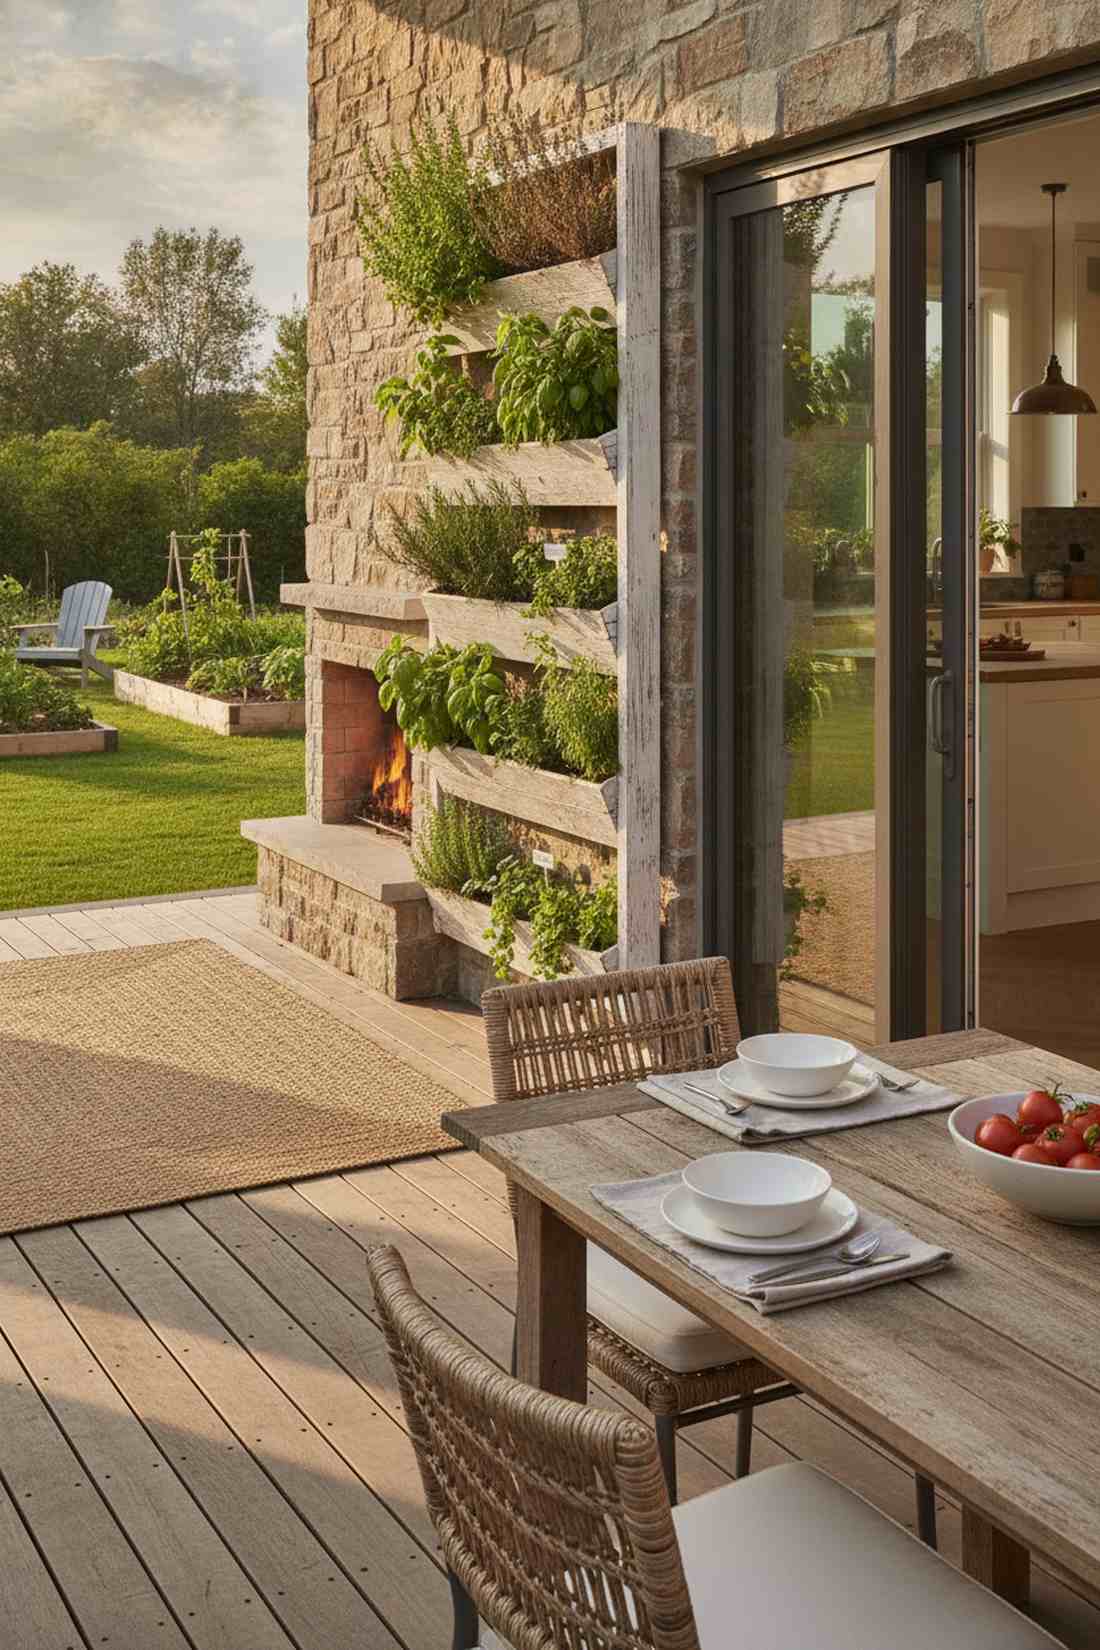
Smells exactly like a rustic Italian kitchen right on your patio. A dedicated living culinary wall display works exceptionally well when mounted just inches from your sliding door.
Grouping edible plants tightly by their watering needs guarantees they look lush instead of stringy and dead. Stack modular boxes loaded with smart garden kit pods to ensure fresh basil and rosemary are always arm’s length away.
You can construct this productive wall for about $40–$60. Highly recommended for a quick weekend win.
- Key Materials: Tiered wooden planter frame, organic culinary herbs
- Vibe / Style: Farm-to-table functionality
- Difficulty: Easy beginner setup
- Budget Breakdown: Frame: $35 | Herbs & Soil: $25.
- Creator’s Tip: Keep moisture-loving mint at the very bottom where water naturally drips down, and dry thyme at the top.
- Smart Sourcing: Snag a freestanding vertical garden tier kit and an organic culinary herb seed starter pack.
14. Ornamental Focal Point Station
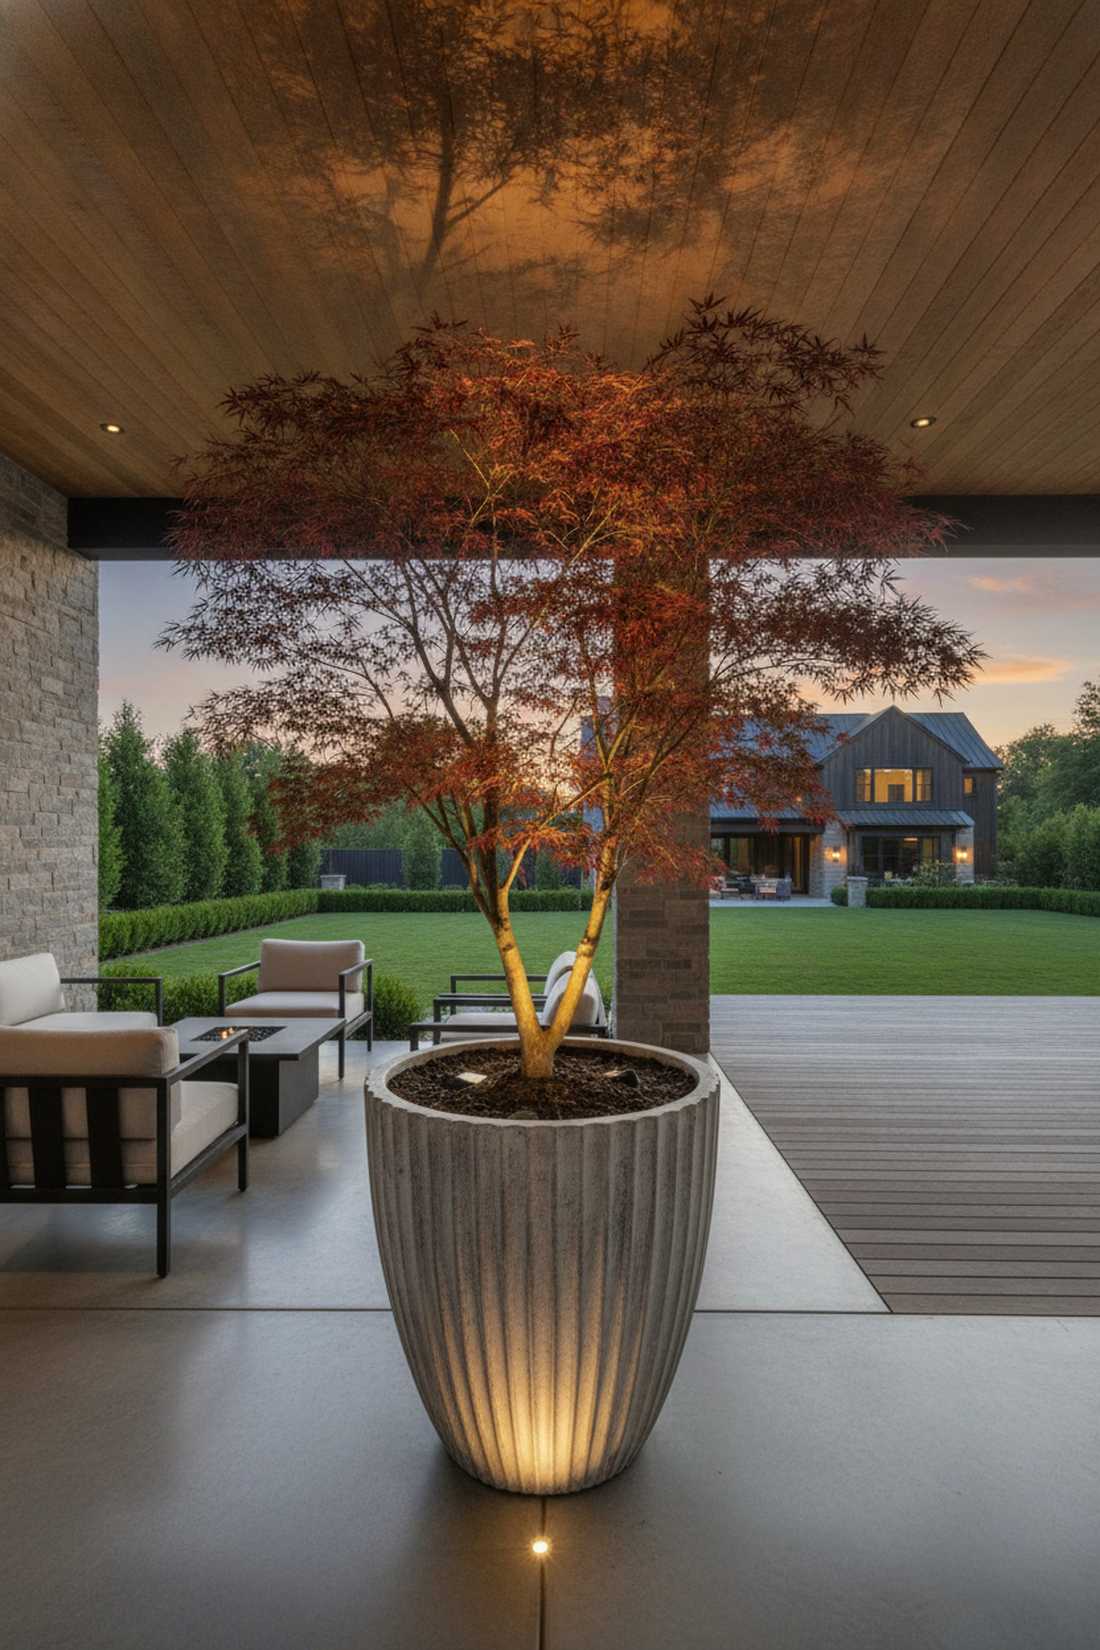
Commands the space like a priceless museum sculpture. Creating a singular dramatic plant pedestal is the perfect use-case for stopping visual chaos in its tracks.
Cluttering a small space with twenty tiny pots ruins the aesthetic, while one massive Japanese maple gives a designer-level finish. Place your star specimen directly in the main interior sightline using a premium architectural pot.
A high-end container and statement tree usually runs $100–$150. Save this to your premium patio upgrade board!
- Key Materials: Fluted concrete urn, architectural specimen tree
- Vibe / Style: Bold gallery minimalism
- Difficulty: Heavy lifting only
- Budget Breakdown: Urn: $80 | Specimen Plant: $60.
- Creator’s Tip: Spotlight the tree from below with a solar up-light to cast massive, dramatic shadows on the ceiling.
- Smart Sourcing: Order a lightweight faux-concrete fluted planter and high-lumens solar spotlight kits.
Wait until you see the next zoning trick—it literally tricks the eye into thinking your square footage just doubled.
Multifunctional Furniture IntegrationCompact Interior-Exterior Solutions
15. Storage Bench Planters
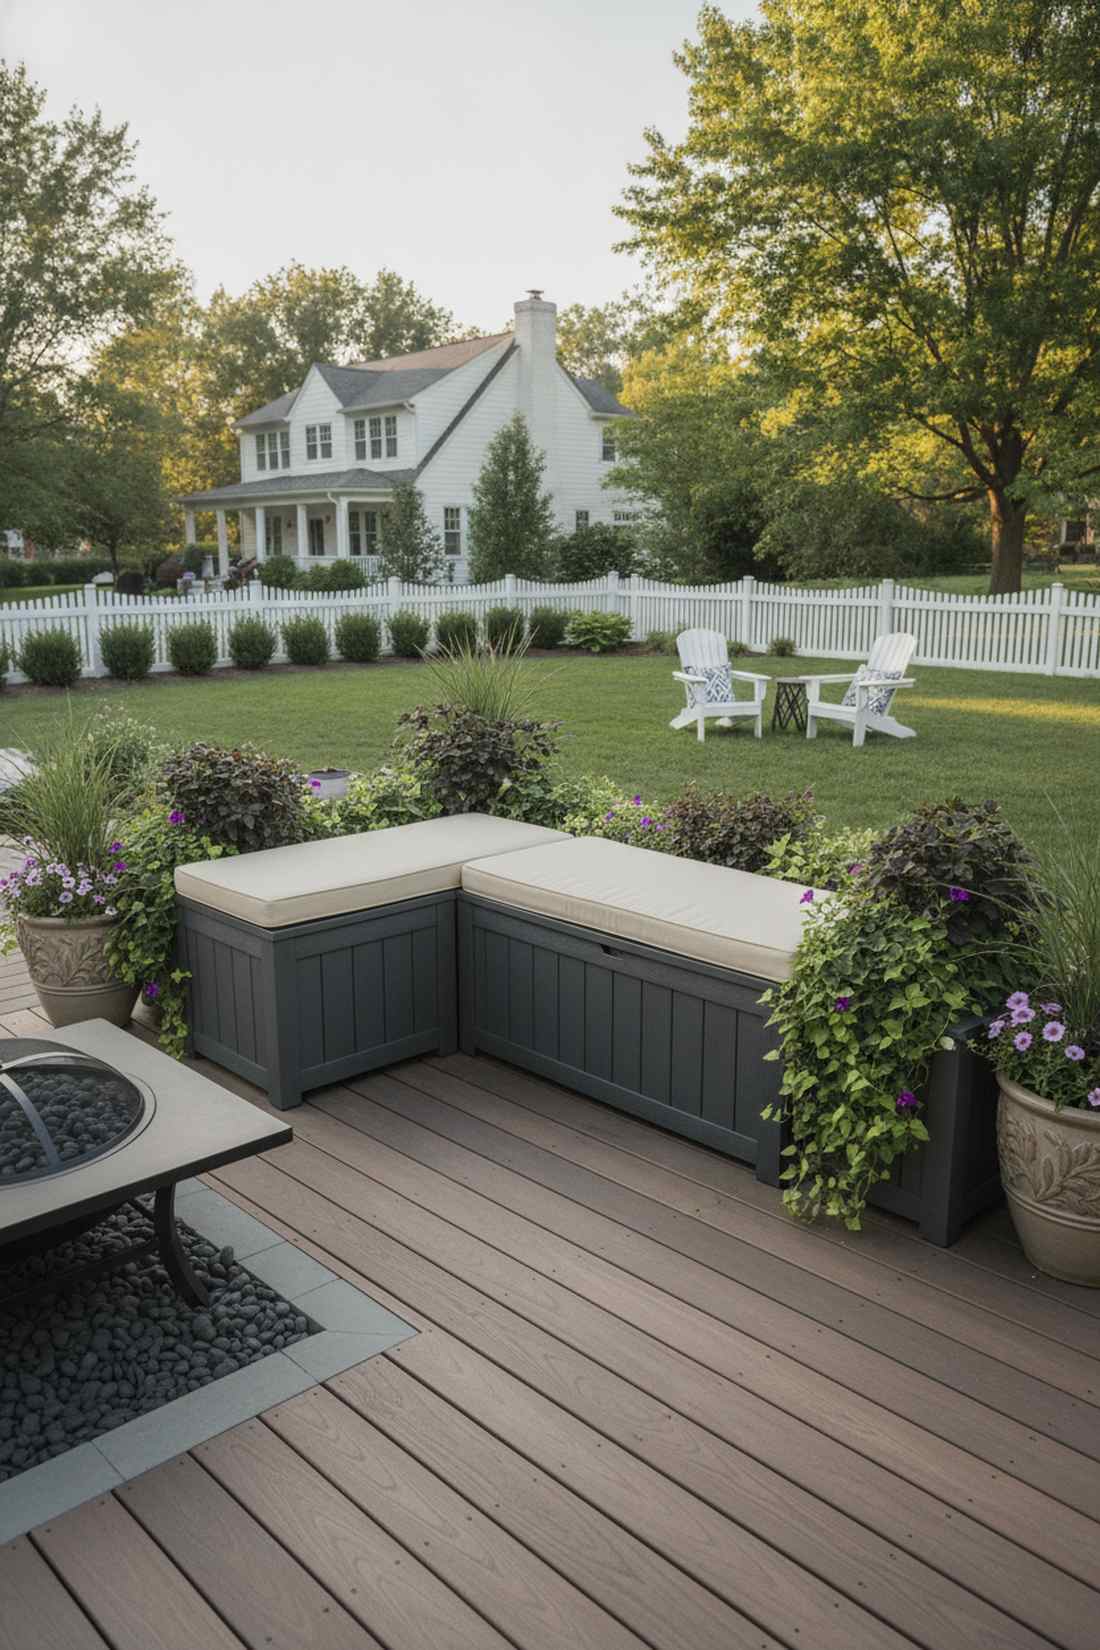
Hides your ugly bags of soil while looking like a custom carpentry job. The dual-purpose seating planter is absolutely essential for keeping narrow footprints flawlessly clean.
Wasting patio corners on standard chairs is a rookie mistake when hidden storage delivers a surprisingly premium look. Top a heavy-duty resin trunk with a tailored weatherproof cushion and flank the sides with lush greenery.
A quality bench will set you back about $80–$120. Pin this to your small space hacks board!
- Key Materials: Waterproof deck box bench, custom foam cushion
- Vibe / Style: Smart utilitarian chic
- Difficulty: Snap-together assembly
- Budget Breakdown: Storage Bench: $90 | Outdoor Cushion: $30.
- Creator’s Tip: Drill two small holes in the bottom back corners of the resin box to prevent any moisture mildew inside.
- Smart Sourcing: Invest in an all-weather resin storage bench kit and fade-resistant outdoor seating pads.
16. Wheeled Planter Privacy Screens
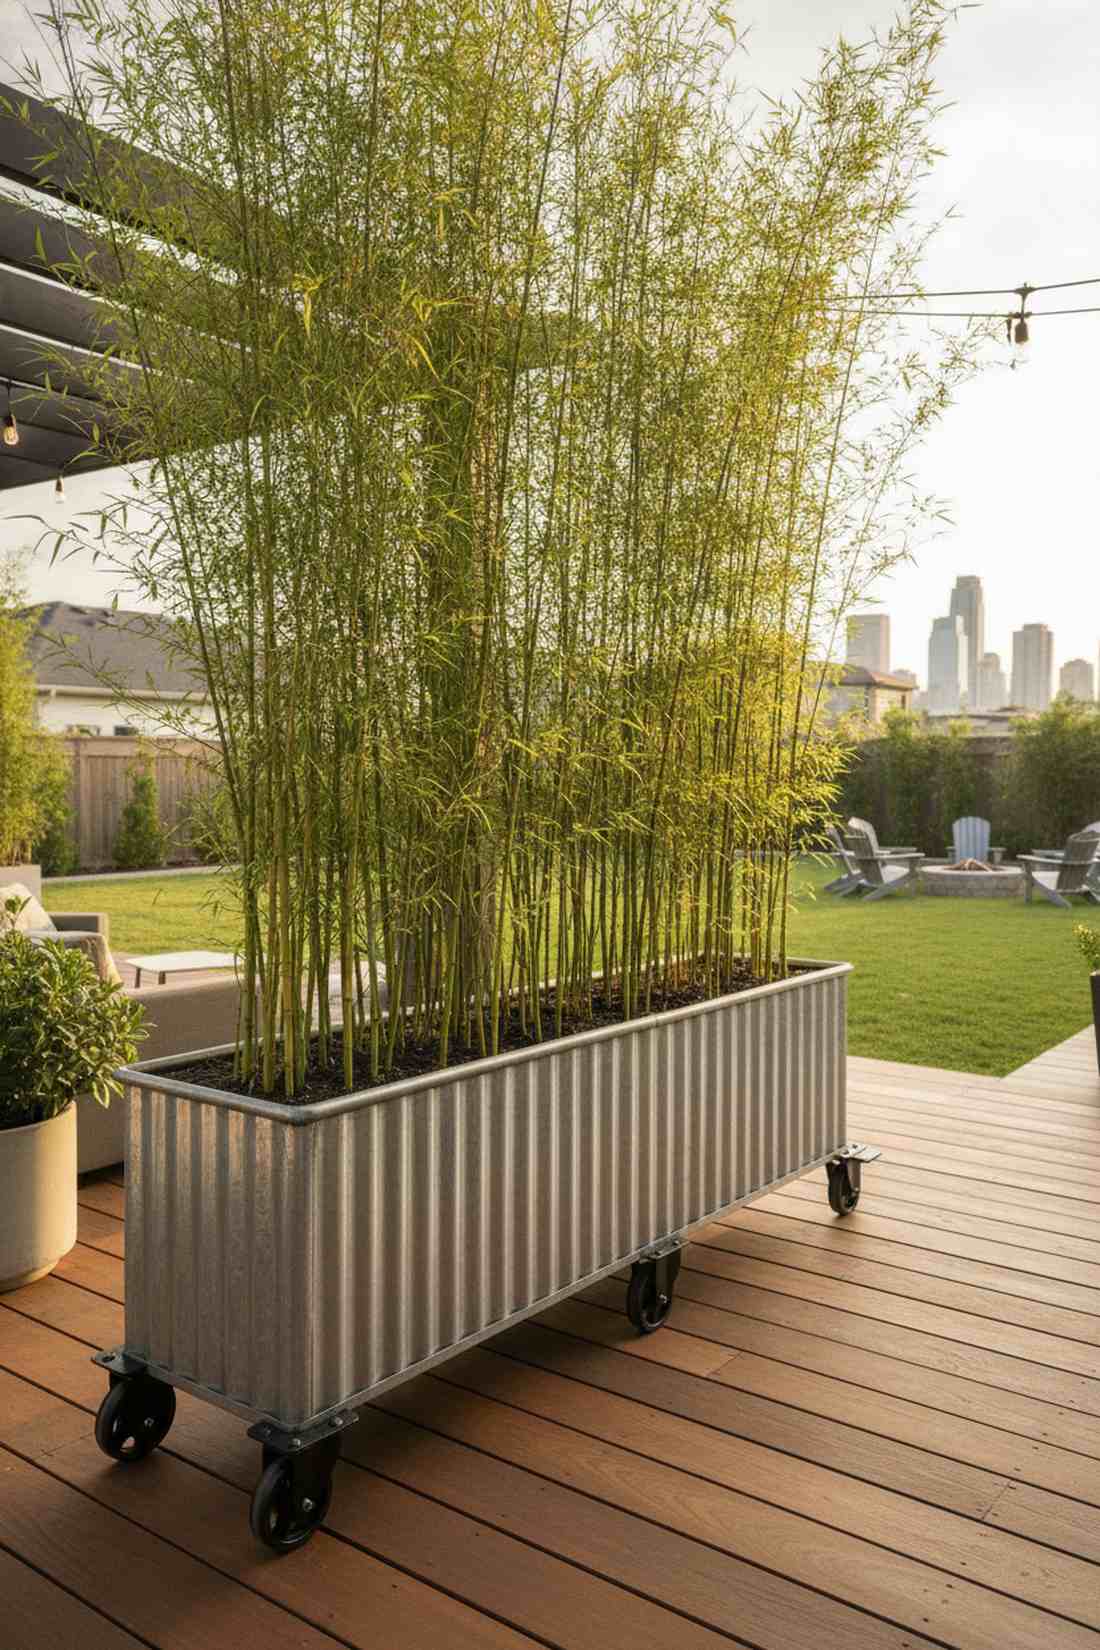
Moves with the grace of a sliding shoji screen. A mobile bamboo privacy wall is the ultimate hack for renters dealing with shifting sun angles or obnoxious neighbors.
Locking your layout in place is restrictive, but adding heavy-duty casters makes your space feel far more expensive than it is. Roll tall clumping grasses to block the afternoon glare, then push them aside for evening city views.
Casters and a deep trough planter cost roughly $60–$85. It’s a fast upgrade that completely changes the vibe.
- Key Materials: Galvanized trough, locking swivel casters
- Vibe / Style: Dynamic modern flexibility
- Difficulty: Requires drilling metal bases
- Budget Breakdown: Trough: $40 | Casters & Hardware: $25.
- Creator’s Tip: Coat the galvanized steel interior with rubberized spray before adding soil to prevent rust blow-outs.
- Smart Sourcing: Grab a corrugated metal planter trough and a heavy-duty locking caster set (4-pack).
17. Fold-Down Dining Ledges
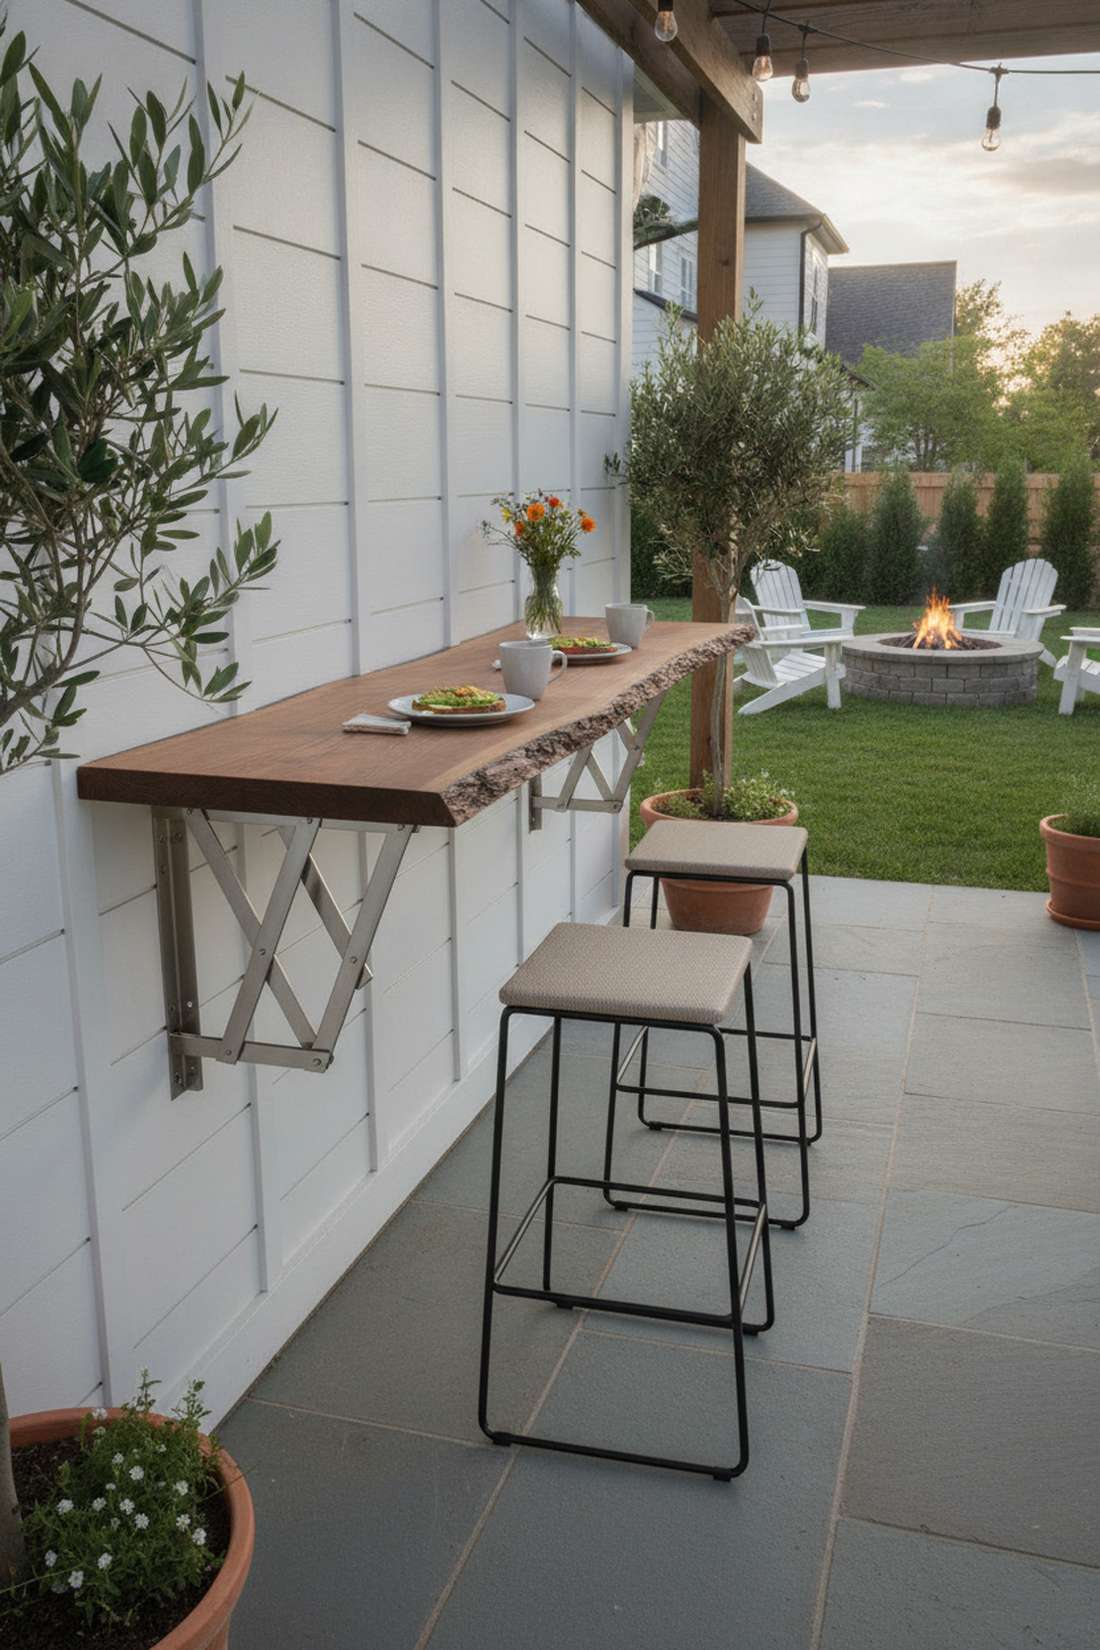
Pops up like a luxury yacht dining table right when you need it. Installing a wall-mounted collapsible bar is a lifesaver for couples who want to eat outside without tripping over legs.
Bulky bistro sets eat up 50% of your floor space, while a drop-leaf ledge gives a designer-level finish that vanishes on command. Pair it with stackable stools and finish the raw edge with UV-resistant stain.
A sturdy folding bracket setup costs around $40–$70. Save this if you’re tired of stubbing your toes on patio tables!
- Key Materials: Heavy-duty folding shelf brackets, sealed wood slab
- Vibe / Style: Clever compact bistro
- Difficulty: Requires precise leveling
- Budget Breakdown: Brackets: $25 | Wood Slab: $30.
- Creator’s Tip: Mount the ledge exactly at a 30-inch height to perfectly match standard interior dining tables.
- Smart Sourcing: Buy stainless steel collapsible shelf brackets and a pre-cut edge-glued pine board.
18. Nested Side Table Clusters
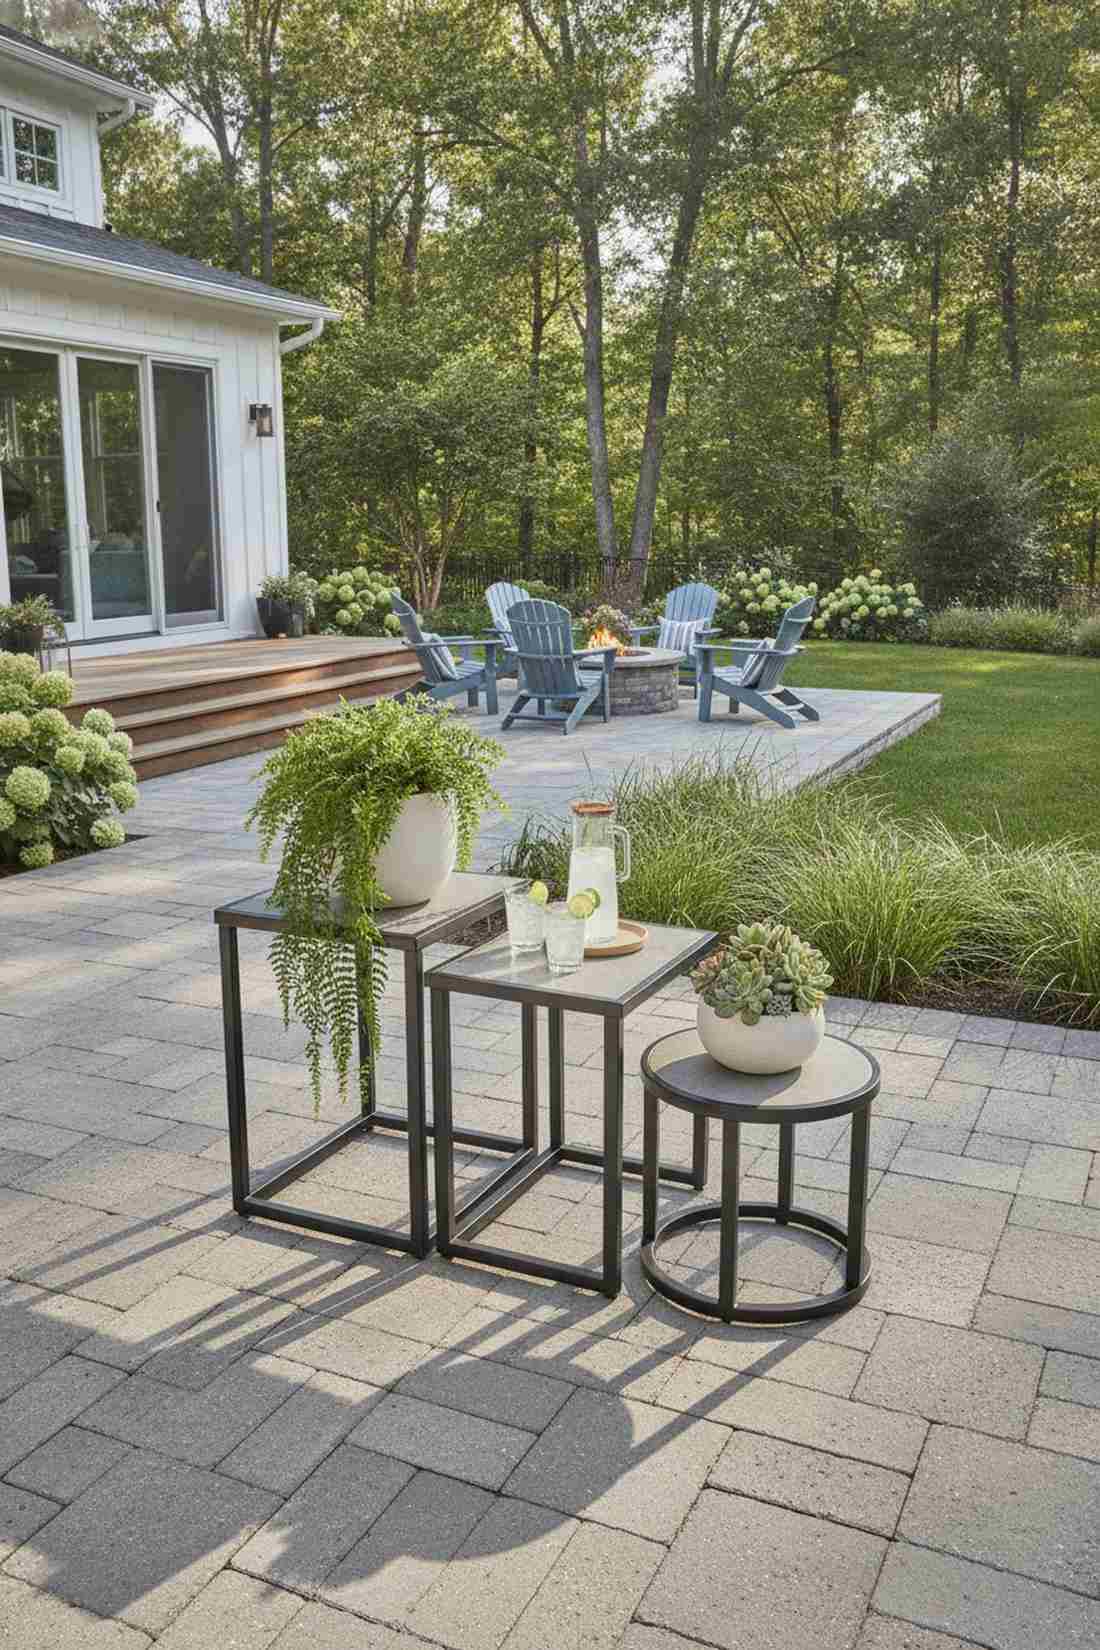
Looks like a high-end designer showroom trick. Implementing a multi-level nesting table setup works exceptionally well for holding cocktail glasses or displaying potted ferns dynamically.
Deploying static furniture feels heavy, but sliding tables out to create tiered layers looks effortlessly expensive. Pick powder-coated aluminum frames that can withstand rain without peeling or rusting.
A sleek set of three usually runs about $70–$100. Highly recommended for a quick weekend win.
- Key Materials: Powder-coated metal nesting trio
- Vibe / Style: Sleek contemporary modular
- Difficulty: Unbox and place
- Budget Breakdown: Table Set: $85 | Accent Decor: $15.
- Creator’s Tip: Use the smallest table exclusively for a dramatic trailing plant, letting the vines drape to the floor.
- Smart Sourcing: Order a rust-proof metal nesting outdoor table set and UV-coated ceramic accent pots.
If you think your threshold is too small, the upcoming mirror technique will completely shatter that myth.
Threshold Planting TechniquesBridging Interior and Exterior Gardens
19. Mirror Species Placement
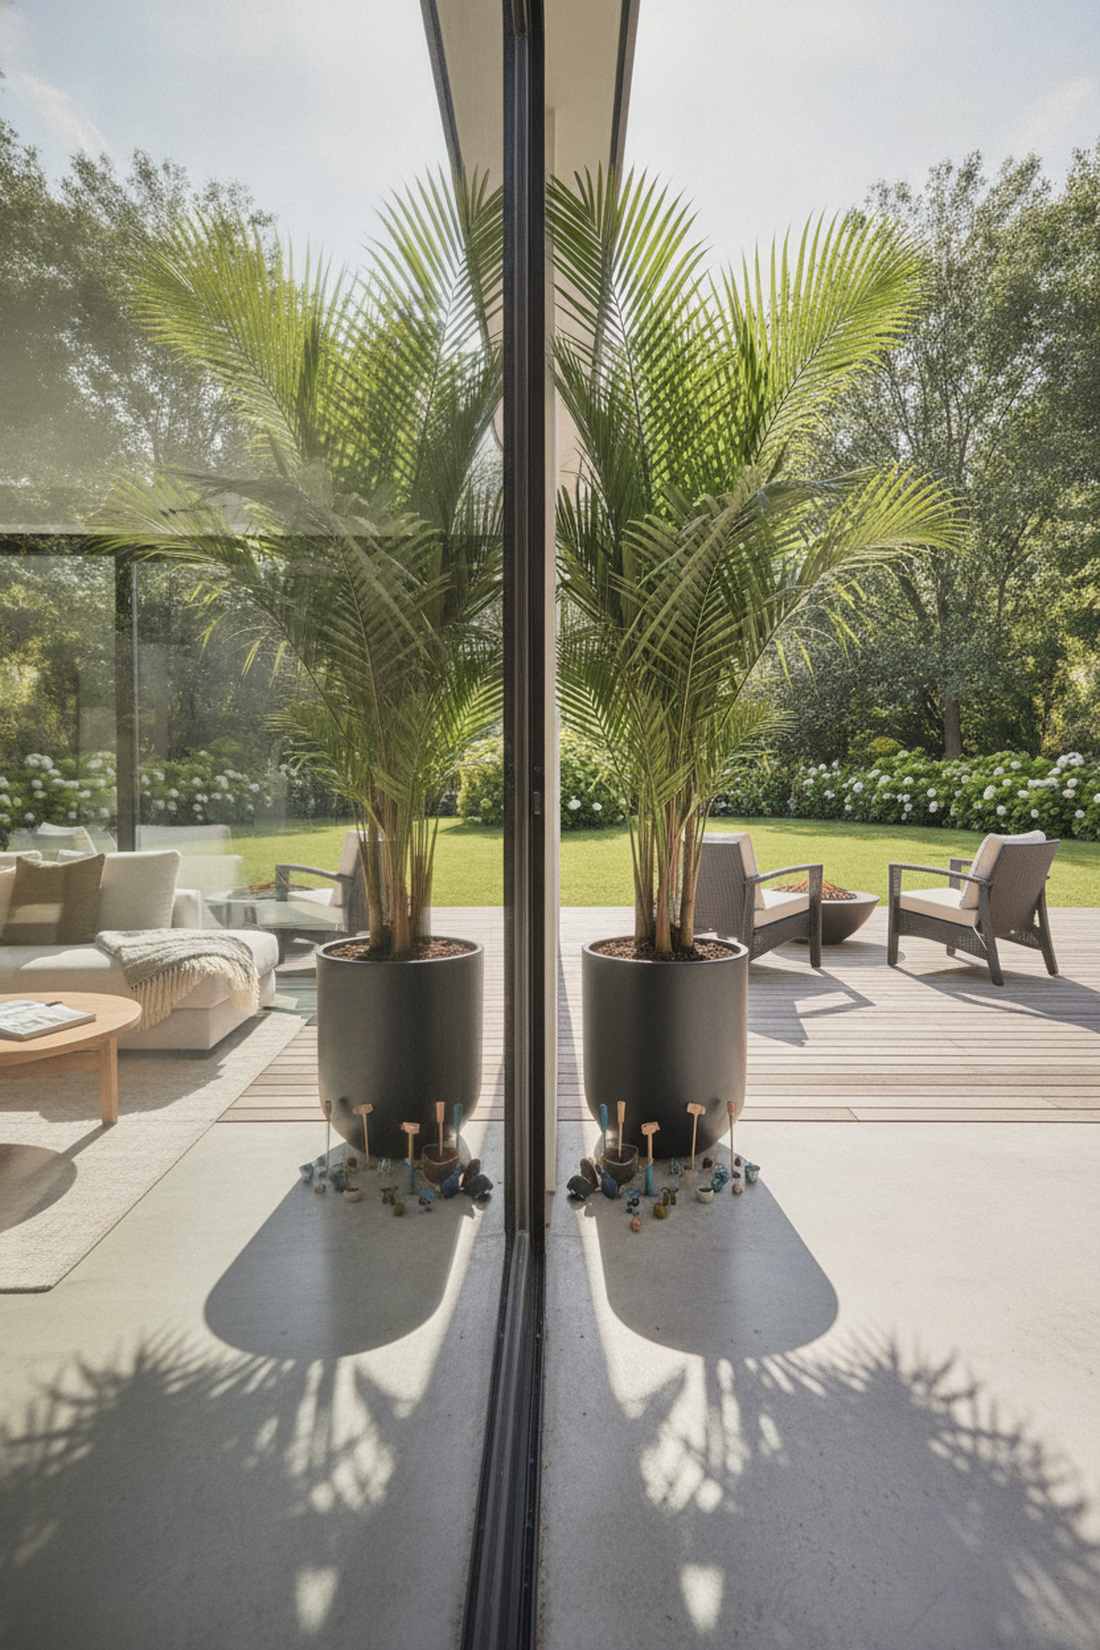
Creates a mind-bending optical illusion that erases the glass door. The symmetrical threshold planting technique is perfect for seamlessly linking your living room to the patio.
Placing an identical Majesty Palm on both sides of the glass tricks the eye into reading the indoor and outdoor areas as one continuous space. Use matching matte black planters and maybe sprinkle in some miniature garden supplies at the soil line for matching texture.
Replicating this twin setup costs around $60–$90 for matching pots and greenery. Pin this to your interior-exterior flow board!
- Key Materials: Twin identical specimen plants, matching tall containers
- Vibe / Style: Harmonious optical illusion
- Difficulty: Simple placement
- Budget Breakdown: Matching Pots: $50 | Twin Plants: $40.
- Creator’s Tip: Rotate the indoor and outdoor plants every month so they receive equal light and grow at identical rates.
- Smart Sourcing: Get a 2-pack modern matte black tall planter set and slow-release palm fertilizer spikes.
20. Flowering Color Echoes
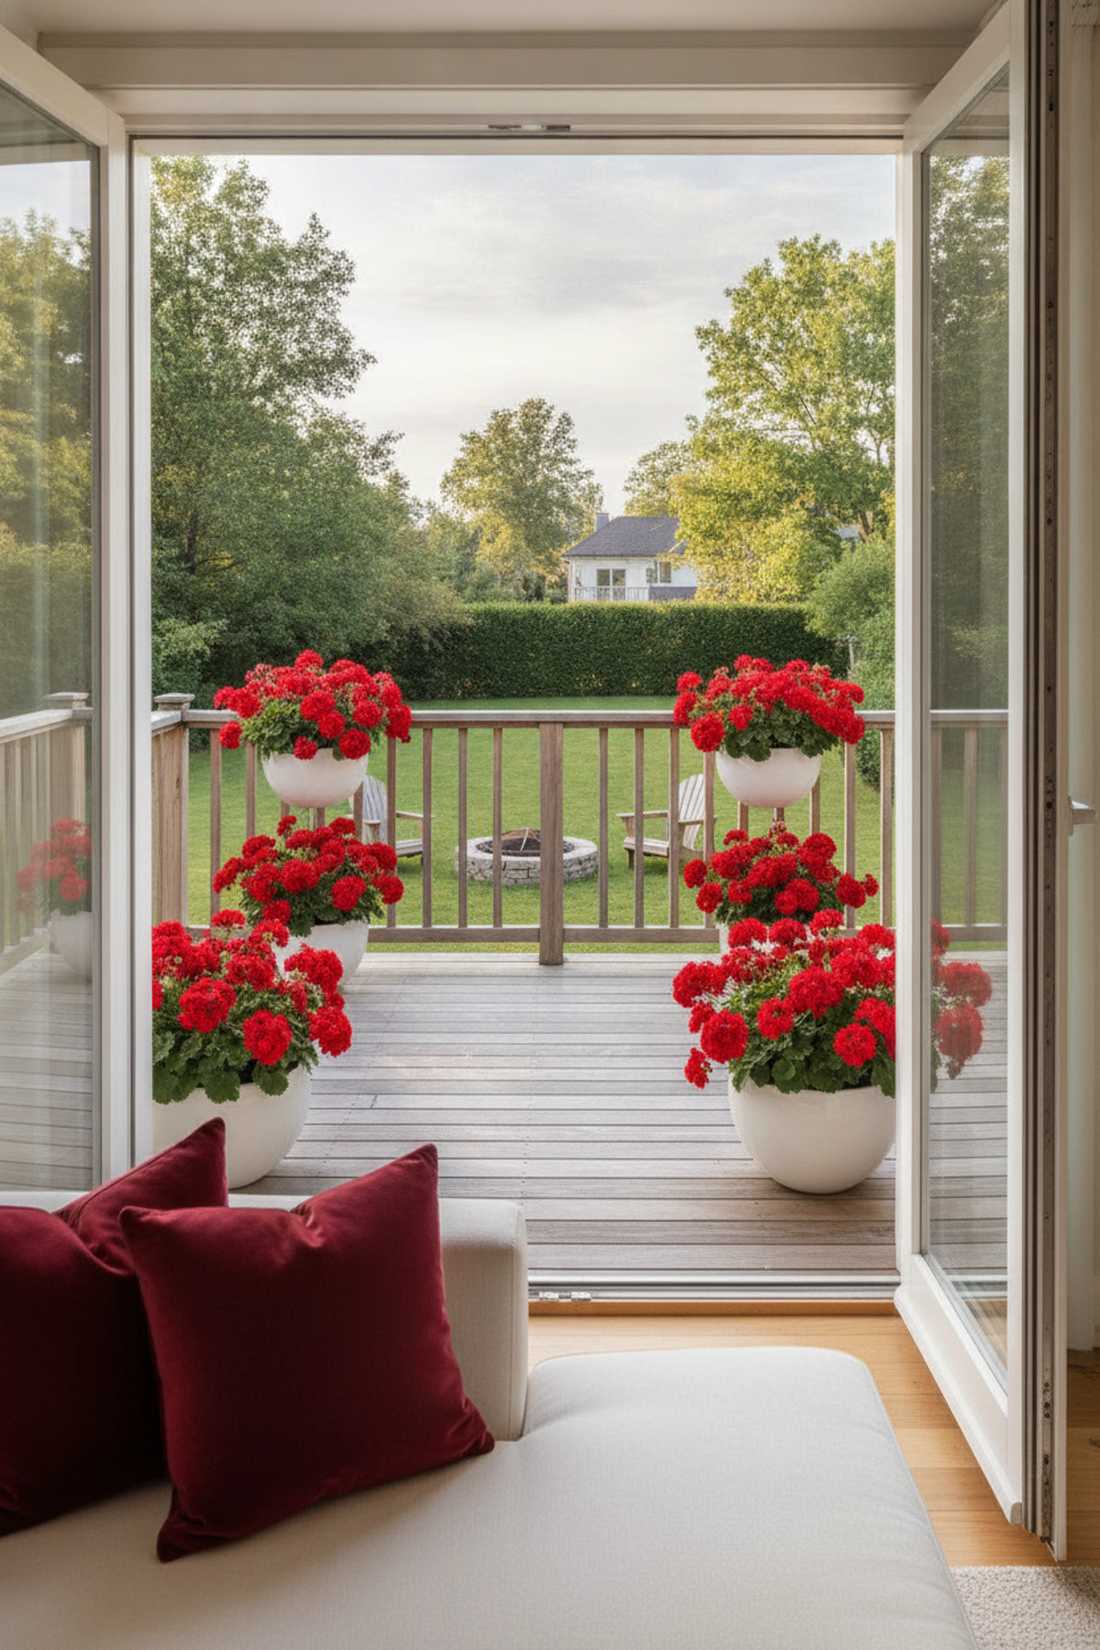
Feels like a professional interior designer color-matched your entire home. Applying the exterior bloom echoing method pulls your indoor accent colors straight out onto the balcony.
Randomly buying whatever looks good at the nursery is a trap when strict color coordination delivers a surprisingly premium look. If you have deep red throw pillows inside, plant vibrant crimson geraniums directly in your outward sightline.
A few precise floral additions will only cost $15–$30. It’s a fast upgrade that completely changes the vibe.
- Key Materials: Color-specific blooming annuals, neutral pot bases
- Vibe / Style: Curated designer palette
- Difficulty: Very easy
- Budget Breakdown: Annual Flowers: $20 | Fresh Soil: $10.
- Creator’s Tip: Stick to neutral grays or whites for the pots so the floral color pop perfectly mirrors your interior textiles.
- Smart Sourcing: Snag UV-coated white resin bowls (multipack) and premium blossom-boosting liquid food.
21. Threshold Pergola Frames
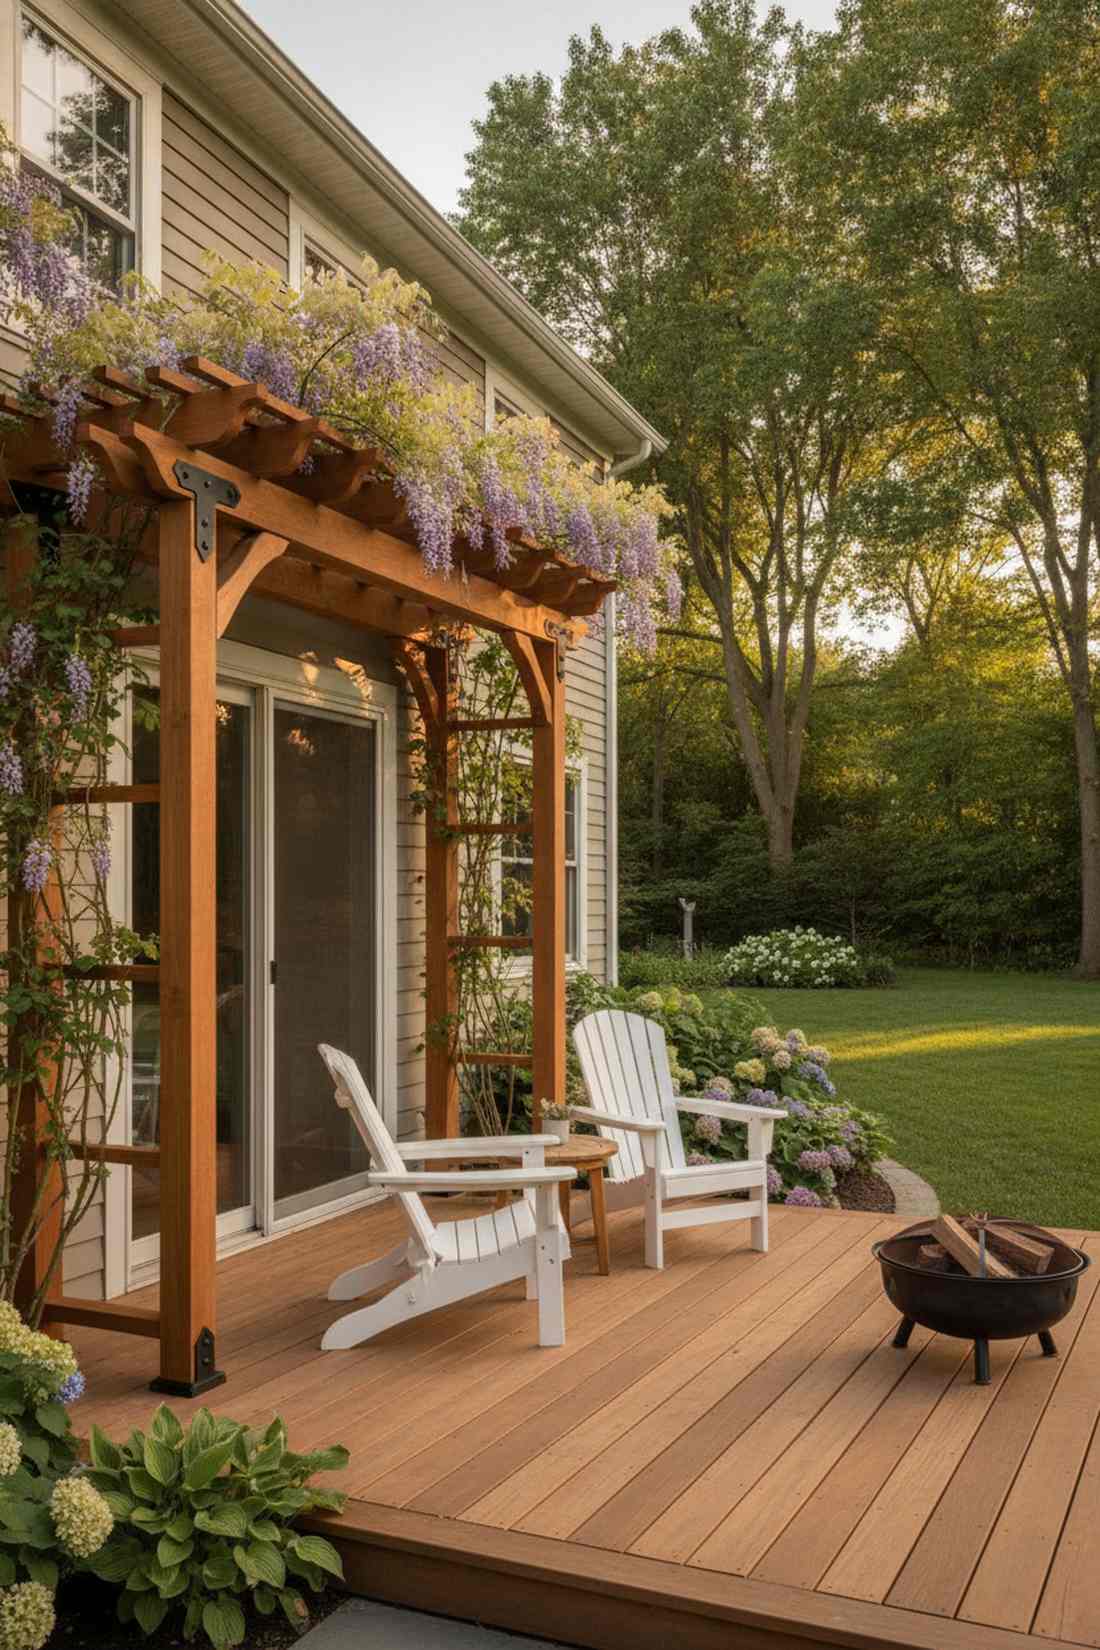
Transforms a boring sliding door into a majestic villa entryway. Building a compact doorway arbor works exceptionally well for defining the transition zone while adding vertical height.
Leaving the door frame bare wastes massive potential, whereas an overhead canopy creates depth that looks far more expensive than it is. Train aggressive climbers over the wooden beams to soften the hard architectural lines of the apartment exterior.
Lumber and structural brackets will run you around $80–$120. Save this if you love the romantic cottage core look!
- Key Materials: Cedar 2x2s, heavy-duty corner brackets
- Vibe / Style: Romantic structural canopy
- Difficulty: Advanced weekend build
- Budget Breakdown: Cedar Wood: $70 | Brackets: $30.
- Creator’s Tip: Use tension rods or non-damaging compression brackets against the balcony ceiling if you aren’t allowed to drill.
- Smart Sourcing: Invest in no-drill adjustable tension poles and a pre-cut cedar trellis kit.
22. Groundcover Spillover
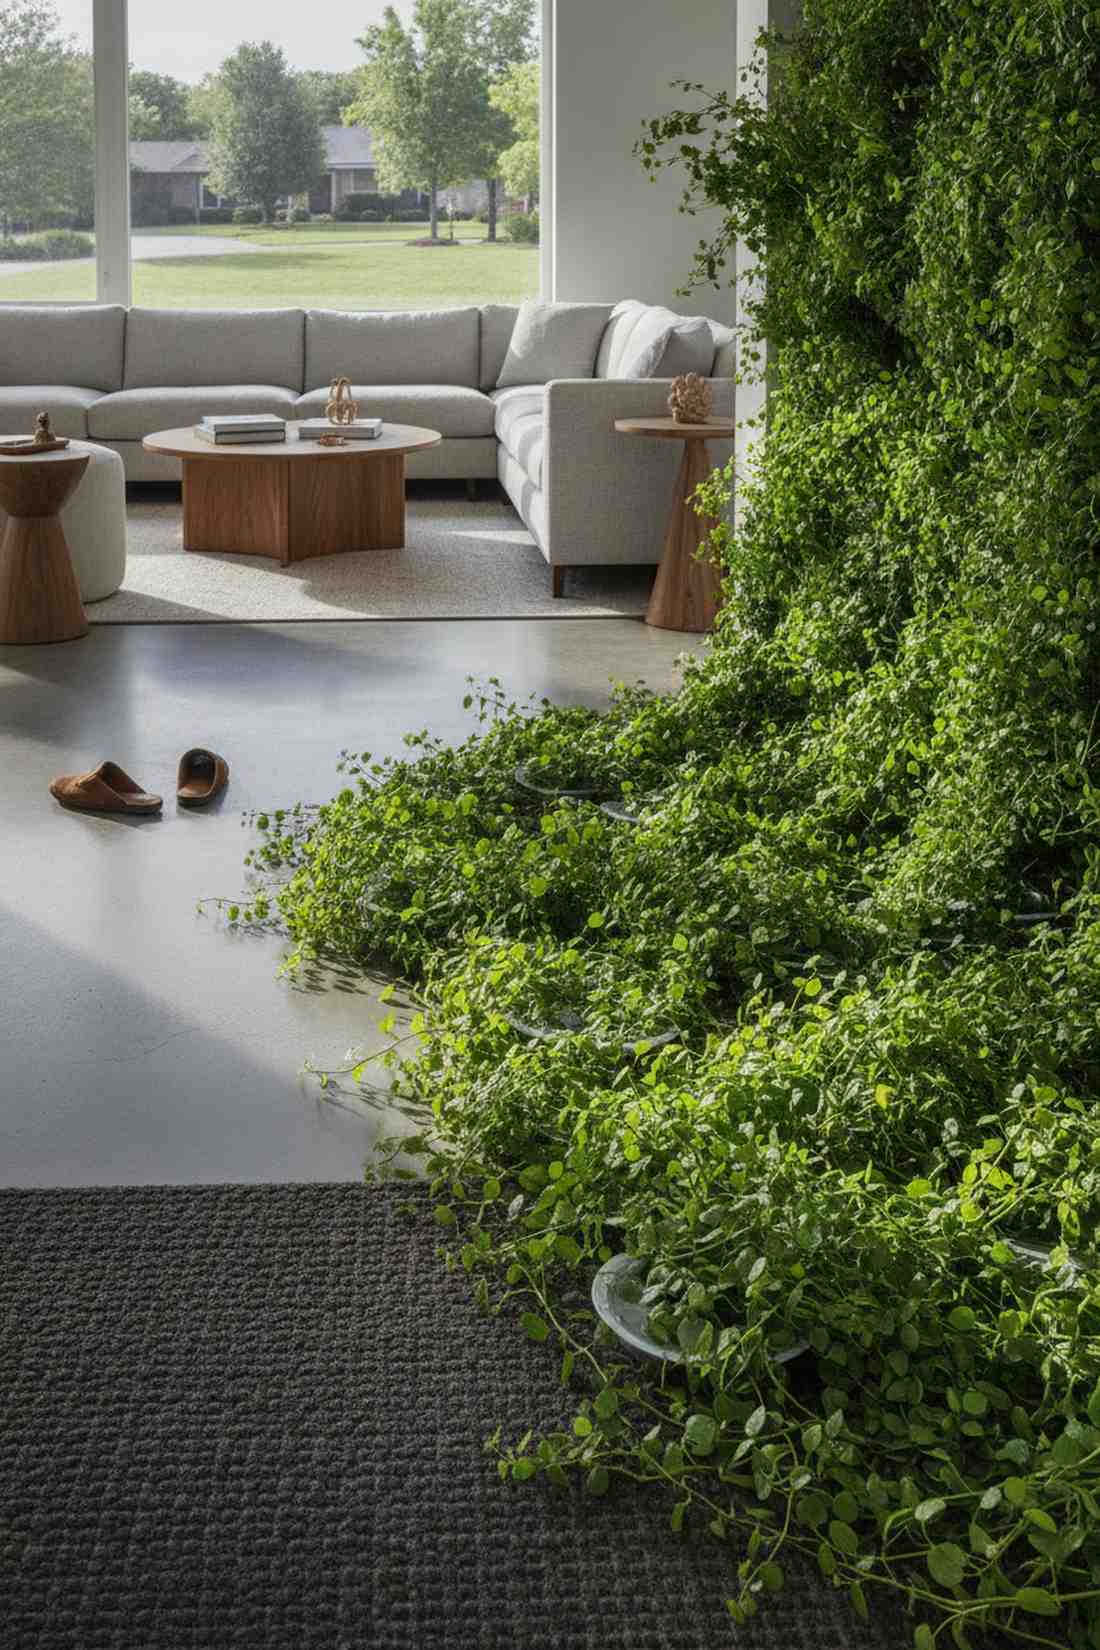
Looks as if nature is beautifully reclaiming your apartment. Implementing a trailing edge green border near the doorway creates a soft, organic bleed between zones.
Hard boundaries make small spaces feel smaller, but letting creeping vines spill slightly inward gives a designer-level finish. Keep low-profile saucers hidden beneath the foliage to catch water without breaking the visual illusion.
A few lush groundcover flats cost practically nothing, around $15–$25. Highly recommended for a quick weekend win.
- Key Materials: Creeping Jenny or Pothos flats, shallow drip trays
- Vibe / Style: Lush organic overgrowth
- Difficulty: 10-minute arrangement
- Budget Breakdown: Vine Flats: $15 | Shallow Trays: $10.
- Creator’s Tip: Prune the spillover every three weeks so it looks intentionally styled rather than messy and unkempt.
- Smart Sourcing: Order ultra-thin waterproof plant saucers (bulk pack) and organic trailing vine starter packs.
Do not skip this next lighting strategy unless you want your night garden to look completely flat and uninspired.
Lighting for Interior-Exterior Blur
23. Warm String Light Canopies
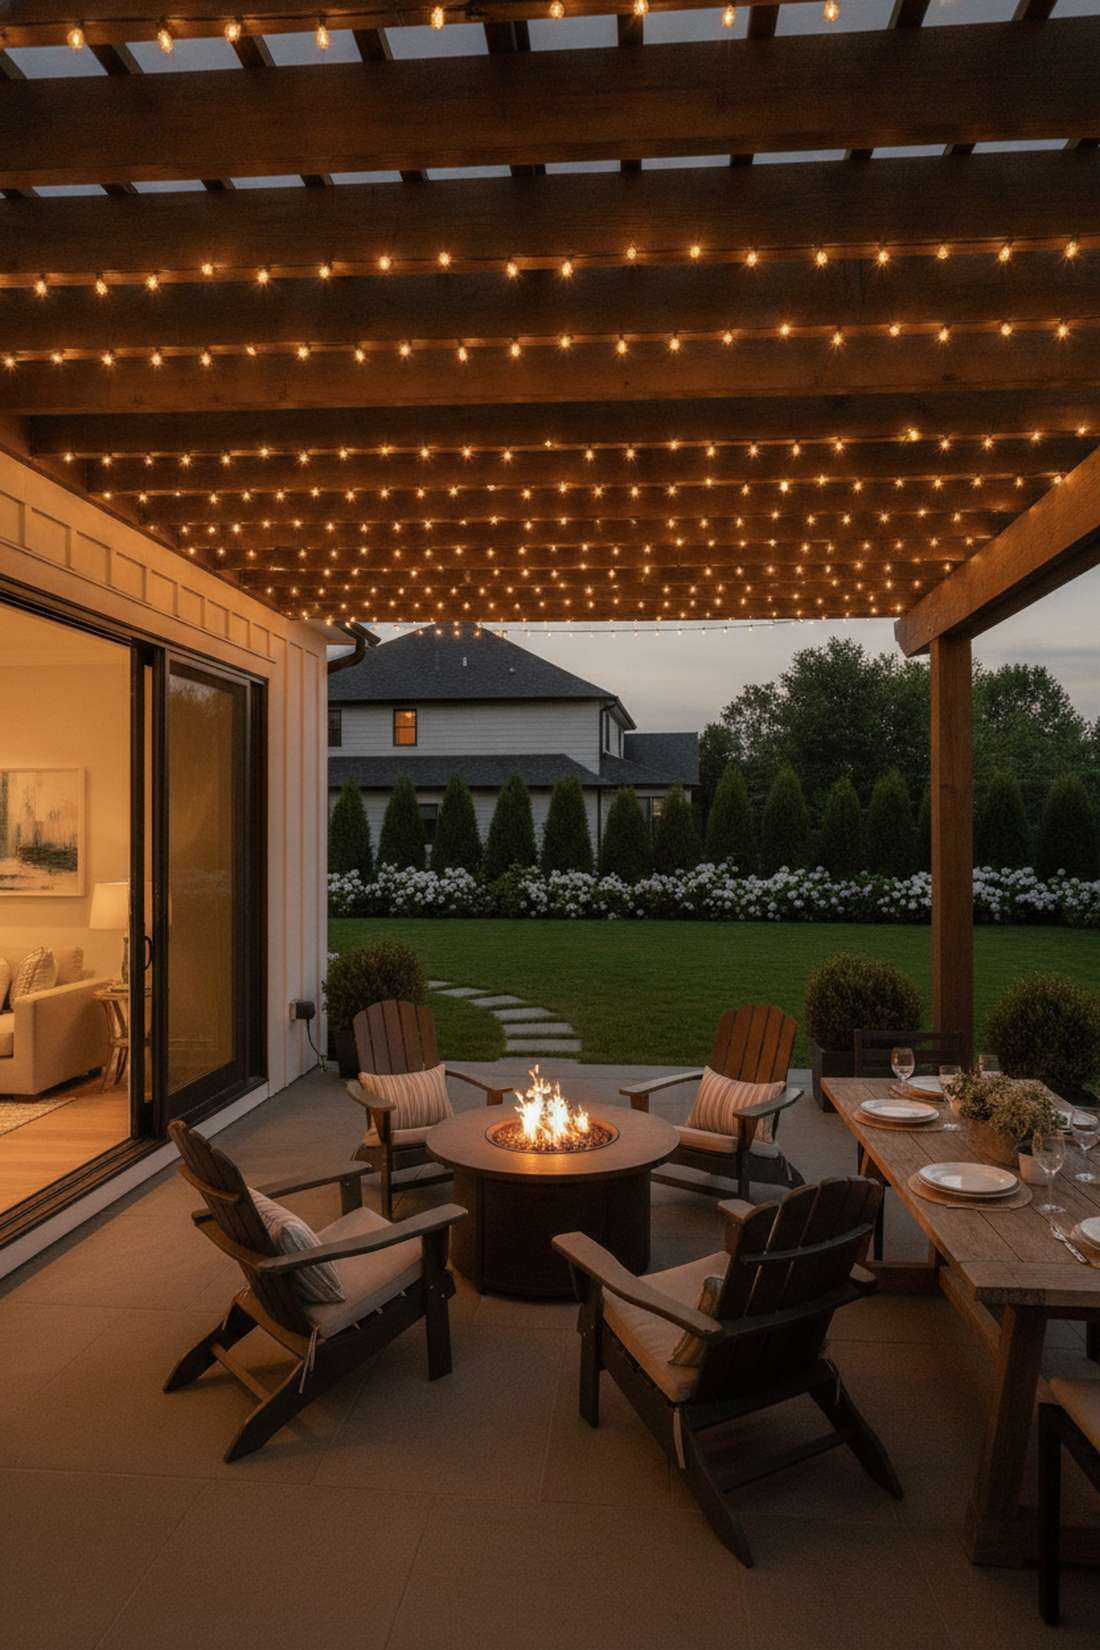
Casts a magical, golden-hour glow across your entire ceiling. Draping a cohesive LED roof web is the absolute best way to unify the indoor and outdoor air space at night.
Using harsh, cool-toned exterior bulbs ruins the cozy vibe, whereas matching a 2700K warm glow inside and out delivers a surprisingly premium look. Hook commercial-grade cafe bulbs from side to side to visually expand the ceiling width.
A high-quality shatterproof lighting strand runs about $30–$50. Pin this to your aesthetic night garden board!
- Key Materials: 2700K LED Edison string lights, outdoor command hooks
- Vibe / Style: European cafe evenings
- Difficulty: Easy ladder setup
- Budget Breakdown: Lights: $35 | Hooks: $10.
- Creator’s Tip: Plug the strands into a smart dimmer switch so you can match the outdoor brightness perfectly with your living room.
- Smart Sourcing: Buy a shatterproof commercial-grade LED string kit and an outdoor-rated smart dimmer plug.
24. Uplighting for Plant Drama
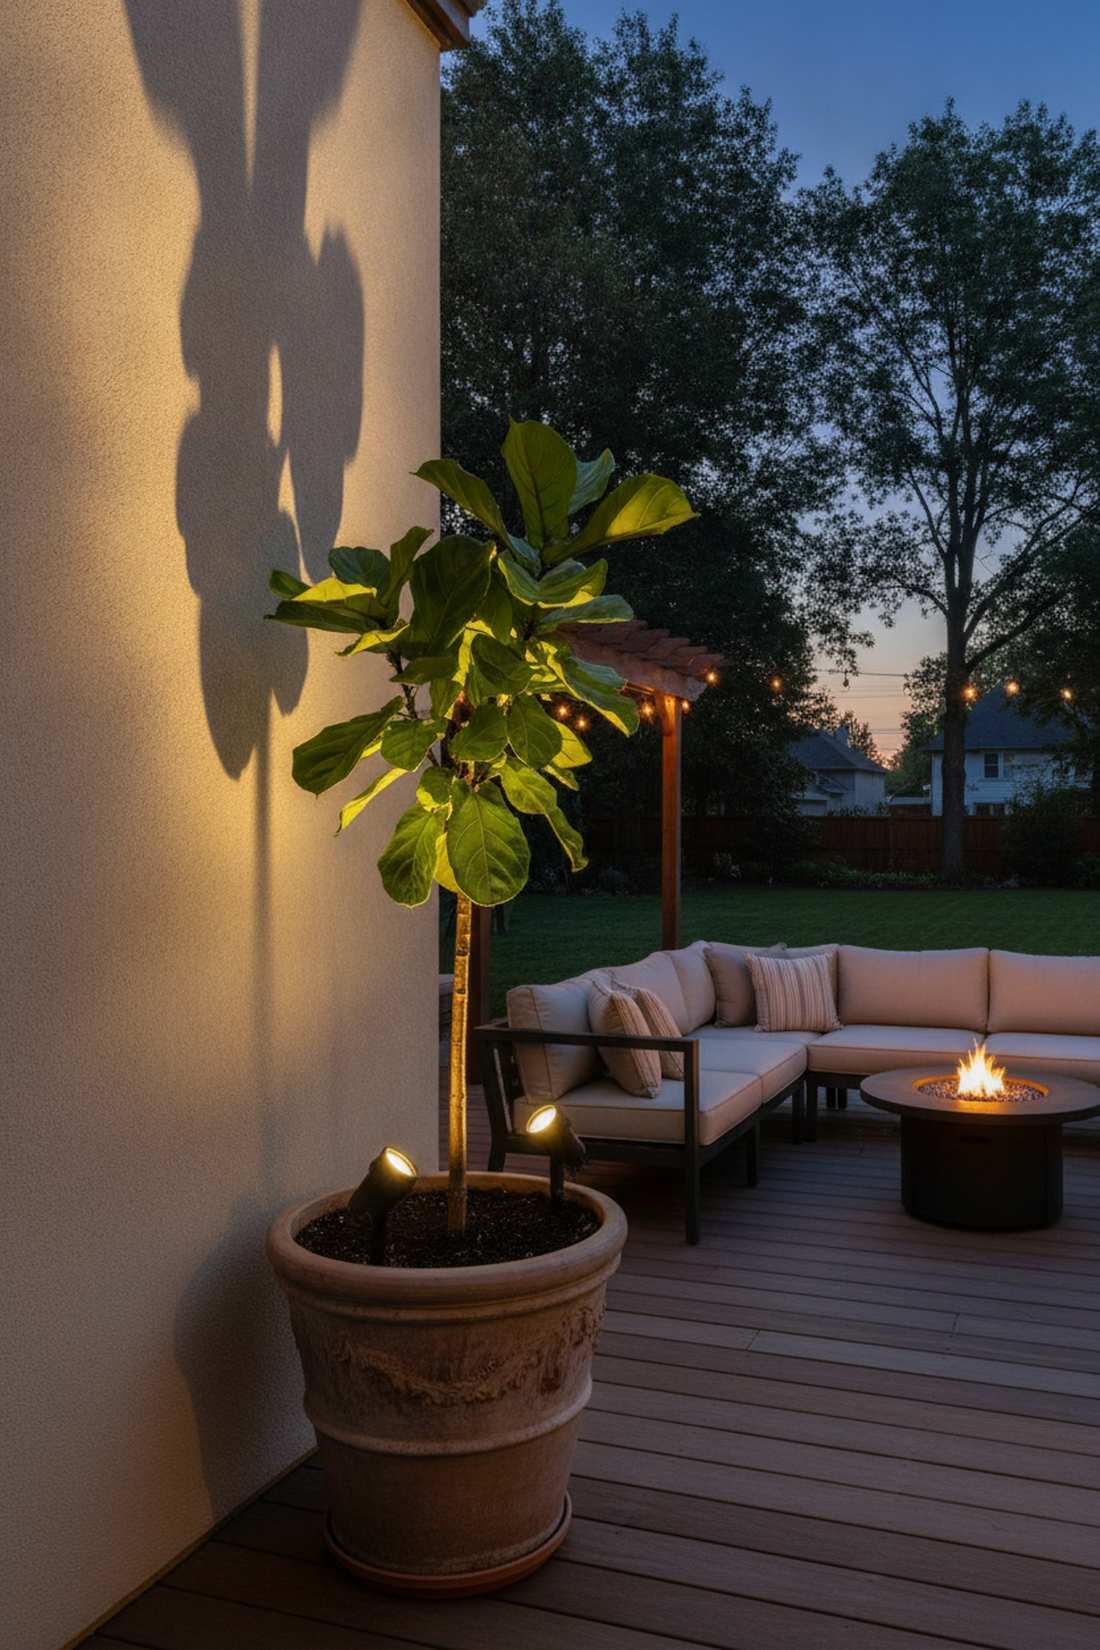
Turns your ordinary foliage into massive, sweeping cinematic art. Tucking a base-level architectural spotlight under your largest plant creates dramatic wall shadows.
Overhead lighting flattens the space, but angular uplighting makes compact patios look far more expensive than they are. Nestle a waterproof solar spot inside the rim of your focal point pot, adjusting the angle to maximize leaf silhouette size.
Two intense spotlights cost roughly $25–$40. It’s a fast upgrade that completely changes the vibe.
- Key Materials: High-lumen solar uplights, adjustable stakes
- Vibe / Style: Dramatic resort luxury
- Difficulty: 2-minute positioning
- Budget Breakdown: Solar Spots: $30.
- Creator’s Tip: Angle the beam at exactly 45 degrees toward the wall to stretch the shadow twice as tall as the actual plant.
- Smart Sourcing: Snag a warm-white LED solar landscape spotlight set and UV-blocking lens protectors.
Material Guide: Cheap vs. Premium Aesthetic
Knowing exactly where to save and where to spend makes all the difference in achieving that “looks expensive but isn’t” vibe when scanning viral home garden photos.
- Standard vs. UV-Resistant/Premium: Standard plastic pots fade to an ugly chalky white in one summer. Upgrading to UV-coated fiberglass or resin stops fading completely and prevents winter cracking.
- Pre-made Kits vs. Sourcing Locally: Running around buying screws, soil, and brackets individually costs way more time. Smart garden starter kits bundle everything with exact measurements, preventing structural failures.
25. Threshold Floor Strips
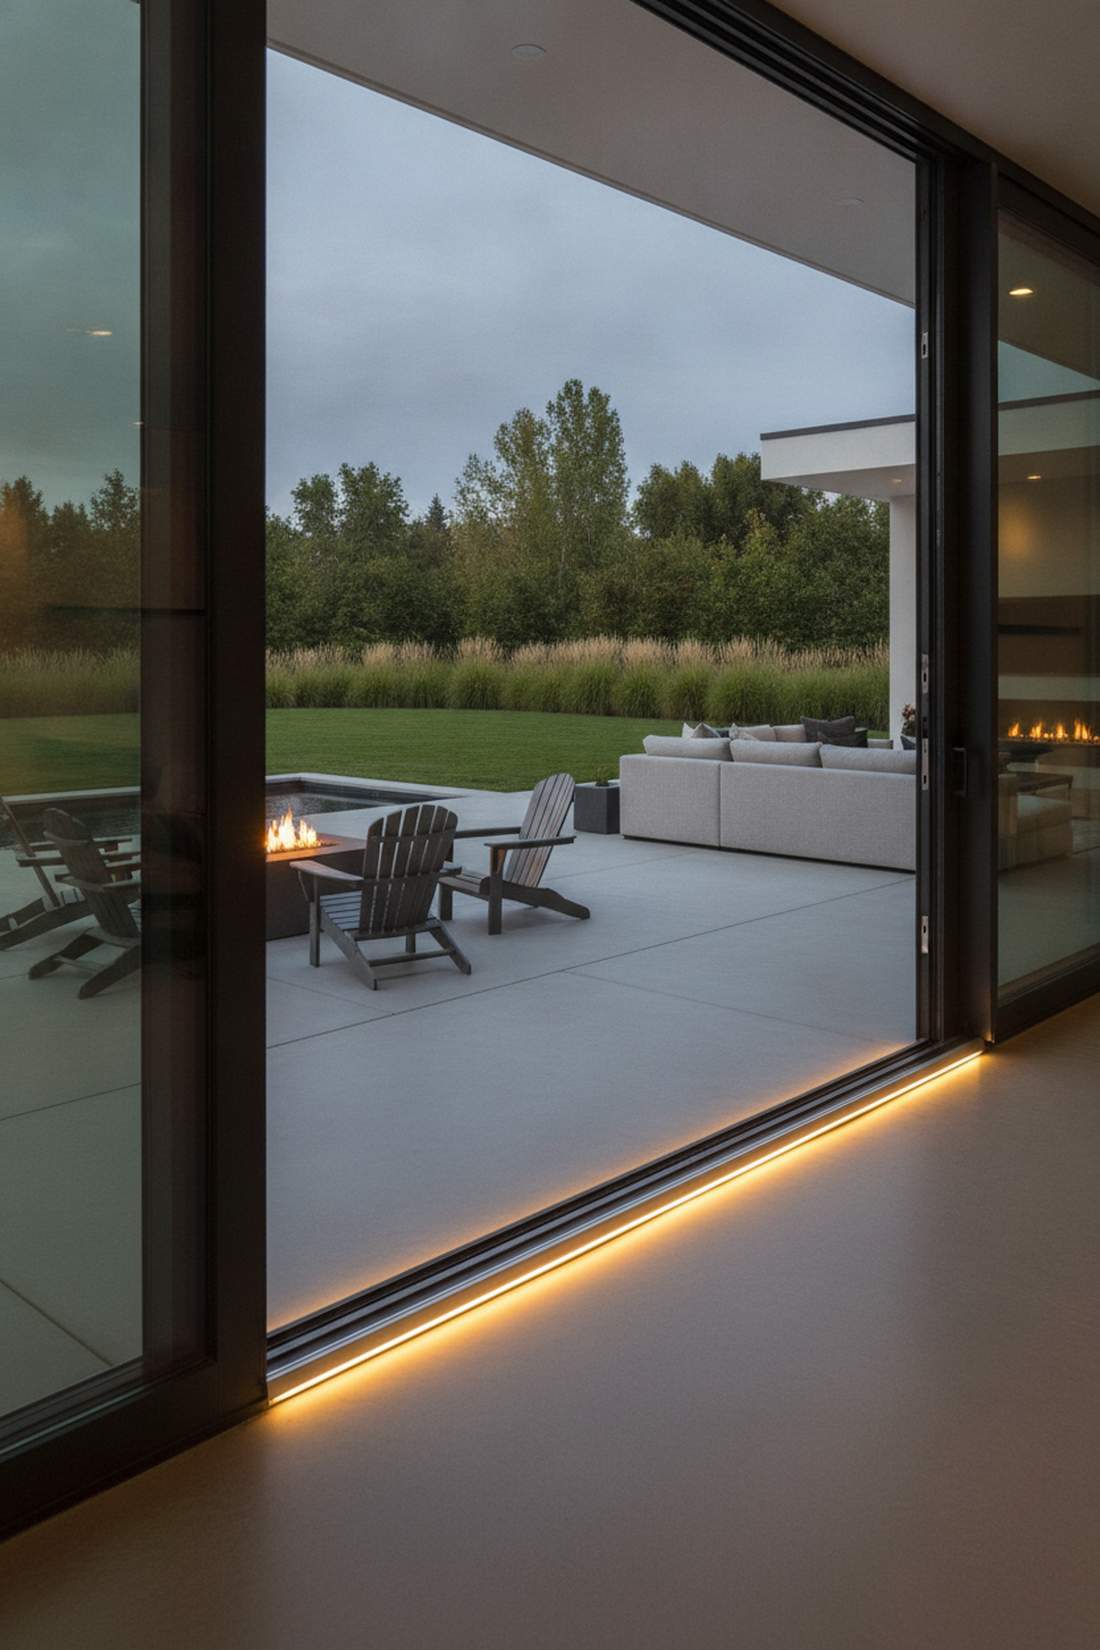
Looks like the sleek illuminated aisles of a luxury sci-fi ship. Embedding an edge-defining LED neon strip across the door tracks safely guides foot traffic while looking incredibly sharp.
Ignoring the floor transition creates a dark tripping hazard, but a recessed glow gives a designer-level finish. Lay IP65 waterproof LED tape directly under the lip of your patio door rail for a smooth, diffused runway effect.
A smart, weatherproof strip kit will cost around $25–$45. Save this if you love ultra-modern patio details!
- Key Materials: IP65 waterproof LED tape light, aluminum diffuser channel
- Vibe / Style: Sleek contemporary lounge
- Difficulty: Peel-and-stick simplicity
- Budget Breakdown: LED Strip: $25 | Diffuser Channel: $15.
- Creator’s Tip: Always use a frosted aluminum channel over the tape light so you see a solid line of glow instead of cheap individual dots.
- Smart Sourcing: Order an IP65 waterproof neon LED rope kit and aluminum frosted LED diffuser tracks (bulk pack).
26. Lantern Cluster Accent Groups

Brings the crackling warmth of a beach bonfire right to your balcony table. Grouping an asymmetrical trio of glowing lanterns is the perfect use-case for corners lacking electrical outlets.
Single lights feel weak and lost, while clustering three different heights looks effortlessly expensive. Throw in battery-operated flicker candles and surround the bases with delicate terrarium accessories for a highly curated centerpiece.
A set of three iron and glass lanterns averages $50–$75. Highly recommended for a quick weekend win.
- Key Materials: Mixed-height metal lanterns, LED pillar candles
- Vibe / Style: Cozy curated romantic
- Difficulty: Unbox and display
- Budget Breakdown: Lantern Trio: $50 | LED Candles: $20.
- Creator’s Tip: Buy lanterns with matching finishes (like matte black) but distinctly different shapes to create dynamic visual interest.
- Smart Sourcing: Grab a 3-piece outdoor geometric lantern set and waterproof resin flameless candle kits.
Edible Garden CompactnessProductive Home Garden Apartment Systems
27. Salad Tower Stackables
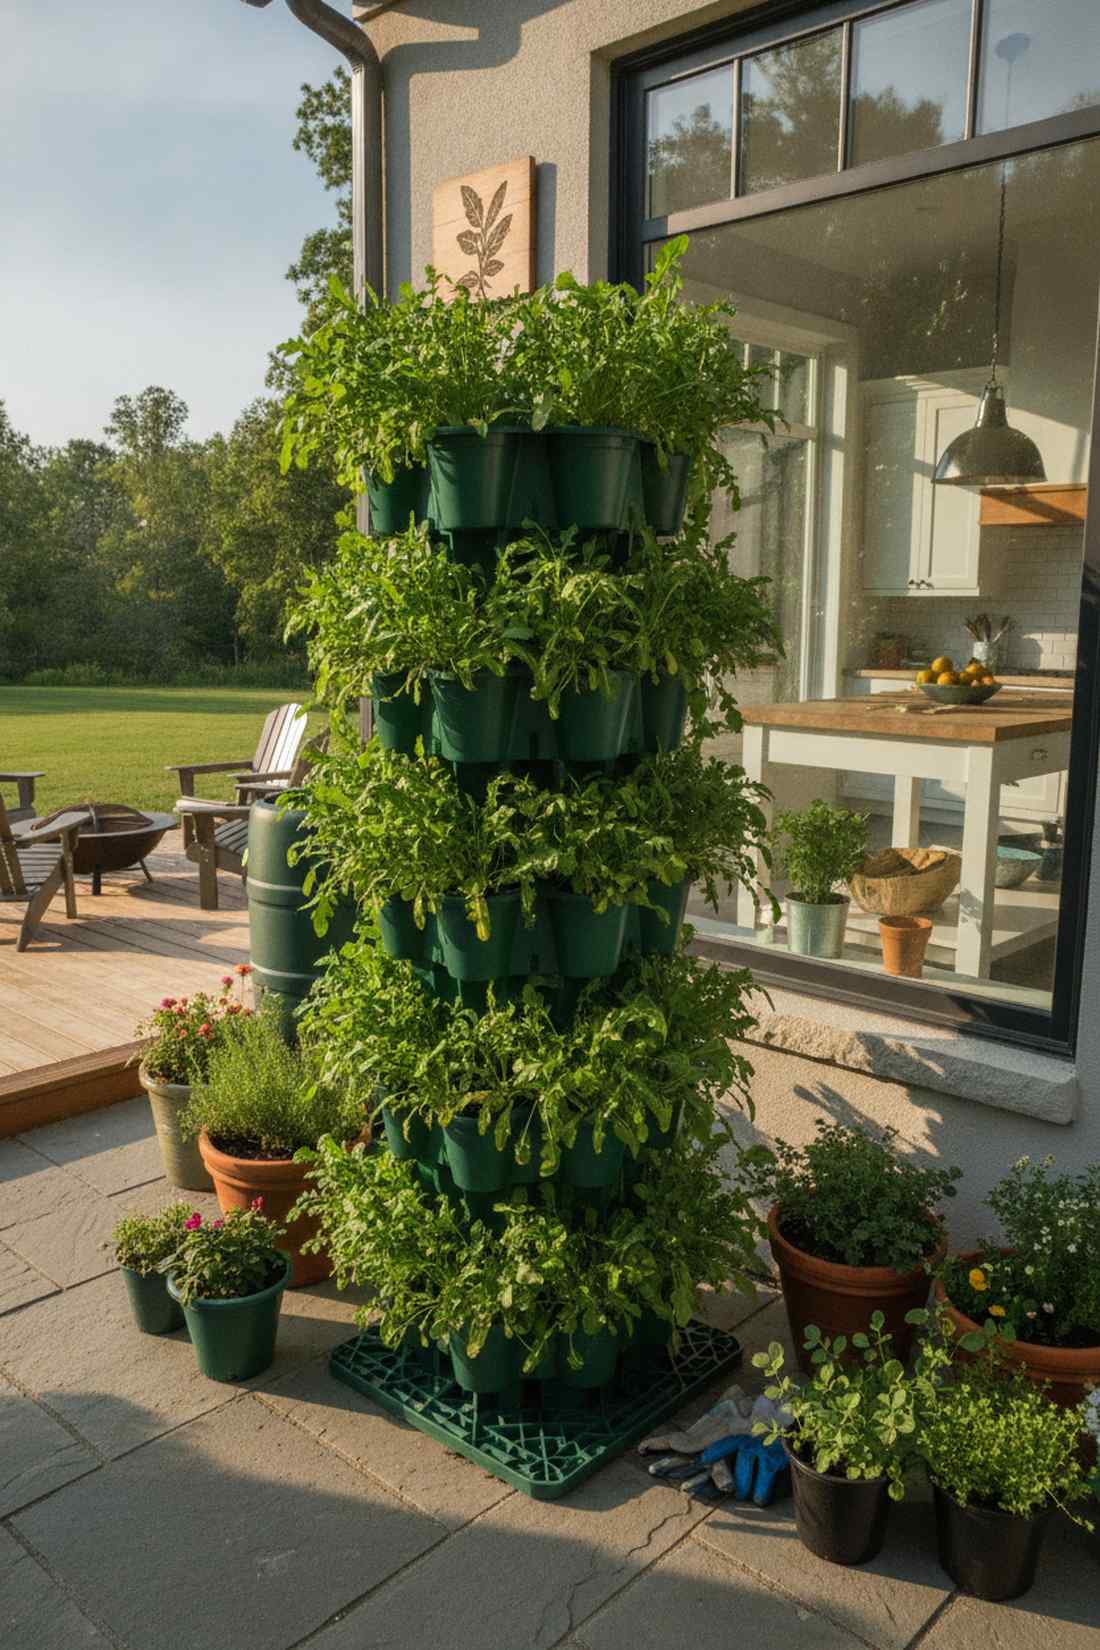
Yields a massive continuous harvest without eating up your square footage. Deploying a multi-tier vertical greens planter works exceptionally well for generating fresh arugula right outside your kitchen window.
Sprawling veggie pots ruin tight layouts, but a central stacking column delivers a surprisingly premium look and keeps crops disease-free. Load the pockets with nutrient-dense soil and use smart garden starter kits to guarantee a foolproof salad rotation.
A high-capacity stacking tower runs about $35–$60. Pin this to your urban homesteading board!
- Key Materials: Interlocking plastic growing tower, rich compost mix
- Vibe / Style: High-density productivity
- Difficulty: Simple stacking
- Budget Breakdown: Tower Kit: $45 | Seeds/Soil: $15.
- Creator’s Tip: Rotate the entire tower 90 degrees every three days so all pockets get equal sun exposure and grow symmetrically.
- Smart Sourcing: Invest in a 5-tier heavy-duty stacking planter and a premium organic salad greens seed kit.
28. Railing-Mounted Herb Boxes
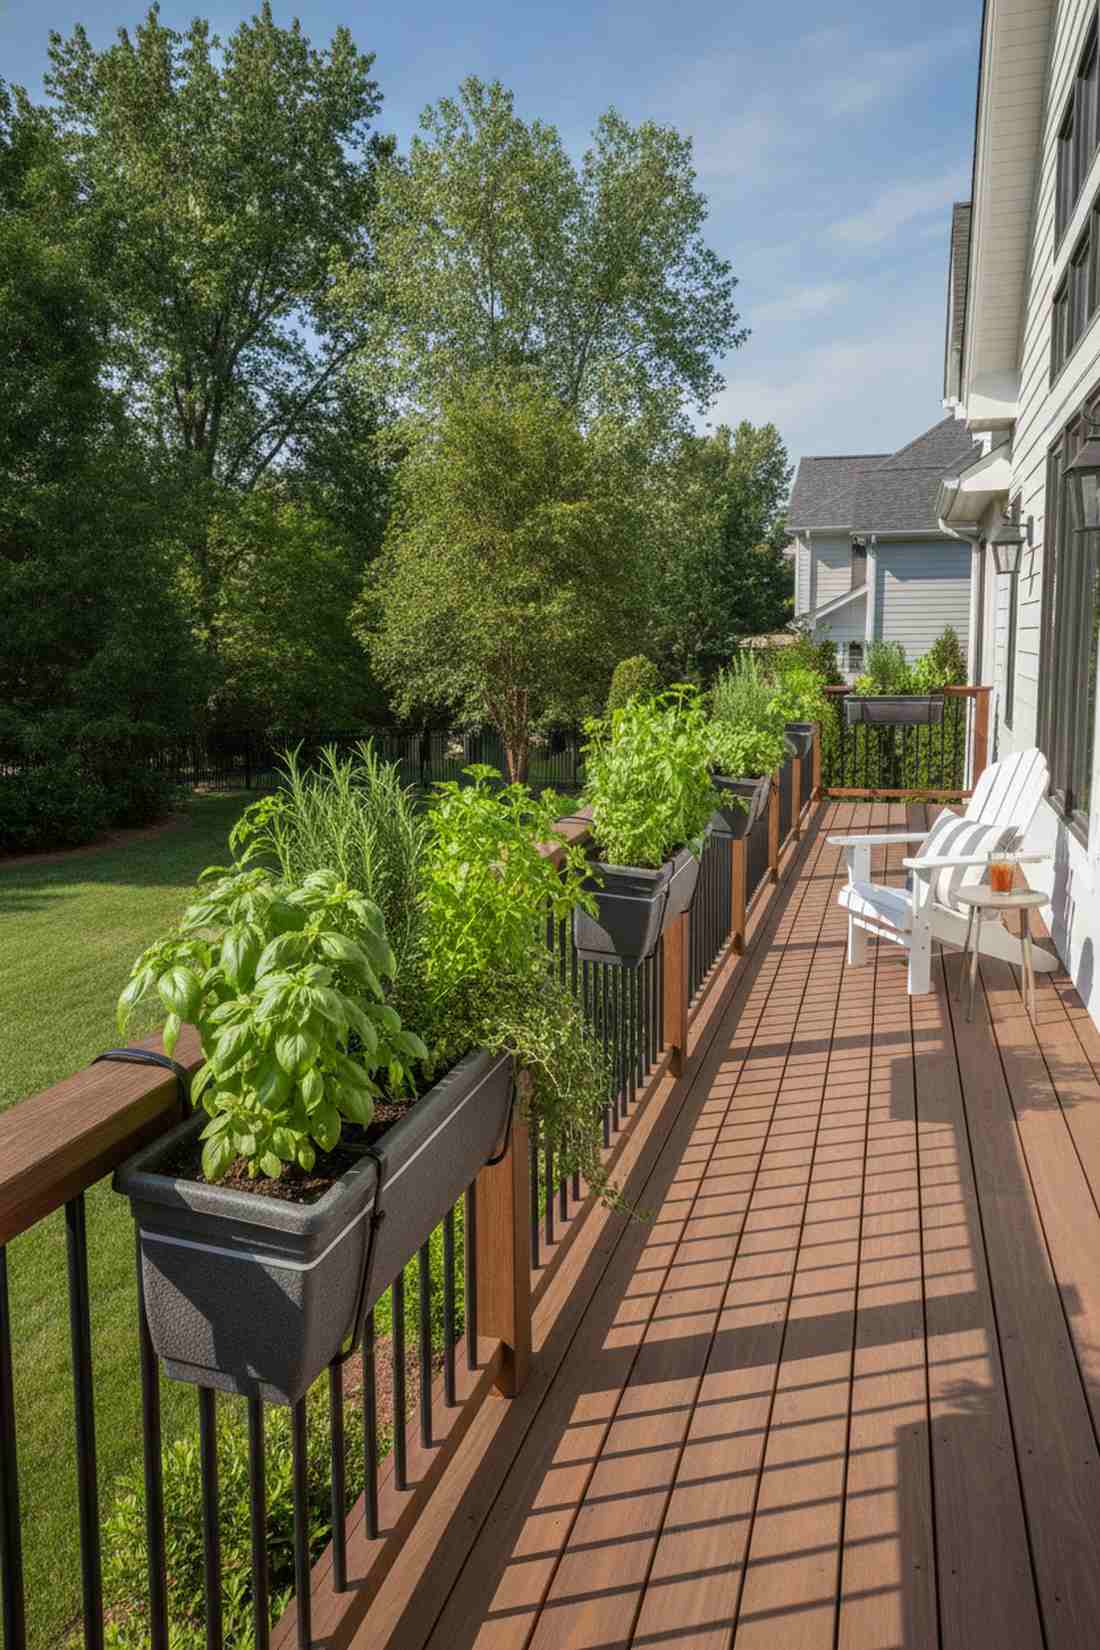
Frees up every inch of floor space while flanking your view with vibrant greens. A secure over-the-rail planter system is absolutely essential for anyone wanting fresh ingredients in a tiny footprint.
Balancing cheap pots on ledges is dangerous, while deep-groove saddle brackets make your space feel far more expensive than it is. Fill them with bushy basil and trailing thyme, ensuring your culinary supply is always thriving in the direct sun.
Sturdy railing saddle boxes cost roughly $20–$40 each. It’s a fast upgrade that completely changes the vibe.
- Key Materials: Saddle-notch railing planters, zip-tie stabilizers
- Vibe / Style: Classic European balcony
- Difficulty: Zero-tool mounting
- Budget Breakdown: Rail Boxes: $35 | Herbs: $15.
- Creator’s Tip: Drill extra drainage holes half an inch above the bottom to create a tiny water reservoir for hot days.
- Smart Sourcing: Buy adjustable over-rail resin planter boxes (multipack) and moisture-control potting soil mix.
29. Dwarf Fruit Tree Containers
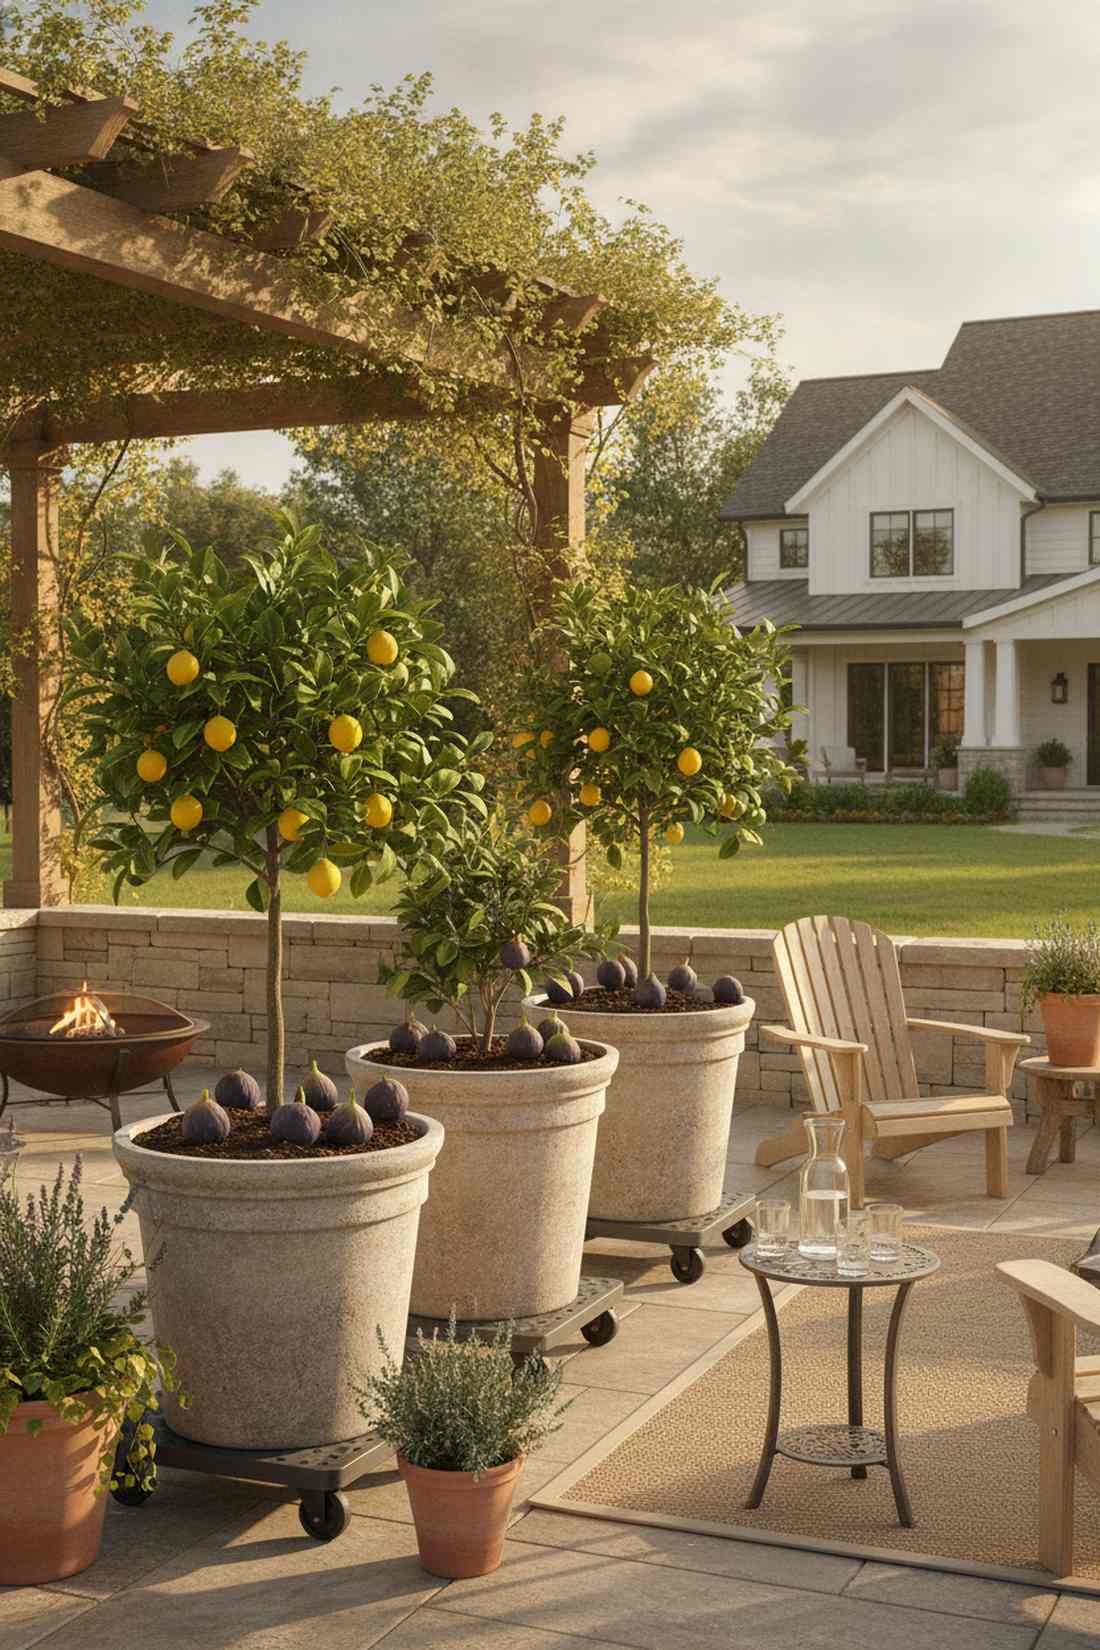
Brings a burst of Mediterranean orchard energy to a concrete jungle. Poting a compact genetic dwarf citrus tree is the perfect use-case for establishing a permanent, fruiting anchor plant.
Standard trees quickly outgrow their space, but true dwarf varieties give a designer-level finish while yielding full-sized lemons. Secure them in heavy 20-gallon faux-concrete tubs that resist winter freezing without cracking.
A grafted dwarf tree and premium pot will set you back $80–$130. Save this if you dream of picking fresh fruit on your patio!
- Key Materials: 20-gallon insulated planter, Meyer Lemon or Fig starter
- Vibe / Style: Abundant Tuscan terrace
- Difficulty: Heavy soil lifting
- Budget Breakdown: Tree Starter: $50 | Large Pot: $60.
- Creator’s Tip: Put the container on a heavy-duty rolling caddy before filling it with dirt so you can easily move the tree during frost warnings.
- Smart Sourcing: Get a double-walled insulated 20-gallon planter and a heavy-duty plant caddy with locking wheels.
This next edible setup feels like a cheat code for harvesting your own premium greens without sacrificing aesthetics…
30. Tomato Cage Tripods
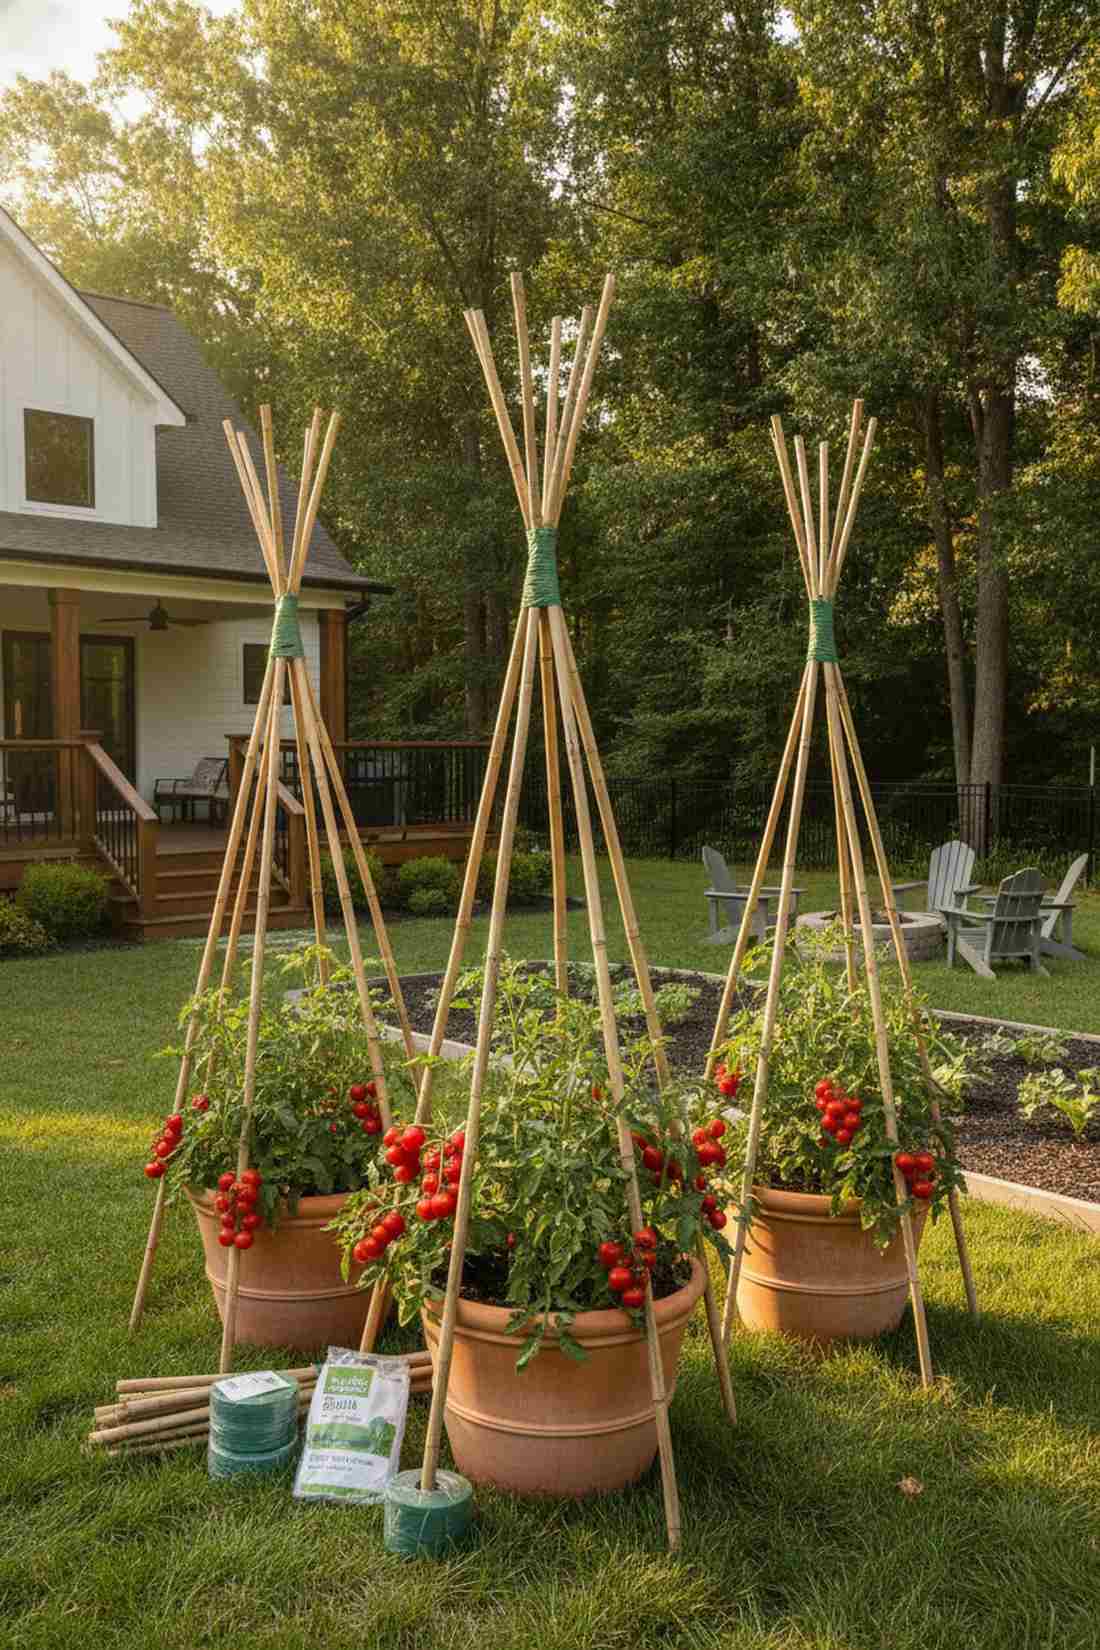
Turns a chaotic, sprawling mess into a tidy, sculptural harvest. Using a rigid structural teepee support is highly effective for keeping determinate tomatoes contained and beautiful.
Flimsy wire rings collapse under weight, but thick bamboo tripods look effortlessly expensive and hold massive yields. Tie the thick stalks with soft garden twine, creating a vertical tower of red fruit that won’t shade your other crops.
Building a robust tripod setup costs about $25–$40. Highly recommended for a quick weekend win.
- Key Materials: Thick bamboo poles, soft plant ties, determinate seeds
- Vibe / Style: Architectural farm-to-table
- Difficulty: Simple binding
- Budget Breakdown: Bamboo Poles: $15 | Large Pot: $20.
- Creator’s Tip: Stick to “Bush Early Girl” or “Patio” tomato varieties which are genetically designed to stop growing at 3 feet tall.
- Smart Sourcing: Order thick natural bamboo garden stakes (bulk pack) and gentle velcro plant tie rolls.
31. Vertical Berry Pockets
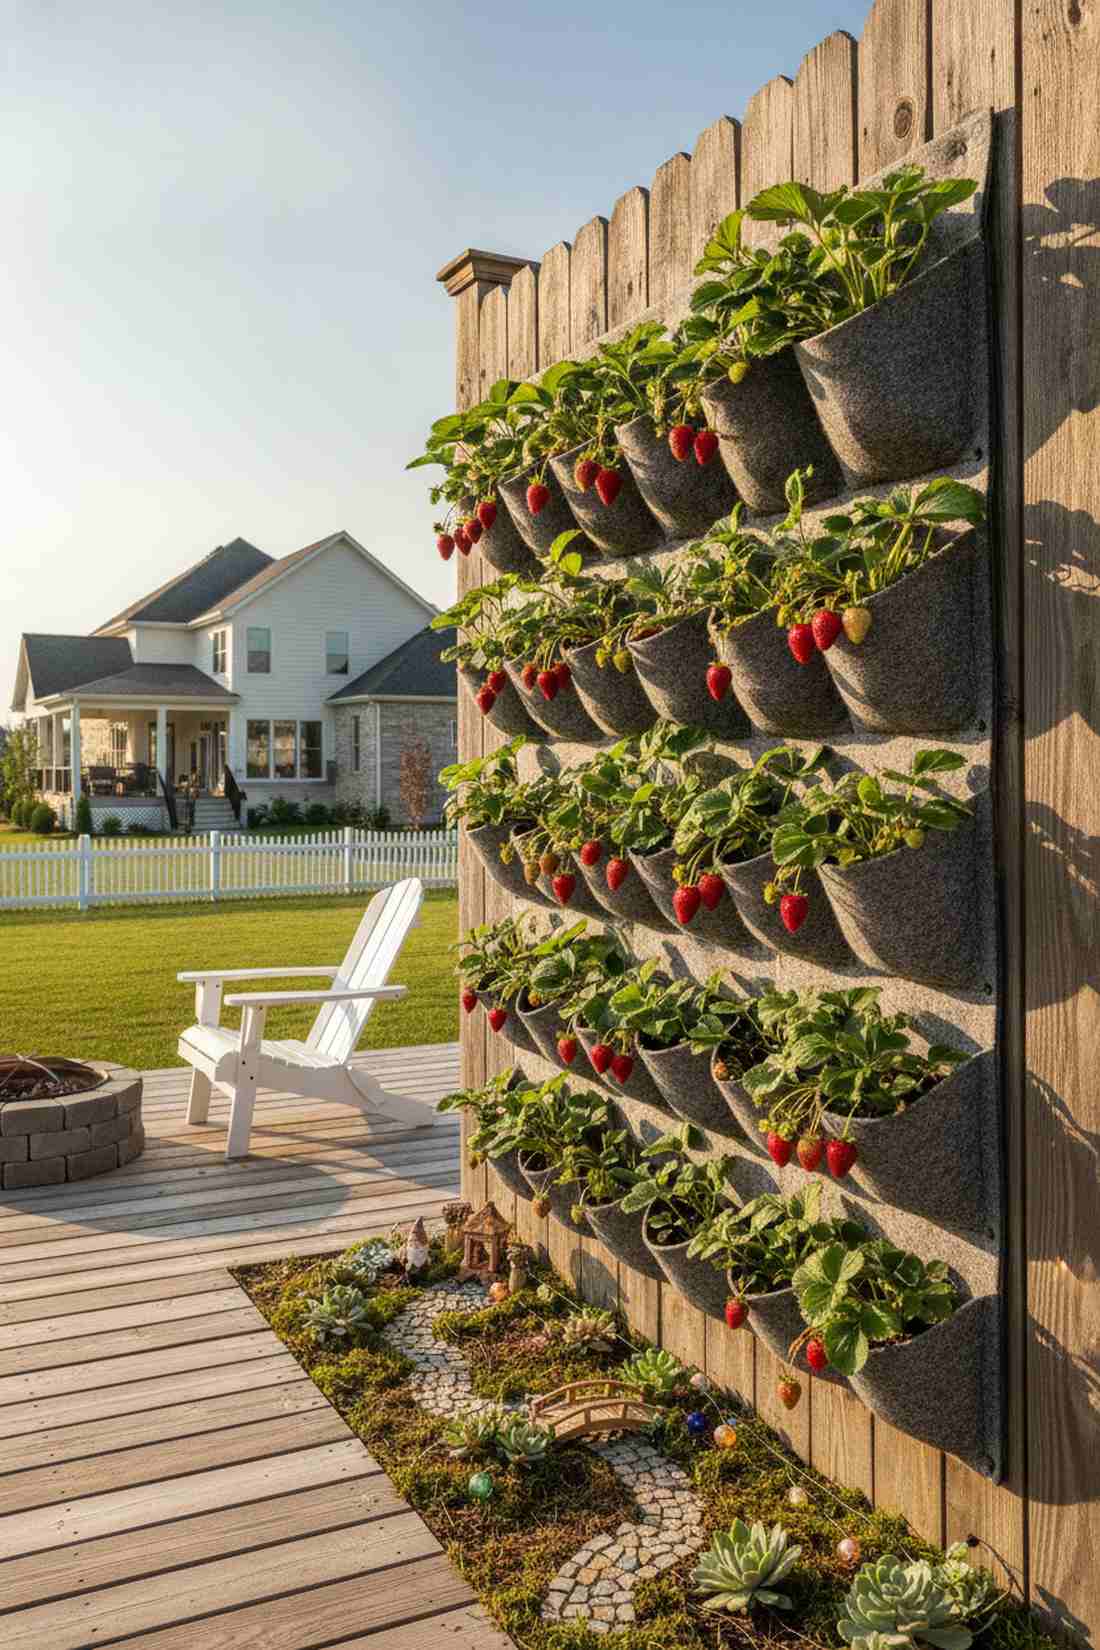
Feels like plucking candy straight from a living green wall. An everbearing strawberry vertical system is absolutely ideal for sunny walls that are otherwise completely wasted.
Letting berries sit on wet dirt guarantees rot, whereas elevating them in fabric pockets delivers a surprisingly premium look and clean fruit. Swap out the soil annually and tuck in some fairy garden kits around the base for an adorable presentation.
A multi-pocket berry station costs roughly $30–$50 to establish. Pin this to your vertical farming inspiration board!
- Key Materials: Breathable felt hanging bags, bare-root strawberry crowns
- Vibe / Style: Sweet suspended harvest
- Difficulty: Very easy
- Budget Breakdown: Pocket Bag: $15 | Bare Roots: $20.
- Creator’s Tip: Mix a handful of perlite and sand into the potting soil to guarantee the rapid drainage that strawberry crowns demand.
- Smart Sourcing: Snag a breathable felt strawberry hanging planter and premium bare-root strawberry starter packs.
32. Microgreen Tray Succession
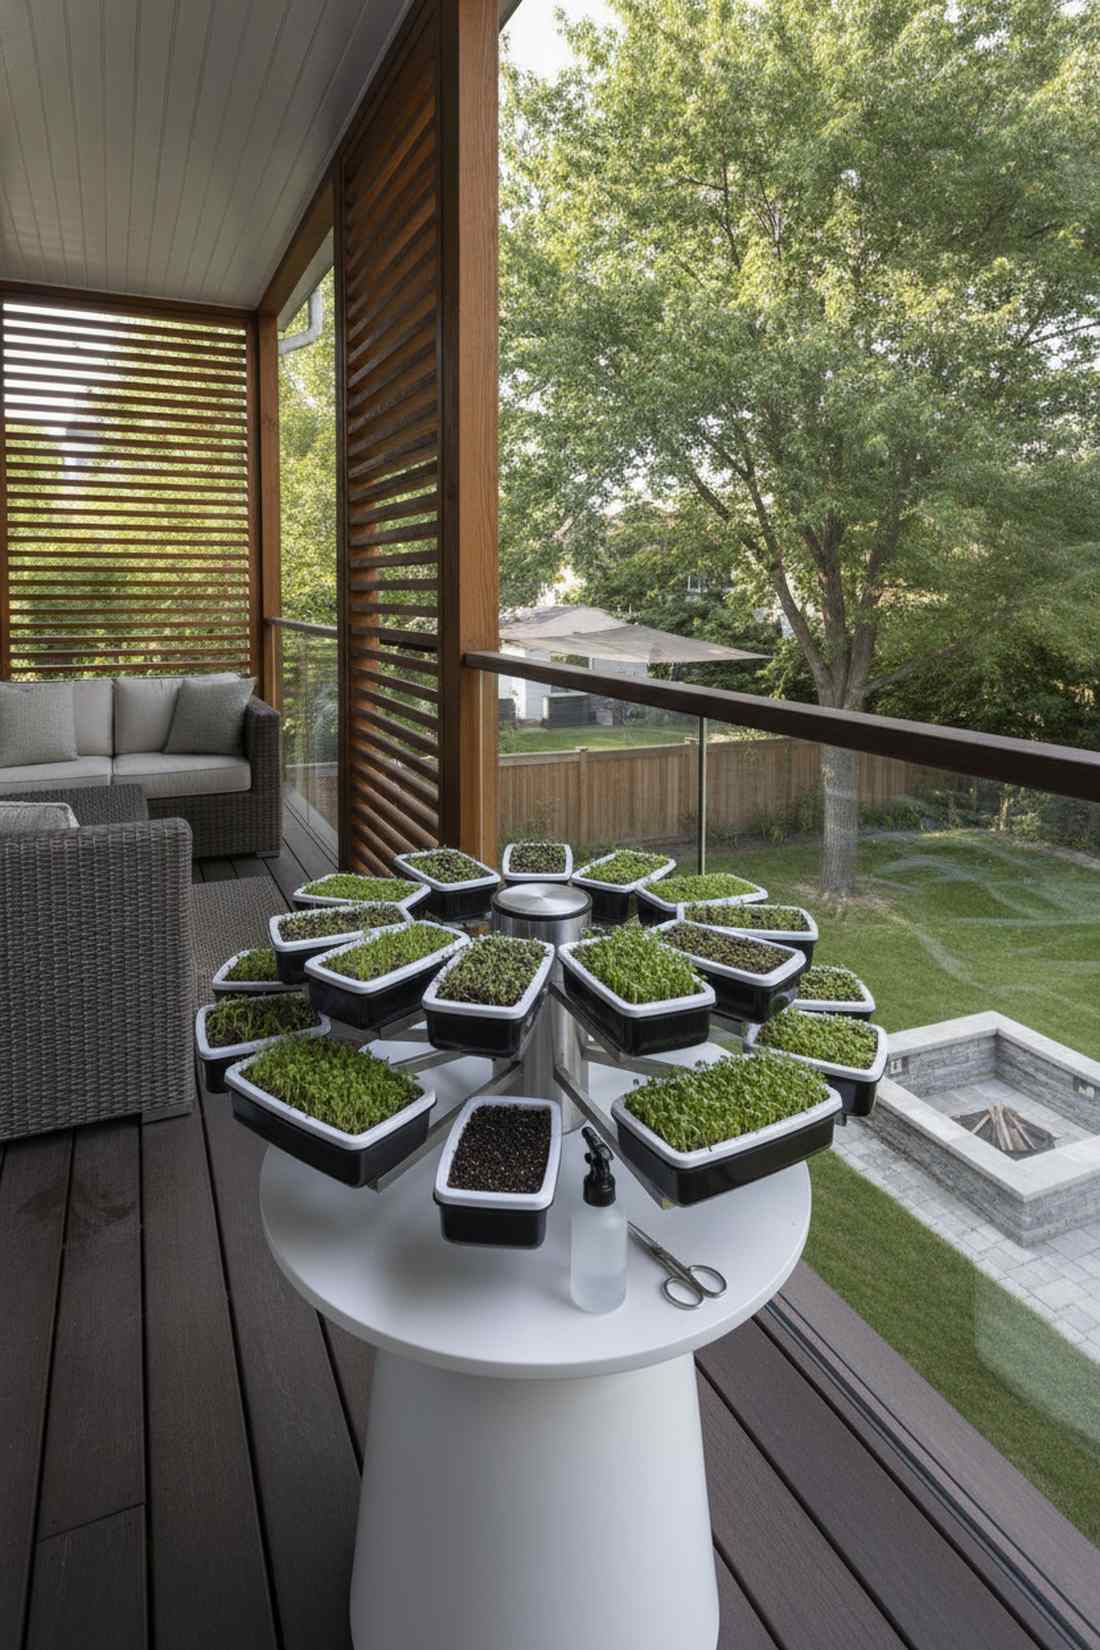
Provides an endless loop of expensive restaurant-quality garnishes on a tiny side table. Setting up a shallow rotating sprout station works exceptionally well for shadier, covered balconies.
Waiting months for a harvest is frustrating, but staggering 10-day crop cycles makes your space feel far more productive. Use sleek, low-profile germination trays that look modern and clean, avoiding the messy aesthetic of spilled dirt.
A sleek tray and seed rotation system costs around $25–$40. It’s a fast upgrade that completely changes the vibe.
- Key Materials: Shallow germination trays, bulk organic seeds
- Vibe / Style: Ultra-modern culinary prep
- Difficulty: Requires daily misting
- Budget Breakdown: Trays: $15 | Bulk Seeds: $15.
- Creator’s Tip: Use a fine-mist spray bottle rather than a watering can to avoid disturbing the delicate seeds as they sprout.
- Smart Sourcing: Buy BPA-free shallow microgreen growing trays (multipack) and organic spicy salad mix bulk seeds.
33. Vertical Bean Teepees
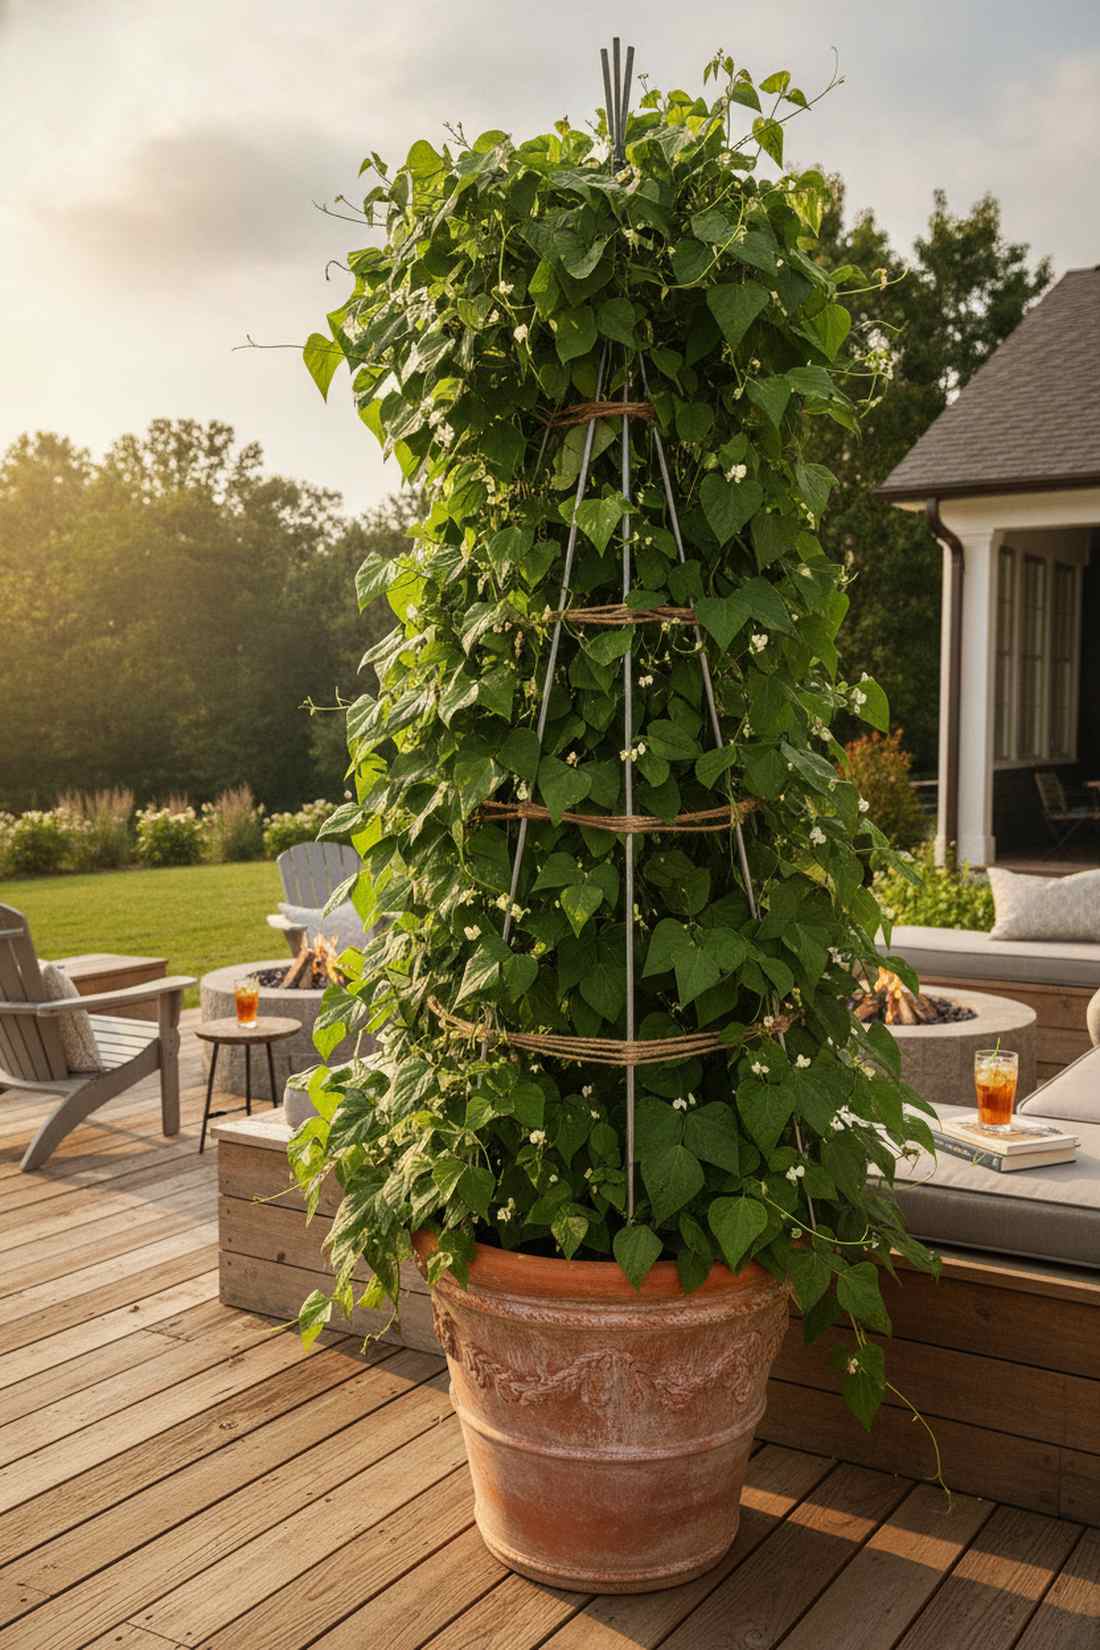
Creates a towering, leafy obelisk right in the corner of your patio. Building a climbing pole bean structure is the perfect use-case for generating a massive canopy of privacy.
A bare corner wastes vertical potential, while training vines up a sturdy pyramid gives a designer-level finish and a heavy food yield. Anchor the poles deep into a heavy pot so the entire structure withstands strong balcony winds.
Poles, a pot, and seeds will total roughly $30–$50. Save this if you’re planning a massive vertical garden!
- Key Materials: 6-foot garden poles, large base container, pole bean seeds
- Vibe / Style: Lush structural canopy
- Difficulty: Fun weekend build
- Budget Breakdown: Poles & Twine: $20 | Container: $20.
- Creator’s Tip: Wrap twine horizontally around the teepee every 12 inches to give the vines an easy ladder to climb upwards.
- Smart Sourcing: Order rust-proof steel garden climbing stakes (bulk pack) and heavy-duty jute garden twine.
Conclusion
Executing a high-end home garden apartment isn’t about having massive square footage; it’s about leveraging vertical space and securing premium starter kits. The 33 robust blueprints outlined above prove that smart sourcing and aggressive vertical scaling outshine basic floor layouts every time. Stop settling for cheap, fading pots that ruin the aesthetic. Upgrade your hardware, implement precise micro-zoning, and trick the eye with seamless floor continuities to achieve that luxury designer finish on a realistic budget. Select three high-impact strategies today and completely redefine your outdoor living experience.
Frequently Asked Questions
What flooring works best for interior-exterior flow in apartments?
The absolute best tactic is mirroring your indoor texture with UV-coated composite decking or oversized outdoor porcelain tiles. Buying a bulk pack of interlocking all-weather deck tiles ensures you eliminate ugly grout lines while saving money on installation. Always insist on premium slip-resistant (R11 minimum) materials to ensure the high-end look lasts without cracking.
How many plants fit in a 50-square-foot balcony garden?
You can comfortably fit 30-50 plants if you utilize smart garden kits and heavy-duty vertical wall planters. The secret is ditching floor pots entirely in favor of over-the-rail saddle boxes and ceiling-mounted macrame clusters. Investing in a vertical starter kit maximizes density while keeping your precious floor footprint completely open for furniture.
Which vegetables produce best in apartment balcony conditions?
Fast-turnover crops like microgreens, trailing cherry tomatoes, and pole beans offer the highest ROI for compact spaces. Skip sprawling pumpkins and grab a premium salad greens seed kit along with shallow germination trays to guarantee continuous harvests. Vertical bean structures and stackable towers ensure you yield heavily without eating up floor space.
How do I create privacy in a home garden apartment without blocking light?
Avoid solid, dark walls and instead build dynamic screens using UV-coated tall fiberglass planter boxes loaded with clumping bamboo or climbing vines. Putting these deep planters on heavy-duty locking casters allows you to roll your privacy screen exactly where you need it. This delivers a high-end designer finish while letting essential sunlight filter through the foliage.
What lighting setup extends balcony garden usability into evening hours?
Ditch harsh overhead floods and invest in a shatterproof commercial-grade LED string kit (2700K warm white) paired with solar uplights. Hiding warm-white LED solar landscape spotlights at the base of your largest plants casts massive, dramatic shadows that make the space look incredibly expensive. Using dimmers ensures your outdoor patio glow perfectly matches the cozy vibe of your interior living room.