Building a stunning green space instantly elevates property value and creates a luxurious aesthetic. Steal these exact material blueprints, premium product hacks, and step-by-step budget breakdowns. Transform bare concrete areas into high-end natural retreats without overspending.
Design Snapshot Key Principles
- Multi-functional Design: Premium outdoor zones must serve aesthetic, social, and functional purposes to justify the investment in quality materials.
- Climate Resilience: Upgrading to UV-coated components and heavy-duty weatherproofing ensures your setup outlasts standard cheap alternatives.
- Smart Sourcing: Buying commercial-grade bulk packs and pre-cut starter kits drastically reduces overall project costs while elevating the look.
- Community Accessibility: Strategic placement ensures an open green space feels welcoming, highly accessible, and visually striking from every angle.
Foundation Urban Parks & Recreation Spaces
Foundation setups rely on smart product choices rather than massive land areas. These open green space layouts maximize every square inch using heavy-duty commercial materials for a luxurious, long-lasting finish.
1. Neighborhood Pocket Parks
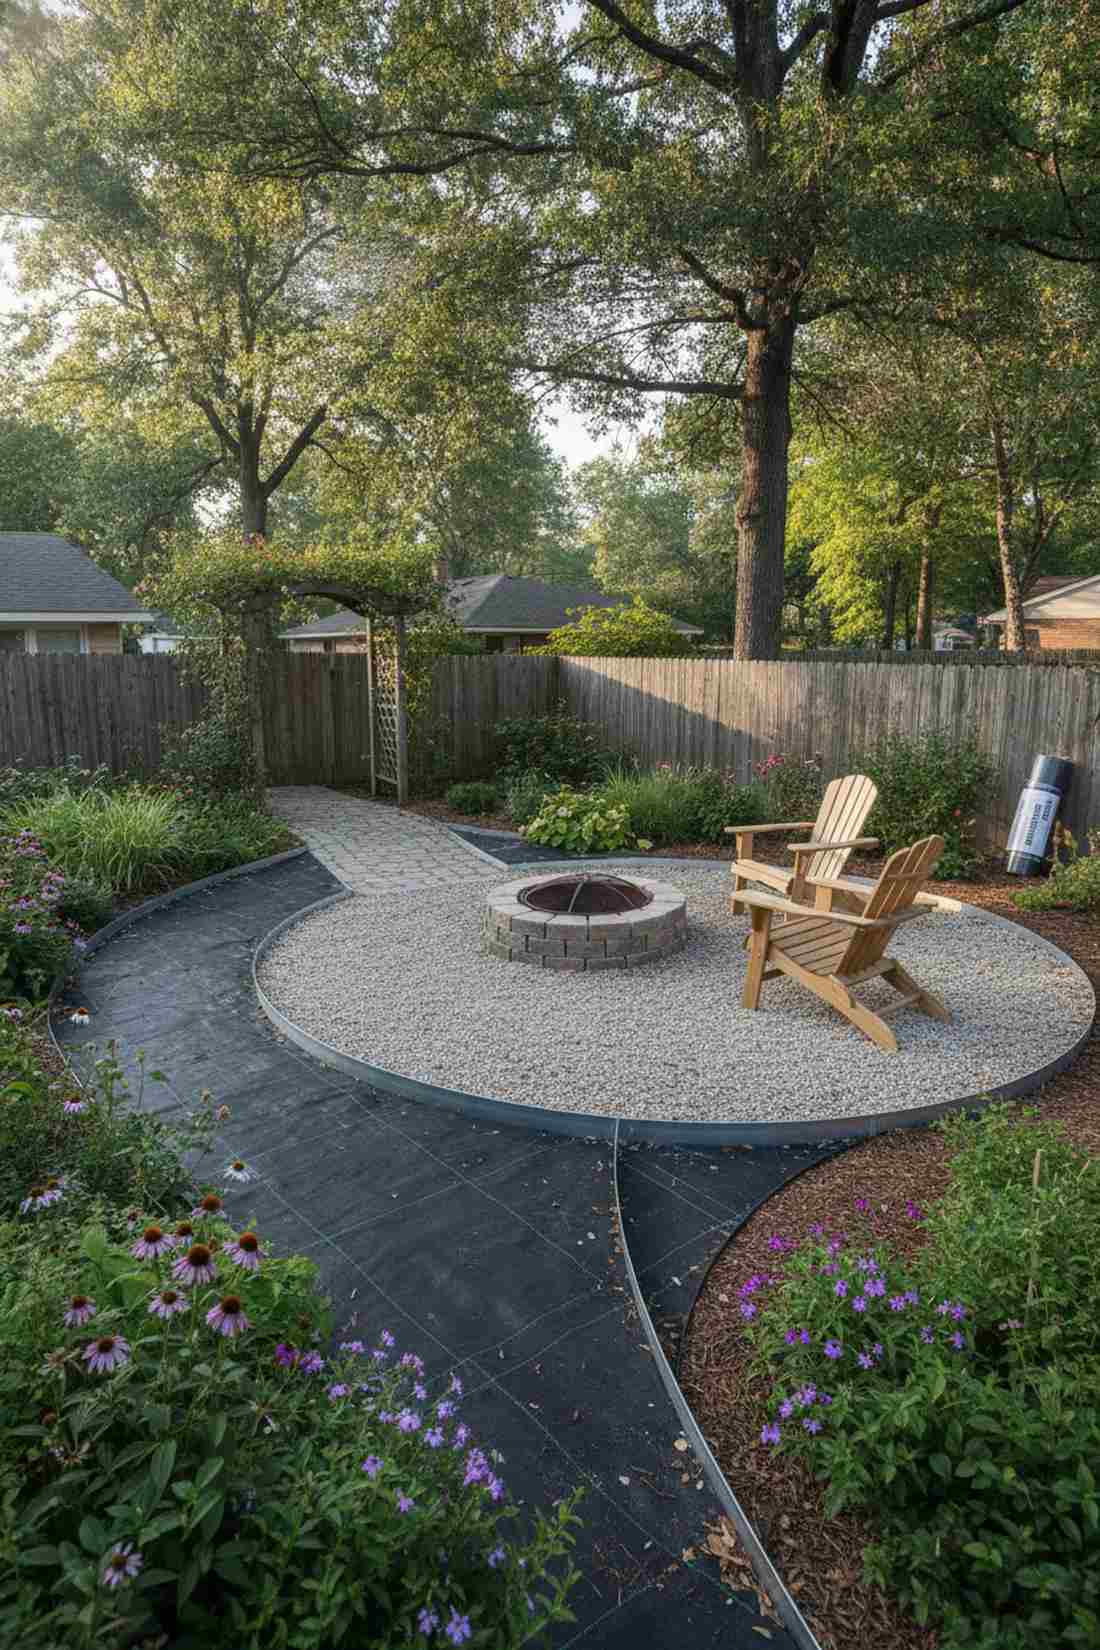
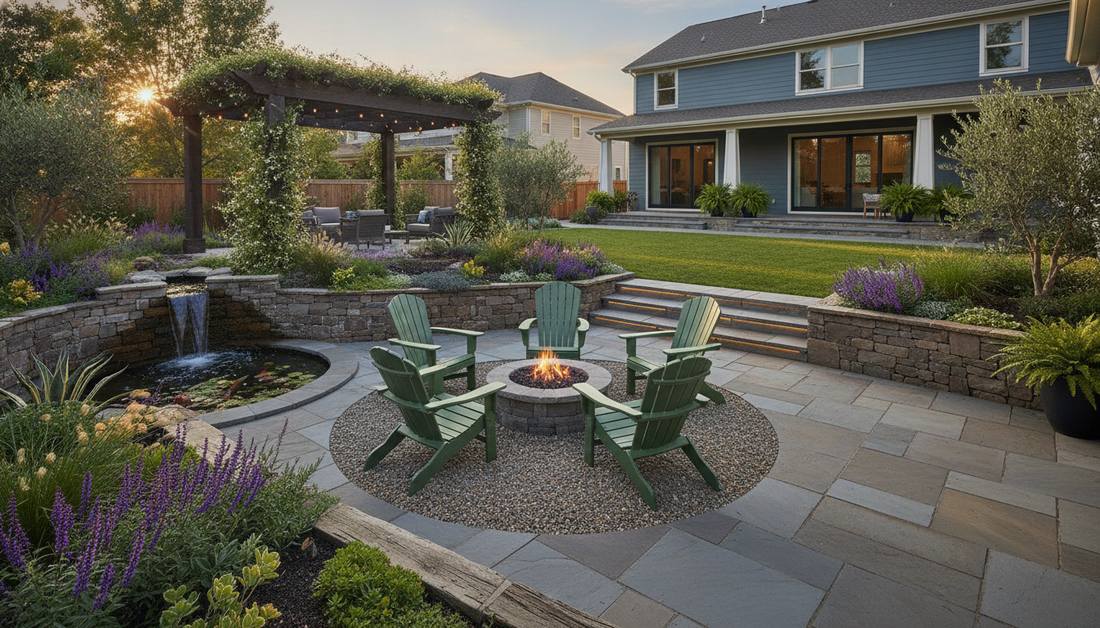
Feels like a hidden oasis you accidentally discovered on a quiet morning walk. Small community pocket setups work exceptionally well for transforming abandoned residential corners into lush social hubs.
Most DIY urban lots end up looking messy, but installing heavy-duty galvanized steel edging gives a designer-level finish. Integrating commercial-grade landscape fabric beneath your gravel prevents weeds and looks far more expensive than it actually is.
You can easily pull off a miniature version of this for around $150–$300. Save this to your weekend community upgrade board.
- Key Materials: Galvanized steel edging, commercial weed barrier
- Vibe / Style: Secret garden lounge
- Difficulty: Beginner weekend project
- Budget Breakdown: Edging: $60 | Barrier: $40 | Base Gravel: $50
- Creator’s Tip: Tamp down the base dirt completely before laying the barrier to prevent future sinking.
- Smart Sourcing: Grab a pre-cut heavy-duty weed barrier roll and bulk pack galvanized edging stakes for ultimate durability.
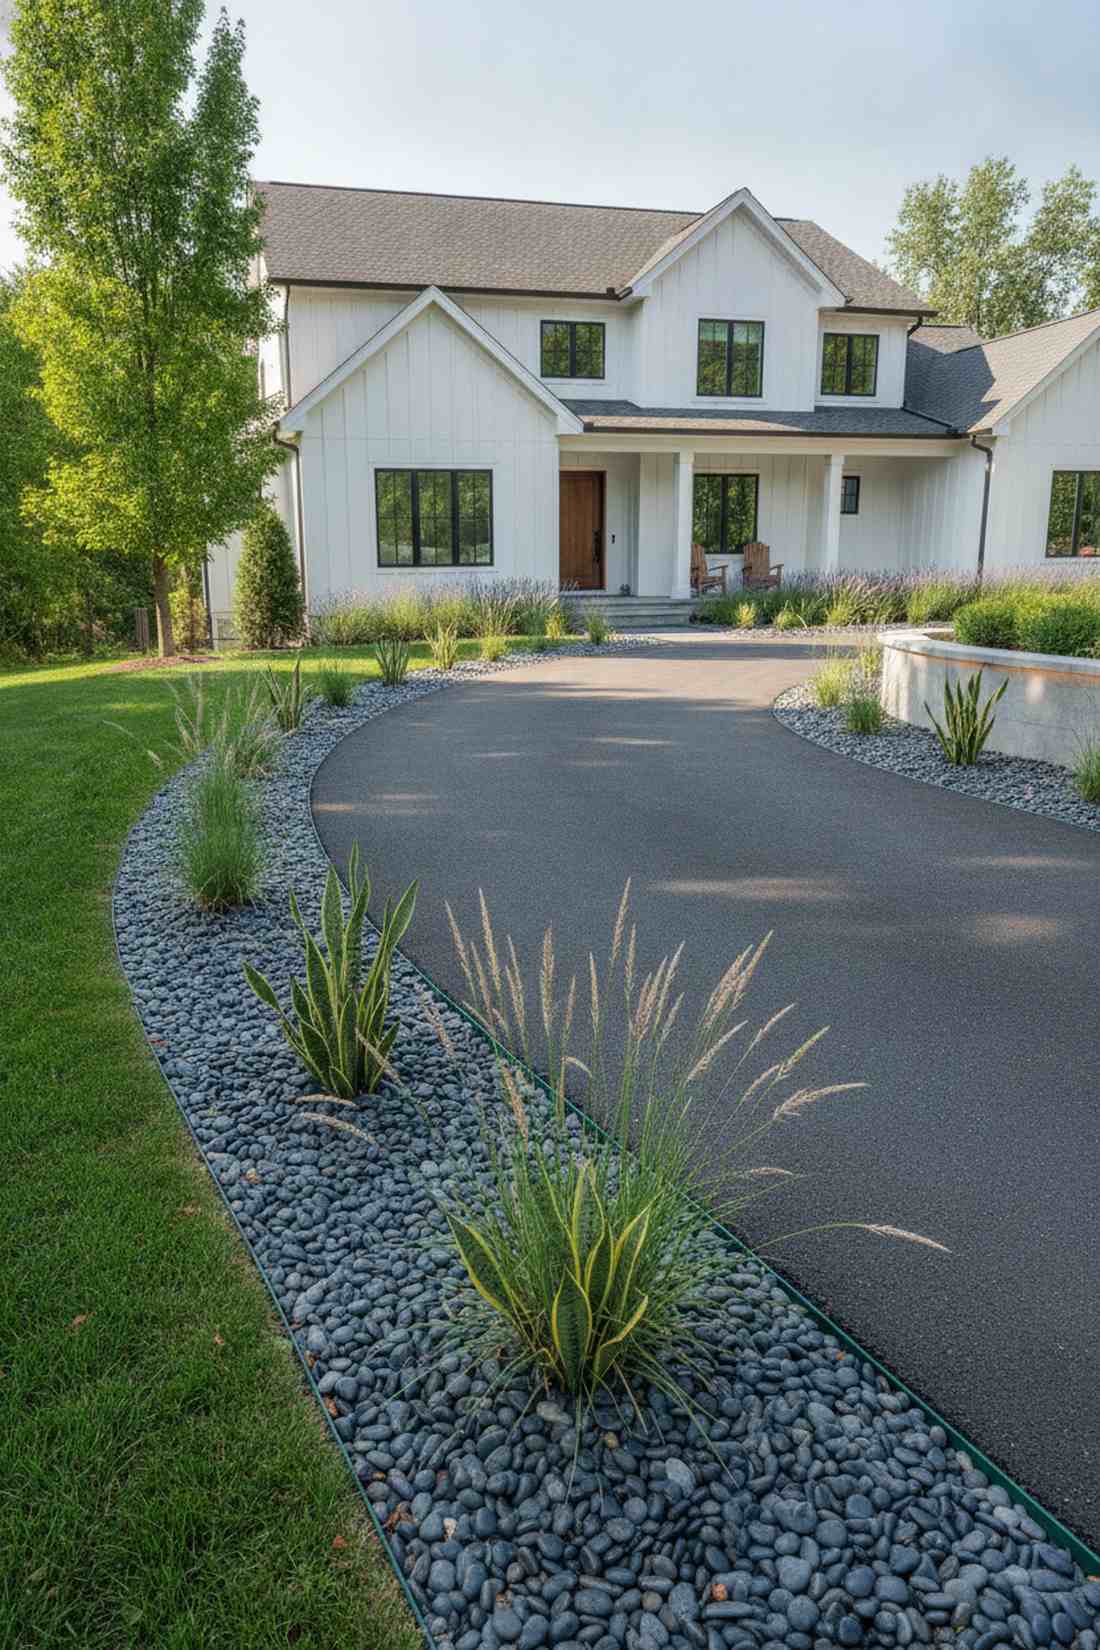
2. Linear Greenway Corridors
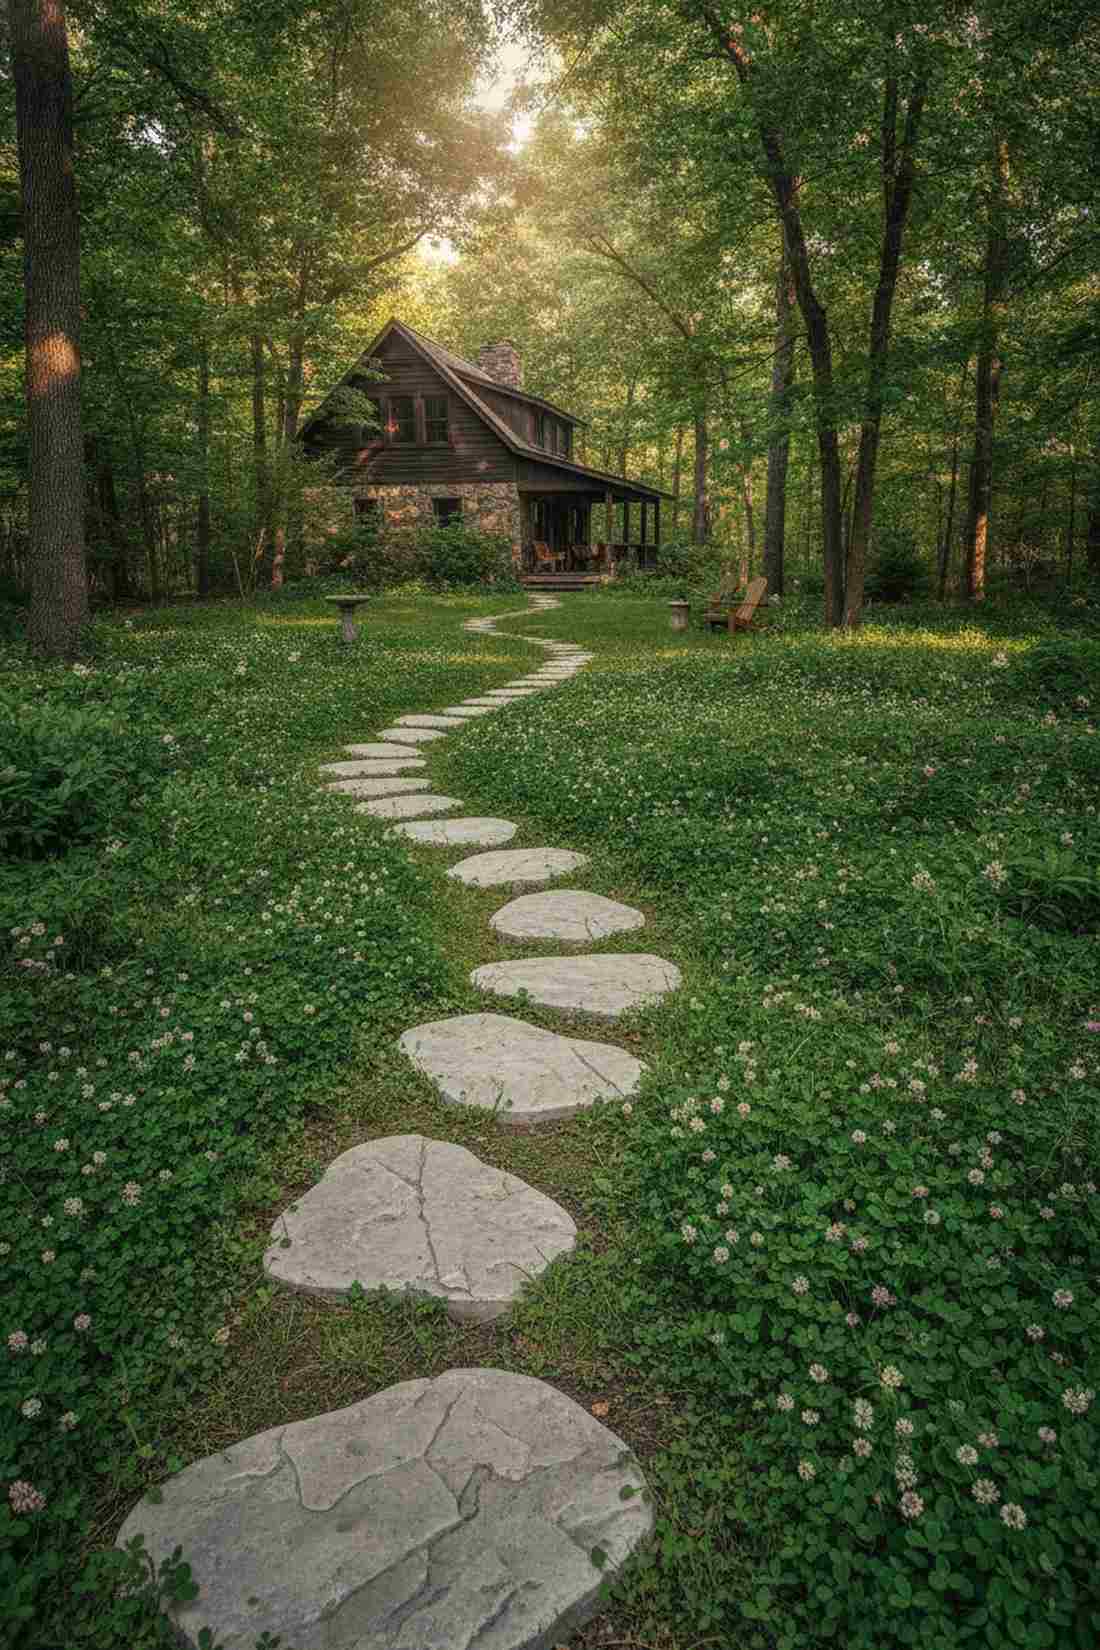
Straight out of a fairy tale pathway leading to a secluded cabin. Linear greenway borders are perfect for narrow side yards or wrapping around awkward property lines.
People often overcomplicate pathways, yet a simple layer of UV-coated resin stepping stones delivers a surprisingly premium look. Utilizing a pre-mixed drought-tolerant seed kit along the borders guarantees lush greenery with zero maintenance effort.
Setting this up will realistically run you about $80–$120 for a standard walkway. It’s a fast upgrade that completely changes the vibe of your exterior.
- Key Materials: Resin faux-stone steppers, bulk clover seeds
- Vibe / Style: Enchanted woodland trail
- Difficulty: Very easy
- Budget Breakdown: Steppers: $70 | Seeds: $25
- Creator’s Tip: Dig the steppers into the ground about an inch so the mower can glide right over them.
- Smart Sourcing: Use a bulk pack drought-resistant seed mix and UV-coated resin stepping stones to avoid cracking.
3. Central Urban Plaza Gardens
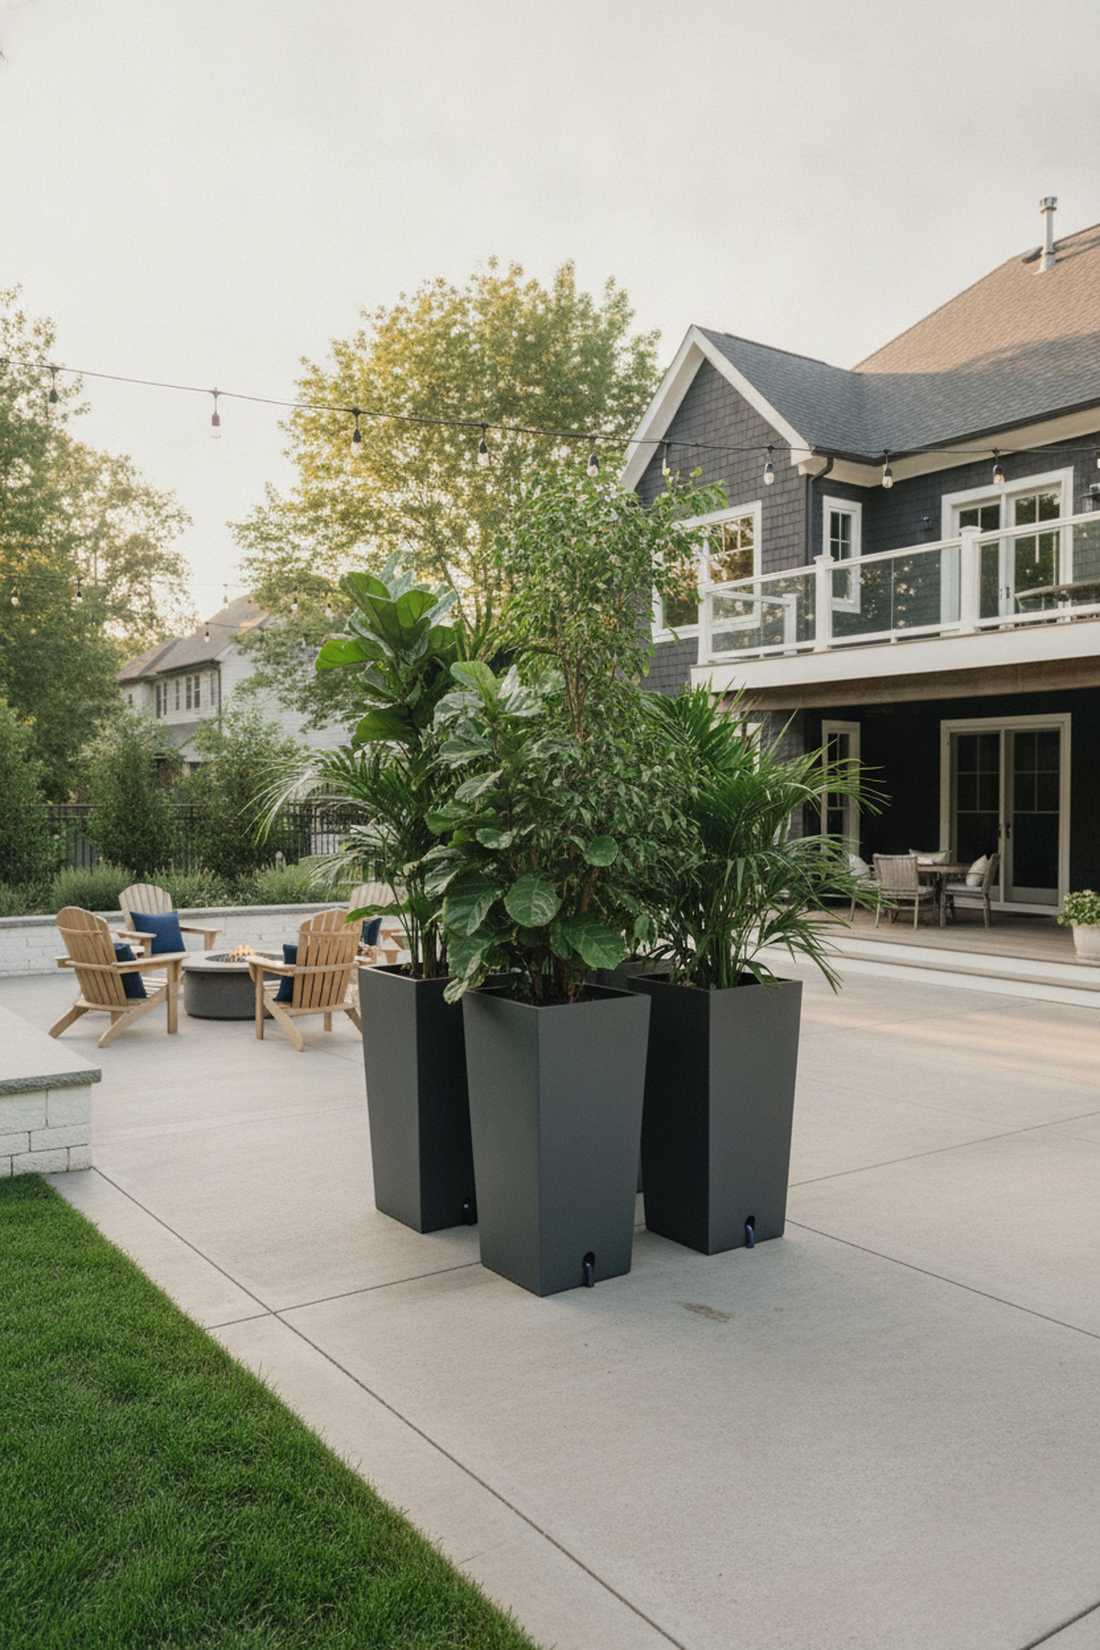
Radiates high-end European courtyard energy right in your backyard. Modern plaza planter groupings are the ultimate solution for breaking up large, boring concrete patios.
Tossing cheap plastic pots on concrete looks tacky, but investing in oversized fiberglass modular planters creates an instant luxury resort aesthetic. Adding self-watering reservoir inserts is the secret to keeping large canopy plants thriving without daily babysitting.
Expect to invest around $200–$400 for a statement cluster. Pin this if you’re planning a total hardscape makeover.
- Key Materials: Fiberglass tall planters, self-watering inserts
- Vibe / Style: Luxury hotel courtyard
- Difficulty: Easy setup, heavy lifting
- Budget Breakdown: Planters: $250 | Inserts: $45 | Soil/Plants: $100
- Creator’s Tip: Fill the bottom half of large planters with recycled plastic bottles to save money on expensive potting soil.
- Smart Sourcing: Always opt for commercial-grade fiberglass planters and high-capacity self-watering reservoirs.
4. All-Ages Playscape Parks
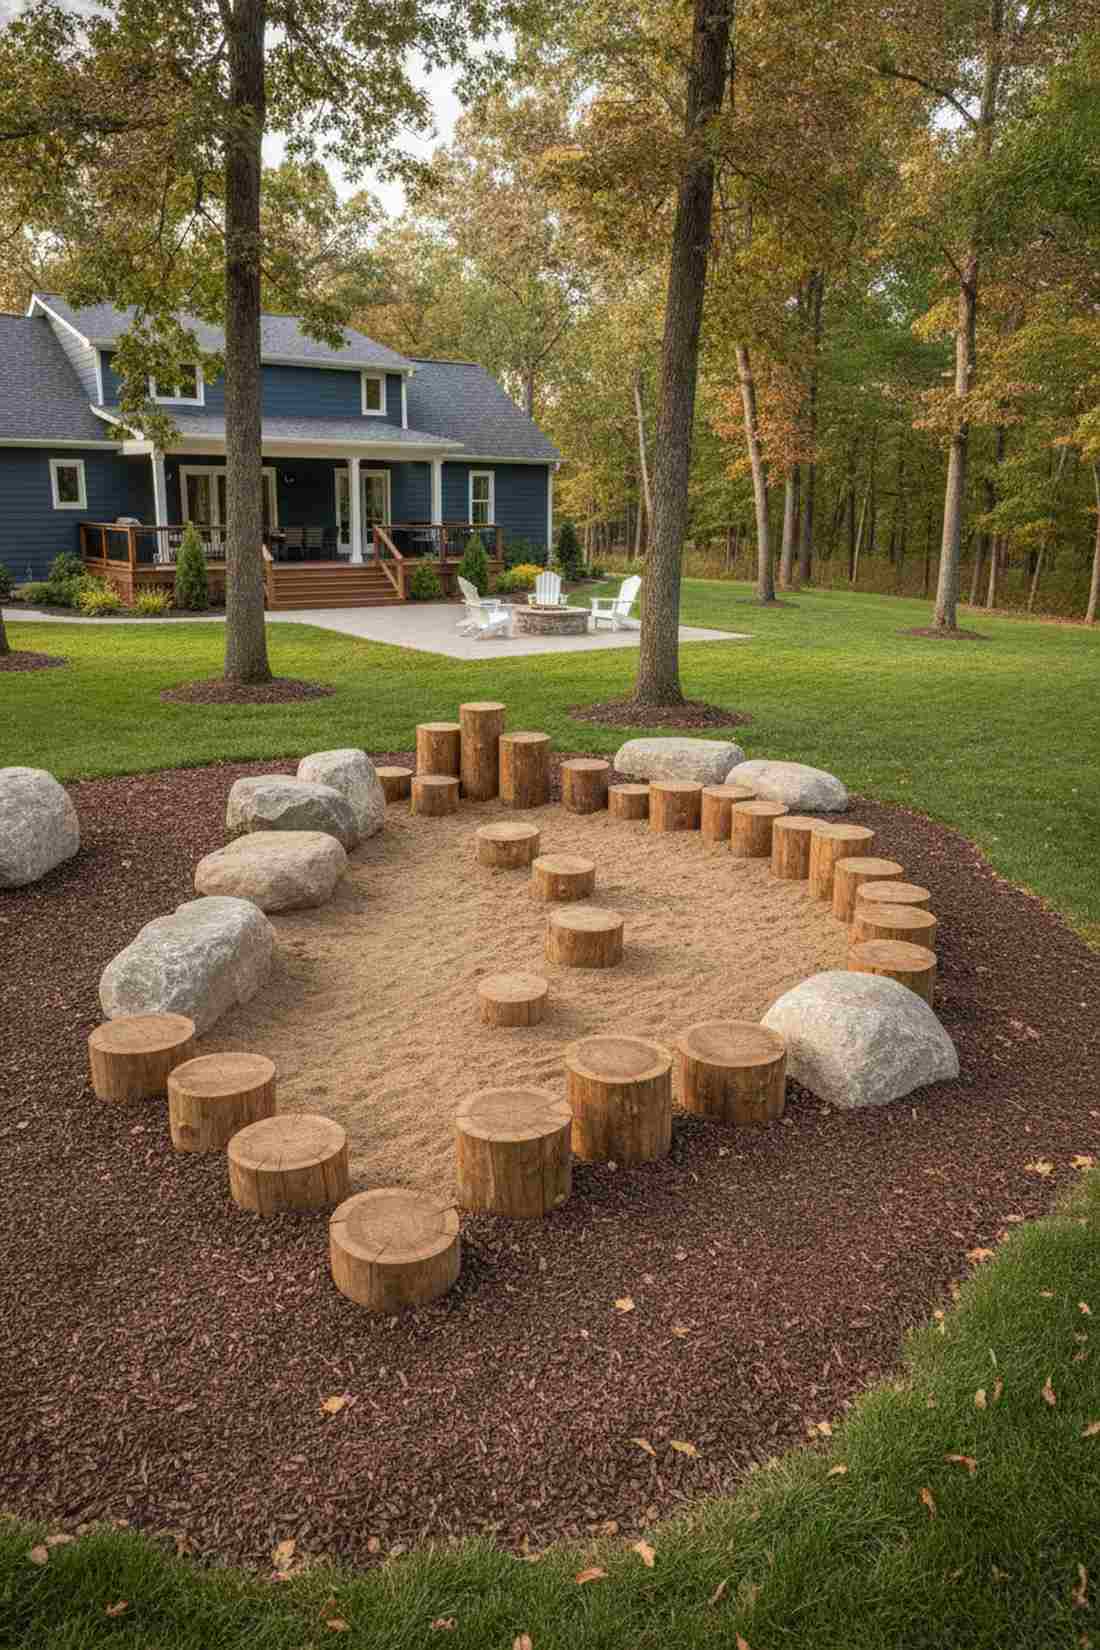
Gives that organic, Montessori-inspired playground feel that kids naturally gravitate toward. Naturalistic sensory playscapes work wonderfully for modern backyards wanting to avoid brightly colored plastic equipment.
Generic play sets look dated quickly, but using smooth, pre-sanded landscape boulders and treated timber rounds instantly elevates the aesthetic. Coating the wood elements with a heavy-duty waterproof sealant ensures they survive harsh winters without rotting or splintering.
A basic natural play corner can be sourced for roughly $150–$250. Highly recommended for a quick weekend win with the family.
- Key Materials: Treated timber stepping rounds, play-safe sand
- Vibe / Style: Rustic forest playground
- Difficulty: Moderate
- Budget Breakdown: Timber pieces: $80 | Sealant: $30 | Play Sand: $40
- Creator’s Tip: Use a thick layer of rubber mulch beneath any climbing logs for an added safety buffer.
- Smart Sourcing: Invest in a non-toxic wood sealant starter kit and pre-cut treated timber rounds.
Most landscape budgets completely bleed out right here… but this next setup looks like a $1,000 custom installation for absolute pocket change.
5. Fitness Circuit Trails
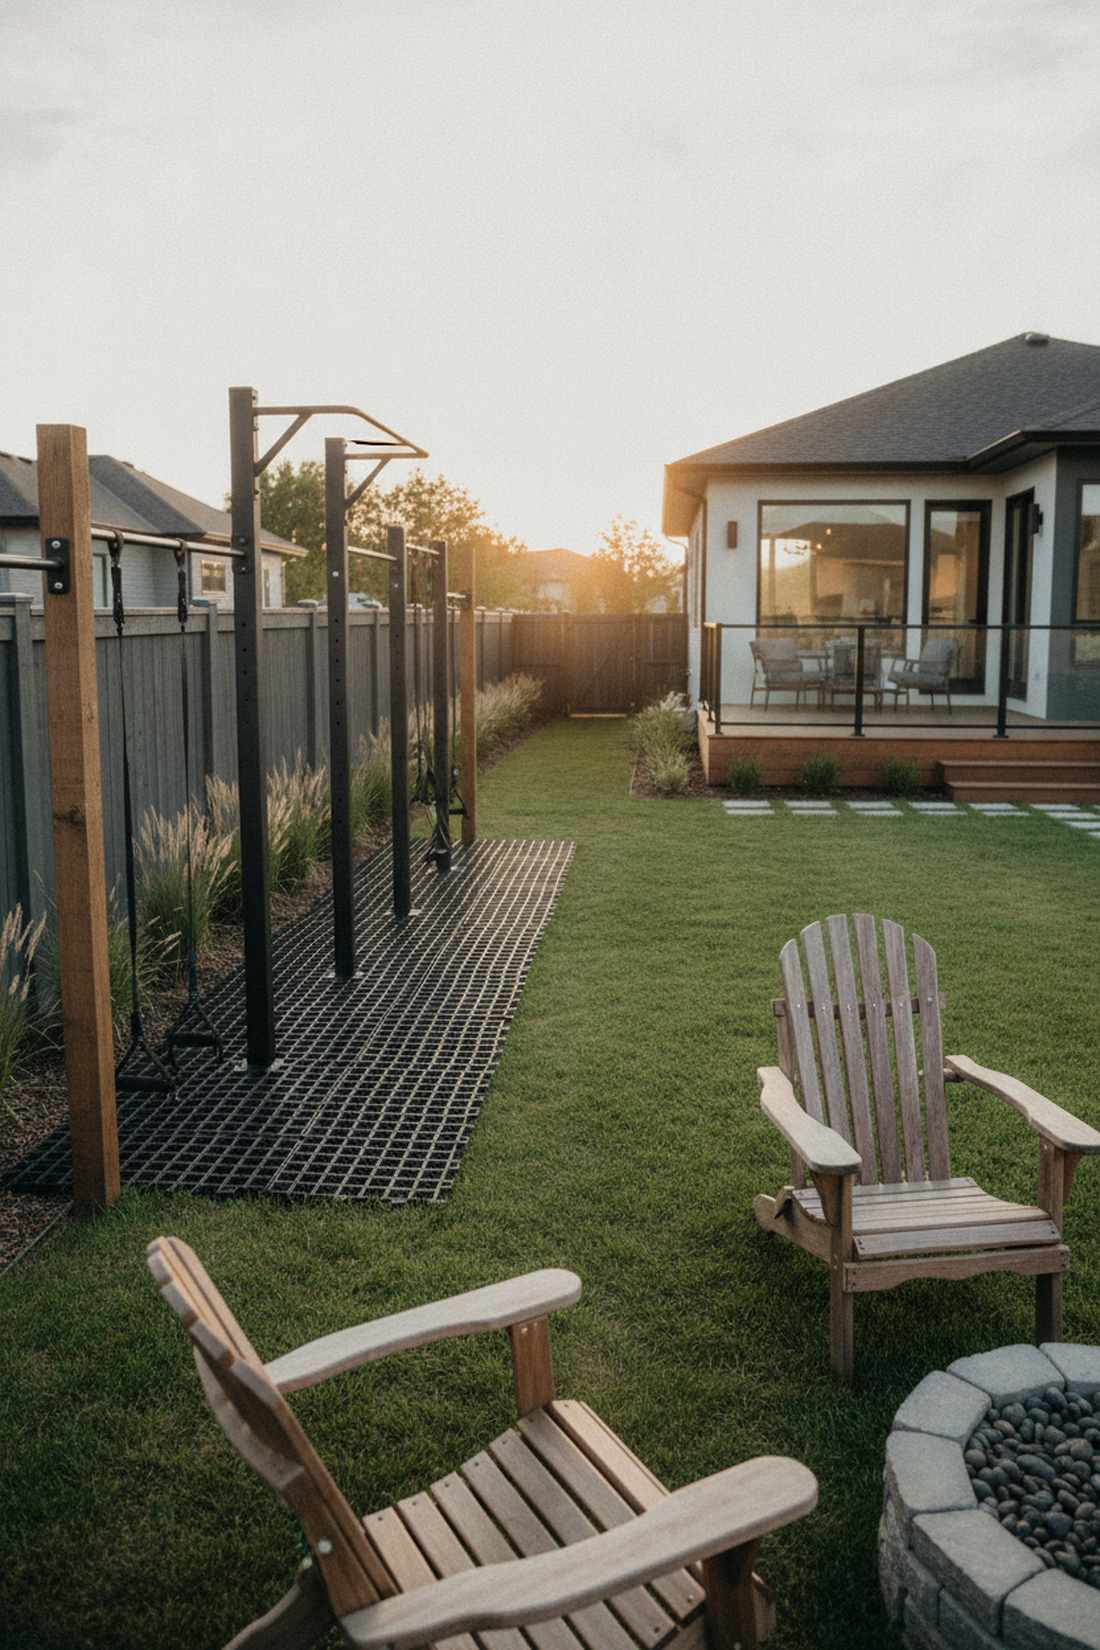
Feels like a private, exclusive outdoor gym seamlessly blended into nature. Backyard fitness circuit stations are a brilliant use-case for long, underutilized perimeter fences.
Instead of leaving a fence line bare, anchoring powder-coated pull-up bars and modular resistance bands transforms the space completely. Dropping down permeable rubber grid pavers underneath keeps the area mud-free and looks incredibly sleek.
You can piece this outdoor gym together for around $100–$200. Save this idea if you want to ditch your indoor gym membership.
- Key Materials: Rubber grid pavers, weather-proof resistance bands
- Vibe / Style: Premium outdoor retreat
- Difficulty: Moderate DIY
- Budget Breakdown: Pavers: $80 | Anchors/Bands: $60
- Creator’s Tip: Always secure bars directly into the fence posts, never the slats, for maximum weight support.
- Smart Sourcing: Buy snap-together rubber grid tiles (bulk pack) and marine-grade steel anchor kits.
6. Dog Park Meadows

Brings a high-energy, durable country club vibe to your pet’s favorite play area. Reinforced canine meadow runs are perfectly designed for side yards that normally get torn up by heavy paw traffic.
Standard grass simply won’t survive dogs, but laying down premium pet-grade artificial turf with advanced drainage backing changes everything. Pairing it with an odor-neutralizing infill gives a custom designer feel while solving the muddy paw problem forever.
This premium pet upgrade costs about $300–$600 depending on the square footage. A must-do if you are tired of cleaning dirty floors.
- Key Materials: Pet-grade turf, odor-blocking infill
- Vibe / Style: Polished pet resort
- Difficulty: Labor intensive
- Budget Breakdown: Turf Roll: $250 | Infill: $80 | Staples: $20
- Creator’s Tip: Leave a 1-foot border of decorative river rock around the turf edges to catch excess rainwater runoff.
- Smart Sourcing: Grab a pre-cut pet turf roll and bulk pack zeolite odor infill for maximum longevity.
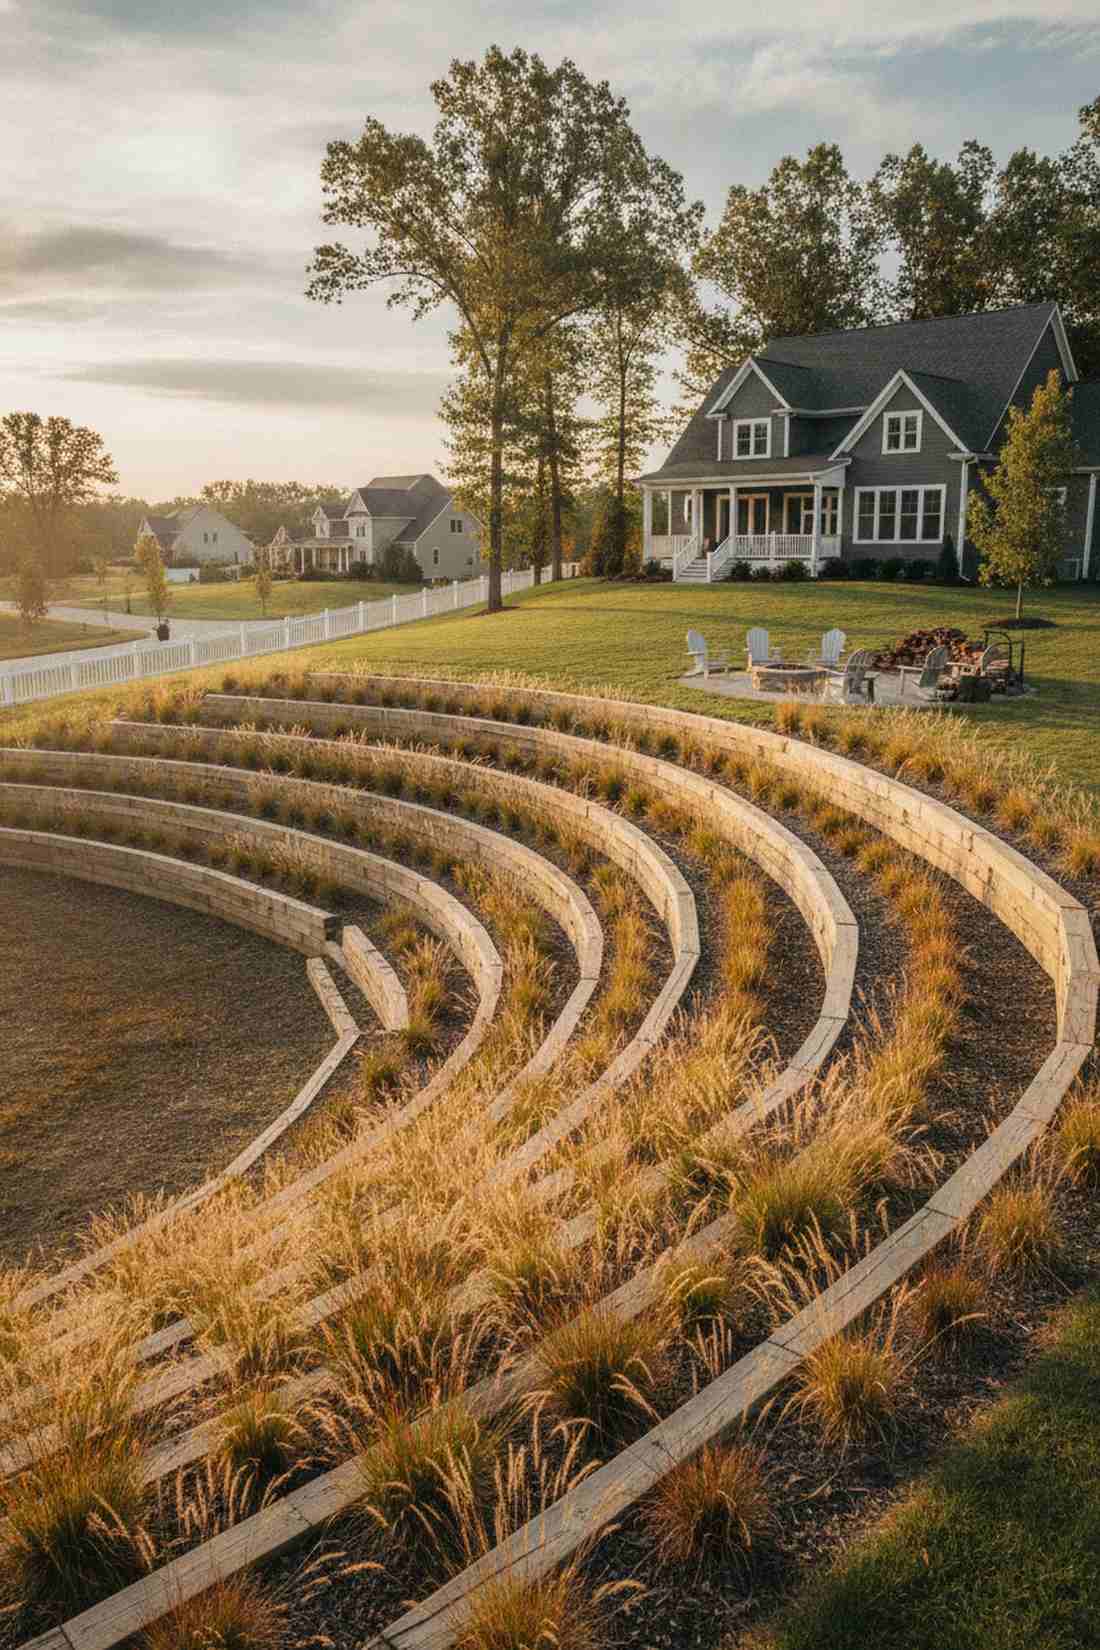
7. Outdoor Amphitheater Greens
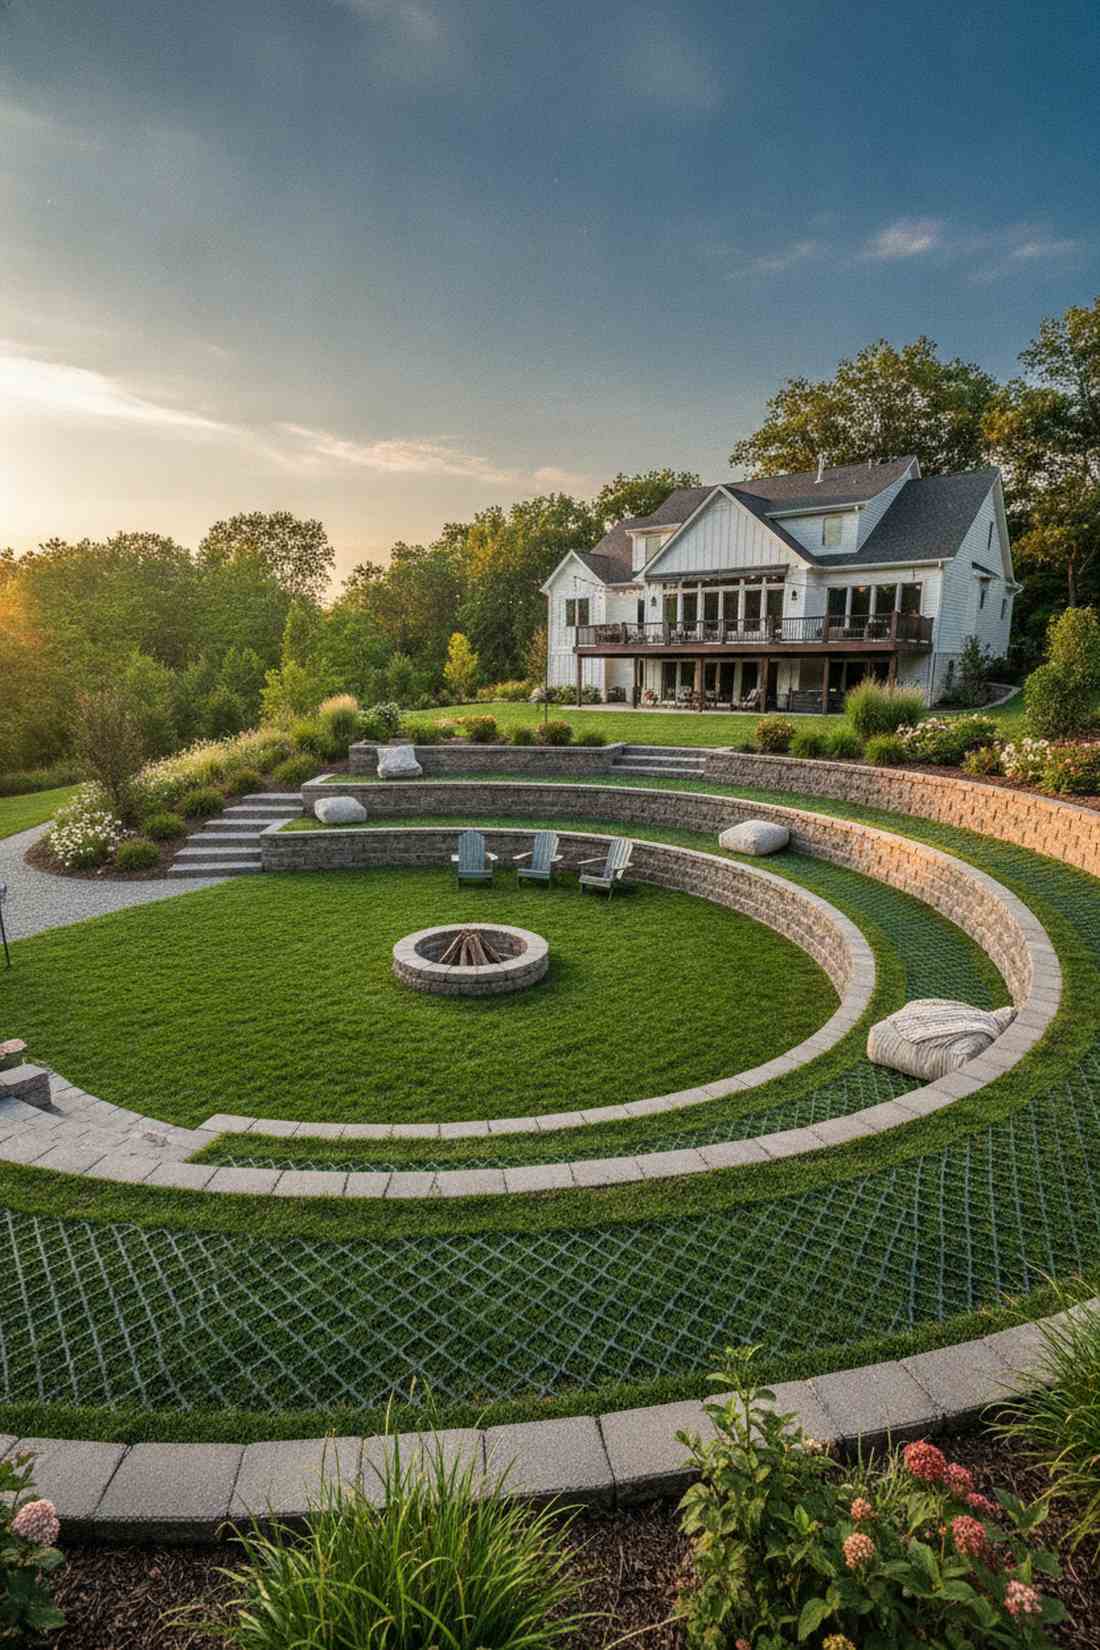
Evokes the feeling of a cozy, starlit summer concert right at home. Tiered seating bowl greens are the perfect slope-solution for yards with awkward, hard-to-mow hills.
Leaving a slope bare is a missed opportunity, but carving in pre-cast concrete retaining blocks creates stunning architectural seating. Using a reinforced turf stabilization grid on the flat tiers ensures the grass never gets compacted during backyard parties.
Creating a mini two-tier setup will run you around $250–$500. Save this to your ultimate backyard entertaining board.
- Key Materials: Retaining wall blocks, turf stabilization grids
- Vibe / Style: Modern event lawn
- Difficulty: Advanced DIY
- Budget Breakdown: Blocks: $150 | Grids: $100 | Soil/Seed: $50
- Creator’s Tip: Slightly angle the seating blocks backward into the hill to naturally resist soil pressure over time.
- Smart Sourcing: Utilize a commercial slope stabilization grid kit and heavy-duty landscape construction adhesive.
Green Infrastructure Systems for Climate Resilience
Modern green space urban planning demands materials that work hard. These resilience setups manage water and heat while looking like premium landscape architecture installations.
8. Bioswale Filtration Gardens
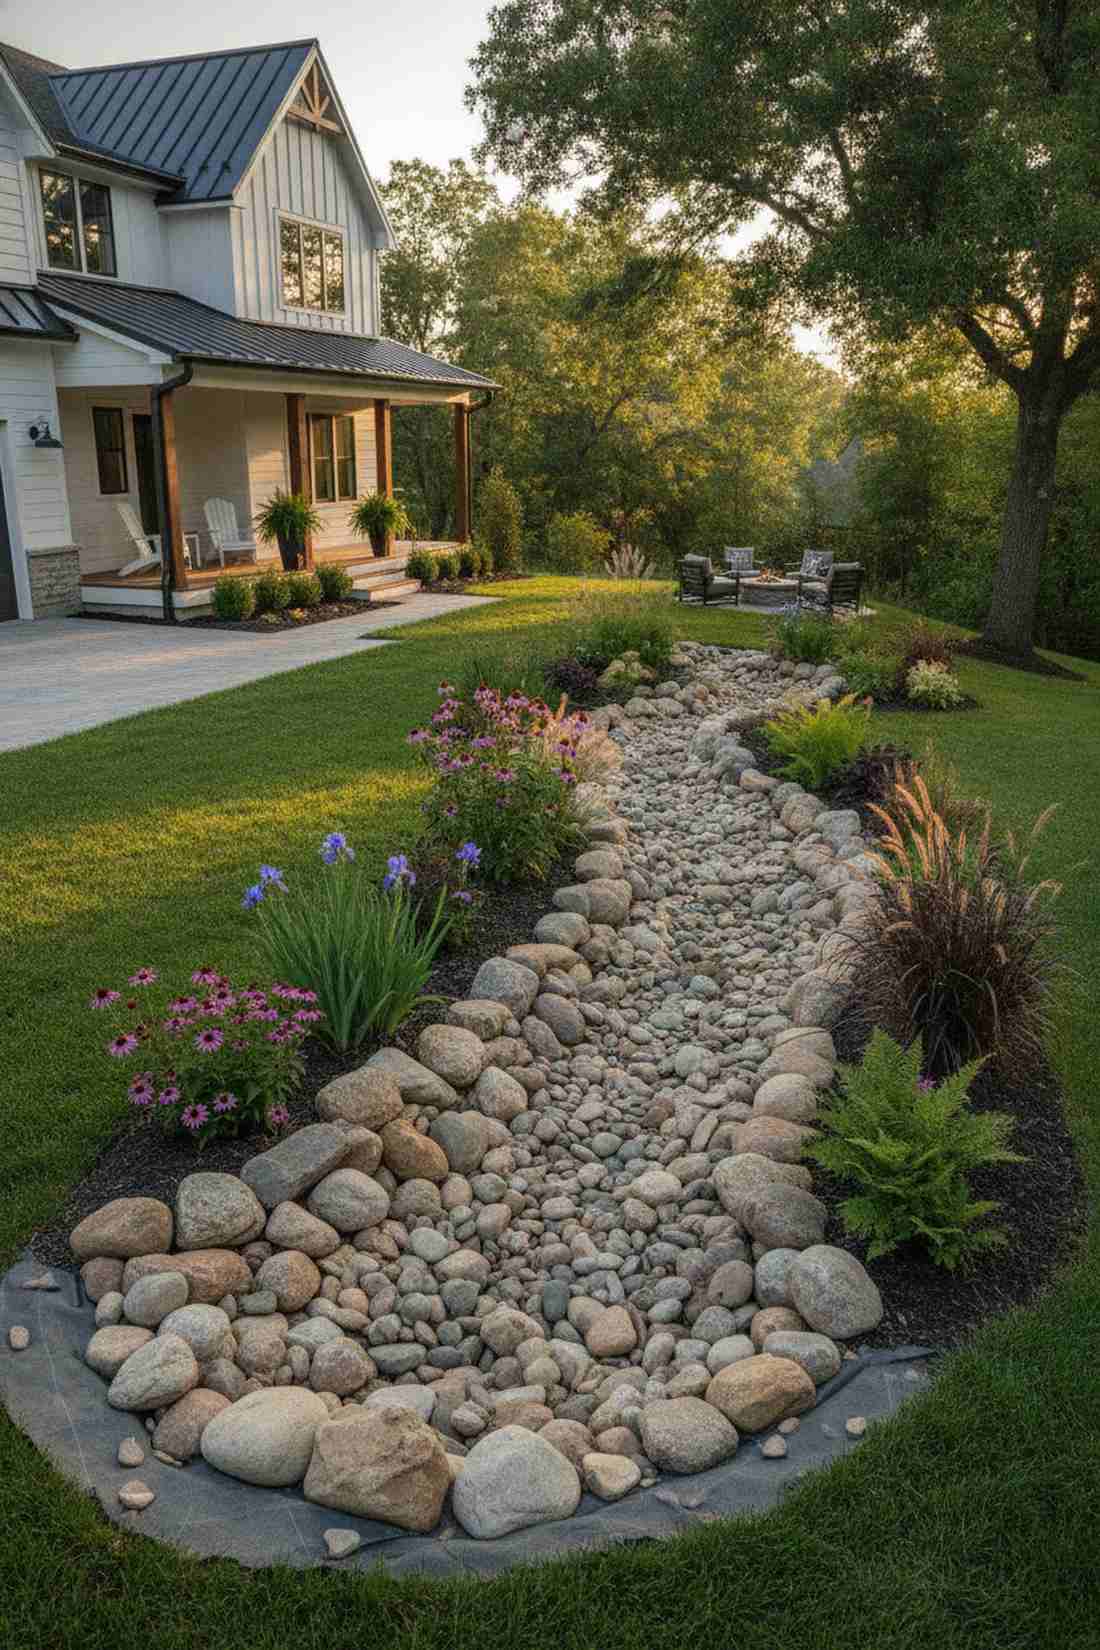
Looks like a beautifully intentional dry riverbed weaving through the property. Stone-lined bioswale channels are an incredibly smart use-case for redirecting driveway runoff away from your foundation.
Plain drainage ditches are an eyesore, but lining the trench with varied river rock and moisture-loving perennials instantly upgrades the aesthetic. Utilizing a heavy-duty non-woven geotextile fabric beneath the stones prevents sinking and makes maintenance nearly zero.
You can build a stunning 10-foot bioswale for about $100–$150. Pin this if you struggle with pooling water after storms.
- Key Materials: River rock mix, geotextile fabric
- Vibe / Style: Natural Zen riverbed
- Difficulty: Heavy digging required
- Budget Breakdown: Rock: $80 | Fabric: $30 | Plants: $40
- Creator’s Tip: Dig the center 4 inches deeper than the sides to ensure water is forced to flow rather than pool.
- Smart Sourcing: Pick up a commercial-grade non-woven drainage fabric and a bulk pack moisture perennial starter kit.
9. Rain Garden Basins
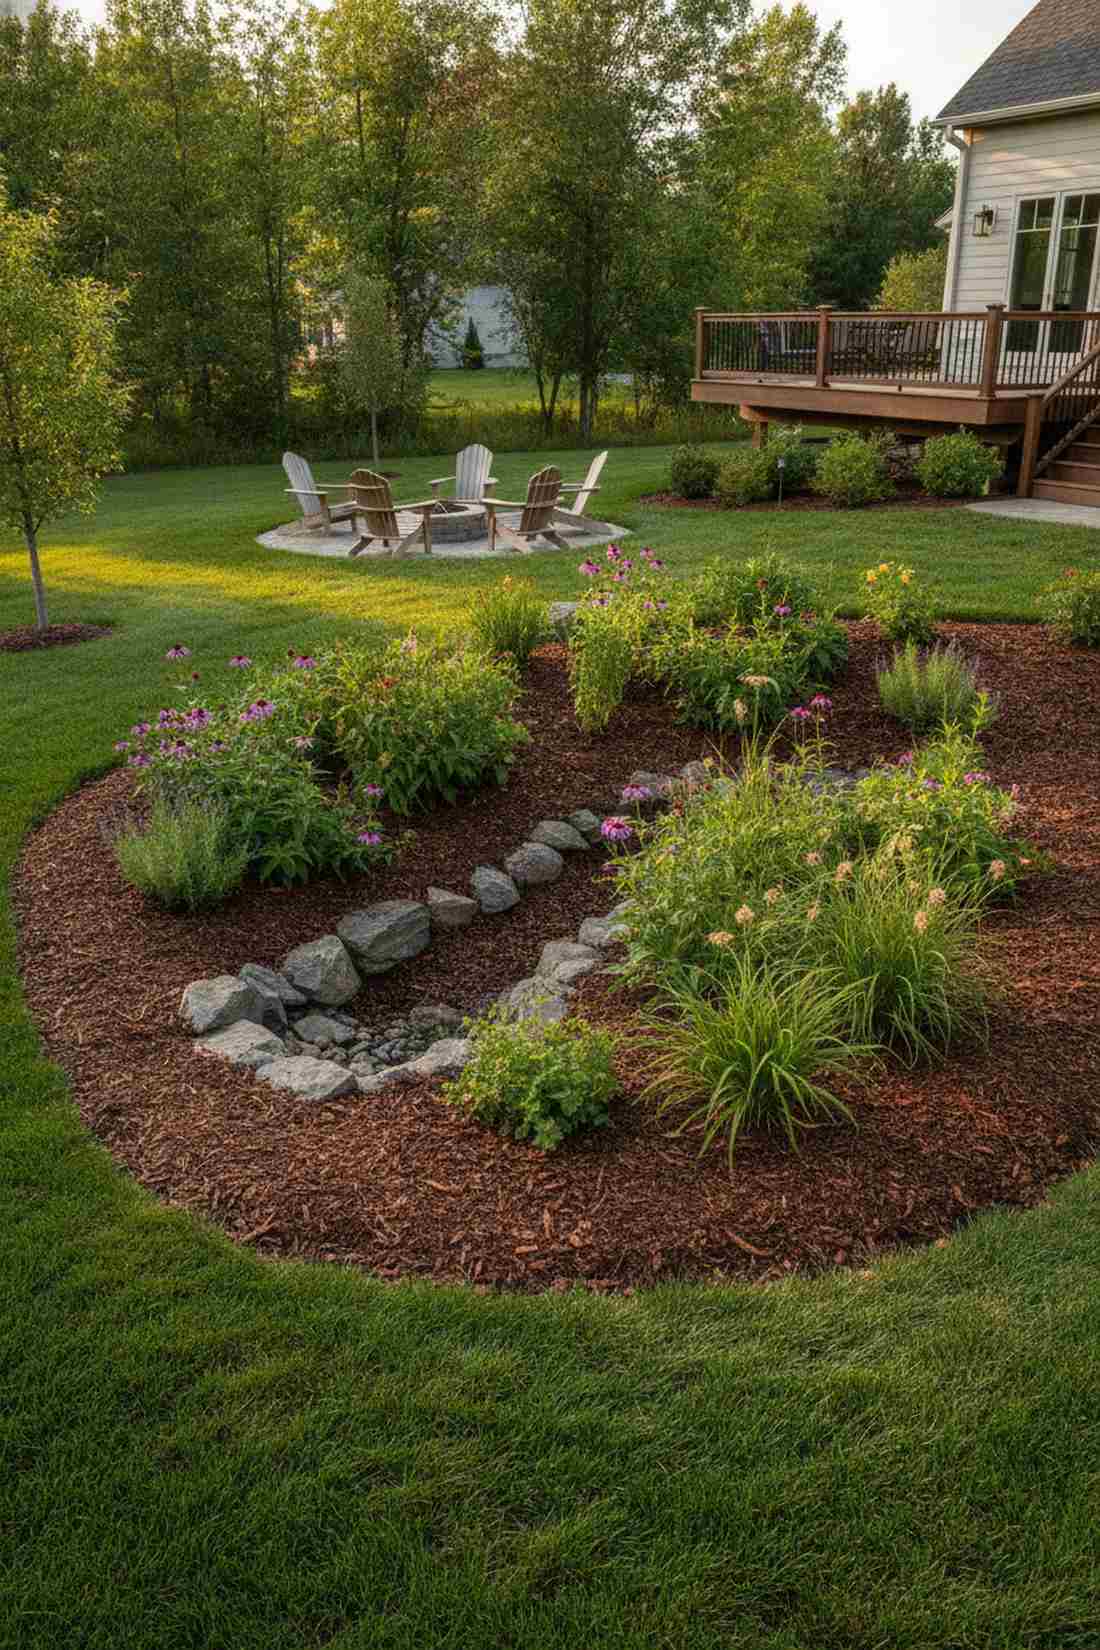
Feels like a lush, sunken oasis that bursts into life after every rainstorm. Deep-rooted rain garden basins work perfectly in the lowest, constantly soggy spots of your lawn.
Ignoring poor drainage ruins lawns, but installing a layered bio-retention soil mix turns a swamp into a premium landscape feature. Topping it off with a thick layer of shredded hardwood mulch keeps moisture balanced and blocks weeds perfectly.
A small aesthetic rain garden costs around $80–$130 in materials. It’s a highly recommended fix that looks like an expensive custom garden.
- Key Materials: Bio-retention soil blend, hardwood mulch
- Vibe / Style: Lush wetland retreat
- Difficulty: Moderate
- Budget Breakdown: Specialty Soil: $50 | Mulch: $25 | Plants: $45
- Creator’s Tip: Use stones at the exact point where water enters the basin to prevent soil erosion during heavy downpours.
- Smart Sourcing: Use a pre-mixed bio-retention soil bag and bulk pack native rain garden seeds.
If you think that was a clever upgrade, wait until you see the commercial-grade hardscape hack coming up next…
10. Permeable Pavement Grids
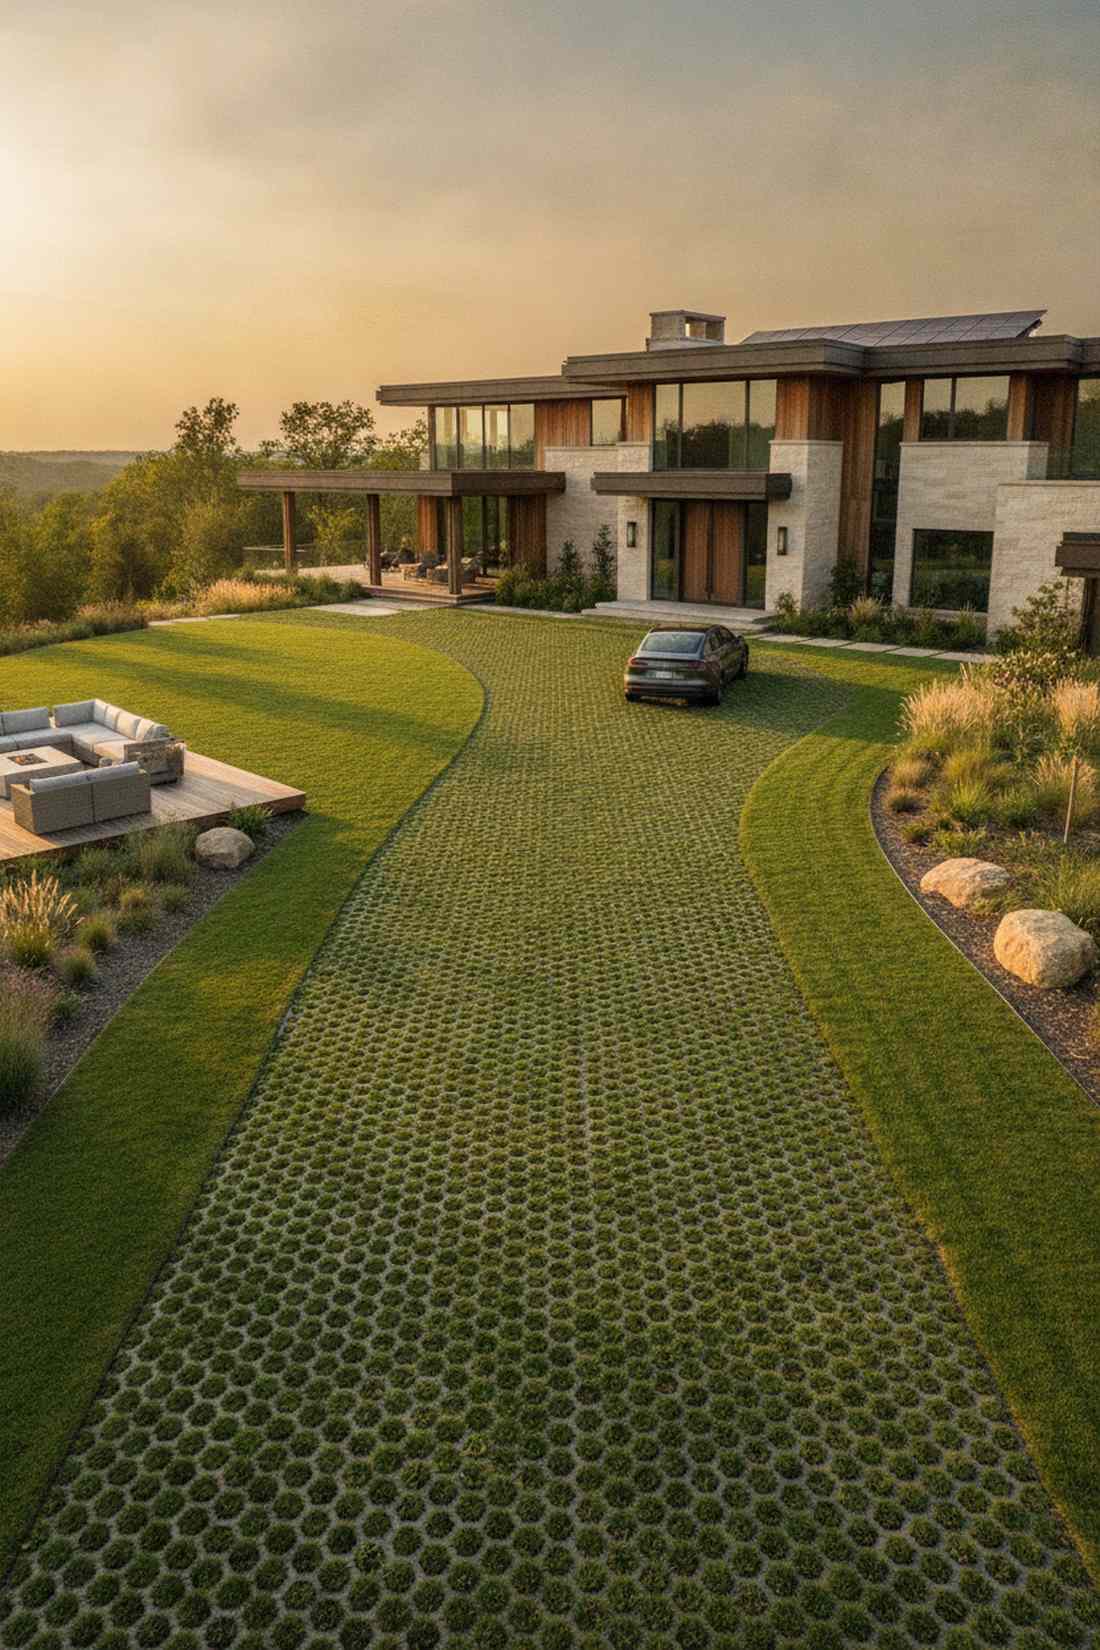
Brings a highly modern, eco-mansion driveway aesthetic right to your home. Grass-filled permeable grids are the ultimate upgrade for expanding parking areas without pouring ugly concrete.
Standard gravel driveways scatter everywhere, but laying down a high-density polyethylene interlocking grid keeps everything completely locked in place. The honeycomb structure supports vehicle weight while giving a sleek, designer-level finish once the grass grows through.
A two-car grid setup will run around $300–$500 for materials. Save this if you need more parking but want to keep your yard green.
- Key Materials: HDPE interlocking grids, sharp sand base
- Vibe / Style: Ultra-modern eco estate
- Difficulty: Advanced DIY
- Budget Breakdown: Grid Panels: $250 | Base Sand: $60 | Seed: $30
- Creator’s Tip: Never use rounded pea gravel inside the grids; always use crushed angular stone so it locks together tight.
- Smart Sourcing: Grab a bulk pack heavy-duty permeable driveway grid and commercial turf builder seed.
💡 Must-Have Supplies for High-End Setups
To build these stunning green spaces faster and ensure they survive harsh weather, skip the generic hardware store aisles and invest in these proven foundational kits.
- Base & Support: Pre-cut heavy-duty geotextile drainage fabric rolls
- Setup Tools: Commercial-grade edging starter kits with steel anchors
- Weather/Durability Protection: UV-coated clear protective sealant sprays (bulk pack)
11. Urban Tree Canopy Networks
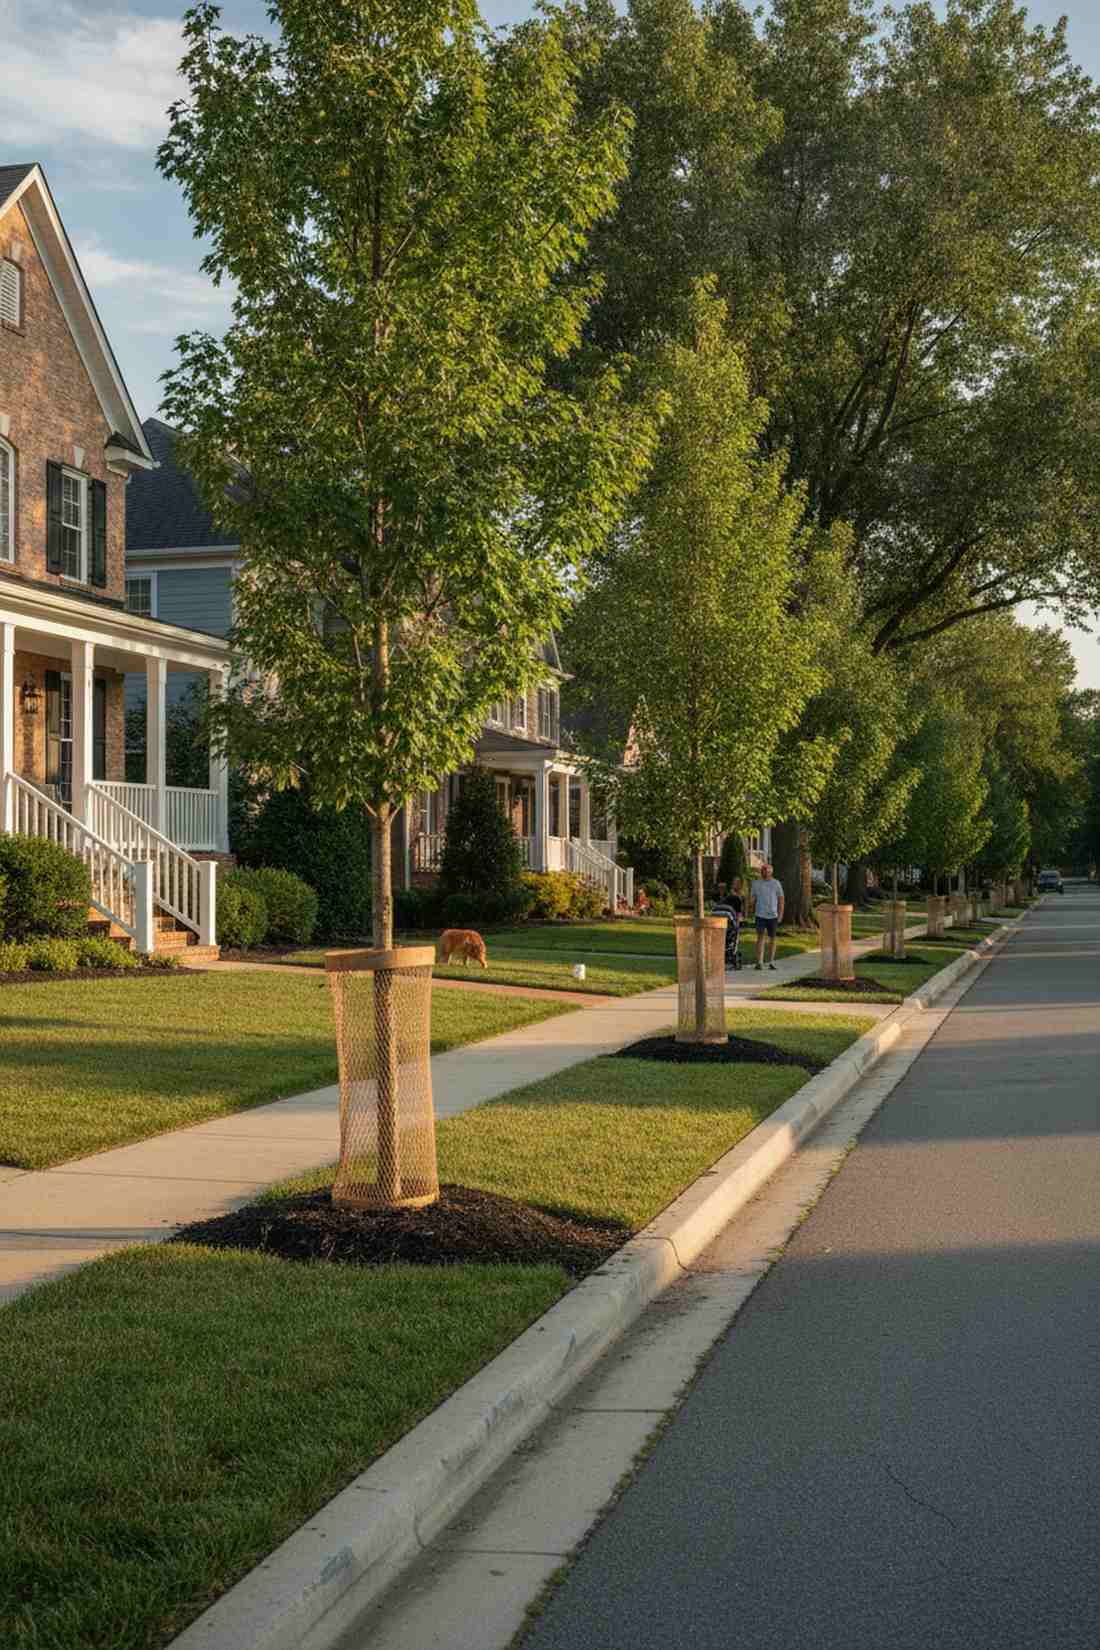
Creates that wealthy, established neighborhood canopy feel that shades the whole street. Strategic canopy tree placements are ideal for reducing brutal summer heat over front yard sidewalks.
Planting trees haphazardly leads to cracked sidewalks, but using modular structural soil cells gives roots room to grow downwards safely. Wrapping the young trunks with breathable protective guards ensures they survive wildlife and string trimmers during the crucial early years.
A proper, protected tree installation costs around $100–$180 per sapling. Highly recommended for long-term property value gains.
- Key Materials: Structural soil mix, trunk guards
- Vibe / Style: Stately avenue
- Difficulty: Moderate
- Budget Breakdown: Sapling: $60 | Soil Kit: $30 | Guards: $15
- Creator’s Tip: Keep mulch pulling away from the actual tree trunk to prevent crown rot from excess moisture.
- Smart Sourcing: Invest in a breathable mesh trunk guard kit and a pre-mixed structural root zone soil.
12. Green Alley Retrofits
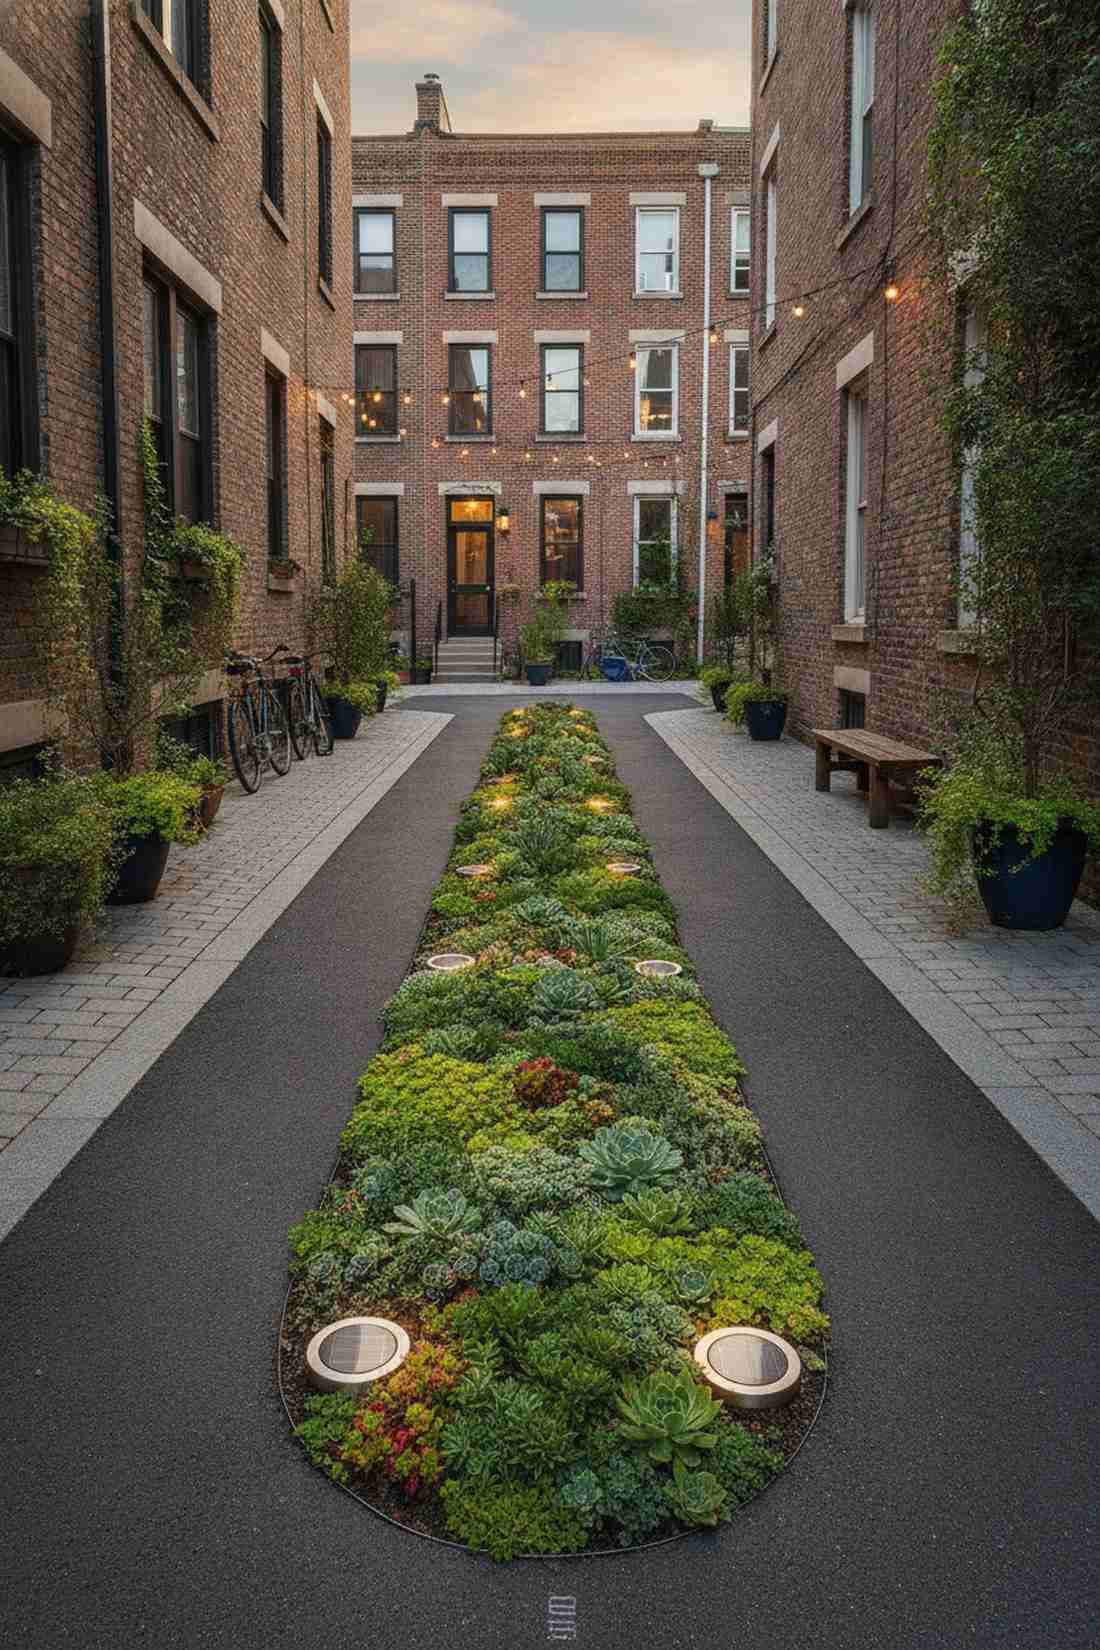
Transforms a creepy, forgotten back alley into a lush, inviting pedestrian corridor. Permeable alley greening kits work wonderfully for neglected service paths behind urban row homes.
Leaving alleys as cracked asphalt brings property values down, but ripping a center strip for drought-hardy succulents looks far more expensive than it is. Installing solar-powered pathway dots along the new green strip provides safety and an incredible nighttime glow.
You can retrofit a 20-foot alley stretch for about $150–$250. Pin this to your urban neighborhood improvement board!
- Key Materials: Solar pathway dots, drought-hardy flats
- Vibe / Style: Modern hidden walkway
- Difficulty: Moderate concrete cutting
- Budget Breakdown: Solar Lights: $40 | Succulents: $80 | Soil: $30
- Creator’s Tip: Choose low-growing groundcovers that max out at 2 inches high so they never interfere with foot traffic.
- Smart Sourcing: Use a bulk pack commercial solar path light kit and drought-resistant groundcover starter flats.
13. Cool Pavement Landscaping
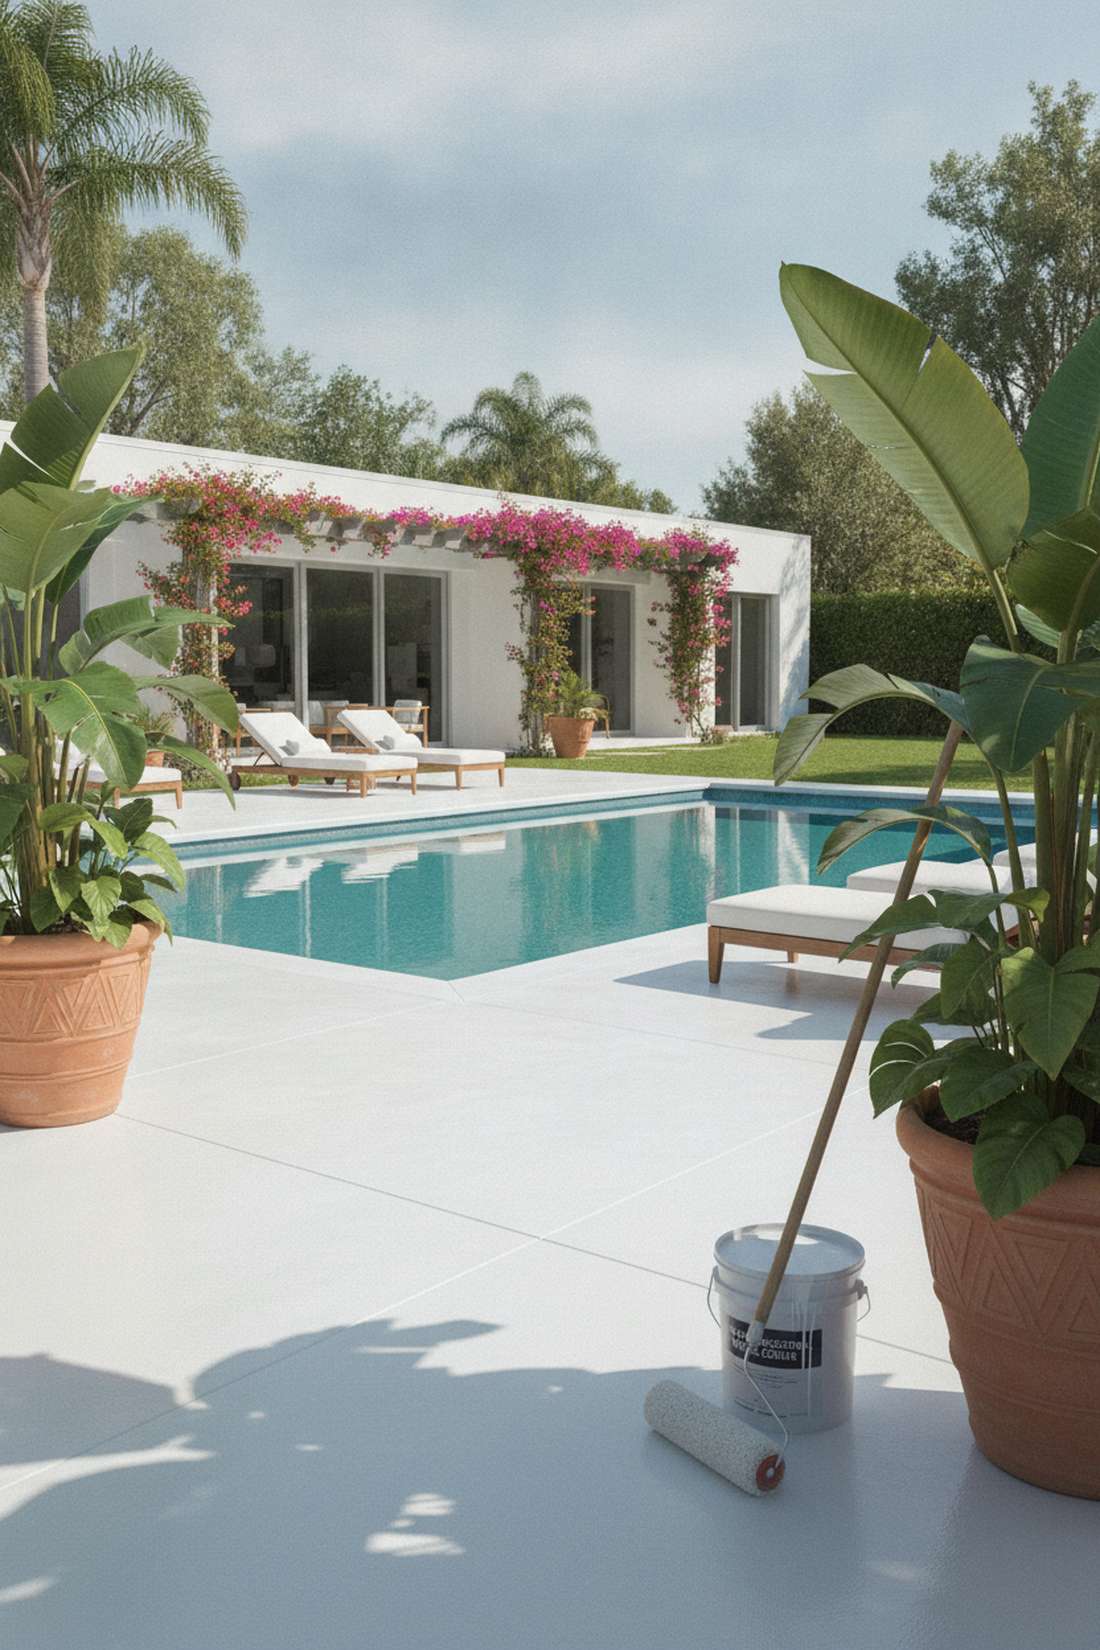
Feels like stepping onto a breezy Mediterranean resort terrace in the middle of July. Reflective cool pavement coatings are a game-changer for scorching hot concrete pool decks or southern-facing patios.
Dark asphalt absorbs brutal heat, but rolling on a specialized acrylic solar-reflective coating drops surface temperatures instantly. Pairing this brightened surface with oversized, dark-leaf tropicals in UV-resistant pots creates striking contrast and a custom designer feel.
A DIY coating bucket covers a lot and costs roughly $100–$150. A must-do if your patio burns your feet in the summer.
- Key Materials: Acrylic solar-reflective paint, heavy-duty rollers
- Vibe / Style: Breezy coastal resort
- Difficulty: Easy painting project
- Budget Breakdown: Coating Bucket: $90 | Roller Kit: $20
- Creator’s Tip: Power wash the concrete and let it dry for a full 48 hours before applying to prevent bubbling.
- Smart Sourcing: Grab a pre-mixed solar-reflective acrylic coating and a commercial-grade textured roller kit.
14. Constructed Wetland Systems
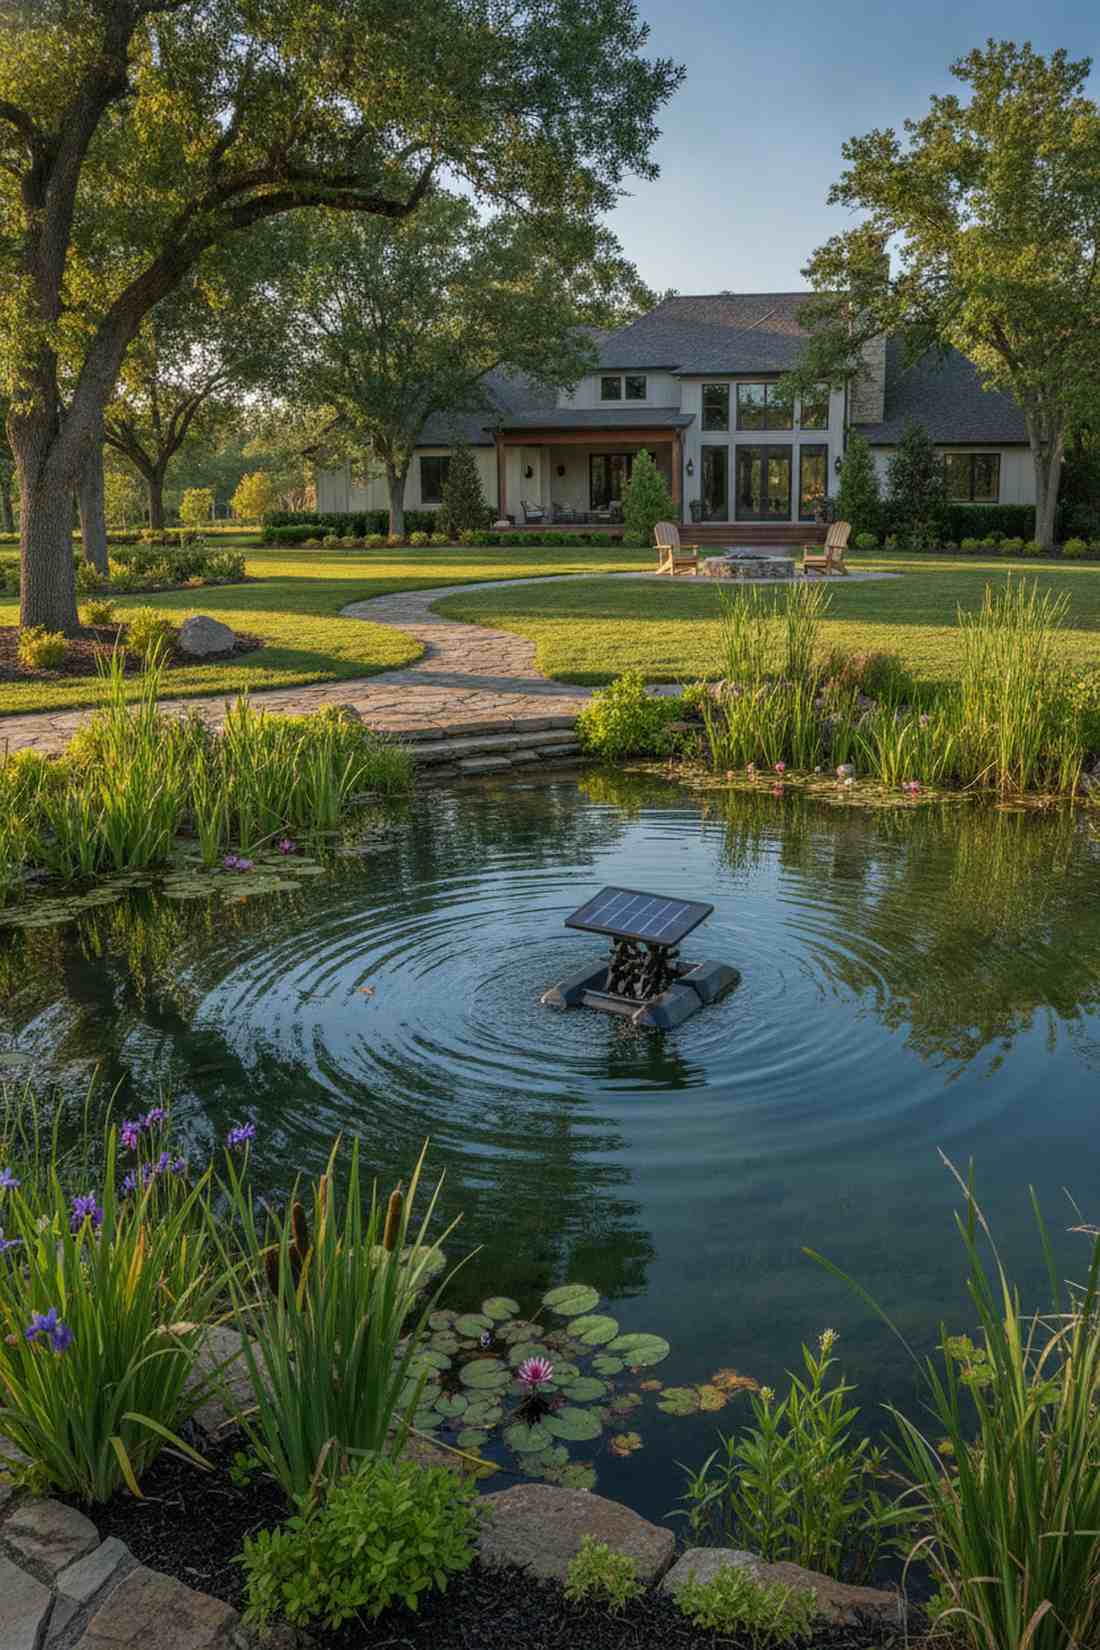
Gives that expansive, tranquil wildlife sanctuary vibe right at the edge of your property. Miniature constructed wetland filters are an incredible use-case for large properties with a nasty, stagnant drainage pond.
Leaving a pond stagnant invites mosquitoes, but installing floating aeration fountains and marginal aquatic plants naturally cleans the water. Slipping slow-release beneficial bacteria pucks into the water system delivers a surprisingly premium look by keeping the water crystal clear.
You can upgrade a small pond for around $150–$300. Save this if you want to turn a swampy mess into a focal point.
- Key Materials: Solar aerator, marginal aquatic plants
- Vibe / Style: Zen botanical garden
- Difficulty: Moderate
- Budget Breakdown: Aerator: $80 | Water Plants: $60 | Bio-Pucks: $30
- Creator’s Tip: Plant the tall reeds on the side that receives the most wind to act as a natural debris filter.
- Smart Sourcing: Purchase a solar-powered floating pond aerator and bulk pack water-clarifying bio-pucks.
Most people stop their garden at ground level… until they discover the breathtaking vertical layouts coming up next.
Vertical & Rooftop Green Space Solutions
When ground space runs out, these advanced vertical green space urban concepts take over. High-end hardware and lightweight modular materials make these gravity-defying designs possible for anyone.
15. Extensive Green Roofs
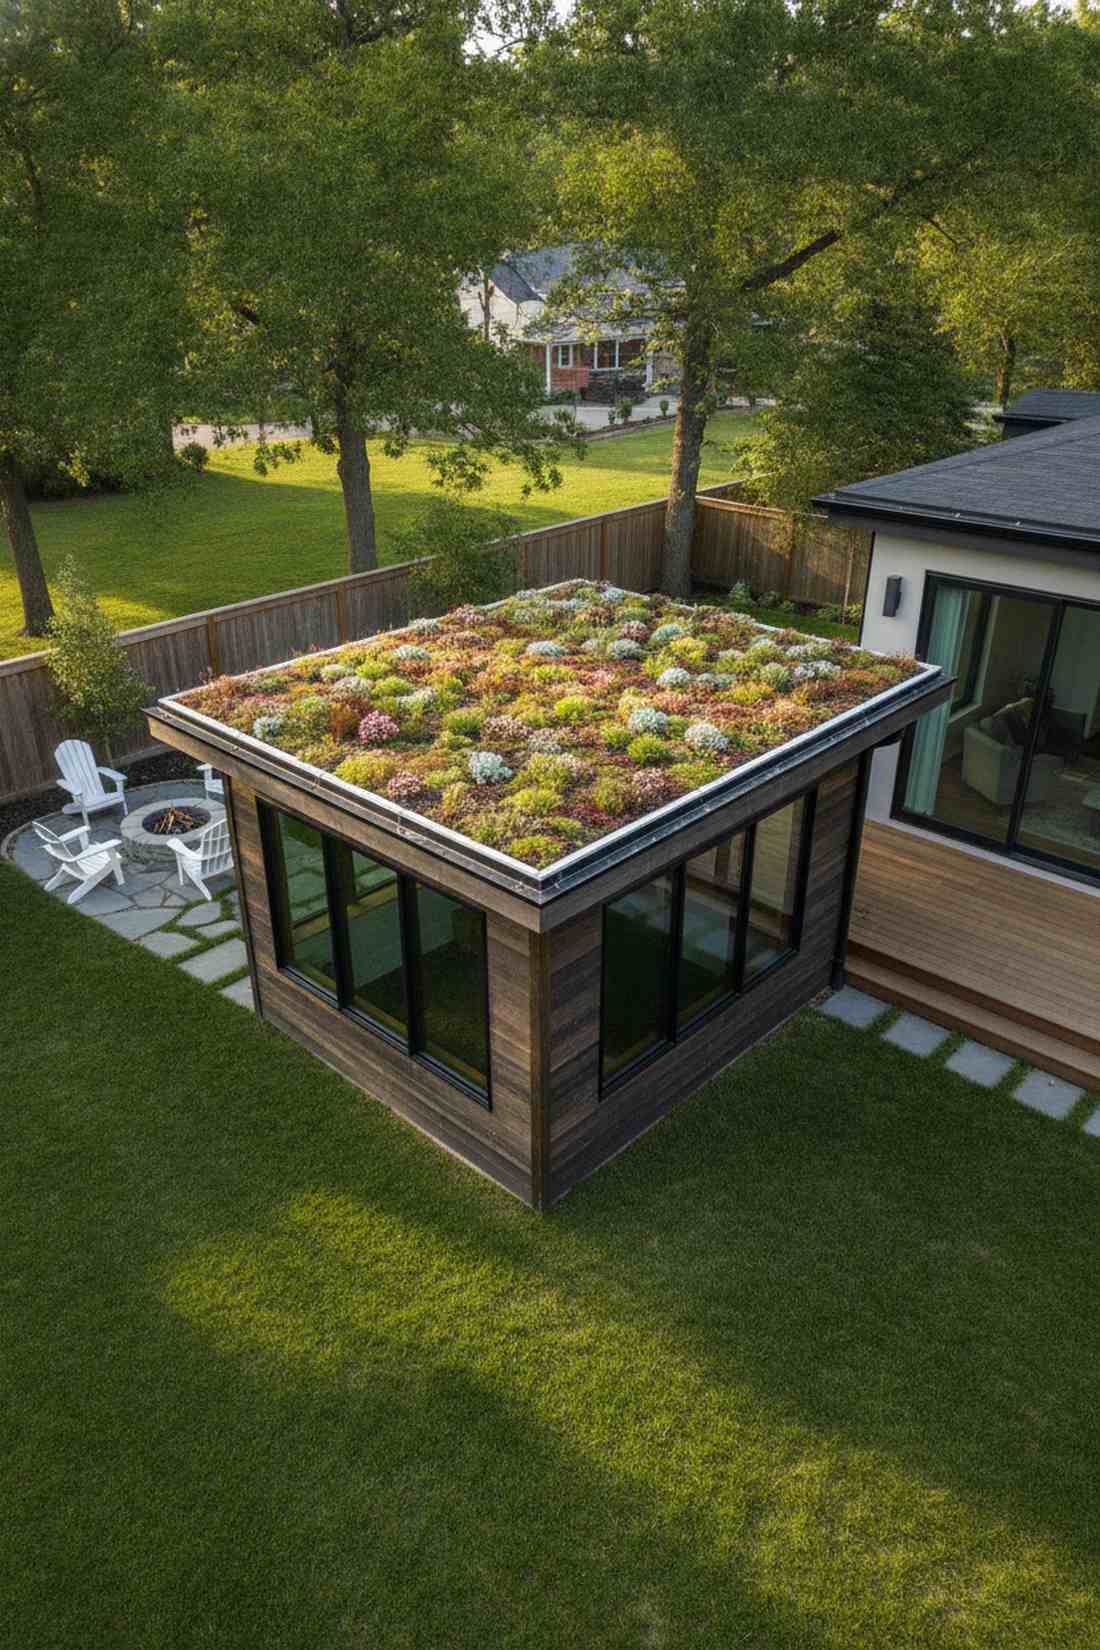
Feels like a slice of pristine nature magically suspended above the city streets. Shallow-tray extensive green roofs are perfectly designed for upgrading ugly flat garage roofs or sturdy sheds.
Shoveling dirt onto a roof is a disaster waiting to happen, but utilizing interlocking pre-planted sedum trays makes the installation foolproof. Laying down a heavy-duty waterproof EPDM membrane first ensures your structure stays bone dry while the roof looks phenomenal.
A small 10×10 shed roof upgrade will run about $300–$500. Pin this to your ultimate tiny-house or shed upgrade board!
- Key Materials: Modular sedum trays, EPDM roofing membrane
- Vibe / Style: Eco-chic modern cabin
- Difficulty: Moderate to Advanced
- Budget Breakdown: Plant Trays: $250 | EPDM Membrane: $80 | Edge Guards: $40
- Creator’s Tip: Ensure your roof has at least a 2-degree pitch so heavy storm water can safely drain out of the trays.
- Smart Sourcing: Use pre-grown interlocking sedum roof trays and a commercial-grade EPDM rubber liner.
16. Intensive Rooftop Gardens
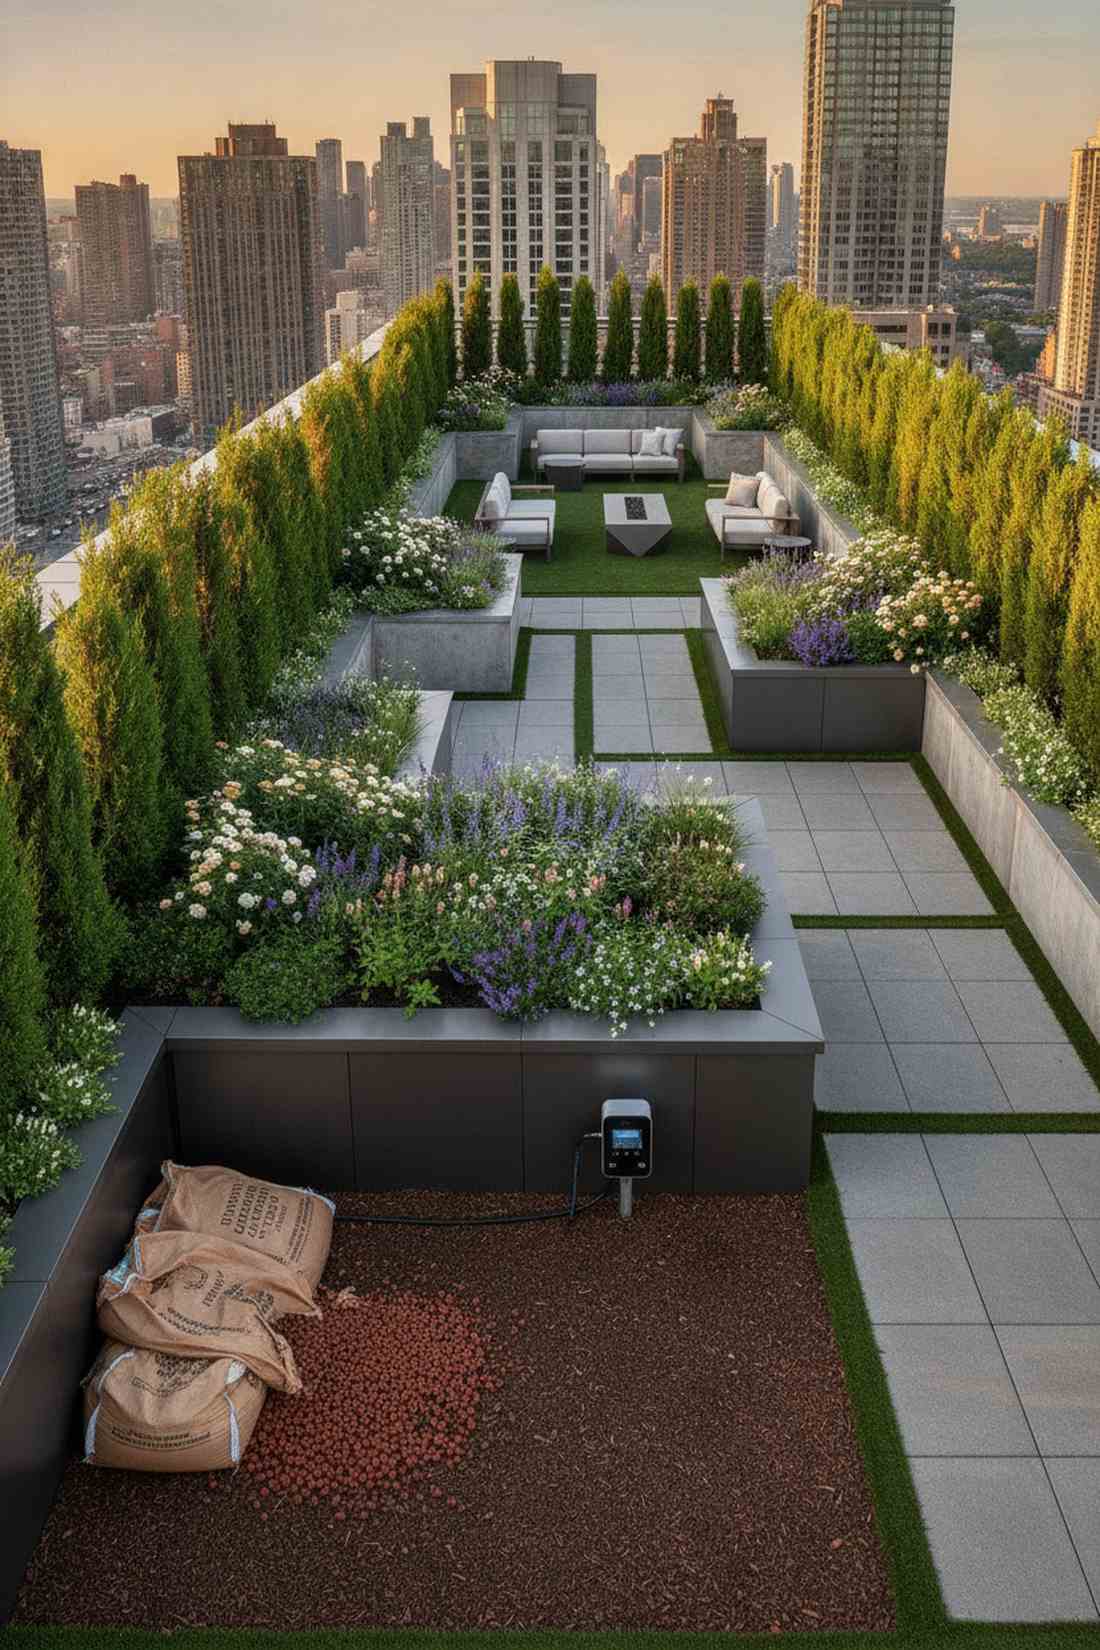
Brings absolute penthouse luxury straight to your accessible rooftop patio. Deep-soil intensive planter boxes work exceptionally well for creating wind-blocking privacy screens high above the ground.
Using standard potting soil on a roof is a massive weight hazard, but filling fiberglass beds with a specialized ultra-lightweight perlite growing mix solves the issue safely. Wrapping the planters with pre-cut composite wood cladding gives a custom designer feel without the rotting issues of real wood.
Expect to spend around $400–$700 for a luxury corner setup. This completely changes the vibe of an urban outdoor living space.
- Key Materials: Lightweight perlite soil, composite cladding
- Vibe / Style: Exclusive penthouse terrace
- Difficulty: Advanced DIY
- Budget Breakdown: Planter Base: $200 | Light Soil: $80 | Cladding: $120
- Creator’s Tip: Always place your heaviest planters directly over the building’s load-bearing walls, never in the middle of the span.
- Smart Sourcing: Buy ultra-lightweight rooftop soil blend (bulk bag) and pre-cut composite fascia boards.
17. Vertical Living Walls
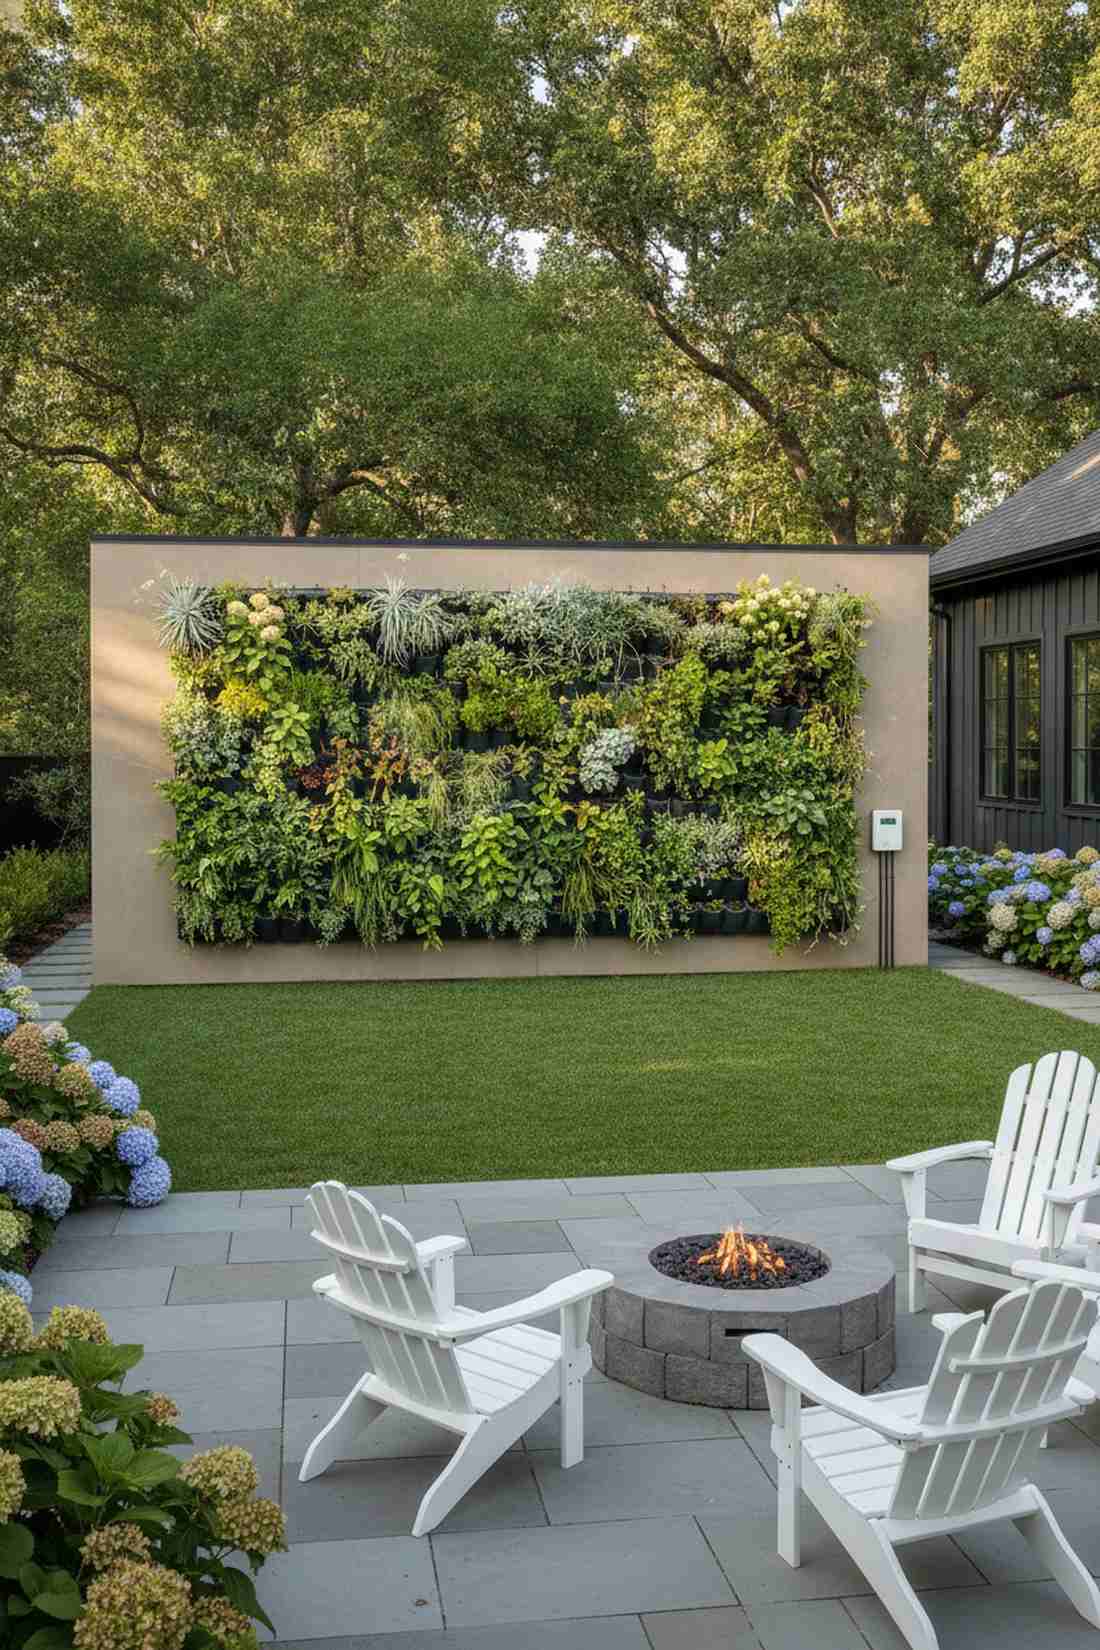
Straight out of an upscale modern art gallery lobby. Modular living wall systems are the ultimate use-case for completely hiding an ugly, stained stucco wall or bare fence.
Nailing individual pots to a wall looks cheap, but snapping together a self-irrigating pocket panel system delivers a surprisingly premium look. Utilizing a smart wifi-enabled drip timer means the entire wall stays lush with zero daily watering effort.
A stunning 4×4 foot living wall can be built for roughly $150–$250. Save this if you need to cover an eyesore fast.
- Key Materials: Pocket wall panels, wifi drip timer
- Vibe / Style: Botanical art installation
- Difficulty: Moderate
- Budget Breakdown: Panel Kit: $60 | Smart Timer: $40 | Plants/Soil: $80
- Creator’s Tip: Put your drought-tolerant plants at the top and moisture-loving ferns at the bottom, as water naturally drips down.
- Smart Sourcing: Grab a self-watering modular pocket wall kit and a wifi-enabled micro drip irrigation starter kit.
18. Green Facade Trellis Systems
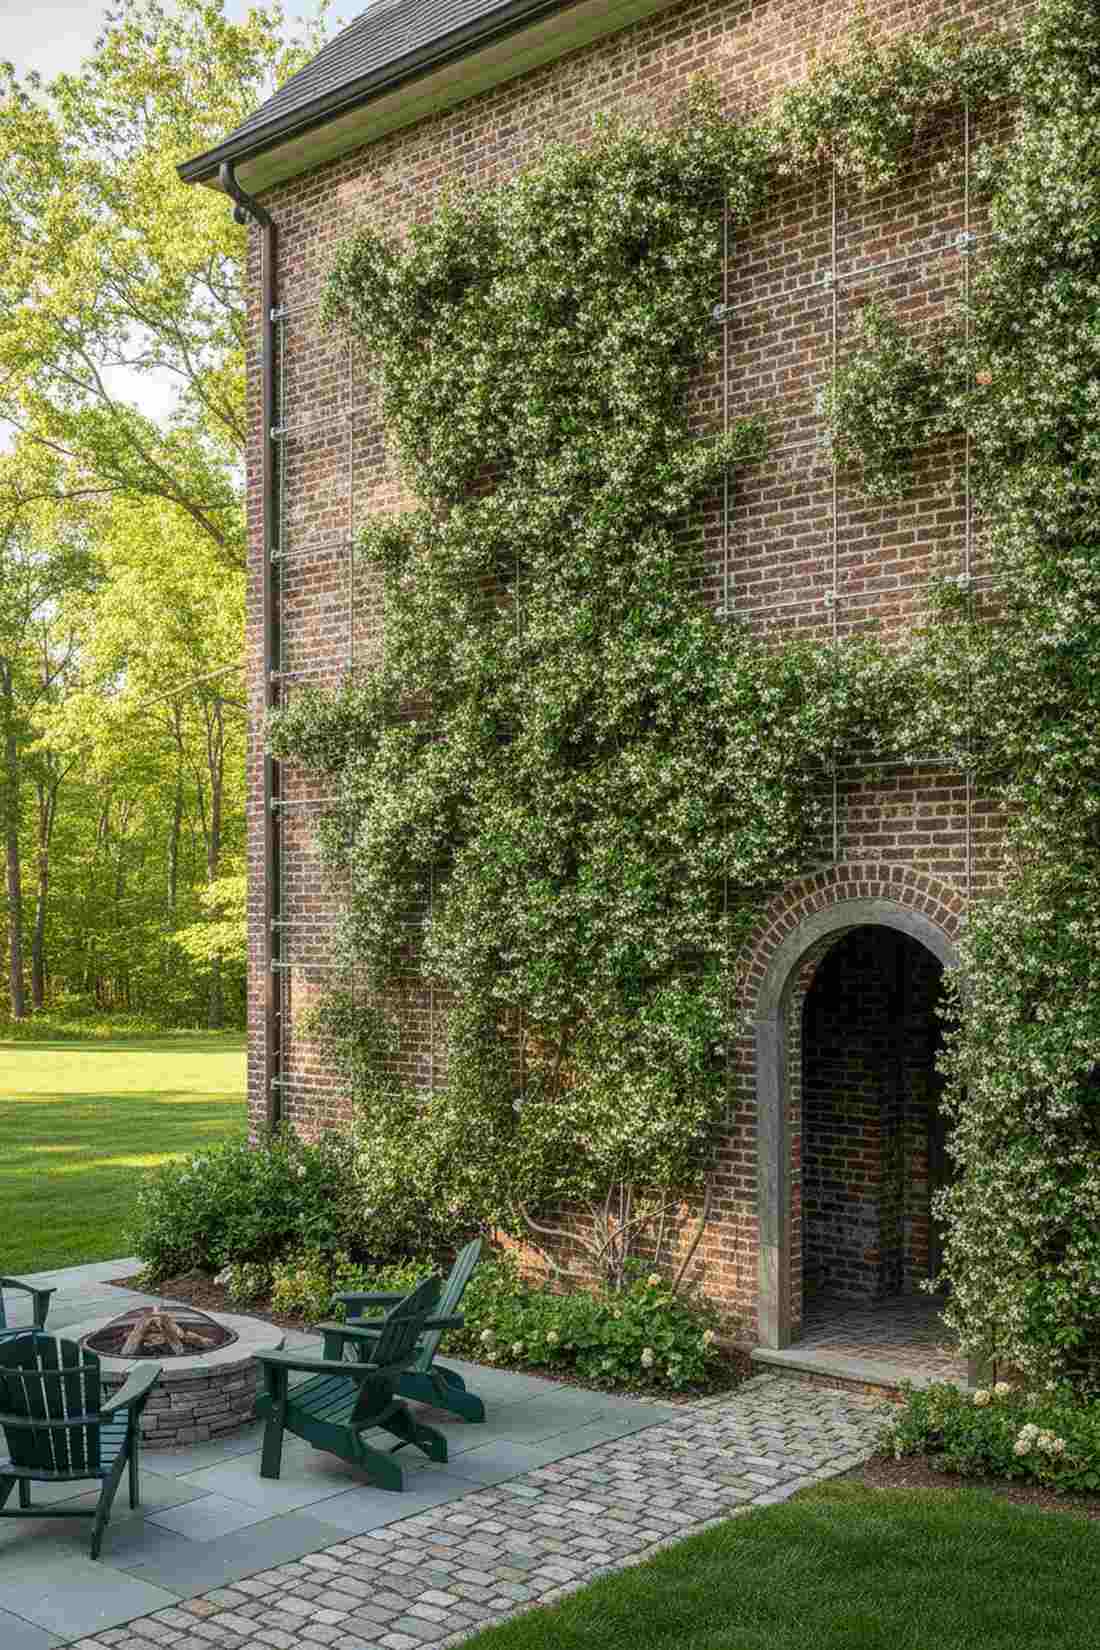
Evokes the feeling of a historic, ivy-covered European estate. Steel cable facade trellises are an elegant solution for cooling down sun-baked brick walls without damaging the masonry.
Wooden lattices warp and snap over time, but installing a marine-grade stainless steel wire tension system looks incredibly sleek and lasts forever. Training fast-growing climbers like Jasmine up the wires instantly upgrades the aesthetic and adds an amazing fragrance.
You can cover a massive wall area for just $60–$100 in cable hardware. Highly recommended for a high-impact, low-cost exterior upgrade.
- Key Materials: Stainless steel wire rope, wall hubs
- Vibe / Style: Romantic historic villa
- Difficulty: Easy drilling required
- Budget Breakdown: Cable Kit: $50 | Anchors: $15 | Climbing Vine: $25
- Creator’s Tip: Keep the wire system at least 3 inches off the wall so the plants have room to wrap and air can circulate behind them.
- Smart Sourcing: Pick up a marine-grade stainless steel trellis wire kit and heavy-duty masonry anchor hubs.
19. Vertical Forest Towers
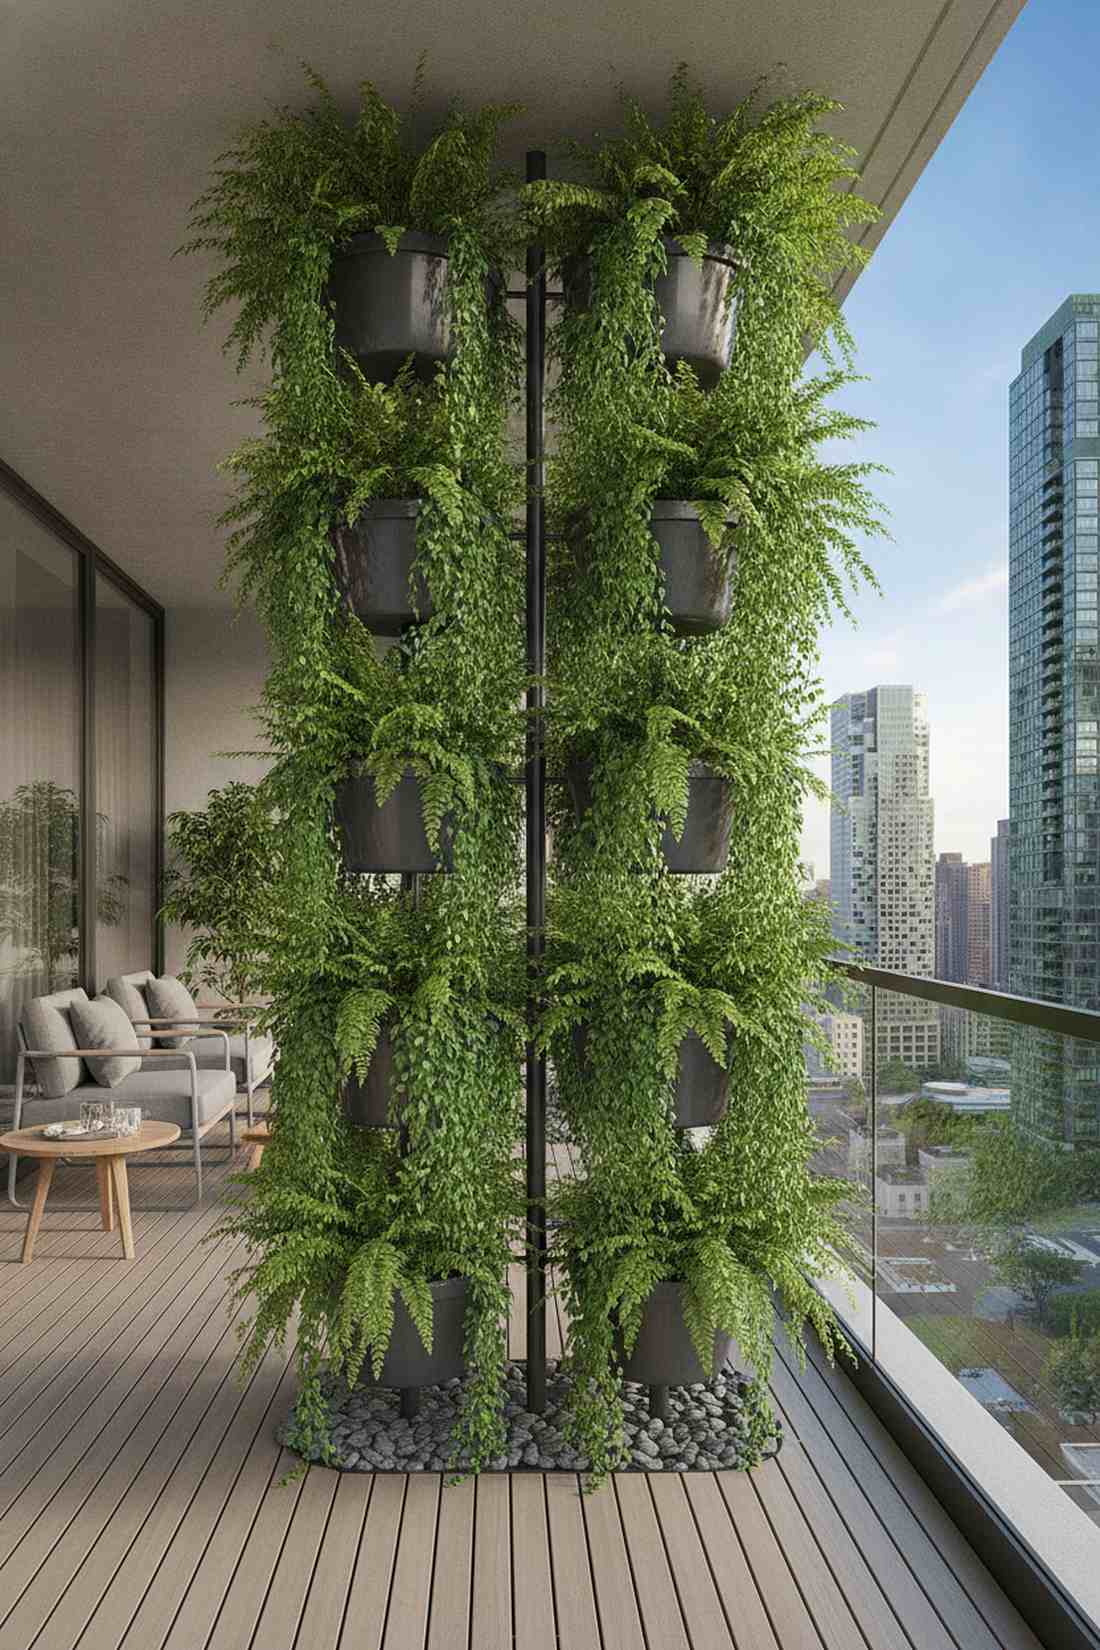
Gives that futuristic, eco-city skyscraper look right on your apartment balcony. Tiered corner forest towers work brilliantly to maximize floor space while creating towering green privacy screens.
Stacking flimsy plastic pots usually topples over in the wind, but utilizing a heavy-based steel tiered plant stand ensures absolute stability. Throwing in oversized ferns and trailing ivy instantly mimics the look of high-end architectural vertical forests.
A sturdy tower setup will run about $80–$130. Pin this to your small apartment balcony inspiration board!
- Key Materials: Heavy-duty tiered metal stand, trailing ivies
- Vibe / Style: Futuristic eco-balcony
- Difficulty: Very easy
- Budget Breakdown: Tower Stand: $60 | Pots: $30 | Plants: $40
- Creator’s Tip: Place heavy stones at the very bottom of the lowest planters to lower the center of gravity and prevent wind tipping.
- Smart Sourcing: Use a powder-coated steel tiered plant tower and UV-resistant acrylic display pots.
You’ll want to save this next one immediately—it’s the fastest, smartest way to blend high-tech energy with nature.
20. Rooftop Solar-Green Hybrids
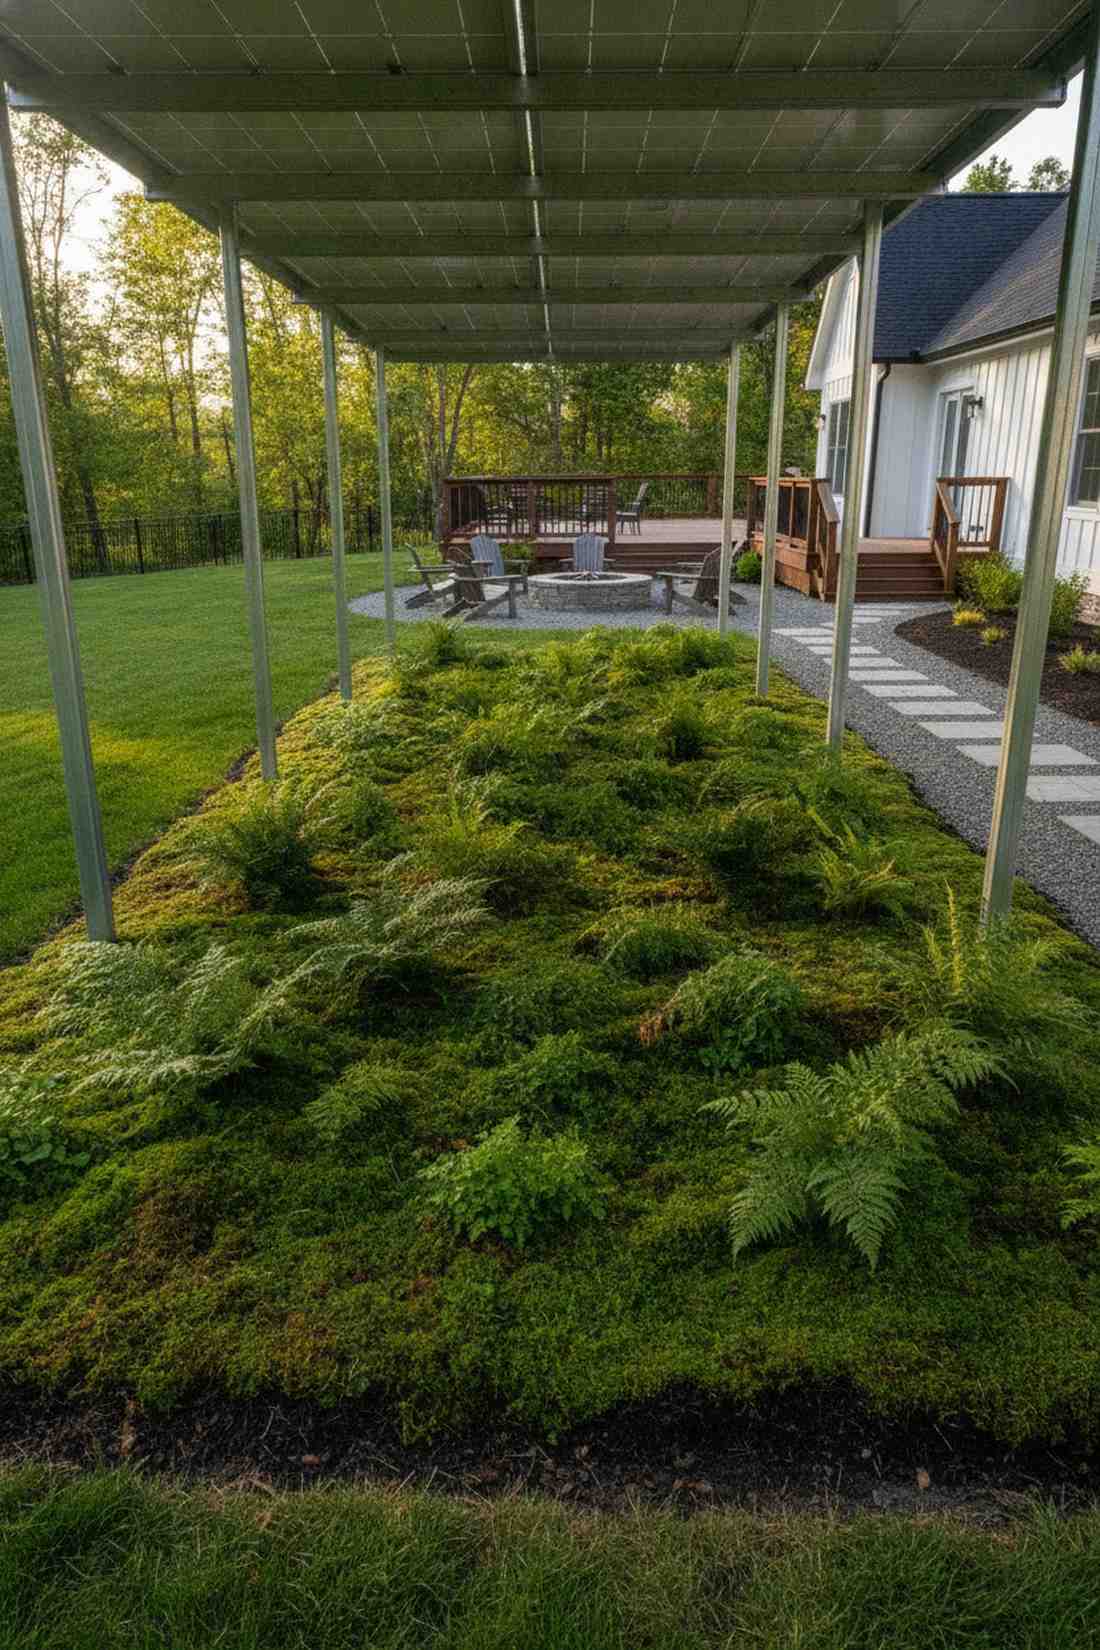
Feels like stepping into a hyper-efficient, off-grid eco sanctuary. Solar panel shade gardens are the perfect use-case for utilizing the dead, shaded space directly underneath your roof or ground solar arrays.
Most people leave the ground under solar panels as ugly dirt, but planting a blanket of shade-loving mosses and ferns drops the ambient temperature, making the panels run more efficiently. Utilizing a pre-cut moss mat roll gives a custom designer feel in under ten minutes.
This genius efficiency hack costs roughly $50–$100 to execute. It’s a fantastic weekend project that visually cleans up your solar setup.
- Key Materials: Pre-cut moss rolls, shade-tolerant ferns
- Vibe / Style: High-tech nature blend
- Difficulty: Easy
- Budget Breakdown: Moss Rolls: $40 | Ferns: $30 | Compost: $15
- Creator’s Tip: Never let plants grow tall enough to cast shadows on the bottom edge of the panels, as it ruins energy output.
- Smart Sourcing: Buy pre-cut preserved moss sheets (bulk pack) and a shade-loving woodland starter plant kit.
Community & Social Green Spaces
The best open green space designs foster community interaction. These setups show how to use commercial-grade modular systems to create high-yield, beautiful shared environments.
21. Community Allotment Gardens
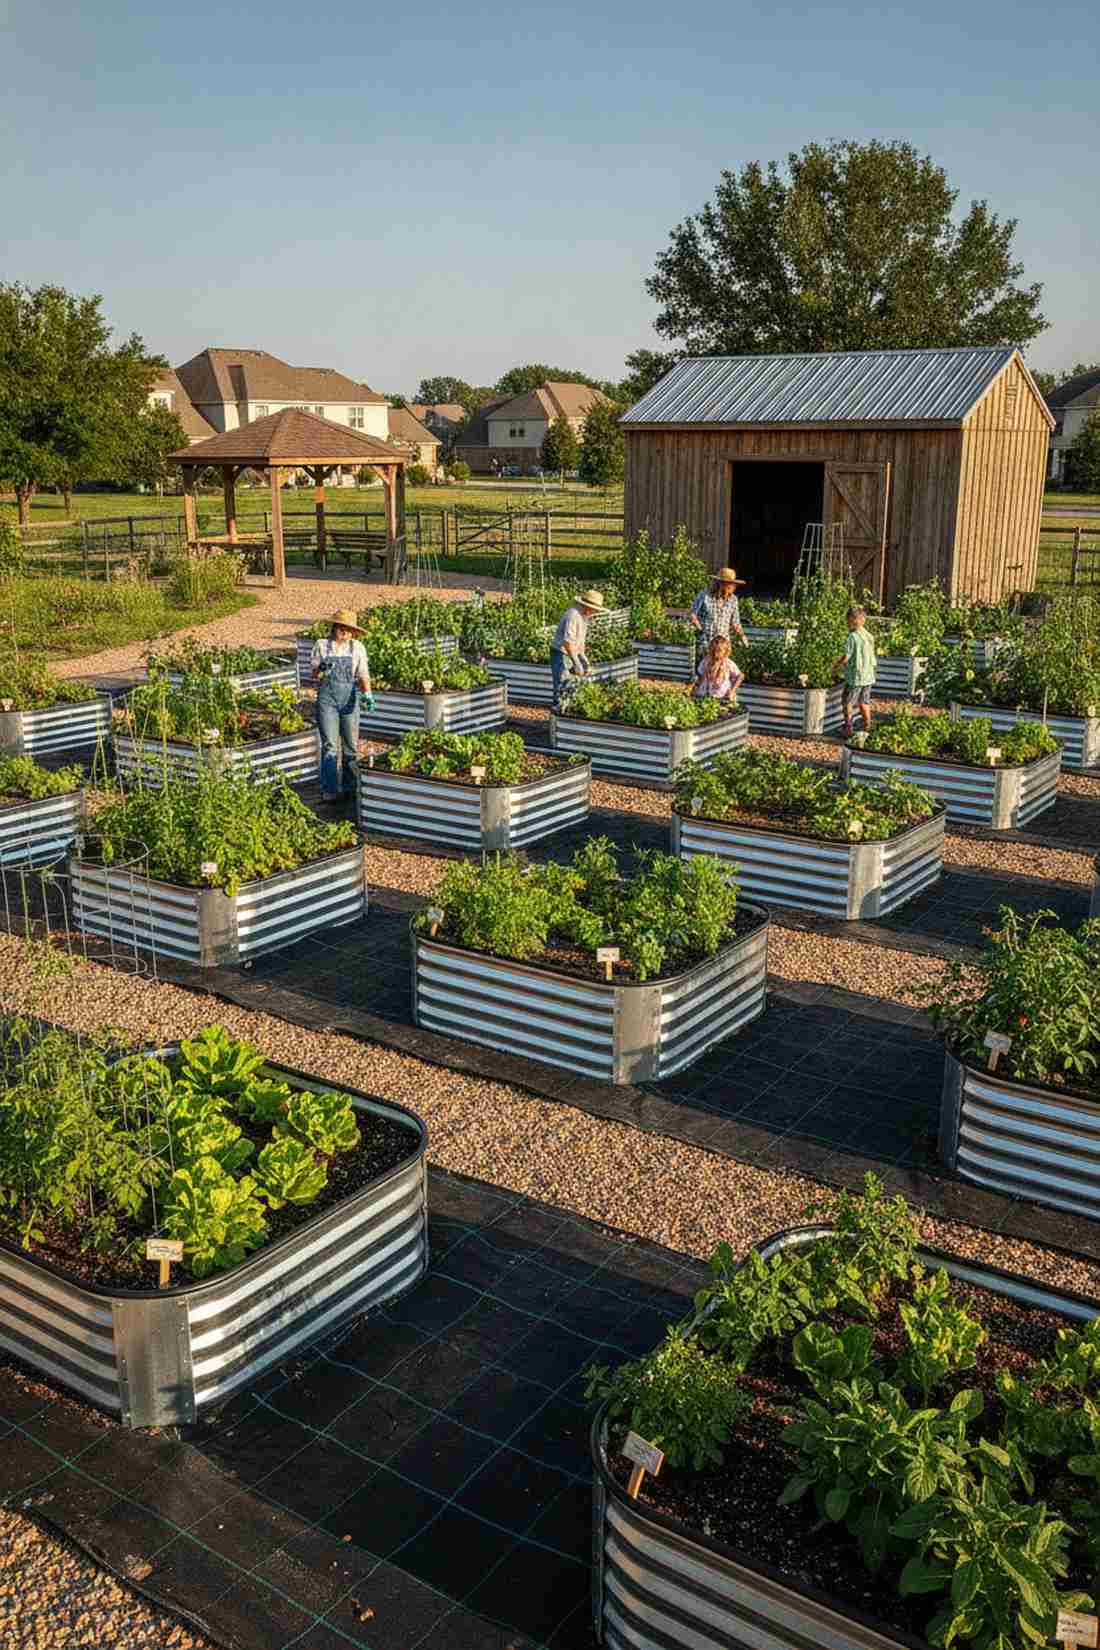
Brings a bustling, rustic farmer’s market energy right to your local neighborhood lot. Standardized modular raised beds are exactly what you need to organize a chaotic community garden project.
Scrap wood beds rot and look terrible within a year, but assembling galvanized corrugated steel garden beds delivers a surprisingly premium look that lasts decades. Lining the walkways with a heavy commercial weed barrier covered in crushed granite keeps the area perfectly manicured.
Setting up one premium plot costs around $80–$150. Save this if you are pitching a garden idea to your HOA.
- Key Materials: Galvanized steel raised beds, crushed granite
- Vibe / Style: Organized rustic agriculture
- Difficulty: Easy assembly
- Budget Breakdown: Steel Bed: $60 | Soil: $40 | Granite Path: $30
- Creator’s Tip: Cap the sharp metal edges of the beds with cheap slit-open rubber hoses to protect hands while gardening.
- Smart Sourcing: Pick up a galvanized modular raised bed kit and commercial-grade woven weed barrier.
22. Urban Orchard Groves
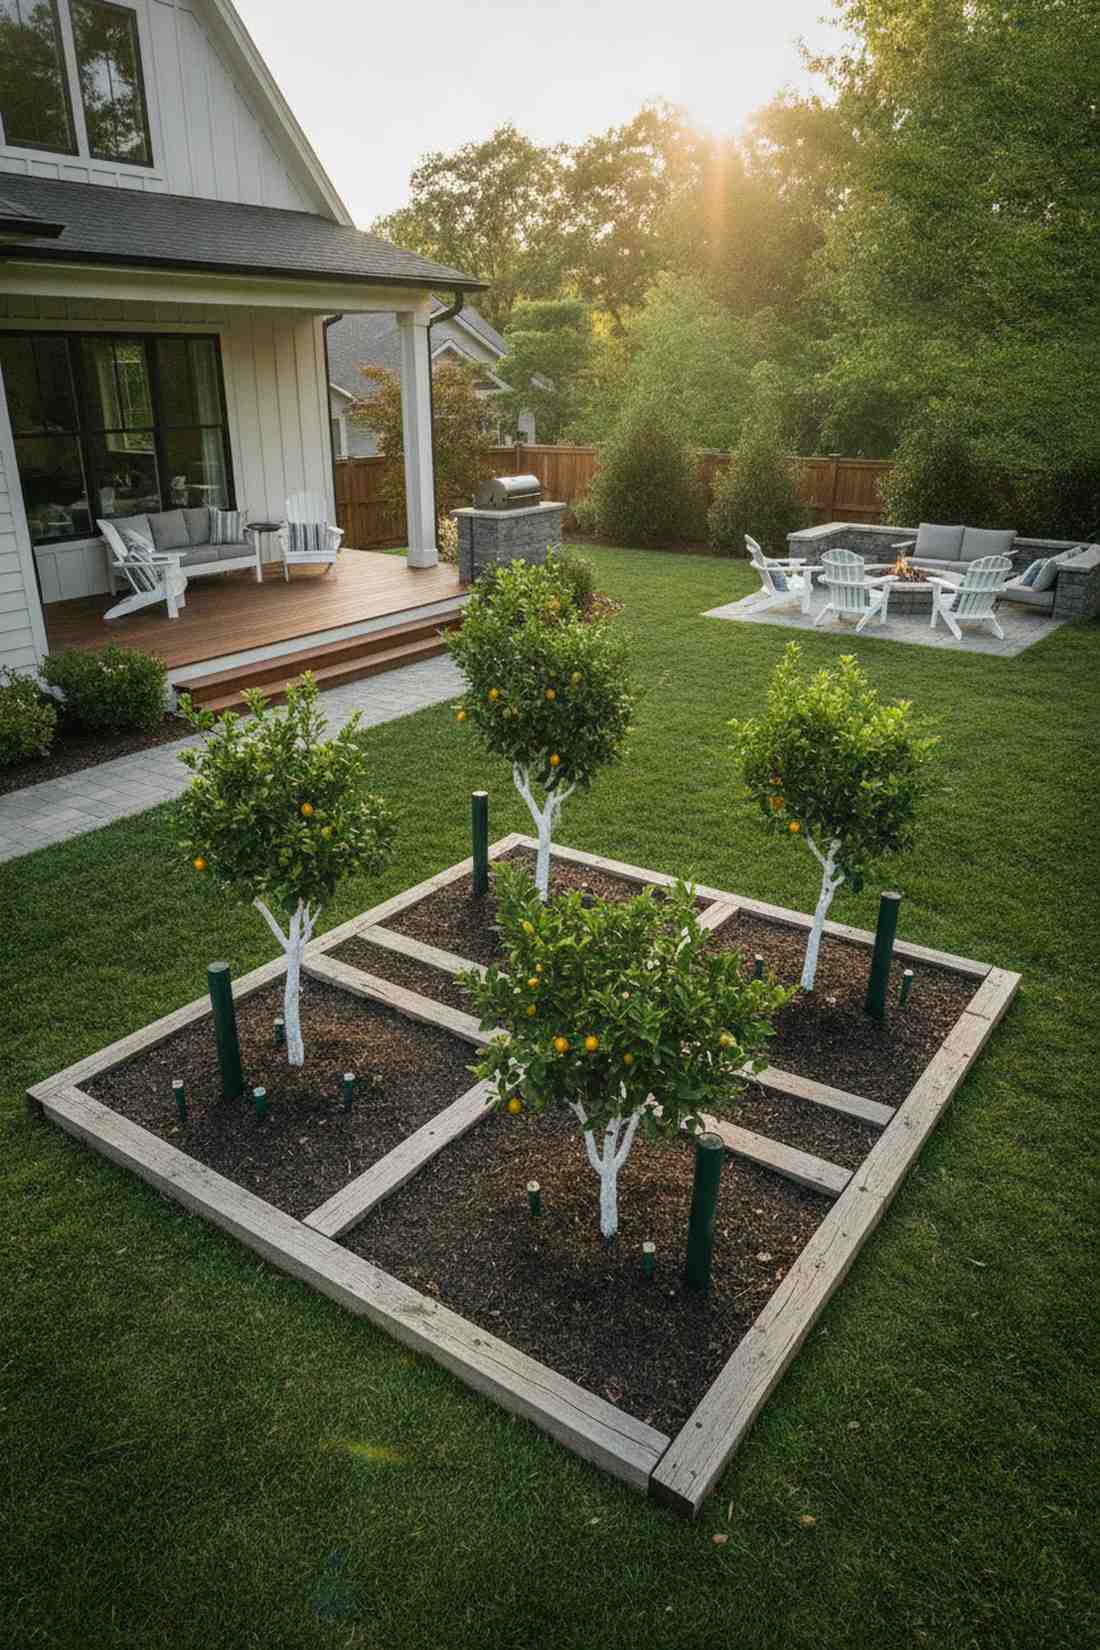
Evokes the feeling of walking through a historic Mediterranean citrus grove. Dwarf fruit tree grids work beautifully for maximizing food production in surprisingly small, sunny urban yards.
Planting massive standard trees overwhelms small spaces, but curating a row of grafted dwarf fruit trees looks far more expensive than it is. Installing deep-root watering stakes next to each trunk ensures massive fruit yields while saving tons of surface water.
A starter grove of three dwarf trees will run about $150–$250. Highly recommended for beautiful spring blossoms and summer harvests.
- Key Materials: Grafted dwarf trees, deep-root watering stakes
- Vibe / Style: Bountiful estate orchard
- Difficulty: Moderate
- Budget Breakdown: Trees (x3): $120 | Water Stakes: $40 | Compost: $30
- Creator’s Tip: Paint the lower trunks with a 50/50 mix of white latex paint and water to prevent winter sunscald on young bark.
- Smart Sourcing: Use a heavy-duty deep root watering tool kit and premium fruit tree fertilizer spikes (bulk pack).
23. Therapeutic Healing Gardens
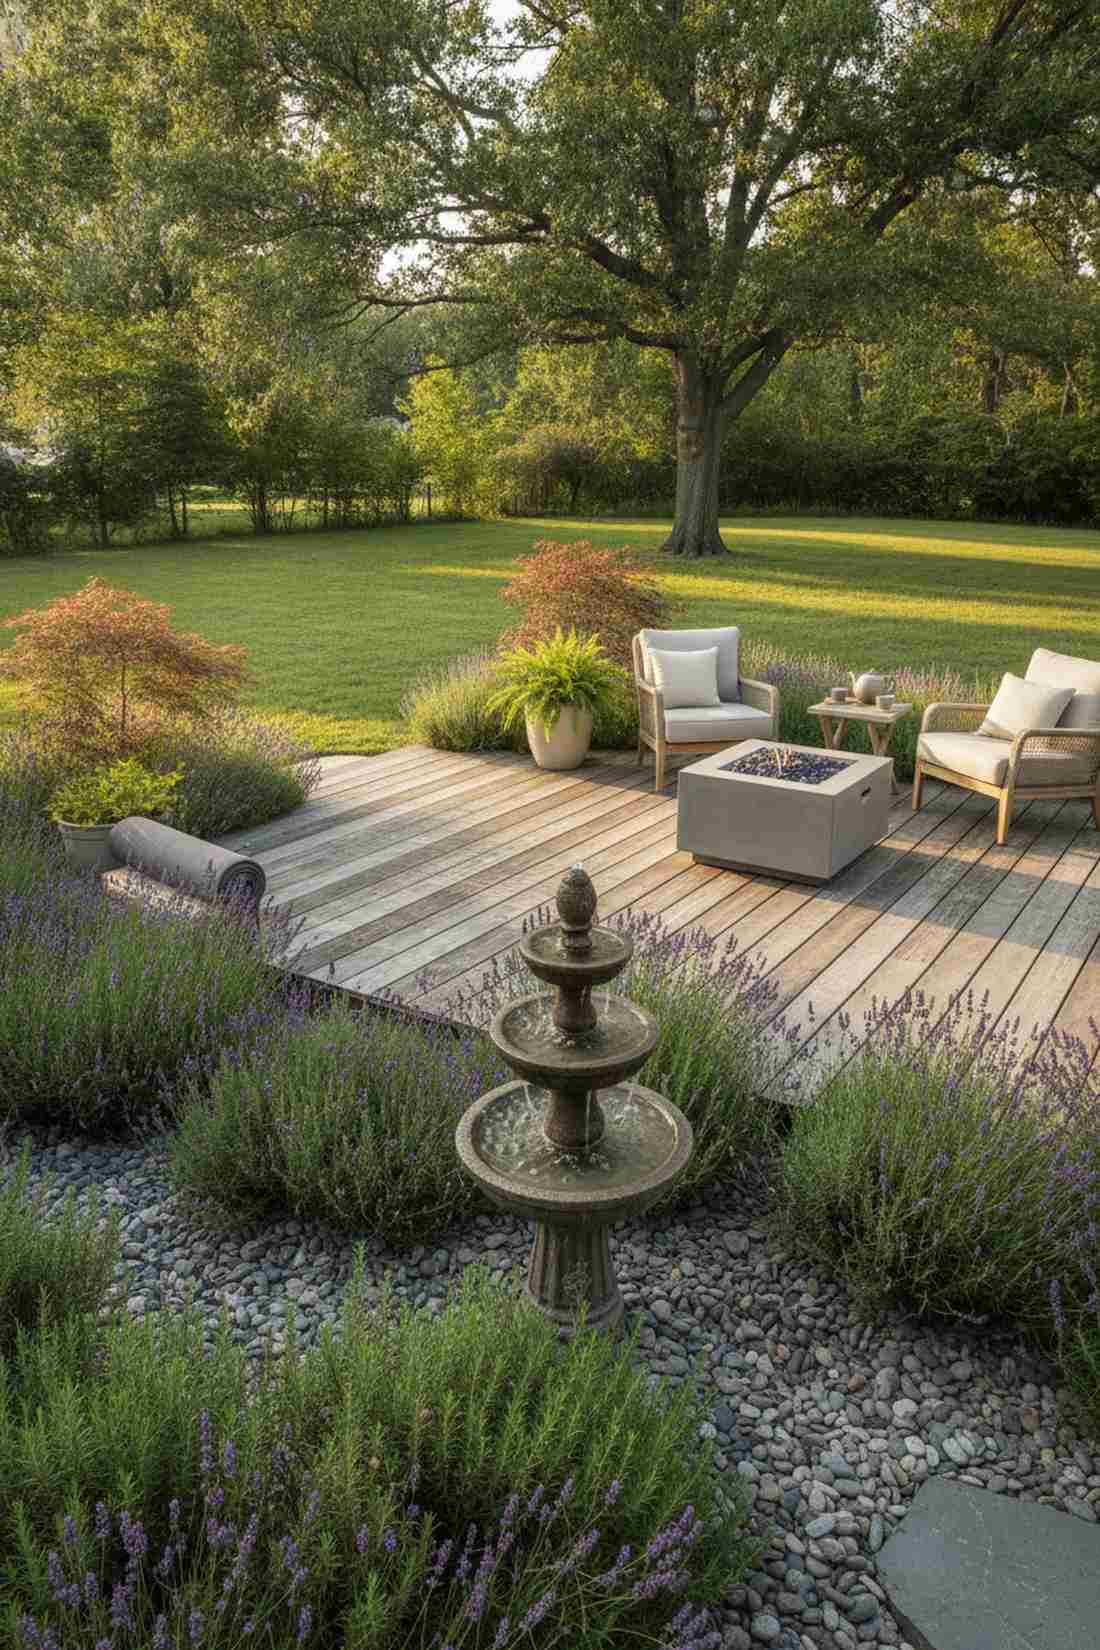
Feels like stepping into a high-end luxury spa sanctuary. Sensory healing plant borders are an incredible use-case for enclosing a quiet reading corner or backyard yoga deck.
Basic flower beds look nice, but layering highly fragrant herbs like lavender and rosemary with a trickling solar water fountain instantly upgrades the aesthetic into a wellness retreat. Dropping down smooth river stones instead of messy mulch keeps the space looking pristine and calming.
You can create this sensory corner for roughly $120–$200. Pin this to your outdoor relaxation and wellness board!
- Key Materials: Aromatic herbs, solar fountain pump
- Vibe / Style: Luxury spa retreat
- Difficulty: Easy
- Budget Breakdown: Plants: $50 | Fountain Kit: $40 | River Rocks: $40
- Creator’s Tip: Plant the fragrant herbs right along the edge of the seating area so you naturally brush against them, releasing the oils.
- Smart Sourcing: Grab a solar-powered birdbath fountain kit and a bulk pack aromatic herb starter kit.
24. School Outdoor Classrooms
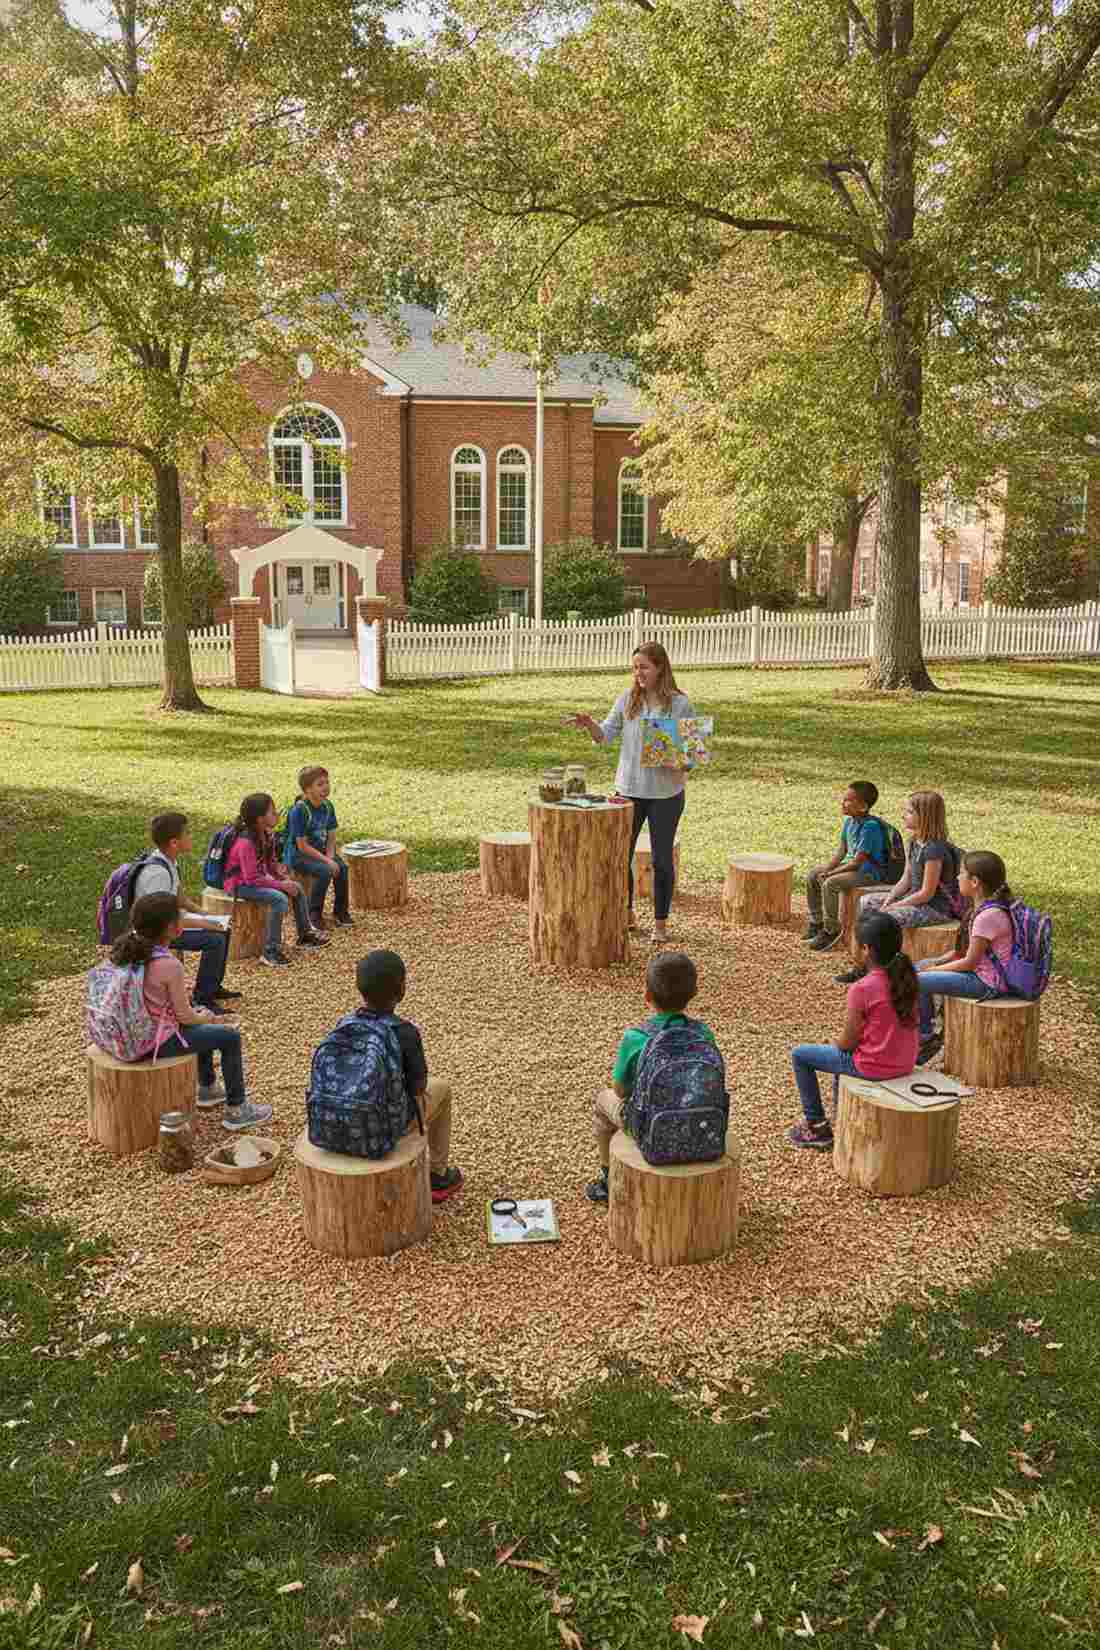
Gives that inspiring, hands-on discovery vibe that makes kids actually want to learn. Semi-circle log seating arrangements are the perfect setup for converting an unused lawn into an educational gathering space.
Standard metal benches are boring and expensive, but using thick, sealed stump rounds around a central focal point gives a custom designer feel. Laying down a heavy layer of playground-certified wood chips guarantees a mud-free, safe zone for daily activities.
This layout is incredibly cheap, usually costing around $100–$200. Save this idea for your next school PTA beautification project.
- Key Materials: Sealed wood stumps, certified play chips
- Vibe / Style: Forest discovery camp
- Difficulty: Moderate heavy lifting
- Budget Breakdown: Logs: $50 | Play Chips: $80 | Sealant: $30
- Creator’s Tip: Strip the bark completely off the logs before sealing them to prevent bugs from nesting underneath.
- Smart Sourcing: Invest in playground-certified safety wood chips and heavy-duty clear polyurethane outdoor sealant.
What’s coming up next looks like a custom architectural installation, but you can literally put it together in one weekend…
25. Cultural Heritage Gardens

Radiates the rich, vibrant energy of a historic botanical estate. Patterned heritage garden plots work flawlessly for showcasing culturally significant heirloom plants as a stunning backyard centerpiece.
Planting in random clusters looks messy, but laying out geometric brick borders to separate the heirloom varieties delivers a surprisingly premium look. Utilizing a heavy-duty masonry adhesive to secure the bricks means your flawless geometric lines will never shift out of place.
You can construct these beautiful borders for about $100–$150. A fantastic way to honor your roots while upgrading your landscape.
- Key Materials: Antique-style brick, masonry adhesive
- Vibe / Style: Historic courtyard
- Difficulty: Moderate
- Budget Breakdown: Bricks: $80 | Adhesive: $20 | Heirloom Seeds: $30
- Creator’s Tip: Dig a one-inch trench for the bricks to sit in so they lock into the earth and look historically authentic.
- Smart Sourcing: Pick up a bulk pack heirloom cultural seed vault and exterior-grade masonry landscape adhesive.
26. Demonstration Sustainable Landscapes
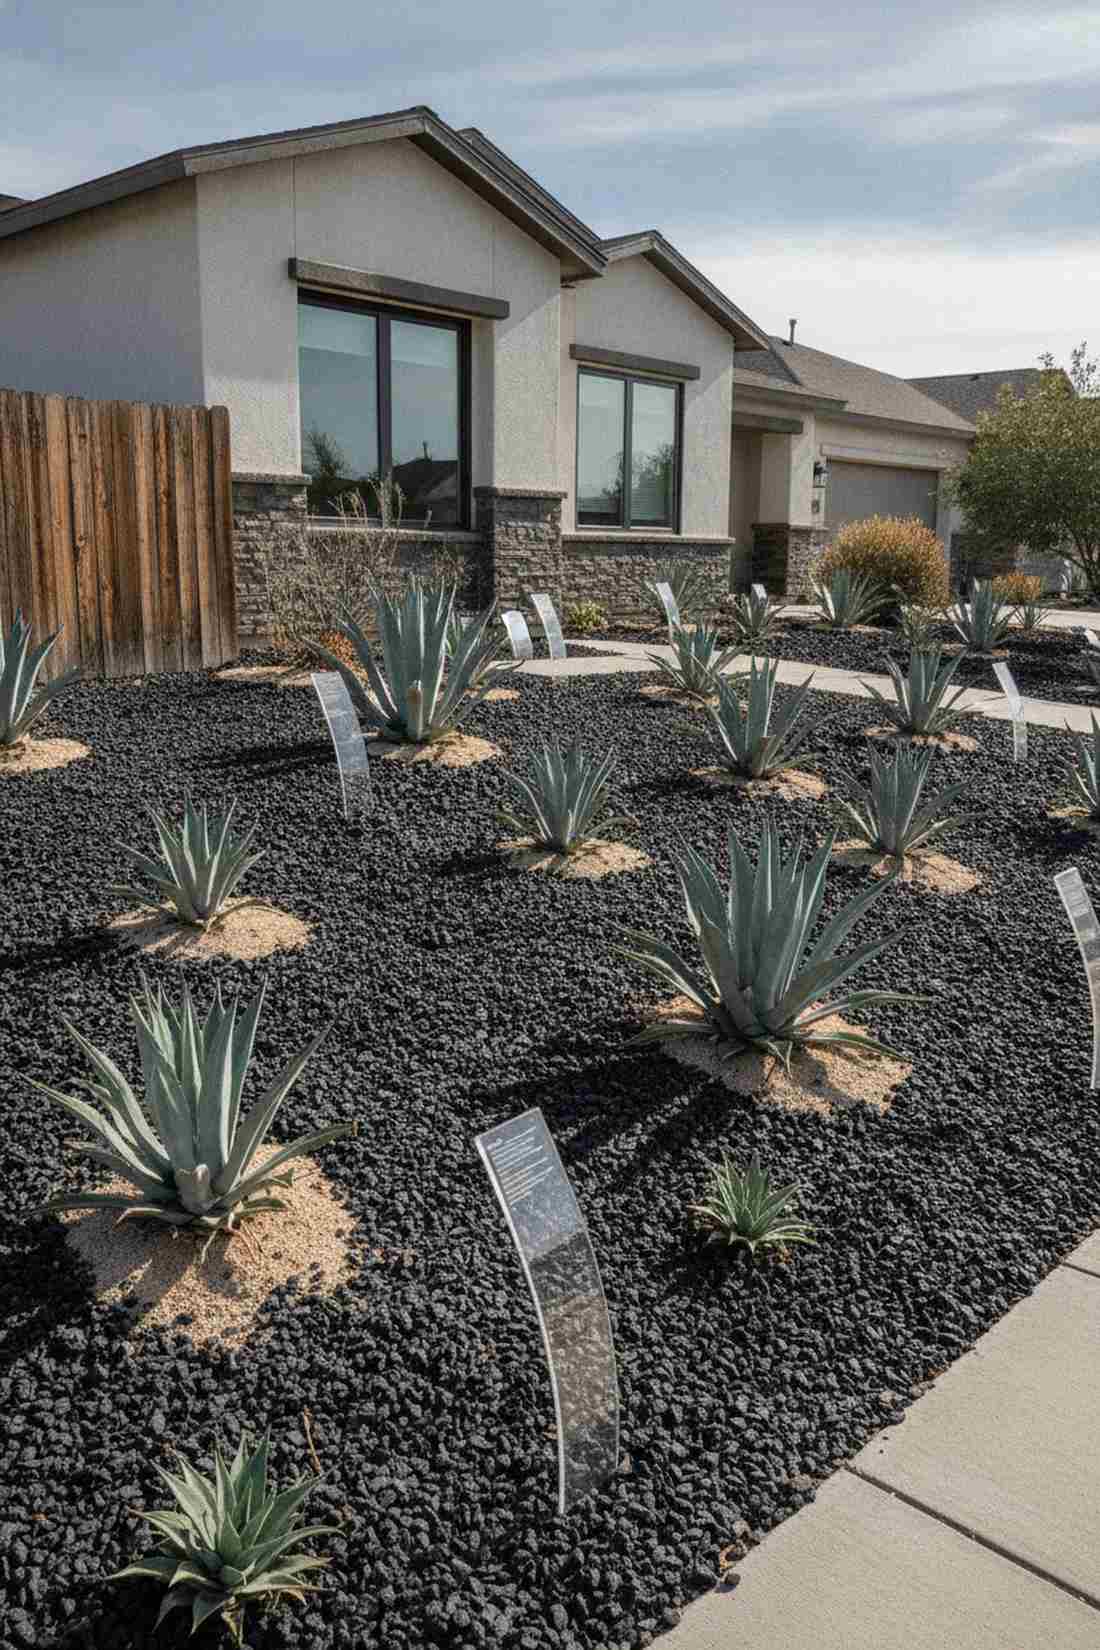
Feels like a pristine eco-exhibit at a modern science museum. Xeriscape demonstration zones are the ultimate use-case for front yards in drought-prone areas where grass refuses to grow.
Dying lawns drag down curb appeal, but swapping it for striking agave plants set against high-contrast black lava rock instantly upgrades the aesthetic. Adding sleek, weather-proof acrylic plant label stakes gives the yard a highly educational, manicured botanical garden feel.
A small front yard conversion costs roughly $250–$400 in hardscaping. Save this if you are tired of paying massive summer water bills.
- Key Materials: Black lava rock, acrylic garden markers
- Vibe / Style: Modern botanical exhibit
- Difficulty: Moderate to heavy
- Budget Breakdown: Lava Rock: $150 | Agaves: $100 | Markers: $30
- Creator’s Tip: Plant the agaves slightly raised on a mound of sandy soil so their crowns never sit in pooling water and rot.
- Smart Sourcing: Grab UV-coated acrylic garden plant markers and a bulk pack premium black lava rock.
27. Neighborhood Memorial Gardens

Brings a profound, peaceful dignity to a quiet corner of the park or community center. Engraved paver memorial borders work beautifully as a structured edge around a large, singular statement tree.
Scattered memorial plaques look chaotic over time, but creating a cohesive ring of custom-engraved concrete pavers looks far more expensive than it is. Surrounding the stones with creeping thyme fills in the gaps beautifully and suppresses weeds naturally.
A starter ring of pavers and plants costs about $150–$250. Highly recommended for a low-maintenance, respectful community tribute.
- Key Materials: Customizable pavers, creeping thyme plugs
- Vibe / Style: Dignified sanctuary
- Difficulty: Easy
- Budget Breakdown: Base Pavers: $100 | Sand: $20 | Thyme Plugs: $40
- Creator’s Tip: Set the pavers on a 2-inch bed of leveling sand to ensure the ring stays perfectly flat as the ground freezes and thaws.
- Smart Sourcing: Buy a commercial paver leveling sand kit and pre-grown creeping thyme starter flats.
Water-Integrated Green Landscapes
Flowing water instantly makes any green space urban design feel high-end. These concepts use modern, durable pumps and liners to create striking water features on a budget.
28. Daylighted Stream Corridors
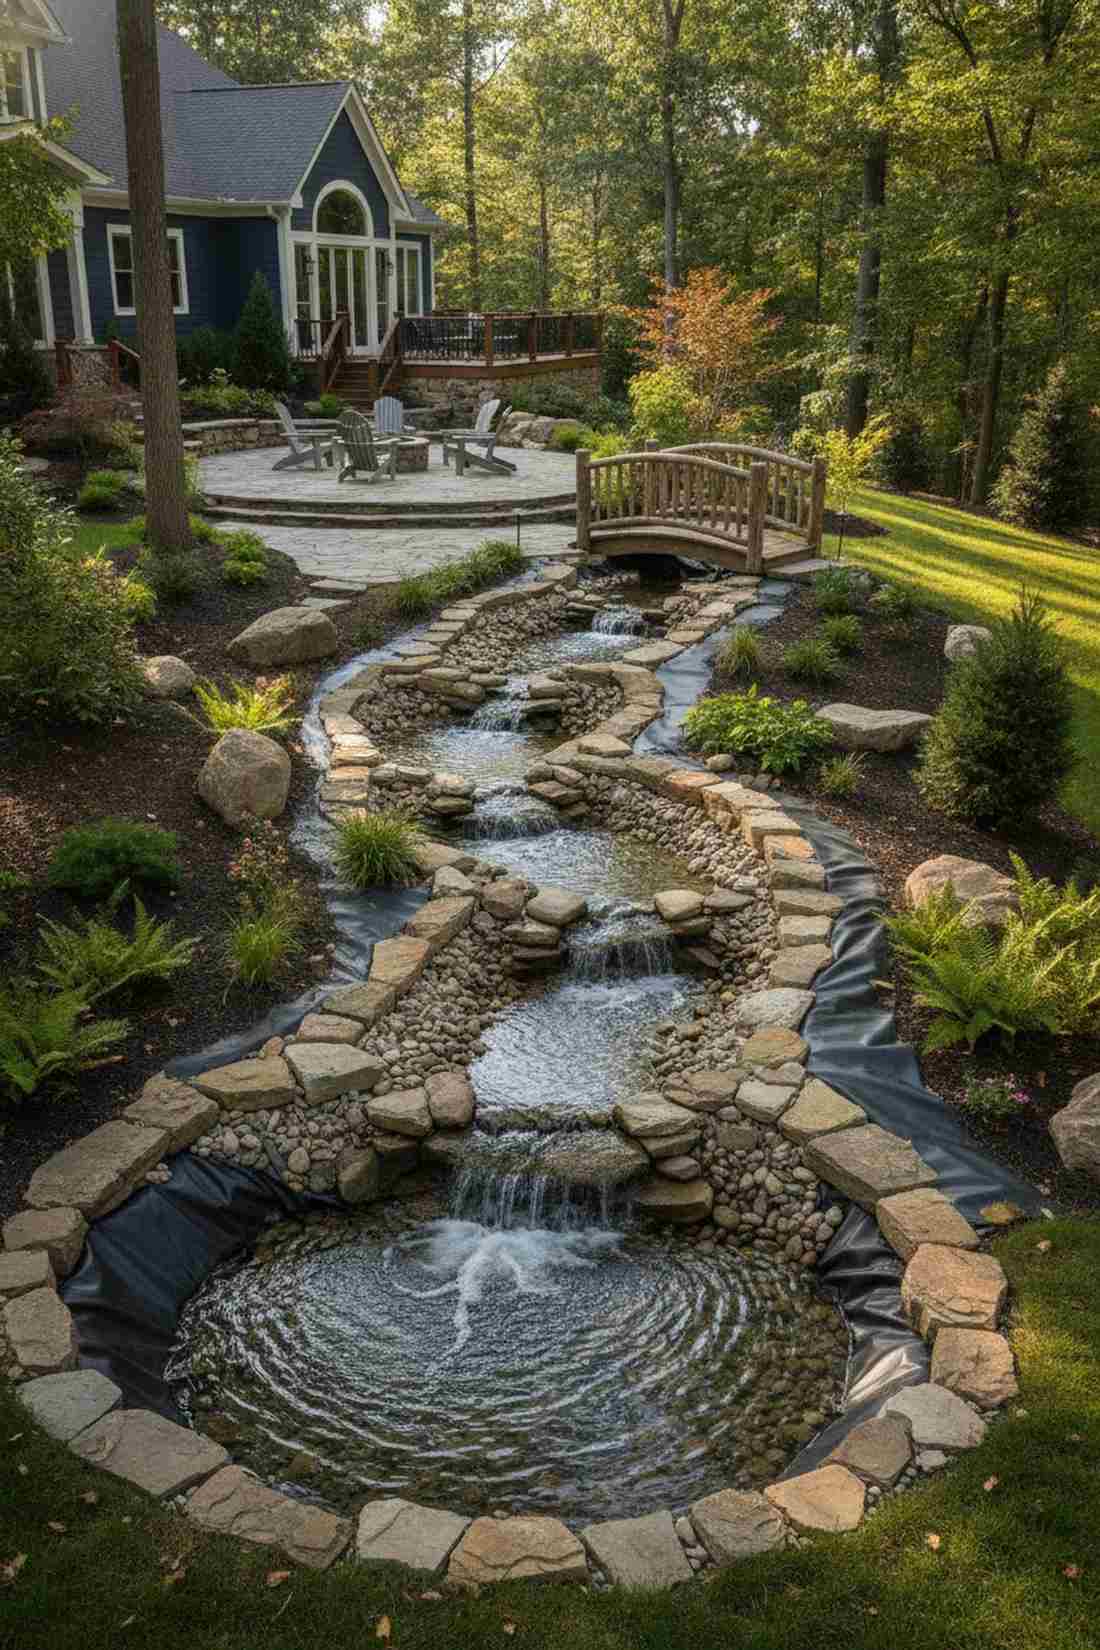
Looks like a babbling brook straight out of a mountain lodge resort. Faux-daylighted recirculating streams are perfectly designed for yards with natural, downward-sloping terrain.
Pre-formed plastic waterfalls always look fake, but laying a heavy-duty EPDM liner and covering it completely with natural fieldstone gives a custom designer feel. Hiding a high-efficiency submersible pump in an underground basin at the bottom creates a stunning, endless water flow.
You can build a small 10-foot backyard stream for around $300–$500. Pin this to your ultimate dream backyard board!
- Key Materials: EPDM liner, submersible pump
- Vibe / Style: Mountain resort creek
- Difficulty: Advanced DIY
- Budget Breakdown: Pump/Hose: $150 | Liner: $80 | Rocks: $100
- Creator’s Tip: Use expanding waterproof pond foam to seal the gaps between the rocks so the water flows over them, not under them.
- Smart Sourcing: Invest in a heavy-duty EPDM pond liner roll and a high-efficiency submersible waterfall pump.
29. Detention Pond Parks
Feels like a lush, natural amphitheater protecting your property from floods. Terraced detention basin edges are an incredible use-case for huge, ugly drainage dips at the edge of suburban lots.
Leaving a drainage pit as muddy grass is a waste, but stepping the edges with moisture-impervious retaining timbers instantly upgrades the aesthetic. Planting deep-rooted ornamental grasses along the tiers locks the soil in place and looks spectacular swaying in the wind.
Upgrading a small basin edge runs about $200–$350. Save this if you want to turn a landscaping nightmare into a feature.
- Key Materials: Pressure-treated timbers, ornamental grass plugs
- Vibe / Style: Sculpted eco-park
- Difficulty: Moderate heavy lifting
- Budget Breakdown: Timbers/Rebar: $150 | Grass Plugs: $60 | Mulch: $40
- Creator’s Tip: Drill holes through the timbers and drive 2-foot pieces of steel rebar directly into the earth to lock the tiers forever.
- Smart Sourcing: Grab a bulk pack ornamental wetland grass kit and heavy-duty steel landscape rebar stakes.
Stop scrolling for a second. This next water-integrated design is going completely viral on Pinterest right now, and it’s shockingly cheap to build.
30. Interactive Water Plazas
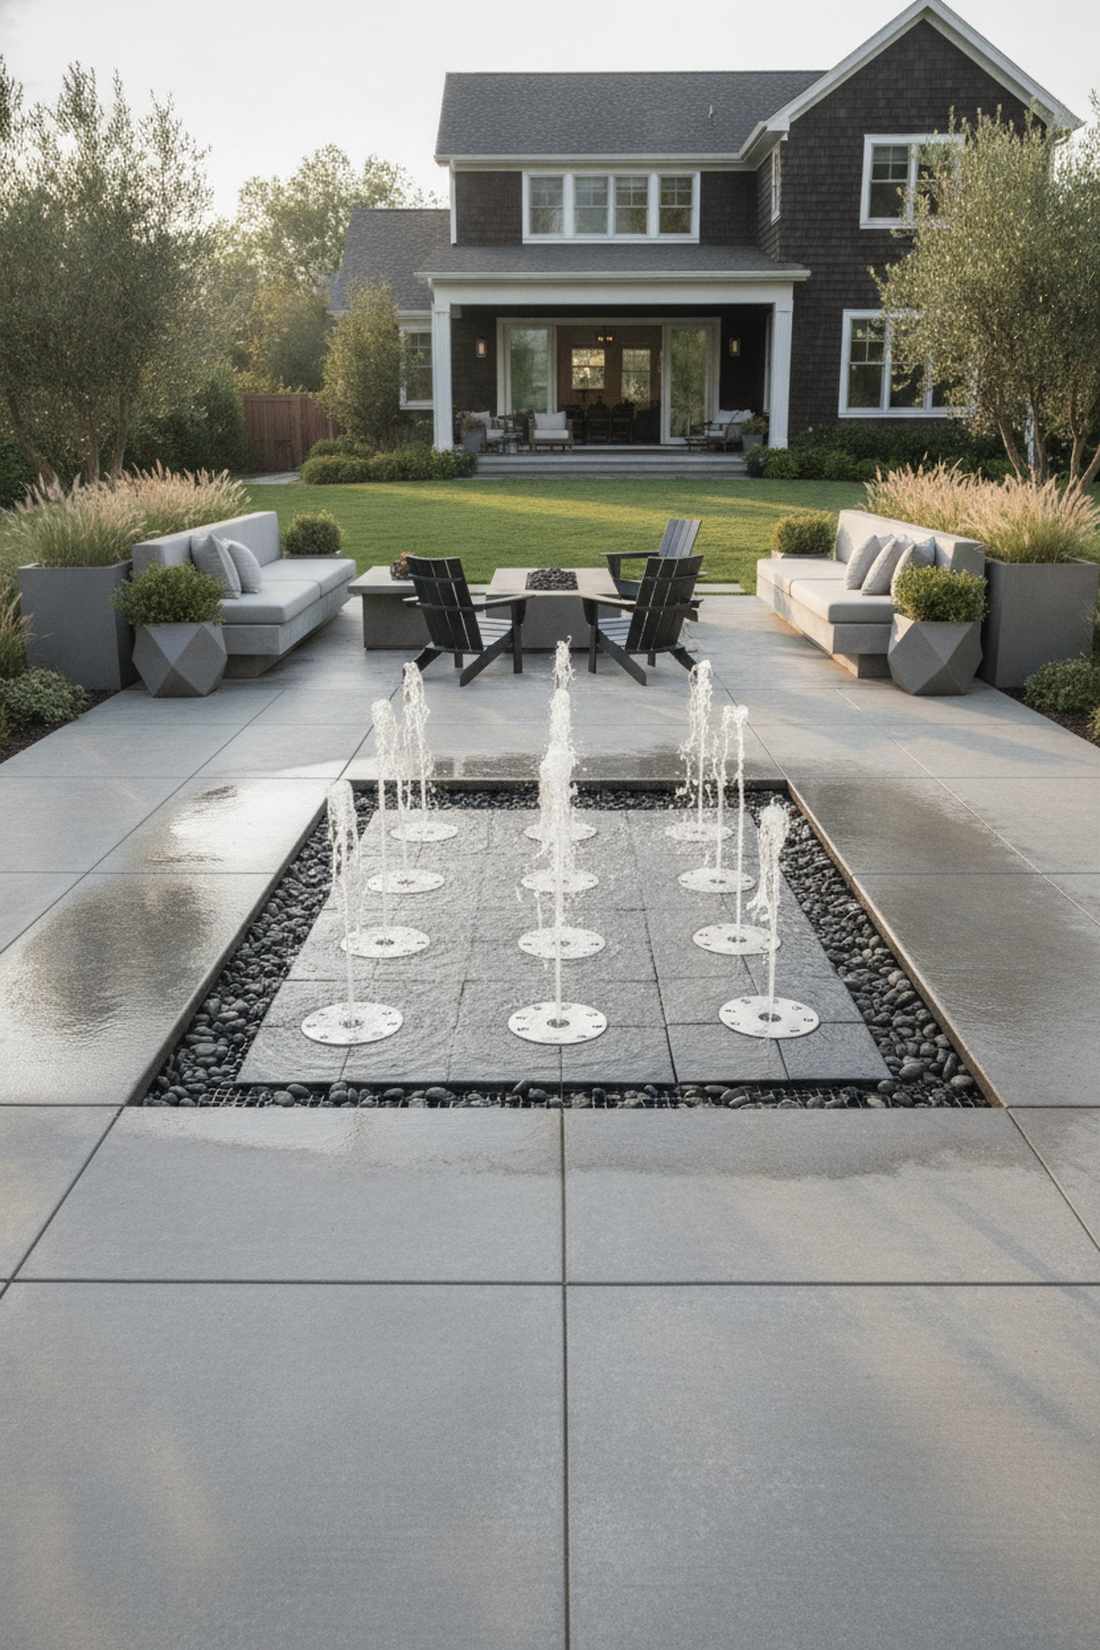
Brings a high-energy, modern museum plaza vibe straight to your backyard patio. Flush-mount fountain bubblers are the perfect modern solution for cooling down a hot concrete deck without building a full pool.
Above-ground fountains take up too much space, but installing a hidden underground water reservoir with a flush-mount deck jet delivers a surprisingly premium look. Utilizing a UV-clarifier in the pump line ensures the water shooting up is always crystal clear and algae-free.
A single hidden bubbler kit costs roughly $150–$250 to install. Pin this if you love high-end, minimalist hardscaping!
- Key Materials: Underground fountain basin, deck jet pump
- Vibe / Style: Modern architectural plaza
- Difficulty: Advanced DIY
- Budget Breakdown: Hidden Basin: $90 | Pump/Jet: $80 | Decorative Stones: $30
- Creator’s Tip: Place a rigid plastic mesh screen over the basin under the decorative rocks to catch leaves before they clog the pump.
- Smart Sourcing: Use an underground hidden fountain basin kit and a UV-clarifying submersible pump.
31. Floating Wetland Islands
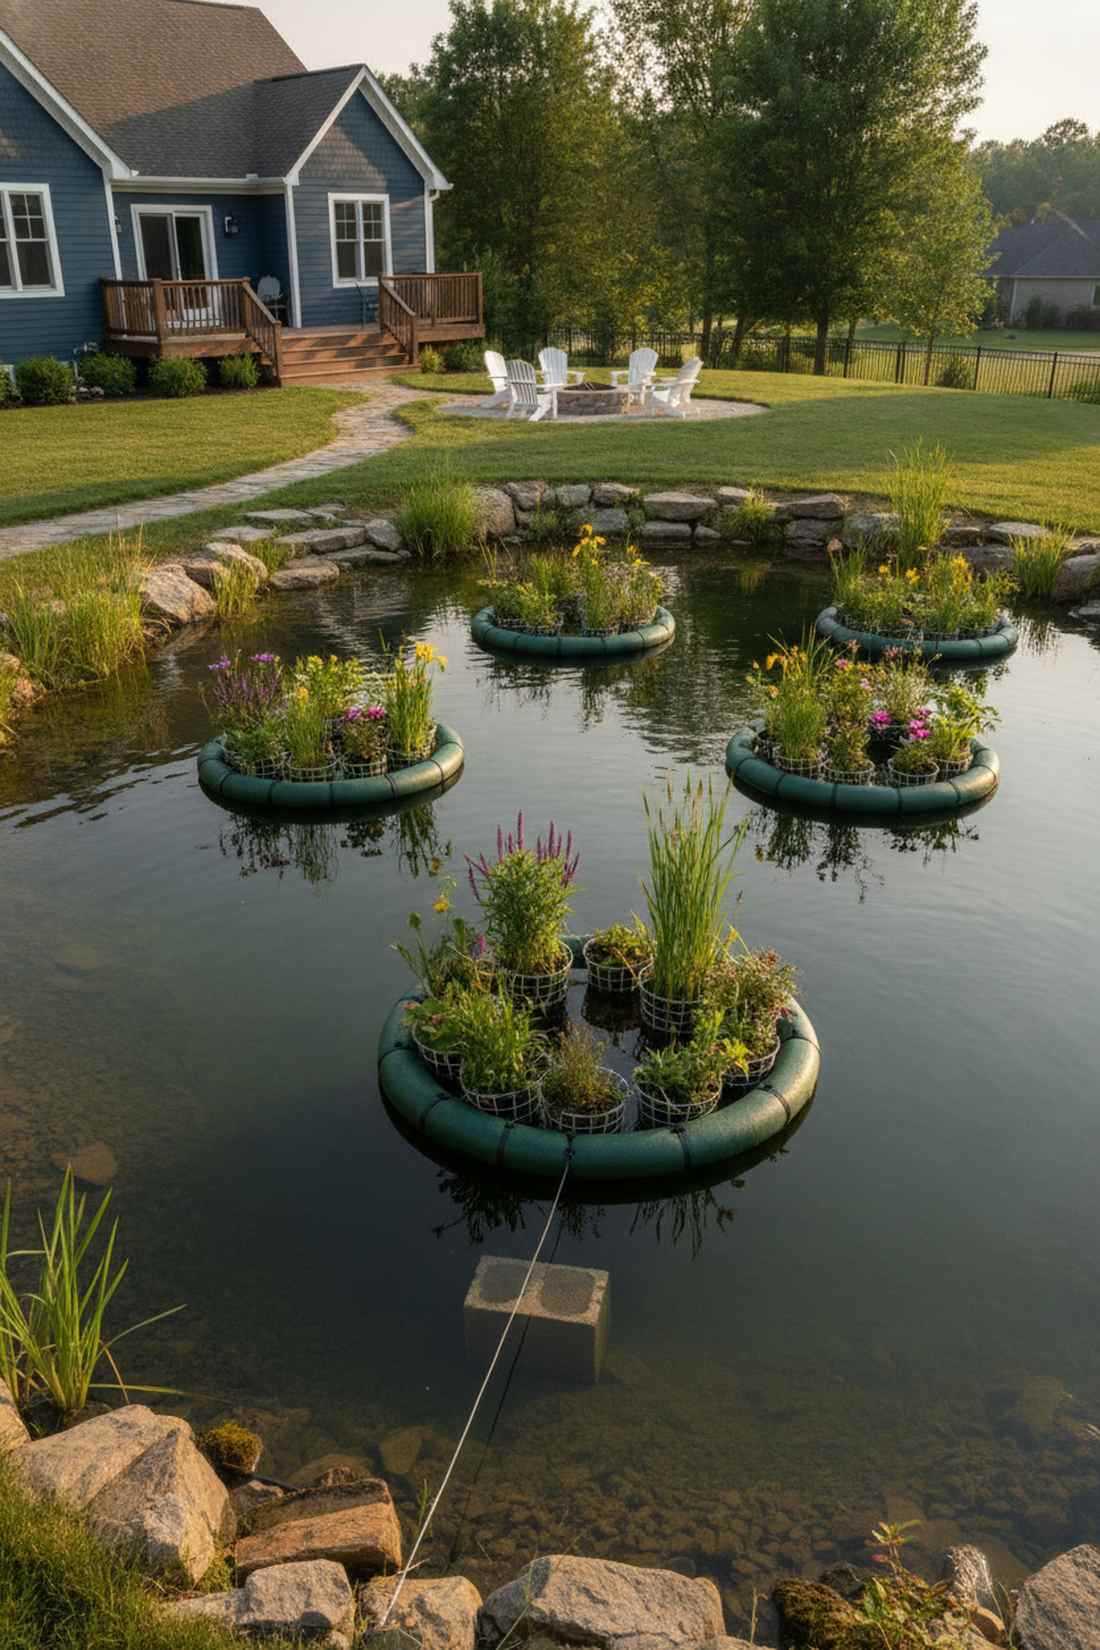
Looks like a magical, floating botanical garden drifting across the water. Buoyant planter islands are a brilliant use-case for adding life and water filtration to deep, inaccessible backyard ponds.
Trying to plant the slippery edges of a deep pond is dangerous, but assembling closed-cell foam floating rings packed with aquatic plants looks far more expensive than it is. Anchoring the islands to a submerged cinderblock keeps them perfectly positioned in the center of the water.
You can build a stunning 3-foot floating island for about $60–$100. Highly recommended for instantly clarifying murky pond water.
- Key Materials: Closed-cell foam tubing, aquatic planter baskets
- Vibe / Style: Magical floating oasis
- Difficulty: Easy
- Budget Breakdown: Foam/Netting: $30 | Planter Baskets: $15 | Plants: $40
- Creator’s Tip: Use zip ties to secure the planter baskets tightly to the foam ring so ducks or turtles can’t tip them over.
- Smart Sourcing: Pick up a pre-cut aquatic mesh planter basket kit and marine-grade closed-cell foam rings.
32. Reclaimed Water Irrigation Landscapes
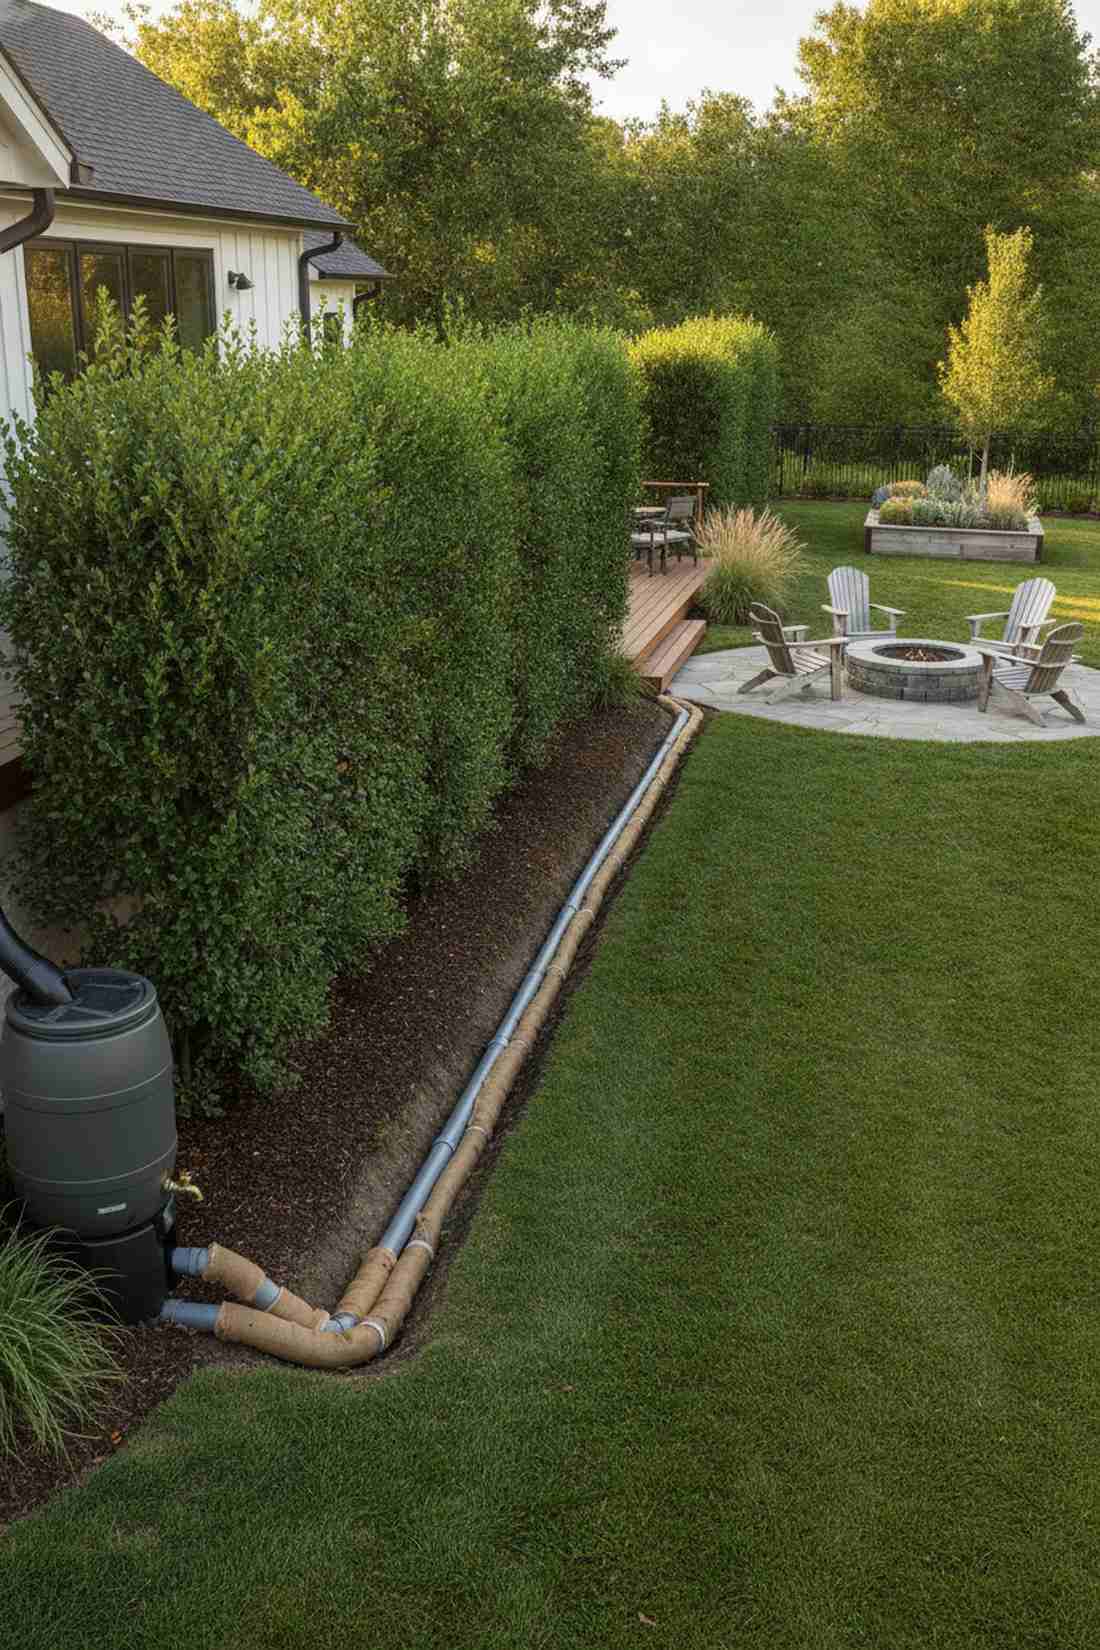
Feels like a hyper-efficient, eco-friendly luxury estate that never wastes a drop. Greywater-fed irrigation trenches work perfectly for keeping heavy-drinking privacy hedges lush during severe summer droughts.
Running city water to hedges costs a fortune, but burying perforated PVC pipes connected to a simple rain barrel system instantly upgrades the aesthetic by keeping everything vibrant green. Wrapping the perforated pipe in a geotextile sleeve prevents dirt from clogging the watering holes.
Setting up a basic gravity-fed trench line runs roughly $100–$150. Save this if you live in an area with strict water restrictions.
- Key Materials: Perforated PVC pipe, geotextile pipe sleeve
- Vibe / Style: Off-grid eco luxury
- Difficulty: Moderate trenching
- Budget Breakdown: Rain Barrel: $70 | Pipe/Fittings: $40 | Fabric Sleeve: $20
- Creator’s Tip: Ensure the trench slopes downward by at least one inch every ten feet so gravity pulls the water to the very end of the line.
- Smart Sourcing: Grab a heavy-duty rain harvesting barrel kit and a bulk roll perforated pipe filter sleeve.
33. Canal Greenway Trails
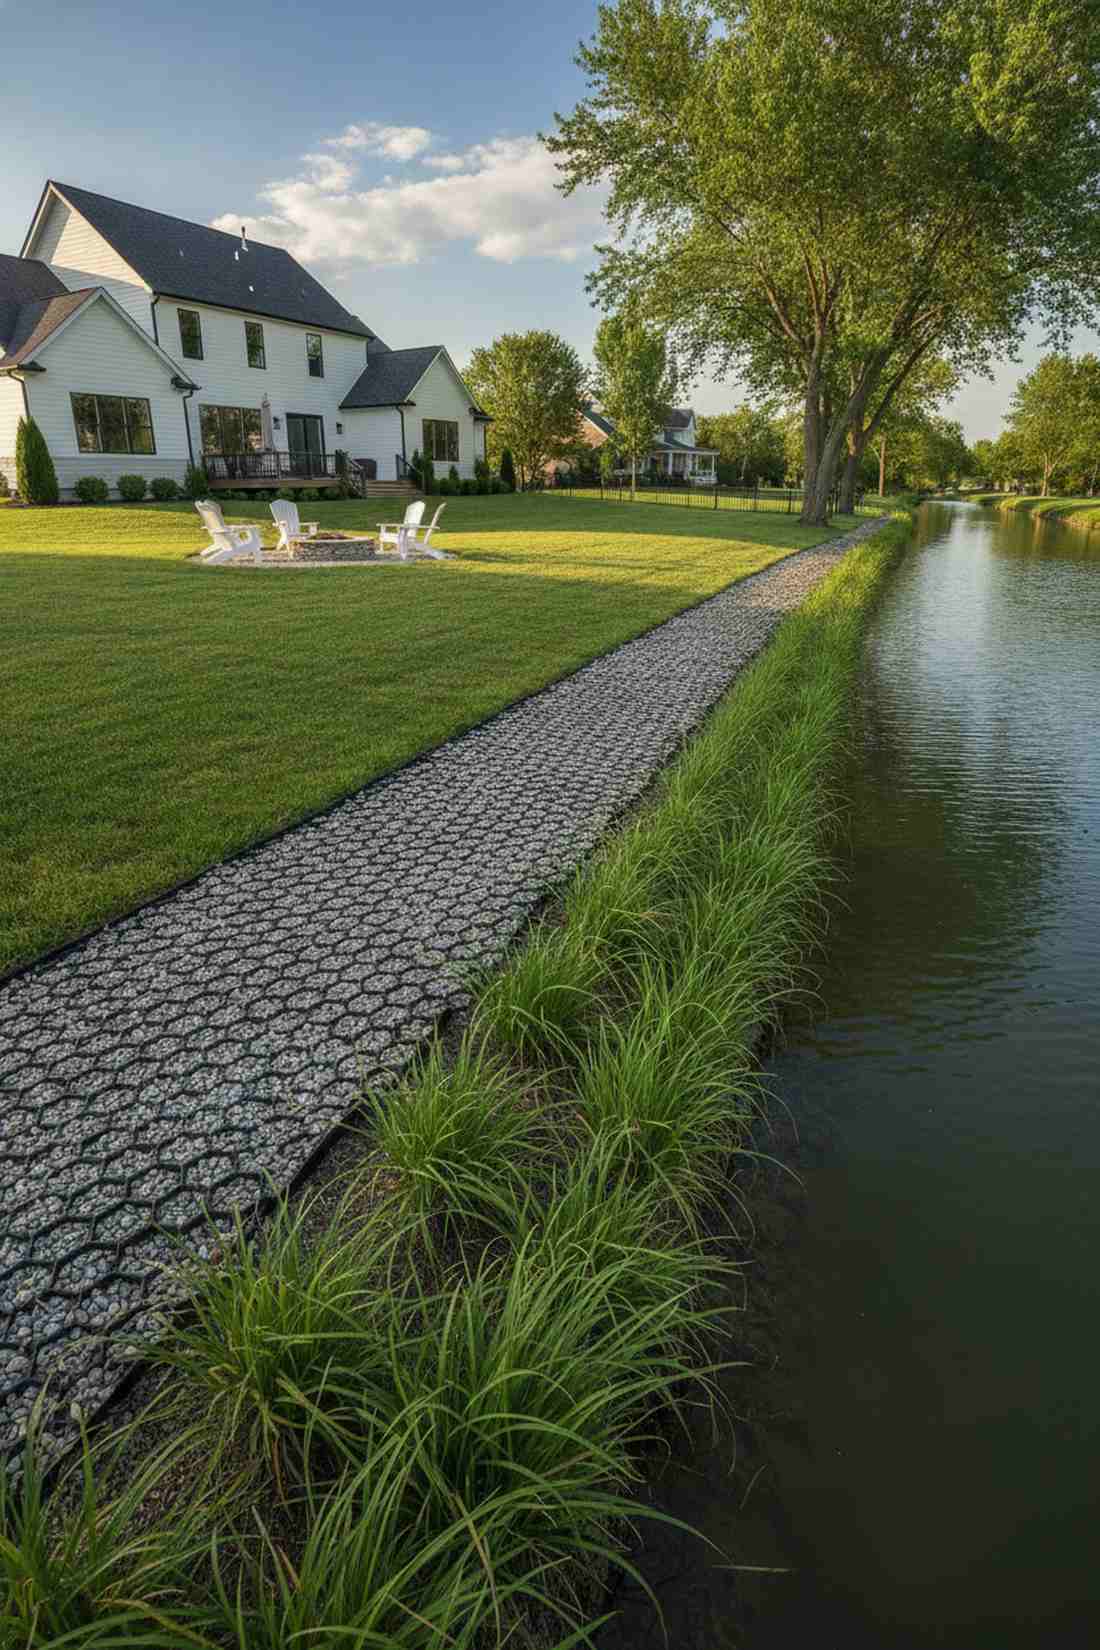
Evokes the tranquil, lazy afternoon vibe of a historic Dutch canal path. Reinforced waterside walking borders are the ultimate use-case for properties backing up to drainage canals or slow-moving creeks.
Walking on a muddy bank is miserable, but laying down a stabilizing honeycomb gravel grid right up to the water’s edge gives a custom designer feel. Planting aggressive-rooting native sedges along the extreme edge stops bank erosion completely.
You can stabilize and beautify a waterside path for about $200–$300. Pin this to your waterfront property inspiration board!
- Key Materials: Gravel stabilizing grid, native sedge plugs
- Vibe / Style: Historic waterfront stroll
- Difficulty: Moderate
- Budget Breakdown: Grid Panels: $150 | Gravel: $50 | Plants: $50
- Creator’s Tip: Tamp the gravel firmly into the grid cells until it is completely flush; overfilling will just cause the gravel to wash into the canal.
- Smart Sourcing: Use a commercial path stabilization grid (bulk pack) and a deep-rooting wetland sedge starter kit.
34. Coastal Living Shorelines
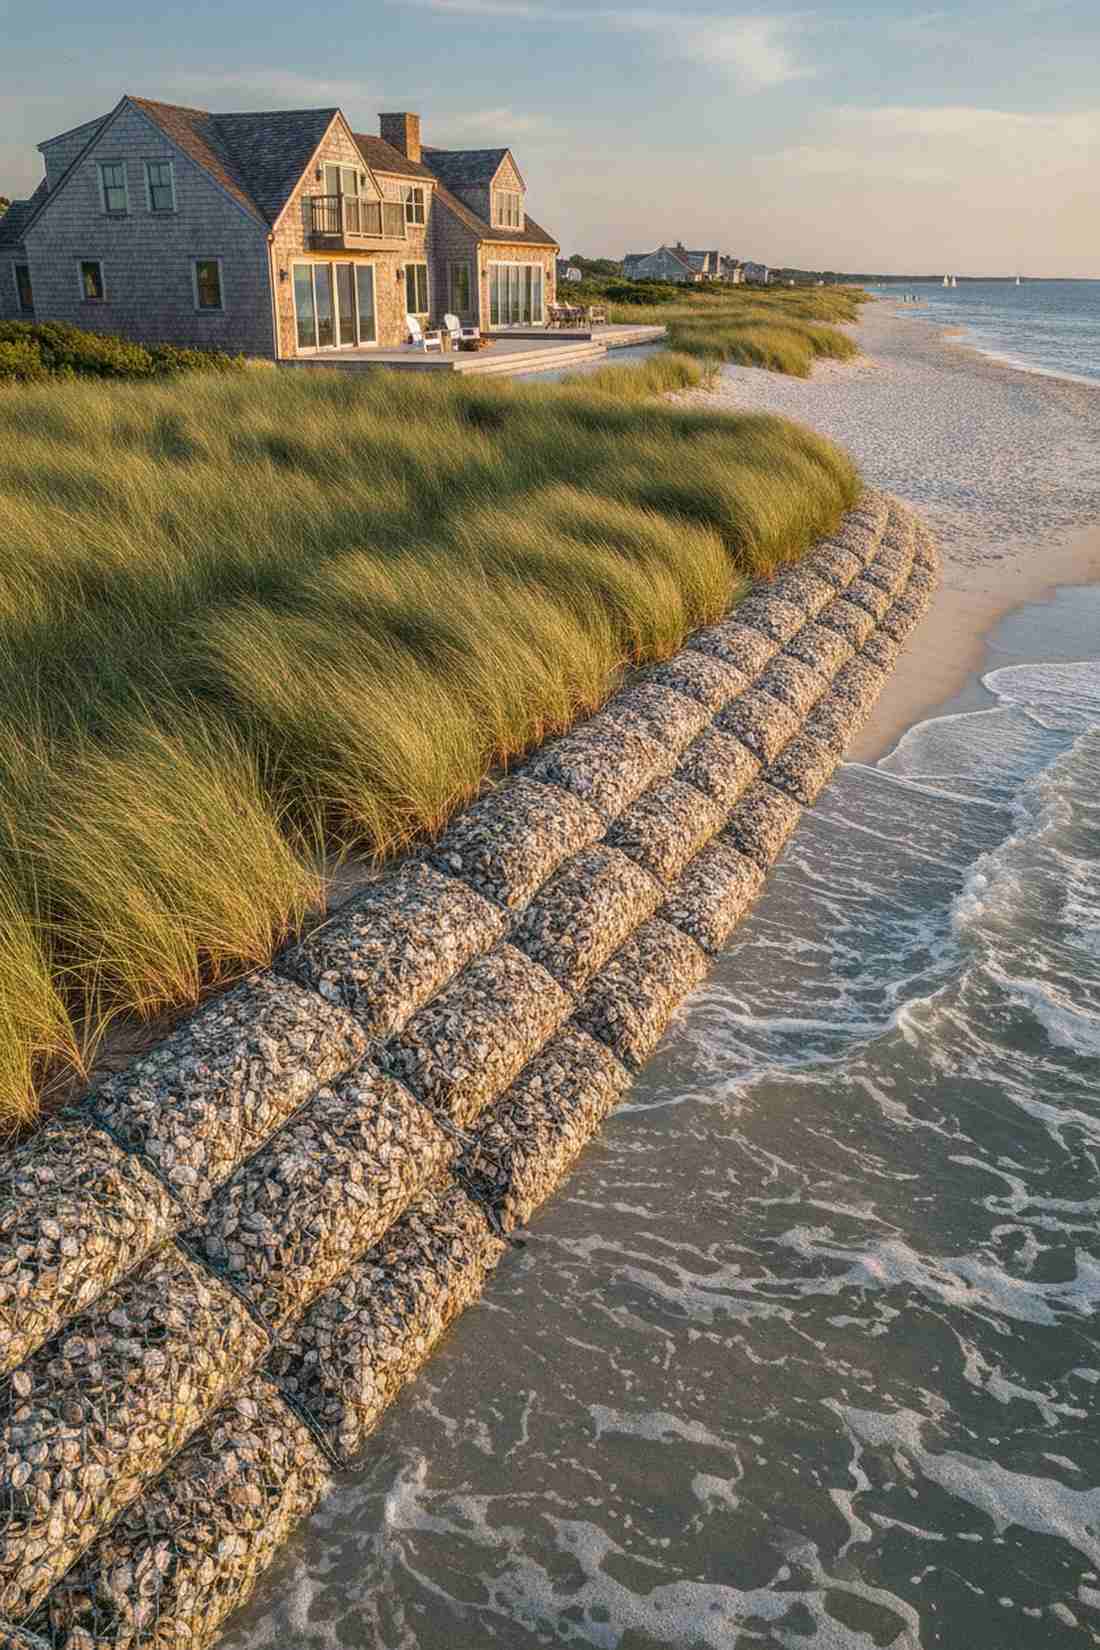
Brings a wild, windswept beach house aesthetic right to your property line. Oyster shell and dune grass barriers work beautifully to protect waterfront properties without using ugly, stark concrete seawalls.
Concrete walls reflect waves and destroy beaches, but creating a sloped mesh bag wall filled with recycled oyster shells looks incredibly natural and absorbs wave energy. Planting deep-rooted dune grasses directly behind the shells locks the sand in and looks far more expensive than it is.
A DIY shoreline buffer costs roughly $150–$300 depending on length. Highly recommended for protecting your coastal investment.
- Key Materials: Heavy-duty mesh shell bags, dune grass plugs
- Vibe / Style: Private nature reserve beach
- Difficulty: Heavy manual labor
- Budget Breakdown: Mesh Bags: $50 | Shells: $100 | Dune Grass: $60
- Creator’s Tip: Plant the dune grasses in an offset zig-zag pattern rather than a straight line to block wind and water much more effectively.
- Smart Sourcing: Invest in marine-grade empty mesh barrier bags and a bulk pack salt-tolerant dune grass kit.
Wildlife & Biodiversity Corridors
To make an open green space truly sustainable, you need to attract the right kind of wildlife. These setups use specific materials to pull in butterflies, birds, and beneficial insects.
35. Native Pollinator Meadows

Feels like stepping into a wild, romantic painting bursting with color and life. Low-mow wildflower meadow patches are an incredible use-case for large, sunny backyards where you hate mowing the grass.
Throwing cheap wild seeds on top of existing grass never works, but solarizing the turf with clear heavy plastic first guarantees a flawless, weed-free meadow bed. Using a premium regional wildflower mix delivers a surprisingly premium look that blooms relentlessly from spring to fall.
You can convert a 20×20 foot area for roughly $60–$100. Pin this if you want to ditch the lawnmower forever!
- Key Materials: Clear solarization plastic, regional wildflower mix
- Vibe / Style: Romantic wild cottage garden
- Difficulty: Easy (requires patience)
- Budget Breakdown: Clear Plastic: $30 | Premium Seed: $40 | Sand: $10
- Creator’s Tip: Mix your tiny wildflower seeds with sandbox sand before broadcasting them so you can easily see where you’ve tossed them.
- Smart Sourcing: Buy a commercial heavy-duty clear solarization tarp and a bulk pack regional pollinator seed mix.
36. Hedgerow Wildlife Borders
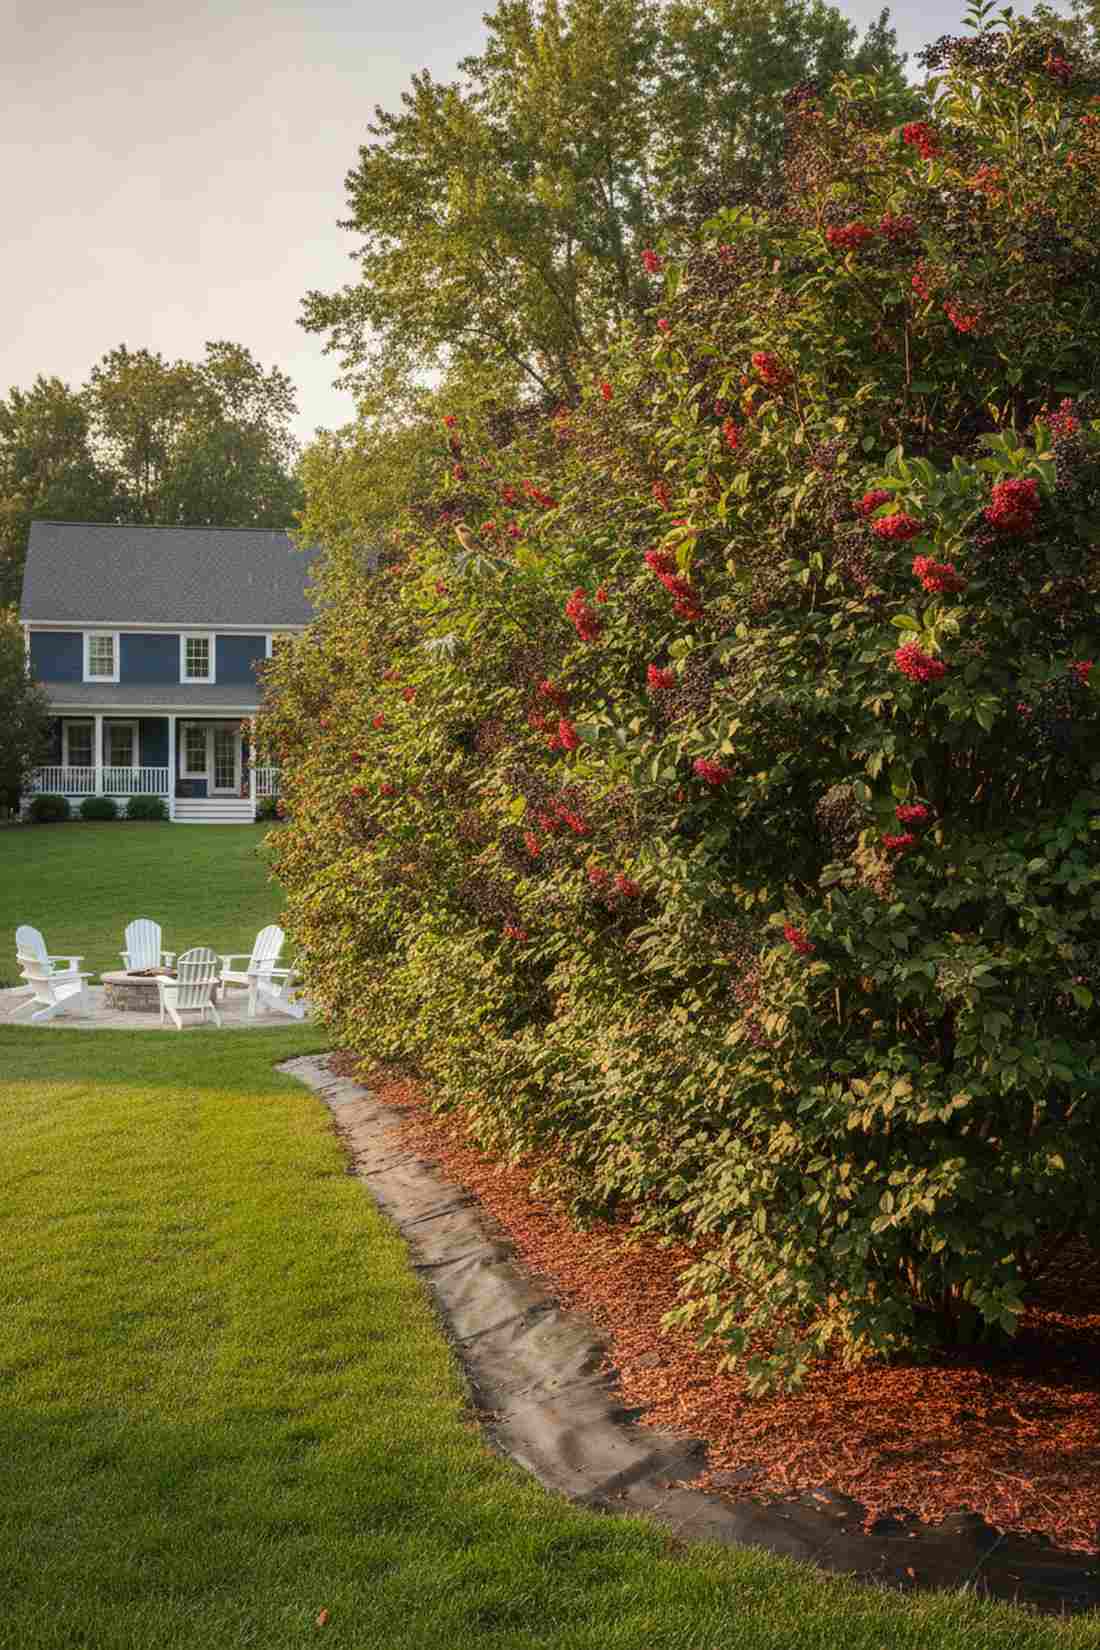
Gives that thick, lush English countryside estate border vibe. Dense berry-producing shrub screens work beautifully for creating ultimate backyard privacy while feeding local songbirds.
Standard wooden fences are boring and block the breeze, but planting a staggered double-row of native viburnum and elderberry instantly upgrades the aesthetic to a living wall. Laying a thick biodegradable weed mat underneath ensures the young shrubs don’t have to compete for water.
A 30-foot living privacy screen costs around $200–$350 in young shrubs. Save this for a long-term, beautiful property line solution.
- Key Materials: Berry-producing shrub saplings, biodegradable weed mat
- Vibe / Style: English countryside estate
- Difficulty: Moderate digging
- Budget Breakdown: Saplings: $200 | Weed Mat: $40 | Mulch: $50
- Creator’s Tip: Space the plants 20% closer than the nursery tag recommends to force them to intertwine and create an impenetrable screen faster.
- Smart Sourcing: Use a heavy-duty biodegradable landscape fabric roll and a bulk pack native privacy shrub kit.
37. Woodland Restoration Zones
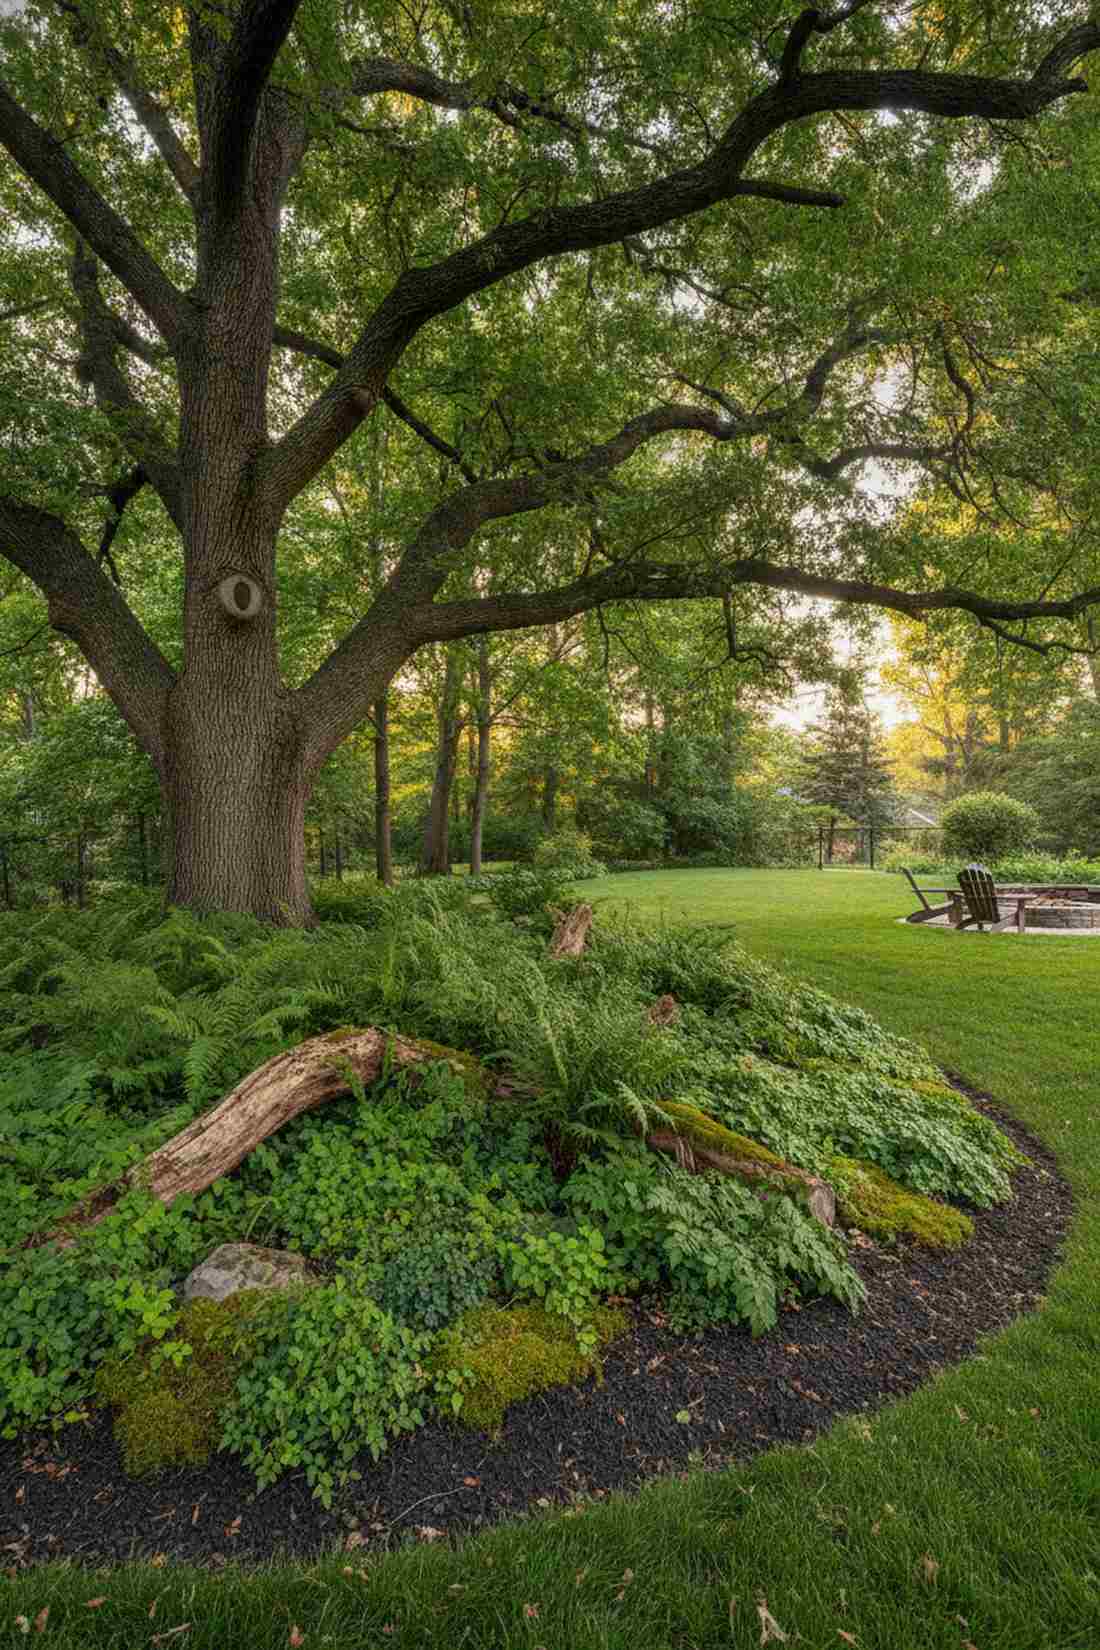
Evokes the deep, tranquil feeling of a private ancient forest retreat. Layered understory shade plantings are perfectly designed for the dark, bare dirt areas underneath massive, mature backyard trees.
Grass will never grow in deep shade, but planting a blanket of native ferns and woodland groundcovers gives a custom designer feel that looks incredibly intentional. Adding a few decaying decorative logs naturally feeds the soil while adding an authentic rustic aesthetic.
You can transform a barren tree base for about $80–$150. Highly recommended for cleaning up the darkest corners of your yard.
- Key Materials: Shade-loving fern plugs, composted leaf mold
- Vibe / Style: Ancient forest sanctuary
- Difficulty: Easy
- Budget Breakdown: Fern Plugs: $60 | Leaf Mold: $30 | Decorative Logs: Free
- Creator’s Tip: Never pile soil or mulch against the actual bark of the mature tree, leave a 4-inch gap to prevent rot.
- Smart Sourcing: Grab a shade-loving woodland fern starter kit and premium composted leaf mold (bulk bag).
38. Butterfly Way Stations
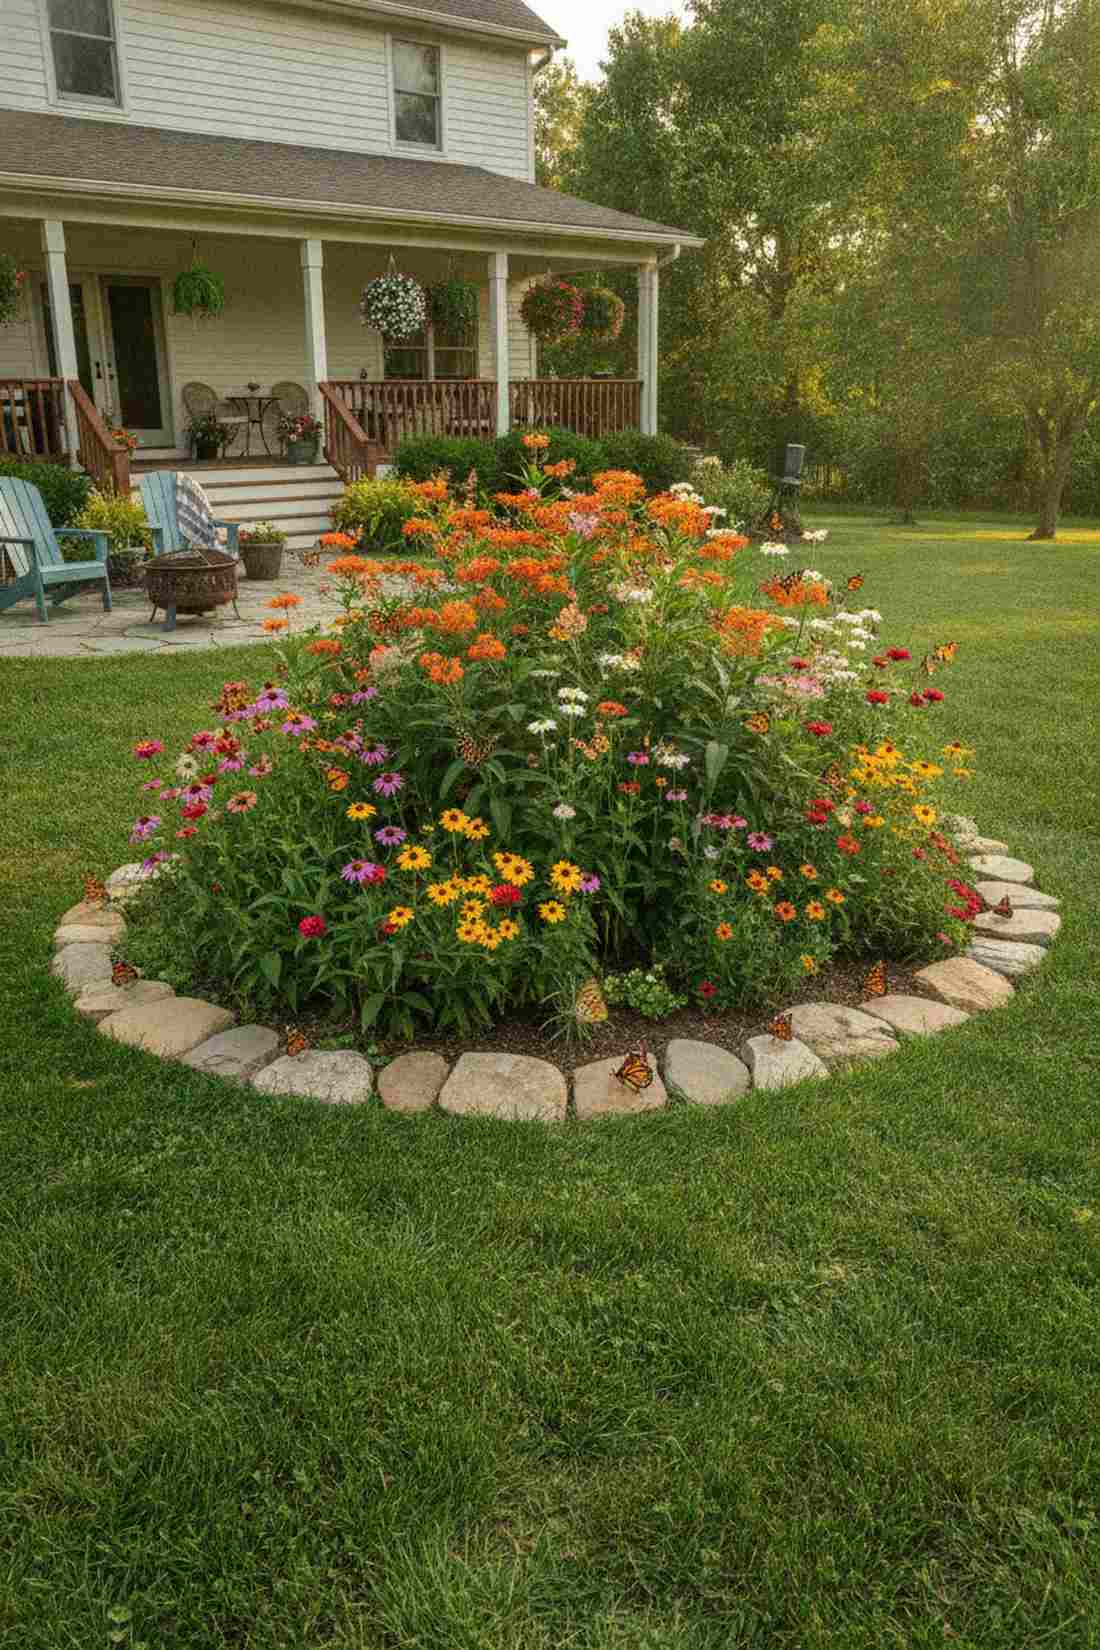
Feels like a magical, fluttering oasis that brings your garden to life every afternoon. Clustered nectar and host plant islands work wonderfully as a vibrant focal point in the middle of a boring green lawn.
Planting a single flower does nothing, but grouping specific host plants like Milkweed with bright nectar landing pads looks far more expensive than it is. Circling the bed with smooth, flat basking stones gives the butterflies a place to warm their wings in the morning sun.
This specialized garden kit usually runs around $50–$90. Pin this to your weekend garden project board!
- Key Materials: Milkweed seeds/plugs, flat river stones
- Vibe / Style: Vibrant magical oasis
- Difficulty: Easy
- Budget Breakdown: Plant Kit: $45 | Basking Stones: $20 | Soil: $15
- Creator’s Tip: Plant the tallest nectar flowers in the absolute center of the bed to block harsh winds from blowing the butterflies away.
- Smart Sourcing: Pick up a certified monarch butterfly host plant kit and a bulk pack flat river basking stones.
Material Guide: Cheap vs. Premium Aesthetic
Knowing exactly where to save and where to spend makes all the difference in achieving that “looks expensive but isn’t” vibe in your green space urban projects.
- Standard Plastic vs. UV-Resistant/Fiberglass: Standard plastic planters crack and fade white within one summer. Upgrading to UV-coated fiberglass or resin ensures the color stays rich and the material survives freezing winters without shattering.
- Pre-made Kits vs. Sourcing Locally: Scavenging for individual parts at hardware stores often results in mismatched aesthetics. Buying commercial starter kits ensures all components fit together perfectly, saving you both time and money on return trips.
You’re going to love this next one. It’s the ultimate pest-control hack masquerading as cute rustic decor…
39. Bat Roosting Habitats
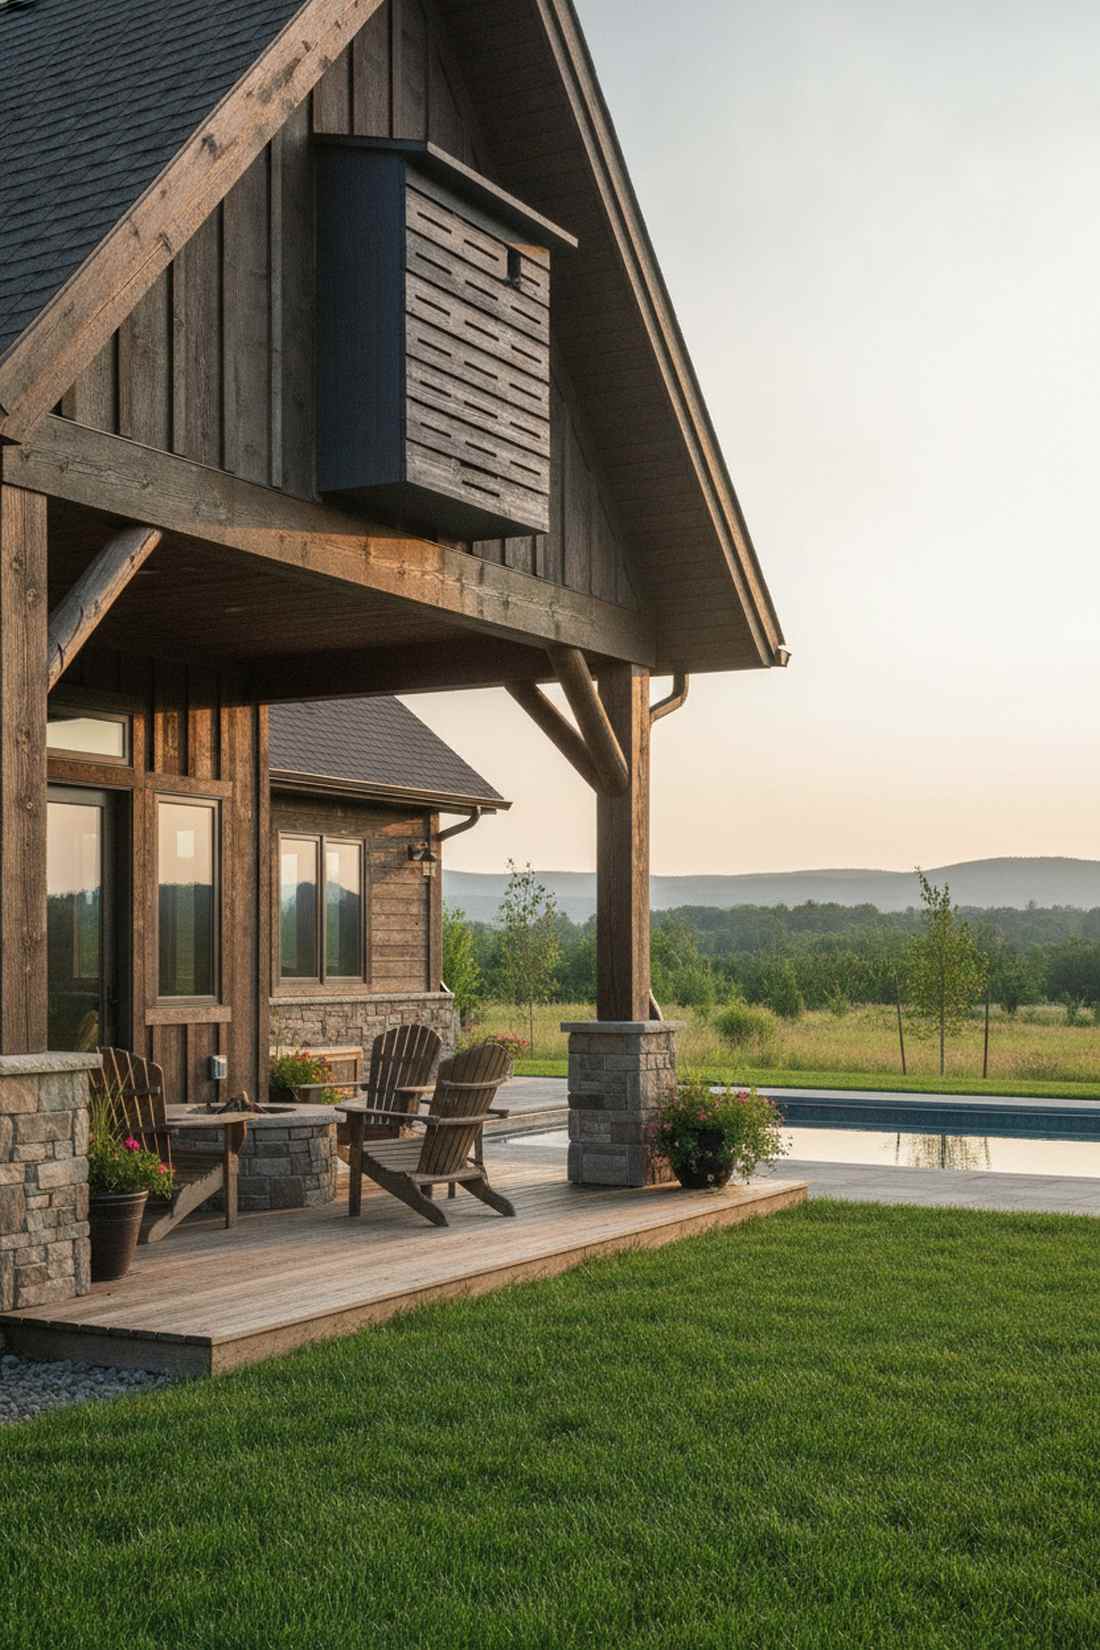
Brings a cool, rustic cabin aesthetic to the high peaks of your exterior walls. Multi-chamber cedar bat houses are an incredibly smart use-case for naturally eliminating mosquitoes without spraying harsh, toxic chemicals.
Cheap single-chamber boxes get too hot, but mounting a tall, multi-chamber grooved cedar box delivers a surprisingly premium look while functioning perfectly. Painting the exterior a dark color helps it absorb morning heat, which is exactly what the colony needs to thrive.
A high-quality habitat runs roughly $40–$80. Save this if you hate mosquitoes ruining your summer patio nights.
- Key Materials: Multi-chamber cedar bat house, exterior dark paint
- Vibe / Style: Rustic eco-cabin
- Difficulty: Requires a tall ladder
- Budget Breakdown: Bat House: $50 | Paint: $15 | Mounting Bracket: $10
- Creator’s Tip: Always mount the house at least 15 feet high, facing South or East, and completely clear of any tree branches.
- Smart Sourcing: Use a premium multi-chamber cedar bat house kit and heavy-duty siding mounting brackets.
40. Bird Migration Rest Stops
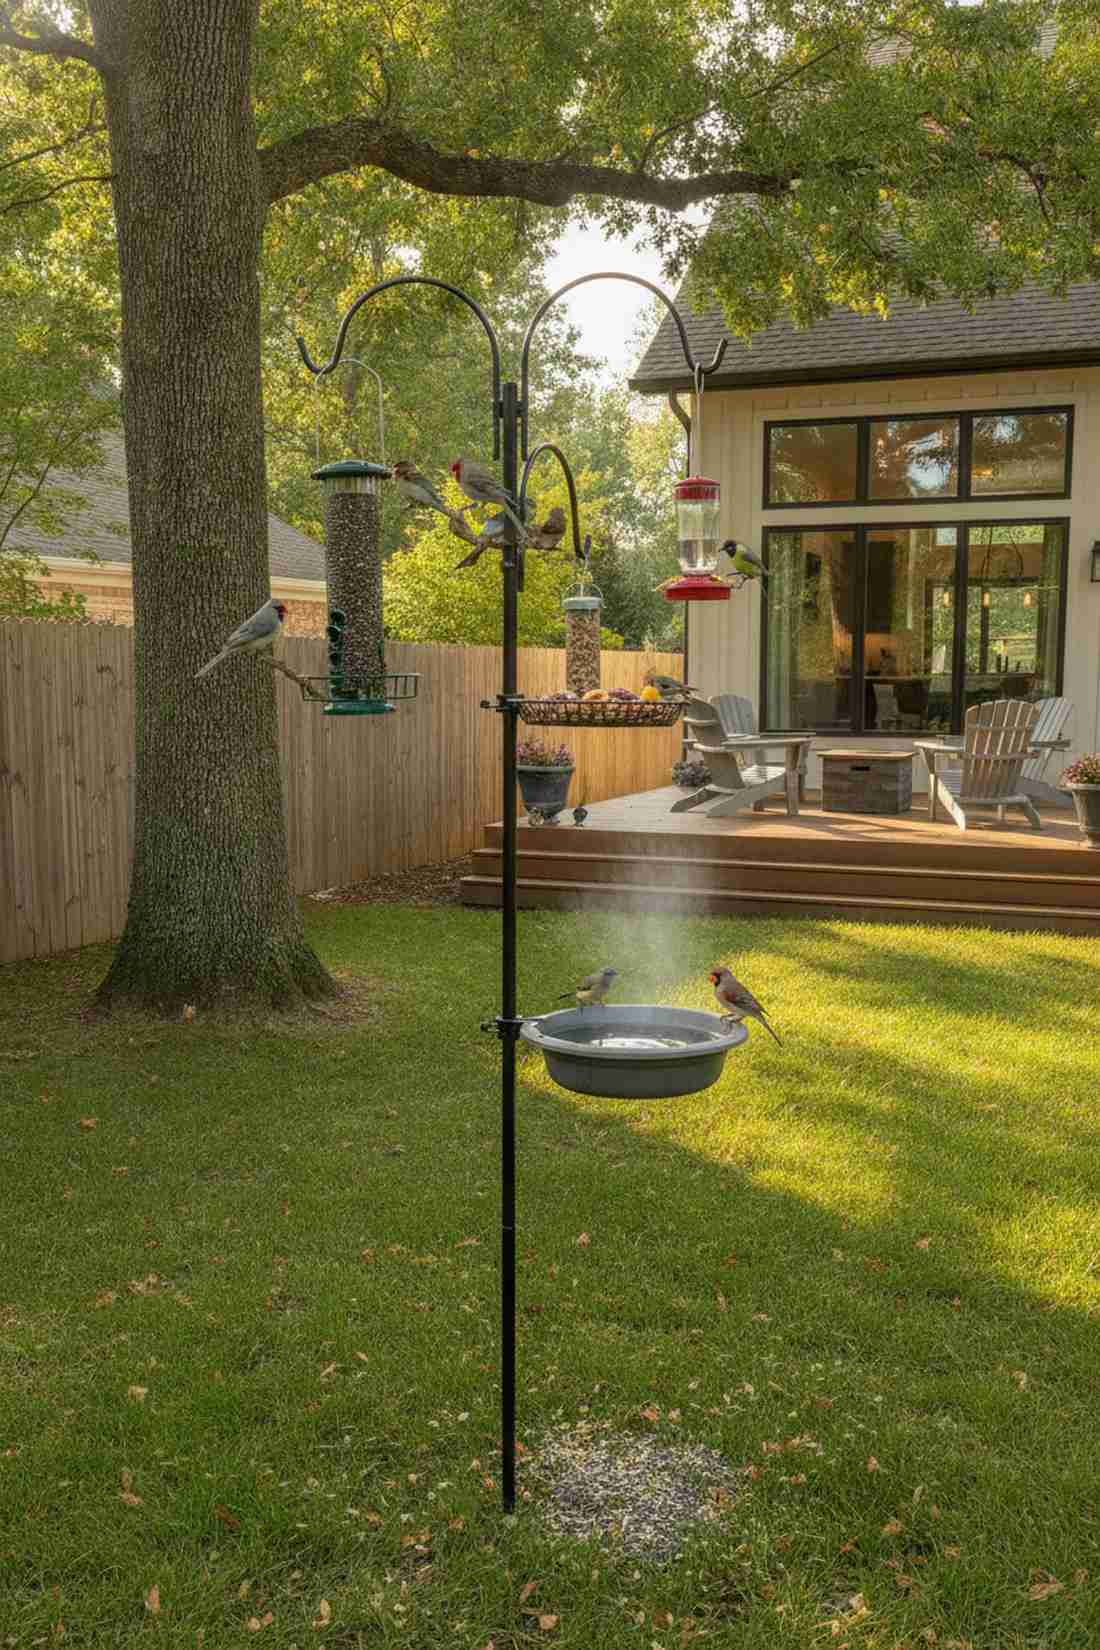
Feels like a bustling, joyful wildlife resort right outside your kitchen window. Multi-level feeder and water stations work perfectly for transforming a boring side yard into an active bird-watching sanctuary.
Hanging a single plastic feeder looks cheap, but installing a heavy-duty powder-coated steel pole system with multiple varied feeding arms instantly upgrades the aesthetic. Adding a heated, clamp-on bird bath ensures the birds stick around your yard even through the freezing winter months.
A premium feeding station setup costs about $100–$150. Highly recommended for adding incredible daily motion to your landscape.
- Key Materials: Steel multi-hook pole, heated bird bath
- Vibe / Style: High-end nature resort
- Difficulty: Easy setup
- Budget Breakdown: Pole System: $70 | Heated Bath: $50 | Seed: $20
- Creator’s Tip: Place the pole exactly 10 feet away from any fences or trees so squirrels can’t make the jump onto the feeders.
- Smart Sourcing: Invest in a heavy-duty squirrel-proof pole system and a UV-coated heated winter bird bath kit.
41. Reptile Basking Rocks
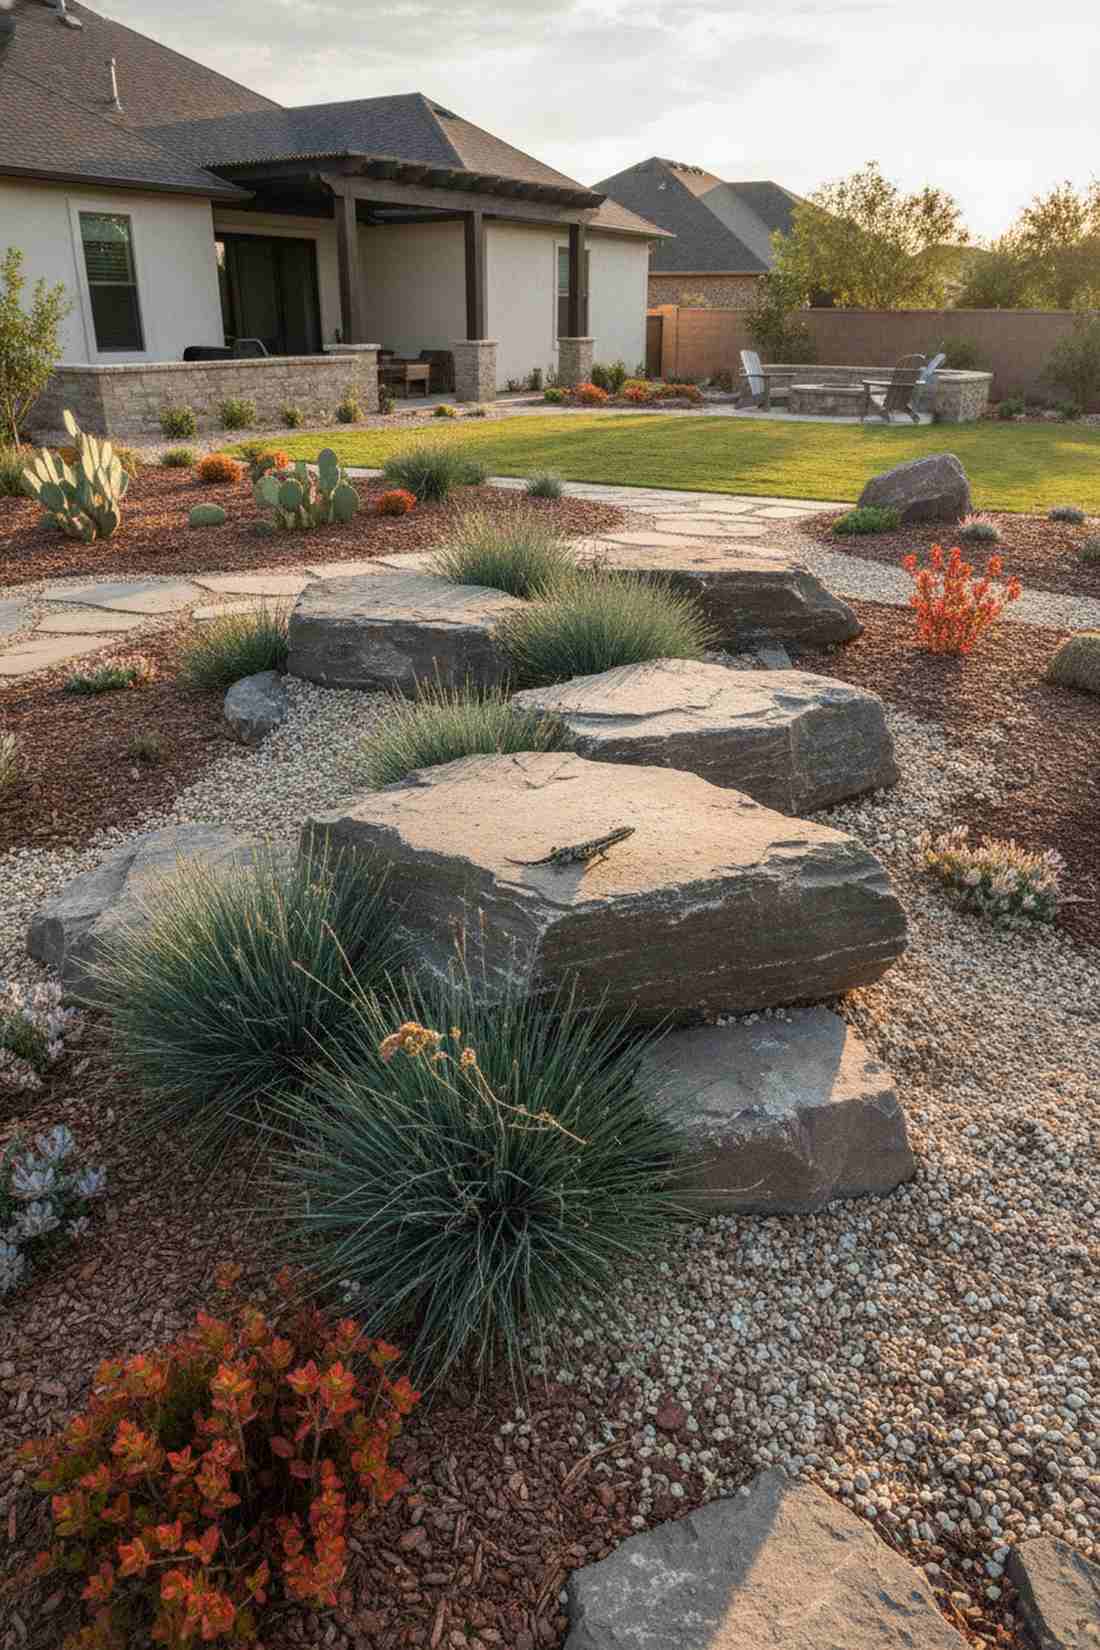
Creates a rugged, stylized desert landscape focal point that looks meticulously curated. Strategic thermal boulder placements are an excellent use-case for breaking up flat, boring stretches of mulch or gravel.
Just dropping a rock on the dirt looks accidental, but burying the bottom third of a massive flat-topped boulder gives a custom designer feel that looks entirely natural. Surrounding the base with native clumping grasses creates a safe, protected micro-climate that beneficial garden lizards will absolutely love.
Sourcing and placing a few premium landscape boulders runs roughly $50–$120. Pin this to your xeriscape design board!
- Key Materials: Flat-top landscape boulders, native clumping grass
- Vibe / Style: Rugged desert architecture
- Difficulty: Very heavy lifting
- Budget Breakdown: Boulders: $80 | Grass Plugs: $30
- Creator’s Tip: Orient the flattest face of the rock directly toward the South or Southwest to capture maximum afternoon thermal heat.
- Smart Sourcing: Pick up premium flat-topped landscape boulders (local delivery) and a drought-resistant clumping grass starter kit.
Smart & Tech-Enabled Urban Green Spaces
The smartest green space urban ideas hide powerful technology behind beautiful aesthetics. These tech upgrades save massive amounts of time and money while keeping your landscape pristine.
42. Sensor-Based Irrigation Systems
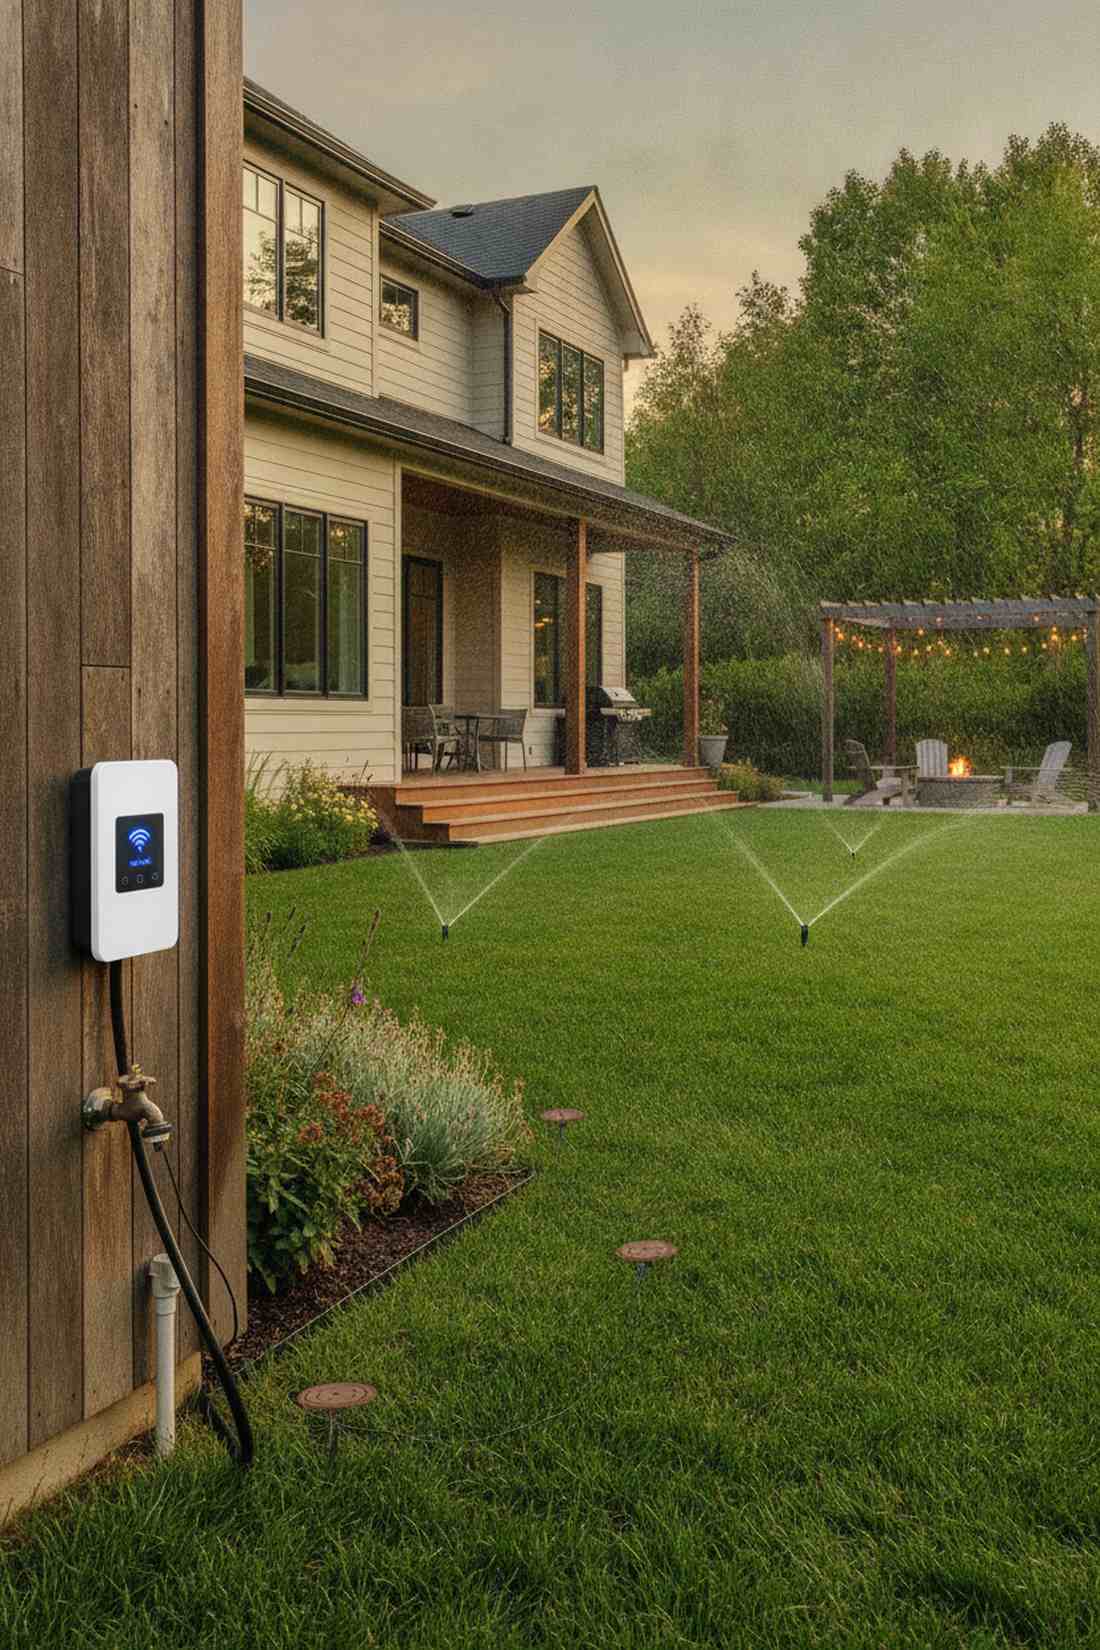
Feels like having a professional landscape crew secretly maintaining your yard every night. Wifi-enabled smart irrigation controllers are the ultimate use-case for homeowners tired of over-watering and wasting money.
Old dial-timers run even when it’s pouring rain, but swapping the faceplate to a smart weather-tracking controller looks far more expensive than it is. Adding wireless soil moisture sensors ensures your lawn only gets watered when the roots are actually dry, slashing your water bill instantly.
This tech upgrade costs around $150–$250 and pays for itself in one summer. A must-do if you want a perfect, effortless lawn.
- Key Materials: Smart wifi sprinkler controller, wireless moisture sensors
- Vibe / Style: Hyper-efficient modern estate
- Difficulty: Easy wiring swap
- Budget Breakdown: Smart Controller: $150 | Sensors: $60
- Creator’s Tip: Take a clear photo of your old timer’s wiring setup before you disconnect anything to make the swap perfectly foolproof.
- Smart Sourcing: Grab a premium wifi-enabled smart sprinkler controller and a wireless soil moisture sensor kit.
43. Solar-Powered Park Lighting

Brings a dramatic, high-end resort ambiance to your yard the second the sun goes down. Commercial solar pathway bollards work exceptionally well for lighting up long, dark driveways without the nightmare of digging electrical trenches.
Cheap plastic solar lights from the dollar store look tacky and break in a week, but installing heavy cast-aluminum solar fixtures delivers a surprisingly premium look. The modern warm-LED glow highlights your landscaping features flawlessly while costing zero dollars in electricity.
A set of six premium lights runs about $150–$250. Save this to your outdoor lighting inspiration board!
- Key Materials: Cast-aluminum solar bollards, heavy-duty ground spikes
- Vibe / Style: Luxury night resort
- Difficulty: Very easy
- Budget Breakdown: Solar Light Kit: $180 | Sand for leveling: $10
- Creator’s Tip: Wipe the solar panels down with a microfiber cloth and glass cleaner once a month to keep the charging efficiency at 100%.
- Smart Sourcing: Invest in a commercial-grade cast aluminum solar path light kit and heavy-duty metal ground mounting spikes.
44. Air Quality Monitoring Gardens
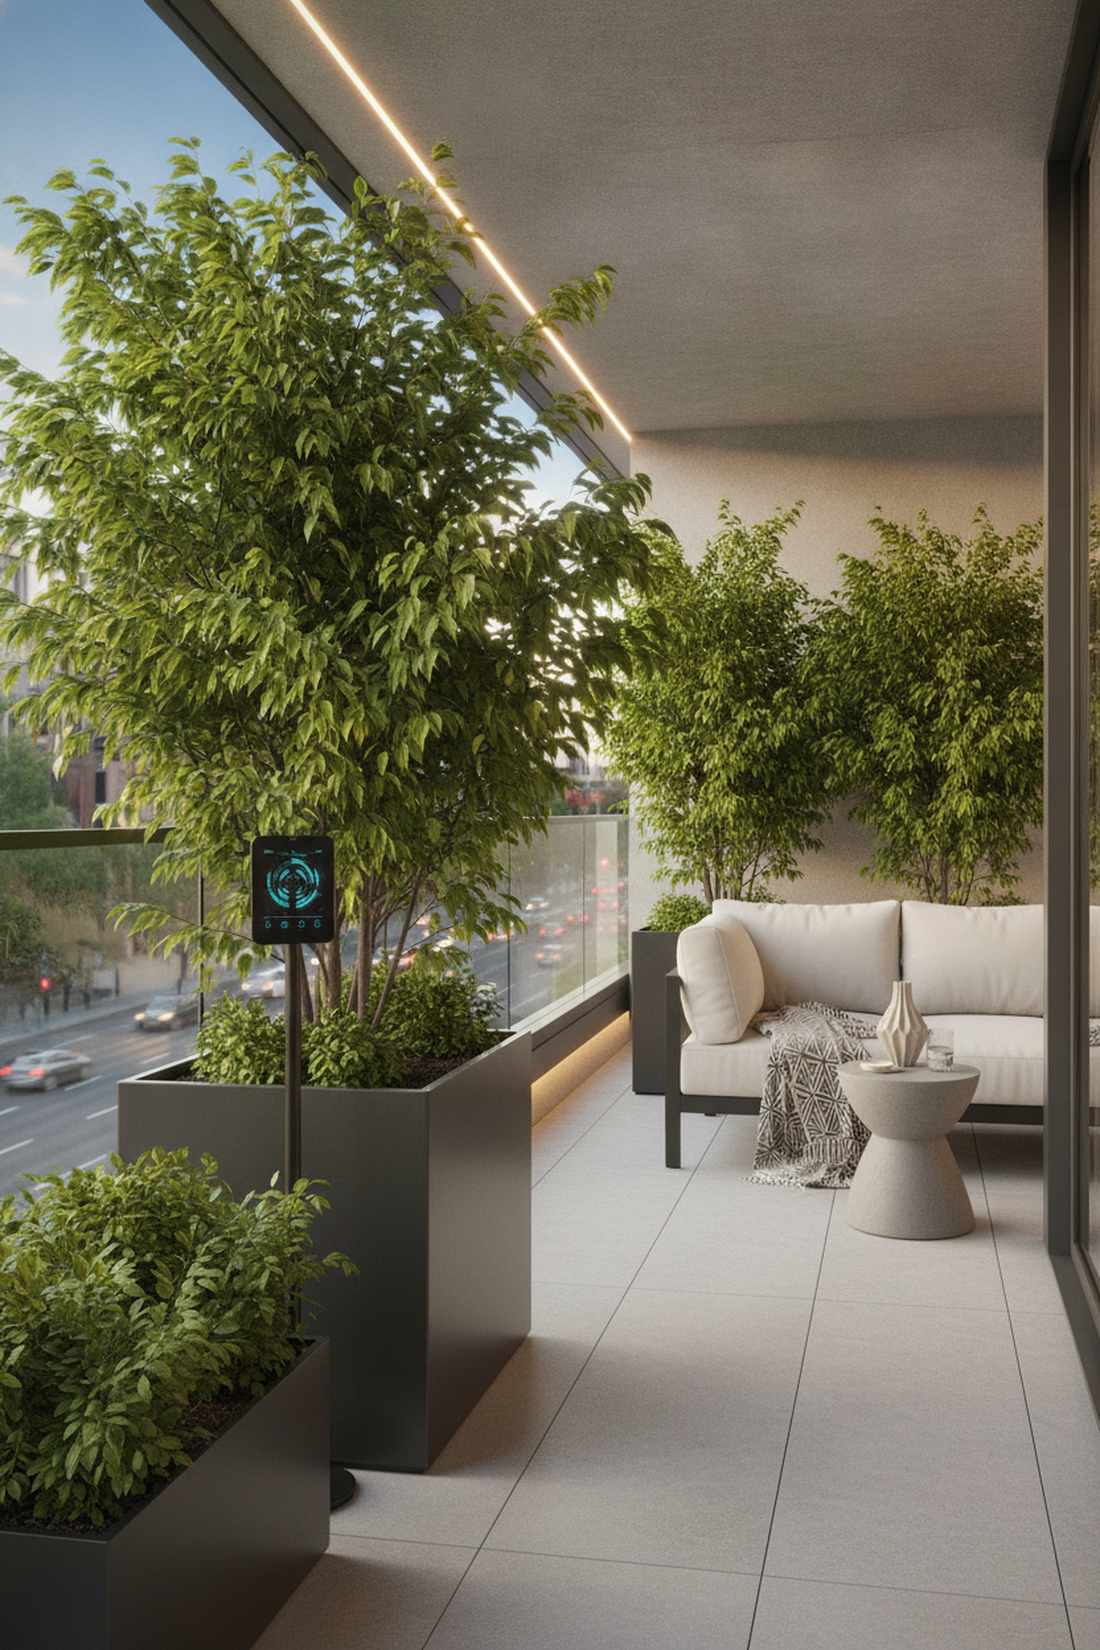
Feels like stepping into a futuristic, hyper-clean eco-bubble. Air-purifying plant clusters with smart monitors are perfectly designed for heavily polluted urban balcony setups.
Just buying plants isn’t enough, but pairing dense, broad-leaf evergreens with a sleek outdoor smart air quality monitor instantly upgrades the aesthetic to a high-tech wellness zone. Watching the real-time data prove that your balcony air is cleaner than the street is incredibly satisfying.
You can set up this tech-driven wellness corner for roughly $150–$200. Pin this if you live in a dense, traffic-heavy city.
- Key Materials: Smart outdoor air monitor, broad-leaf evergreens
- Vibe / Style: Futuristic wellness bubble
- Difficulty: Easy
- Budget Breakdown: Smart Monitor: $120 | Air-Purifying Plants: $60
- Creator’s Tip: Wash the leaves of your plants gently with a damp cloth every few weeks so they can absorb maximum particulate matter.
- Smart Sourcing: Use a wifi-enabled outdoor air quality monitor and a bulk pack broad-leaf air purifying plant kit.
Most DIYers completely ignore this next concept, but adding this one piece of furniture makes your yard feel like a $500/night hotel.
45. Smart Park Furniture
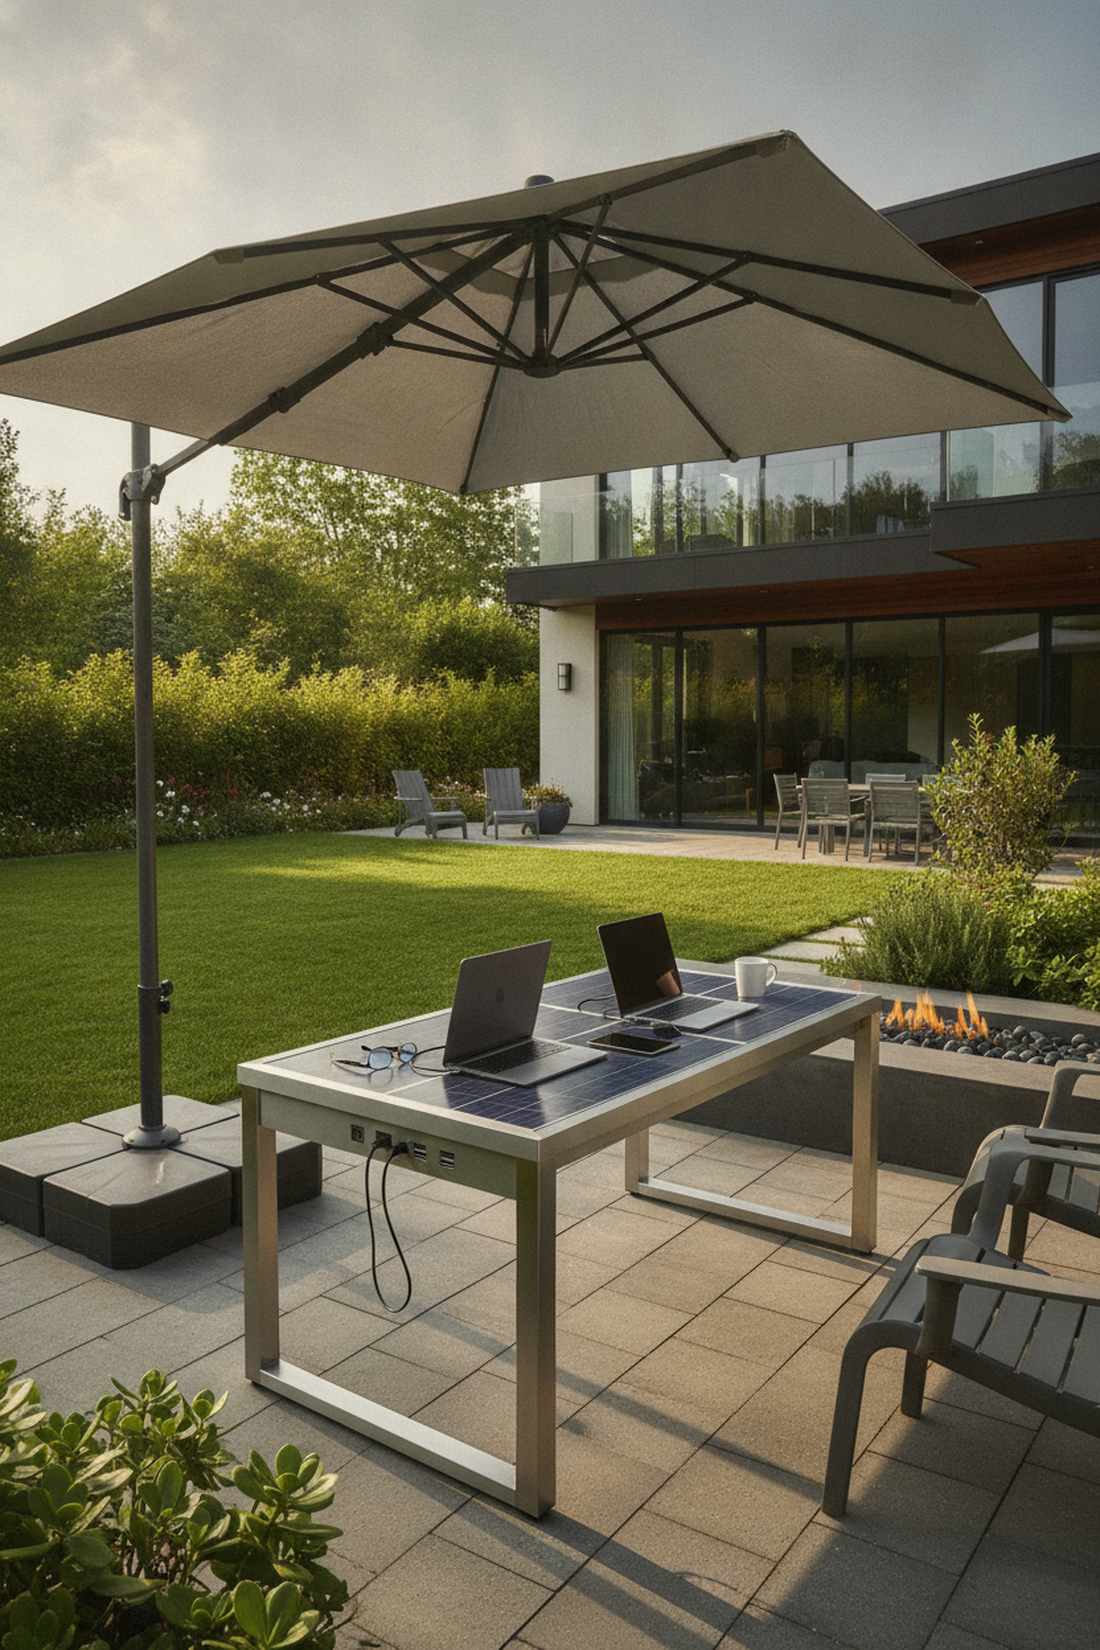
Radiates the sleek, connected energy of a Silicon Valley corporate campus. Solar-charging outdoor lounge tables are the ultimate use-case for turning a sunny backyard patio into your remote work-from-home office.
Standard patio tables are useless for laptops, but investing in a weather-proof table with integrated solar panels and USB ports gives a custom designer feel. Pairing it with a heavy-duty cantilever umbrella ensures you can work outside all day without screen glare or battery anxiety.
A smart patio work setup costs around $300–$600. Highly recommended if you want to take your home office outdoors.
- Key Materials: Solar-integrated patio table, UV-resistant cantilever umbrella
- Vibe / Style: Tech-campus lounge
- Difficulty: Moderate assembly
- Budget Breakdown: Smart Table: $250 | Umbrella: $150 | Base weights: $50
- Creator’s Tip: Ensure the umbrella base is filled with wet sand rather than just water so it never blows over in a severe storm.
- Smart Sourcing: Grab a solar-charging weather-resistant outdoor table and a UV-coated commercial cantilever umbrella.
46. Digital Wayfinding Systems
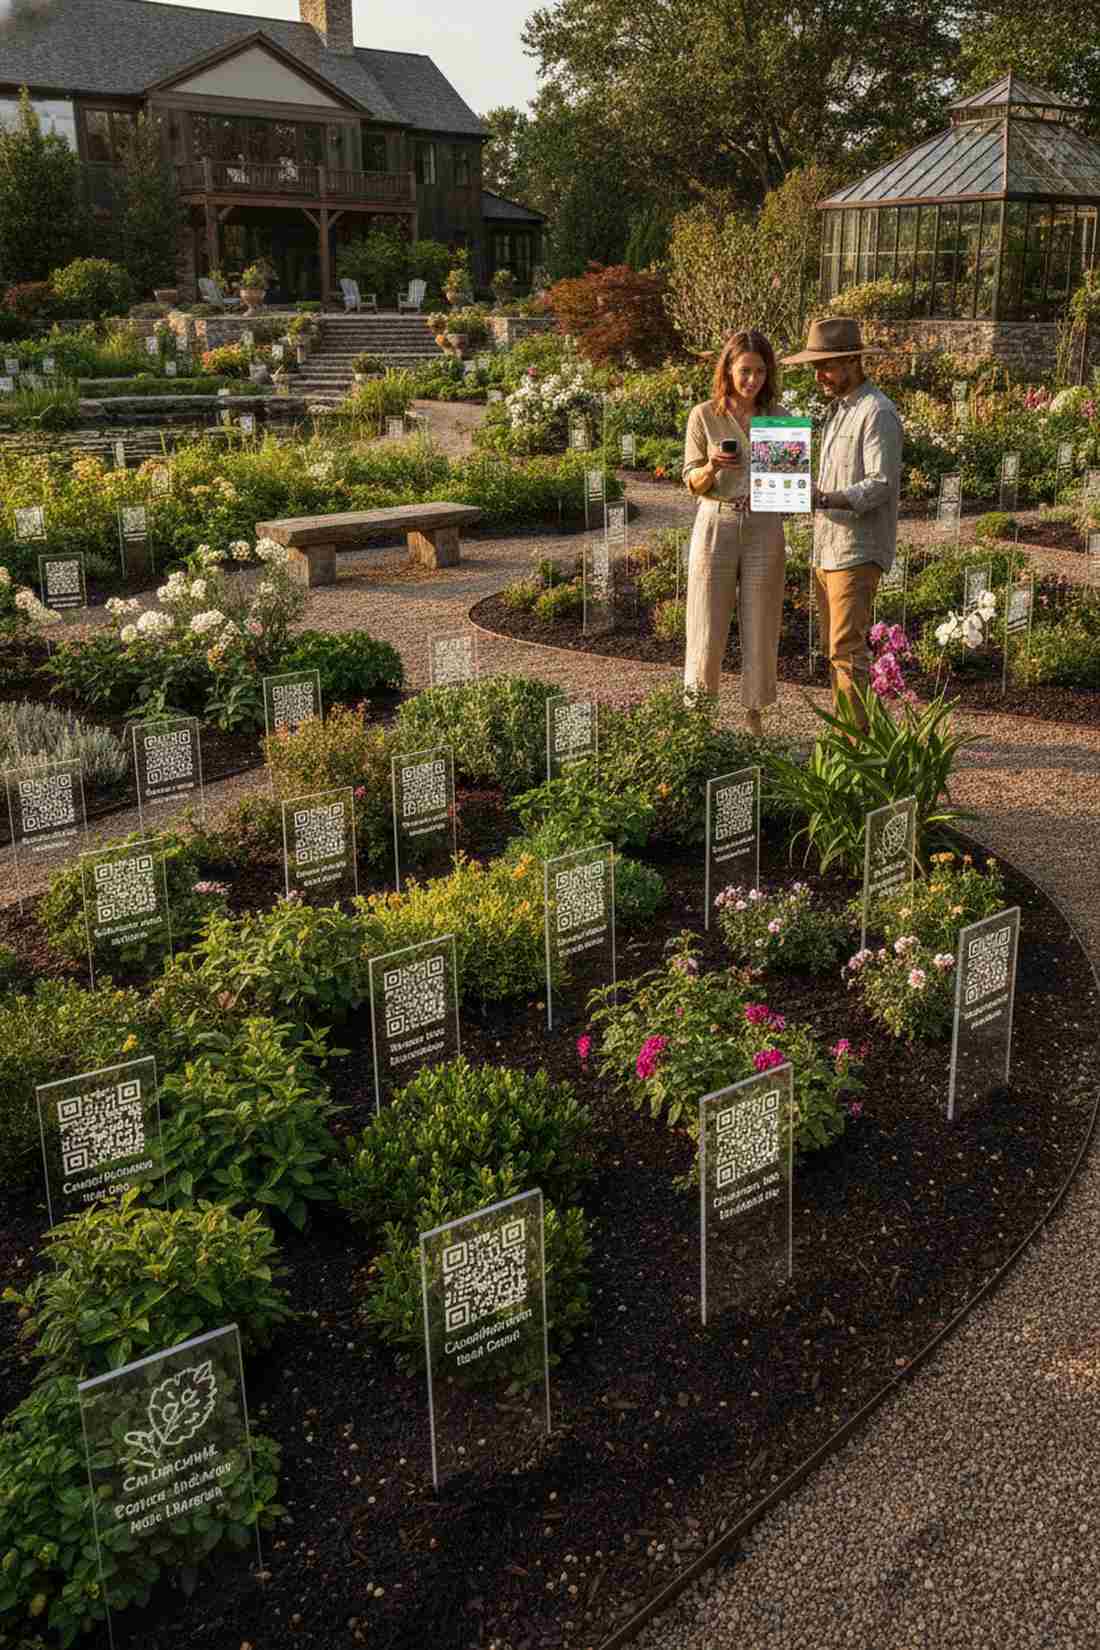
Gives that expansive, highly curated botanical garden vibe to your sprawling property. QR-coded acrylic plant markers work beautifully for large garden enthusiasts who want to track the exact species and care schedule of every plant.
Hand-written wooden stakes fade and look trashy quickly, but laser-etched acrylic stakes linked to a digital garden app looks far more expensive than it is. It allows guests to scan the tags with their phones to learn about the plant, creating an interactive, high-end experience.
You can upgrade your whole garden’s tagging system for about $40–$80. Save this if you love organizing your landscaping!
- Key Materials: Laser-etched QR acrylic stakes, digital garden app
- Vibe / Style: Curated botanical exhibit
- Difficulty: Very easy
- Budget Breakdown: Custom QR Stakes: $50 | Garden App: Free
- Creator’s Tip: Link the QR codes directly to a free Google Doc or Notion page where you log when the plant was fertilized last.
- Smart Sourcing: Buy a custom laser-etched acrylic QR stake kit and UV-resistant clear stake sealants.
47. Automated Maintenance Robotics
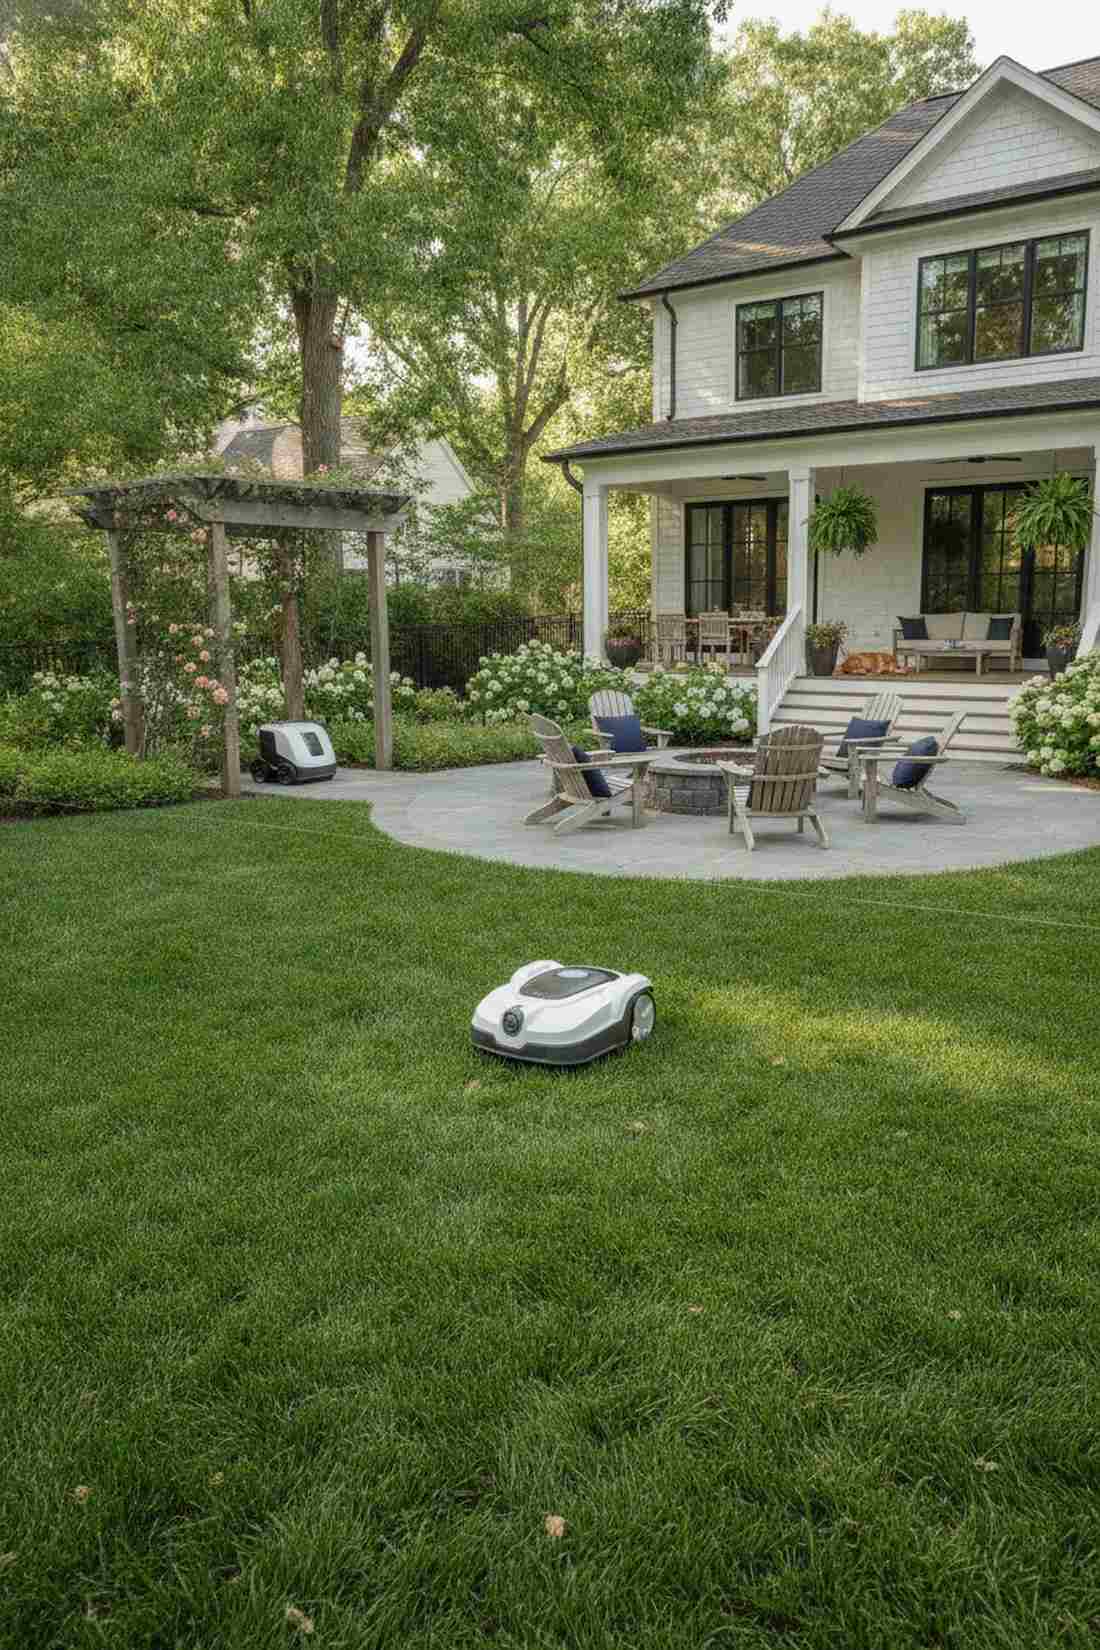
Feels like living in the future with a perfectly manicured lawn every single day. GPS-guided robotic lawn mowers are the perfect solution for medium-sized, fenced-in yards where you hate doing weekend chores.
Pushing a noisy mower ruins your weekend peace, but setting up an ultra-quiet robotic mower base station instantly upgrades the aesthetic by keeping the grass micro-trimmed daily. Because it clips the grass into microscopic pieces that fall back to the soil, it acts as a constant, free fertilizer.
A solid robotic mower setup requires an investment of $600–$1,200. Pin this to your ultimate smart-home upgrade board!
- Key Materials: Robotic mower unit, boundary wire kit
- Vibe / Style: Effortless luxury estate
- Difficulty: Moderate initial setup
- Budget Breakdown: Mower Unit: $800 | Extra Wire/Pegs: $50
- Creator’s Tip: Spend extra time burying the perimeter wire tightly in the corners so the robot can edge perfectly without getting stuck.
- Smart Sourcing: Invest in a weather-proof GPS robotic mower kit and a heavy-duty boundary wire bulk pack.
Adaptive Reuse & Innovation Projects
The most striking green space ideas come from transforming ugly infrastructure into beautiful, functional features using clever commercial materials.
48. Rail-Trail Conversions
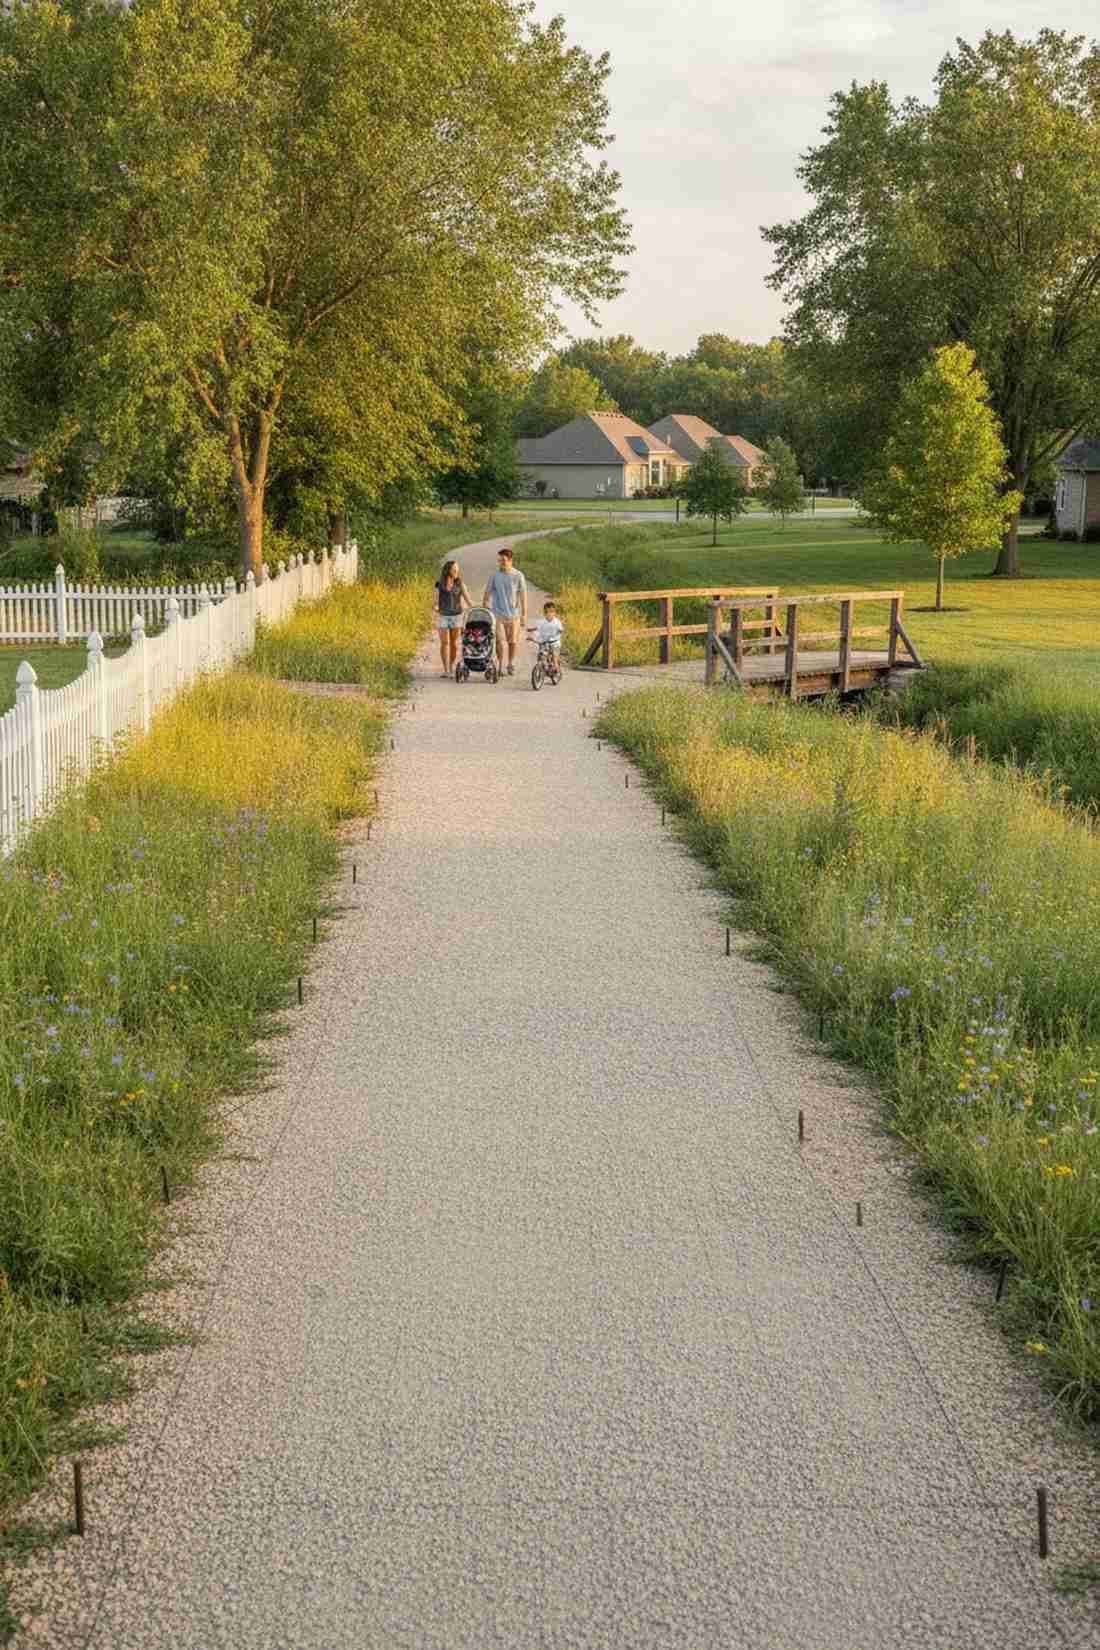
Straight out of a scenic countryside postcard featuring an endless rustic path. Crushed gravel linear trail paths work exceptionally well for reclaiming long, dead strips of land behind a property line.
Leaving old dirt paths rutted looks terrible, but laying down a heavy-duty stabilization grid filled with fine crushed limestone gives a custom designer feel. The grid ensures bicycles, strollers, and heavy foot traffic never create potholes or muddy sinkholes.
You can convert a 50-foot path for roughly $300–$500. Save this if you share a rear easement with your neighbors.
- Key Materials: Path stabilization grid, fine crushed limestone
- Vibe / Style: Scenic rail-trail stroll
- Difficulty: Heavy manual labor
- Budget Breakdown: Grid System: $200 | Limestone Dust: $150
- Creator’s Tip: Wet the limestone dust heavily after laying it down and use a heavy hand-tamper to lock it into a concrete-like finish.
- Smart Sourcing: Use a commercial path stabilization grid roll and heavy-duty steel landscape stakes.
49. Elevated Park Conversions
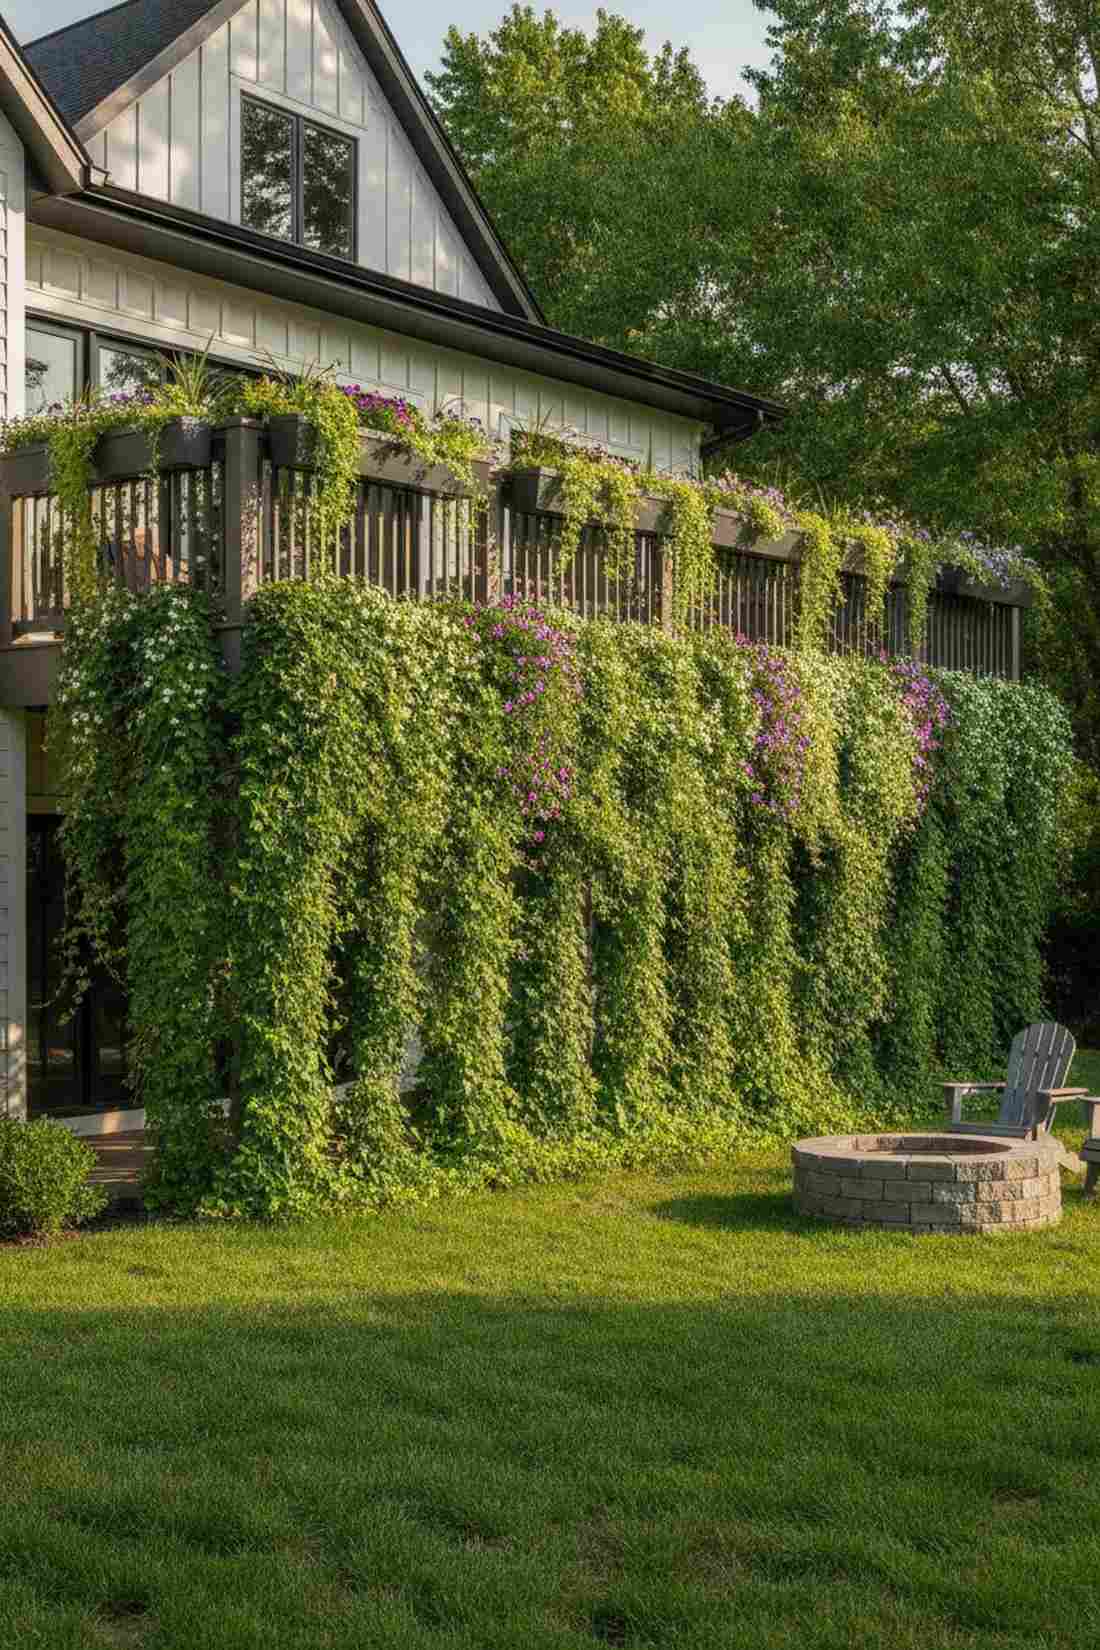
Brings a high-fashion, high-line architectural aesthetic straight to your property. Elevated deck planter borders are an incredible use-case for turning a boring second-story wooden deck into a lush, floating green space.
Screwing heavy wooden boxes to a deck causes structural rotting, but utilizing lightweight powder-coated aluminum railing planters looks far more expensive than it is. Filling them with trailing vines softens the hard edges of the deck and creates an incredible floating garden effect from the ground below.
Adding a perimeter of these luxury planters costs about $150–$300. Highly recommended for instantly upgrading a builder-grade deck.
- Key Materials: Aluminum railing planters, lightweight potting mix
- Vibe / Style: Urban high-line park
- Difficulty: Easy
- Budget Breakdown: Railing Planters: $120 | Soil/Plants: $80
- Creator’s Tip: Place a strip of foam weather-stripping between the metal planter bracket and your wooden rail to prevent scratching the paint.
- Smart Sourcing: Pick up a bulk pack powder-coated aluminum railing planters and ultra-lightweight container soil mix.
50. Landfill Reclamation Parks
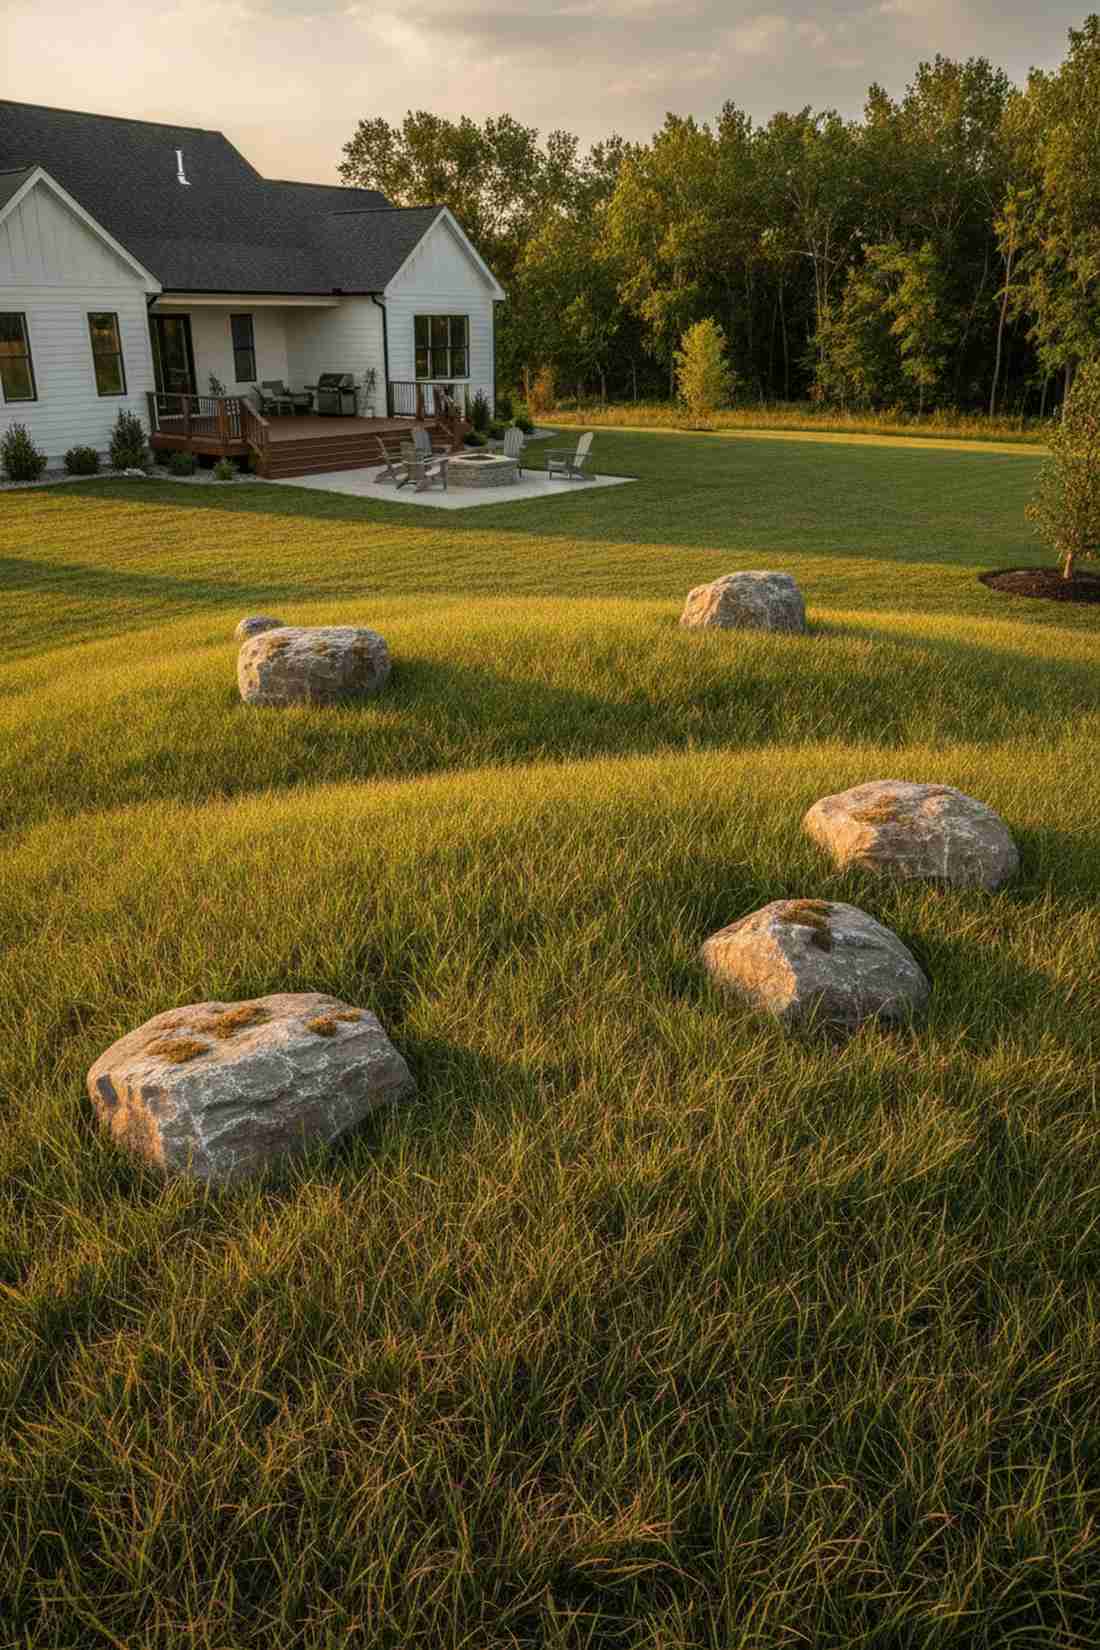
Evokes the feeling of a sweeping, open prairie restoration project. Shallow-root meadow cap plantings are perfectly designed for areas covering buried septic tanks or underground utility lines where deep roots are forbidden.
Planting trees over underground utilities is a disaster, but sowing a dense mat of shallow-rooting native fescues delivers a surprisingly premium look that protects the ground cover safely. Adding a few lightweight, faux-stone fiberglass boulders provides visual height without adding dangerous weight to the site.
You can safely beautify a utility zone for around $100–$200. Pin this if you have a septic mound you need to hide!
- Key Materials: Shallow-root fescue seed, faux-stone fiberglass boulders
- Vibe / Style: Rolling open prairie
- Difficulty: Easy
- Budget Breakdown: Fescue Seed: $40 | Faux Boulders: $120
- Creator’s Tip: Anchor the lightweight faux boulders by driving a piece of rebar through the hidden inside lip so they don’t blow away.
- Smart Sourcing: Grab a shallow-root native fescue seed mix and UV-coated fiberglass faux landscape boulders.
Most people look at an ugly concrete wall and give up. This next hack shows you how to turn it into the most expensive-looking feature in your yard.
51. Quarry Transformation Parks
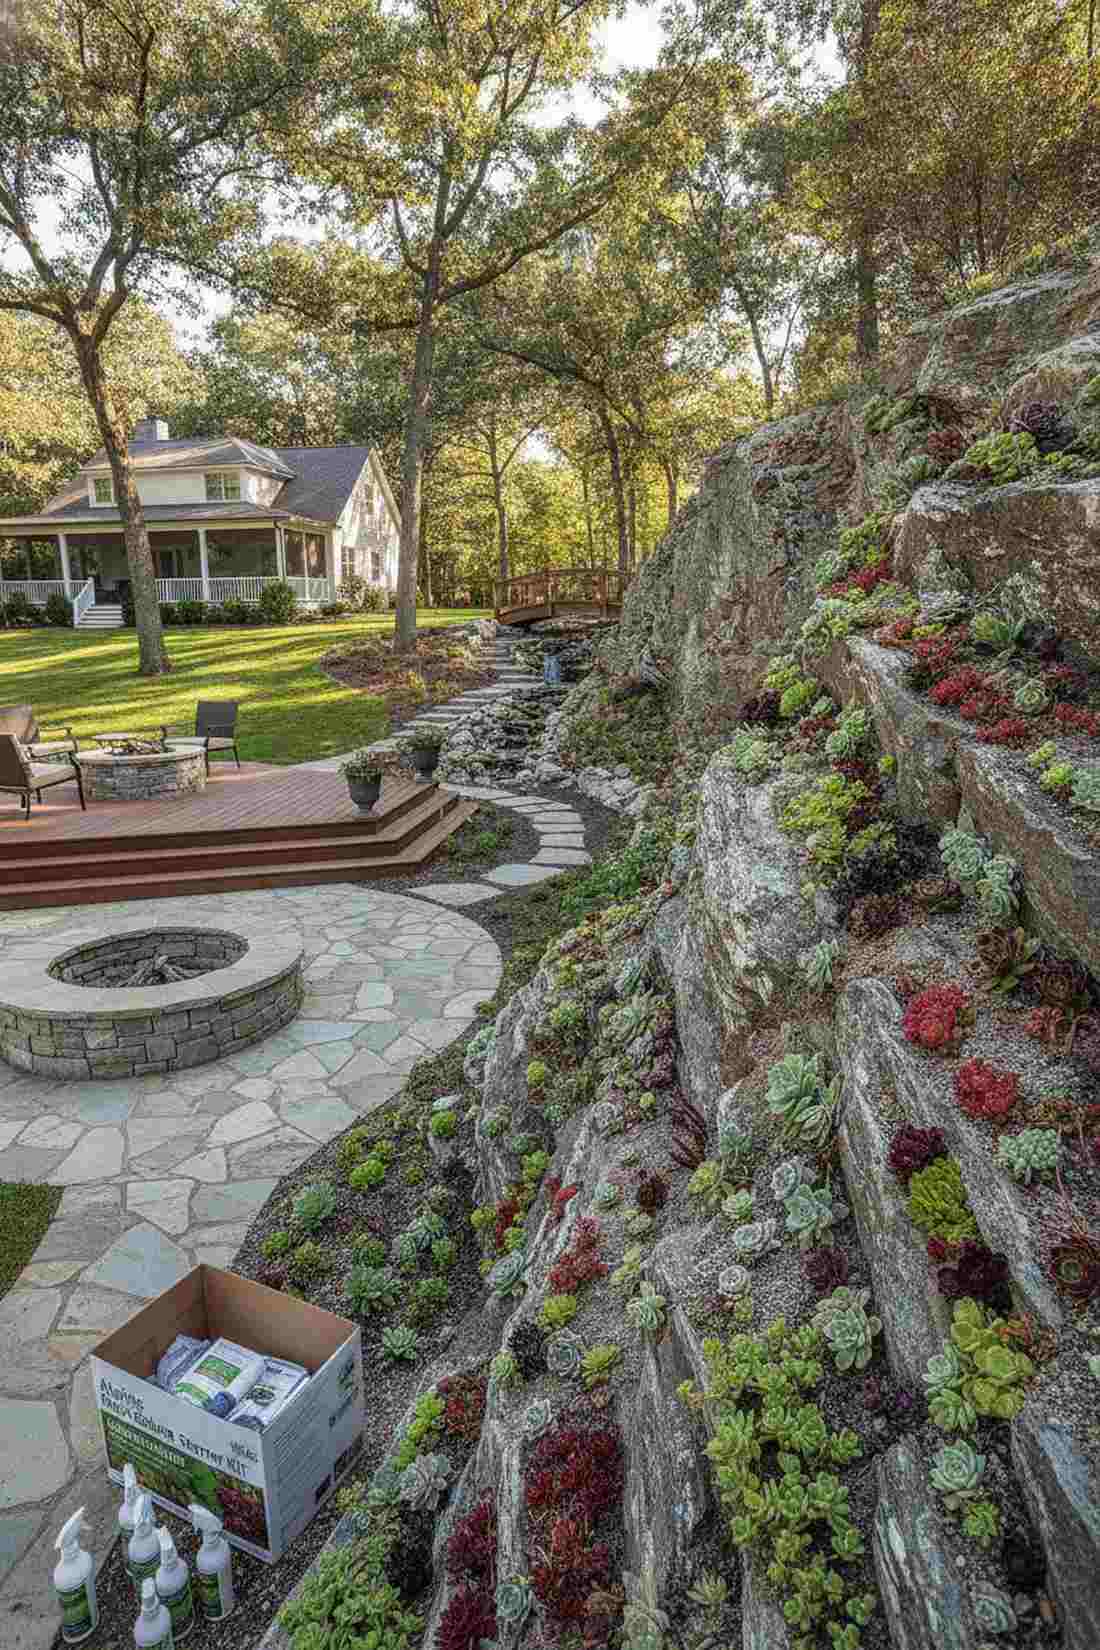
Creates a dramatic, rugged architectural feature right out of a high-end landscape design magazine. Exposed rock wall cascading gardens work wonderfully for steep, rocky drop-offs or ugly exposed retaining walls.
Leaving a rocky cut bare looks like a construction zone, but tucking hardy alpine succulents into the crevices instantly upgrades the aesthetic. Utilizing specialized rock-garden soil glue keeps the dirt from washing out of the cracks during heavy rainstorms.
A stunning crevice garden can be planted for roughly $80–$150. Save this if you have steep, rocky terrain you don’t know how to landscape.
- Key Materials: Alpine succulent plugs, landscape soil glue
- Vibe / Style: Dramatic alpine cliff
- Difficulty: Moderate climbing required
- Budget Breakdown: Succulent Plugs: $60 | Soil Glue: $30 | Compost: $10
- Creator’s Tip: Mix your compost with coarse sand before stuffing it into the rocks; alpine plants need rapid drainage to survive.
- Smart Sourcing: Buy an alpine rock garden succulent starter kit and a commercial-grade landscape soil binder spray.
52. Underpass Activation Gardens
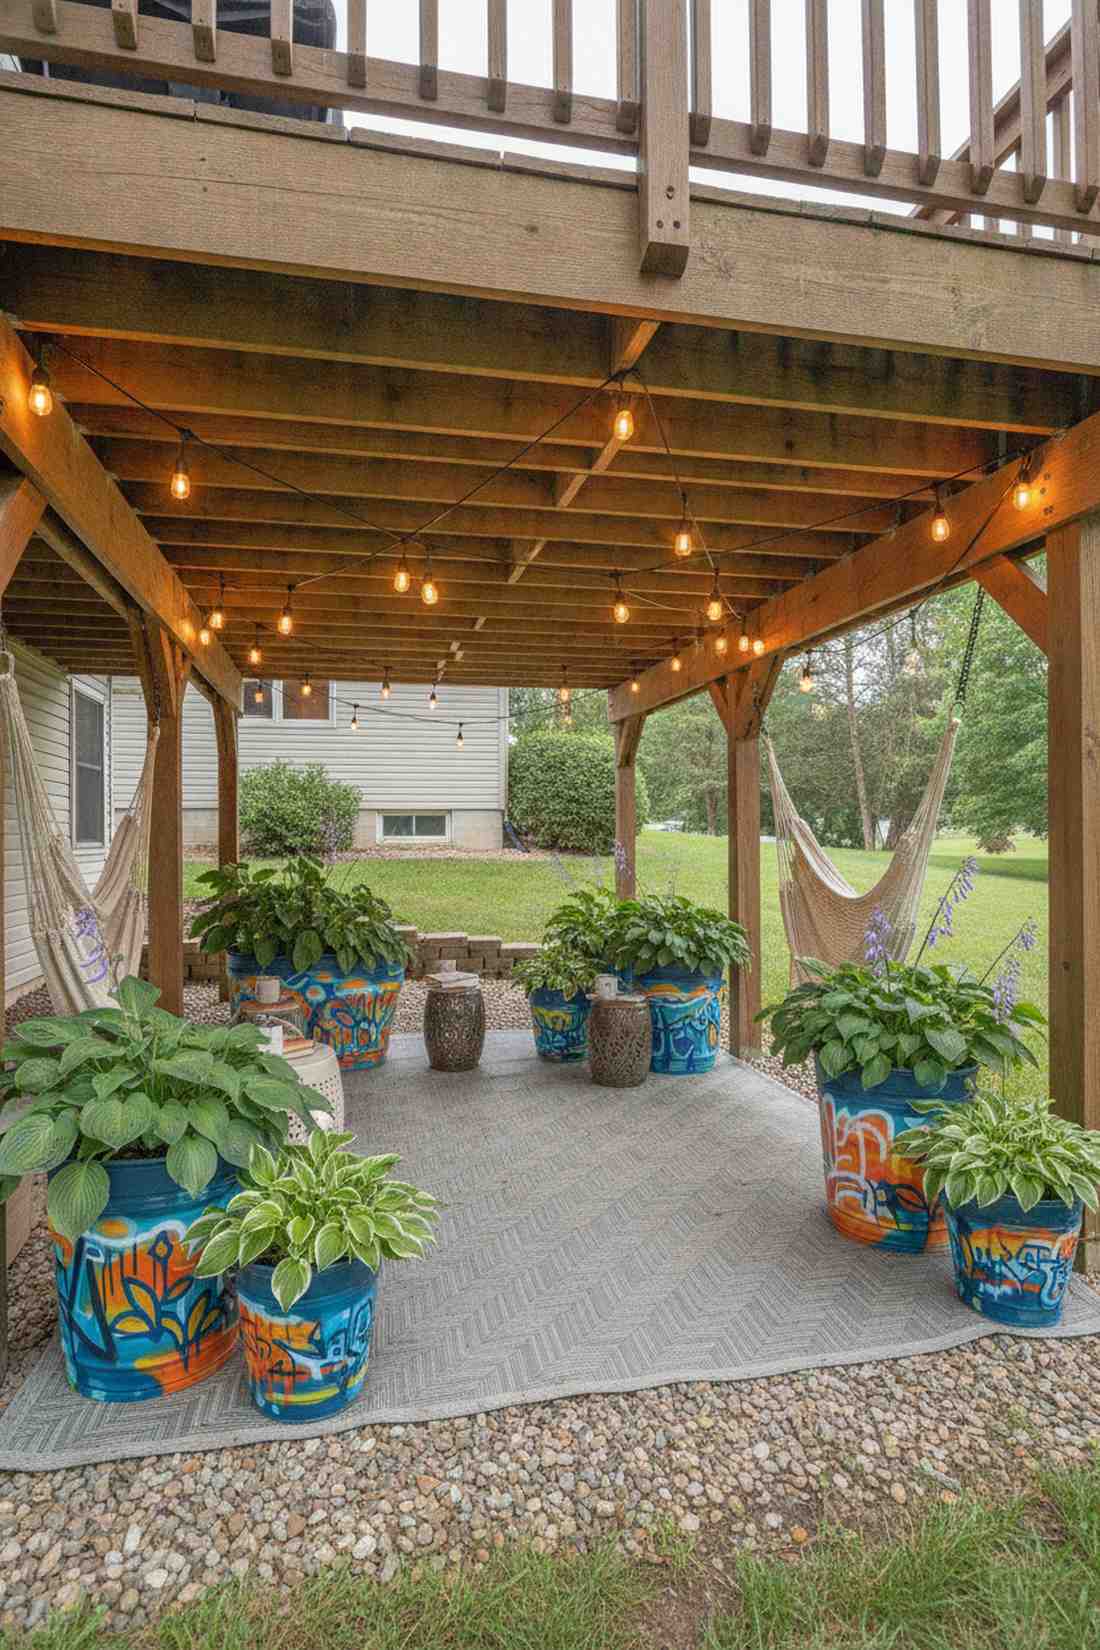
Feels like discovering a vibrant, hidden street-art oasis under the city. Shade-tolerant container murals are an incredible use-case for the dark, gloomy space directly underneath an elevated backyard deck.
Most under-deck areas turn into muddy junk storage, but laying down an outdoor rug and grouping brightly painted galvanized tubs gives a custom designer feel. Planting shade-loving hostas and stringing commercial-grade LED bistro lights completely transforms the dead space into a cozy hangout.
You can reclaim this hidden space for about $150–$250. Pin this to your under-deck patio inspiration board!
- Key Materials: Galvanized tubs, commercial LED bistro lights
- Vibe / Style: Cozy urban hideaway
- Difficulty: Easy
- Budget Breakdown: Tubs: $80 | Lights: $50 | Hostas: $40
- Creator’s Tip: Drill at least four half-inch drainage holes in the bottom of the galvanized tubs before adding any soil.
- Smart Sourcing: Use a commercial-grade LED bistro string light kit and a bulk pack shade-loving hosta root kit.
53. Parking Lot Greening Retrofits
Brings a high-end commercial plaza aesthetic straight to your boring concrete driveway. Driveway edge bioswale strips are the perfect solution for softening the harsh look of a massive asphalt parking pad.
A giant slab of concrete dominates curb appeal, but cutting a narrow 1-foot trench along the edge and filling it with smooth Mexican beach pebbles looks far more expensive than it is. Popping in a few architectural snake plants or ornamental grasses breaks up the gray perfectly.
This driveway border upgrade costs roughly $100–$200. Highly recommended for instantly boosting front-yard curb appeal.
- Key Materials: Smooth Mexican beach pebbles, architectural grasses
- Vibe / Style: Modern commercial plaza
- Difficulty: Moderate concrete/sod cutting
- Budget Breakdown: Pebbles: $80 | Plants: $40 | Edge Guard: $30
- Creator’s Tip: Lay down a strip of heavy weed barrier in the trench before adding the pebbles so grass doesn’t creep back in.
- Smart Sourcing: Pick up a bulk pack polished Mexican beach pebbles and heavy-duty plastic trench edging.
54. Industrial Brownfield Remediation Gardens
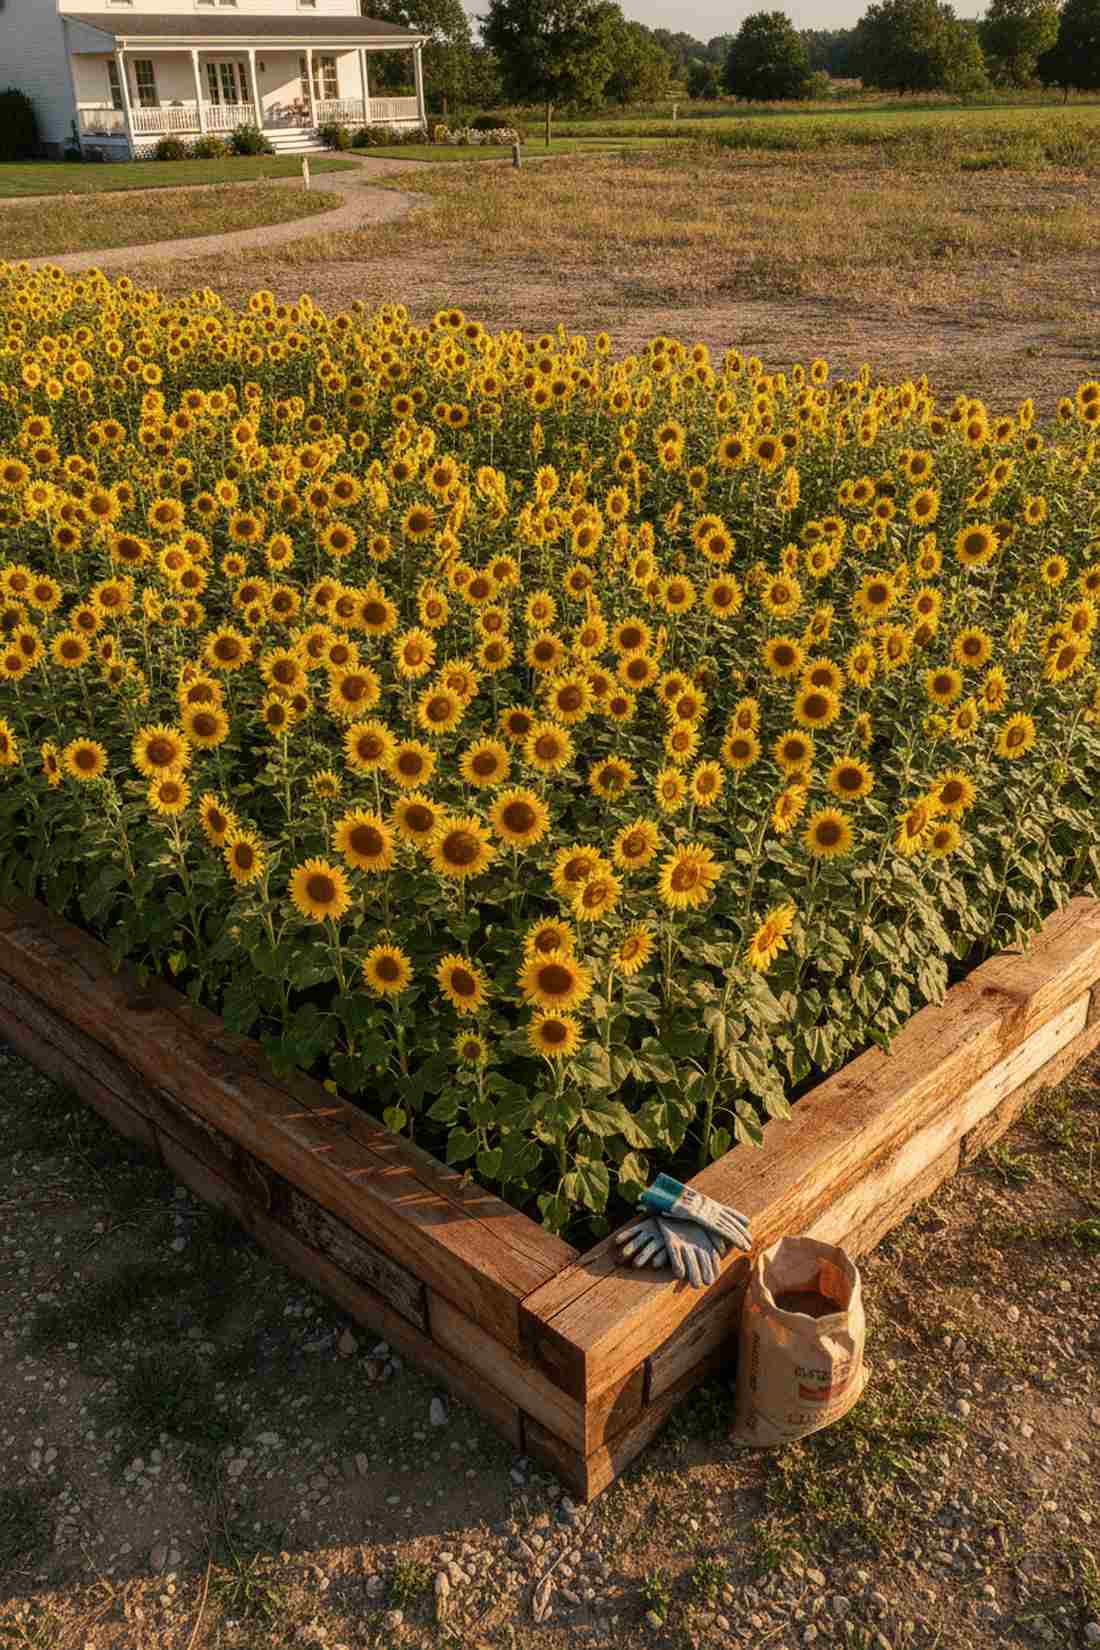
Radiates a powerful, regenerative energy that literally heals the earth. Phytoremediation sunflower fields work beautifully for vacant lots or side yards where the soil is too poor or contaminated for a vegetable garden.
Trying to grow food in bad urban soil is dangerous, but planting a dense block of hyper-accumulating sunflowers delivers a surprisingly premium look while pulling toxins from the ground. Bordering the patch with thick cedar logs keeps the wild look intentionally contained and structural.
A huge, healing sunflower patch only costs about $40–$80 in bulk seeds. Save this for a massive, high-impact summer bloom.
- Key Materials: Bulk sunflower seeds, cedar log borders
- Vibe / Style: Regenerative eco-farm
- Difficulty: Easy
- Budget Breakdown: Seed Bulk Pack: $30 | Cedar Logs: $40
- Creator’s Tip: When the sunflowers die in the fall, pull them out by the roots and dispose of them in the city yard waste, do not compost them at home.
- Smart Sourcing: Buy a bulk pack hyper-accumulating sunflower seed kit and heavy-duty gardening gloves.
55. Shipping Container Pop-Up Gardens
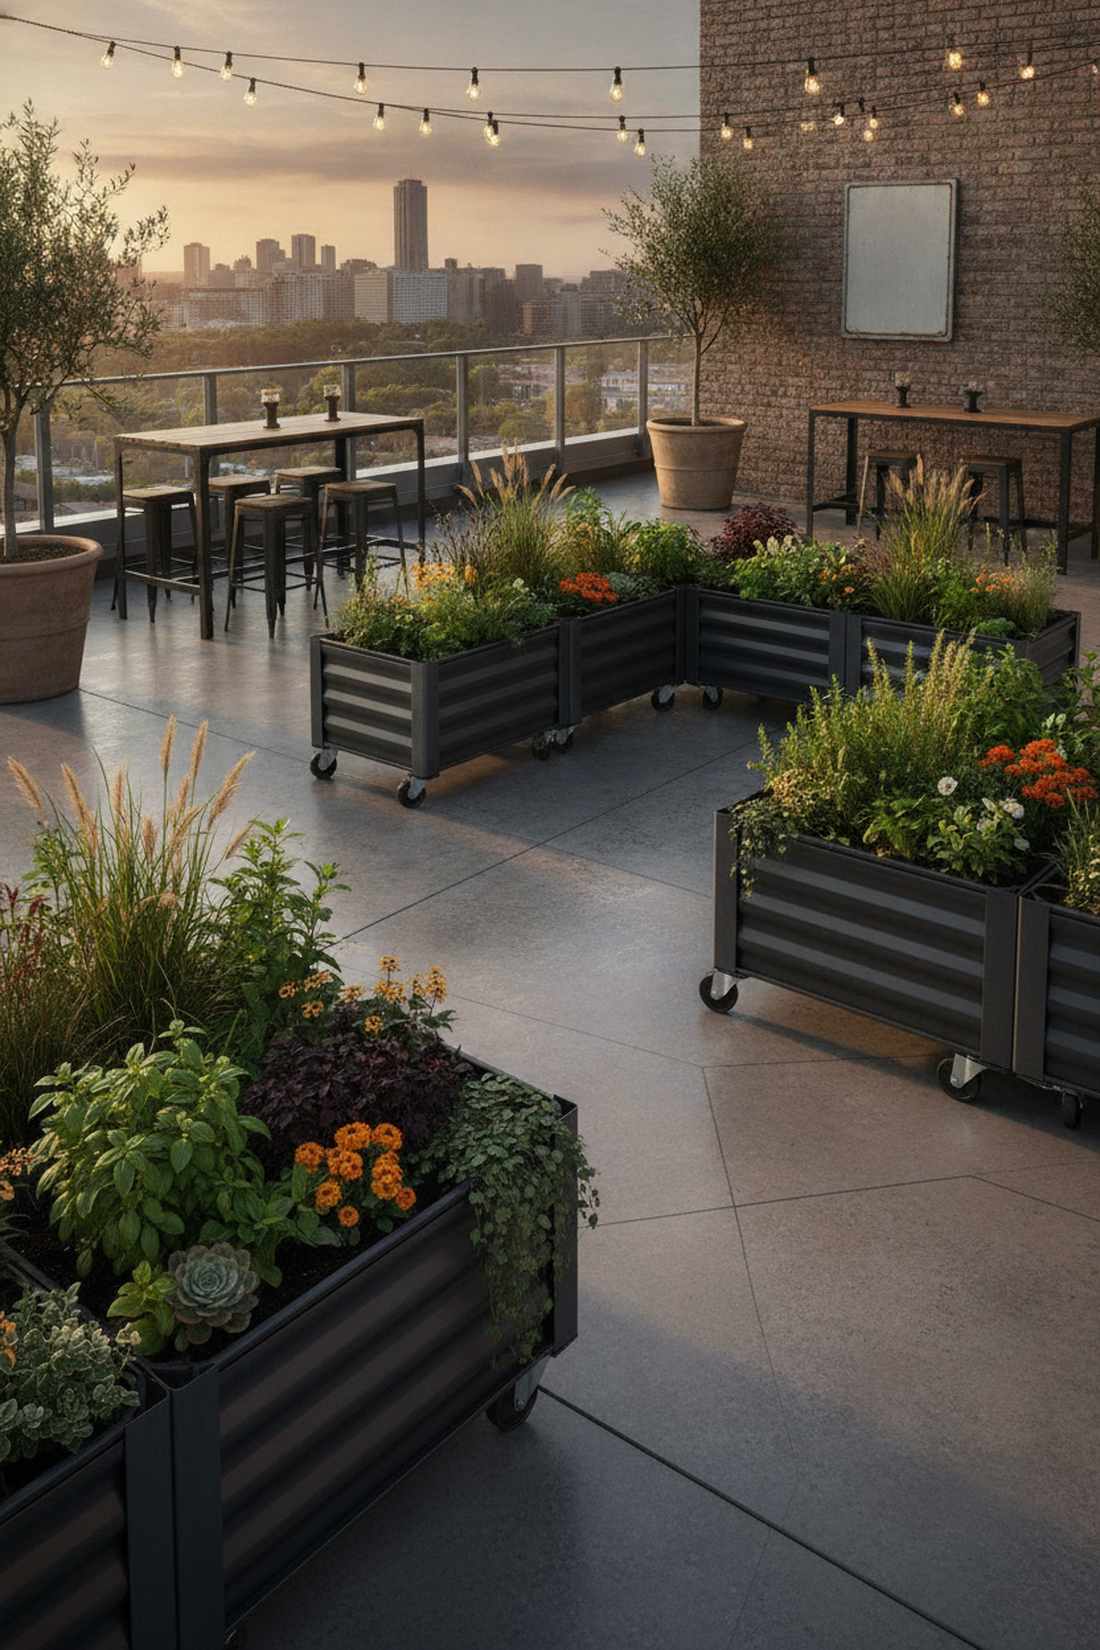
Feels like stepping into a trendy, high-end hipster brewery patio. Corrugated steel modular planter boxes are the absolute best use-case for creating a tough, urban-industrial garden on a solid concrete balcony.
Flimsy wood planters look out of place in a modern city, but bolting together corrugated steel raised beds instantly upgrades the aesthetic with extreme durability. Coating the inside with a rubberized spray sealant prevents rust and extends the life of the metal by decades.
An industrial planter setup will run roughly $150–$300. Pin this to your urban industrial outdoor decor board!
- Key Materials: Corrugated steel beds, rubberized spray sealant
- Vibe / Style: Trendy industrial pop-up
- Difficulty: Easy assembly
- Budget Breakdown: Steel Beds: $150 | Rubber Spray: $30 | Soil: $60
- Creator’s Tip: Put the planters on heavy-duty caster wheels before filling them with dirt so you can easily move them around the patio later.
- Smart Sourcing: Use a corrugated steel modular raised bed kit and UV-coated rubberized liquid sealant spray.
Bringing Green Space Concepts to Life
Implementing a truly effective green space isn’t about having unlimited land; it’s about smart sourcing and high-end material selection. Start with these 55 DIY blueprints, grab the commercial-grade starter kits, and build out your vision without the massive landscape architect fees. By prioritizing UV-resistant materials and modular setups, you can transform any urban concrete pad into a luxurious, sustainable retreat that drastically increases your property value.
Frequently Asked Questions
What qualifies as urban green space?
An urban green space includes everything from high-end commercial-grade park installations to modular balcony gardens using UV-resistant planters. Whether it’s a massive regional greenway or a small patio outfitted with a self-watering fiberglass planter kit, if it integrates living vegetation with smart hardscaping, it qualifies. Effective setups balance stunning visual aesthetics with heavy-duty, long-lasting materials.
How much green space does a sustainable city need?
The World Health Organization recommends 9 square meters per capita, but in DIY terms, quality heavily outweighs quantity. A well-designed 10×10 foot patio using premium vertical pocket wall kits and high-density sedum trays serves a home much better than a massive, weed-filled lawn. High-yield, visually striking setups using structural soil grids are the secret to maximizing dense urban footprints.
What are the primary benefits of urban green infrastructure?
Beyond looking incredibly expensive, premium green infrastructure reduces stormwater flooding by 80% when using permeable grid pavers, drops ambient heat with solar-reflective coatings, and increases property values by up to 20%. Investing in commercial-grade weed barriers and heavy-duty edging ensures you get a massive return on your landscaping investment while keeping maintenance to a minimum.
How do you maintain green spaces sustainably?
Sustainable maintenance is all about buying the right tech. Swapping manual hoses for wifi-enabled smart sprinkler controllers and drip irrigation starter kits cuts water use by 70%. Combine that with bulk packs of native, drought-resistant seed mixes and heavy layer of commercial weed fabric, and your garden will practically maintain itself.
Can green spaces work in high-density urban areas?
Absolutely, high-density areas are perfect for high-end vertical aesthetics. By utilizing lightweight composite cladding, pre-cut moss panels, and marine-grade stainless steel trellis wire kits, you can turn any blank wall or small balcony into a towering green sanctuary. These smart material hacks deliver maximum visual impact without exceeding the structural weight limits of urban apartments.
What is the difference between green space and open space?
A green space actively uses living elements—like bulk pollinator seed meadows or intensive rooftop planter setups—to provide ecological and aesthetic value. An open space might just be a bare concrete plaza. Upgrading an open space into a premium green space usually just requires adding modular, commercial-grade planters and weather-proof smart outdoor furniture to create a high-end, functional destination.