
An urban garden rooftop instantly upgrades dead concrete into a thriving, high-end sanctuary. These exact layout blueprints reveal how to source smart materials and build wind-resistant zones on a budget. Get maximum visual impact without risking structural overload.
Design SnapshotKey Principles
- Structural Load Distribution: Position heavy planters over support beams and building columns to prevent exceeding weight limits
- Wind Mitigation: Install windbreaks, use low-profile plantings, and secure all elements to prevent displacement in high-altitude conditions
- Microclimate Zones: Create distinct areas for sun-loving plants, shade tolerators, and transitional species based on building orientation
- Access and Maintenance: Design clear pathways with minimum 36-inch width for moving supplies and equipment to rooftop elevations
Space-Maximizing Layouts for Urban Garden Apartments
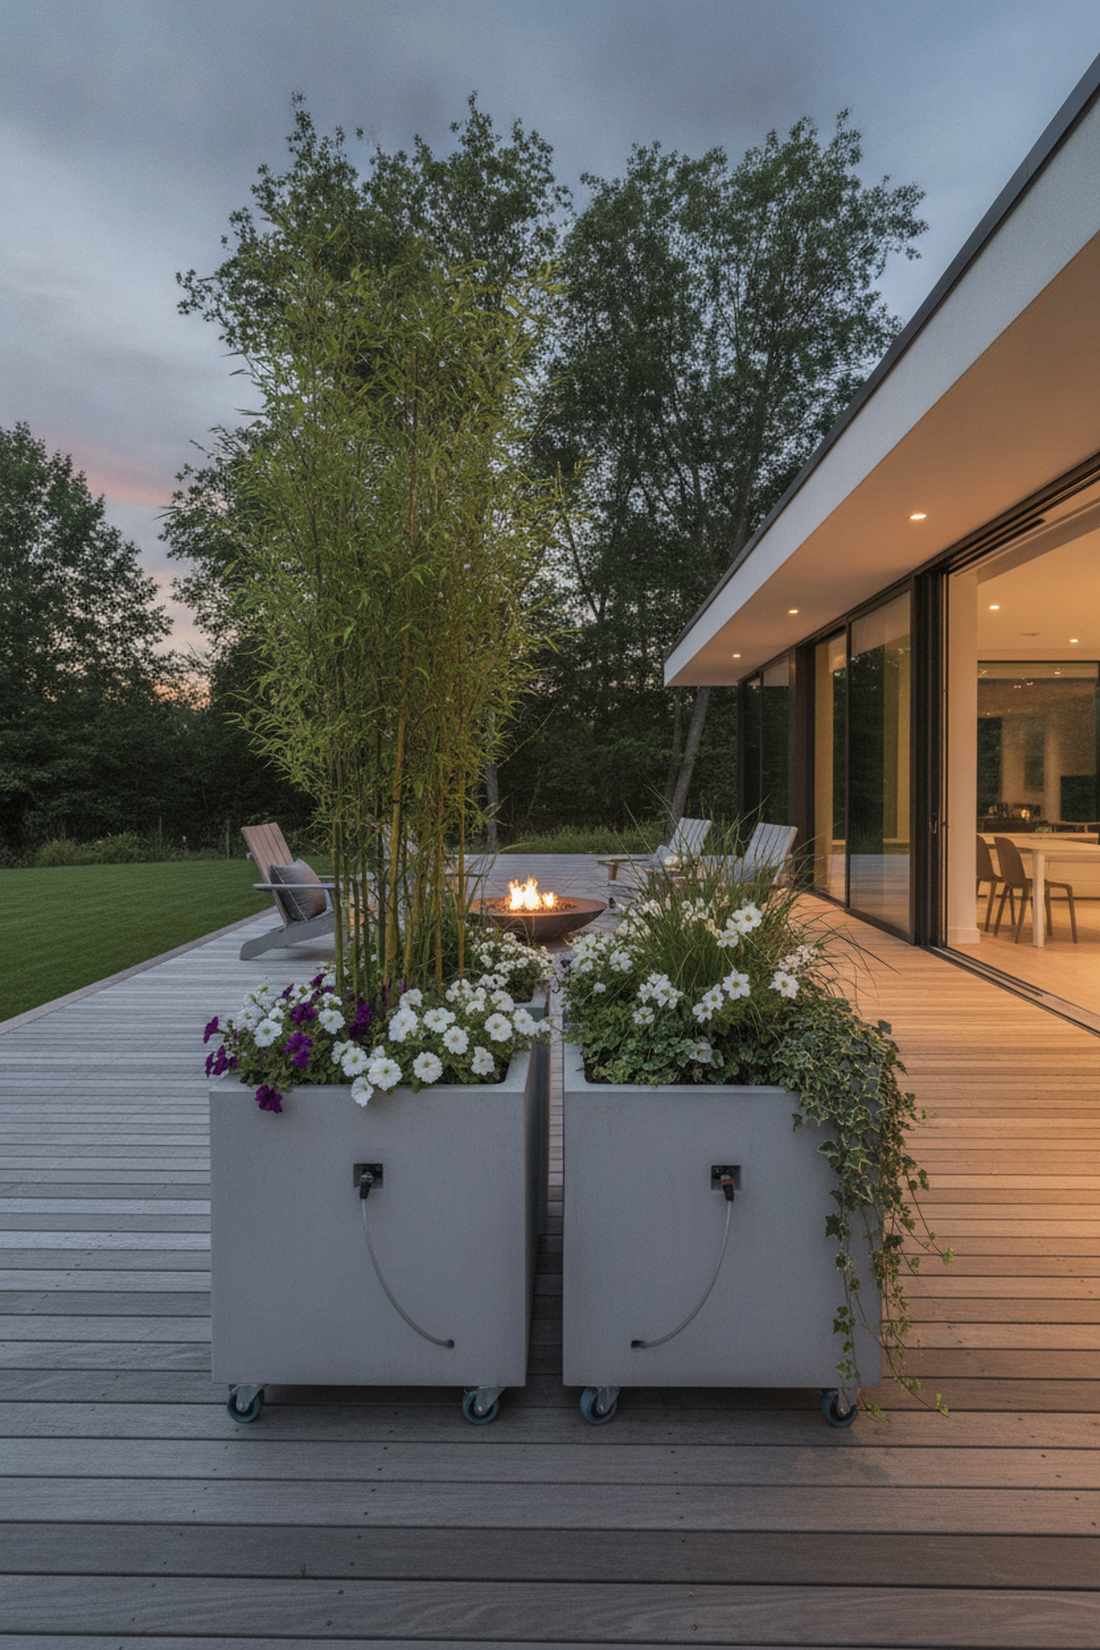
1. Perimeter Planter Belt System
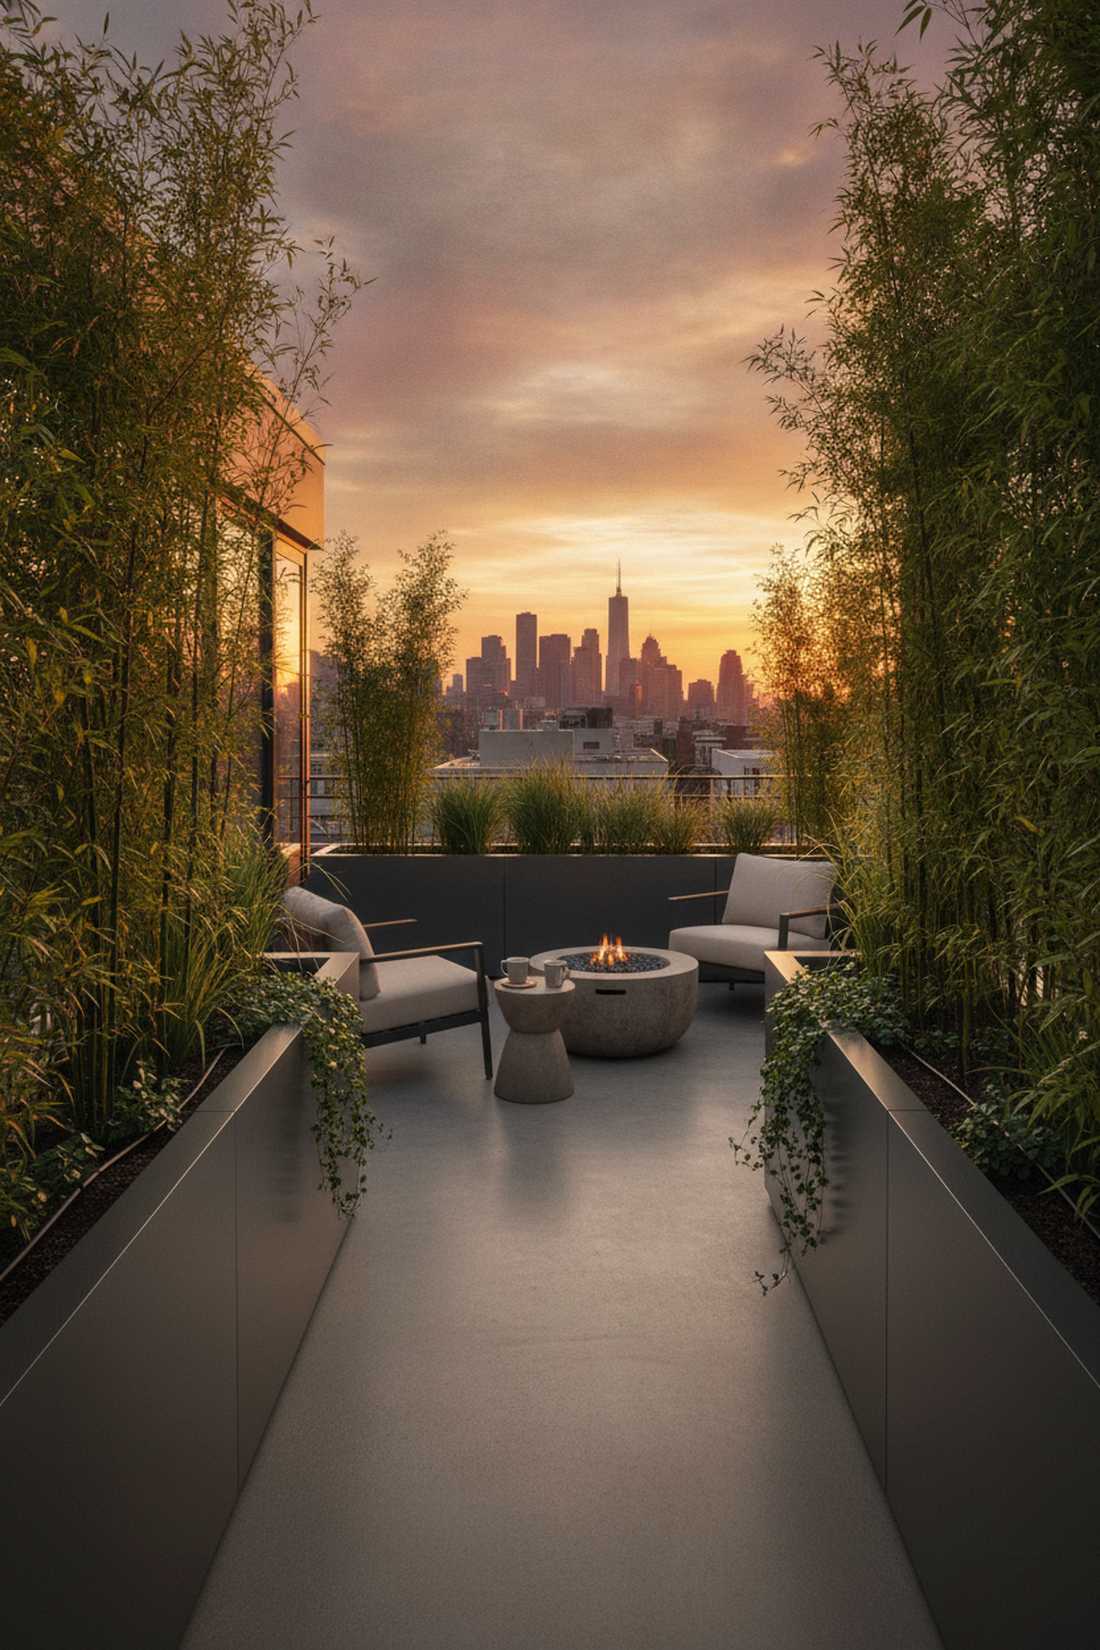
This layout feels like an exclusive penthouse lounge you accidentally unlocked. Modern perimeter planter borders define your outdoor room perfectly. It works exceptionally well for an urban garden apartment craving serious privacy without blocking the sunset.
Most beginners just scatter pots randomly, but a continuous belt delivers a surprisingly premium look while naturally hiding drip irrigation lines. You’ll want to lock in this design using high-grade composite containers that resist brutal high-altitude UV fading.
You can effortlessly pull off this edge-defining setup for around $30–$45 per linear foot. Save this to your DIY weekend patio board if you’re planning a massive spring transformation.
- Key Materials: Lightweight fiberglass trough planters, automated drip tubing
- Vibe / Style: Sleek minimalist boundary
- Difficulty: Easy beginner setup
- Budget Breakdown: Planters: $200 | Irrigation: $45 | Soil & Flora: $150
- Creator’s Tip: Use empty plastic bottles at the bottom of deep planters to reduce soil weight by 40%.
- Smart Sourcing: UV-coated fiberglass planter troughs and pre-assembled micro-drip starter kits.
2. Corner Quadrant Zoning
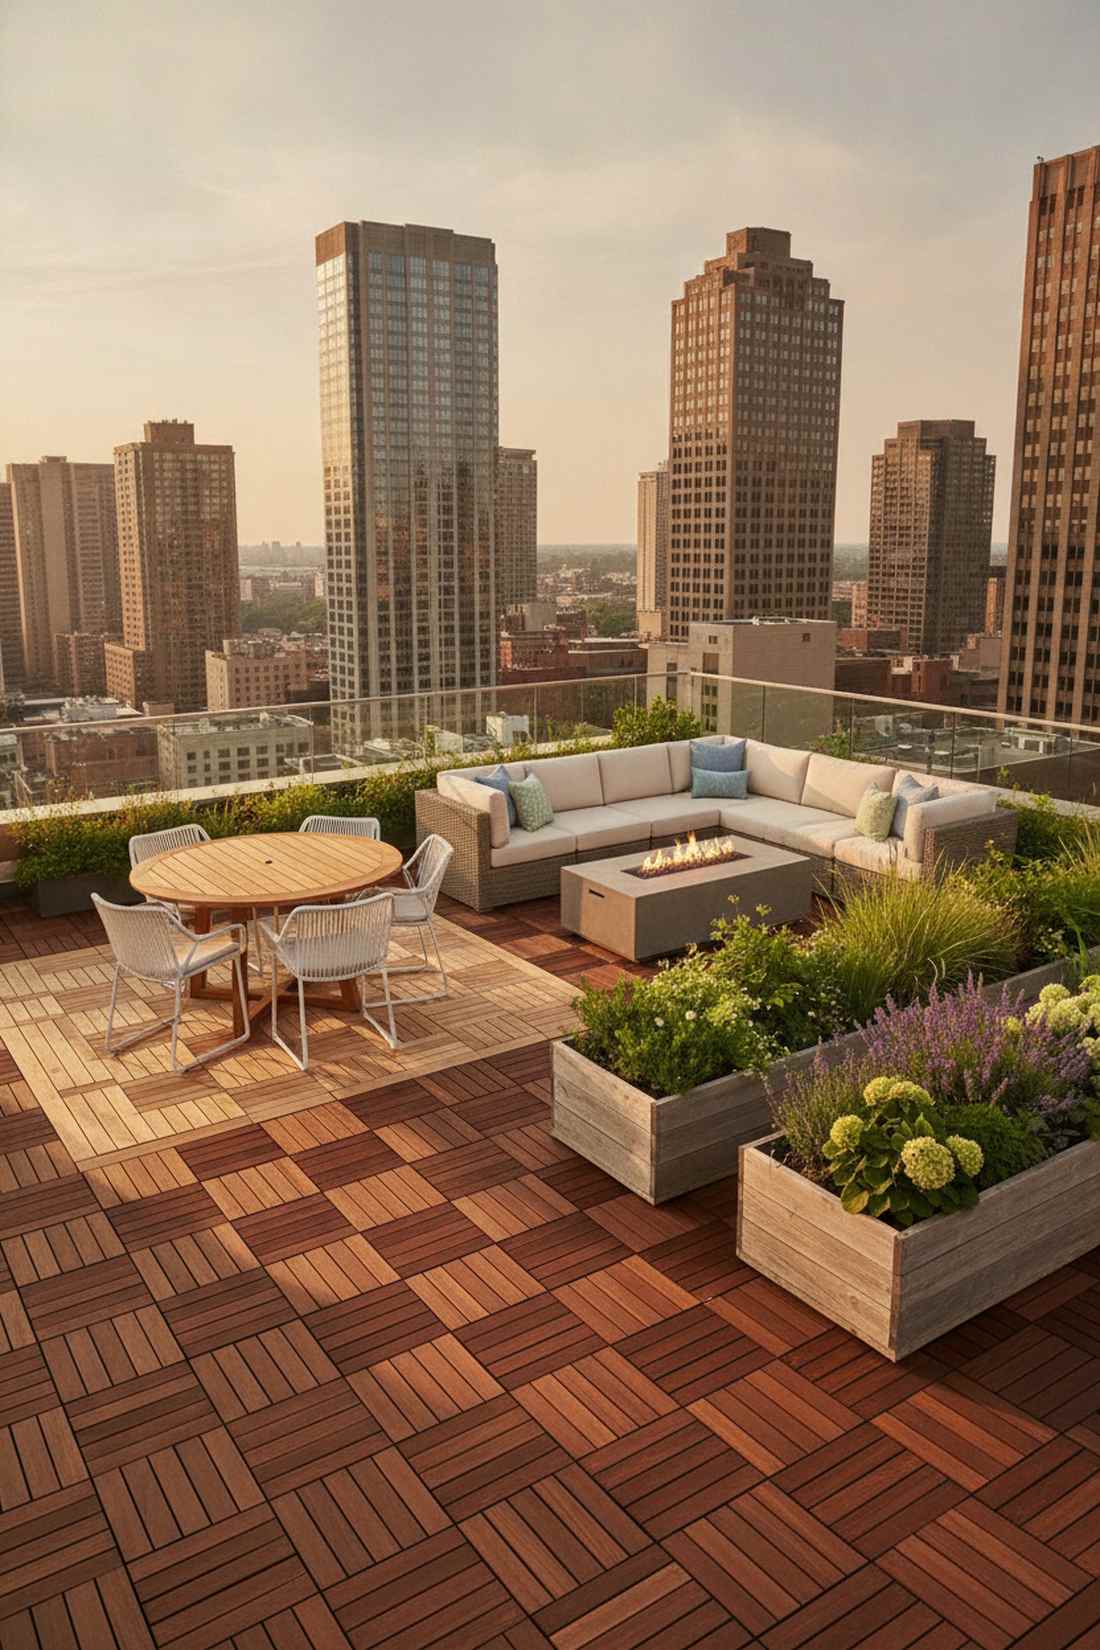
Transforming dead corners into functional rooms gives off serious architectural digest vibes. Zoned corner deck modules create the illusion of massive square footage. This configuration is brilliant for rooftop spaces that need to juggle dining, lounging, and gardening simultaneously.
The secret to not looking cheap is using contrasting deck tiles to visually separate spaces without building walls. This method provides a designer-level finish while completely bypassing the need for expensive structural permits or heavy carpentry.
Expect to invest around $150 for the visual flooring breaks, making it a shockingly cheap optical illusion. It’s a fast upgrade that completely changes the vibe of a square rooftop.
- Key Materials: Snap-together teak deck tiles, low-profile corner planters
- Vibe / Style: Organized boutique terrace
- Difficulty: Quick afternoon project
- Budget Breakdown: Deck Tiles: $120 | Corner Planters: $90
- Creator’s Tip: Lay permeable weed barrier under your deck tiles to prevent rooftop grime buildup.
- Smart Sourcing: Interlocking acacia wood deck tiles (bulk pack) and weatherproof corner seating kits.
3. Floating Island Clusters
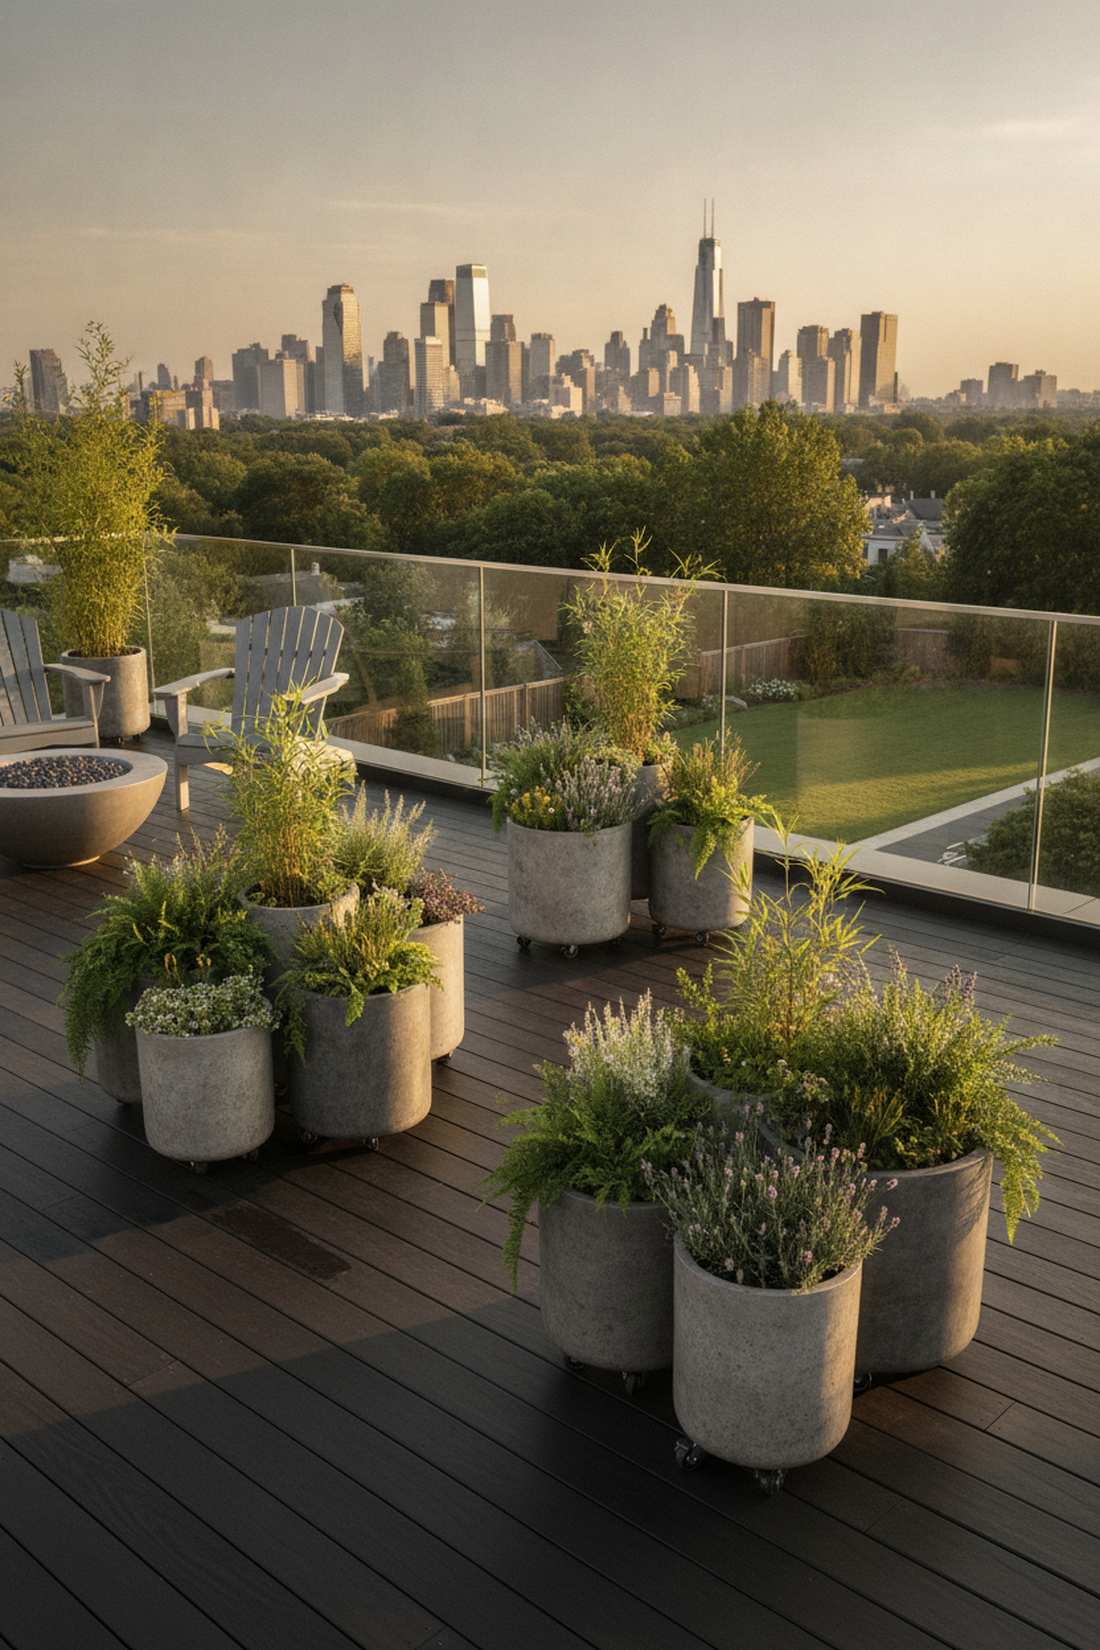
This setup feels like a lush botanical exhibit floating right outside your window. Clustered rolling container islands offer dramatic topographical heights. Perfect for awkwardly shaped rooftops where traditional linear designs just end up looking forced.
Amateurs line everything against the railing, but grouping planters asymmetrically looks far more expensive than it is. By securing high-end miniature garden supplies into these clusters, you create micro-habitats that invite gorgeous airflow and prevent humidity diseases.
You can piece together a stunning 3-pot cluster for roughly $85. Pin this layout if you need a design that can be pushed aside when hosting large outdoor parties.
- Key Materials: Varying height resin pots, hidden heavy-duty casters
- Vibe / Style: Dynamic organic flow
- Difficulty: Beginner-friendly styling
- Budget Breakdown: Resin Pots: $60 | Casters: $25
- Creator’s Tip: Always buy pots with recessed bottoms so the caster wheels remain completely invisible.
- Smart Sourcing: Heavy-duty locking platform casters and lightweight faux-concrete resin pots.
4. Rail-Mounted Cascading Garden

Imagine a waterfall of greenery plunging from the sky—that’s the exact energy here. Over-the-rail cascading planters literally consume zero floor space. This is the ultimate hack for tight urban balconies desperate for a lush privacy screen.
While many assume vertical setups require wall drilling, hooking directly to existing safety rails completely bypasses landlord restrictions. Upgrading to self-watering rail brackets ensures your trailing vines survive the intense summer sun without daily babysitting.
A full railing transformation usually clocks in under $75 per tier. Highly recommended for a quick weekend win that stops neighbors from peeking into your space.
- Key Materials: Adjustable railing brackets, self-watering trough inserts
- Vibe / Style: Lush hanging oasis
- Difficulty: Zero-tool assembly
- Budget Breakdown: Rail Brackets: $35 | Troughs: $40
- Creator’s Tip: Mix creeping jenny with sweet potato vines for an ultra-dense, neon-green privacy curtain.
- Smart Sourcing: Adjustable heavy-duty rail planter brackets and self-watering reservoir trough kits.
This next setup flips the traditional planting rulebook entirely—yielding a luxury hotel look for cheap…
5. Diagonal Pathway Bisection
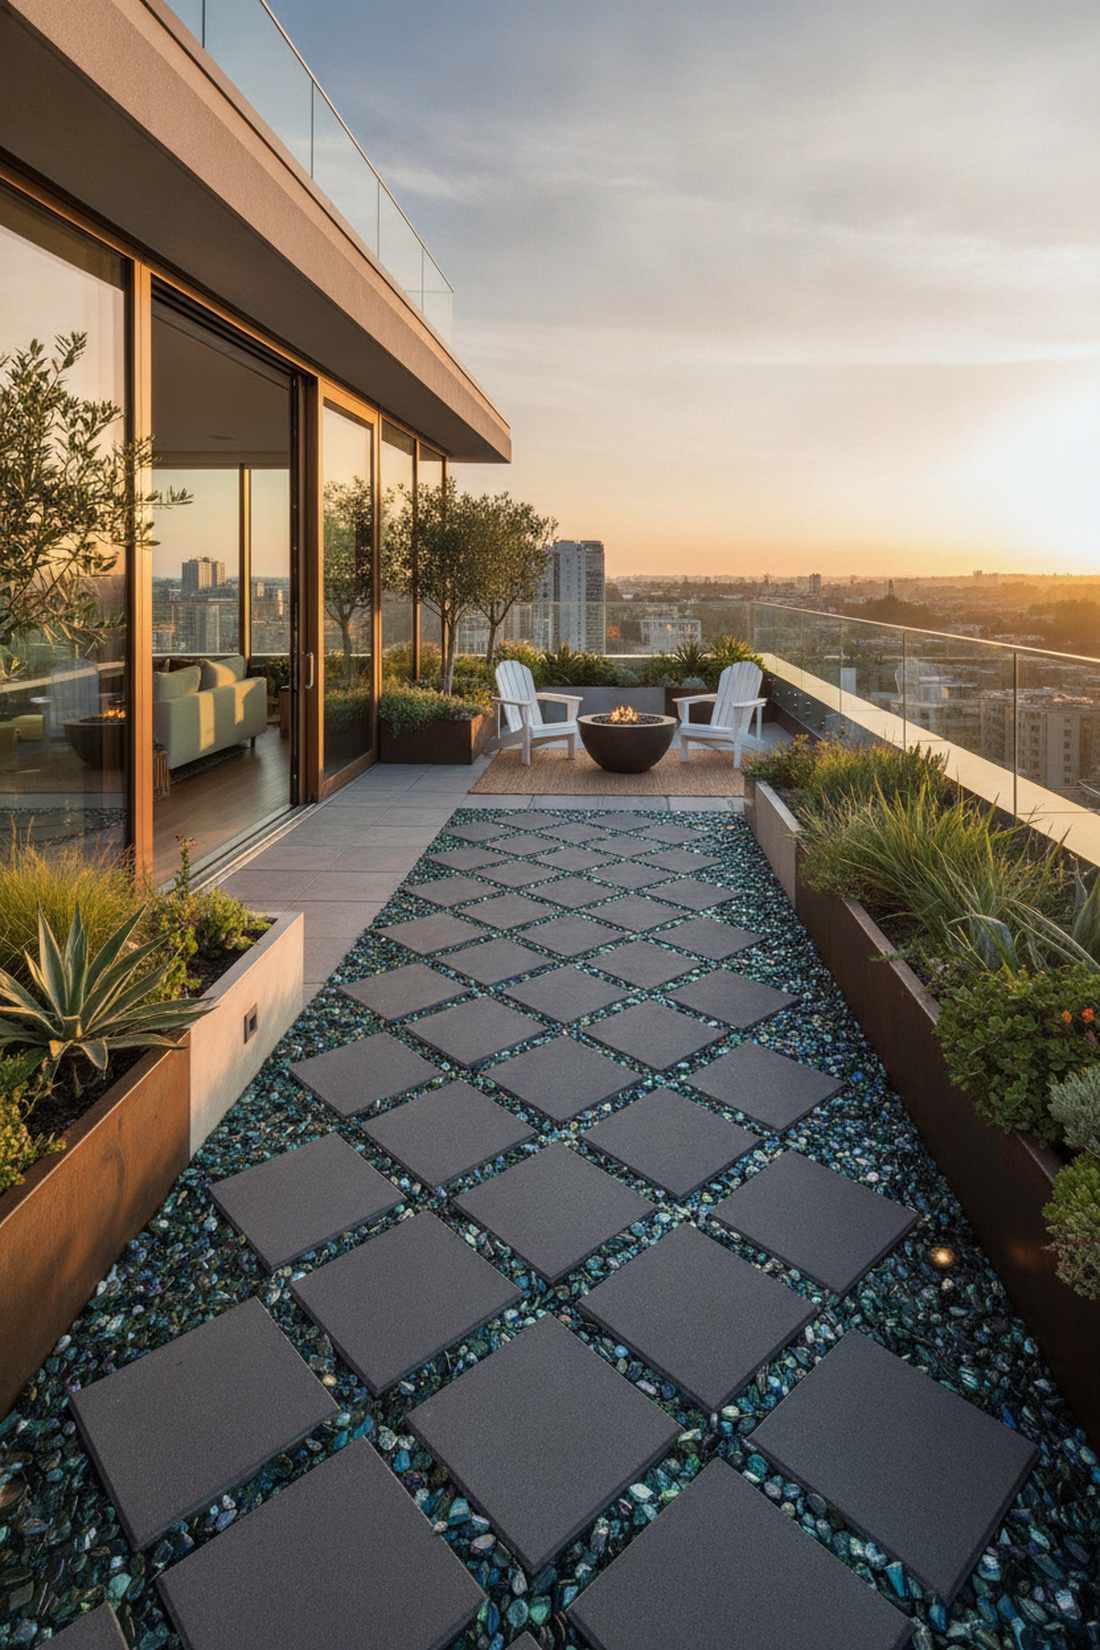
Walking through this space feels like navigating a hidden geometric maze in the sky. Diagonal stepping stone pathways trick the eye into perceiving double the actual distance. This is the smartest layout for long, narrow rooftops that feel too much like a bowling alley.
Straight paths emphasize confined widths, but slicing the space on a sharp angle instantly adds high-end architectural tension. Using lightweight composite pavers bordered by contrasting crushed glass completely elevates the aesthetic above standard dirt trails.
Laying down a striking 10-foot diagonal path will run you about $110. Save this layout to your mood board if you want to fix awkward rooftop proportions instantly.
- Key Materials: Lightweight composite pavers, tumbled glass mulch
- Vibe / Style: Edgy modern geometry
- Difficulty: Moderate measuring required
- Budget Breakdown: Pavers: $65 | Glass Mulch: $45
- Creator’s Tip: Run your pathway exactly 45 degrees off the main doorway for the maximum forced-perspective effect.
- Smart Sourcing: Ultra-lightweight rubber stepping stones and tumbled landscape glass bulk bags.
NYC-Inspired High-Density Rooftop Designs
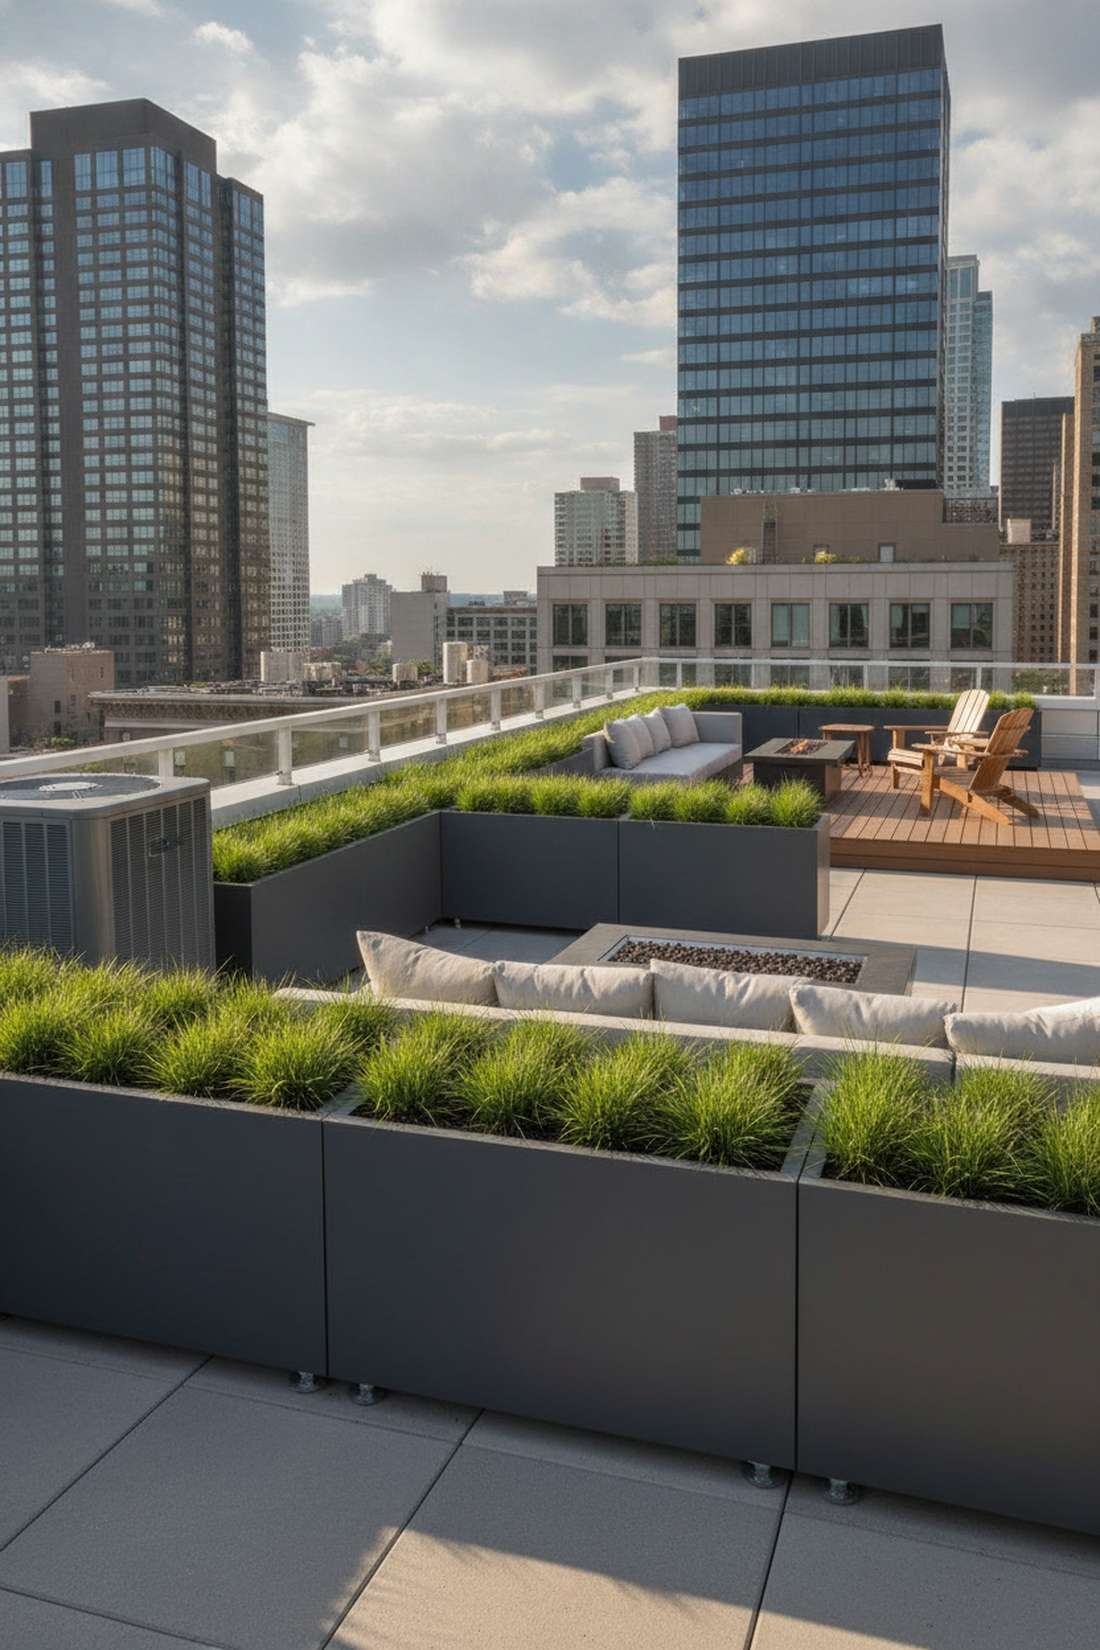
6. Penthouse Terrace Wraparound
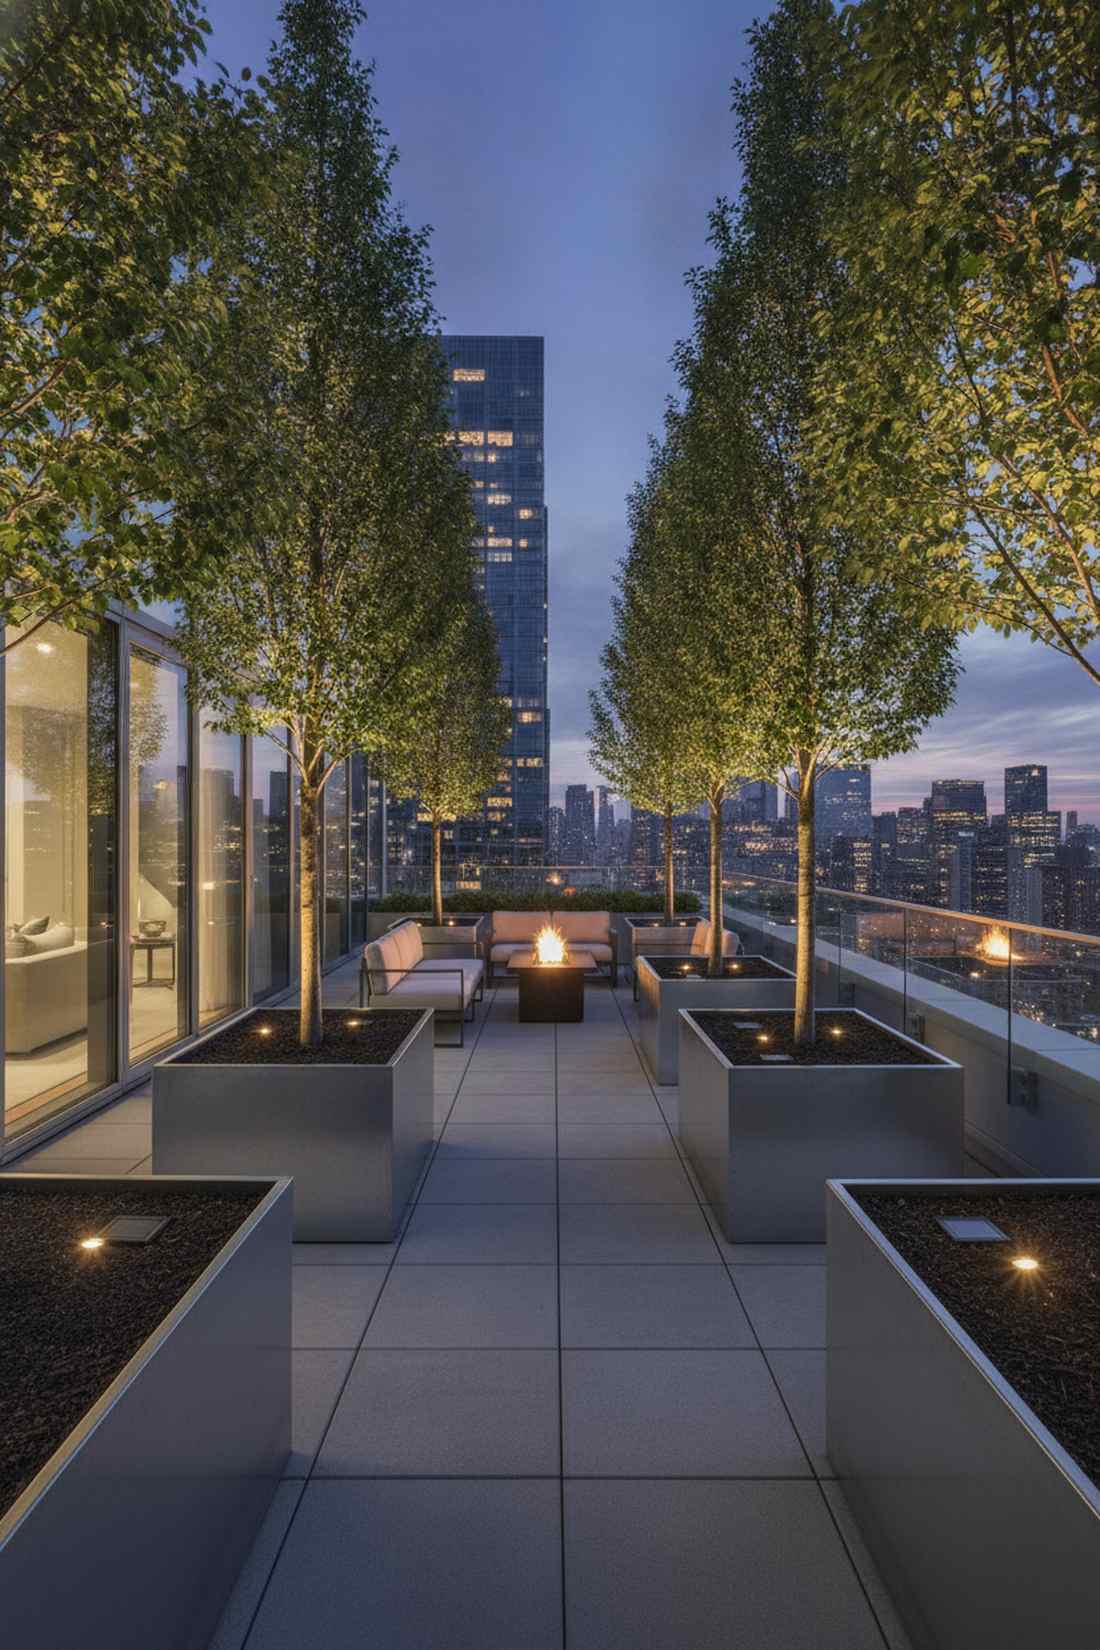
This wraps your exterior in a living canopy, giving off peak billionaire-row energy. Wraparound illuminated tree planters create a formidable but gorgeous windbreak. It nails that iconic urban garden nyc aesthetic perfectly for anyone wanting high-altitude seclusion.
Most high-rise owners give up on trees due to the wind, but securing columnar hornbeams in deep, weighted corner boxes solves the problem entirely. Integrating low-voltage uplighting into the soil surface gives a designer-level finish that looks incredible from inside your living room at night.
Setting up one premium lit tree corner costs around $250, but the visual payoff is massive. Pin this if you want your rooftop to glow beautifully after sunset.
- Key Materials: Deep galvanized planters, solar landscape uplights
- Vibe / Style: Exclusive luxury courtyard
- Difficulty: Heavy lifting involved
- Budget Breakdown: Galvanized Boxes: $150 | Uplights: $40 | Trees: $60
- Creator’s Tip: Anchor tree root balls to the bottom of the planter with heavy nylon straps before adding soil to prevent wind-tipping.
- Smart Sourcing: Commercial-grade galvanized steel planters and weatherproof LED solar uplight starter kits.
7. Fire Escape Garden Integration
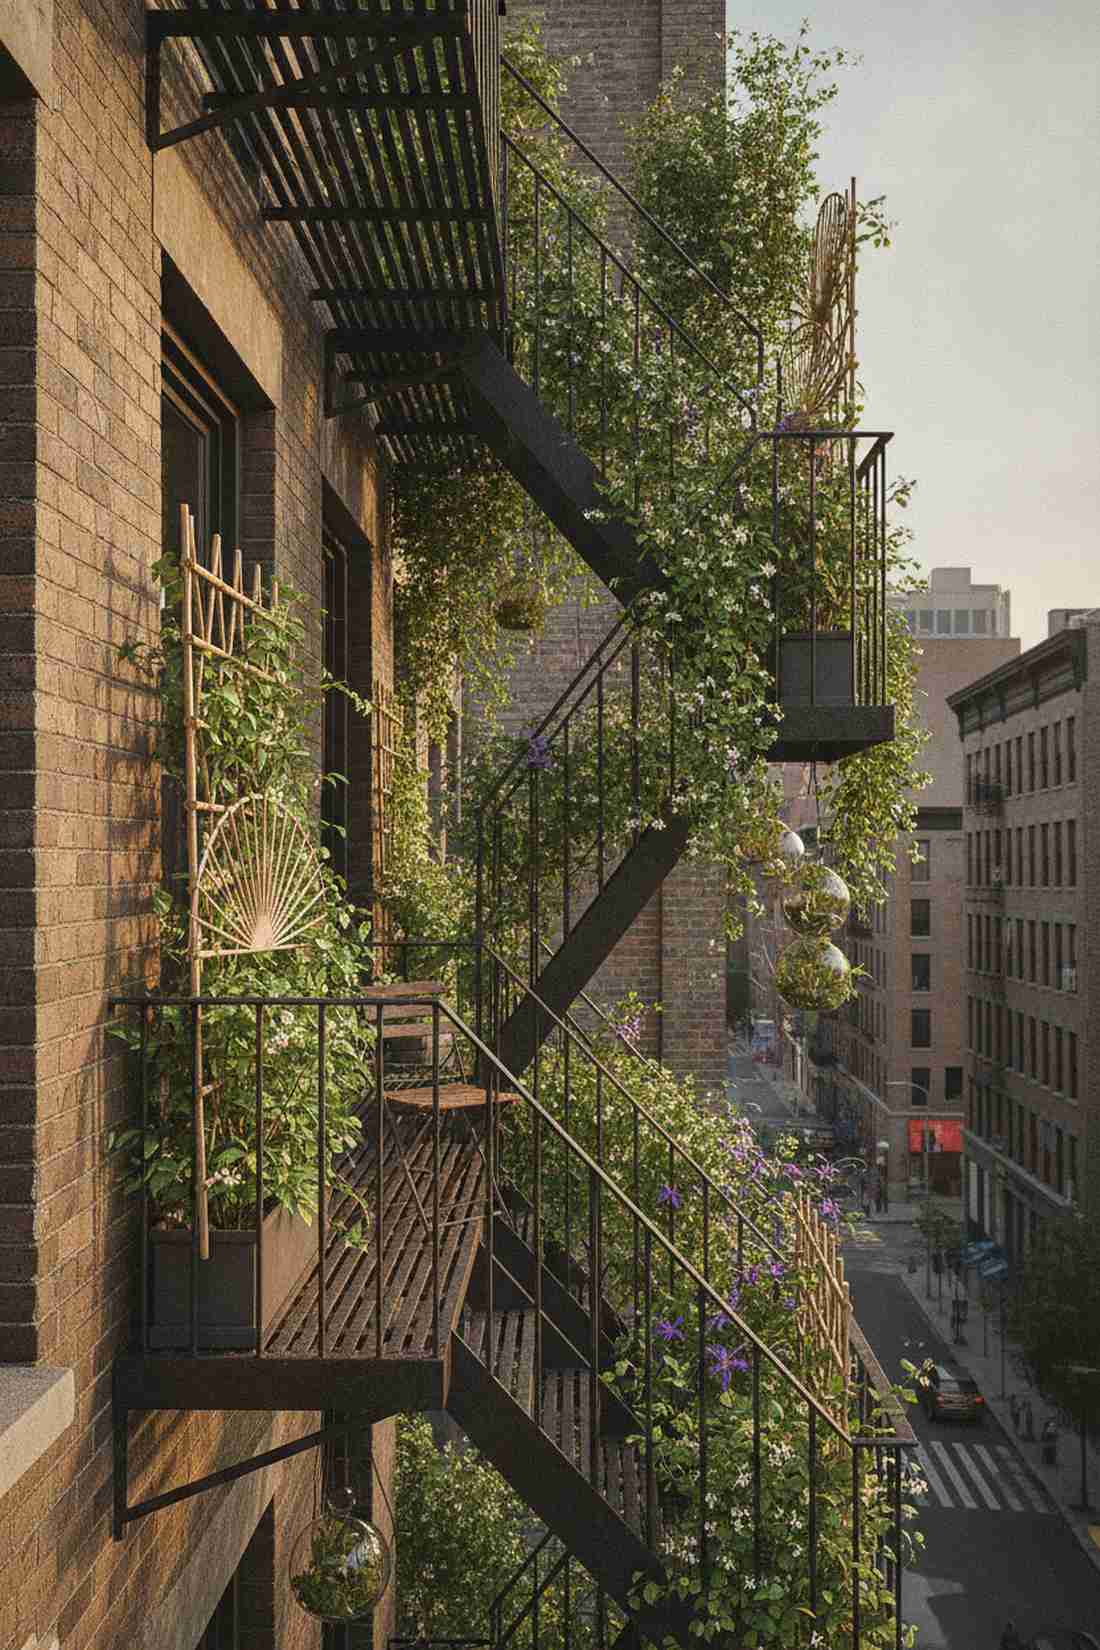
Turning a rusty safety feature into a vibrant trellis feels wonderfully rebellious yet safe. Code-compliant slim box planters frame the ironwork without blocking vital pathways. This is a lifesaver for cramped city dwellers who want greenery without failing their annual building inspection.
City ordinances usually kill balcony gardens, but using detachable trellis screens seamlessly integrates nature while maintaining 100% legal egress clearance. Upgrading to specialized terrarium accessories and climbing vine brackets ensures nothing permanently damages the metal infrastructure.
You can execute this code-friendly vertical climb for a mere $45. Keep this idea handy if you’re dealing with strict landlord regulations.
- Key Materials: Narrow rail boxes, detachable bamboo trellis fans
- Vibe / Style: Gritty urban jungle
- Difficulty: Easy and compliant
- Budget Breakdown: Slim Boxes: $25 | Trellis: $20
- Creator’s Tip: Use magnetic hooks to attach lightweight vines to the ironwork—easy to pull down during inspections!
- Smart Sourcing: Narrow balcony rail box planters and heavy-duty magnetic climbing hooks (bulk pack).
8. Skyline View Framing Layout

This setup feels like looking through a perfectly curated botanical picture frame. Low-profile foreground planters highlight city landmarks rather than burying them. Designed specifically for penthouses where the million-dollar skyline view is the actual main attraction.
A lot of people ruin their vistas with overgrown shrubs, but keeping plant height strictly under 18 inches draws the eye outward. Using contrasting ornamental grasses creates a soft, swaying lower border that makes the rigid concrete skyline pop dynamically.
Achieving this sleek, restrained look costs roughly $120 in low-height containers. It’s an elegant layout that respects the million-dollar view you’re paying rent for.
- Key Materials: Shallow bowl planters, dwarf ornamental grasses
- Vibe / Style: Modern gallery viewing deck
- Difficulty: Minimal effort required
- Budget Breakdown: Bowl Planters: $85 | Grass Plugs: $35
- Creator’s Tip: Stick to a monochromatic green-and-white color palette to prevent the plants from visually competing with the city lights.
- Smart Sourcing: Low-profile fiberglass bowl planters and pre-mixed dwarf ornamental grass seed packs.
9. Brooklyn Farm Production Grid
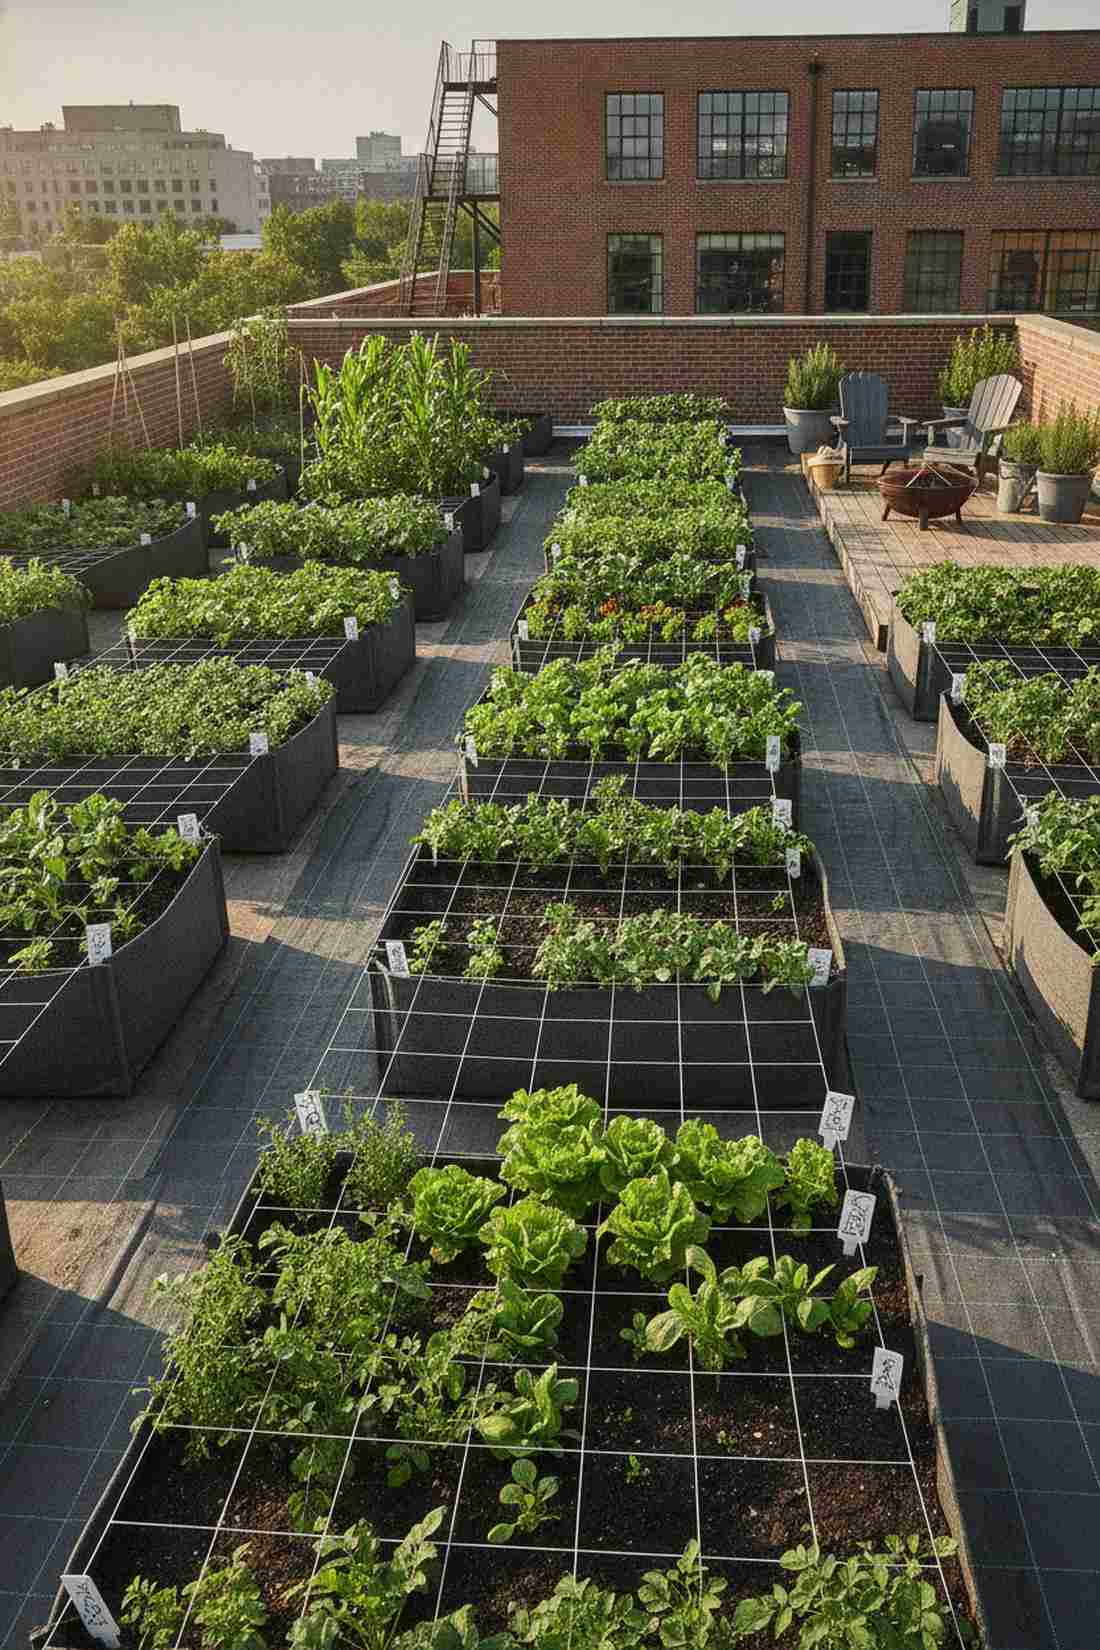
Step outside and it feels like you own a private organic farmers market. Linear raised production aisles maximize every single inch of harvestable sunlight. This utilitarian setup is perfect for serious foodies wanting massive vegetable yields on concrete.
While ornamental curves are pretty, laying out rigid parallel grids delivers a surprisingly premium look reminiscent of professional urban agriculture. Swapping heavy lumber for modular fabric aeration beds drastically reduces roof strain while exploding your root growth potential.
You can establish a high-yield dual-row system for just under $90. Save this to your urban homesteading board to prep for the growing season.
- Key Materials: Breathable fabric raised beds, grid-line string markers
- Vibe / Style: Industrial urban agriculture
- Difficulty: Effortless grid layout
- Budget Breakdown: Fabric Beds: $50 | Soil Setup: $40
- Creator’s Tip: Orient your grid strictly North-to-South so the tall crops don’t cast shadows on your shorter greens.
- Smart Sourcing: Heavy-duty 100-gallon fabric raised beds and pre-cut weed barrier aisle runners.
Most people overspend on custom wood boxes… until they see the genius modular trick coming up next.
10. Water Tower Companion Planting
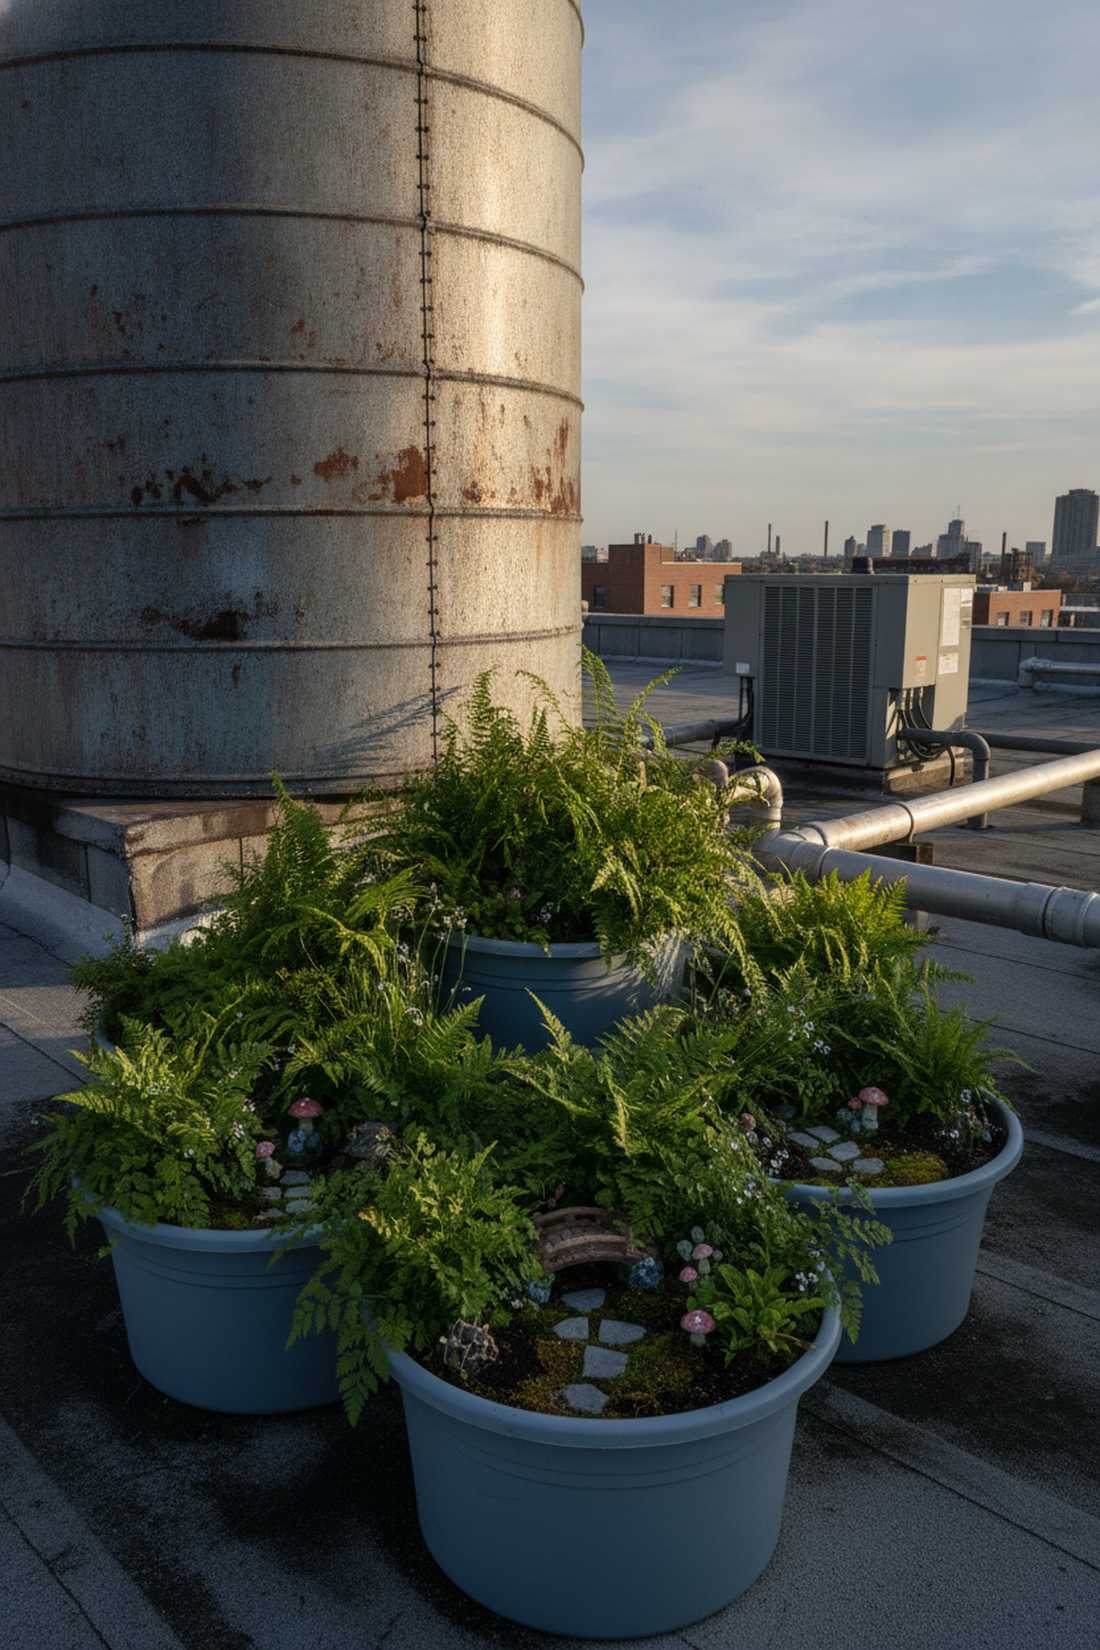
This clever layout turns a massive industrial eyesore into a magical woodland alcove. Shade-loving container ferns leverage the shadow cast by rooftop mechanical equipment. This shines brightest on unpolished rooftops filled with ugly pipes and exposed HVAC units.
Builders usually try to hide equipment with expensive fencing, but embracing the microclimate to grow delicate fairy garden kits and ferns is wildly cost-effective. The tower naturally blocks the scorching afternoon wind, letting fragile humidity-loving foliage thrive in an otherwise hostile sky.
Transforming an ugly utility corner into a lush retreat costs around $60. It’s a brilliant way to turn a building’s worst feature into its best.
- Key Materials: High-humidity soil blends, large plastic resin tubs
- Vibe / Style: Secret rooftop forest
- Difficulty: Super beginner friendly
- Budget Breakdown: Resin Tubs: $40 | Ferns/Soil: $20
- Creator’s Tip: Paint your cheap plastic tubs the exact same color as the water tower structure to make them look built-in.
- Smart Sourcing: UV-resistant faux-stone resin tubs and bulk moisture-control potting mixes.
💡 Must-Have Supplies for High-End Setups
To build these setups faster and ensure they last, skip the generic craft aisles and invest in the right foundational kits to protect your rooftop investment.
- Base & Support: Interlocking drainage cell mats (bulk pack) to keep water off the concrete.
- Setup Tools: Automated solar drip irrigation starter kits to prevent vacation plant-death.
- Weather/Durability Protection: Marine-grade clear UV sealant sprays to stop cheap plastic planters from cracking.
Modular Container Systems
11. Mobile Planter Chess Board
Pushing these blocks around feels like you’re playing a giant, lush game of Tetris. Grid-aligned rolling cube planters let you completely redefine your space in seconds. Perfect for the entertainer who needs a yoga studio at dawn and a cocktail lounge by dusk.
Committing to permanent heavy concrete blocks is a rookie mistake; using wheeled modular systems completely changes the game for layout flexibility. Dropping high-end quick-release irrigation valves on each box ensures you get a designer-level finish without trailing messy hoses everywhere.
You can outfit four giant rolling cubes for about $180 total. Pin this if you get bored easily and love redesigning your layout every season.
- Key Materials: 30-inch lightweight cubes, outdoor-rated caster wheels
- Vibe / Style: Interactive modern art gallery
- Difficulty: Requires minor drill work
- Budget Breakdown: Cubes: $130 | Casters: $50
- Creator’s Tip: Apply a heavy coat of rust-proofing spray to your casters before installing them—rooftop rain destroys cheap metal fast.
- Smart Sourcing: Pre-drilled modular cube planters and marine-grade locking swivel casters.
12. Stacking Cube Vertical Tower
This soaring tower makes your patio look like it was styled by a futuristic architectural firm. Interlocking vertical pyramid planters build massive height without a massive footprint. It is the absolute savior for tiny balconies craving a big, imposing focal point.
Instead of paying thousands for custom metal fabrication, these snap-together systems deliver a surprisingly premium look straight out of the box. Loading the bottom tier with heavy gravel secures the tower against vicious crosswinds while leaving the top free for wild, cascading spillers.
A striking 6-foot tower setup runs right around $95. Highly recommended to break up the monotony of flat, horizontal rooftop spaces.
- Key Materials: Interlocking modular cubes, heavy base gravel
- Vibe / Style: Futuristic vertical pillar
- Difficulty: Easy stacking assembly
- Budget Breakdown: Stacking Kit: $80 | Base Gravel: $15
- Creator’s Tip: Thread a single PVC pipe through the center holes of the cubes to act as an internal spine against heavy winds.
- Smart Sourcing: Modular stackable vertical planter kits and heavy-duty drainage gravel bags.
13. Linear Trough Assembly
Walking alongside this clean green line feels like stepping into a chic modern museum courtyard. Continuous fiberglass trough barriers segment large roofs into intimate, cozy zones. Ideal for massive, intimidating concrete expanses that desperately need structural boundaries.
Flimsy individual pots lined up in a row look incredibly messy, but clicking seamless troughs together gives a designer-level finish. Injecting broad miniature garden supplies like ornamental grass plugs creates a fluffy, uniform privacy hedge that sways beautifully in the wind.
You can build an 8-foot sleek divider wall for approximately $140. Save this layout to your mood board if you need to hide ugly air conditioning units.
- Key Materials: Rectangular fiberglass troughs, leveling shims
- Vibe / Style: Crisp contemporary lines
- Difficulty: Requires basic leveling
- Budget Breakdown: Trough Sections: $120 | Shims/Hardware: $20
- Creator’s Tip: Always use adjustable leveling feet; urban rooftops are intentionally sloped for water drainage, which makes flat pots look crooked.
- Smart Sourcing: Seamless fiberglass trough planters (bulk pack) and adjustable heavy-duty leveling feet.
14. Radial Spoke Arrangement
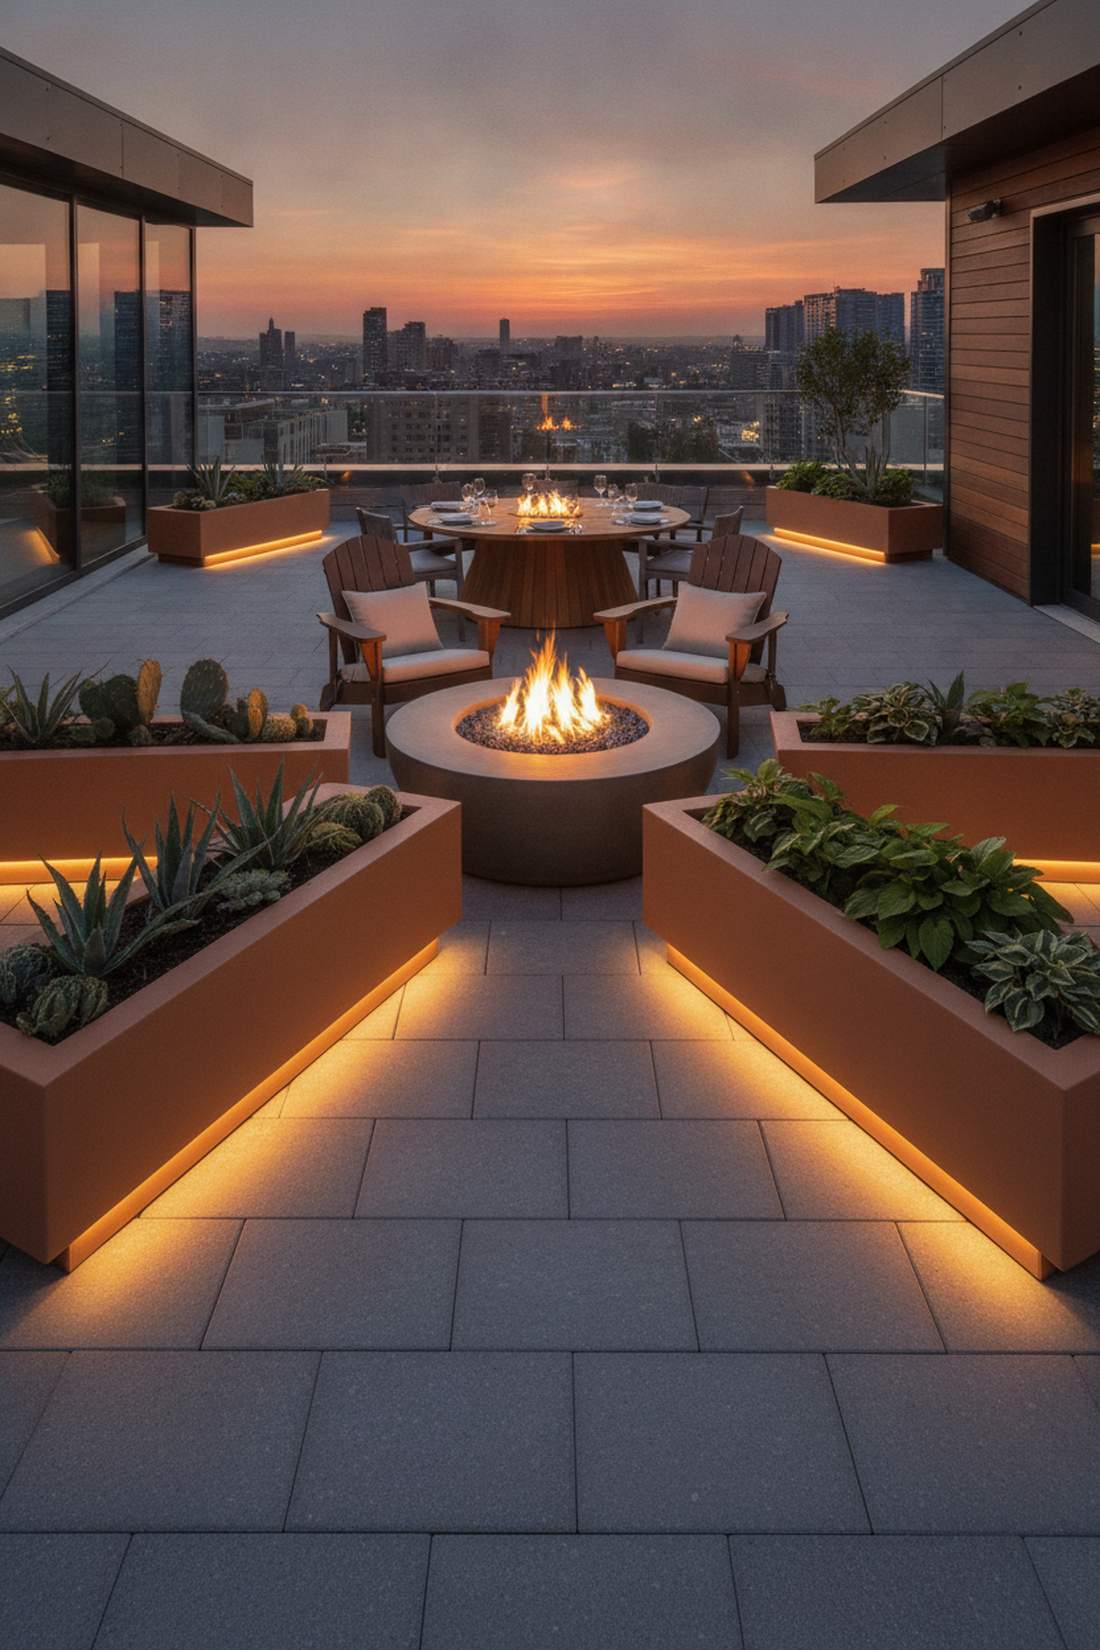
This layout radiates outward, pulling you straight into the ultimate rooftop gathering hub. Wedge-shaped sunburst planters naturally guide foot traffic directly to your central fire pit or dining table. It works like magic on awkward circular or octagonal building caps.
While standard grid layouts fight against curved architecture, arranging boxes in a sunburst pattern looks far more expensive than it is. Integrating discrete pathway lighting beneath the spoke planters creates a breathtaking, glowing runway effect once the sun goes down.
A beautiful four-spoke lighting and planter setup costs around $160. It’s an incredibly intuitive layout that makes hosting outdoor parties effortless.
- Key Materials: Rectangular planters arranged radially, LED strip lighting
- Vibe / Style: Centralized lounge hub
- Difficulty: Moderate spatial planning
- Budget Breakdown: Planters: $130 | LED Strips: $30
- Creator’s Tip: Plant the sunniest spokes with heat-loving succulents and the shaded spokes with hostas to create micro-climate perfection.
- Smart Sourcing: Weatherproof outdoor LED light strips and low-profile rectangular resin boxes.
Don’t lock in your patio design before reading this next space-saving configuration…
15. Nested Rectangle Series
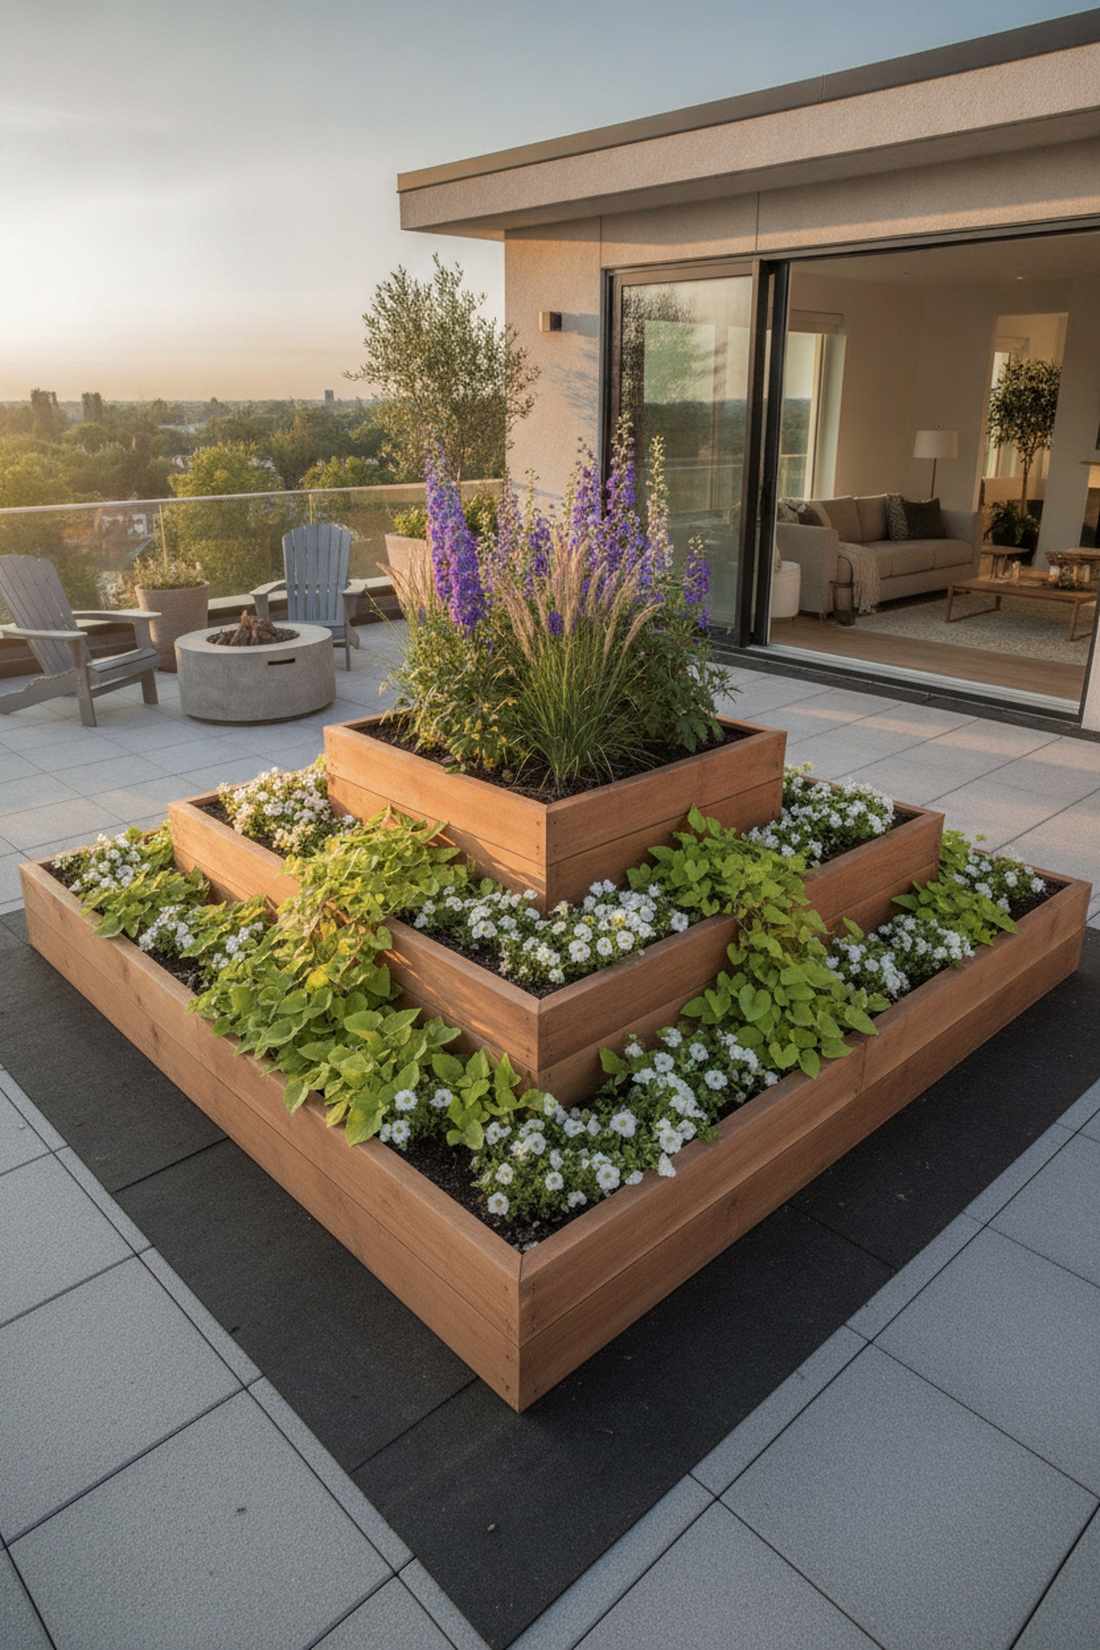
This layered approach feels like a beautifully manicured estate garden shrunk down for the sky. Concentric nested planter boxes create an optical illusion of incredible depth. This trick is an absolute must for flat, boring roofs that lack any architectural texture.
Most folks just push everything against the edges, but building inward with stepped heights delivers a surprisingly premium look. Utilizing pre-drilled flat-pack nested kits completely eliminates the need for expensive carpenters or heavy lifting through tight elevator shafts.
You can achieve this deep, tiered illusion for around $115 using modular kits. Pin this idea if you want to turn a dead center space into a lush focal point.
- Key Materials: Progressive sized rectangular boxes, varied soil heights
- Vibe / Style: Tiered formal garden
- Difficulty: Simple puzzle assembly
- Budget Breakdown: Nested Kits: $95 | Hardware: $20
- Creator’s Tip: Place your tallest, most dramatic thrillers in the dead center box, framing them with cascading spillers in the outer rings.
- Smart Sourcing: Pre-cut nested cedar planter kits and heavy-duty deck protector mats.
Vertical Integration Layouts
16. Cable Trellis Green Screen
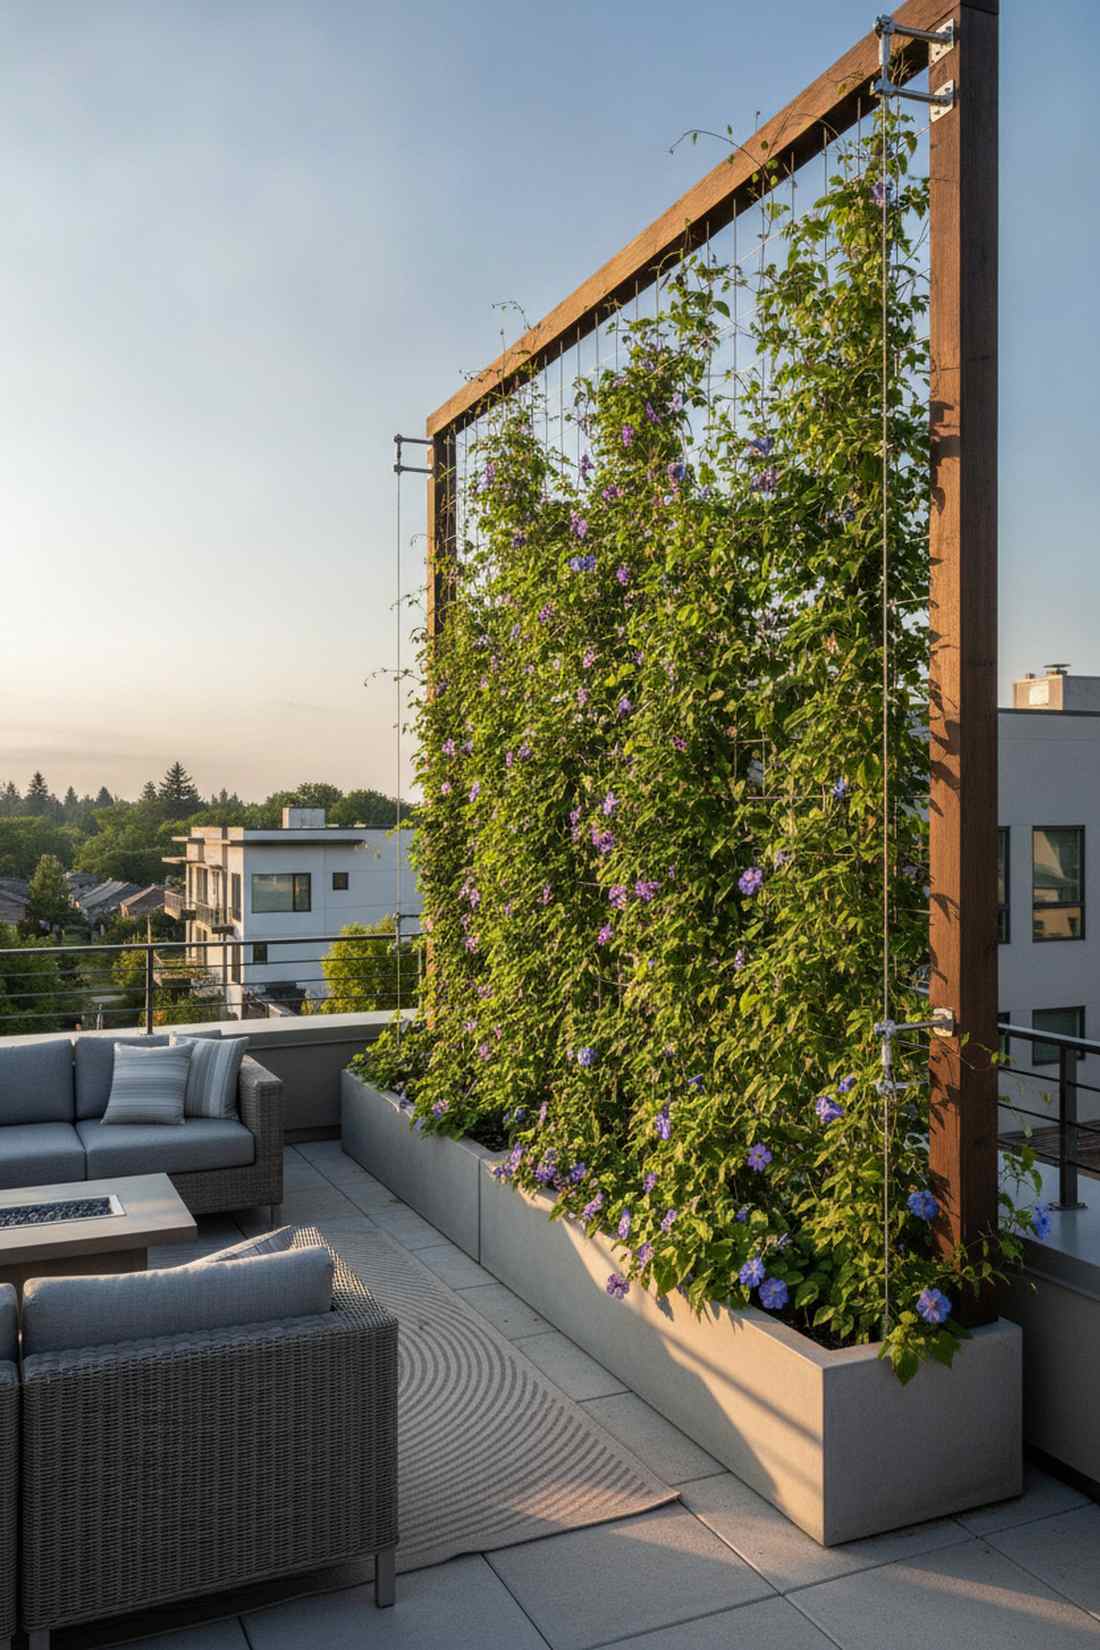
Watching vines race up these sleek steel lines feels like living inside a modern eco-resort. Stainless steel tension cables create an invisible framework for rapid vertical growth. It’s the ultimate high-end privacy screen for rooftops directly facing nosy neighbors.
Heavy wooden lattices look incredibly cheap and catch dangerous wind loads, but thin wire systems completely change the game for safety and style. Tightening marine-grade turnbuckles ensures the cables stay perfectly rigid, giving a designer-level finish that architects charge a fortune for.
A massive 10-foot vertical wire screen only costs about $60 in hardware. Save this to your DIY weekend board for a high-impact, low-cost afternoon project.
- Key Materials: Stainless wire rope, turnbuckle tensioners
- Vibe / Style: Invisible modern canopy
- Difficulty: Requires basic drilling
- Budget Breakdown: Wire Hardware: $45 | Base Planter: $15
- Creator’s Tip: Plant rapid-growing Clematis or Morning Glories for a wall that goes from zero to fully opaque in just one season.
- Smart Sourcing: Stainless steel wire rope starter kits and heavy-duty eyelet turnbuckles (bulk pack).
17. Stepped Pyramid Planter Wall
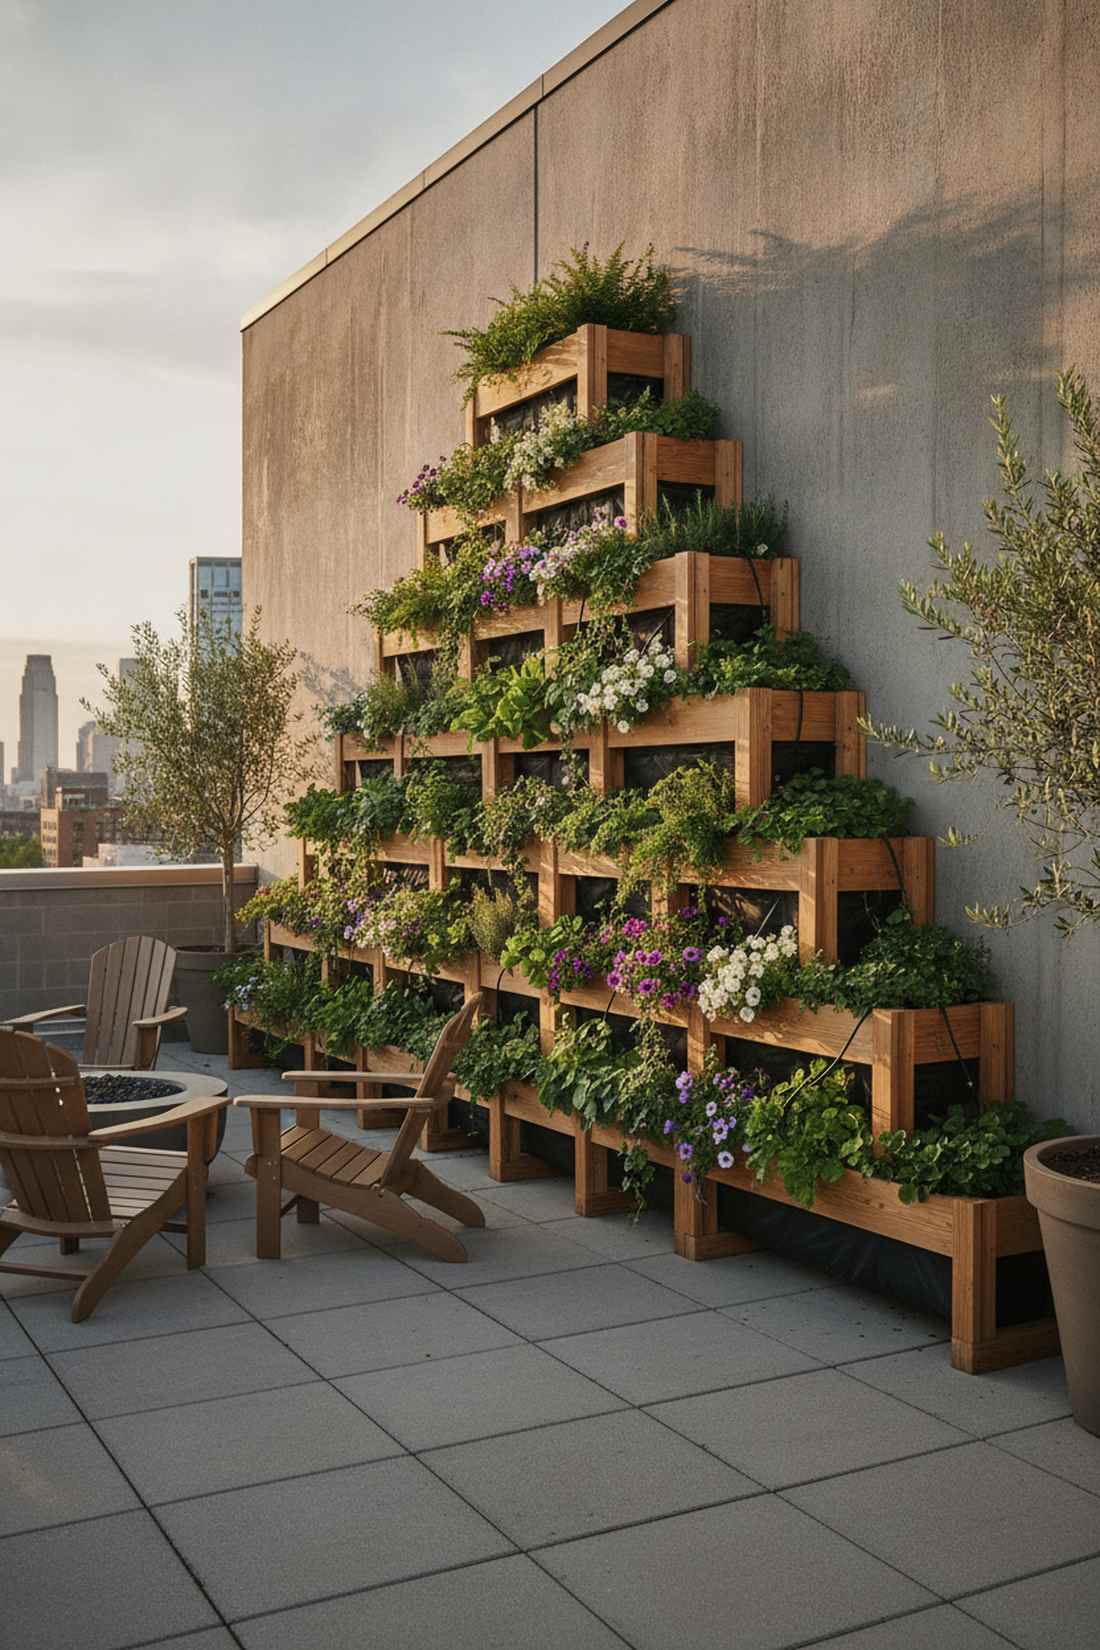
This grand staircase of greenery gives off serious ancient hanging-garden energy. Multi-tier stepped planter shelves ensure every single leaf gets blasted with perfect sunlight. If your rooftop has a massive, ugly blank wall, this is exactly how you cure it.
Standard flat planters waste so much vertical potential, but stepping them back drastically multiplies your harvestable square footage. Incorporating broad terrarium accessories like automated micro-drip lines into each tier ensures you aren’t stuck hand-watering 40 different pockets every evening.
You can assemble a massive wooden pyramid kit for around $135. It’s a fast upgrade that completely changes the vibe of a sterile concrete wall.
- Key Materials: Pre-cut tiered wood frames, plastic liner inserts
- Vibe / Style: Cascading green monument
- Difficulty: Moderate screwing required
- Budget Breakdown: Tier Kit: $110 | Liners/Staples: $25
- Creator’s Tip: Seal the back of the pyramid with thick plastic sheeting to prevent moisture from destroying your building’s exterior wall.
- Smart Sourcing: Pre-cut multi-tier cedar planter kits and heavy-duty plastic staple gun starter kits.
18. Hydroponic Tower Garden Cluster
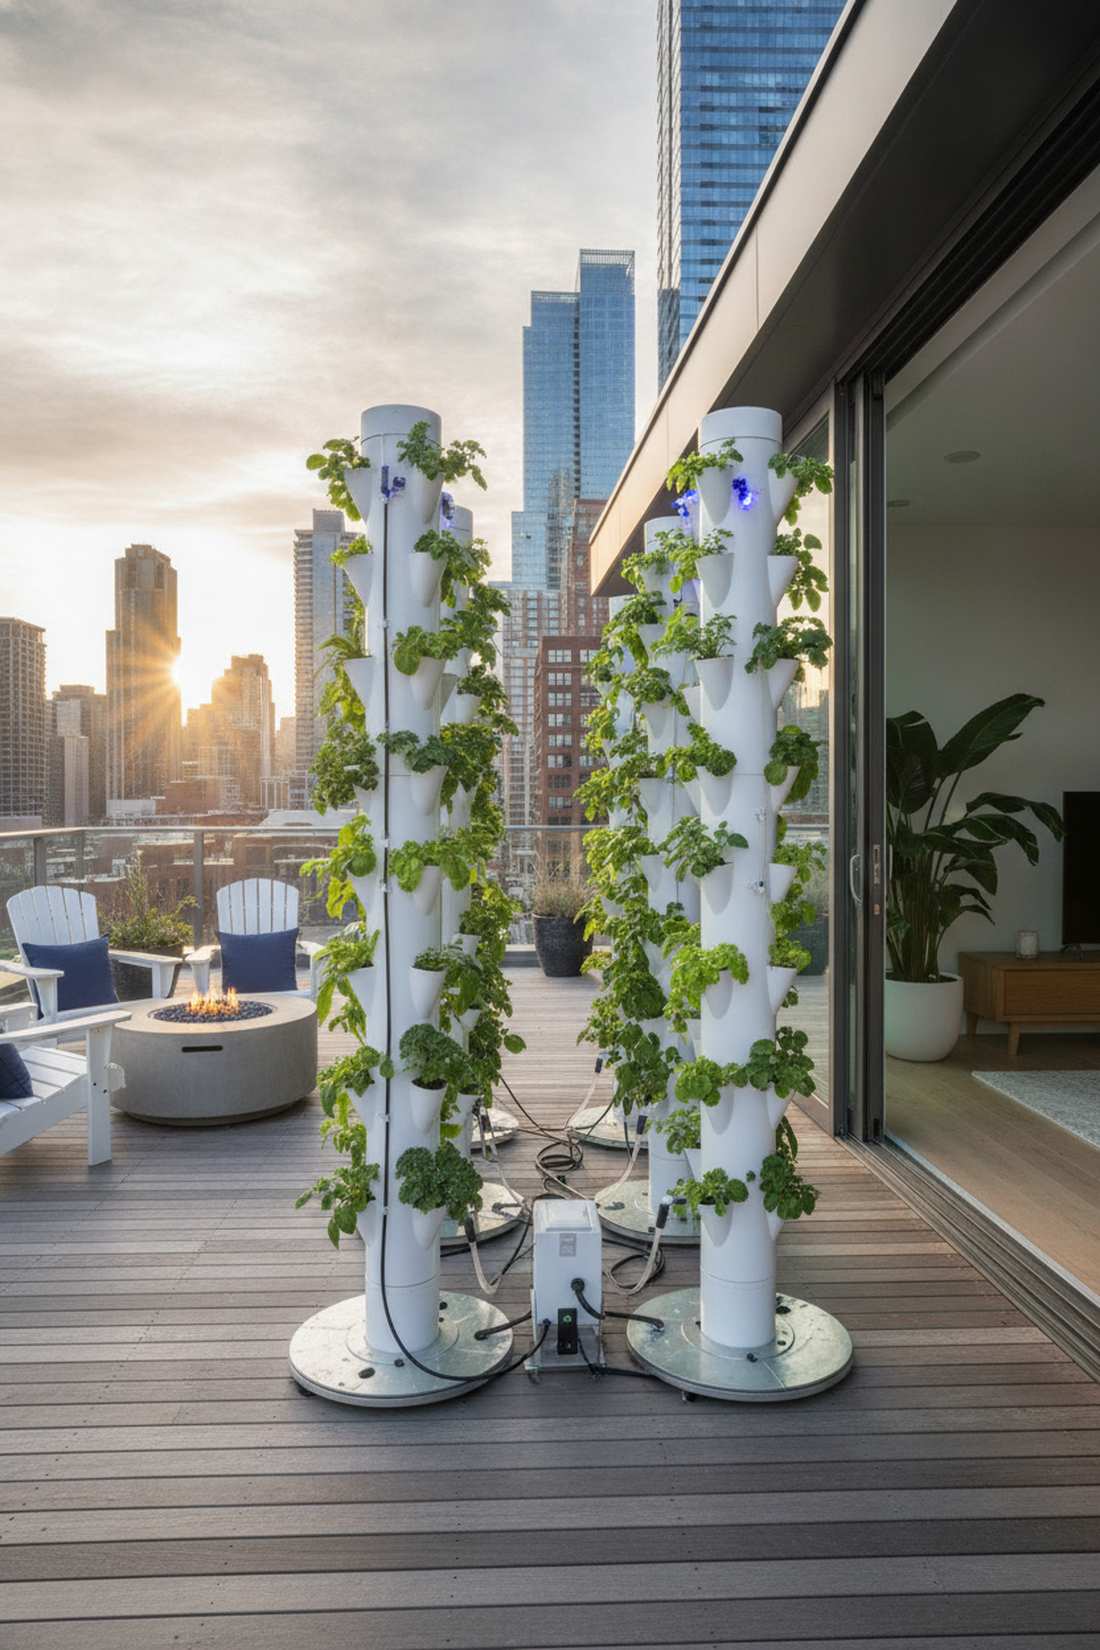
Stepping into this setup feels like walking through a high-tech Martian greenhouse. Vertical aeroponic growing towers pump out massive yields without a single ounce of heavy dirt. It is the absolute holy grail for tech-loving urbanites craving fresh salads without weight-limit anxiety.
Lug dirt up an elevator once and you’ll realize why soil-less setups look far more expensive than they are in the long run. Utilizing automated nutrient timers slashes water weight by 75%, completely bypassing restrictive structural load codes while quadrupling your harvest speed.
A beginner-friendly vertical water tower runs about $180 to start. Pin this if you want an ultra-modern, zero-weeding vegetable factory.
- Key Materials: PVC tower kits, submersible water pumps
- Vibe / Style: Sci-fi urban agriculture
- Difficulty: Basic plumbing snap-together
- Budget Breakdown: Tower Base: $140 | Pump & Nutrients: $40
- Creator’s Tip: Put your tower on a heavy-duty lazy susan so you can easily spin the plants for equal 360-degree sun exposure.
- Smart Sourcing: Vertical hydroponic starter kits and outdoor-rated submersible pump upgrades.
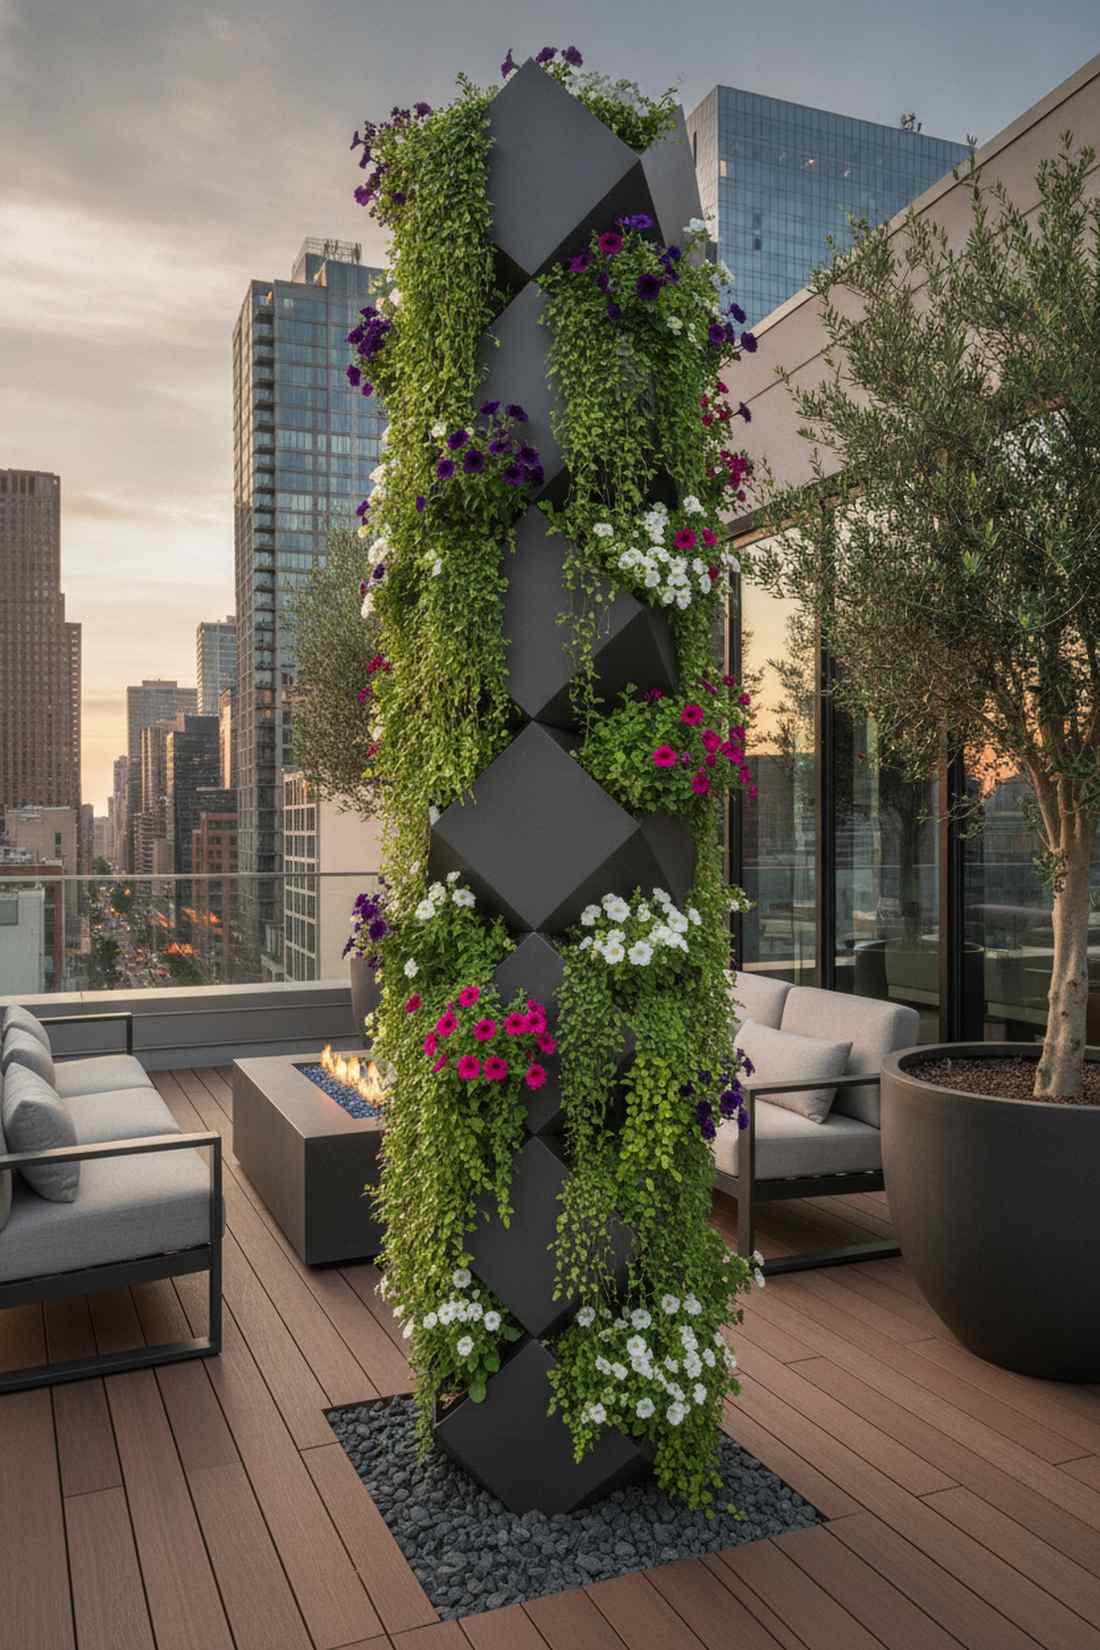
19. Living Wall Panel Backdrop
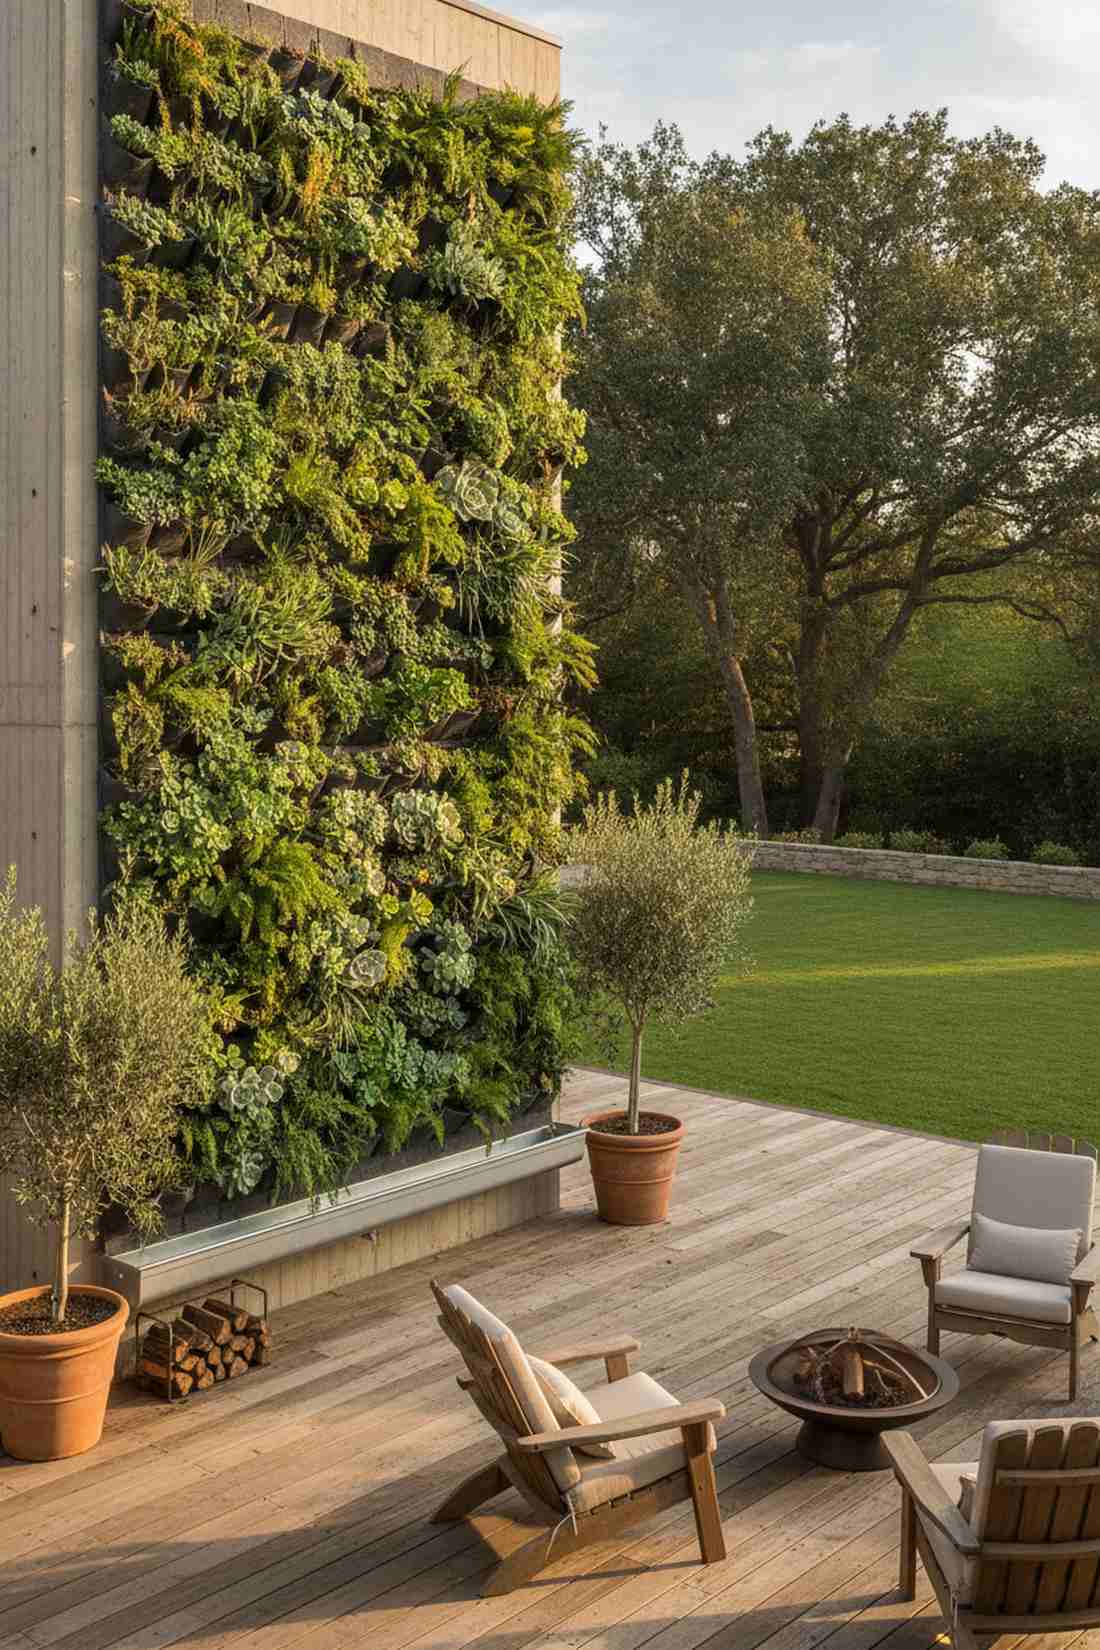
This solid wall of foliage feels like a boutique hotel lobby you get to live in. Modular felt pocket panels instantly blanket ugly elevator housings in lush greenery. Ideal for tight spaces where every inch of floor space is needed for lounging.
Hard plastic wall grids crack in the winter, but using breathable recycled felt pouches delivers a surprisingly premium look that insulates roots. Stuffing these pockets with hardy succulents or ferns creates an instant mature garden without waiting years for vines to crawl.
You can drape a massive 4×8 wall in felt pockets for just $65. Highly recommended to hide the ugliest parts of your building’s roof.
- Key Materials: Breathable felt pocket mats, heavy-duty masonry hooks
- Vibe / Style: Lush architectural tapestry
- Difficulty: Easy hanging setup
- Budget Breakdown: Felt Panels: $45 | Hanging Hardware: $20
- Creator’s Tip: Always install a cheap aluminum gutter right below the felt panels to catch muddy runoff before it stains your deck.
- Smart Sourcing: Pre-pouched breathable felt wall hanging bags and heavy-duty masonry anchor kits.
The following setup is notoriously hard to get right, but this specific blueprint makes it foolproof…
20. Arbor Overhead Canopy Integration
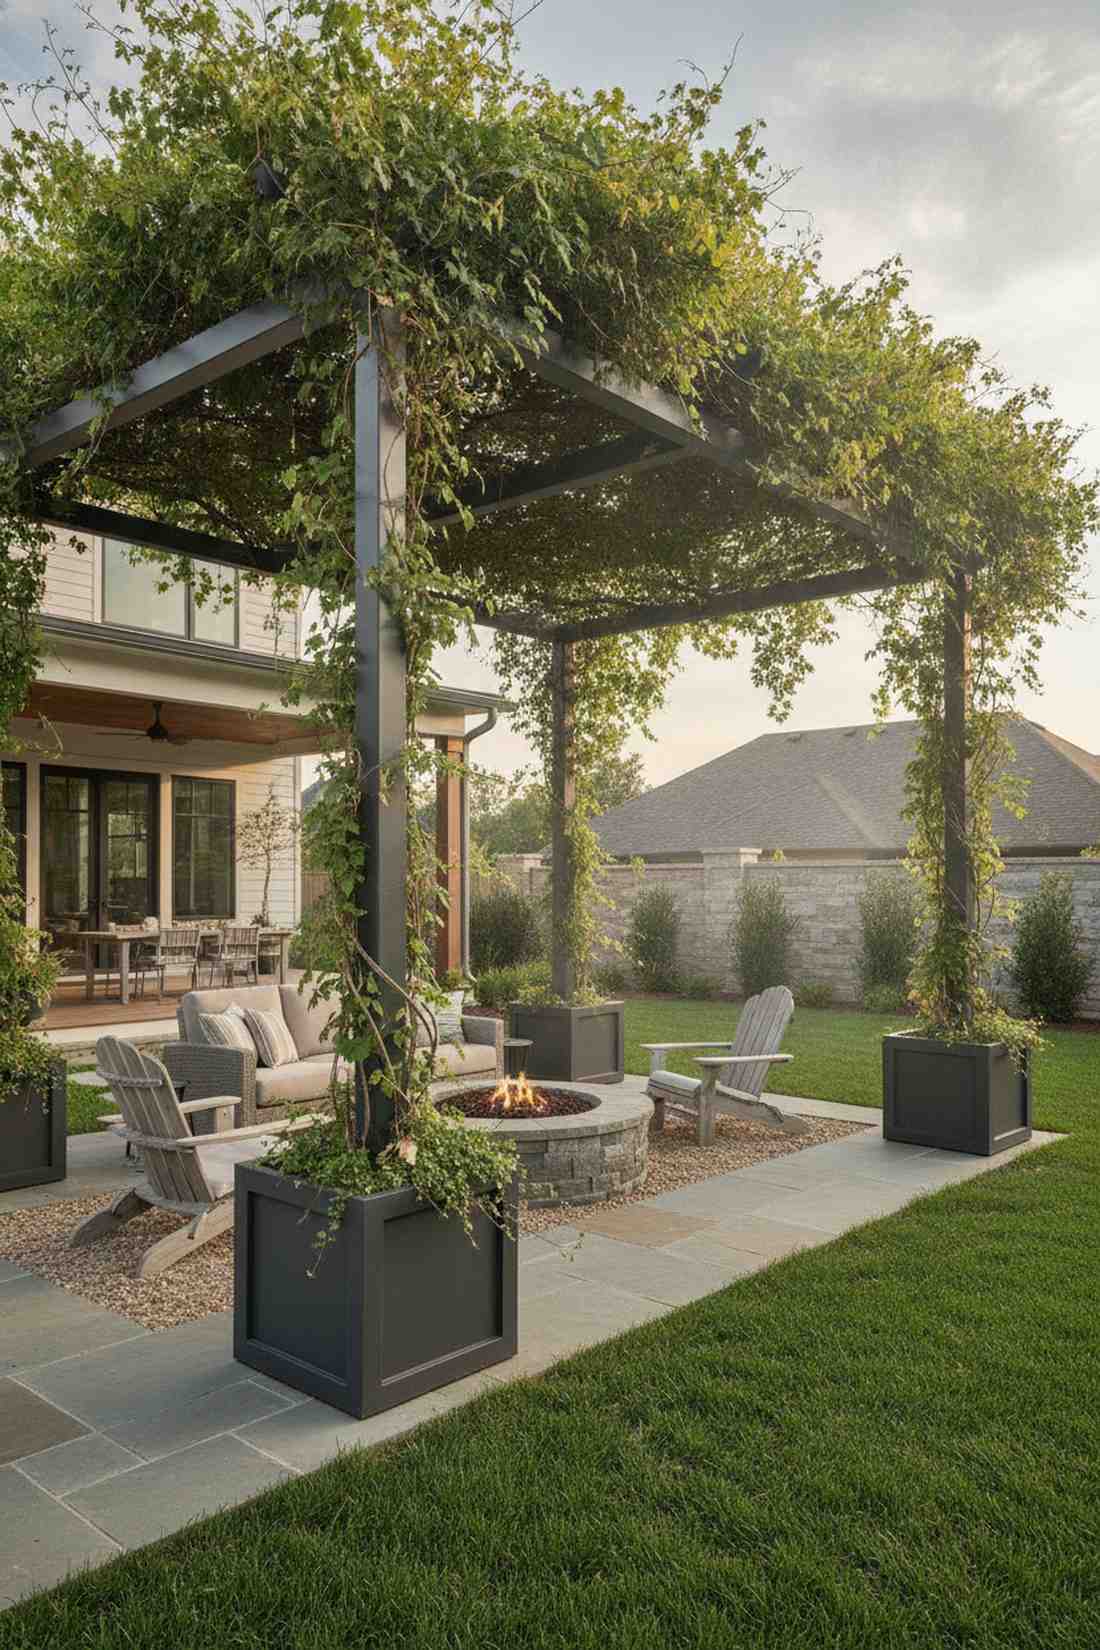
Sitting under this dappled green roof feels like escaping to a Mediterranean vineyard. Lightweight aluminum pergola frames support heavy, shading vines right over your seating zone. This is a game-changer for blistering rooftops that get completely baked in the July heat.
Most folks try to rig up cheap sun sails that tear in the wind, but an anchored vine canopy completely changes the game for natural temperature control. By planting aggressive climbers in deep base pots, you drop the surface temperature underneath by up to 20 degrees naturally.
A sleek, lightweight aluminum arbor kit will set you back around $220. Save this layout to your Pinterest board to finally beat the summer heat.
- Key Materials: Hollow aluminum pergola kits, deep anchoring pots
- Vibe / Style: Cooling vineyard retreat
- Difficulty: Requires a second set of hands
- Budget Breakdown: Arbor Kit: $170 | Base Pots: $50
- Creator’s Tip: Bolt the arbor legs directly to the inside of massive, soil-filled planters so the weight of the dirt acts as your storm anchor.
- Smart Sourcing: Lightweight aluminum pergola kits and extra-deep square resin anchoring planters.
Edible Production Configurations
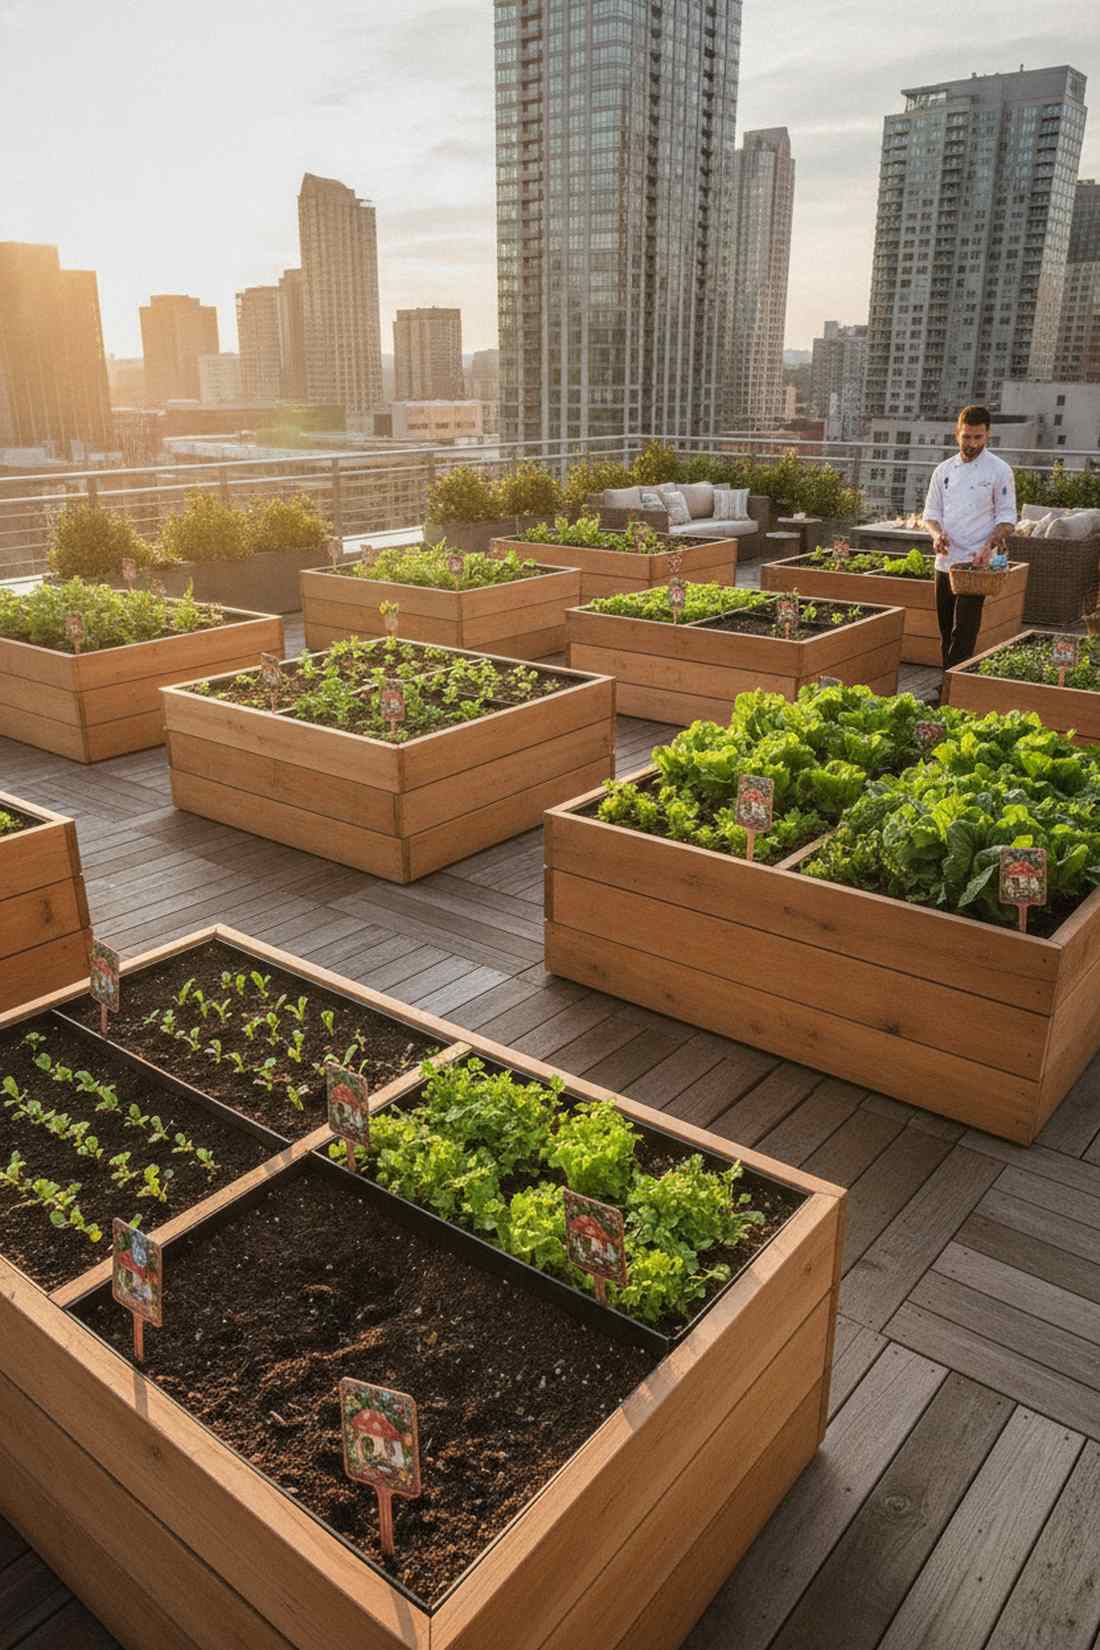
21. Raised Bed Square Foot Grid
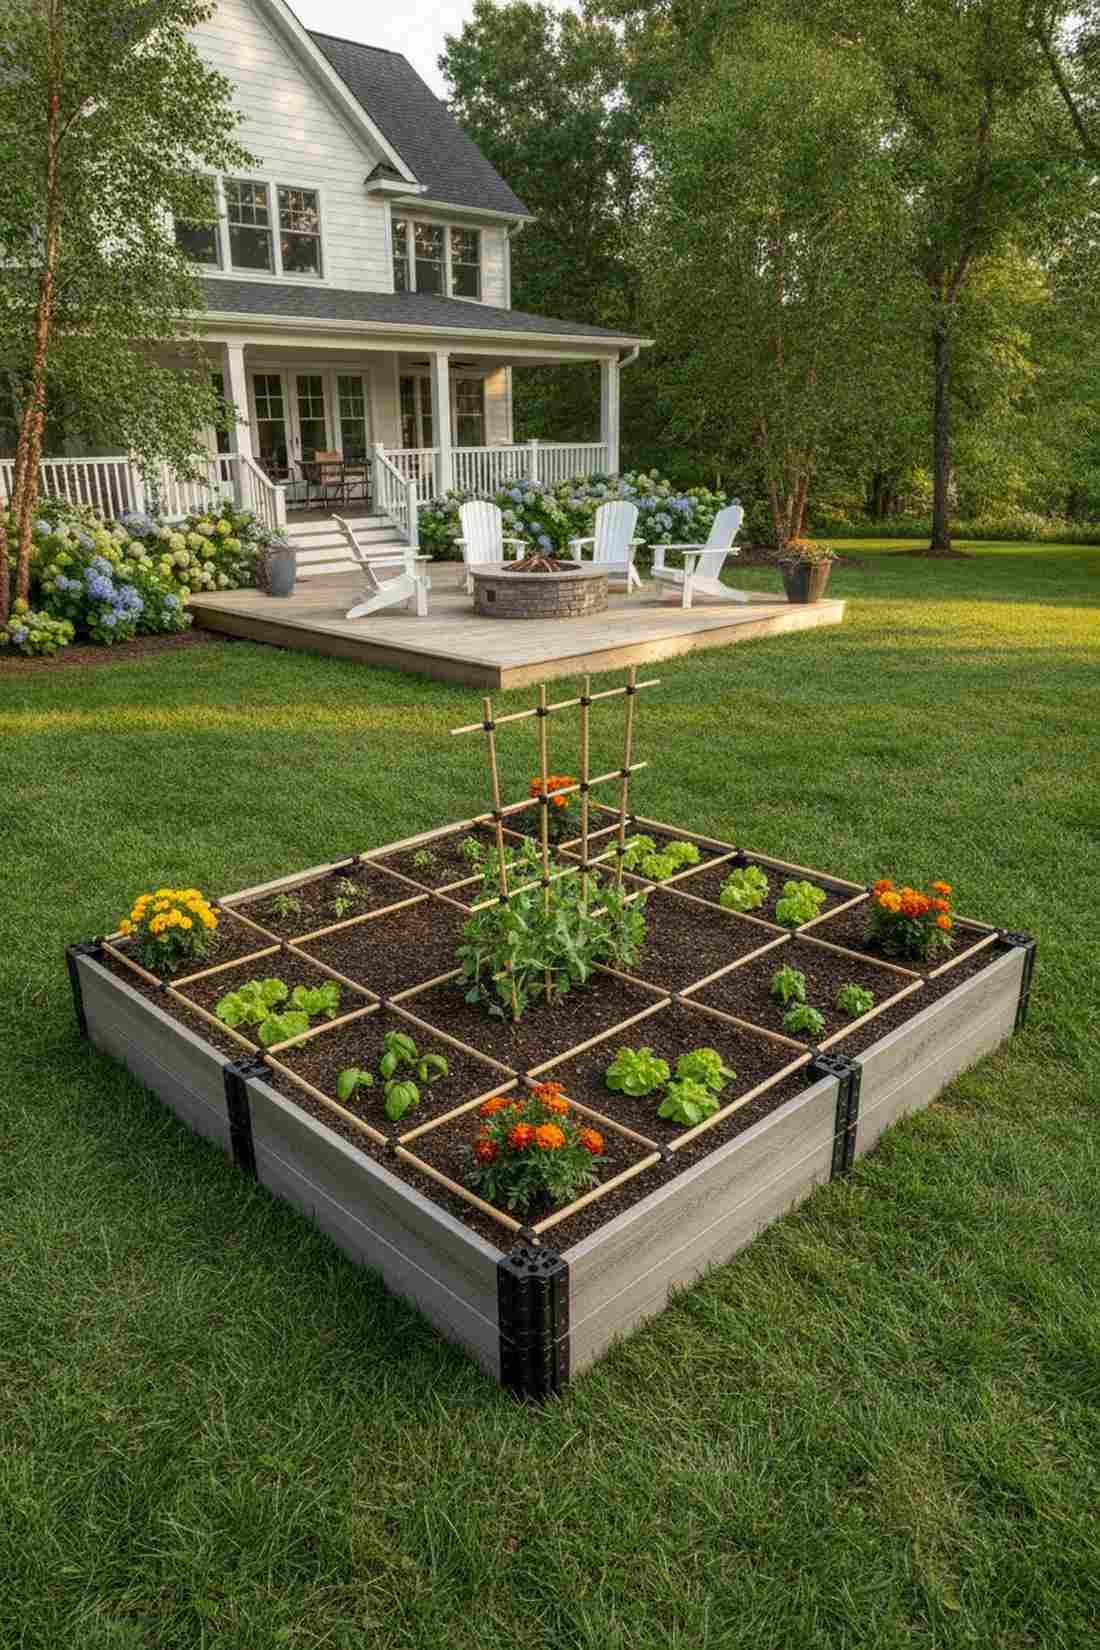
Looking at this hyper-organized bed feels like peering into a master gardener’s secret playbook. Segmented square-foot grid overlays turn messy dirt boxes into high-yield production zones. It’s perfect for data-driven DIYers who want maximum food from minimal space.
Throwing seeds randomly leads to chaotic overcrowding, but strictly dividing the soil gives a designer-level finish while quadrupling your harvest. Laying down a permanent bamboo or plastic grid over the soil eliminates the guesswork of plant spacing entirely.
You can construct this ultra-efficient grid system for around $40. Pin this if you love the idea of an aggressively productive, perfectly neat edible garden.
- Key Materials: Raised bed frame, rigid grid dividers
- Vibe / Style: Hyper-efficient bio-matrix
- Difficulty: Simple measuring task
- Budget Breakdown: Grid Materials: $15 | Bed Frame: $25
- Creator’s Tip: Plant insect-repelling marigolds in all four corner squares to act as a natural, chemical-free pest barrier.
- Smart Sourcing: Pre-cut square-foot grid overlays and snap-together composite raised bed kits.
22. Salad Table Accessible Garden
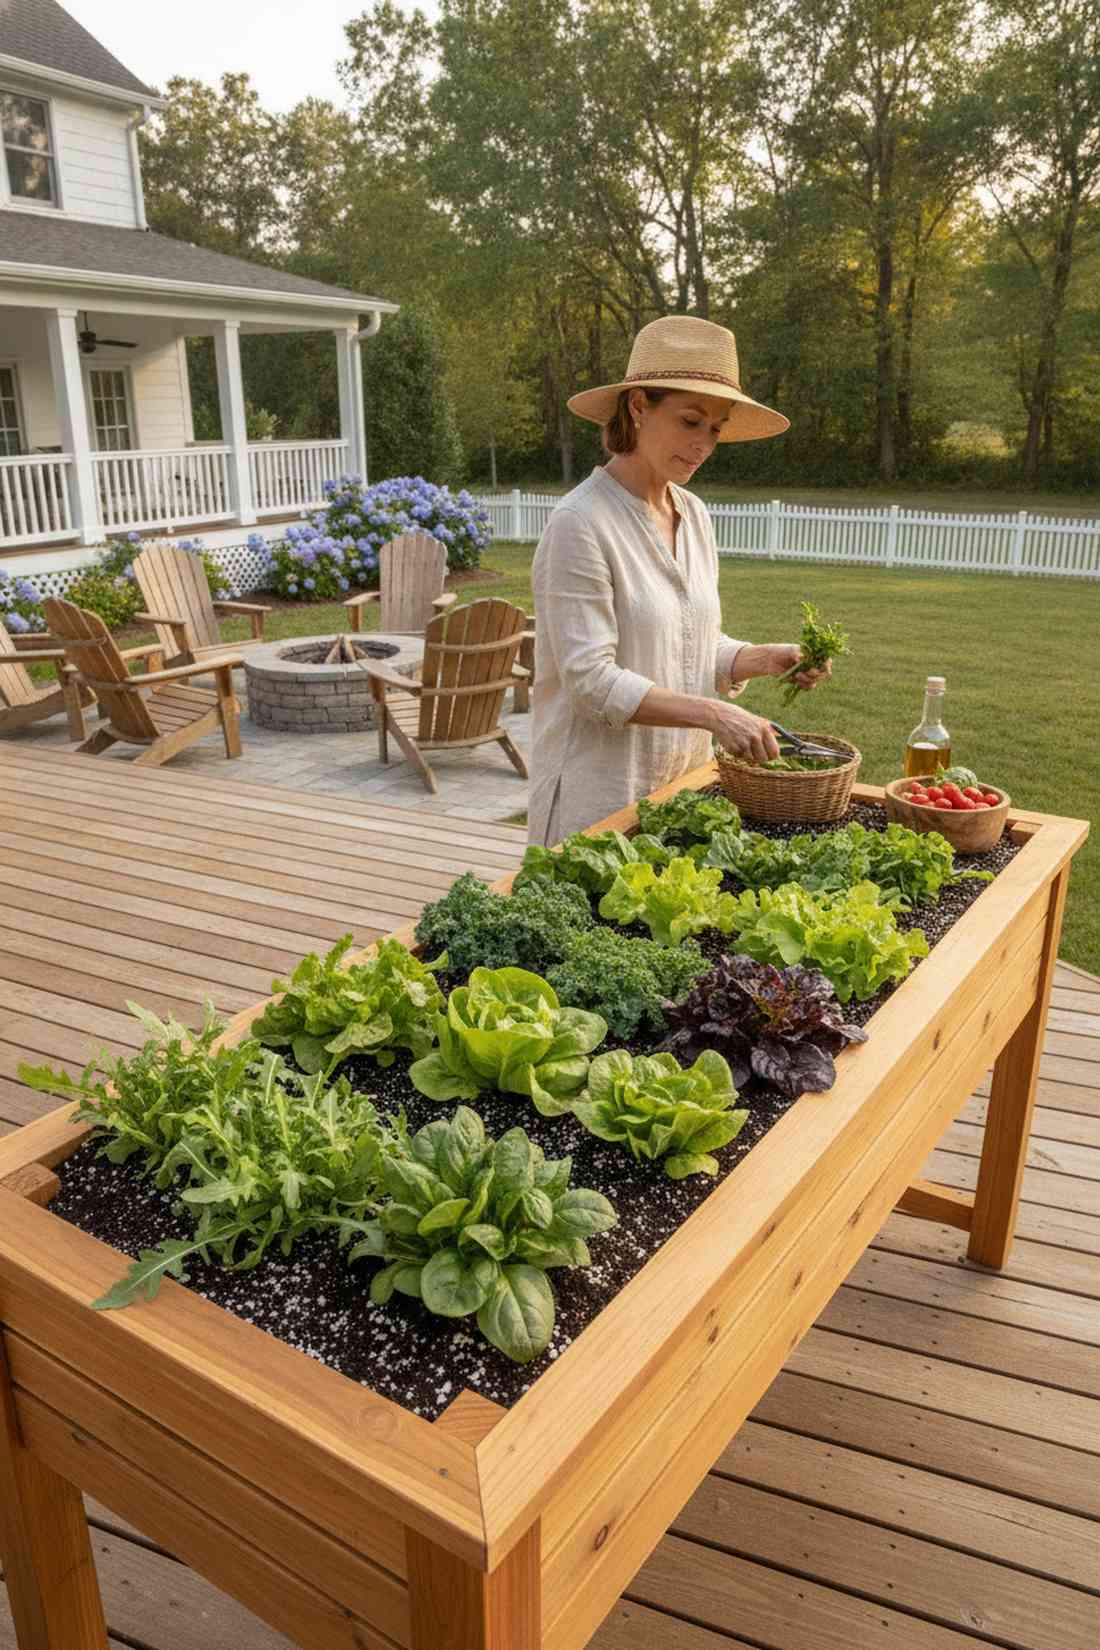
Harvesting dinner from this setup feels as comfortable as prepping food at your kitchen counter. Waist-high elevated planter tables eliminate painful bending and knee-crushing labor. This is an absolute must-have layout for folks wanting effortless daily access to fresh greens.
Bending over ground-level pots gets old fast, but bringing the garden up to your waist looks far more expensive than it is. These elevated tables also naturally prevent ground-dwelling pests from reaching your precious arugula, keeping your salads completely hole-free.
You can build or buy a sturdy elevated salad station for roughly $85. Highly recommended for a quick weekend win that saves your lower back.
- Key Materials: Standing planter boxes, lightweight soil mix
- Vibe / Style: Ergonomic culinary station
- Difficulty: Easy bolt assembly
- Budget Breakdown: Planter Table: $65 | Soil: $20
- Creator’s Tip: Line the bottom of the table with cheap hardware cloth before adding soil to prevent the wood from sagging under water weight.
- Smart Sourcing: Elevated waist-high planter boxes (cedar) and bulk lightweight perlite soil amendments.
23. Vertical Pallet Herb Wall
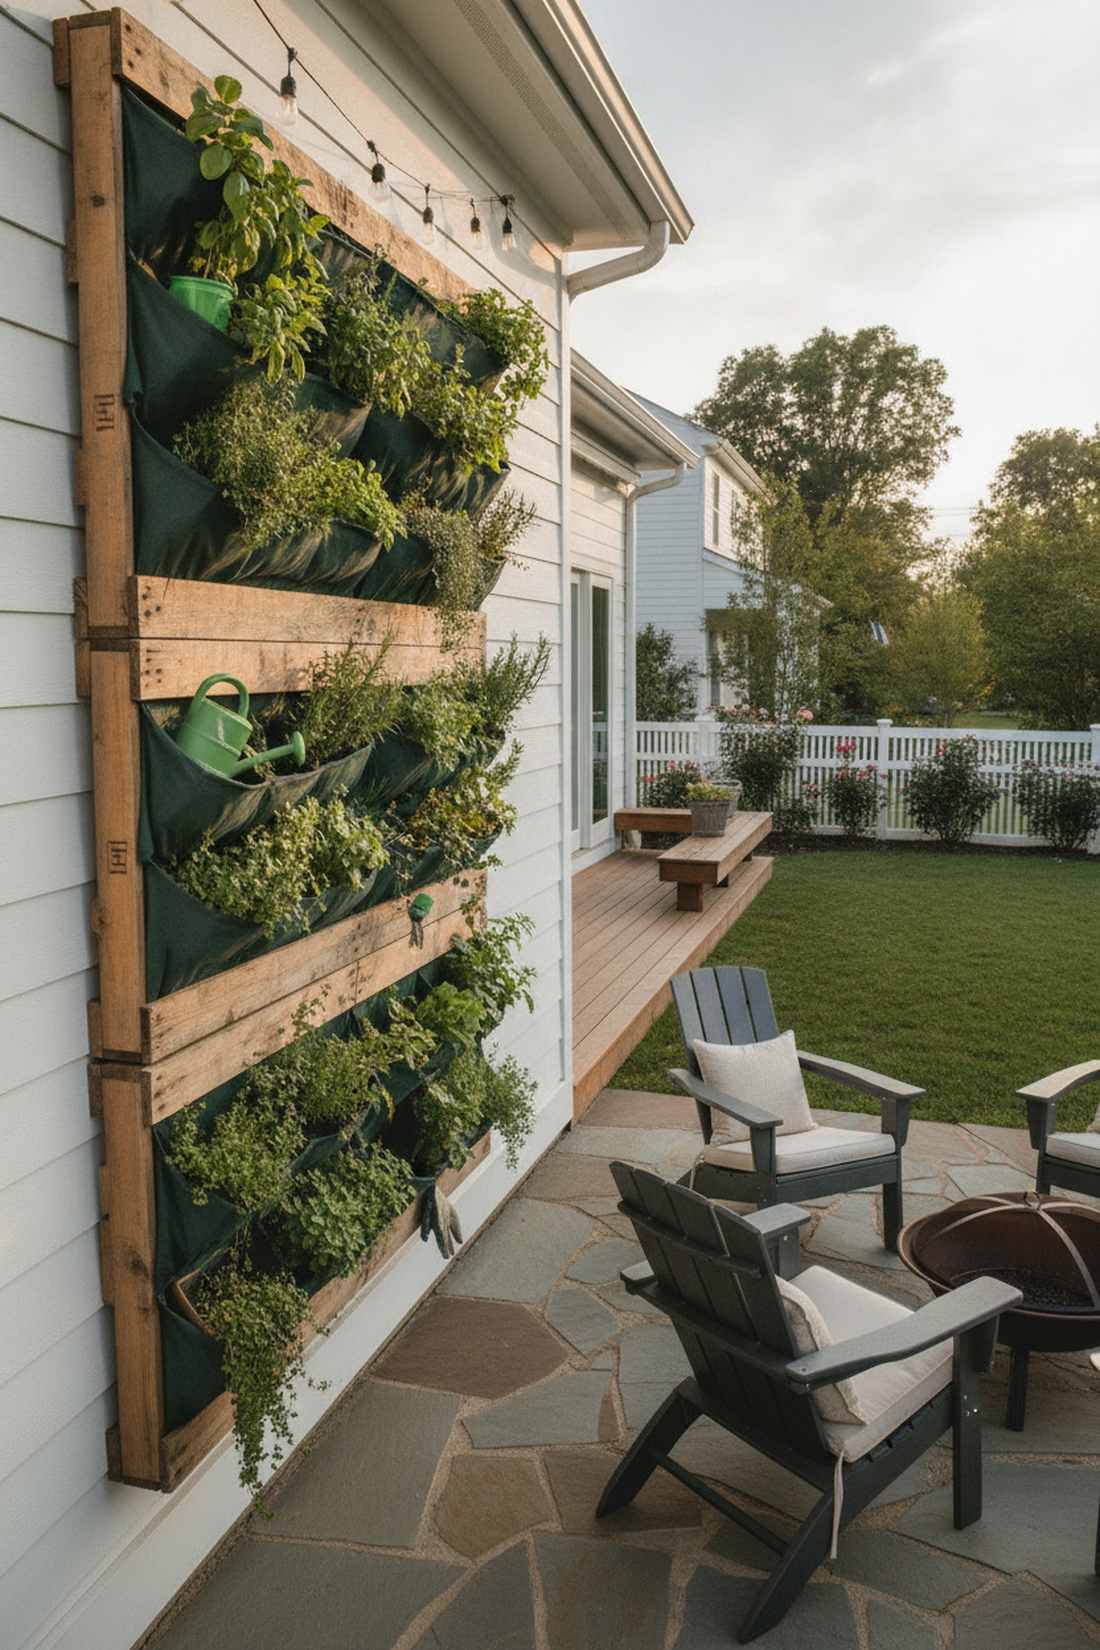
Upcycling trash into this rustic beauty feels like an ultimate hipster triumph. Landscape fabric-backed shipping pallets turn free wood into a massive vertical spice rack. It is the ultimate budget hack for renters with totally blank, boring walls.
Most DIYers leave the wood untreated and watch it rot in months, but securing heavy-duty weed barrier inside the slats completely changes the game. Loading it up with broad miniature garden supplies and trailing herbs creates an incredibly dense, fragrant privacy wall for pennies.
You can execute this entire rustic masterpiece for under $25. Save this to your Pinterest board if you love high-impact, low-budget upcycling.
- Key Materials: Heat-treated wood pallet, heavy weed barrier
- Vibe / Style: Rustic urban upcycle
- Difficulty: Requires heavy stapling
- Budget Breakdown: Pallet: $0 | Fabric & Staples: $25
- Creator’s Tip: Look for pallets stamped with “HT” (Heat Treated). Never use pallets marked “MB”, as they are treated with toxic chemicals.
- Smart Sourcing: Heavy-duty landscape fabric rolls (bulk) and heavy-duty staple gun starter kits.
Material Guide: Cheap vs. Premium Aesthetic
Knowing exactly where to save and where to spend makes all the difference in achieving that “looks expensive but isn’t” vibe on your rooftop.
- Standard Plastic vs. UV-Resistant Fiberglass: Standard plastics turn brittle and crack within one high-altitude winter. Upgrading to UV-coated fiberglass ensures your planters survive freezing winds and blistering sun for decades.
- Pre-made Kits vs. Sourcing Locally: While grabbing random wood seems cheaper, pre-drilled modular starter kits often save both time and money by eliminating the need for expensive power tools and reducing structural weight loads by up to 30%.
24. Three Sisters Companion Cluster
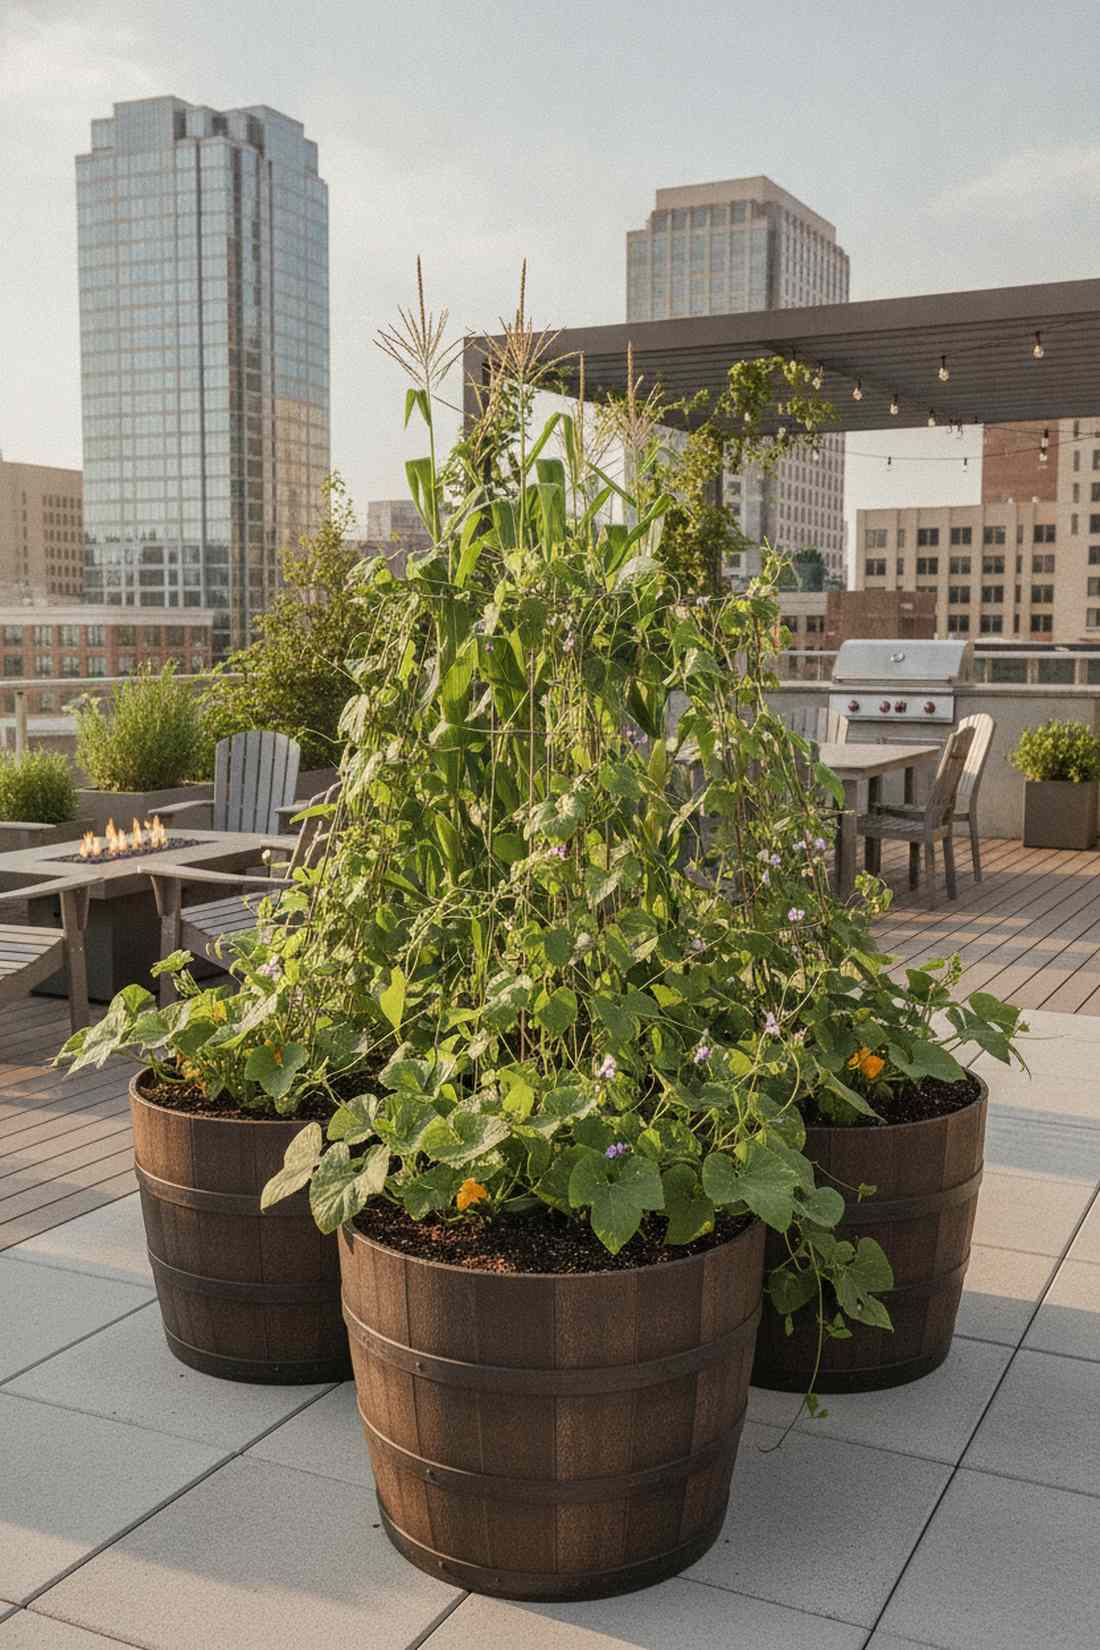
Watching these plants work together feels like witnessing ancient magic on a modern rooftop. Extra-large deep barrel containers house corn, beans, and squash in perfect symbiotic harmony. Perfect for balcony farmers wanting to maximize yield through brilliant ecological science.
Planting single crops in giant pots wastes so much space, but the Three Sisters method delivers a surprisingly premium look of dense, lush chaos. The corn acts as a natural trellis, the beans fix nitrogen into the soil, and the squash acts as a living mulch to prevent rapid evaporation.
Setting up this historical powerhouse cluster costs around $55. Pin this idea if you want an educational, wildly productive summer project.
- Key Materials: 40-gallon resin half-barrels, organic compost
- Vibe / Style: Wild synergistic jungle
- Difficulty: Requires careful timing
- Budget Breakdown: Giant Barrel: $40 | Seed/Compost: $15
- Creator’s Tip: Wait until the corn is exactly 6 inches tall before planting the beans, otherwise the rapid-growing vines will strangle the young stalks.
- Smart Sourcing: Extra-large resin whiskey barrels and organic companion planting seed packs.
Forget everything you know about standard raised beds; the next hybrid layout changes the game entirely…
25. Succession Planting Rotation Zones
This layout operates like a beautifully oiled, never-ending vegetable machine. Staggered chronological planting boxes ensure you harvest fresh food every single week of summer. It is the ultimate flex for rooftop chefs who refuse to run out of fresh cilantro.
Rookies plant everything on day one and end up with rotting excess, but zoning your boxes on a 3-week delay completely changes the game. Using waterproof labels and specific fairy garden kits to mark your zones keeps your miniature farm running with clinical, aesthetic precision.
Organizing this endless-harvest rotation system costs just $30 in staging materials. It’s a fast upgrade that completely eliminates the feast-or-famine gardening cycle.
- Key Materials: Segmented box sections, waterproof plant markers
- Vibe / Style: Methodical chef’s supply
- Difficulty: Requires calendar discipline
- Budget Breakdown: Box Dividers: $15 | Premium Markers: $15
- Creator’s Tip: Use quick-growing radishes in your first zone—they harvest in just 25 days, giving you an instant psychological win.
- Smart Sourcing: Waterproof copper plant markers (bulk pack) and staggered succession seed vaults.
26. Espalier Fruit Tree Fence
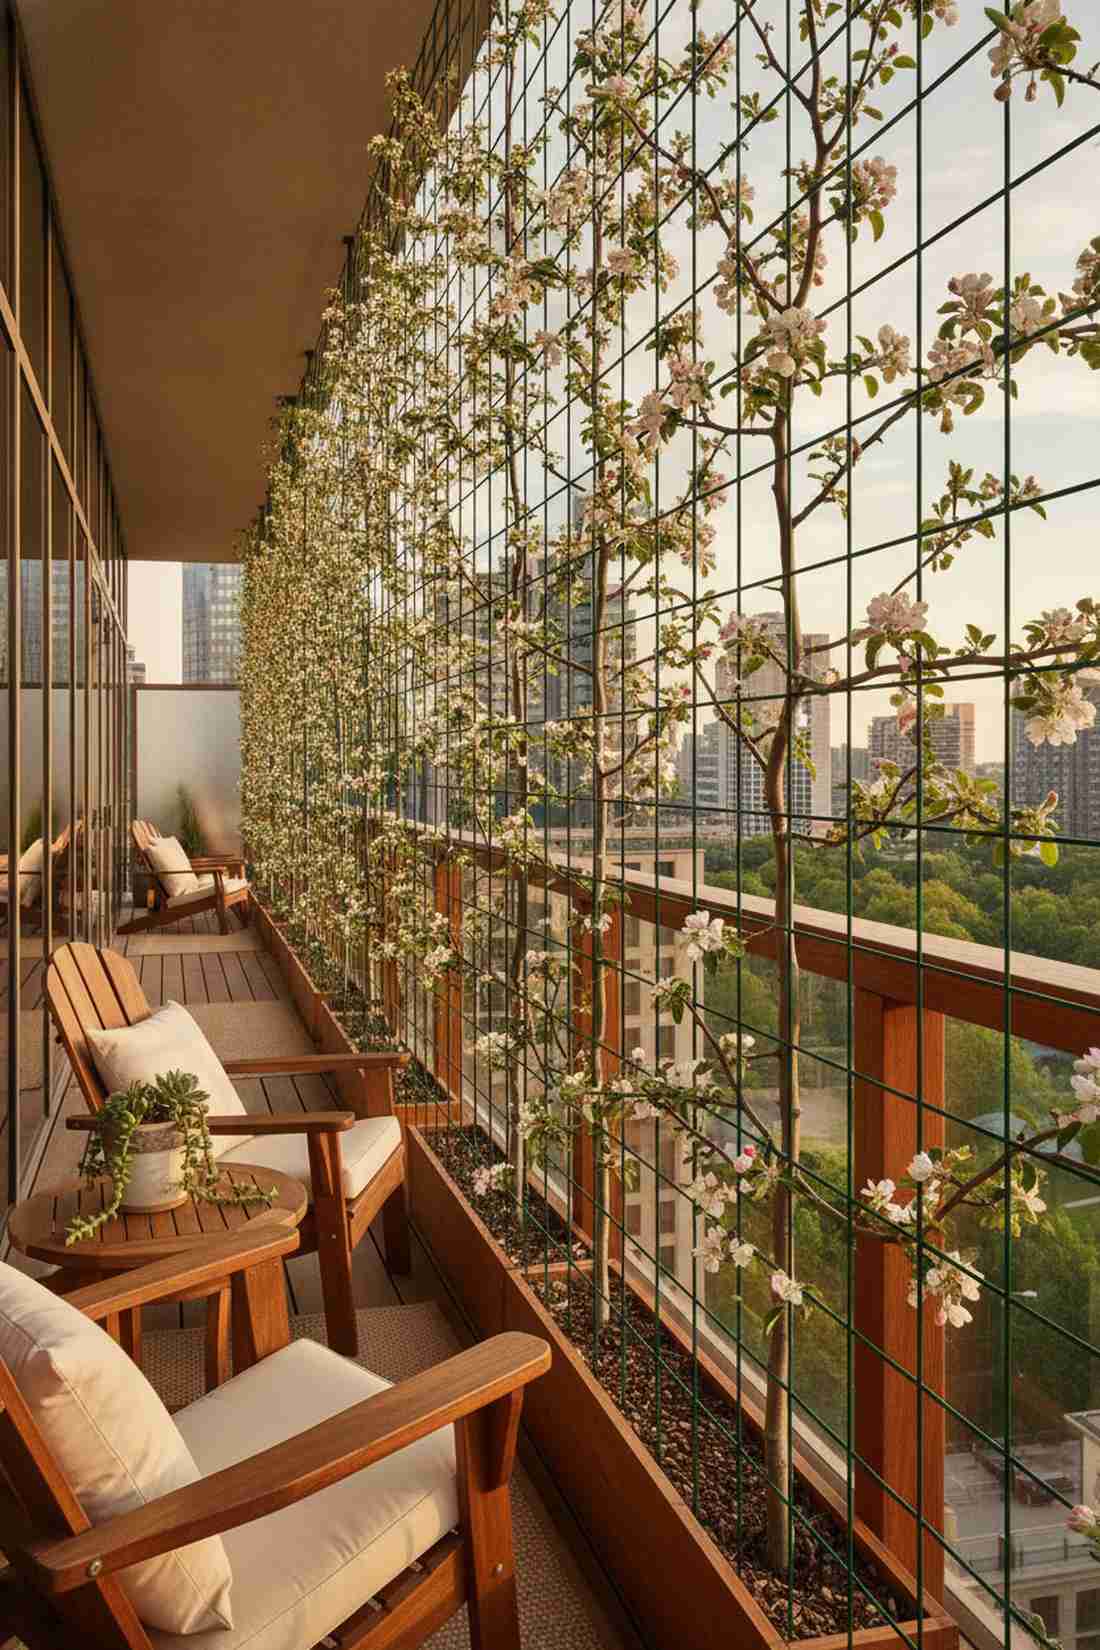
Trimming trees into 2D living fences feels like you’ve imported a piece of a royal French estate. Wire-trained dwarf fruit trees hug your railings without eating up an inch of floor space. Ideal for tiny balconies where a full, bushy tree is totally out of the question.
People think growing apples on a high-rise is impossible, but utilizing ancient espalier techniques looks far more expensive than it is. Forcing branches to grow flat against high-tension wires creates an architectural masterpiece that produces gorgeous blooms and legitimate fruit harvests.
You can set up the wire framework and your first dwarf tree for about $85. Save this to your luxury garden board if you want a jaw-dropping focal point.
- Key Materials: Dwarf rootstock trees, soft-tie training wire
- Vibe / Style: Elegant formal orchard
- Difficulty: Requires delicate pruning
- Budget Breakdown: Dwarf Tree: $60 | Wire Kit: $25
- Creator’s Tip: Always use rubber-coated training wire; bare metal cuts into the expanding branches and introduces disease.
- Smart Sourcing: Heavy-duty rubber-coated soft tie wire rolls and dwarf patio fruit tree starter kits.
Multifunctional Zone Designs
27. Outdoor Kitchen Garden Integration
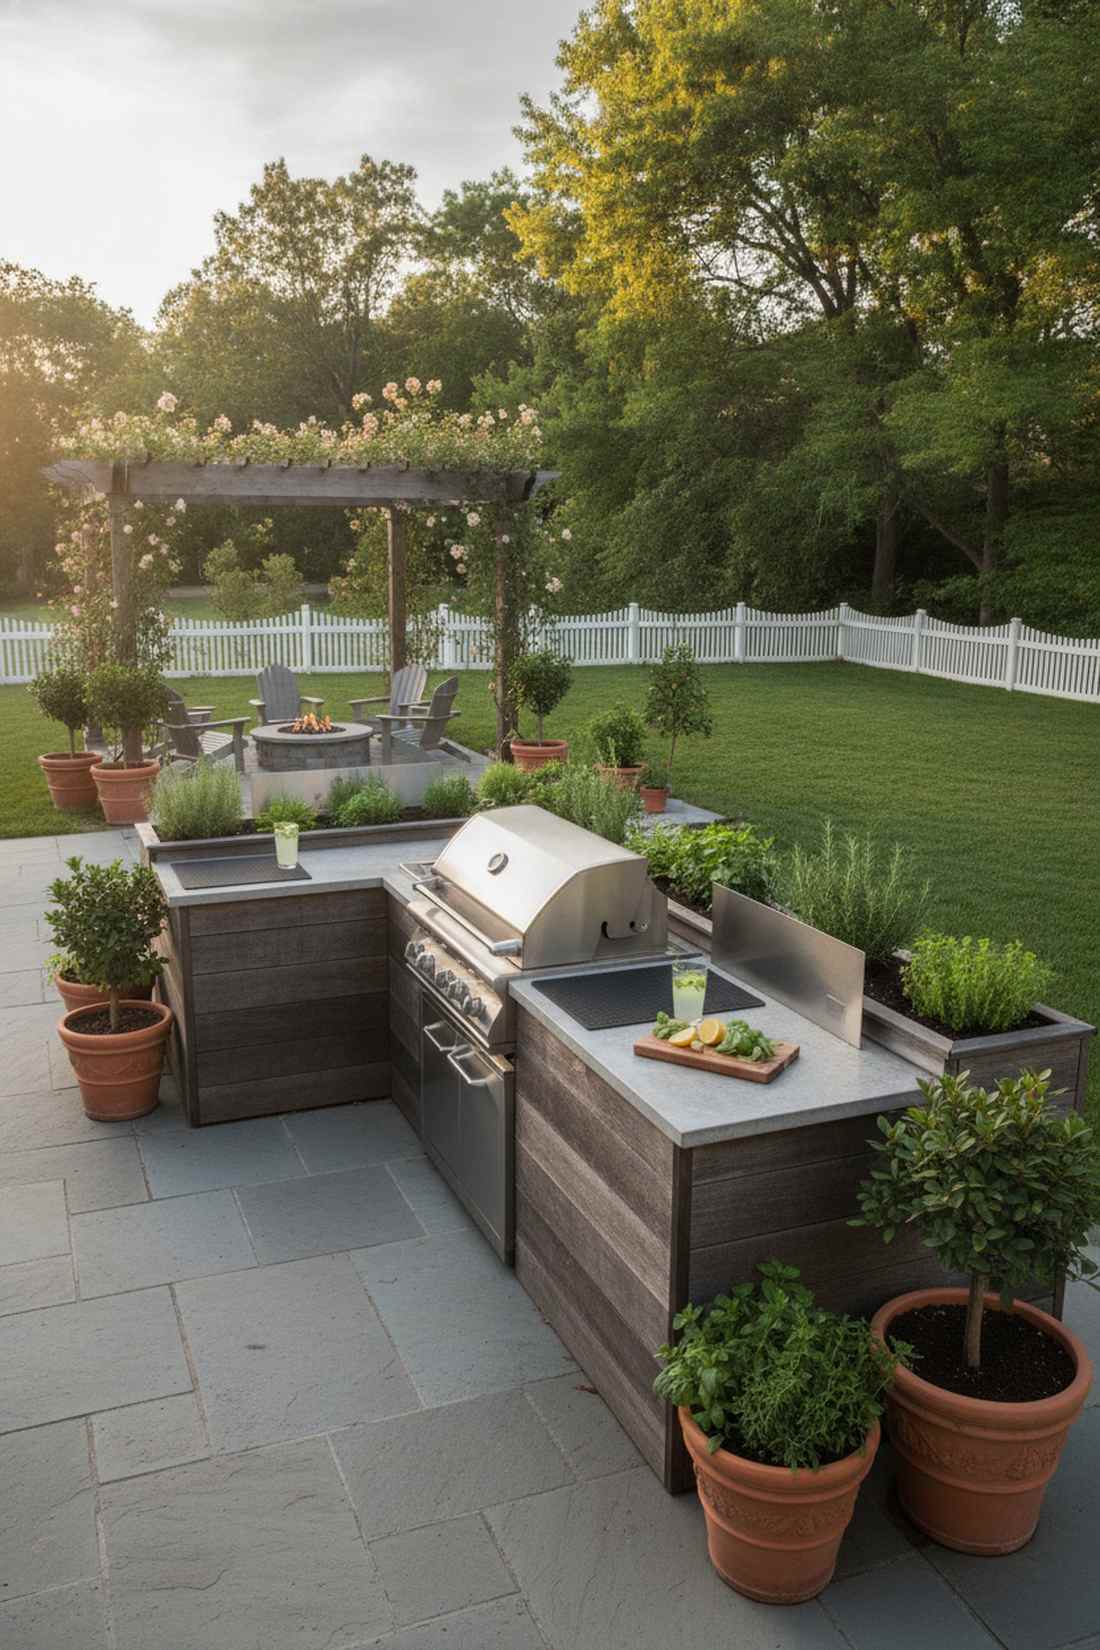
Grabbing fresh basil right next to the grill feels like the ultimate luxury cooking flex. Integrated wrap-around herb stations fuse your cooking space directly into the landscape. This is the ultimate setup for entertainers who want to show off ultra-fresh meal prep.
Having pots scattered across the roof is annoying while cooking, but building herbs directly into the prep station delivers a surprisingly premium look. By shielding the planters with heat-resistant barriers, you ensure your delicate mint doesn’t get scorched when the BBQ fires up.
Creating this integrated culinary perimeter costs around $120. Pin this if you want to completely elevate your summer grilling parties.
- Key Materials: Heat-deflecting planter shields, modular counter boxes
- Vibe / Style: Michelin-star patio
- Difficulty: Simple modular placement
- Budget Breakdown: Counter Planters: $90 | Heat Shields: $30
- Creator’s Tip: Keep rosemary and thyme closest to the grill—they actually smell incredible if a little bit of ambient heat hits them.
- Smart Sourcing: Modular railing counter box planters and heat-resistant silicone grill barrier mats.
28. Pollinator Habitat Lounge Combination
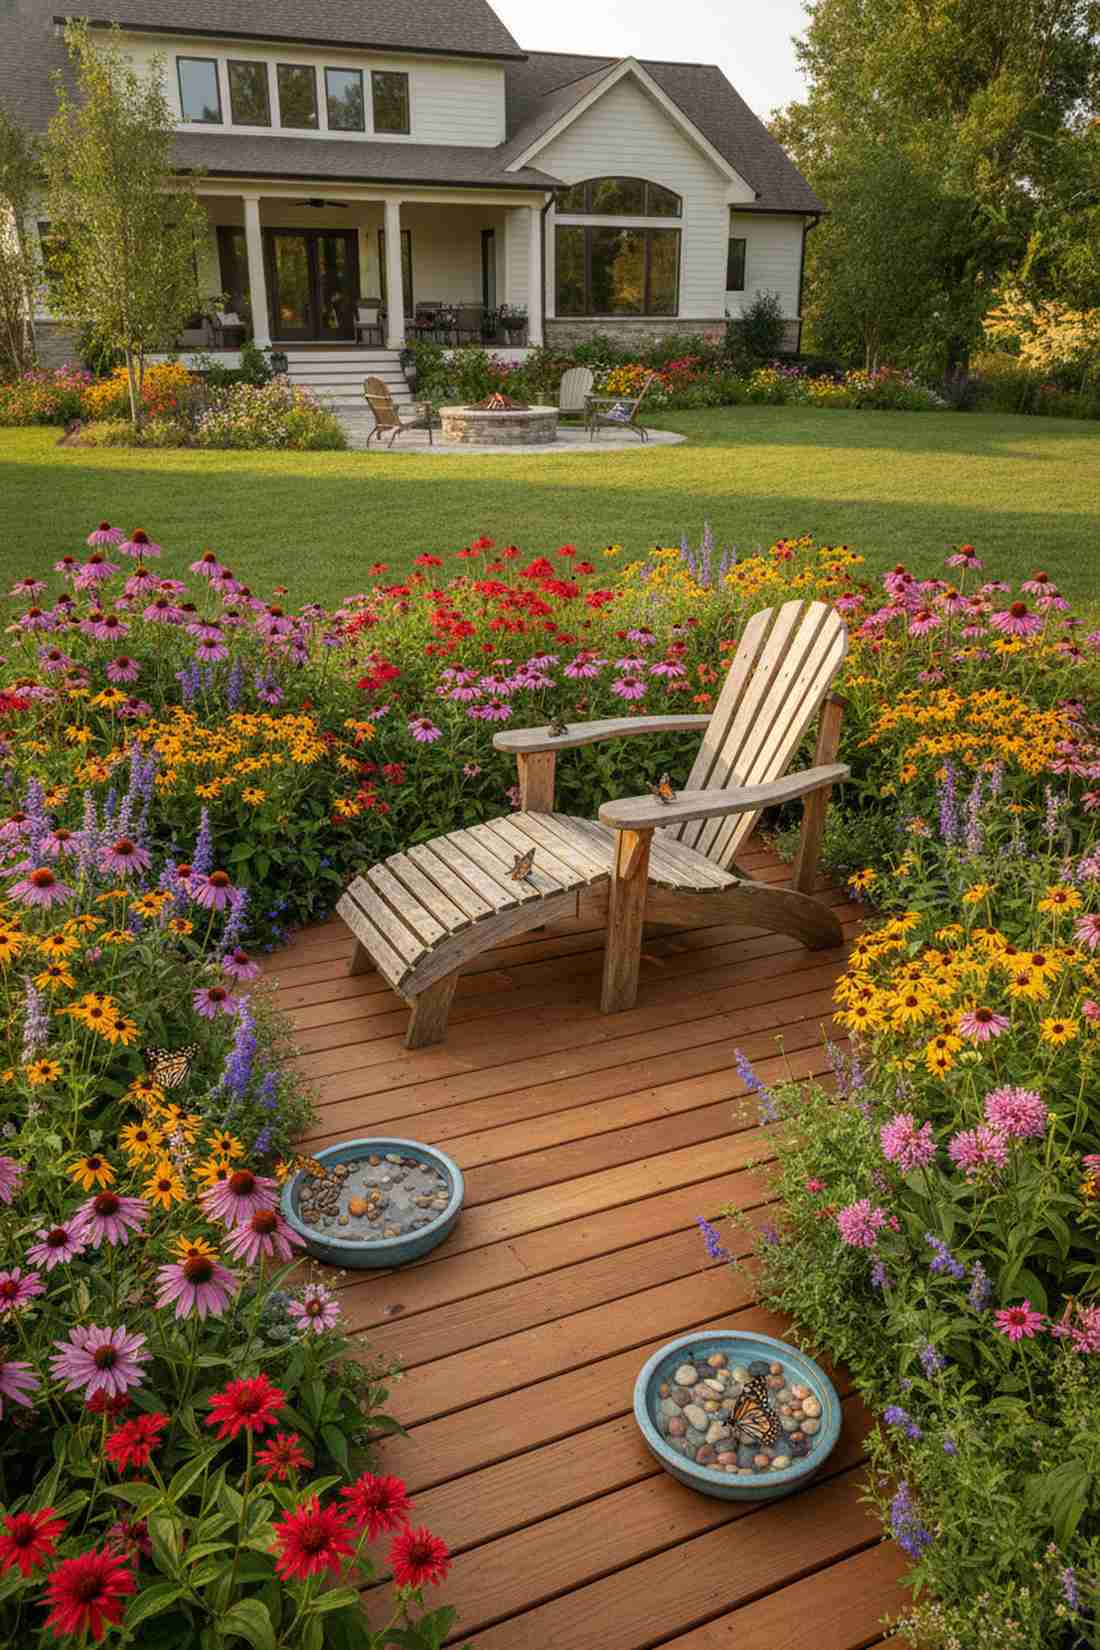
Surrounding your lounge chair with hummingbirds and butterflies feels like a Disney movie come to life. Native blooming perimeter borders turn a sterile deck into a buzzing, vibrant ecosystem. It’s an absolute dream for nature lovers trapped in a concrete jungle.
Most urbanites settle for fake grass, but injecting high-nectar blooms completely changes the game for local ecology. Sourcing broad terrarium accessories like shallow pebble water dishes ensures these beneficial insects stick around to entertain you all summer long.
You can establish this buzzing, colorful sanctuary for just $60 in seeds and dishes. Highly recommended for a quick weekend win that helps the planet.
- Key Materials: Native wildflower seed mixes, shallow ceramic watering dishes
- Vibe / Style: Wildflower meadow escape
- Difficulty: Throw and grow
- Budget Breakdown: Seed Mix: $25 | Ceramic Dishes & Pebbles: $35
- Creator’s Tip: Provide overlapping bloom times by mixing early spring bulbs with late summer asters so the bugs never go hungry.
- Smart Sourcing: Bulk regional native pollinator seed mixes and shallow ceramic butterfly puddling dishes.
Wait until you see how this final setup practically pays for itself over a single summer…
29. Yoga Deck Zen Garden Fusion
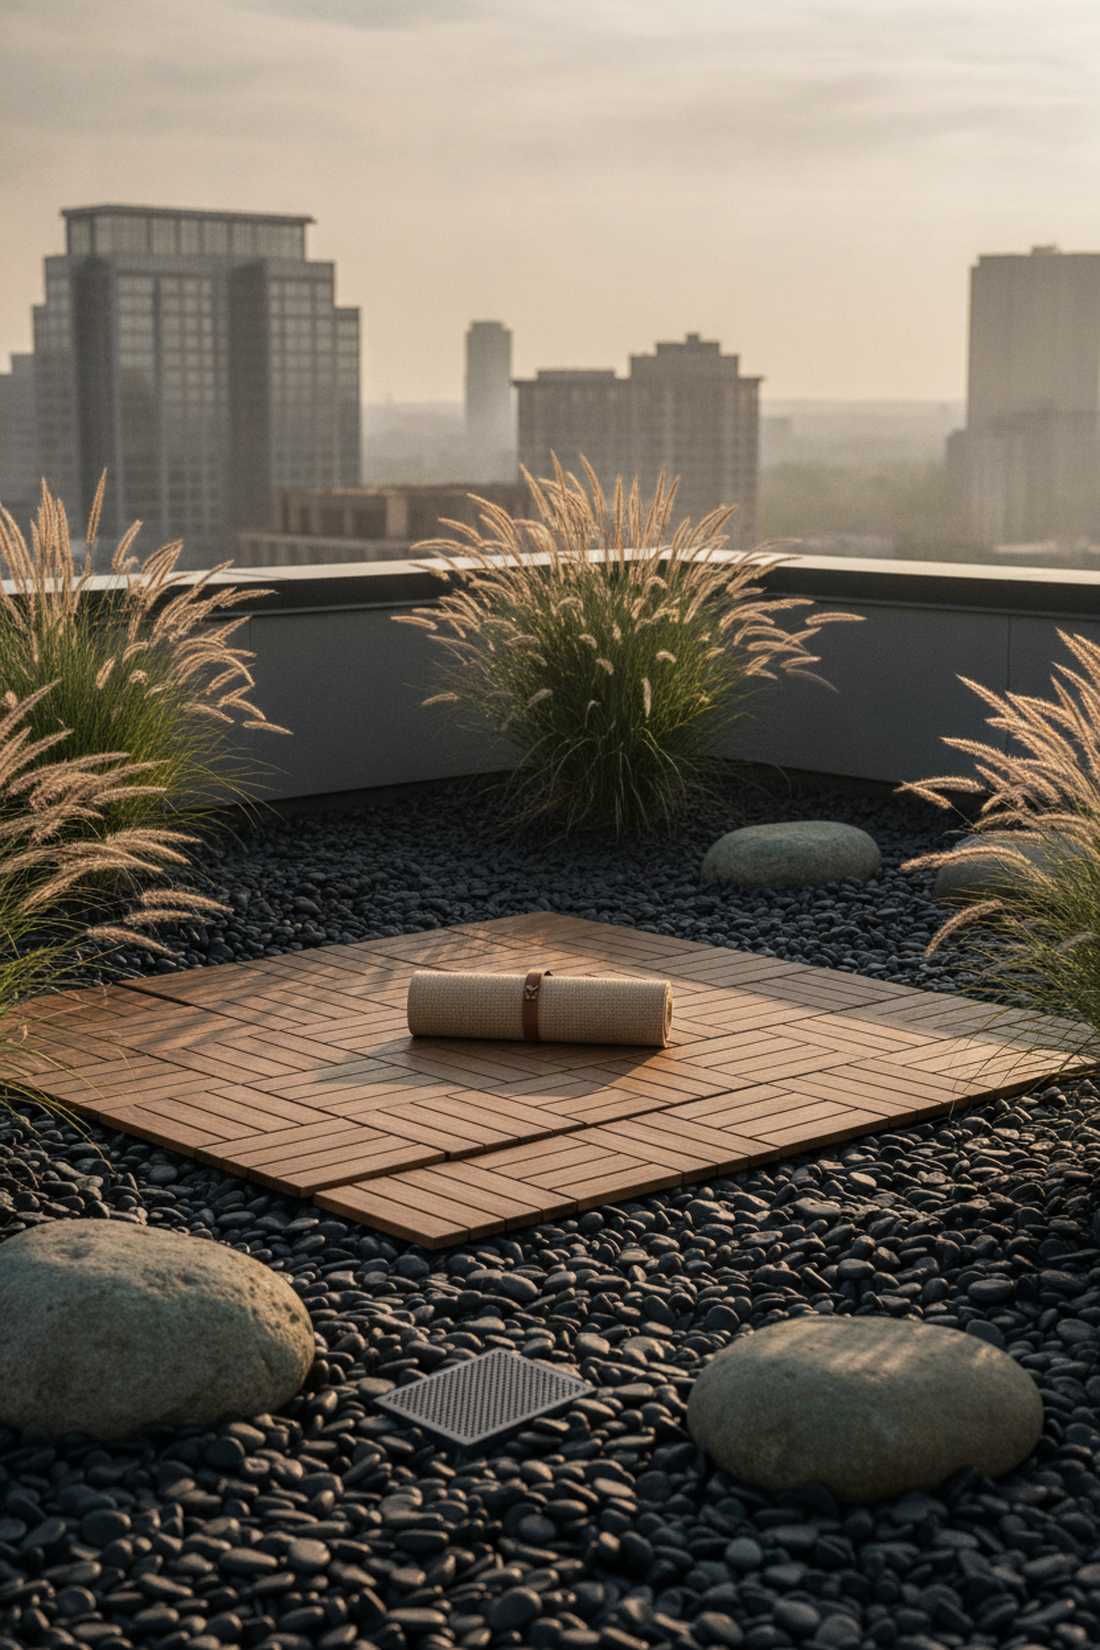
Rolling out a mat here feels like finding a secret temple hidden in the sky. Flush deck tiles surrounded by minimalist gravel create an instantly calming, grounded zone. Ideal for anyone who needs a serene, low-maintenance escape from chaotic city noise.
Cluttering a roof with loud, colorful plastics causes visual anxiety, but stripping it back to bamboo and smooth stones gives a designer-level finish. Strategically placing hardy, wind-resistant ornamental grasses adds a soothing auditory rustle that drowns out distant traffic.
You can carve out this minimalist meditation zone for roughly $140. Save this idea to your wellness board if you desperately need a place to unplug.
- Key Materials: Bamboo deck inserts, smooth river rocks
- Vibe / Style: Minimalist sky temple
- Difficulty: Easy lifting and raking
- Budget Breakdown: Bamboo Decking: $90 | River Rocks: $50
- Creator’s Tip: Embed a hidden waterproof Bluetooth speaker into the river rock bed to play ambient soundscapes during your morning stretches.
- Smart Sourcing: Interlocking solid bamboo deck tiles (bulk pack) and polished black river rocks (bulk bags).
30. Rainwater Harvesting Garden System
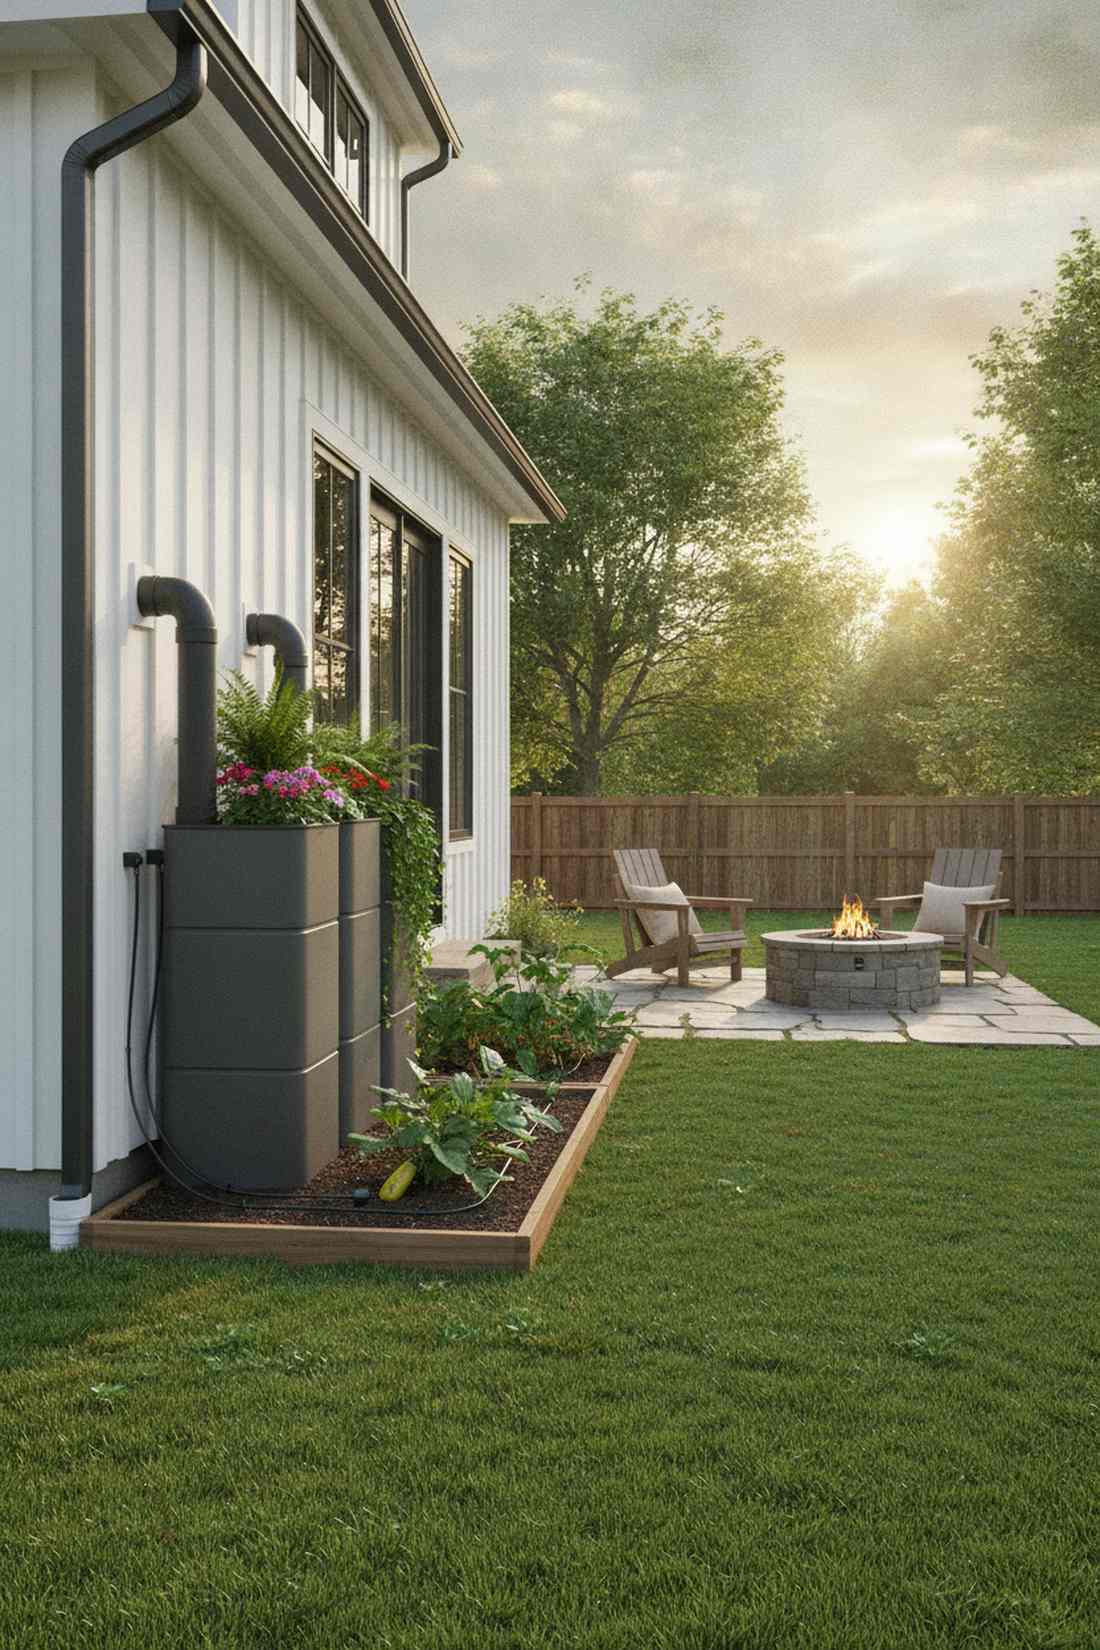
Watching this system catch and feed your plants feels incredibly satisfying and brilliantly eco-friendly. Sleek integrated rain barrel planters turn massive roof runoff into free, chemical-free irrigation. Perfect for eco-conscious dwellers tired of dragging heavy watering cans from the kitchen sink.
Old ugly blue barrels look like a junkyard, but modern slimline water catchments look far more expensive than they are. Hooking these sleek tanks directly into a gravity-fed drip line completely eliminates daily watering chores and slashes your summer utility bills.
You can install a highly efficient slimline water catcher for about $130. It’s a genius upgrade that practically pays for itself in water savings.
- Key Materials: Slimline water butt, gravity drip-line kit
- Vibe / Style: High-tech eco-warrior
- Difficulty: Basic hose connections
- Budget Breakdown: Slim Barrel: $95 | Drip Hose: $35
- Creator’s Tip: Always install a mosquito-proof mesh screen over the intake hole to prevent your water reserve from becoming a bug breeding ground.
- Smart Sourcing: UV-coated slimline rainwater harvesting barrels and gravity-fed micro-drip irrigation kits.
Transform Your High-Rise Exterior with Expert Rooftop Layouts
These 30 exact blueprints prove that high-rise exterior living can easily rival expensive ground-level landscapes. Whether you’re upgrading a tight urban balcony or a massive penthouse terrace, sourcing smart, UV-coated materials guarantees a high-end look without blowing the budget. Start by picking one of these 30 layouts, secure your premium starter kits, and turn that dead concrete into your ultimate elevated sanctuary.
Frequently Asked Questions
What is the weight limit for rooftop gardens on high-rise buildings?
Most residential rooftops support 40–60 pounds per square foot, but grabbing heavy dirt can ruin this fast. To achieve a premium look without the danger, switch to lightweight growing media and composite boxes. Pre-cut fiberglass planar sets and bulk bags of perlite drastically cut weight down to 35 pounds per cubic foot, keeping you totally safe.
How do you protect rooftop garden plants from high winds?
Wind is the ultimate balcony killer, but you don’t need expensive custom glass. Instead, use UV-coated structural privacy screens or heavy-duty trellis starter kits to break the wind by 70%. Combine these with deep, heavily-weighted resin pots locked onto outdoor-rated casters so you can easily pull delicate plants inward during massive storms.
What plants grow best in urban garden rooftop conditions?
You need absolute survivors up there. Skip the fussy tropicals and invest in drought-tolerant prairie kits, sedums, and dwarf ornamental grasses. If you want edibles, grab specific container-ready starter kits like bush tomatoes and tough herbs—they handle the brutal sky-high drying effect brilliantly without needing a gallon of water every hour.
How much does it cost to install an urban rooftop garden layout?
You can easily fake a high-end setup for cheap if you source properly. Buying modular interlocking deck tiles (bulk packs) and pre-assembled drip kits drops DIY costs to just $15–$30 per square foot. While a full professional build runs $15,000+, you can easily execute a stunning 200-square-foot hybrid layout yourself for under $1,500 using smart online bulk materials.
Do you need permission to create a rooftop garden in NYC or other cities?
Yes, permanent heavy builds trigger permit nightmares, which is exactly why you want modular, non-permanent setups. Using snap-together raised beds and adjustable rail brackets bypasses structural code issues because they are legally considered “temporary furniture.” Always check local laws, but using premium lightweight modular gear keeps landlords happy and your deposit safe.