Finding the right garden furniture umbrella instantly upgrades your patio’s entire vibe. We reveal the exact budget-friendly materials, UV-coated setups, and smart sourcing tricks below. Achieve that luxury resort aesthetic without overspending.
Design Snapshot Key Principles
- Scale Proportions: Match the canopy span precisely to your seating layout for optimal high-end aesthetics.
- Material Hierarchy: Prioritize top-tier garden furniture accessories like UV-resistant fabrics and coated metals to stop weathering.
- Functional Layering: Combine primary shade with aesthetic garden furniture cushions and heating zones to maximize year-round use.
- Anchoring Strategy: Always invest in bulk-weight solutions to prevent dangerous wind displacement of premium structures.
Umbrella Core Structures
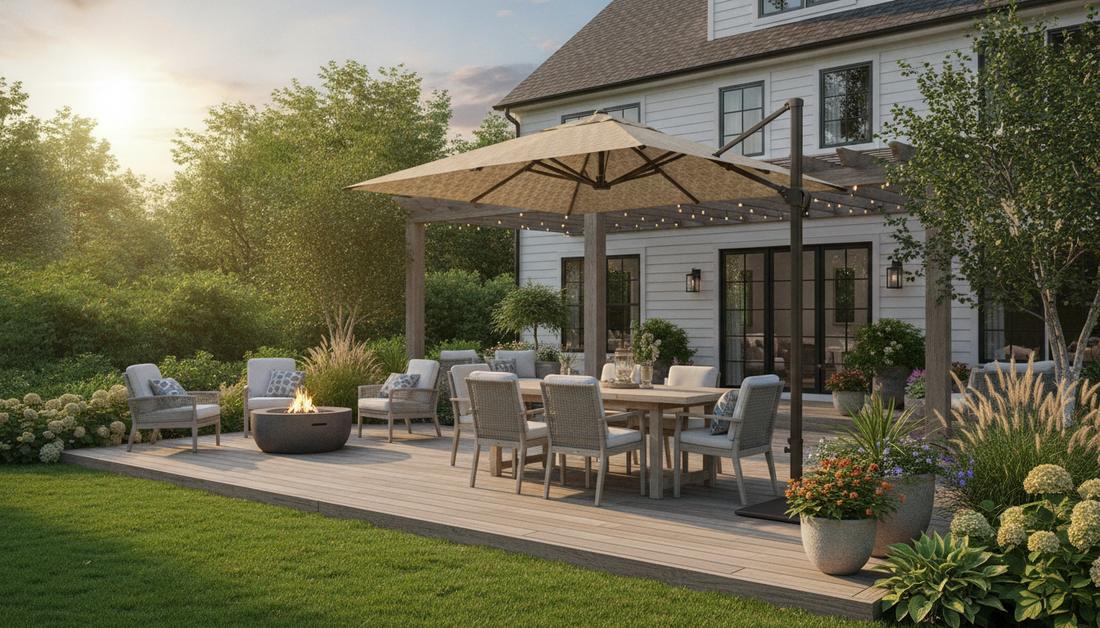
1. Cantilever Offset Umbrellas
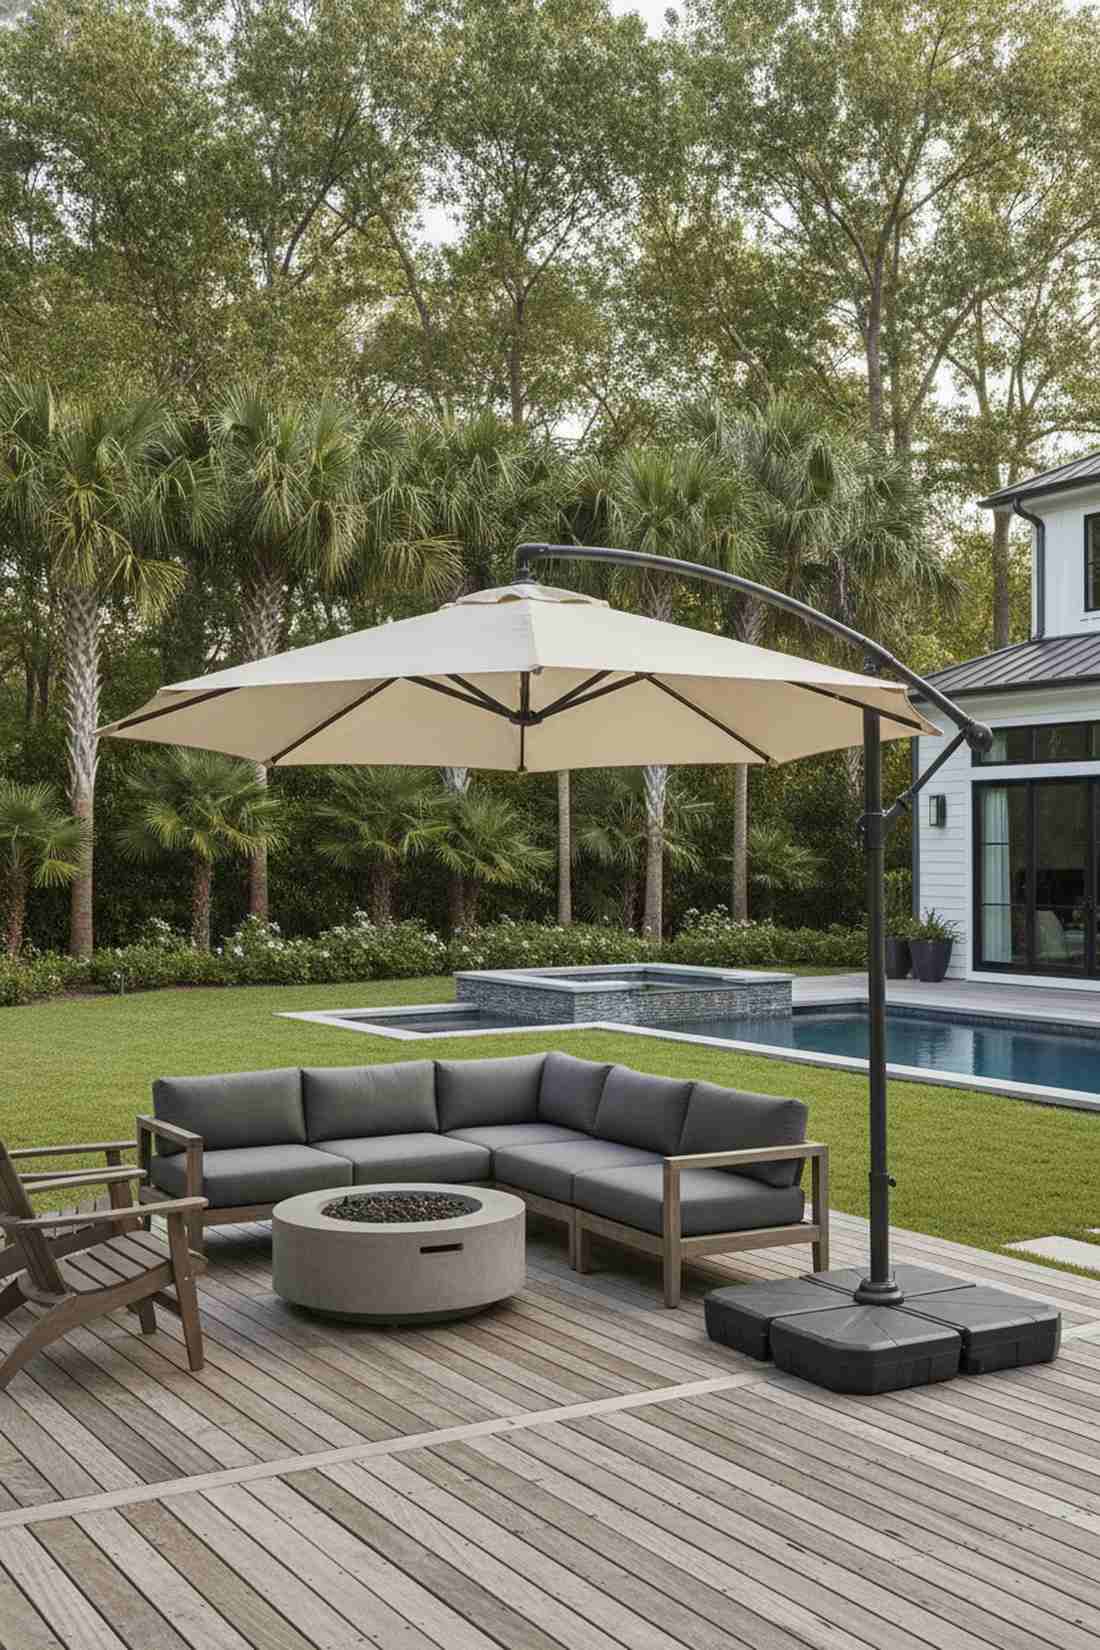
This freestanding patio shade structure feels like a private luxury cabana you’d find at a five-star resort. It perfectly solves the awkward table pole issue, making it brilliant for wide, open lounge seating or deep sectionals.
People often waste money on fixed permanent awnings when an offset canopy delivers a surprisingly premium look instantly. Layering a heavy-duty cantilever frame with outdoor canopy setups provides incredible layout flexibility.
You can easily pull this off for around $150–$350 depending on the frame weight. Save this to your DIY weekend patio upgrade board!
- Key Materials: Heavy-duty offset aluminum frame, UV-blocking canopy
- Vibe / Style: Modern resort oasis
- Difficulty: Moderate weekend assembly
- Budget Breakdown: Frame kit: $180 | Sandbag weights: $40.
- Creator’s Tip: Always over-weight the base by 20% more than the manufacturer suggests to prevent storm tipping.
- Smart Sourcing: Grab an offset aluminum umbrella starter kit and heavy-duty cross-base (bulk pack) for massive savings.
2. Market Center-Pole Umbrellas

A classic wooden or metal center pole canopy gives off that charming European street cafe energy. It works exceptionally well seamlessly integrated right into the middle of a bustling outdoor dining table.
Most beginners ignore the pole diameter, but getting a perfectly fitted flush pole looks far more expensive than it actually is. Utilizing standard garden furniture accessories like a proper under-table wedge completely eliminates annoying wobbles.
Expect to spend a highly reasonable $80–$150 for this setup. It’s a fast upgrade that completely changes the dining vibe.
- Key Materials: Wooden or powder-coated steel pole, vented fabric top
- Vibe / Style: European bistro dining
- Difficulty: Extremely easy slide-in installation
- Budget Breakdown: Canopy: $90 | Iron base: $50.
- Creator’s Tip: Pick a vented top design to allow hot air to escape, keeping diners much cooler.
- Smart Sourcing: Order UV-coated market umbrellas (pre-assembled) and a cast-iron heavy base kit.
3. Half-Wall Balcony Umbrellas
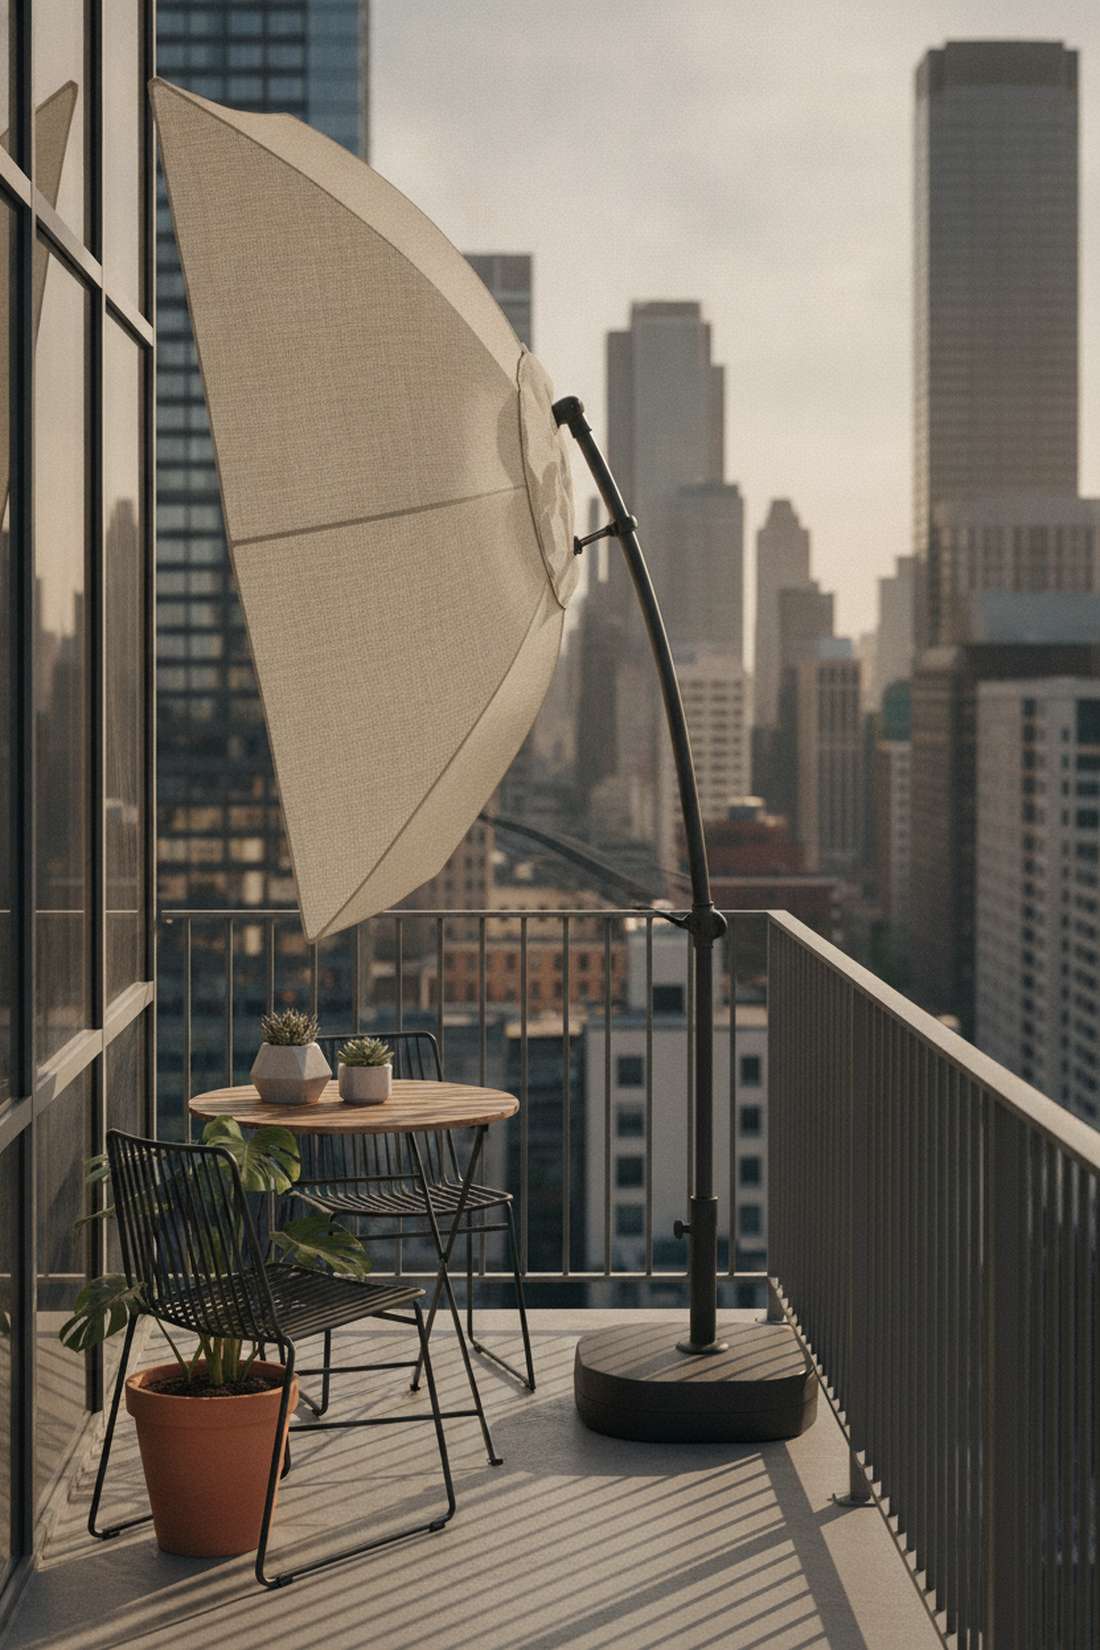
This ingenious flat-back small space shade feels like a hidden architectural secret for urban dwellers. It is an absolute lifesaver designed explicitly to sit flush against a wall or railing on tight apartment balconies.
Standard circular shades are completely wrong for narrow decks, but a half-canopy gives a designer-level finish without eating floor space. This is a must-have piece of small apartment patio hardware.
You can set this up for a minimal $60–$90 investment. Pin this if you’re planning a tiny balcony makeover!
- Key Materials: Semi-circle fabric canopy, flat-edge steel base
- Vibe / Style: Urban chic terrace
- Difficulty: Easy beginner setup
- Budget Breakdown: Half-shade: $50 | Flush base: $35.
- Creator’s Tip: Secure the pole to the actual balcony railing with a zip-tie strap for extra wind security.
- Smart Sourcing: Use a pre-cut half-canopy (UV-treated) and a half-moon resin base starter kit.
4. Double-Sided Commercial-Grade Umbrellas
An oversized twin-canopy patio shade looks straight out of a high-end vineyard tasting room. It provides massive, uninterrupted shade coverage, making it the perfect match for extra-long 10-person dining tables.
People assume you need custom pergolas for large areas, but a commercial twin setup delivers maximum impact for a fraction of the cost. Sourcing commercial-grade hospitality shade systems elevates the entire yard’s aesthetic.
This larger footprint will run you roughly $200–$400 but covers double the space. Highly recommended for frequent outdoor entertainers.
- Key Materials: Extra-wide dual canopy, reinforced central mast
- Vibe / Style: Luxury estate dining
- Difficulty: Requires two people to lift
- Budget Breakdown: Twin canopy: $250 | Extra-heavy base: $90.
- Creator’s Tip: Always close a double-sided canopy when not in use; the large surface area acts like a giant sail in the wind.
- Smart Sourcing: Buy commercial-grade twin canopies (bulk order style) and high-capacity fillable base kits.
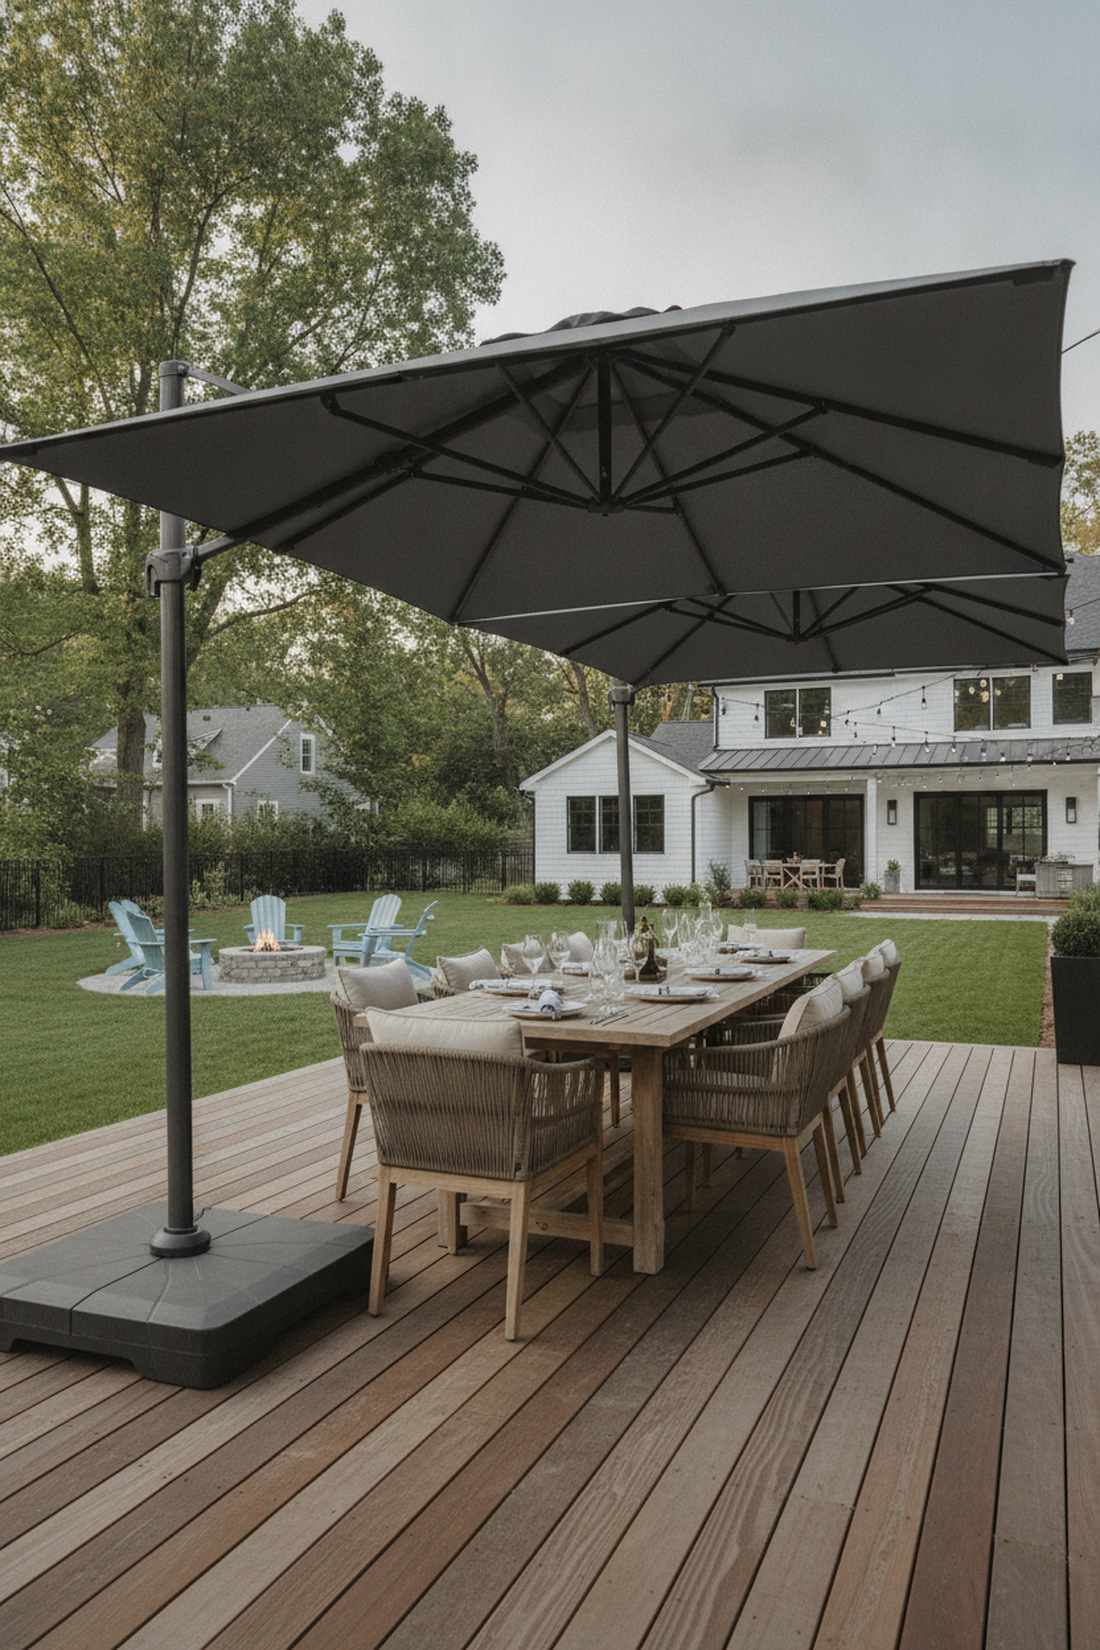
5. Square Acrylic Cantilever Models
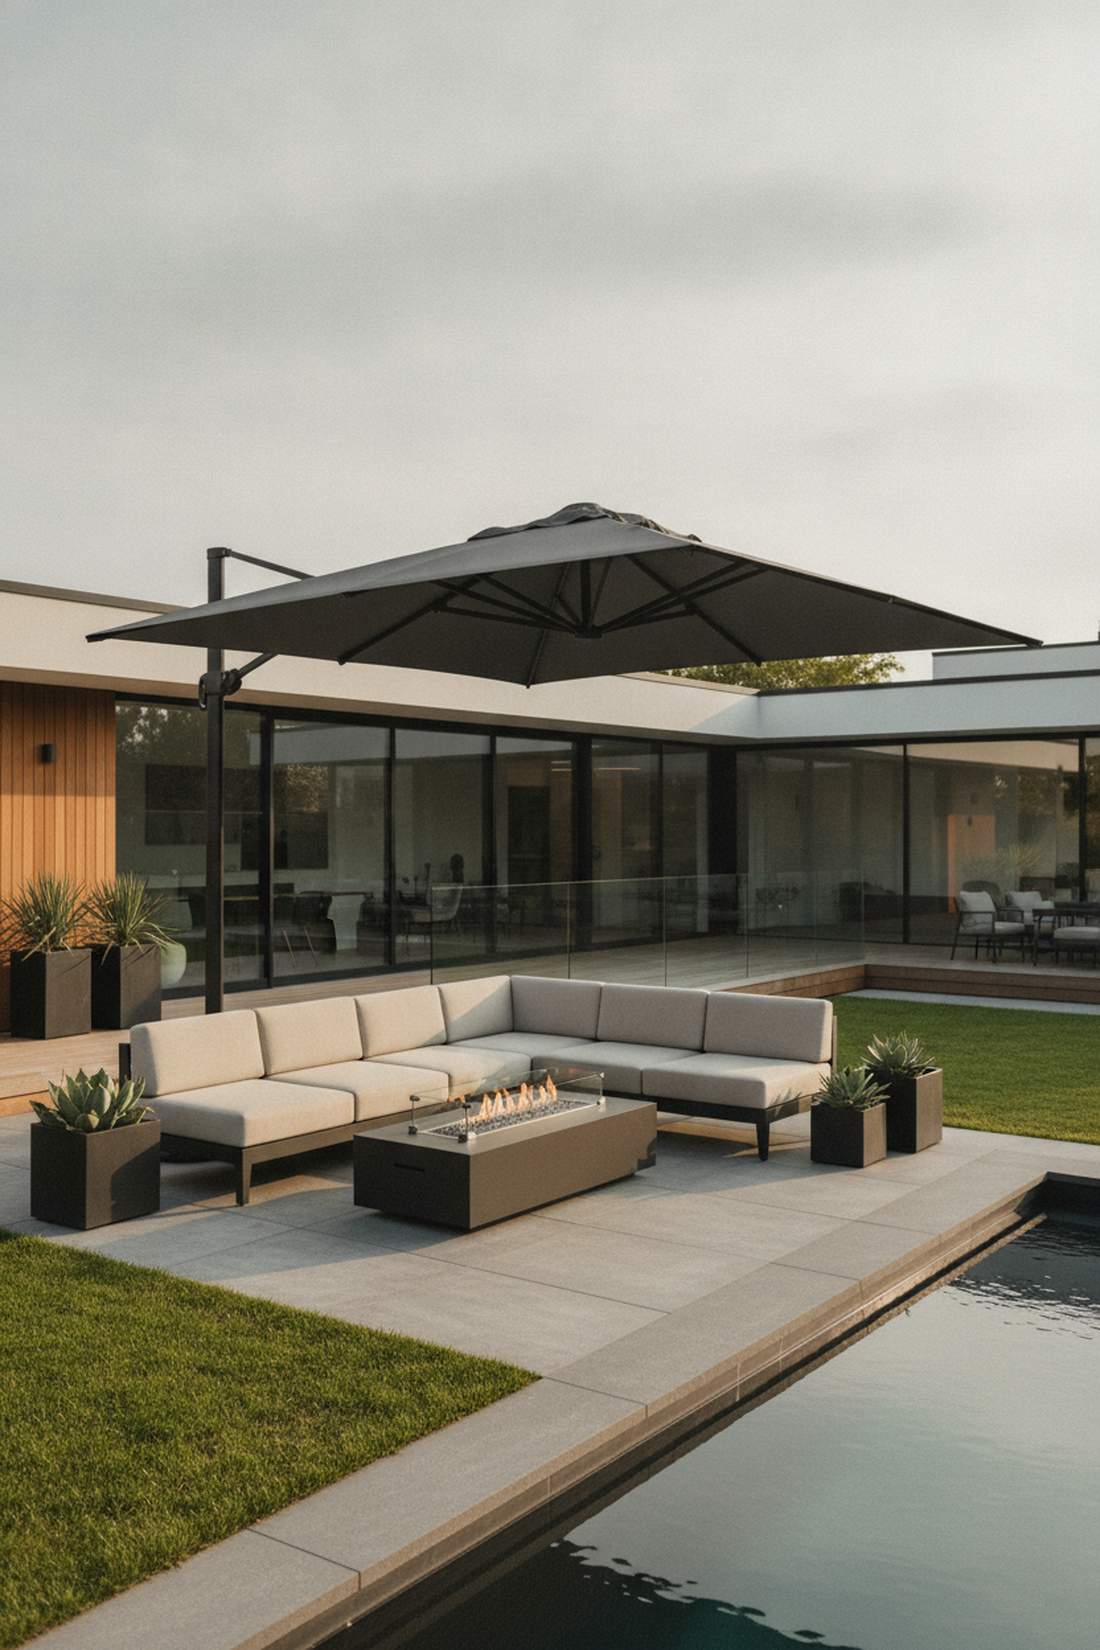
The sleek lines of a modern square patio parasol bring a crisp, architectural minimalism to your space. It perfectly mirrors the geometry of modern rectangular sectionals and clean-lined fire pits.
Round umbrellas can sometimes look dated, but geometric acrylic shades instantly inject a striking, contemporary designer edge. Using fade-resistant acrylic hardware ensures the modern look never degrades into a cheap, sun-bleached mess.
Budget around $250–$500 for true acrylic materials. Save this to your ultra-modern outdoor architecture board!
- Key Materials: Solution-dyed square acrylic canopy, matte black frame
- Vibe / Style: Ultra-modern minimalist
- Difficulty: Moderate base assembly
- Budget Breakdown: Acrylic top: $300 | Cantilever frame: $150.
- Creator’s Tip: Match the canopy color exactly to your exterior house trim for a bespoke, built-in look.
- Smart Sourcing: Choose solution-dyed square canopies (UV-coated) and a matte-finish modern pole kit.
This next setup is ridiculously cheap but looks like a $1,000 custom-engineered shade display…
6. Tilt-Function Adjustable Umbrellas
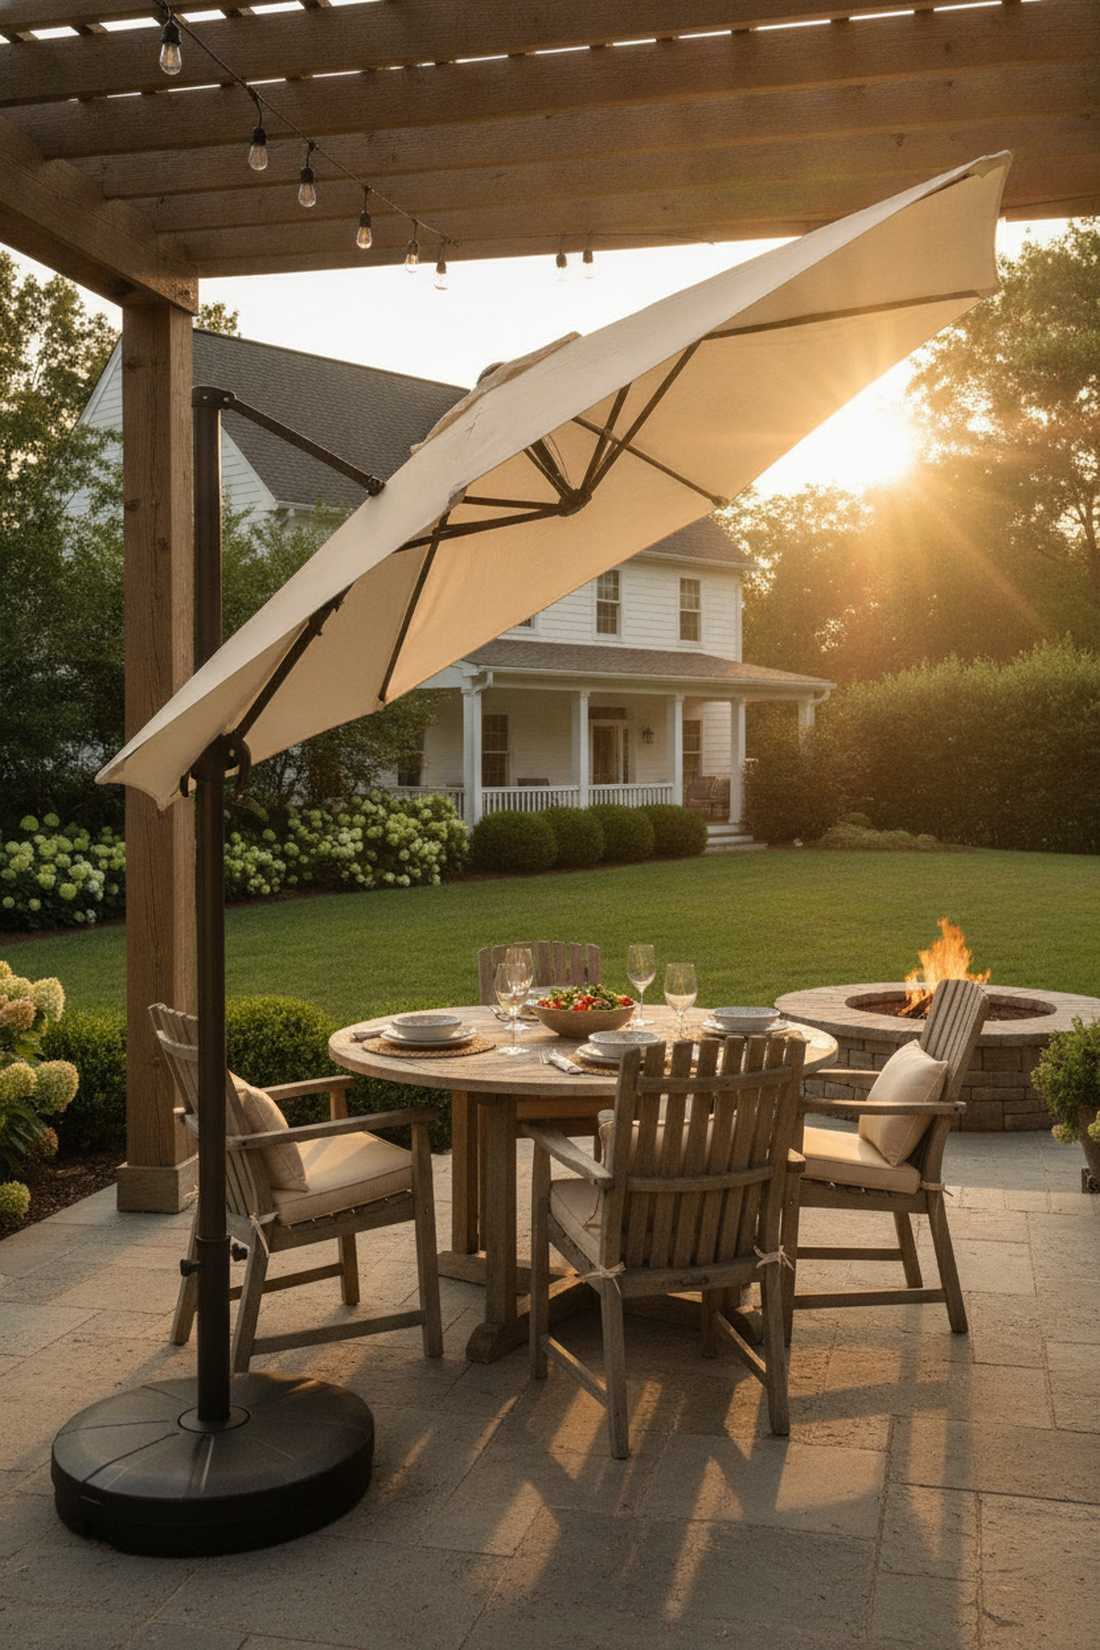
An auto-tilting angled canopy acts like a smart-shade system that shifts as the day goes on. It’s an essential tactical addition for west-facing patios that get blinded by the brutal late-afternoon sun.
Fixed shades are virtually useless after 4 PM, but an adjustable crank-tilt system solves the sun-glare problem beautifully. Incorporating smart shade accessories prevents guests from squinting during sunset dinners.
You can score a reliable tilting model for just $90–$160. It’s a functional upgrade that saves your evening parties.
- Key Materials: Zinc-alloy tilt hinge mechanism, polyester shade
- Vibe / Style: Practical sunset dining
- Difficulty: Very easy manual operation
- Budget Breakdown: Tilting umbrella: $110 | Weighted base: $40.
- Creator’s Tip: Push-button tilts are cheaper, but crank-tilts last significantly longer without jamming.
- Smart Sourcing: Opt for a crank-tilt mechanical umbrella kit and heavy-duty zinc hinge replacements.
Garden Furniture Cushions and Comfort Layers
7. Sunbrella Solution-Dyed Acrylic Cushions
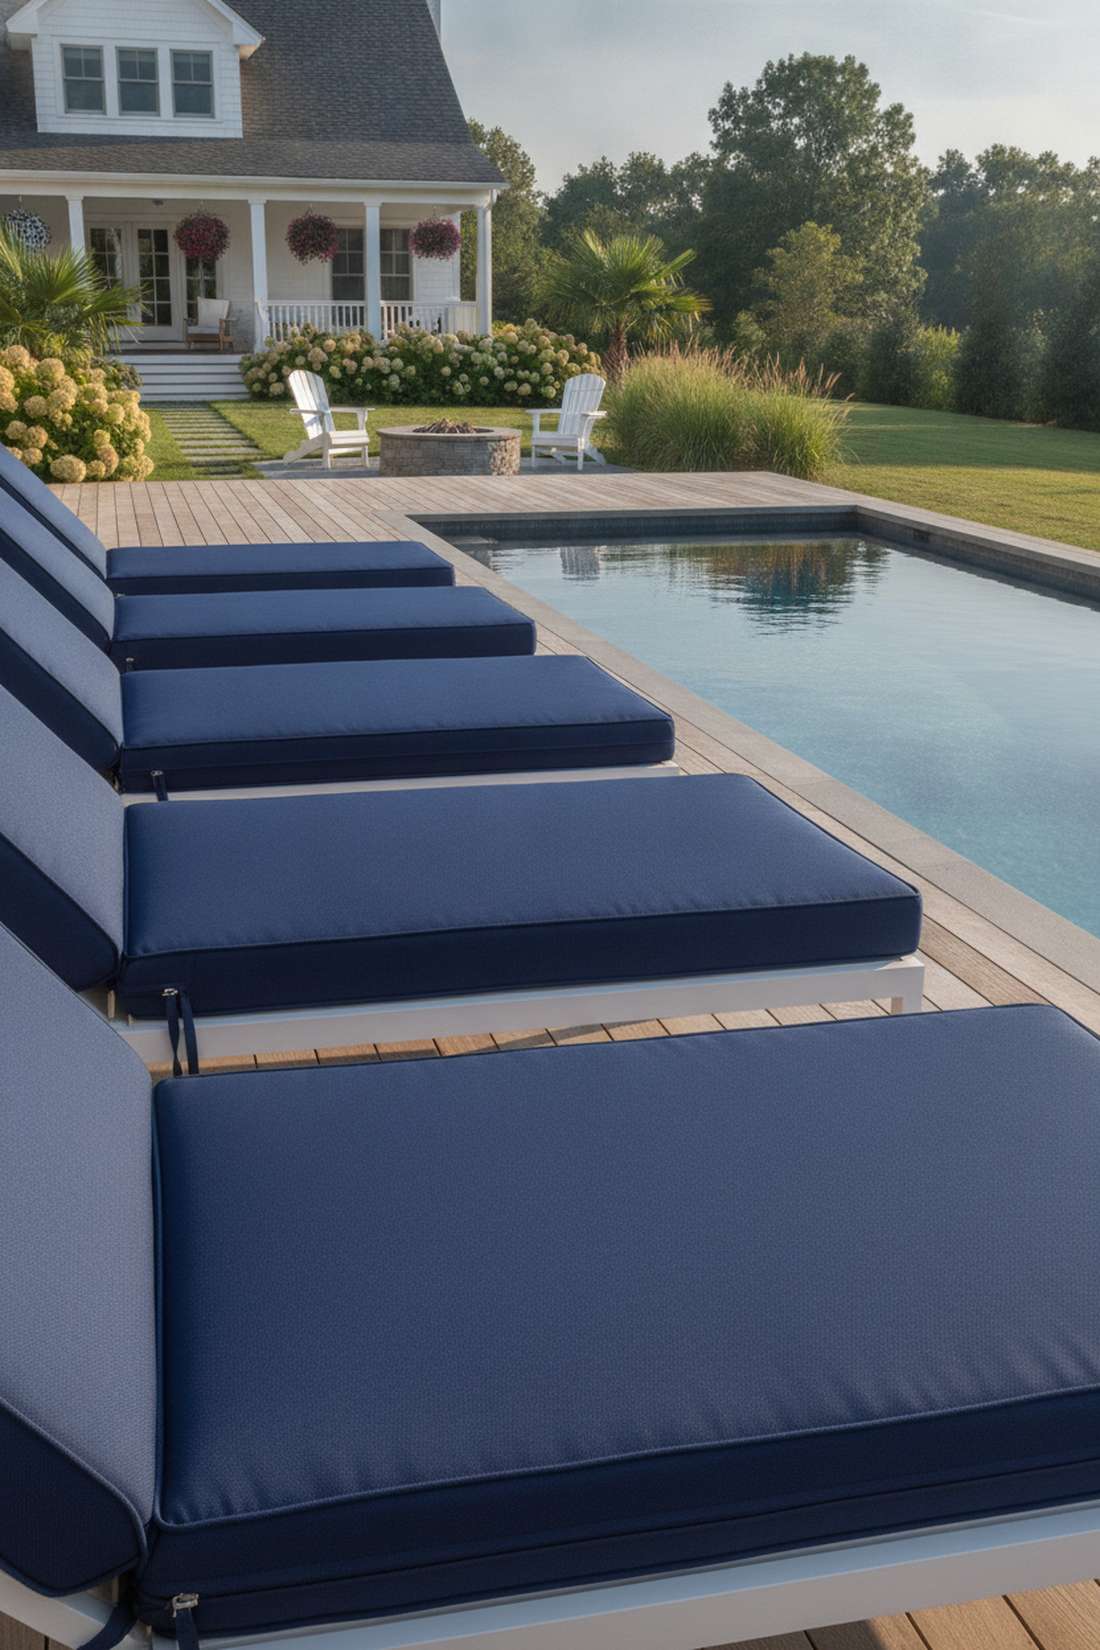
Upgrading to premium acrylic outdoor seating pads feels like bringing high-end living room luxury outside. These are the absolute gold standard for uncovered poolside lounges and bright, sun-drenched garden furniture cushions.
Most people buy cheap box-store cushions that fade in one month, while solution-dyed fabrics look brand new for five years. Investing in premium outdoor upholstery completely eliminates the embarrassment of sun-bleached, crusty seating.
While an initial investment of $100–$200 per seat seems high, it pays off rapidly. Pin this so you remember exactly what fabric to buy!
- Key Materials: 100% solution-dyed acrylic fabric, marine-grade thread
- Vibe / Style: Five-star resort luxury
- Difficulty: Easy slip-on replacement
- Budget Breakdown: Cushion covers: $120/ea | Inner foam: $40/ea.
- Creator’s Tip: Ensure the zippers are strictly outdoor-rated so they don’t rust shut over the winter.
- Smart Sourcing: Source pre-cut Sunbrella fabric kits and marine-grade outdoor zippers (bulk pack).
8. Olefin Quick-Dry Cushion Fabrics

This fast-drying vibrant patio fabric is a lifesaver that feels wonderfully plush to the touch. It’s specifically engineered to survive rainy climates without turning into a heavy, water-logged sponge on your patio.
Everyone thinks acrylic is the only option, but Olefin gives a stunning designer aesthetic at half the cost. Using quick-dry garden furniture accessories is the smartest hack for unpredictable spring weather.
You can outfit an entire sofa for around $150–$250. It’s an unbeatable mid-tier option that over-delivers.
- Key Materials: Synthetic Olefin weave, mesh drainage bottoms
- Vibe / Style: Vibrant and practical outdoor living
- Difficulty: Low maintenance swap
- Budget Breakdown: Olefin sets: $180 total | Water-repellent spray: $15.
- Creator’s Tip: Stand Olefin cushions vertically on their zipper edge after heavy rain to drain water 3x faster.
- Smart Sourcing: Pick up Olefin cushion starter kits and waterproofing fabric spray (2-pack).
9. Polyester Coated Cushions
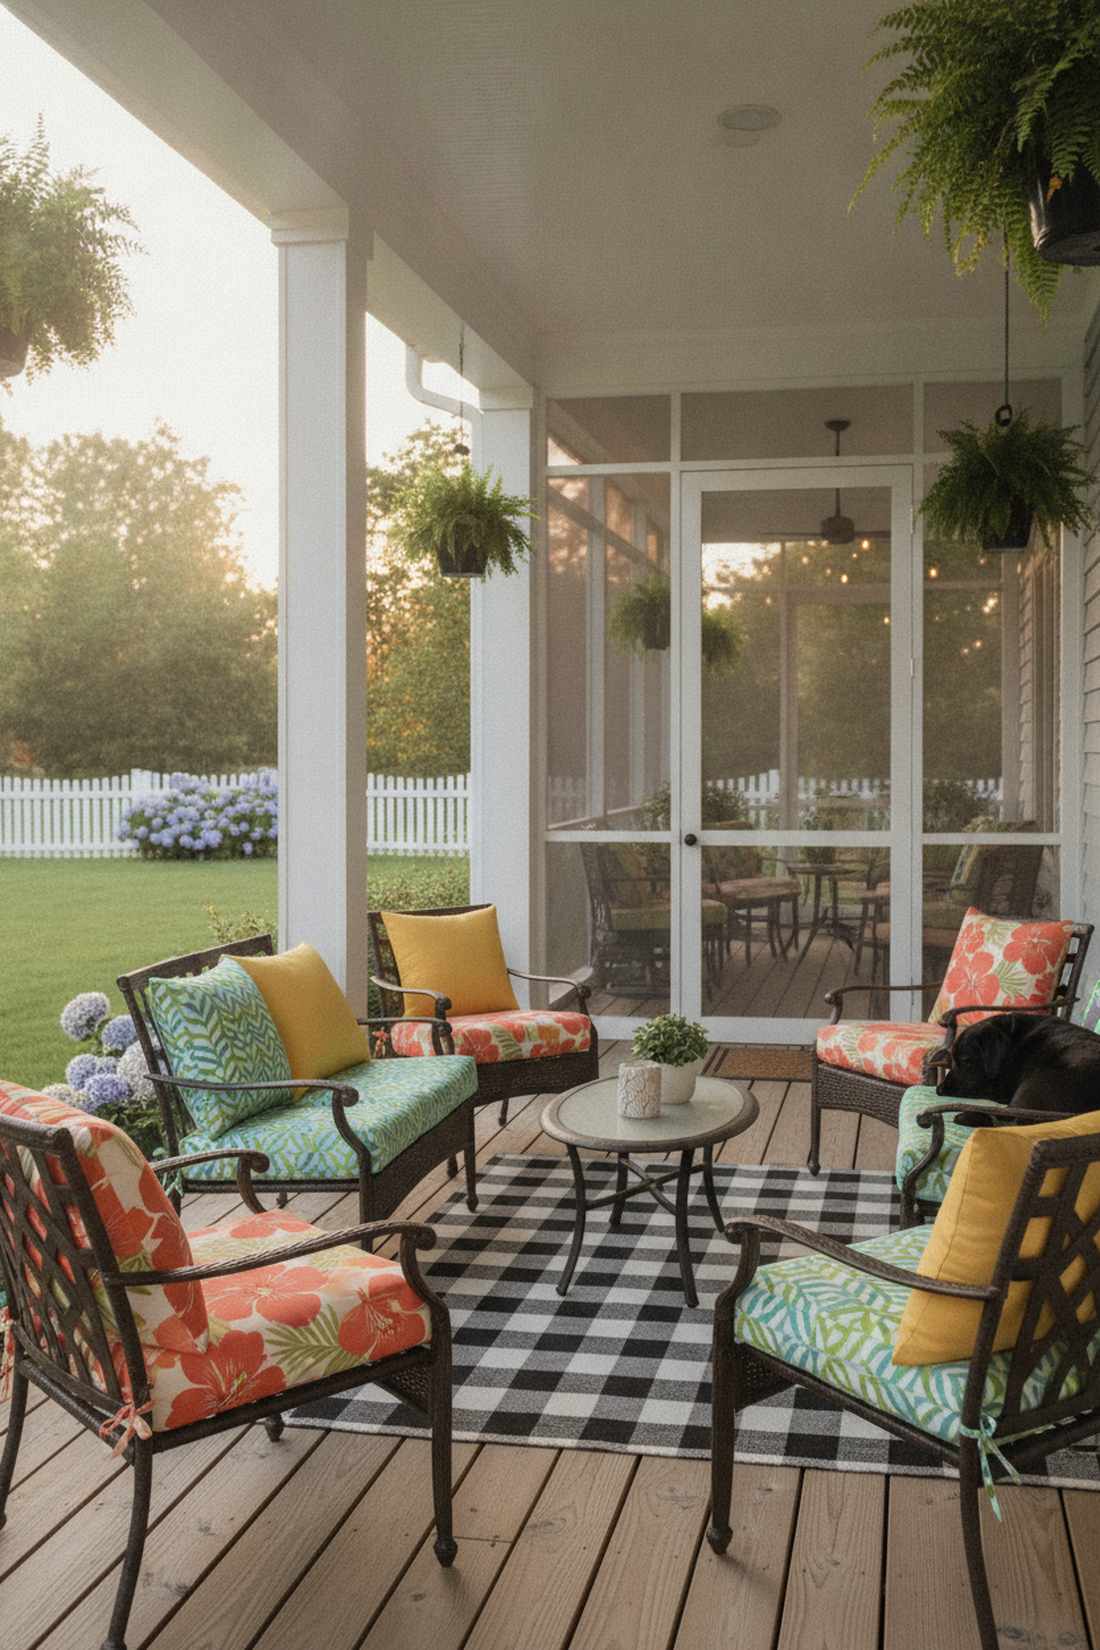
A set of TPU-backed entry-level seating pads provides an instant pop of trendy color to an otherwise boring yard. It is exceptionally practical for covered porches or seasonal setups where budget is the primary focus.
Design snobs hate on polyester, but coated variants offer a surprisingly premium look for a single season of heavy entertaining. It’s the easiest way to jump on a micro-trend without committing serious cash.
These easily run a budget-friendly $40–$80 per set. Save this to your extreme budget patio makeover board!
- Key Materials: Printed polyester shell, waterproof TPU inner membrane
- Vibe / Style: Trendy and colorful seasonal decor
- Difficulty: Zero setup required
- Budget Breakdown: Printed cushions: $50 | Storage bag: $20.
- Creator’s Tip: Never leave these in direct blistering sun; they are meant for shaded or covered areas.
- Smart Sourcing: Use TPU-coated patio seat pads (bulk pack) and UV-blocking fabric guard.
10. High-Density Foam Core Systems
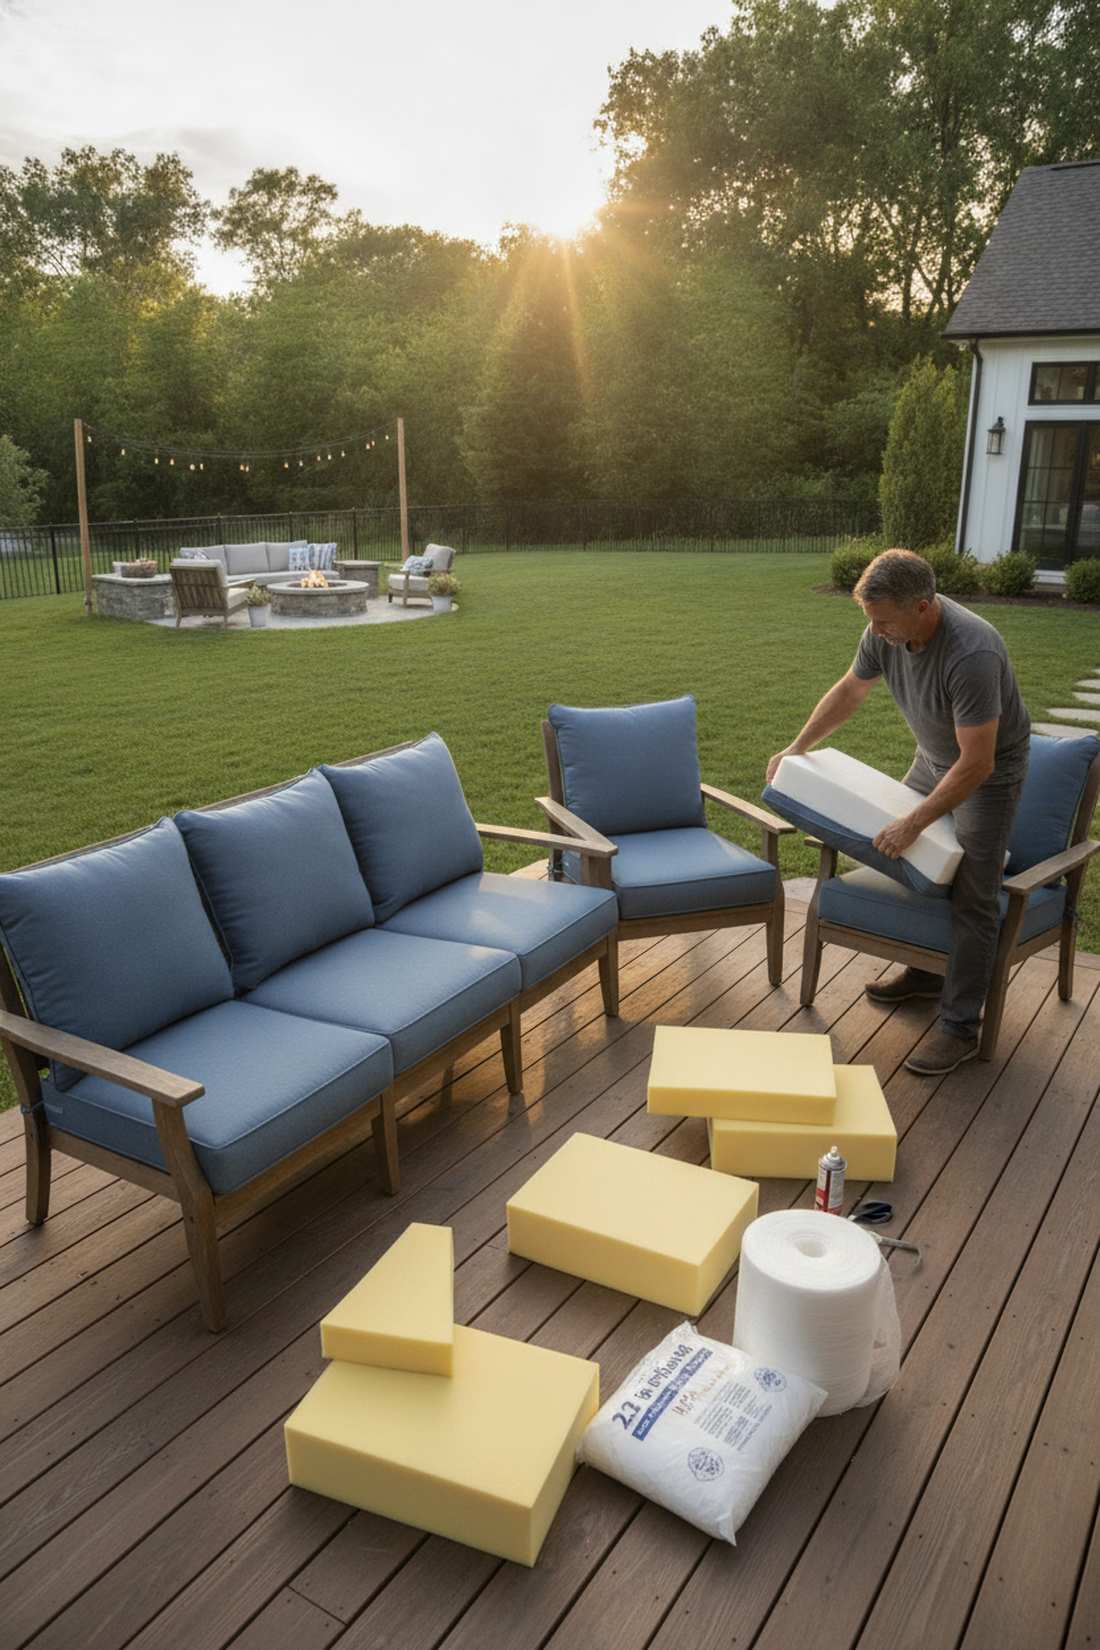
Re-stuffing your seats with open-cell outdoor foam inserts makes your patio furniture feel firmer than an expensive mattress. It completely revitalizes saggy, sad-looking garden furniture cushions that have lost their shape.
Most DIYers throw away the whole cushion, but swapping just the core gives a designer-level firmness for pennies. Upgrading your foam density is the ultimate insider secret in outdoor furniture restoration.
Raw foam costs roughly $30–$60 per cushion depending on thickness. It’s a weekend DIY project that saves hundreds.
- Key Materials: 2.2 lb density open-cell foam, Dacron batting wrap
- Vibe / Style: Crisp and tailored restoration
- Difficulty: Intermediate DIY stuffing
- Budget Breakdown: Raw foam sheet: $45 | Spray adhesive: $12.
- Creator’s Tip: Wrap the raw foam in a thin layer of Dacron batting to give the cushion a soft, rounded, professional edge.
- Smart Sourcing: Buy pre-cut high-density patio foam (bulk pack) and Dacron batting rolls.
💡 Must-Have Supplies for High-End Setups
To build these stunning patio setups faster and ensure they survive harsh weather, skip the generic hardware aisles and invest in the right foundational kits from the start.
- Base & Support: Heavy-duty cantilever weight starter kits
- Setup Tools: Pre-cut UV-blocking fabric and marine zipper kits
- Weather/Durability Protection: Industrial-grade waterproofing fabric sealants
Most people get their fire pit seating completely wrong… until they try the custom layout coming up next.
11. Custom-Fit Fire Pit Bench Cushions
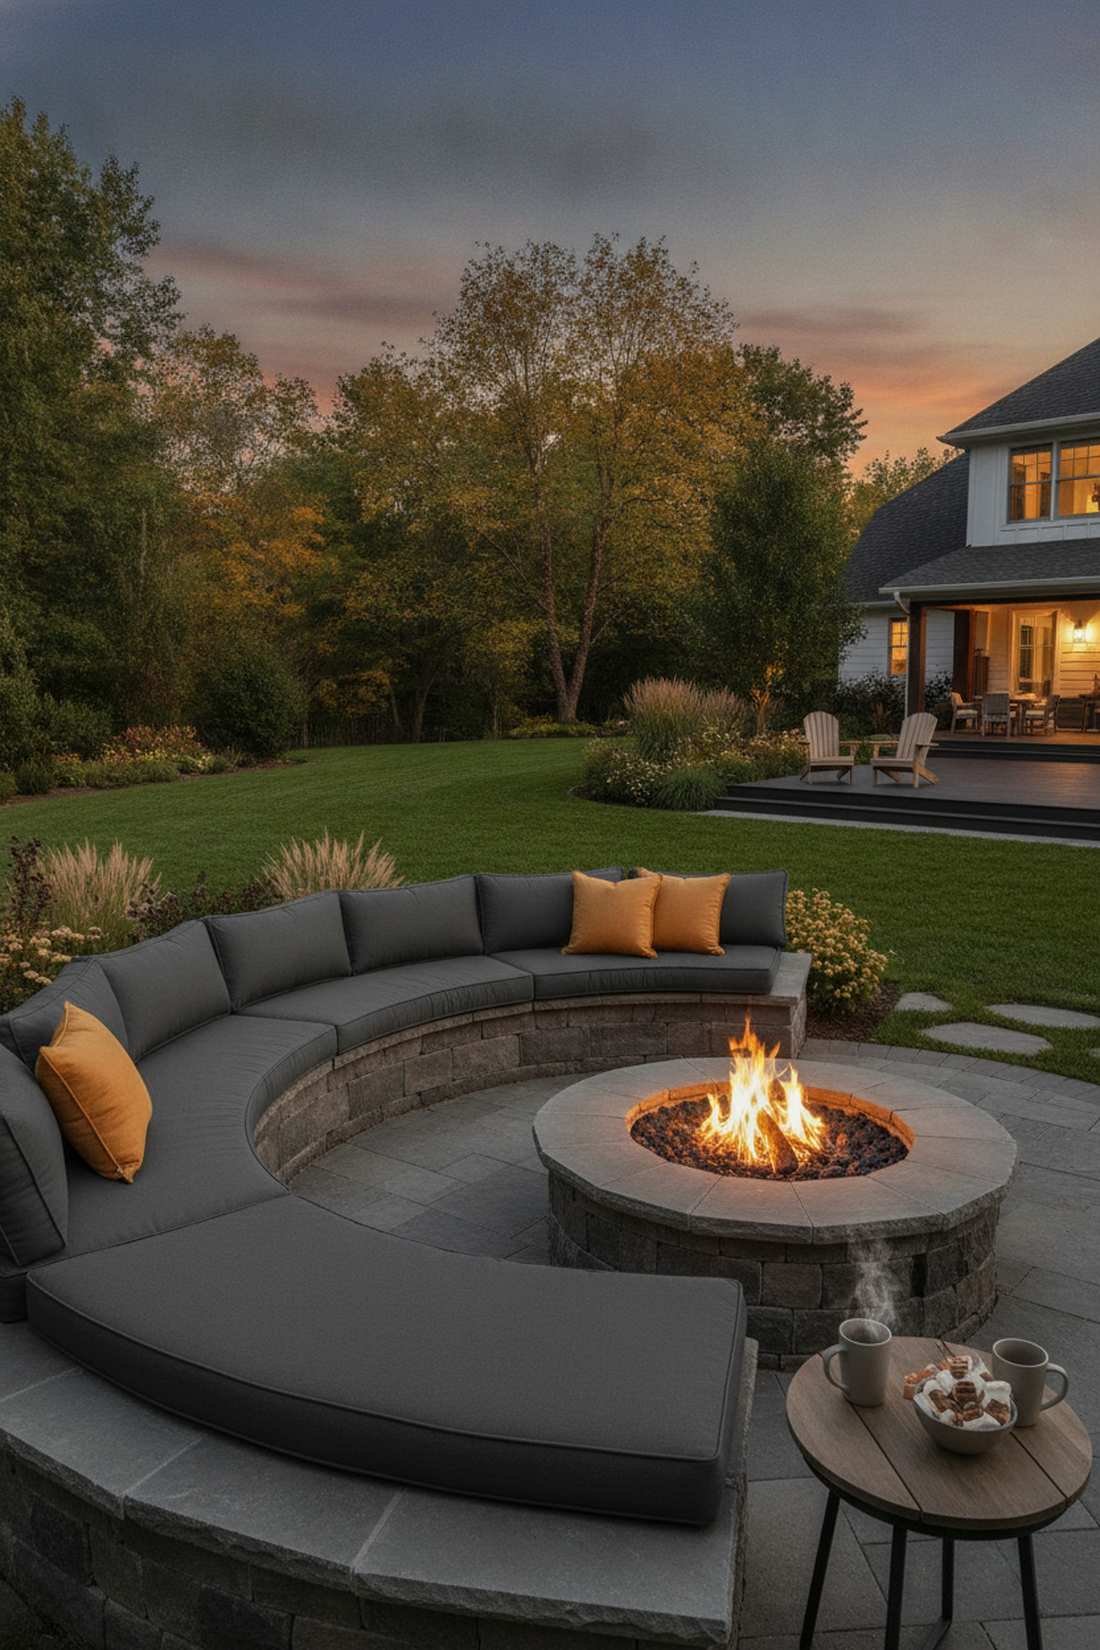
Creating a curved stone seating pad setup feels like you’ve installed a permanent, luxurious amphitheater. It beautifully softens hard masonry, making it absolutely perfect for late-night garden furniture with fire pit gatherings.
Standard square pillows look terrible on curved benches, while custom-templated cushions look far more expensive and intentional. Adding flame-resistant upholstery elevates both the safety and aesthetic of your hardscaping.
Custom fabrication typically costs $200–$400, but the permanent look is unmatched. Pin this if you have a built-in stone fire pit!
- Key Materials: Flame-retardant treated acrylic, templated curved foam
- Vibe / Style: Cozy luxury campfire
- Difficulty: Requires precise measuring
- Budget Breakdown: Custom fabric cut: $150 | Flame-resistant foam: $120.
- Creator’s Tip: Always make templates out of cheap butcher paper first before sending dimensions to a cushion fabricator.
- Smart Sourcing: Source flame-resistant outdoor foam kits and custom-cut curved canvas covers.
12. Box-Edge Welted Cushion Construction
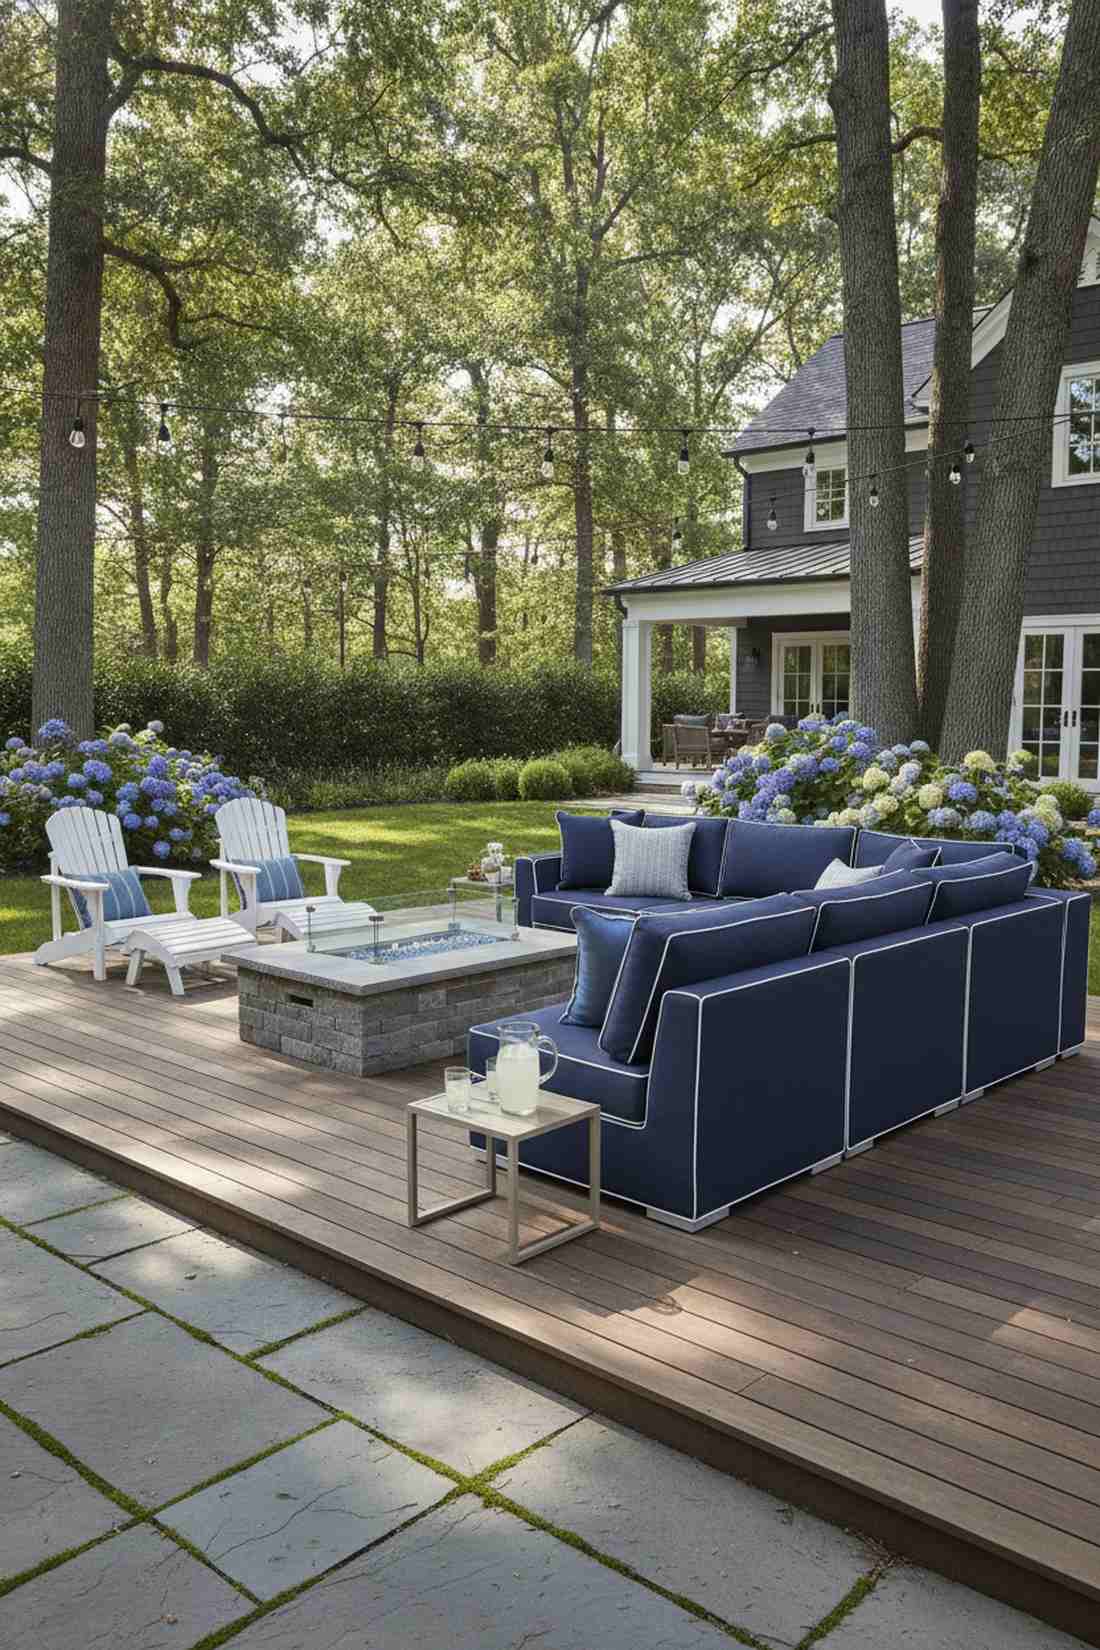
This tailored 3D piped cushion design gives your seating that razor-sharp, structured look found in exclusive catalogs. It prevents slouching and is an essential upgrade for high-traffic patio sofa setups.
Flat knife-edge pillows often look messy, but a corded welt delivers a surprisingly premium, structured appearance instantly. Enhancing your garden furniture cushions with box edges adds serious architectural weight to your lounge.
You can order welted upgrades for about 30% more than standard covers. It’s an easy detail that screams high-end.
- Key Materials: Corded fabric piping, rigid box corner stitching
- Vibe / Style: High-end structured lounge
- Difficulty: Best left to professional sewers
- Budget Breakdown: Welted covers: $140/ea | Piping cord: $15.
- Creator’s Tip: Use a contrasting color for the welt cord (like white piping on navy fabric) to make the structural shape pop.
- Smart Sourcing: Use pre-made box-edge cushion shells and weatherproof piping cord (bulk pack).
Garden Furniture with Fire Pit Enhancements
13. Lava Rock Fire Media
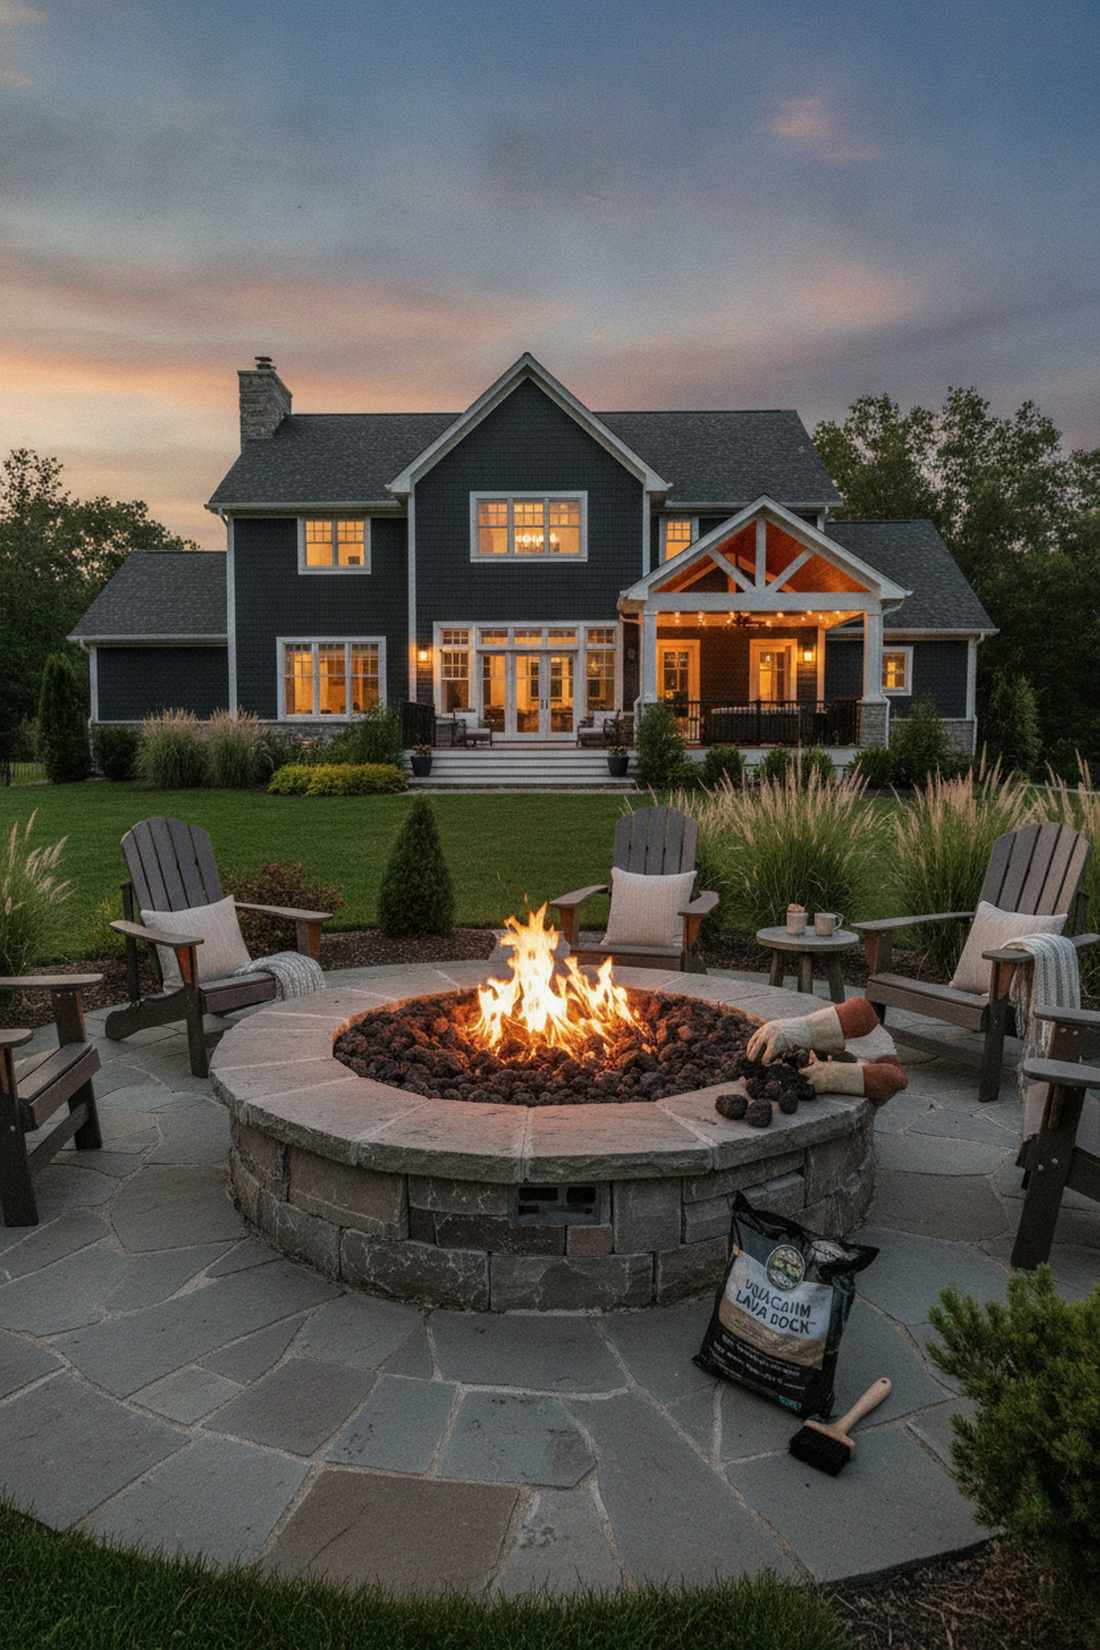
Pouring natural volcanic stone chunks into your burner feels wonderfully rustic and grounding. It acts as an incredible heat sink, perfect for a garden furniture with fire pit setup that needs to radiate warmth long after the flame is off.
People default to fake ceramic logs, but porous natural lava rock gives a designer-level finish that looks rugged and earthy. High-end landscape supplies like real volcanic media elevate the tactile feel of the space.
A full bag of quality rock only sets you back $20–$40. Pin this to your backyard hardscaping board!
- Key Materials: 1-2 inch natural volcanic porous rock
- Vibe / Style: Rugged organic modernism
- Difficulty: Simply pour and arrange
- Budget Breakdown: 10lb Lava rock bag: $25 | Burner cleaning brush: $10.
- Creator’s Tip: Wash the rocks with a hose and let them dry completely before first use to remove the dusty soot layer.
- Smart Sourcing: Grab premium volcanic lava rock (bulk pack) and a heavy-duty fire media starter kit.
14. Reflective Fire Glass Beads
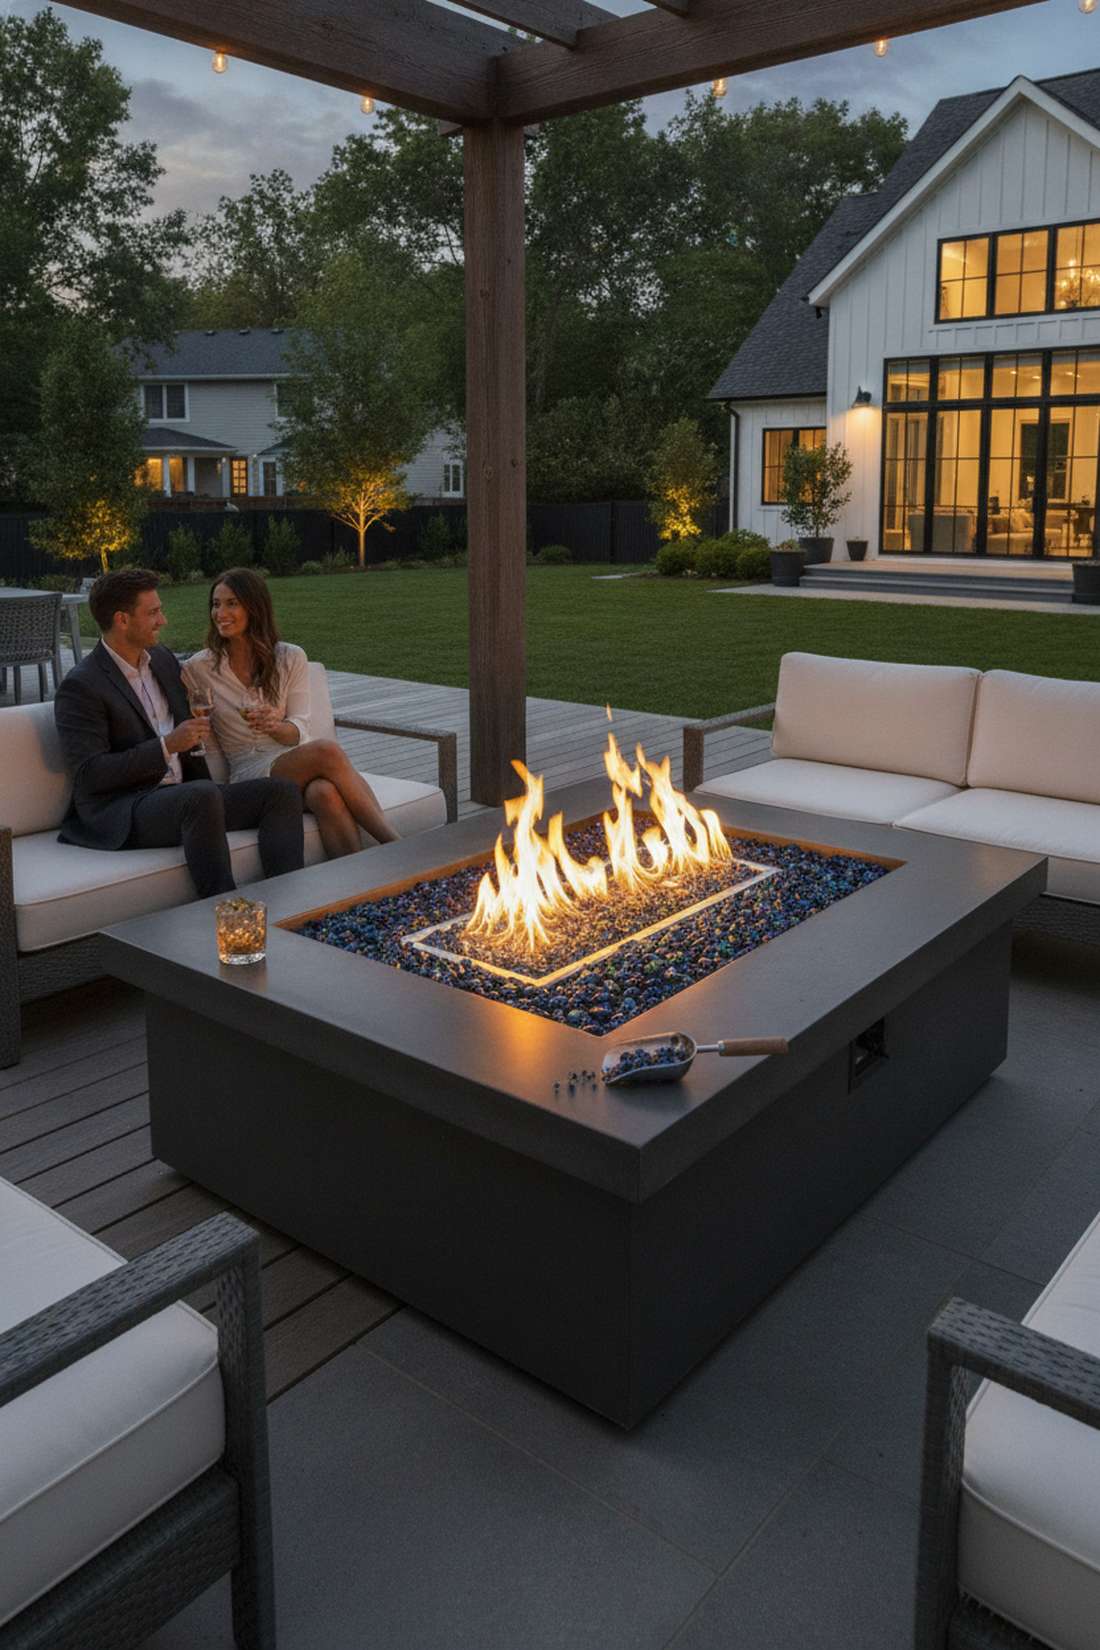
Using shimmering tempered glass pebbles creates a mesmerizing, glittering light show when the fire is lit. It completely transforms a basic gas unit into a sleek, ultra-modern centerpiece for evening cocktails.
Standard stones look dull at night, but reflective fire glass looks far more expensive as it bounces the flame’s light. It’s the ultimate hack for modernizing older garden furniture accessories.
You can fill an average bowl for around $40–$70. It’s a massive visual upgrade for very little effort.
- Key Materials: Heat-tempered colored glass beads, soot-resistant finish
- Vibe / Style: High-glamour modern lounge
- Difficulty: Very easy pour-in setup
- Budget Breakdown: 20lb Reflective glass: $60 | Glass scoop: $8.
- Creator’s Tip: Don’t cover the actual gas burner holes with too much glass, or it will create a dangerous smothering effect.
- Smart Sourcing: Buy heat-tempered reflective fire glass (bulk pack) and high-heat glass cleaning kits.
15. Glass Wind Guards
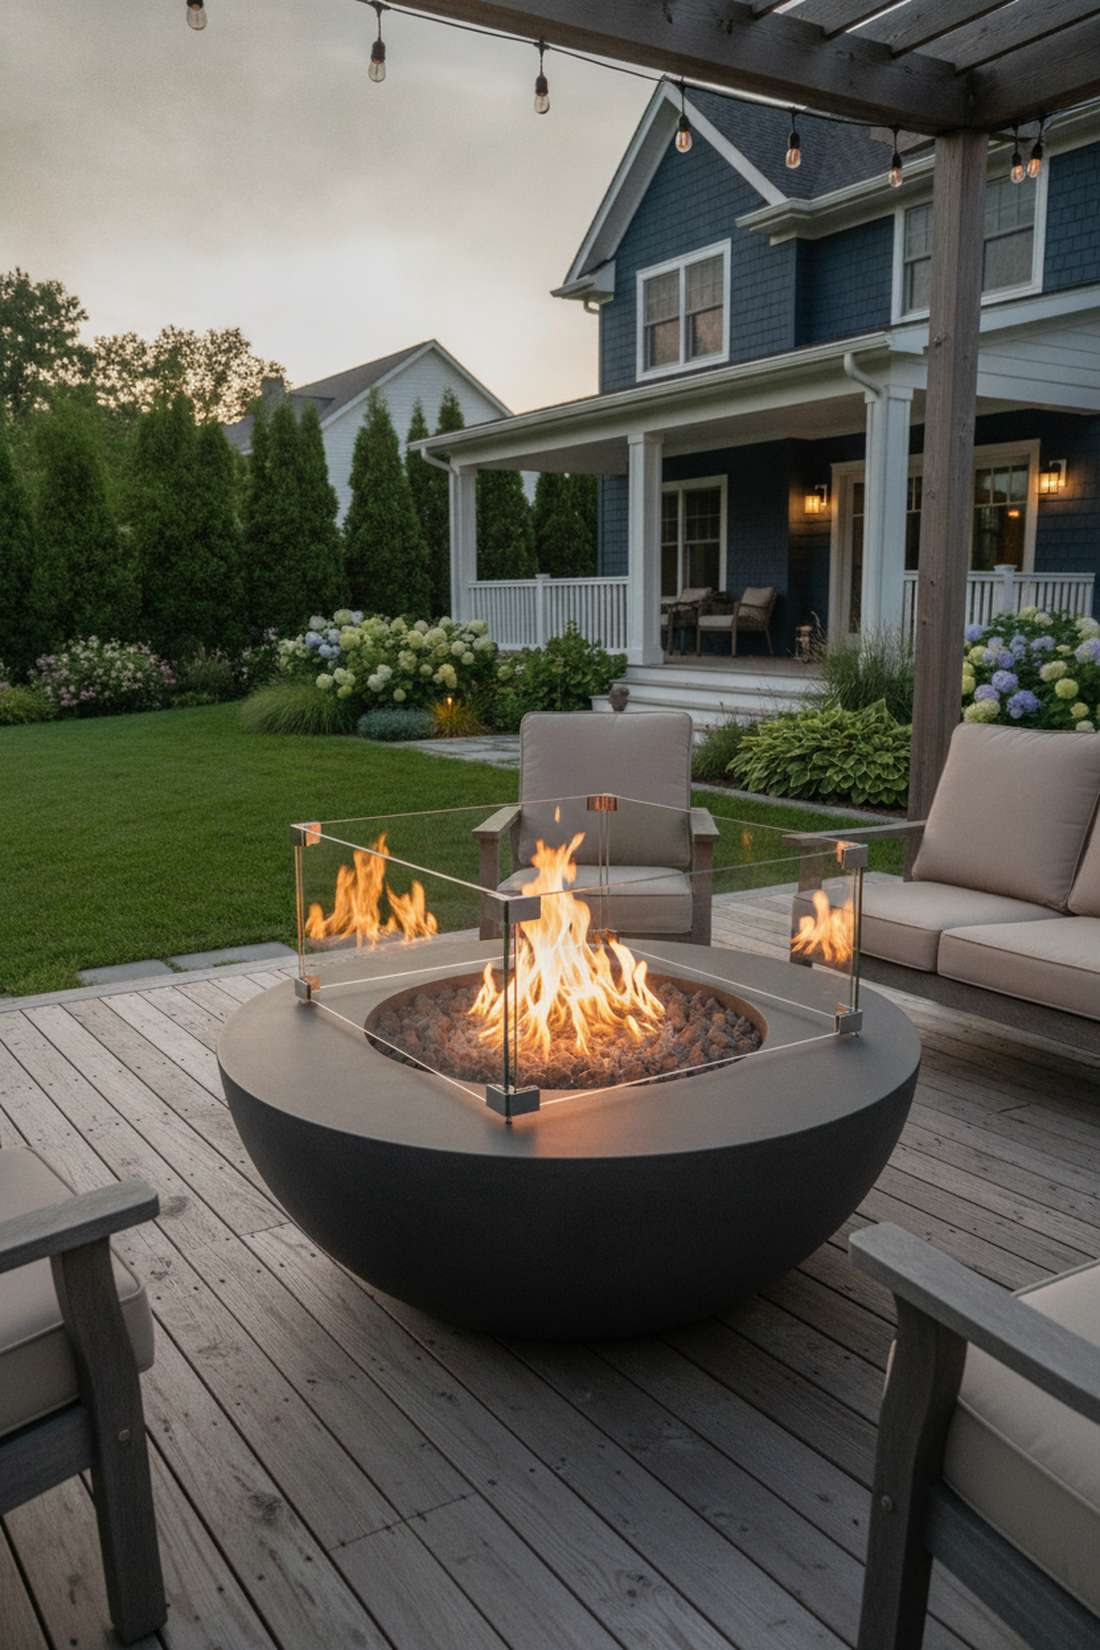
A sleek transparent flame barrier feels like a museum-quality display case for your fire. It is an absolute lifesaver for windy evenings where your garden furniture with fire pit experience would otherwise be ruined by blown-out flames.
Most beginners just let their fires blow wildly, but a tempered glass shield delivers a surprisingly premium, controlled look. Adding specialized fire accessories instantly makes your patio feel like a commercial hotel lounge.
These protective barriers run between $70–$150. Save this if you live in a breezy or coastal area!
- Key Materials: 5mm tempered glass panels, aluminum corner brackets
- Vibe / Style: Sleek commercial hospitality
- Difficulty: Easy bracket assembly
- Budget Breakdown: Glass guard kit: $100 | Microfiber cleaning cloth: $5.
- Creator’s Tip: Leave a slight gap at the bottom of the glass to ensure the fire still pulls enough oxygen to burn brightly.
- Smart Sourcing: Get a tempered glass wind guard starter kit and aluminum corner brackets (4-pack).
This next transformation turns a single-use patio item into an everyday essential…
16. Fire Pit Table Conversion Kits

Dropping a flush metal burner lid over your fire bowl instantly creates a sleek, functional coffee table. It is the smartest dual-purpose layout for small patios where space for both dining and fires is non-existent.
People crowd their decks with too many tables, but a conversion lid gives a designer-level finish while saving precious square footage. Integrating versatile garden furniture accessories makes small spaces incredibly efficient.
A good aluminum cover costs roughly $60–$120. Highly recommended for maximizing your patio’s utility.
- Key Materials: Powder-coated aluminum lid, flush-mount handles
- Vibe / Style: Smart minimal space-saving
- Difficulty: Simple drop-in placement
- Budget Breakdown: Aluminum lid cover: $85 | Heat-resistant mat: $20.
- Creator’s Tip: Never put the lid on while the rocks are still hot; wait at least two hours to prevent warping the metal.
- Smart Sourcing: Look for aluminum fire pit conversion kits and heat-resistant burner covers (pre-cut).
17. Fire Pit Seating Sets
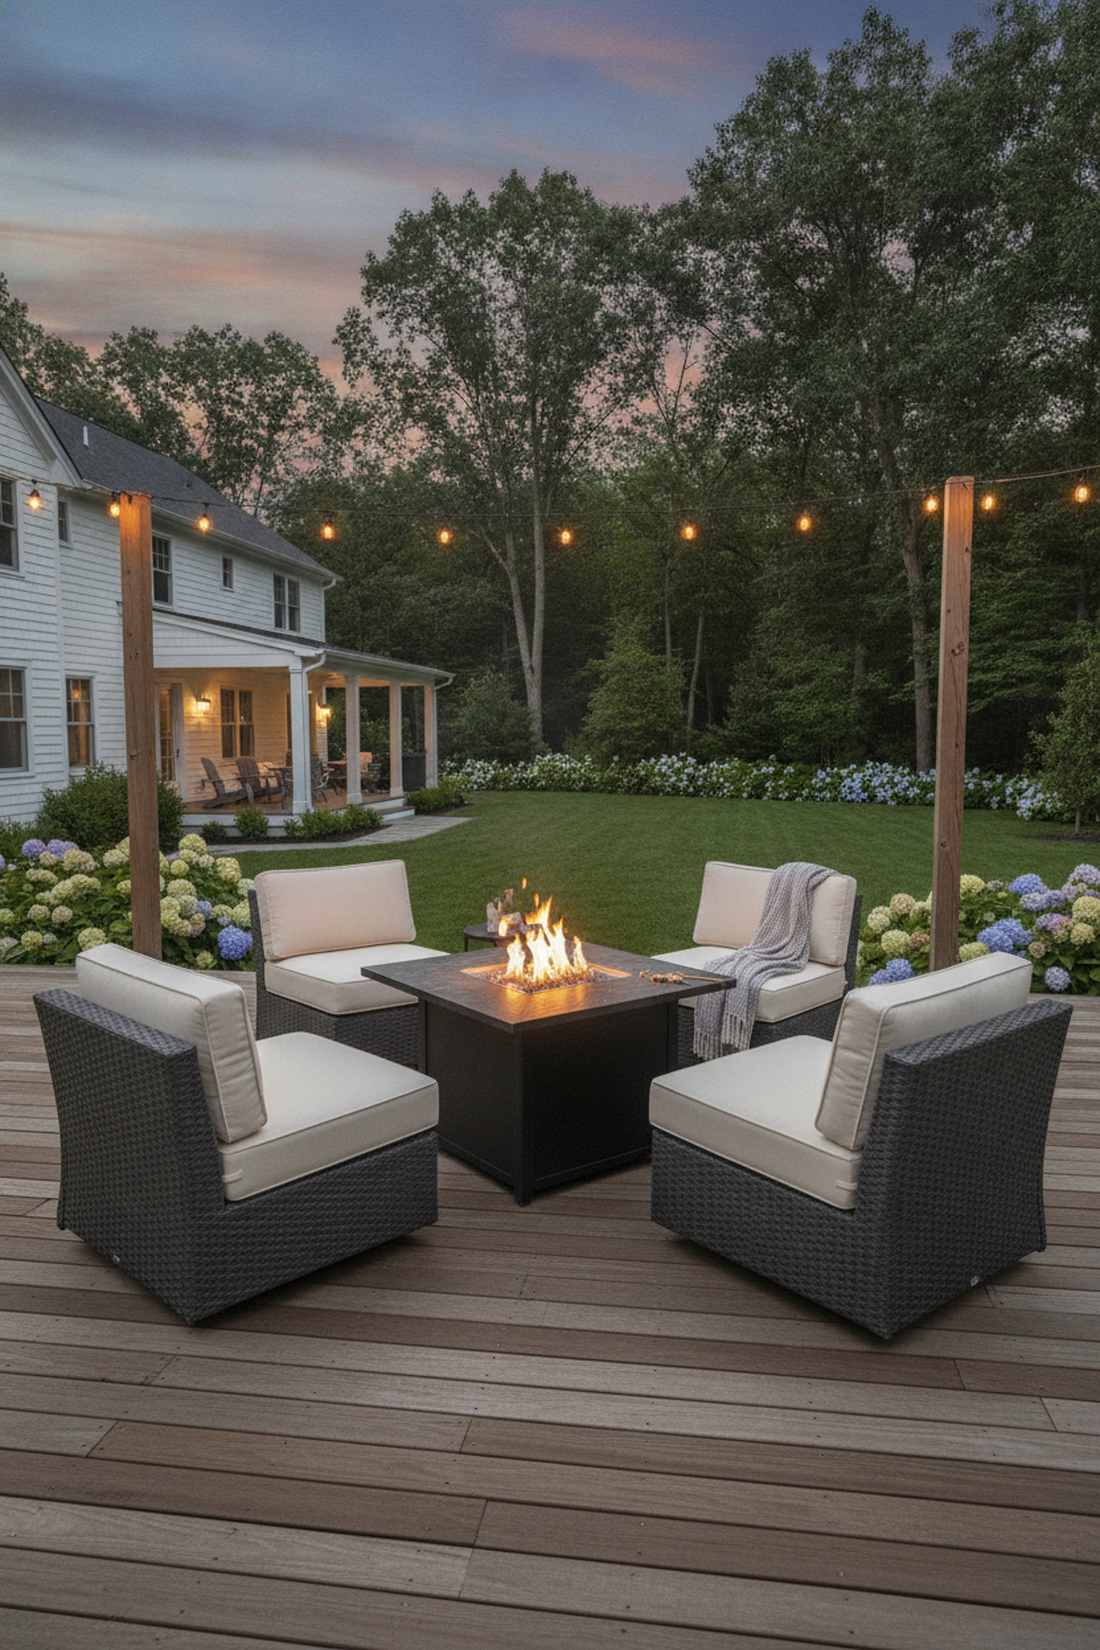
Arranging a matching curved club chair setup around a central flame feels inherently inviting and cozy. It dictates the perfect conversational flow for your garden furniture with fire pit evening sessions.
Haphazardly dragging random chairs to a fire looks messy, but a dedicated, symmetrical seating ring looks incredibly high-end. Utilizing properly spaced outdoor furniture sets creates a luxurious focal point in your yard.
A full 4-piece seating arrangement ranges from $400–$900. Pin this to your ultimate patio blueprint board!
- Key Materials: Synthetic wicker frames, deep-seating foam pads
- Vibe / Style: Intimate fireside luxury
- Difficulty: Moderate furniture assembly
- Budget Breakdown: 4-Chair set: $600 | Center fire table: $300.
- Creator’s Tip: Keep the front edge of the chairs exactly 36 inches from the flame edge for optimal leg warmth and safety.
- Smart Sourcing: Invest in UV-coated resin wicker chair sets and heat-resistant outdoor furniture starter kits.
Functional Garden Furniture Accessories
18. Weighted Umbrella Bases
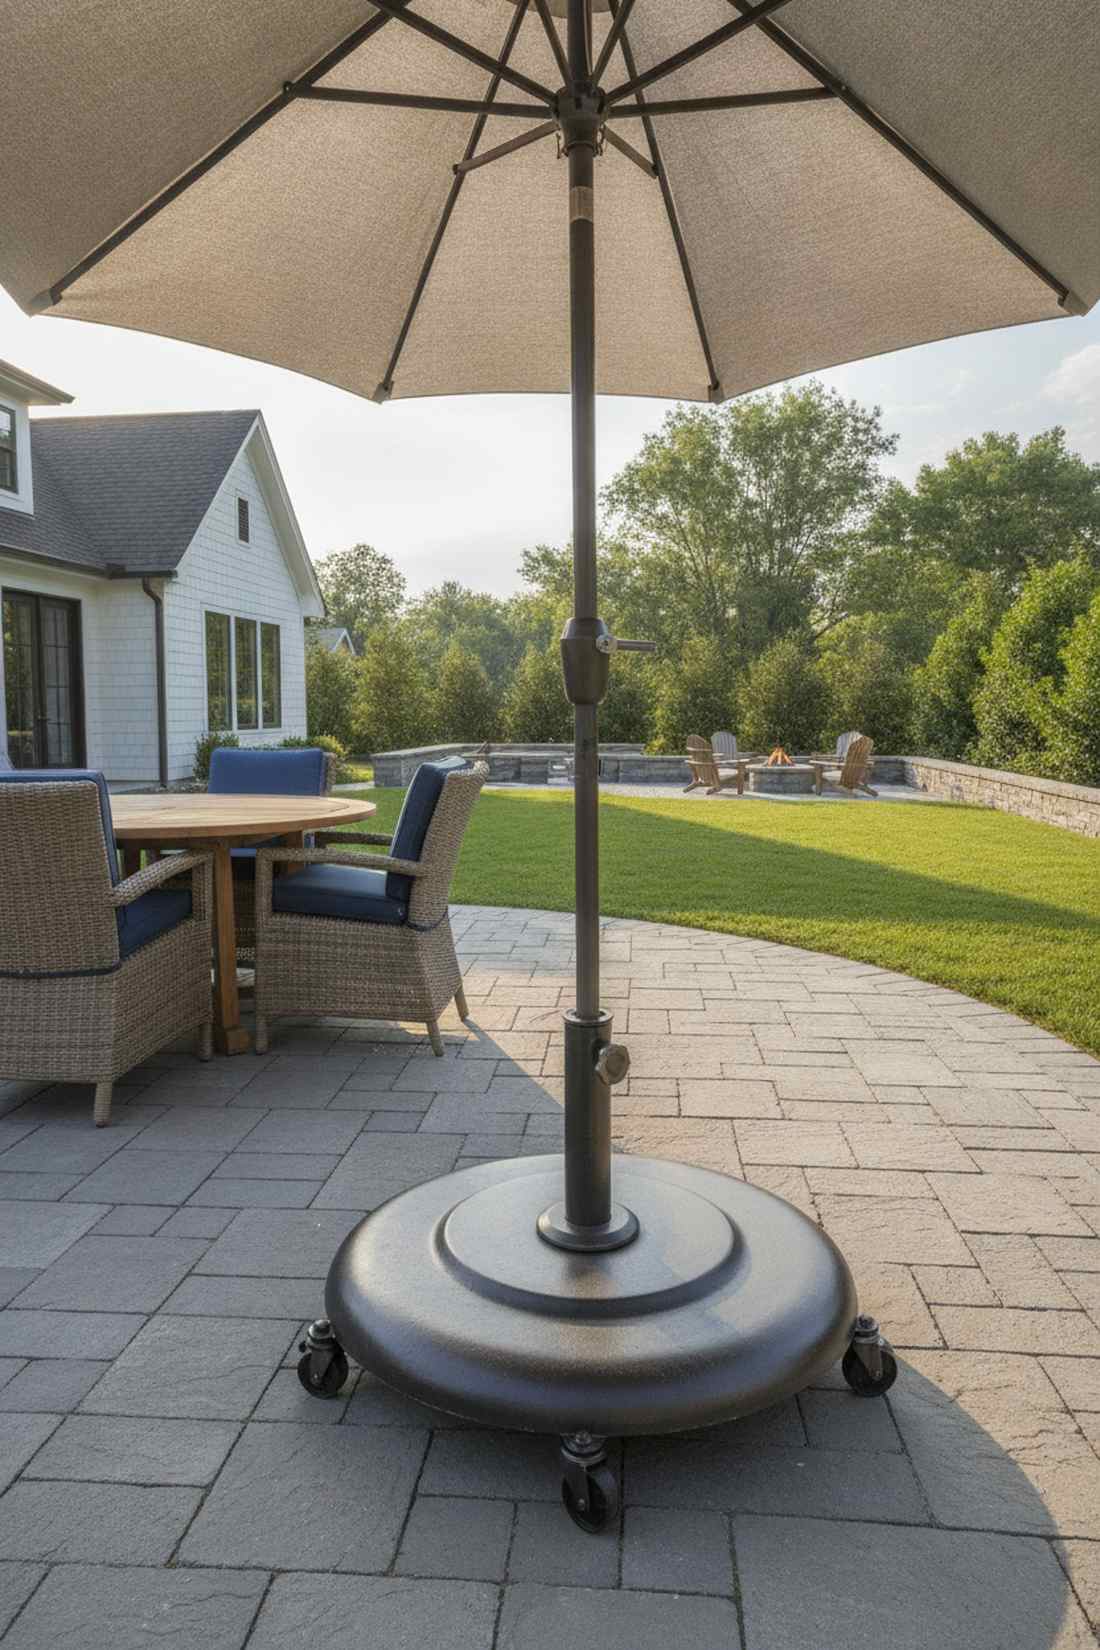
A massive concrete or cast-iron support anchor is the silent hero that keeps your canopy perfectly upright. It’s a non-negotiable safety requirement for wide-spanning patio parasols in exposed, gusty areas.
Amateurs buy cheap plastic bases that crack in a week, while heavy cast-iron delivers a surprisingly premium look and permanent stability. Upgrading basic garden furniture accessories to commercial weight classes prevents disastrous wind accidents.
Quality 50+ pound bases run about $60–$140. It’s the most important safety investment you’ll make.
- Key Materials: Cast iron or concrete-filled resin, tension knobs
- Vibe / Style: Unshakable commercial stability
- Difficulty: Heavy lifting required
- Budget Breakdown: Cast iron base: $95 | Anti-rust clear coat: $10.
- Creator’s Tip: Look for bases with built-in hidden caster wheels so you don’t break your back moving them around the deck.
- Smart Sourcing: Order heavy-duty concrete-filled bases (pre-sealed) and locking caster wheel kits.
19. Cantilever Umbrella Sandbags
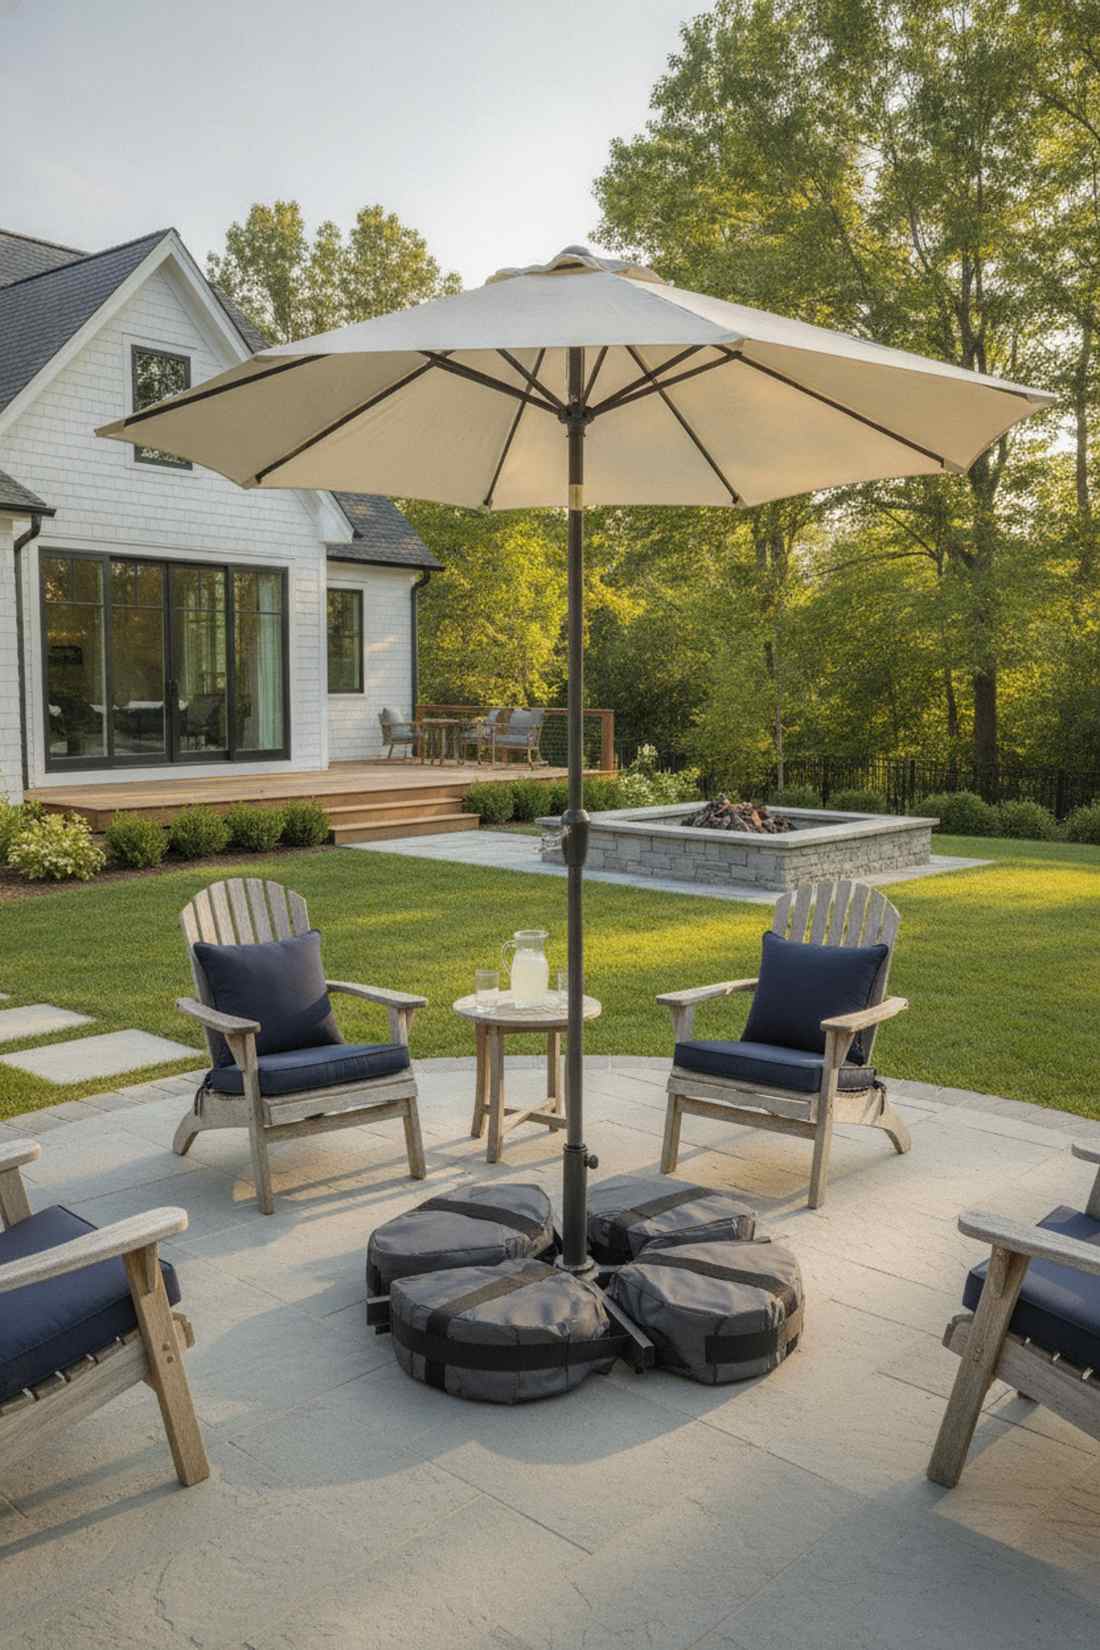
These tactical fabric ballast weights drape perfectly over cross-bar stands to lock your offset canopy to the earth. They are the ultimate discreet fix for top-heavy offset frames that tend to wobble.
Naked metal cross-bases look unfinished, but wrapped canvas sandbags give a neat, tailored appearance that looks highly intentional. Adding heavy-duty outdoor patio hardware secures your investment against sudden summer storms.
A set of empty bags to fill yourself costs a mere $30–$50. Pin this genius stabilization hack!
- Key Materials: 900D Oxford fabric pouches, washed play sand
- Vibe / Style: Tactical and tidy stabilization
- Difficulty: Easy velcro strap attachment
- Budget Breakdown: Sandbag shells: $35 | 100lbs Play sand: $15.
- Creator’s Tip: Use pea gravel instead of sand; if the bags ever rip, gravel is significantly easier to clean off your patio.
- Smart Sourcing: Grab UV-coated cross-base sandbags (4-pack) and weatherproof Oxford fabric kits.
20. Ground-Mount Umbrella Anchors
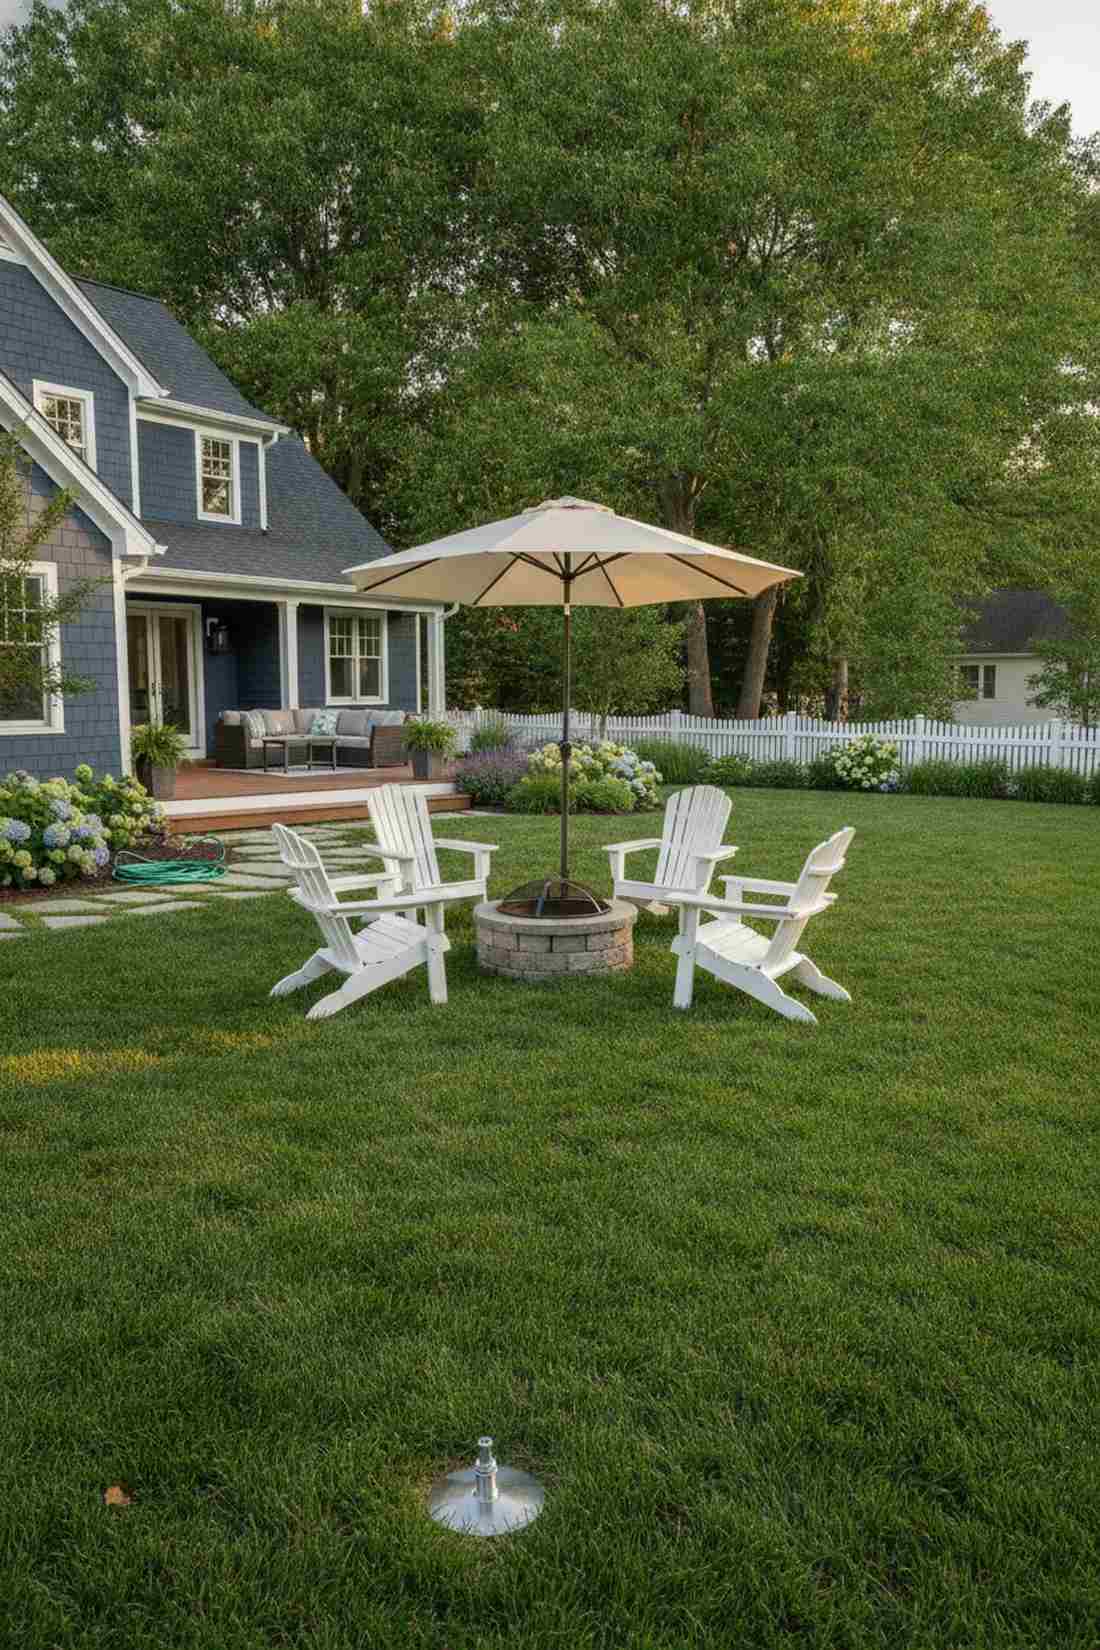
Sinking a flush metal auger sleeve straight into your lawn or soil creates a magically invisible shade support. It completely removes the tripping hazard of bulky bases, perfect for seamless garden seating areas.
Surface bases clutter the grass, but an flush earth anchor looks far more expensive, mimicking professional park installations. Installing permanent outdoor canopy hardware elevates a casual lawn into a structural landscape.
The steel anchor kits are surprisingly cheap, around $40–$70. Save this for a hyper-clean lawn aesthetic!
- Key Materials: Galvanized steel earth auger, flush-mount locking collar
- Vibe / Style: Invisible architectural integration
- Difficulty: Requires aggressive soil twisting
- Budget Breakdown: Auger mount: $55 | Leverage bar: $15.
- Creator’s Tip: Wet the ground thoroughly 24 hours before installation to make twisting the steel auger into the dirt much easier.
- Smart Sourcing: Choose galvanized steel ground-mount kits and heavy-duty earth auger starter kits.
Before you buy another piece of plastic yard decor, you need to see how the pros secure their tables…
Material Guide: Cheap vs. Premium Aesthetic
Knowing exactly where to save and where to spend makes all the difference in achieving that “looks like a $5,000 patio but isn’t” vibe.
- Standard vs. UV-Resistant/Premium: Upgrading to solution-dyed acrylics and UV-coated metals stops fading dead in its tracks, meaning you aren’t rebuying the same exact items next spring.
- Pre-made Kits vs. Sourcing Locally: Buying commercial-grade starter kits (like heavy-duty bases or full cushion sets) often saves 40% compared to piecing together flimsy components from big-box garden aisles.
21. Table-Clamp Umbrella Mounts
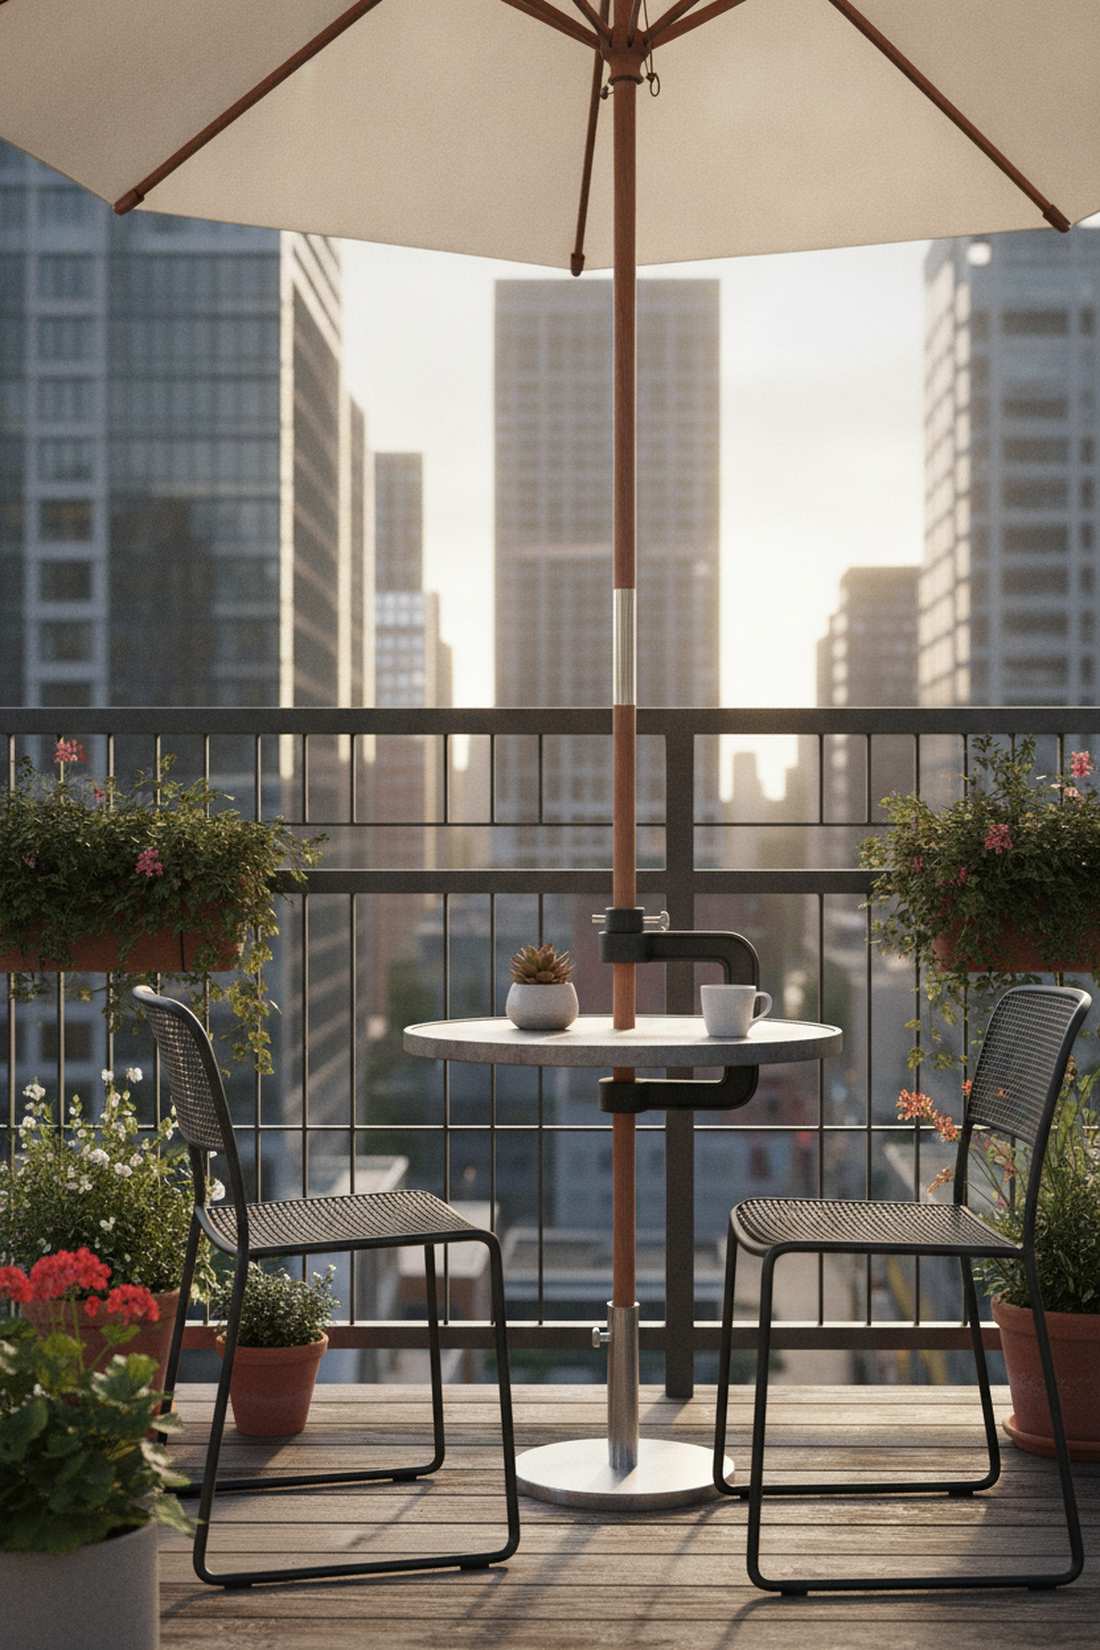
A compact heavy-duty C-clamp bracket attaches shade directly to your table edge or balcony railing like a vise. It is the ultimate space-saving hack for tiny bistro tables that lack a center pole hole.
People struggle with bases in small areas, but a rail clamp delivers a surprisingly premium, custom-built look without eating an inch of floor. Utilizing smart garden furniture accessories makes tiny urban spaces deeply functional.
These brilliant clamps cost a incredibly low $20–$40. Pin this if you have a zero-clearance balcony!
- Key Materials: Cast iron C-clamp, rubber-coated grip pads
- Vibe / Style: Urban industrial efficiency
- Difficulty: Instant twist-on attachment
- Budget Breakdown: Clamp mount: $30 | Rubber padding: $5.
- Creator’s Tip: Always add extra rubber shelf-liner between the clamp and the railing to prevent scratching your apartment’s paint.
- Smart Sourcing: Grab a heavy-duty railing clamp starter kit and protective rubber grip pads (bulk pack).
22. Umbrella Base Planter Combinations
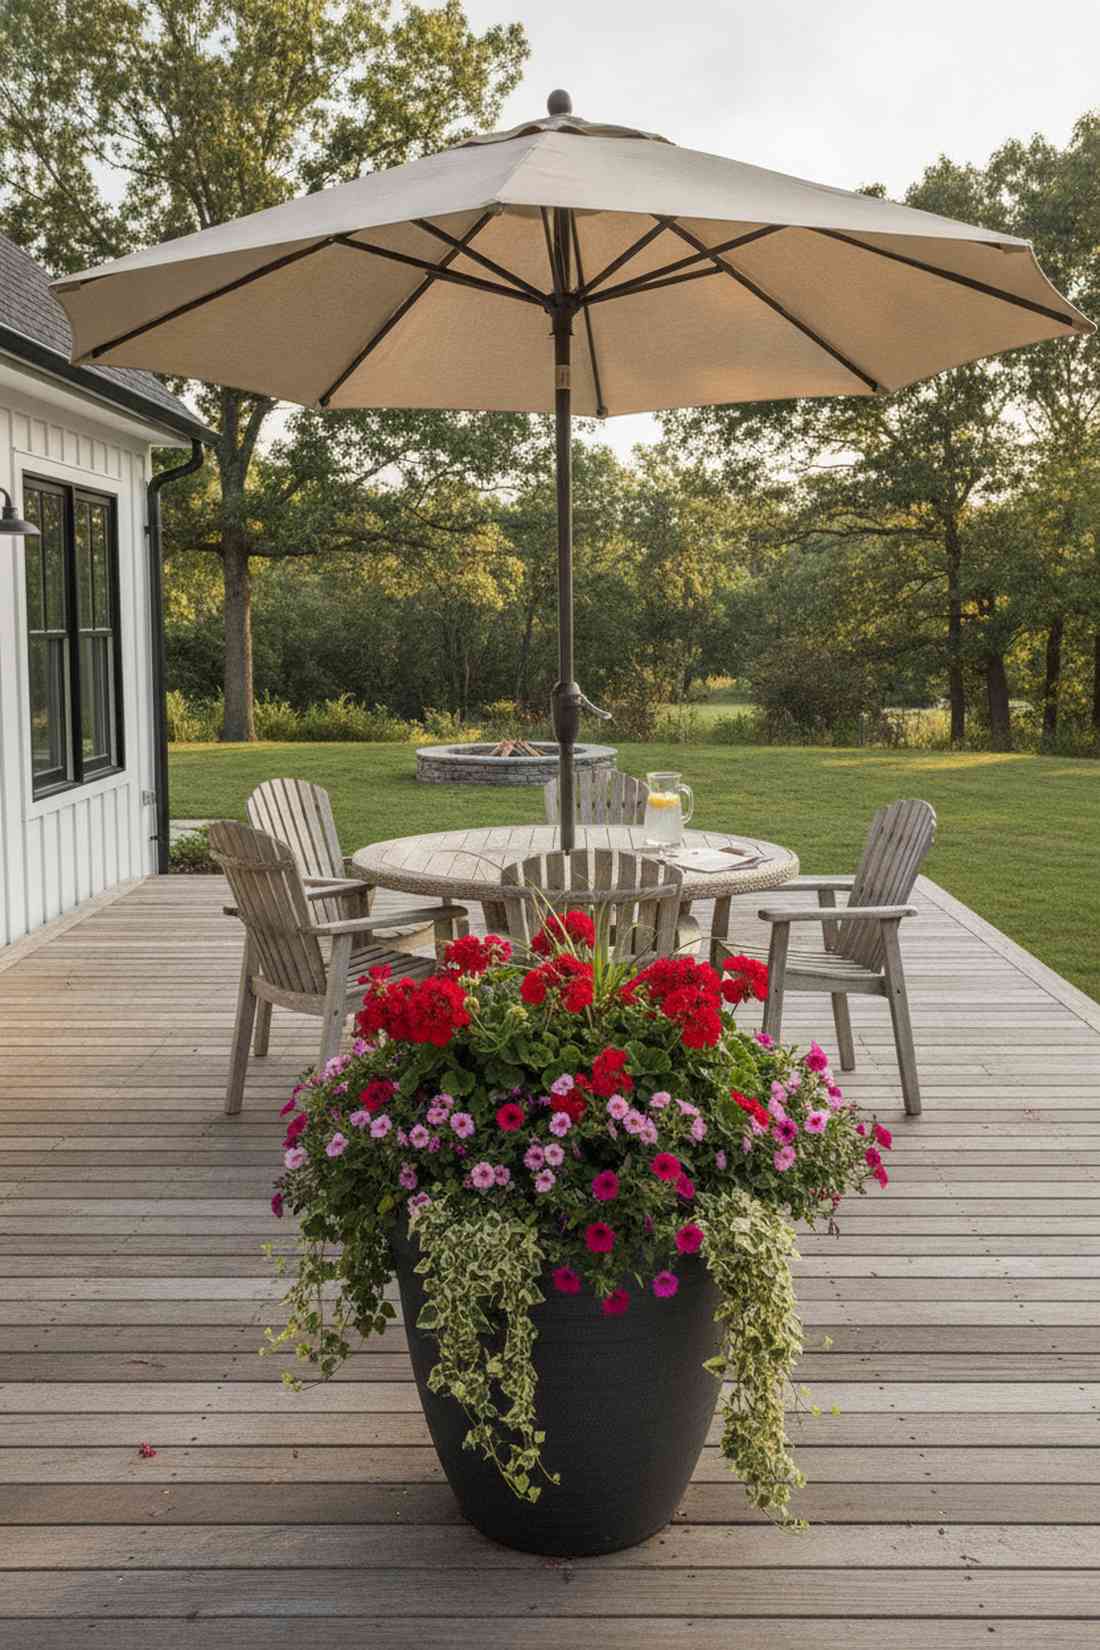
Disguising a steel pole inside a lush blooming floral container feels like a genius landscaping magic trick. It transforms an ugly, utilitarian anchor into a gorgeous vertical garden focal point on your patio.
Staring at raw plastic bases is an eyesore, but a planted base gives a designer-level finish that blends seamlessly into the yard. Integrating multi-functional outdoor decor pieces maximizes both beauty and structural shade support.
Building one from scratch with a sturdy barrel runs about $70–$120. Highly recommended for adding instant curb appeal.
- Key Materials: Deep resin planter, PVC center pipe, concrete ballast
- Vibe / Style: Lush botanical integration
- Difficulty: Intermediate DIY potting project
- Budget Breakdown: Large planter: $45 | Concrete mix & PVC: $20.
- Creator’s Tip: Drill massive drainage holes in the bottom before pouring concrete to ensure your flowers don’t drown in standing water.
- Smart Sourcing: Use UV-coated resin planter kits and a quick-set concrete base (starter bag).
Lighting and Heating Additions
23. Solar-Powered LED Umbrella Lights
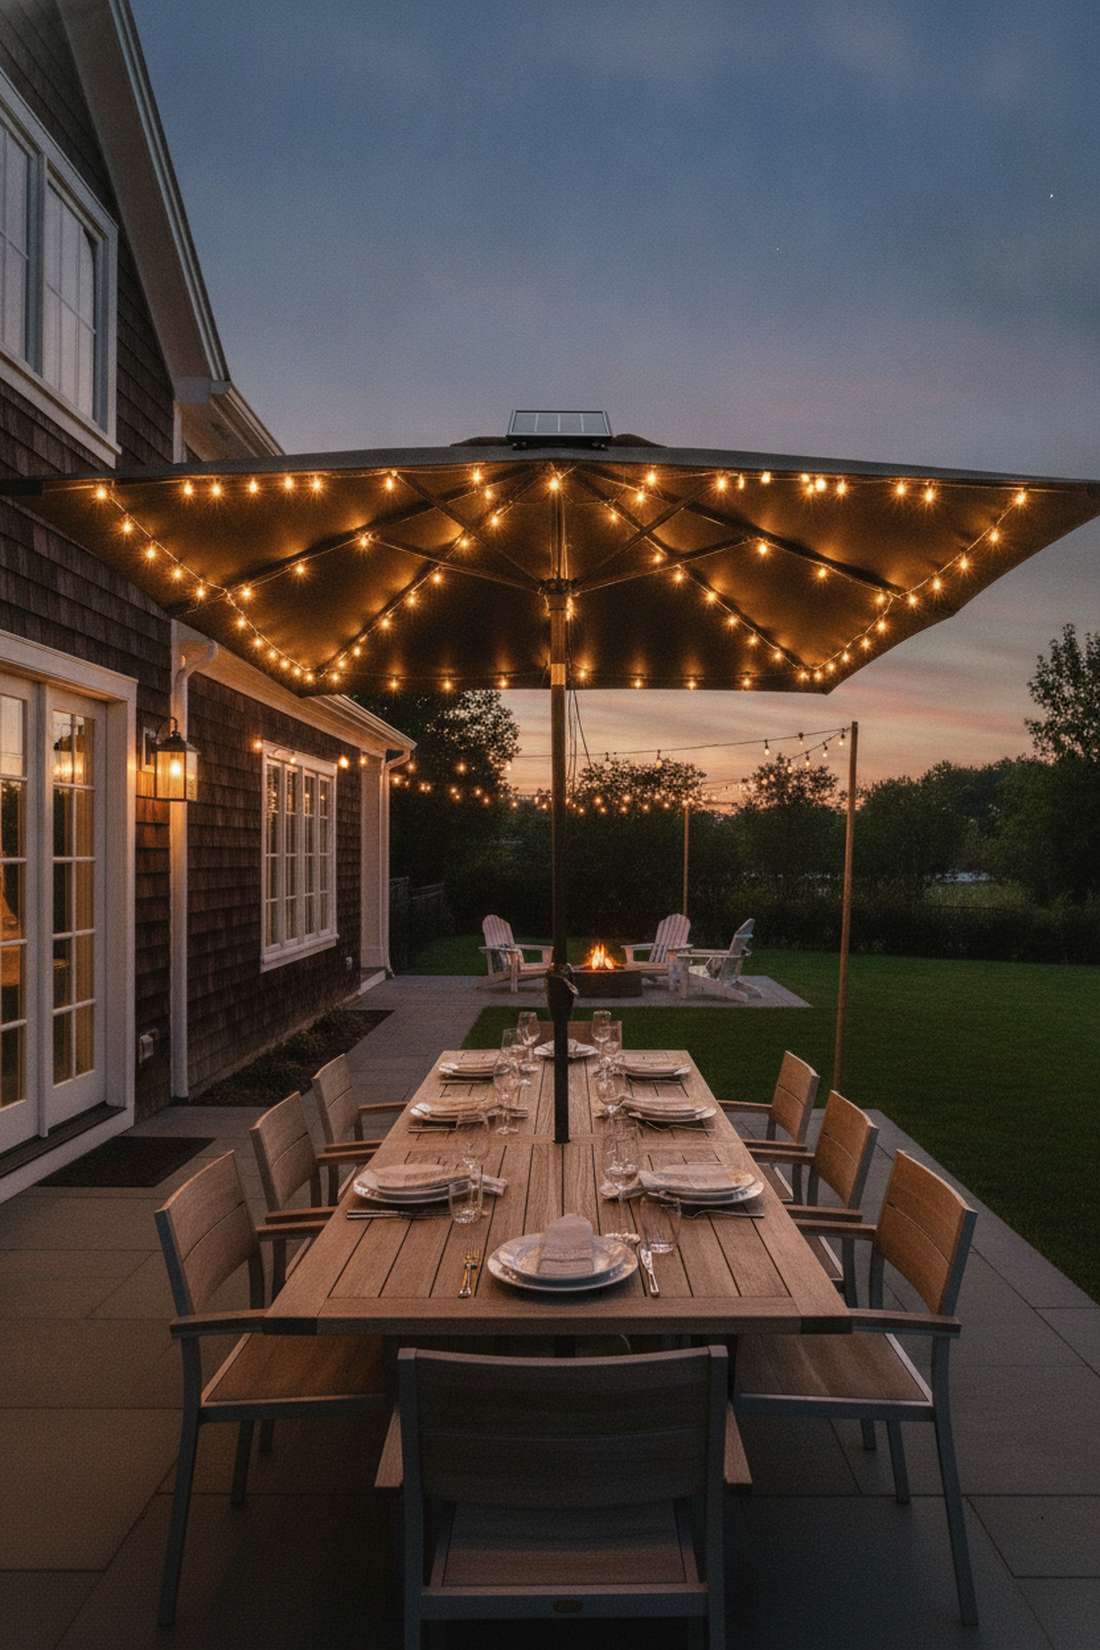
Clipping wireless glowing LED pods to your canopy ribs creates a magical, starlit dining atmosphere. It completely transforms your shade structure into a glowing evening chandelier without running a single ugly extension cord.
Harsh floodlights kill the mood, but solar umbrella ribs look far more expensive and create a soft, ambient glow. Upgrading with smart solar patio supplies turns a daytime shade into a nighttime luxury fixture.
You can light up the night for an easy $30–$60. Save this for your romantic outdoor dining board!
- Key Materials: Top-mount solar panel, clip-on LED string nodes
- Vibe / Style: Magical twilight bistro
- Difficulty: Simple clip-and-go setup
- Budget Breakdown: Solar string kit: $40 | Zip ties: $5.
- Creator’s Tip: Face the top-mounted solar receiver strictly dead south to guarantee a full 8-hour charge for evening parties.
- Smart Sourcing: Opt for solar-powered canopy lights (pre-wired kit) and UV-resistant clear zip ties (bulk pack).
24. Infrared Umbrella Heaters
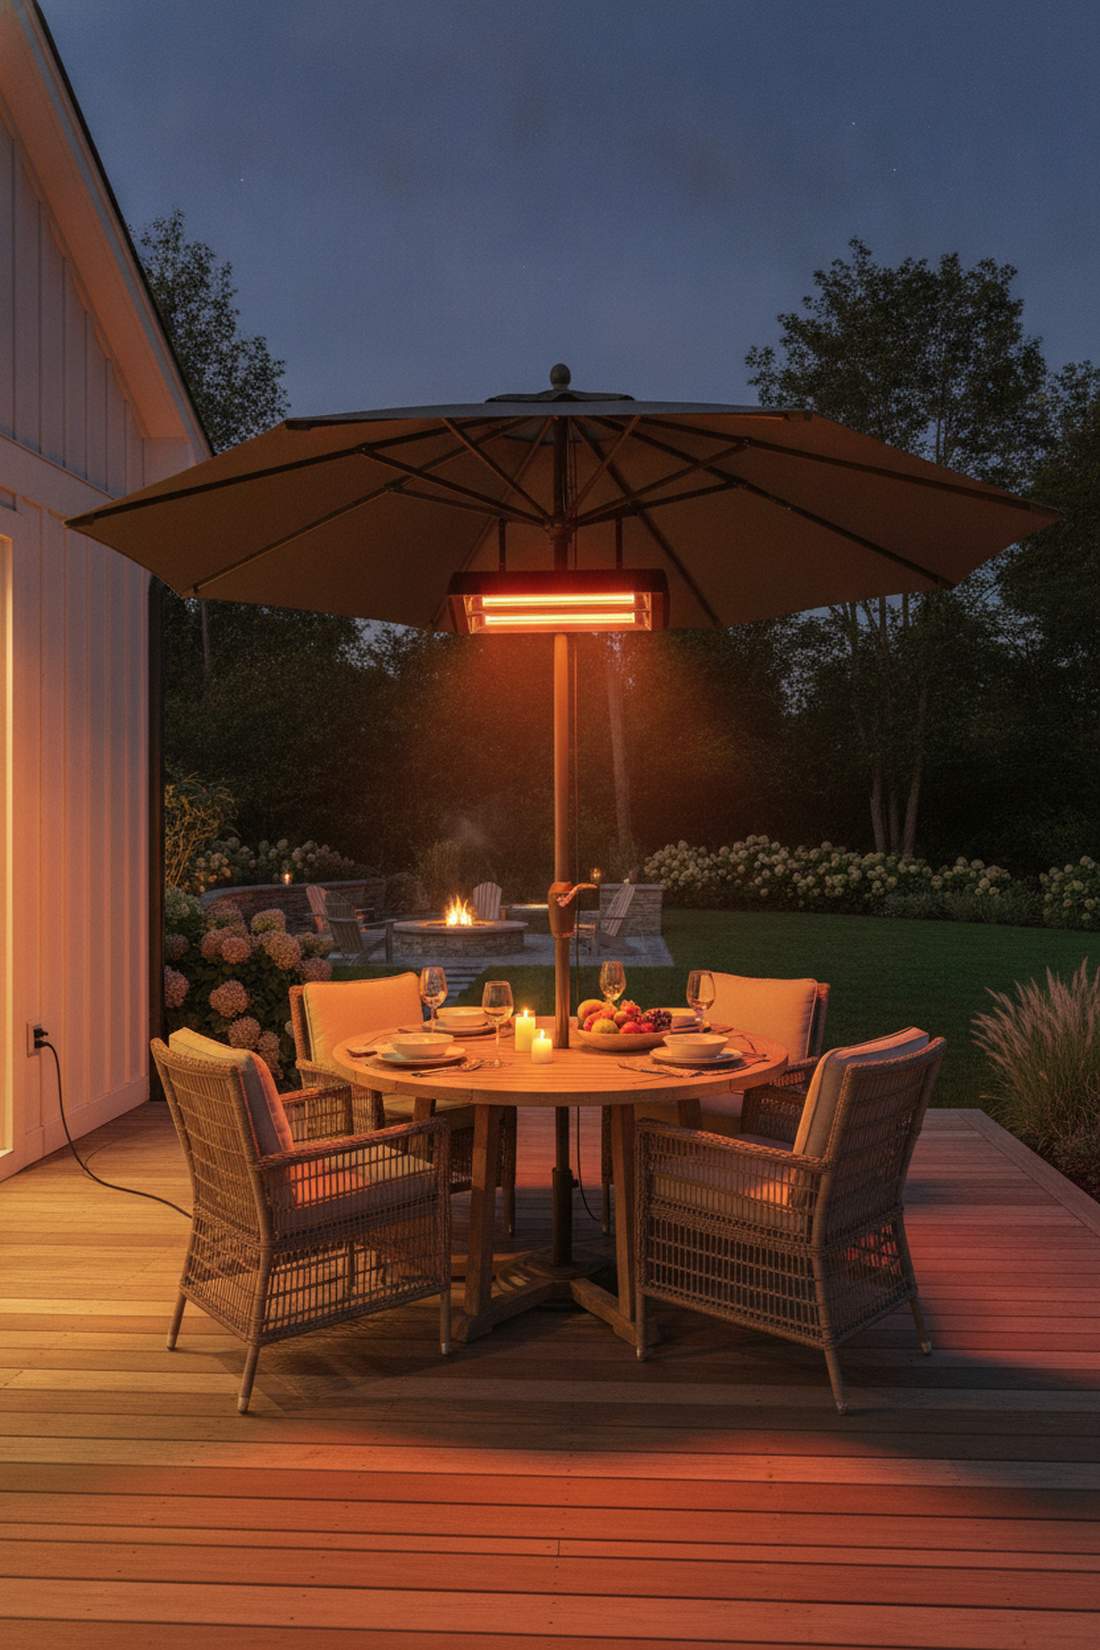
Mounting a directional electric heat lamp directly to the center pole feels like bringing a luxury ski resort to your backyard. It provides instant, silent radiant warmth that targets diners perfectly on crisp autumn nights.
Propane towers take up too much space, but a pole-mounted infrared unit gives a designer-level finish while staying completely out of the way. Investing in high-efficiency outdoor heating kits stretches your patio season into December.
These units range from $120–$250 depending on wattage. It’s an investment that triples your patio usage time.
- Key Materials: Electric infrared halogen tubes, clamping bracket
- Vibe / Style: Four-season luxury dining
- Difficulty: Requires nearby electrical outlet
- Budget Breakdown: Infrared unit: $150 | Outdoor extension cord: $30.
- Creator’s Tip: Always fold the umbrella down before a storm, but make absolutely sure the heater is unplugged and fully cooled first.
- Smart Sourcing: Purchase clamp-on infrared heater kits and weatherproof outdoor extension cords (heavy-duty).
Stop settling for a silent, boring patio—this next upgrade makes every weekend feel like a party…
25. Bluetooth Speaker Umbrella Systems
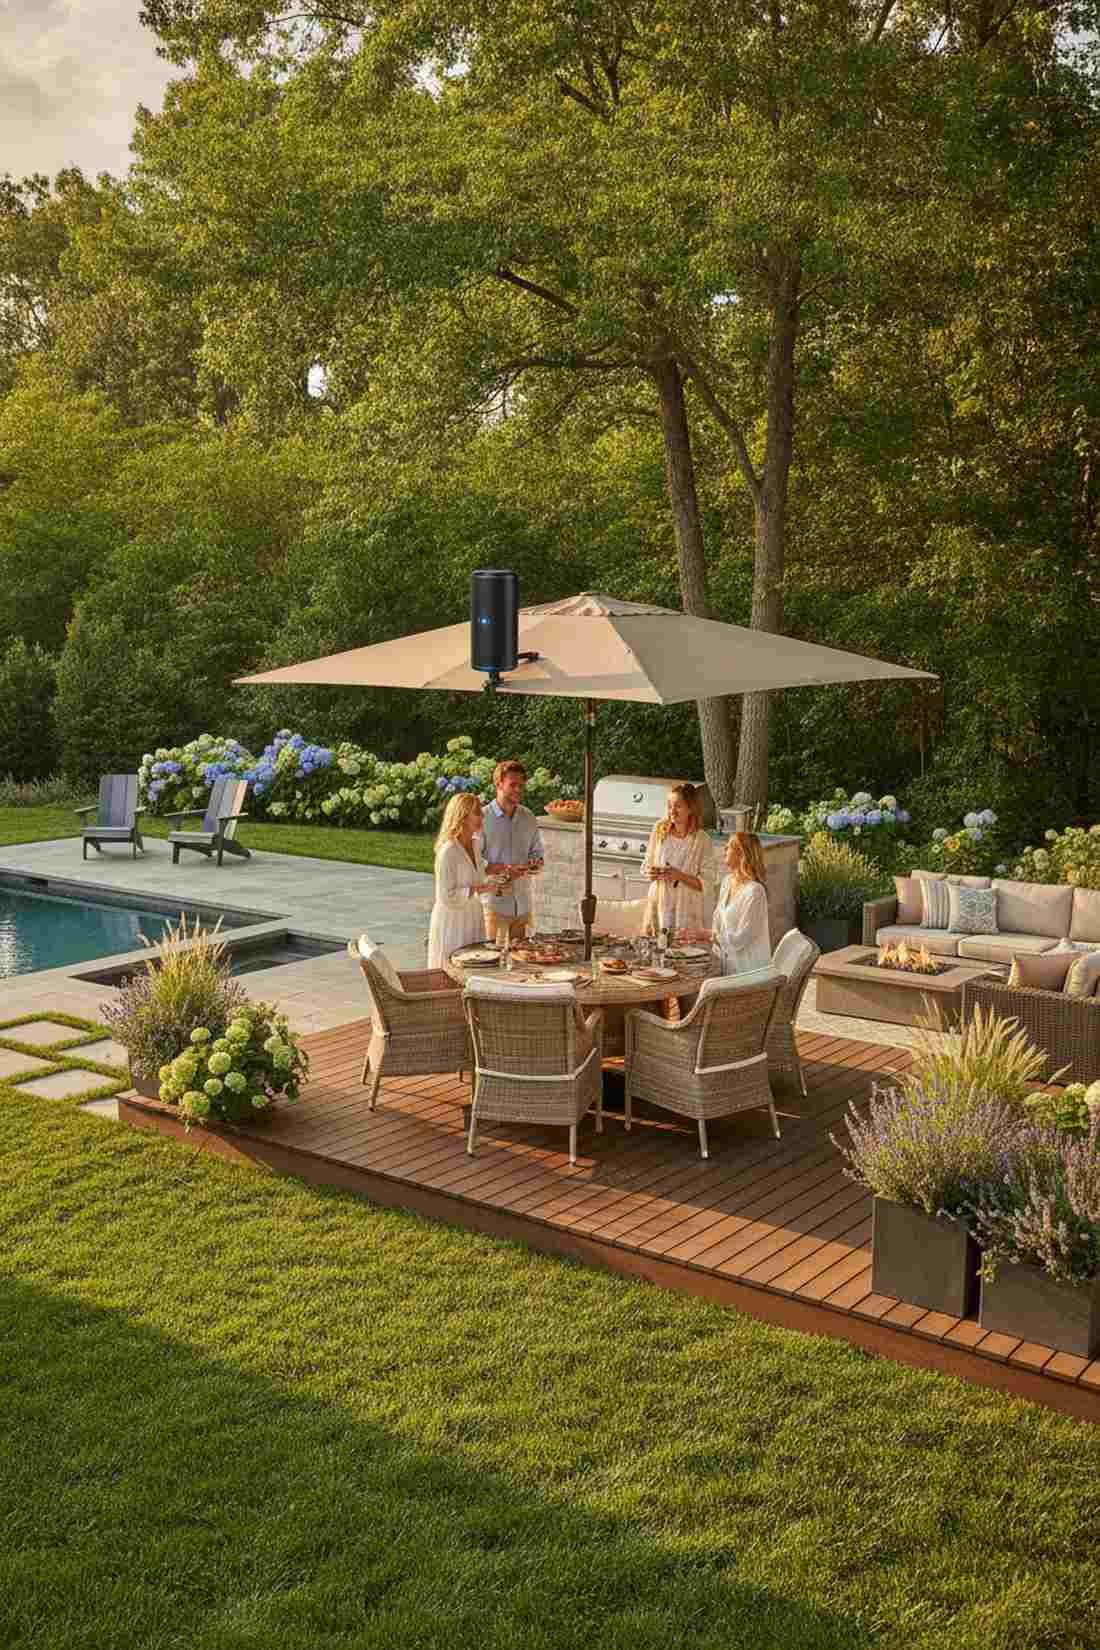
Snapping a wireless audio hub onto your central pole creates an invisible, surround-sound party zone. It floods the seating area with music, making it perfect for lively afternoon barbecues and poolside lounging.
Leaving expensive portable speakers on the table is risky, but a high-mount clamped audio system looks incredibly high-end and keeps tech safe from spills. Adding tech-forward garden furniture accessories modernizes any old setup.
A waterproof hub costs a very reasonable $40–$90. Pin this if you love hosting outdoor happy hours!
- Key Materials: IPX7 waterproof speaker housing, tension clamp
- Vibe / Style: Upbeat tech-forward entertaining
- Difficulty: Instant clamp-on pairing
- Budget Breakdown: Bluetooth hub: $60 | Charging cable: $10.
- Creator’s Tip: Mount the speaker high up near the canopy fabric to help the sound waves bounce downward, amplifying the bass.
- Smart Sourcing: Grab waterproof pole-mount speaker kits and a high-capacity power bank (bulk pack) for charging.
26. Umbrella Pole LED Strip Lighting
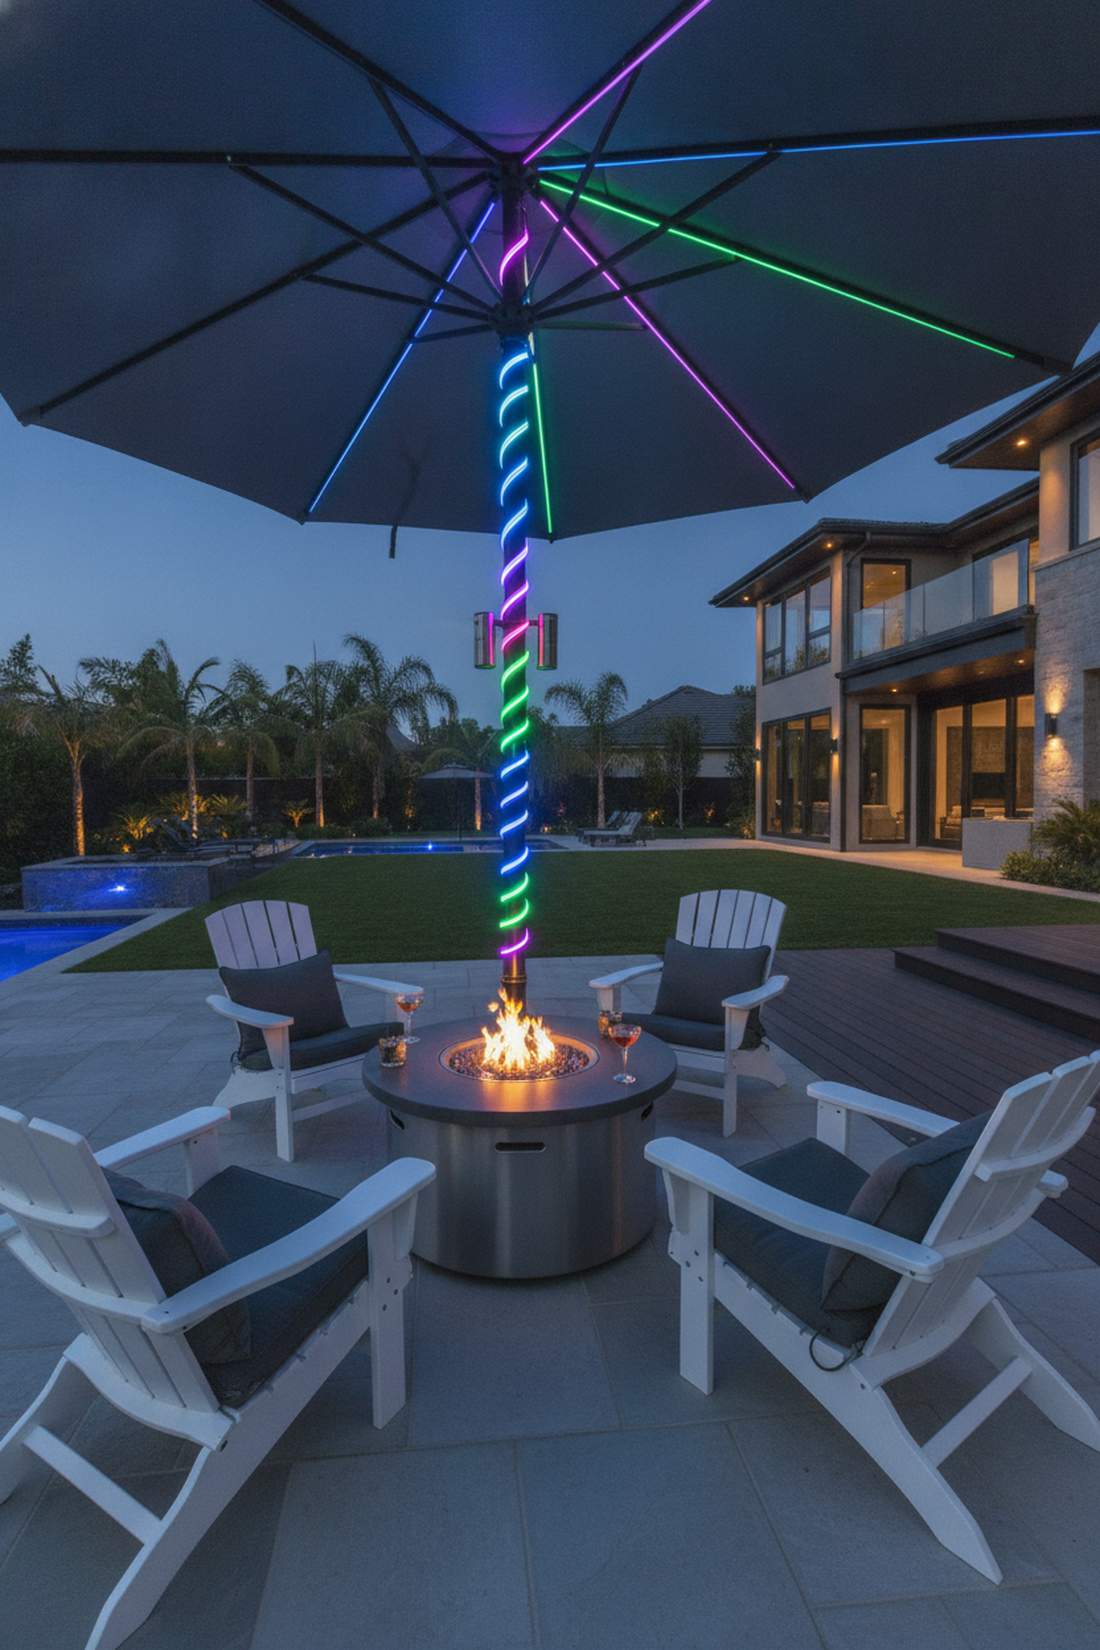
Wrapping a color-changing neon light ribbon around your main mast gives off a striking, futuristic lounge vibe. It highlights the architectural structure of your canopy, creating an instant focal point for late-night cocktails.
Basic lanterns look fine, but a fully illuminated pole delivers a surprisingly premium, custom-lit aesthetic that mimics expensive commercial bars. Sourcing LED patio decor lighting completely redefines your yard’s nighttime geometry.
You can achieve this custom look for just $20–$40. It’s a fast, flashy upgrade that changes everything.
- Key Materials: Silicone-coated LED tape, battery pack strap
- Vibe / Style: Neon cyber-lounge chic
- Difficulty: Easy peel-and-stick wrap
- Budget Breakdown: LED waterproof strip: $25 | Rechargeable batteries: $15.
- Creator’s Tip: Use small dots of outdoor silicone glue at the top and bottom of the LED strip so the adhesive doesn’t peel in the heat.
- Smart Sourcing: Get silicone-coated LED strips (waterproof kit) and outdoor silicone adhesive (pre-cut tubes).
27. Umbrella-Mounted Misting Systems
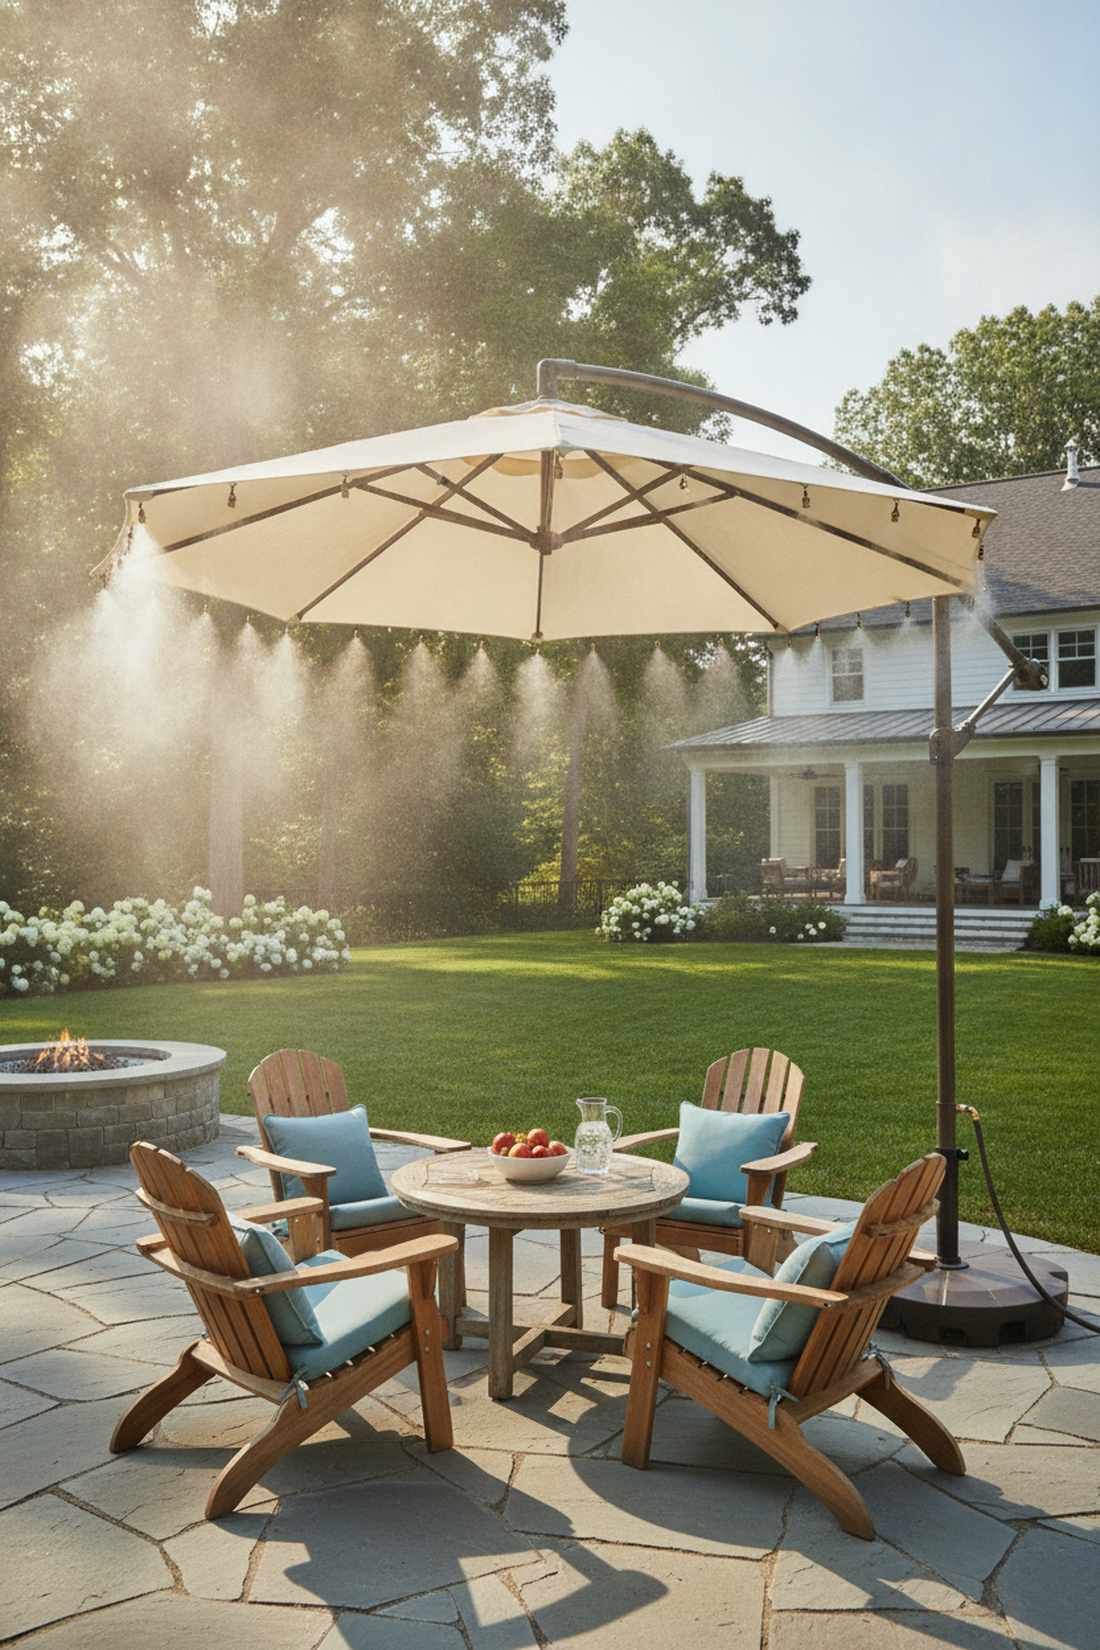
Threading a micro-vapor cooling line along the canopy edge feels like standing in a refreshing, air-conditioned oasis. It drops the ambient temperature radically, making it an absolute necessity for brutal mid-summer heatwaves.
Fans just blow hot air around, but an atomized misting rig gives a designer-level finish that rivals luxury desert resorts. Equipping your shade with heavy-duty cooling accessories turns an unlivable patio into a paradise.
A full perimeter kit only costs $30–$60. Save this genius trick to survive the August heat!
- Key Materials: Polyurethane tubing, brass atomizing nozzles
- Vibe / Style: Refreshing resort cooling
- Difficulty: Simple hose hookup setup
- Budget Breakdown: Misting line kit: $40 | Hose splitter valve: $12.
- Creator’s Tip: Install an inexpensive calcium filter at the hose connection to prevent hard water from instantly clogging the tiny brass nozzles.
- Smart Sourcing: Source brass nozzle misting starter kits and inline hard water filters (2-pack).
Protection and Maintenance Systems
28. Waterproof Umbrella Covers
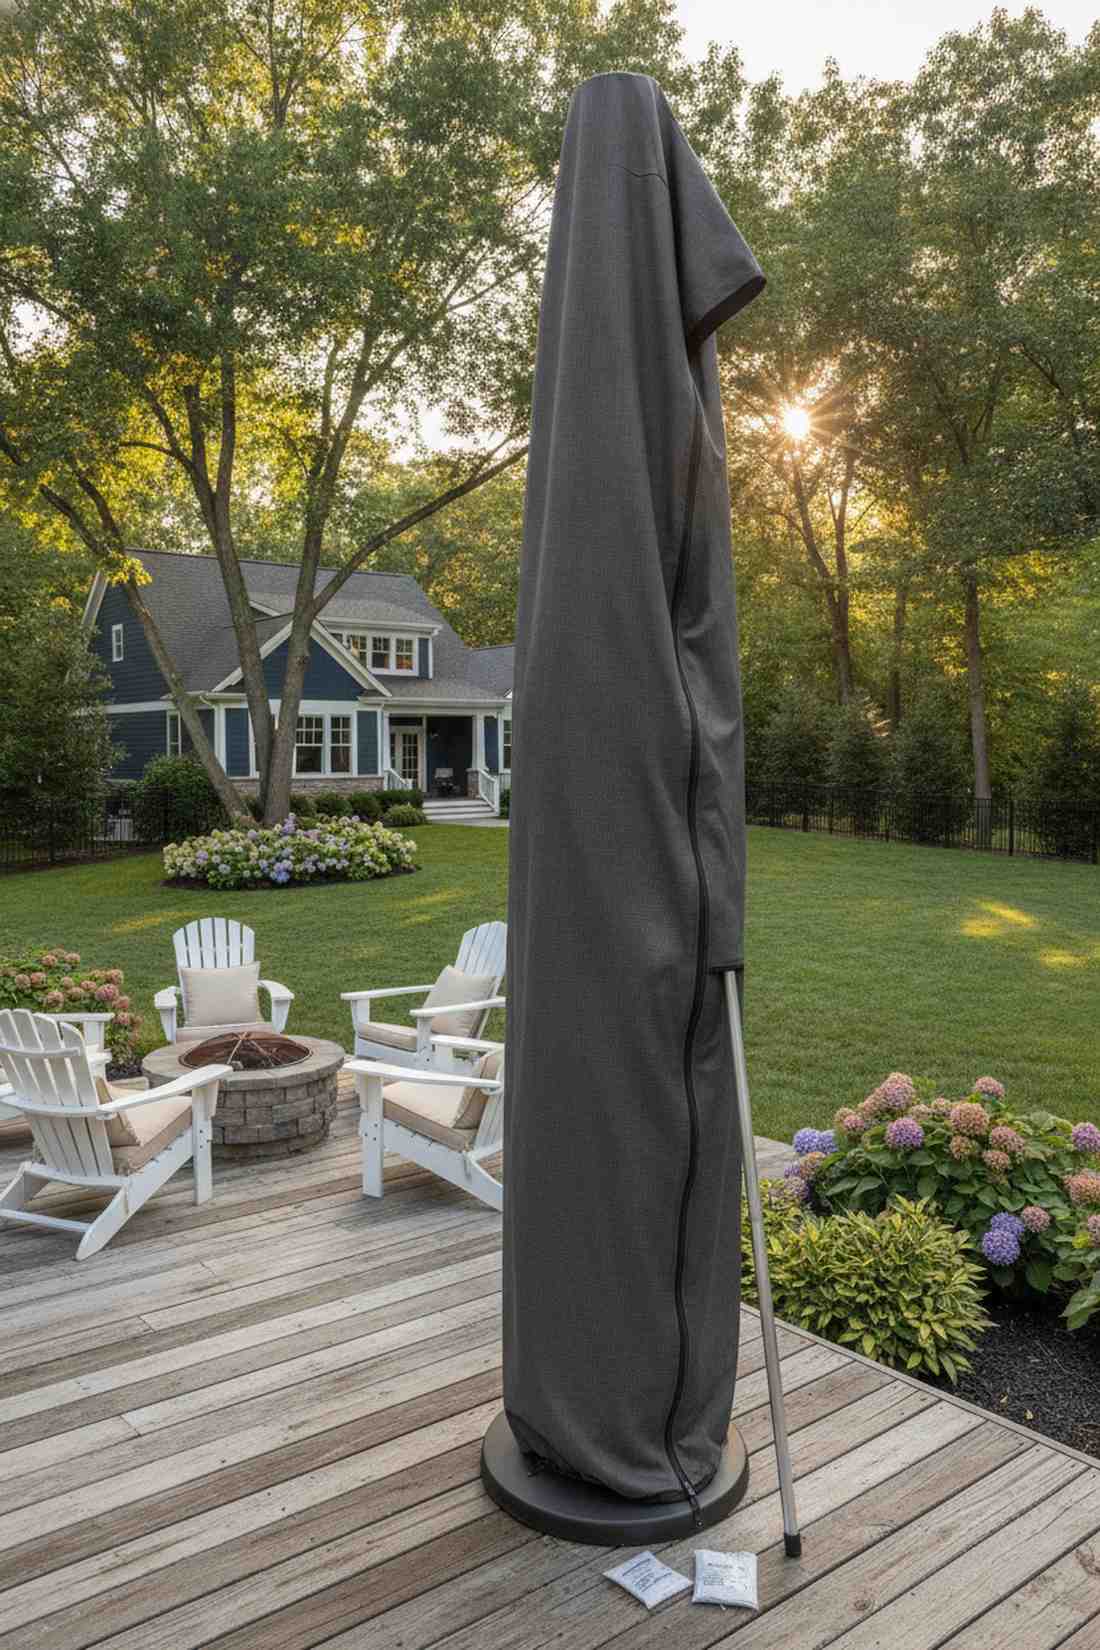
Slipping a heavy-duty full-length fabric sheath over your closed canopy feels like putting armor on your investment. It is the absolute most critical step to prevent winter mold and devastating sun-rot during the off-season.
People complain about their canopies tearing after one year, but using a proper sheath makes them look brand new for five. Securing your investment with premium outdoor storage gear is the smartest money you can spend.
A high-quality protective sleeve runs $30–$70. Never skip this step if you want your gear to last.
- Key Materials: 600D PVC-backed polyester, fiberglass reach-pole
- Vibe / Style: Pristine and protected longevity
- Difficulty: Easy zipper wand closure
- Budget Breakdown: Waterproof cover: $45 | Moisture absorbers: $10.
- Creator’s Tip: Toss a couple of silica gel packets into the folds of the umbrella before zipping it up to kill trapped winter moisture.
- Smart Sourcing: Buy 600D weatherproof umbrella covers (pre-sized) and industrial silica gel packs (bulk pack).
29. Furniture Cushion Storage Bags
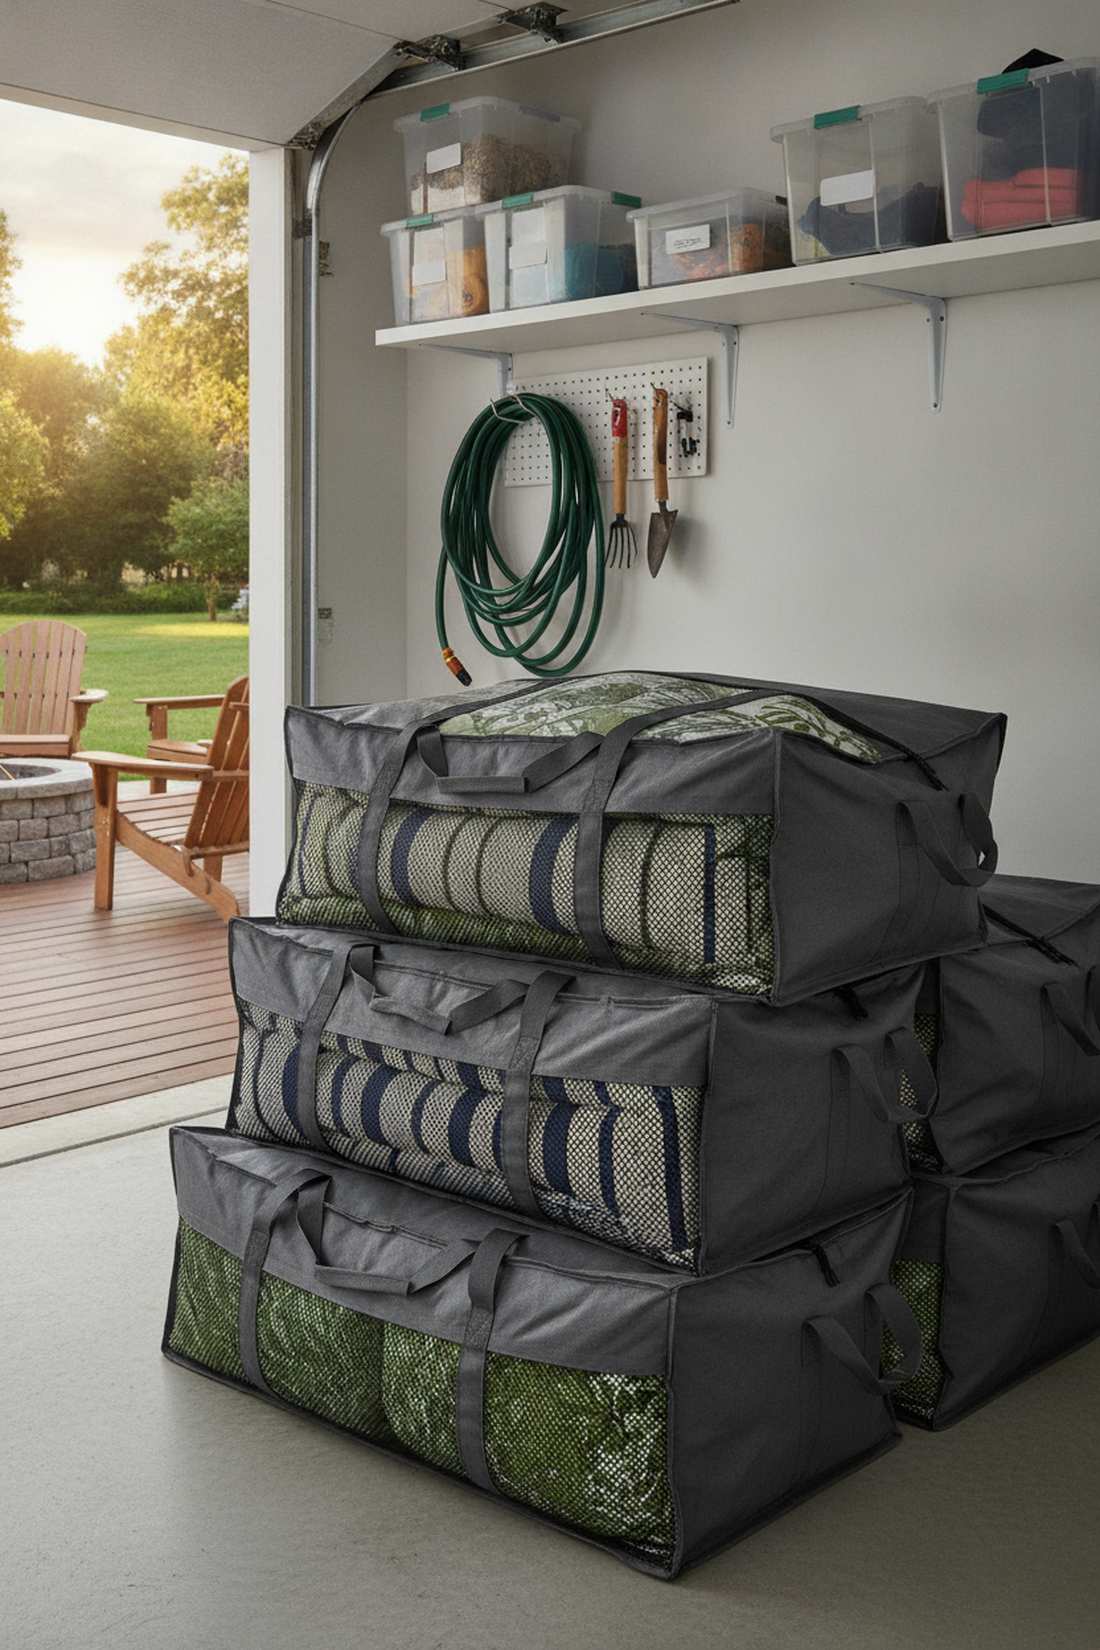
Tucking your soft goods into a ventilated mega-tote bag feels incredibly satisfying and organized. It keeps aggressive mice, spiders, and gross mildew away from your beautiful garden furniture cushions while stored in the garage.
Leaving pillows in a pile guarantees they get ruined, but structured storage bags deliver a surprisingly premium level of fabric care. Hoarding high-quality seasonal protection accessories saves hundreds in replacement costs every spring.
Massive storage totes cost about $30–$60 each. Pin this to your garage organization and patio care board!
- Key Materials: Tear-proof oxford cloth, mesh ventilation strips
- Vibe / Style: Immaculate garage organization
- Difficulty: Fast zip-and-store
- Budget Breakdown: Large tote bag: $40 | Fabric freshener: $8.
- Creator’s Tip: Wash and completely bone-dry the cushions before bagging them; even 1% moisture will turn into a massive mold colony.
- Smart Sourcing: Pick up heavy-duty cushion storage bags (bulk pack) and mildew-resistant fabric spray.
30. Furniture Protective Covers
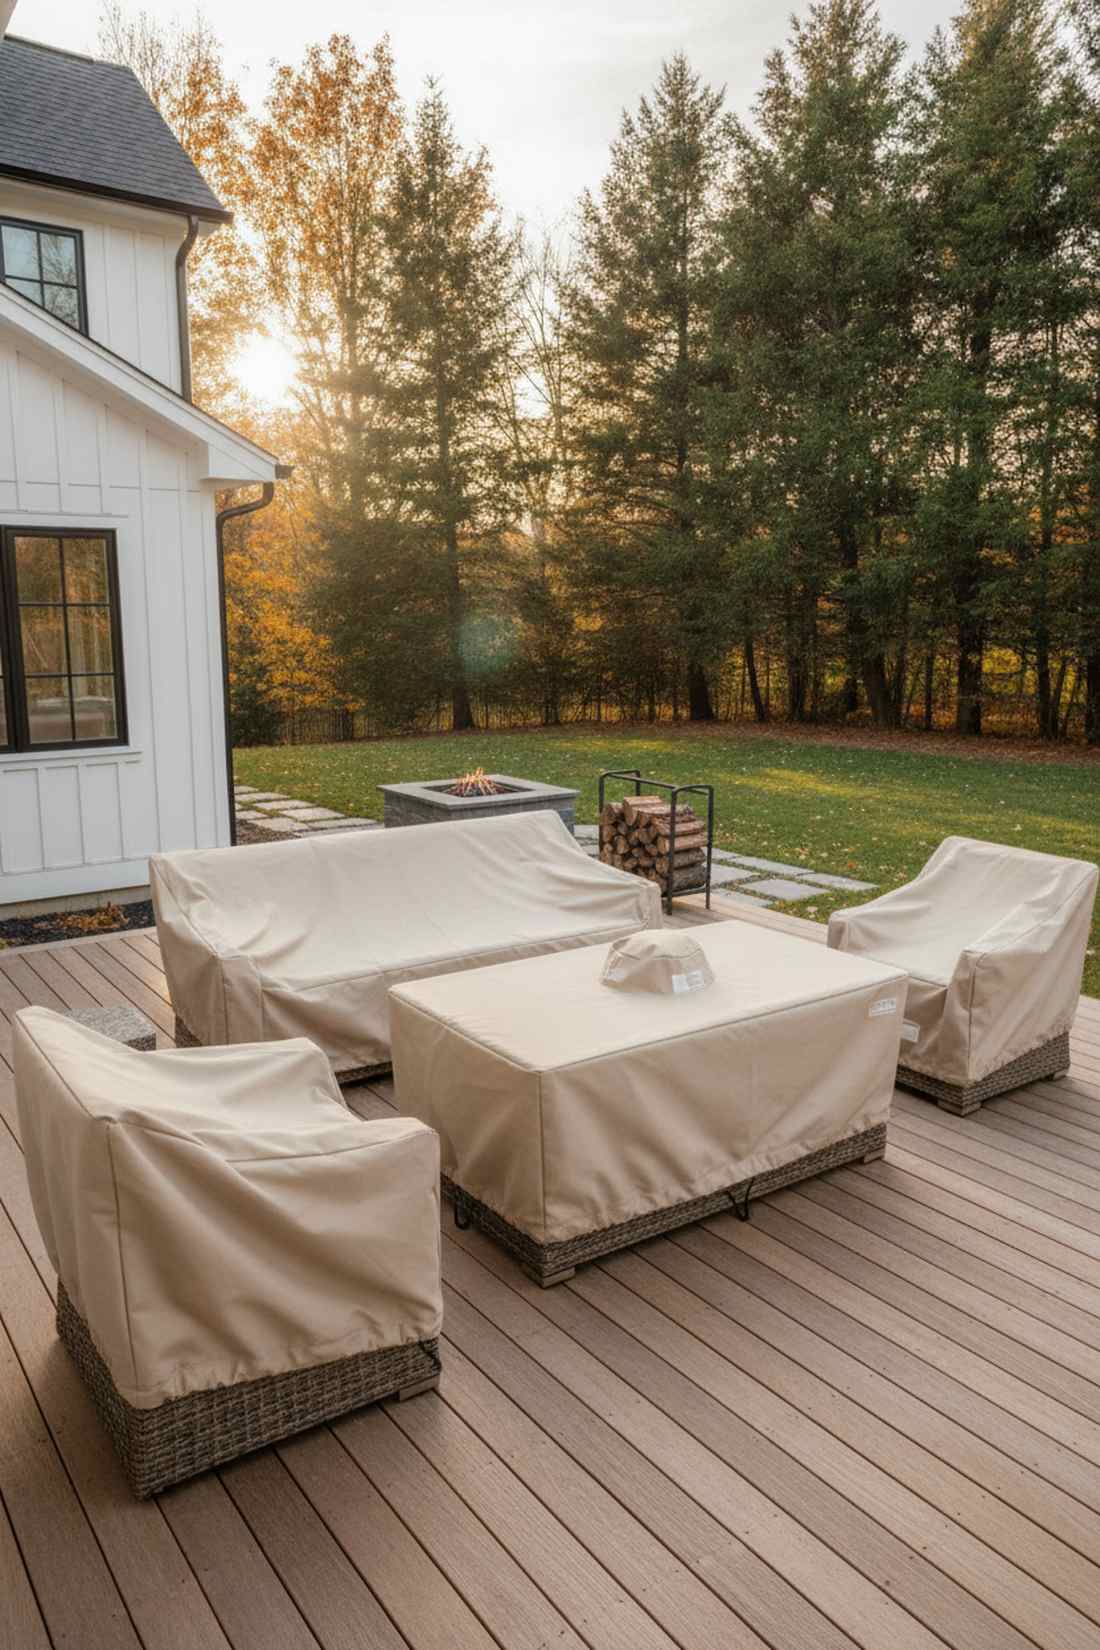
Draping custom-cinched tarp cloaks over your entire dining or lounge set feels like tucking your patio into bed. It blocks brutal UV rays, heavy snow, and destructive bird droppings from destroying your expensive woven wicker.
Generic blue tarps look like a construction zone, but tailored beige covers look far more expensive and intentional. Investing in fitted garden furniture accessories ensures your outdoor living room survives the harshest blizzards.
A full set of covers ranges from $100–$250 depending on the layout. It’s the ultimate insurance policy for your patio.
- Key Materials: UV-coated marine canvas, adjustable bungee hems
- Vibe / Style: Tailored off-season protection
- Difficulty: Simple drape and cinch
- Budget Breakdown: Sofa/Table covers: $150 | Water-shedding poles: $30.
- Creator’s Tip: Place an inflated beach ball under the center of the table cover to create a tent peak so heavy rain rolls right off.
- Smart Sourcing: Grab UV-coated custom furniture covers (starter kits) and cover support poles (pre-cut).
You’re losing money every year if you skip these final two maintenance routines…
31. Umbrella Cleaning Maintenance Kits
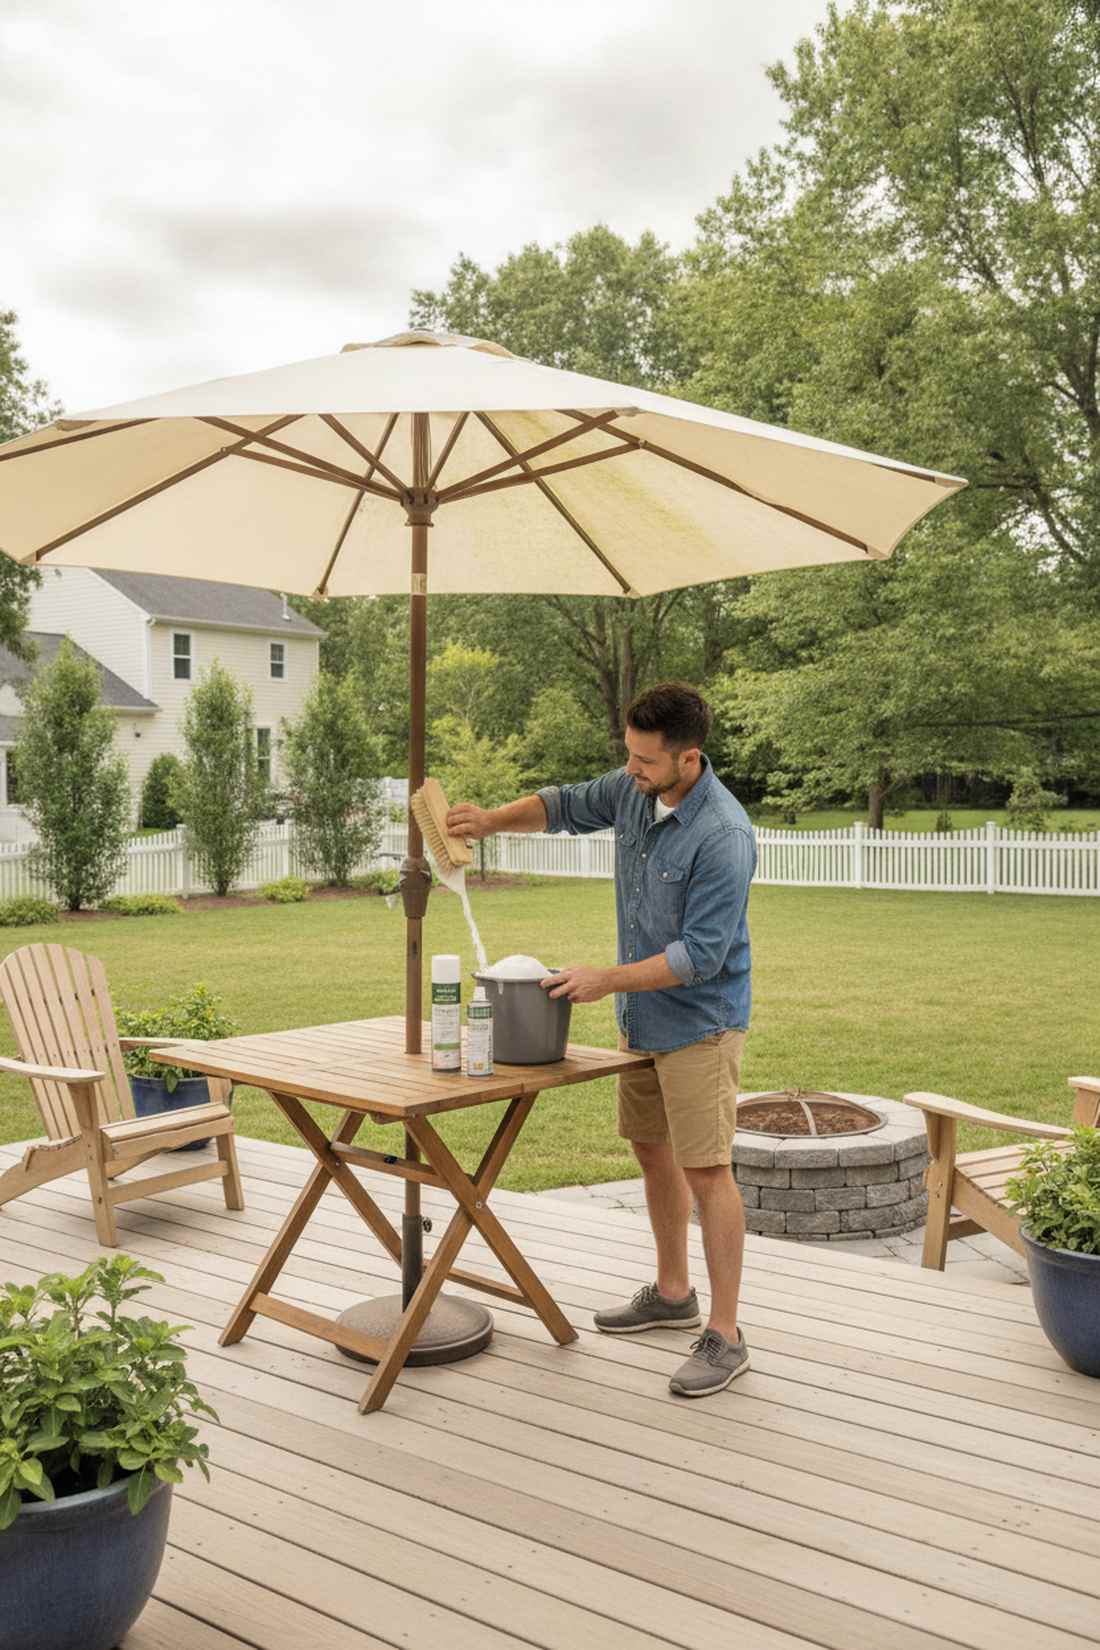
Scrubbing your canvas with a specialized soft-bristle fabric detailing set feels incredibly refreshing and restorative. It strips away layers of sticky pollen, dirt, and mildew, bringing the vibrant original color back to life.
Using harsh bleach destroys the fabric fibers, but an enzyme-based fabric cleaner gives a designer-level finish that looks brand new. Incorporating professional-grade cleaning hardware extends the lifespan of your setup massively.
A complete fabric care kit costs a minimal $20–$40. Save this cleaning hack for your spring patio prep!
- Key Materials: Horsehair brush, enzyme-based fabric shampoo
- Vibe / Style: Crisp like-new restoration
- Difficulty: Requires some elbow grease
- Budget Breakdown: Enzyme cleaner: $18 | Soft brush: $12.
- Creator’s Tip: After deep cleaning and drying, always spray the canopy heavily with a fabric water-repellent to restore its factory waterproofing.
- Smart Sourcing: Use enzyme fabric cleaner kits and waterproofing aerosol shield (bulk pack).
32. Rust-Prevention Treatments
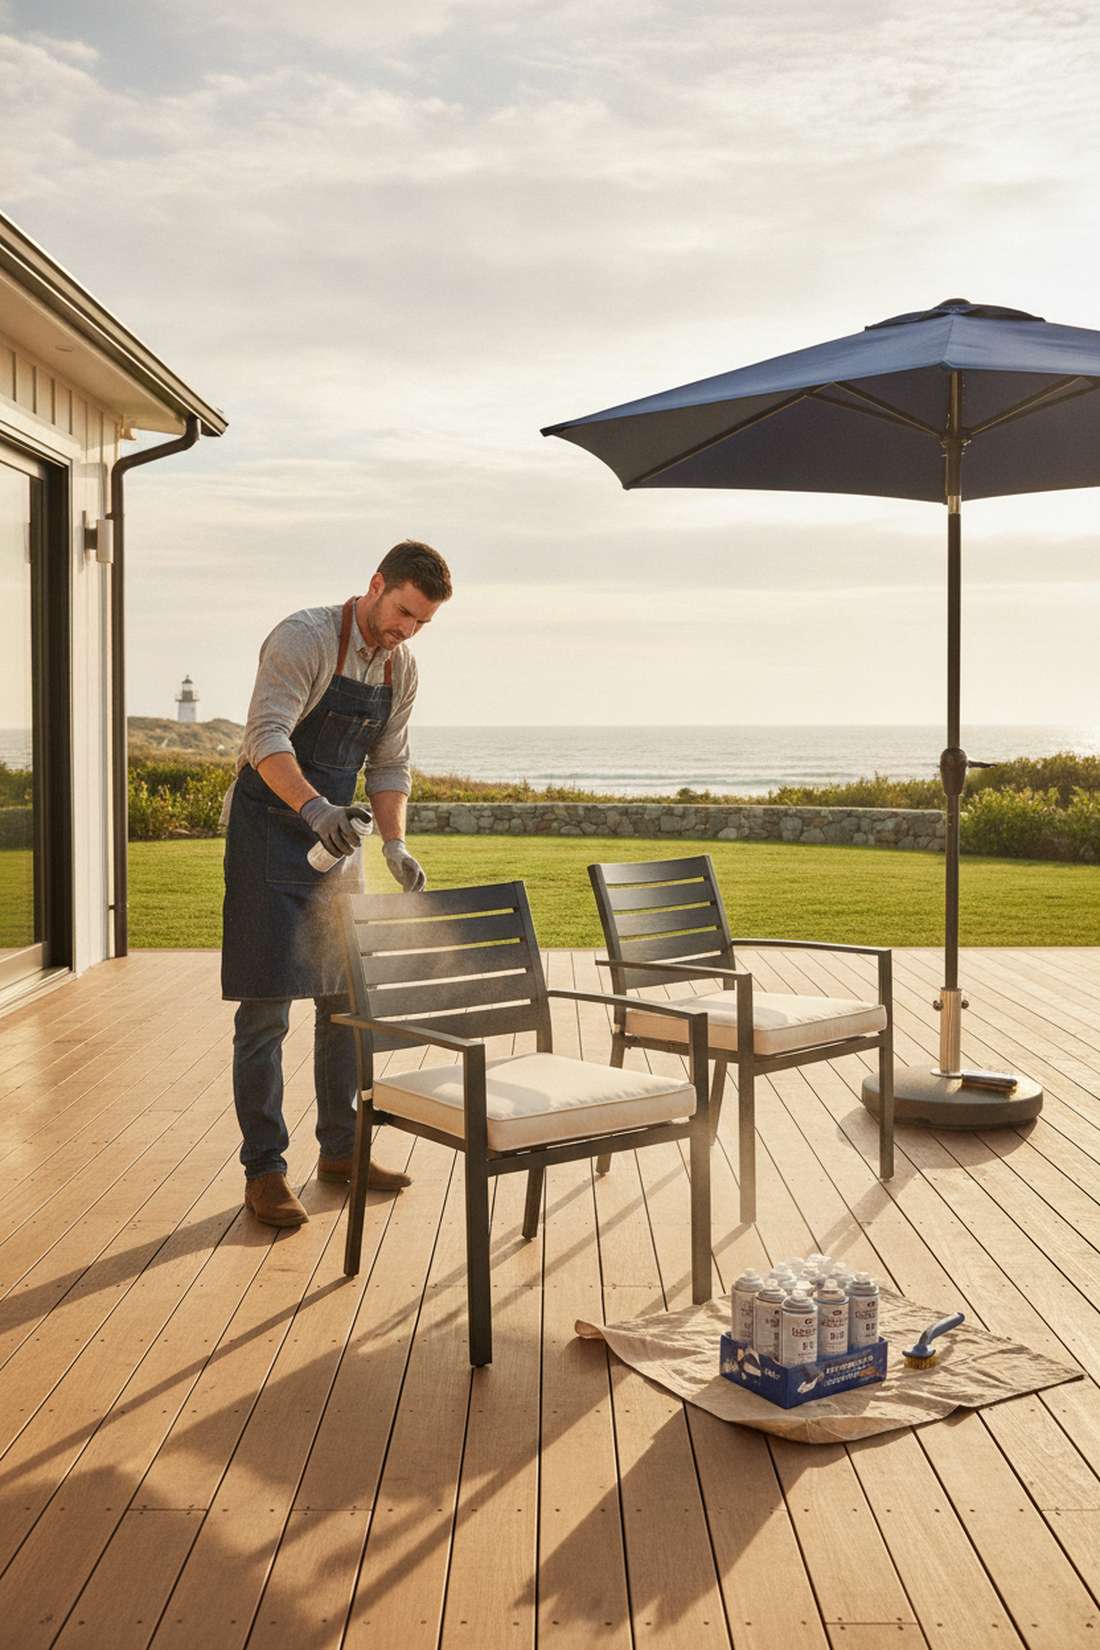
Coating your metal frames with a clear preventative sealant spray feels like putting an invisible shield on your expensive hardware. It stops ugly orange oxidation dead in its tracks, which is vital for humid or salty coastal climates.
Most people just watch their chairs rust away, but a proactive clear-coat gives a surprisingly premium lifespan to cheap metals. Securing your investment with heavy-duty metal care supplies is the ultimate smart-money move.
A few cans of top-tier sealant only cost $15–$30. It’s a 10-minute chore that saves you hundreds.
- Key Materials: Clear enamel rust-stopping spray, wire prep brush
- Vibe / Style: Flawless long-term durability
- Difficulty: Very easy spray application
- Budget Breakdown: Clear enamel spray: $15 | Wire brush: $5.
- Creator’s Tip: Spray the inside of the umbrella pole and the metal base screw threads, as these hidden spots are where rust always starts first.
- Smart Sourcing: Opt for rust-stopping clear enamel (bulk pack) and a wire prep-brush starter kit.
Bringing It All Together
Selecting the perfect garden furniture umbrella and building out the ultimate patio setup requires mixing high-end aesthetics with hyper-smart sourcing. By implementing these 32 exact material upgrades, UV-coated cushions, and protective systems, you instantly elevate your backyard into a luxury resort experience. Stop wasting money on cheap replacements; invest in the right base kits, heavy-duty fabrics, and smart accessories to ensure your outdoor living space looks expensive and lasts for years.
Frequently Asked Questions
What size garden furniture umbrella do I need for my patio table?
To achieve that high-end resort look without skimping on shade, add 2 feet to your table diameter. A 42-inch round table pairs beautifully with a 7.5-foot canopy, while premium 60-inch dining setups require 9-foot canopies. Sourcing an oversized UV-coated umbrella starter kit ensures your guests stay perfectly cooled and protected.
How much weight does my umbrella base need?
Never under-weight your base! You need a strict minimum of 50 pounds per 7.5 feet of canopy. A 9-foot canopy demands a heavy-duty 60-pound base, while an 11-foot model requires 75+ pounds. For offset models, buy a high-capacity cantilever weight starter kit to counteract the massive leverage forces safely.
What is the best material for outdoor furniture cushions?
For a designer-level finish that won’t fade, 100% solution-dyed acrylic (like Sunbrella) is the absolute gold standard for premium garden furniture cushions. If you’re on a tighter budget, look for pre-cut Olefin cushion fabric starter kits—they offer fantastic water resistance and vibrant colors at a fraction of the high-end cost.
Can I leave my garden furniture umbrella open overnight?
Absolutely not—leaving it open is the number one reason patio gear gets destroyed. Unexpected midnight gusts will rip the canopy or snap the pole. Always crank it down and use a heavy-duty waterproof umbrella cover (bulk pack) to protect the fabric from morning dew, UV rot, and sudden storms.
How do I clean mildew from outdoor cushions?
For high-end acrylic fabrics, mix one cup of bleach per gallon of water with a squirt of mild dish soap, scrub with a soft-bristle brush kit, and rinse heavily. For cheaper Olefin or polyester garden furniture cushions, skip the bleach to prevent color loss and use an enzyme-based outdoor fabric cleaner kit instead.
What accessories work best with garden furniture fire pits?
To make your garden furniture with fire pit setup look like a $10,000 installation, invest in heat-tempered reflective fire glass beads instead of cheap fake logs. Pair that with a tempered glass wind guard kit to stop flames from blowing out, and use custom-templated flame-resistant cushions for safe, luxurious seating.