Perfecting indoor outdoor living demands flawless architectural transitions and smart styling. We reveal exact premium material sourcing and builder-grade setup blueprints. Achieve a custom high-end aesthetic without overspending.
Design Snapshot: Key Principles
- Continuity of Materials: Extend flooring materials or match visual characteristics across the threshold to eliminate jarring breaks
- Level Matching: Align indoor and outdoor floor heights to create smooth passage and maximize door retraction
- Door Selection: Choose opening systems that disappear or minimize frames to preserve sightlines and airflow
- Weather Durability: Specify outdoor-rated materials with slip resistance and temperature tolerance for transition zones
Door Systems That Vanish
Doors define the quality of indoor outdoor spaces more than any other element. Architects favor systems that retract completely, eliminating barriers when weather permits while maintaining insulation when closed.
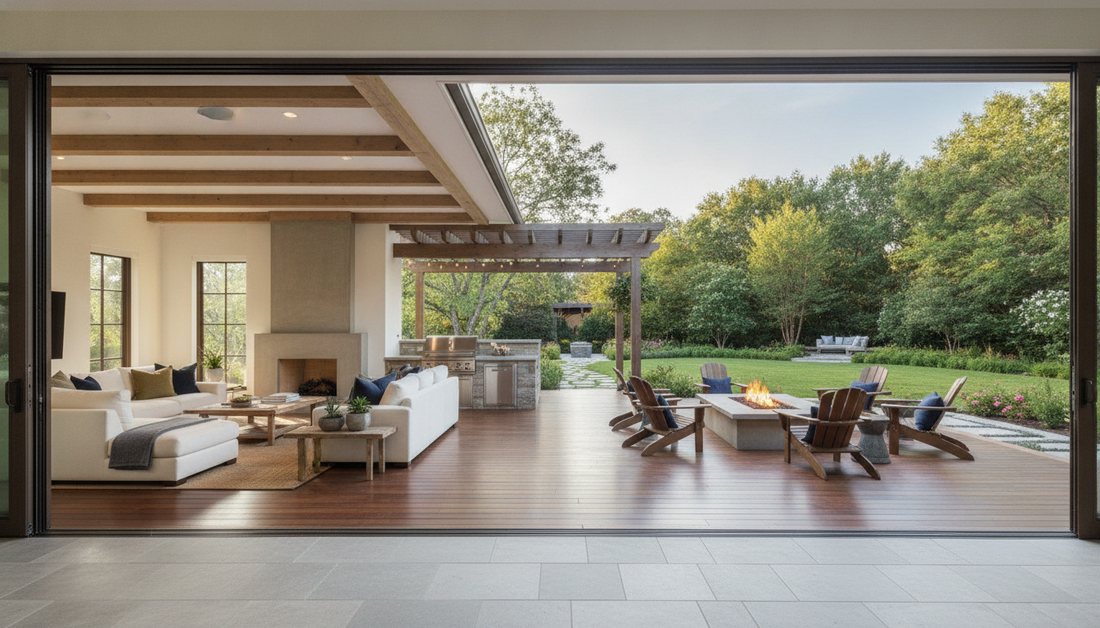
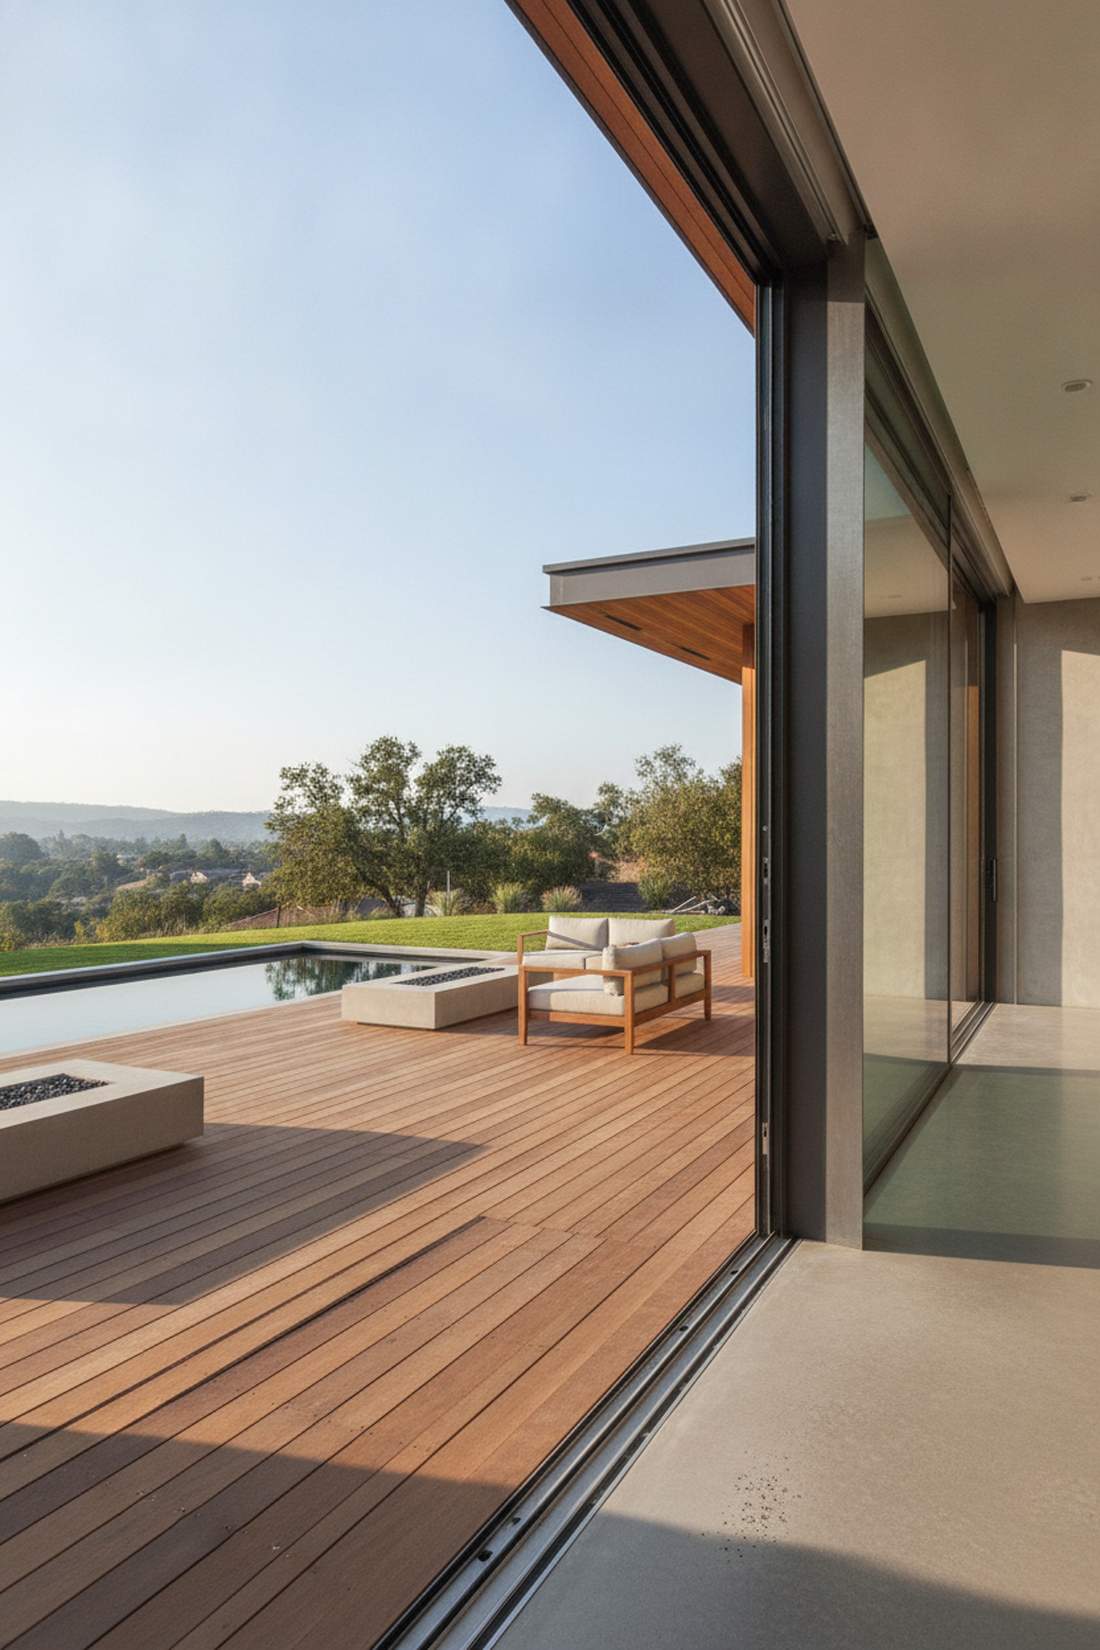
1. Multi-Panel Sliding Glass Walls
Feels like the entire room breathes freely. Open-concept glass wall designs work beautifully for large living rooms facing a spacious backyard patio.
Many assume these require a massive custom structural tear-out, but they are highly accessible. Installing modern commercial-grade architectural sliding glass systems delivers a breathtaking pavilion effect with minimal friction.
Expect to spend around $2,500–$8,000 depending on panel size. Pin this if you’re planning a massive spatial upgrade!
- Key Materials: Multi-track aluminum frames, tempered low-E glass panels
- Vibe / Style: Ultra-modern open pavilion
- Difficulty: Advanced professional install
- Budget Breakdown: Hardware: $1,500 | Glass & Labor: $4,500.
- Creator’s Tip: Ensure the top track header is structurally reinforced to prevent sagging over time.
- Smart Sourcing: Use heavy-duty sliding track hardware kits and pre-cut low-E glass panels.
2. Bifold Accordion Door Systems
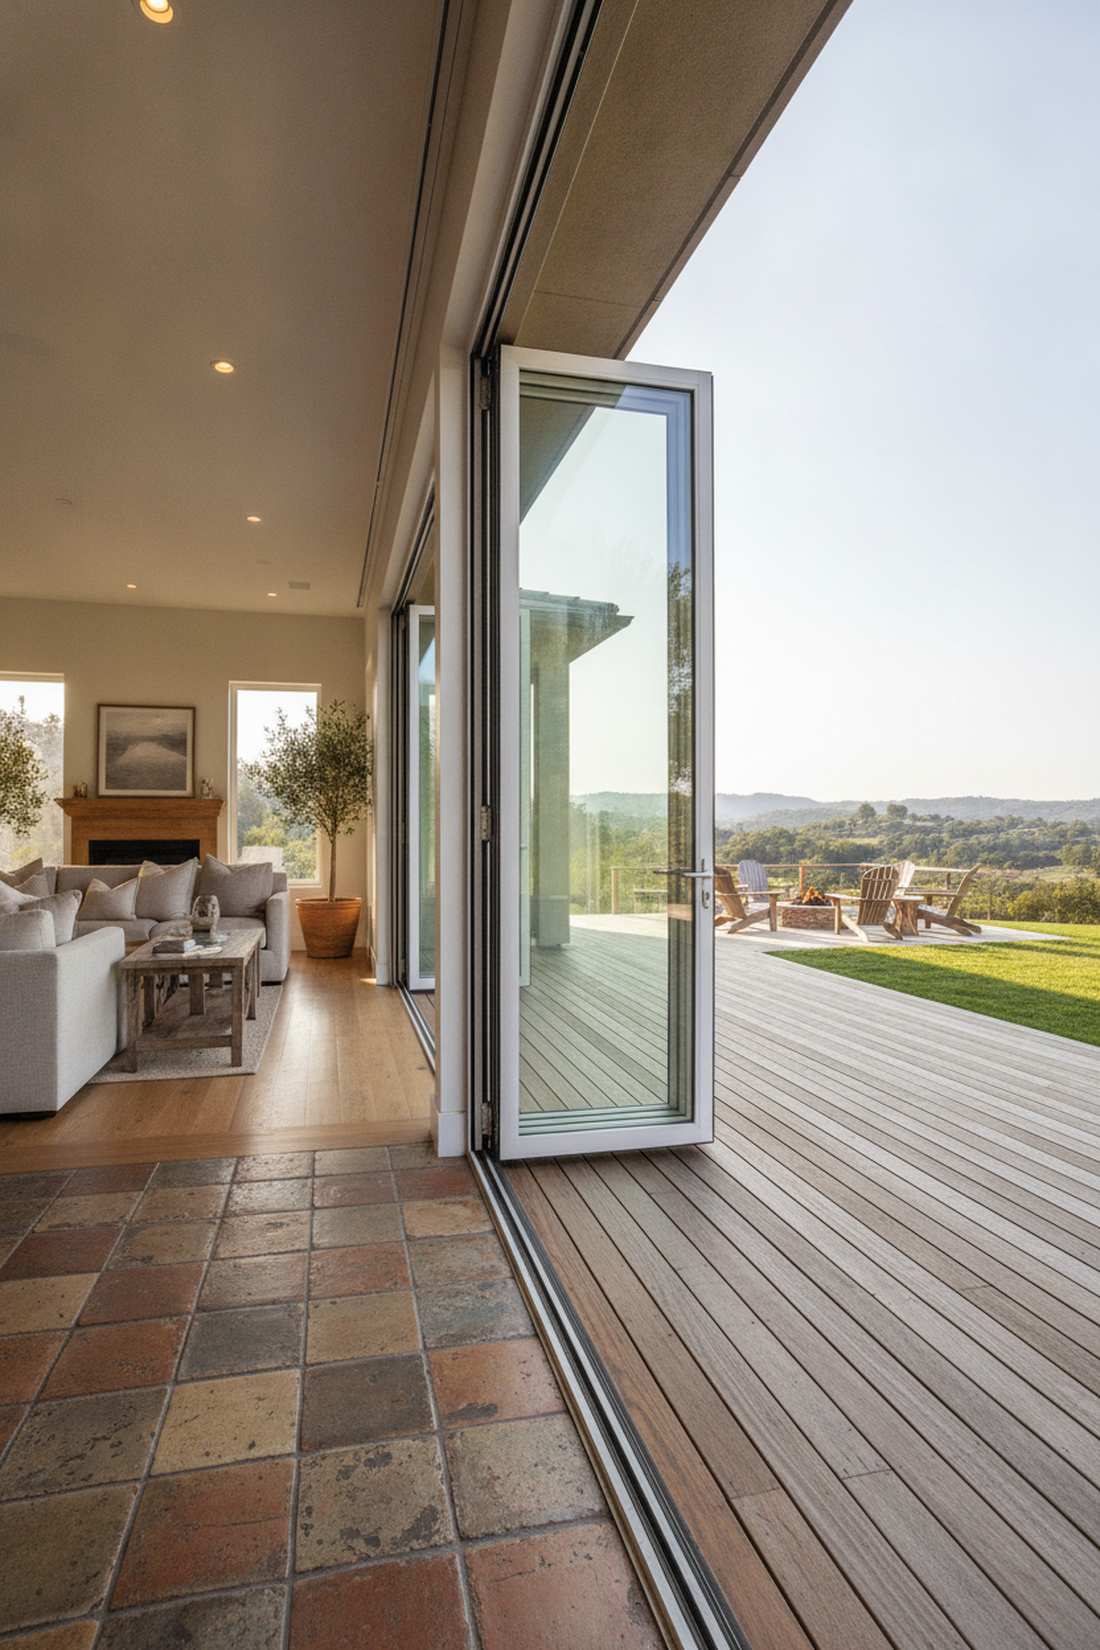
Gives a vibrant, airy café vibe straight out of a Mediterranean villa. Folding glass patio doors are perfect for maximizing airflow in tight wall spaces.
Skip traditional sliders that permanently block half your view. Securing weather-sealed folding door kits allows you to push the entire wall aside for an unfiltered breeze.
This premium upgrade usually runs between $3,000 and $10,000. It’s a striking investment that transforms the whole house.
- Key Materials: Concertina hinge hardware, weather-stripped panels
- Vibe / Style: Breezy European villa
- Difficulty: Advanced professional install
- Budget Breakdown: Panels: $2,500 | Hardware & Track: $1,500.
- Creator’s Tip: Always opt for top-hung systems rather than bottom-rolling to prevent debris jams.
- Smart Sourcing: Buy commercial-grade marine hinge sets (bulk pack) and UV-coated frame sealants.
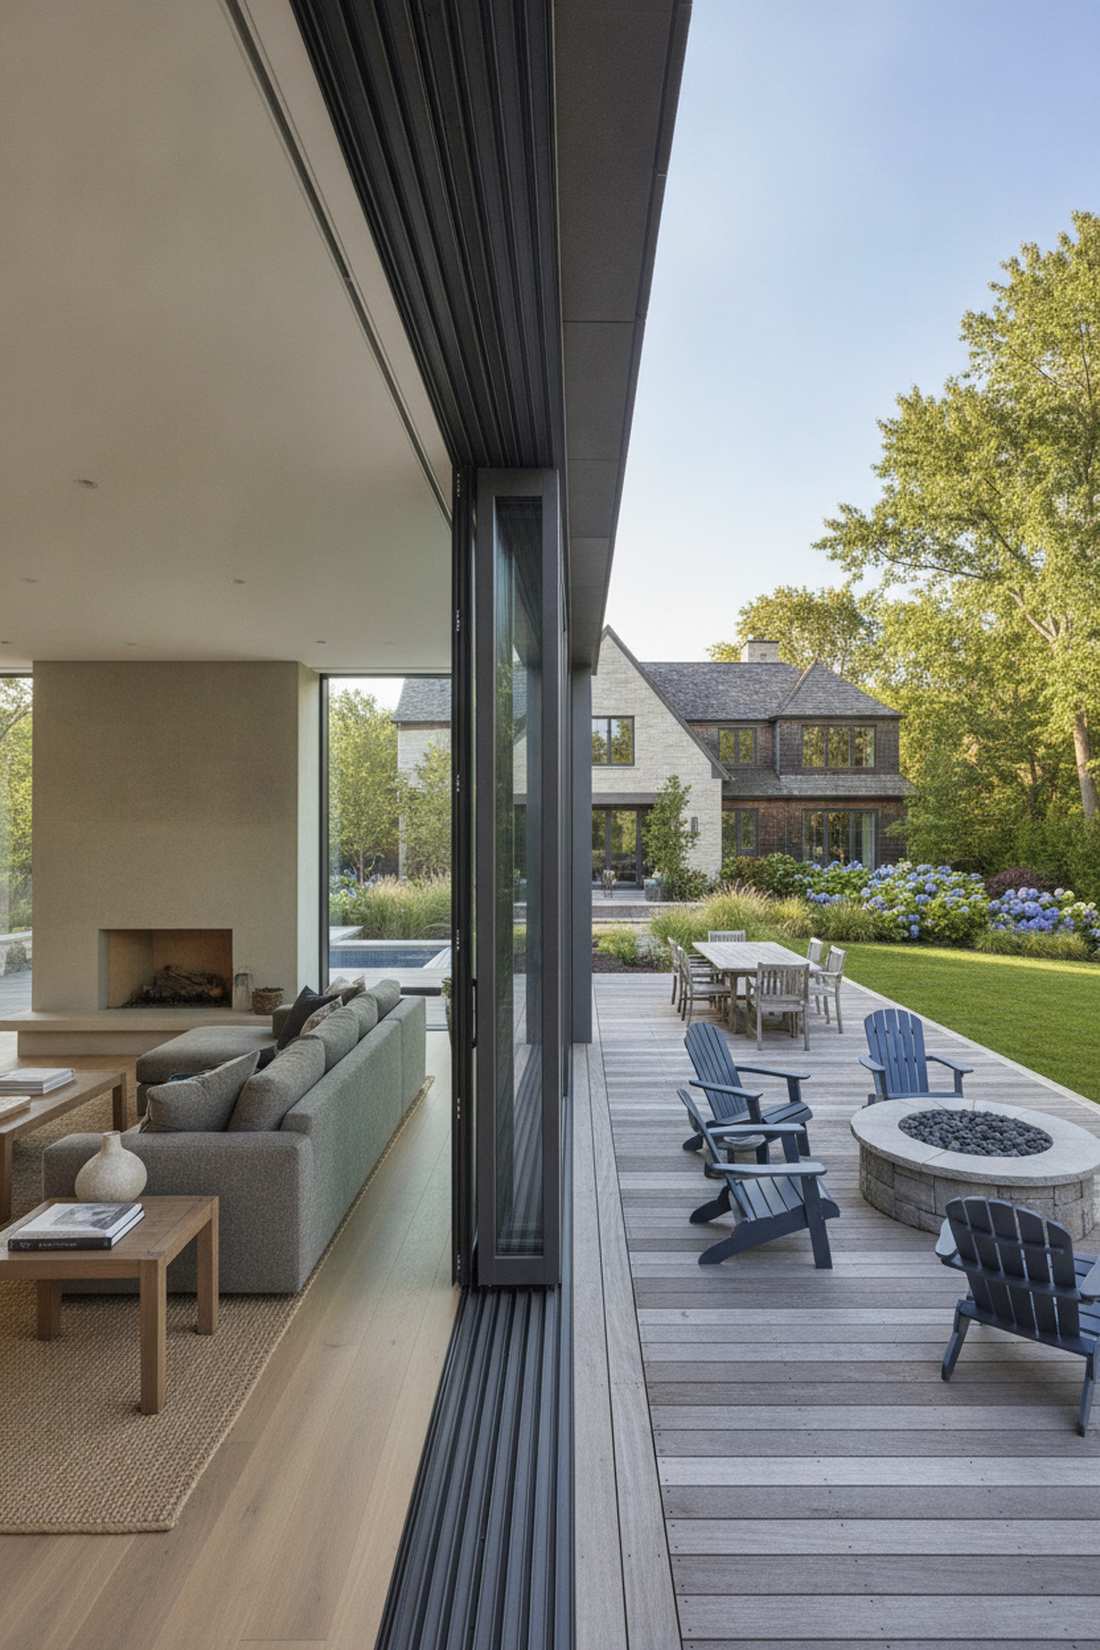
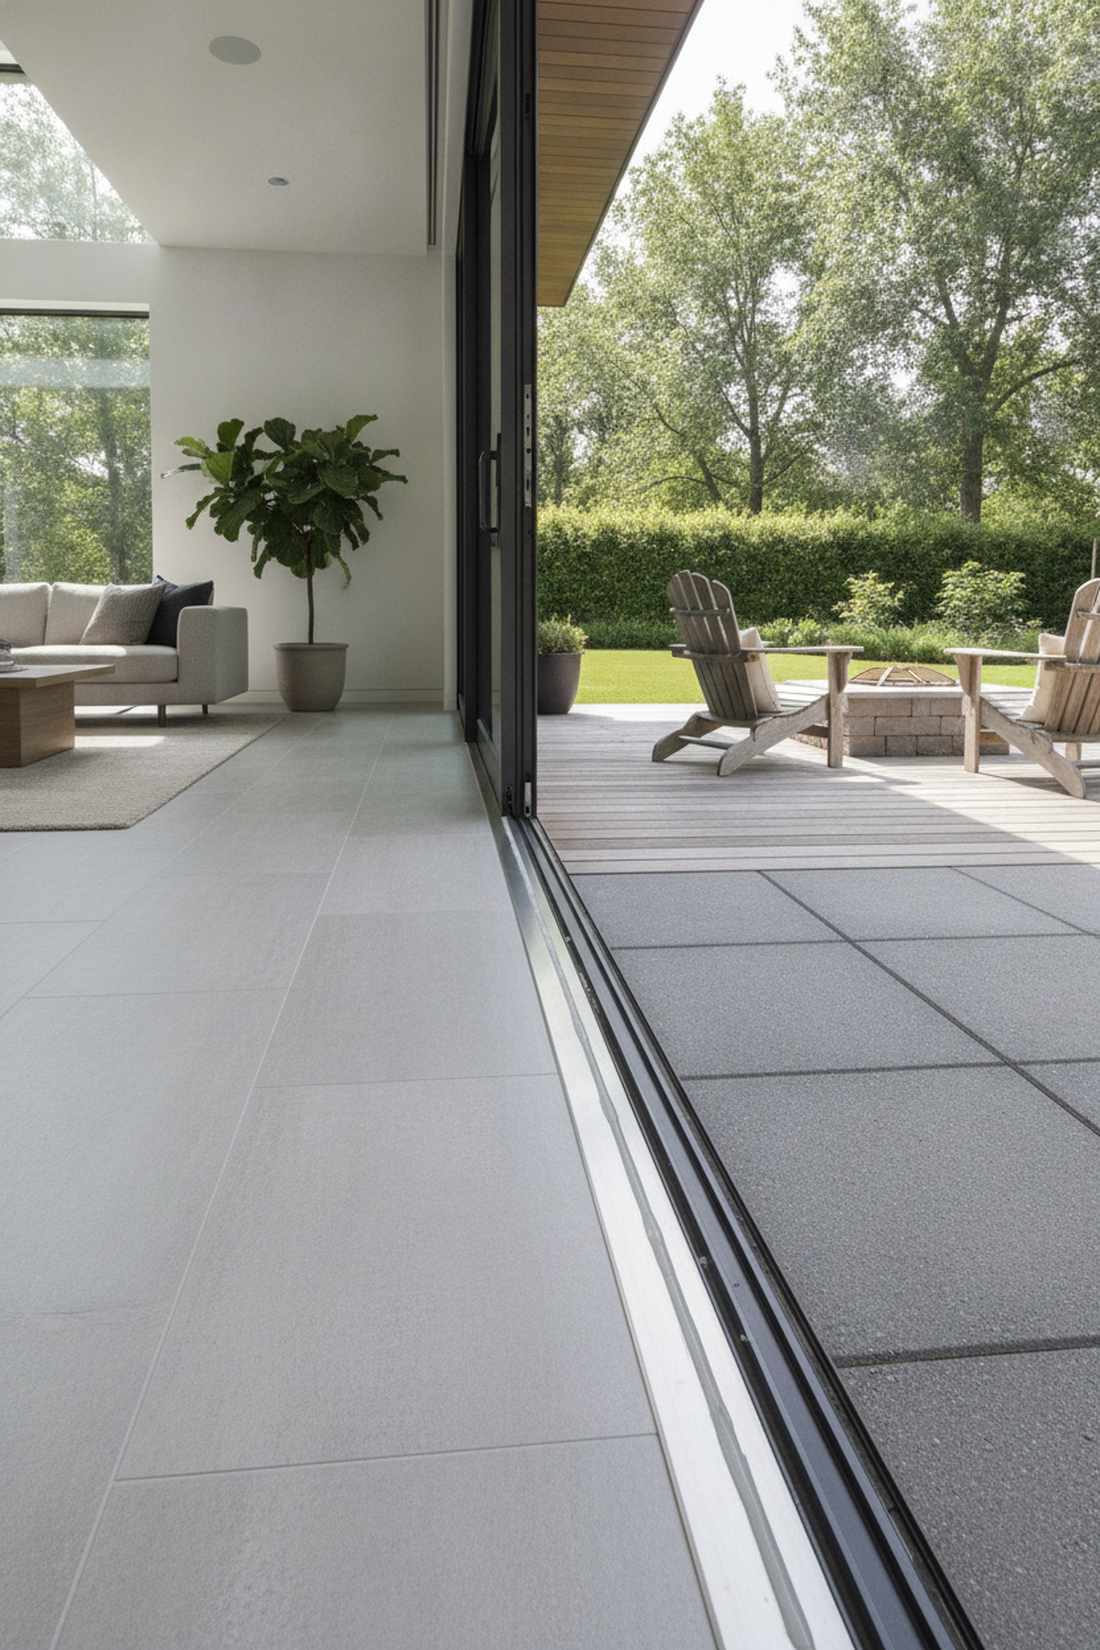
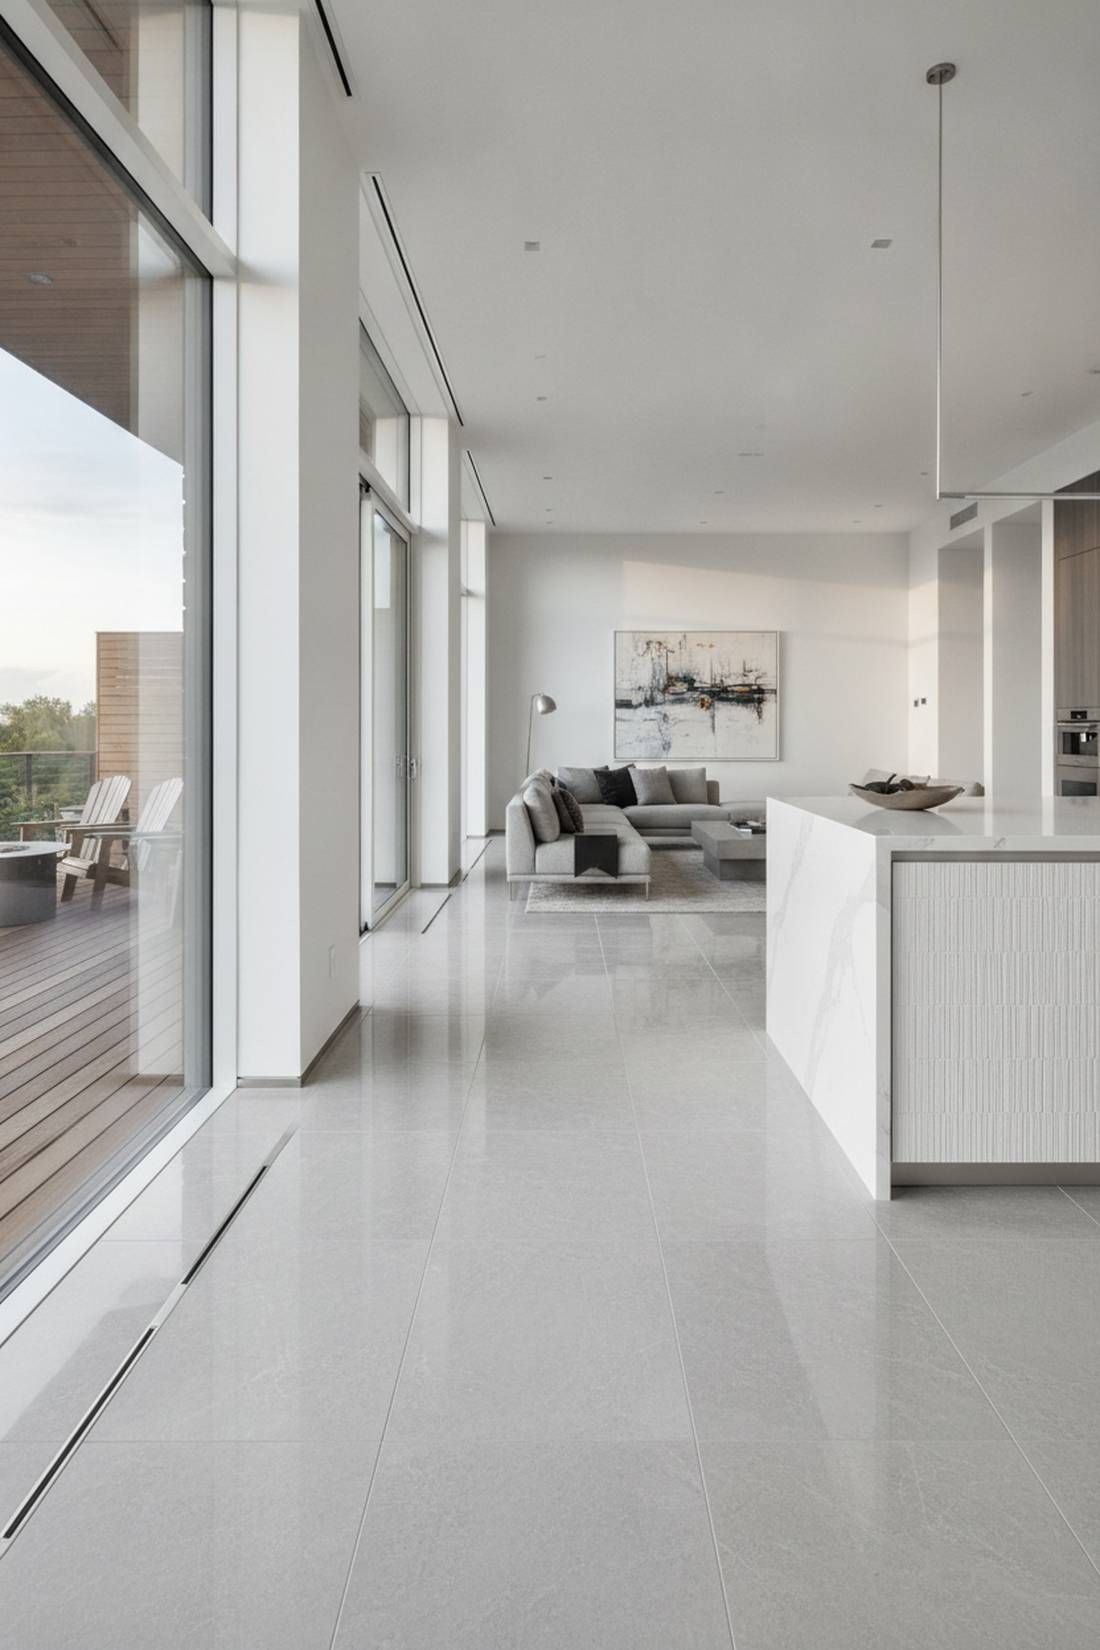
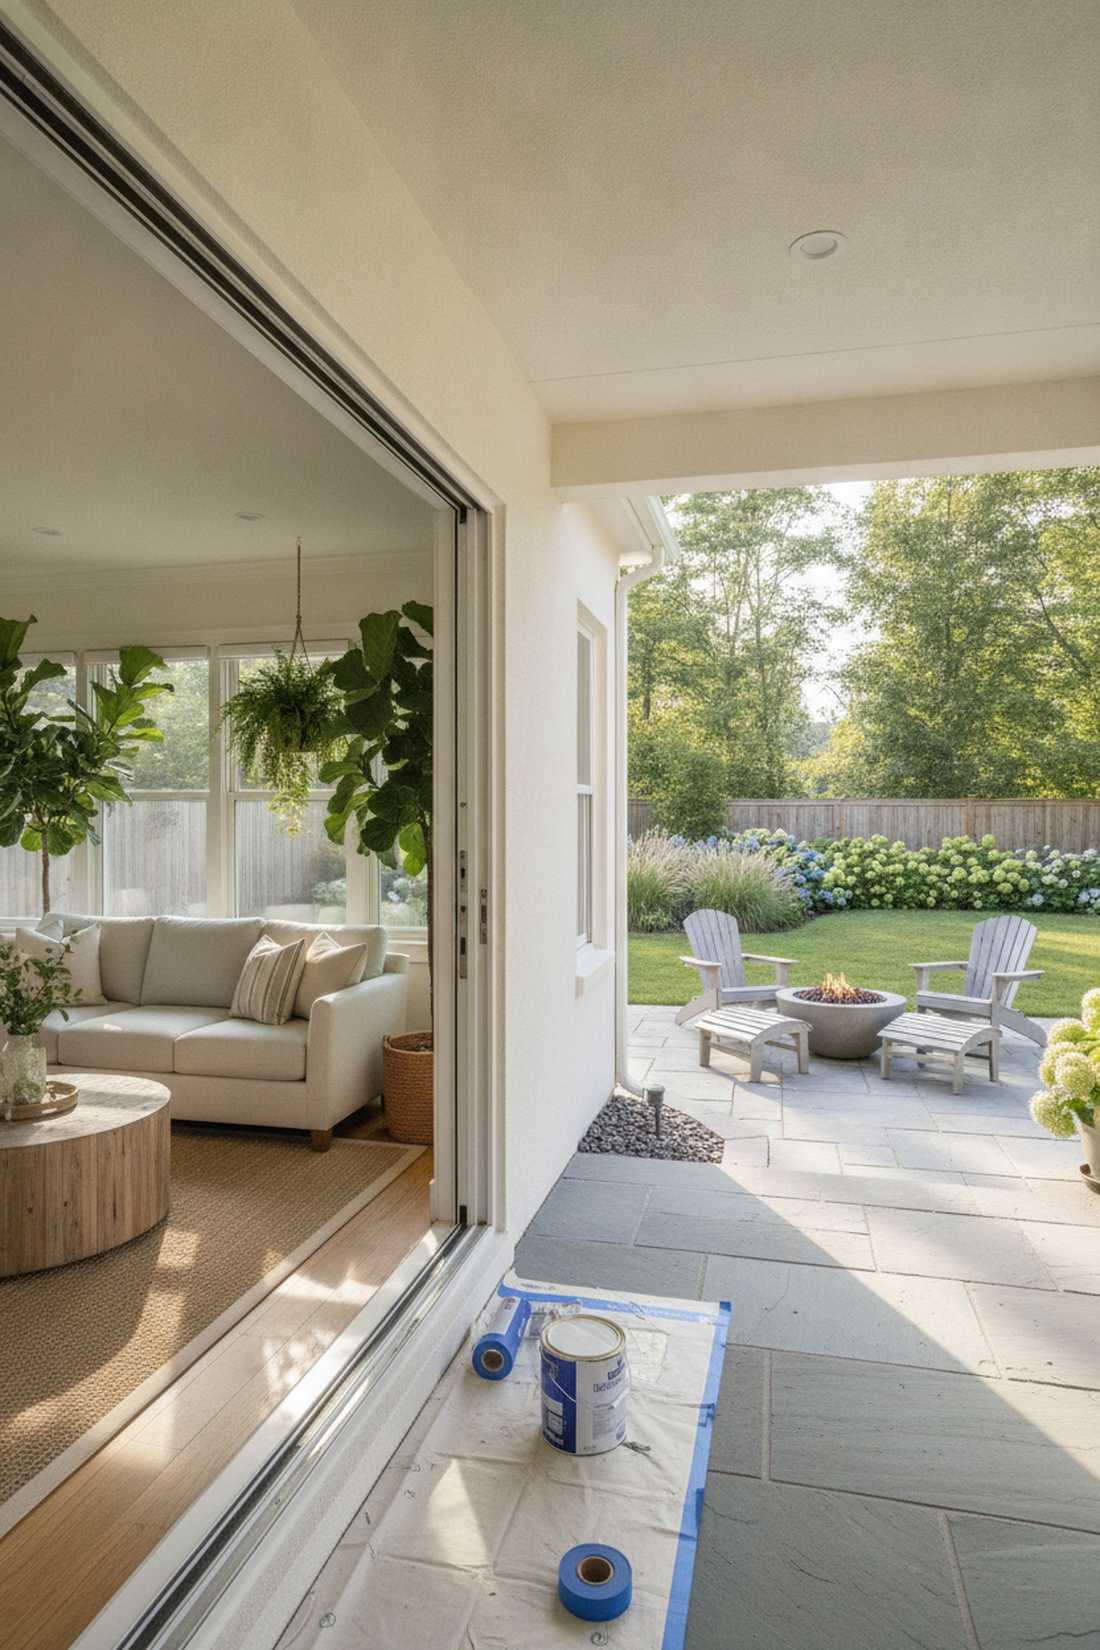
3. Flush Threshold Sliding Doors
Creates an invisible, zero-step boundary that feels almost magical. Flush floor sliding track setups are ideal for seamless, wheelchair-friendly backyard transitions.
The biggest mistake is laying the track over the finished floor, creating a tripping hazard. Sinking a heavy-duty recessed track frame directly into the subfloor gives a designer-level finish that naturally resists water pooling.
Professional installation typically costs $1,500–$4,000.
- Key Materials: Recessed U-channels, hidden drainage tracks
- Vibe / Style: Sleek seamless continuity
- Difficulty: Expert level
- Budget Breakdown: Subfloor Modification: $800 | Track System: $1,200.
- Creator’s Tip: Install a linear drain exactly parallel to the track to prevent storm flooding.
- Smart Sourcing: Get heavy-duty recessed floor tracks and pre-cut linear drain covers.
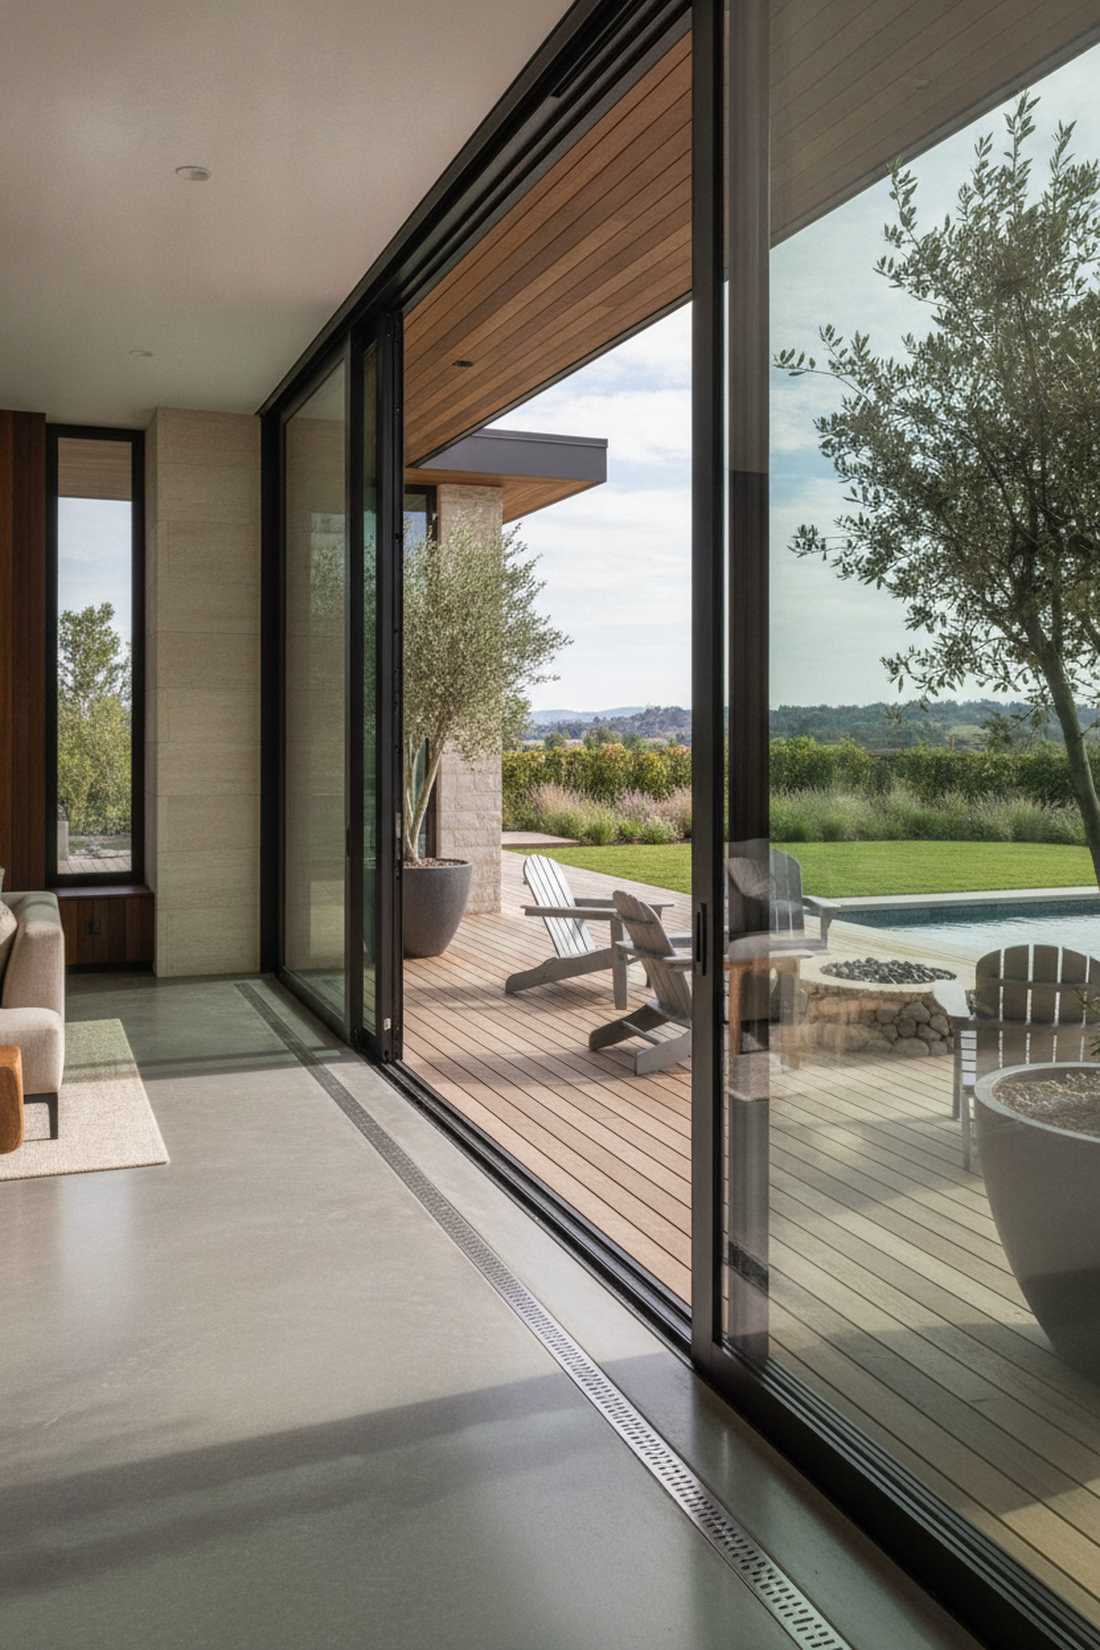
4. Pocket Door Openings
Looks incredibly sleek and feels like a hidden architectural secret. Disappearing exterior glass walls work exceptionally well for modern minimalist builds with thick exterior walls.
It completely challenges the norm of bulky stacked frames by hiding everything out of sight. Using steel-reinforced pocket door kits ensures heavy panels glide flawlessly into the drywall for decades.
Planning this structural shift costs roughly $2,000–$6,000. Save this to your dream home renovation board!
- Key Materials: Steel pocket frames, heavy-duty rollers
- Vibe / Style: Minimalist hidden architecture
- Difficulty: Expert framing required
- Budget Breakdown: Steel Framing: $1,000 | Door Hardware: $1,500.
- Creator’s Tip: Integrate soft-close dampeners to prevent massive glass panels from slamming into the wall cavity.
- Smart Sourcing: Look for heavy-duty steel pocket frame kits and soft-close roller hardware.
Most people get their exterior transitions completely wrong… until they try the exact layout coming up next.
5. Pivoting Glass Doors
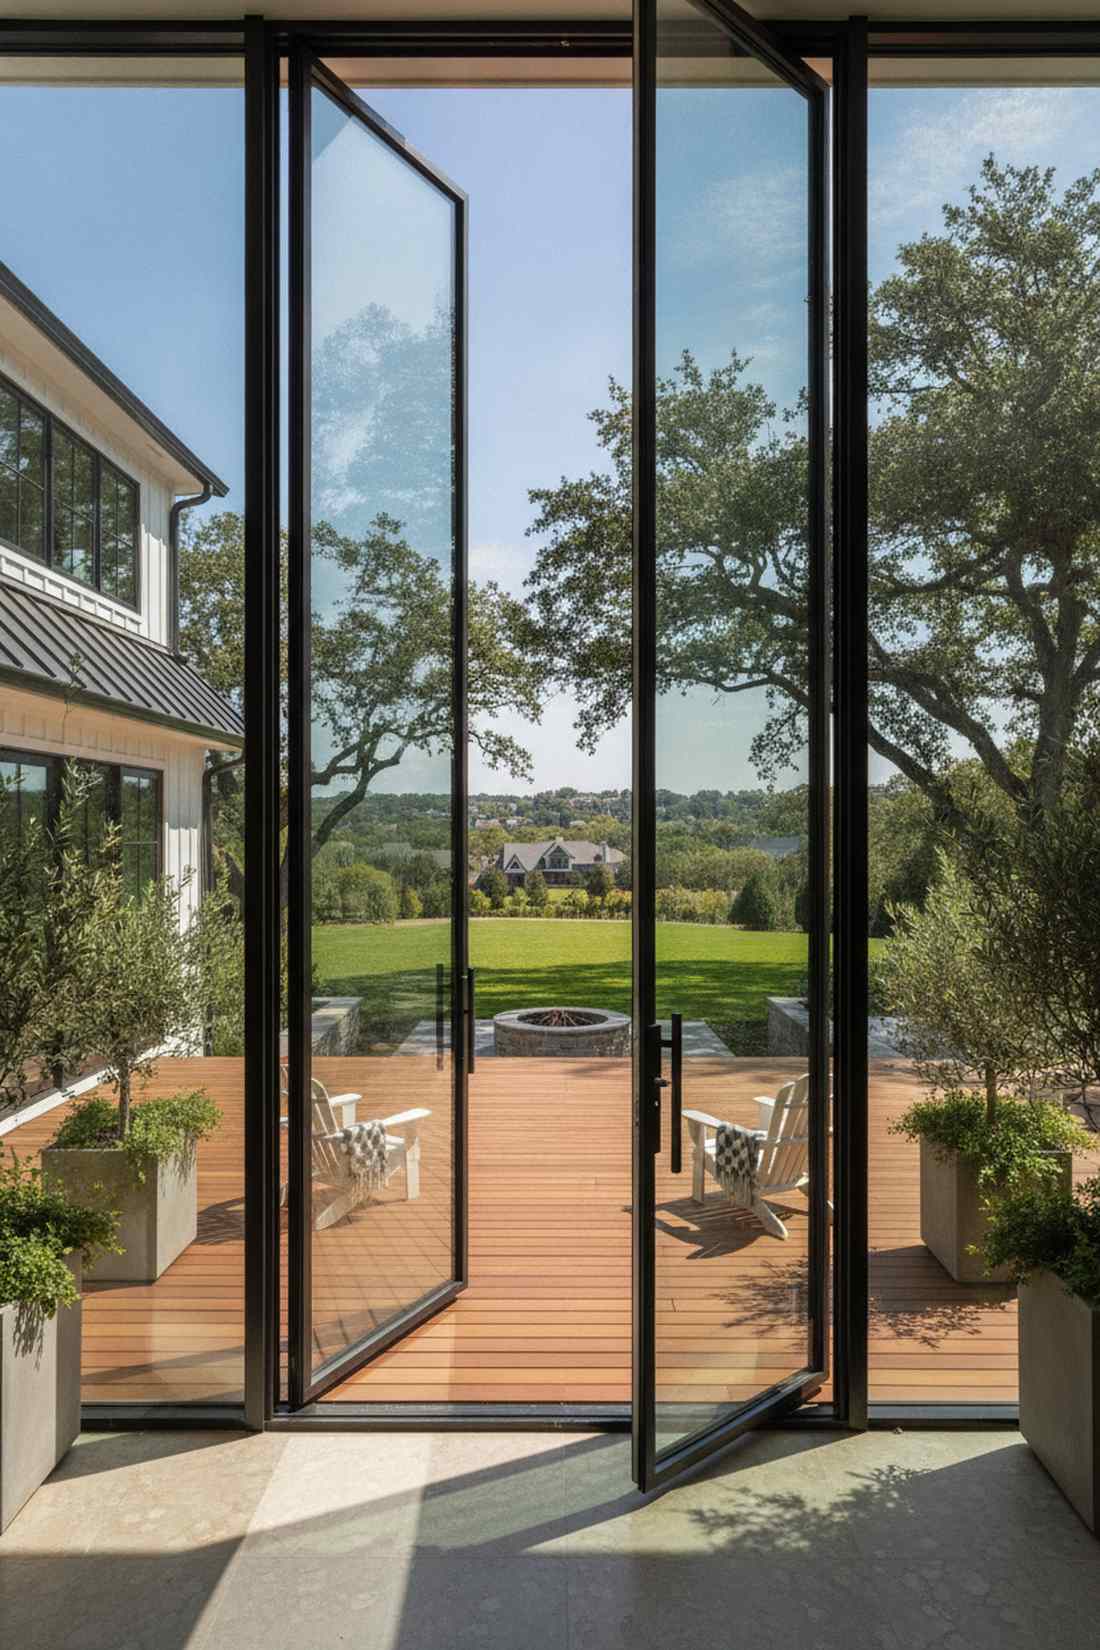
Brings a dramatic, museum-like entrance energy. Oversized pivot patio doors fit perfectly into grand central entryways leading to an expansive deck.
Forget standard side hinges that eventually warp under heavy glass weight. Opting for top-rated heavy-duty floor pivot hinges easily handles massive custom panels with effortless rotation.
Custom setups range from $4,000 to $12,000.
- Key Materials: Floor pivot boxes, oversized glass frames
- Vibe / Style: Dramatic grand entrance
- Difficulty: Advanced installation
- Budget Breakdown: Pivot Mechanism: $800 | Custom Glass: $3,500.
- Creator’s Tip: Ensure your floor substrate is heavily reinforced, as the entire door weight sits on a single point.
- Smart Sourcing: Invest in commercial-grade pivot hardware sets and weather-sealed threshold sweeps.
6. French Door Pairs
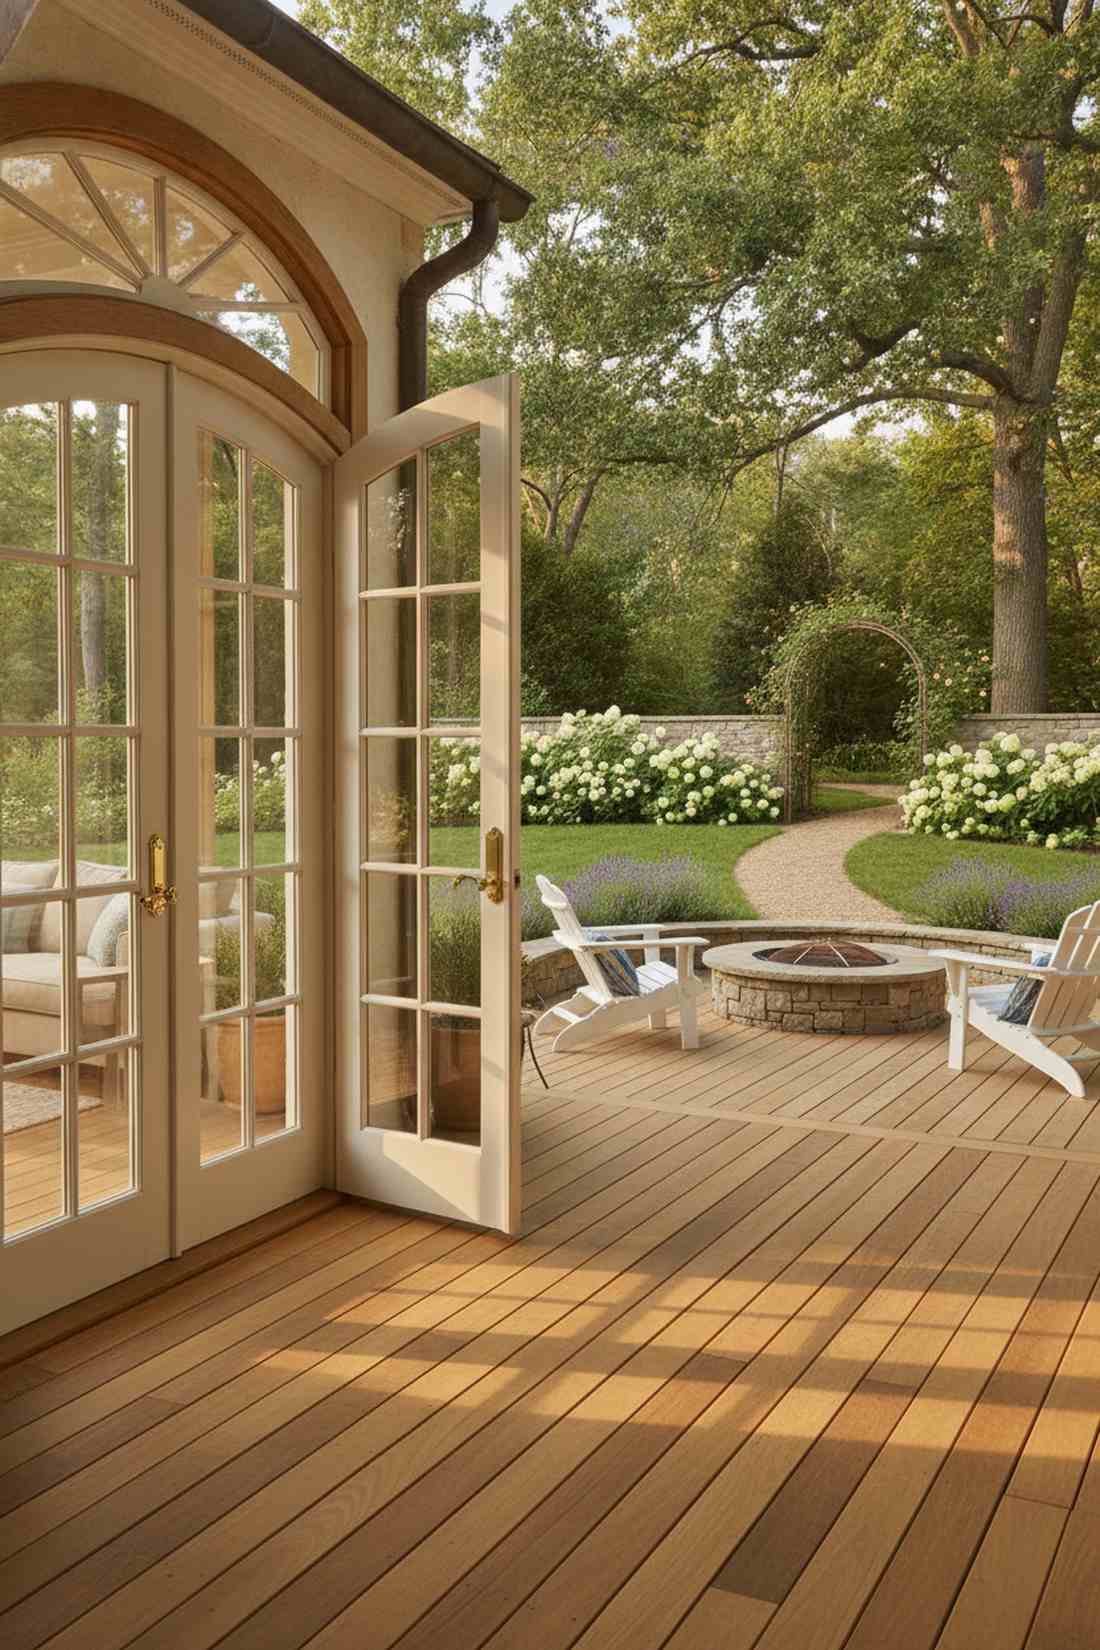
Carries a deeply romantic, classic estate aesthetic. Traditional double glass patio doors are highly recommended for historical homes or vintage garden renovations.
Homeowners often overspend on modern smart tech when classic symmetry does the trick perfectly. Fitting pre-hung exterior French door units with multi-point locks creates secure, beautiful boundaries.
You can complete this for around $800–$2,500. Pin this if you love a timeless estate aesthetic!
- Key Materials: Pre-hung wood/fiberglass doors, multi-point locks
- Vibe / Style: Timeless classic romance
- Difficulty: Intermediate DIY
- Budget Breakdown: Pre-hung Doors: $1,200 | Hardware: $300.
- Creator’s Tip: Use outswing configurations if you want to maximize your interior floor space.
- Smart Sourcing: Buy weather-stripped pre-hung door frames and brass multi-point locking sets.
7. Corner Opening Systems
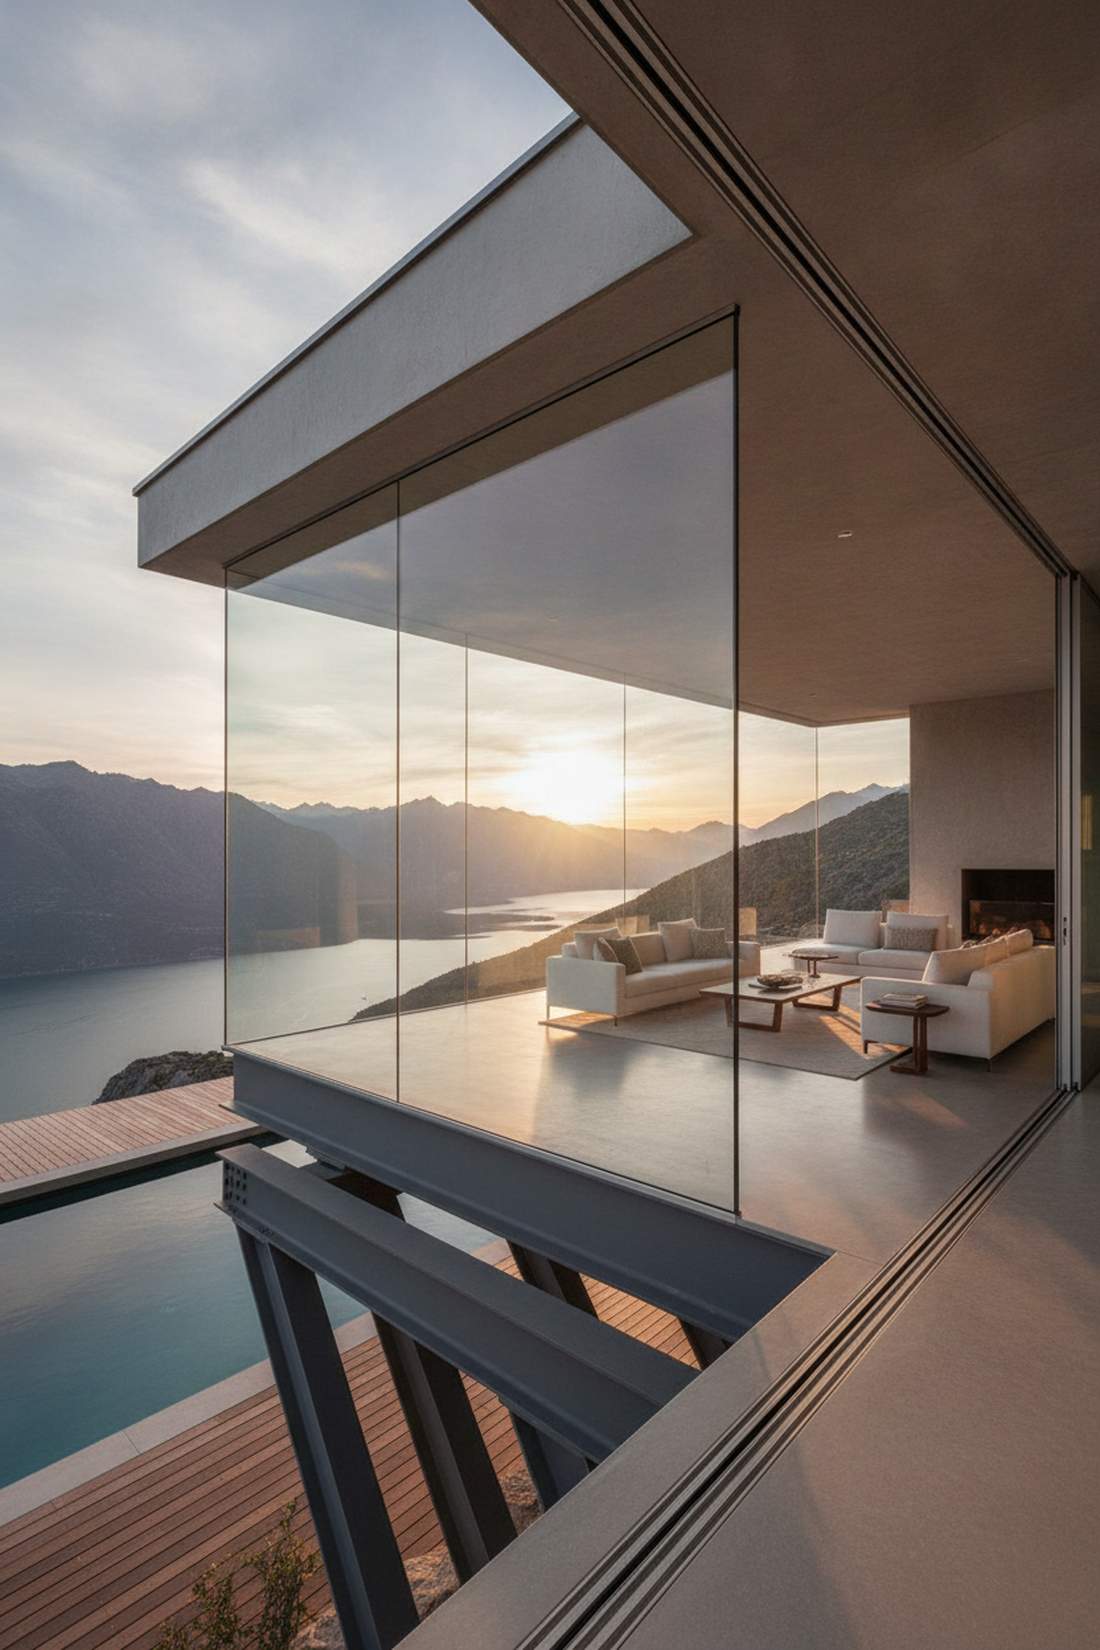
Completely erases the room’s edge, feeling wildly futuristic. Floating corner glass walls are breathtaking for properties overlooking wraparound panoramic views.
Removing a structural corner sounds terrifying, but it yields the highest visual ROI. Engineered cantilevered roof supports make it possible, drastically outperforming any standard flat-wall installation.
This luxury structural upgrade costs $10,000+.
- Key Materials: Cantilever steel beams, 90-degree interlocking weatherstripping
- Vibe / Style: Futuristic panoramic flow
- Difficulty: Structural engineering required
- Budget Breakdown: Engineering/Steel: $5,000 | Custom Doors: $6,000.
- Creator’s Tip: Coordinate heavily with a structural engineer before removing the corner post.
- Smart Sourcing: Use heavy-duty 90-degree weatherstripping (bulk pack) and premium track joiners.
Flooring Continuity Strategies
Flooring materials either reinforce separation or dissolve boundaries. Select materials that perform in both environments while maintaining a continuous visual line.
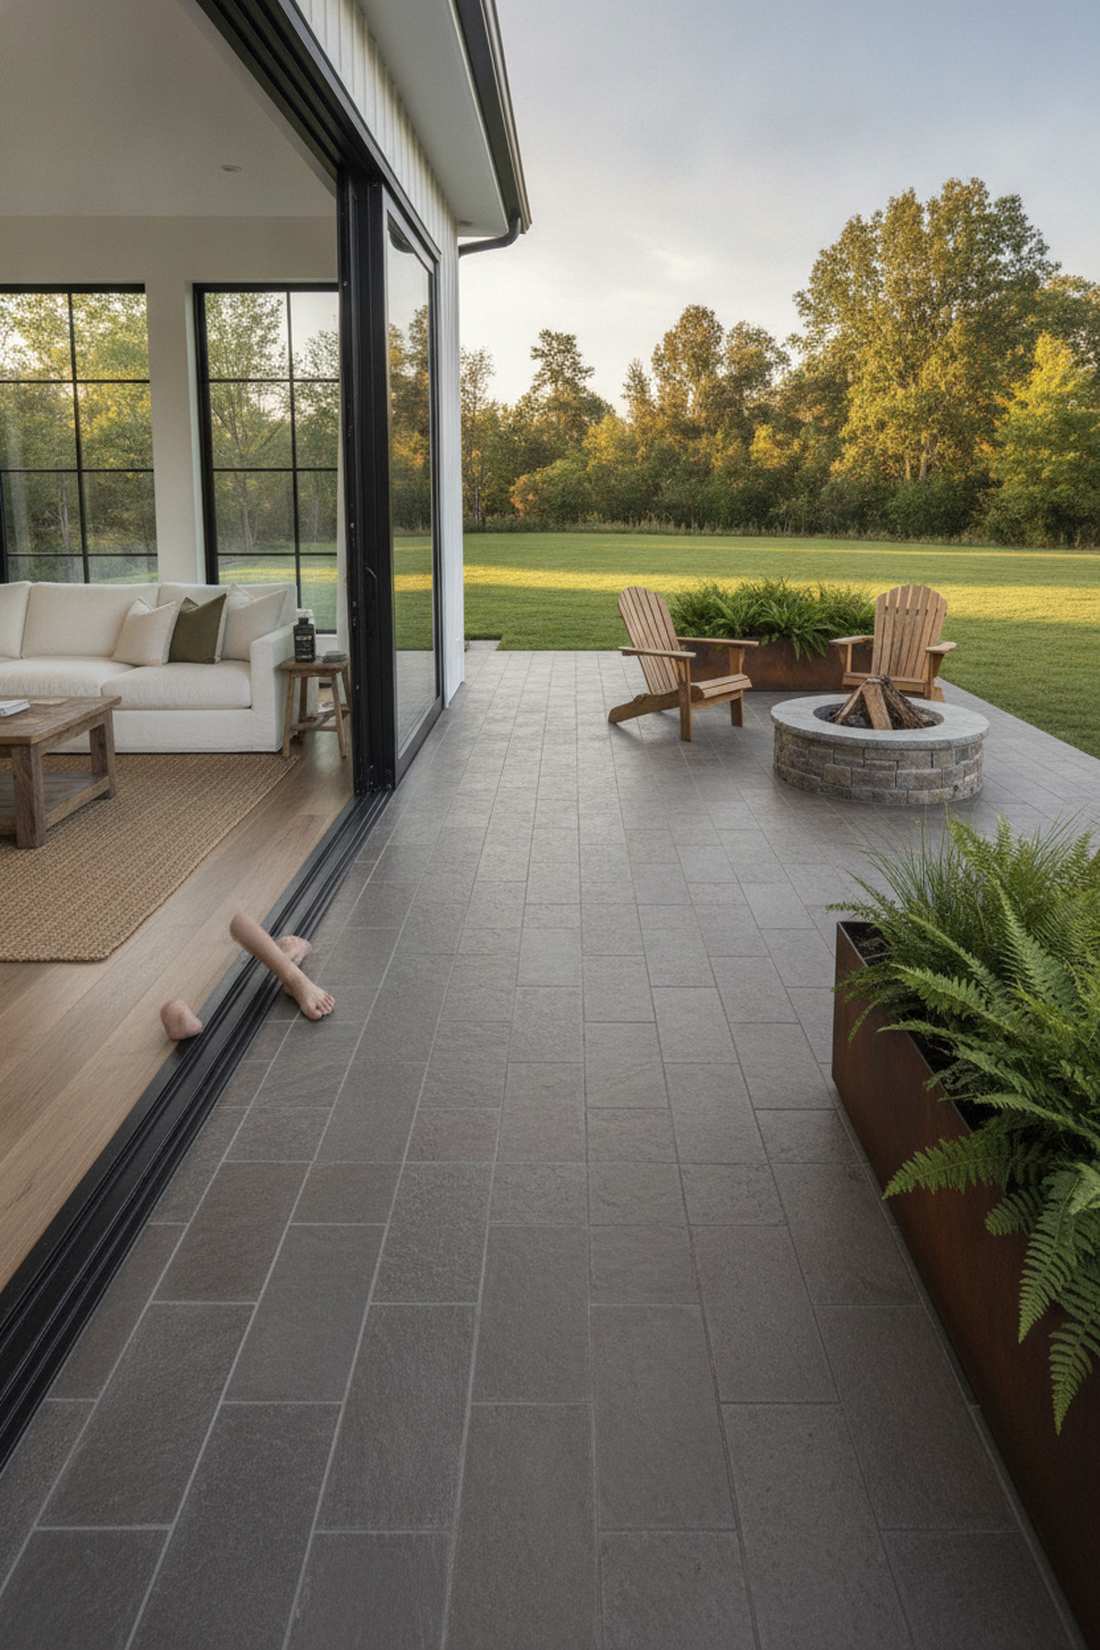
8. Porcelain Tile Inside and Out

Provides a hyper-smooth, continuous runway effect. Continuous indoor outdoor tiling is flawless for connecting a kitchen directly to an open-air dining space.
Changing materials abruptly at the threshold completely ruins the visual flow. Utilizing UV-resistant outdoor porcelain tile that matches your interior identically visually doubles your home’s square footage.
Materials and labor run about $15–$30 per square foot. Save this to your patio inspiration board!
- Key Materials: Large-format rectified porcelain, weatherproof thinset
- Vibe / Style: Expansive modern flow
- Difficulty: Intermediate to Advanced DIY
- Budget Breakdown: Tiles: $8/sq ft | Mortar/Grout: $3/sq ft.
- Creator’s Tip: Ensure the outdoor tiles have a higher slip-resistance rating (R11) while matching the indoor color.
- Smart Sourcing: Buy UV-resistant porcelain tiles (bulk pack) and exterior-grade epoxy grout.
This next flooring setup is ridiculously durable but looks like a highly customized $10,000 architectural pour…
9. Polished Concrete Floors
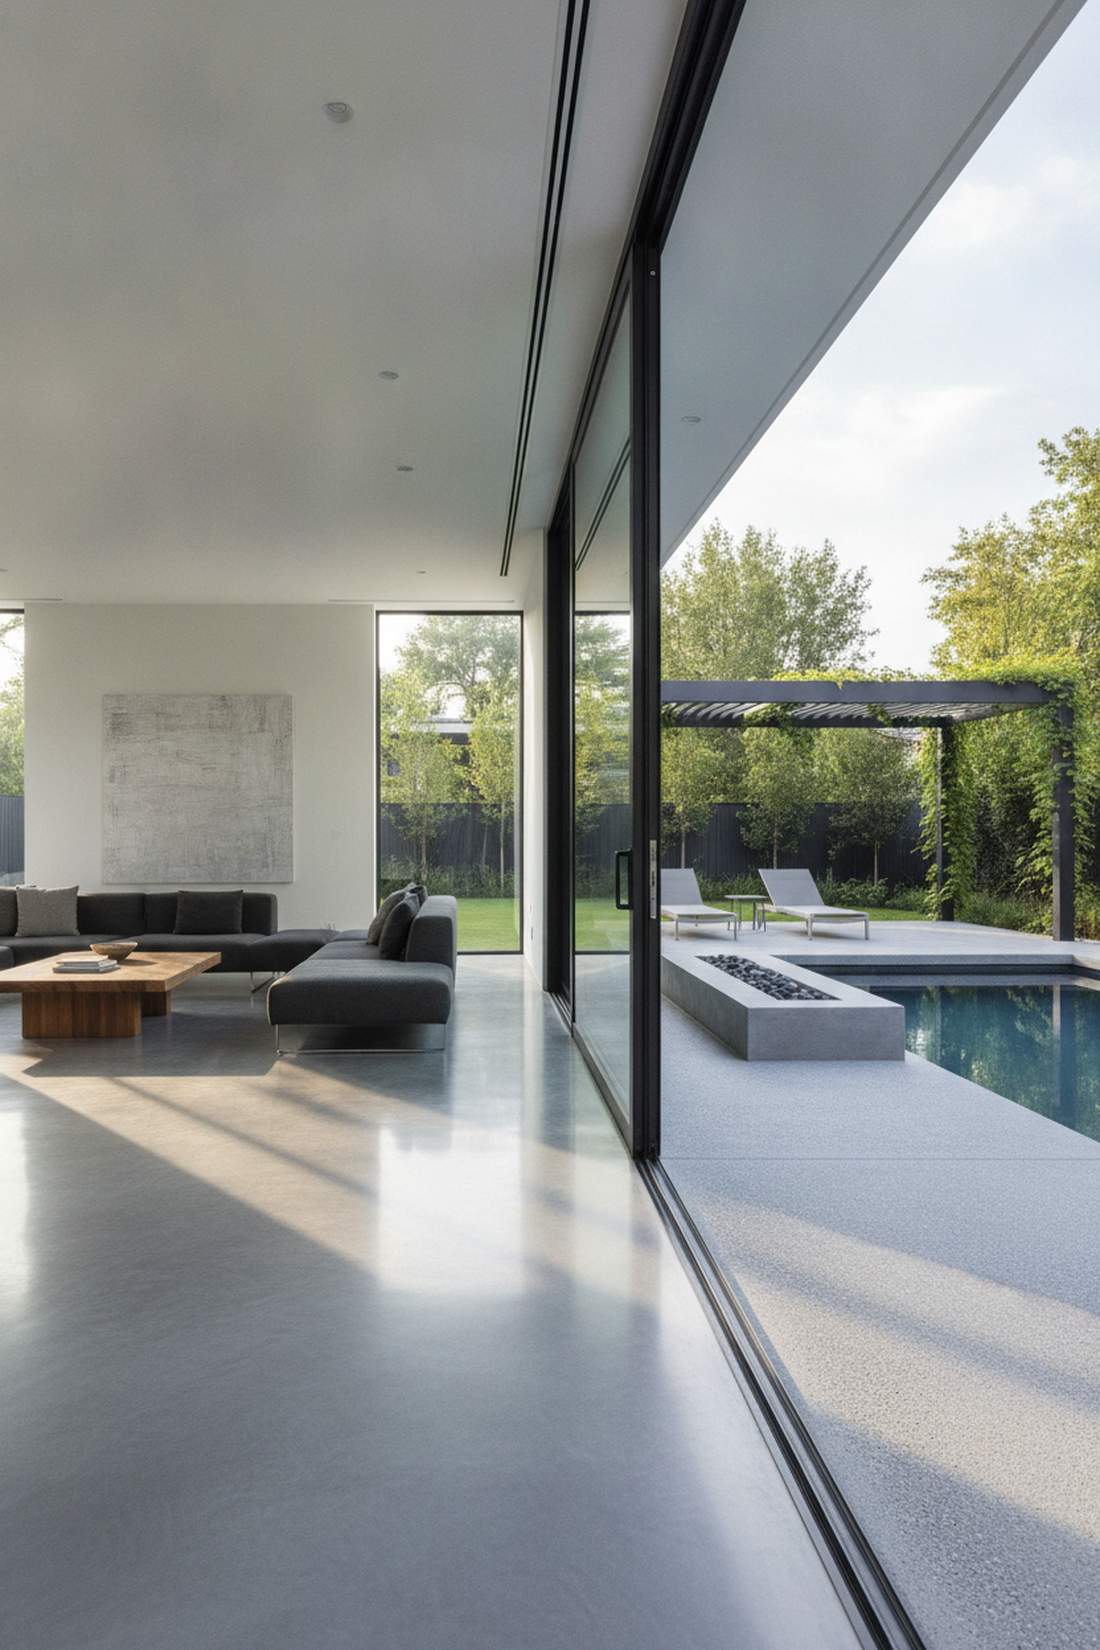
Radiates a cool, industrial-chic energy. Seamless concrete slab pouring works brilliantly for contemporary homes bridging living rooms to poolside lounging areas.
Most standard floors scratch or warp with heavy backyard traffic. Pouring a continuous slab and utilizing commercial-grade epoxy sealants creates an unbreakable surface that looks far more expensive than it is.
Expect to pay roughly $6–$15 per square foot.
- Key Materials: High-PSI concrete, mechanical polishers, acrylic sealers
- Vibe / Style: Industrial minimalist
- Difficulty: Professional pour required
- Budget Breakdown: Pouring: $5/sq ft | Polishing & Sealing: $4/sq ft.
- Creator’s Tip: Use a broom finish on the exterior portion to prevent slipping while keeping the color uniform.
- Smart Sourcing: Use commercial-grade penetrating sealers and slip-resistant grit additives.
💡 Must-Have Supplies for High-End Setups
To build these architectural transitions faster and ensure they actually survive the weather, skip the generic hardware aisles and invest in the right foundational products.
- Base & Support: Heavy-duty recessed track kits and structural floor pedestals
- Setup Tools: Laser level starter kits and commercial suction lifters
- Weather/Durability Protection: UV-resistant polyurethane sealants and marine-grade weatherstripping
10. Natural Stone Continuation
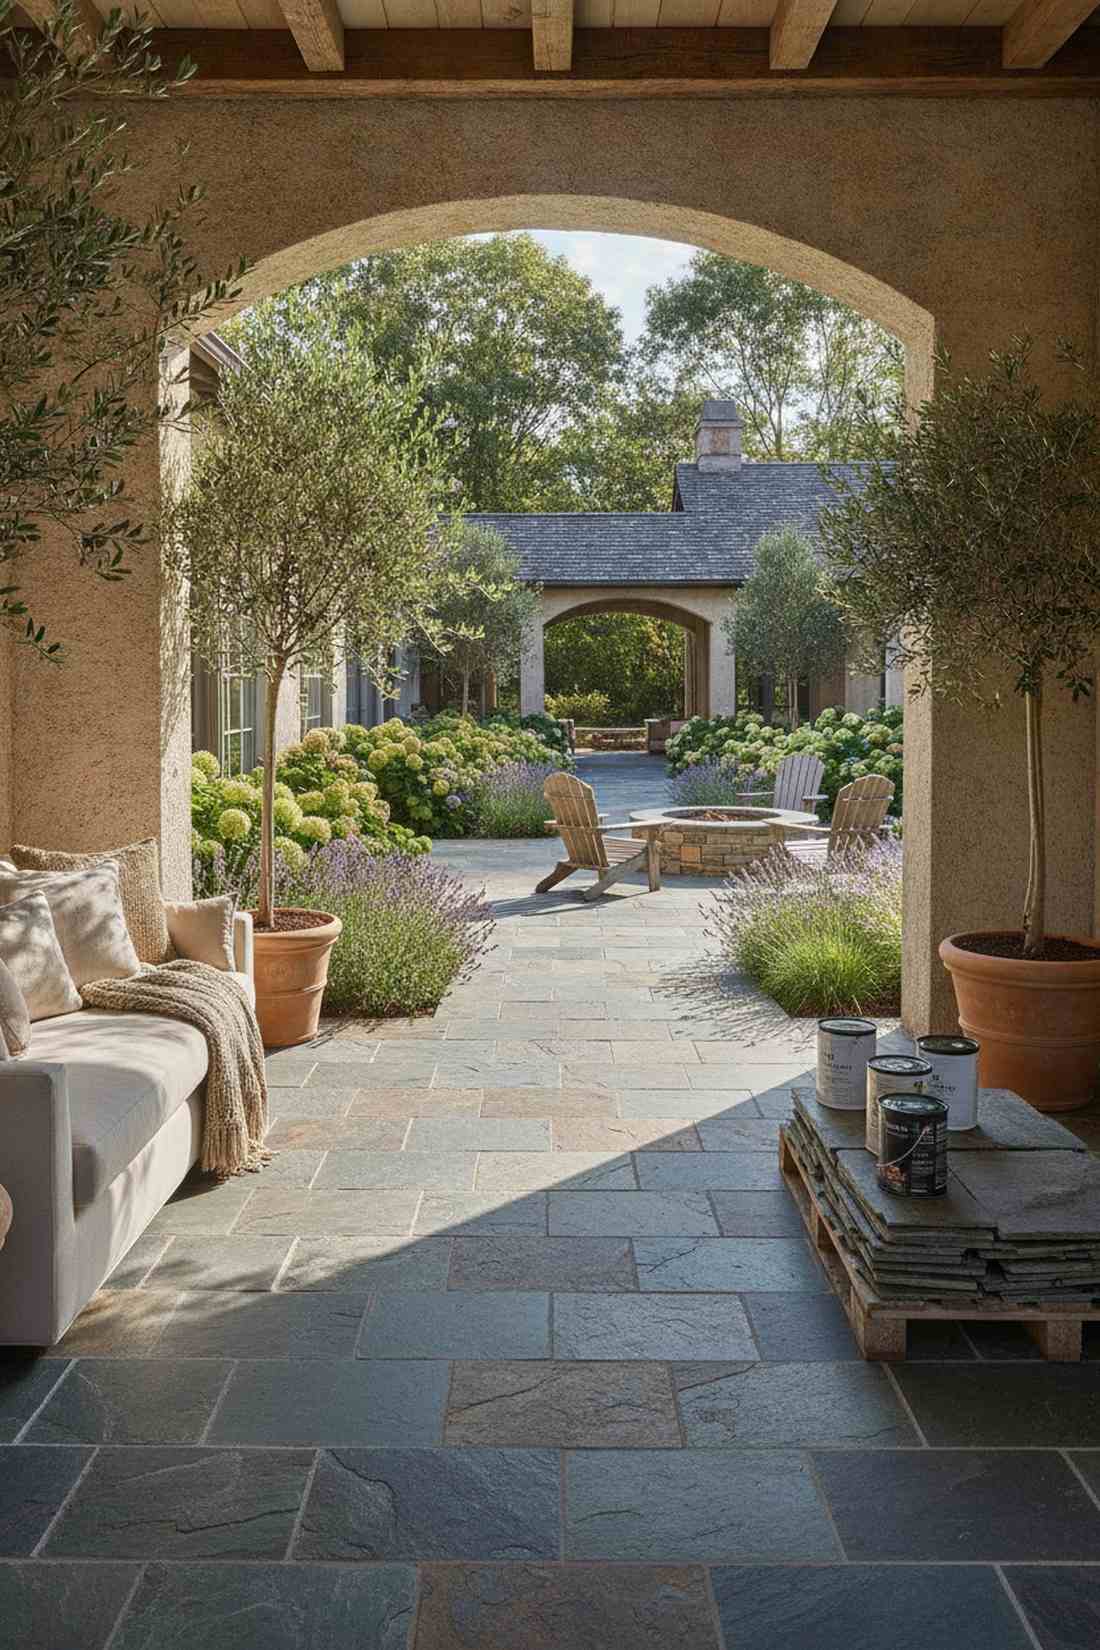
Feels grounding, earthy, and highly sophisticated. Continuous natural stone paving is a stunning choice for blending rustic sunrooms into garden courtyards.
Faux stone alternatives easily chip and fade under direct sunlight. Sourcing premium natural slate or limestone and running it seamlessly across the threshold delivers a genuinely organic, high-end finish.
This premium approach runs $20–$40 per square foot.
- Key Materials: Travertine or slate tiles, penetrating stone sealer
- Vibe / Style: Earthy organic elegance
- Difficulty: Advanced DIY
- Budget Breakdown: Stone: $15/sq ft | Sealer & Mortar: $5/sq ft.
- Creator’s Tip: Lay the stone in a dry run first to blend the natural color variations perfectly before mortaring.
- Smart Sourcing: Get pre-cut natural stone tiles (bulk pallet) and color-enhancing penetrating sealers.
11. Wood-Look Porcelain Planks
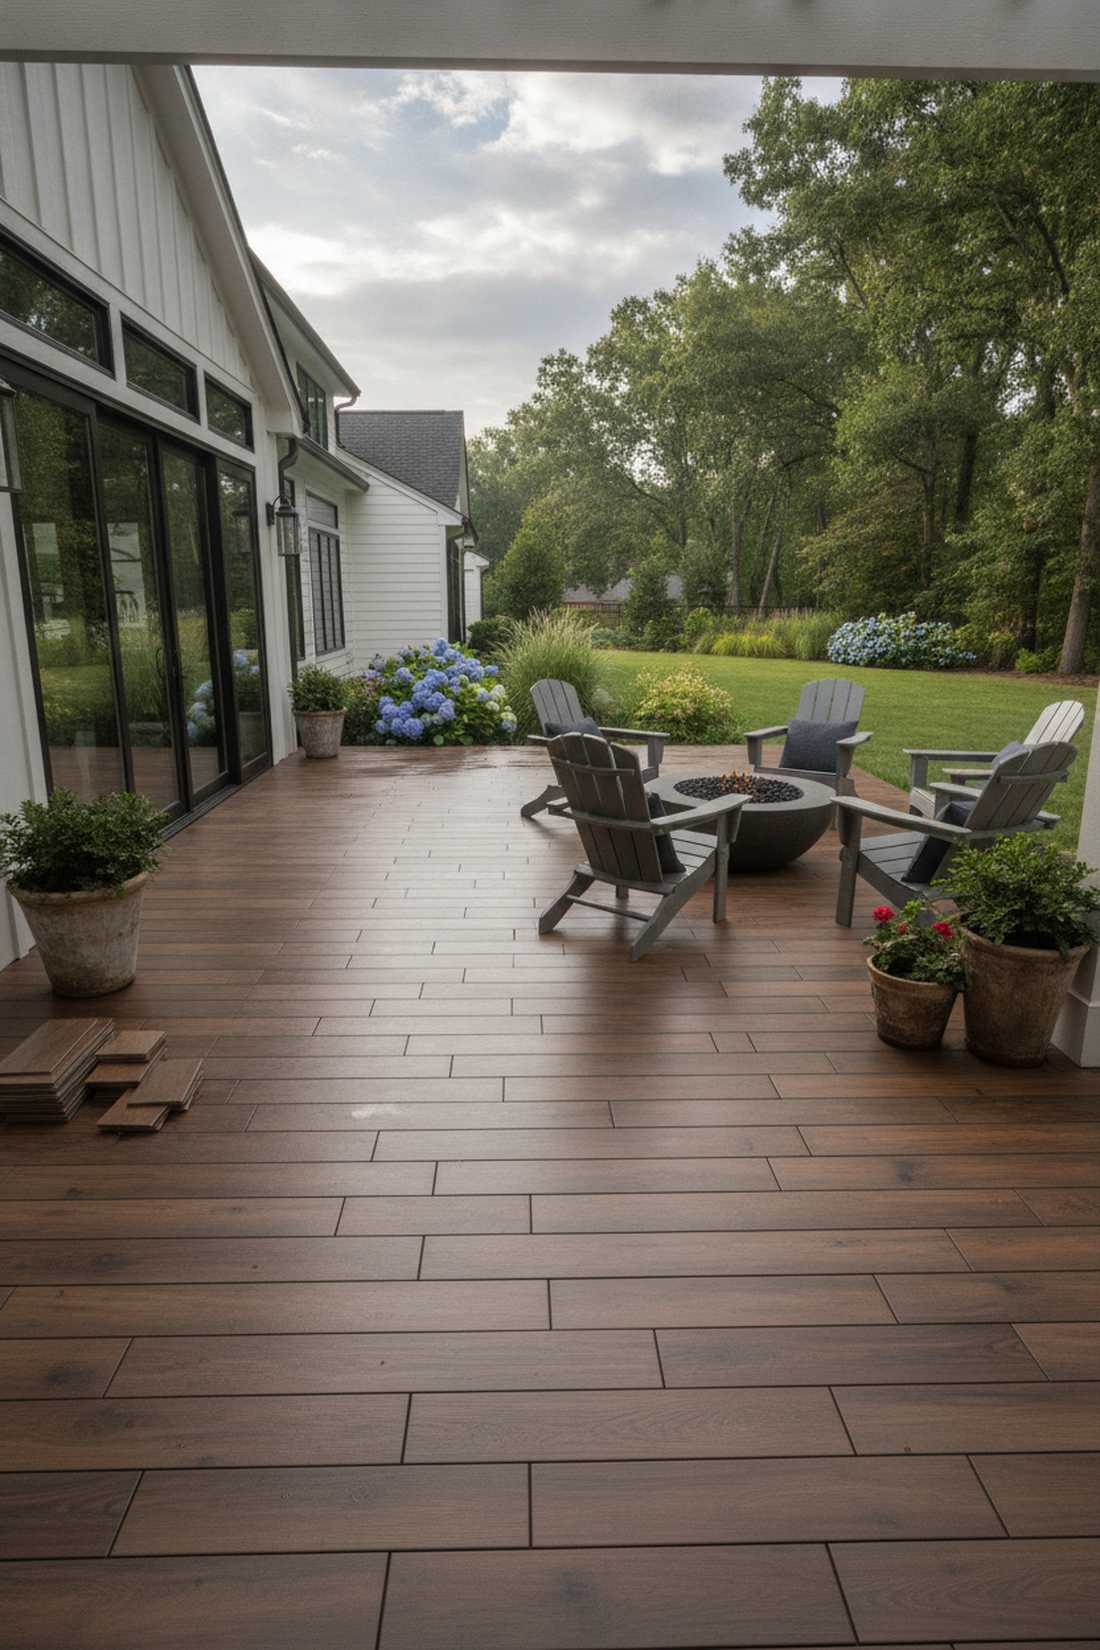
Gives you the cozy warmth of a cabin without the water damage risk. Ceramic wood plank flooring is perfect for exposed transitional decks facing heavy rain.
Real hardwood rots instantly when exposed past the door frame. Installing frost-proof ceramic wood textures flawlessly mimics the organic grain while providing absolute structural invincibility.
Achieve this look for $8–$20 per square foot.
- Key Materials: Rectified wood-look porcelain, leveling clips
- Vibe / Style: Warm rustic durability
- Difficulty: Intermediate DIY
- Budget Breakdown: Planks: $6/sq ft | Install System: $3/sq ft.
- Creator’s Tip: Use a dark brown grout with extremely tight grout lines to make it look exactly like real hardwood flooring.
- Smart Sourcing: Use frost-proof ceramic wood planks and tile leveling clip kits.
12. Composite Decking with Hardwood Tones
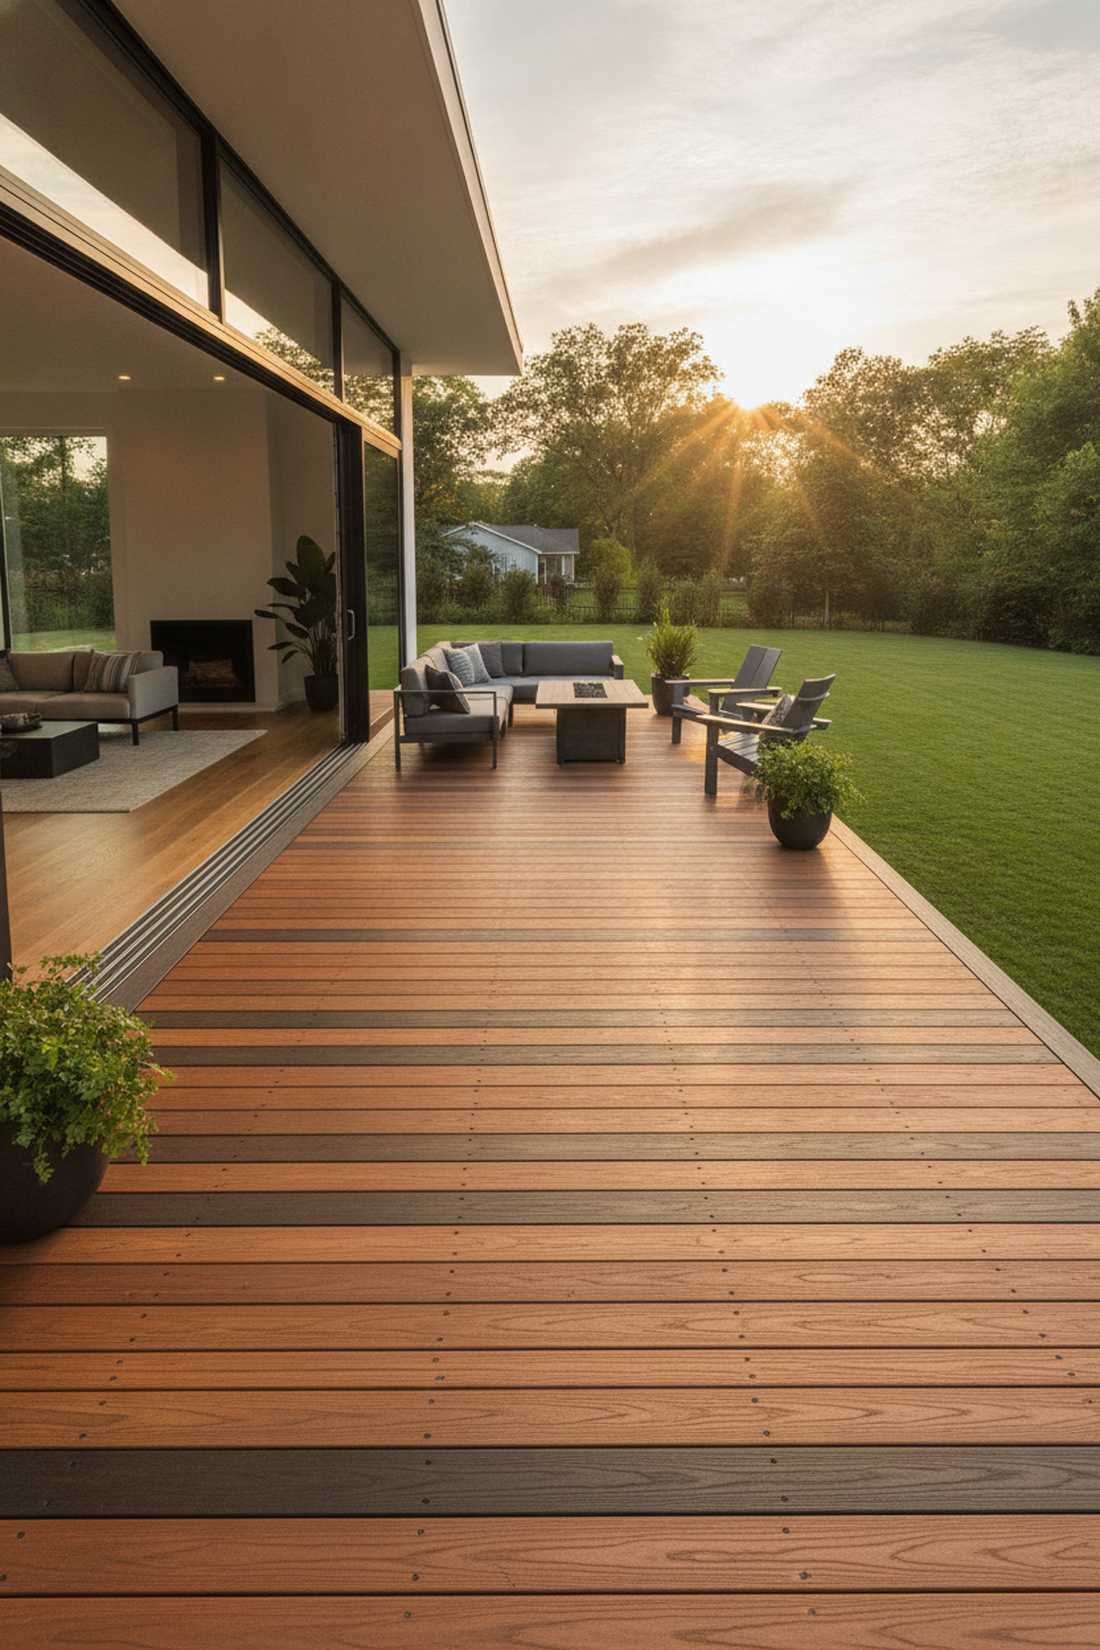
Offers a rich, polished deck space that requires zero weekend sanding. Color-matched composite decking works effectively to extend a hardwood living room outwards.
Wood decks are notorious for splintering and requiring endless upkeep. Utilizing premium composite decking boards matched to your interior wood tone gives a designer-level finish without the maintenance nightmare.
Materials generally cost $30–$60 per square foot. Pin this if you hate sanding decks!
- Key Materials: Capped composite boards, hidden fastener clips
- Vibe / Style: Clean modern outdoors
- Difficulty: Intermediate DIY
- Budget Breakdown: Boards: $25/sq ft | Framing/Clips: $10/sq ft.
- Creator’s Tip: Use picture-frame borders around the deck edges to hide the cut ends of the composite boards.
- Smart Sourcing: Purchase capped composite decking boards (bulk pack) and hidden deck fastener kits.
13. Luxury Vinyl Plank Transitions
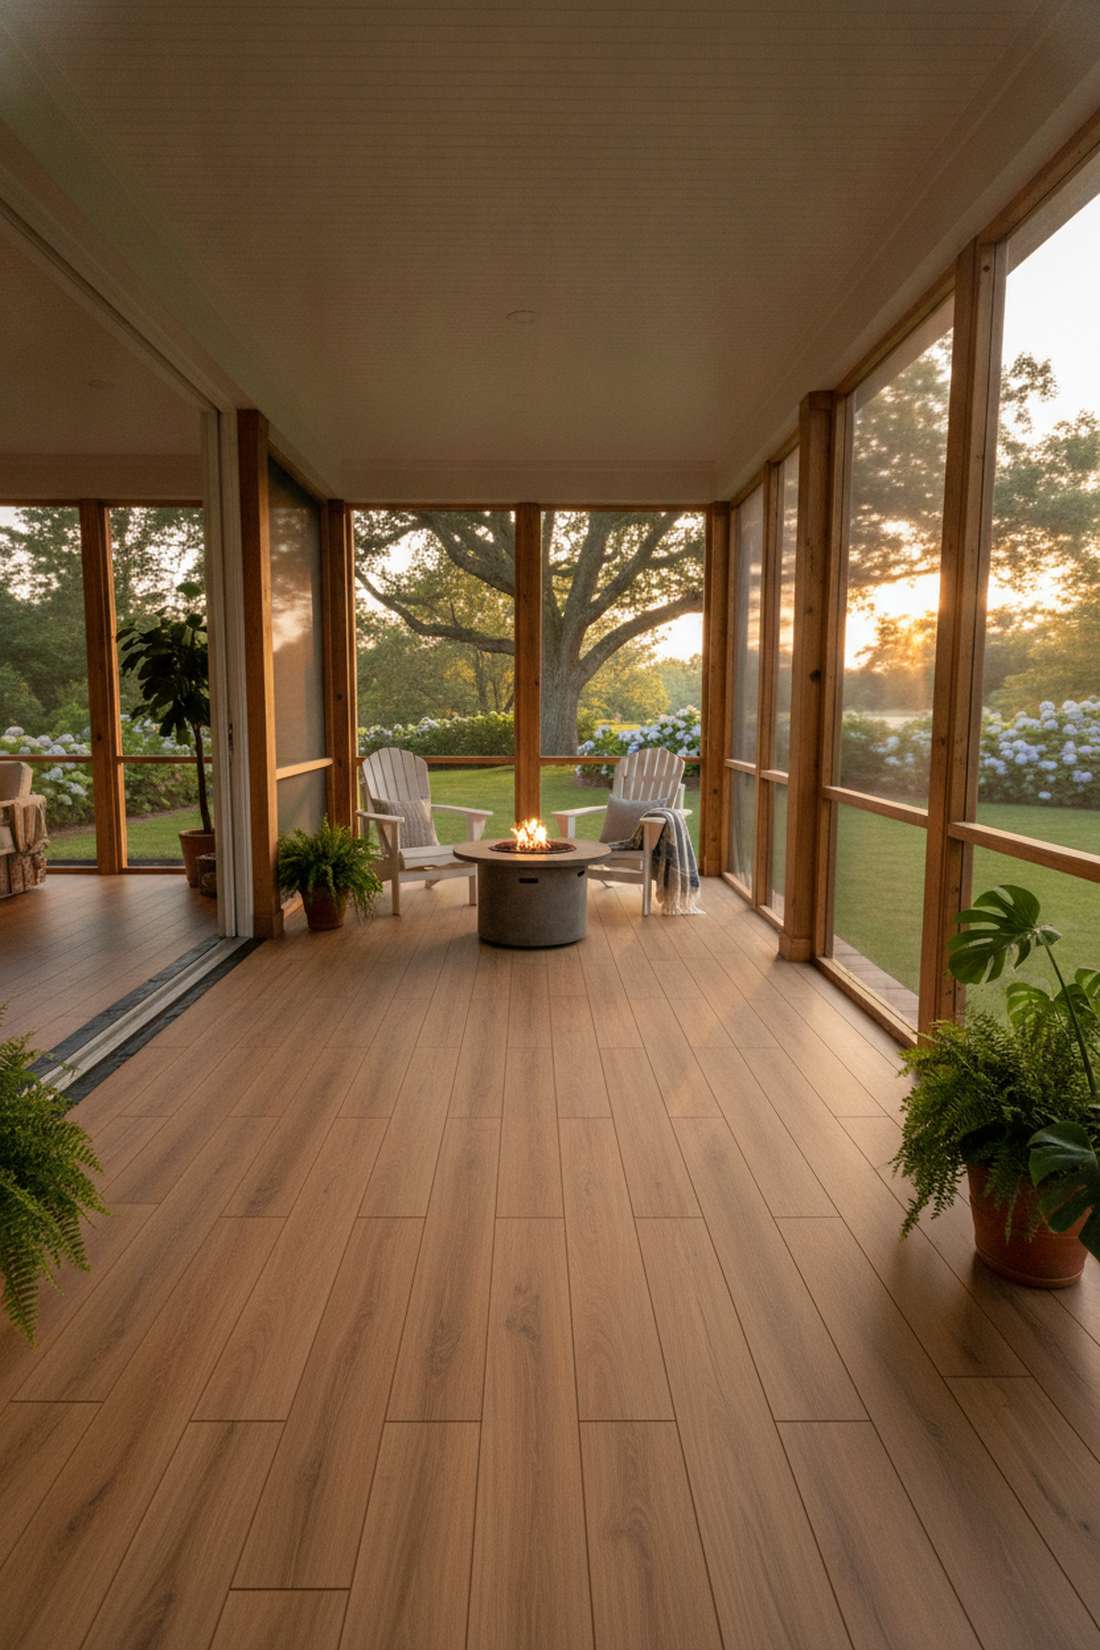
Delivers a flawless wood visual on a strict budget. Waterproof LVP flooring extensions are fantastic for fully covered, three-season screened porches.
Traditional laminates buckle the second humidity spikes. Snapping together top-rated waterproof vinyl planks allows you to float a continuous, beautiful floor right up to the weather line.
This extremely budget-friendly setup costs just $3–$8 per square foot.
- Key Materials: SPC rigid core vinyl, moisture barrier underlayment
- Vibe / Style: Budget-friendly seamless flow
- Difficulty: Easy beginner setup
- Budget Breakdown: Planks: $4/sq ft | Underlayment: $1/sq ft.
- Creator’s Tip: Stagger the planks randomly to avoid visual “H-patterns” that reveal it’s a floating floor.
- Smart Sourcing: Opt for rigid core luxury vinyl planks (bulk pack) and pre-cut moisture barriers.
You’ll be shocked at how a simple $20 metal strip completely changes the visual value of your entire room…
Threshold & Transition Solutions
Where materials must change at the door, proper transition profiles create clean connections, prevent tripping, and control water infiltration.
14. Flush-Mount T-Bar Strips
Looks incredibly sharp, clean, and intentionally designed. Low-profile metal T-bars are the ultimate finish for connecting identical-height indoor and outdoor tiles.
Bulky wooden saddles look dated and disrupt foot traffic. Dropping a slim, architectural-grade T-molding straight into the gap delivers a surprisingly premium look with practically zero effort.
You can grab these for about $15–$40 per doorway.
- Key Materials: Anodized aluminum or brass T-molding, construction adhesive
- Vibe / Style: Razor-sharp architectural detail
- Difficulty: Very easy DIY
- Budget Breakdown: Metal Strip: $25 | Adhesive: $5.
- Creator’s Tip: Apply a bead of silicone under the top lip of the T-bar to stop moisture from getting underneath.
- Smart Sourcing: Use anodized aluminum T-molding strips and heavy-duty construction adhesive tubes.
15. Reducer Strips for Height Changes
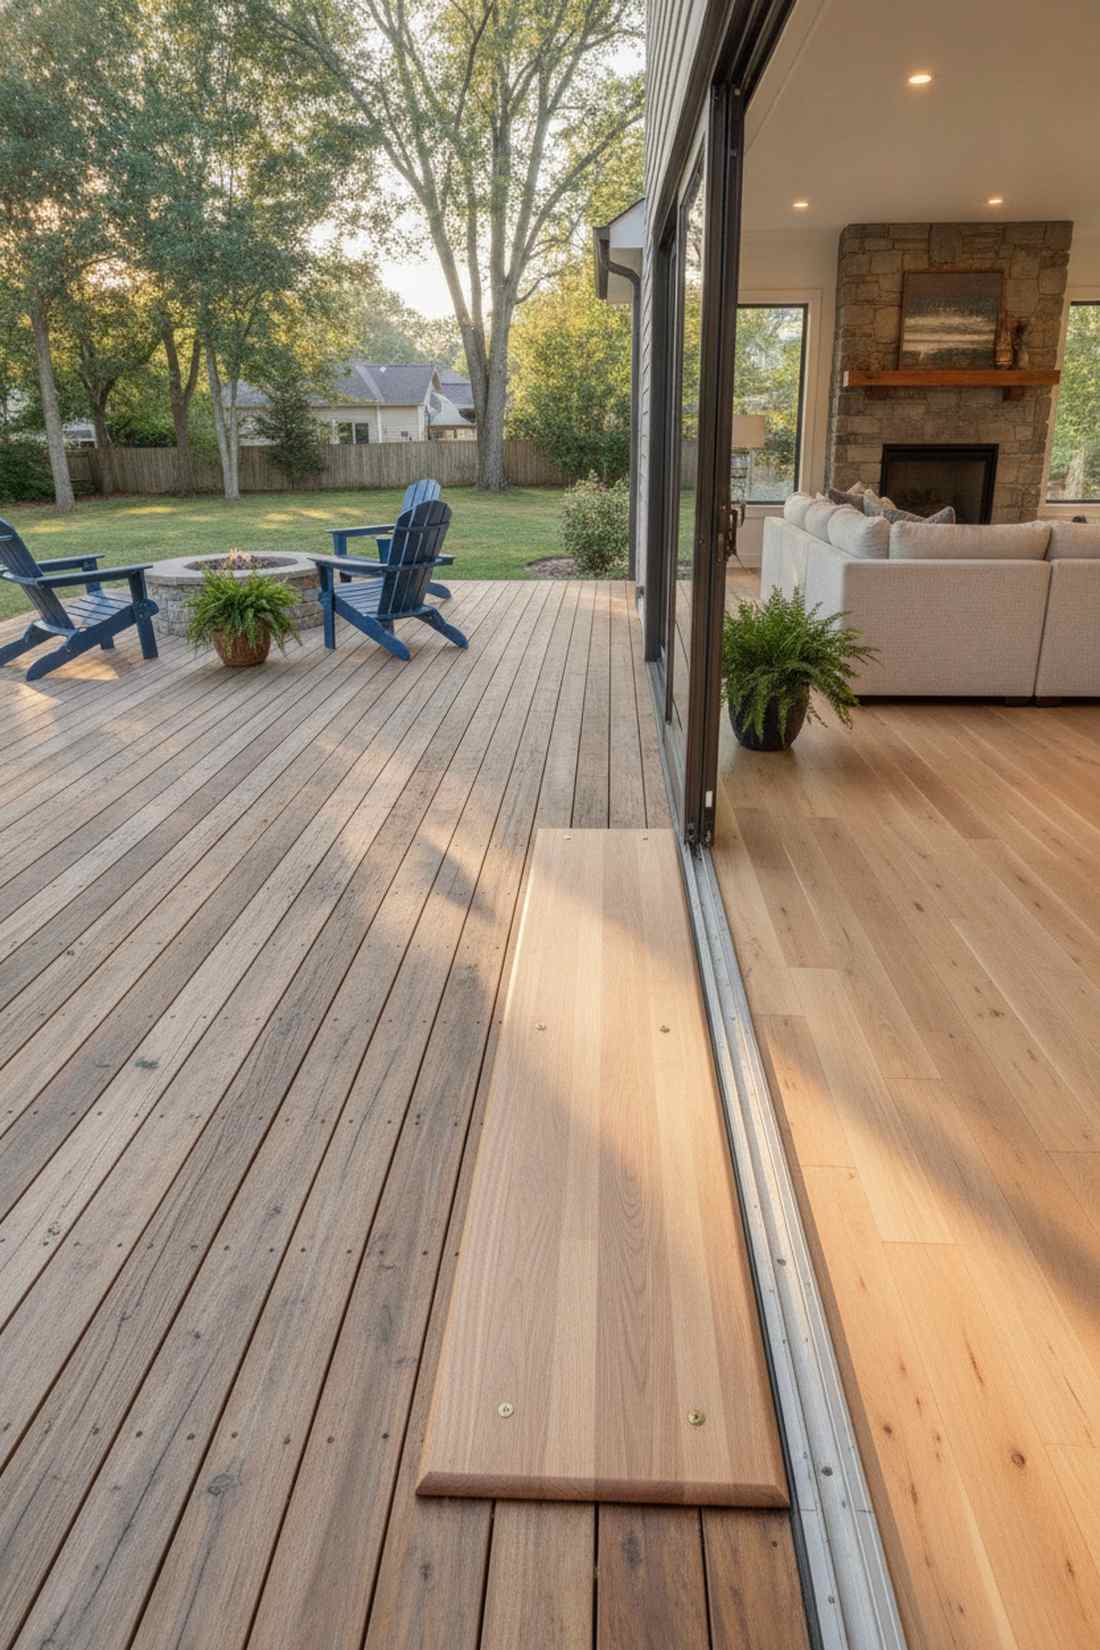
Creates a gentle, toe-saving ramp that feels natural underfoot. Sloped transition reducers are essential for joining a thick exterior deck to a thinner interior floor.
Leaving a sharp, exposed edge is an absolute tripping hazard. Installing a perfectly color-matched, ADA-compliant reducer strip smooths out subfloor differences while looking totally intentional.
These pieces generally run $20–$50. Pin this to remember your finishing details!
- Key Materials: Hardwood or metal reducer strips
- Vibe / Style: Safe and smoothed
- Difficulty: Easy DIY
- Budget Breakdown: Reducer Trim: $30 | Fasteners: $5.
- Creator’s Tip: Match the reducer material to the higher of the two floors to visually extend the larger space.
- Smart Sourcing: Get pre-finished wood reducer strips and flush-mount trim screws.
16. Weatherproof Door Thresholds
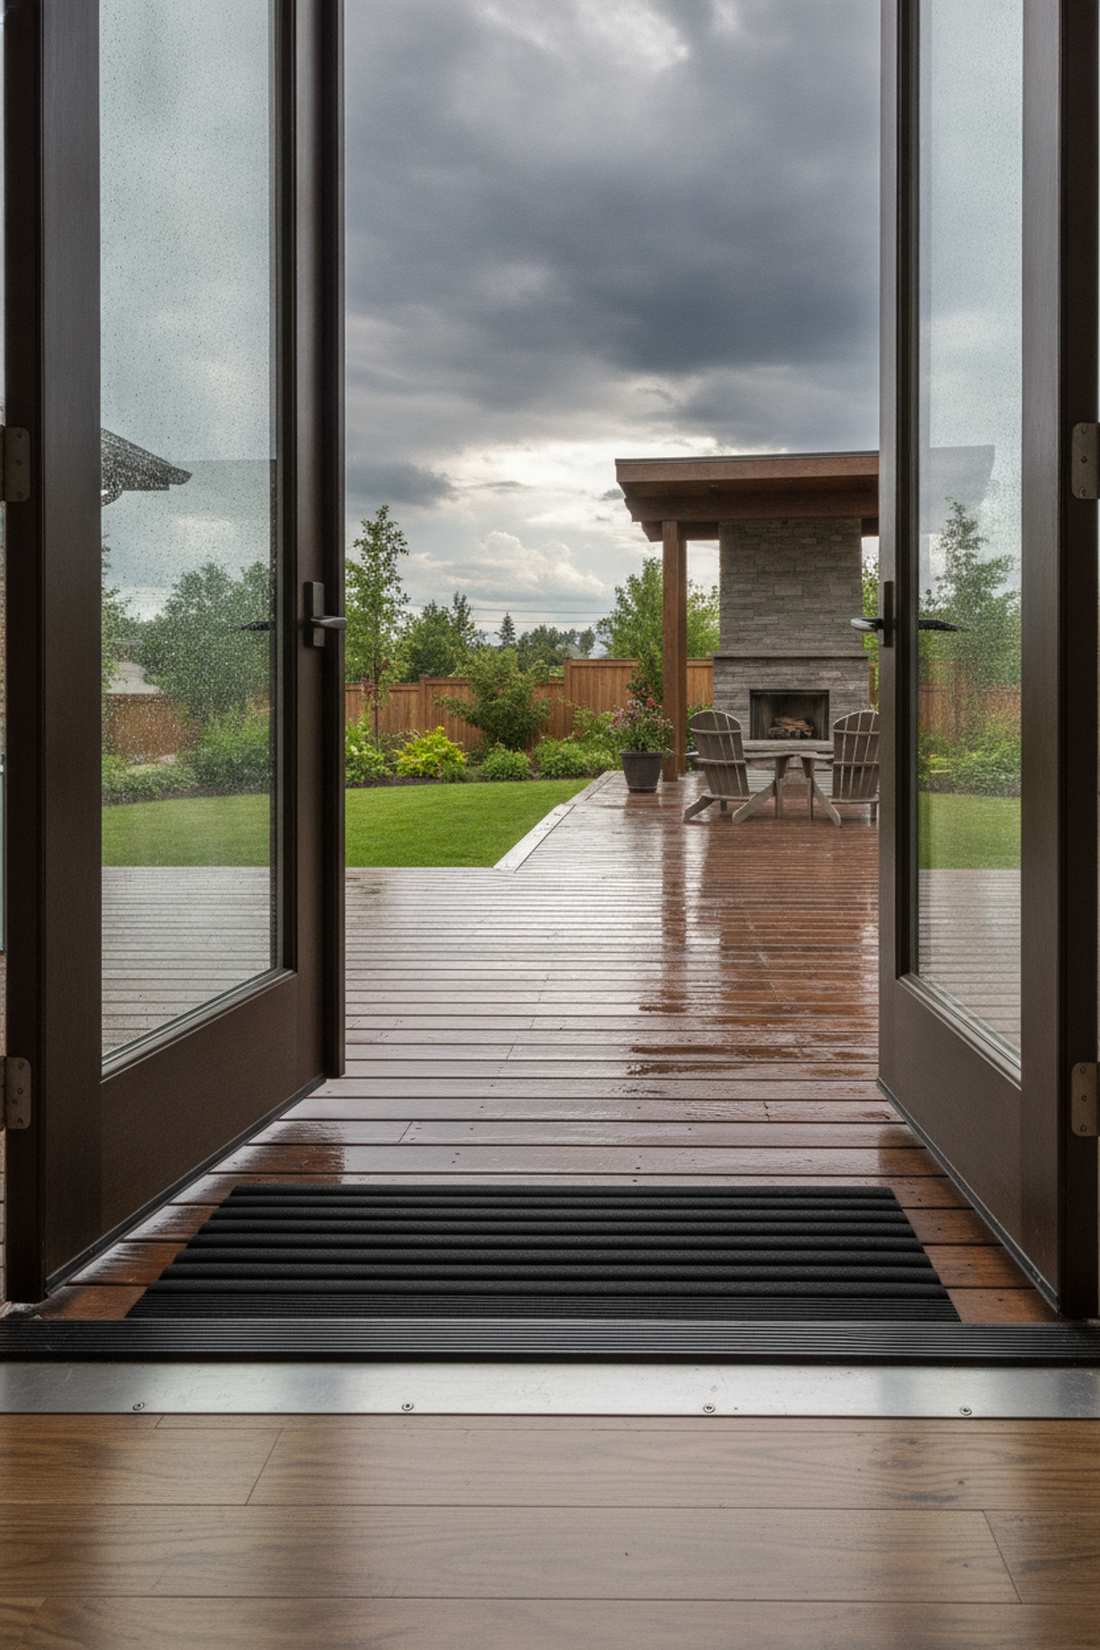
Acts as an impenetrable shield against storms while looking neat. Thermal break aluminum thresholds are mandatory for any exposed backyard door facing severe weather.
Cheap wooden thresholds warp and rot within a few rainy seasons. Upgrading to commercial-grade weather-sealed sills stops drafts dead in their tracks while maintaining a low-profile step.
Expect to spend around $40–$100. It’s a fast upgrade that completely changes the vibe and comfort of the room.
- Key Materials: Aluminum threshold base, rubber weatherstripping
- Vibe / Style: Secure and storm-ready
- Difficulty: Intermediate DIY
- Budget Breakdown: Threshold: $60 | Silicone Sealant: $10.
- Creator’s Tip: Caulk heavily under the sill plate during installation; water driven by wind will find any dry gap.
- Smart Sourcing: Purchase thermal break aluminum thresholds and replacement weatherstrip coils.
17. Invisible Schluter Profiles
Disappears almost entirely, leaving only a hairline metallic glint. Recessed metal tile edging works exceptionally well for ultra-modern open-concept tile setups.
Standard overlapping trims scream “DIY afterthought” and gather dirt. Embedding a German-engineered Schluter profile right into the thinset gives a designer-level finish that guards tile edges from cracking.
These premium tracks cost roughly $15–$35 per length.
- Key Materials: Schluter metal L-angles or T-profiles
- Vibe / Style: Ultra-minimalist luxury
- Difficulty: Intermediate DIY (during tile install)
- Budget Breakdown: Profile Strips: $25 | Thinset: $10.
- Creator’s Tip: Cut these precisely with a metal-cutting blade on a miter saw; hacksaws leave jagged, ugly edges.
- Smart Sourcing: Look for pre-cut Schluter metal profiles (bulk pack) and metal-cutting circular blades.
18. Granite or Marble Thresholds
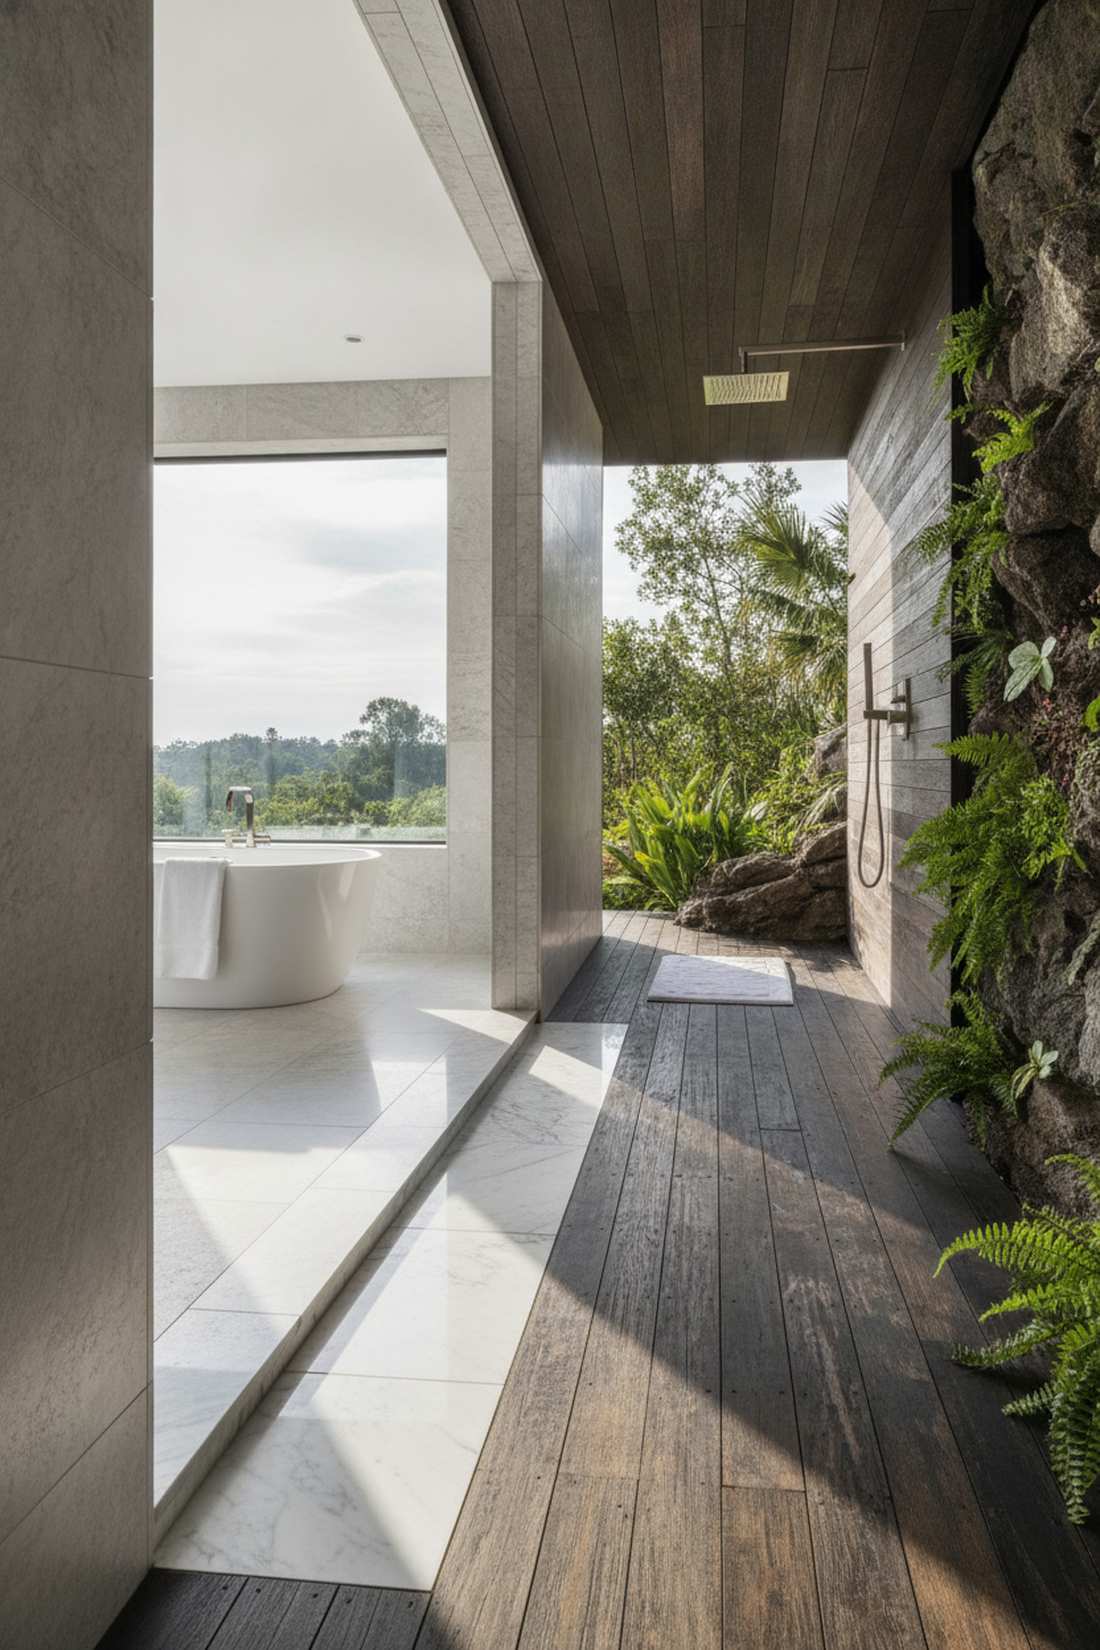
Instantly elevates a standard door into a luxurious portal. Solid stone doorway saddles are perfect for bridging elegant interior bathrooms with private outdoor showers.
Wood and metal eventually show deep scratches from foot traffic. Dropping in a custom-beveled natural stone saddle ensures absolute durability while making the space look incredibly wealthy.
You can easily pull this off for around $40–$90. Save this to your luxury bath/patio board!
- Key Materials: Polished marble or granite saddle cut to length
- Vibe / Style: High-end hotel luxury
- Difficulty: Easy DIY
- Budget Breakdown: Stone Saddle: $50 | Mortar: $10.
- Creator’s Tip: Ensure the subfloor beneath the stone is perfectly level; any void will cause the marble to snap under weight.
- Smart Sourcing: Get pre-beveled marble threshold saddles and premium stone adhesives.
Most DIYers completely ignore floor height changes, resulting in stubbed toes and awkward layouts. Here is how you fix it…
19. Ramped Transition Strips
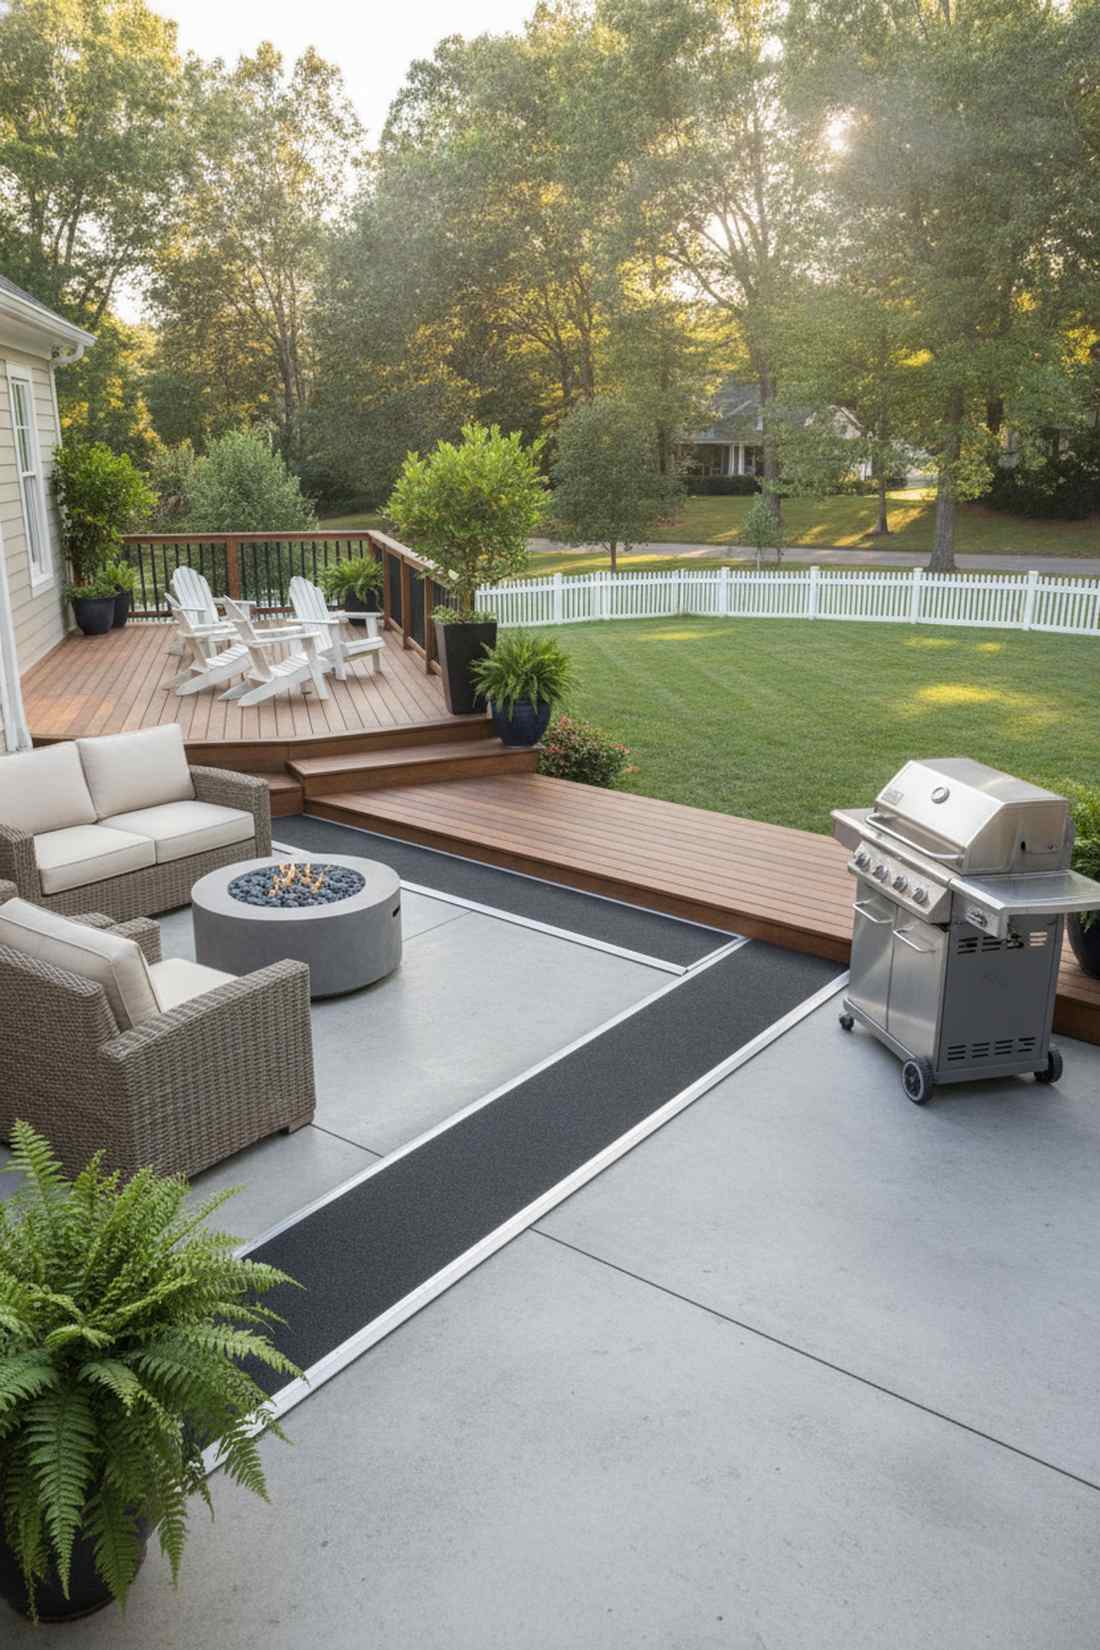
Creates a smooth, gliding entrance for rolling carts or wheelchairs. Extended rubber or metal ramps are highly recommended for solving stubborn, large drop-offs onto concrete patios.
A single unexpected step is the leading cause of dropped grill trays. Integrating an elongated gradient ramp eliminates the hazard entirely while looking far more expensive than it is.
These transition ramps typically cost $50–$150.
- Key Materials: Extruded aluminum ramps, heavy-duty slip-resistant rubber
- Vibe / Style: Accessible and functional
- Difficulty: Intermediate DIY
- Budget Breakdown: Ramp Kit: $100 | Fastening Hardware: $15.
- Creator’s Tip: Use textured grip tape on the incline if the ramp will be exposed to rain.
- Smart Sourcing: Buy ADA-compliant aluminum ramp kits and UV-coated anti-slip tape rolls.
Material Matching Techniques
When identical materials cannot span inside and outside, sophisticated matching strategies maintain visual flow through color, texture, and pattern coordination.
20. Color-Coordinated Different Materials
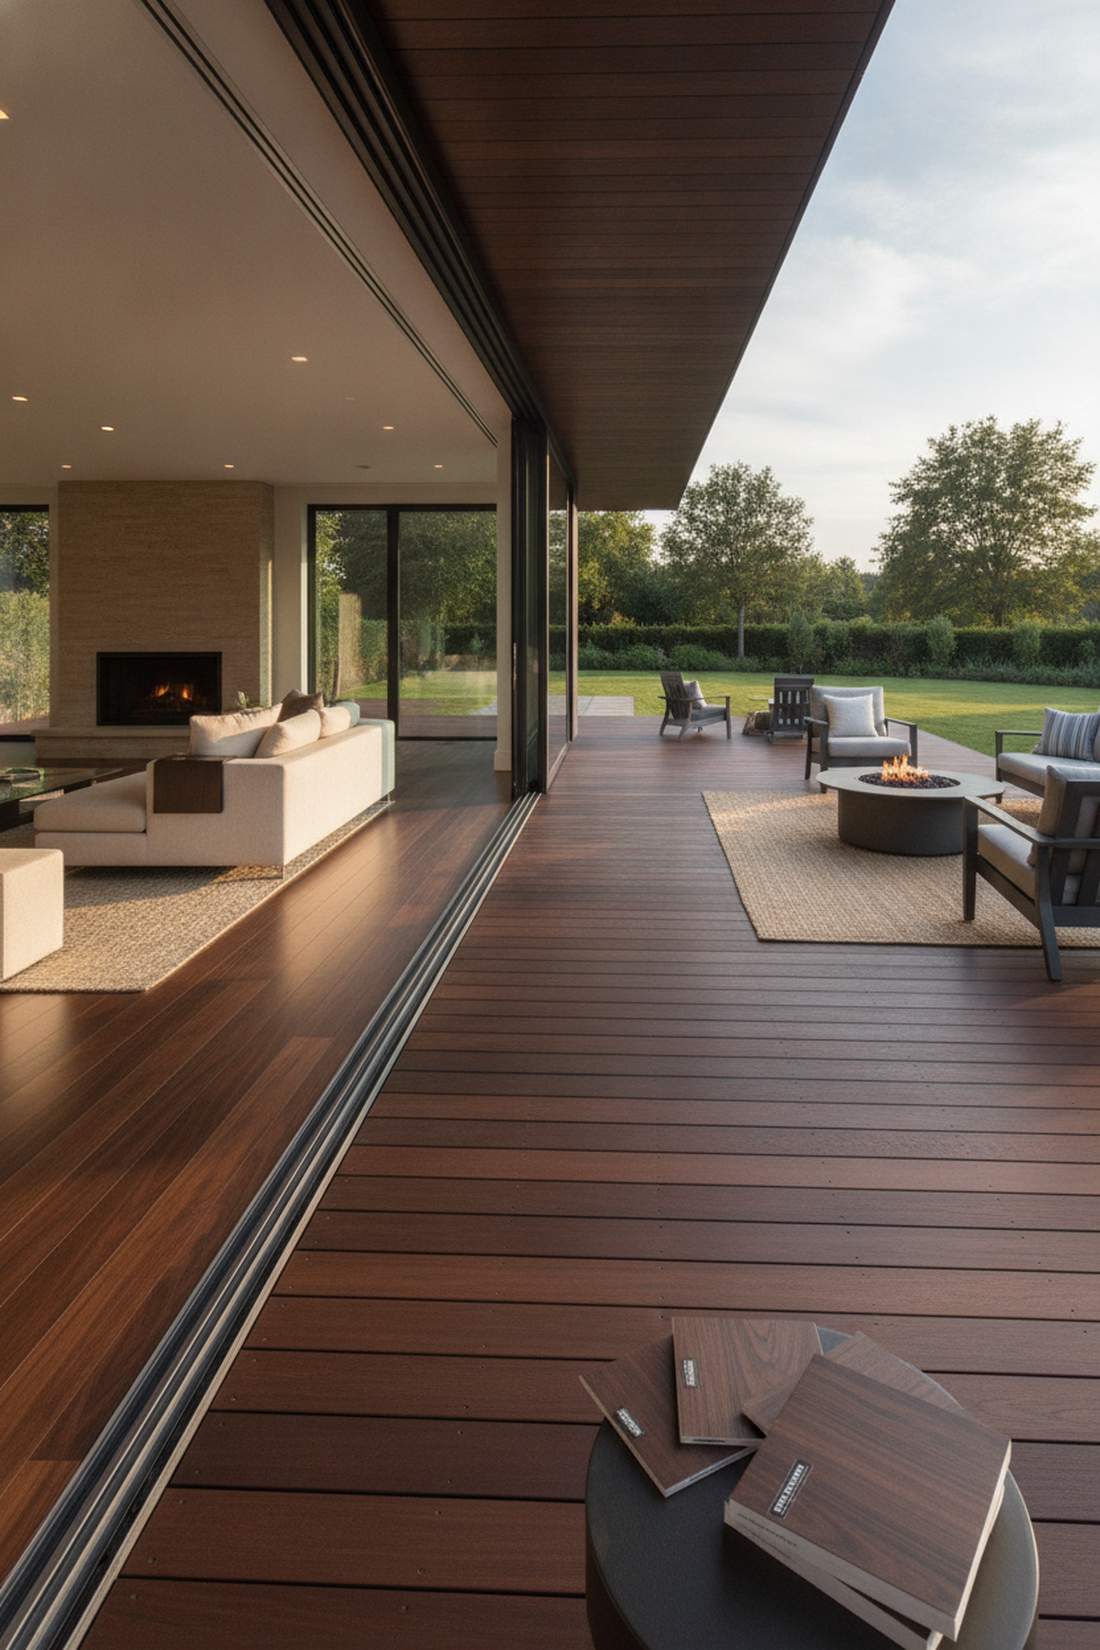
Tricks the eye into seeing one massive, unified space. Color-matching indoor wood with outdoor decking is the smartest way to blend a living room into a wooden patio.
Using wildly contrasting materials creates a harsh visual stop at the door. Opting for premium composite decking boards stained in the exact walnut hue of your interior hardwood completely dissolves that boundary.
This strategy costs nothing extra but massively upgrades the aesthetic.
- Key Materials: Color-matched flooring samples
- Vibe / Style: Harmonious visual expansion
- Difficulty: Easy design planning
- Budget Breakdown: Sample Boards: $10 | Flooring: Variable.
- Creator’s Tip: Always evaluate material color samples outside in direct sunlight, as UV lighting drastically alters undertones.
- Smart Sourcing: Order flooring sample starter kits to test color matching before buying.
21. Pattern Repetition Across Materials
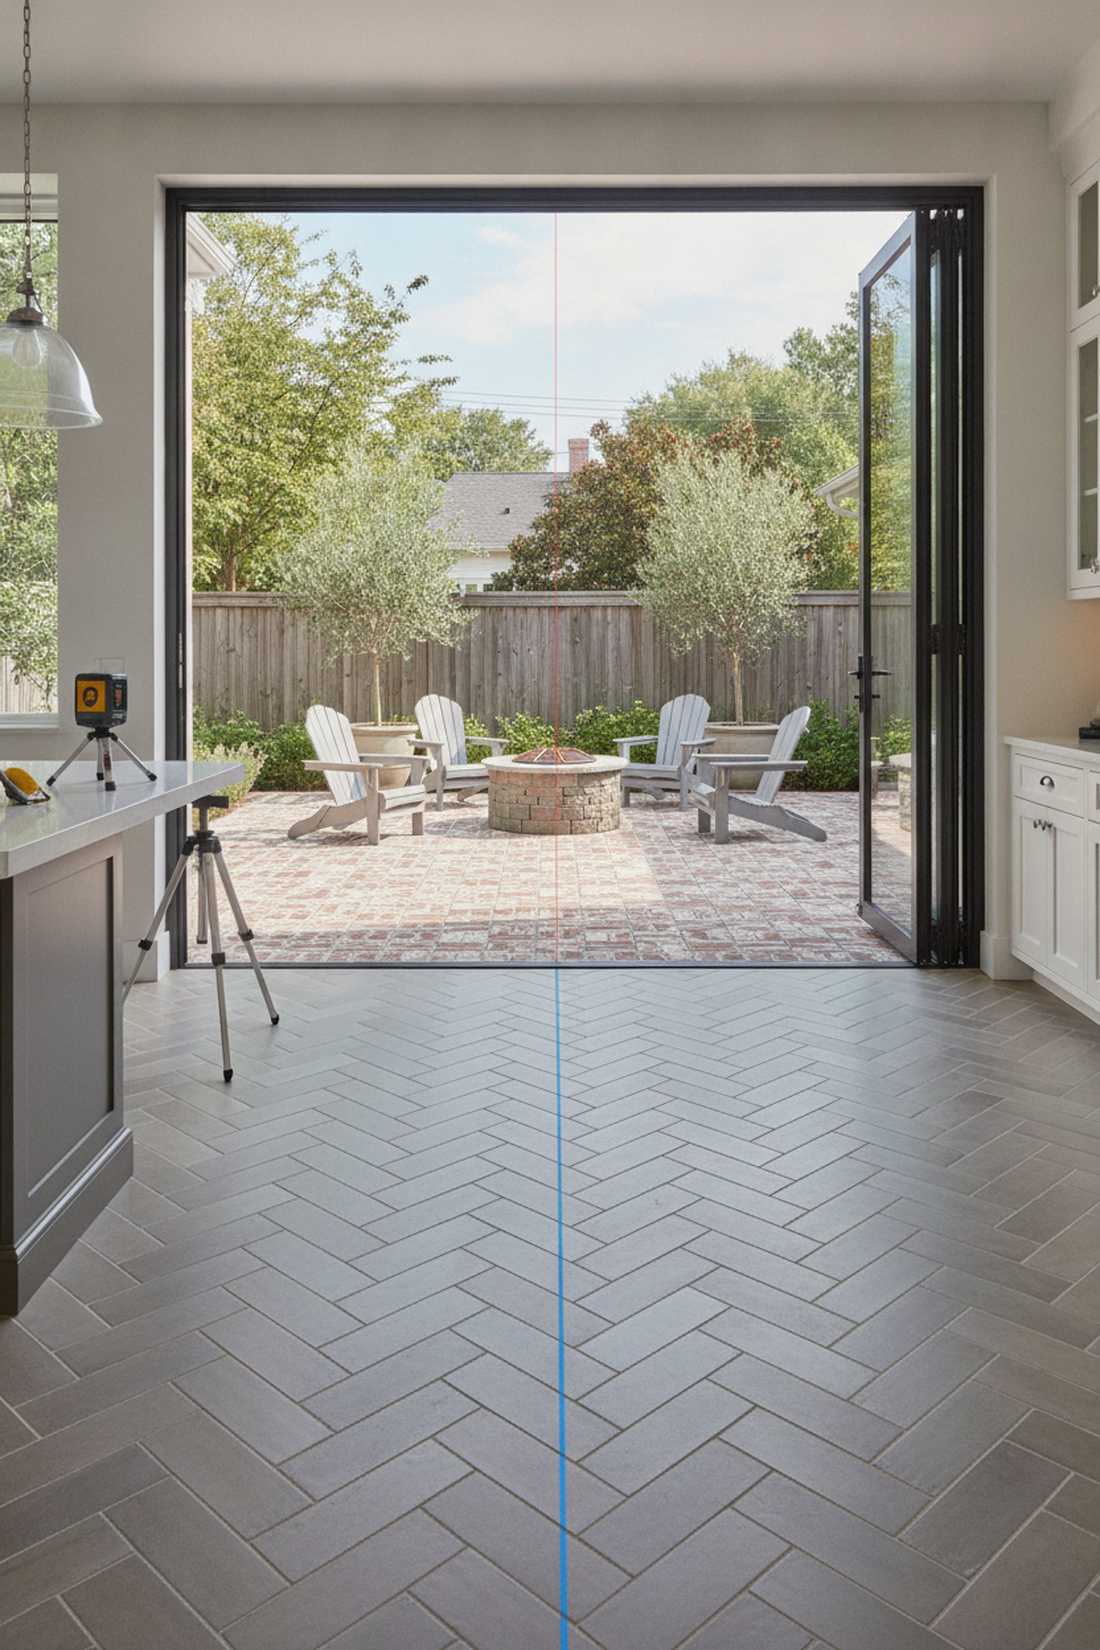
Creates an addictive geometric rhythm that leads you outside. Continuing a herringbone or grid tile layout works wonders for connecting a kitchen to a brick courtyard.
Switching from a linear indoor pattern to a random outdoor layout breaks the flow. Repeating the exact running bond angle across the threshold delivers a surprisingly premium look that professional architects swear by.
Layout planning is free, making this a highly profitable design hack.
- Key Materials: Identically sized indoor/outdoor tiles, chalk lines
- Vibe / Style: Rhythmic and deeply intentional
- Difficulty: Intermediate planning
- Budget Breakdown: Chalk Line/Tools: $15.
- Creator’s Tip: Align your primary grout line perfectly with the center of the doorway to establish perfect symmetry.
- Smart Sourcing: Use heavy-duty contractor chalk lines and laser level starter kits.
22. Texture Continuity Strategies
Makes the transition feel seamless beneath your bare feet. Matching surface finishes is perfect when transitioning from indoor slate to an outdoor stamped concrete patio.
A sudden shift from glossy smooth to aggressively rough disrupts the sensory experience. Maintaining a consistent honed or lightly textured feel gives a designer-level finish that unifies the zones subliminally.
It’s an easy strategy to implement during material selection. Pin this if you love tactile design details!
- Key Materials: Texturally matched tiles, sealers
- Vibe / Style: Tactile and organic
- Difficulty: Easy design planning
- Budget Breakdown: Material Dependent.
- Creator’s Tip: Use matte or honed finishes inside to perfectly bridge the gap to slip-resistant outdoor surfaces.
- Smart Sourcing: Look for honed finish stone tiles (bulk pack) and matte-finish stone sealers.
23. Border Definition at Transitions
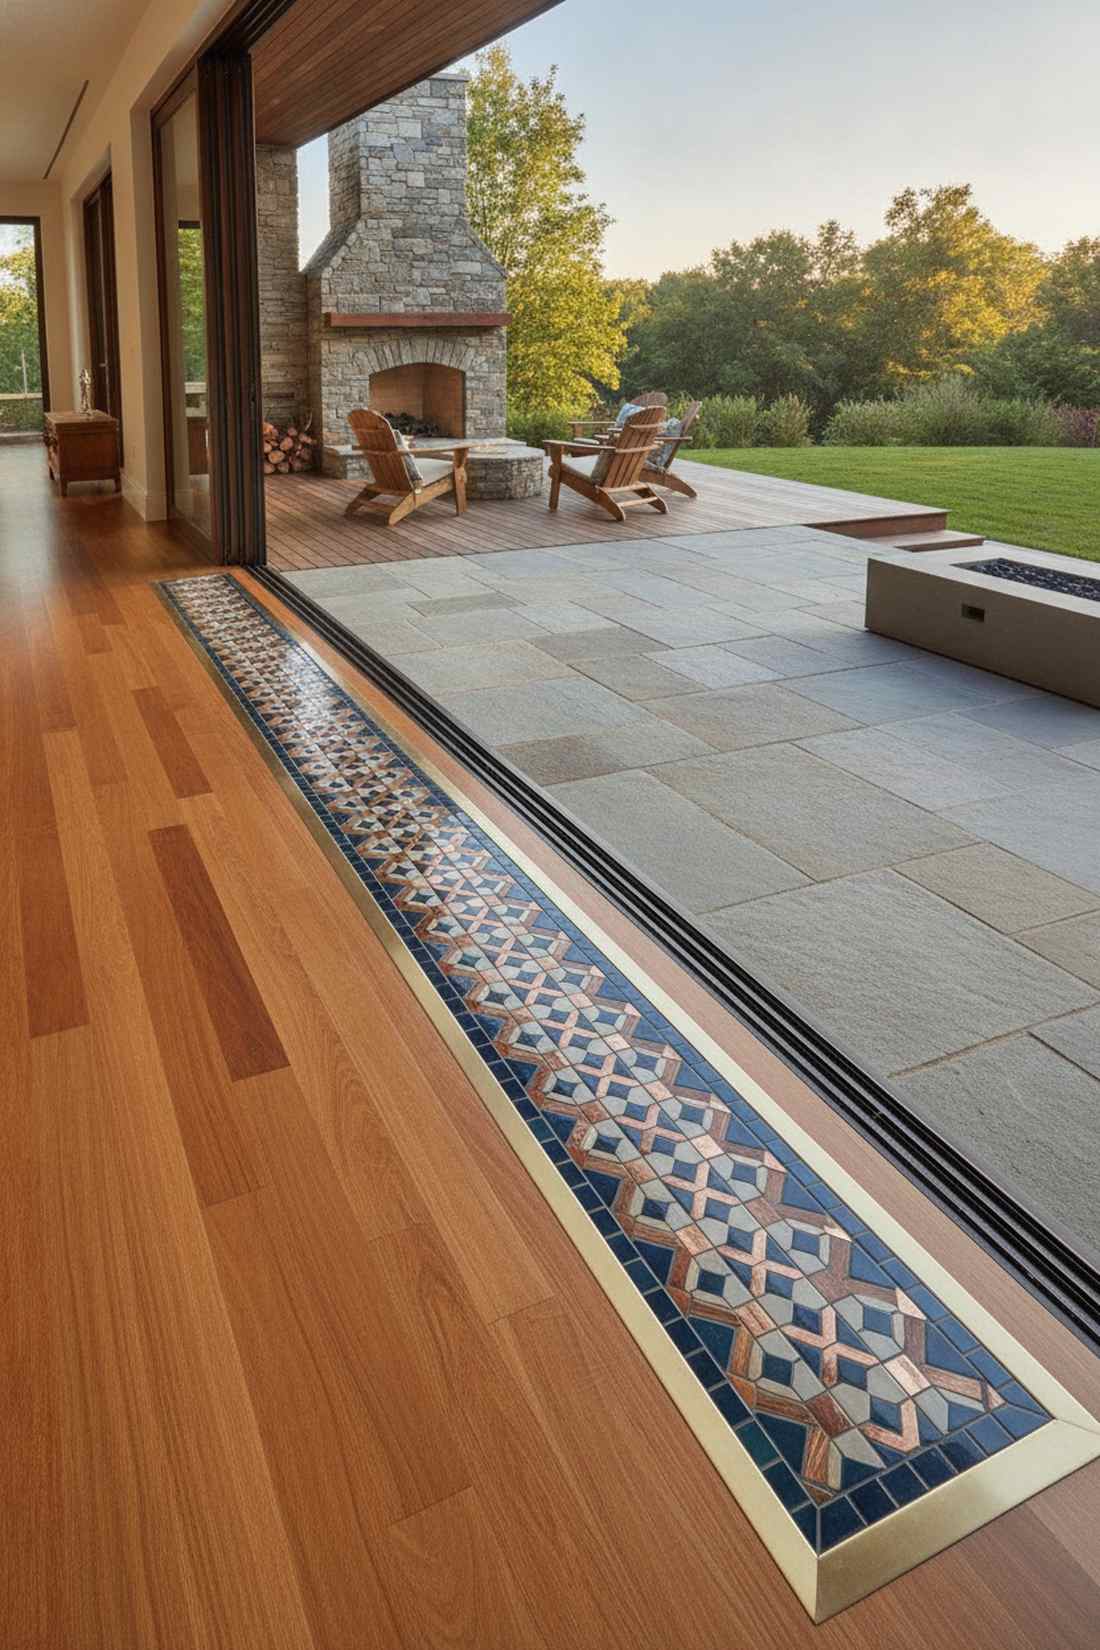
Celebrates the boundary like an architectural piece of art. Contrasting mosaic tile borders look stunning when framing a transition from a hardwood hall to a stone patio.
Trying to perfectly match two slightly different materials usually looks like a mistake. Leaning into the change by installing a striking, defined border strip looks far more expensive than it is.
A decorative border usually adds $50–$150 to the project.
- Key Materials: Accent mosaic sheets, metal framing strips
- Vibe / Style: Defined architectural luxury
- Difficulty: Intermediate DIY
- Budget Breakdown: Mosaic Sheets: $60 | Edge Trim: $20.
- Creator’s Tip: Keep the border width between 6 and 12 inches to ensure it looks like a deliberate feature, not an accident.
- Smart Sourcing: Buy pre-meshed accent mosaic sheets and decorative border trim edges.
24. Monochromatic Material Palettes
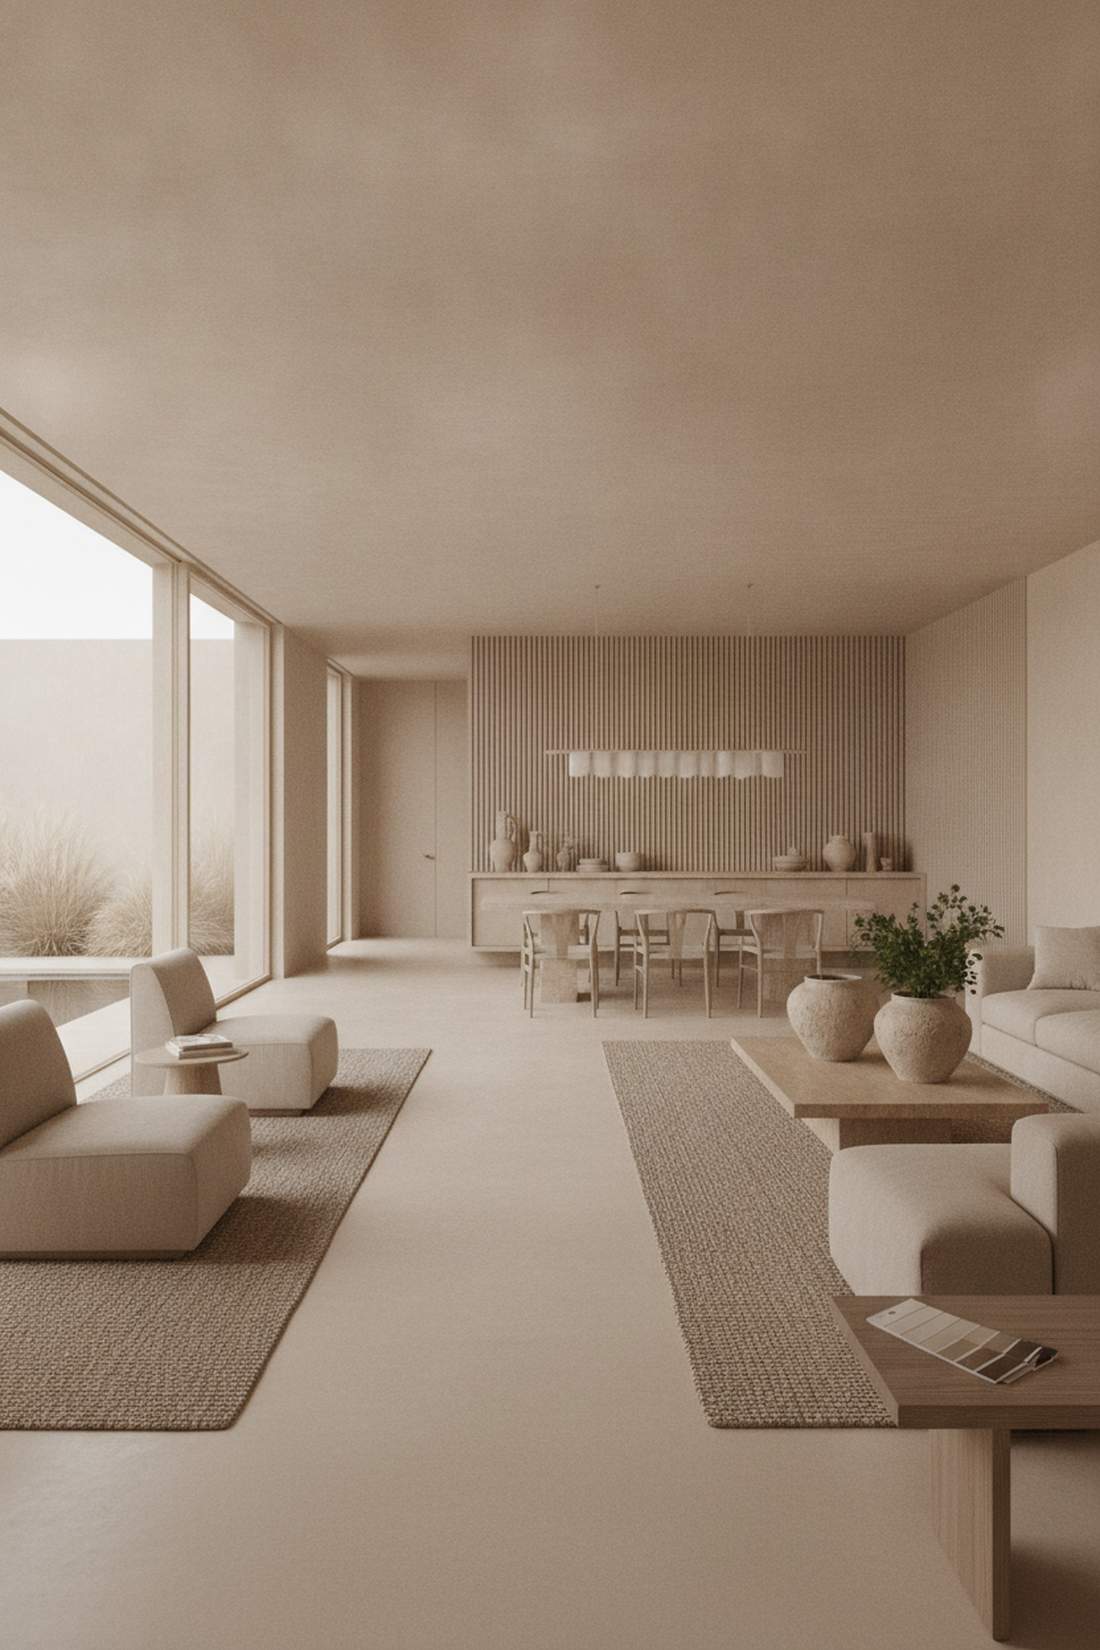
Creates an incredibly calm, spa-like atmosphere. Using strictly tonal grays or warm beiges works exceptionally well for modern, minimalist concrete and stone properties.
Mixing busy, high-contrast flooring chops the house into tiny, disconnected boxes. Restricting your entire palette to a single monochromatic tone completely erases the visual boundaries and expands the space.
This is a free design philosophy that yields massive results.
- Key Materials: Tonally matched paint, stone, and wood
- Vibe / Style: Zen minimalist luxury
- Difficulty: Easy design planning
- Budget Breakdown: Design Phase (Free).
- Creator’s Tip: Use heavily textured accents like rugs or planters to add interest since the color palette is so restrained.
- Smart Sourcing: Use monochromatic concrete dye kits and tonal color swatch decks.
Material Guide: Cheap vs. Premium Aesthetic
Knowing exactly where to save and where to spend makes all the difference in achieving that “looks expensive but isn’t” vibe across your transitions.
- Standard vs. UV-Resistant/Premium: Standard indoor materials bleach out and warp in months. Upgrading to UV-coated components stops fading, preventing you from replacing your floors every three years.
- Pre-made Kits vs. Sourcing Locally: Scavenging separate hardware bits rarely aligns perfectly. Buying commercial-grade track and door starter kits ensures precision alignment, saving both installation time and money on errors.
If you think your patio has to be lower than your living room, this next architectural trick will blow your mind…
Level & Elevation Approaches
Eliminating elevation changes between indoor and outdoor floors produces the smoothest transitions. Strategic grading and structural planning make this possible on any site.
25. Raised Deck Platforms to Match Floors
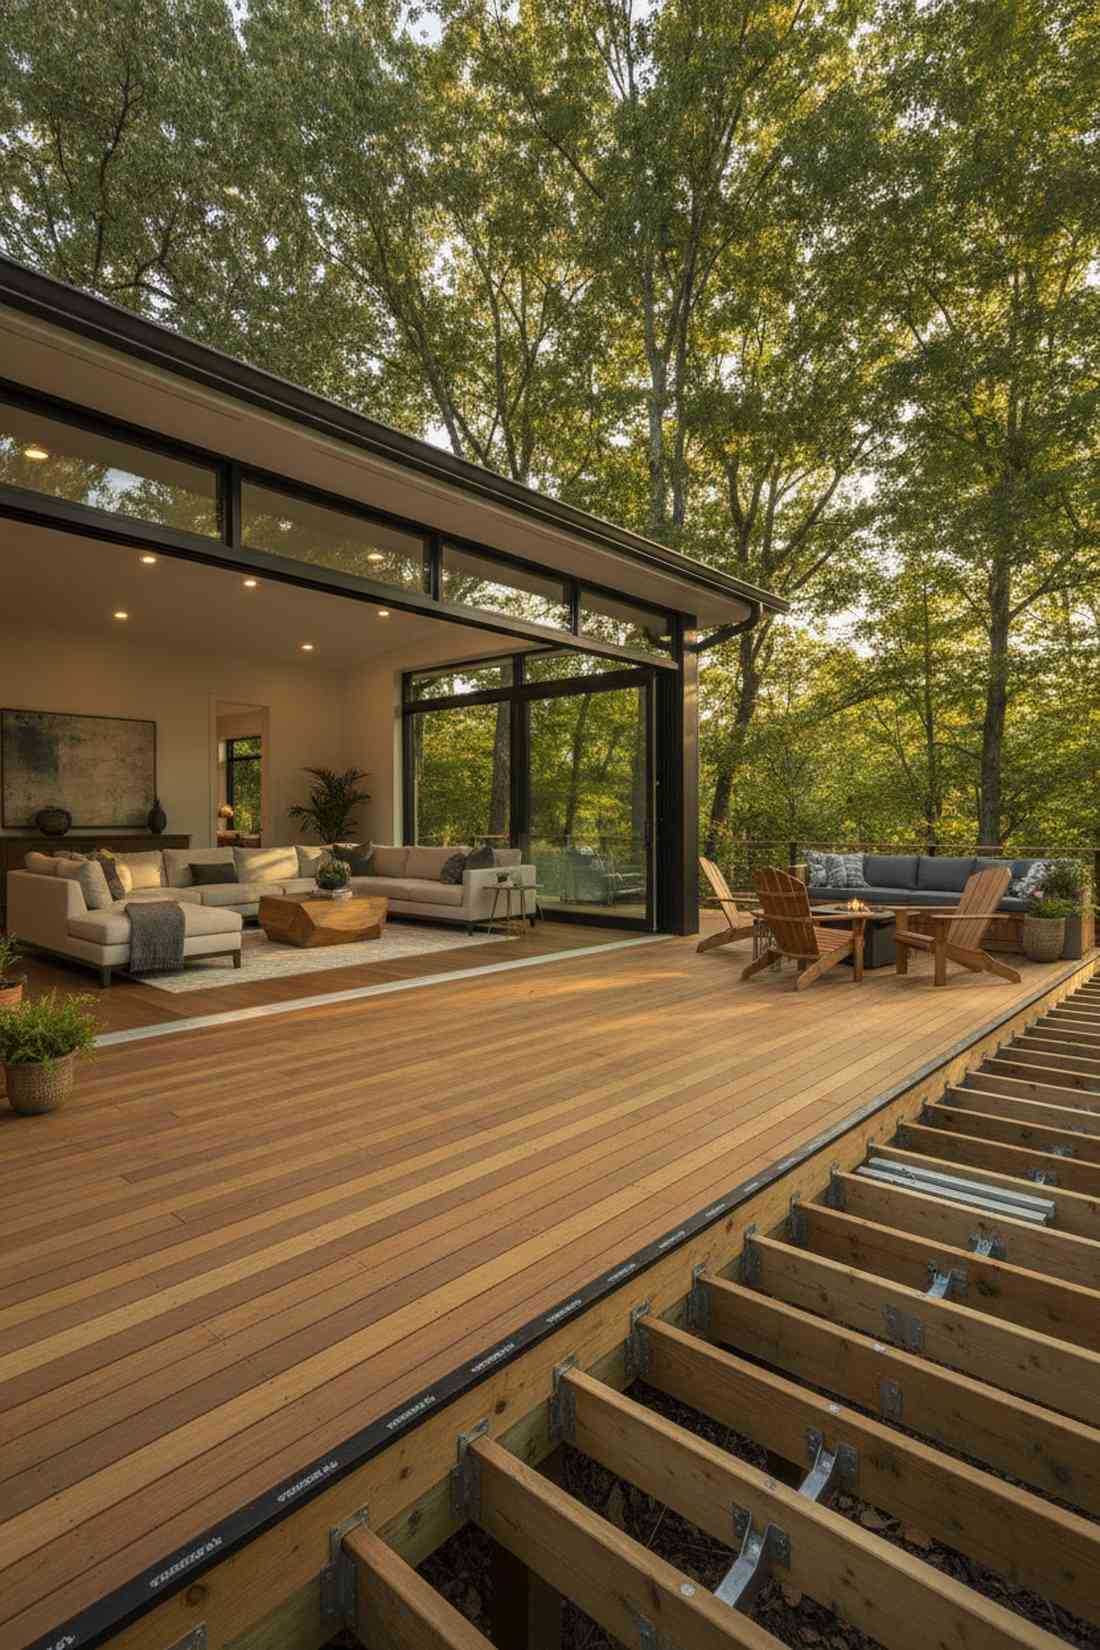
Completely removes the psychological barrier of stepping outside. Elevated flush-mount decking works wonders for connecting a raised living room straight into the tree canopy.
Most builders automatically drop the patio down a foot, breaking the flow. Building an elevated deck sub-structure to perfectly align with your interior baseboards delivers a surprisingly premium look of one massive, unified room.
Lumber framing for this runs $15–$30 per square foot.
- Key Materials: Pressure-treated joists, ledger boards, flashing
- Vibe / Style: Seamless expansive floating deck
- Difficulty: Advanced DIY / Carpentry
- Budget Breakdown: Framing Lumber: $10/sq ft | Hardware: $5/sq ft.
- Creator’s Tip: Install premium ledger flashing tape to absolutely guarantee water doesn’t rot your home’s rim joist.
- Smart Sourcing: Get heavy-duty galvanized joist hangers (bulk pack) and self-adhering ledger flashing tape.
26. Sunken Living Room Variations
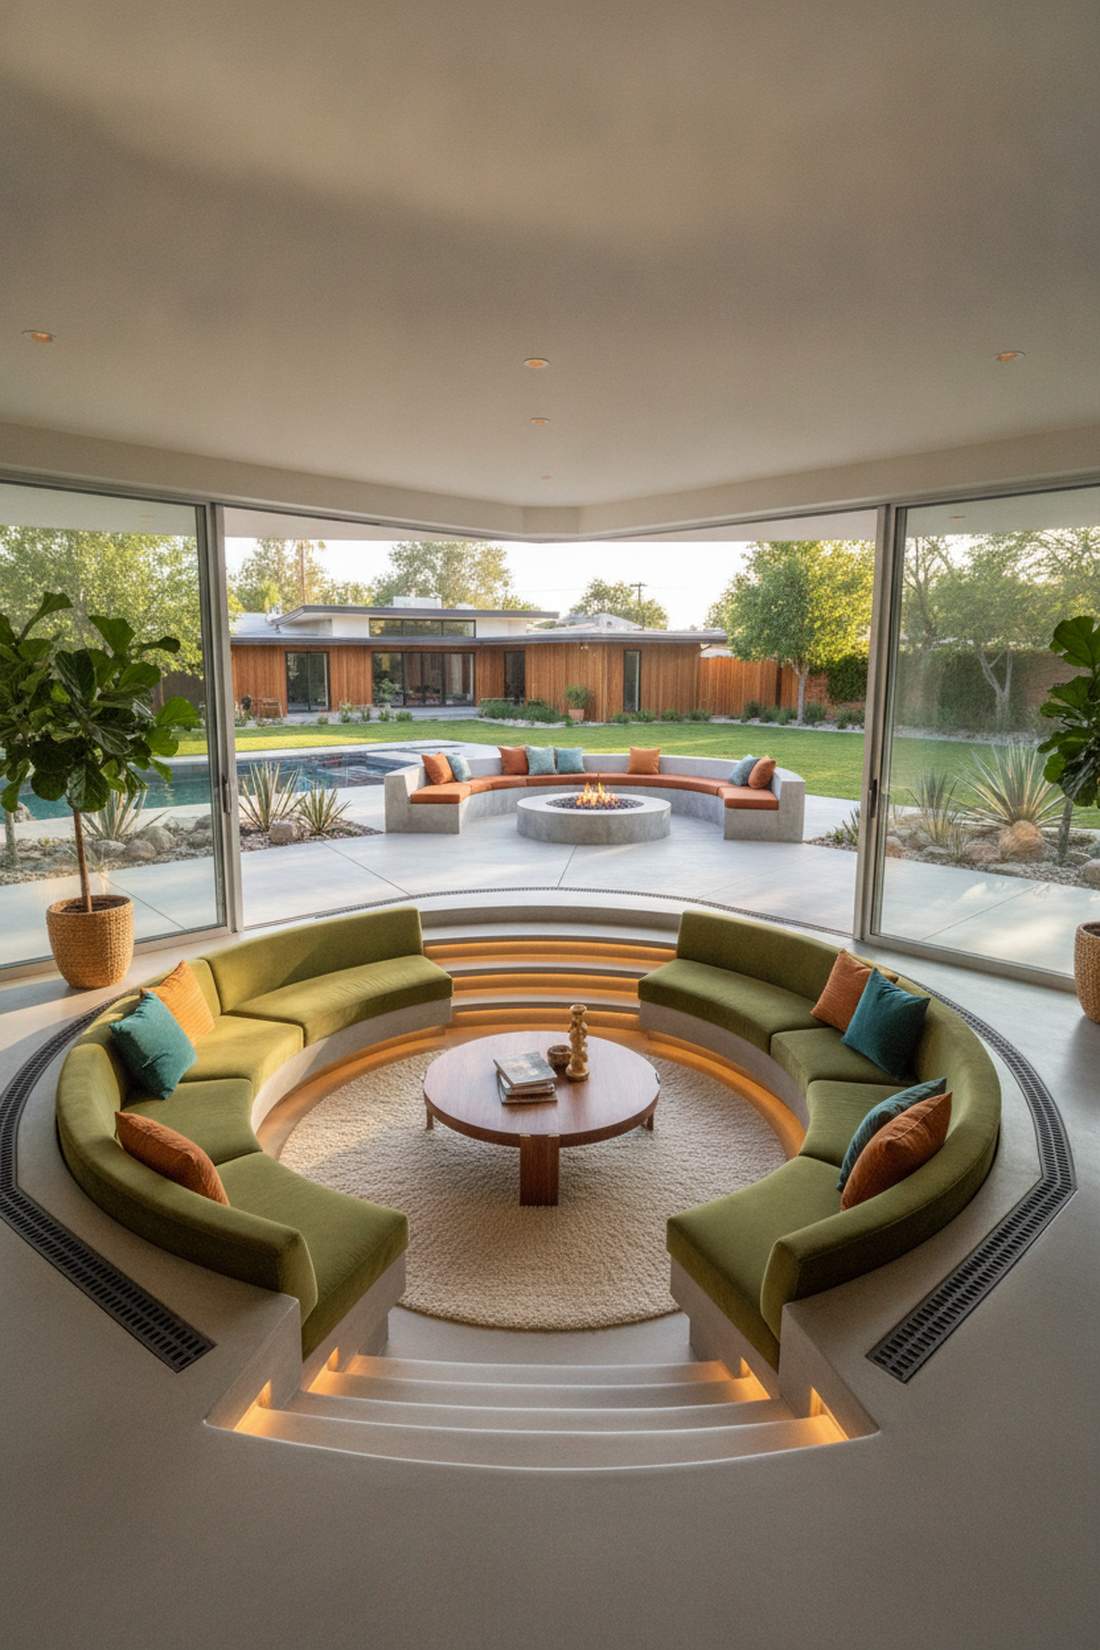
Brings a wildly cozy, mid-century modern aesthetic to the forefront. Dropping the interior floor to meet an existing backyard patio creates intimate conversation pits.
Instead of struggling to build a massive deck up to your house, you alter the inside. Excavating a step-down lounge solves elevation issues perfectly and gives a designer-level finish that guests will love.
This is a major architectural shift costing $5,000+. Pin this if you love retro-modern styling!
- Key Materials: Concrete slab modification, retaining steps
- Vibe / Style: Retro-chic conversation pit
- Difficulty: Expert level renovation
- Budget Breakdown: Excavation: $2,000 | New Slab: $3,000.
- Creator’s Tip: Waterproofing is non-negotiable here; ensure robust perimeter French drains are installed outside.
- Smart Sourcing: Use commercial-grade concrete waterproofing sealants and pre-cut French drain pipe kits.
27. Engineered Level Subfloor Systems
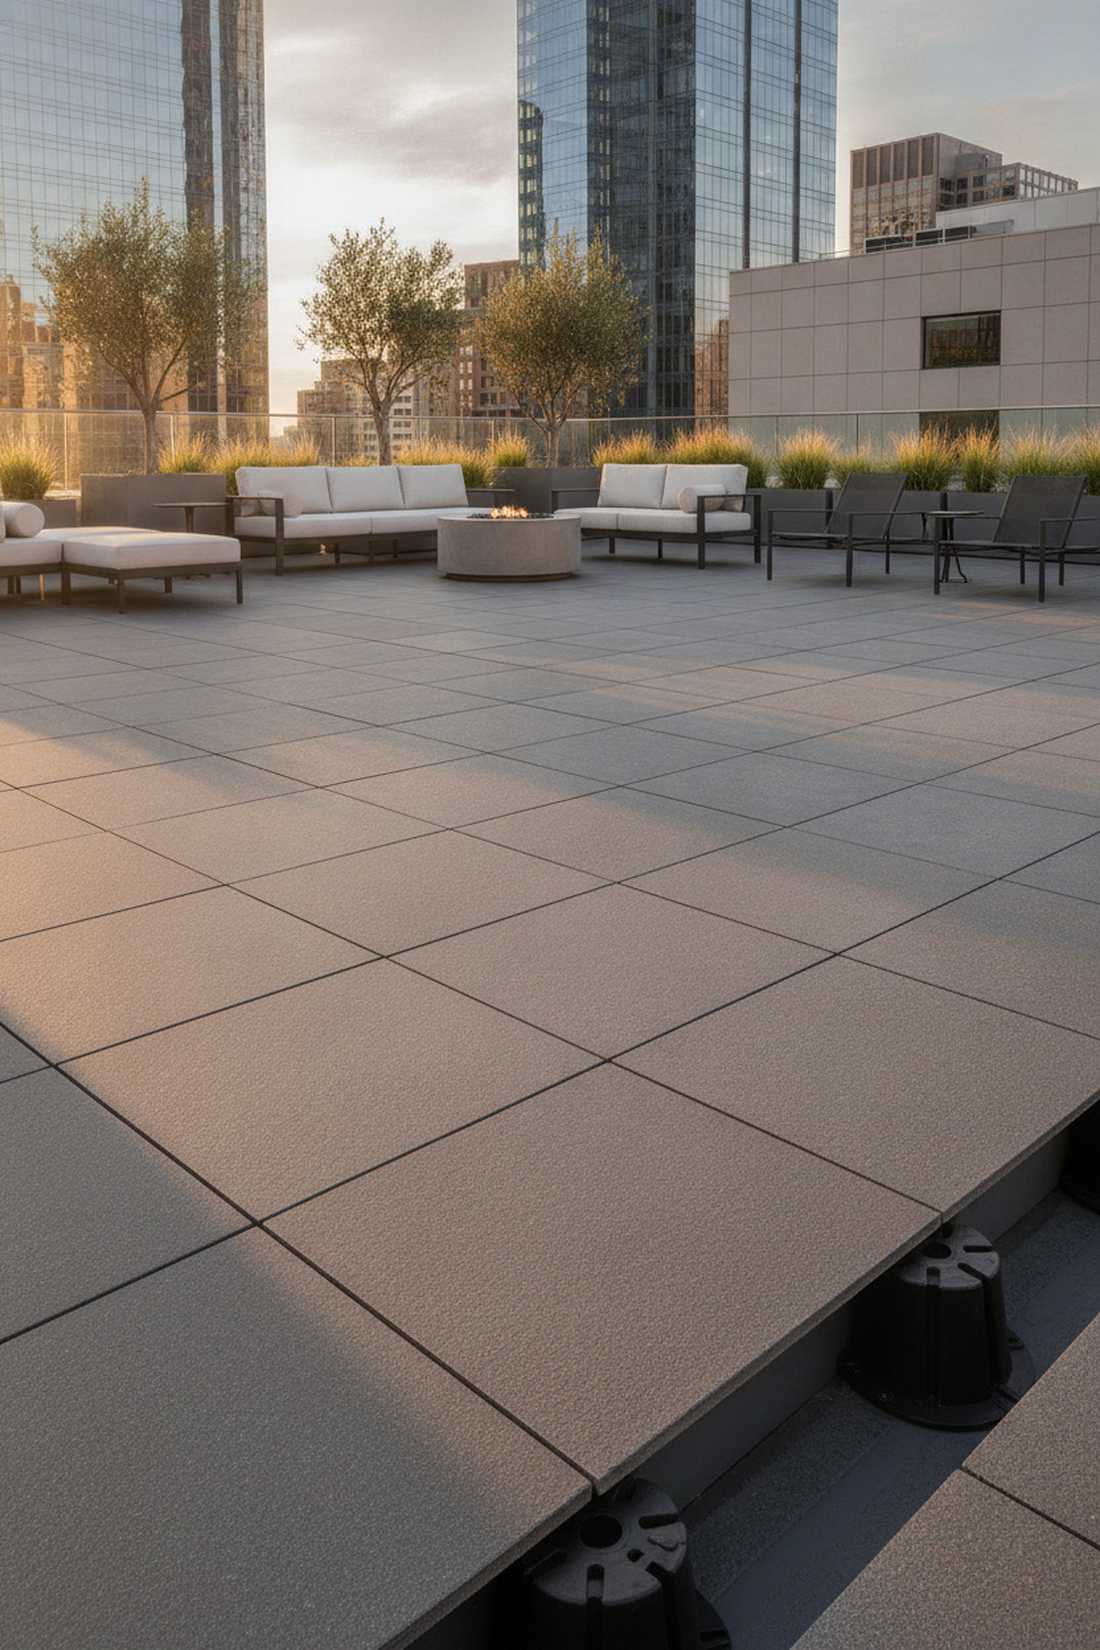
Transforms a sloped, uneven roof or balcony into a perfectly flat entertainment zone. Adjustable paver pedestal systems are a godsend for urban apartment balconies.
Trying to mortar tiles over a sloping drainage slab is a guaranteed failure. Clicking exterior pavers onto heavy-duty adjustable pedestals corrects any slope instantly while allowing water to safely drain underneath.
Pedestal systems generally cost $5–$12 per square foot.
- Key Materials: Adjustable plastic pedestals, heavy porcelain pavers
- Vibe / Style: Flat, flawless urban rooftop
- Difficulty: Intermediate DIY
- Budget Breakdown: Pedestals: $4/sq ft | Pavers: $6/sq ft.
- Creator’s Tip: Start from the door threshold at the highest point and adjust the pedestals upward as the slope drops away.
- Smart Sourcing: Order adjustable floor pedestal kits (bulk pack) and heavy-duty structural porcelain pavers.
28. Floating Deck Systems
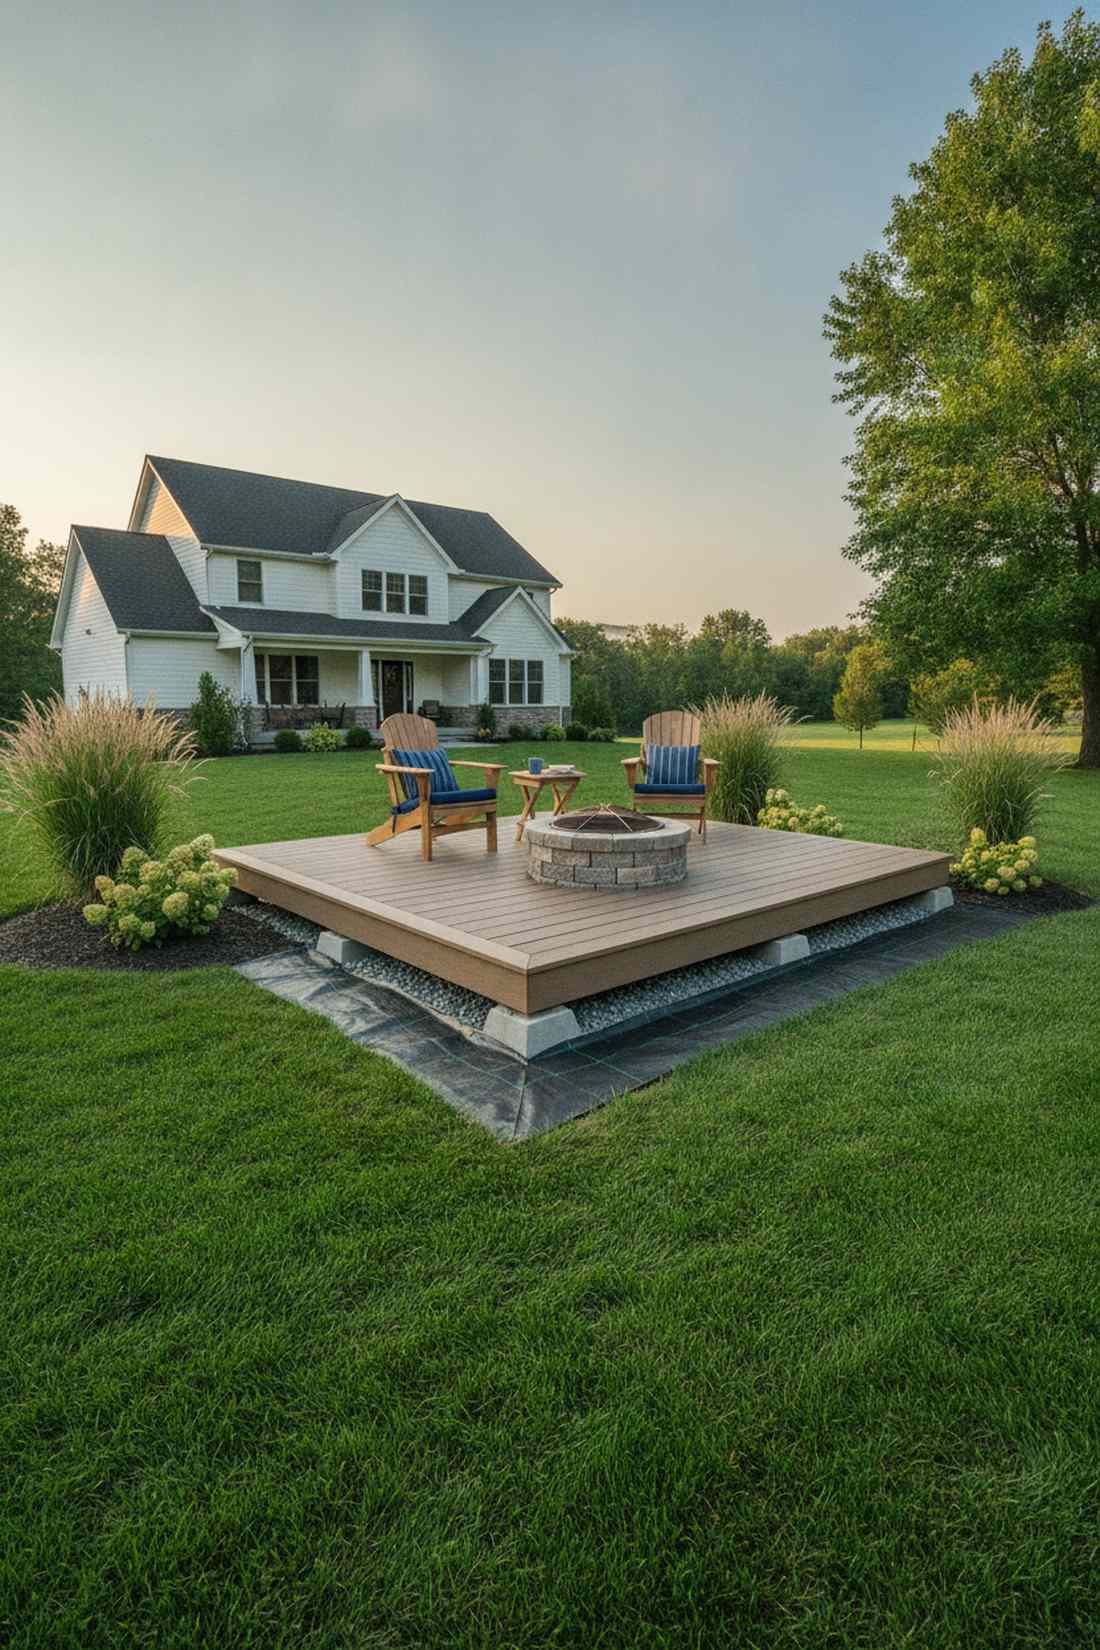
Creates a gorgeous, low-profile lounge without touching your home’s foundation. Freestanding platform decks are excellent for quickly leveling out a bumpy backyard.
Attaching ledger boards to a house can trigger strict permit nightmares and rot risks. Building an independent, floating grid on concrete deck blocks looks far more expensive than it is and bypasses attachment completely.
You can easily pull this off for around $800–$2,000.
- Key Materials: Concrete deck blocks, treated 2x6s, composite boards
- Vibe / Style: Quick, clean floating oasis
- Difficulty: Intermediate DIY
- Budget Breakdown: Deck Blocks: $50 | Framing/Decking: $900.
- Creator’s Tip: Use weed barrier fabric and gravel directly under the floating frame to prevent damp rot and overgrowth.
- Smart Sourcing: Buy pre-cast concrete deck blocks and heavy-duty weed barrier rolls.
29. Gradual Ramp Designs
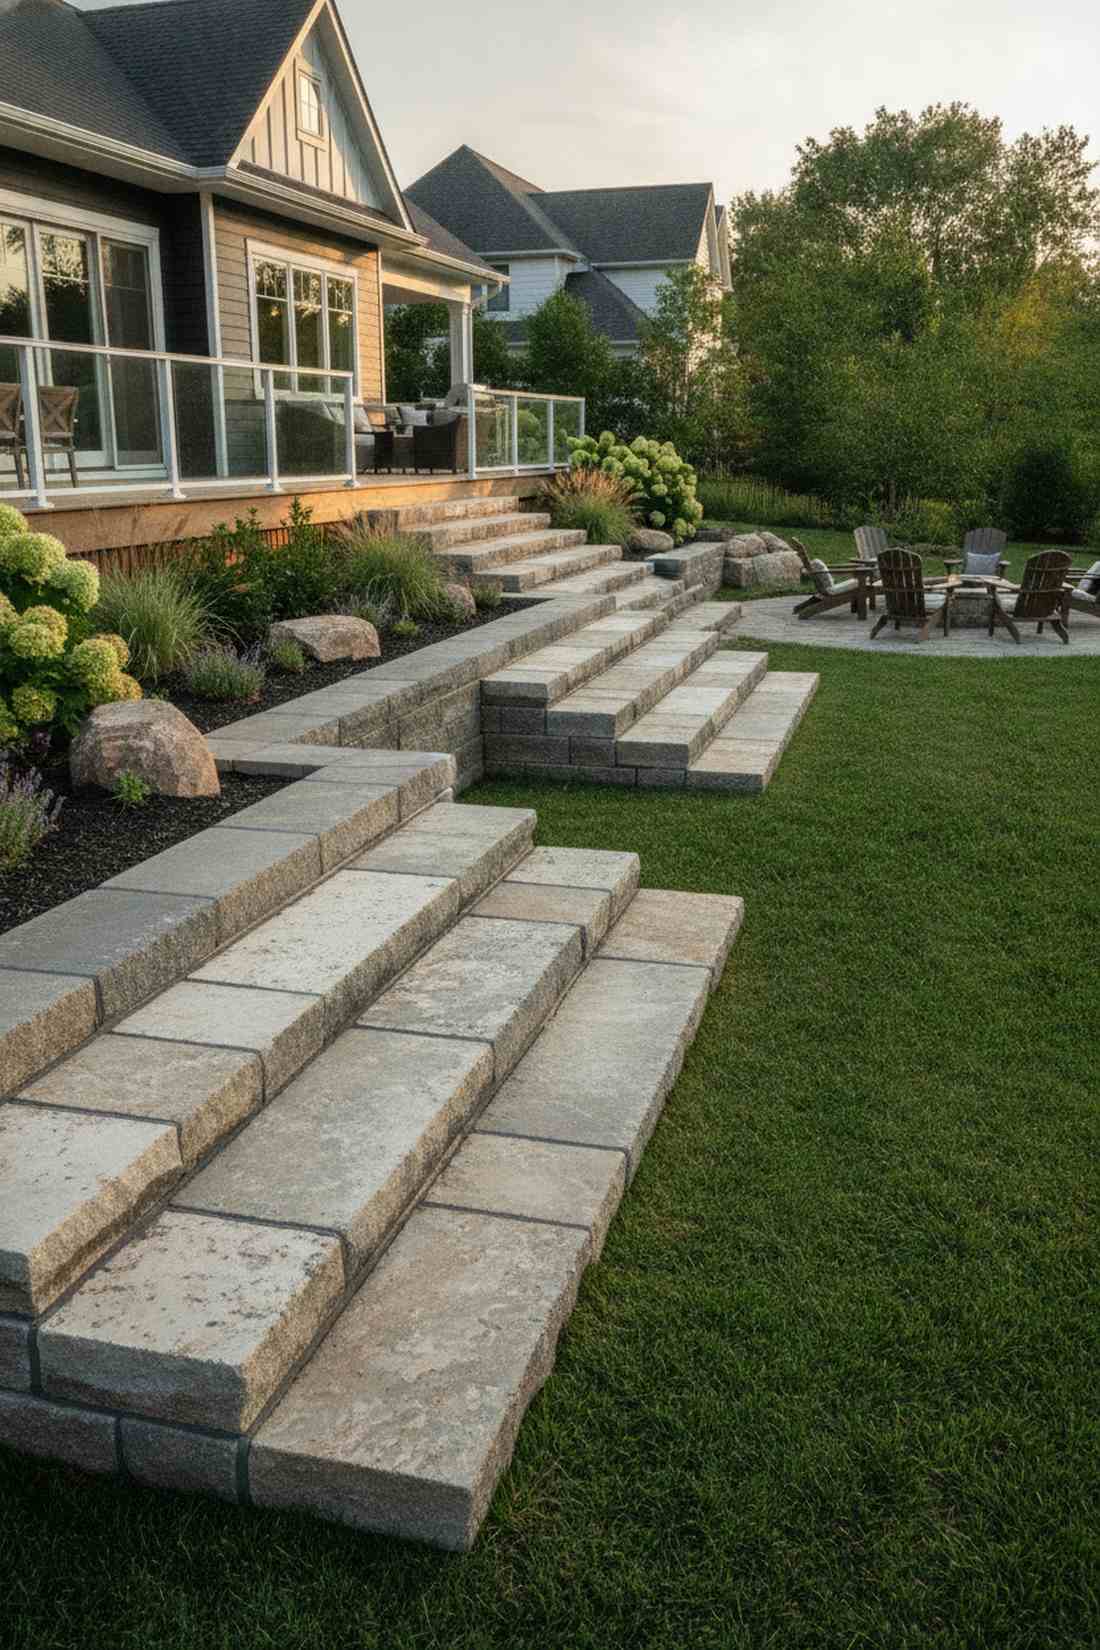
Delivers a majestic, sweeping entrance that feels like a luxury resort. Deep, elongated step ramps work incredibly well for managing large drops into a garden space.
Sharp, narrow staircases break the flow and feel restrictive. Replacing them with massively wide, shallow steps creates a gentle 1:12 slope that practically glides you from the living room to the lawn.
Constructing these wide platforms costs around $1,500–$3,500. Save this to your landscape architecture board!
- Key Materials: Concrete blocks, natural stone caps, landscape fill
- Vibe / Style: Sweeping resort elegance
- Difficulty: Advanced DIY
- Budget Breakdown: Base Materials: $800 | Stone Caps: $1,200.
- Creator’s Tip: Keep step risers under 4 inches and treads over 15 inches to create that effortless “ramp-step” feeling.
- Smart Sourcing: Use pre-cut stone tread caps and heavy-duty landscape block adhesive.
Most people focus so much on the floors that they completely ignore the ceiling—which is actually the biggest secret to faking a massive house.
Visual Flow Enhancements
Beyond materials and levels, design details reinforce the connection. Lighting, color schemes, and architectural elements guide the eye to perceive a unified space.
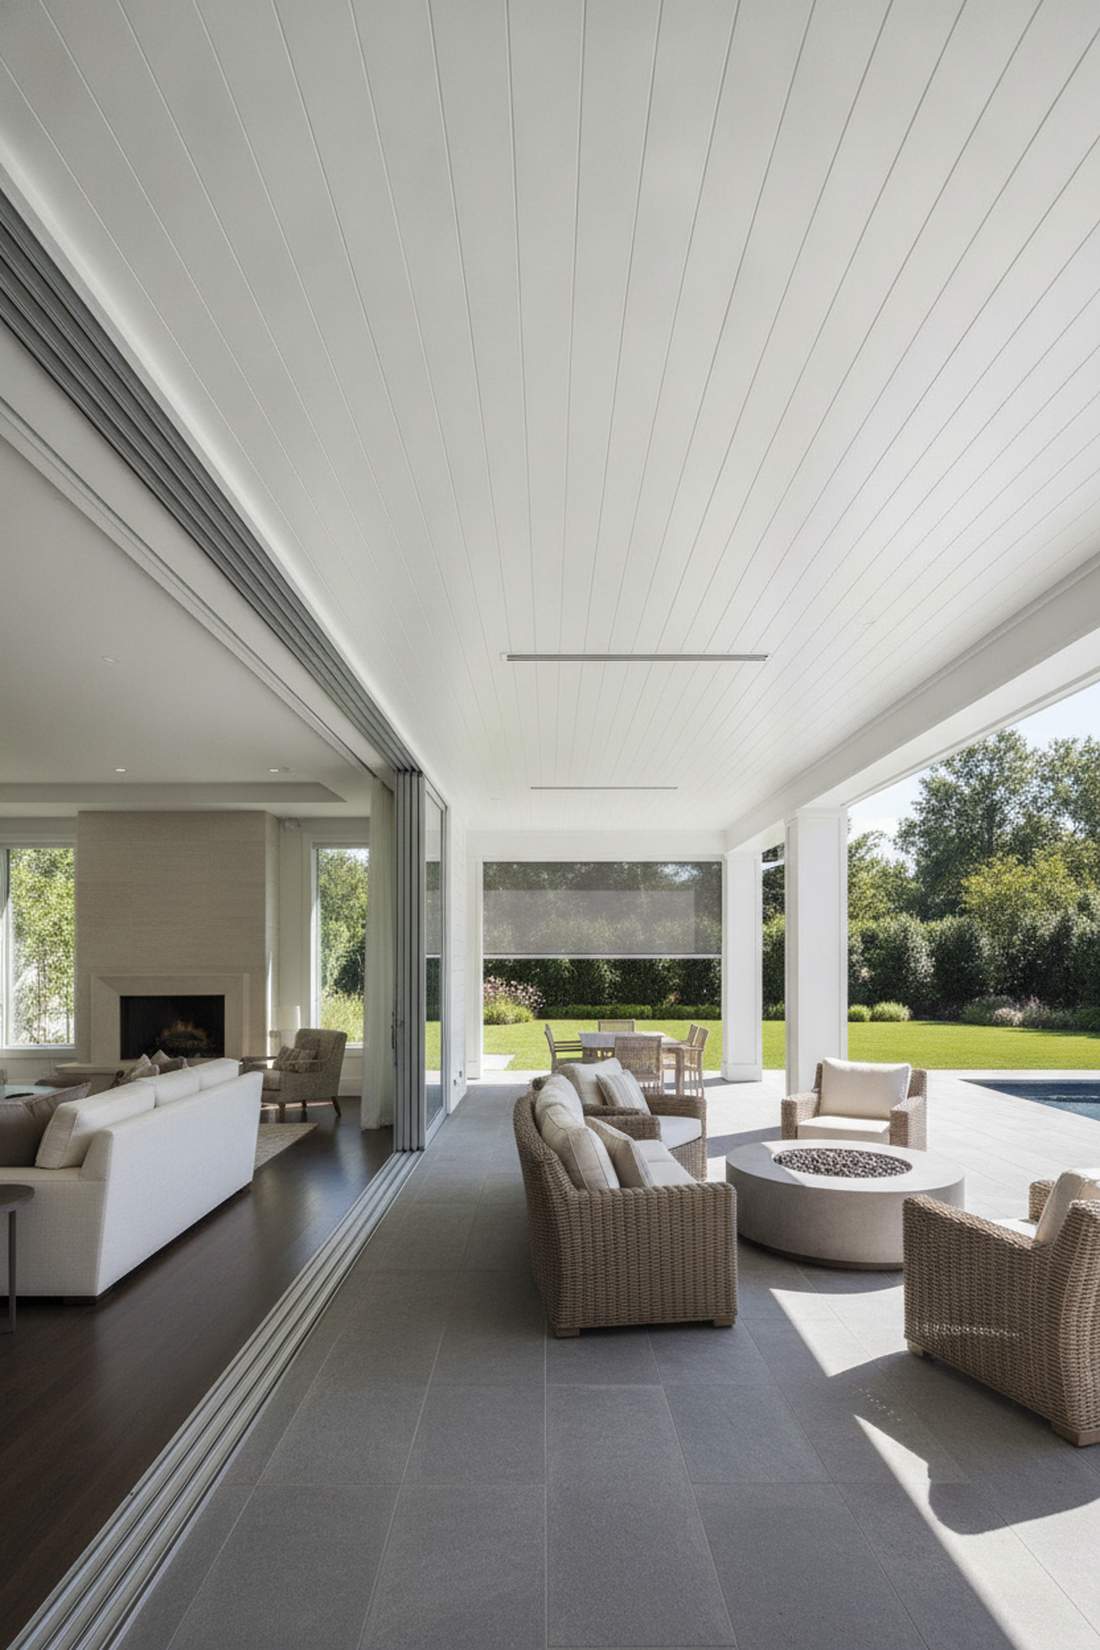
30. Continuous Ceiling Planes
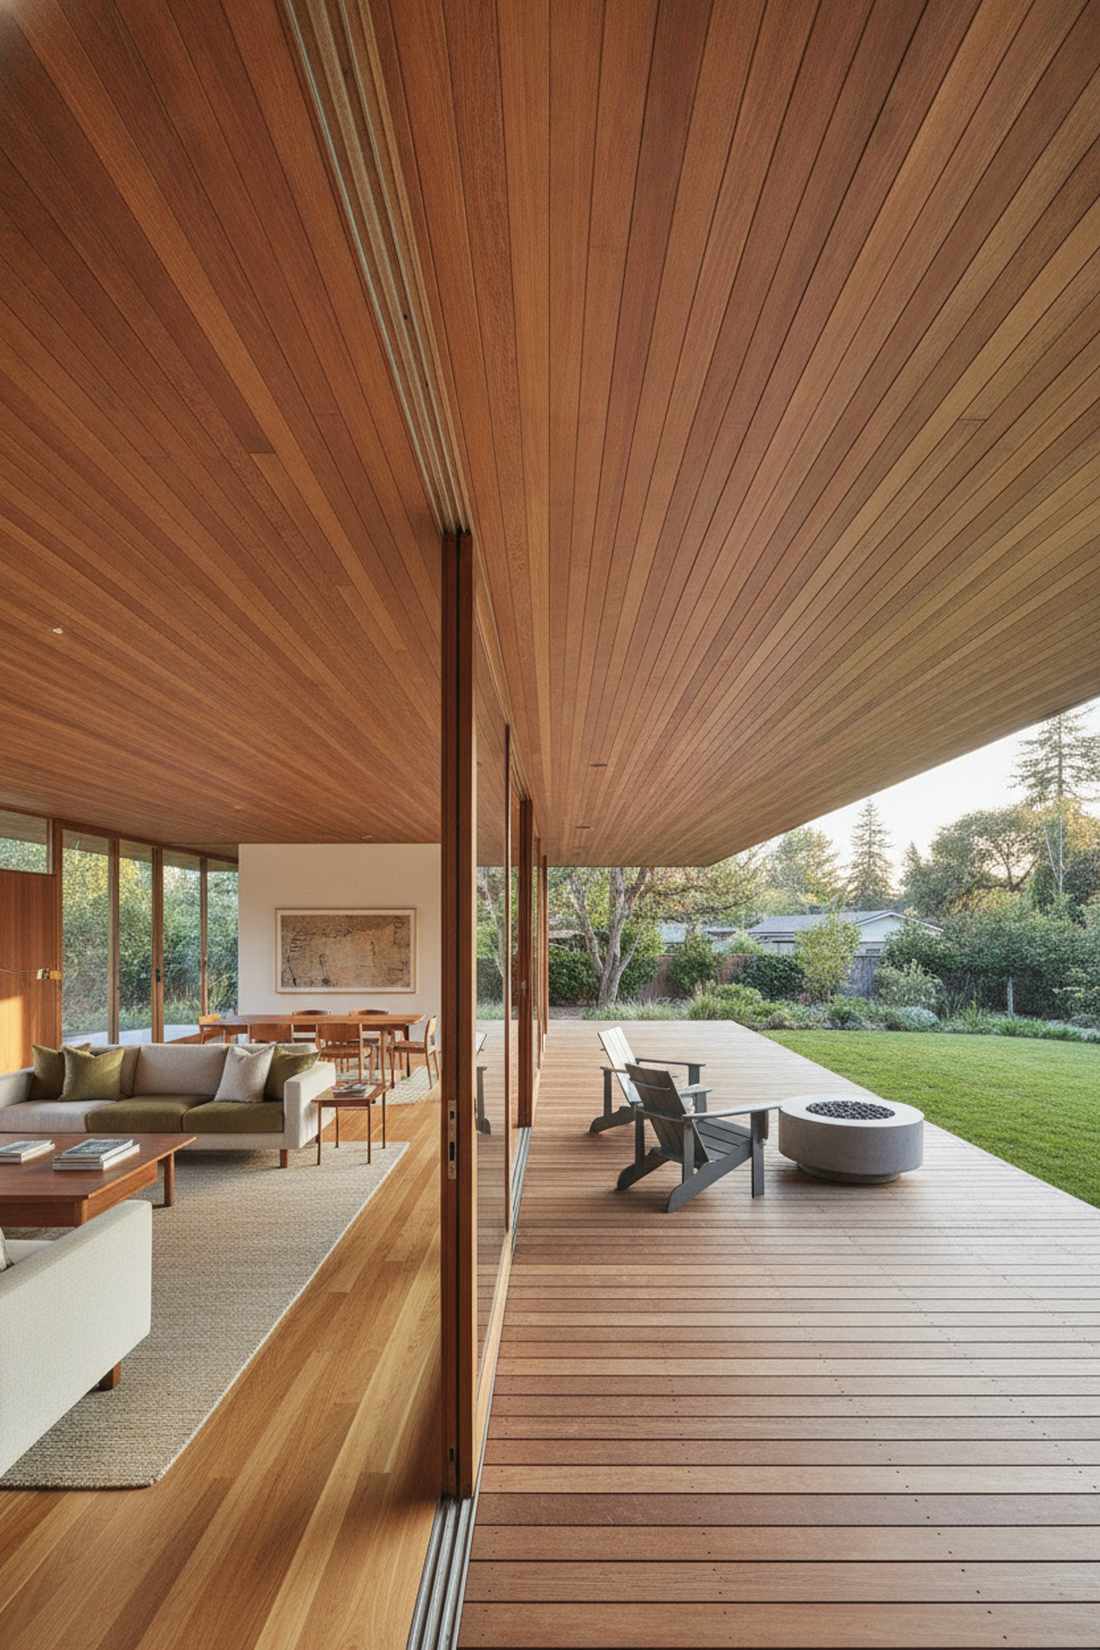
Draws your eyes outward, making the interior feel endlessly large. Running wood plank ceilings straight through to the patio soffit is a masterstroke for mid-century modern homes.
Stopping a beautiful ceiling treatment at the glass line shrinks the room. Extending those precise UV-resistant outdoor wooden planks past the glass visually dissolves the boundary, making the overhang feel like part of the living room.
This architectural upgrade usually costs $20–$40 per square foot.
- Key Materials: Tongue-and-groove cedar, marine varnish
- Vibe / Style: Endlessly expansive horizon
- Difficulty: Advanced Carpentry
- Budget Breakdown: Wood Planks: $15/sq ft | Varnish/Labor: $10/sq ft.
- Creator’s Tip: Ensure the planks run perpendicular to the door frame, pointing directly outward like an arrow toward the yard.
- Smart Sourcing: Buy pre-cut tongue-and-groove cedar boards (bulk pack) and marine-grade clear varnish.
31. Unified Lighting Design
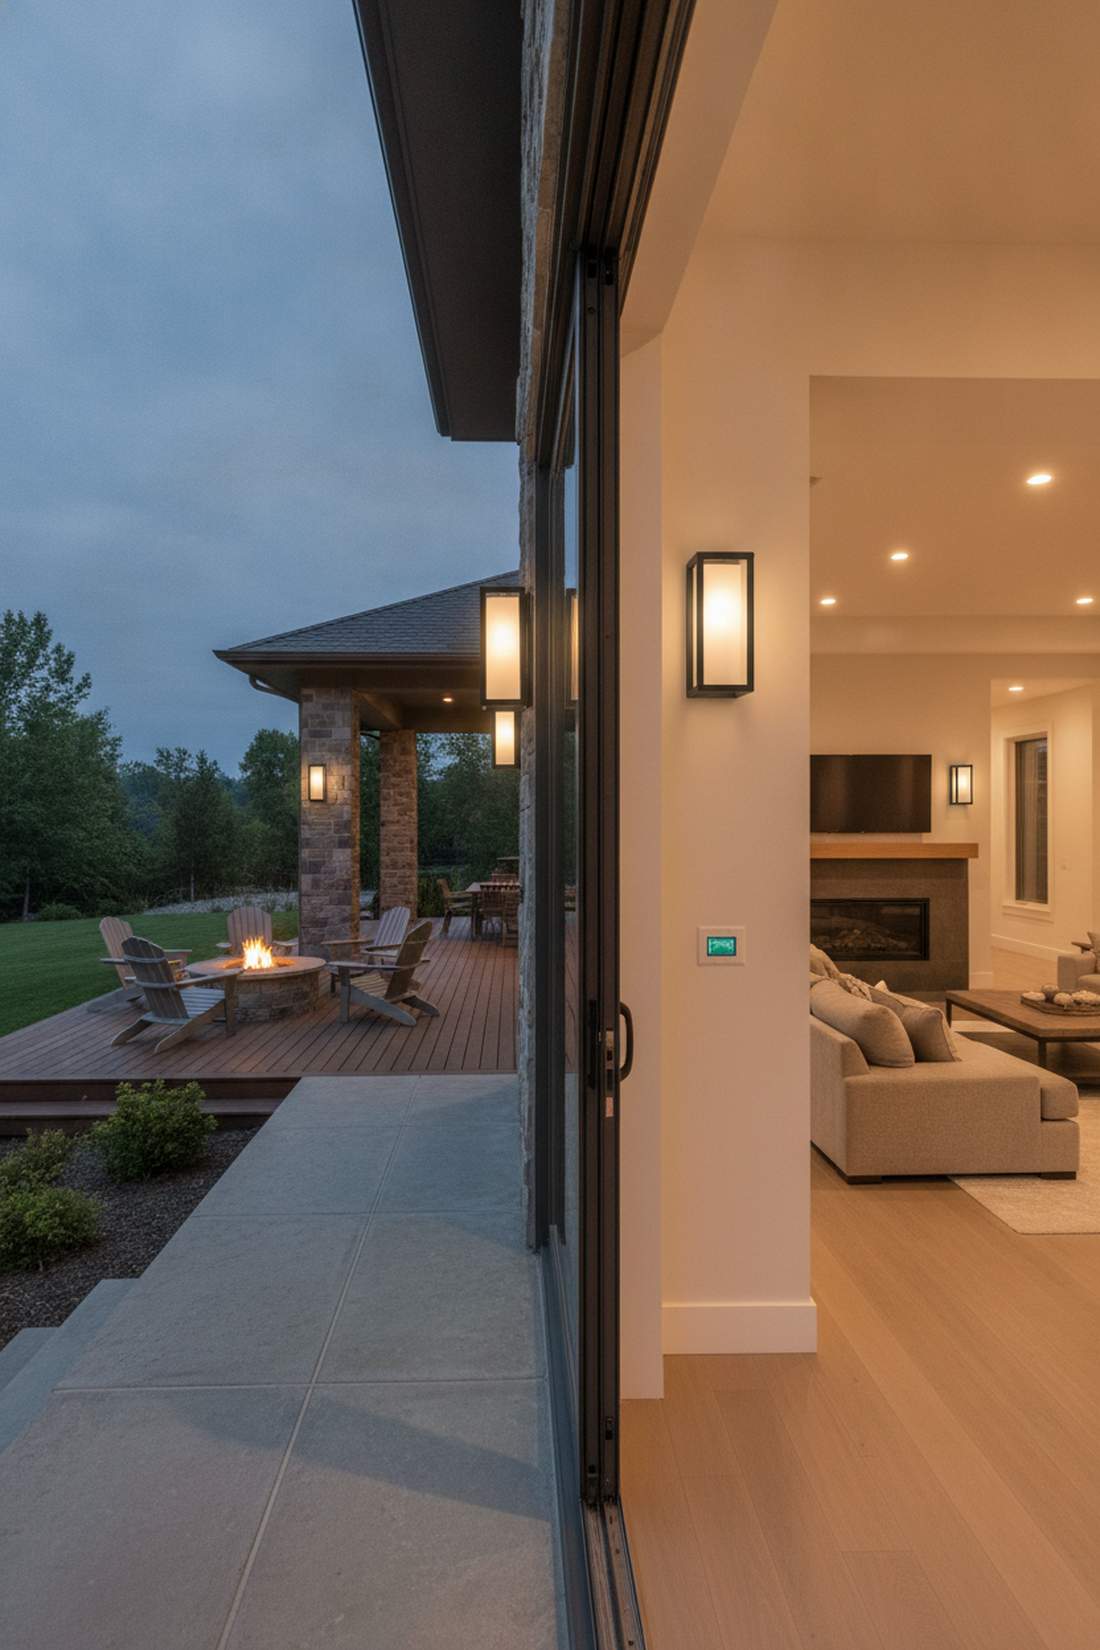
Blurs the lines of the house completely after dark. Symmetrical indoor and outdoor wall sconces are perfect for setting a moody, cohesive evening atmosphere.
A bright cool-white living room clashing with dim yellow patio lights looks horribly disjointed. Matching the color temperature (around 2700K) and fixture styles across the threshold gives a designer-level finish that pulls the eye outward.
You can easily pull this off for around $100–$300. Pin this to your lighting inspiration board!
- Key Materials: Weatherproof LED sconces, smart dimmers
- Vibe / Style: Ambient and cohesive evening glow
- Difficulty: Easy DIY (if wired)
- Budget Breakdown: Fixtures: $150 | Smart Switches: $50.
- Creator’s Tip: Put both indoor and outdoor threshold lights on a single smart switch so they always illuminate together.
- Smart Sourcing: Order weatherproof LED wall sconce pairs and smart home dimmer switch kits.
32. Structural Columns Inside and Out
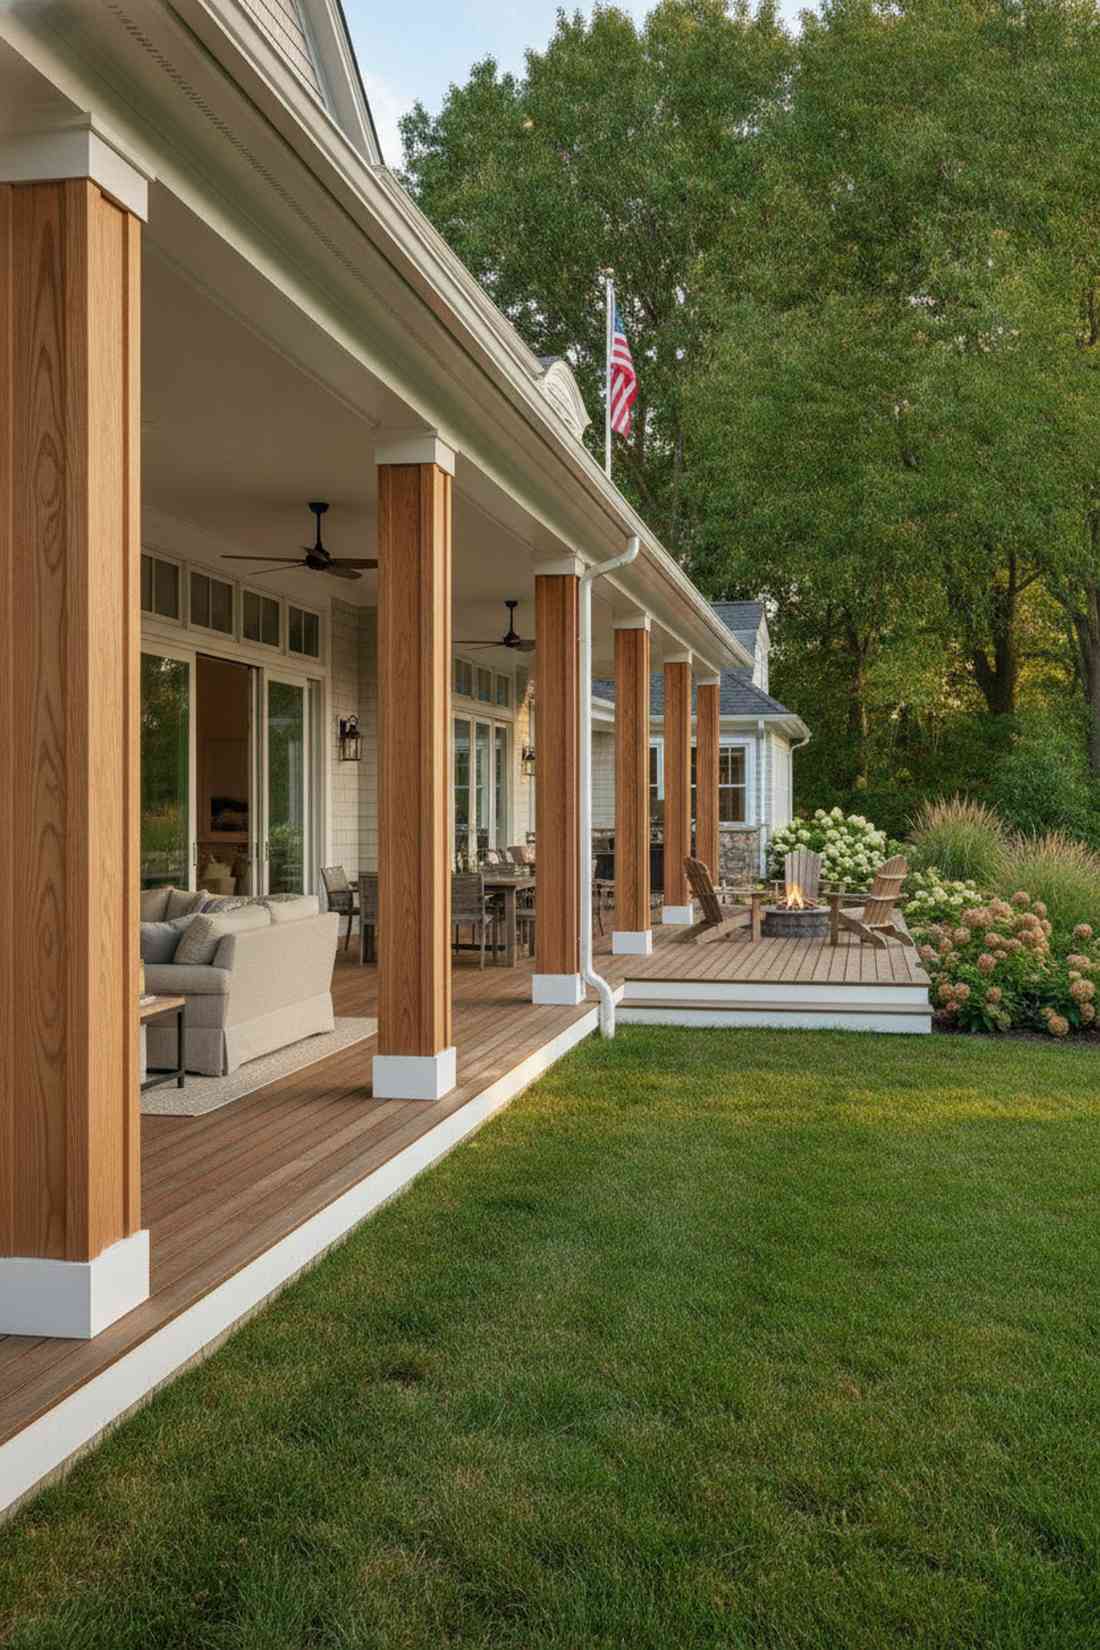
Creates a powerful, rhythmic colonnade that marches right out into nature. Matching interior and exterior structural pillars works beautifully for properties with deep, sweeping rooflines.
Using drywall inside and chunky brick outside breaks the visual continuity. Wrapping both the interior supports and the patio posts in the identical premium composite wood casing forcefully unifies the architecture.
Wrapping existing columns costs about $200–$500 per pillar.
- Key Materials: Column wrap kits, PVC trim boards
- Vibe / Style: Stately architectural rhythm
- Difficulty: Intermediate DIY
- Budget Breakdown: Wrap Kits: $250/column | Adhesives: $20.
- Creator’s Tip: Use cellular PVC trim for the outdoor column bases so they never wick moisture or rot from patio puddles.
- Smart Sourcing: Get pre-cut PVC column wrap kits and weatherproof PVC cements.
33. Paint Color Continuity
Erase the mental barrier of stepping “outside” with one simple trick. Flowing wall paint colors directly onto exterior stucco is a brilliant, cheap way to blend a sunroom with an open patio.
A stark color change at the door frame screams separation. Grabbing an exterior-grade paint mixed to the exact identical shade of your interior living room delivers a surprisingly premium look with zero structural work.
You can complete this for around $50–$100 in paint.
- Key Materials: Color-matched exterior acrylic latex paint, painter’s tape
- Vibe / Style: Visually blurred boundaries
- Difficulty: Very easy DIY
- Budget Breakdown: Premium Paint: $60/gallon | Supplies: $20.
- Creator’s Tip: Opt for an eggshell finish outside to mimic the softness of interior drywall while still resisting dirt.
- Smart Sourcing: Buy exterior-grade acrylic latex paint and professional-grade edge masking tape.
34. Furniture Style Coordination
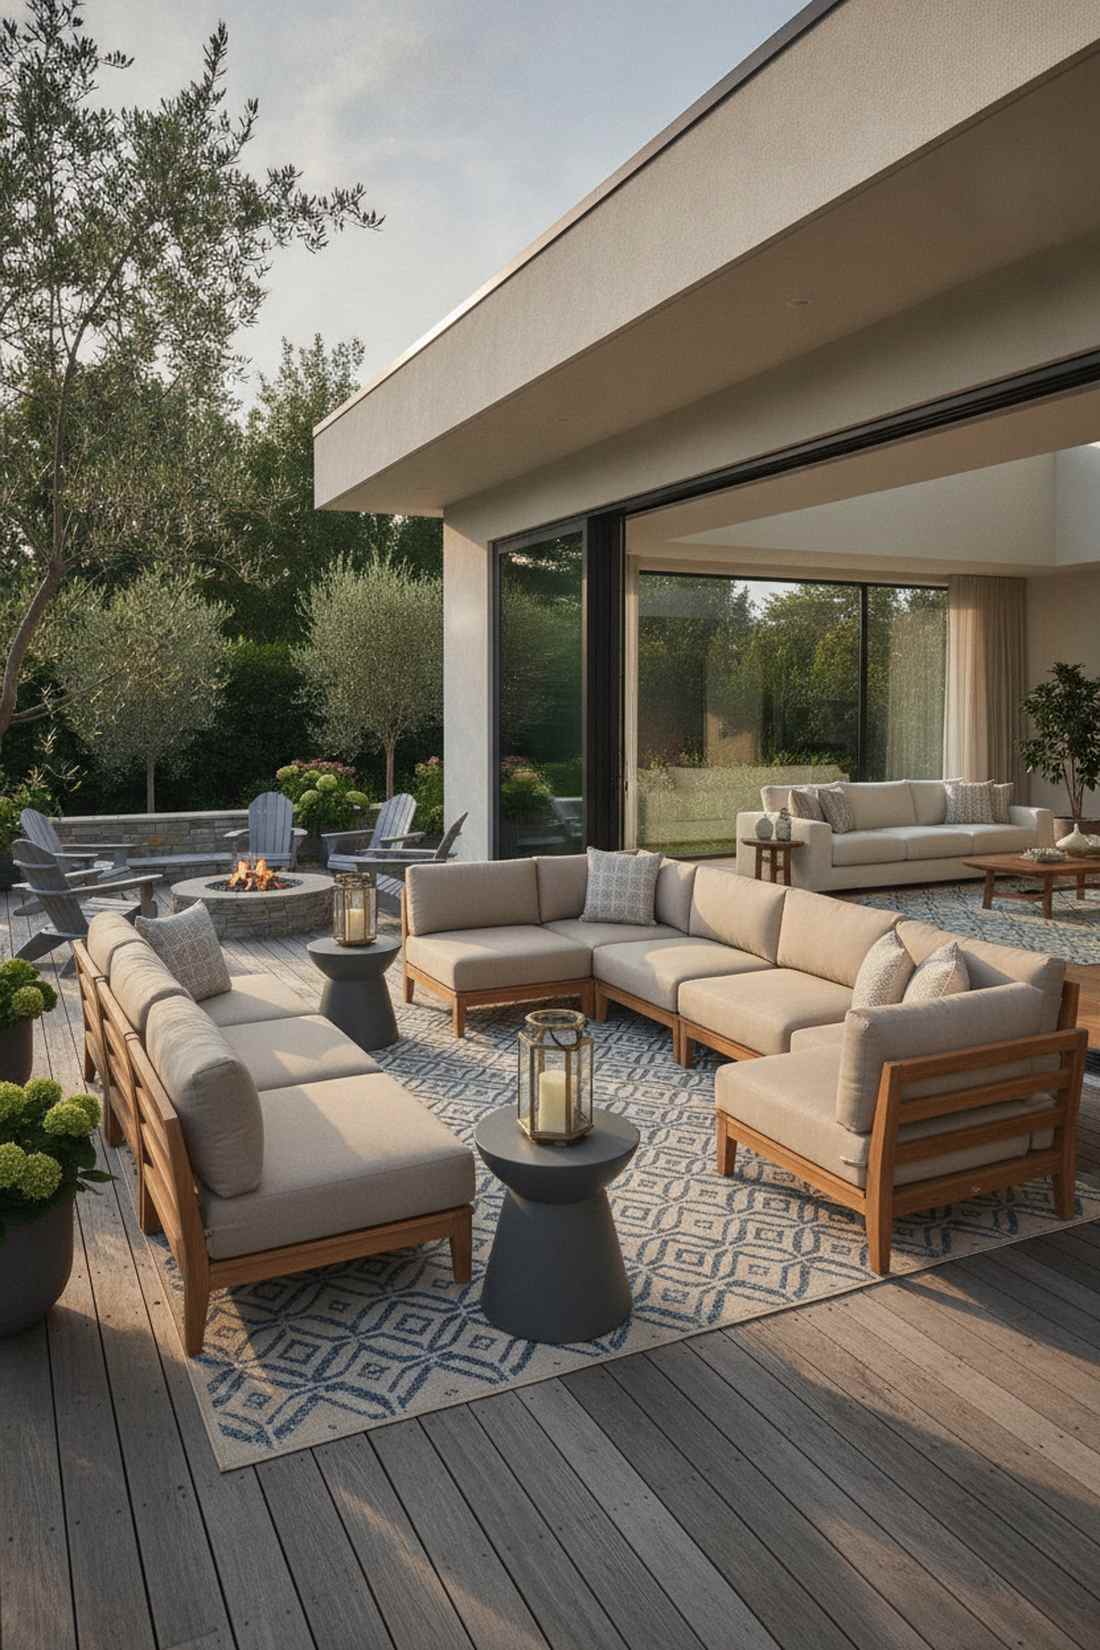
Makes your patio feel like a luxurious extension of your living room couch. Styling weather-resistant upholstered outdoor sofas works perfectly to mimic high-end interior lounges.
Sticking cheap plastic chairs outside next to a luxury leather interior ruins the aesthetic instantly. Investing in high-performance acrylic fabrics and teak wood that match your interior furniture looks far more expensive than it is.
A coordinated outdoor furniture set ranges from $800–$3,000.
- Key Materials: Solution-dyed acrylic cushions, teak or powder-coated aluminum frames
- Vibe / Style: High-end luxury resort
- Difficulty: Easy shopping
- Budget Breakdown: Sofa Set: $1,200 | Accent Tables: $300.
- Creator’s Tip: Bring outdoor-safe rugs inside just near the doorway, and place matching ones outside to bridge the gap perfectly.
- Smart Sourcing: Look for UV-resistant outdoor fabric cushion sets and washable outdoor area rugs.
This final trick costs almost nothing, but it’s the exact secret landscape architects use to make small homes feel like sprawling estates…
35. Plant Integration Strategies
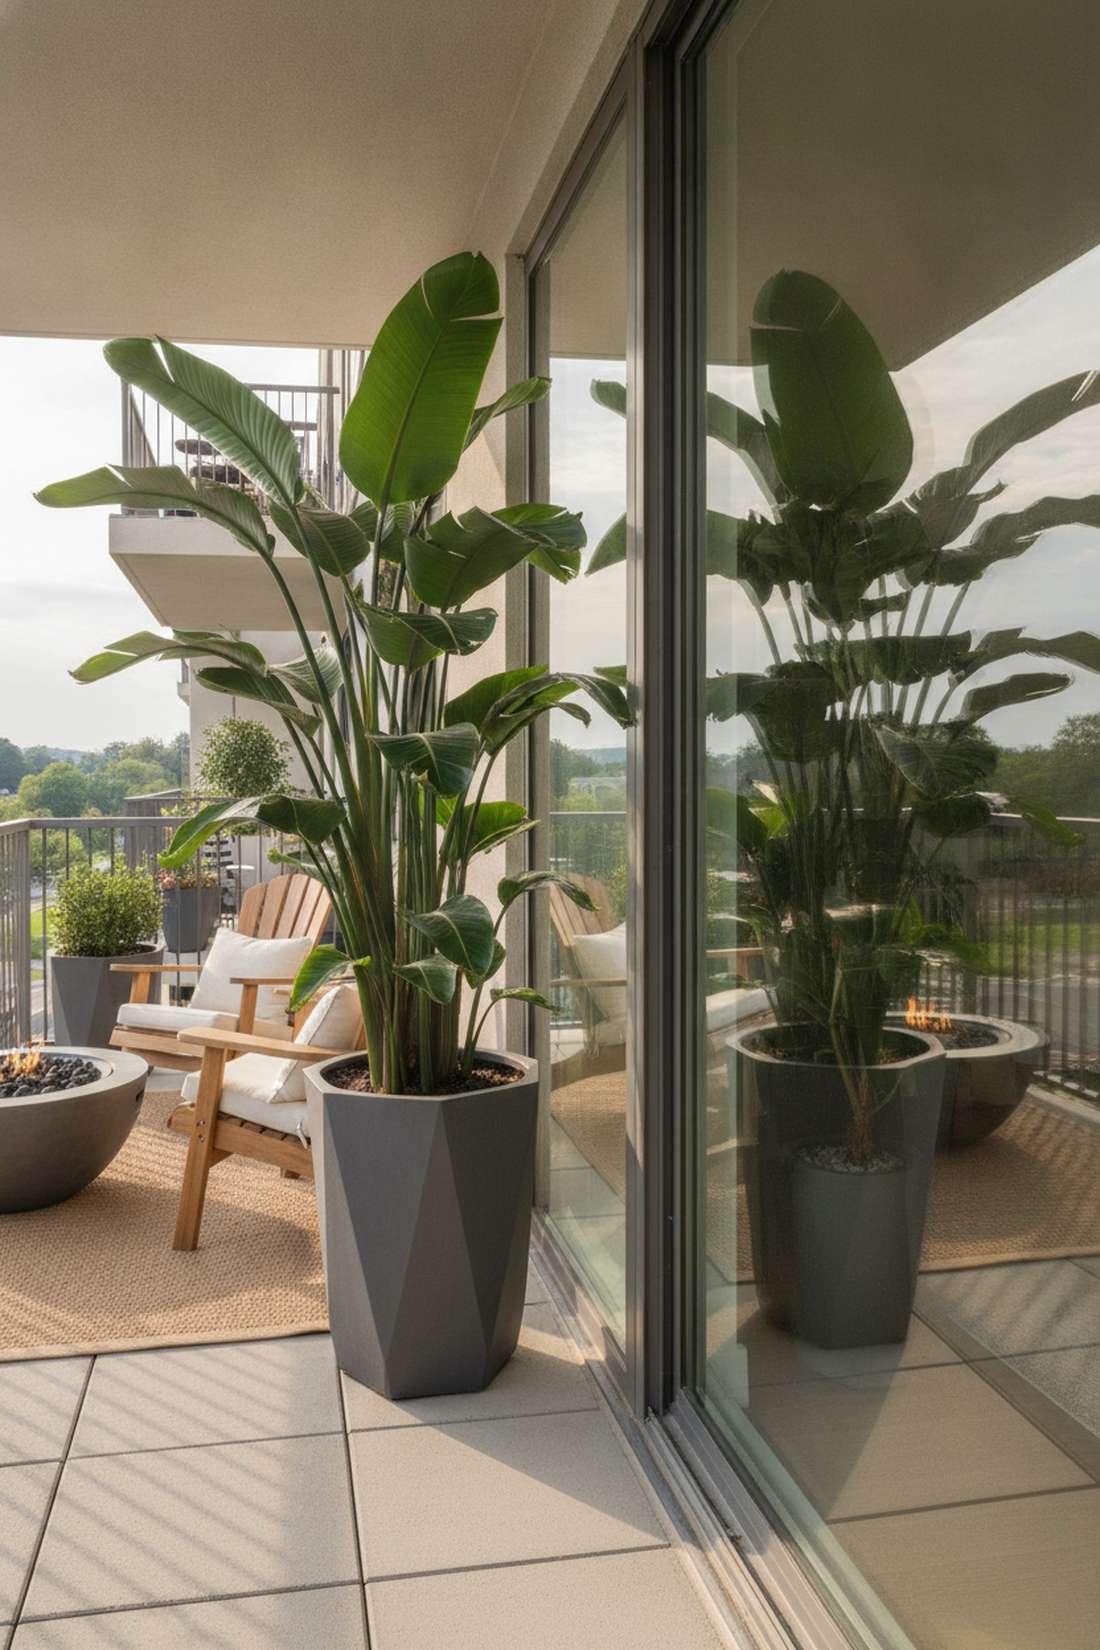
Brings a wild, lush jungle energy directly to your sliding glass doors. Flanking large identical planters on both sides of the glass is an incredible hack for apartment balconies.
Keeping all the greenery shoved to the far corners of the yard makes the patio feel dead. Placing oversized identical botanical arrangements right up against both sides of the transition creates a seamless green bridge.
You can easily pull this off for around $100–$250. Save this for your weekend garden project!
- Key Materials: Twin large geometric planters, shade-tolerant tall plants
- Vibe / Style: Lush botanical flow
- Difficulty: Very easy setup
- Budget Breakdown: Twin Planters: $120 | Plants & Soil: $80.
- Creator’s Tip: Use Ficus or Bird of Paradise; keep the indoor one by the bright glass, and the outdoor one in the patio shade.
- Smart Sourcing: Buy heavy-duty resin geometric planters (bulk pack) and premium indoor/outdoor potting mix.
36. View Framing Through Doors
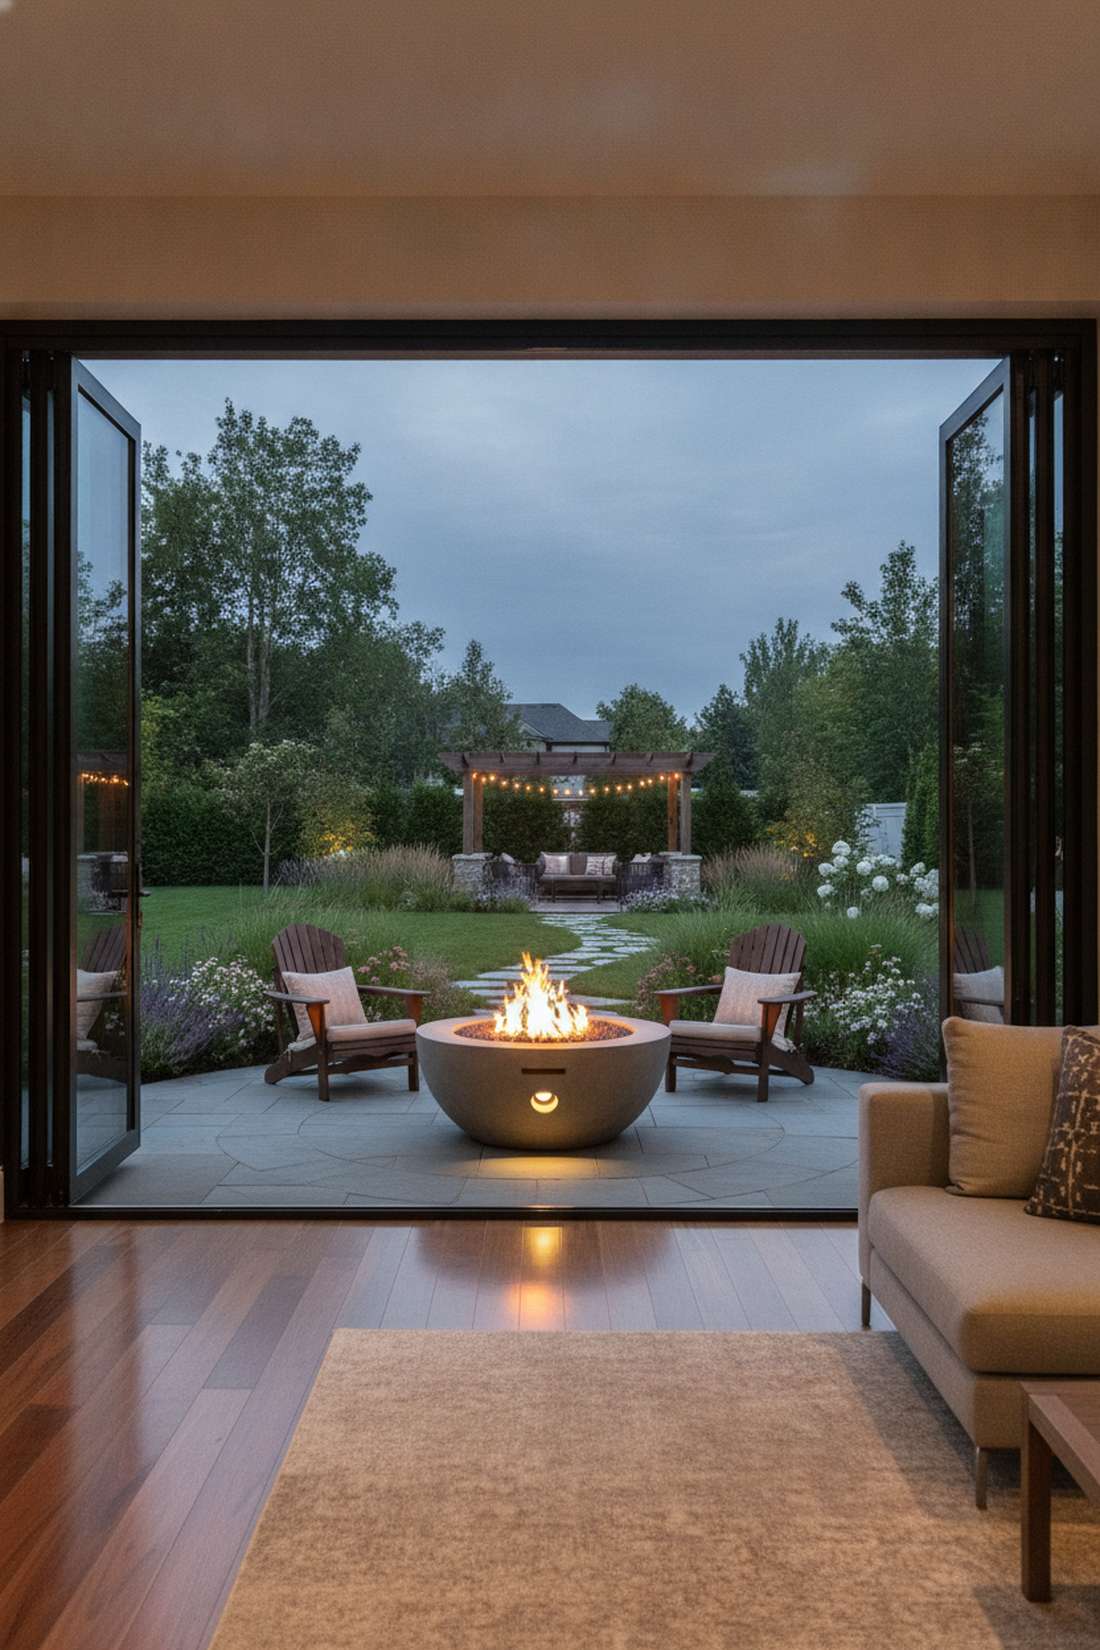
Turns your backyard into a living, breathing landscape painting. Centering a fire pit or water feature on the doorway axis works flawlessly for drawing guests directly outside.
Scattering patio features randomly makes the space look chaotic from the inside. Aligning a stunning visual focal point perfectly with the center mullion of your doors gives a designer-level finish that pulls the entire house together.
Planning the alignment is free; focal points vary in cost.
- Key Materials: Focal point sculptures, fountains, or fire bowls
- Vibe / Style: Gallery-level staging
- Difficulty: Easy design planning
- Budget Breakdown: Design Phase (Free) | Fire Bowl: $300.
- Creator’s Tip: Install a bright landscape spotlight on the focal feature so the “picture frame” effect works brilliantly at night too.
- Smart Sourcing: Use pre-cast concrete fire bowls and low-voltage LED landscape spotlights.
37. Reflected Ceiling Plans
Prevents the claustrophobic “cave” feeling when stepping onto a covered porch. Perfectly matching indoor and outdoor ceiling heights is essential for high-end custom home builds.
Dropping the exterior patio roof heavily compresses the space and signals a harsh boundary. Coordinating the framing so the 9-foot interior drywall flows seamlessly into a 9-foot exterior soffit is an architectural masterclass.
Coordinating this during the blueprint phase is crucial. Pin this to your future custom build board!
- Key Materials: Coordinated roof trusses, seamless soffit panels
- Vibe / Style: Endless overhead volume
- Difficulty: Advanced Architecture
- Budget Breakdown: Architectural Planning: Variable.
- Creator’s Tip: Hide a roll-down bug screen exactly in the ceiling cavity where the heights meet so it becomes invisible when retracted.
- Smart Sourcing: Get recessed motorized bug screen kits and flush-mount soffit panels.
Bringing It All Together
Mastering indoor outdoor living transitions means looking past basic flooring and investing in architectural cohesion. By applying these exact 37 premium setup blueprints, you stop guessing and start building highly intentional, expansive spaces. Whether you implement commercial-grade architectural sliding glass systems, drop in heavy-duty recessed track setups, or just upgrade your UV-resistant outdoor porcelain, the secret is strict continuity.
The highest-ROI projects rely on leveling subfloors and erasing visual boundaries through smart, productized material matching. Don’t settle for cheap fixes that rot in a year. Invest in the proper starter kits and bulk pack materials outlined above to ensure your doorways, ceilings, and patios fuse into one spectacular, high-end living space.
Frequently Asked Questions
What is the best door type for seamless indoor outdoor living transitions?
For the absolute cleanest aesthetic, commercial-grade architectural sliding glass walls and heavy-duty folding glass door kits are unrivaled. To achieve a zero-step boundary, you must specify flush floor sliding track systems. Buying full premium track starter kits rather than piecing hardware together ensures massive glass panels glide effortlessly for years without warping.
Can I use the same flooring material indoors and outdoors?
Yes, but you must use specifically rated materials. UV-resistant outdoor porcelain tile, commercial-grade polished concrete, and natural stone work perfectly. If you want a wood aesthetic outside, skip real hardwood and use frost-proof ceramic wood planks or premium composite decking boards to prevent warping and water rot.
How do I eliminate the step at my patio door?
To erase the tripping hazard entirely, you need to match floor elevations using heavy-duty recessed floor tracks or adjustable floor pedestal kits for pavers. If you have a massive drop-off, constructing elevated flush-mount decking or using ADA-compliant aluminum ramp kits delivers a smooth, high-end accessibility flow.
What flooring materials are most durable for indoor outdoor transitions?
UV-resistant outdoor porcelain tile is nearly indestructible, resisting freeze-thaw cycles and heavy foot traffic. Polished concrete treated with commercial-grade penetrating sealers offers unbeatable longevity. Avoid cheap laminates and stick to rigid core luxury vinyl planks if you need a budget-friendly option for a covered, three-season room.
How important is matching floor levels for indoor outdoor living?
It is the most critical architectural decision you can make. Perfectly matching levels with structural floor pedestals or recessed door sills psychologically erases the boundary, making a small house feel like a sprawling estate. It also prevents costly stumbles and allows heavy outdoor furniture to glide effortlessly between zones.
Should flooring materials change exactly at the door threshold?
Not necessarily! One of the best designer tricks is letting interior tile bleed 2 to 3 feet past the door onto the patio before switching to composite decking, or vice versa. If you must change at the door, always use low-profile metal T-bars or pre-cut Schluter metal profiles for a razor-sharp, premium finish.