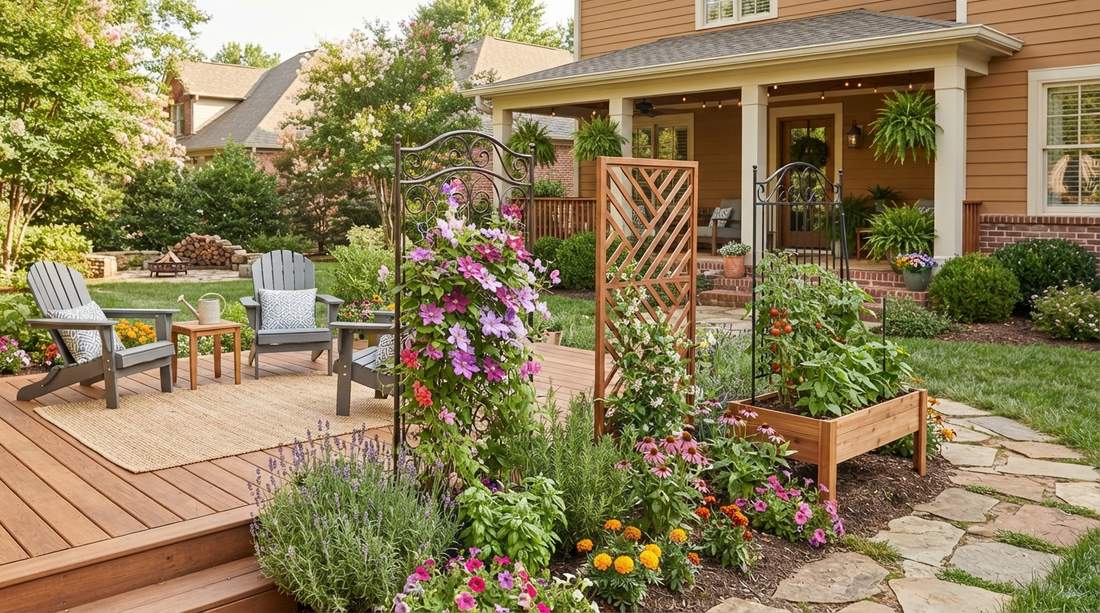
A well-built small garden trellis instantly doubles your vertical growing capacity. These structural blueprints deliver a designer aesthetic using smart, durable hardware setups. Achieve that high-end courtyard finish without the premium landscaping price tag.
Design Snapshot: Key Principles
- Structural Integrity: Sourcing high-end galvanized kits outlasts cheap garden-center bamboo by decades.
- Grid Spacing: Opt for pre-cut mesh panels tailored exactly to your crop’s climbing footprint.
- Height Planning: Maximum yield requires premium vertical extensions that tower at least 6 to 8 feet.
- Anchoring Strategy: Always utilize commercial-grade ground stakes or weighted resin planters for wind-proof stability.
Classic Frameworks for Edible Gardens
Traditional setups optimized for maximum yield require robust foundations. Upgrading to commercial-grade hardware ensures your heavy fruiting crops are fully supported through violent summer storms.
1. Cattle Panel Arch Tunnel
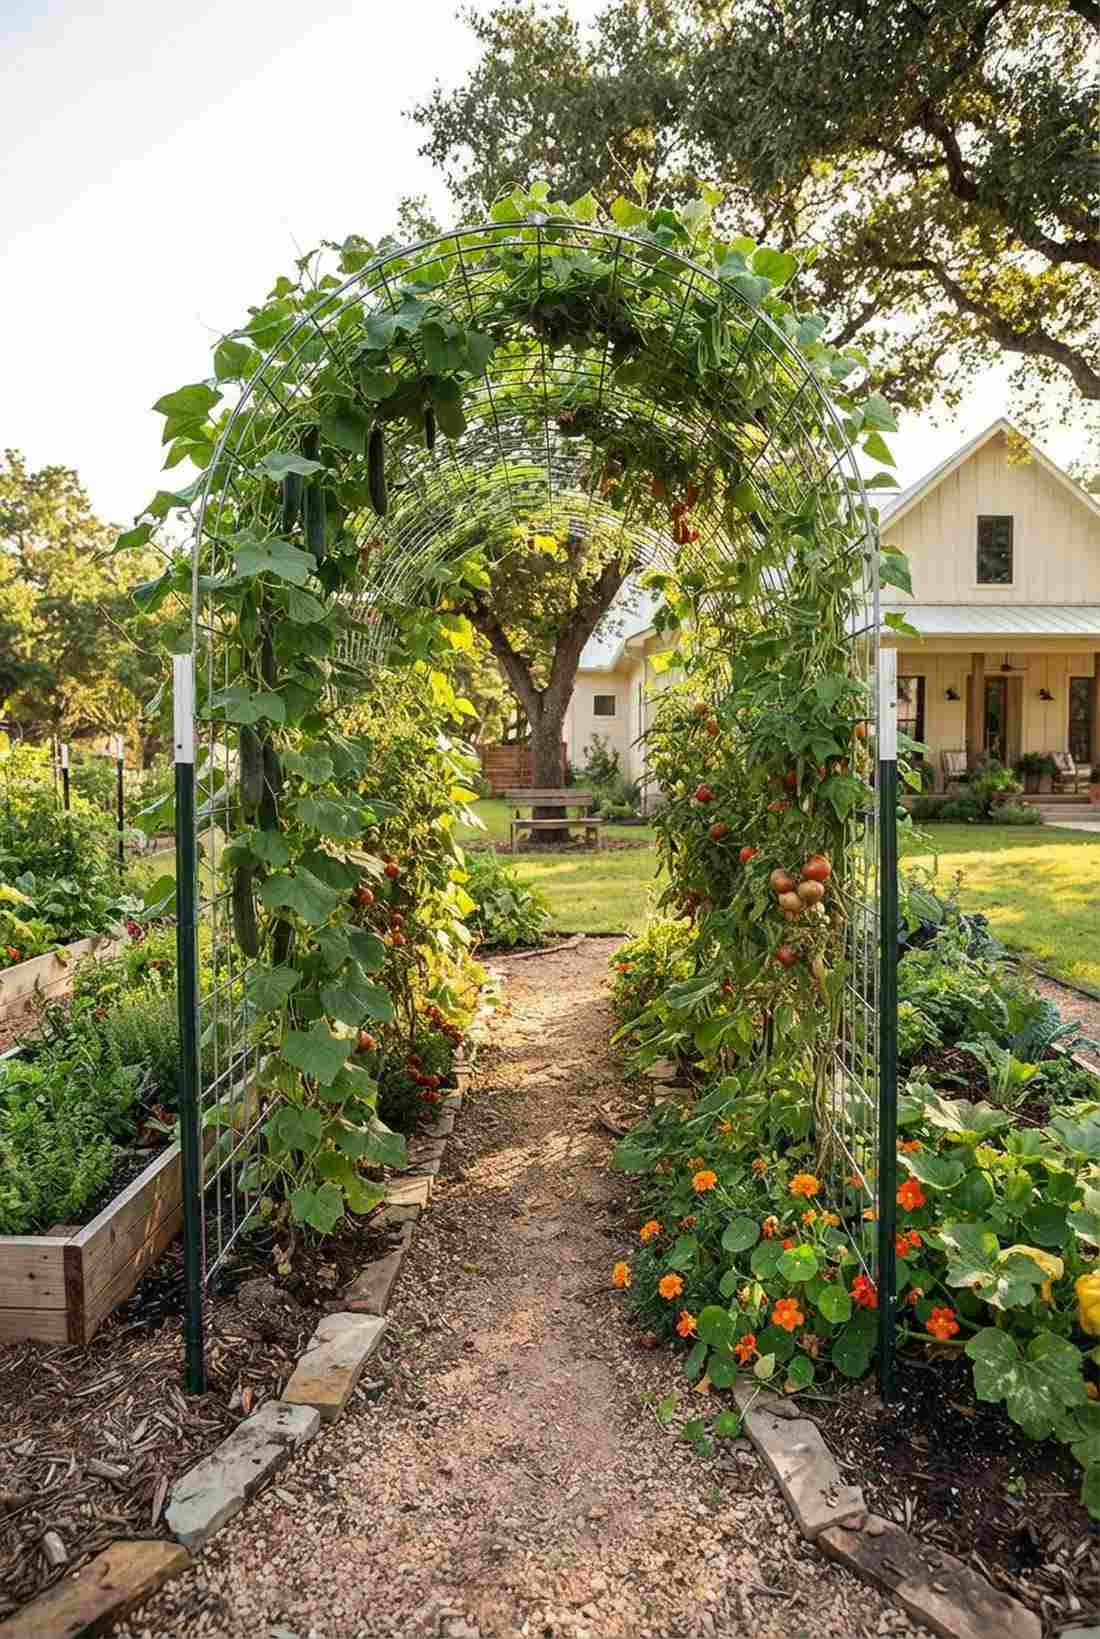

Walk beneath an overhead canopy that feels straight out of an organic homestead magazine. This curved garden archway transforms open pathways into immersive, heavily shaded walkways.
The arched geometry delivers a surprisingly premium look while easily supporting massive fruit loads. Weave in heavy-duty galvanized cattle panels to establish a permanent structure that outlasts flimsy seasonal wire.
You can easily pull this off for around $40–$60 per section. Pin this visual blueprint if you are planning a massive vegetable yield this summer.
- Key Materials: Galvanized livestock panels, steel T-posts
- Vibe / Style: Lush homestead tunnel
- Difficulty: Moderate weekend build
- Budget Breakdown: Materials: $45 | Base Stakes: $15
- Creator’s Tip: Overlap panels by at least 6 inches at the top peak for superior arch rigidity.
- Smart Sourcing: 16-foot galvanized livestock panels (bulk pack), UV-resistant heavy-duty zip ties.
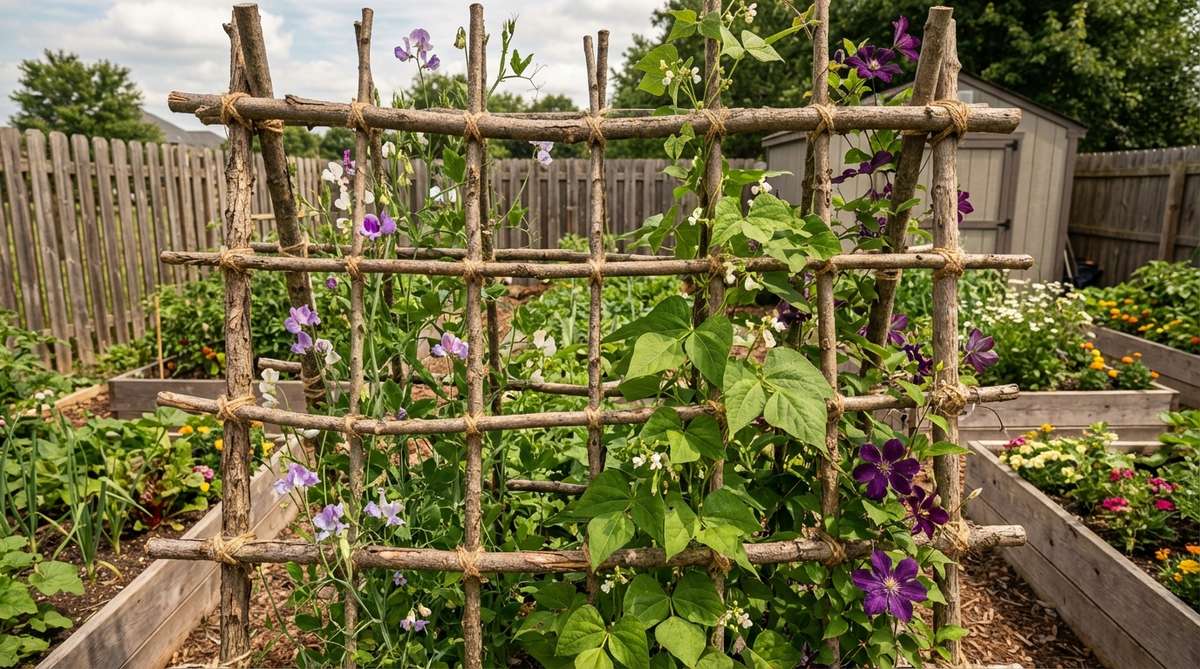
2. Vertical Wall Trellis for Pole Beans
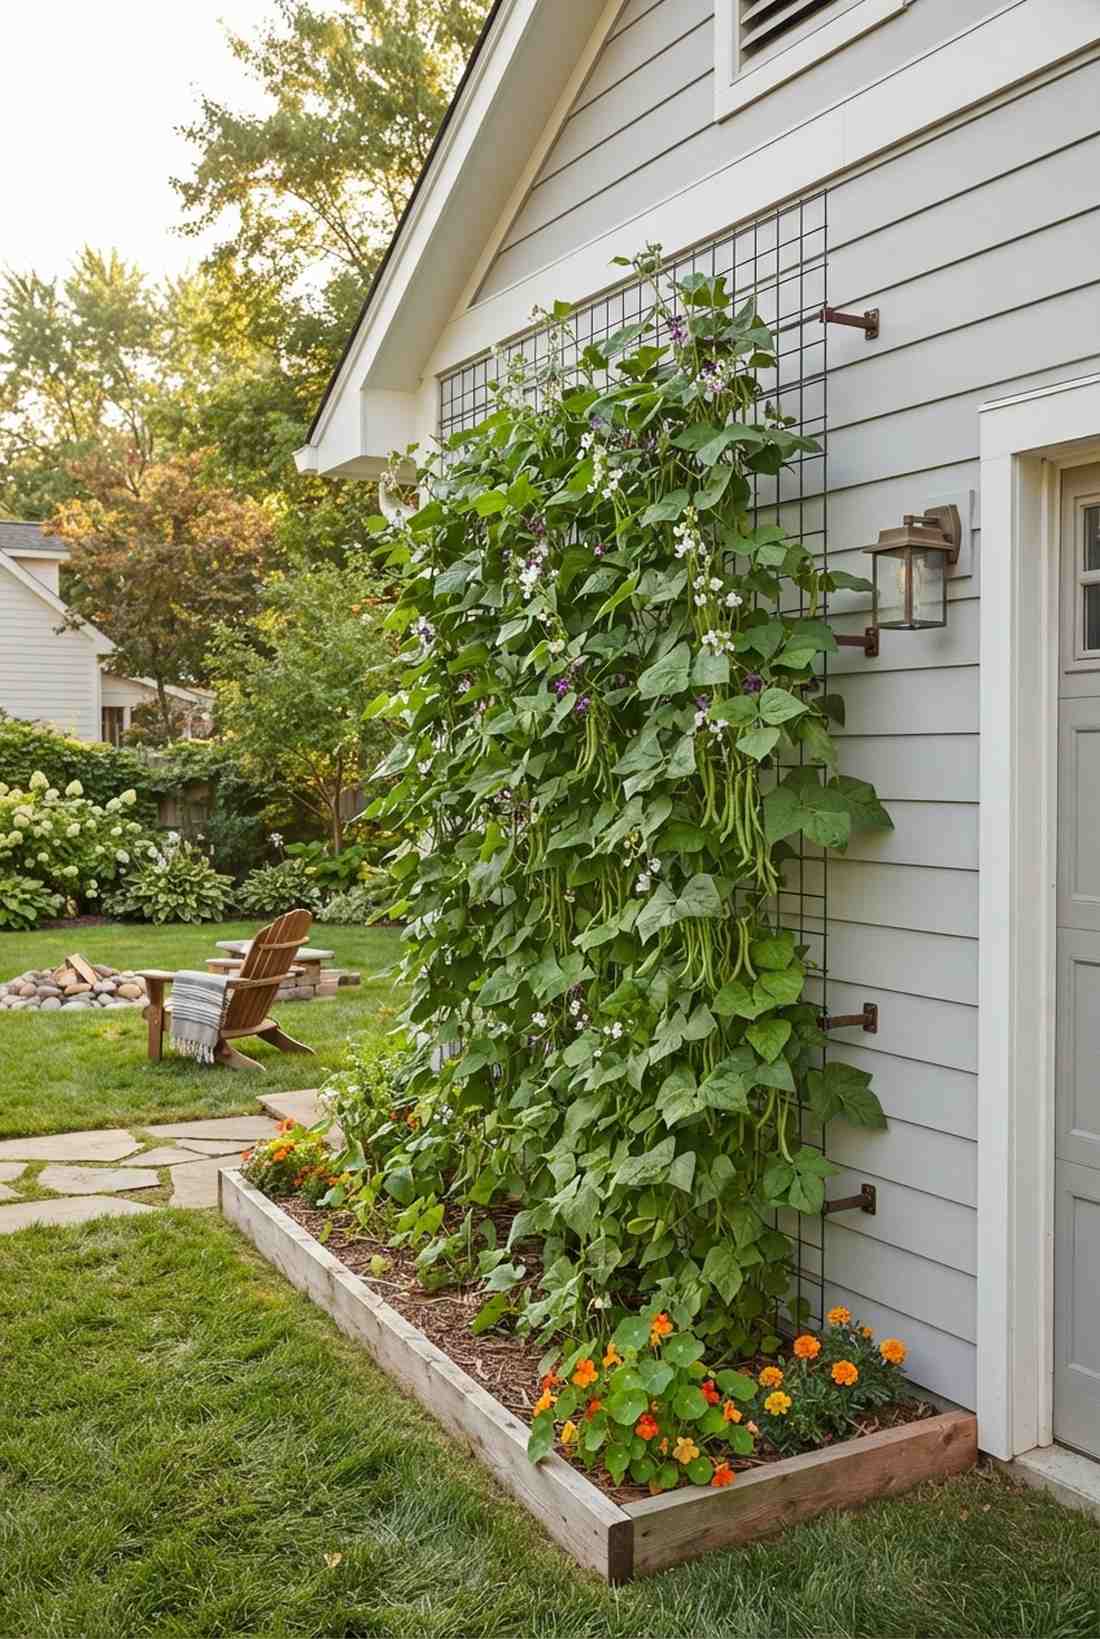
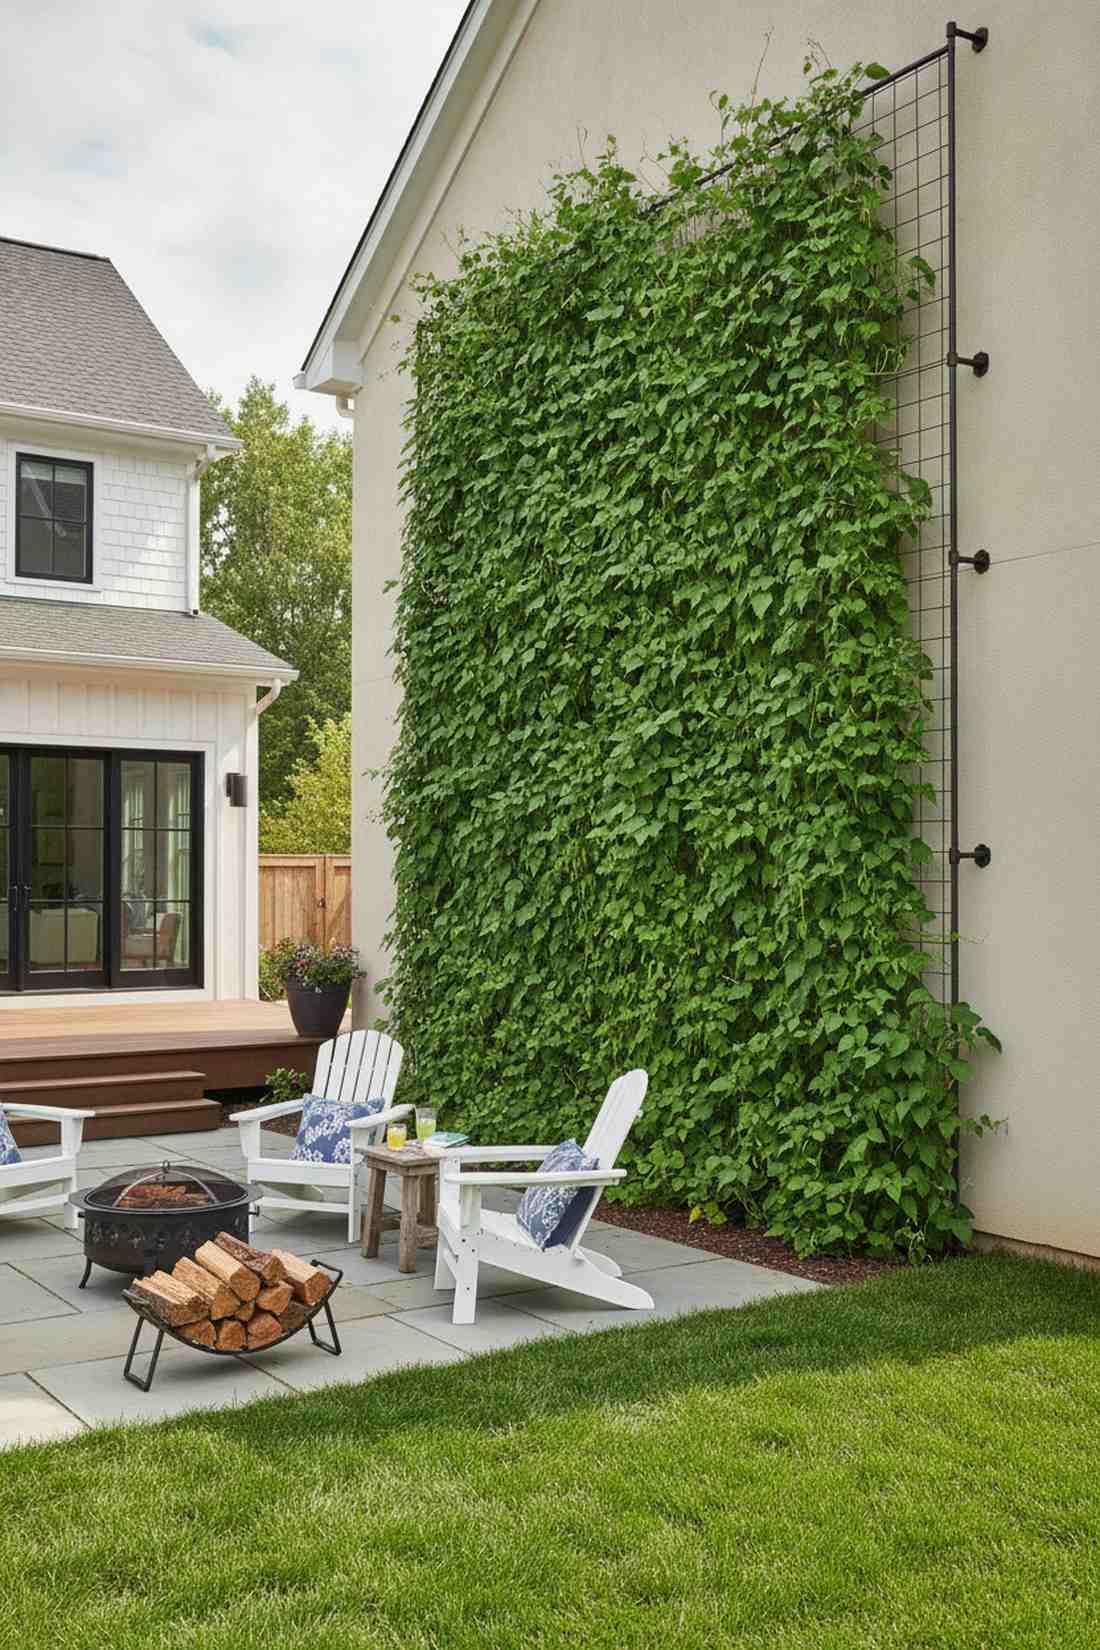
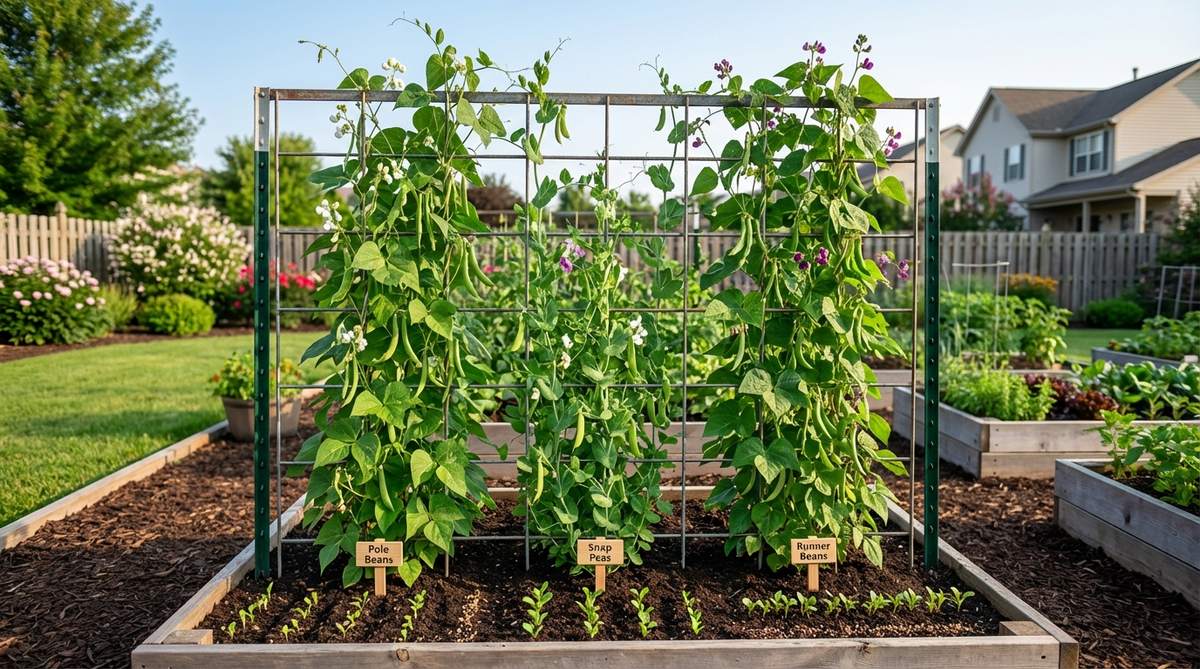
Creating a dense wall of greenery feels like wrapping your space in a vibrant living tapestry. A tall vertical bean screen works flawlessly against dull garage exteriors or barren property lines.
Standard teepees waste too much footprint compared to a flush-mounted grid system. Secure weather-resistant trellis mesh kits to anchor massive vertical growth without bowing or collapsing mid-season.
Expect to spend roughly $25–$45 depending on the anchoring hardware. It’s a fast upgrade that completely changes the yard’s vibe.
- Key Materials: Pre-cut steel grids, rust-proof mounts
- Vibe / Style: Clean architectural green wall
- Difficulty: Fast beginner setup
- Budget Breakdown: Metal Mesh: $30 | Mounts: $10
- Creator’s Tip: Leave a 3-inch gap between the wall and the grid to ensure perfect airflow around the foliage.
- Smart Sourcing: pre-cut welded wire grids, heavy-duty steel T-posts (4-pack).
3. A-Frame Teepee for Climbing Vegetables
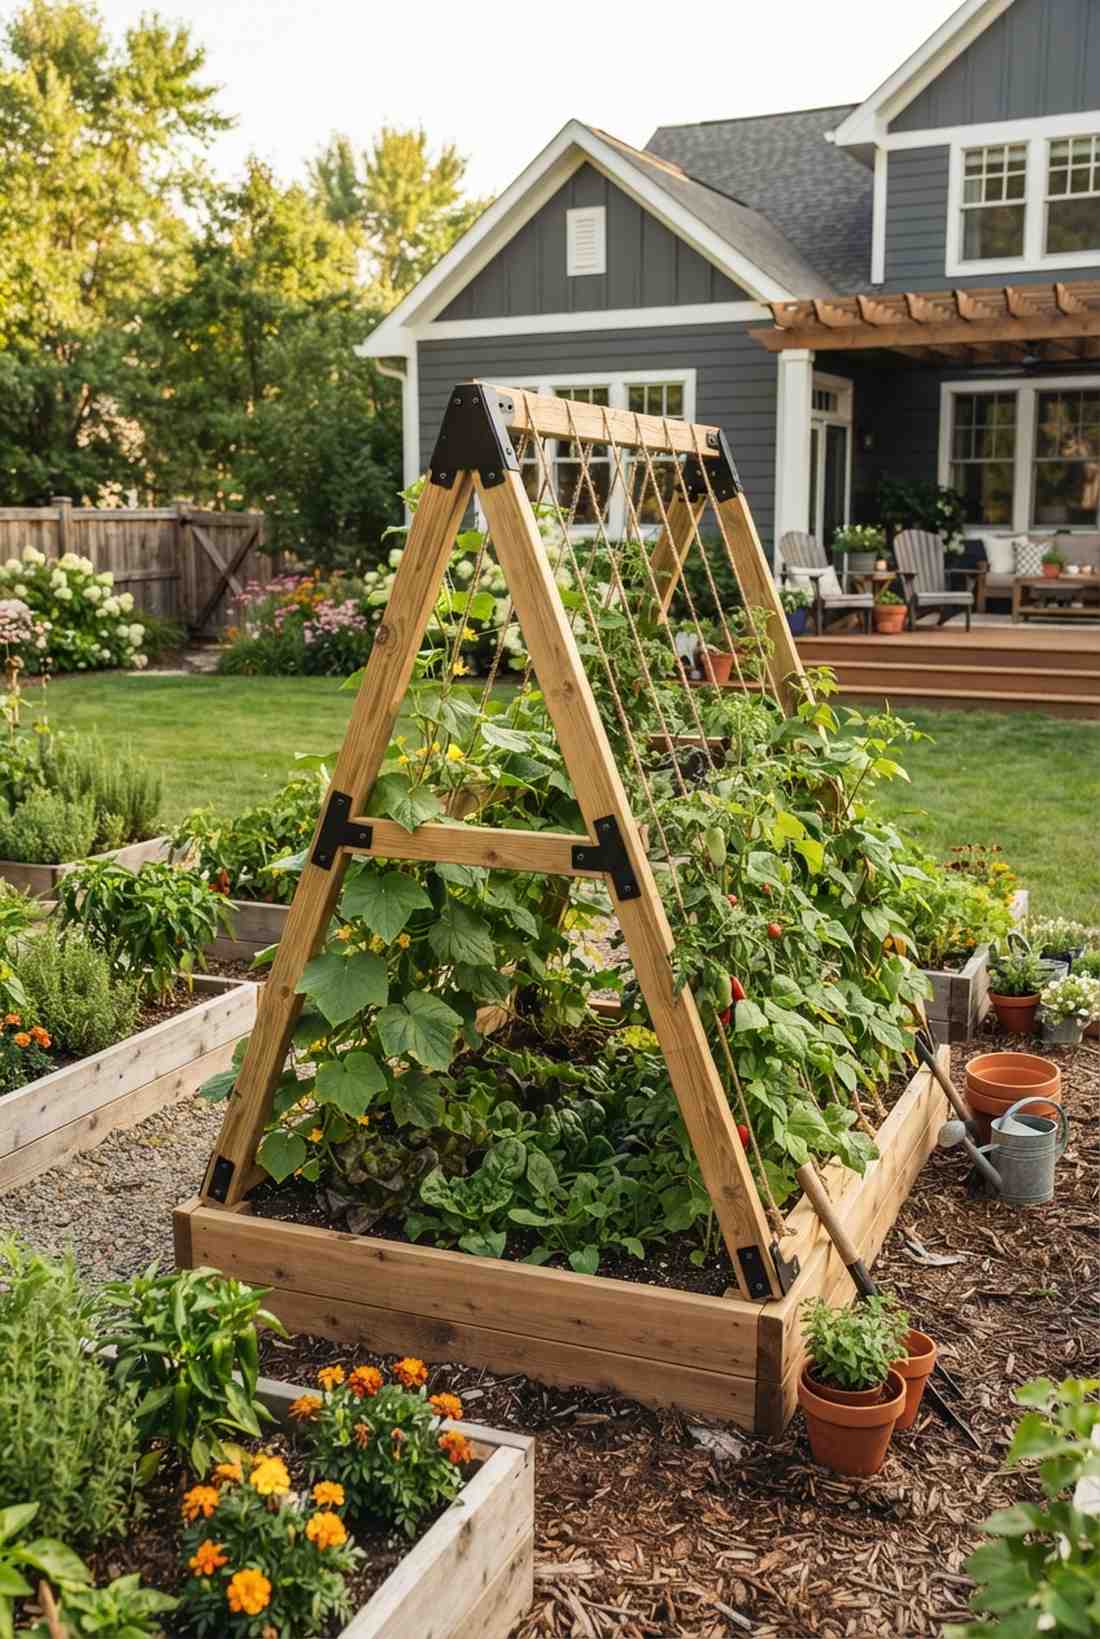

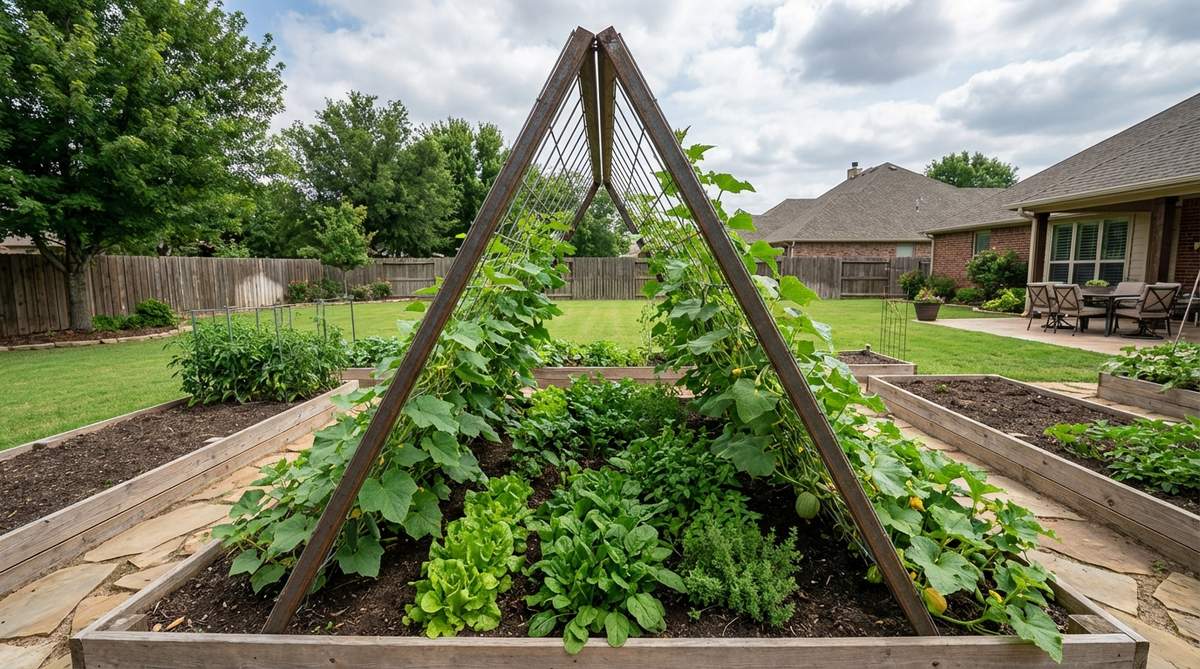
This dual-sided slope feels like discovering a secret garden fortress hidden in plain sight. An A-frame vegetable support provides an outstanding yield-maximizing setup for tight raised beds.
A sloped pitch looks far more expensive than it is while protecting sensitive leafy greens in the shaded understory. You absolutely need premium structural hinges to maintain stability during intense summer storm winds.
Grabbing the baseline materials will set you back about $30–$55 total.
- Key Materials: Treated lumber, hinge brackets, climbing twine
- Vibe / Style: Productive geometric farmstand
- Difficulty: Simple hand-tool project
- Budget Breakdown: Wood: $25 | Hardware: $15
- Creator’s Tip: Plant shade-loving lettuces directly underneath the A-frame to maximize every inch of soil.
- Smart Sourcing: powder-coated A-frame brackets, rust-proof metal structural clips.
4. Box Cage for Indeterminate Tomatoes
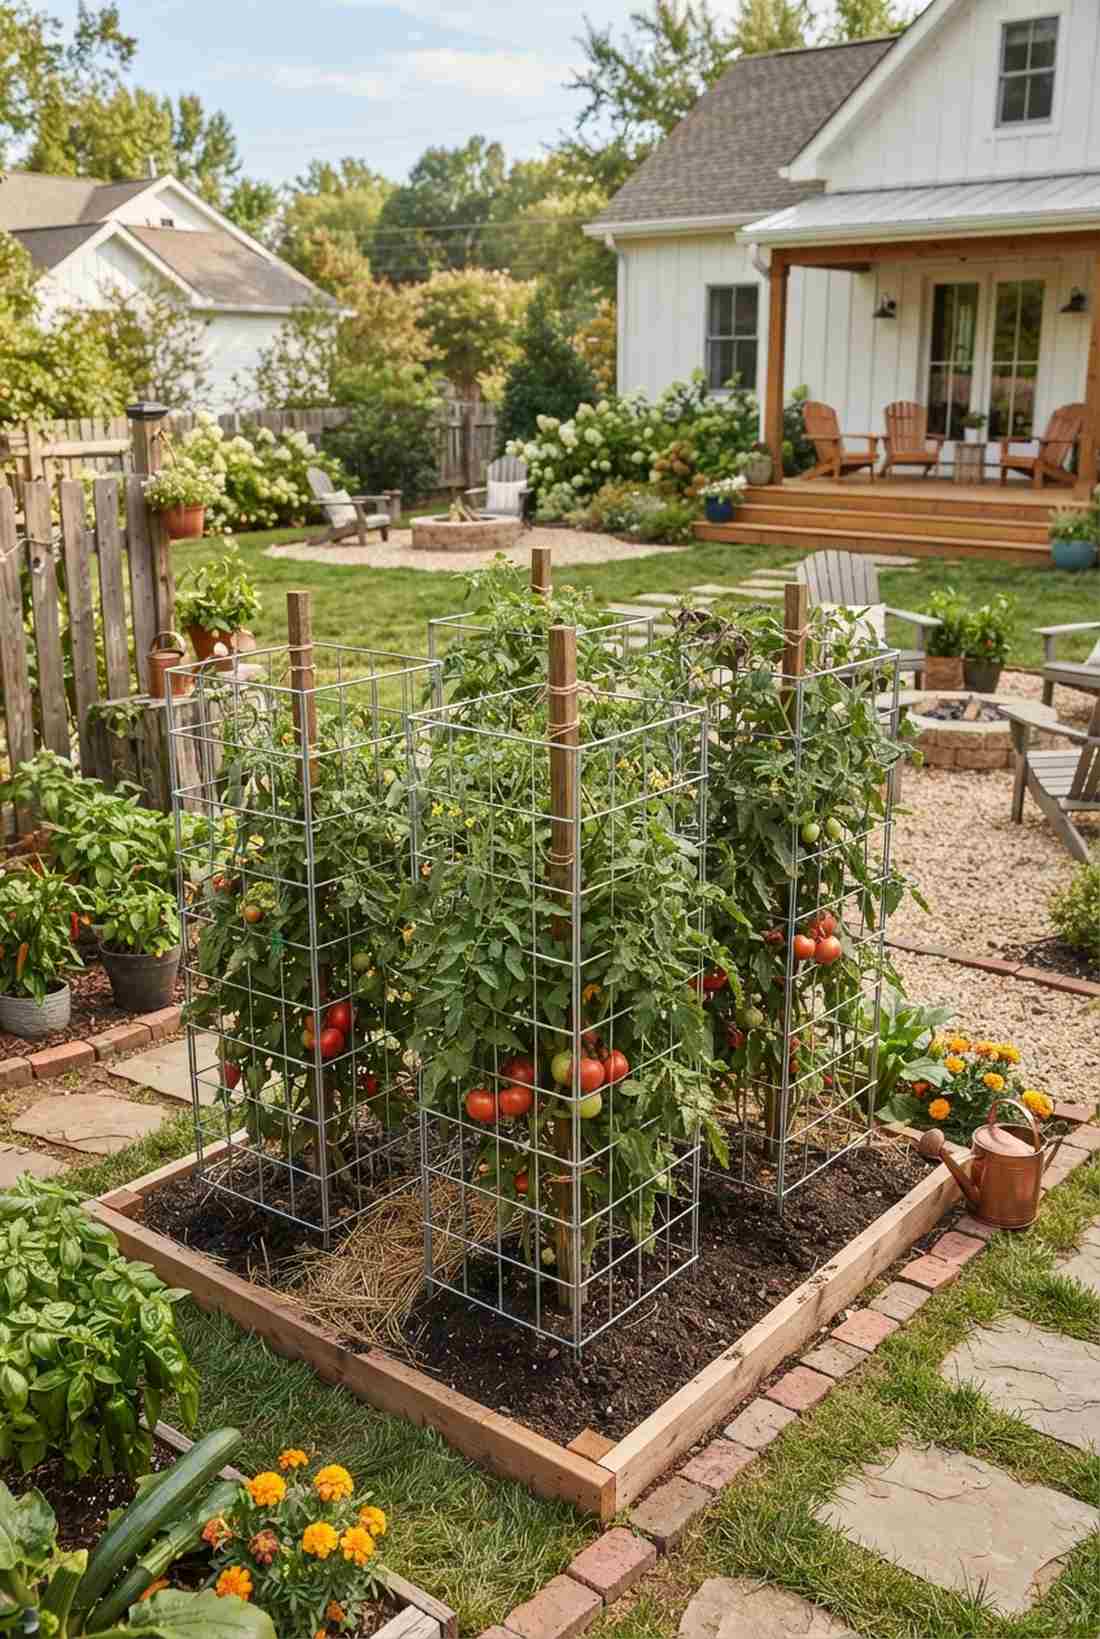

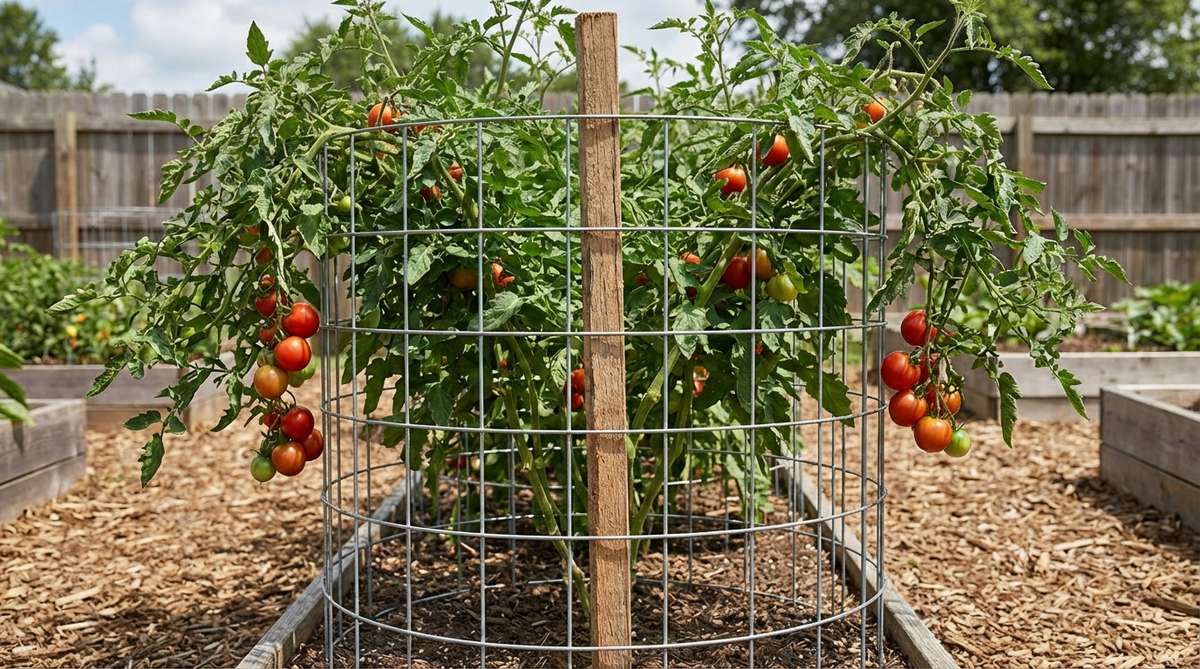
Containing wild tomato vines gives your space an incredibly organized, farm-to-table aesthetic. The heavy-duty square tomato cage thrives inside deep patio containers or dedicated vegetable plots.
Flimsy single wire rings always buckle, but a rigged box frame holds immense weight flawlessly. Integrate commercial-grade tomato support wire to ensure giant heirloom varieties never snap the central stem.
Building a set of four typically costs $40–$70. Save this to your DIY garden board to stop losing heavy fruit to ground rot.
- Key Materials: Welded wire fencing, bolt cutters
- Vibe / Style: Industrial crop protection
- Difficulty: Easy wire-bending task
- Budget Breakdown: Wire Roll: $50 | Fasteners: $10
- Creator’s Tip: Cut the bottom horizontal wire flush to create instant grounding spikes that drive deep into the soil.
- Smart Sourcing: galvanized welded wire fencing (bulk roll), weather-coated central support stakes.
This next setup is ridiculously cheap but looks like a $100 custom display…
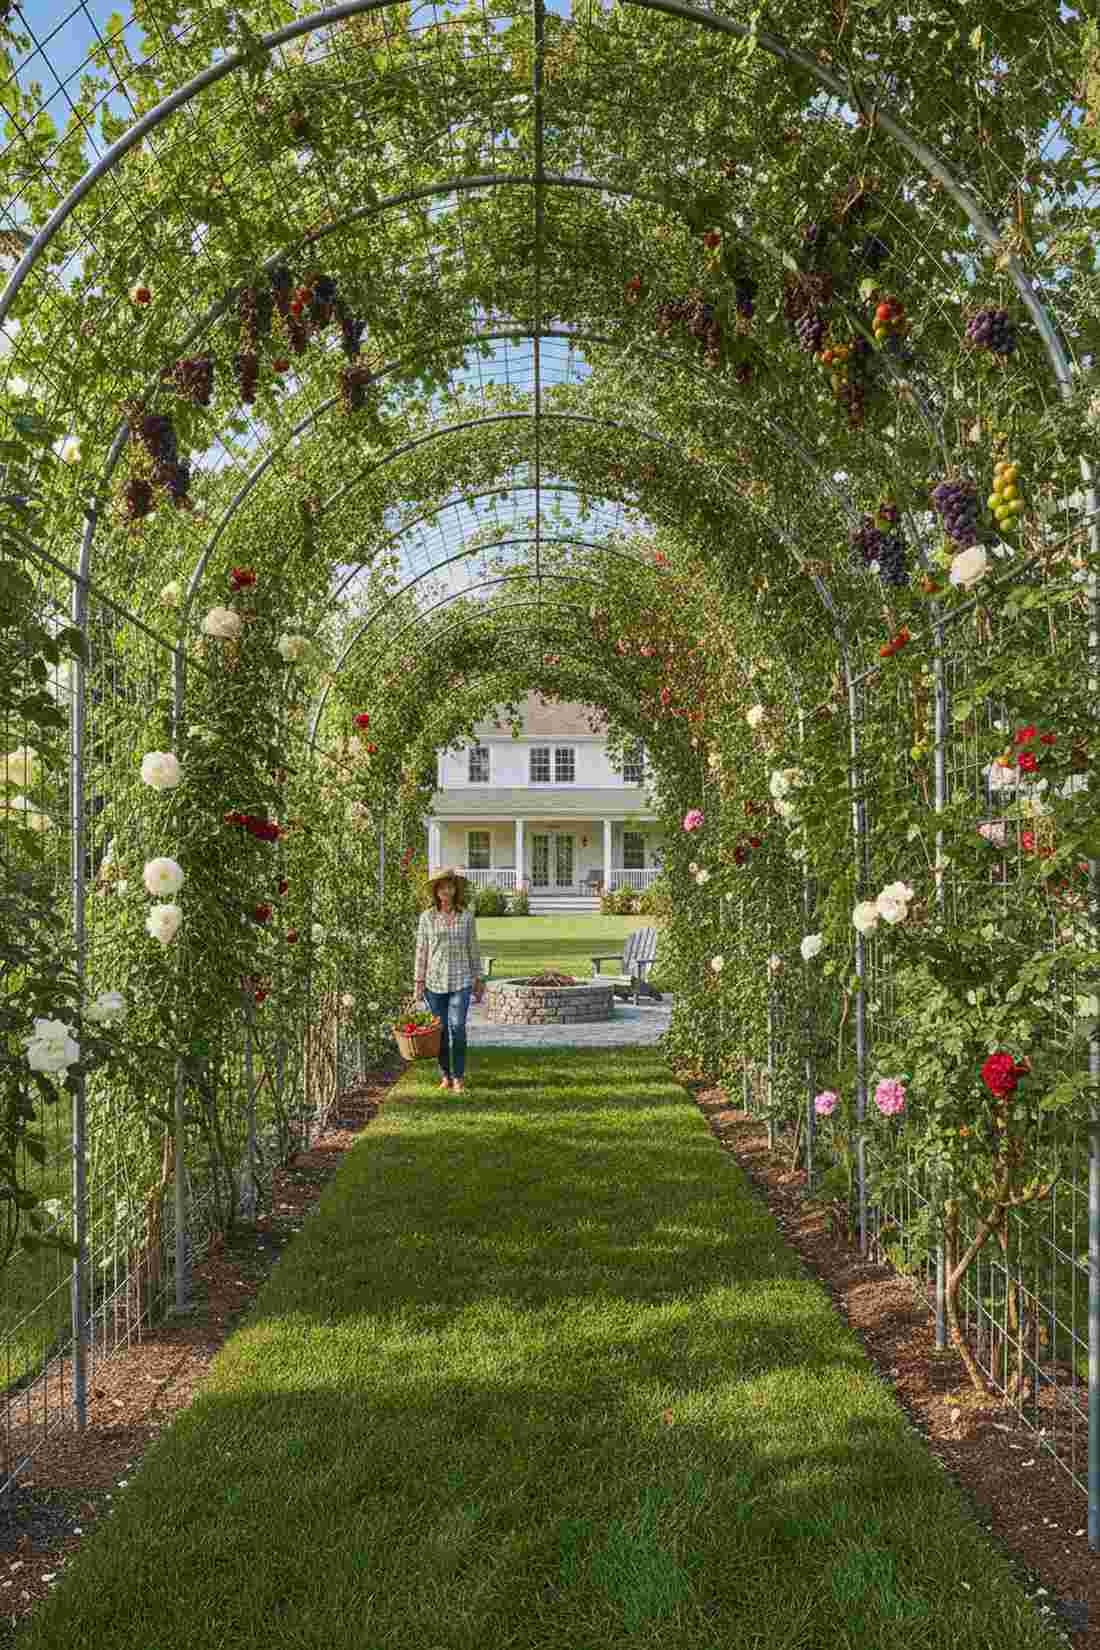
5. Horizontal Overhead Trellis for Heavy Fruits
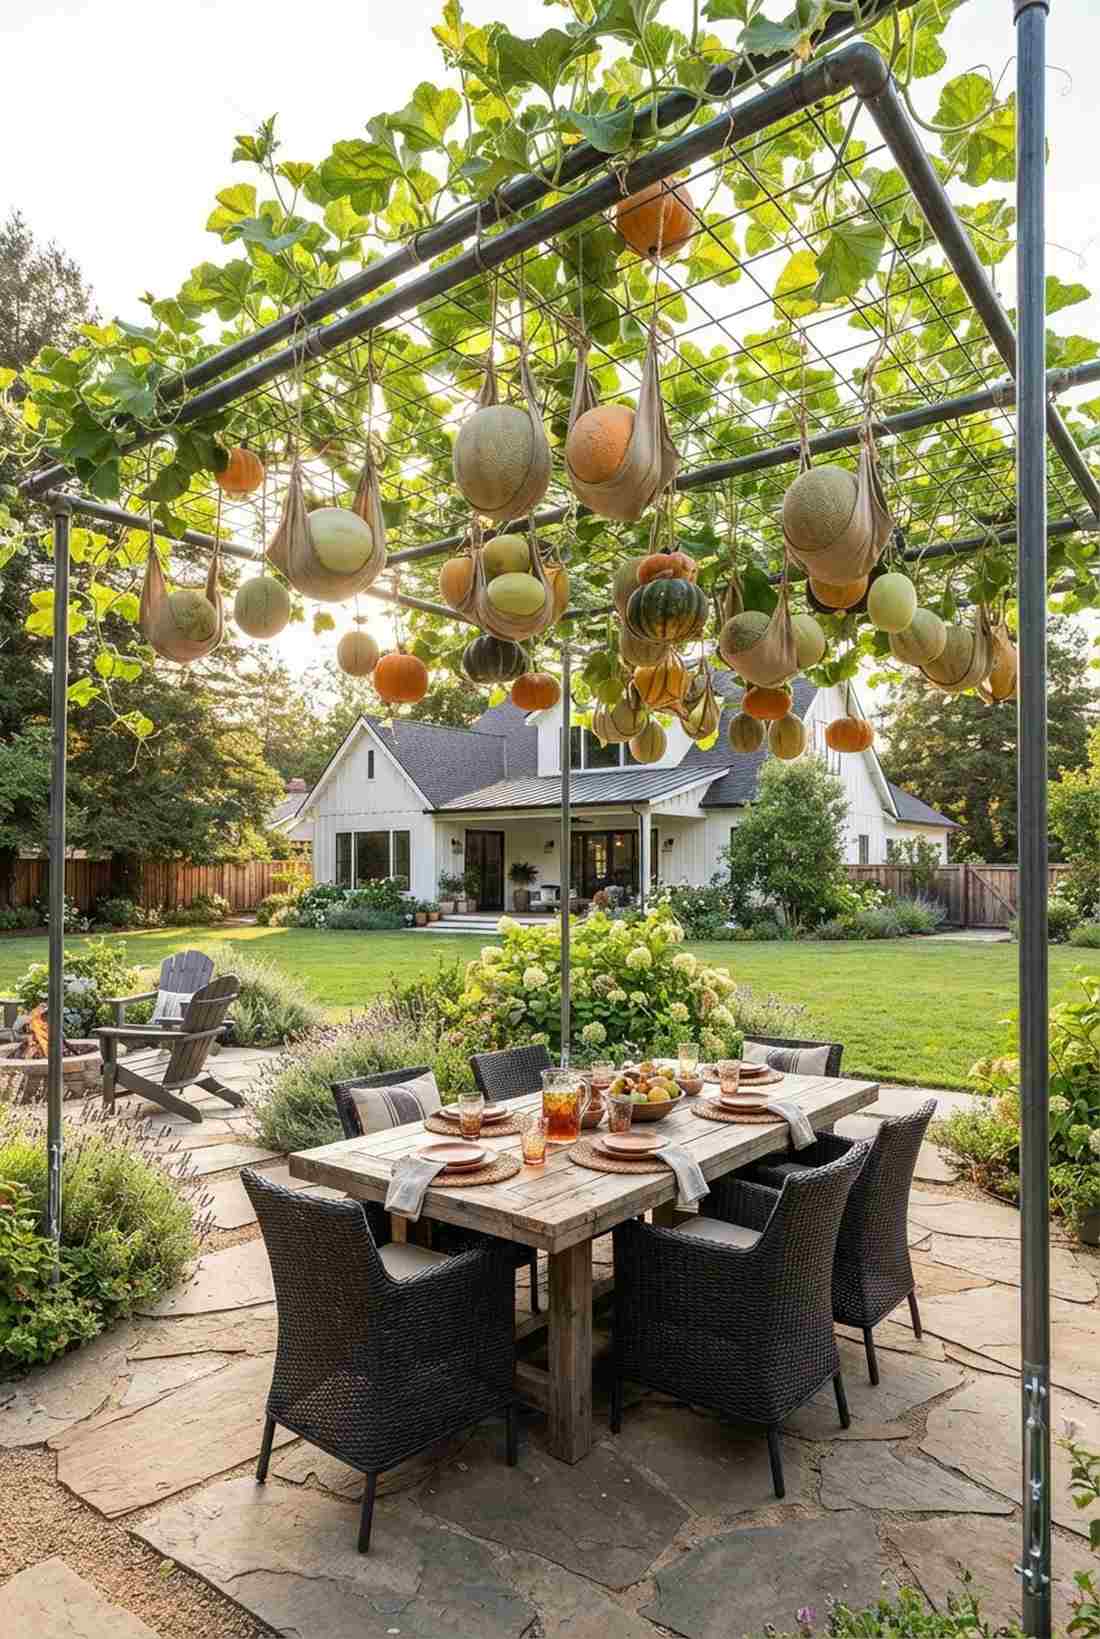
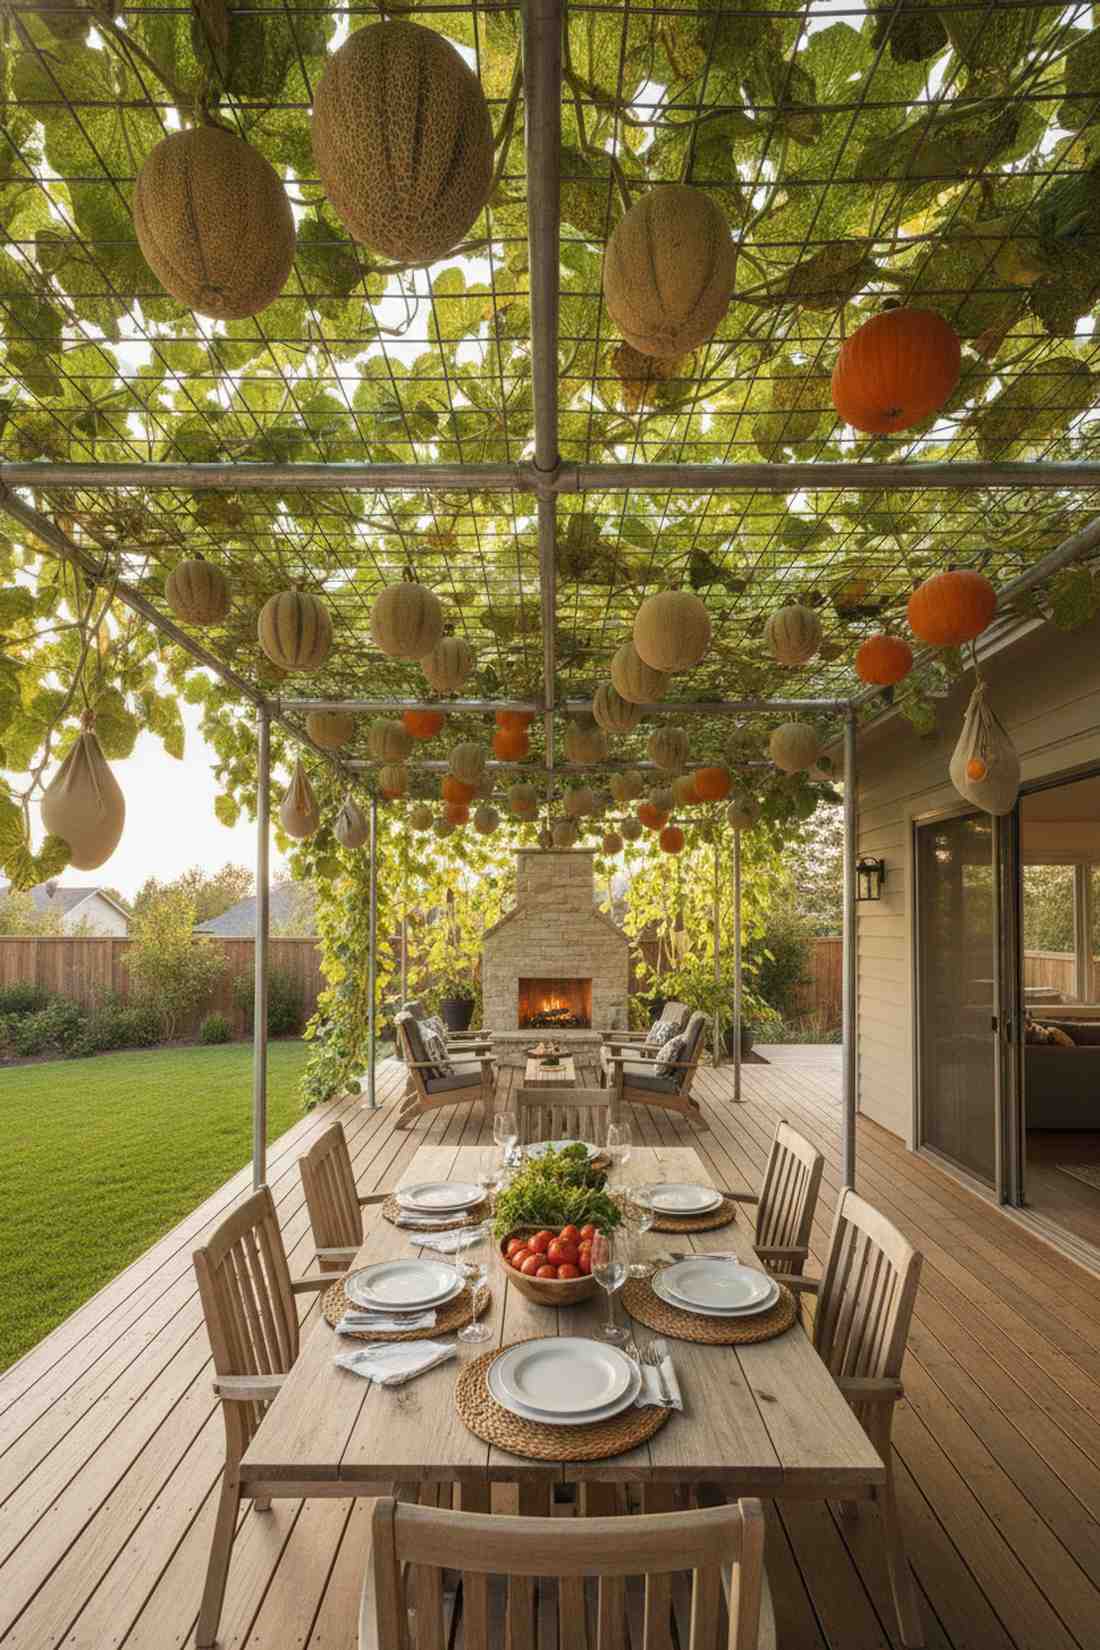

Resting under a canopy of hanging melons feels like a Mediterranean vineyard canopy. An overhead fruit pergola works perfectly suspended over outdoor dining tables or walkway intersections.
Most basic frames sag overhead, but utilizing structural conduit gives a designer-level finish. Upgrading to a taut steel checkerboard matrix distributes massive pumpkin weights evenly without snapping.
You can easily pull this off for around $80–$120. Highly recommended for creating a stunning, jaw-dropping harvest display.
- Key Materials: Metal conduit pipes, tension wire
- Vibe / Style: Immersive hanging harvest
- Difficulty: Advanced structural build
- Budget Breakdown: Metal Pipes: $70 | Wire Mesh: $30
- Creator’s Tip: Craft fabric slings out of old t-shirts to cradle massive melons as they swell overhead.
- Smart Sourcing: galvanized structural conduit pipes, heavy-duty wire turnbuckle tensioners.
Privacy Screens with Ornamental Appeal
Creating a secluded barrier doesn’t mean sacrificing beauty. These living walls blend solid architectural screening with vibrant climbing vines to establish absolute backyard privacy.
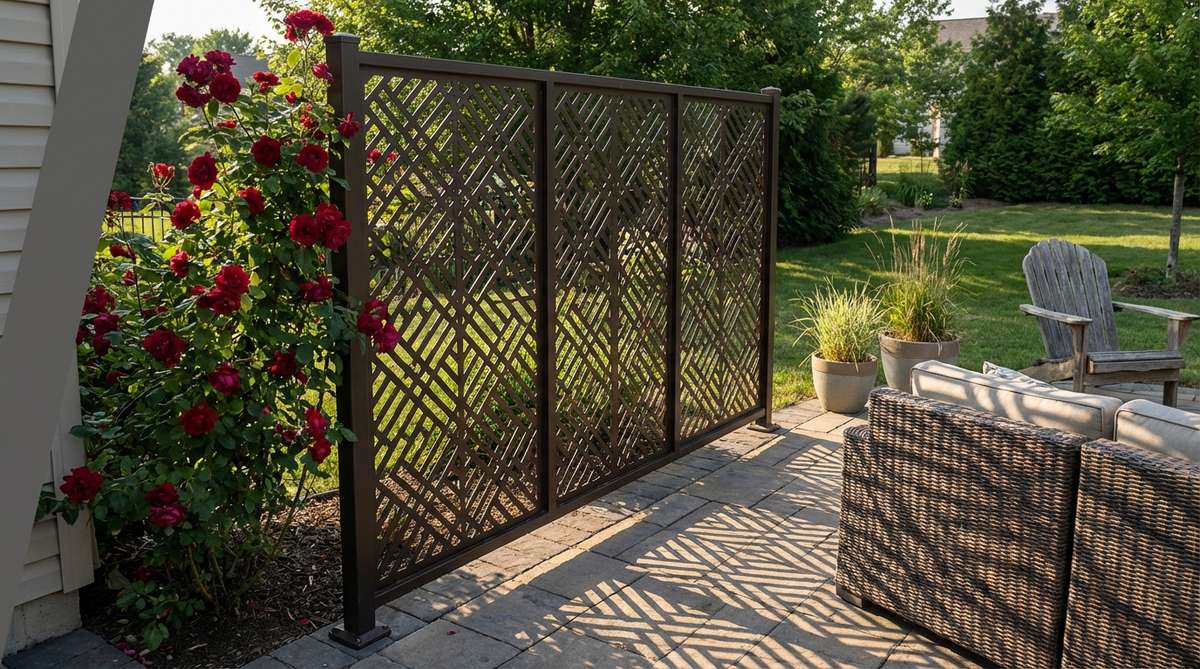
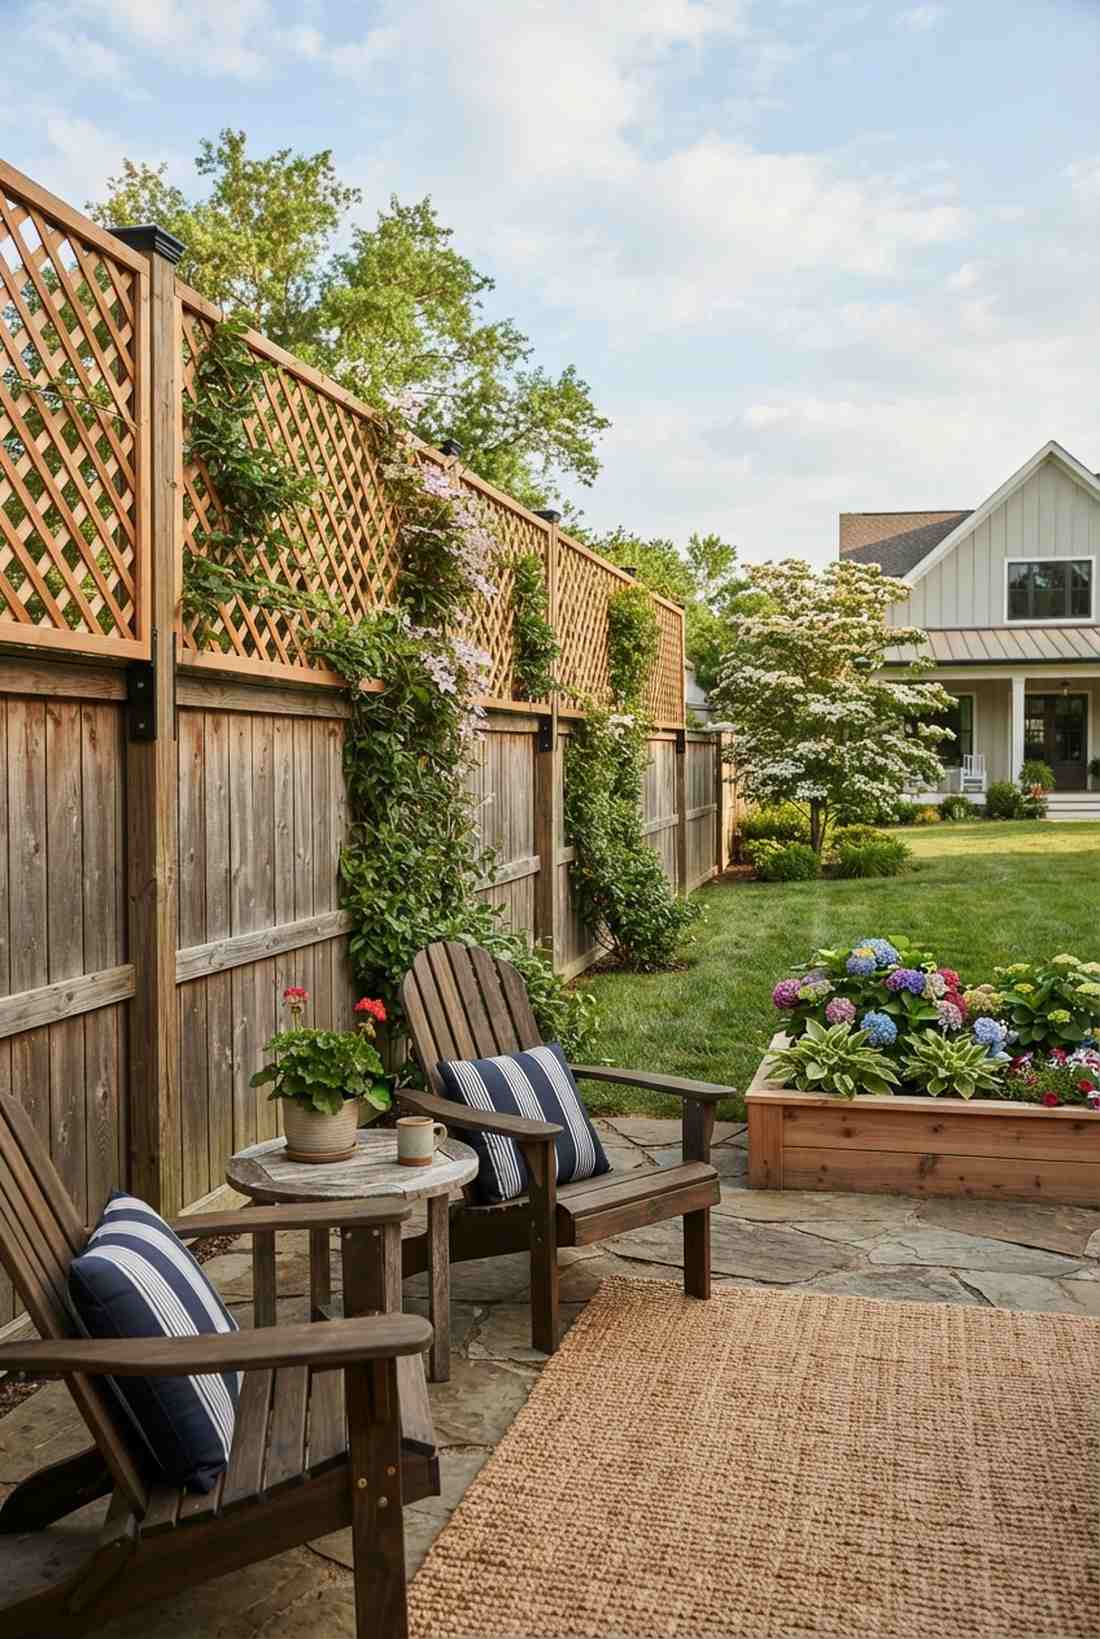
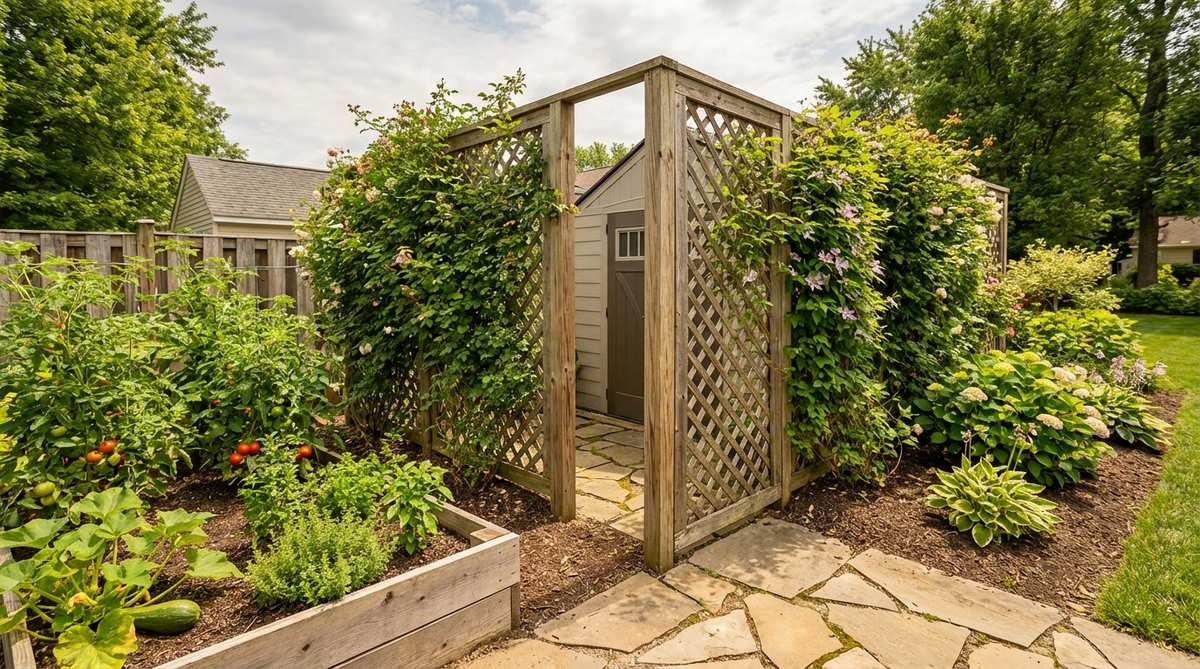
6. Diagonal Lattice Privacy Panel
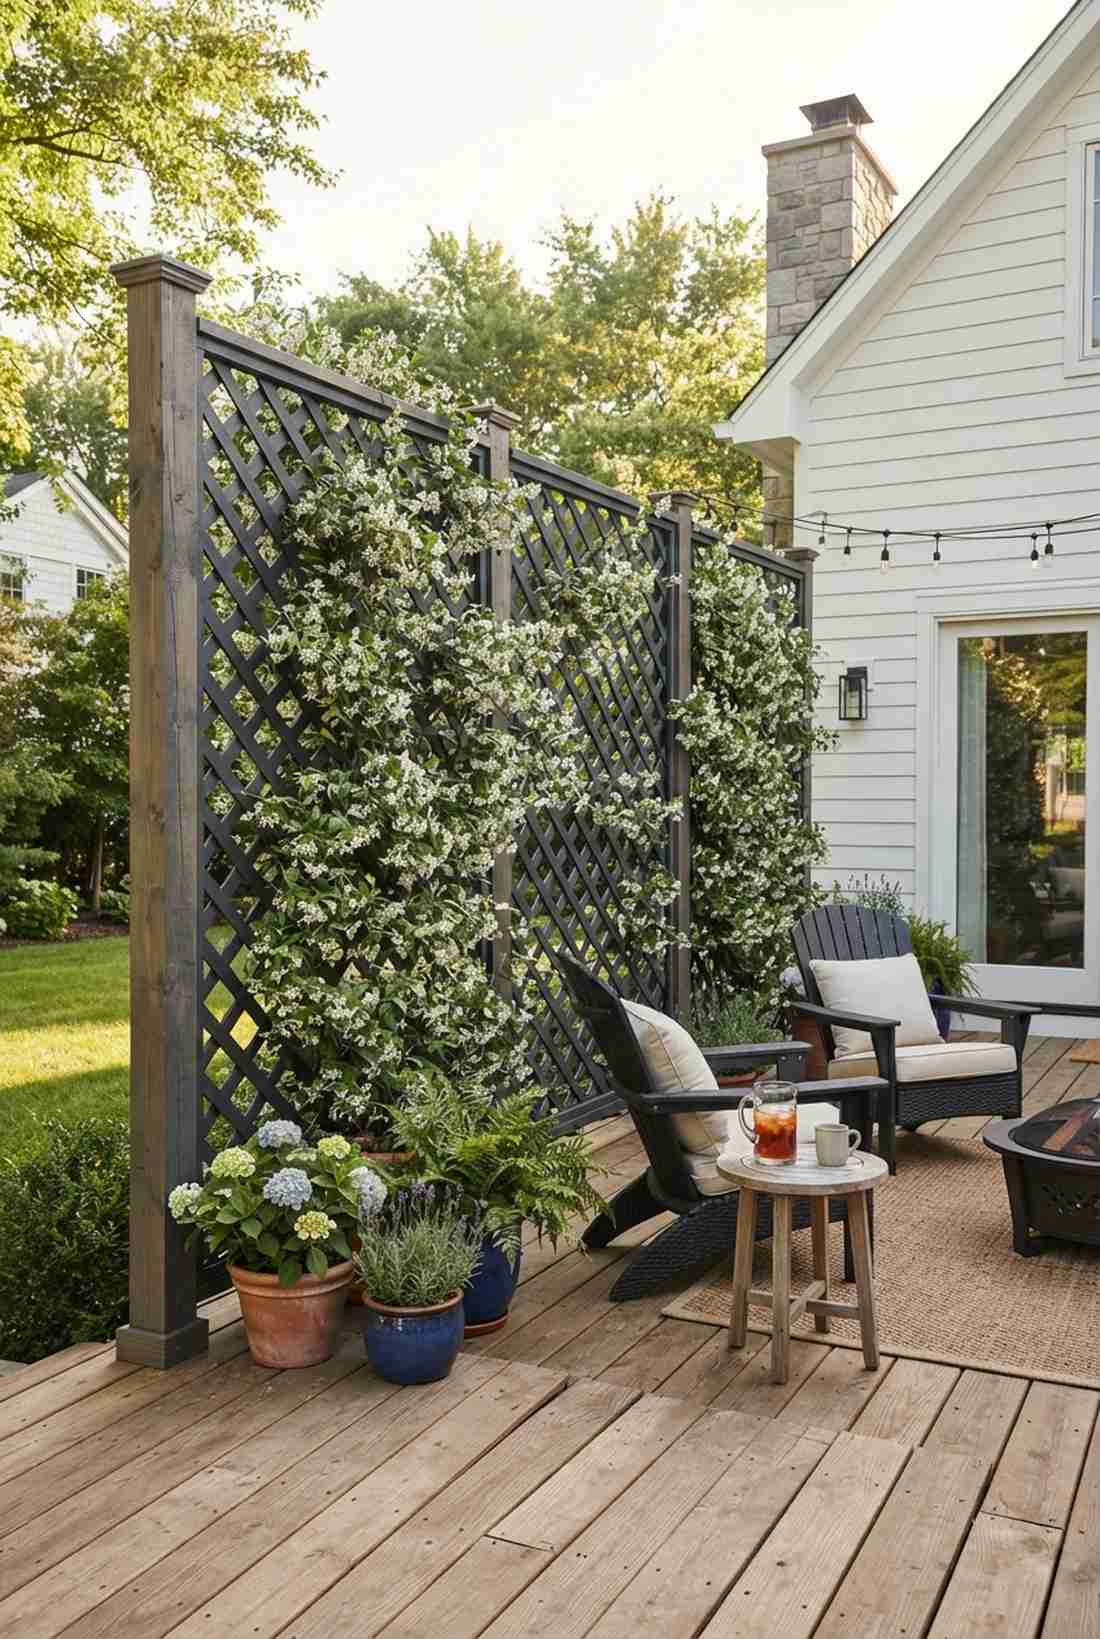
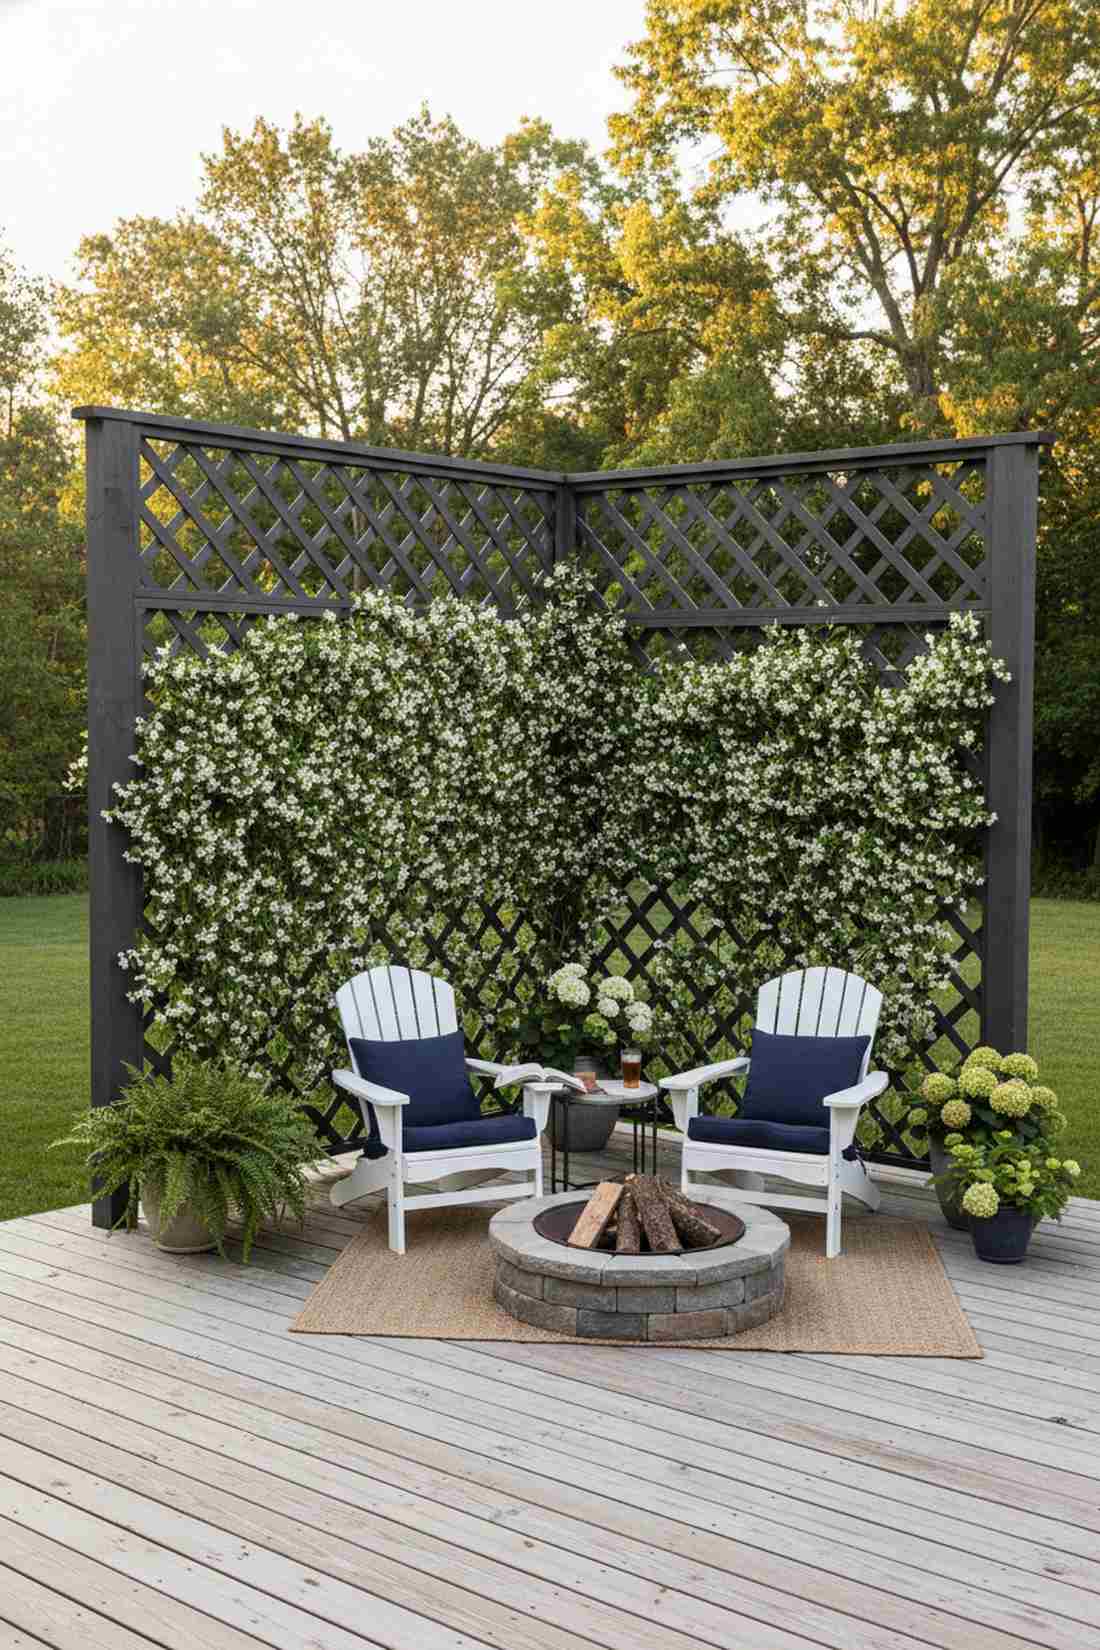

Blocking out neighbors with blooming jasmine delivers a secluded resort courtyard ambiance. A diagonal lattice privacy wall is ideal for enclosing an exposed backyard deck or patio corner.
Basic vertical slats expose too much, while diagonal cross-hatching instantly elevates the visual weight. Use pre-treated outdoor timber panels to guarantee the wood survives constant moisture from watering vines.
This premium aesthetic costs roughly $50–$90 per panel segment. Pin this if you need a fast, gorgeous property line fix.
- Key Materials: Diamond lattice screens, 4×4 posts
- Vibe / Style: Classic botanical estate
- Difficulty: Moderate carpentry
- Budget Breakdown: Lattice: $40 | Posts/Hardware: $35
- Creator’s Tip: Paint the lattice a dark charcoal grey to make green foliage and white blooms visually pop.
- Smart Sourcing: pre-stained diagonal lattice panels, exterior-grade deck screws (bulk bucket).
7. Expanding Willow Screen
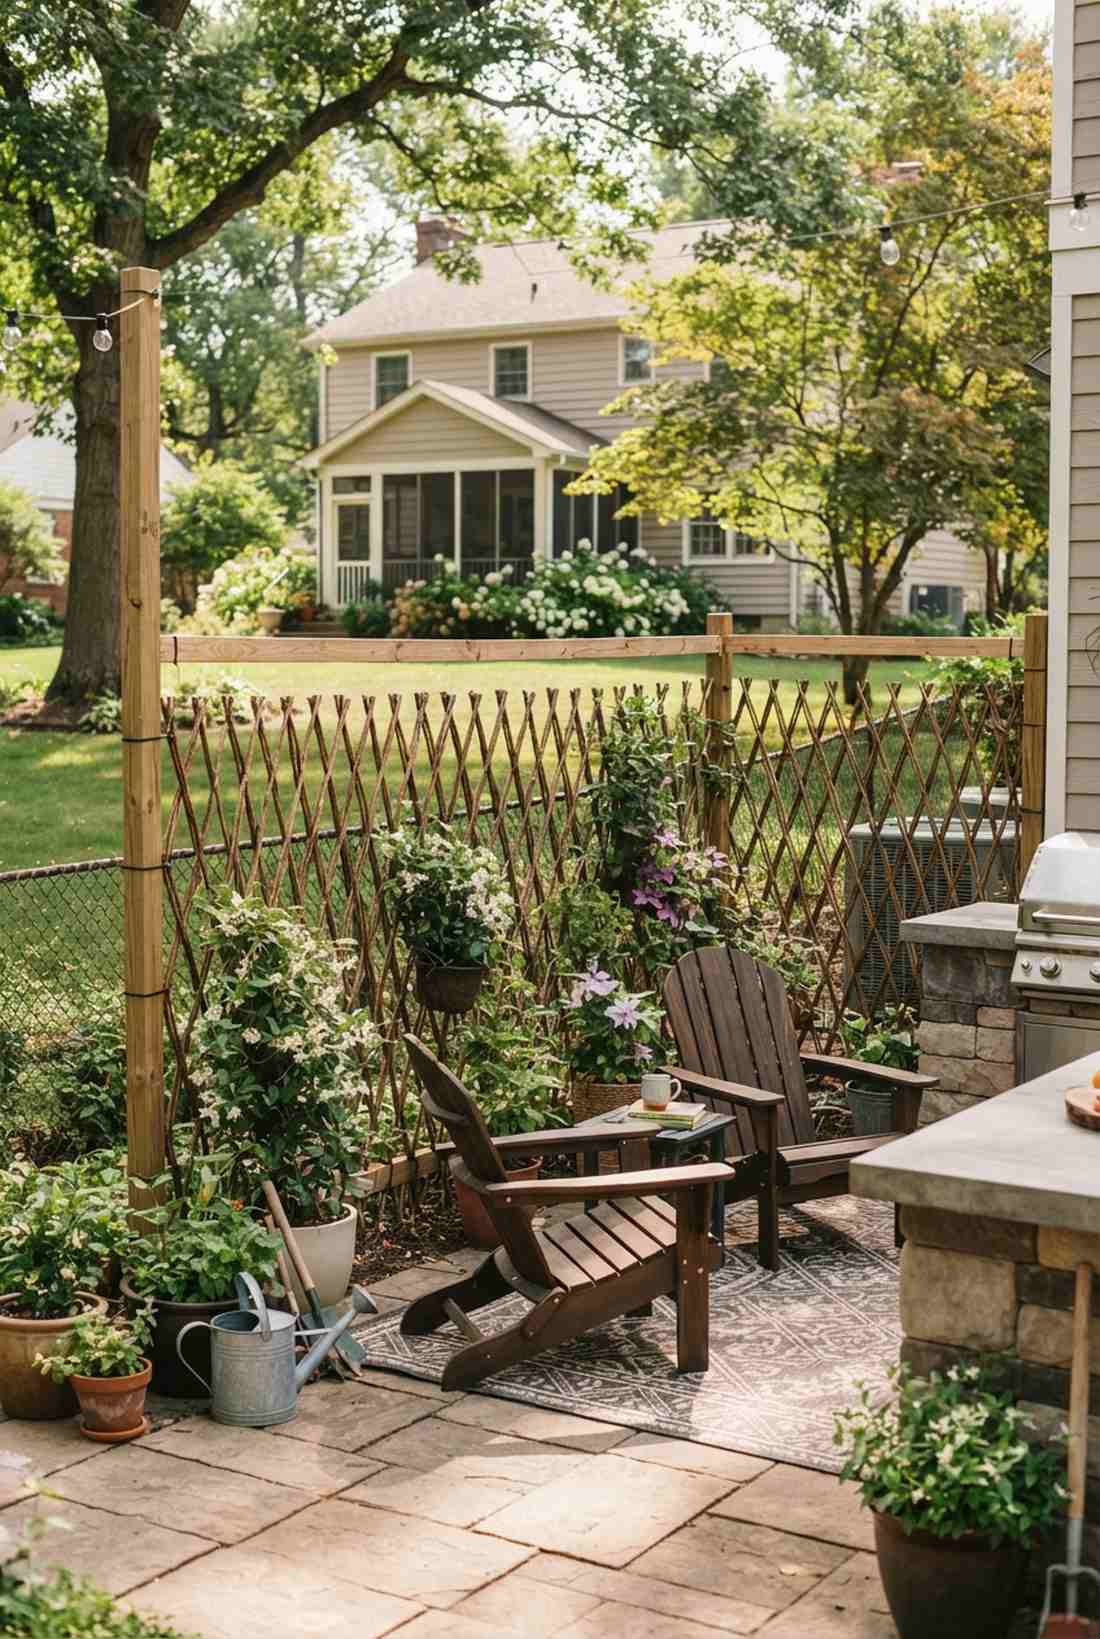
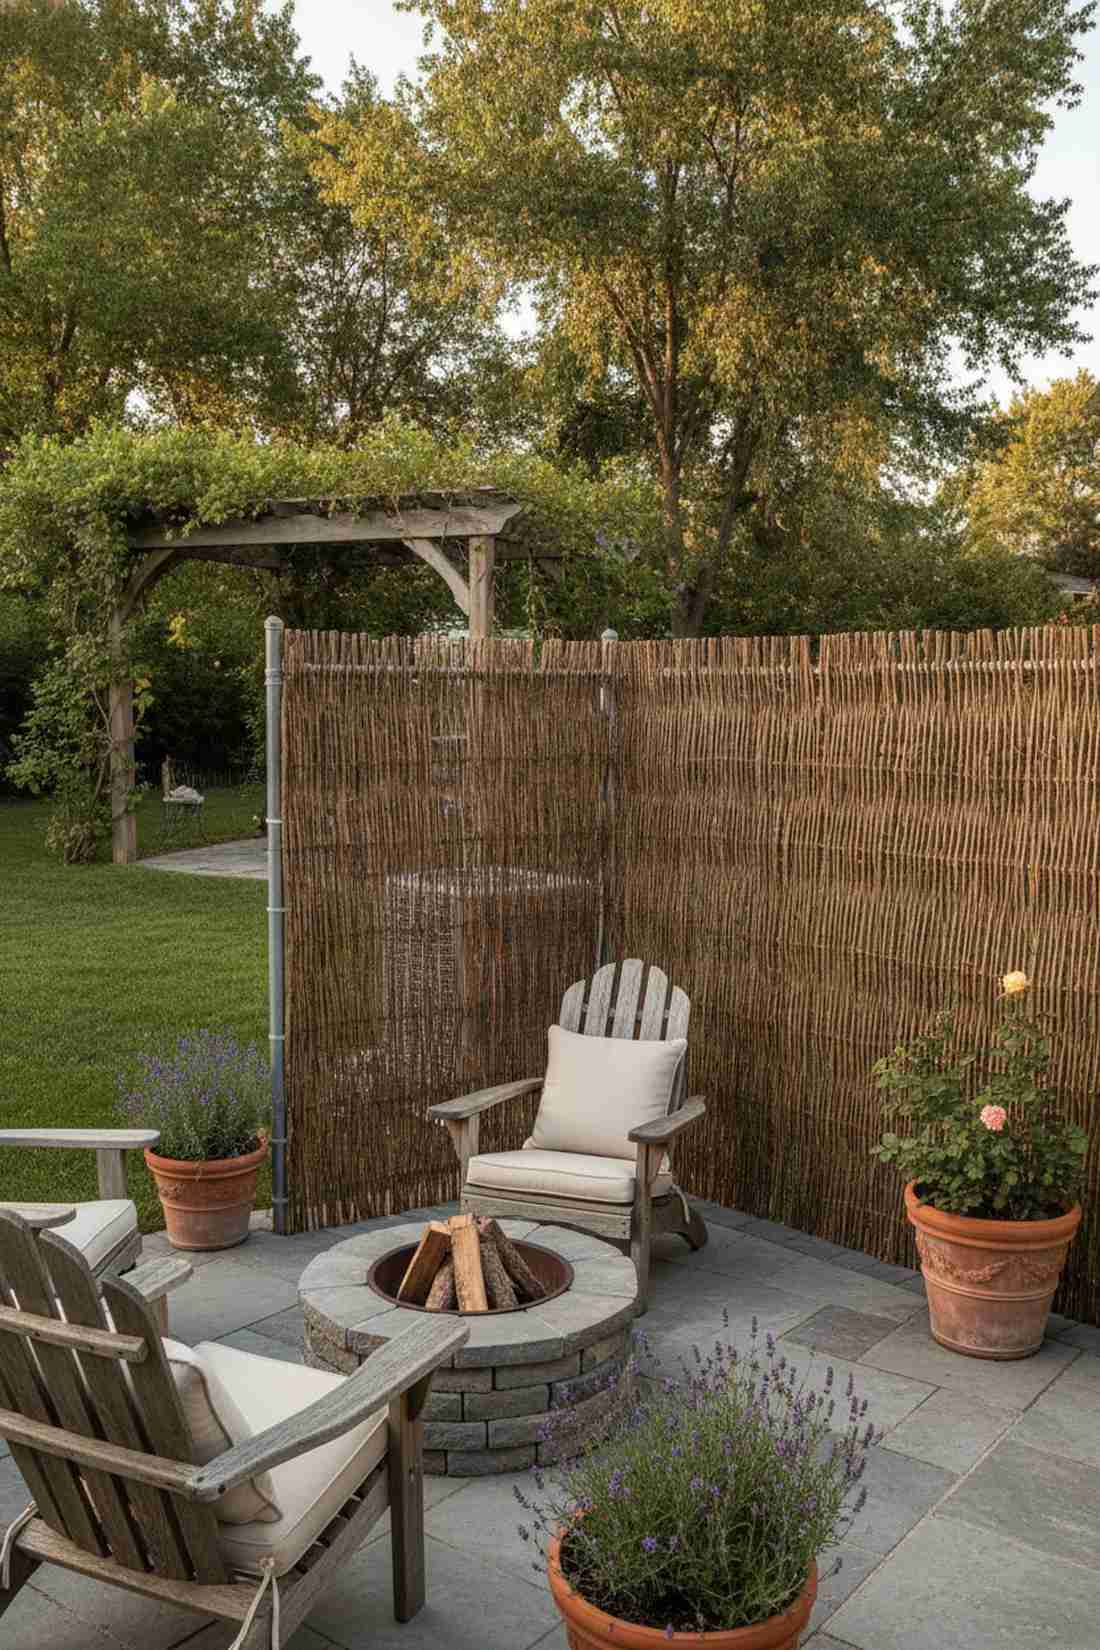
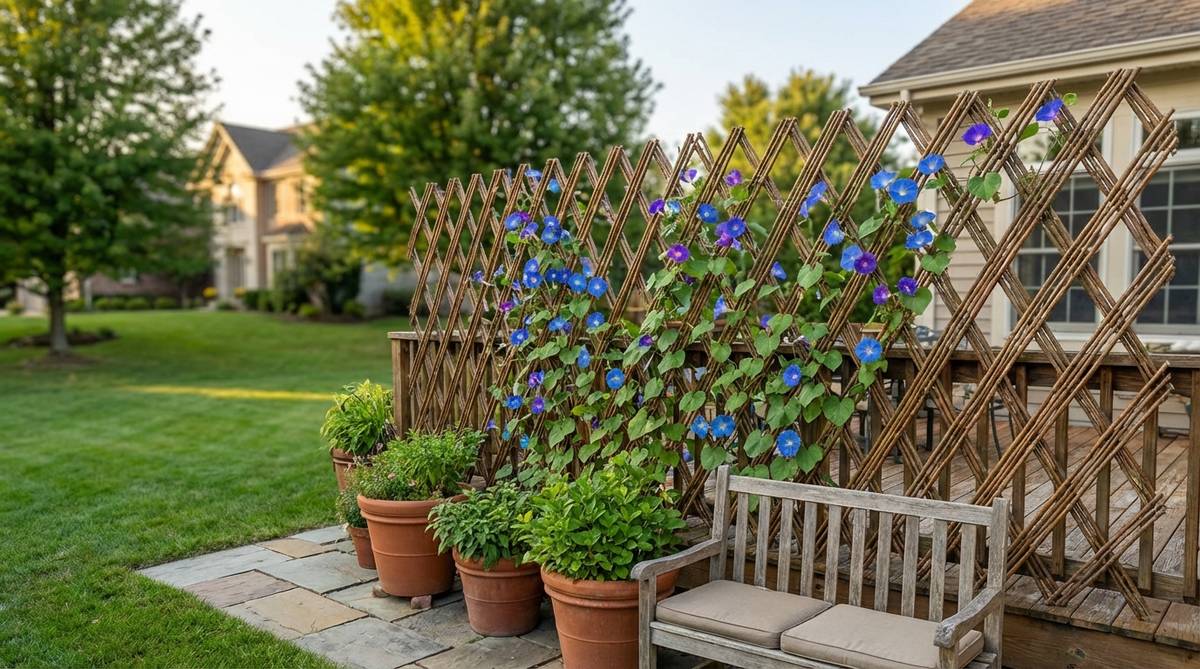
Wrapping a patio in natural branches creates a whimsical, storybook border. Expandable willow fencing is excellent for camouflaging ugly chain-link boundaries or air conditioning units.
Solid fences block too much light, yet this expandable weave maintains perfect airy separation. Integrating natural woven garden supplies softens harsh hardscaping with an organic, texturized touch.
You can cover significant ground for around $35–$60. It’s an instant upgrade that entirely masks ugly yard elements.
- Key Materials: Accordion willow panels, zip ties
- Vibe / Style: Earthy rustic cottage
- Difficulty: Ultra-fast installation
- Budget Breakdown: Panels: $45 | Ties: $5
- Creator’s Tip: Overlap the edges of two panels by a few inches to hide the transition seam completely.
- Smart Sourcing: expandable natural willow fencing rolls, UV-resistant clear mounting ties.
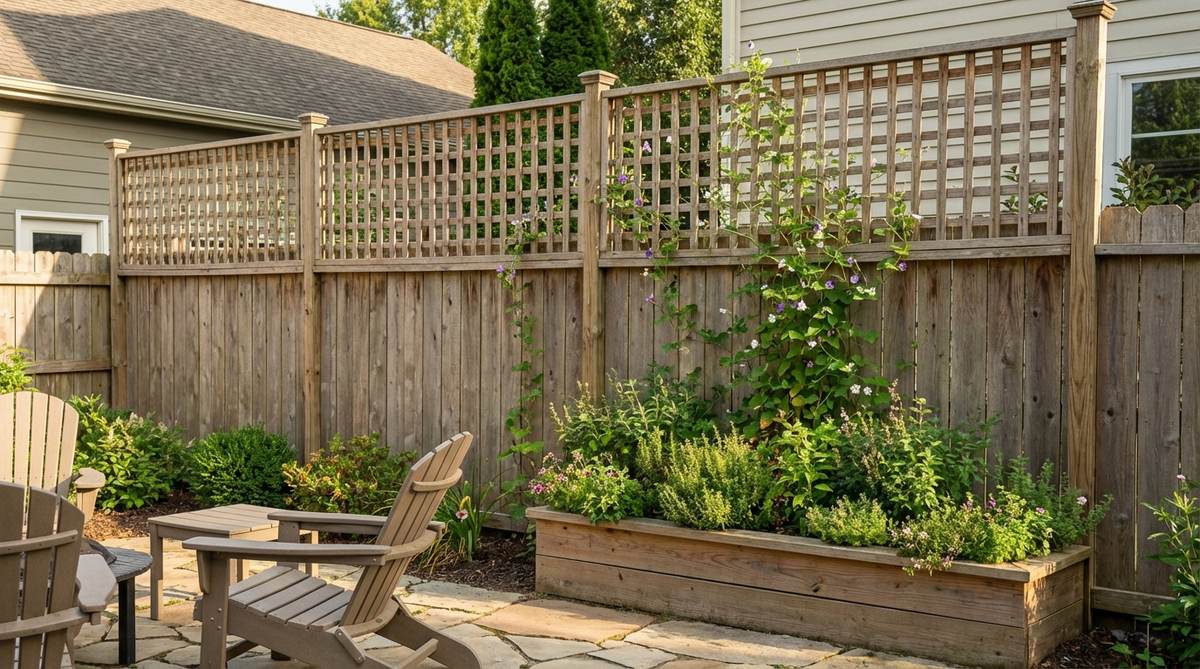
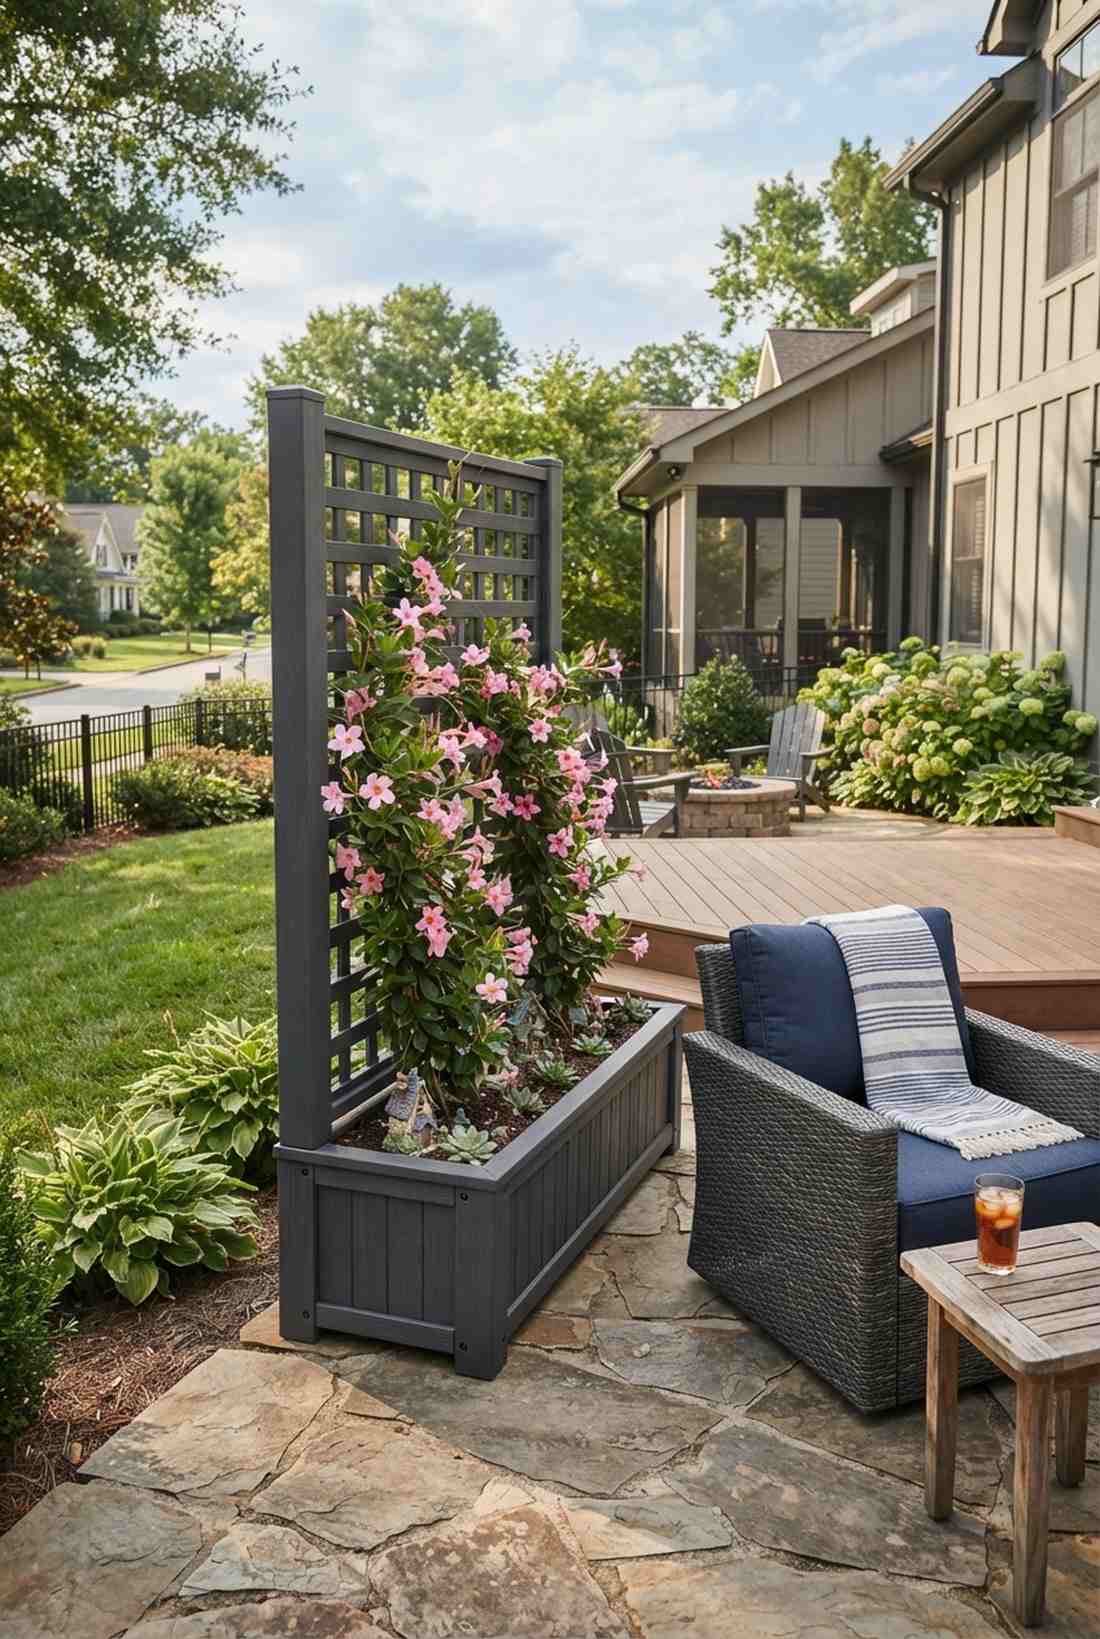
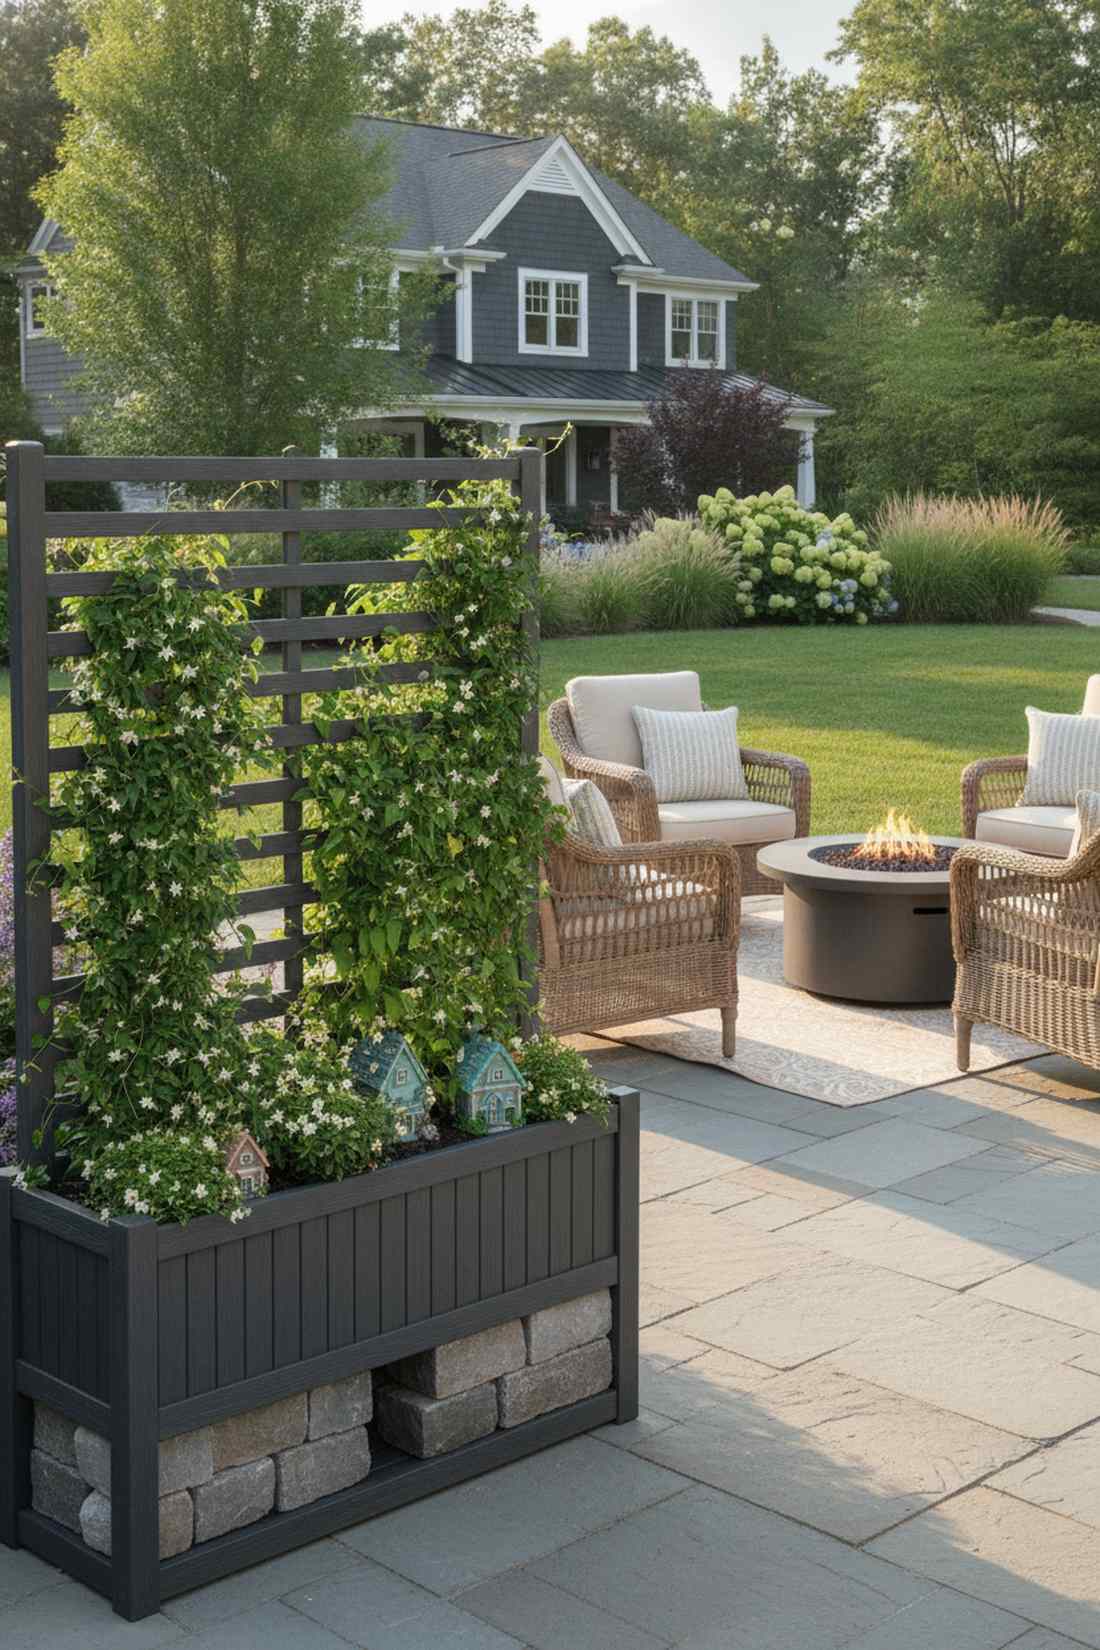
8. Vertical Slat Screen with Planter Base
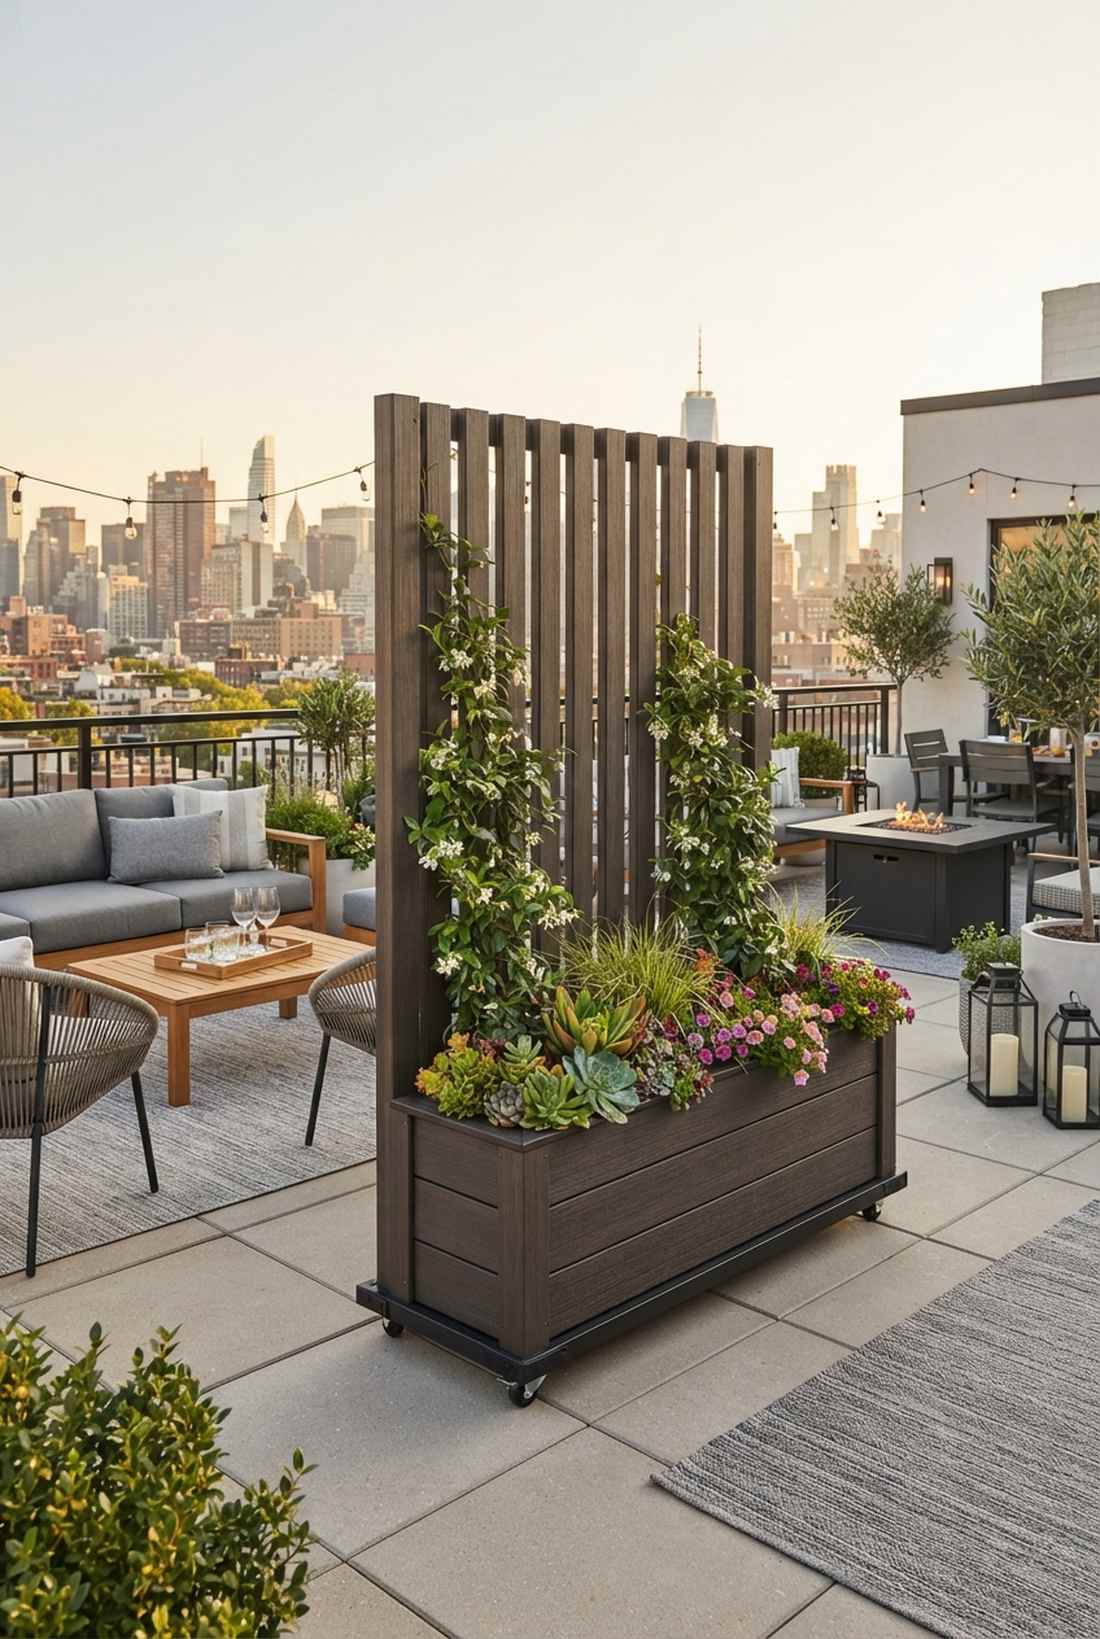

Setting up a mobile green wall feels like an upscale hotel rooftop barrier. A freestanding planter trellis is highly recommended for rented balcony spaces where digging is strictly prohibited.
Cheap plastic pots crack outdoors, but a reinforced mobile base offers lasting modular flexibility. Invest in heavy-duty planter box kits that can handle 100+ pounds of wet soil without bowing.
This premium freestanding unit will run you $100–$150. Save this to your patio design board for renter-friendly inspiration.
- Key Materials: Composite decking, deep planter box
- Vibe / Style: Modern luxury modular
- Difficulty: Intermediate assembly
- Budget Breakdown: Planter Base: $80 | Slats: $40
- Creator’s Tip: Fill the bottom 2 inches of the planter with crushed gravel to perfectly stabilize the towering screen.
- Smart Sourcing: heavy-duty modular planter box bases, weather-resistant composite slat boards.
Most people get this completely wrong… until they try the exact layout coming up next.
9. Metal Geometric Panel Screen
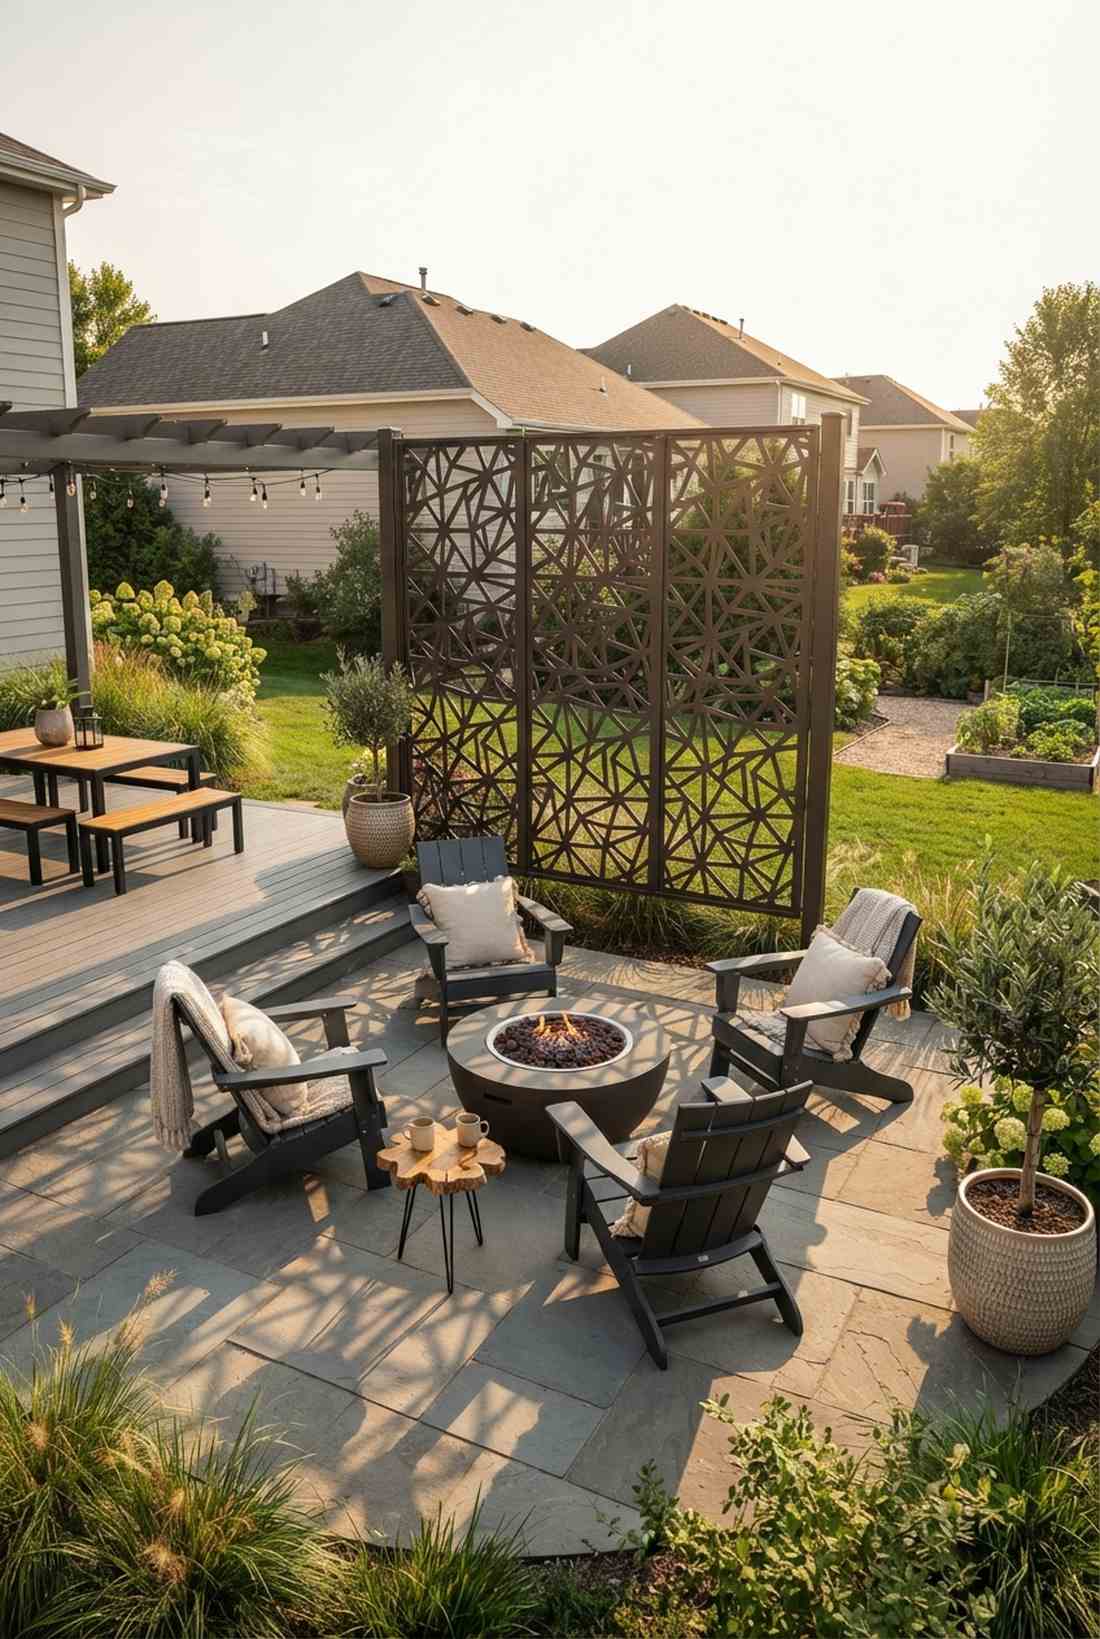
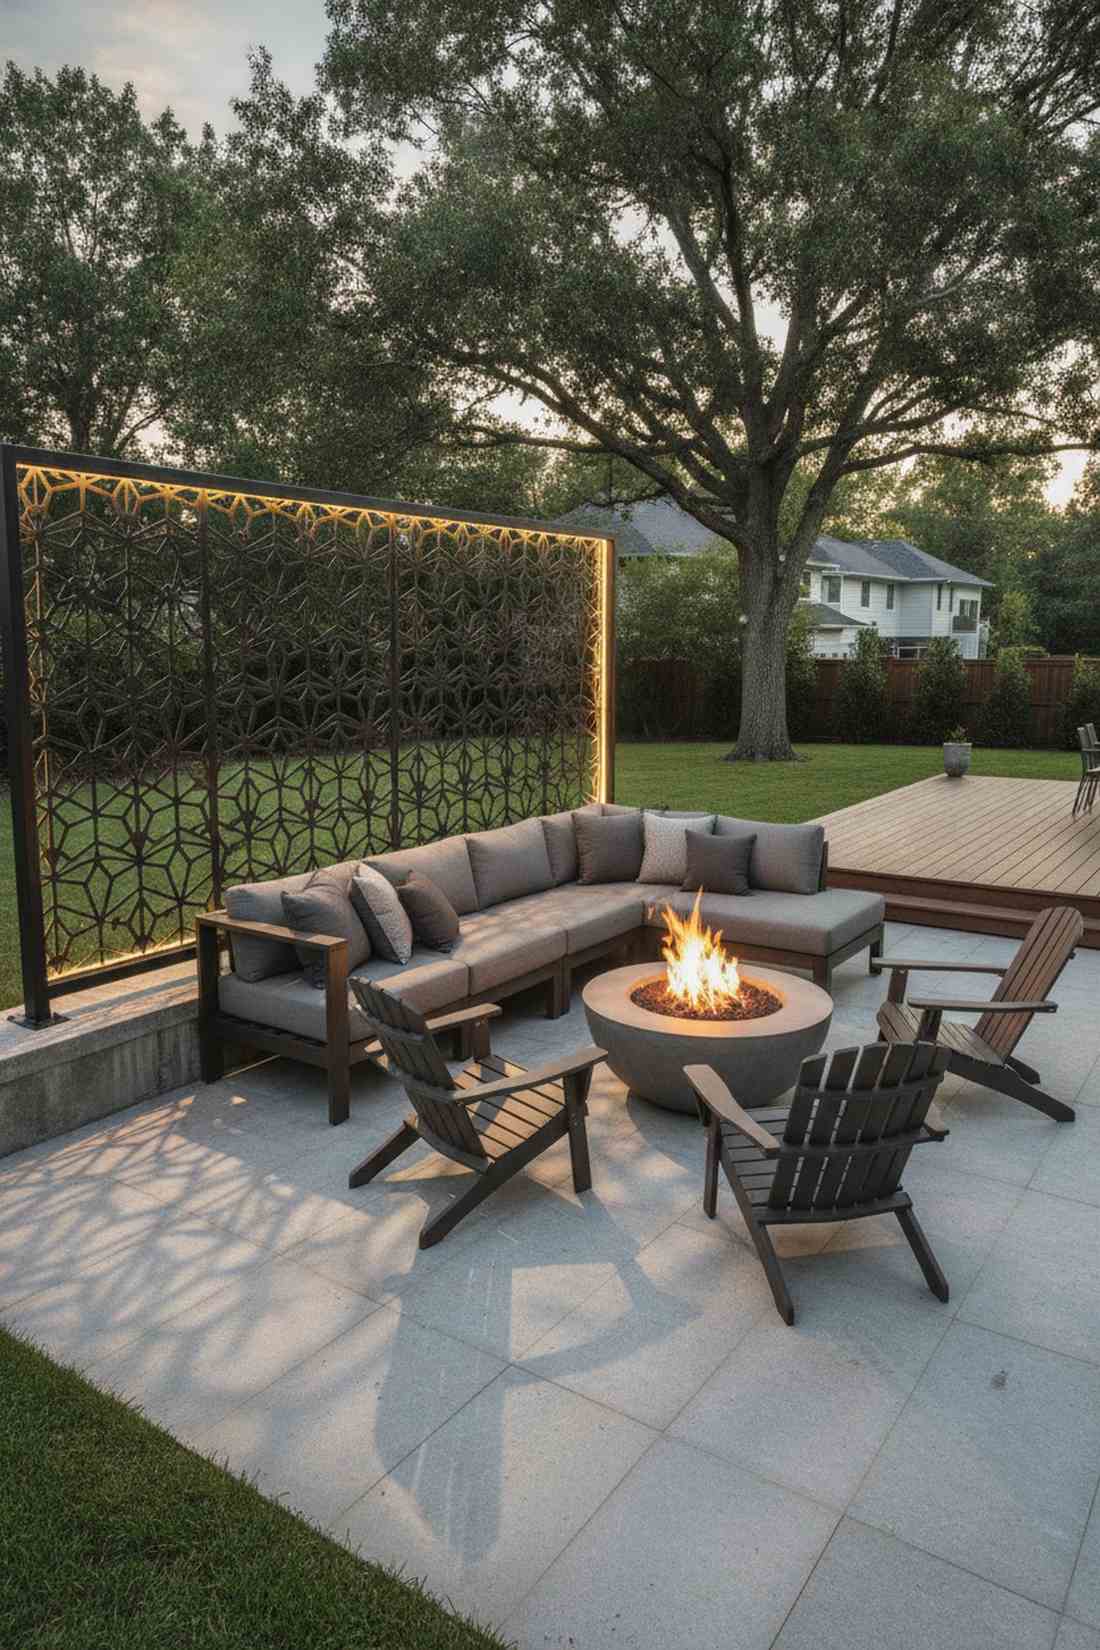
Shadows casting through intricate cutouts project a sleek, ultra-modern architectural vibe. A laser-cut metal garden screen perfectly anchors an outdoor seating firepit area with striking industrial flair.
Standard wooden grids rot quickly, whereas precision-cut metal guarantees a stunning permanent focal point. Selecting powder-coated aluminum privacy screens completely eliminates the nightmare of seasonal rust and repainting.
While an investment, expect to budget $200–$350 for true architectural grade art.
- Key Materials: Laser-cut metal sheets, rigid framing
- Vibe / Style: Contemporary designer courtyard
- Difficulty: Drill and mount installation
- Budget Breakdown: Metal Panel: $250 | Mounts: $30
- Creator’s Tip: Backlight the panel with waterproof LED strips to turn the trellis into a glowing nighttime feature.
- Smart Sourcing: laser-cut architectural aluminum screens, heavy-duty metal post anchor kits.
💡 Must-Have Supplies for High-End Setups
To build these setups faster and ensure they last, skip the generic craft aisles and invest in the right foundational kits.
- Base & Support: commercial-grade galvanized ground stakes
- Setup Tools: heavy-duty metal tensioning starter kits
- Weather/Durability Protection: UV-coated clear exterior marine sealant
Space-Saving Wall-Mounted Solutions
When ground space is non-existent, vertical facades become your most valuable real estate. These attached setups turn empty brick and siding into thriving botanical canvases.
10. Fan Trellis for Wall Corners
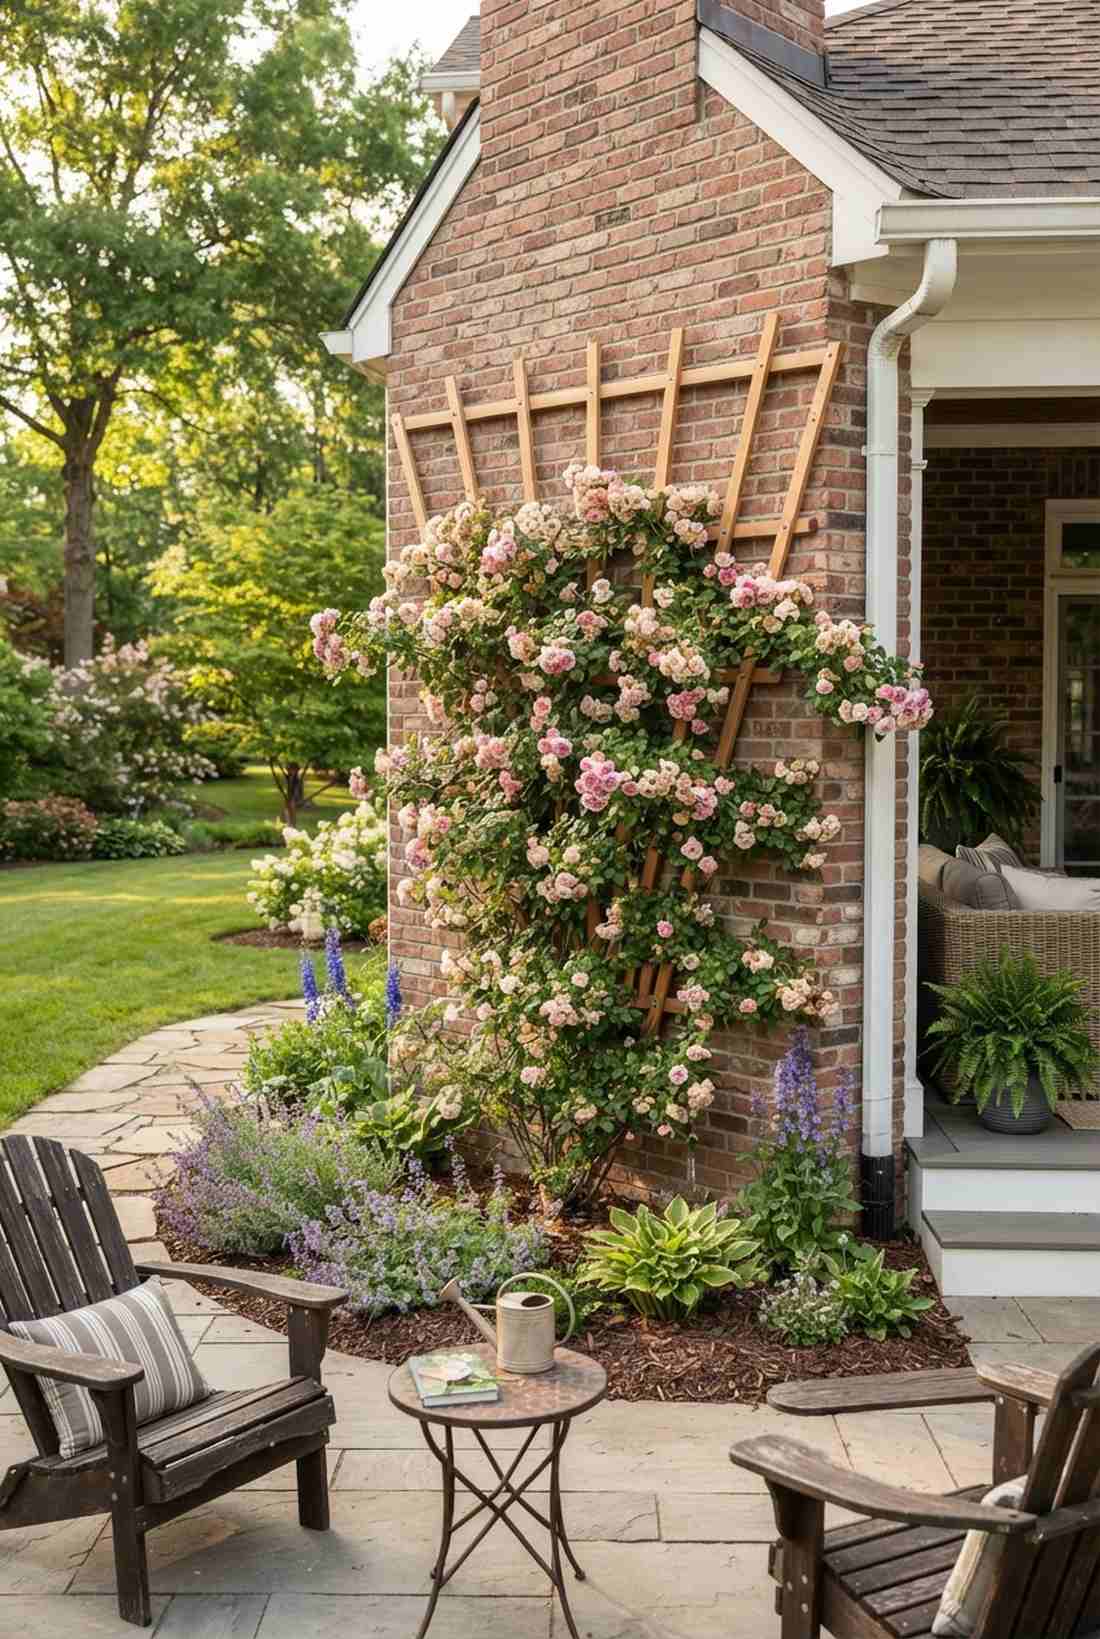

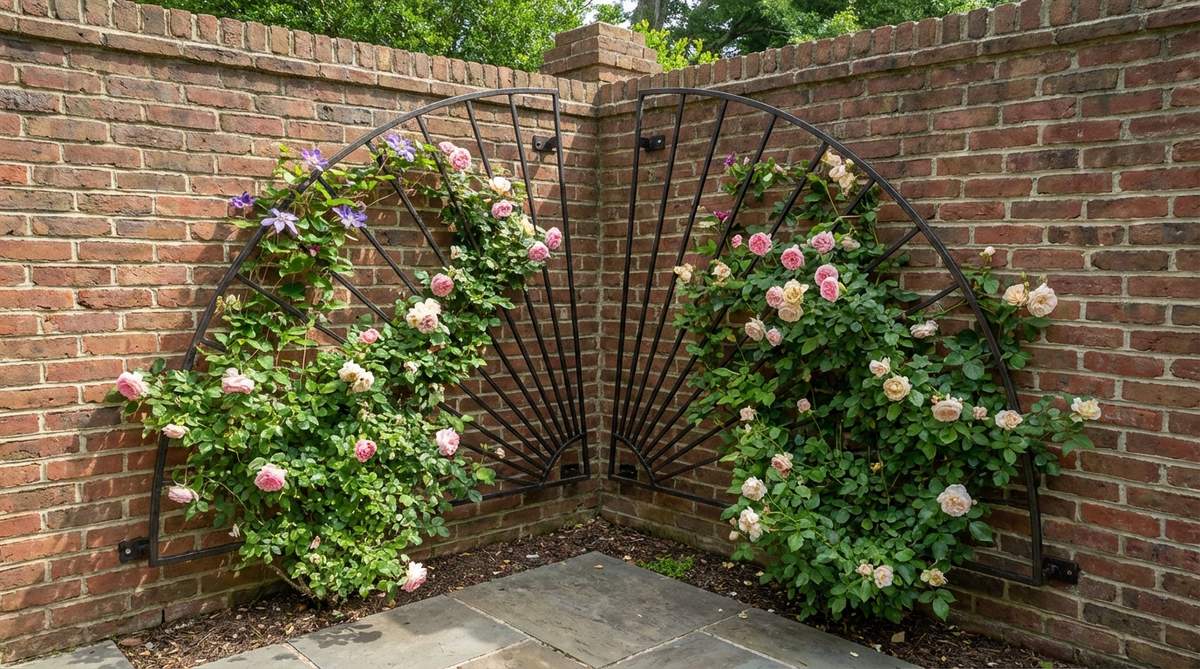
Guiding a climbing rose up a tight intersection looks like a romantic cottage corner bursting with blooms. A corner fan plant support is best utilized on blank masonry walls that normally trap heat.
Empty corners often become dead zones, but a radiating framework draws the eye upward beautifully. Fasten it using rust-proof masonry anchors to ensure heavy mature vines don’t rip the frame from the brick.
You can easily pull this off for around $40–$65. Pin this layout if you need to soften harsh house siding.
- Key Materials: Flared wood trellis, masonry screws
- Vibe / Style: Classic English garden accent
- Difficulty: Quick power-drill mounting
- Budget Breakdown: Fan Trellis: $45 | Anchors: $10
- Creator’s Tip: Mount the fan at least one foot off the ground to protect the wood from soil-borne rot.
- Smart Sourcing: pre-assembled wooden fan trellises, rust-proof corner masonry anchors.
11. Fold-Down Balcony Trellis
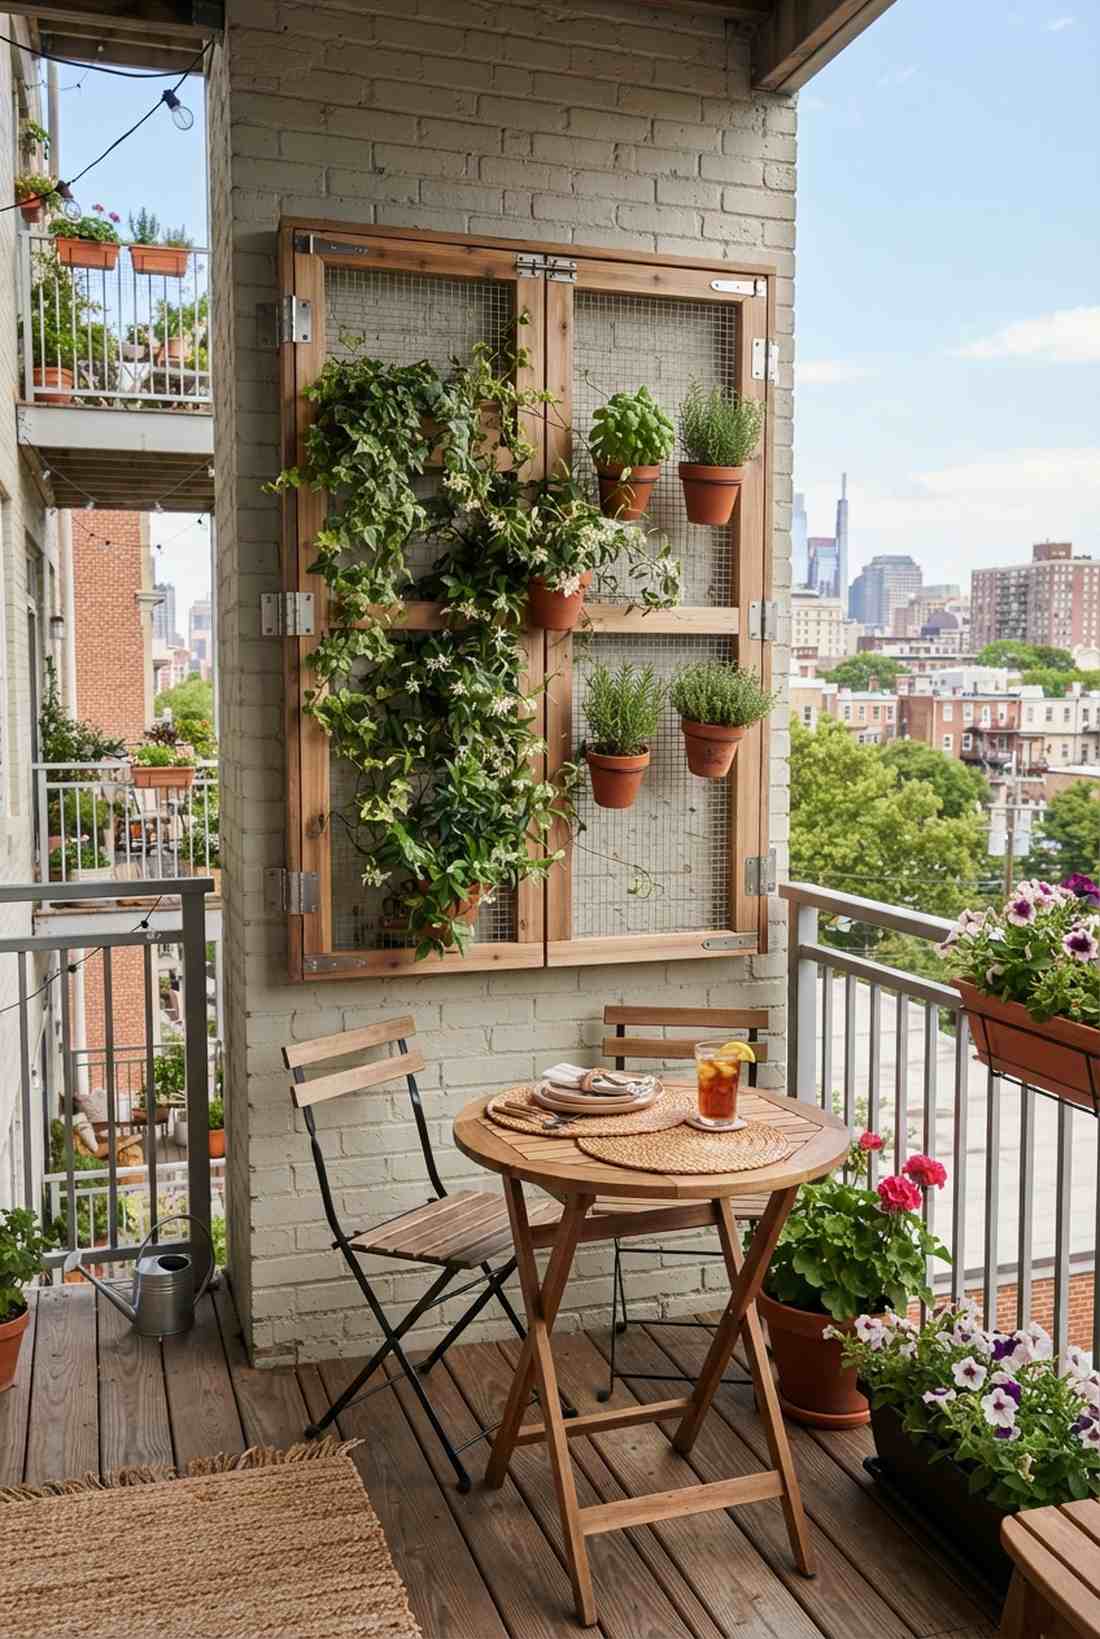

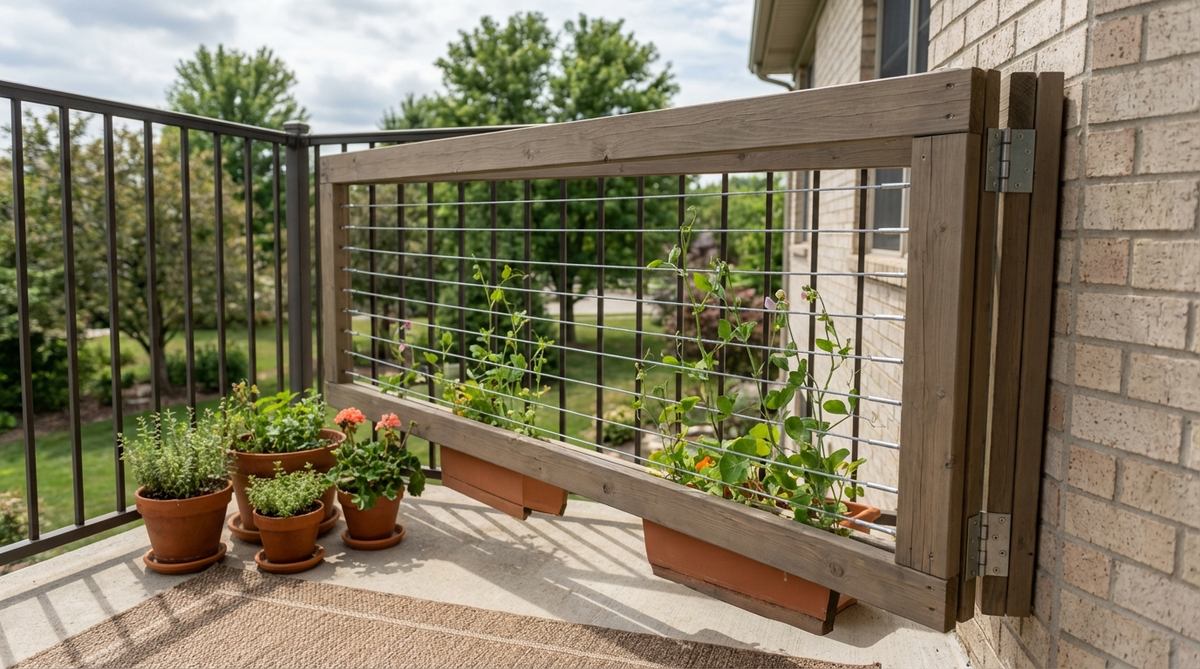
Having a collapsible green wall delivers a clever, space-shifting urban oasis. A foldable balcony grid is an absolute game-changer for tiny apartment patios that double as dining zones.
Fixed balcony mounts violate most lease agreements, making this hinged setup a brilliant loophole. Integrate marine-grade folding hardware to ensure the hinge operates flawlessly even after years of rain exposure.
Set this dynamic rig up for an easy $30–$50. Highly recommended for multi-purpose urban balconies.
- Key Materials: Wood frame, piano hinges, wire
- Vibe / Style: Smart utilitarian chic
- Difficulty: Moderate precision assembly
- Budget Breakdown: Wood/Wire: $25 | Hinges: $15
- Creator’s Tip: Install a slide-bolt latch at the top to securely lock the trellis upright during heavy wind gusts.
- Smart Sourcing: marine-grade folding piano hinges, weather-resistant balcony mounting straps.
12. Wire Grid Garage Wall System
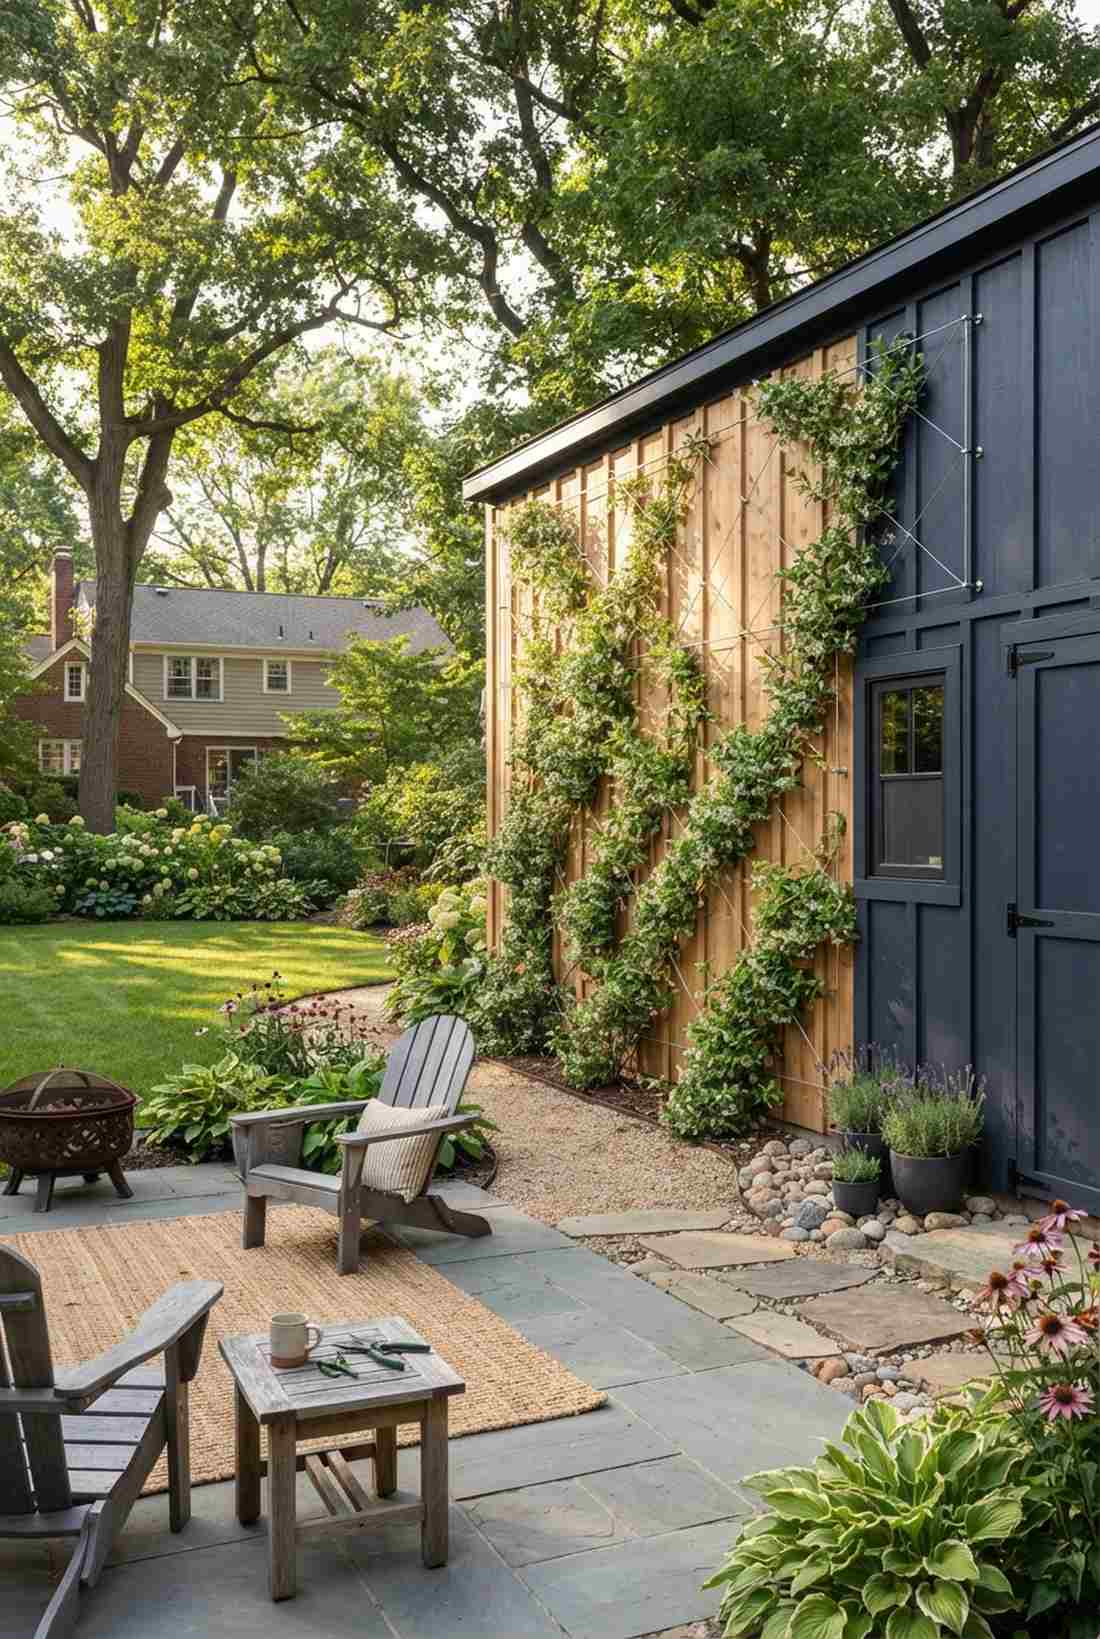
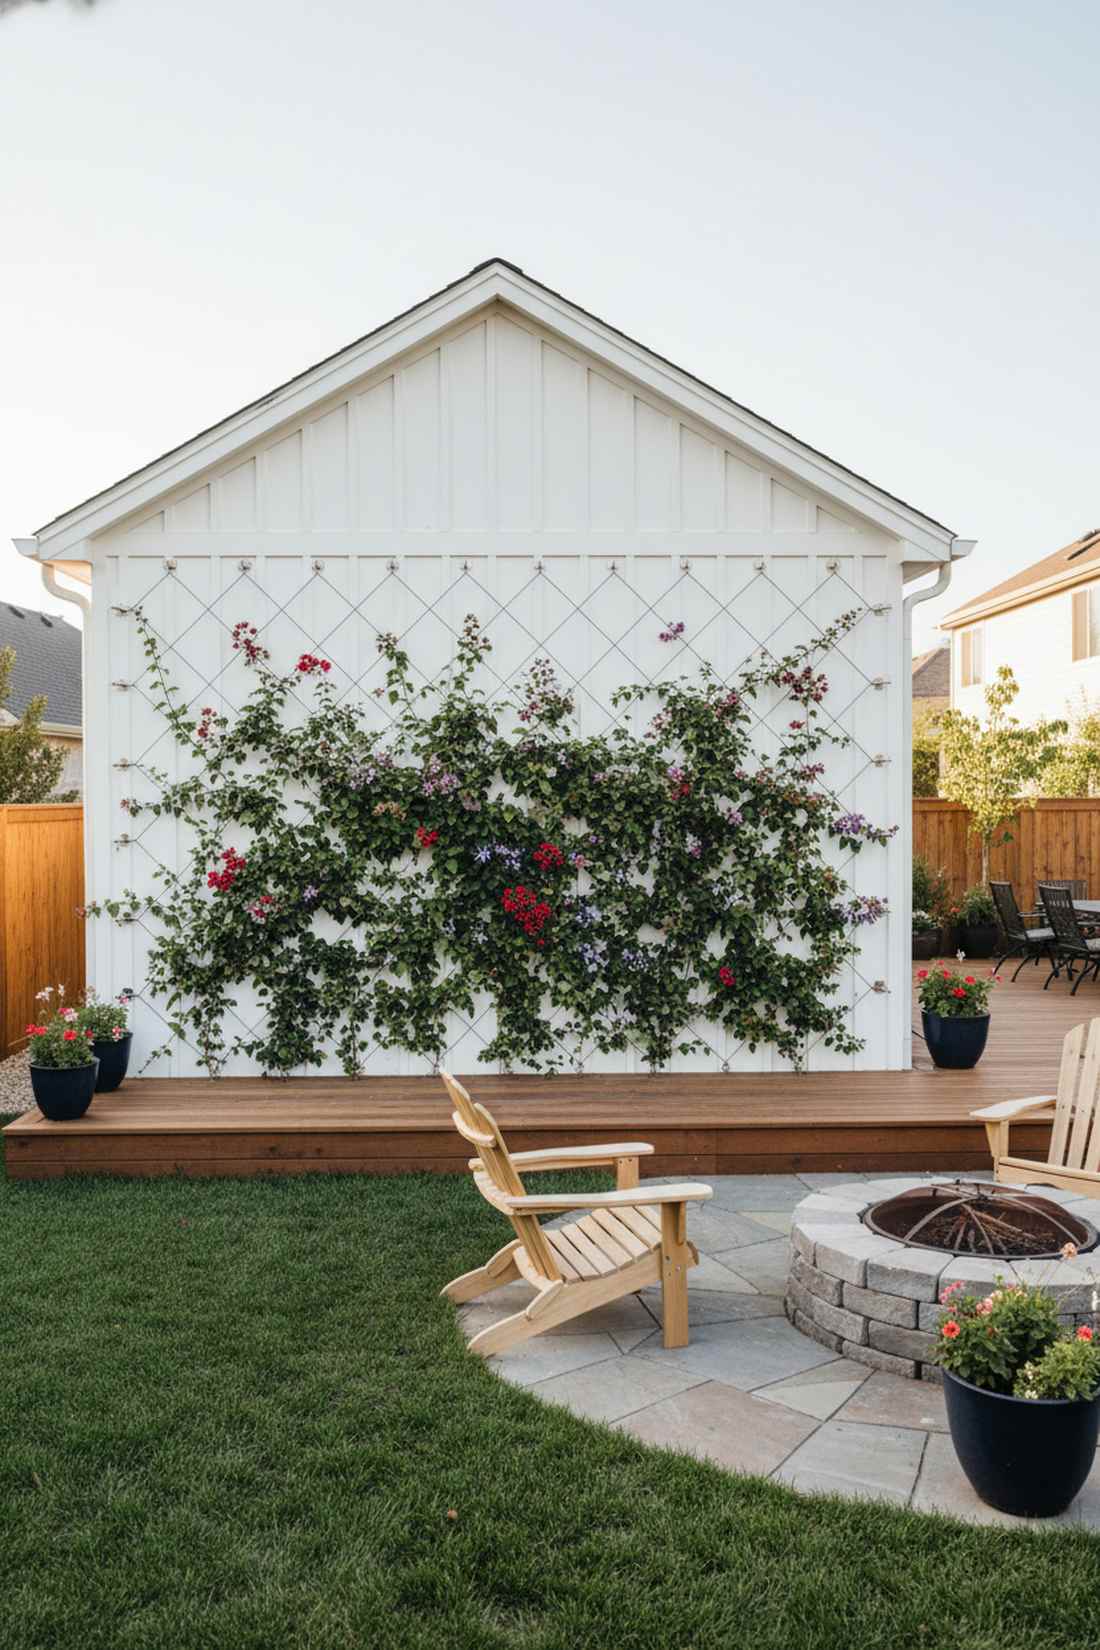
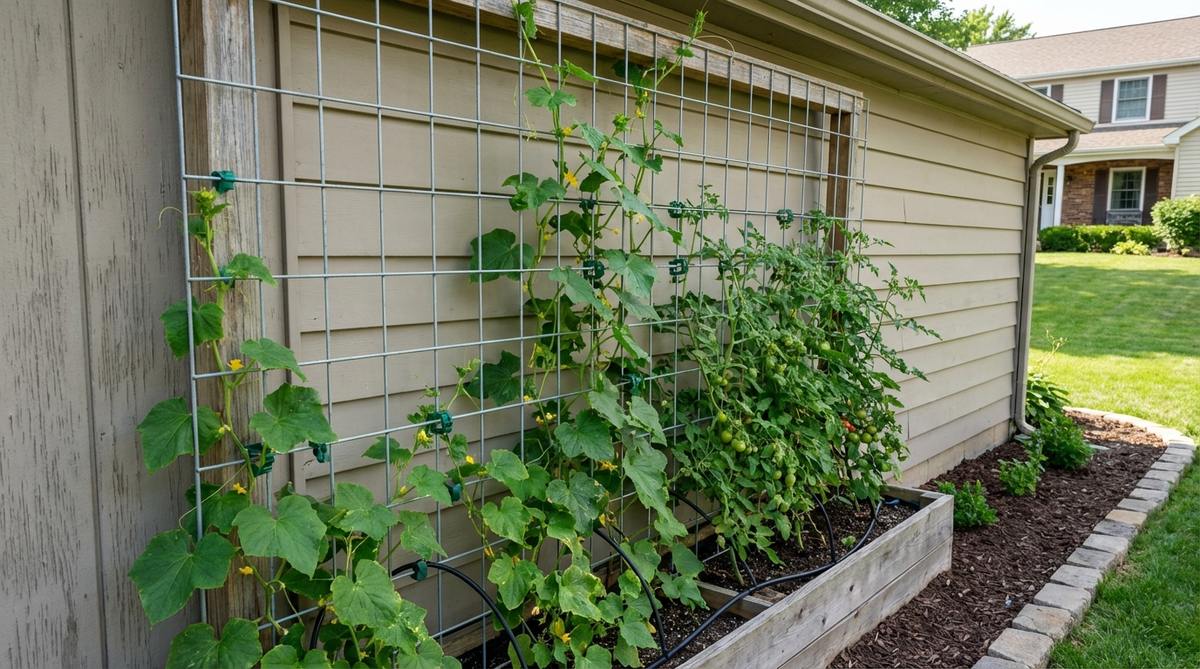
Draping a sun-baked wall in cool foliage transforms an industrial facade into an abundant living surface. A wire grid espalier wall is exceptional for utilizing the wasted siding on large backyard sheds.
Nailing vines directly destroys siding, while a taut wire matrix protects walls and boosts airflow. Sourcing stainless steel wall standoff kits delivers a flawless, invisible floating effect for your plants.
Expect to spend roughly $25–$40 for the wire and hardware. Save this to your DIY weekend garden board for an instant curb appeal boost.
- Key Materials: Eye hooks, galvanized wire, turnbuckles
- Vibe / Style: Invisible floating foliage
- Difficulty: Drill and tension setup
- Budget Breakdown: Wire Roll: $15 | Standoff Hardware: $20
- Creator’s Tip: Map out a perfect geometric diamond pattern with painter’s tape before drilling a single hole.
- Smart Sourcing: stainless steel espalier wire kits, heavy-duty wire turnbuckle tensioners.
13. Hanging Basket Trellis Combination
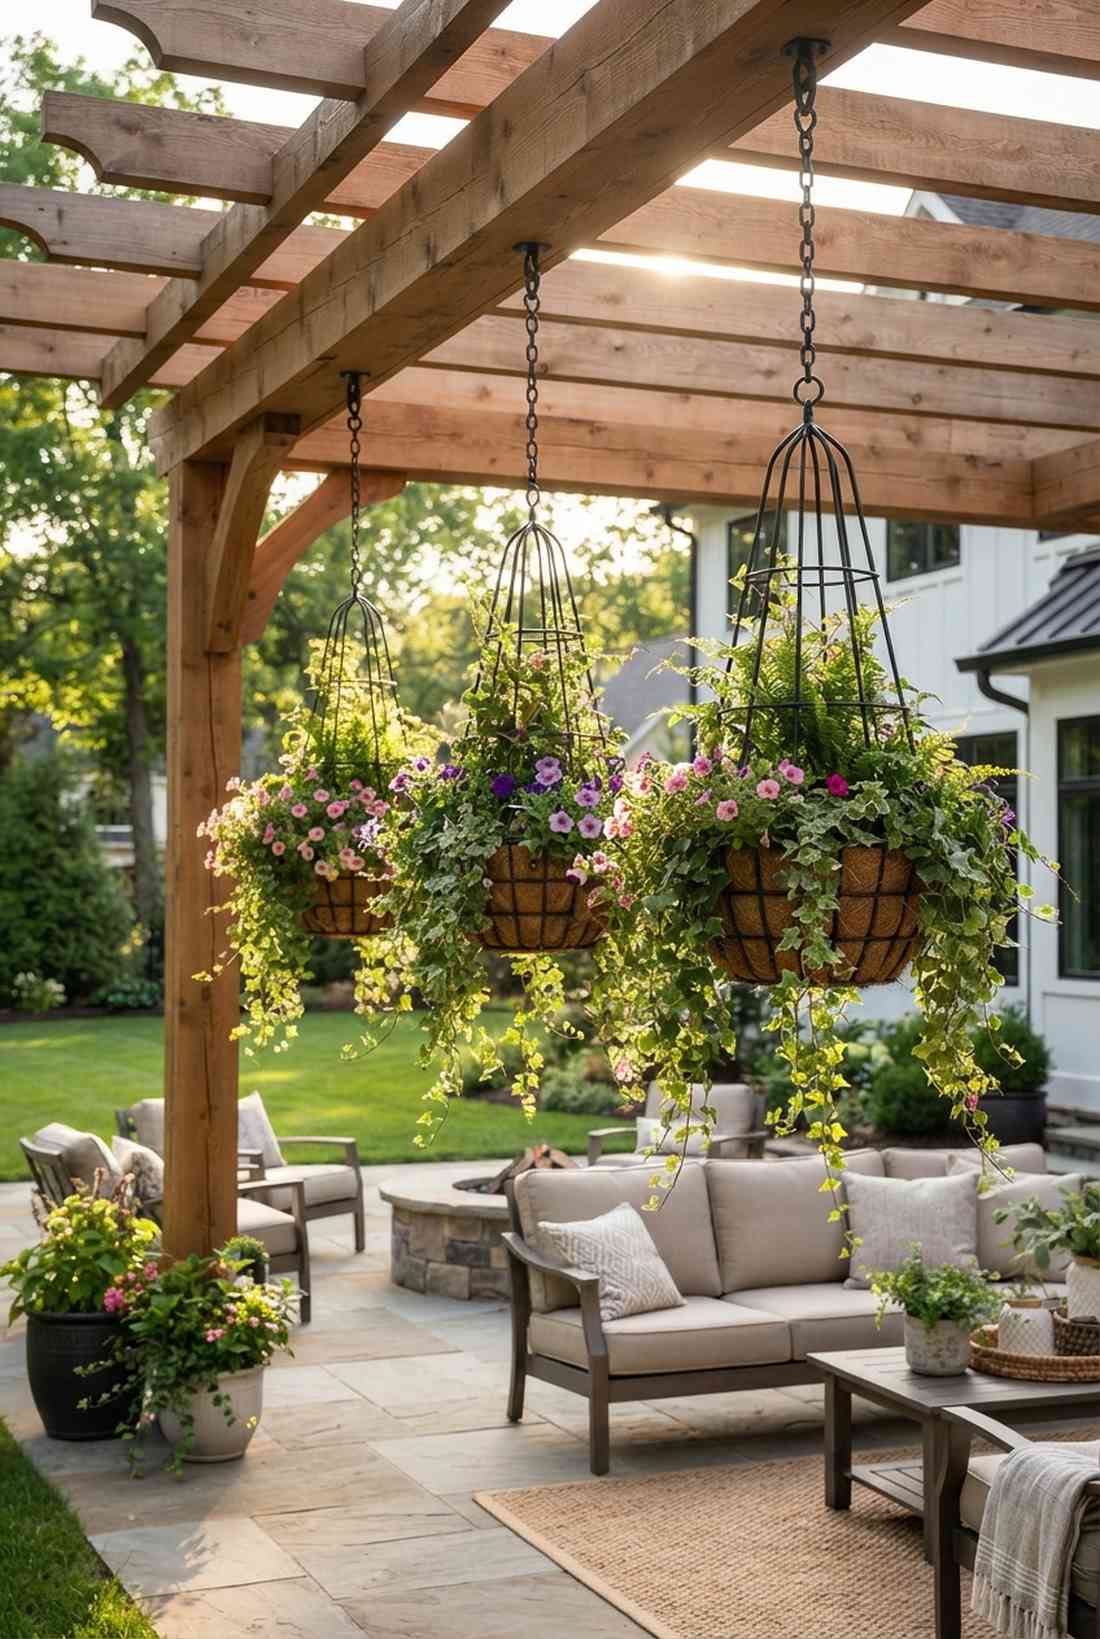
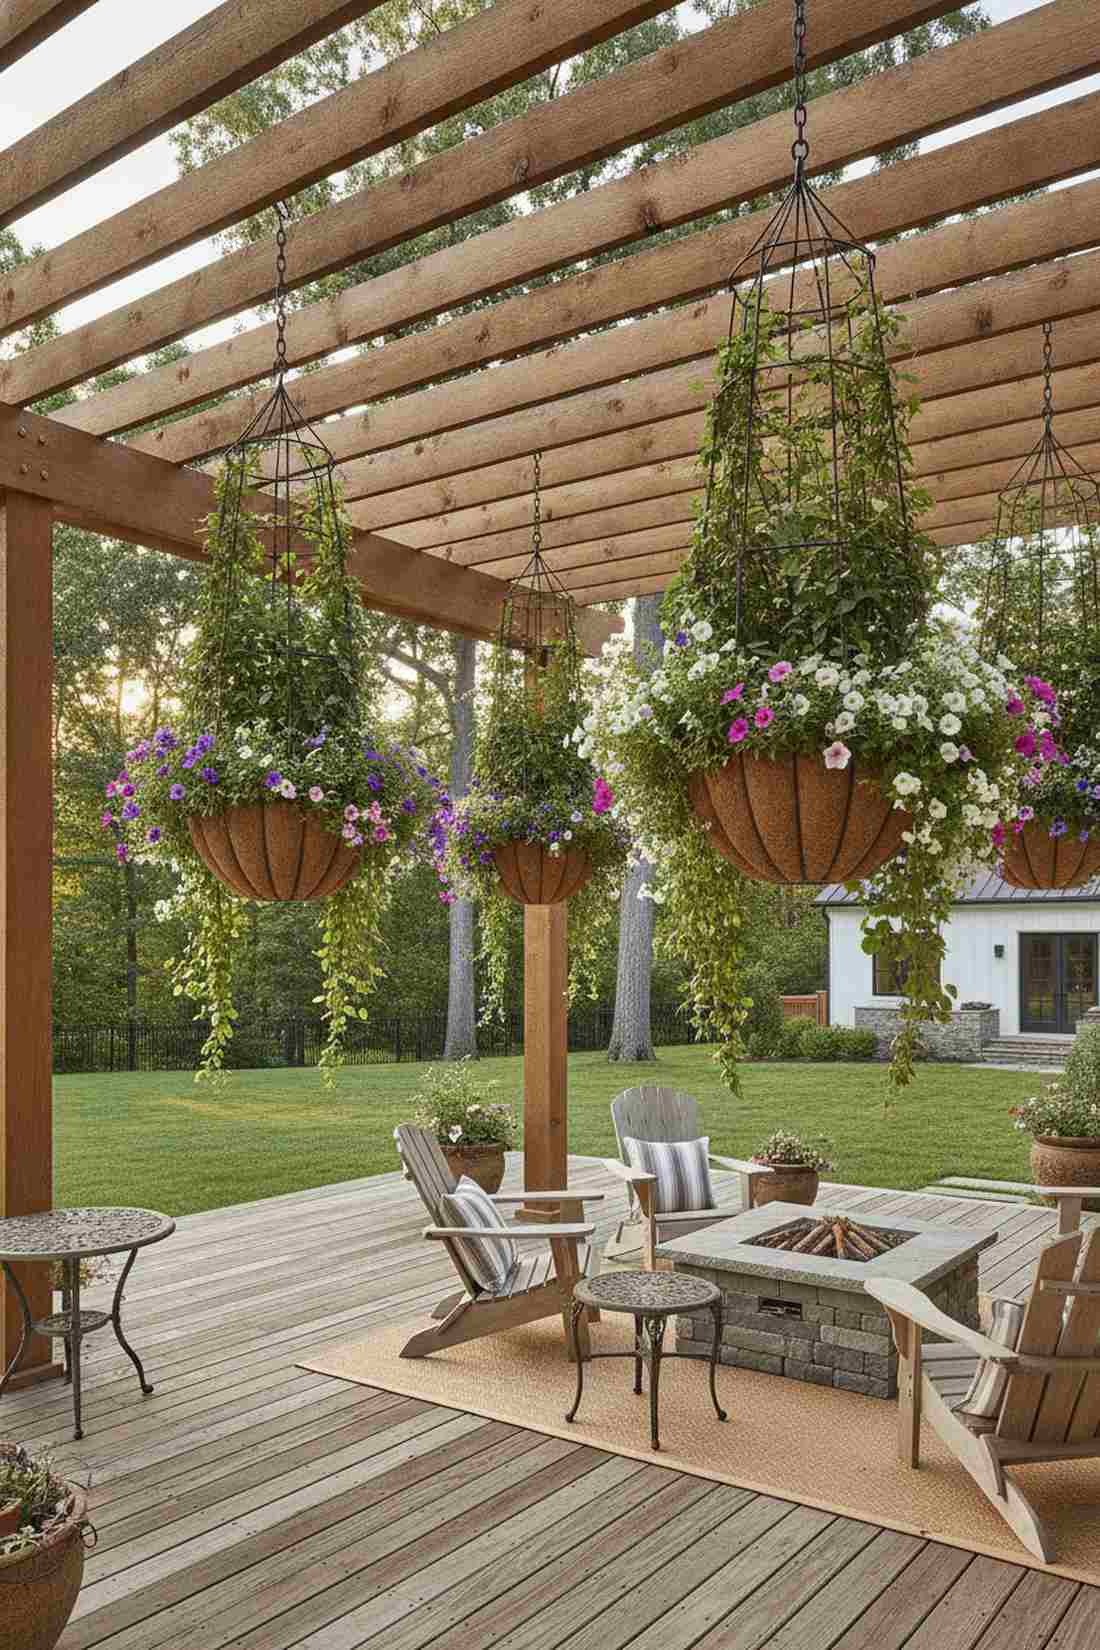
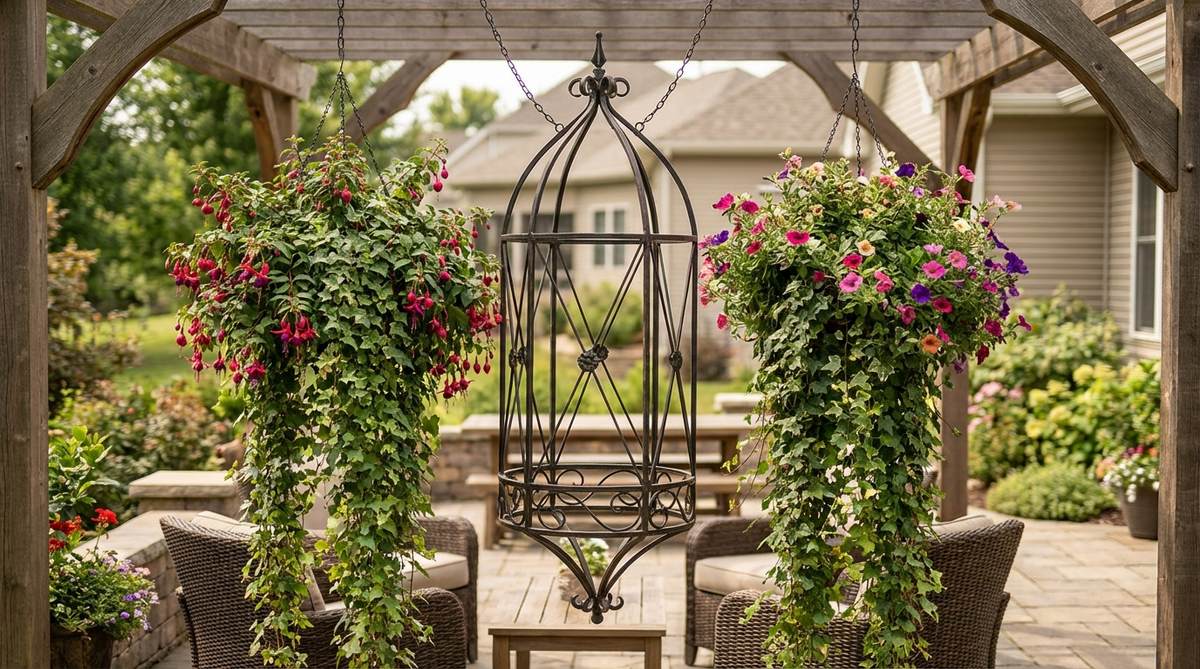
Watching trailing vines spiral downward feels like floating columns of lush floral tapestries. Suspended obelisk planters look absolutely stunning when hung from sturdy pergola cross-beams.
Ground-level planters invite pests, but suspending heavy-duty hardware elevates the entire floral display. You must use industrial ceiling hook kits to safely bear the immense weight of a water-logged hanging basket.
You can create this floating magic for about $45–$75. It’s a fast upgrade that completely changes the patio vibe.
- Key Materials: Wire obelisk, heavy chain, basket
- Vibe / Style: Ethereal floating columns
- Difficulty: Easy hanging project
- Budget Breakdown: Wire Frame: $30 | Hooks/Chain: $20
- Creator’s Tip: Line the basket with a thick coco coir mat to retain vital moisture in the exposed canopy.
- Smart Sourcing: powder-coated steel wire obelisks, heavy-duty ceiling hook hardware (bulk pack).
This next setup is ridiculously cheap but looks like a $100 custom display…
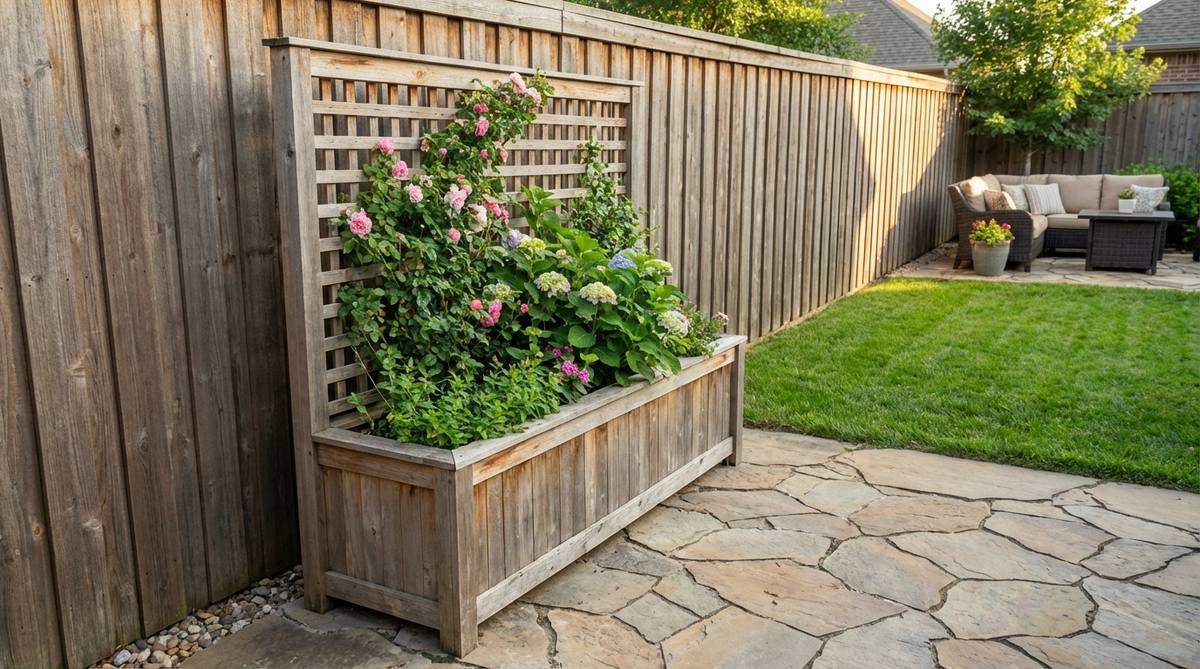
14. Fence Topper Extension Trellis
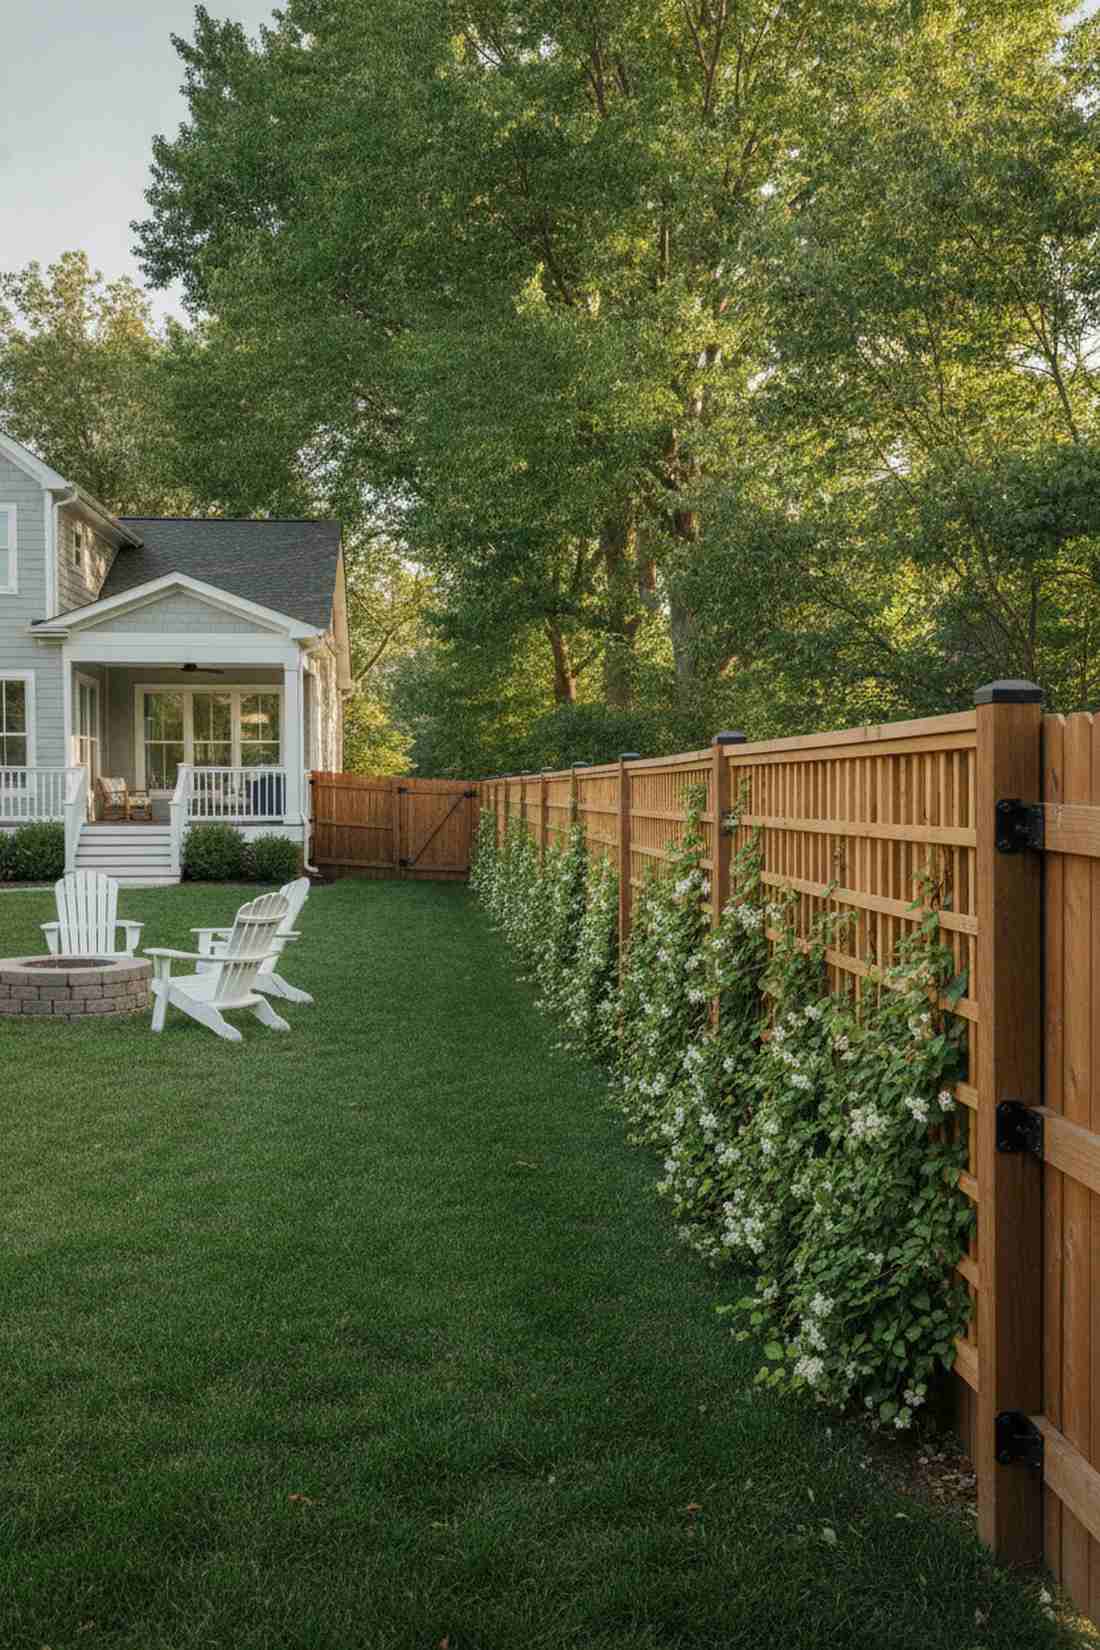
Adding a crown of flowering ivy extends your personal sanctuary without tearing down existing structures. Privacy fence topper panels work wonderfully along short, exposed neighborhood boundaries.
Full fence replacements are financially draining, but a top-mounted addition delivers cheap, instant height. Upgrading to pre-cut cedar lattice extensions provides a gorgeous, rot-resistant upgrade that matches most standard yard fencing.
Budget around $60–$90 per panel section. Pin this if you need an immediate fix for nosy neighbors.
- Key Materials: Lattice strips, structural brackets
- Vibe / Style: Seamless neighborhood border
- Difficulty: Simple bracket mounting
- Budget Breakdown: Toppers: $50 | Brackets: $20
- Creator’s Tip: Ensure your local zoning laws allow for the combined height before bolting the extensions permanently.
- Smart Sourcing: pre-cut cedar lattice toppers, heavy-duty fence extension bracket kits.
Freestanding Structures for Flexible Placement
Mobility is the ultimate luxury in a shifting landscape. These self-contained towers and screens allow you to redesign your garden flow season after season without digging holes.
15. Obelisk Tower for Container Gardens
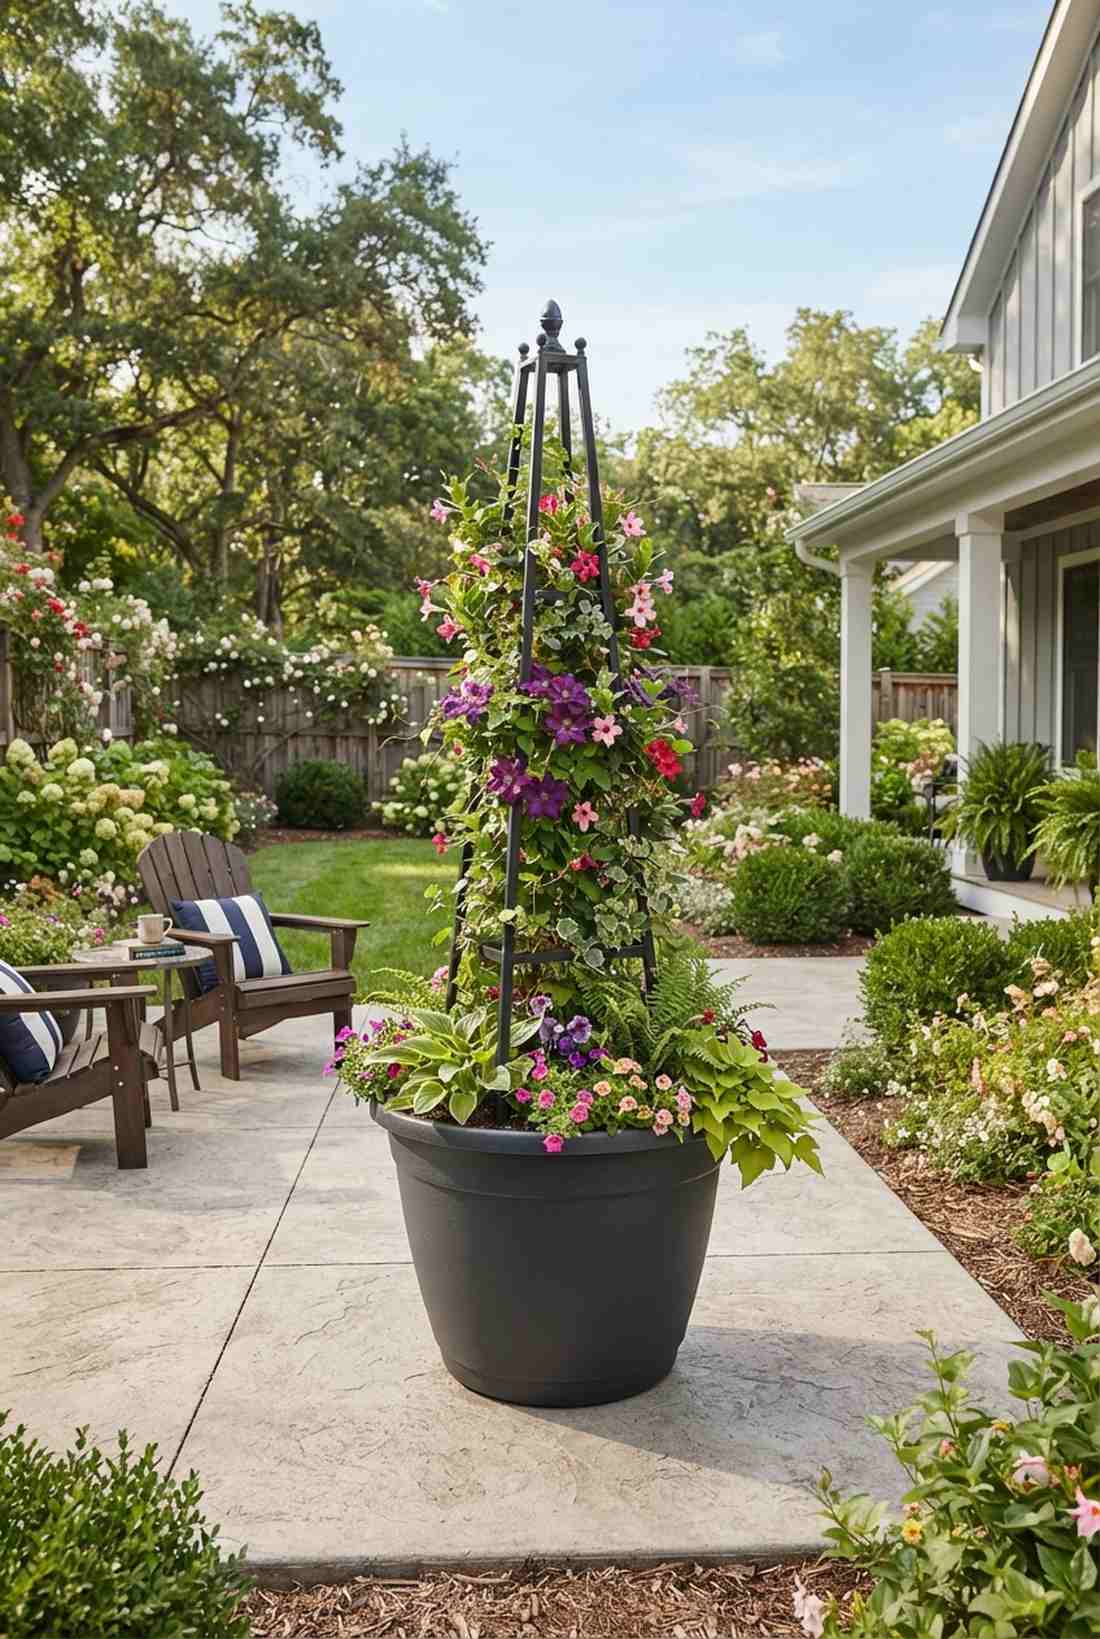
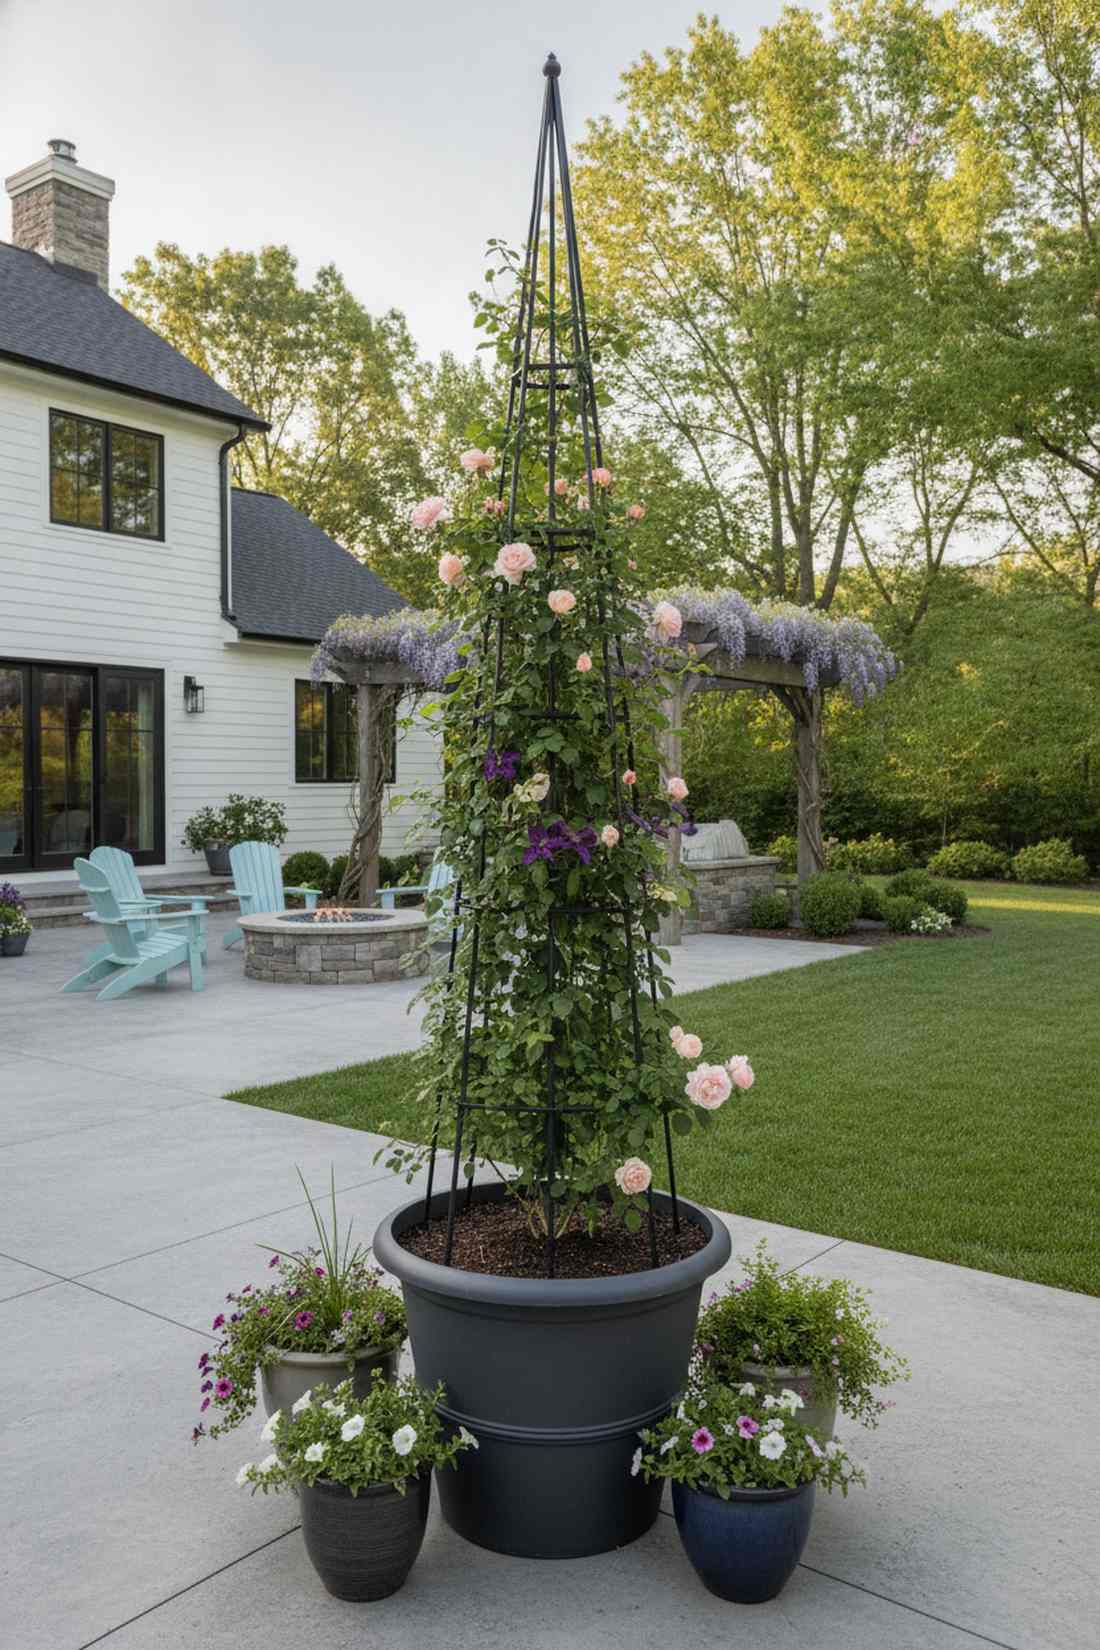
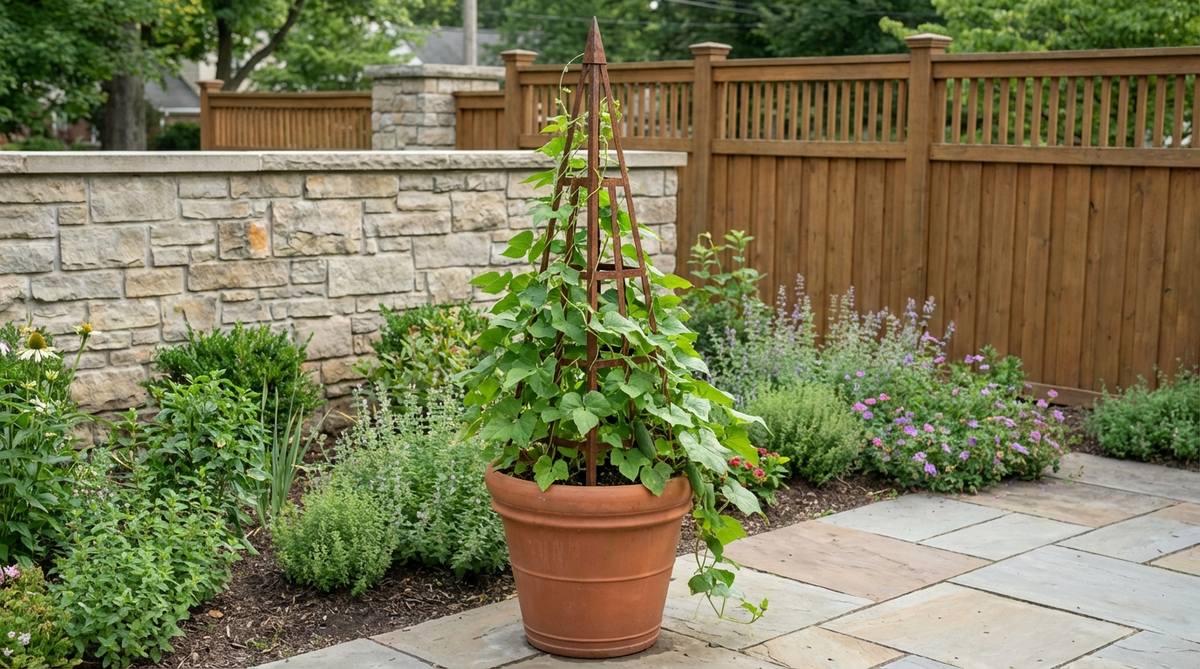
Placing a striking vertical peak in a flat yard stands like an elegant garden monument among low-lying foliage. A pyramid container obelisk is the ultimate centerpiece for concrete slab patios.
Squat planters look cluttered, whereas a towering central column anchors the space with architectural intent. Buying powder-coated steel garden accents prevents the base legs from rotting away inside damp potting soil.
You can easily source a premium tower for $55–$85. Highly recommended to add instant vertical drama.
- Key Materials: Pre-built metal obelisk, large deep pot
- Vibe / Style: Formal estate centerpiece
- Difficulty: Zero-tool drop-in
- Budget Breakdown: Tower: $60 | Base Pot: $20
- Creator’s Tip: Bury the bottom rung of the obelisk entirely under the soil to lock the structure firmly in place.
- Smart Sourcing: powder-coated steel garden obelisks, heavy-duty resin container bases.
16. Double-Sided Room Divider Screen
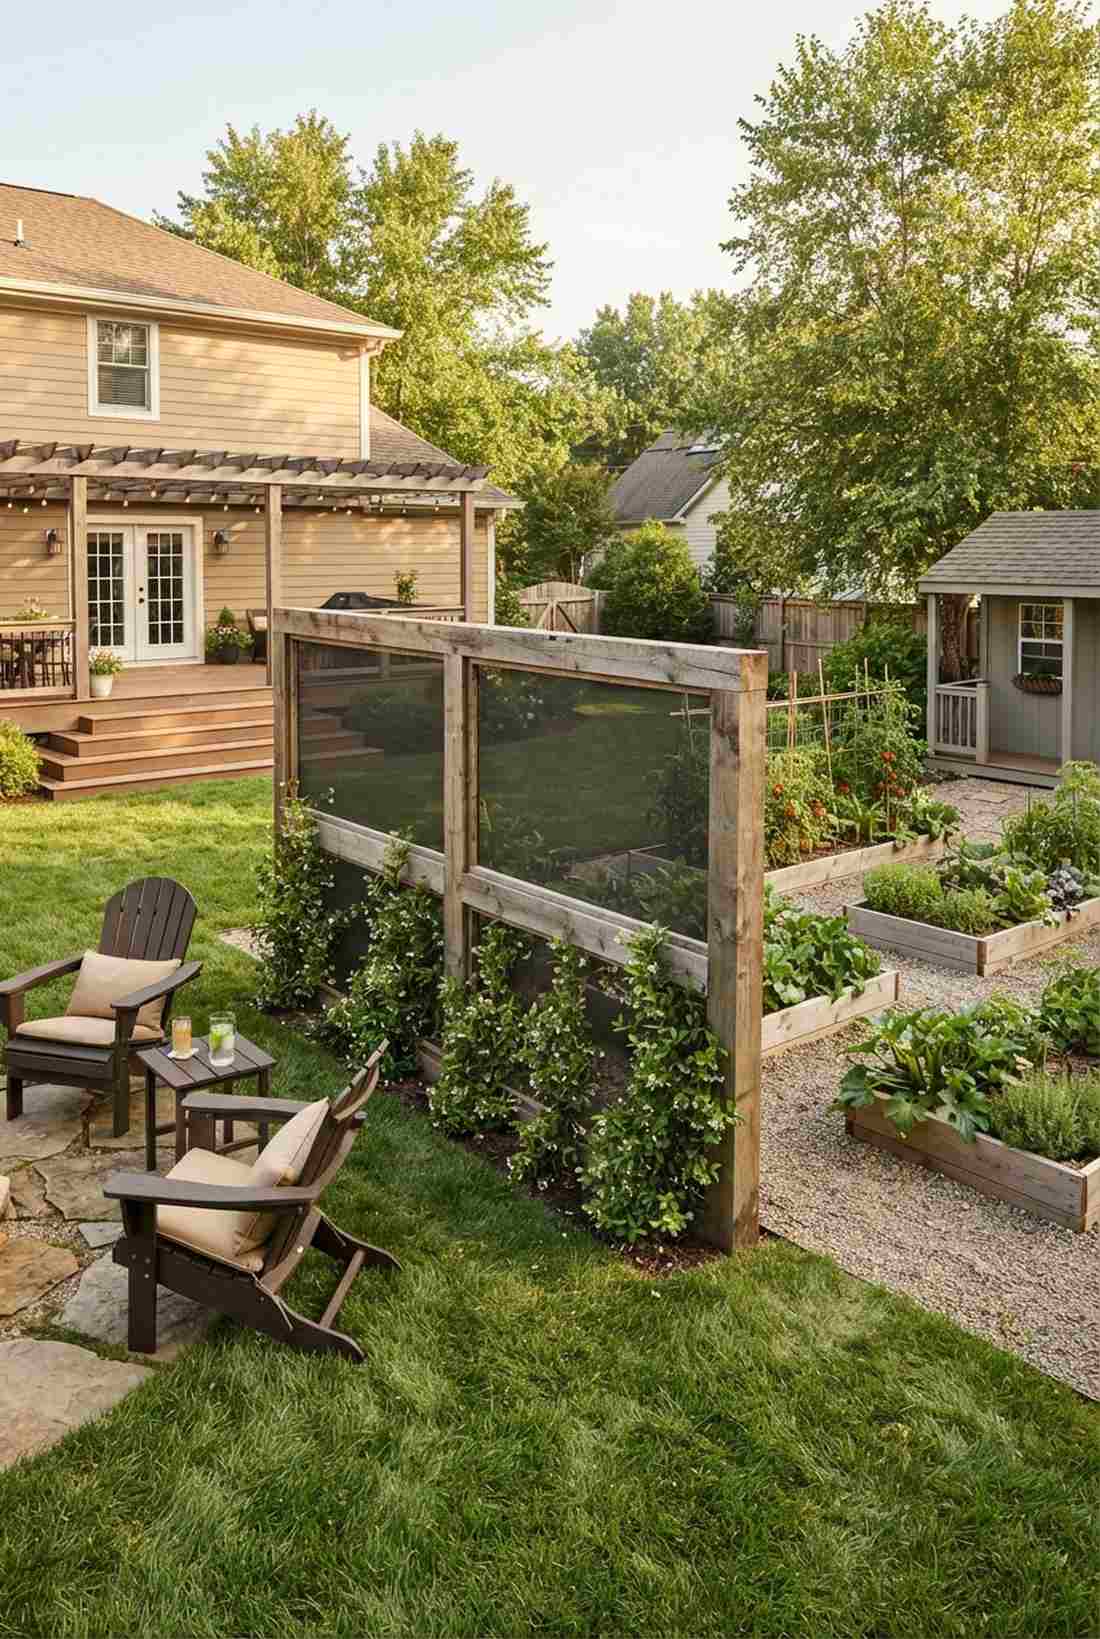
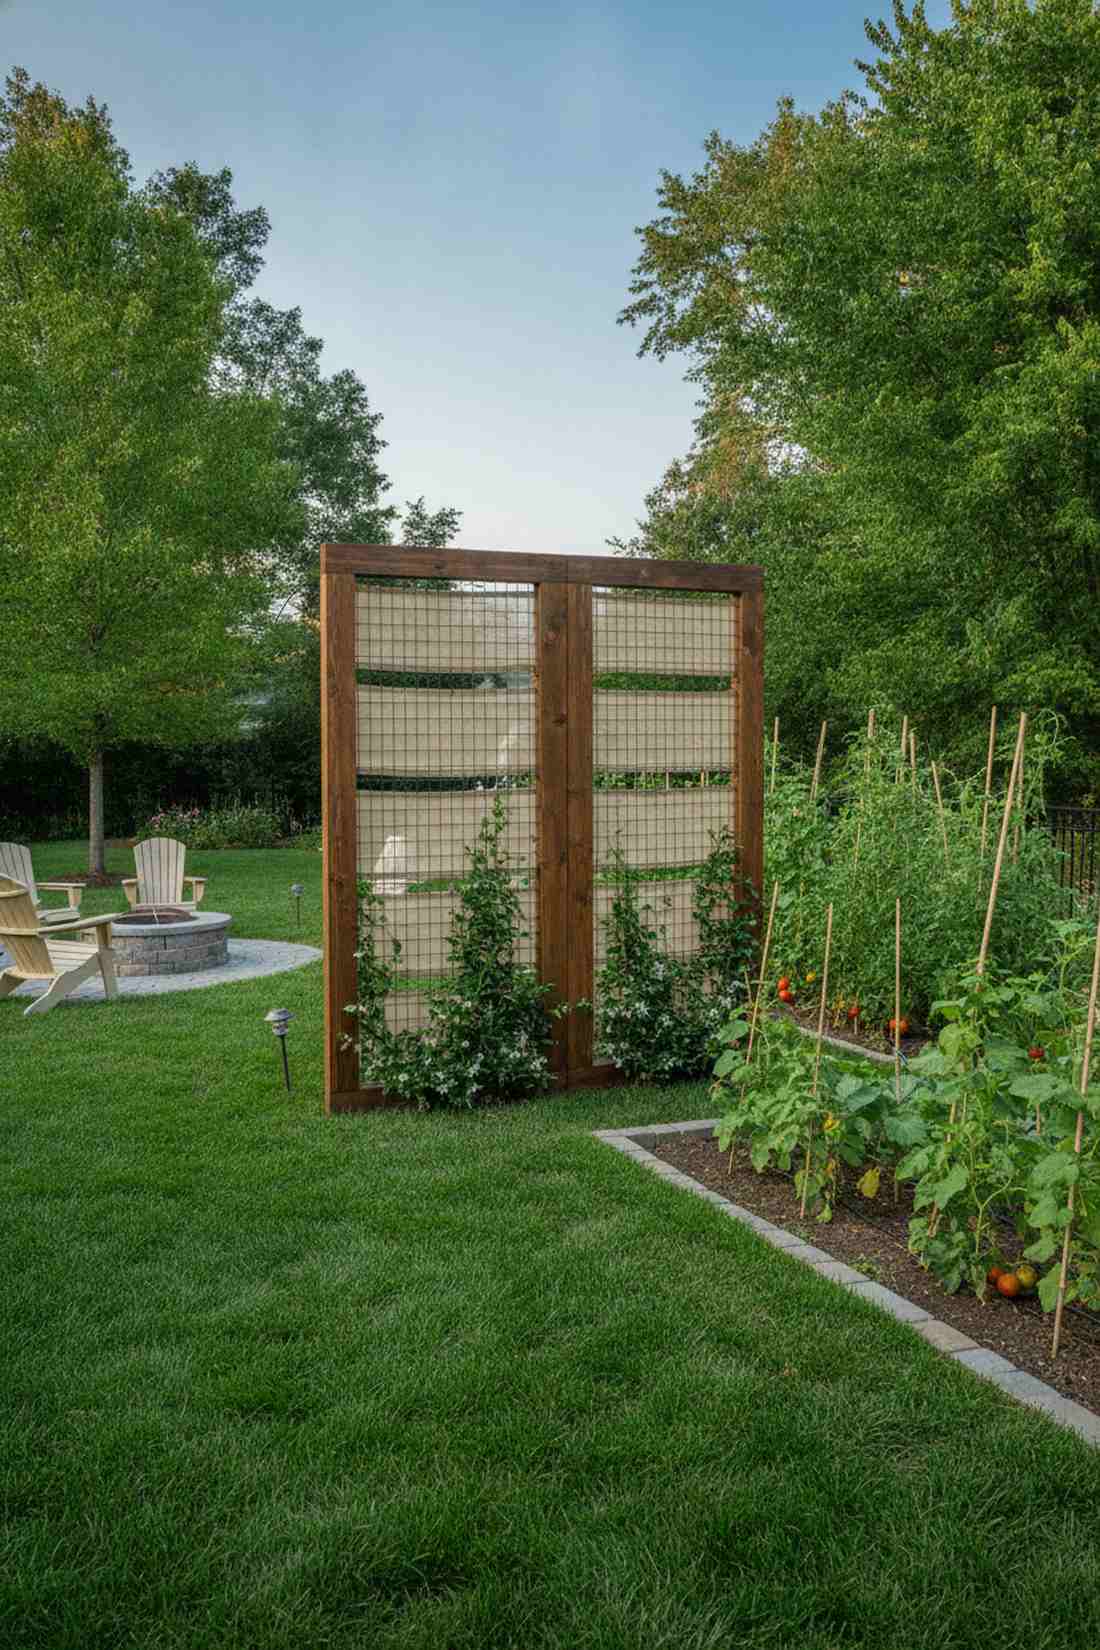
Carving out distinct yard zones acts like a lush, living partition separating outdoor rooms. A double-sided wire partition beautifully divides a manicured lawn from a messy, productive vegetable patch.
Opaque screens make yards feel tiny, but a breathable wire matrix maintains a spacious, open flow. Implement weather-resistant vinyl mesh panels to ensure the divider looks pristine from both viewing angles.
This room-defining build runs about $70–$110. Save this to your DIY weekend garden board for clever zoning ideas.
- Key Materials: Thick timber frame, double-sided wire
- Vibe / Style: Open-concept garden divider
- Difficulty: Intermediate framing project
- Budget Breakdown: Wood: $50 | Vinyl Mesh: $40
- Creator’s Tip: Plant evergreen climbers like Star Jasmine on the base so the screen remains opaque all winter.
- Smart Sourcing: weather-resistant vinyl mesh panels, outdoor wood sealant sprays.
17. Tripod Teepee with String Web
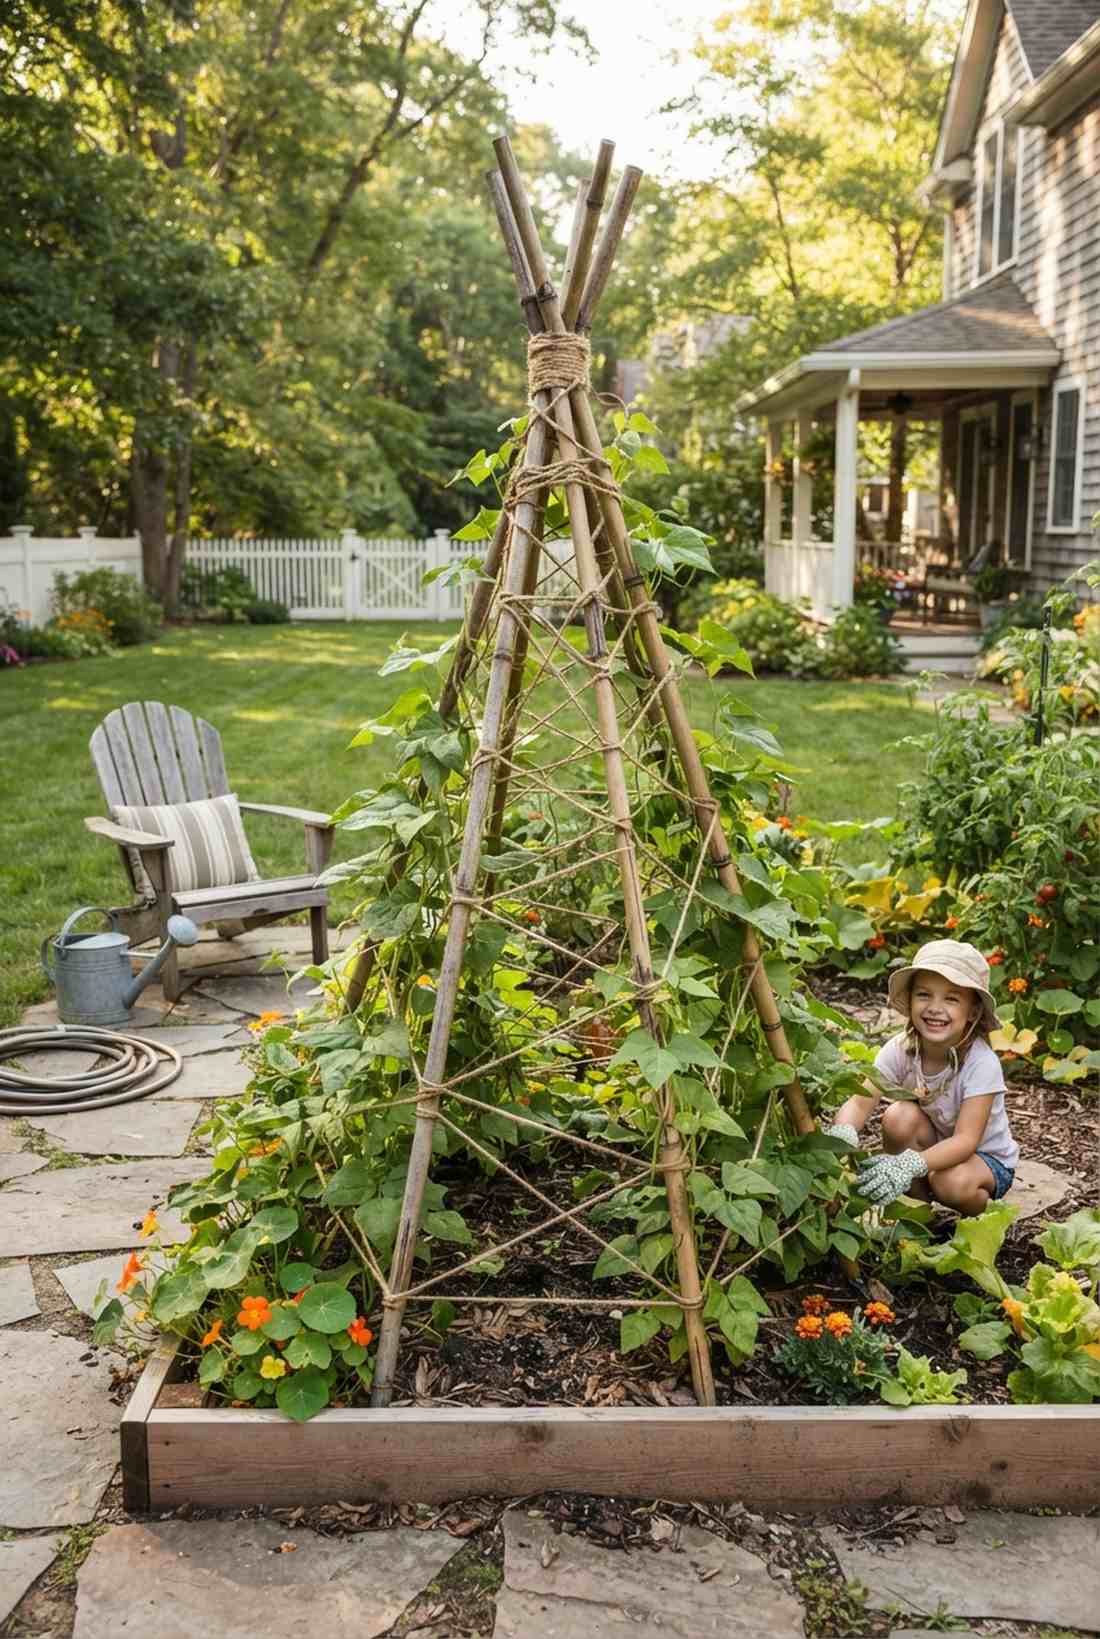
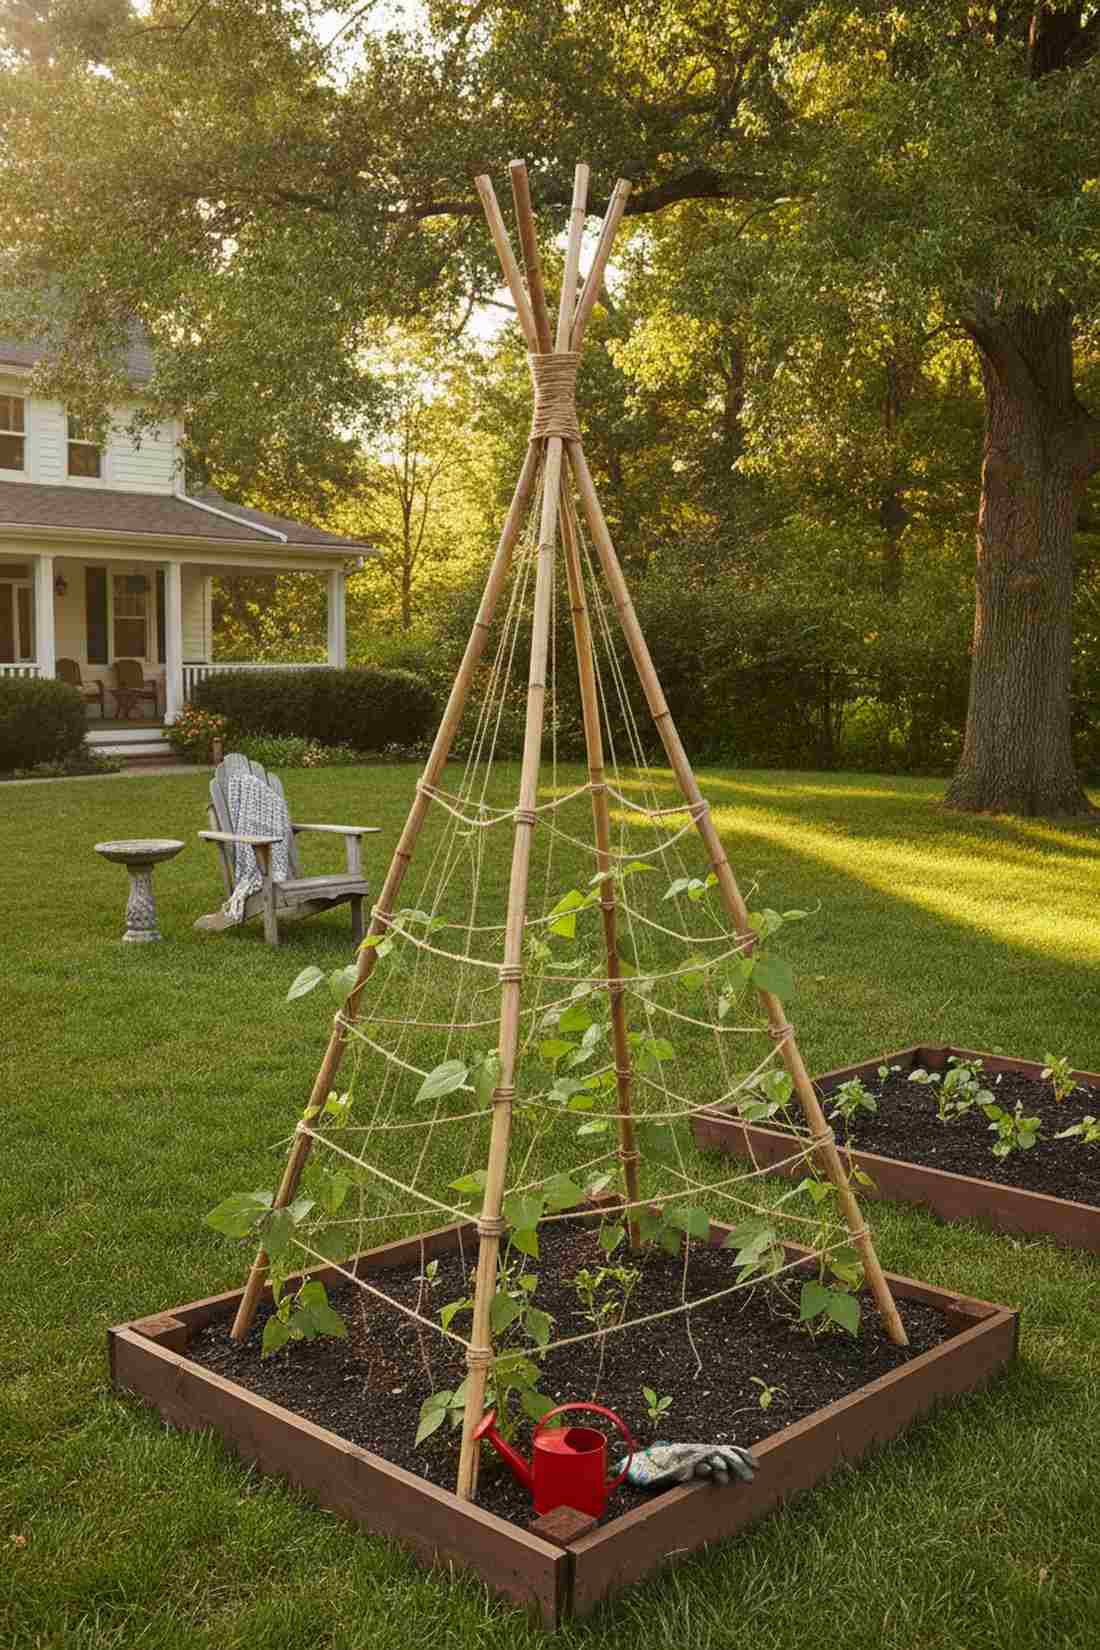
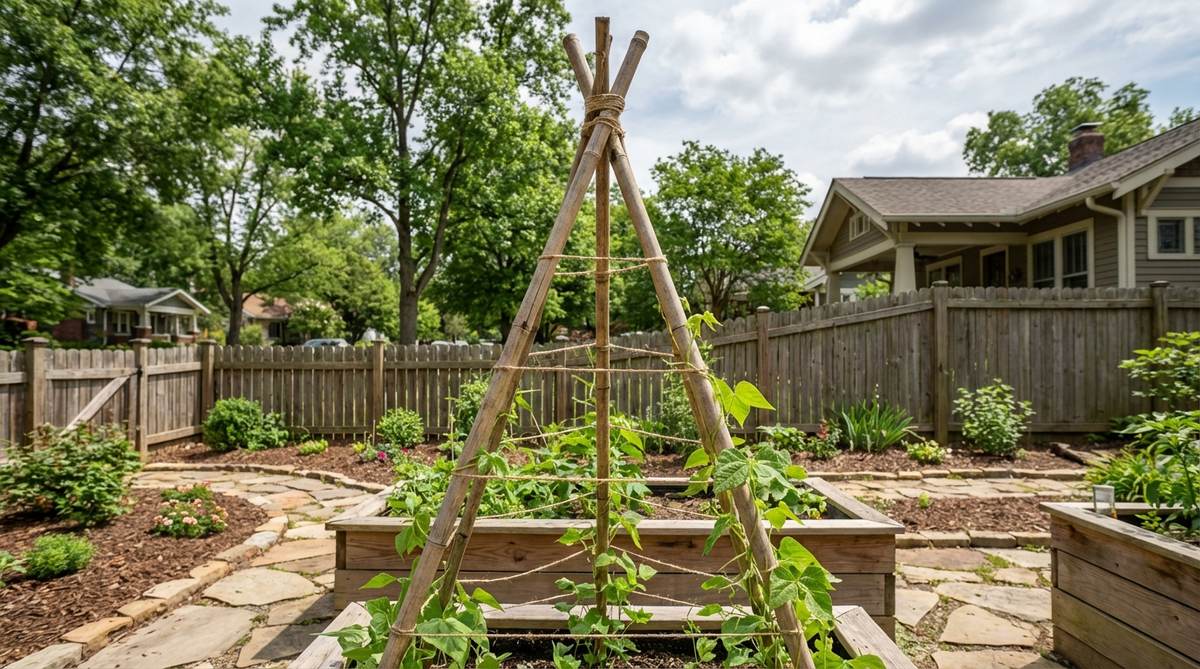
Tying together a rapid plant support evokes a rustic, foraging-friendly woodland camp. A bamboo string teepee is perfect for engaging children in corner garden plots with quick-growing pole beans.
Complex joinery takes hours, while a rapid-lashed tension framework sets up in literally ten minutes. Relying on thick organic jute twine provides immense grip for tendrils while allowing the entire rig to be composted later.
You can easily pull this off for an ultra-cheap $15–$25. It’s a fast upgrade that completely changes the vegetable bed.
- Key Materials: Bamboo poles, heavy garden twine
- Vibe / Style: Organic temporary camp
- Difficulty: Fast manual tying
- Budget Breakdown: Bamboo: $15 | Twine: $5
- Creator’s Tip: Wrap the string around the poles in a tight figure-eight pattern to prevent the legs from splaying outward.
- Smart Sourcing: organic jute twine (bulk roll), heavy-duty garden lashing cord.
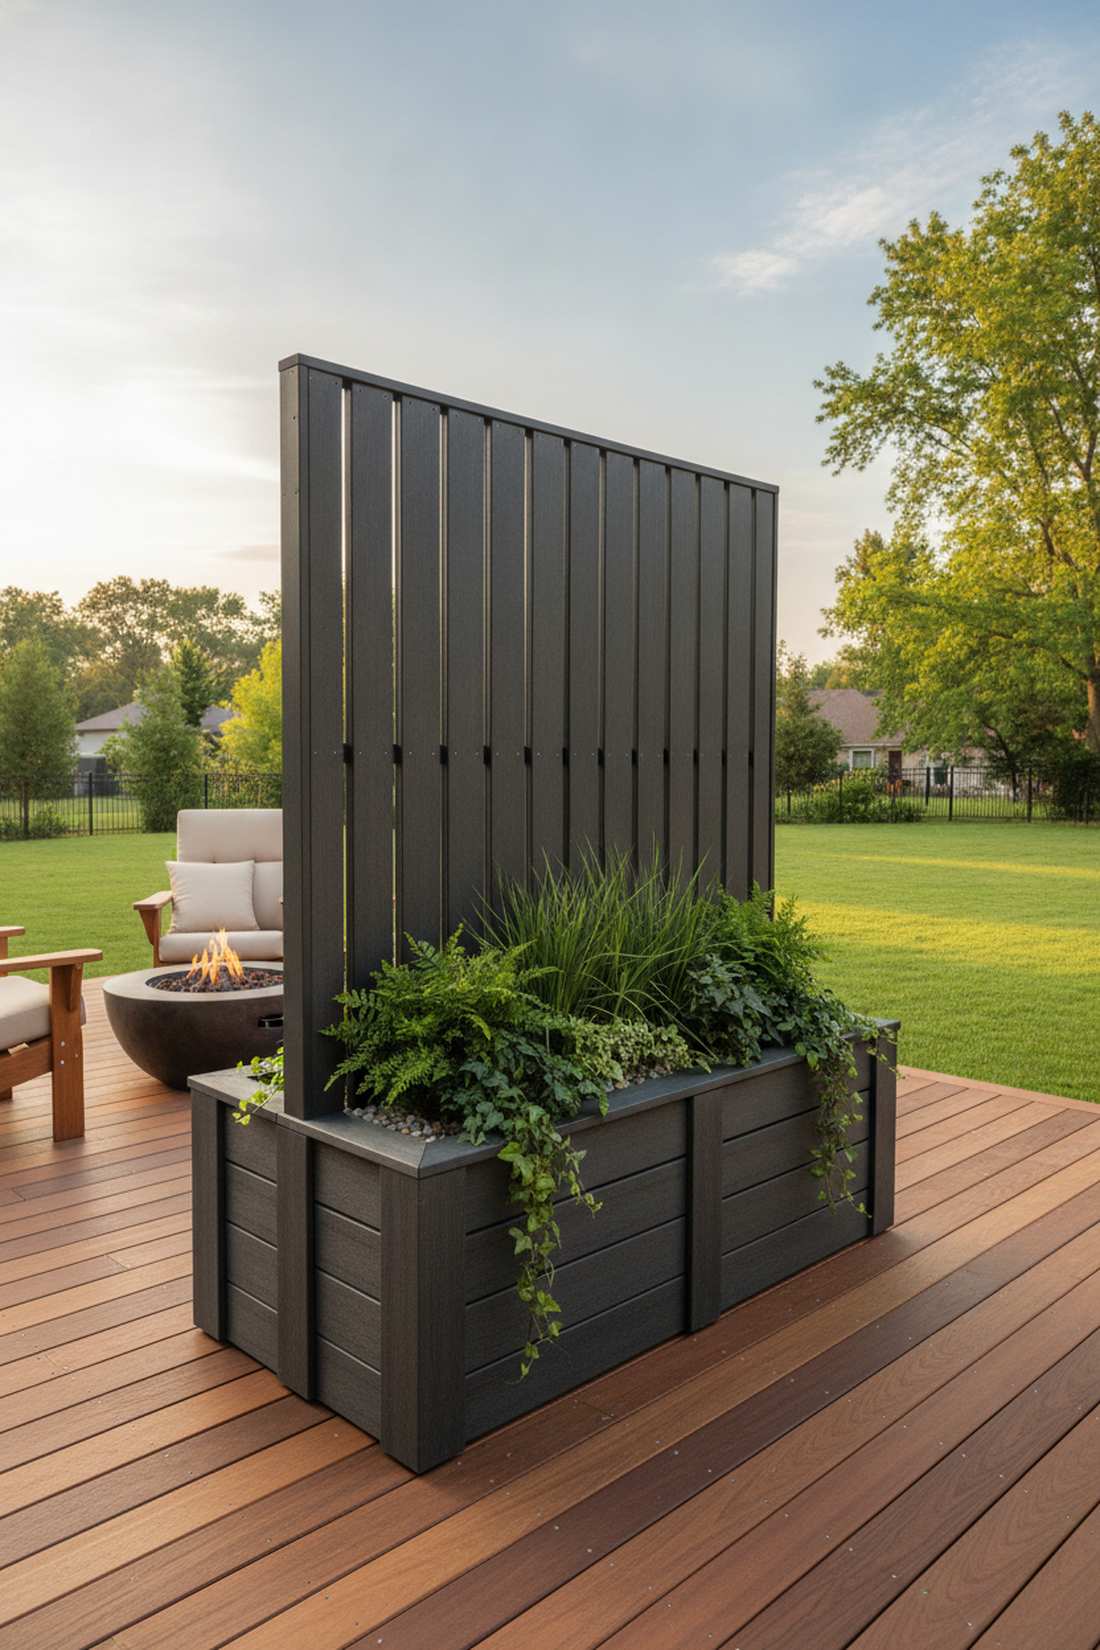
18. Screen Planter Combo Unit
Unboxing a pre-finished setup gives you an instant, ready-made botanical barrier. A commercial screen planter combo is the fastest way to shield an exposed patio edge from street traffic.
Custom builds require heavy tools, whereas turnkey commercial bases simply snap together for immediate use. Securing self-watering planter trellis kits guarantees your climbing vines won’t dry out and die during mid-July heatwaves.
Expect premium commercial units to range from $150–$250. Pin this if you want a zero-effort, high-end patio upgrade.
- Key Materials: Pre-built resin planter with back screen
- Vibe / Style: Turnkey modern privacy
- Difficulty: Out-of-the-box ready
- Budget Breakdown: Combo Unit: $180 | Potting Soil: $20
- Creator’s Tip: Place heavy paving stones in the false bottom of the resin planter to prevent wind tipping.
- Smart Sourcing: self-watering planter trellis kits, UV-coated resin fairy cottage kits (for base decor).
Most people get this completely wrong… until they try the exact layout coming up next.
Budget-Friendly DIY Constructions
You do not need a massive landscaping budget to build gorgeous vertical structures. Repurposing smart materials delivers incredible functionality with authentic, rustic charm.
19. Pallet Wood Vertical Planter
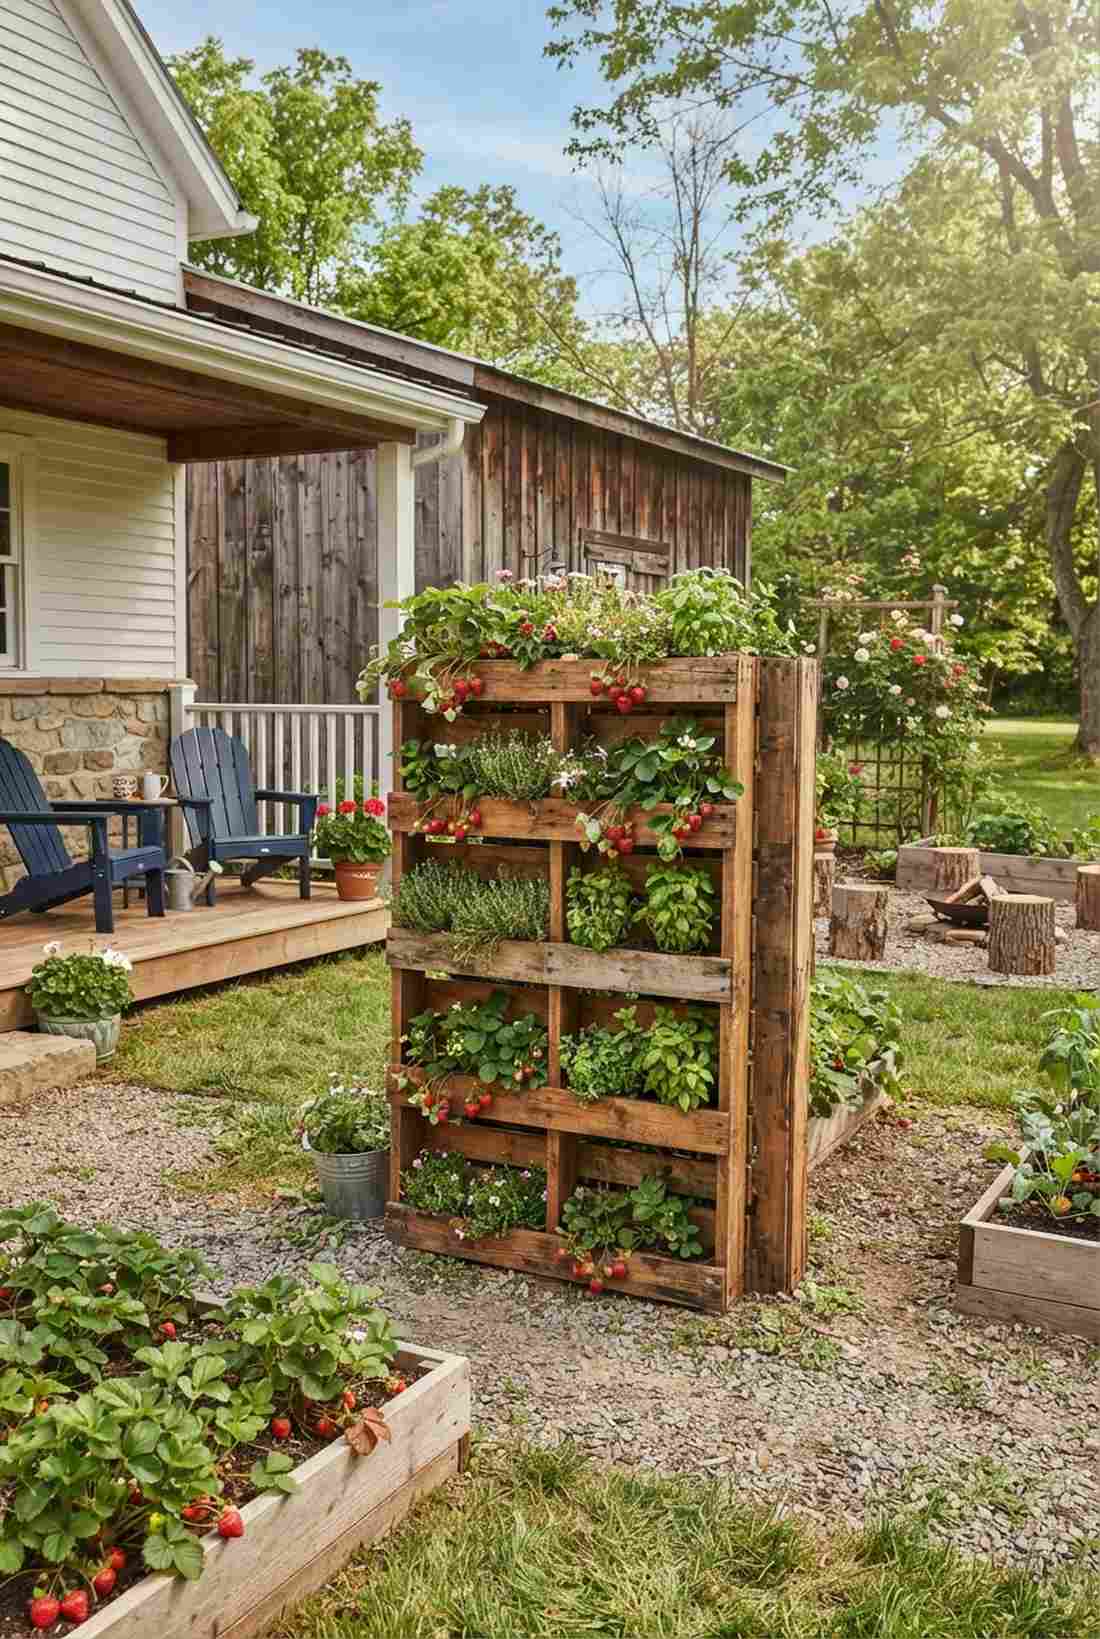
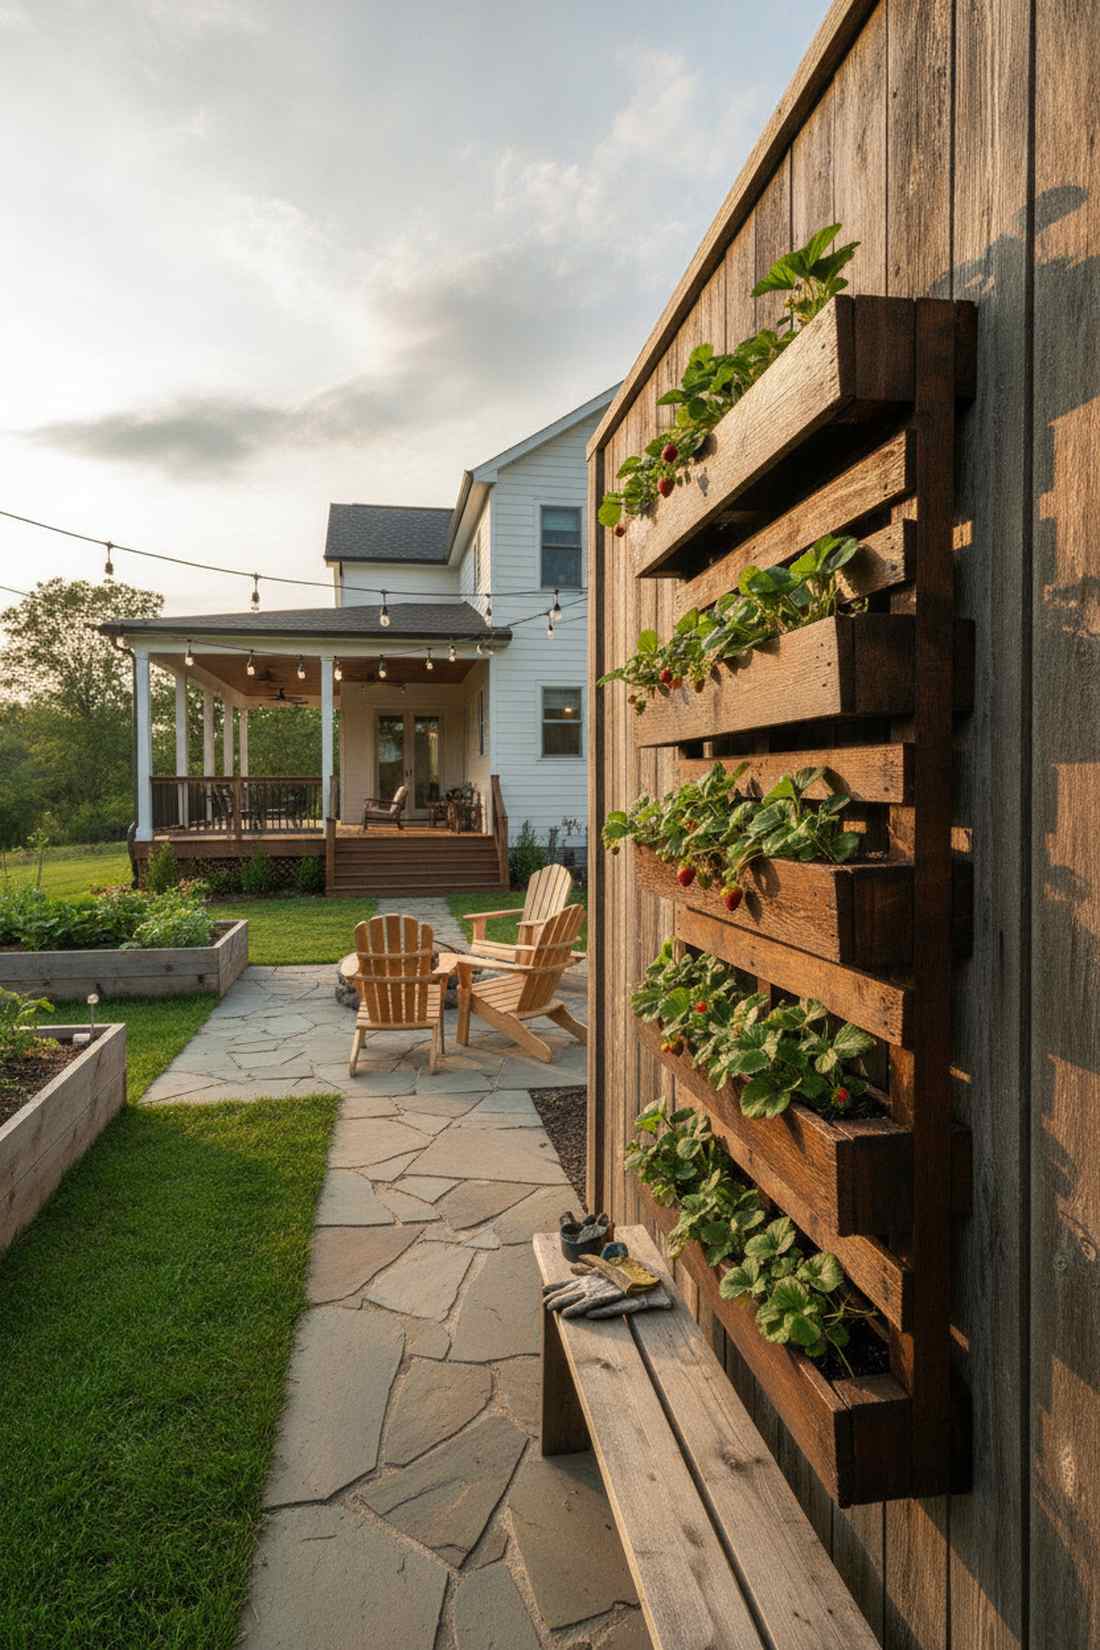
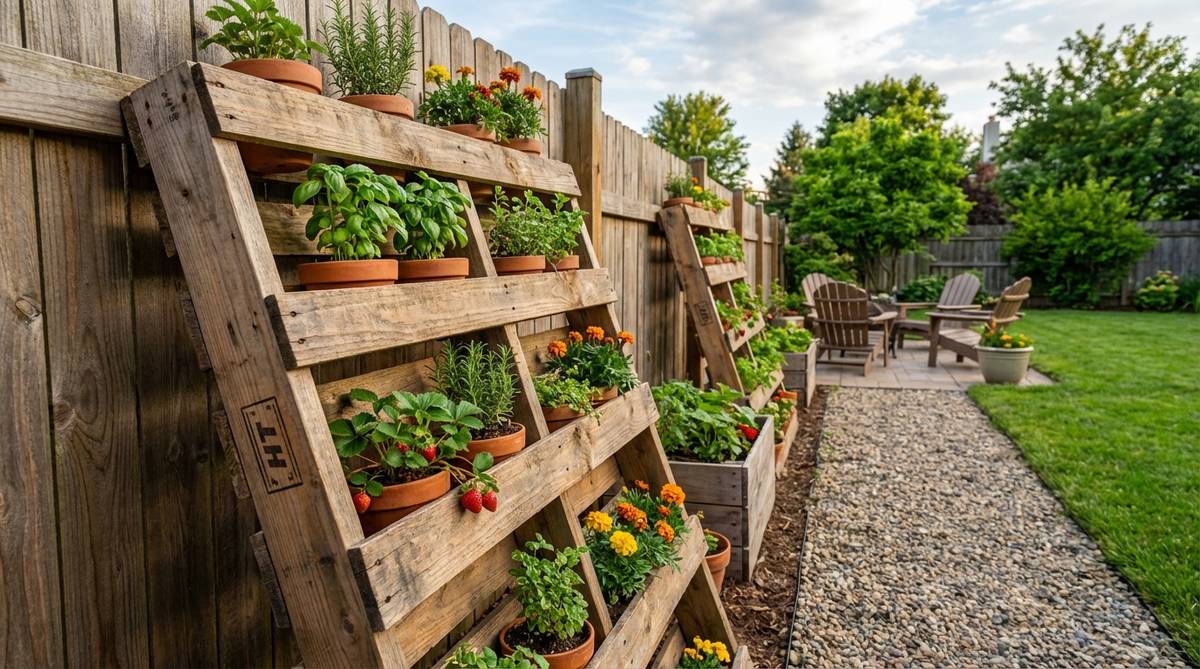
Mounting weathered shipping slats carries a rugged, earth-friendly upcycled charm. A reclaimed wood vertical planter is a brilliant fit for rustic farmhouse backyards looking to maximize strawberry yields.
Throwing away shipping timber is a massive waste when simple cuts yield a striking vertical display. Coating the rough boards in a heavy-duty exterior wood stain seals out rot and instantly makes trash look like a boutique purchase.
You can build this almost entirely for free, or $0–$15 for hardware. Highly recommended for sustainable garden enthusiasts.
- Key Materials: Heat-treated pallets, decking screws
- Vibe / Style: Upcycled farmhouse rugged
- Difficulty: Moderate dismantling/cutting
- Budget Breakdown: Pallets: Free | Stain/Screws: $15
- Creator’s Tip: Only use pallets stamped with ‘HT’ (Heat Treated) to ensure no toxic chemicals leach into your soil.
- Smart Sourcing: weatherproof exterior wood stain, heavy-duty pry bar tools.
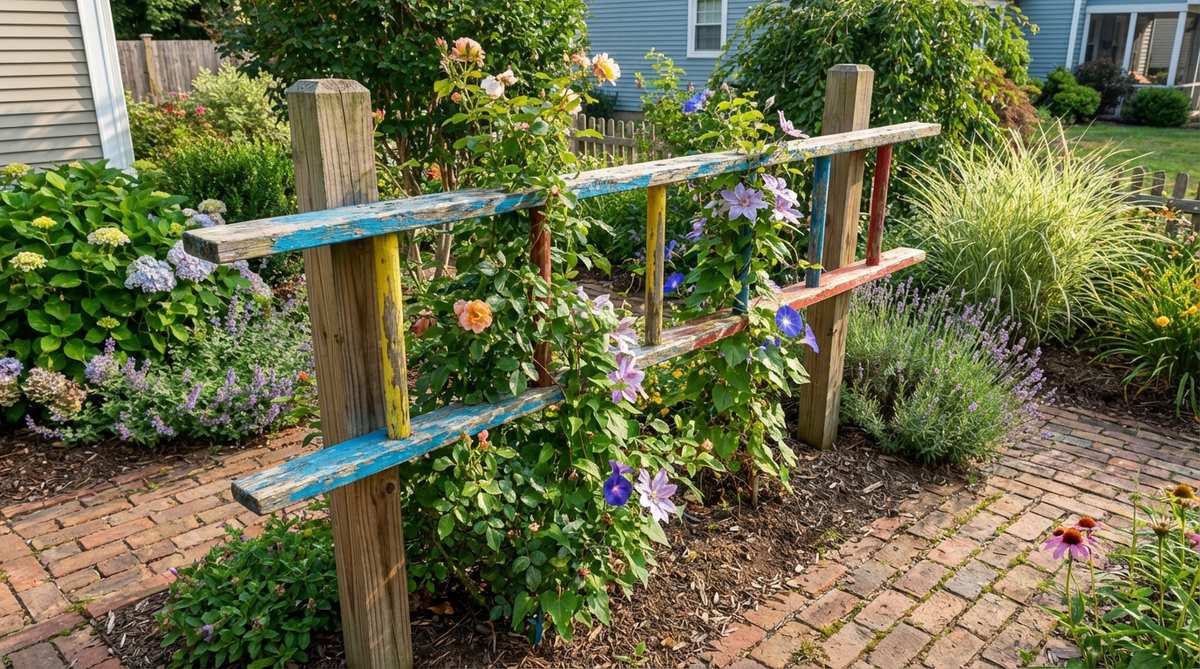
20. Branch and Twig Rustic Screen
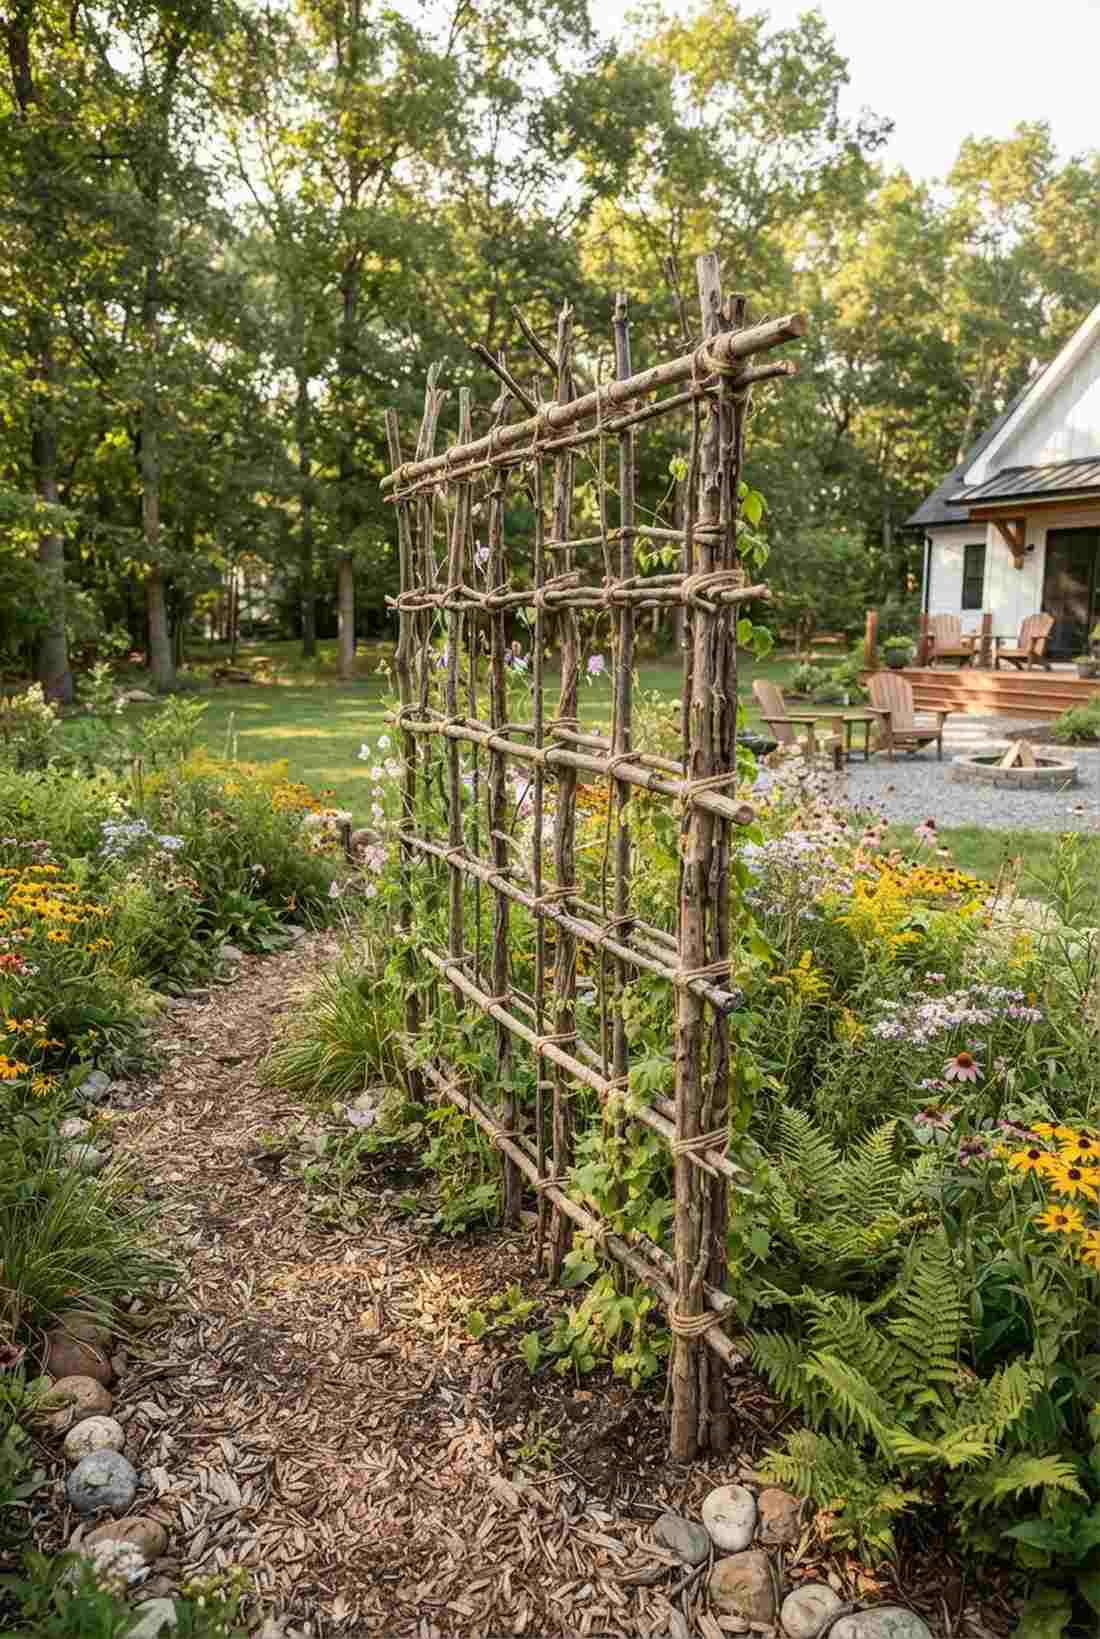
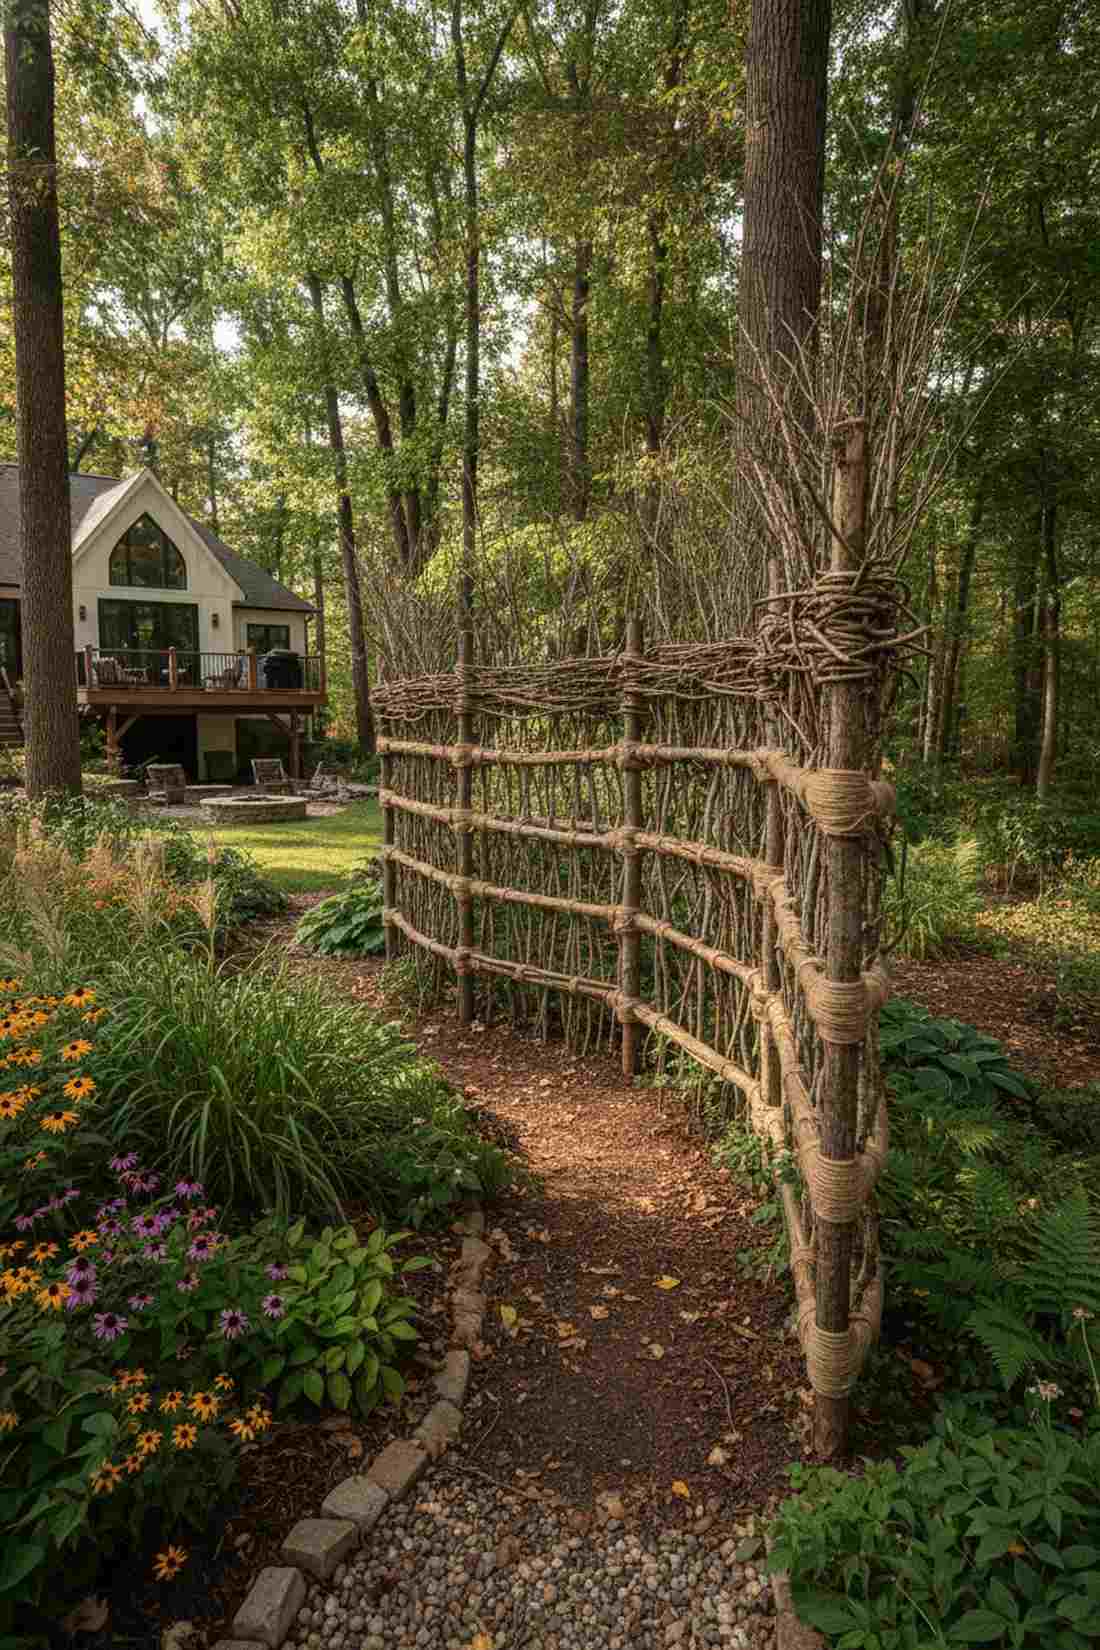
Weaving fallen limbs together feels like a naturally woven nest straight from the forest. A foraged branch climbing frame is a flawless addition to a native wildflower border or woodland path.
Store-bought plastic looks cheap, but locally gathered timber blends flawlessly into natural landscaping. By incorporating heavy-duty garden lashing cord, you can tightly bind uneven twigs into surprisingly rigid, weather-resistant structural grids.
Since materials are foraged, your only cost is roughly $0–$10 for tying supplies. Save this to your DIY weekend garden board for zero-budget magic.
- Key Materials: Foraged hardwood branches, lashing cord
- Vibe / Style: Authentic woodland wild
- Difficulty: Easy creative weaving
- Budget Breakdown: Branches: Free | Twine: $8
- Creator’s Tip: Harvest branches in late winter when the sap is down so the wood cures hard instead of rotting.
- Smart Sourcing: organic jute twine (bulk roll), heavy-duty garden lashing cord.
Material Guide: Cheap vs. Premium Aesthetic
Knowing exactly where to save and where to spend makes all the difference in achieving that “looks expensive but isn’t” vibe.
- Standard vs. UV-Resistant/Premium: Uncoated zip ties and cheap plastic netting will shatter within one summer under harsh UV rays. Upgrading to UV-coated mounting hardware stops your massive vines from crashing down.
- Pre-made Kits vs. Sourcing Locally: While foraging saves money, purchasing pre-cut heavy-duty mesh starter kits drastically cuts down on painful wire-clipping time and delivers perfectly geometric, professional lines.
21. PVC Pipe and Netting Frame
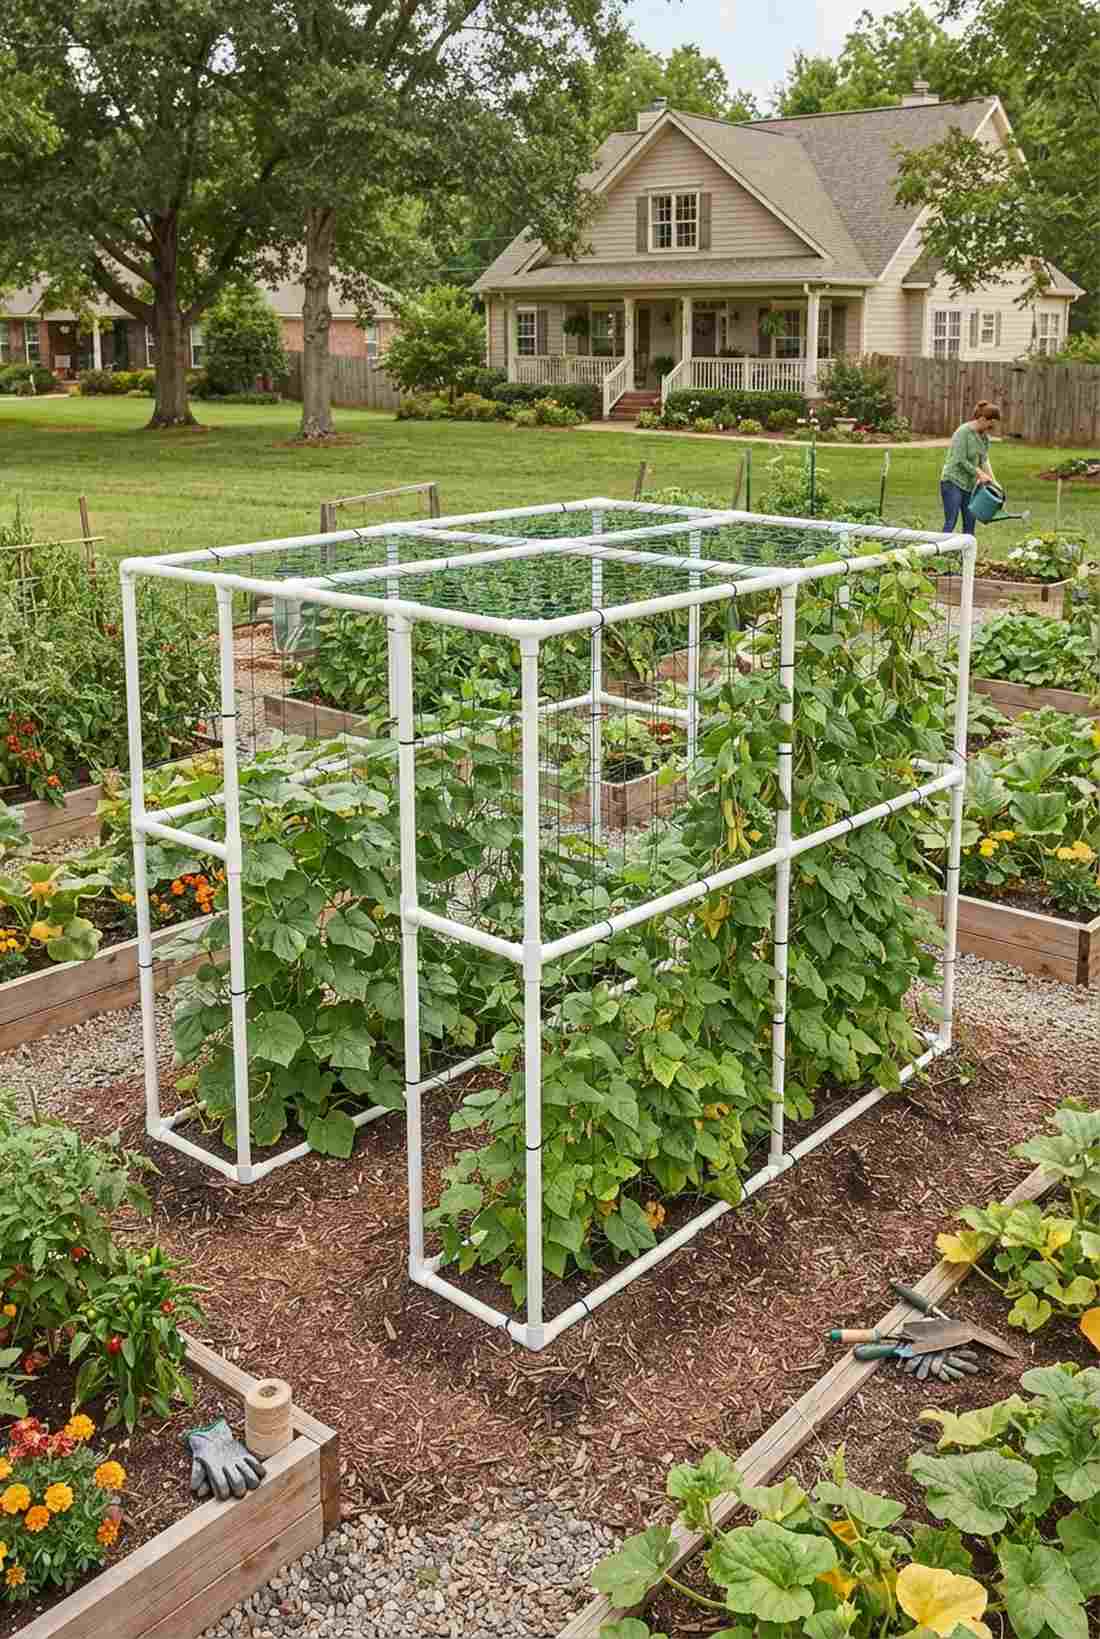
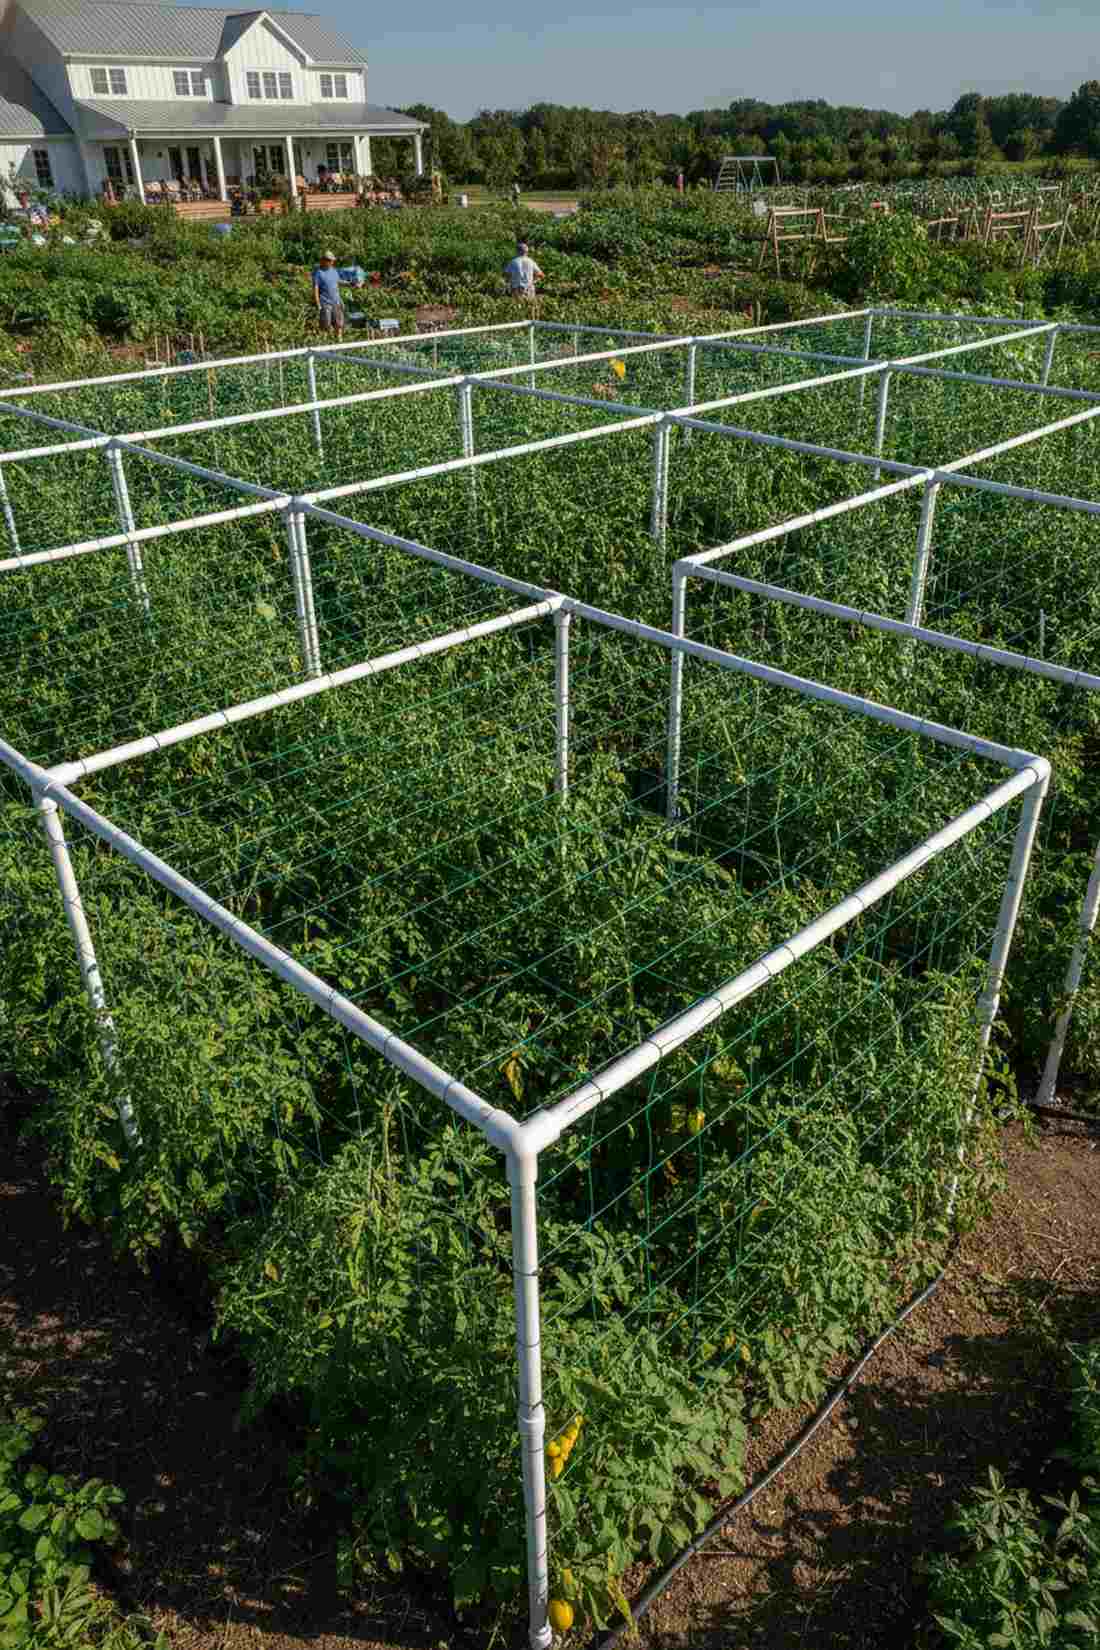
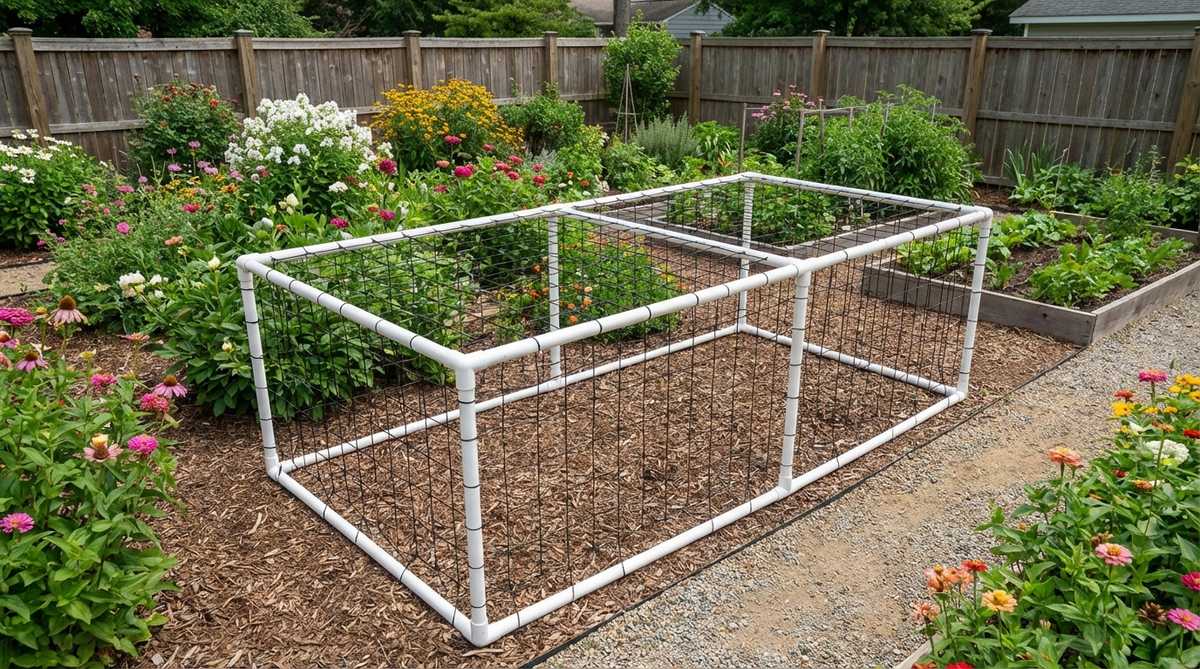
Snapping white tubular grids together looks incredibly crisp and geometrically uniform. A PVC netting support frame is an absolute powerhouse for massive community garden plots needing standardized rows.
Wood warps under constant watering, but industrial synthetic tubing handles decades of brutal moisture. Utilizing UV-coated PVC connector fittings guarantees the brilliant white frame won’t turn yellow and brittle in the harsh July sun.
This immortal utility setup typically costs $20–$35 per panel. It’s a fast upgrade that completely changes large-scale crop management.
- Key Materials: PVC pipes, plastic netting, zip ties
- Vibe / Style: Clinical high-yield agriculture
- Difficulty: Fast snap-together build
- Budget Breakdown: PVC/Joints: $20 | Netting: $10
- Creator’s Tip: Do not glue the joints; leaving them dry-fitted allows you to dismantle the massive frames for easy winter storage.
- Smart Sourcing: UV-coated PVC connector fittings, heavy-duty trellis netting rolls.
22. Ladder Trellis Repurpose
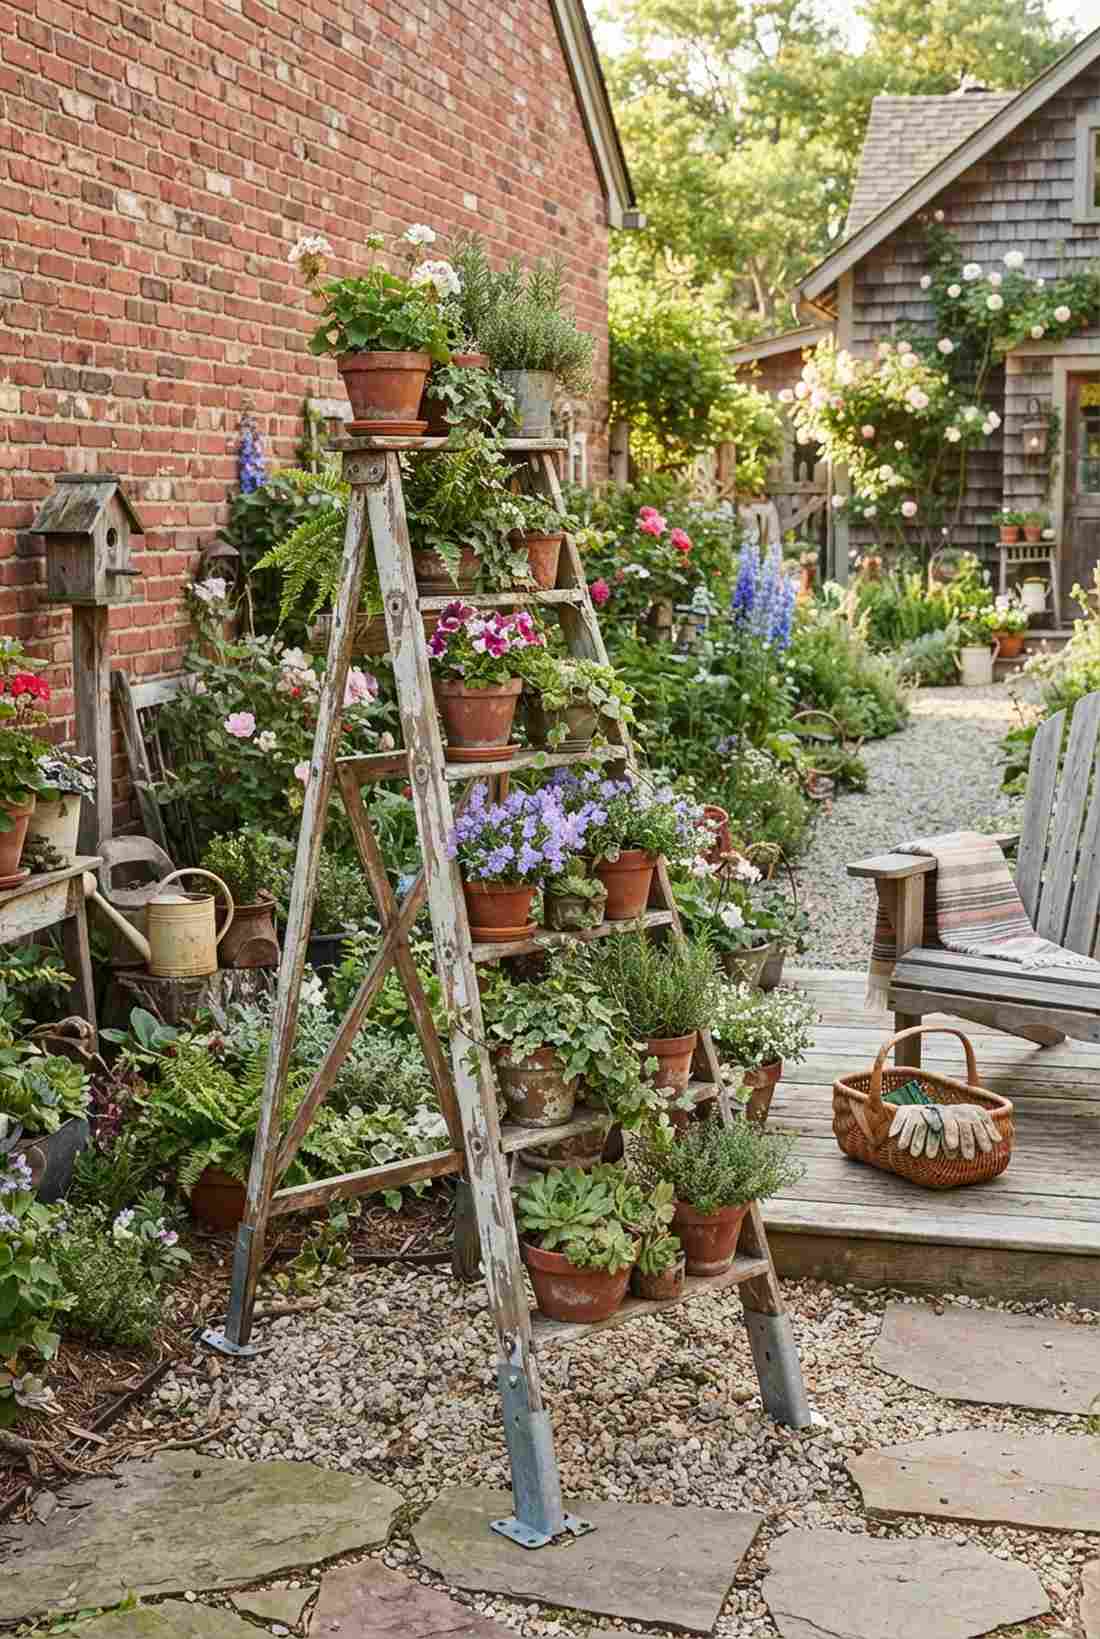
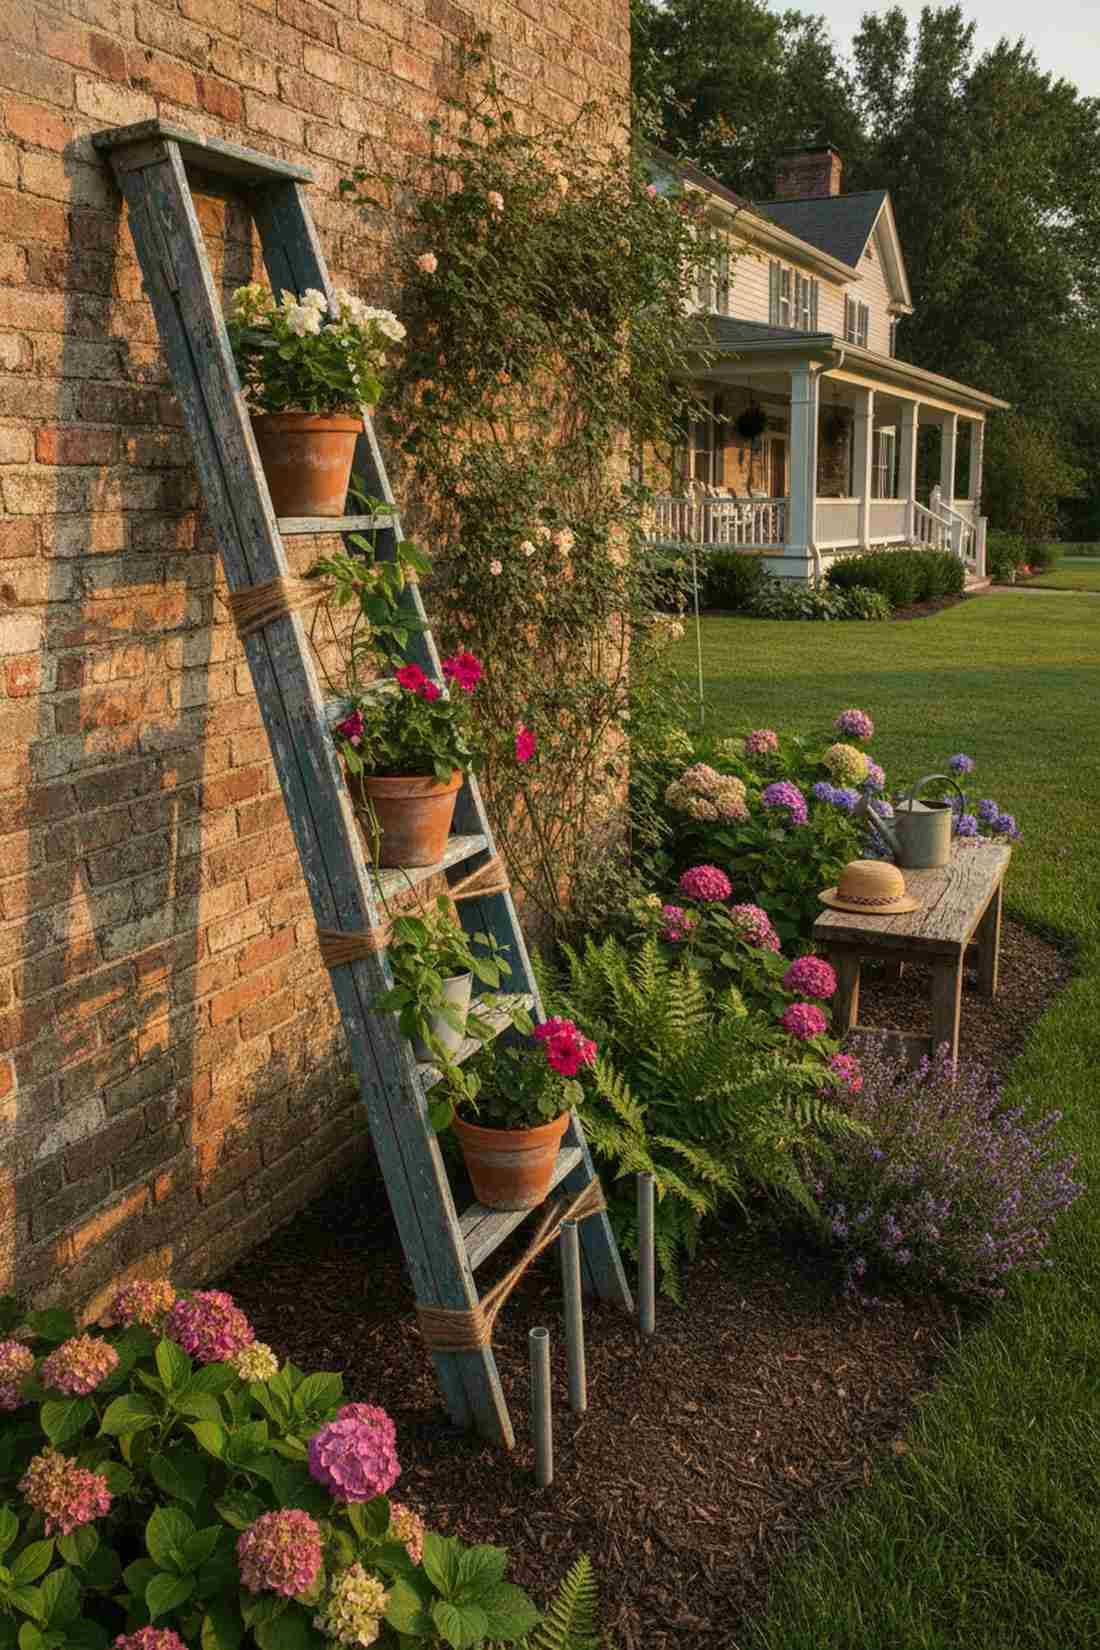
Leaning an old wooden step-stool among your flowers radiates charming vintage flea-market energy. A repurposed ladder plant stand makes a stunning accent piece against a weathered brick wall.
Buying antique garden props is overpriced, yet an old utility step-stool offers the exact same authentic vibe. Anchor it using heavy-duty ground stakes to ensure the top-heavy ladder never tips over during intense wind gusts.
Sourced from a yard sale, this charming focal point costs a mere $5–$20. Pin this visual blueprint if you love eclectic cottage styling.
- Key Materials: Old wooden ladder, ground anchors
- Vibe / Style: Eclectic vintage cottage
- Difficulty: Zero-effort placement
- Budget Breakdown: Thrifted Ladder: $10 | Anchors: $5
- Creator’s Tip: Distress the paint lightly with sandpaper, then seal it with clear polyurethane to freeze the “weathered” look permanently.
- Smart Sourcing: commercial-grade galvanized ground stakes, outdoor wood sealant sprays.
23. Chicken Wire Window Frame Screen
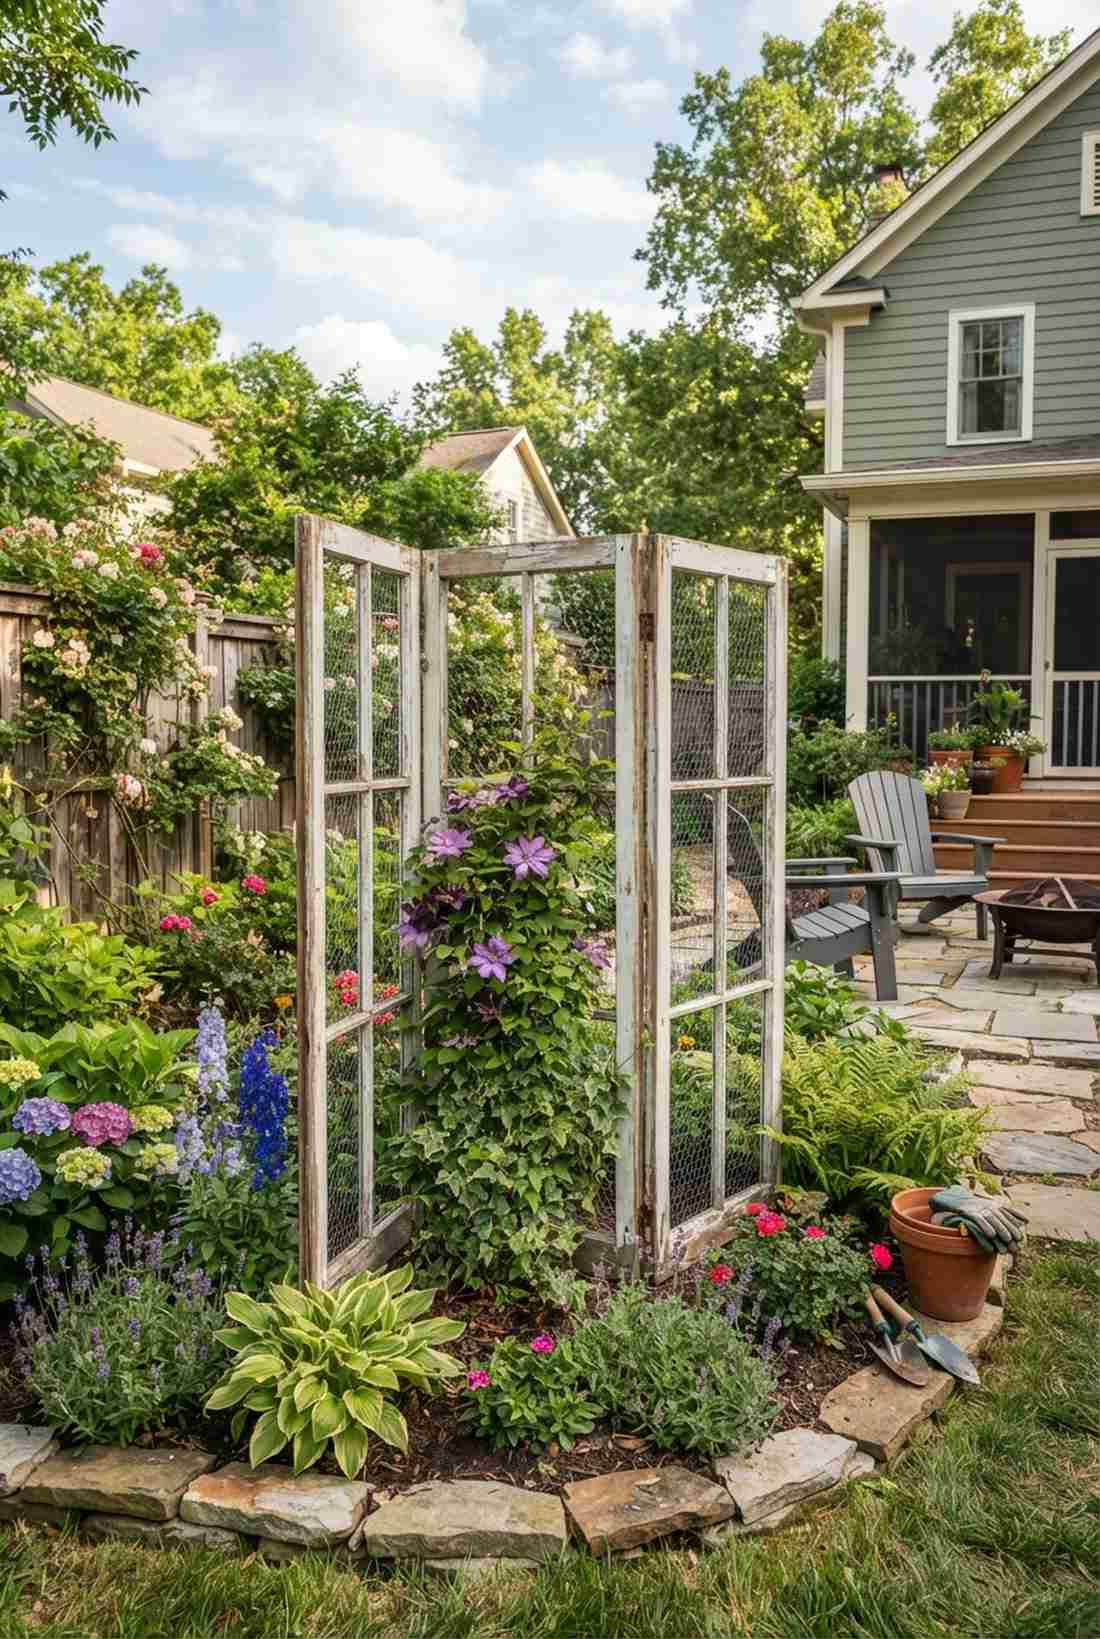
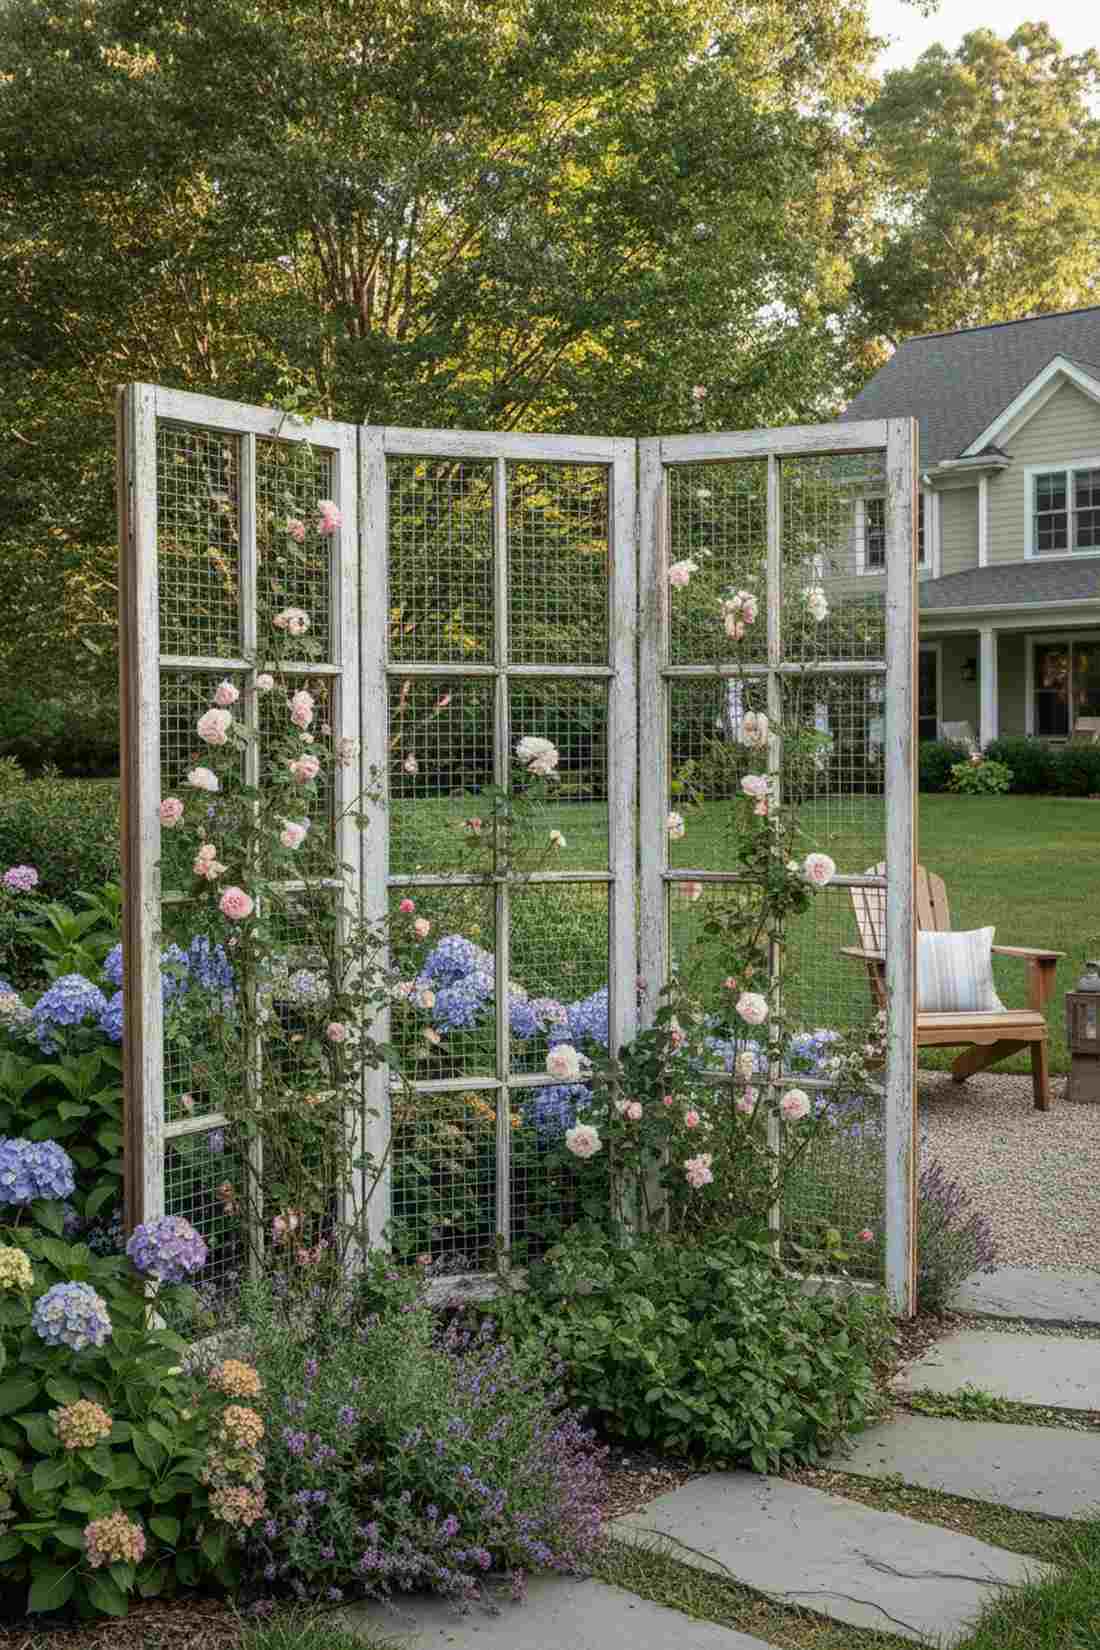
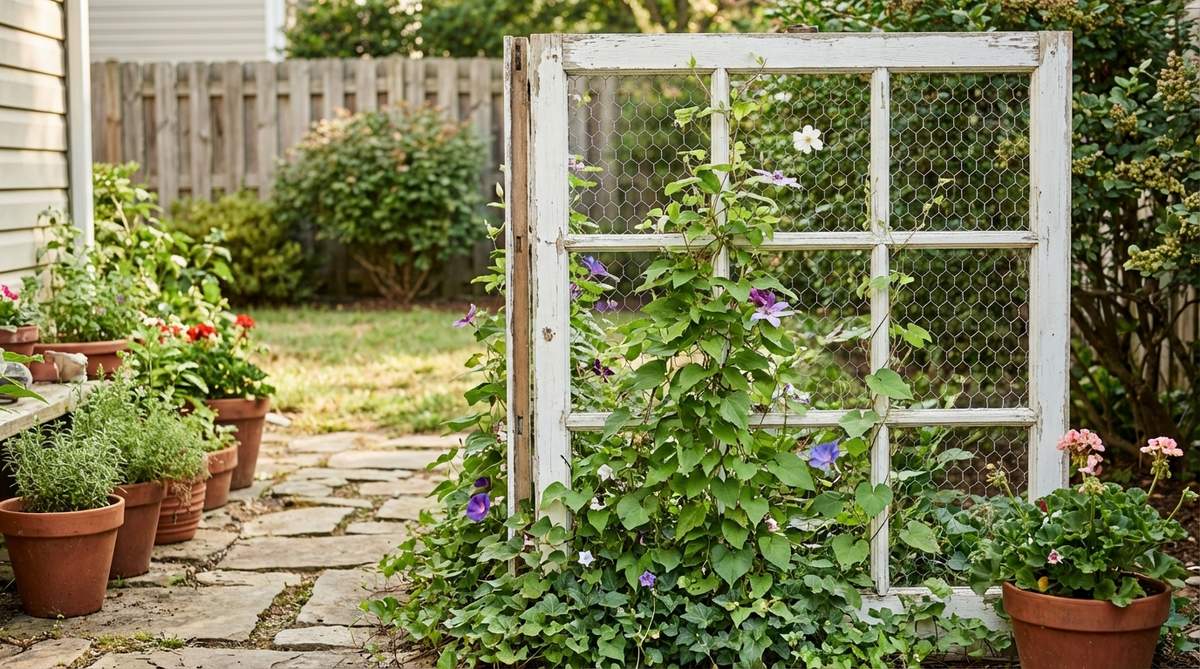
Stretching wire across salvaged glassless sashes channels a magical, antique greenhouse aesthetic. A salvaged window frame wire screen makes a captivating focal point floating in a side-yard garden bed.
Blank glass panes break easily, but stretched hardware cloth transforms old casements into indestructible climbing grids. Integrating galvanized hardware cloth (bulk roll) behind the wood adds immense structural rigidity and prevents aggressive rust stains.
You can easily pull this off for around $25–$45. Highly recommended for a quick weekend win that looks incredibly custom.
- Key Materials: Salvaged window frames, hardware cloth, staples
- Vibe / Style: Magical antique greenhouse
- Difficulty: Simple stapling project
- Budget Breakdown: Frame: $15 | Wire/Staples: $15
- Creator’s Tip: Mount three frames side-by-side using heavy hinges to create a freestanding, zigzagging accordion privacy screen.
- Smart Sourcing: galvanized hardware cloth (bulk roll), heavy-duty staple gun kits.
This next setup is ridiculously cheap but looks like a $100 custom display…
Specialty Designs for Unique Challenges
Some environments demand engineered solutions beyond basic grids. These hyper-specific layouts solve extreme weather, tight space limits, and advanced horticultural needs.
24. Espalier Training Wire System
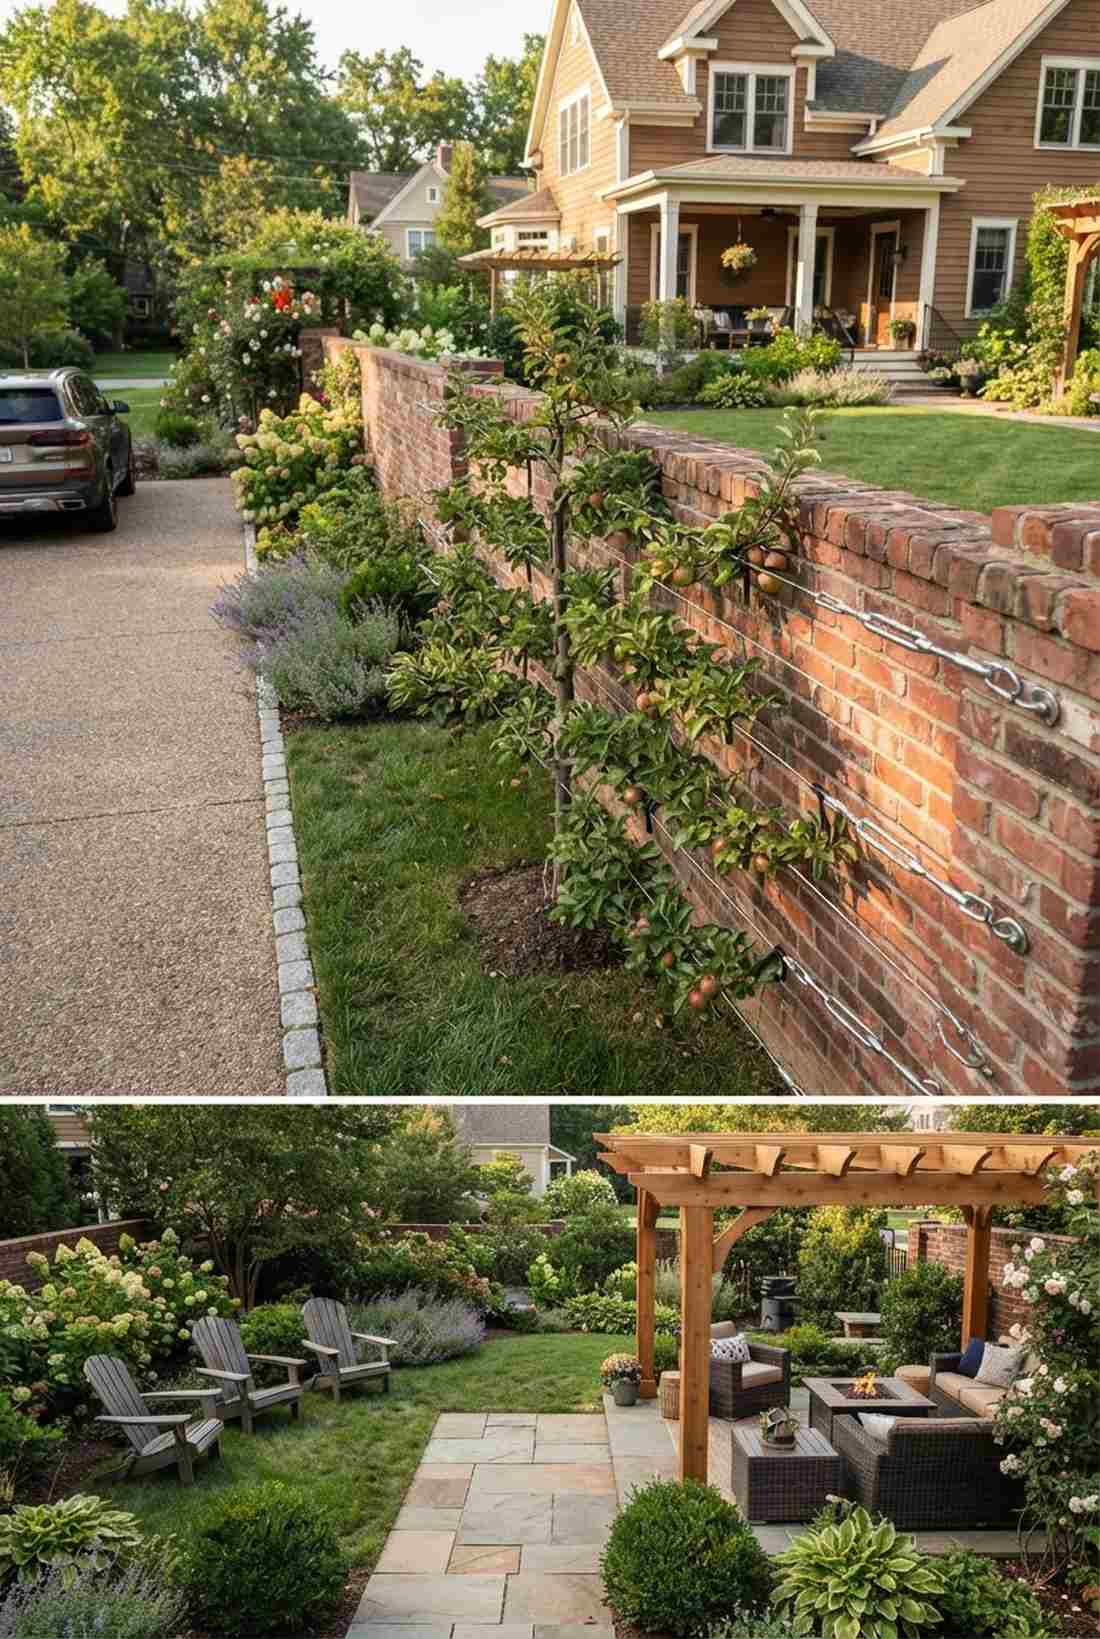
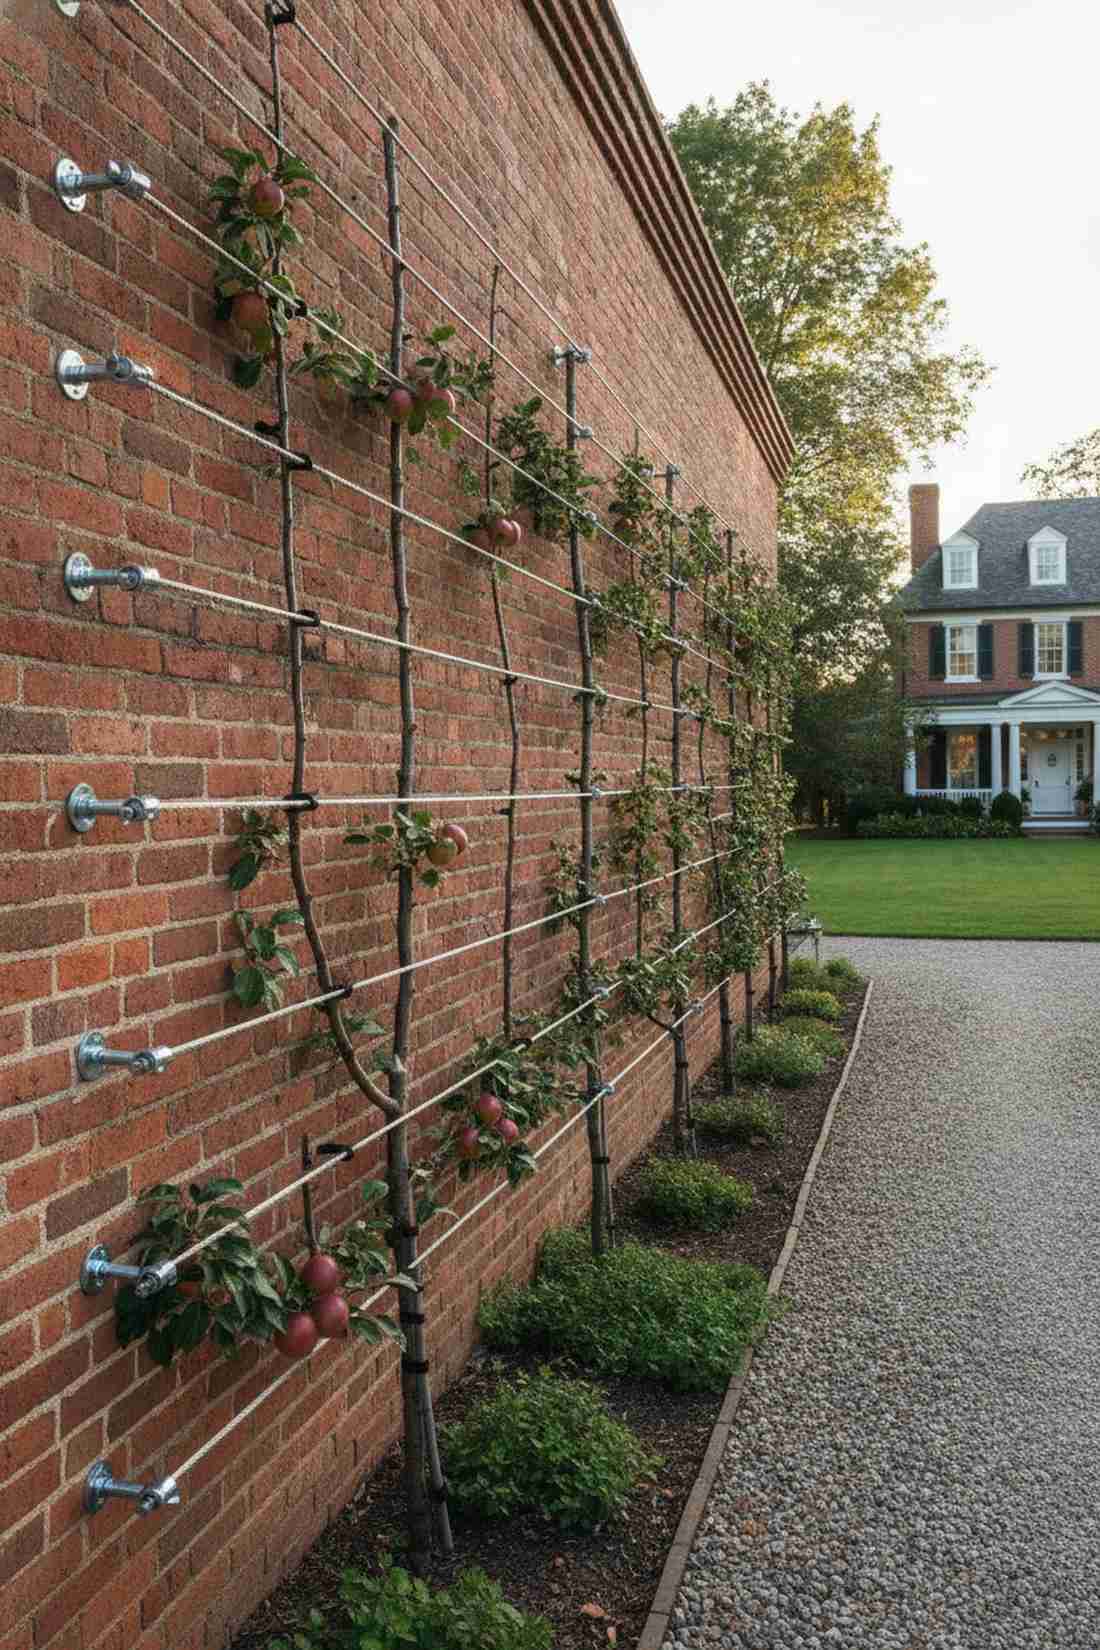
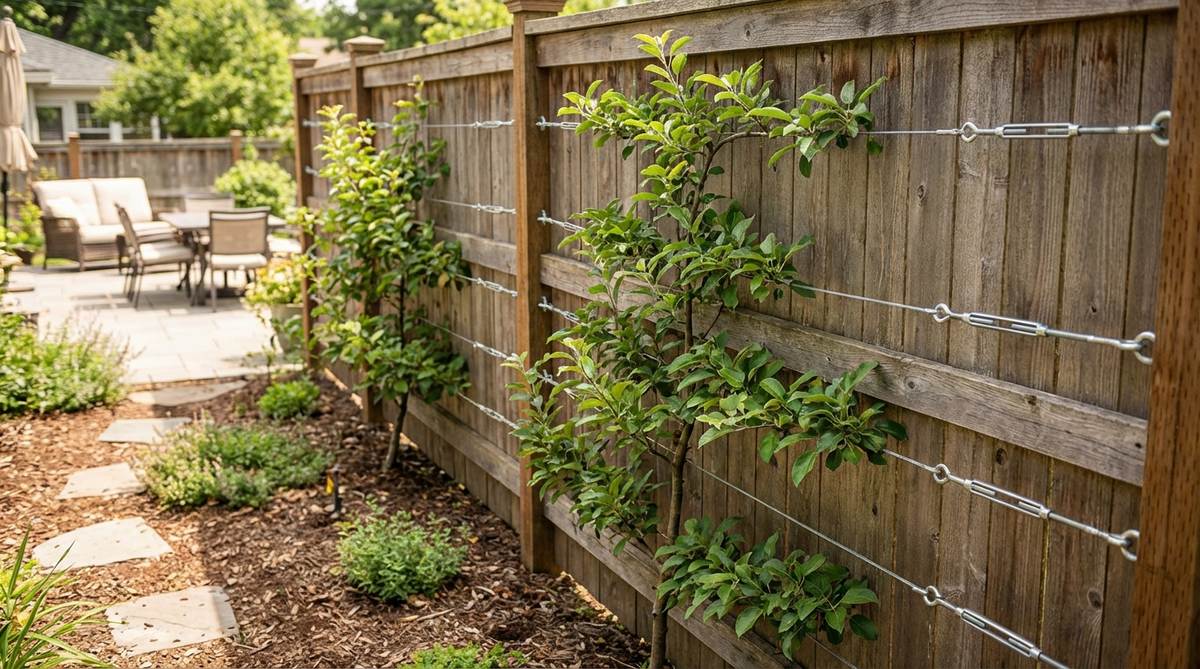
Pinning apple branches flat against a brick boundary showcases an elite, centuries-old horticultural mastery. A taut wire espalier system is the most sophisticated way to line a narrow driveway without sacrificing vehicle clearance.
Unruly fruit trees shade out undergrowth, but lateral tension training yields massive harvests in mere inches of width. You absolutely must use heavy-duty wire turnbuckle tensioners to keep the steel cables from bowing under the weight of mature fruit wood.
Setting up this elite wire grid costs roughly $80–$130. Save this to your DIY weekend garden board for advanced fruit yields.
- Key Materials: Steel wire, turnbuckles, masonry bolts
- Vibe / Style: Elite European orchard
- Difficulty: Advanced precision mounting
- Budget Breakdown: Hardware/Wire: $100 | Plant Ties: $15
- Creator’s Tip: Use soft, expanding rubber tree ties rather than wire to bind the branches, preventing brutal bark girdling as the tree grows.
- Smart Sourcing: stainless steel espalier wire kits, heavy-duty wire turnbuckle tensioners.
25. Adjustable String Trellis Greenhouse
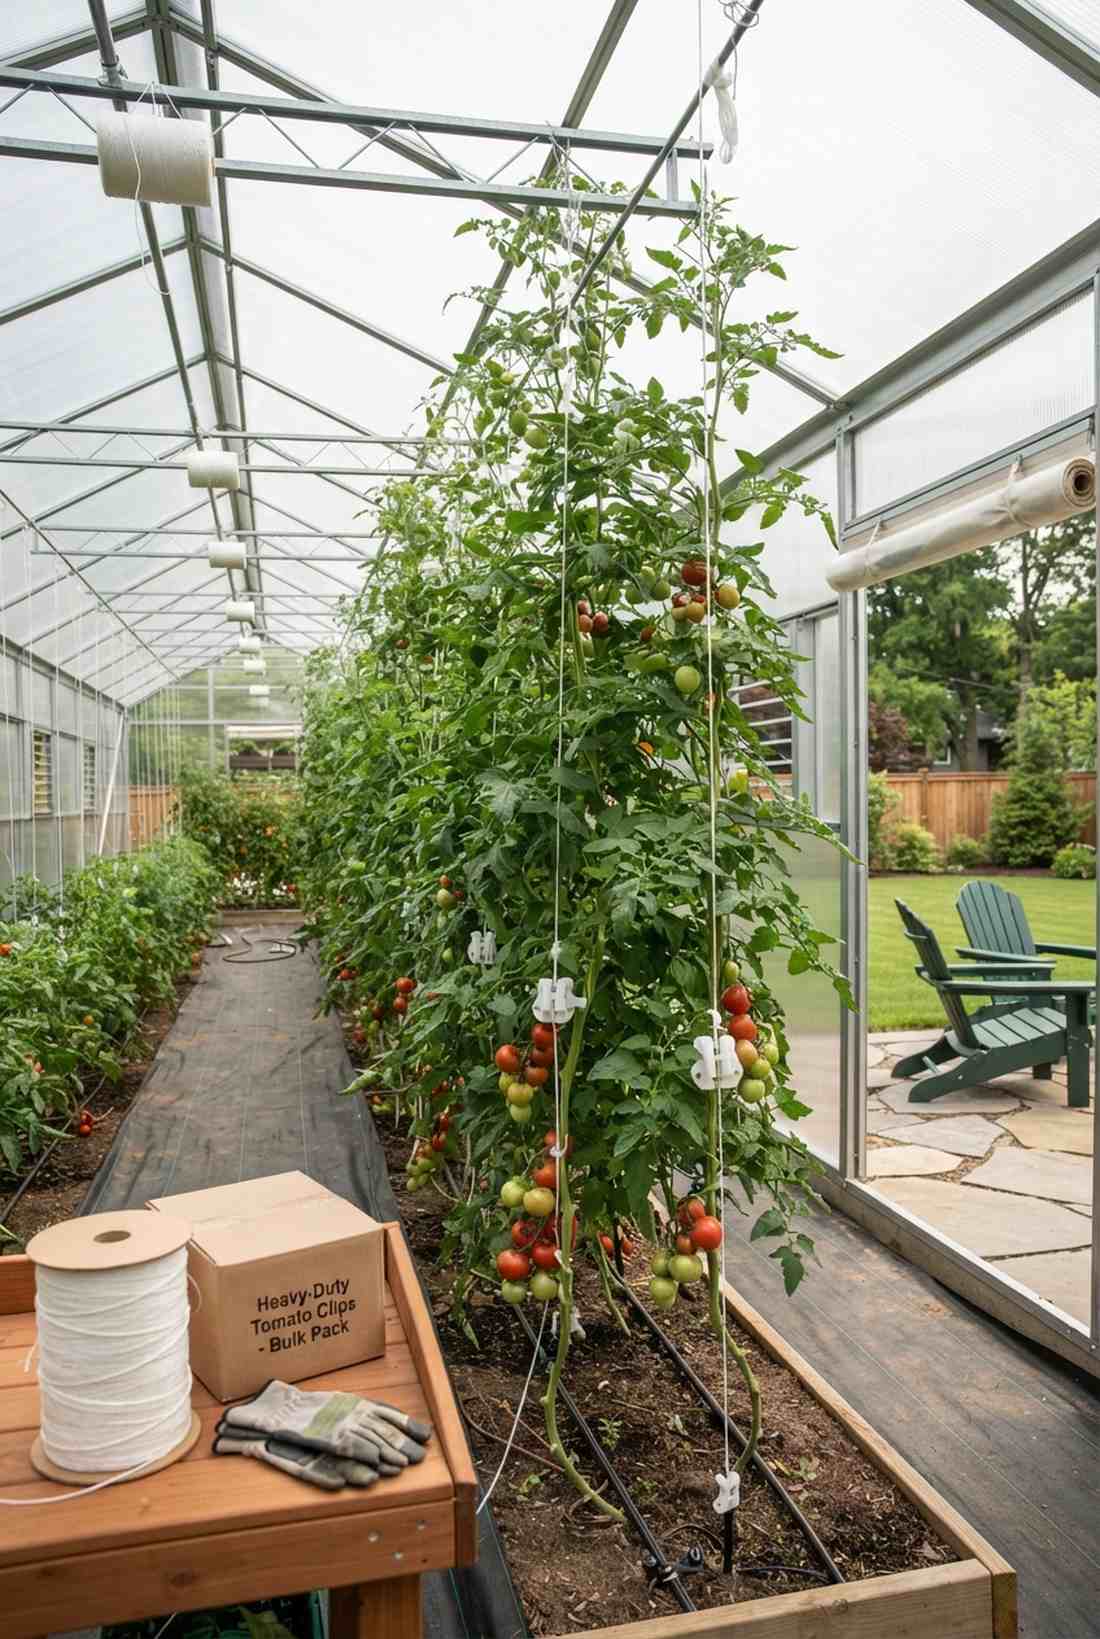
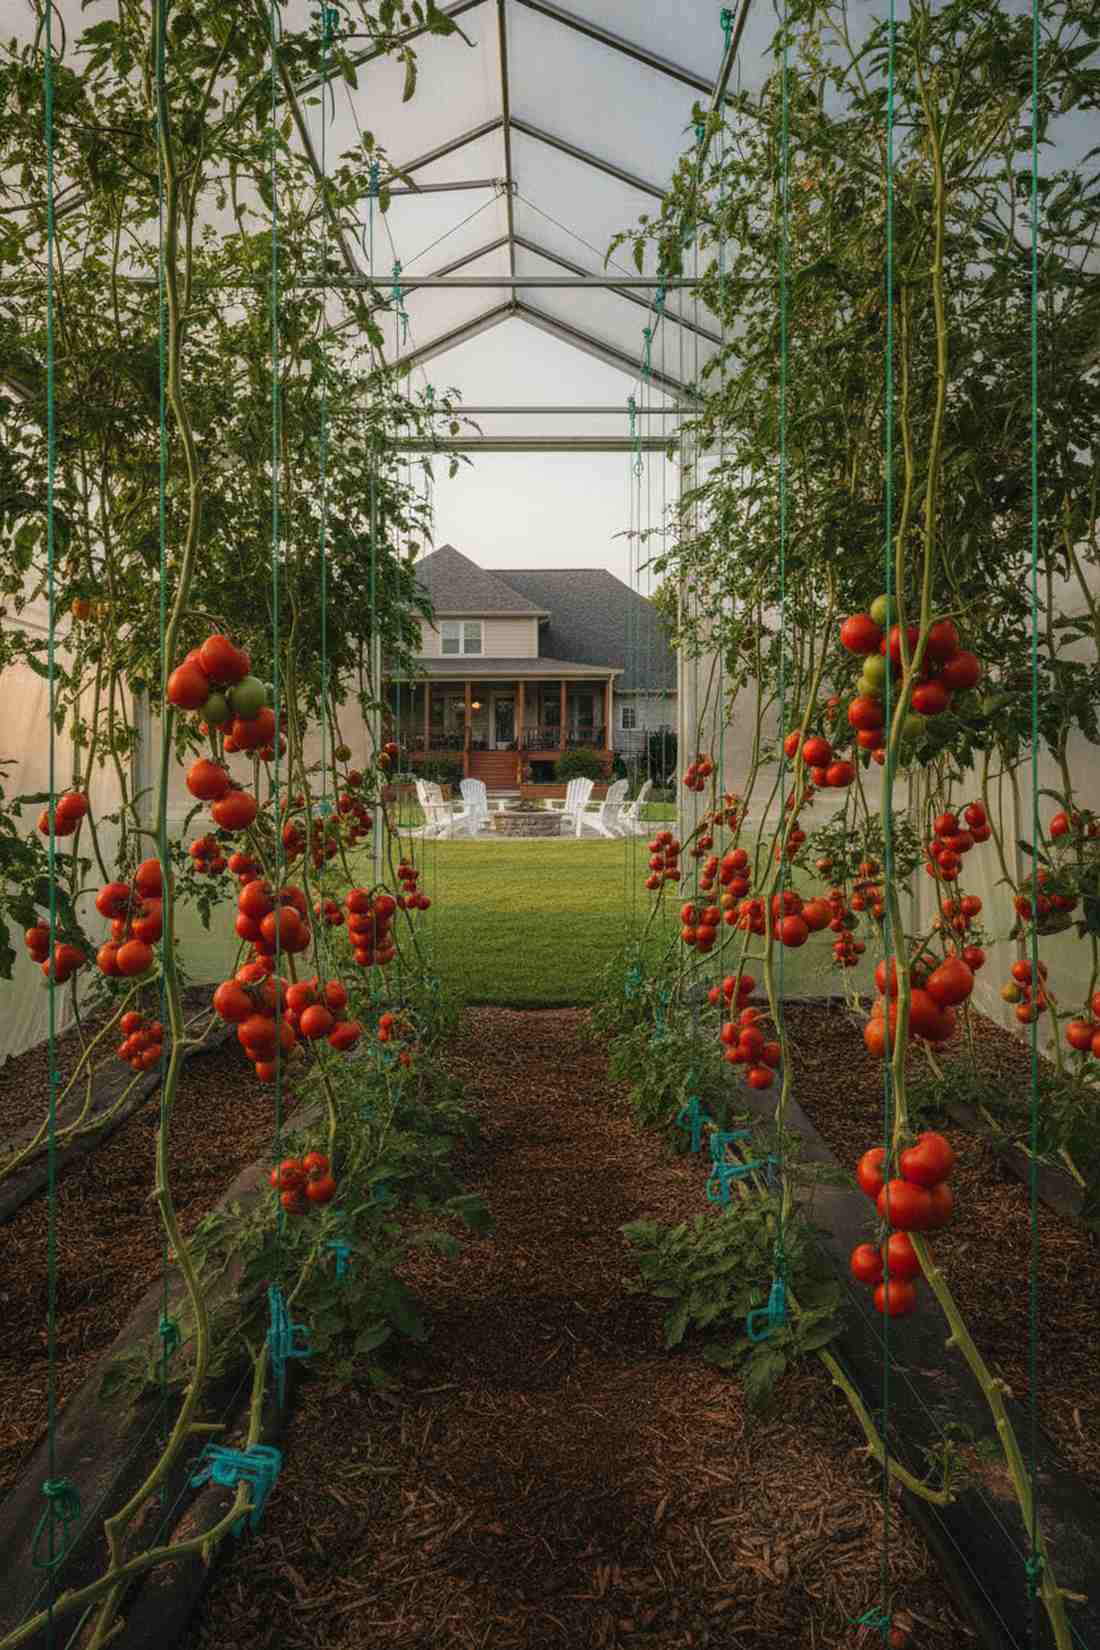
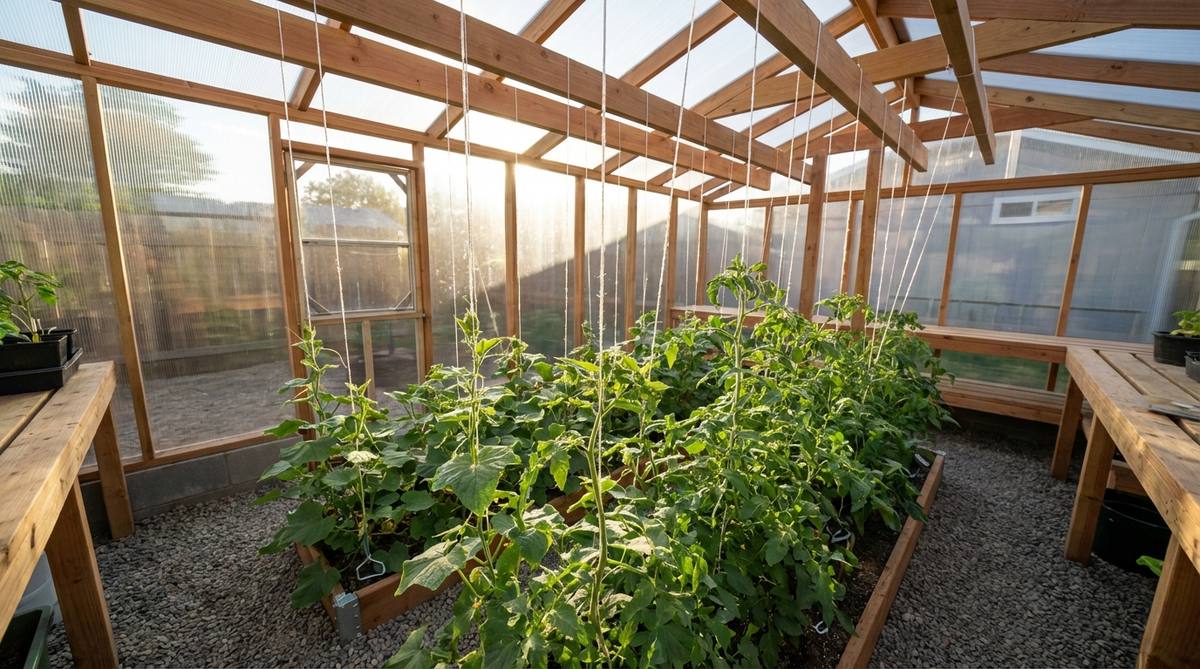
Dropping vertical tension lines down to massive tomato bases functions like a high-yield commercial farm module. An adjustable greenhouse string drop is a staple layout for serious high-tunnel growers pushing vines past 10 feet.
Rigid cages restrict late-season growth, while a suspended drop-line adapts infinitely to towering, sprawling vines. Sourcing commercial greenhouse support twine ensures the string won’t snap mid-season when laden with sixty pounds of ripening fruit.
This commercial-level suspension system costs a shocking $15–$30. It’s a fast upgrade that completely changes harvest volumes.
- Key Materials: Polypropylene twine, overhead hooks, ground clips
- Vibe / Style: High-yield commercial agriculture
- Difficulty: Fast tying and tensioning
- Budget Breakdown: Twine Roll: $15 | Tomato Clips: $10
- Creator’s Tip: Gently wrap the main stem around the string in a clockwise direction once a week to maintain vertical dominance.
- Smart Sourcing: commercial greenhouse support twine, heavy-duty plastic tomato clips (bulk pack).
26. Shade Cloth Combination Trellis
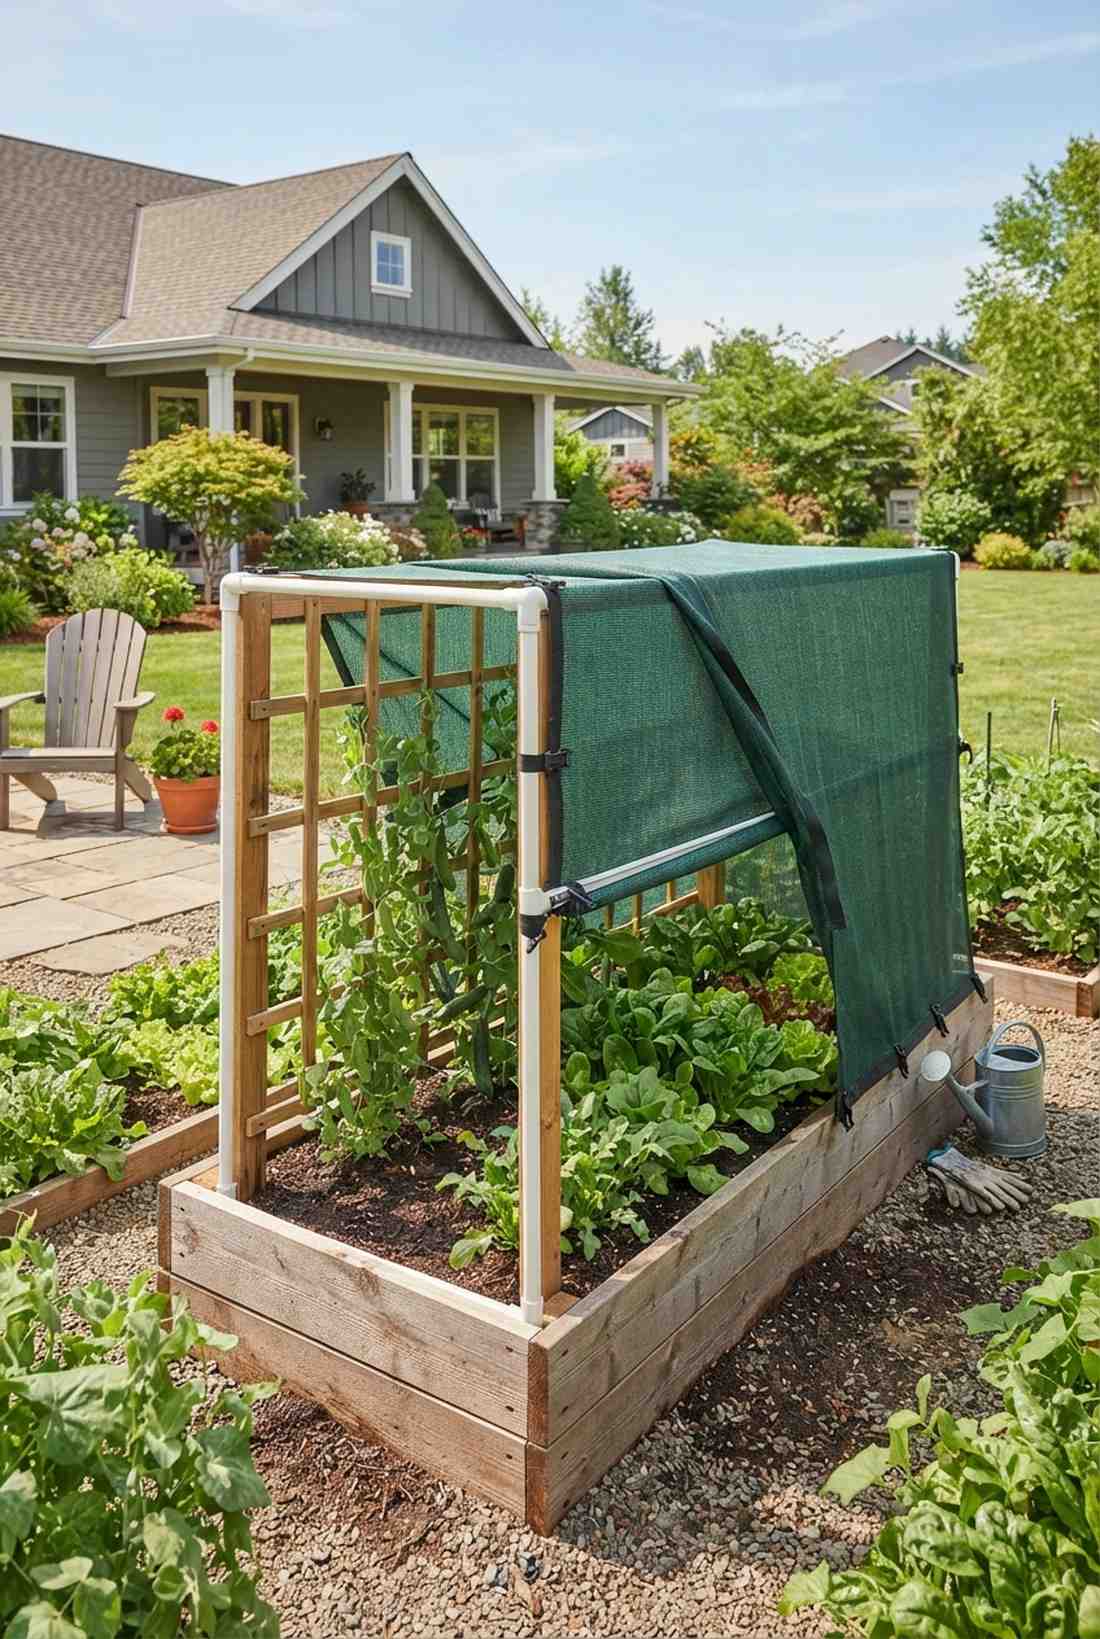
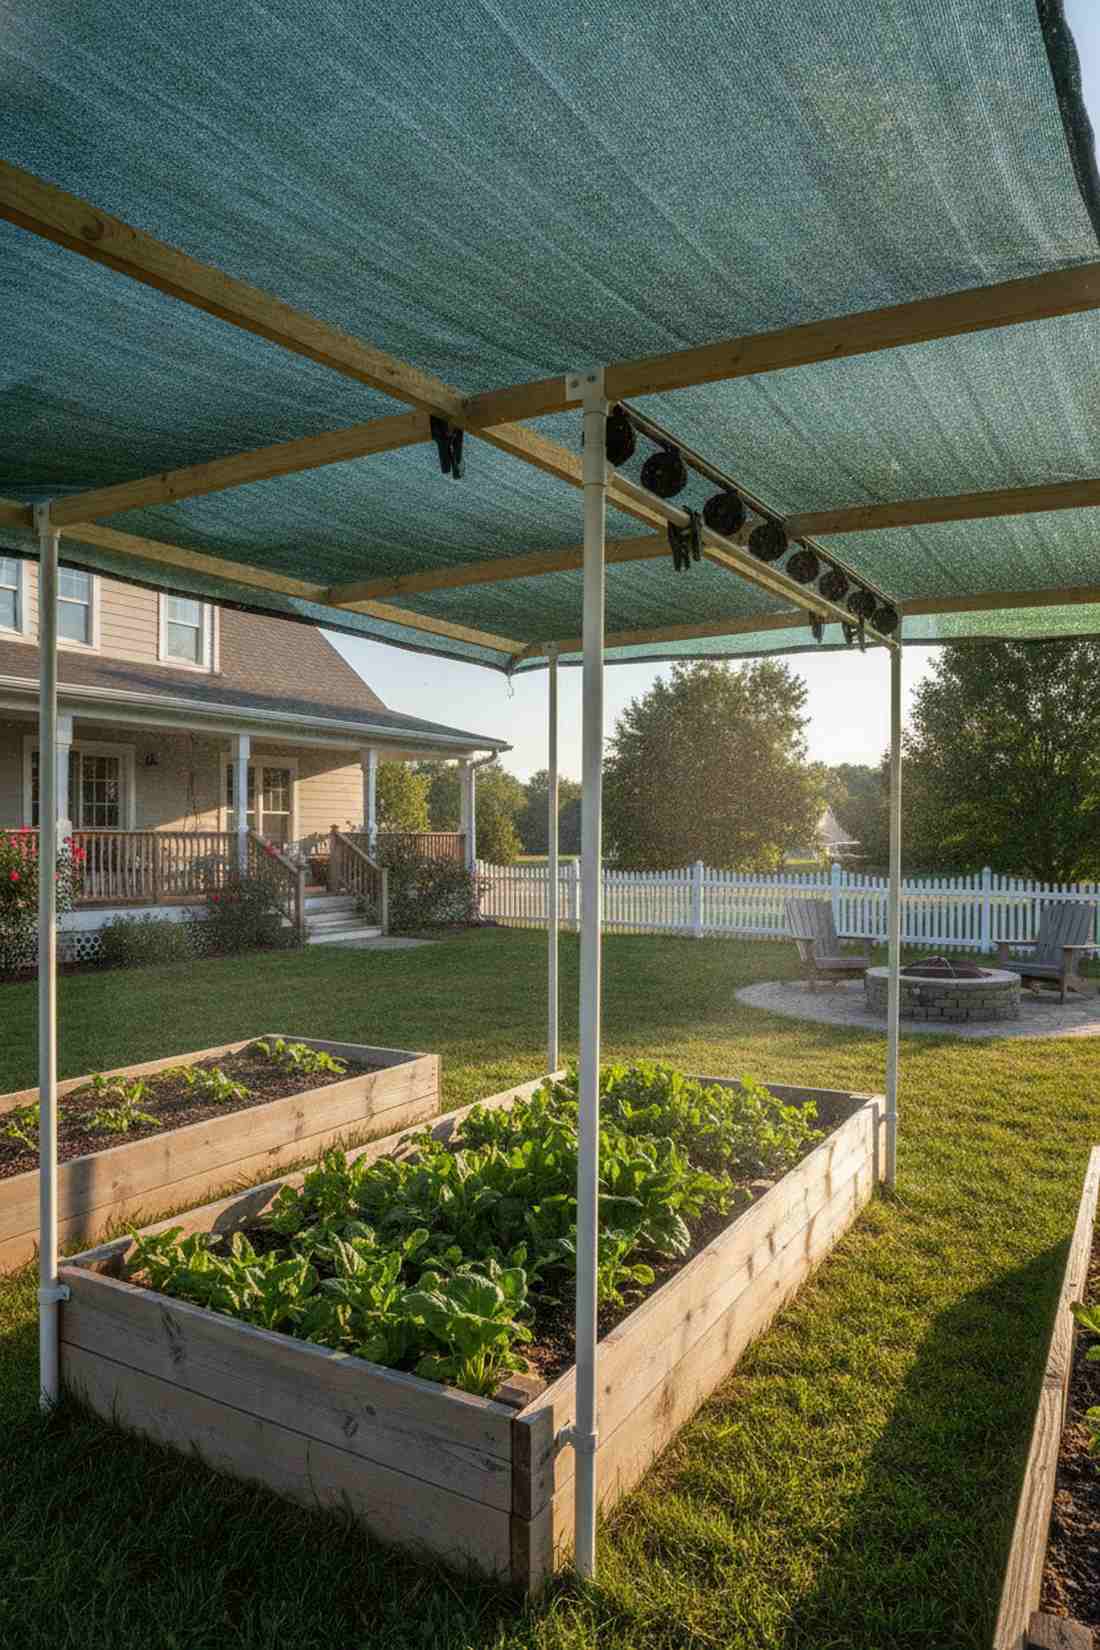
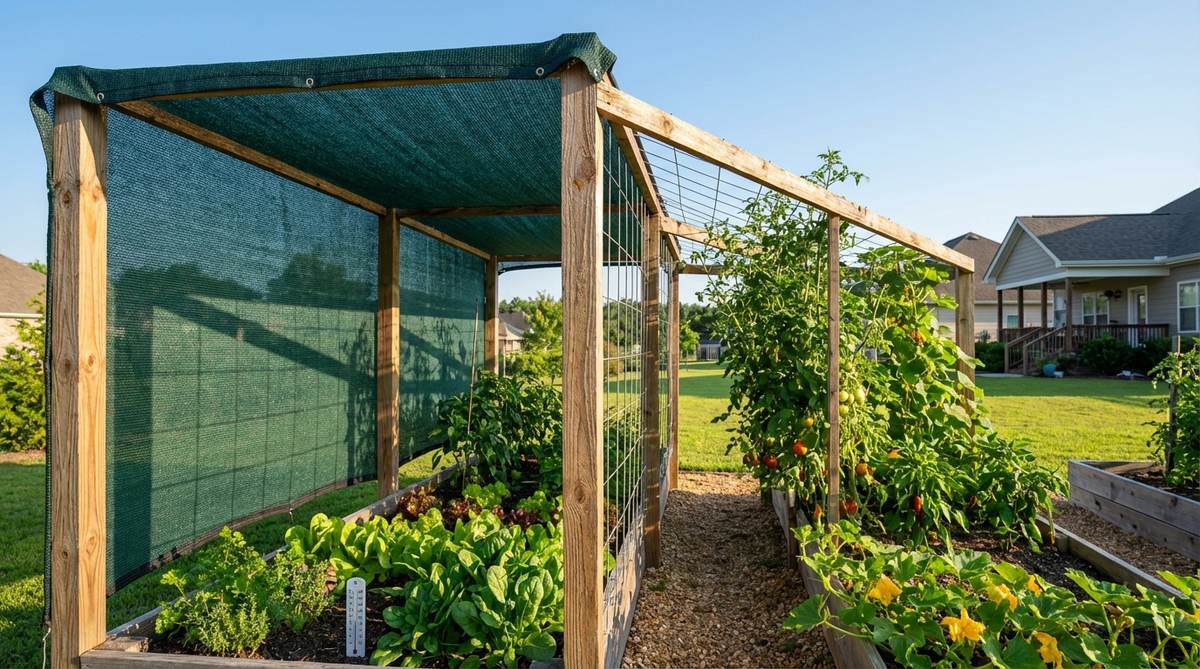
Draping cooling fabric over tender spinach beds feels like a shady oasis in the middle of a baking desert. A sun-blocking canopy frame is an absolute lifesaver for south-facing beds in extreme, scorching summer climates.
Unfiltered sun scorches tender crops, but a dual-purpose protective canopy extends your harvesting window by months. Combining your trellis with UV-blocking agricultural shade cloth drops soil temperatures significantly, saving your cool-season crops from bolting early.
You can easily pull off this microclimate rig for around $45–$70. Pin this if you constantly battle wilting summer vegetables.
- Key Materials: Wood/PVC frame, 40% shade cloth, clips
- Vibe / Style: Protective climate-controlled oasis
- Difficulty: Simple frame draping
- Budget Breakdown: Shade Fabric: $30 | Framework: $25
- Creator’s Tip: Mount the shade cloth on rolling track pulleys so you can quickly pull it back during cloudy, overcast days.
- Smart Sourcing: UV-blocking agricultural shade cloth, heavy-duty shade fabric clips.
27. Herb Spiral with Vertical Elements
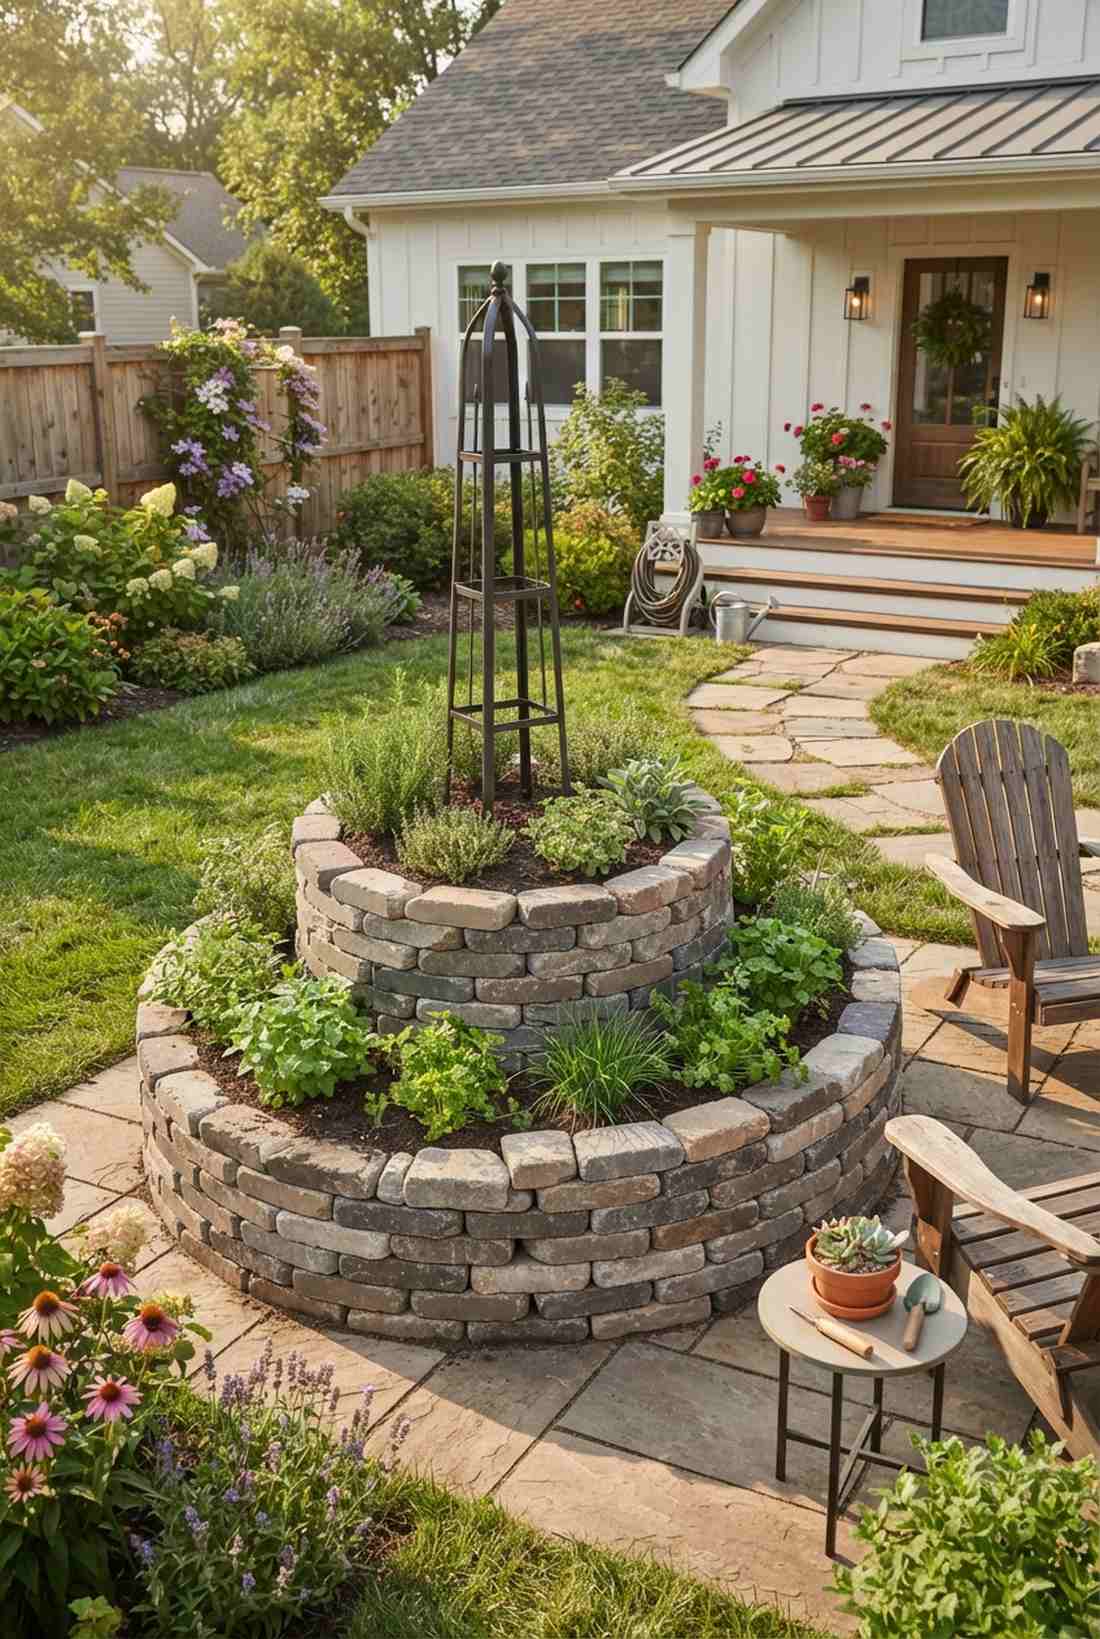
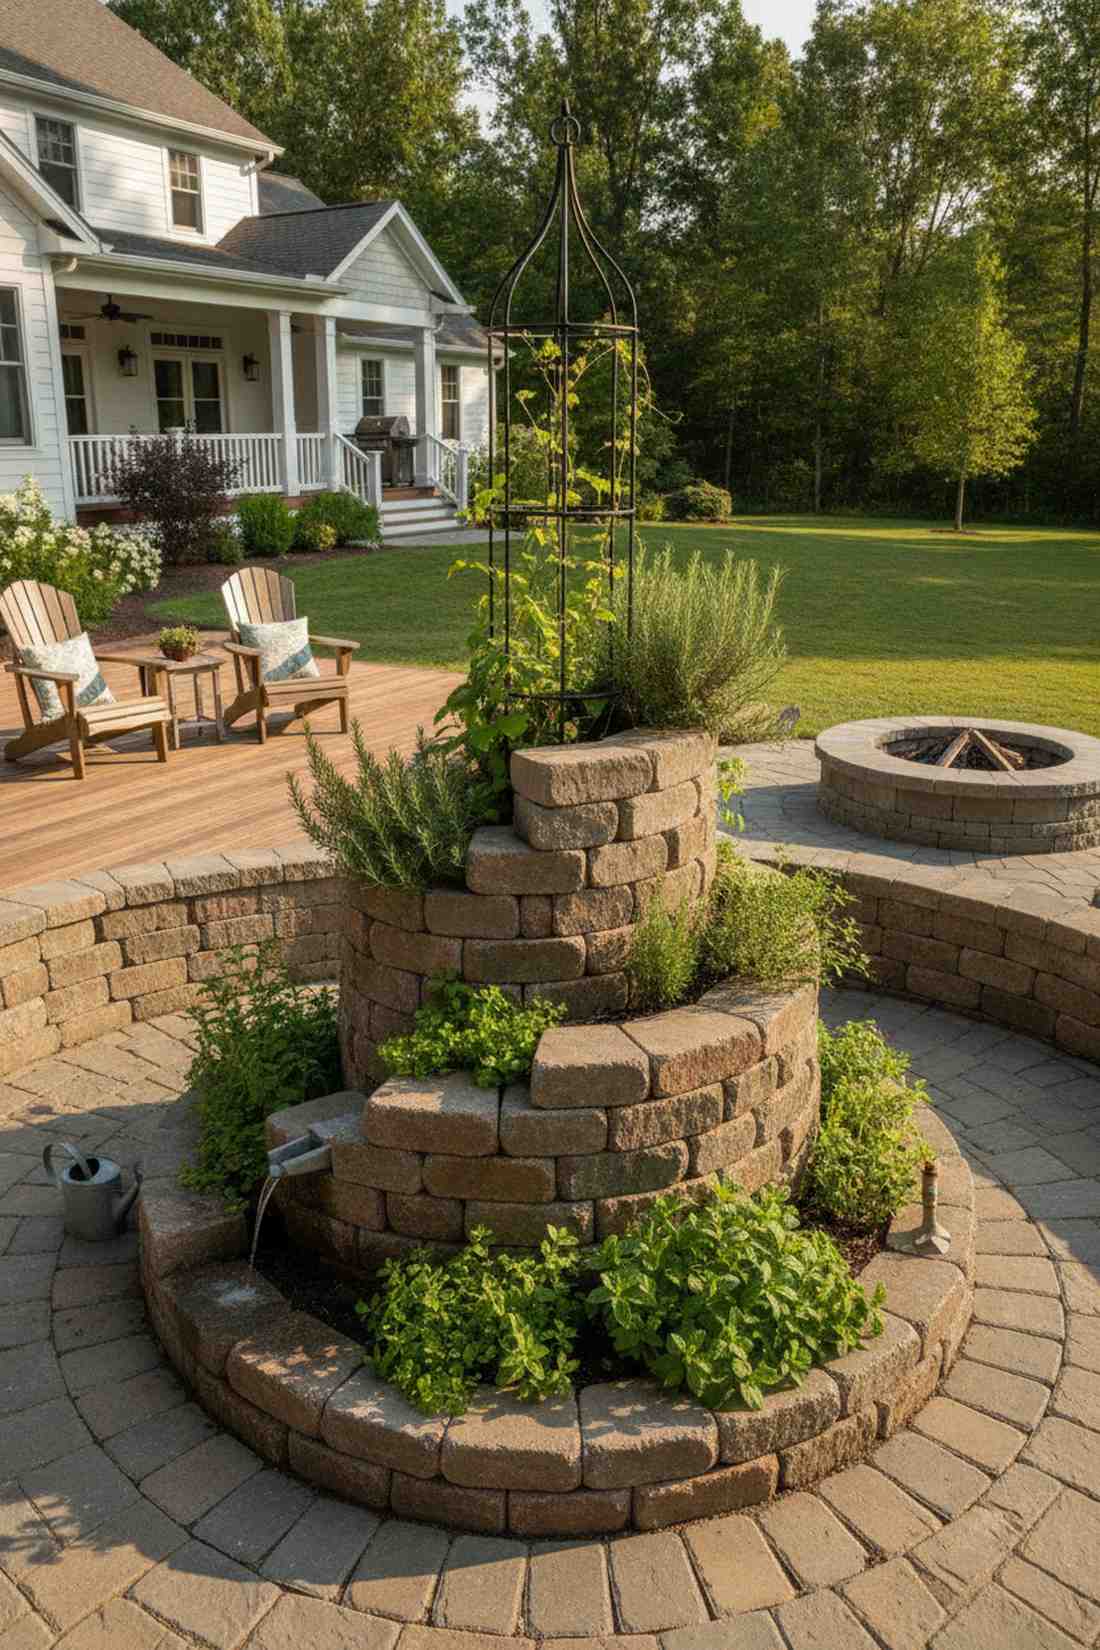
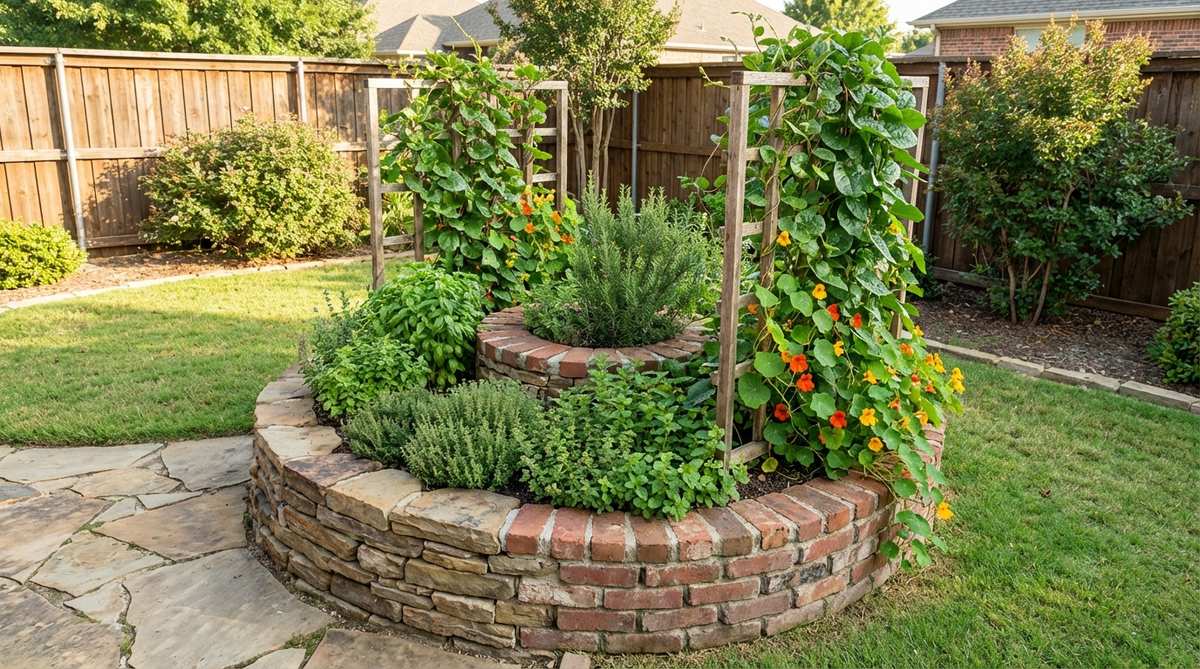
Stacking stones into a massive, curling mound twists into a spectacular three-dimensional botanical sculpture. A vertical herb spiral tower maximizes dynamic yield in a tight circular courtyard footprint.
Flat beds waste irrigation runoff, whereas a stacked gravity-fed mound ensures every drop nourishes the root zone perfectly. Adding a central climbing pole and stackable landscape retaining bricks turns a flat herb garden into a towering, productive architectural marvel.
Expect to invest about $60–$100 depending on the stone used. Highly recommended for maximizing tiny circular patio corners.
- Key Materials: Landscaping stone, topsoil, central metal pole
- Vibe / Style: Dynamic permaculture focal point
- Difficulty: Heavy lifting and stacking
- Budget Breakdown: Stone/Bricks: $60 | Soil: $30
- Creator’s Tip: Plant drought-tolerant rosemary at the top peak, and moisture-loving mint at the wet, shaded bottom edge.
- Smart Sourcing: stackable landscape retaining bricks, powder-coated steel garden obelisks.
Conclusion
Implementing a premium small garden trellis layout is the most effective way to multiply your yield while injecting serious architectural beauty into your landscape. By executing any of these 27 high-end structural blueprints, you bypass flimsy seasonal setups and build lasting, designer-level outdoor elements. Source the recommended commercial-grade materials and heavy-duty hardware starter kits to guarantee your vertical display remains a stunning, wind-proof focal point for years to come.
Frequently Asked Questions
What is the best material for a small garden trellis?
If you want a setup that looks expensive but isn’t, sourcing heavy-duty galvanized cattle panels or commercial-grade welded wire fencing delivers the best 15-20 year lifespan. Standard untreated wood and cheap bamboo kits snap easily under the weight of mature vines and rot away quickly. To achieve a high-end designer look that lasts, invest in powder-coated aluminum kits, UV-resistant vinyl grids, or pre-stained premium cedar. Grabbing bulk packs of professional mounting hardware is the secret to a professional installation.
How tall should a trellis be for cucumbers and beans?
To maximize your vertical yield without sacrificing stability, build your support system at least 6 to 8 feet tall. Vining crops rapidly outgrow short stakes, folding back on themselves and creating tangled, disease-prone clusters. Utilize heavy-duty steel T-posts or commercial A-frame connector kits to safely achieve these heights. Anything under 5 feet is a waste of a pole bean’s natural climbing potential—just ensure your premium mesh kits are securely tensioned to prevent wind collapse.
Can I grow tomatoes on a flat trellis screen?
Yes, but flat grids are generally best reserved for determinate or compact patio varieties. Massive indeterminate heirloom tomatoes look much better and perform optimally inside heavy-duty square tomato cages or suspended from a commercial greenhouse drop-string system. If you insist on a flat aesthetic, you must aggressively tie the thick central leader stems using premium expanding rubber plant clips to ensure the incredible weight of the fruit doesn’t rip the vine right off the flat mesh.
How do I anchor a freestanding trellis without digging posts?
Renters and patio owners can skip the digging entirely by utilizing heavy-duty modular planter box bases filled with 100+ pounds of wet potting soil and gravel. This massive ballast anchors tall vertical slats flawlessly against brutal wind gusts. Alternatively, you can use commercial cast-iron umbrella stands or wide-stance cross-brace footing kits. Opting for self-watering planter trellis kits gives you incredible mobility and architectural height without ruining your landlord’s concrete patio.
What spacing is needed between plants at the base of a trellis?
For a lush, overgrown Pinterest-worthy wall of foliage, space vigorous vines like pole beans or jasmine about 12-18 inches apart. However, airflow is critical to prevent powdery mildew—so keep bulky tomatoes at least 24-36 inches apart even on premium commercial wire grids. If you are using pre-cut welded wire panels, let the geometric layout guide you: plant one seed or starter kit exactly underneath every major vertical junction to ensure perfectly even, high-end coverage as they climb.