
A highly optimized balcony decor wall immediately elevates your narrow outdoor footprint. Strategic material sourcing delivers a premium aesthetic without the luxury price tag. Maximize your vertical square footage effortlessly.
Design Snapshot Key Principles
- Vertical Layering: Stack planters and wall-mounted systems to create depth and maximize growing space without sacrificing floor area
- Material Durability: Select weather-resistant materials like powder-coated metal, rot-resistant wood, and UV-stable plastics for long-term outdoor performance
- Visual Balance: Combine living greenery with artistic elements to prevent monotony and establish focal points at varying heights
- Integrated Irrigation: Install drip systems or self-watering planters to maintain healthy plants with minimal daily maintenance
Living Wall Systems for Maximum Impact
1. Modular Pocket Planters
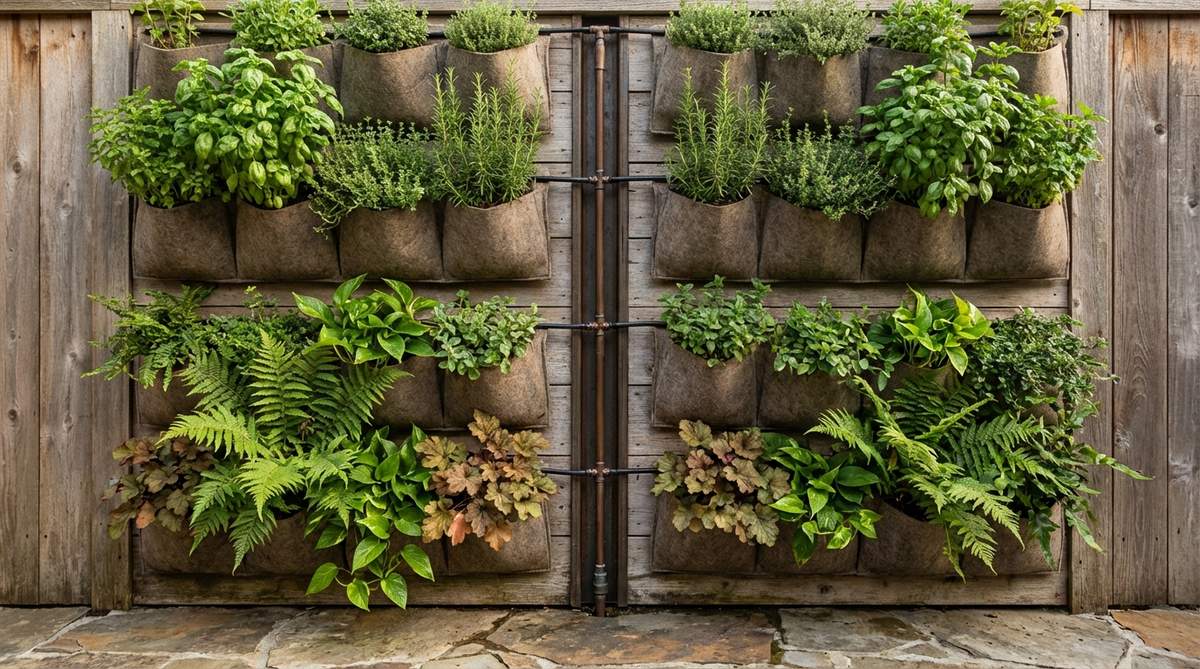
Feels like a lush living tapestry cascading down your exterior. A vertical herb wall garden is perfectly optimized for shaded apartment balconies.
Throwing away money on flimsy local nursery pots is a rookie mistake; this approach gives a designer-level finish. Integrating premium vertical garden kits ensures long-term root health without constant maintenance.
You can easily pull this off for around $30–$45. Pin this if you’re planning a small space upgrade!
- Key Materials: UV-resistant fabric pocket grids
- Vibe / Style: Lush urban jungle
- Difficulty: Easy beginner setup
- Budget Breakdown: Pockets: $20 | Soil & Seeds: $15.
- Creator’s Tip: Line lower pockets with perlite for excess water capture.
- Smart Sourcing: UV-coated fabric wall planters (bulk pack) and heavy-duty self-watering drip kits.
2. Wall-Mounted Planter Grids
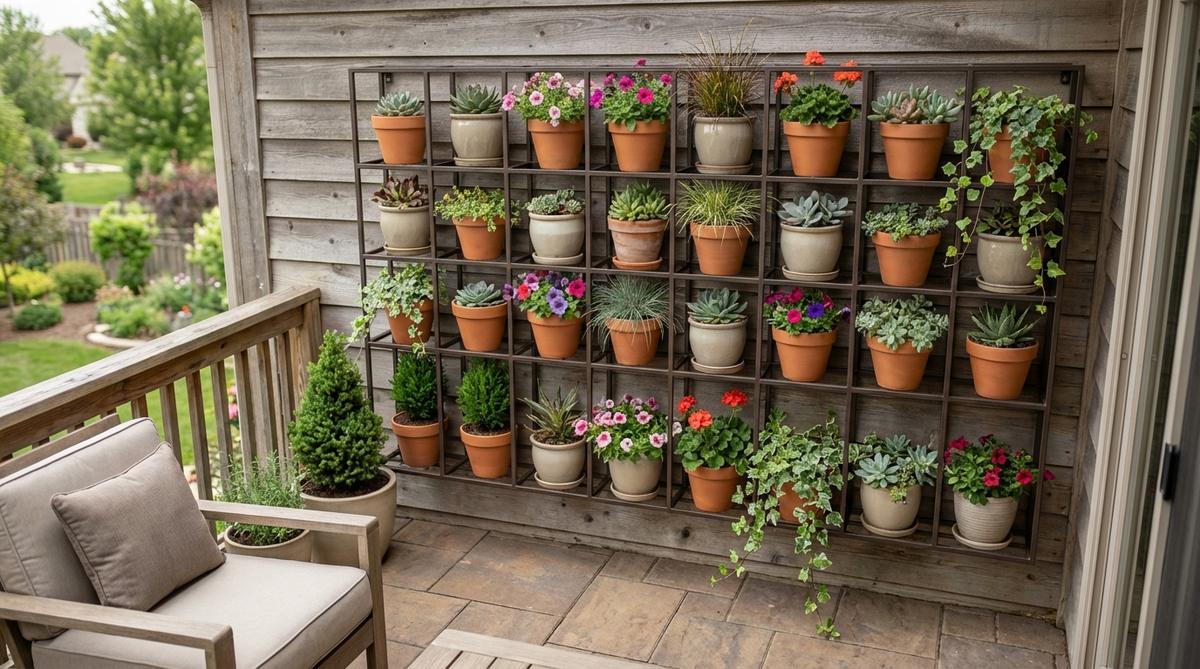
Straight out of a chic architectural magazine spread. Using a geometric balcony wall grid works exceptionally well for narrow transitional spaces.
Most DIYers ignore structural integrity, but this layout looks far more expensive than it actually is. Utilizing rust-proof outdoor mounting supplies keeps the grid locked securely in all seasons.
Expect to spend roughly $40 to $60 depending on the grid size.
- Key Materials: Powder-coated steel wire frames
- Vibe / Style: Modern minimalist
- Difficulty: Intermediate
- Budget Breakdown: Grid: $35 | Hooks: $10.
- Creator’s Tip: Use zip ties painted to match the grid for invisible stabilization.
- Smart Sourcing: rust-proof powder-coated metal grids and weatherproof S-hook starter kits.
3. Stacked Tower Gardens
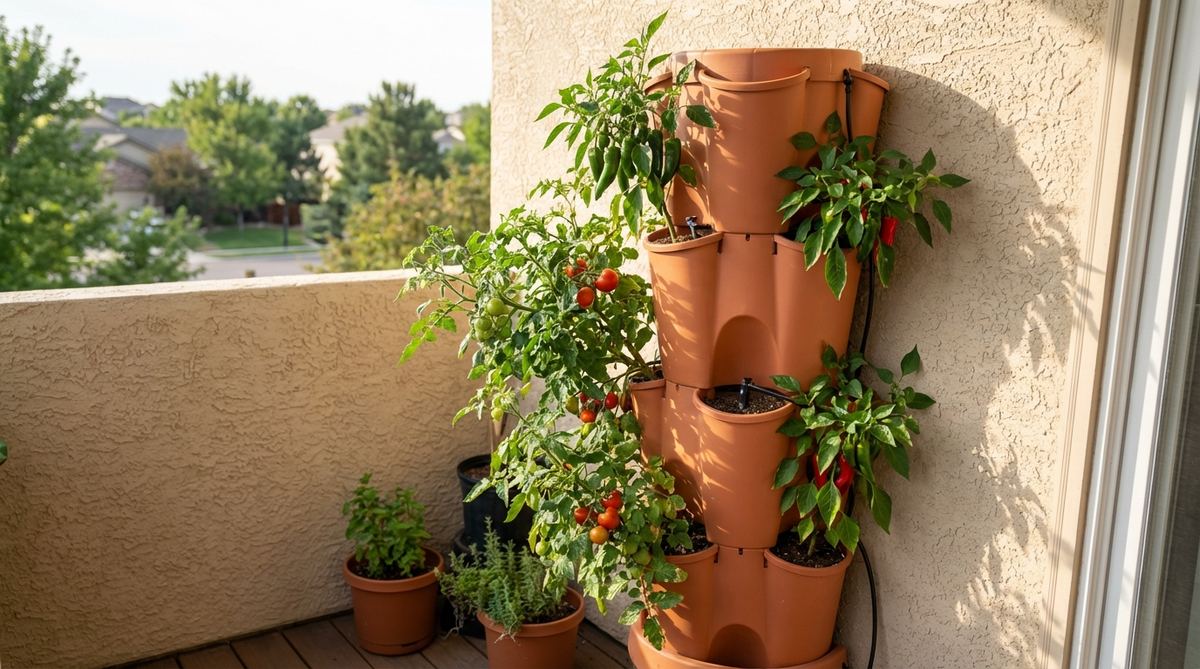
Brings a futuristic, bountiful greenhouse energy to an empty corner. Setting up an outdoor vertical tower system solves the problem of limited floor space immediately.
Standard flat planters waste too much space; this towering design delivers a surprisingly premium look. Adding automated hydroponic nutrient kits to the reservoir guarantees explosive plant growth.
This high-yield setup will run you about $50–$80. Save this to your DIY weekend garden board!
- Key Materials: Interlocking tiered plastic rings
- Vibe / Style: High-tech organic
- Difficulty: Moderate assembly
- Budget Breakdown: Tower Kit: $60 | Base nutrients: $15.
- Creator’s Tip: Rotate the tower 90 degrees weekly for balanced sun exposure.
- Smart Sourcing: BPA-free stackable planter kits and liquid plant food starter packs.
4. Pallet Wall Gardens
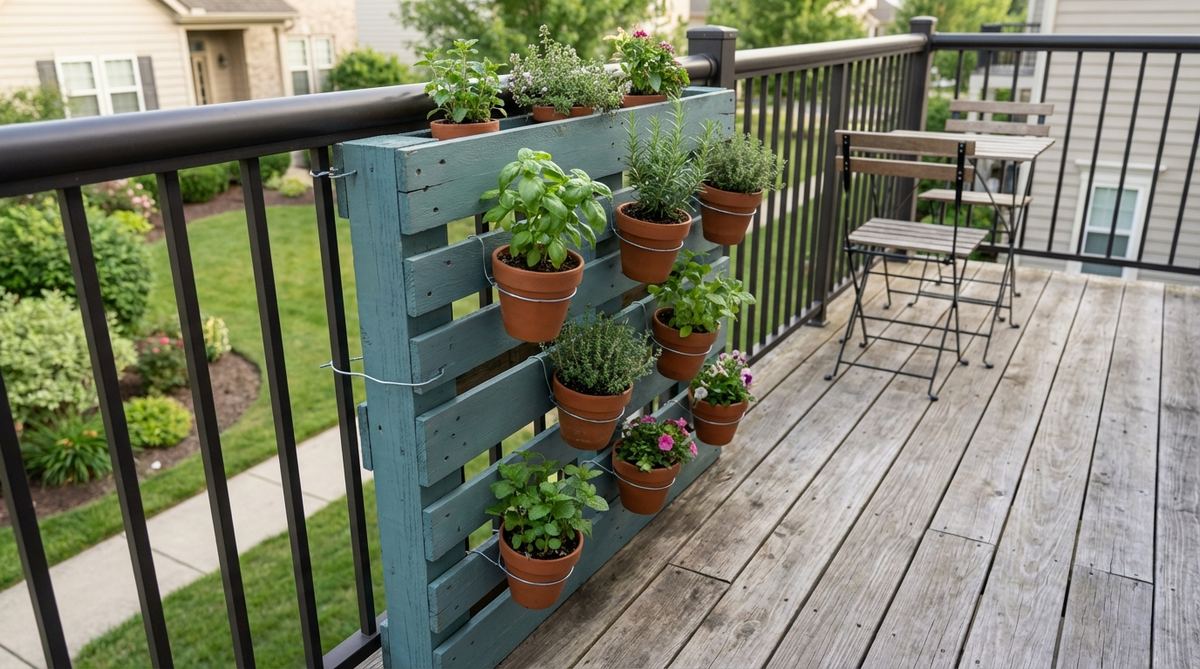
Evokes the warmth of a reclaimed rustic farmhouse retreat. A repurposed wooden pallet garden is brilliant for creating a massive focal point cheaply.
Leaving raw wood untreated guarantees rot, but sealing it properly completely transforms standard layouts. Applying marine-grade sealants makes this budget hack outlast expensive commercial catalog buys.
You can execute this weekend project for under $25.
- Key Materials: Heat-treated wood pallets, landscape fabric
- Vibe / Style: Rustic cottage core
- Difficulty: Hands-on weekend project
- Budget Breakdown: Pallet: $0 | Sealant & Fabric: $25.
- Creator’s Tip: Only use pallets stamped “HT” (Heat Treated) for safety.
- Smart Sourcing: commercial-grade landscape fabric (bulk roll) and clear UV-resistant outdoor sealants.
This next setup is ridiculously cheap but looks like a $100 custom display…
5. Living Moss Panels
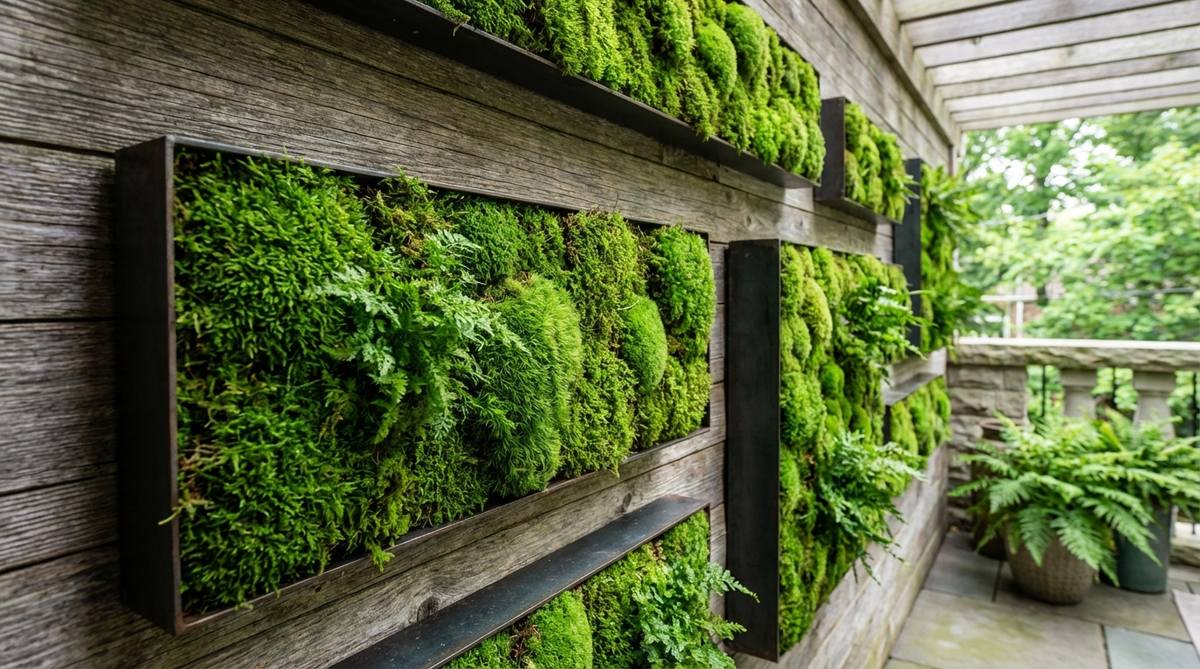
Feels like a tiny hidden forest you accidentally discovered. Installing a framed botanical moss wall acts as living art for deeply shaded balconies.
Constantly replacing dead flowers is frustrating; this maintenance-free option looks undeniably luxurious. Relying on preserved terrarium accessories keeps the vibrant green color locked in year-round.
This elegant zero-maintenance art piece costs around $45 to create.
- Key Materials: Preserved reindeer moss, shallow frames
- Vibe / Style: Enchanted woodland
- Difficulty: Simple craft project
- Budget Breakdown: Moss bulk: $30 | Frame base: $15.
- Creator’s Tip: Use a hot glue gun on a low setting to avoid melting the frame backing.
- Smart Sourcing: pre-cut preserved moss sheets (bulk pack) and heavy-duty outdoor mounting tape.
6. Hydroponic Wall Systems
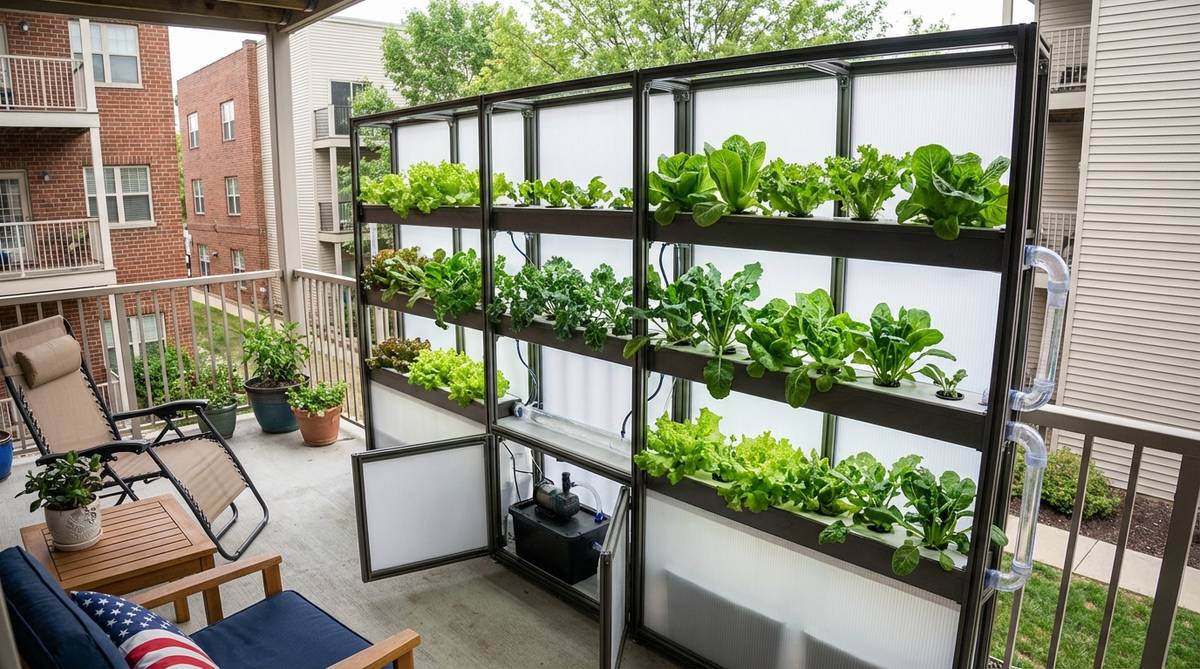
Channels an ultra-modern, clean laboratory aesthetic right outside your door. A soil-free balcony garden is ideal for growing pristine leafy greens without the mess.
Dealing with soil spills on a high-rise balcony is a nightmare; this water-based solution upgrades your whole growing experience. Securing premium hydroponic circulation pumps ensures the water never goes stagnant.
Setup costs typically range from $70 to $100. Pin this if you want to grow food without the dirt!
- Key Materials: PVC piping, circulating water pump
- Vibe / Style: Futuristic eco-chic
- Difficulty: Advanced DIY
- Budget Breakdown: Tubing & Pump: $60 | Net cups: $15.
- Creator’s Tip: Paint PVC pipes black to prevent internal algae blooms.
- Smart Sourcing: submersible hydroponic pump starter kits and reusable mesh net cups (bulk pack).
Artistic Installations That Define Space
7. Metal Wall Sculptures

Projects a bold, gallery-curated energy into the open air. Hanging an industrial outdoor wall sculpture anchors your seating area beautifully.
Flimsy canvas art fades in a week; this heavy-duty upgrade delivers a surprisingly premium look. Mounting rust-resistant architectural decor items guarantees your space survives the harshest weather.
Expect an investment of around $60–$120 depending on the metal thickness.
- Key Materials: Powder-coated steel or aluminum shapes
- Vibe / Style: Contemporary industrial
- Difficulty: Quick drill installation
- Budget Breakdown: Art Piece: $80 | Concrete anchors: $10.
- Creator’s Tip: Install an outdoor LED spotlight below to cast dramatic nighttime shadows.
- Smart Sourcing: rust-resistant masonry anchor kits and solar-powered accent spotlights (2-pack).
8. Outdoor Mosaic Murals
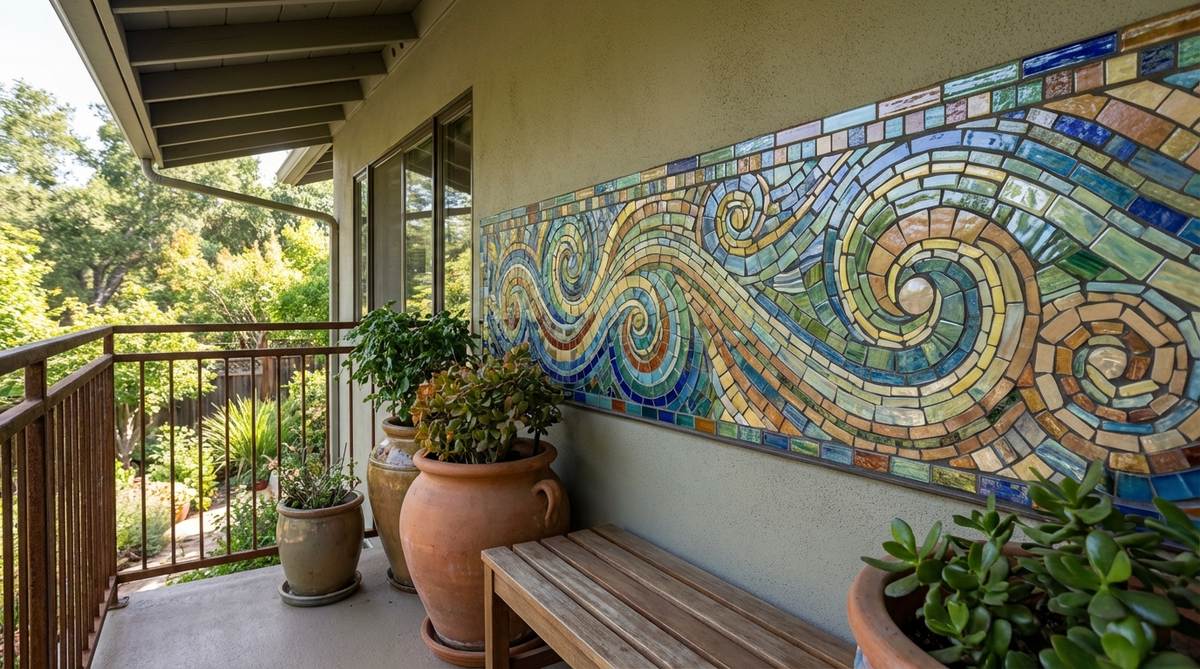
Radiates the vibrant charm of a Mediterranean coastal villa. A glass tile balcony backsplash perfectly brightens up dull, gray concrete walls.
Most paint peels under direct sun; this permanent tile hack looks far more expensive than it is. Using weatherproof grout and premium mosaic supplies seals the deal against rain damage.
You can piece this together for about $50 to $80. Save this idea for your next creative weekend!
- Key Materials: Glass tiles, outdoor-grade mortar
- Vibe / Style: Tuscan resort
- Difficulty: Time-intensive crafting
- Budget Breakdown: Tiles: $45 | Grout & Mortar: $25.
- Creator’s Tip: Work on a cement backer board first, then mount the finished board to the wall.
- Smart Sourcing: pre-mixed weatherproof outdoor grout and shatter-resistant glass mosaic tiles (bulk pack).
9. Carved Wood Panels
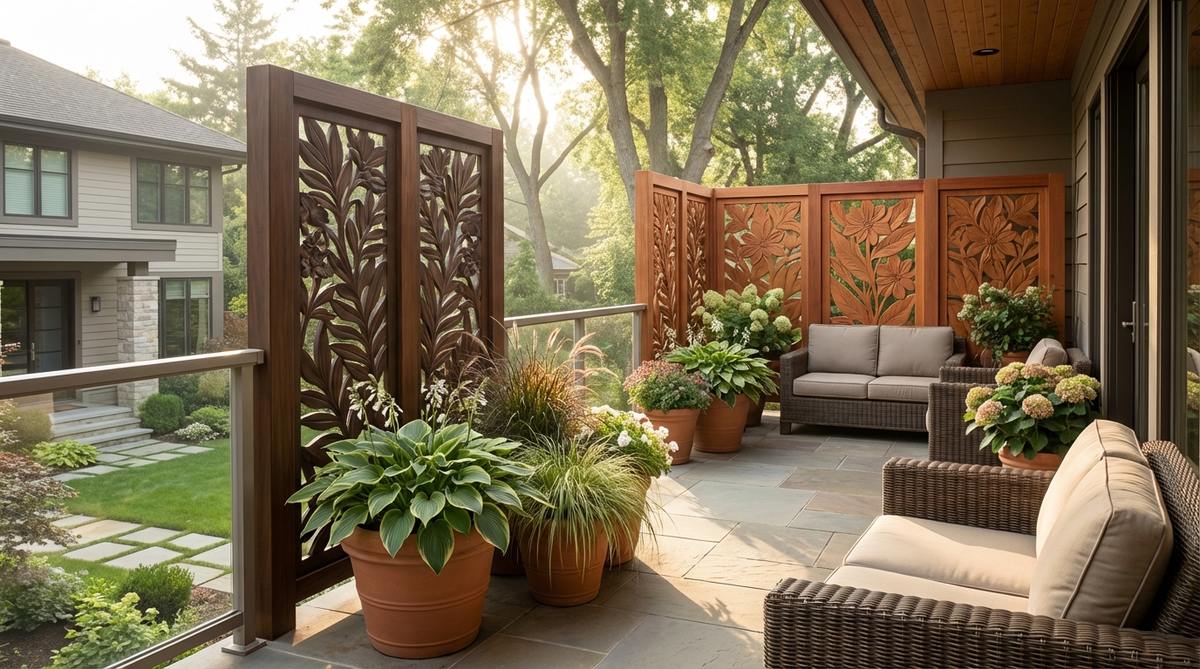
Brings a grounding, zen-like tranquility to chaotic urban environments. Mounting a botanical carved teak panel bridges the gap between raw nature and architecture.
Hanging untreated indoor art outside is a recipe for disaster; this robust layout totally changes the durability game. Treating the wood with protective outdoor sealants keeps the rich grain intact.
This premium architectural addition costs roughly $70–$100.
- Key Materials: Solid teak or cedar carvings
- Vibe / Style: Balinese spa retreat
- Difficulty: Easy mounting
- Budget Breakdown: Wood Panel: $80 | Wood oil: $15.
- Creator’s Tip: Apply a fresh coat of teak oil at the beginning of every spring season.
- Smart Sourcing: marine-grade wood protecting oils and heavy-duty French cleat hangers (metal).
Most people get this completely wrong… until they try the exact layout coming up next.
💡 Must-Have Supplies for High-End Setups
To build these setups faster and ensure they last, skip the generic craft aisles and invest in the right foundational kits.
- Base & Support: commercial-grade masonry wall anchor kits
- Setup Tools: heavy-duty outdoor leveling and mounting starter kits
- Weather/Durability Protection: UV-resistant clear acrylic waterproofing spray
10. Ceramic Plate Collections
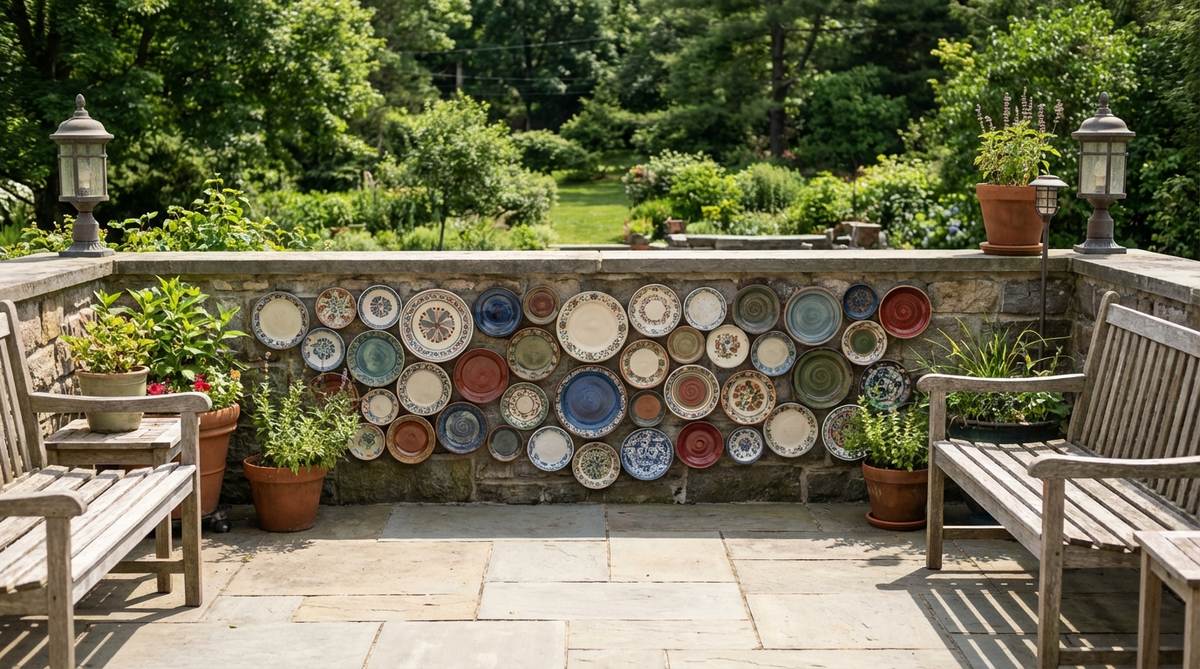
Creates a whimsical, curated aesthetic that feels highly personalized. An asymmetrical plate gallery wall looks stunning against plain painted brick.
Standard wire hangers rust and snap; this clever mounting method outperforms expensive catalog buys. Securing the collection with specific weatherproof plate hangers prevents tragic shattering in high winds.
A thrifted collection can easily be mounted for under $30. Pin this to your eclectic decor board!
- Key Materials: Thrifted ceramics, adhesive disc hangers
- Vibe / Style: Eclectic vintage
- Difficulty: Measuring-intensive
- Budget Breakdown: Plates: $15 | Hangers: $15.
- Creator’s Tip: Trace plates on newspaper and tape them to the wall to perfect the layout first.
- Smart Sourcing: weatherproof adhesive plate hanger kits and UV-coated protective clear sprays.
11. Laser-Cut Steel Screens
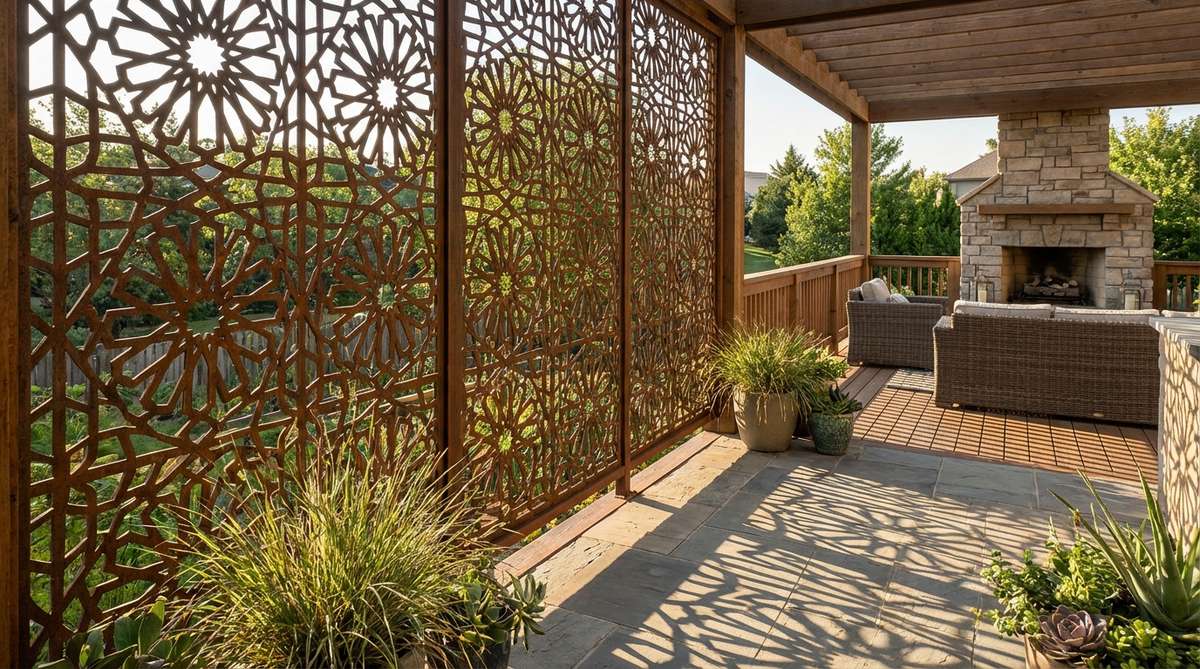
Casts mesmerizing geometric shadows as the sun moves across the sky. A perforated privacy wall screen doubles as high-end contemporary art.
Flimsy plastic lattice warps in the heat; this solid metal option delivers a surprisingly premium look. Utilizing outdoor privacy screen panels instantly upgrades your balcony’s perceived real estate value.
High-quality metal panels run anywhere from $90 to $150.
- Key Materials: Galvanized steel cutouts
- Vibe / Style: Luxury hotel lounge
- Difficulty: Heavy lifting required
- Budget Breakdown: Metal Screen: $110 | Standoff mounts: $20.
- Creator’s Tip: Mount the screen exactly 2 inches off the wall to maximize the shadow effect.
- Smart Sourcing: stainless steel standoff mounting hardware (bulk pack) and rust-converter base primers.
12. Mirror Panels

Feels like a secret window opening up into a deeper garden. A weatherproof outdoor mirror installation is the ultimate optical illusion for cramped balconies.
Using a cheap indoor mirror guarantees black edges from moisture; this specialized approach looks far more expensive than it is. Applying outdoor-rated mirror sealants protects the silver backing from degrading in the rain.
You can execute this space-expanding trick for about $50 to $75.
- Key Materials: Acrylic mirrors, weatherproof sealant
- Vibe / Style: Secret courtyard
- Difficulty: Careful handling needed
- Budget Breakdown: Acrylic Mirror: $45 | Sealant: $15.
- Creator’s Tip: Angle the mirror slightly downward to reflect greenery rather than the sky or neighbors.
- Smart Sourcing: shatterproof acrylic mirror sheets (pre-cut) and mirror-safe waterproof silicone sealants.
Climbing Structures and Trellis Designs
13. Wooden Lattice Trellises
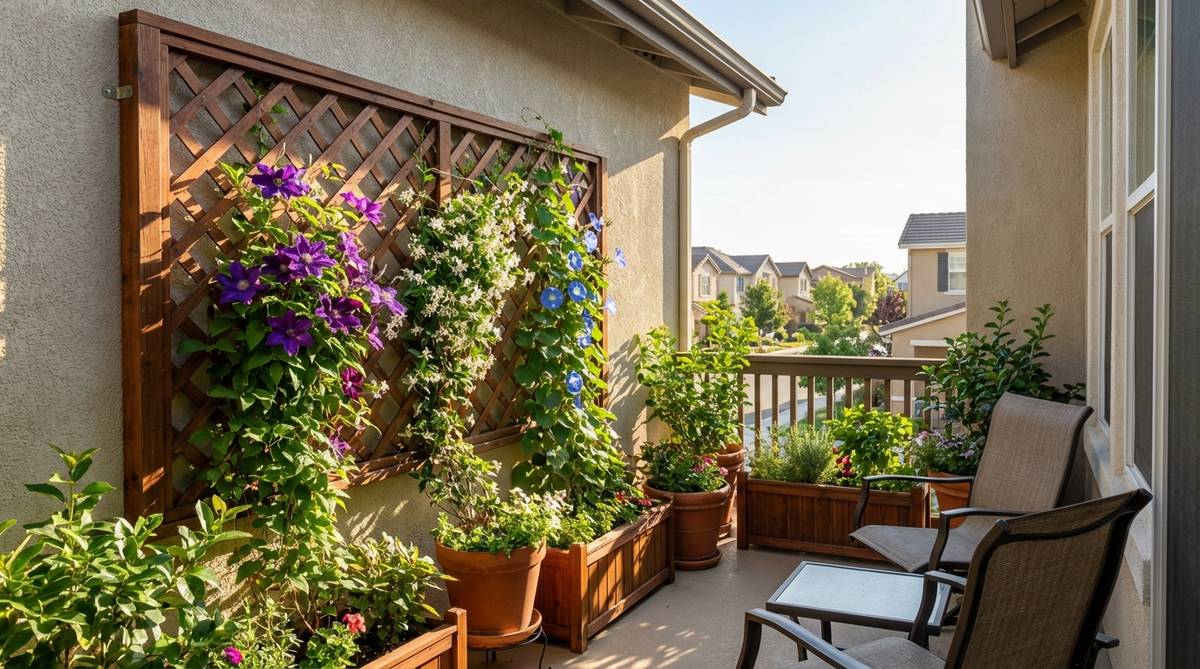
Brings a classic, English cottage garden framework to an urban apartment. A traditional wooden climbing grid is perfect for fast-growing ivy or jasmine.
Nailing wood flush against the siding restricts airflow; this spacer-based method completely transforms standard layouts. Integrating proper standoffs prevents mold and ensures your climbing plants thrive all summer.
This classic support structure costs roughly $30 to $50. Save this for your spring planting prep!
- Key Materials: Cedar lattice panels, wooden standoffs
- Vibe / Style: Traditional botanical
- Difficulty: Basic carpentry
- Budget Breakdown: Lattice: $25 | Hardware/Stain: $20.
- Creator’s Tip: Stain the wood a dark charcoal to make the green foliage pop dramatically.
- Smart Sourcing: pre-cut cedar lattice panels (bulk pack) and weatherproof wood stain and sealer kits.
14. Wire Cable Systems
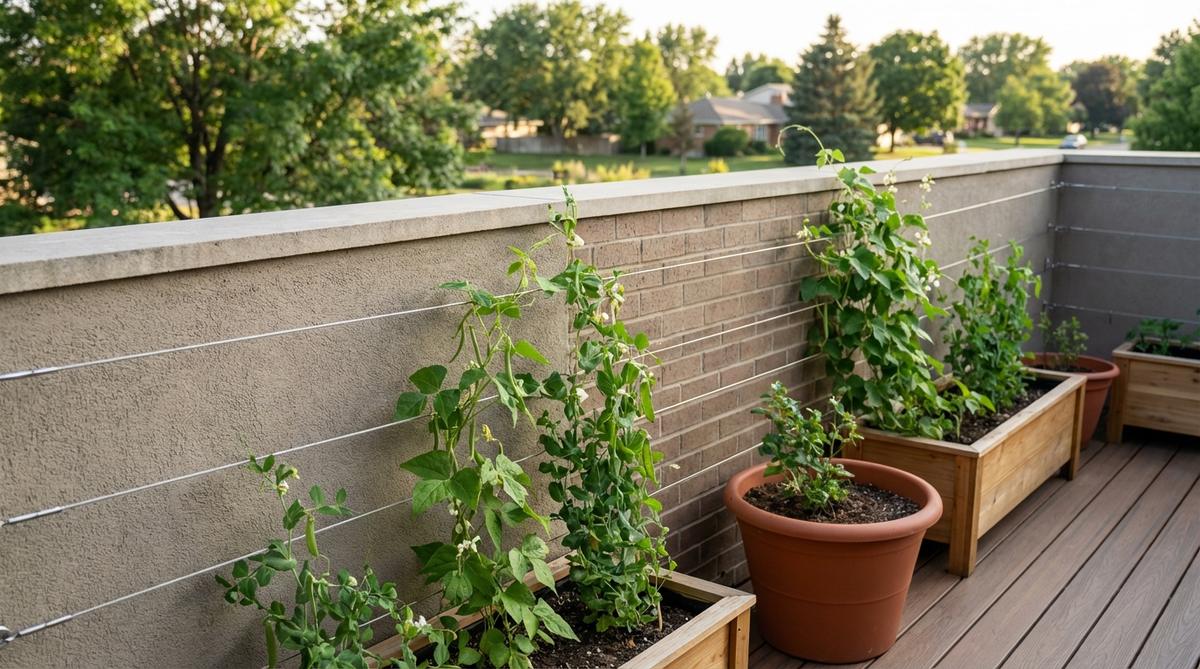
Offers a sleek, nearly invisible support system that lets plants steal the show. A stainless steel vine tension grid works exceptionally well for modern architectural facades.
Using cheap string sags under the weight of heavy vines; this heavy-duty hardware looks undeniably luxurious. Investing in premium stainless wire rope kits guarantees the grid stays taut through severe storms.
A complete tension grid will run you about $40 to $60.
- Key Materials: Steel cable, turnbuckles, eye hooks
- Vibe / Style: Invisible modernism
- Difficulty: Precision tensioning
- Budget Breakdown: Cable kit: $45 | Wall anchors: $10.
- Creator’s Tip: Retighten the turnbuckles after the first frost, as metal contracts in the cold.
- Smart Sourcing: stainless steel wire rope tension kits and heavy-duty masonry eye bolt packs.
If you think your space is too small, wait until you see this upcoming gravity-defying trick.
15. Arched Metal Trellises

Adds sweeping romantic architecture to otherwise rigid, square balconies. An outdoor curved metal arbor perfectly frames doorways or seating nooks.
Flimsy garden center arches bend in the wind; this structural choice outperforms expensive catalog buys. Selecting rust-proof powder-coated trellis frames creates a permanent, high-end focal point.
You can secure a solid arch piece for roughly $80 to $120. Pin this to your romantic garden board!
- Key Materials: Tubular steel framing
- Vibe / Style: Romantic estate
- Difficulty: Moderate assembly
- Budget Breakdown: Arch Kit: $90 | Zip ties/mounts: $10.
- Creator’s Tip: Anchor the base legs directly into heavy planter pots filled with concrete for ultimate wind resistance.
- Smart Sourcing: rust-proof powder-coated trellis frames and heavy-duty outdoor zip ties (bulk pack).
16. Bamboo Trellis Panels
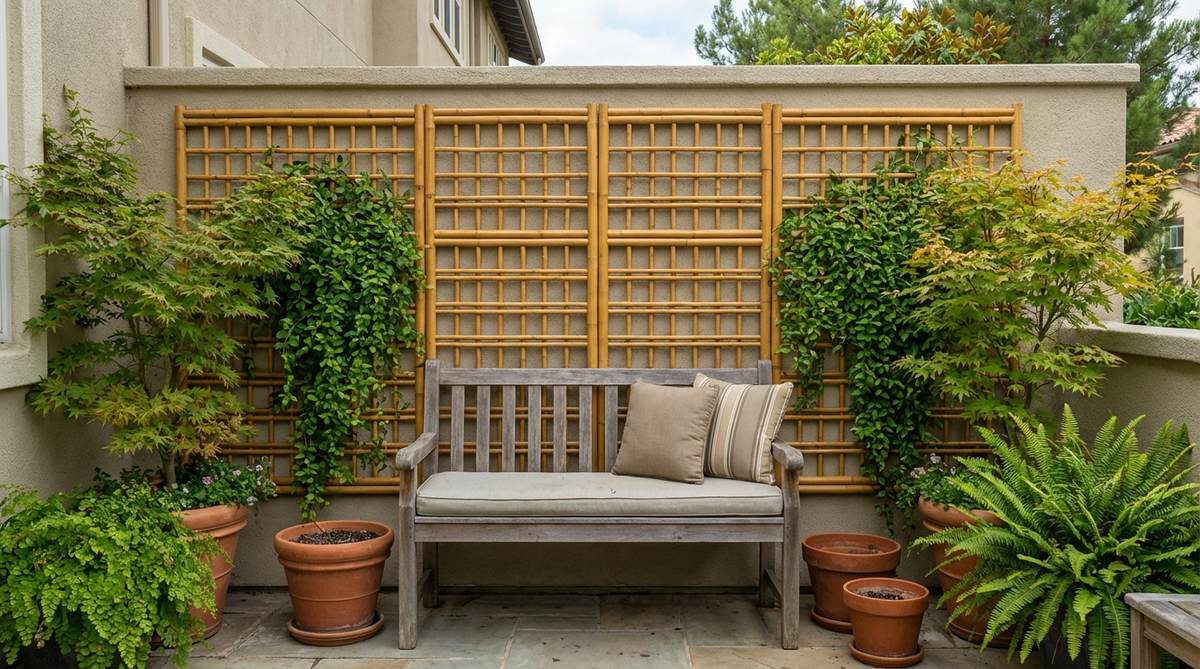
Radiates a warm, tropical island energy that instantly relaxes the mind. A natural bamboo climbing wall is phenomenal for supporting exotic flowering vines.
Untreated bamboo splits wide open in dry heat; this smart treatment delivers a surprisingly premium look. Coating the poles with specialized bamboo sealants dramatically extends their lifespan and keeps them golden.
This eco-friendly upgrade typically costs around $35 to $55.
- Key Materials: Bamboo poles, weather-resistant lashing twine
- Vibe / Style: Tropical oasis
- Difficulty: Easy tying
- Budget Breakdown: Bamboo bundle: $25 | Twine & Sealant: $20.
- Creator’s Tip: Lash the intersections with a tight square knot using black waxed cord for a professional finish.
- Smart Sourcing: UV-coated natural bamboo poles (bulk pack) and heavy-duty waxed lashing twine.
17. Obelisk Structures
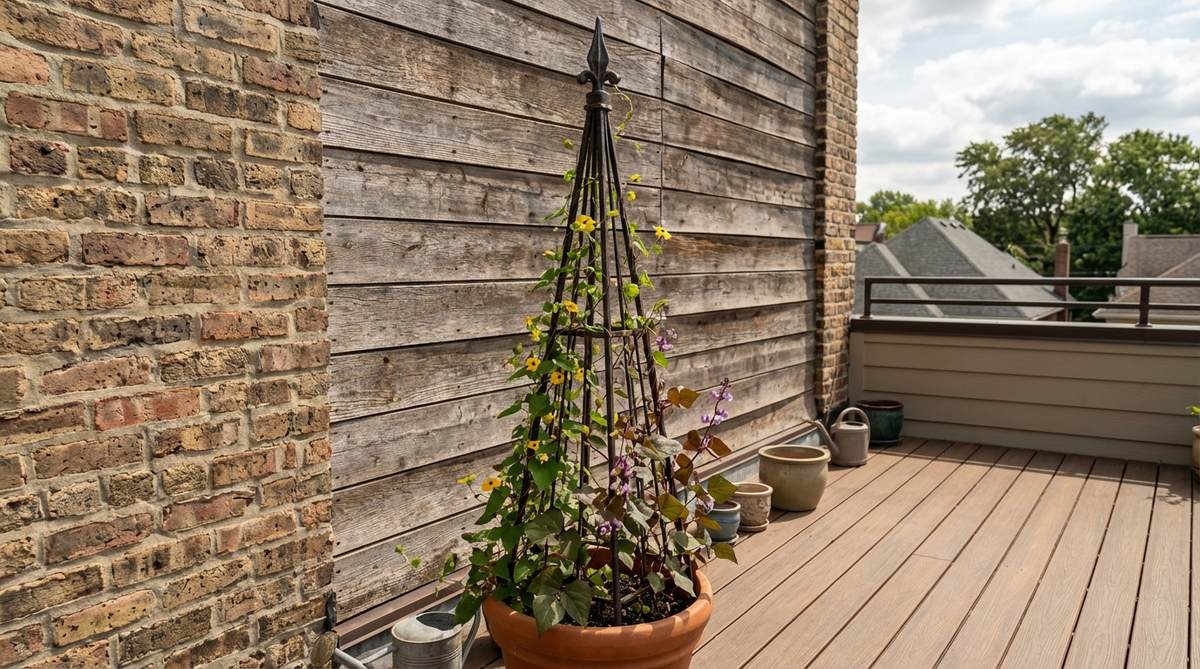
Draws the eye completely upward, making low ceilings feel infinitely higher. A freestanding garden obelisk works beautifully when pushed directly against a flat corner wall.
Standard flat trellises lack depth; this 3D architectural layout looks far more expensive than it is. Positioning premium garden support towers adds instant formal geometry to messy, organic plant growth.
A sturdy metal obelisk will cost you between $50 and $75. Save this for your next patio redesign!
- Key Materials: Tapered metal or wood frames
- Vibe / Style: Formal geometric
- Difficulty: Quick placement
- Budget Breakdown: Obelisk kit: $60 | Base pot: $15.
- Creator’s Tip: Plant sweet peas or morning glories at the base for rapid, colorful vertical coverage.
- Smart Sourcing: weatherproof garden obelisk starter kits and heavy-duty resin base planters.
18. Fan-Shaped Trellises
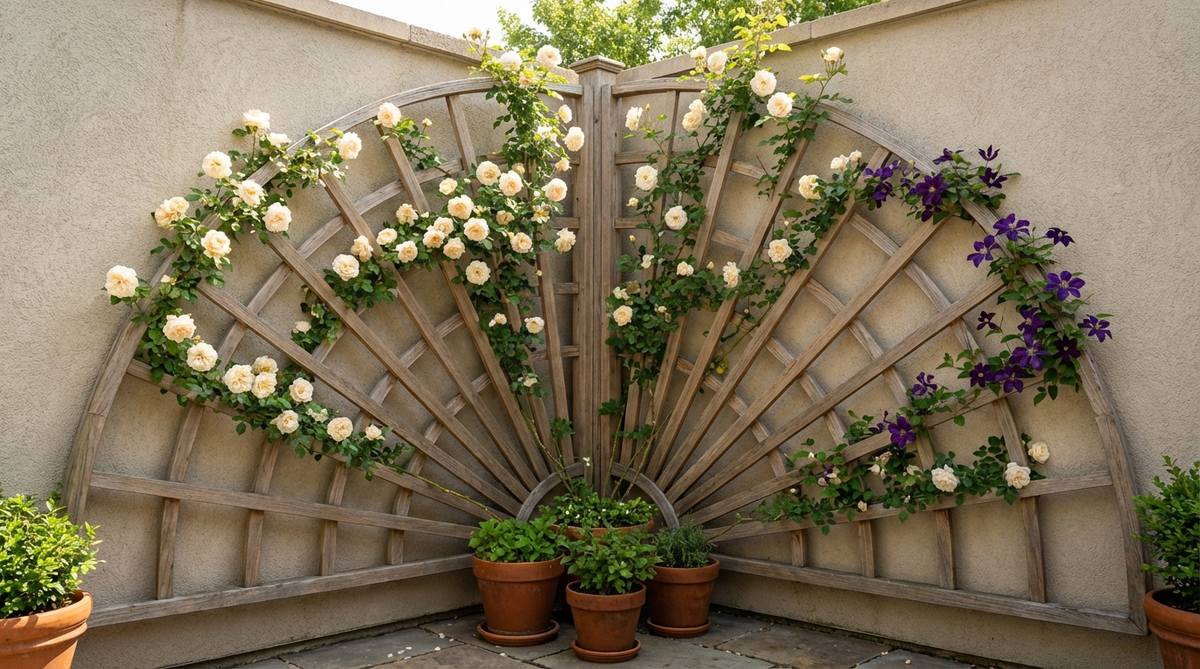
Spreads out like a peacock tail, maximizing vertical coverage from a single narrow pot. A radiating wooden wall fan perfectly supports heavy climbing roses.
Using straight poles clusters the vines into a tangled mess; this elegant spreading method completely transforms standard layouts. Fixing durable hardwood trellis grids ensures the heavy blooms are supported safely.
You can install this classic piece for about $40 to $60.
- Key Materials: Hardwood slats, pivoting base bolt
- Vibe / Style: Classic Victorian
- Difficulty: Simple expansion
- Budget Breakdown: Fan Trellis: $45 | Mounting screws: $5.
- Creator’s Tip: Gently tie stems to the outer ribs early in the season to train the sweeping shape.
- Smart Sourcing: pre-assembled cedar fan trellises and soft silicone plant training ties (bulk pack).
Hanging Solutions for Vertical Interest
19. Macrame Plant Hangers
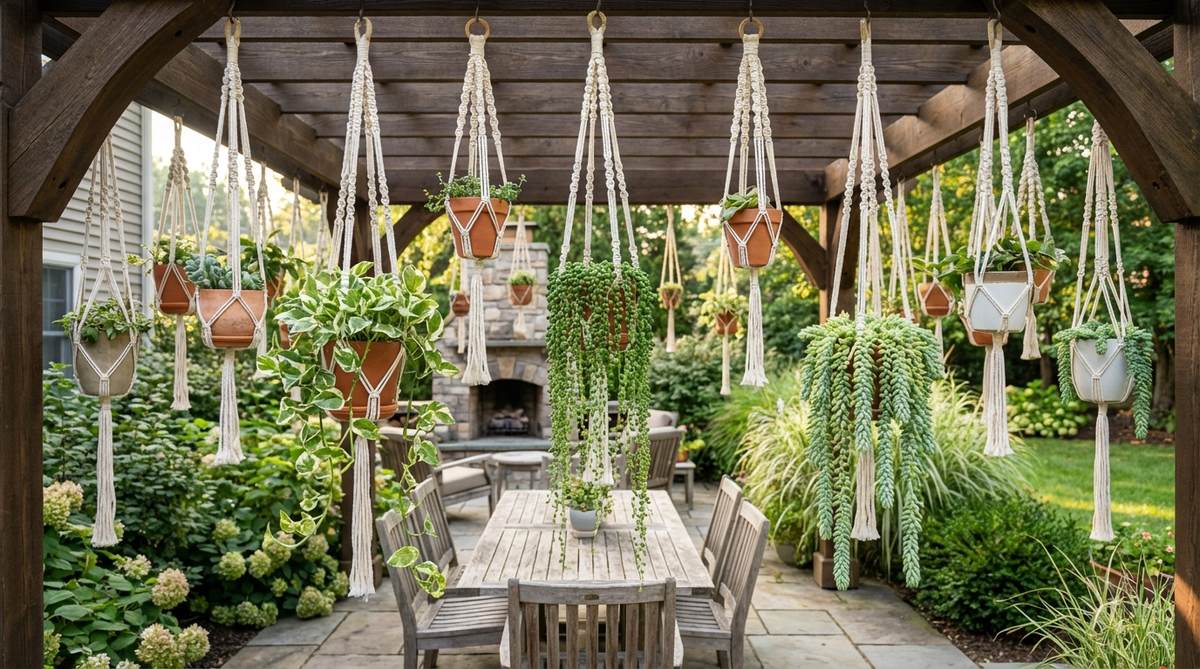
Brings a breezy, bohemian softness to hard architectural balcony lines. Hanging a woven textile plant cradle visually drops the ceiling and warms the space.
Indoor cotton ropes rot instantly in the rain; this clever swap delivers a designer-level finish. Upgrading to outdoor-rated poly-cord ensures your hanging plants survive sudden downpours without molding.
You can string up three of these for around $20 to $35. Pin this to your boho decor board!
- Key Materials: Polypropylene cord, metal O-rings
- Vibe / Style: Boho chic
- Difficulty: Easy knotting
- Budget Breakdown: Poly cord: $15 | Hardware: $10.
- Creator’s Tip: Stagger the hanging lengths to create a cascading waterfall effect against the wall.
- Smart Sourcing: UV-resistant macrame cord (bulk roll) and rust-proof metal hanging rings.
Contractors charge hundreds for what you are about to learn to do in ten minutes.
20. Ceiling-Mounted Hooks
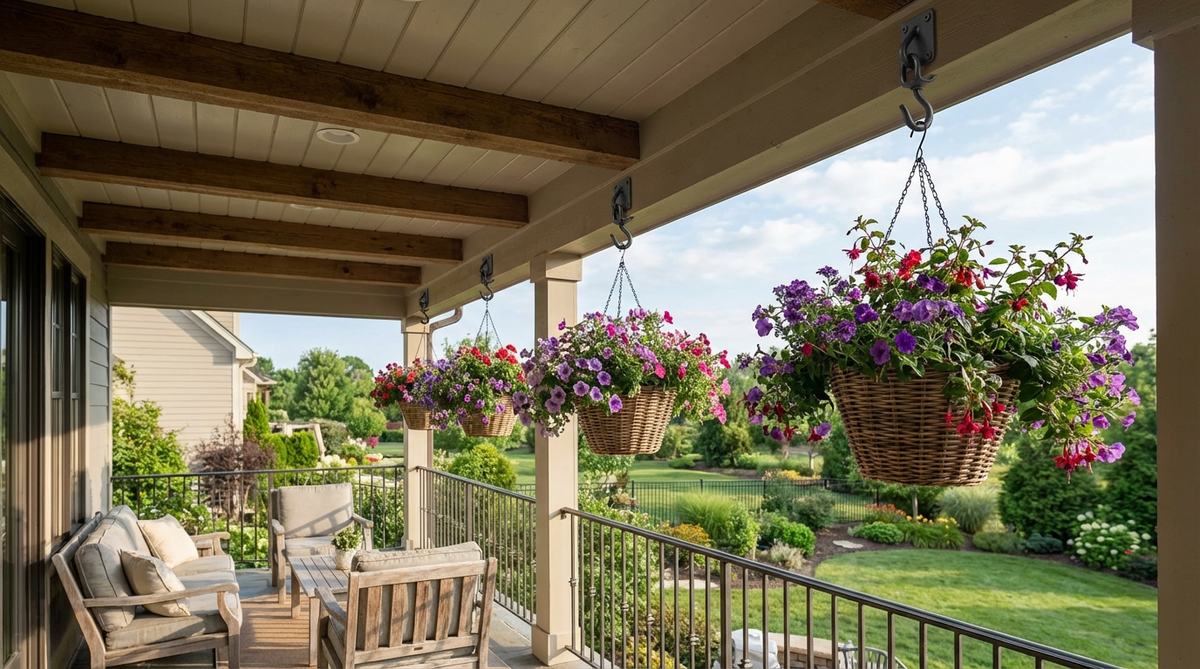
Frees up precious floor space while creating a floating garden effect above eye level. A heavy-duty swivel hook installation is ideal for massive ferns or trailing petunias.
Adhesive hooks will inevitably drop heavy pots on your head; this secure method outperforms expensive catalog buys. Anchoring commercial-grade hanging hardware into the joists guarantees zero accidents.
Proper ceiling hardware costs less than $15 to set up safely.
- Key Materials: Toggle bolts, swivel ceiling hooks
- Vibe / Style: Floating conservatory
- Difficulty: Overhead drilling
- Budget Breakdown: Swivel hooks: $10 | Toggle anchors: $5.
- Creator’s Tip: Always calculate the “wet weight” of the planter—soaked soil is twice as heavy as dry.
- Smart Sourcing: commercial-grade ceiling swivel hooks (multi-pack) and heavy-duty drywall toggle bolt kits.
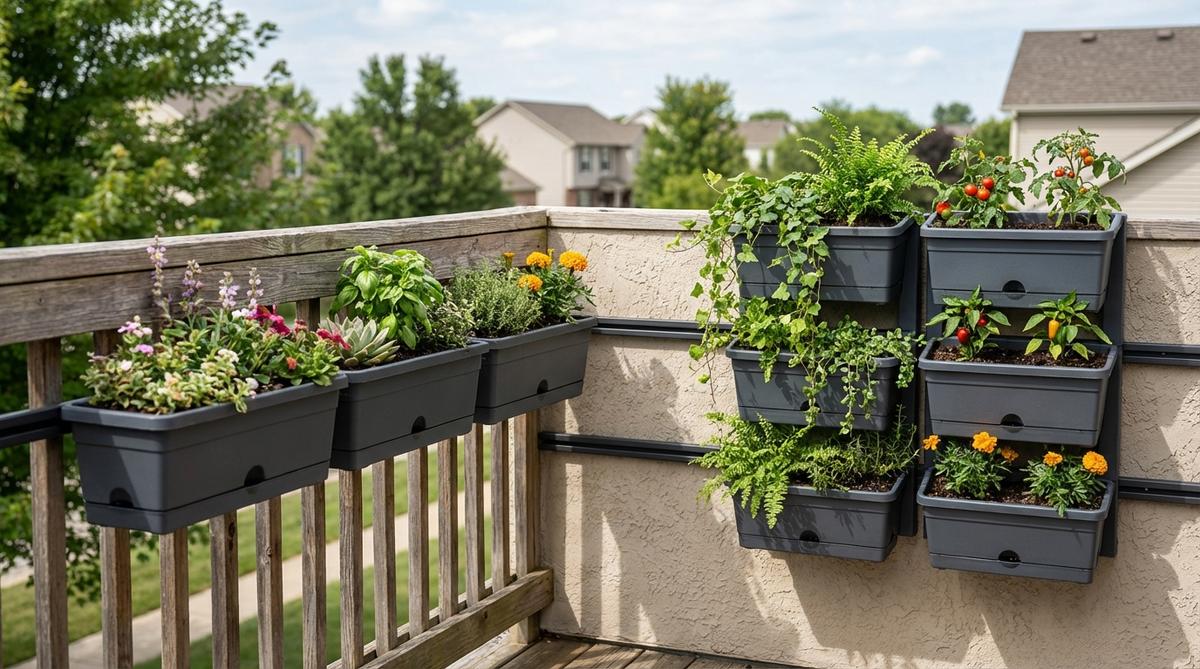
21. Railing-Hanging Planters
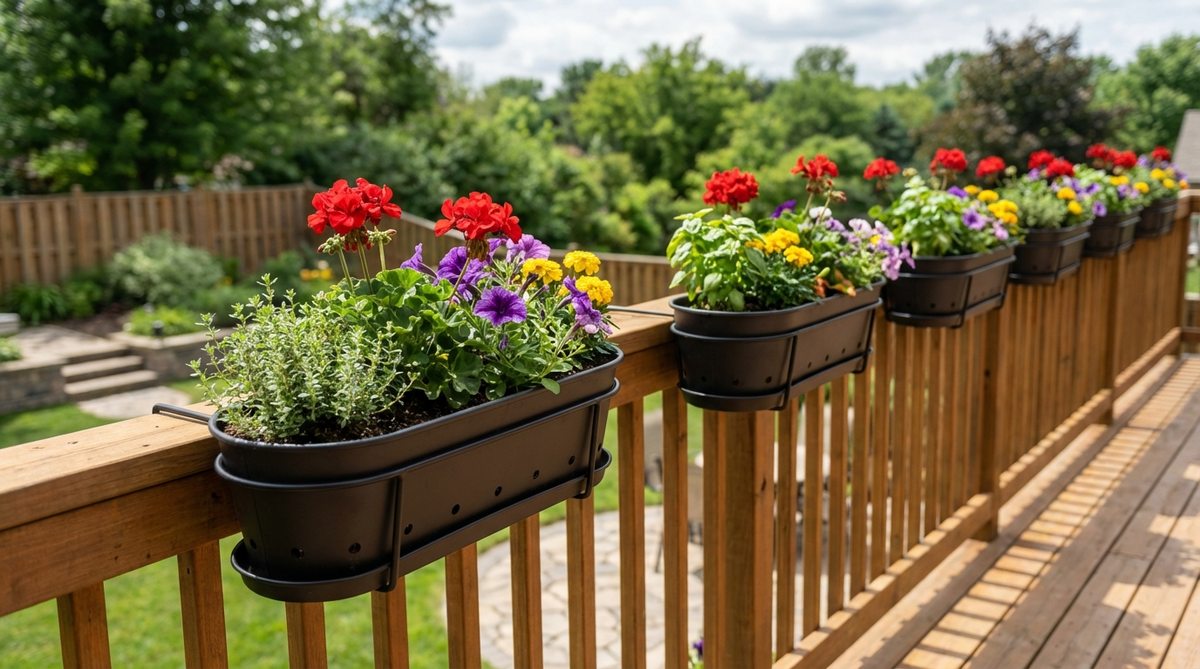
Wraps your balcony perimeter in a bright, welcoming ribbon of vibrant flowers. An over-the-rail metal planter box makes use of totally wasted boundary space.
Flimsy plastic boxes crack in winter freezes; this layout looks far more expensive than it is. Utilizing heavy-duty self-watering planter brackets ensures your blooms stay hydrated while resisting wind shear.
A set of high-quality rail planters will cost you about $40 to $70. Save this for your spring flower upgrades!
- Key Materials: Adjustable steel brackets, resin troughs
- Vibe / Style: Parisian apartment
- Difficulty: No-tool attachment
- Budget Breakdown: Planter troughs: $45 | Coco liners: $15.
- Creator’s Tip: Ensure your planter has a built-in drip tray to avoid watering the neighbors below you.
- Smart Sourcing: heavy-duty self-watering planter brackets and pre-cut coco coir planter liners (bulk pack).
22. Pulley System Planters
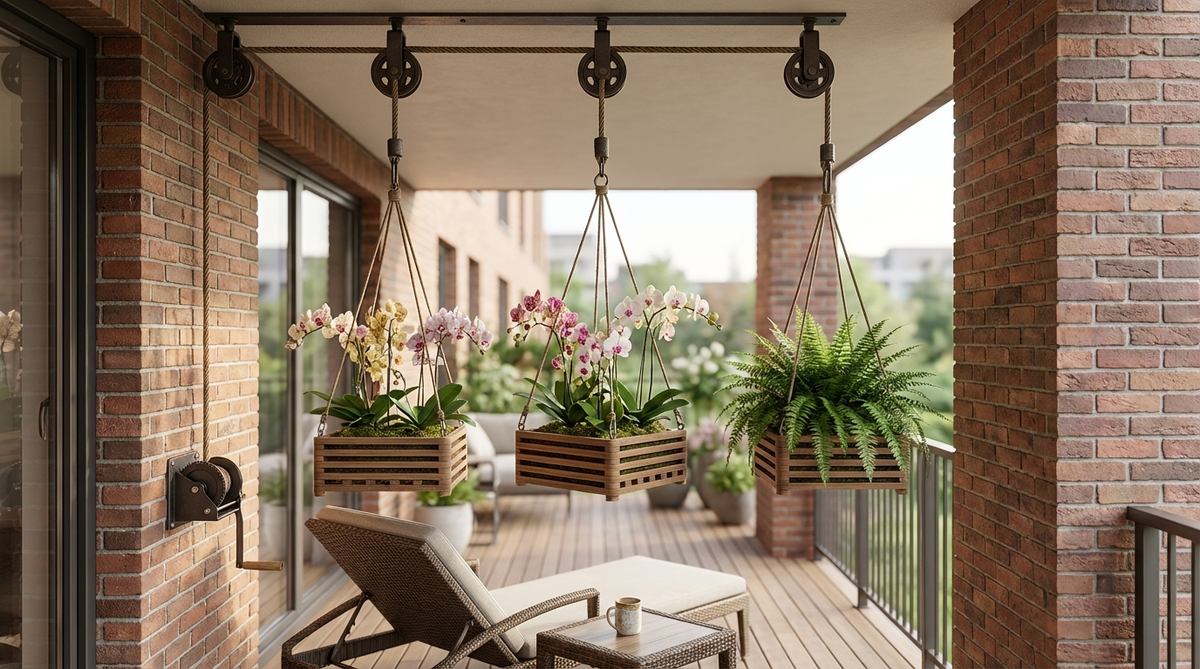
Adds functional mechanics to high ceilings for effortless daily plant care. A retractable plant lowering system is a lifesaver for hard-to-reach balcony overhangs.
Standing on wobbly chairs with a watering can is dangerous; this clever hack completely transforms standard layouts. Installing marine-grade outdoor pulleys lets you pull heavy baskets down to waist height smoothly.
You can set up a dual pulley rig for around $25 to $40.
- Key Materials: Retractable plant ratchets
- Vibe / Style: Industrial utility
- Difficulty: Quick ceiling mount
- Budget Breakdown: Pulley blocks: $20 | Carabiners: $10.
- Creator’s Tip: Test the locking mechanism with a heavy bucket of water before hanging a fragile ceramic pot.
- Smart Sourcing: heavy-duty retractable plant pulley kits and stainless steel locking carabiners (bulk pack).
23. Mason Jar Hangers
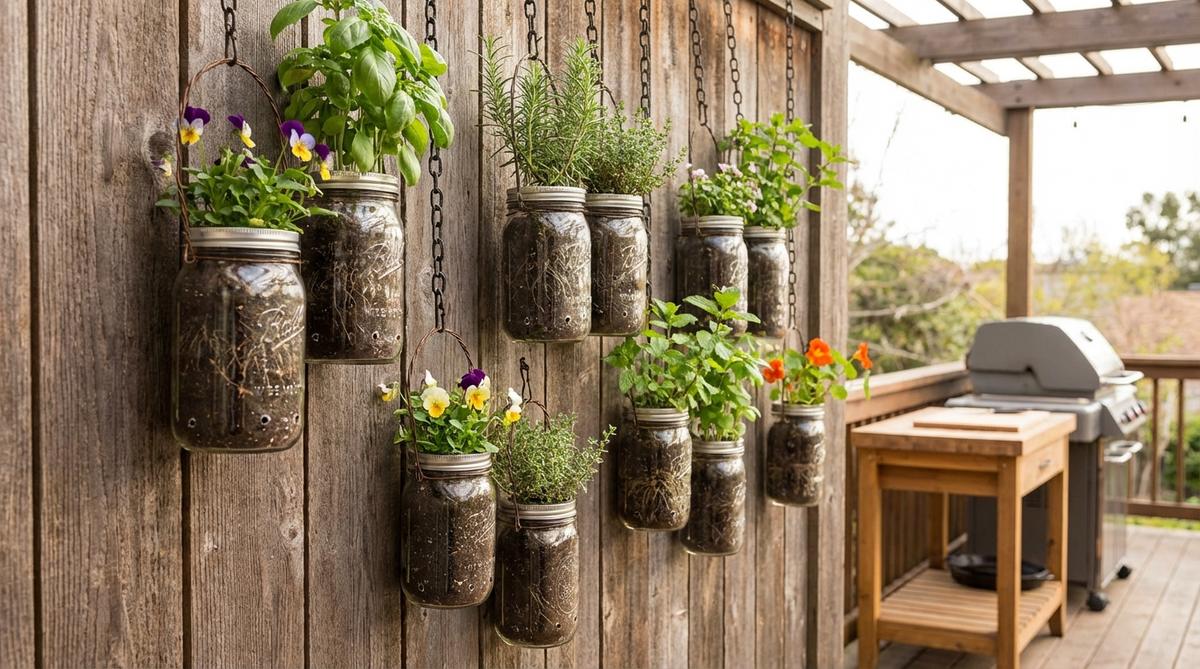
Captures the sun brilliantly while showcasing layered soil and roots. A floating glass jar herb wall is perfect for sunny spots right next to the kitchen door.
Closed jars usually drown roots instantly; this drainage hack delivers a surprisingly premium look. Adding charcoal layers and utilizing miniature garden supplies prevents root rot while looking highly decorative.
This upcycled lighting and planter trick costs under $20.
- Key Materials: Glass jars, wire loops, charcoal
- Vibe / Style: Country farmhouse
- Difficulty: Delicate crafting
- Budget Breakdown: Jars: $0 (recycled) | Wire & Charcoal: $15.
- Creator’s Tip: Drill a small drainage hole in the glass bottom using a special diamond-tipped drill bit under running water.
- Smart Sourcing: diamond tip glass drill bit sets and horticultural charcoal drainage layers (bulk pack).
24. Tiered Hanging Baskets
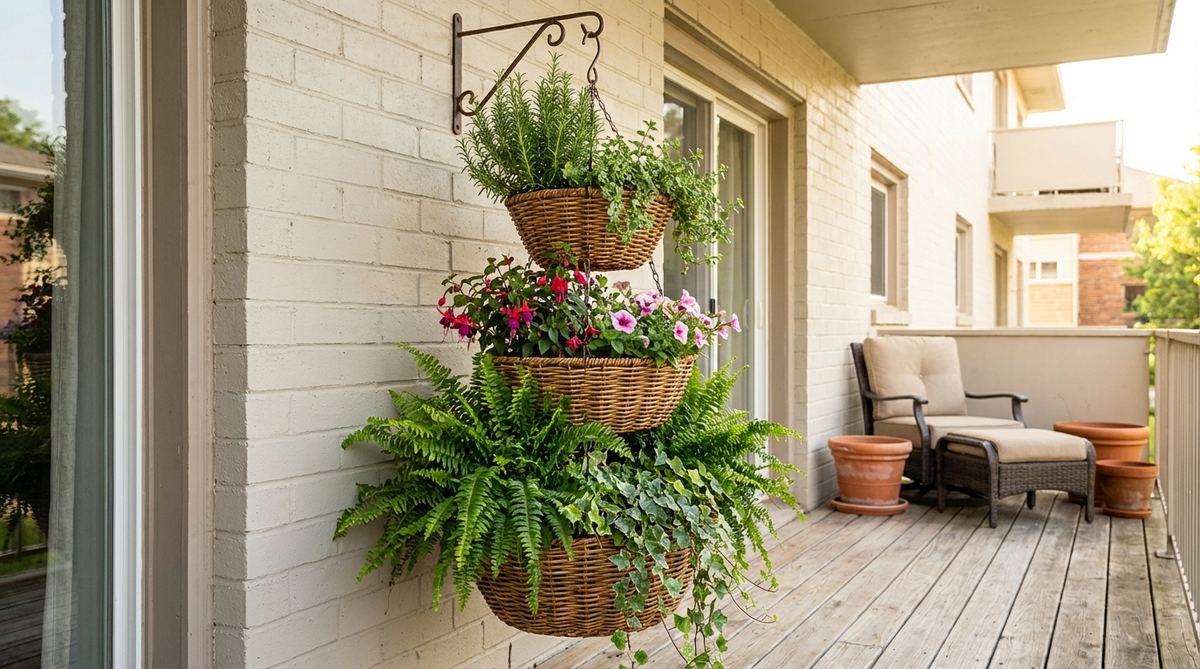
Creates a dramatic, towering pillar of cascading foliage from a single hook. A three-tier hanging wire basket maximizes aerial space beautifully.
Watering the top makes a muddy mess of the bottom; this smart layering technique looks undeniable luxurious. Using pre-cut coco coir liners and staggering plant moisture needs ensures perfect hydration at every level.
A multi-tier system will run you about $35 to $55. Pin this if you love overflowing greens!
- Key Materials: Linked wire baskets, coco liners
- Vibe / Style: Victorian conservatory
- Difficulty: Balance tuning
- Budget Breakdown: Tiered basket: $30 | Liners & Soil: $15.
- Creator’s Tip: Put drought-tolerant herbs on top and moisture-loving ferns on the bottom tier.
- Smart Sourcing: pre-cut coco basket liners (multi-pack) and water-retaining soil crystal starter kits.
Skip the expensive catalog buys. This next hack delivers the exact same luxury vibe.
Modular and Stackable Systems
25. Interlocking Cube Planters
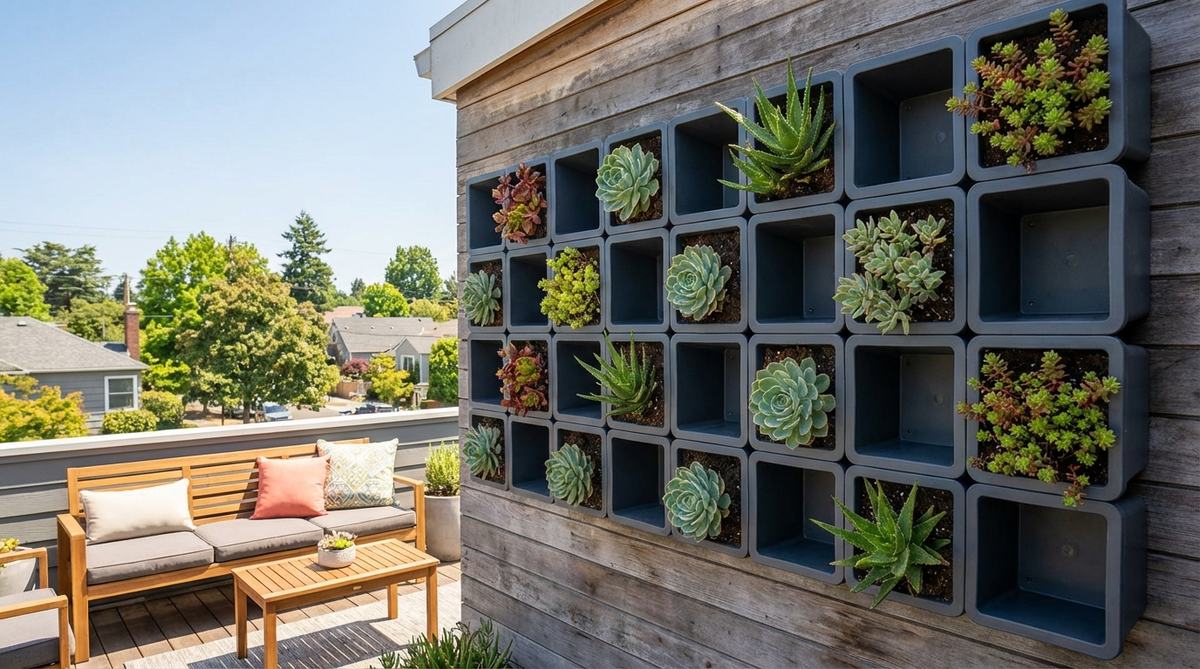
Constructs a sharp, pixelated green wall that feels highly architectural. A modular geometric stacking wall works exceptionally well for blocking ugly utility meters.
Flimsy plastic bends out of shape quickly; this structural layout outperforms expensive catalog buys. Snapping together UV-resistant vertical garden supplies ensures the cubes never fade or crack in the sun.
You can build a starter grid for roughly $50 to $80.
- Key Materials: UV-stabilized polypropylene cubes
- Vibe / Style: Contemporary pixel art
- Difficulty: Lego-style assembly
- Budget Breakdown: Cube kit: $65 | Potting mix: $15.
- Creator’s Tip: Leave a few cubes empty to serve as open shelving for lanterns or outdoor speakers.
- Smart Sourcing: UV-coated interlocking wall planter kits and lightweight indoor/outdoor potting mix (bulk).
26. Tiered Tower Planters
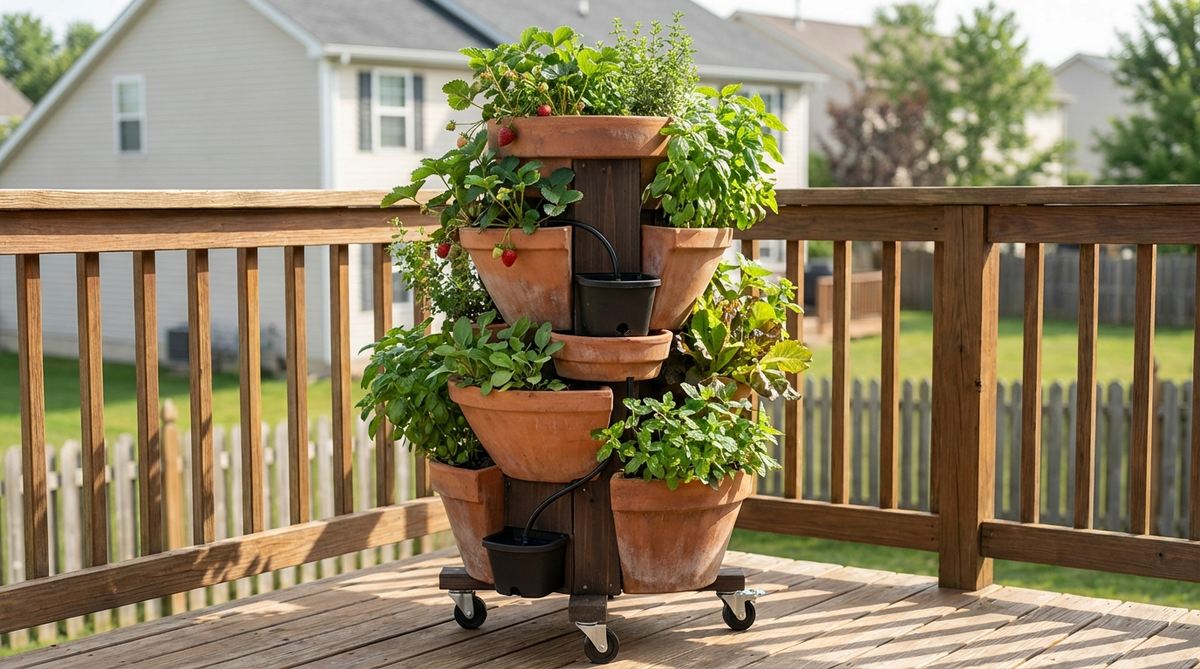
Explodes with fresh strawberries and lettuce from an impossibly tiny footprint. A freestanding spiraled vertical farm is the ultimate food-production hack for apartment living.
Most pots require daily watering in summer heat; this self-sustaining method looks far more expensive than it is. Utilizing built-in central reservoirs means you only have to top off the water once a week.
A high-yield spinning tower setup costs around $60 to $100. Save this for your urban homesteading board!
- Key Materials: Heavy-duty molded plastic tiers, rolling base
- Vibe / Style: Urban homestead
- Difficulty: Quick stacking
- Budget Breakdown: Tower Kit: $75 | Rolling caster base: $15.
- Creator’s Tip: Buy a kit with heavy-duty caster wheels so you can spin it to chase the morning sun.
- Smart Sourcing: self-watering vertical tower starter kits and heavy-duty locking caster wheel sets.
27. Wall-Mounted Modules
Slides seamlessly along metal rails to let you re-design your wall instantly. A horizontal track planting system is perfect for seasonal rotation.
Drilling a new hole for every single pot ruins your wall; this dynamic layout delivers a surprisingly premium look. Installing a sleek aluminum rail once allows you to swap out premium planter boxes endlessly.
This flexible track system usually requires a $70 to $110 investment.
- Key Materials: Aluminum wall tracks, slide-in pots
- Vibe / Style: Sleek commercial
- Difficulty: Leveling required
- Budget Breakdown: Track rails: $40 | Planter boxes: $50.
- Creator’s Tip: Use a laser level when mounting the main track—even a half-inch tilt will make the pots slide.
- Smart Sourcing: heavy-duty aluminum planter track kits and UV-stabilized drop-in module pots.
28. Pyramid Stackers
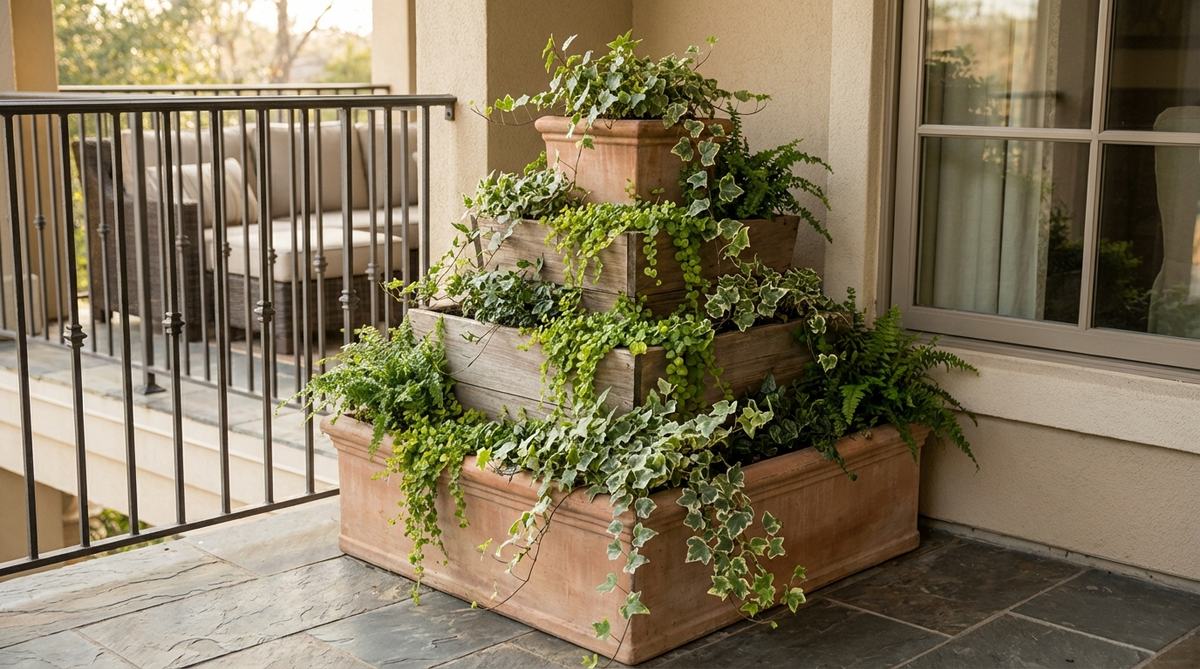
Creates a stable, stepped mountain of cascading flowers that draws the eye upward. An offset tiered pyramid planter fits beautifully into tight balcony corners.
Standard stacked pots shadow the plants below them; this architectural shape completely transforms standard layouts. The staggered design ensures every single level gets blasted with premium sunlight.
You can assemble a corner pyramid for about $45 to $70. Pin this if you have a dead corner to fill!
- Key Materials: Graduated square cedar boxes
- Vibe / Style: Geometric modern
- Difficulty: Easy stacking
- Budget Breakdown: Cedar kit: $60 | Corner brackets: $10.
- Creator’s Tip: Plant trailing sweet potato vines on the top tier to waterfall over the sharp wooden edges.
- Smart Sourcing: pre-cut cedar pyramid planter kits and weatherproof corner bracket packs.
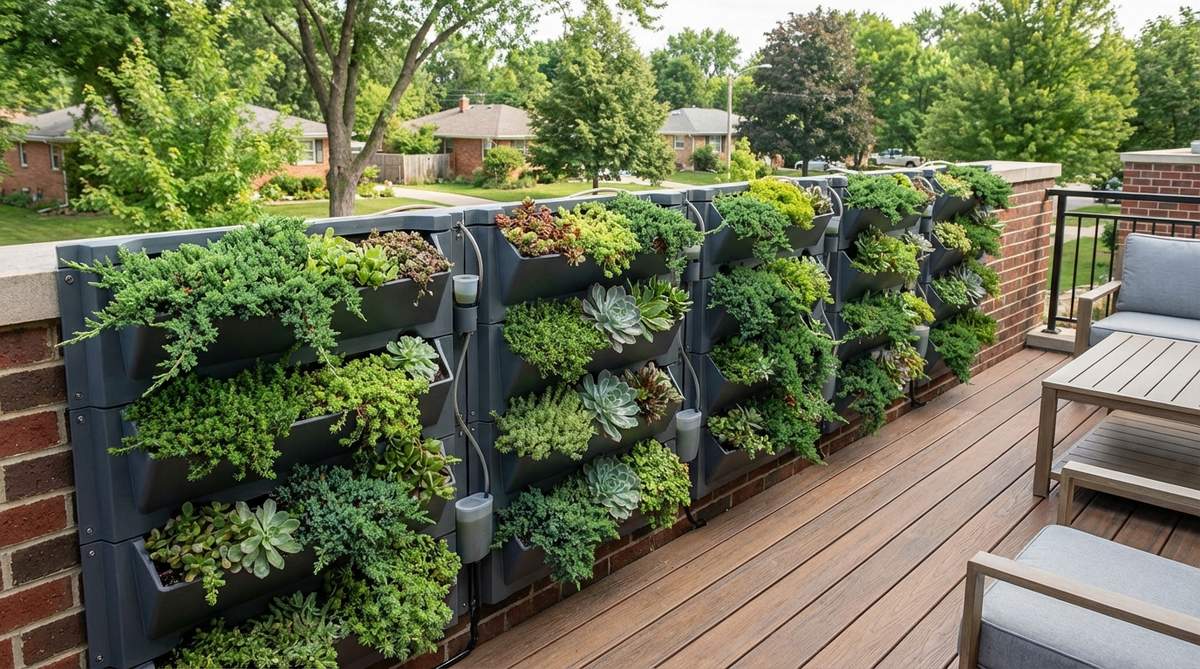
29. Panel Systems with Pockets
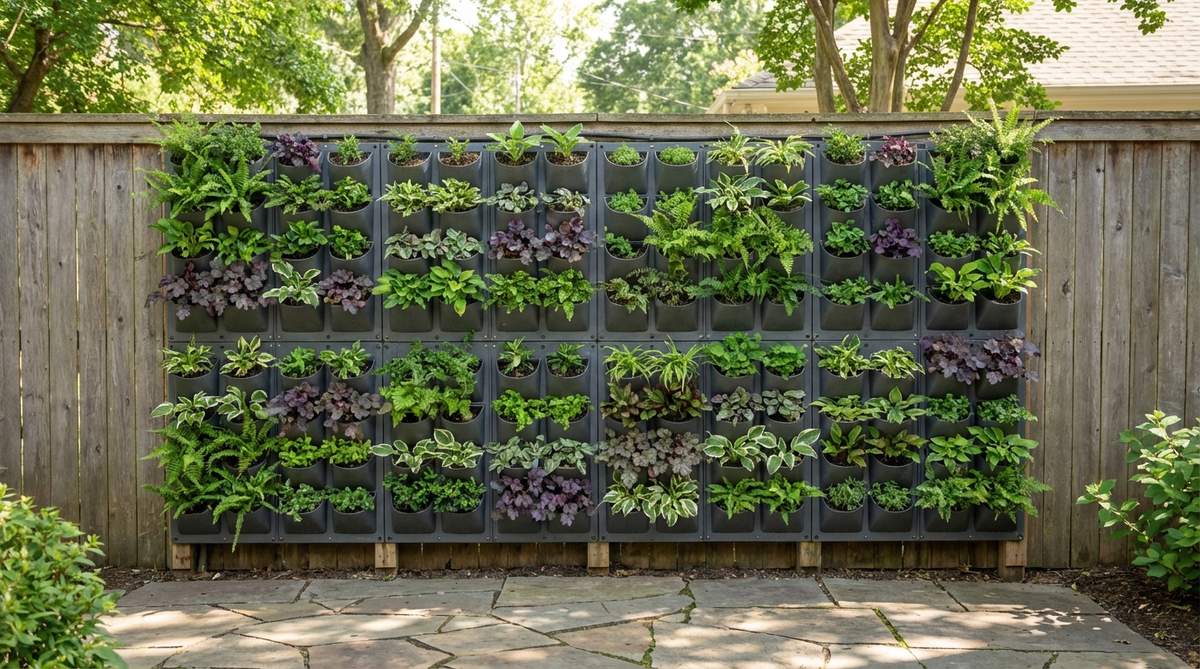
Wraps an entire wall in a dense, jungle-like carpet of green in just an afternoon. A rigid pocket panel green wall is the fast track to ultimate privacy.
Flimsy felt sags over time; this rigid structure outperforms expensive catalog buys. Using hard-backed hydroponic pocket panels keeps the roots aerated and prevents moisture from rotting your balcony siding.
A full wall panel system runs approximately $100 to $150.
- Key Materials: Recycled plastic wall panels, built-in drip lines
- Vibe / Style: Corporate eco-lobby
- Difficulty: Moderate installation
- Budget Breakdown: Panel boards: $90 | Irrigation lines: $30.
- Creator’s Tip: Mount the panels on French cleats so you can easily take the whole wall down if you move.
- Smart Sourcing: rigid vertical garden panel starter kits and heavy-duty aluminum French cleats.
Warning: This next layout is so striking, your neighbors will definitely ask for your designer’s number.
30. Shelf Ladder Systems
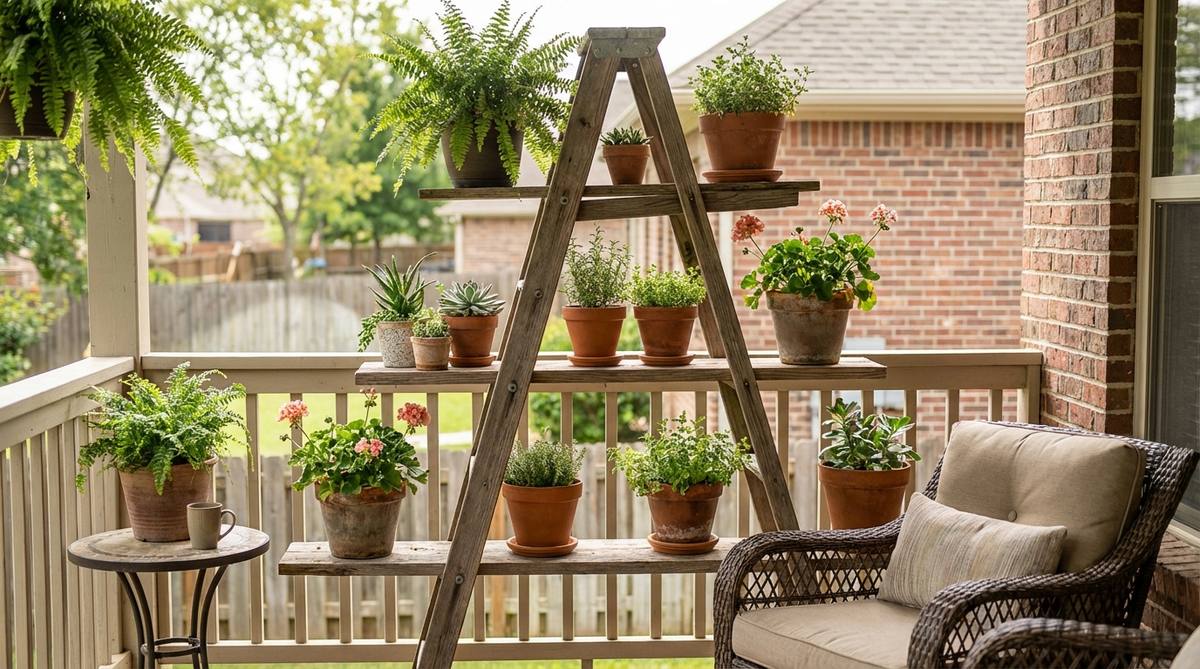
Delivers a casual, leaning aesthetic that requires exactly zero wall drilling. A slanted outdoor plant ladder is the holy grail for renters with strict landlords.
Wobbly indoor shelves blow over in a breeze; this angled layout looks far more expensive than it is. Integrating heavy-duty outdoor display shelving ensures your heavy terracotta pots remain locked safely in place.
You can score a solid plant ladder for about $50 to $80. Save this idea if you’re renting!
- Key Materials: Leaning A-frame wood or steel
- Vibe / Style: Casual apartment
- Difficulty: Tool-free setup
- Budget Breakdown: Ladder frame: $65 | Rubber feet: $5.
- Creator’s Tip: Place your heaviest ceramic pots on the very bottom shelf to lower the center of gravity.
- Smart Sourcing: weatherproof folding plant ladder kits and heavy-duty non-slip rubber furniture pads.
Decorative Screens with Dual Function
31. Living Privacy Walls
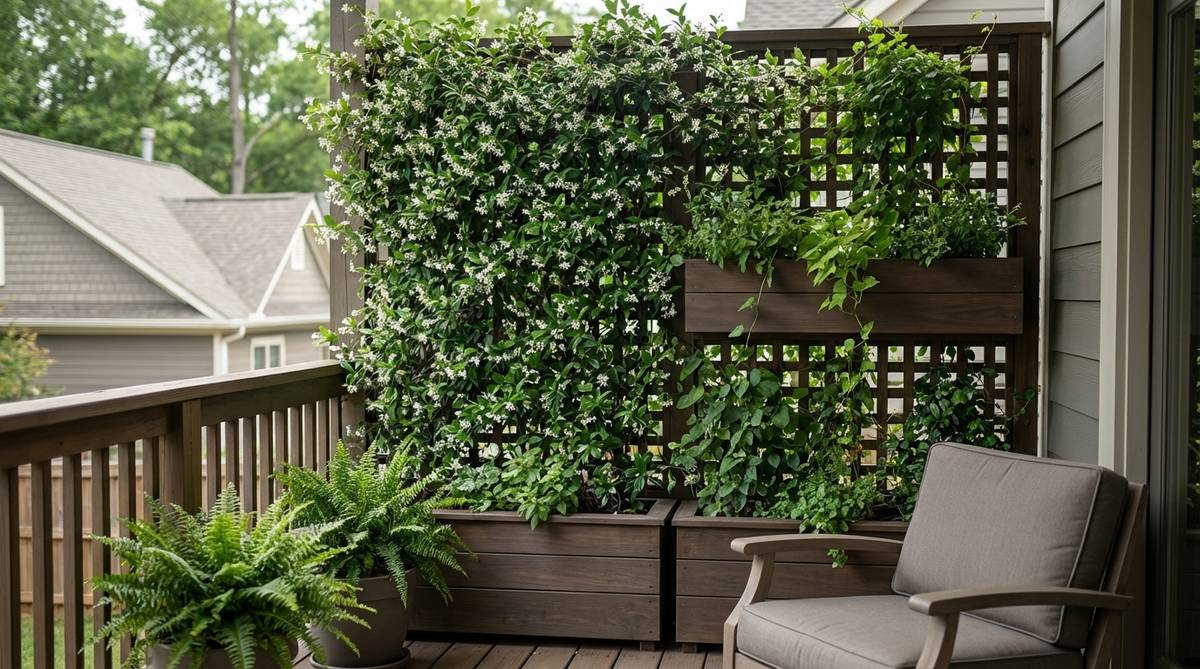
Provides an impenetrable, lush barrier against nosy neighbors. A freestanding ivy screen planter box blocks the wind while serving as a massive garden anchor.
Temporary fabric screens rip after one storm; this permanent setup delivers a surprisingly premium look. Packing the base with outdoor privacy screen panels and heavy soil ensures the screen survives gale-force winds.
Constructing a heavy-duty living screen costs roughly $120 to $180.
- Key Materials: Deep planter box, tall trellis backer
- Vibe / Style: Exclusive penthouse
- Difficulty: Heavy lifting
- Budget Breakdown: Planter/Trellis Kit: $140 | Heavy soil: $30.
- Creator’s Tip: Plant Star Jasmine; it grows fast, stays green year-round, and smells incredible in the evening.
- Smart Sourcing: heavy-duty planter box with trellis kits and bulk organic potting soil bags.
32. Reed and Bamboo Screens
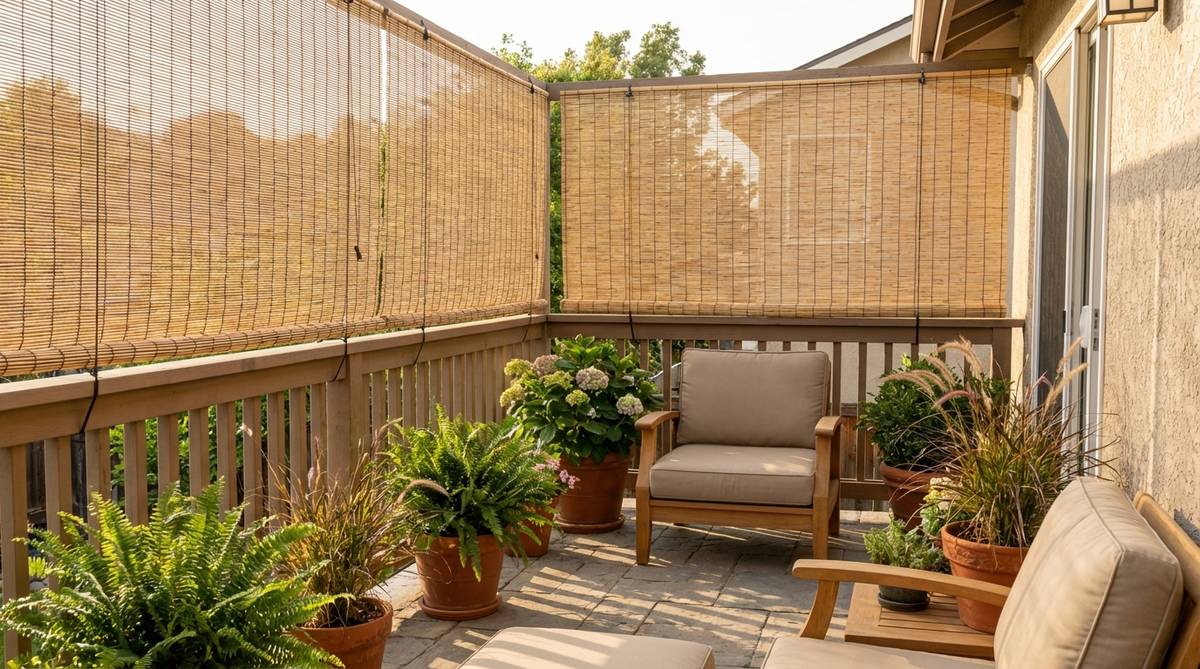
Casts a soft, filtered light that makes harsh concrete feel like a coastal cabana. A rolled natural reed fence is perfect for quickly hiding ugly metal railings.
Leaving it loose causes annoying rattling; this tightly bound method completely transforms standard layouts. Securing the roll with UV-resistant outdoor zip ties keeps the bamboo flush and totally silent in the breeze.
This instant privacy hack runs a highly affordable $30 to $50. Pin this for a quick patio makeover!
- Key Materials: Rolled reed or split bamboo
- Vibe / Style: Beachfront resort
- Difficulty: Easy unrolling
- Budget Breakdown: Reed roll: $35 | Zip ties: $10.
- Creator’s Tip: Snip the tails of the zip ties flush with nail clippers for a clean, invisible installation.
- Smart Sourcing: natural rolled bamboo screen (bulk pack) and UV-resistant heavy-duty zip ties.
33. Fabric Privacy Panels
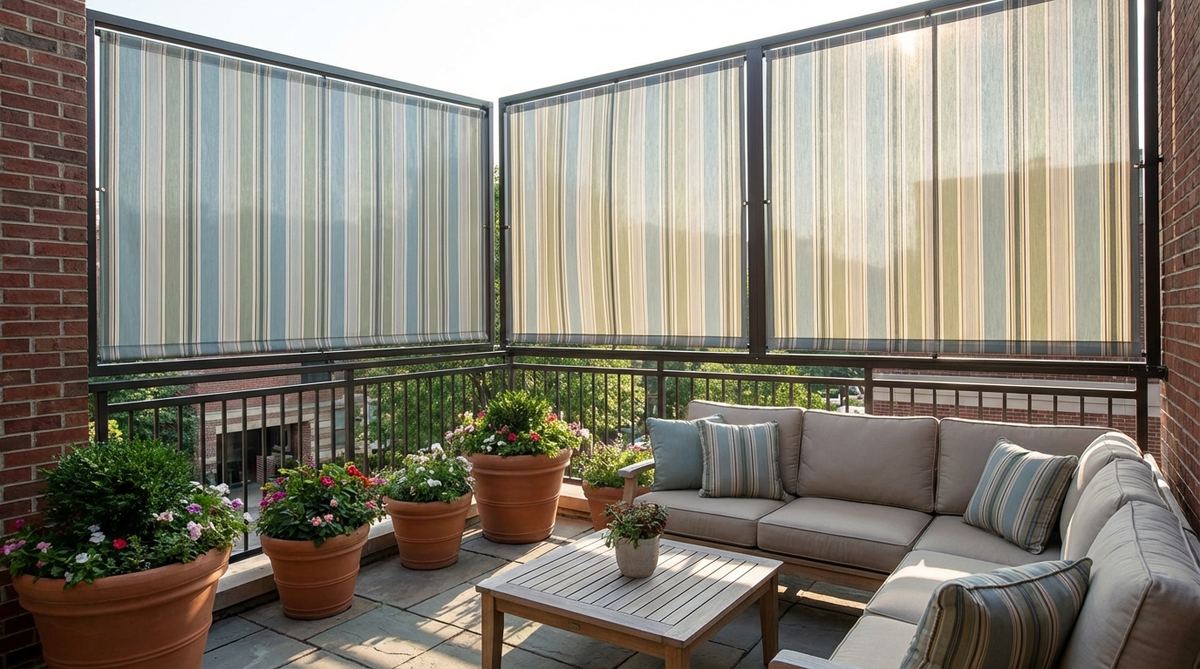
Injects a massive pop of solid color while blocking 100% of street-level views. A taut canvas balcony shield works exceptionally well for modern, minimalist themes.
Cheap tarps look like a construction zone; this sleek fabric choice outperforms expensive catalog buys. Selecting marine-grade UV-blocking canvas ensures the vibrant color won’t fade into a dusty gray by August.
Custom-sized outdoor fabric panels cost about $40 to $70.
- Key Materials: Marine canvas, brass grommets, bungee cords
- Vibe / Style: Modern sailing
- Difficulty: Quick tying
- Budget Breakdown: Fabric panel: $45 | Bungee balls: $15.
- Creator’s Tip: Use ball-bungee cords instead of zip ties to allow the fabric a tiny bit of flex during high winds.
- Smart Sourcing: UV-coated balcony privacy fabric kits and heavy-duty ball bungee cords (bulk pack).
34. Perforated Metal Screens
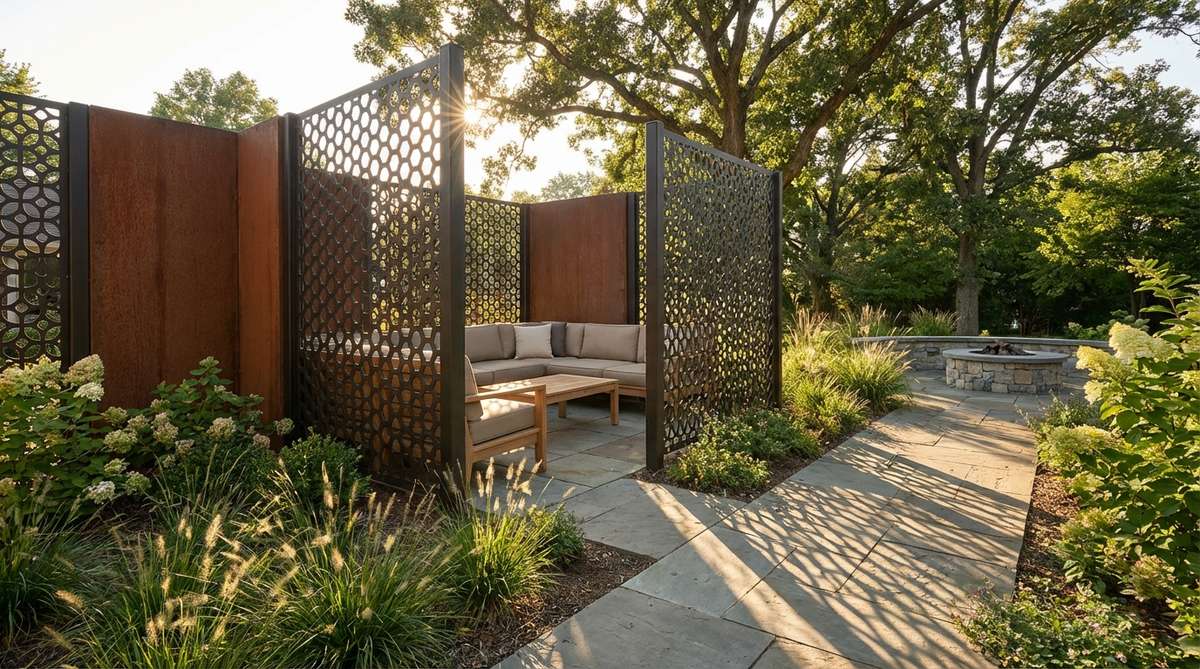
Lets the breeze flow freely while totally obscuring you from the outside. An industrial punched steel panel acts as high-end balcony wall decor.
Standard wooden lattice feels dated; this metallic layout looks far more expensive than it is. Anchoring premium laser-cut architectural steel adds massive curb appeal and a striking nighttime silhouette.
A designer metal panel will require an investment of $100 to $150. Save this for a high-end modern look!
- Key Materials: Powder-coated punched aluminum
- Vibe / Style: Urban loft
- Difficulty: Hardware mounting
- Budget Breakdown: Metal panel: $120 | Mounting clips: $15.
- Creator’s Tip: Place an LED light strip at the base to illuminate the cut-out patterns beautifully at night.
- Smart Sourcing: laser-cut outdoor privacy panels (pre-cut) and weatherproof outdoor LED strip kits.
Almost nobody thinks to use this material outdoors, yet it outlasts expensive commercial options.
Material Guide: Cheap vs. Premium Aesthetic
Knowing exactly where to save and where to spend makes all the difference in achieving that “looks expensive but isn’t” vibe.
- Standard vs. UV-Resistant/Premium: Standard plastics turn brittle and crack in one summer. Always upgrade to UV-stabilized bins and cords to stop fading and breaking.
- Pre-made Kits vs. Sourcing Locally: Scavenging hardware stores piece-by-piece costs more in gas and mistakes. Pre-configured starter kits guarantee everything fits and saves hours of frustration.
35. Living Green Screen Panels
Creates a thick, impenetrable wall of dense foliage instantly. A faux boxwood modular wall is the ultimate solution for spaces with zero natural sunlight.
Most fake plants look like shiny plastic trash; this hyper-realistic option delivers a surprisingly premium look. Utilizing UV-coated faux foliage tiles gives you immediate, maintenance-free privacy that fools the eye.
Covering a small wall in premium faux panels costs around $70 to $100.
- Key Materials: Interlocking faux boxwood squares
- Vibe / Style: High-end country club
- Difficulty: Easy snap-together
- Budget Breakdown: Boxwood tiles: $80 | Staple gun: $15.
- Creator’s Tip: Paint the wall dark green before mounting the panels so no white spots show through the leaves.
- Smart Sourcing: UV-coated faux boxwood panels (bulk pack) and heavy-duty manual staple gun starter kits.
Upcycled and DIY Planter Ideas
36. Wooden Crate Gardens
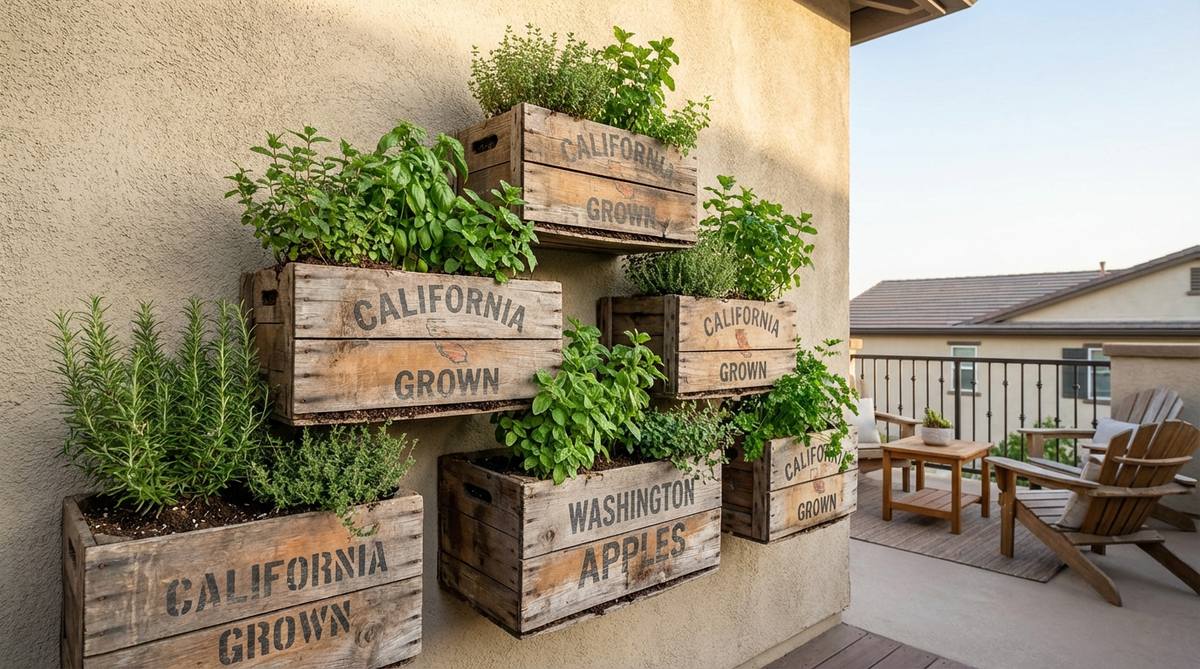
Injects deep rustic character while offering surprisingly deep soil capacity. A stacked vintage fruit crate wall works beautifully next to an outdoor dining setup.
Letting dirt spill through the wooden slats is messy; this smart lining method completely transforms standard layouts. Stapling commercial-grade landscape fabric inside the crates holds the soil while allowing perfect water drainage.
You can thrift and seal these crates for under $35. Pin this for a charming vintage vibe!
- Key Materials: Reclaimed apple crates, landscape fabric
- Vibe / Style: Farm-to-table rustic
- Difficulty: Simple stacking
- Budget Breakdown: Crates: $20 | Fabric & Staples: $15.
- Creator’s Tip: Bolt the crates to each other at the back to prevent the stack from tipping in high winds.
- Smart Sourcing: heavy-duty landscape fabric rolls (pre-cut) and weatherproof exterior wood sealers.
37. Gutter Planters
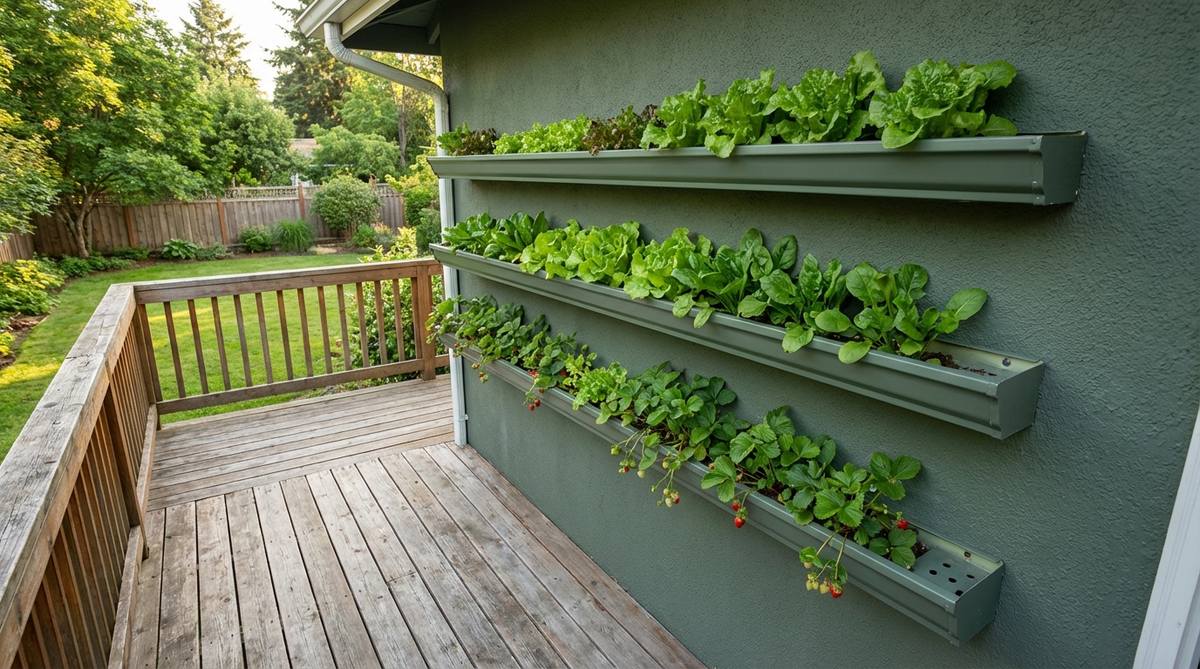
Draws clean, modern horizontal lines across an otherwise boring, empty wall. A repurposed rain gutter garden is exceptionally optimized for shallow-rooted salad greens.
Hanging them perfectly flat causes stagnant water; this tilted layout outperforms expensive catalog buys. Sloping the gutters slightly and using heavy-duty end caps ensures perfect drainage without overflowing.
This massive linear planter project costs roughly $30 to $50.
- Key Materials: Vinyl rain gutters, mounting brackets, end caps
- Vibe / Style: Linear modernism
- Difficulty: Precise measuring
- Budget Breakdown: Gutters & Caps: $35 | Wall brackets: $15.
- Creator’s Tip: Drill a small drainage hole every 6 inches along the lowest edge of the tilted gutter.
- Smart Sourcing: heavy-duty vinyl rain gutter starter kits and rust-proof gutter mounting brackets (bulk pack).
38. Tin Can Wall Gardens
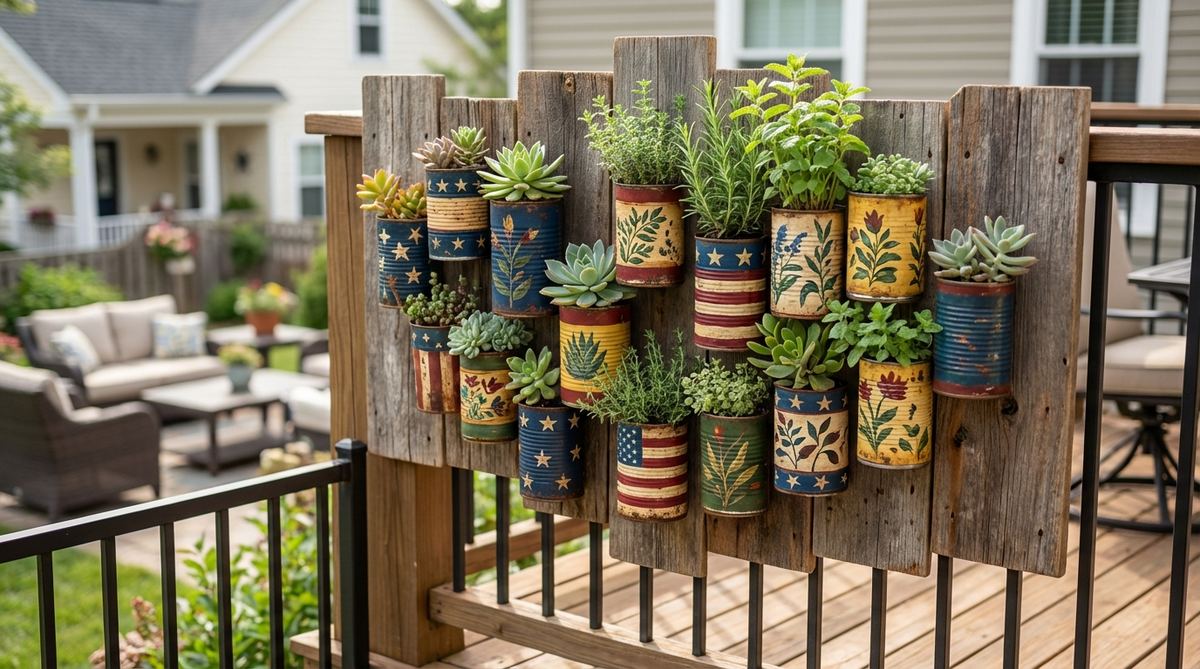
Pops with bright, eclectic colors against a neutral background. A painted tin can succulent gallery is an incredibly fun, zero-cost upcycling project.
Nailing cans directly to the wall creates rust stains; this protective method looks far more expensive than it is. Spraying the cans with clear UV-resistant enamels totally stops rust and preserves your bright paint job.
You can execute this colorful craft for literally $10 in spray paint. Save this for a fun family weekend project!
- Key Materials: Recycled food cans, enamel spray paint
- Vibe / Style: Colorful folk art
- Difficulty: Easy crafting
- Budget Breakdown: Cans: $0 | Enamel & Screws: $10.
- Creator’s Tip: Always hammer a nail through the bottom of the can multiple times to create ample drainage.
- Smart Sourcing: UV-resistant clear enamel spray paints and heavy-duty exterior mounting screws.
39. Shoe Organizer Gardens
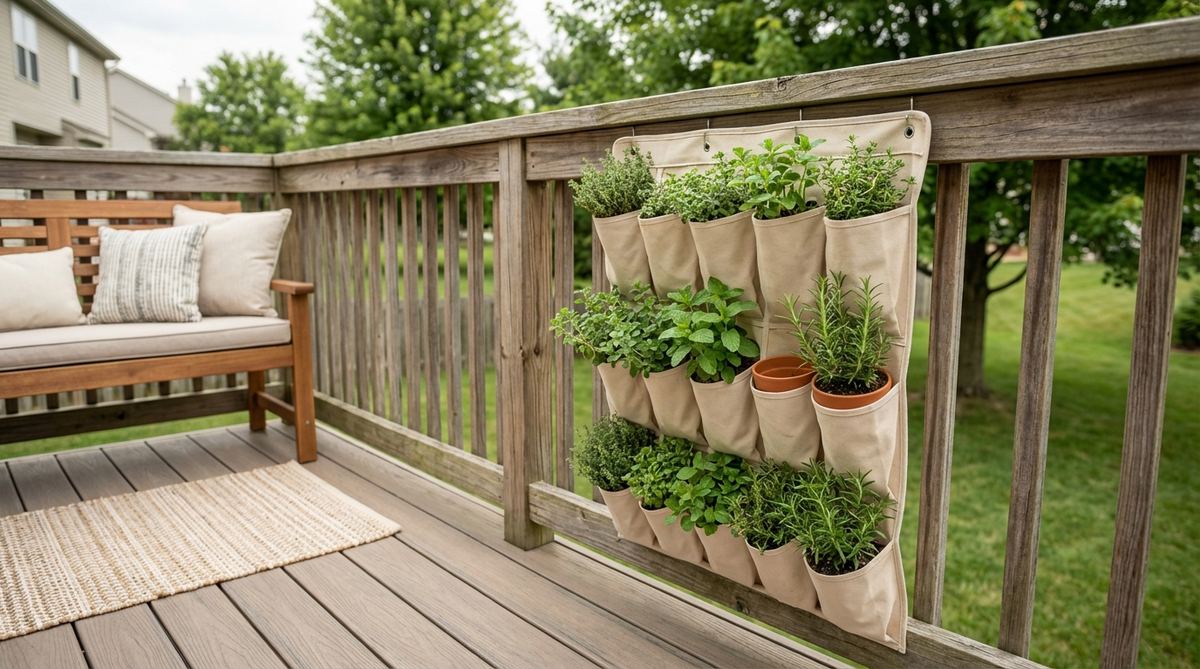
Creates an instant, massive wall of pockets without touching a single power tool. An over-the-door fabric planter wall is the ultimate cheat code for tiny apartments.
Using cheap plastic organizers bakes the roots alive; this breathable swap delivers a surprisingly premium look. Utilizing a heavy canvas organizer allows roots to breathe while excess water drains out the bottom.
This instant vertical garden hack costs exactly $15.
- Key Materials: Canvas shoe organizer, over-door hooks
- Vibe / Style: College dorm ingenuity
- Difficulty: Zero-tool setup
- Budget Breakdown: Canvas organizer: $15 | Potting soil: $10.
- Creator’s Tip: Reinforce the top hanging holes with heavy zip ties if you plan on filling every pocket with wet soil.
- Smart Sourcing: heavy-duty breathable canvas pocket organizers and water-retaining potting mix (bulk).
Before you run to the hardware store, check out this brilliant upcycling secret below.
40. Colander Hanging Baskets
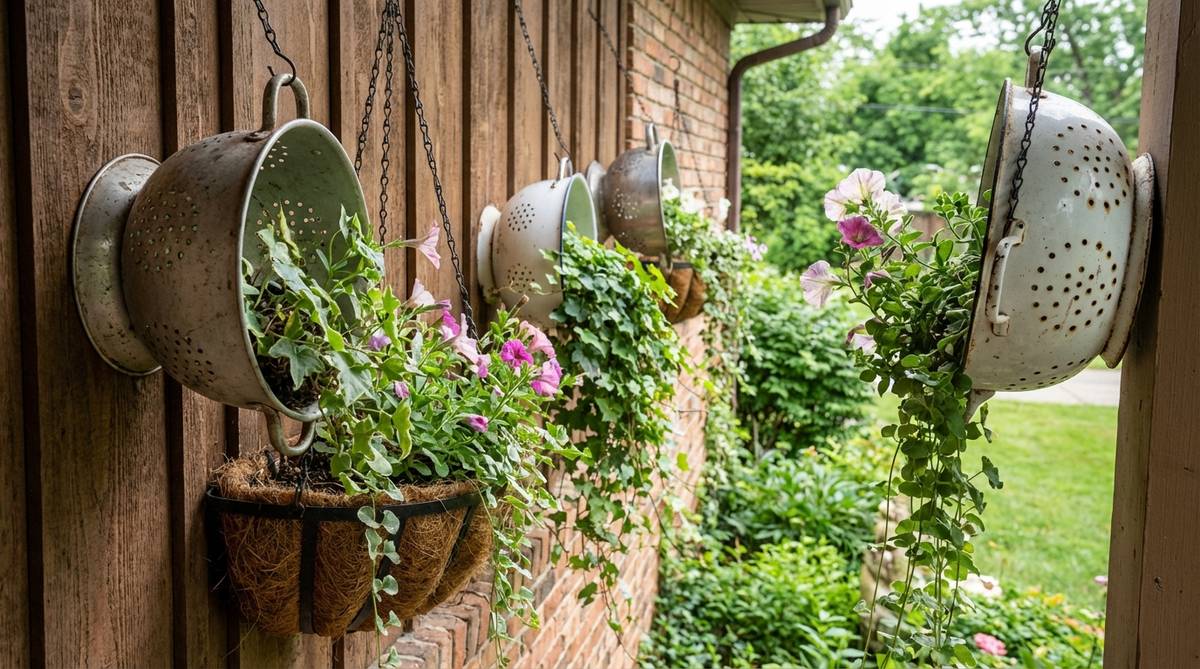
Oozes vintage charm while solving the number one problem of hanging plants: drainage. A repurposed enamel colander basket looks brilliant swaying in the breeze.
Standard pots drown plants after heavy rain; this built-in drainage method completely transforms standard layouts. Lining the metal bowl with thick coco liners keeps the soil contained while letting water pour out effortlessly.
A thrifted colander project will cost you under $15. Pin this brilliant upcycling hack!
- Key Materials: Metal colanders, hanging chains, coco liner
- Vibe / Style: Shabby chic
- Difficulty: Quick assembly
- Budget Breakdown: Colander: $5 (thrifted) | Chain kit: $10.
- Creator’s Tip: Use S-hooks to attach the chains directly through the colander’s built-in handles.
- Smart Sourcing: rust-proof metal hanging chain kits and pre-cut coco coir basket liners (bulk pack).
41. Bottle Vertical Gardens
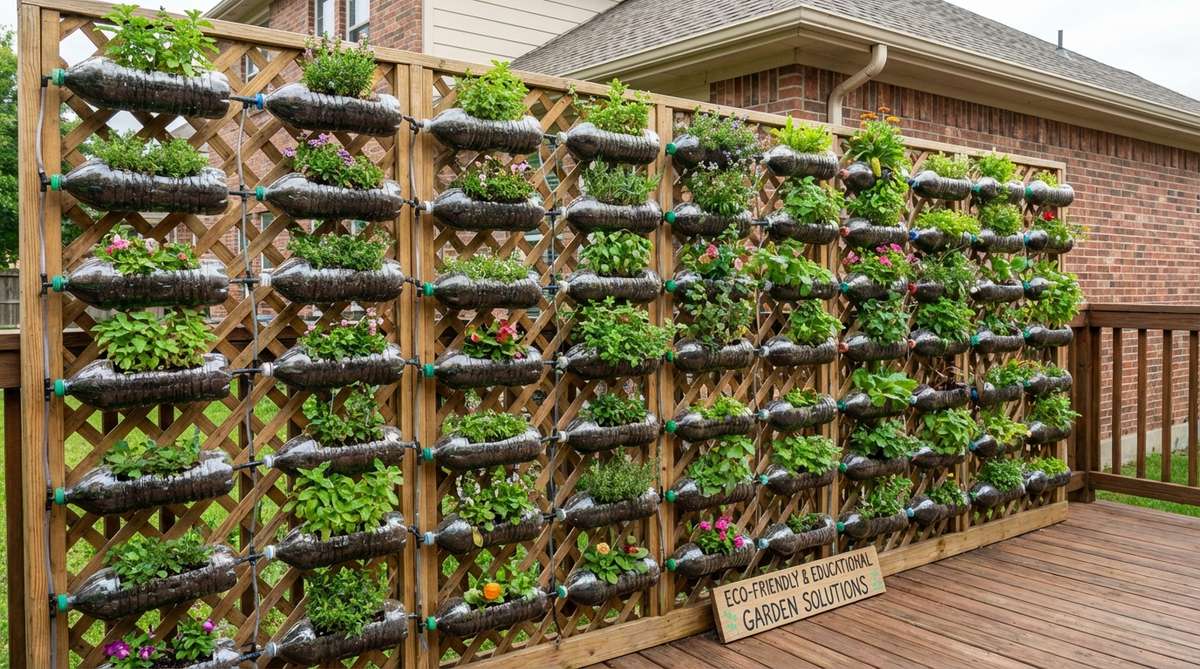
Constructs a brilliant, self-watering cascade out of pure recycled plastic. A stacked soda bottle drip tower is phenomenal for eco-conscious balcony owners.
Leaving the bottles clear breeds nasty algae; this painting trick outperforms expensive catalog buys. Spraying the exterior of the bottles with opaque UV-blocking paint keeps the roots dark and healthy.
This highly productive recycling project costs almost nothing—around $10.
- Key Materials: 2-liter bottles, string, soil
- Vibe / Style: Eco-hacker space
- Difficulty: Cutting & stringing
- Budget Breakdown: Bottles: $0 | Paracord: $10.
- Creator’s Tip: Cut the bottles so the top half inverts into the bottom half, creating an automatic water reservoir.
- Smart Sourcing: UV-coated exterior spray paints and heavy-duty weather-resistant paracord (bulk roll).
42. Bucket Wall Planters
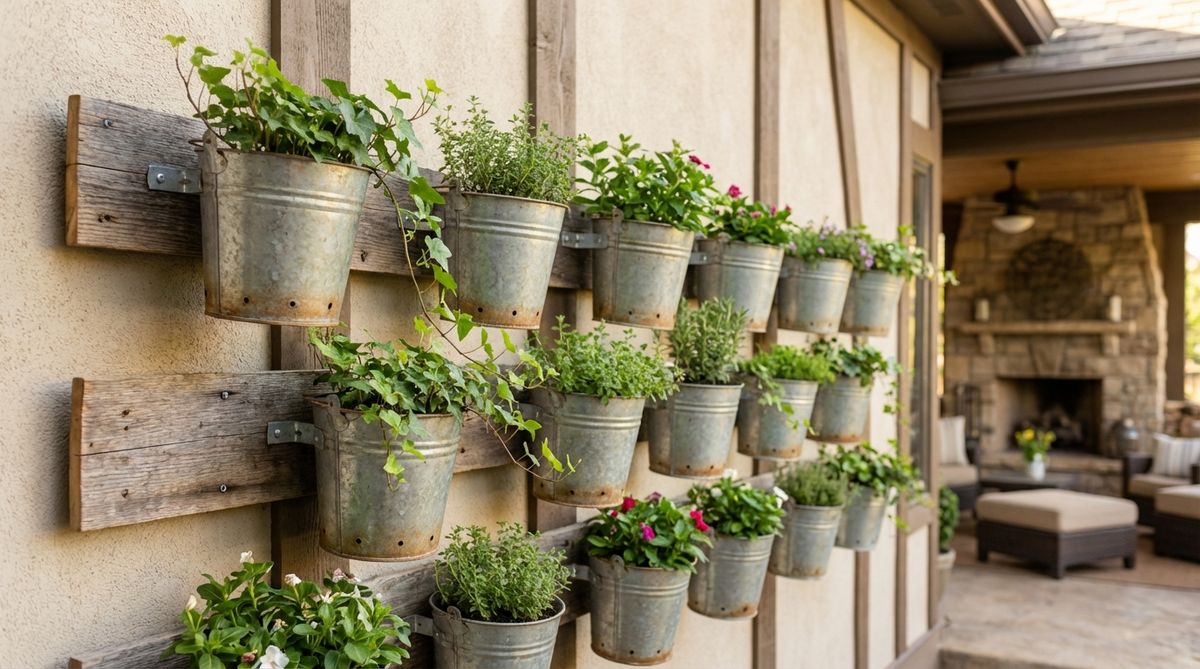
Adds a heavy, industrial farmhouse weight to a flimsy wooden balcony divider. A galvanized steel bucket wall easily holds larger plants with deeper root systems.
Cheap tin rusts through the bottom in weeks; this sturdy layout looks far more expensive than it is. Investing in actual galvanized metal buckets and sealing the inside corners ensures years of rust-free planting.
You can mount a trio of heavy-duty buckets for roughly $40 to $60. Save this for your patio wall upgrade!
- Key Materials: Galvanized buckets, heavy lag bolts
- Vibe / Style: Industrial farmhouse
- Difficulty: Power drilling required
- Budget Breakdown: Buckets: $30 | Heavy bolts: $10.
- Creator’s Tip: Drill the mounting hole slightly below the top rim so the bucket tilts outward, catching rainwater.
- Smart Sourcing: rust-proof galvanized metal buckets (multi-pack) and heavy-duty masonry lag bolts.
Conclusion
Transforming your empty space with these 42+ high-end balcony decor wall blueprints ensures you maximize every inch of vertical real estate. Whether you choose premium UV-resistant vertical garden kits or clever upcycling hacks, strategic sourcing elevates the aesthetic without breaking the bank. Pick the layout that matches your skill level, grab a durable starter kit, and dramatically upgrade your outdoor sanctuary this weekend.
Frequently Asked Questions
What are the best plants for balcony vertical gardens?
Herbs like basil, thyme, and oregano thrive when planted in premium vertical garden kits due to their compact roots. Trailing plants such as pothos and ivy look incredible spilling over heavy-duty self-watering planter brackets. If you want maximum yield, invest in hydroponic nutrient starter packs to rapidly grow lettuce and spinach on your balcony wall.
How do I water vertical wall gardens efficiently?
Installing an automated heavy-duty self-watering drip kit distributes moisture evenly across your entire balcony decor wall. Utilizing modular wall systems with built-in reservoirs drastically cuts down your daily maintenance. If you are hand watering, always start at the top tier of your planters so gravity pulls the excess moisture down to the bottom levels safely.
Can balcony wall decorations withstand harsh weather?
Absolutely, but you must invest in UV-coated fabric wall planters and rust-proof powder-coated metal grids to prevent degradation. Applying clear UV-resistant outdoor sealants to any wood or upcycled items completely blocks sun and rain damage. Always anchor your heavier items using commercial-grade masonry wall anchor kits to withstand severe high-rise wind shear.
How much weight can balcony walls support?
Weight capacity depends heavily on the structure, so using lightweight outdoor privacy screen panels or fabric pockets is much safer than heavy ceramics. A planter’s “wet weight” is often double its dry weight; always use heavy-duty drywall toggle bolt kits or masonry anchors. If you cannot drill into the walls, opt for a freestanding weatherproof folding plant ladder kit instead.
Are vertical gardens suitable for rental balconies?
Yes, utilizing no-drill options like adjustable railing planter brackets or tension-based shelves keeps your security deposit perfectly safe. Using a lightweight over-the-door canvas pocket organizer provides an instant green wall without any permanent wall damage. Freestanding plant towers and rolling base kits are completely mobile and easy to take with you when your lease ends.
What maintenance do balcony wall gardens require?
Routine care involves quick weekly checks of your self-watering drip irrigation kits and pinching off dead leaves. Monthly, you should apply a liquid plant food starter pack to replenish nutrients washed out of small vertical pots. Annually, re-apply marine-grade wood protecting oils to wooden trellises and tighten all mounting hardware to ensure your balcony decor wall remains secure.